Do you know why the Japanese stewartia tree is one of my favorites? "Stewart" is my last name after all.
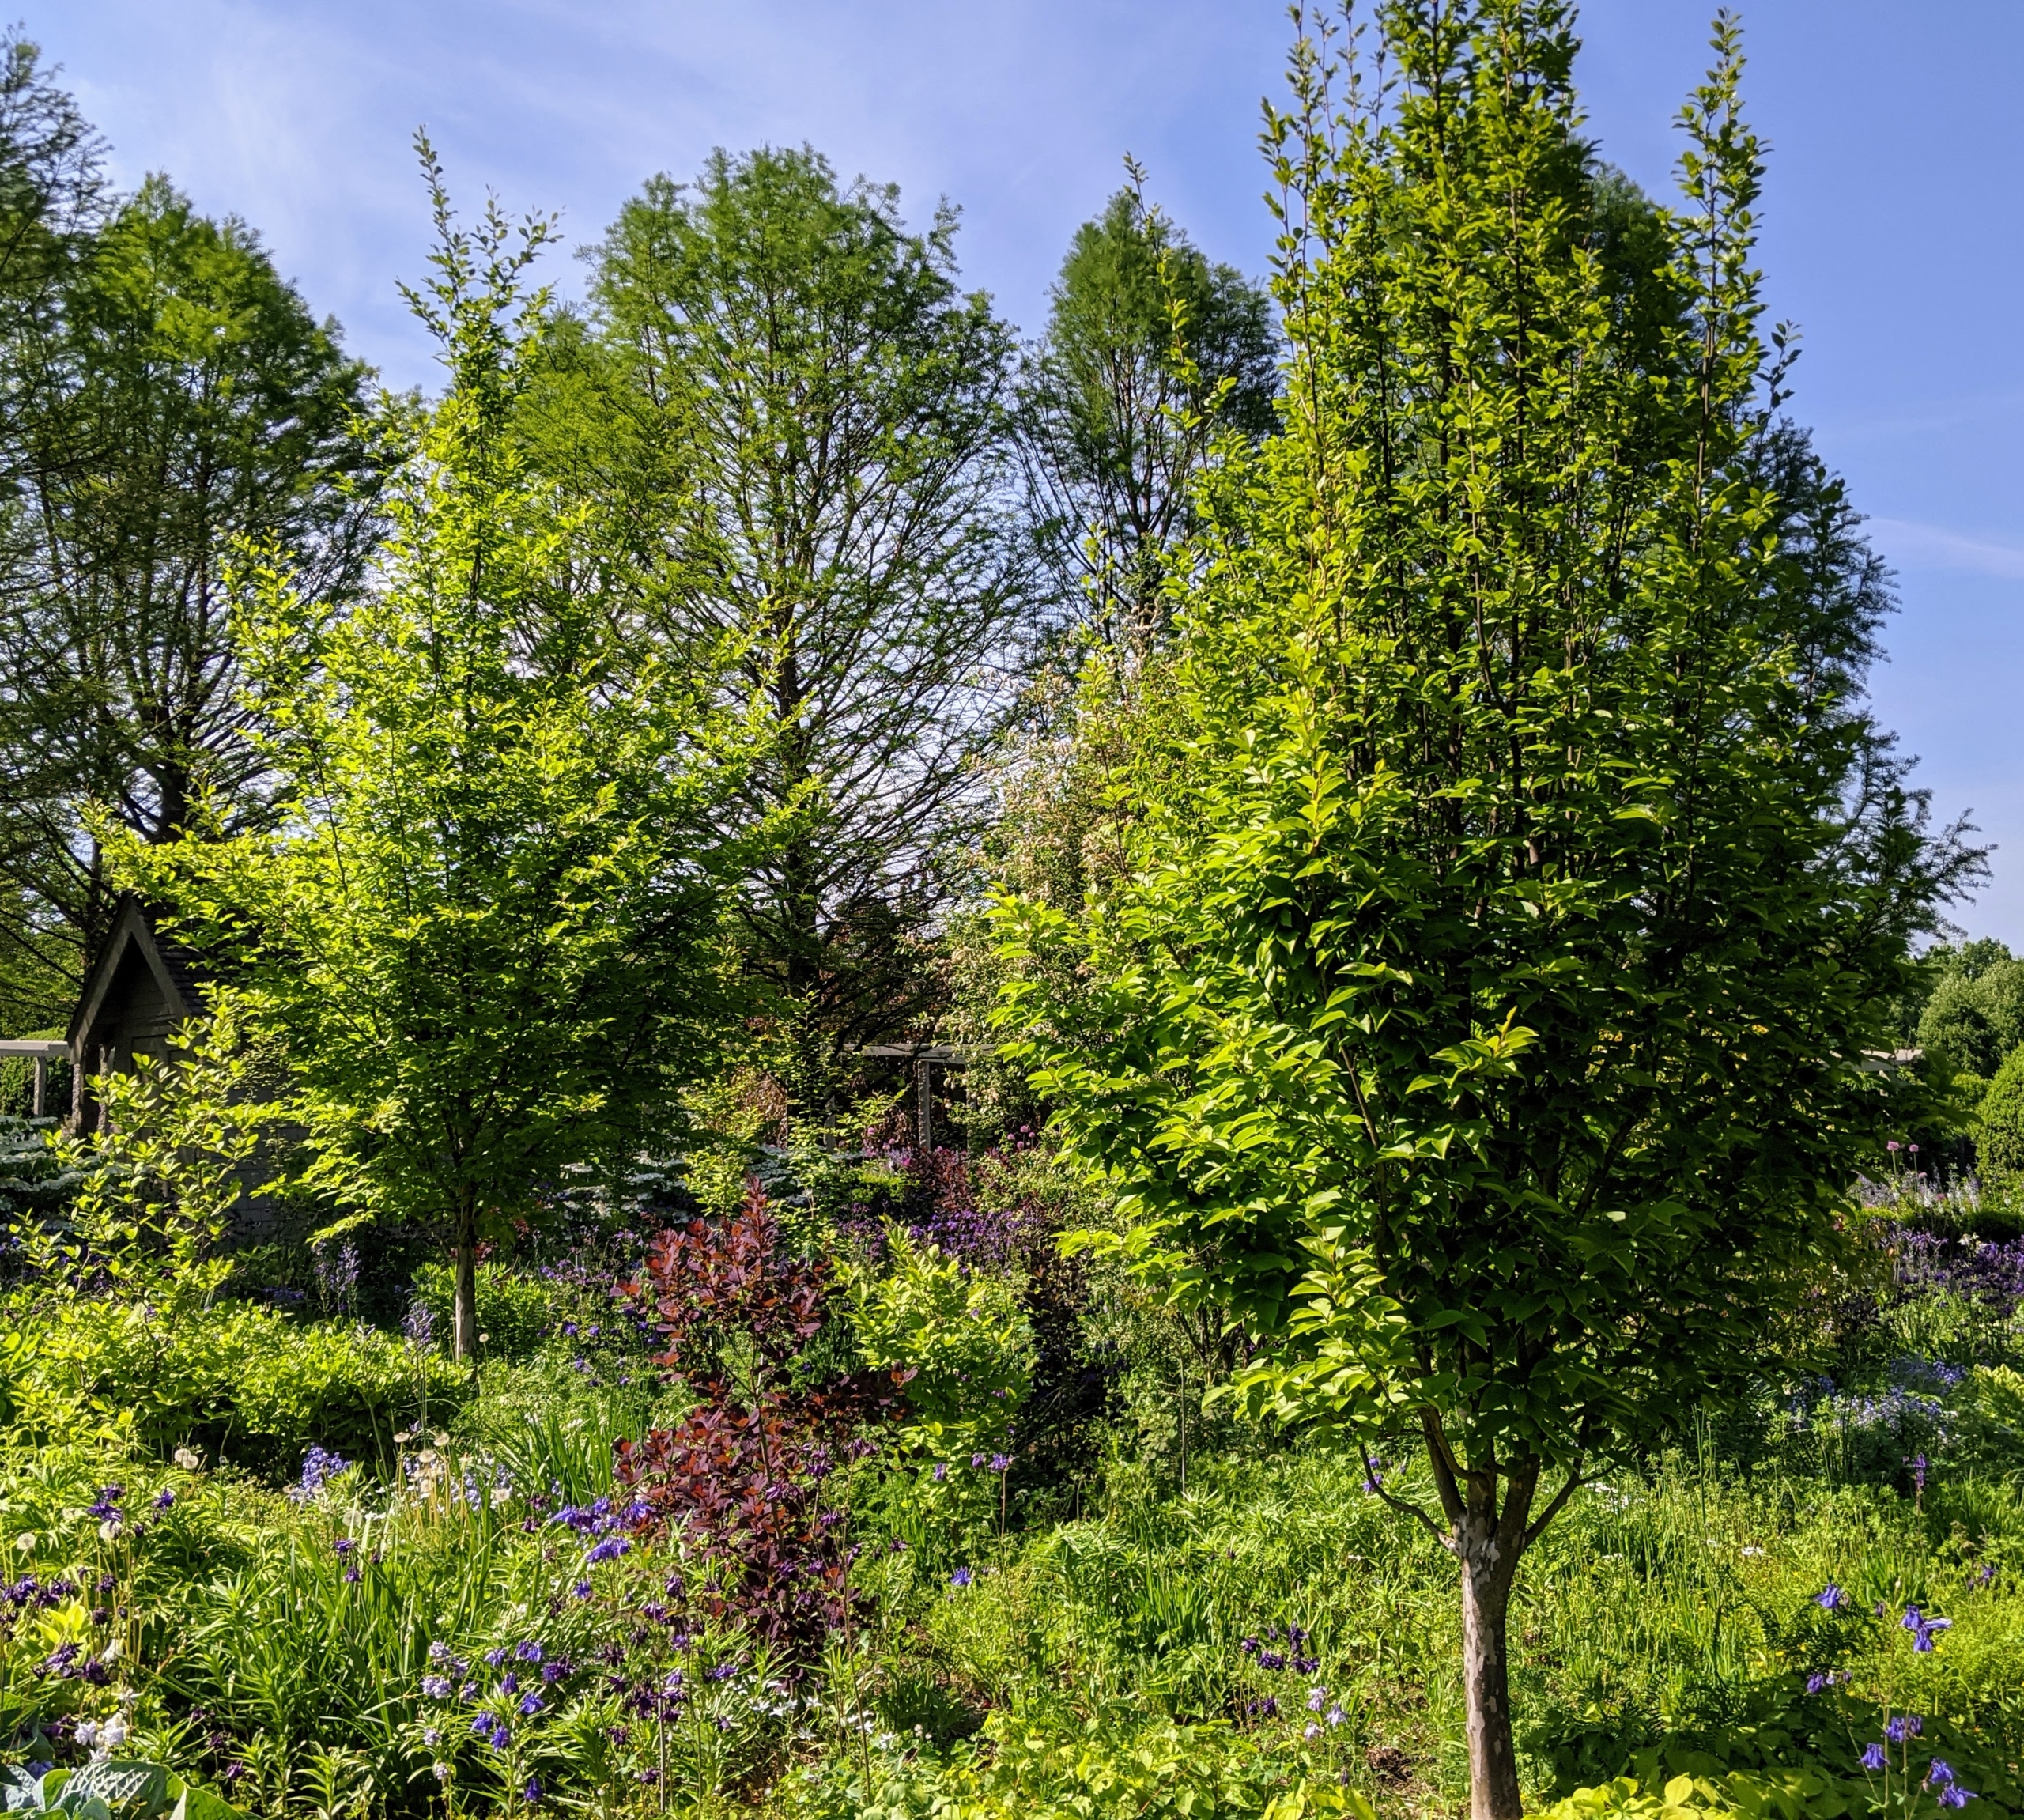
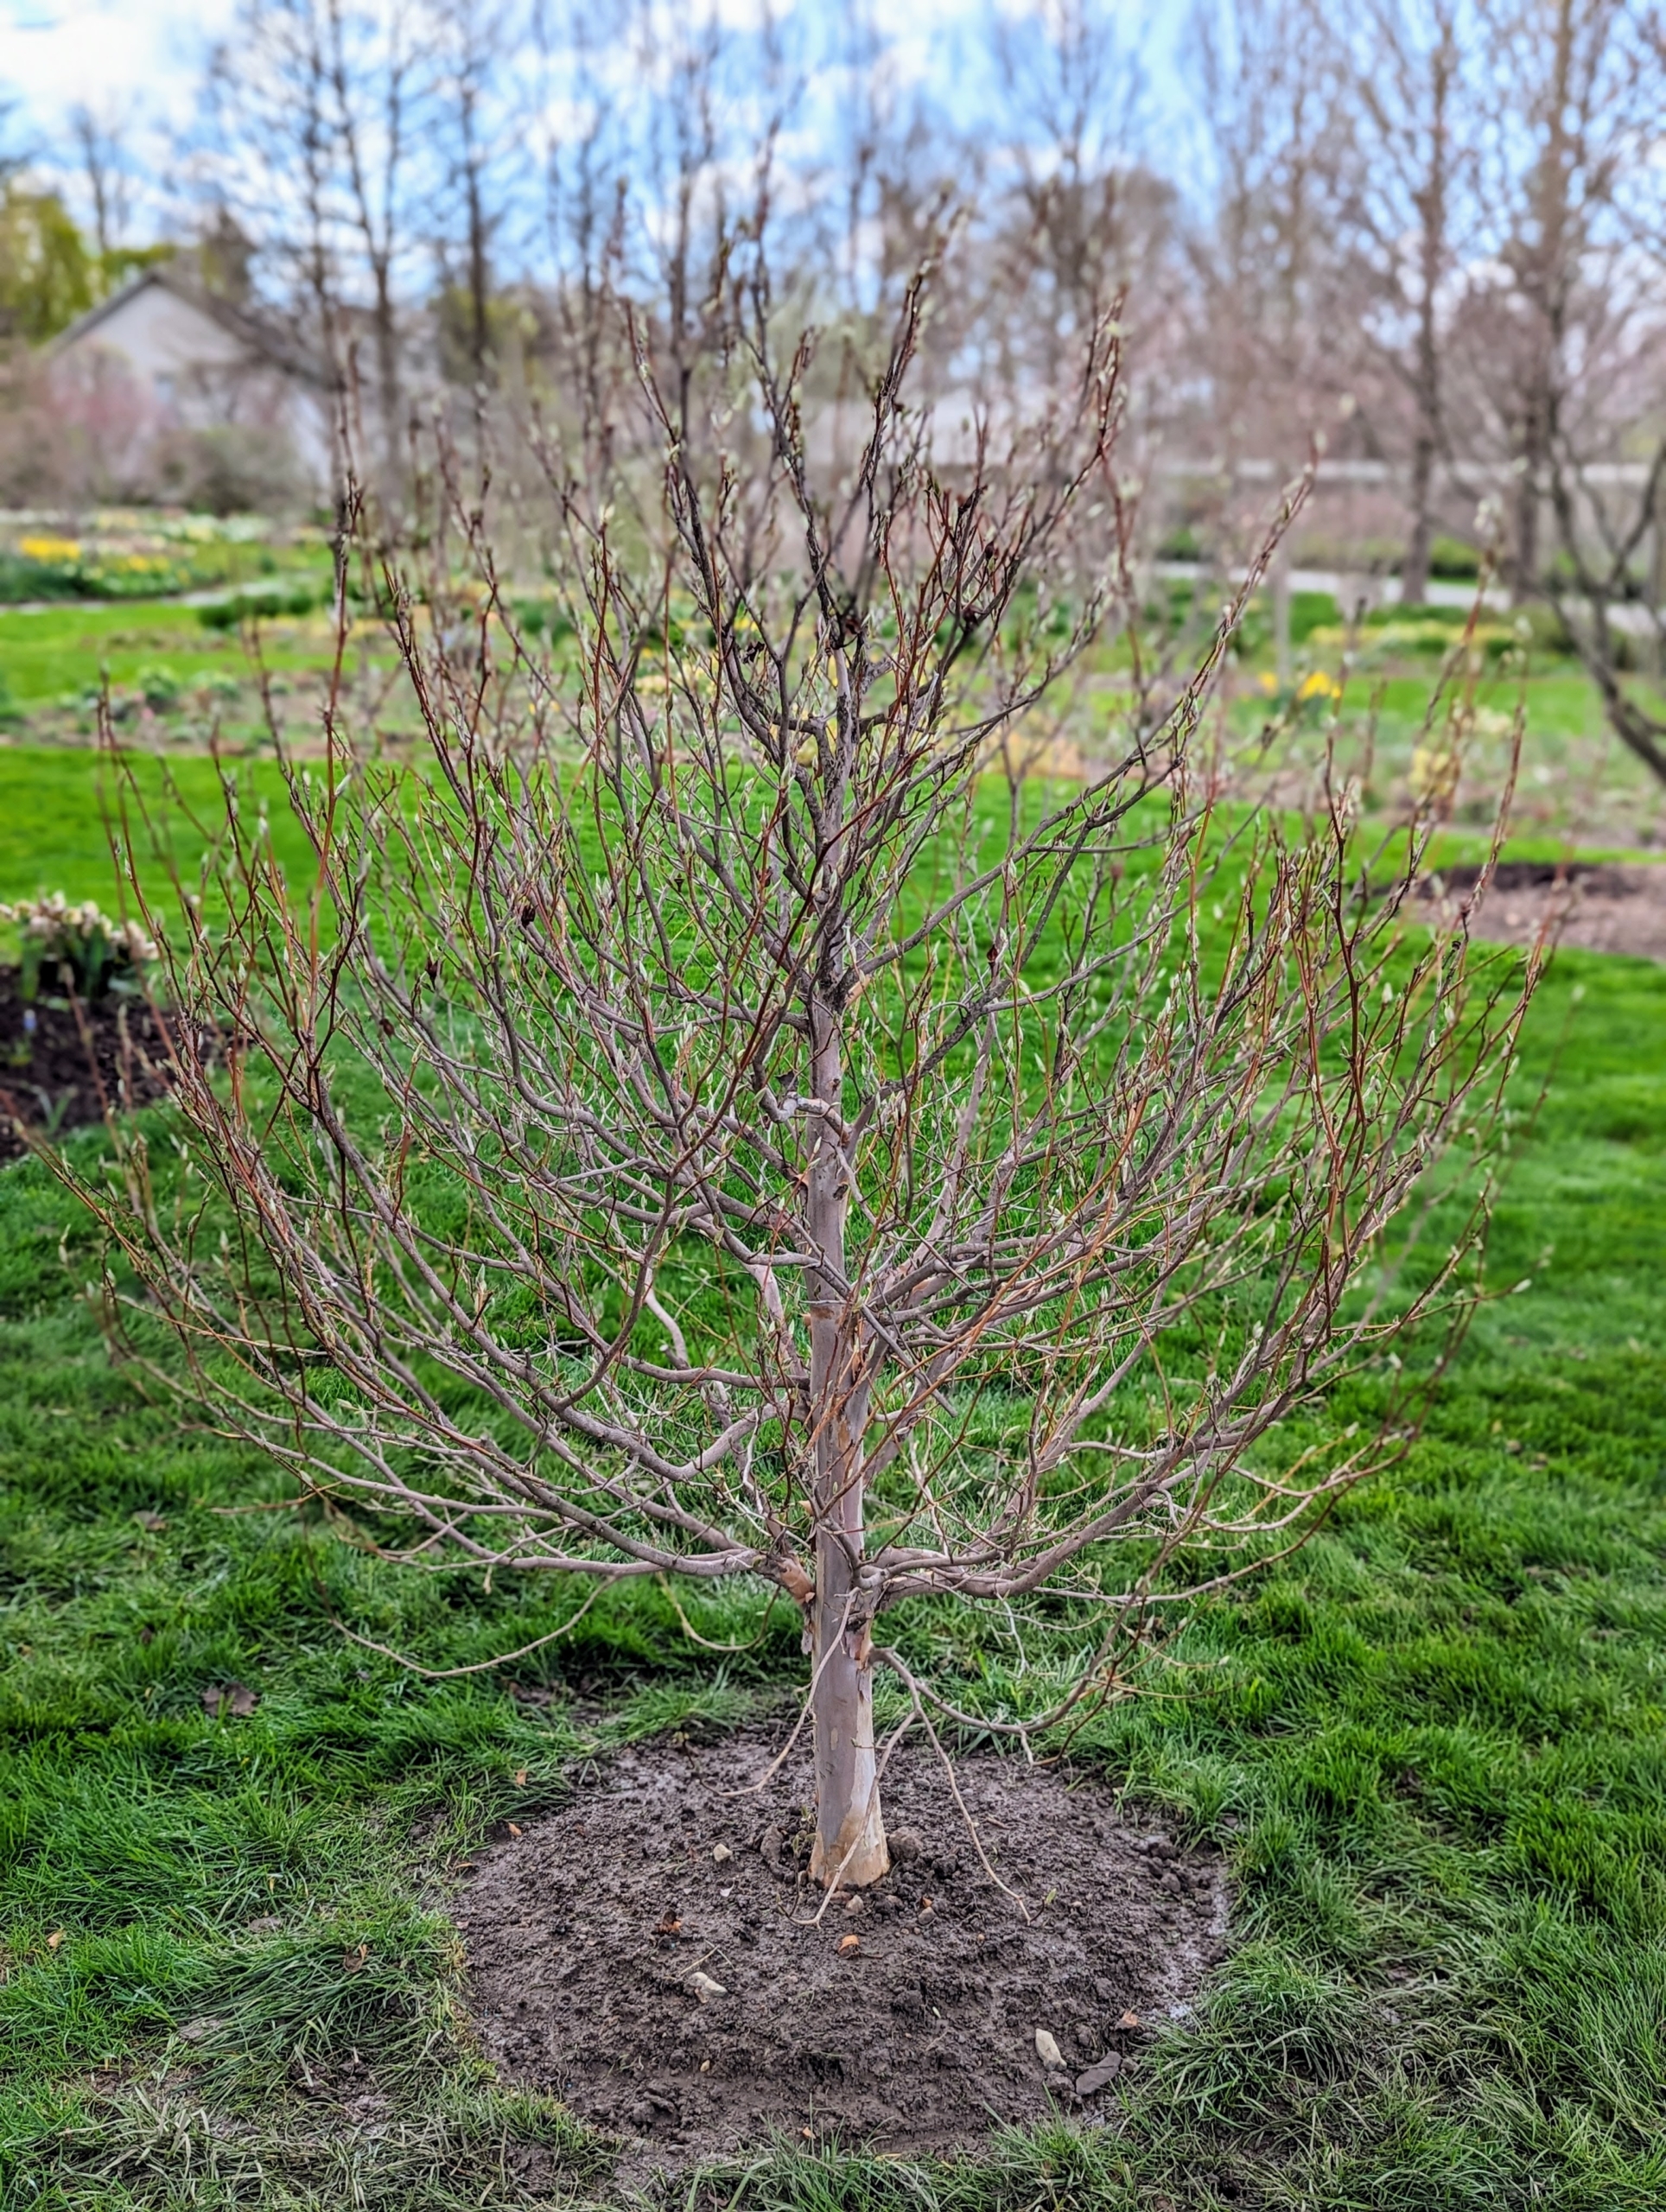
The Japanese stewartia, Stewartia pseudocamellia, is a small, slow-growing, all-season performer that shows off fresh green leaves in spring, white flowers resembling single camellias in summer, and colorful foliage in autumn. It's also well-loved for its attractive exfoliating bark, which peels away in strips of gray, reddish-brown, and orange. Yesterday, my outdoor grounds crew planted a stand of young stewartia trees behind my Gym building in an area not far from my main Greenhouse, my winding pergola, and of course, my stewartia garden.
Here are some photos.
I love stewartia trees and have several different kinds of stewartias growing at my farm. This is a view of my Stewartia garden behind my Tenant House in late spring. The stewartias planted here include Stewartia gemmata, Stewartia x. henryae, Stewartia pseudocamellia ‘Ballet’, Stewartia monadelpha, Stewartia rostrata, and Stewartia henry ‘Skyrocket’.
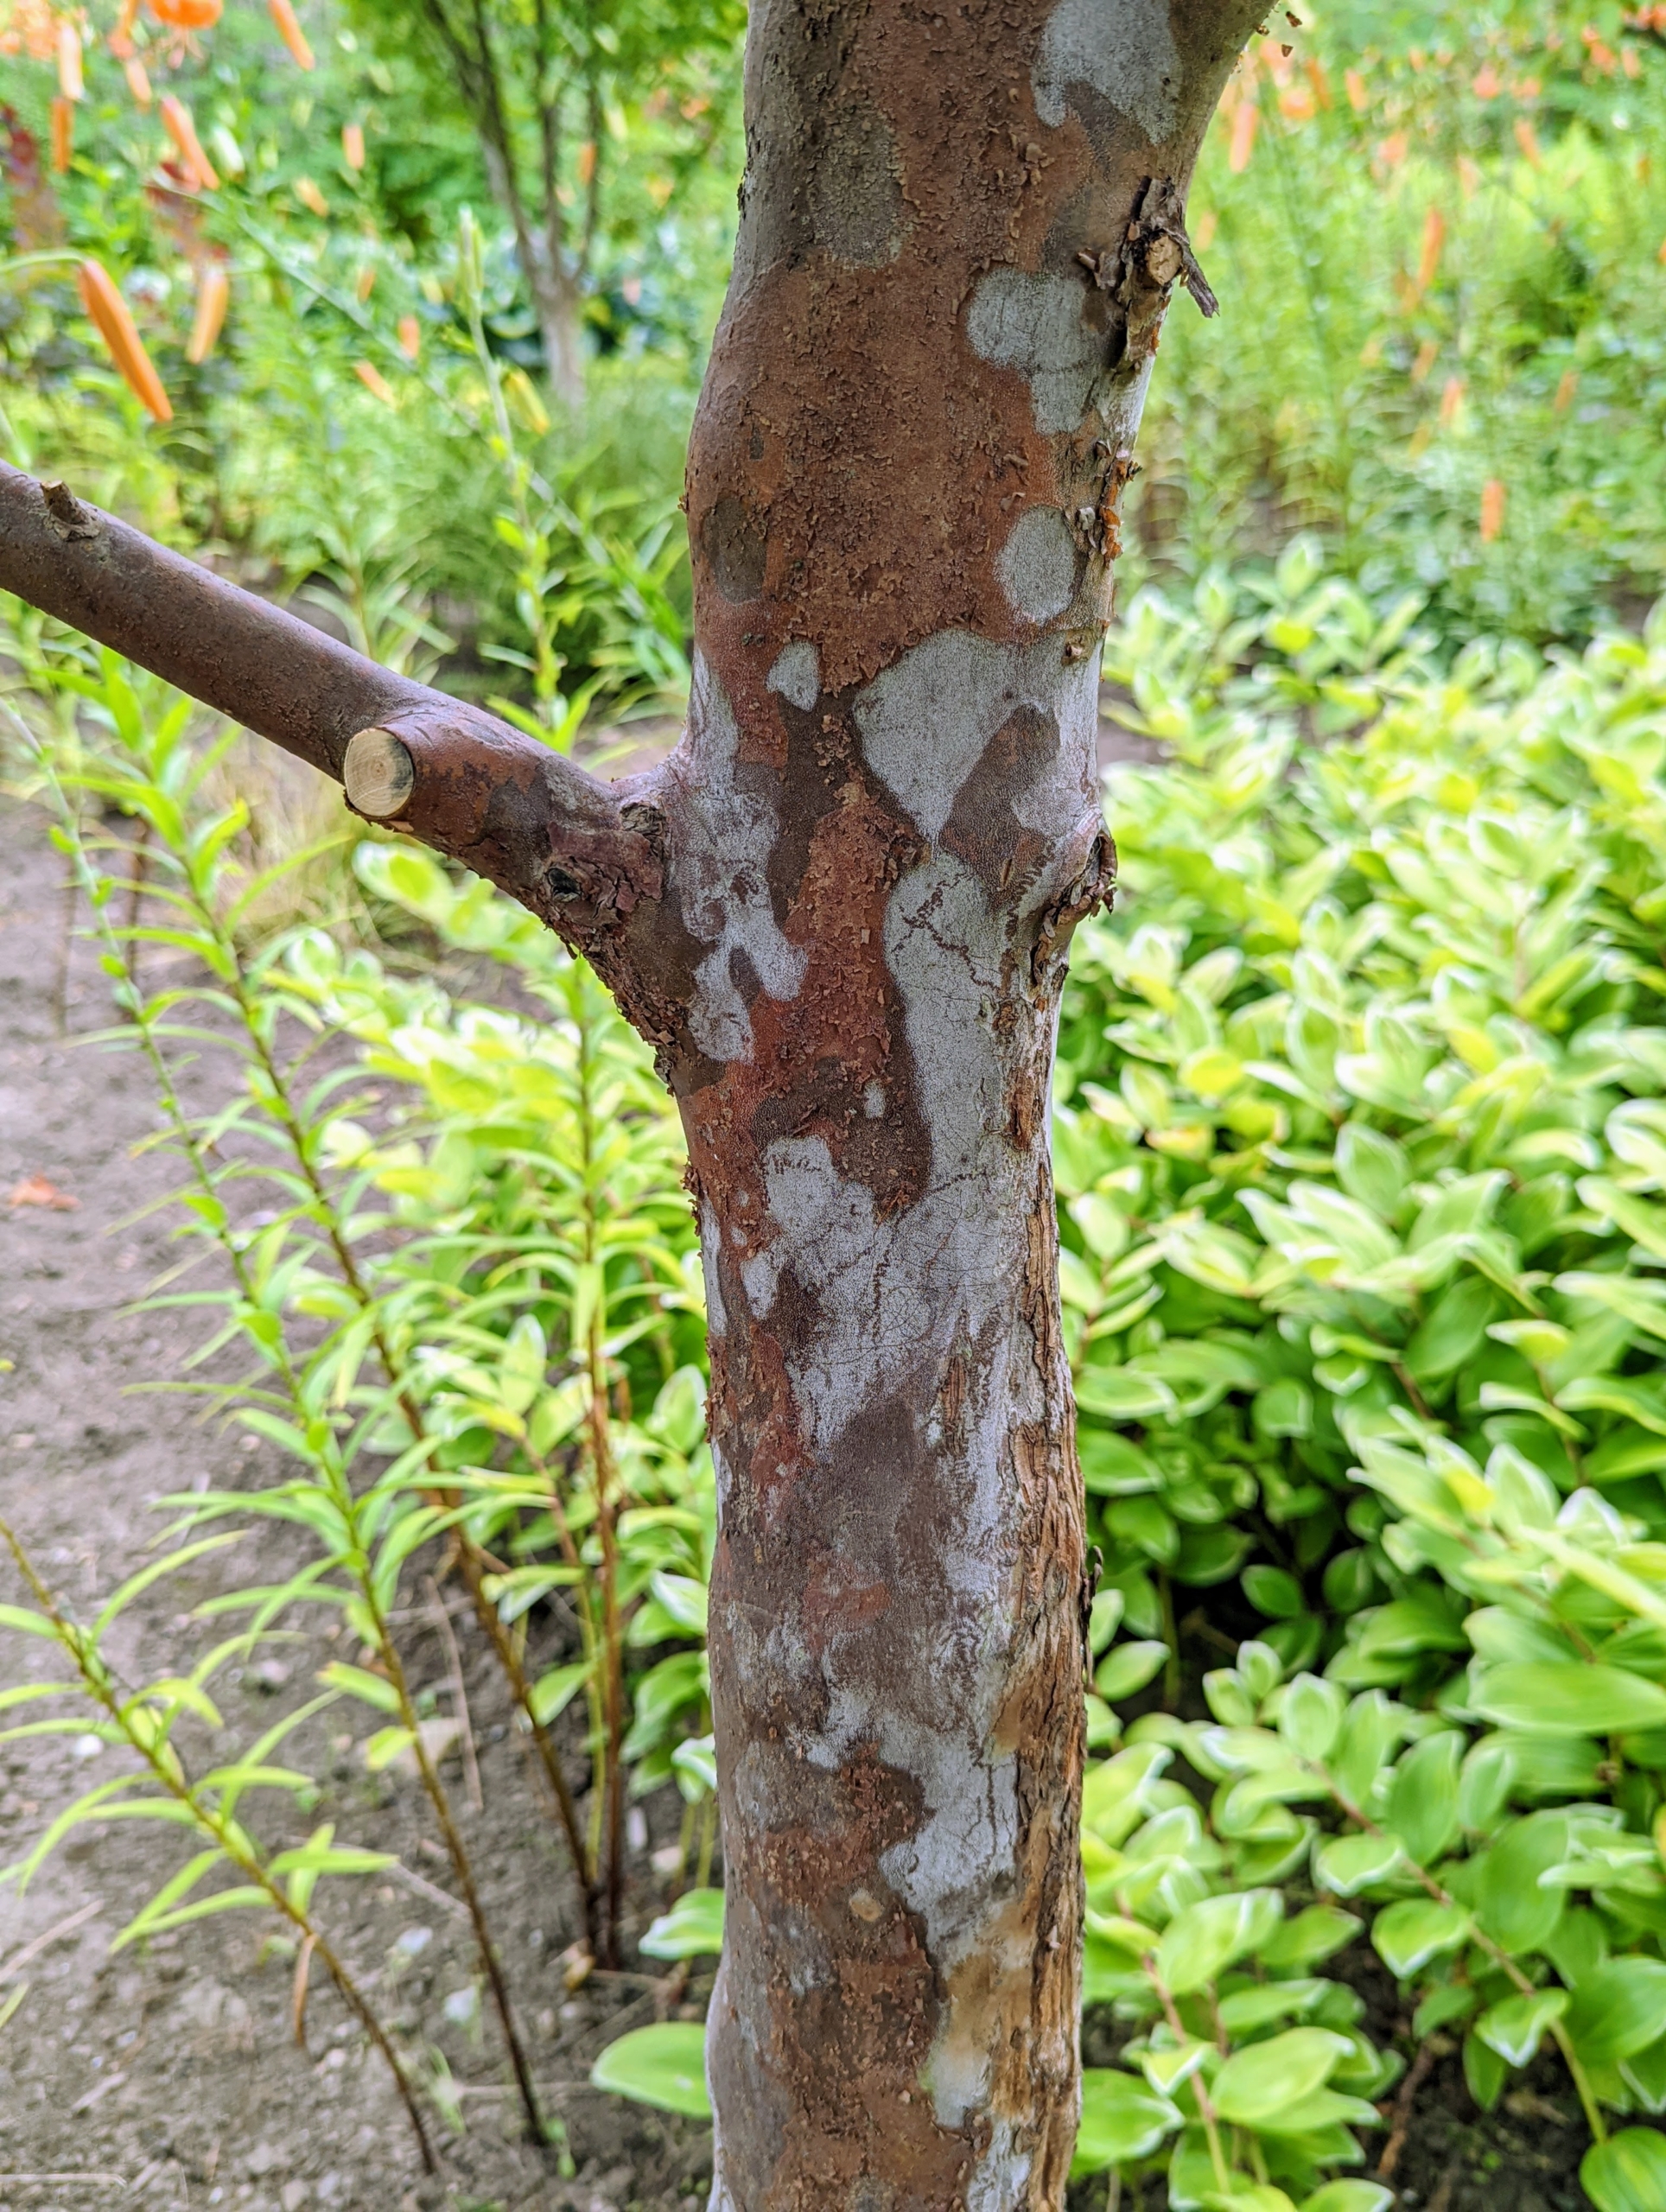
One of its appealing features is the stewartia’s bark.
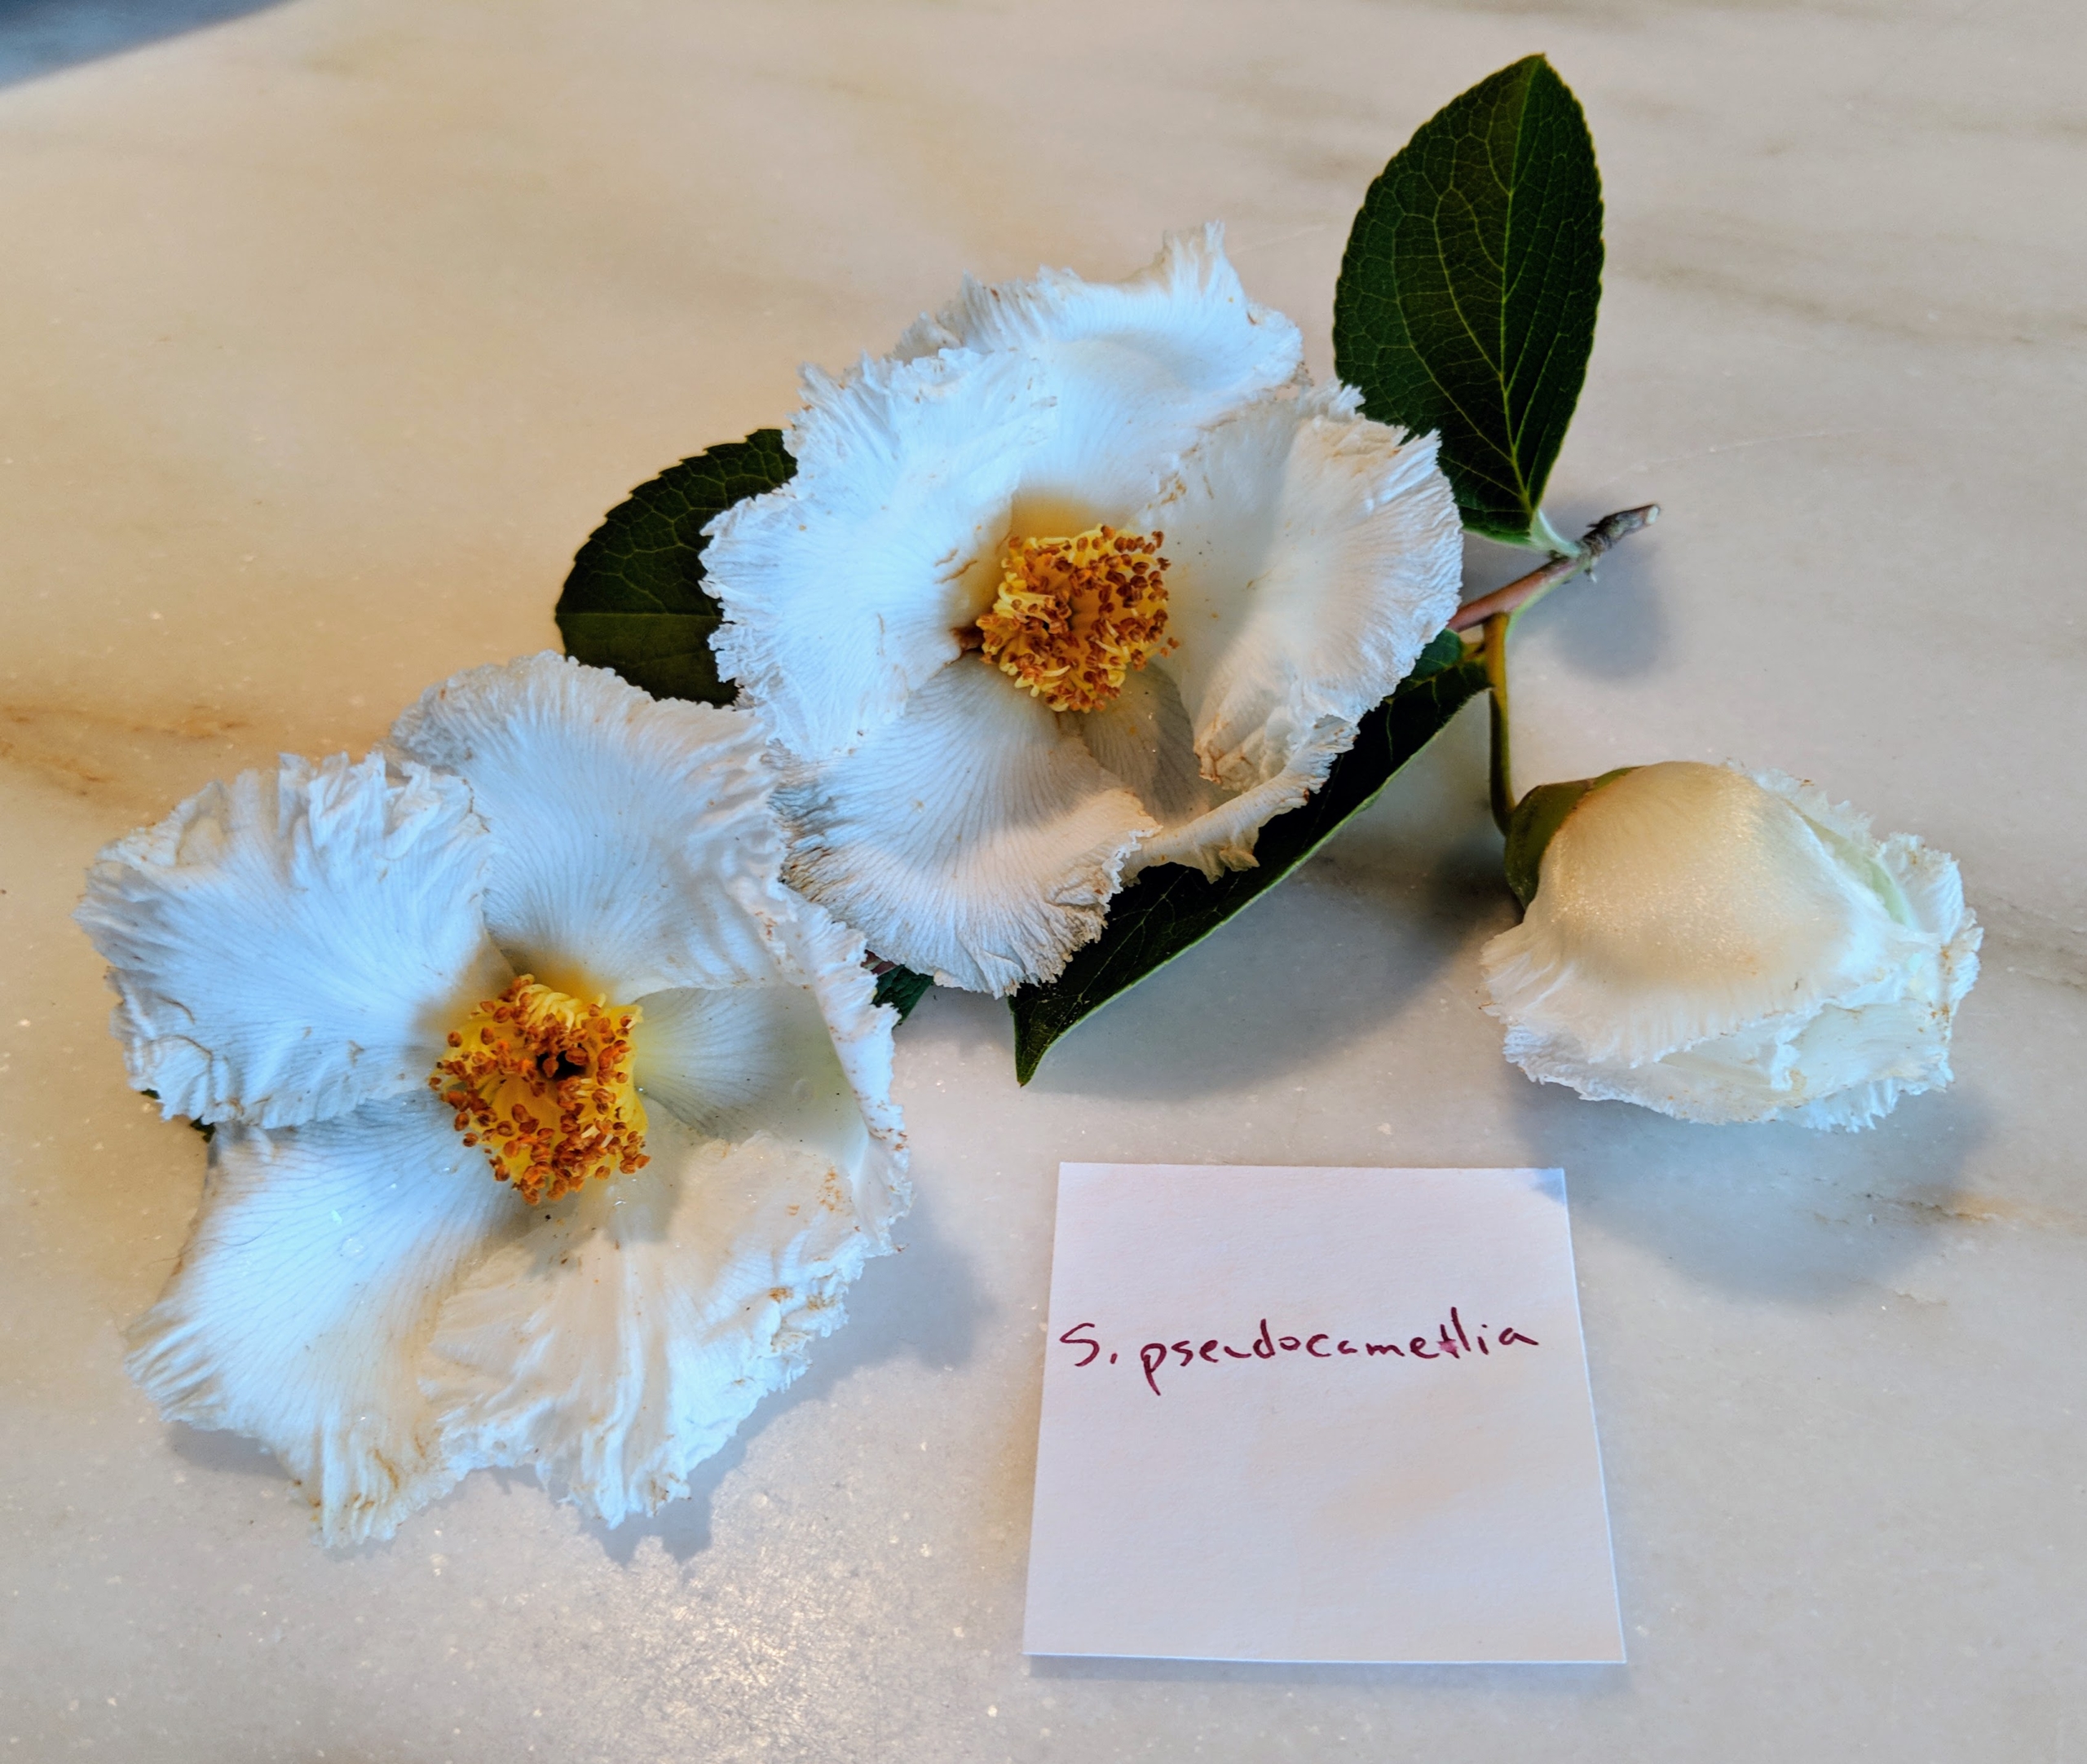
And these are the flowers of a Stewartia pseudocamellia – cup-shaped, camellia-like white blossoms up to two-and-a-half inches in diameter with showy orange-yellow anthers.
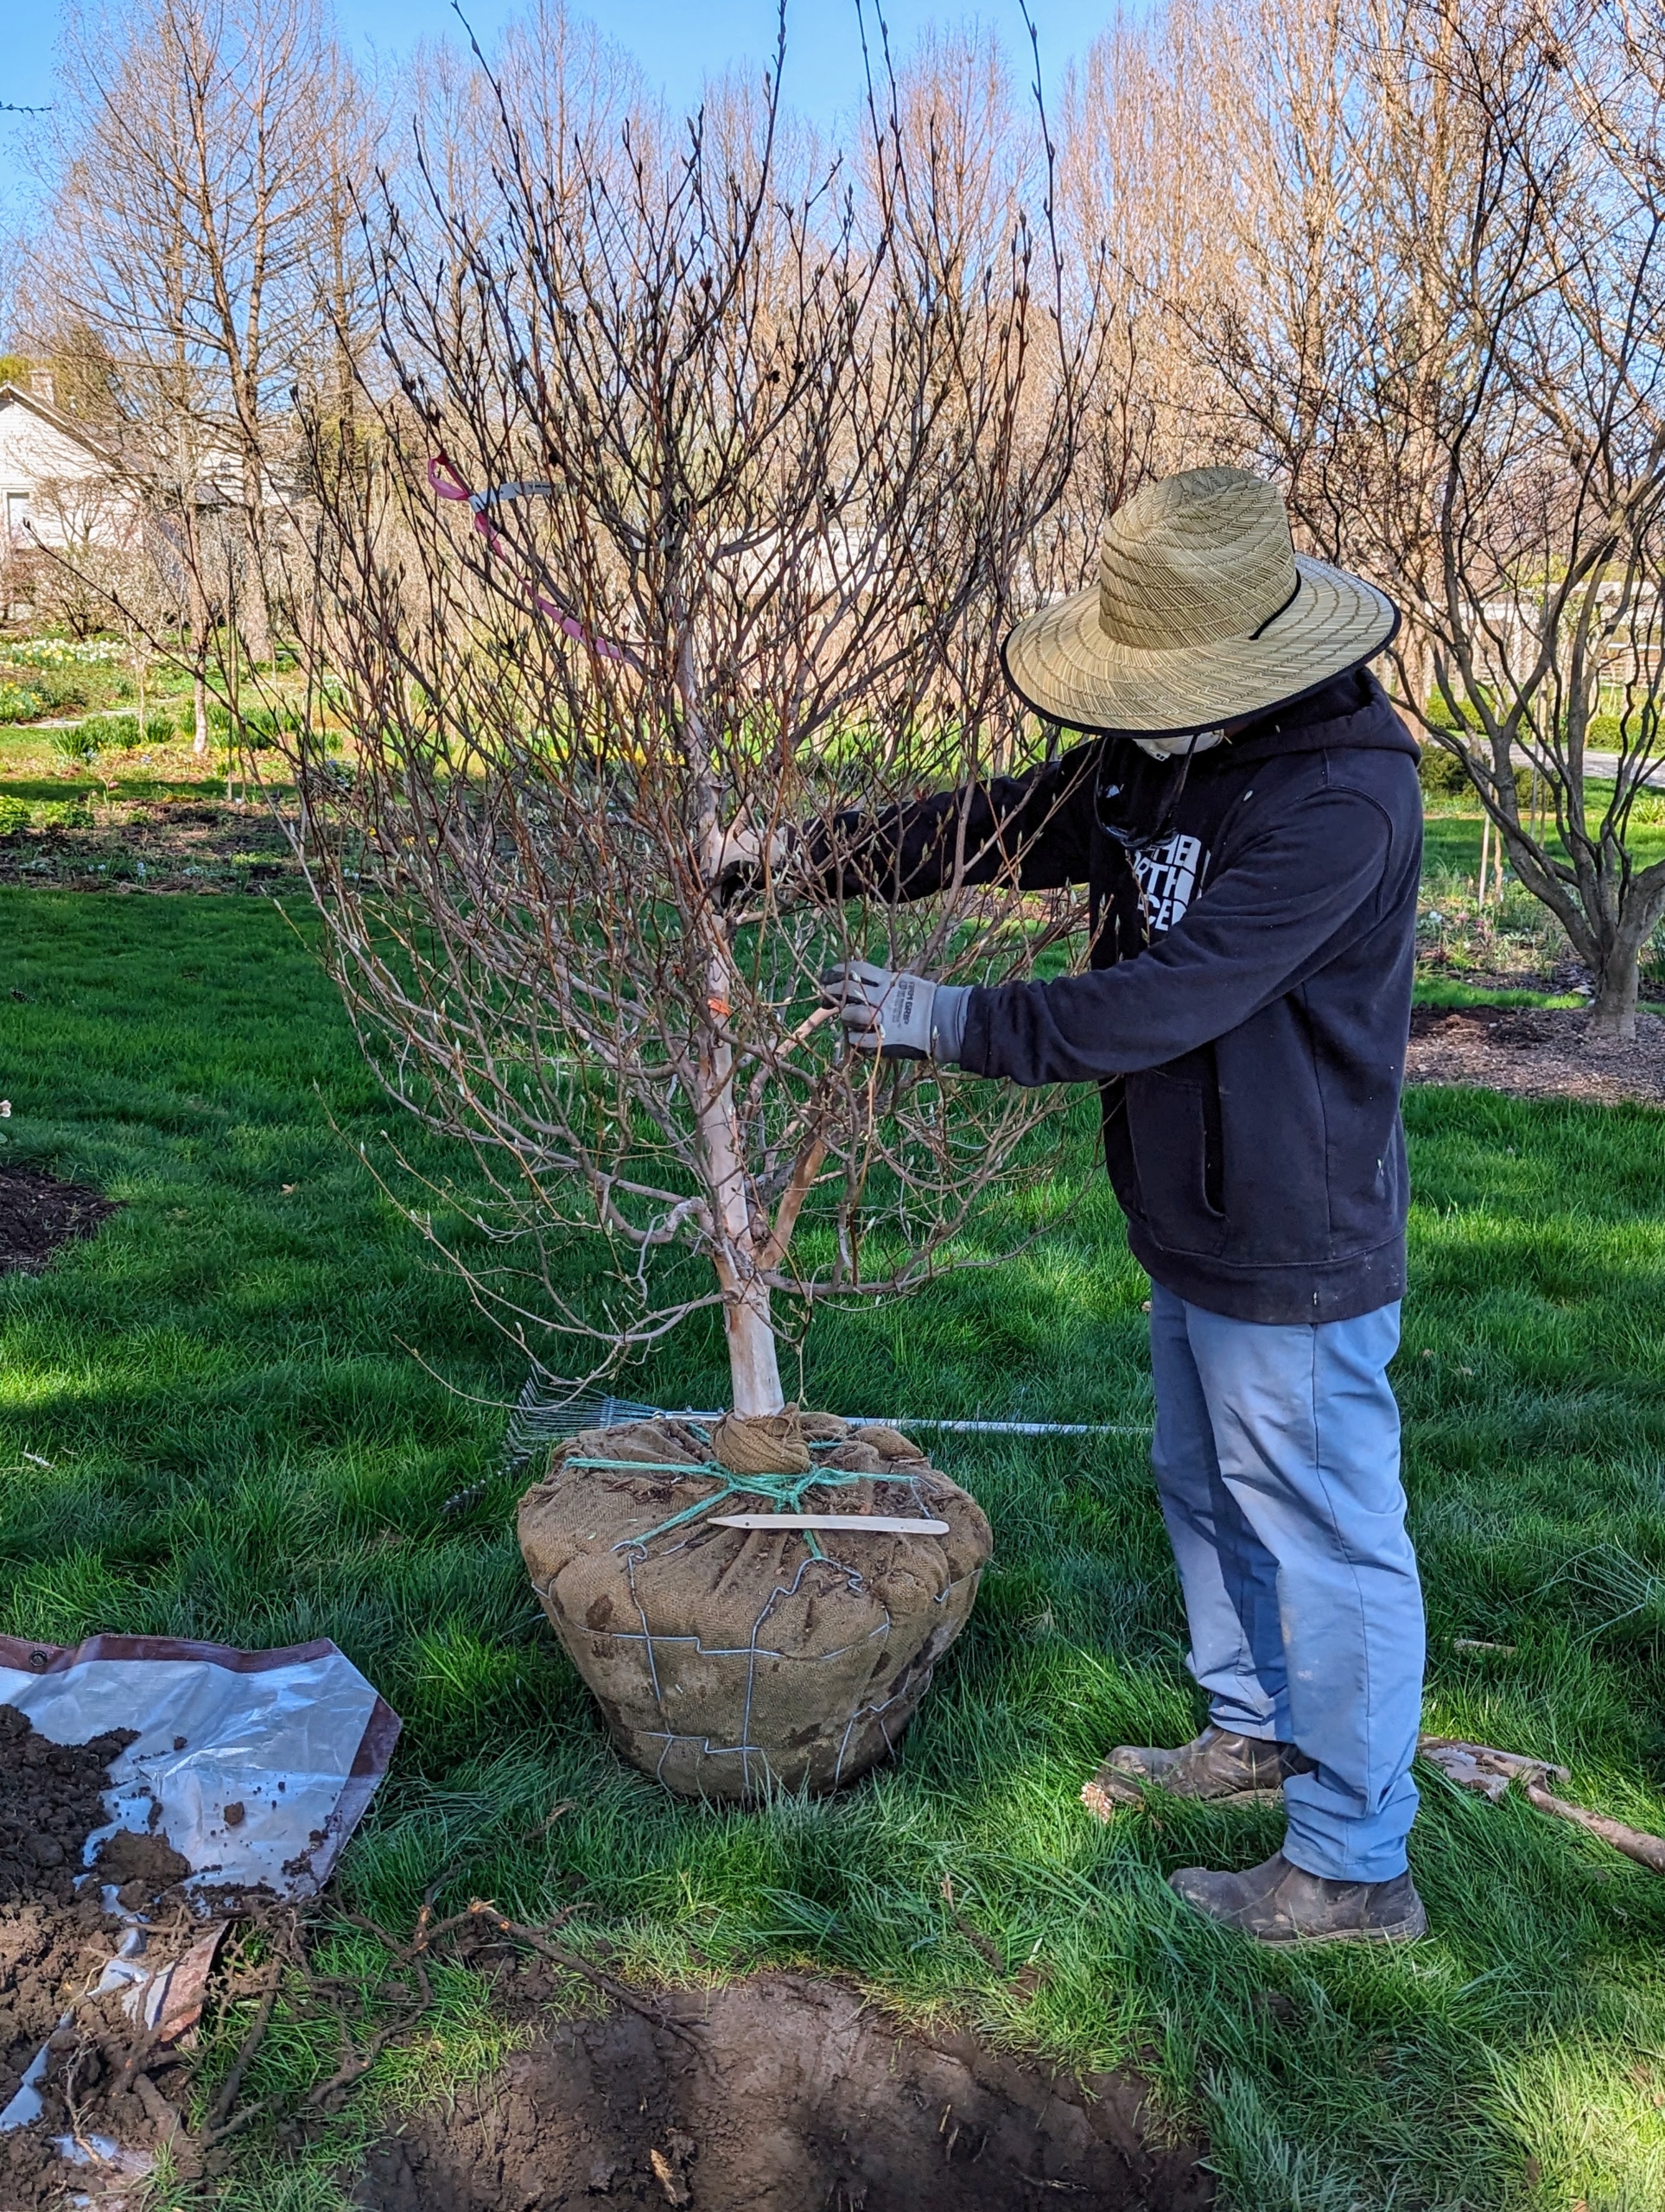
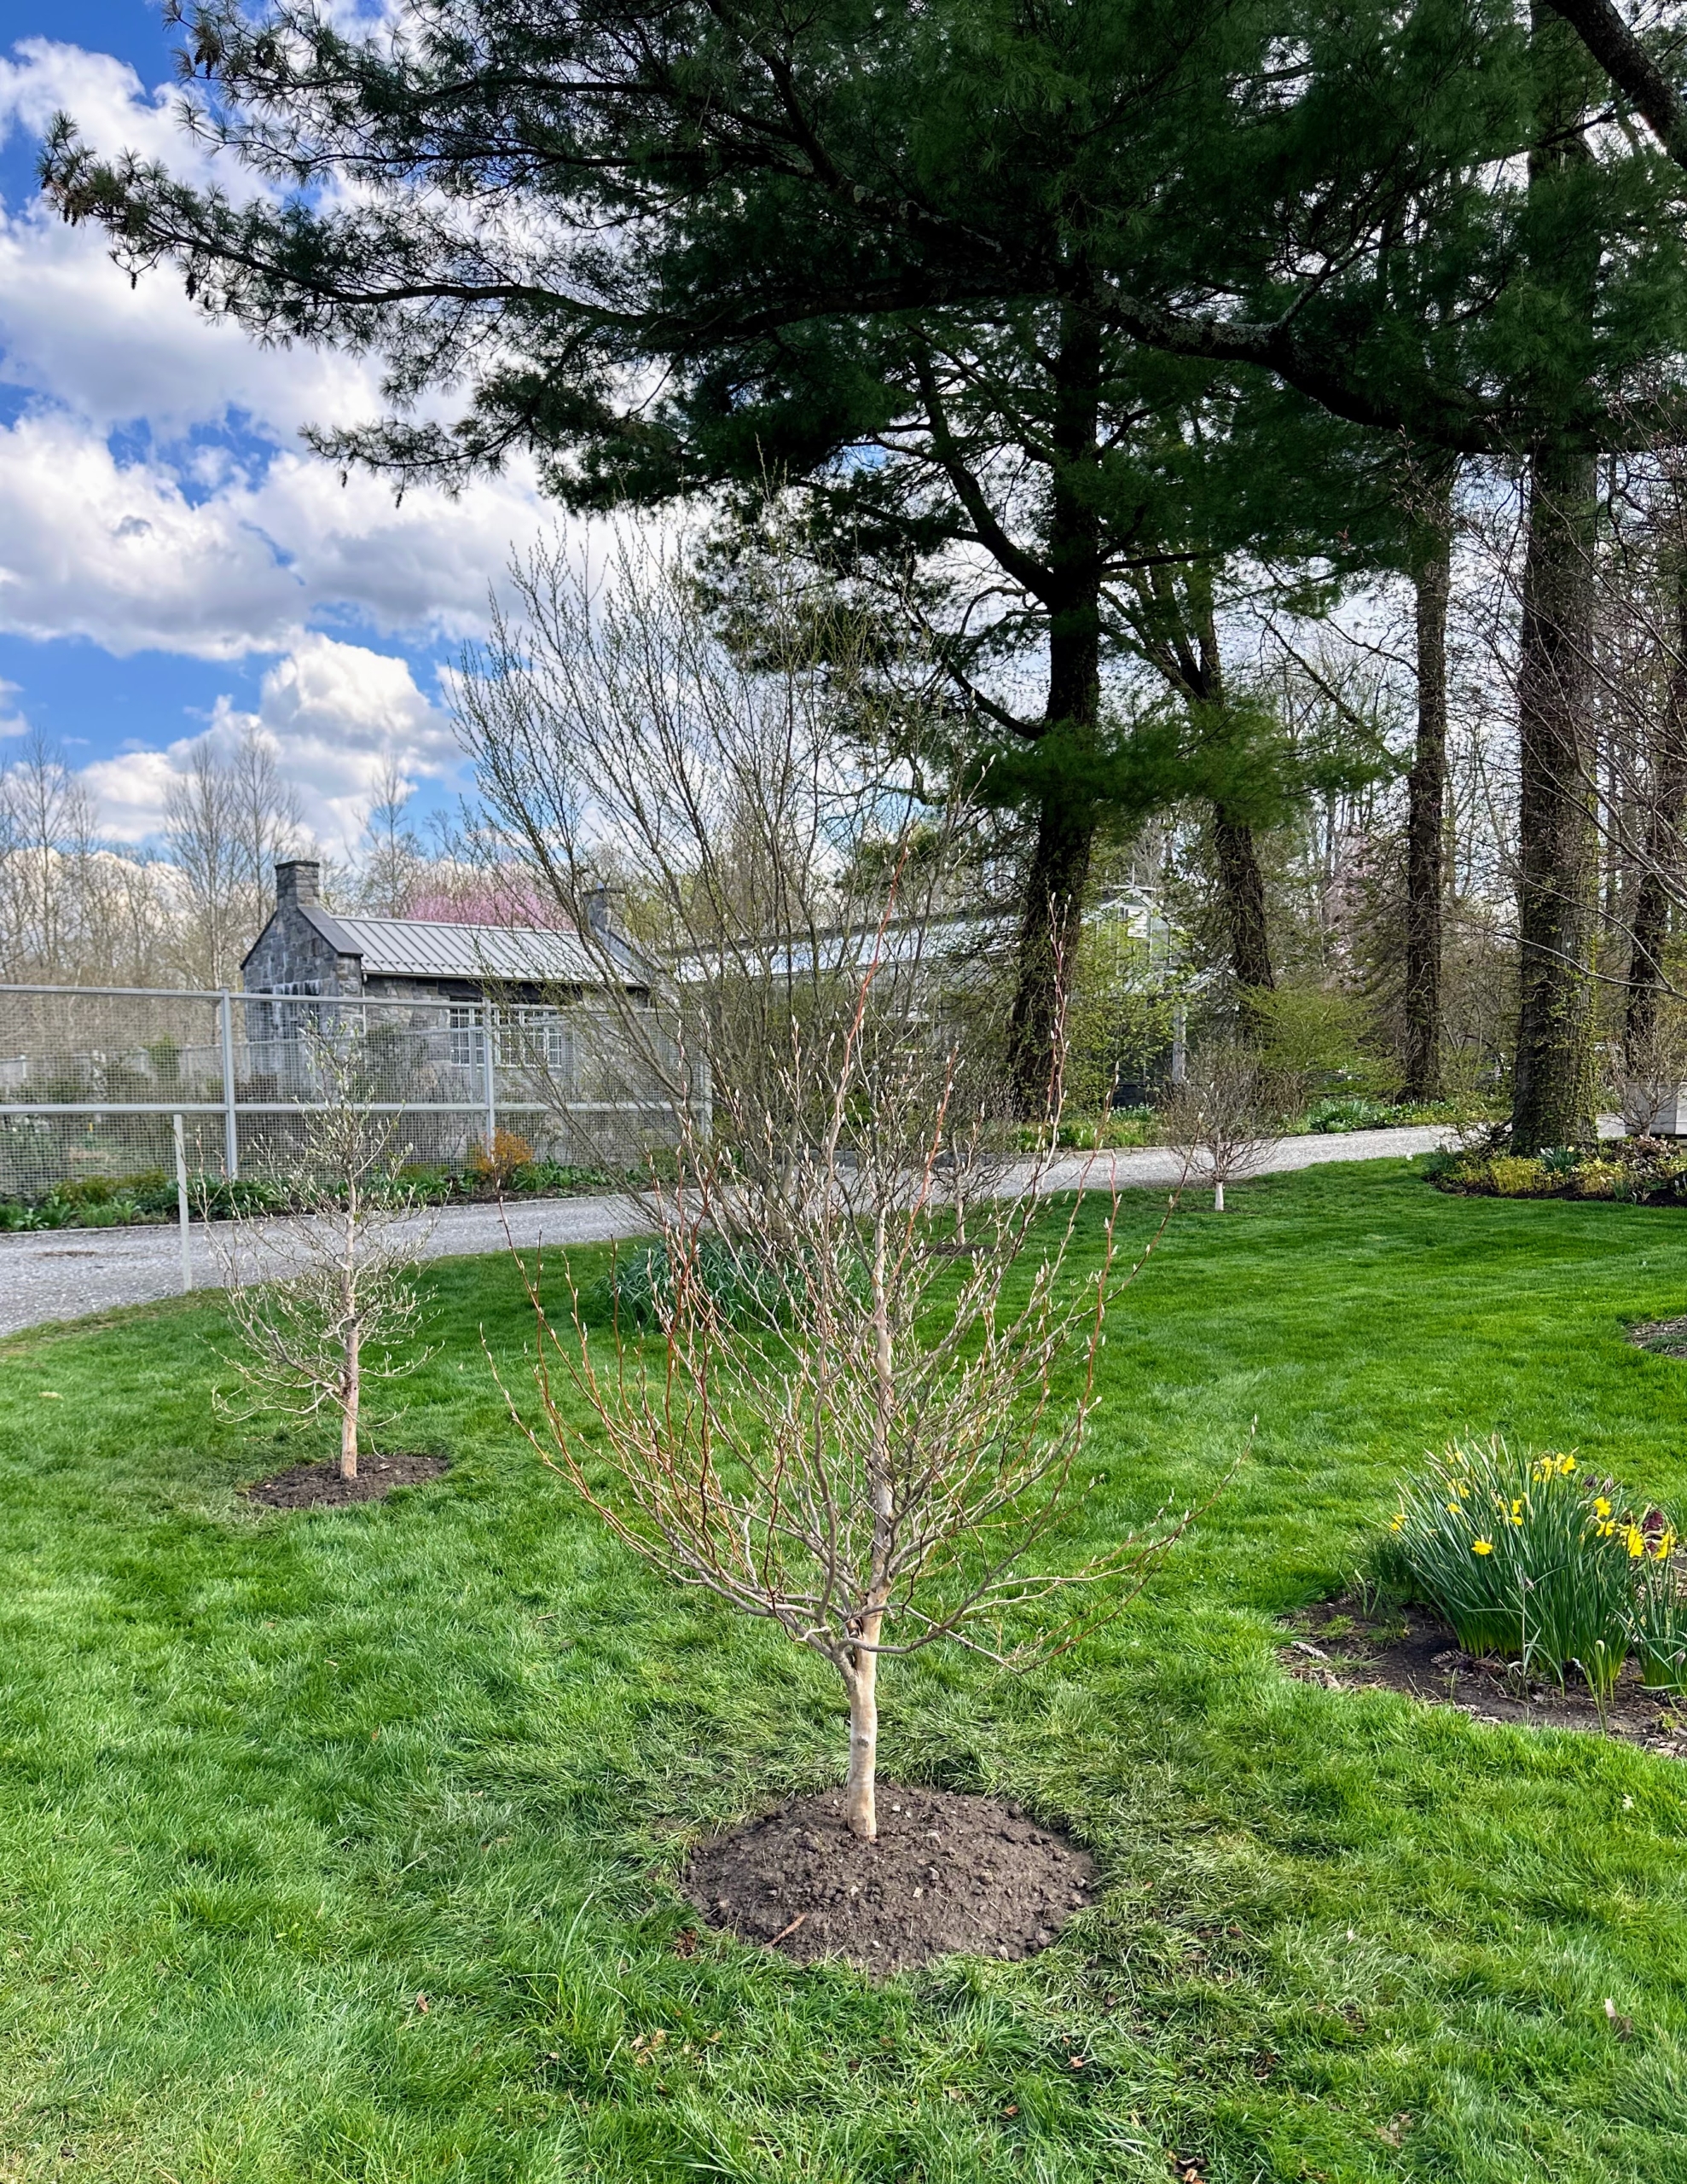
Over the weekend, I purchased a selection of stewartia trees to plant along the carriage road behind my Gym Building. Here, they will get full to partial shade and be somewhat shielded from any winds.
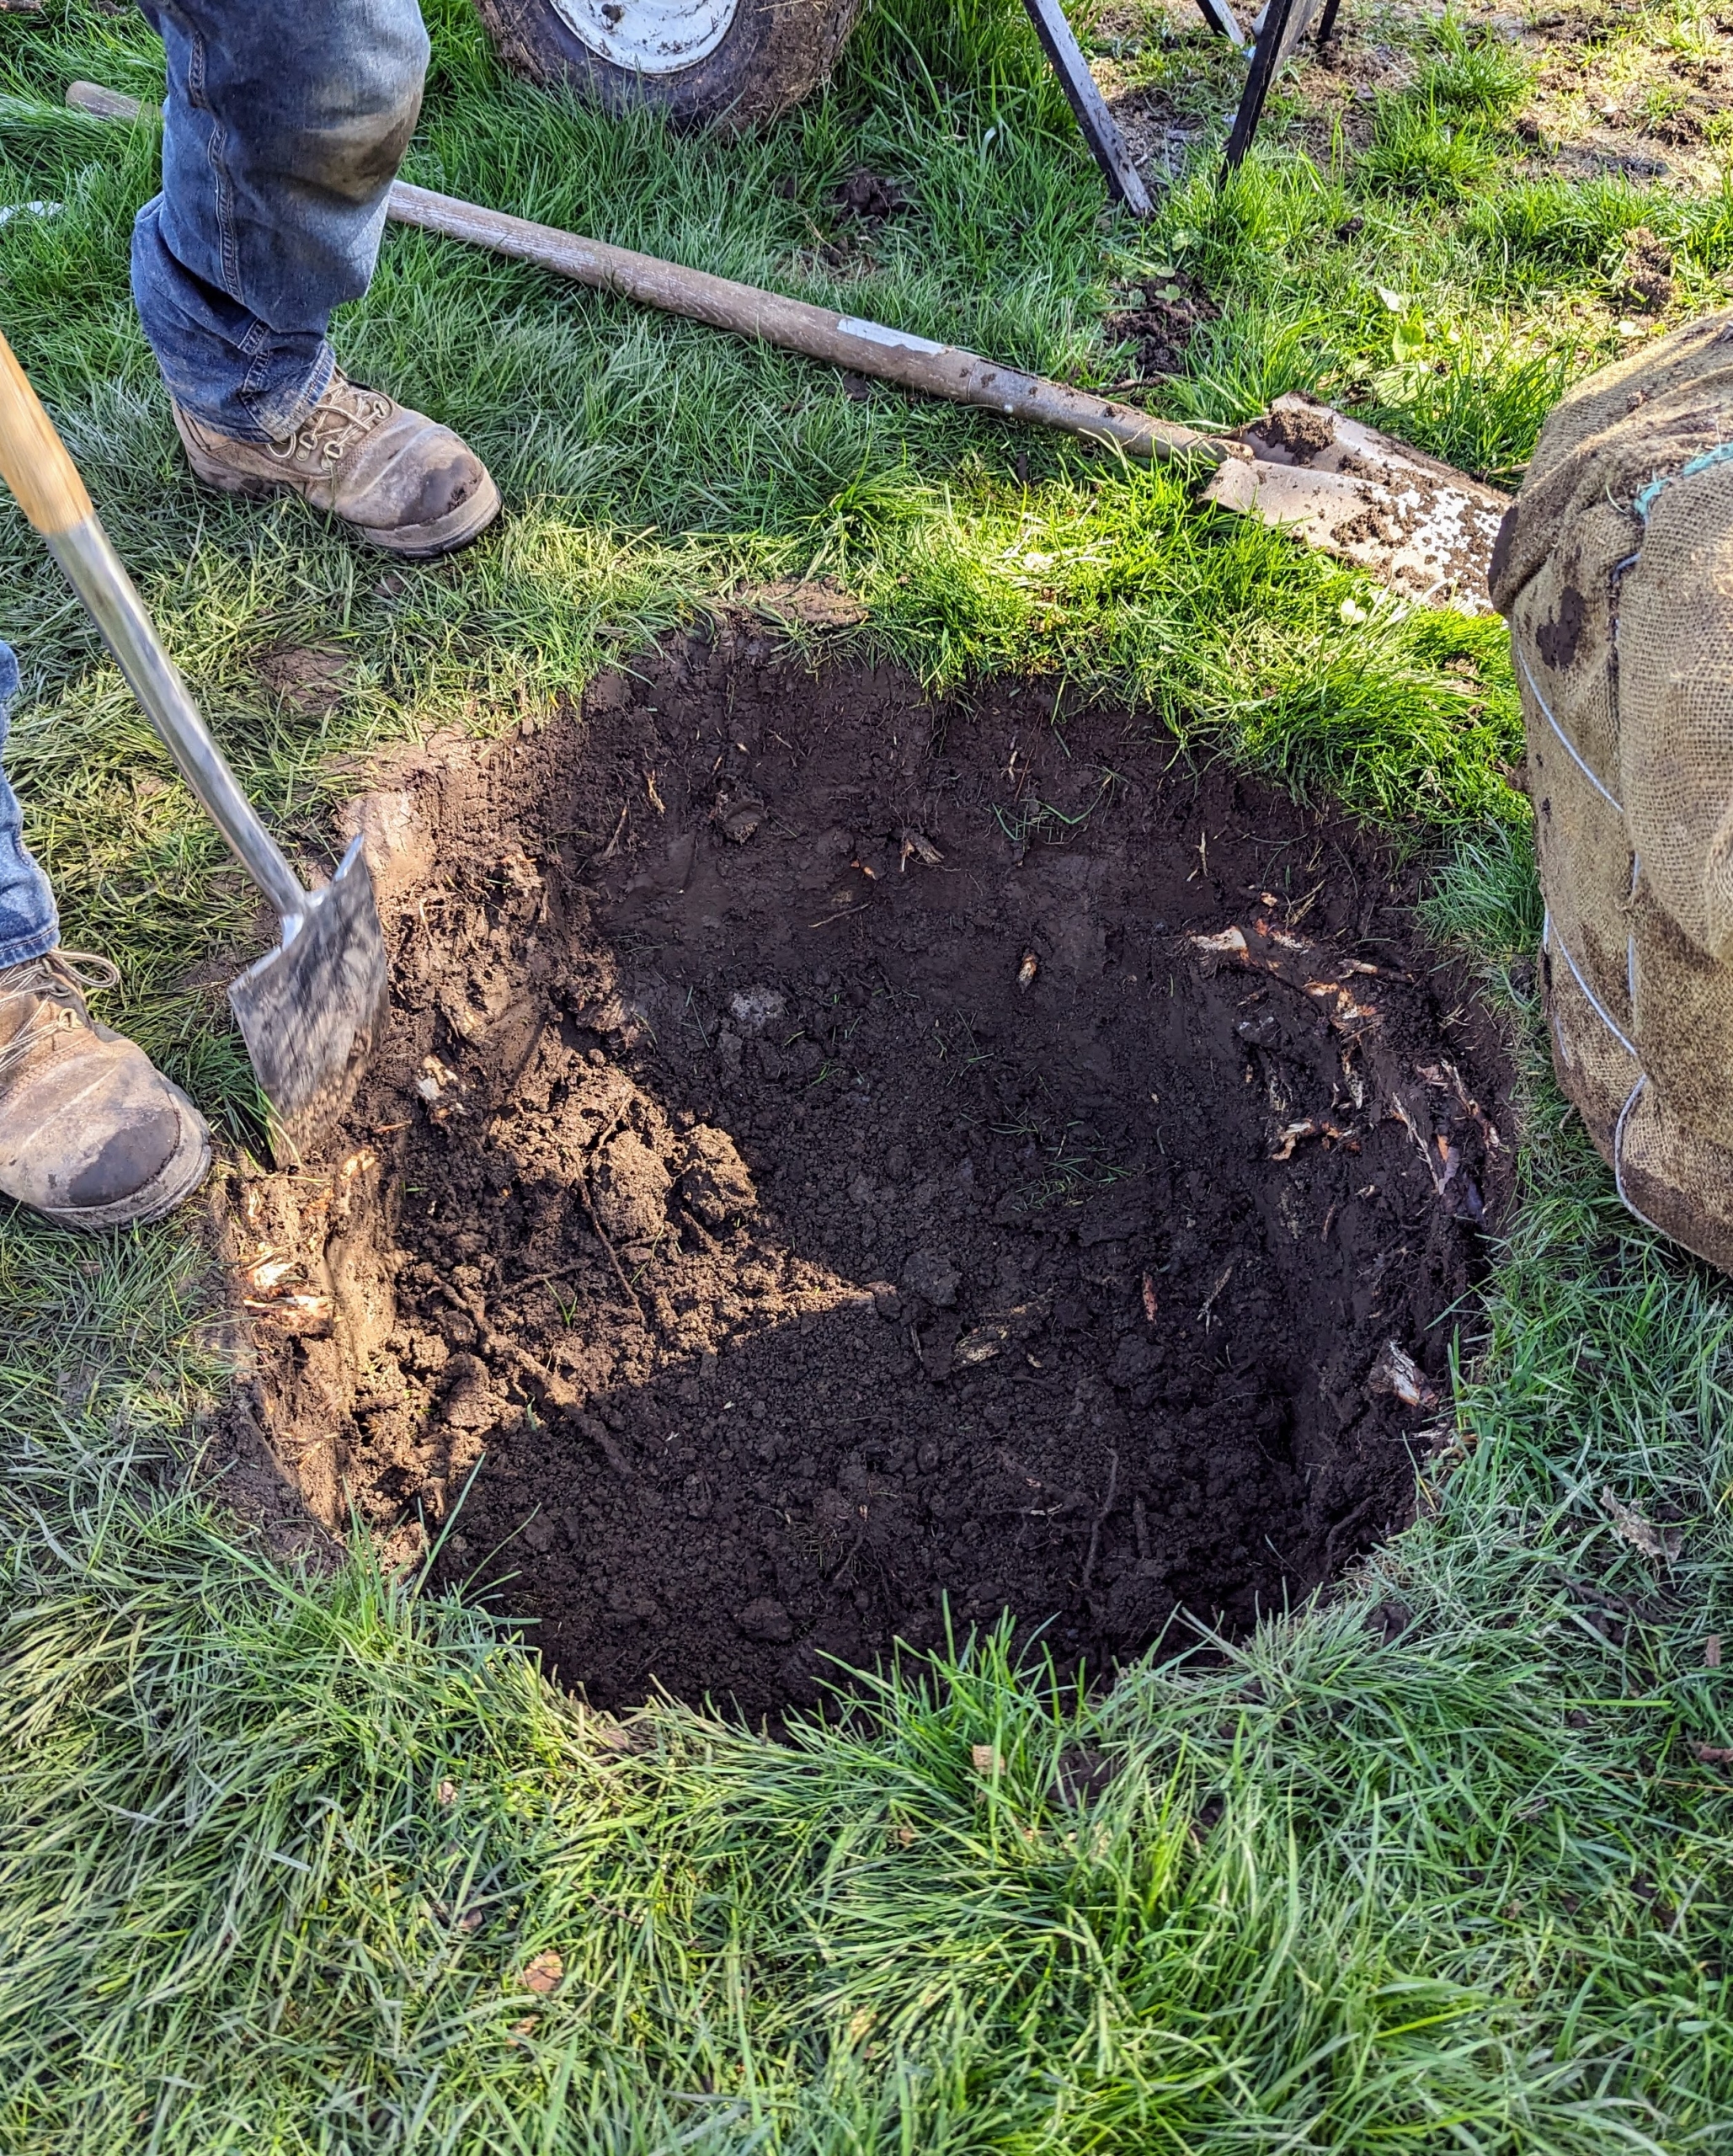
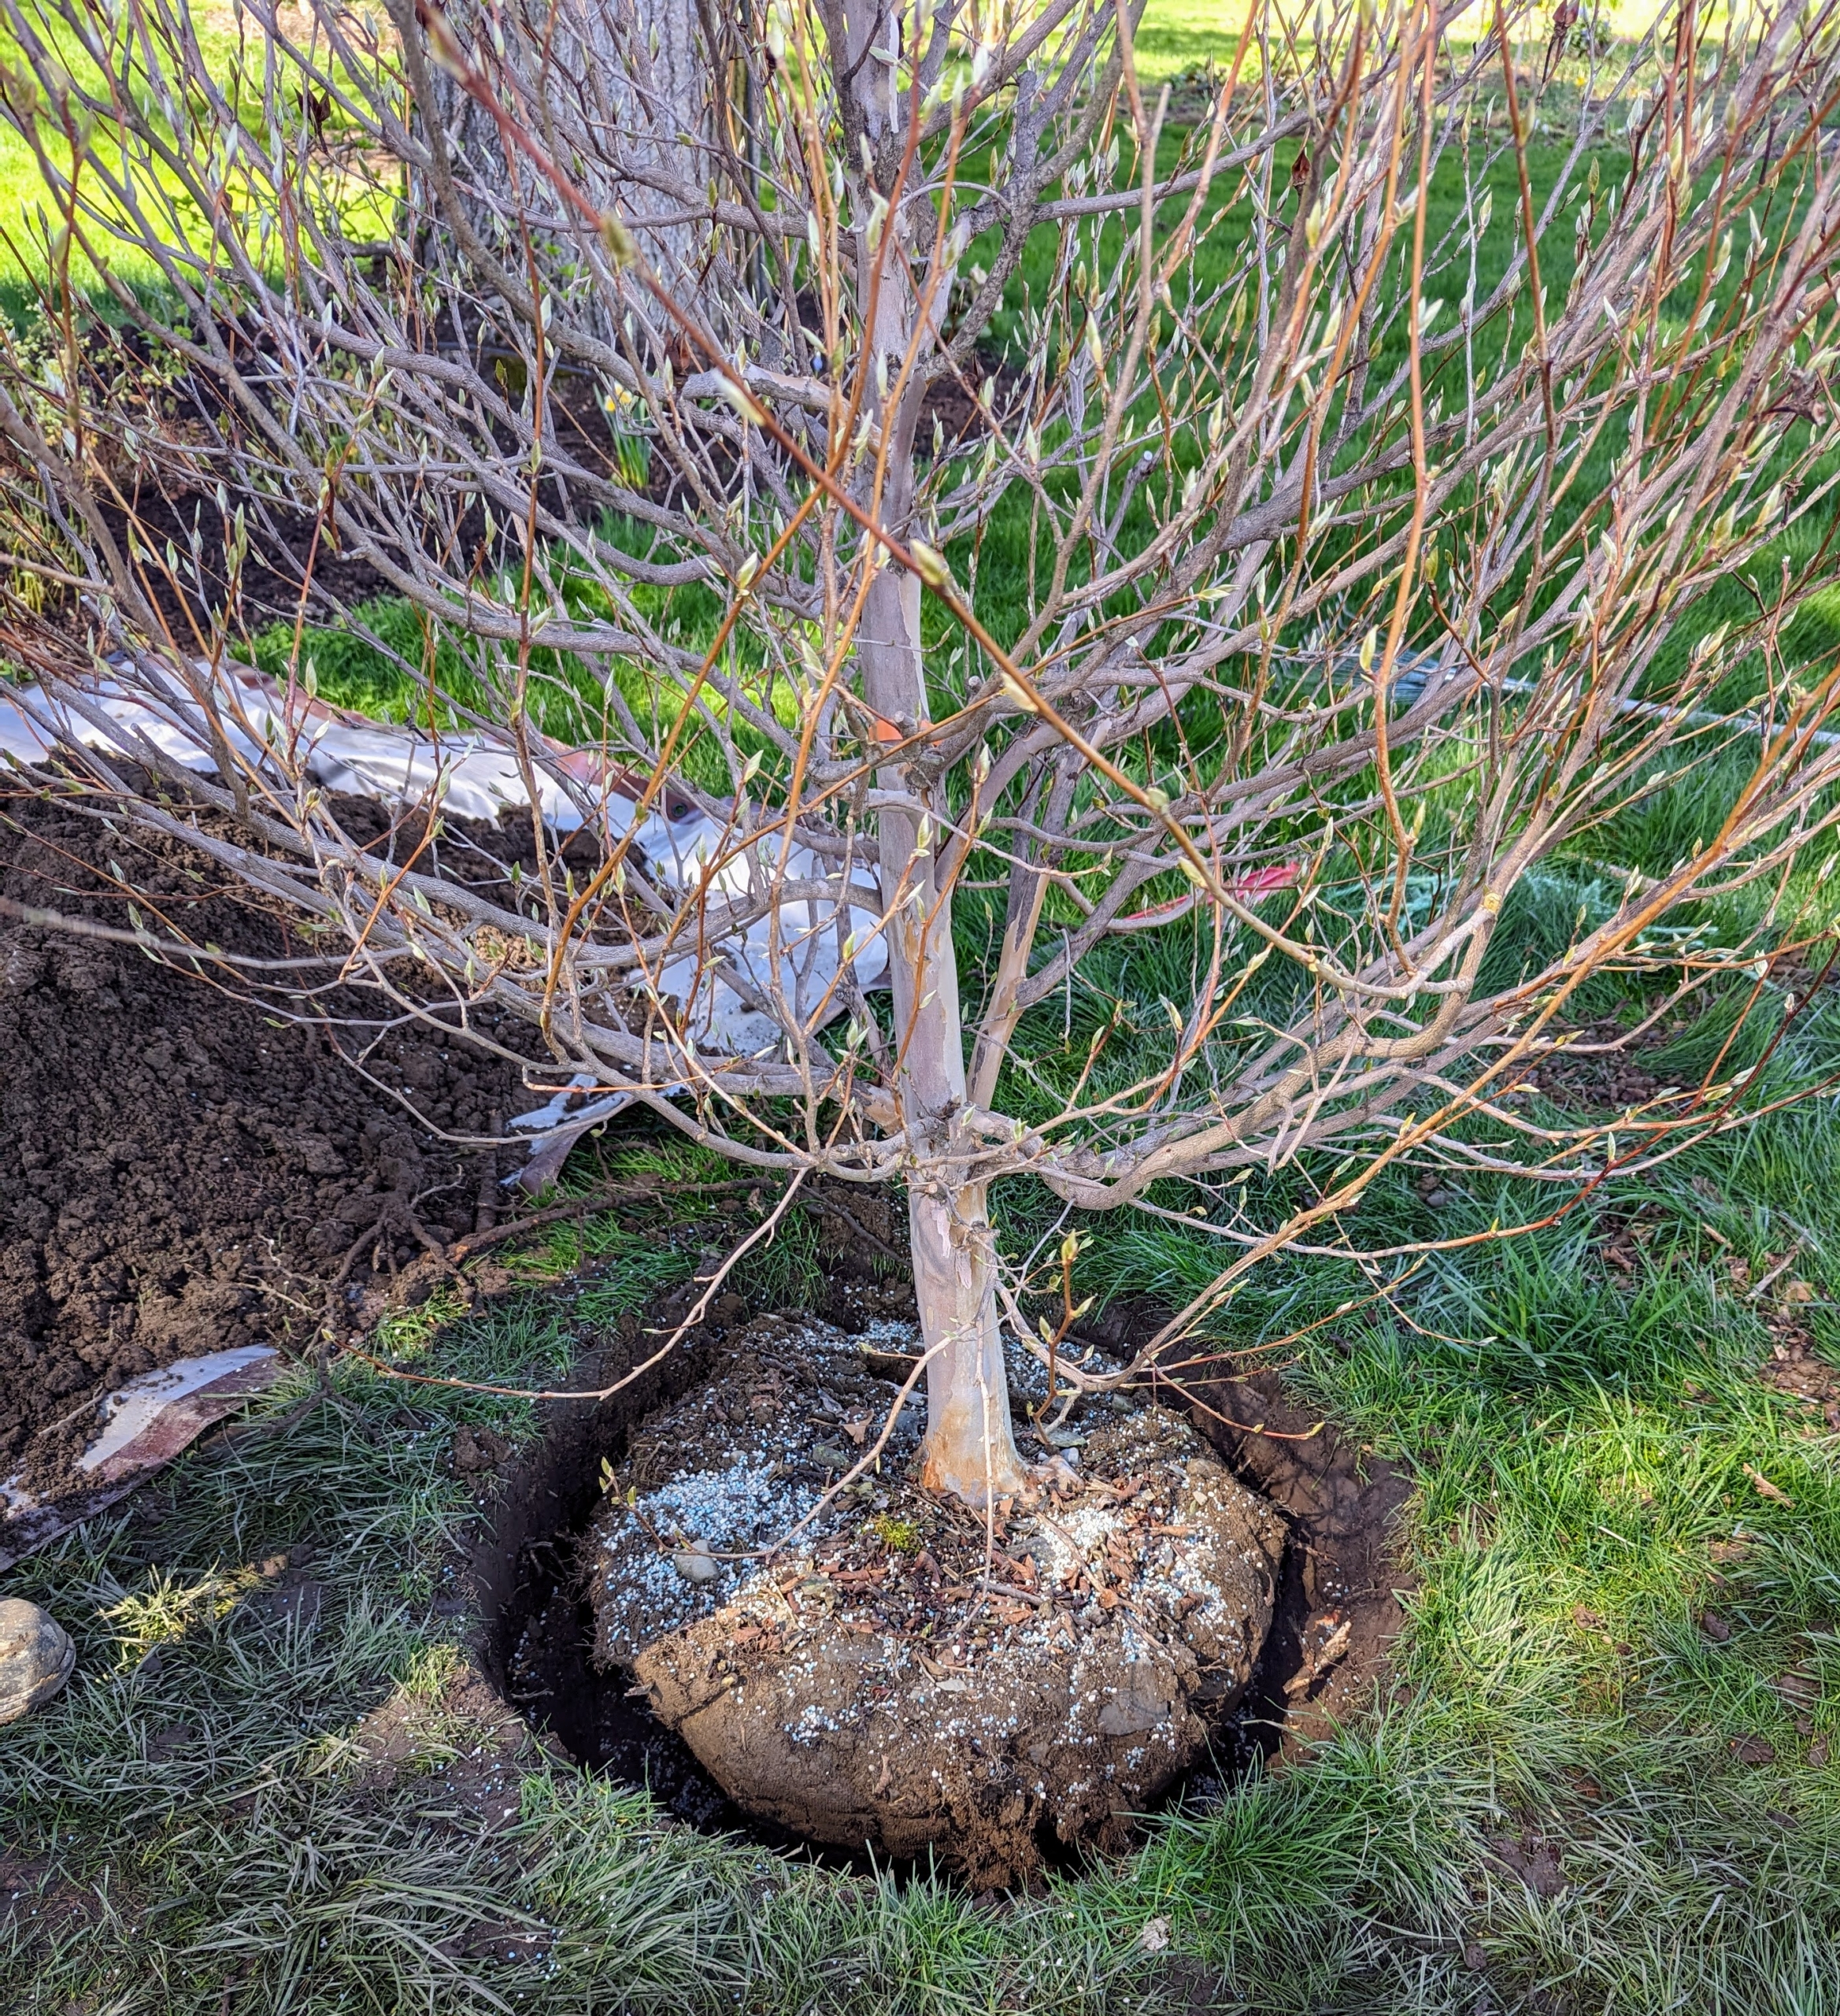
A crucial step in growing healthy trees is to plant them properly. The hole should be two to three times wider than the diameter of the tree’s rootball and two to three inches less than the height of the rootball.
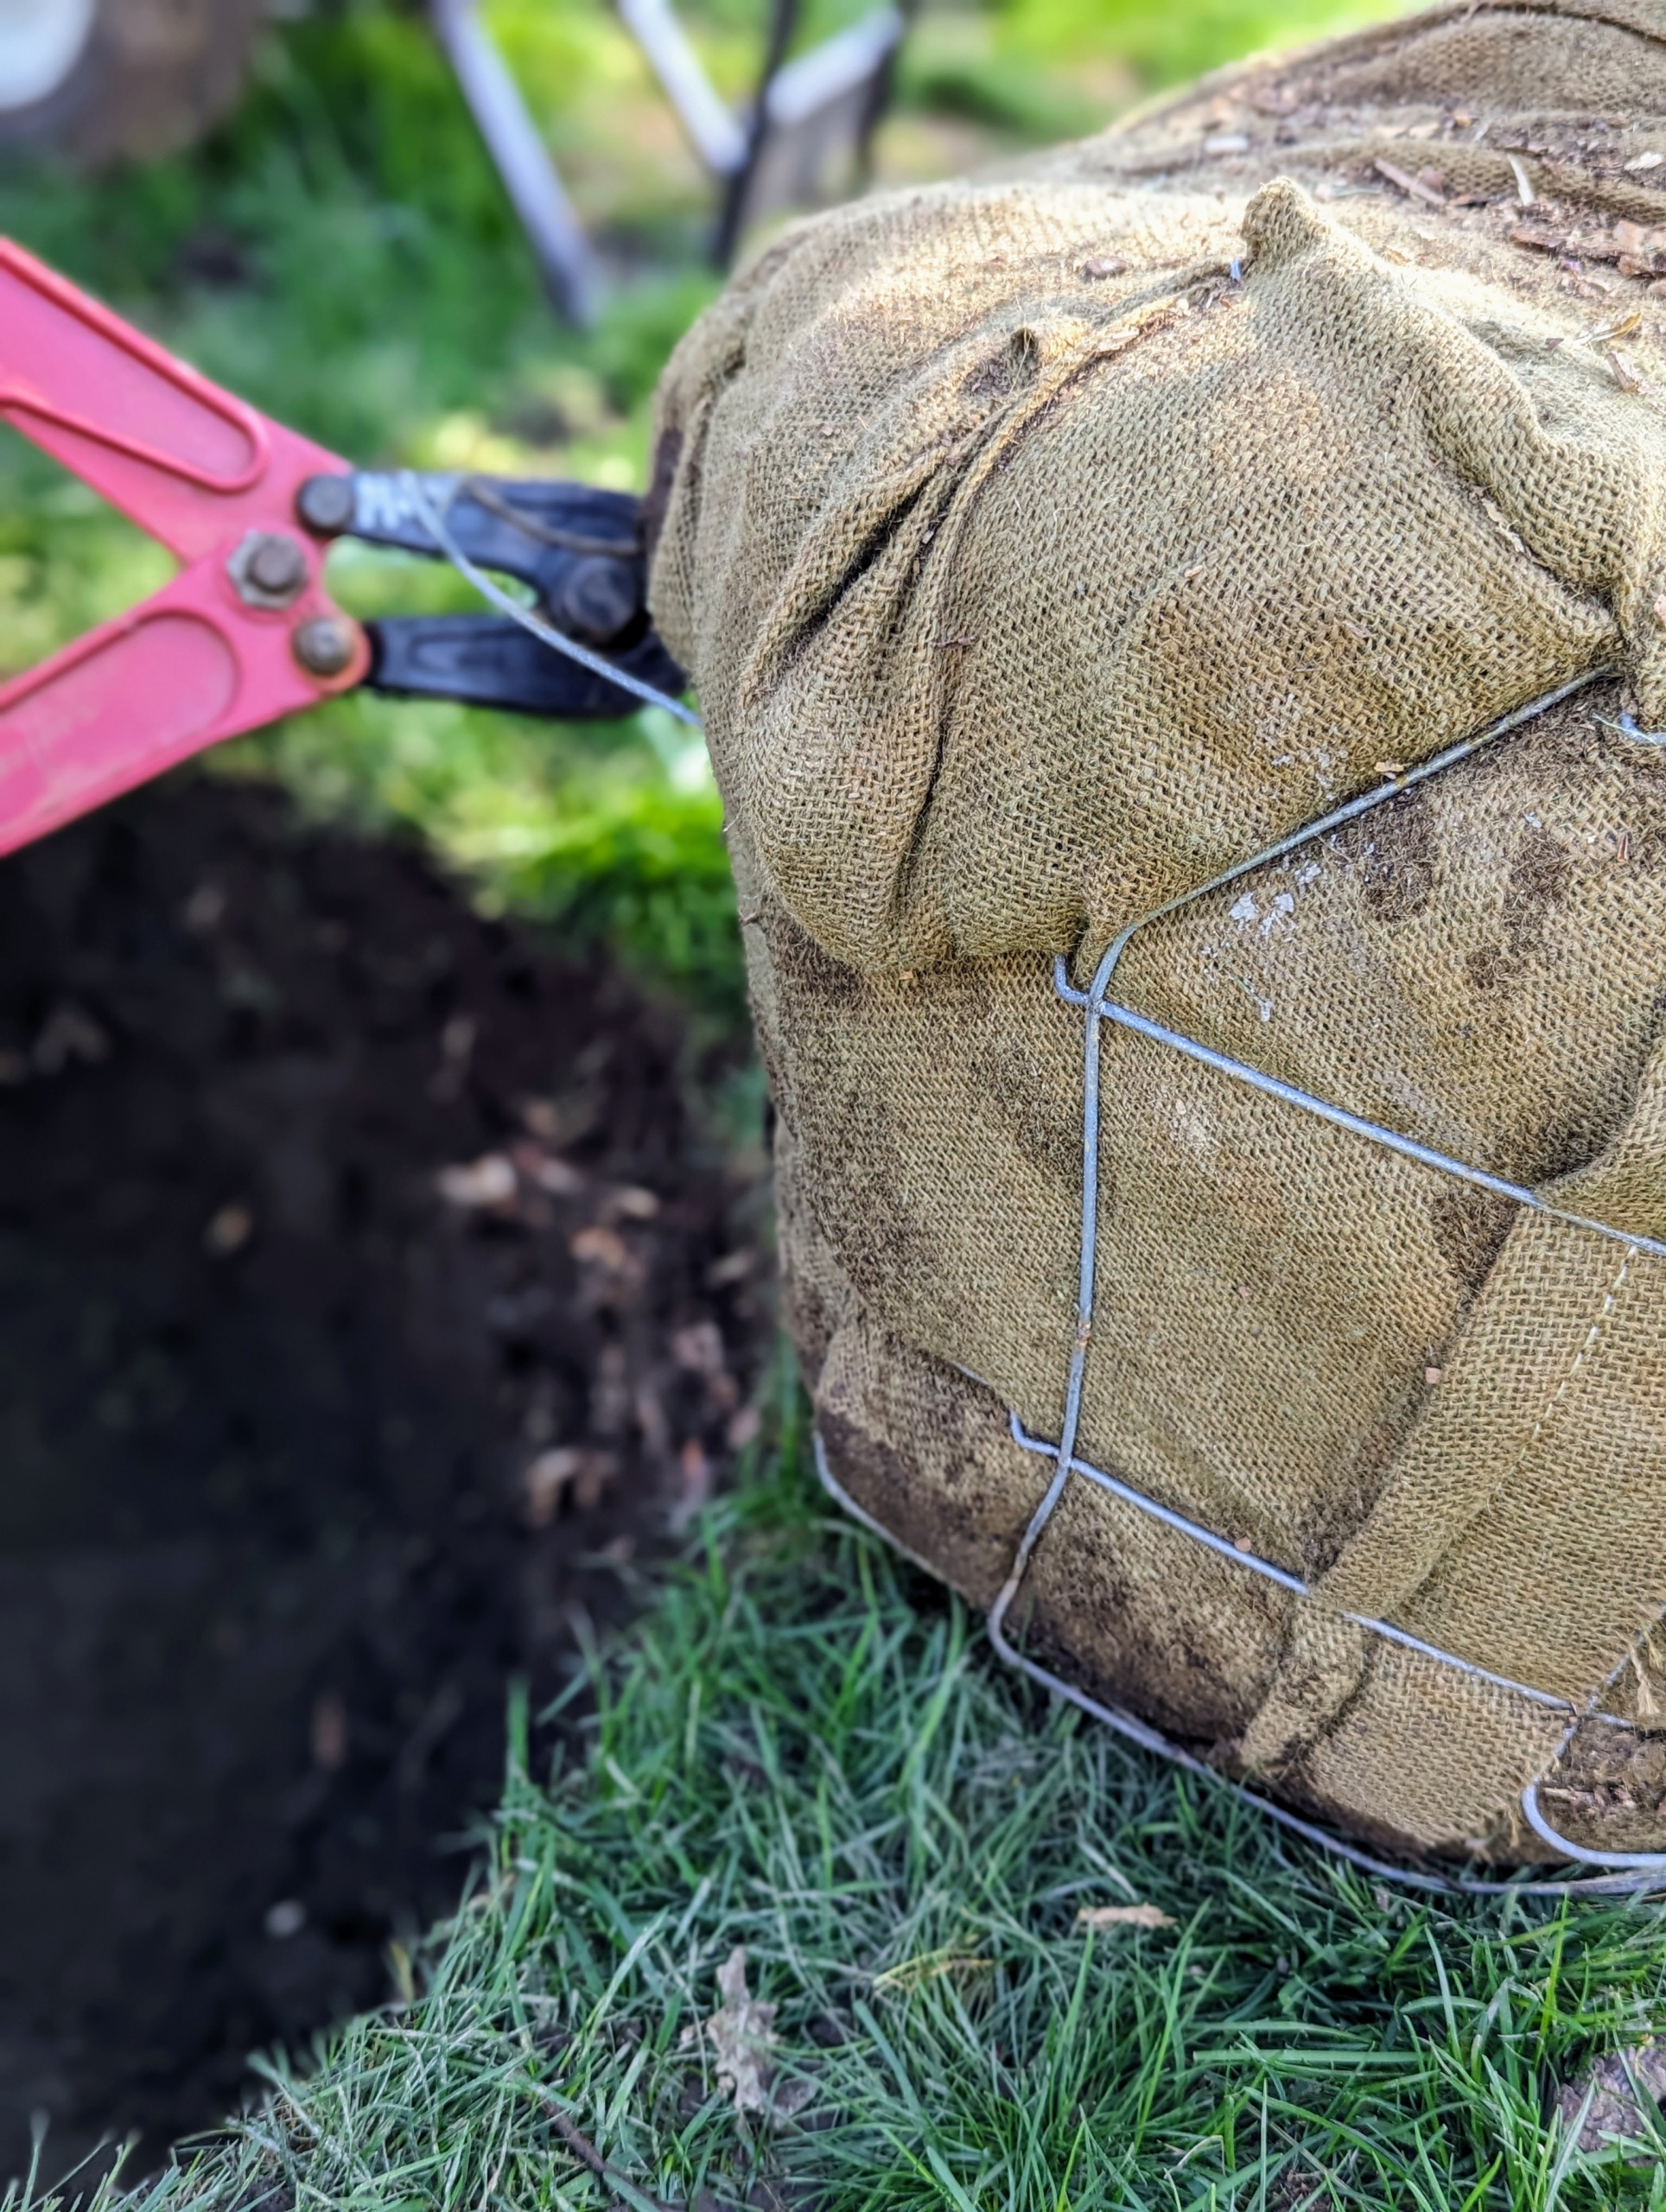
Chhiring cuts off the wire basket so it can be removed. Wire baskets were designed to support the root ball during loading, shipping, and transplanting. Some cut the cages and leave them in the ground, but I prefer to remove them completely, so there is nothing blocking the growing roots.
He also removes the burlap wrapping that holds the root ball together.
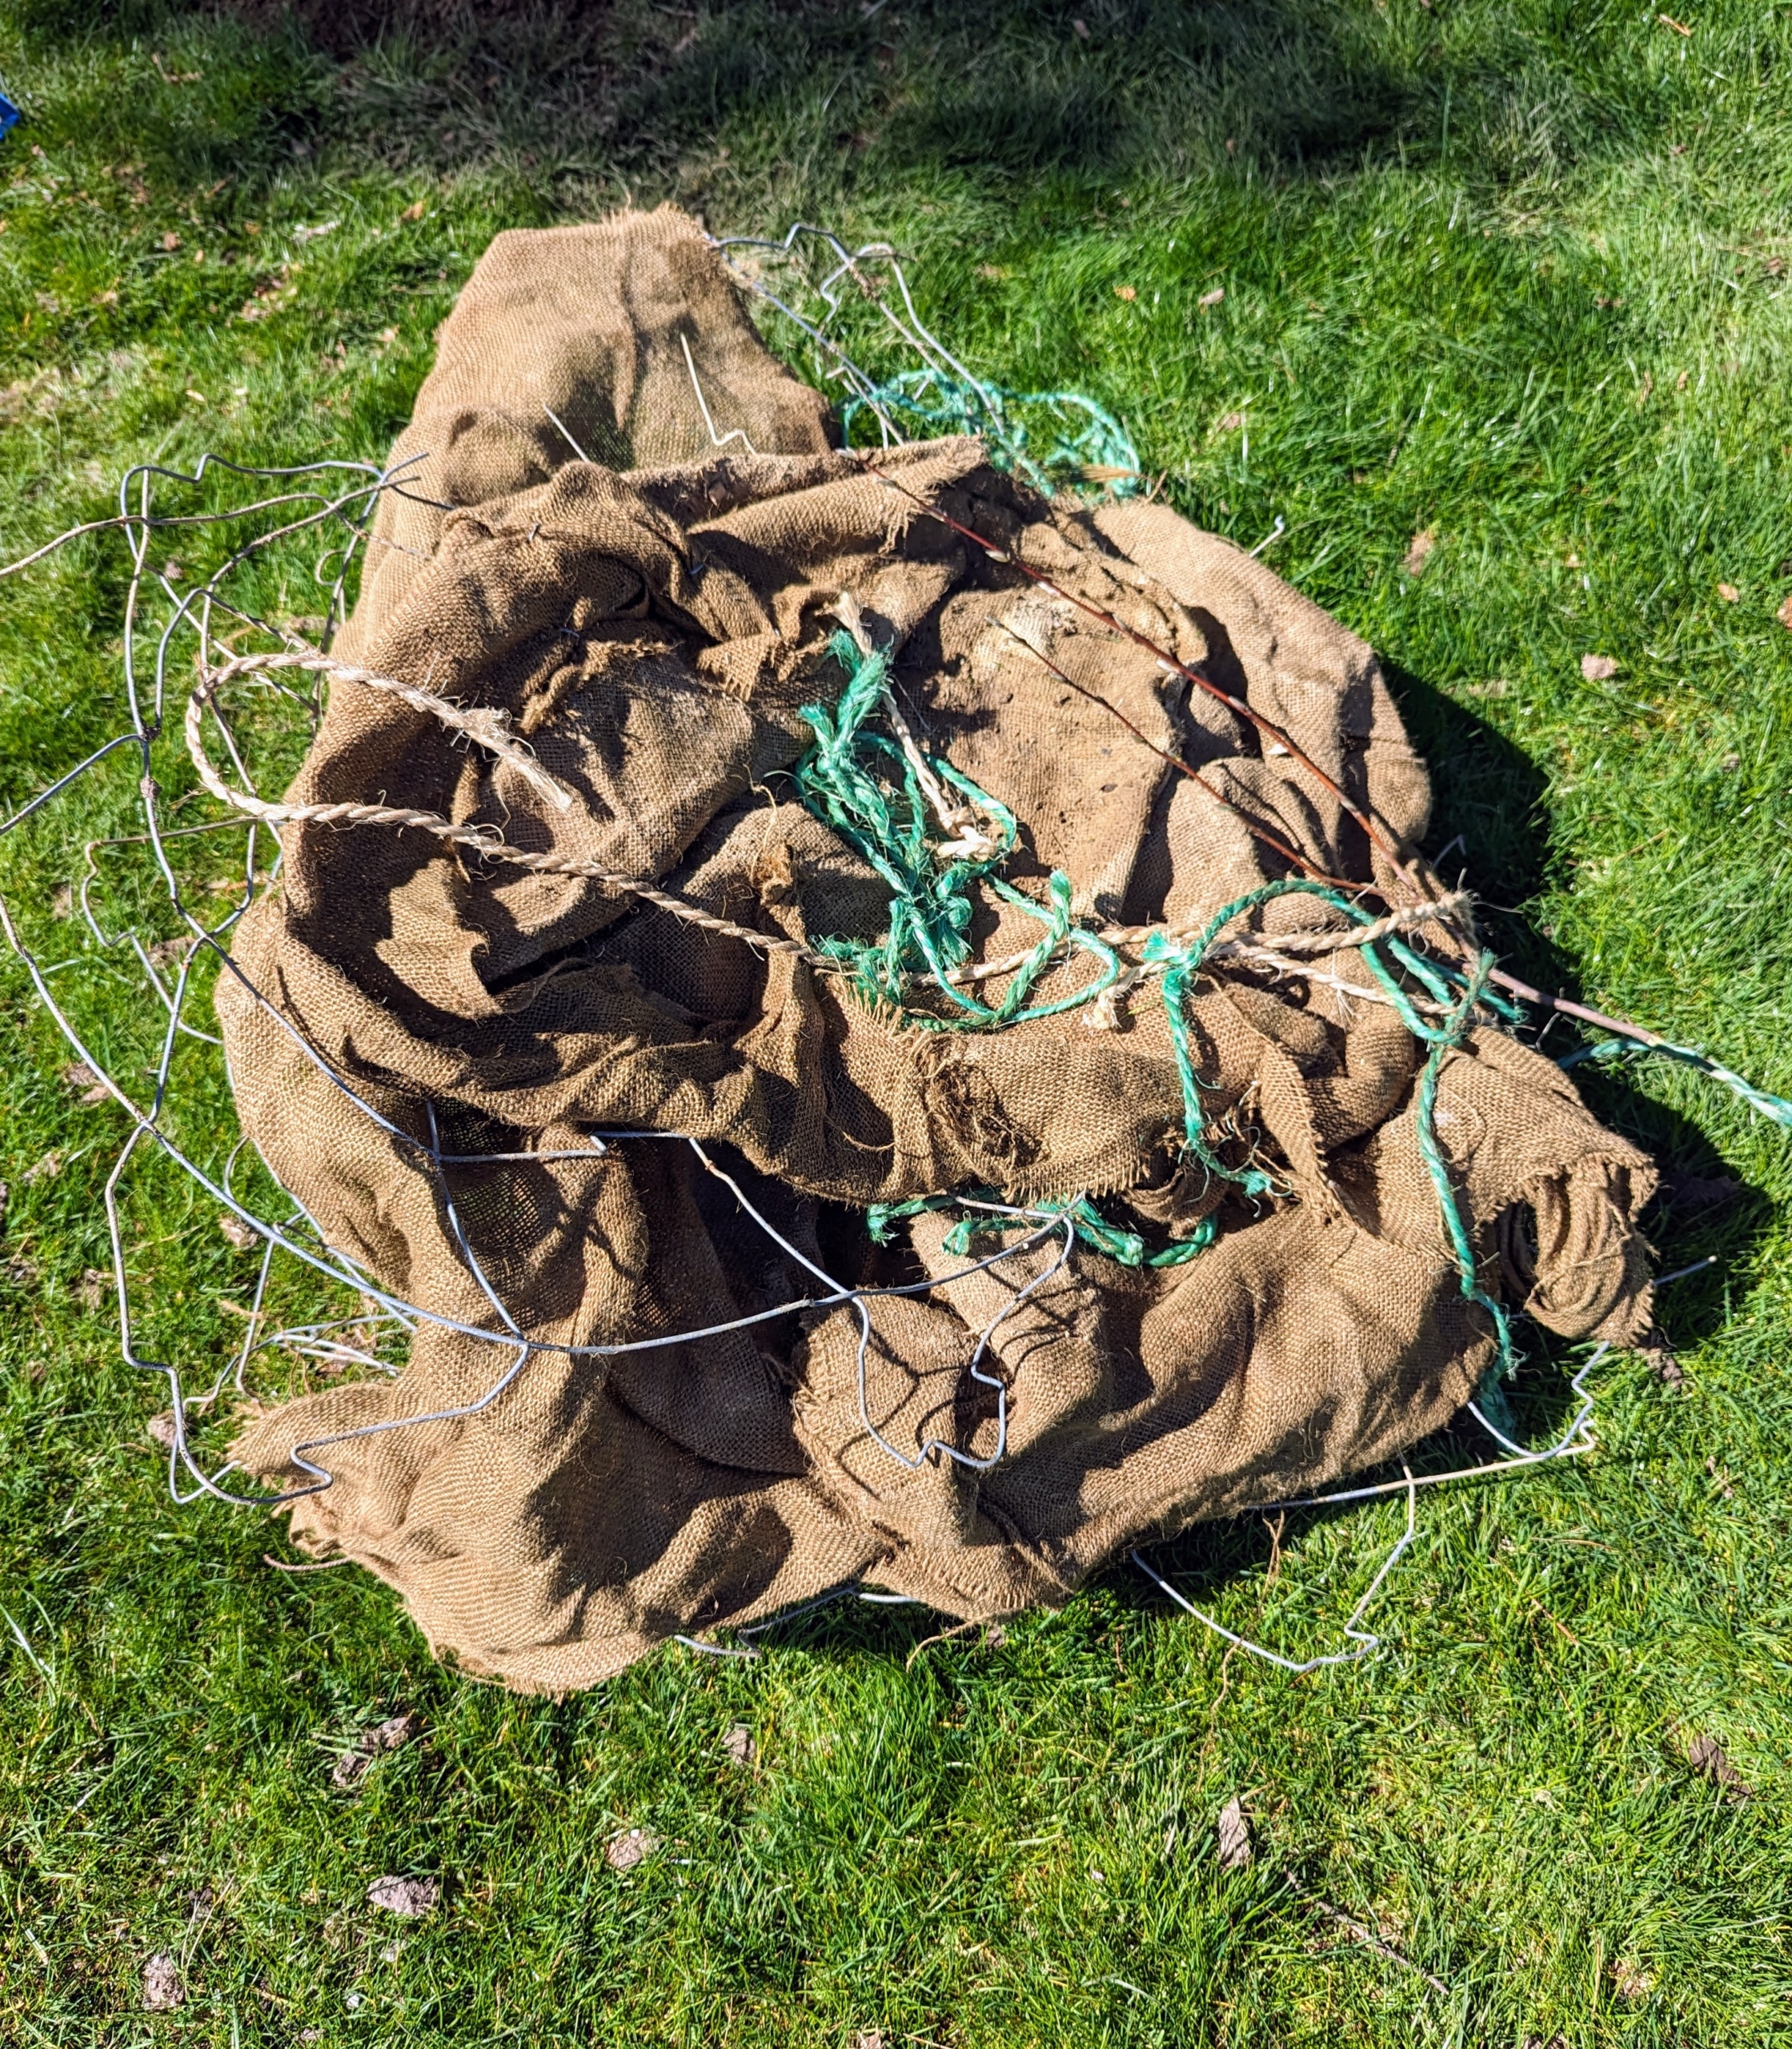
All the wire cages and wrapping are piled up and discarded.
Chhiring rolls the root ball slowly and carefully into the hole and then looks at the tree from all sides to ensure it is perfectly straight and its best side is facing out toward the carriage road.
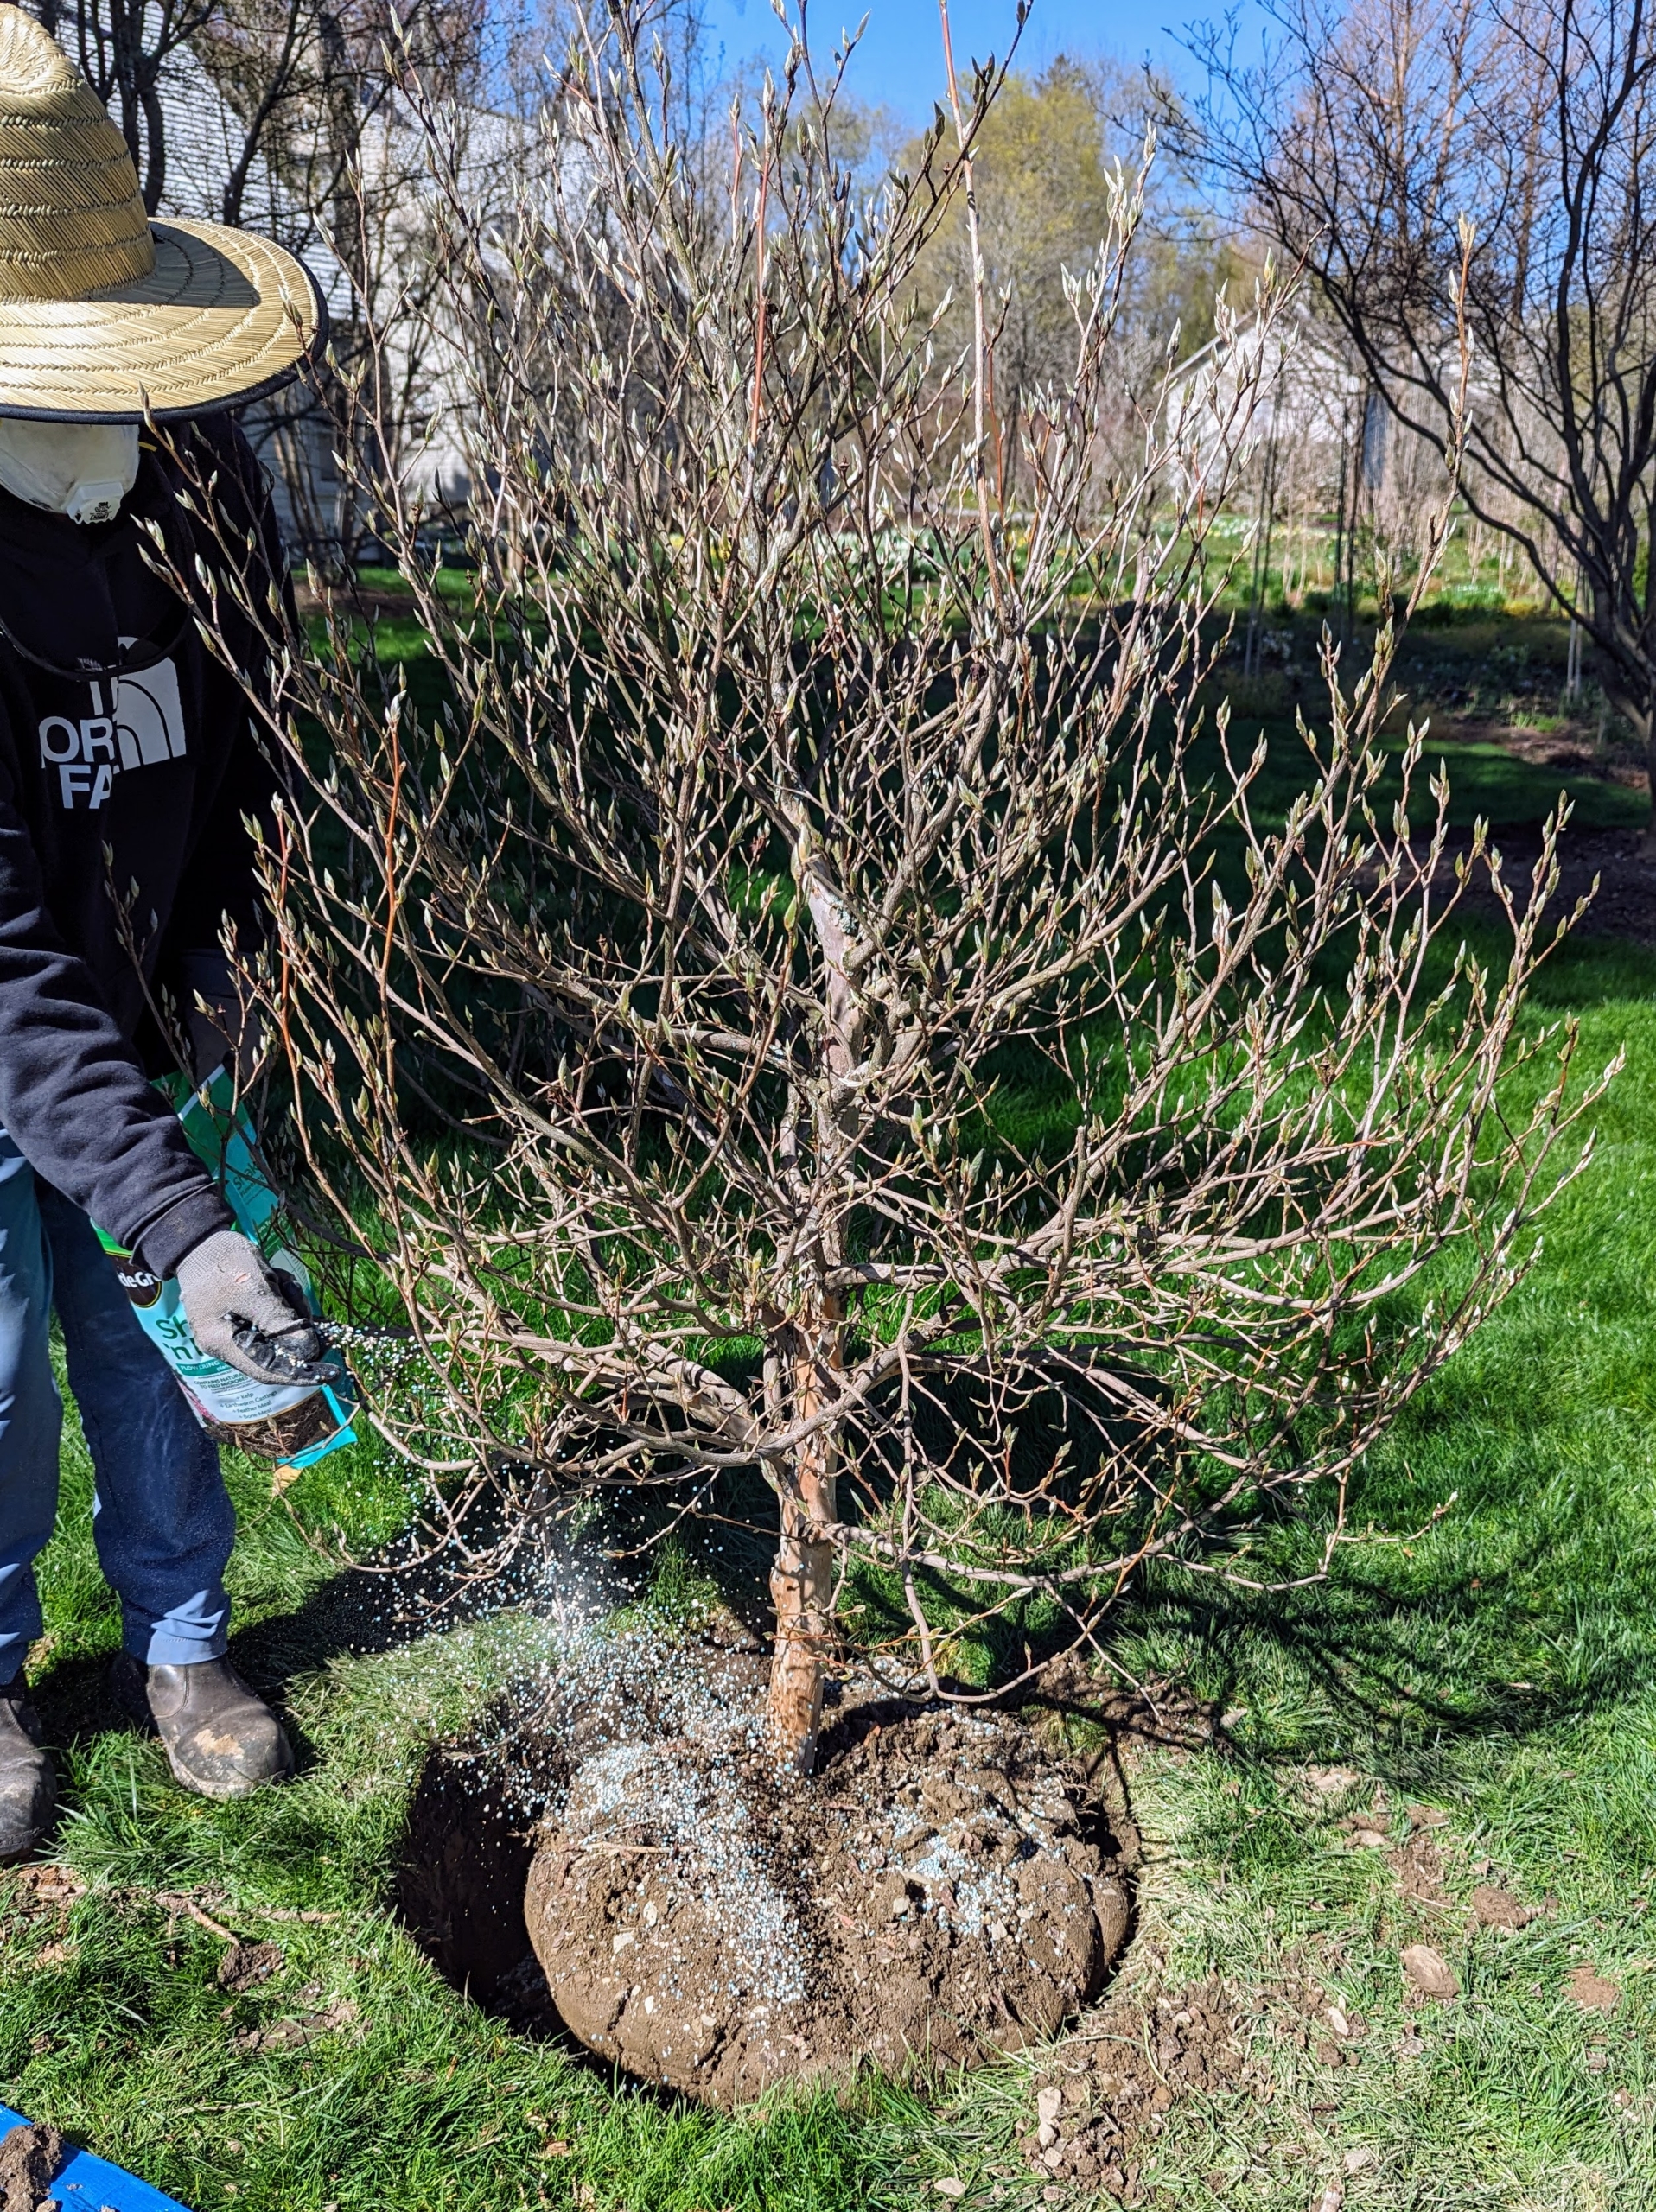
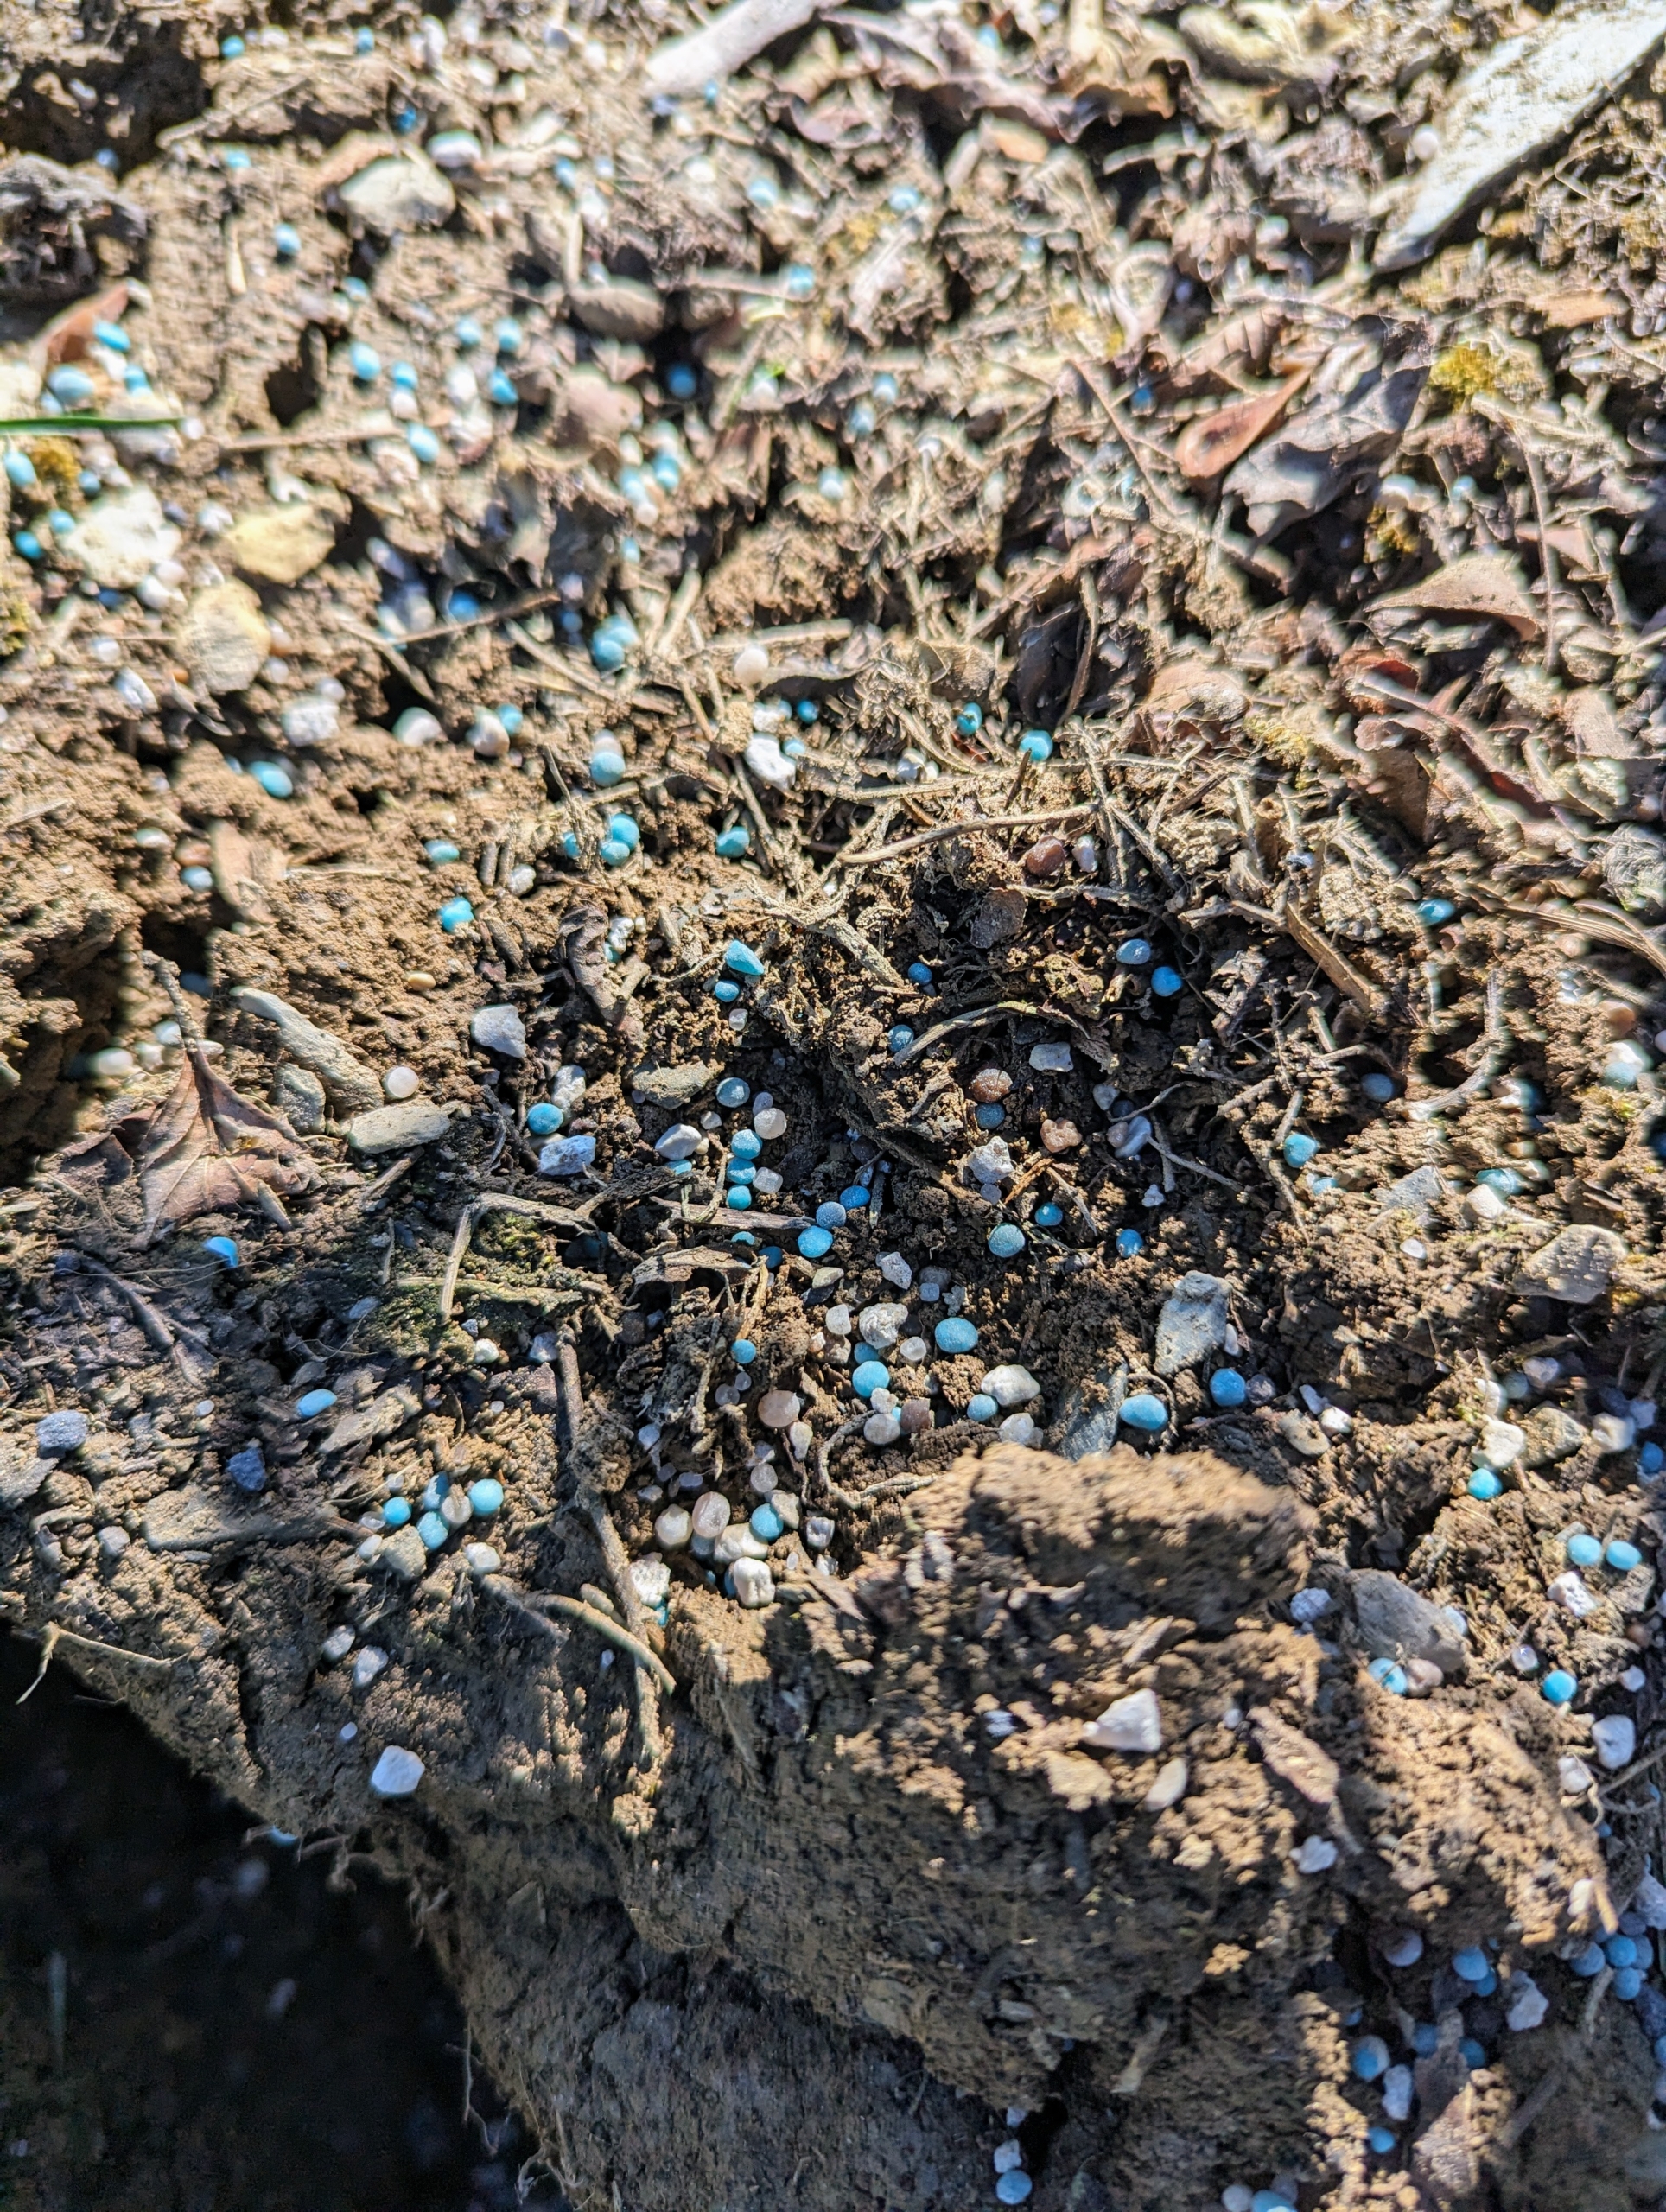
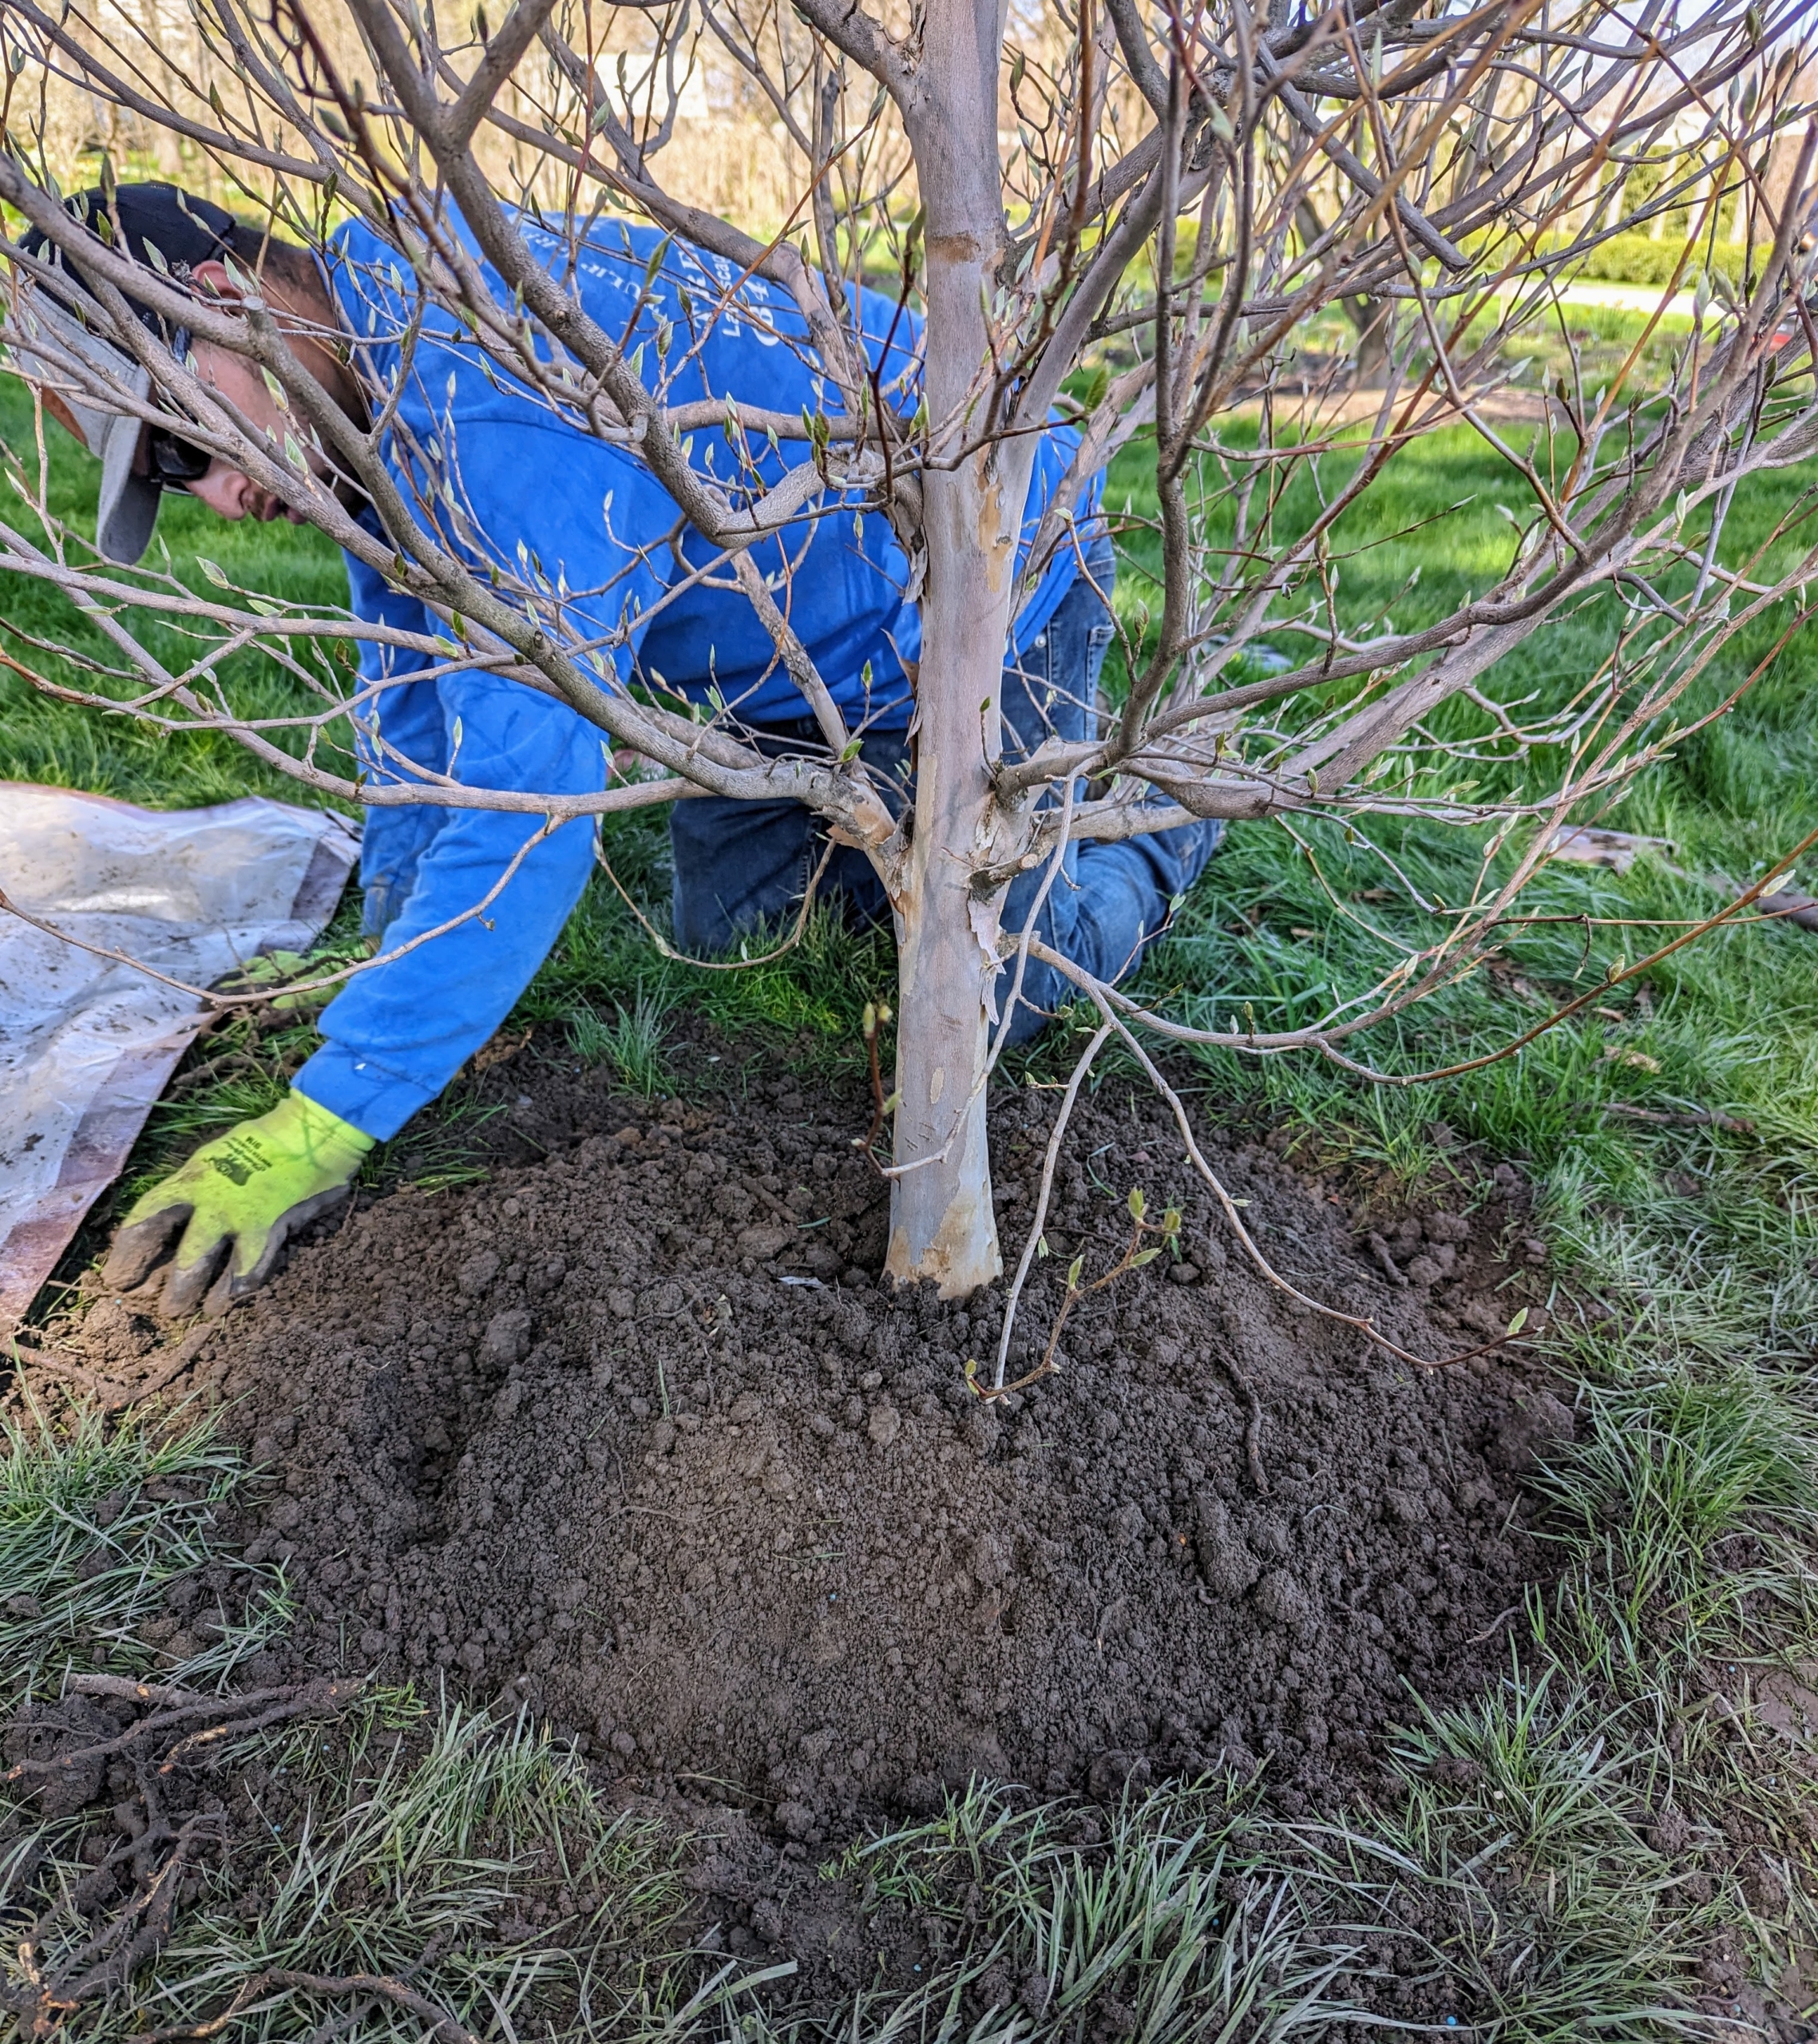
Chhiring is now sprinkling fertilizer. I always say, “if you eat, your plants should eat.” The soil in the planting hole is also amended with fertilizer.
The biodegradable resin coated shells allow for a slow release of the fertilizer.
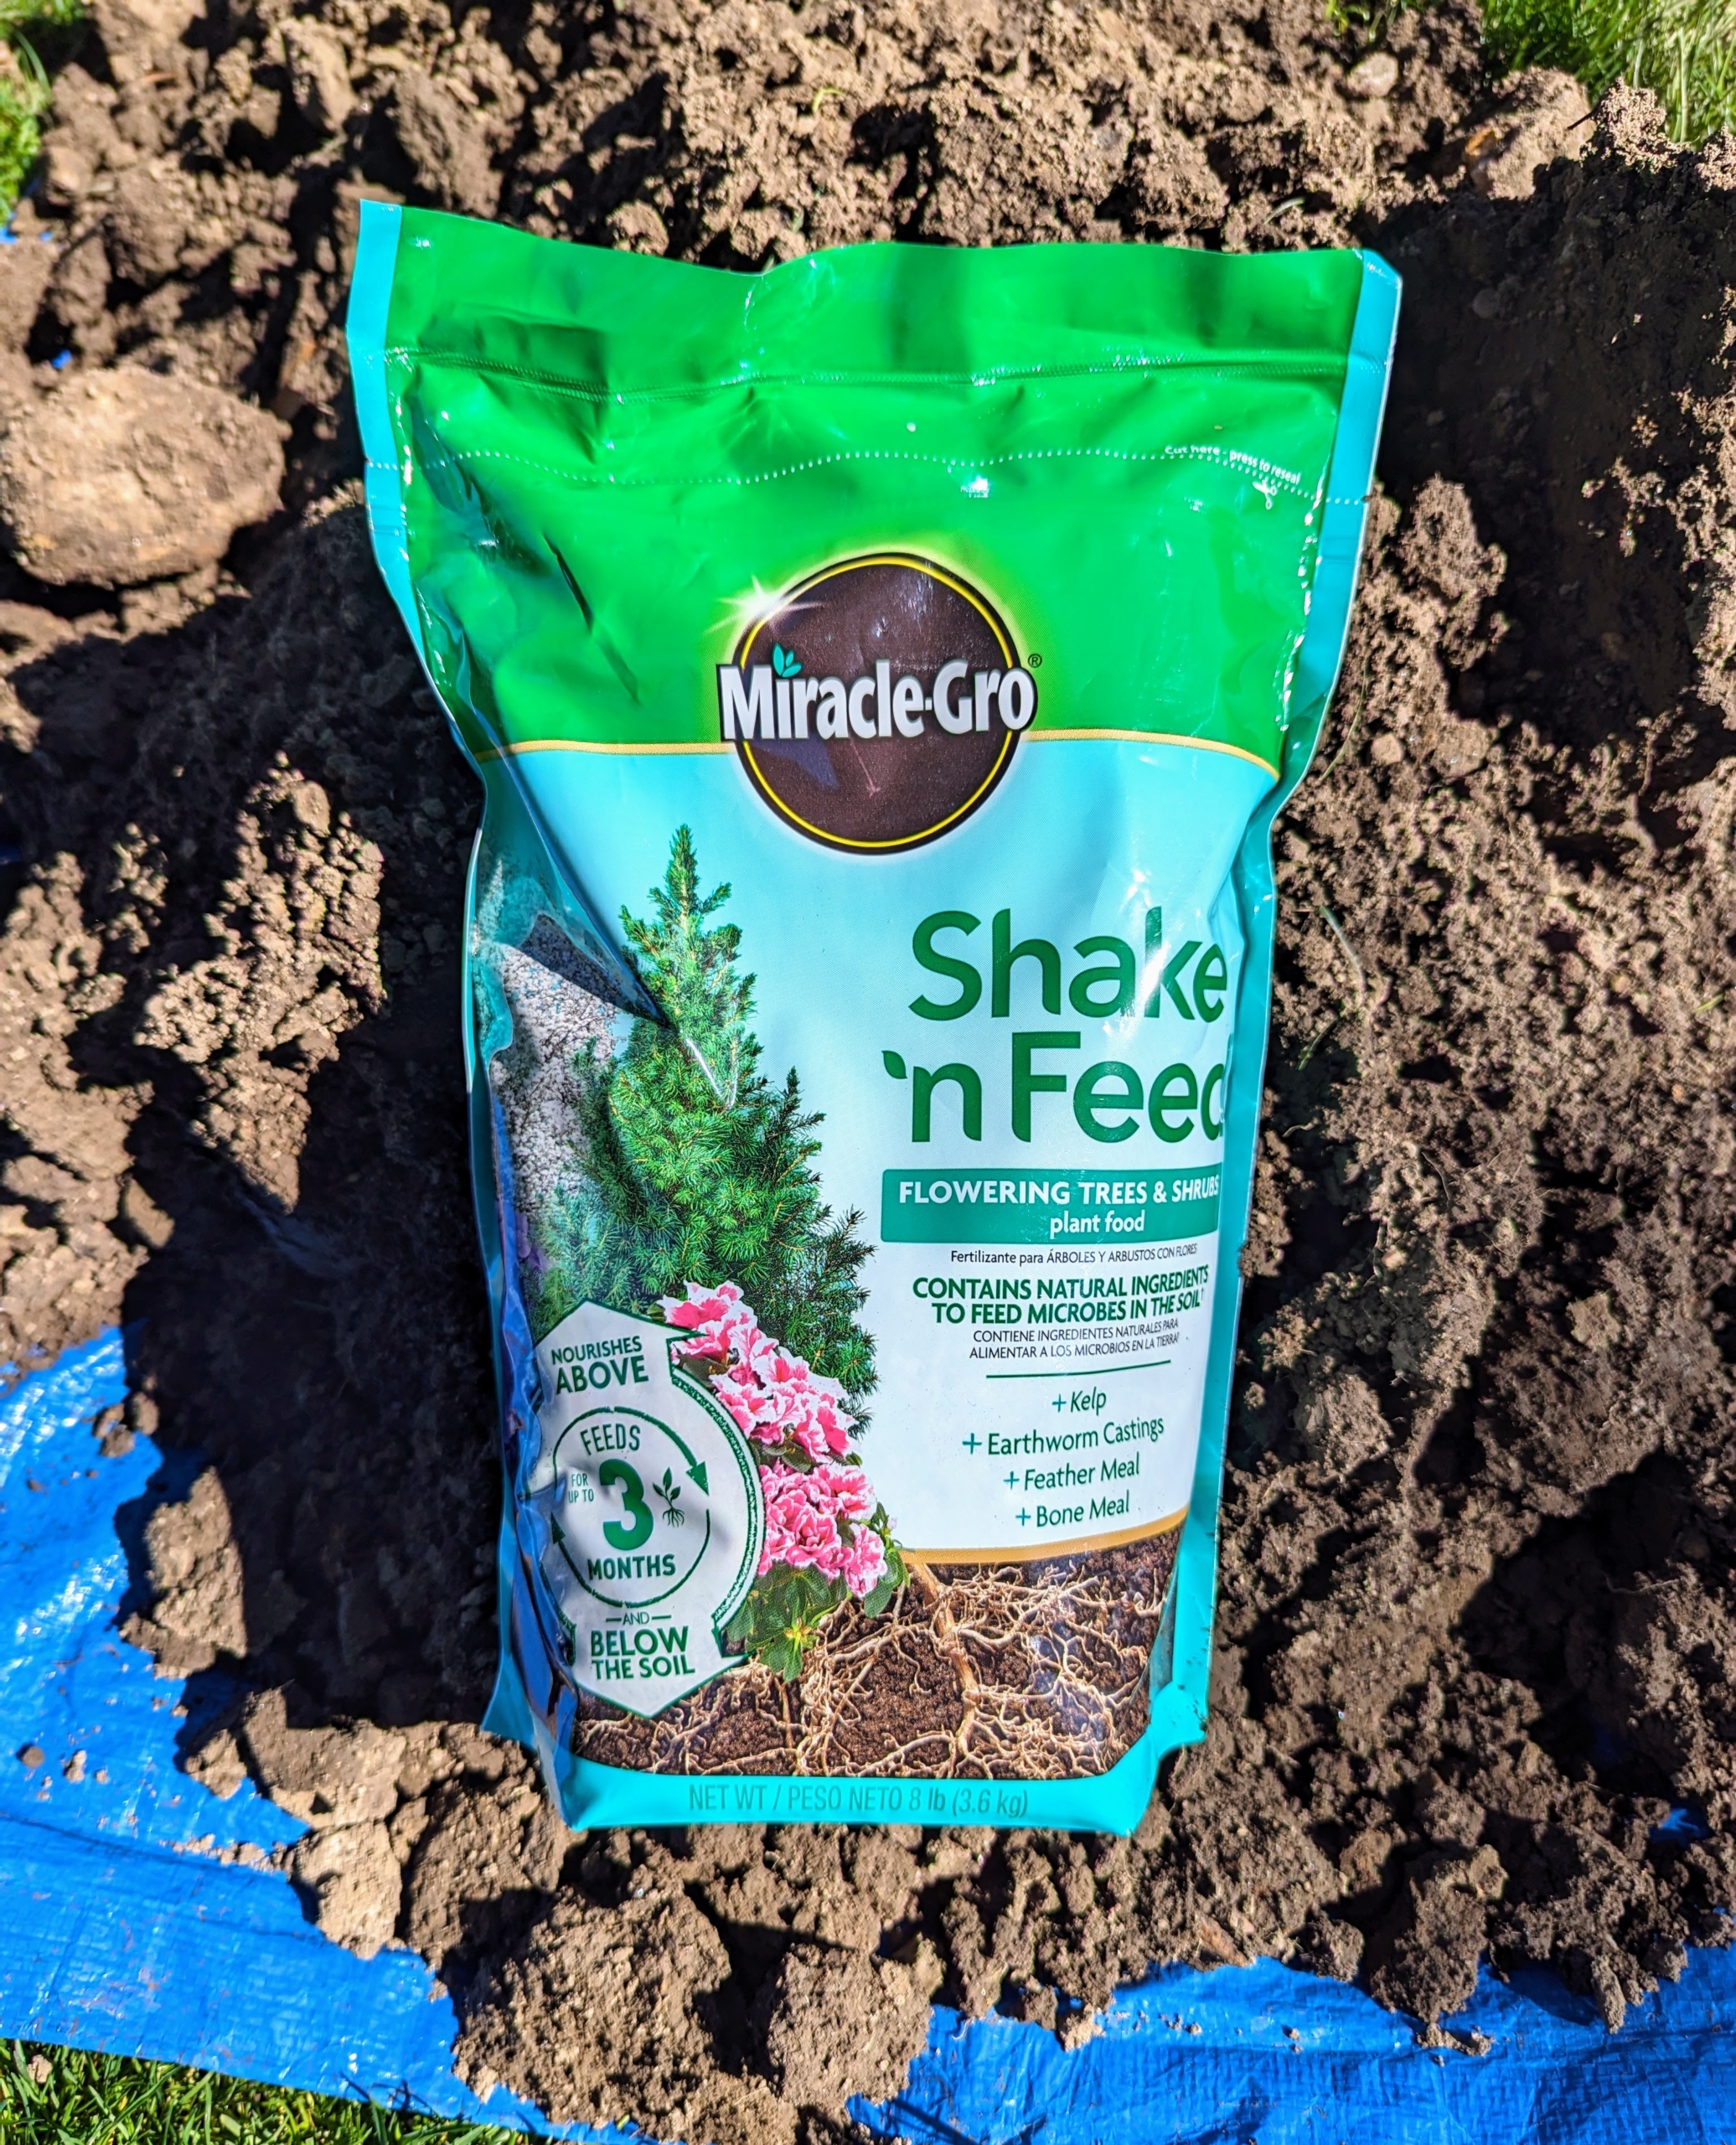
We use Miracle-Gro® Shake ‘N Feed Flowering Trees and Shrubs Plant Food, which contains natural ingredients to feed microbes in the soil and provides continuous release feeding for up to three months.
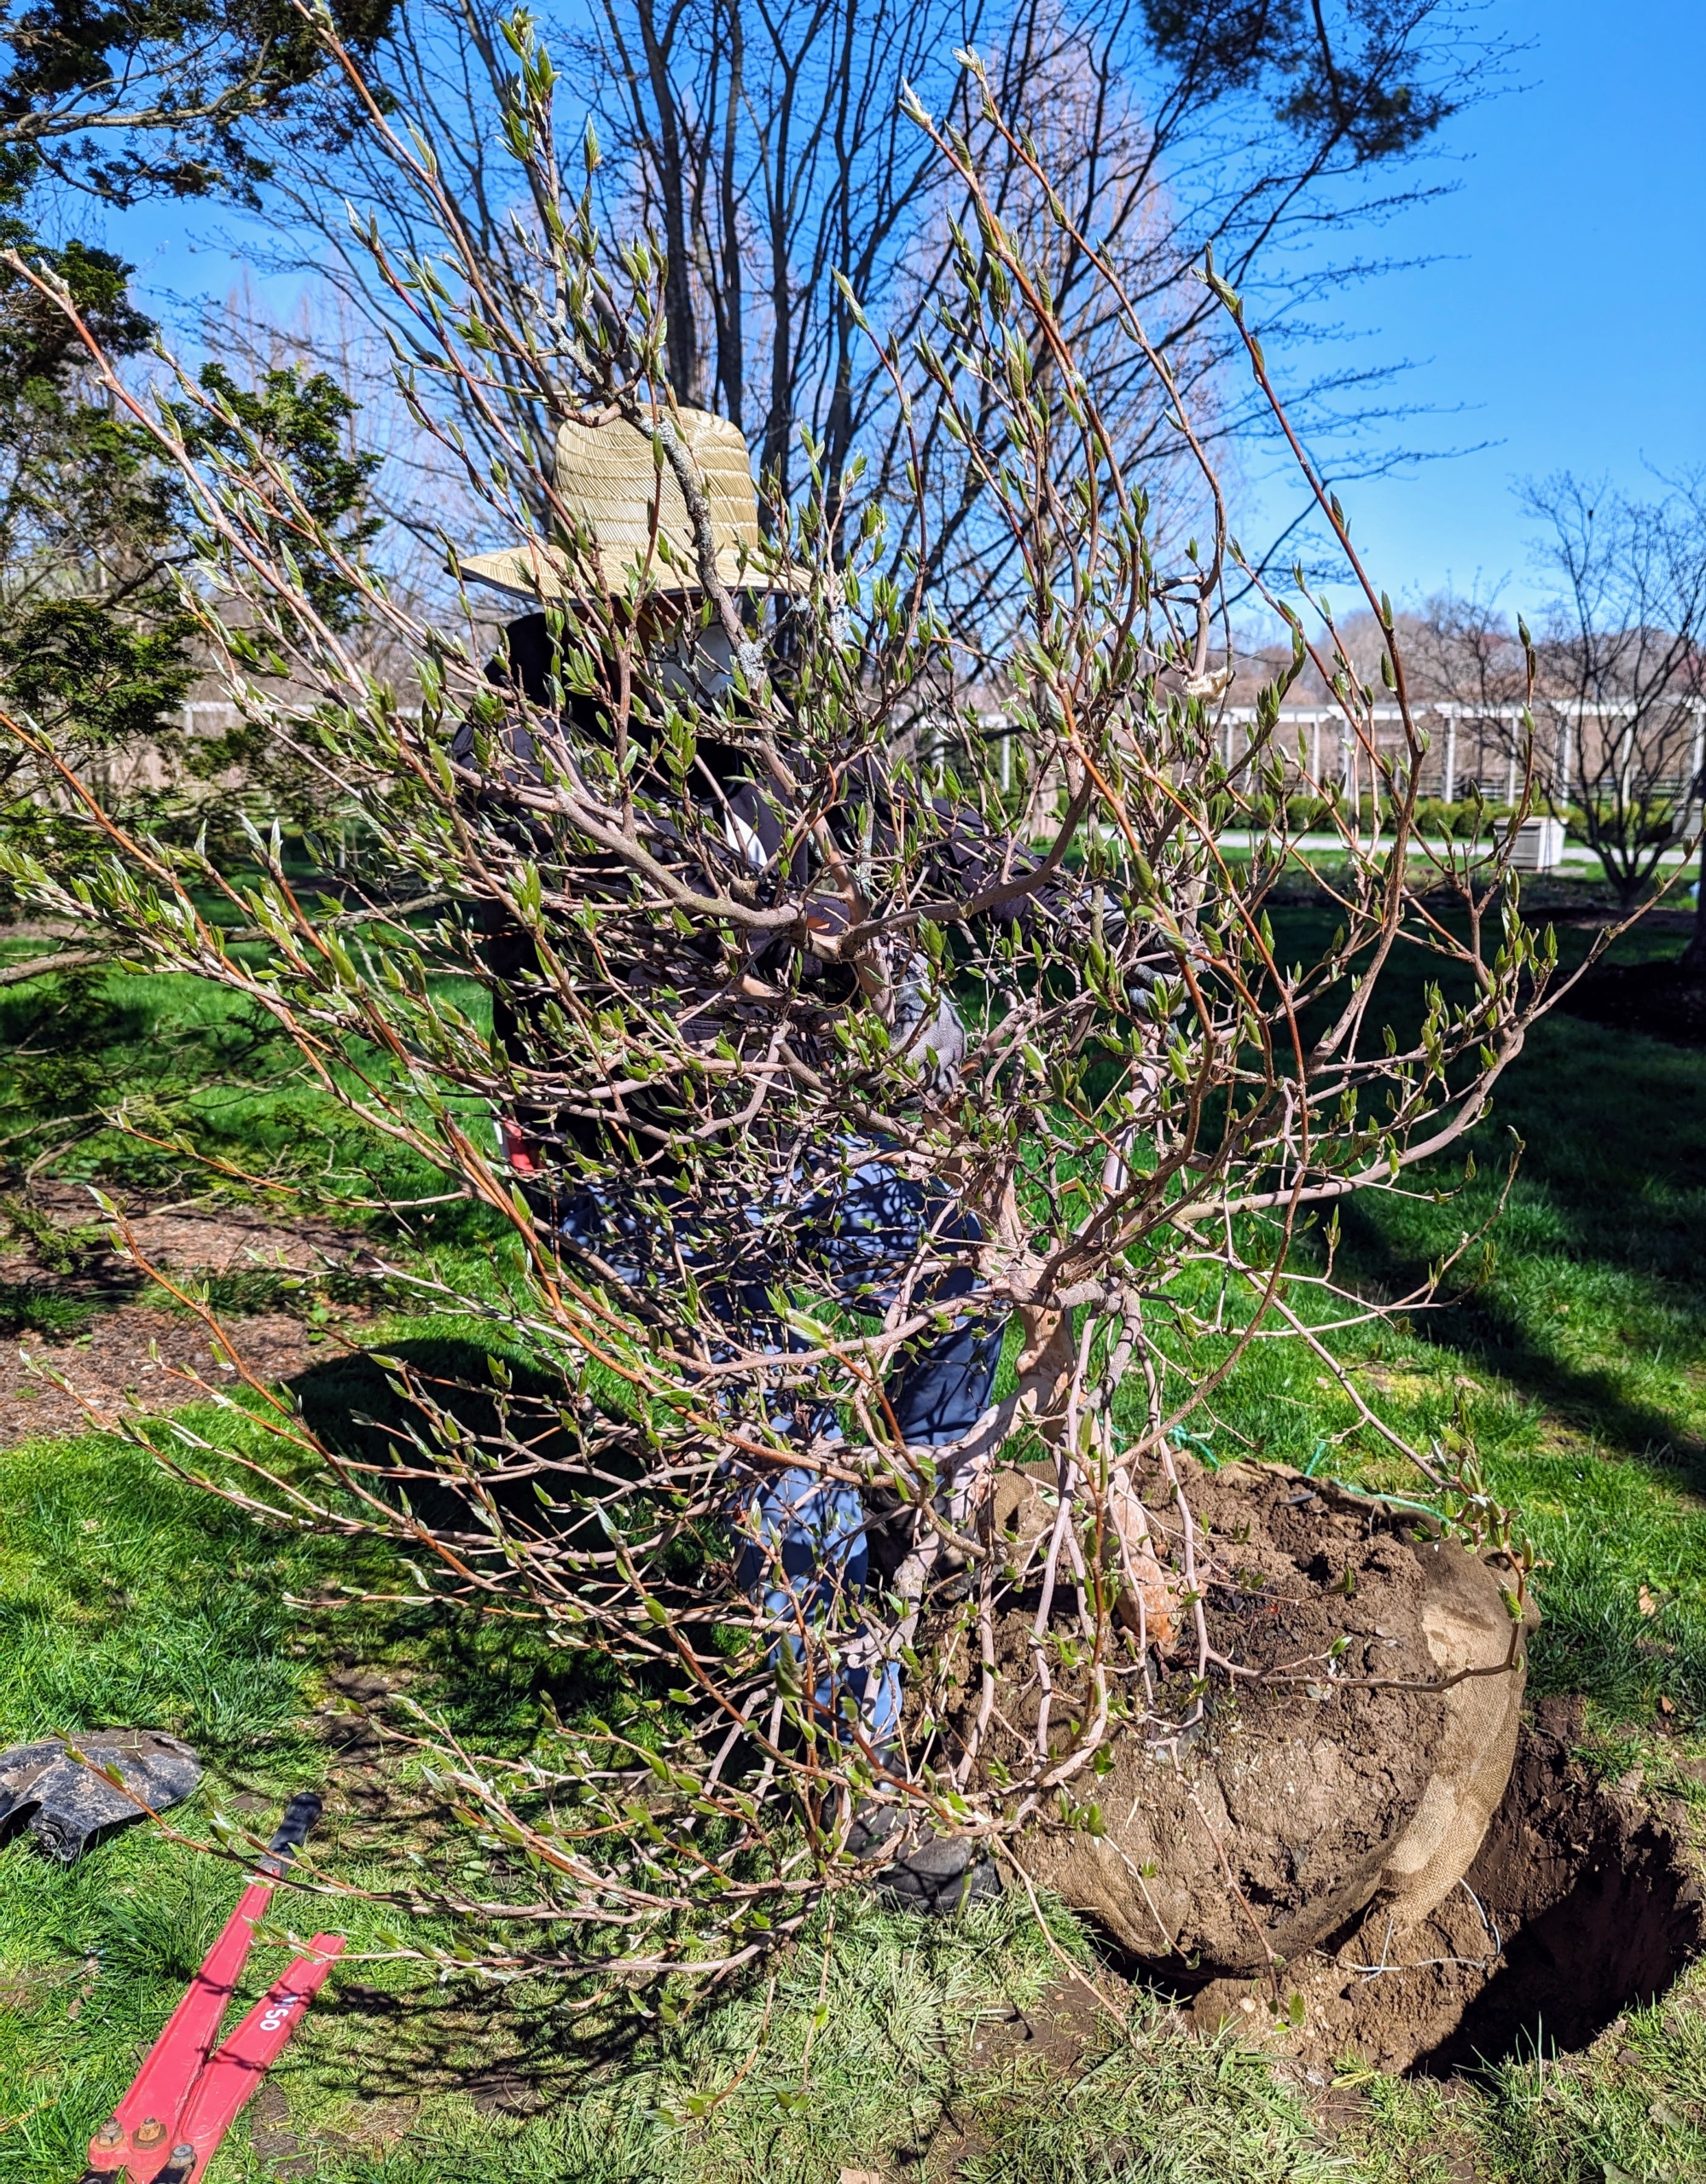
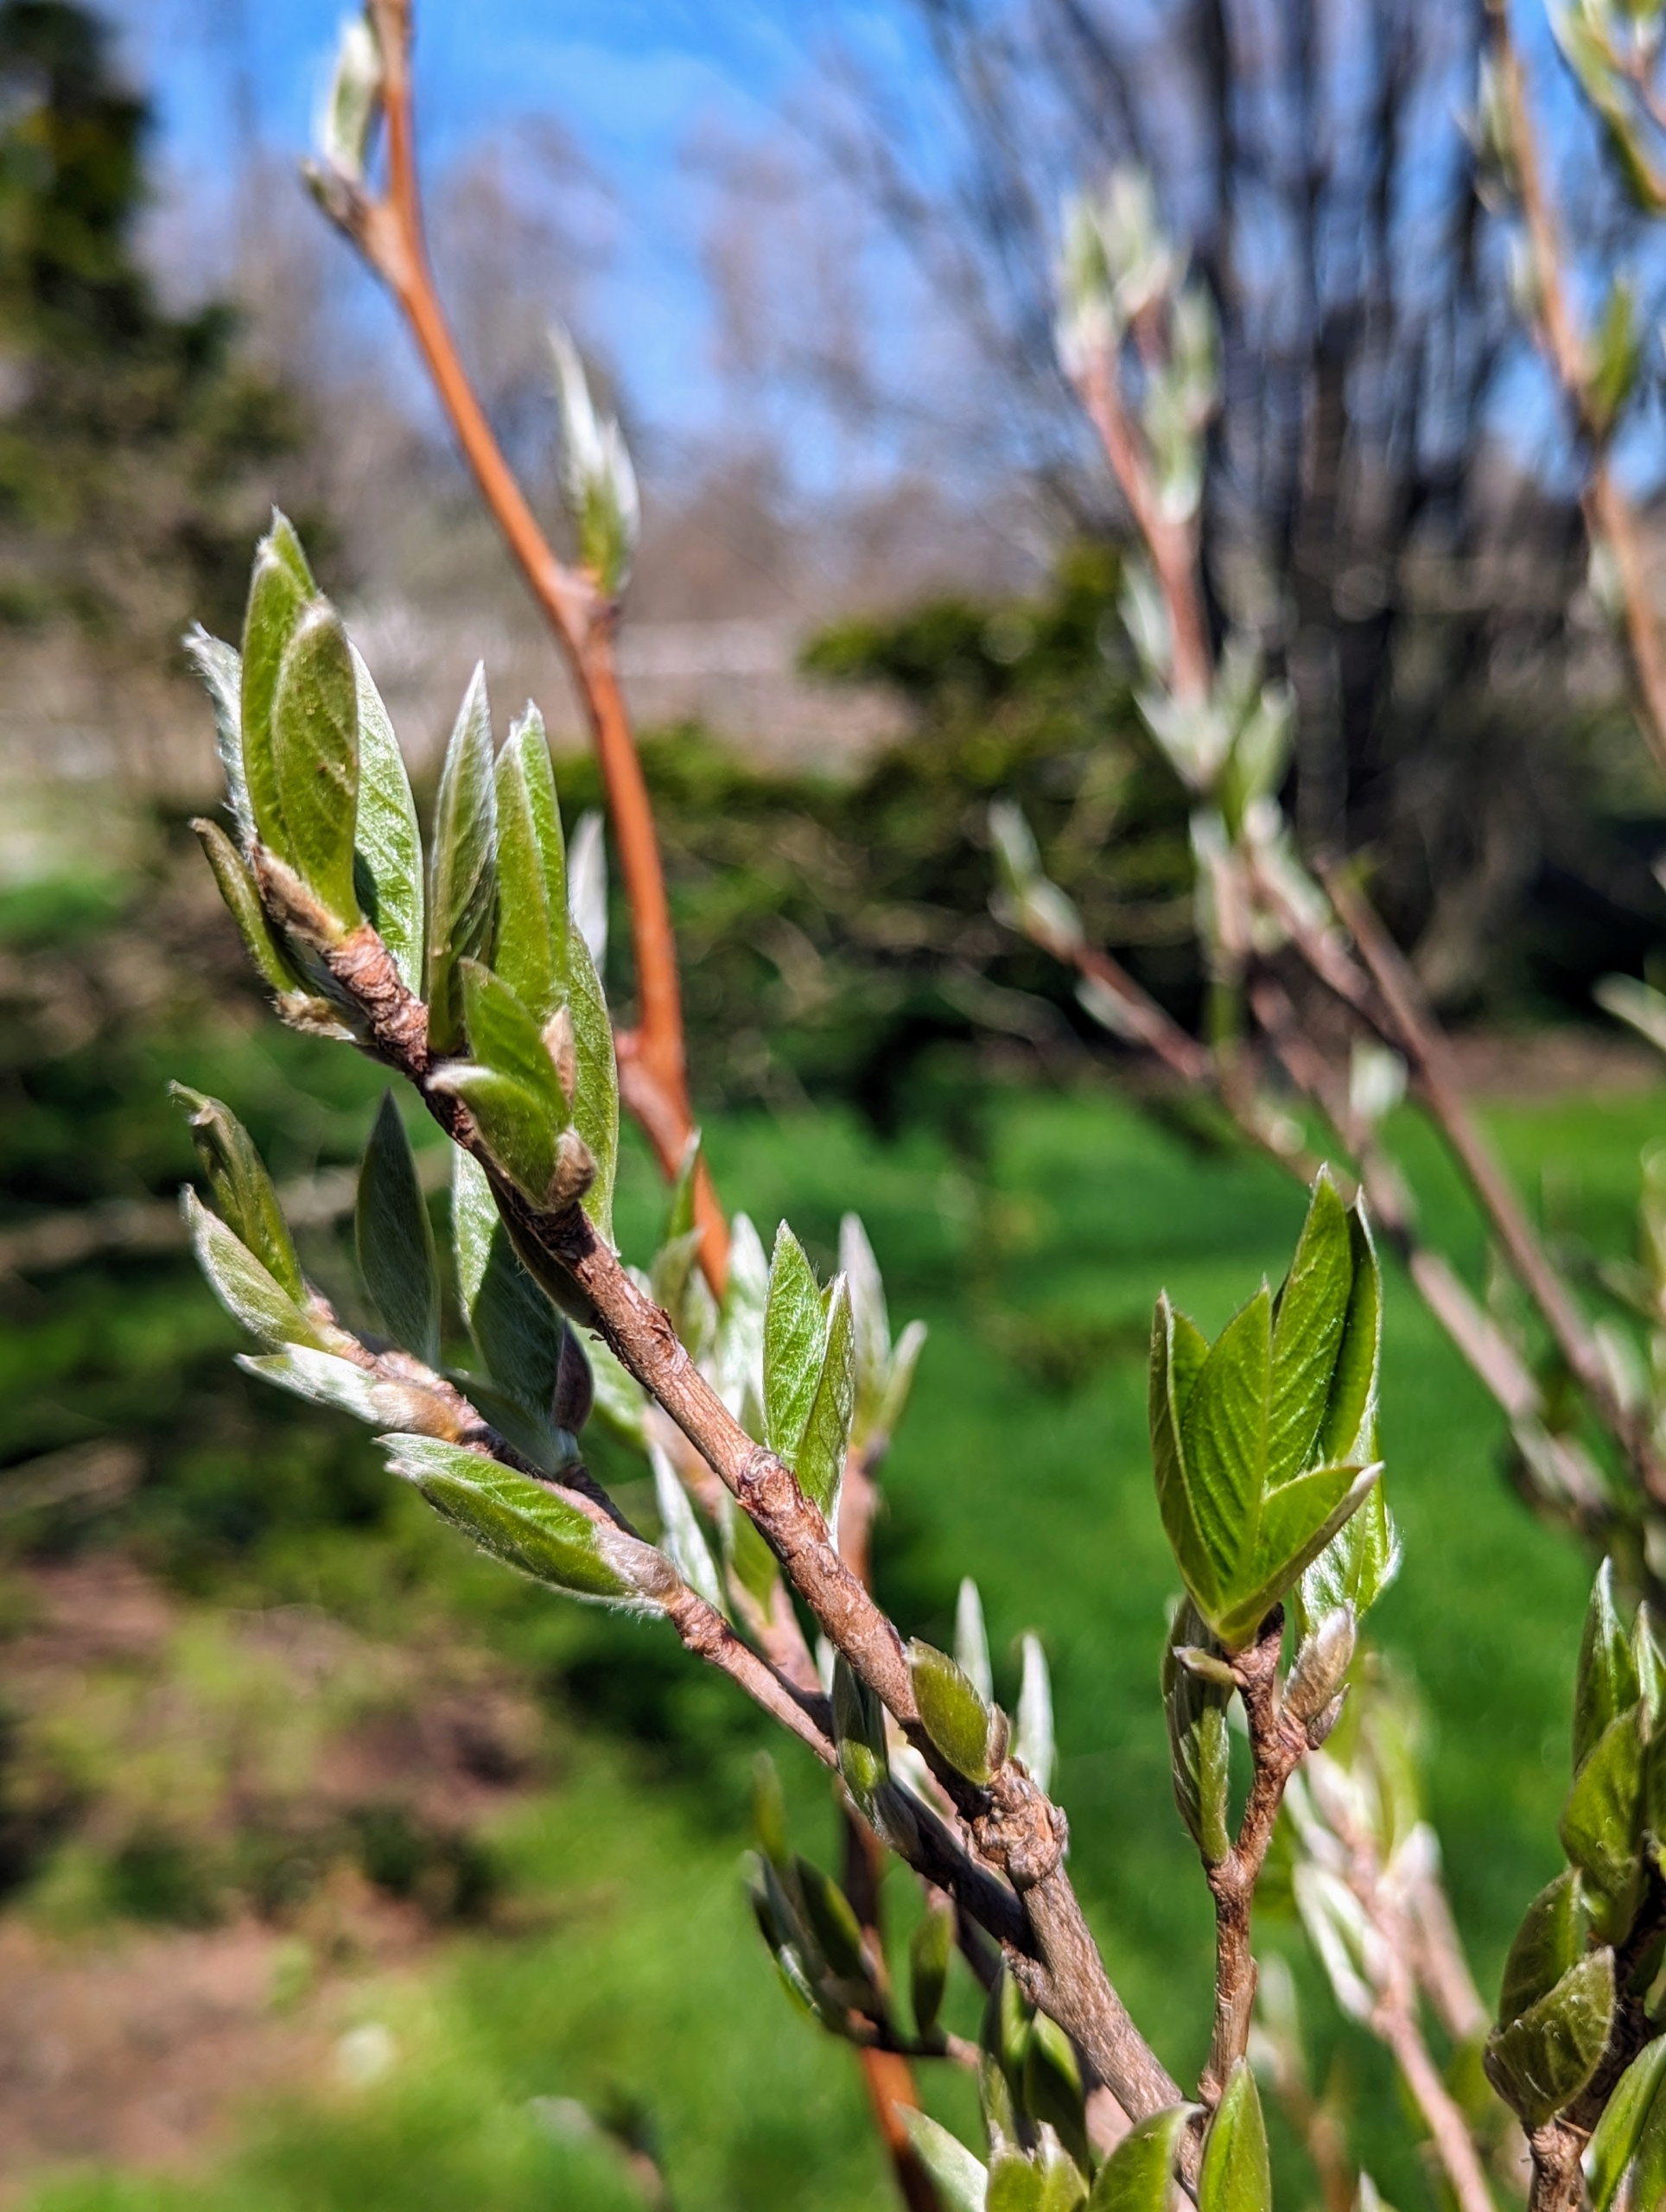
The branches are just beginning to show spring growth. Stewartias have alternate, simple, elliptic, dark green leaves that grow five to nine-centimeters long.
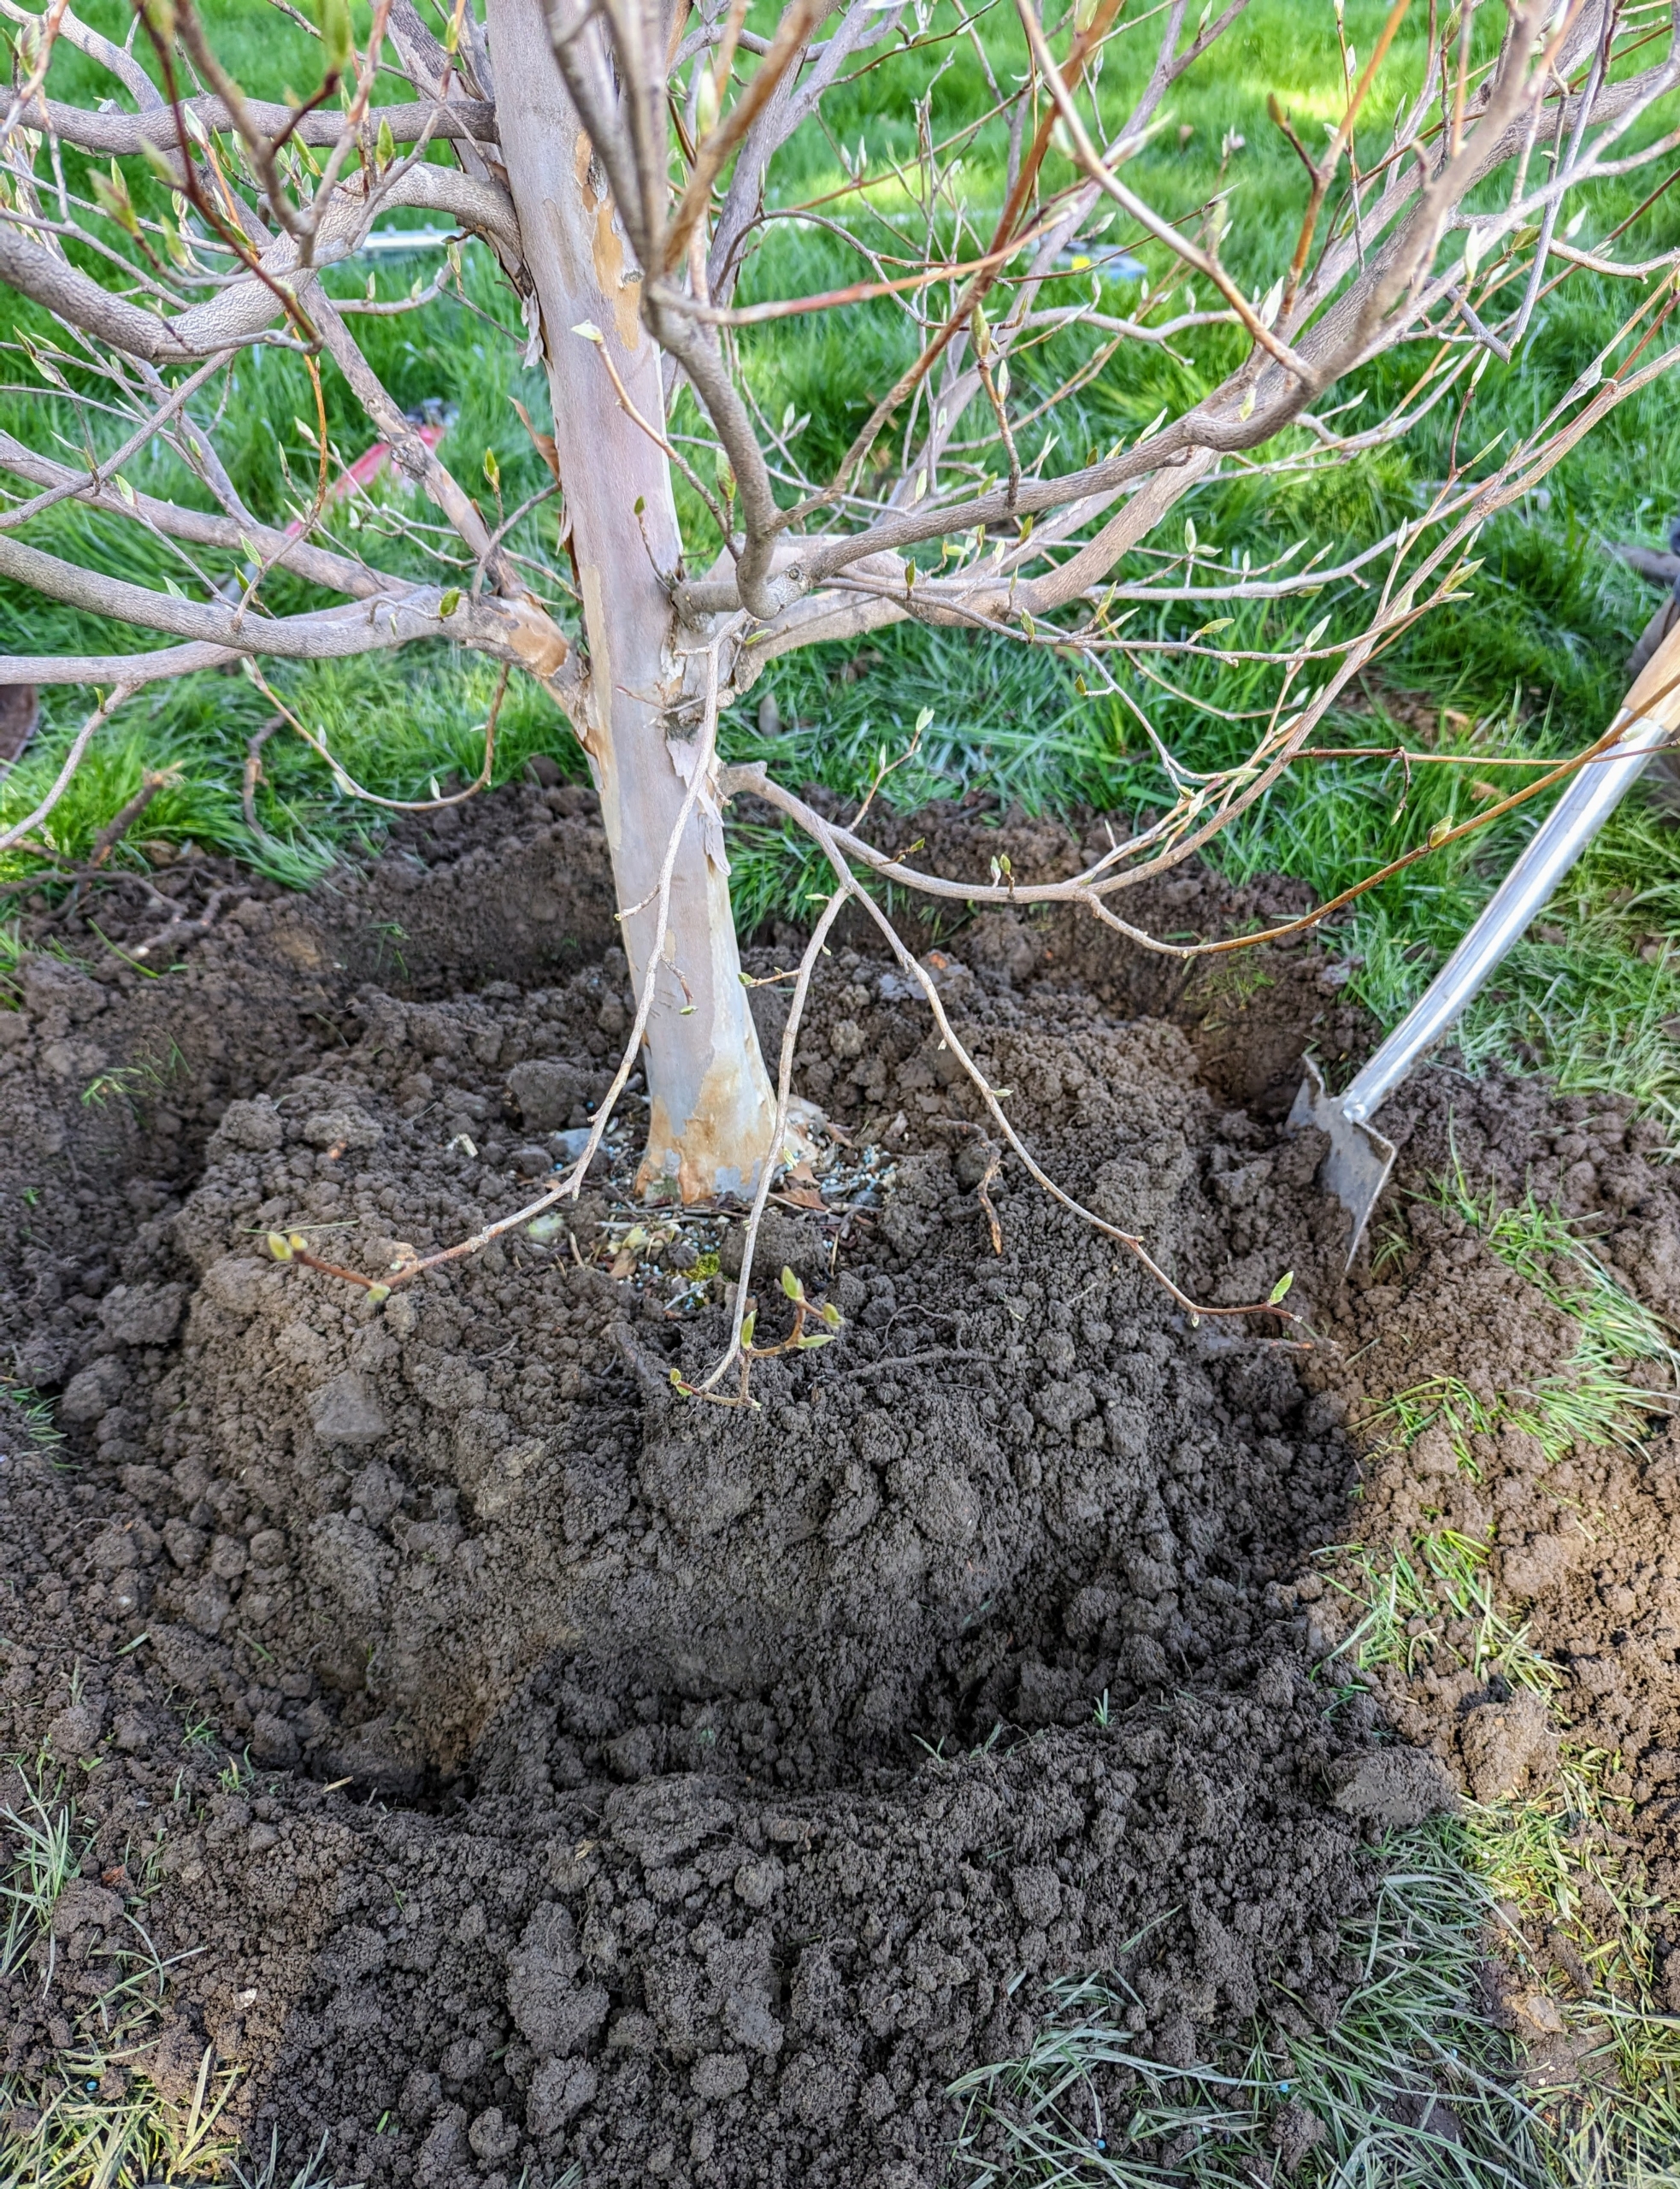
This tree is placed at the right depth – at its flare – the bulge just above the root system where the roots begin to branch away from the trunk. When fully mature, the Stewartia can reach up to 30- to 40-feet tall.
The surrounding tree pit is given a nice edge…
…And then the hole is backfilled completely and tamped down to create good contact between the soil and the root ball..
It’s a good idea to use a tarp to hold any of the removed soil and sod – this will save lots of clean-up time and effort later.
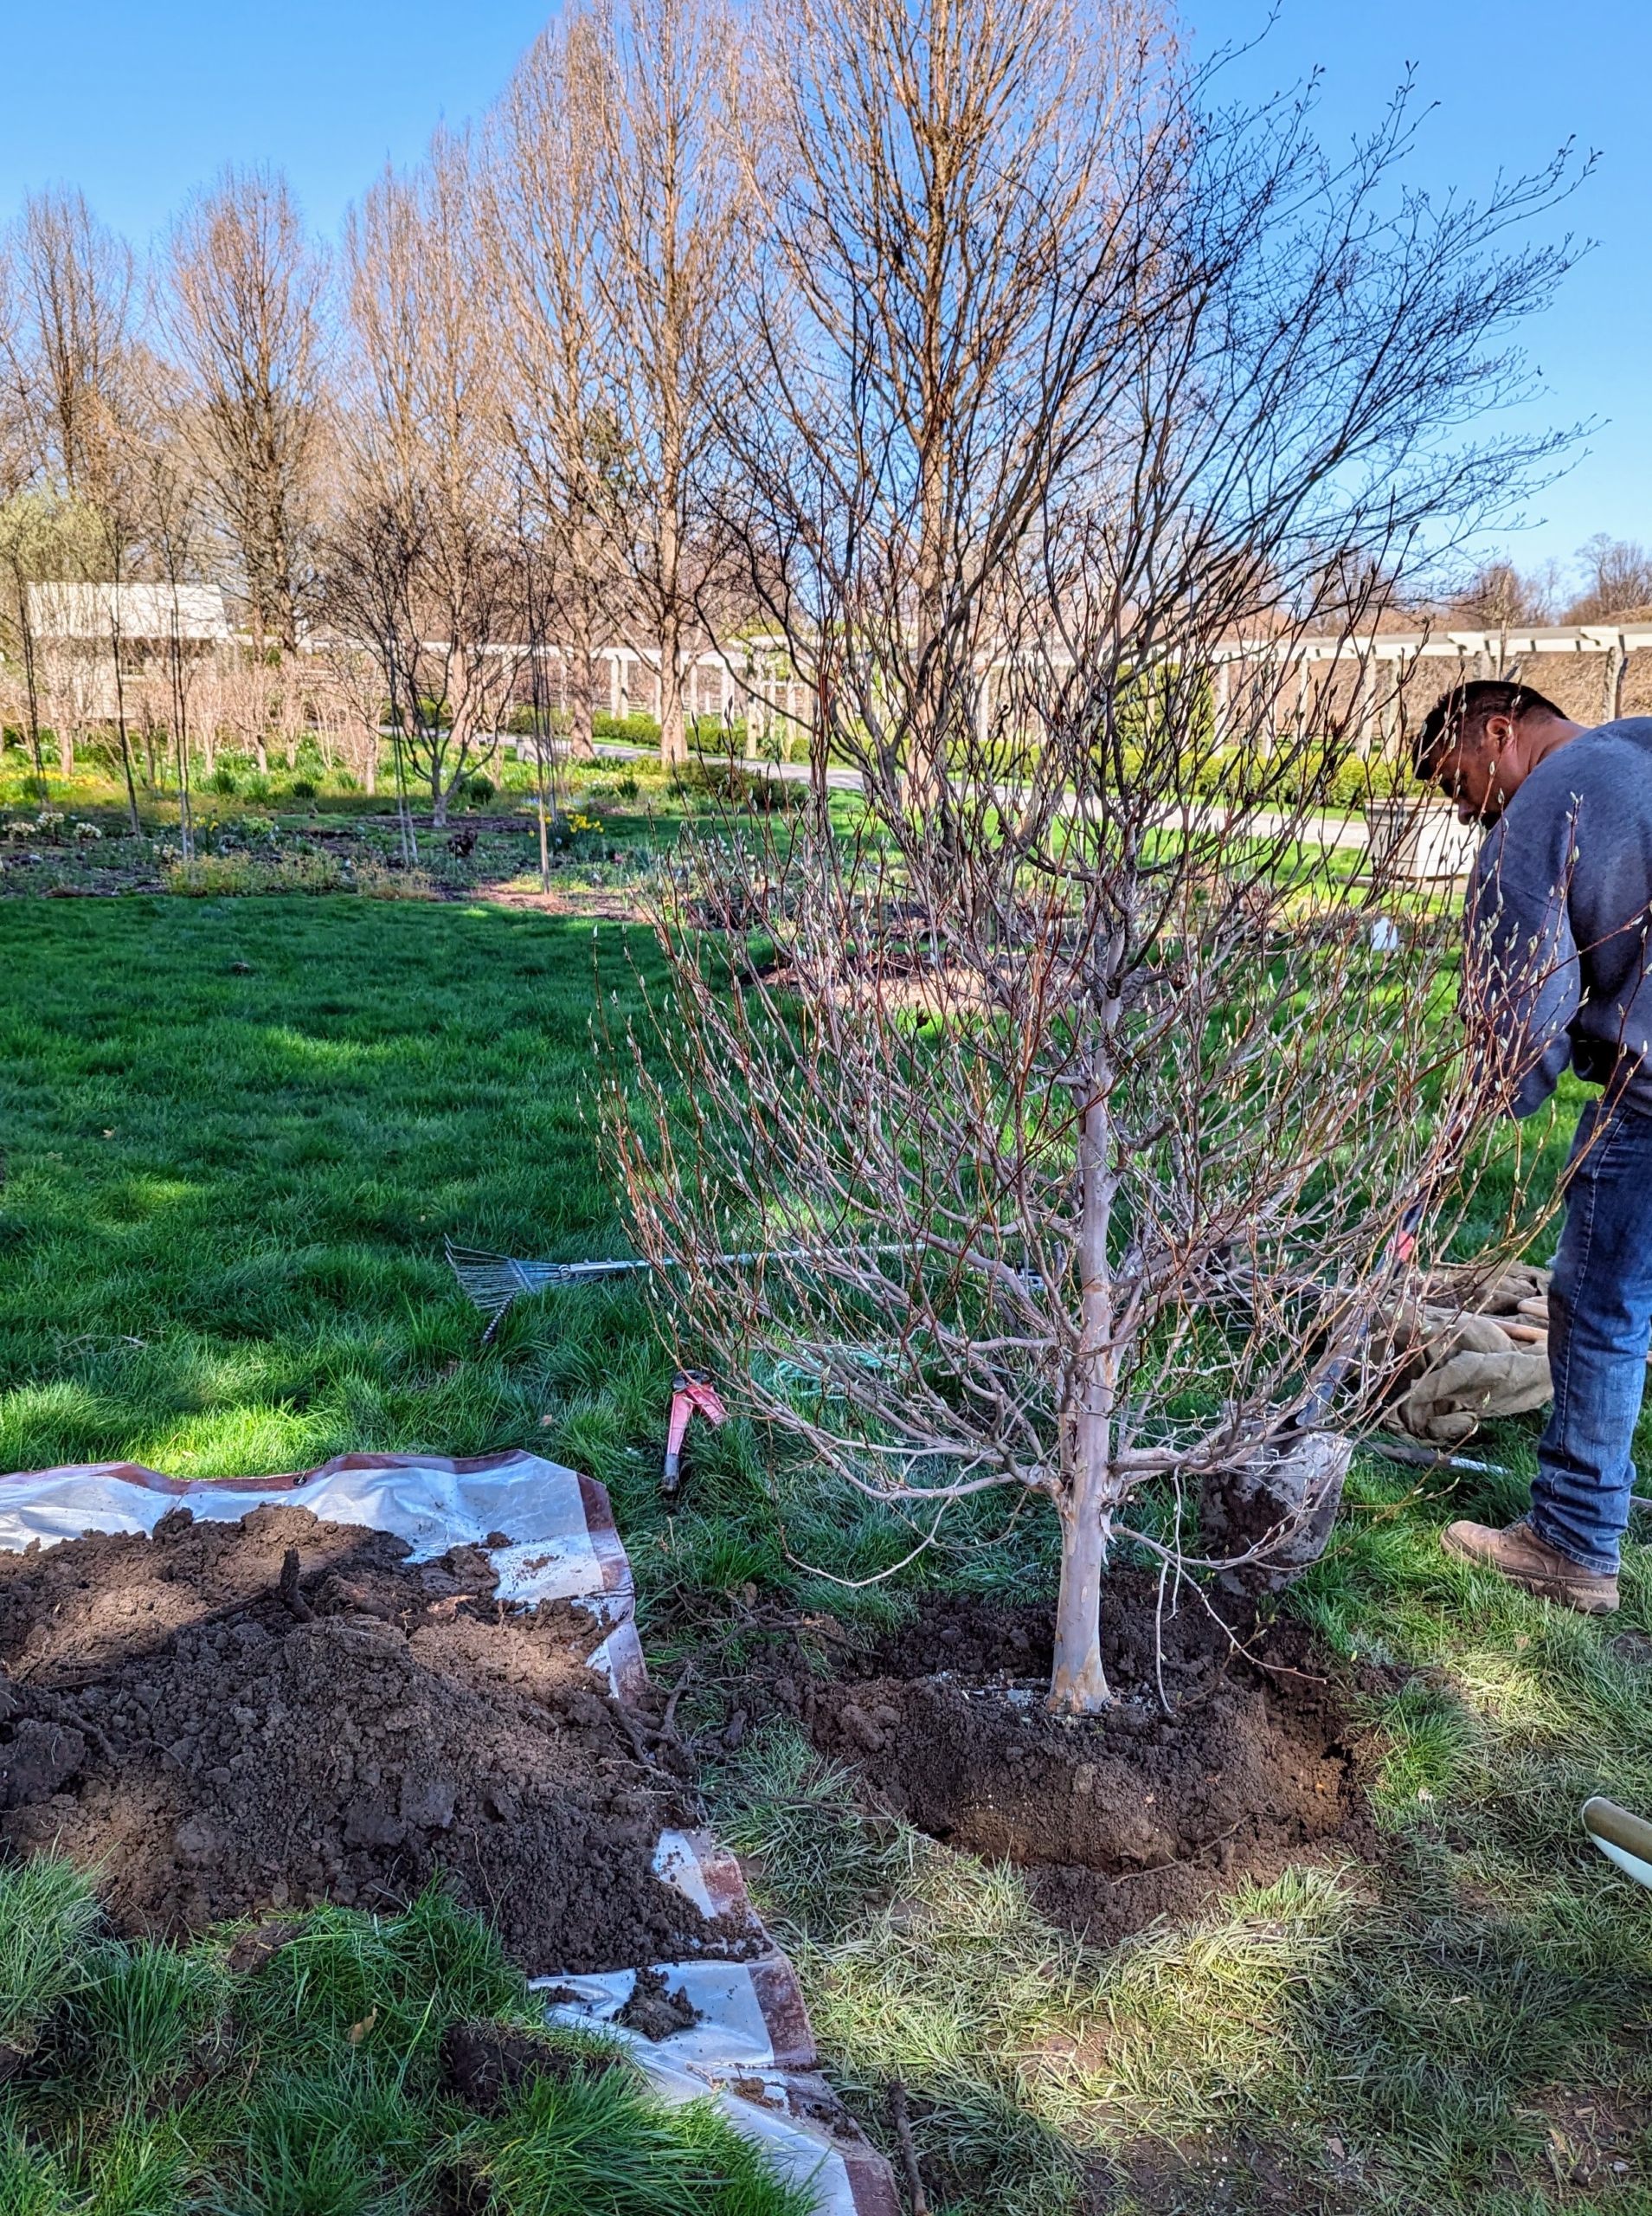
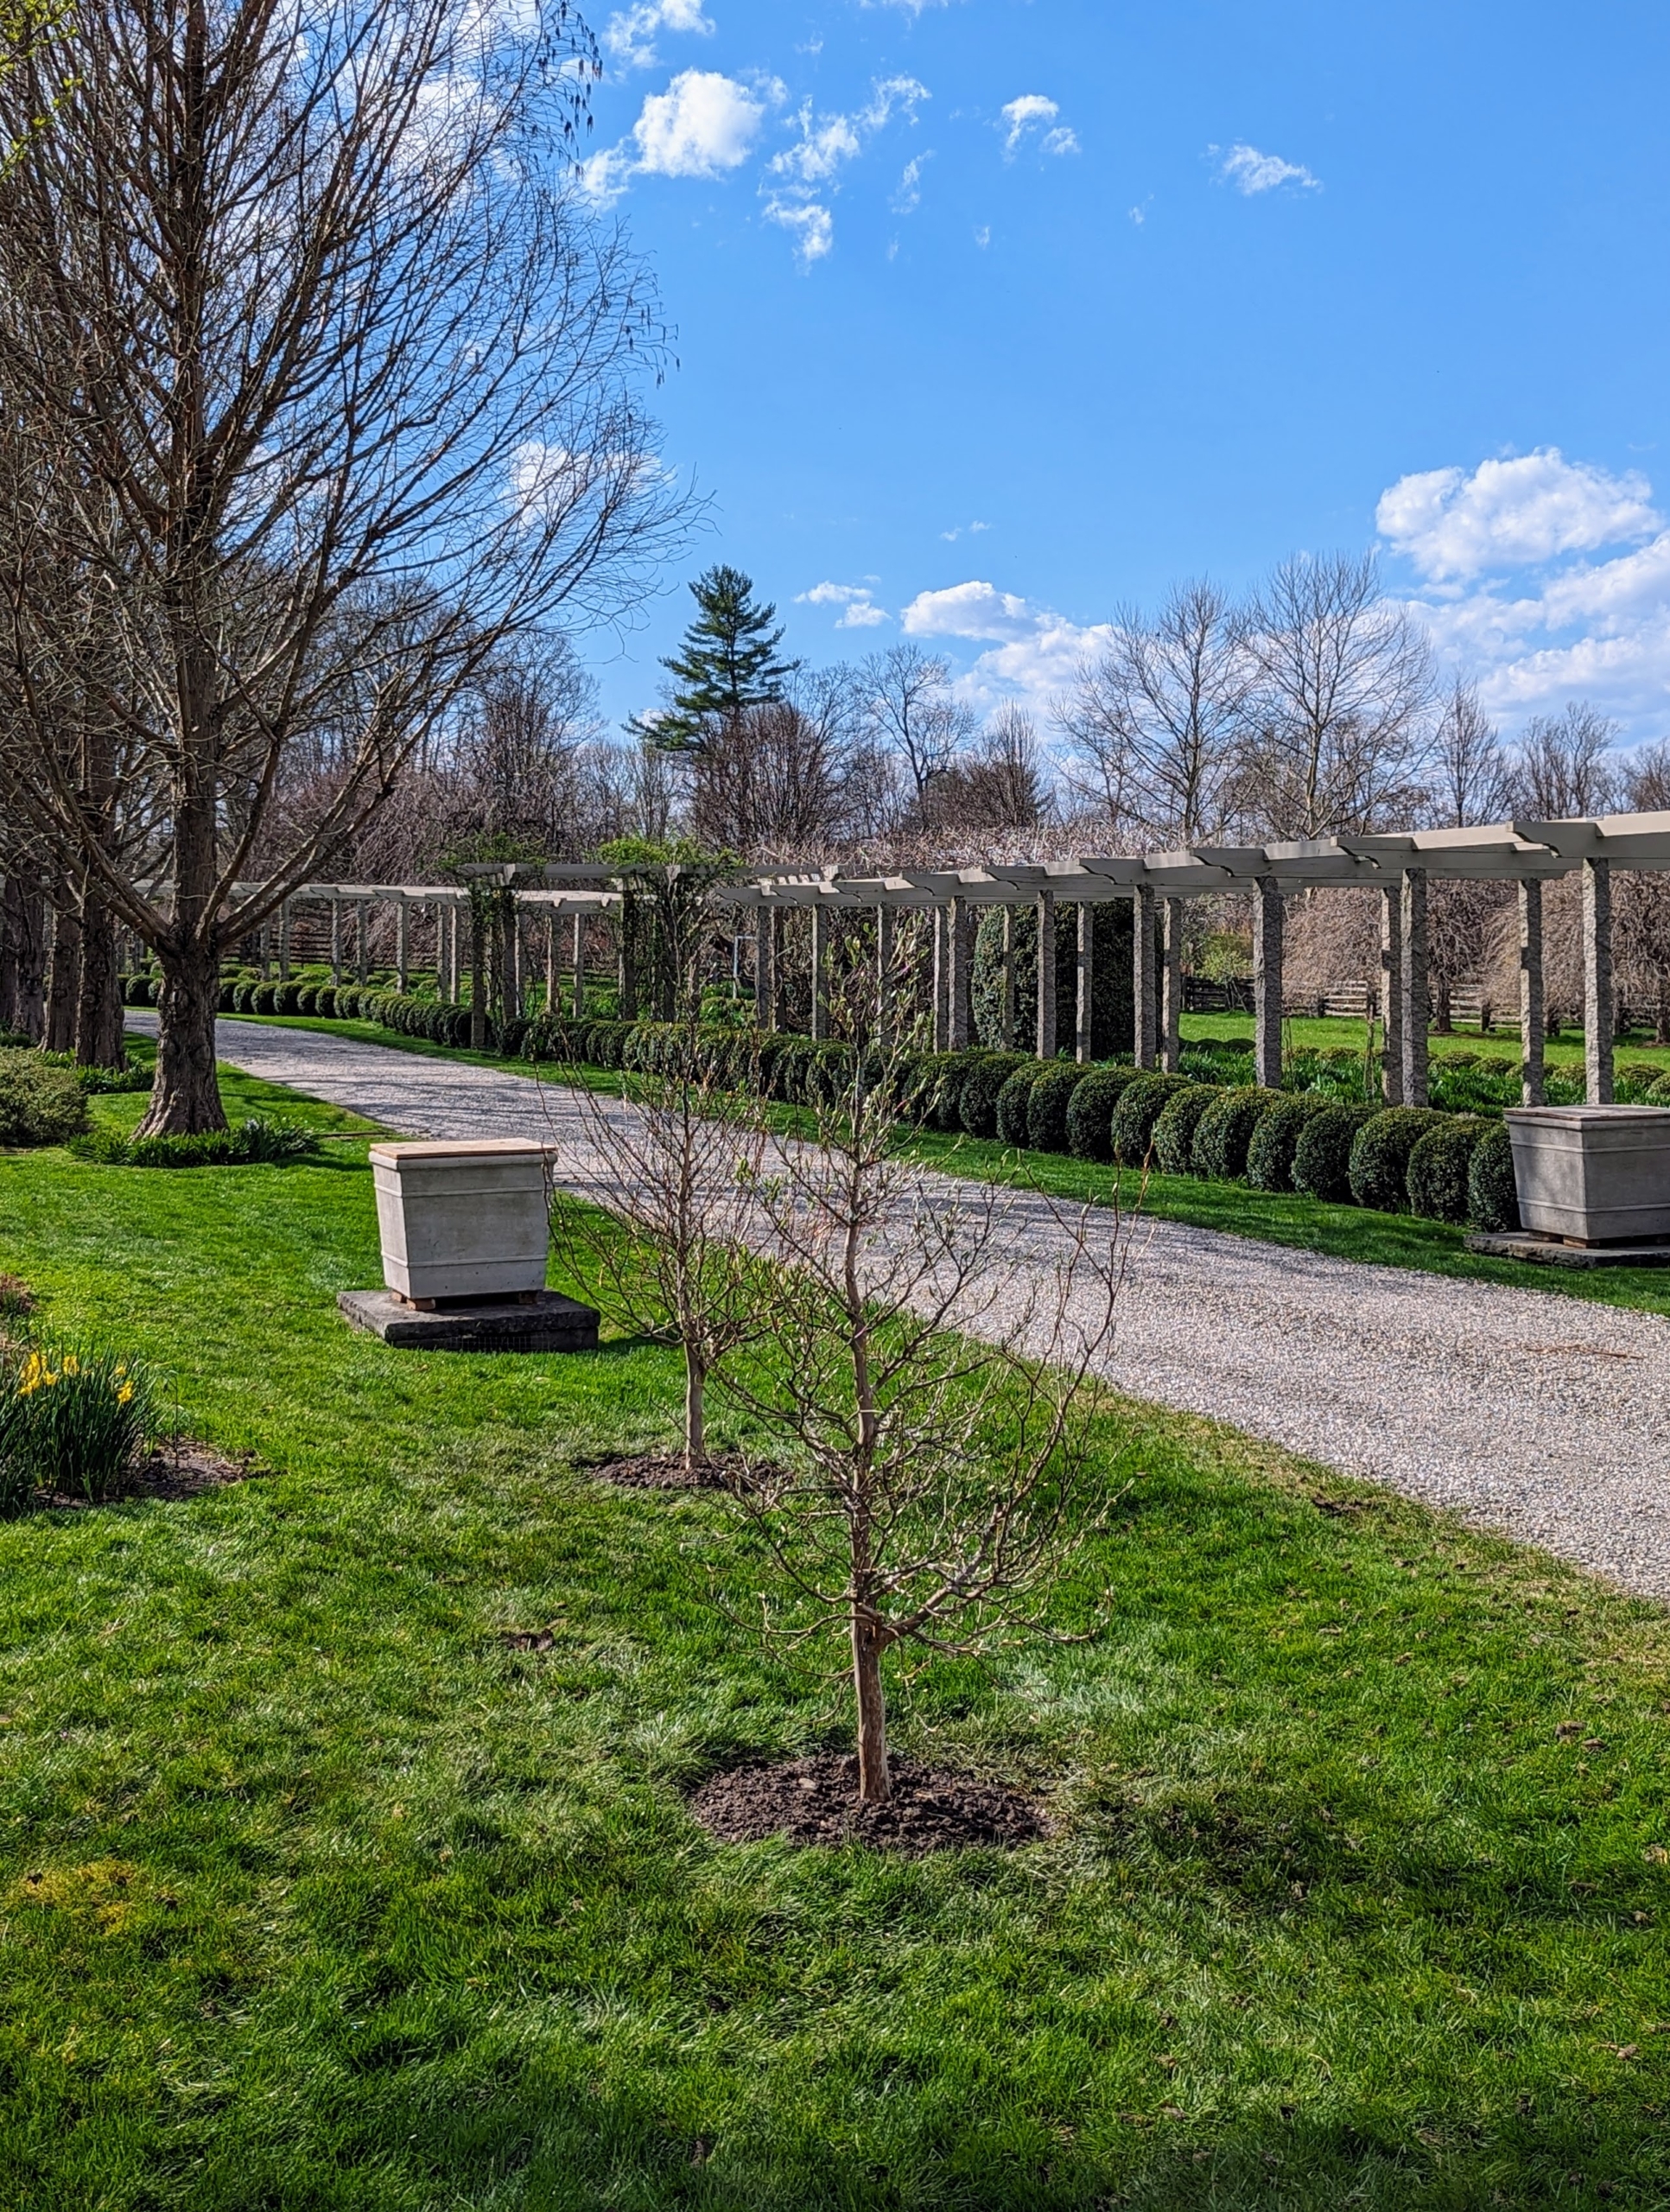
I think the trees look so pretty in this area. And remember, always remove any tags that are on the tree. If left too long, these tags will eventually cut into the bark and potentially cut off the flow of nutrients.
While these trees are slow-growing and only about six-feet tall now, they have ample room here in this location.
They are some of the first flowering trees guests will see when they visit. Across is my long pergola, and on the left, the handsome tall trees are bald cypress, Taxodium distichum. I am looking forward to watching these trees grow and flourish.
We're preparing for this year's growing season here at my Bedford, New York farm - my gardeners are busy starting all the many vegetables and flowers from seed.
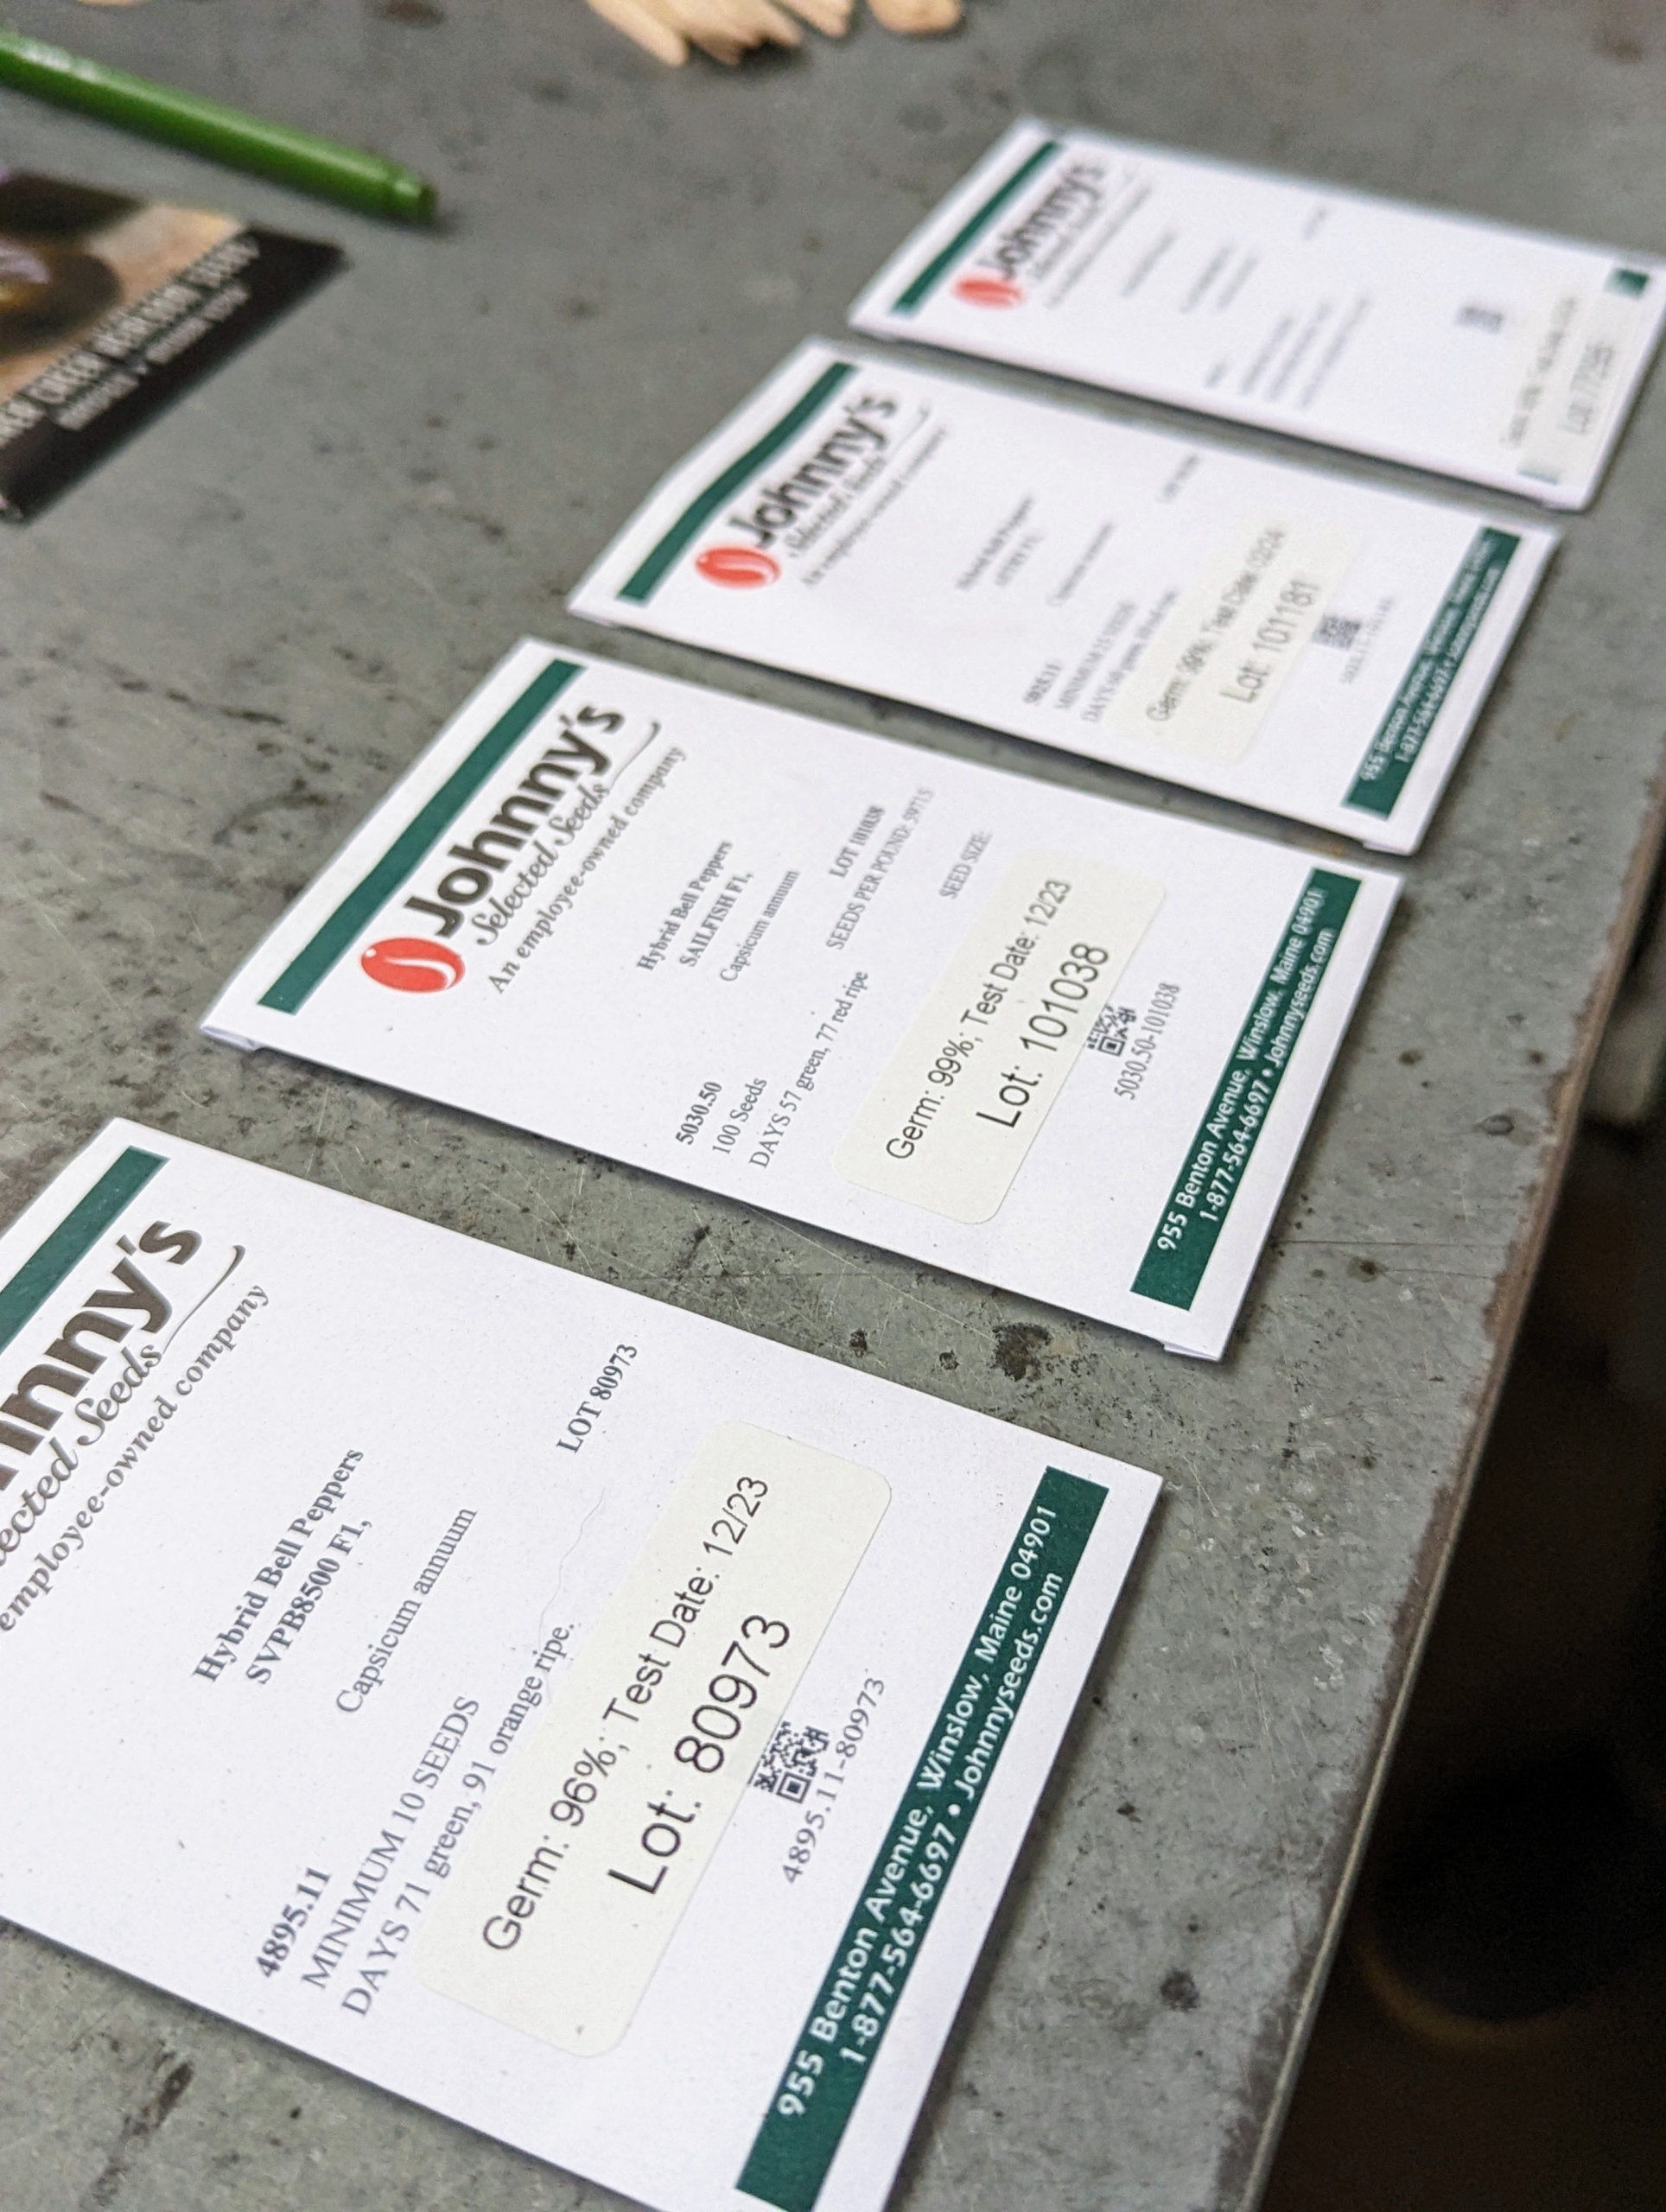
Many of our vegetable seeds and other supplies are from Johnny’s Selected Seeds in central Maine - a company I’ve been using for quite some time. Starting from seed isn’t difficult. They can be planted closely together in seed starting trays and then pulled apart when they're ready to move into larger pots or outdoors.
Enjoy these photos.
This time of year my head house tables are often filled with seeds ready to be planted in trays. Johnny’s Selected Seeds is a privately held, employee-owned organic seed producer. Johnny’s offers hundreds of varieties of organic vegetable, herb, flower, fruit and farm seeds that are known to be strong, dependable growers.
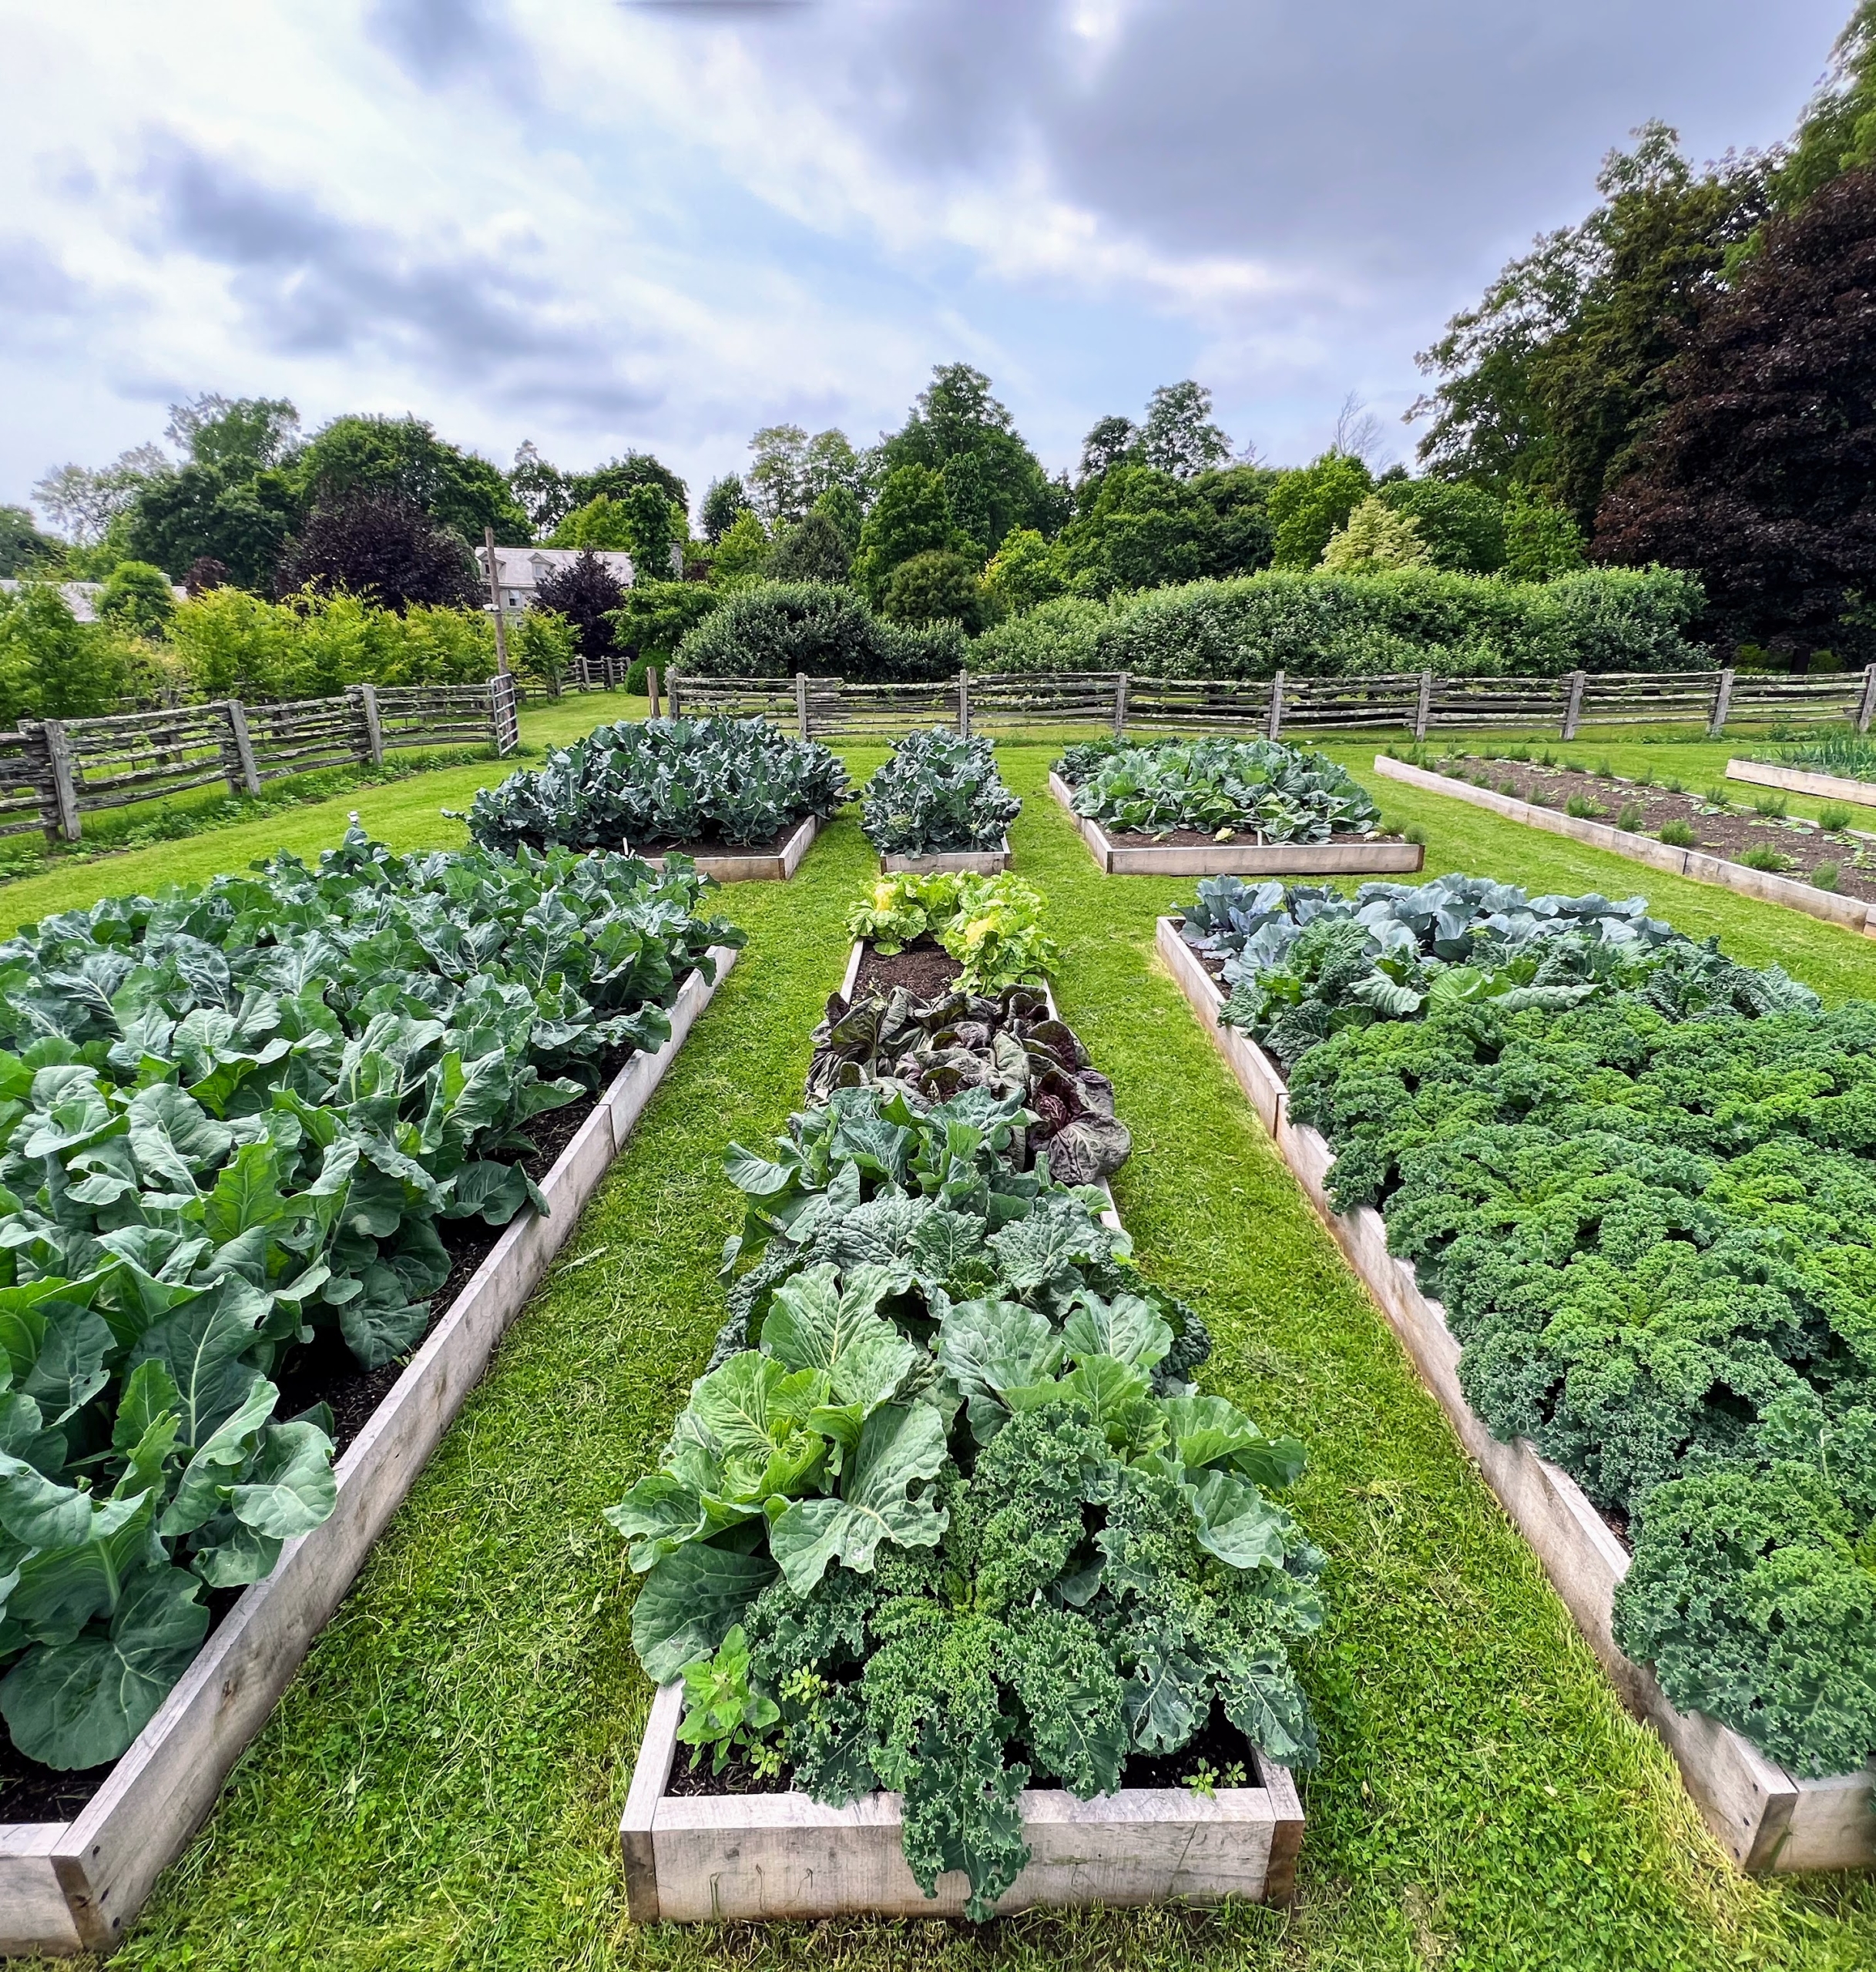
Remember all the beautiful vegetables my gardeners and I grew last year in this giant half-acre space? Lots of them were grown from Johnny’s Selected Seeds. Together with nutrient-rich soil, we grew our best crops ever.
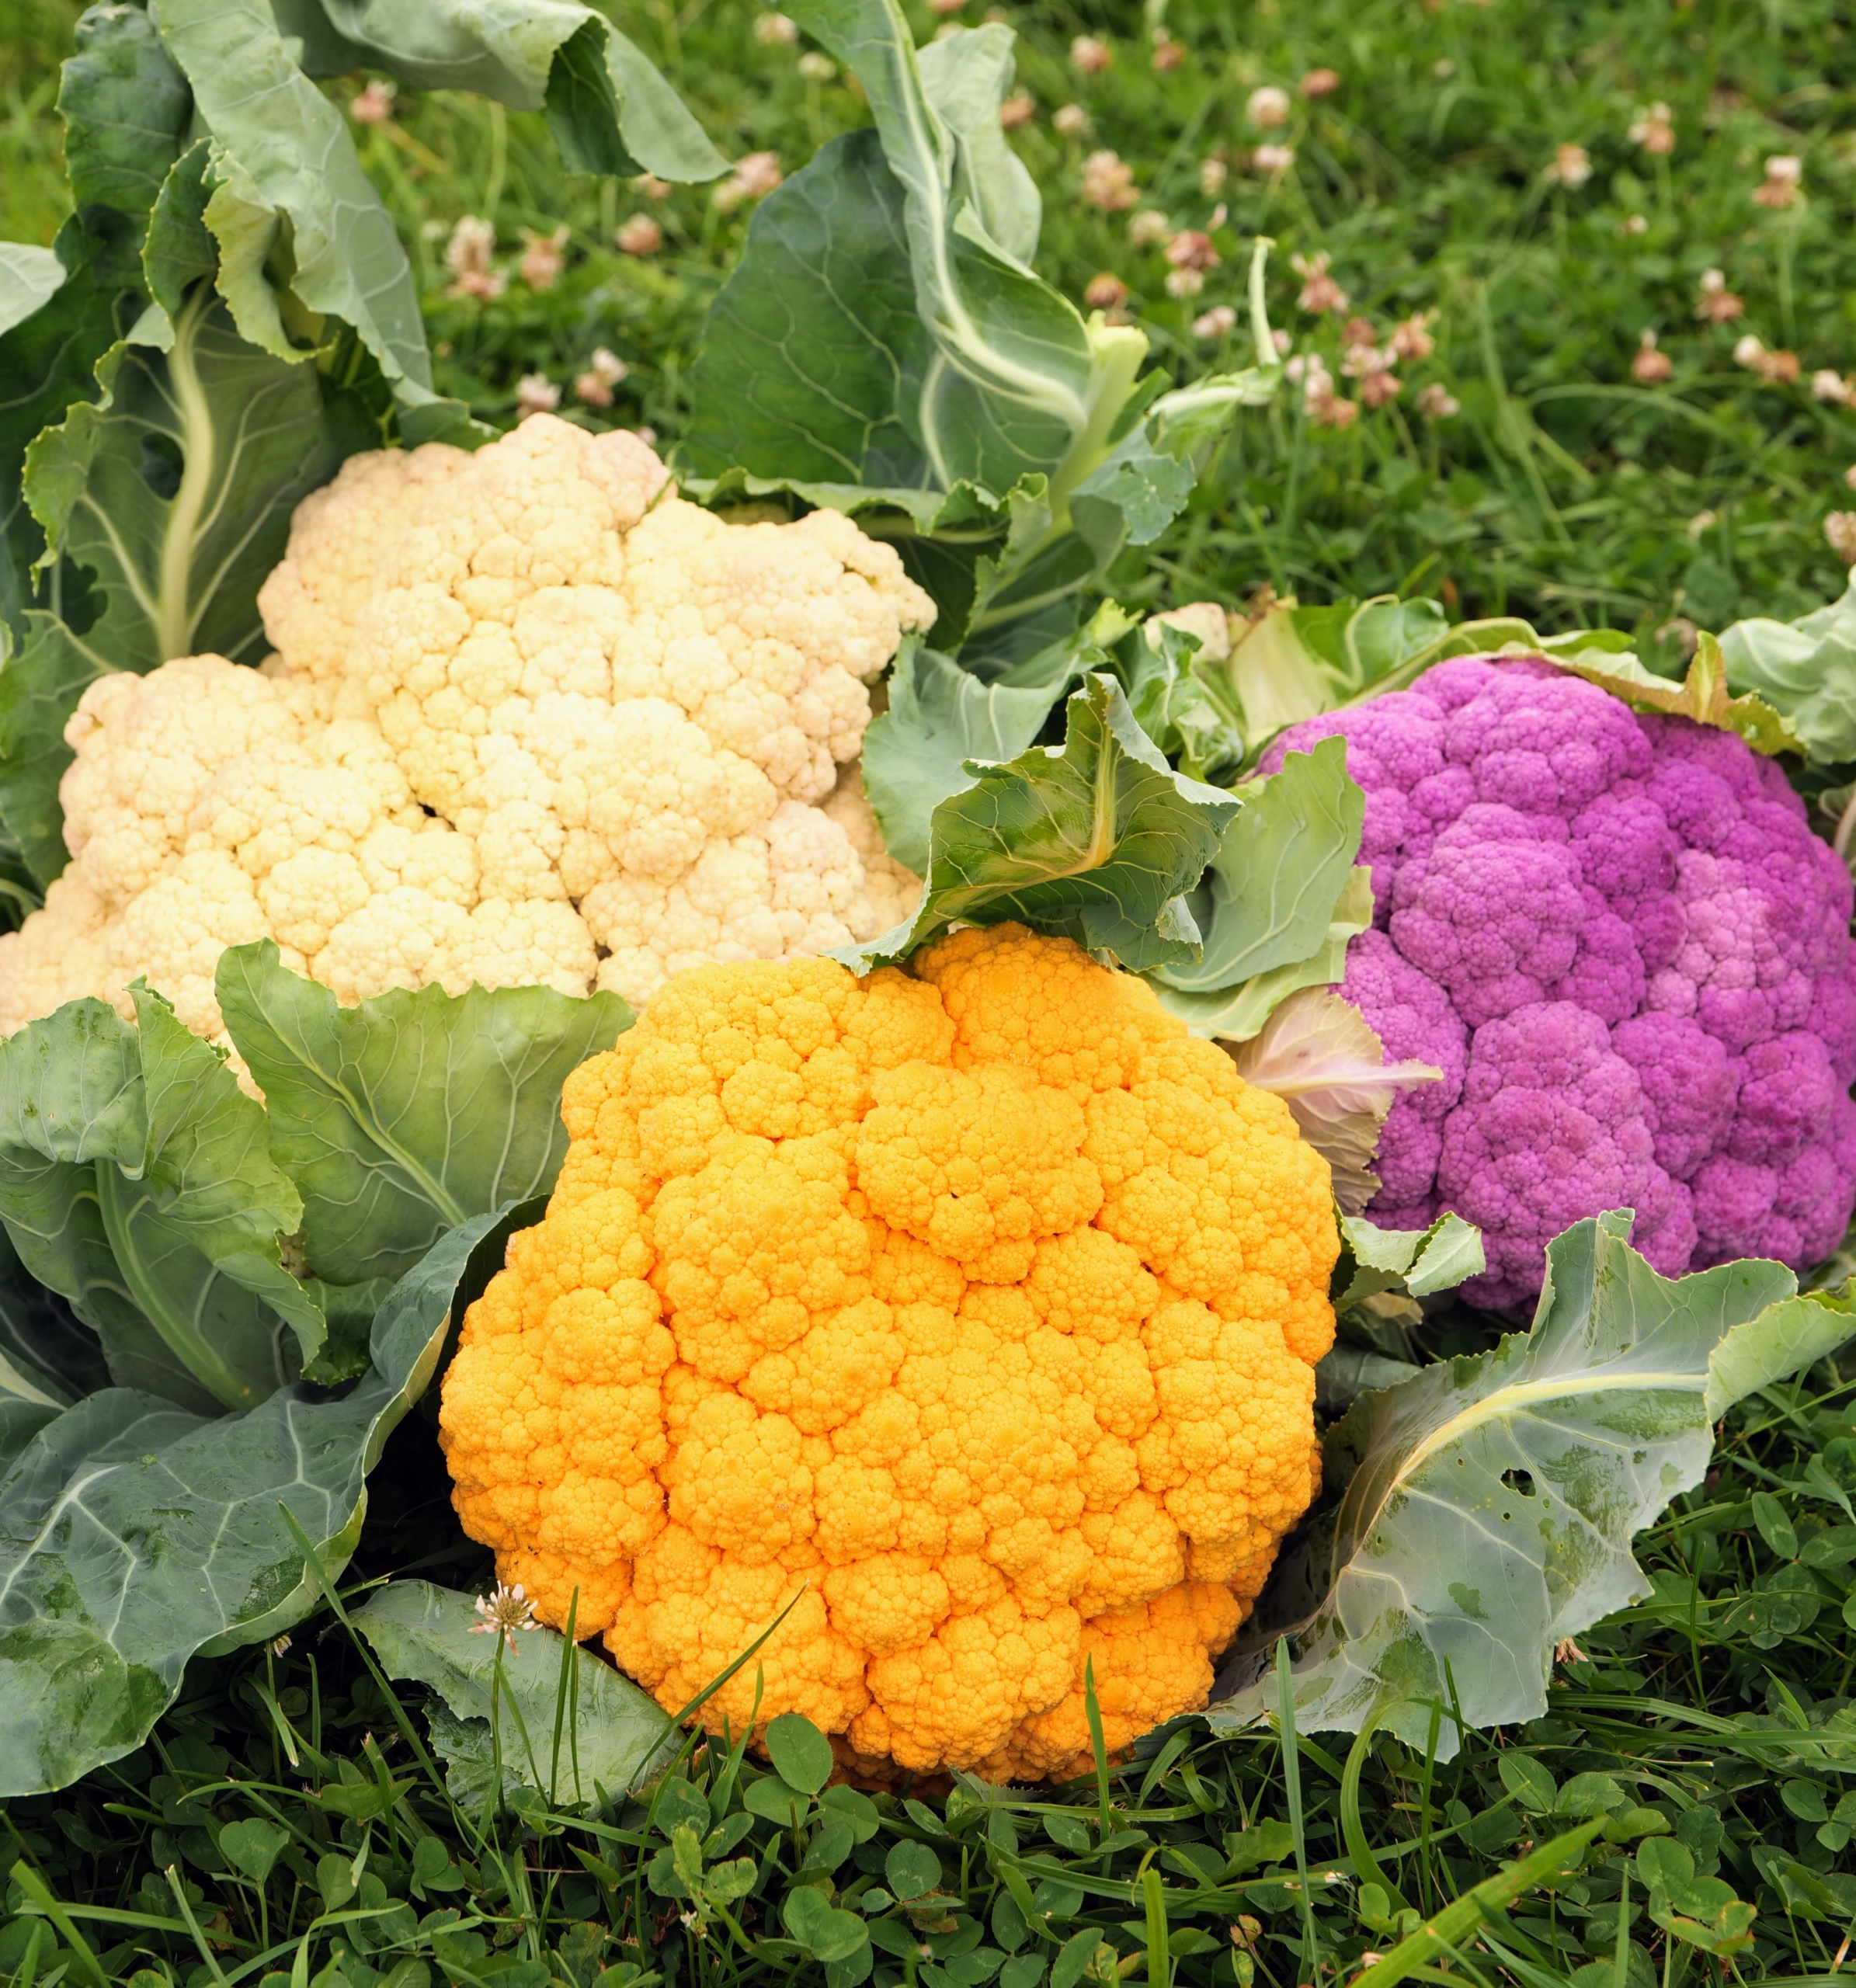
Among them – this beautiful cauliflower. Most are familiar with the white varieties, but cauliflower also grows in yellow-orange, purple, and even green.
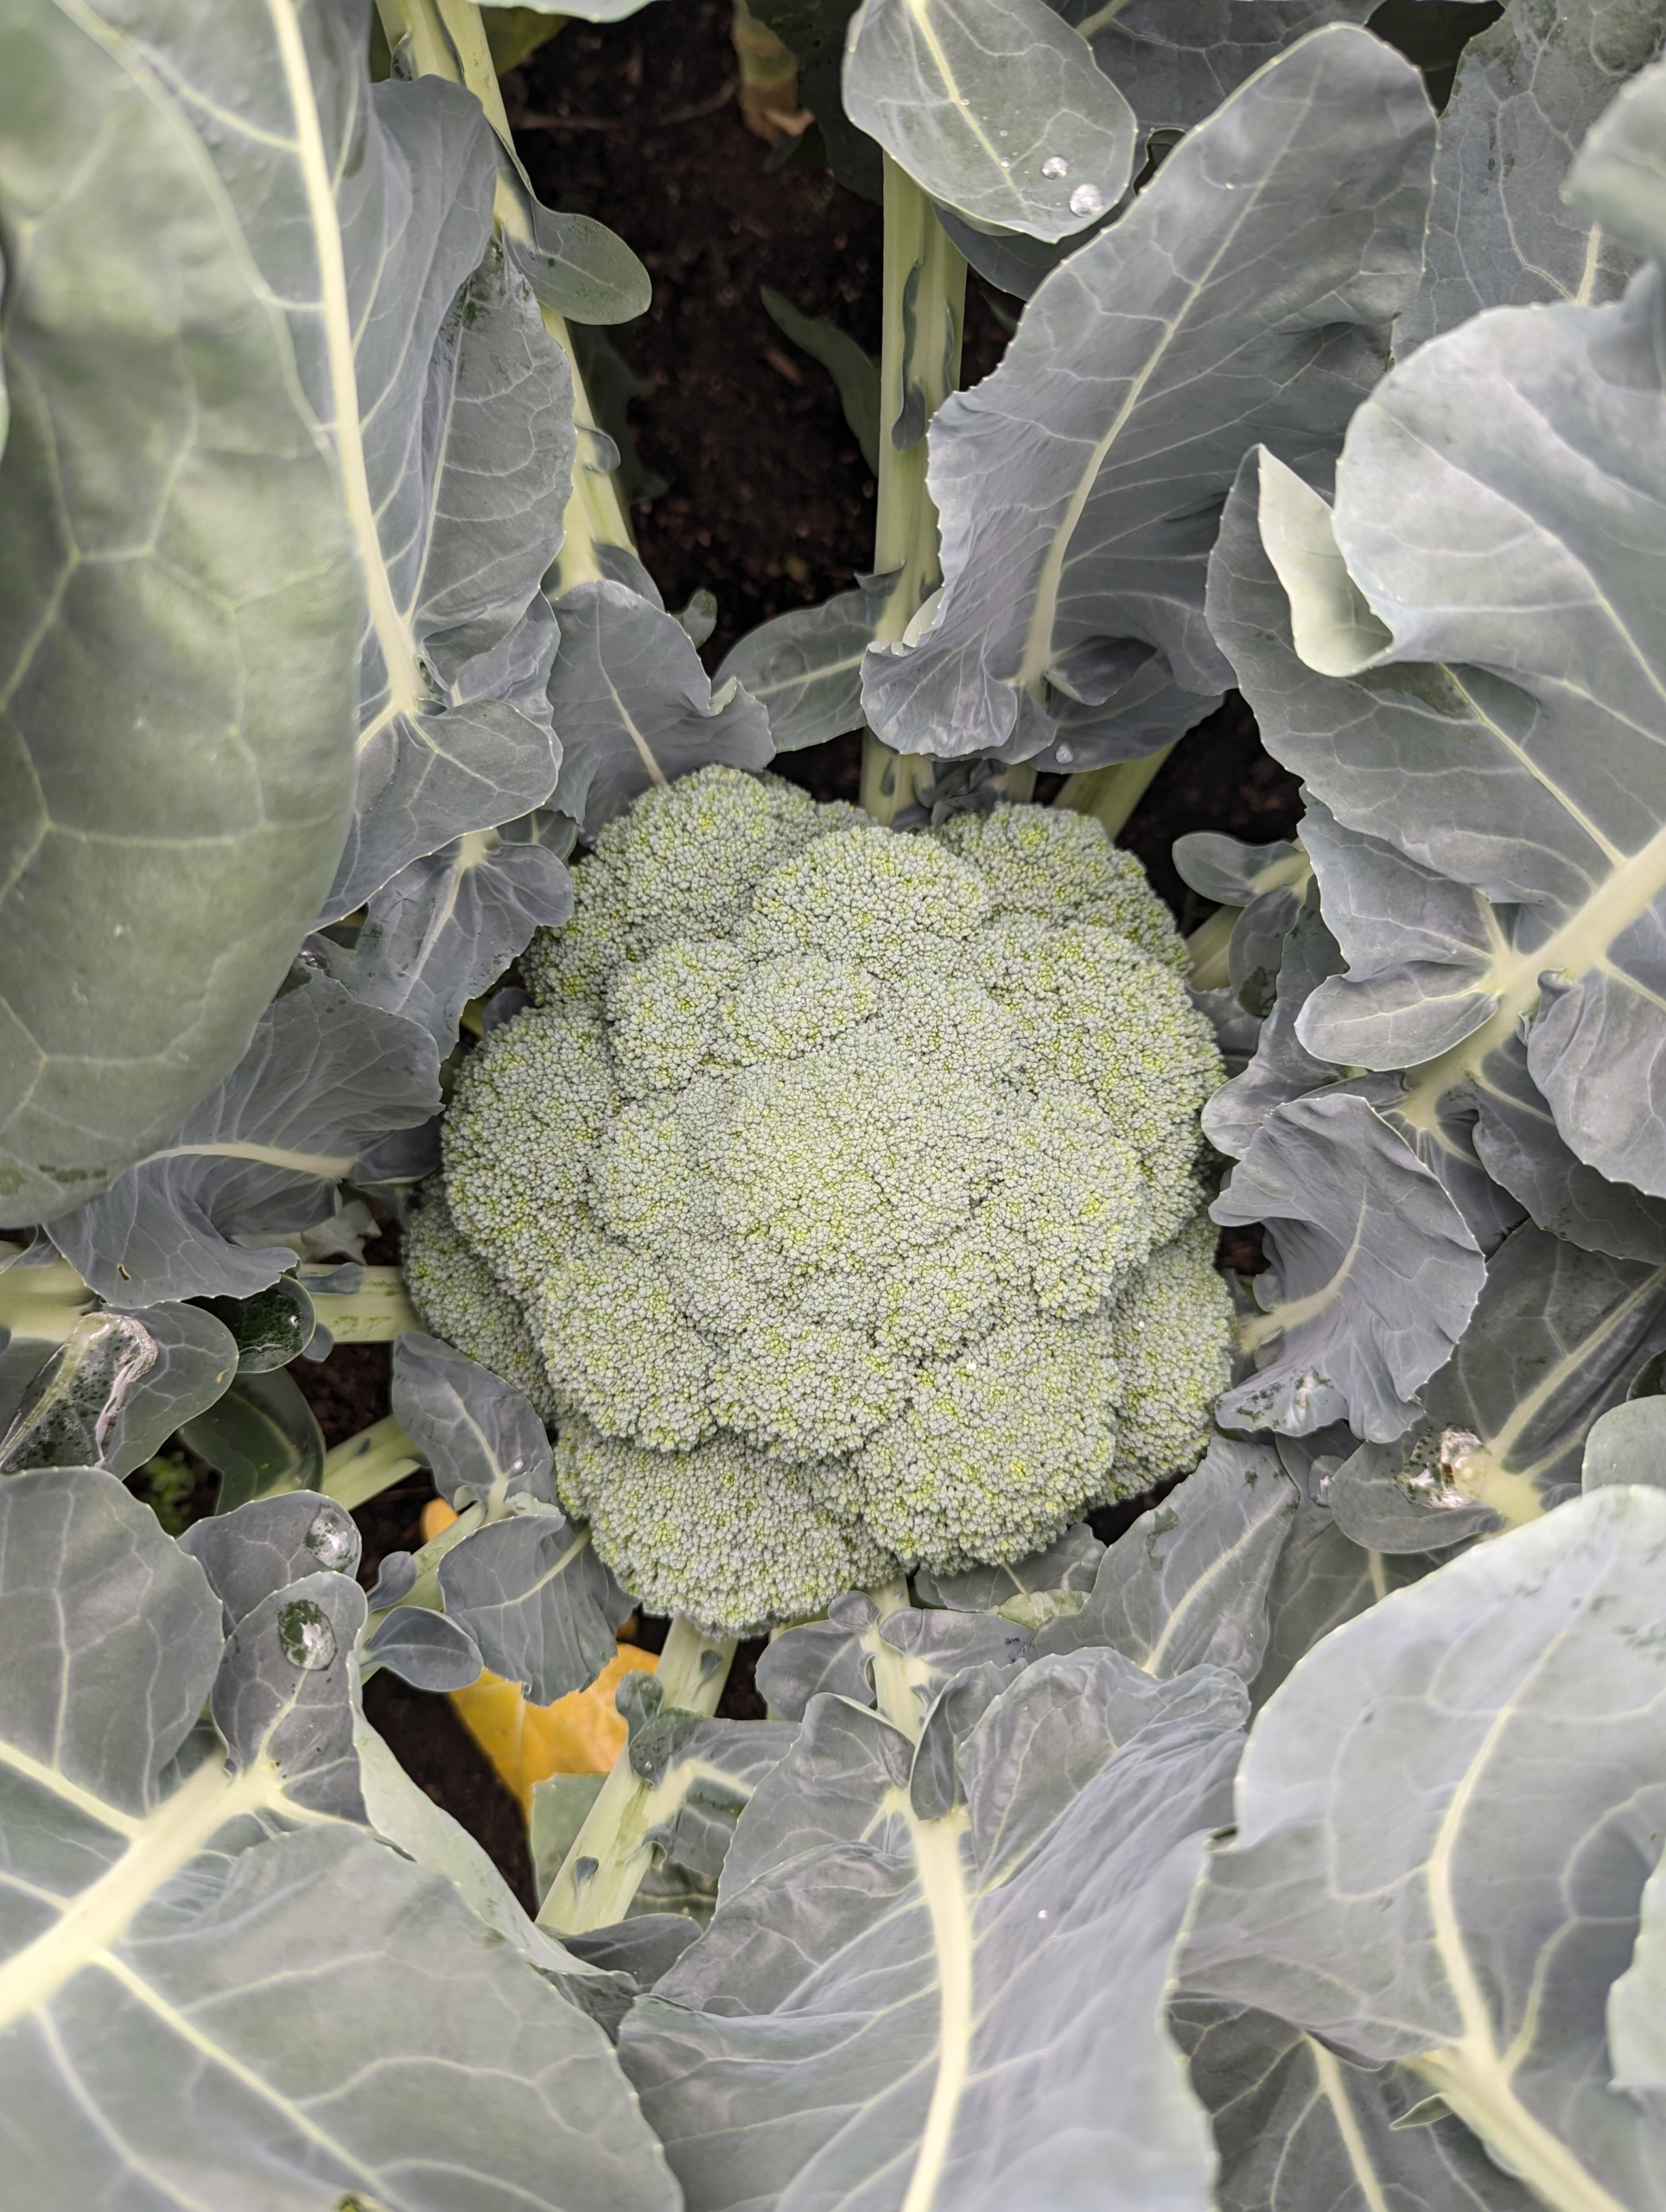
We grew tons of broccoli – perfect heads of delicious and nutritious broccoli.
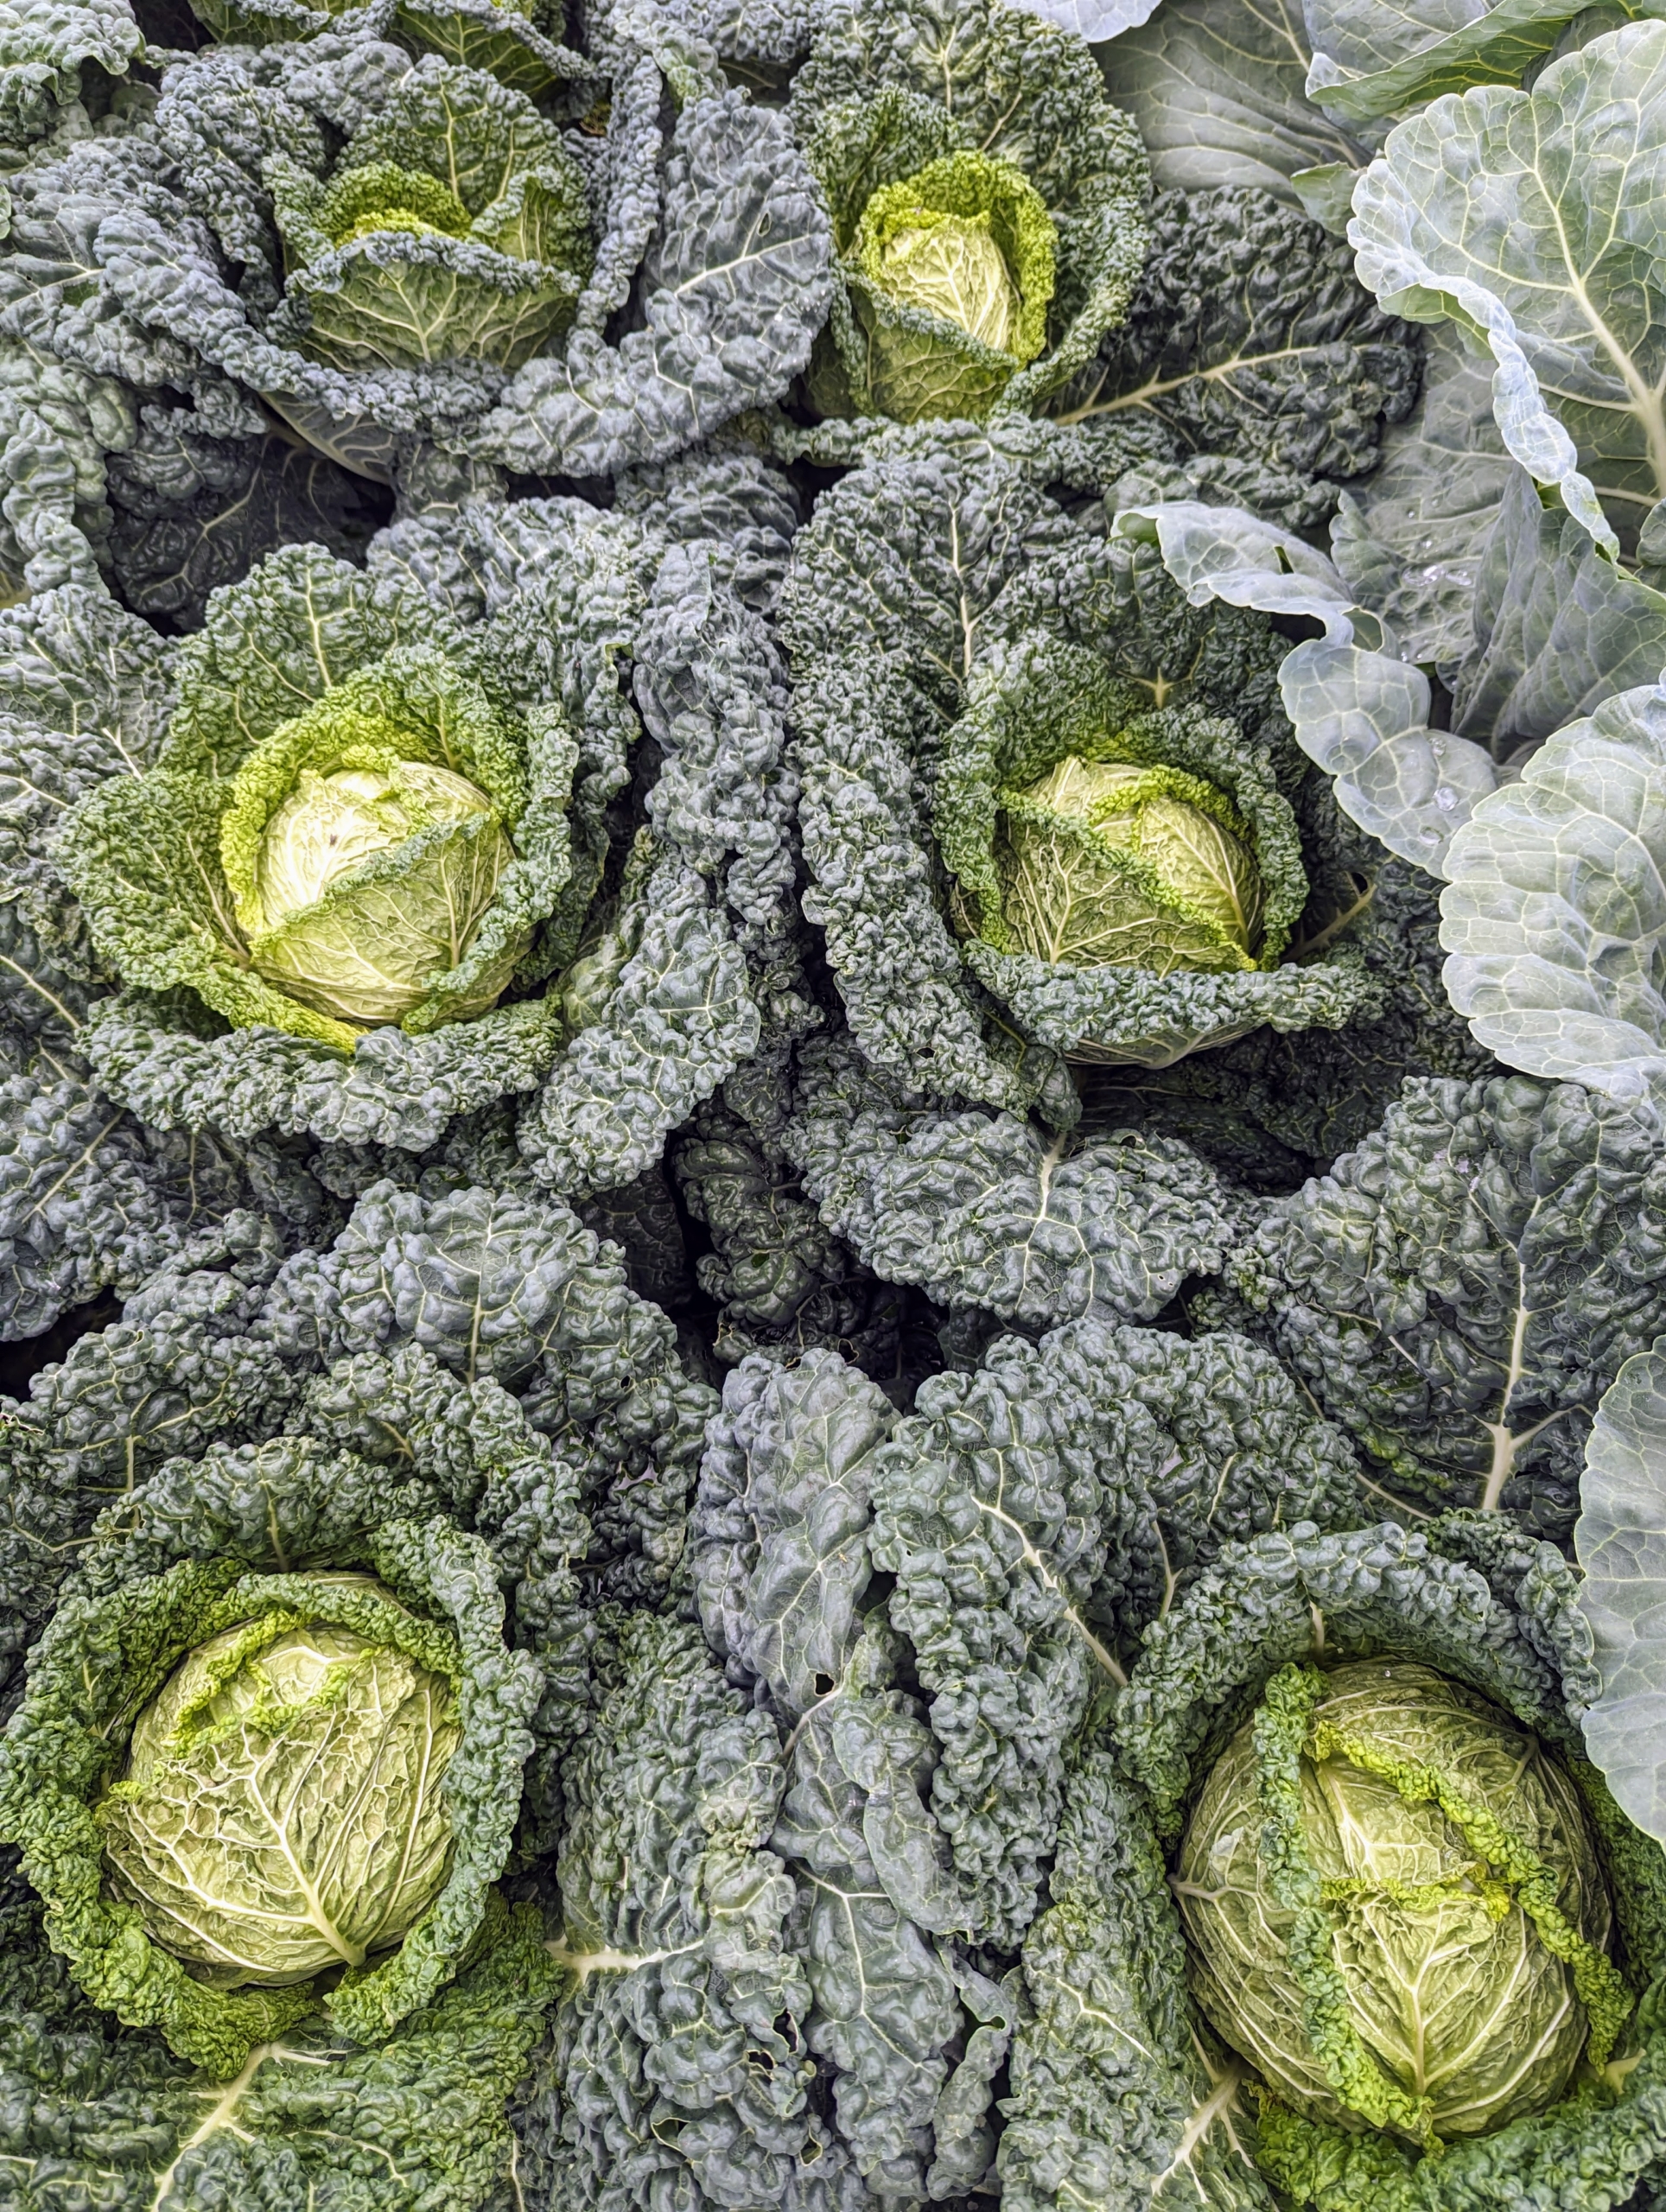
An of course cabbage – Savoy cabbage, green cabbage, red cabbage, Napa cabbage, etc.
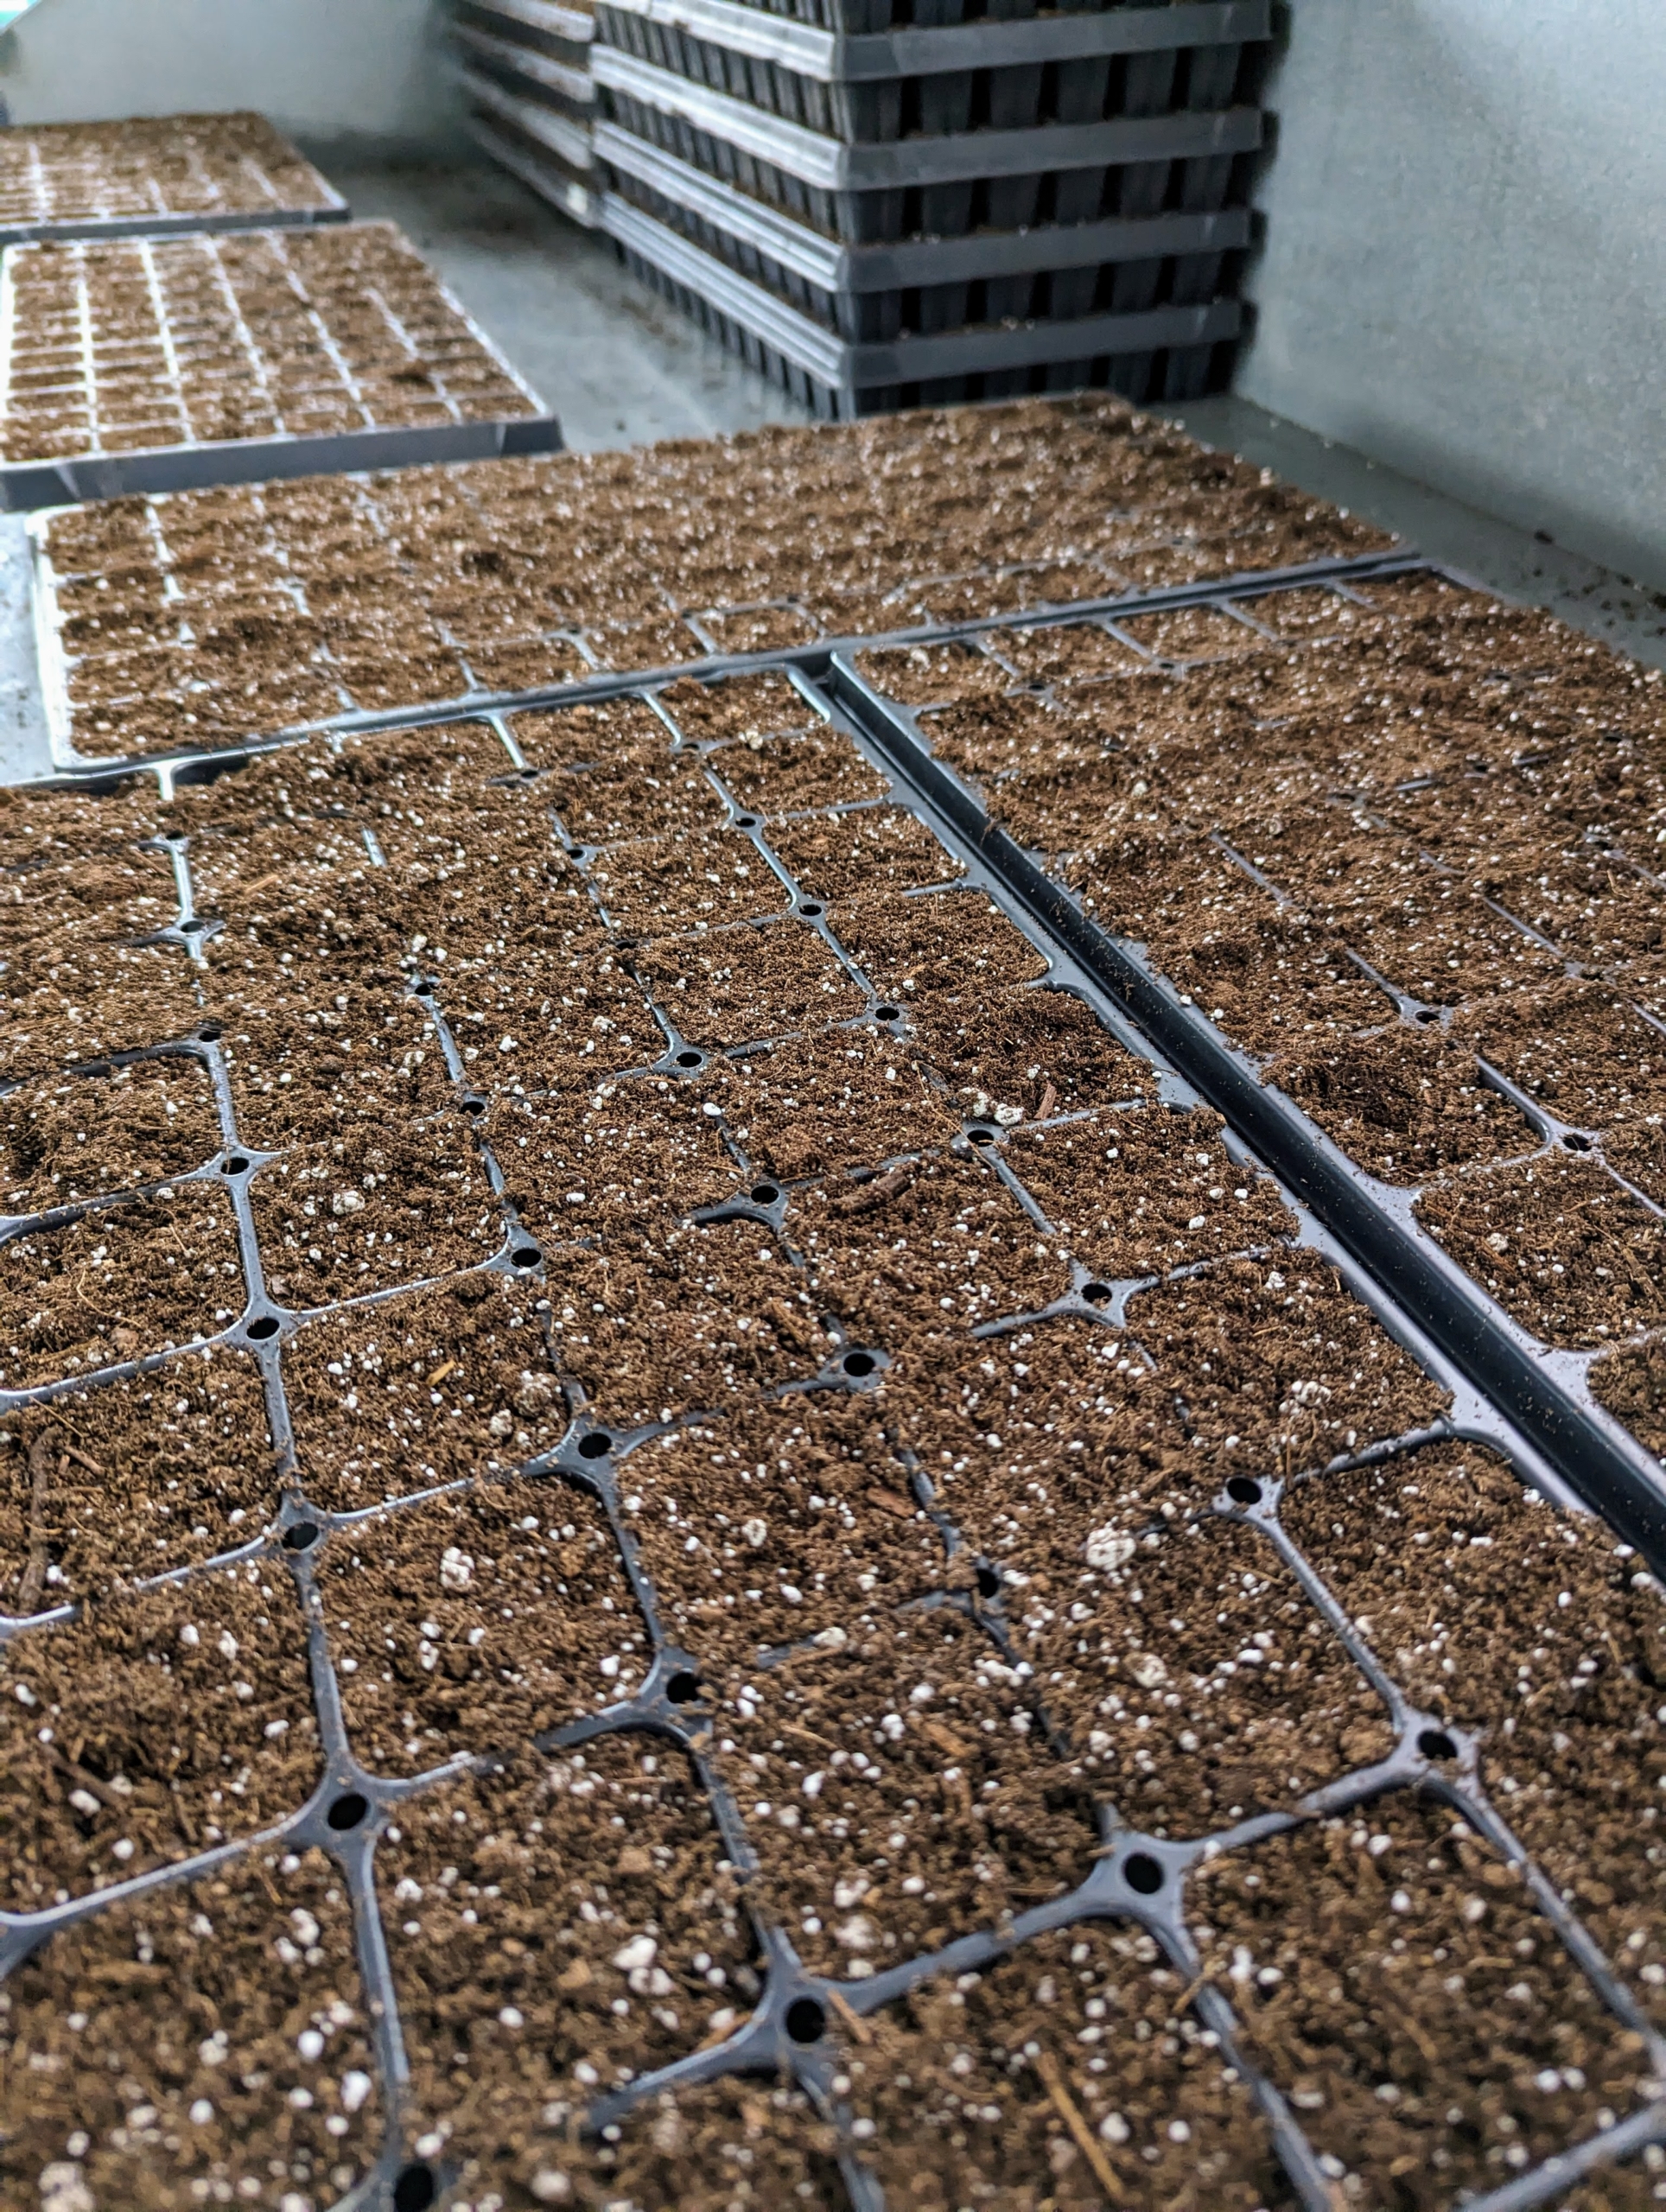
Seeds are started in trays like these. These can be saved from year to year, so don’t throw them away after the season. Seed starting trays are available in all sizes and formations.
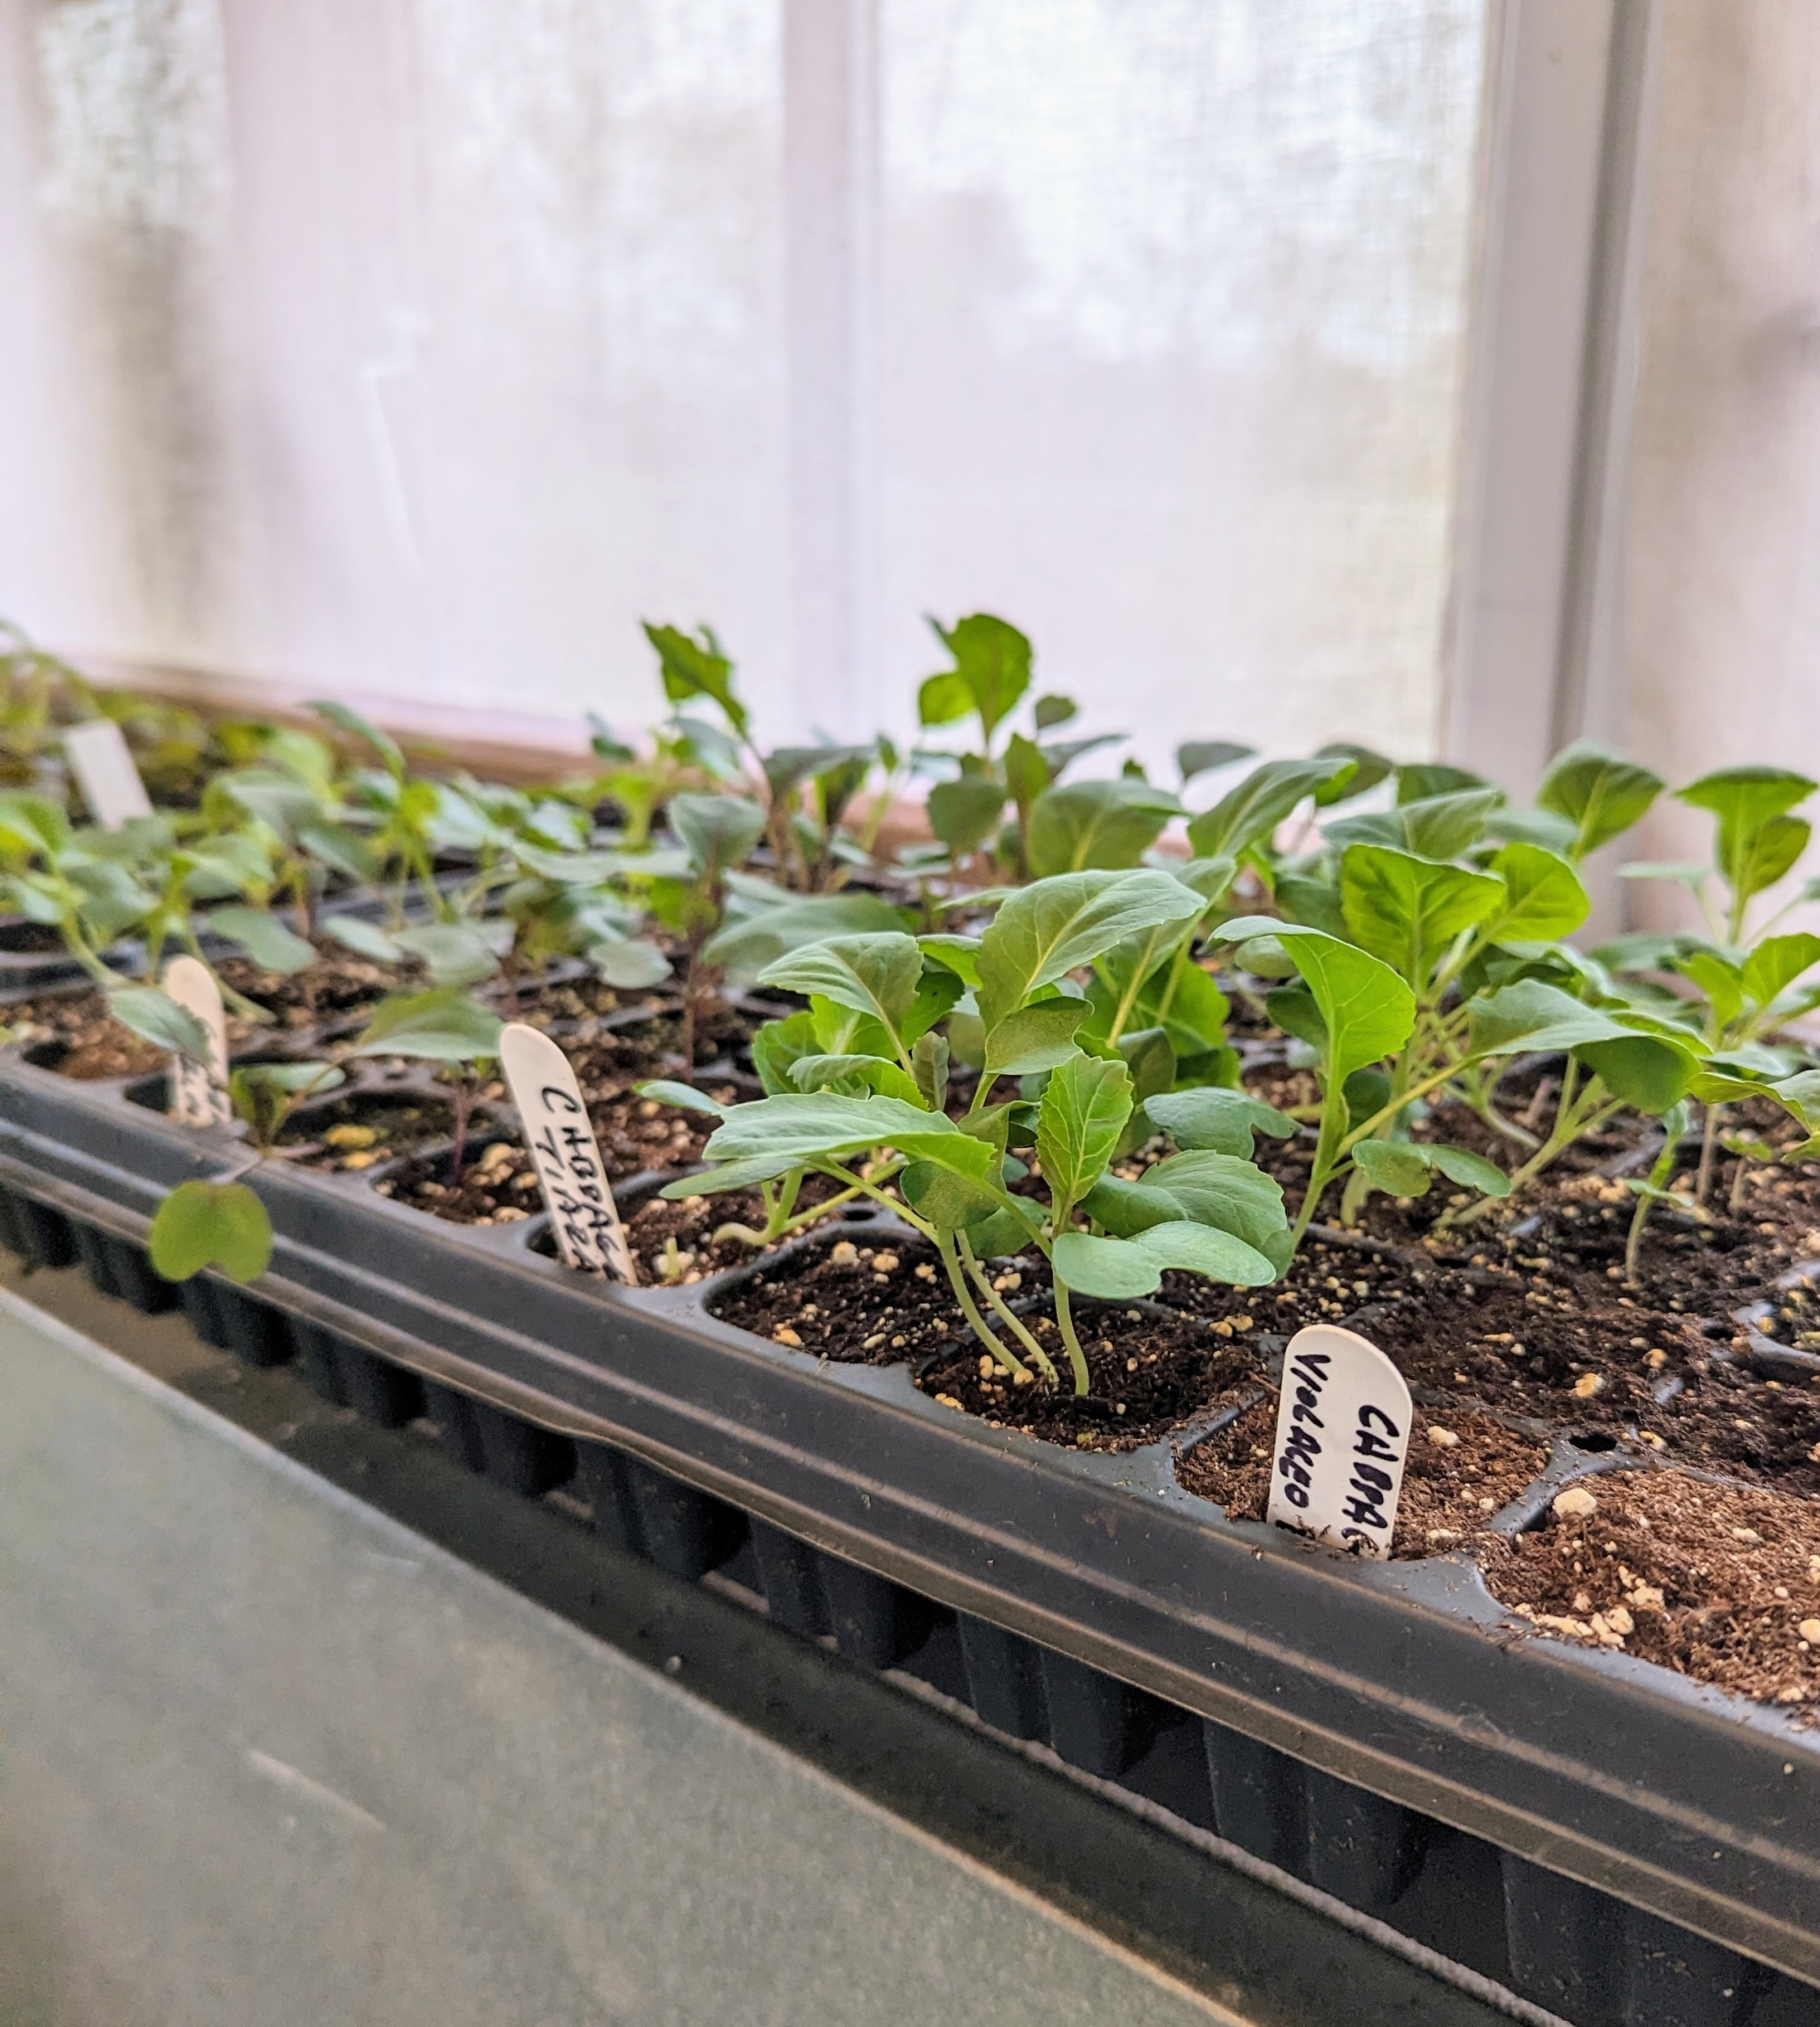
Here’s a tray of cabbage that was started a few weeks ago. Fortunately, my greenhouse is large and can accommodate lots of seed starting.
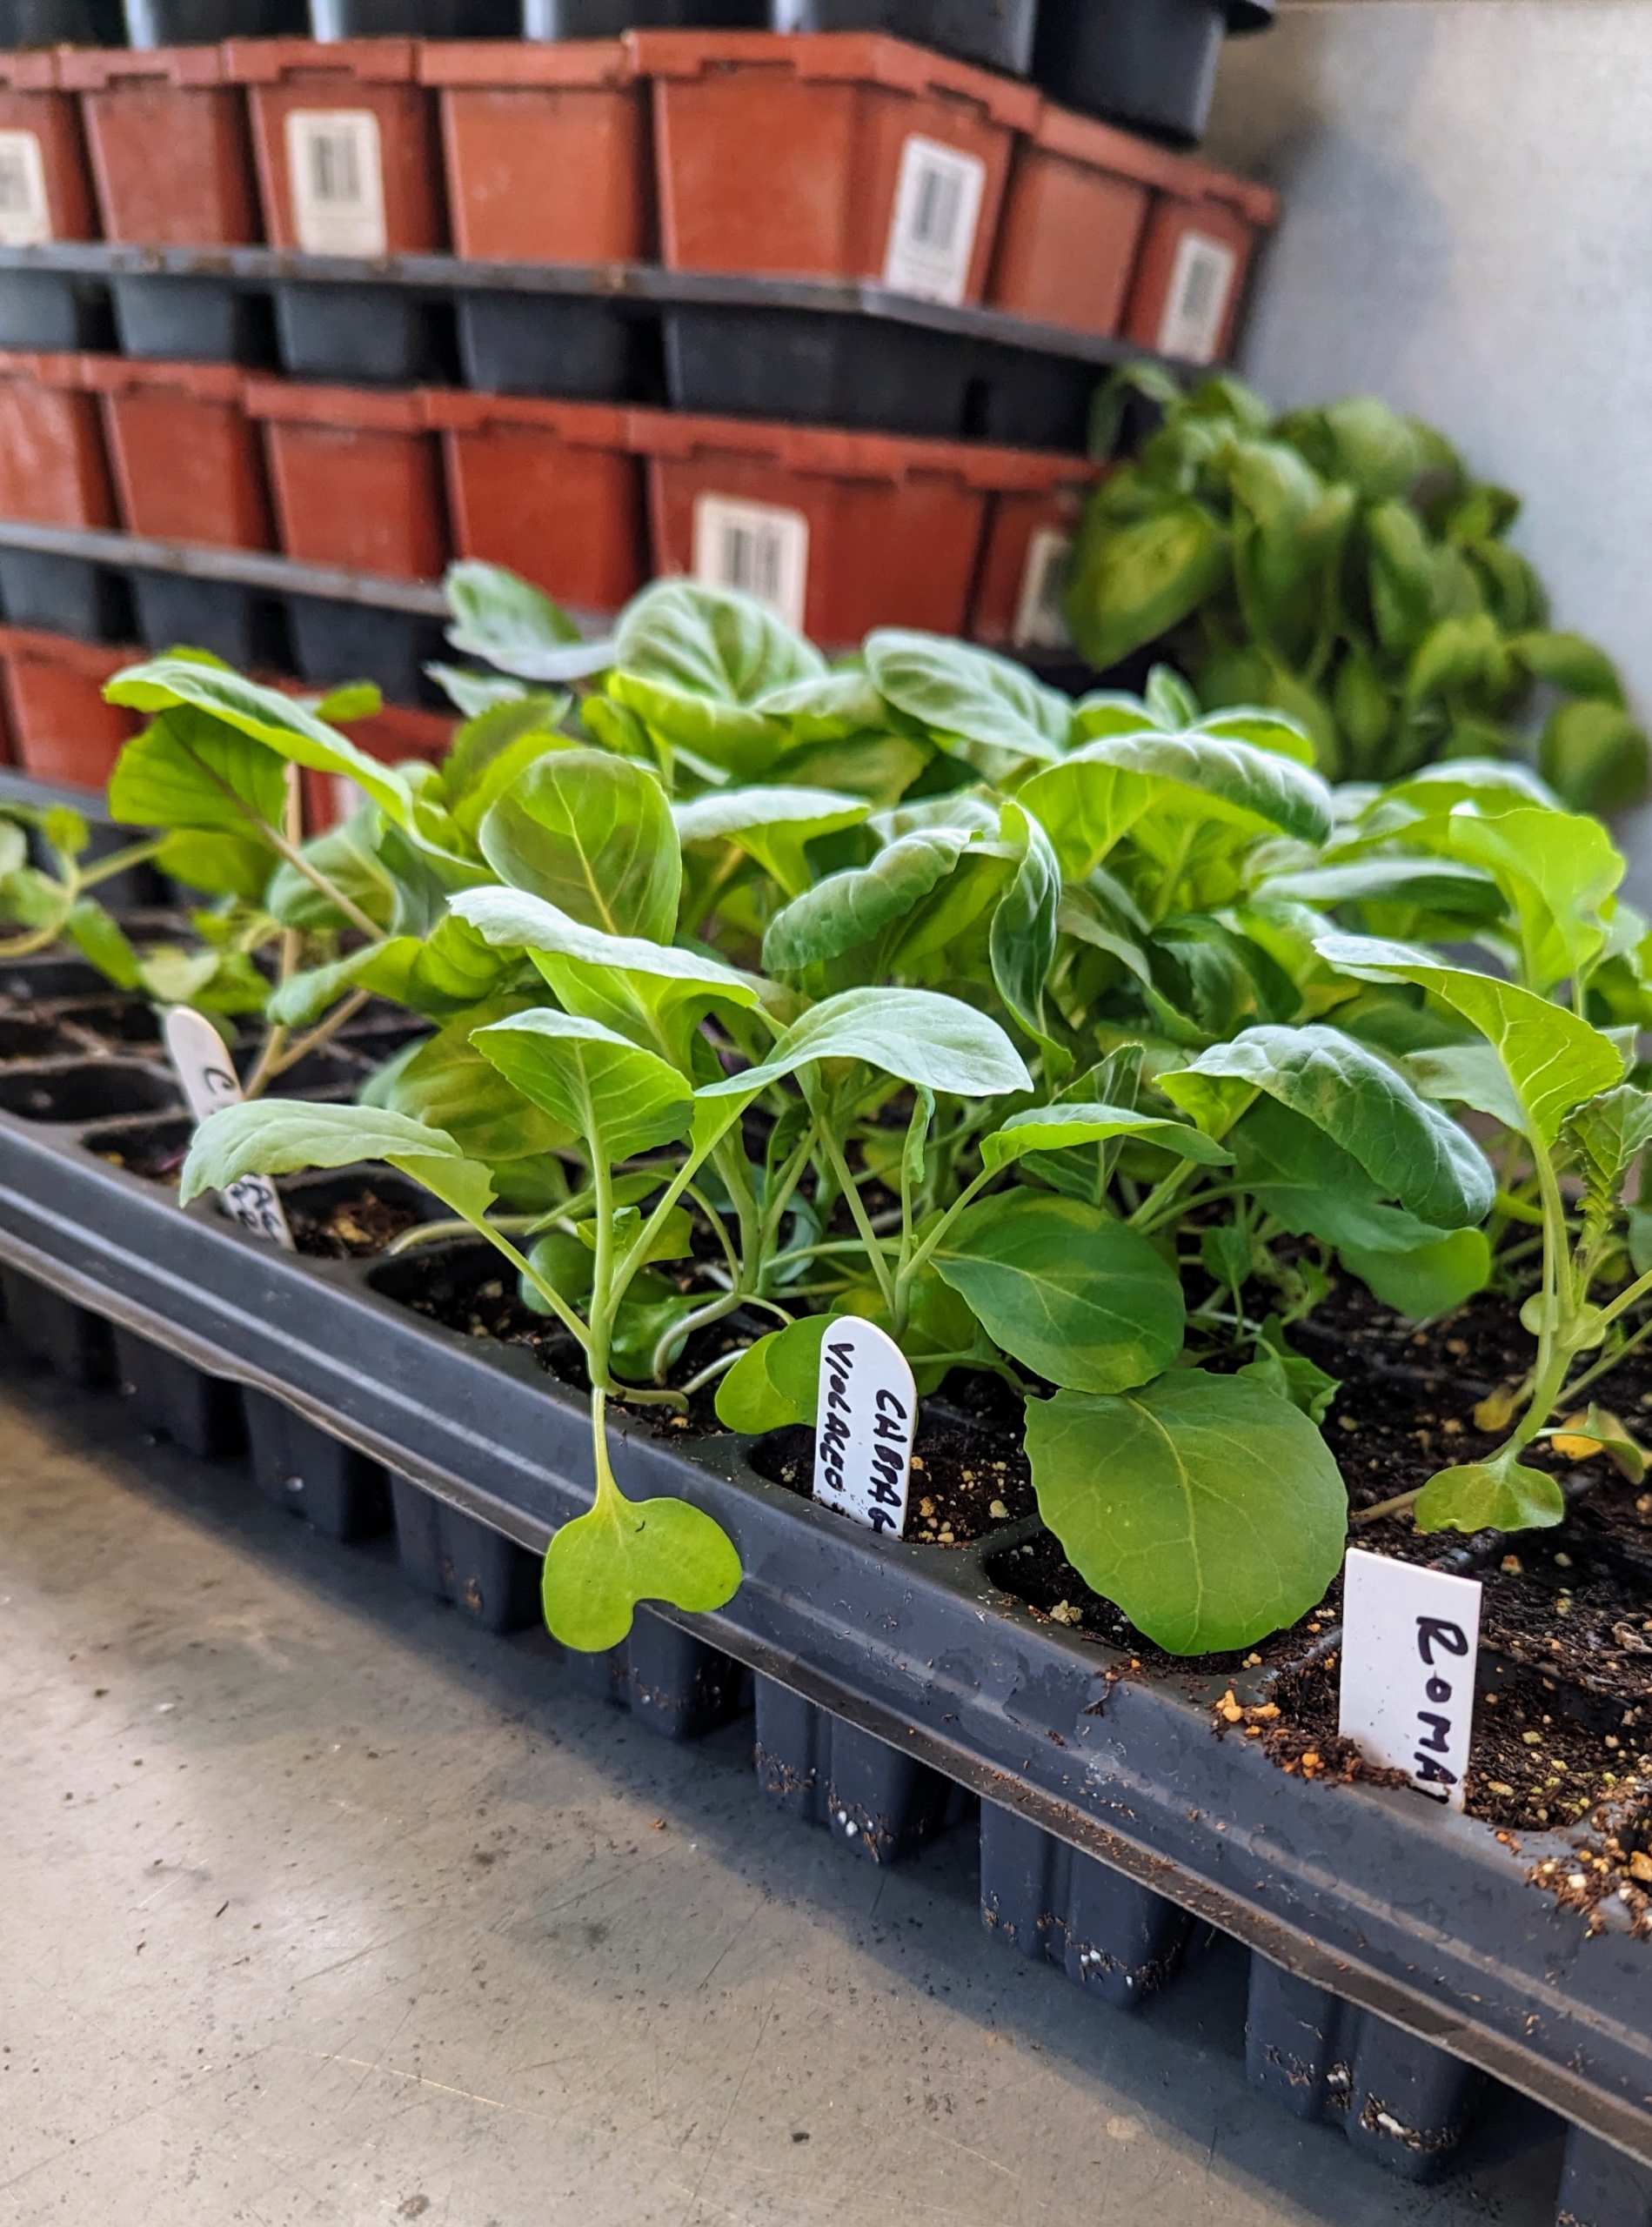
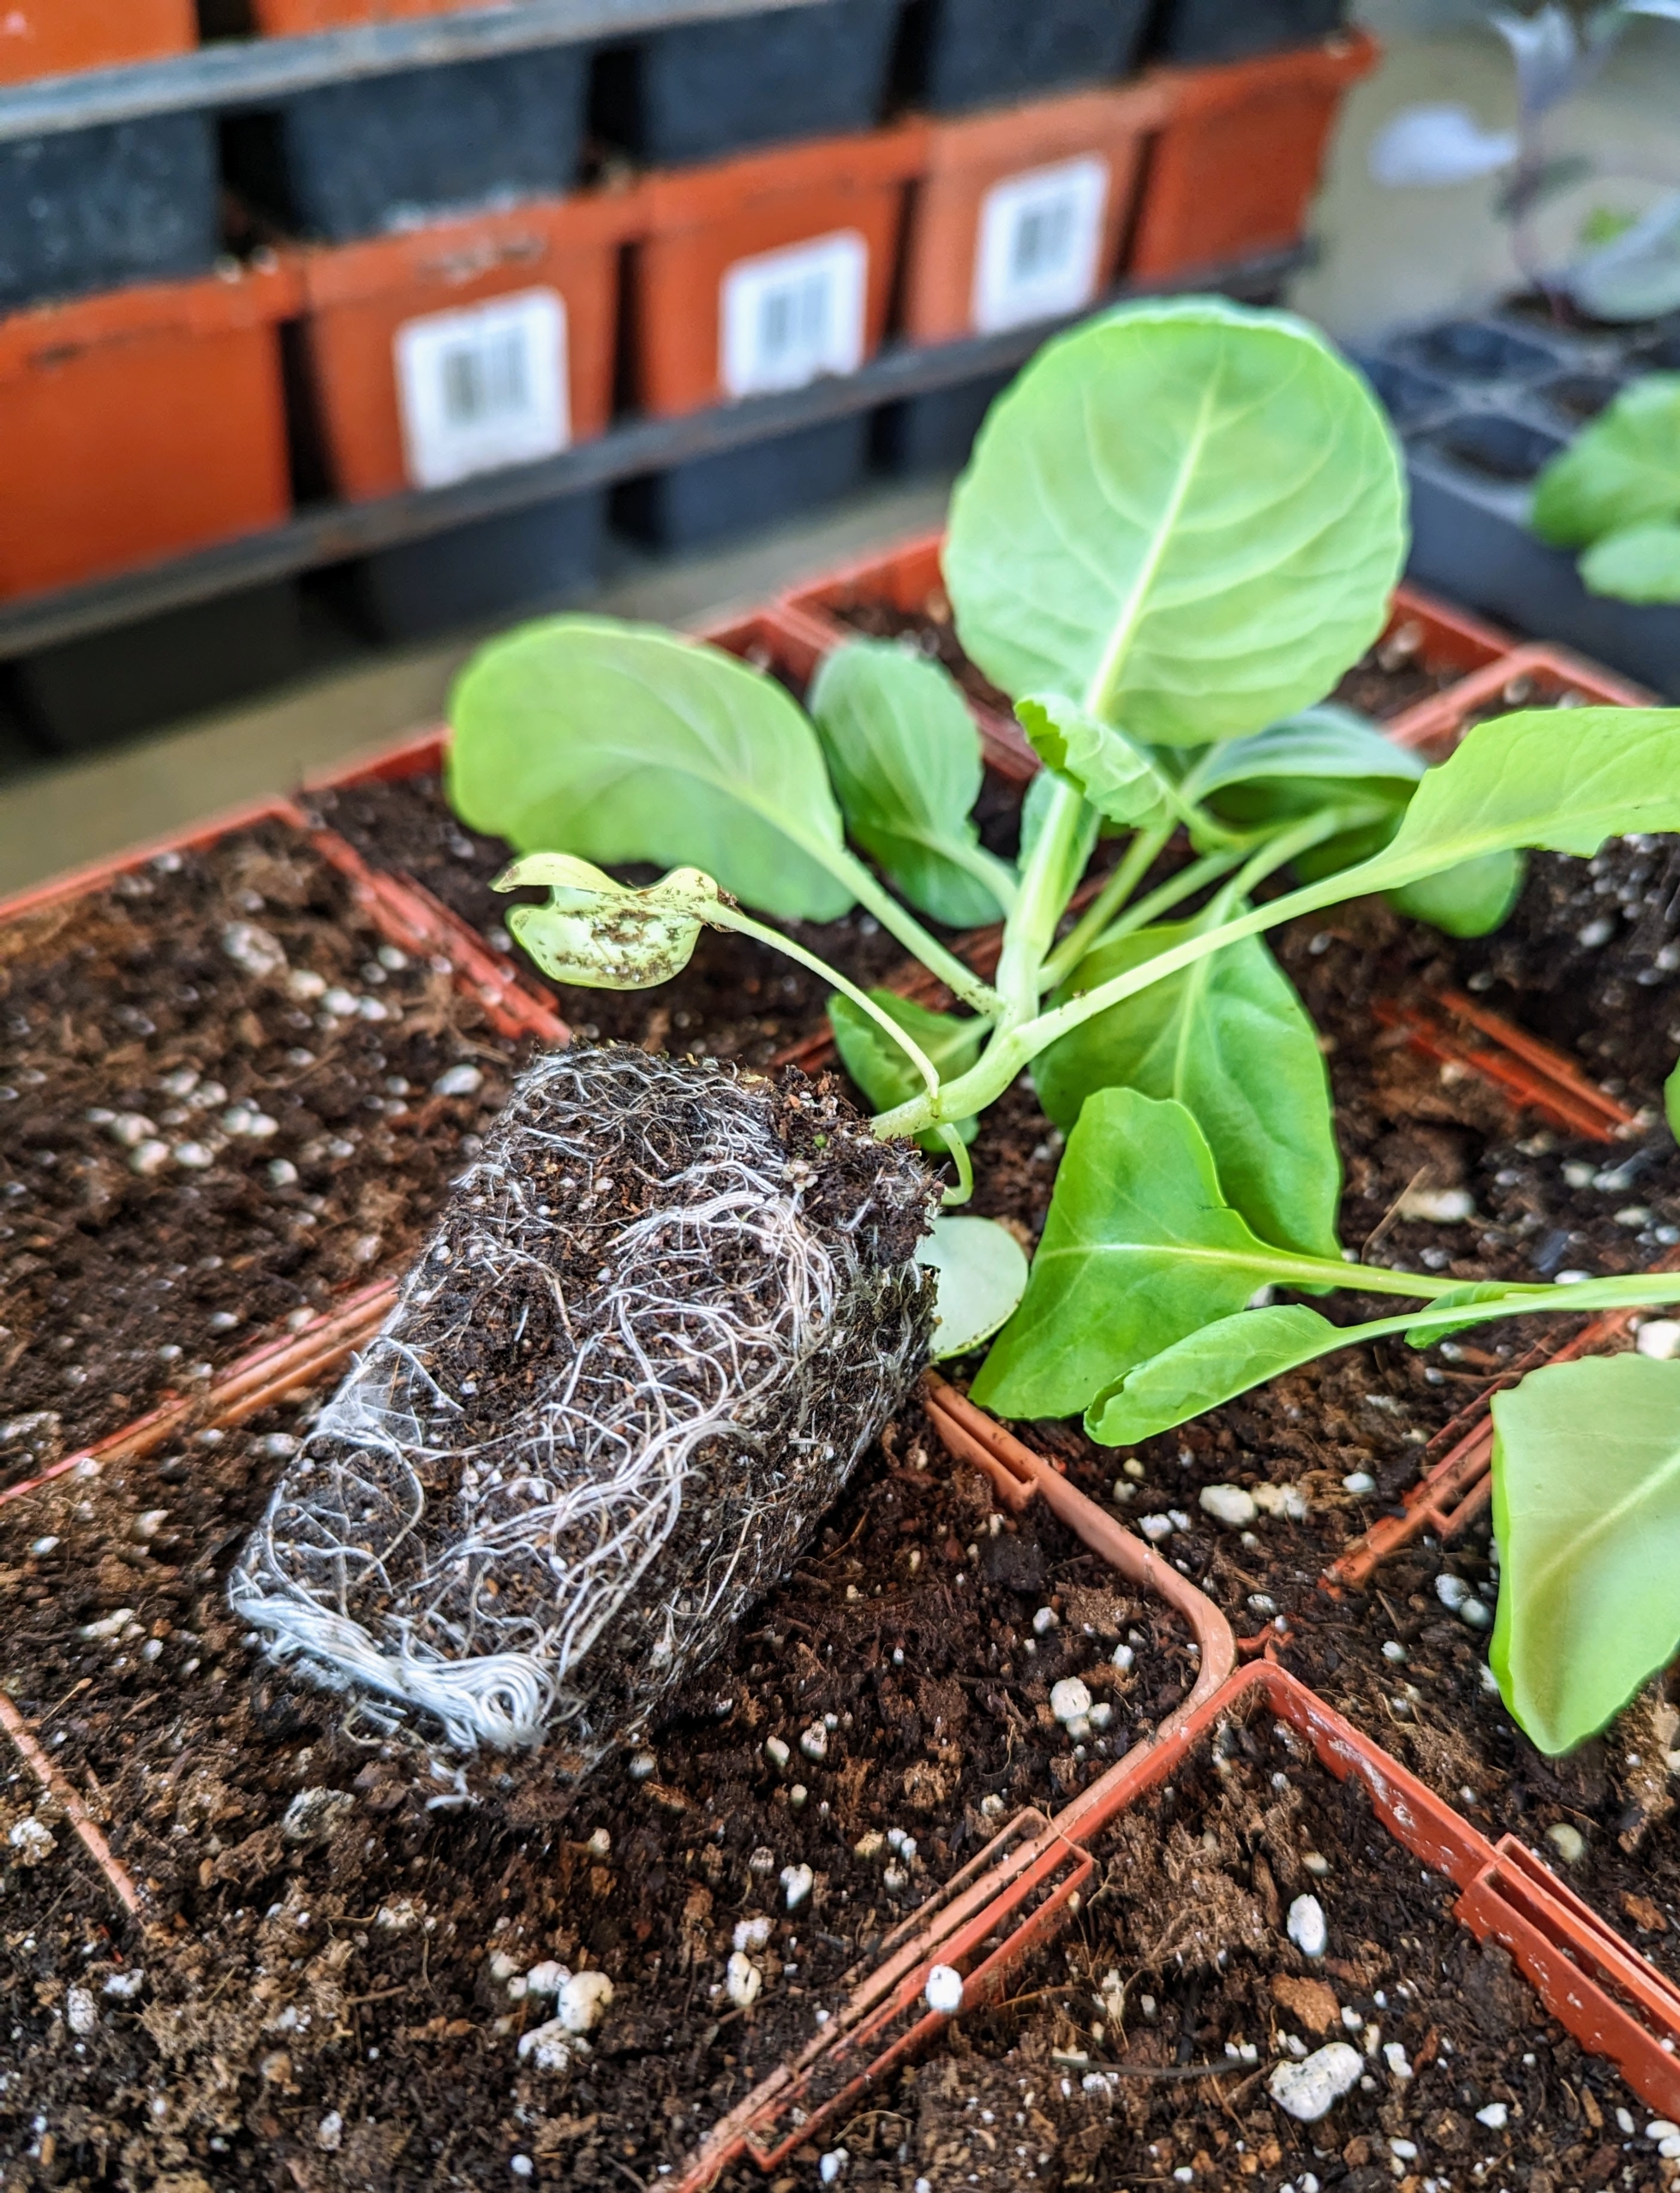
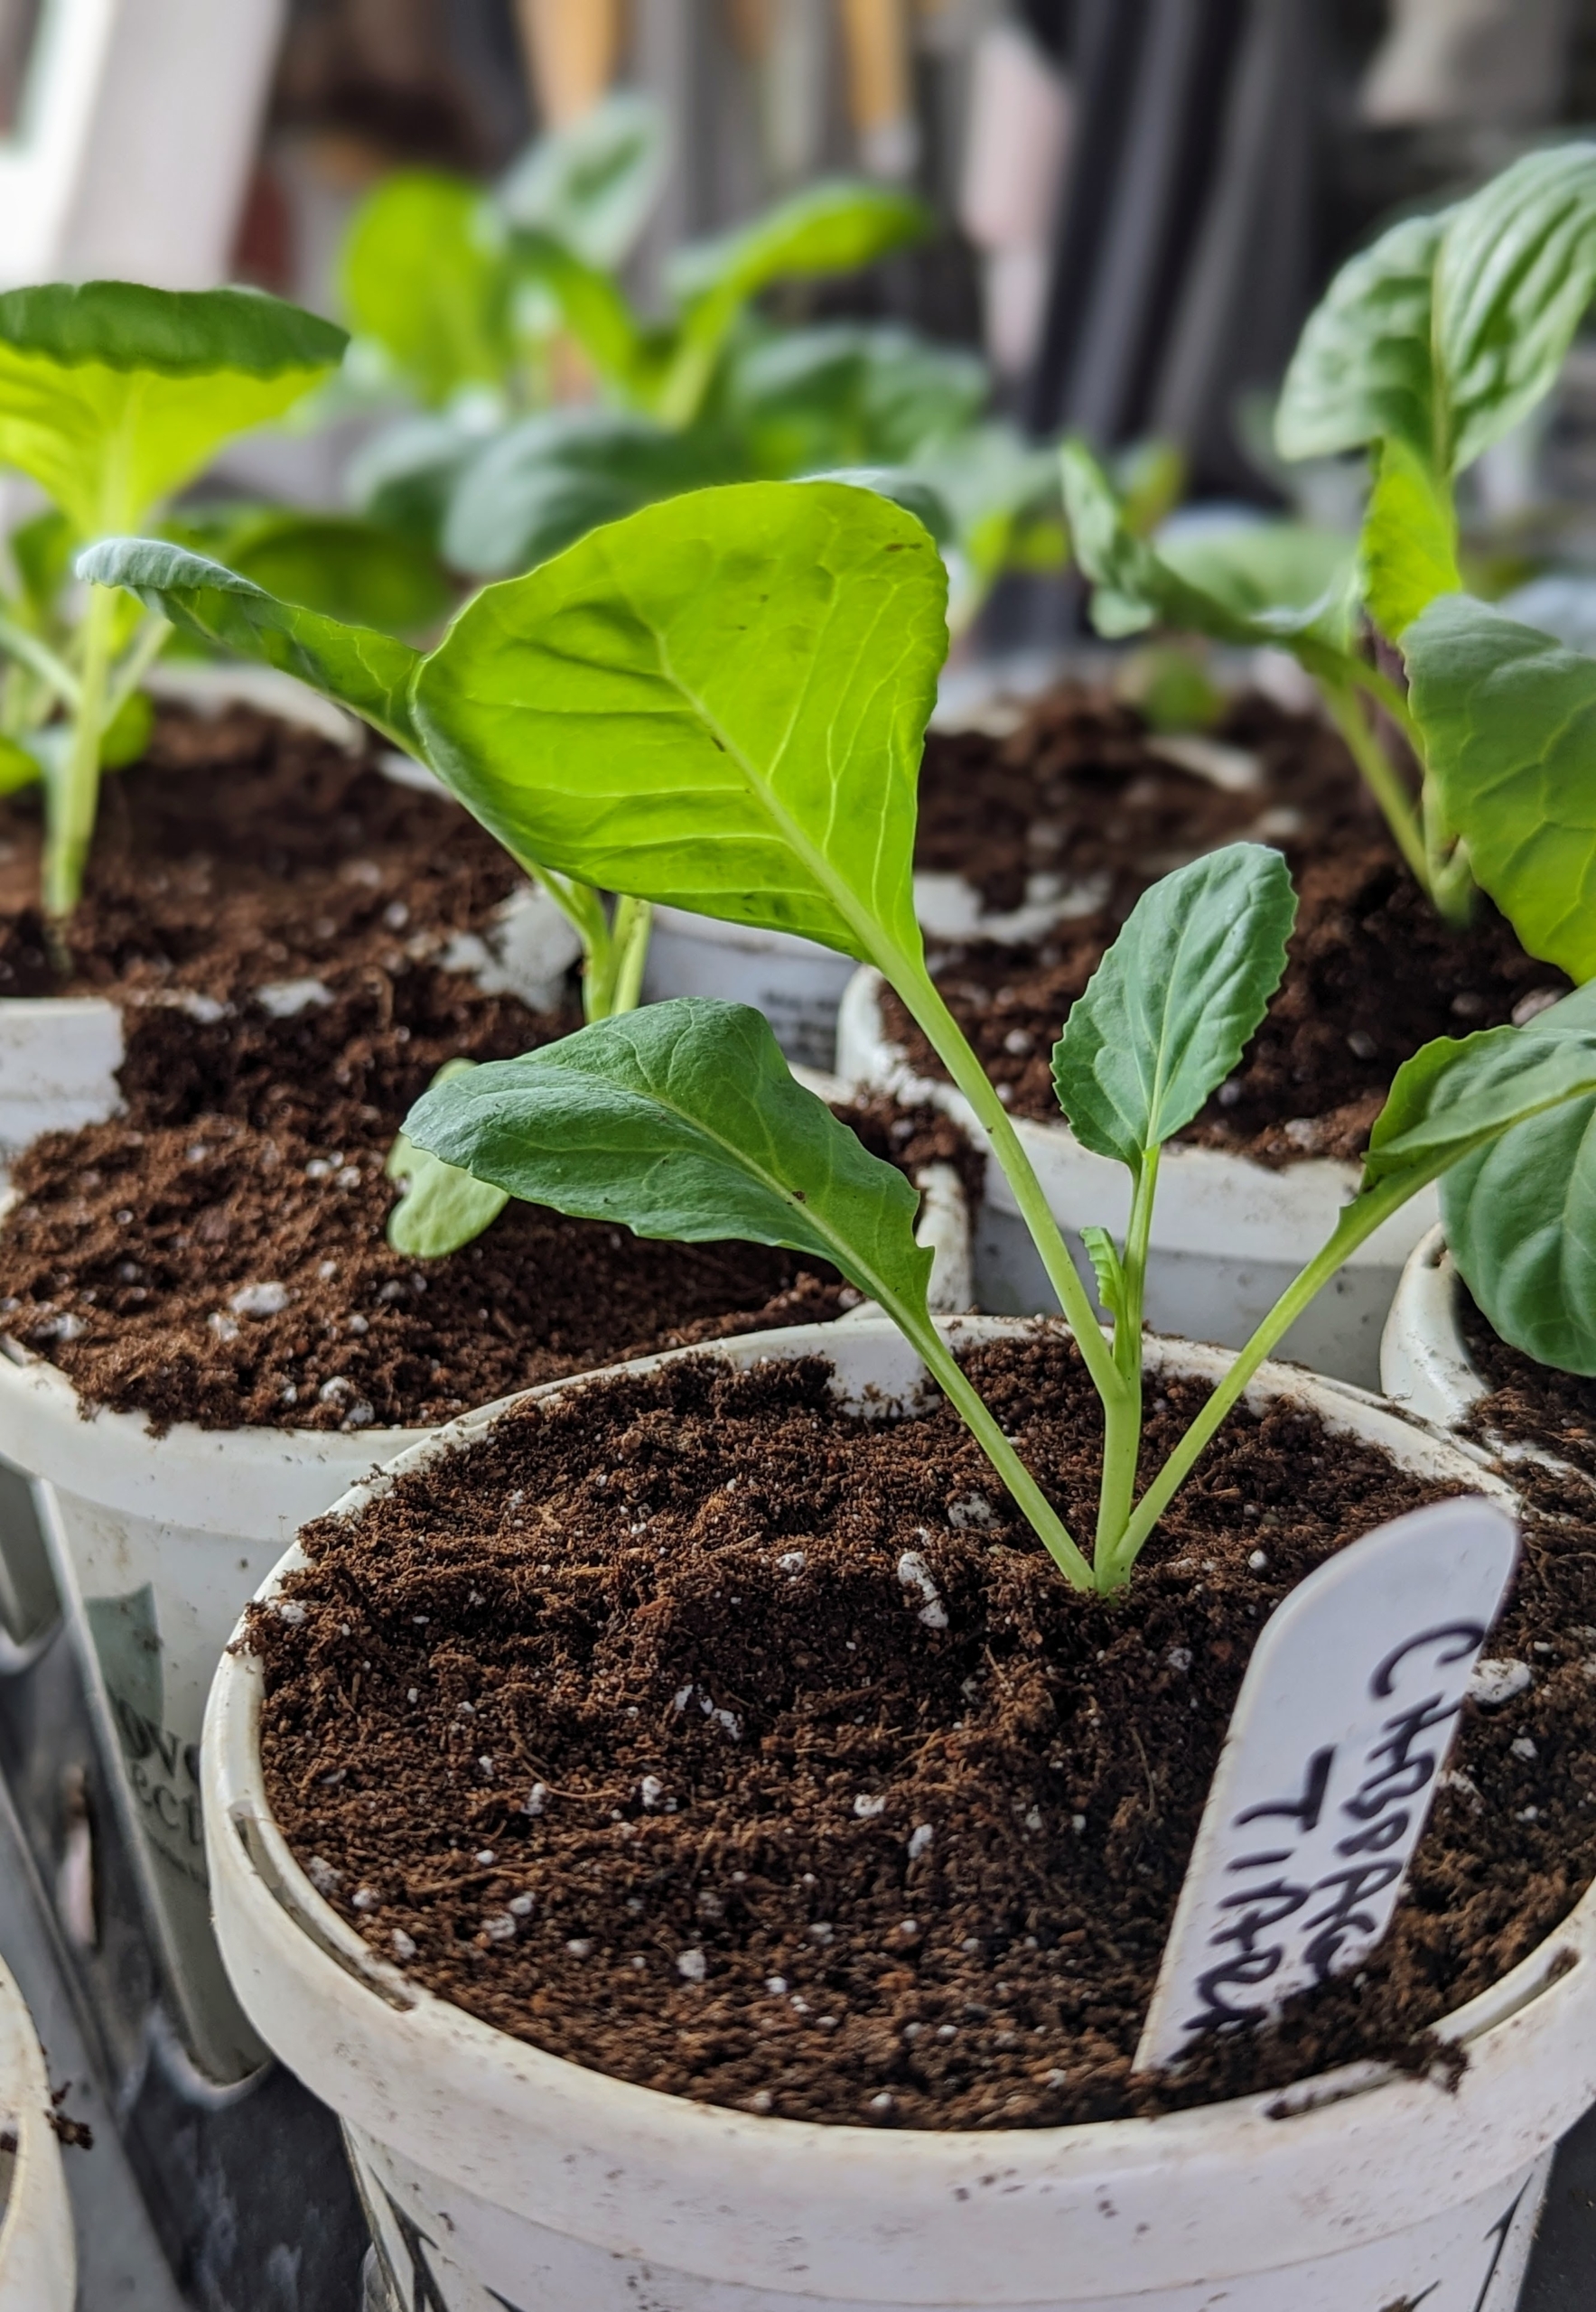
And here is the same tray last week. When the seedlings are a few inches tall, and have reached their “true leaf” stage, which is when each seedling has sprouted a second set of leaves, it’s time for a process called selective thinning.
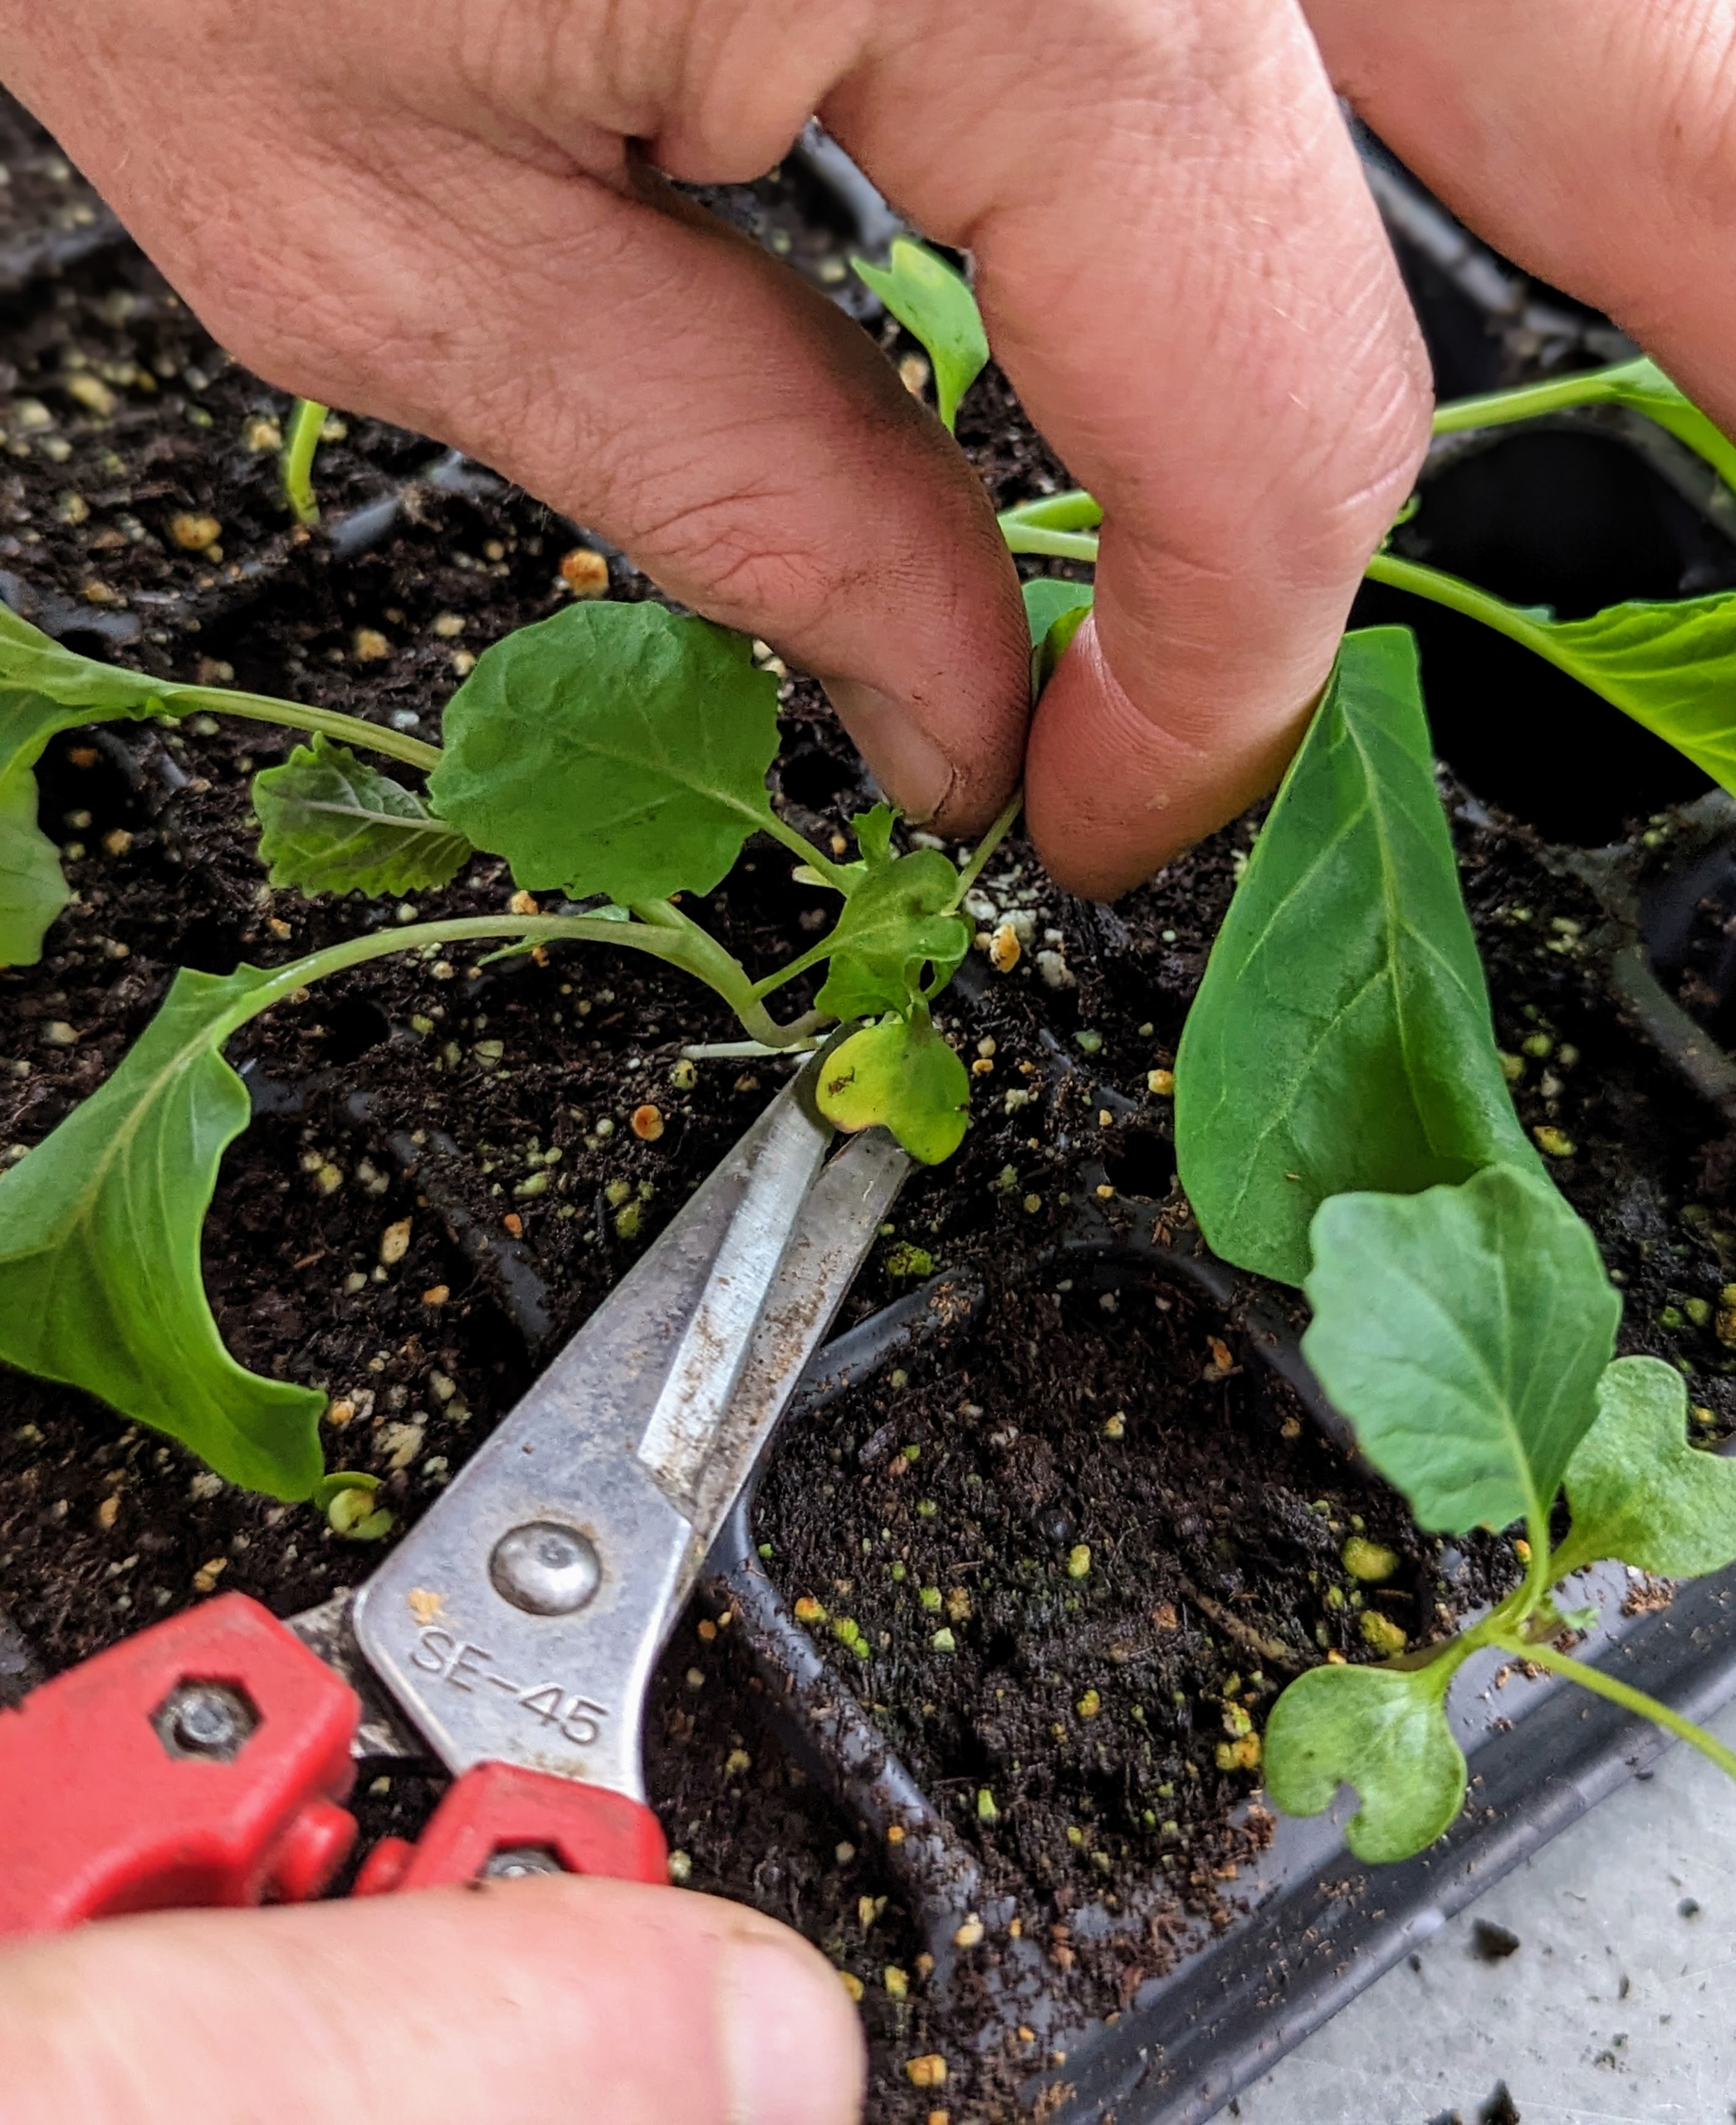
Ryan carefully inspects the seedlings to determine the strongest ones. Always look for fleshy leaves, upright stems, and center positioning in the space. The smaller, weaker, more spindly looking seedlings are removed, leaving only the stronger ones to mature.
Using a widger, Ryan carefully loosens the soil around the healthy seedling and lifts it out of the cell. The widger from Johnny’s also helps to avoid damage to the plant’s leaves or roots.
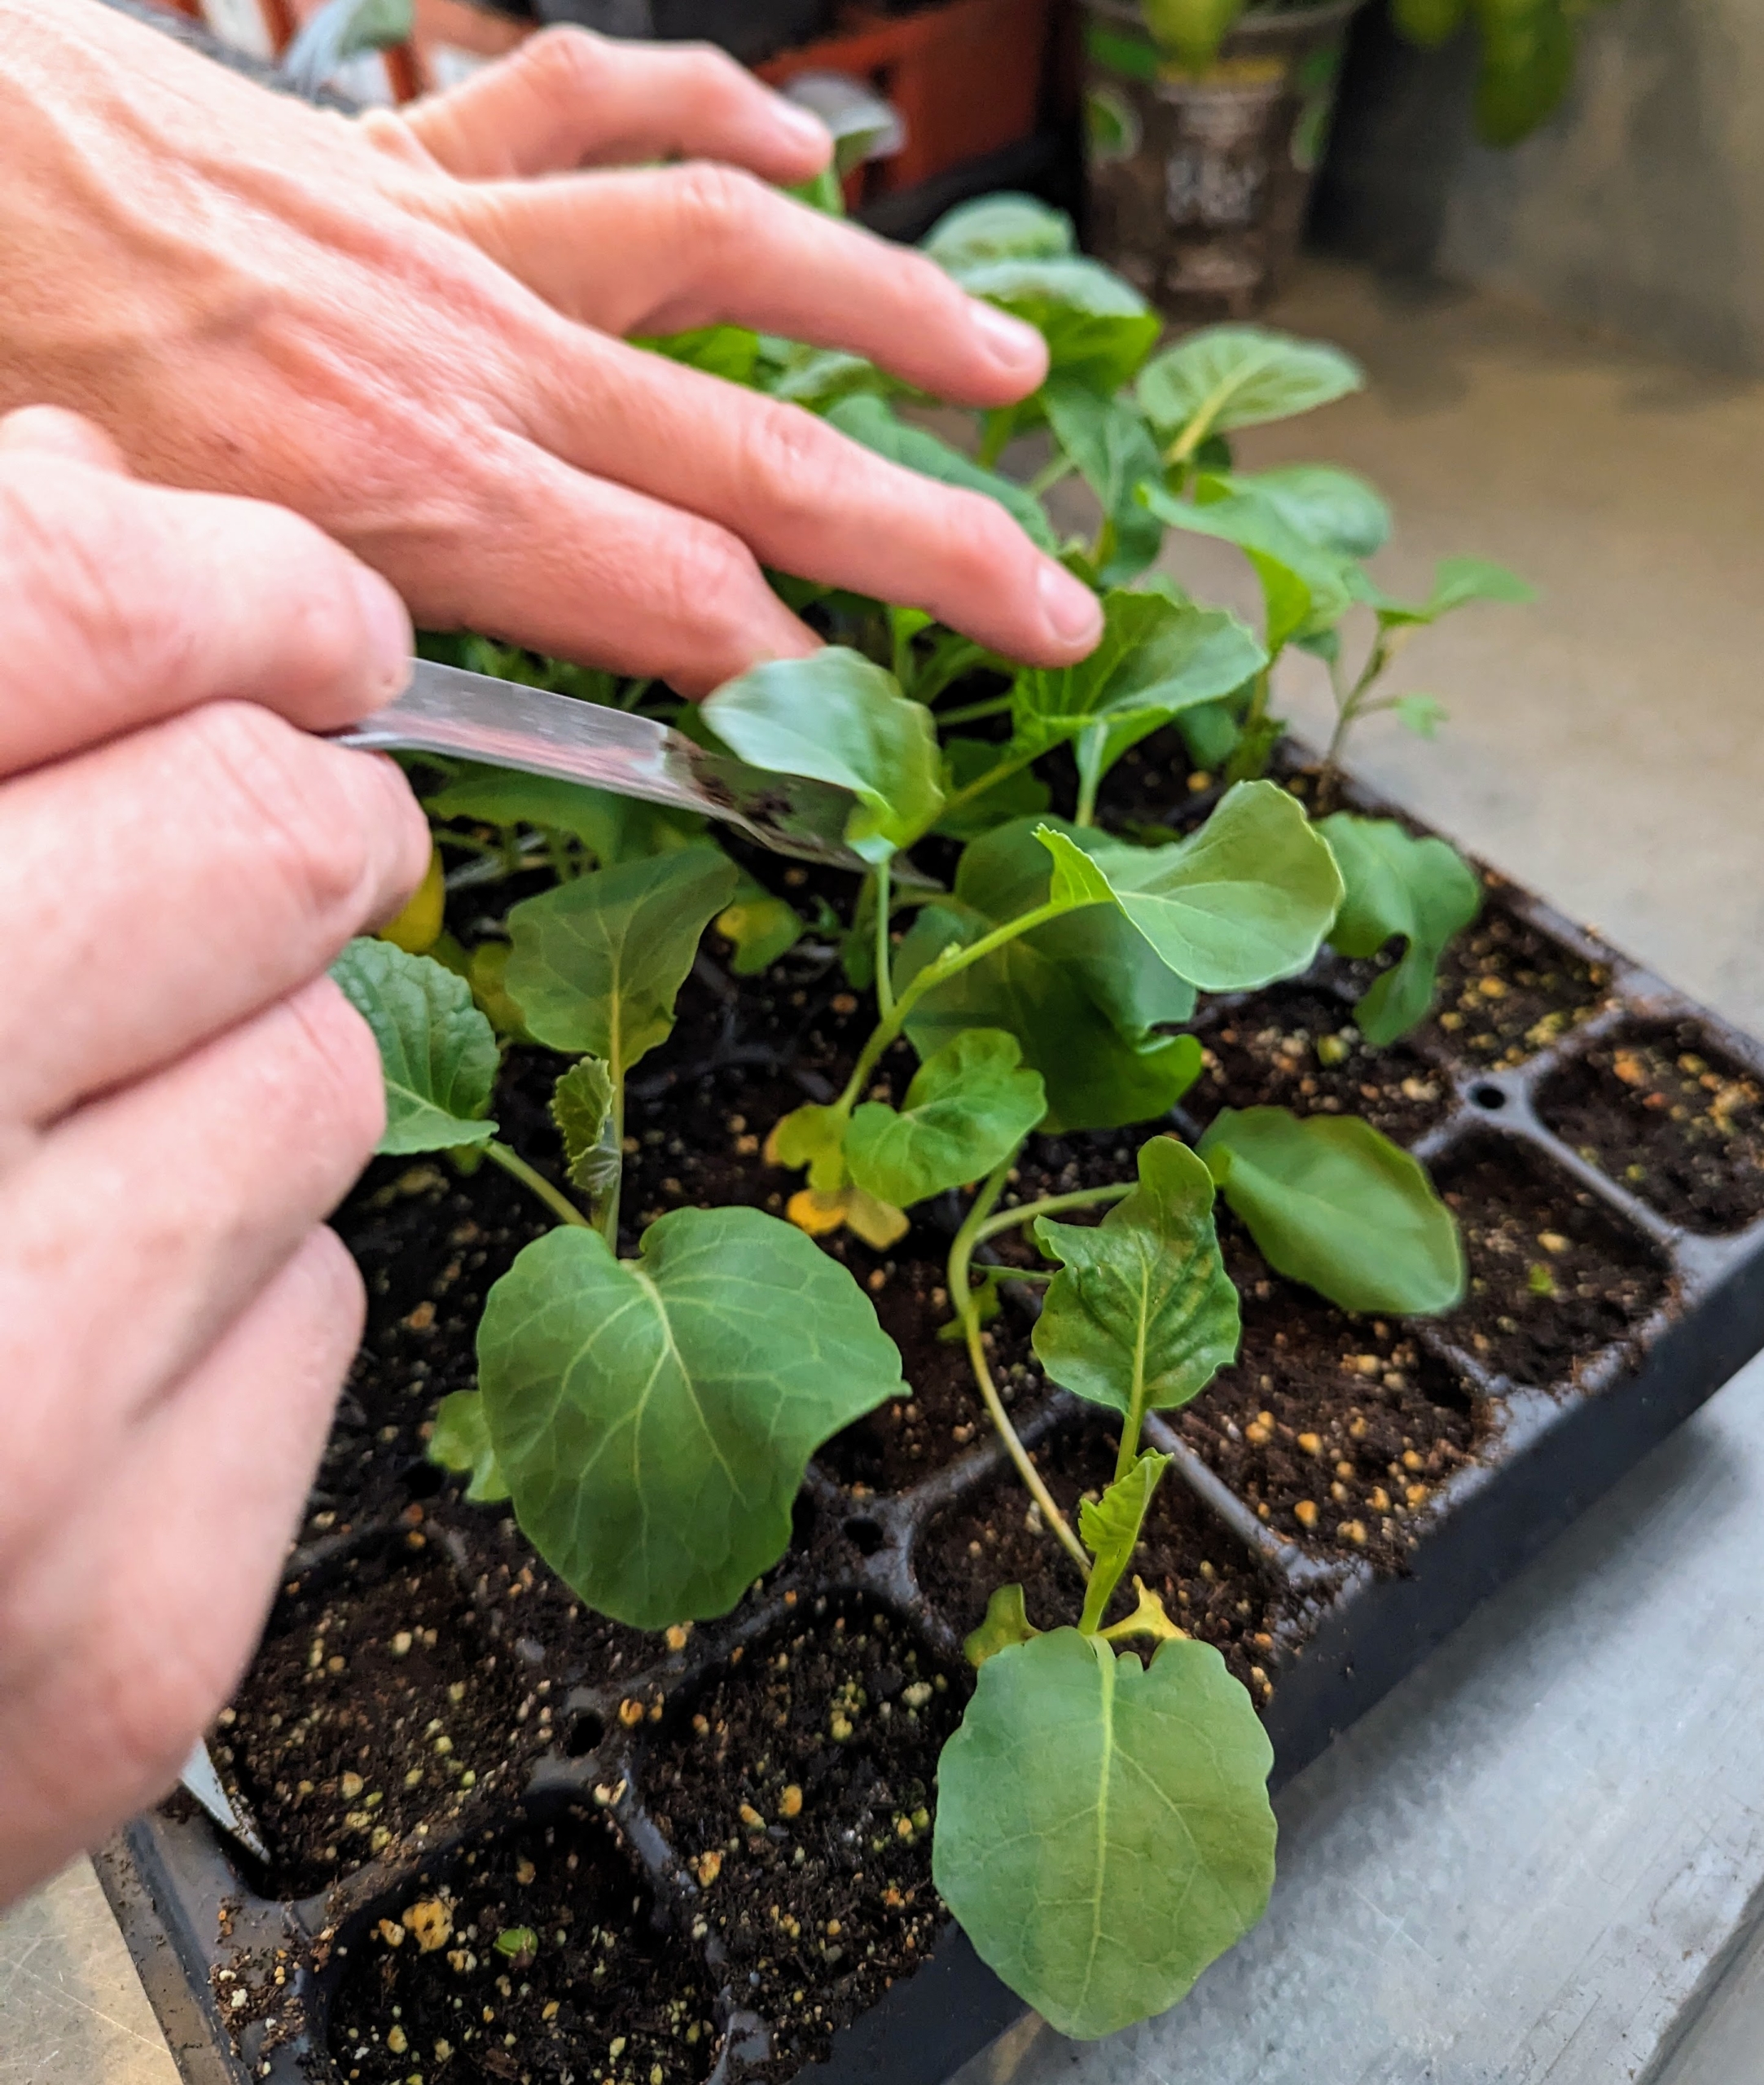
This seedling is very healthy – its leaves are bright green and the plant has a strong stem and root system.
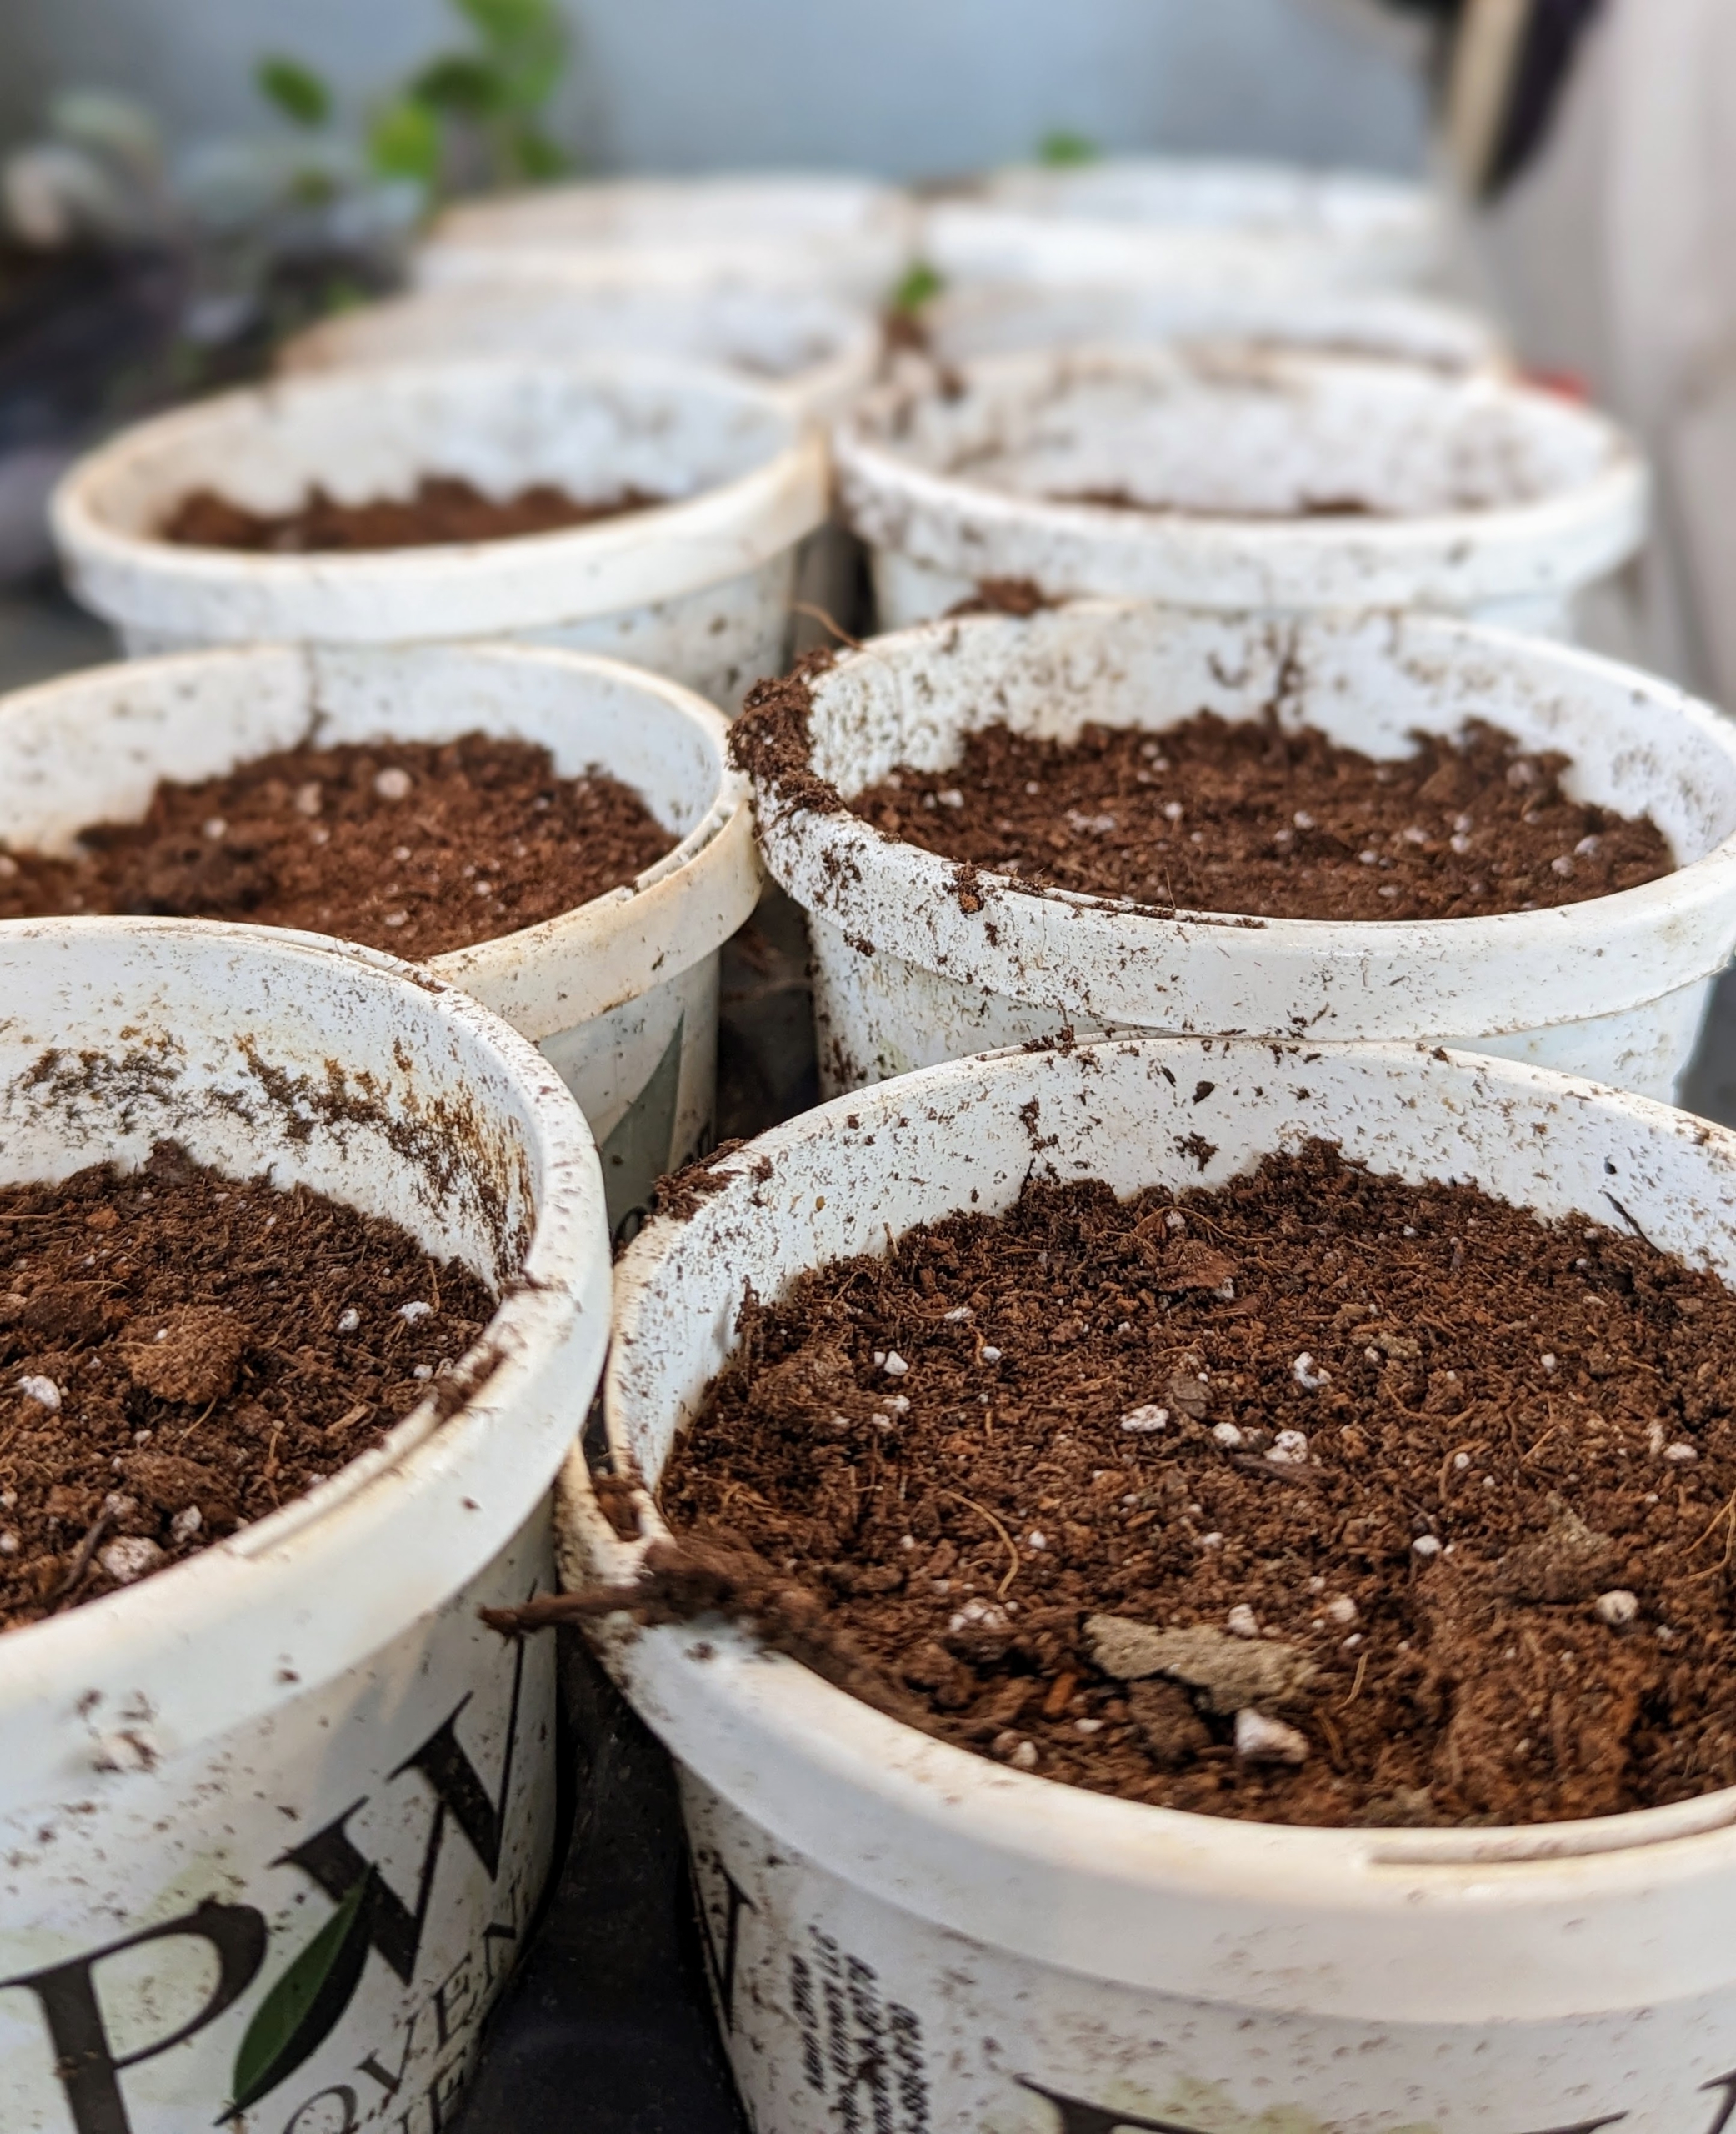
These pots are bigger and will accommodate the growing plants. Always save plastic pots for this purpose – they can be used time after time. The purpose of transplanting is to provide enough room – overcrowding can stress the tender, young sprouts. Ryan fills them all with soil mix.
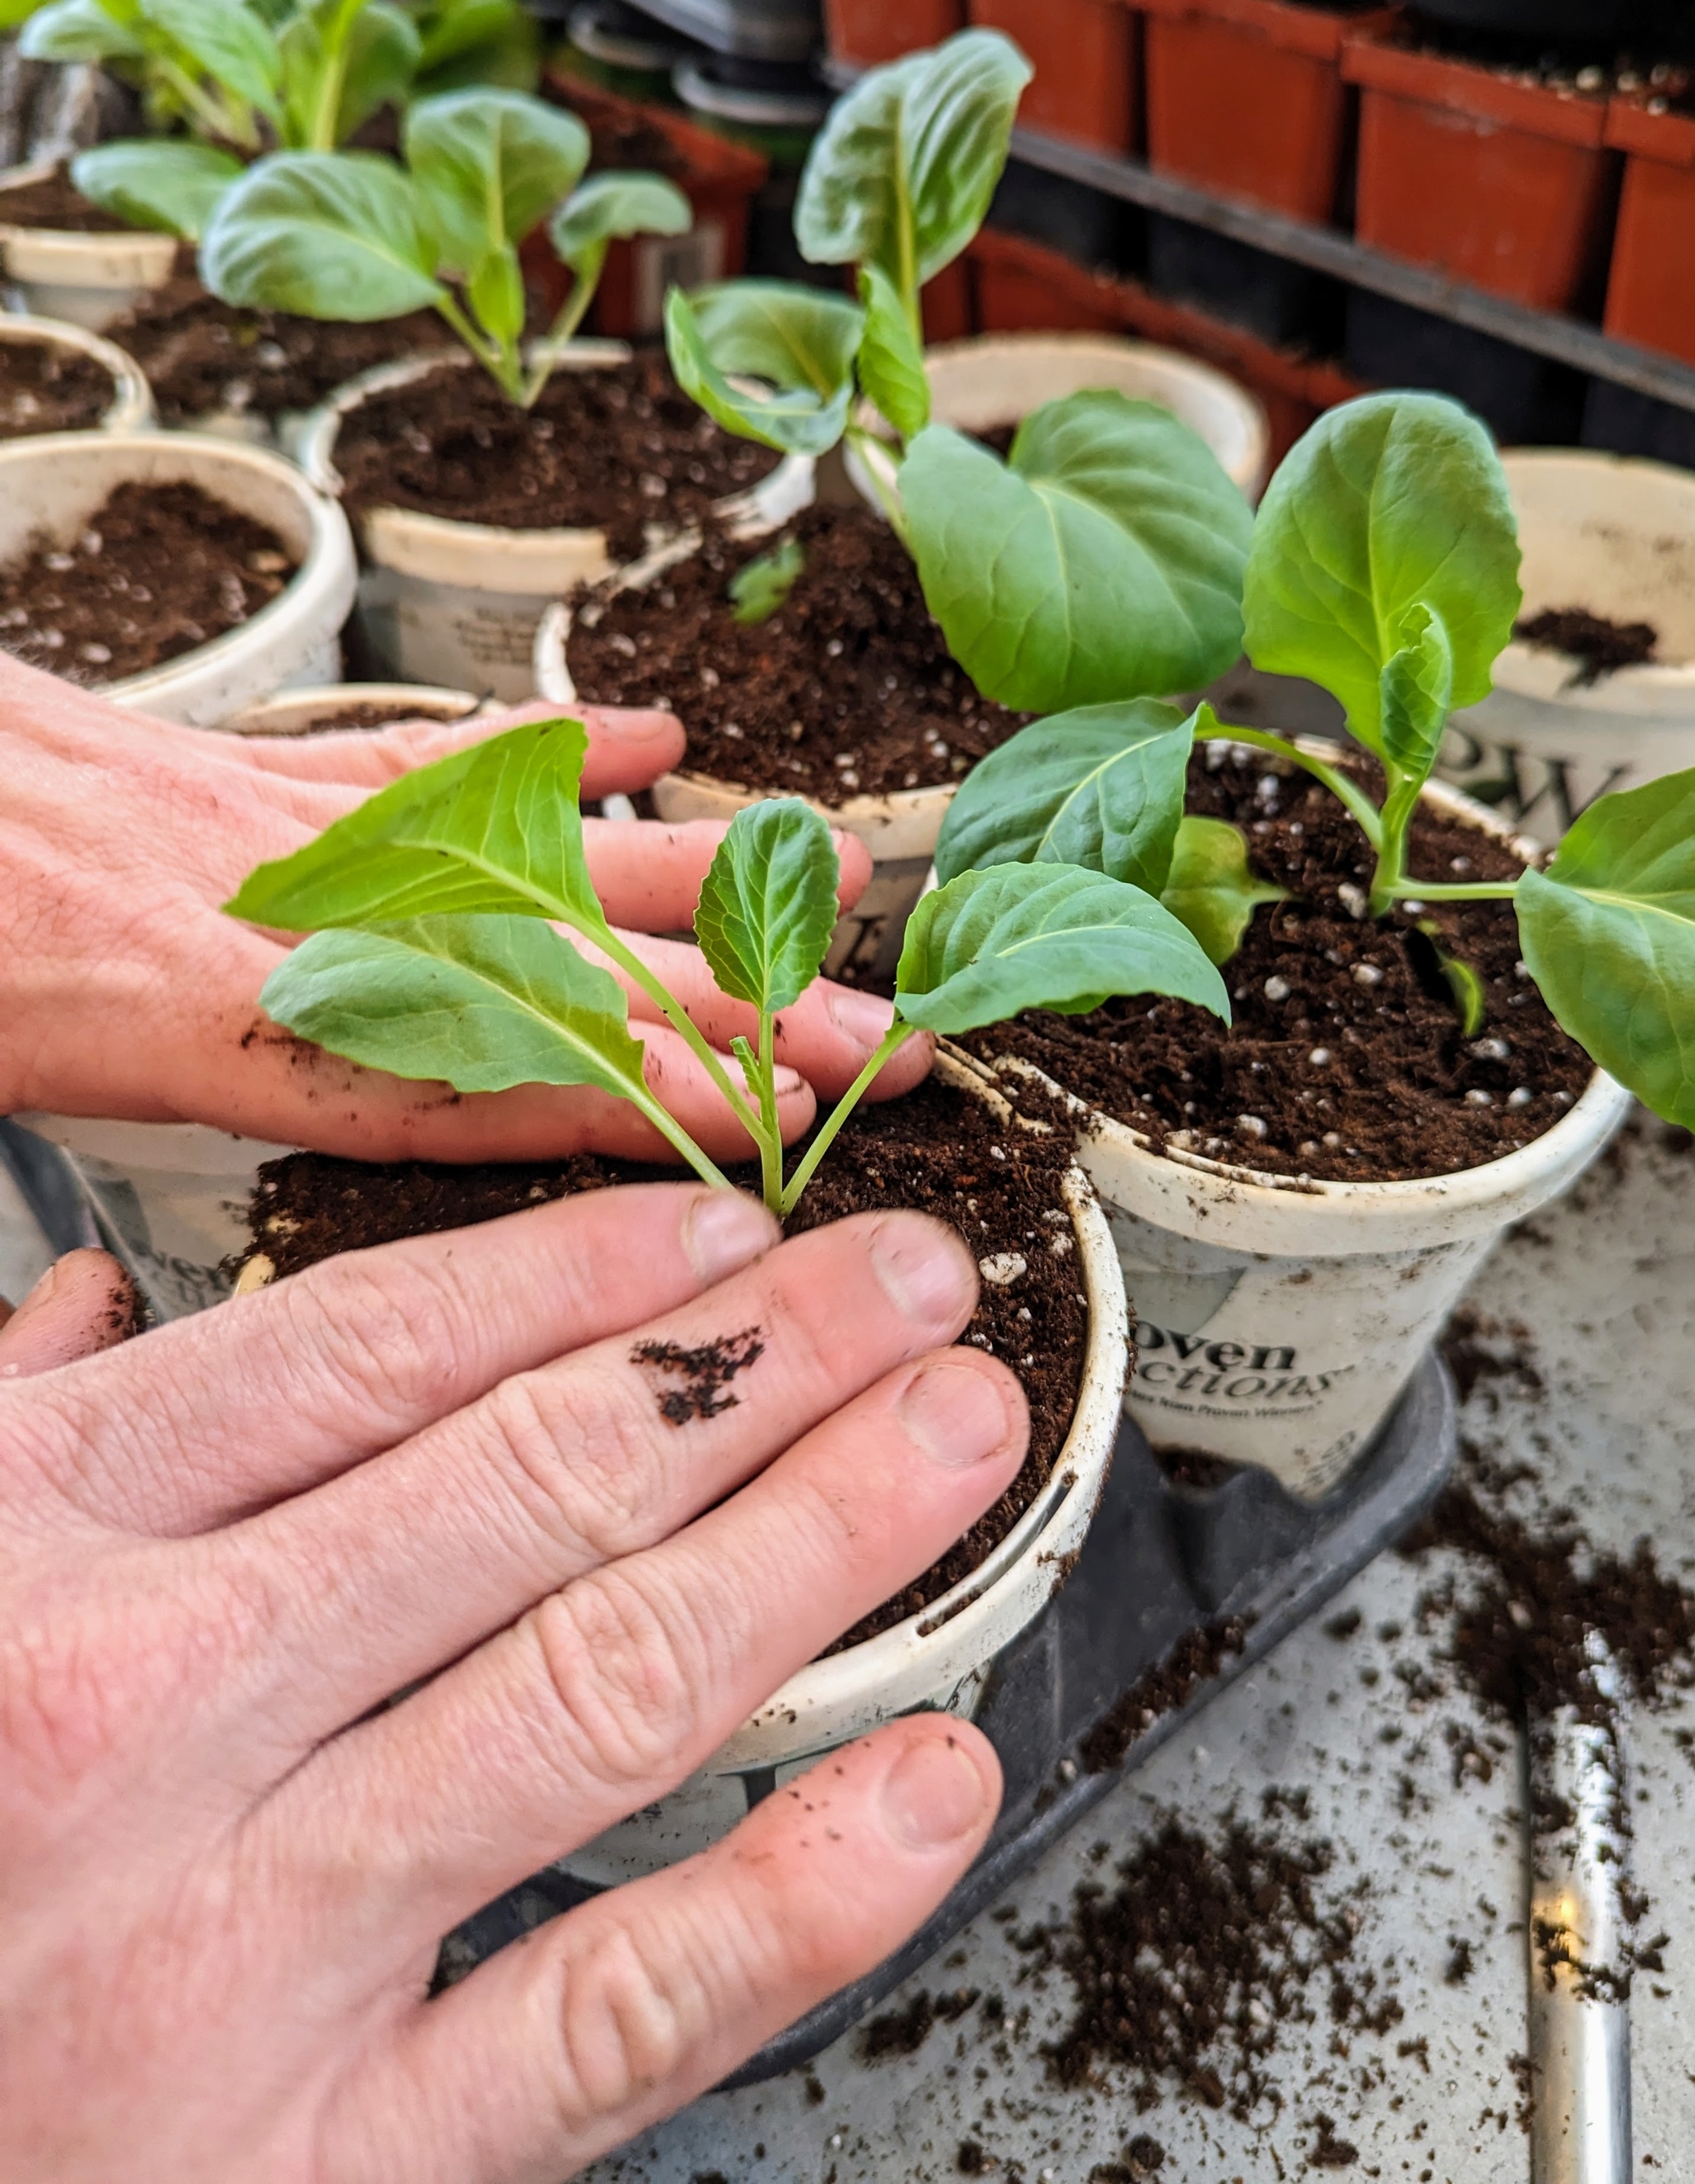
He places the seedling in the pot and gently firms up the surrounding soil. Avoid handling the seedling by its stems, which can bruise easily. Here, there is lots of room to mature and plants won’t have to compete for nutrients. These seedlings will remain in these pots until they are ready to be planted outdoors.
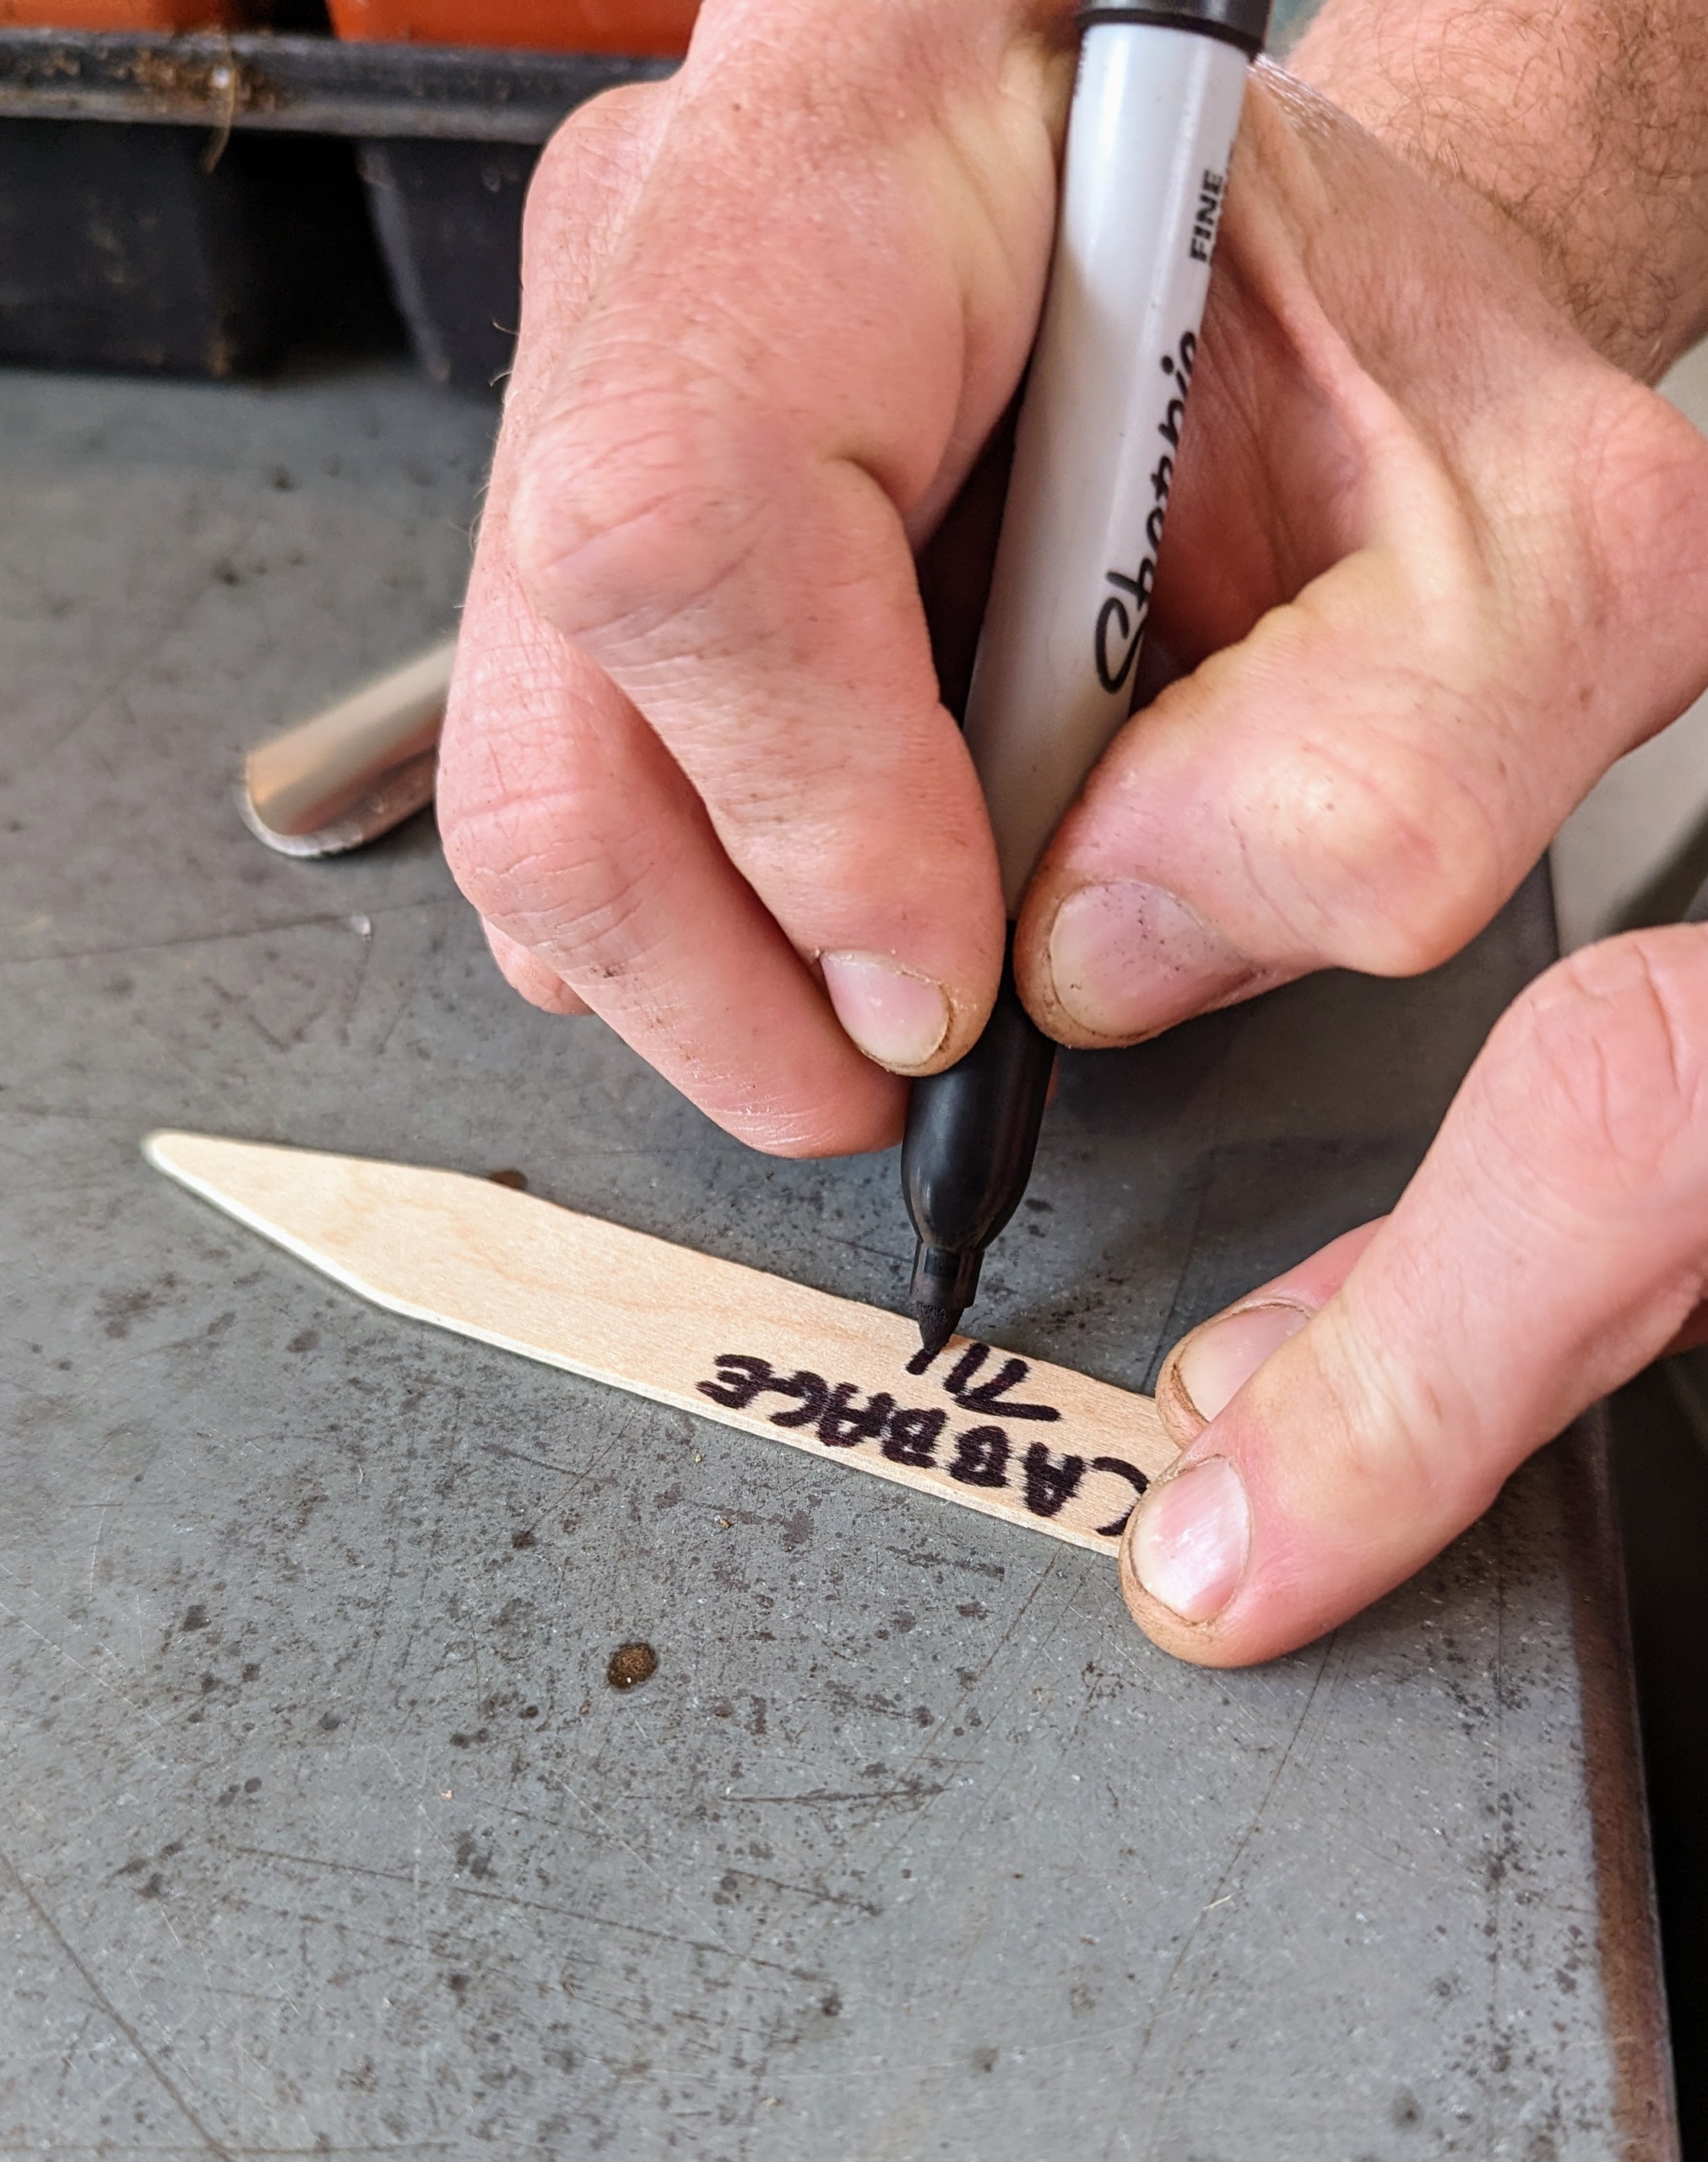
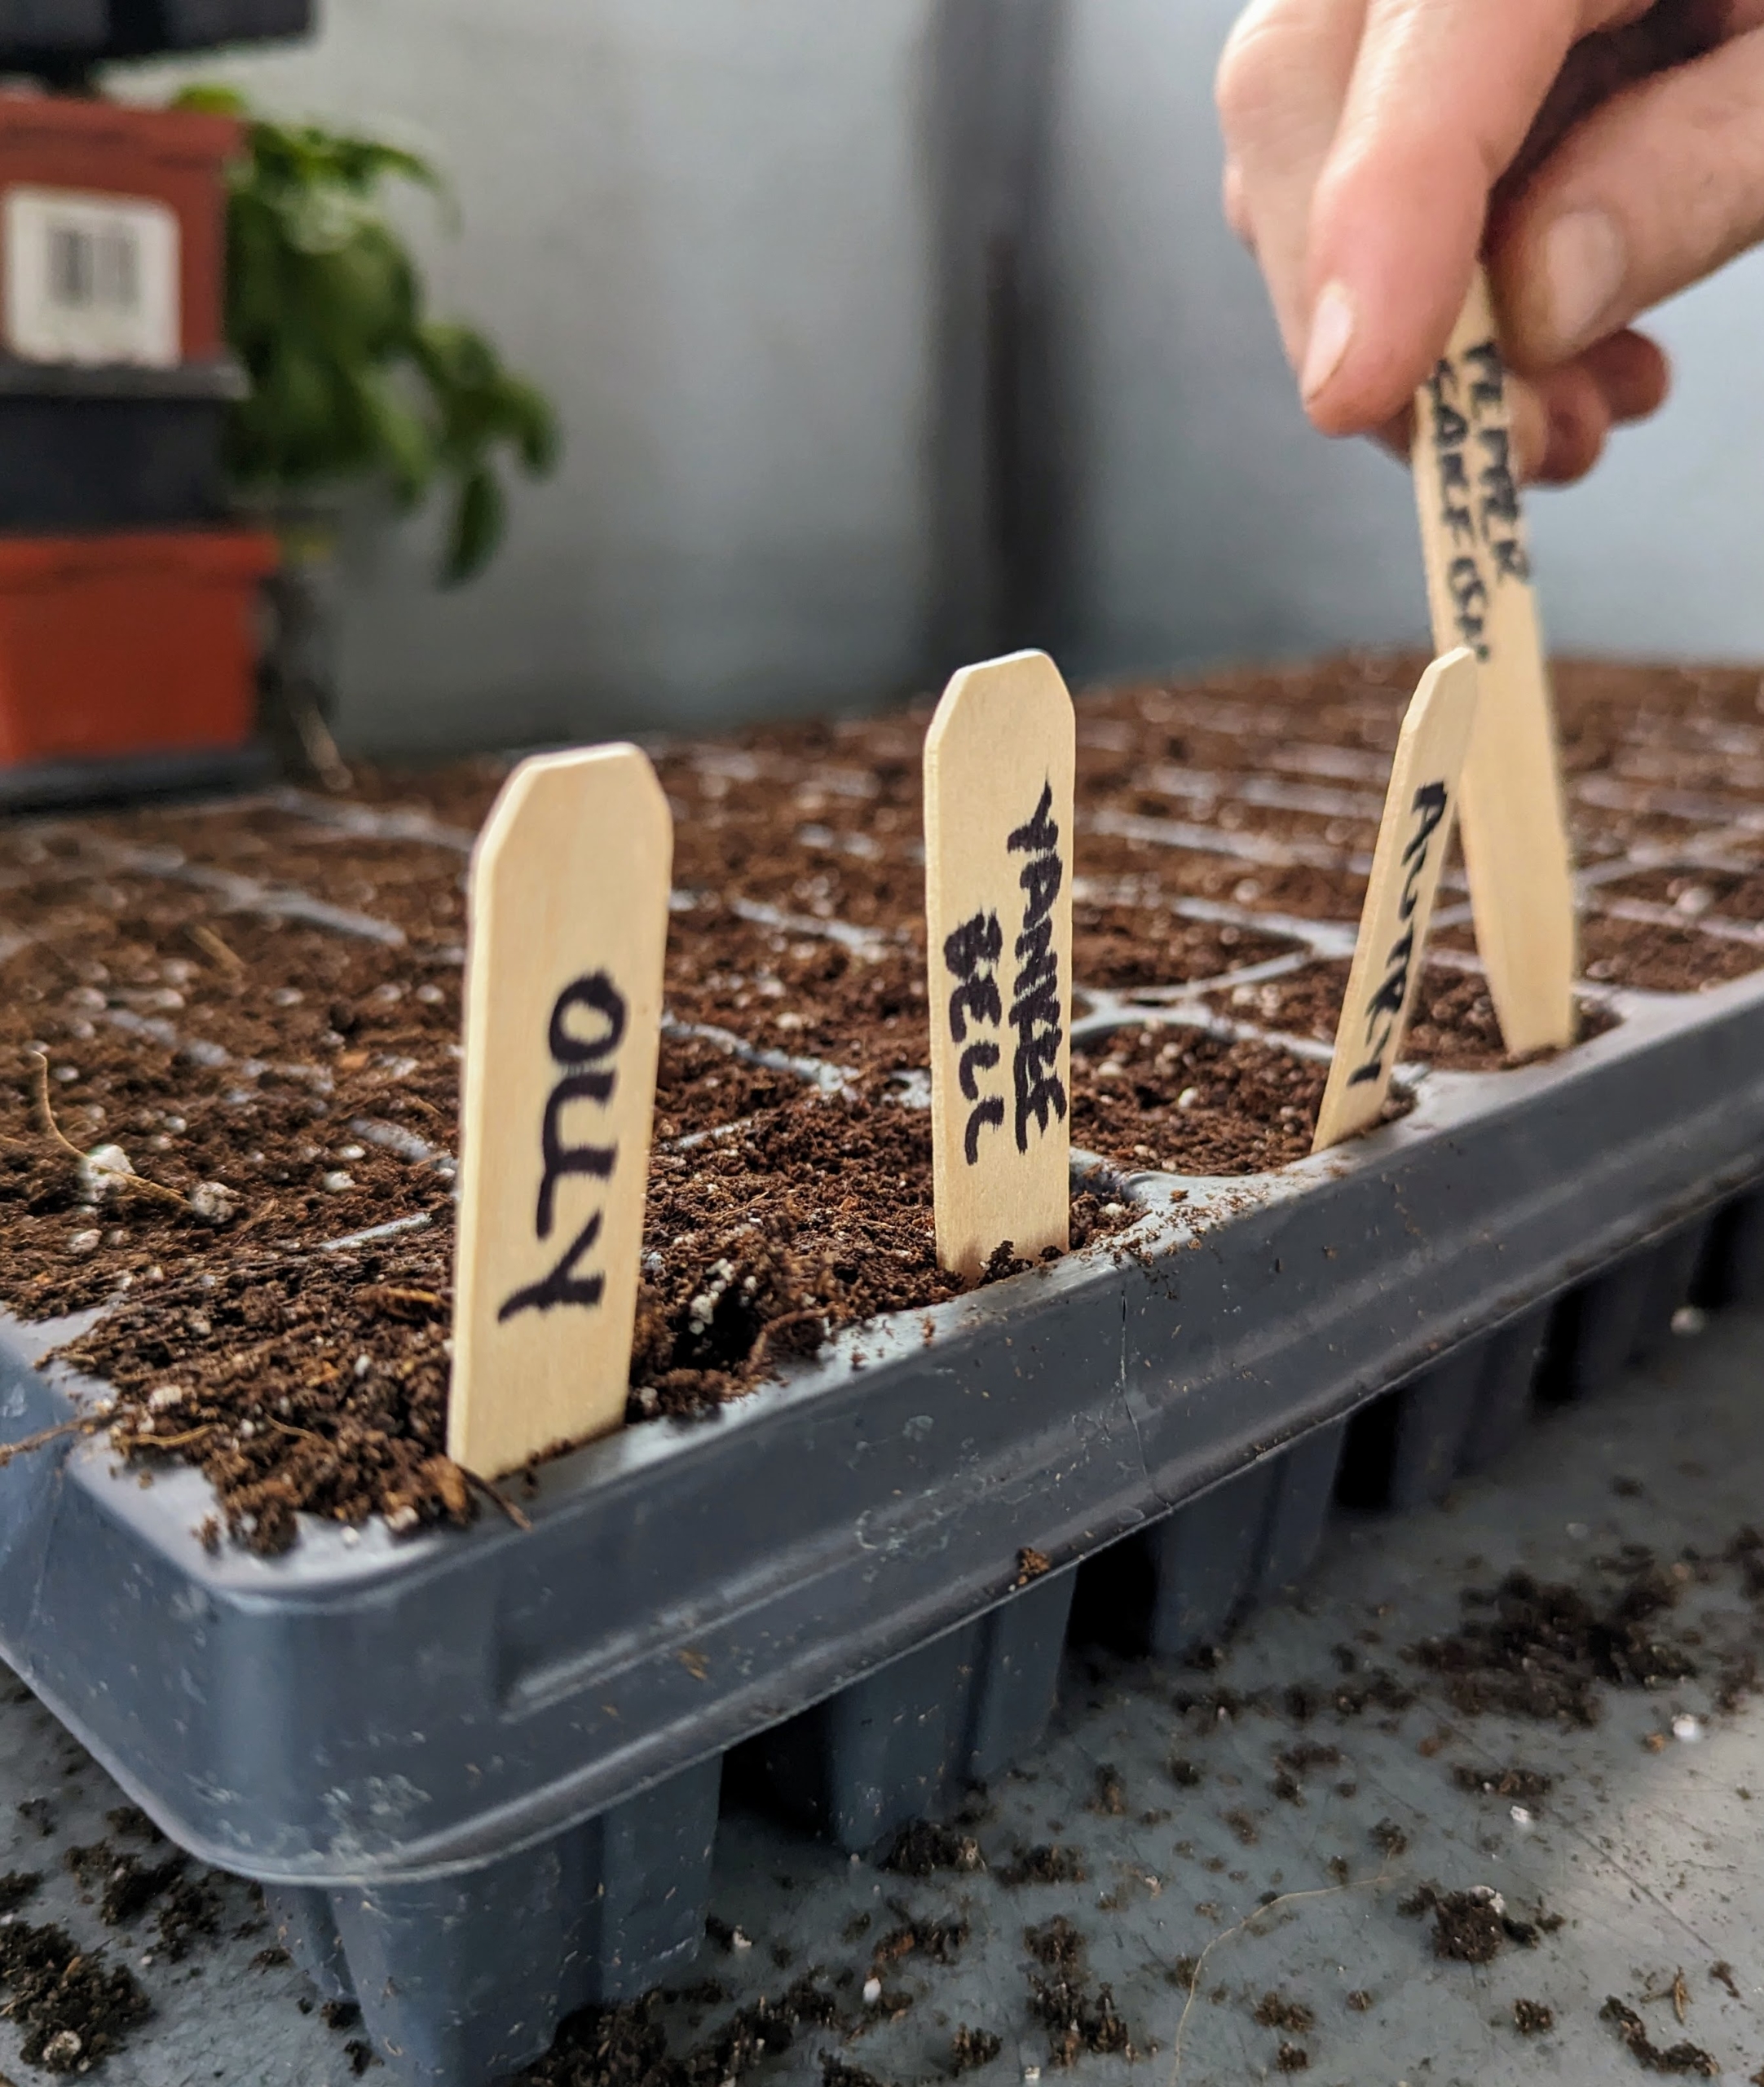
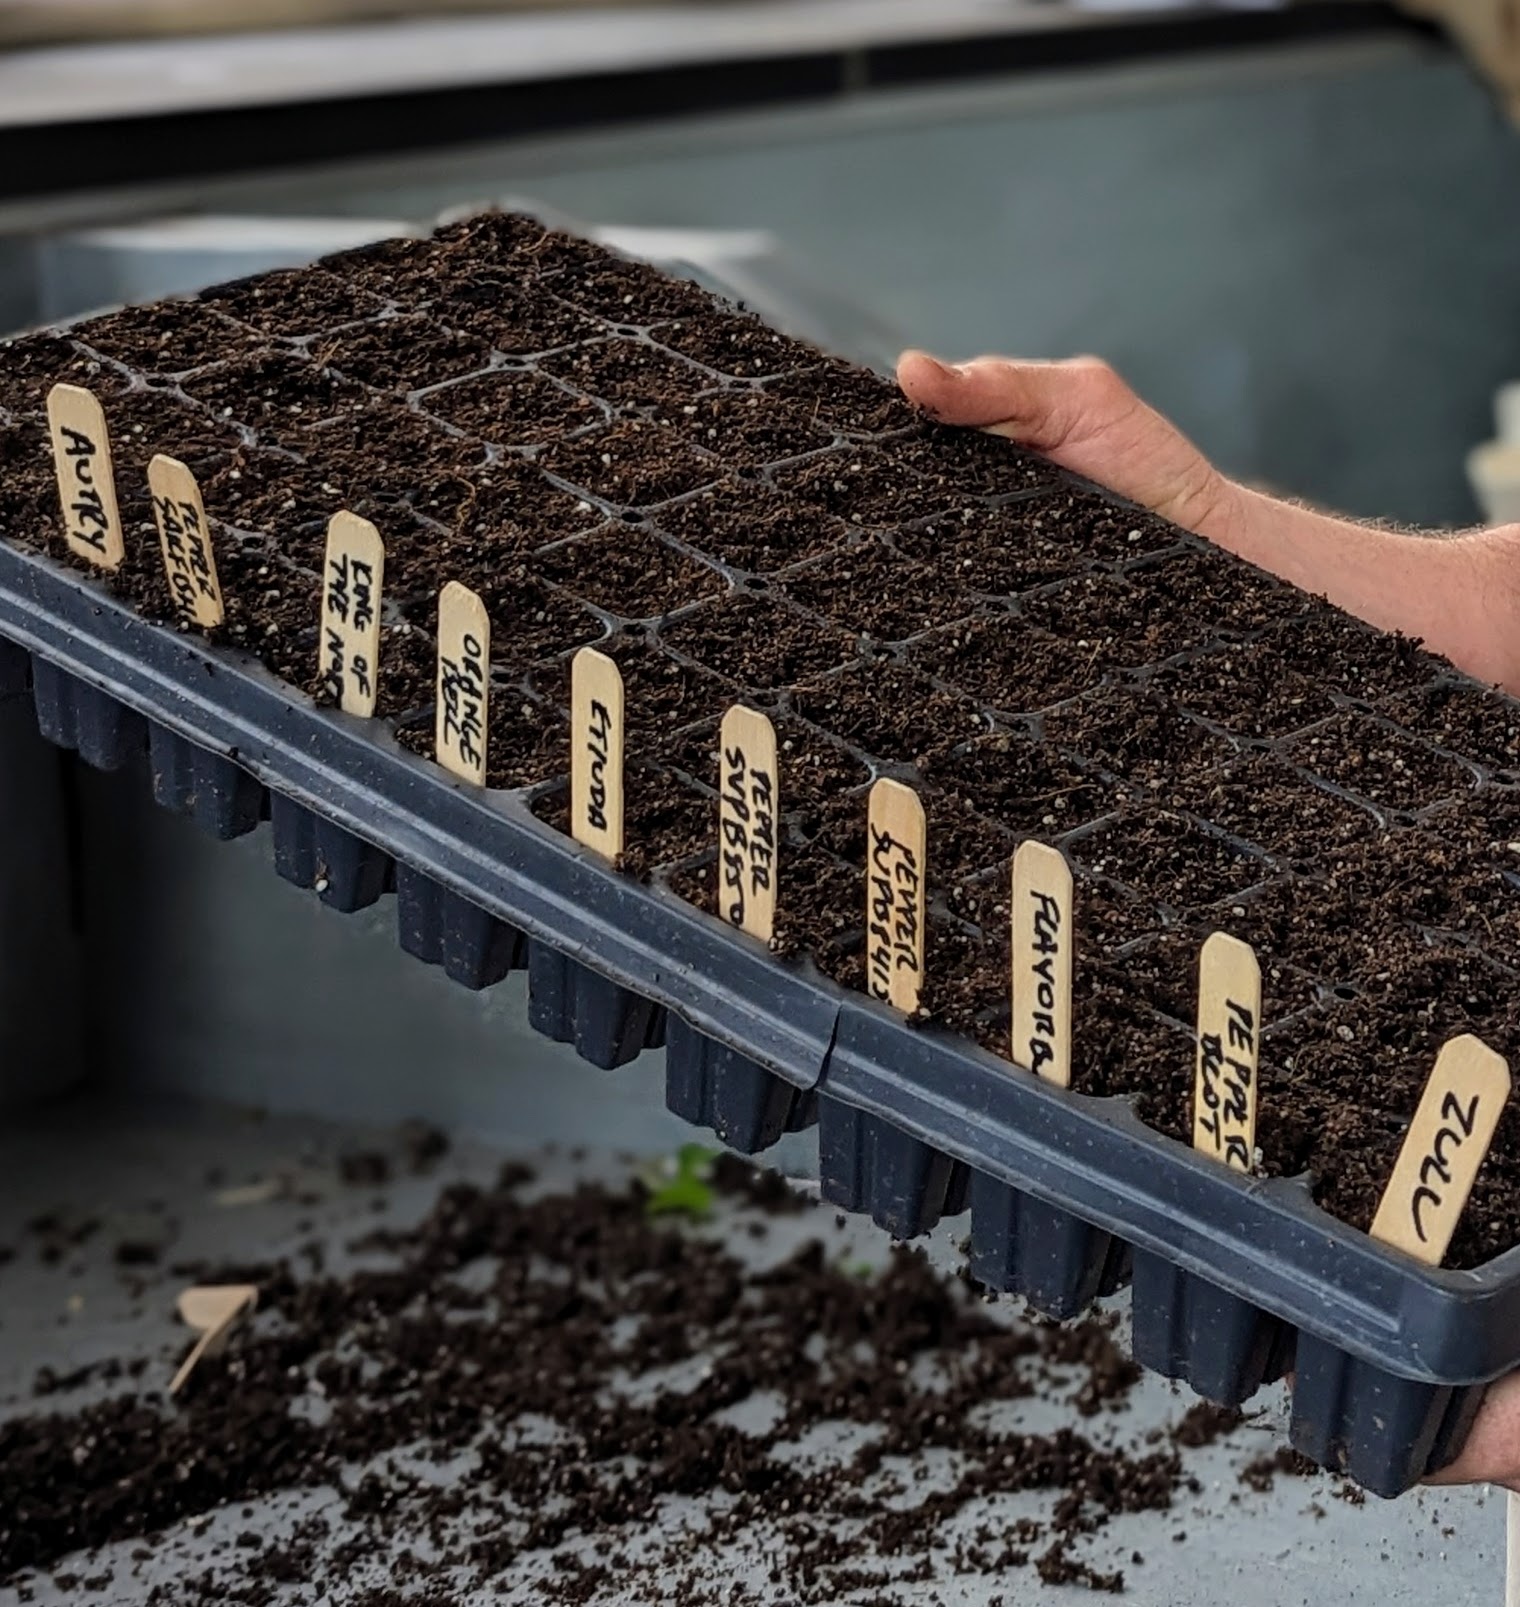
Markers are transferred from tray to pot or made again. Keeping plants well-identified through the seeding process helps Ryan keep track of what varieties do best here at my farm.
‘Tiara’ produces beautiful, hefty, round heads packed with mildly sweet leaves that are excellent for cooking or fresh use.
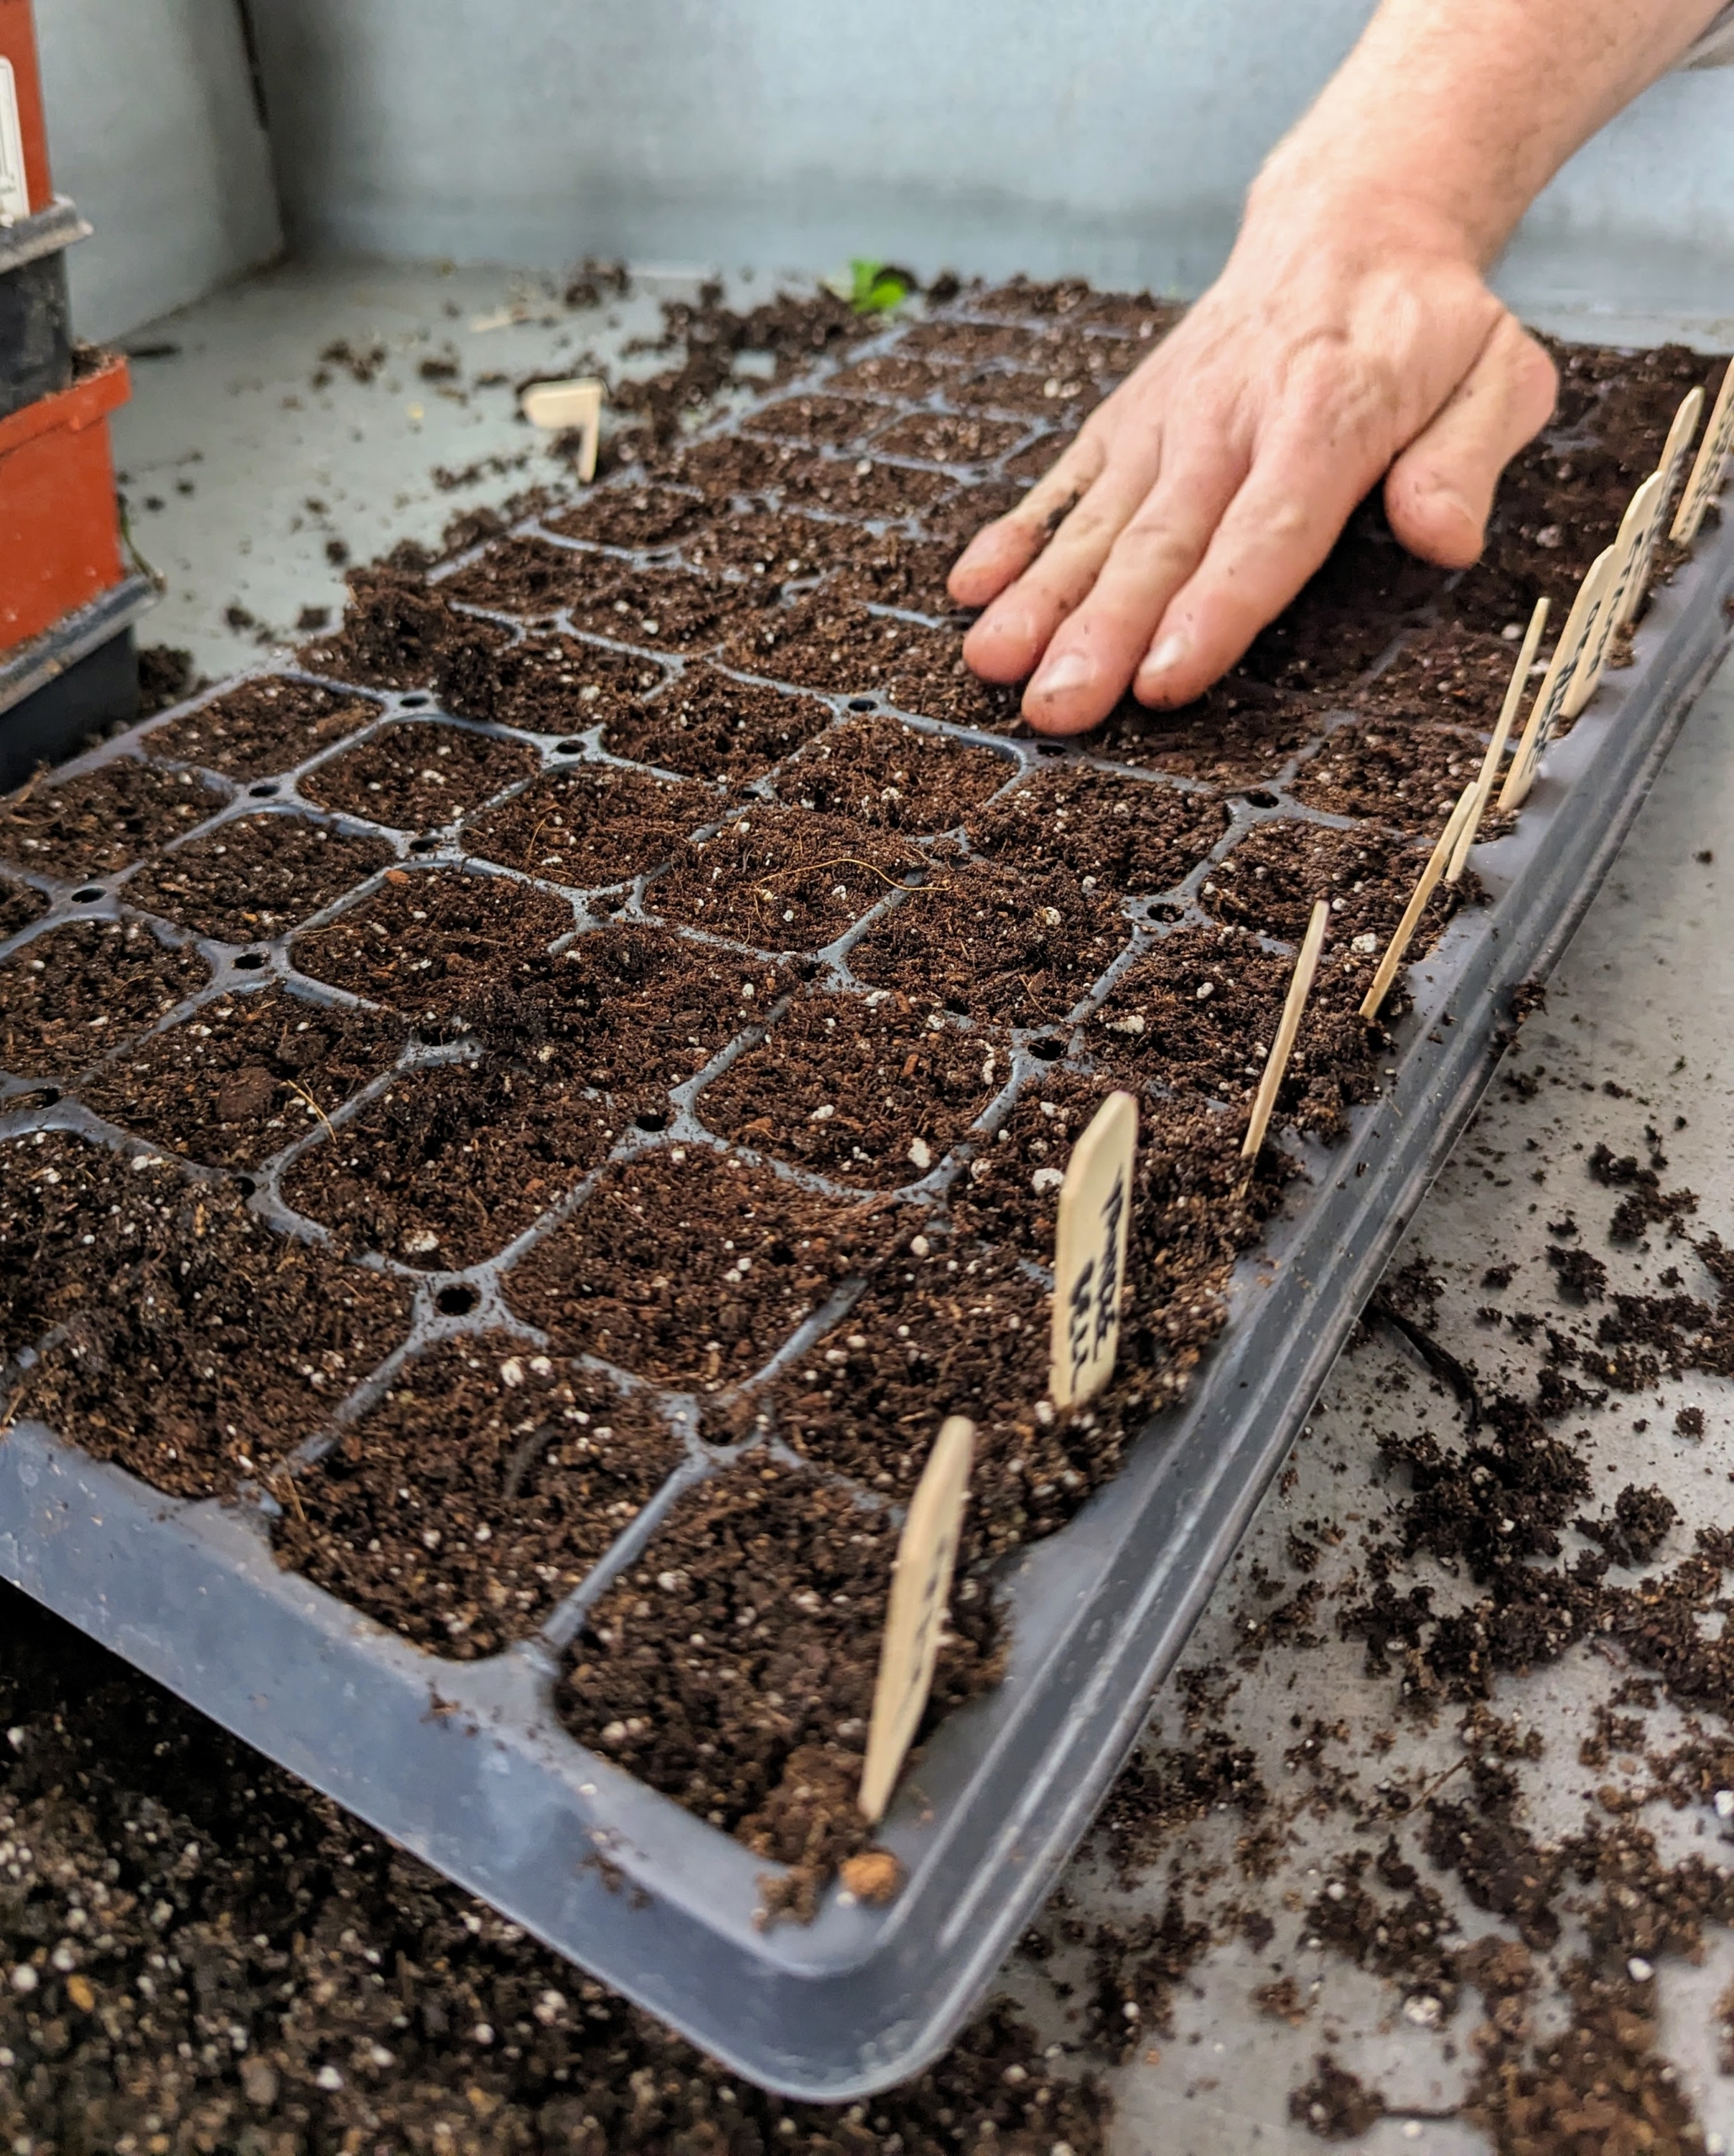
Seeds are planted at different times depending on their maturity durations. On this day, Ryan also starts some peppers.
He places markers in the tray to identify the varieties.
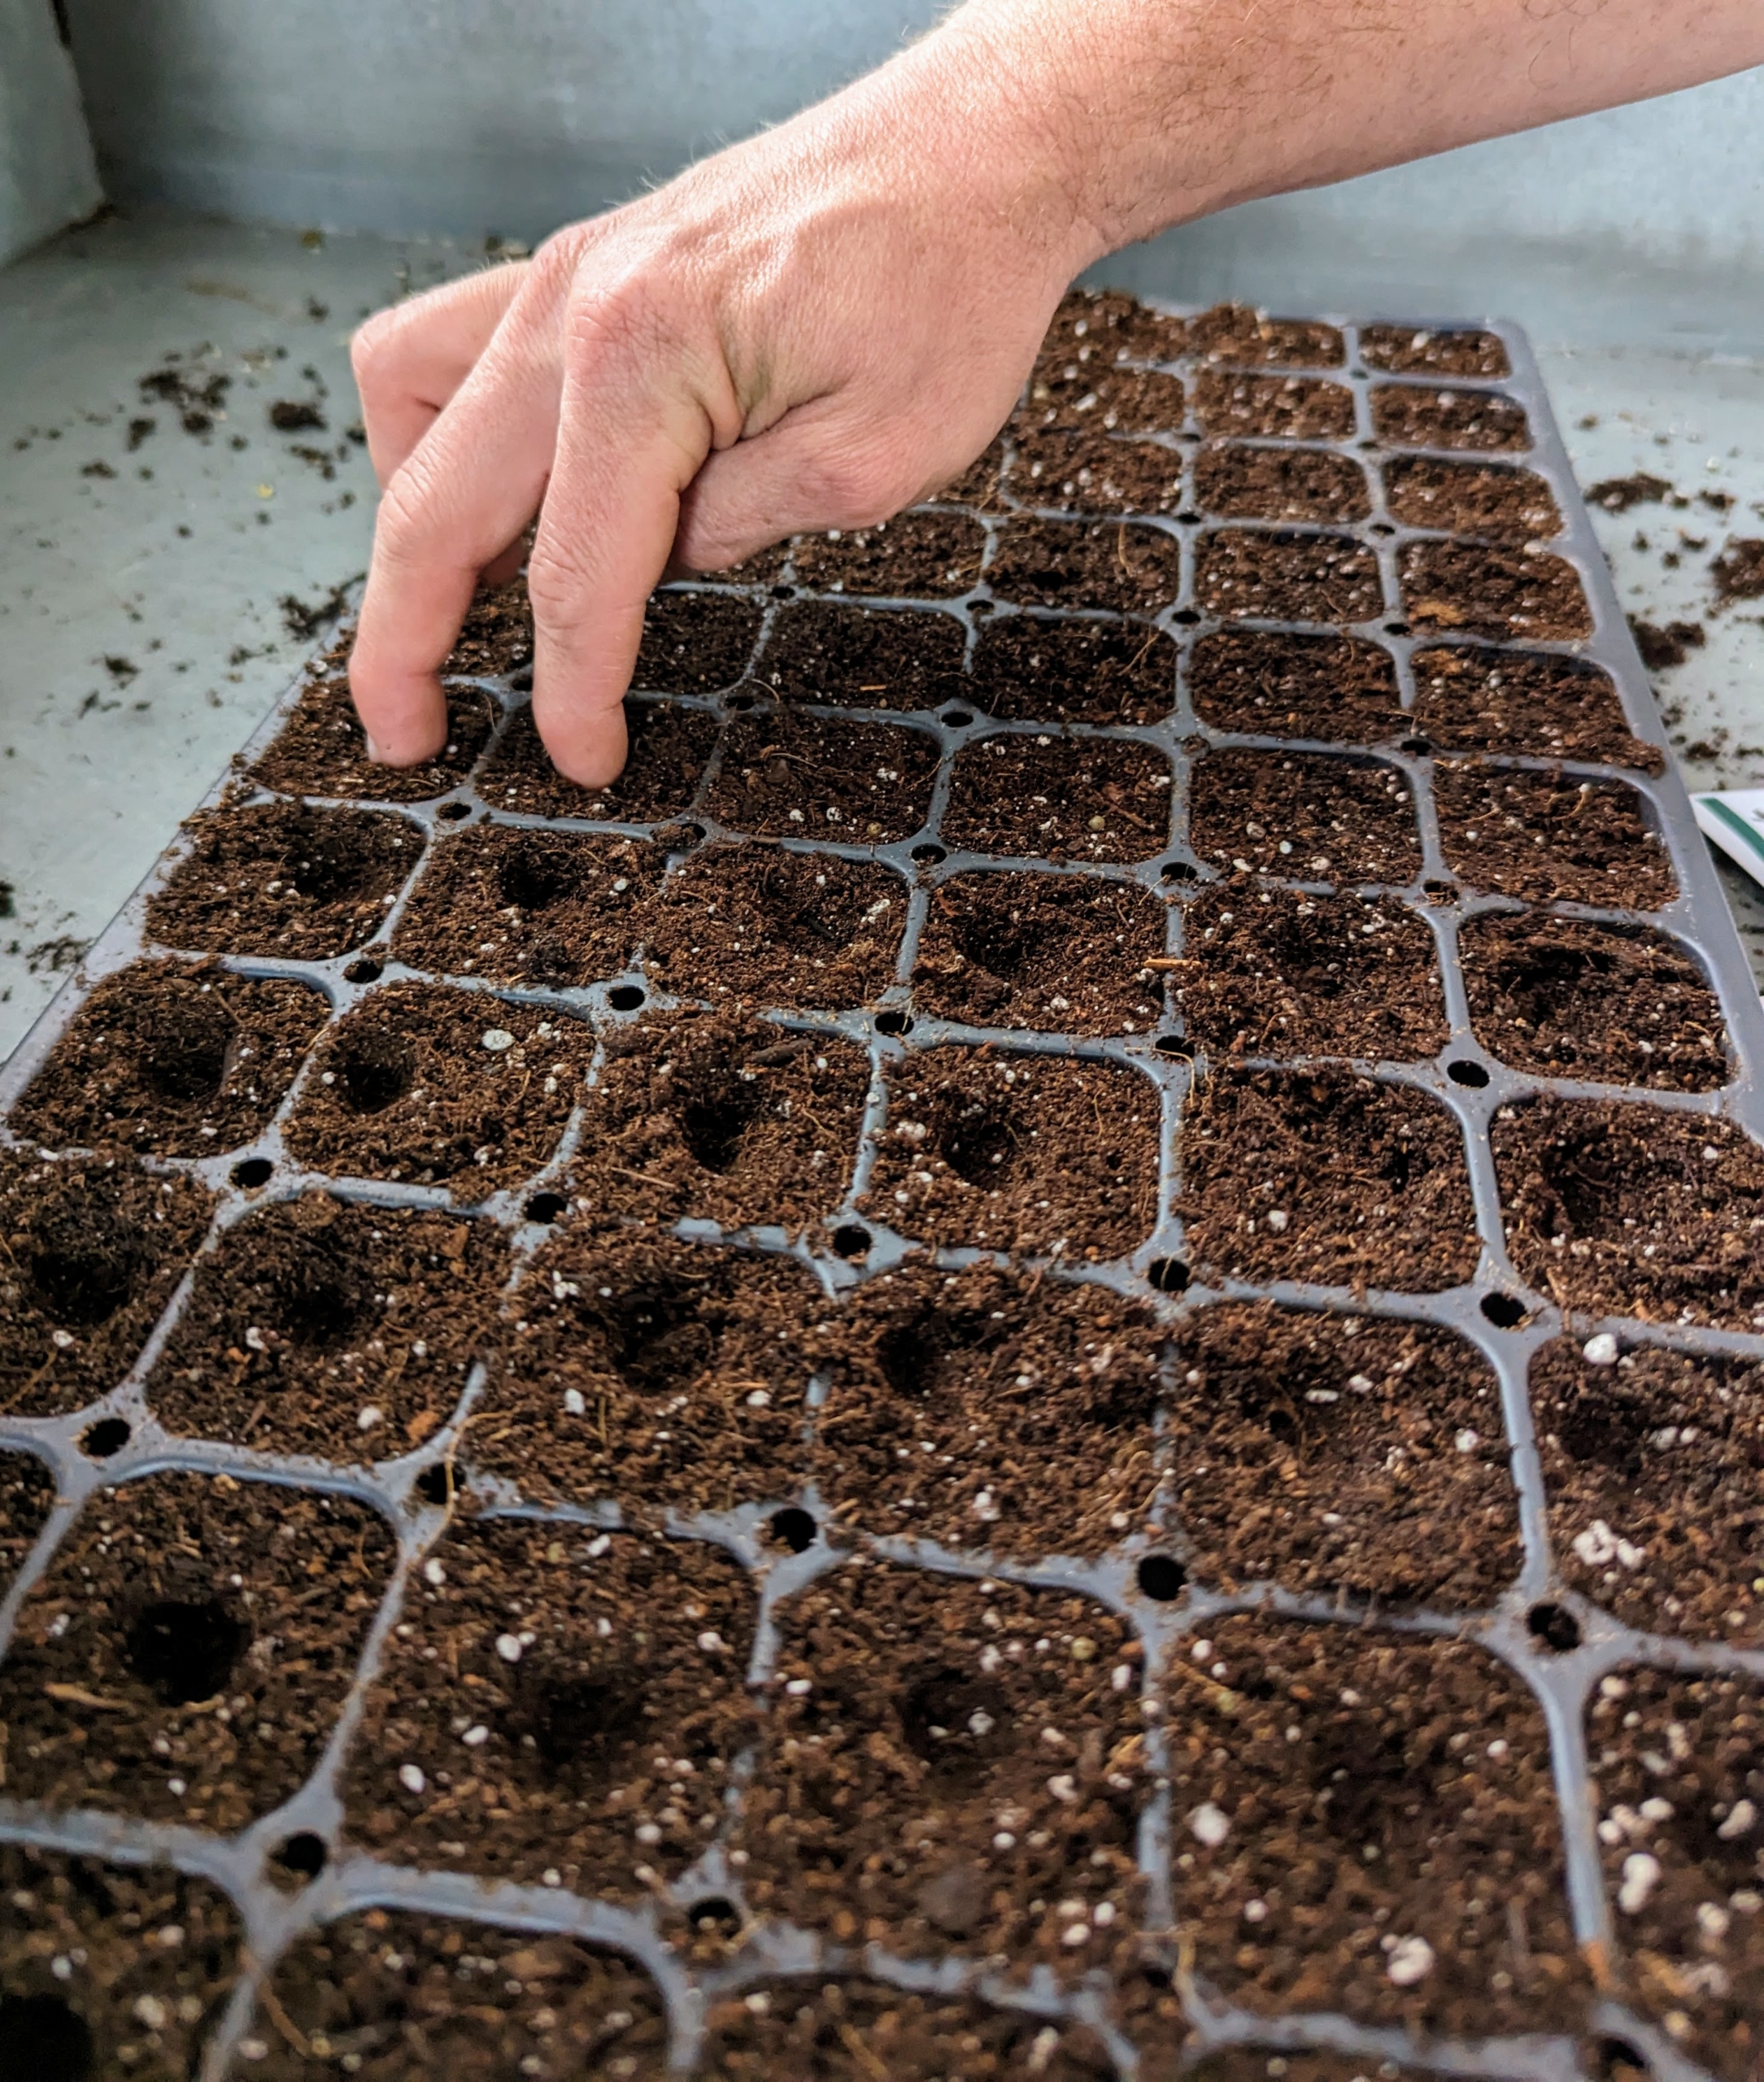
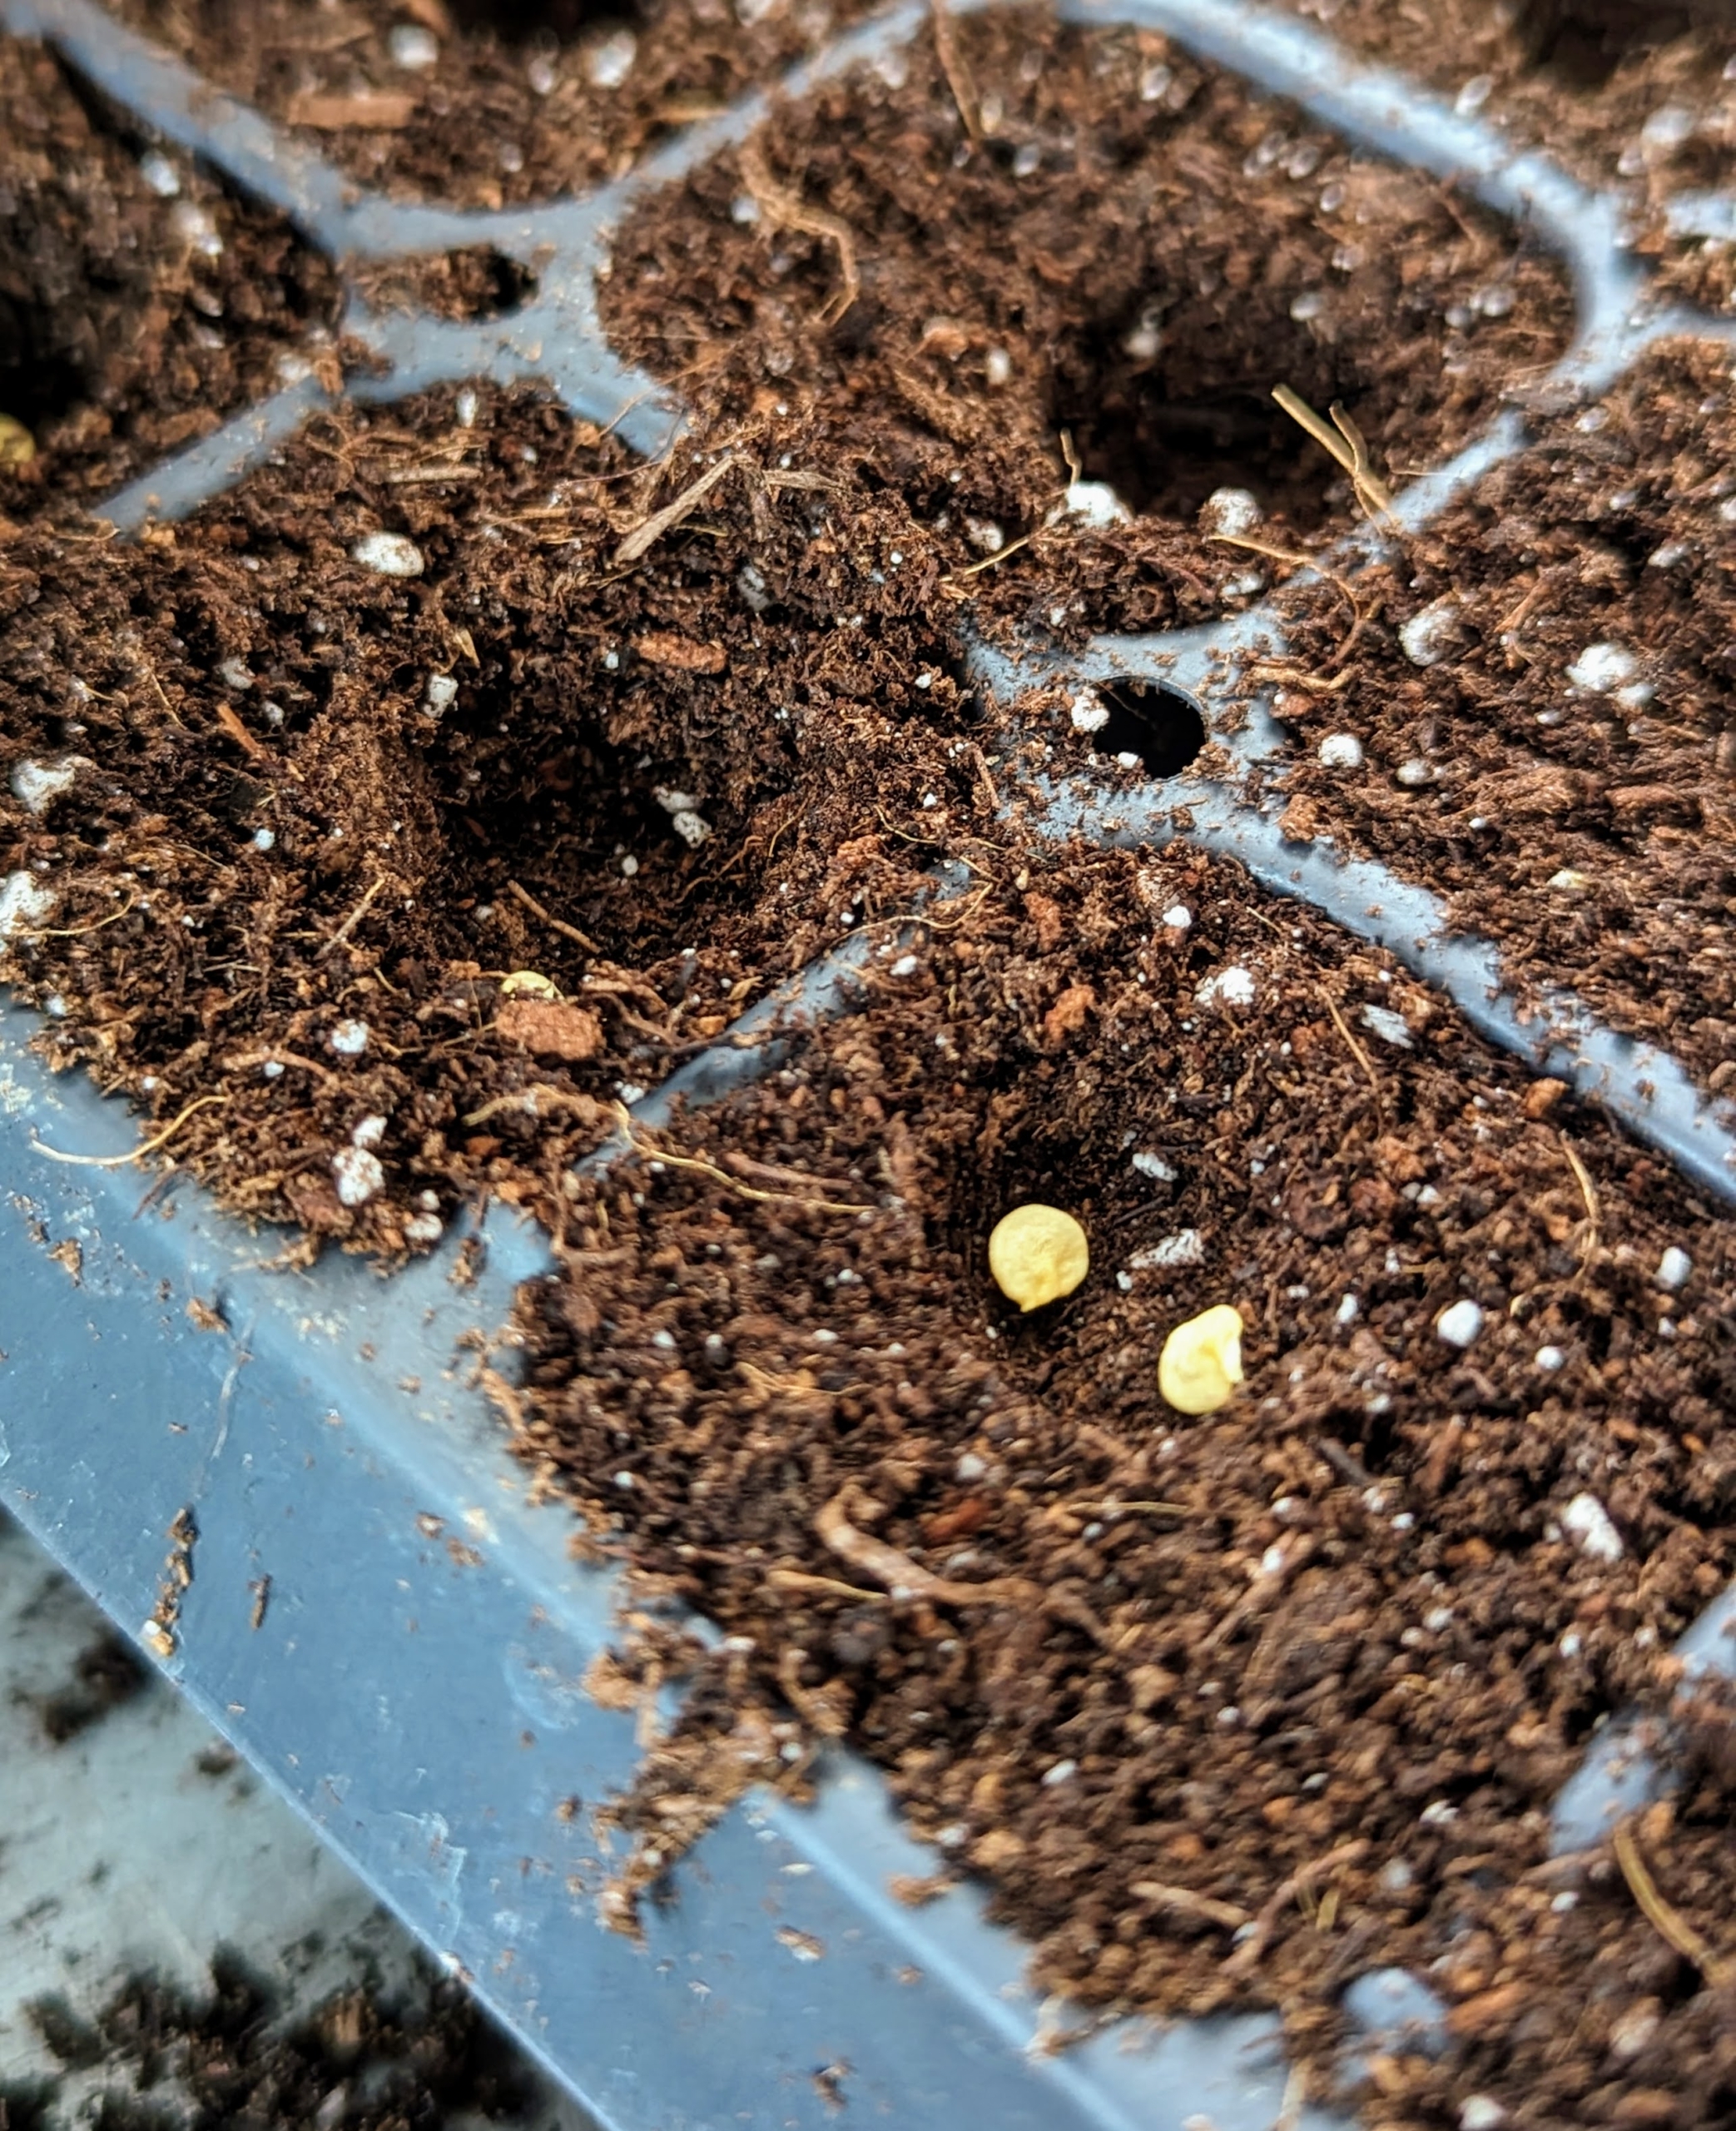
Using his fingers, Ryan makes a hole in each cell, and then drops seeds into each one.
Seeds will germinate in seven to 10 days in optimal temperature and lighting environments, which is 50 to 85 degrees Fahrenheit under bright light. Then they will get selectively thinned in the same way the cabbage was done.
Once the entire tray is seeded, the cells are covered up with another layer of soil mix.
And then the tray is placed in our Urban Cultivator growing system – it has water, temperature and humidity all set-up in a refrigerator like unit. What seeds are you starting?
What DIY tasks are you taking on this weekend? Quick, easy-to-do projects around the garden can totally transform a space.
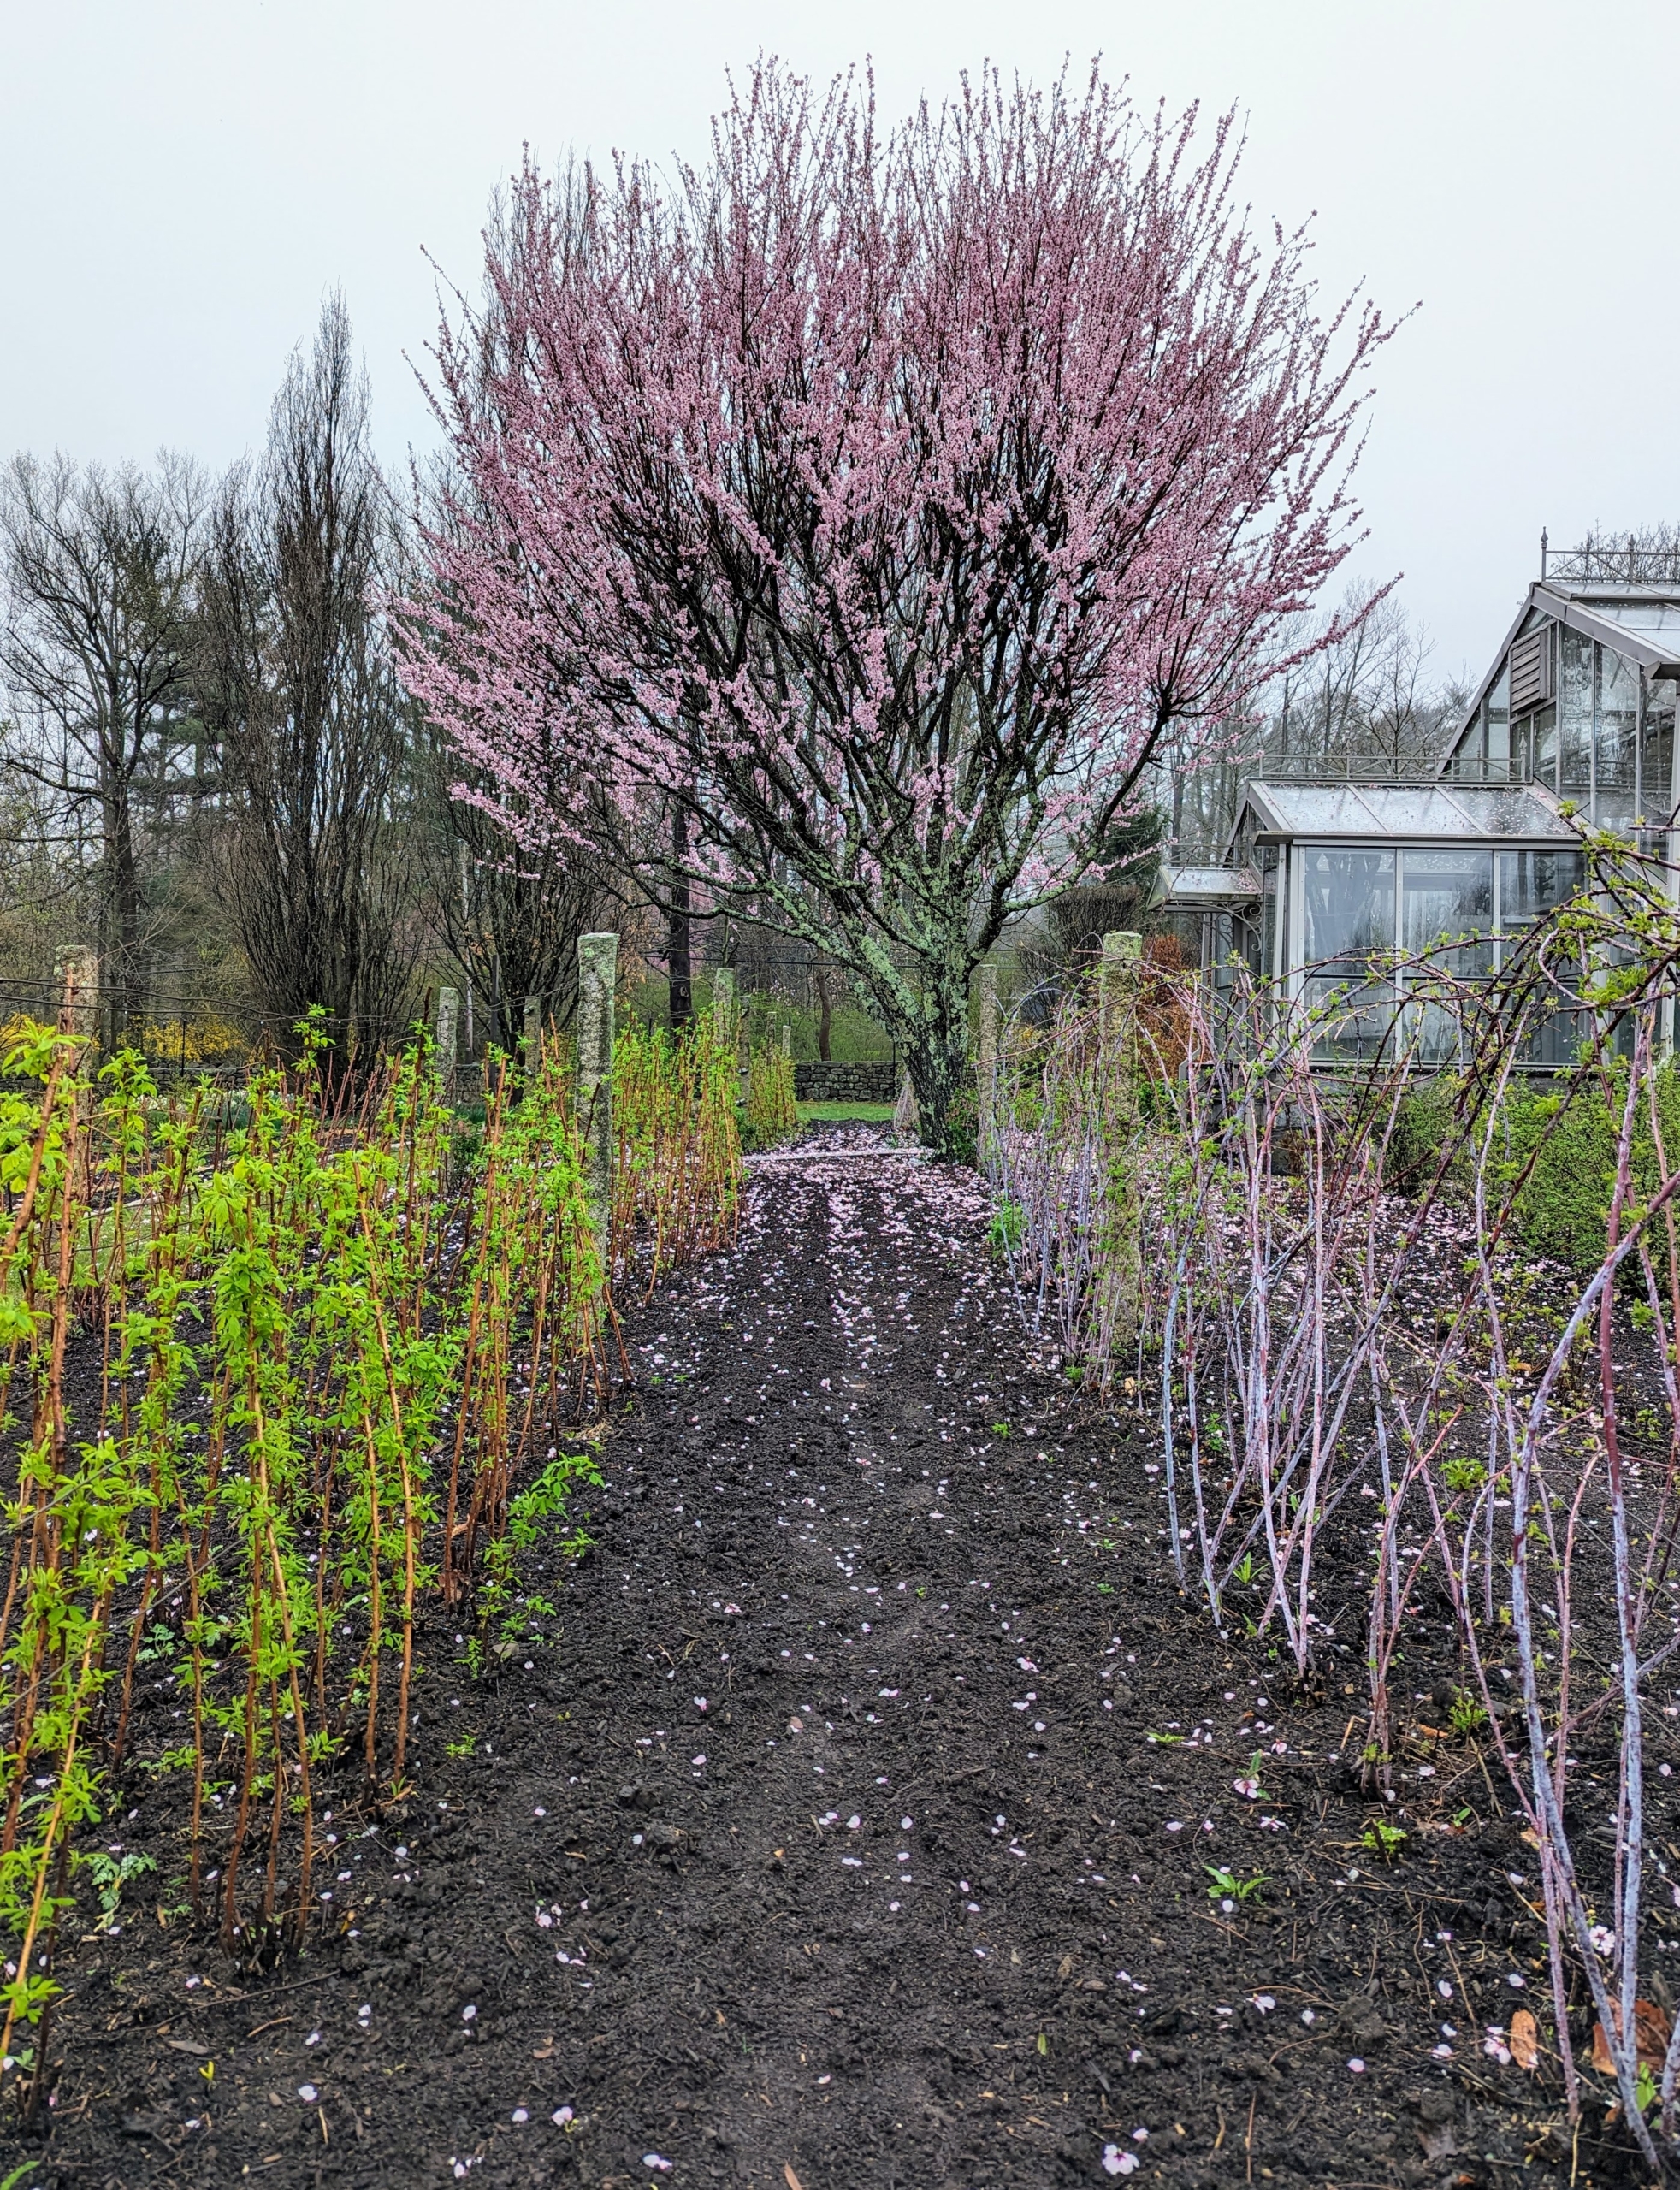
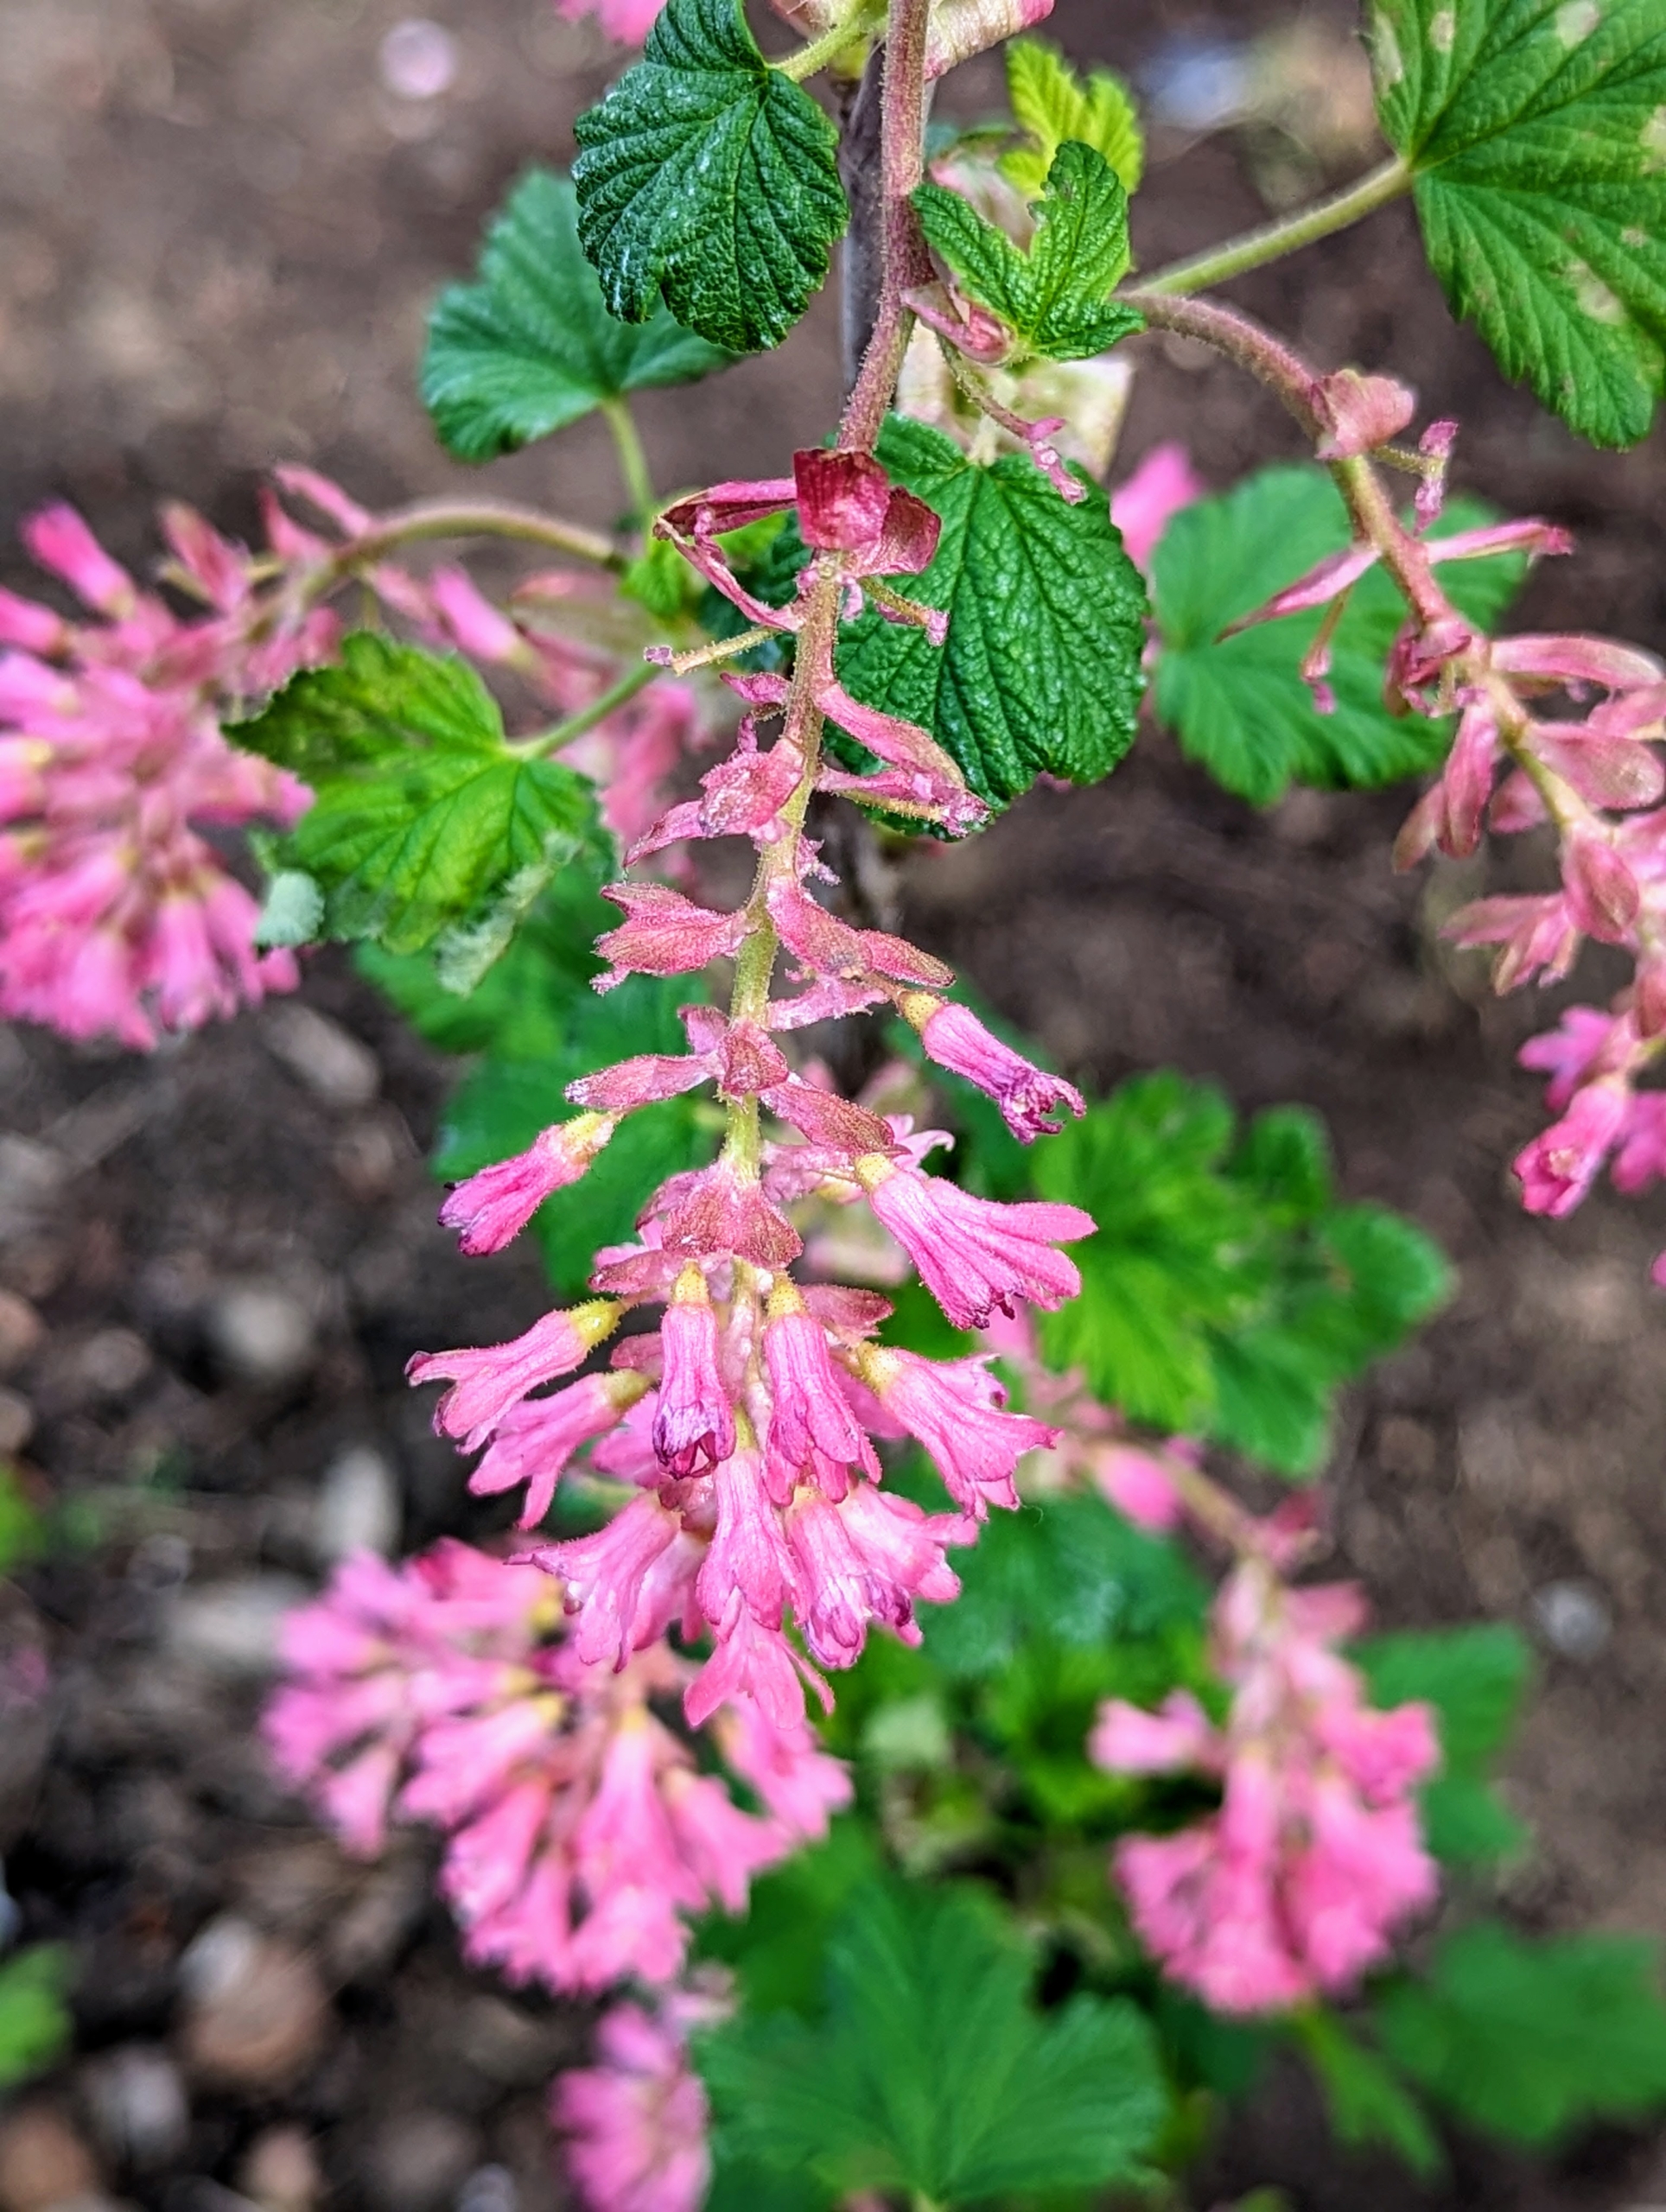
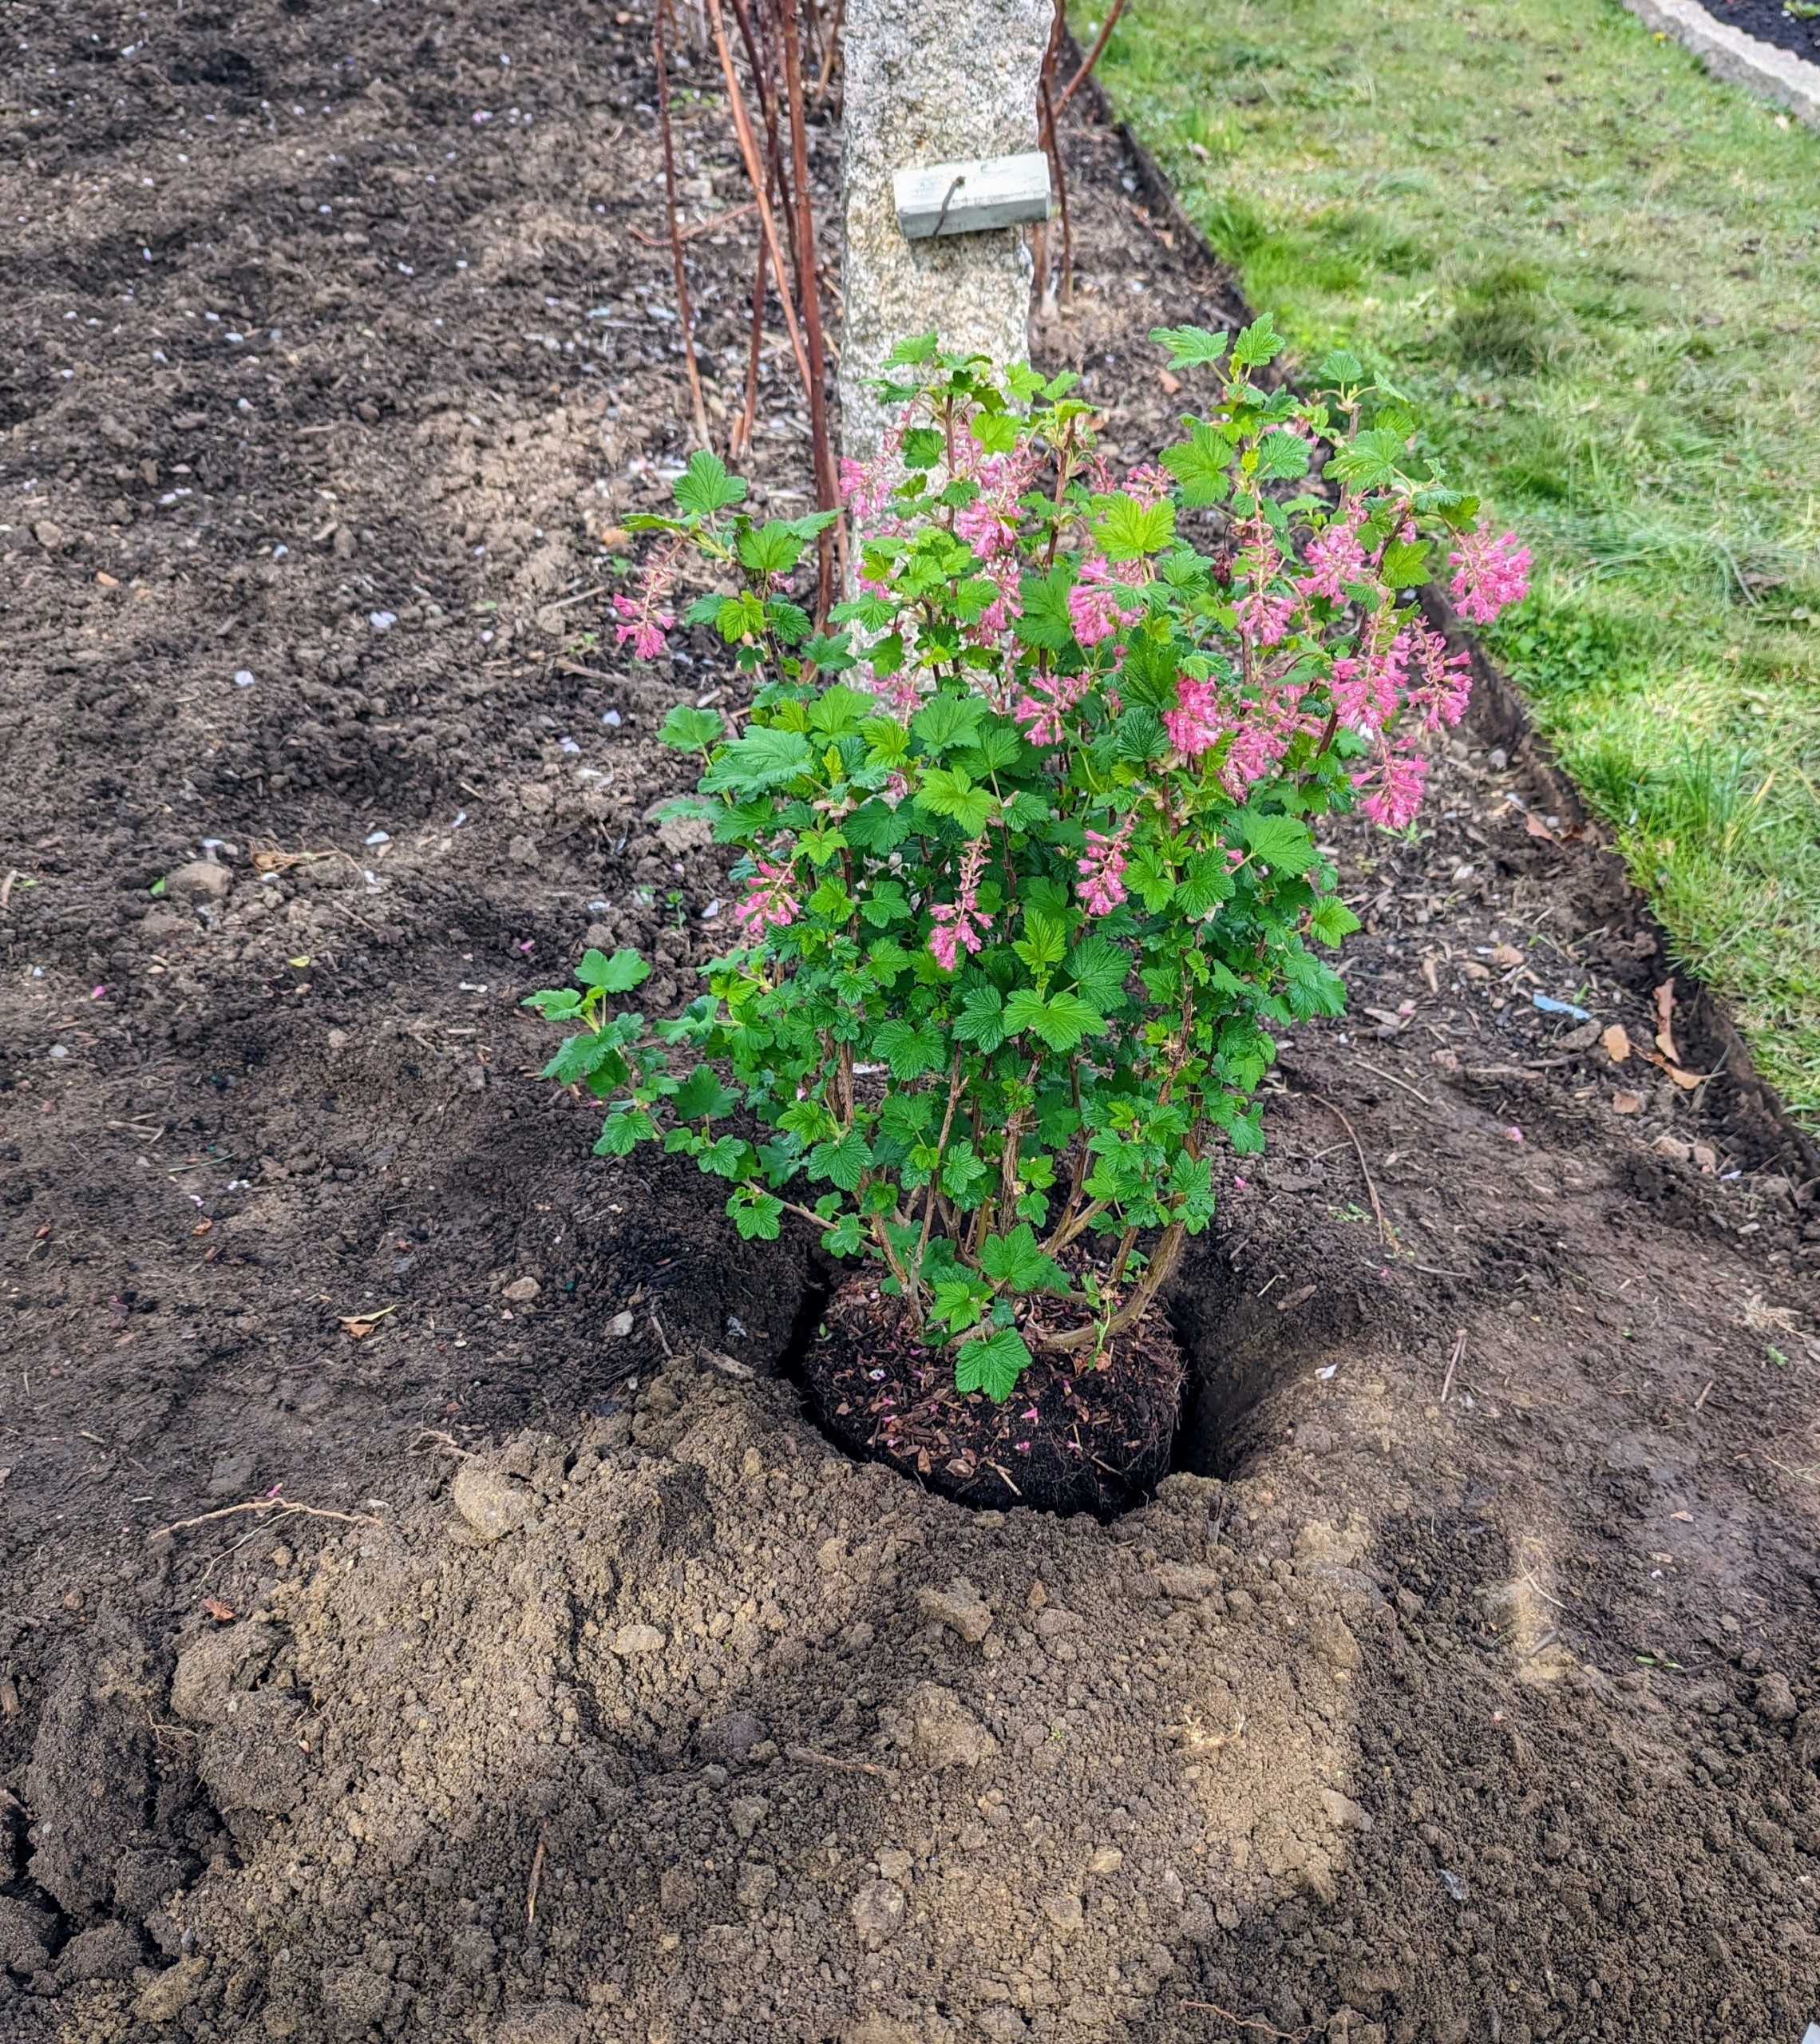
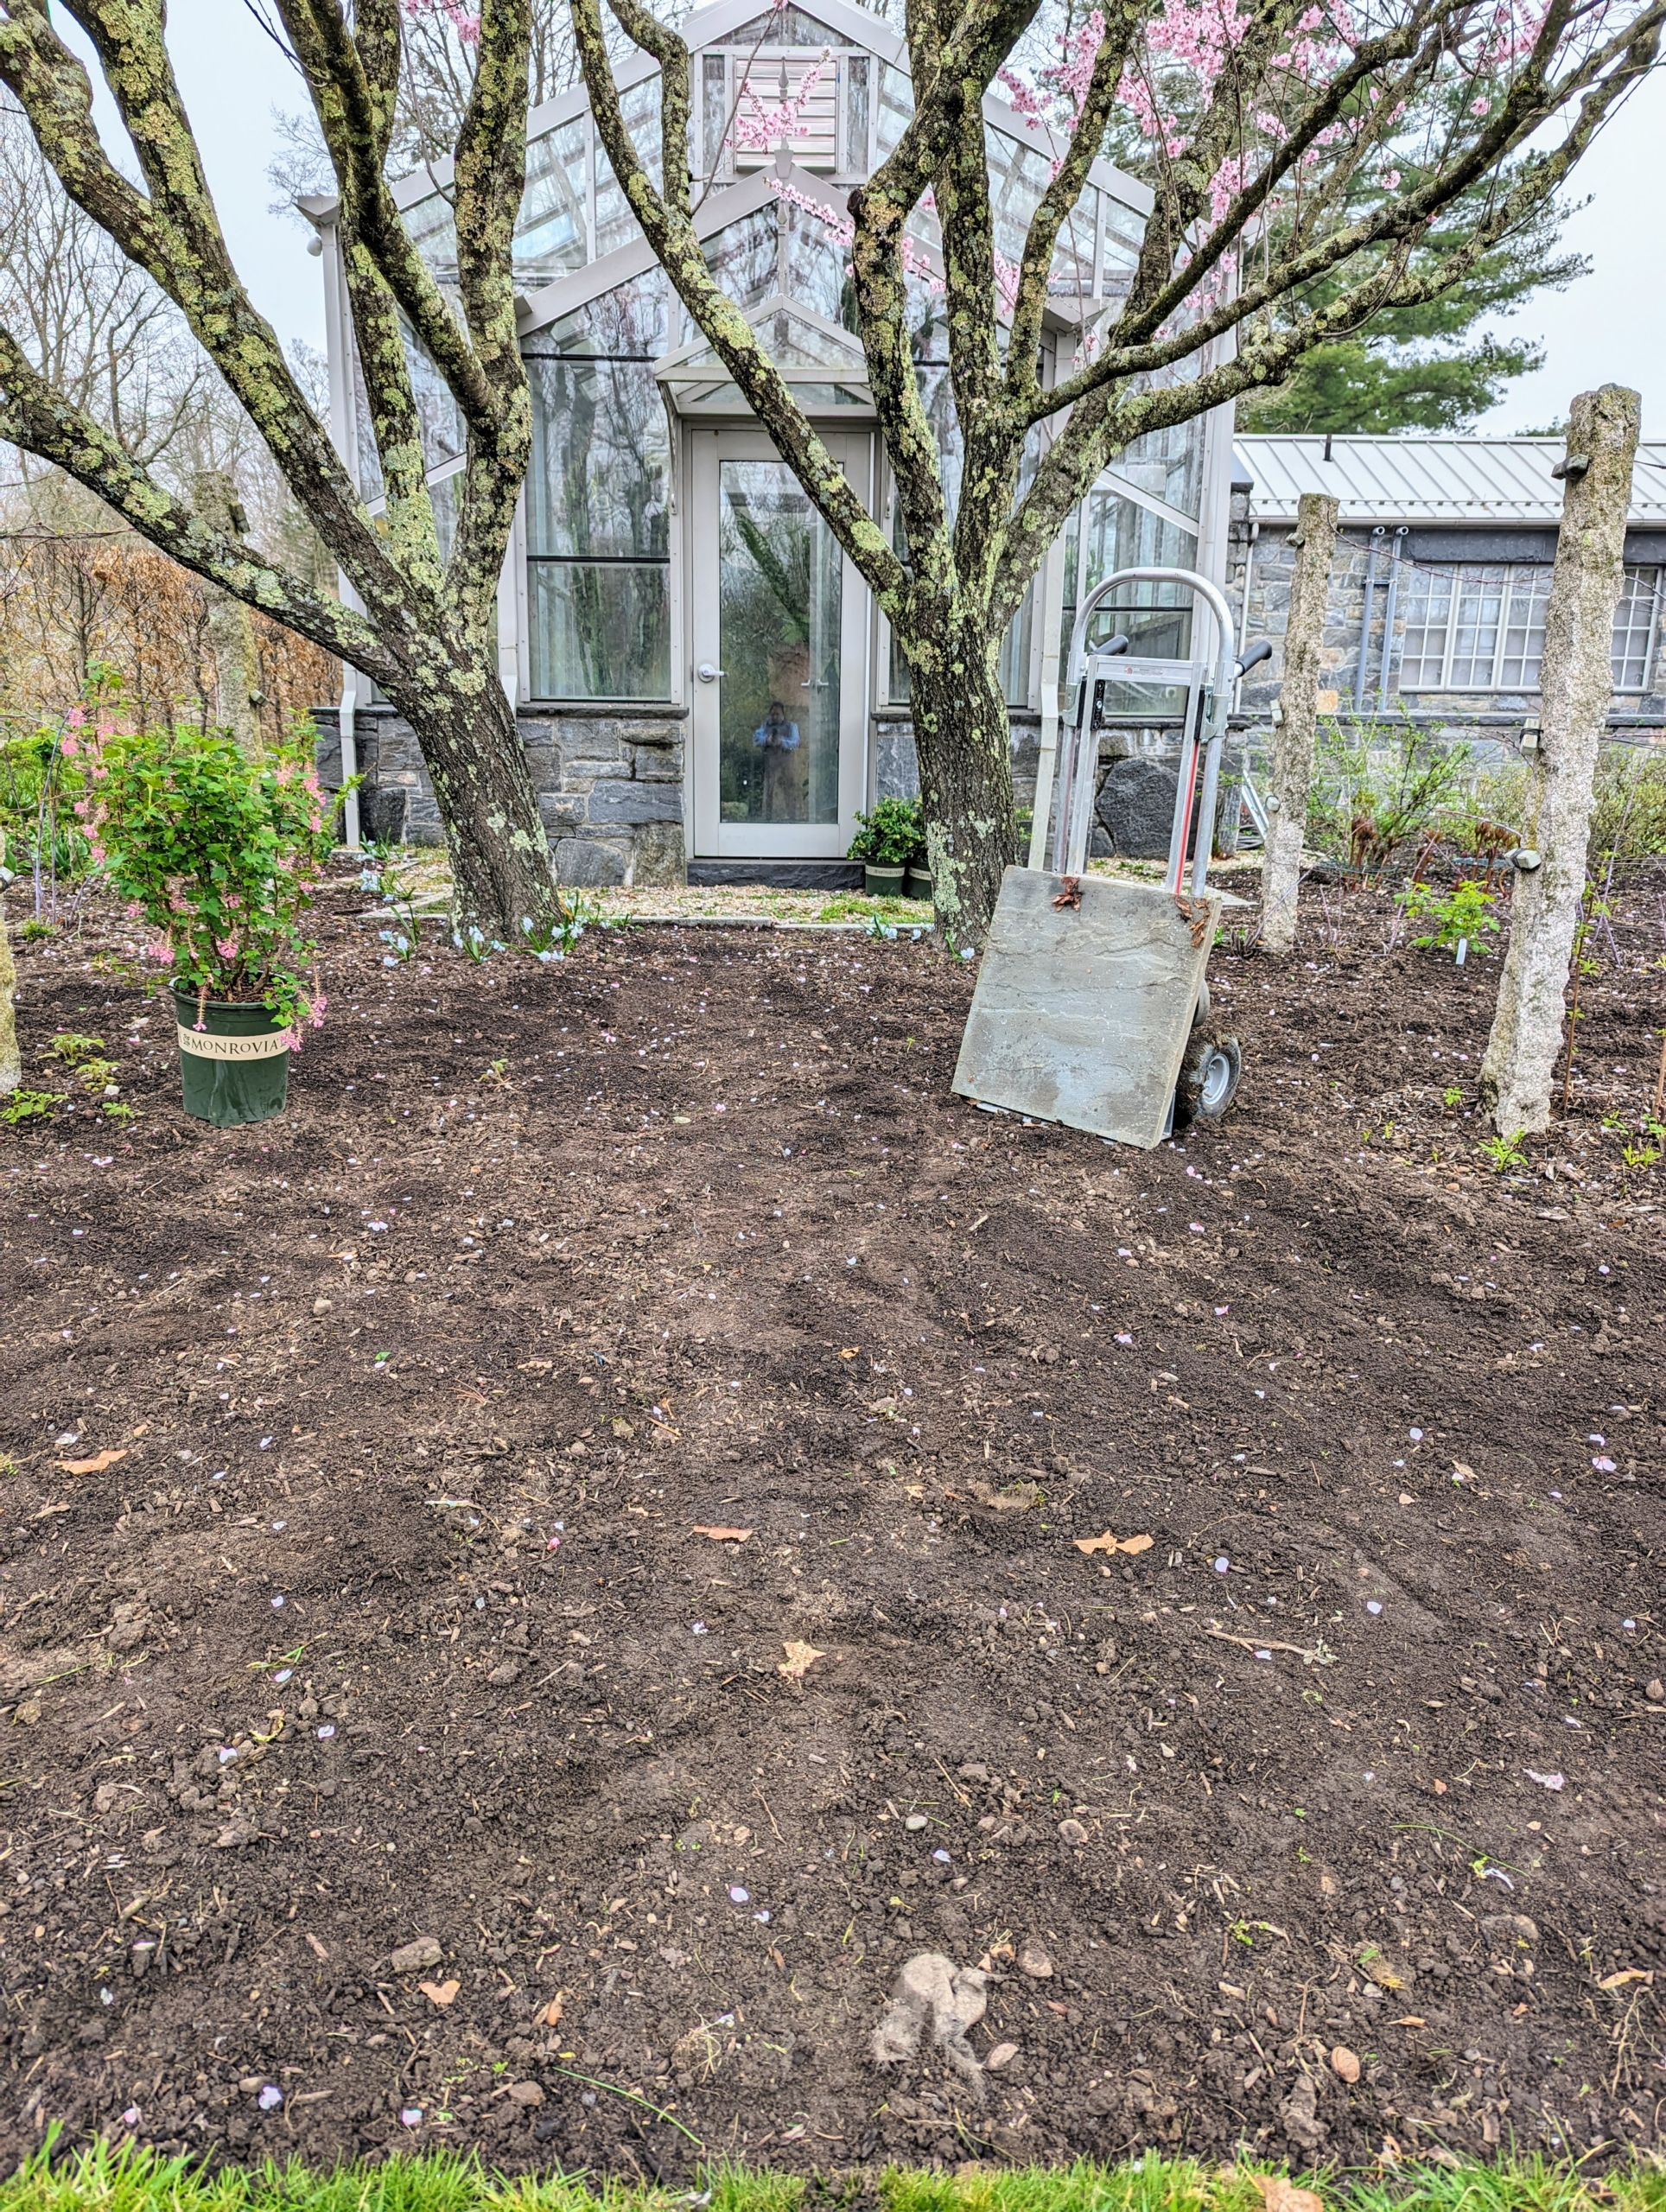
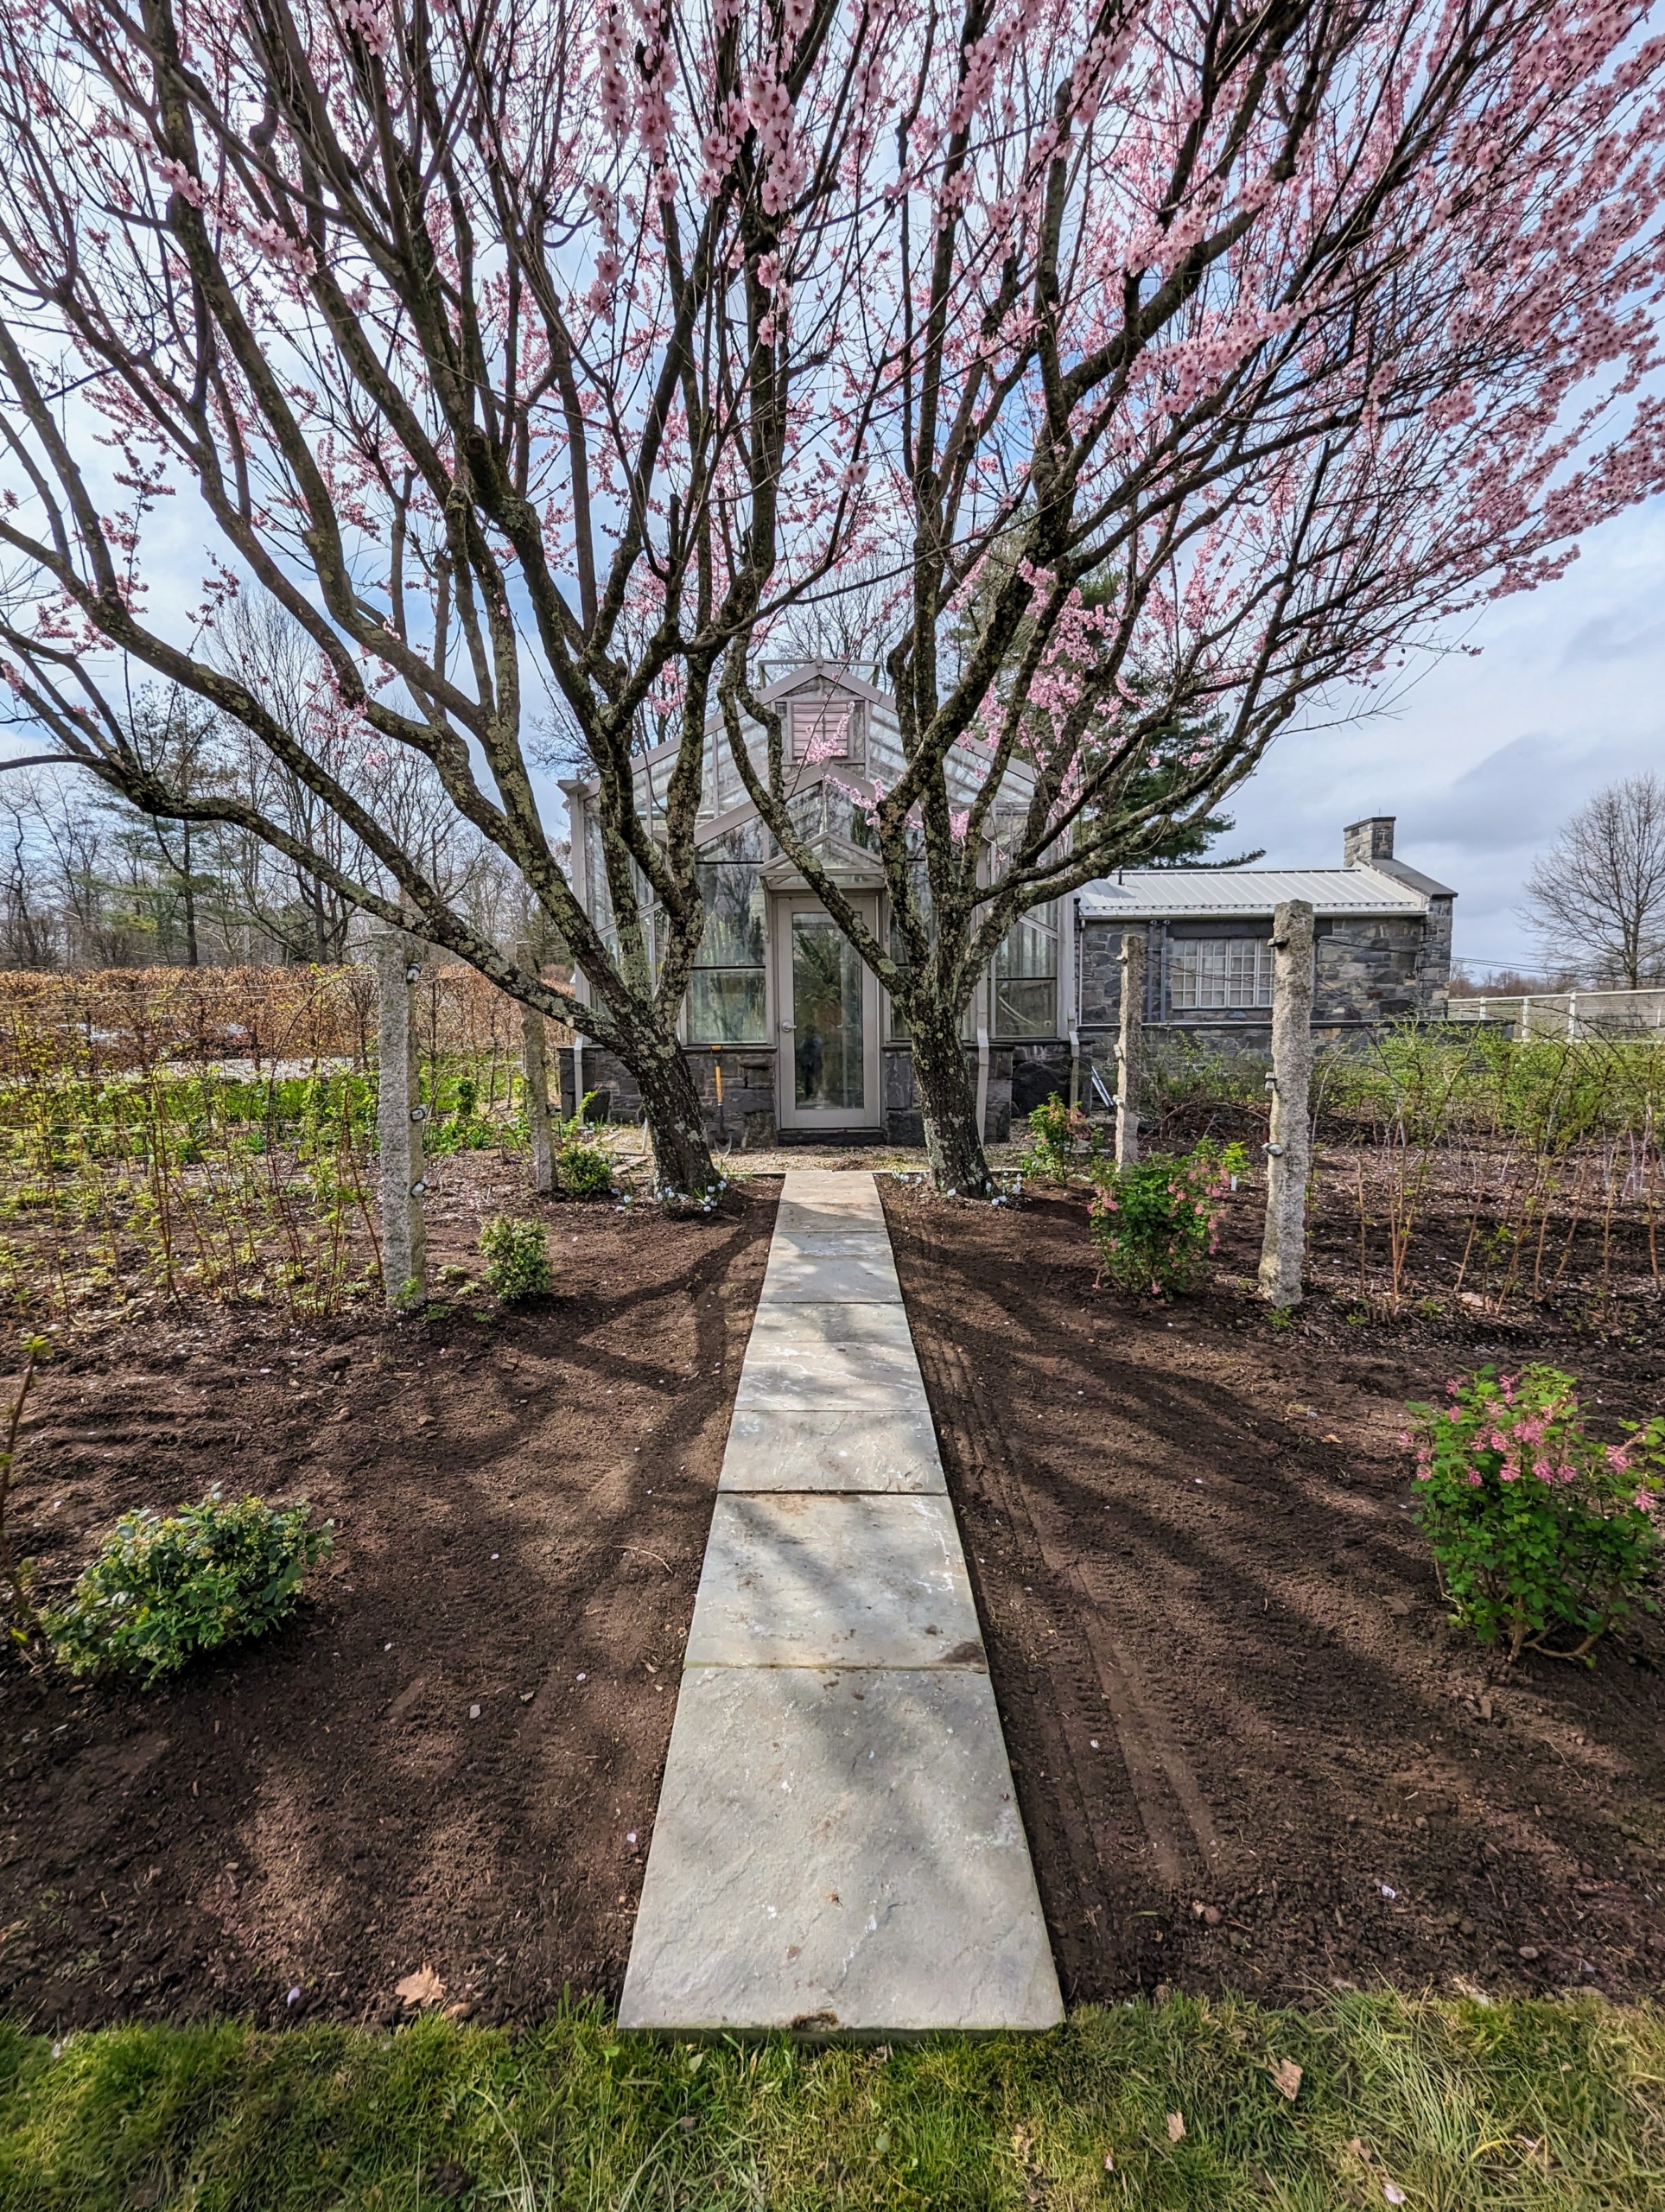
Just outside my main greenhouse, where I grow many of my sweet summer berries, is an area that needed a little attention. I decided it would look so much better with a stone footpath leading to the gardens, and a few plantings to give it a more finished look. As part of a delivery of plants from the wholesale nursery, Monrovia, I received three flowering currants - fragrant, spring-blooming shrubs native to the northwest United States. These specimens feature bold crimson flower clusters that are a favorite nectar source for hummingbirds and other pollinators. They were planted along with three blueberry bushes also from Monrovia.
Here are some photos, enjoy.
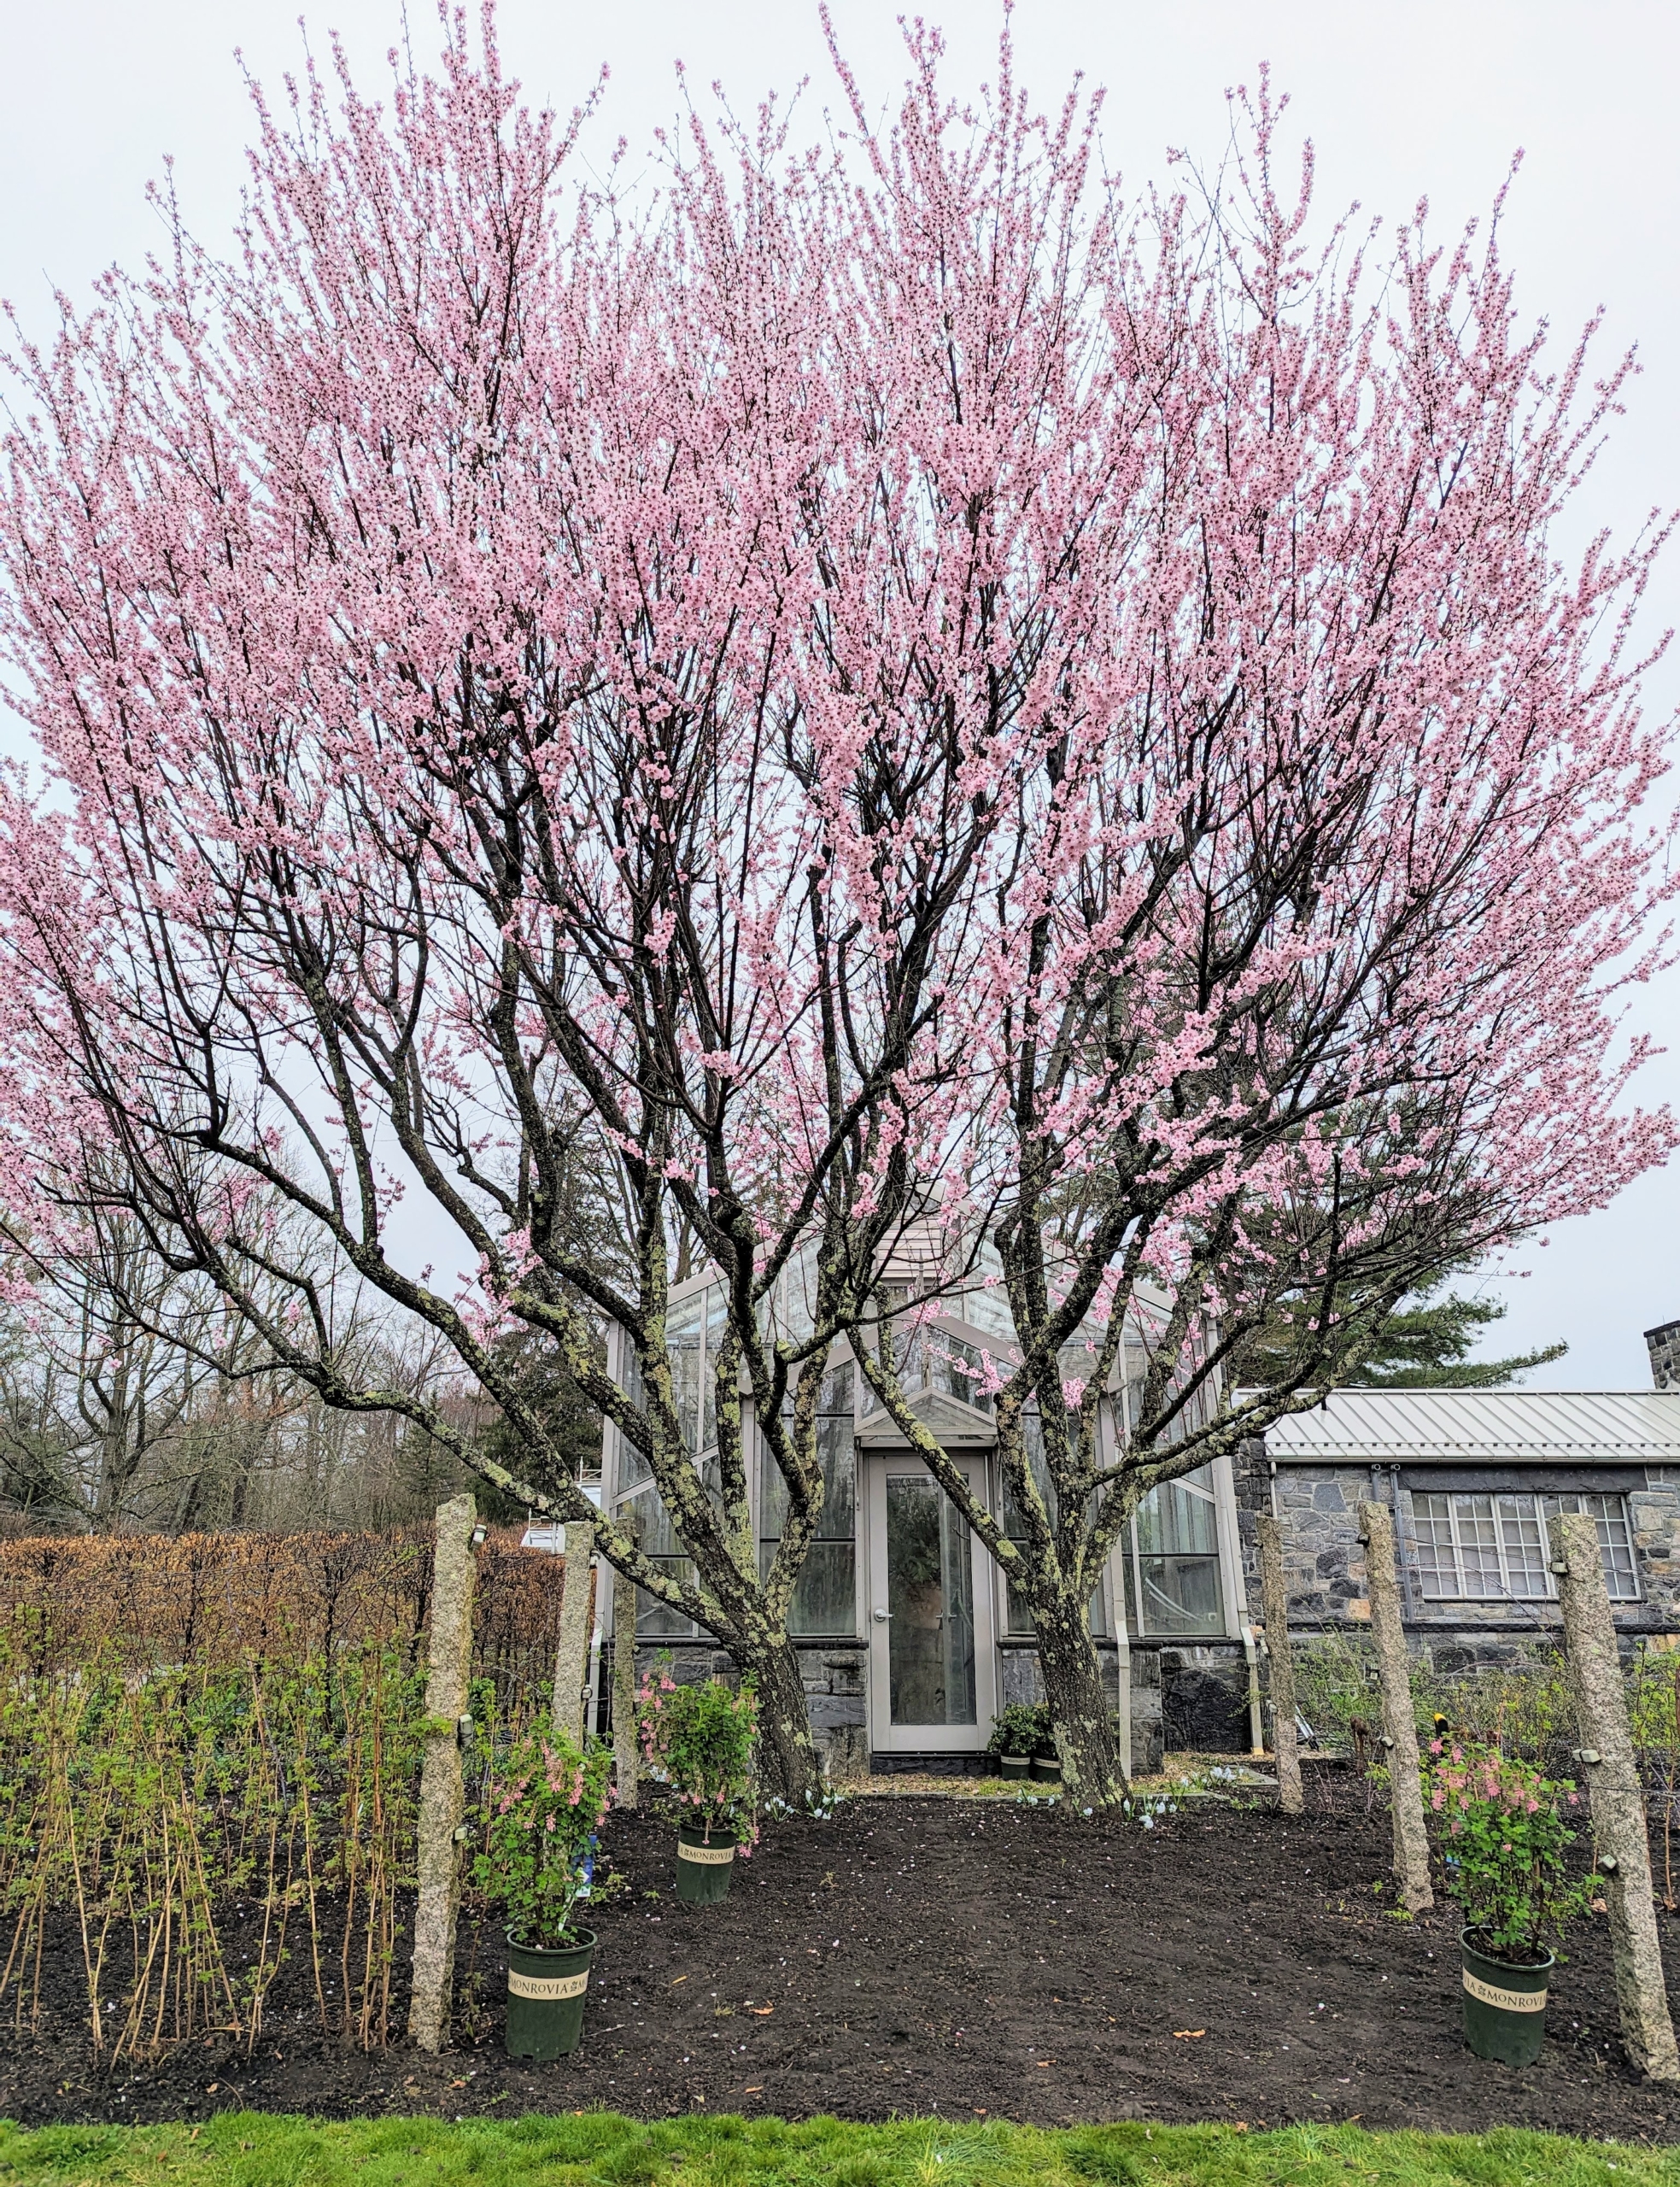
My large glass greenhouse has several entryways. Planted outside this door are two very productive almond trees. The almond is a species of small tree from the genus Prunus, cultivated worldwide for its seed – those delicious and nutritious nuts.
The almond trees are between several rows of raspberry bushes and not far from my strawberries, gooseberries, and currants.
Our most recent order from Monrovia includes several more berries and flowering currants. Ryan and I work together to place all these plants in their permanent locations around the farm.
‘King Edward VII’ Flowering Currant, Ribes sanguineum, is a compact grower with a rich color of pendulous bloom clusters. It is a slow grower and only reaches about three to six feet tall.
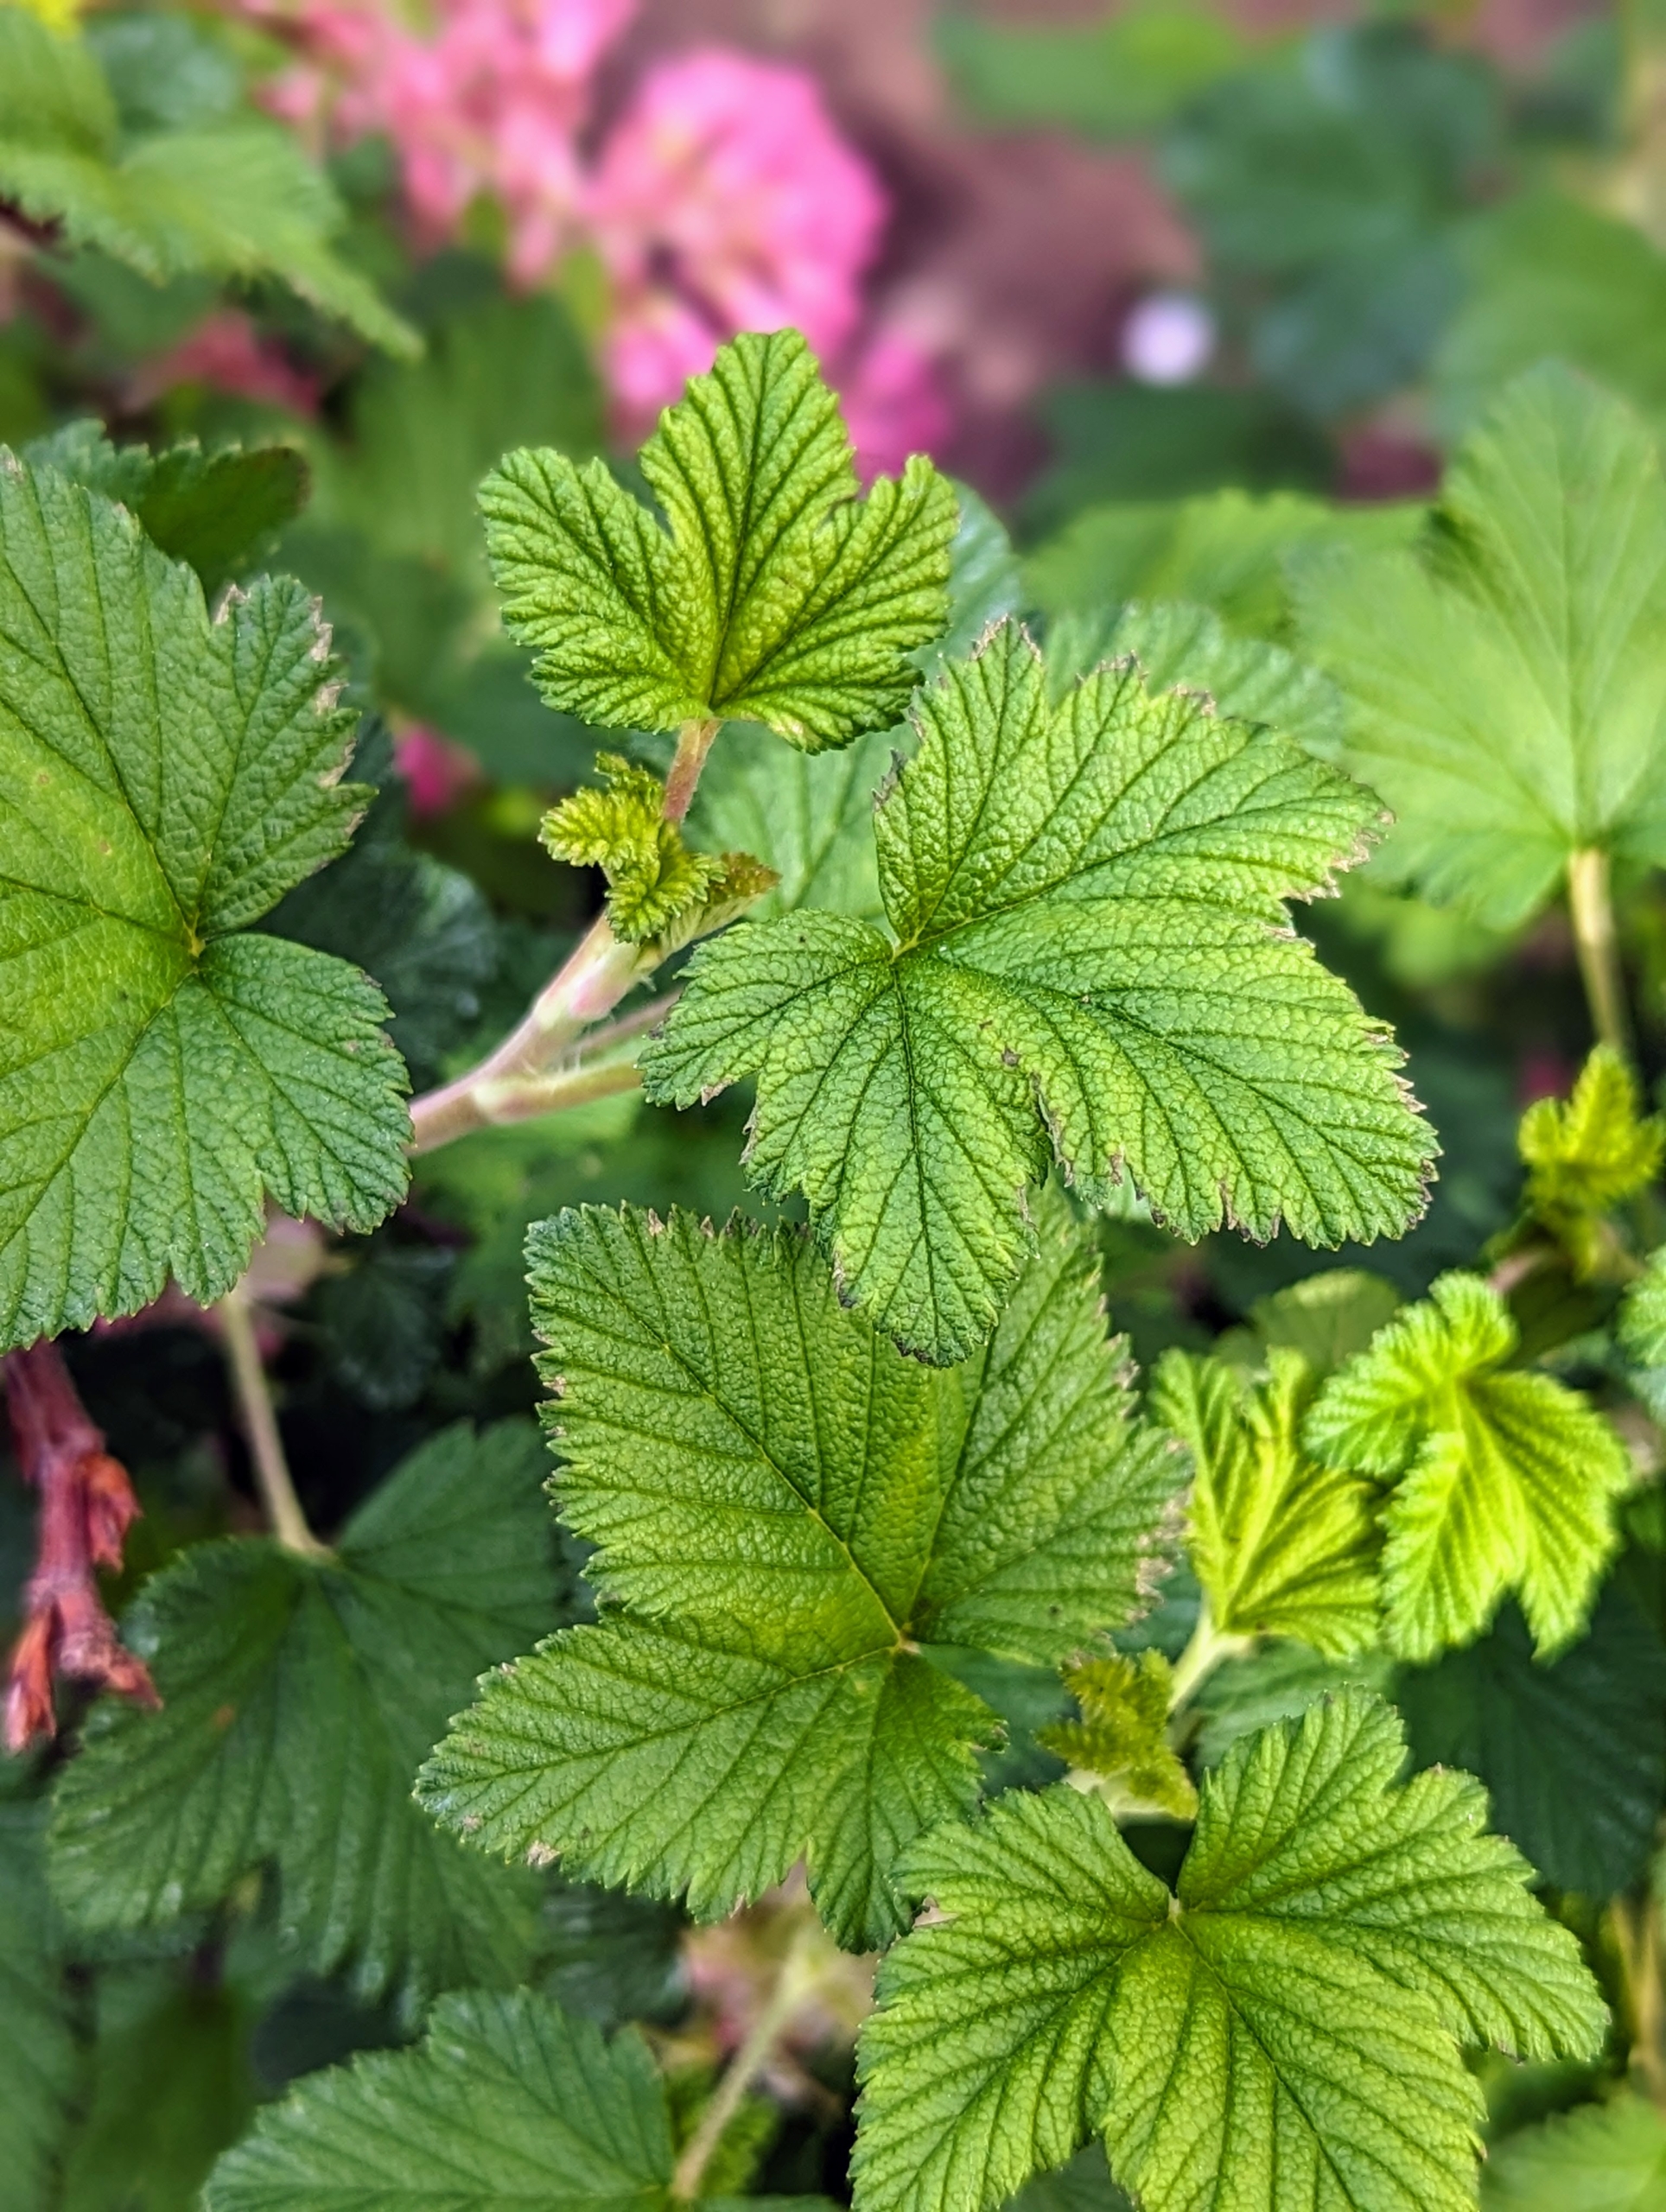
The leaves of the flowering currant are alternate and rounded with three to five shallow lobes and deep veins. The plants prefer well-drained soils and sun.
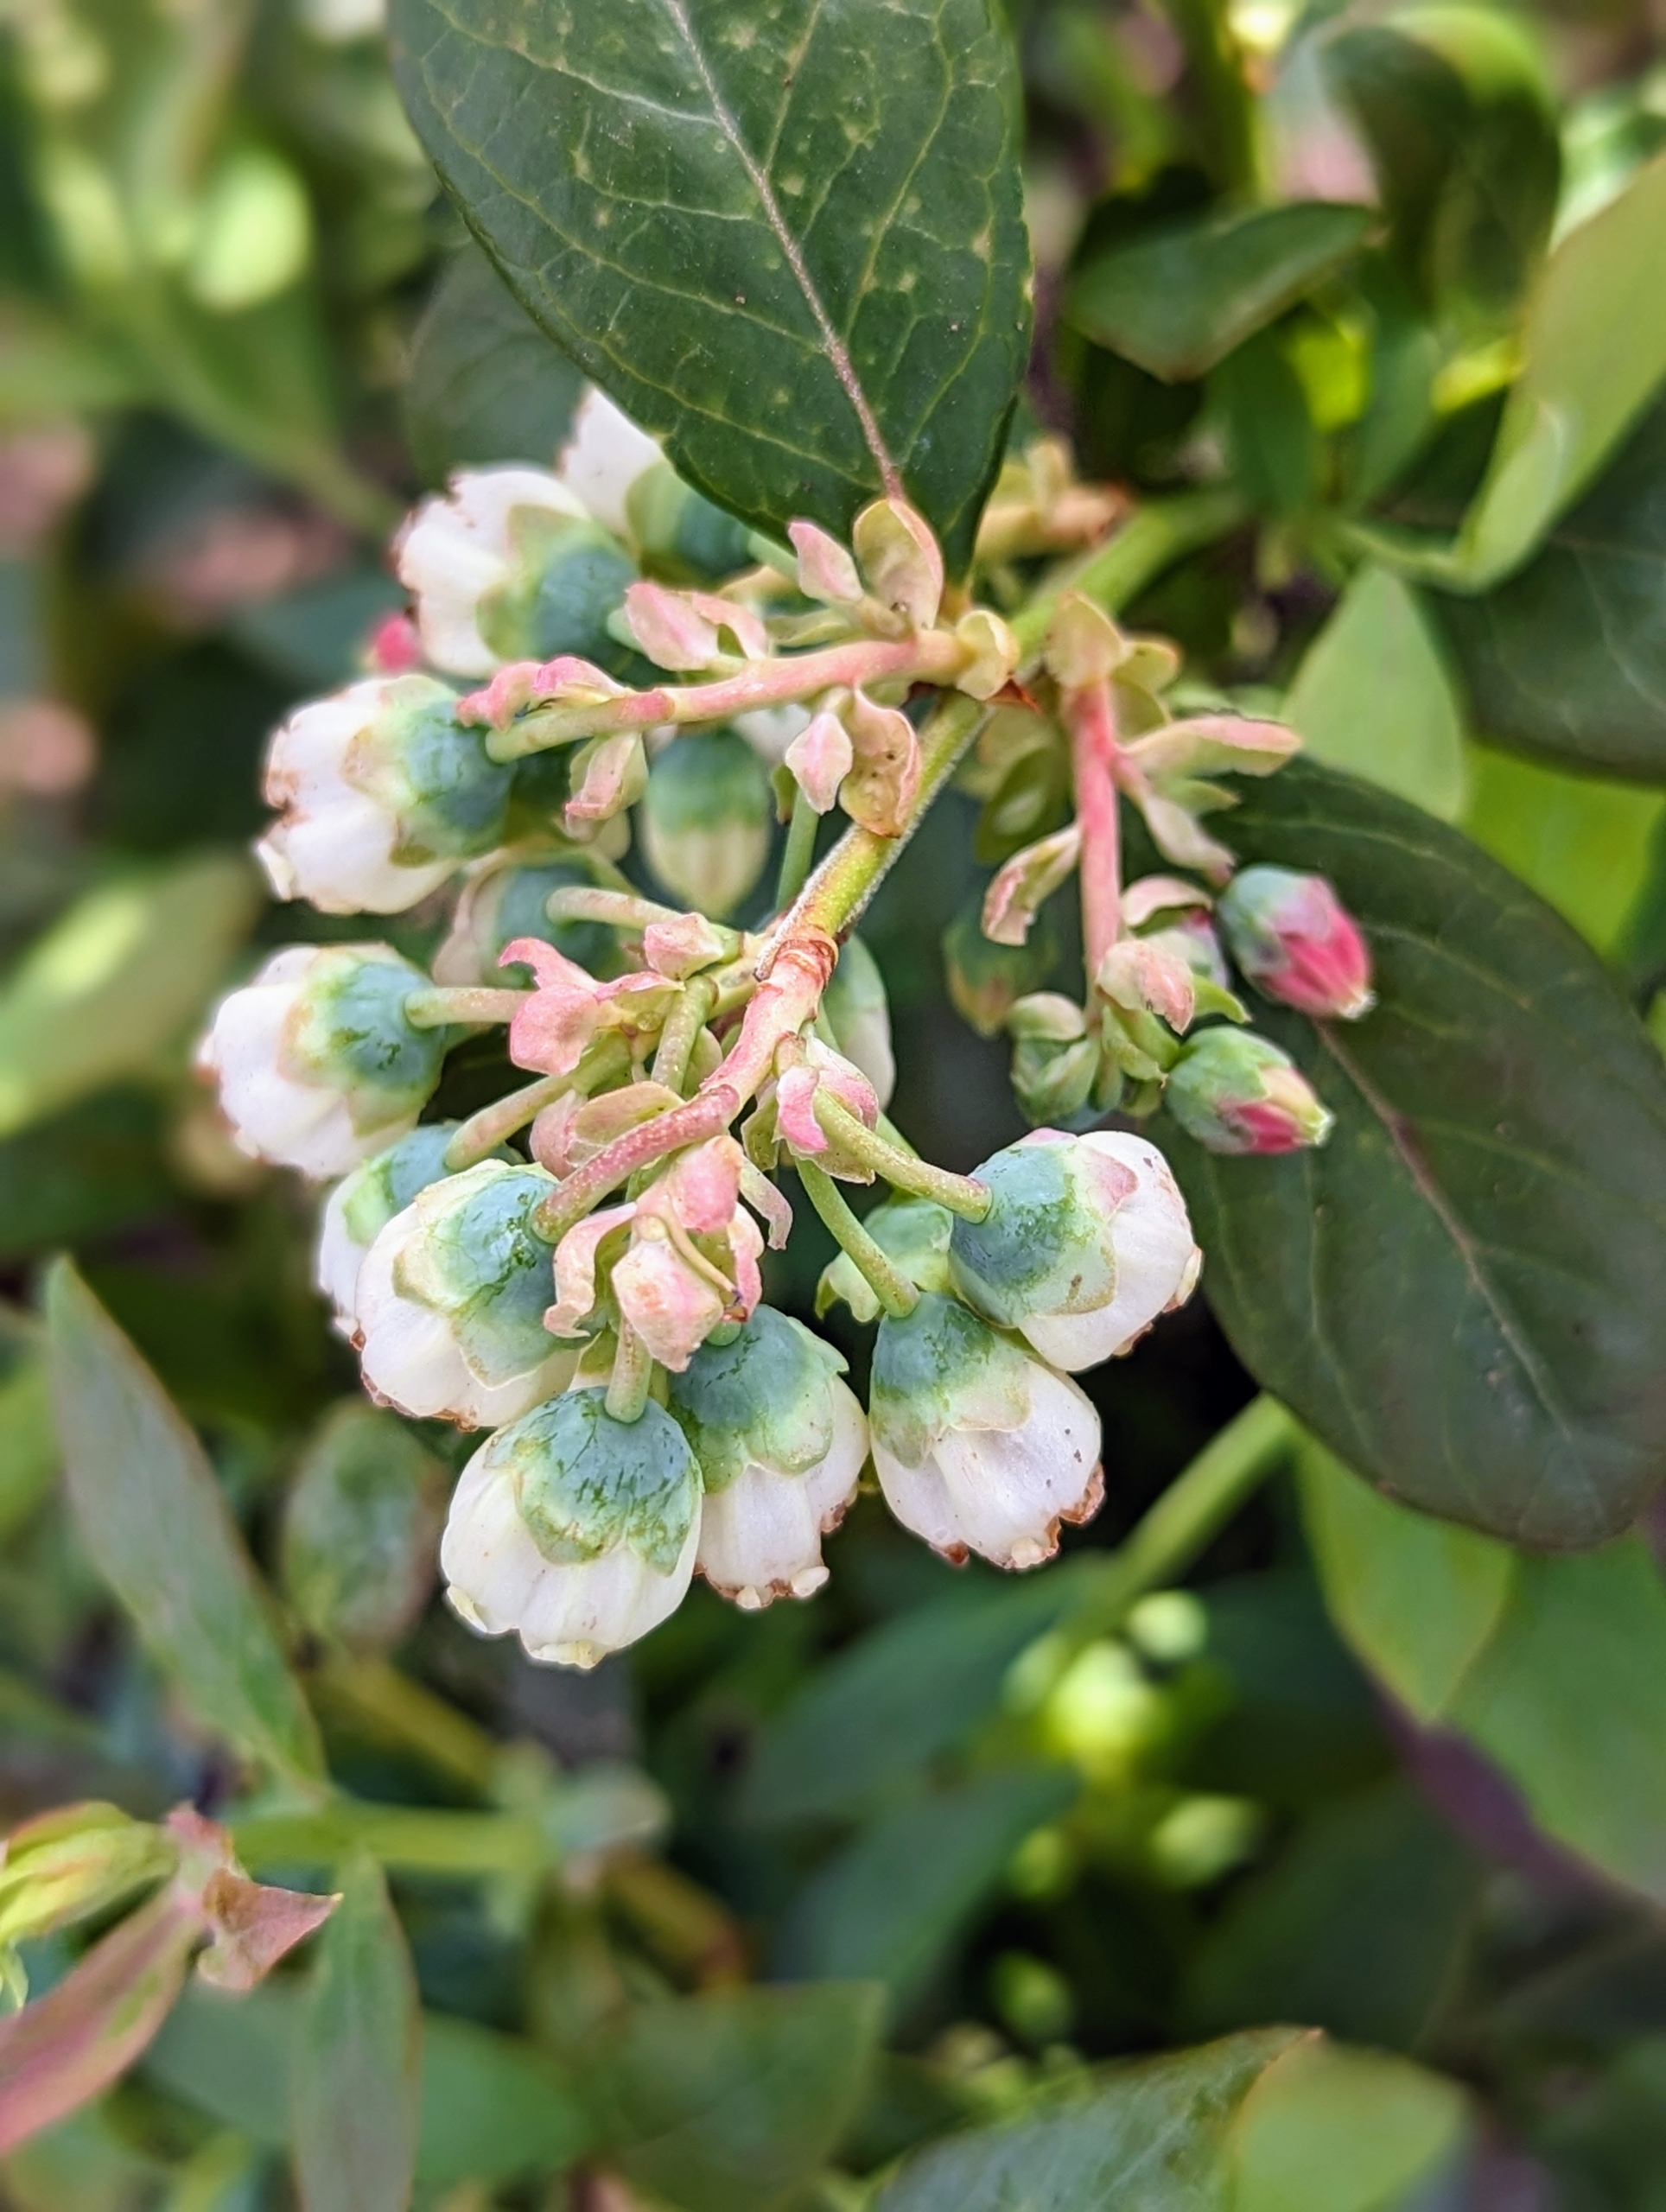
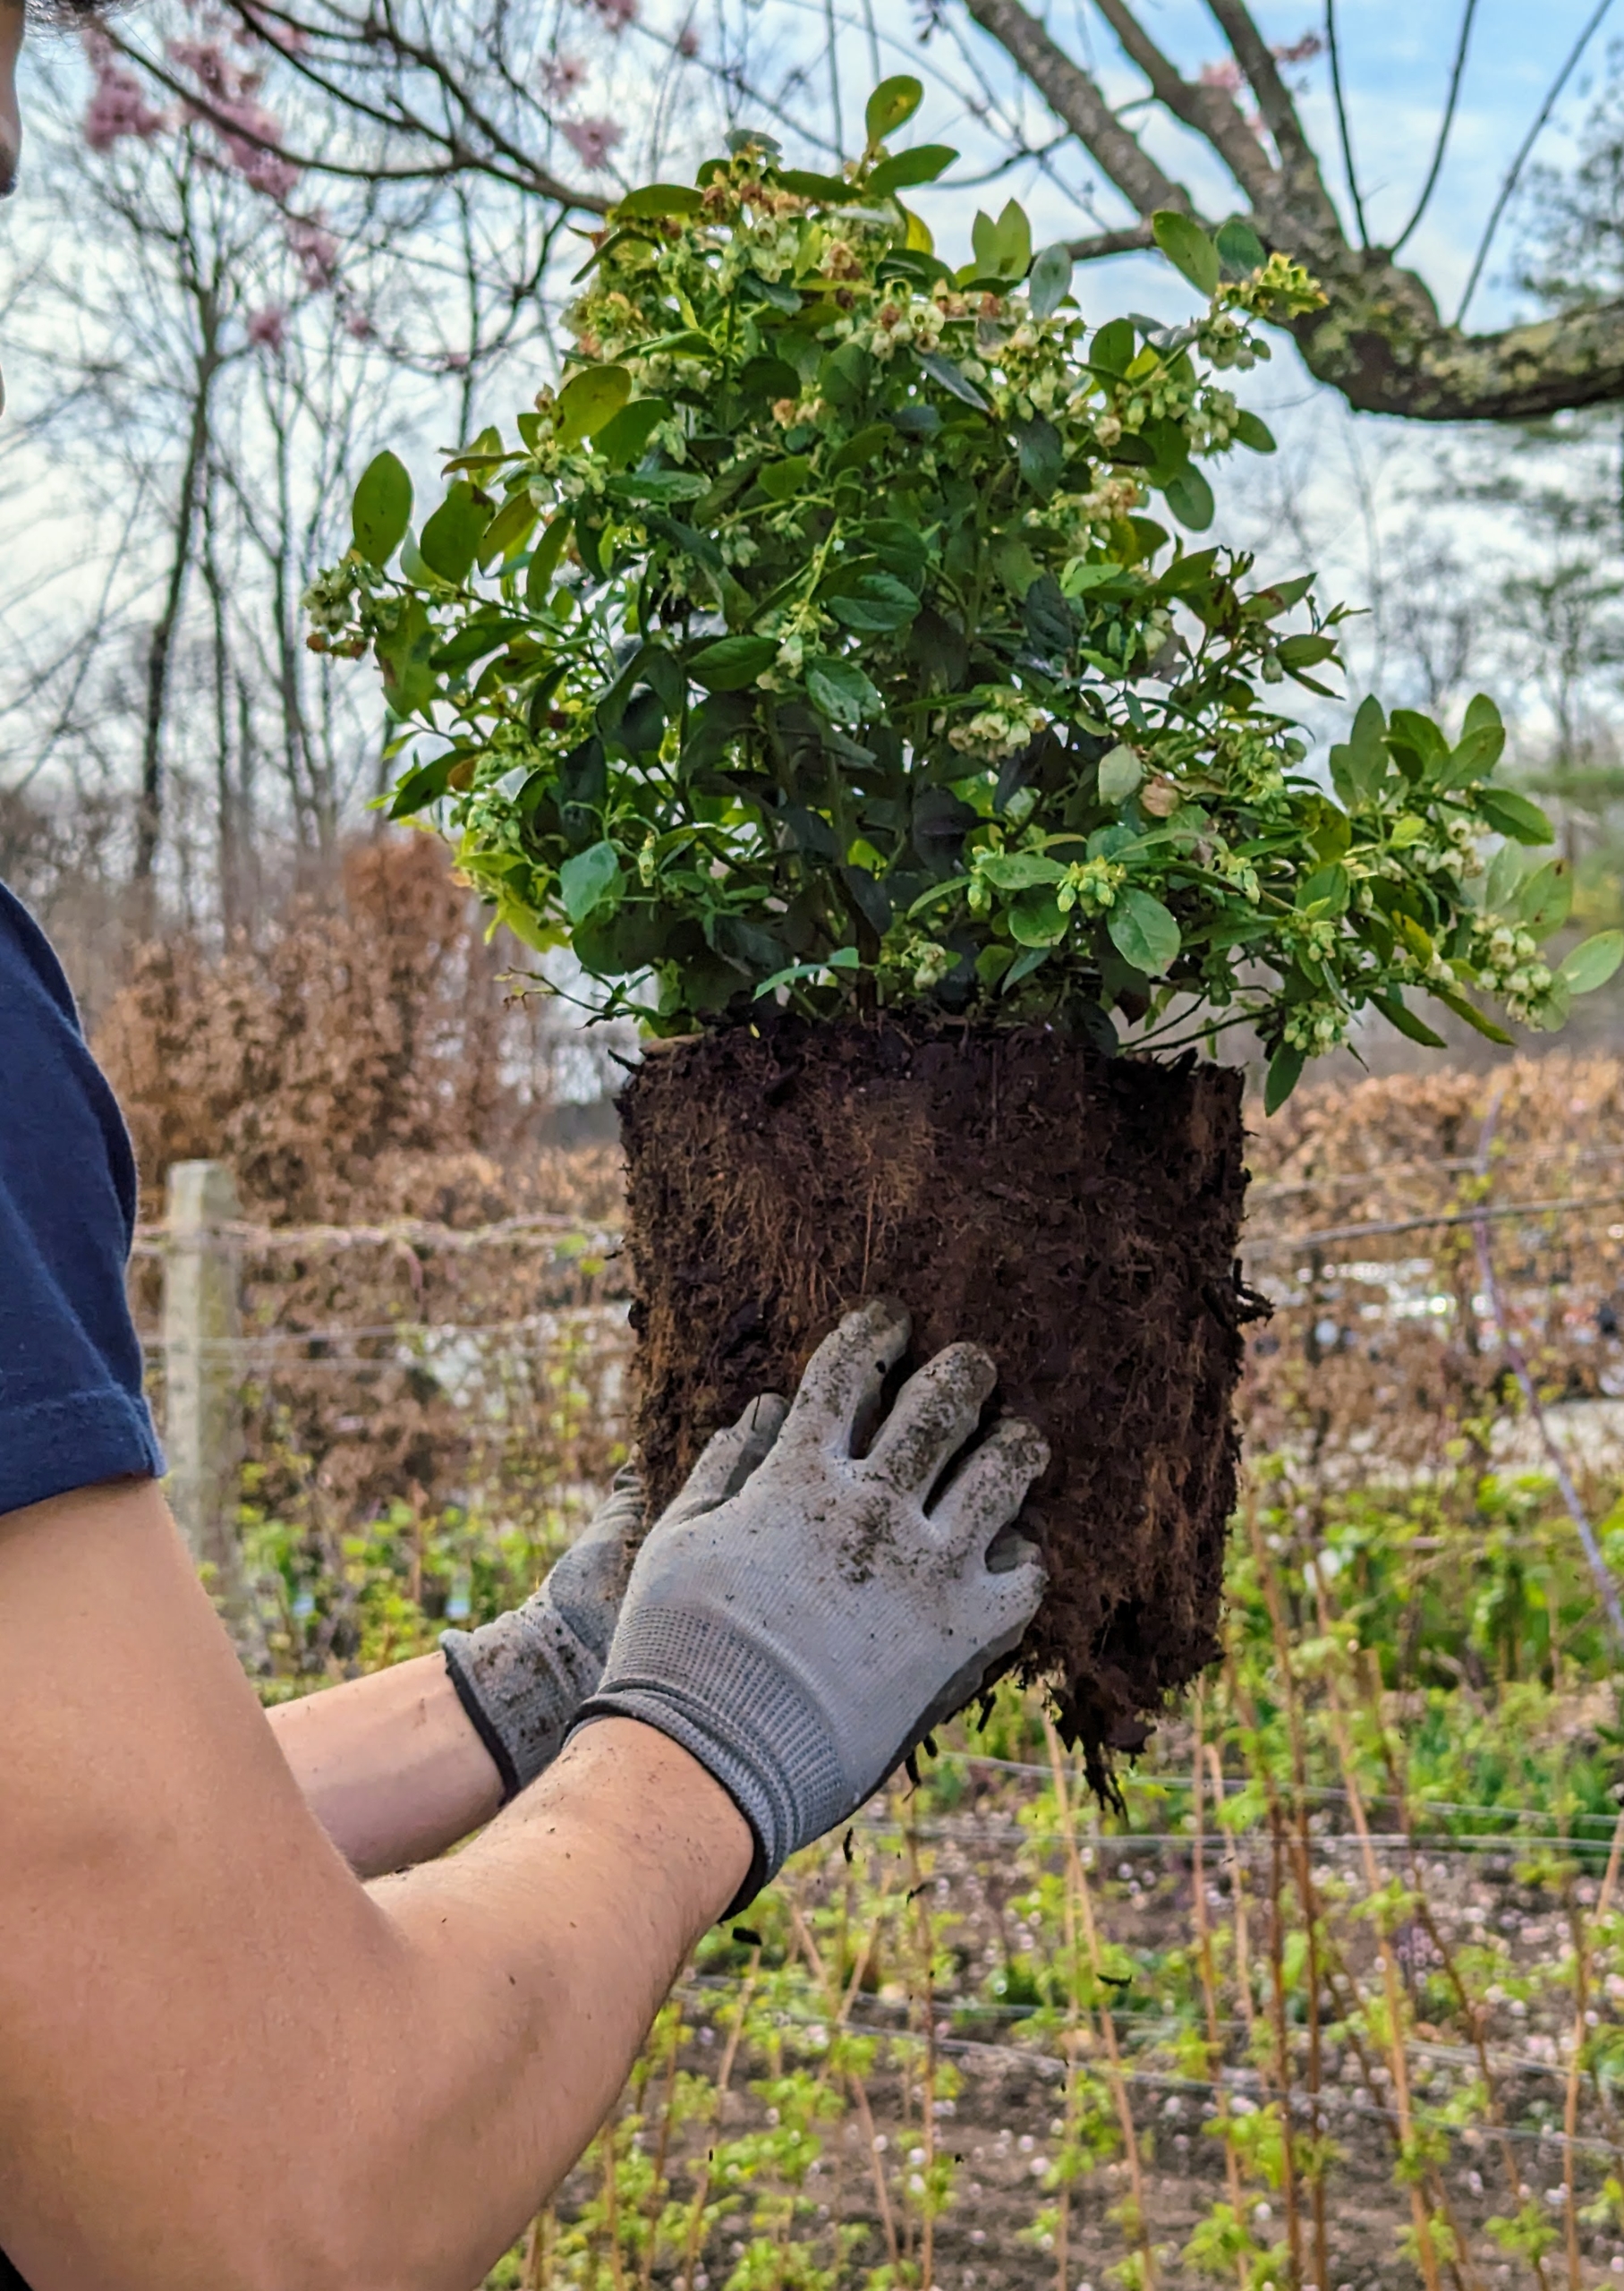
I also decided to plant three blueberry bushes in this area. These are the buds of Bountiful Blue® Blueberry, also from Monrovia. Its pink-blush flowers produce large, sweet and juicy fruits.
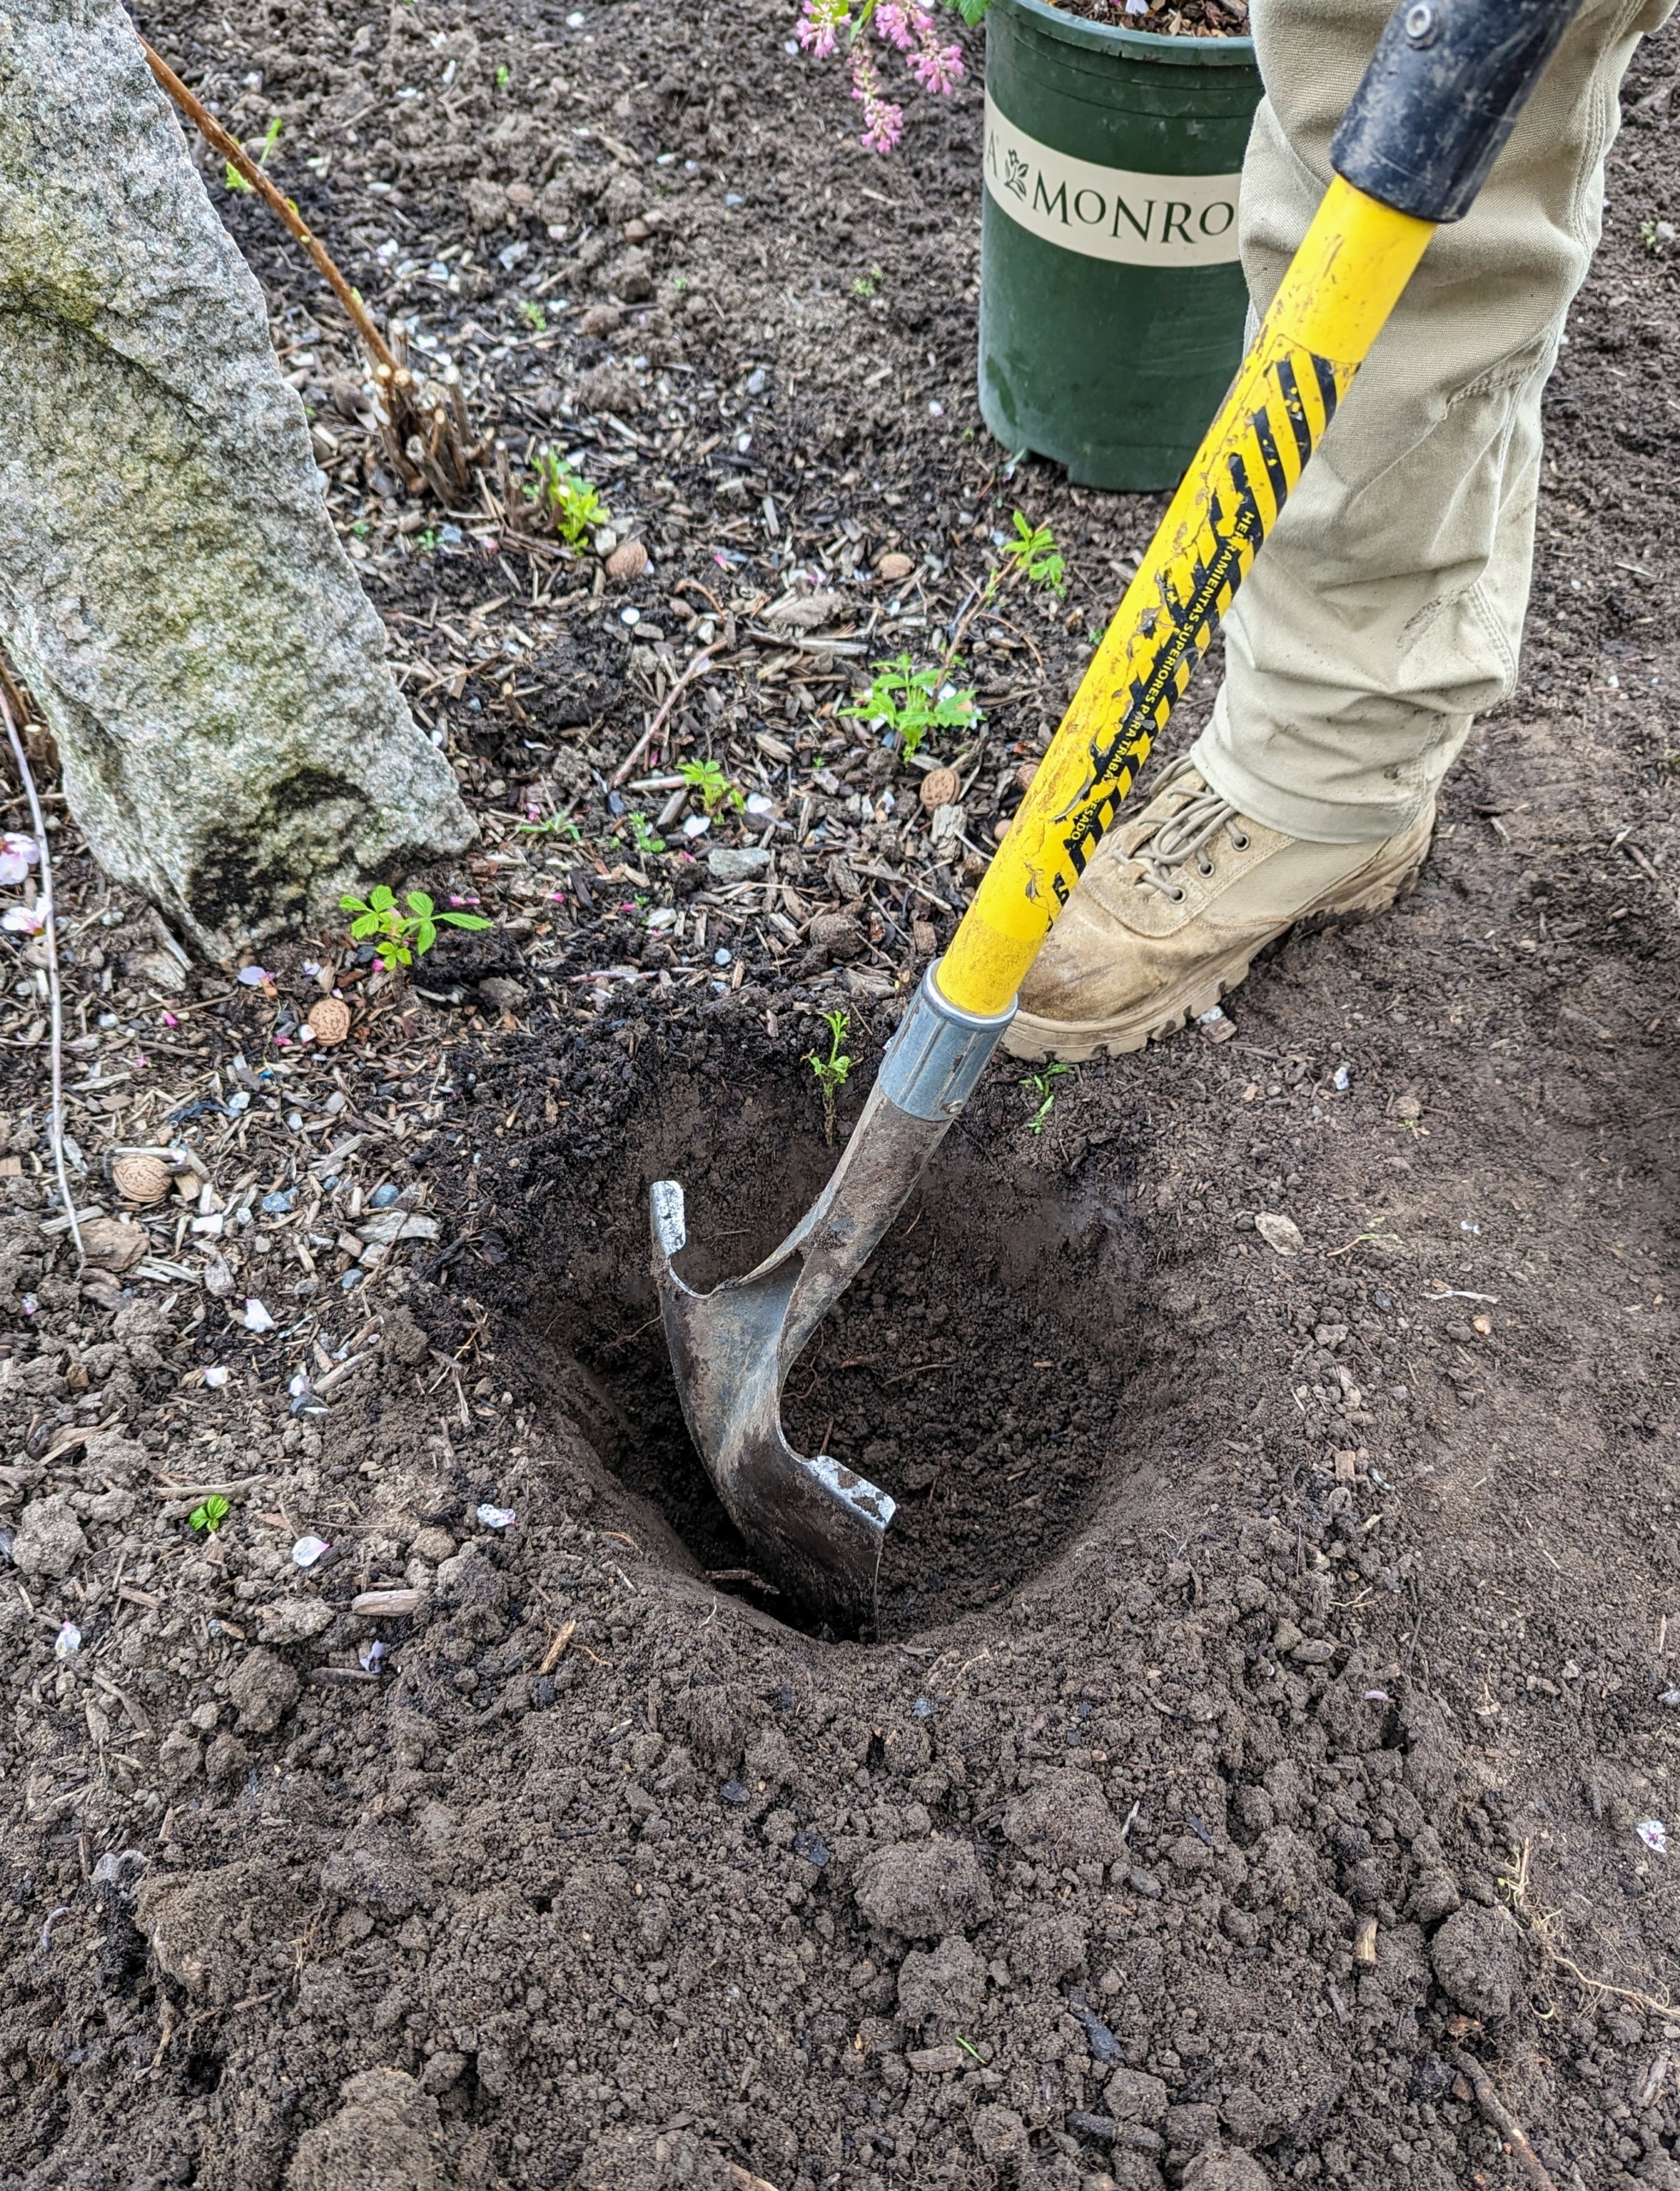
Planting six small shrubs does not take long. Remember the rule of thumb – dig a hole that is two to three times wider than the root ball, but only as deep as the height of the root ball.
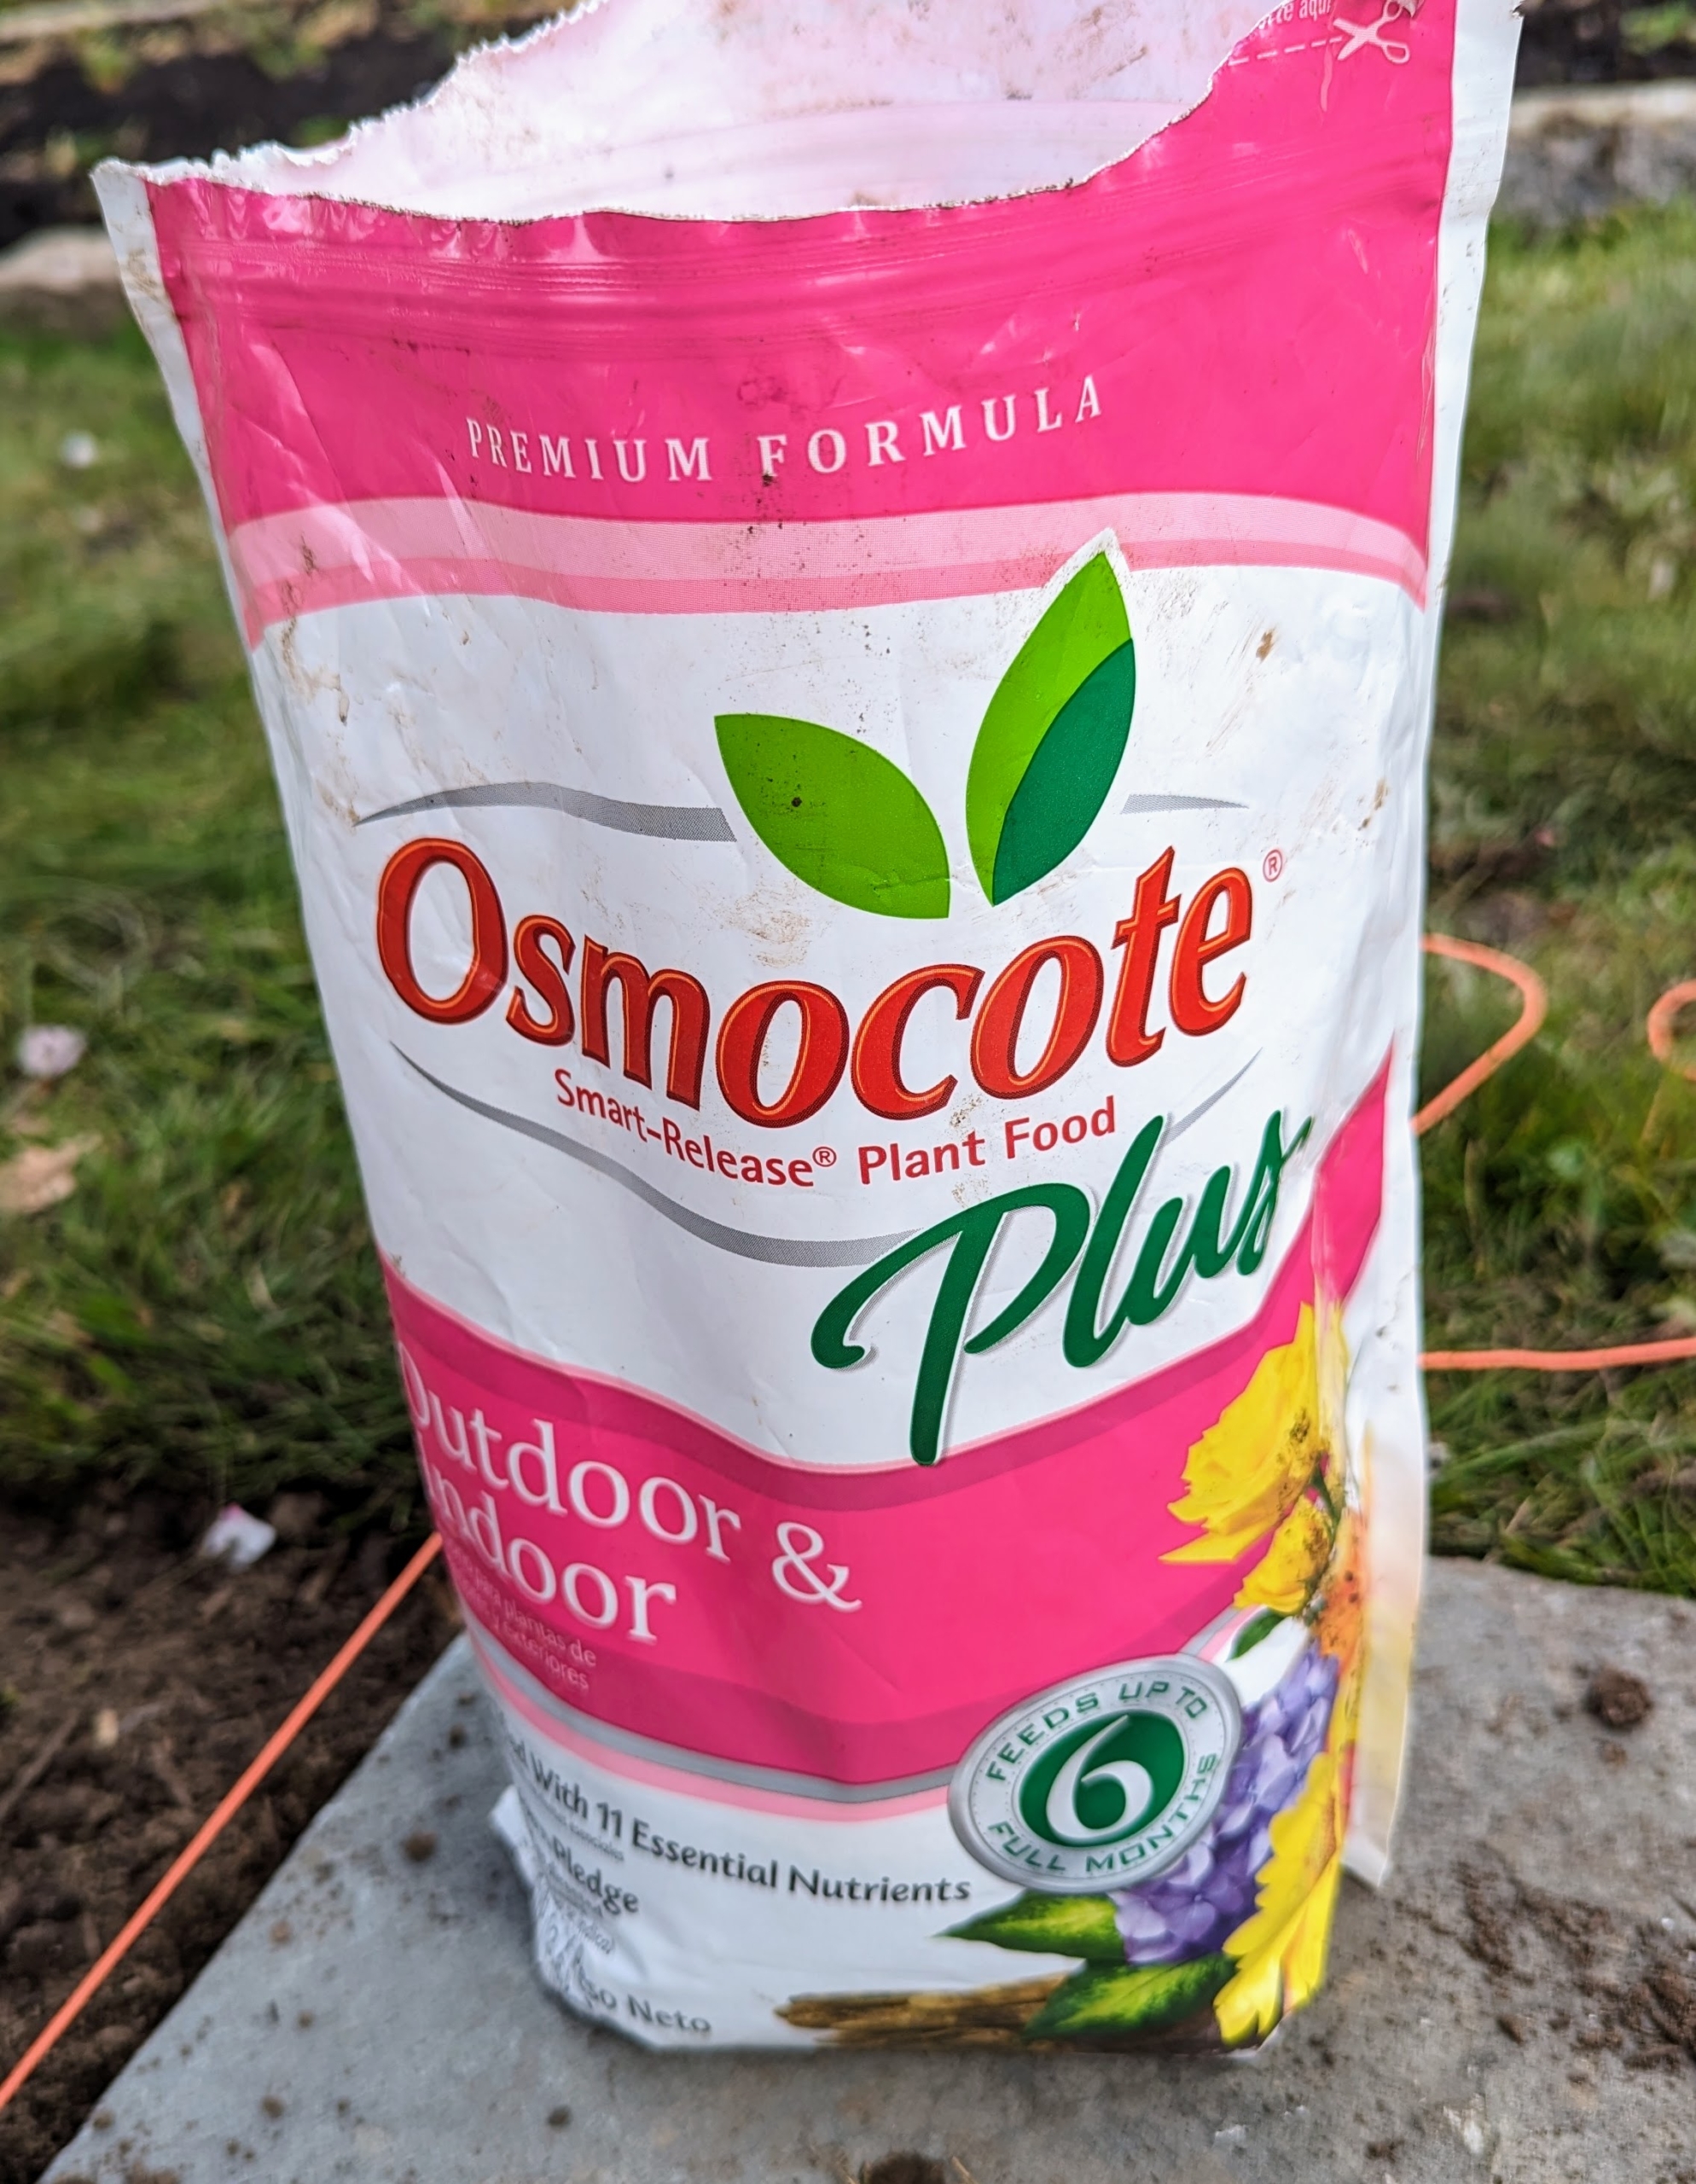
It is very important to feed the plants. I always say, “if you eat, so should your plants.” Proper fertilizing will help the plant establish strong roots and encourage new growth.
We use Osmocote® Smart Release® Plant Food Plus Outdoor and Indoor, which is a slow-release fertilizer fortified with 11-essential nutrients for all plants in all conditions.
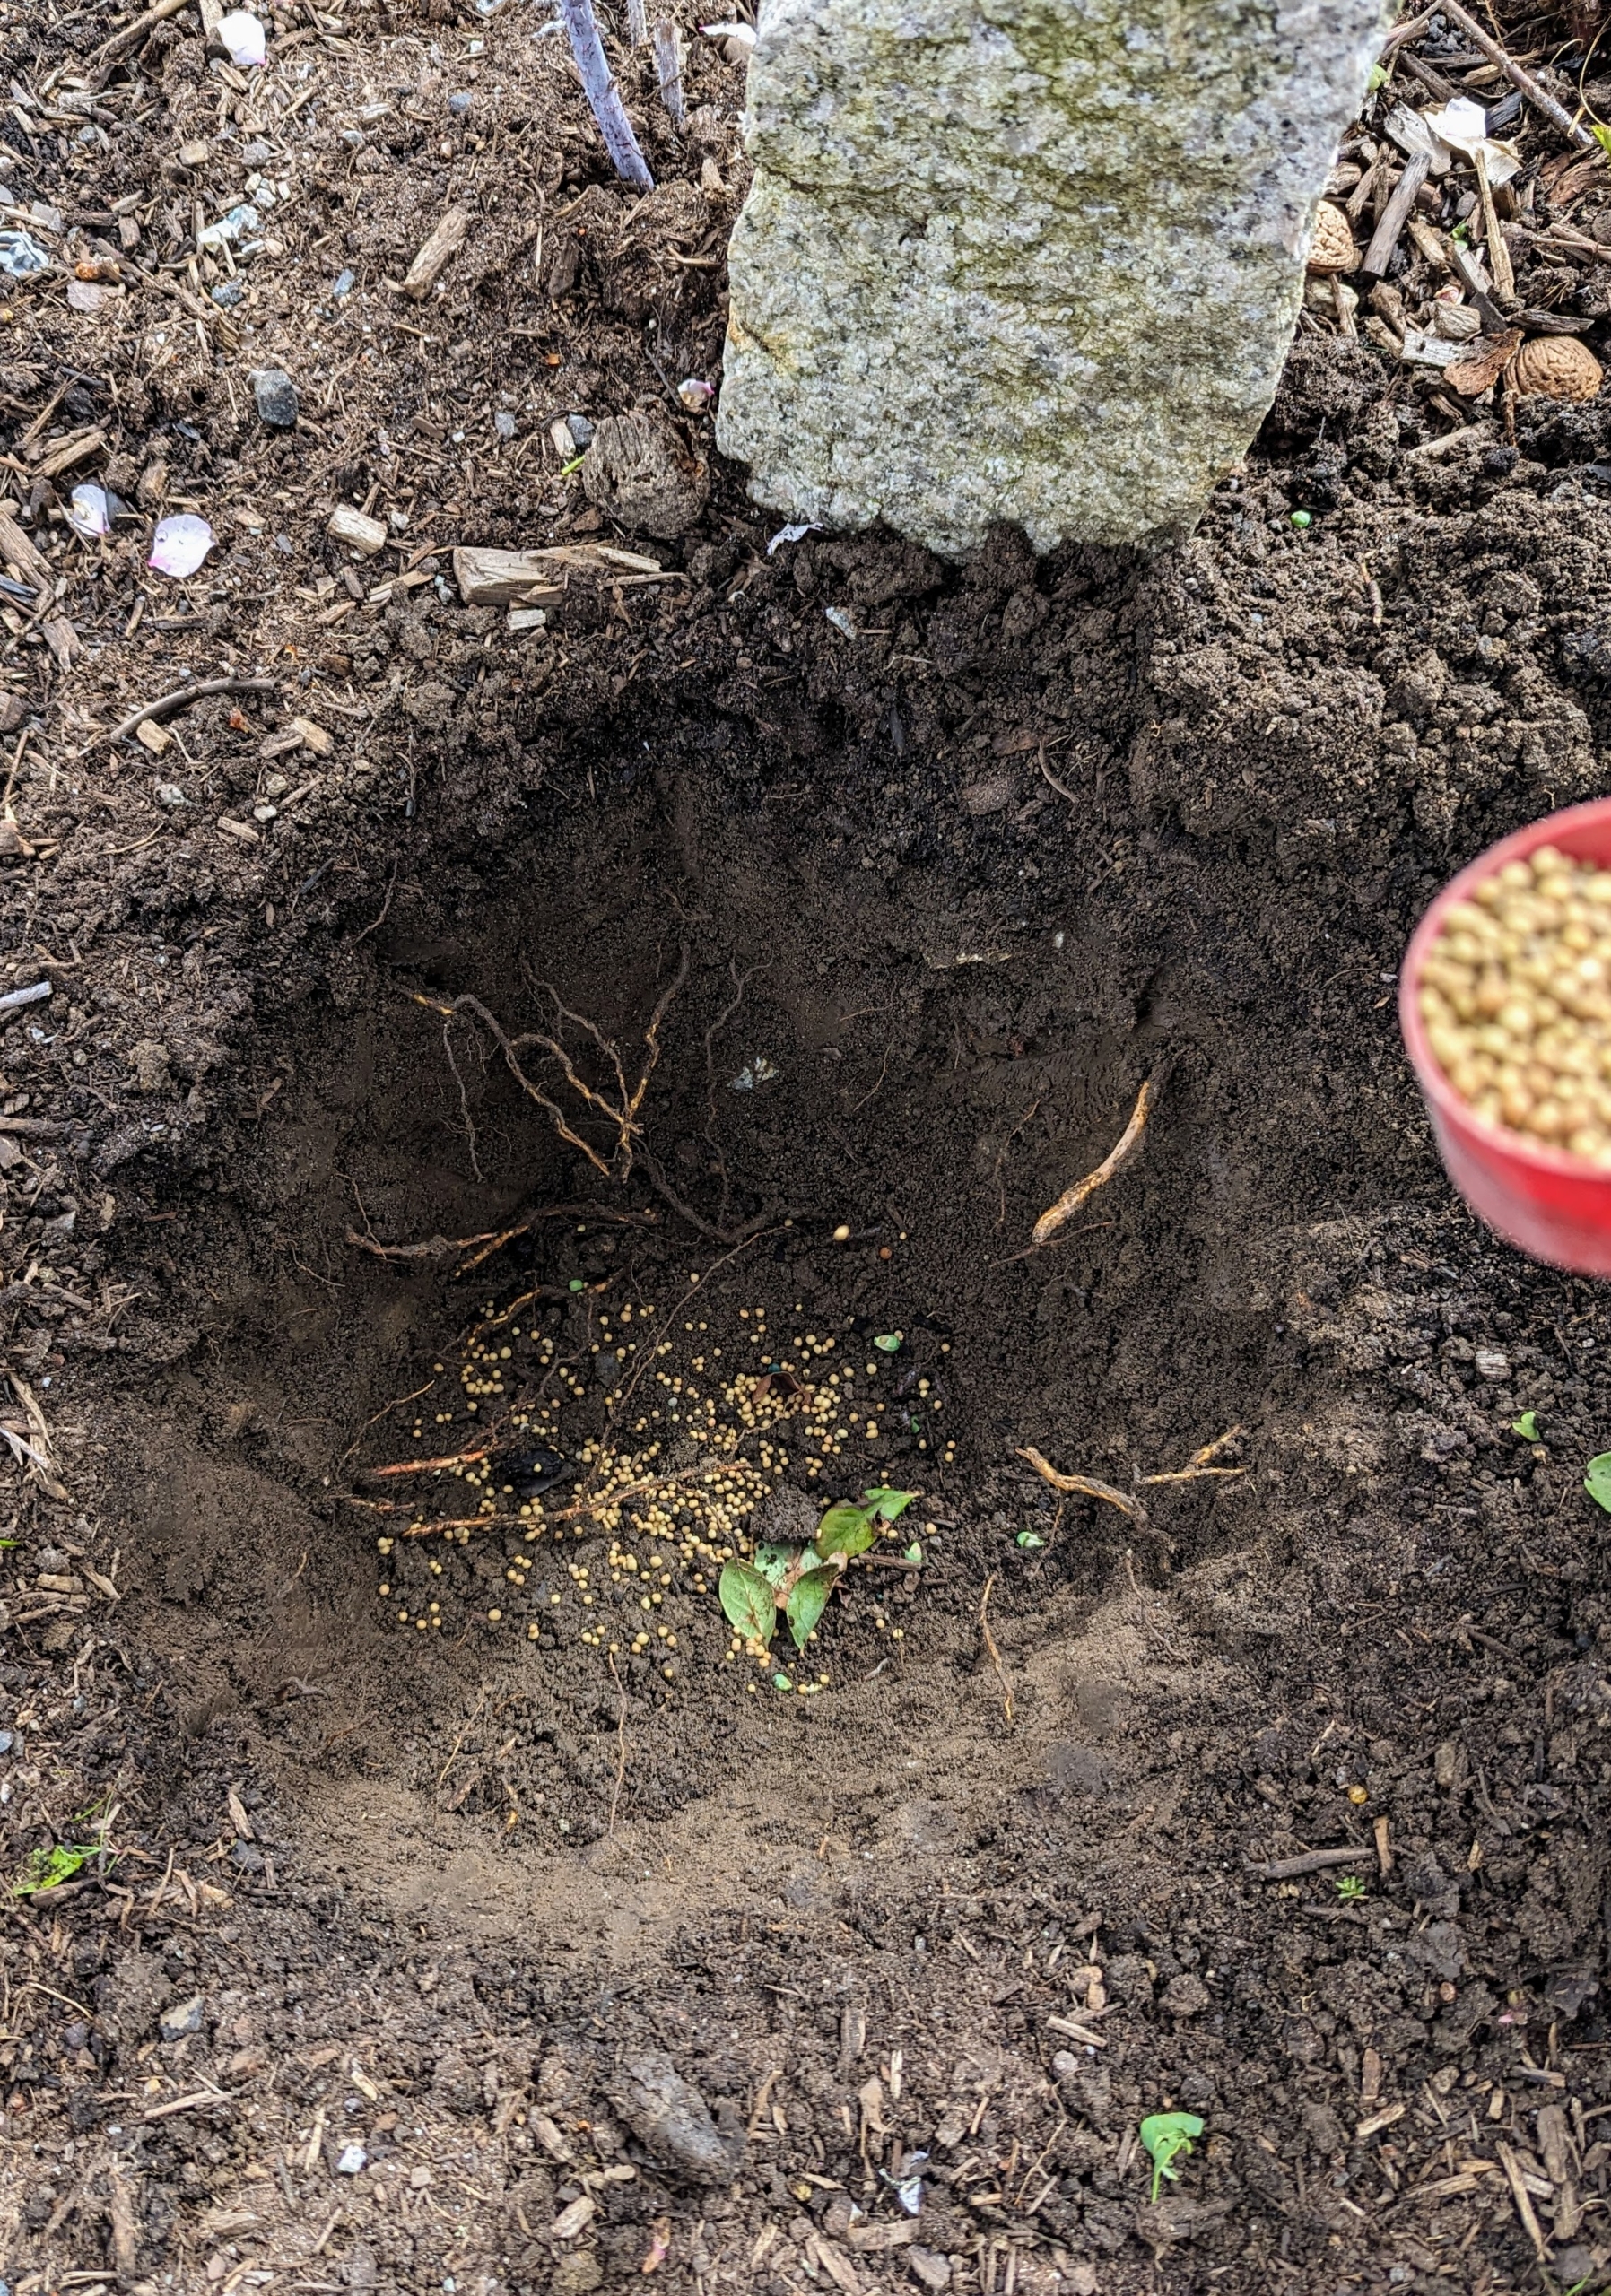
Whenever planting, always scarify first. This means to manually scratch up the sides and bottom of the rootball to loosen the roots and stimulate growth.
Once the plant is placed into the hole, be sure to have its best side facing out. Each plant is positioned at the end of a row on one side of a granite stake.
Next, the hole is carefully backfilled. Only backfill until the “flare” – where the main stem meets the roots.
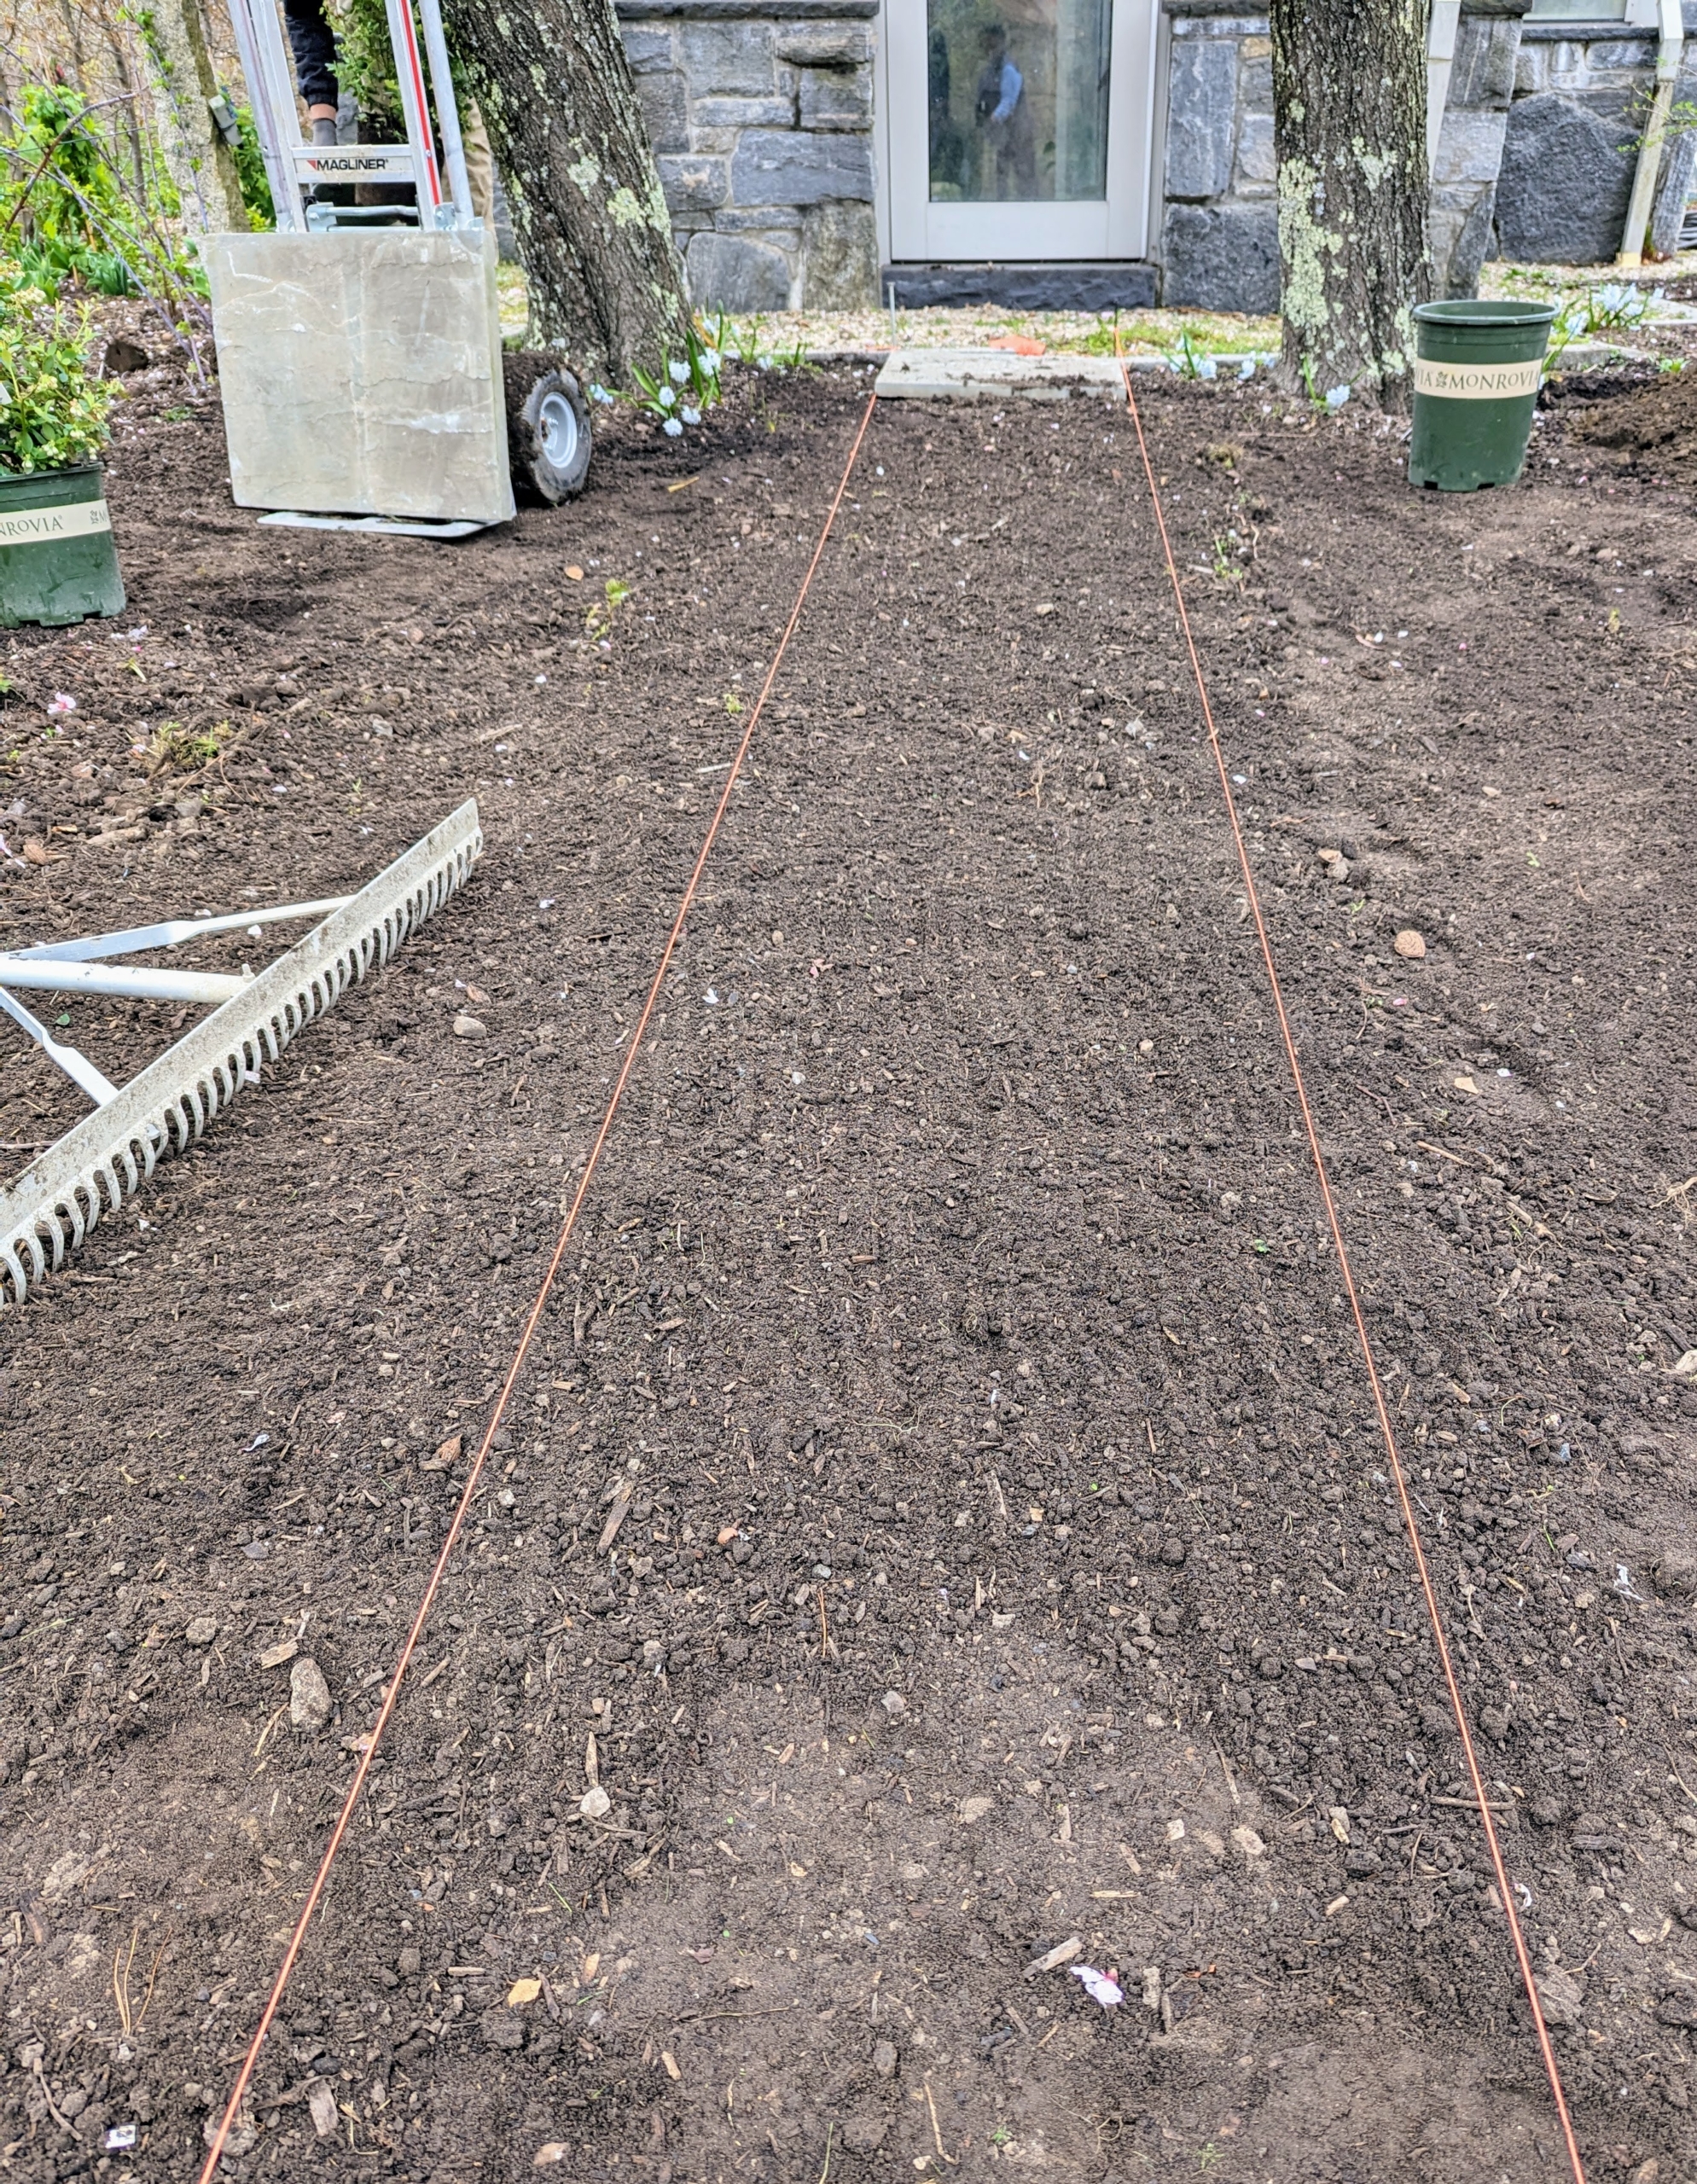
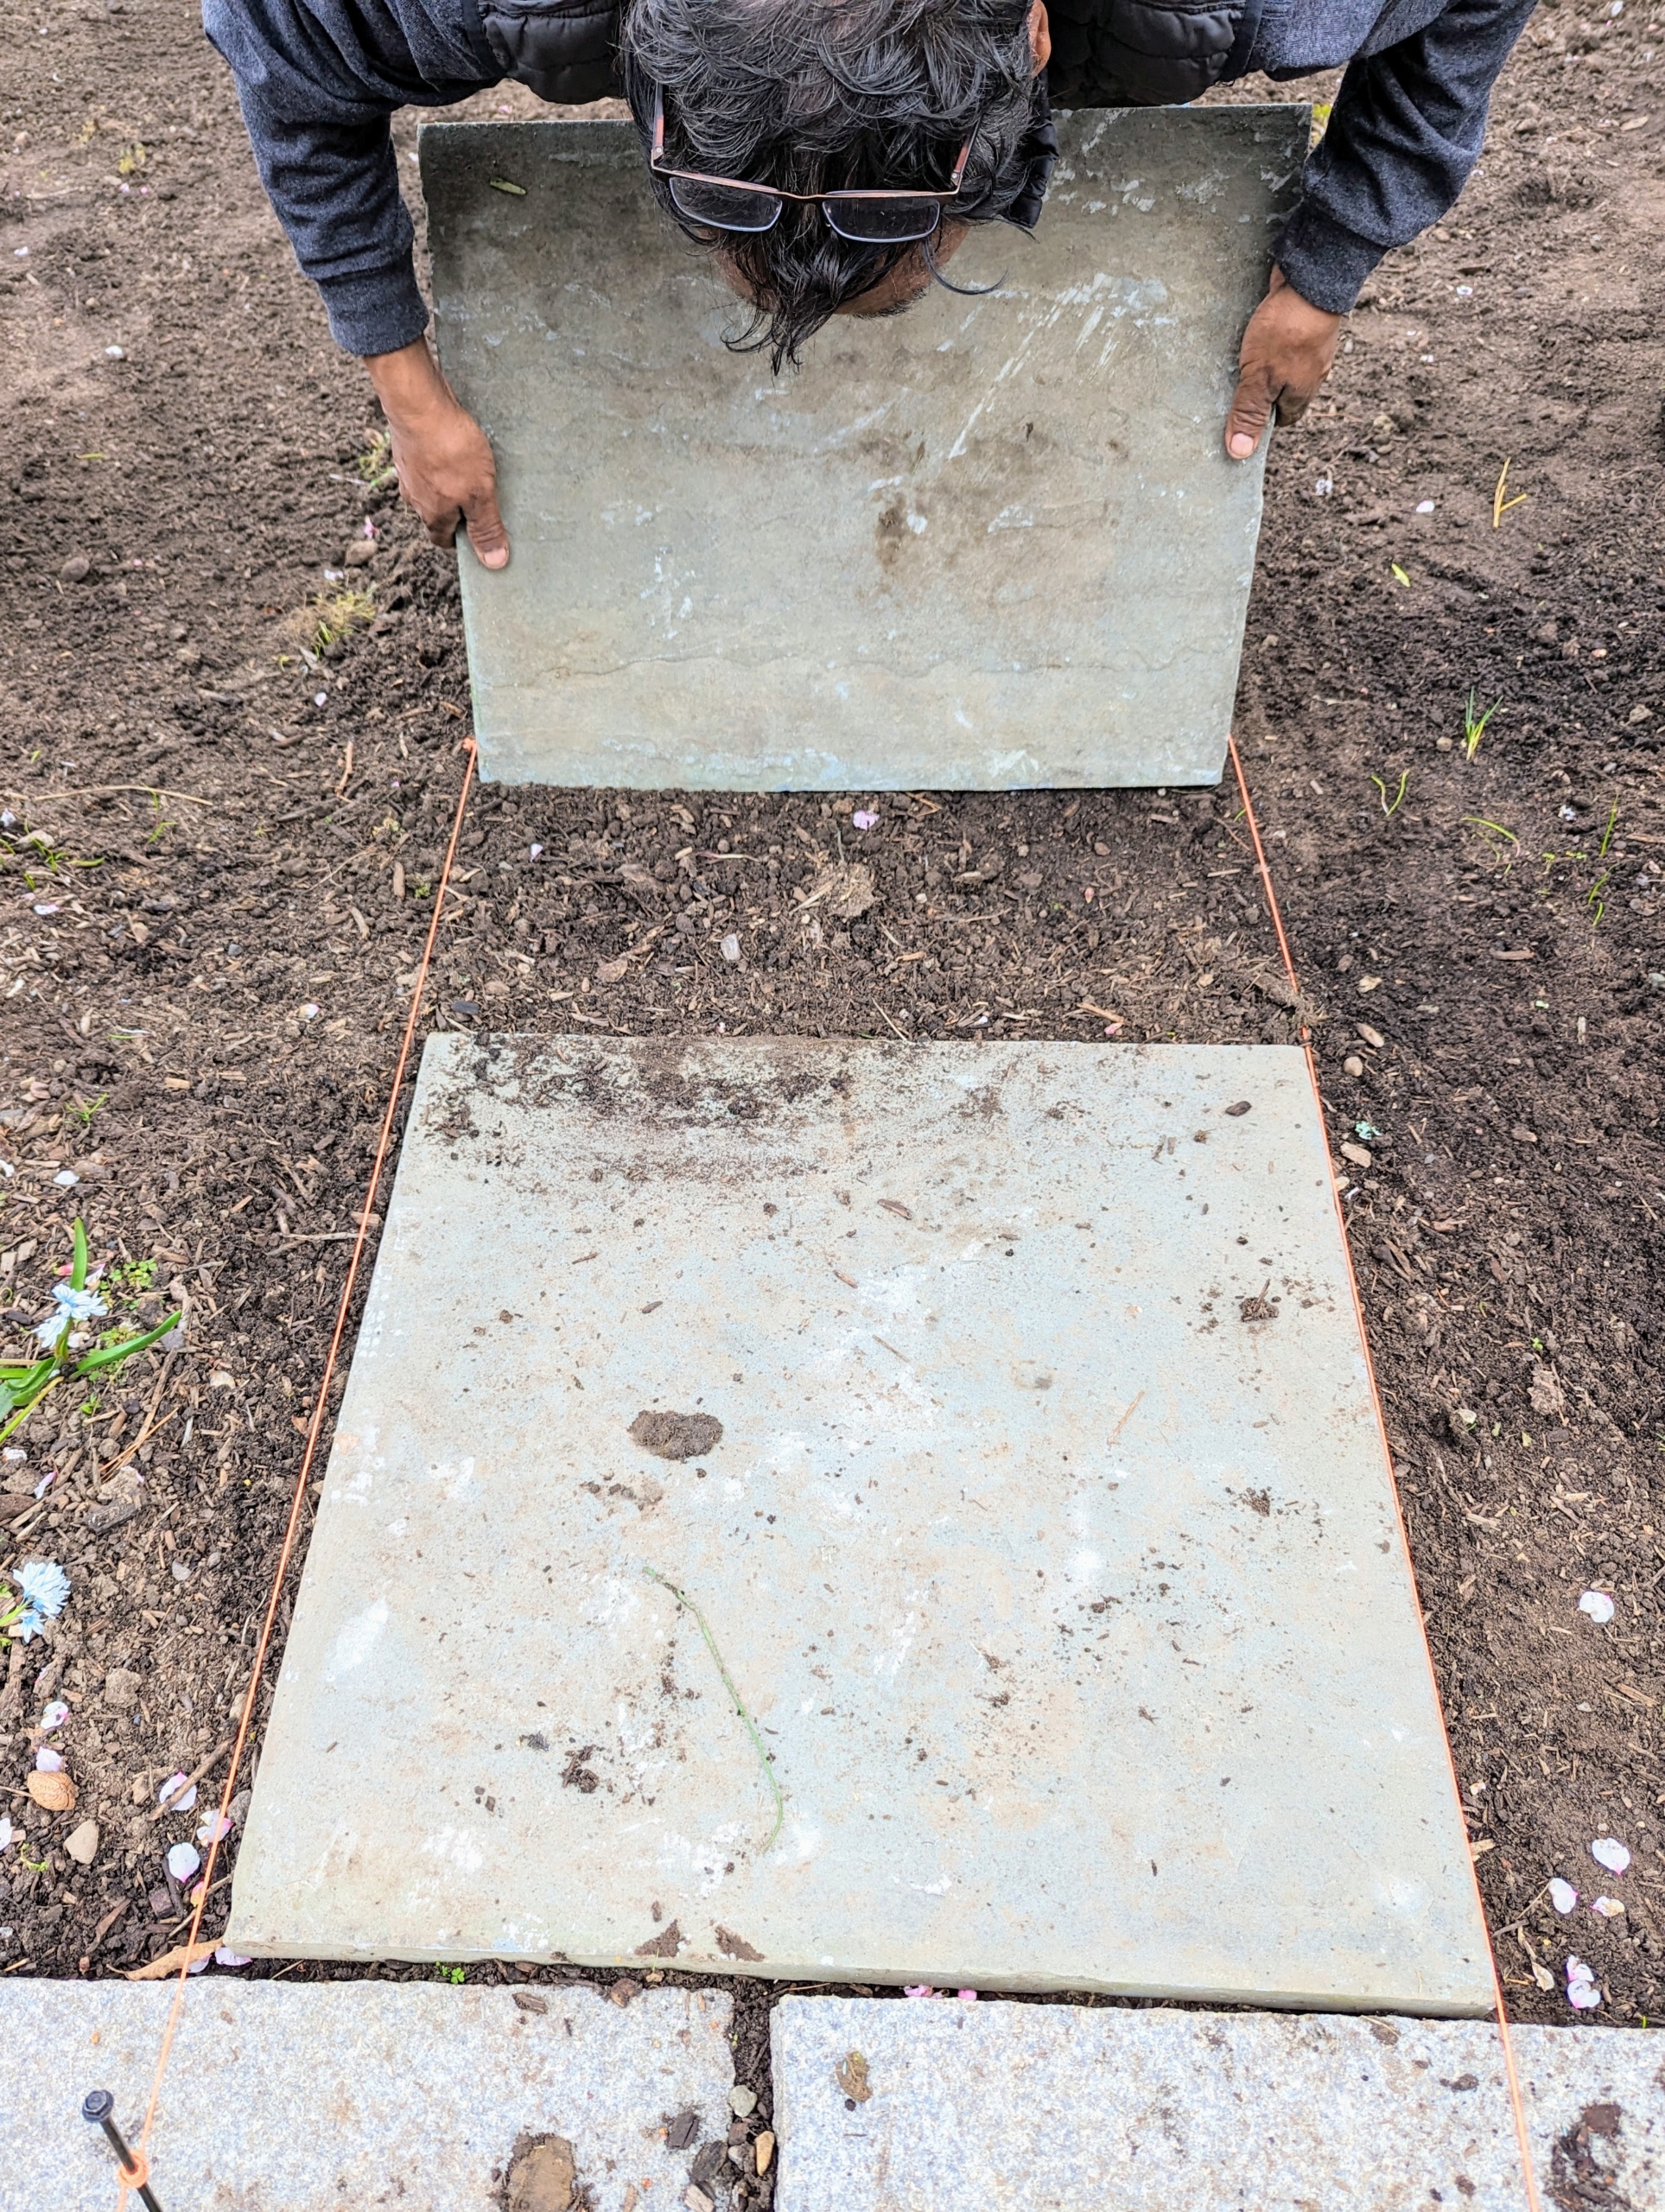
Meanwhile, Pete prepares to create a short bluestone path leading from the greenhouse door and across the soil to the lawn.
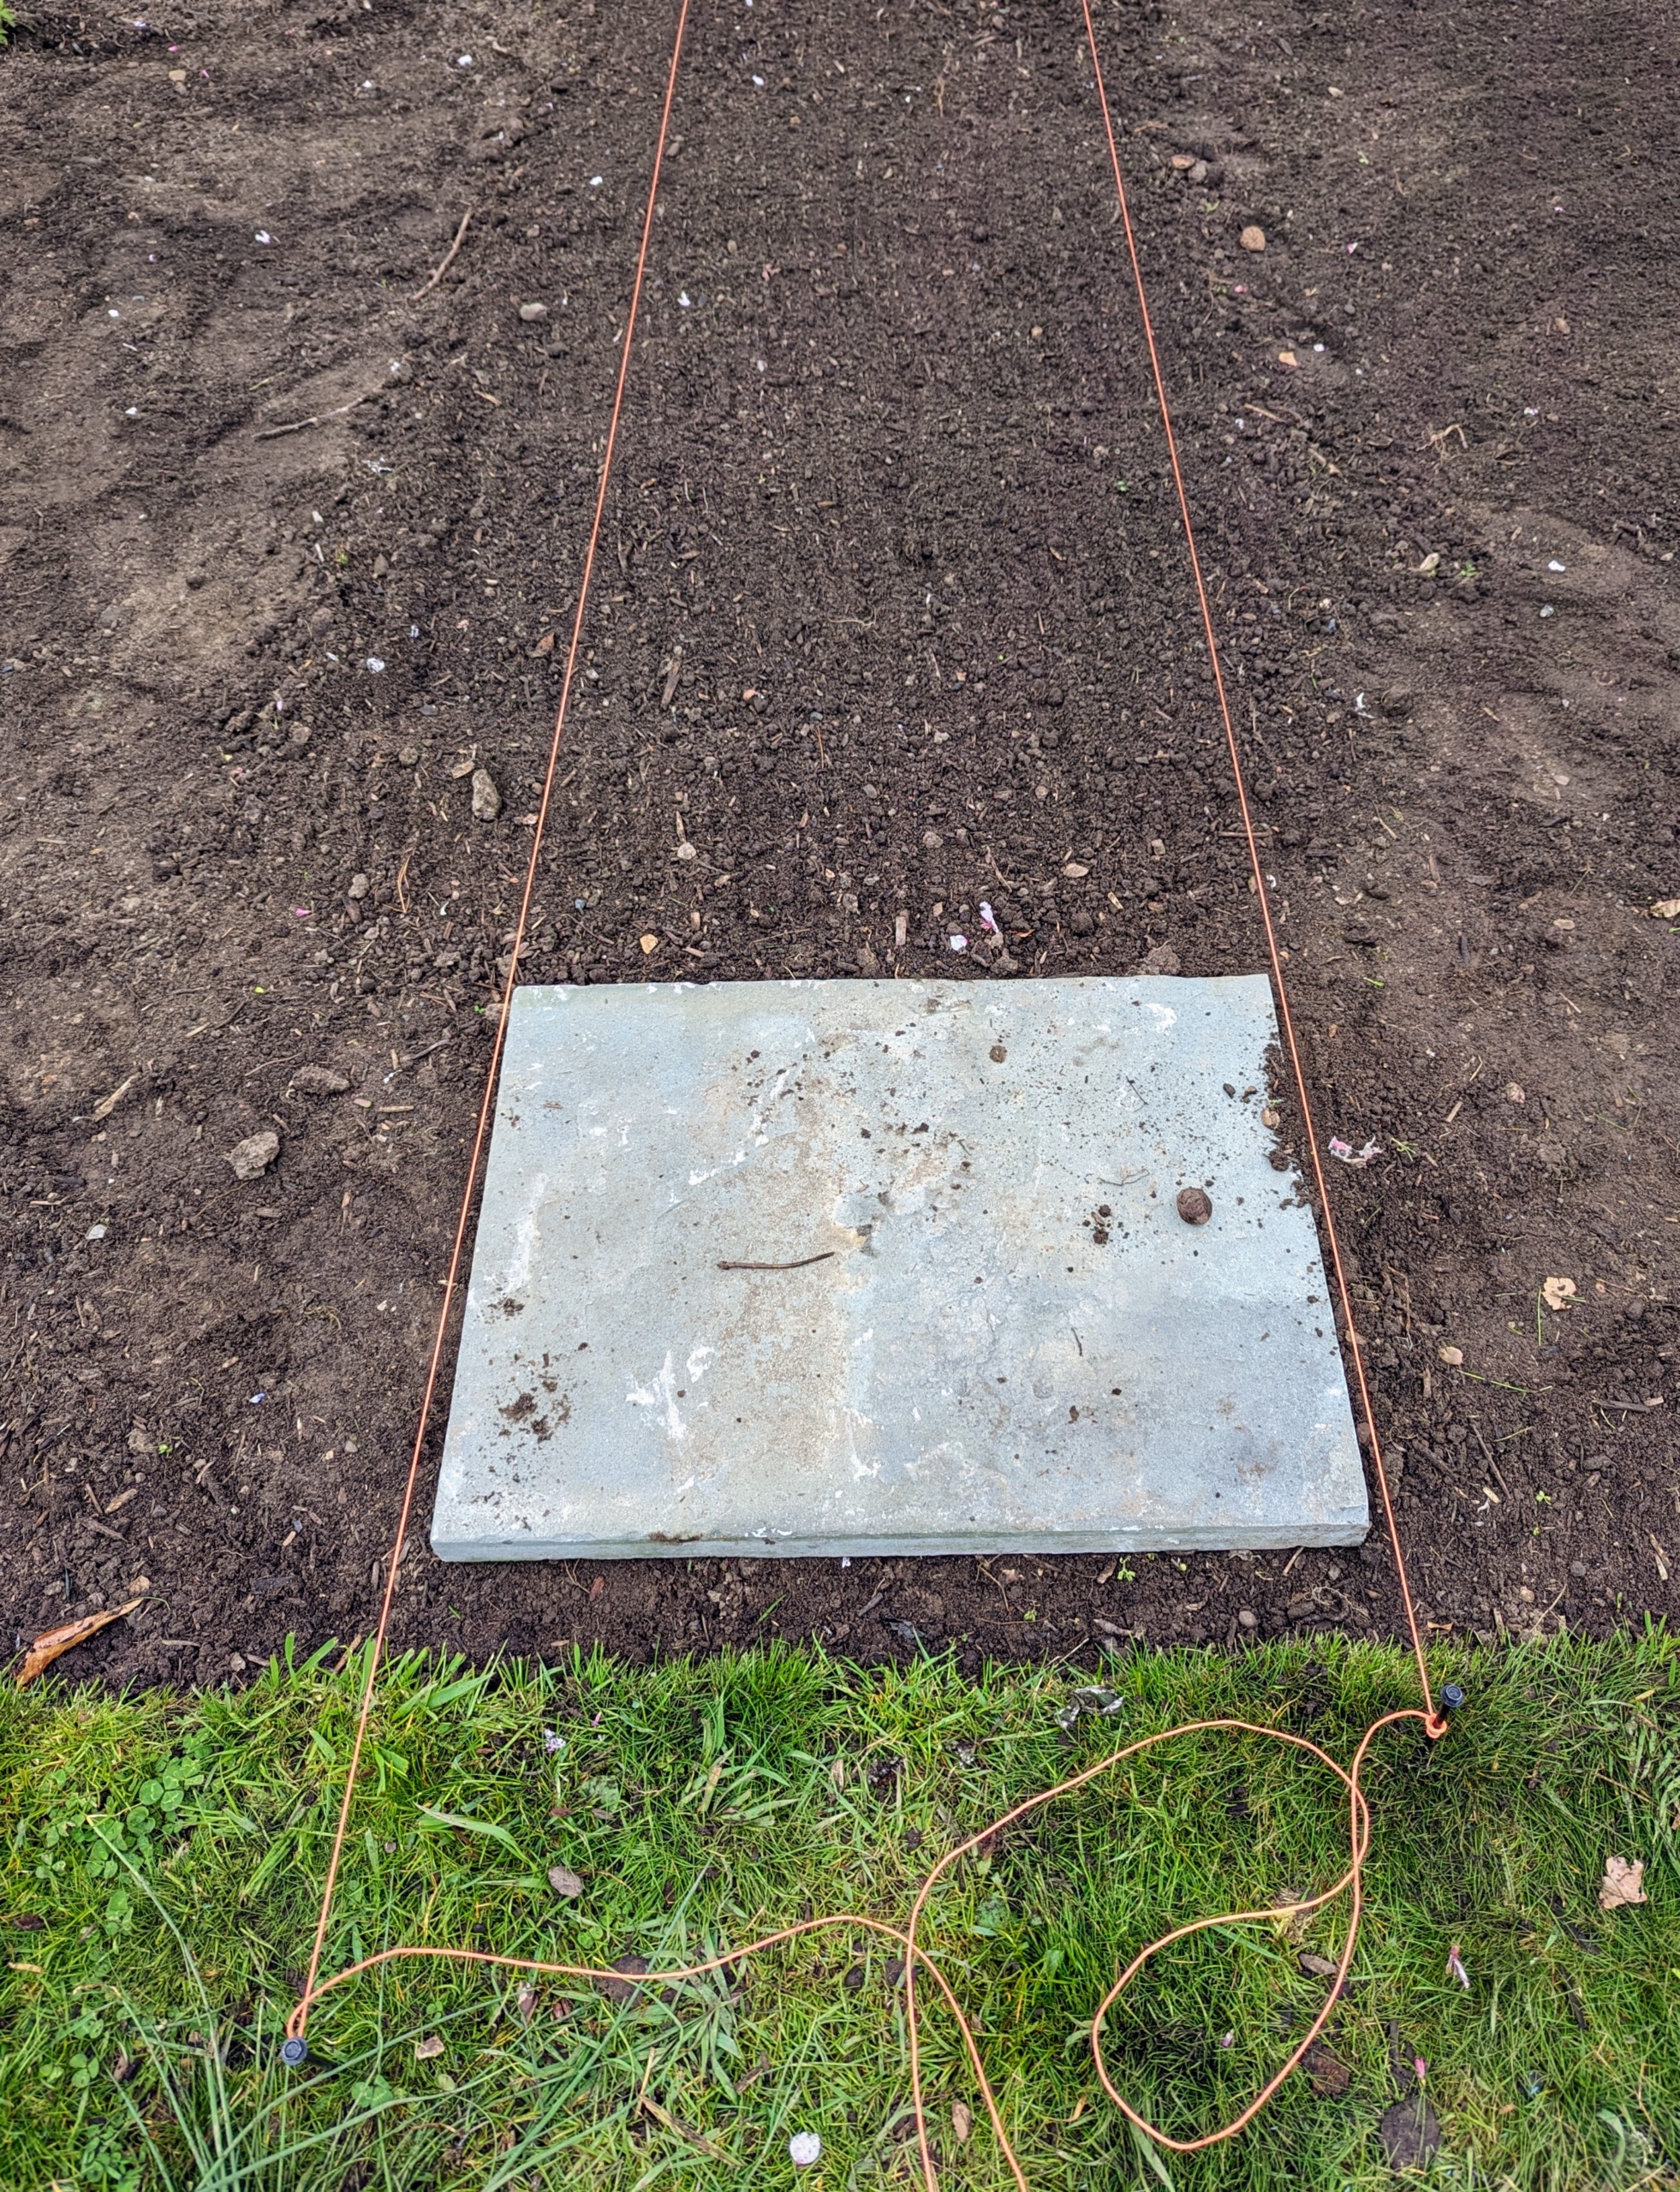
Pete rakes the space and removes any weeds, rocks, and old almond hulls. Then he puts up the landscape twine to guide the placement of the pavers. When using twine remember not to cut it – keep it spooled at one end, so it can be used over and over.
The first paver is positioned – this one next to the grass.
These bluestone pavers once covered the terrace at my former East Hampton home. I am glad I brought them all back here to my farm where they can be repurposed.
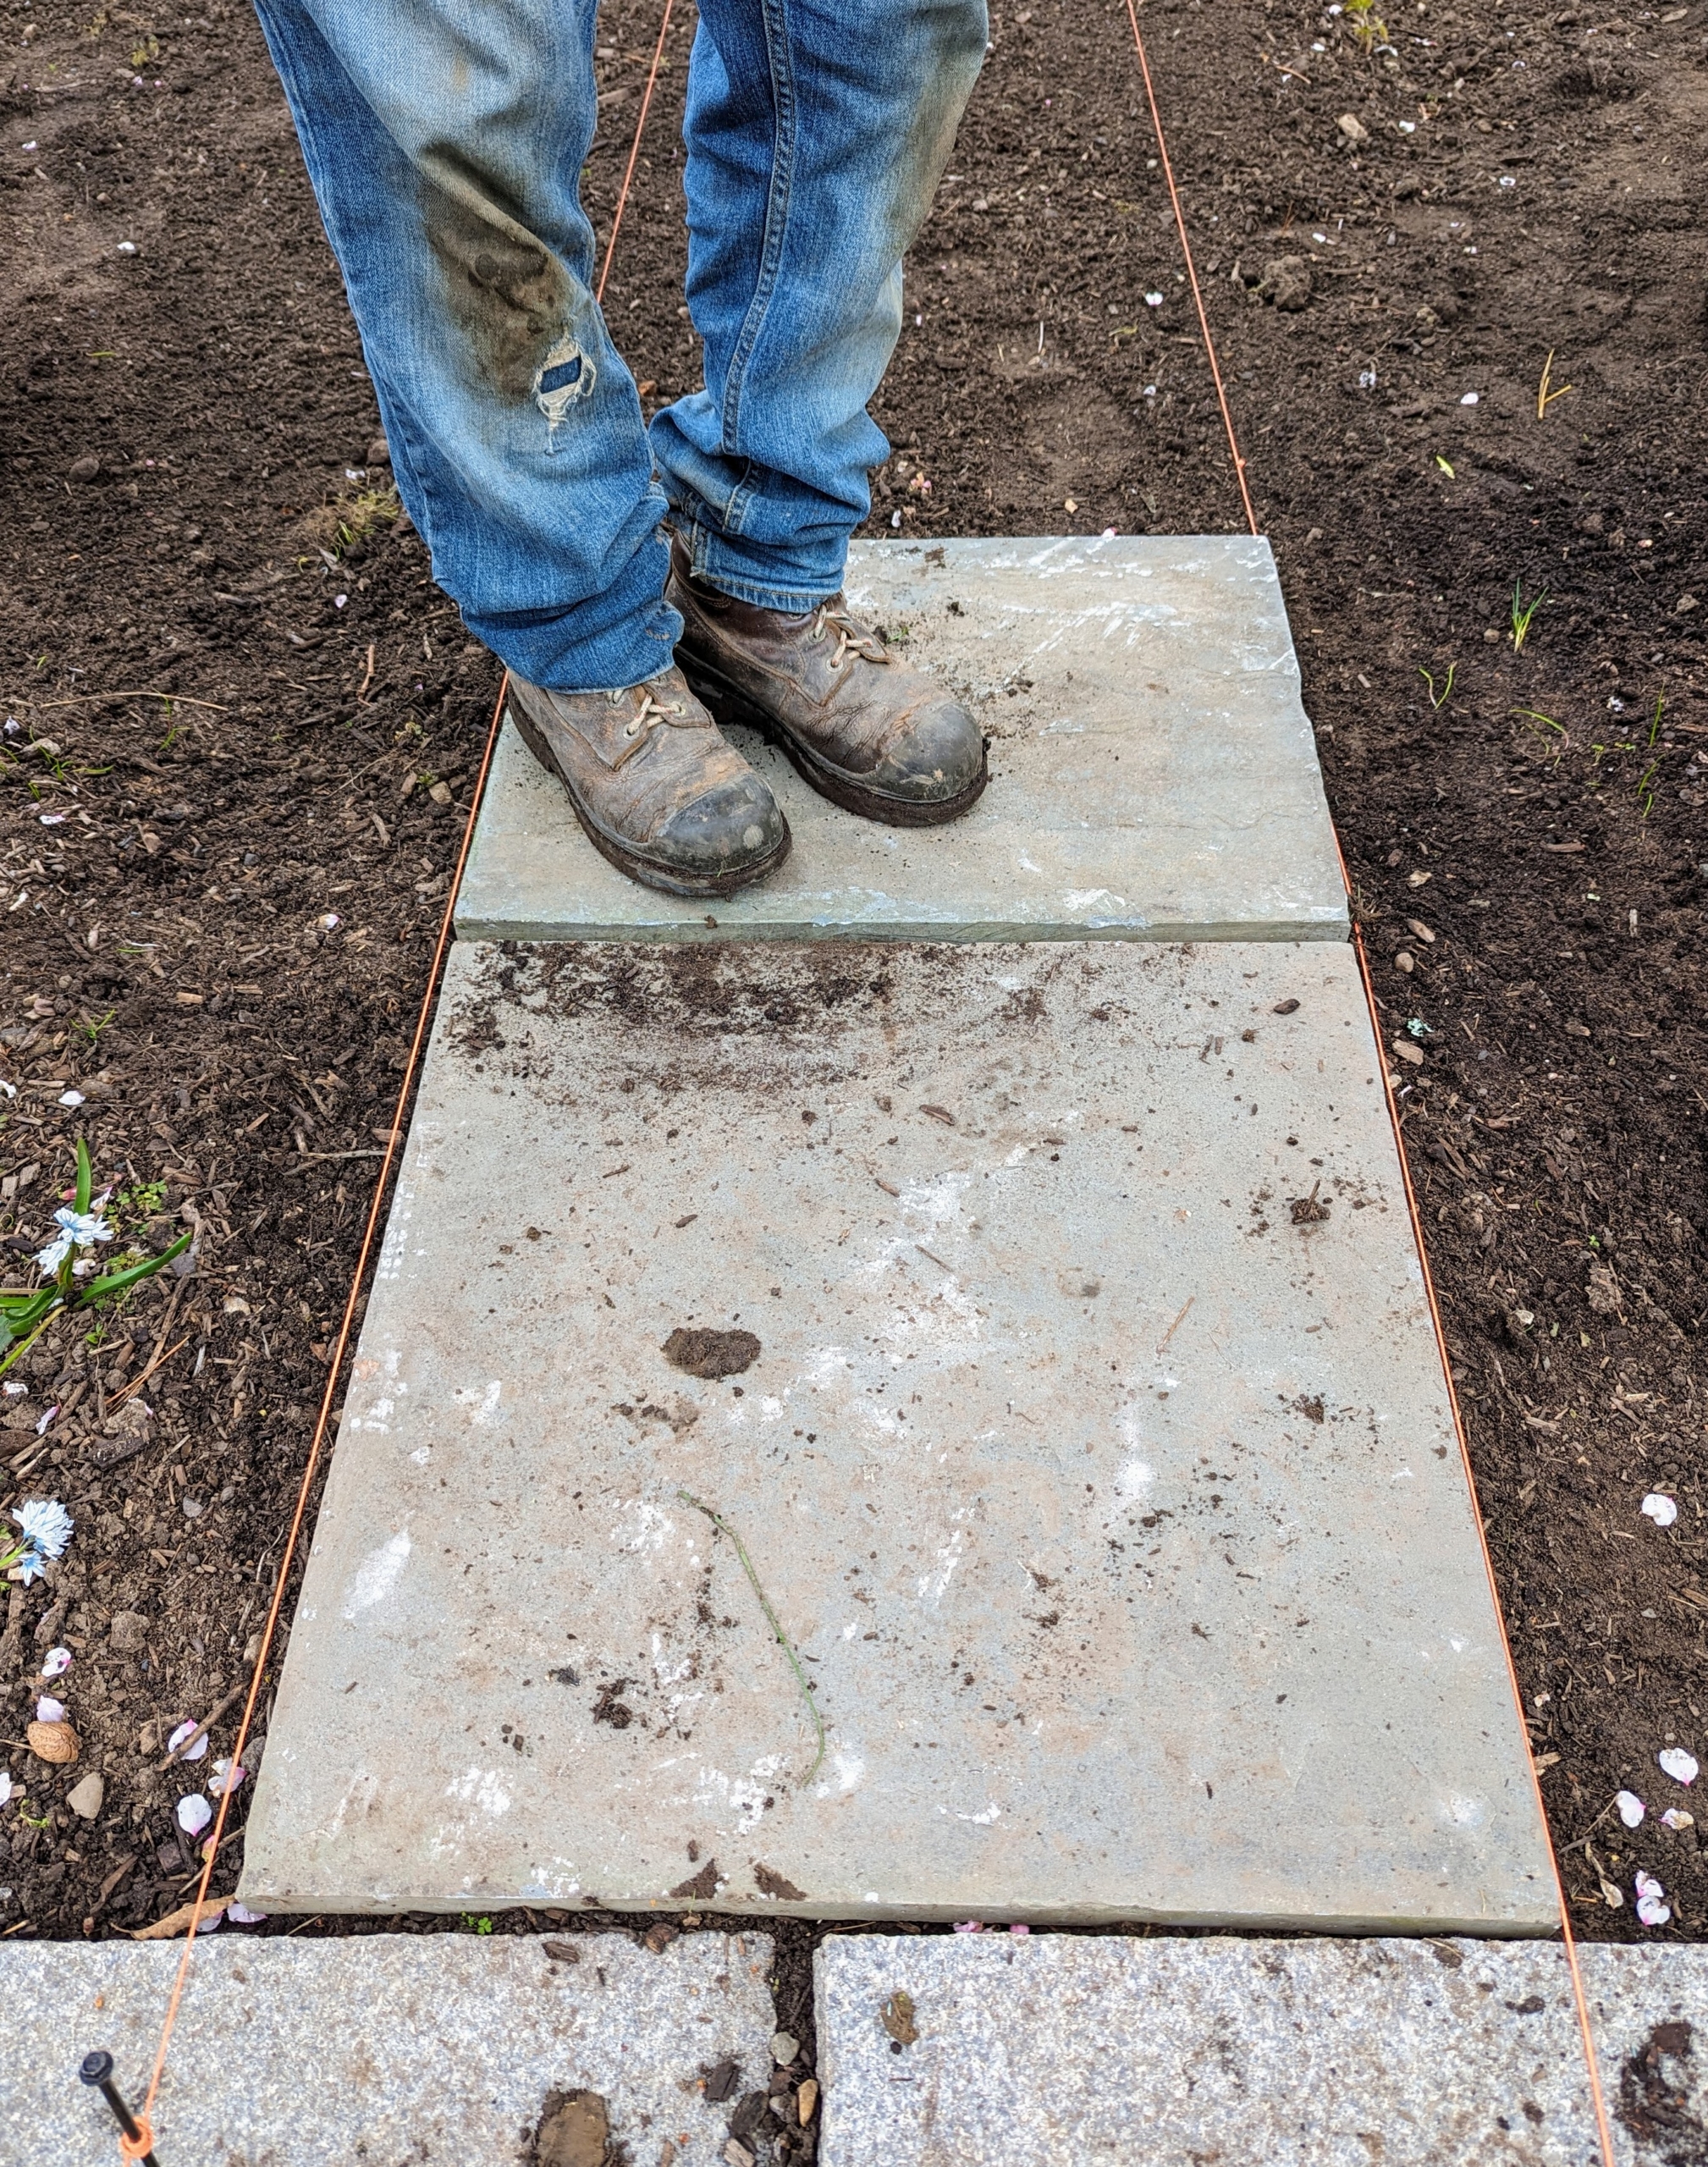
As he goes, Pete steps on the stone to ensure it does not move or wobble.
One by one, Pete carefully positions each piece.
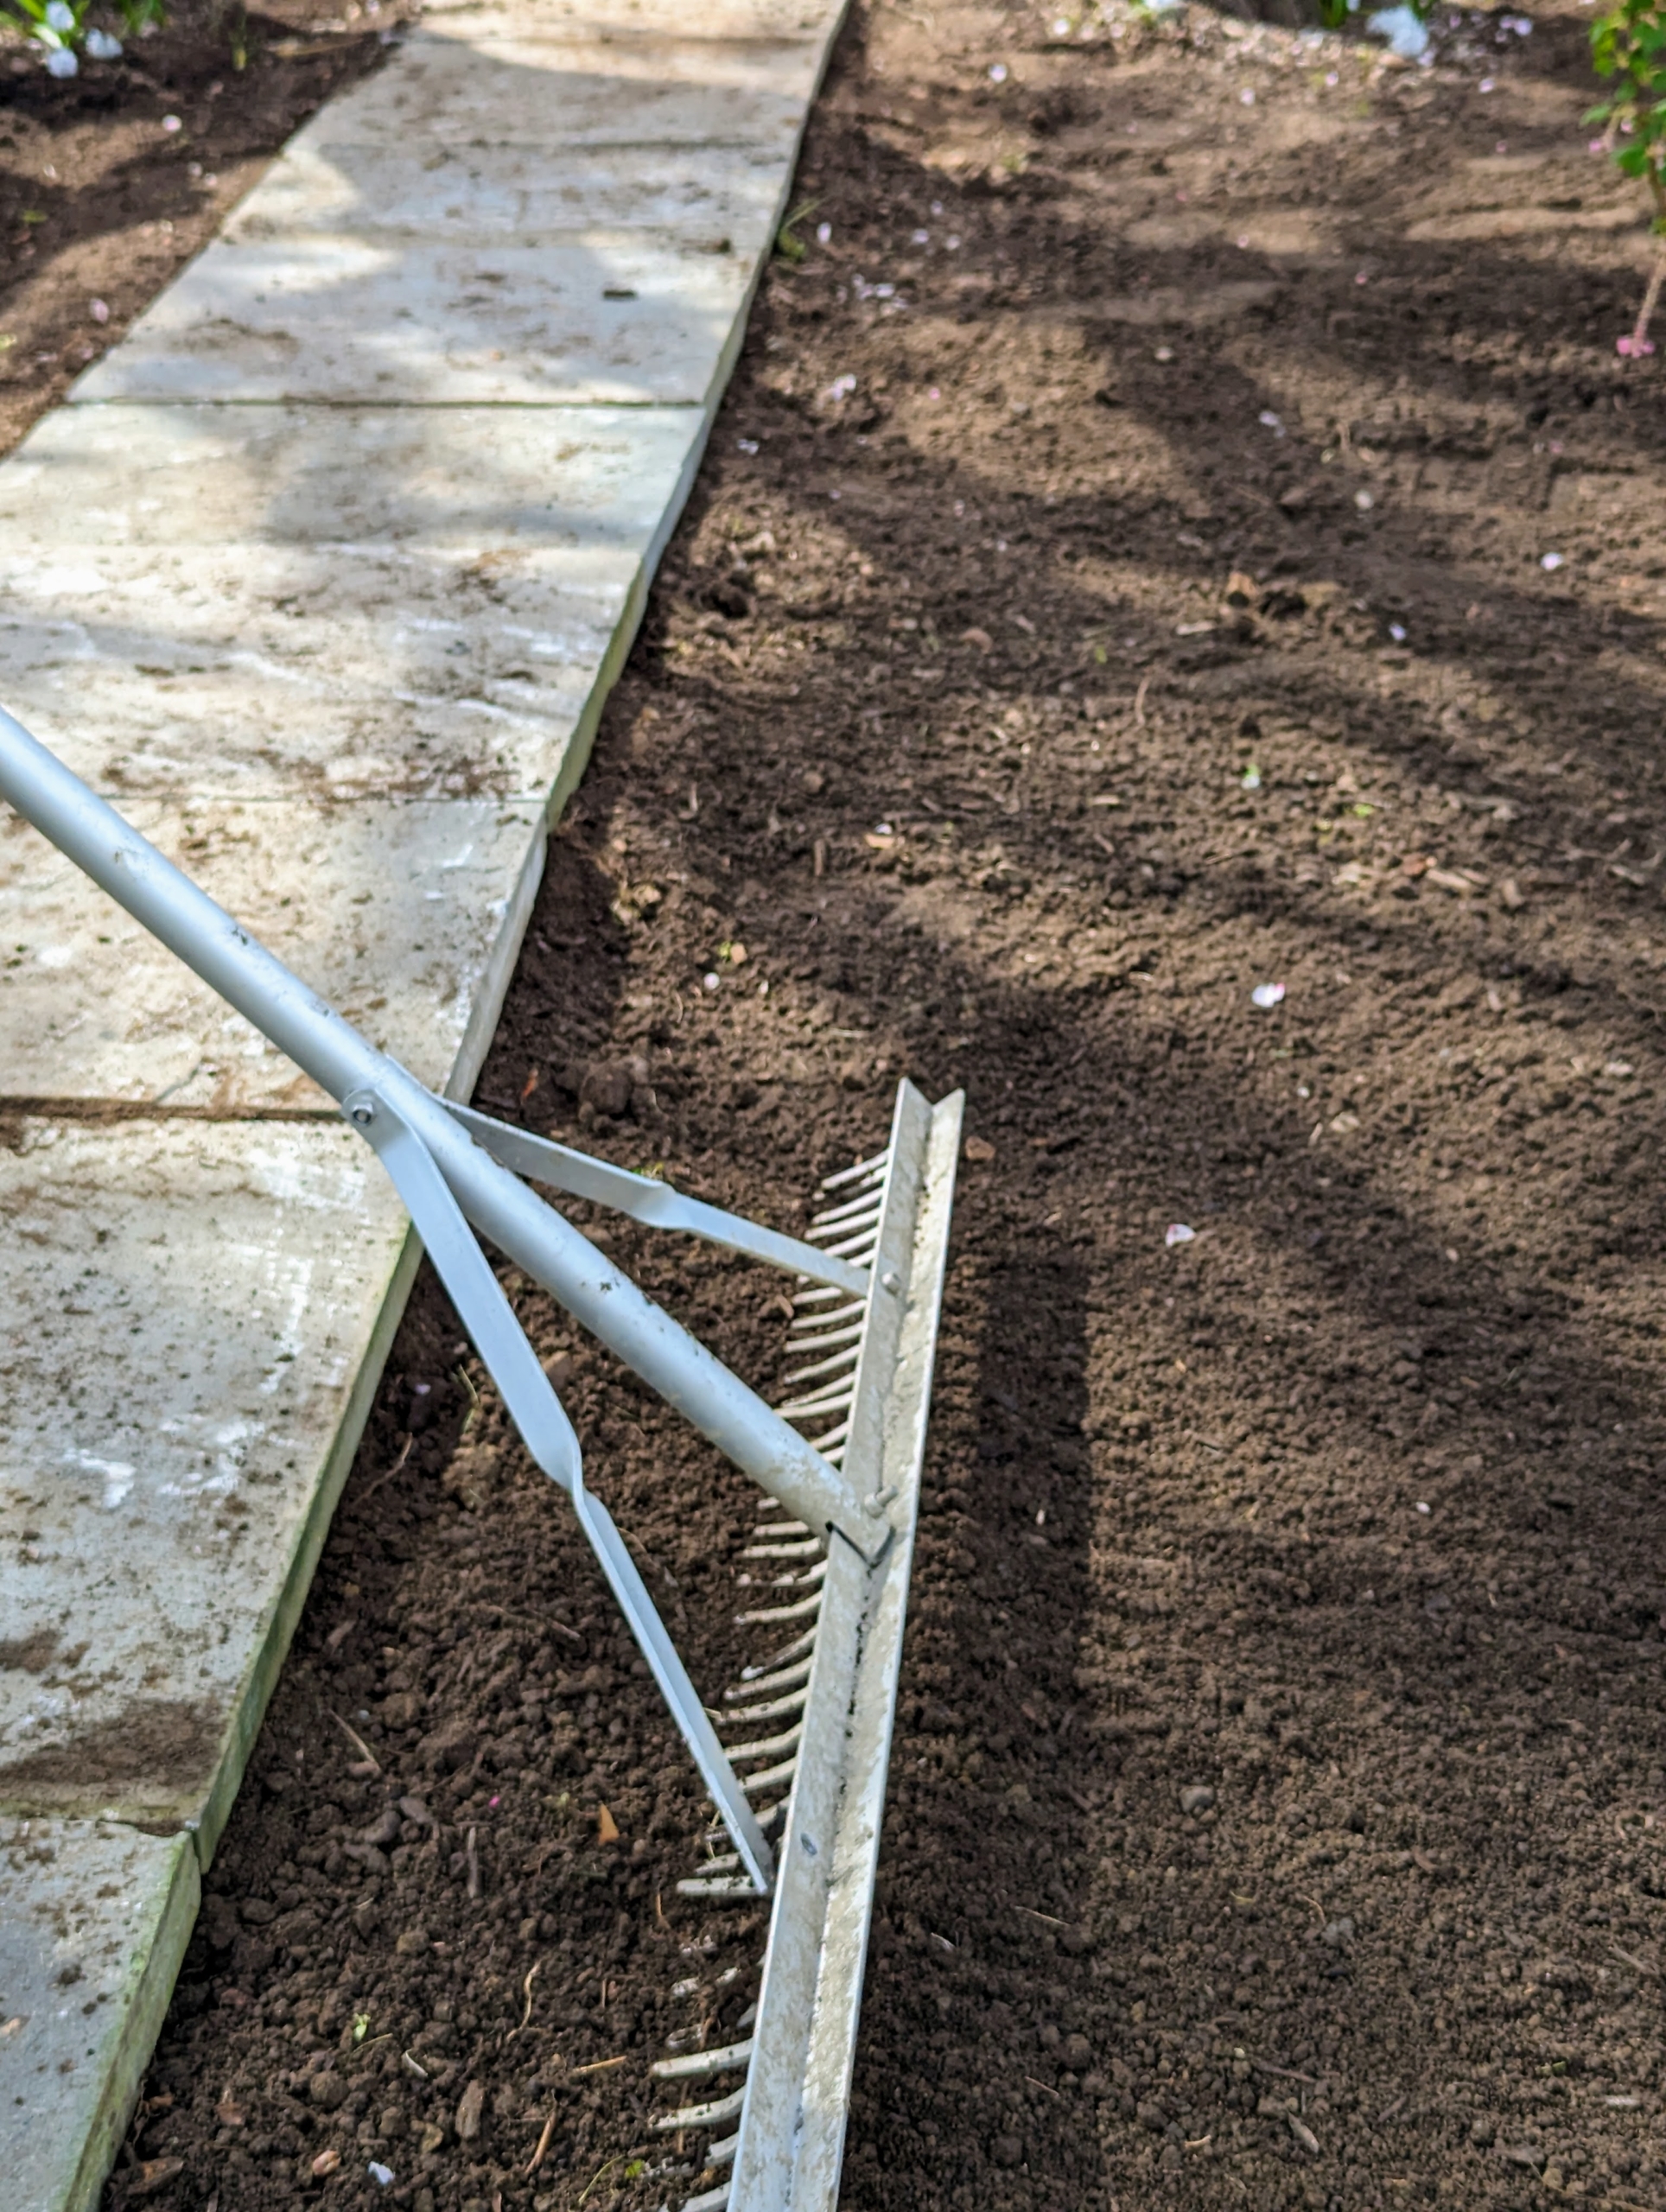
After all of them are in place, soil on both sides of the path is raked smooth.
And here it is all finished. In under an hour, this entire area has transformed and it looks terrific! I hope this inspires you to take on a project at your home this weekend!