It's always rewarding to repurpose materials and put them to good use around my farm.
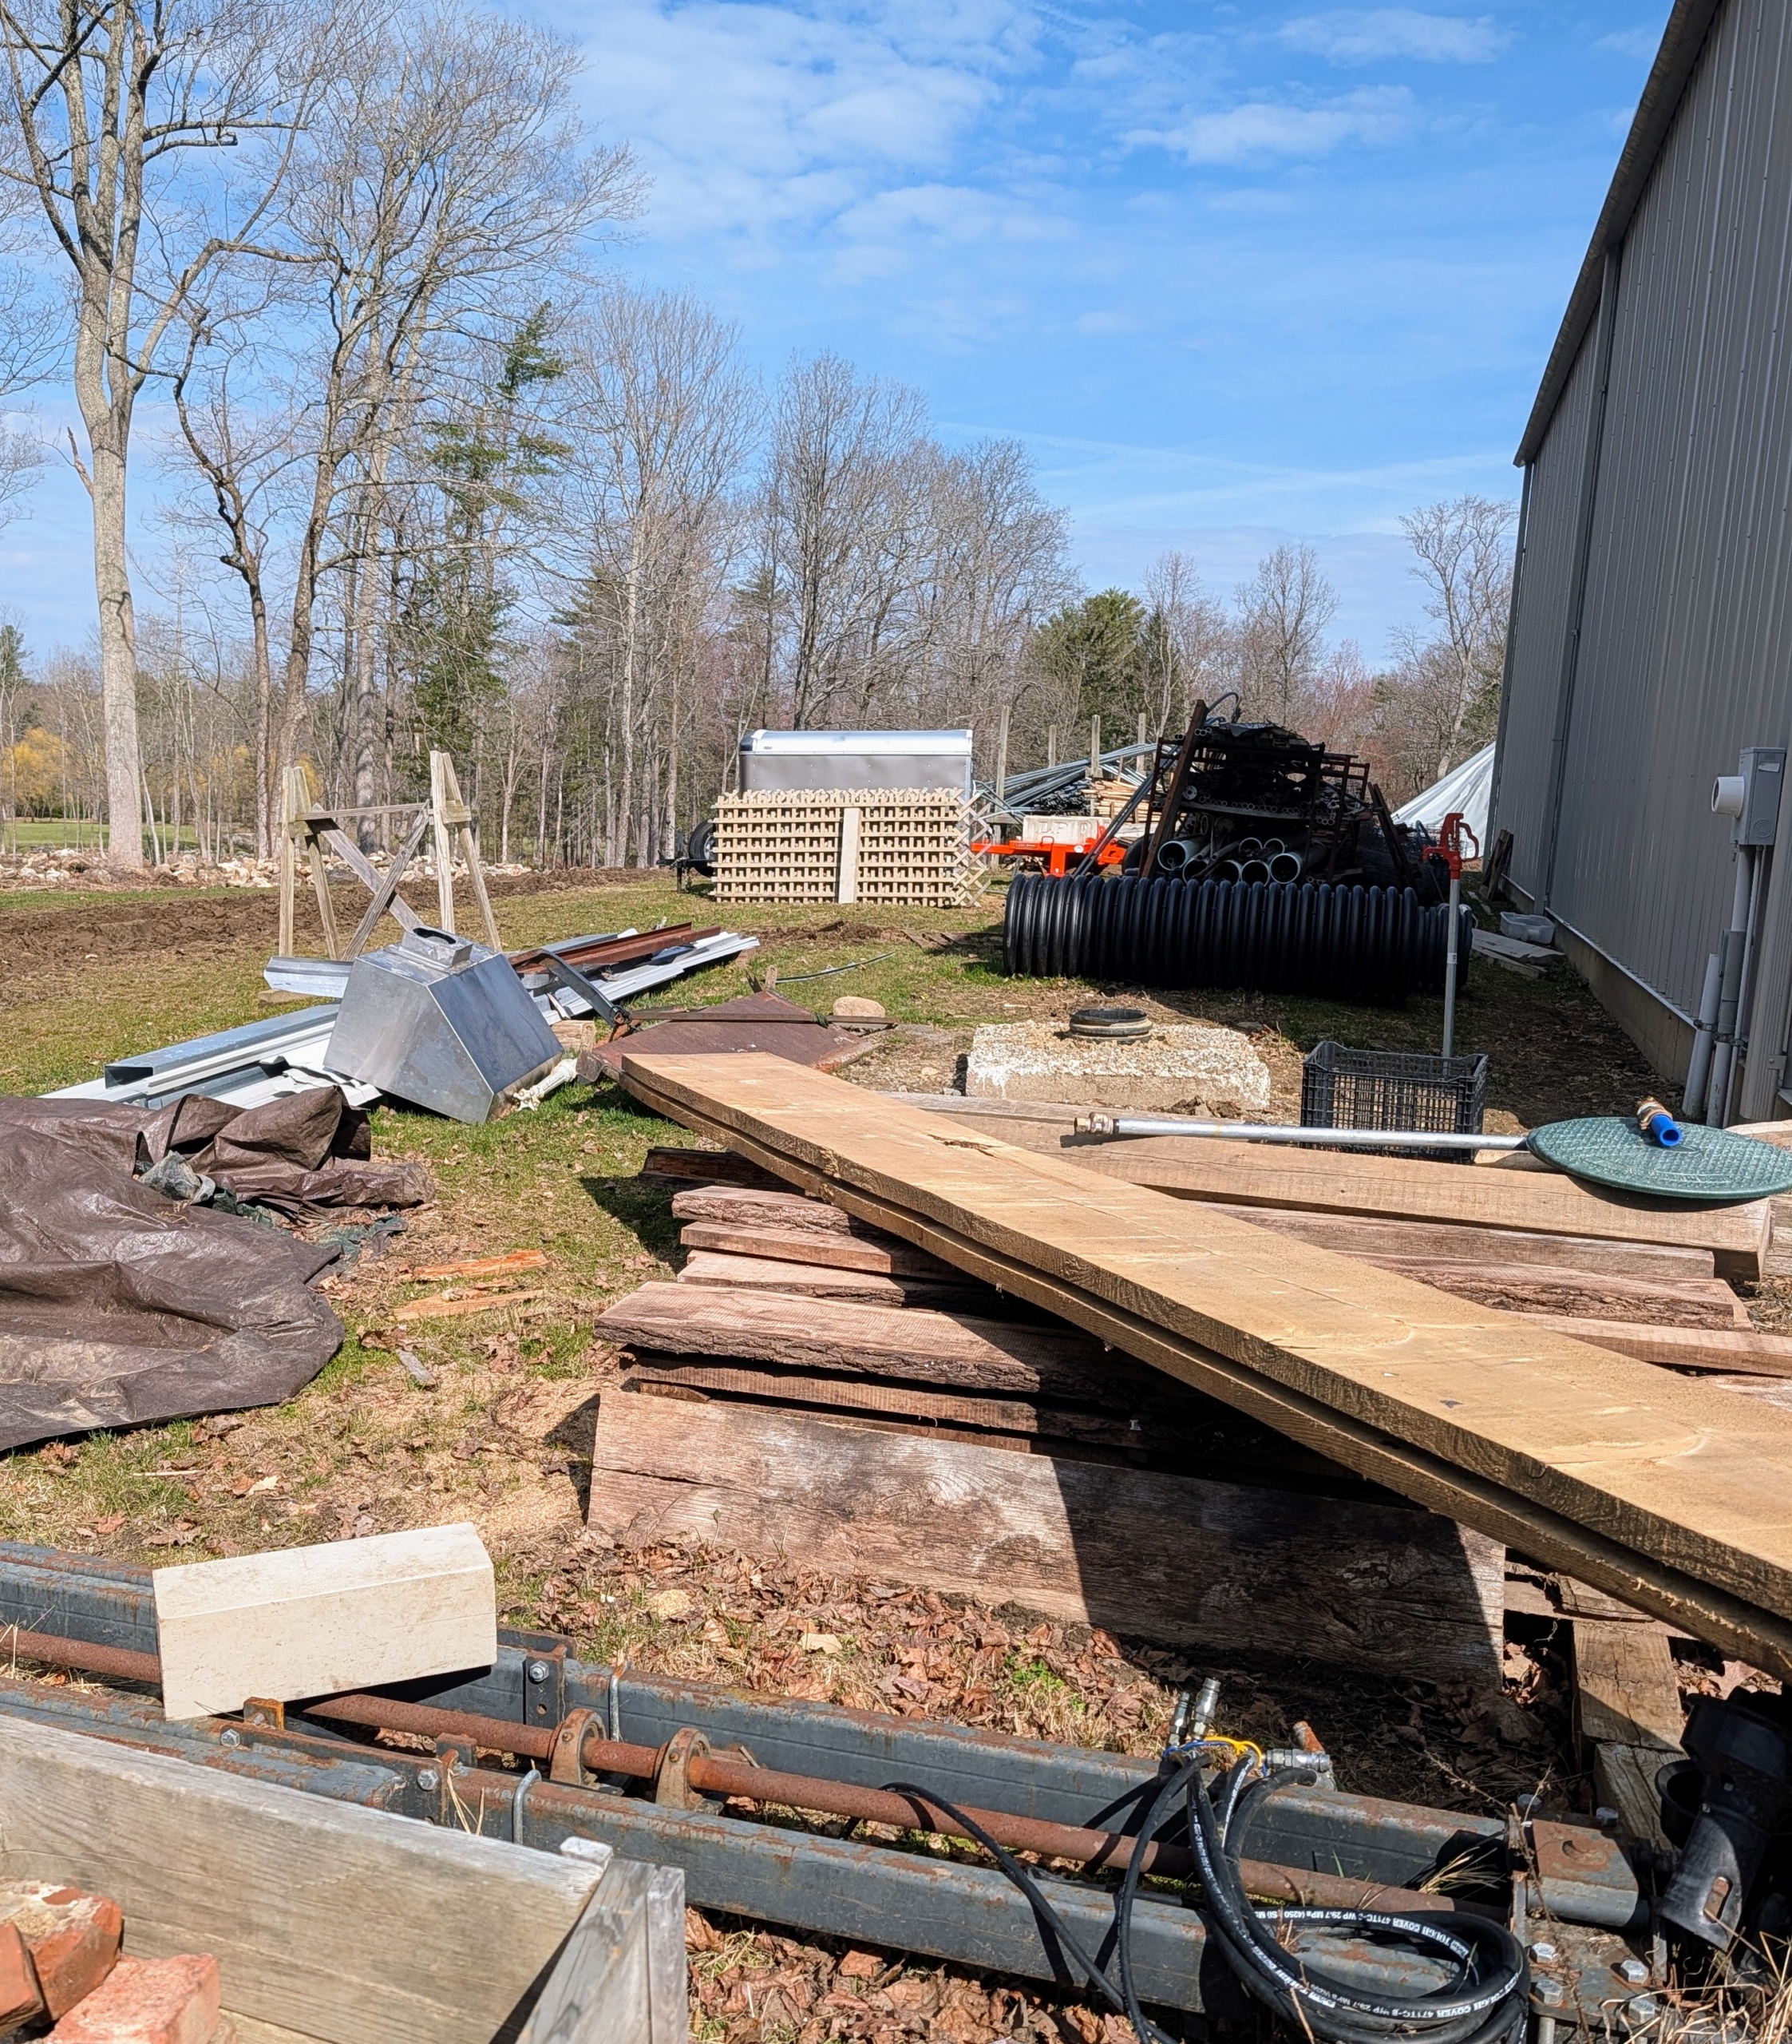
Now that the weather is warmer, I asked Pete Sherpa from my outdoor grounds crew to clean and organize an area in the back of one of my fields where I store various building materials including wooden stakes and boards, metal framing for our protective burlap structures, spare wire fencing, etc. Soon after starting the project Pete found an old concrete slab once used as a base for an automatic horse waterer and thought it would make a good foundation for the outdoor faucet in this space.
Enjoy these photos.
Do you have a storage shed or space where you keep spare lumber and other materials? Is it all in order? This area is located just behind my compost yard. Once a year, I like to go through it and take stock of what is there, what is usable, and what needs to be disposed.
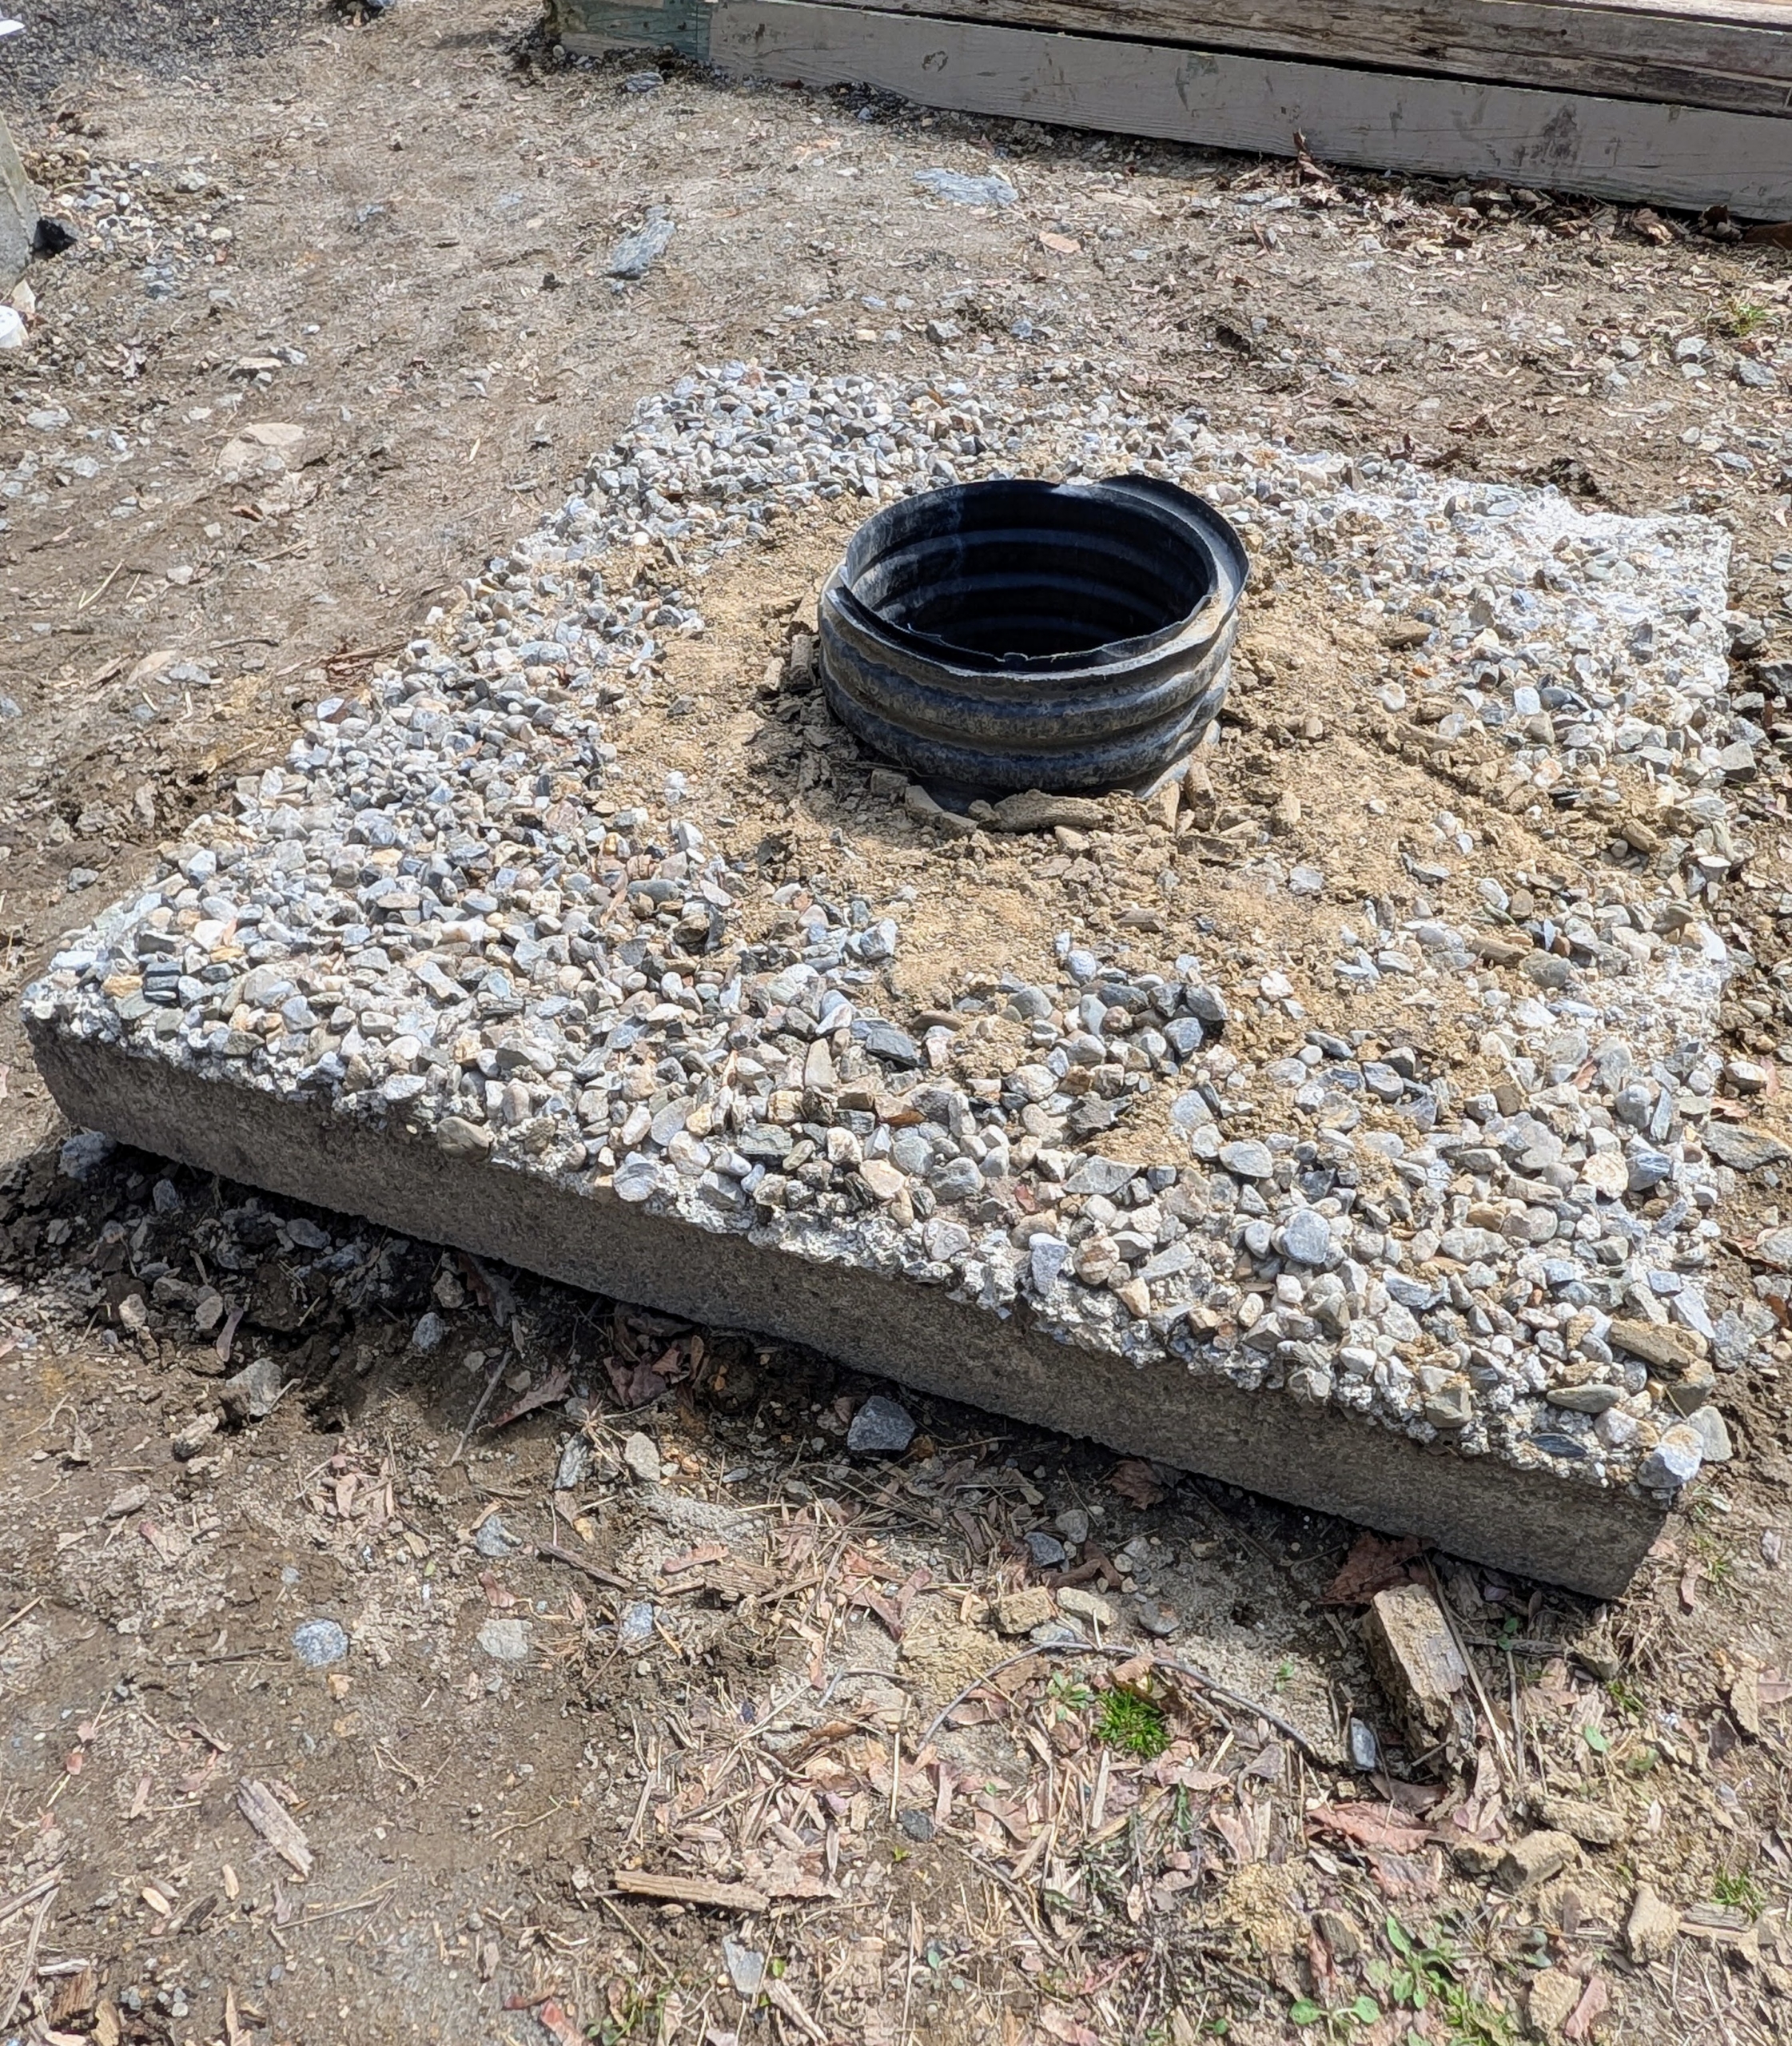
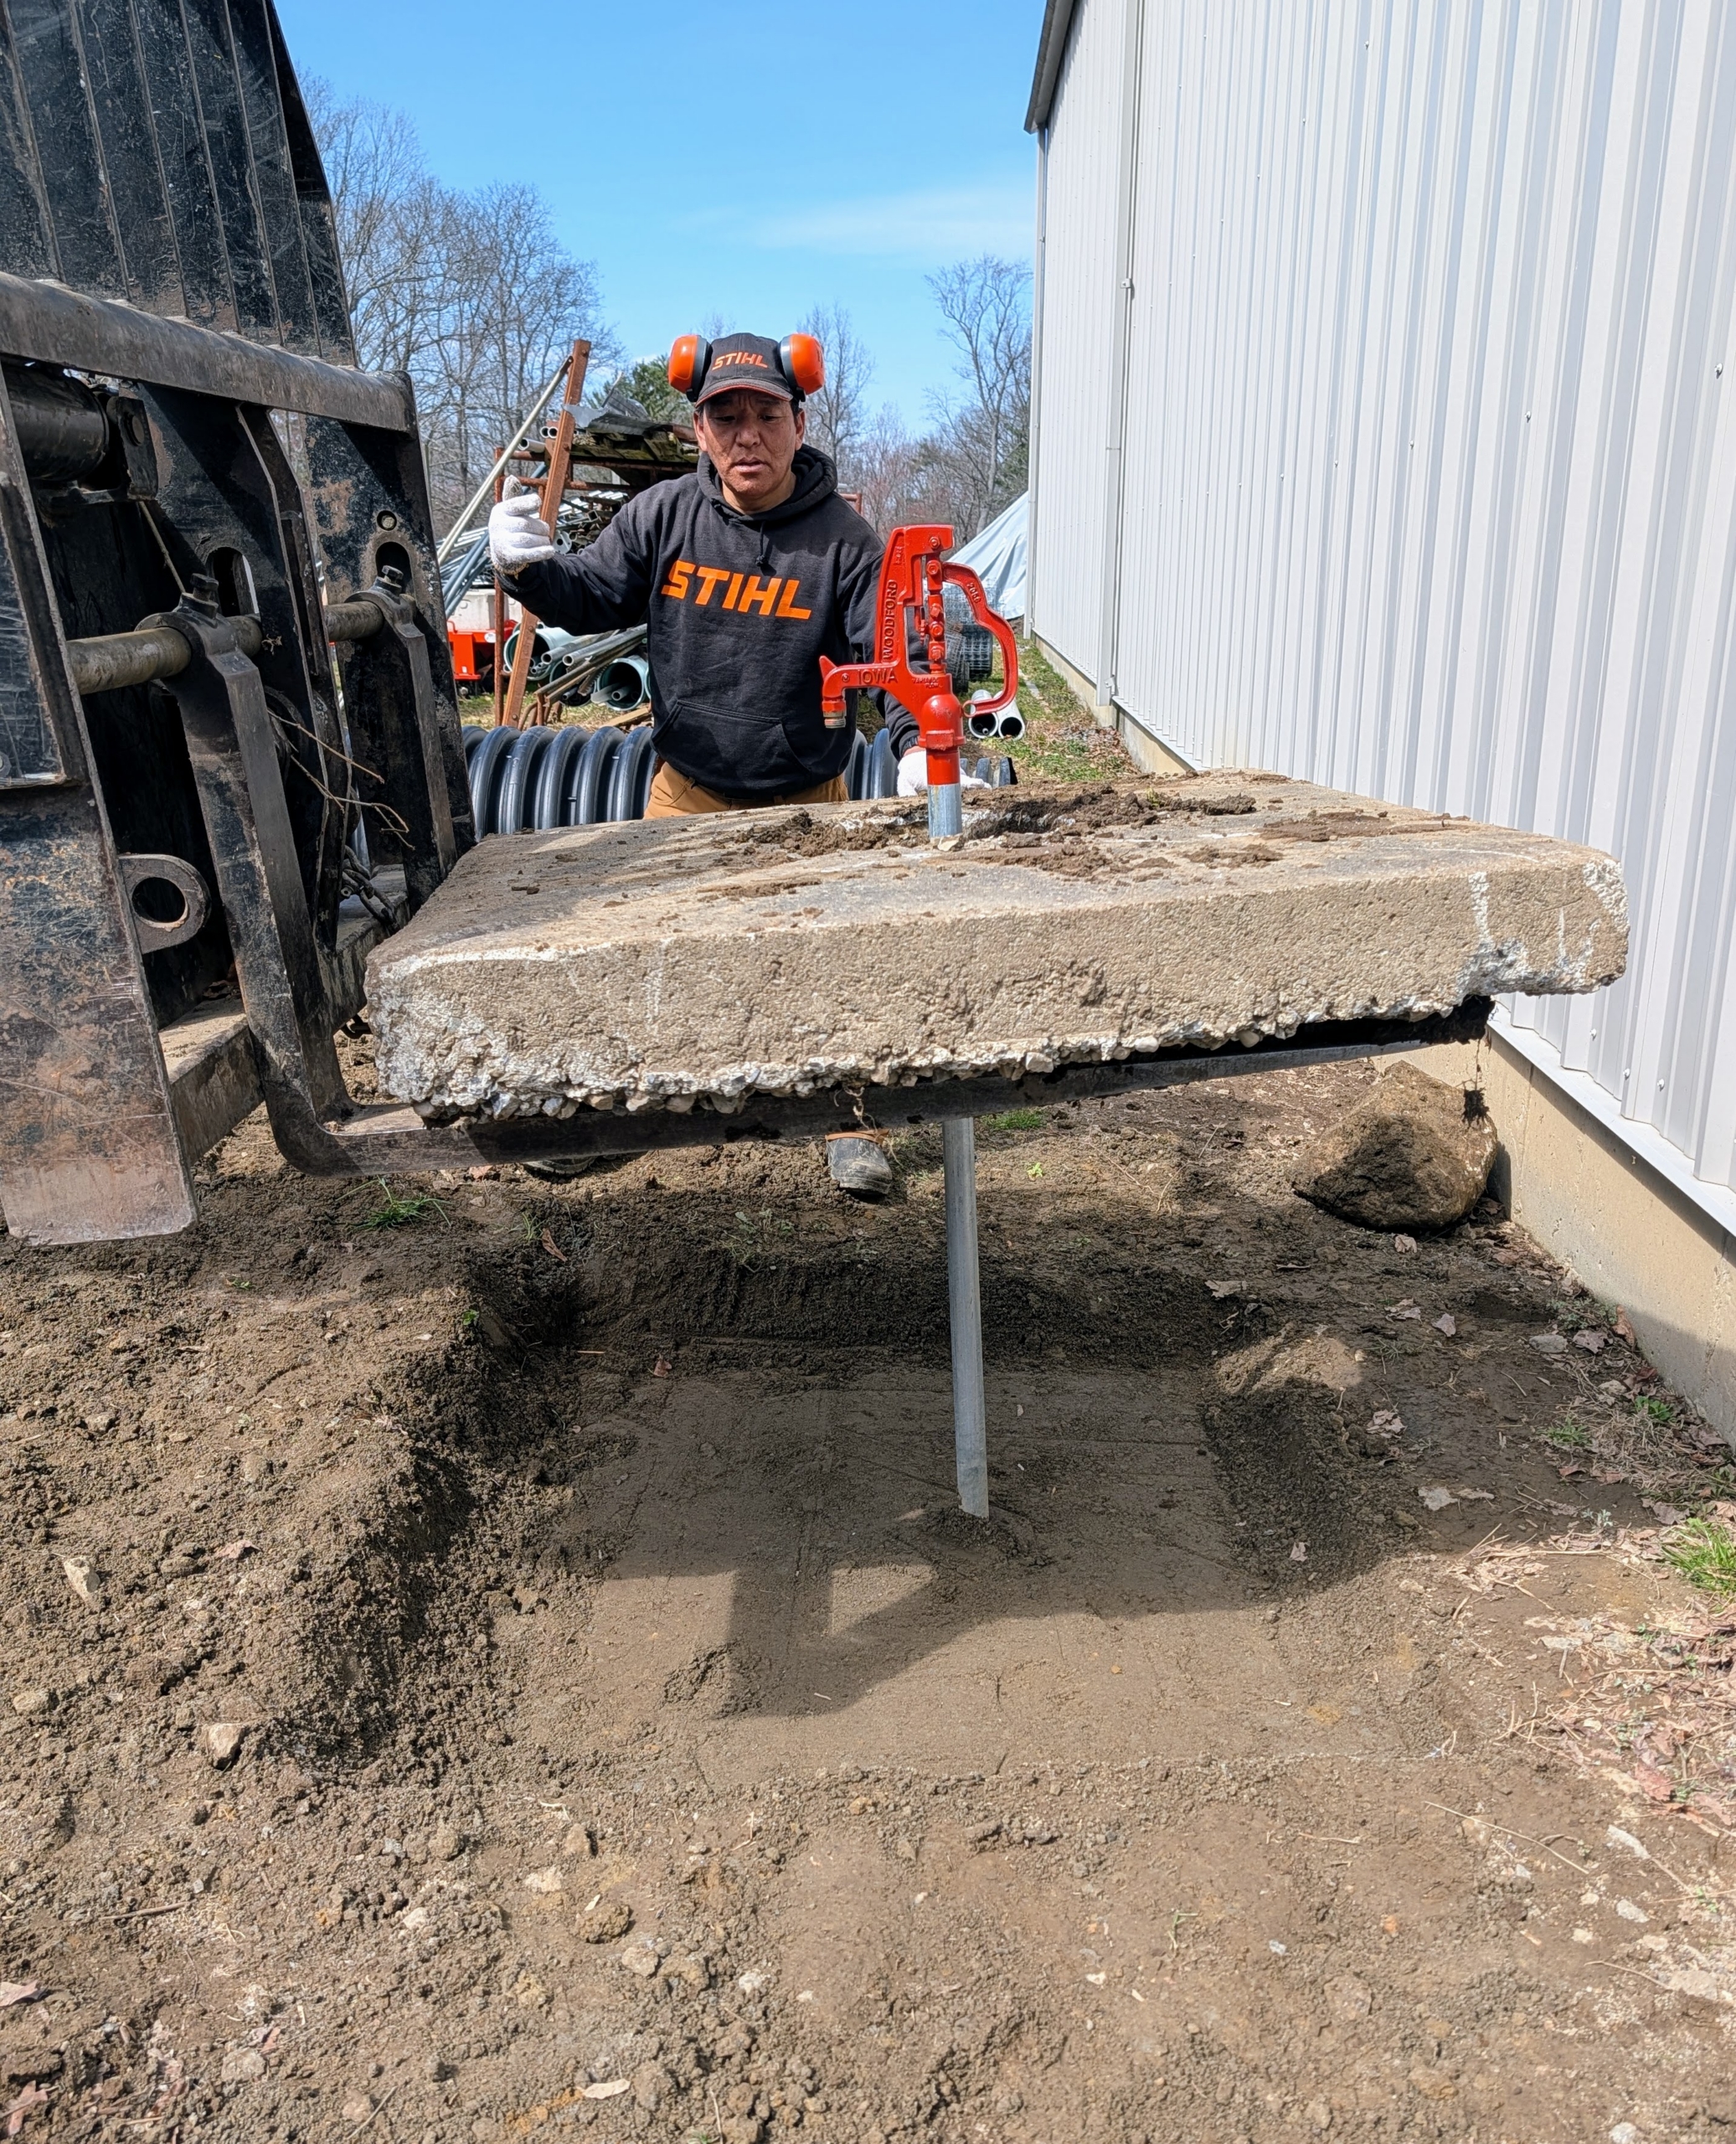
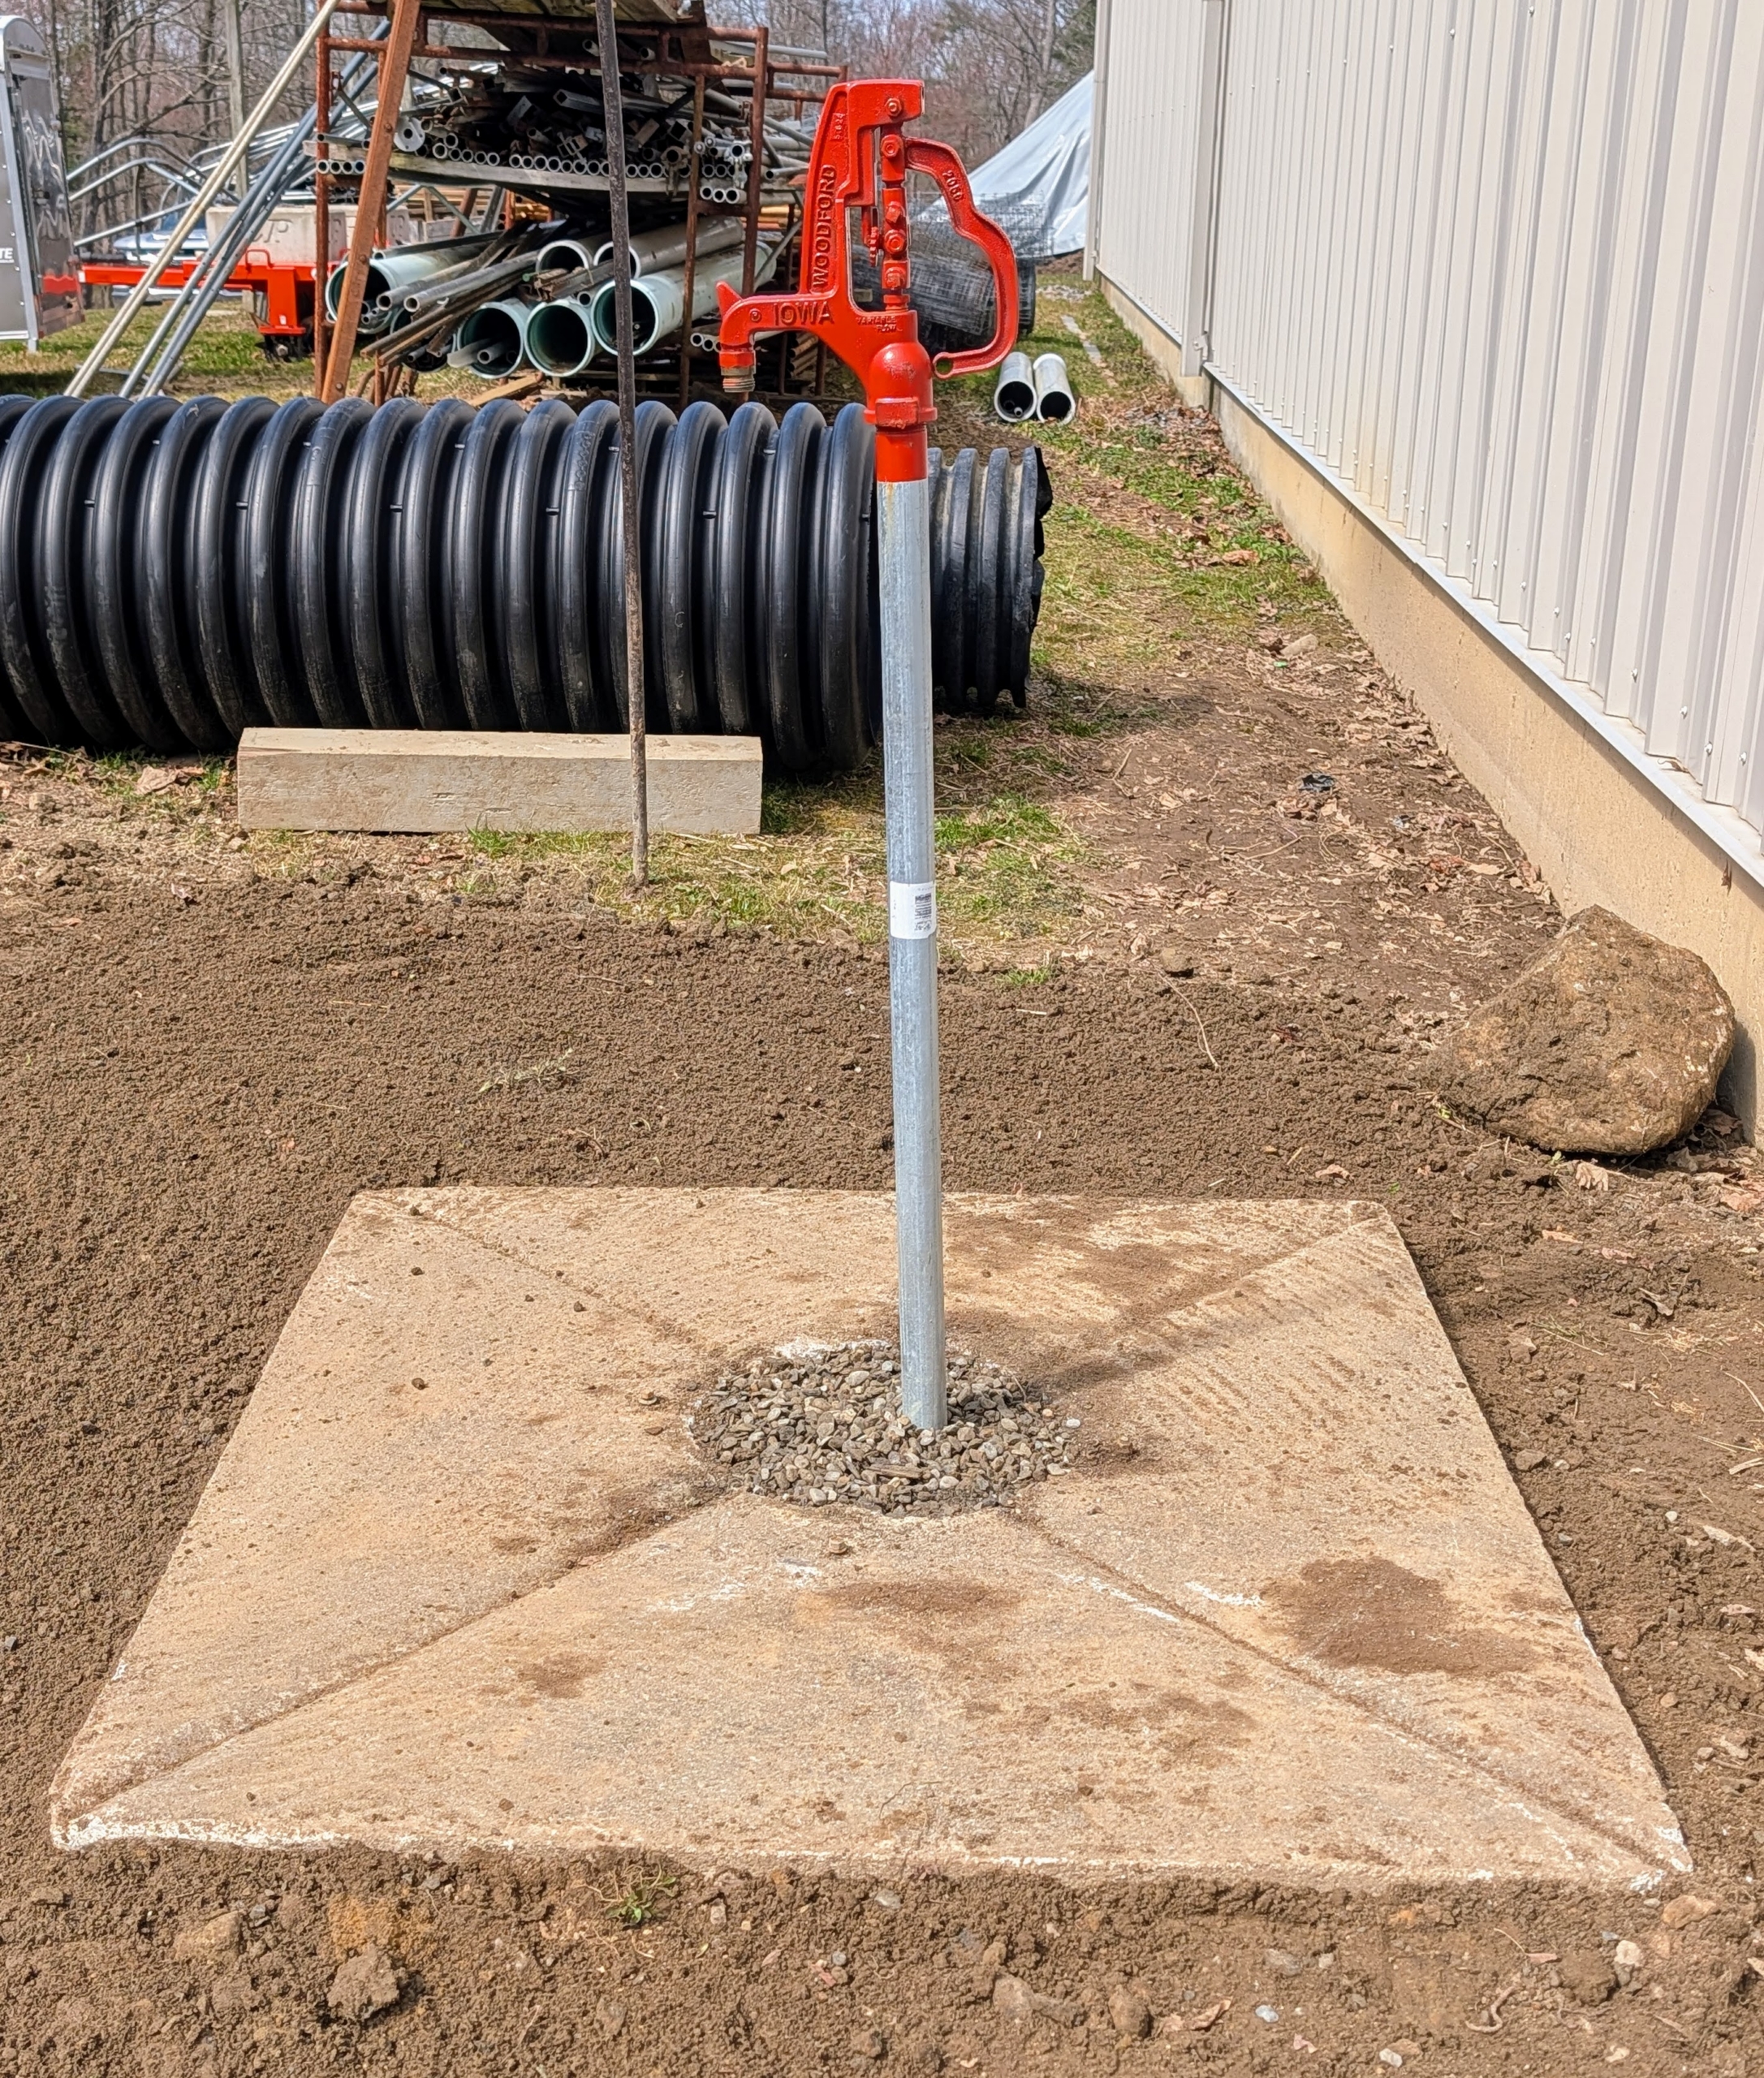
Underneath some lumber, Pete found this four foot square piece of concrete once located in one of my paddocks and used as the foundation of an automatic equine water source – one of those things I saved “just in case” it could be reused.
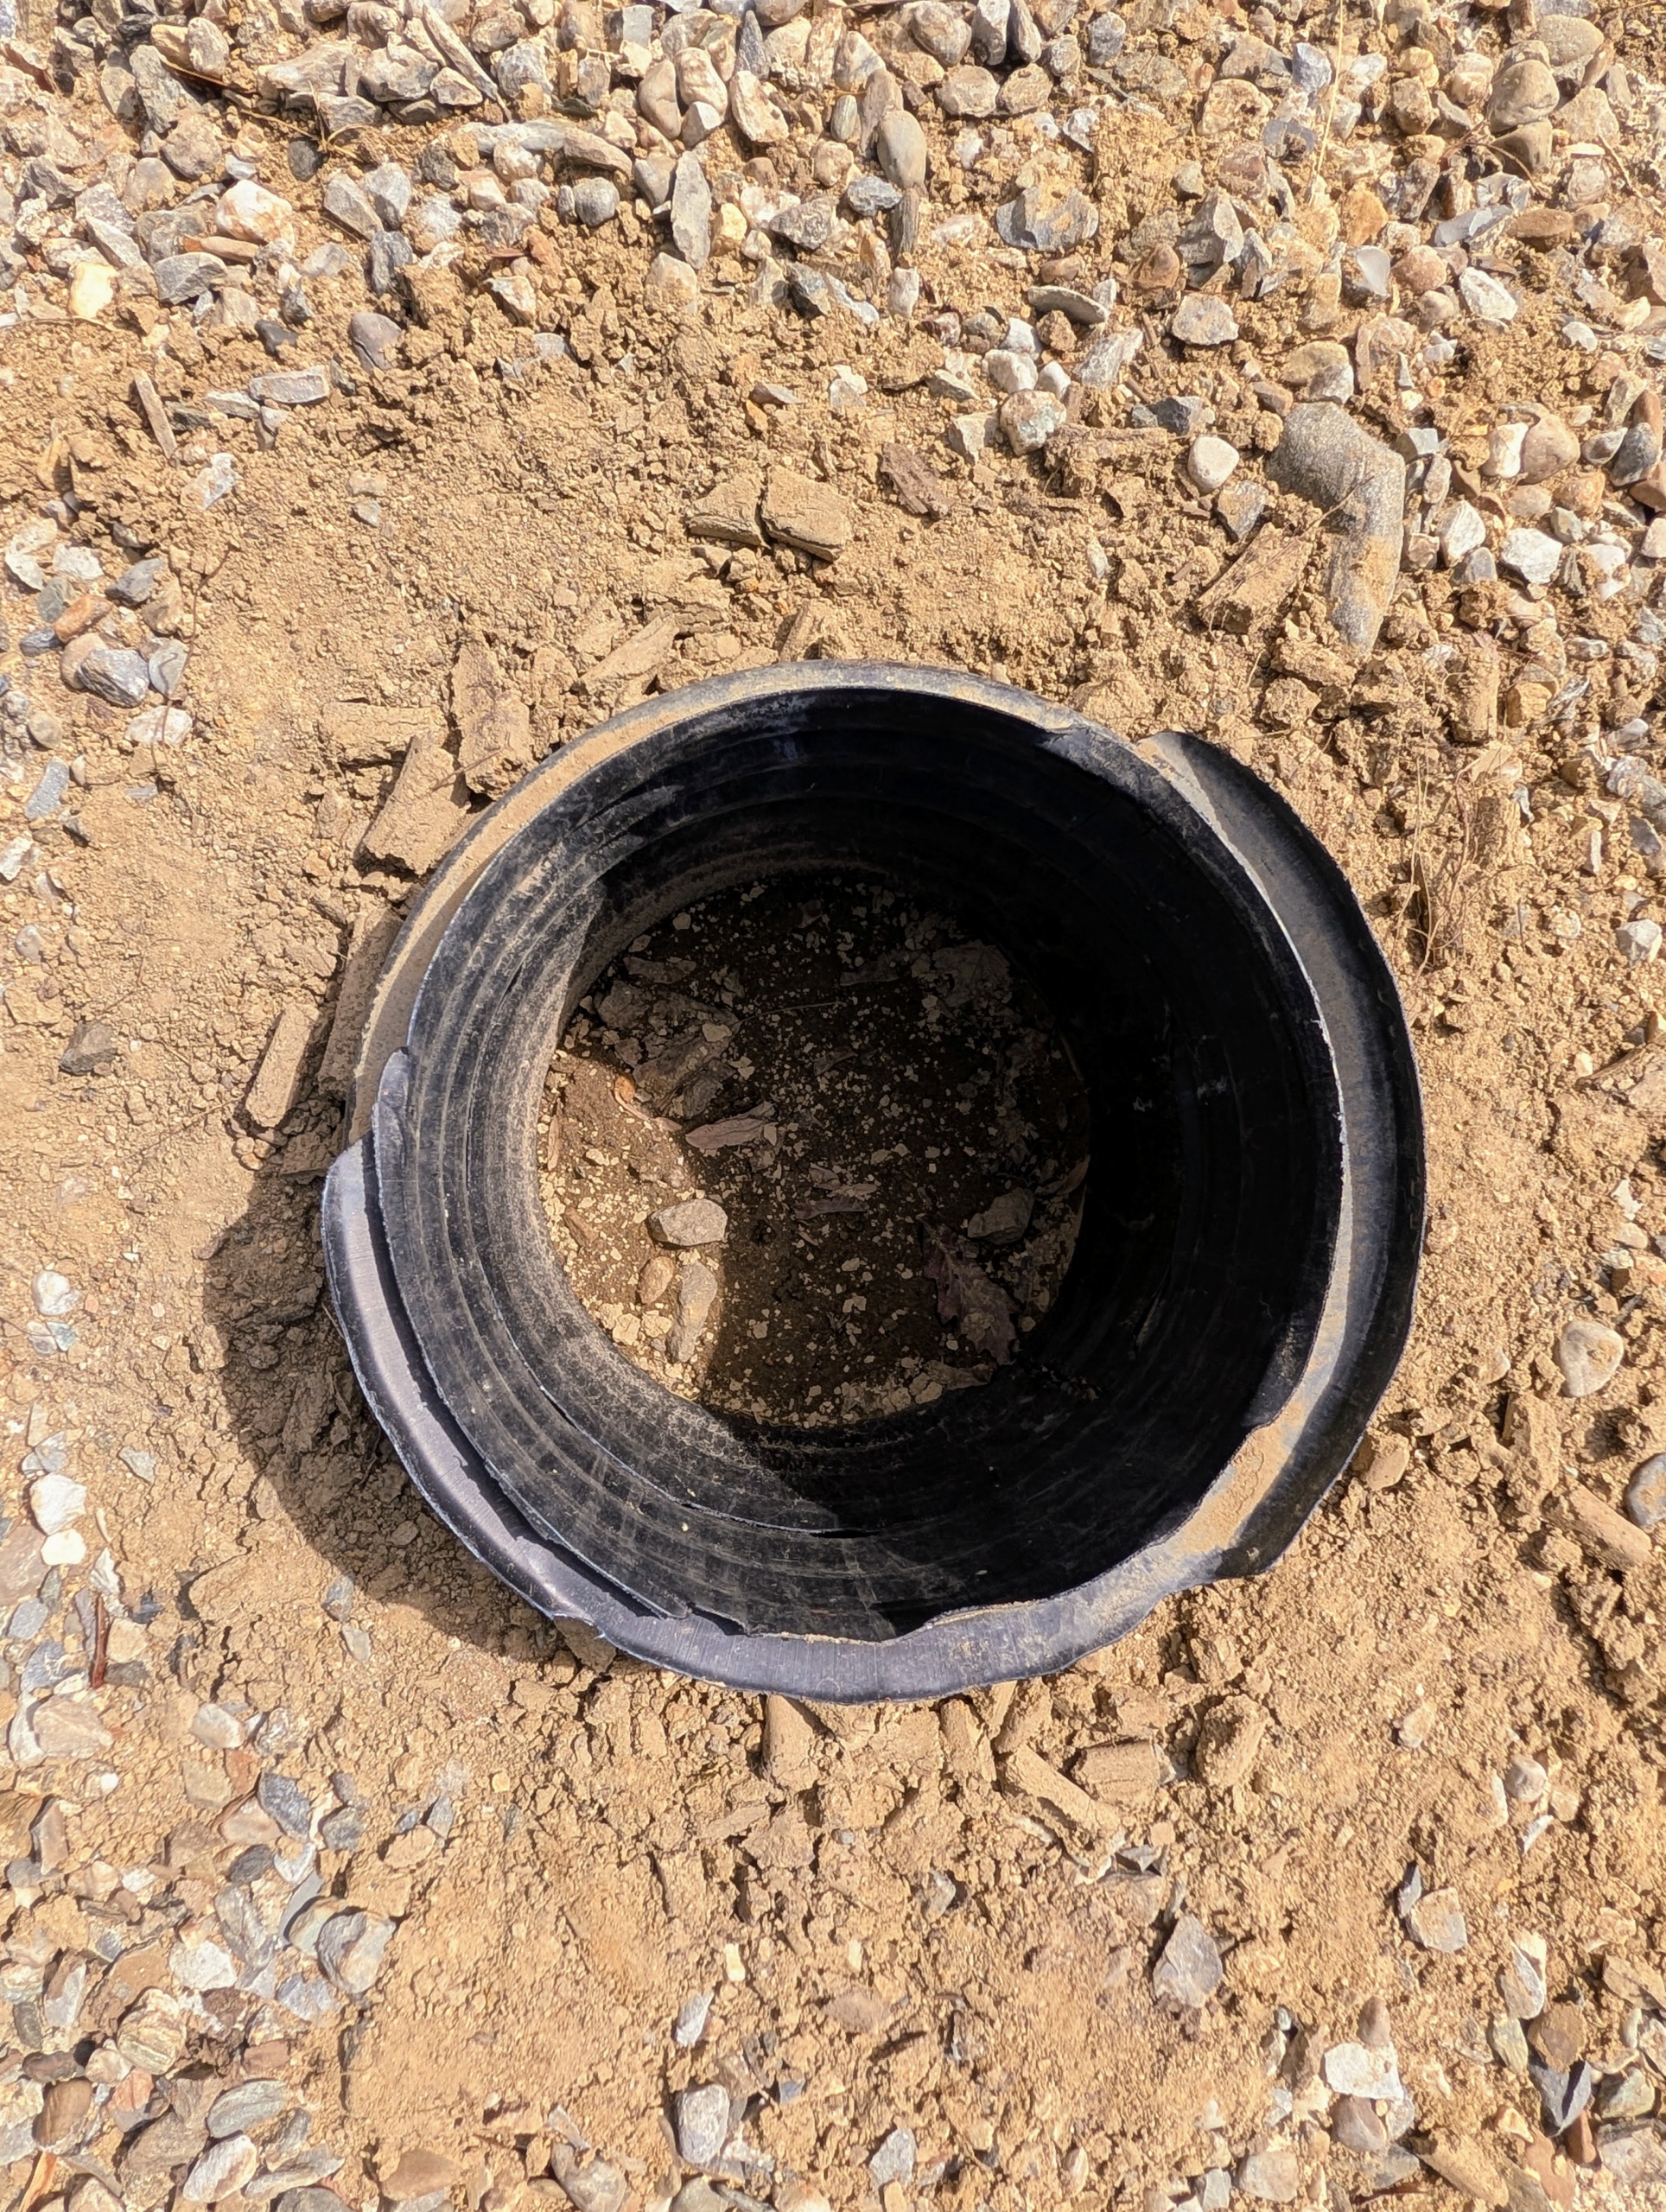
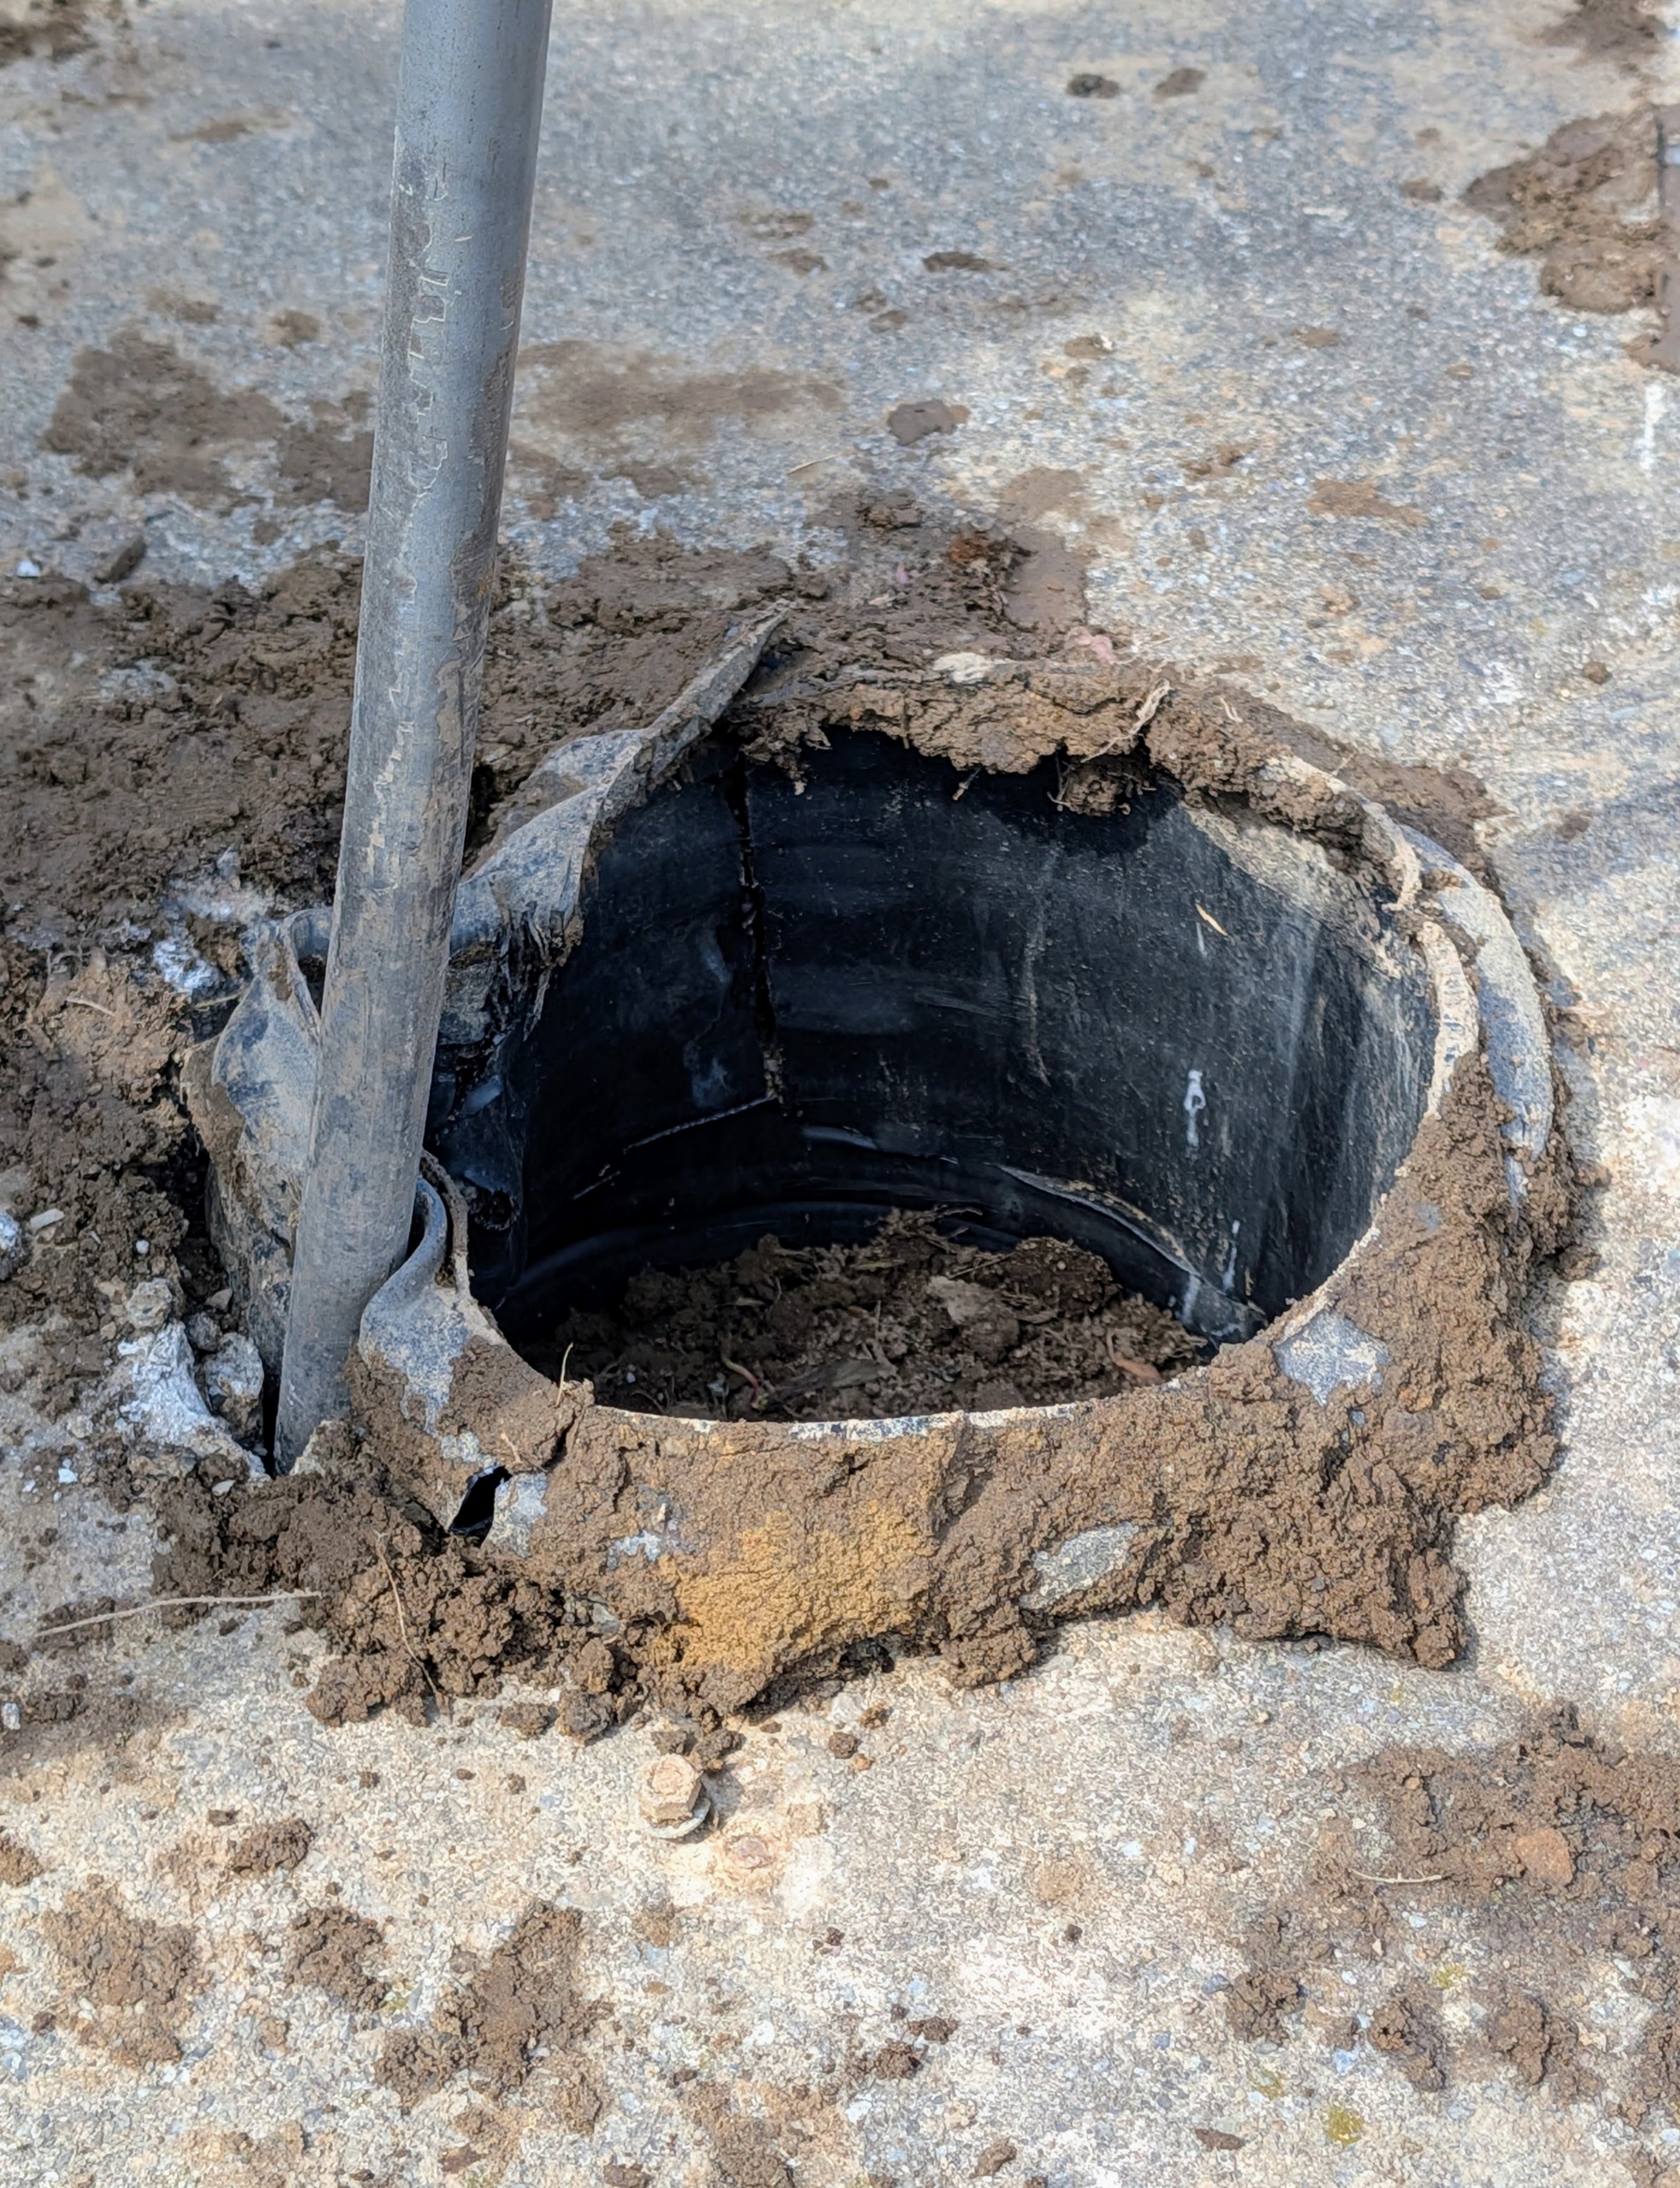
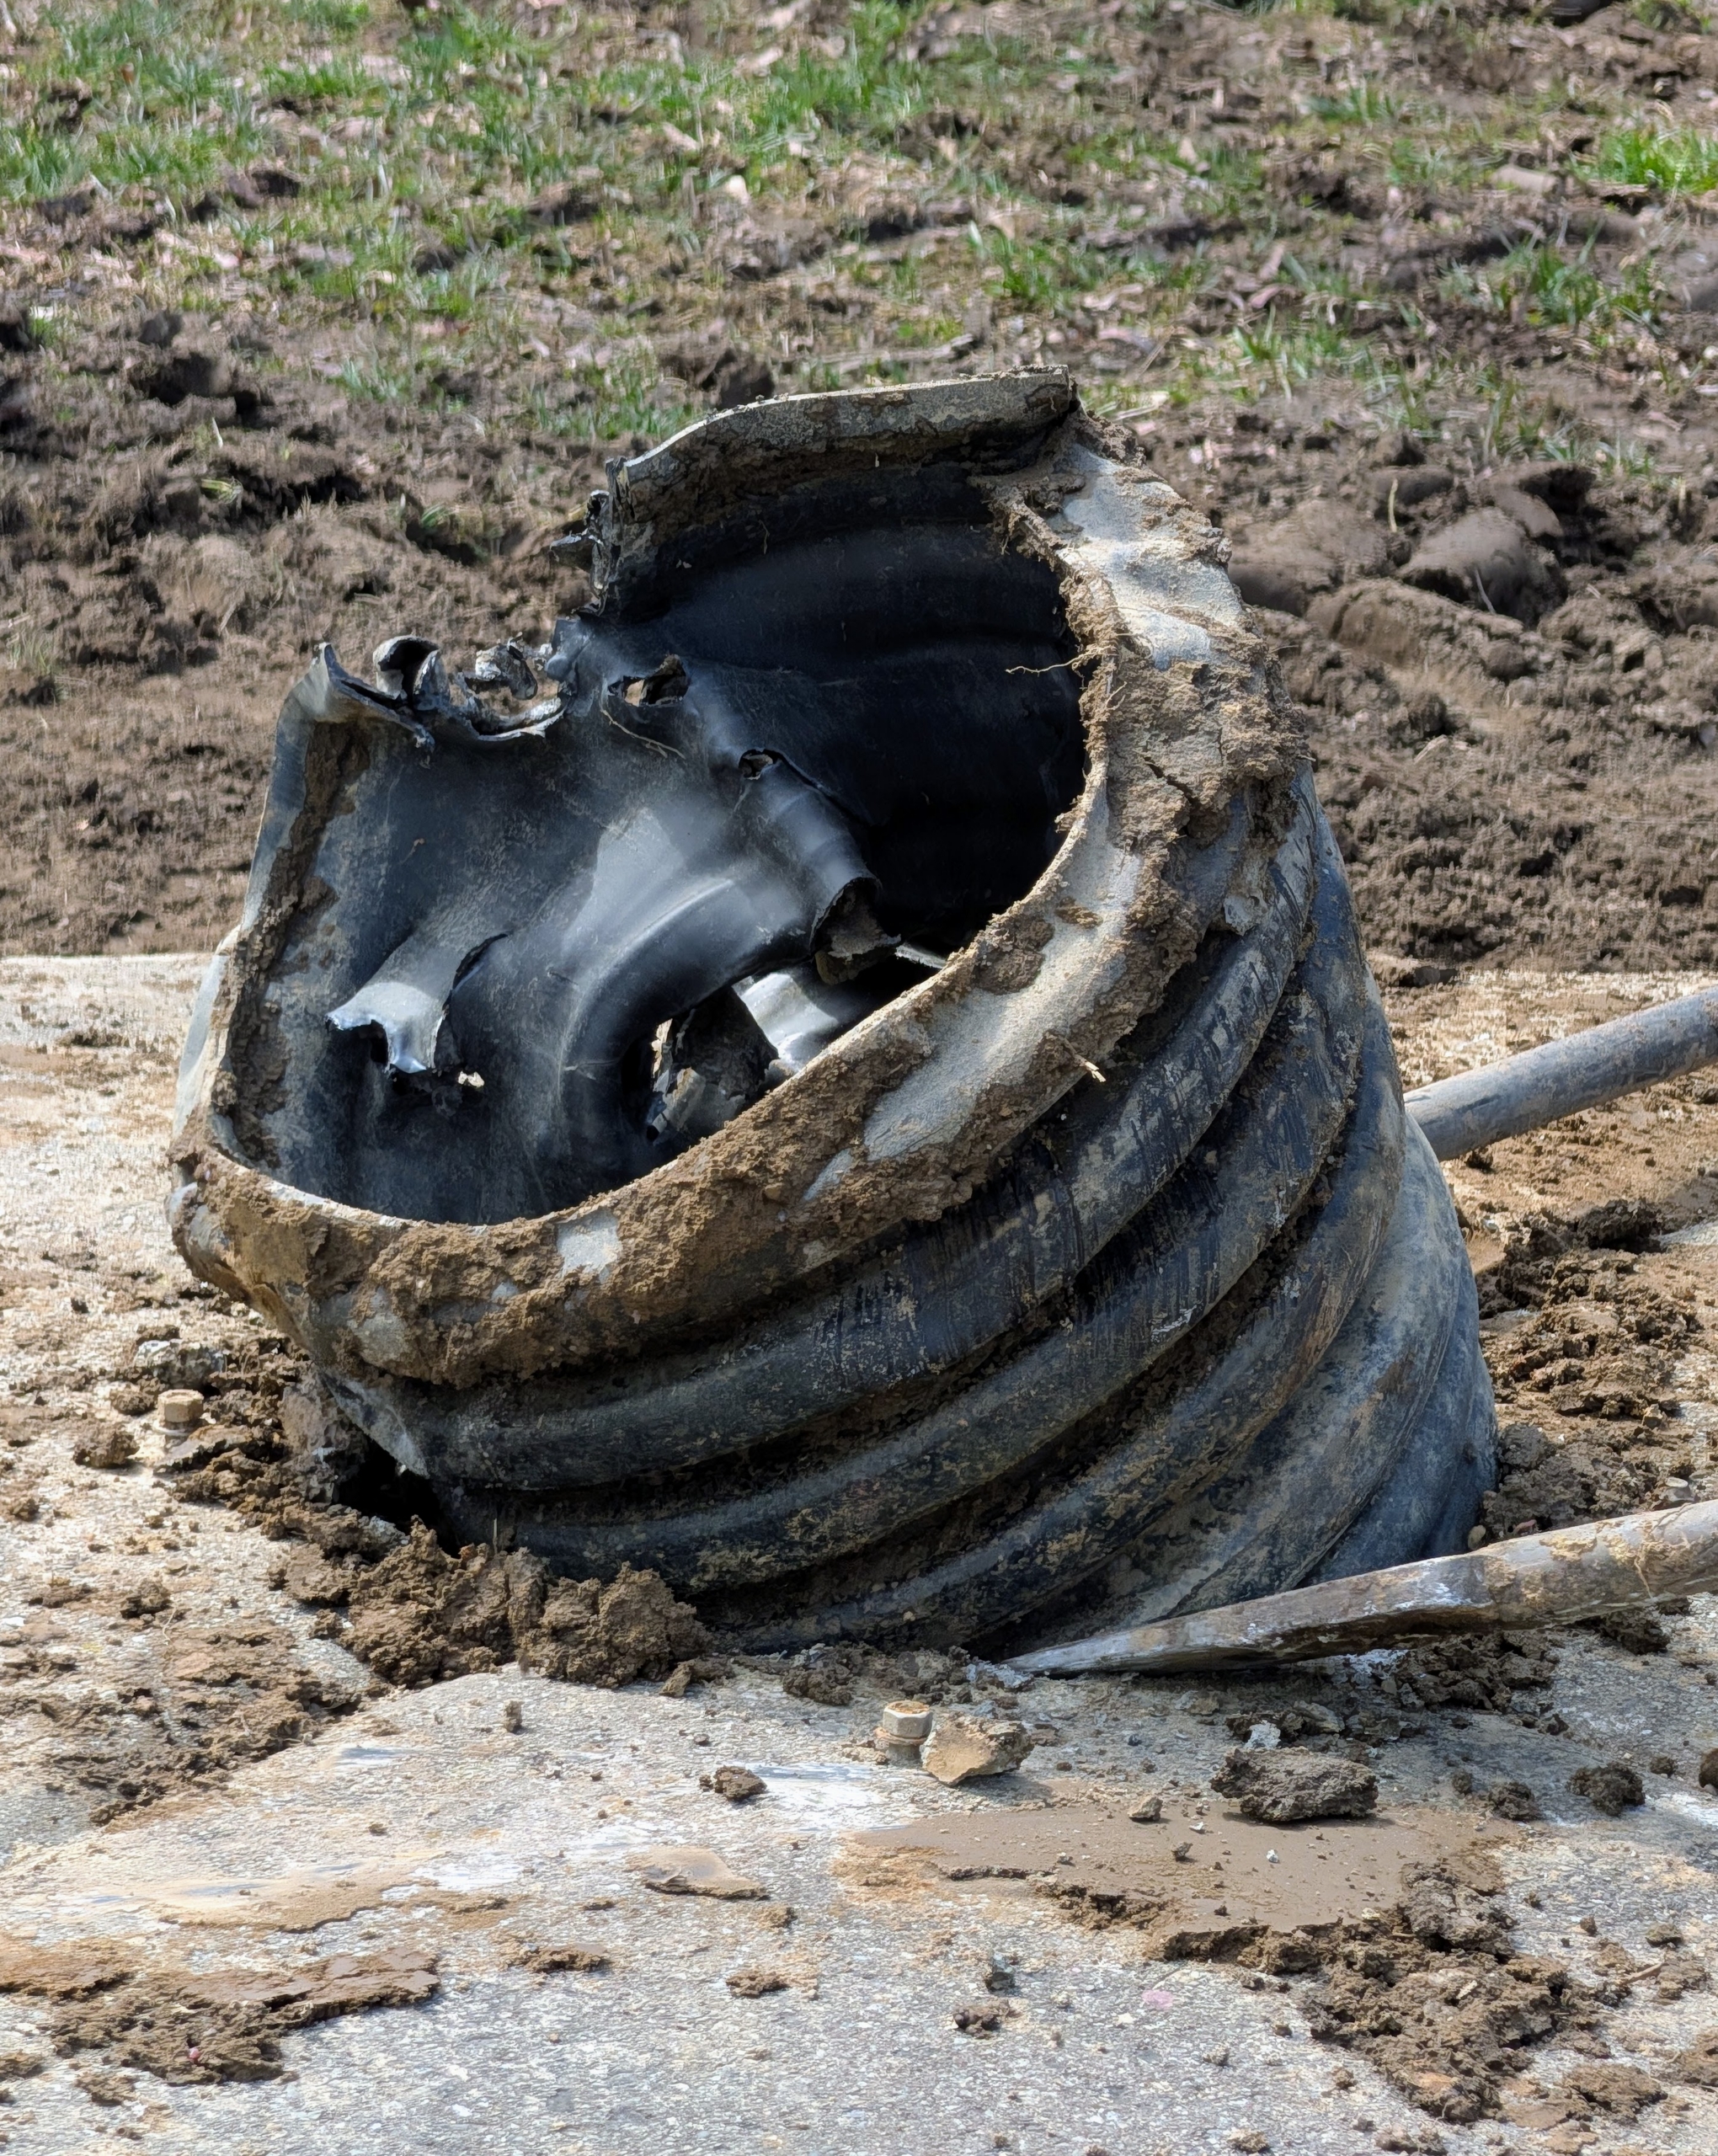
In the center was a hole lined with a piece of industrial drainage piping.
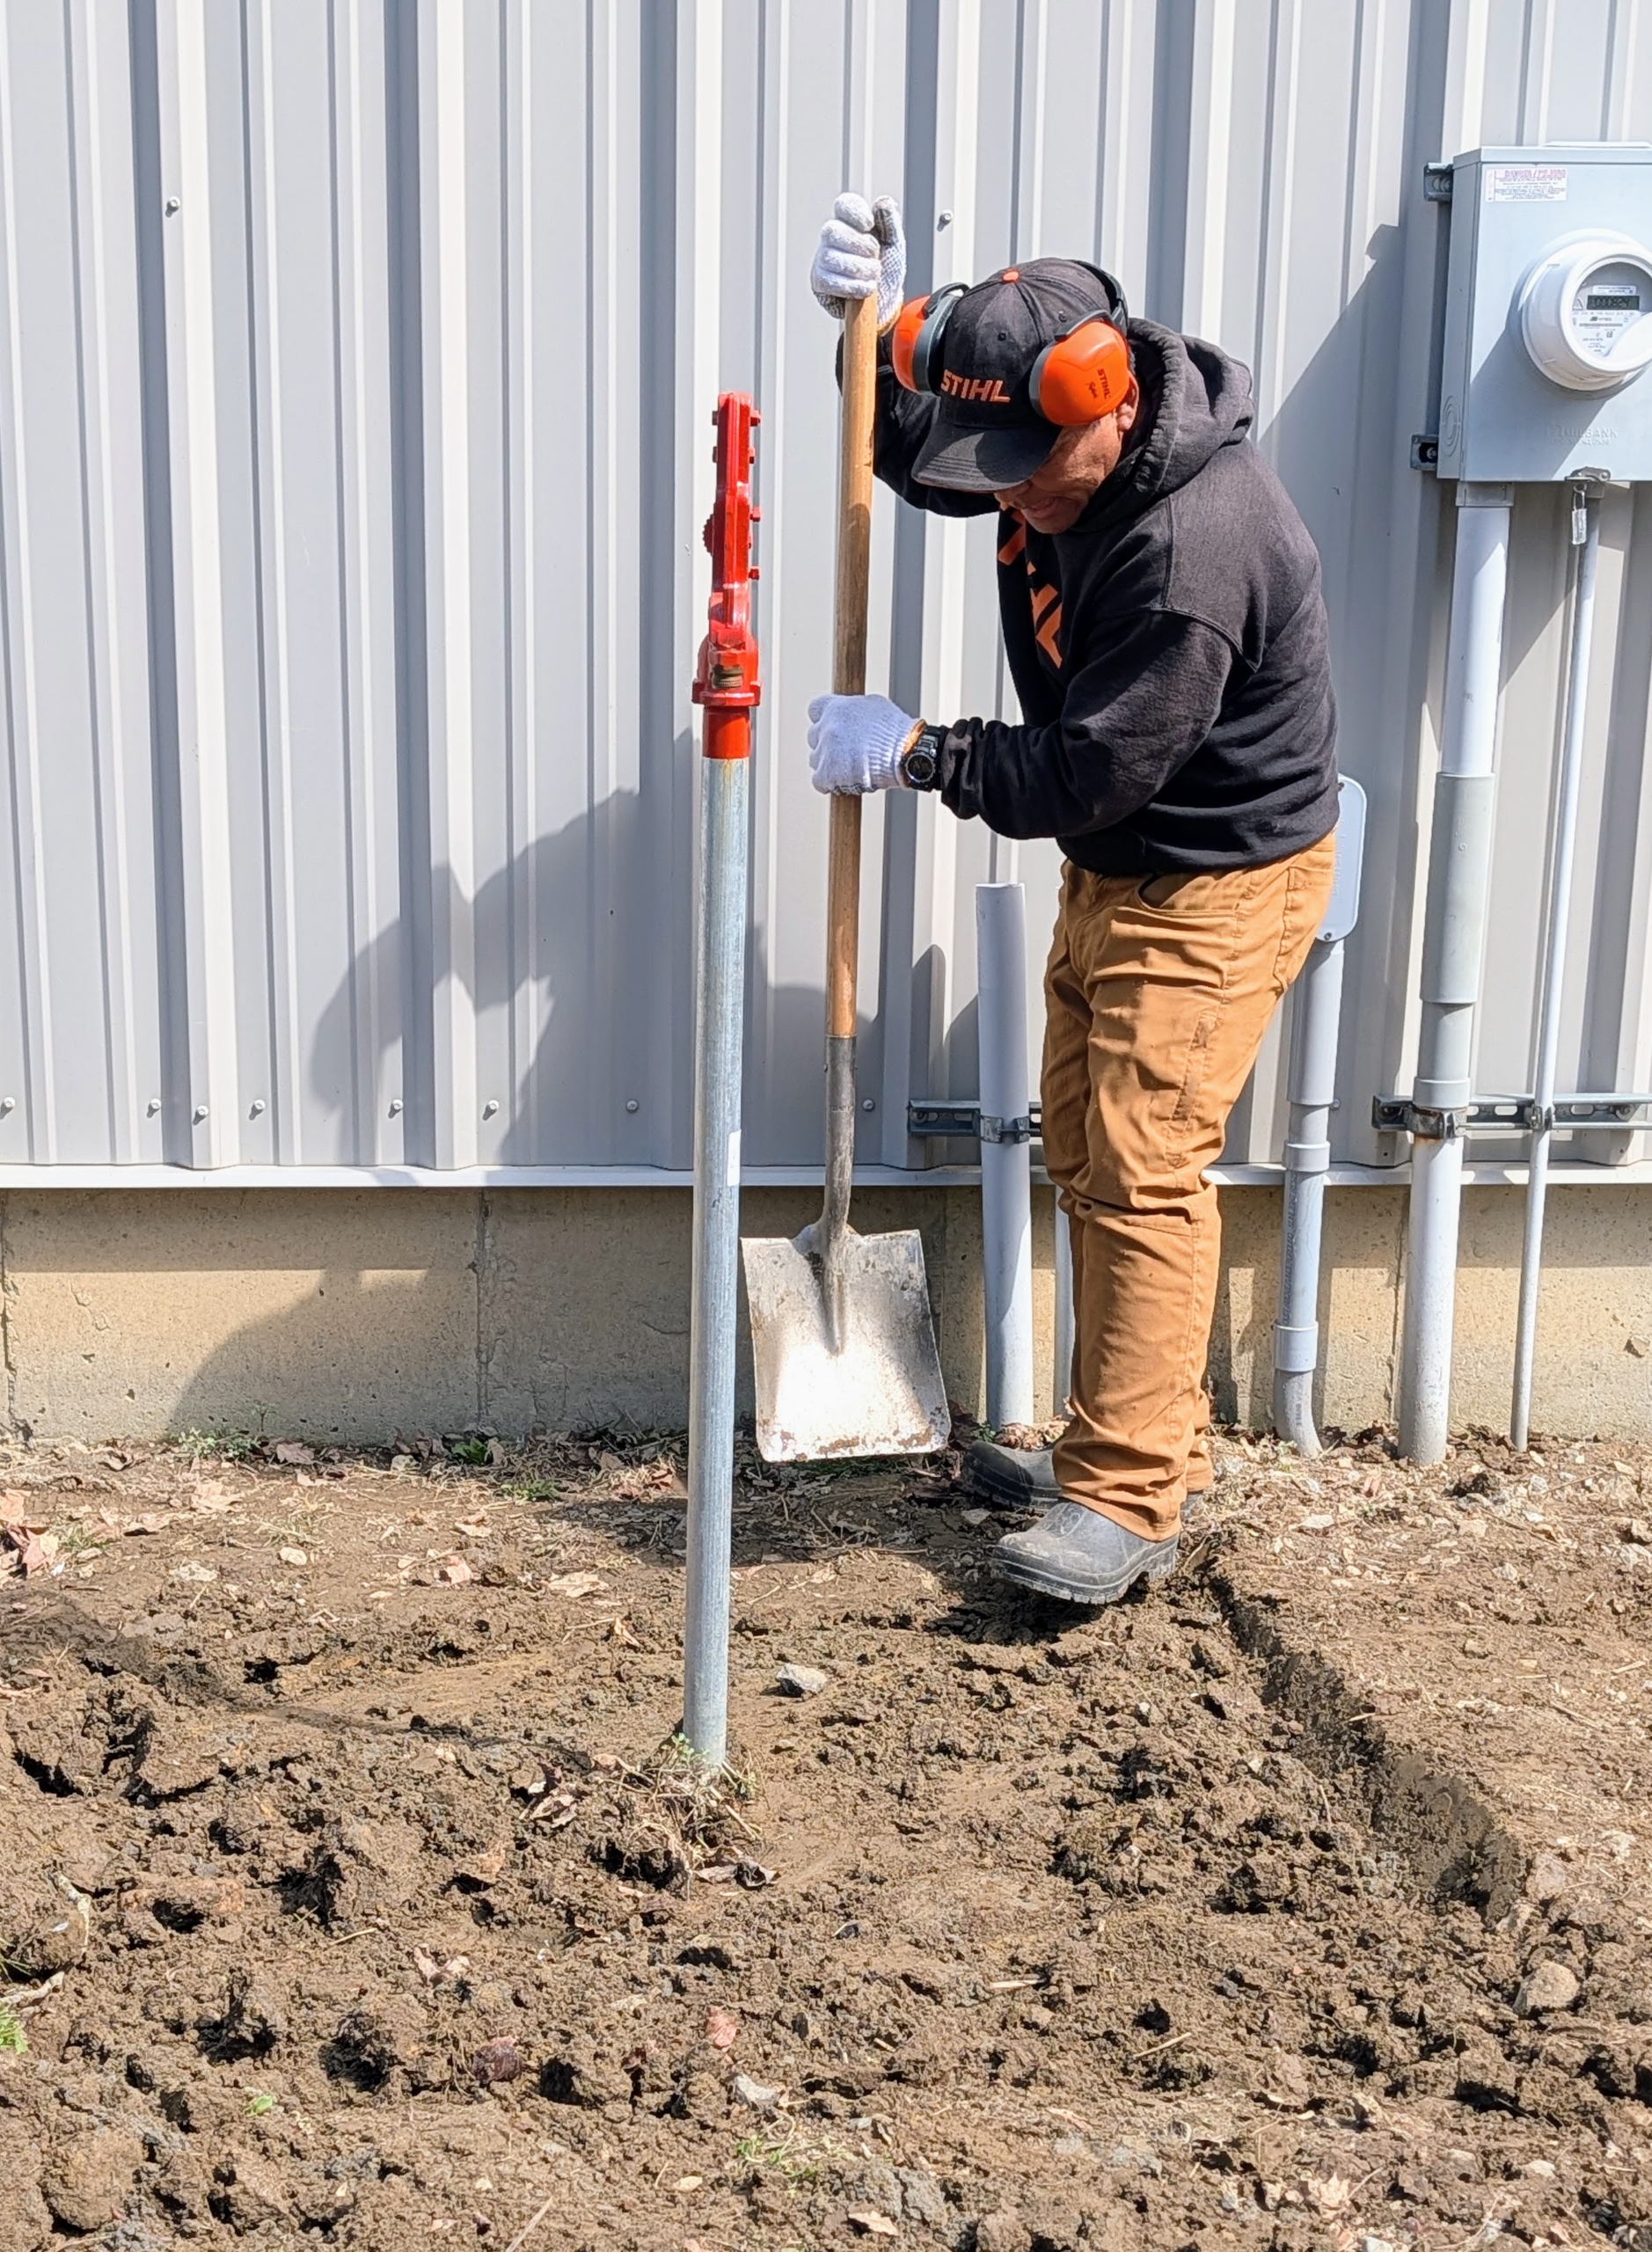
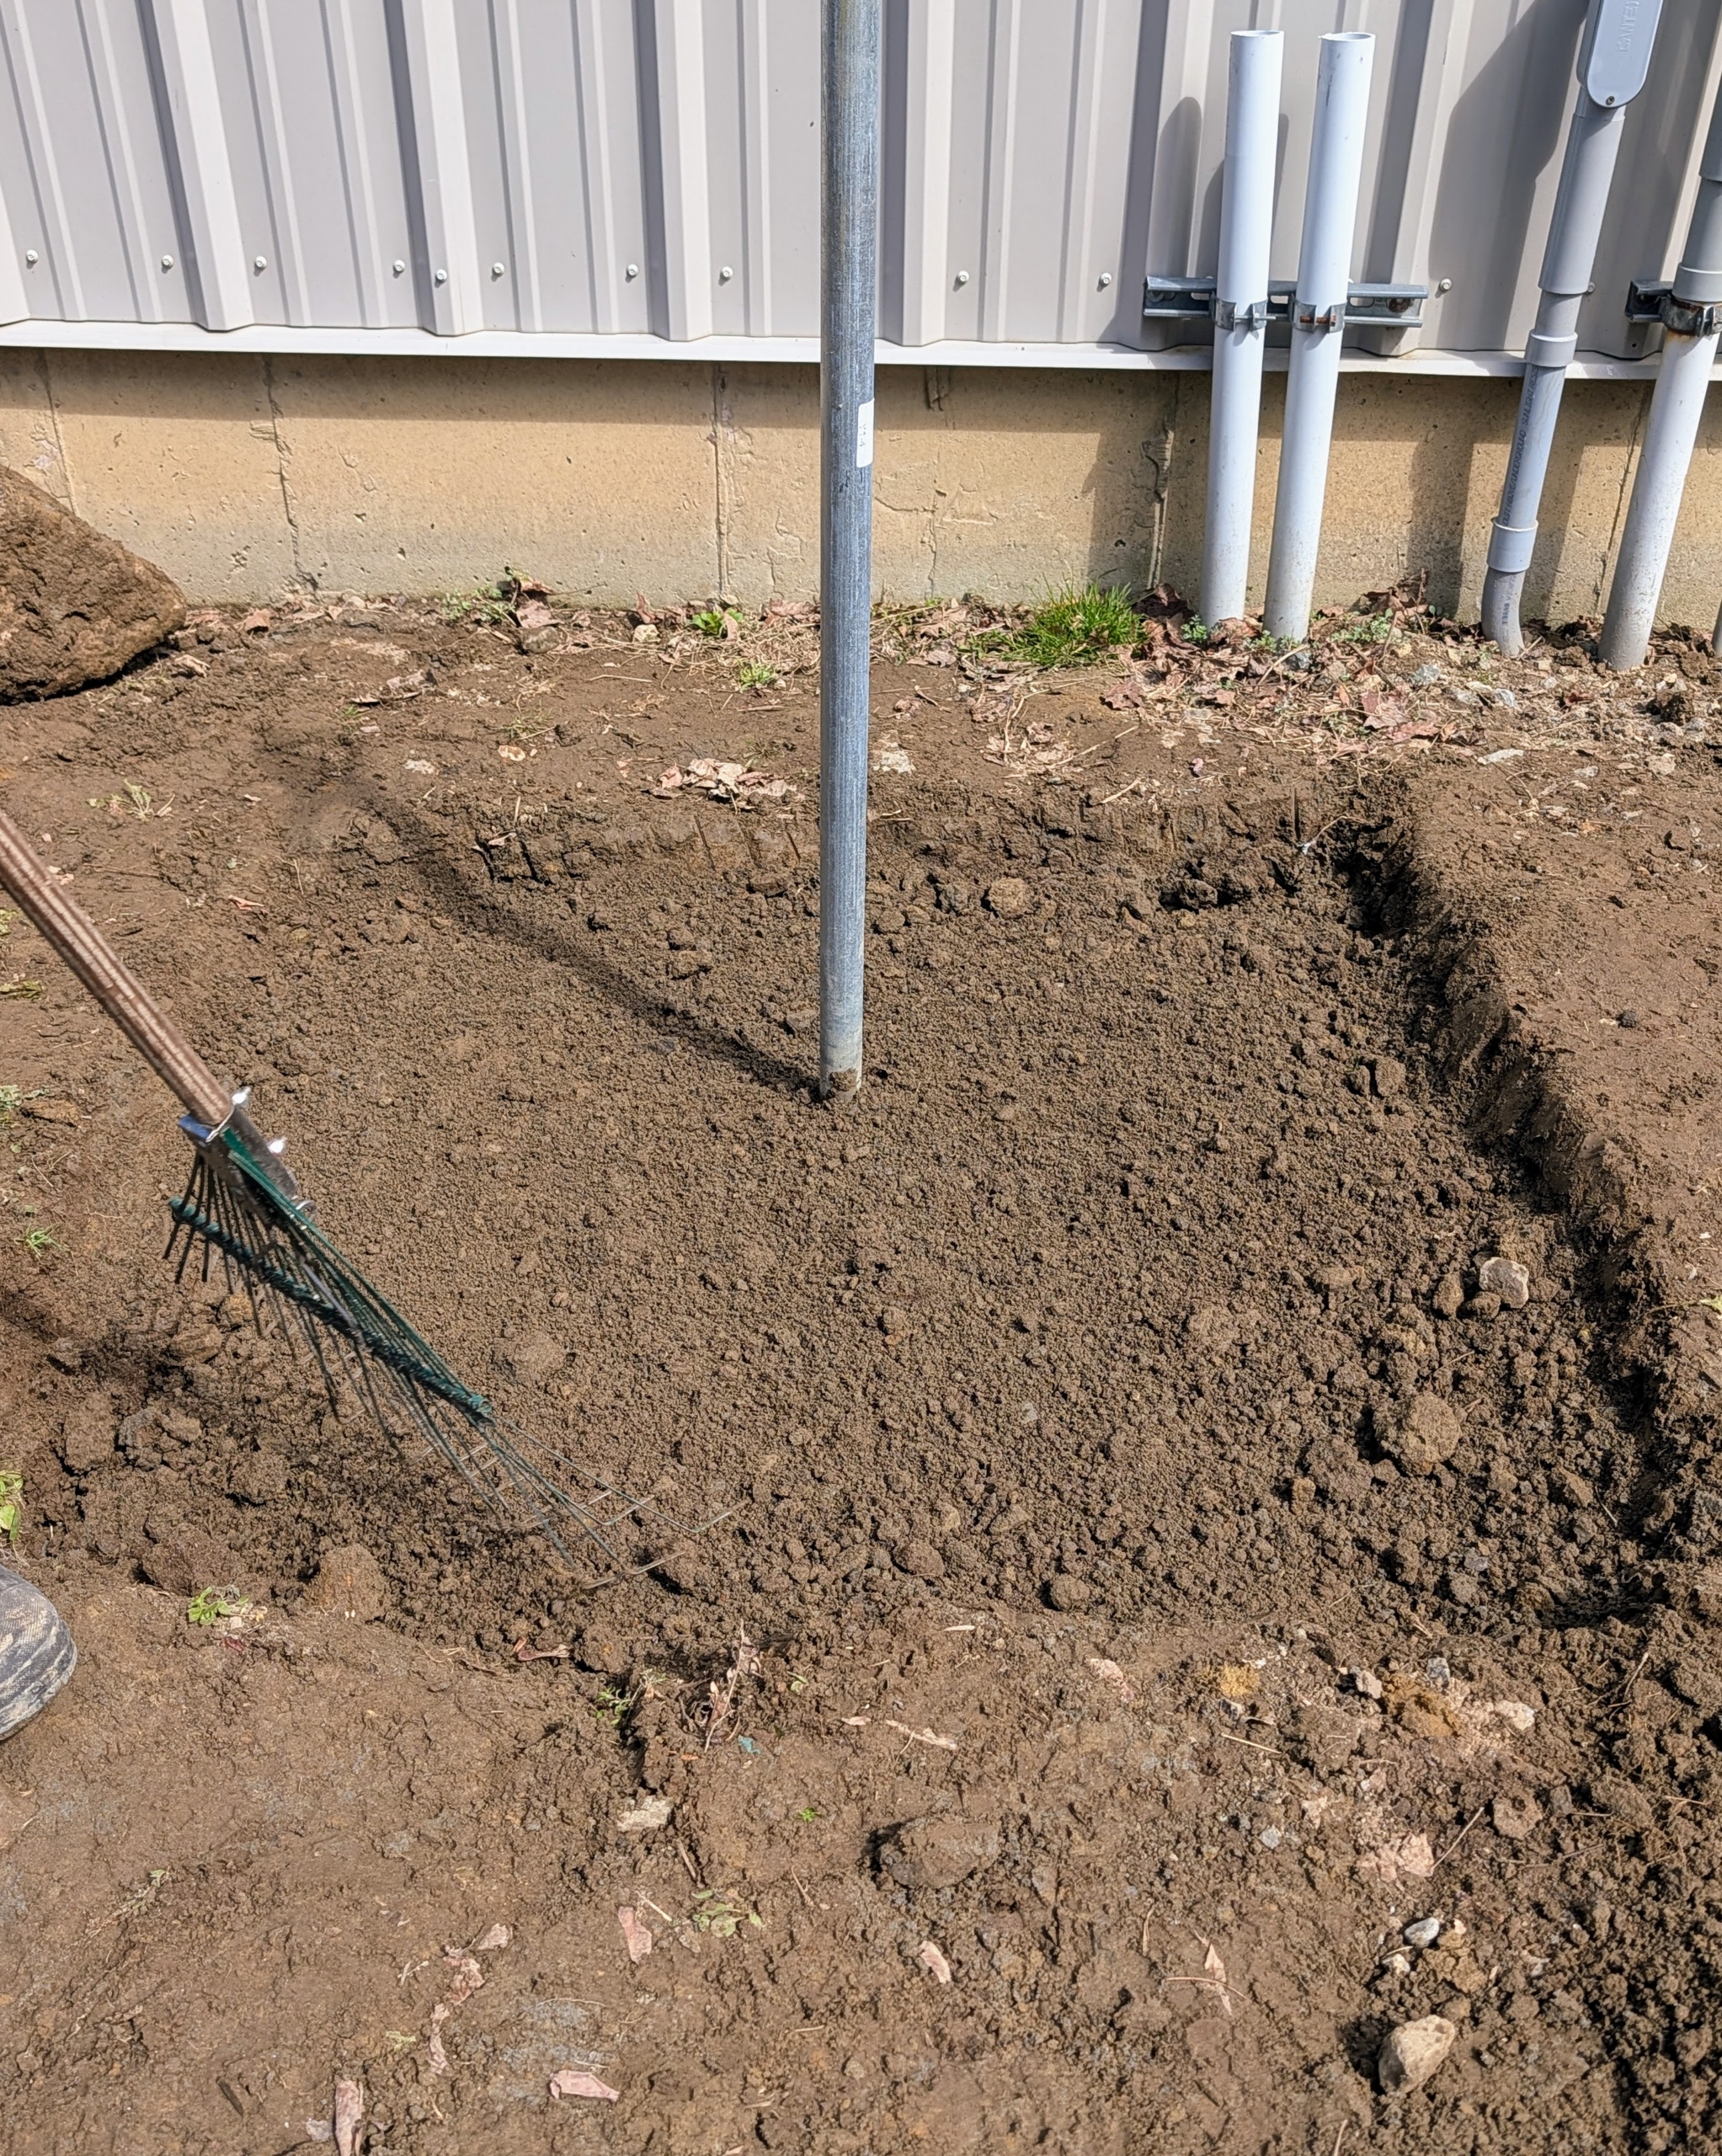
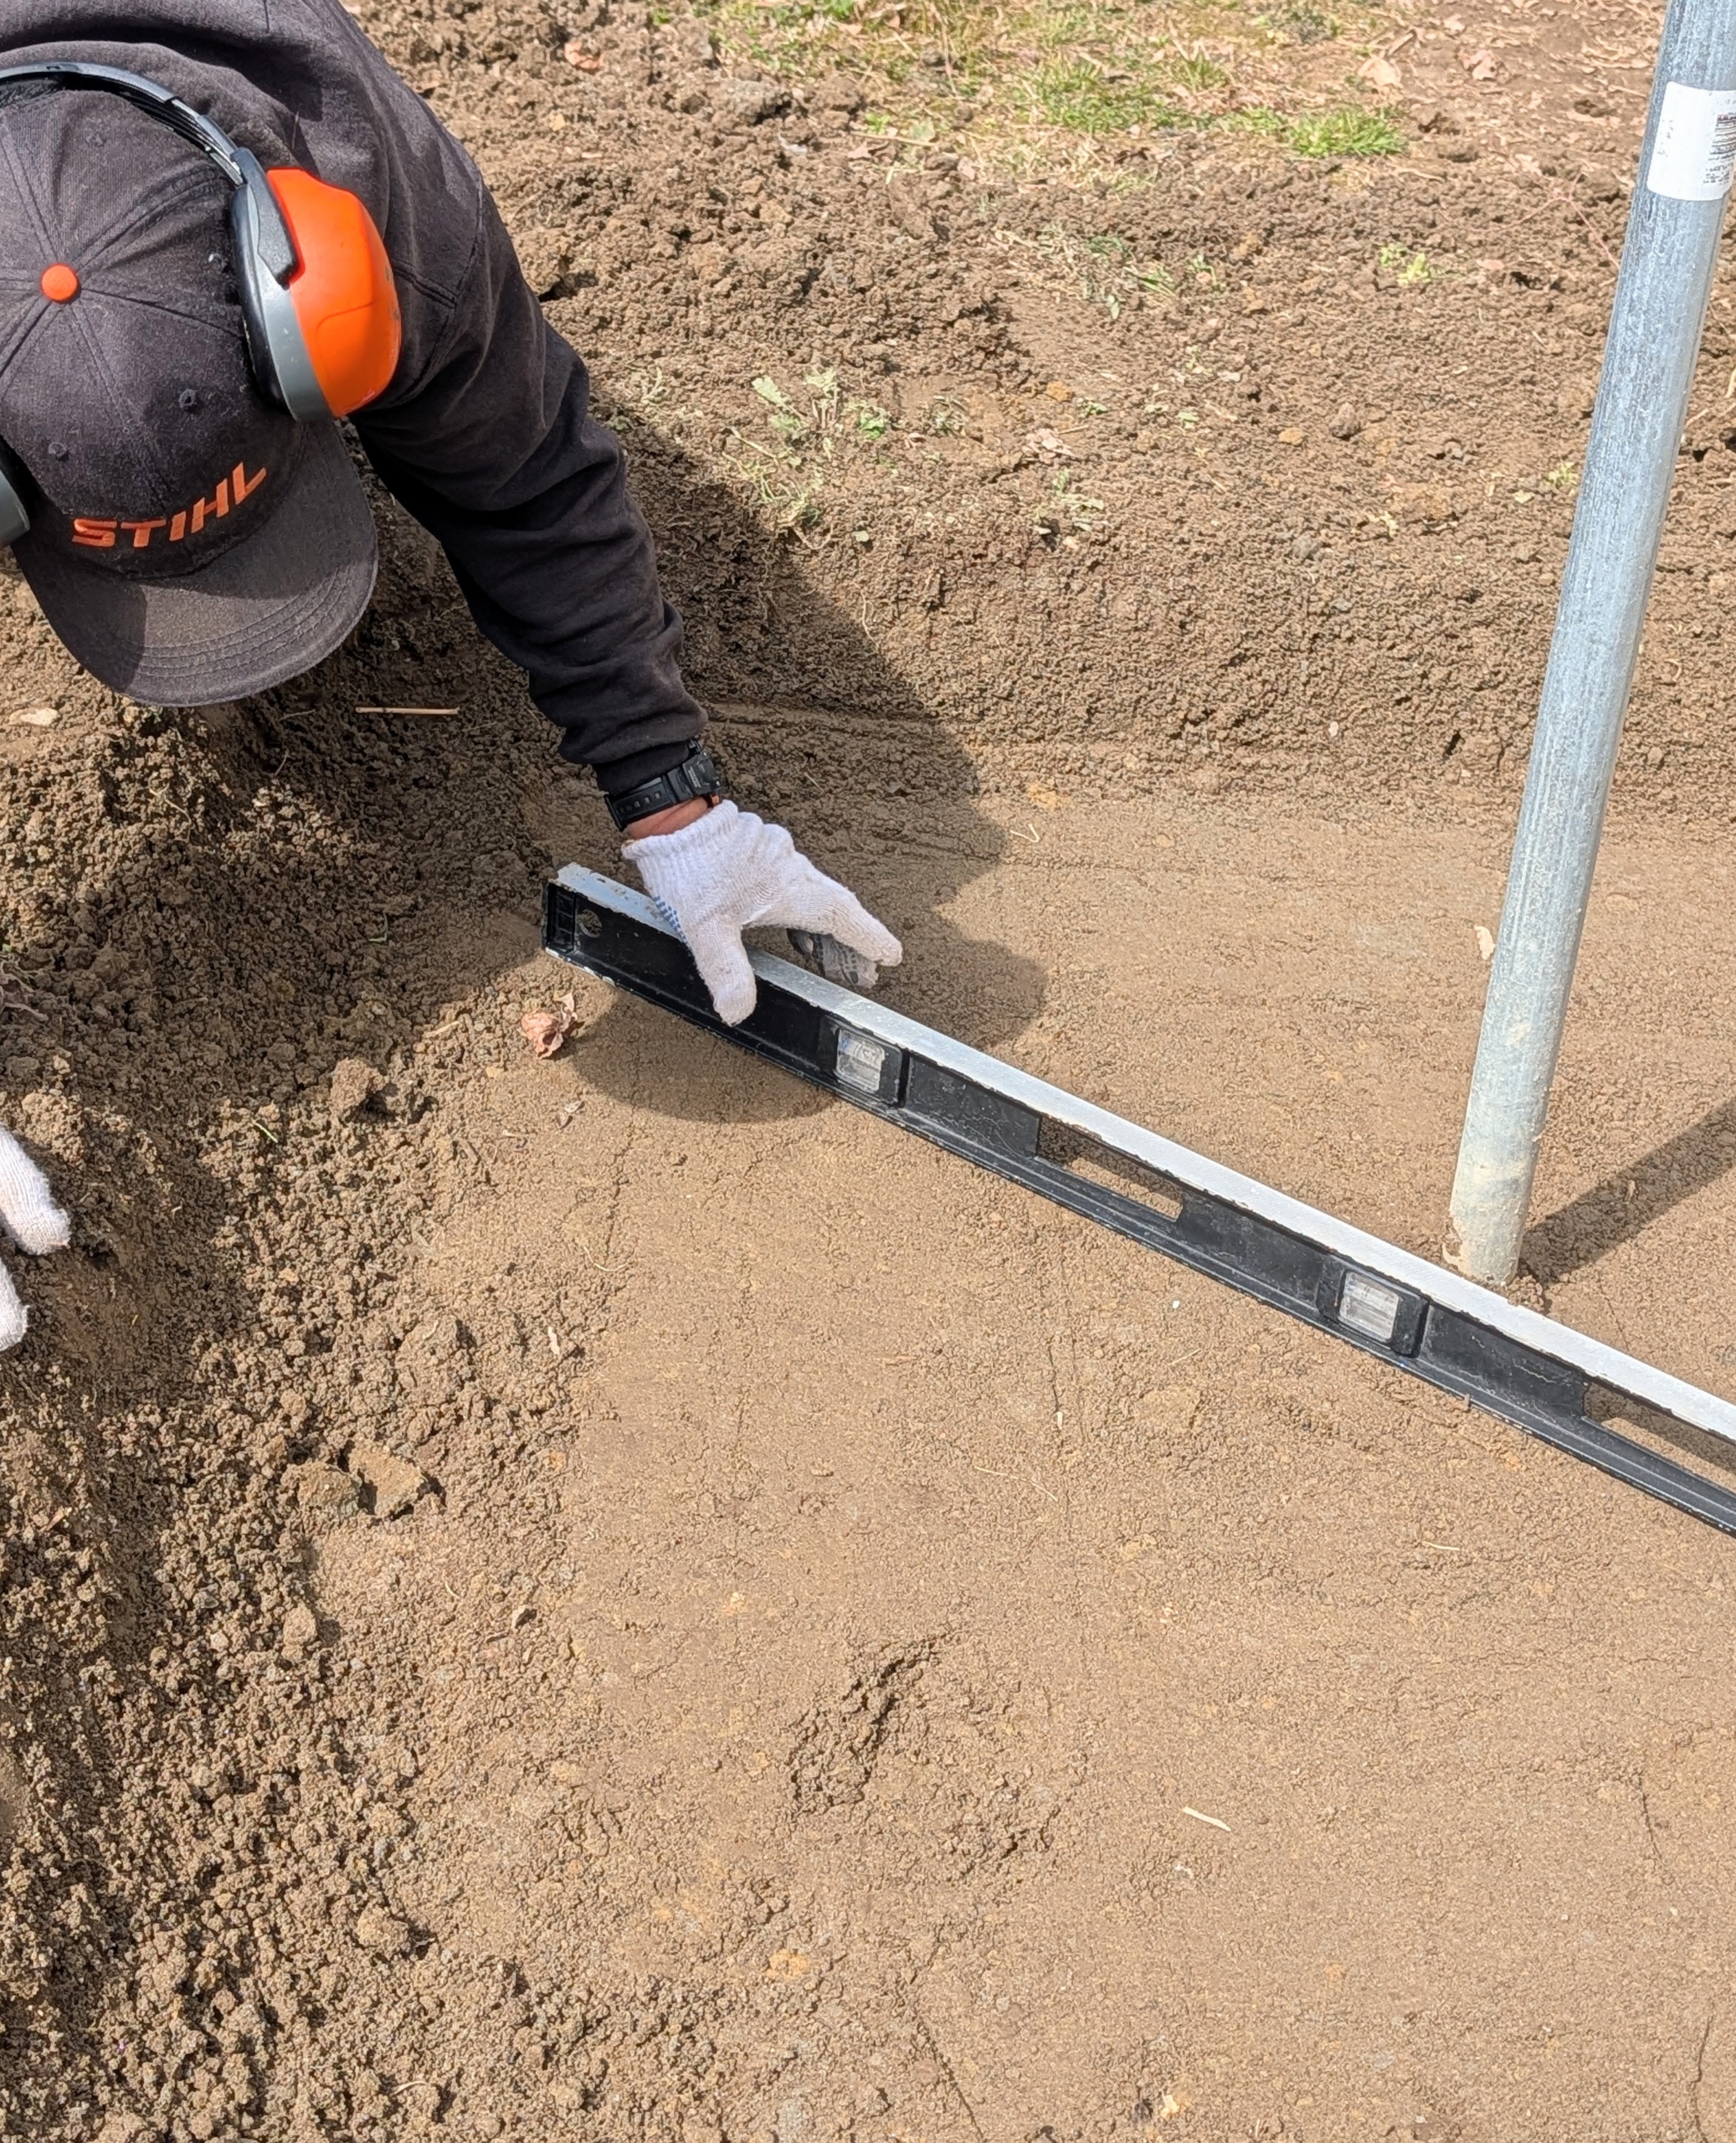
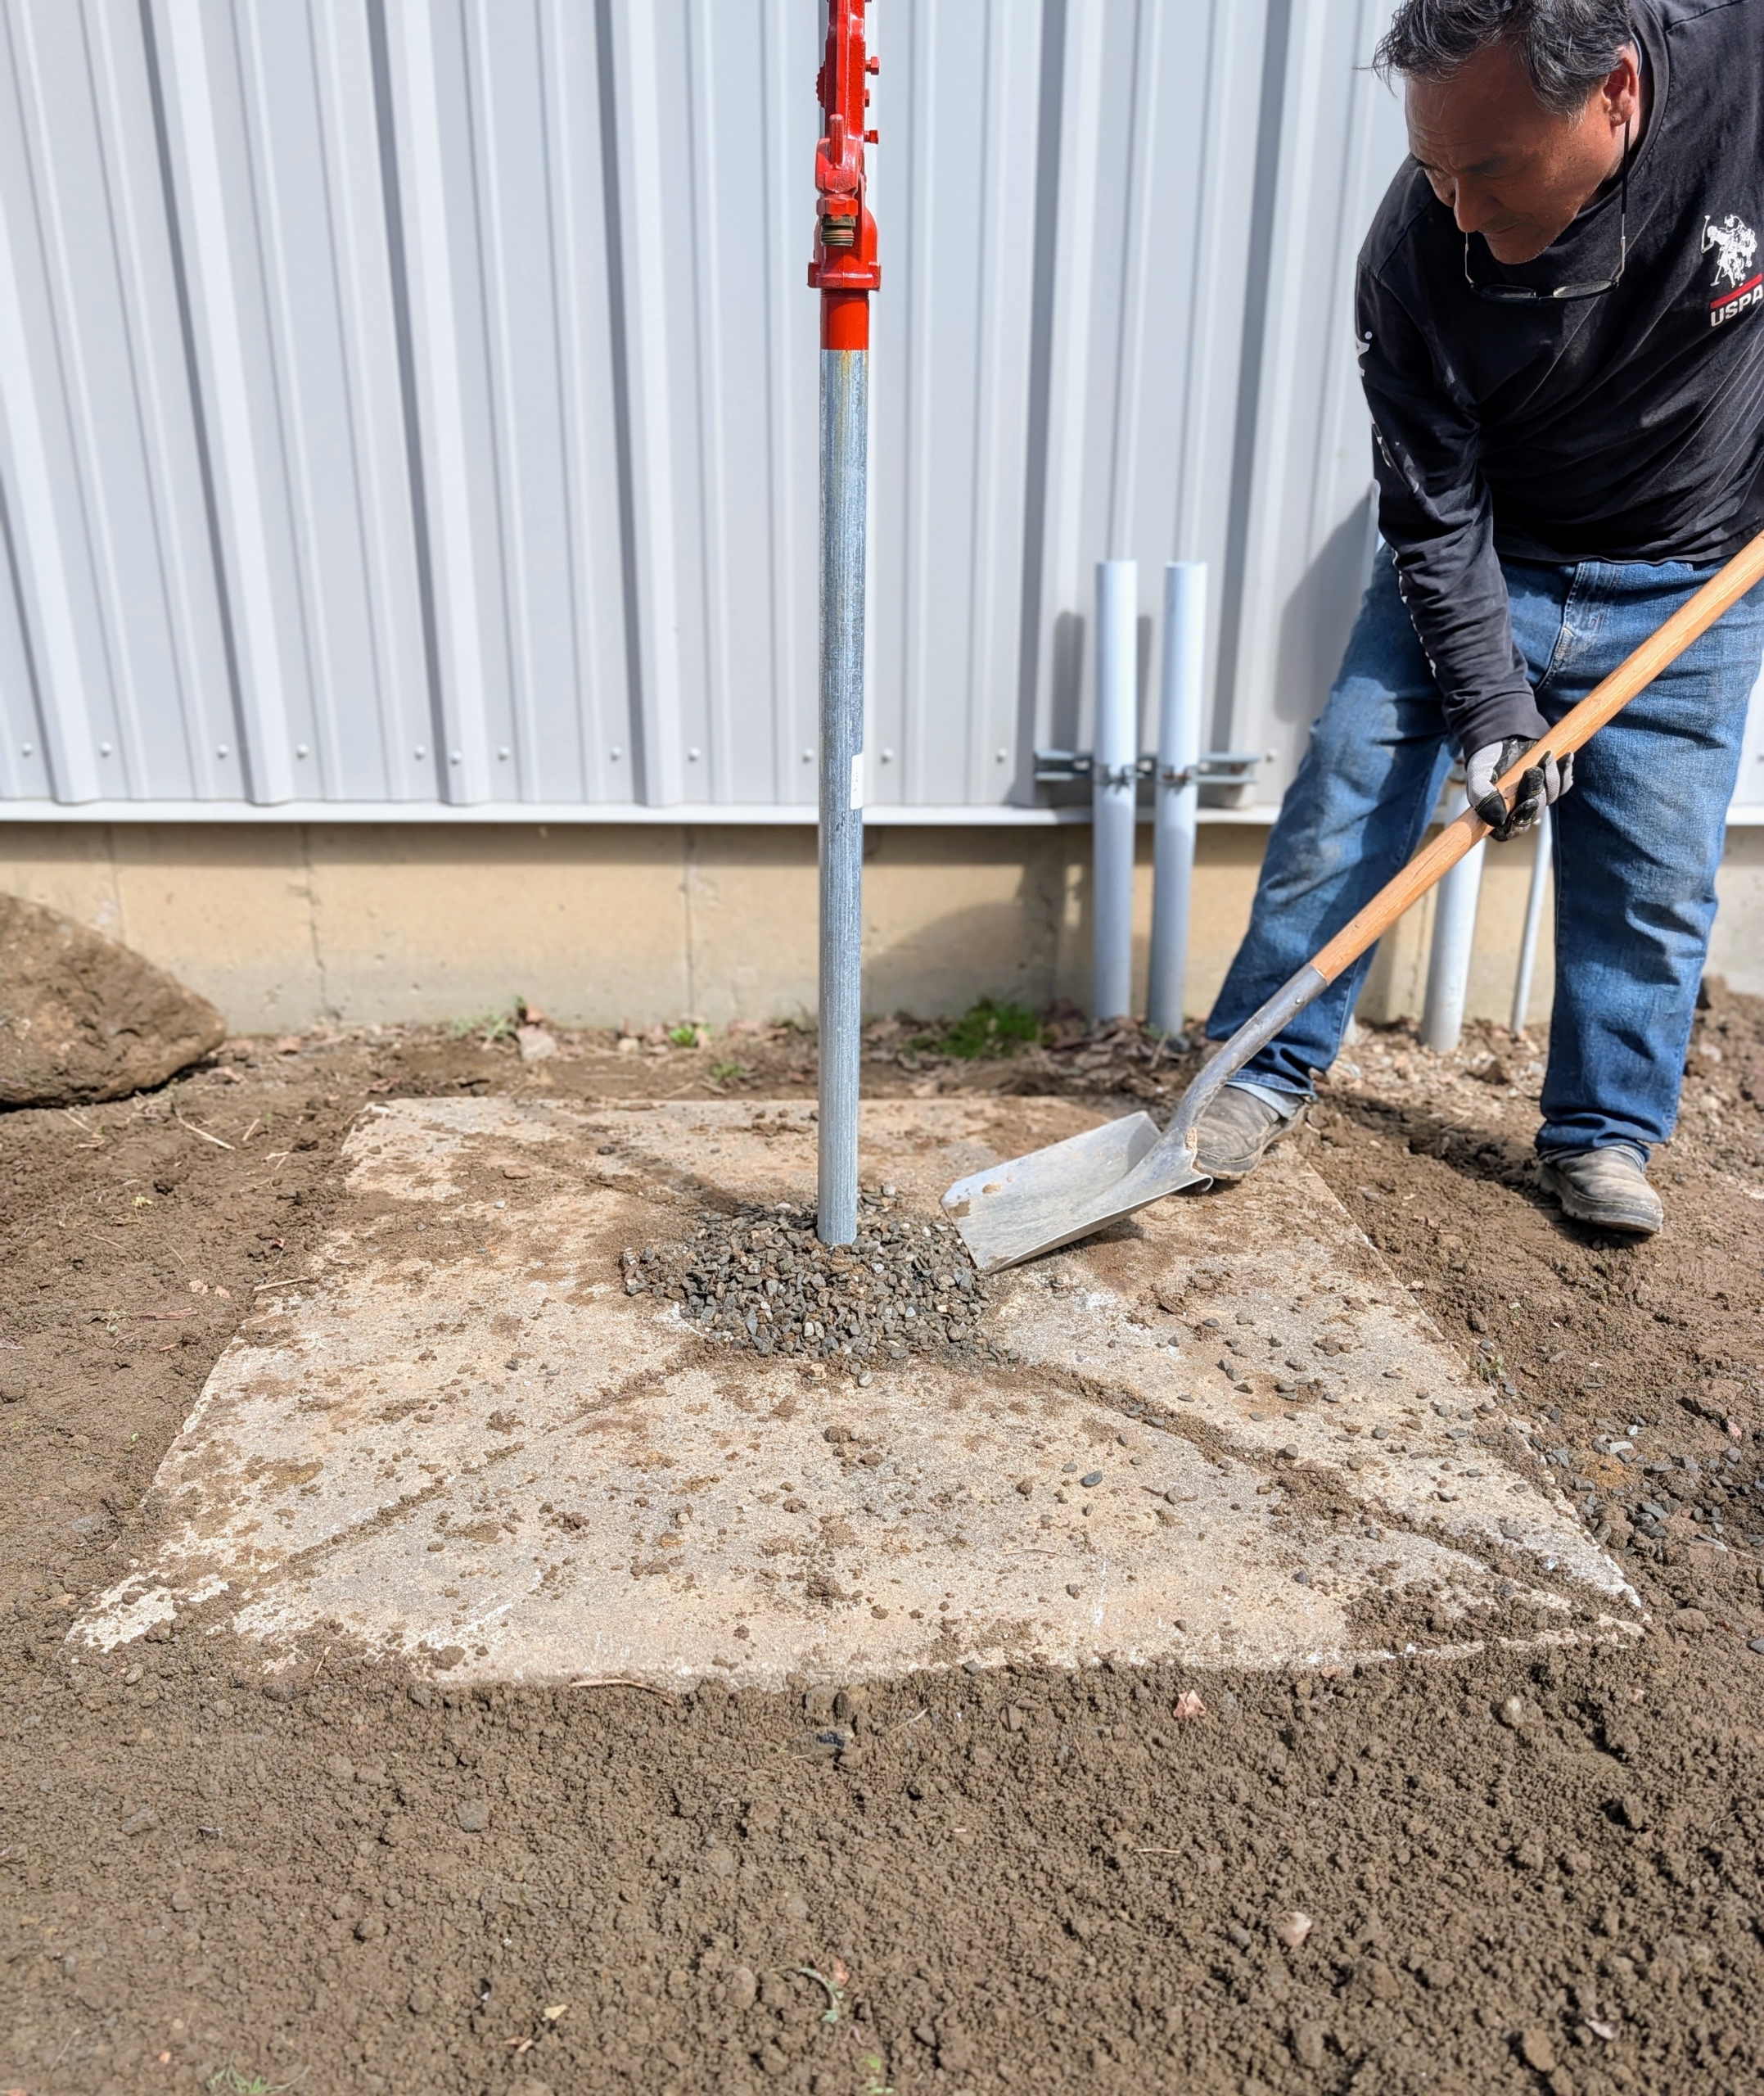
Pete thought it would work well as a base for this existing free standing hose bib. Here’s Phurba digging a level space to fit the concrete square.
The new base would provide a place to stand and store a hose. It will also keep mud from ponding around the faucet.
But the area must first be prepped. Pete rakes any stones away from the space.
He also goes over it with a four foot wide gravel rake.
Phurba uses a four foot long piece of wood to tamp down on the soil.
And then the area is checked for level. It must be perfectly level for the concrete to sit properly in the space.
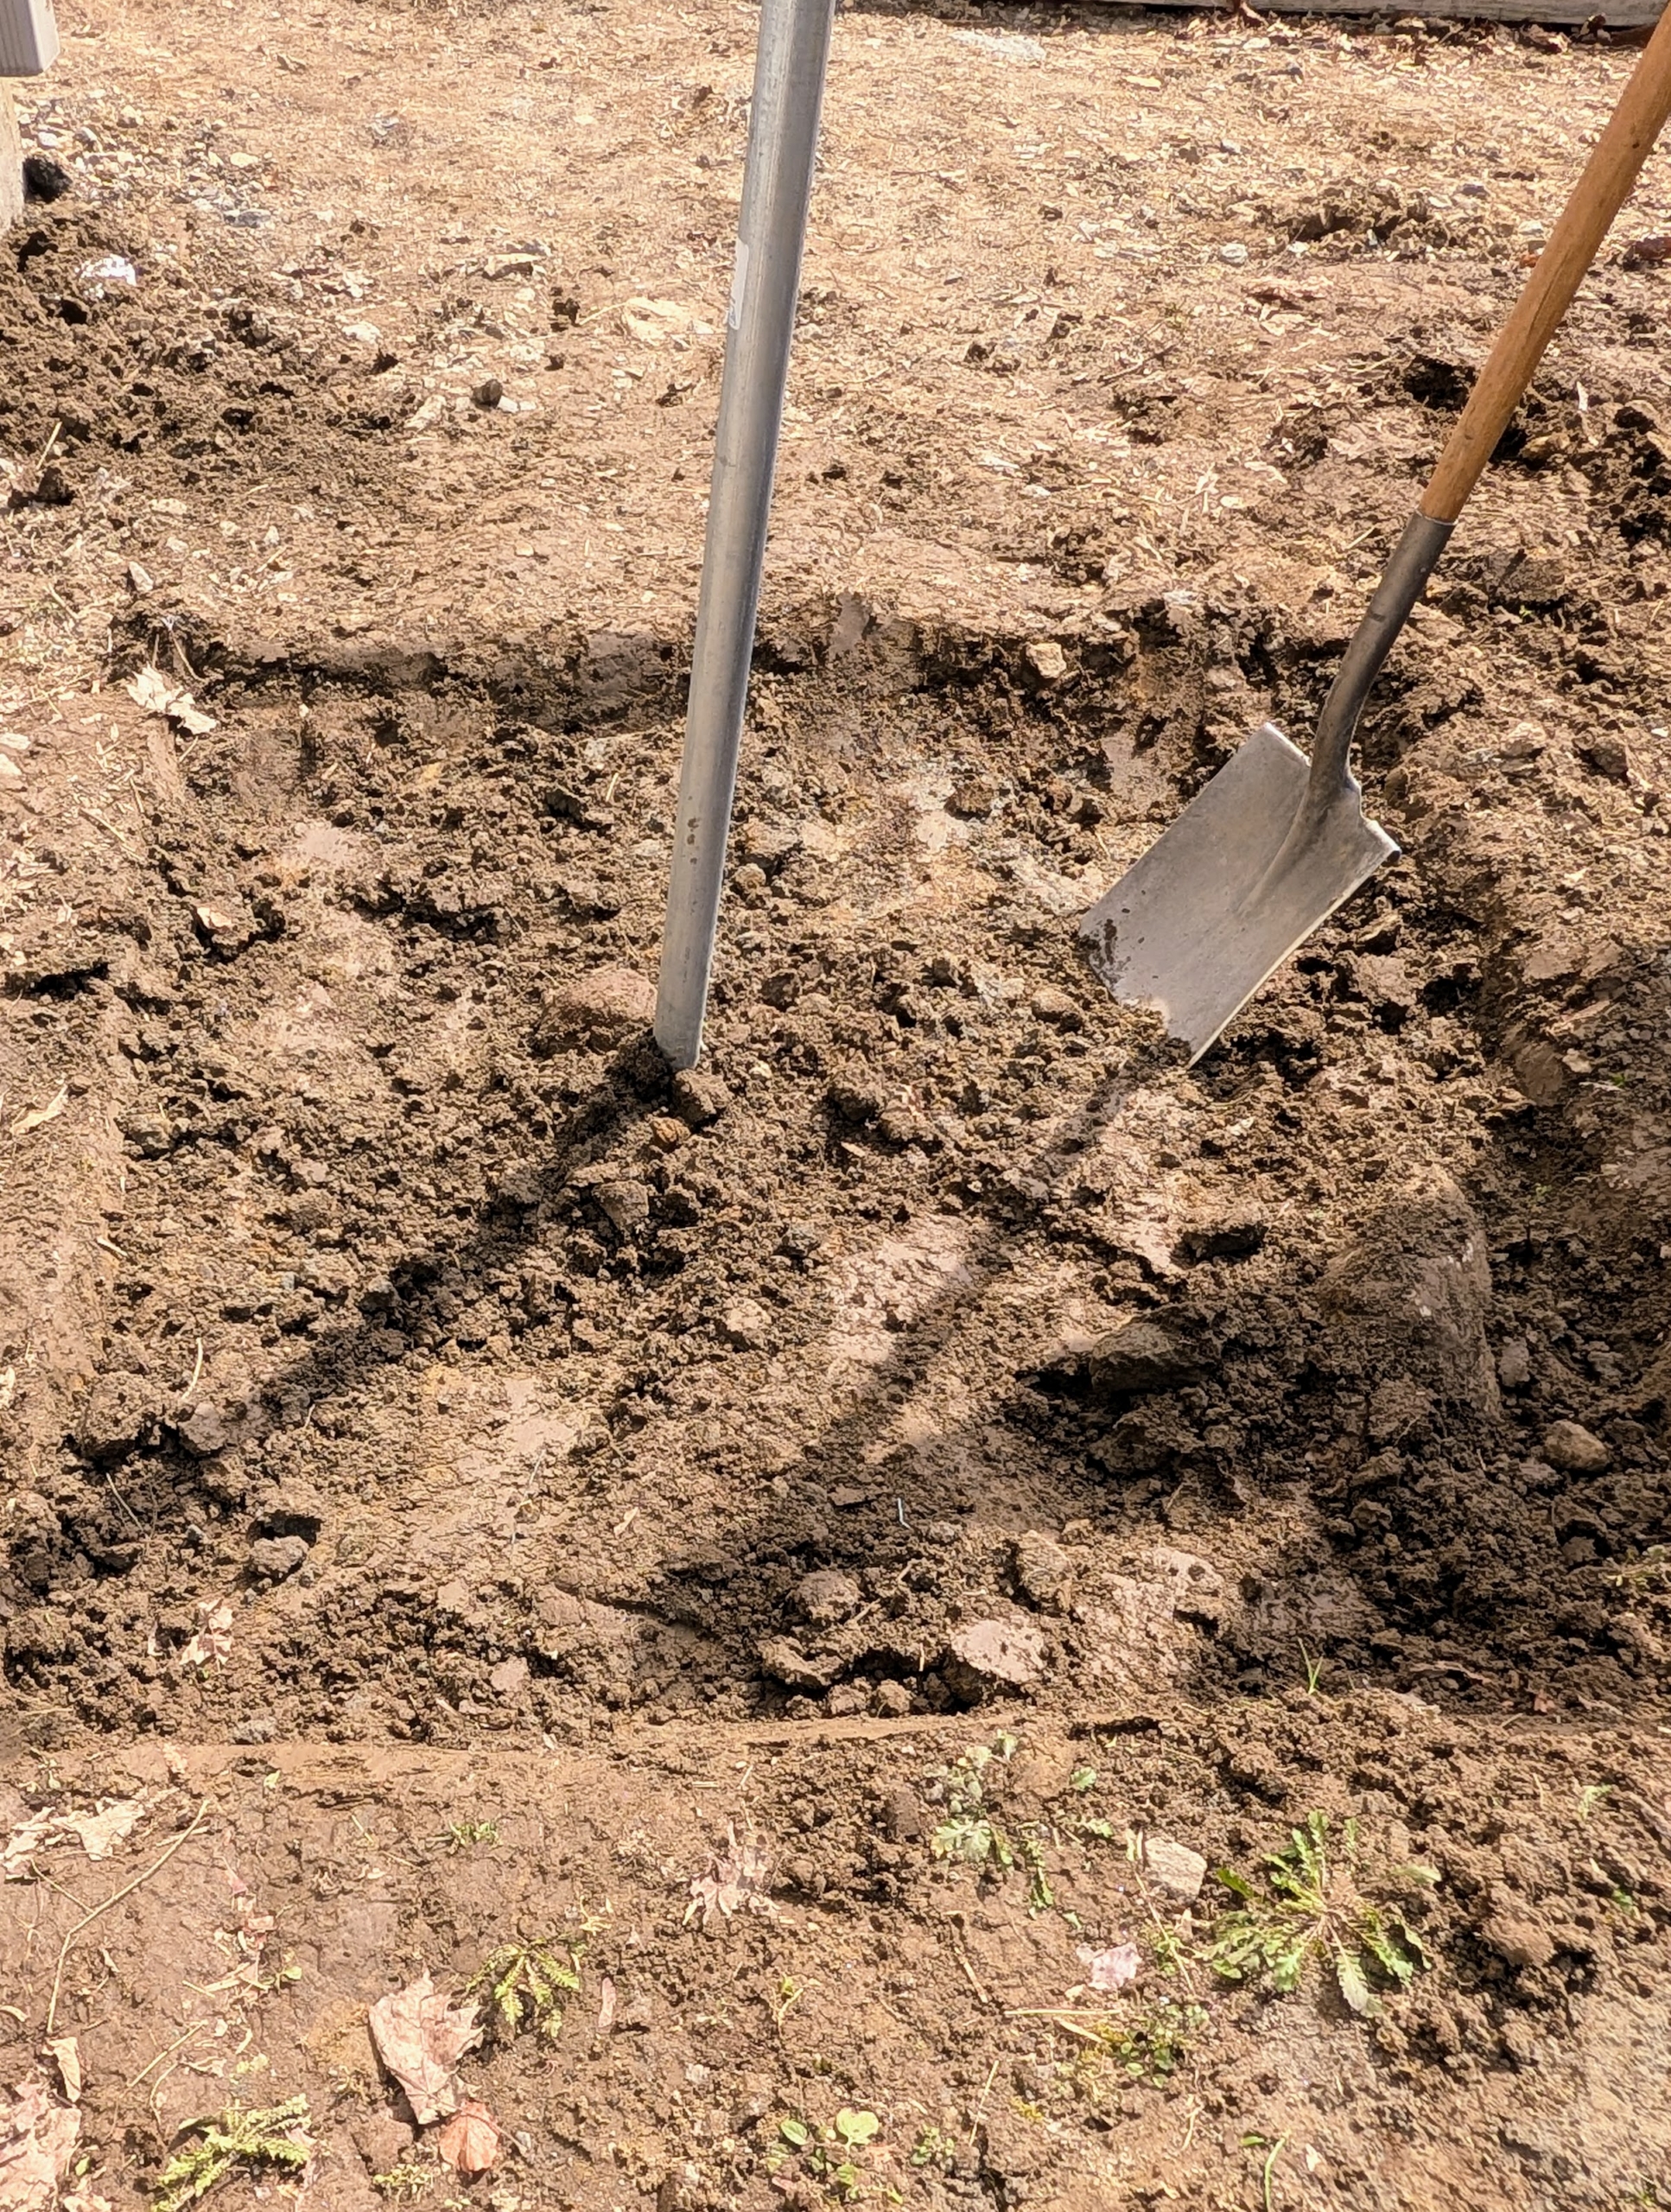
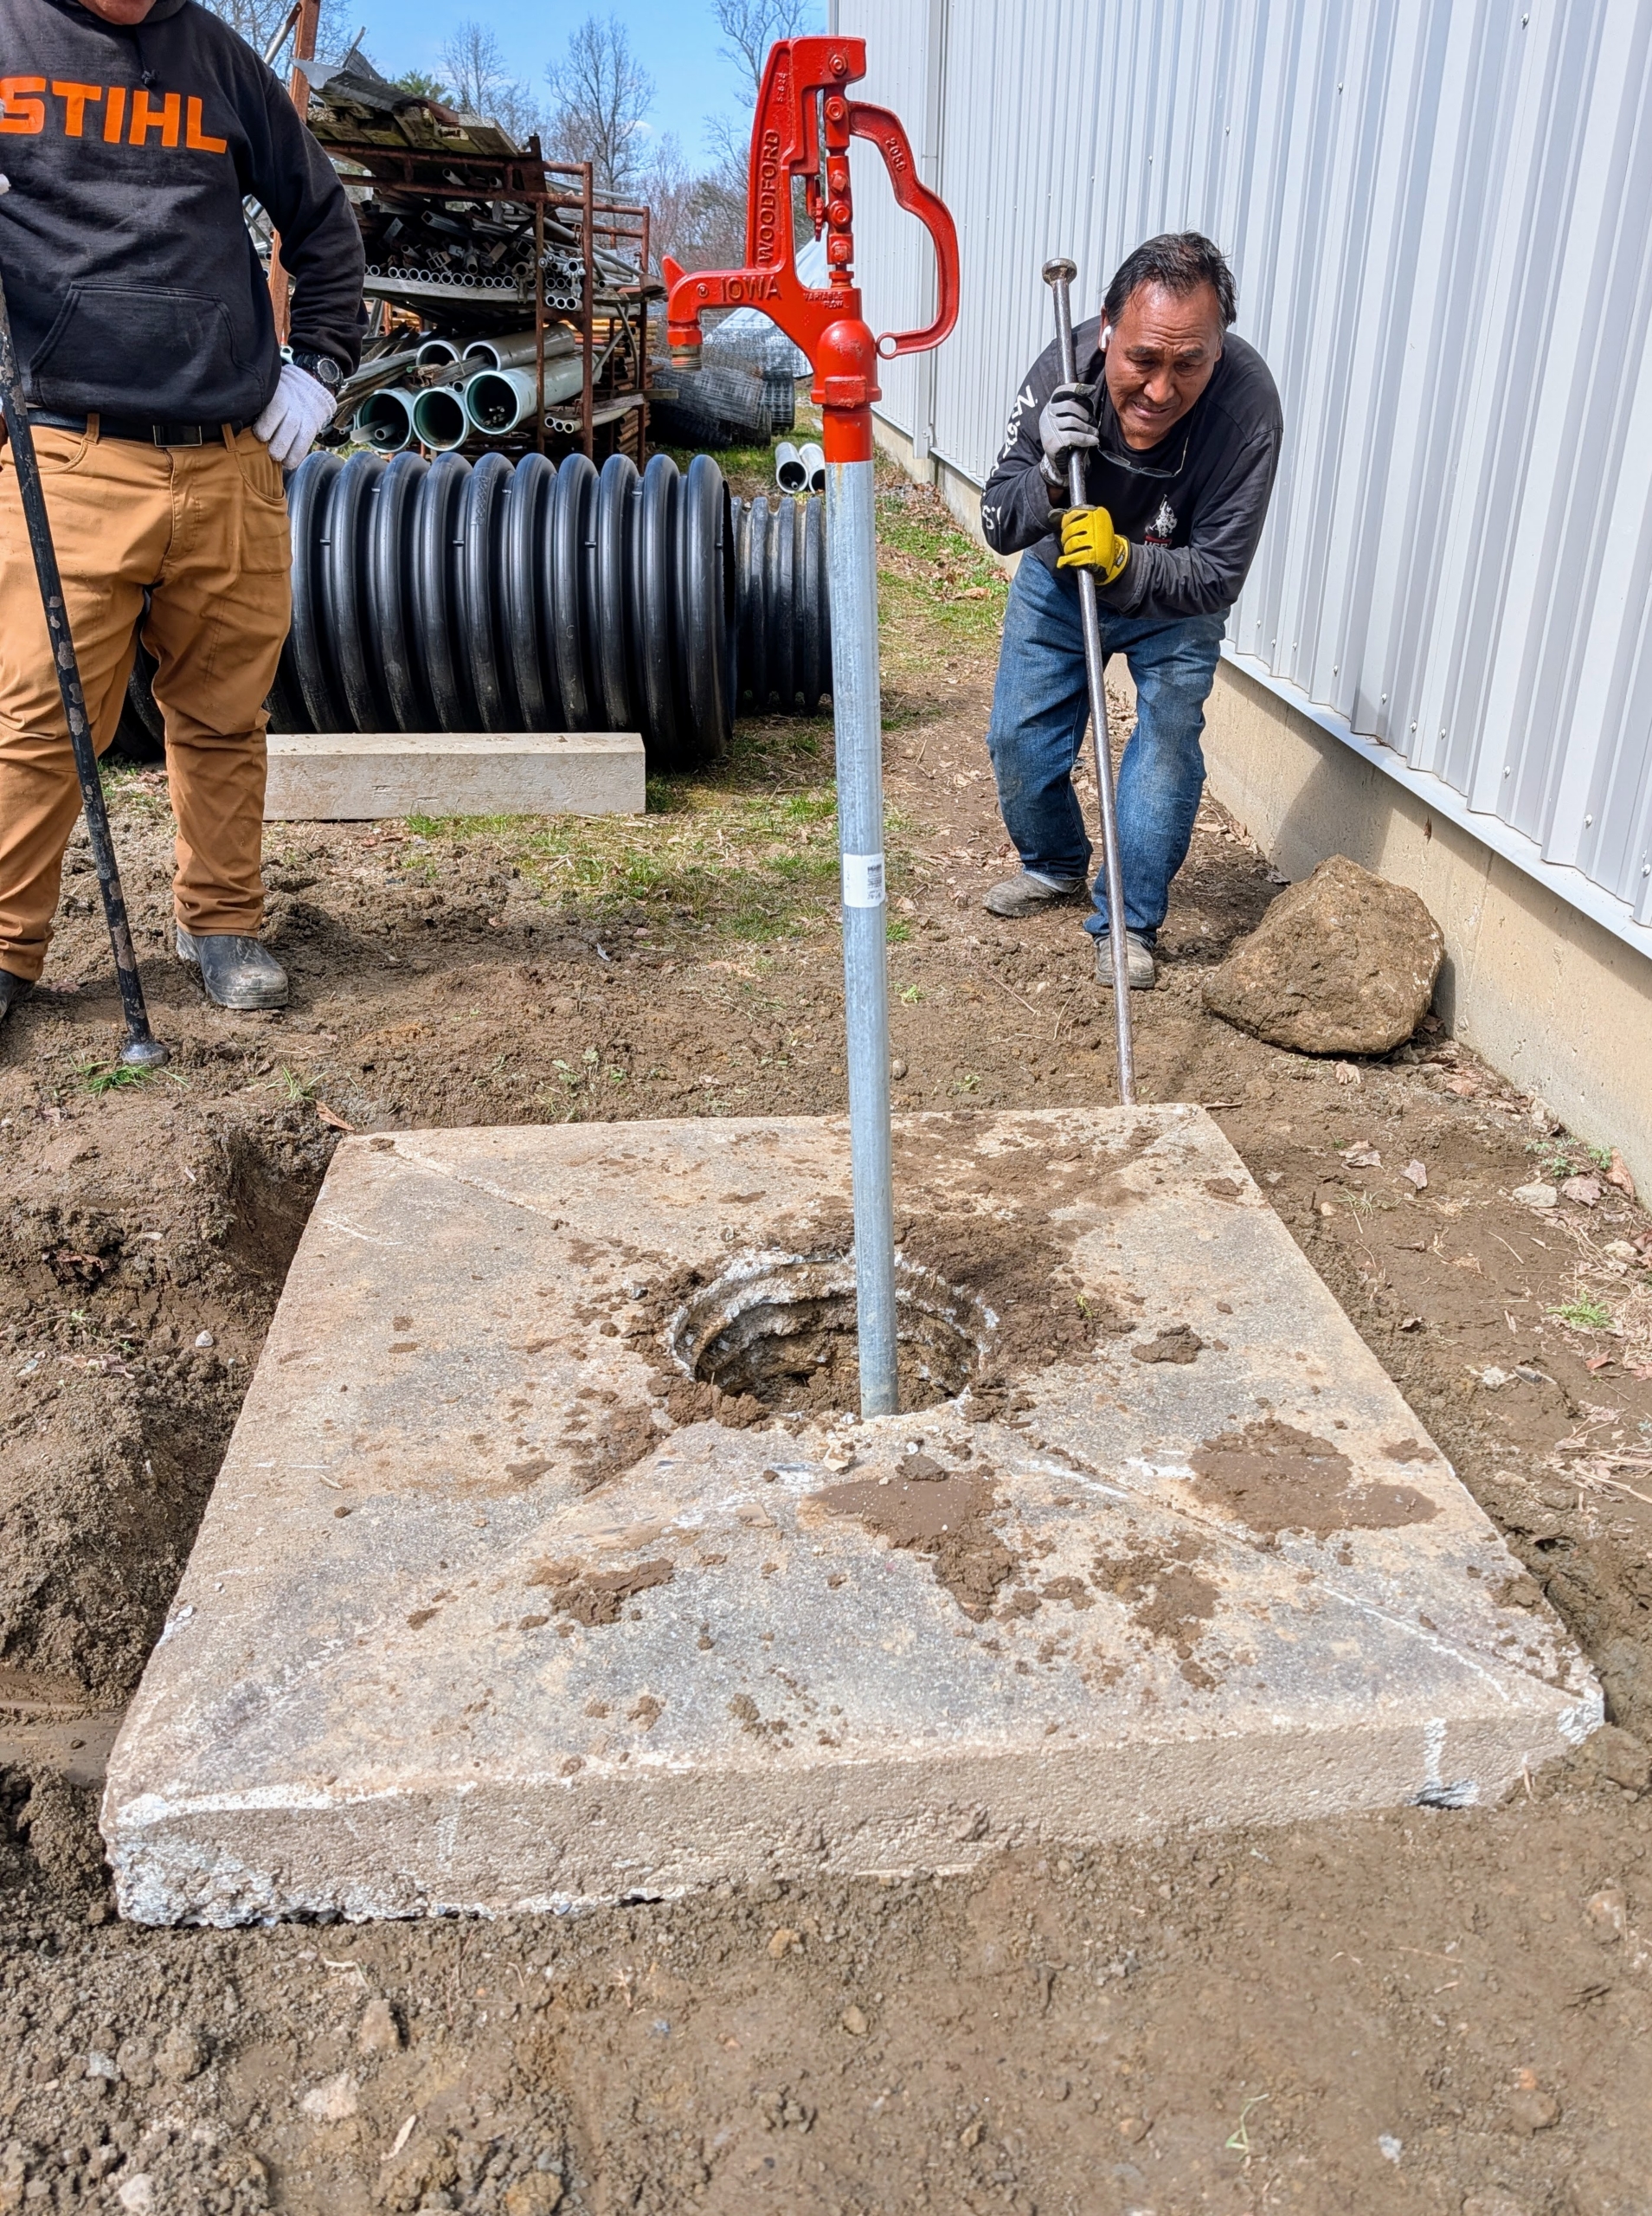
Meanwhile, using a steel digging bar Pete removes the underground drainage pipe from center of the piece.
It takes some elbow grease to remove, but in a few minutes, it’s out and discarded.
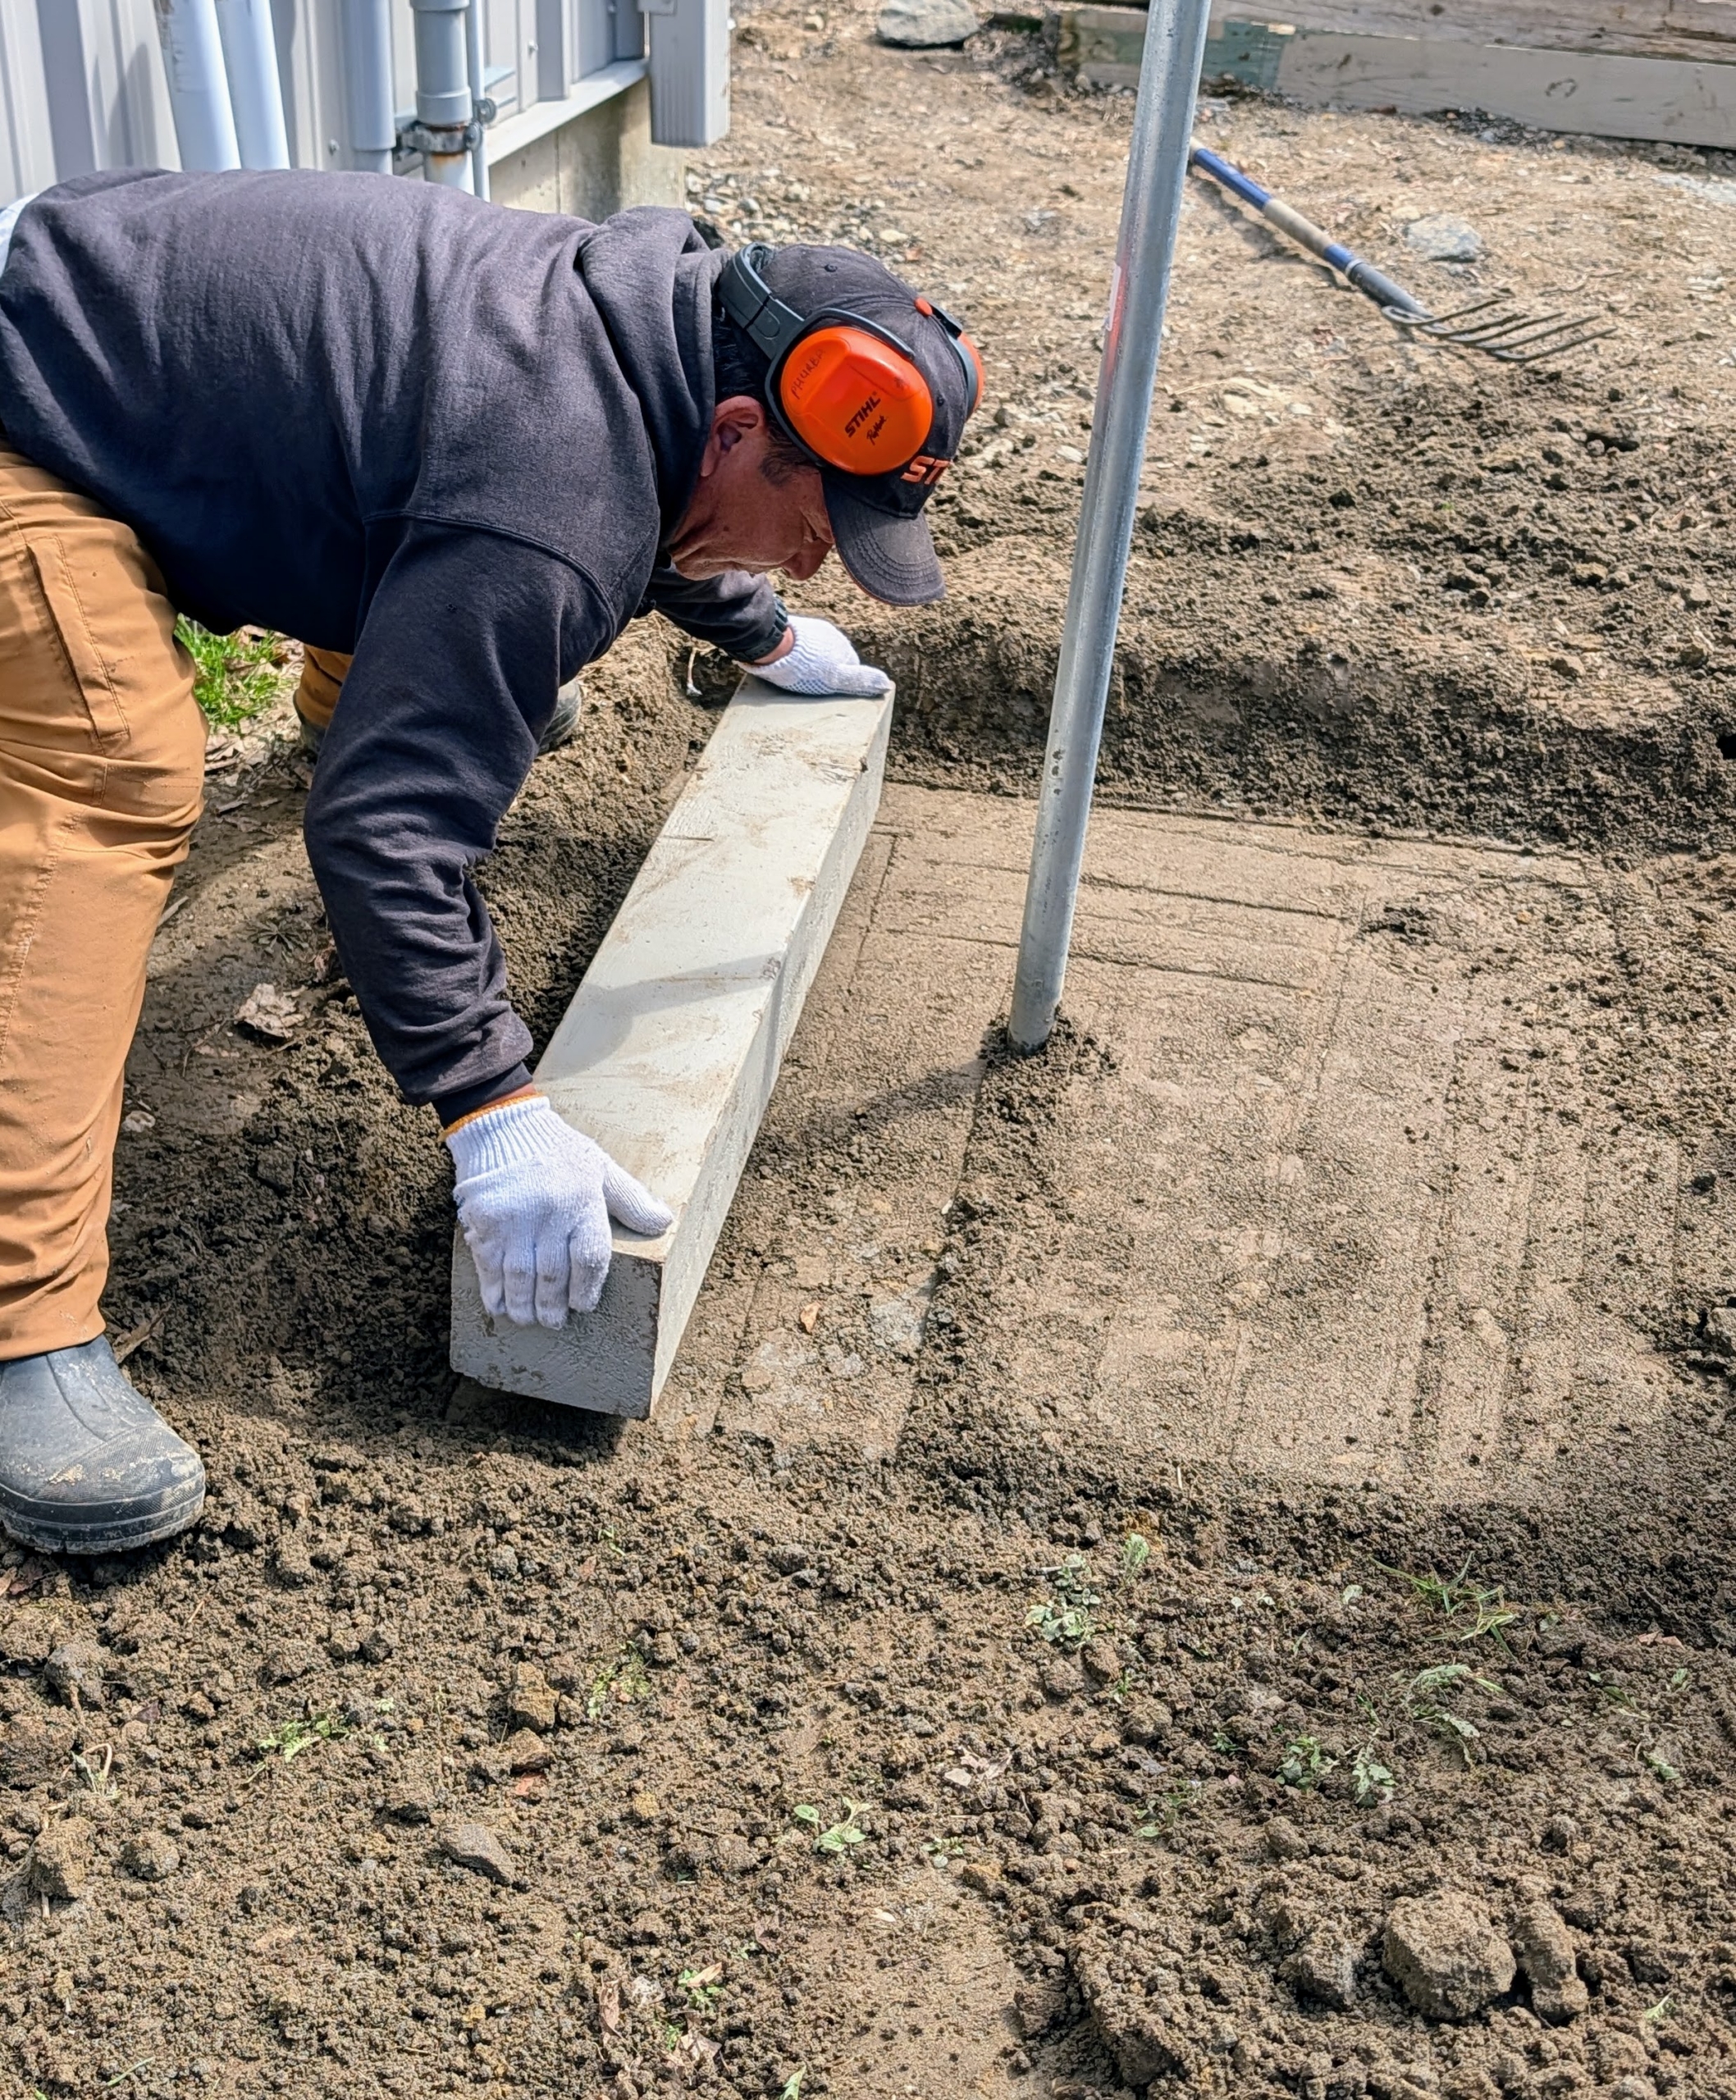
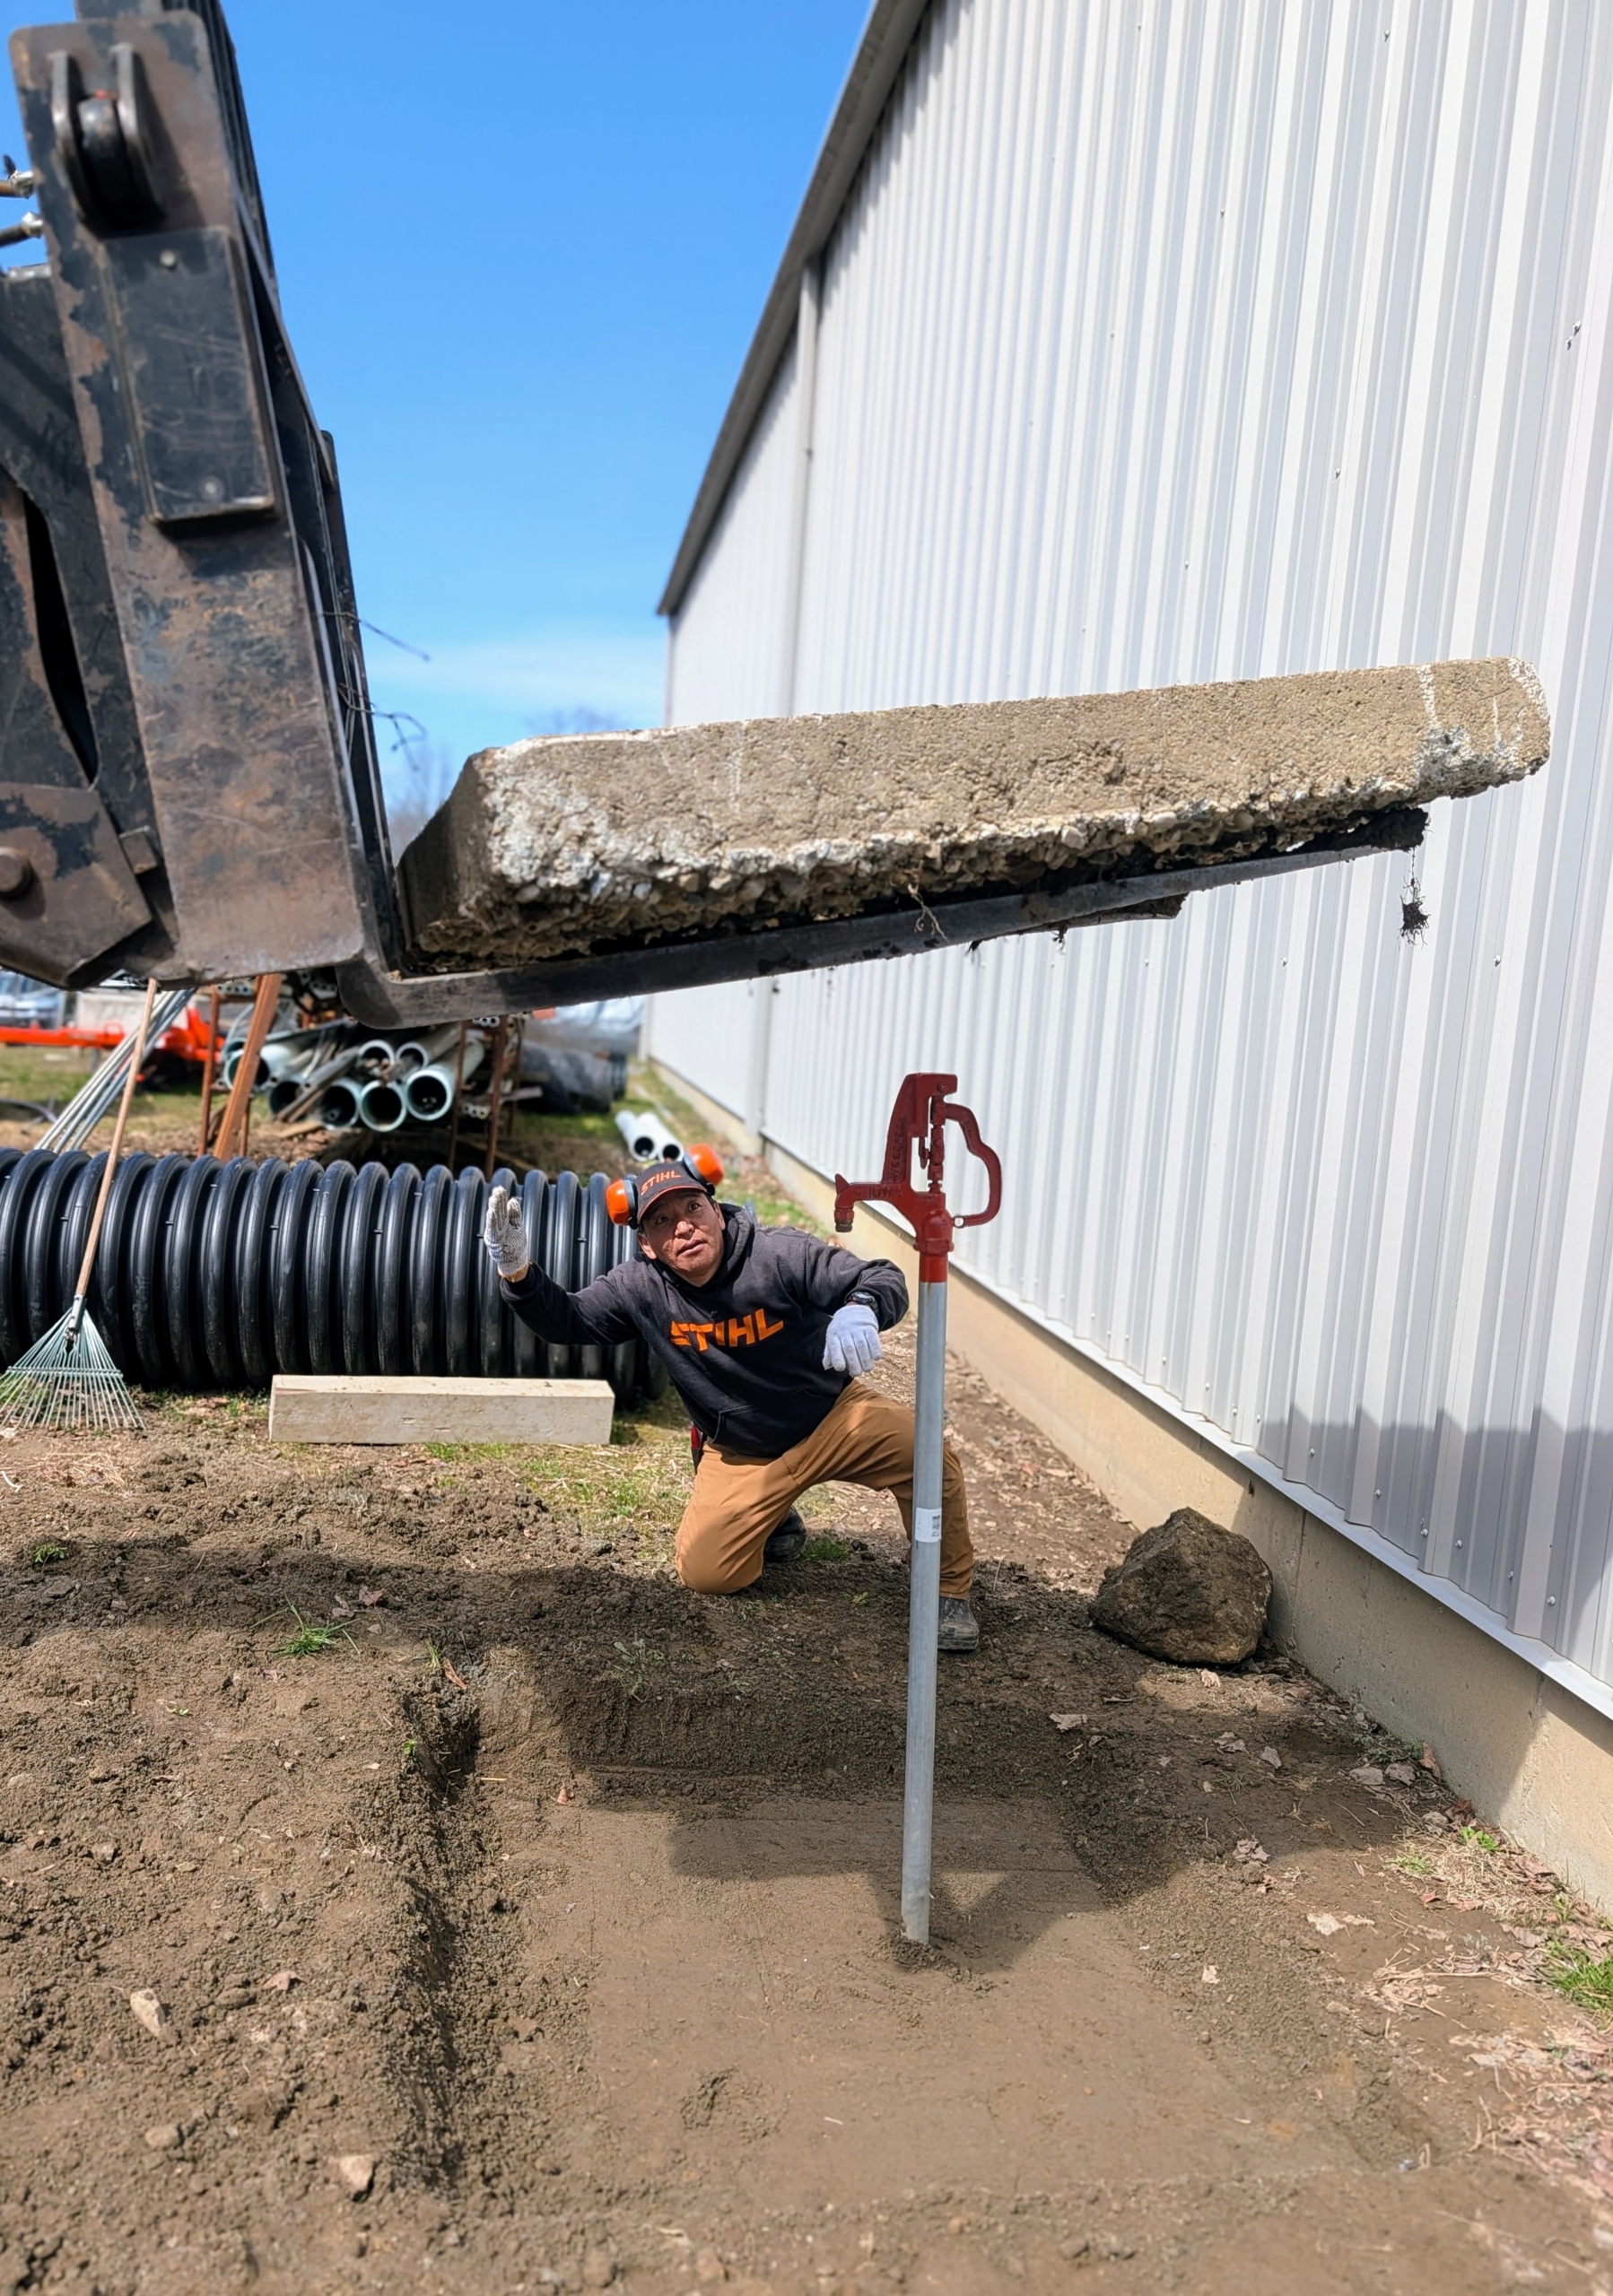
Next, Pete uses the fork of the Hi-Lo to transport the concrete to the faucet.
With Phurba on the side to direct Pete’s positioning, the square is carefully positioned with the center hole just above the faucet.
And then it is slowly lowered into position.
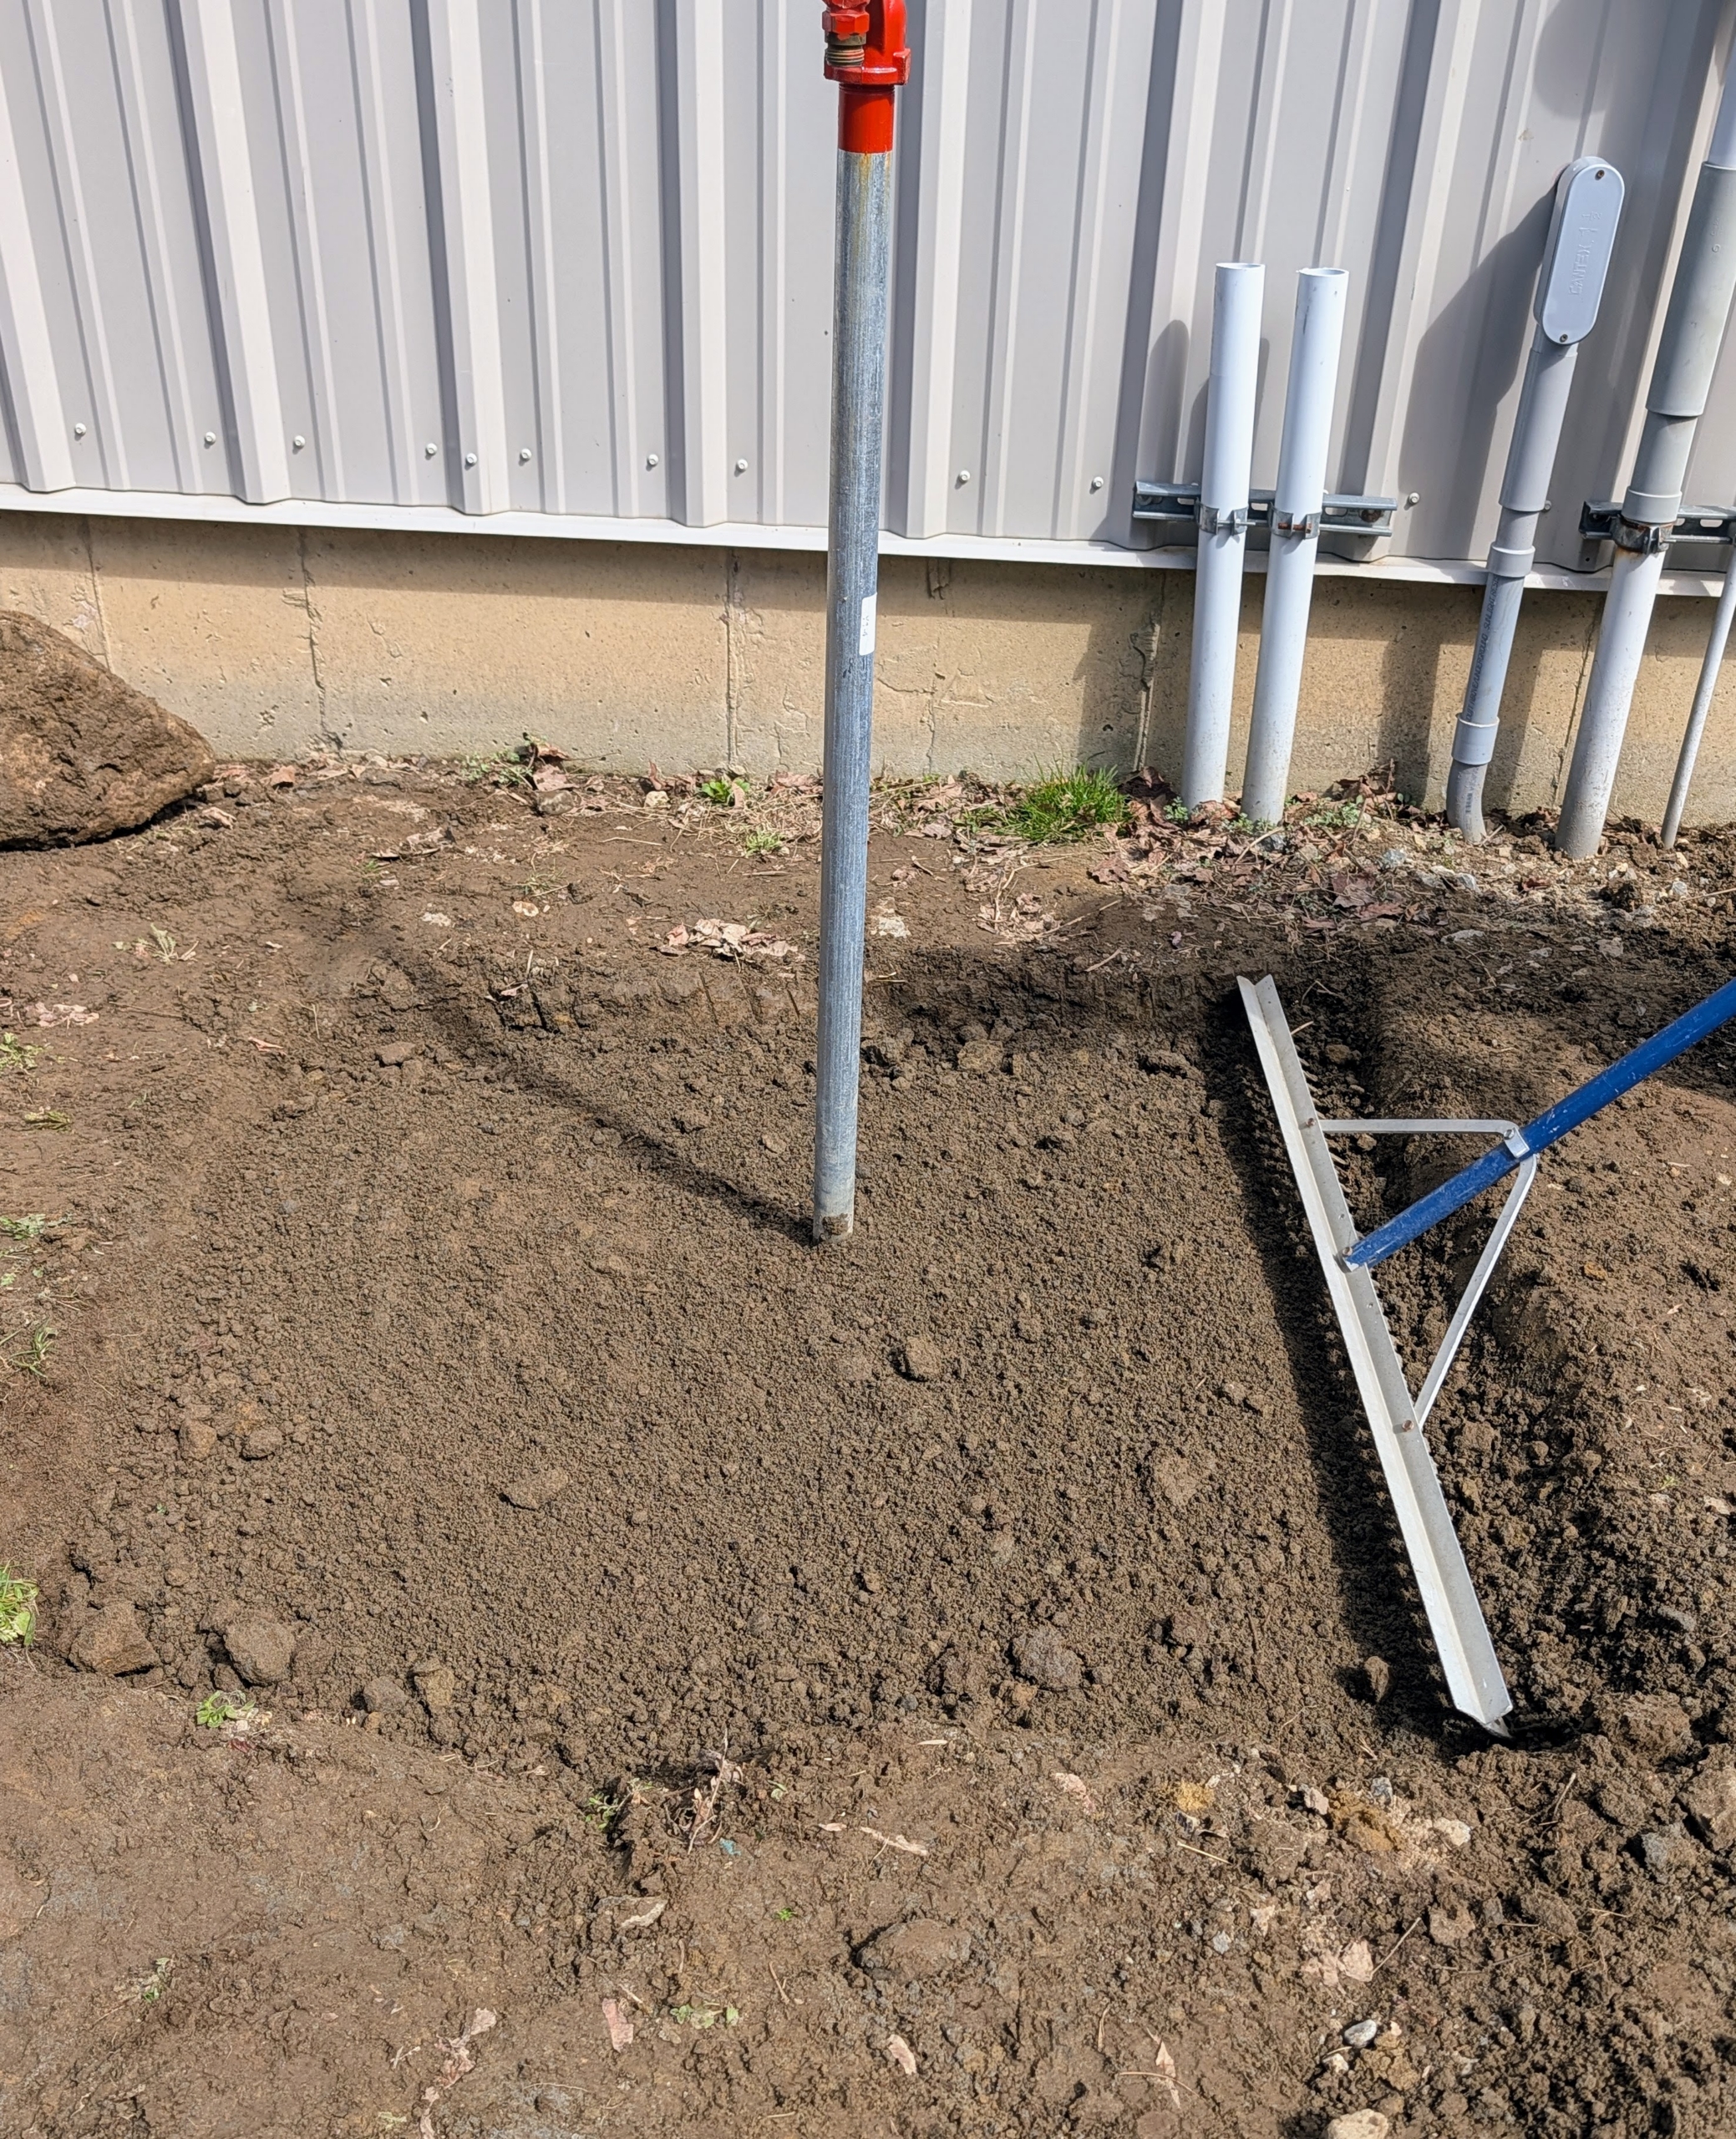
Pete uses the digging bar to make sure the piece is completely straight.
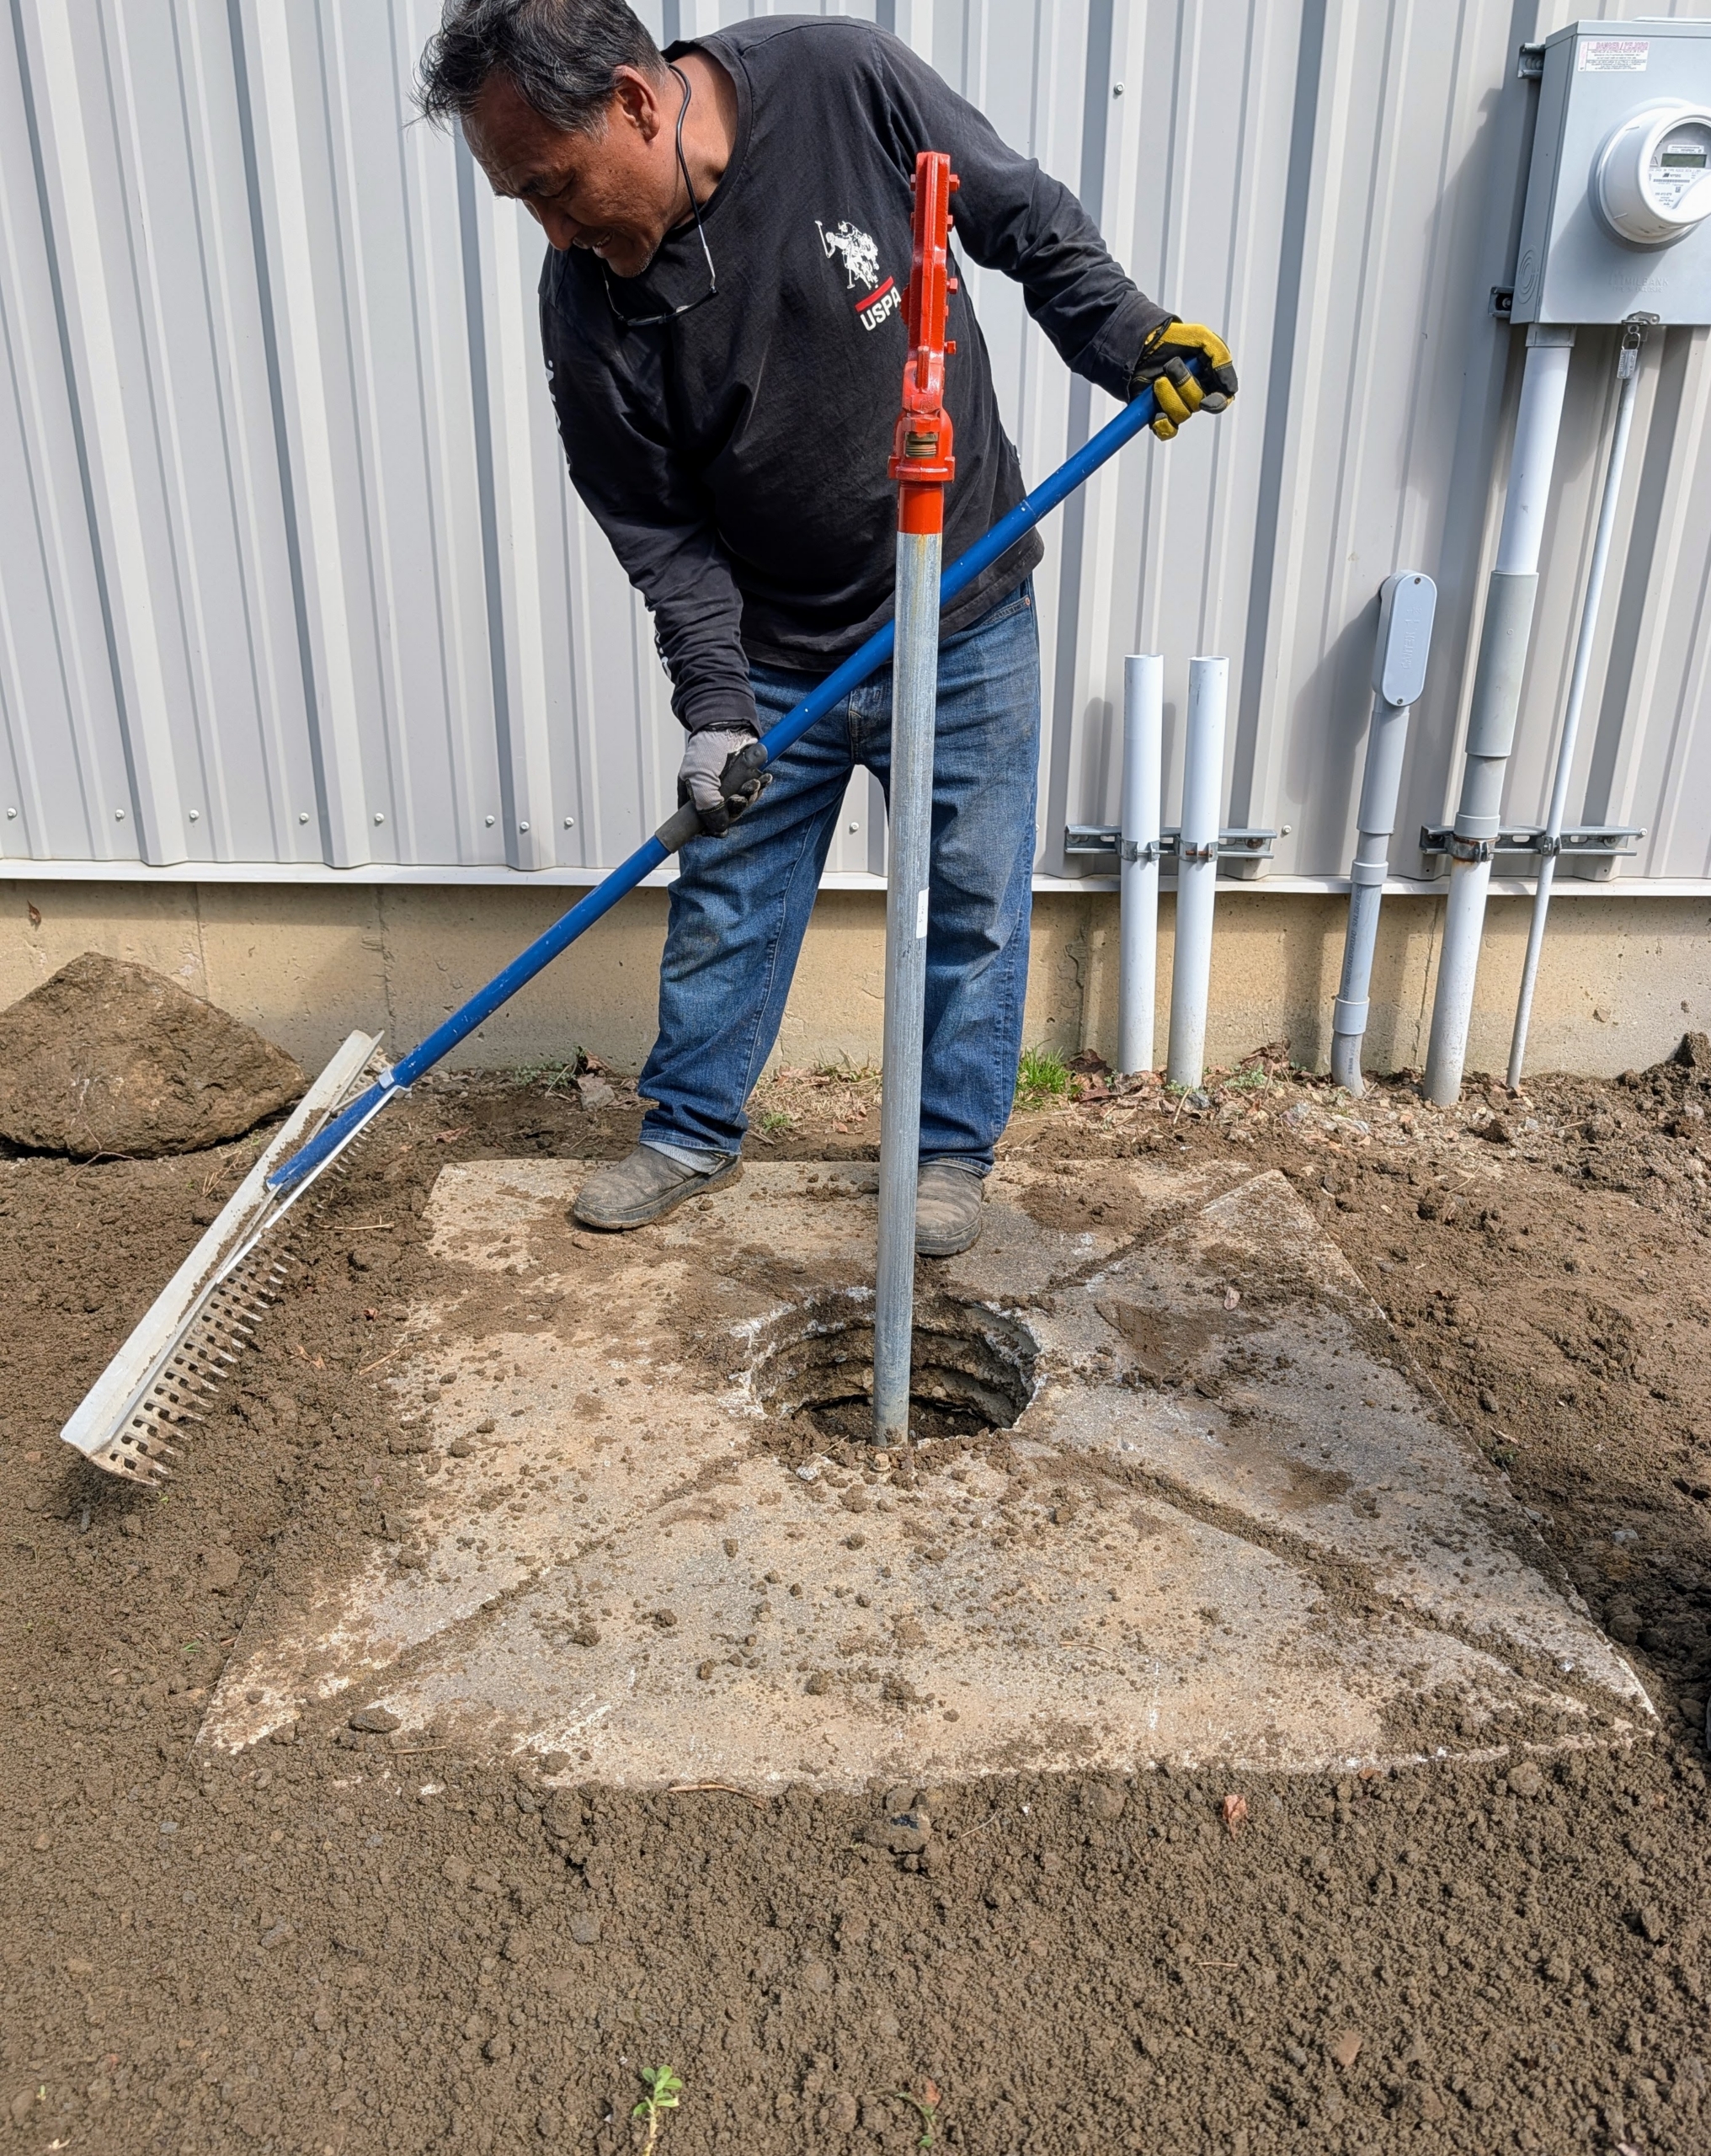
Next, he uses the gravel rake to move the soil snug around the base.
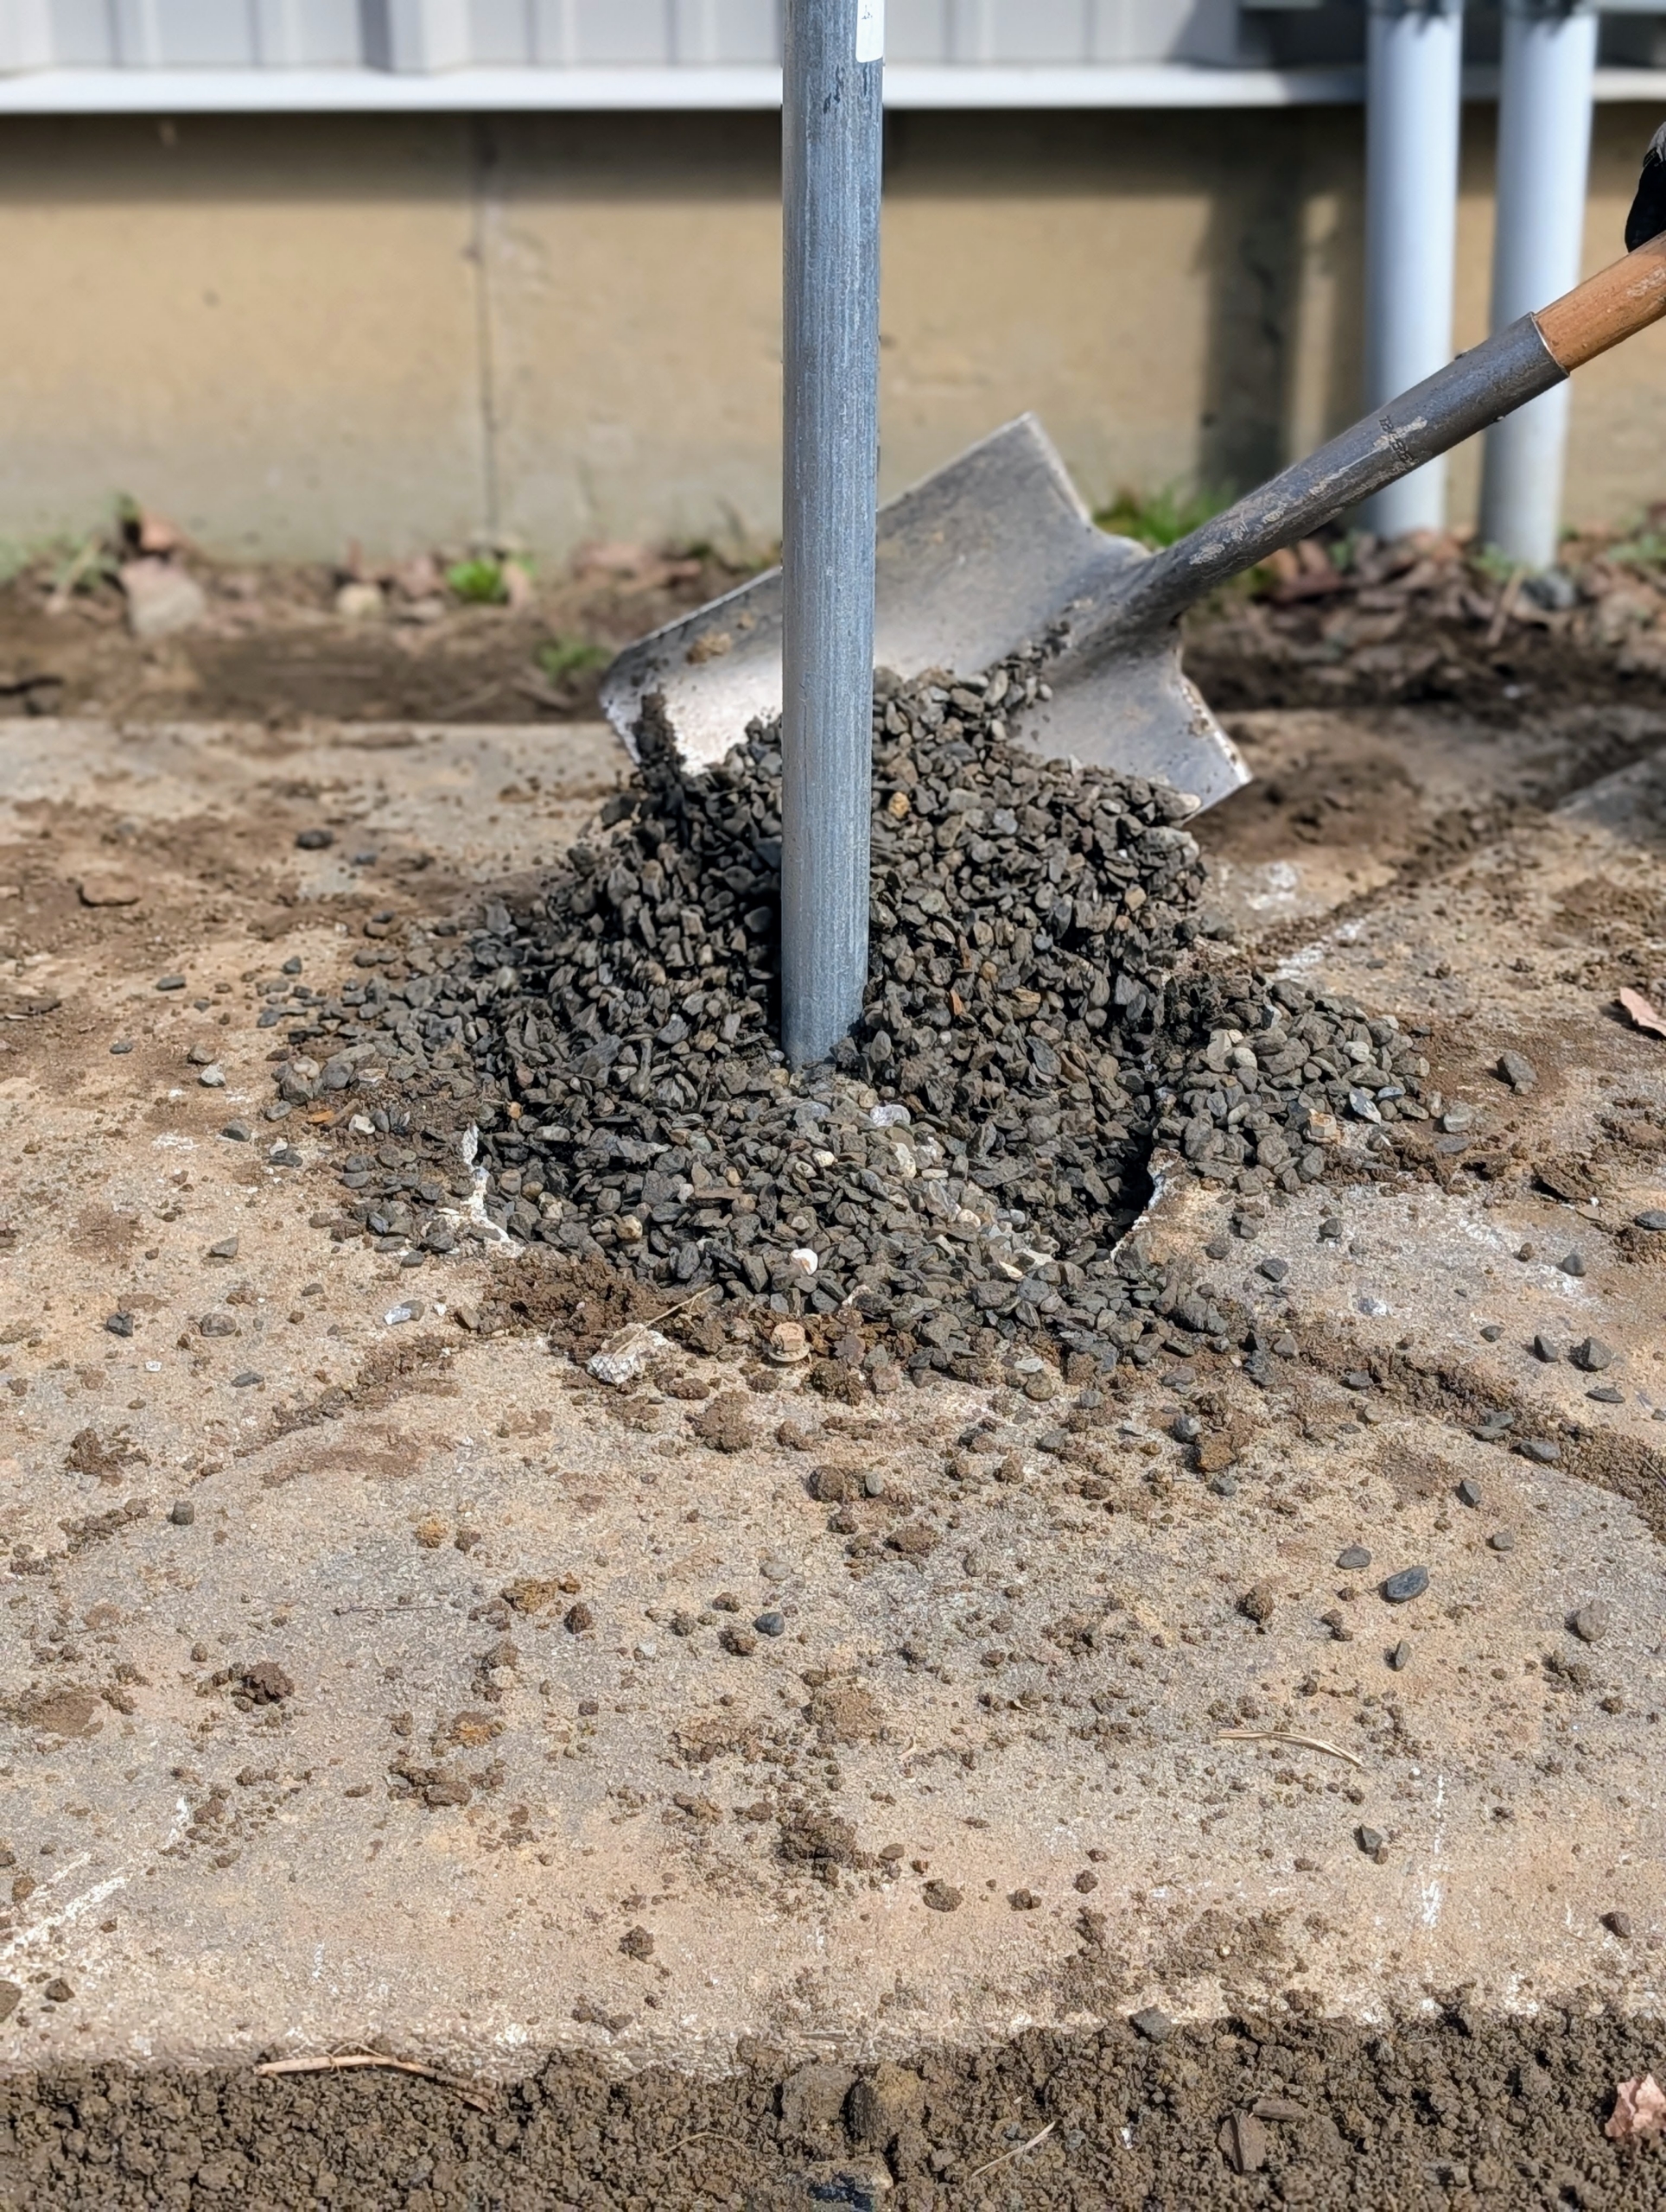
He surrounds the faucet pipe with gravel to keep it sturdy in place.
And then tamps down lightly to ensure the gravel is settled.
It looks so much better – as if it was always there. If you’re doing some spring cleaning around your home, take a look at what you have – you may just find something you can reuse and repurpose.
Now that it's spring, everyone on the farm is busy cleaning up and preparing for the season.
Farm chores include animal care, garden maintenance, and other seasonal tasks. To stay organized during transitions, we follow a schedule of chores from one year to the next. Over the last few weeks, we've been blowing old leaves, pruning trees, cleaning out garden beds, and removing all the burlap that protected my precious boxwood all winter long.
Here are some photos, enjoy.
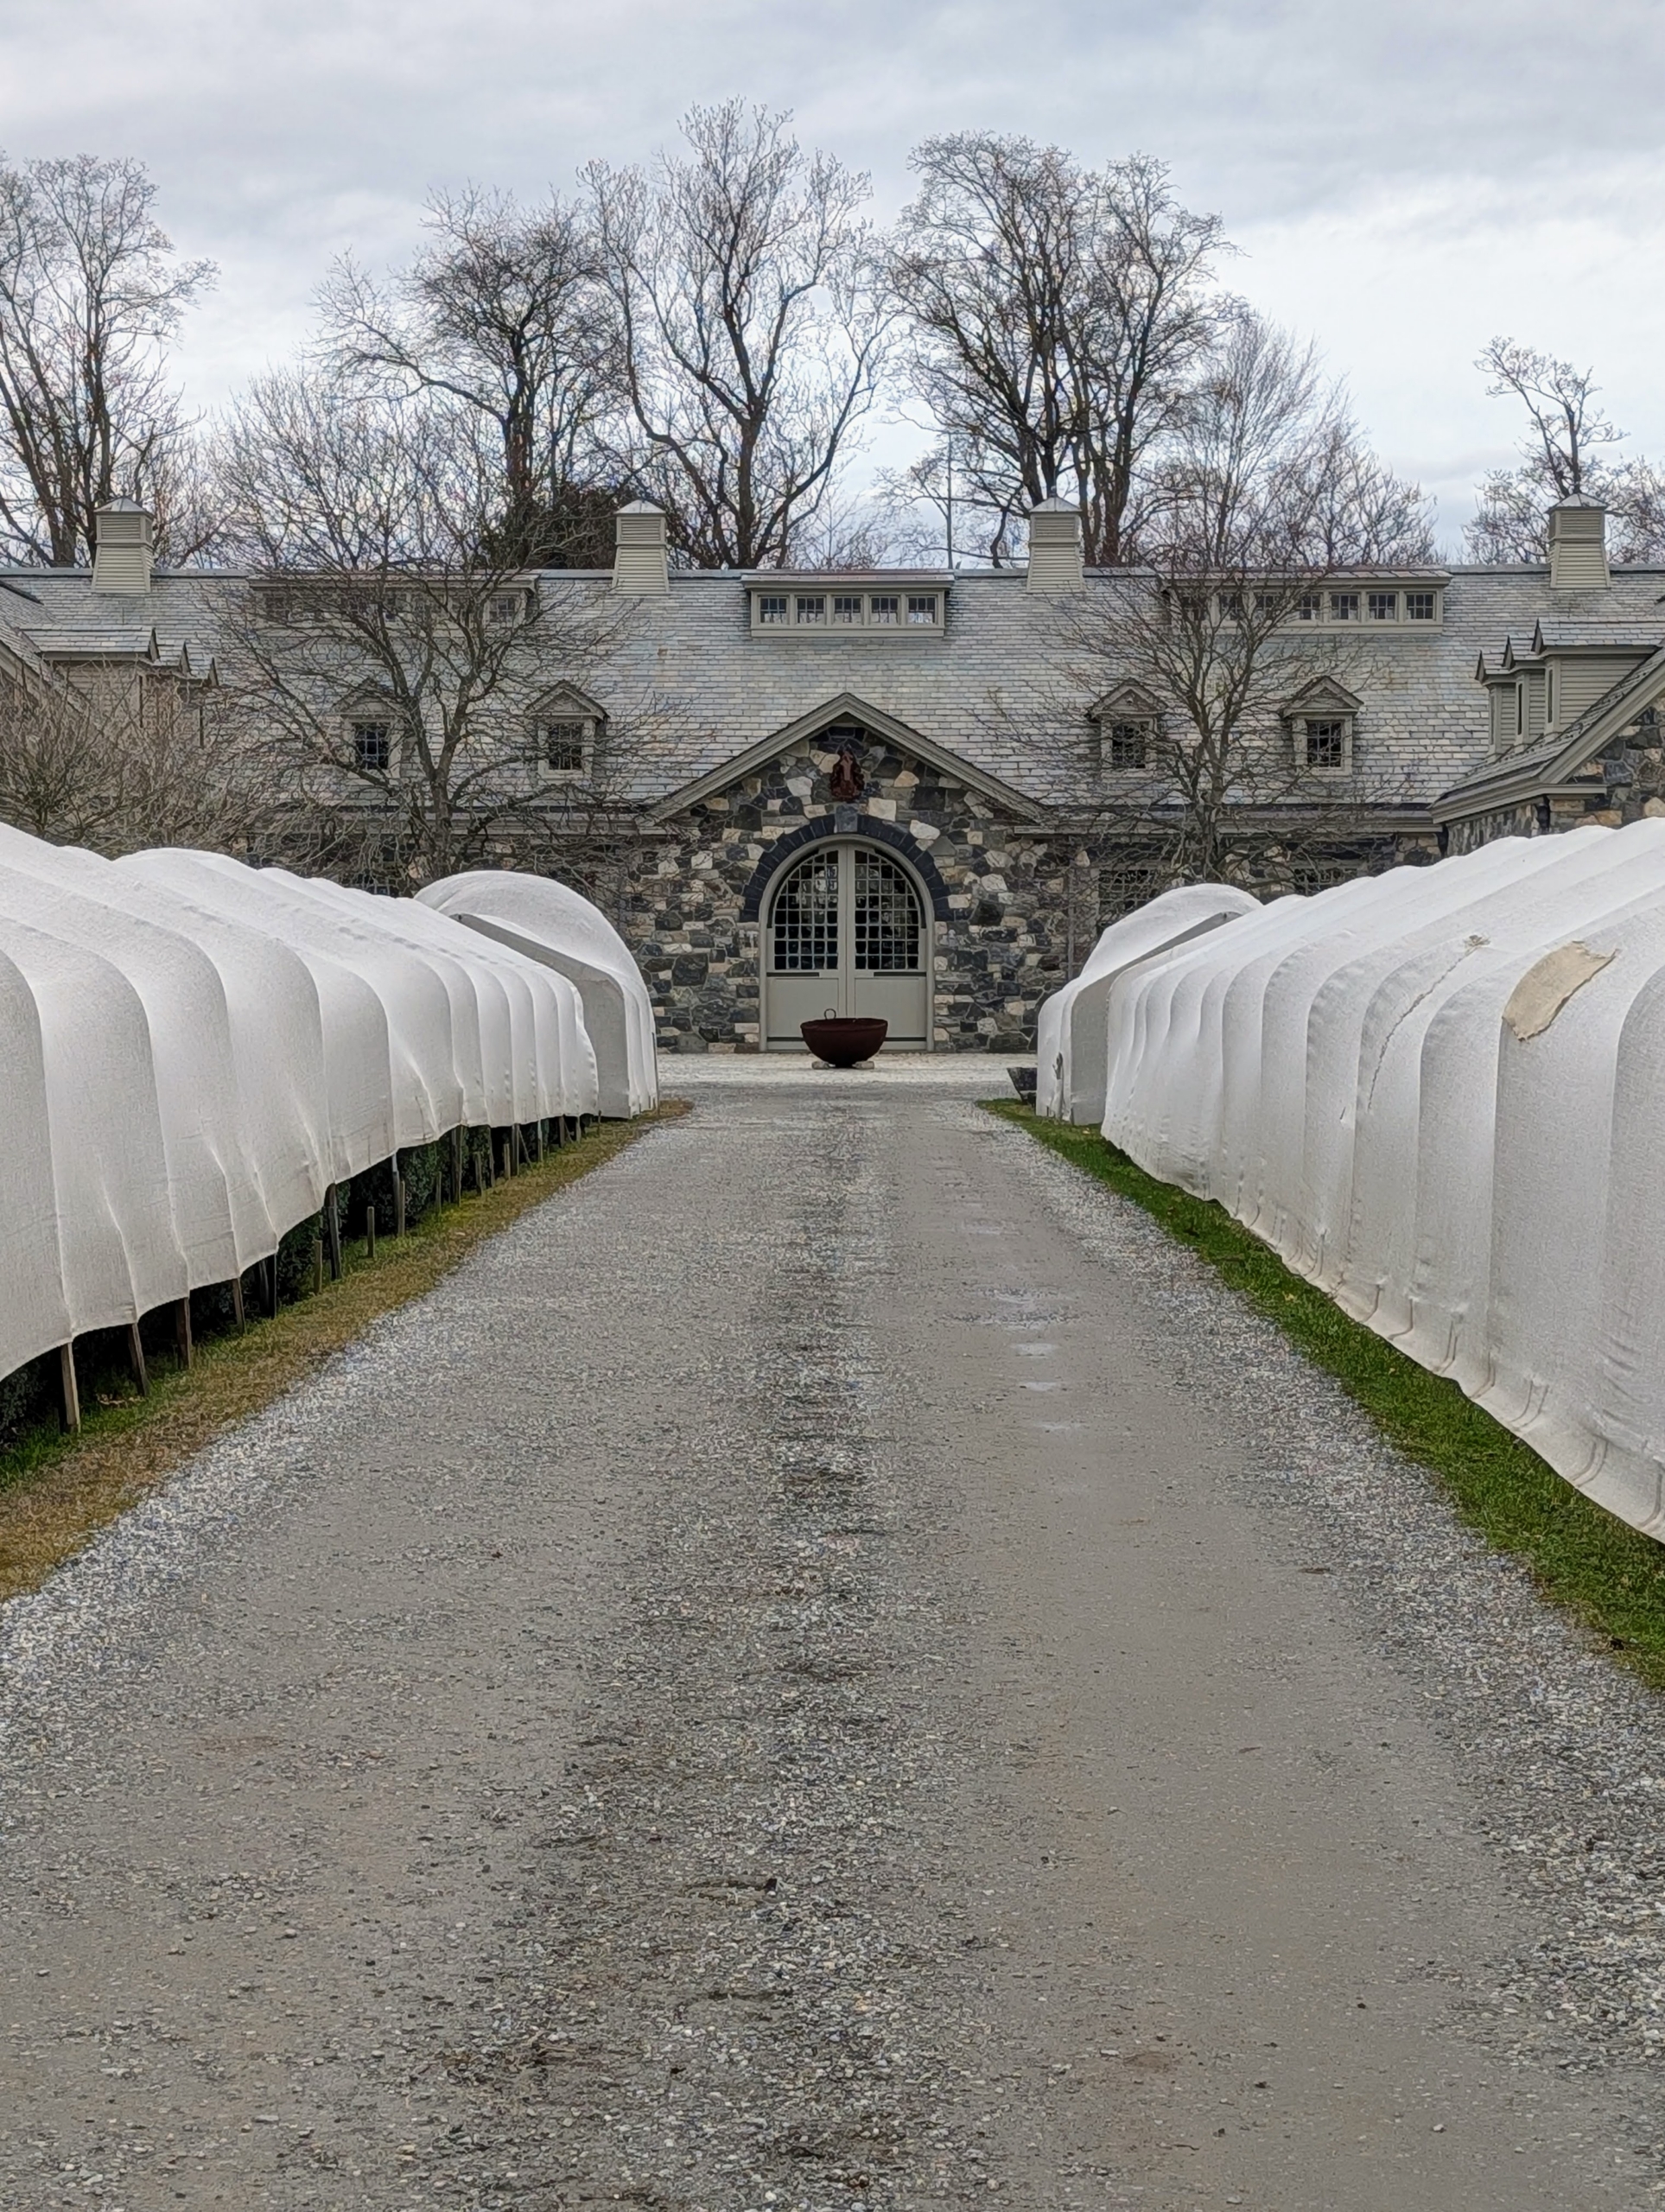
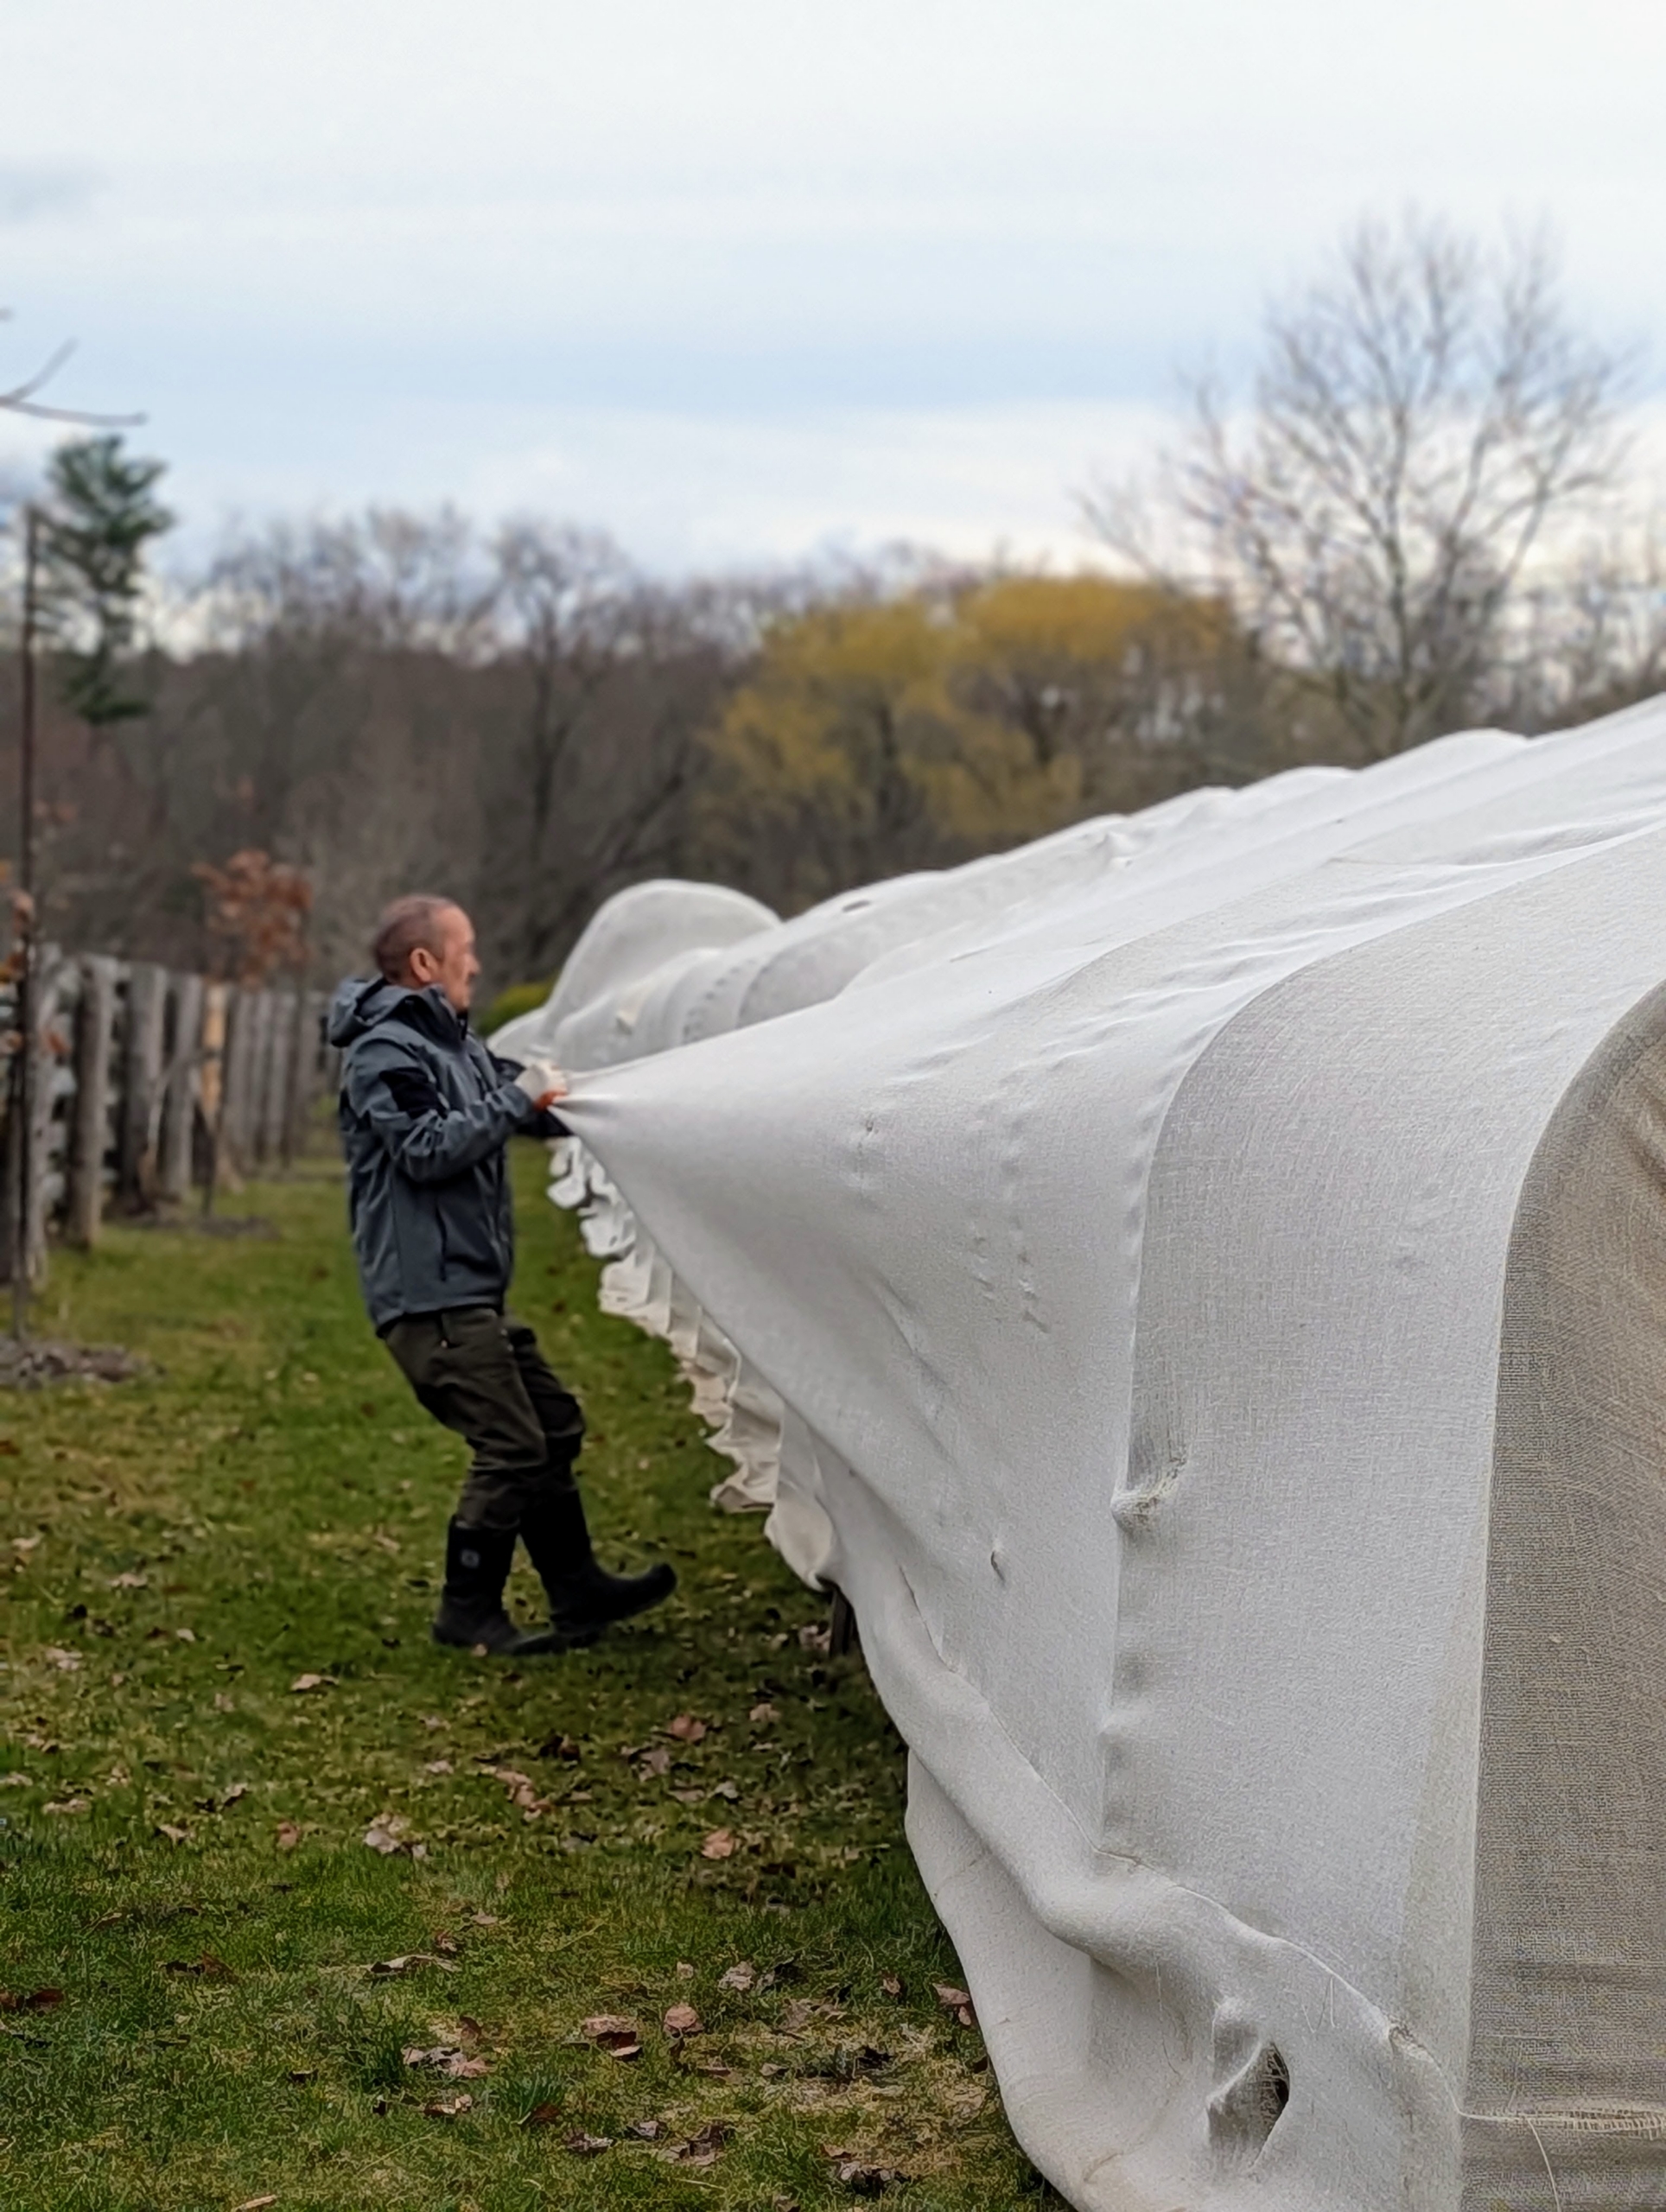
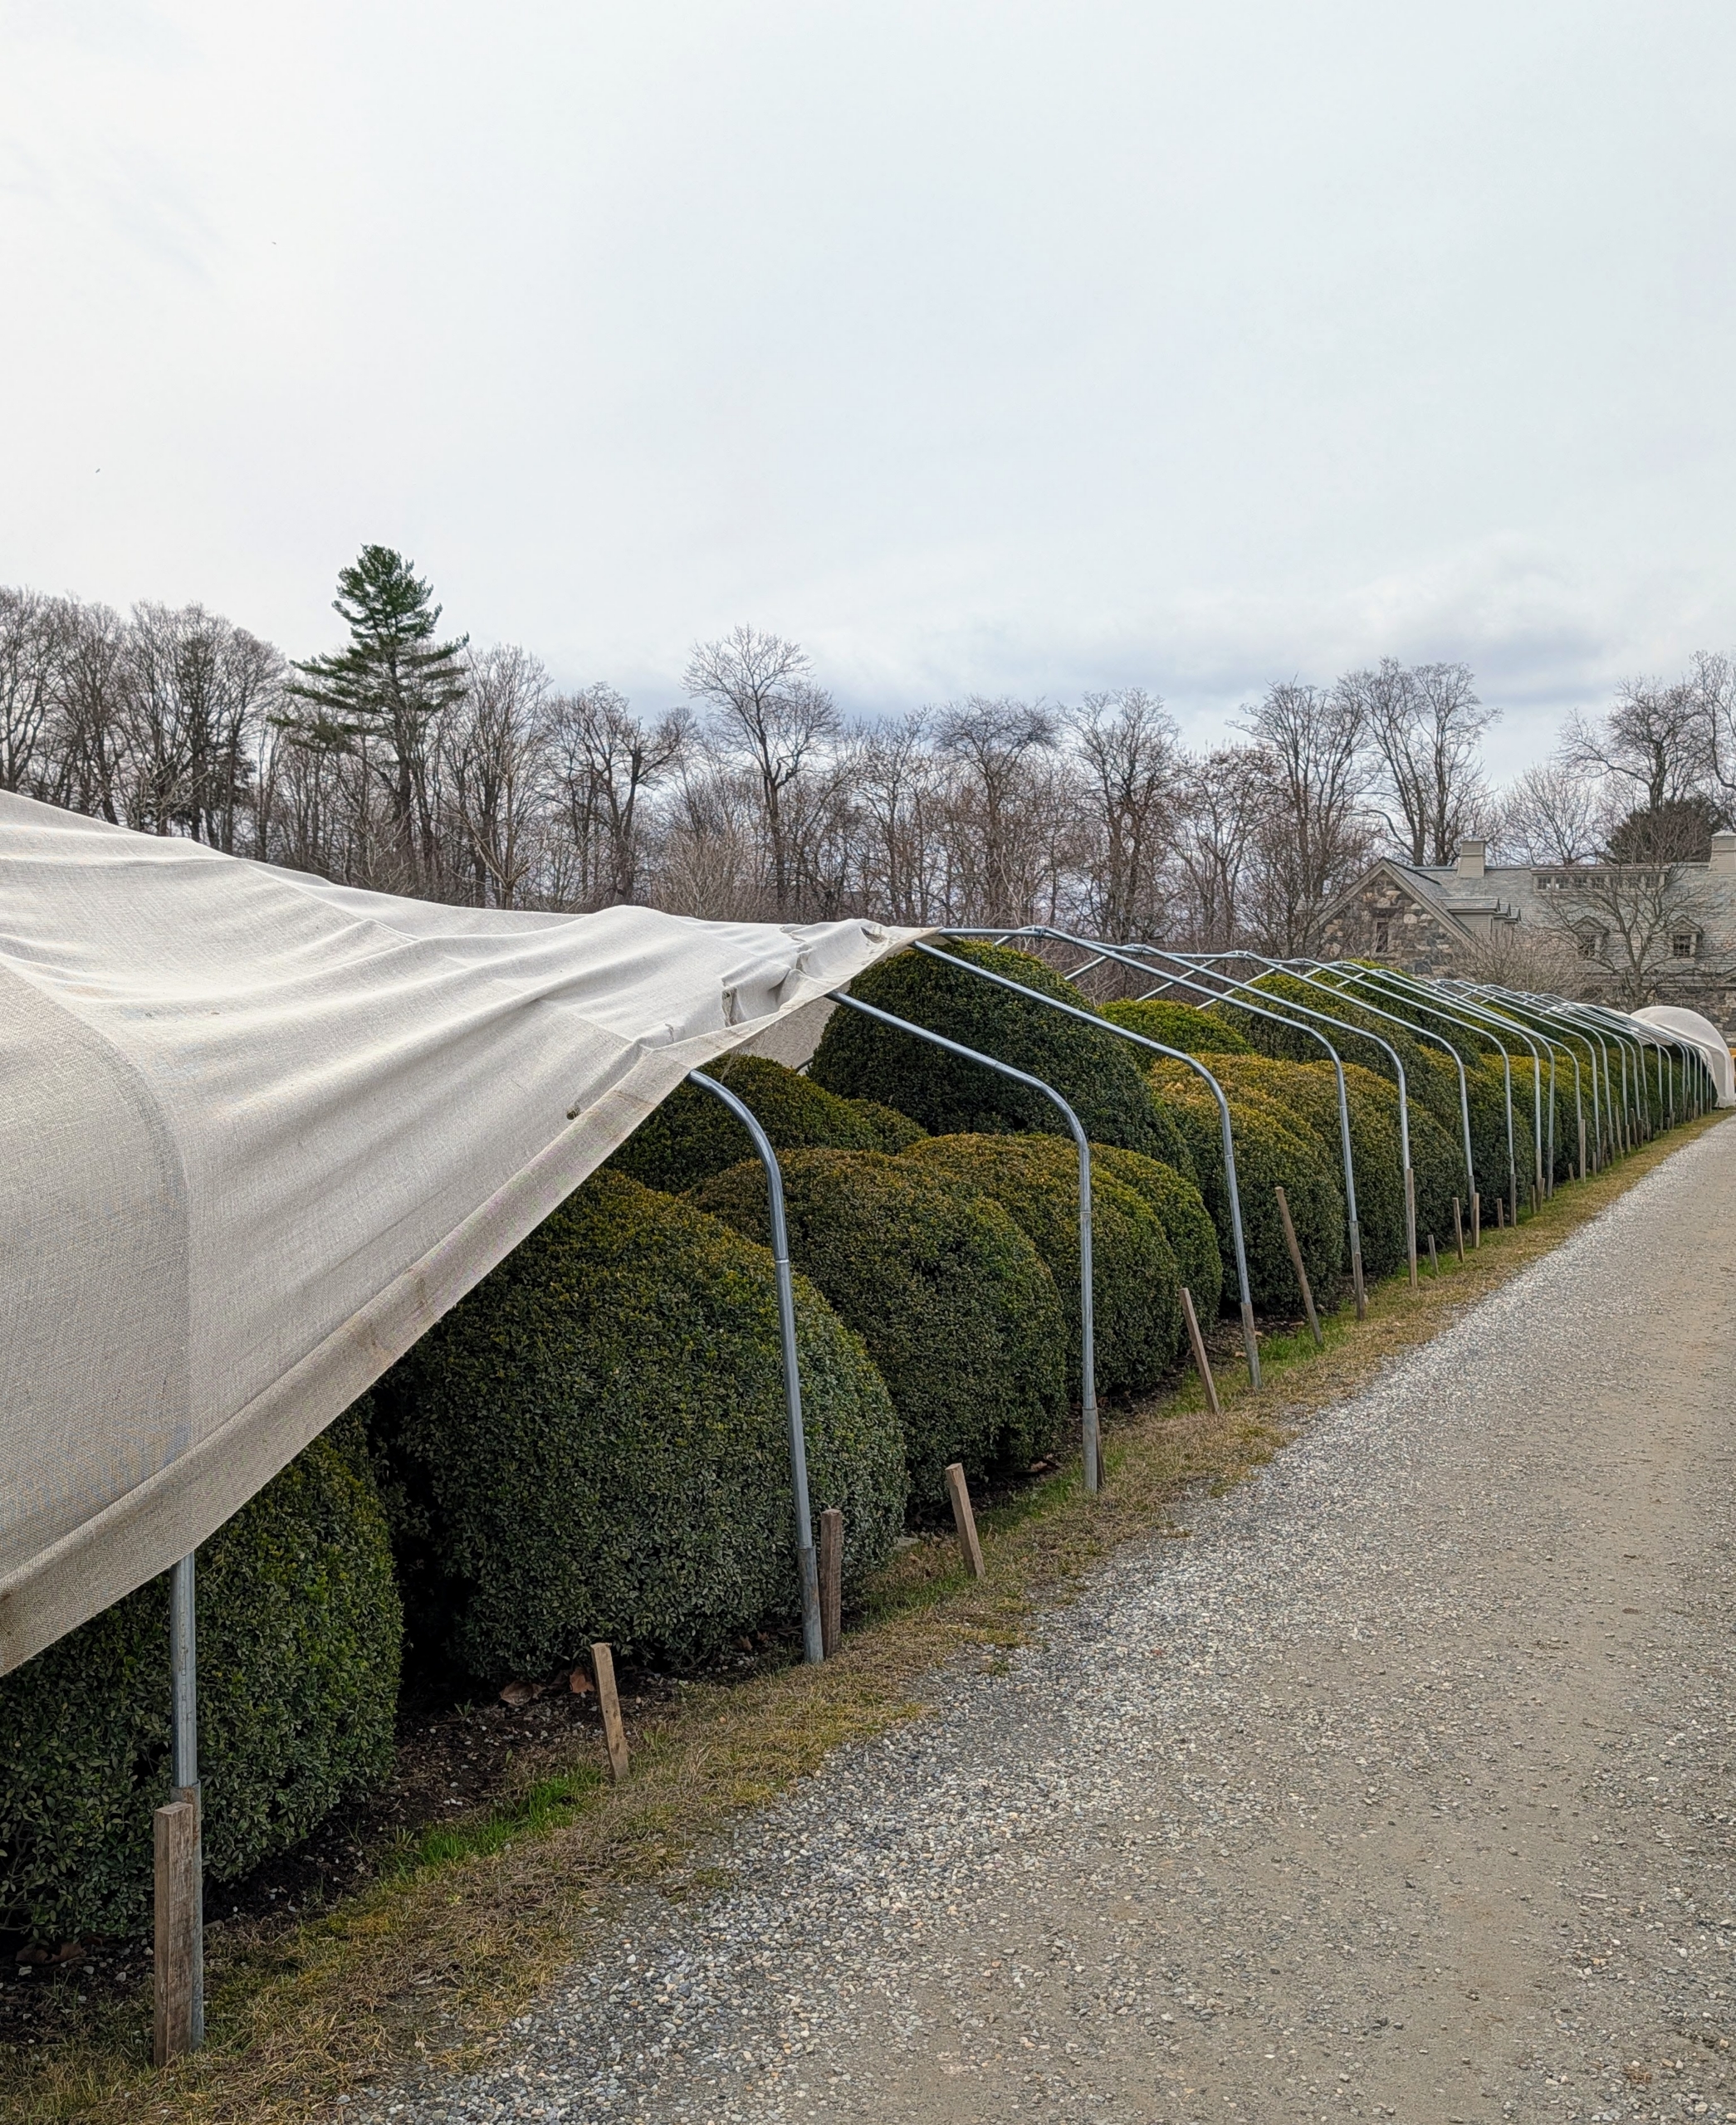
For as long as I’ve been gardening I’ve covered my boxwood shrubs and outdoor ornamental urns. When the ground begins to thaw, it’s all removed. Here is the Boxwood Allee about to go through its spring transformation.
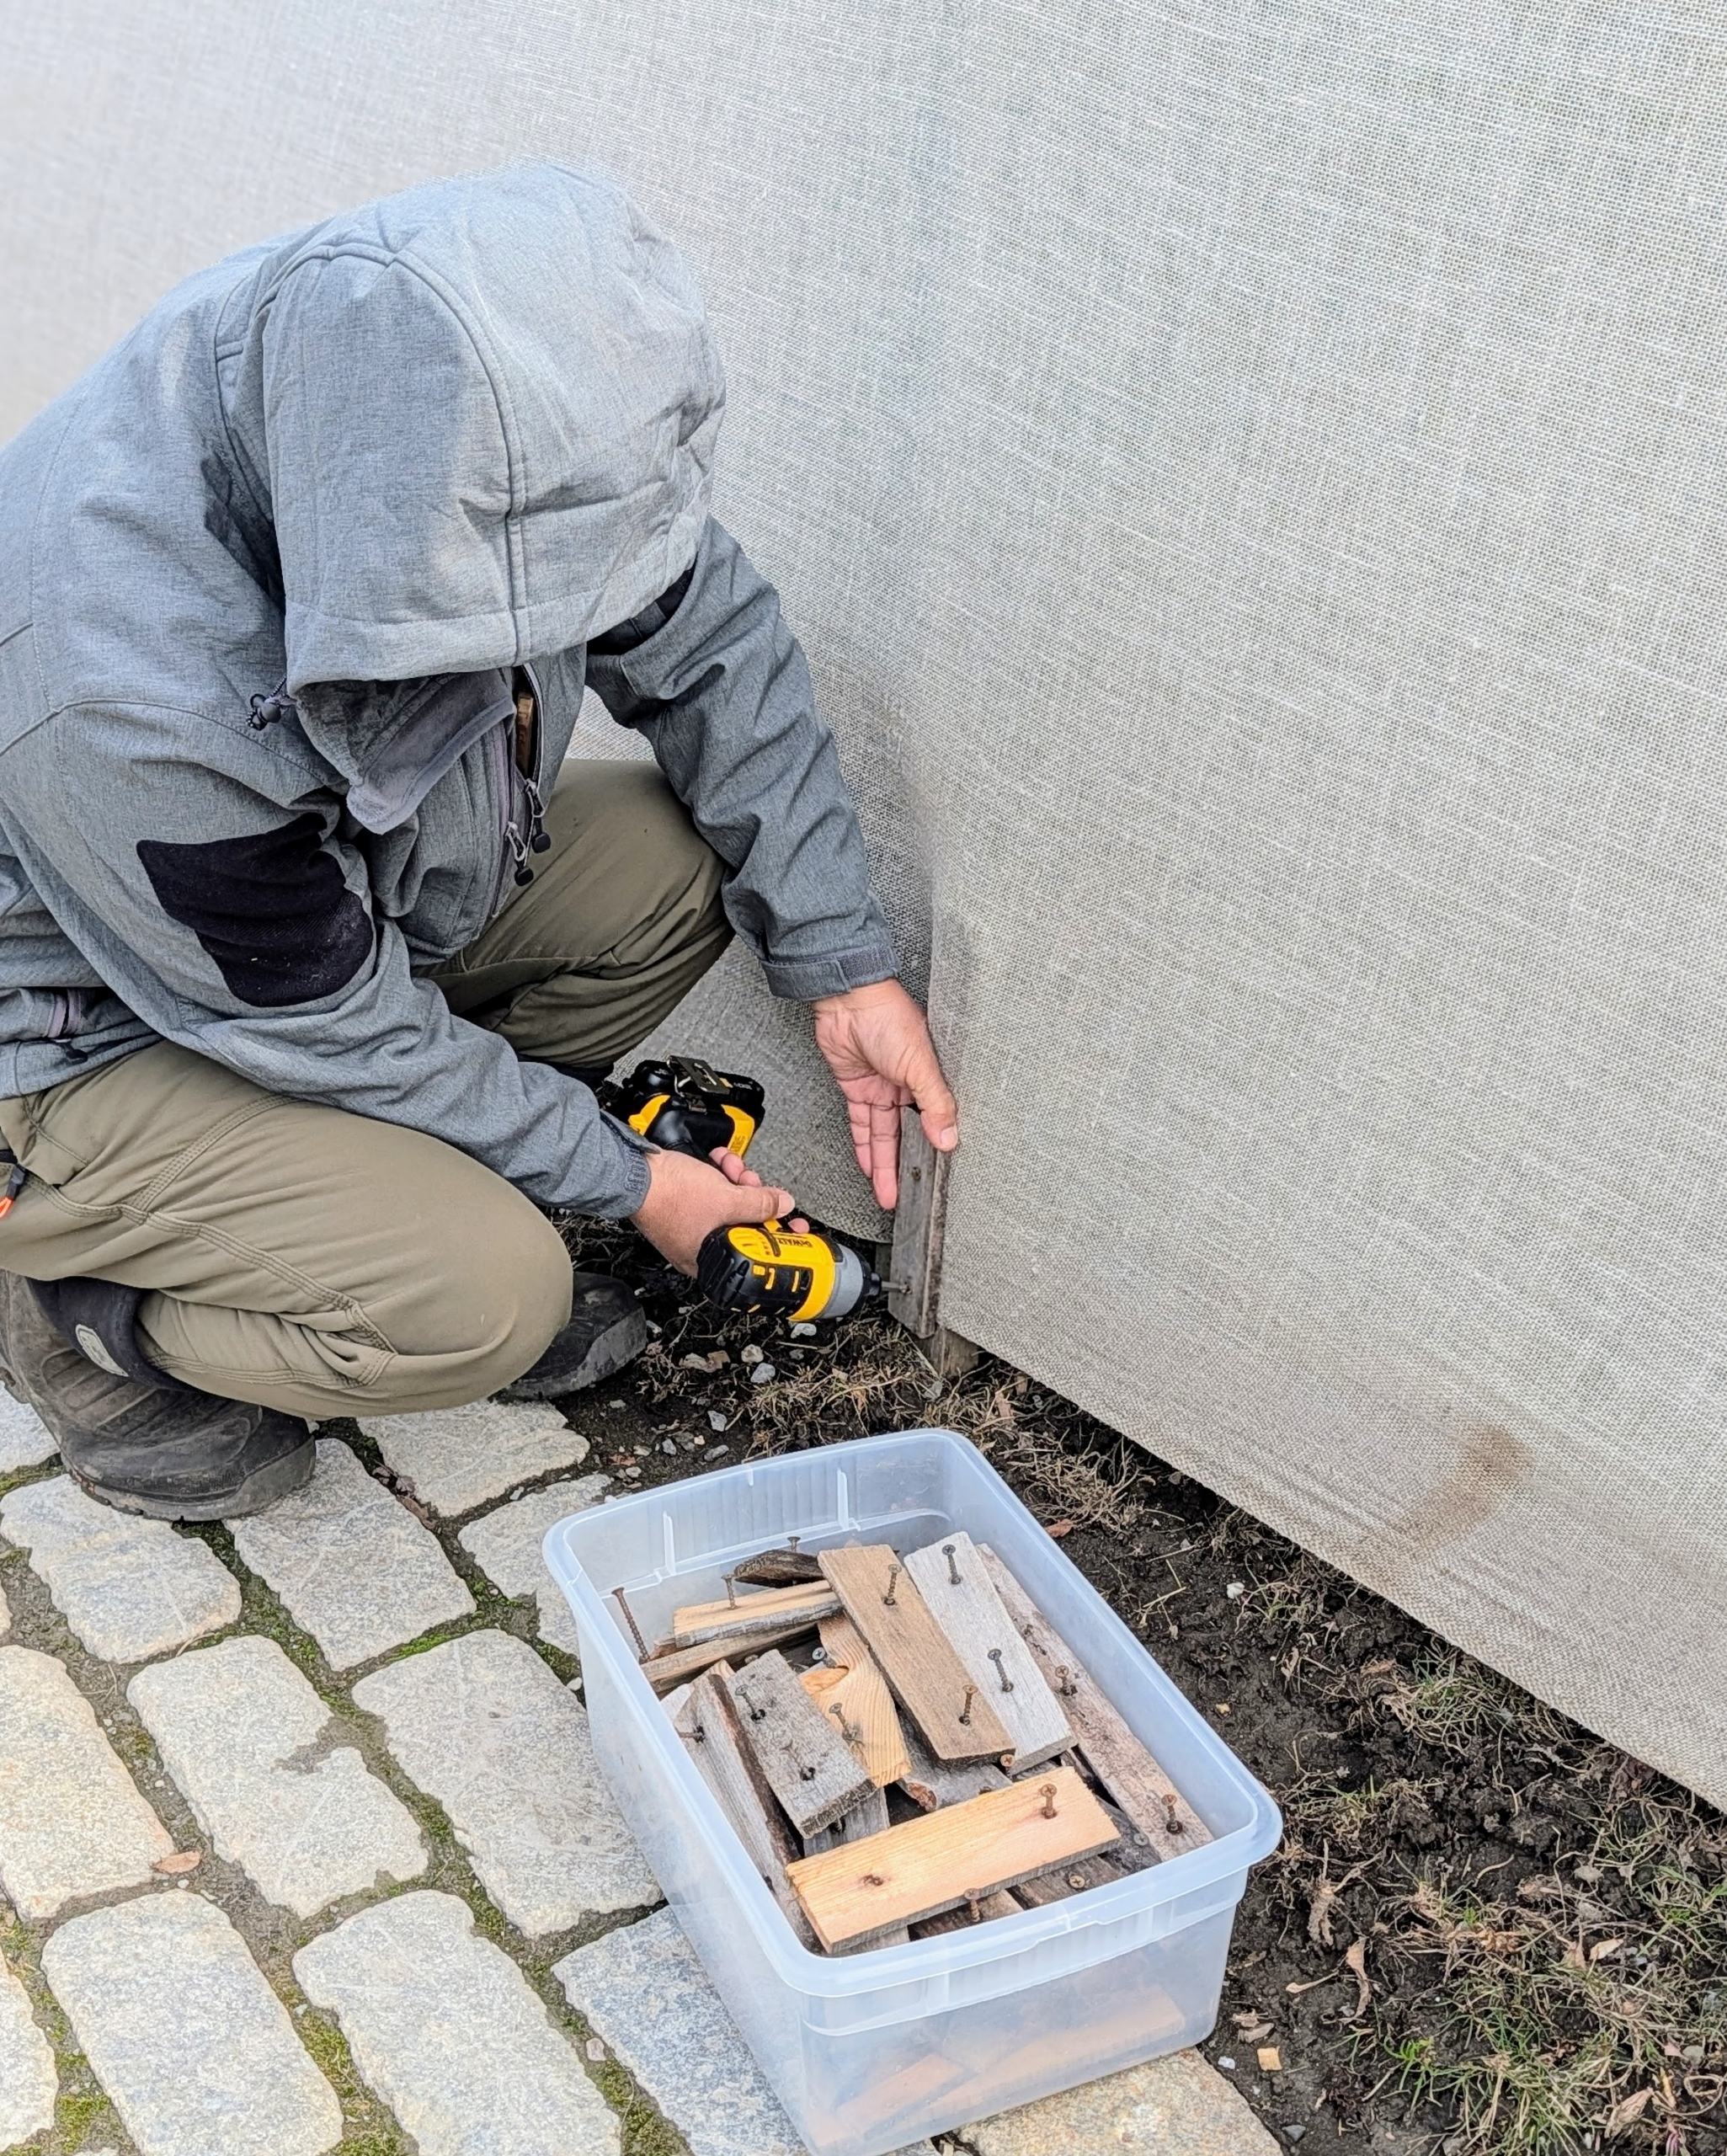
The first step is to remove the wooden strips that help sandwich and secure the burlap. These strips are at the bottom of the metal frames.
Once a section is unattached, Chhiring slowly pulls back the fabric from on top of the metal frames.
It doesn’t take long, but the burlap is very heavy.
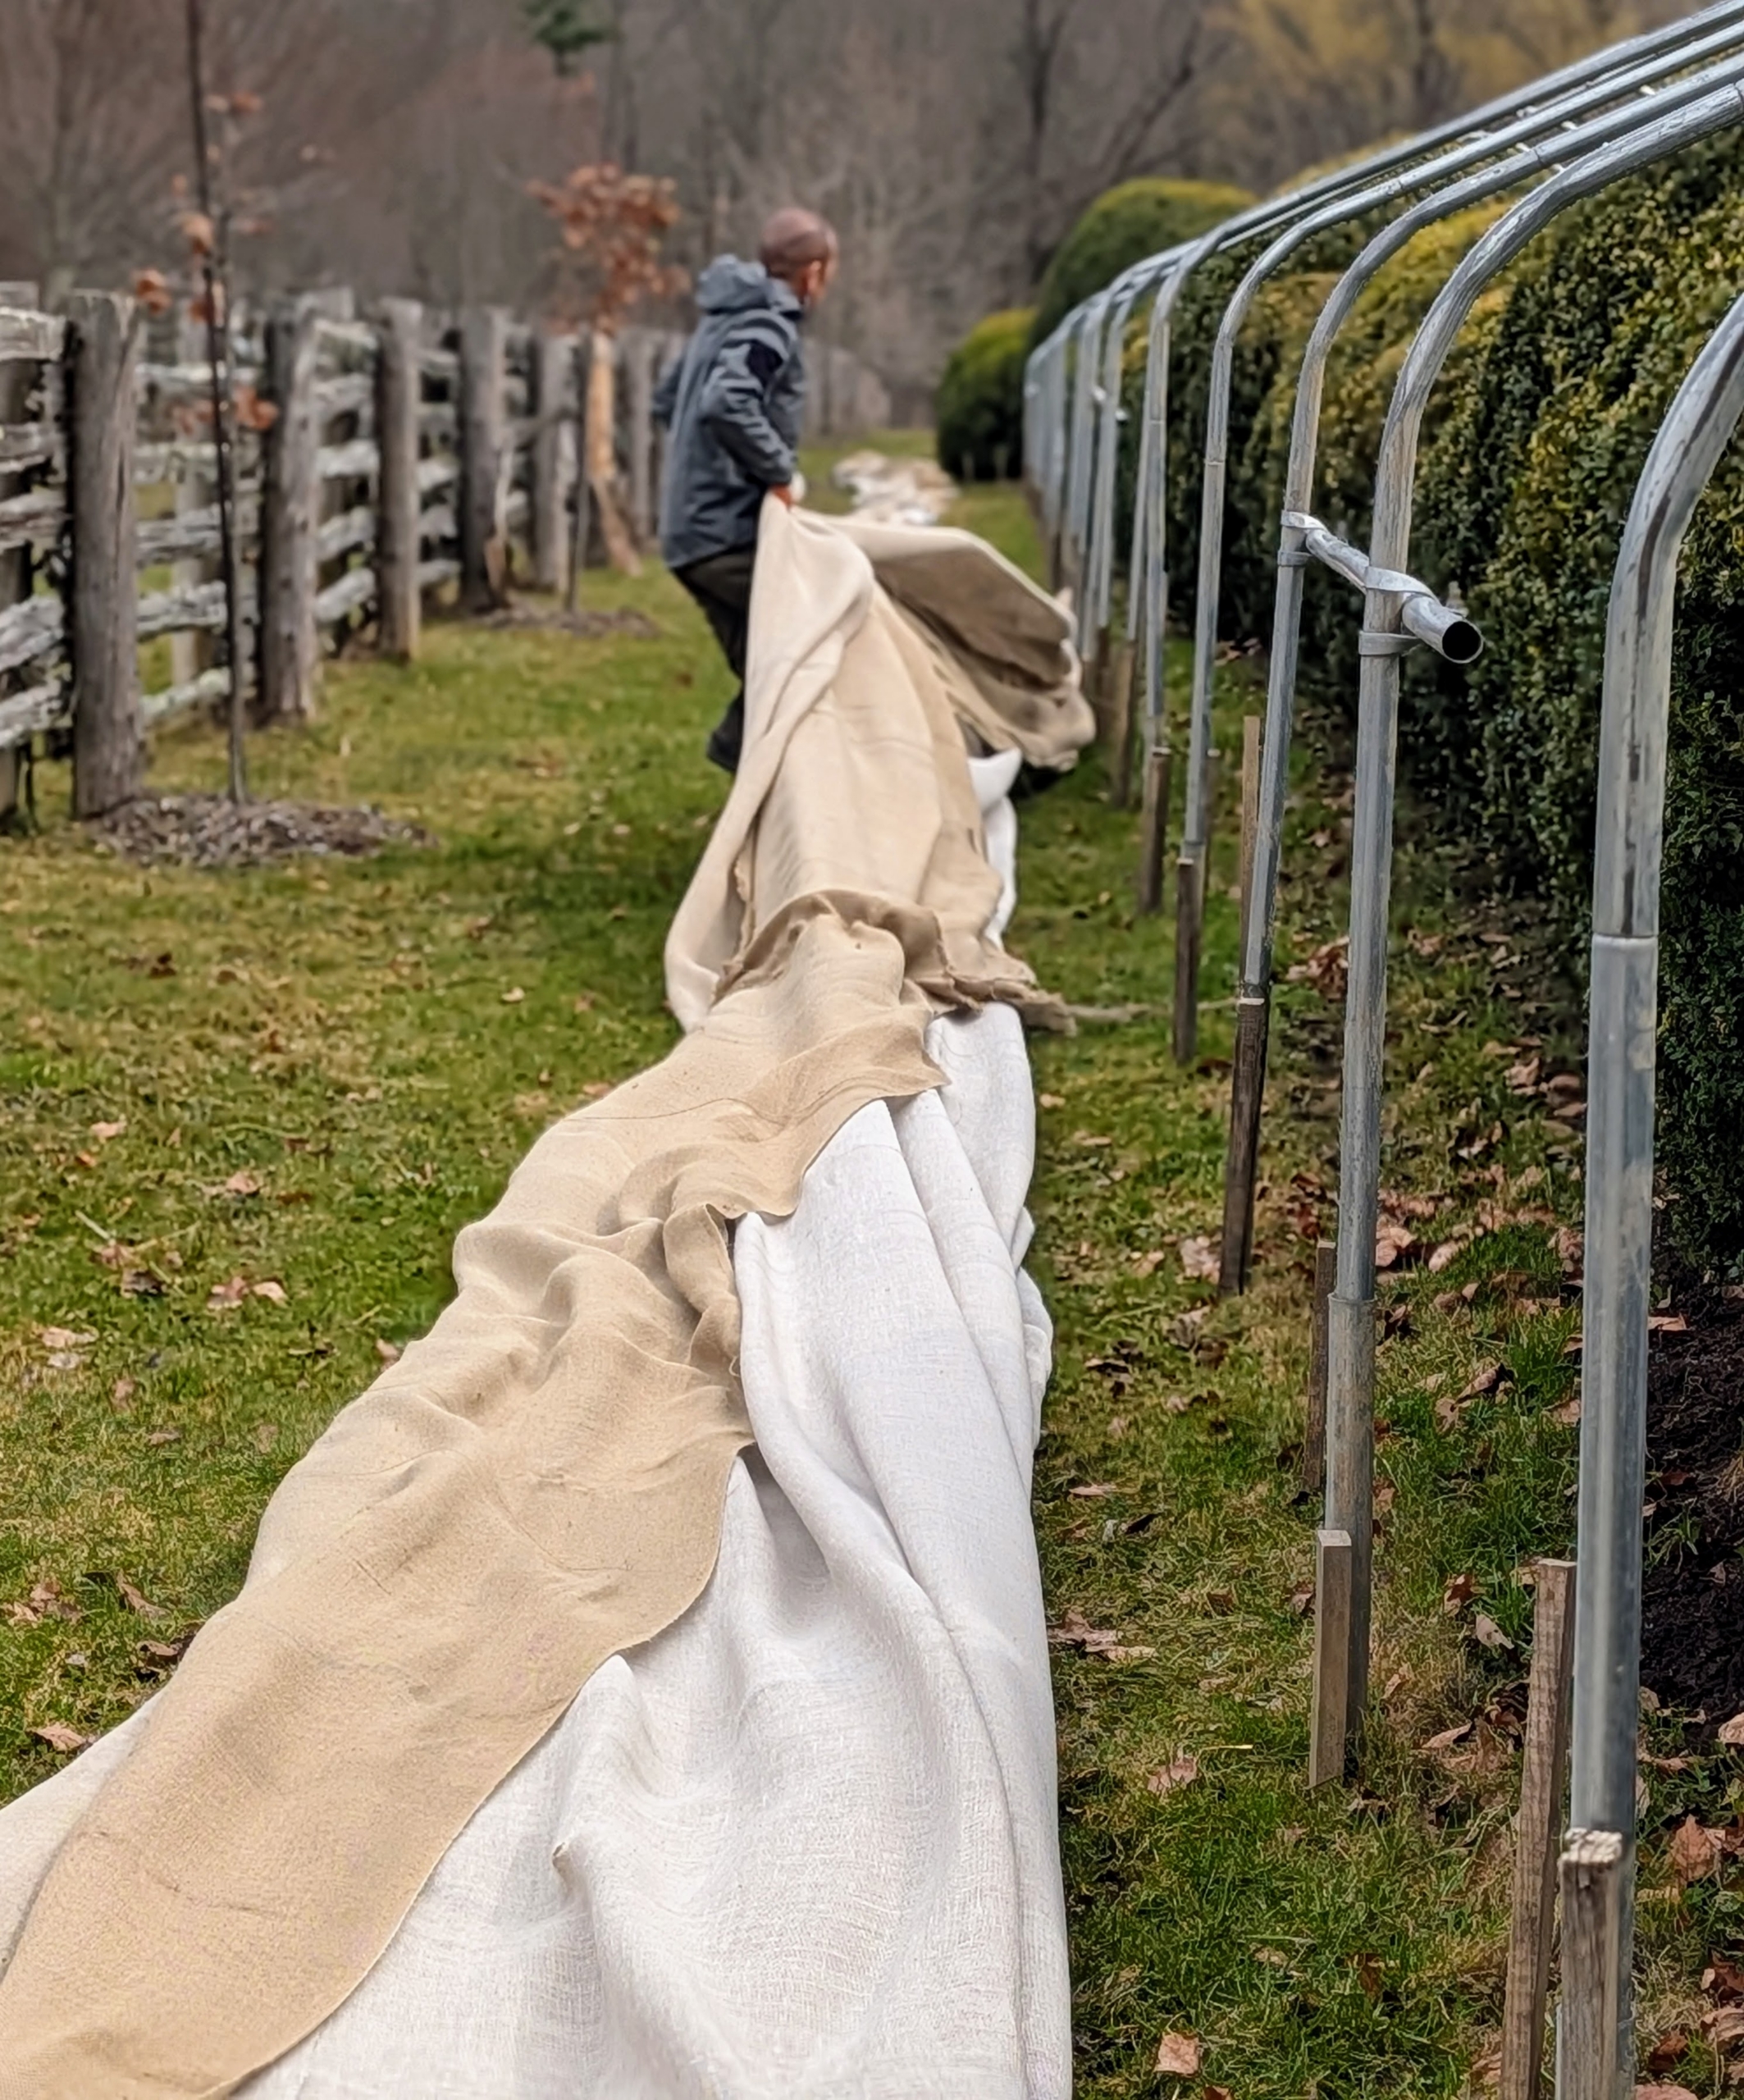
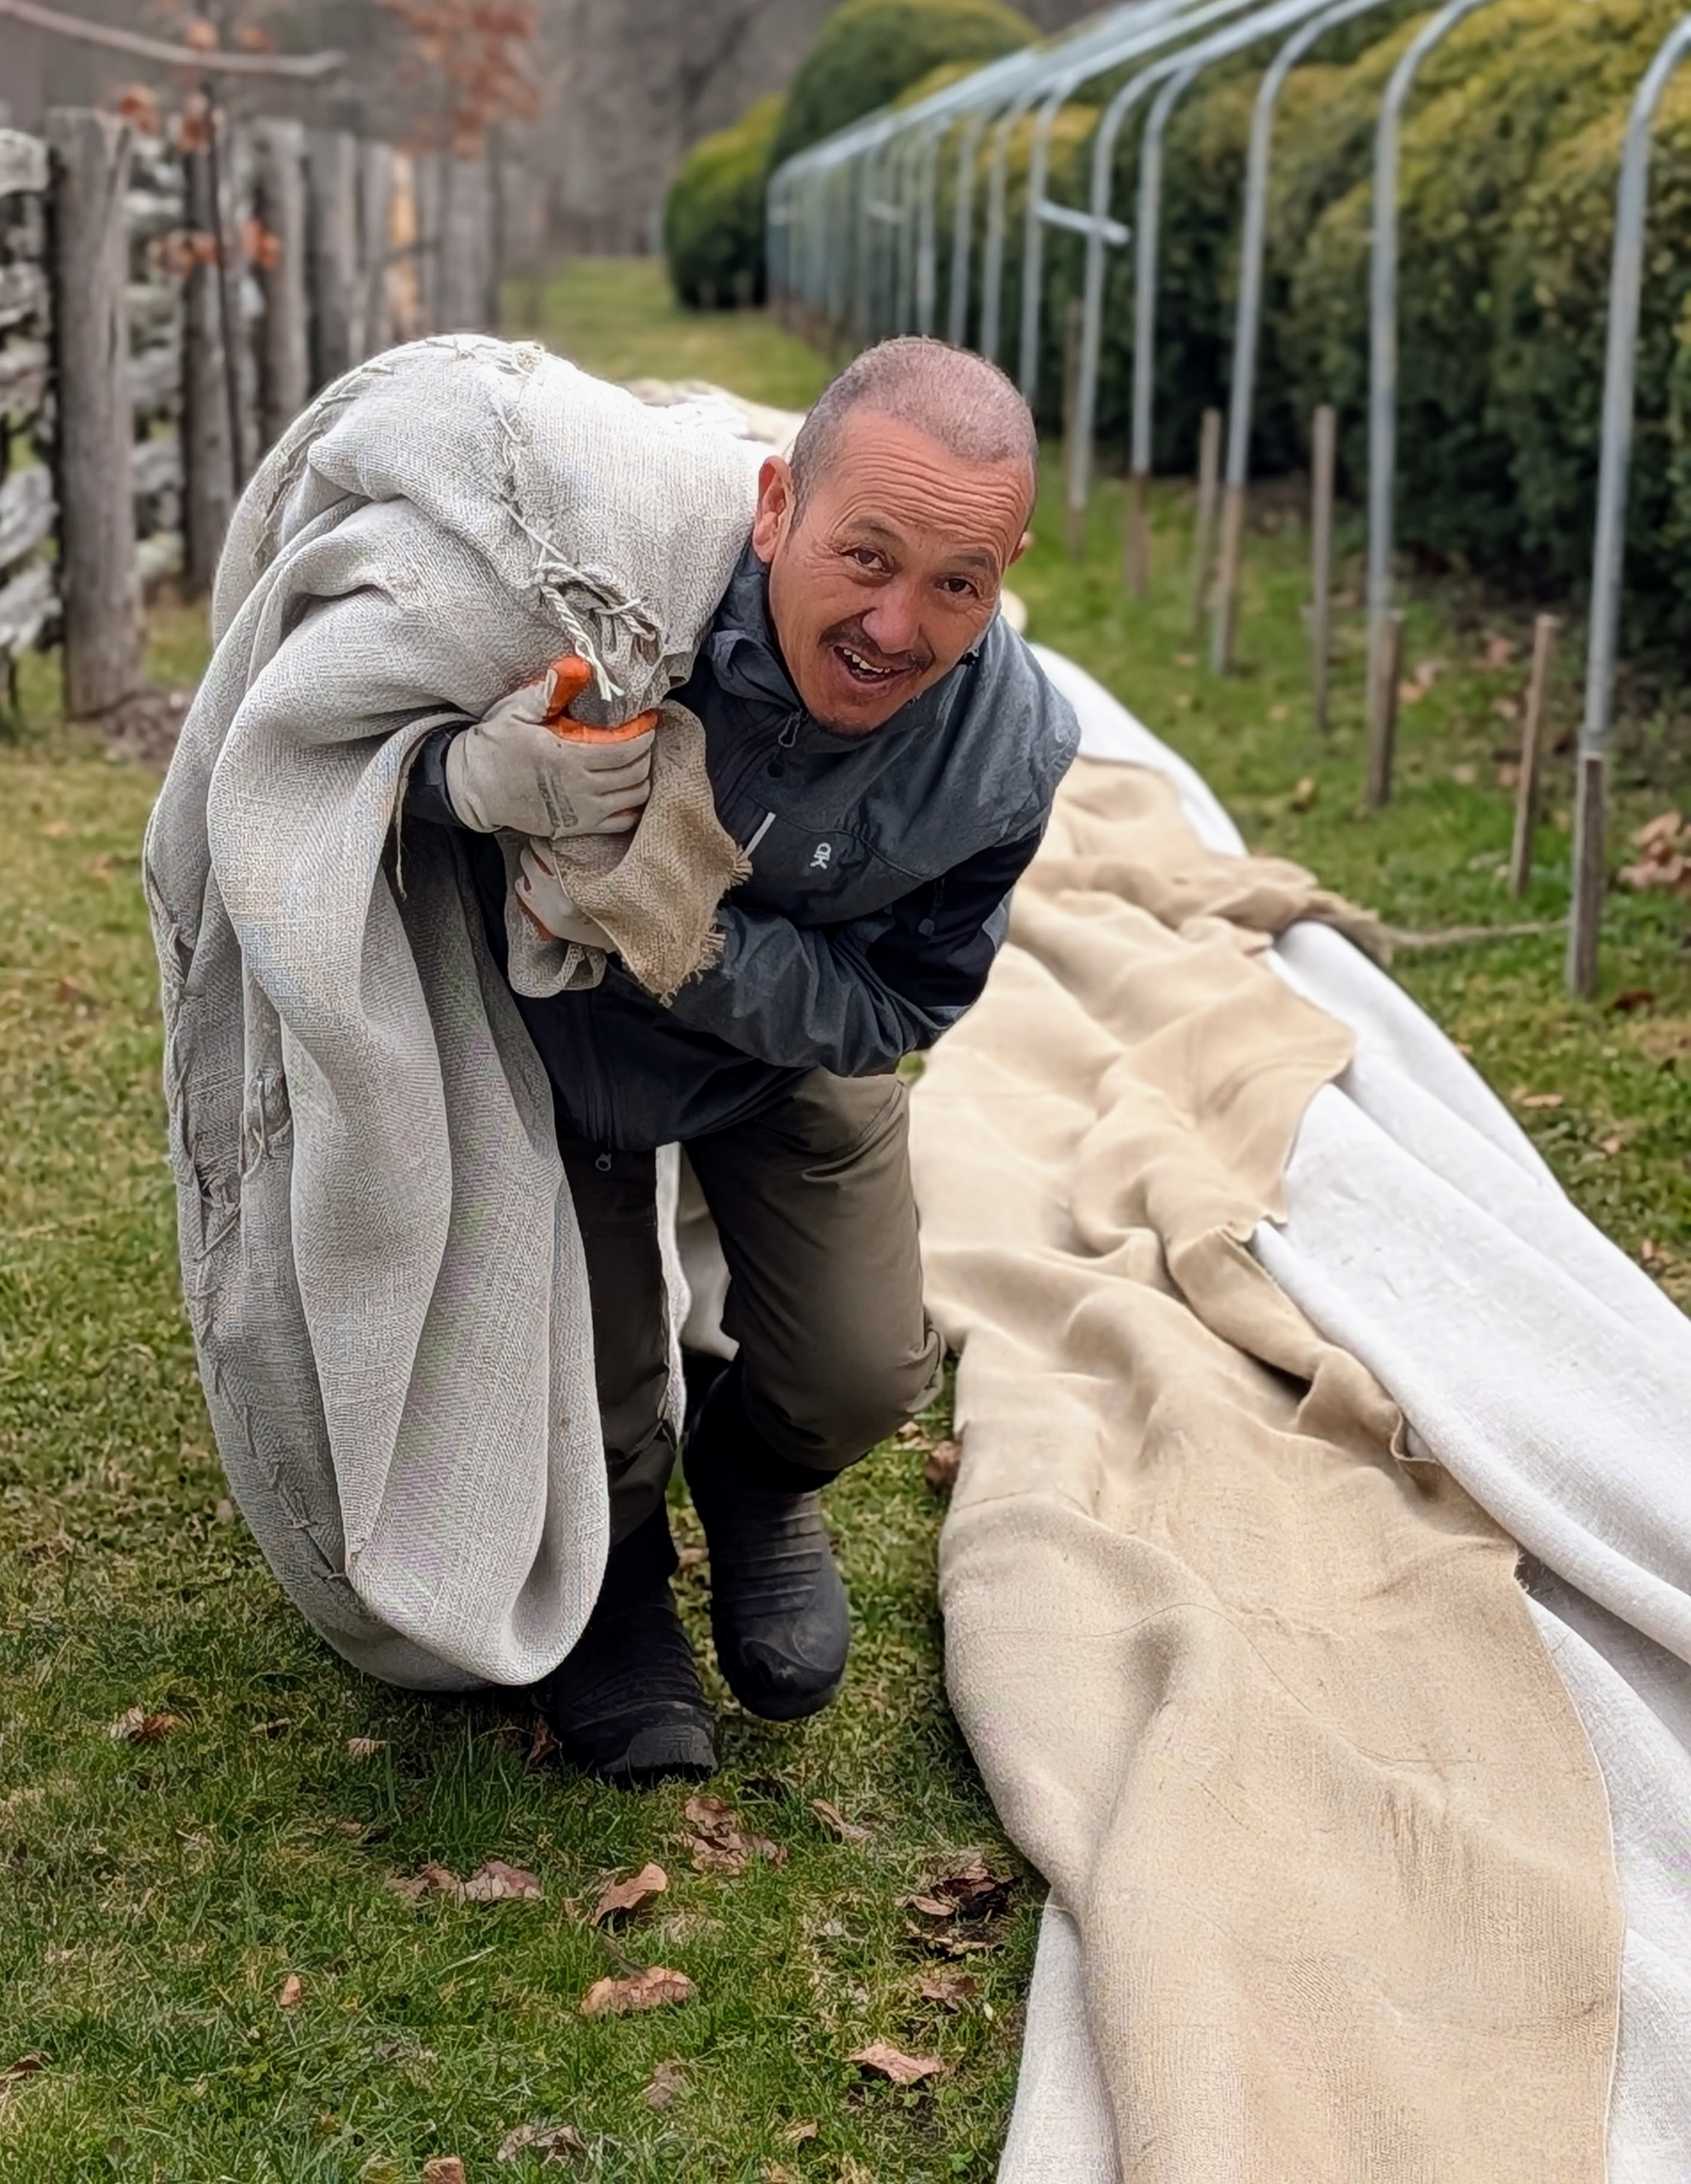
After the burlap is removed, it is folded in half neatly on the ground and then rolled.
Here’s Chhiring bringing one end up as part of the folding process.
Meanwhile, Justin walks my Fell Pony Banchunch into the stable after his turnout. Depending on the weather, my horses are turned out during the day and then brought into the stable for grooming and feeding.
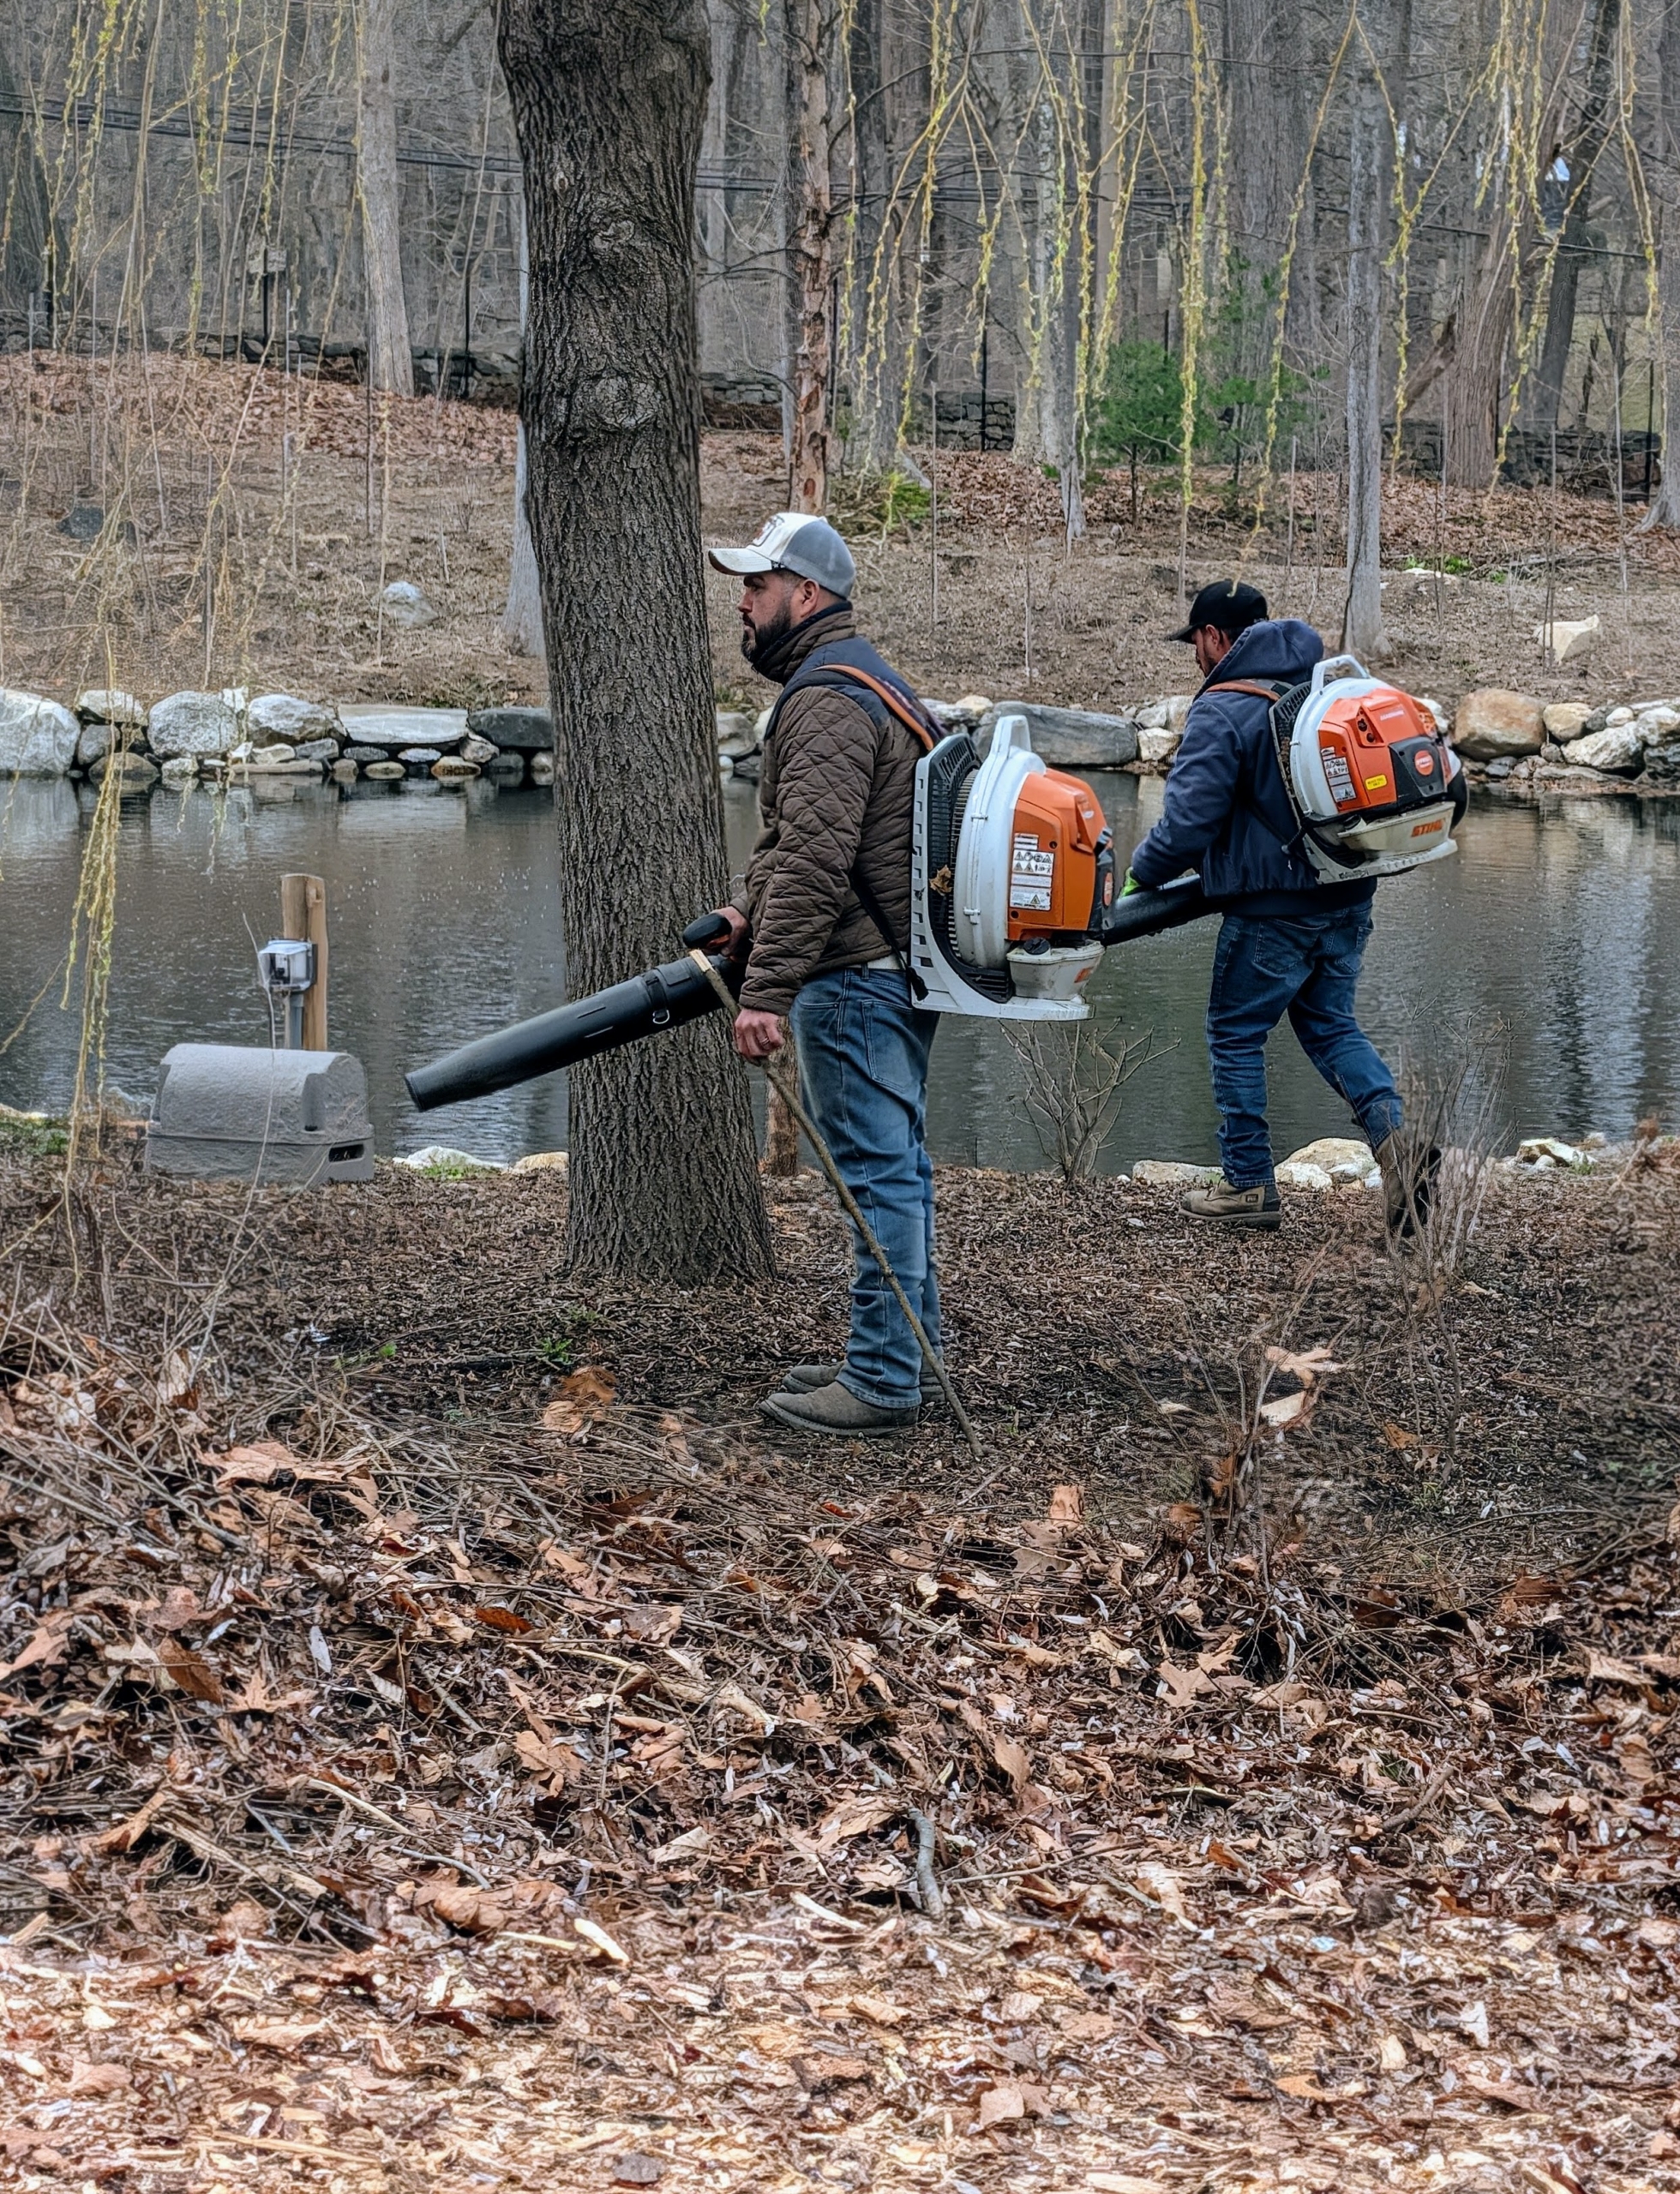
Up at my pond, the leaves left over from last fall are blown. The pond are was in need of a good cleanup. I am looking forward to seeing all the blooming azaleas this spring.
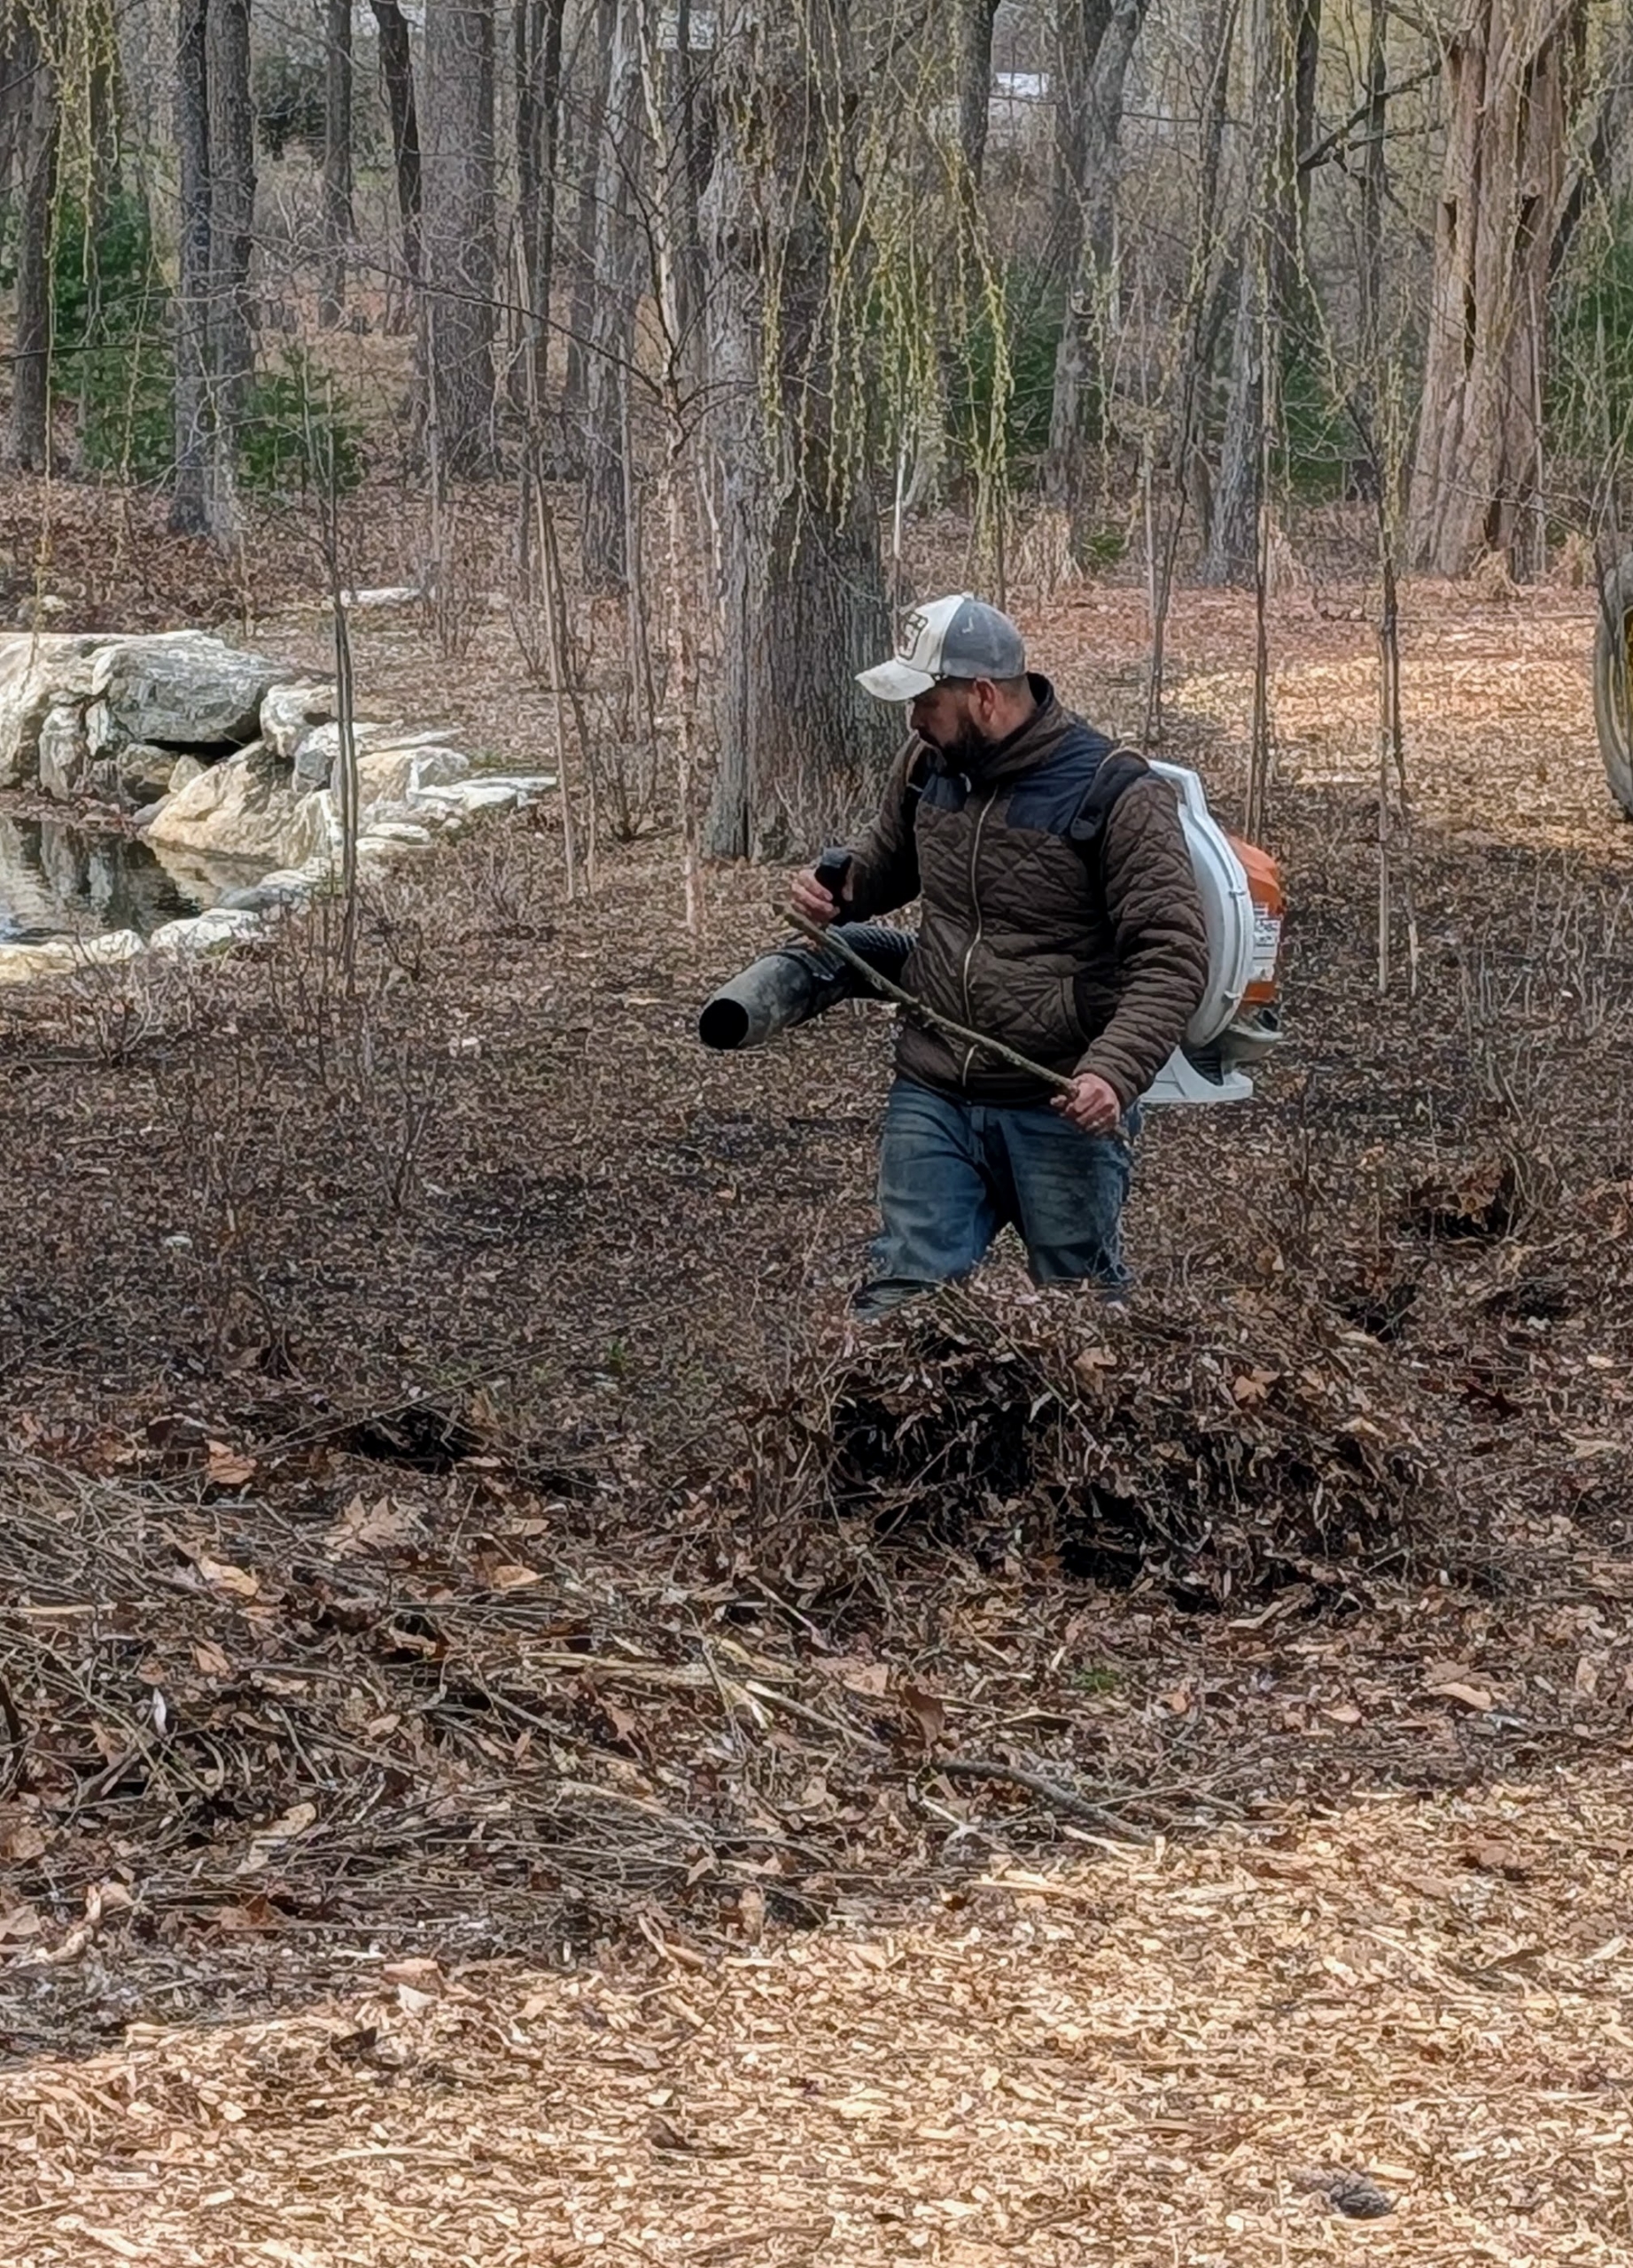
Here’s Adan clearing the area using one of our STIHL leaf blowers. I’ve been using STIHL’s backpack blowers for years here at my farm. Both the gas and battery powered units are powerful and efficient.
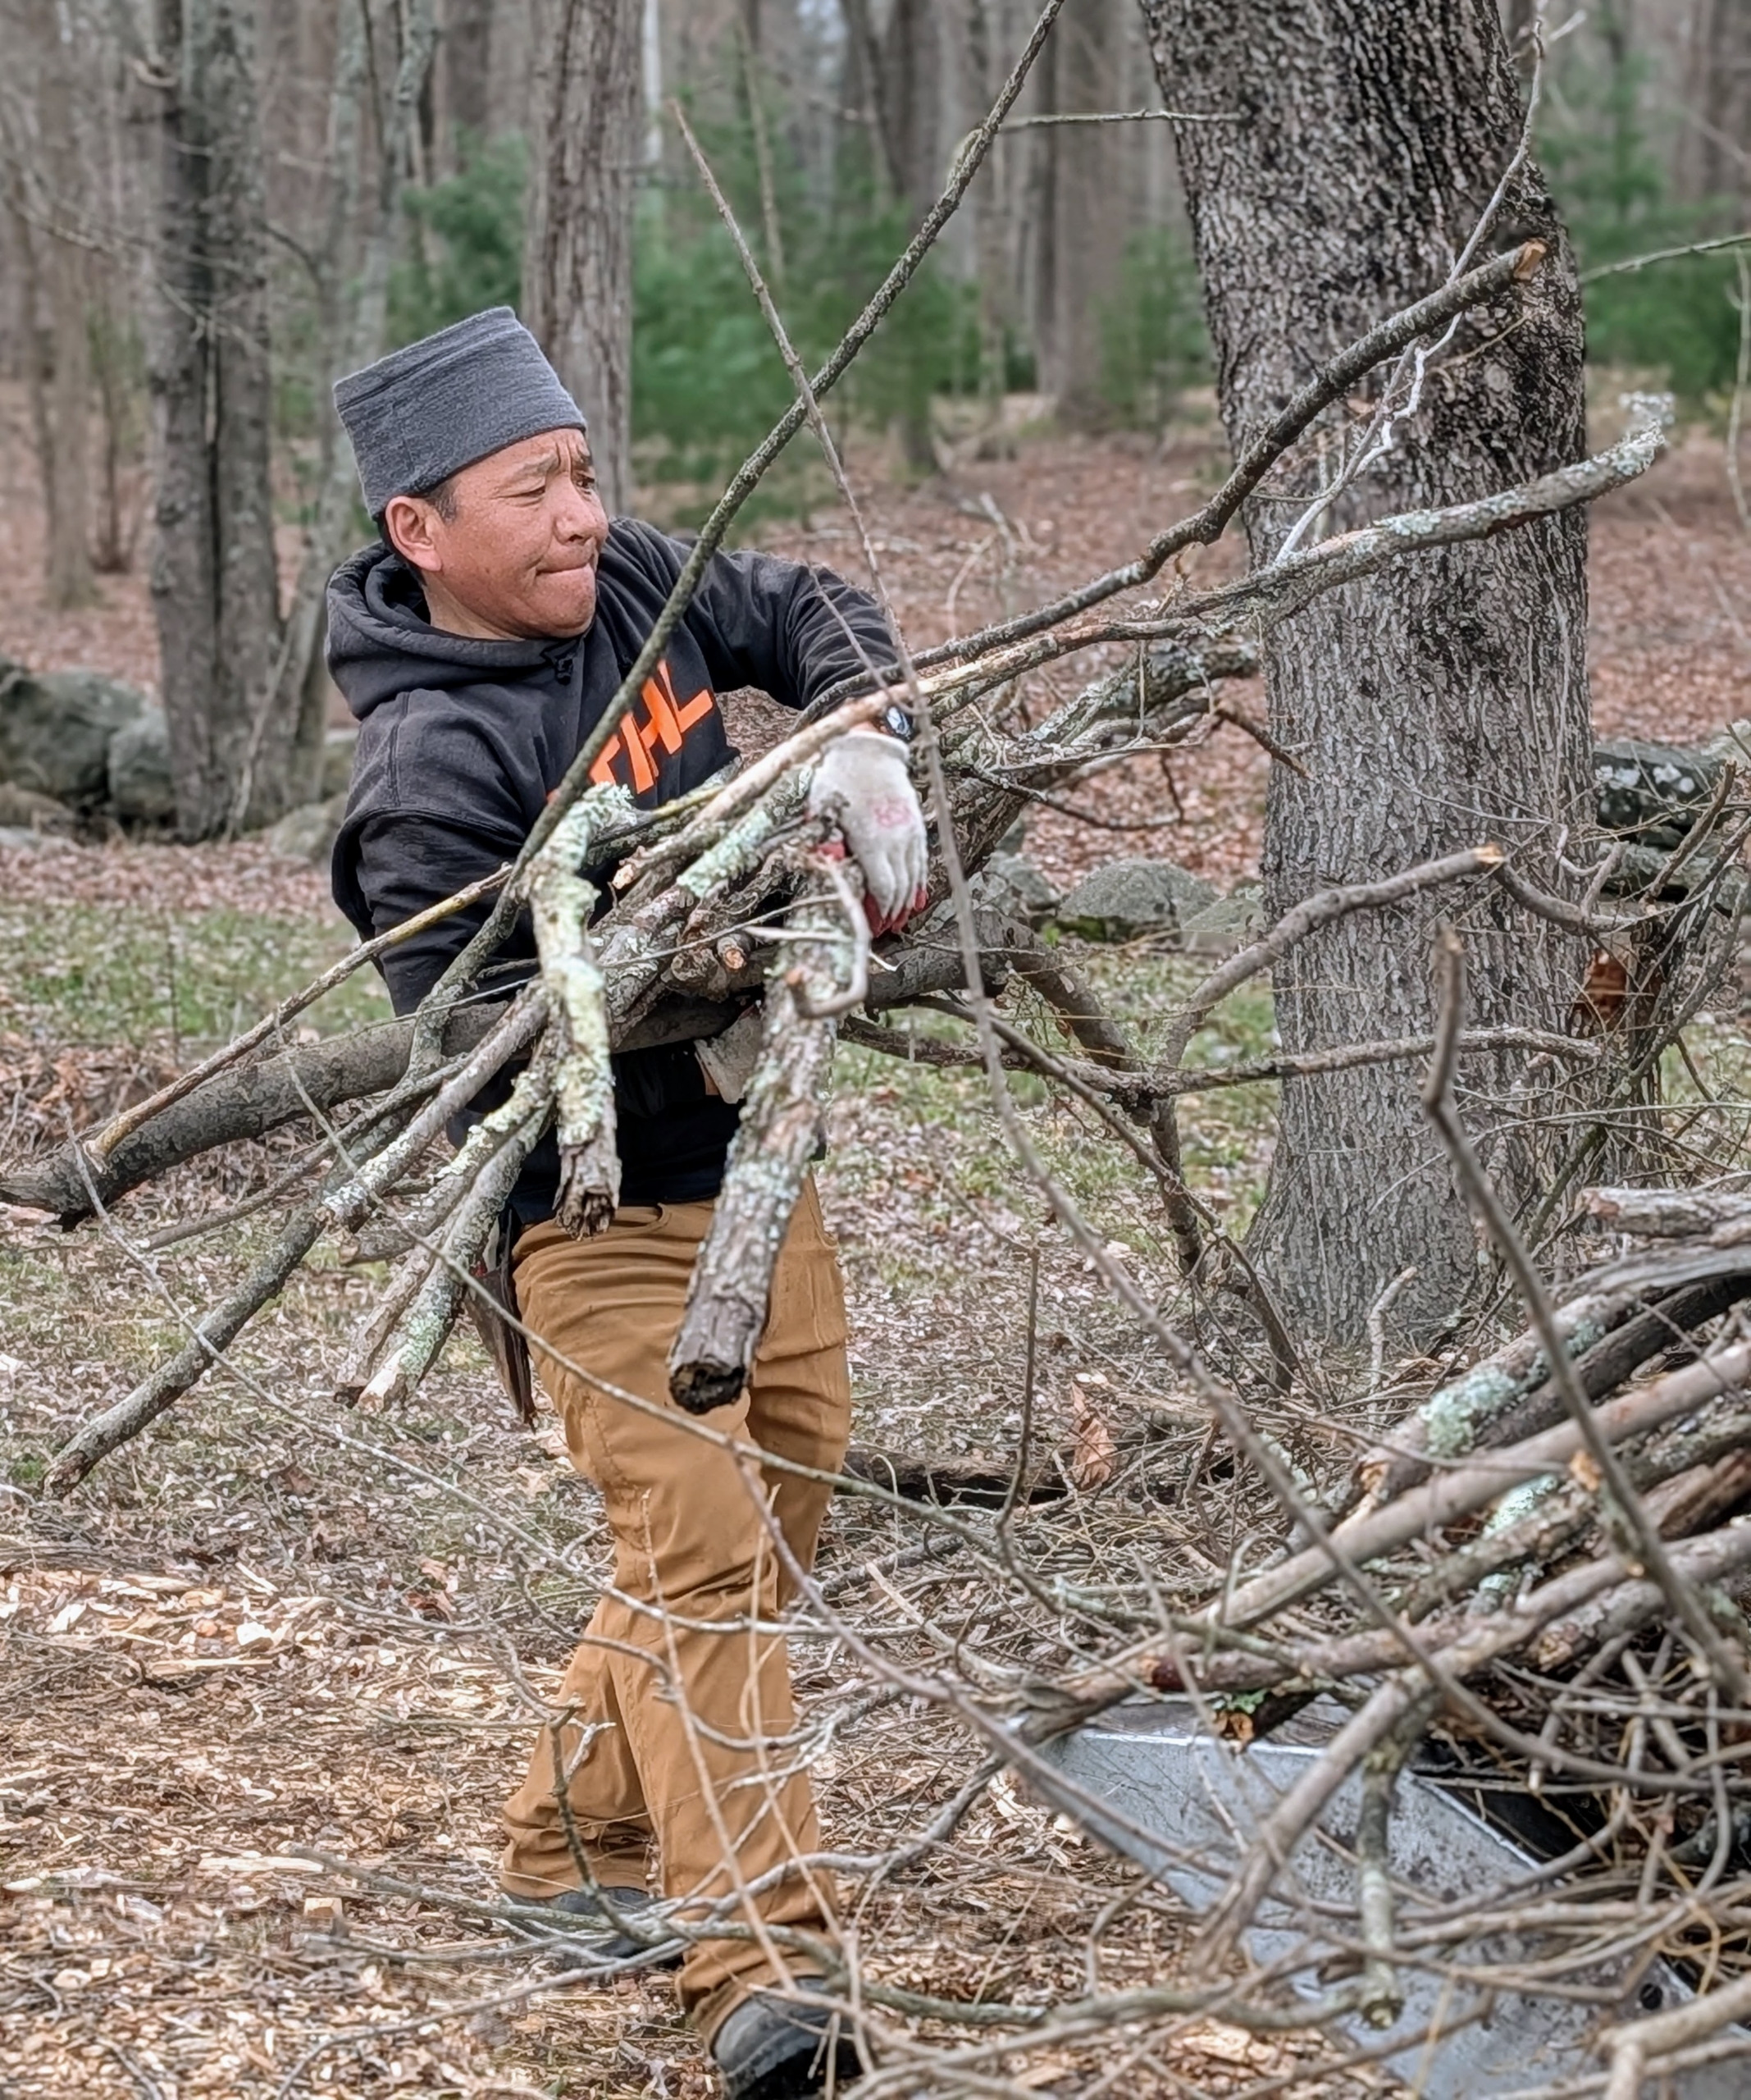
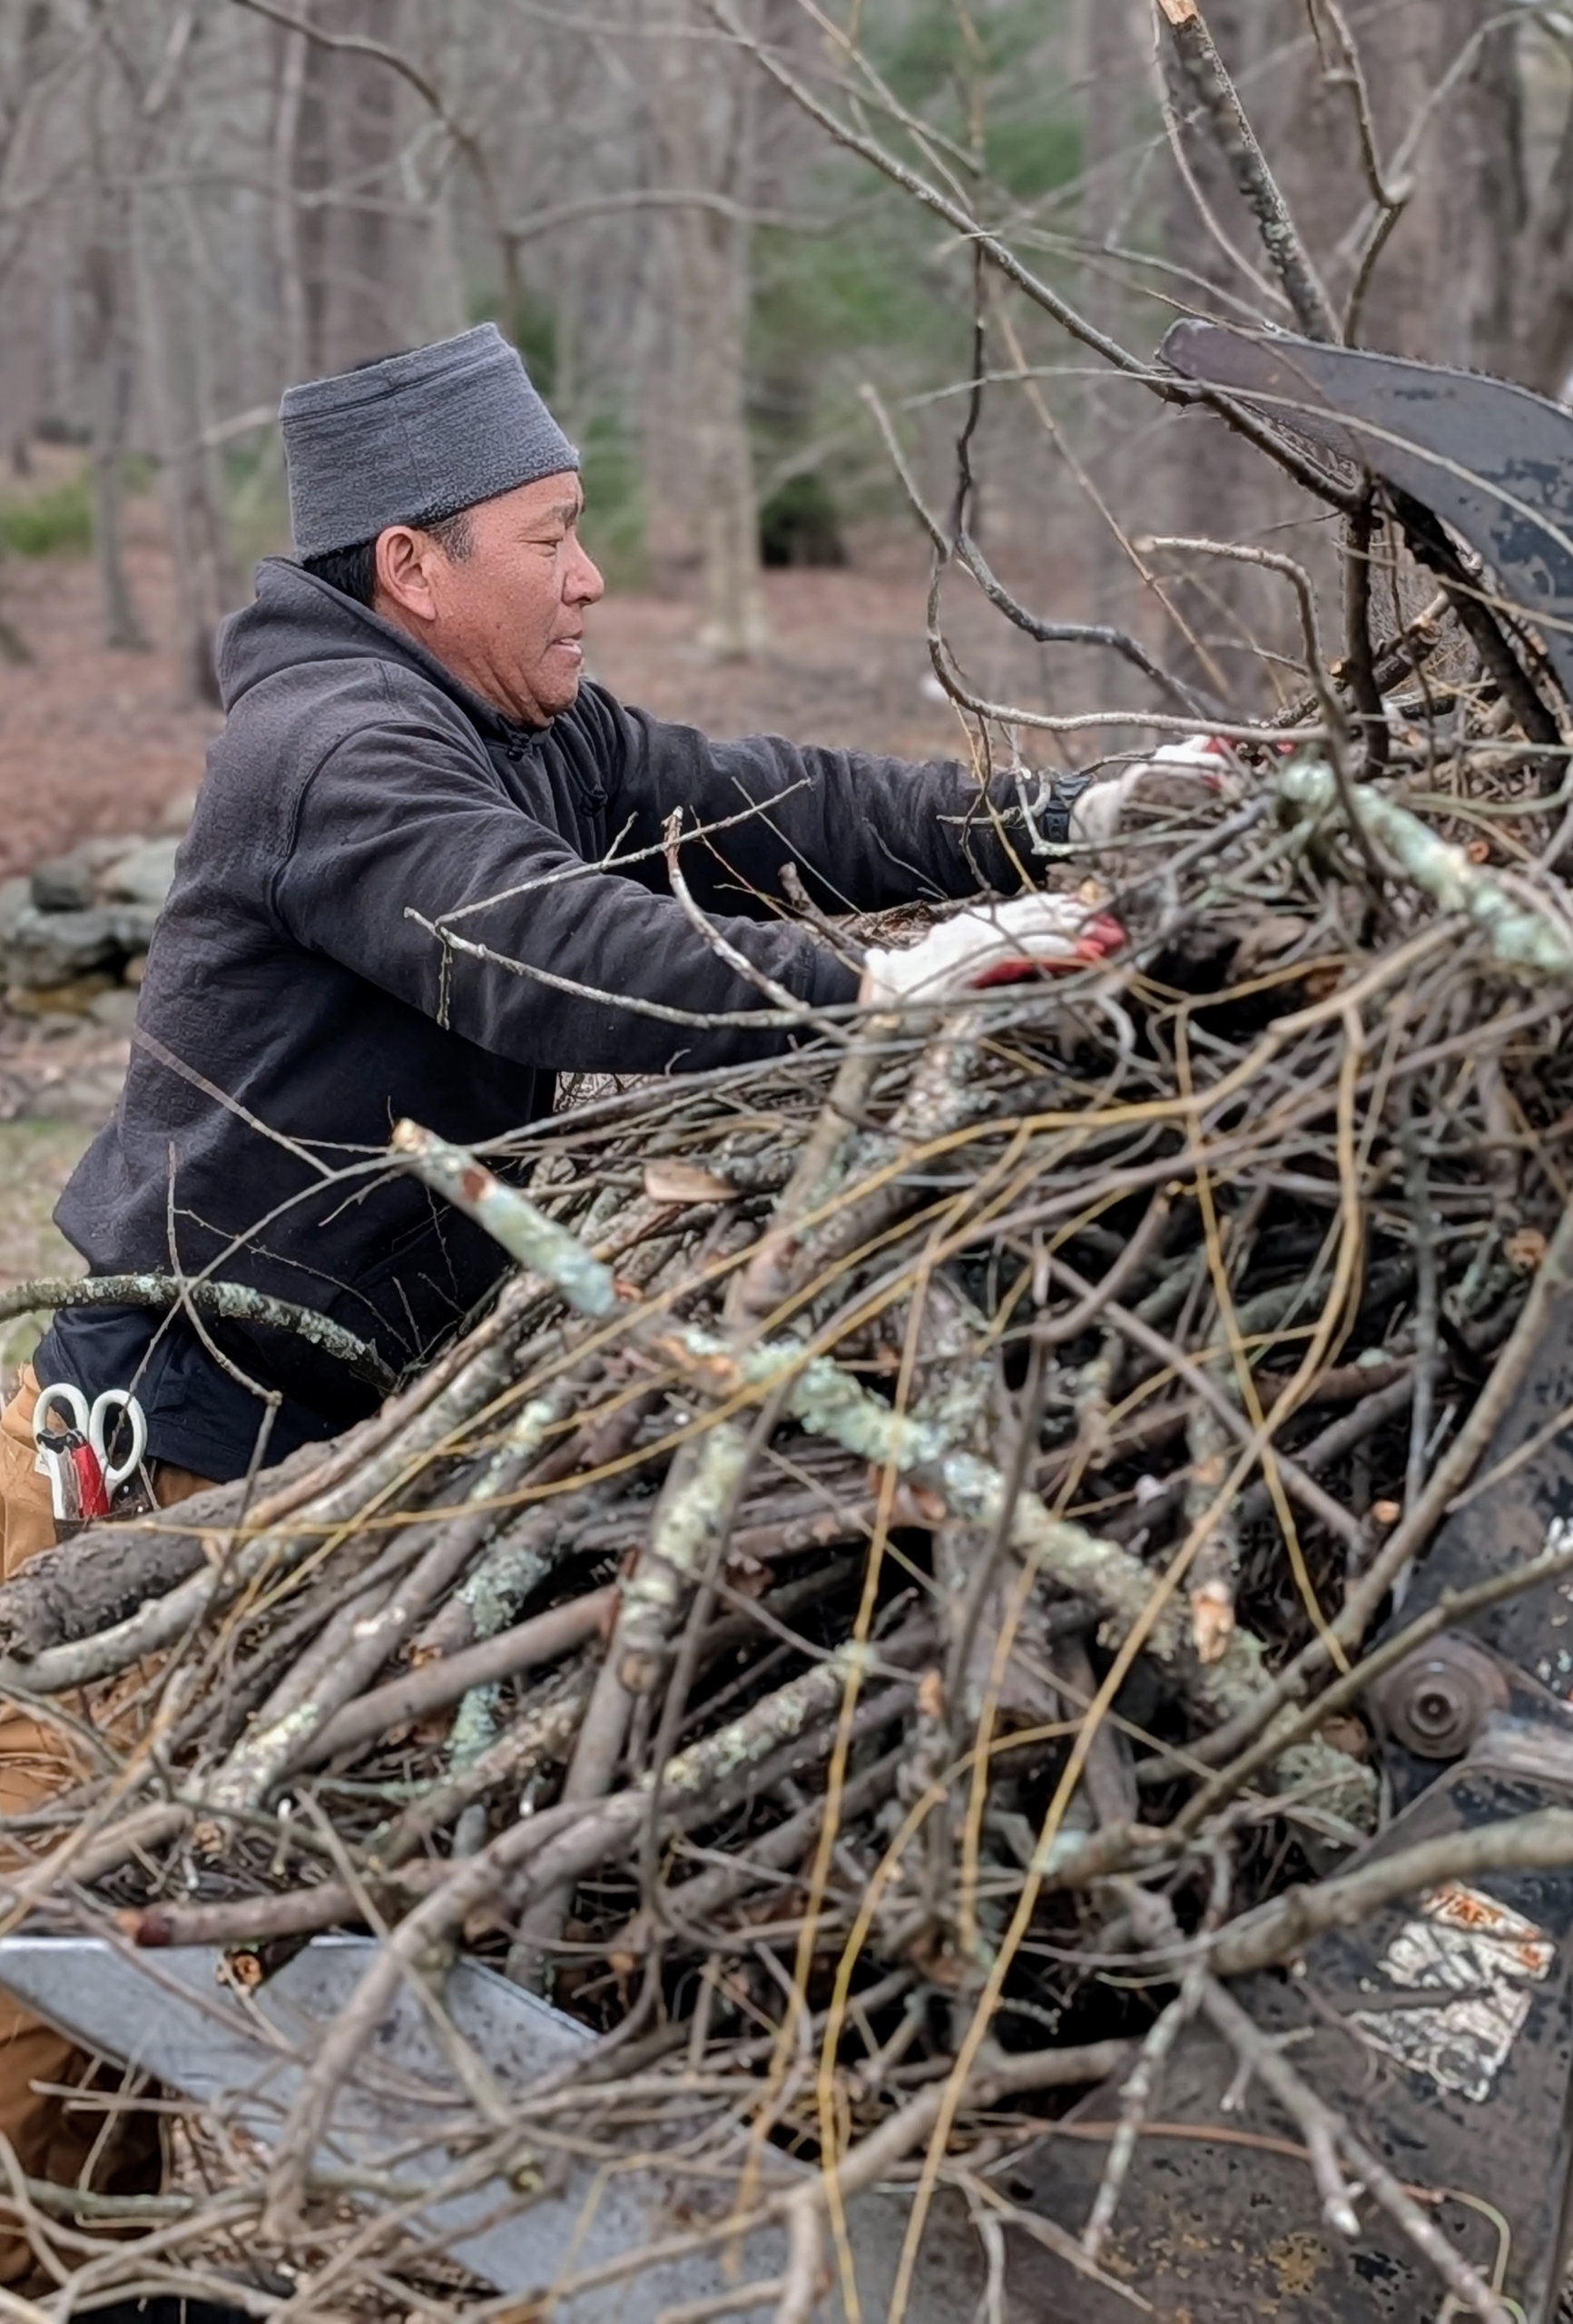
Phurba follows and collects the branches and other debris gathered in bunches.
All the debris is put onto the tractor bucket and brought to the compost yard where they await chipping and then spread out in other areas of the farm as top dressing.
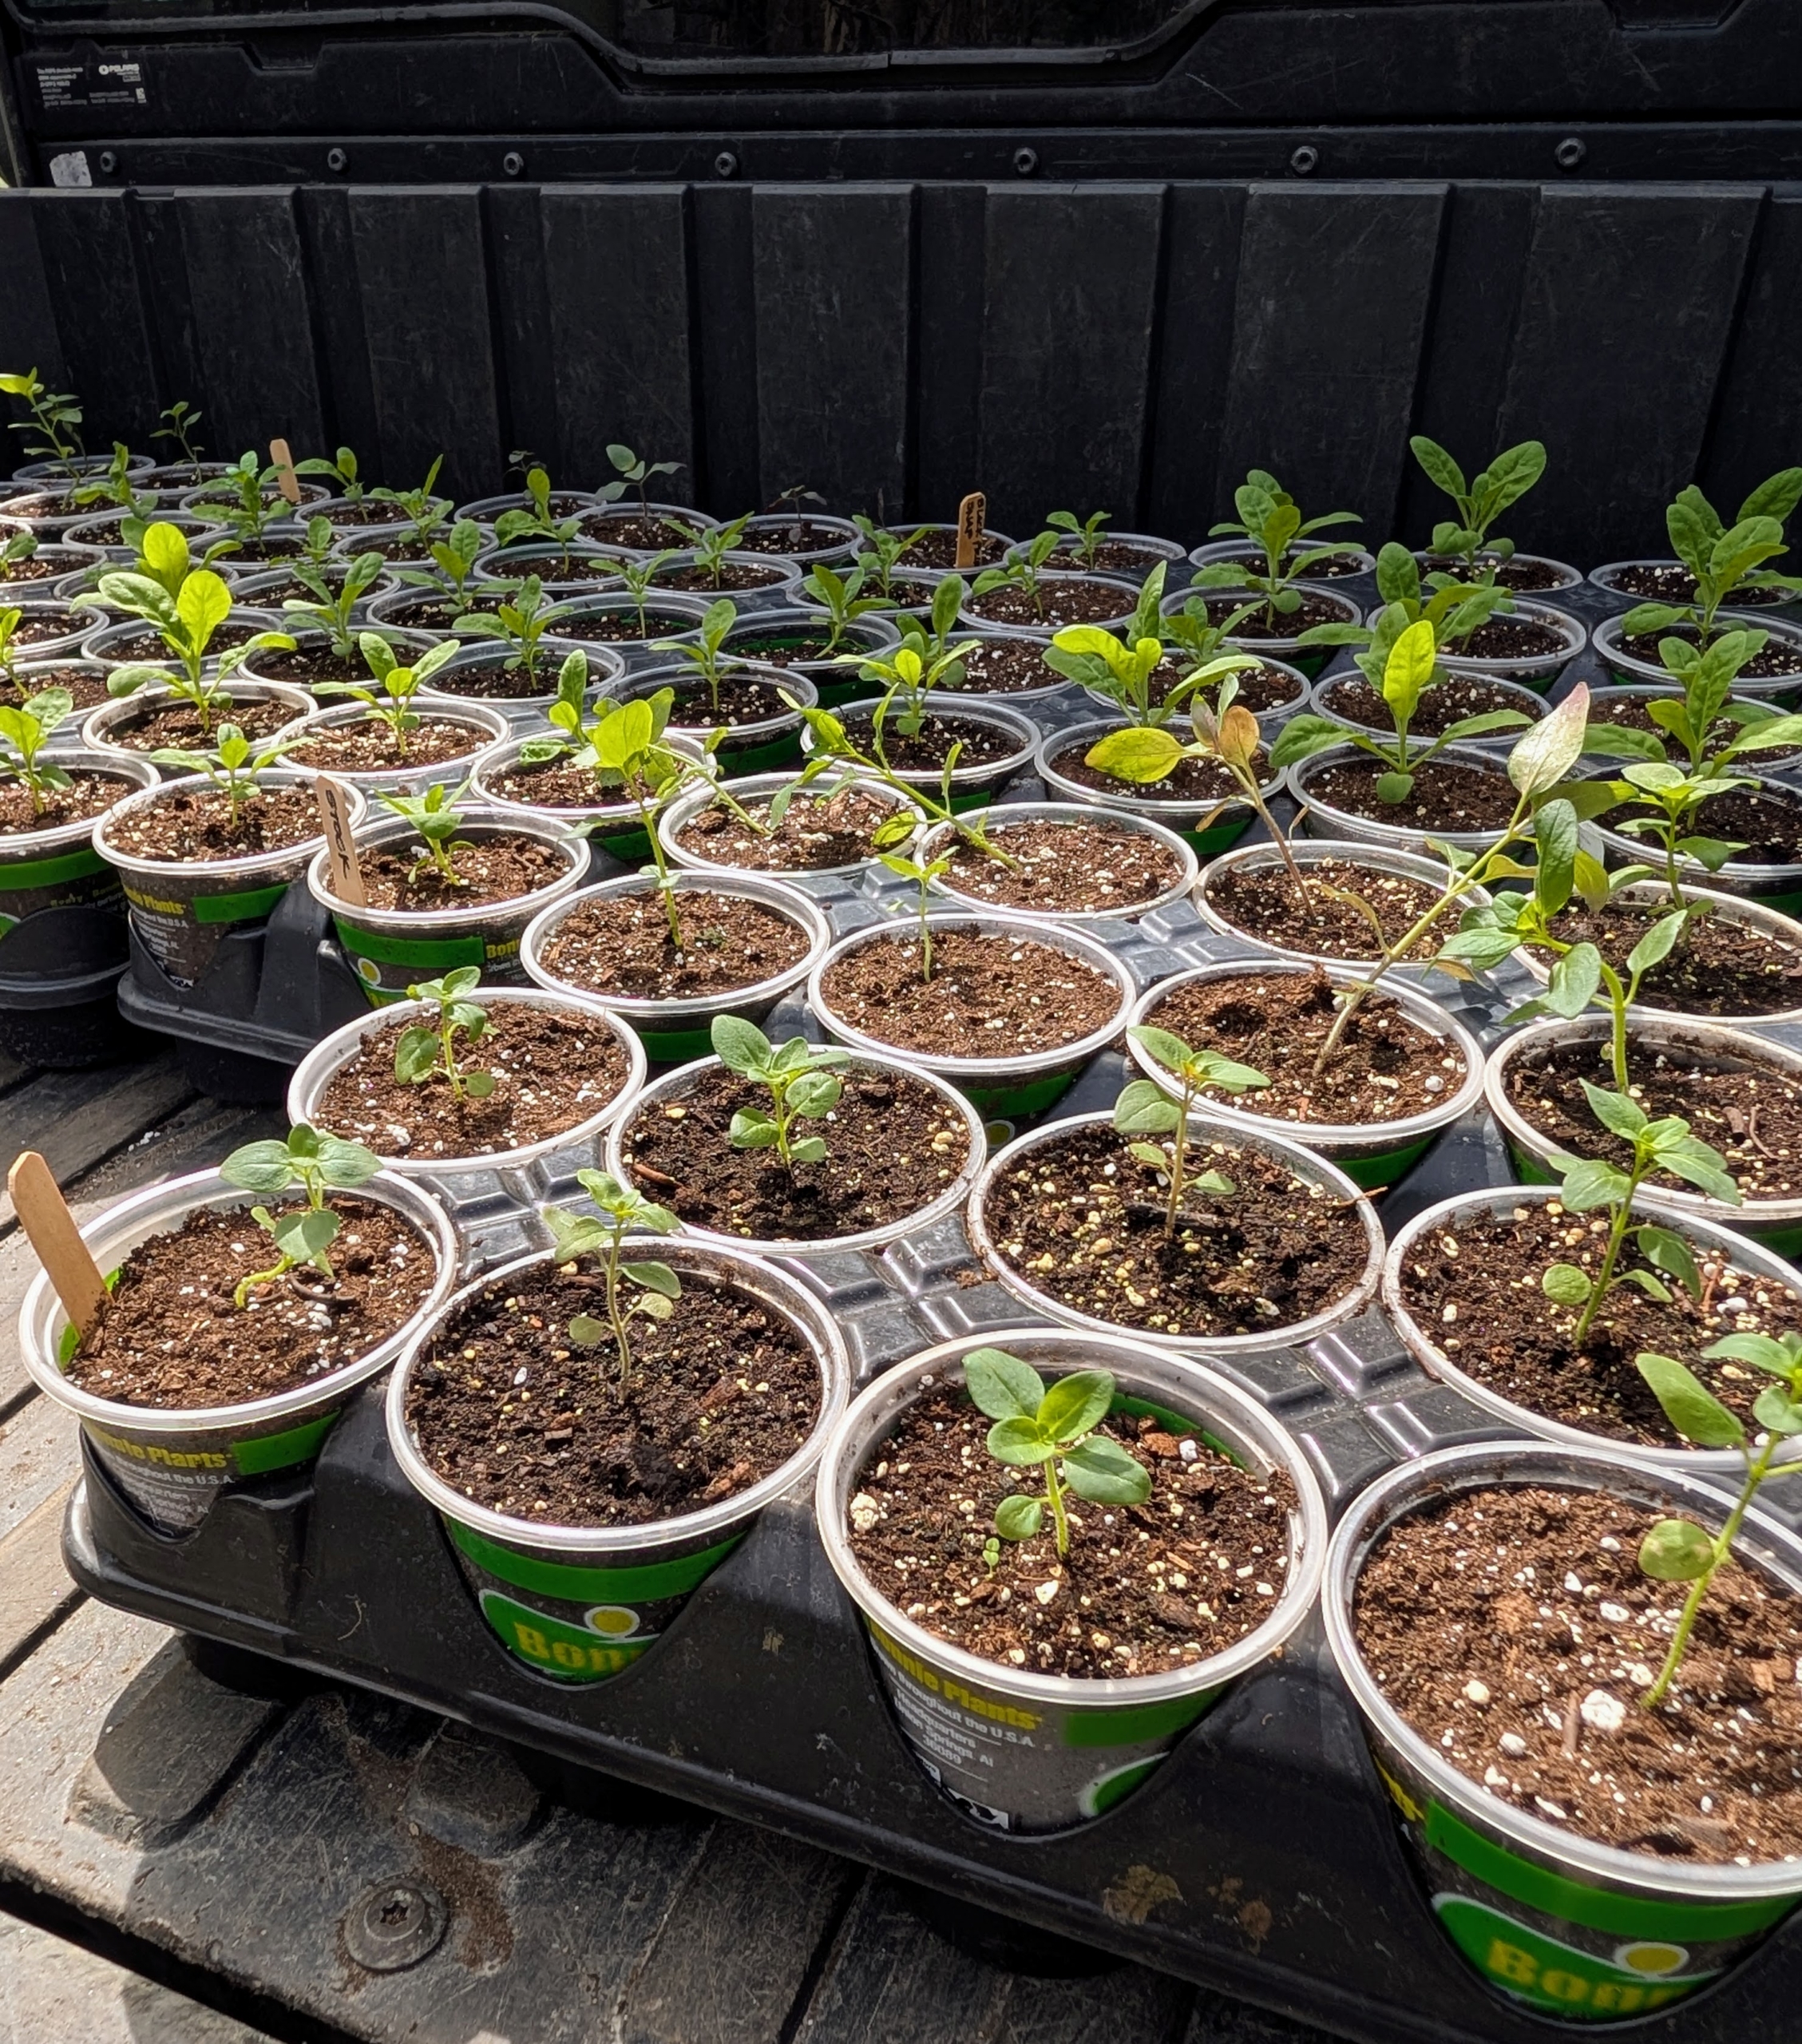
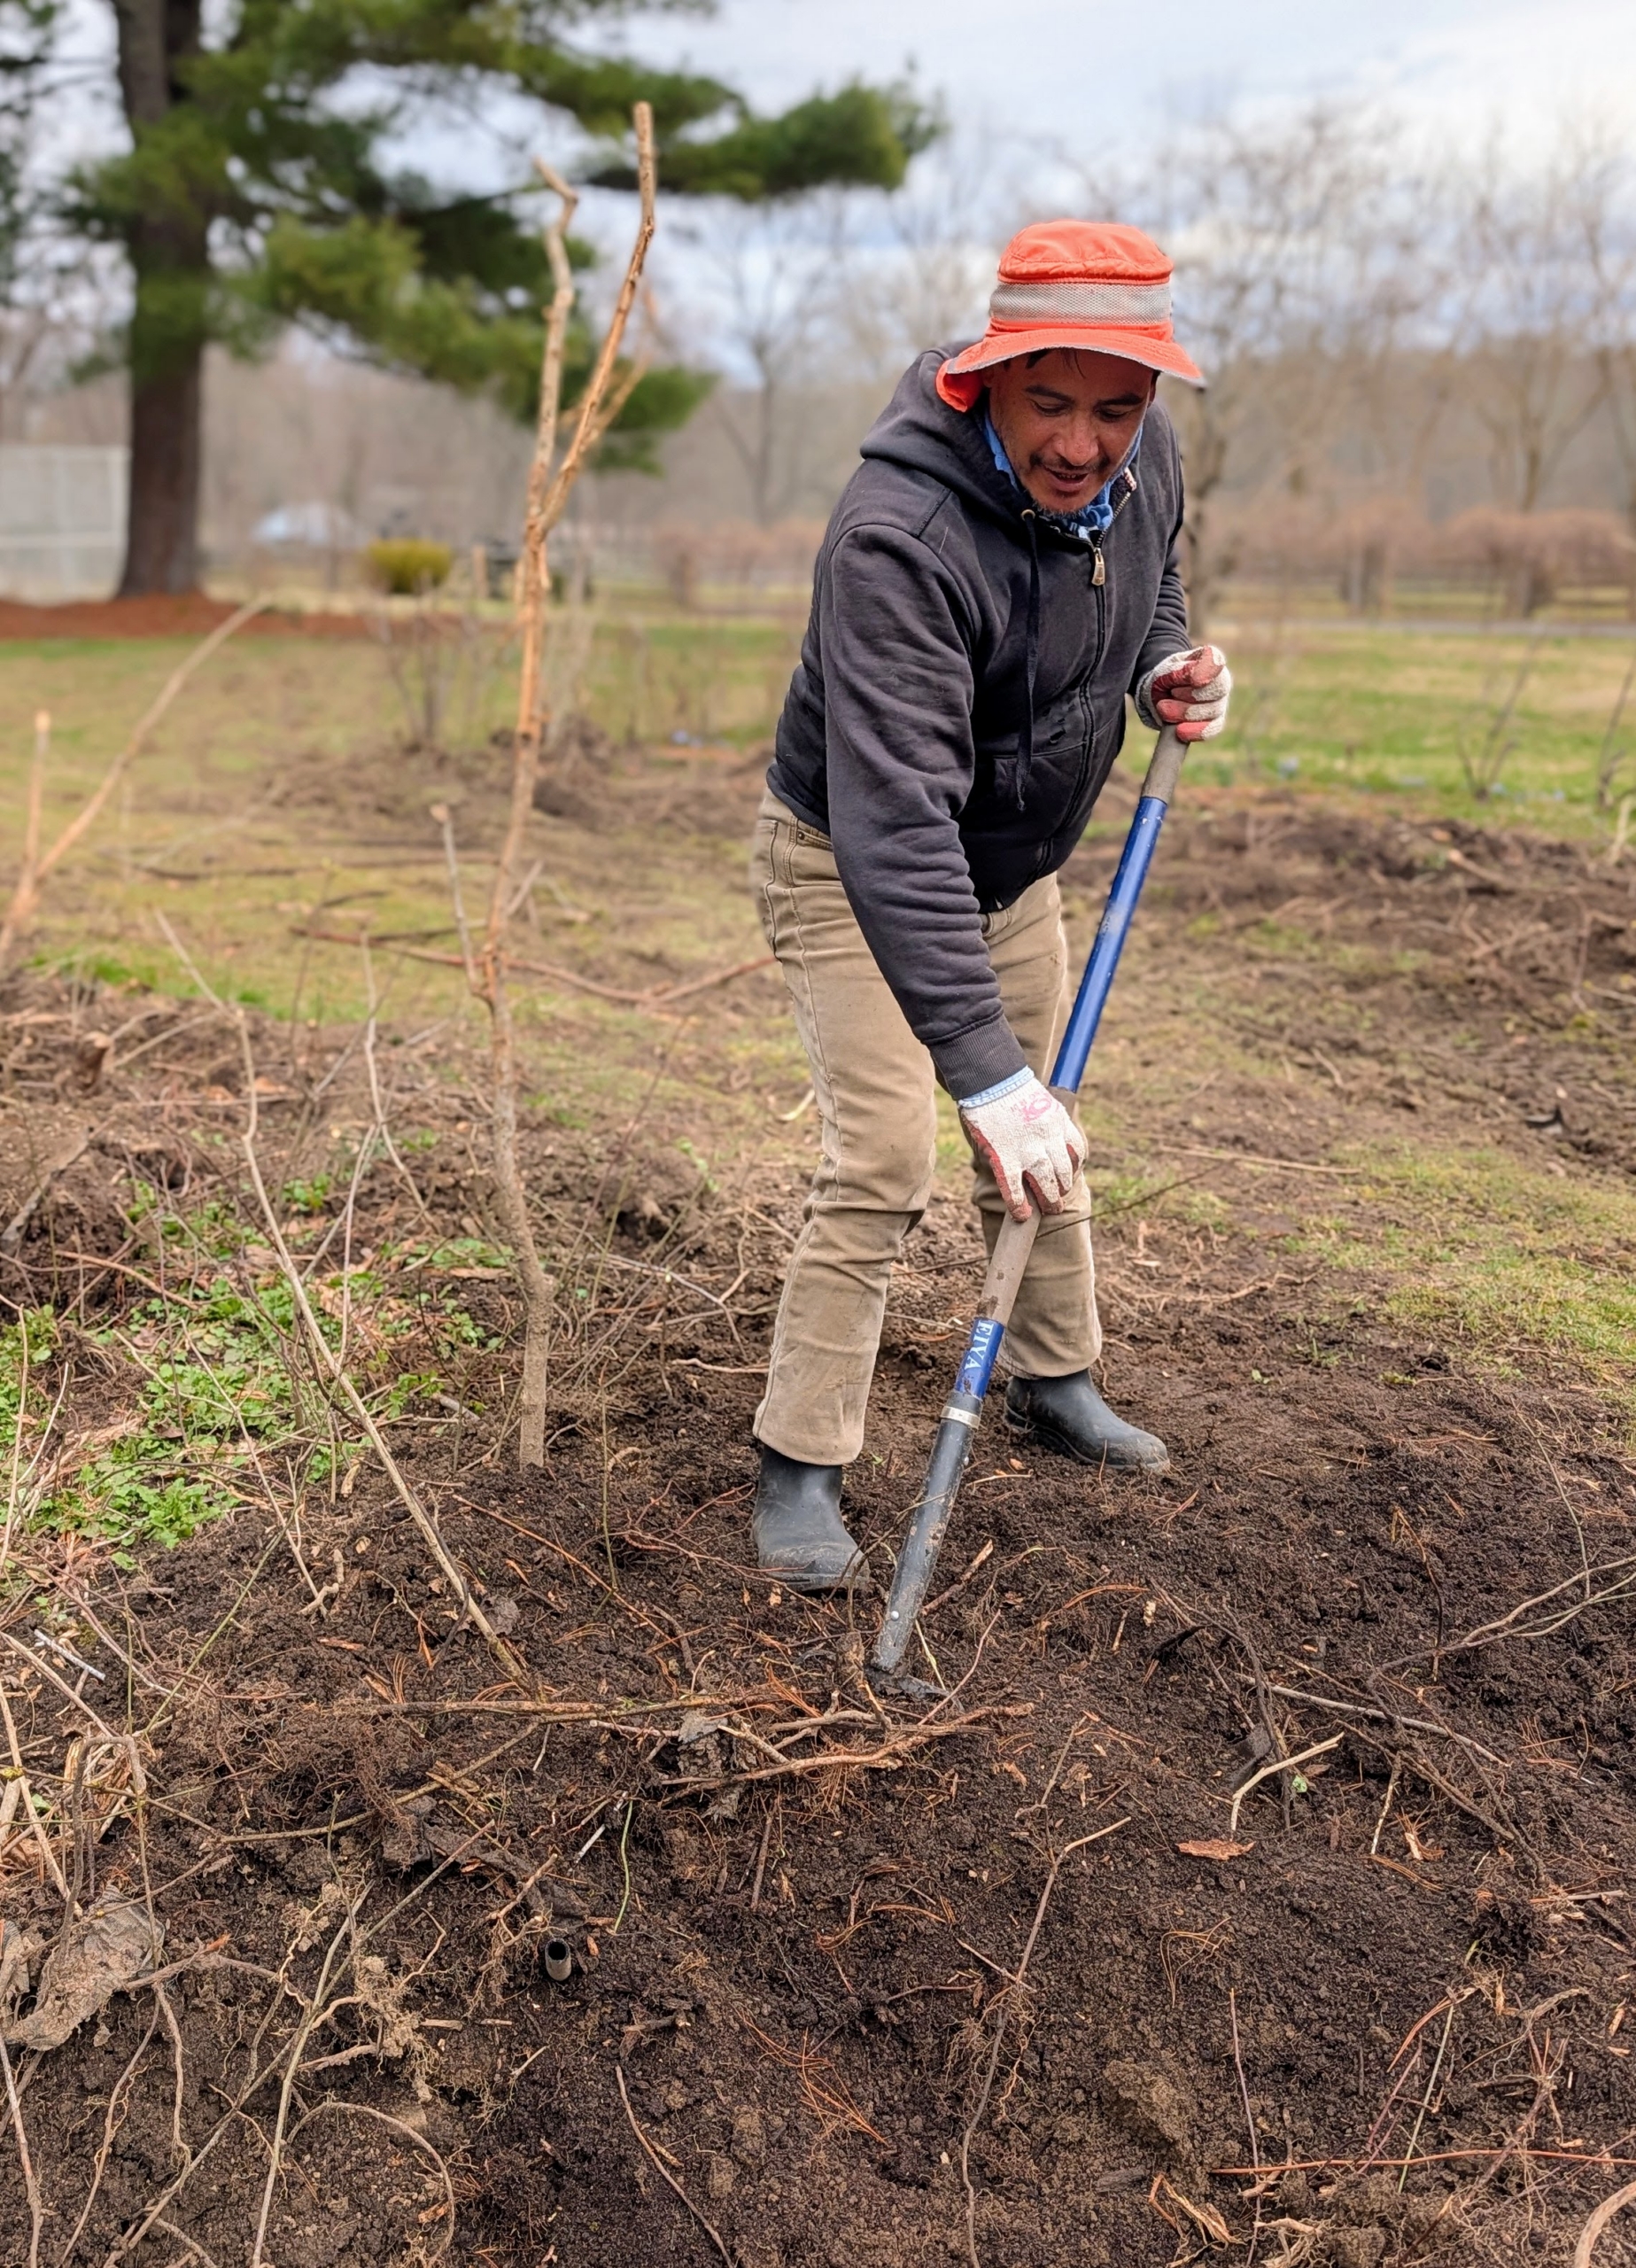
More growing seedlings are transplanted into larger pots and brought to one of the temperature and humidity controlled hoop houses where they can continue to grow until they are planted into the ground.
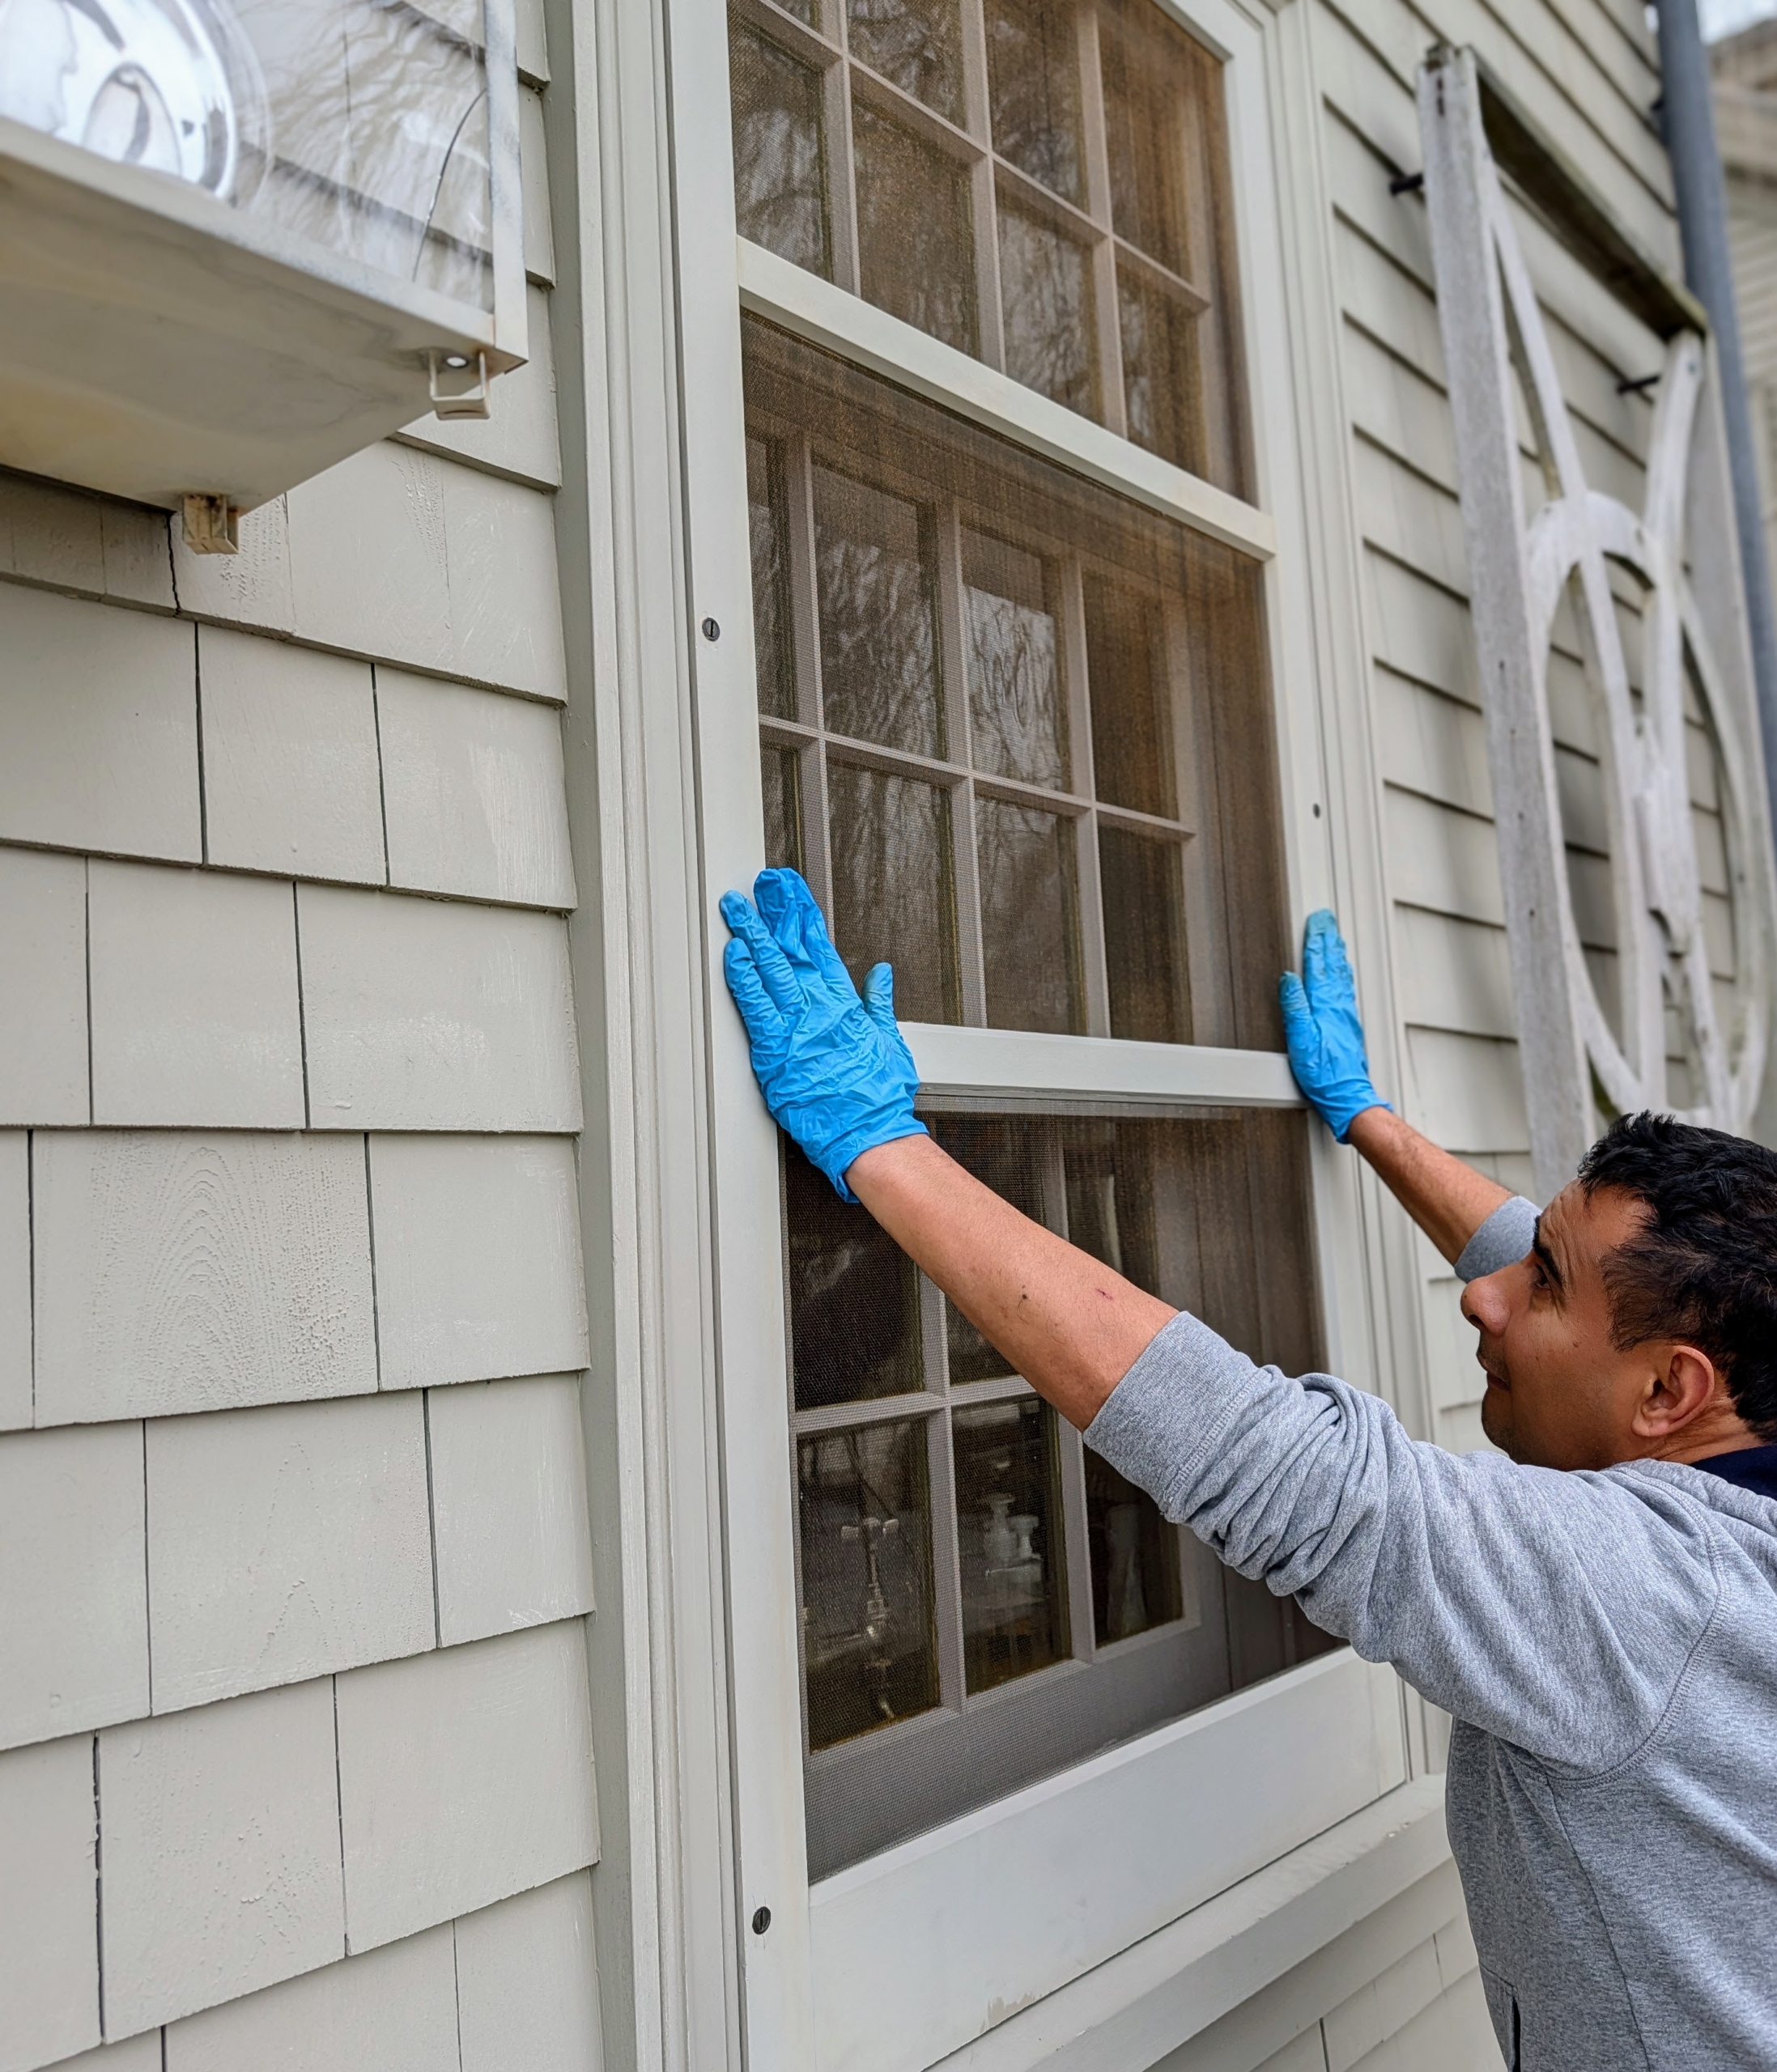
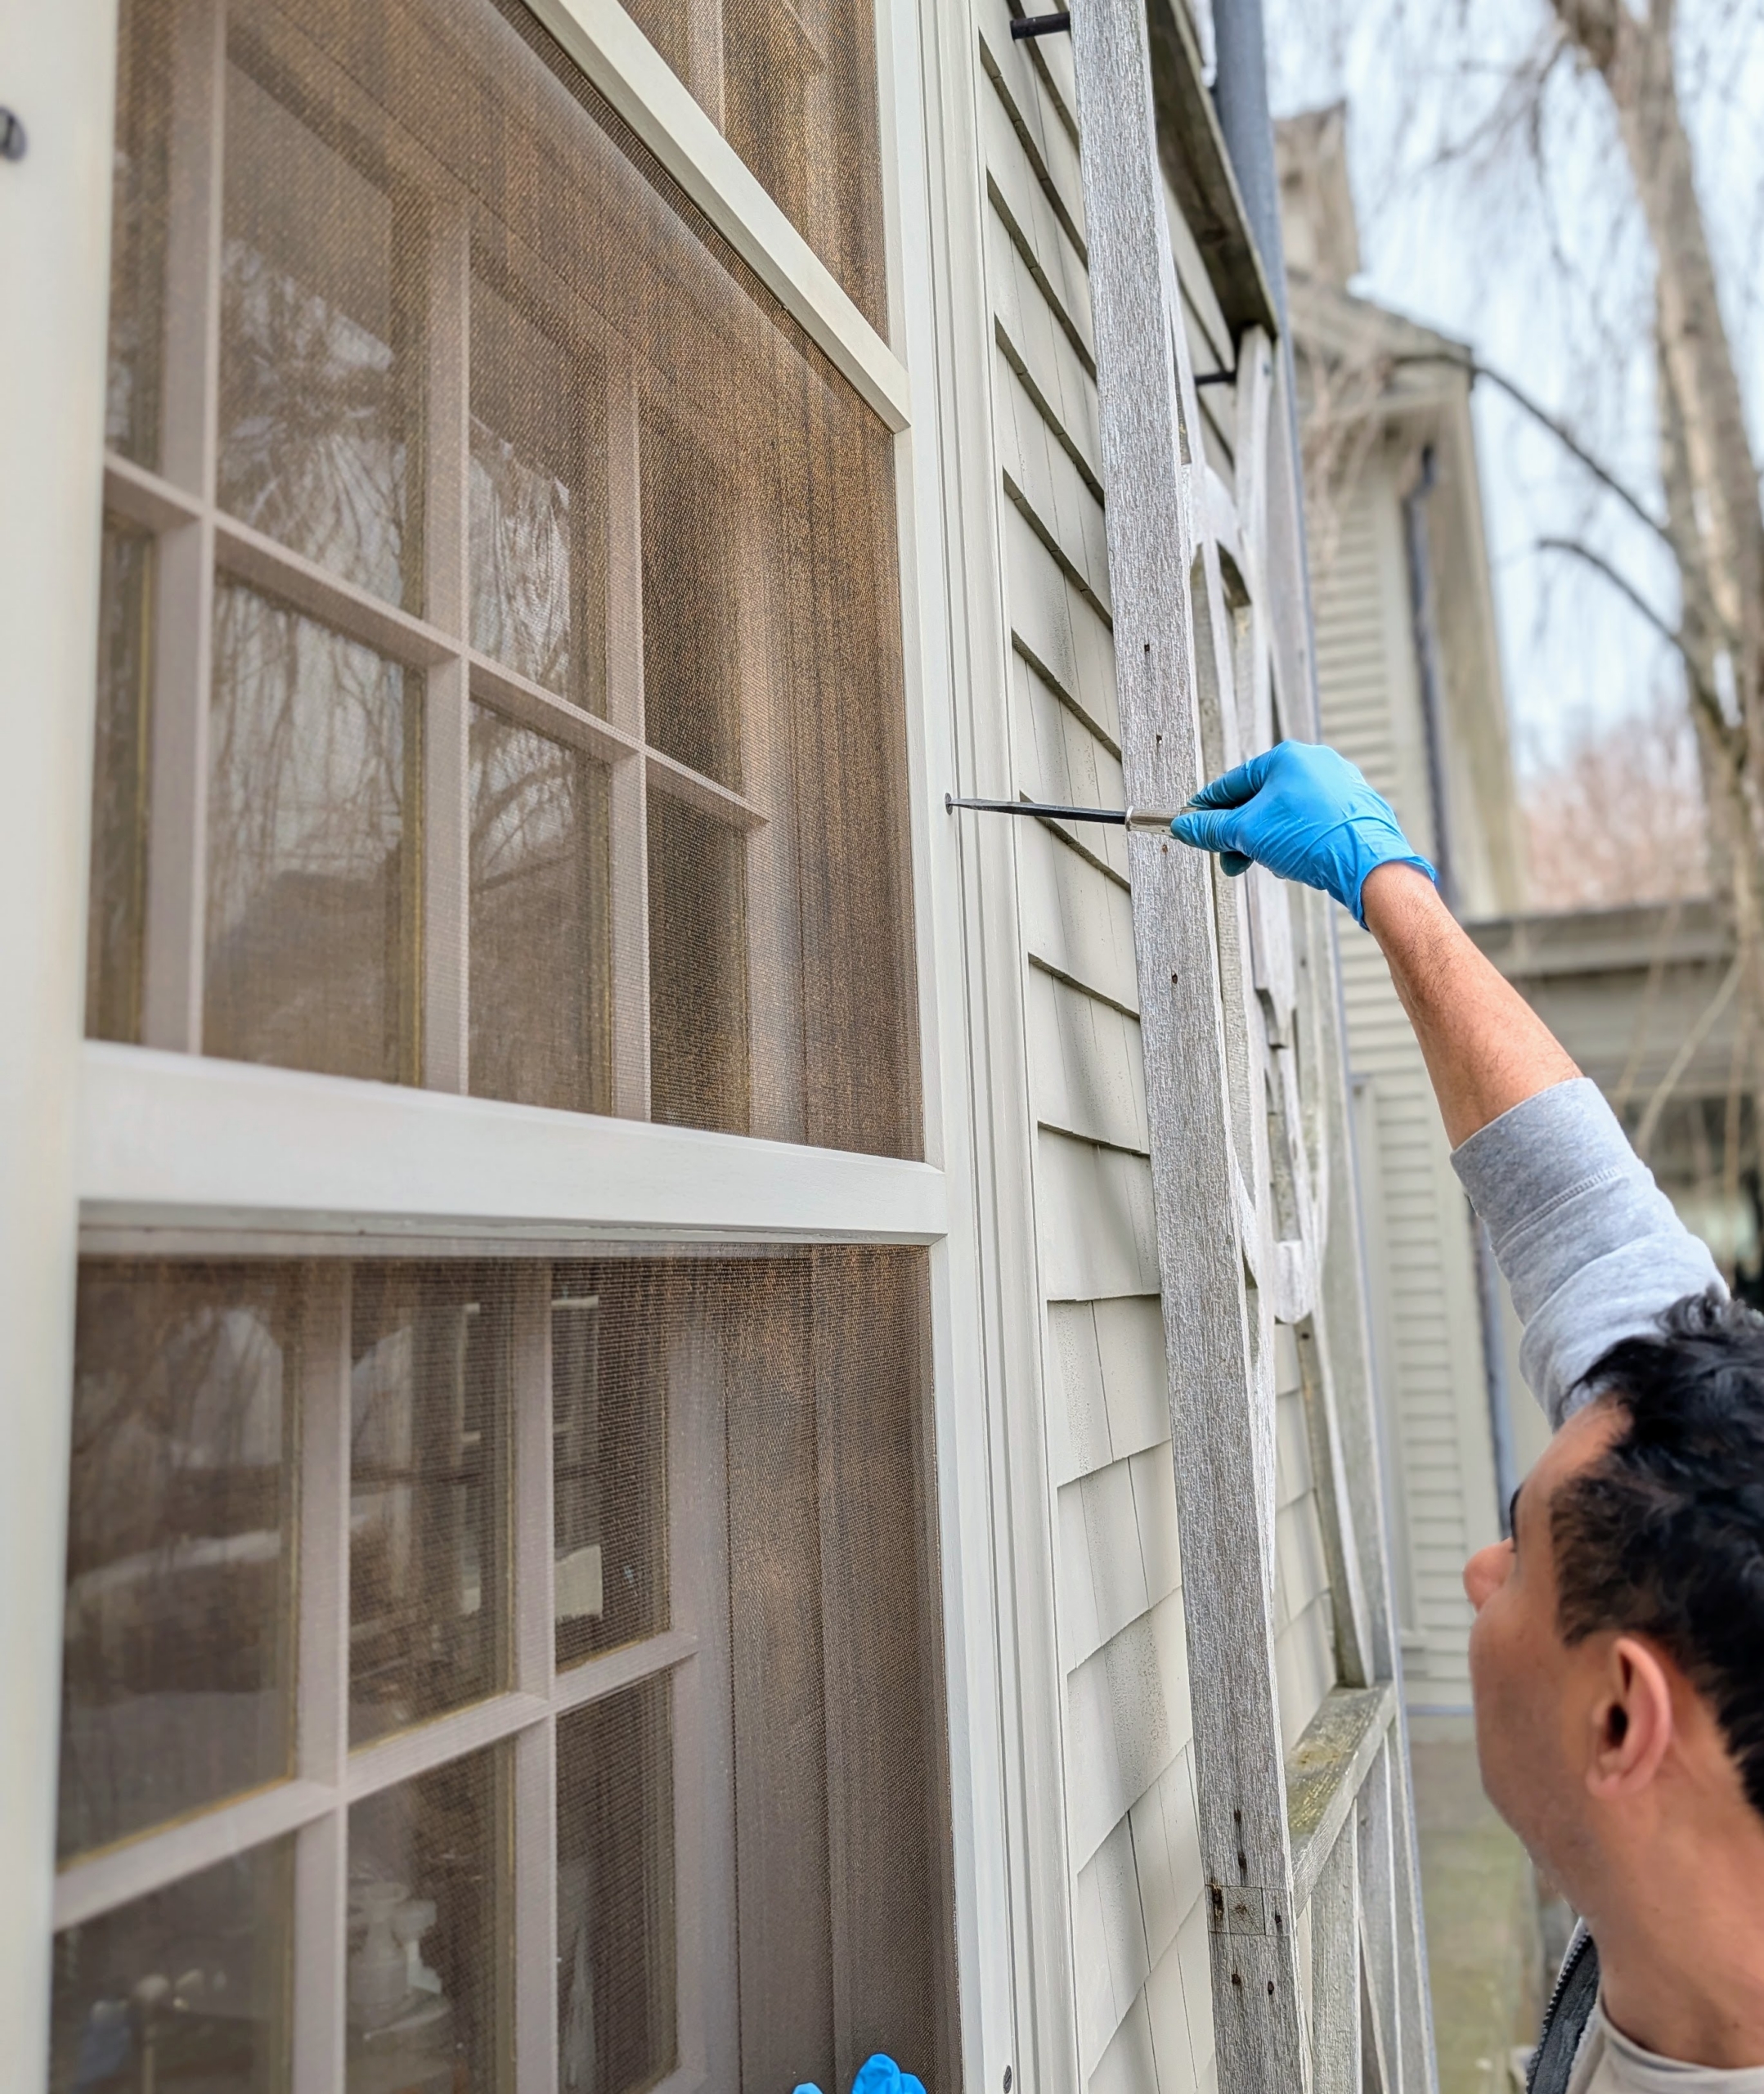
Storm windows are removed and screens are installed for the season.
Carlos carefully inserts each screen and secures it to the window frame. Mine are secured with screws.
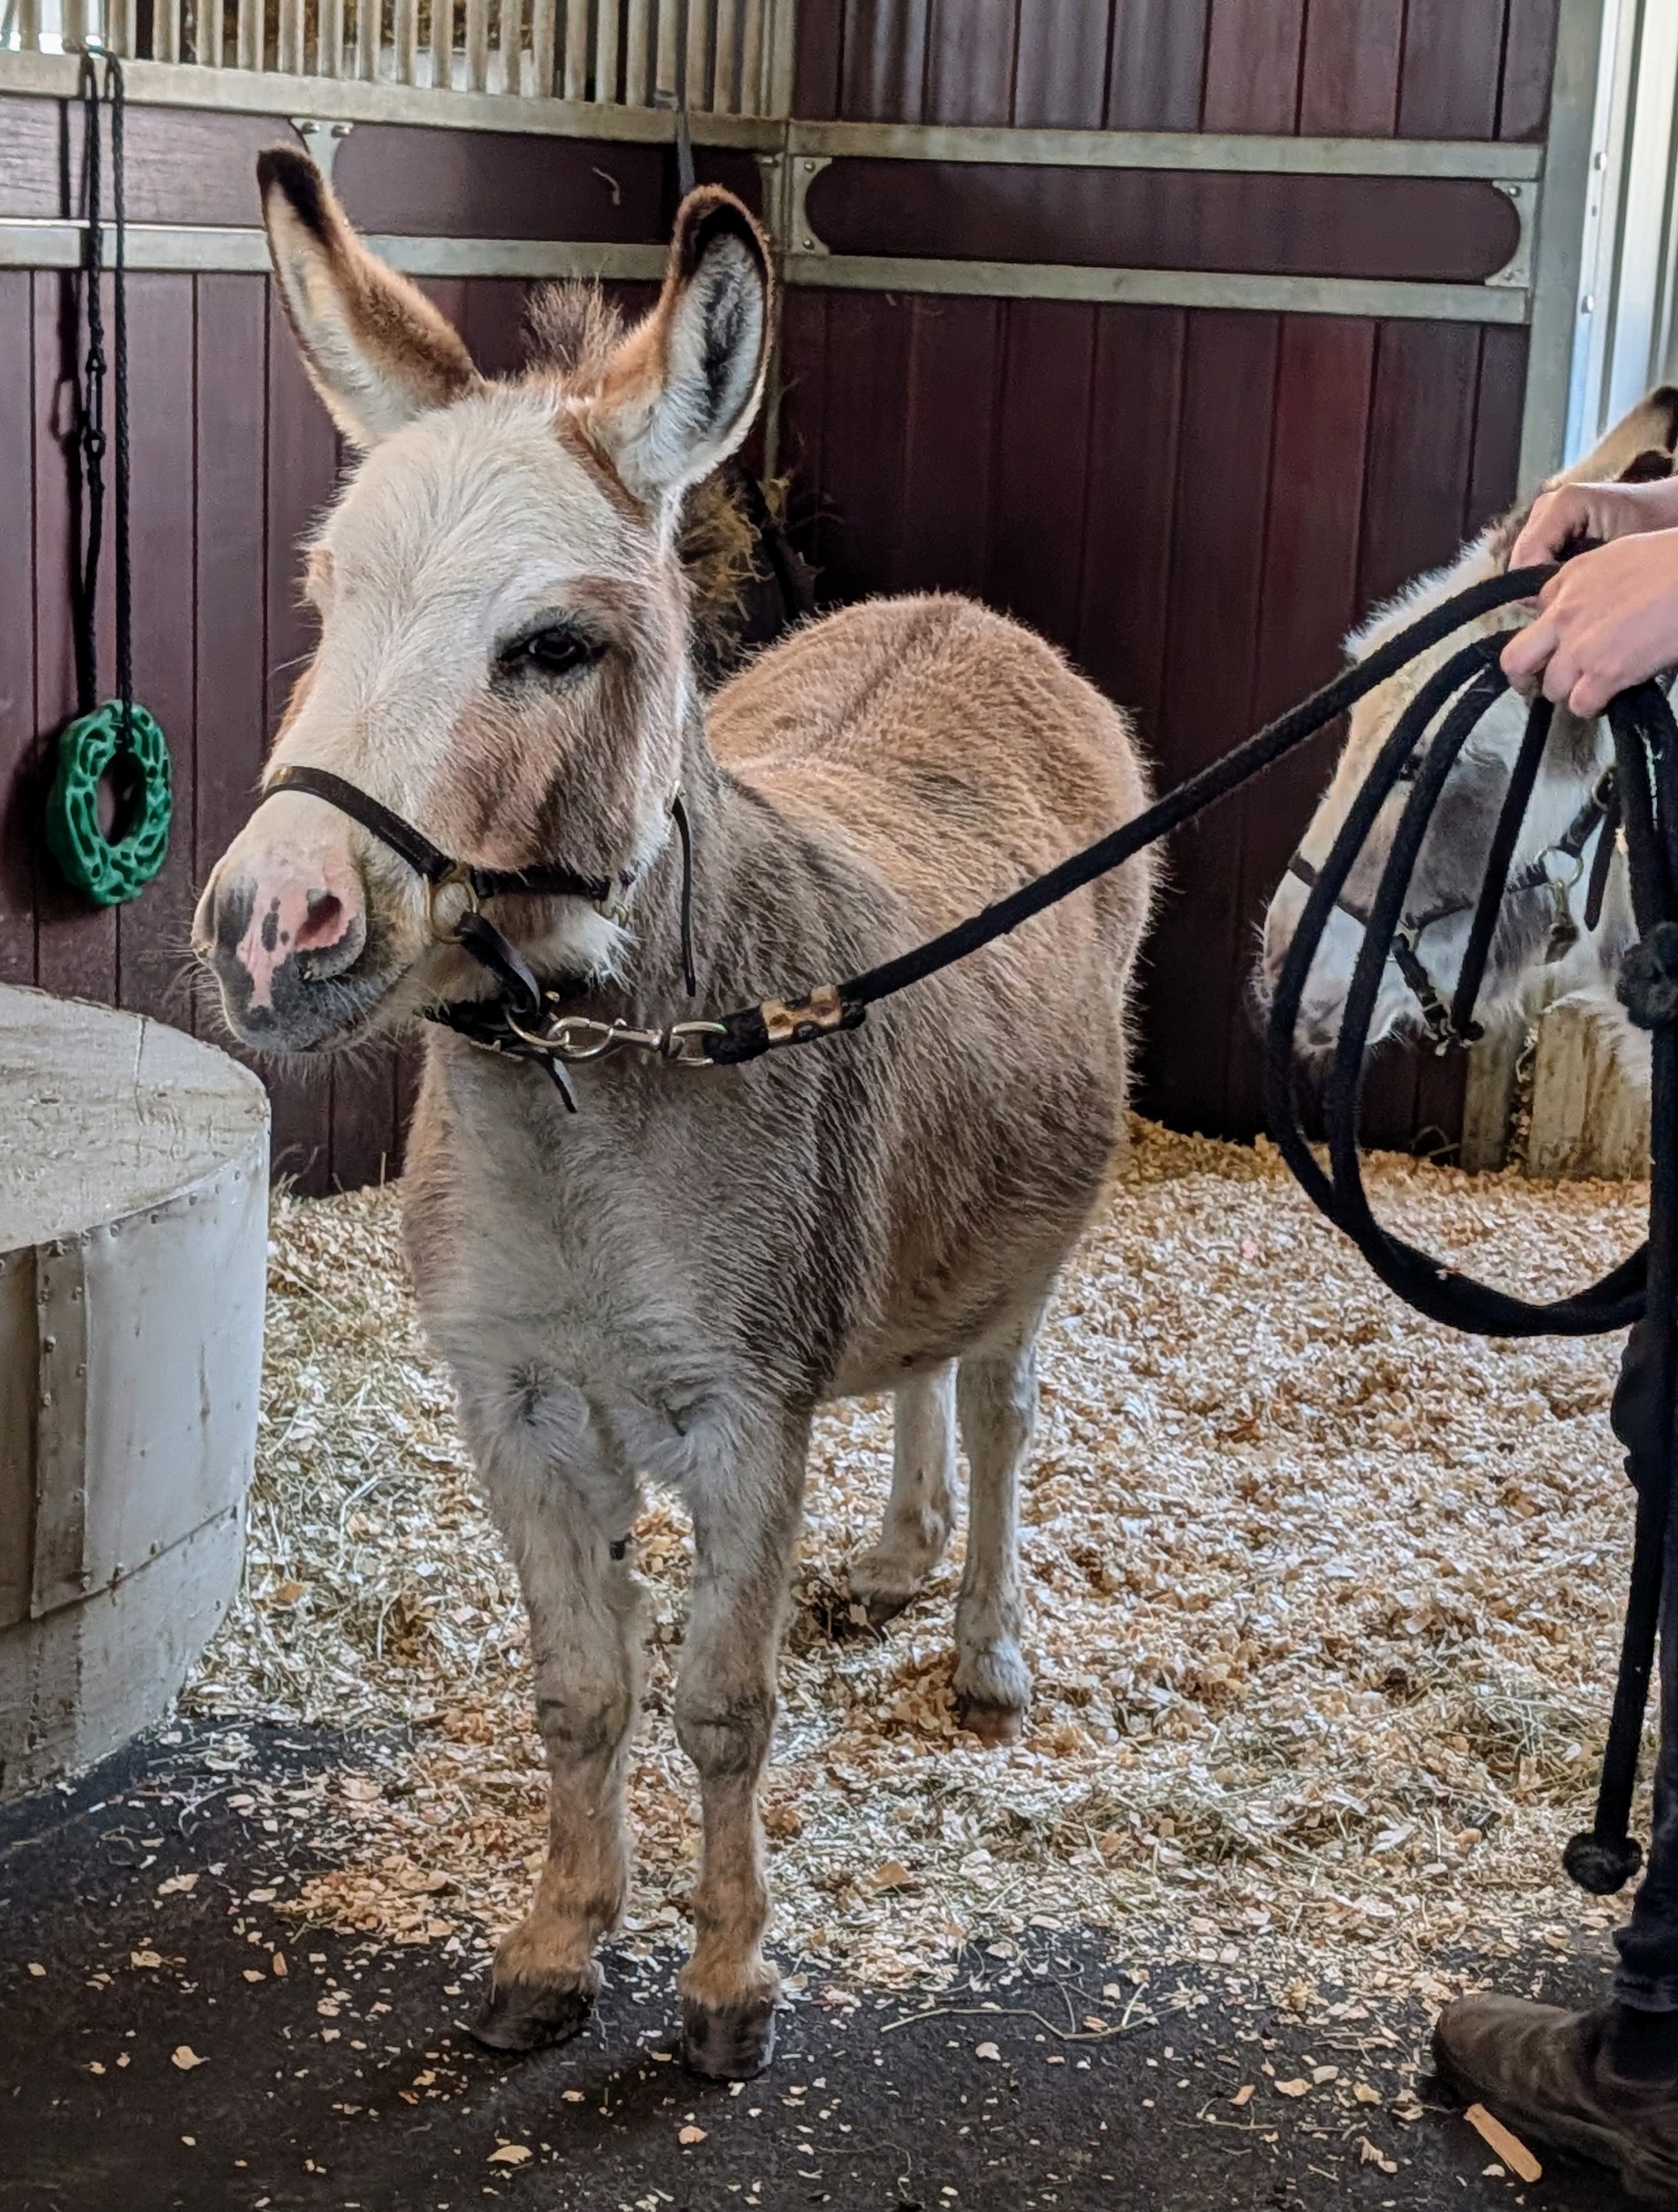
Truman “TJ” Junior is taken out of his stall to meet with his farrier. Compared to a horse, a donkey’s hooves are smaller, more upright, and more resistant, but like all equines, their hooves are constantly growing. My farrier comes every six to eight weeks to check on the donkeys’ hooves and give them a good trim.
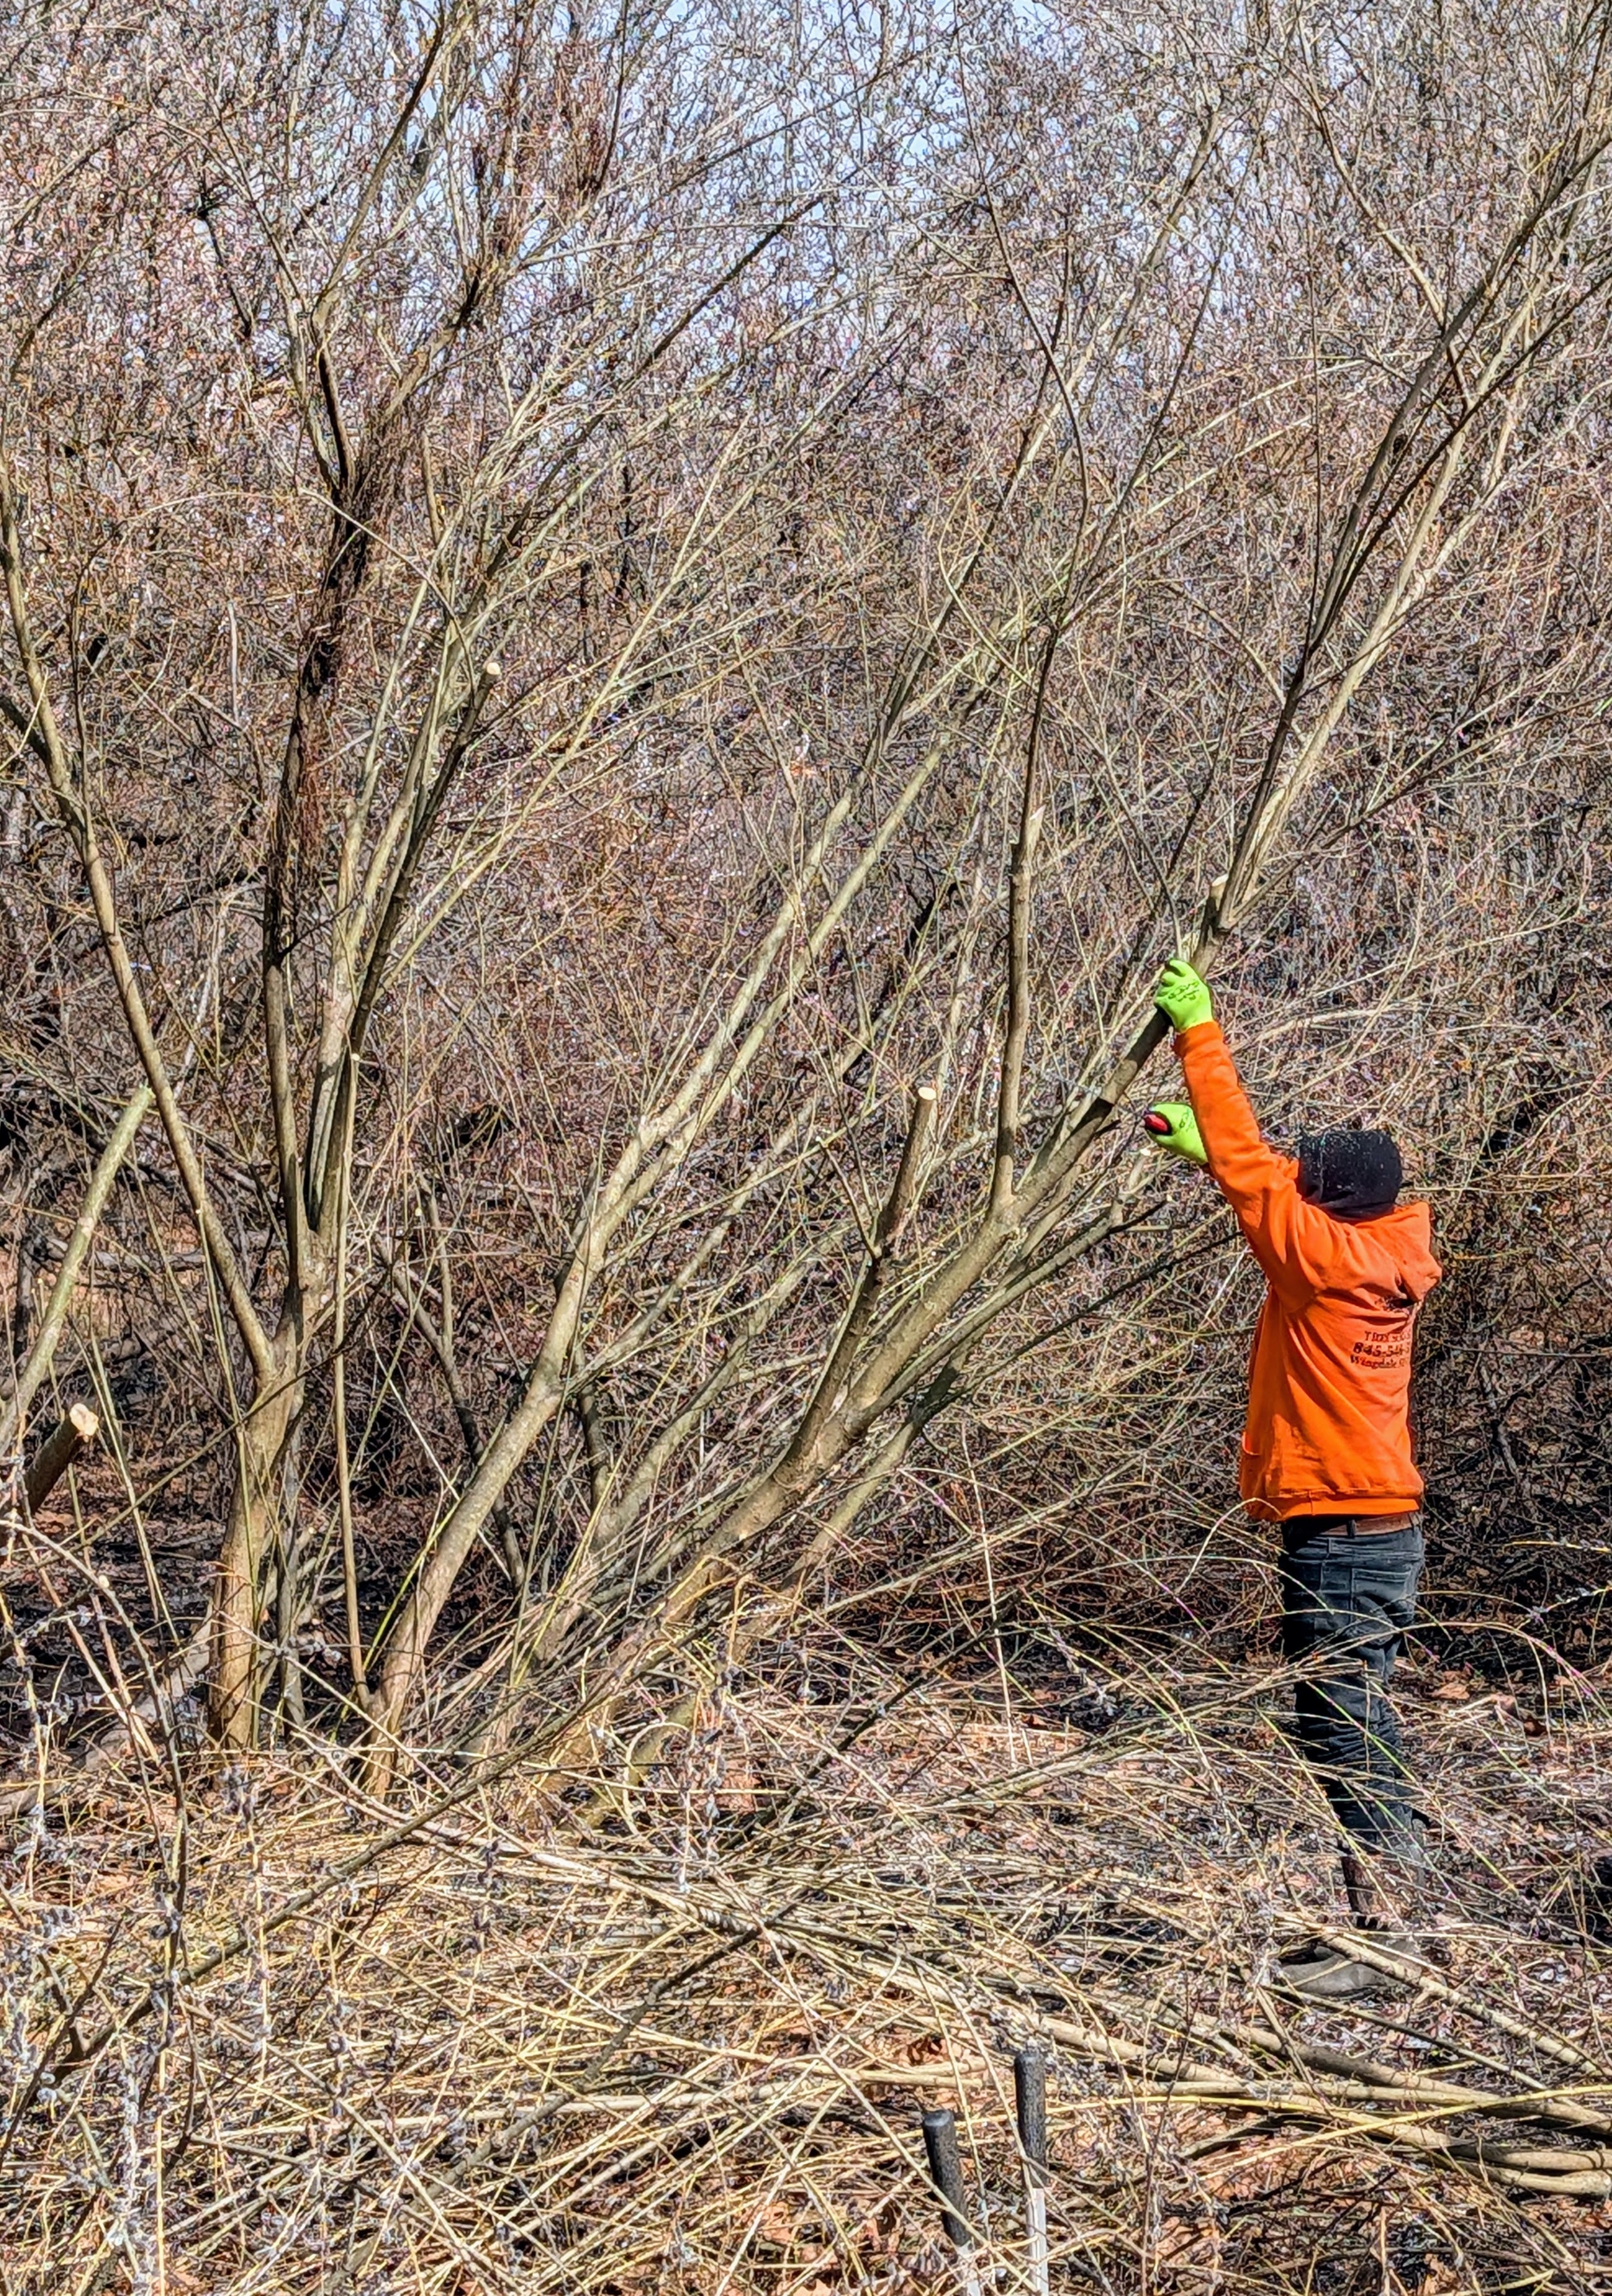
Behind my main greenhouse, the pussy willows are getting a hard pruning which helps to promote healthy growth, enhance blooms, control size, and prevent disease.
Here, Pasang takes away any pruned branches and piles them up at the edge for easy removal later.
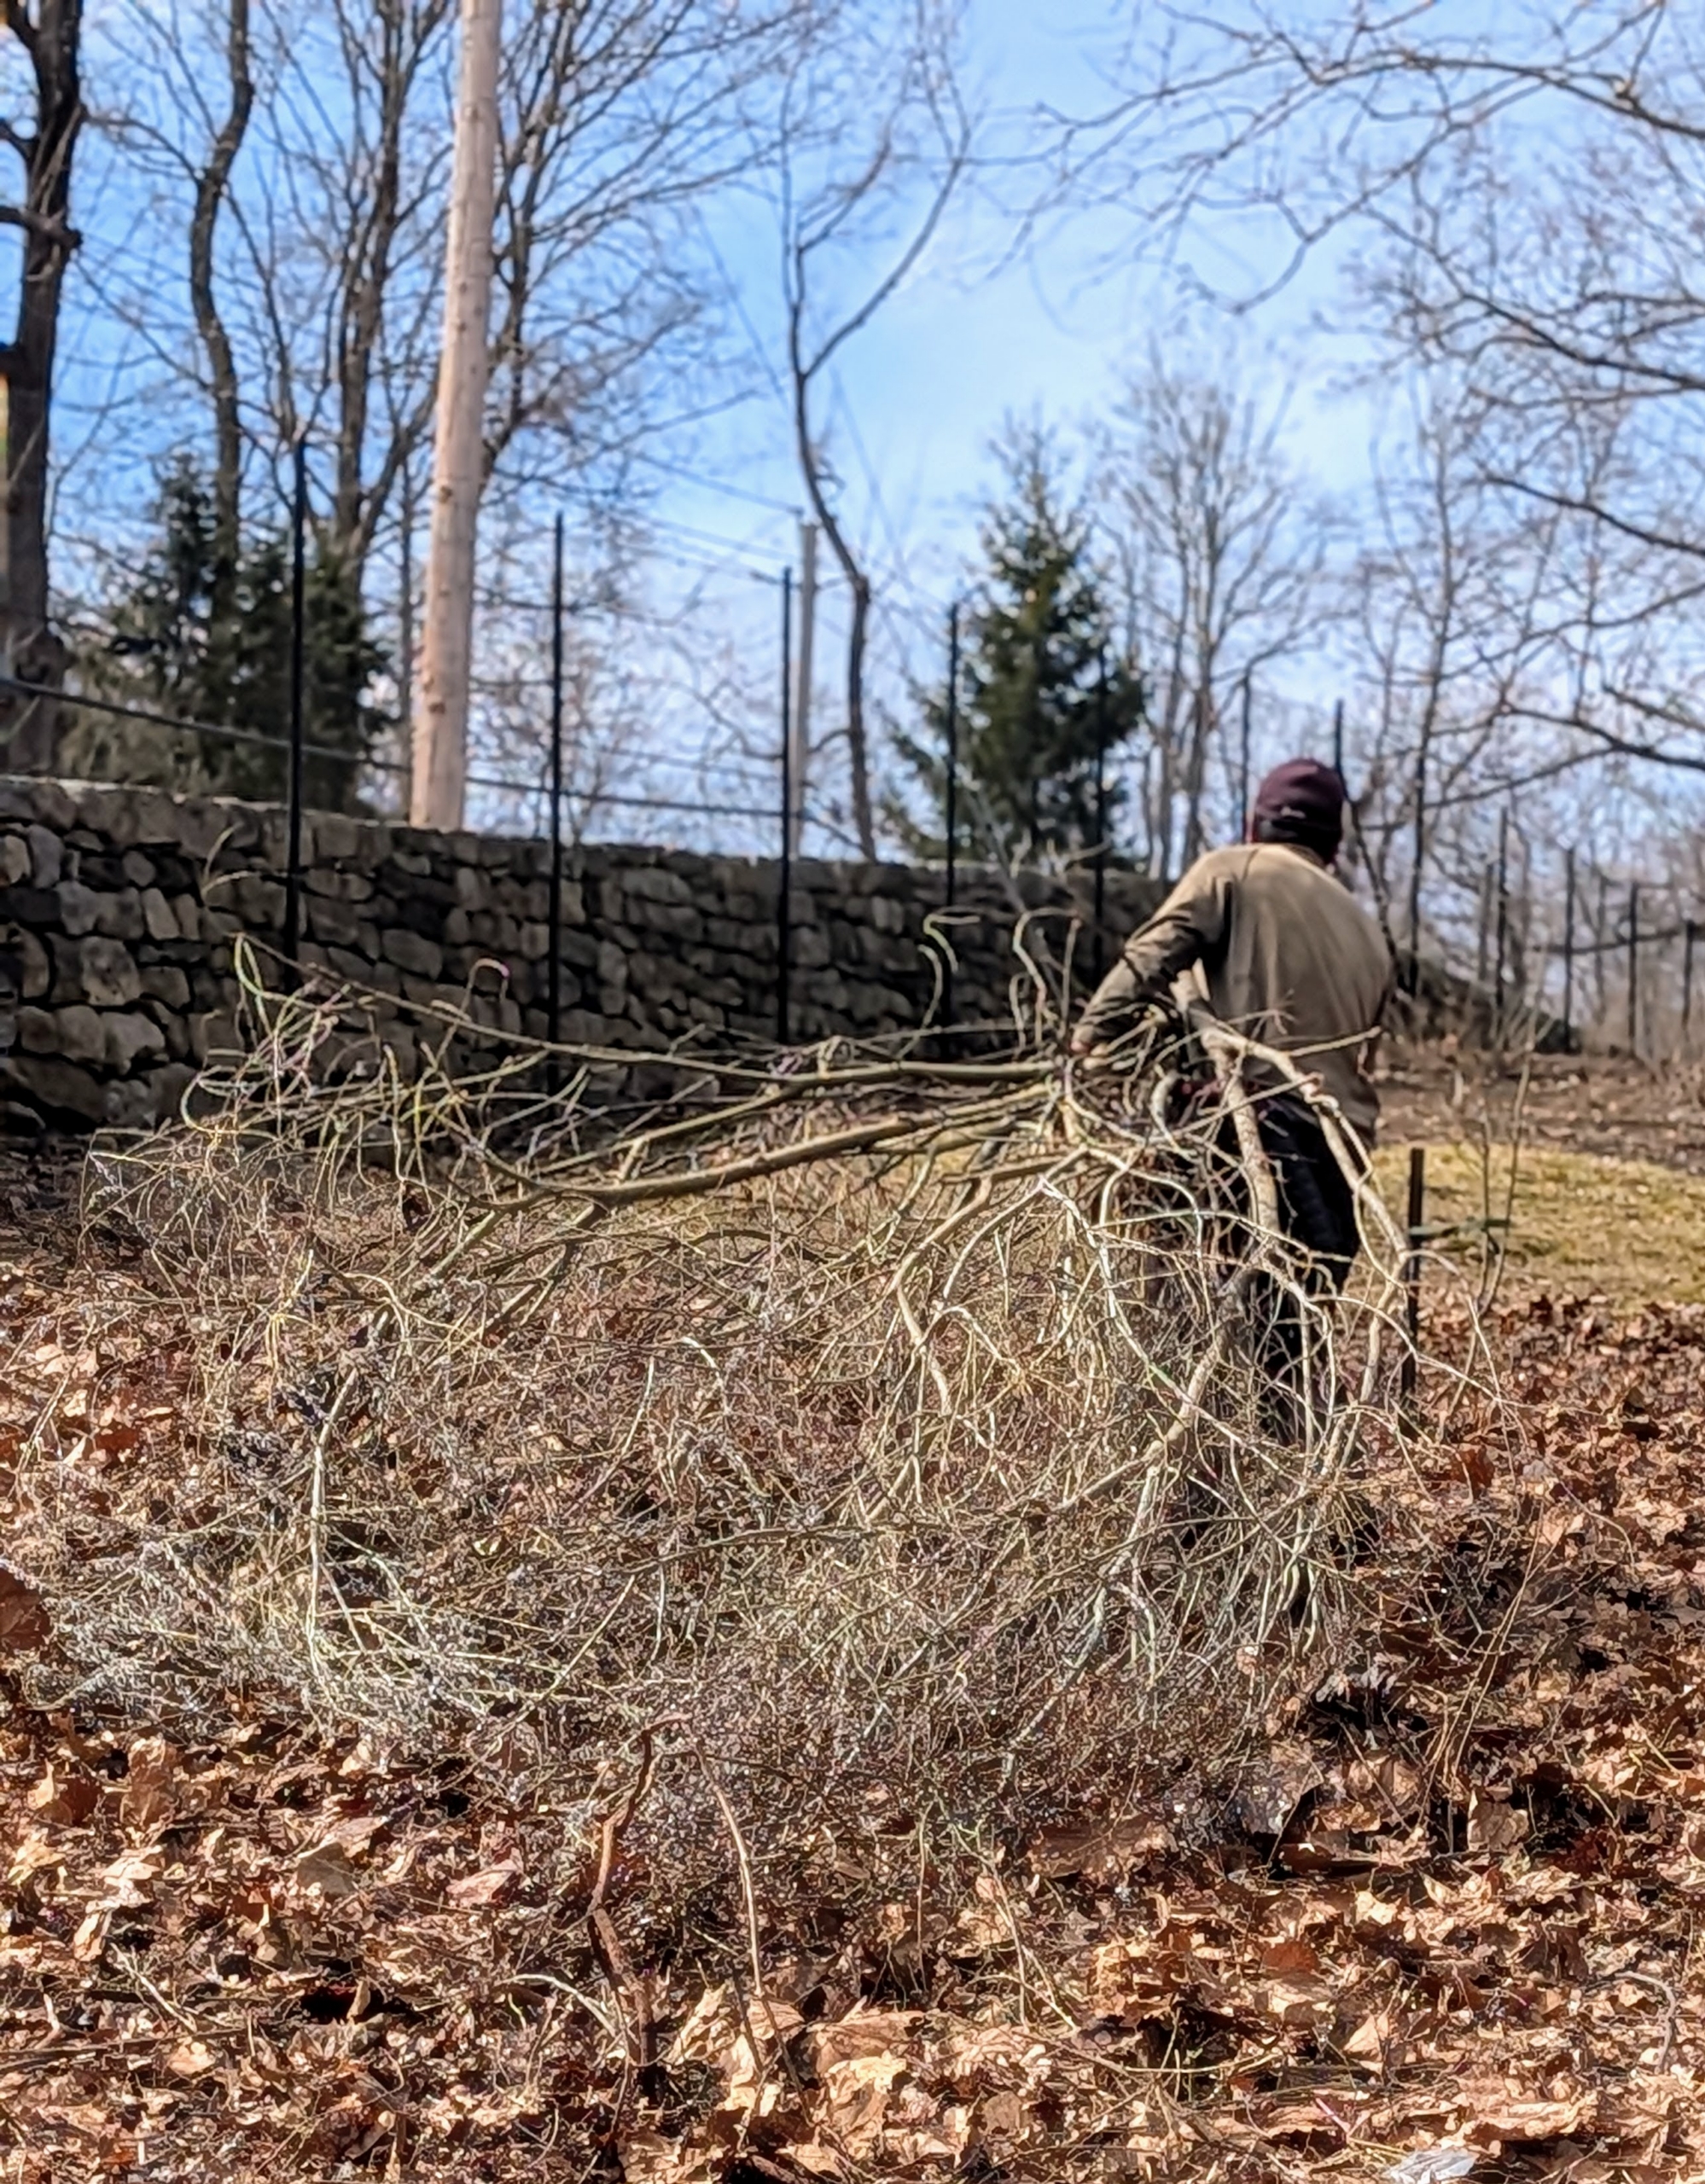
Cesar is cleaning up another garden – wait until you see this transformation in a future post.
Fernando helps to remove the branches and take them away.
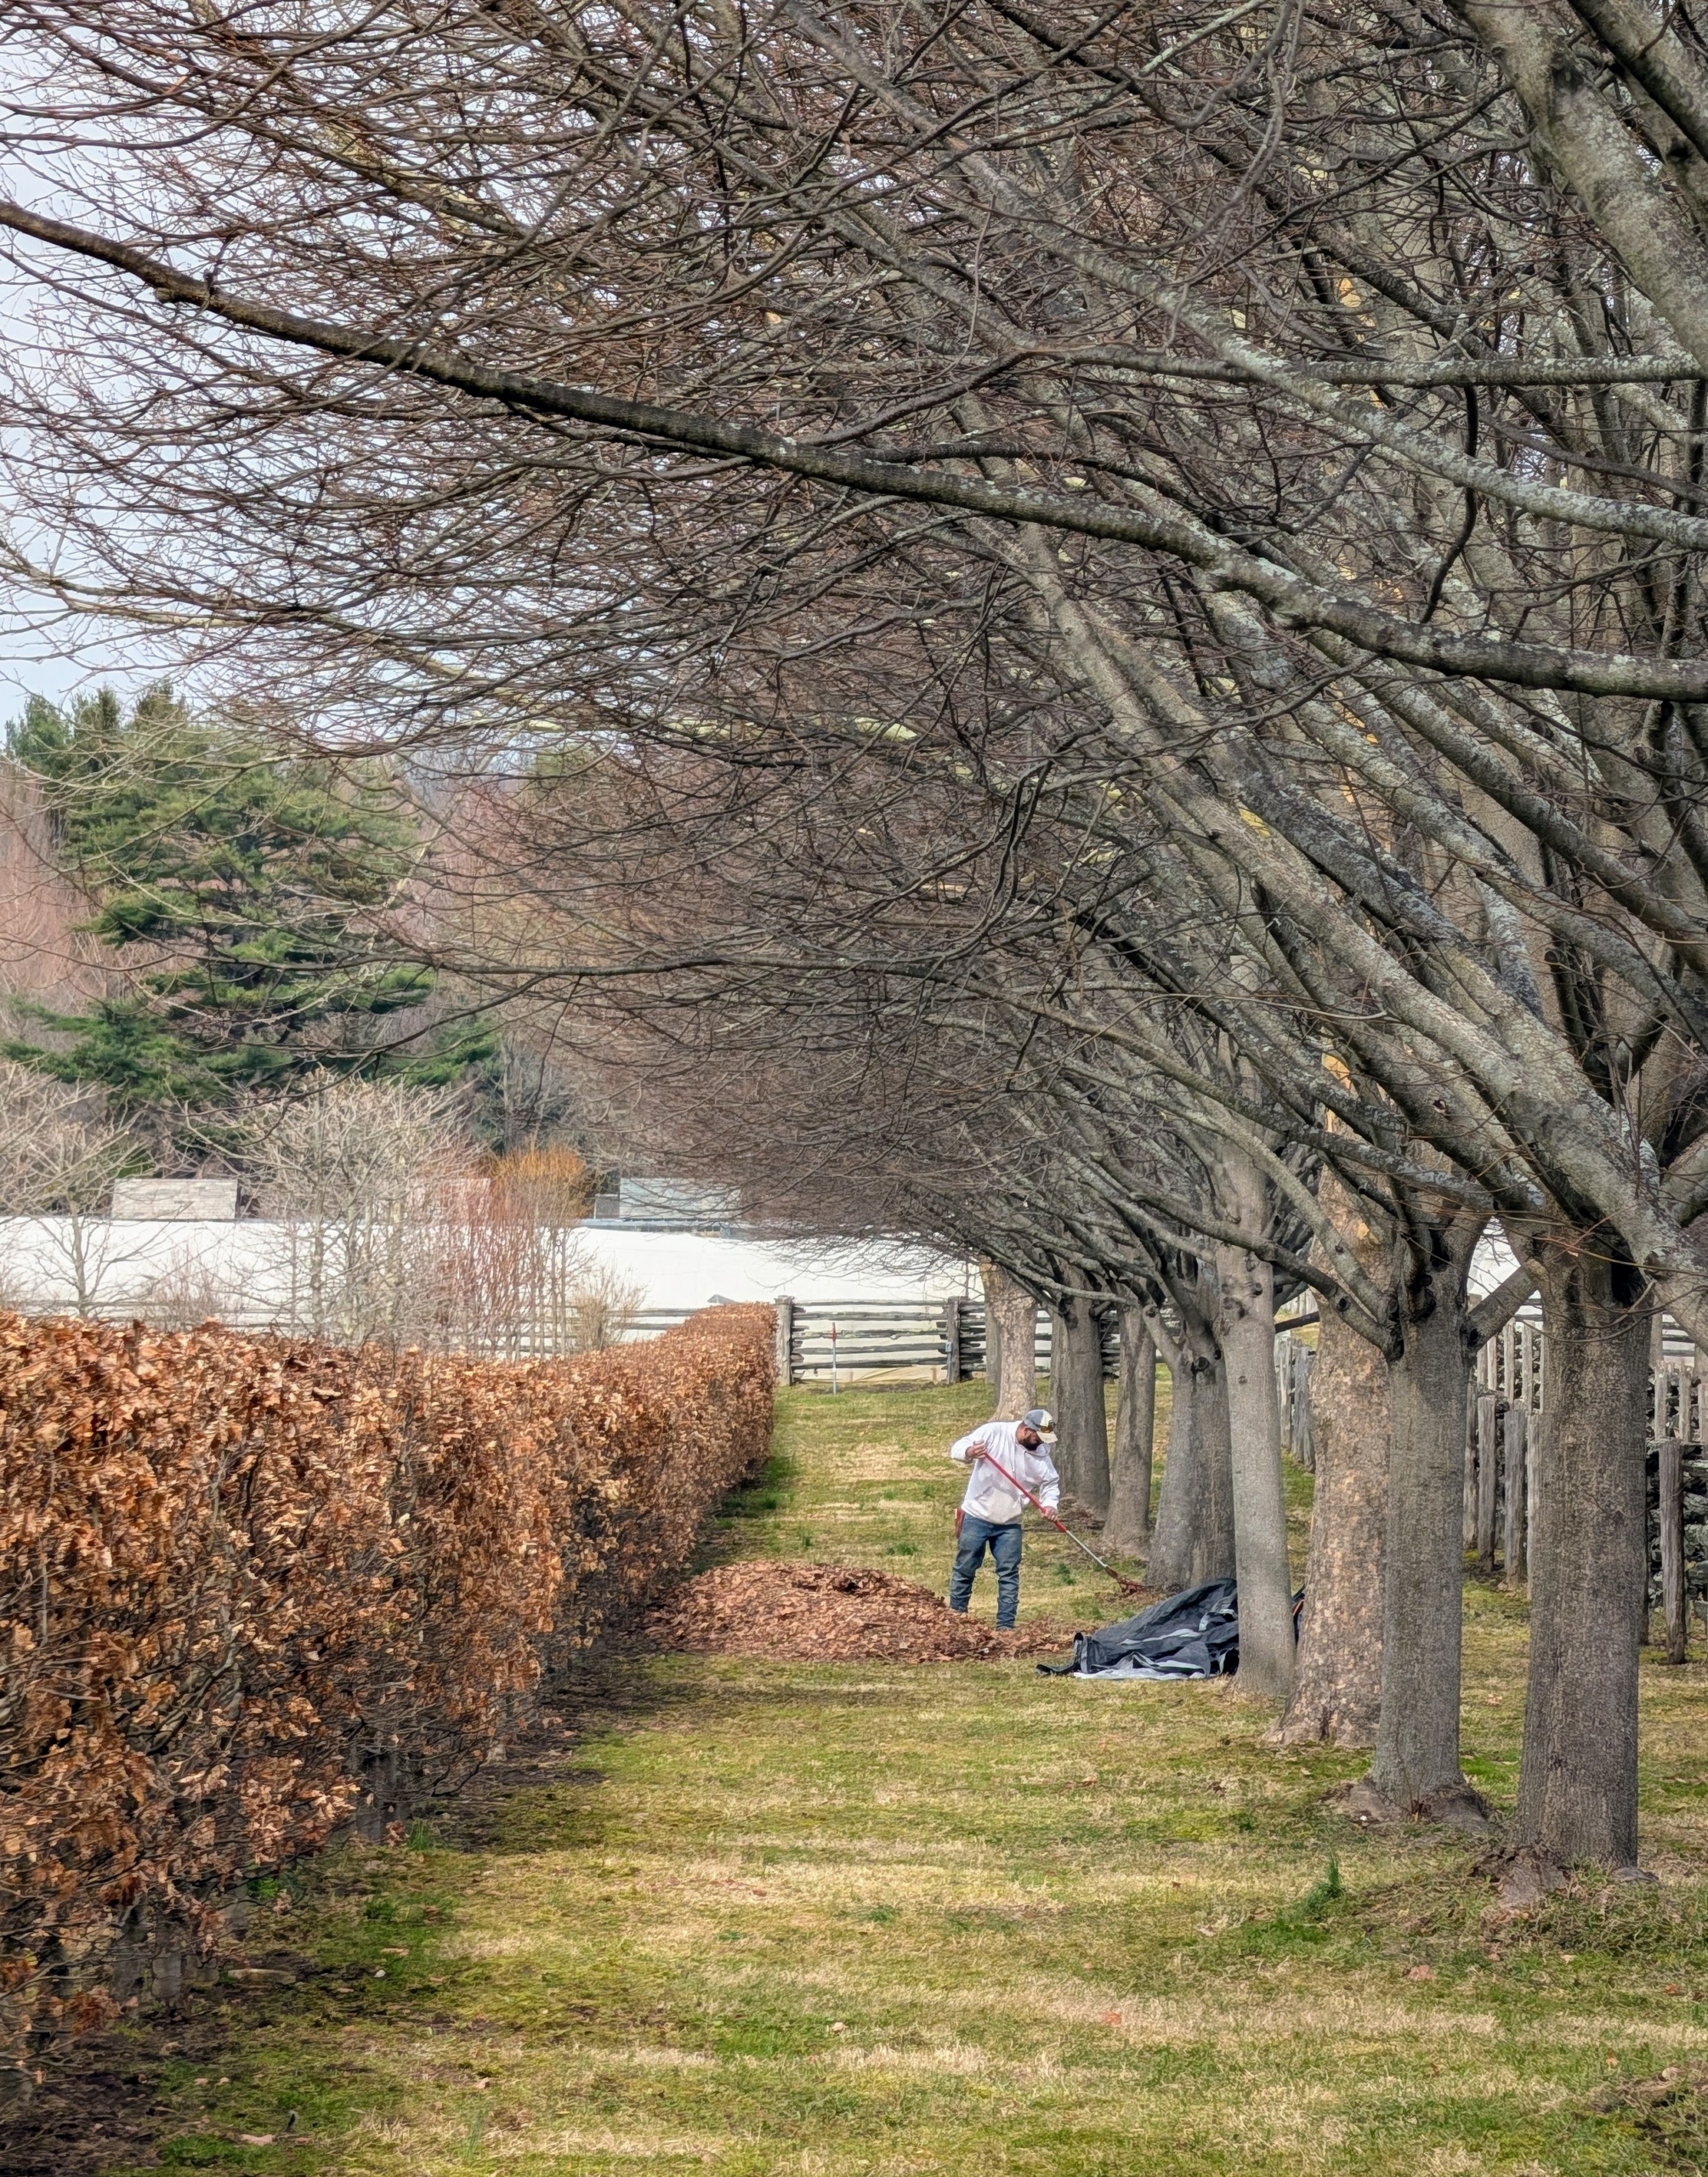
And here’s Adan blowing more old leaves by this allée of lindens. On the left is a hedge of European beech trees, Fagus sylvatica, or the common beech.
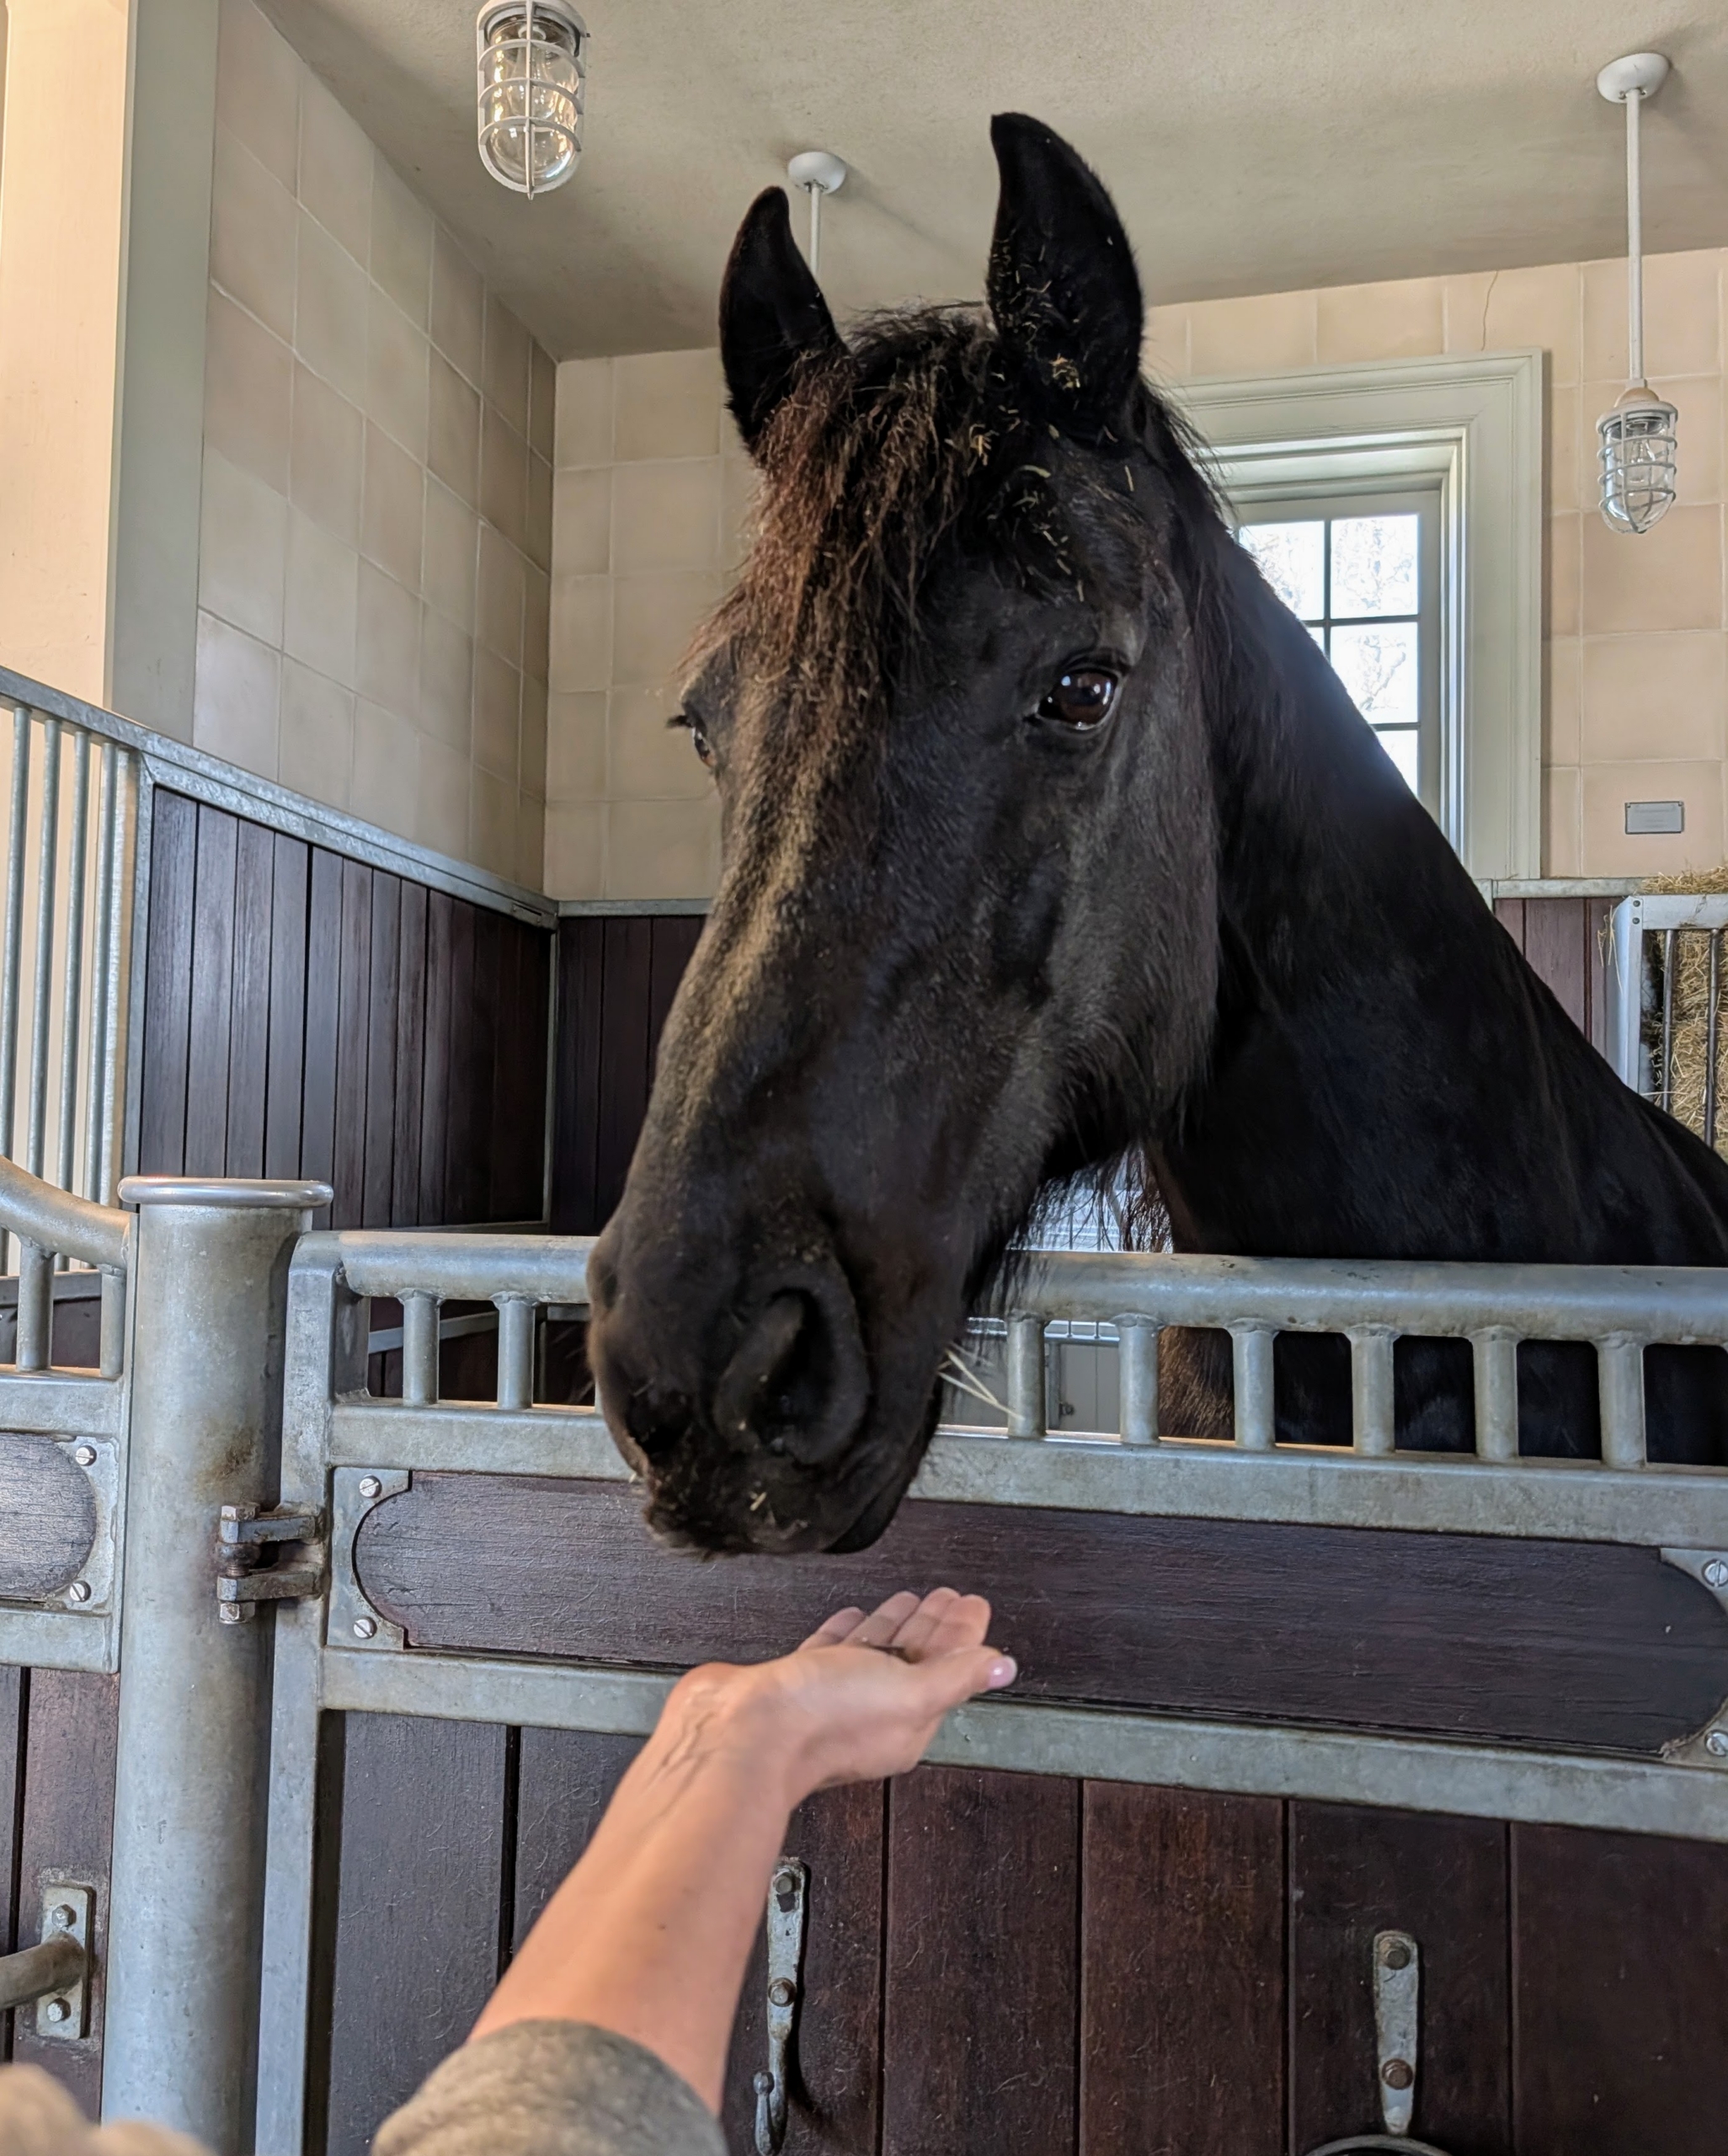
And at the end of the day – treats for everyone. Here’s Bond, one of the handsome Friesian residents in my stable. As long as the weather continues to cooperate, we can get lots of good tasks done around the farm. What spring jobs did you do around your home this weekend?
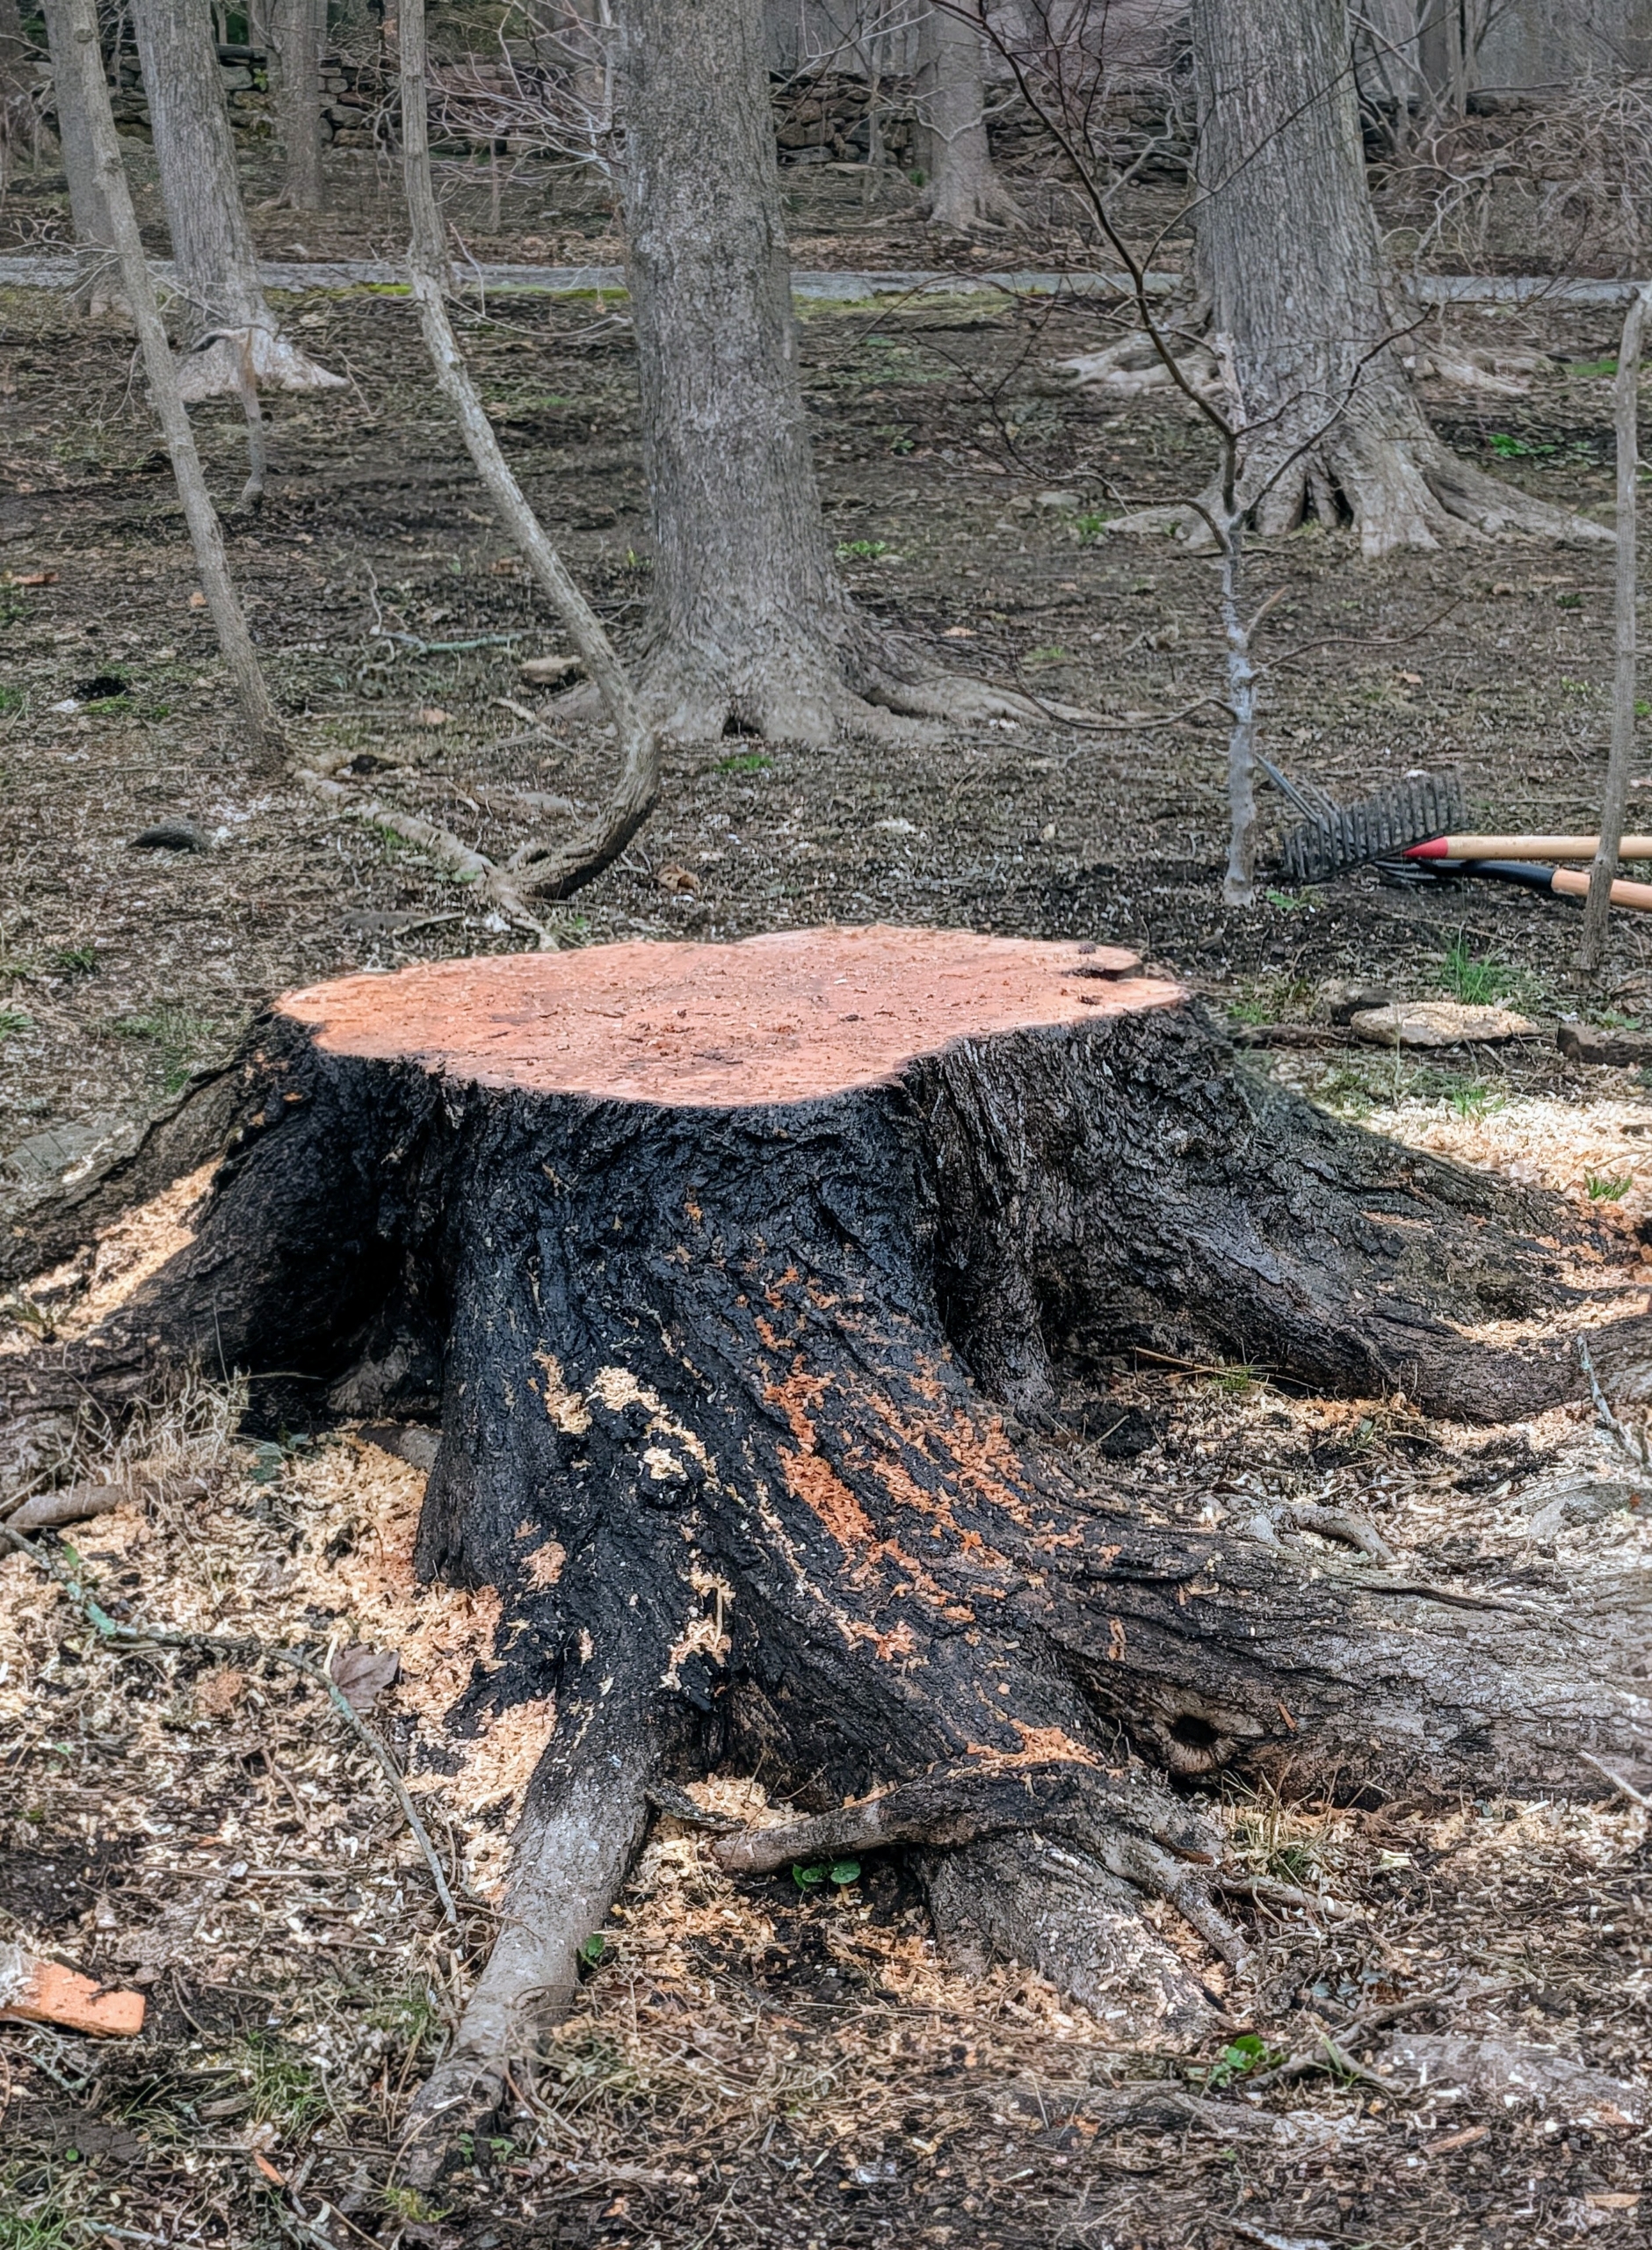
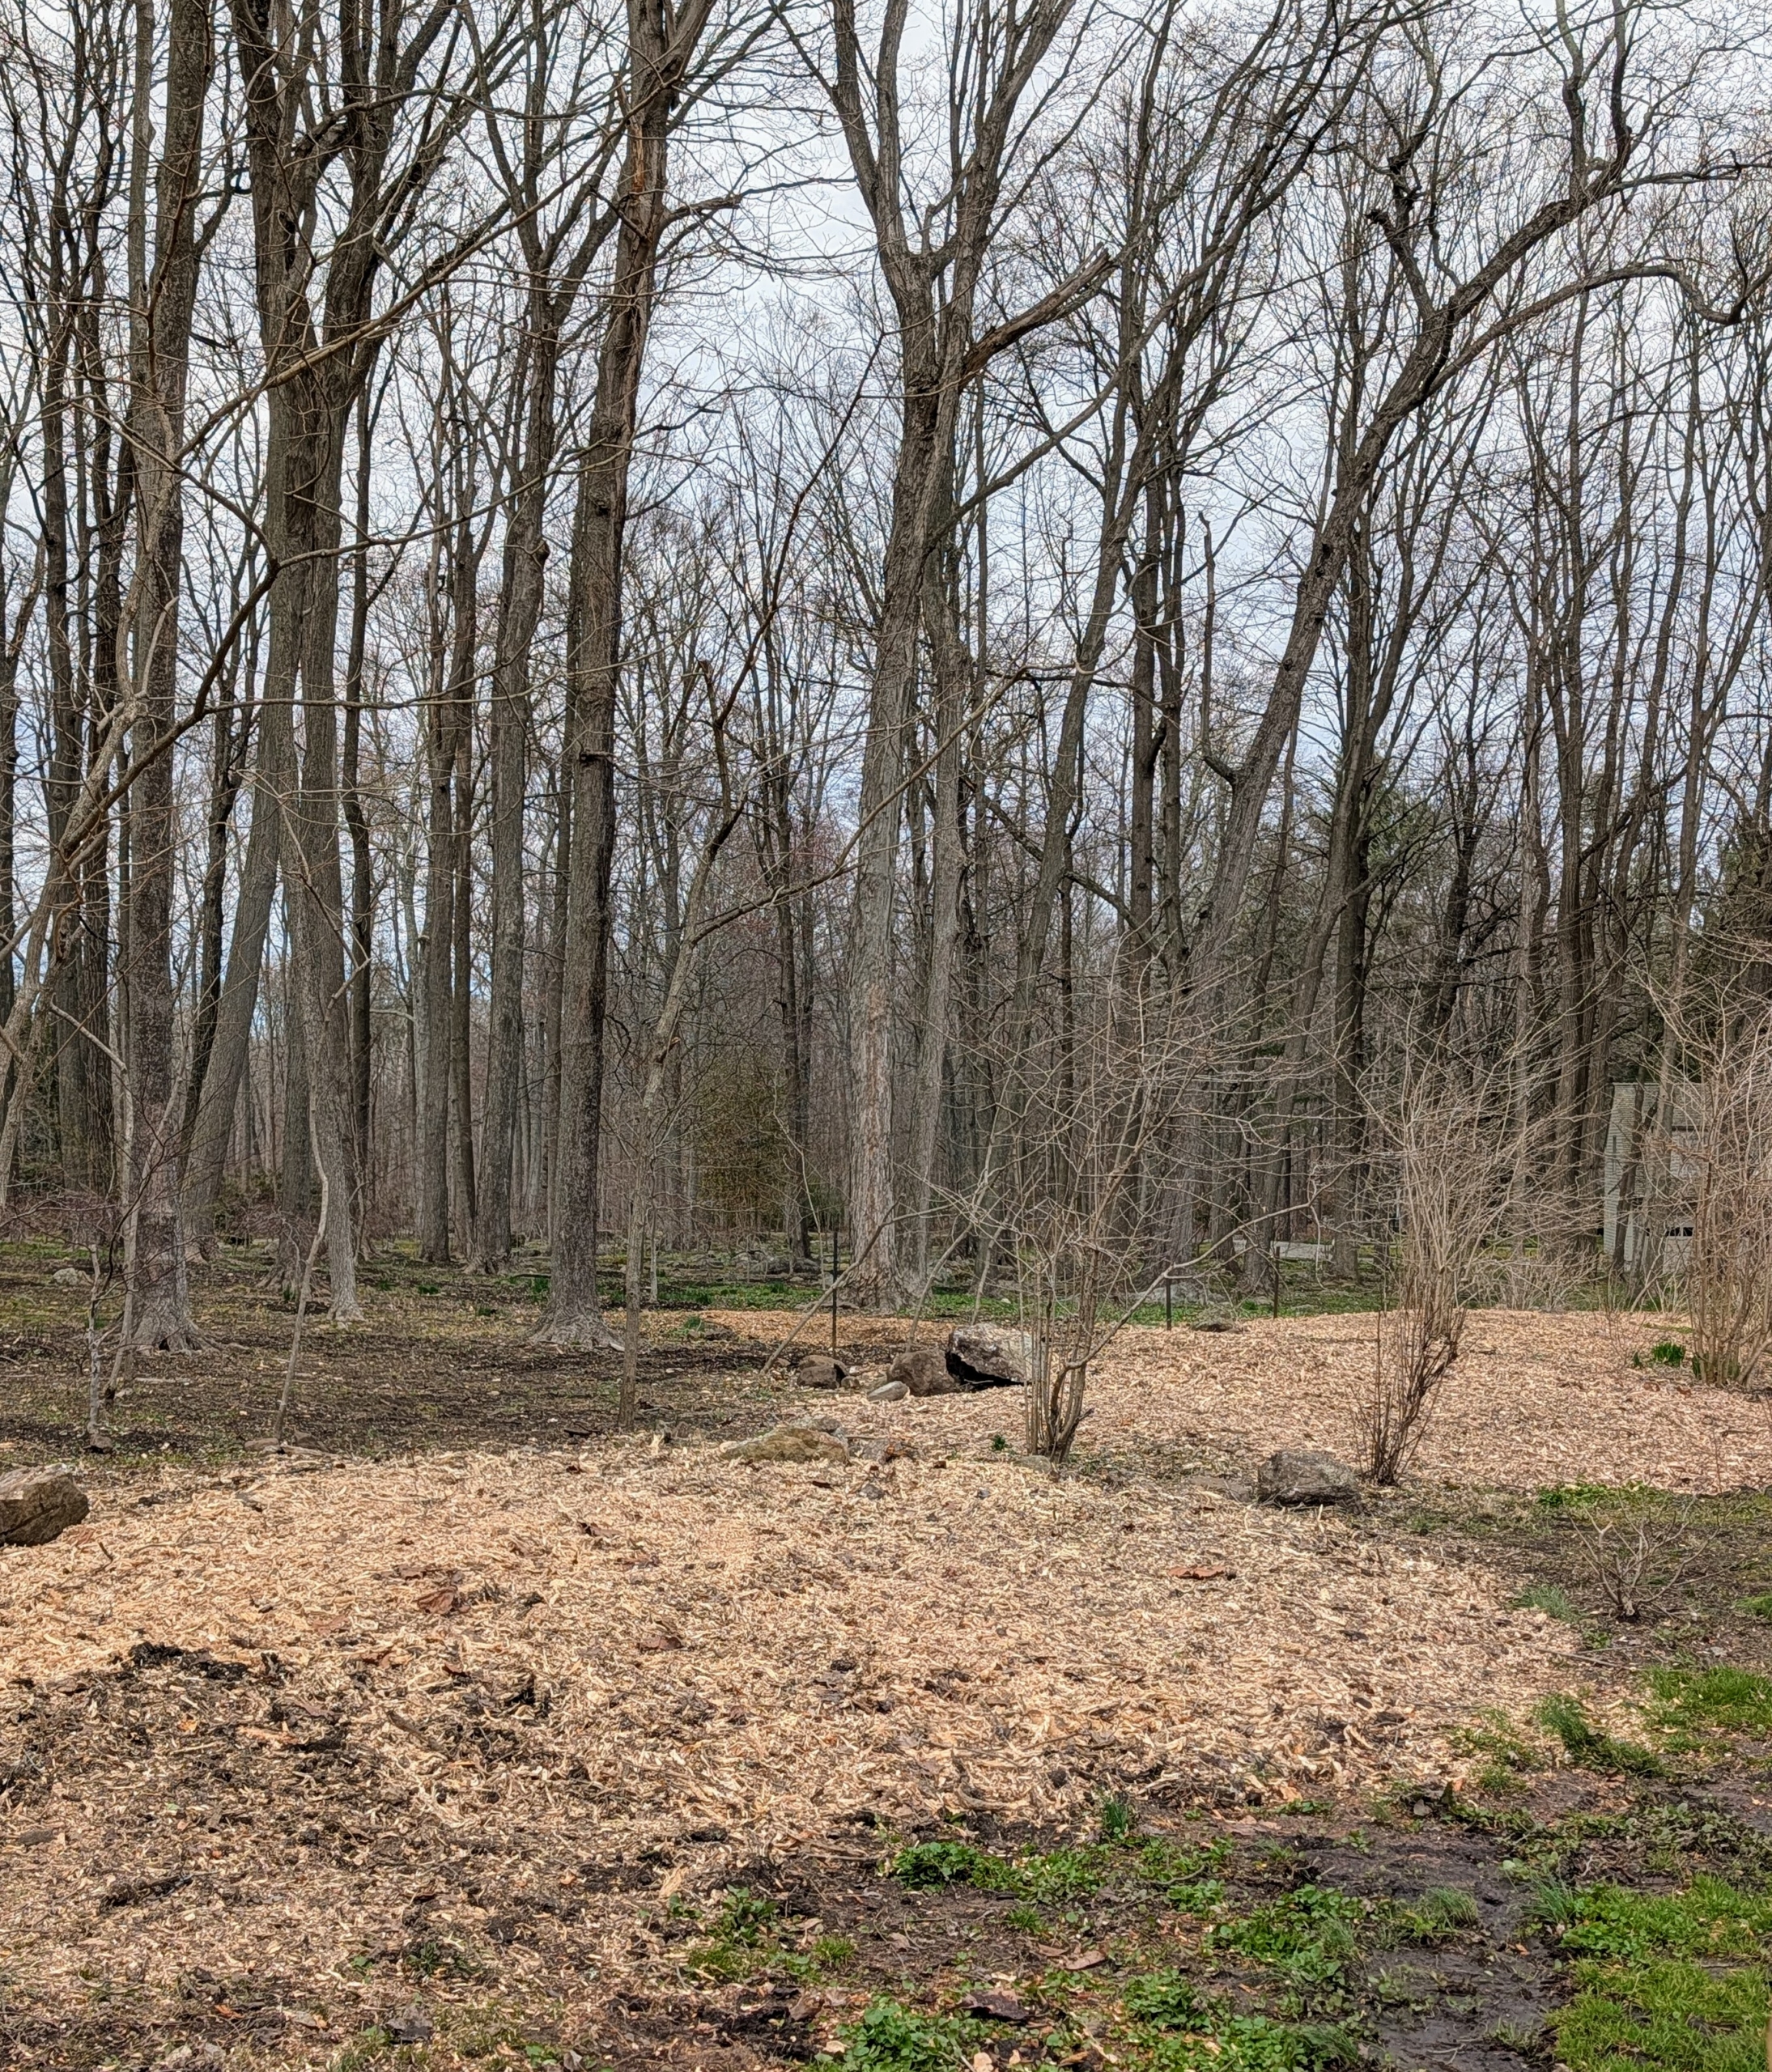
Once trees are taken down in the garden, it's essential to grind the tree stumps left behind.
Grinding the tree stumps prevents pest infestation, clears space for new plants, improves the safety of the area, and maintains a clean and tidy landscape. After several trees were taken down from an area near my hoop houses, the team from Bizee Bee Tree Service returned the following day with the stump grinder to finish the job.
Here are some photos, enjoy.
I hate removing any tree, but those trees that are dead, diseased, or growing improperly can fall and cause injury and damage, so they must always be removed. Eight trees were taken down in an area near my hoop houses. Now it’s time to grind the stumps.
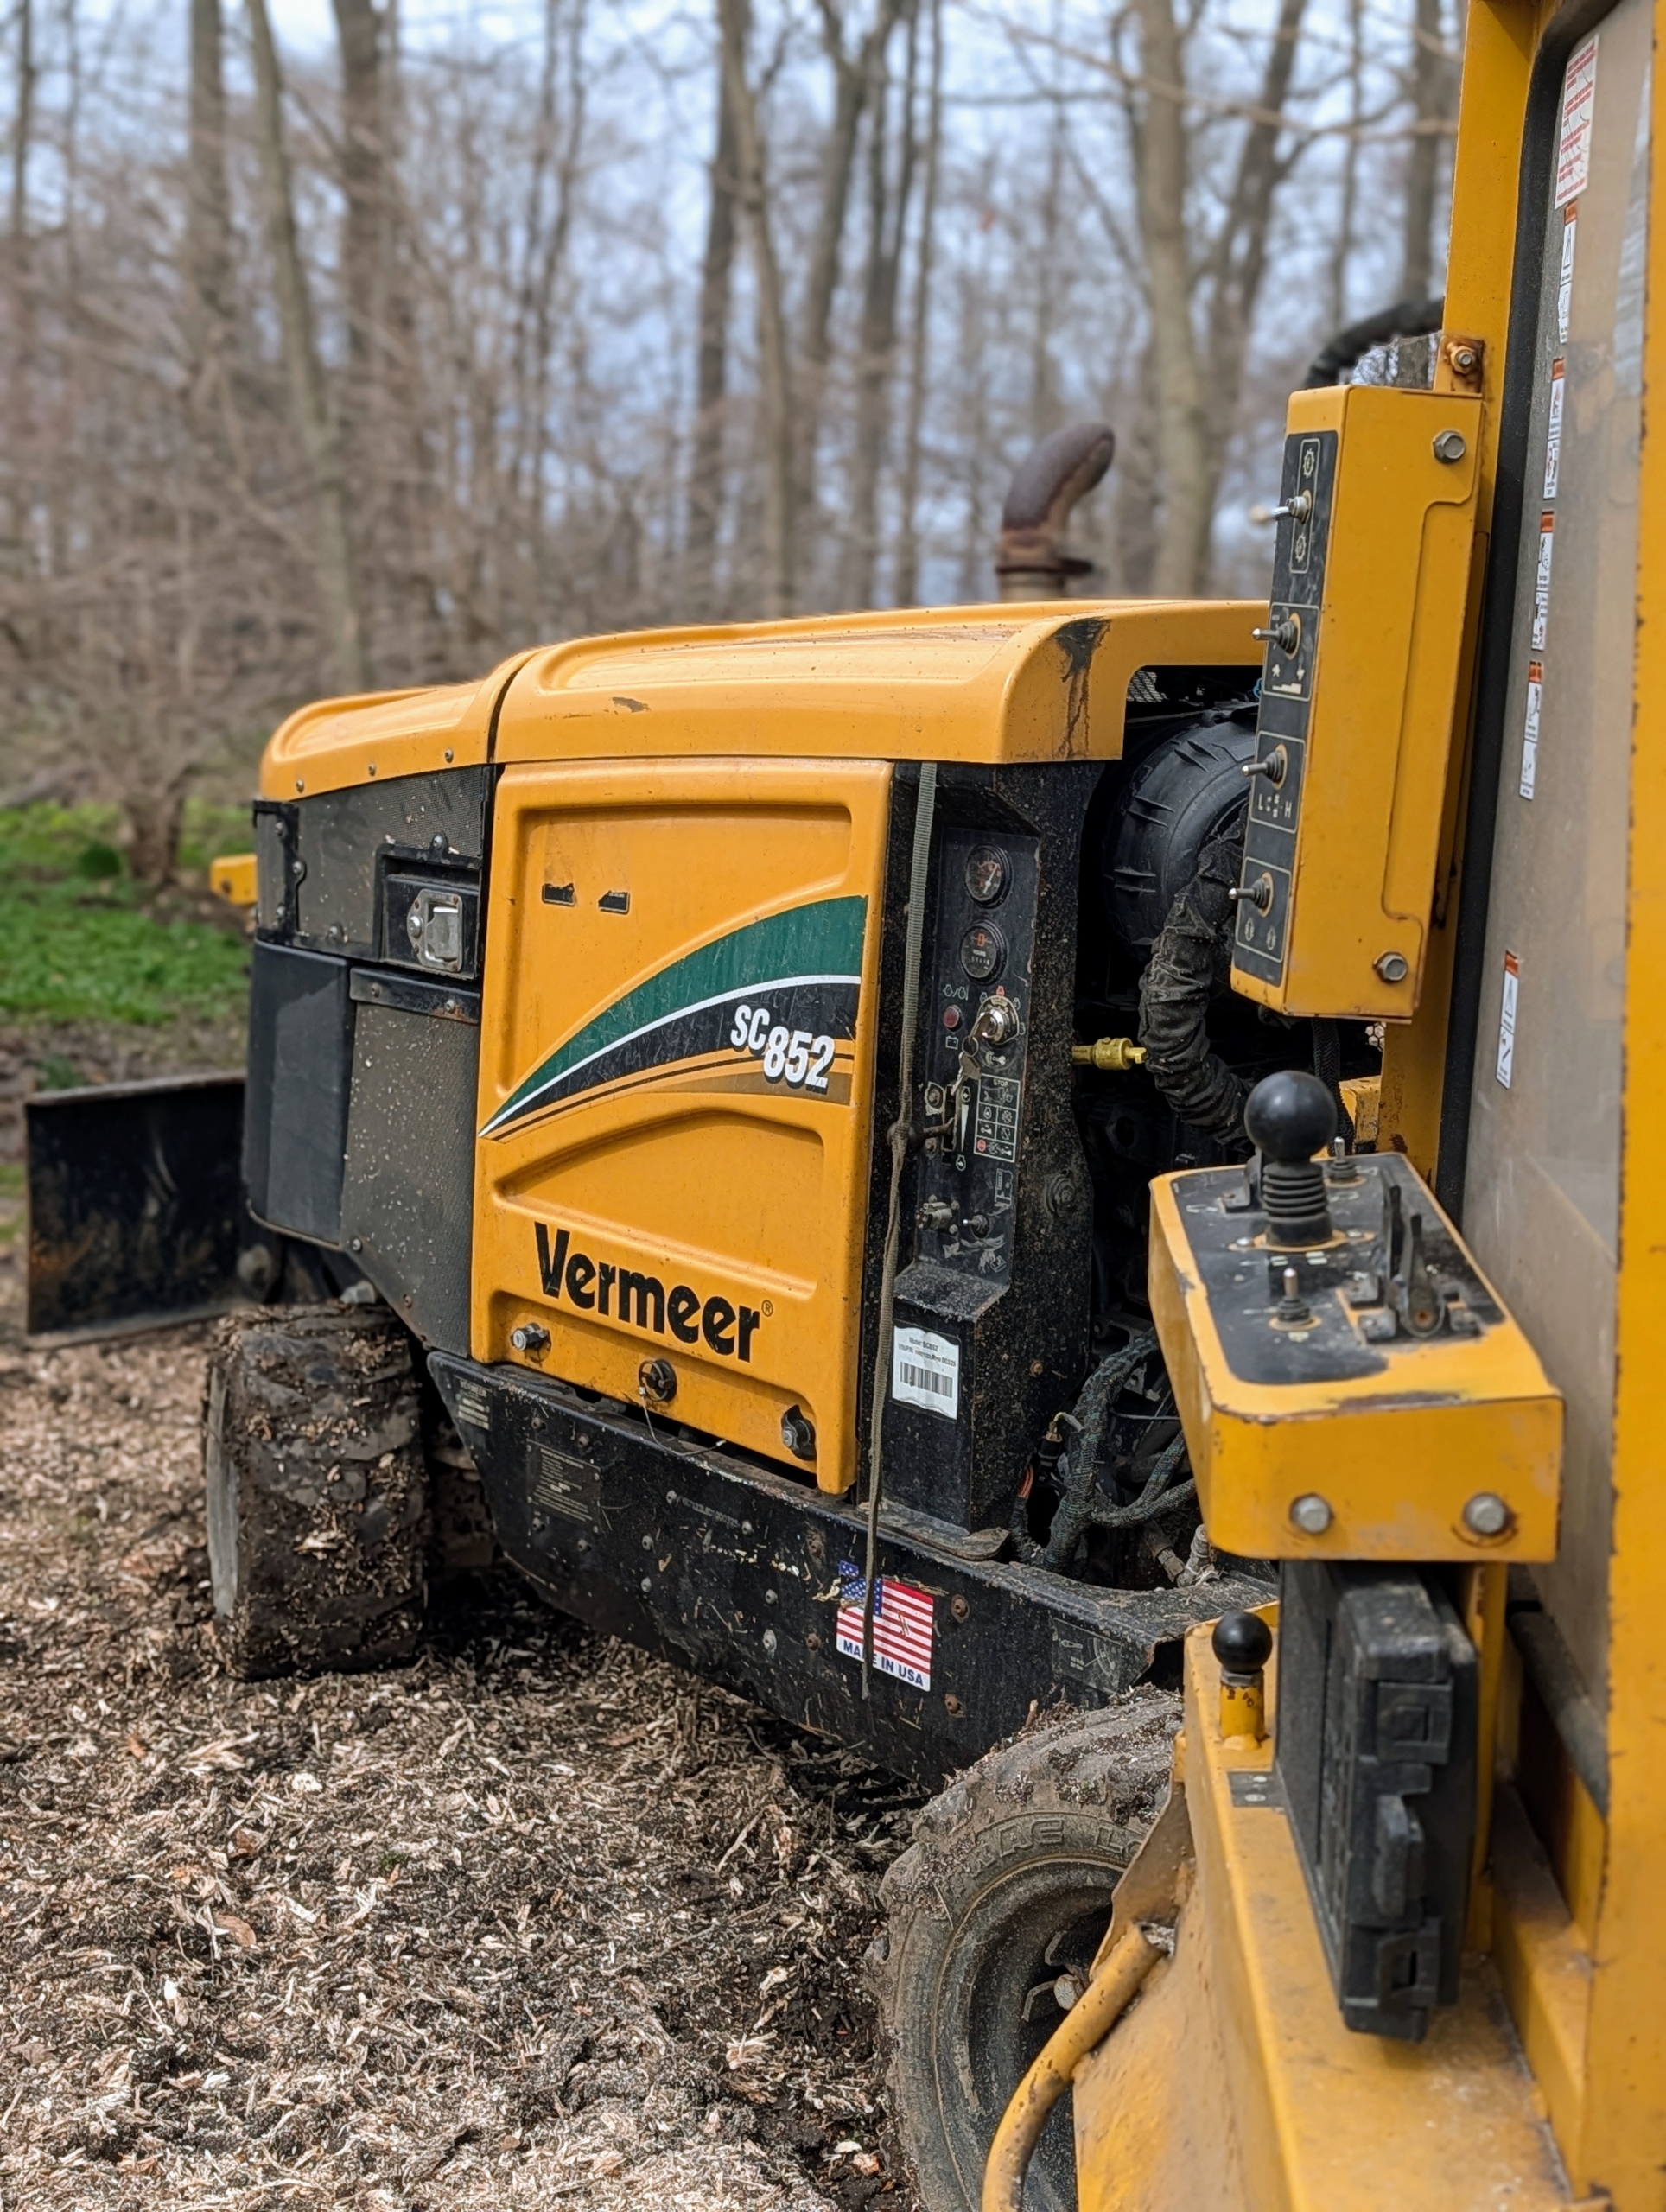
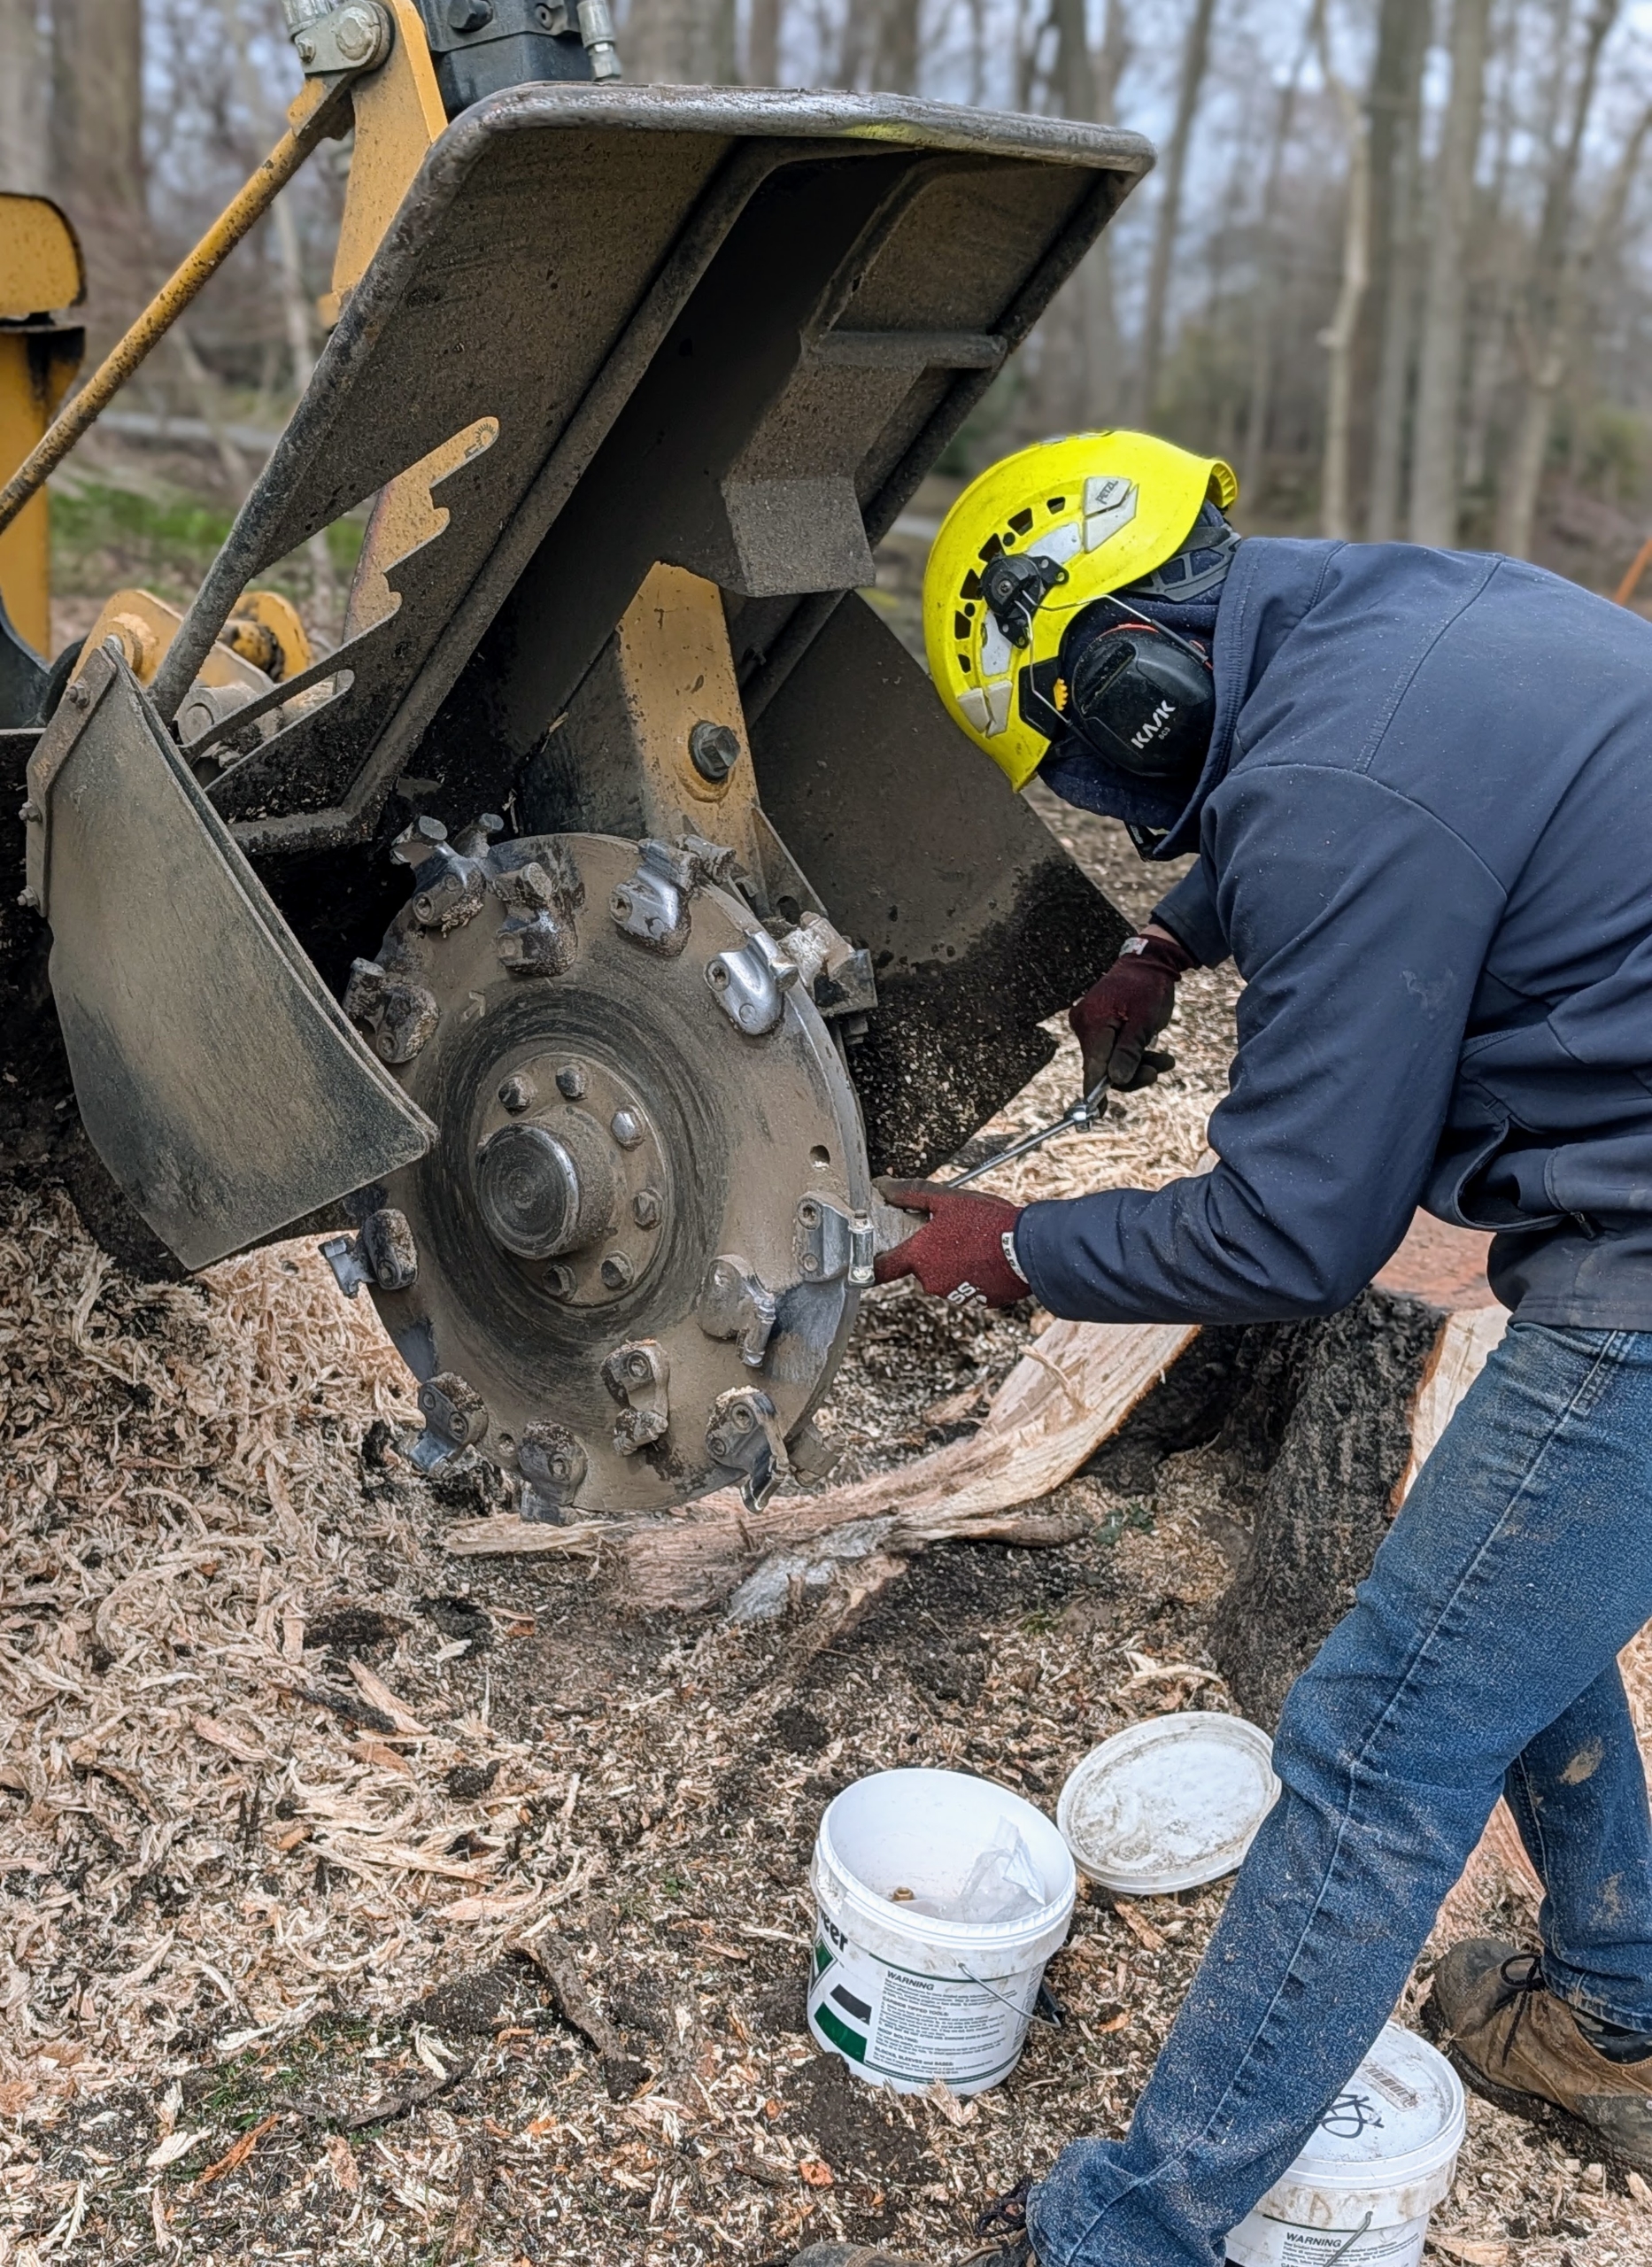
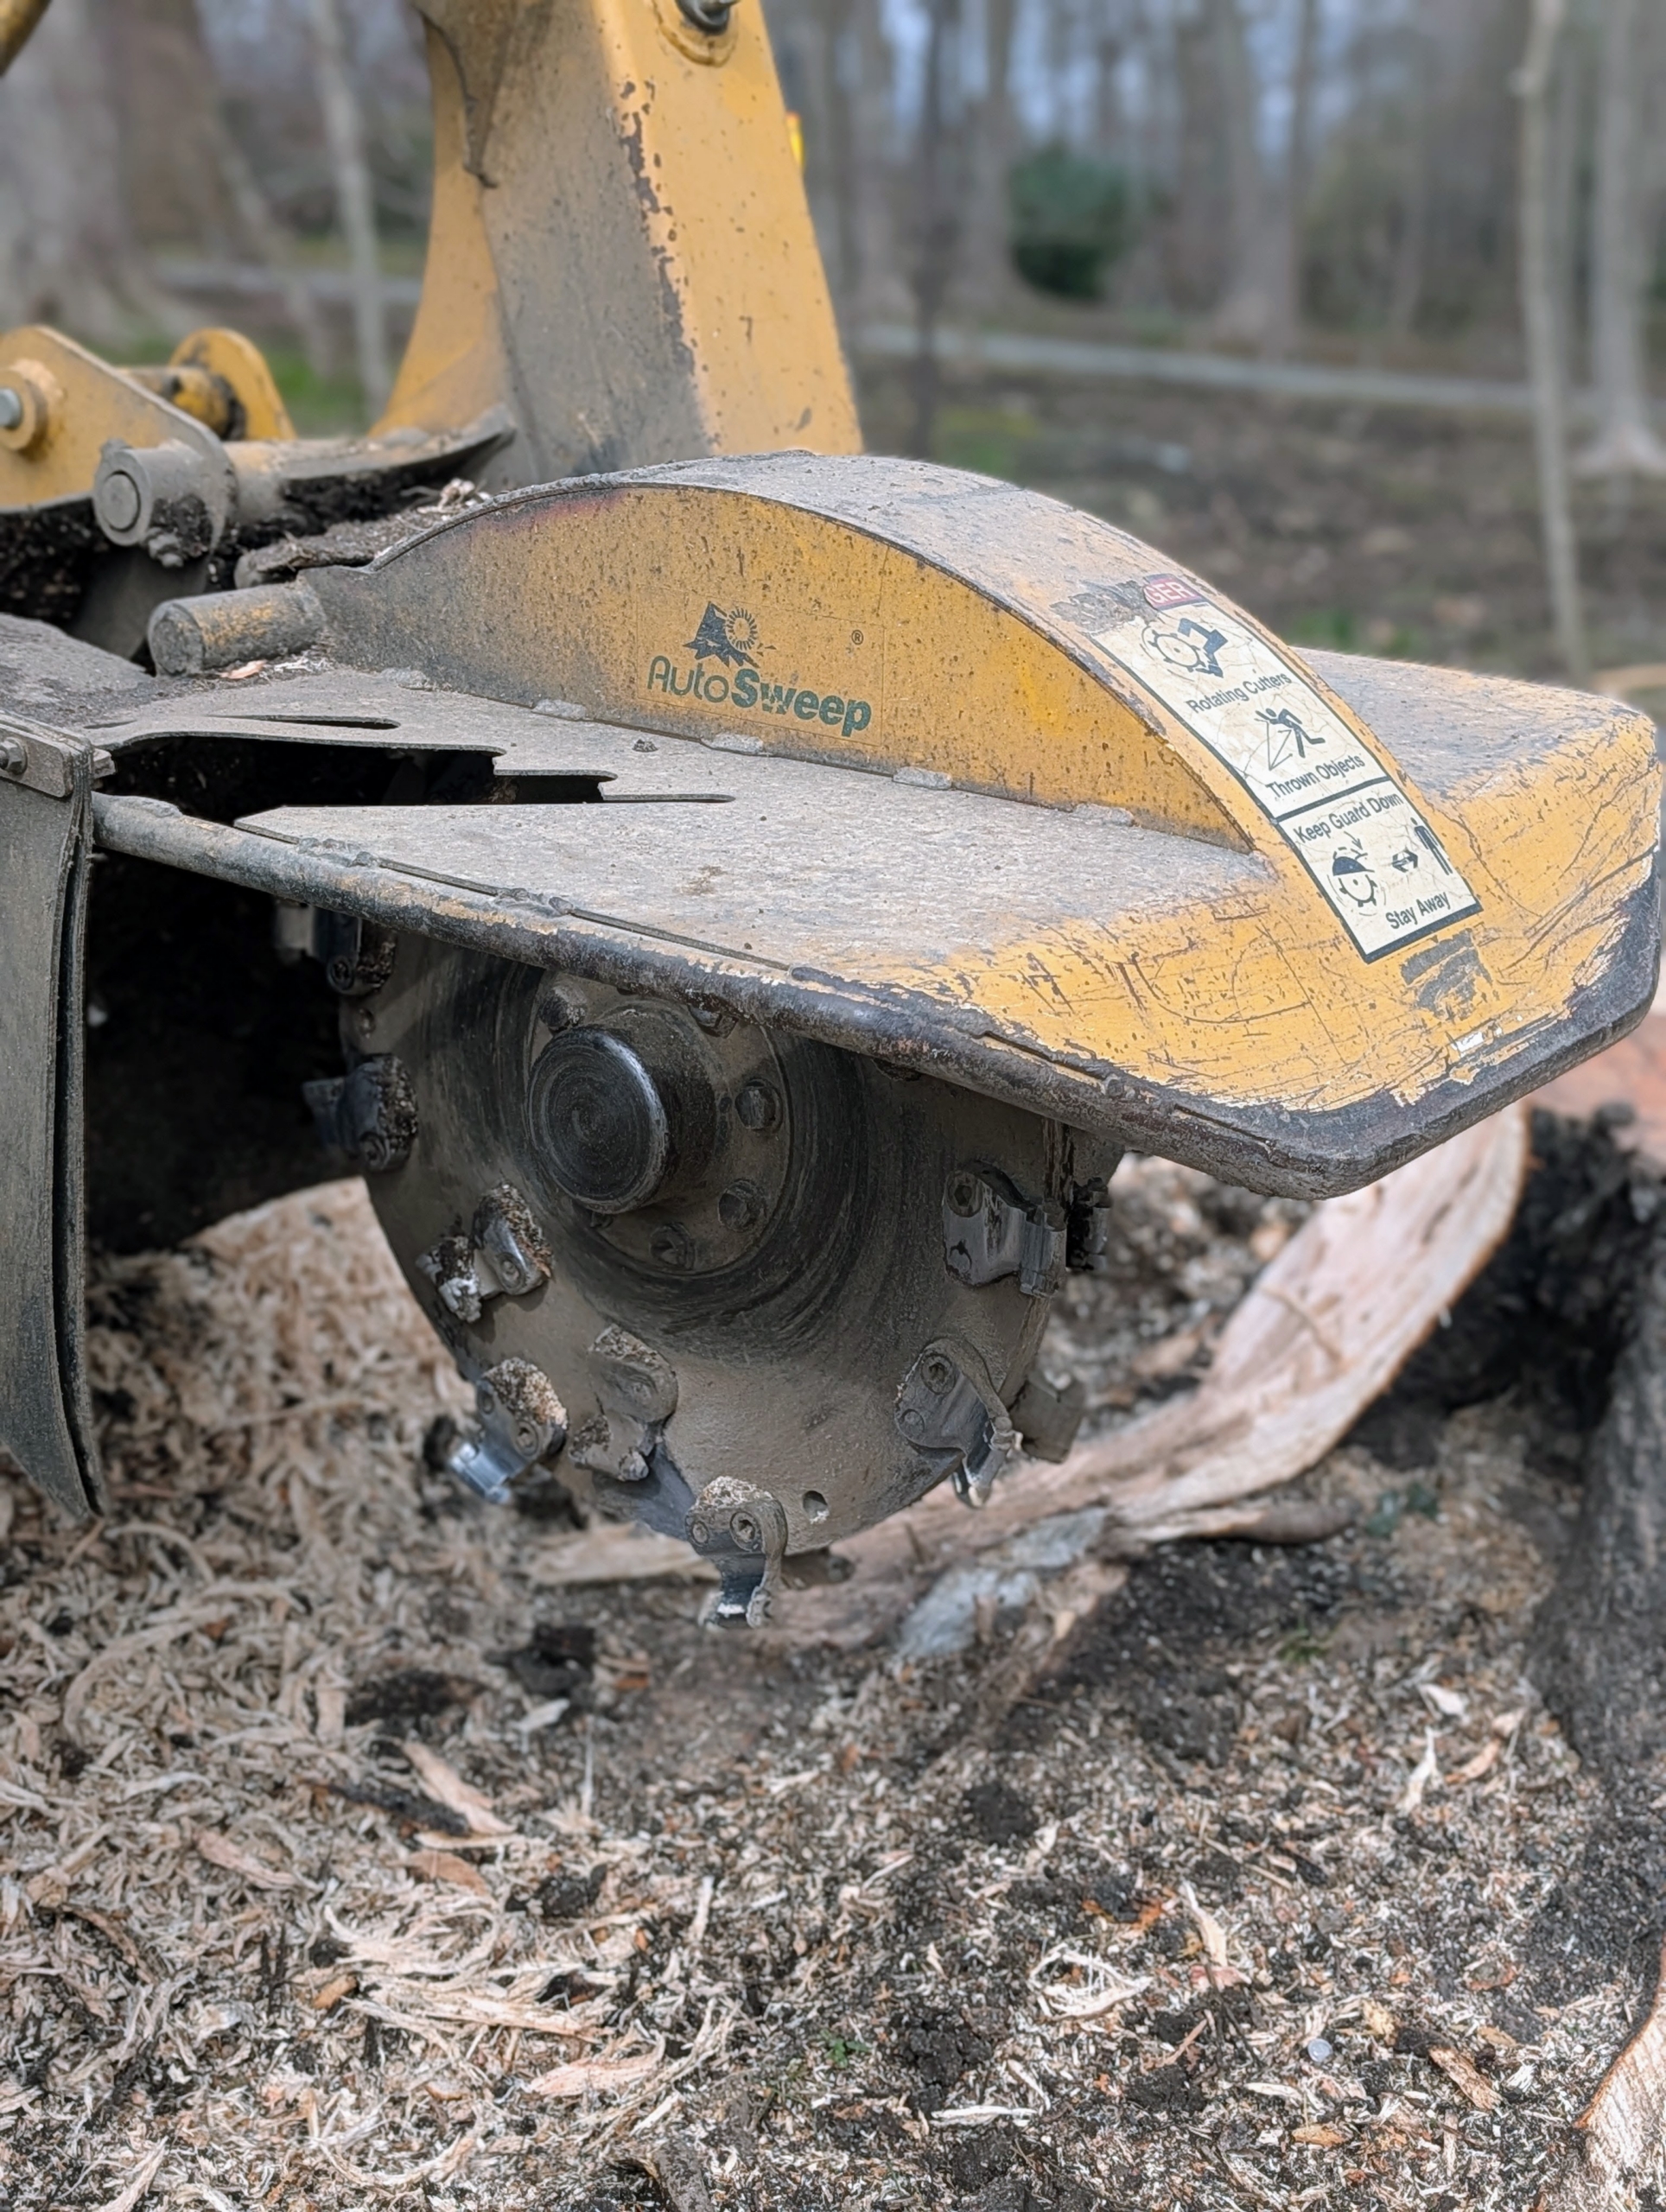
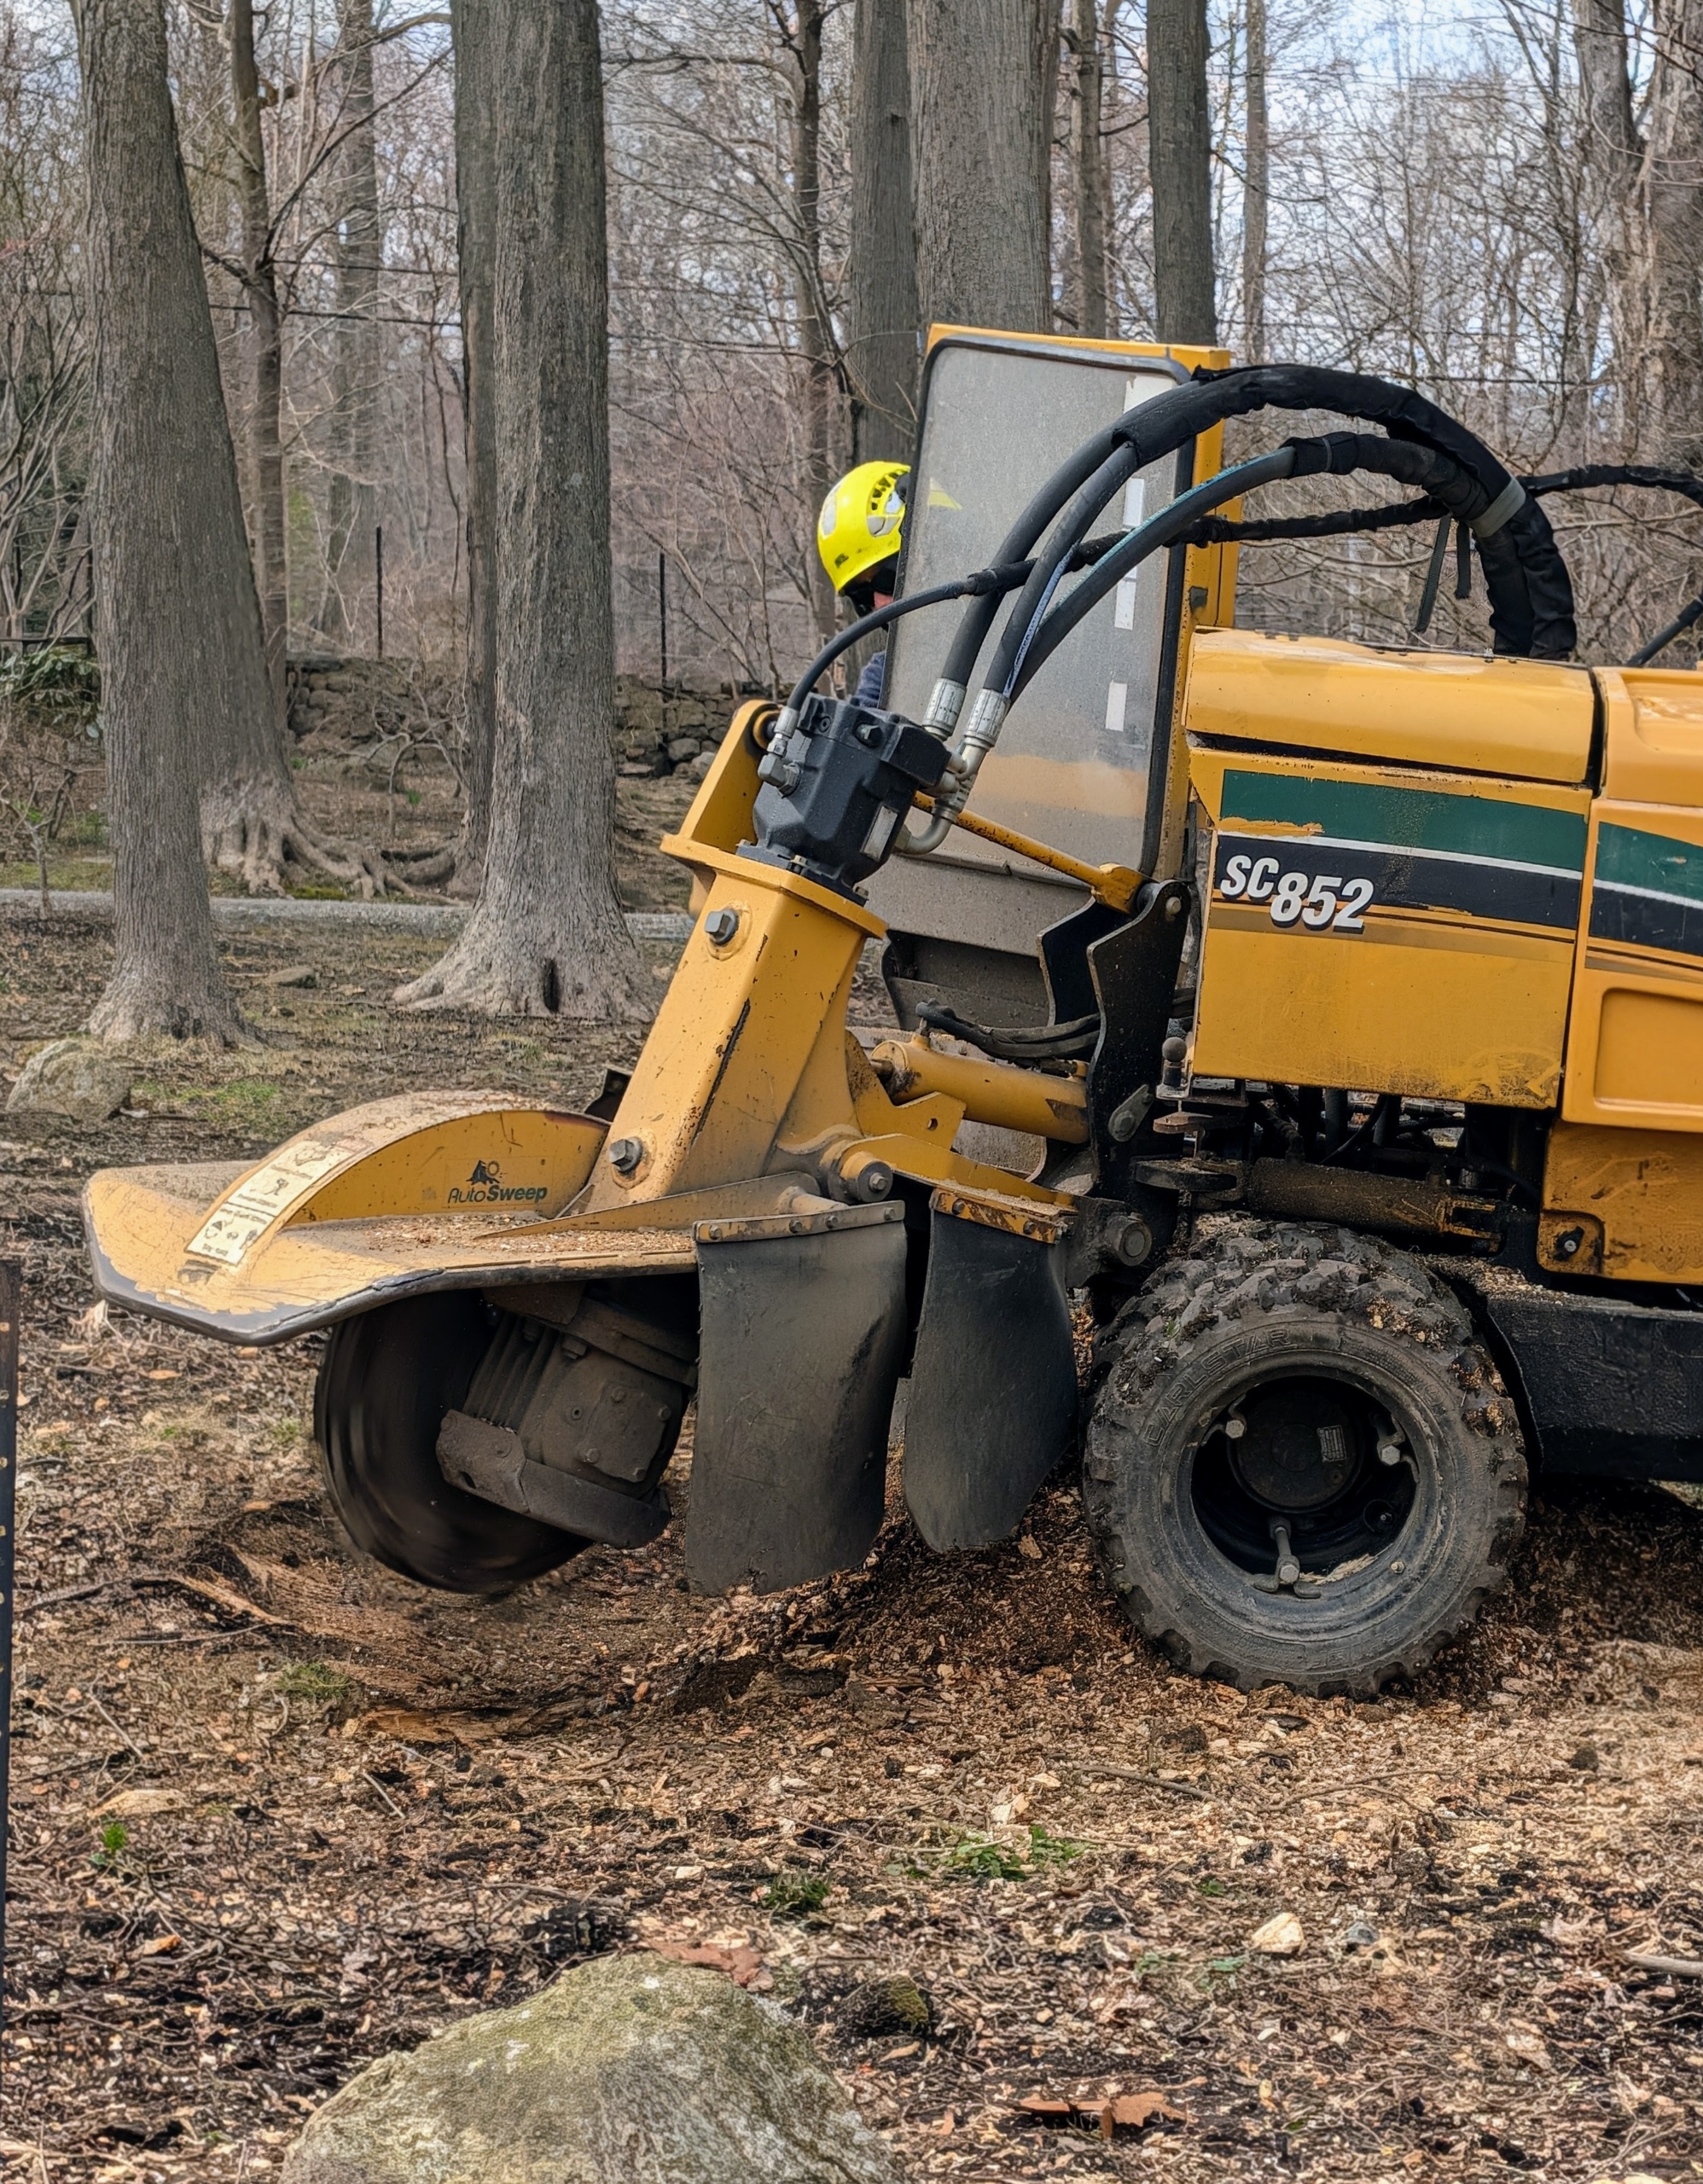
A stump grinder is a powerful machine designed to eliminate the remaining part of a tree stump by grinding it into small wood chips.
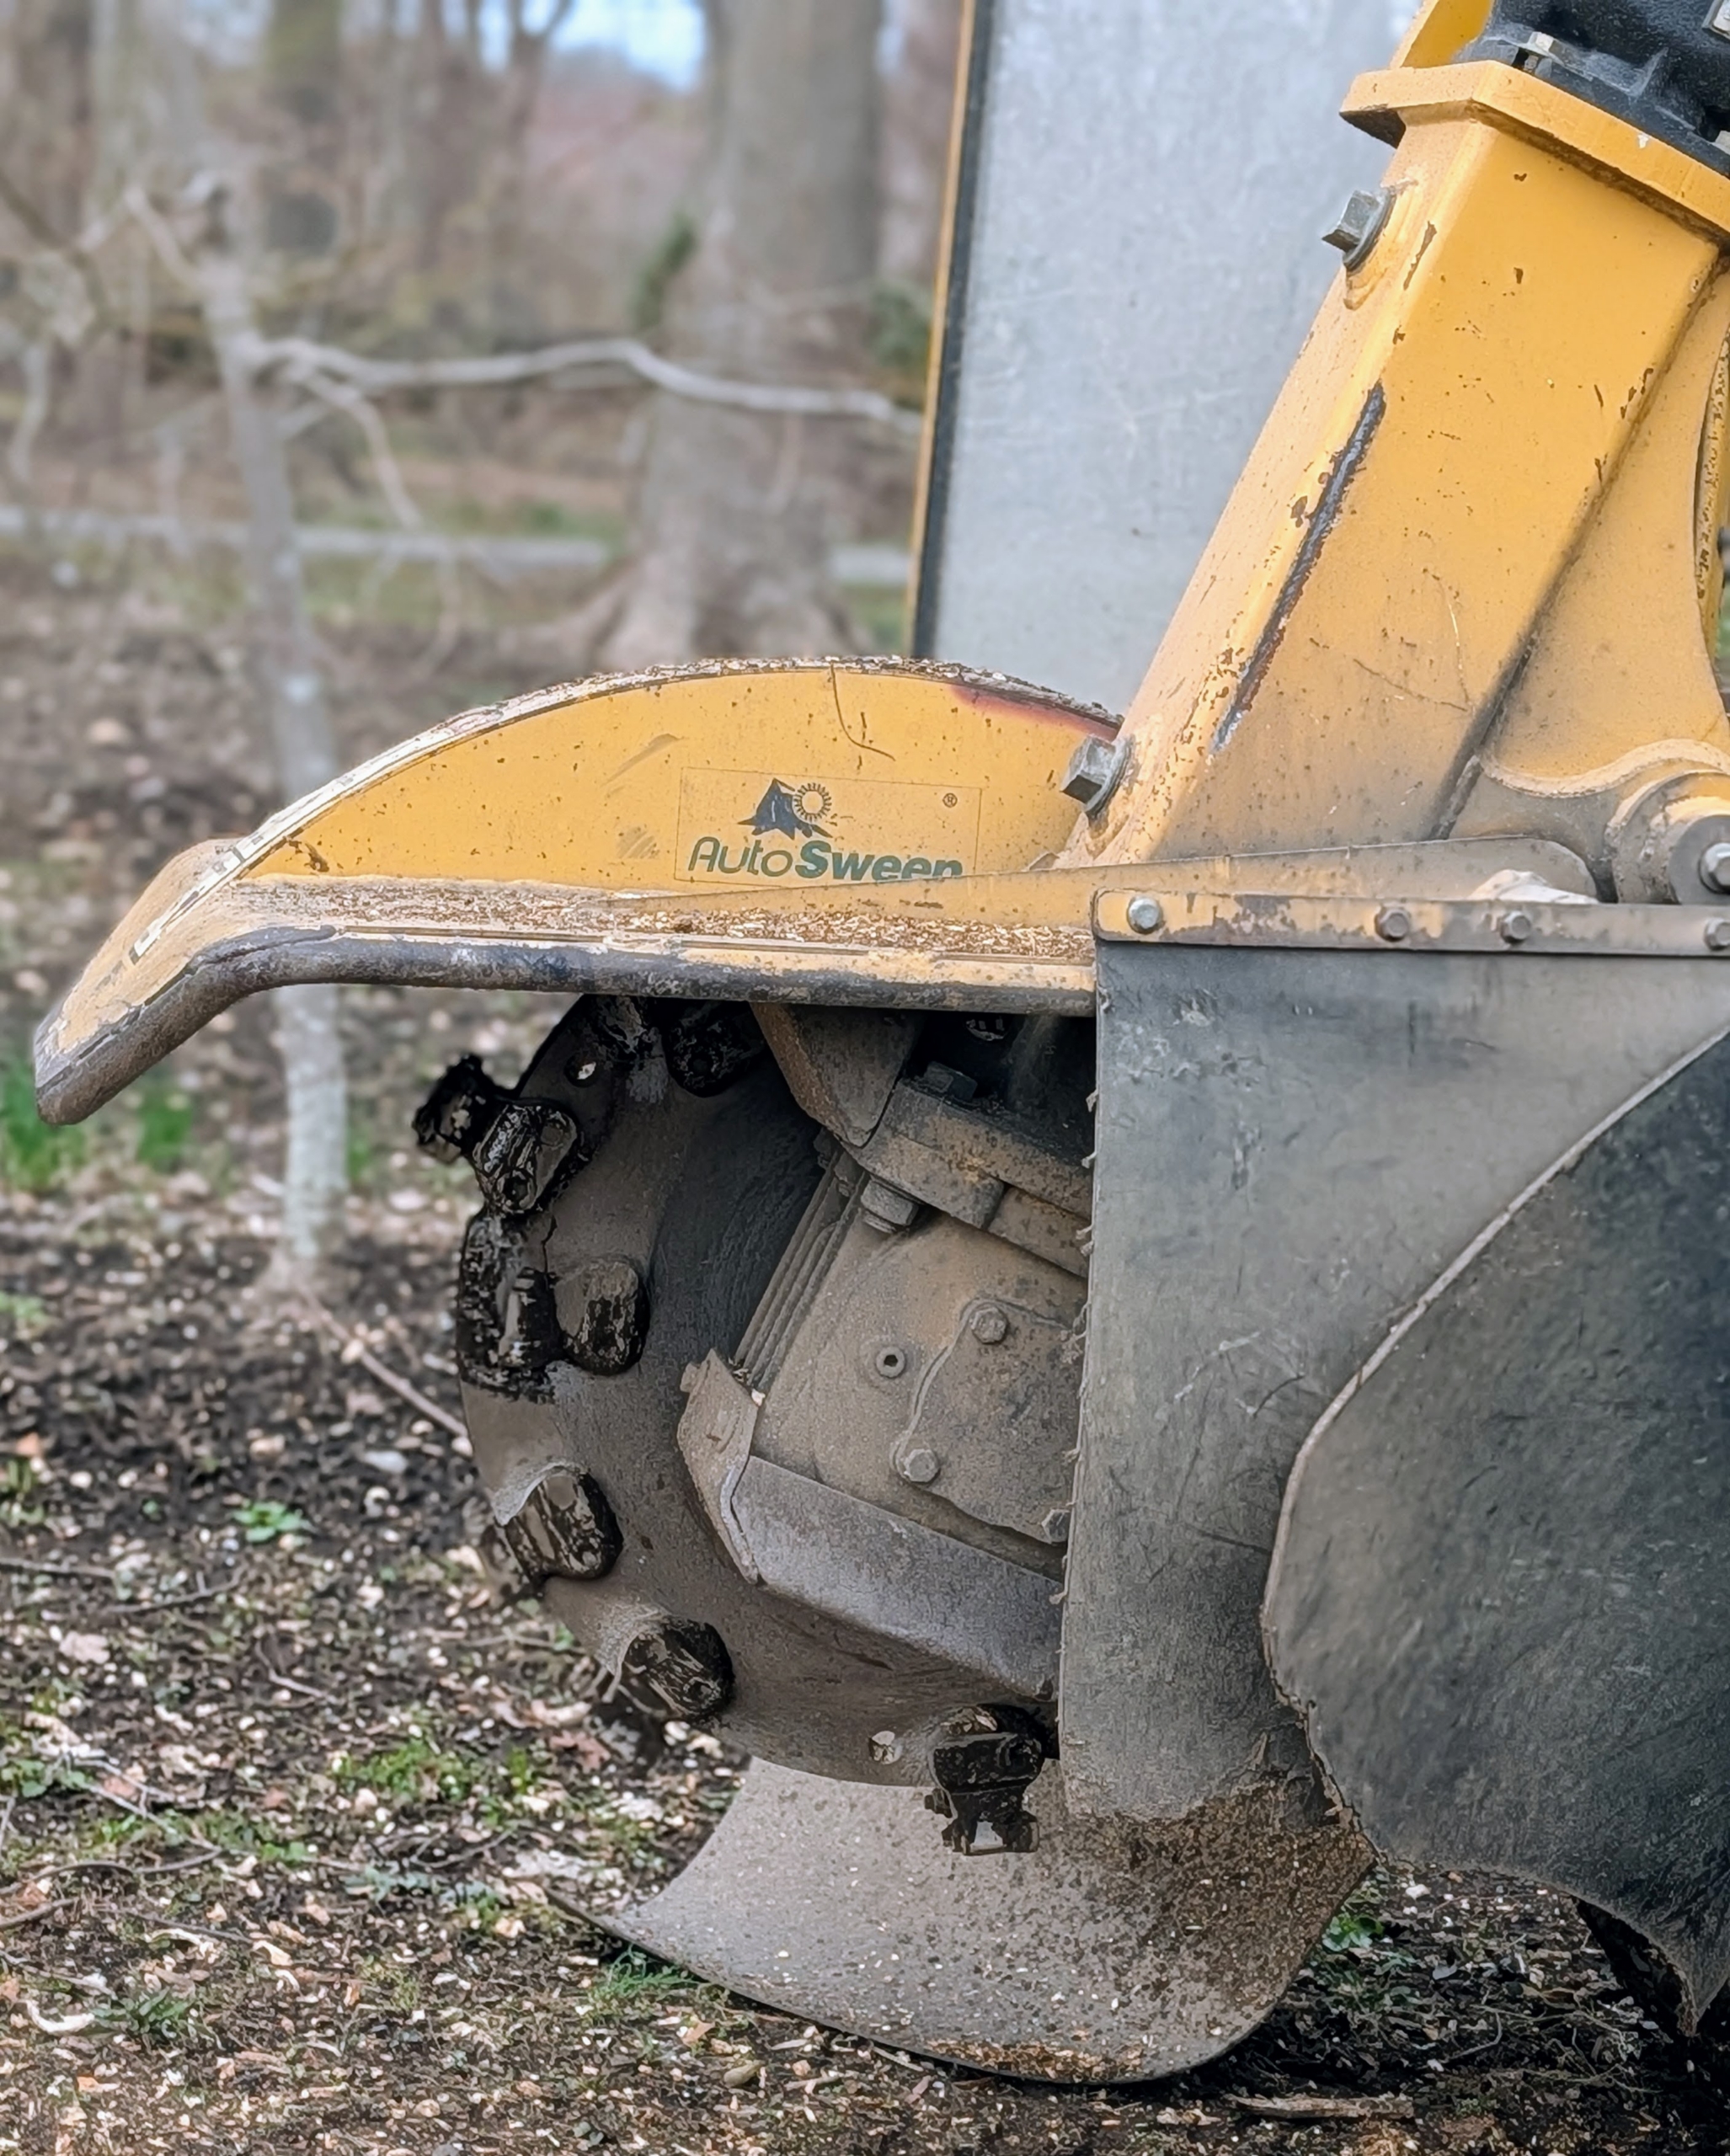
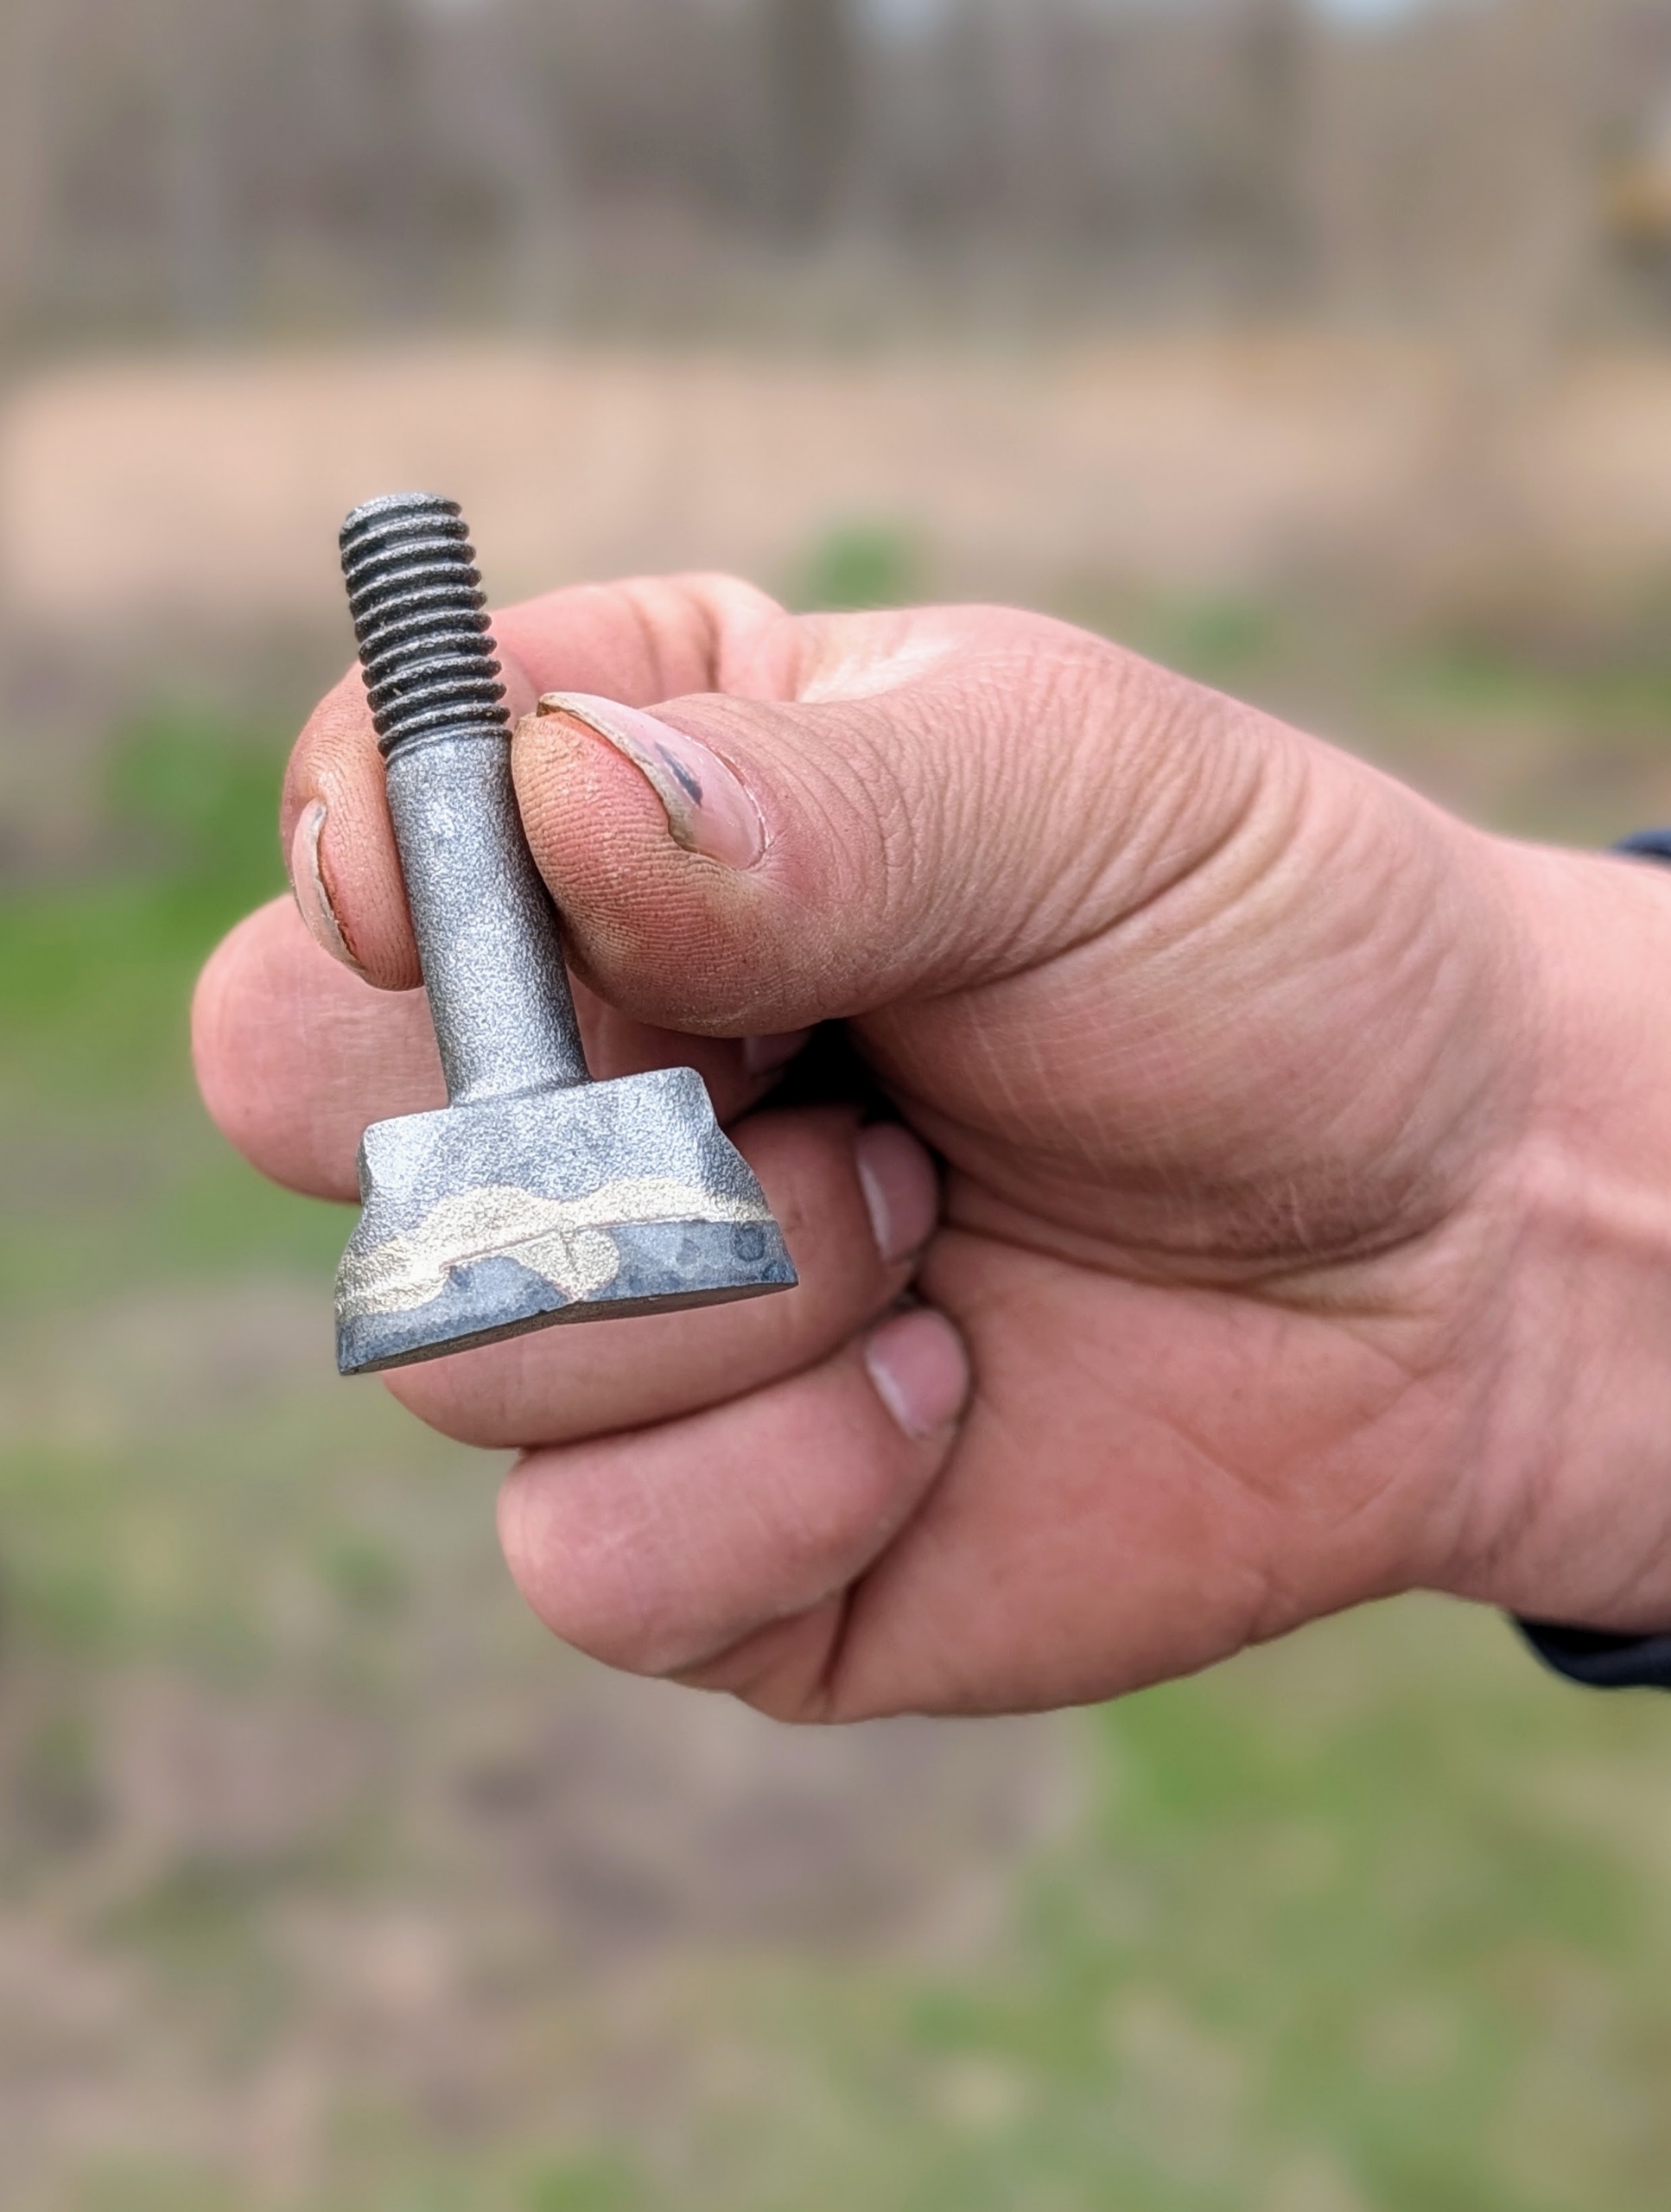
The main component of the stump grinder is the cutting wheel. It is equipped with carbide teeth that grind the wood.
Here, the teeth are inspected to make sure all are in good working condition.
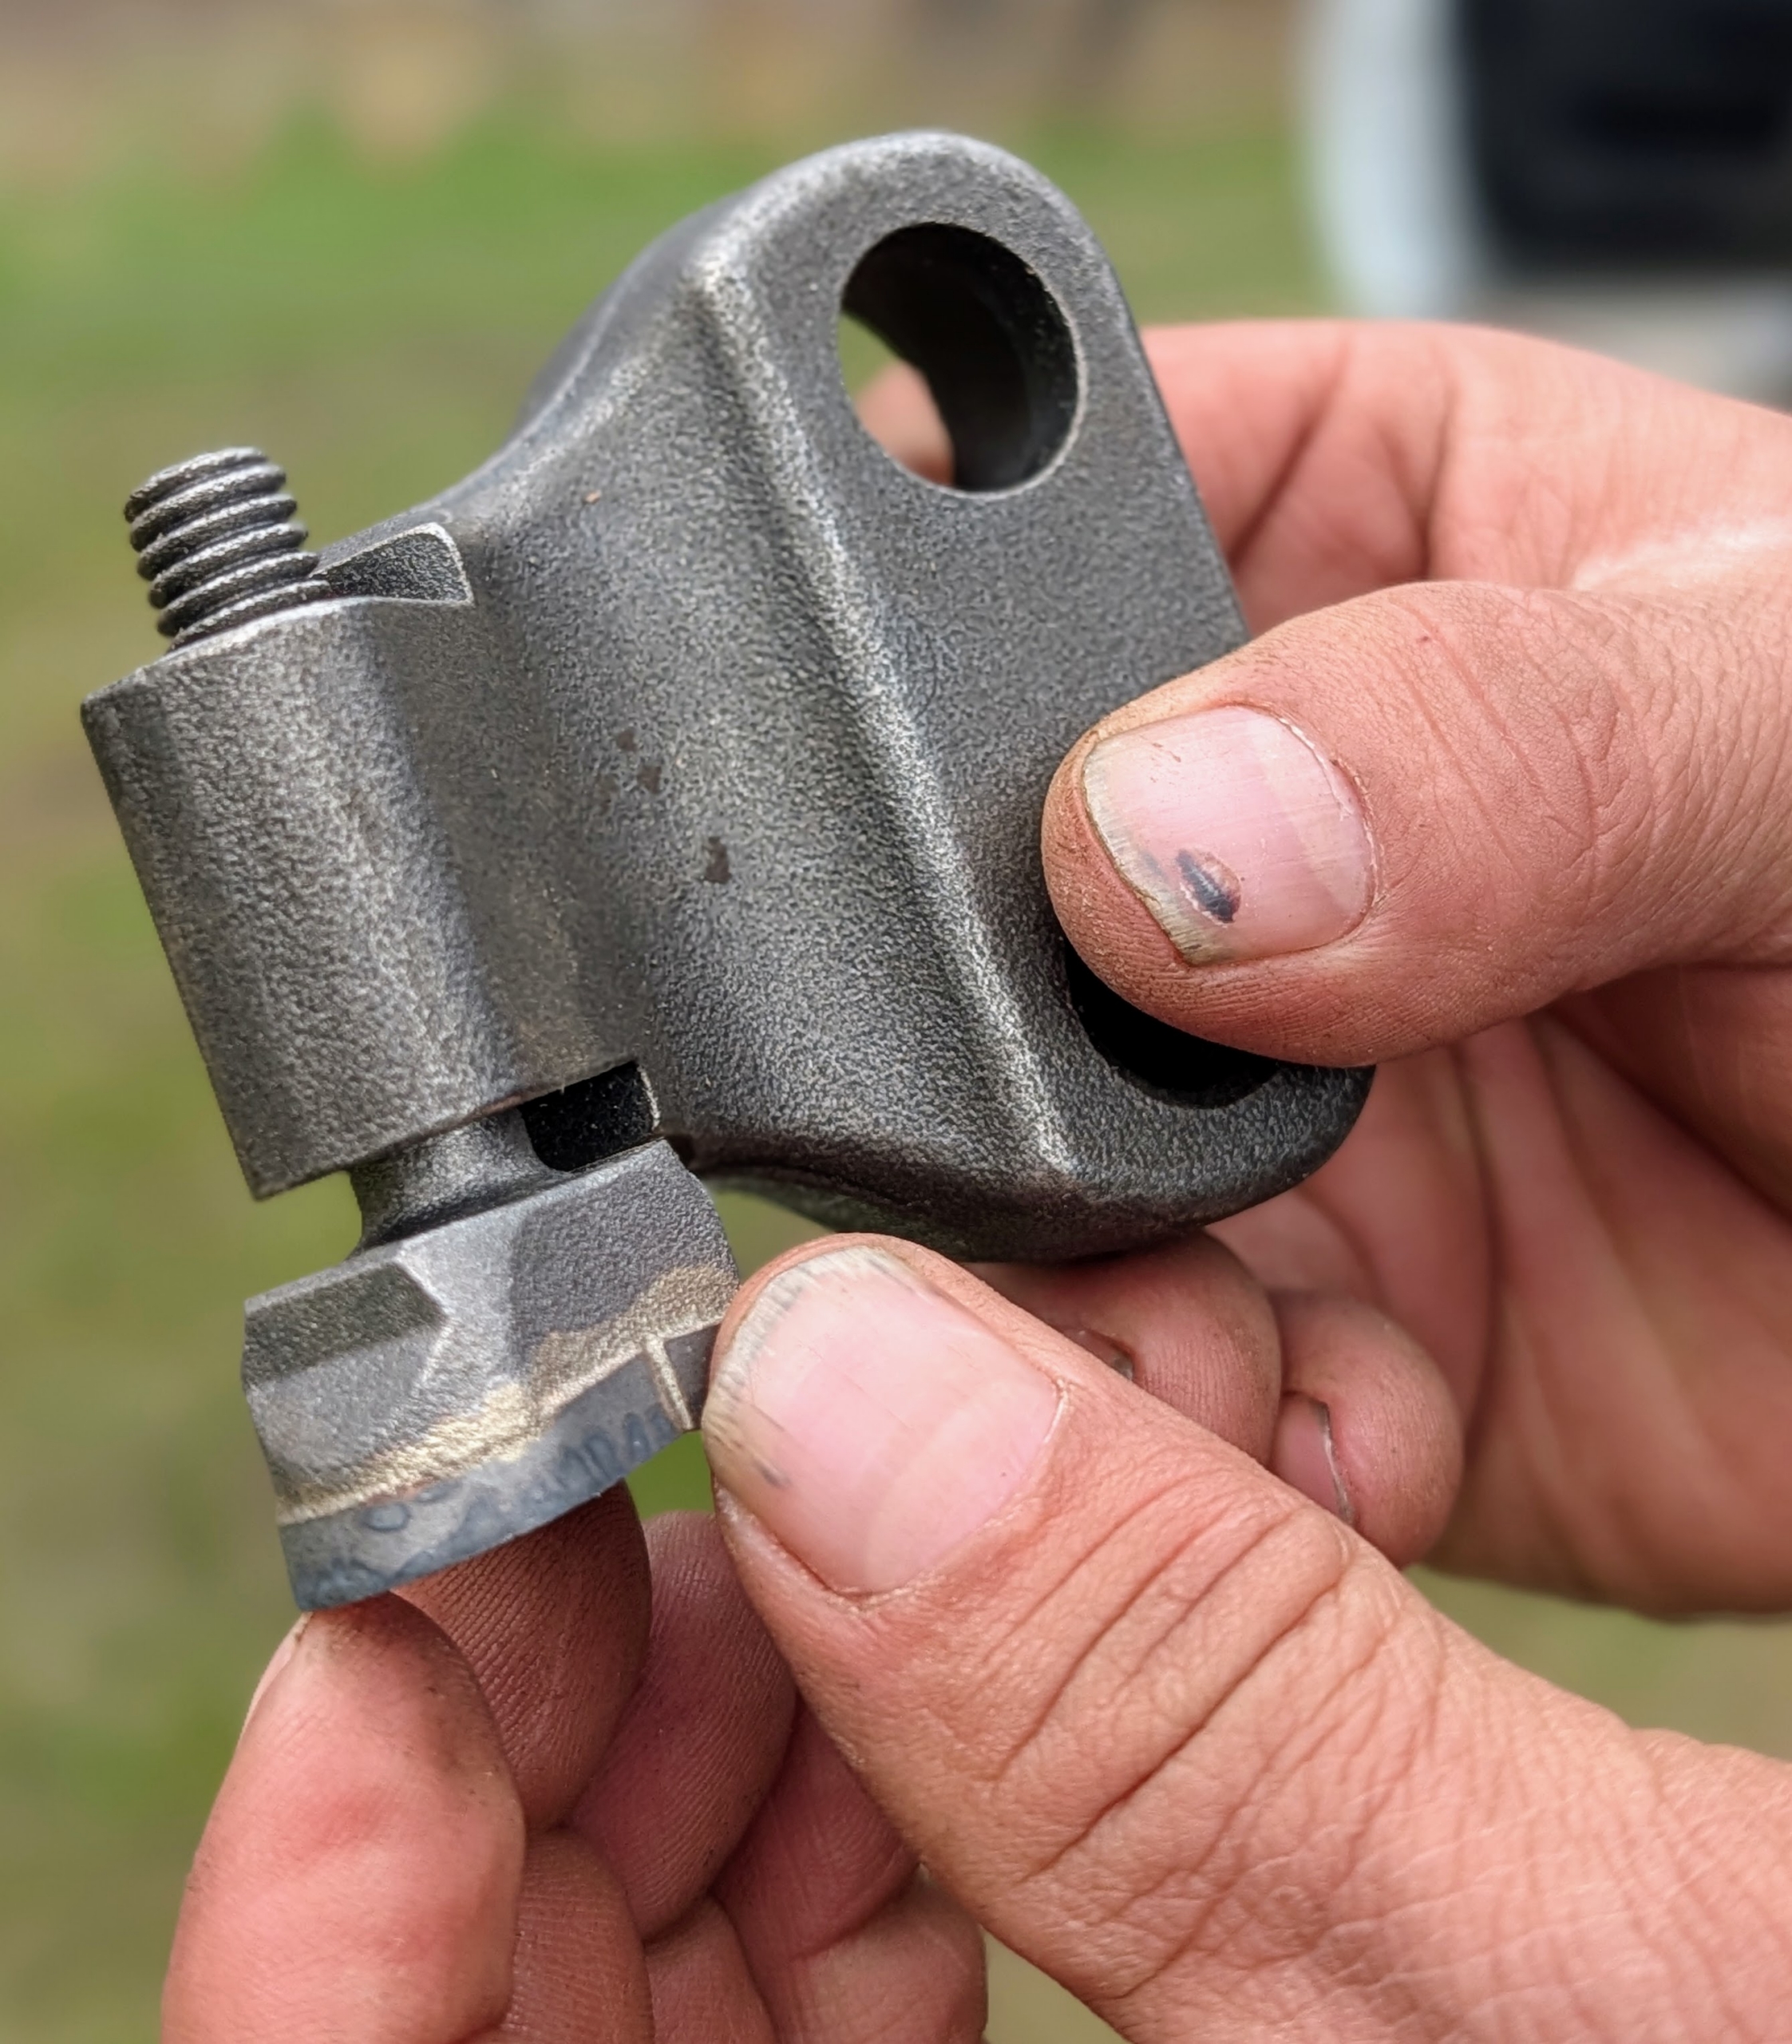
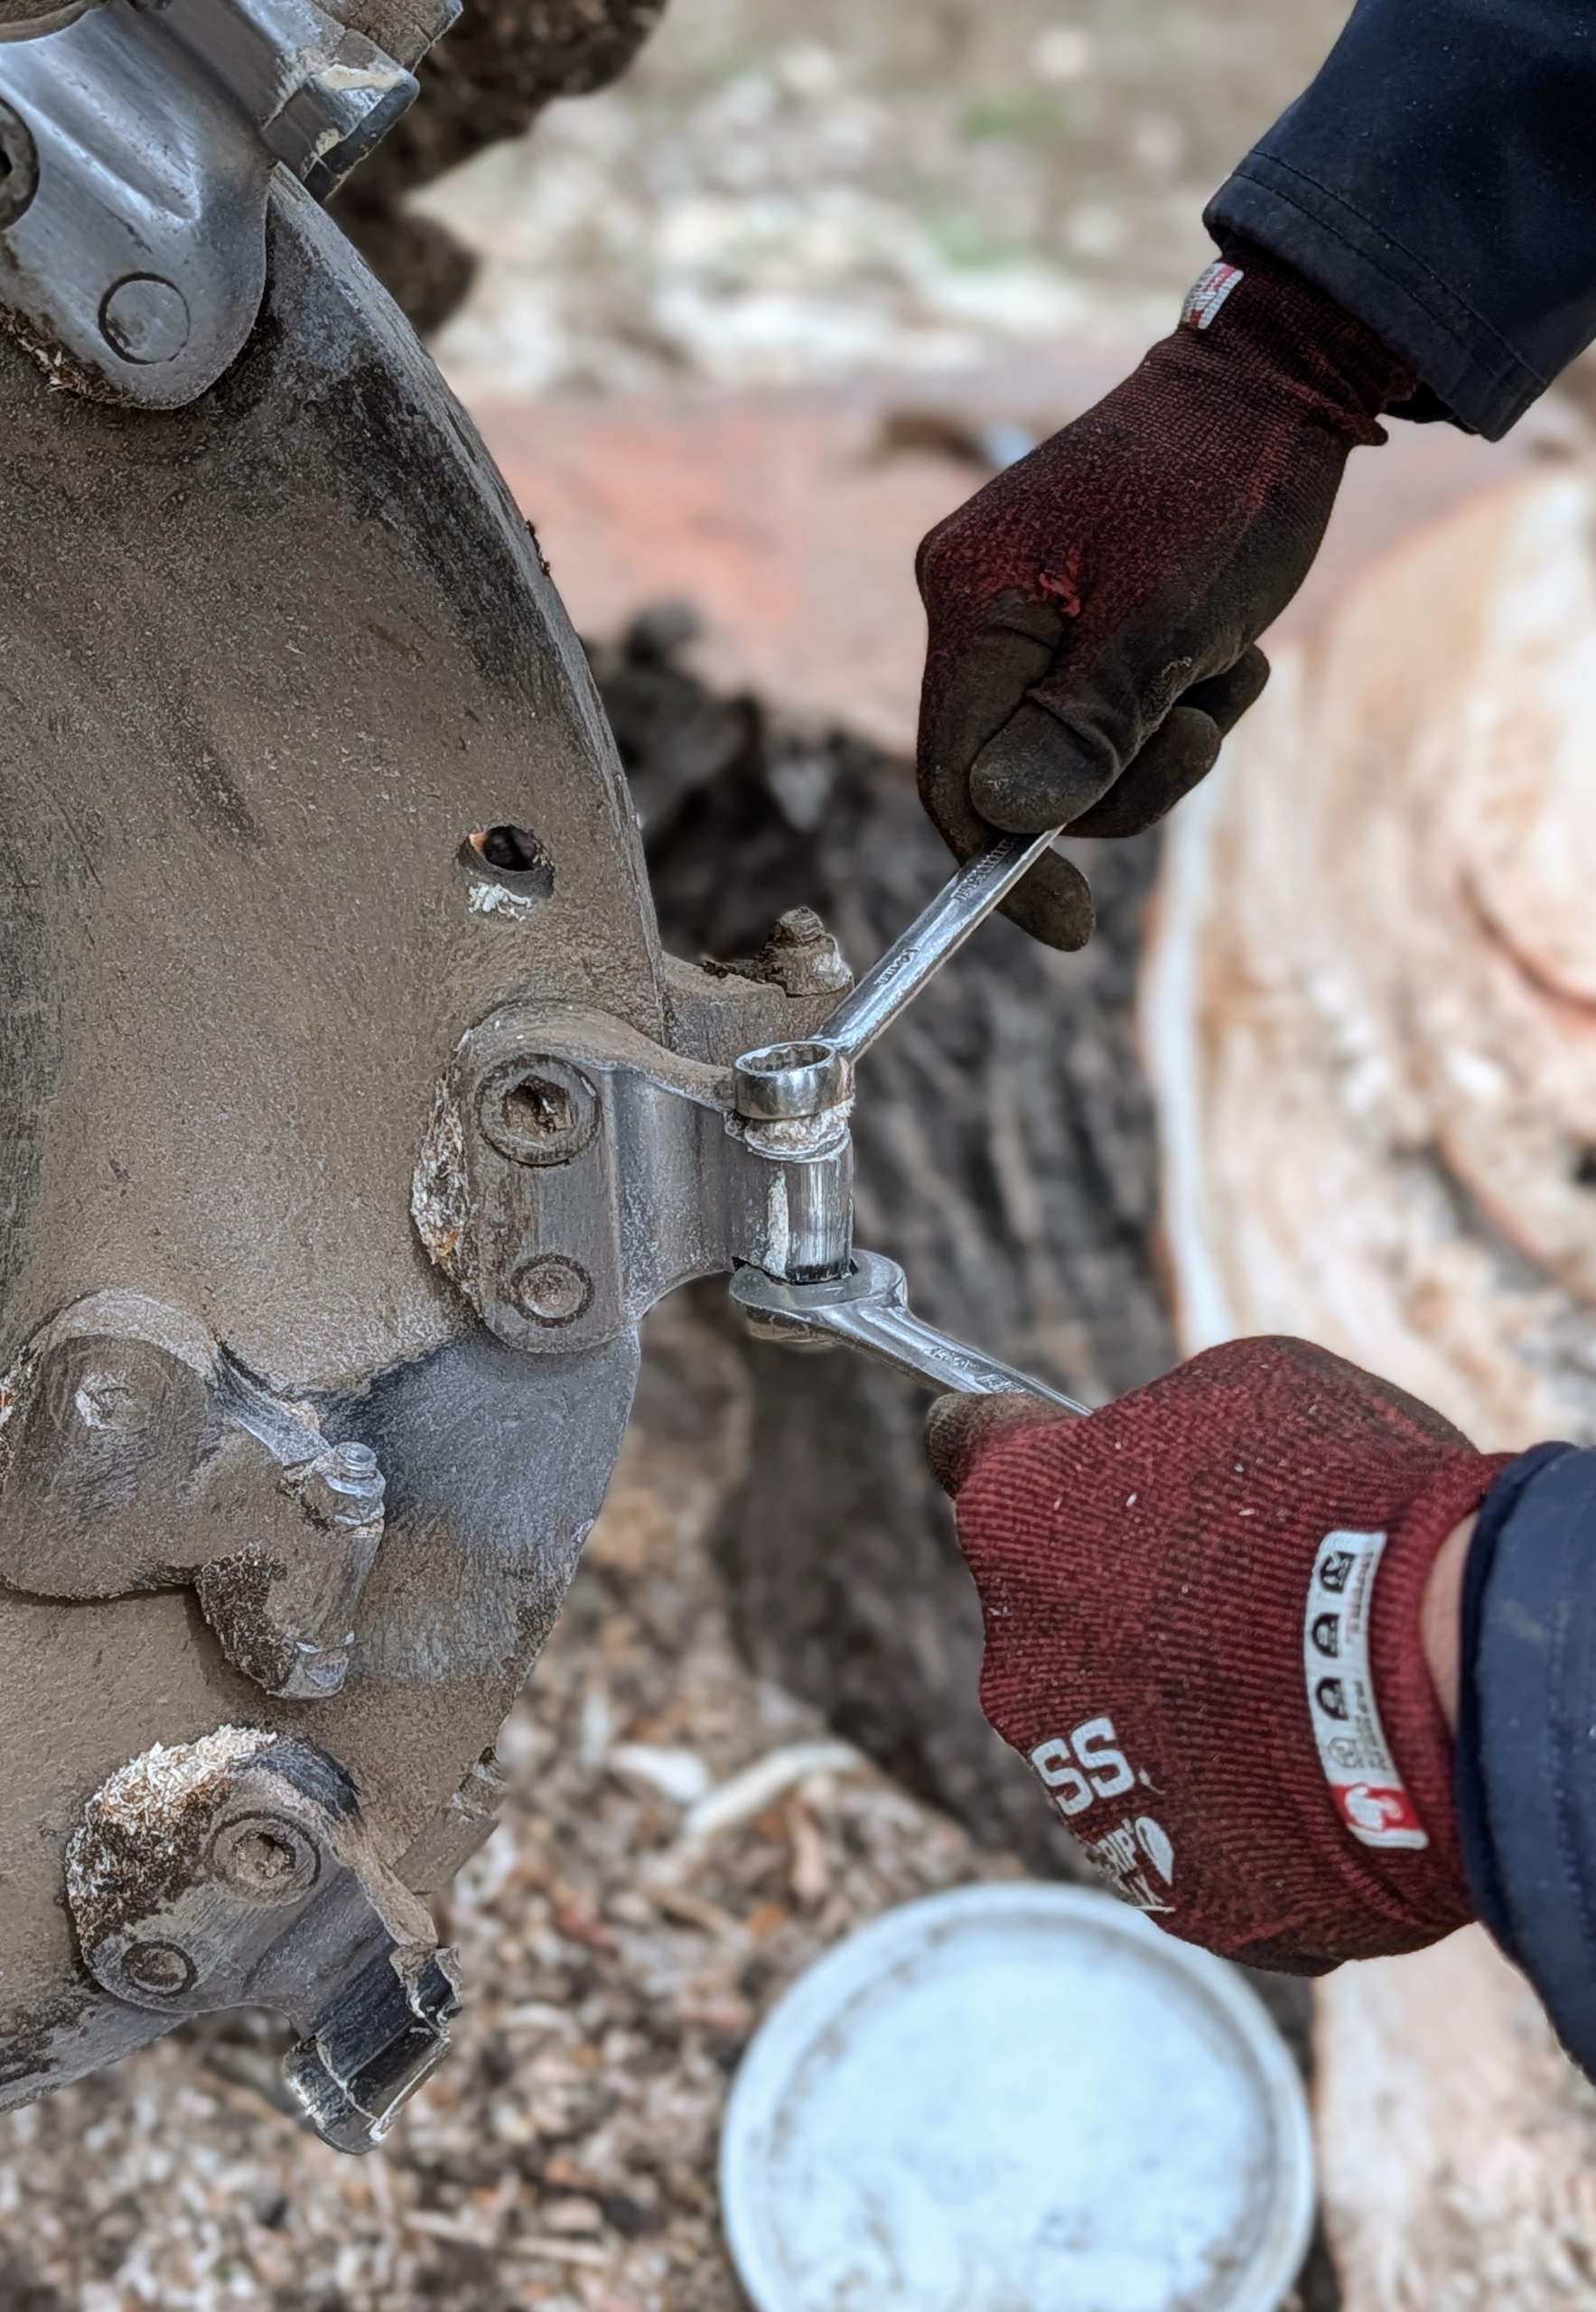
The teeth are held on by these clamps that attach to the cutting wheel.
Sometimes these teeth need to be rotated or replaced. They are often checked for damage and wear during the grinding process.
The teeth are removed and replaced easily with wrenches and ratchets.
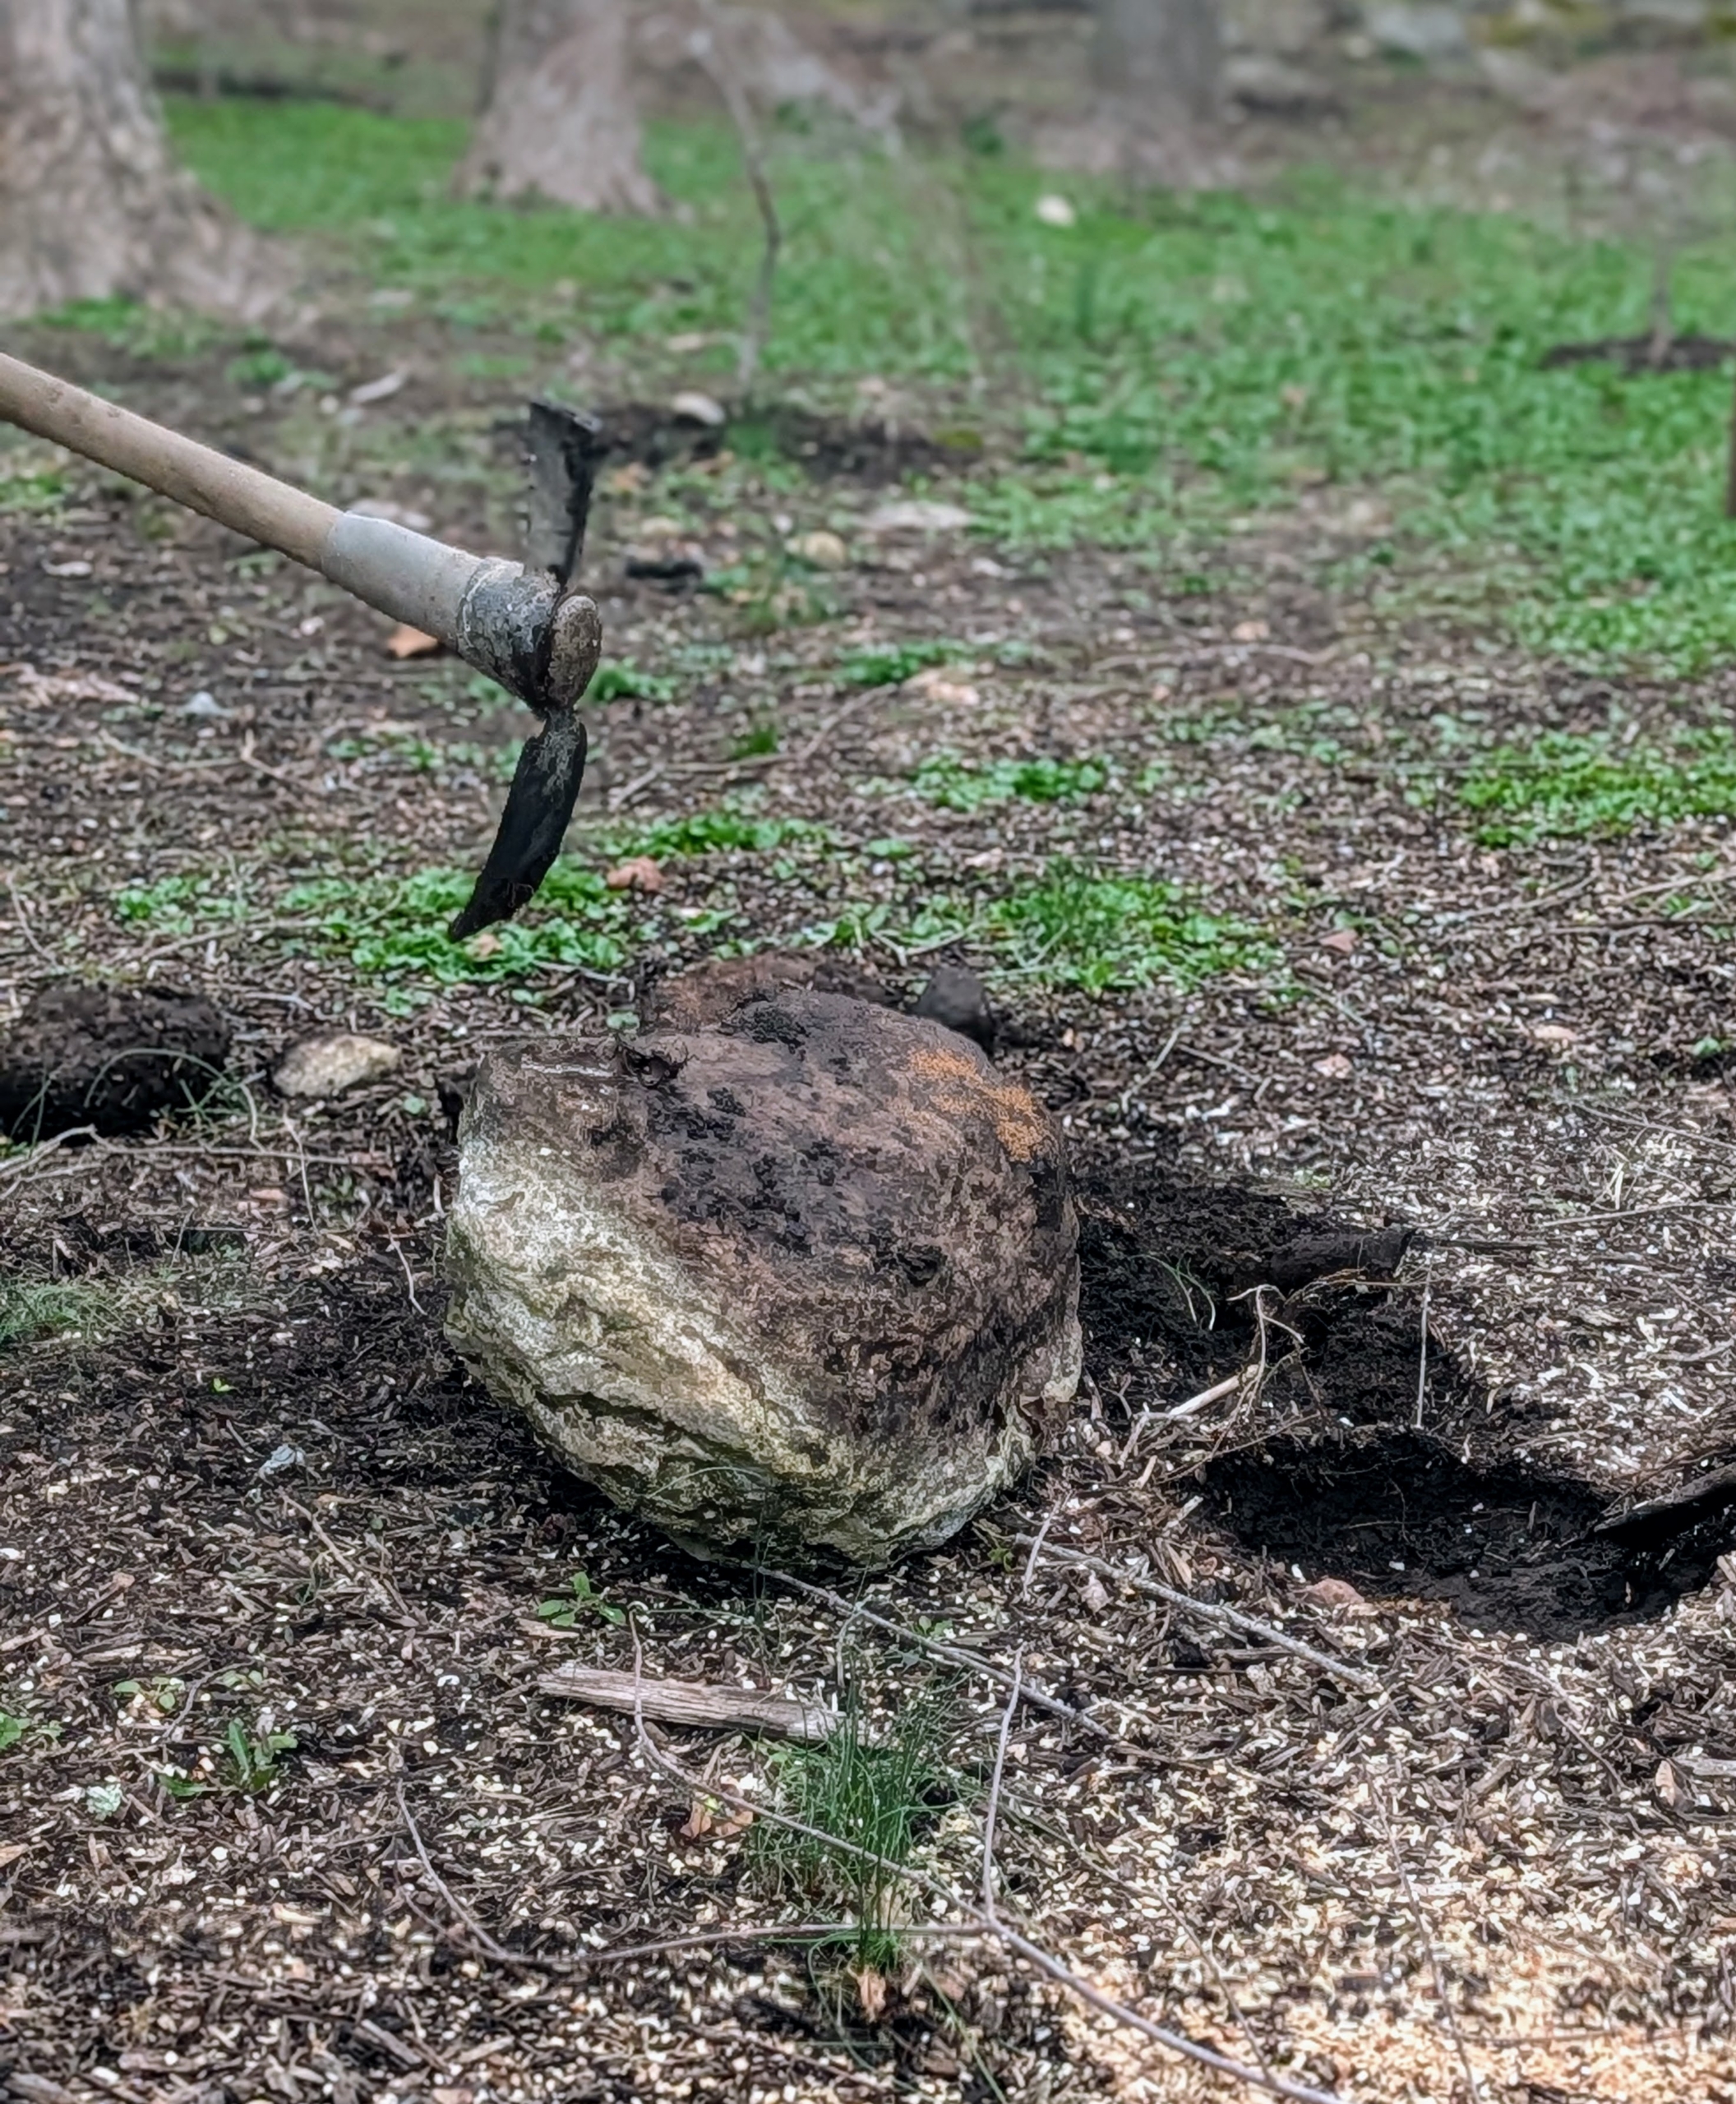
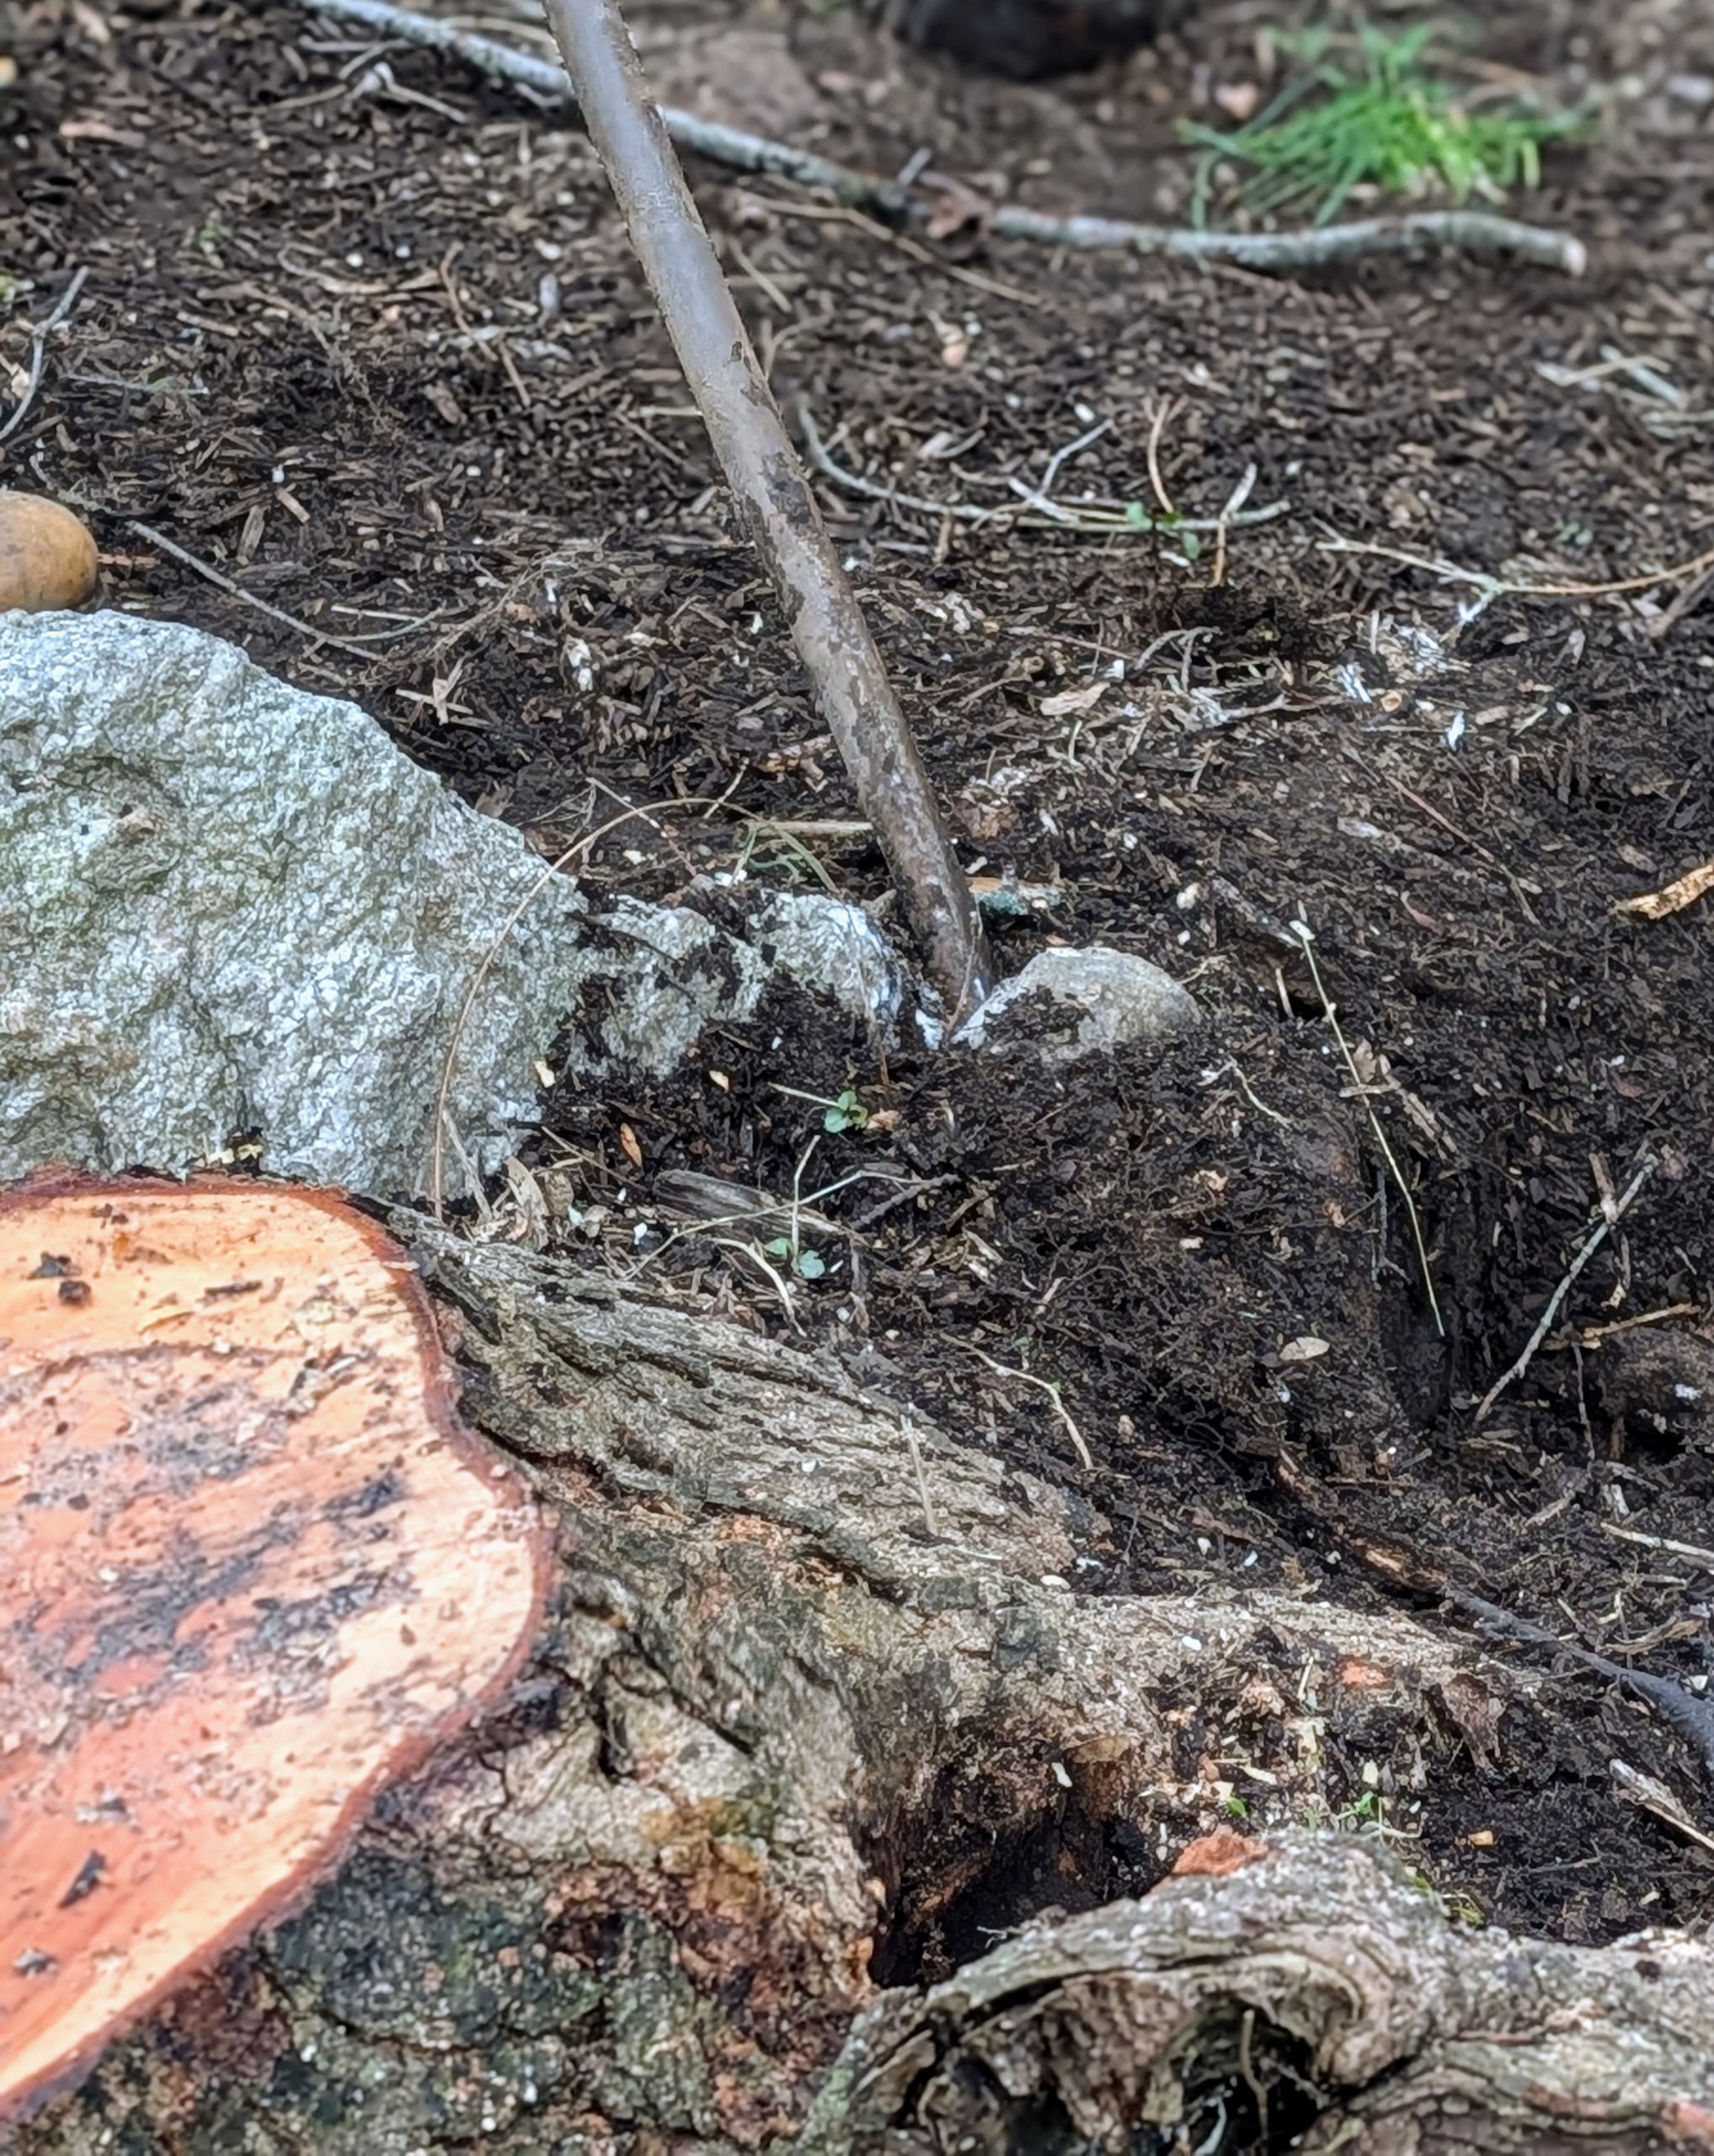
Meanwhile, any stones or big rocks are removed from near the stump. This is to prevent any unnecessary damage to the grinder’s cutter teeth.
It is also done to prevent any projectiles that could potentially cause serious injury.
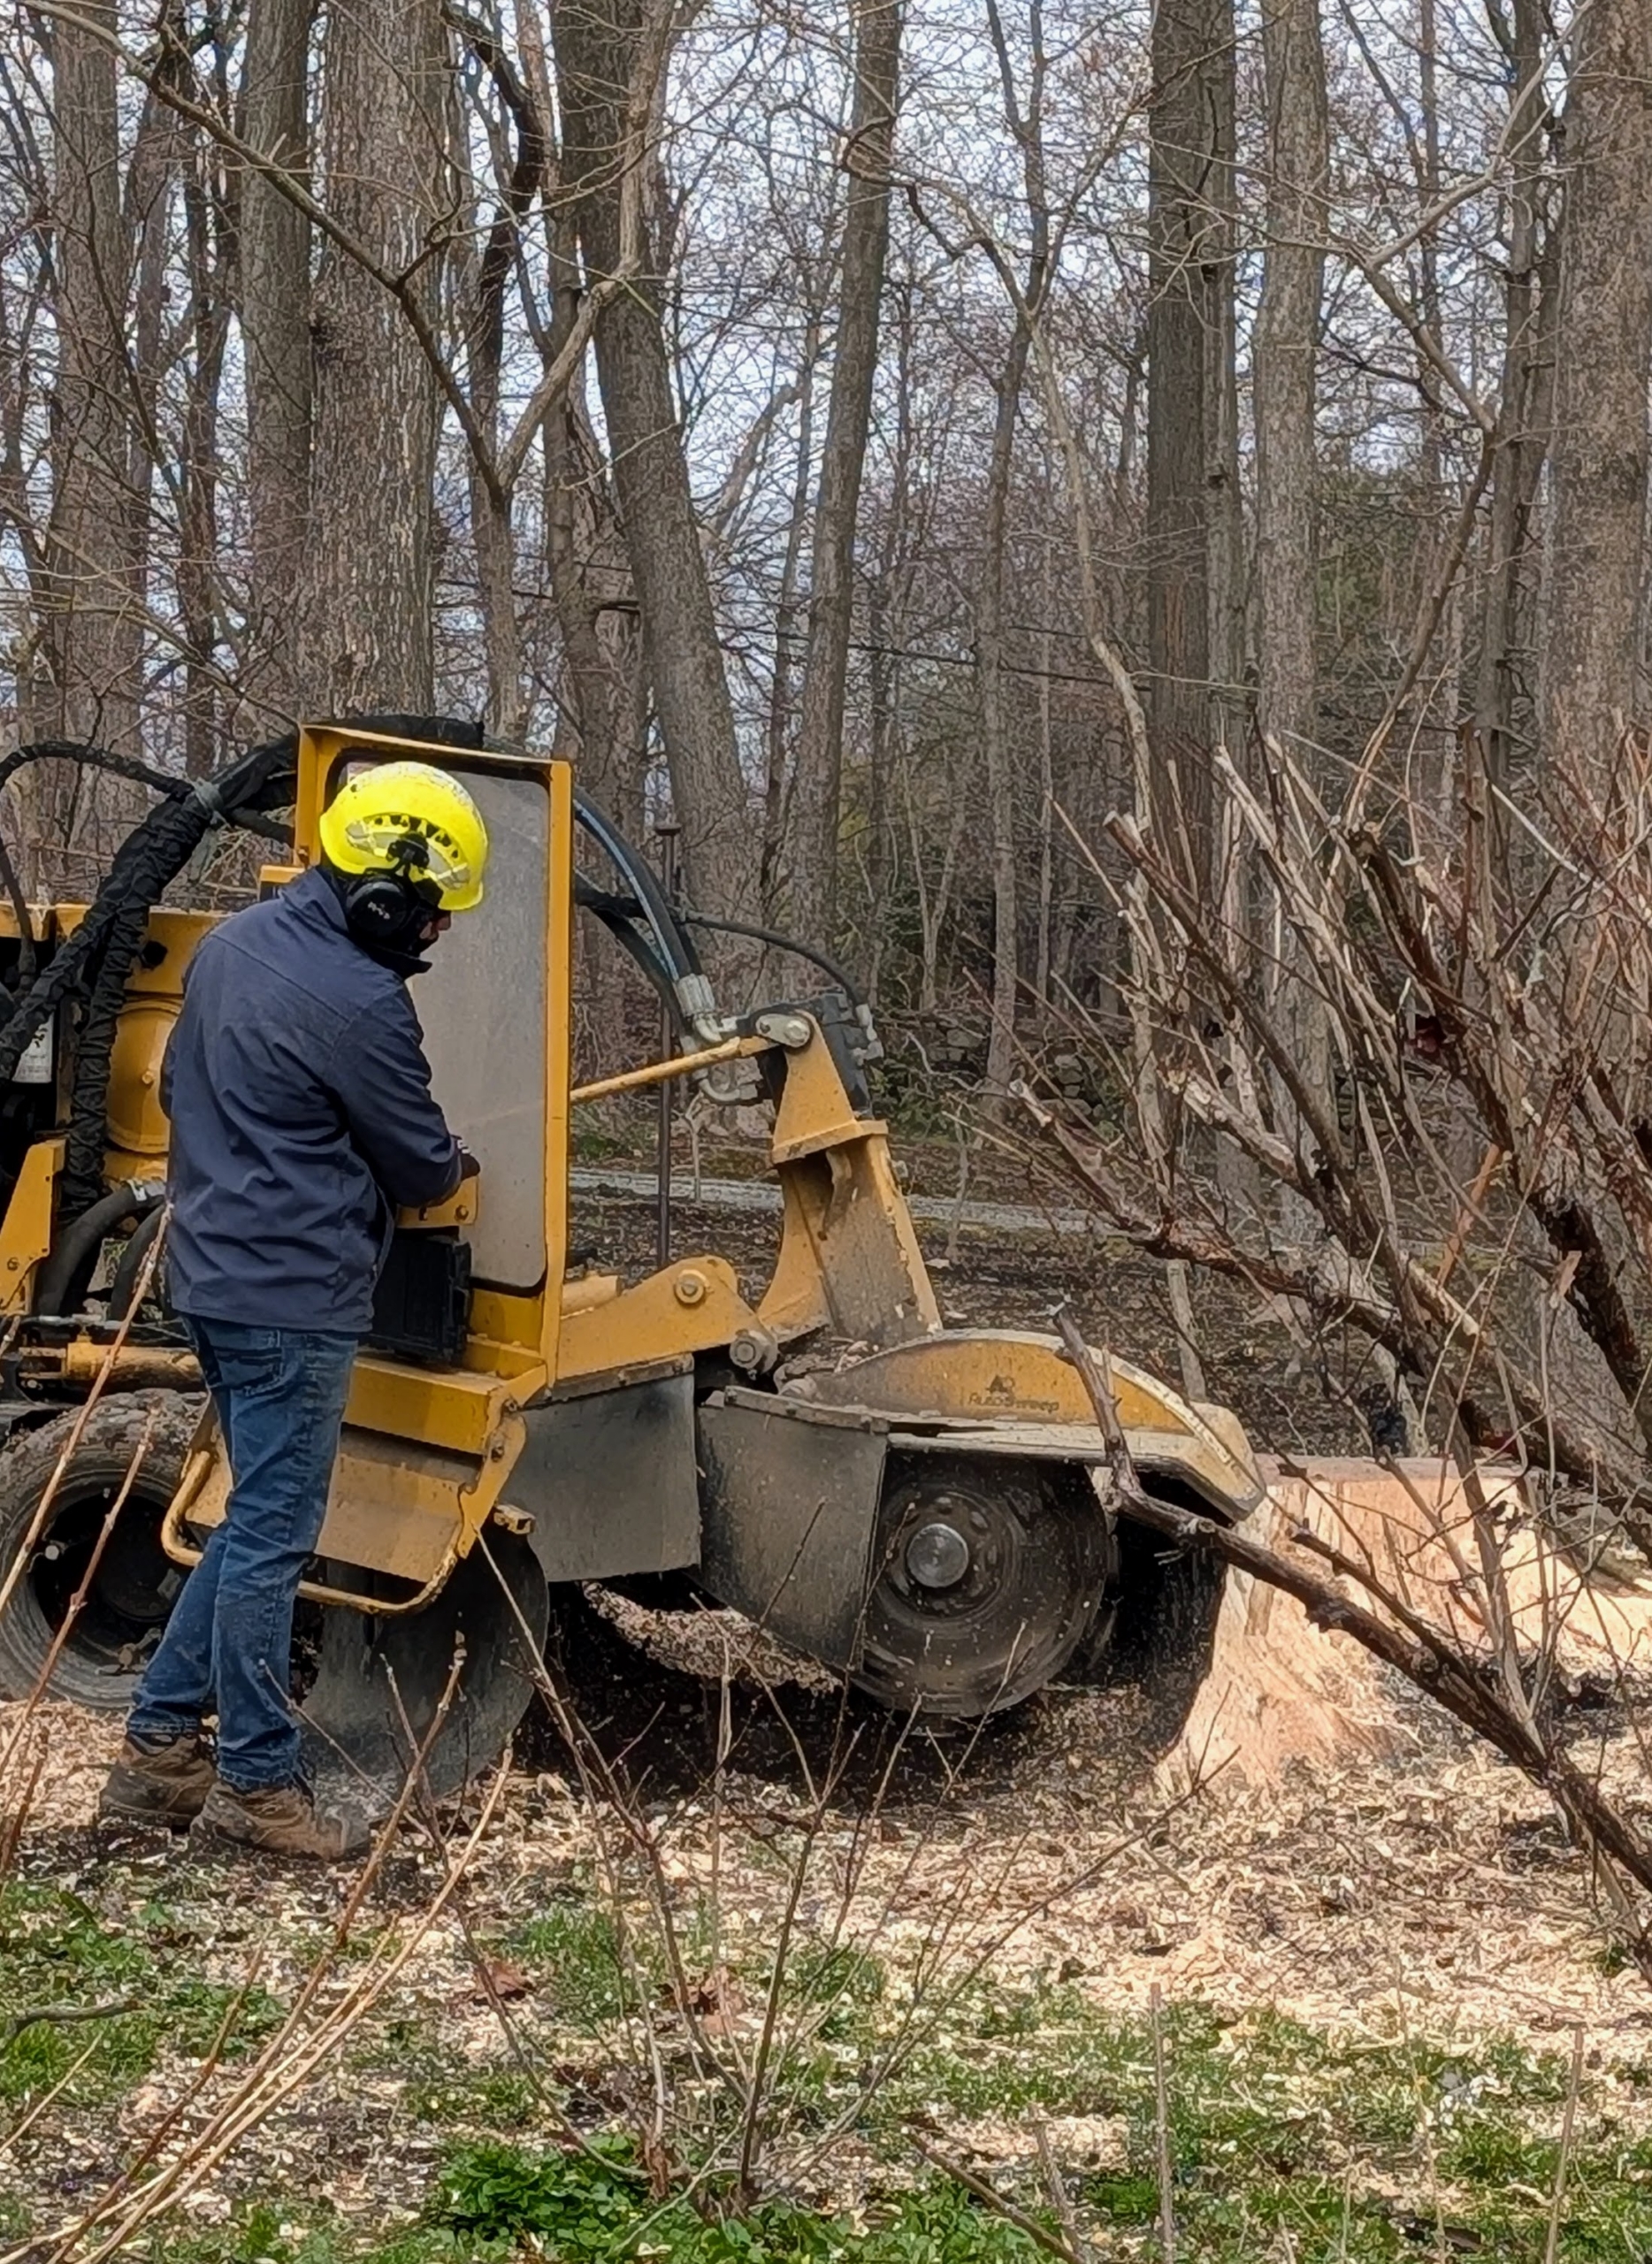
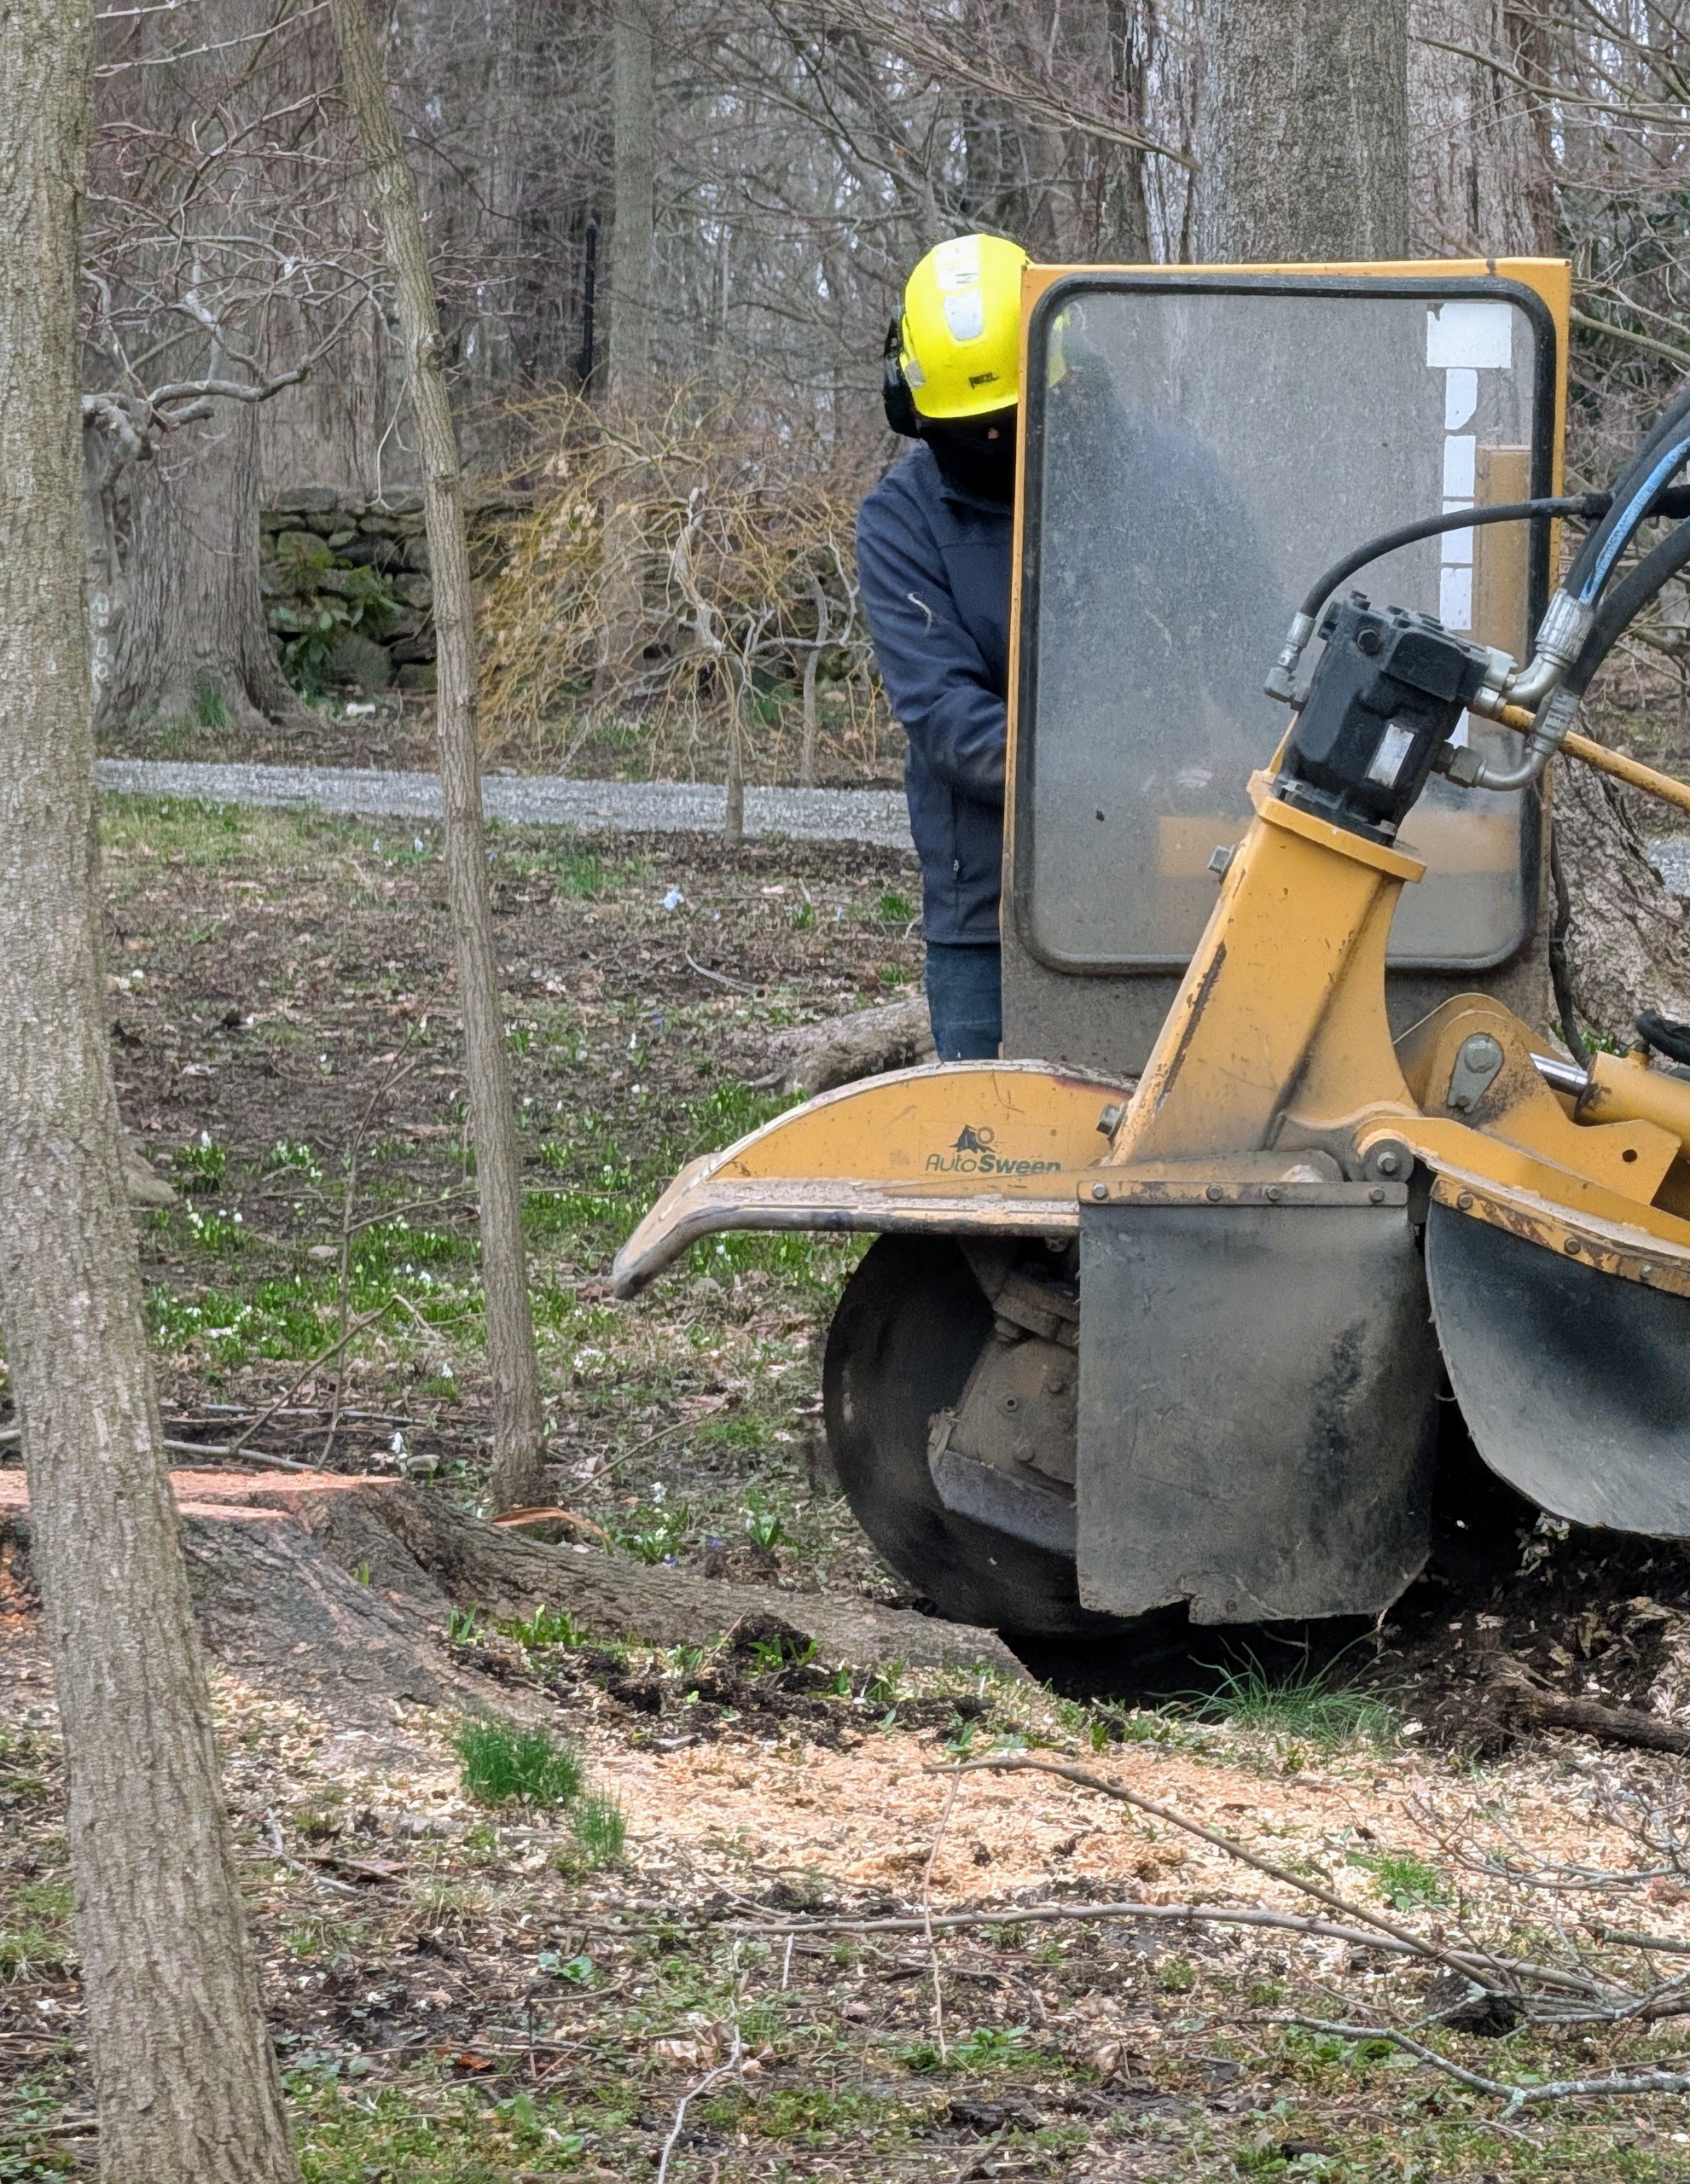
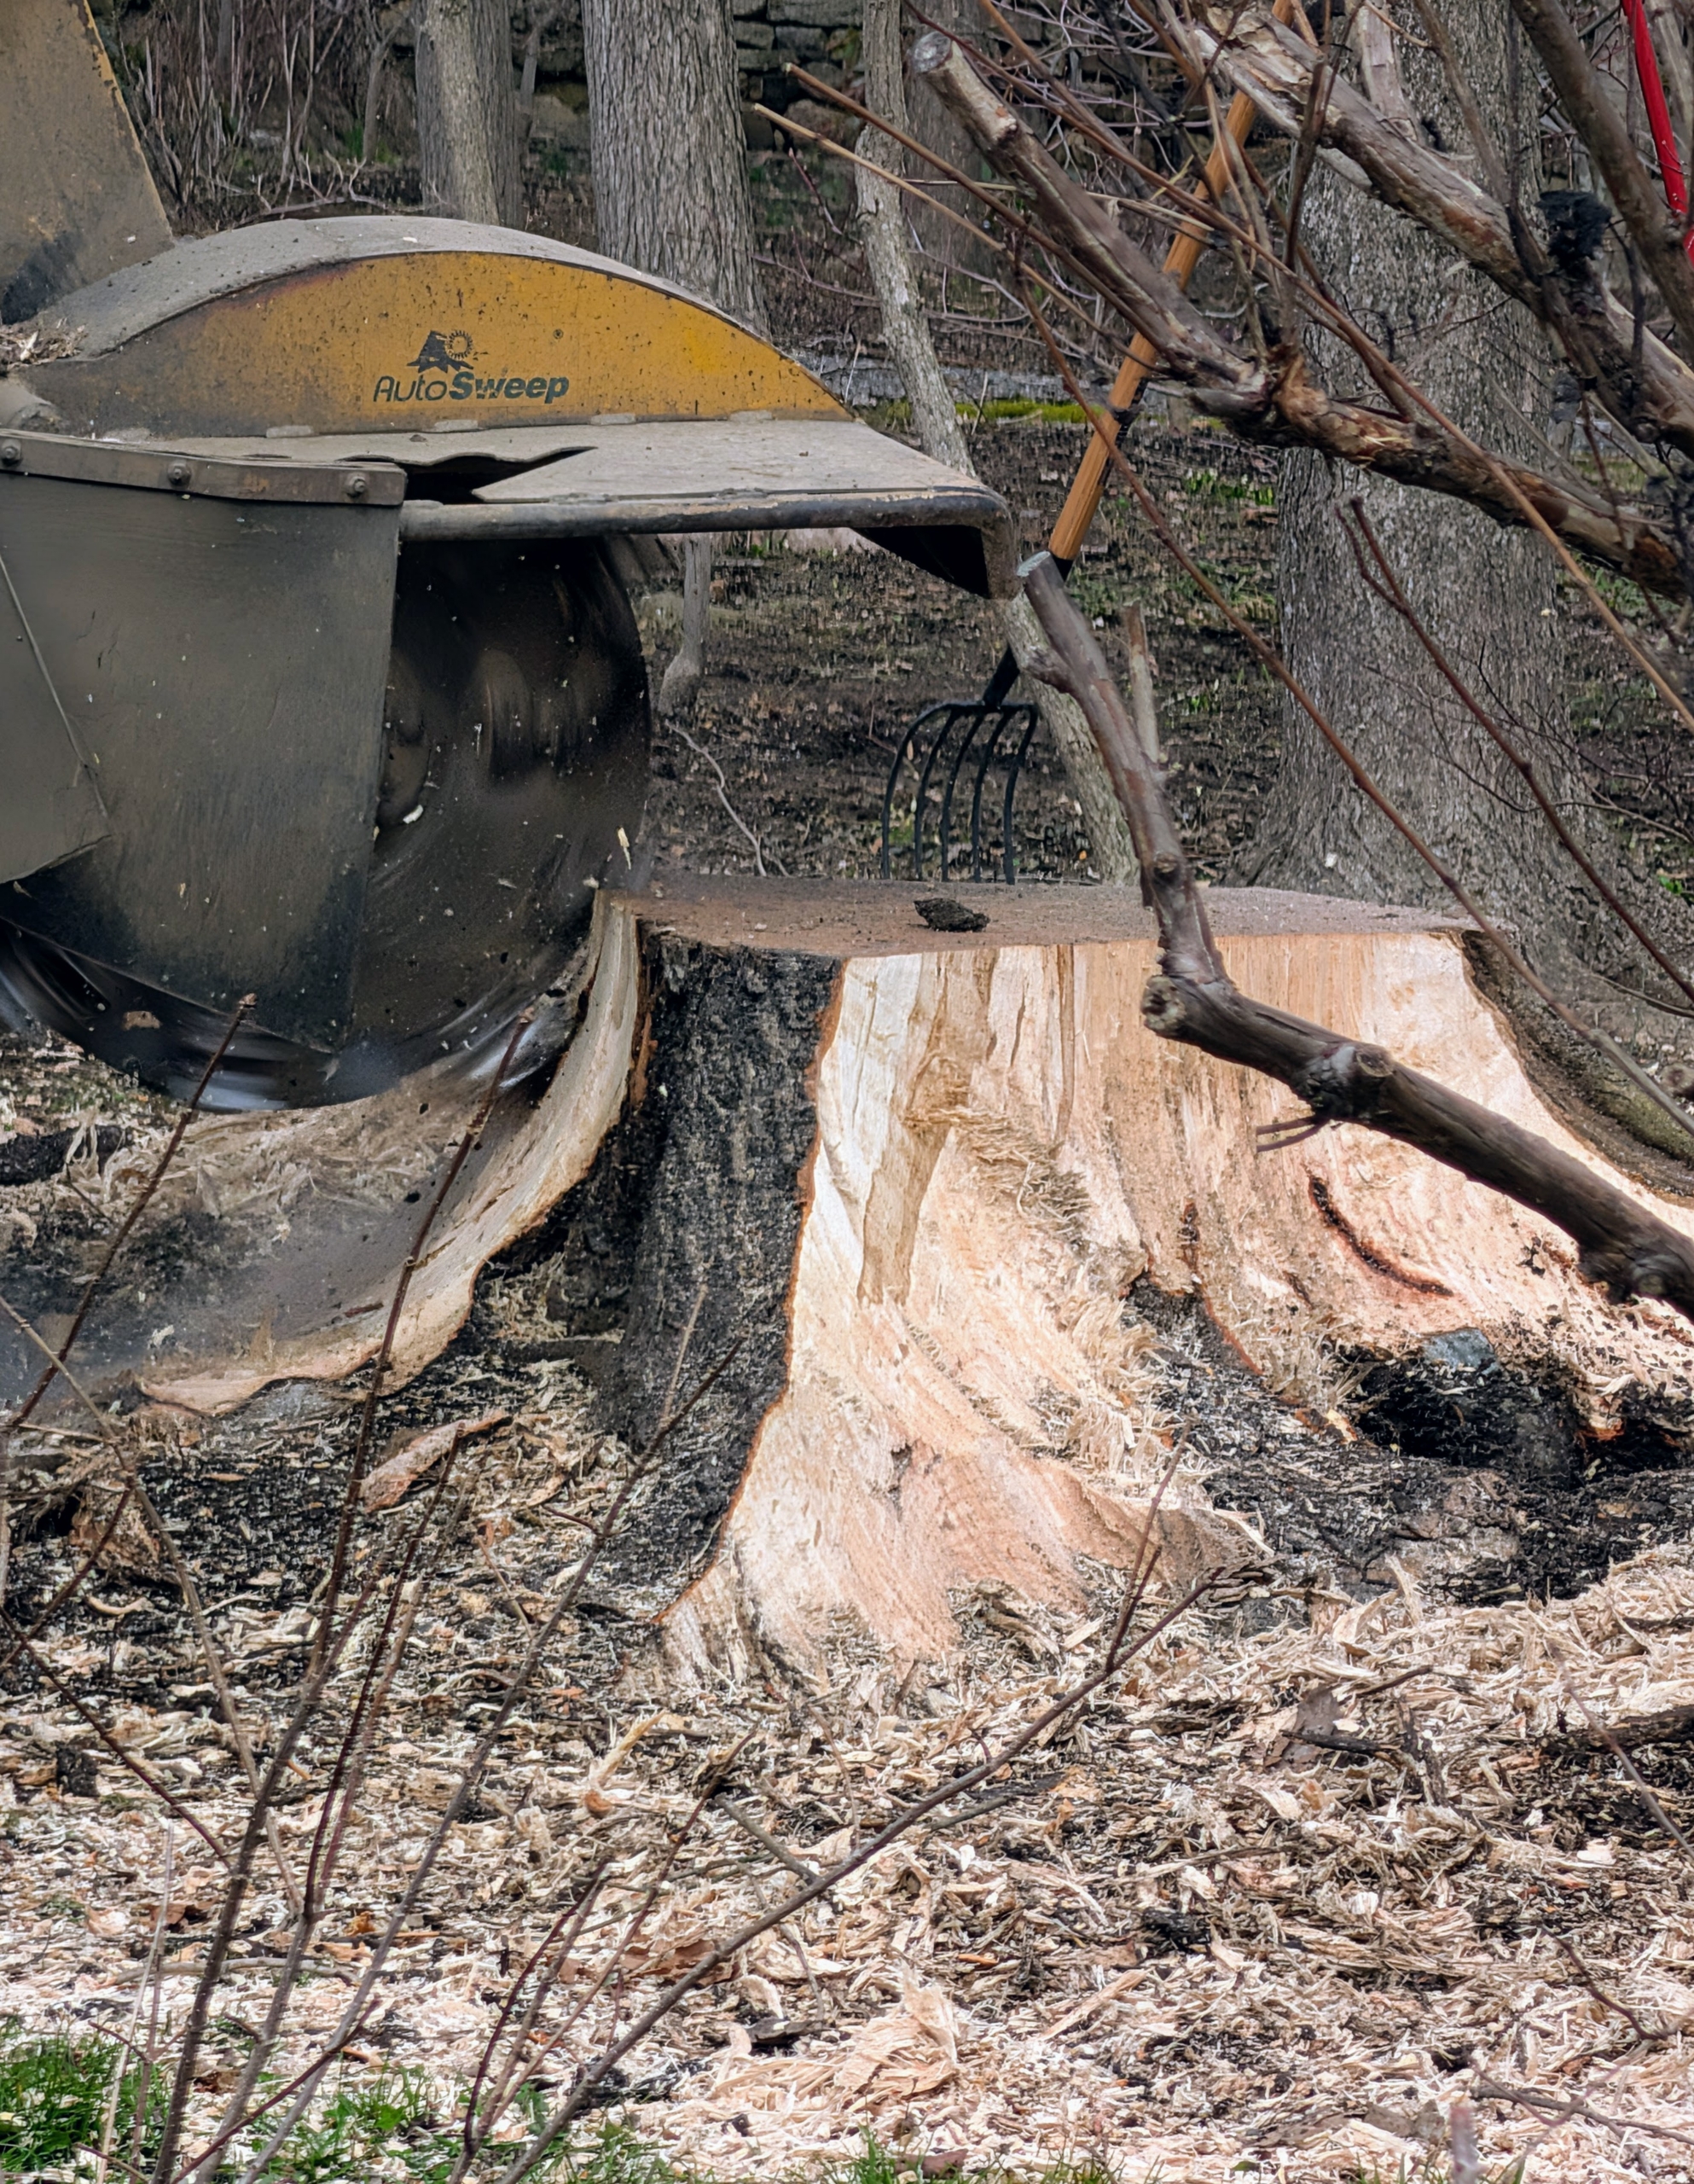
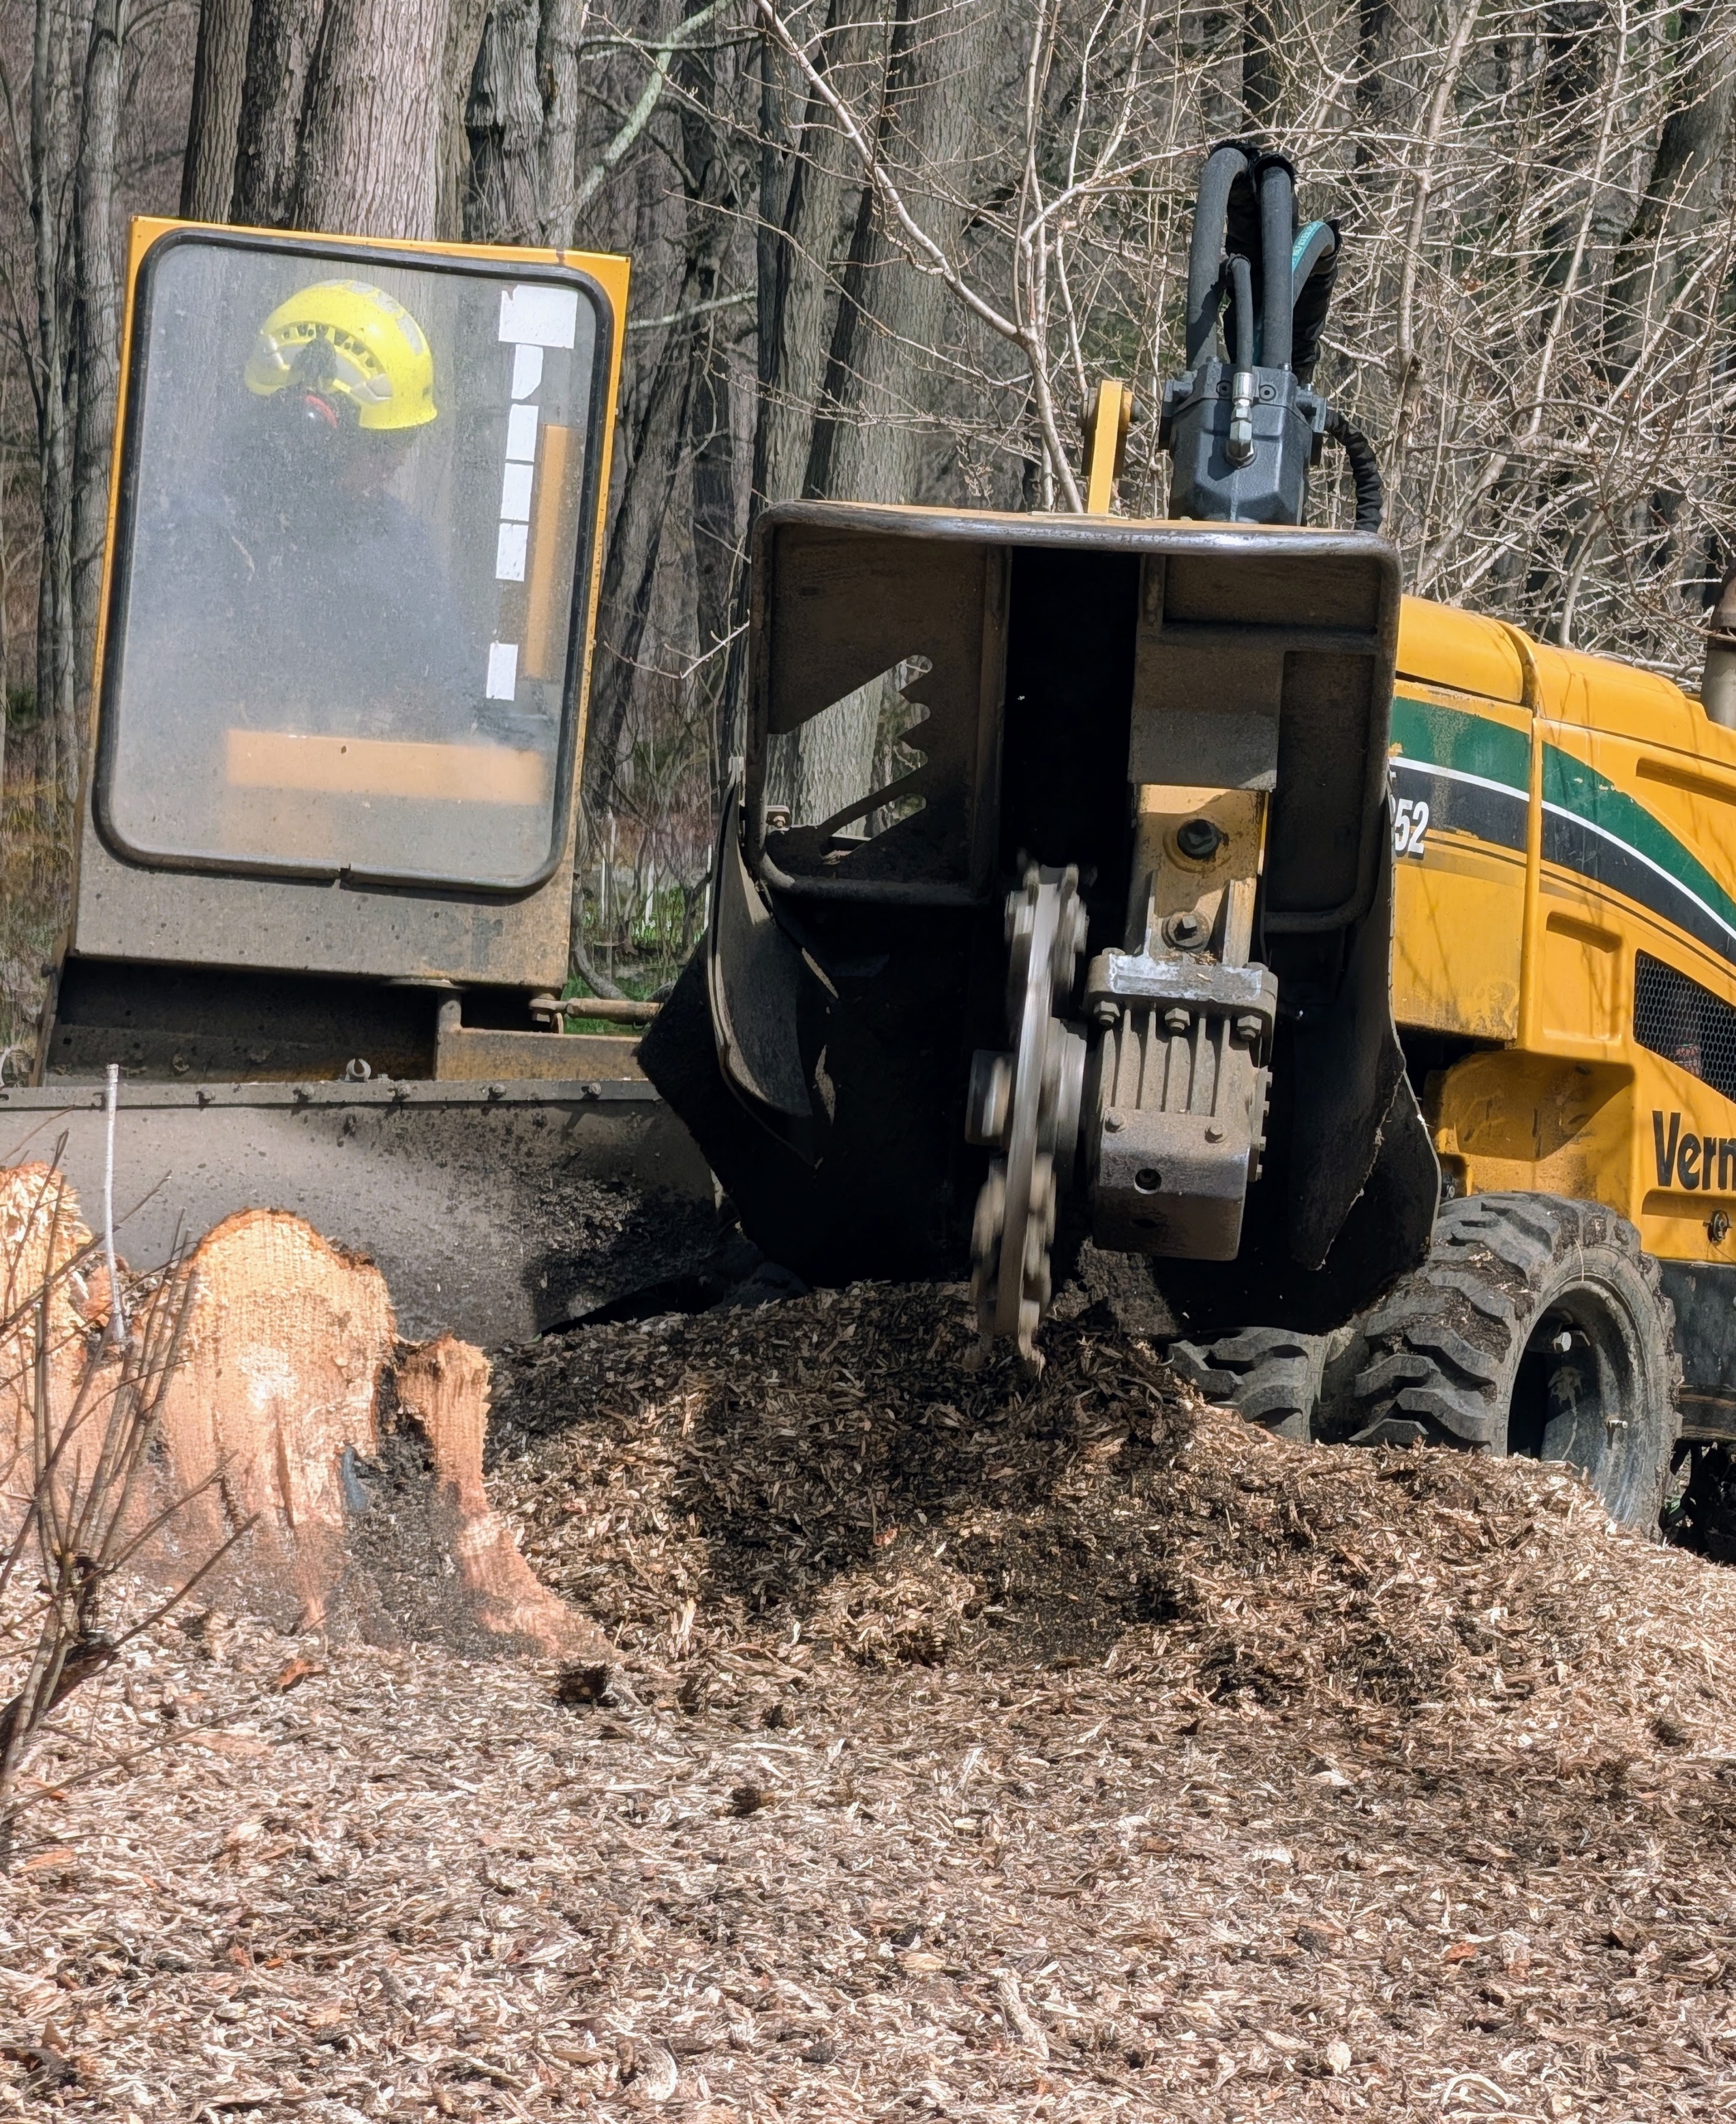
The operator stands at the controls behind a shield while grinding up the stump.
And then he maneuvers the machine right up to the stump and begins grinding.
The pressure of the grinder and the carbide teeth chip the wood away quickly.
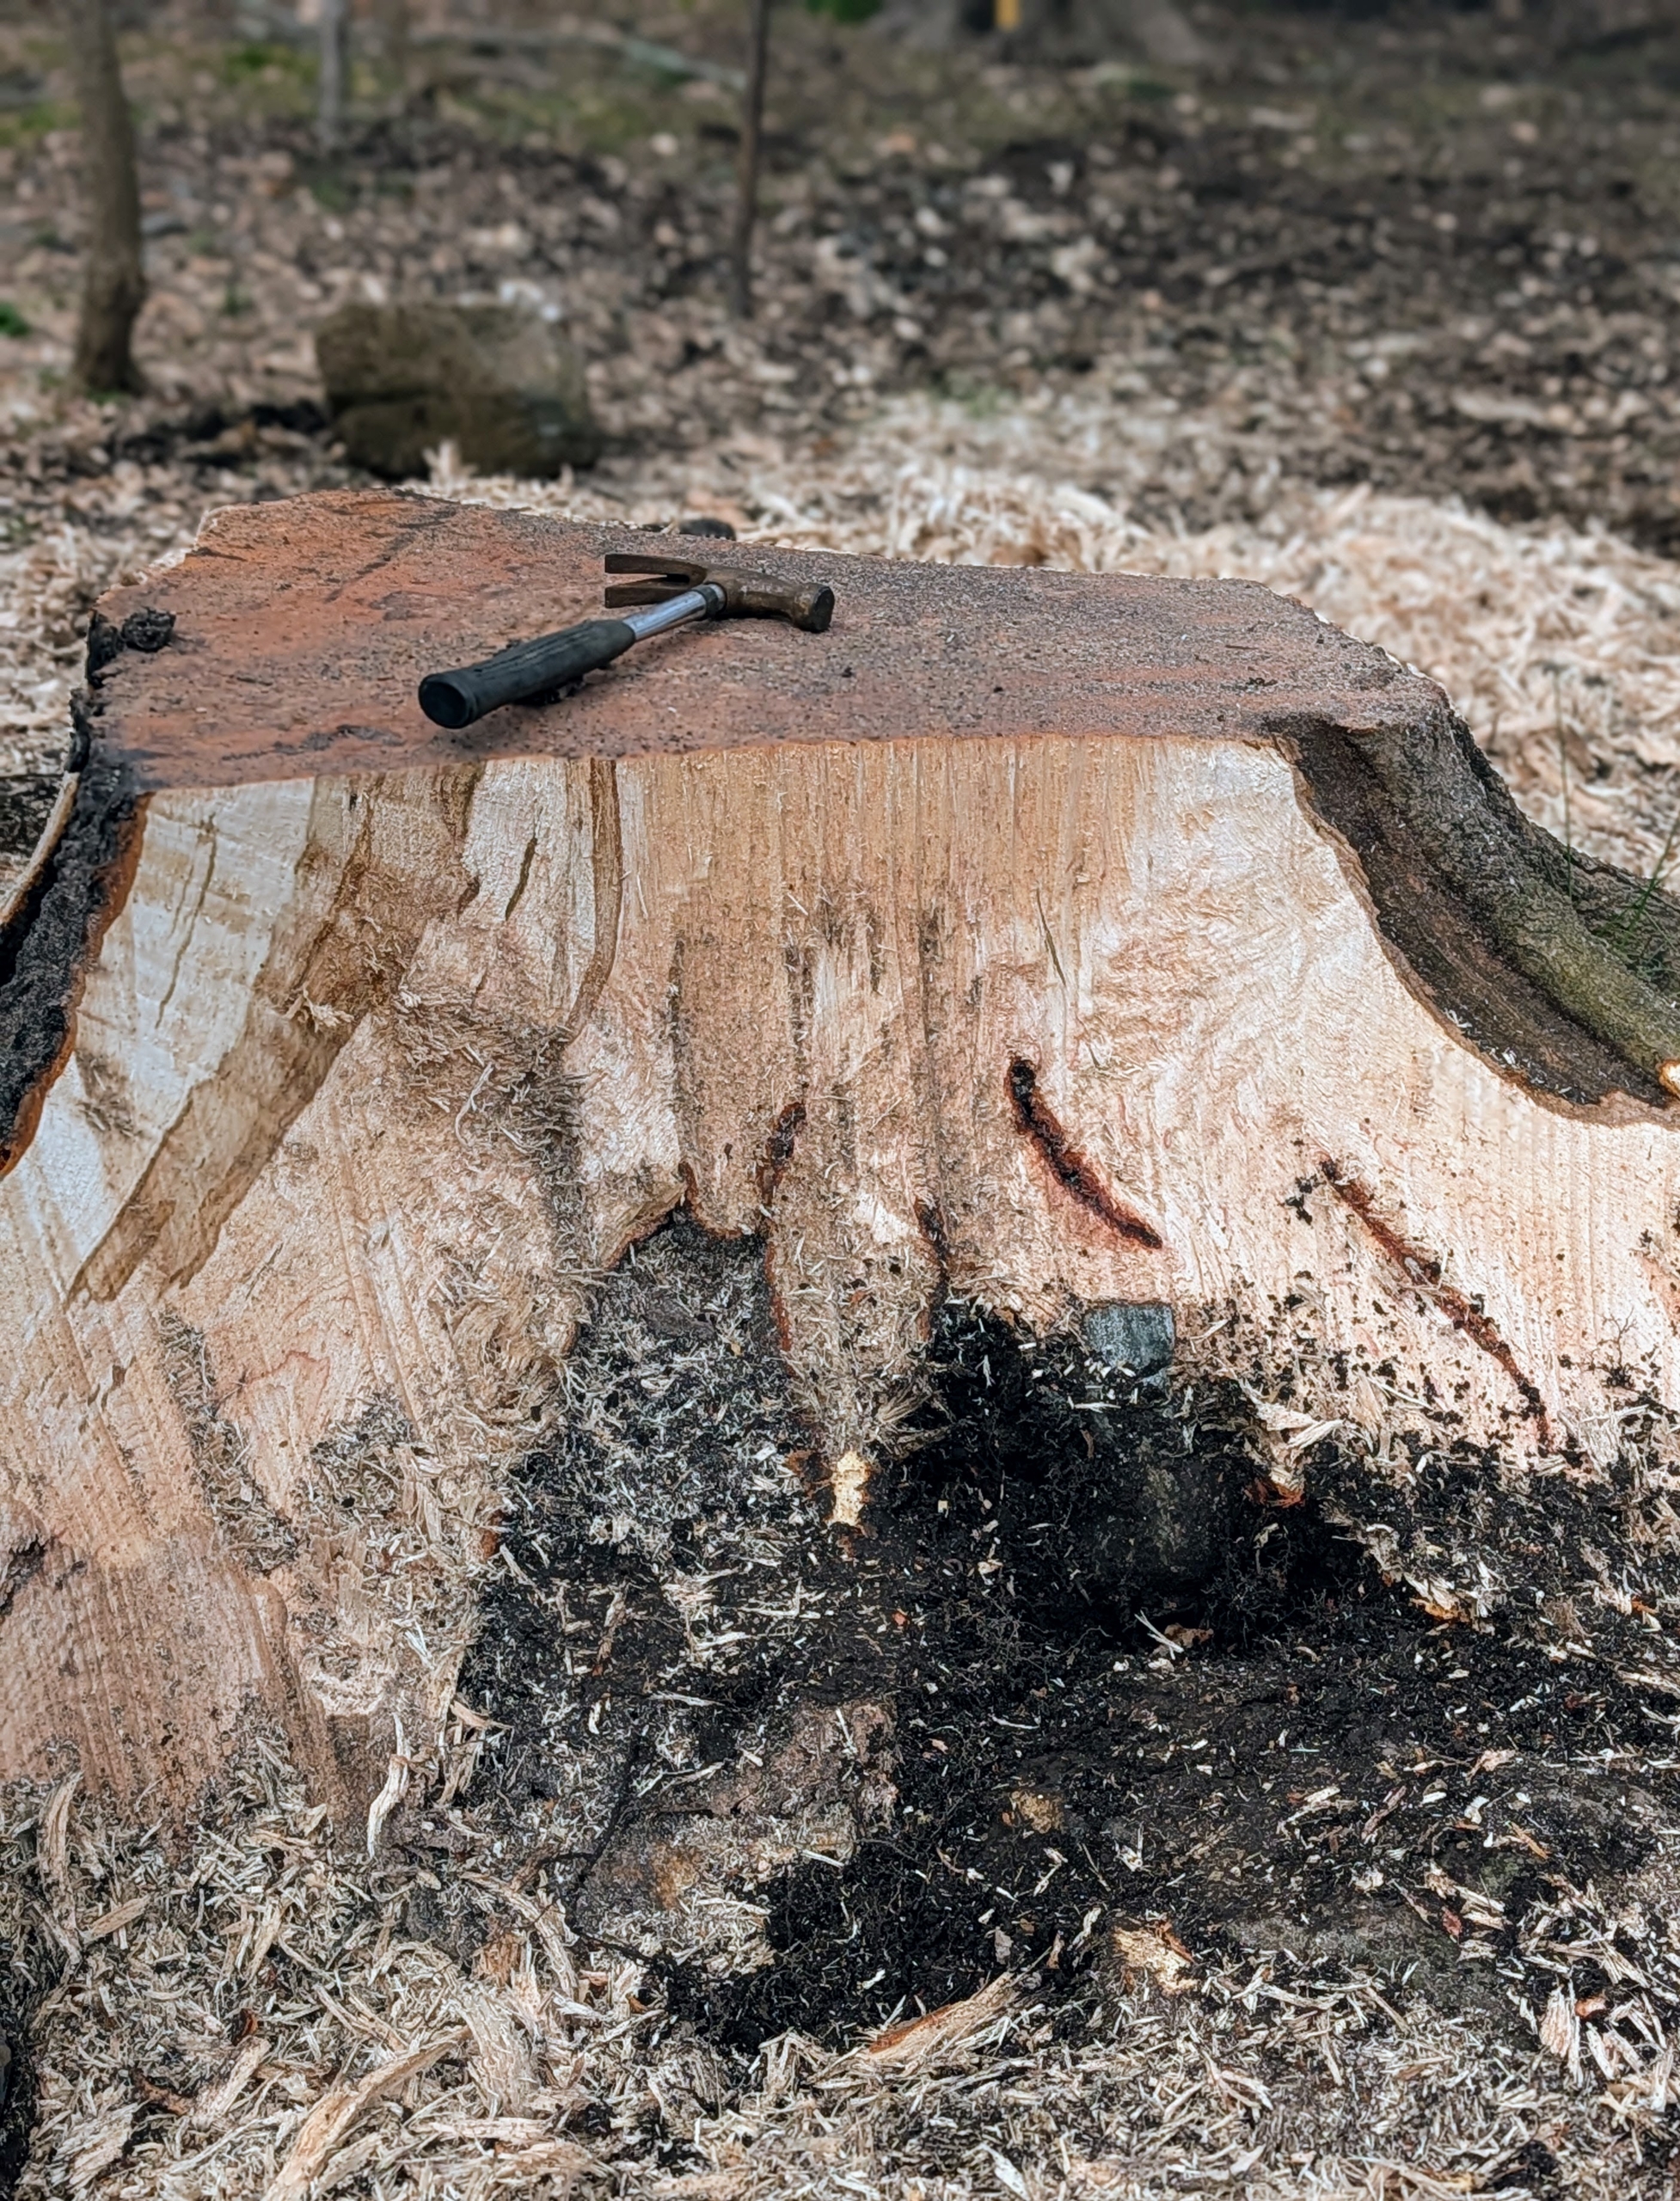
Here is a section of the stump done.
The grinder works from the other side.
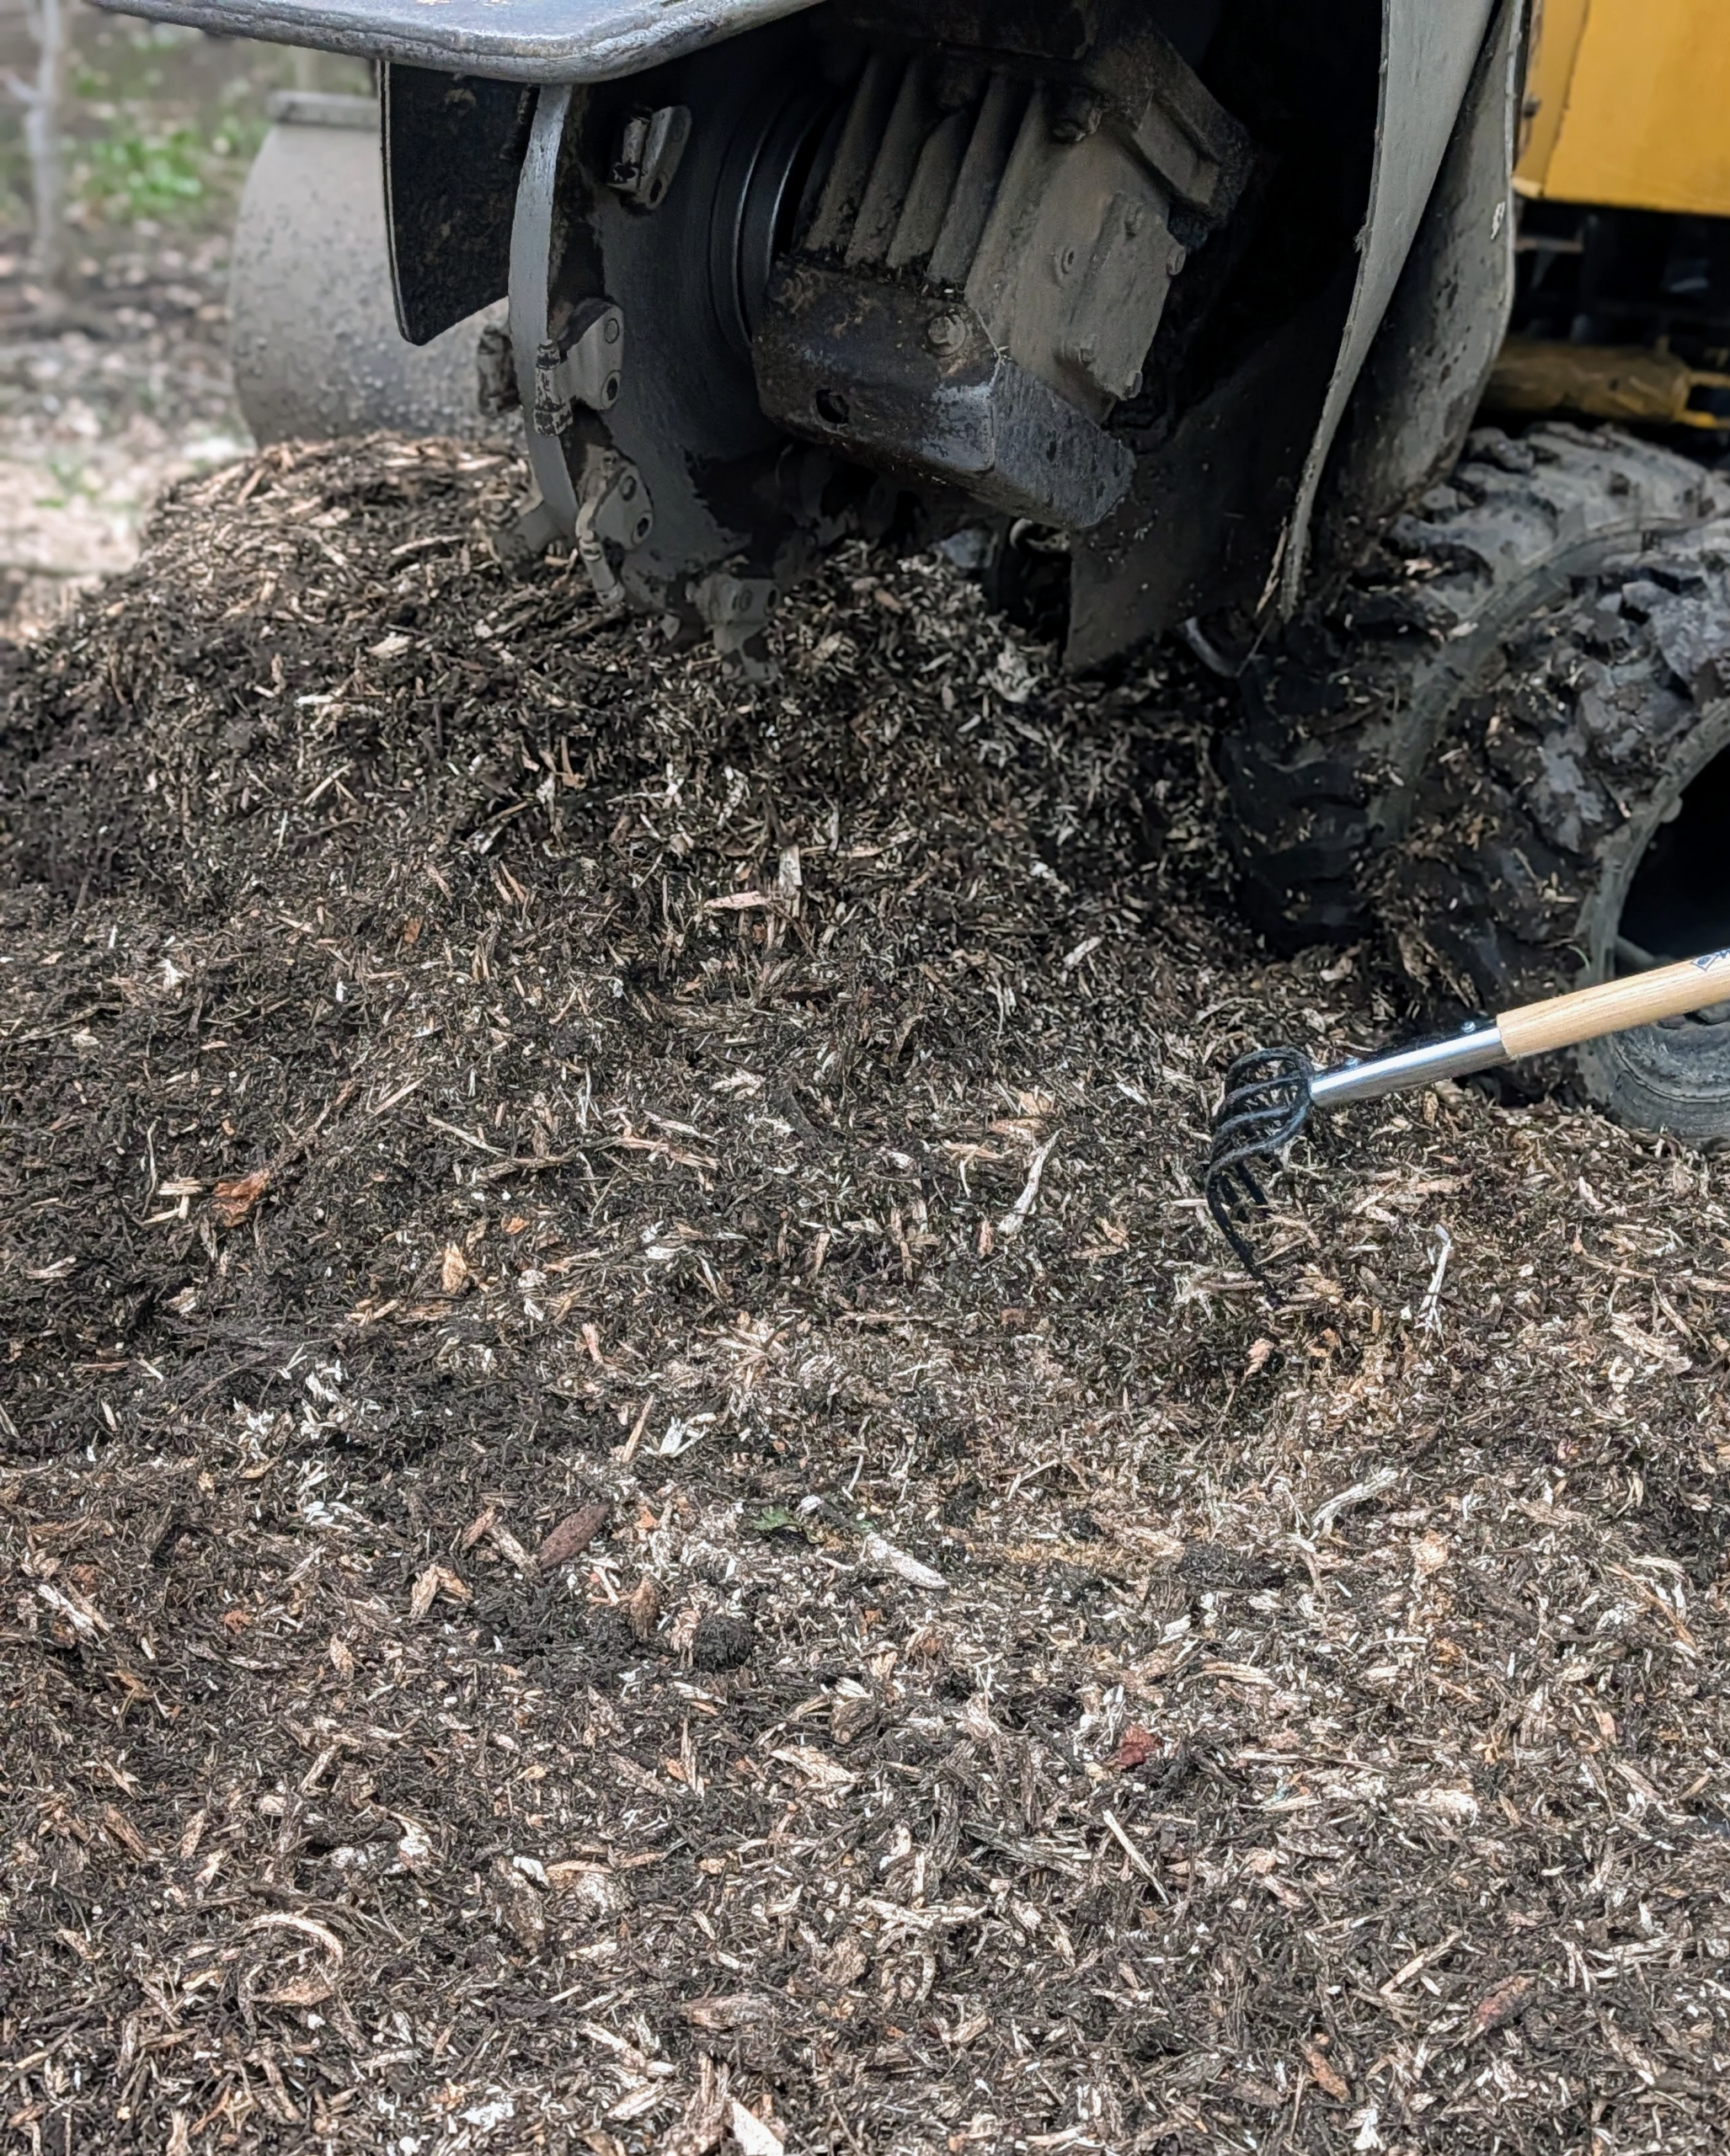
The stump grinder uses its high speed cutting wheel to chip until it is at least five inches below ground level.
A stump can take anywhere from 30-minutes to two hours to grind down a tree stump depending on the size, wood type, and accessibility. To grind all eight stumps took the crew one day.
The wood chips can be used to top dress the bed. They provide moisture retention, weed suppression, and improve the soil’s health. All the wood chips from the grinding job are returned to the earth.
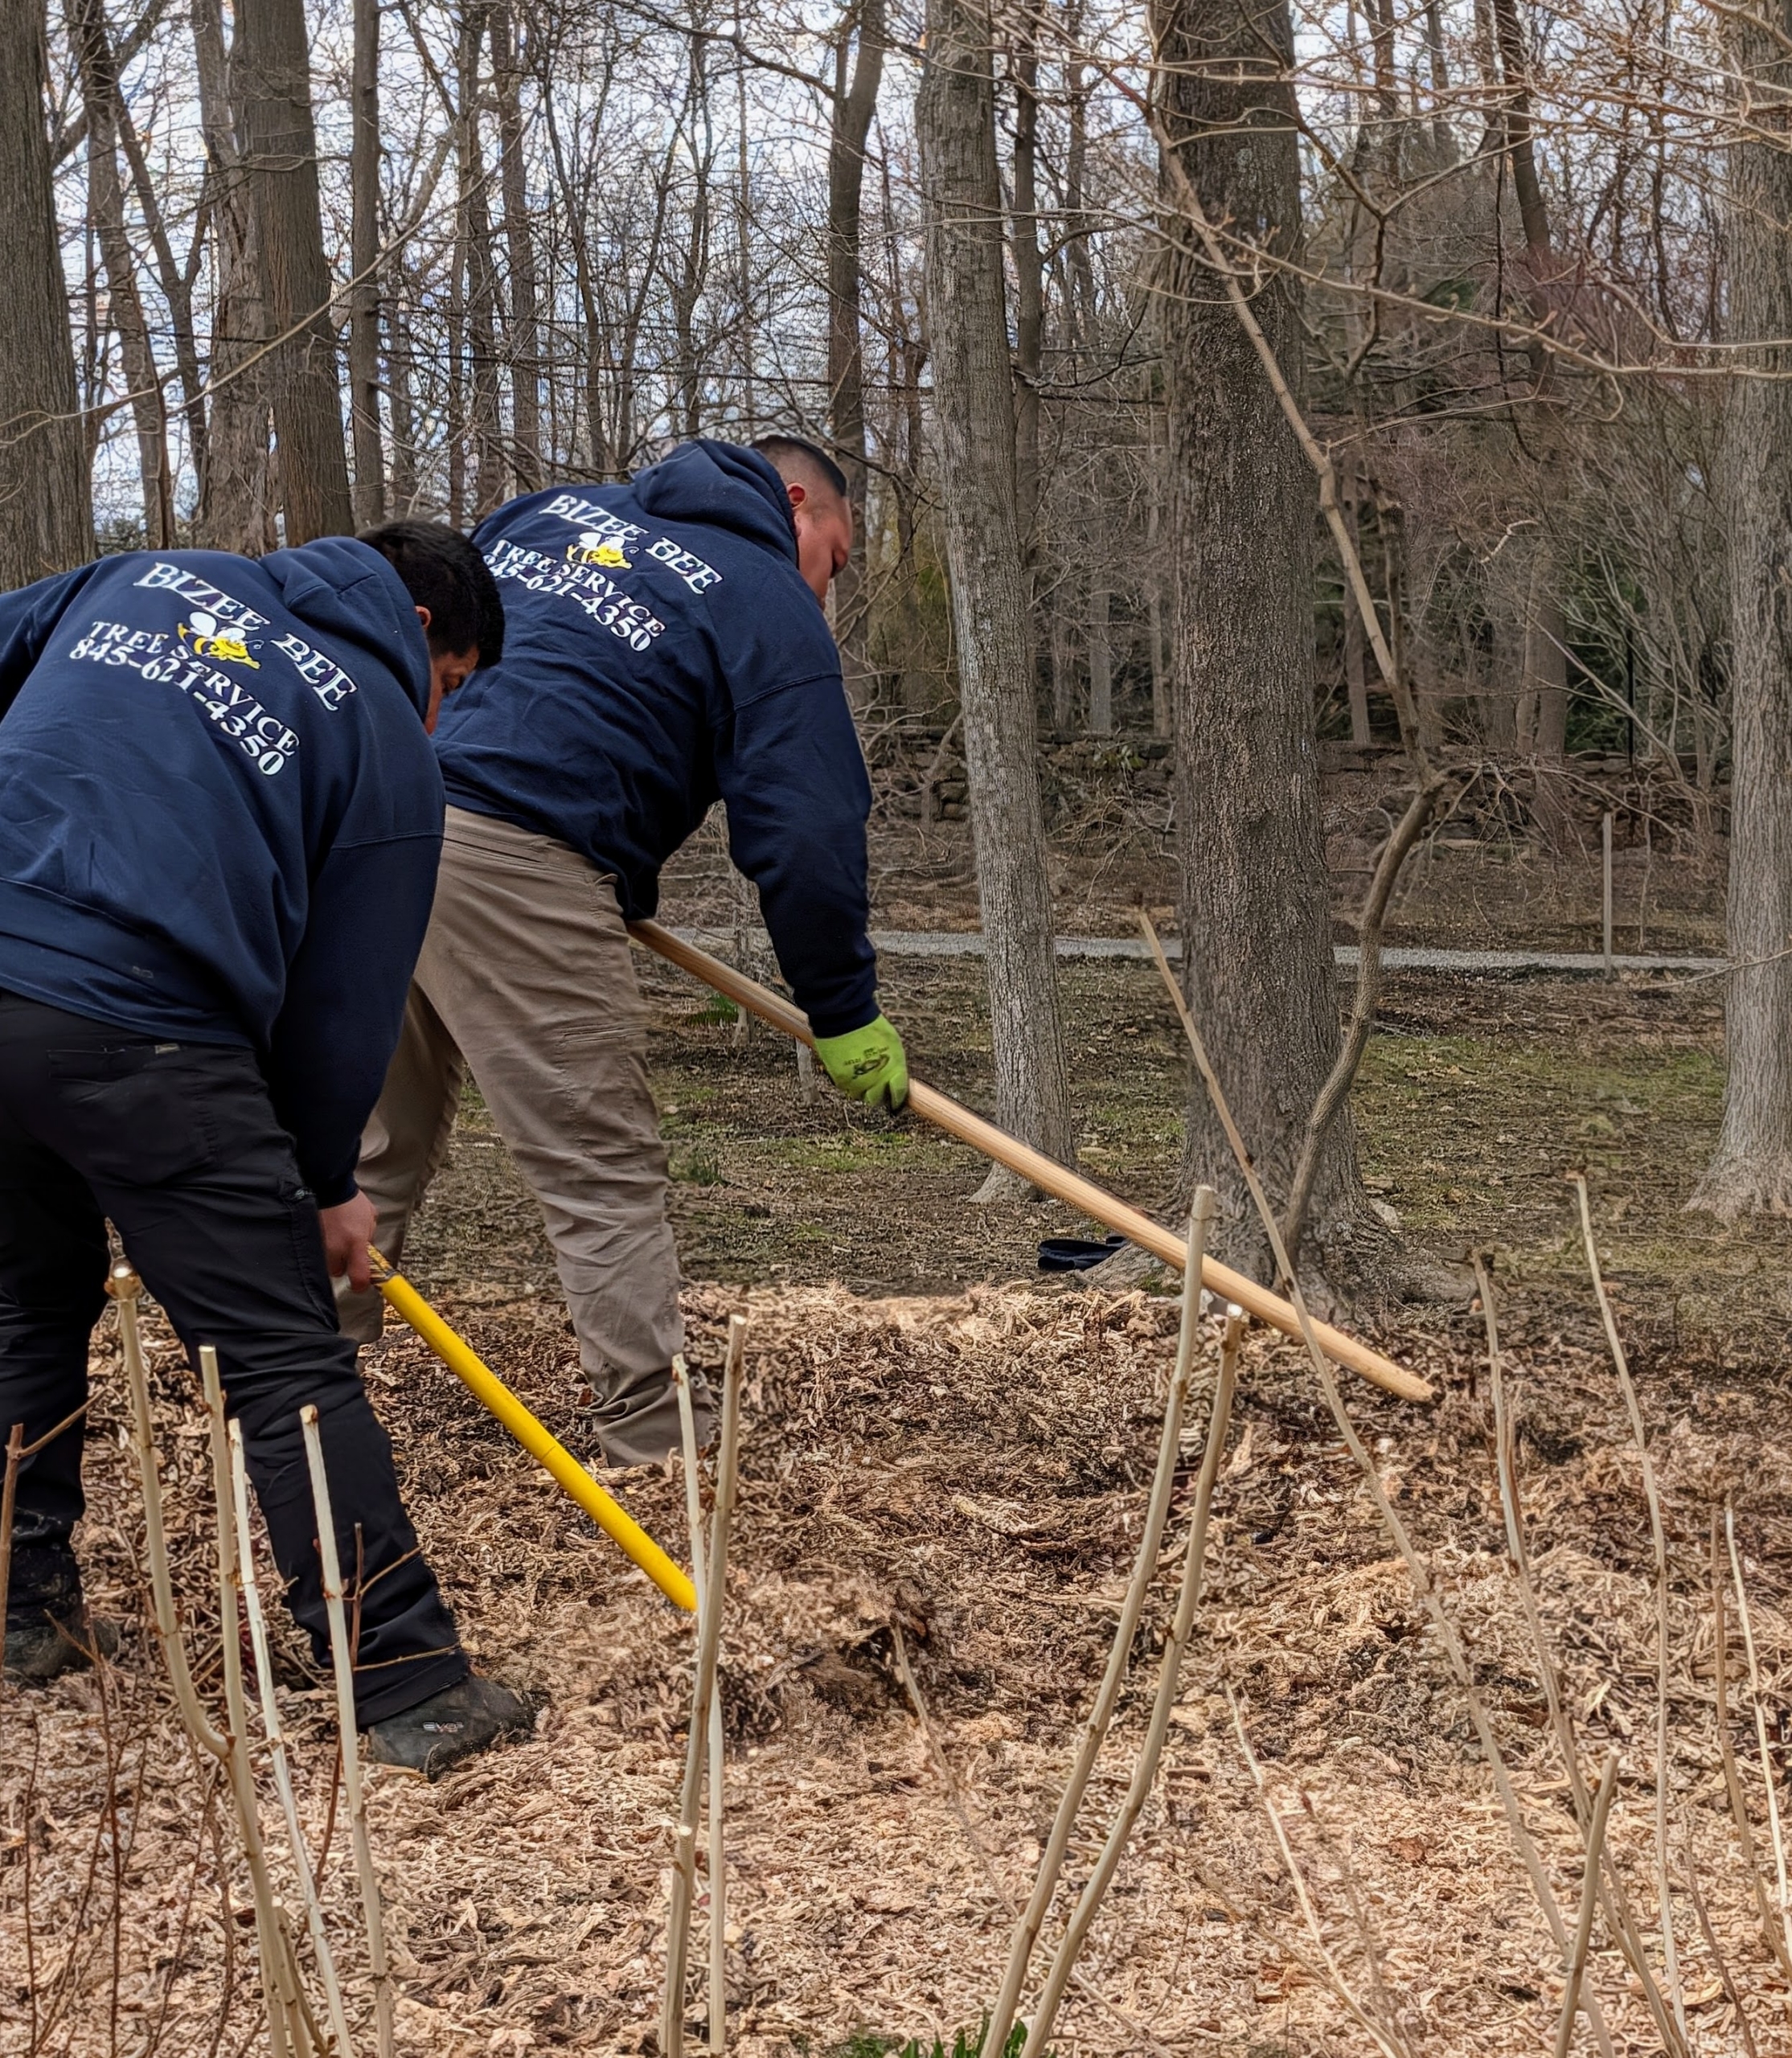
Once a stump is done, the crew spreads and levels the wood chips.
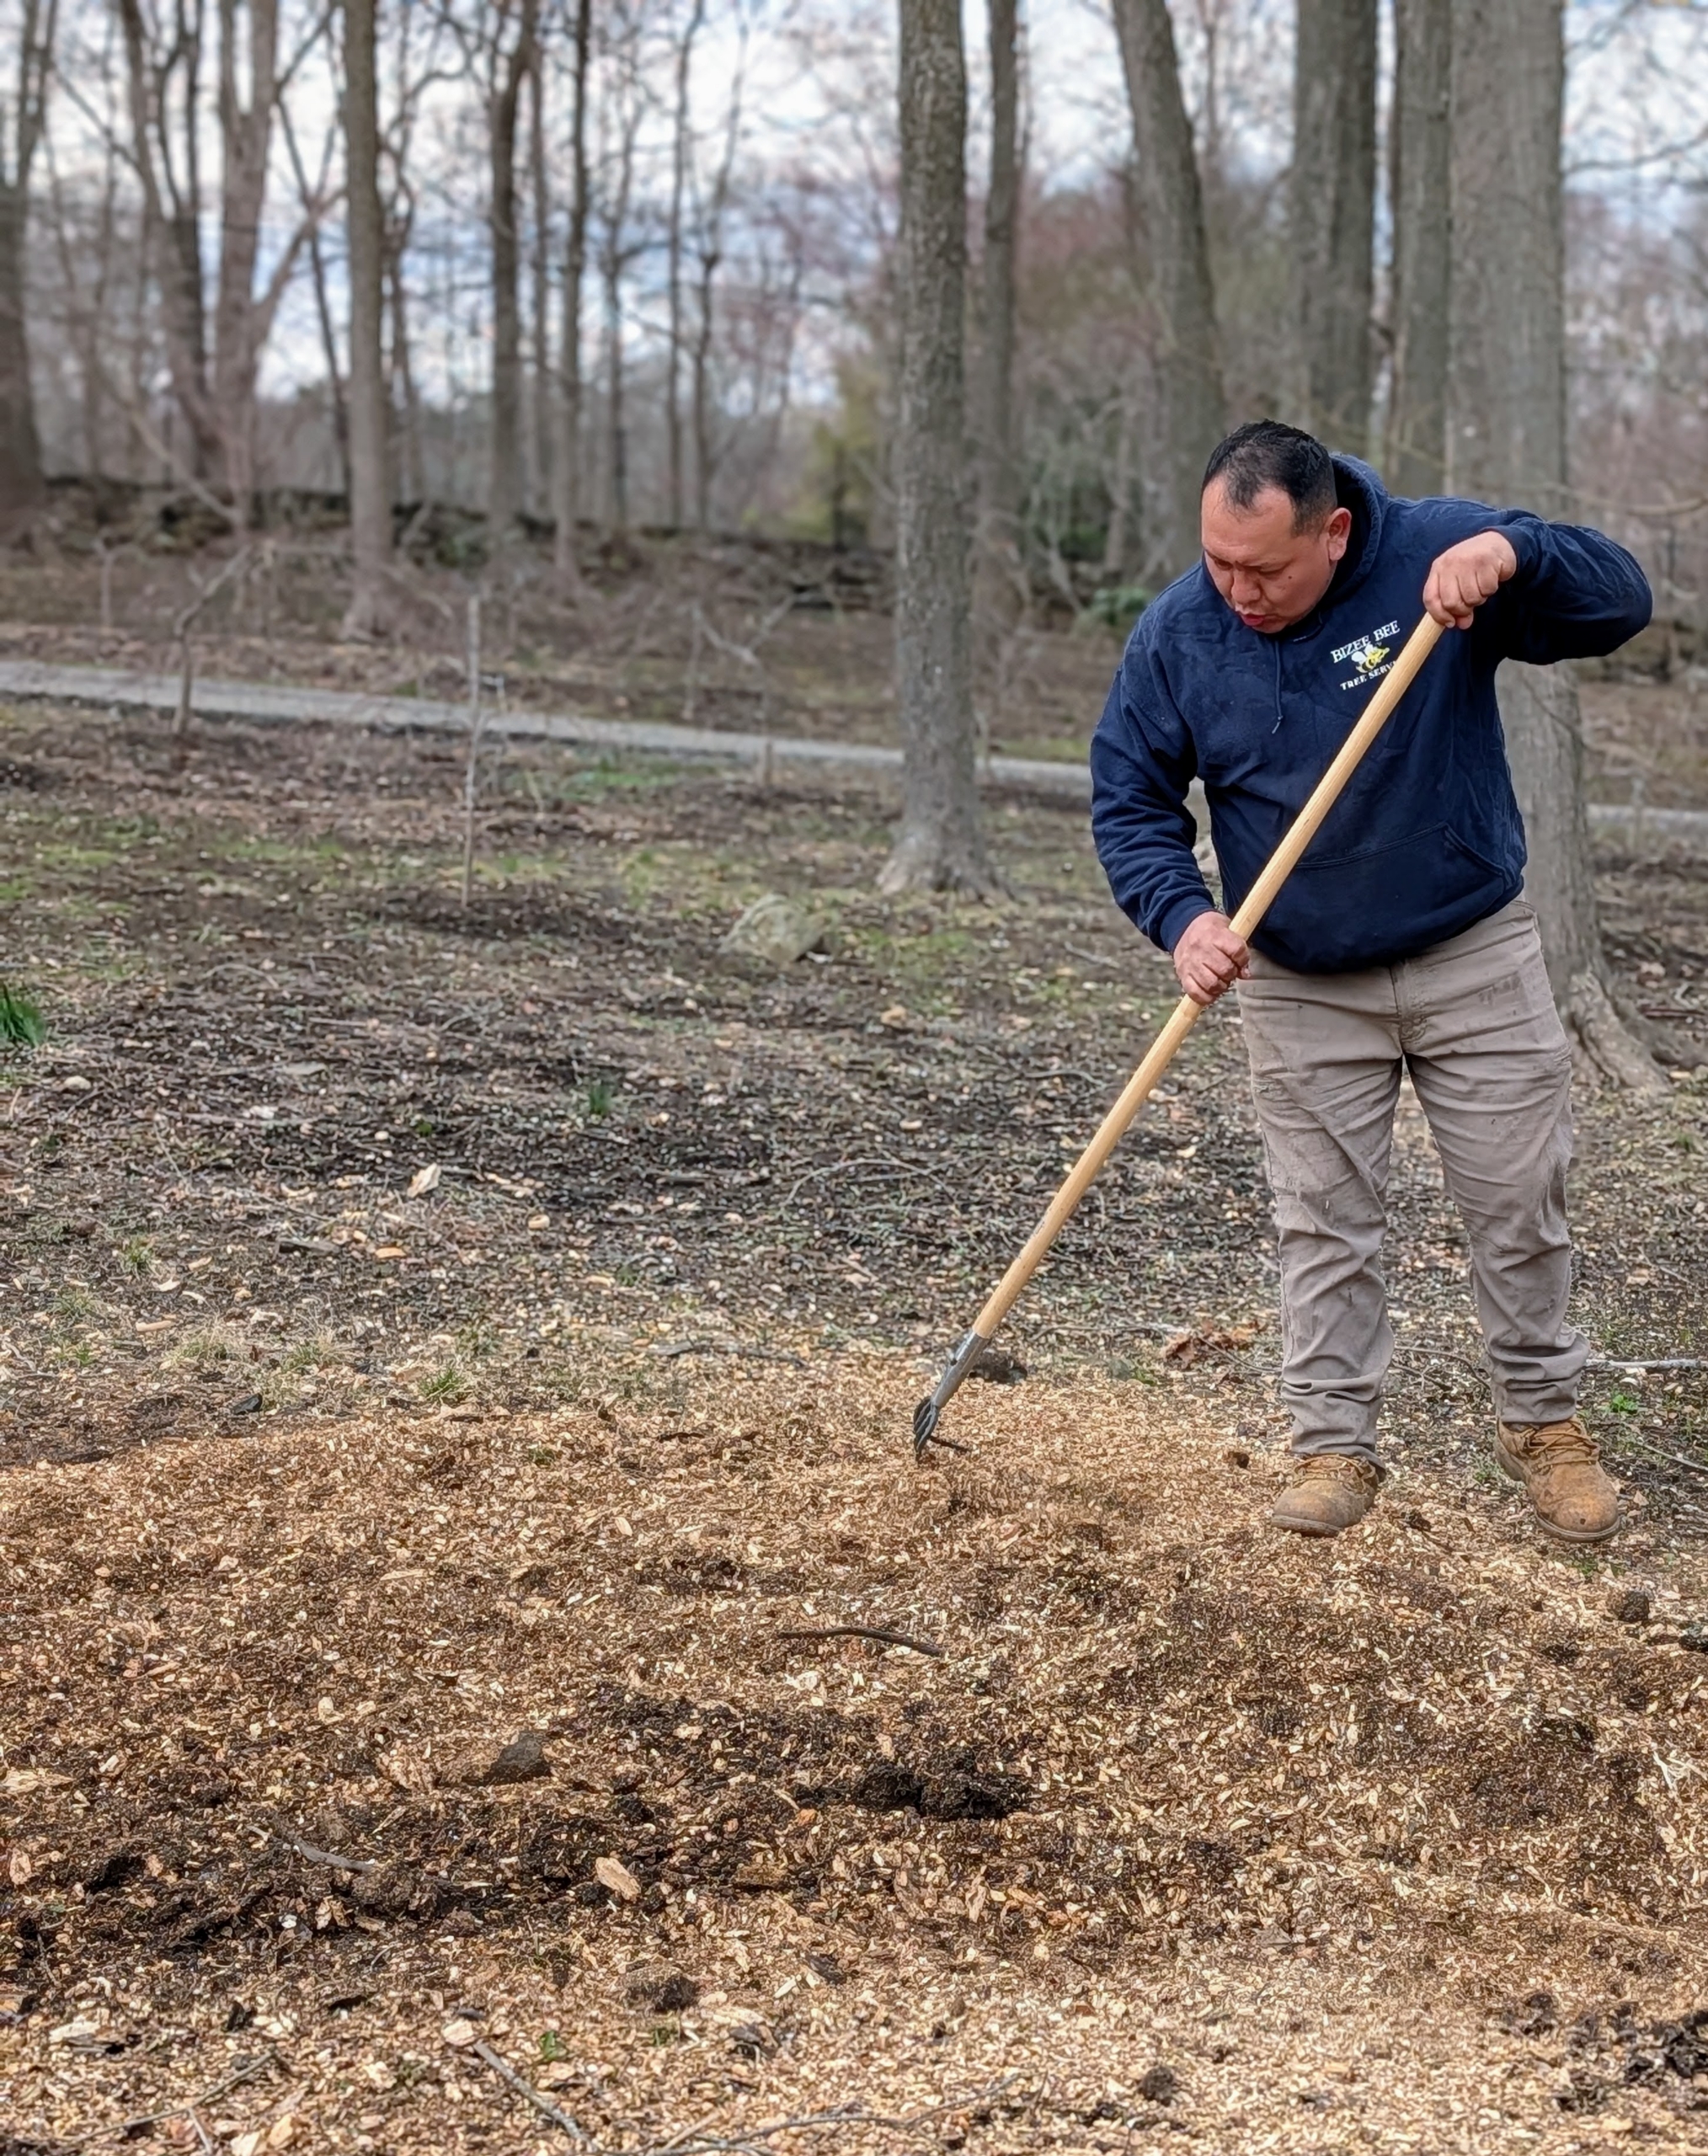
And finally, the area is raked evenly.
This space at the edge of my Japanese Maple Woodland and near my hoop houses is now clear, giving more light and air to the plants and smaller trees nearby.