Winter is the best time to cover garden beds with a rich layer of organic compost.
Fortunately I am able to make it right here at my Bedford, New York farm. During the course of the year, my outdoor grounds crew amasses large amounts of organic debris - felled trees, branches, underbrush, etc., but none of the material goes to waste. The wood is either repurposed quickly as milled lumber, chipped and returned to the woodland as top dressing, or mixed with other biodegradable materials including chicken and horse manure to make compost - that nutrient rich “black gold” that's spread generously over all the gardens to protect plants and growing bulbs and keep them insulated until spring.
Enjoy these photos.
Another very big and important task that is done regularly around my farm is top dressing all the garden beds with nutrient-rich and protective compost. This is it! I make it right here in my compost yard.
Right now, my outdoor grounds crew is covering garden beds all around my home with beautiful compost.
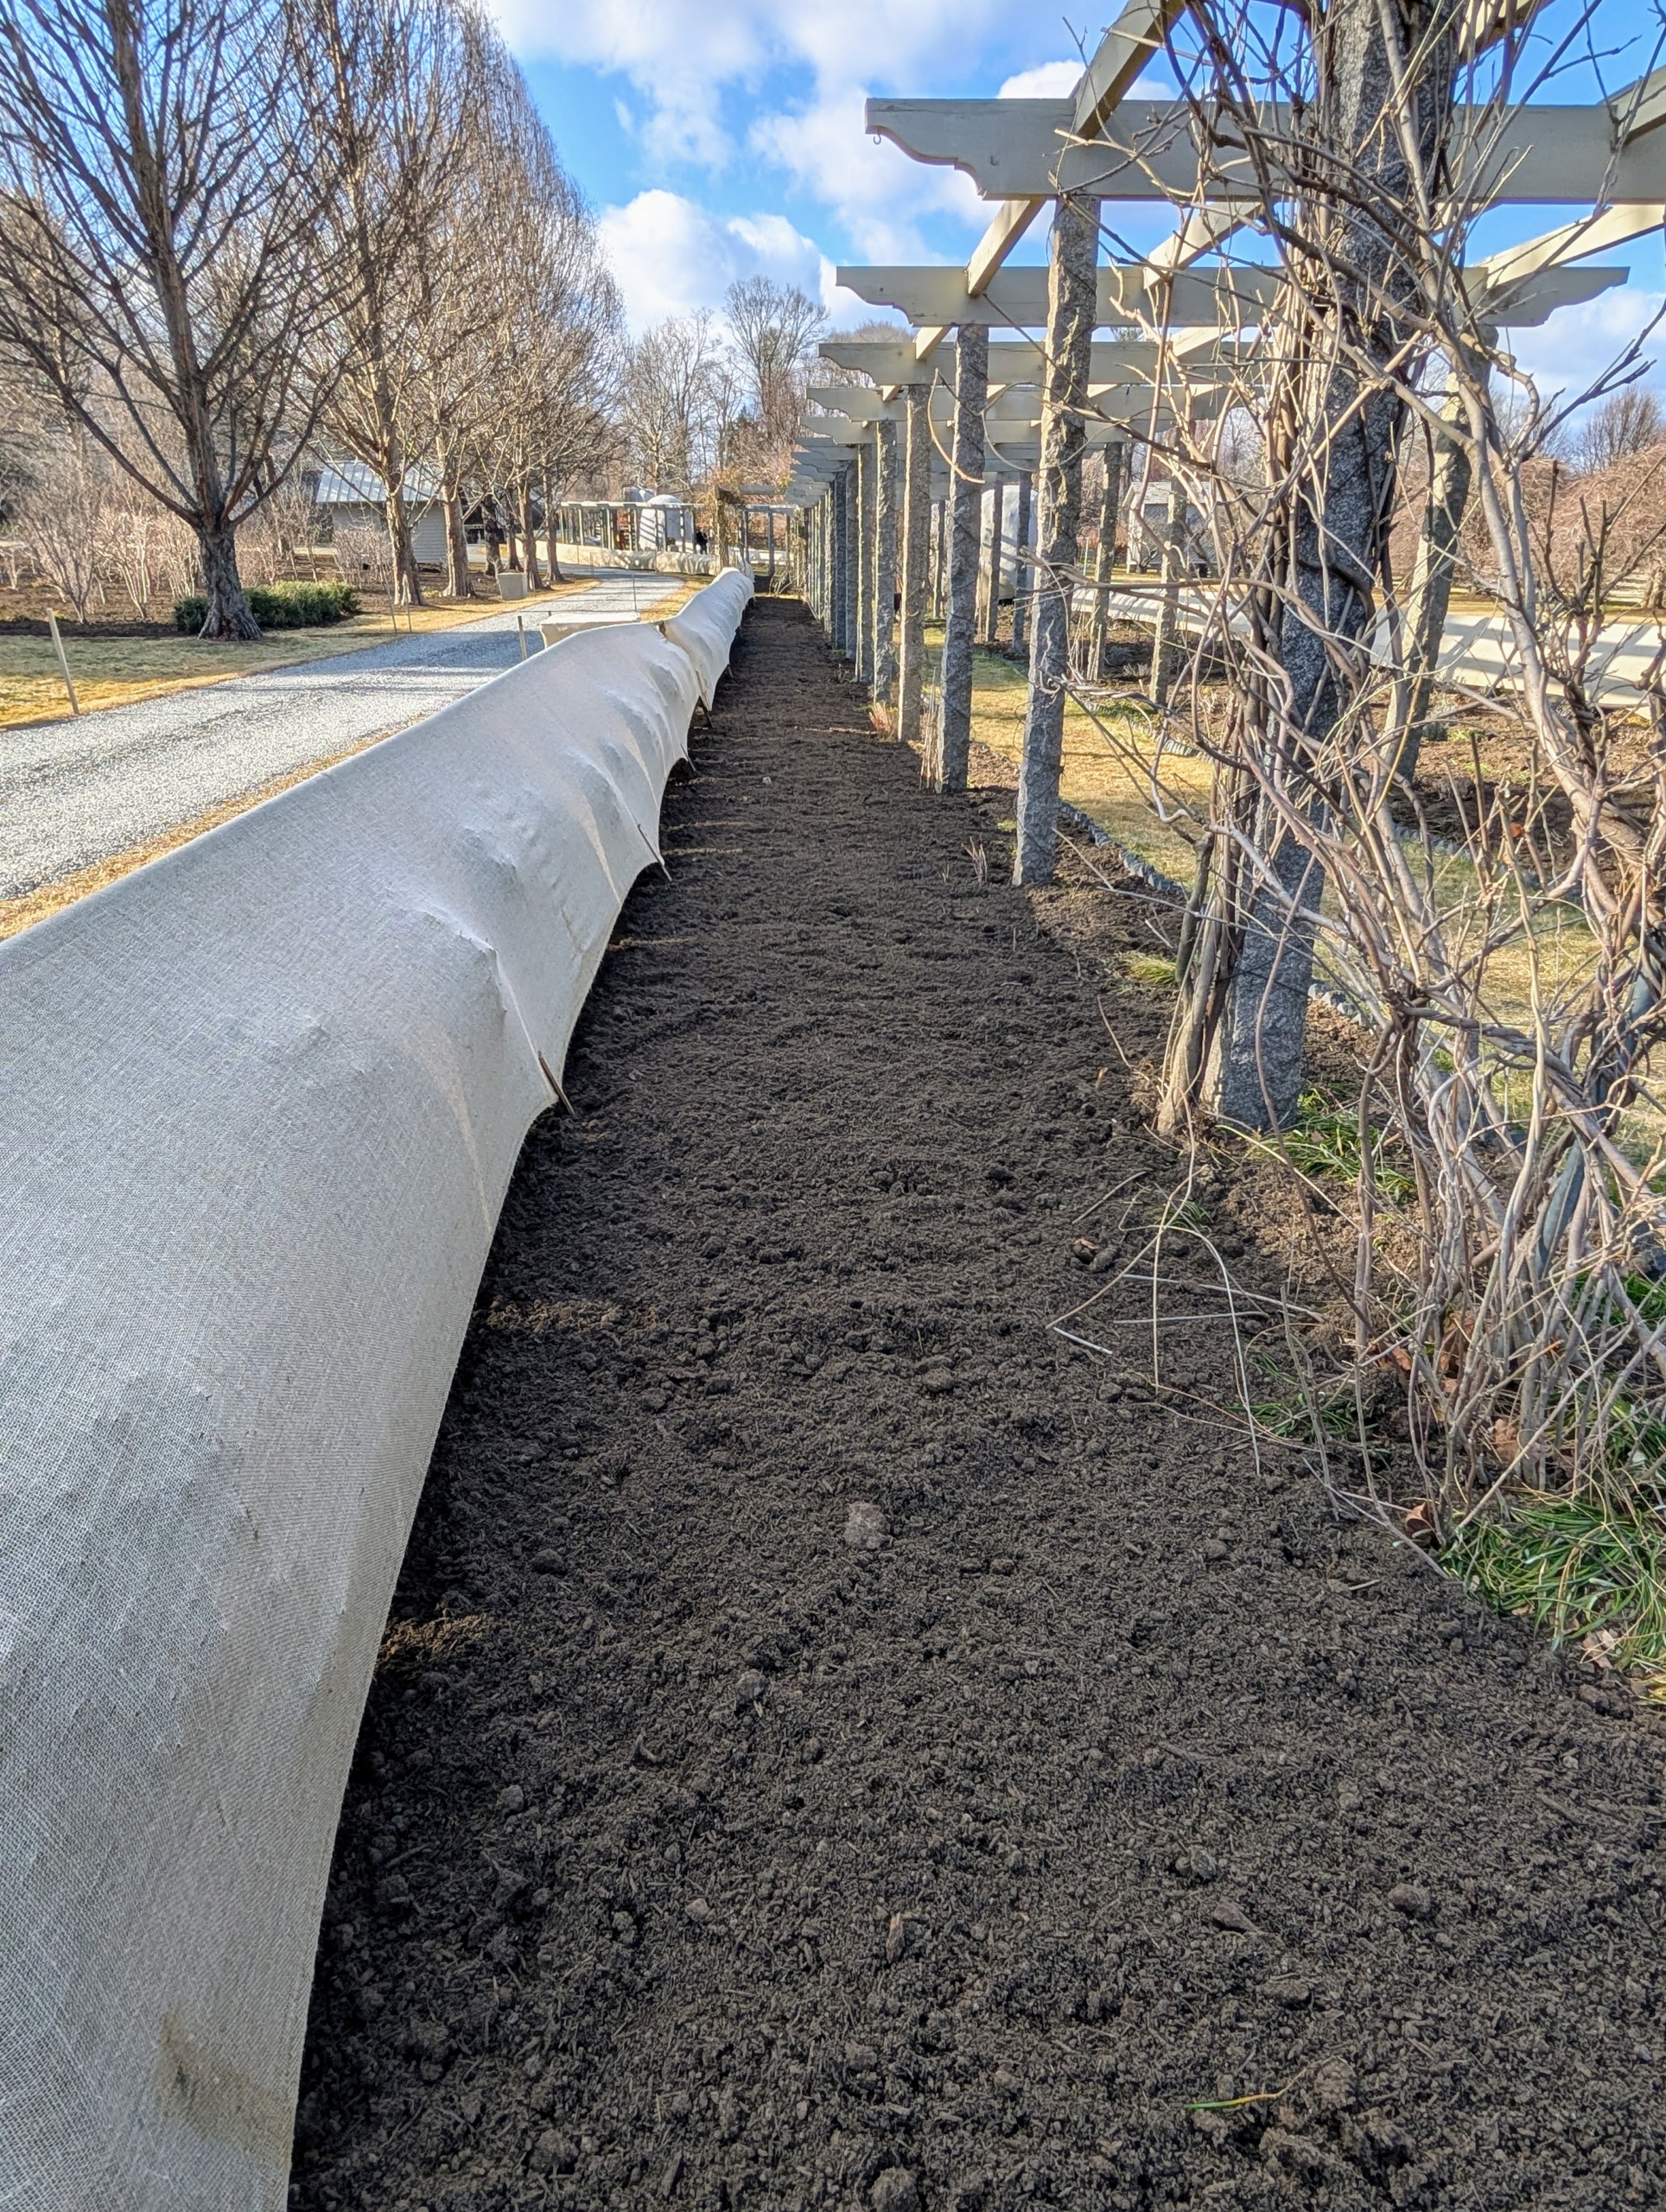
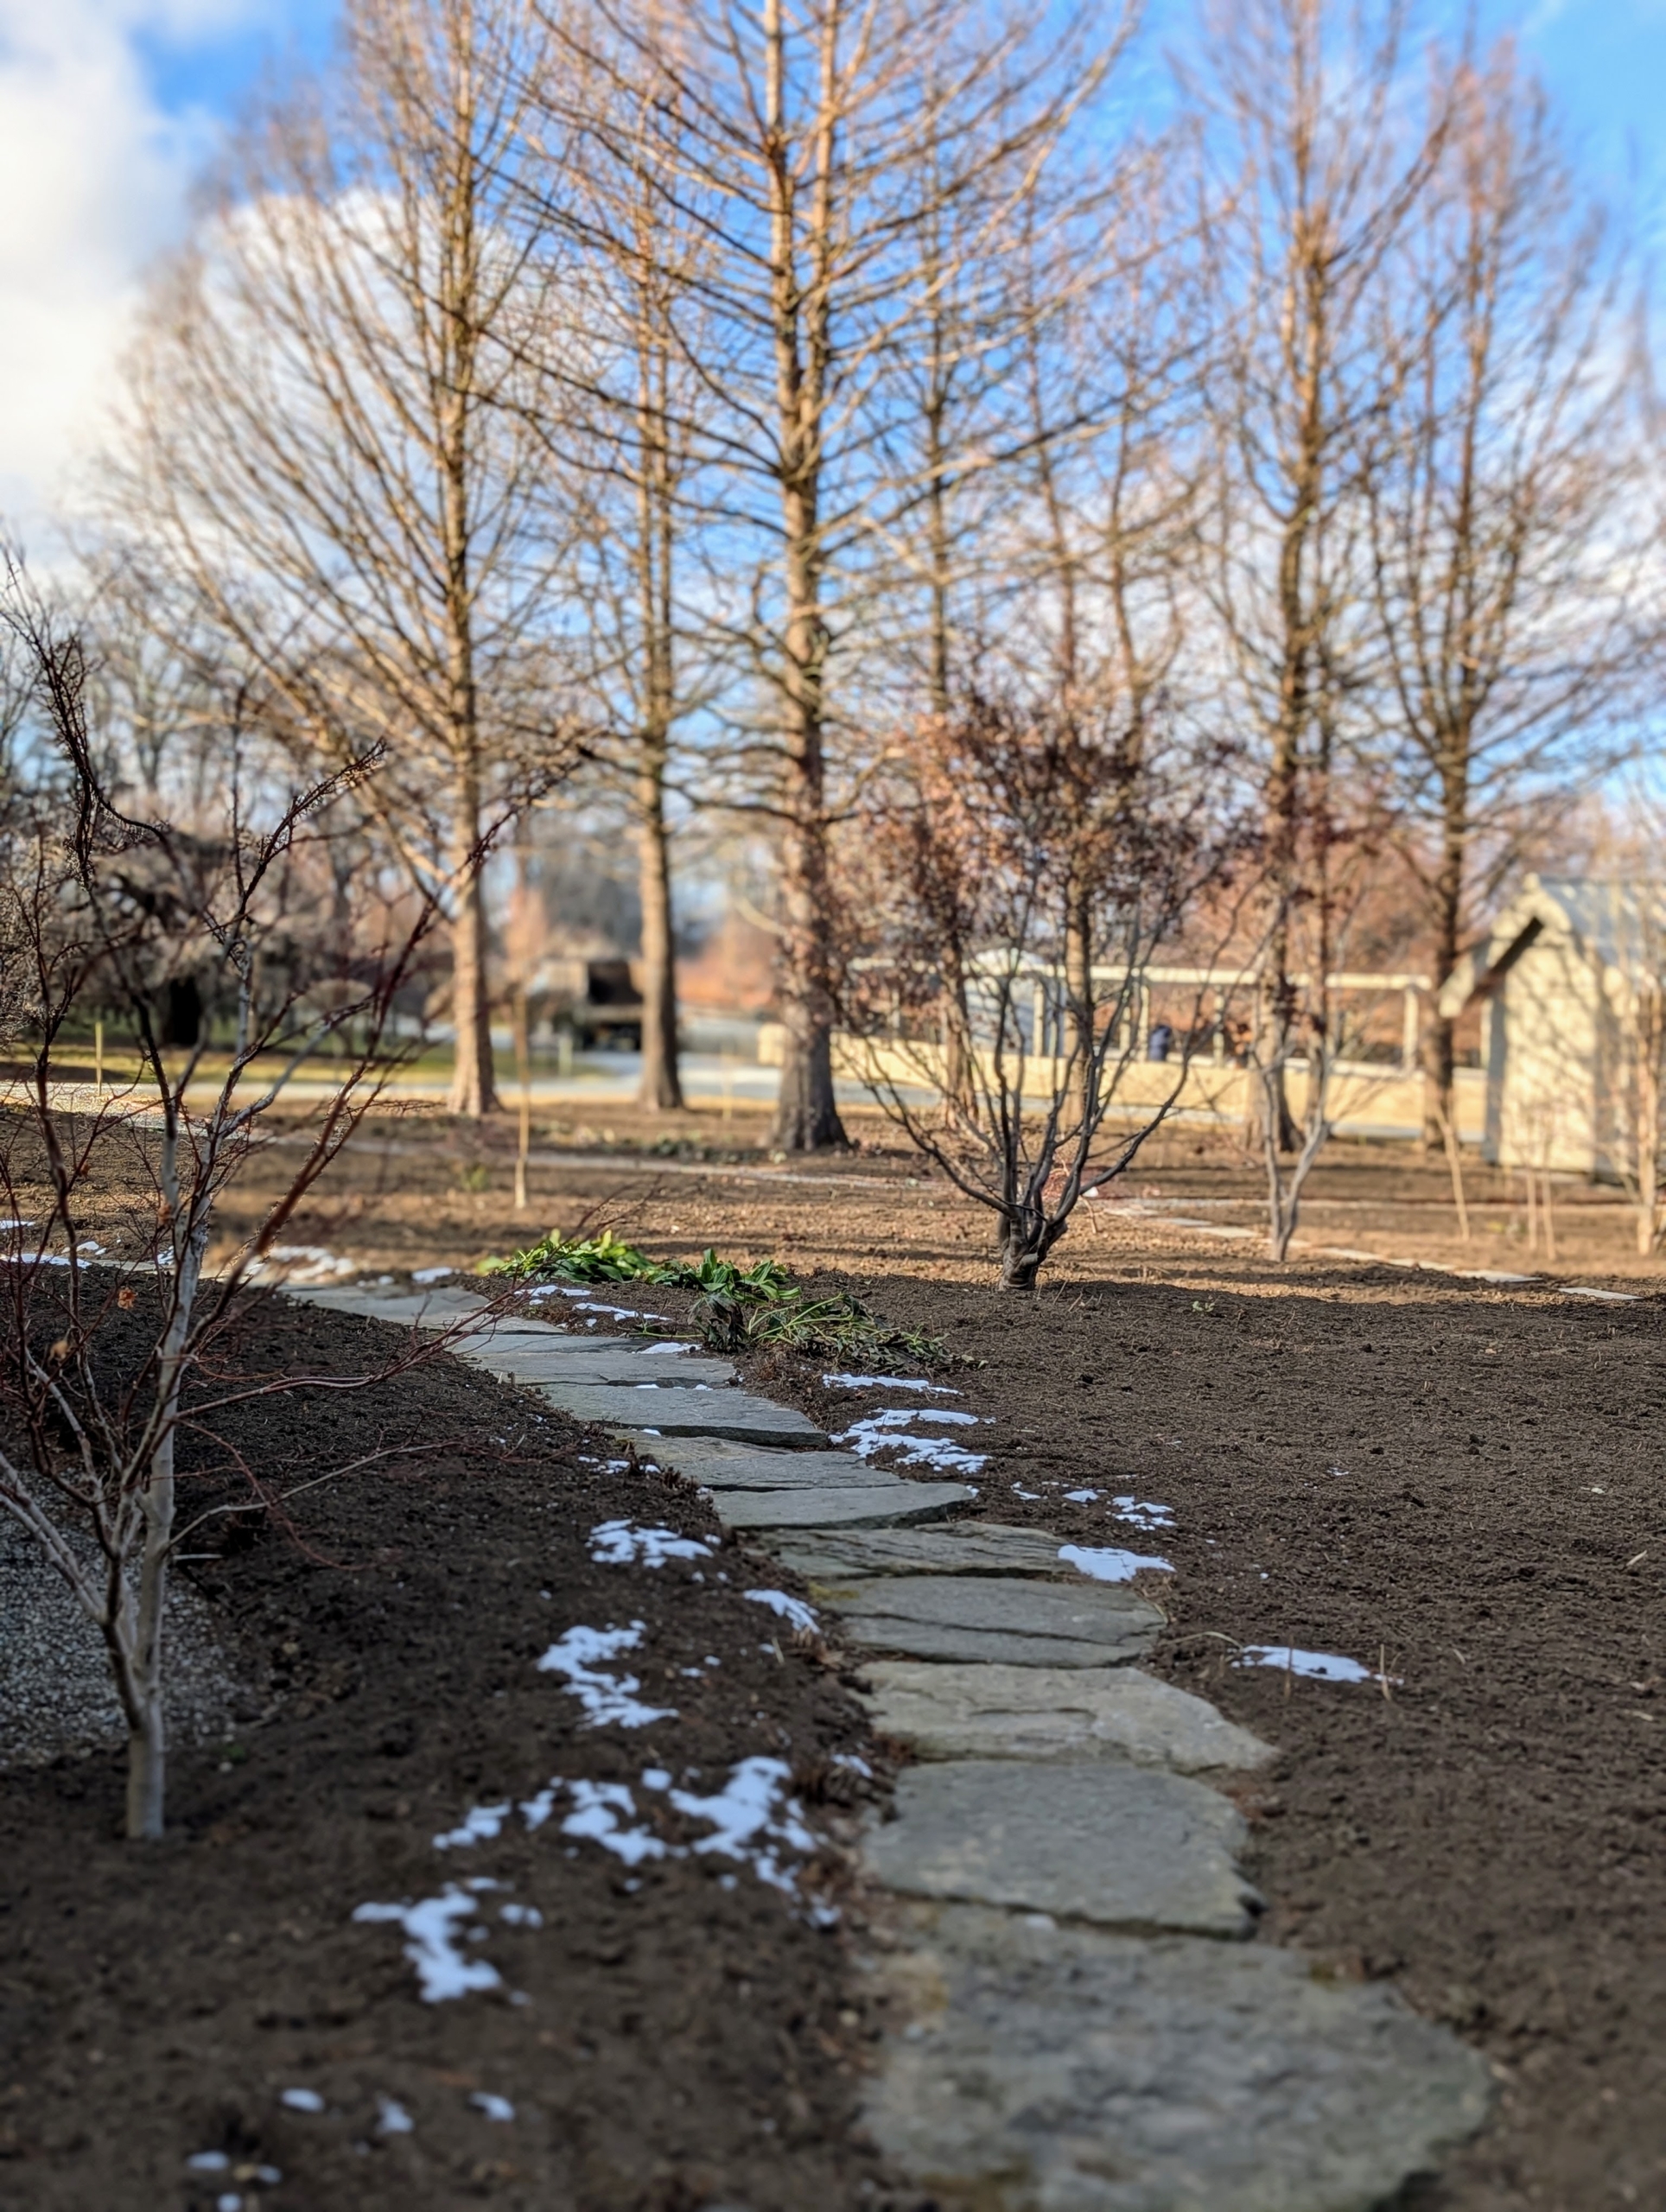
This is my long pergola garden – freshly dressed with compost.
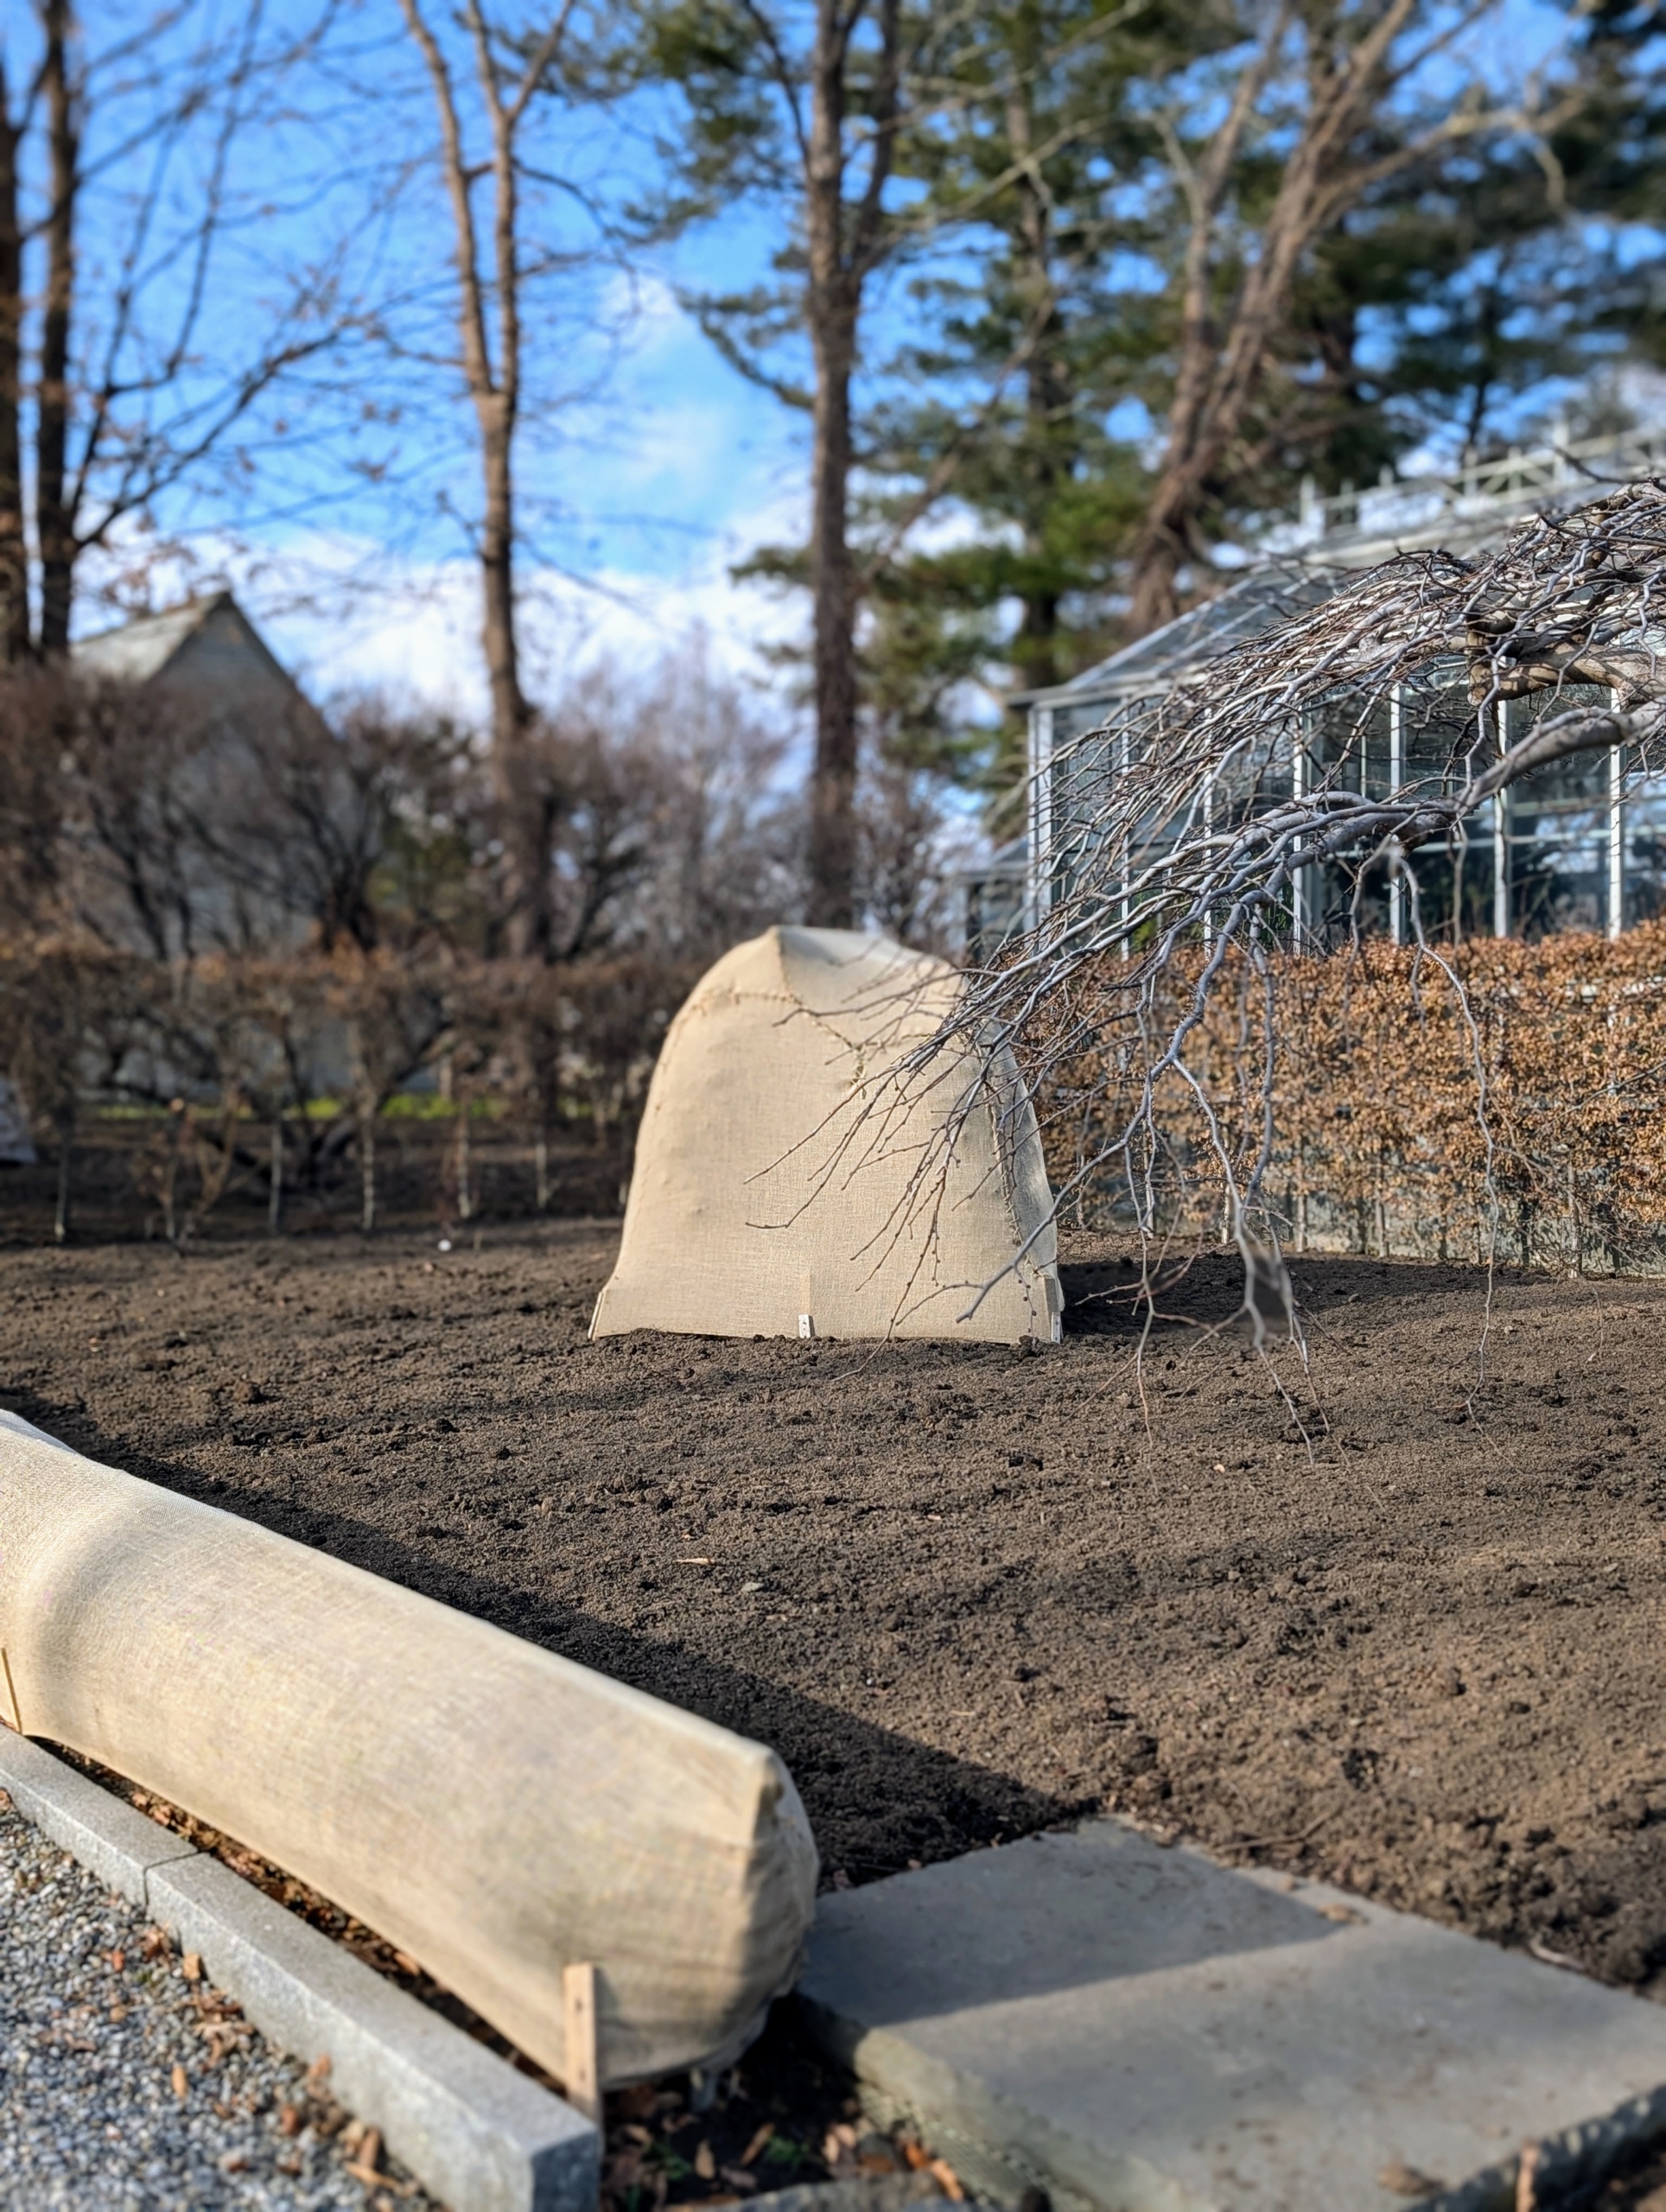
And this bed is in front of my main greenhouse. The boxwood shrub is tucked safely under protective burlap and the surrounding area is covered with a layer of compost to insulate all the bulbs below.
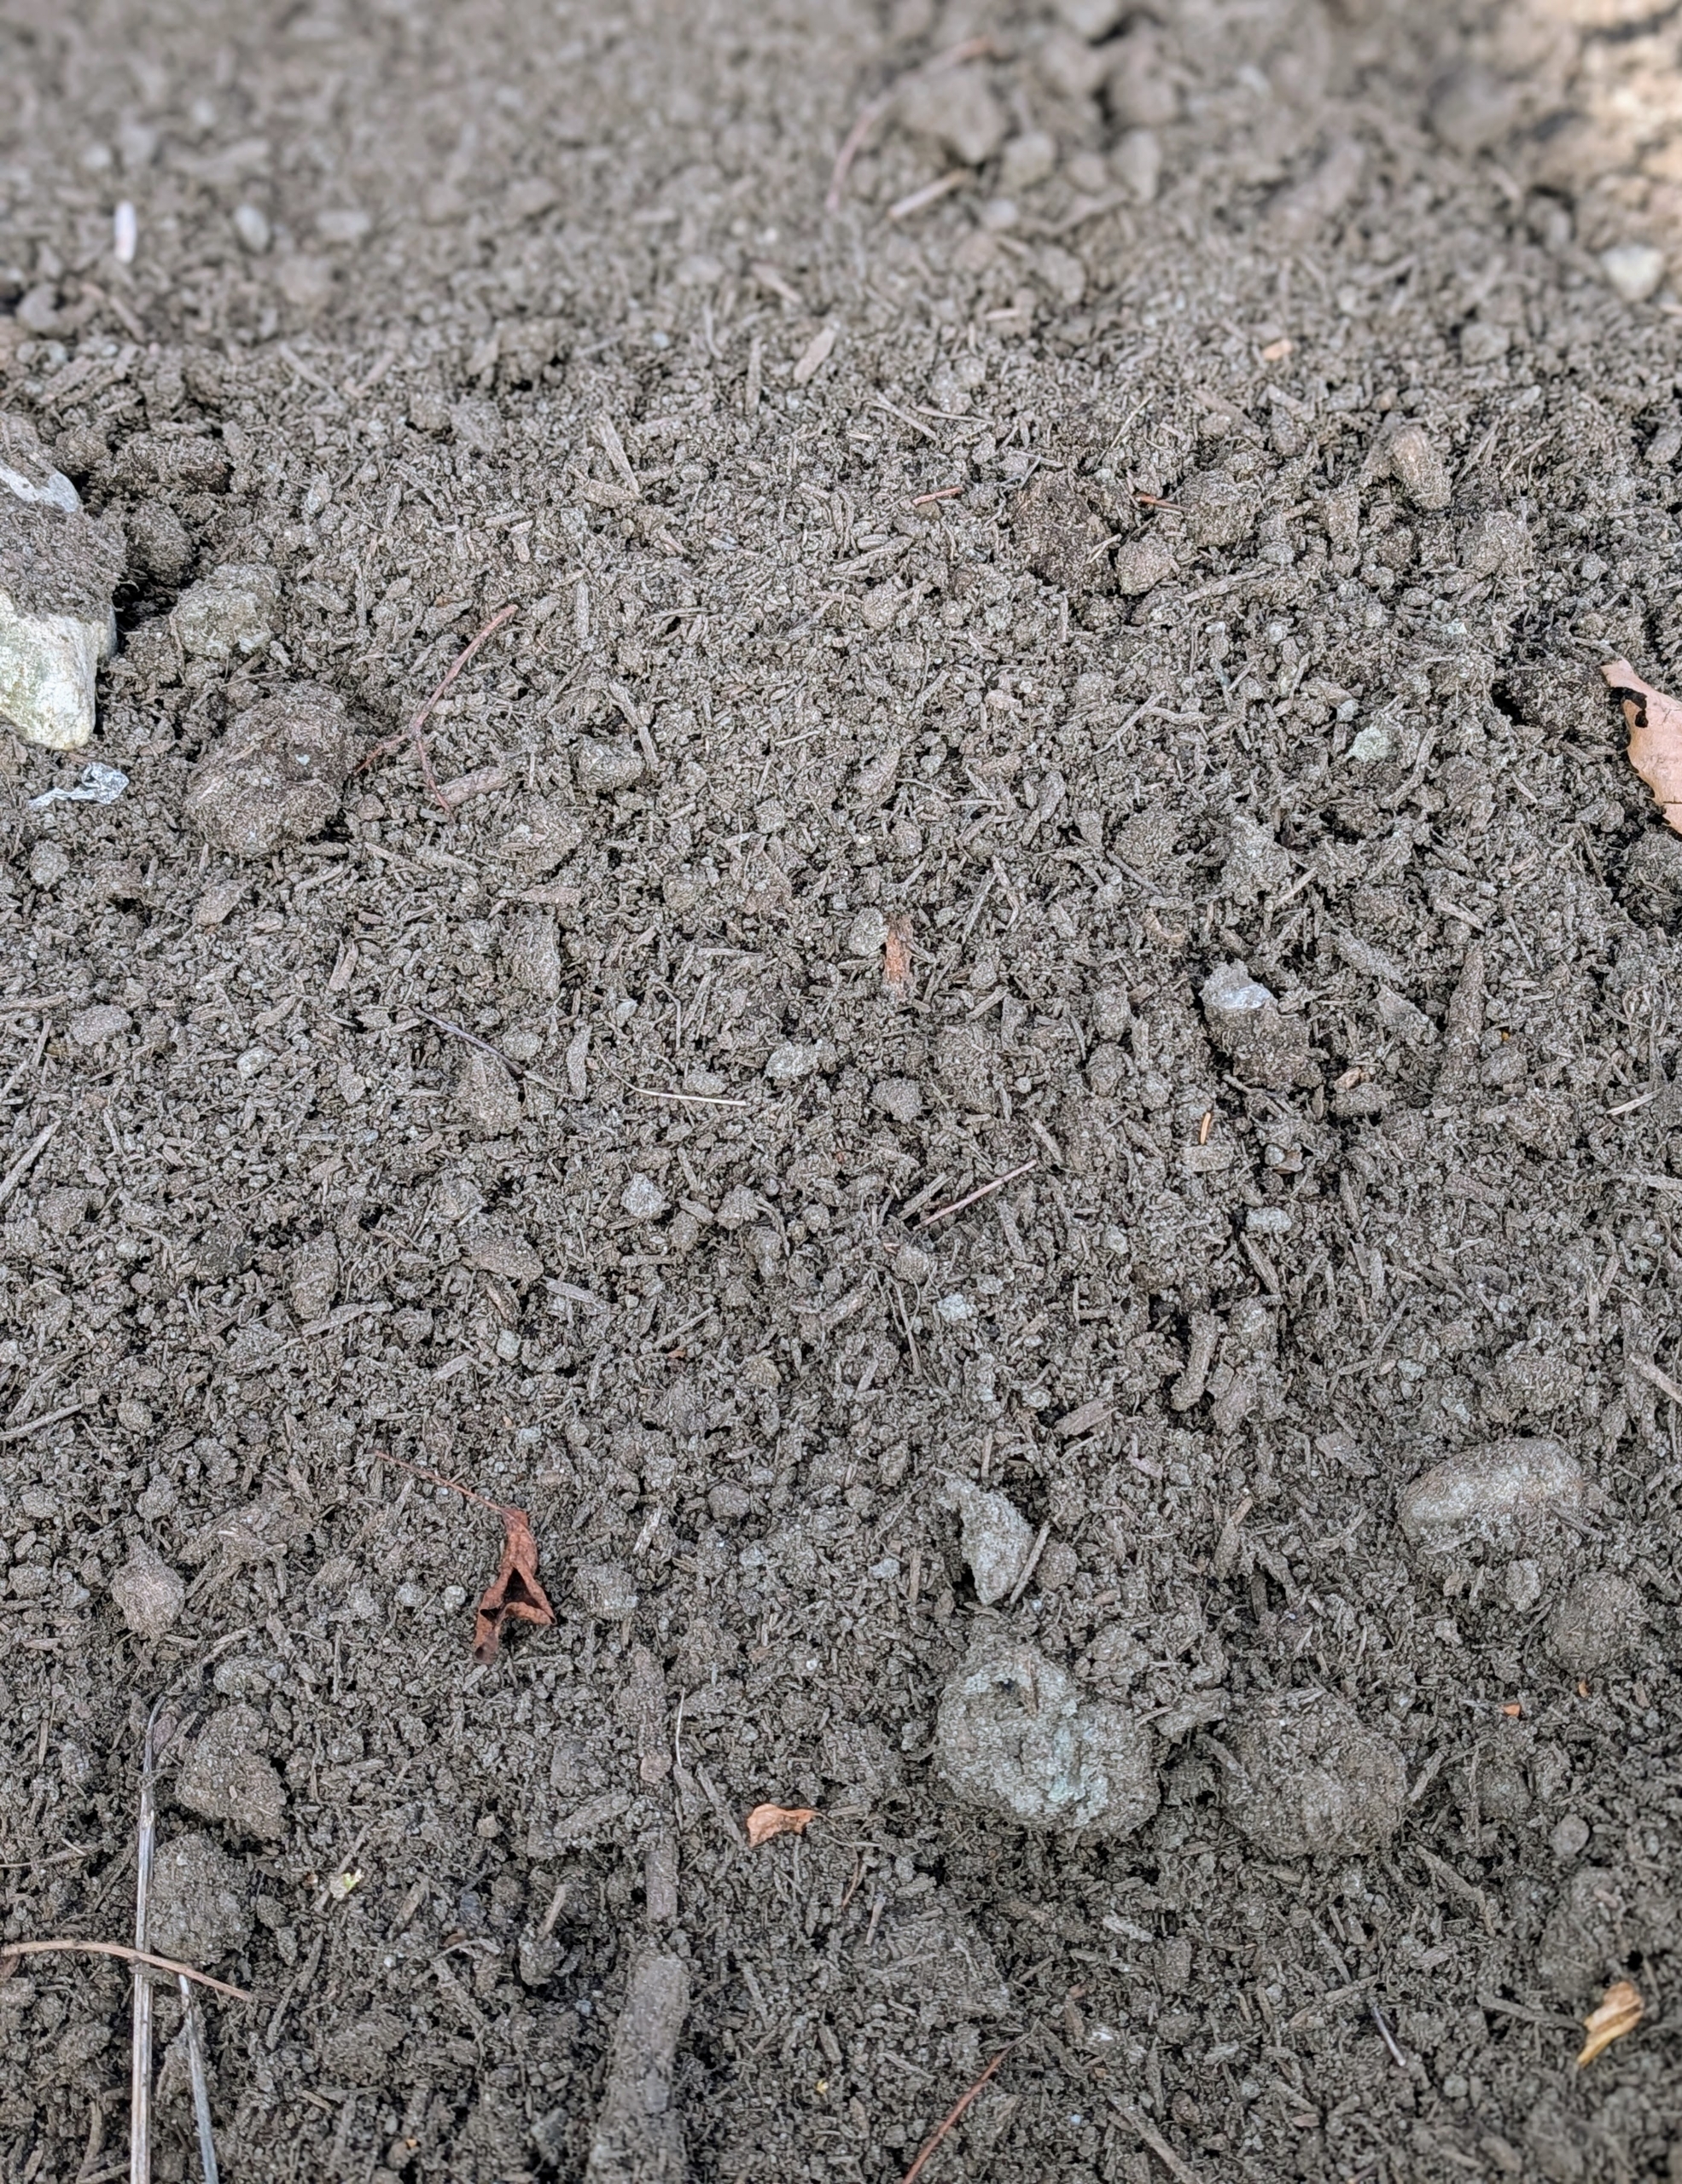
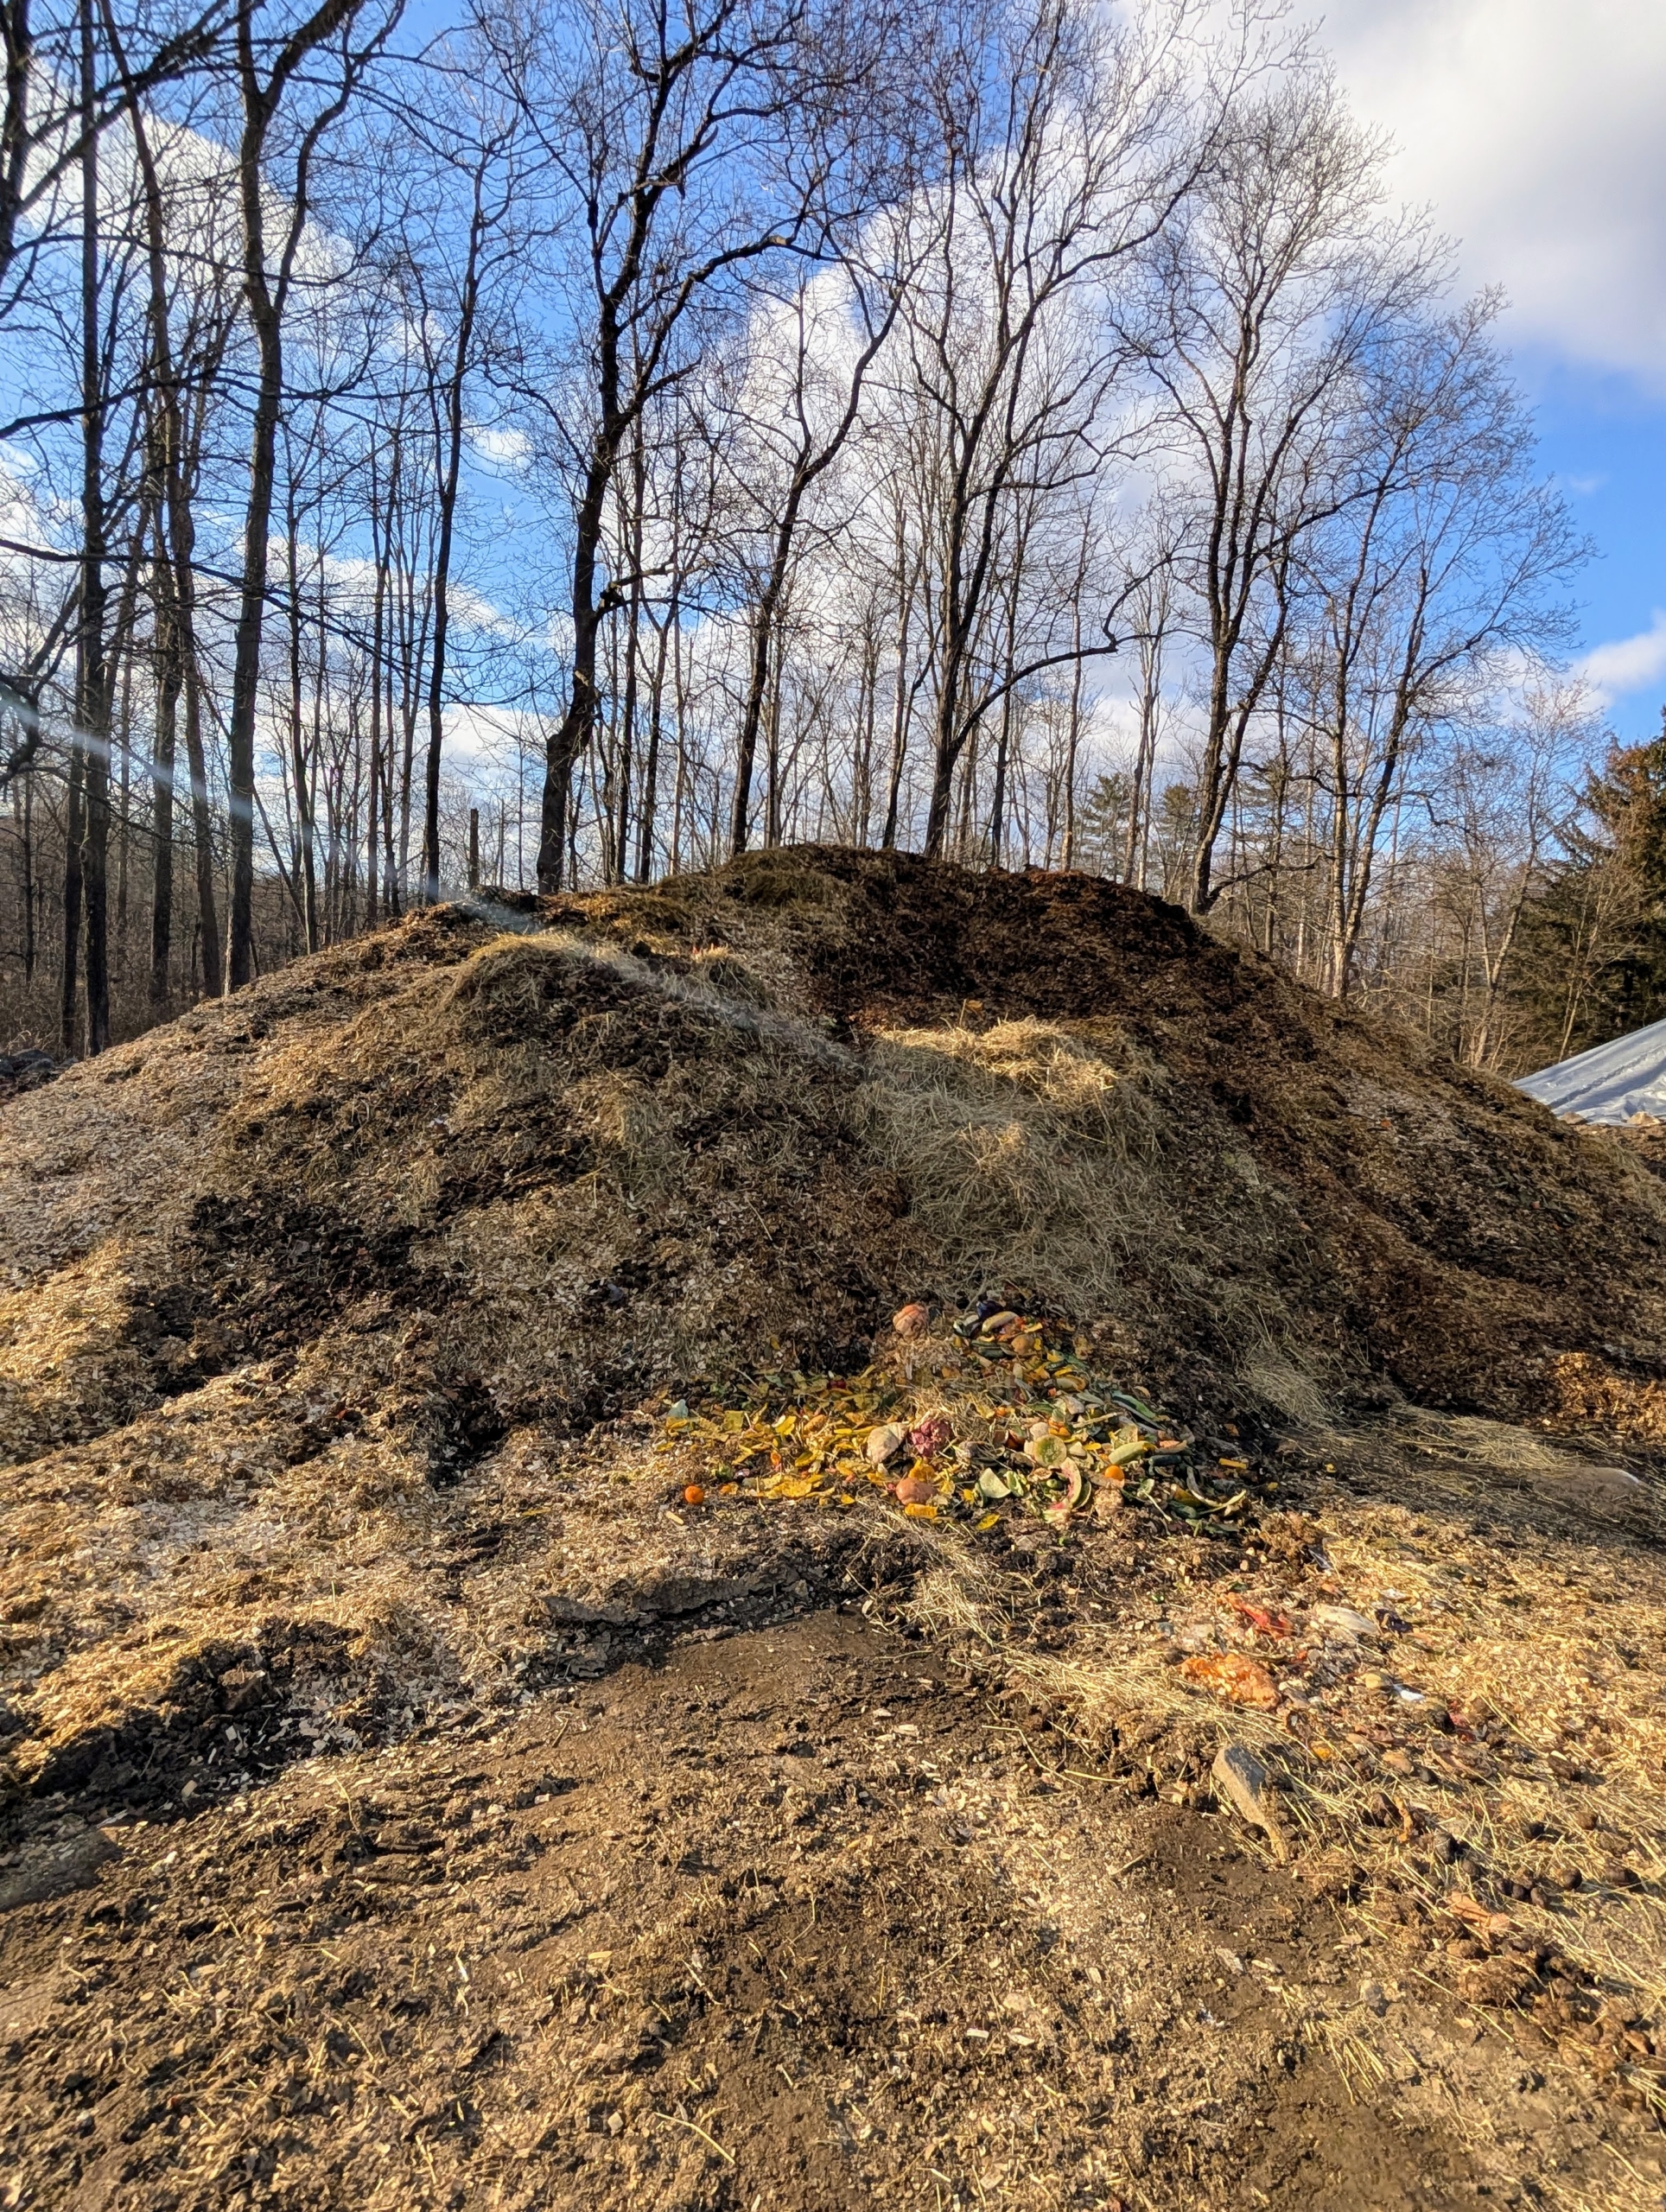
Here’s a closer look at the compost, what gardeners call “black gold” because of all the nutrients it adds to the existing soil.
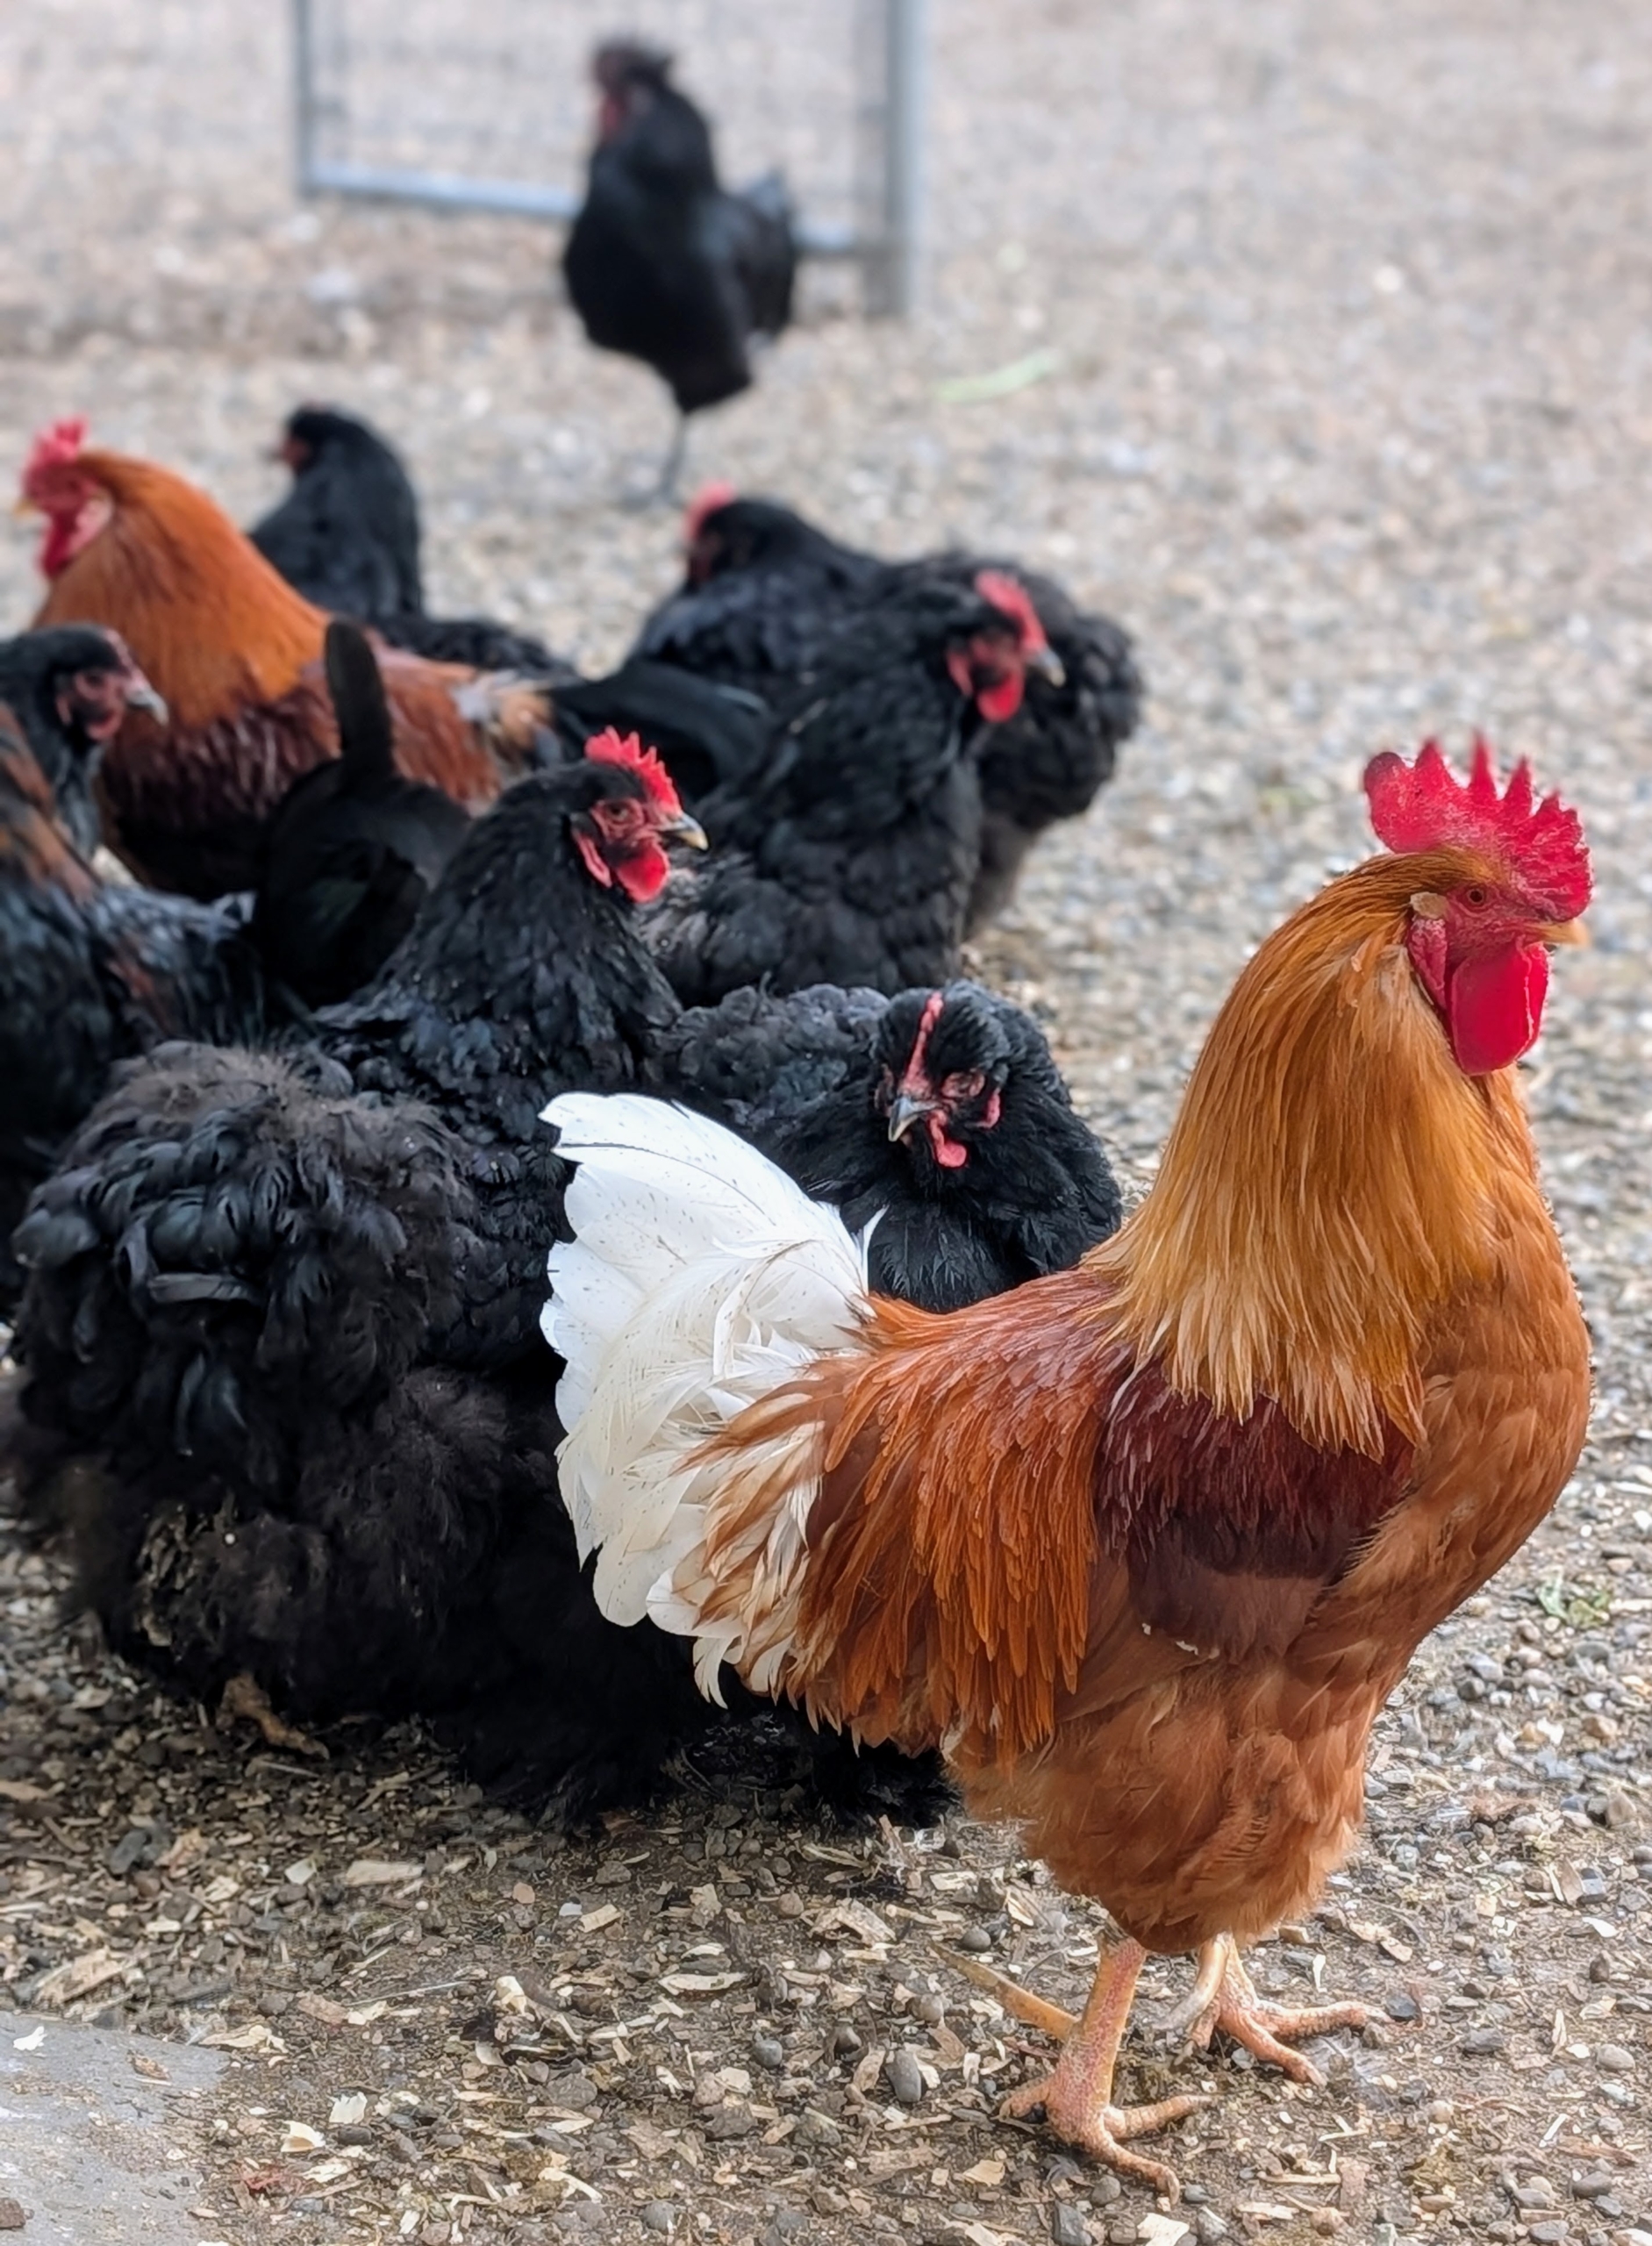
And much of it starts right here in my chicken yard. My roosters, hens, turkeys, geese, pheasants, and peafowl all help to create my valuable compost.
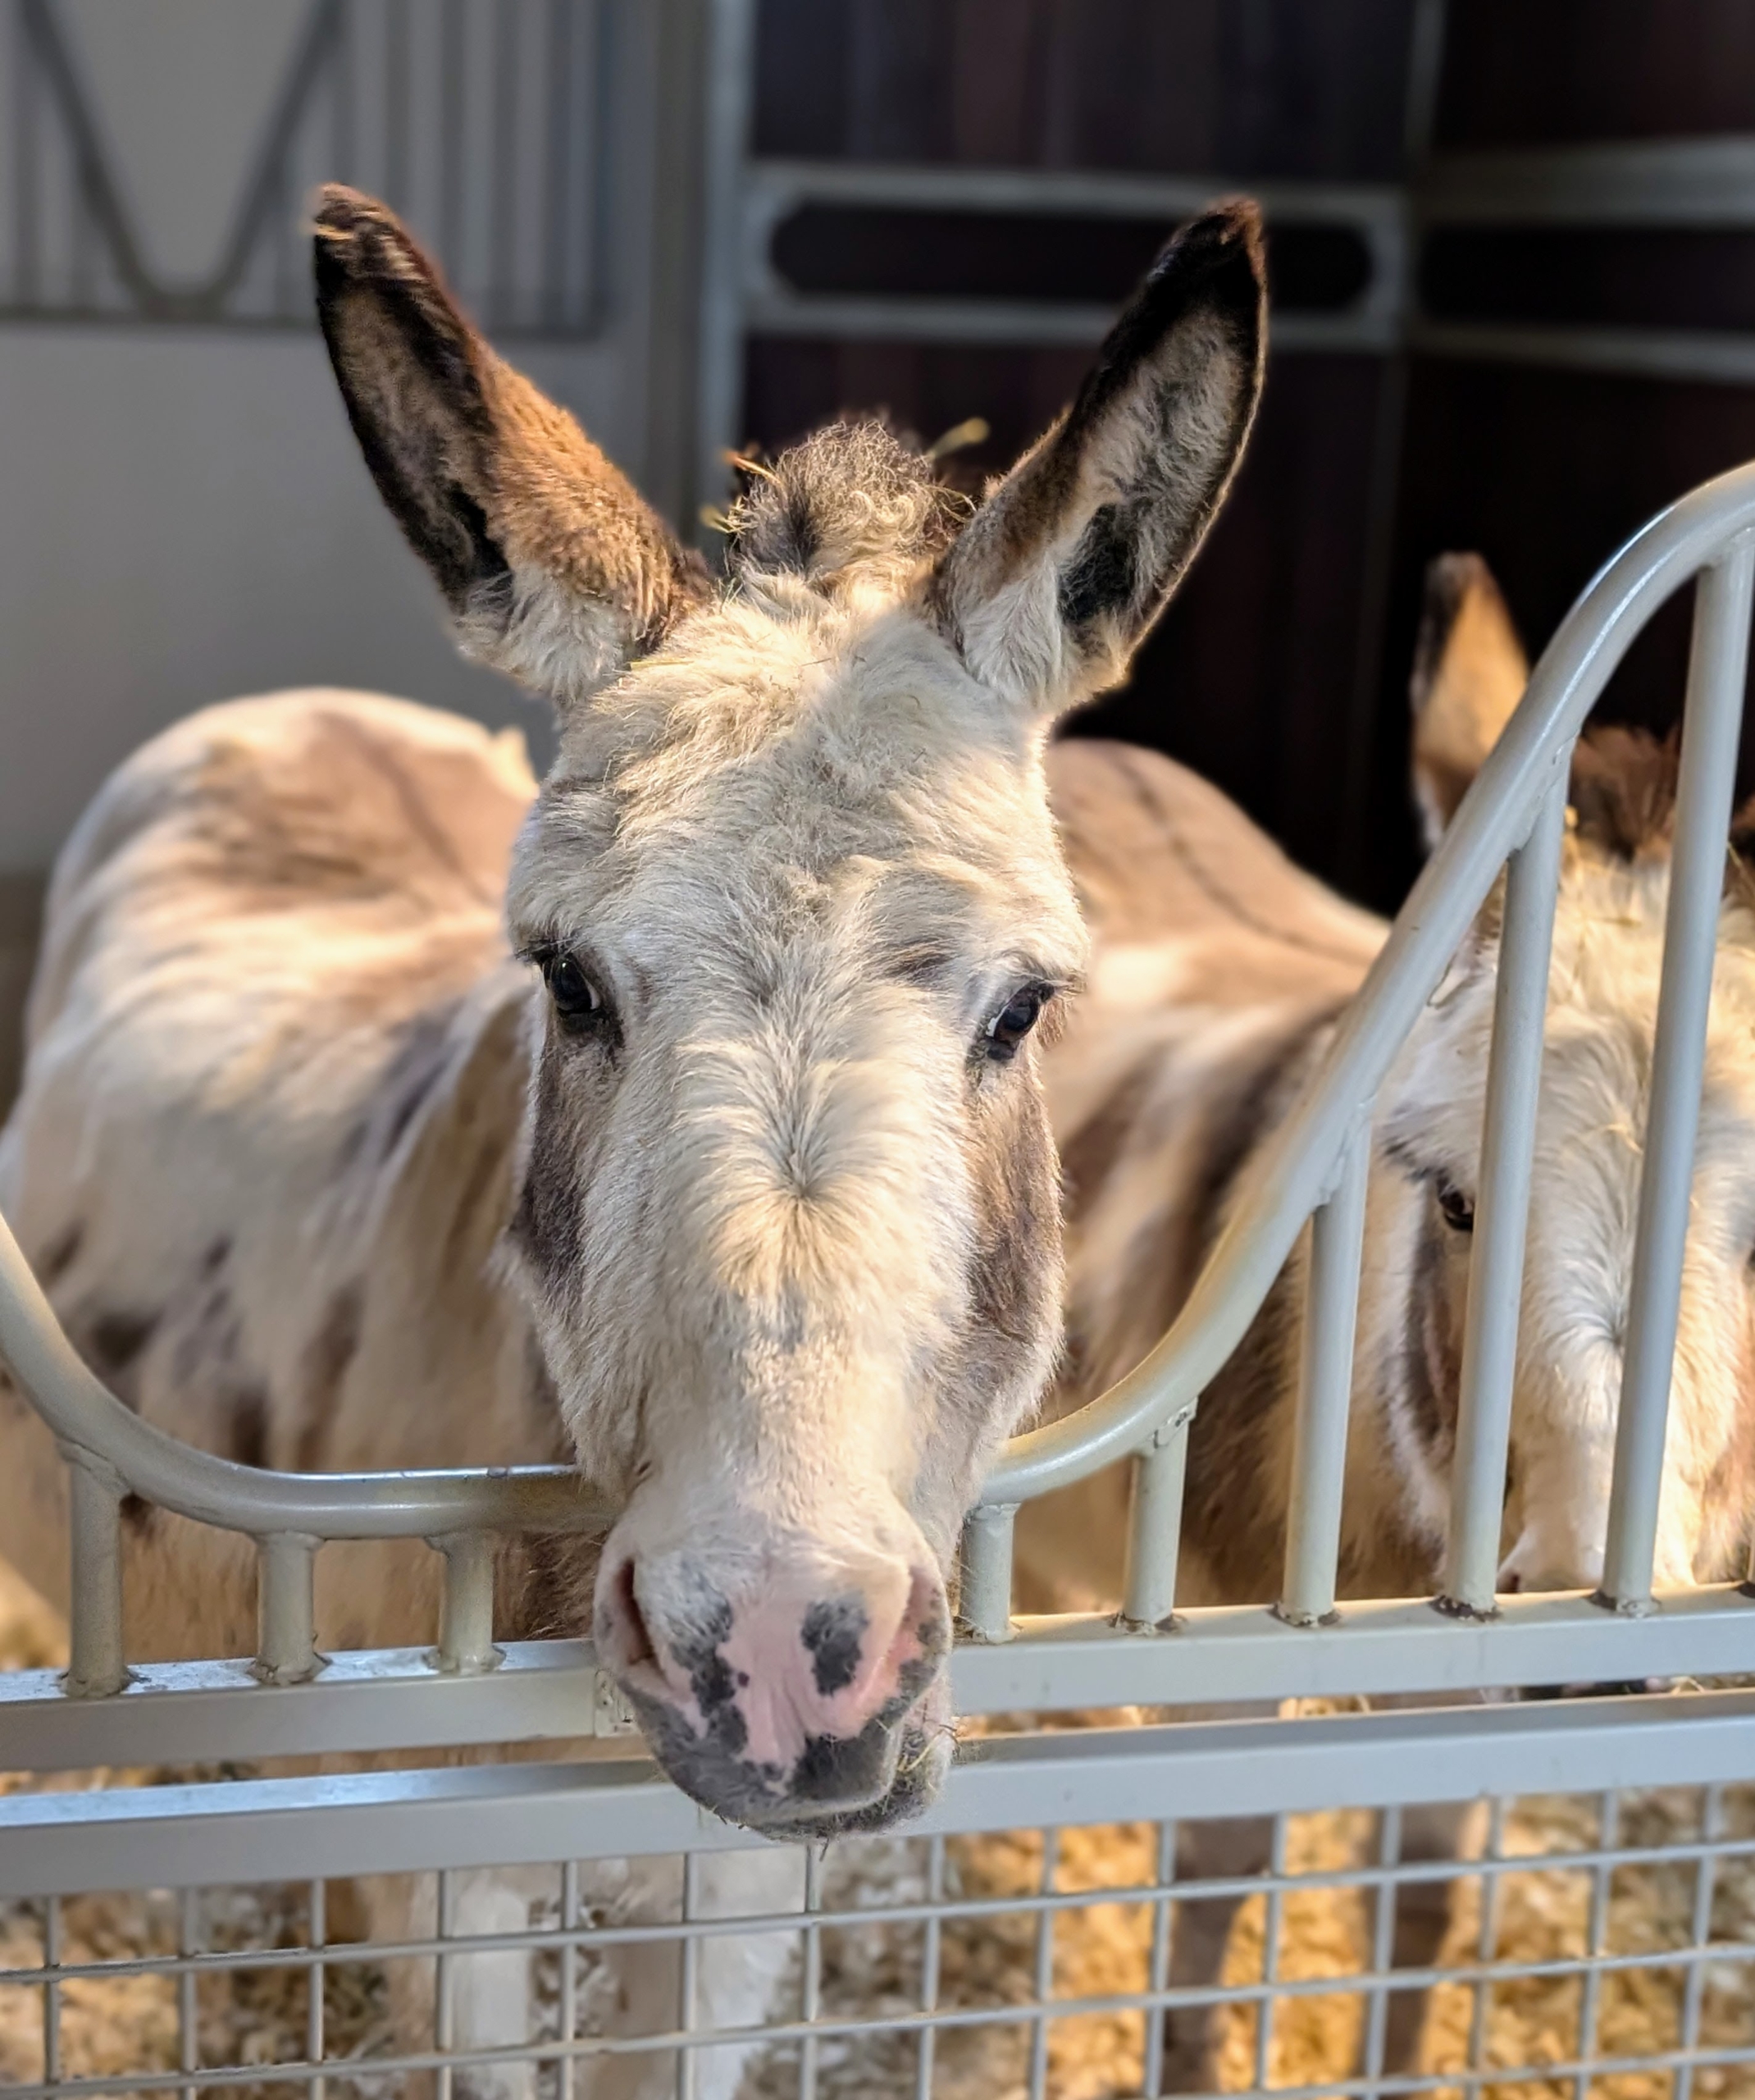
… And so do my five donkeys and five horses.
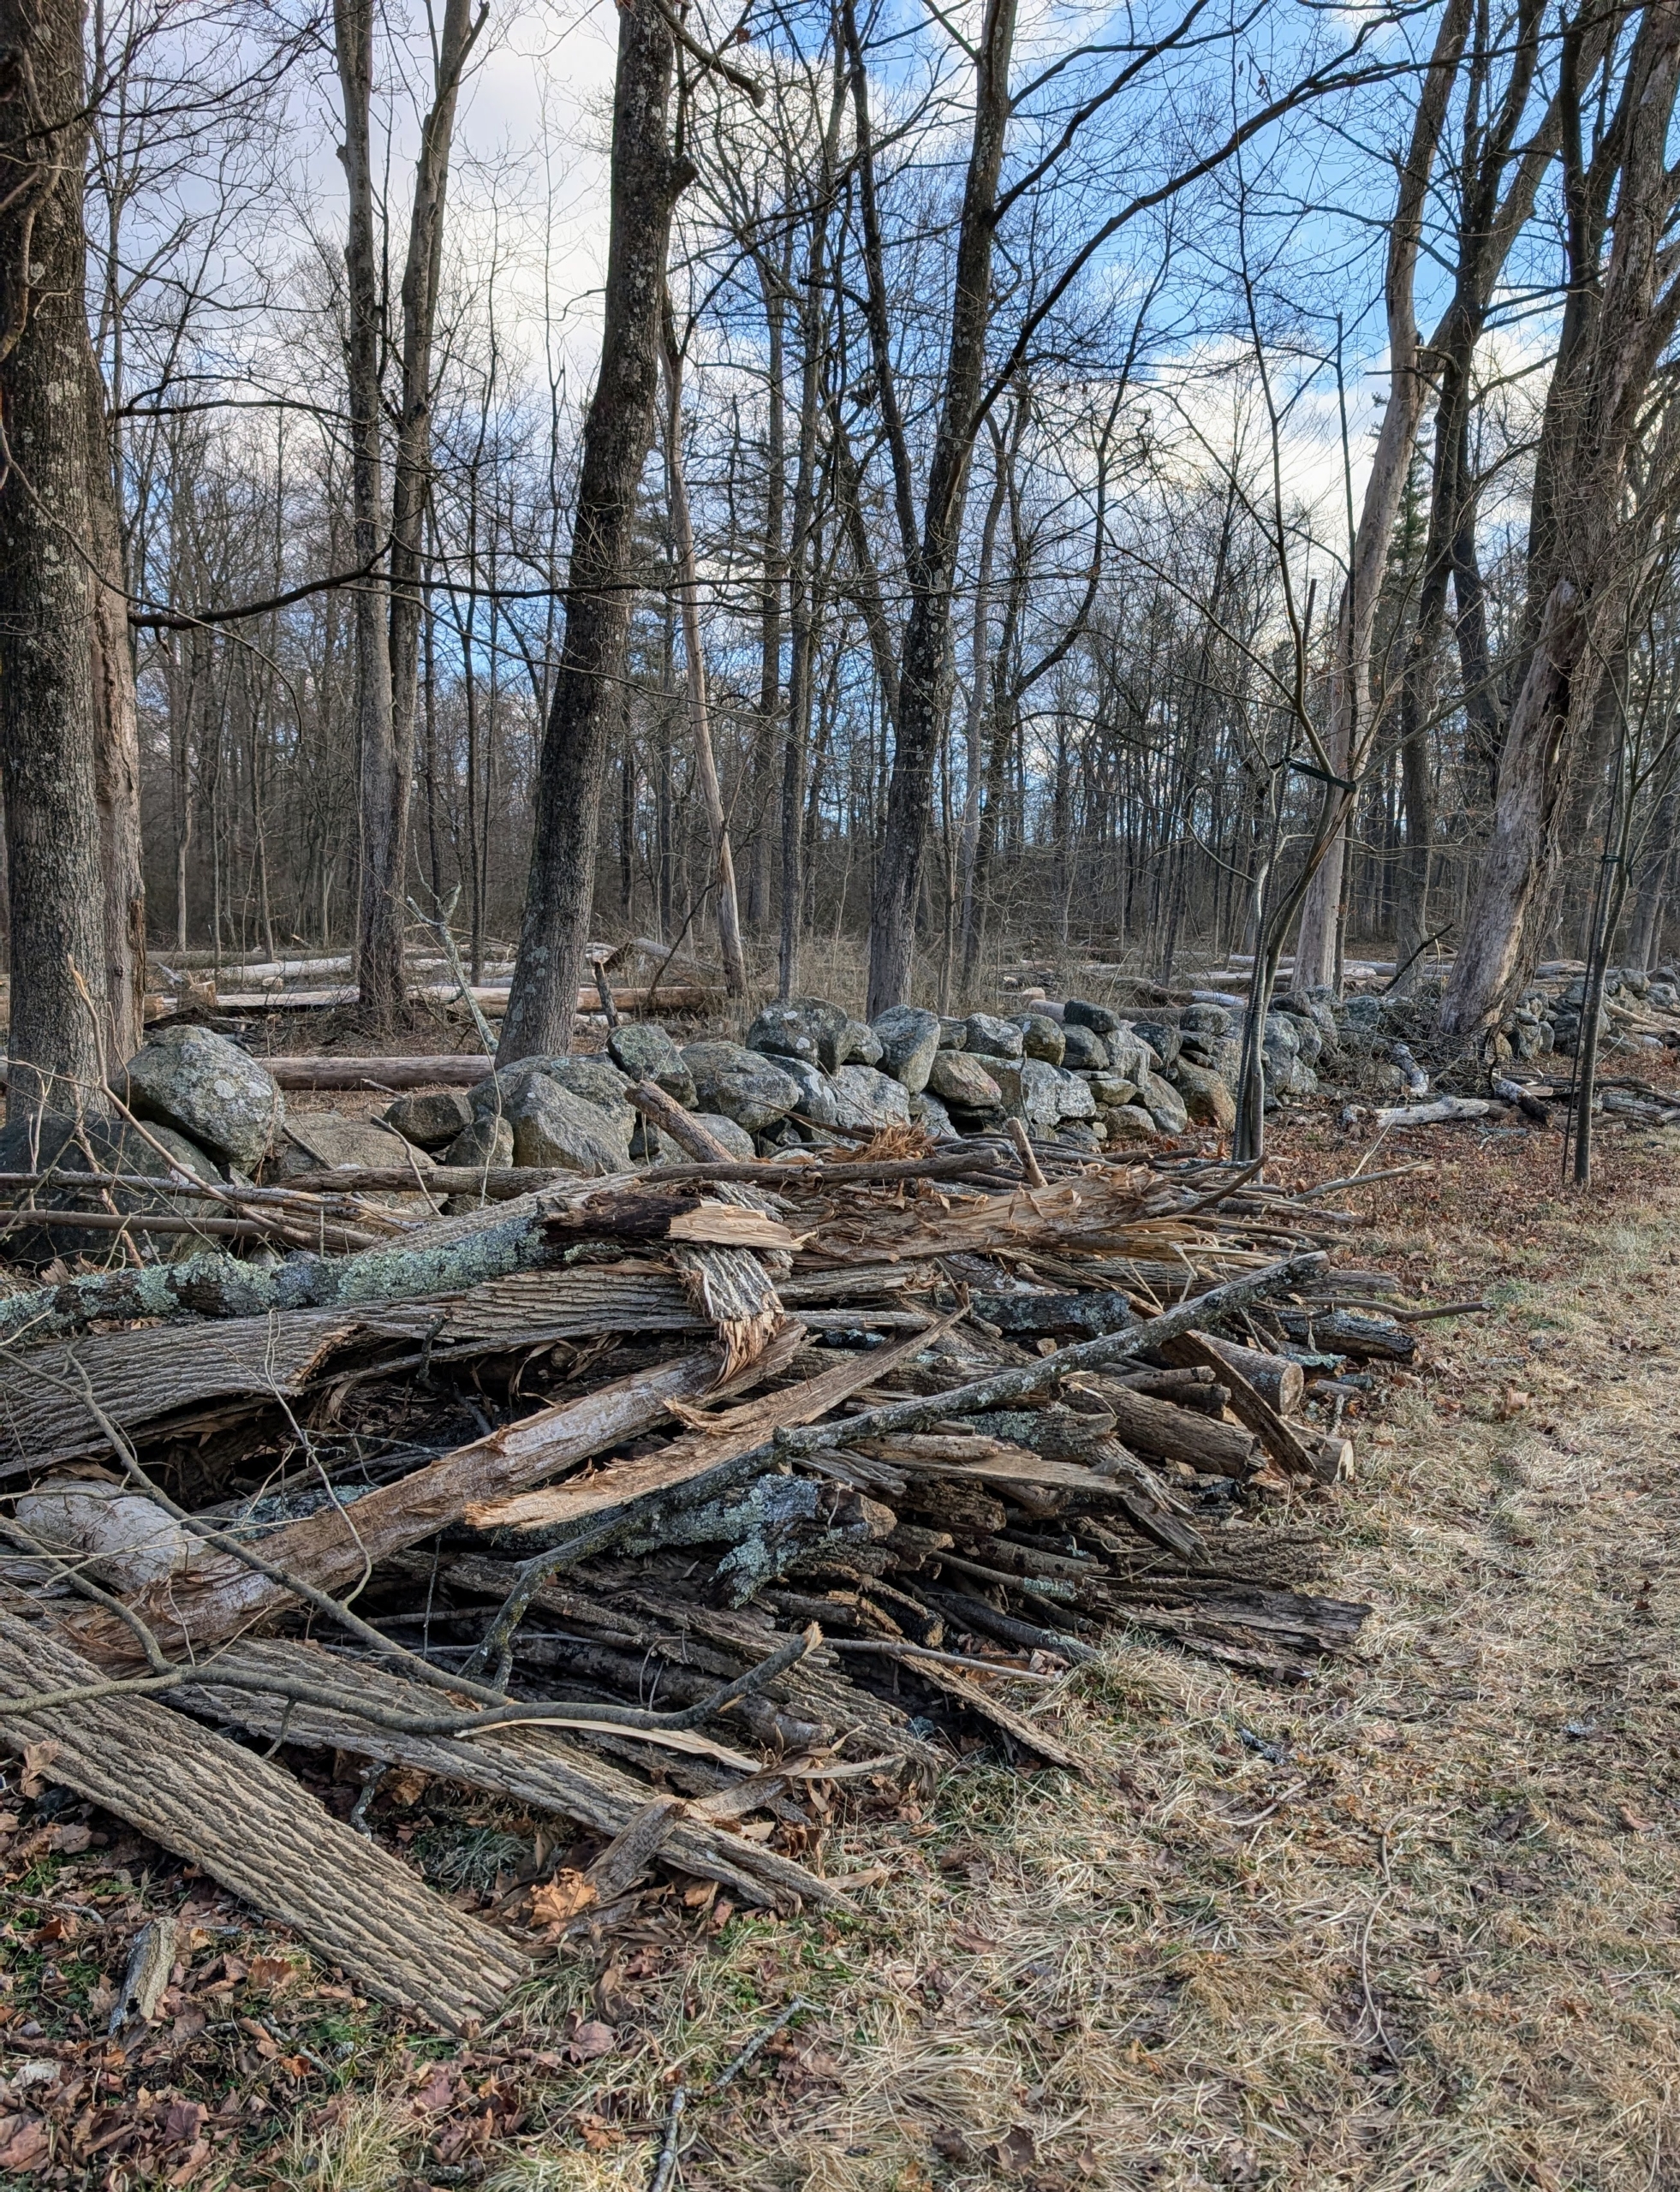
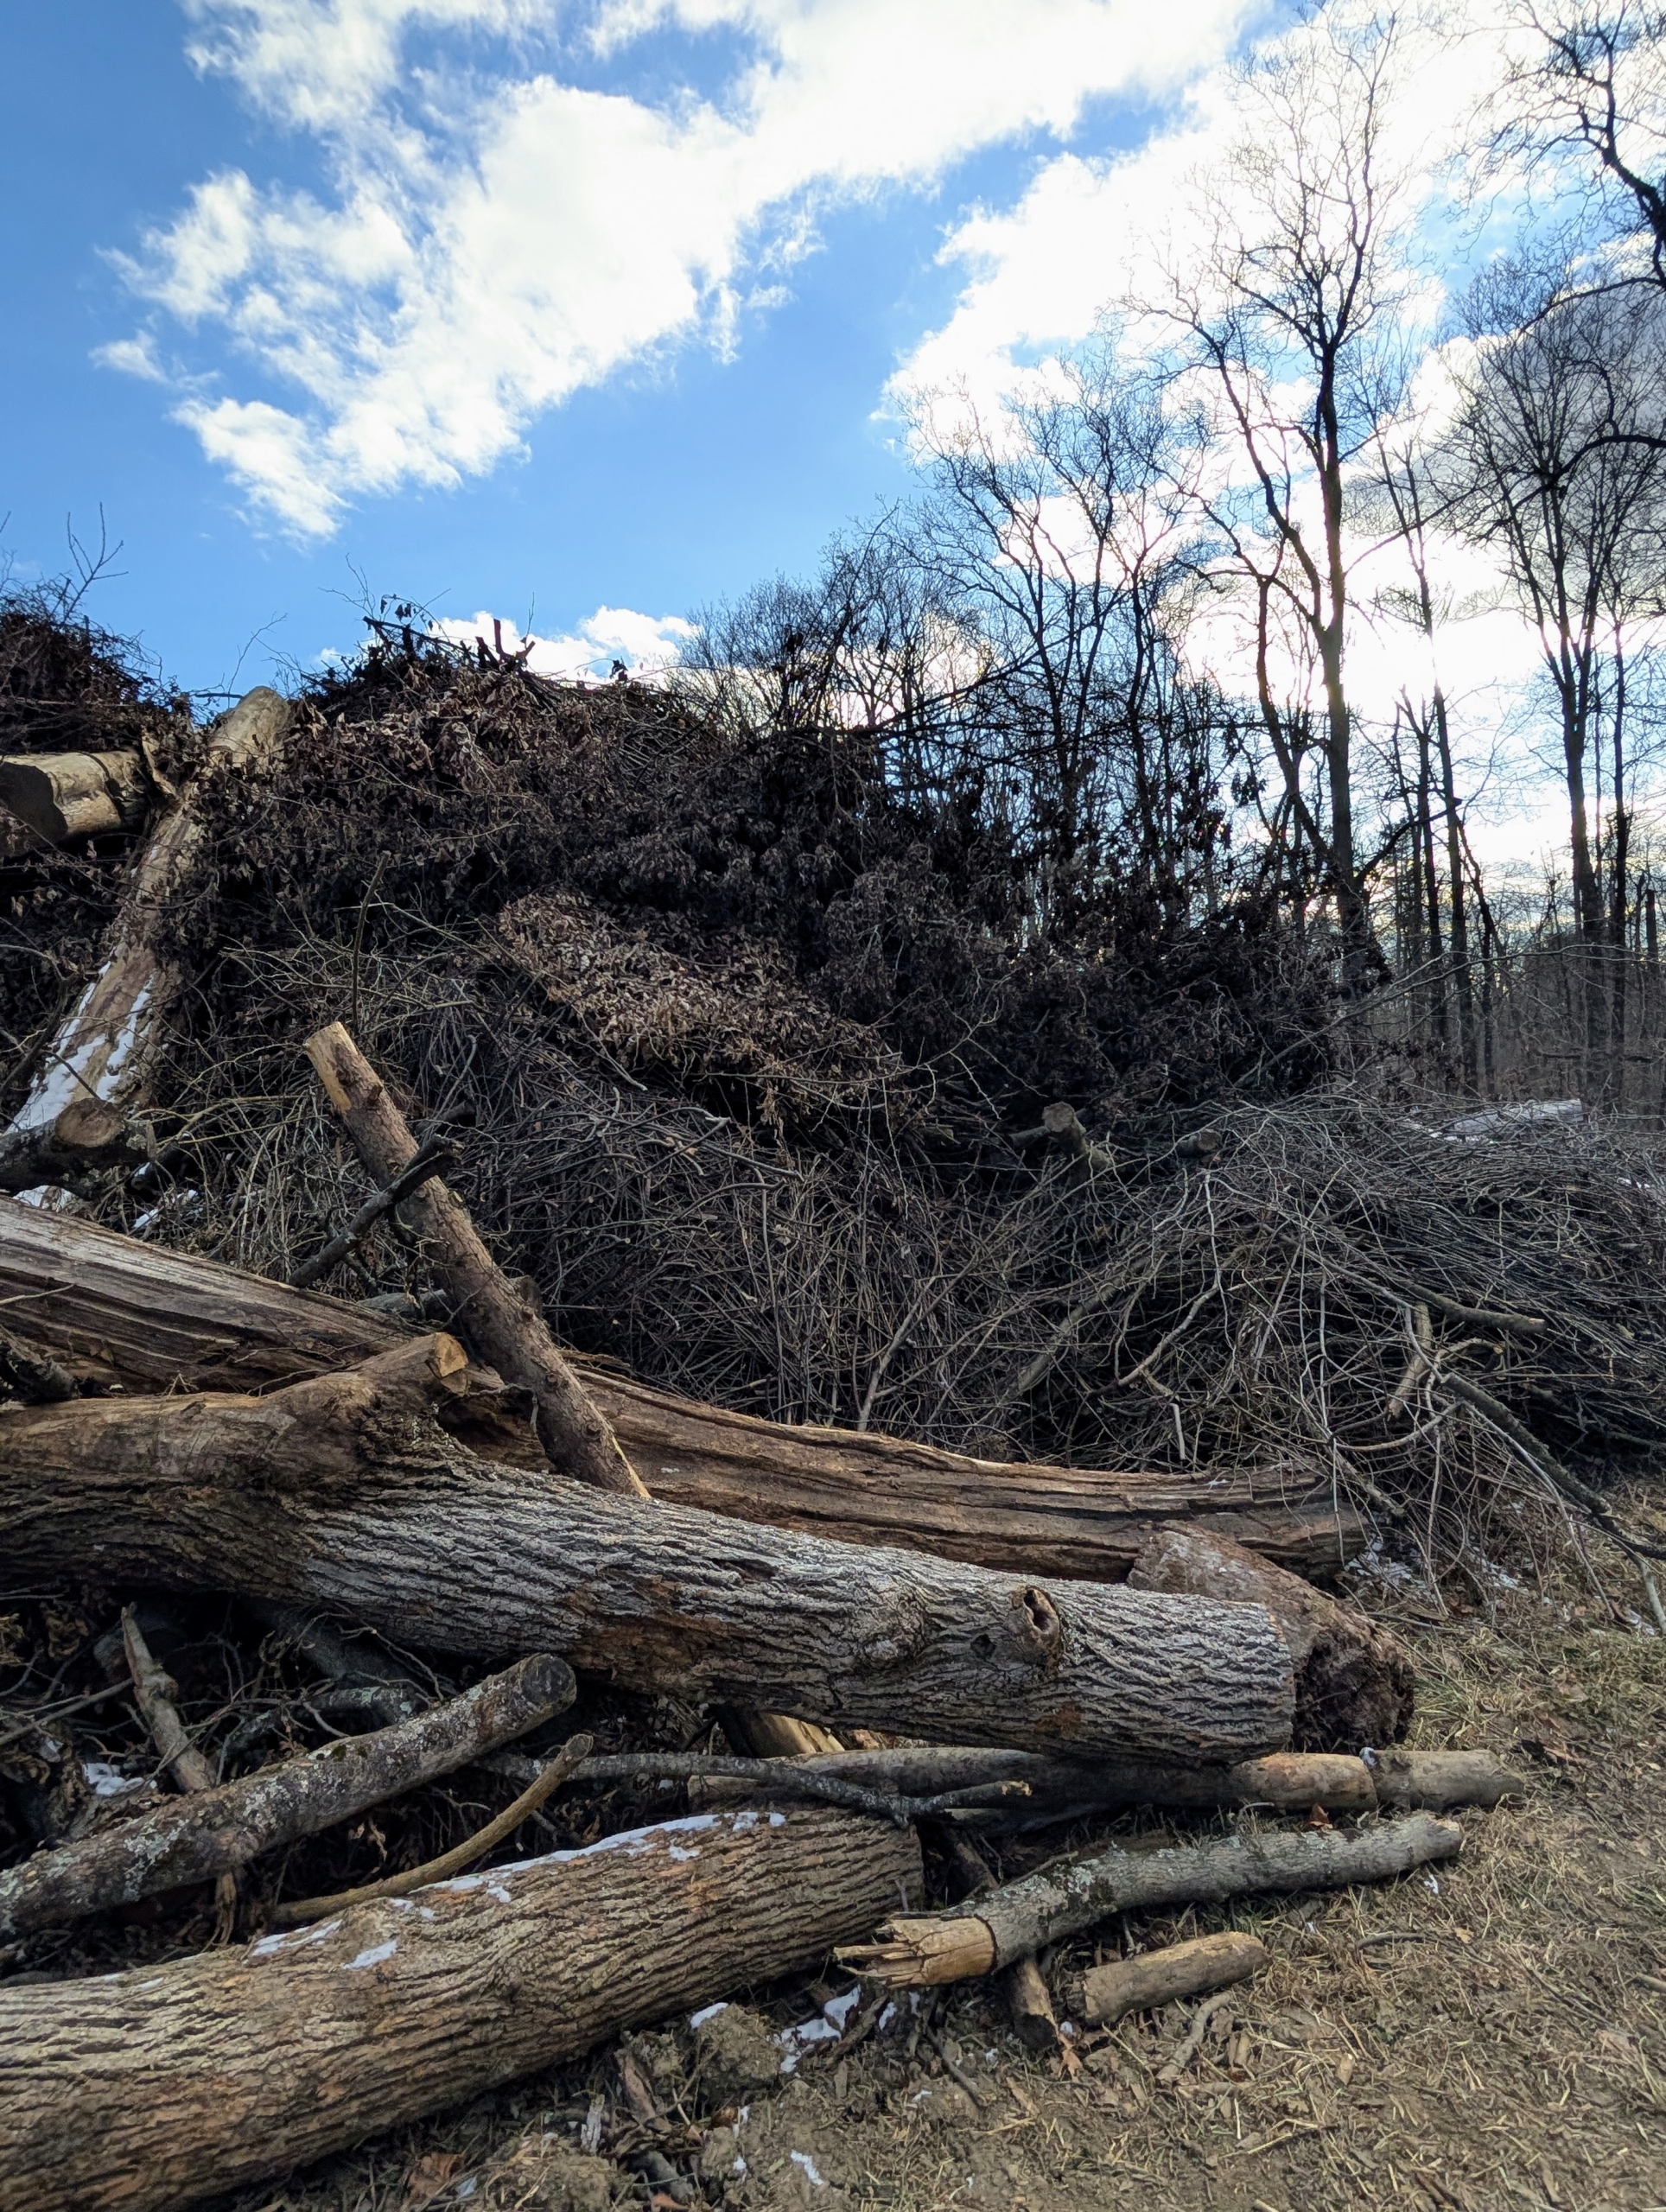
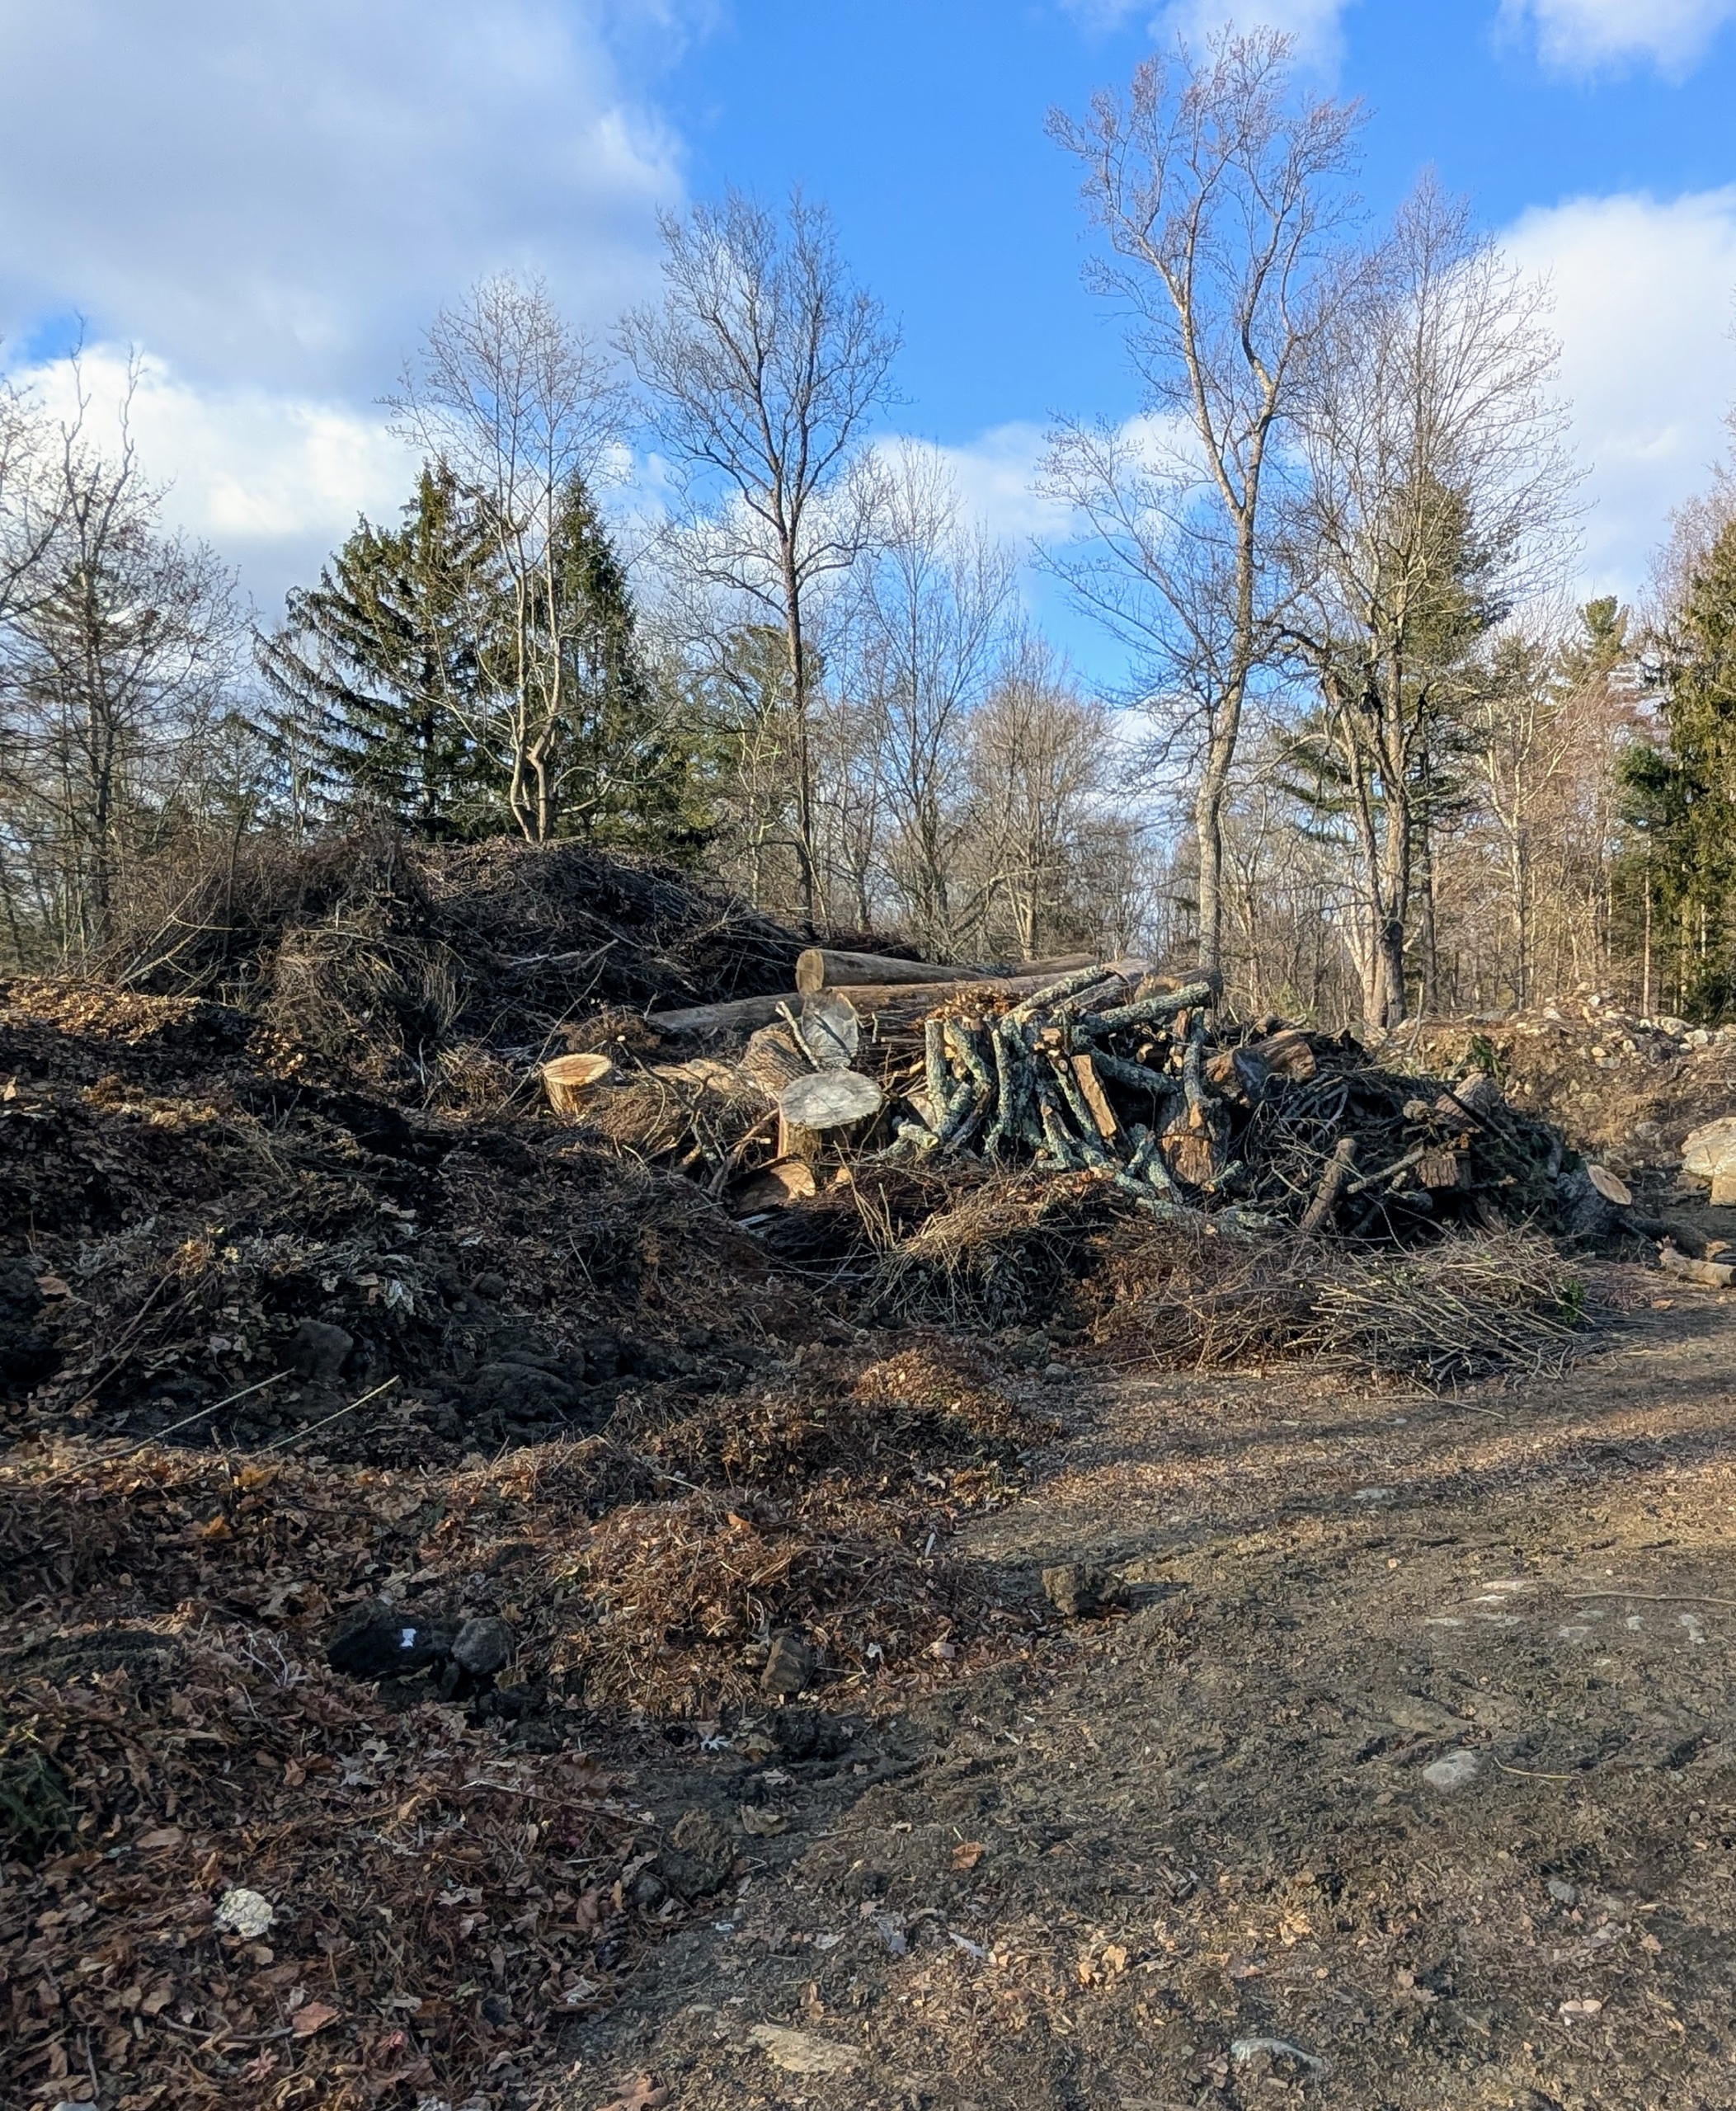
Compost also includes some of the organic debris from the woodland. During the course of the year, these felled tree limbs and branches are piled neatly by the side of the carriage road. When possible, it is either chipped and returned as dressing in the woods, or carted away and brought to the compost yard and saved for the tub grinder.
The debris is piled up high in one neat area. This gets processed through the tub grinder which I rent once a year or once every two. A tub grinder is able to grind the wood to produce finer material.
Here is the animal waste and hay collected in another area – this also gets processed.
And here are other piles – leaf mold, or composted leaves, and other organic brush and plant debris – all carbon-rich materials in various stages of decay.
After it is all run through the tub grinder multiple times, it is left to decay naturally under giant tarps and made into garden compost – filled with nutrients.
This compost is well decayed. The rich, dark, and crumbly compost can now support proper soil structure, improve water retention, and promote beneficial microbial life back in the gardens.
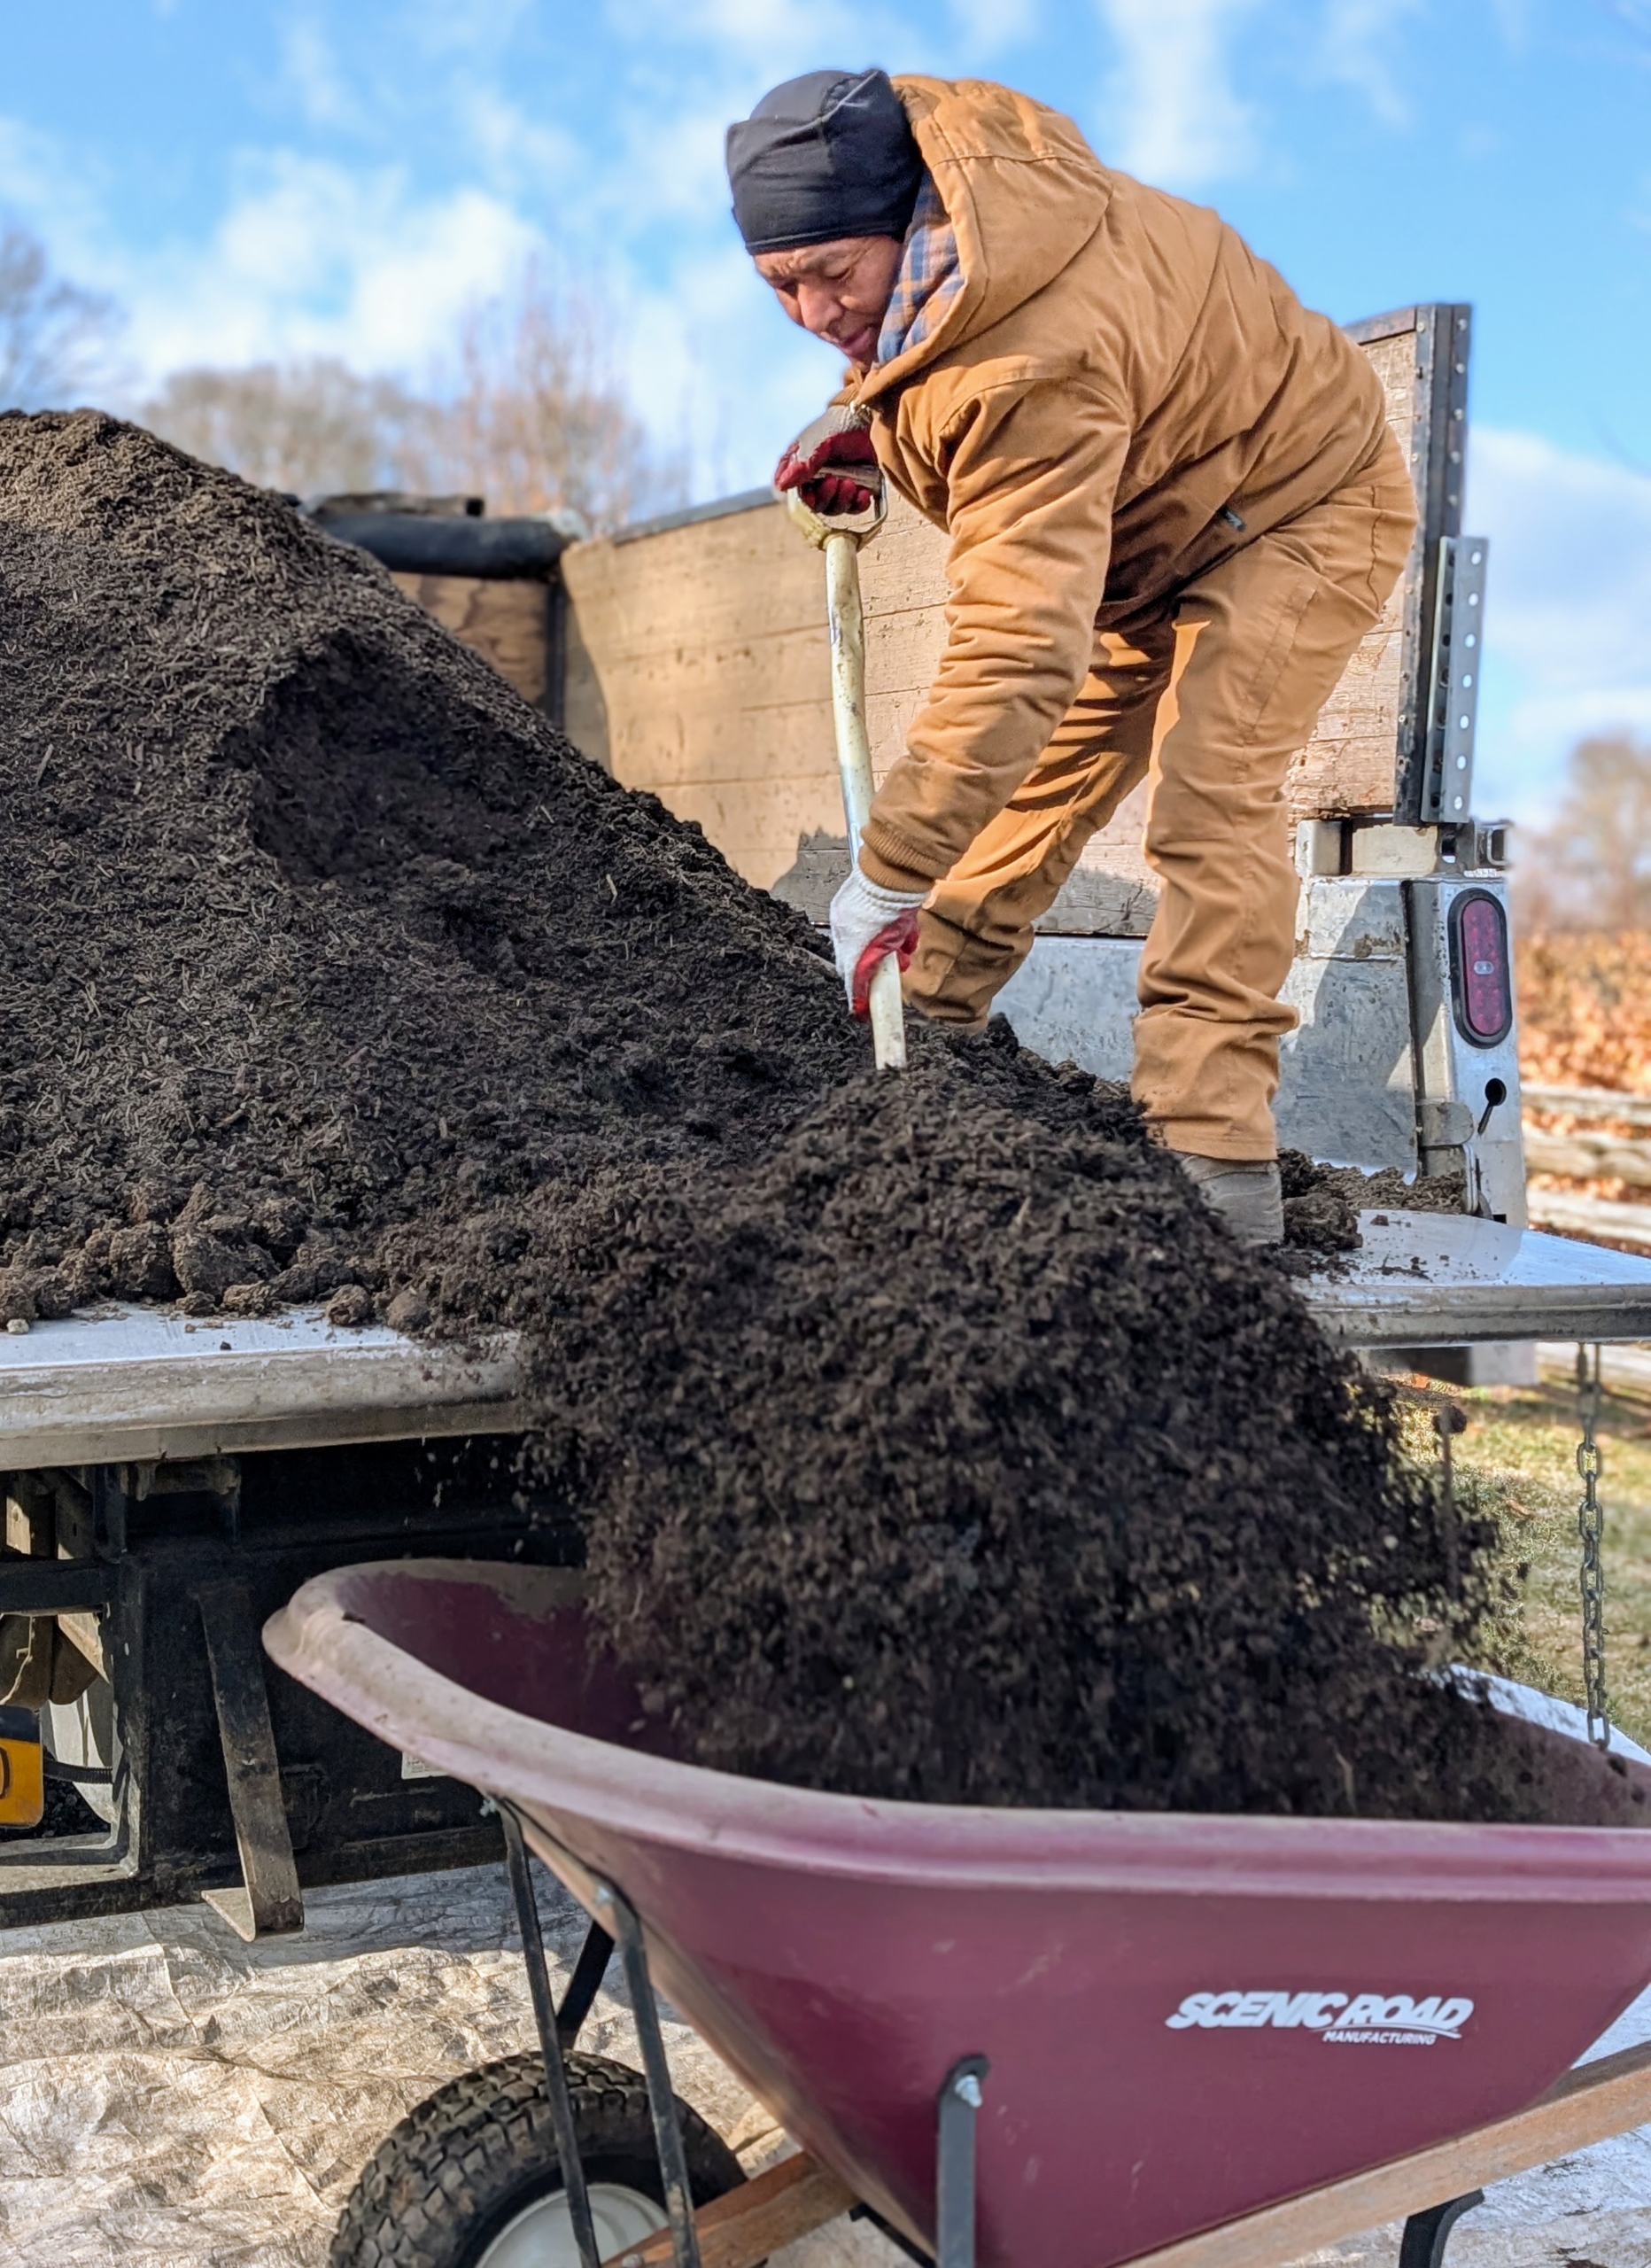
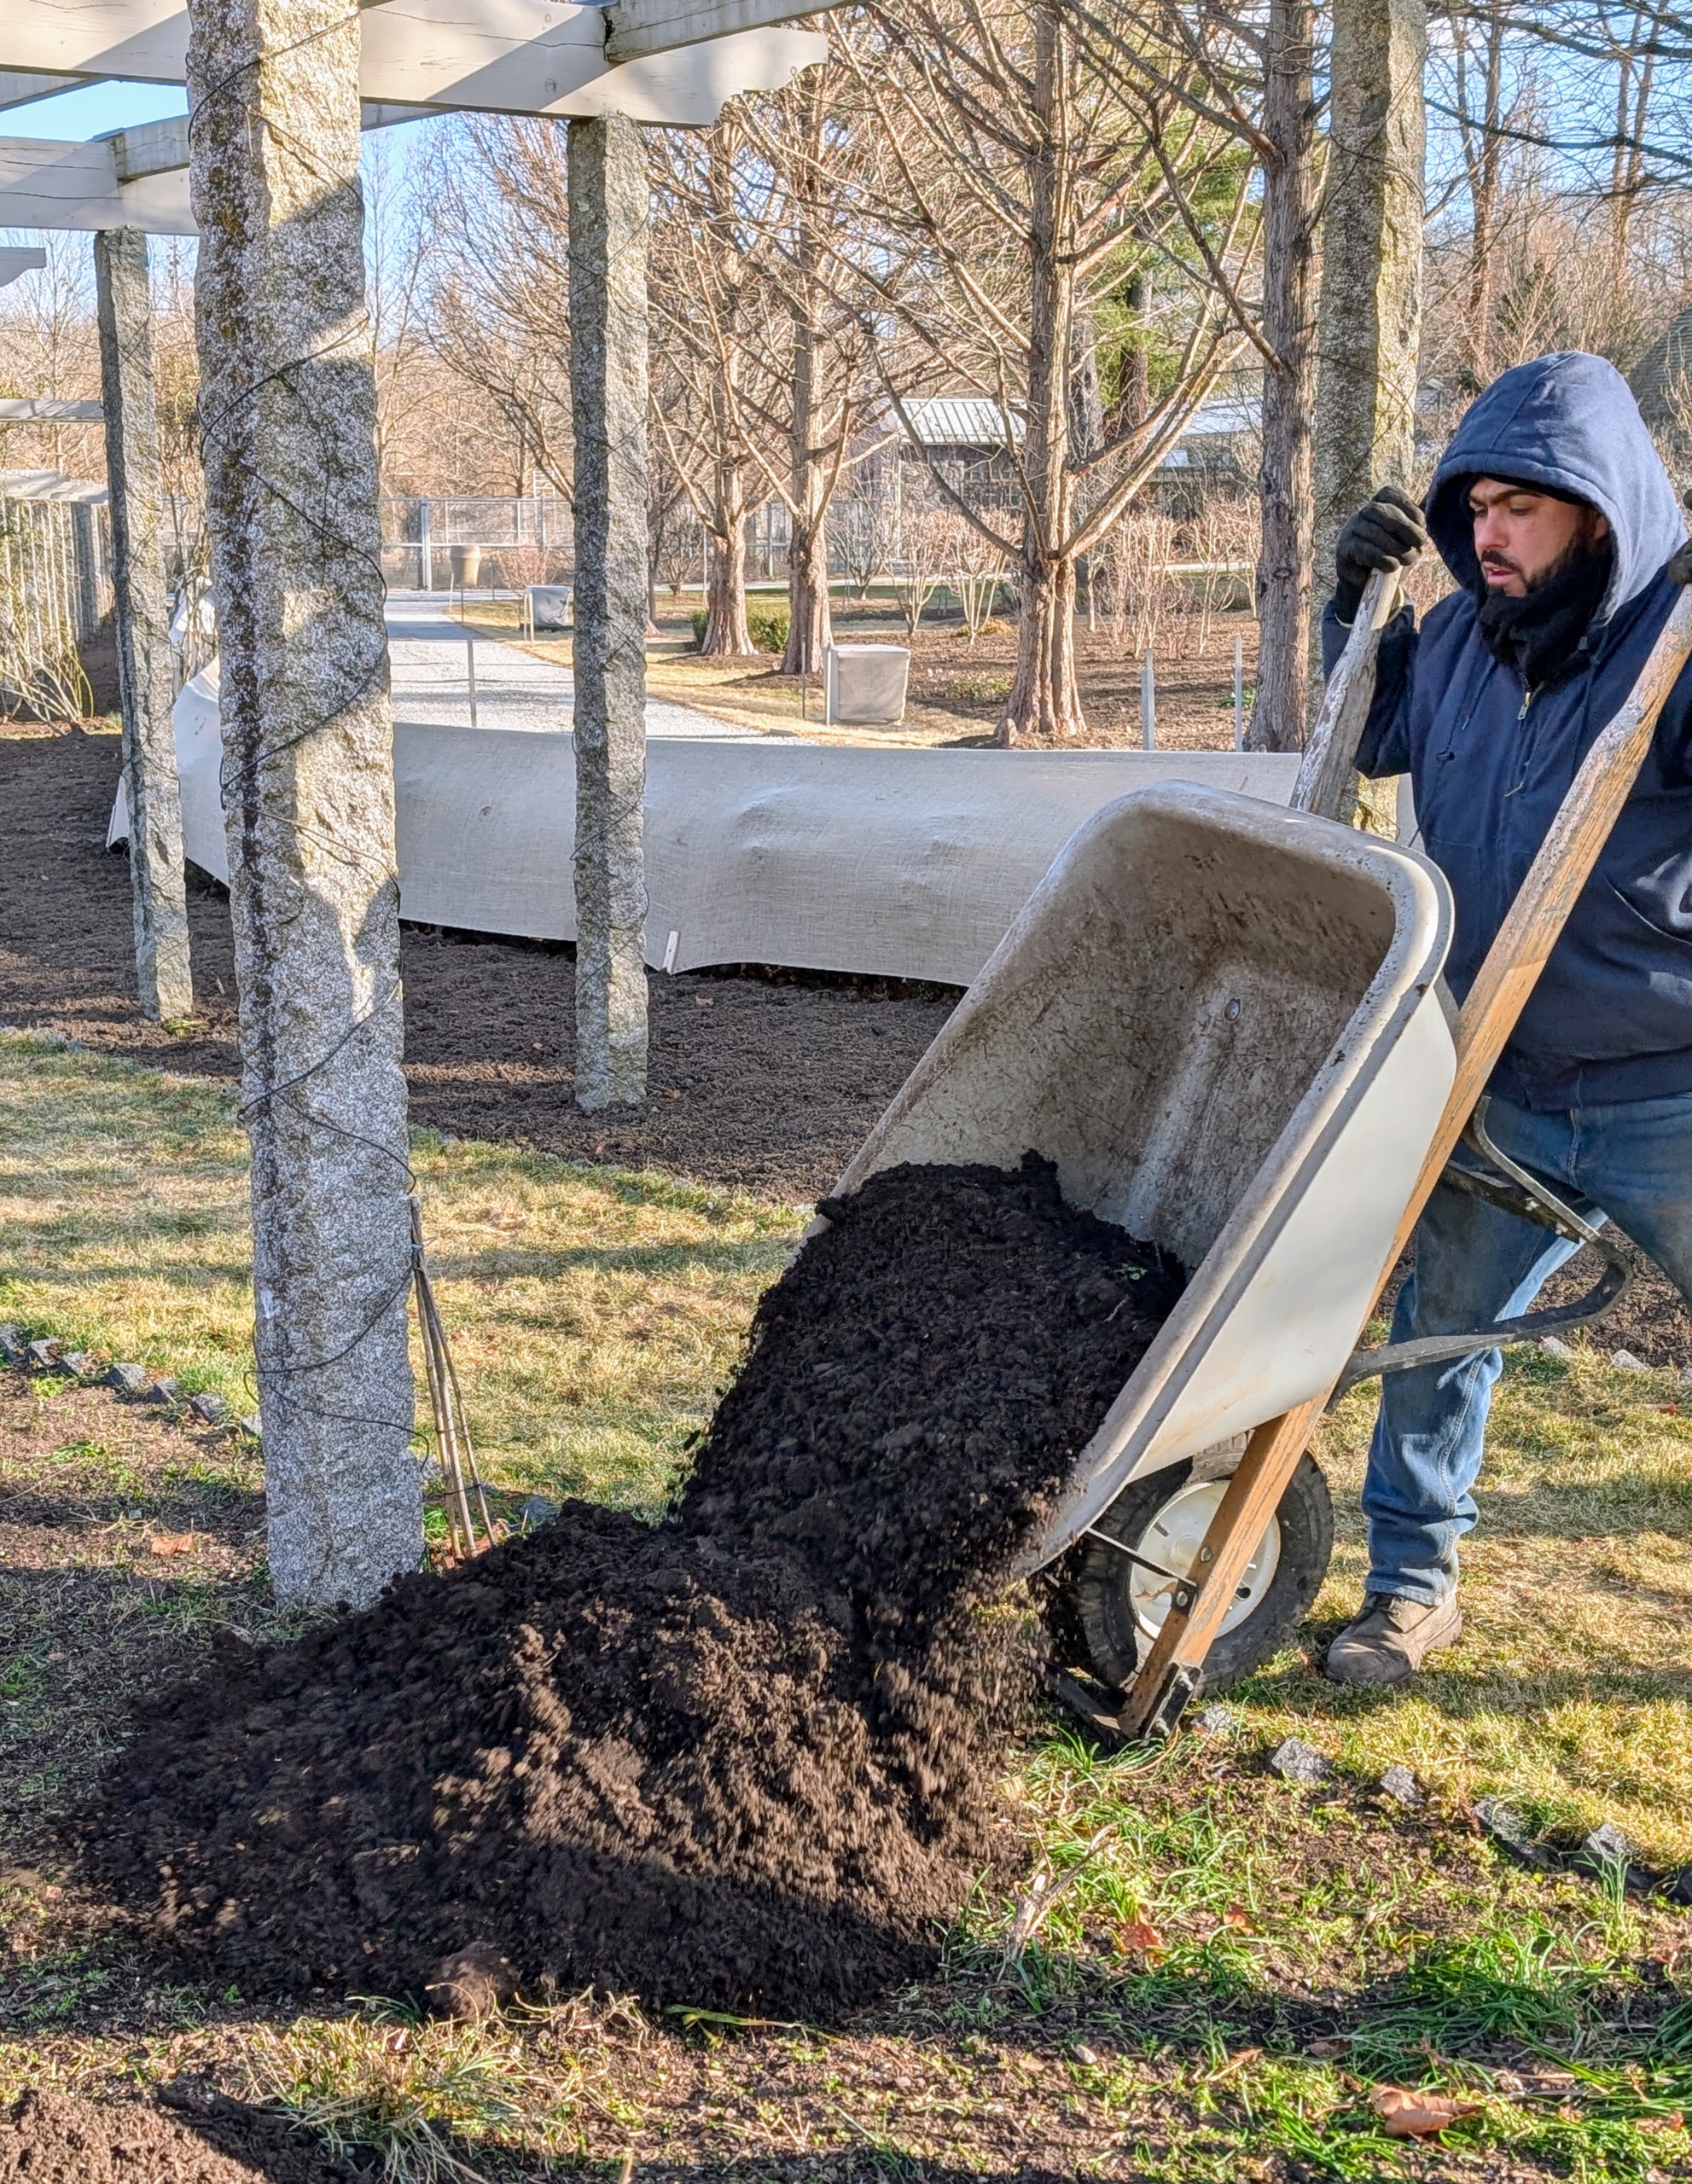
Here, Phurba fills a wheelbarrow with compost. I am so proud that I can make this material right here.
Because of all the ground they need to cover, my crew works in an assembly line process, which is fast and efficient.
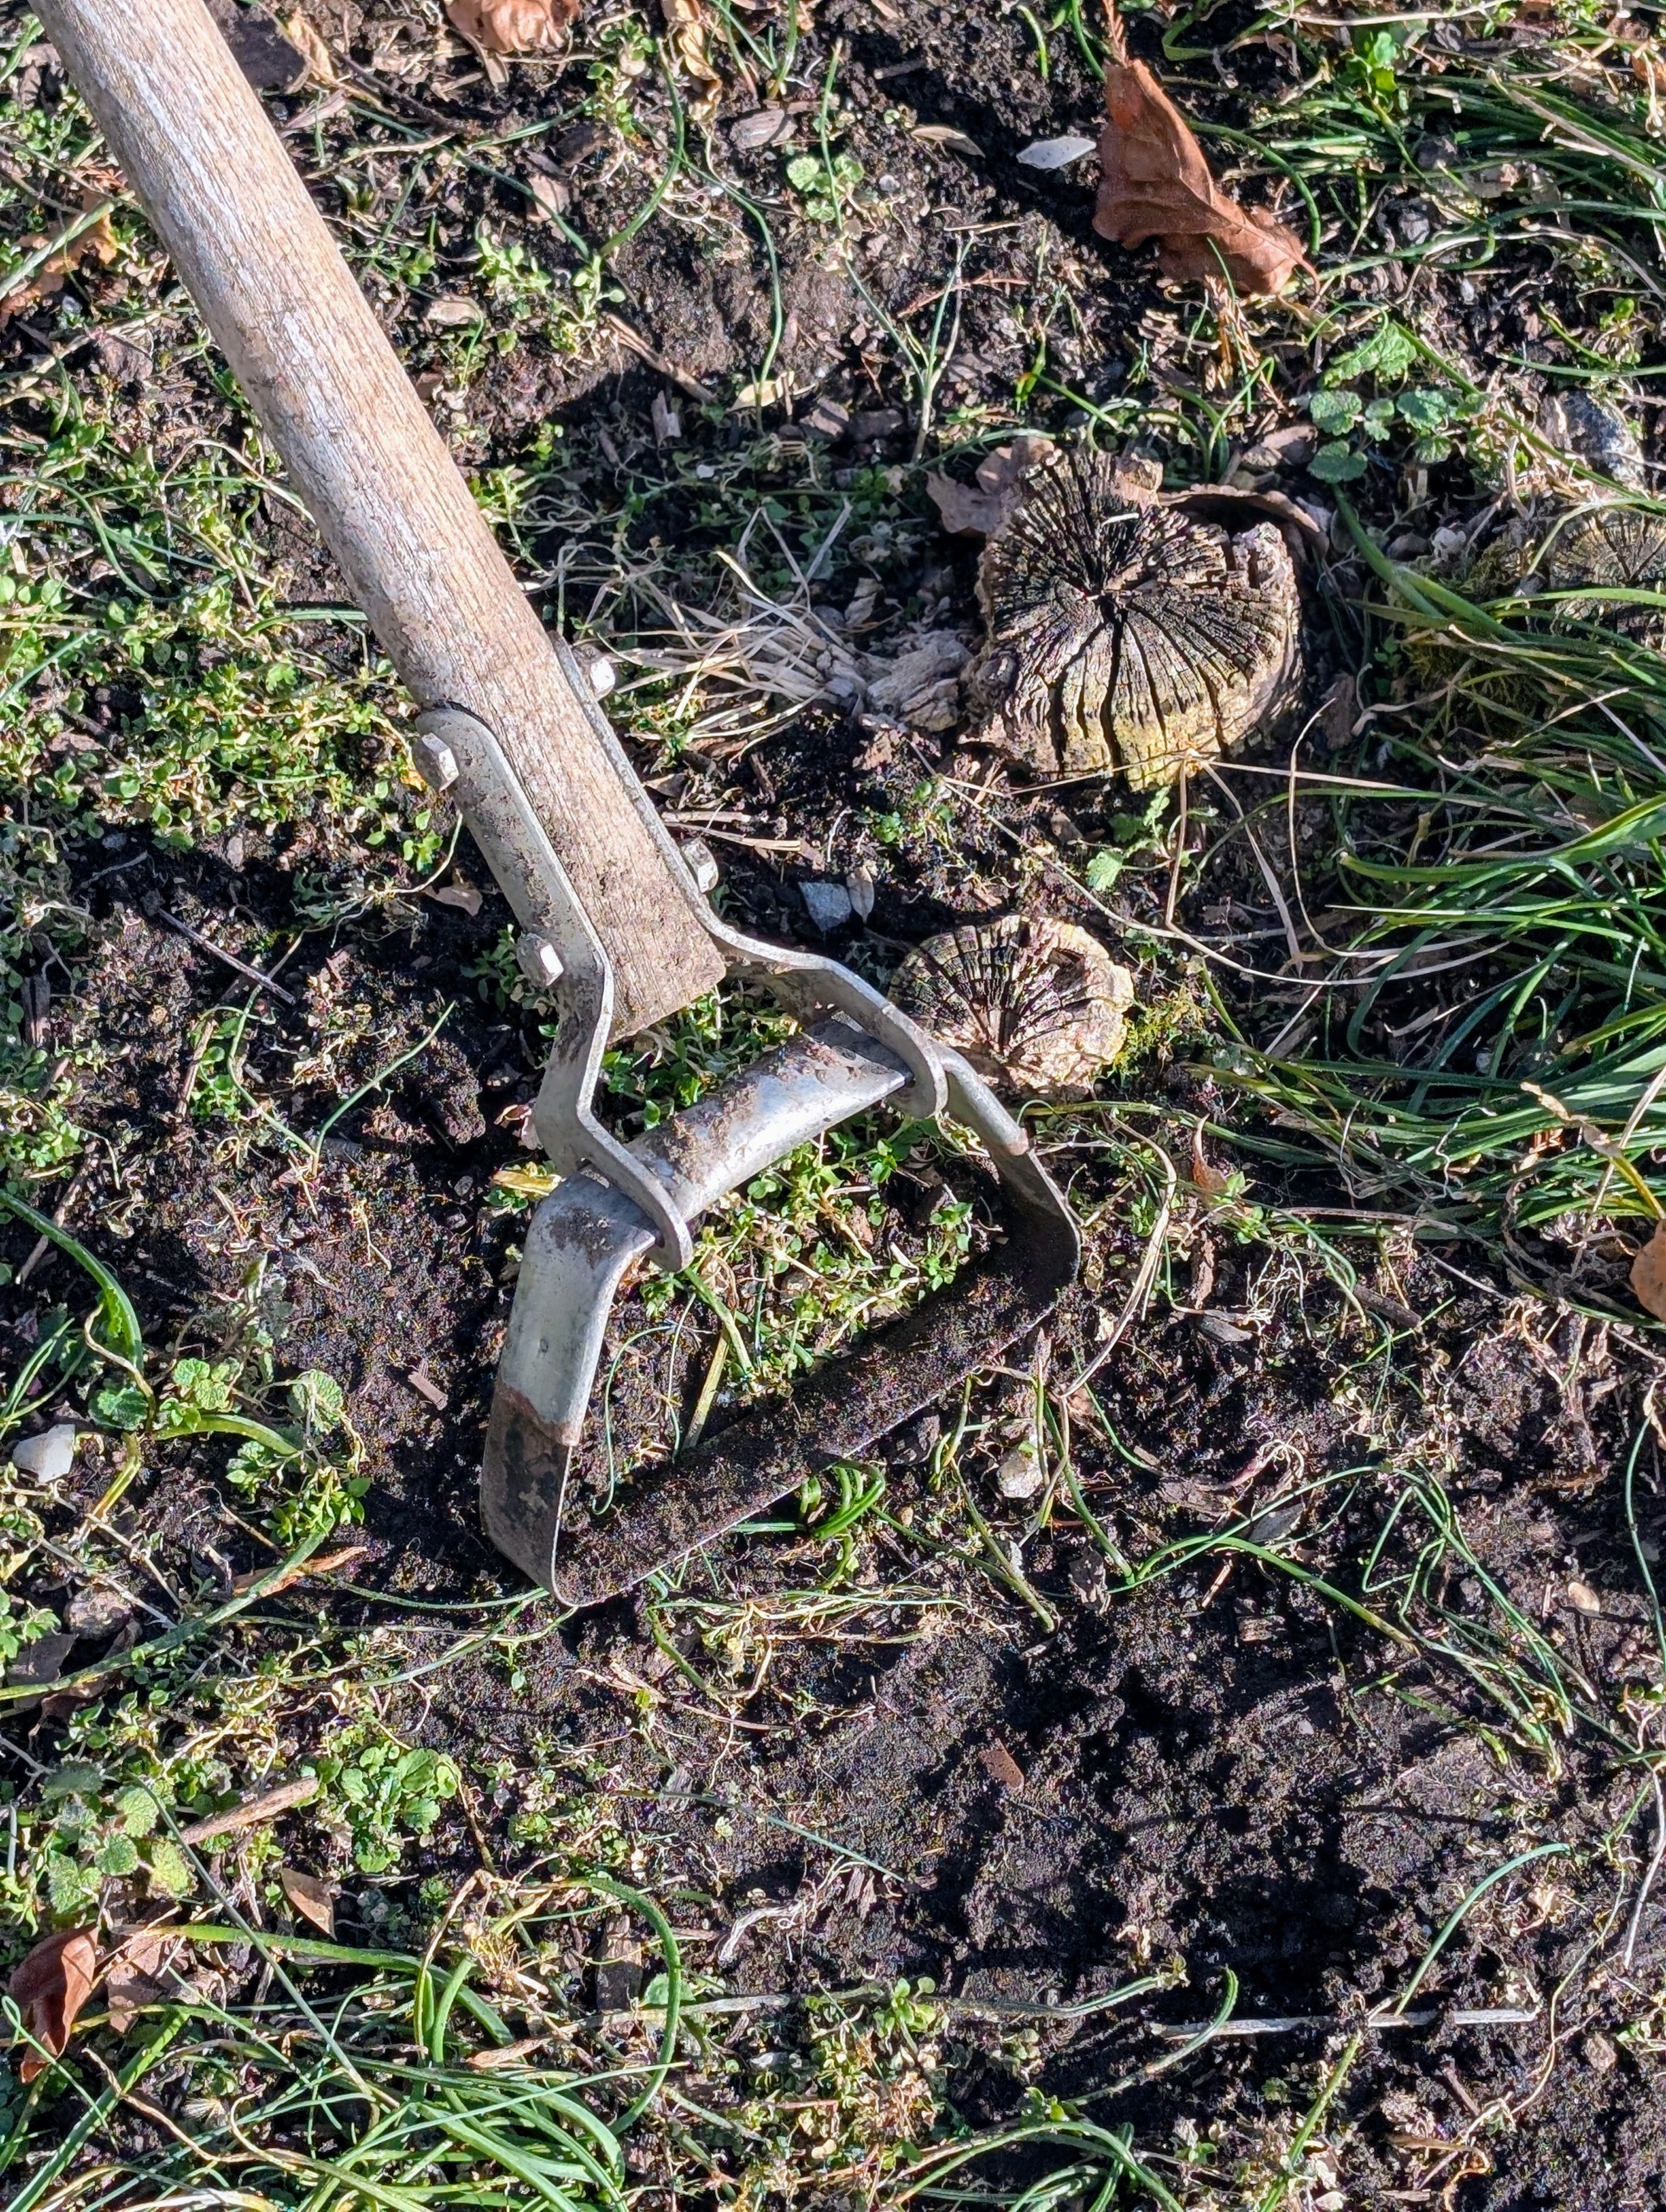
Weeds are removed before any top dressing is applied. Covering the garden beds with compost will also help deter future weeds… we hope.
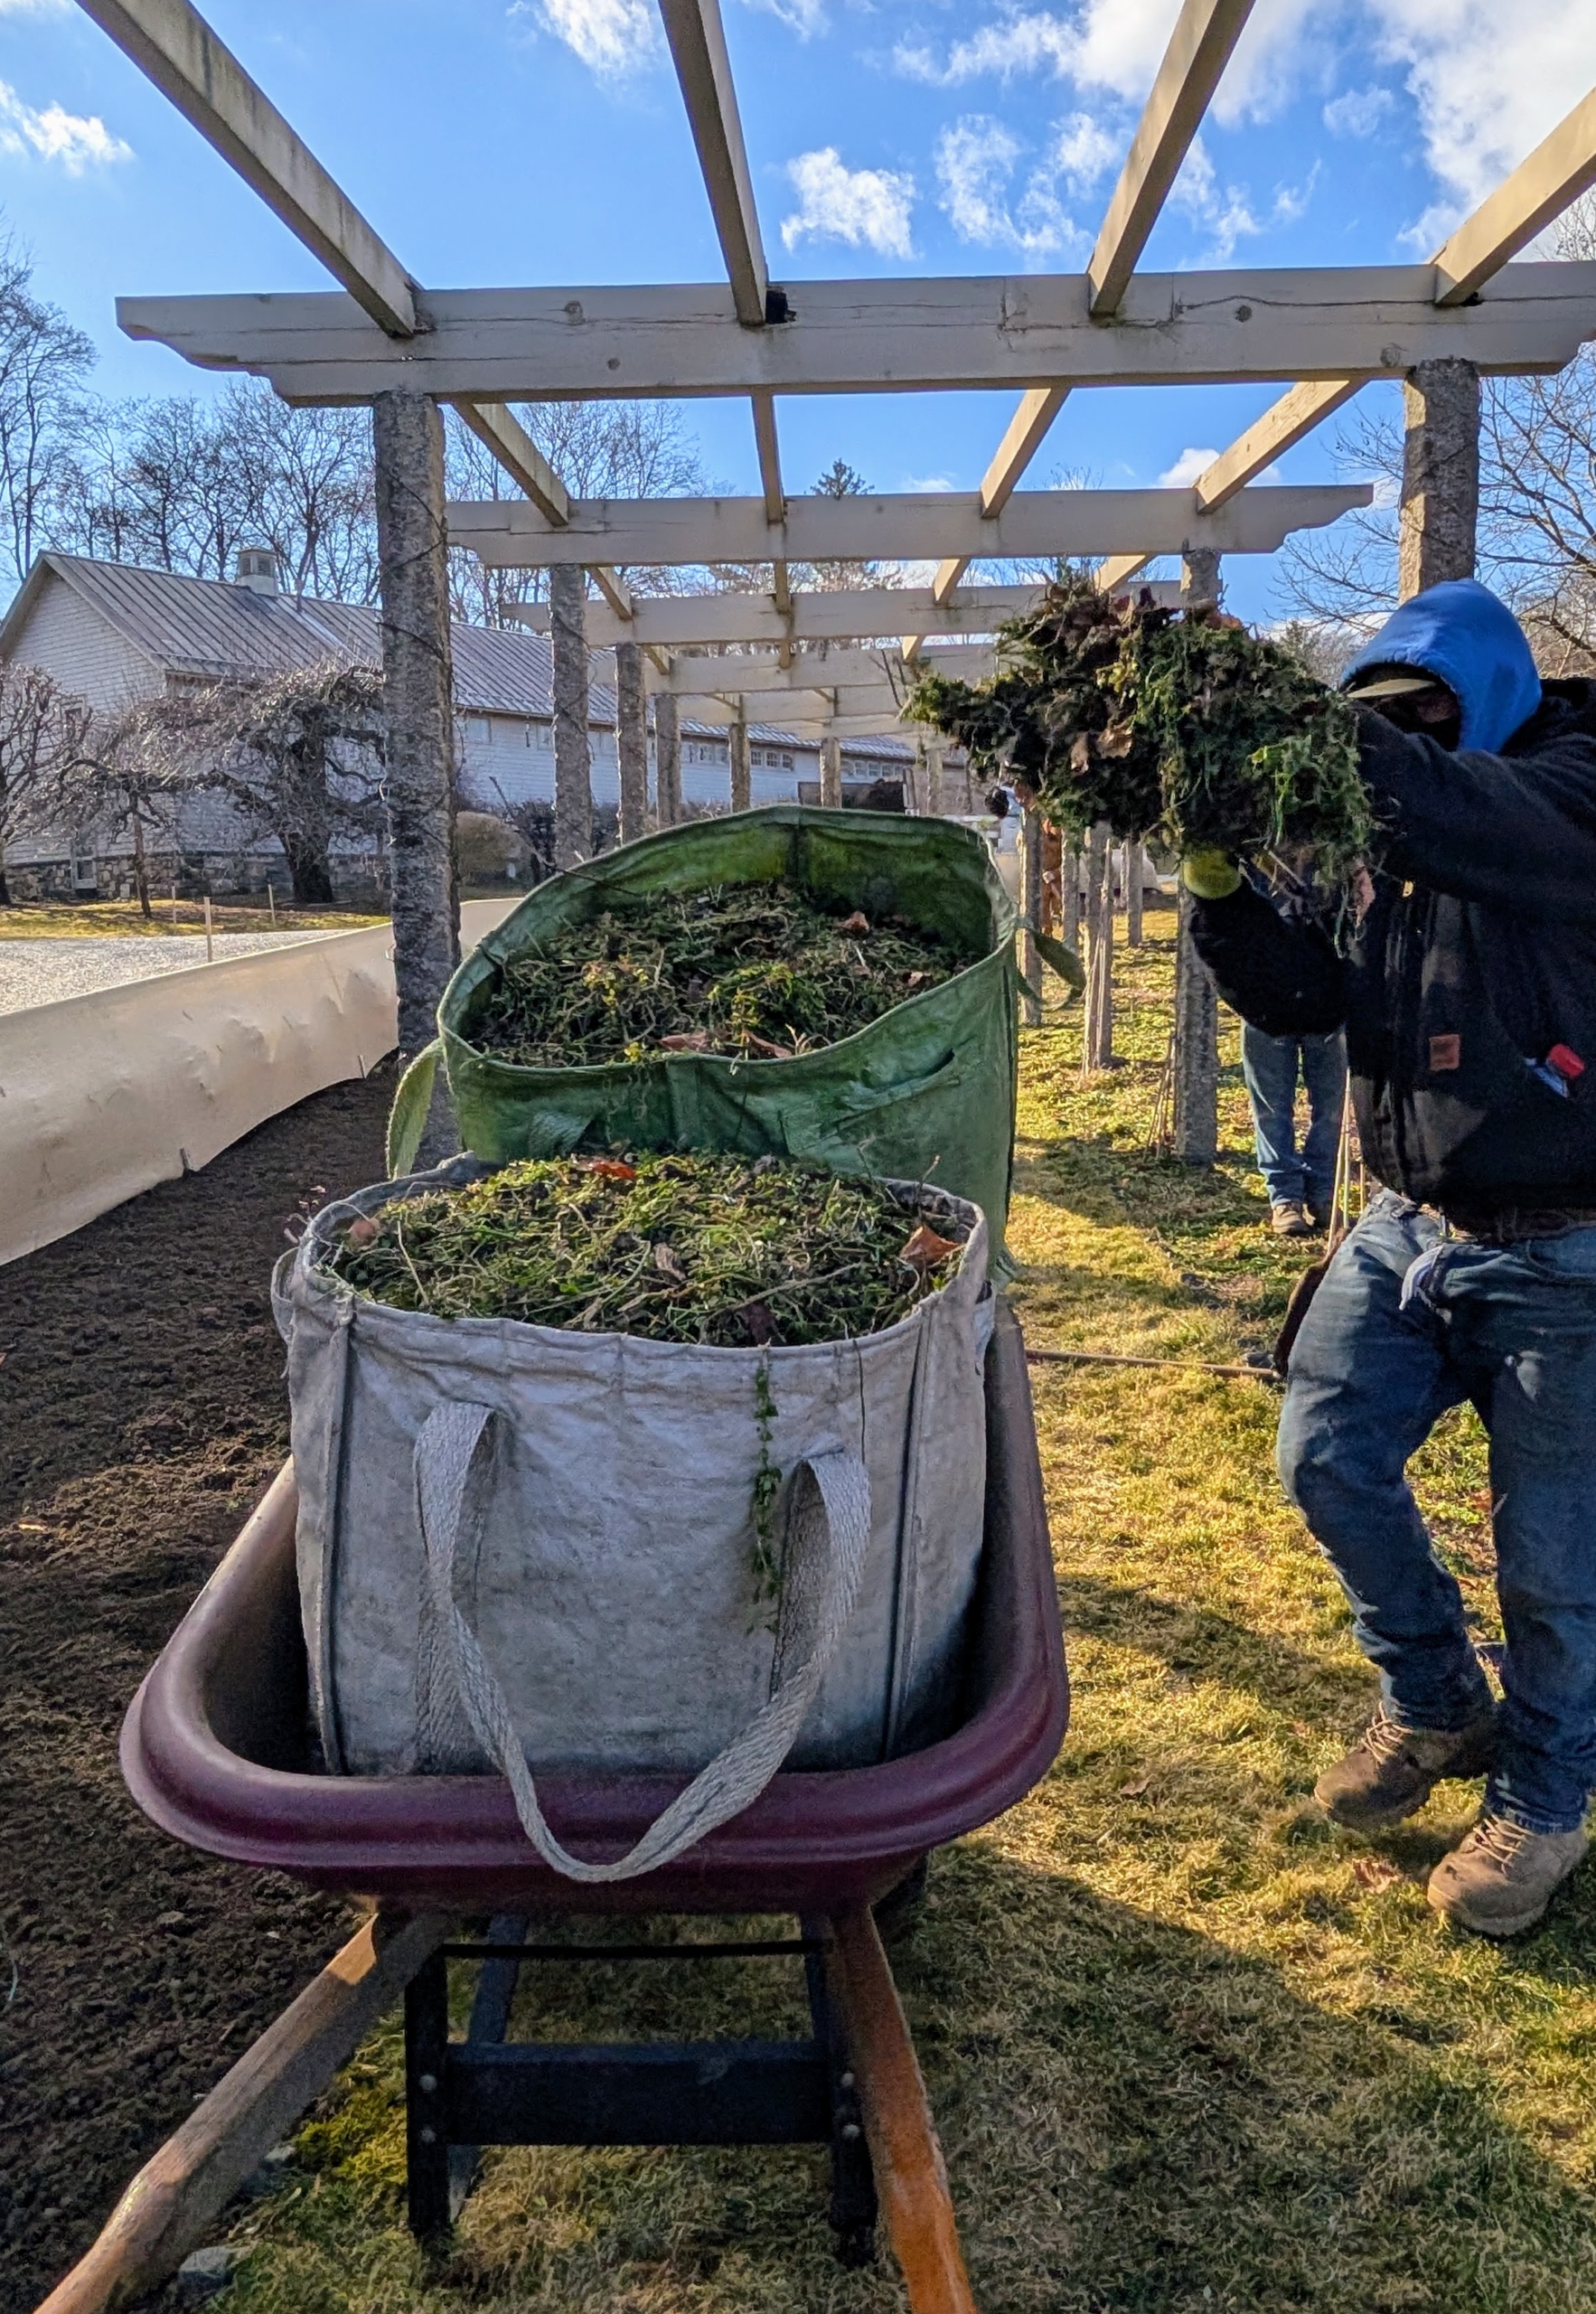
The pesky weeds are bagged and completely discarded.
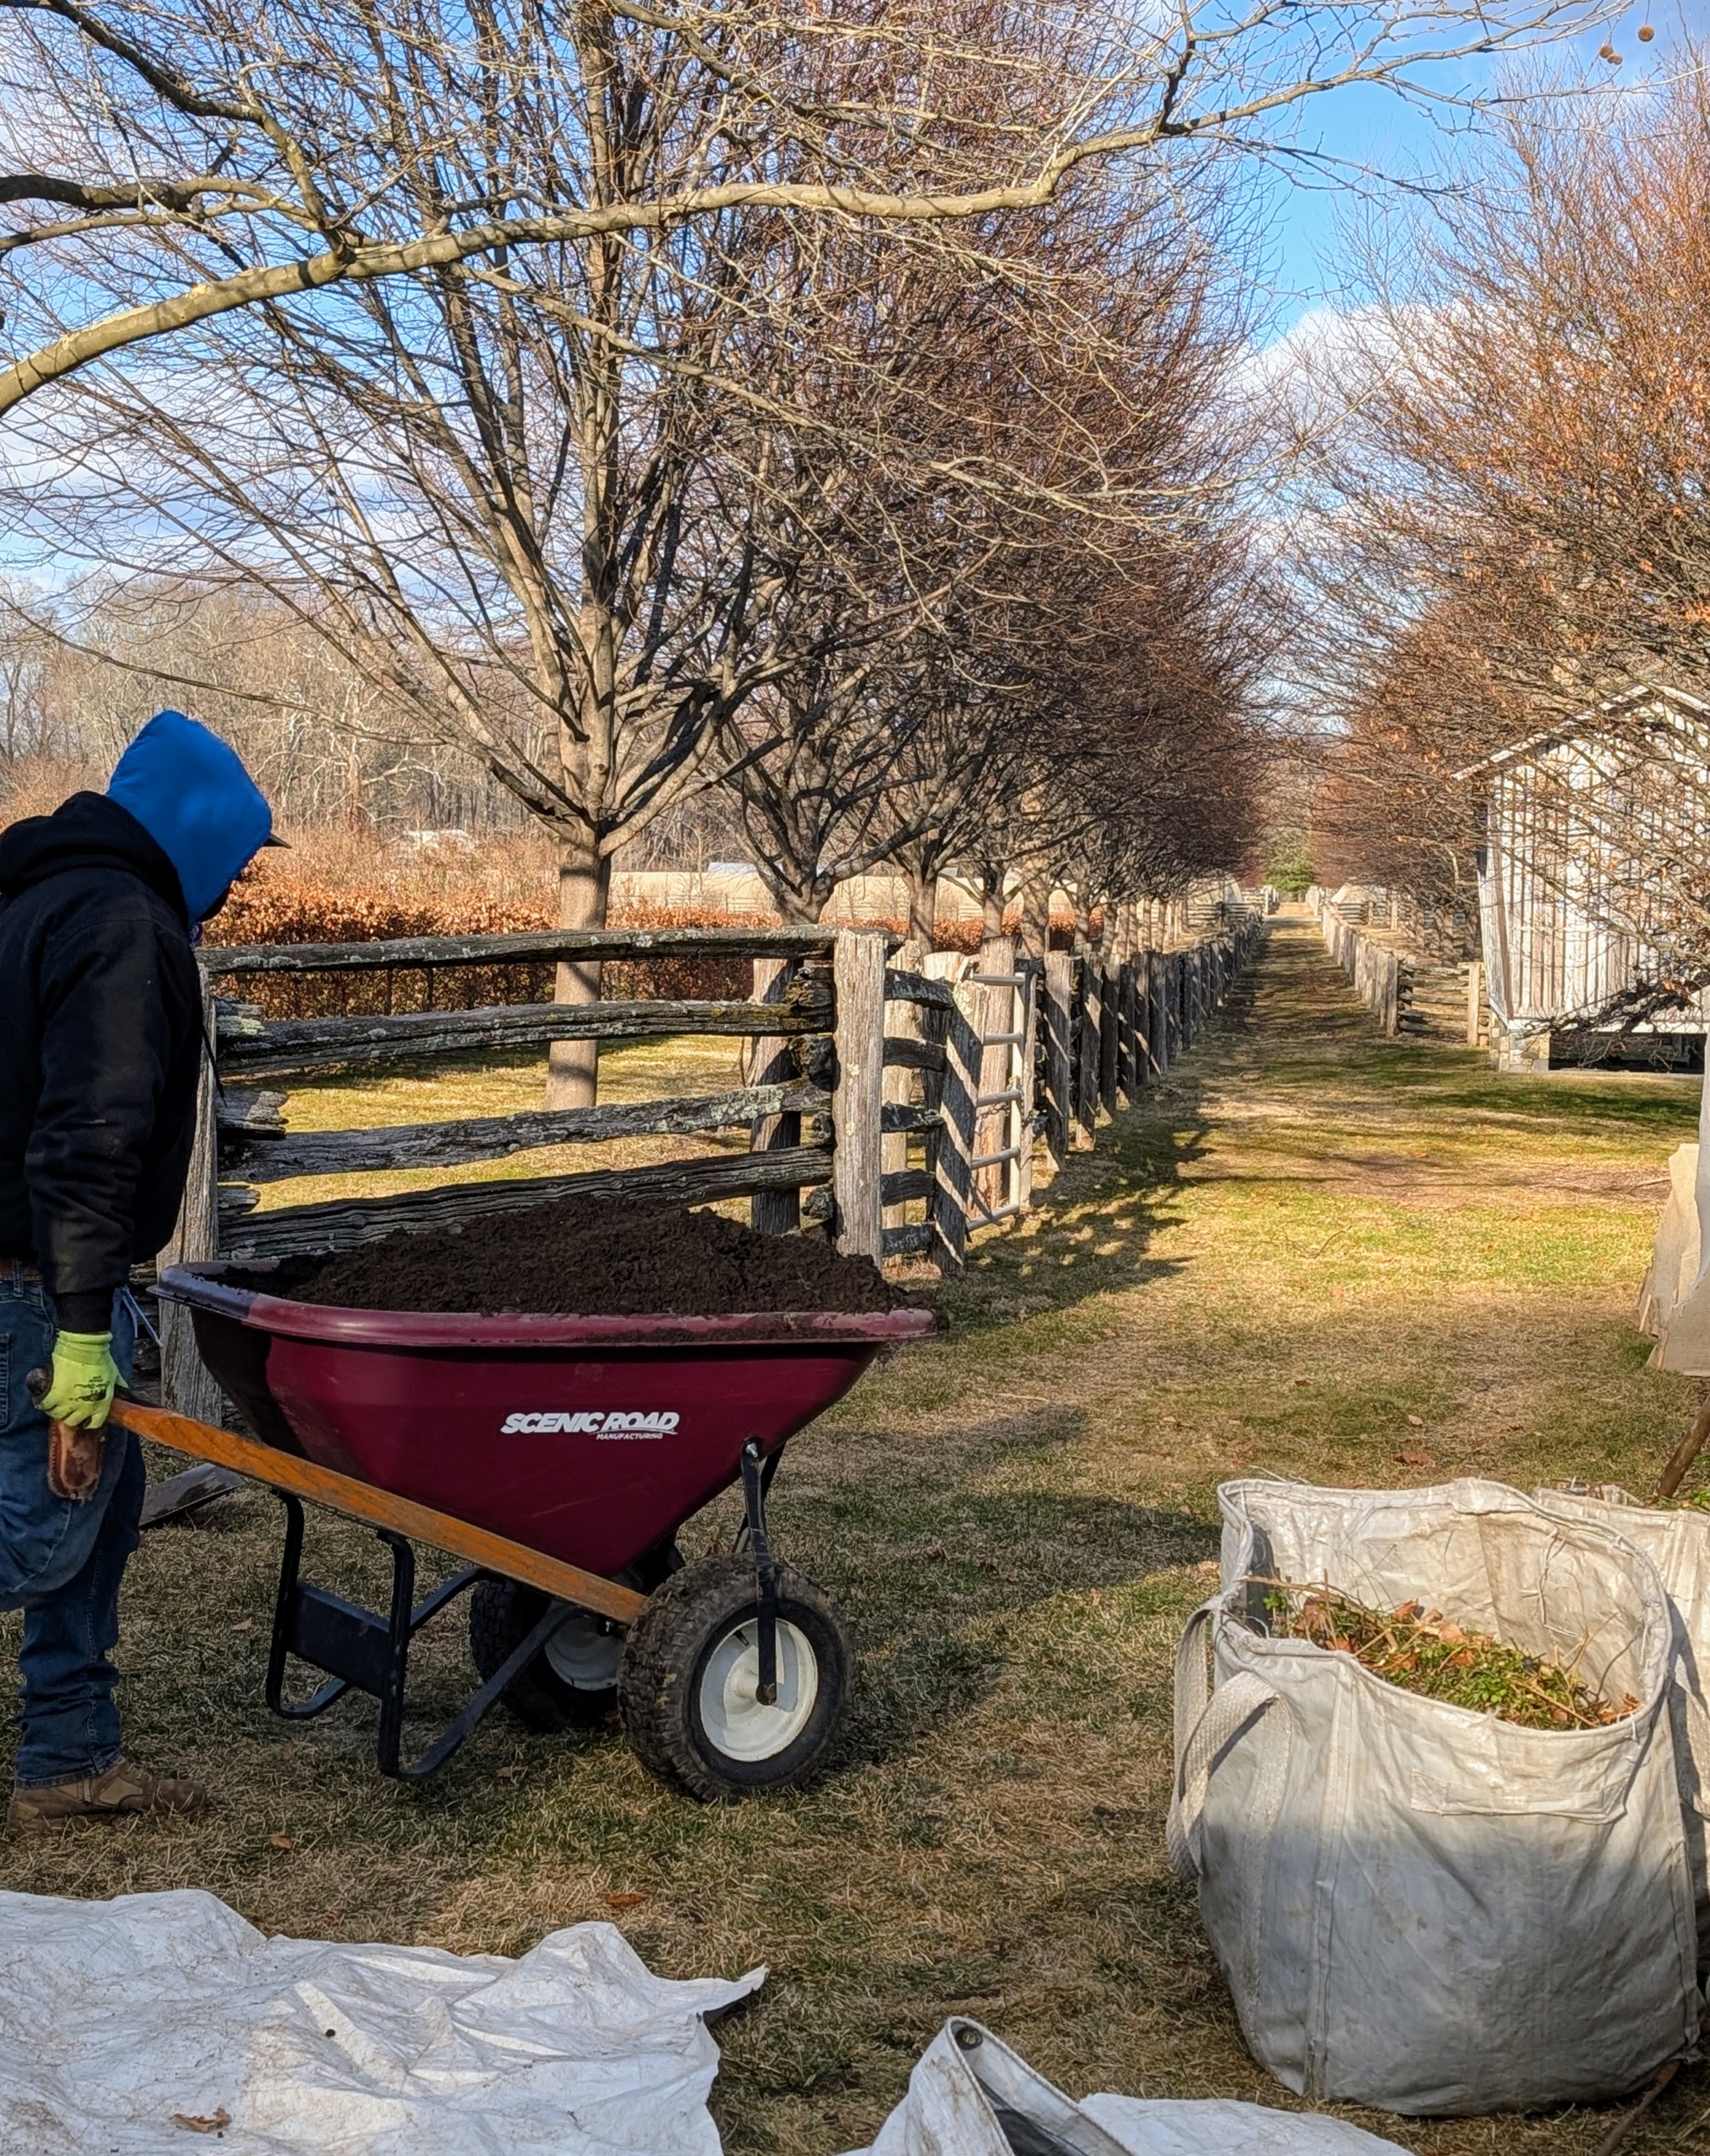
And then as each wheelbarrow is filled, it is brought to the cleaned bed and unloaded in piles. Here is Adan delivering more compost to the pergola garden.
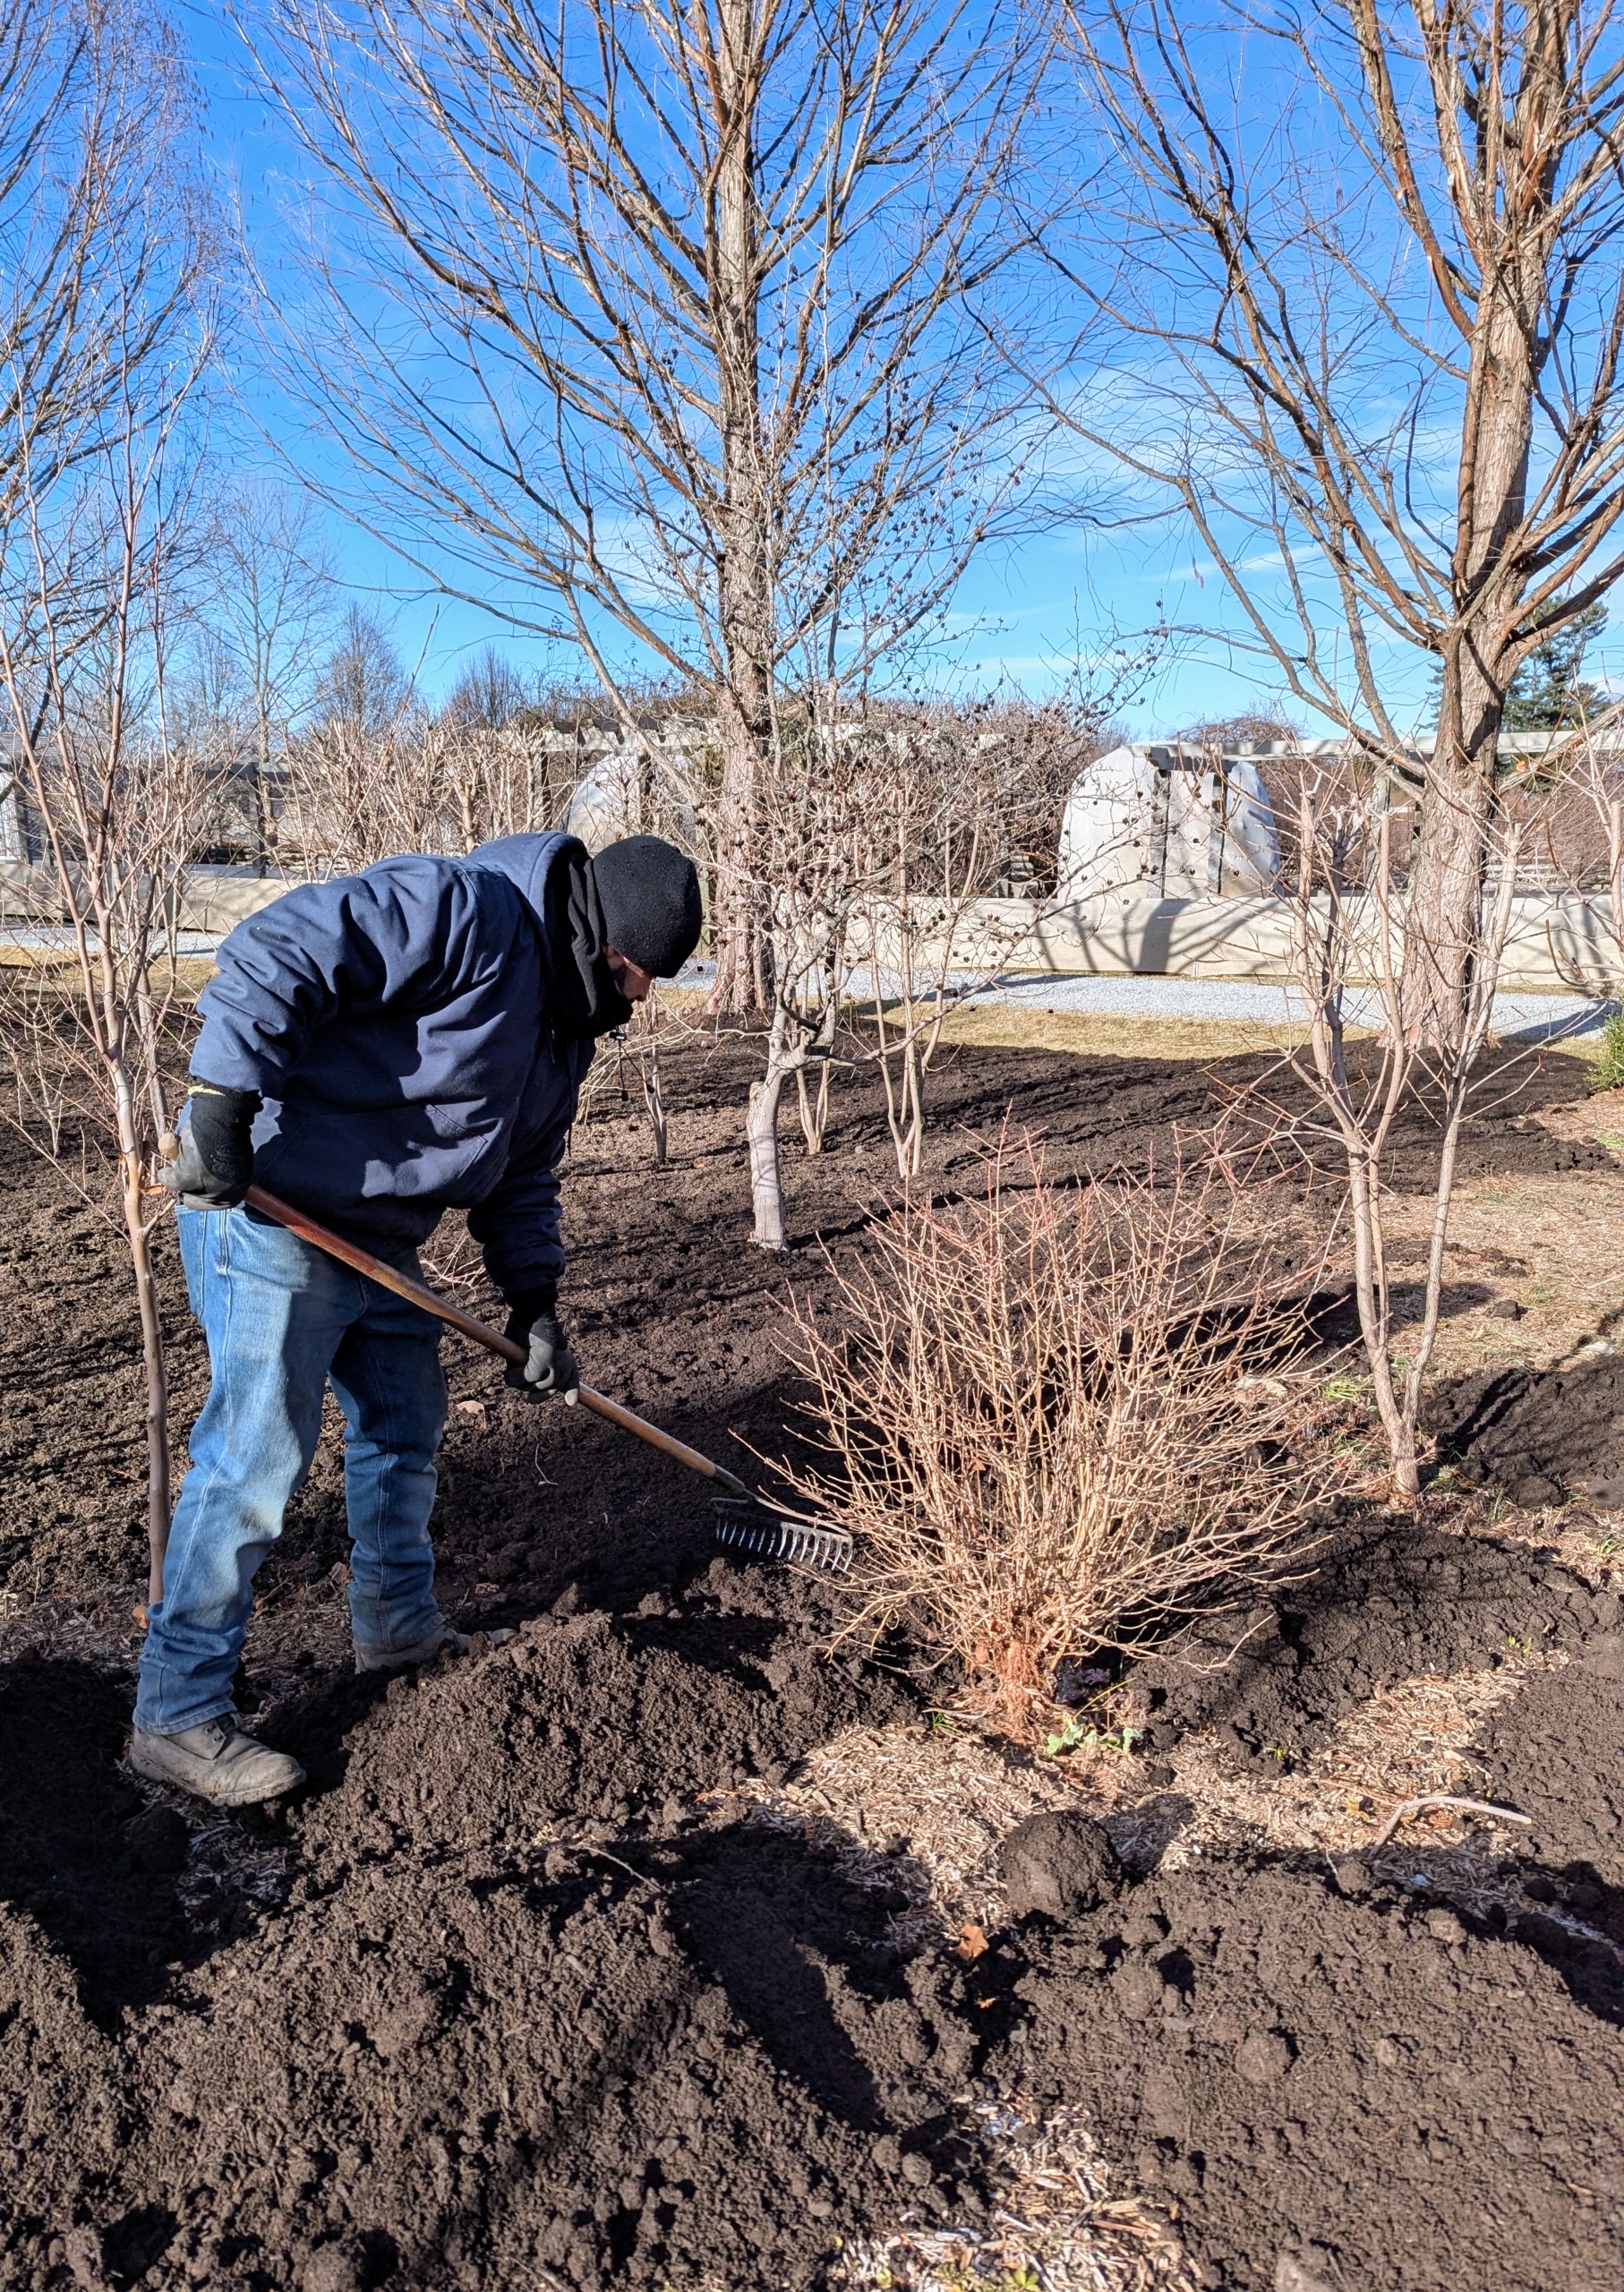
And by hand, a three to four inch layer of compost is spread over all the beds. I prefer this done in winter when flowers are not in bloom and the crew can gingerly walk through without disturbing any growth.
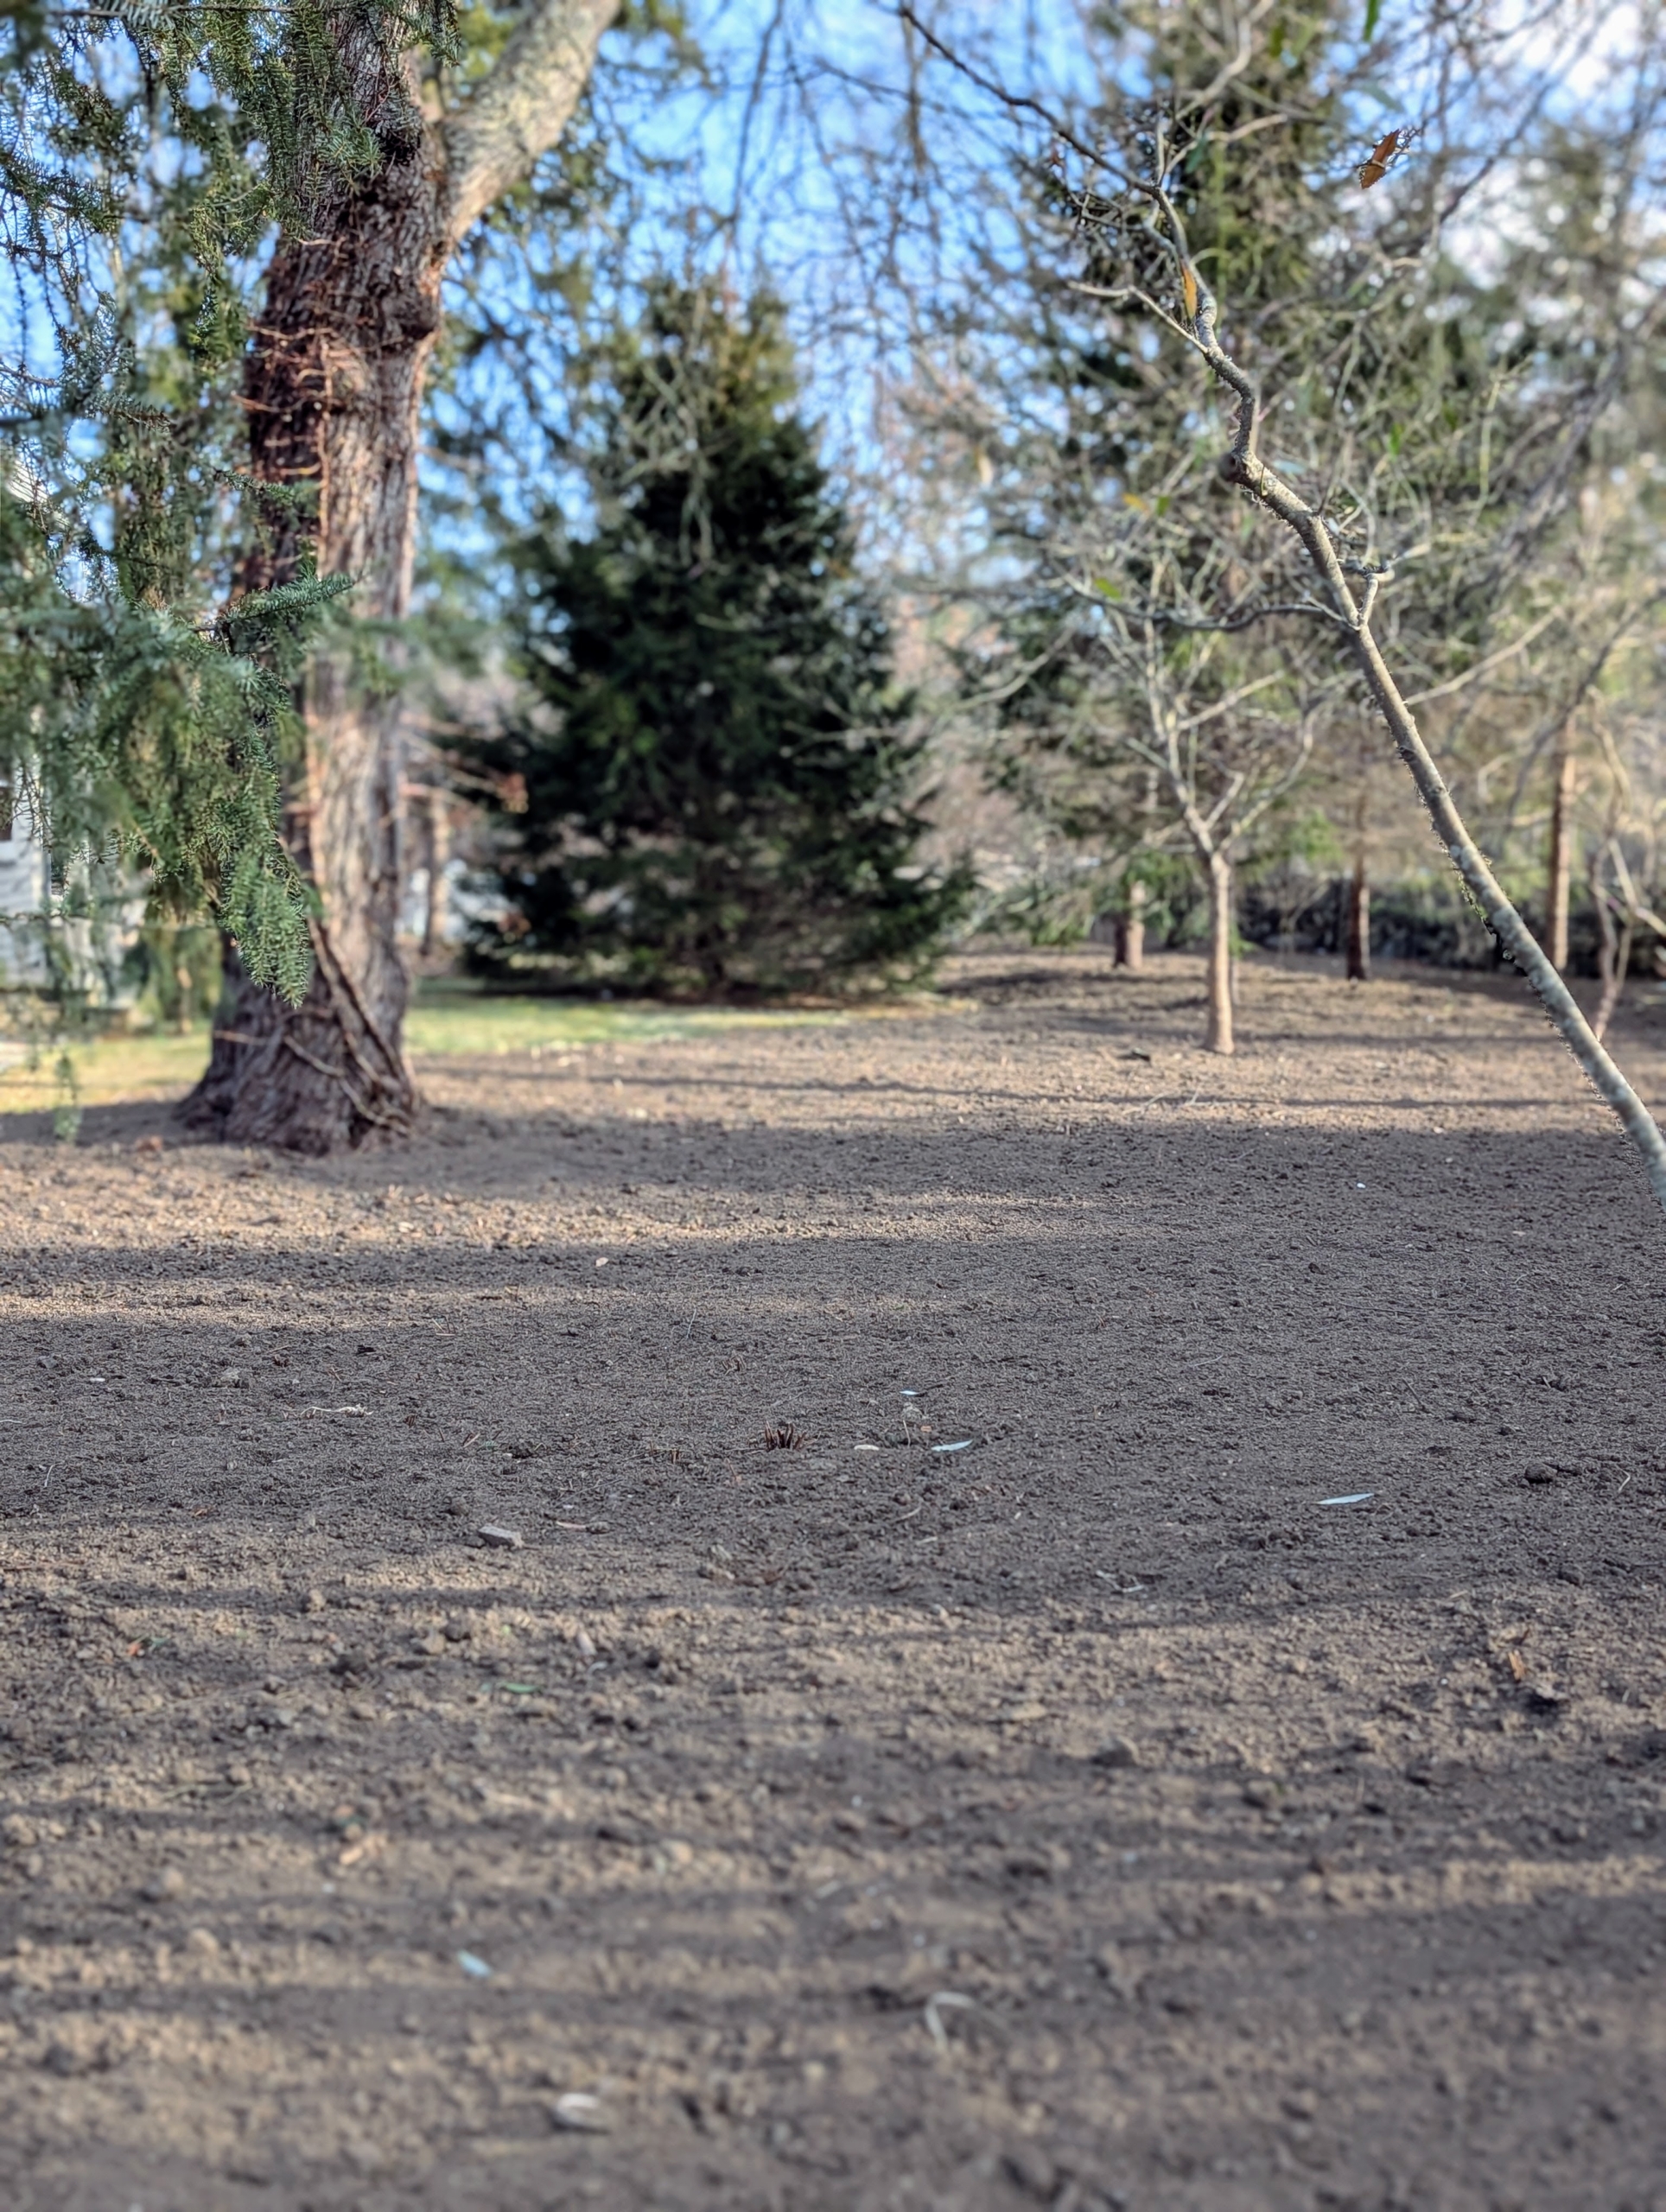
This area is part of my Stewartia garden, where I plant various perennials, spring blooming bulbs, and of course, Stewartia trees.
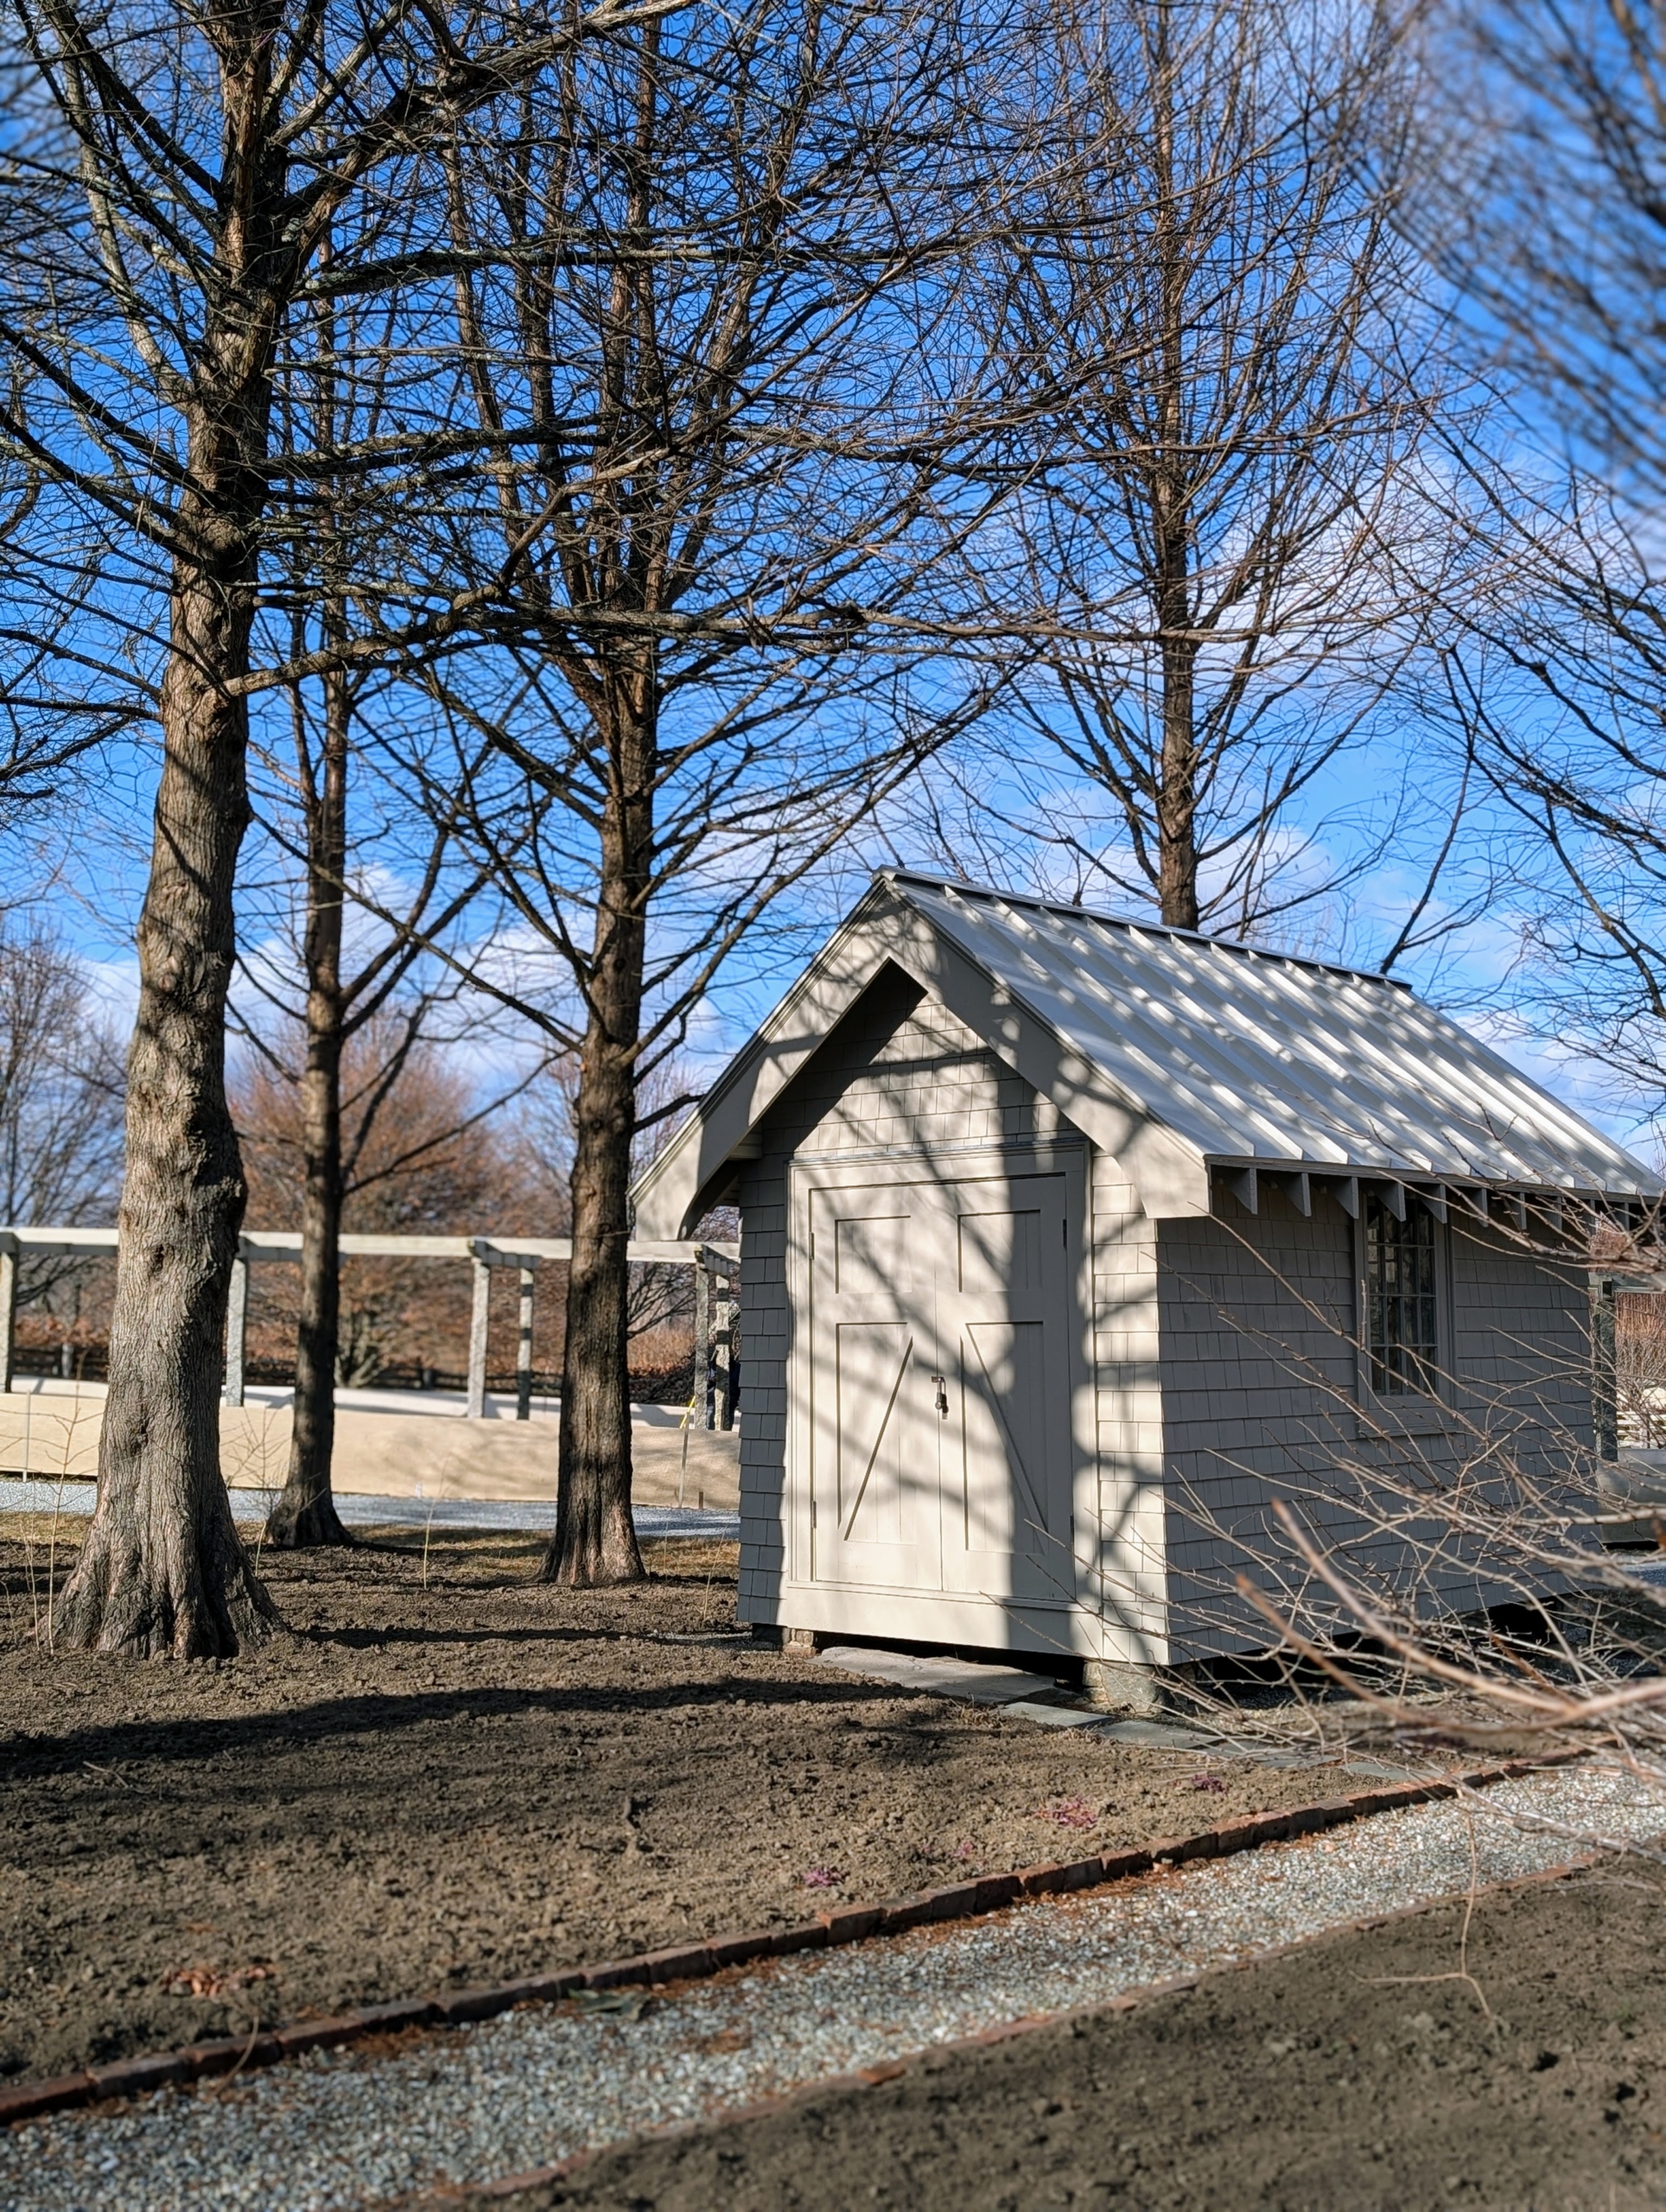
And this is the garden surrounding my Basket House below the towering bald cypress trees – all bare of their feathery fern-like foliage.
If you can, cover your gardens with a good layer of compost. It’s nature’s best soil conditioner and a wonderful way to beautify the gardens and give back to the earth.
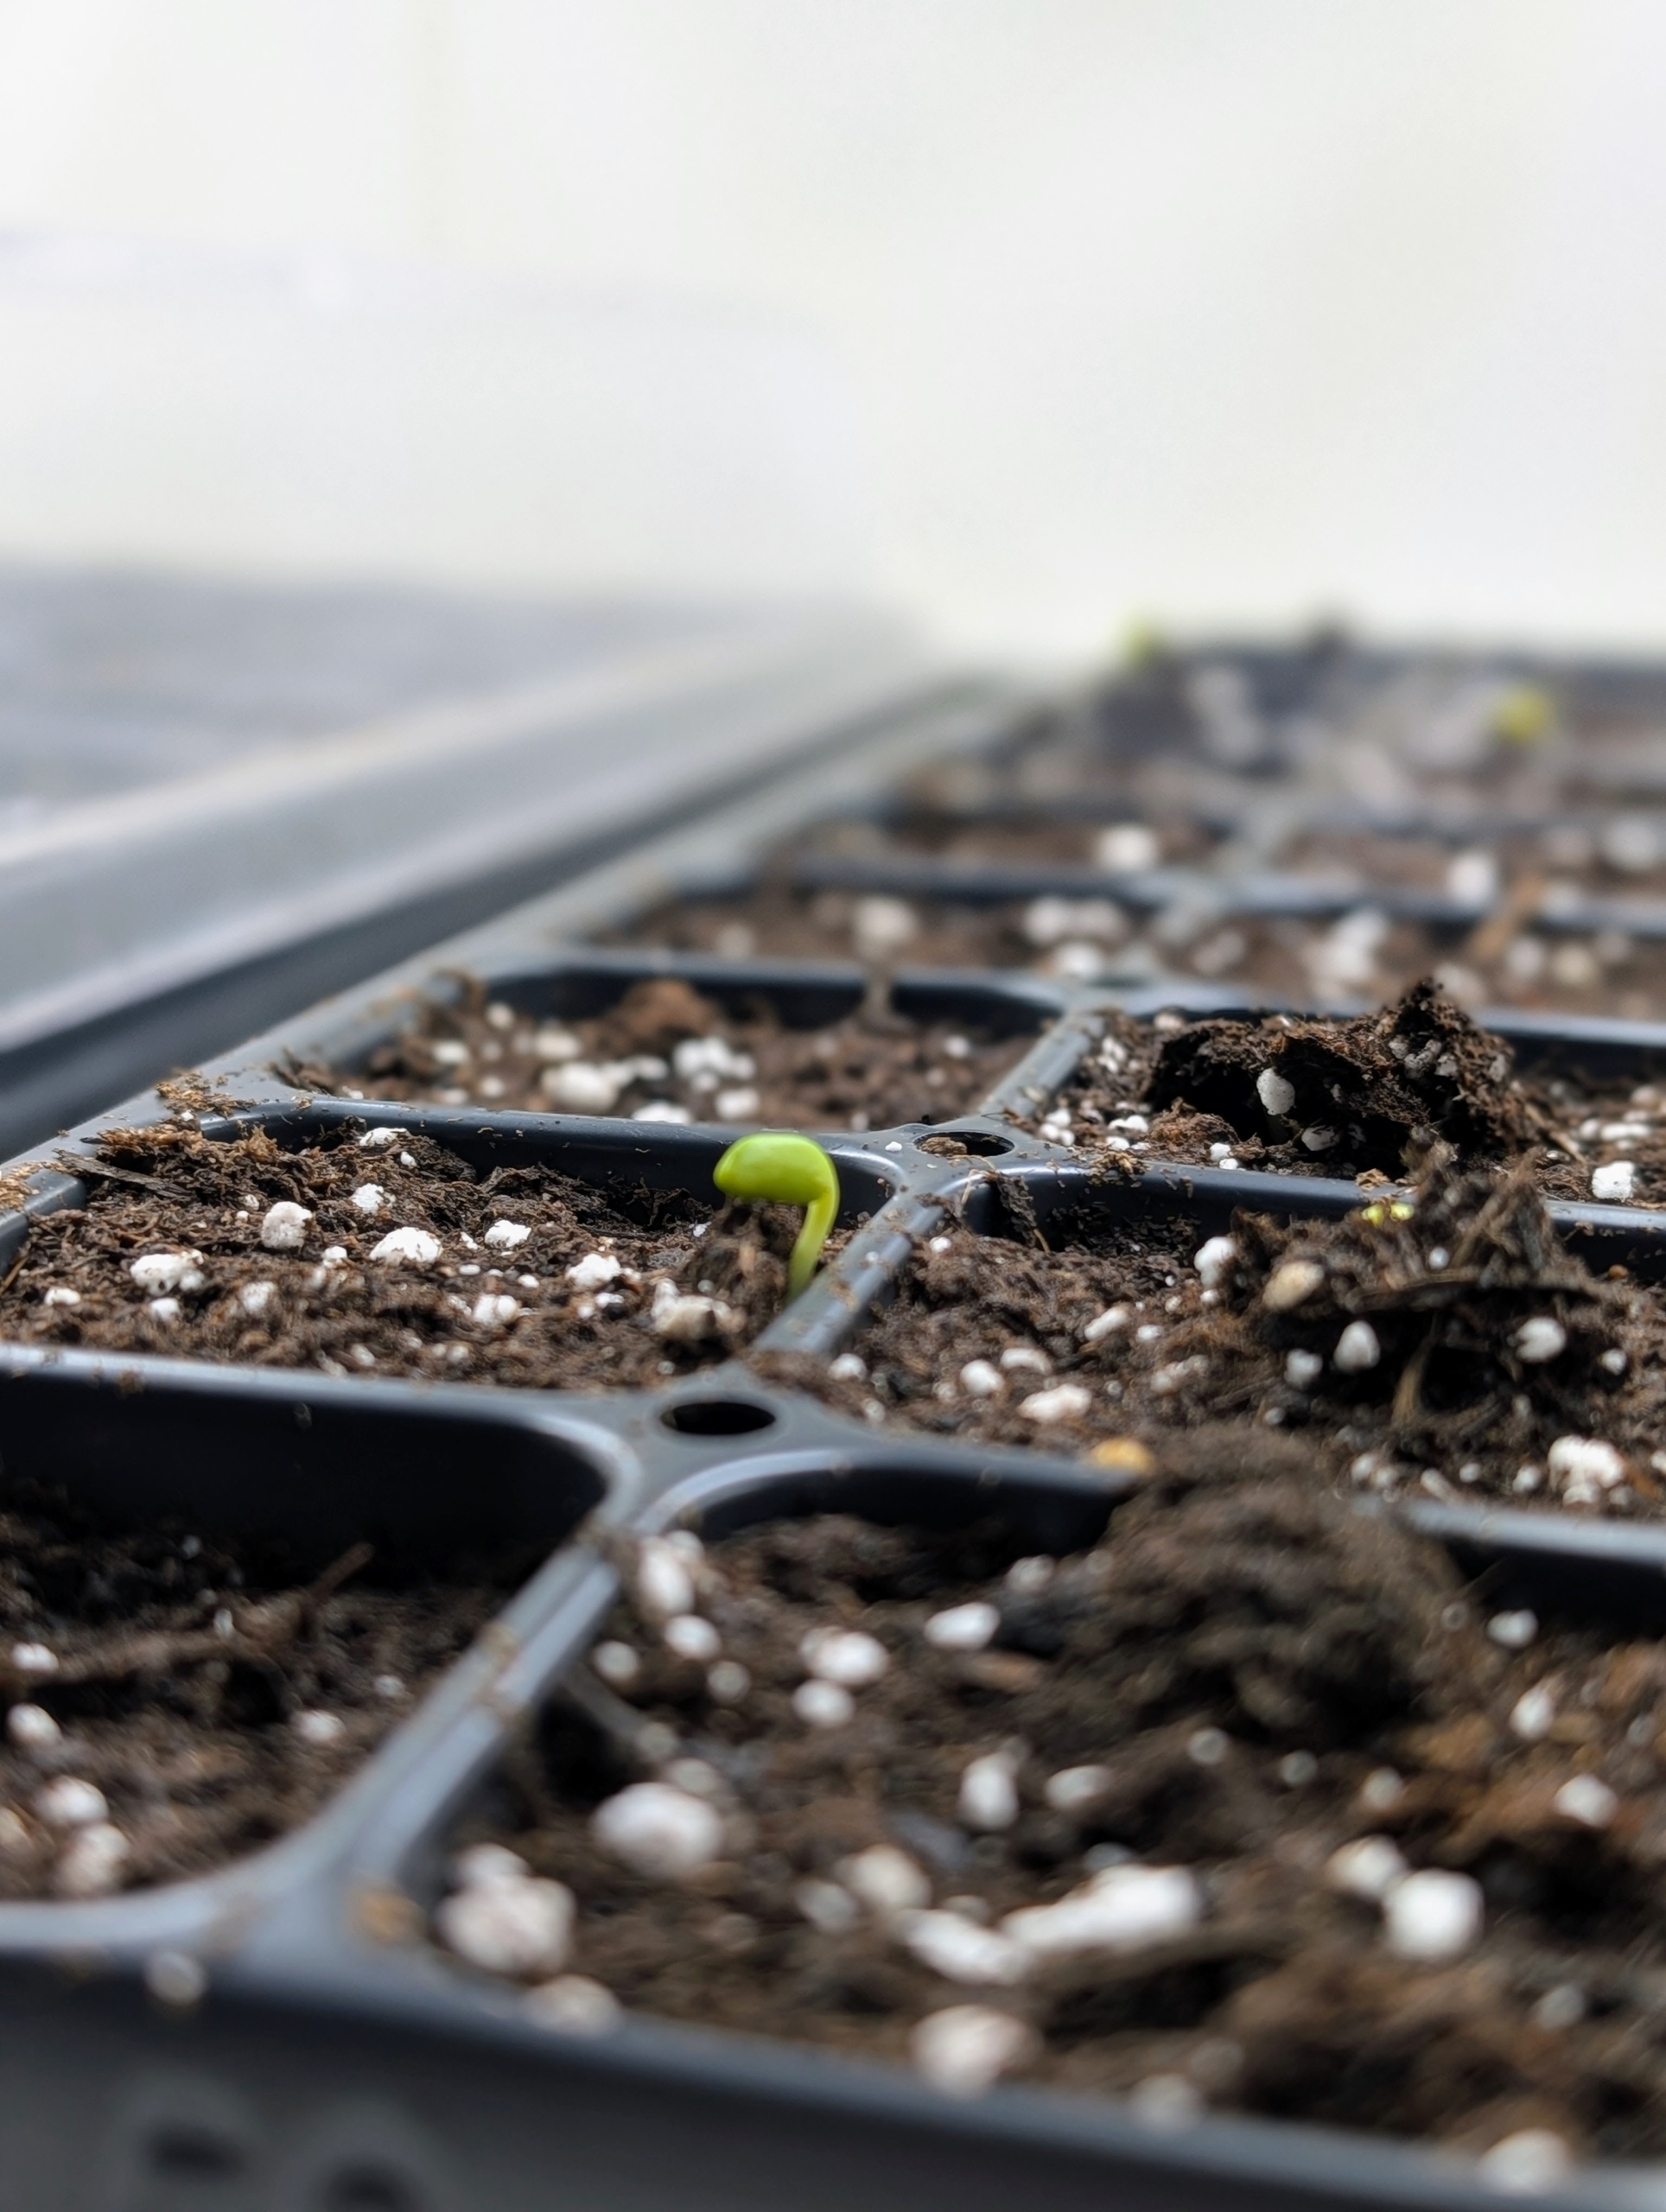
Here at my farm, patches of snow and ice cover the ground, but inside my greenhouse there's a flurry of spring activity. My head gardener, Ryan McCallister, is already starting flower seeds in preparation for the coming growing season.
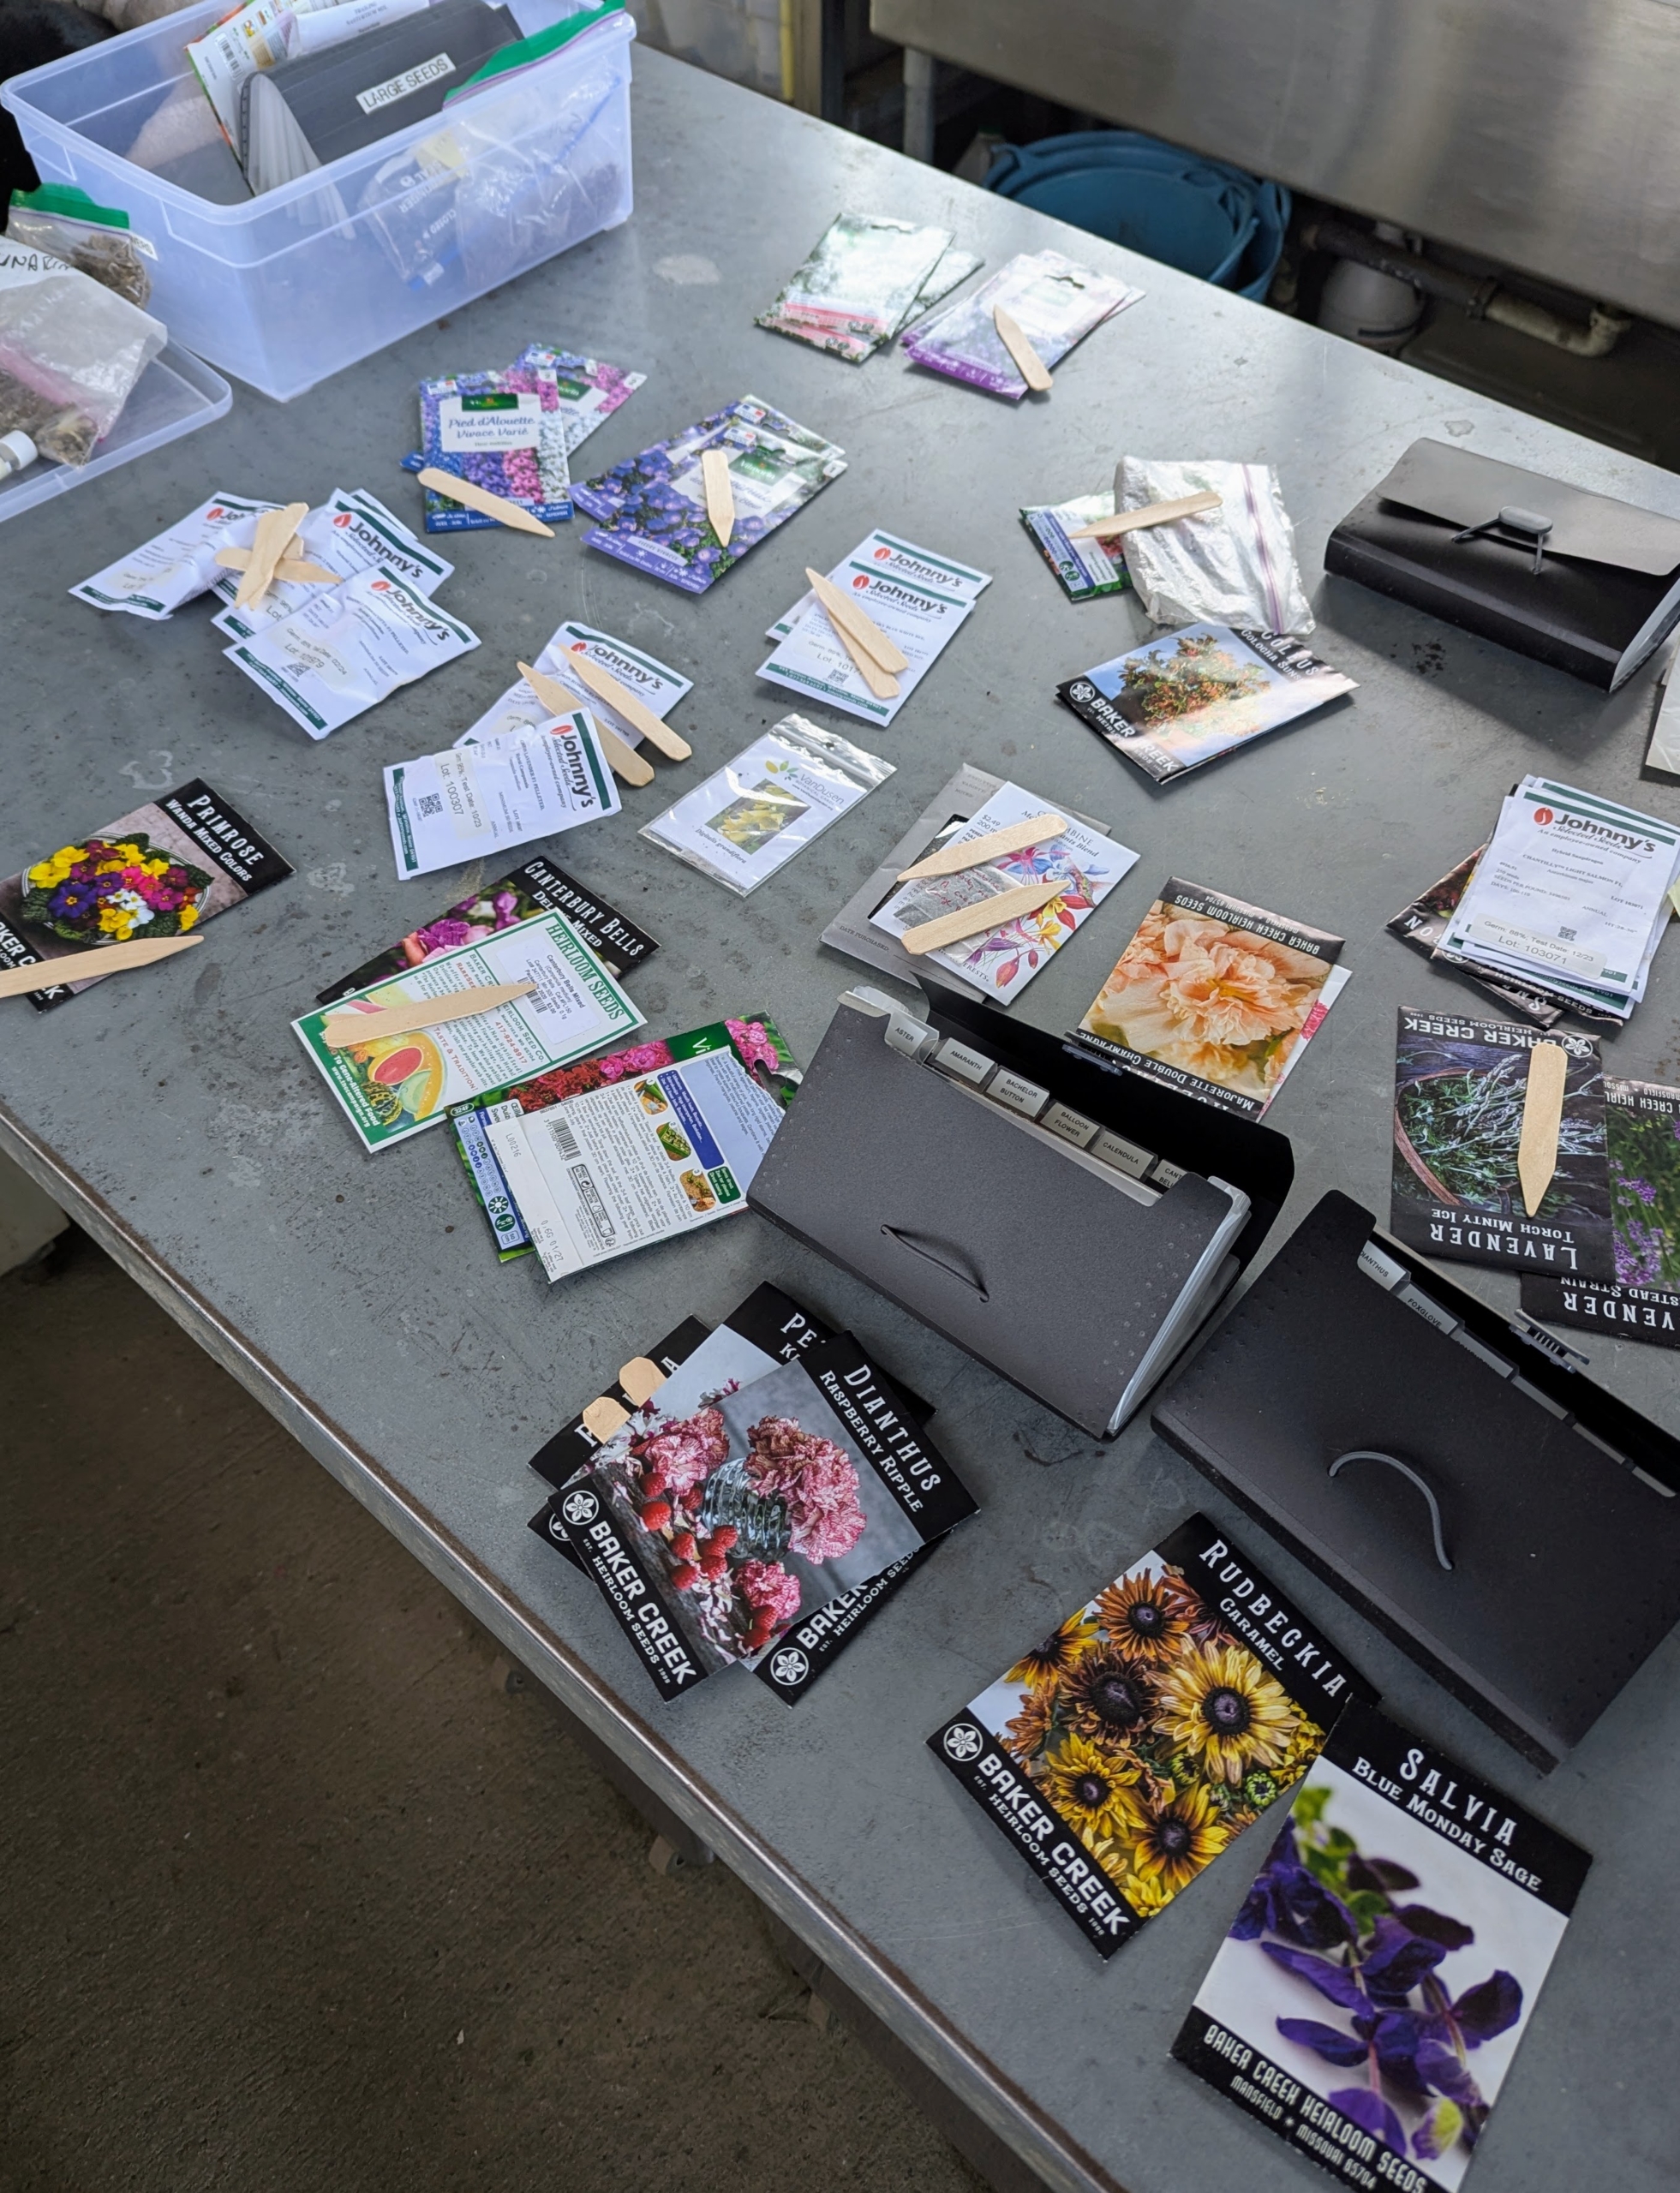
We sow thousands of seeds every year - all those wonderful seeds I enjoy purchasing during my travels and seeds we order from our favorite sources. Our first trays include a selection of lupines, delphiniums, and campanulas.
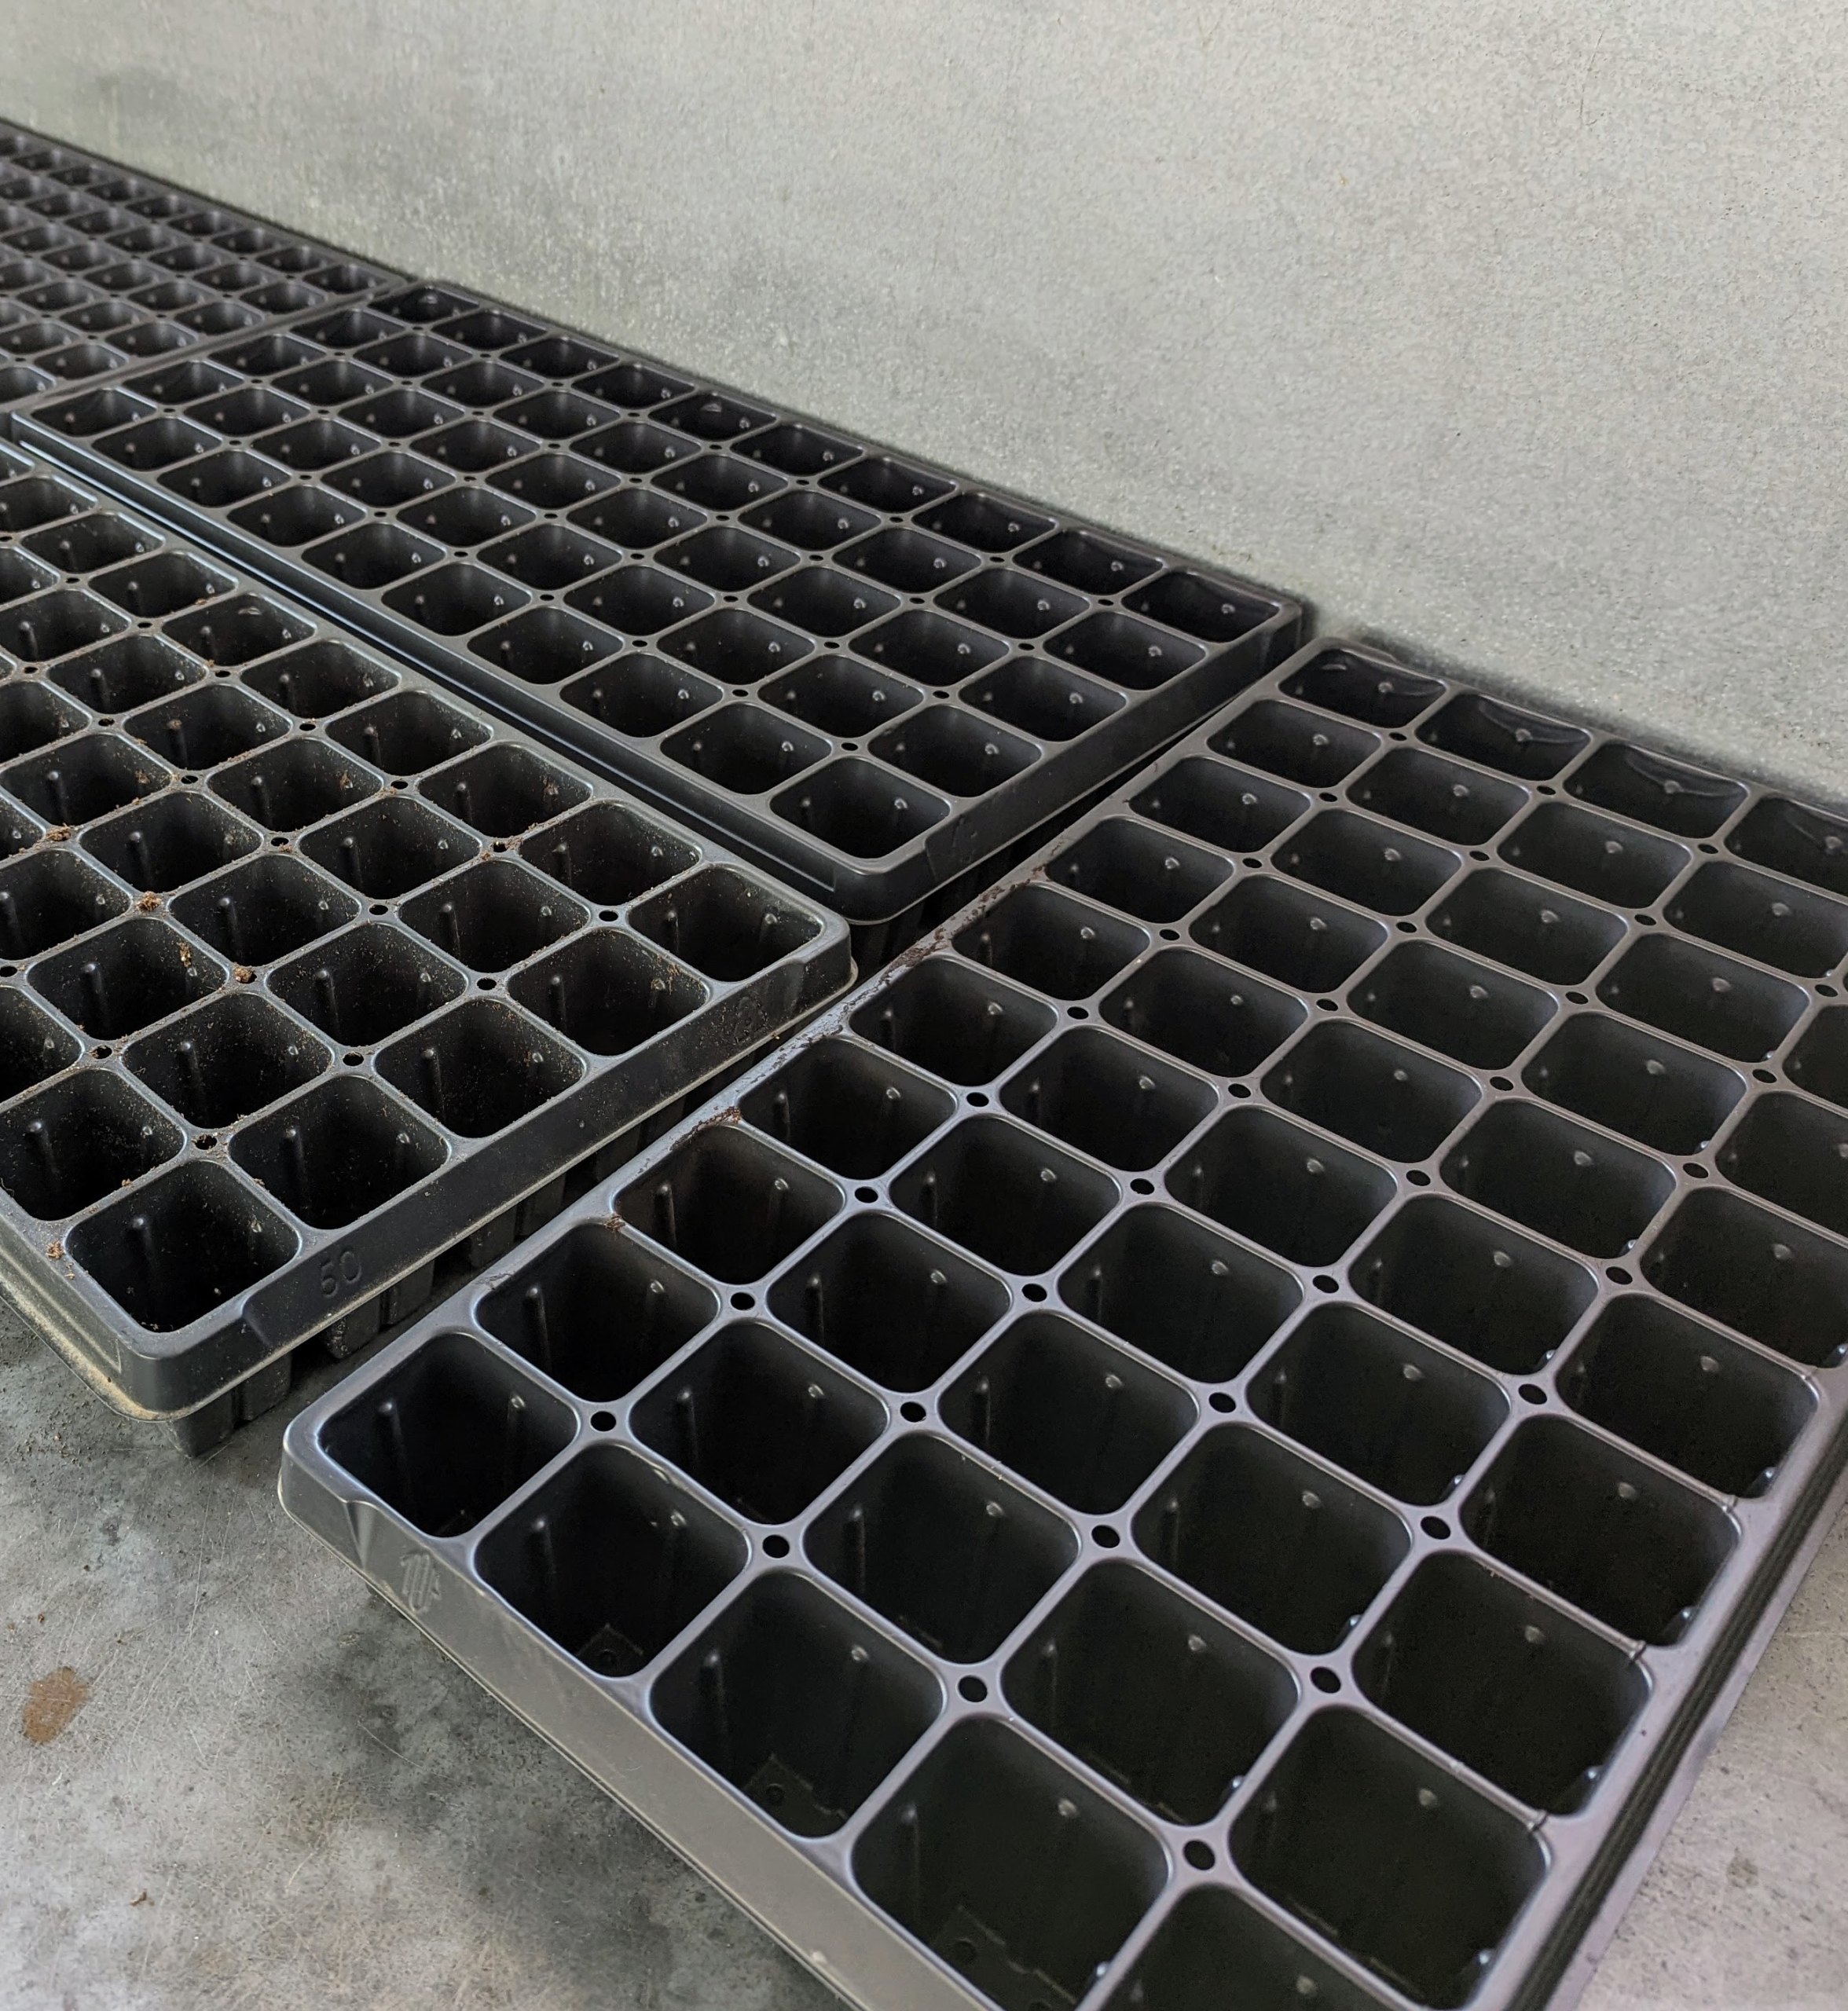
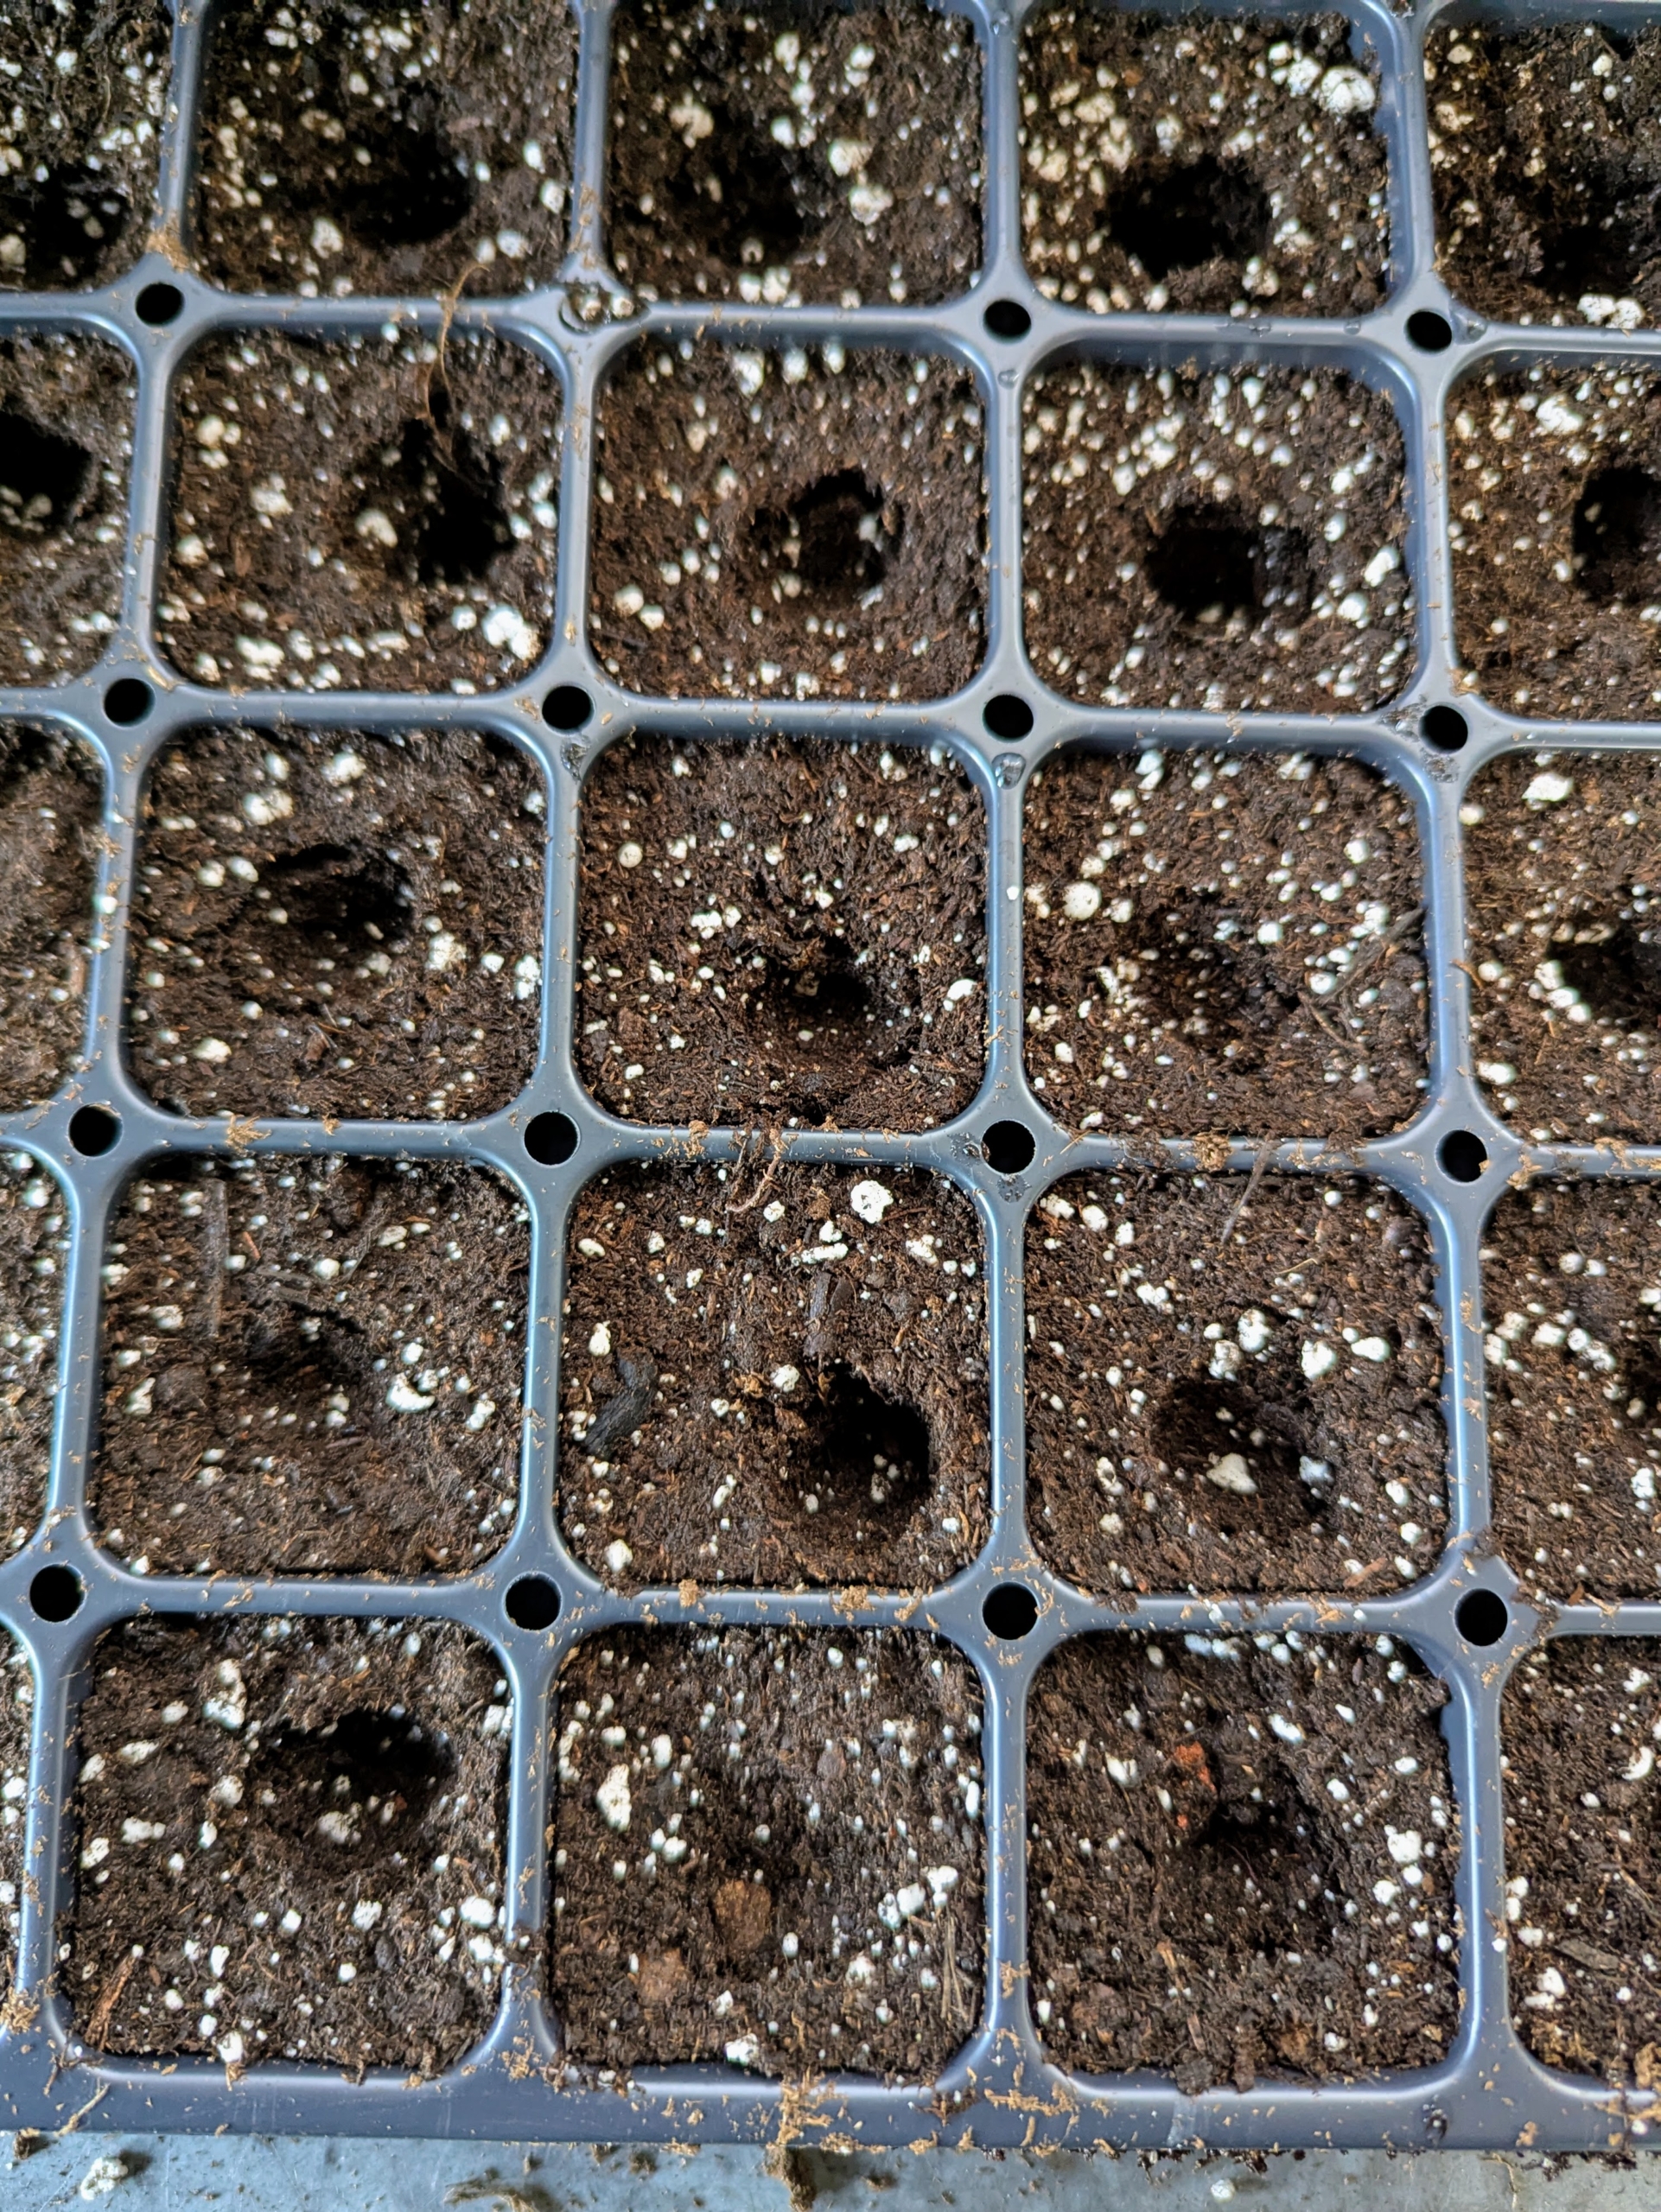
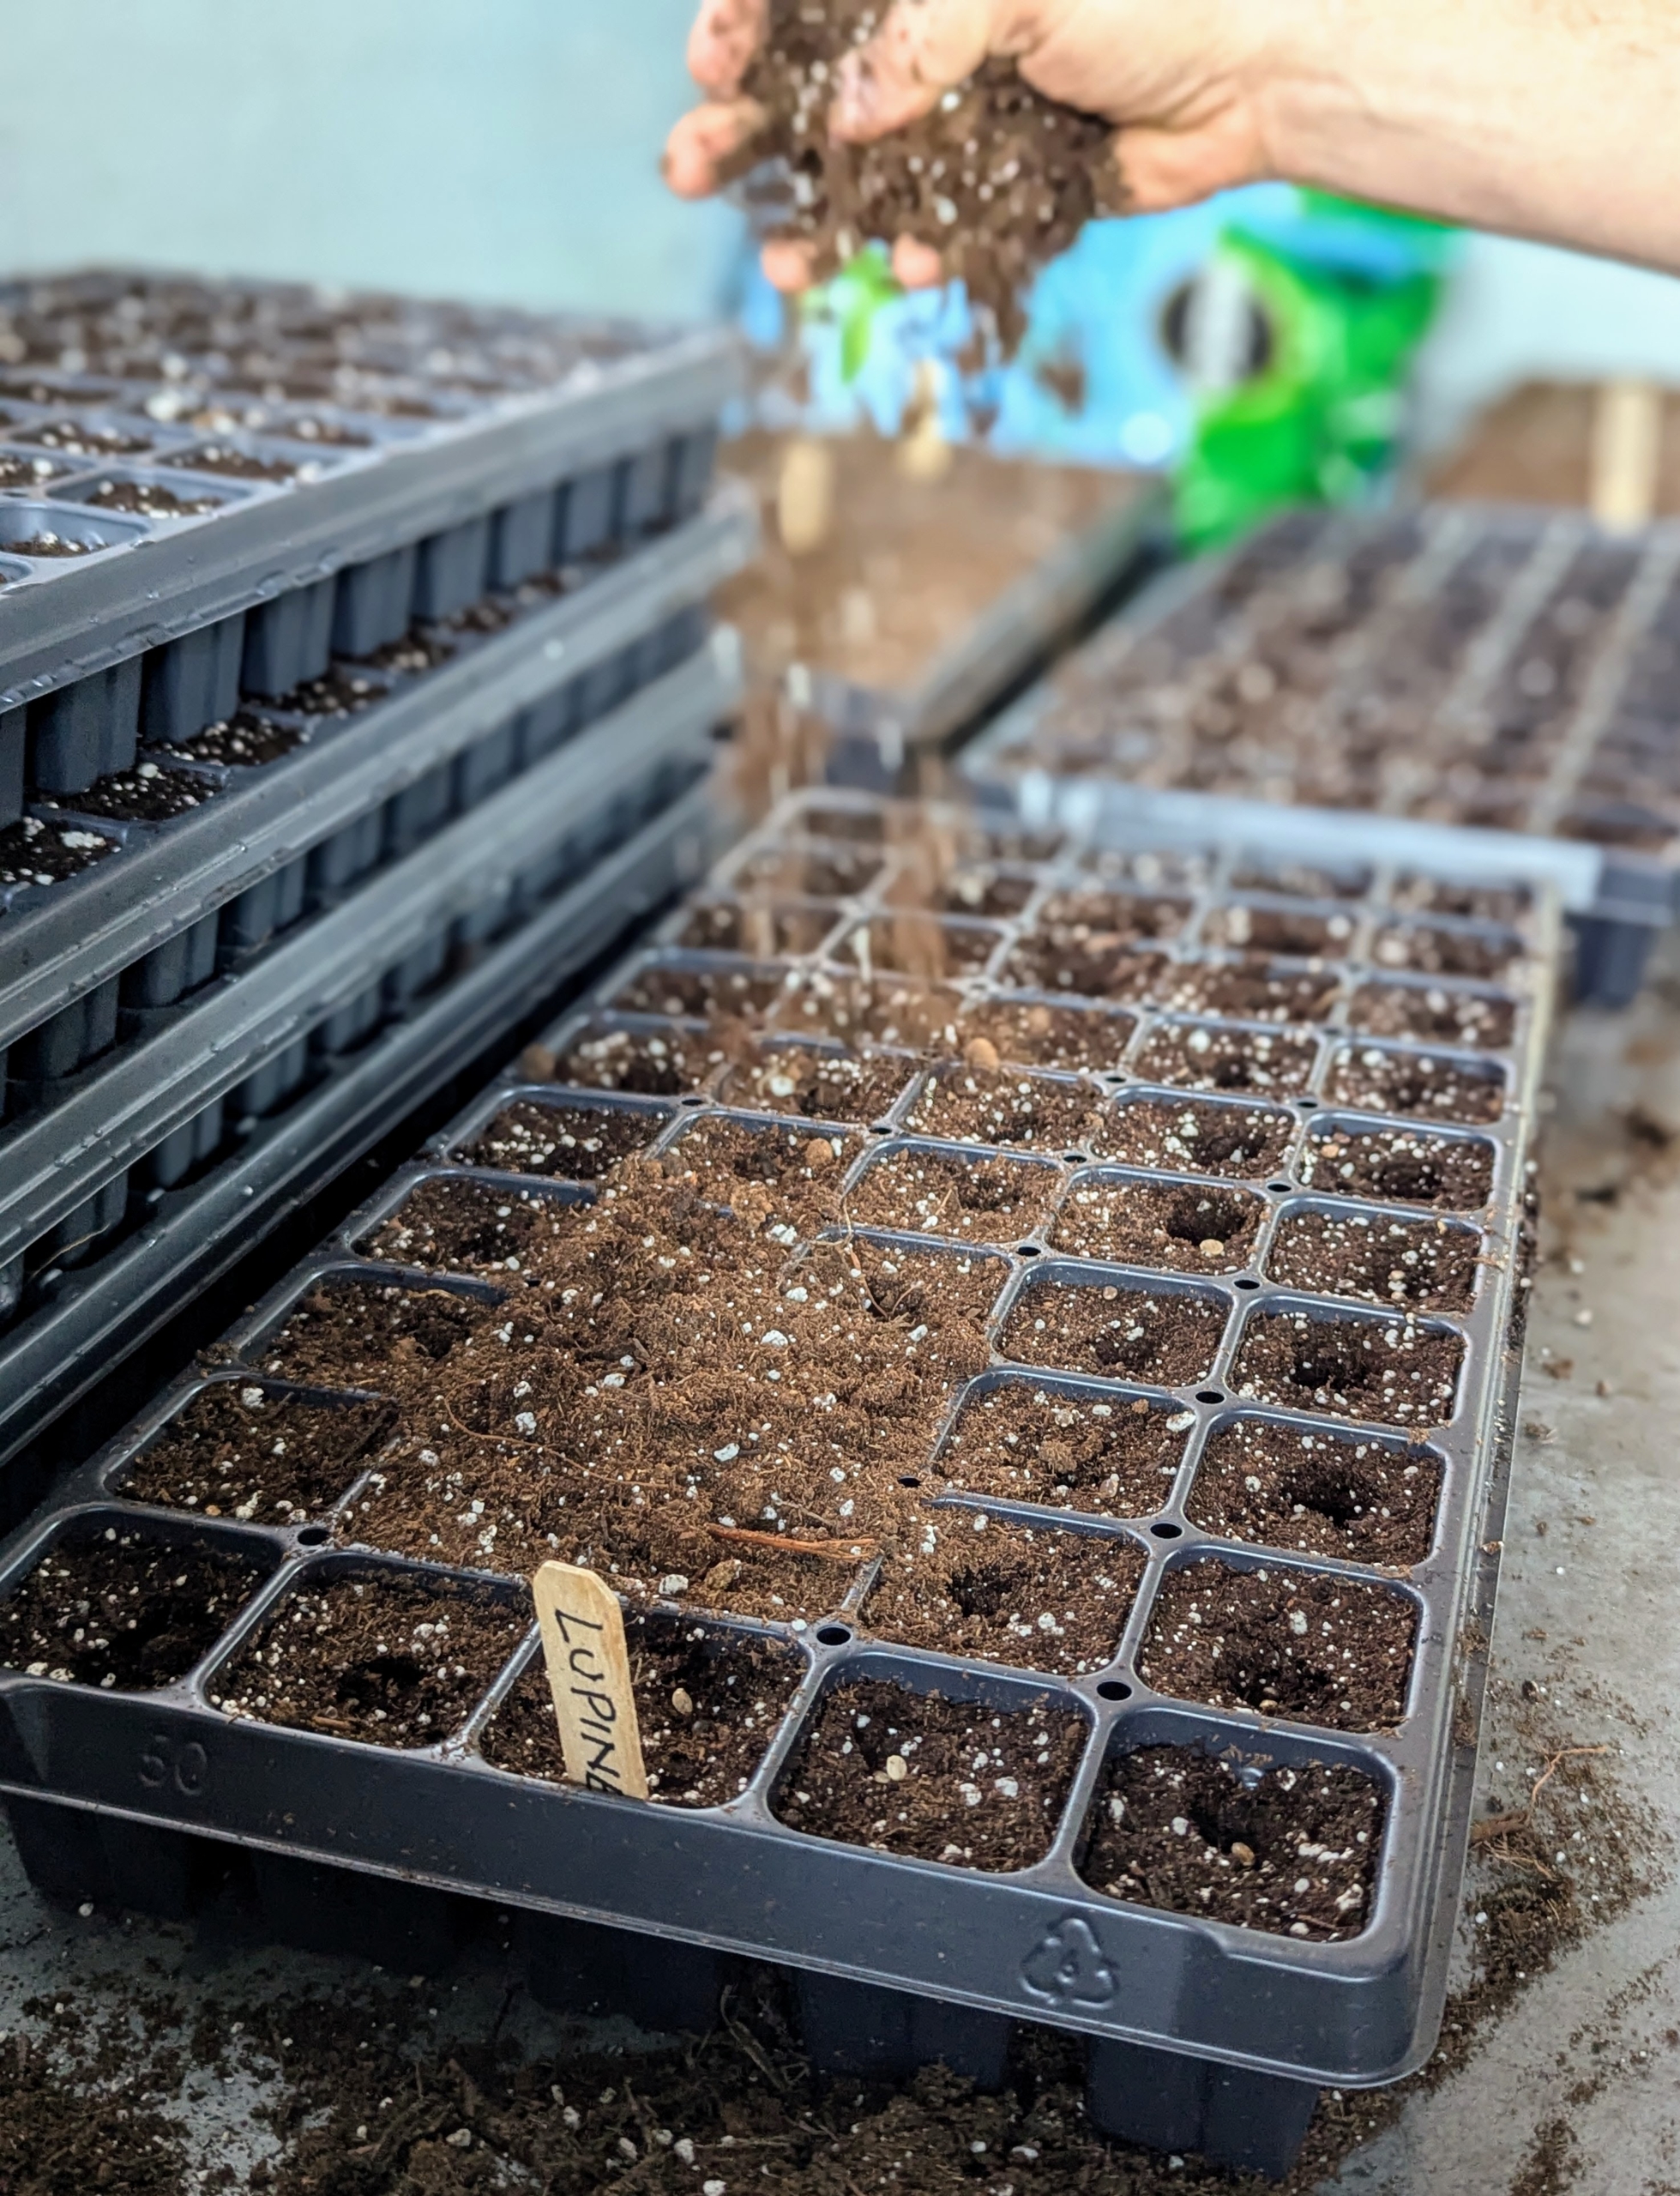
Ryan chooses all the necessary seed starting trays. These can be saved from year to year, so don’t throw them away after the season. Seed starting trays are available in all sizes and formations depending on seed needs.
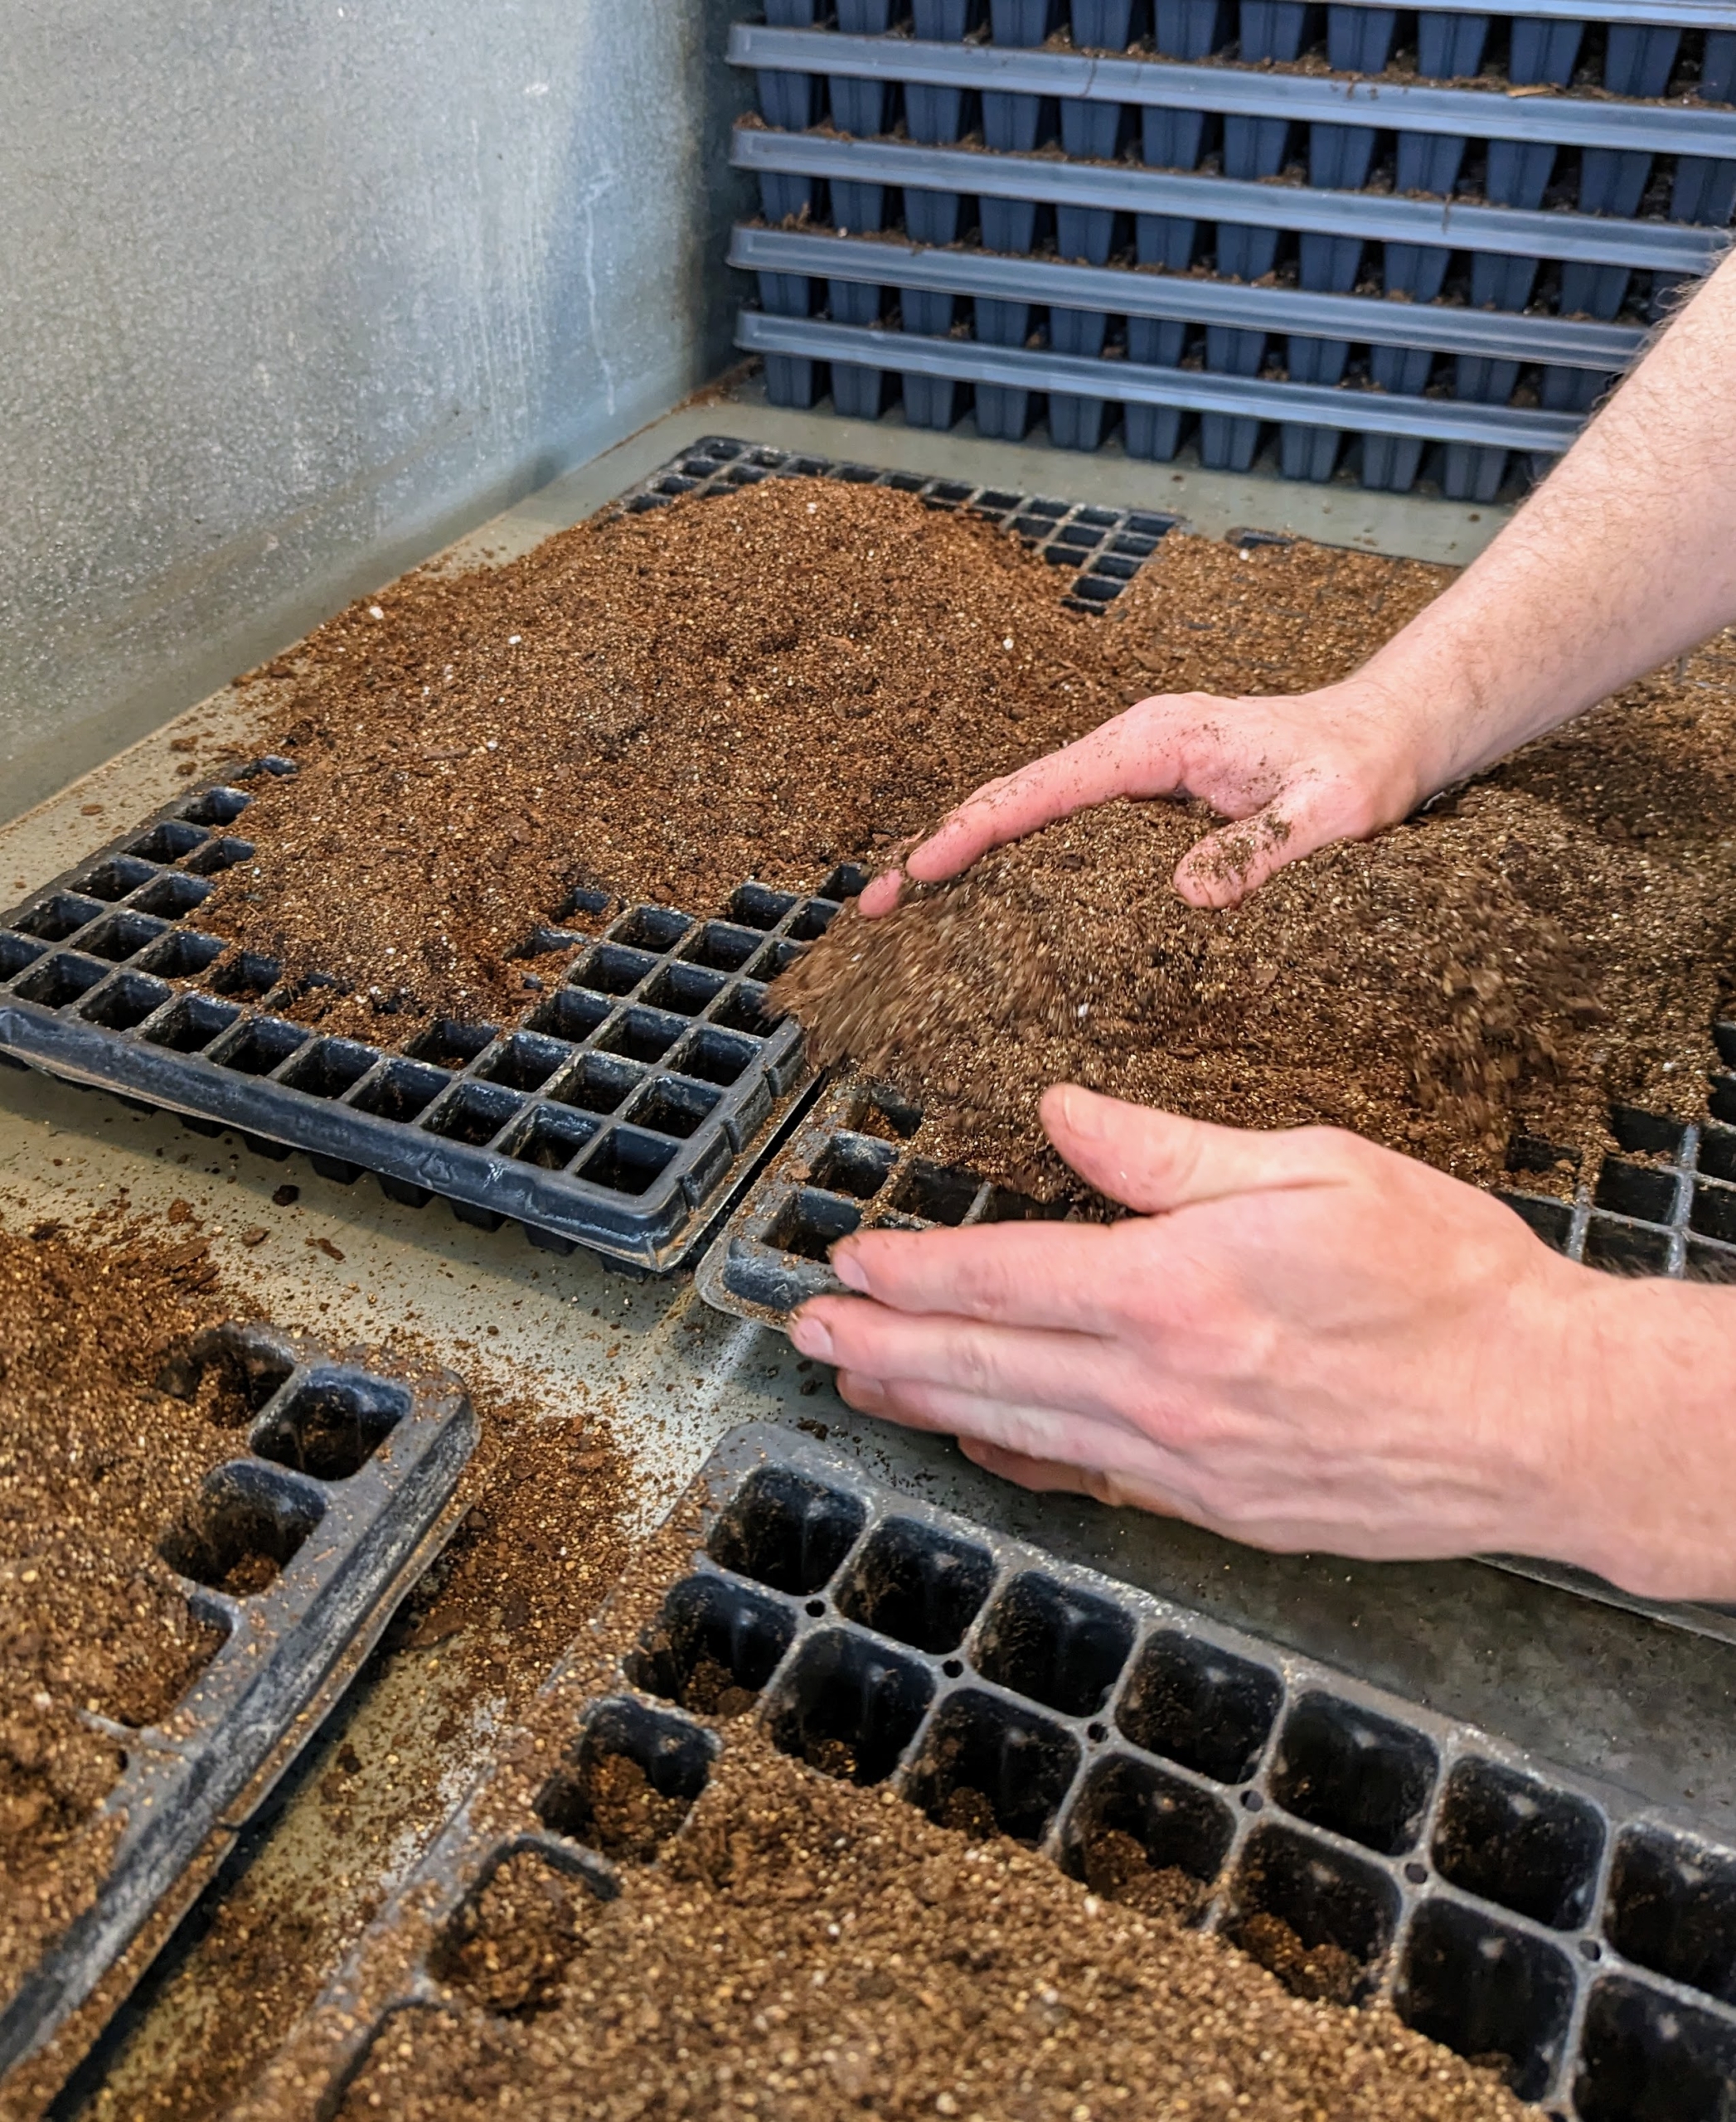
He fills several trays with a pre-made seed starting mix that contains the proper amounts of vermiculite, perlite, and peat moss.
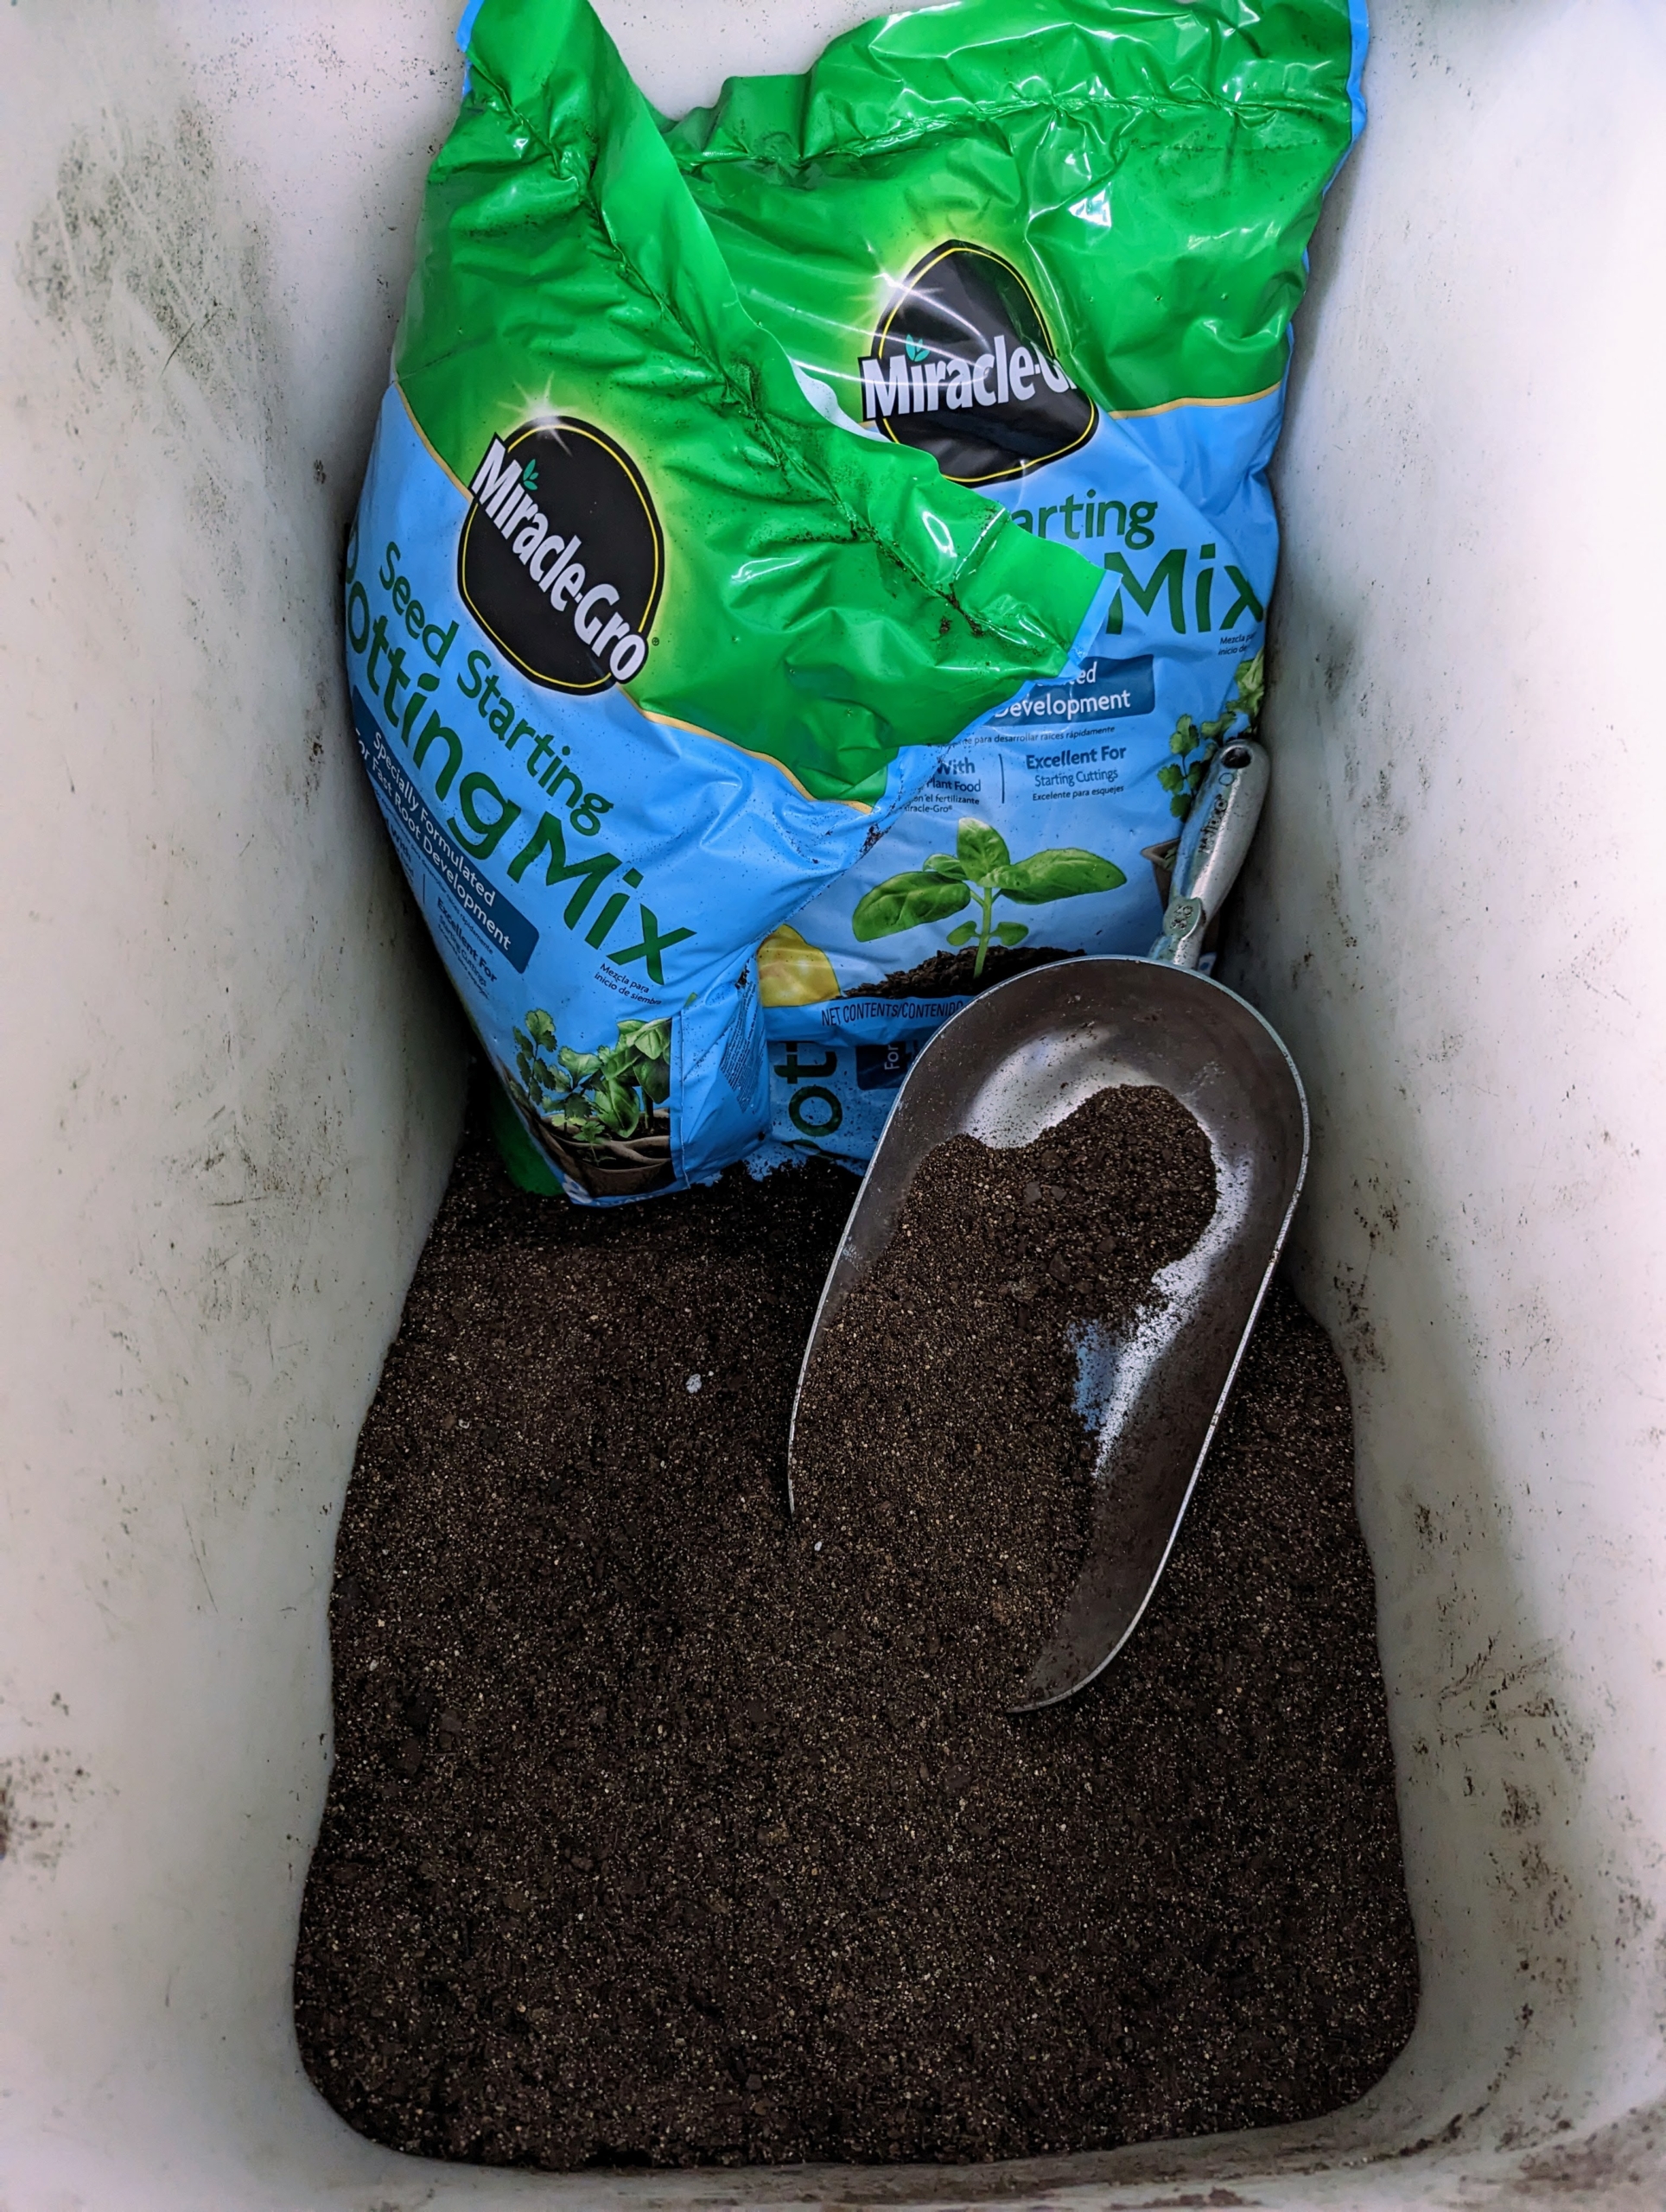
Miracle-Gro Seed Starting Potting Mix comes in handy, light eight quart bags. Because we seeds so many trays, I like to keep a goodly amount of potting mix in the head house ready to use. I store soil mixes in large stainless steel bakery ingredient bins – so durable and useful.
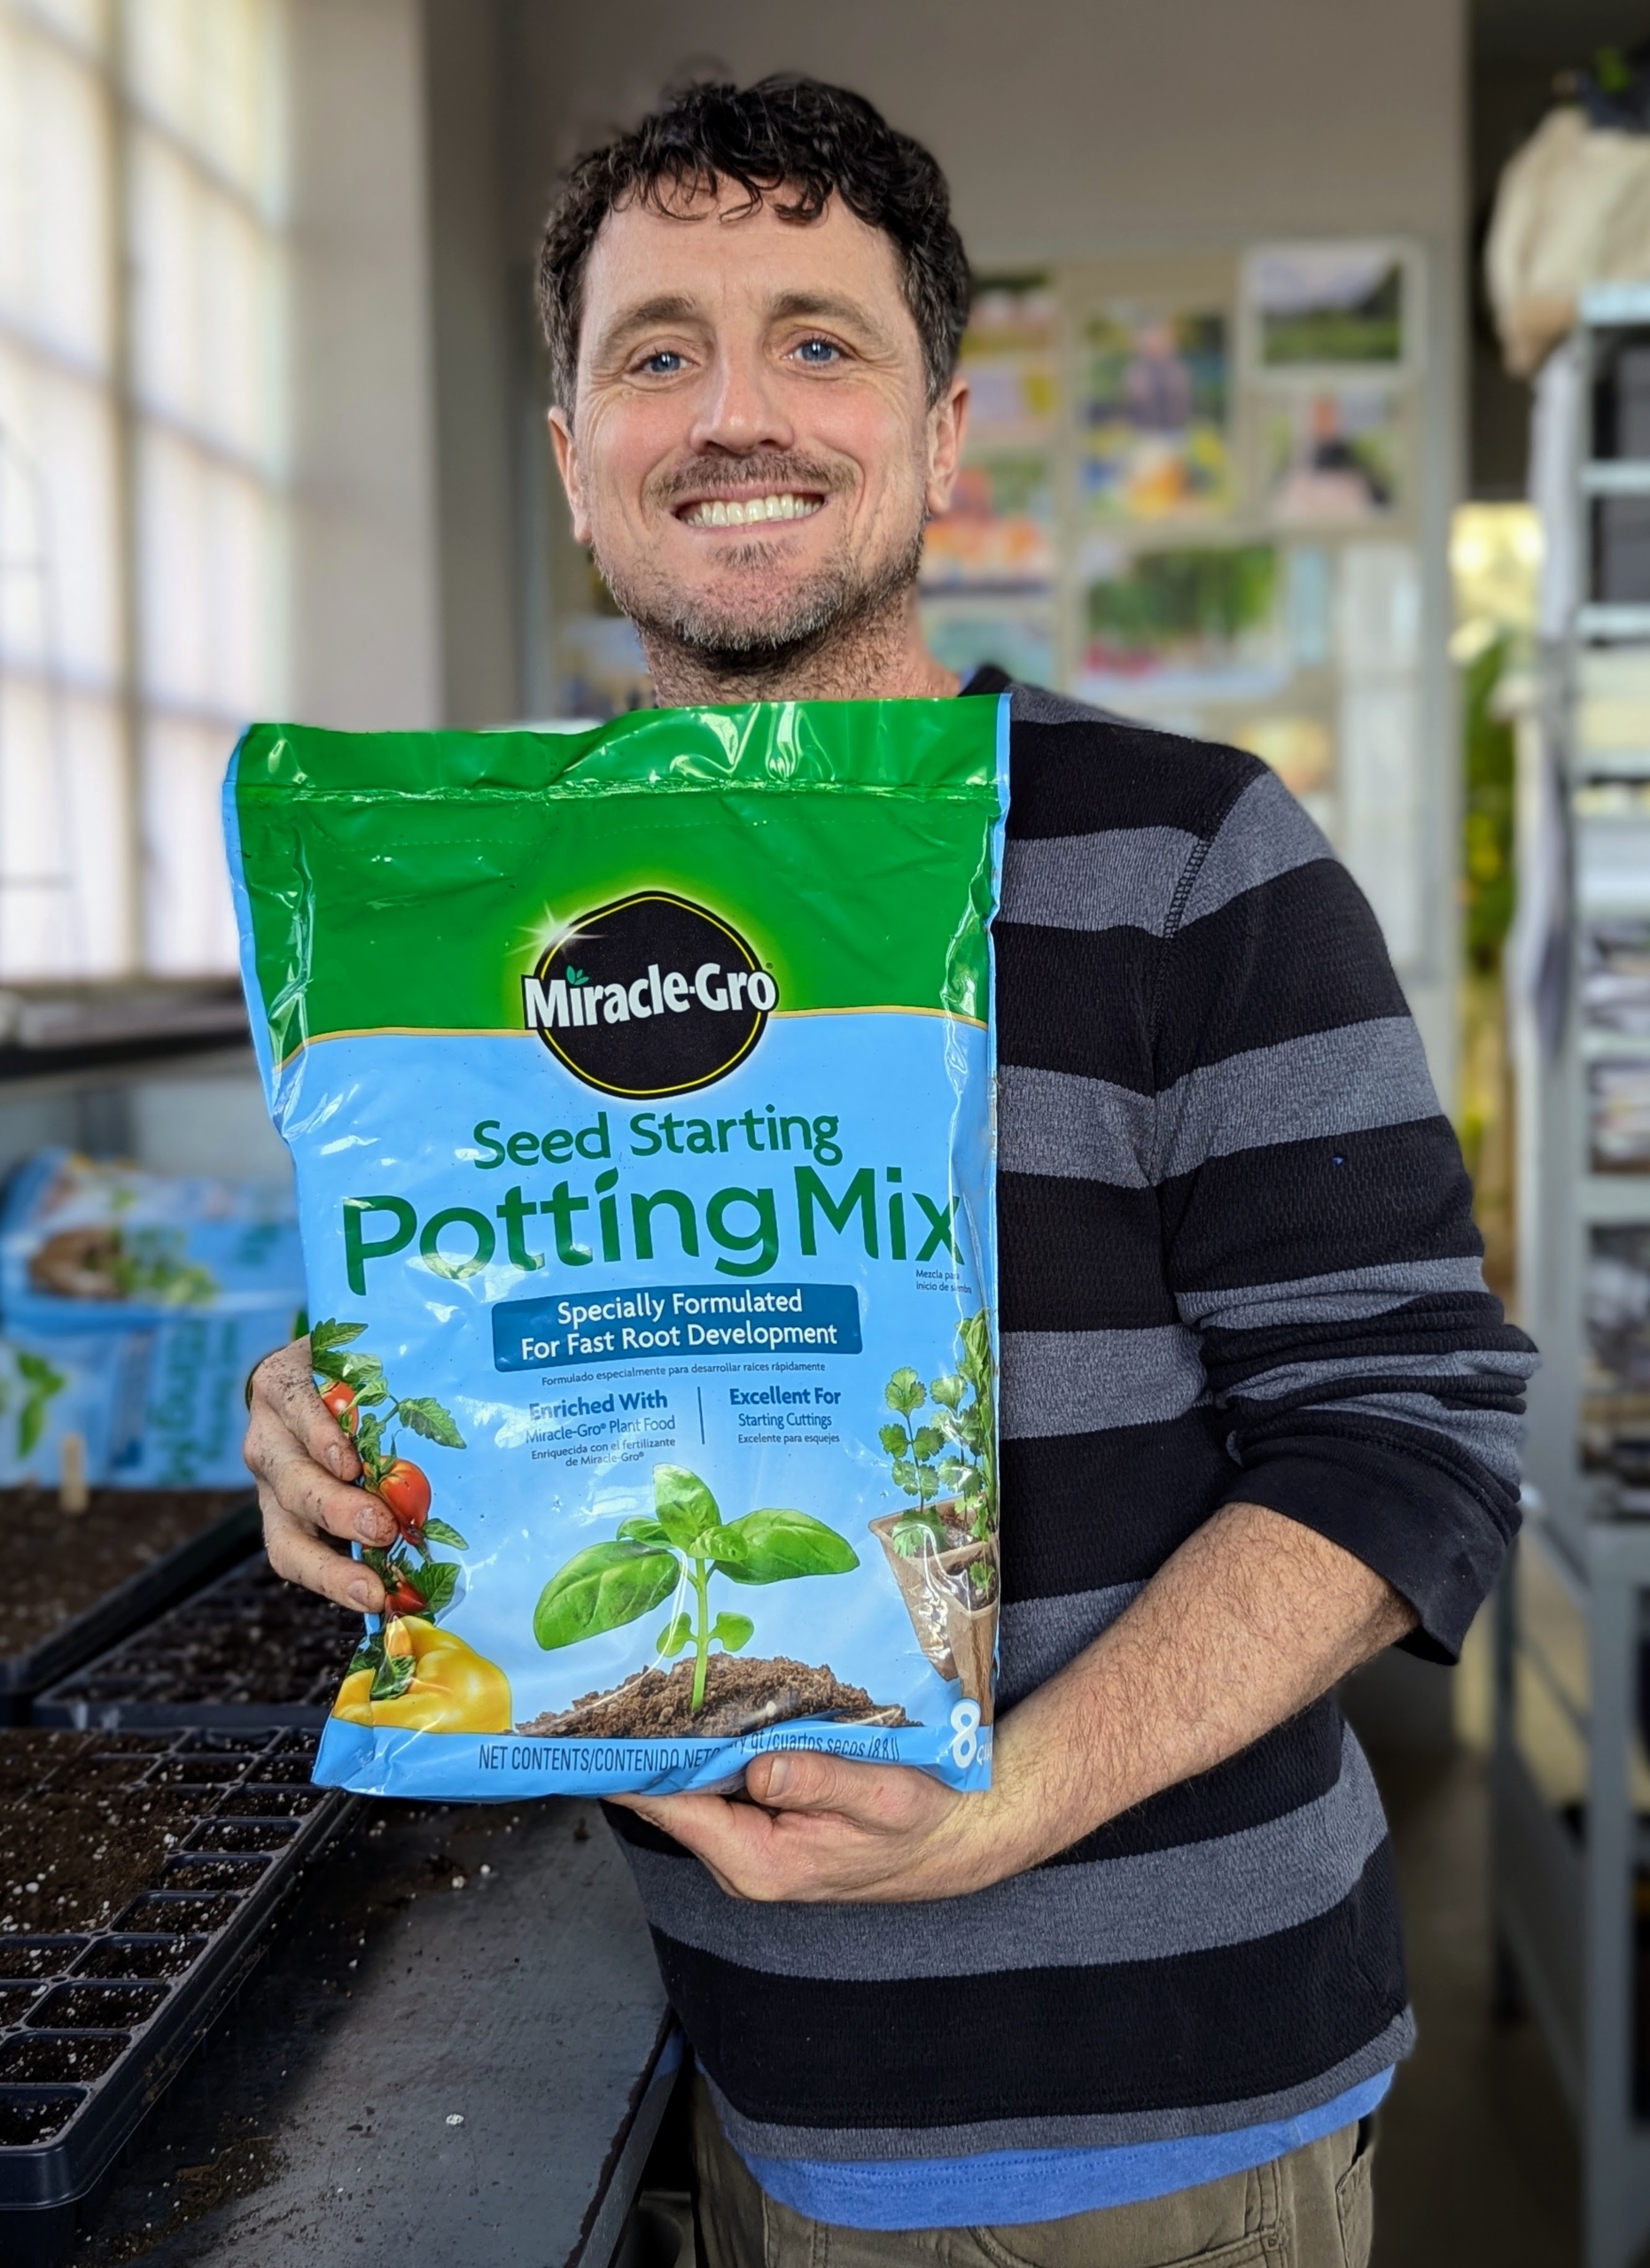
I use Miracle-Gro Seed Starting Potting Mix, which is specially formulated for fast root development.
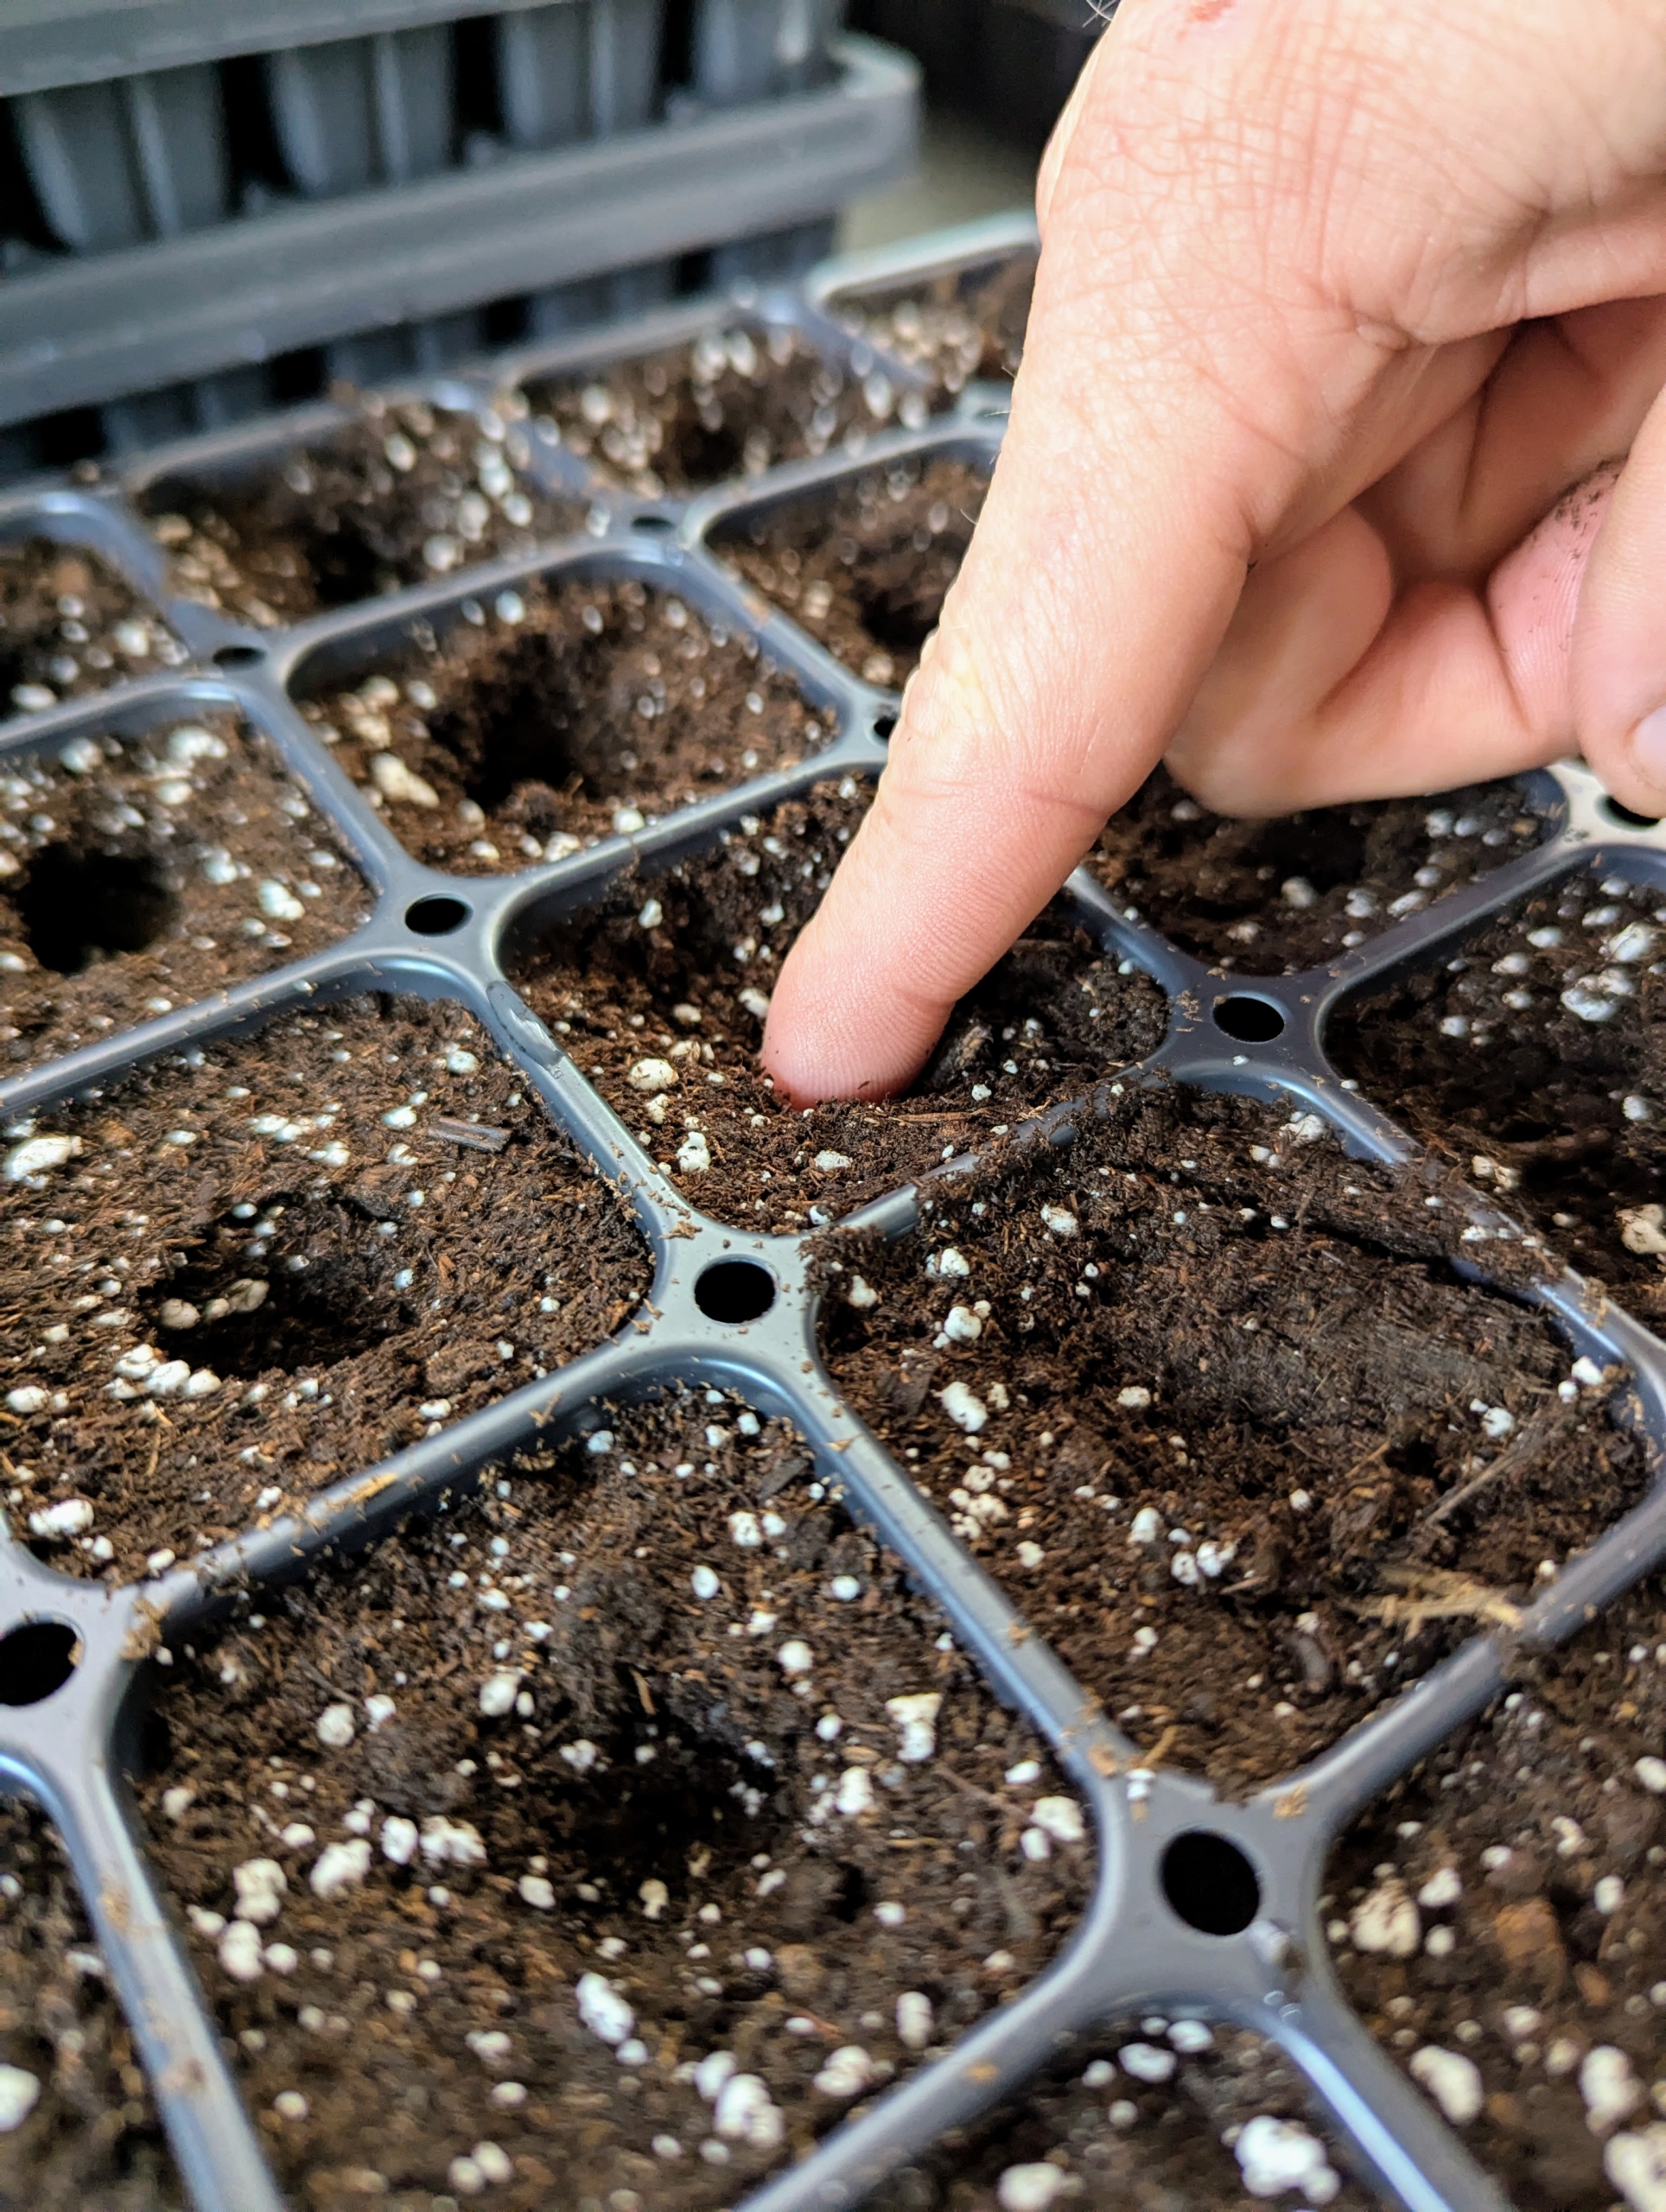
Using a finger or the end of a closed thick marker pen, Ryan makes a shallow hole in each cell of the tray.
The hole just needs to be big enough for the seed to be dropped in and then covered with more potting mix.
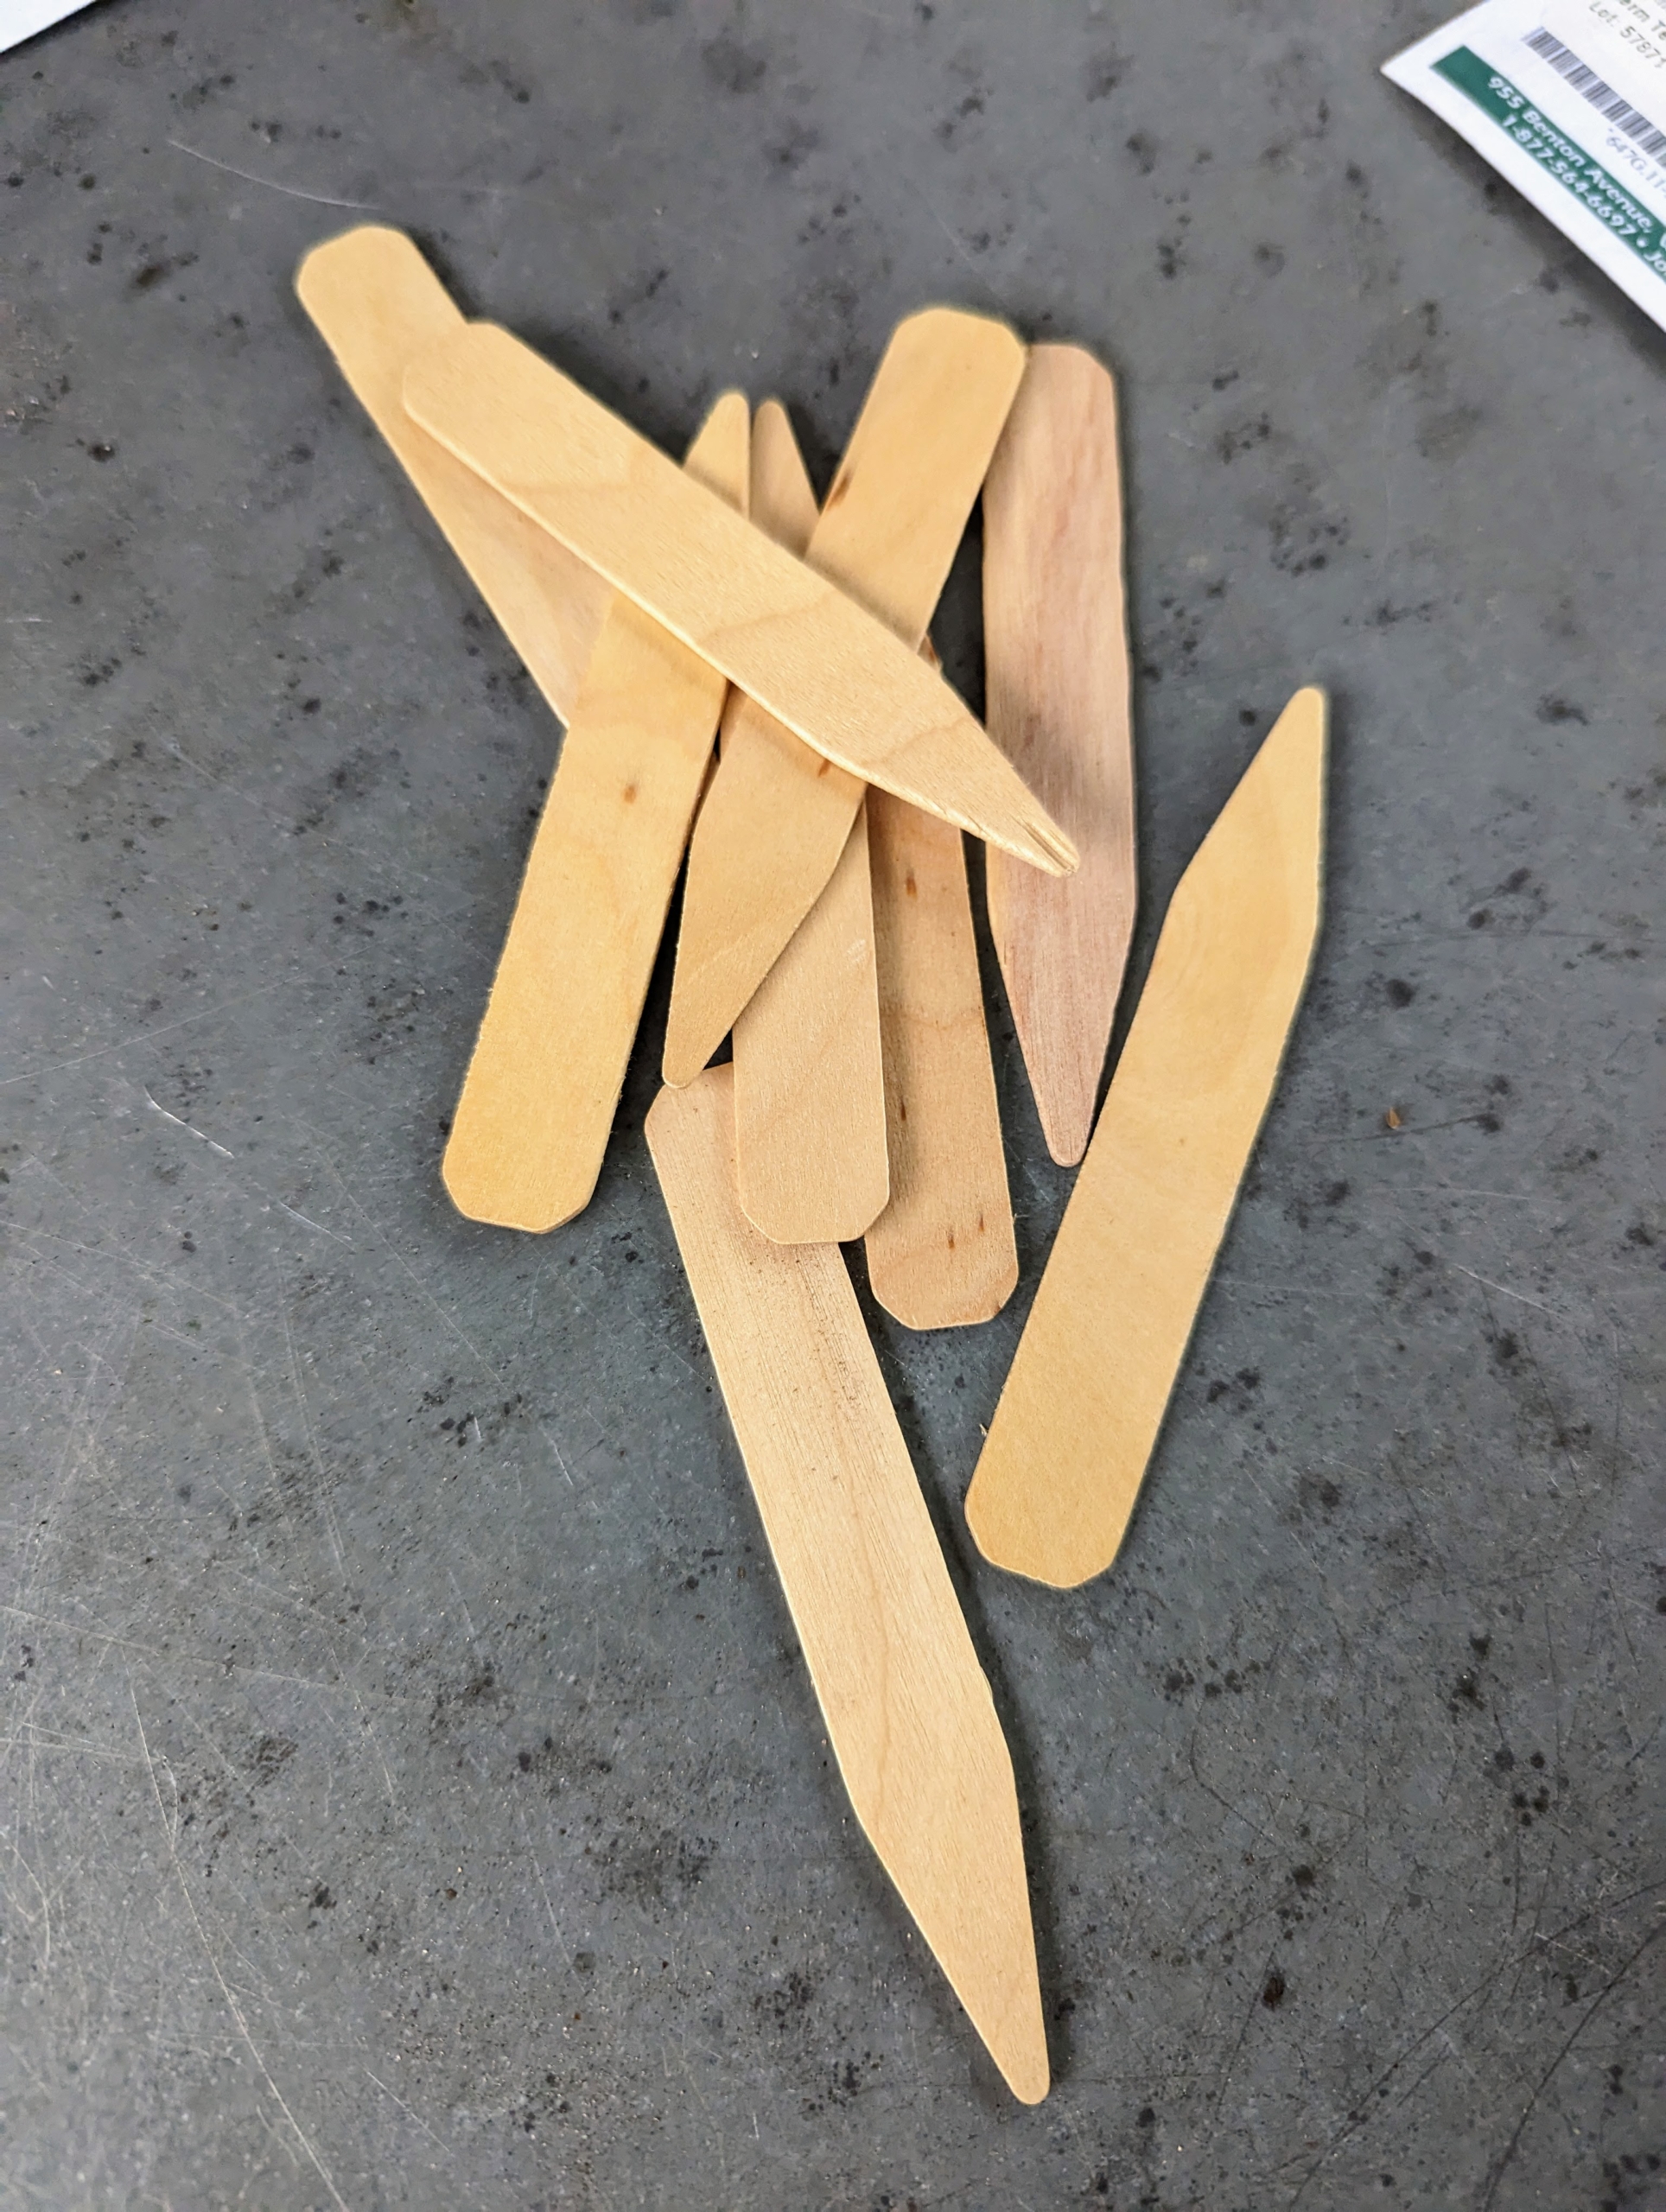
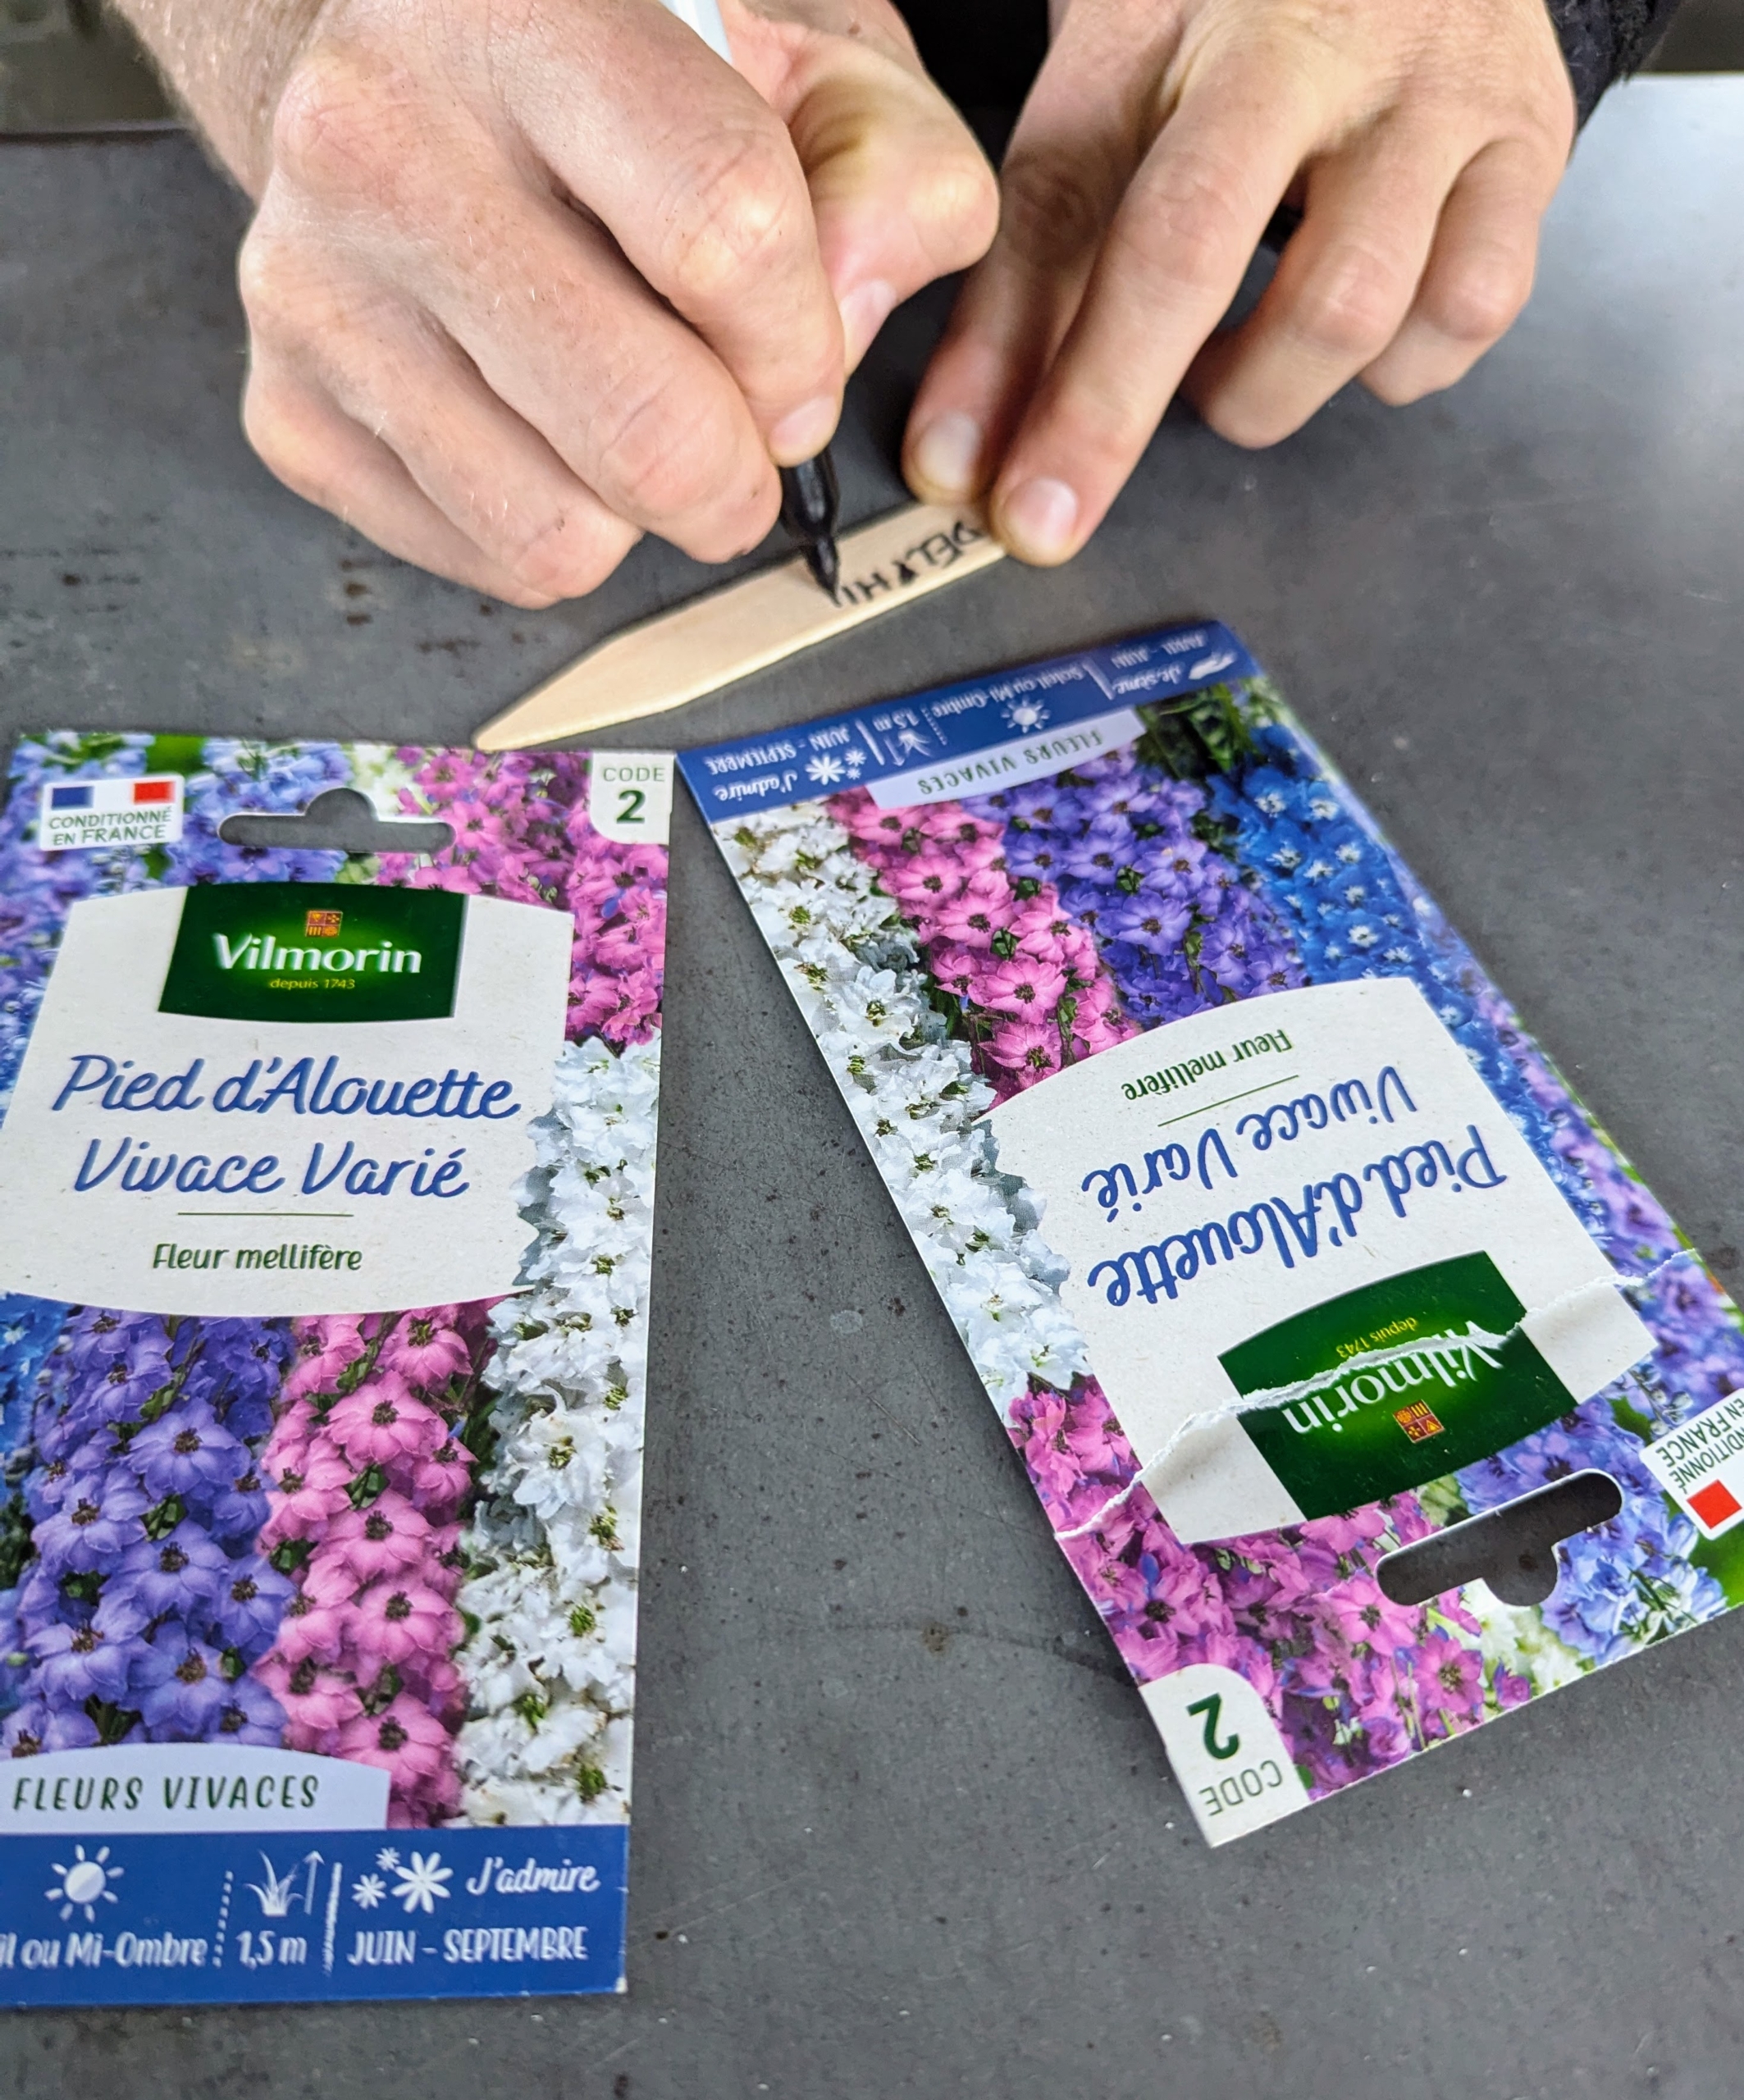
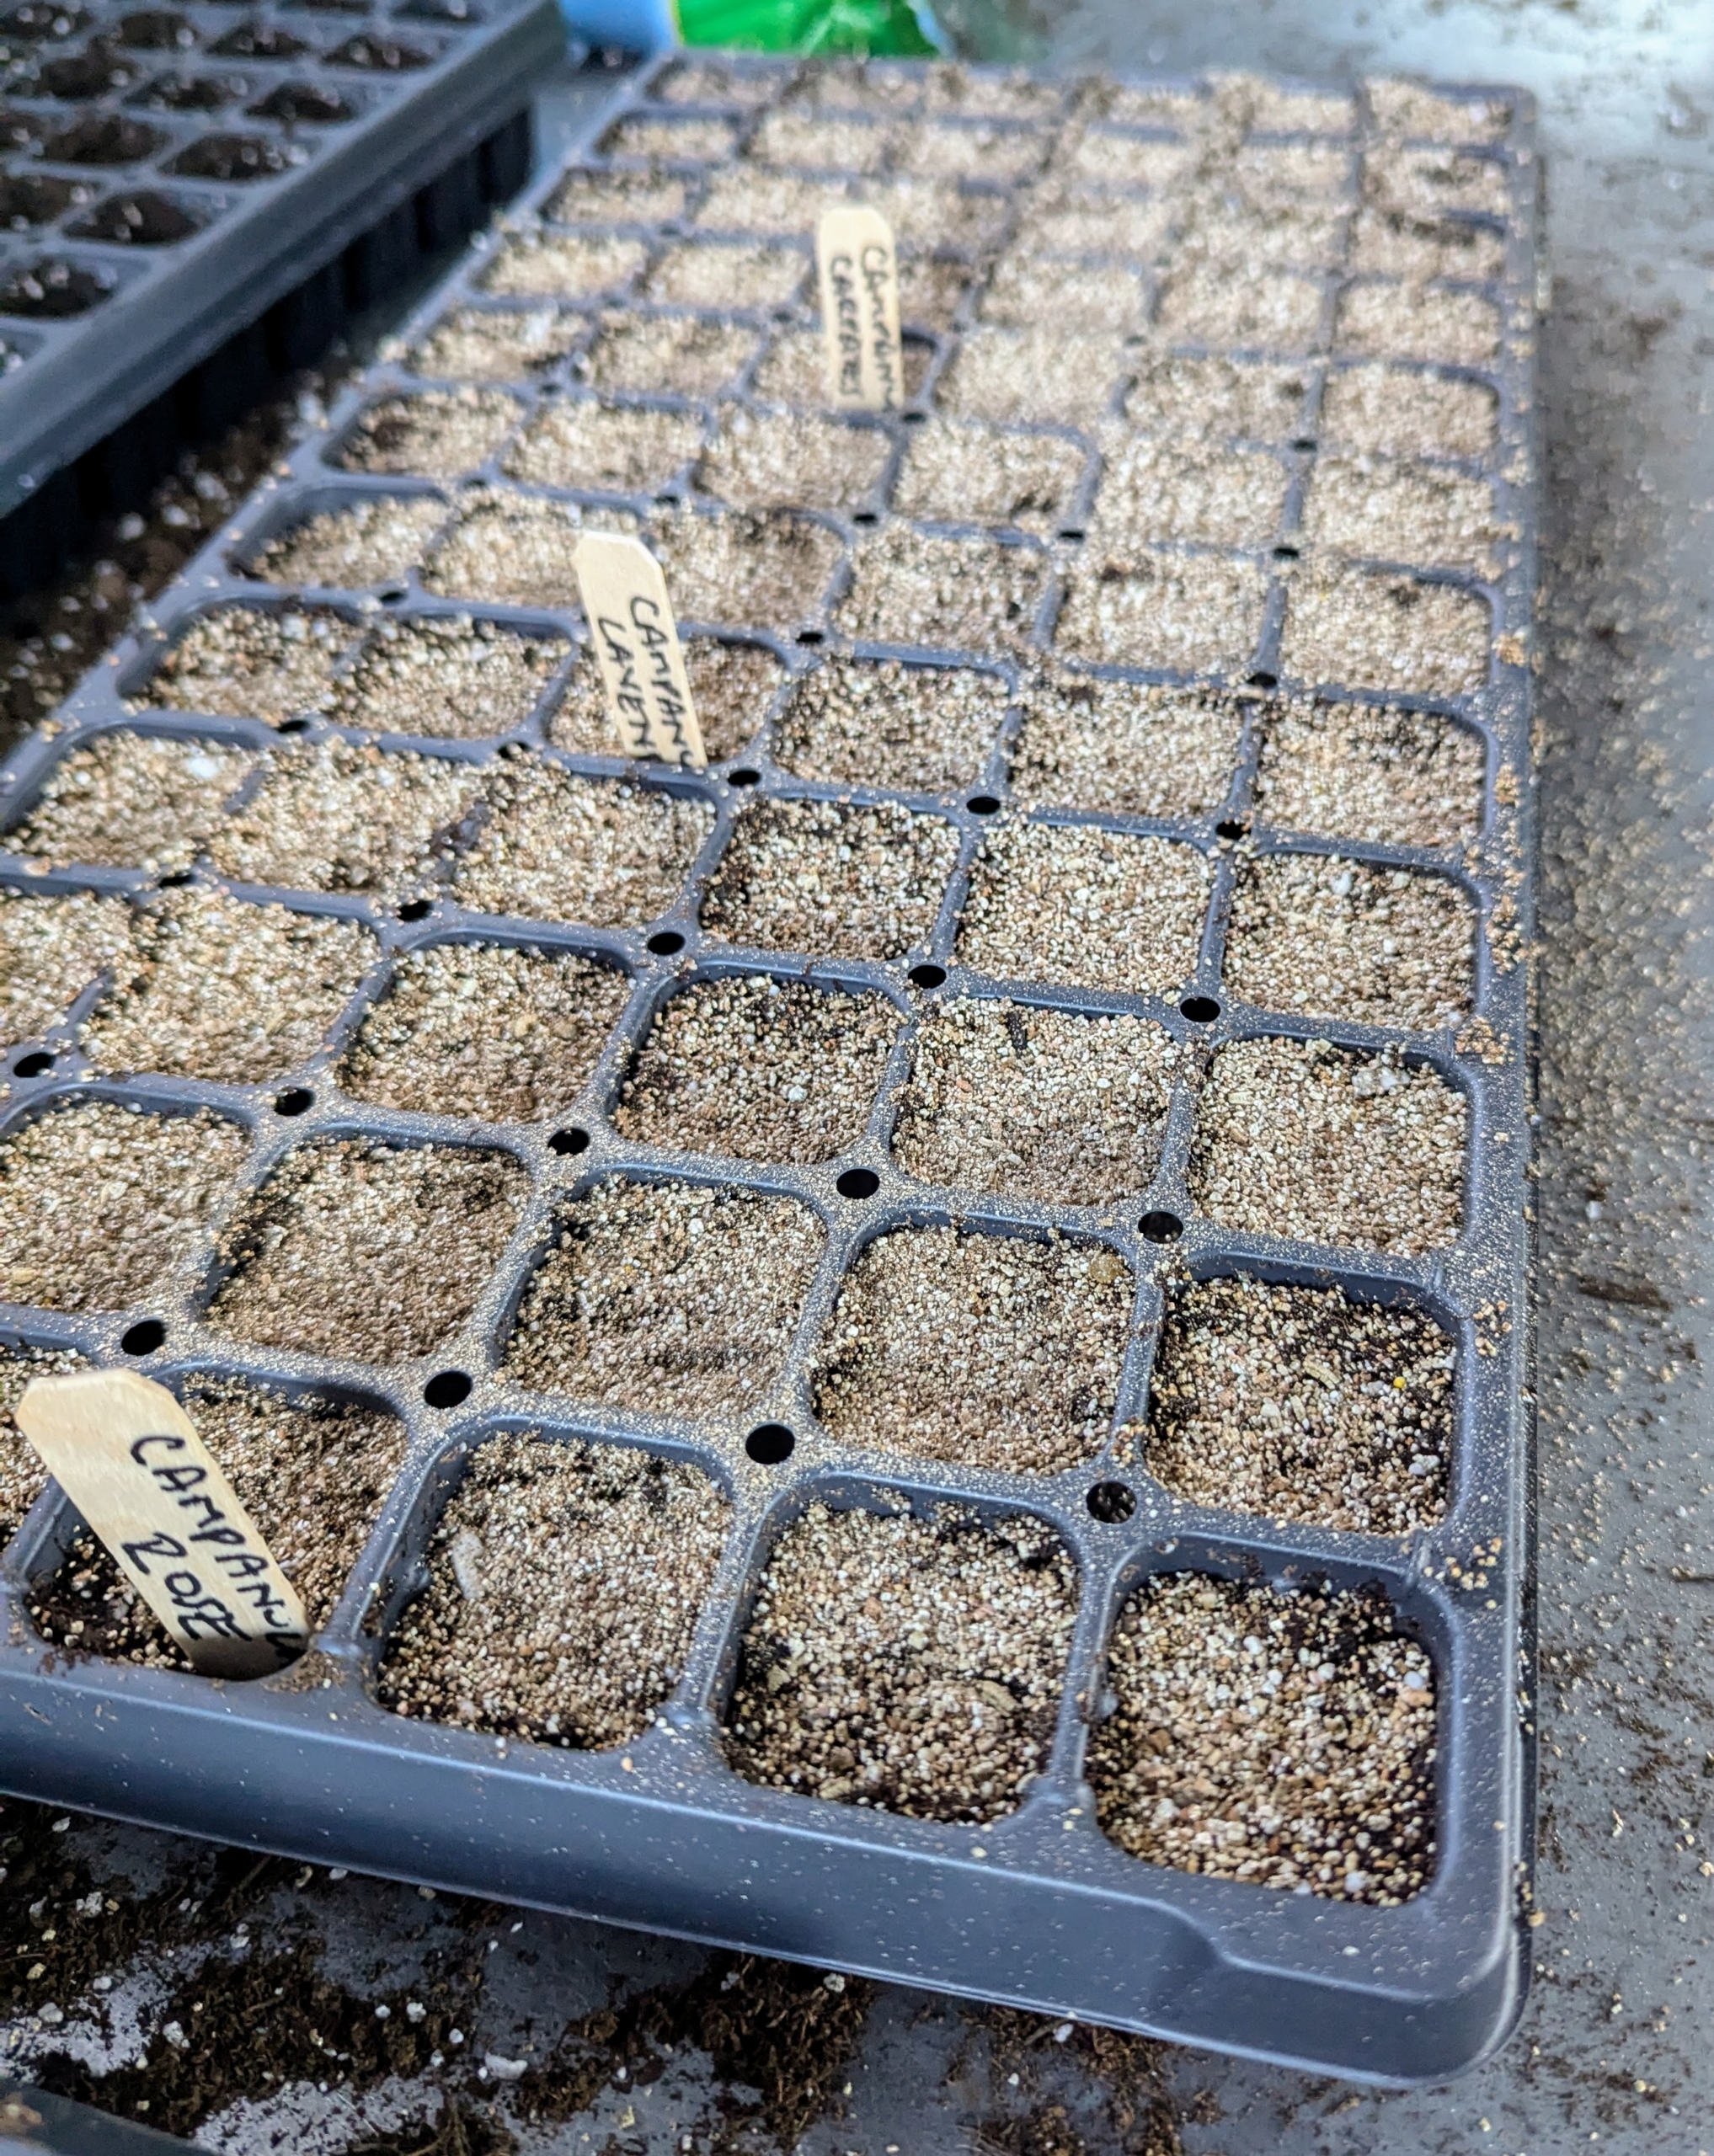
Small wooden markers identify the specific flowers and varieties, so we can keep track of the kinds that grow best in my gardens.
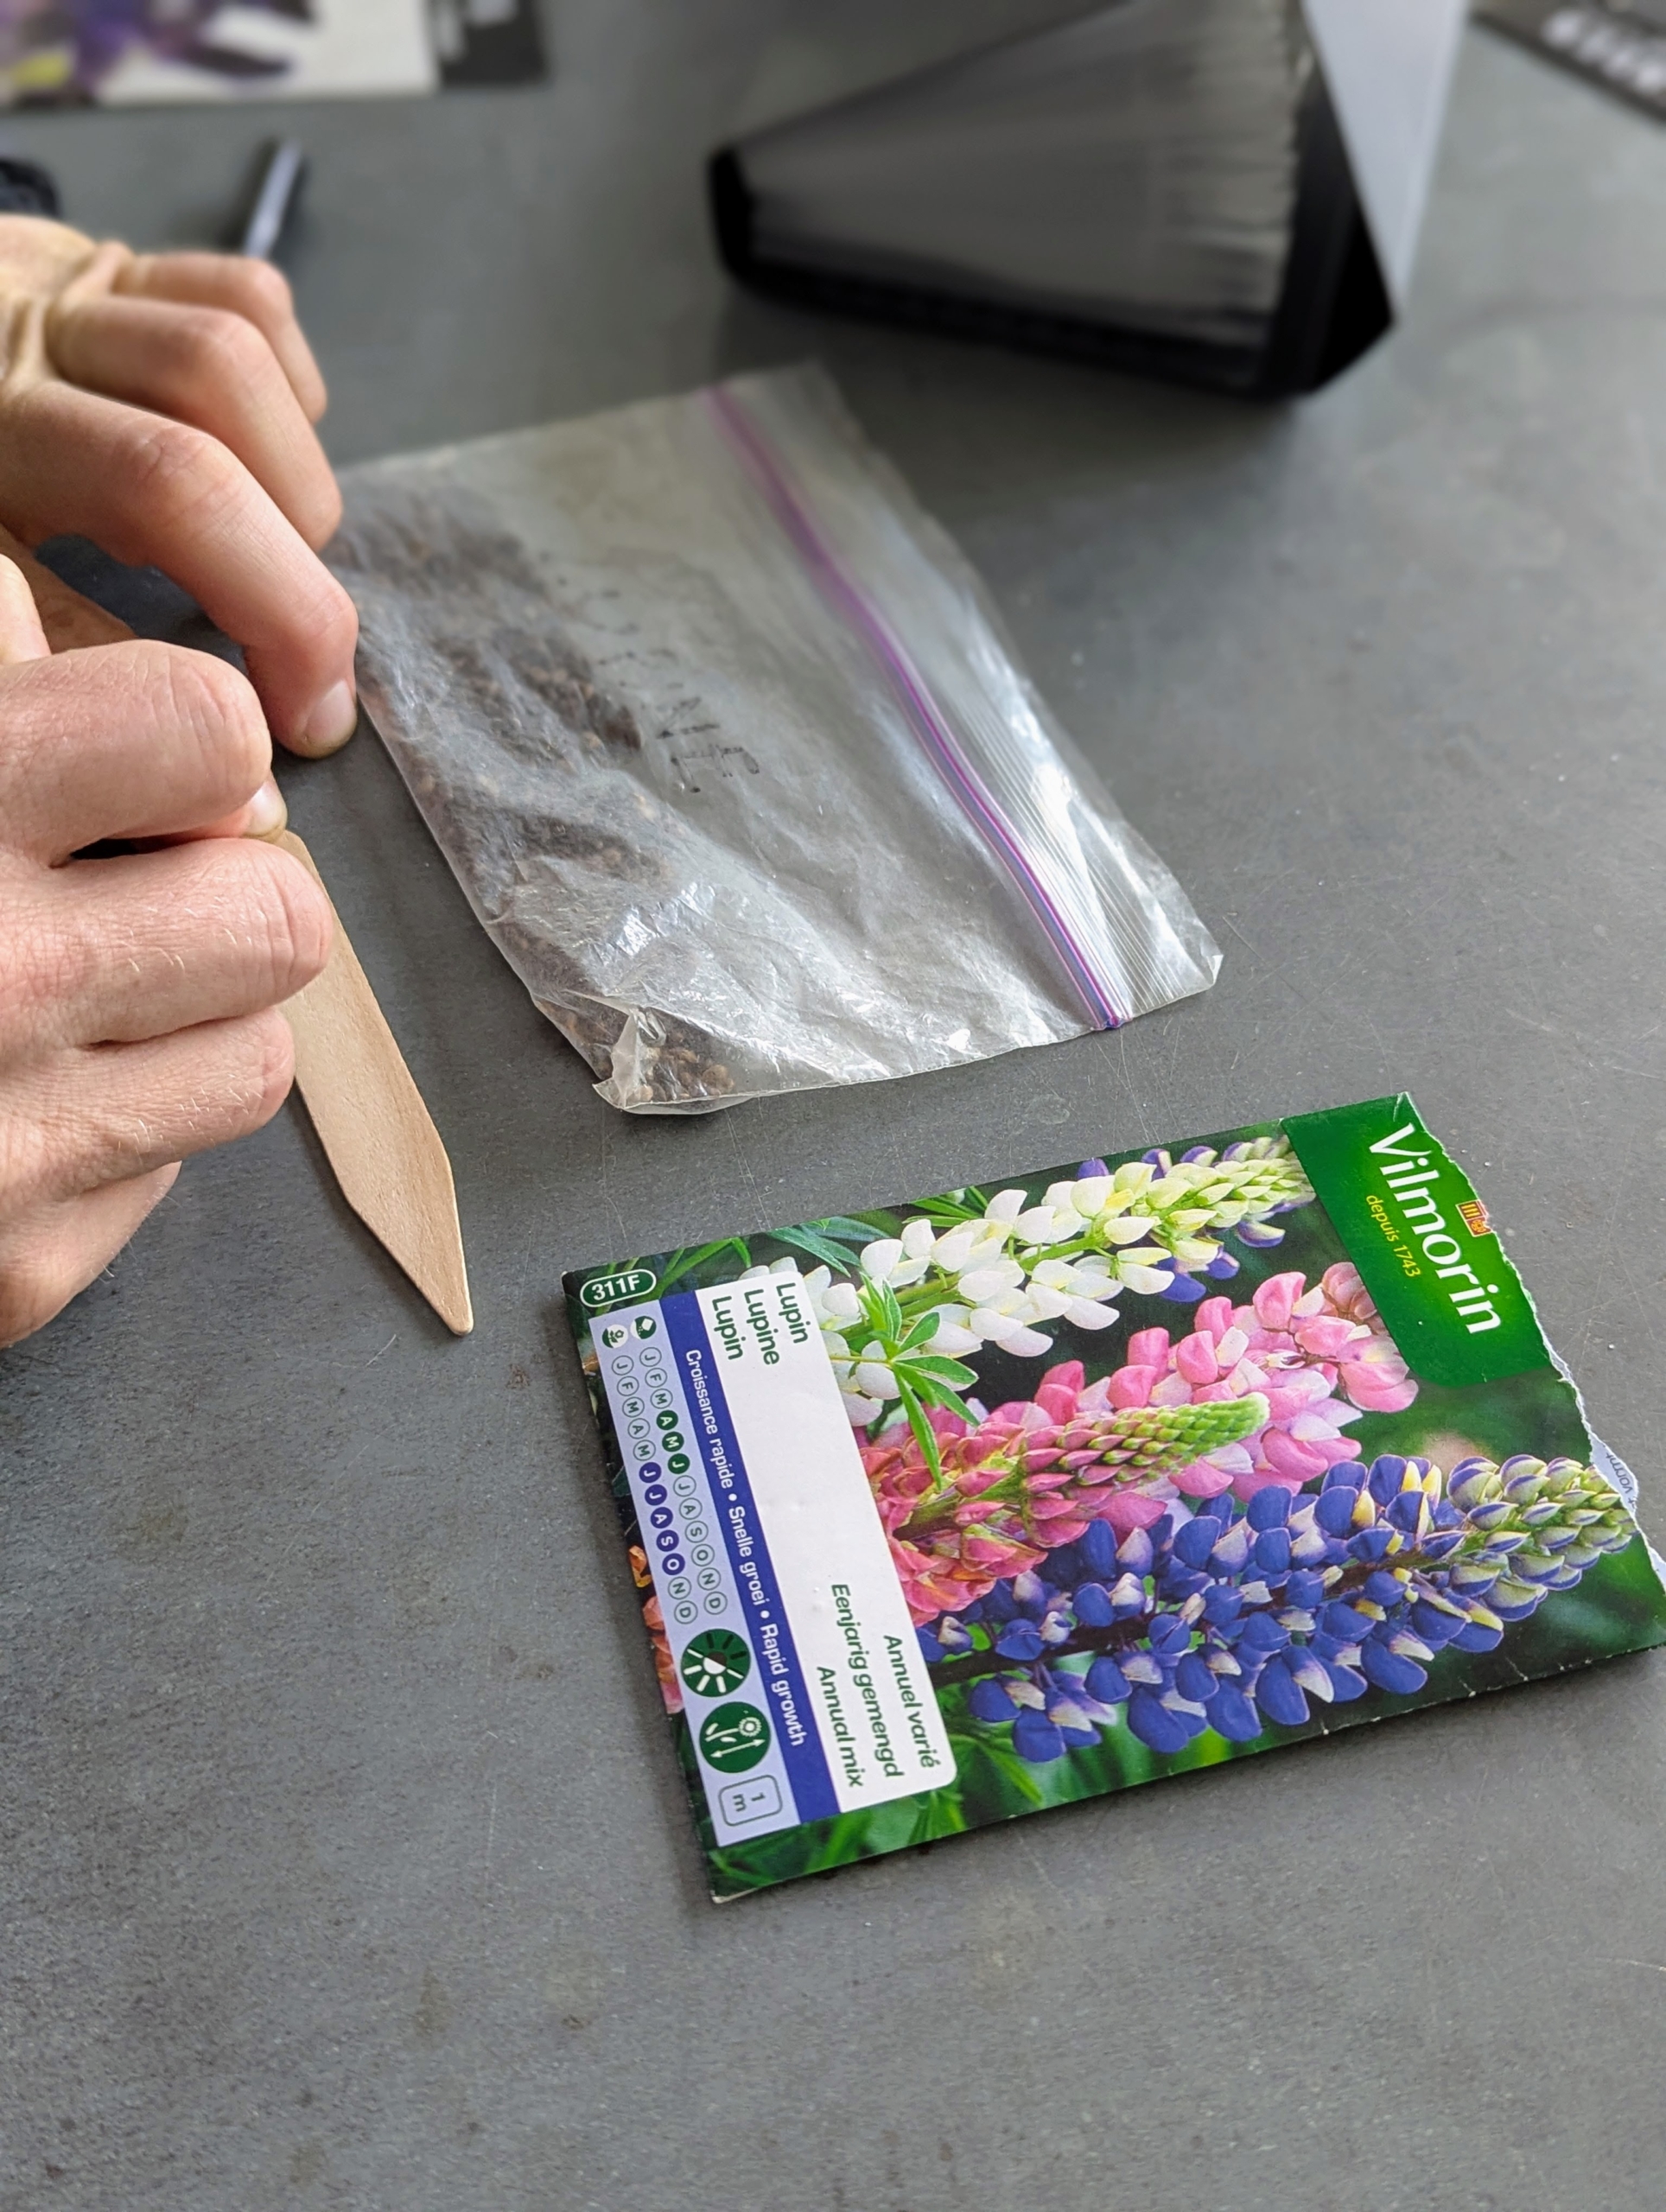
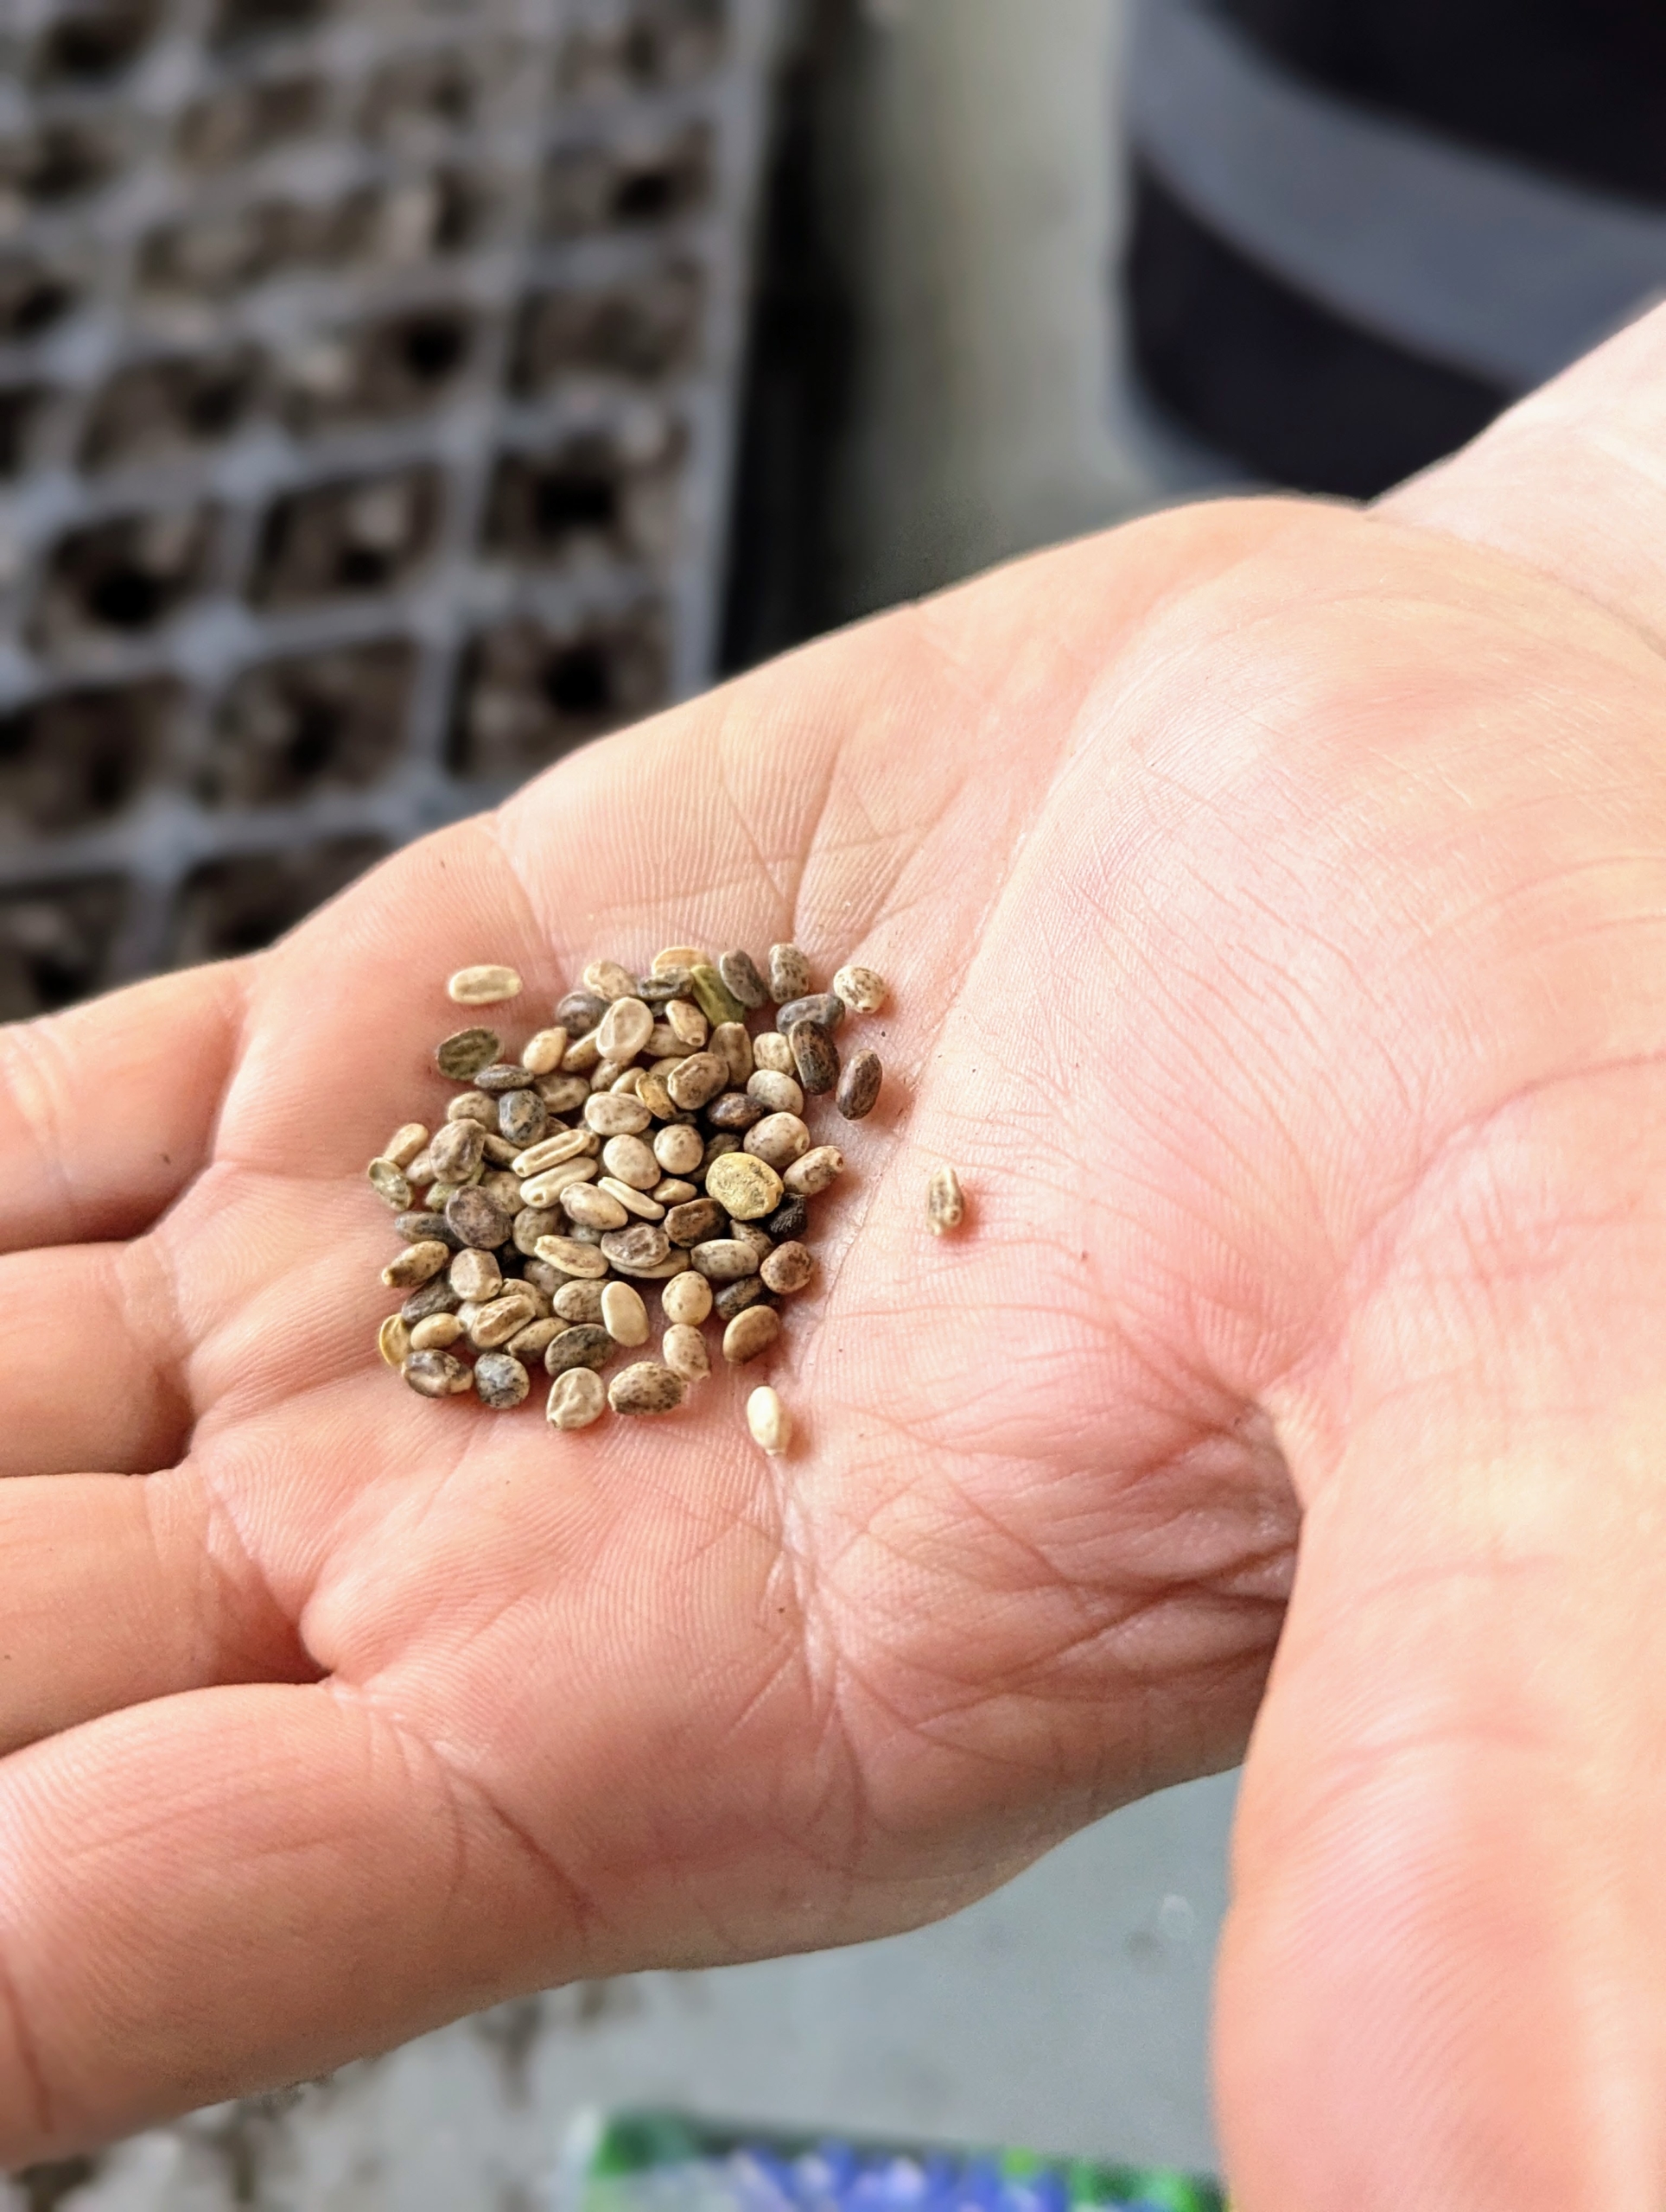
Ryan prepares markers for the lupines, writing down the flower name and variety. The bag on the left contains seeds from flowers we’ve grown in the past.
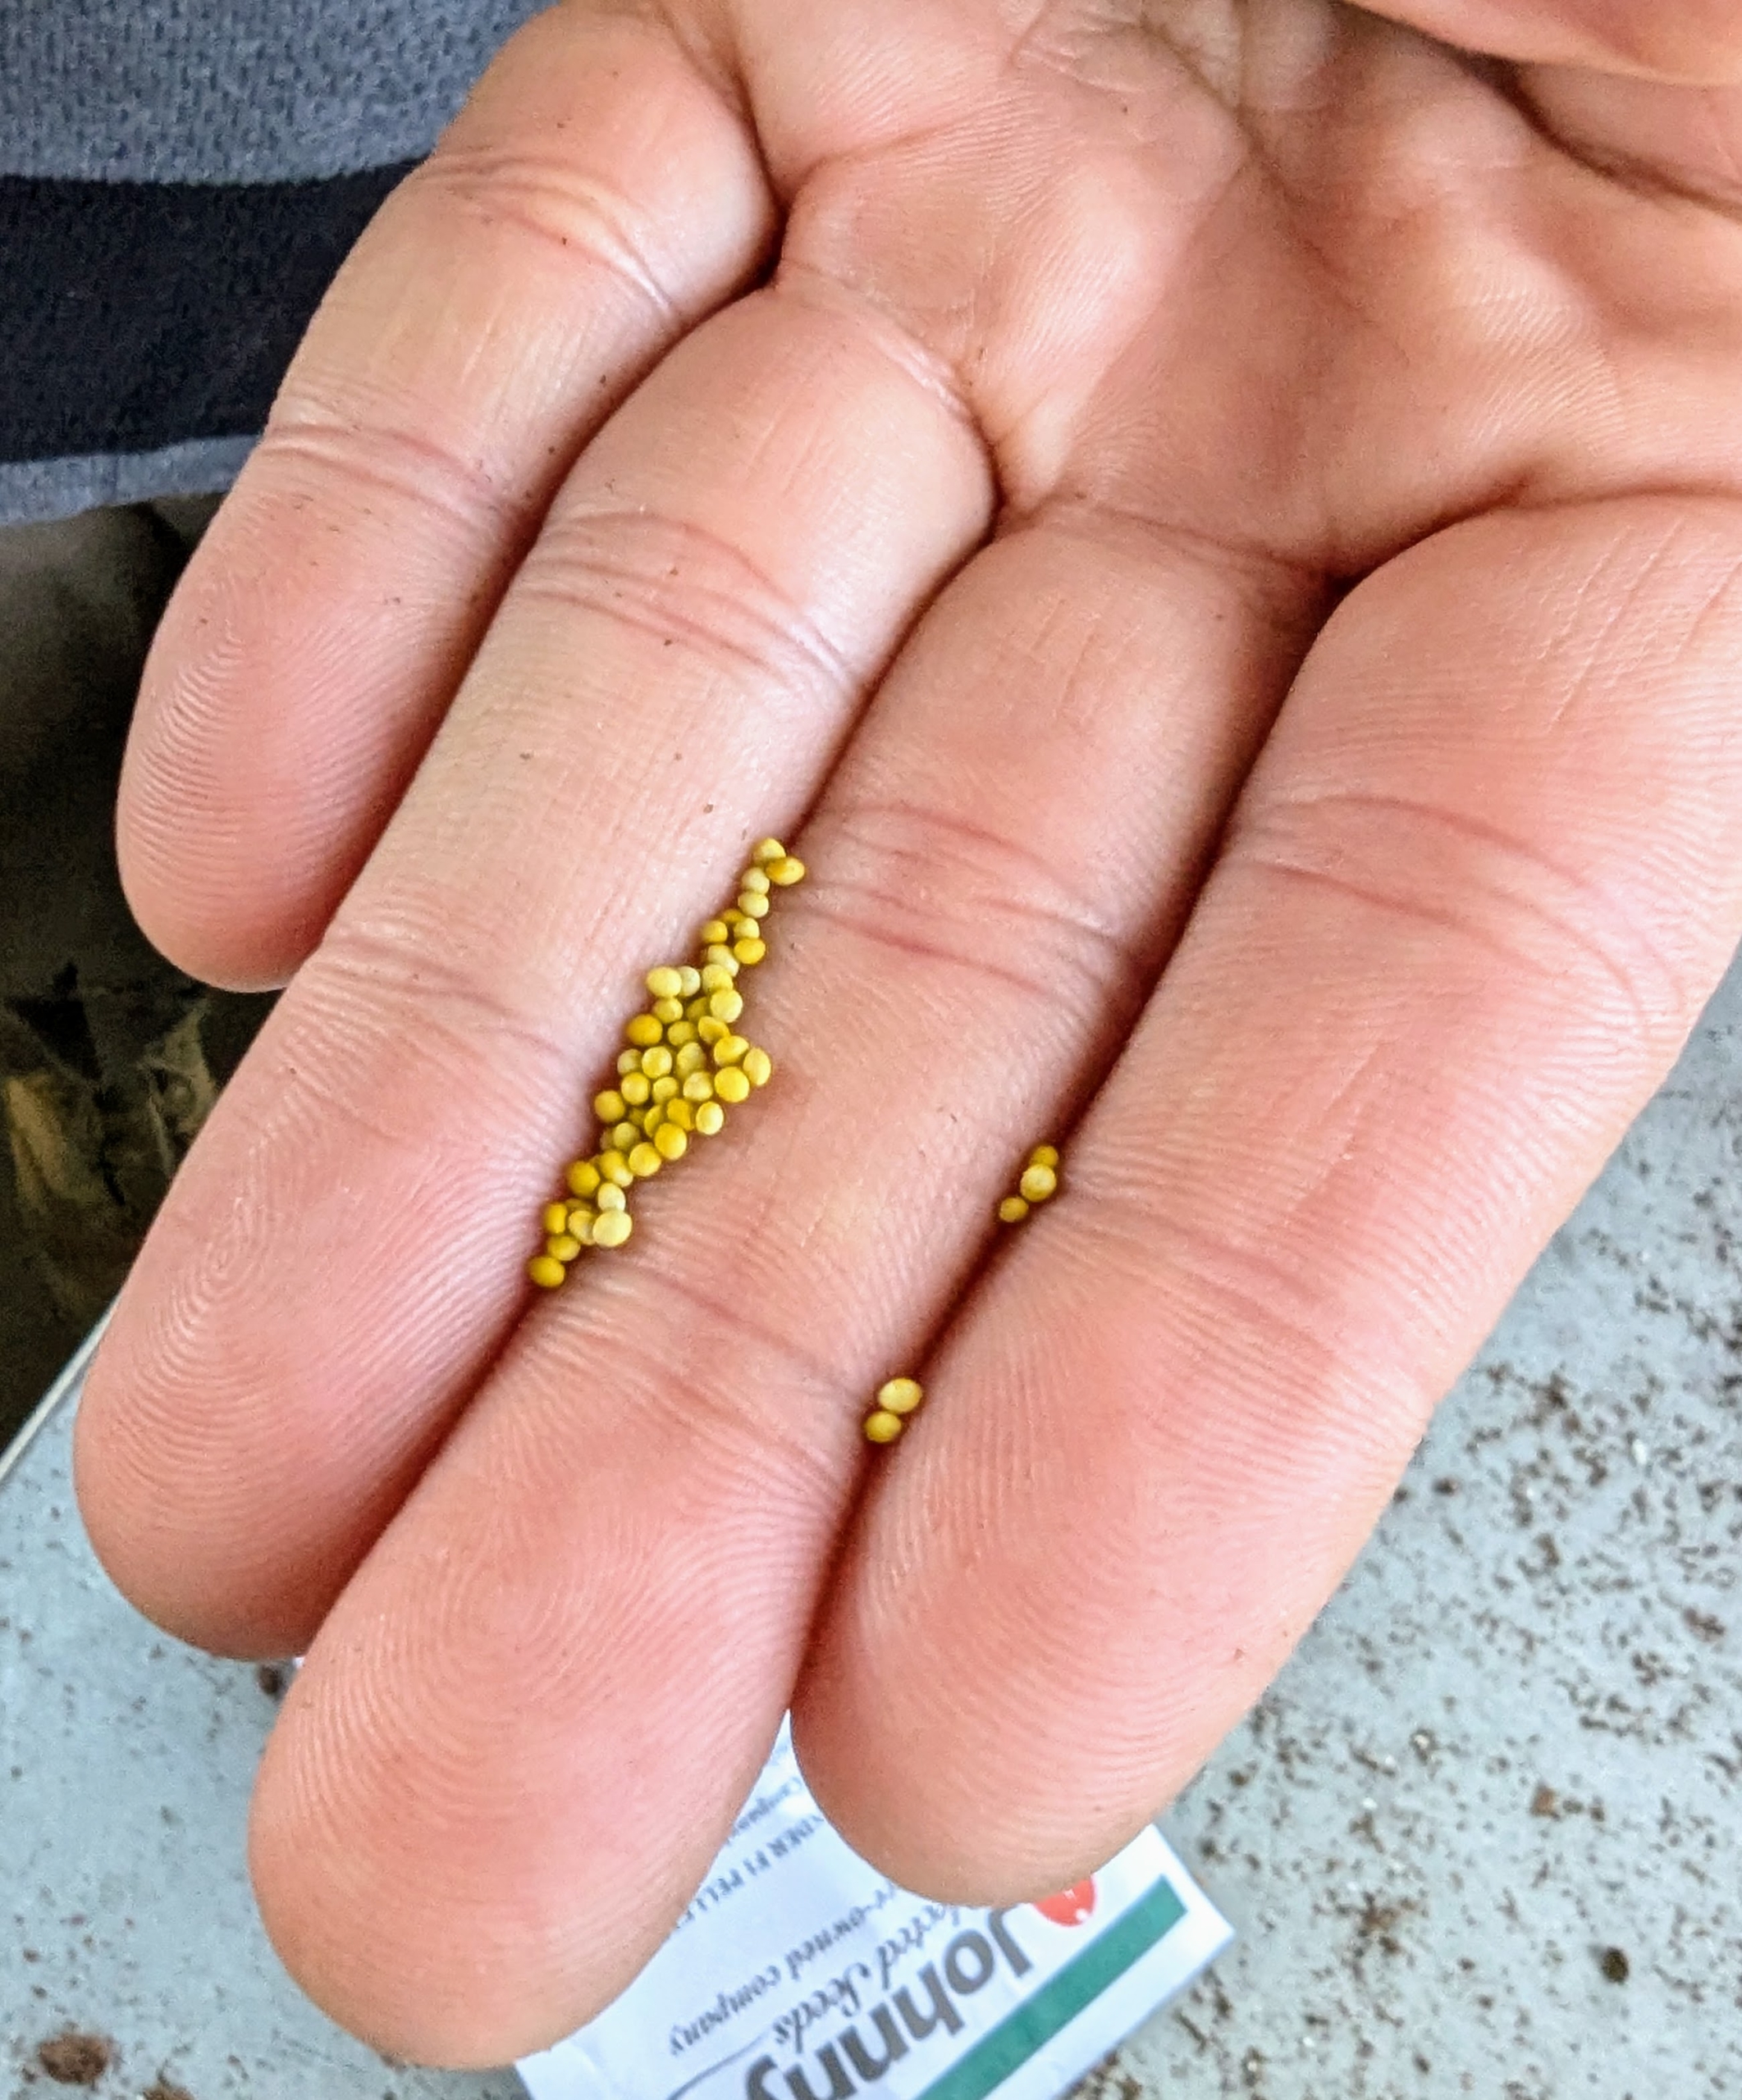
Lupine seeds are oval shaped, shiny, and light brown in color. They are also a good size, making them easy to see and handle.
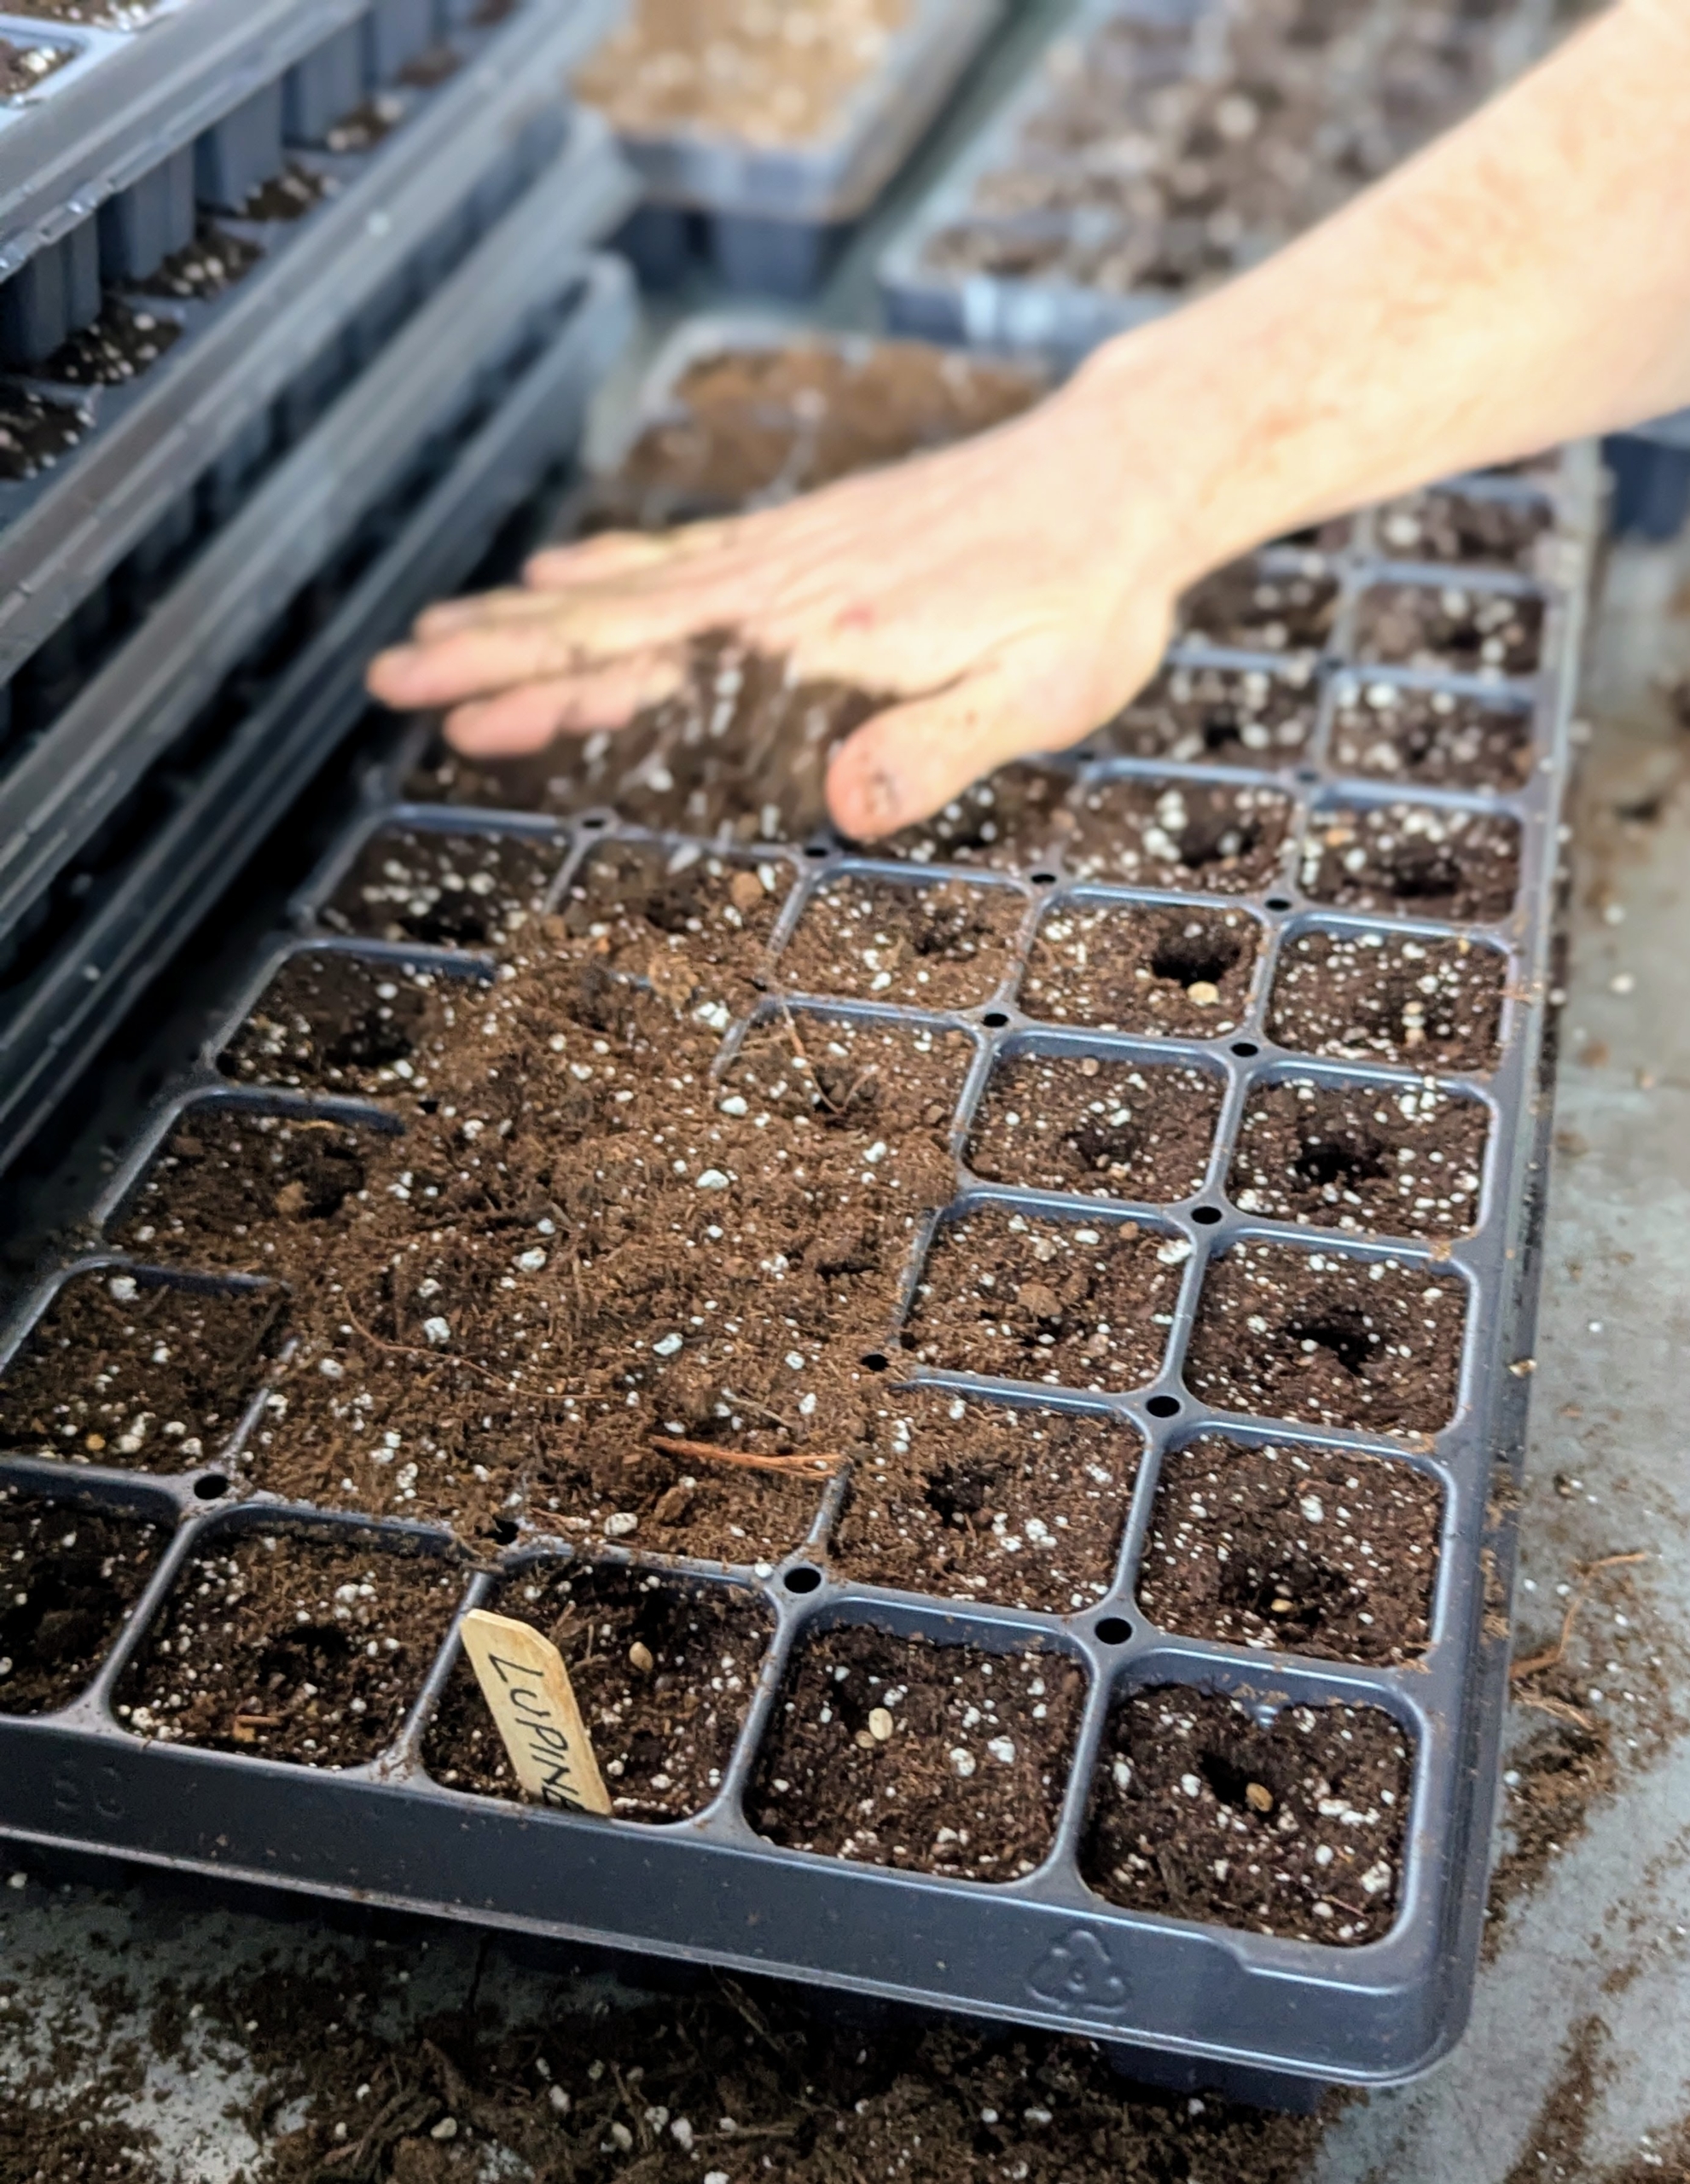
Here, Ryan drops the seeds into the cells by hand – about two for each cell. Germination is never guaranteed, so multiple seeds are always planted. This provides a better chance at least one will take root.
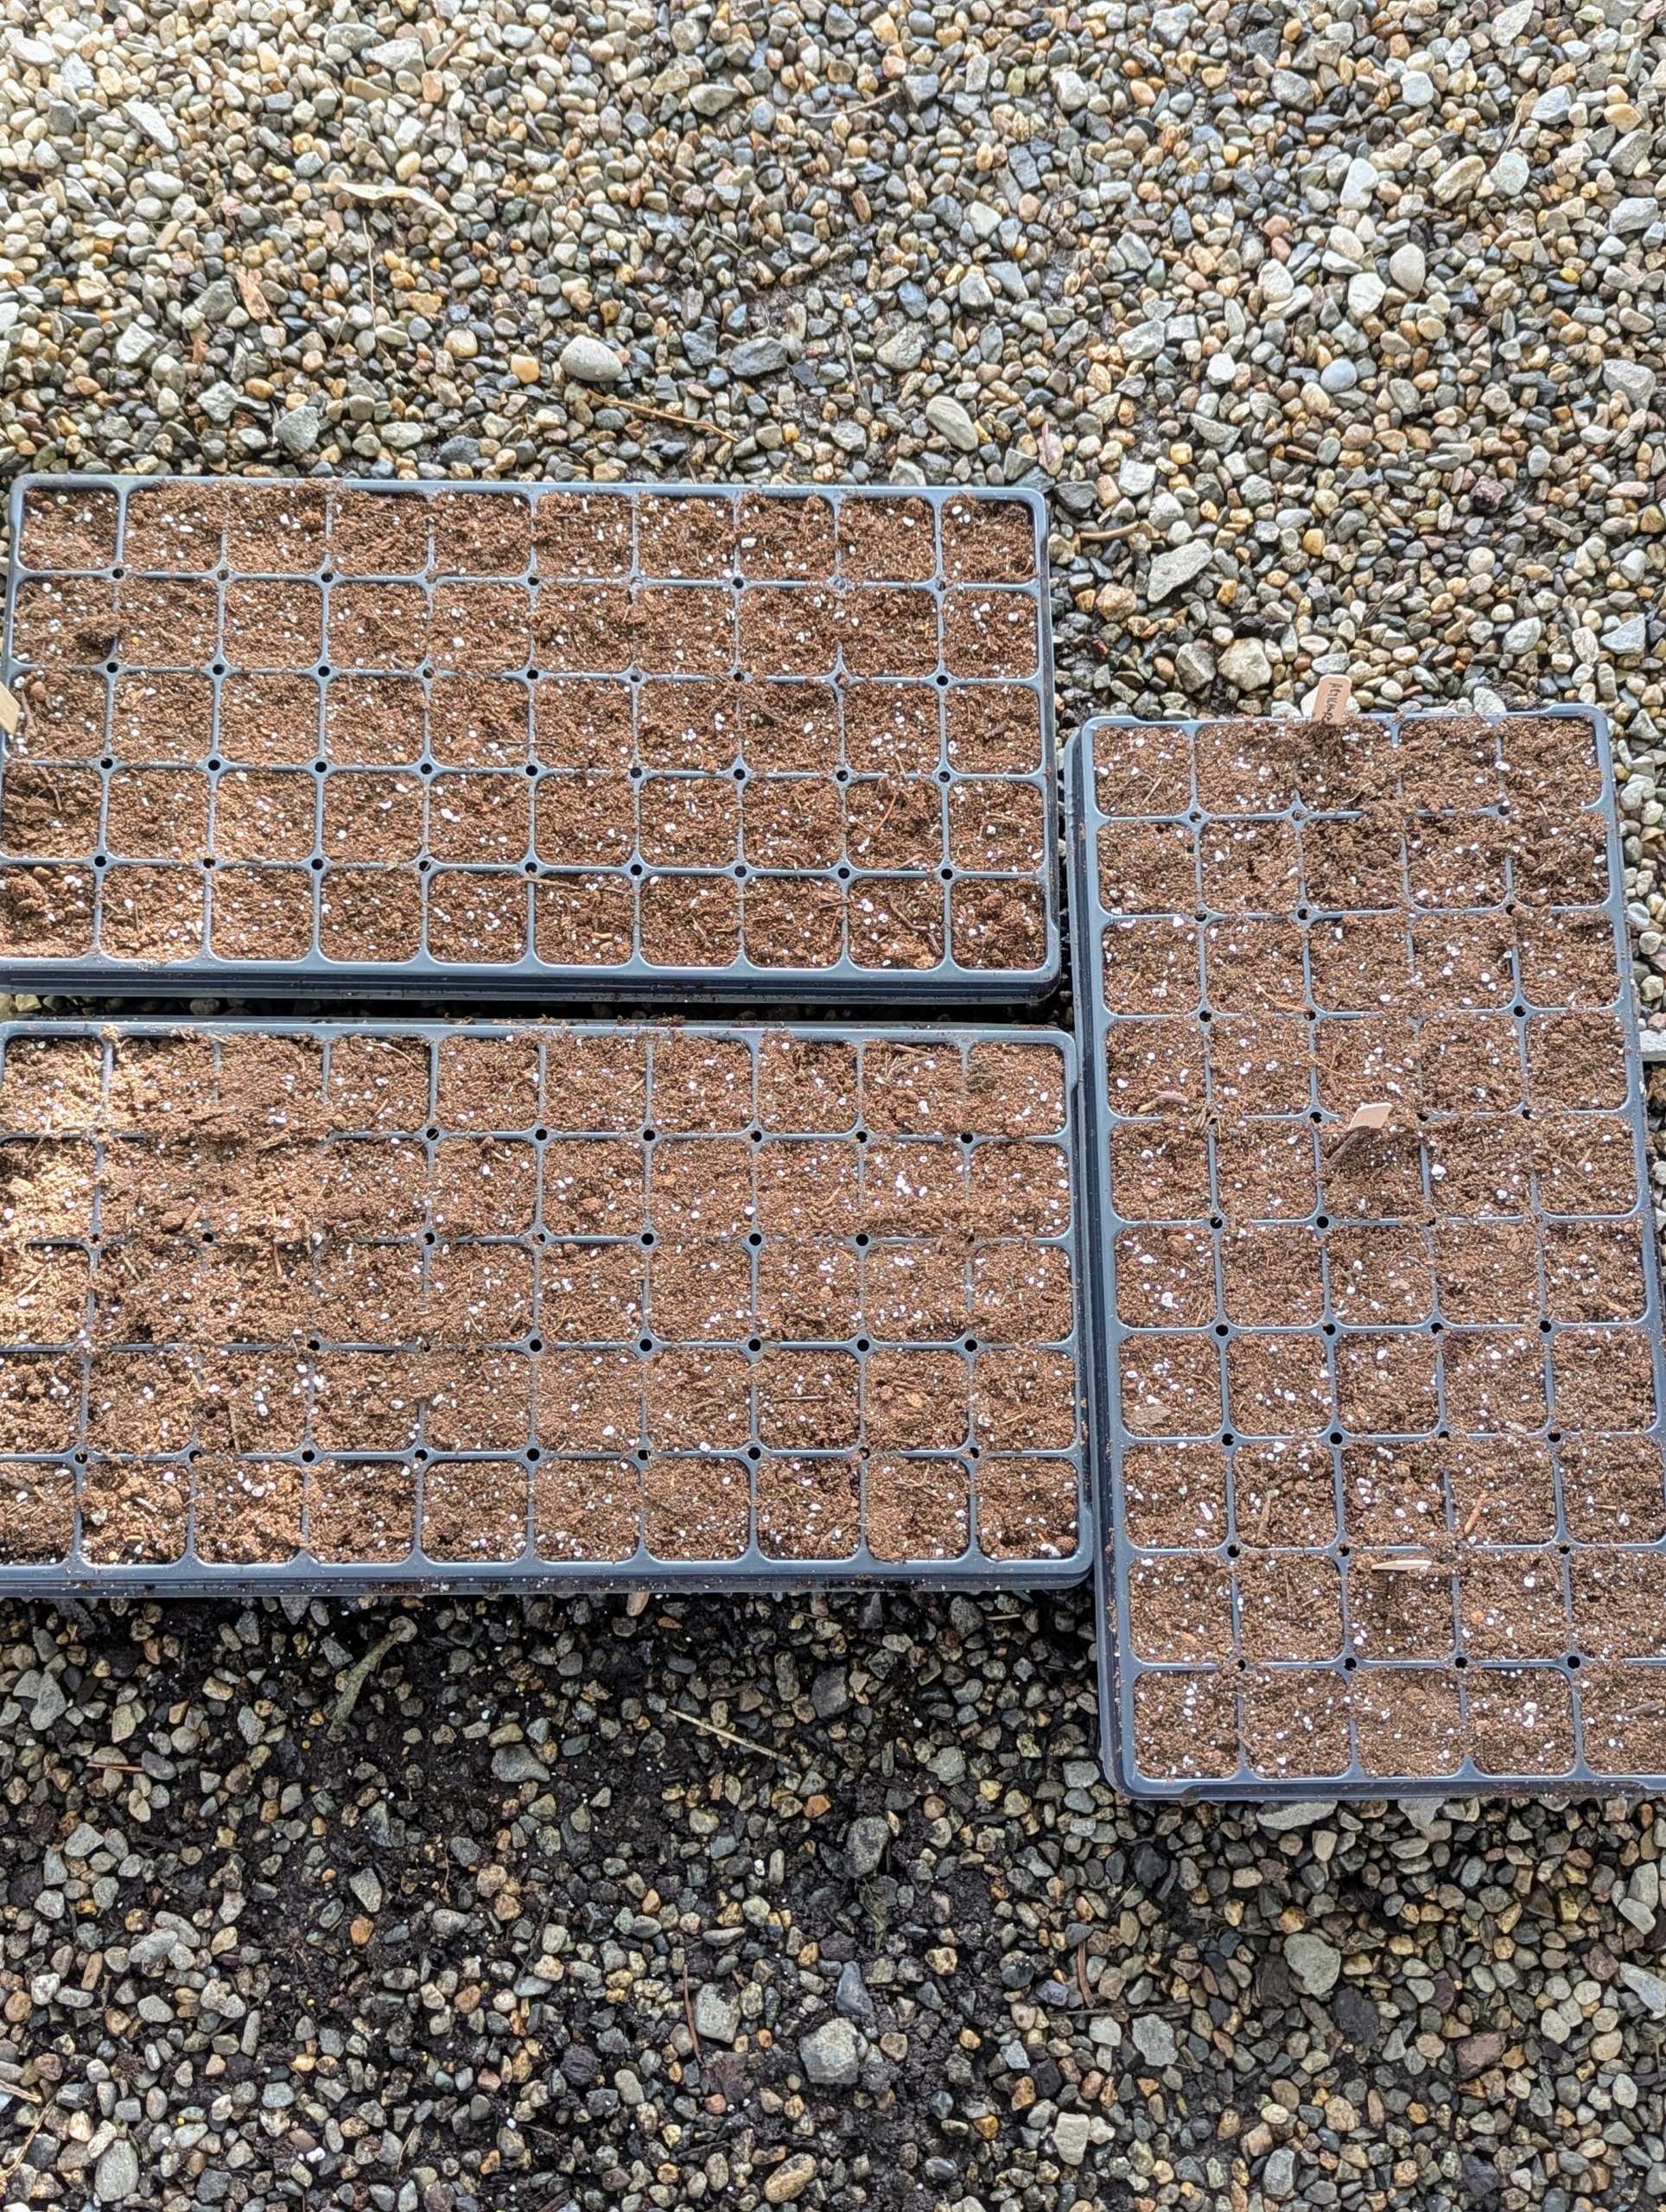
Once the entire tray has been filled, Ryan adds more potting mix to cover the seeds.
He carefully levels the mix over the tray. And then he lightly pats the soil down, so the seeds have good contact with the soil.
Seeds will germinate in about seven to 10 days in optimal temperature and lighting environments, which is 50 to 85 degrees Fahrenheit under bright light. Then they will get selectively thinned so the stronger seeds are left to continue growing.
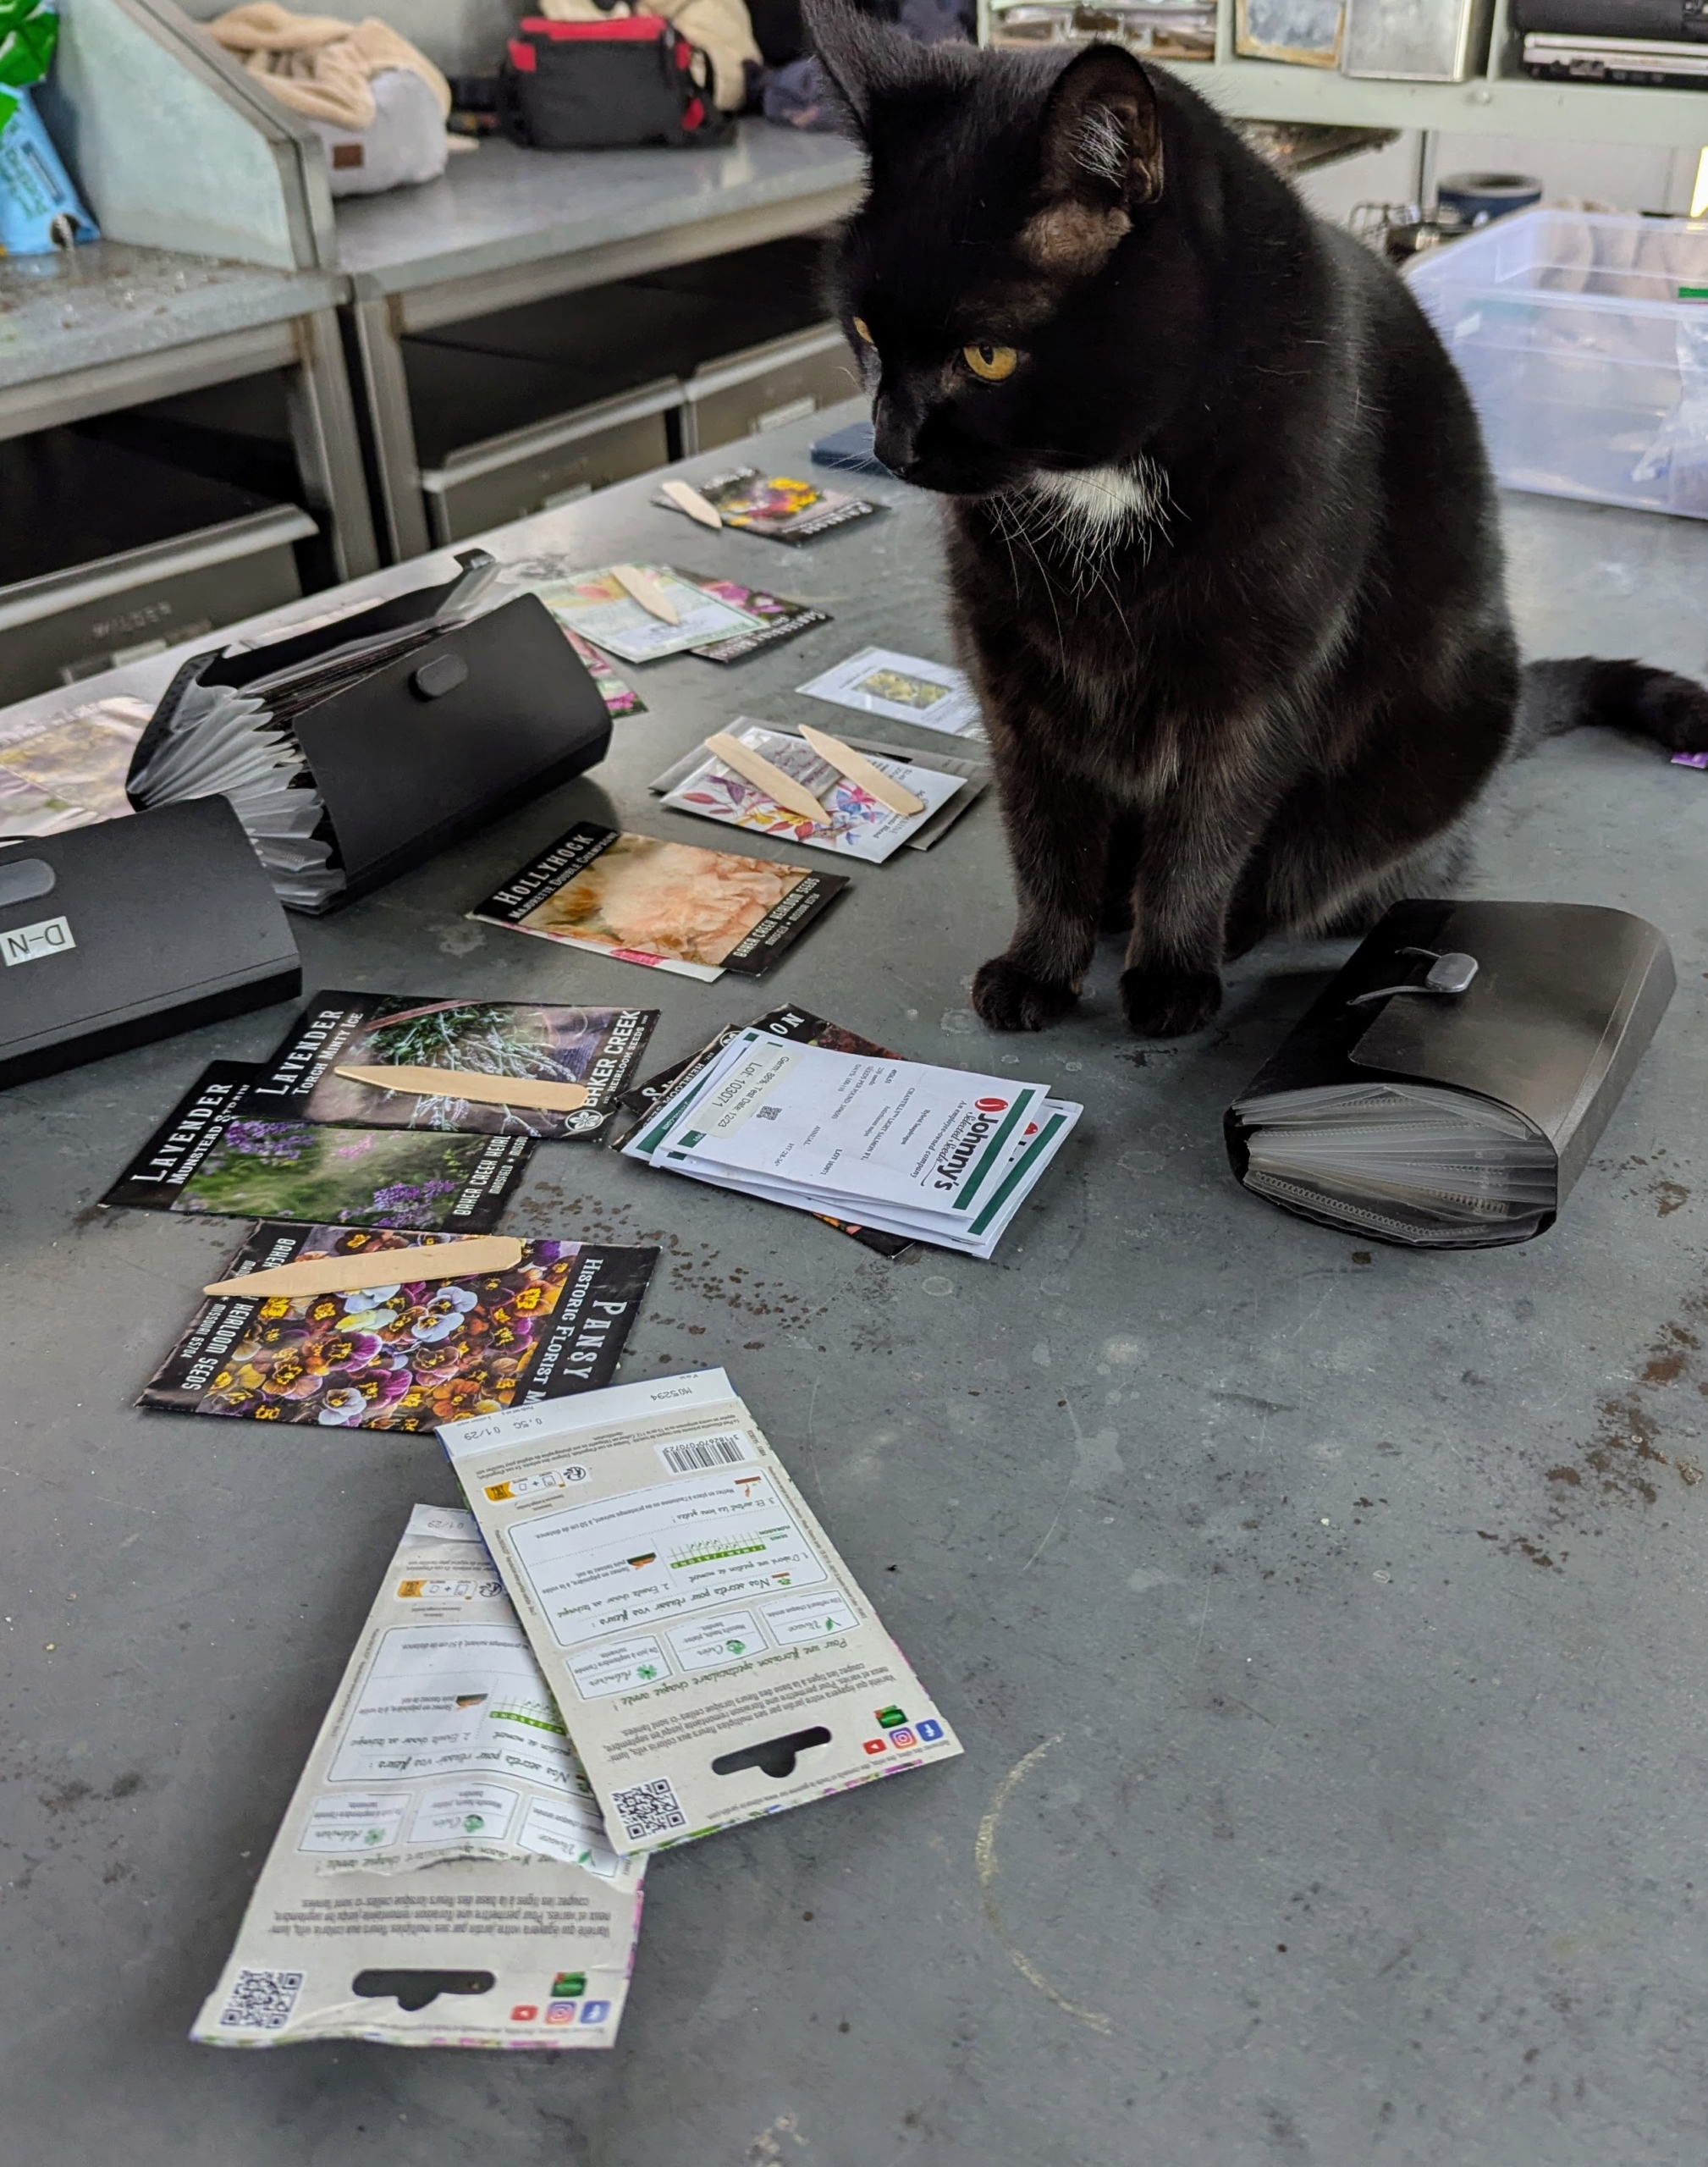
Our favorite greenhouse kitty, Blackie, loves to watch all the activity in the greenhouse.
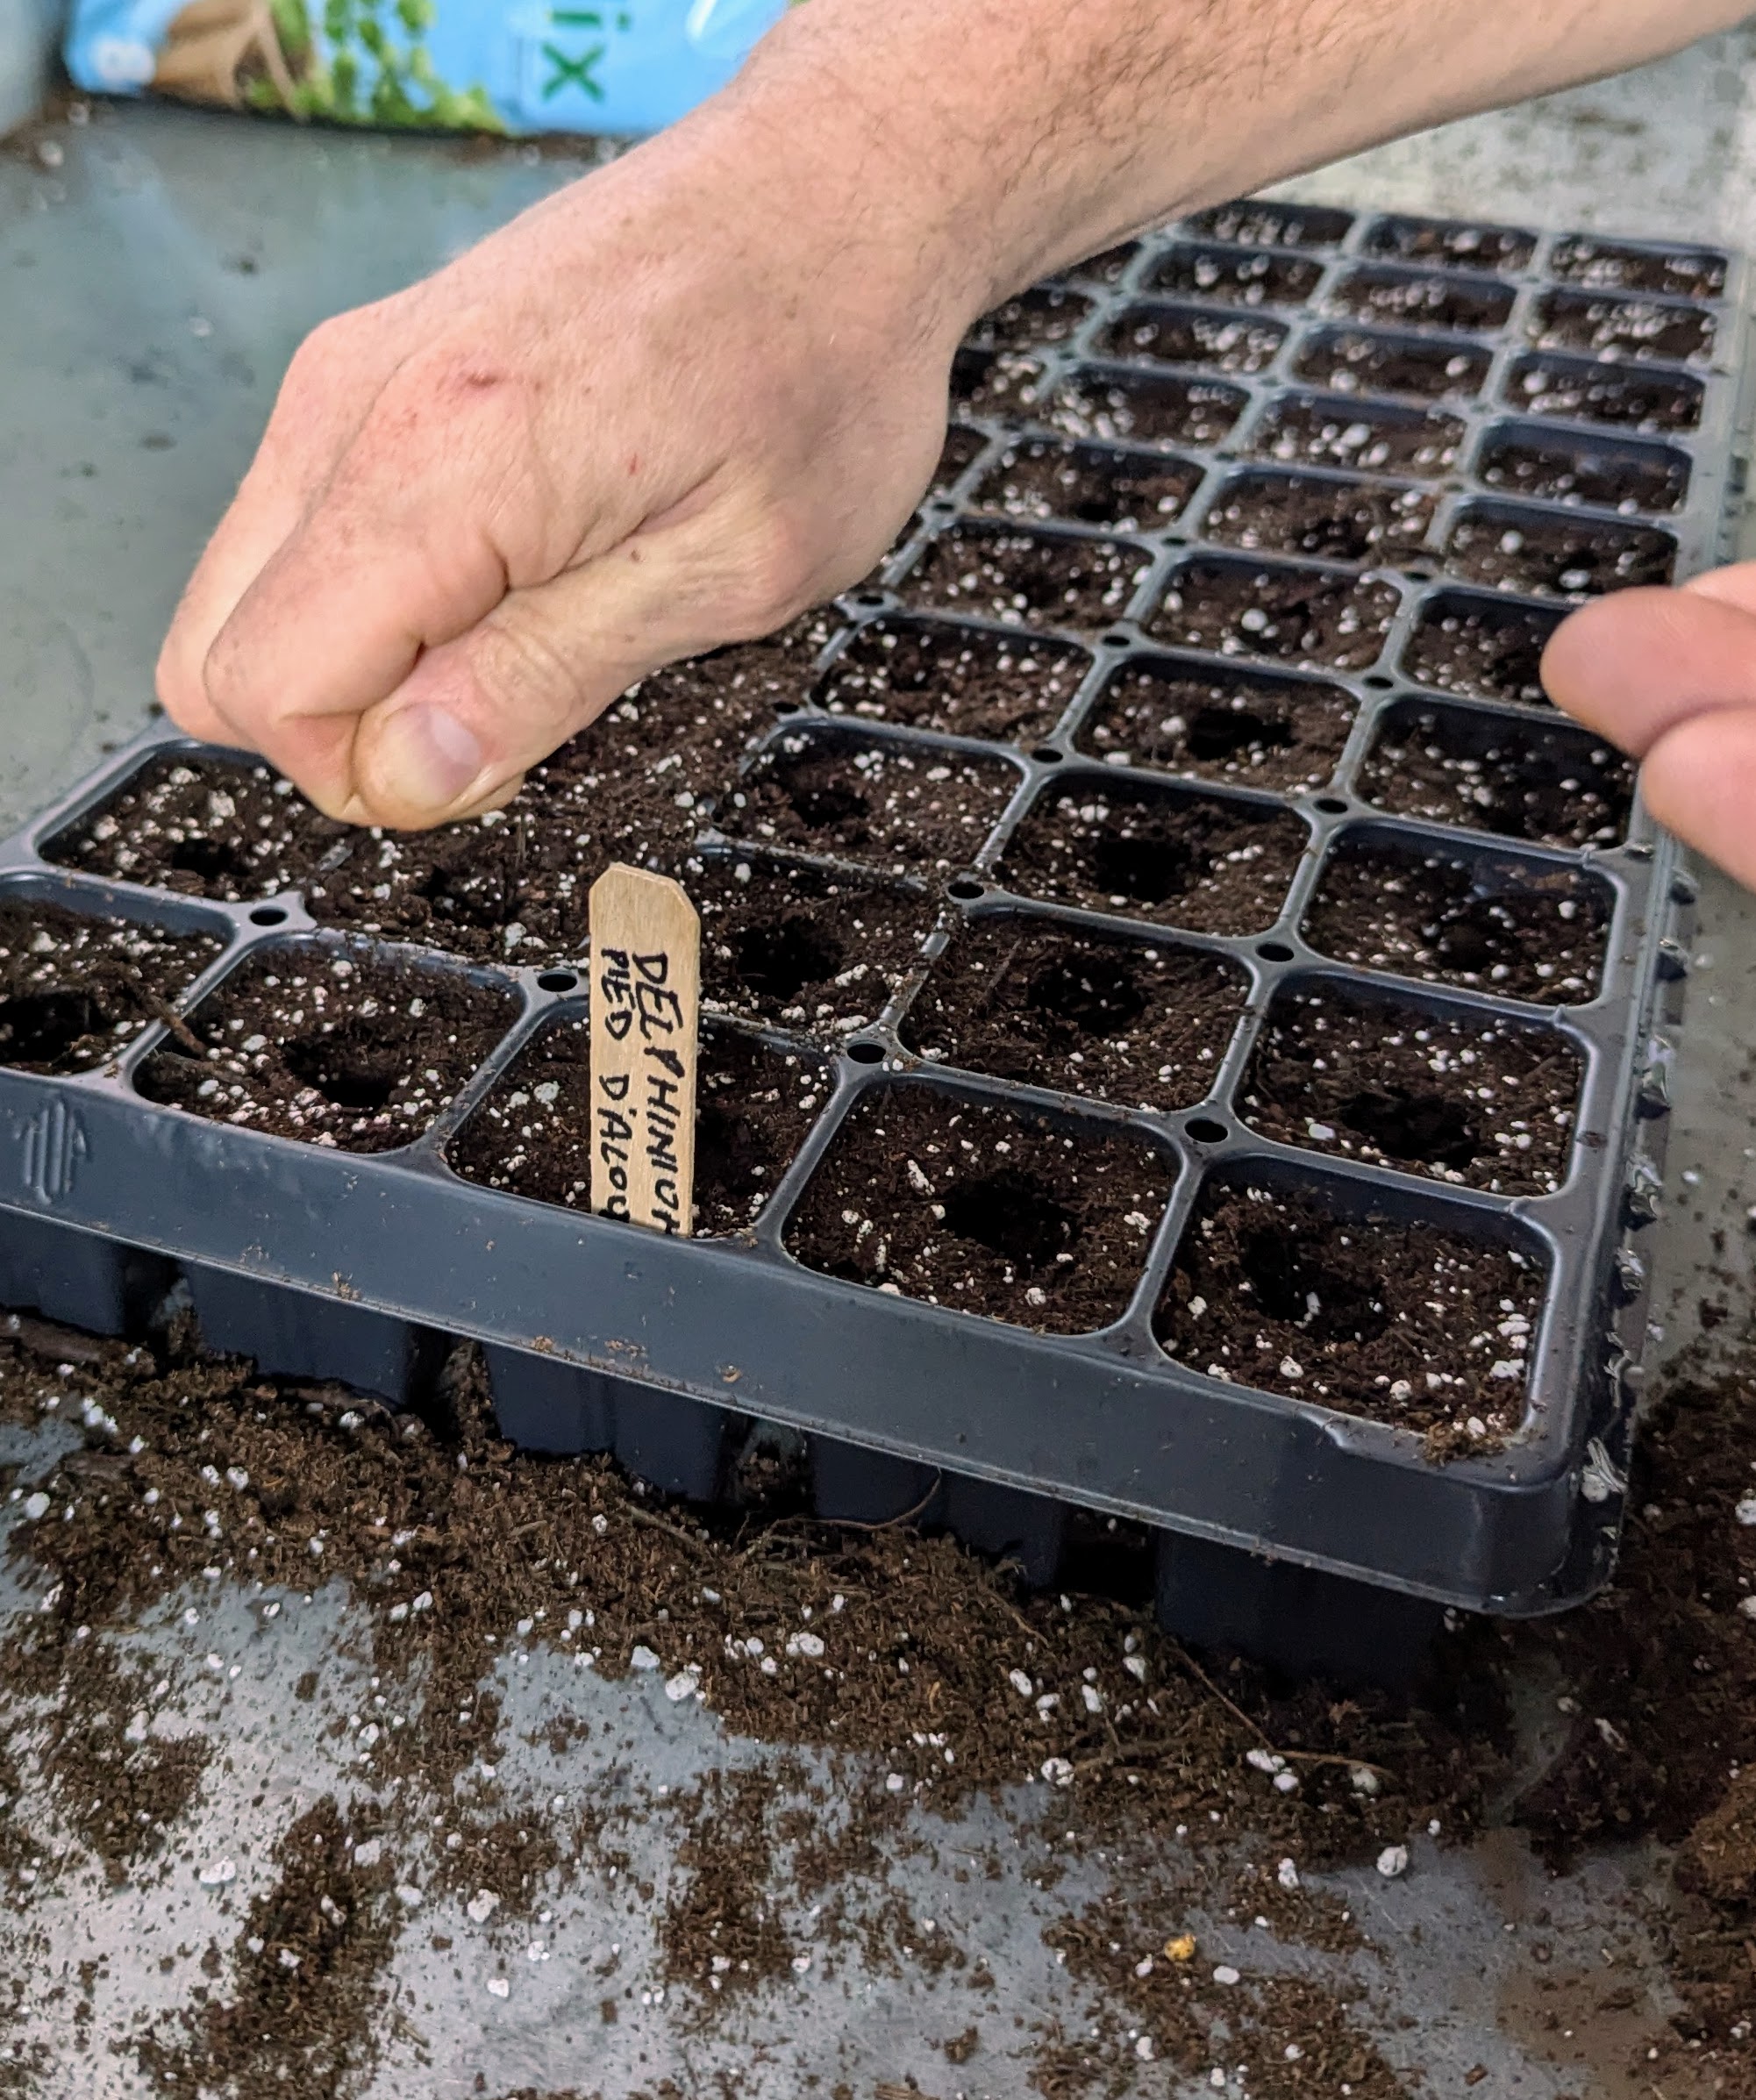
Next, Ryan prepares markers for delphiniums. Delphinium seeds are good to start indoors about six to eight weeks before the last frost.
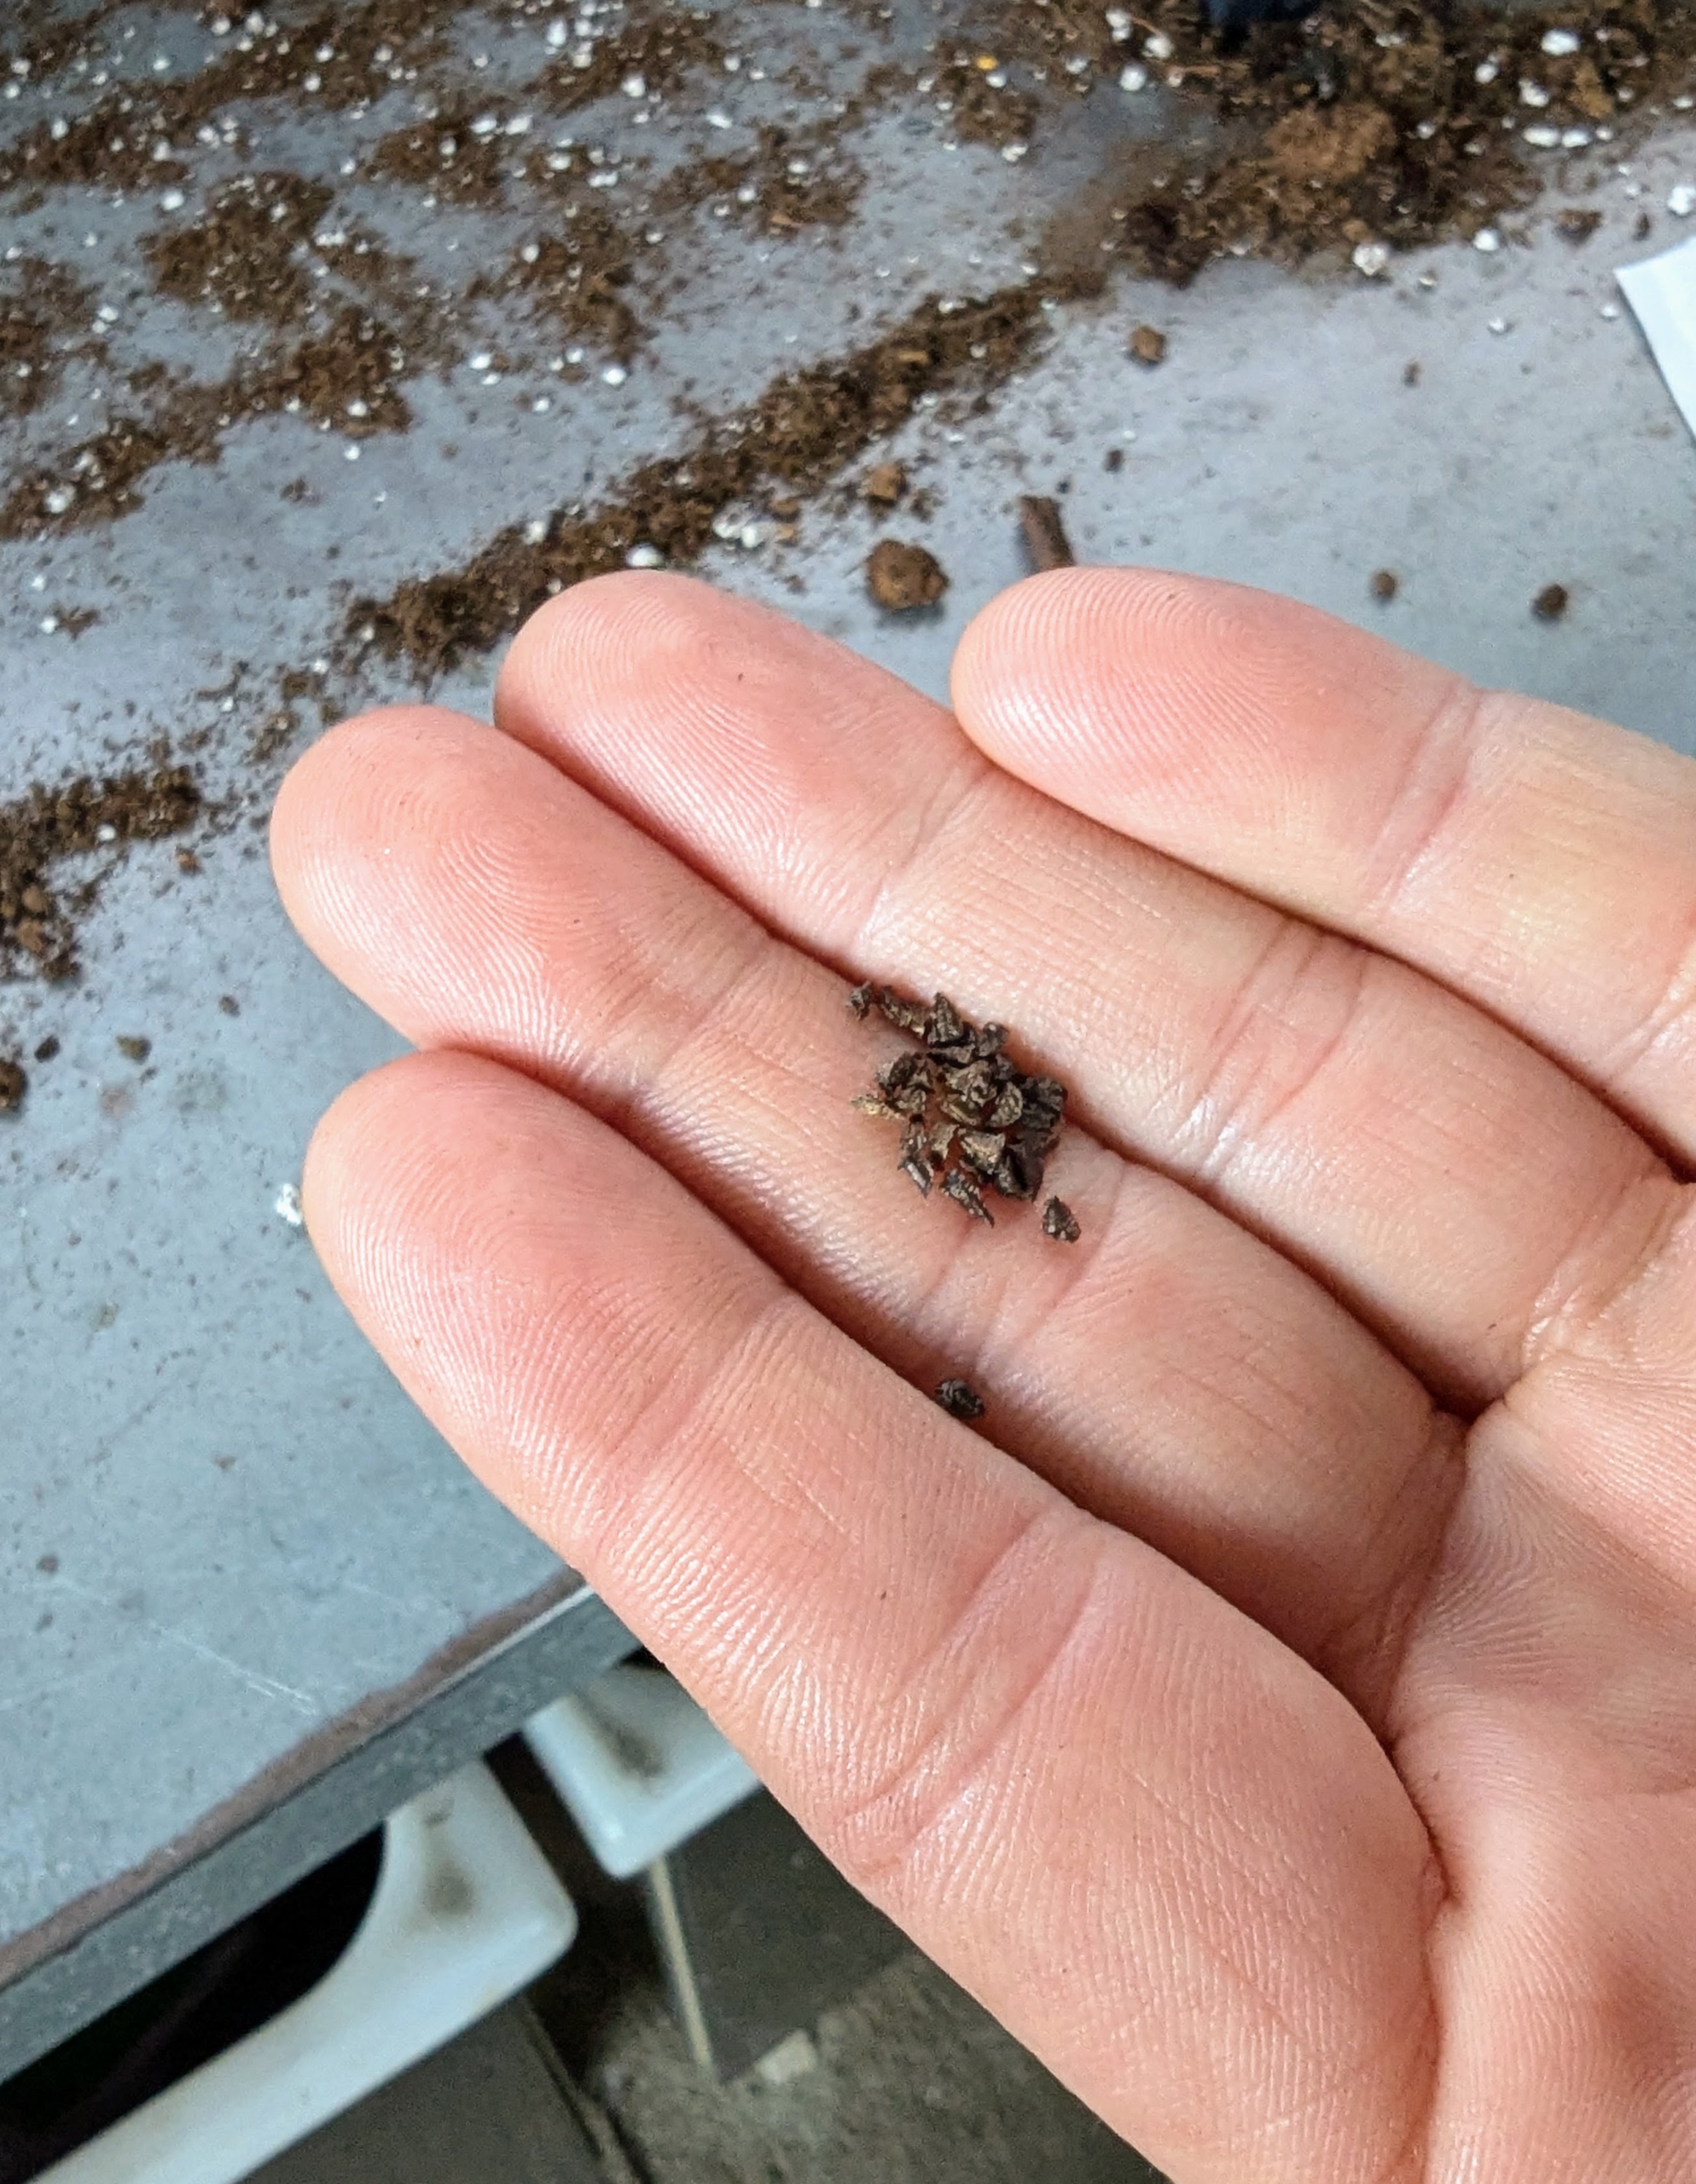
Delphinium seeds are very small, brown, and triangular in shape – be careful when pouring them out of the packet.
Again, Ryan drops a couple seeds into each cell of the tray.
And these are pelleted campanula medium seeds. These campanulas are also known as Canterbury Bells, those tall biennials with showy cup-and-saucer shaped flowers. Pelleting is a process where seeds are coated so they are easier to see and handle when sowing.
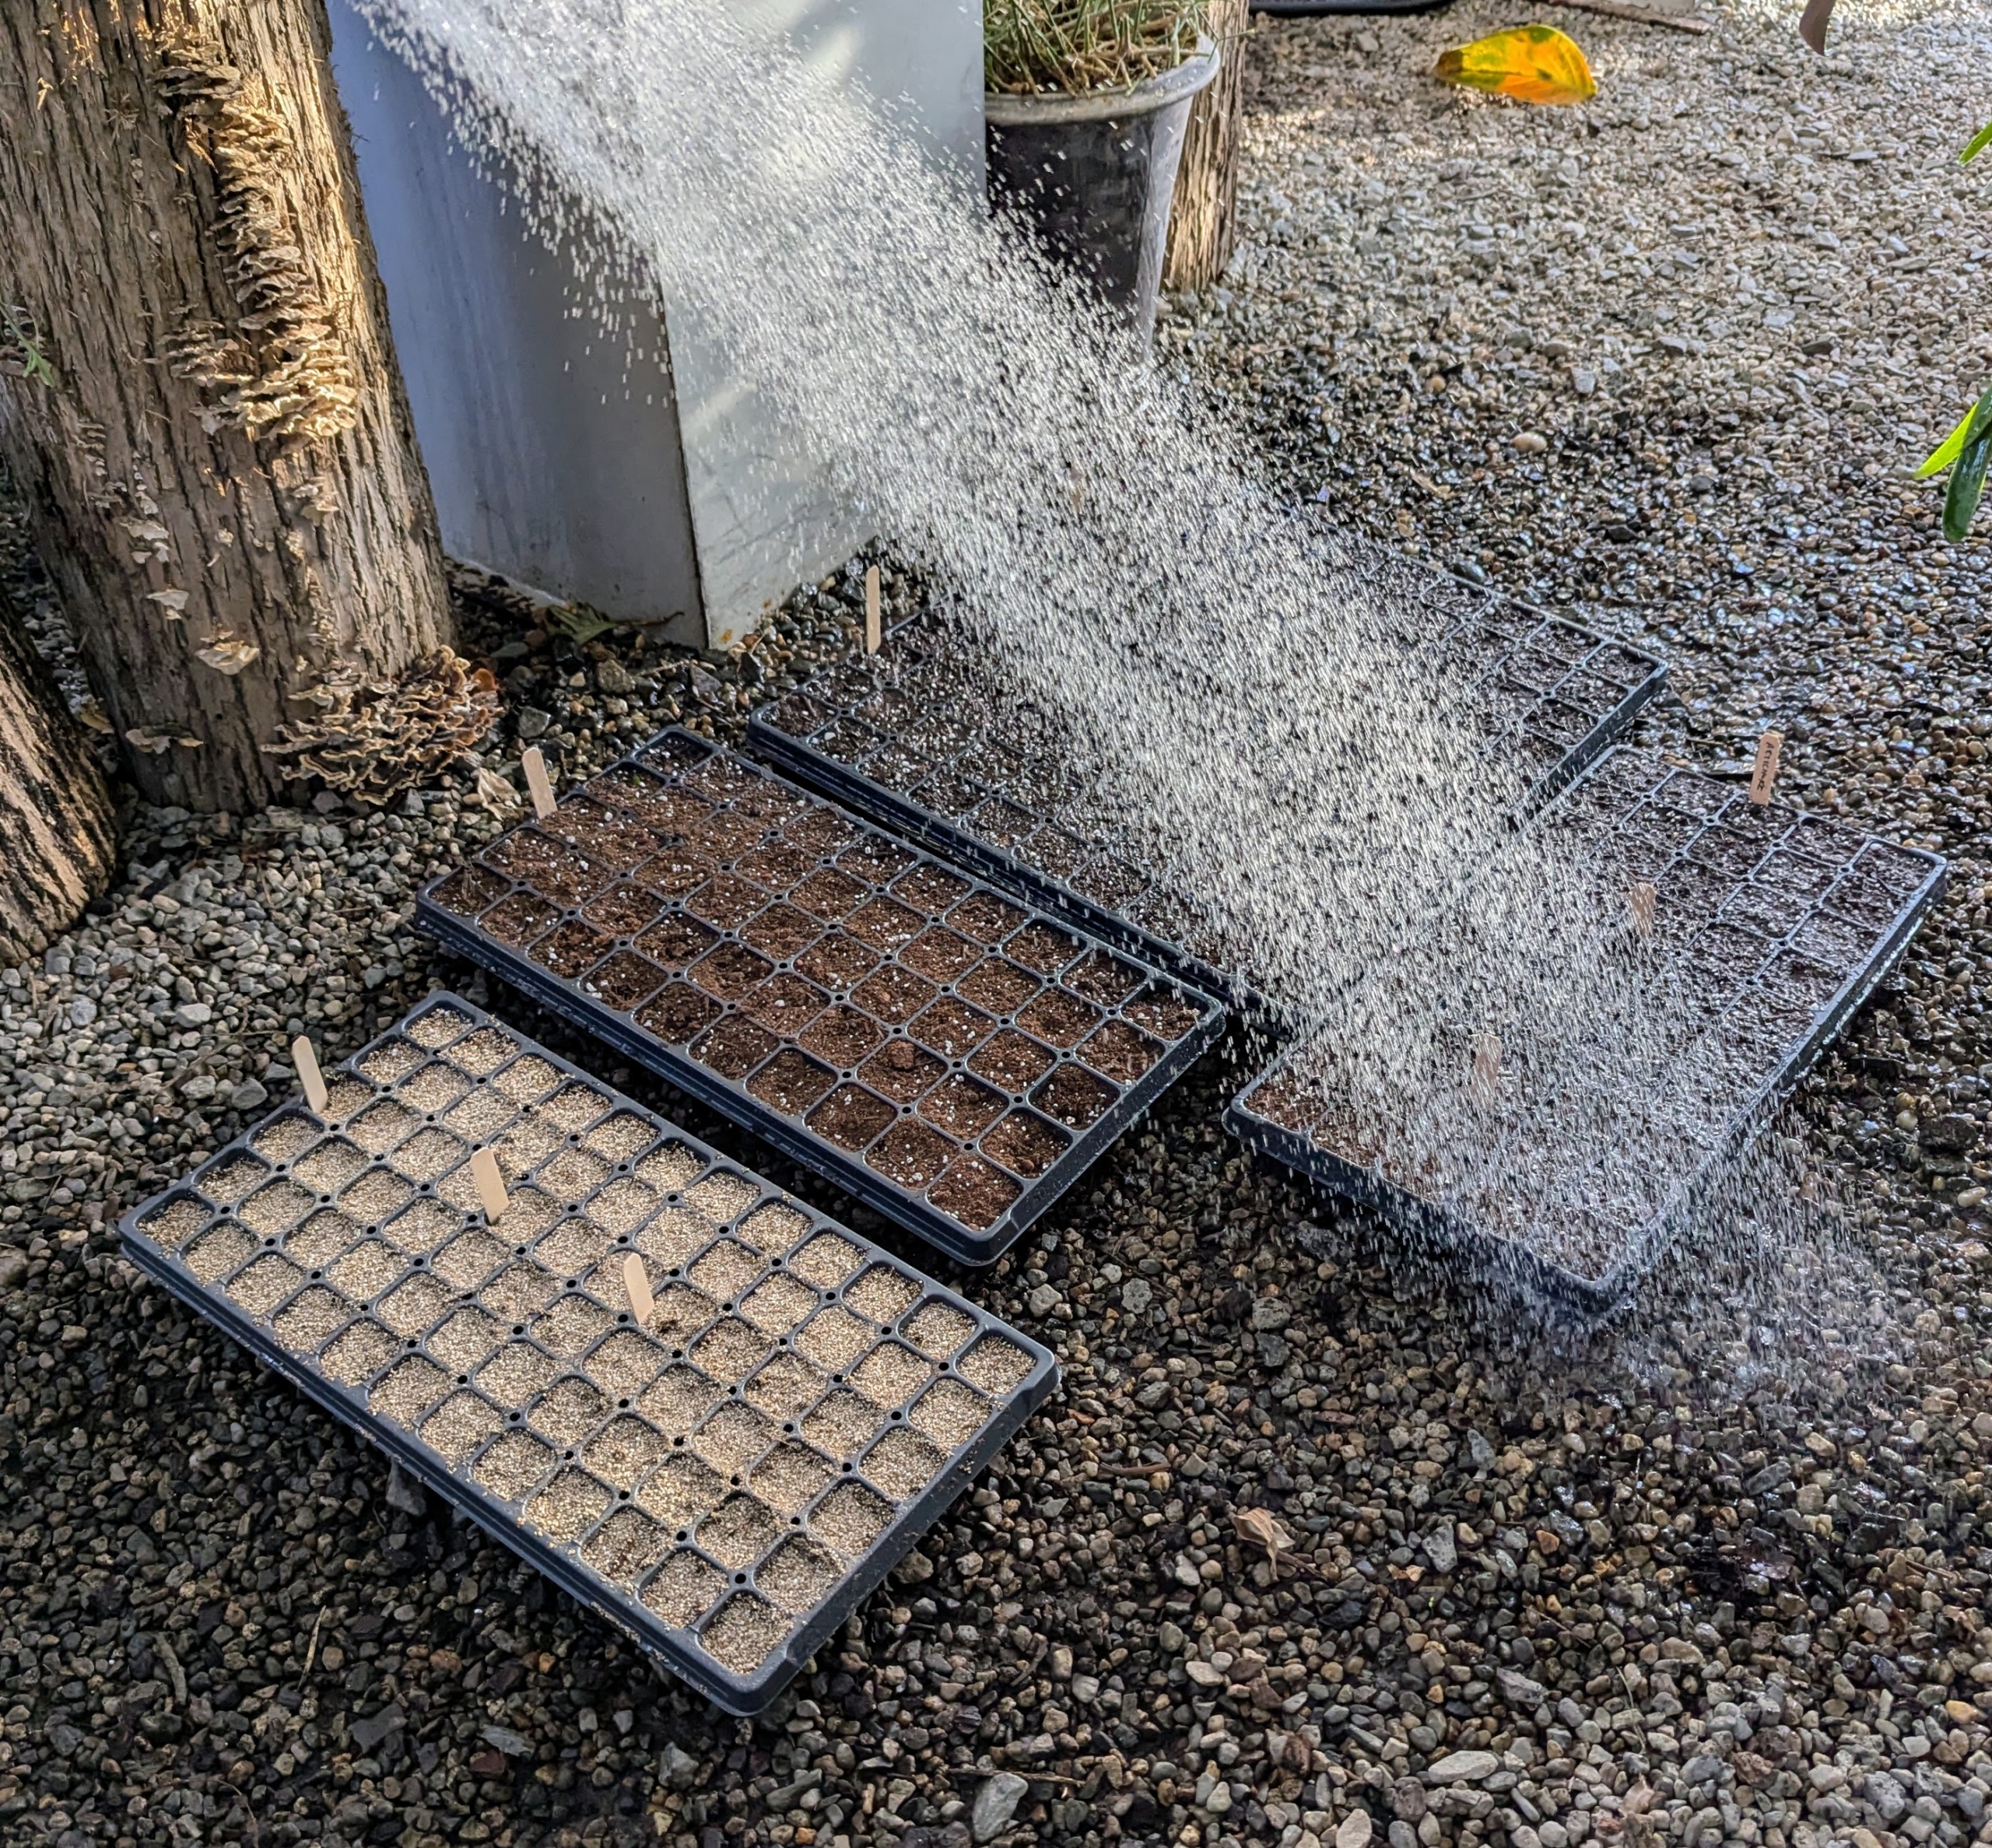
Next, Ryan covers the campanula seed tray with a layer of vermiculite. Vermiculite is a mica-like mineral often used as a soil amendment. It is mined out of the ground, exfoliated, treated with high heat and pressure to force it to expand. The porous surface is great for retaining moisture and nutrients.
All the trays are given a good and thorough drink.
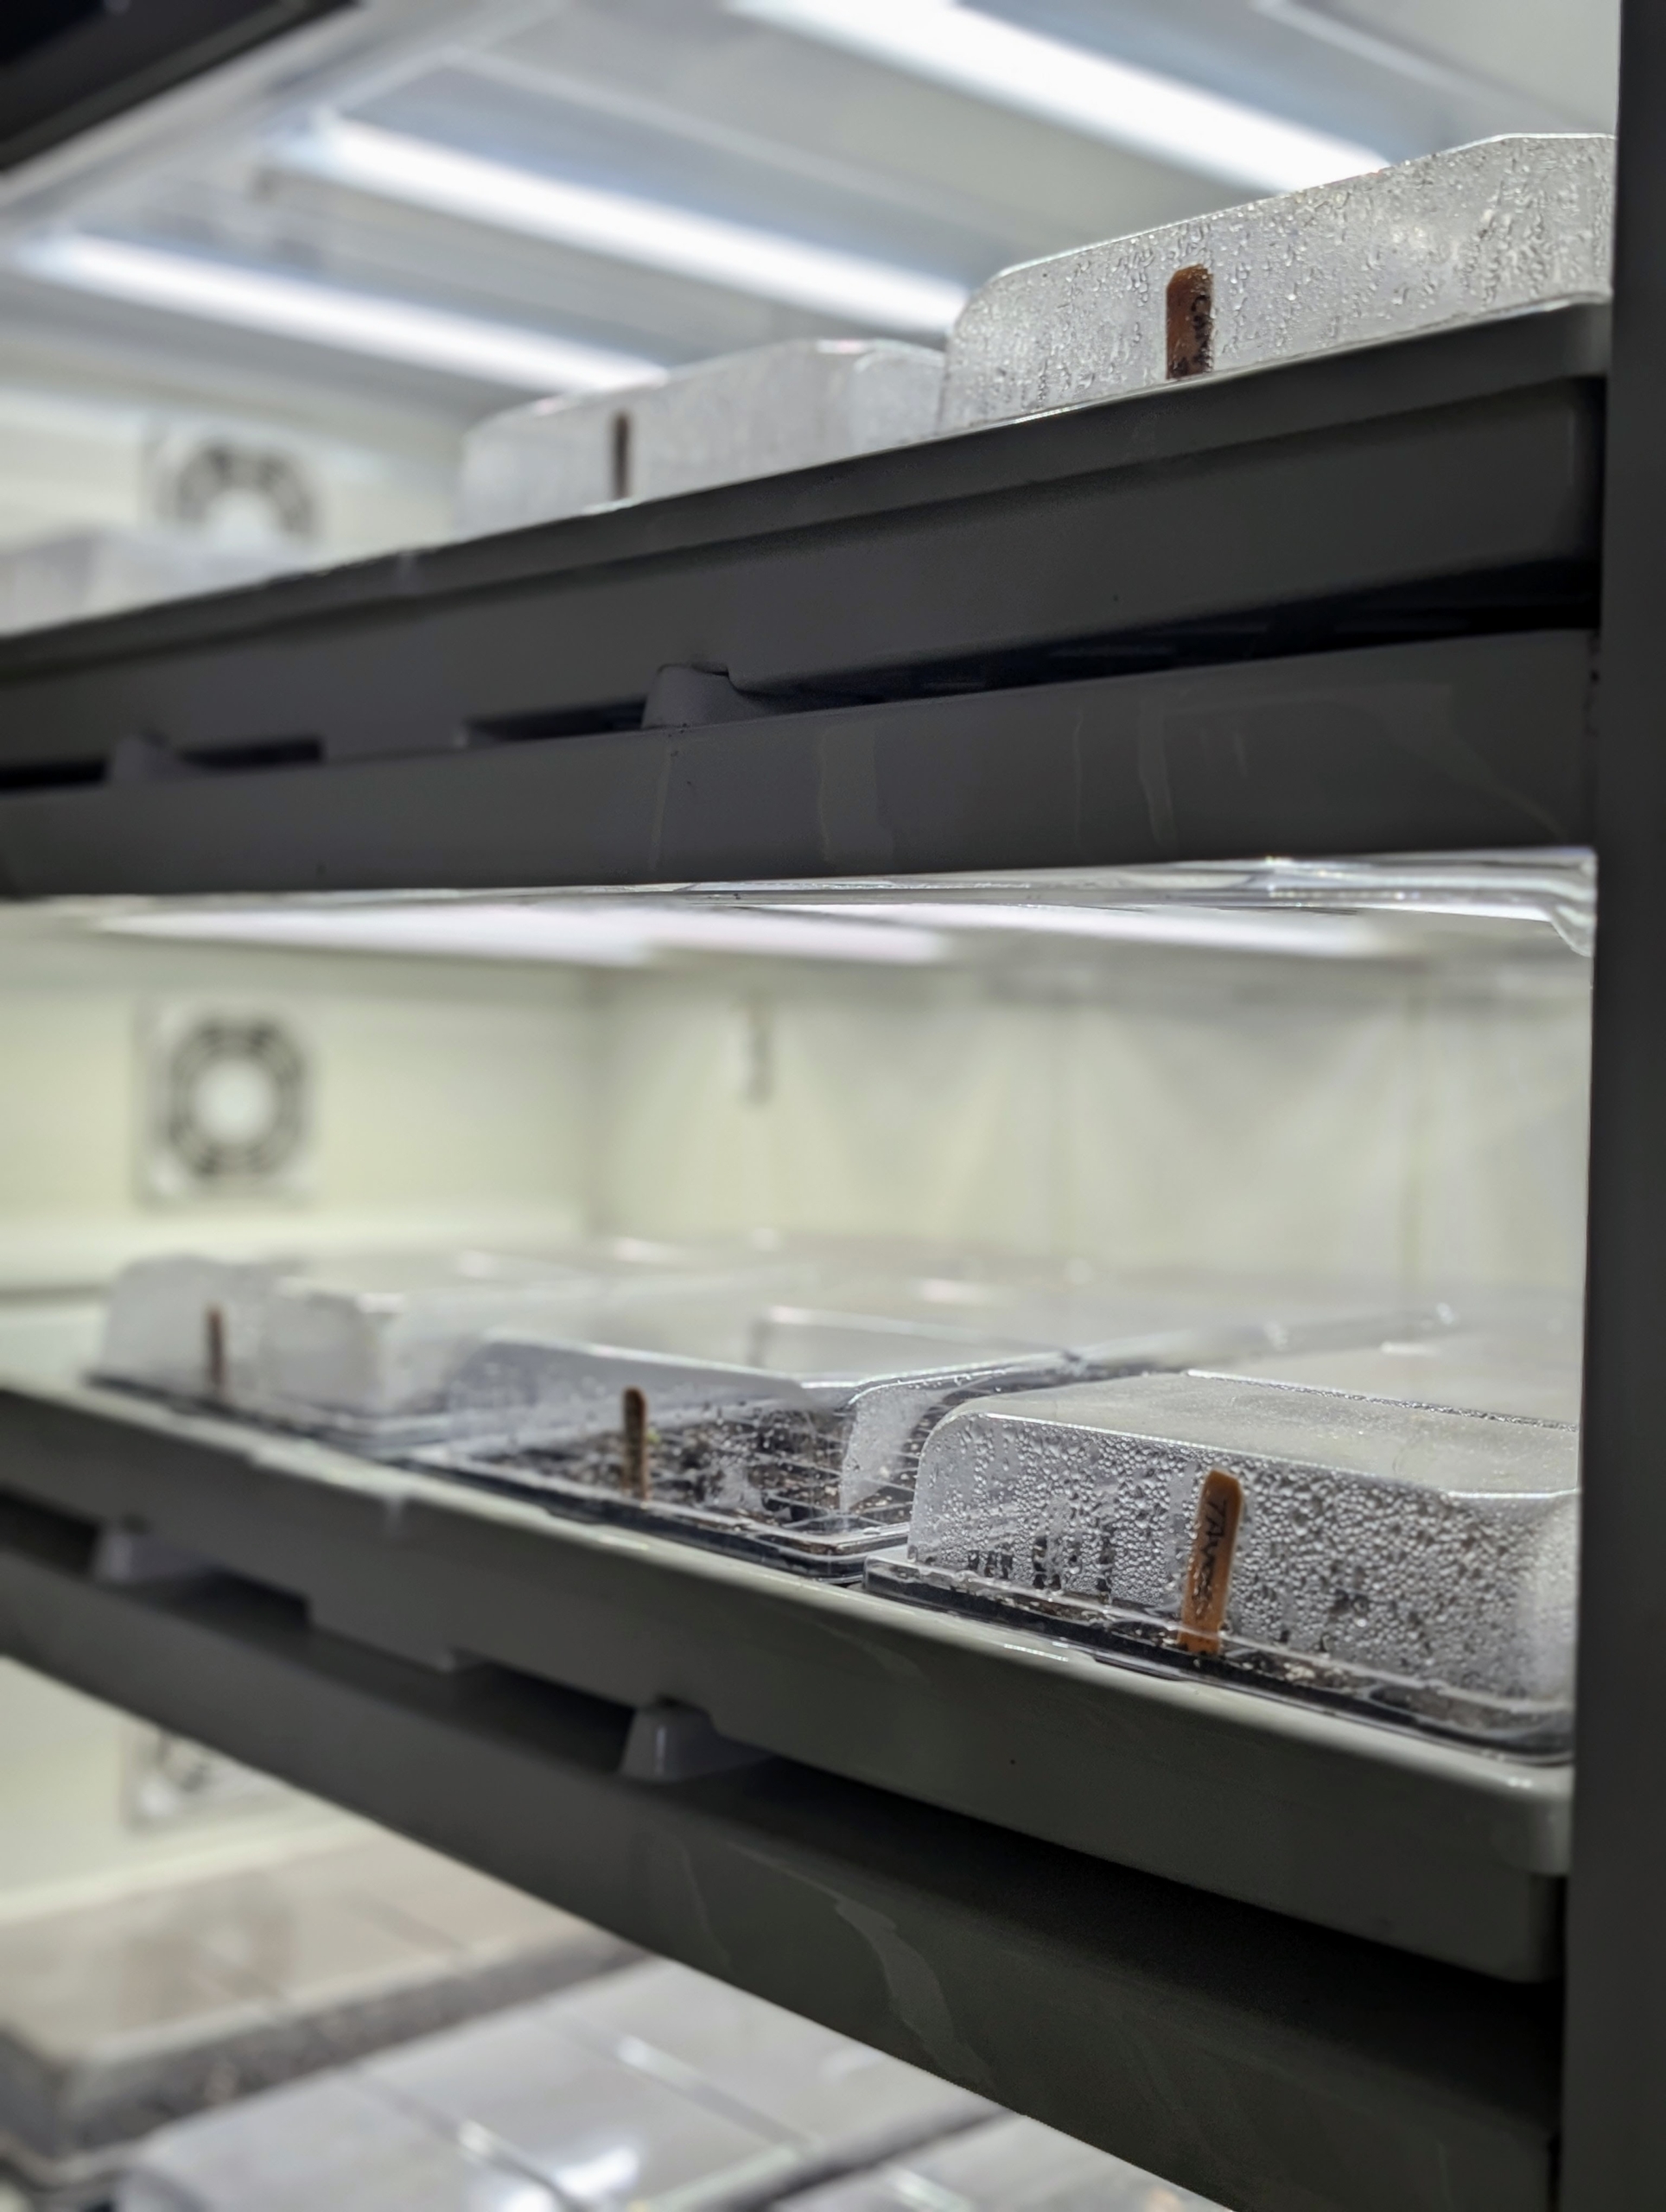
And then some trays go into a commercial-sized Urban Cultivator, which can hold up to 16-trays. The Urban Cultivator’s pre-programmed control center adds just the right amount of water, light, humidity, and air for the seeds to germinate.
And look, after just three days, a lupine has already poked through the soil. We’re off to a great start. And then it’s back to starting more seeds, but we have many more trays to go. Seeds are usually started about two months before the last frost – we will be planting seeds well into March.
It's always fun to view the familiar through someone else's lens.
Last month, I traveled to Namibia with my daughter, Alexis, her children, Jude and Truman, and our friend Ari Katz. We journeyed through the deserts of the Republic of Namibia on safari and saw some of the most amazing wild animals - elephants, zebras, antelopes, giraffes, white rhinos, and so many more. We all took photos from the ground and from above. We captured images of animals alone and in herds, grazing, fighting, watching, building nests, guarding their young, etc. I am always interested to see the pictures taken by our group and to share them all with you.
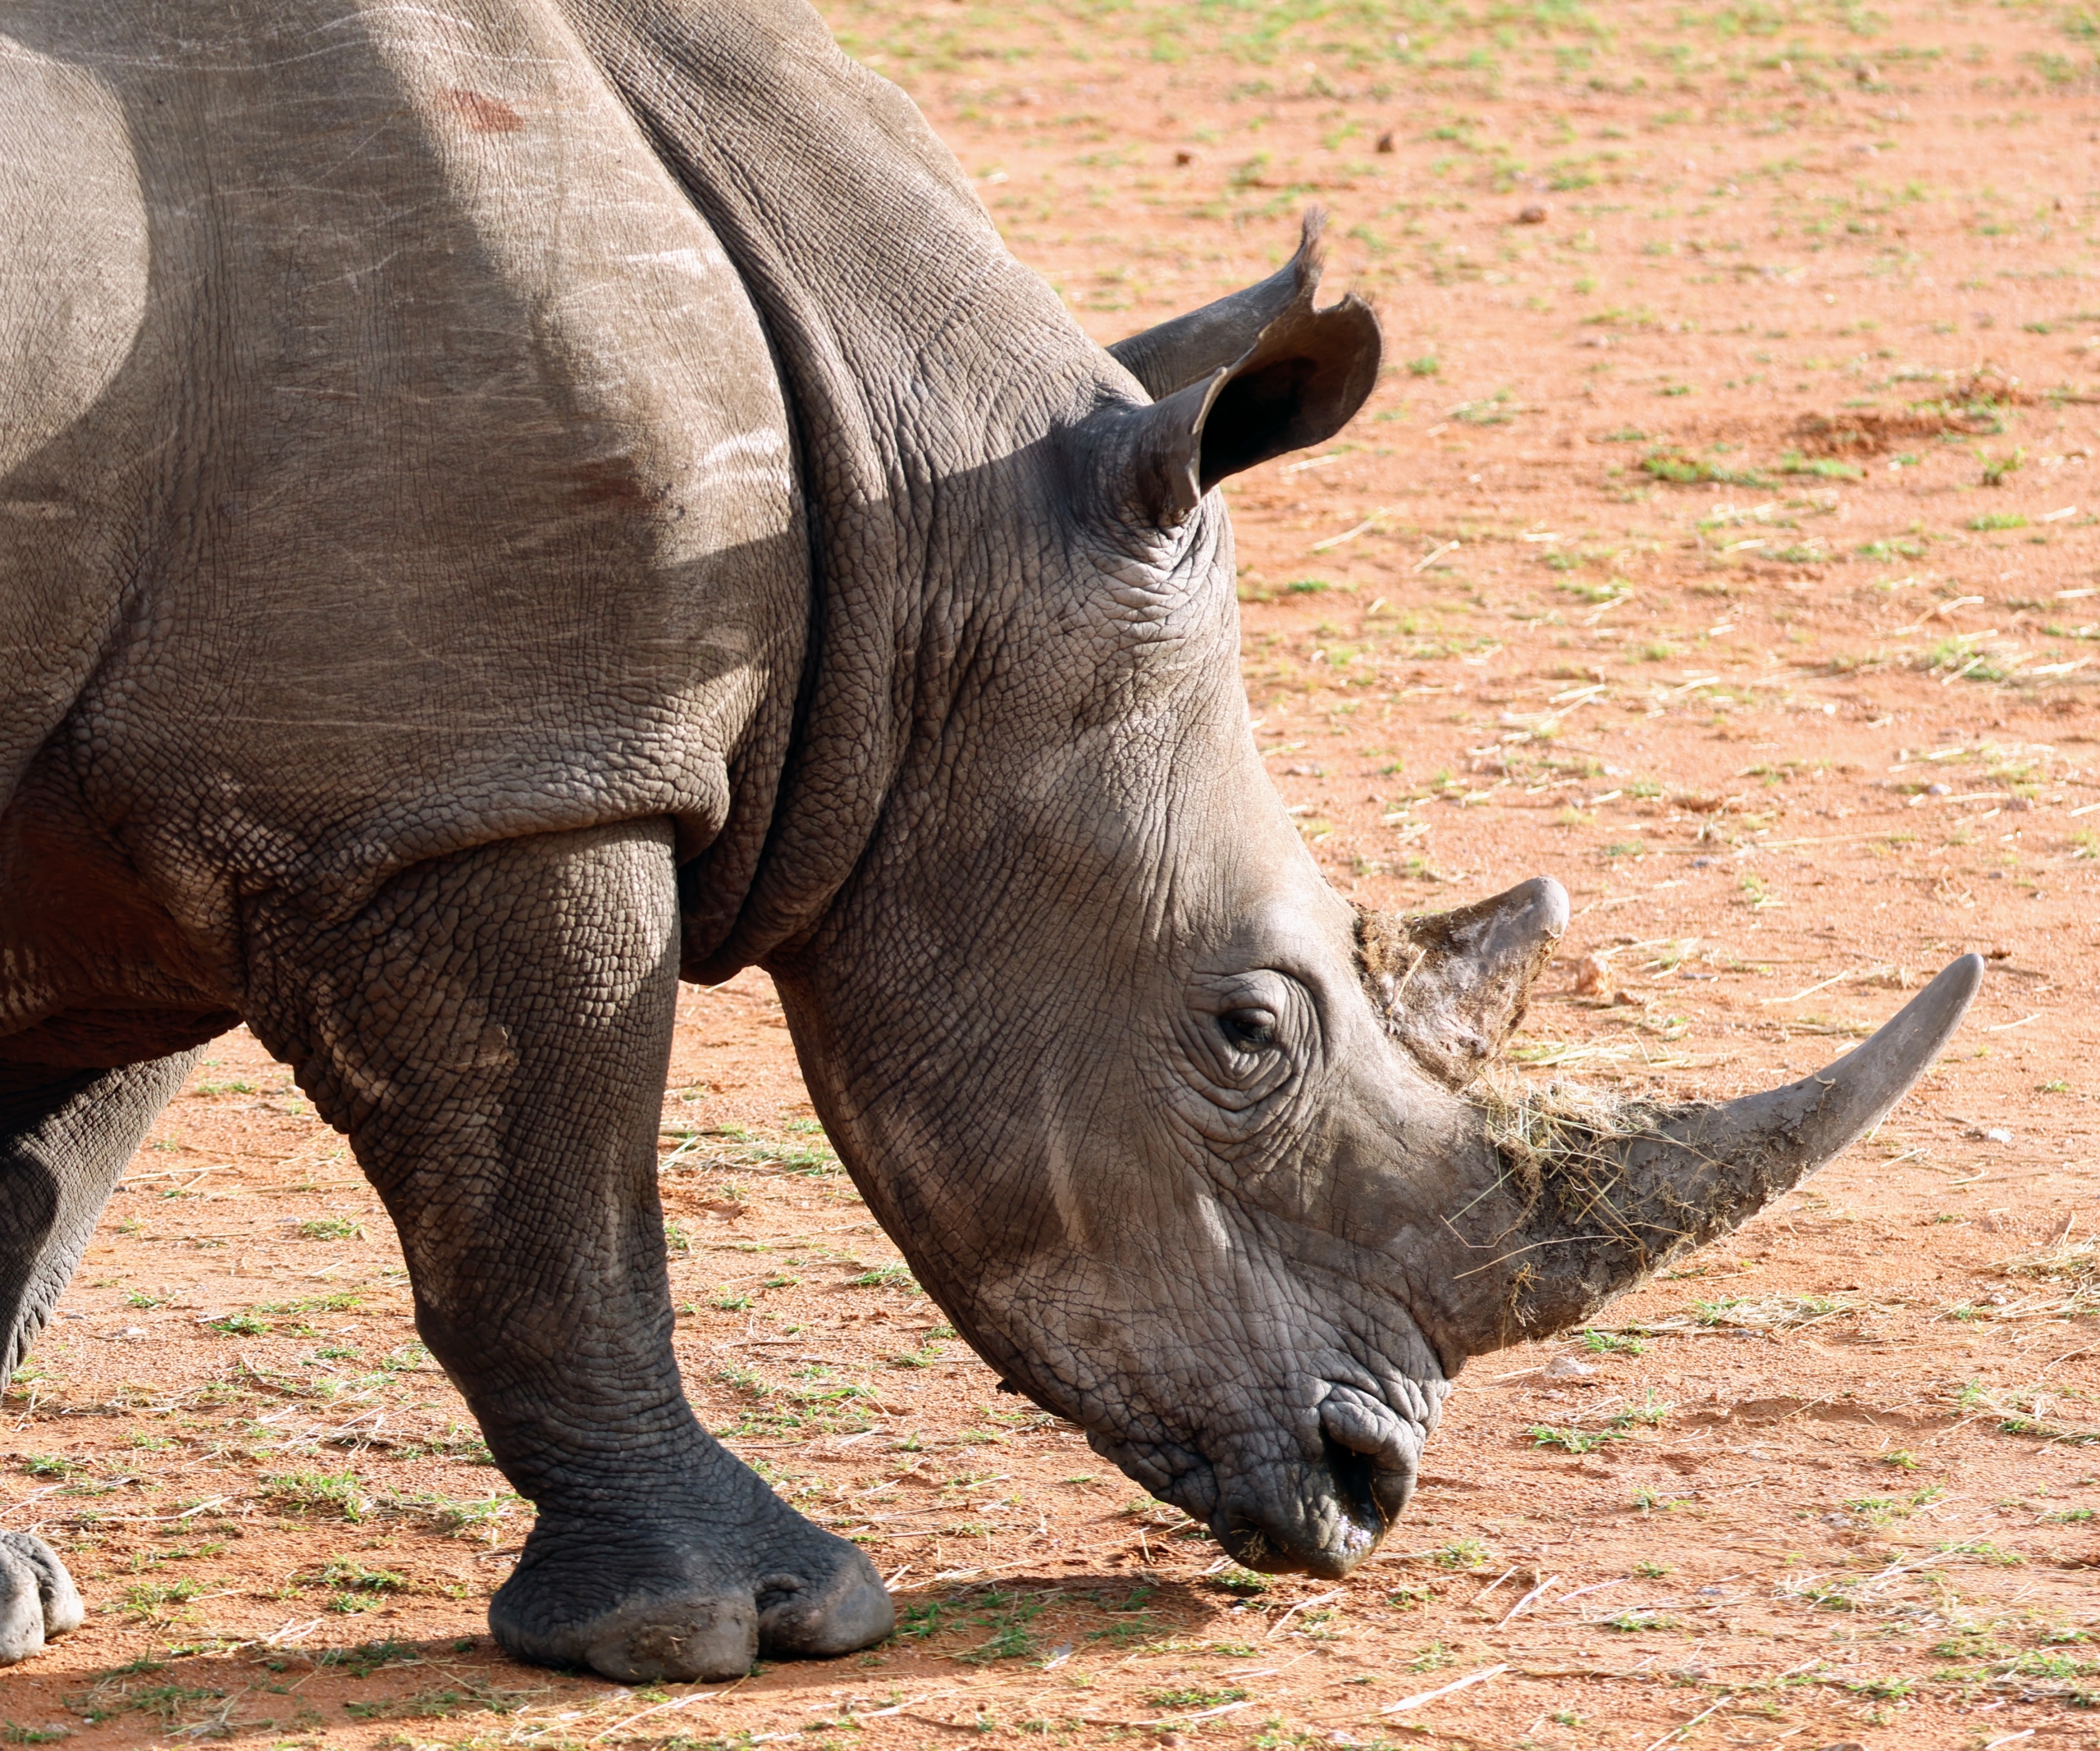
Here are photos taken by Ari using his Canon EOS R7 Mirrorless camera, enjoy.
Ari was able to capture closeup photos with his camera. Here is one of white rhinos we all saw on safari. For the most part, rhinos are gentle and keep to themselves, but like many animals may charge if threatened. Their vision is not very good, but they have a keen sense of hearing.
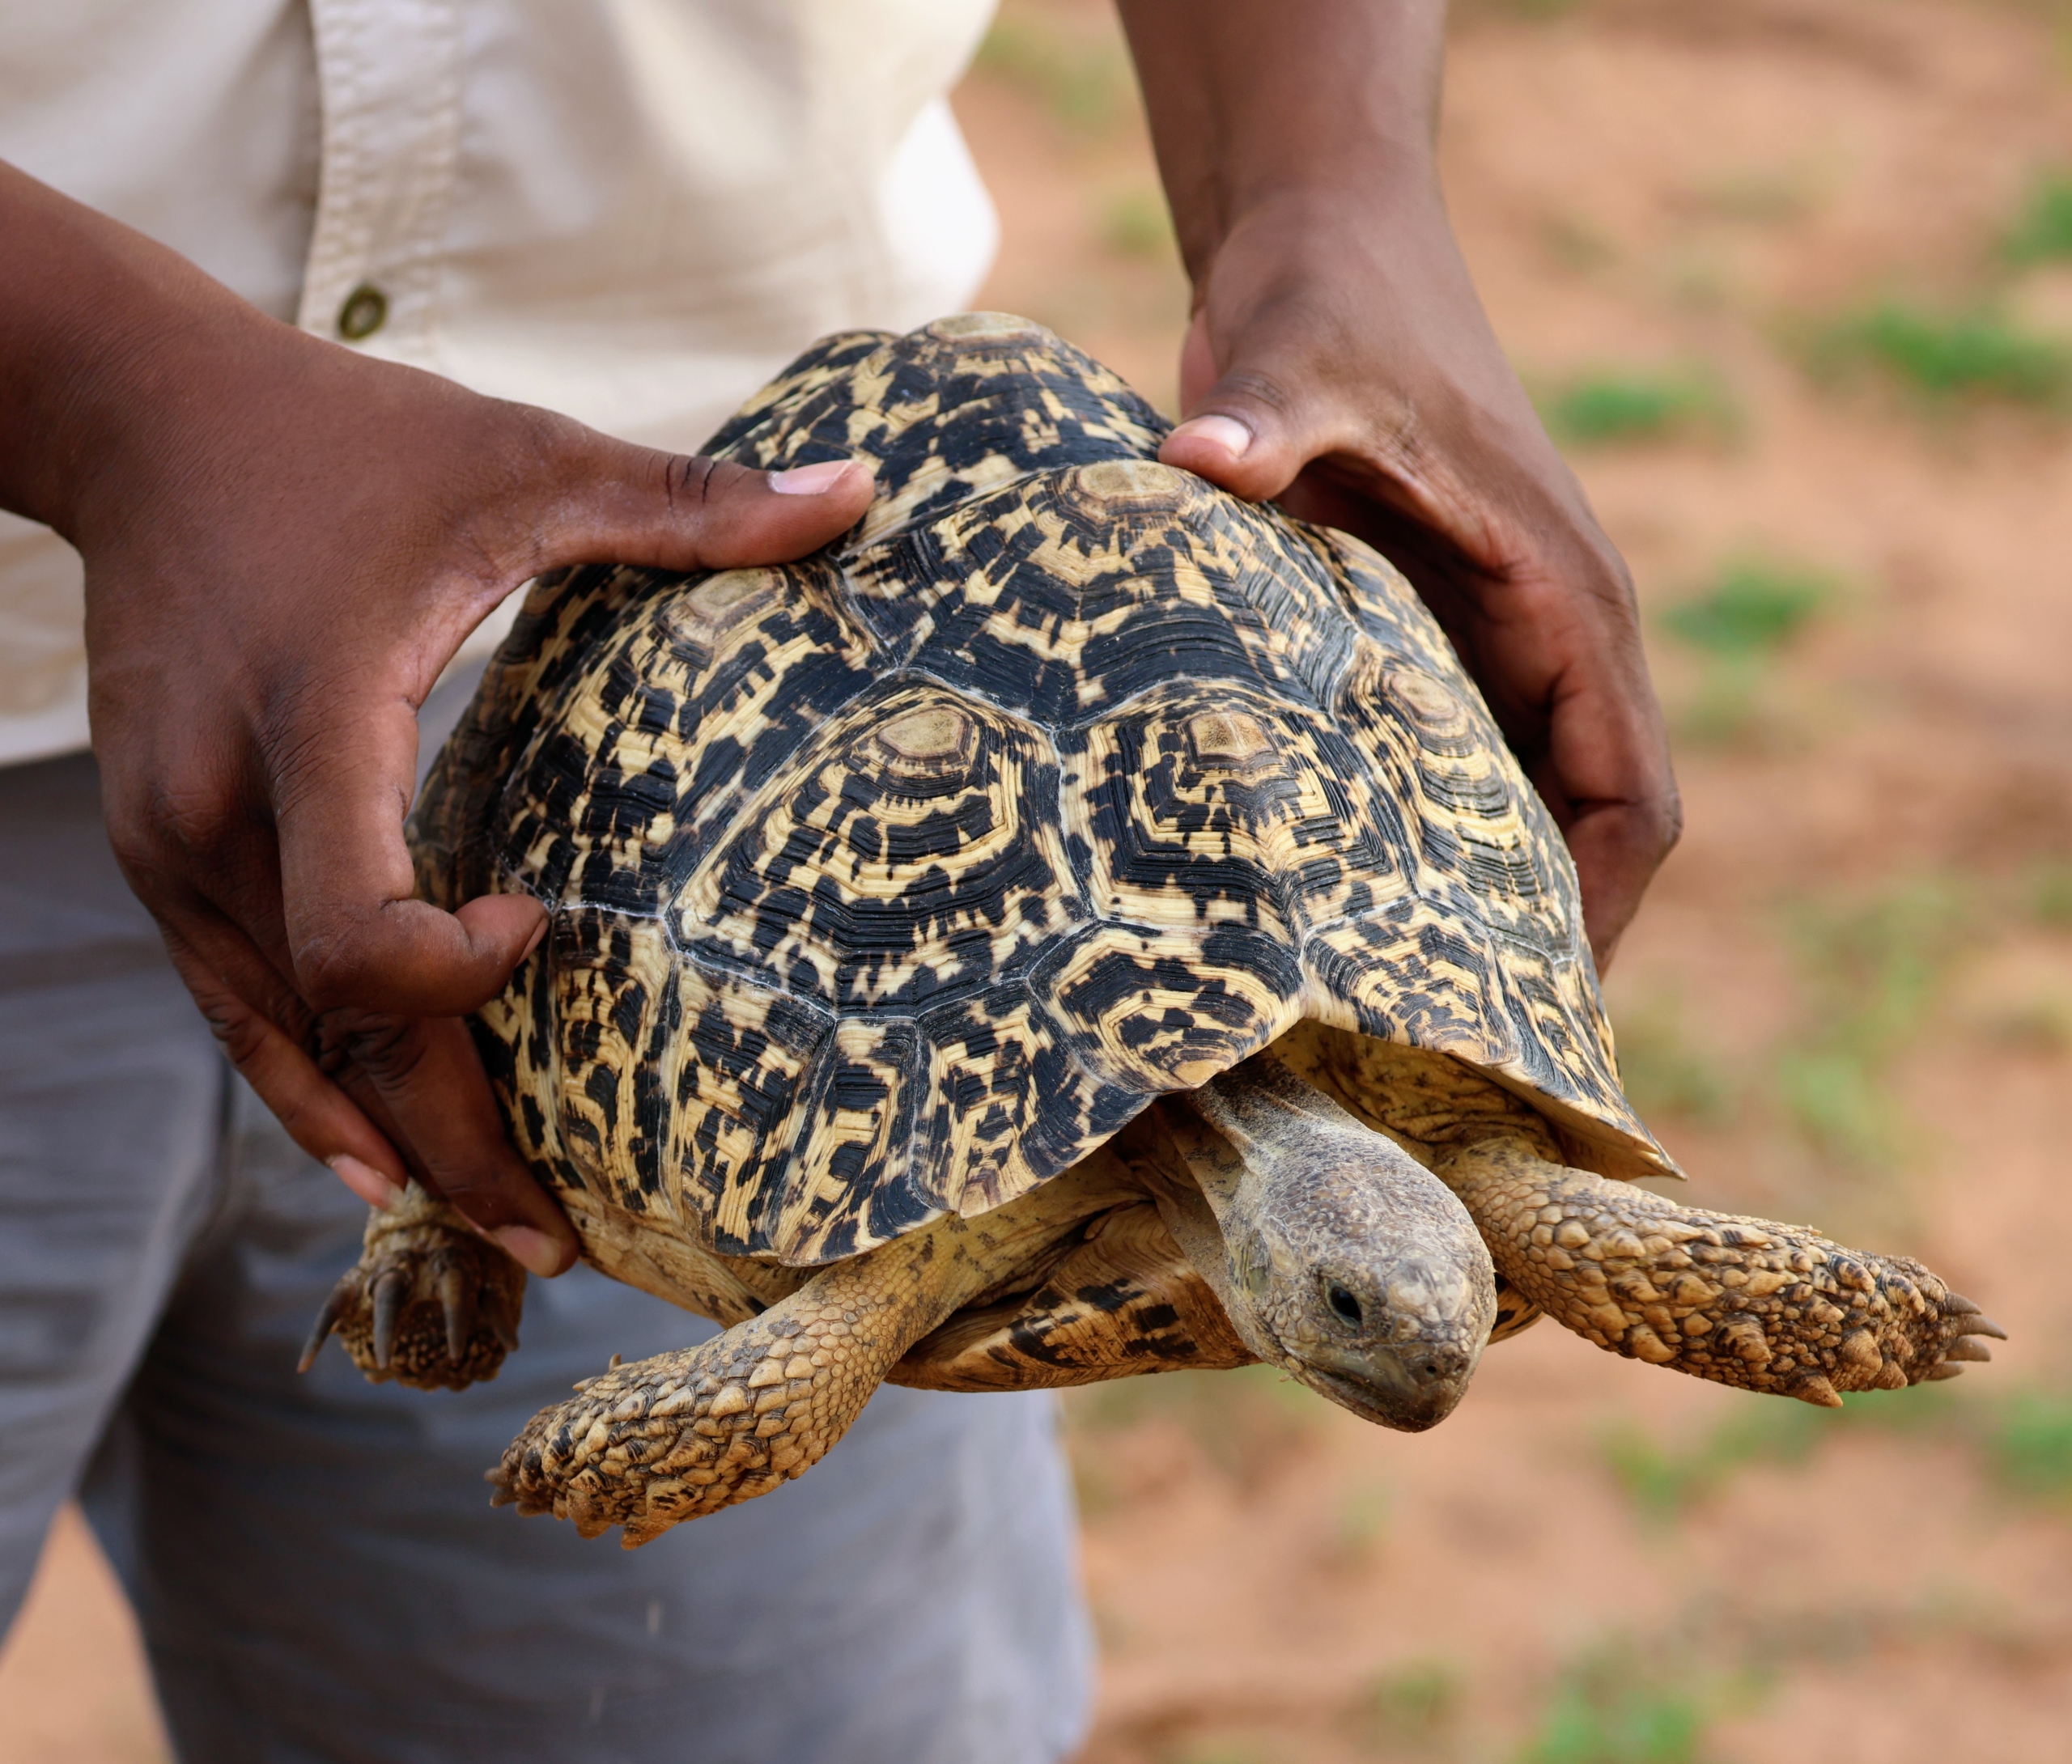
The leopard tortoise is a large and well marked tortoise found in the savannas of eastern and southern Africa, from Sudan to the southern Cape Province. This tortoise gets its name from the markings on the shell that resemble the spotted cat with the same name.
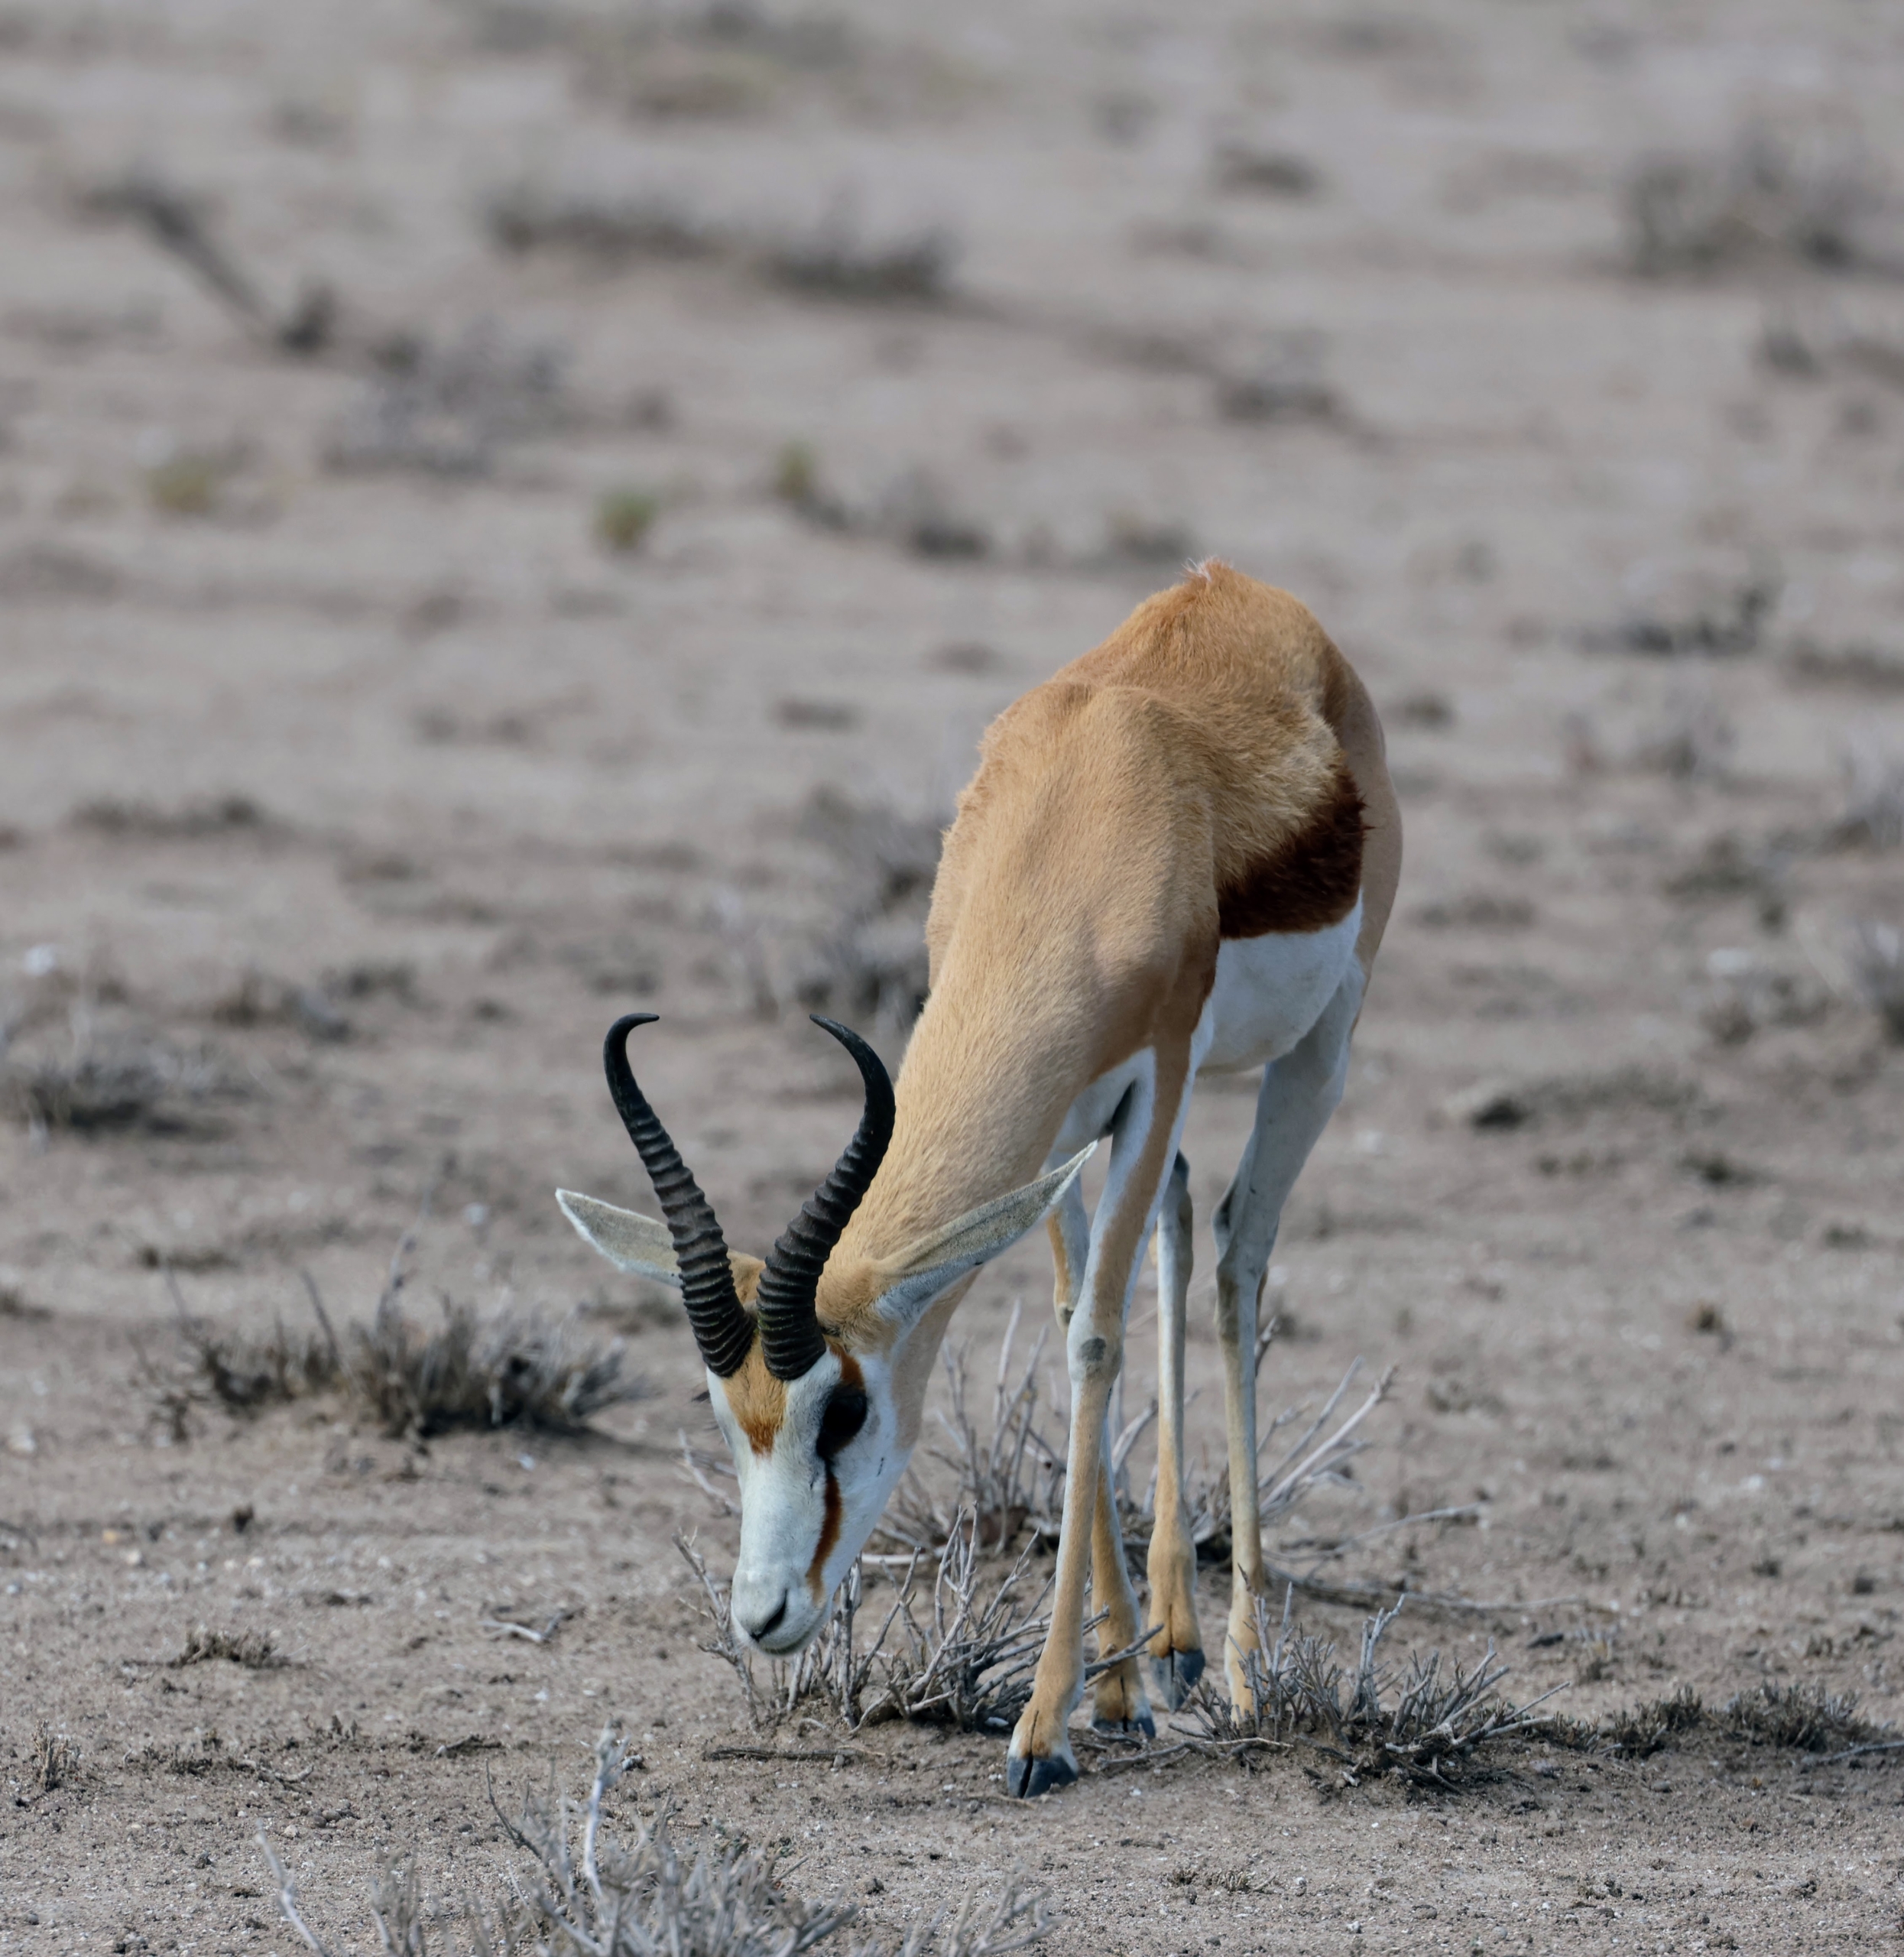
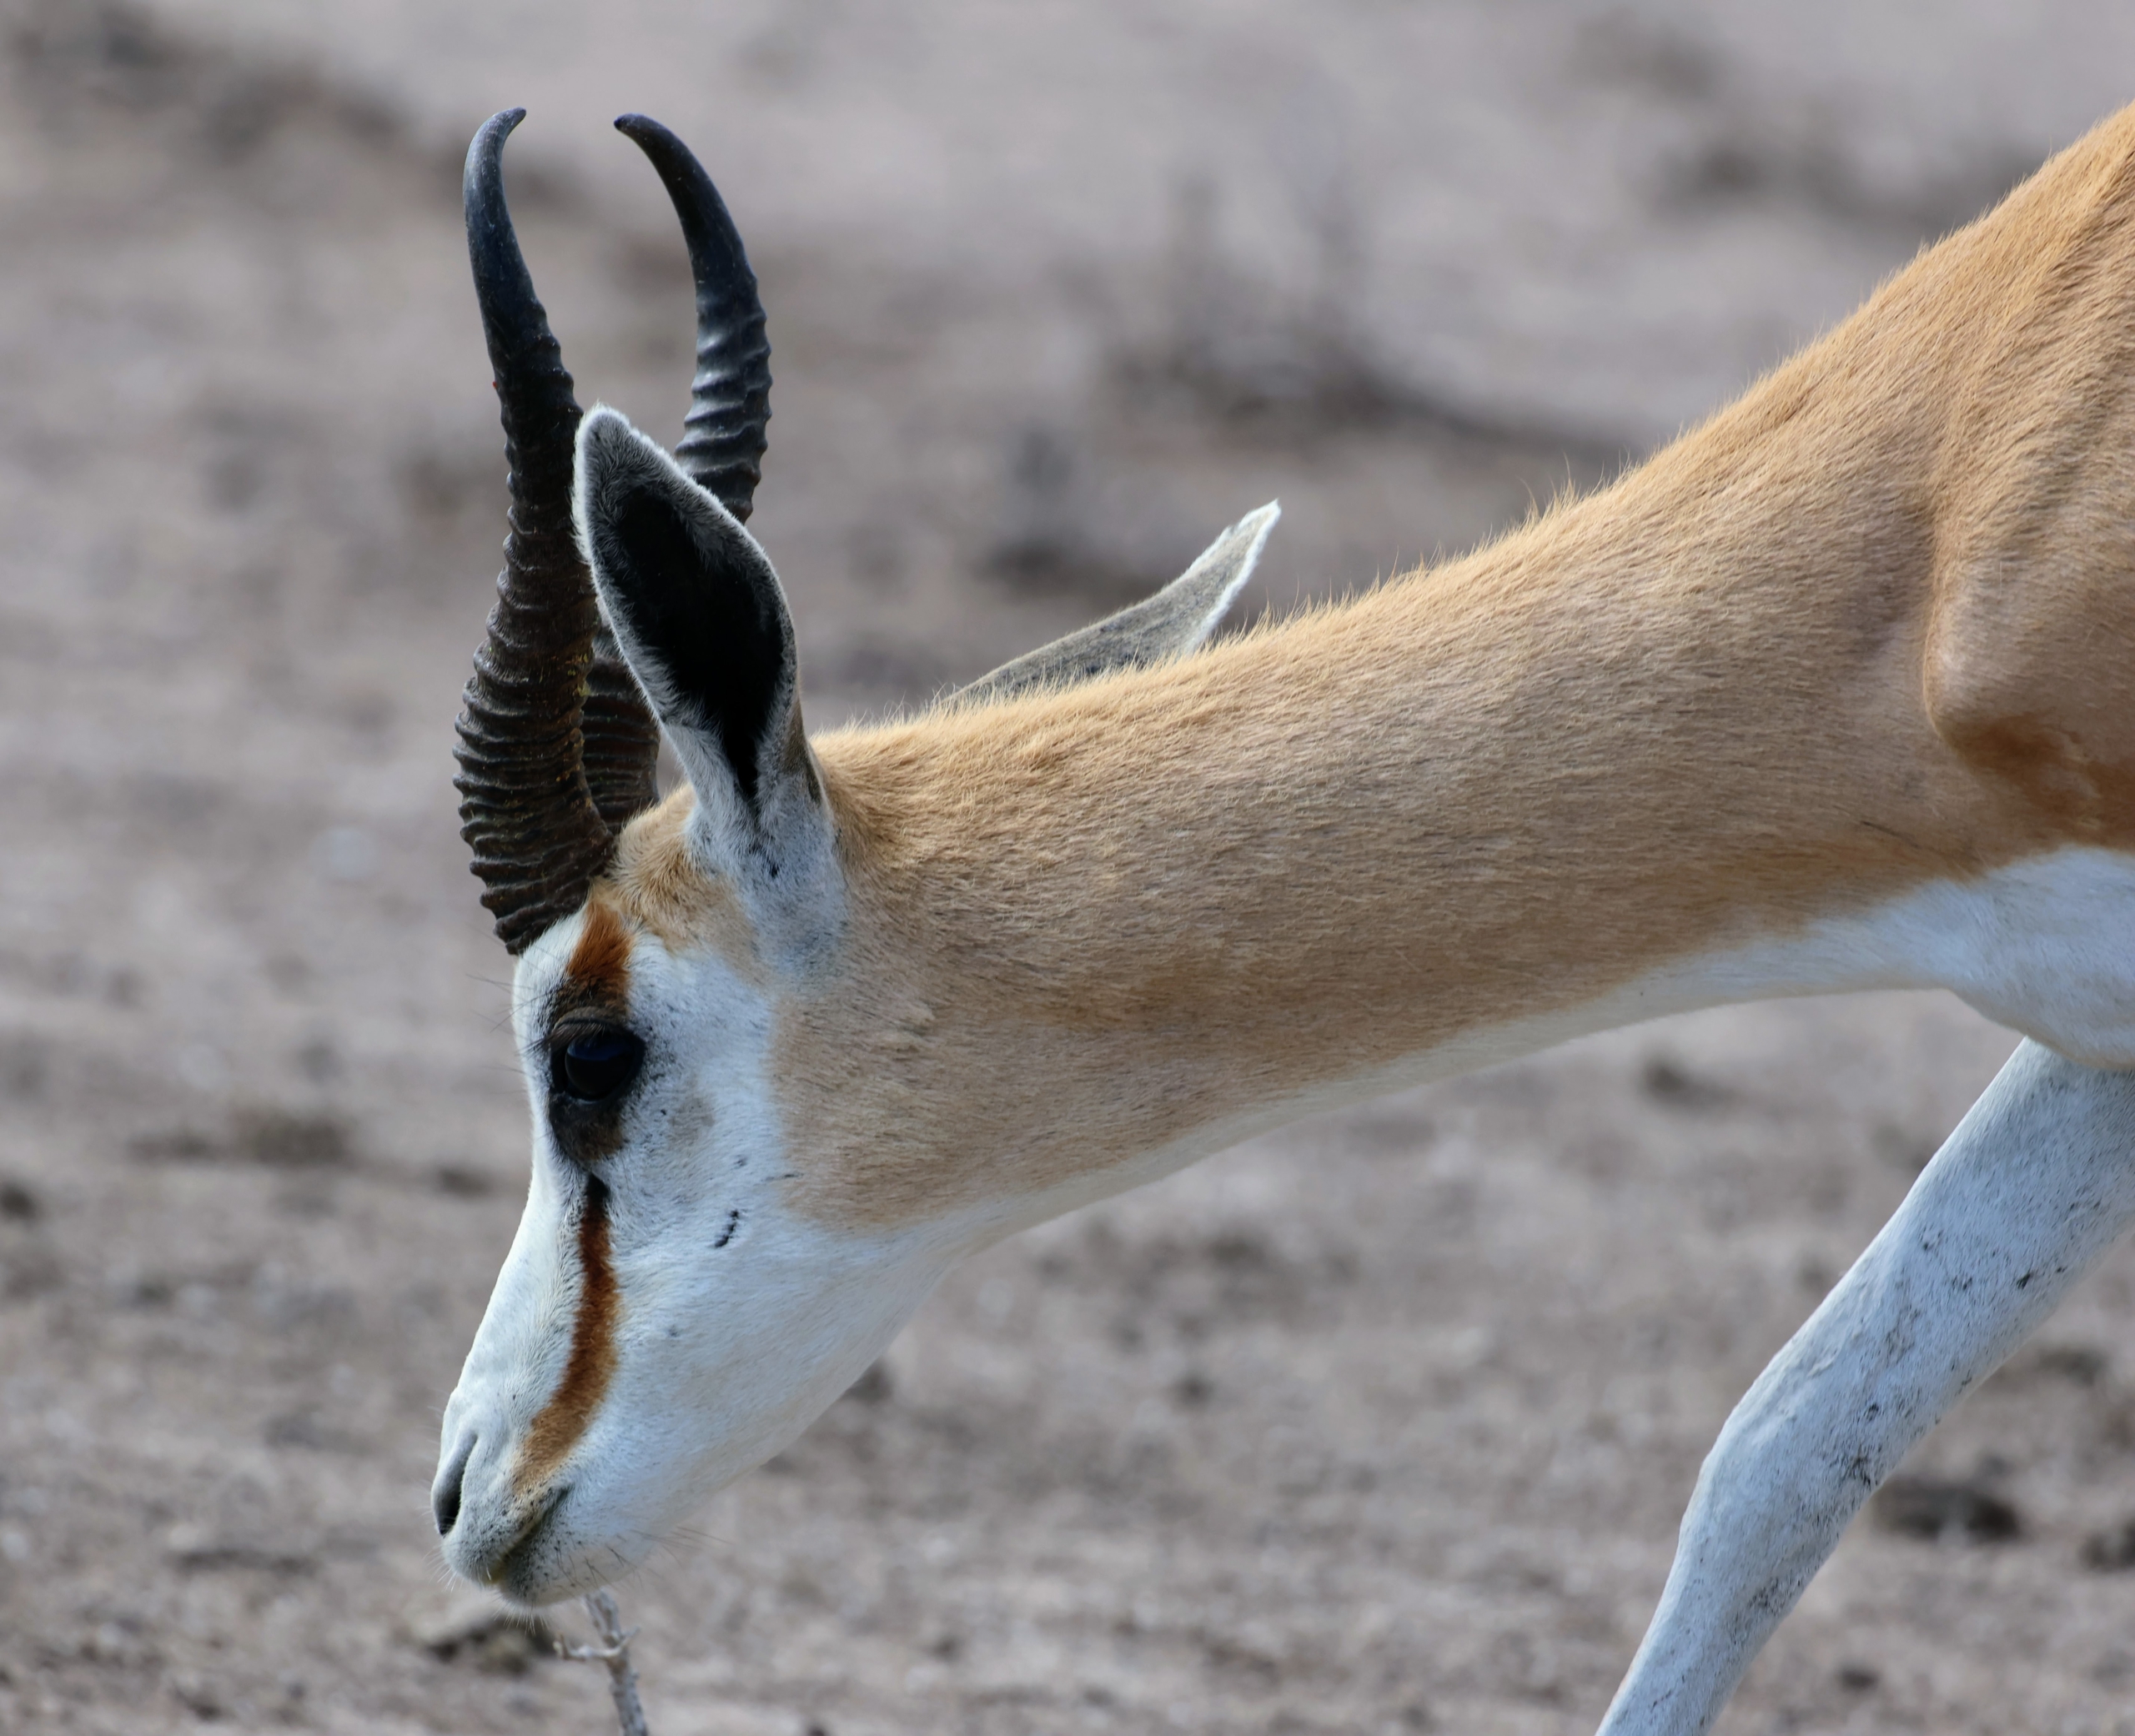
Both male and female springboks have horns; however, on the male, the horns grow longer and slightly curved, while those of the female springbok are narrower, straighter, and shorter.
Springboks are herbivores and graze mainly on seasonal grasses and shrubs.
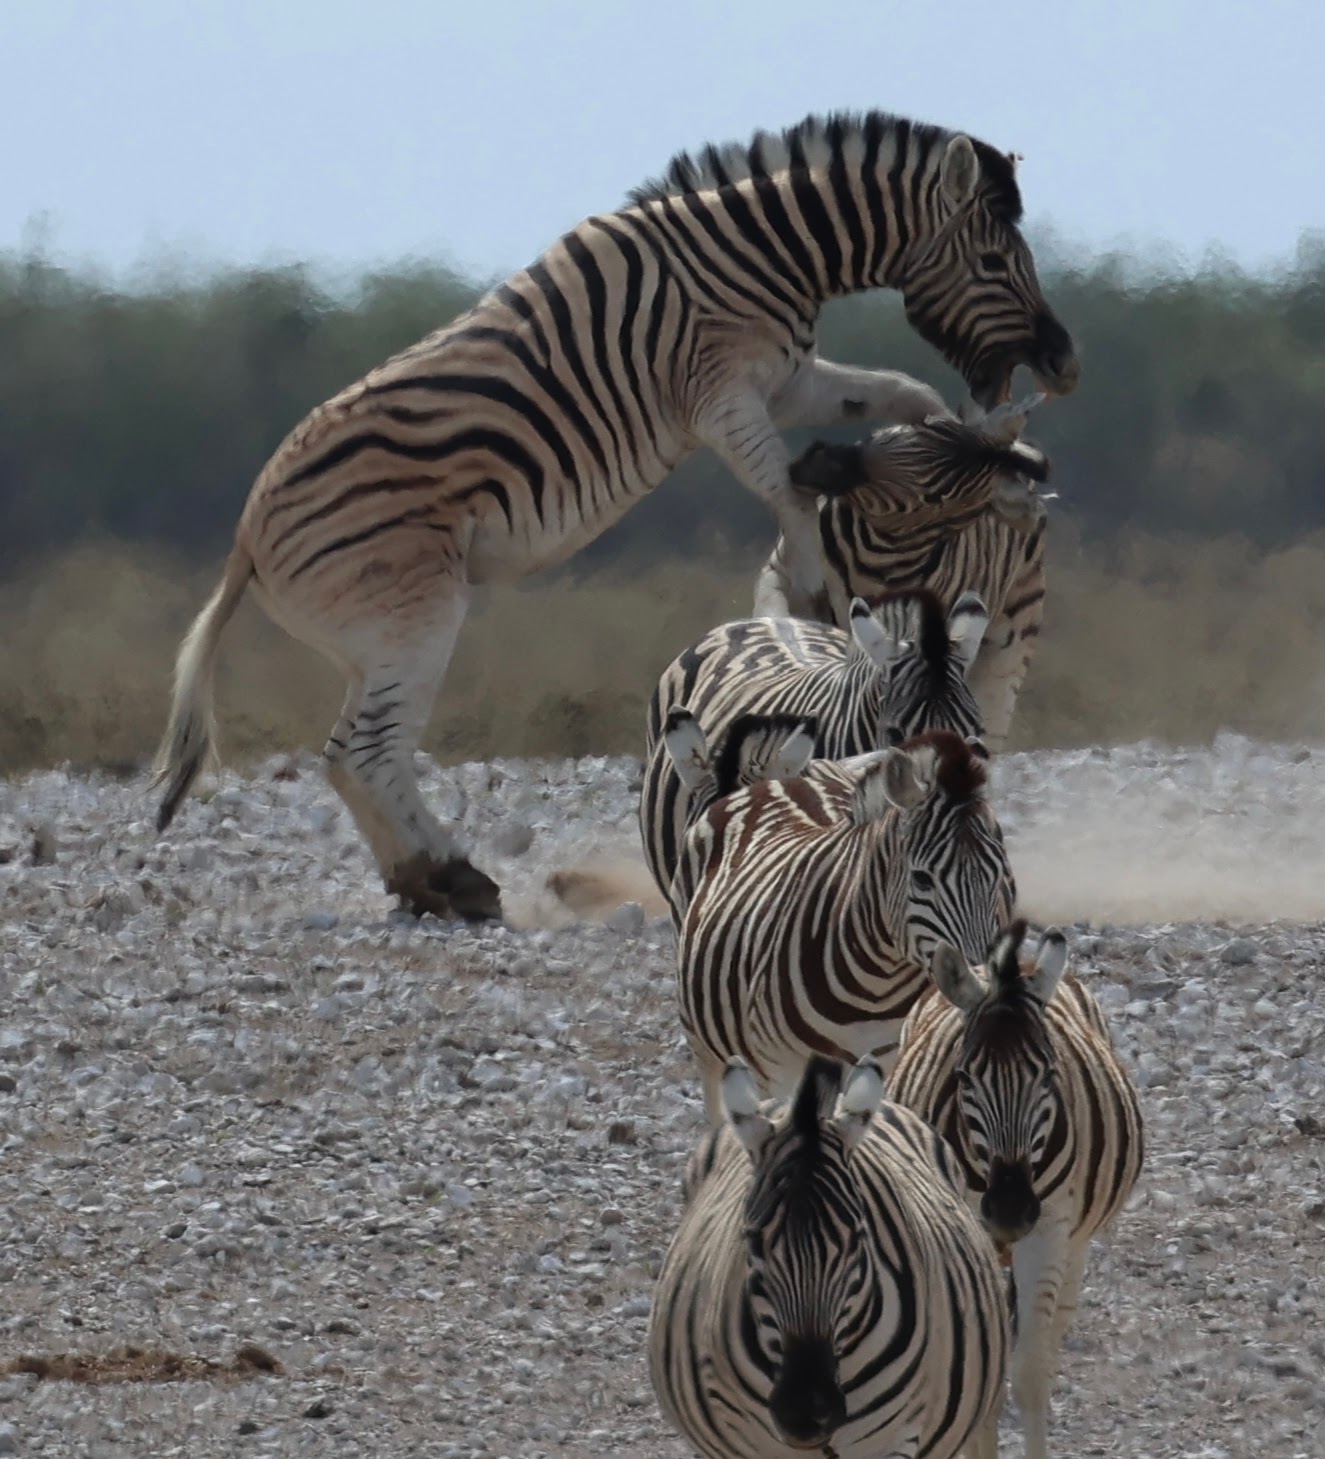
Ari caught this amazing photo of a zebra fight. Male zebras are known to battle each other over females. Ritualized displays often show them striking out with their hooves, standing on their hind feet and wrestling.
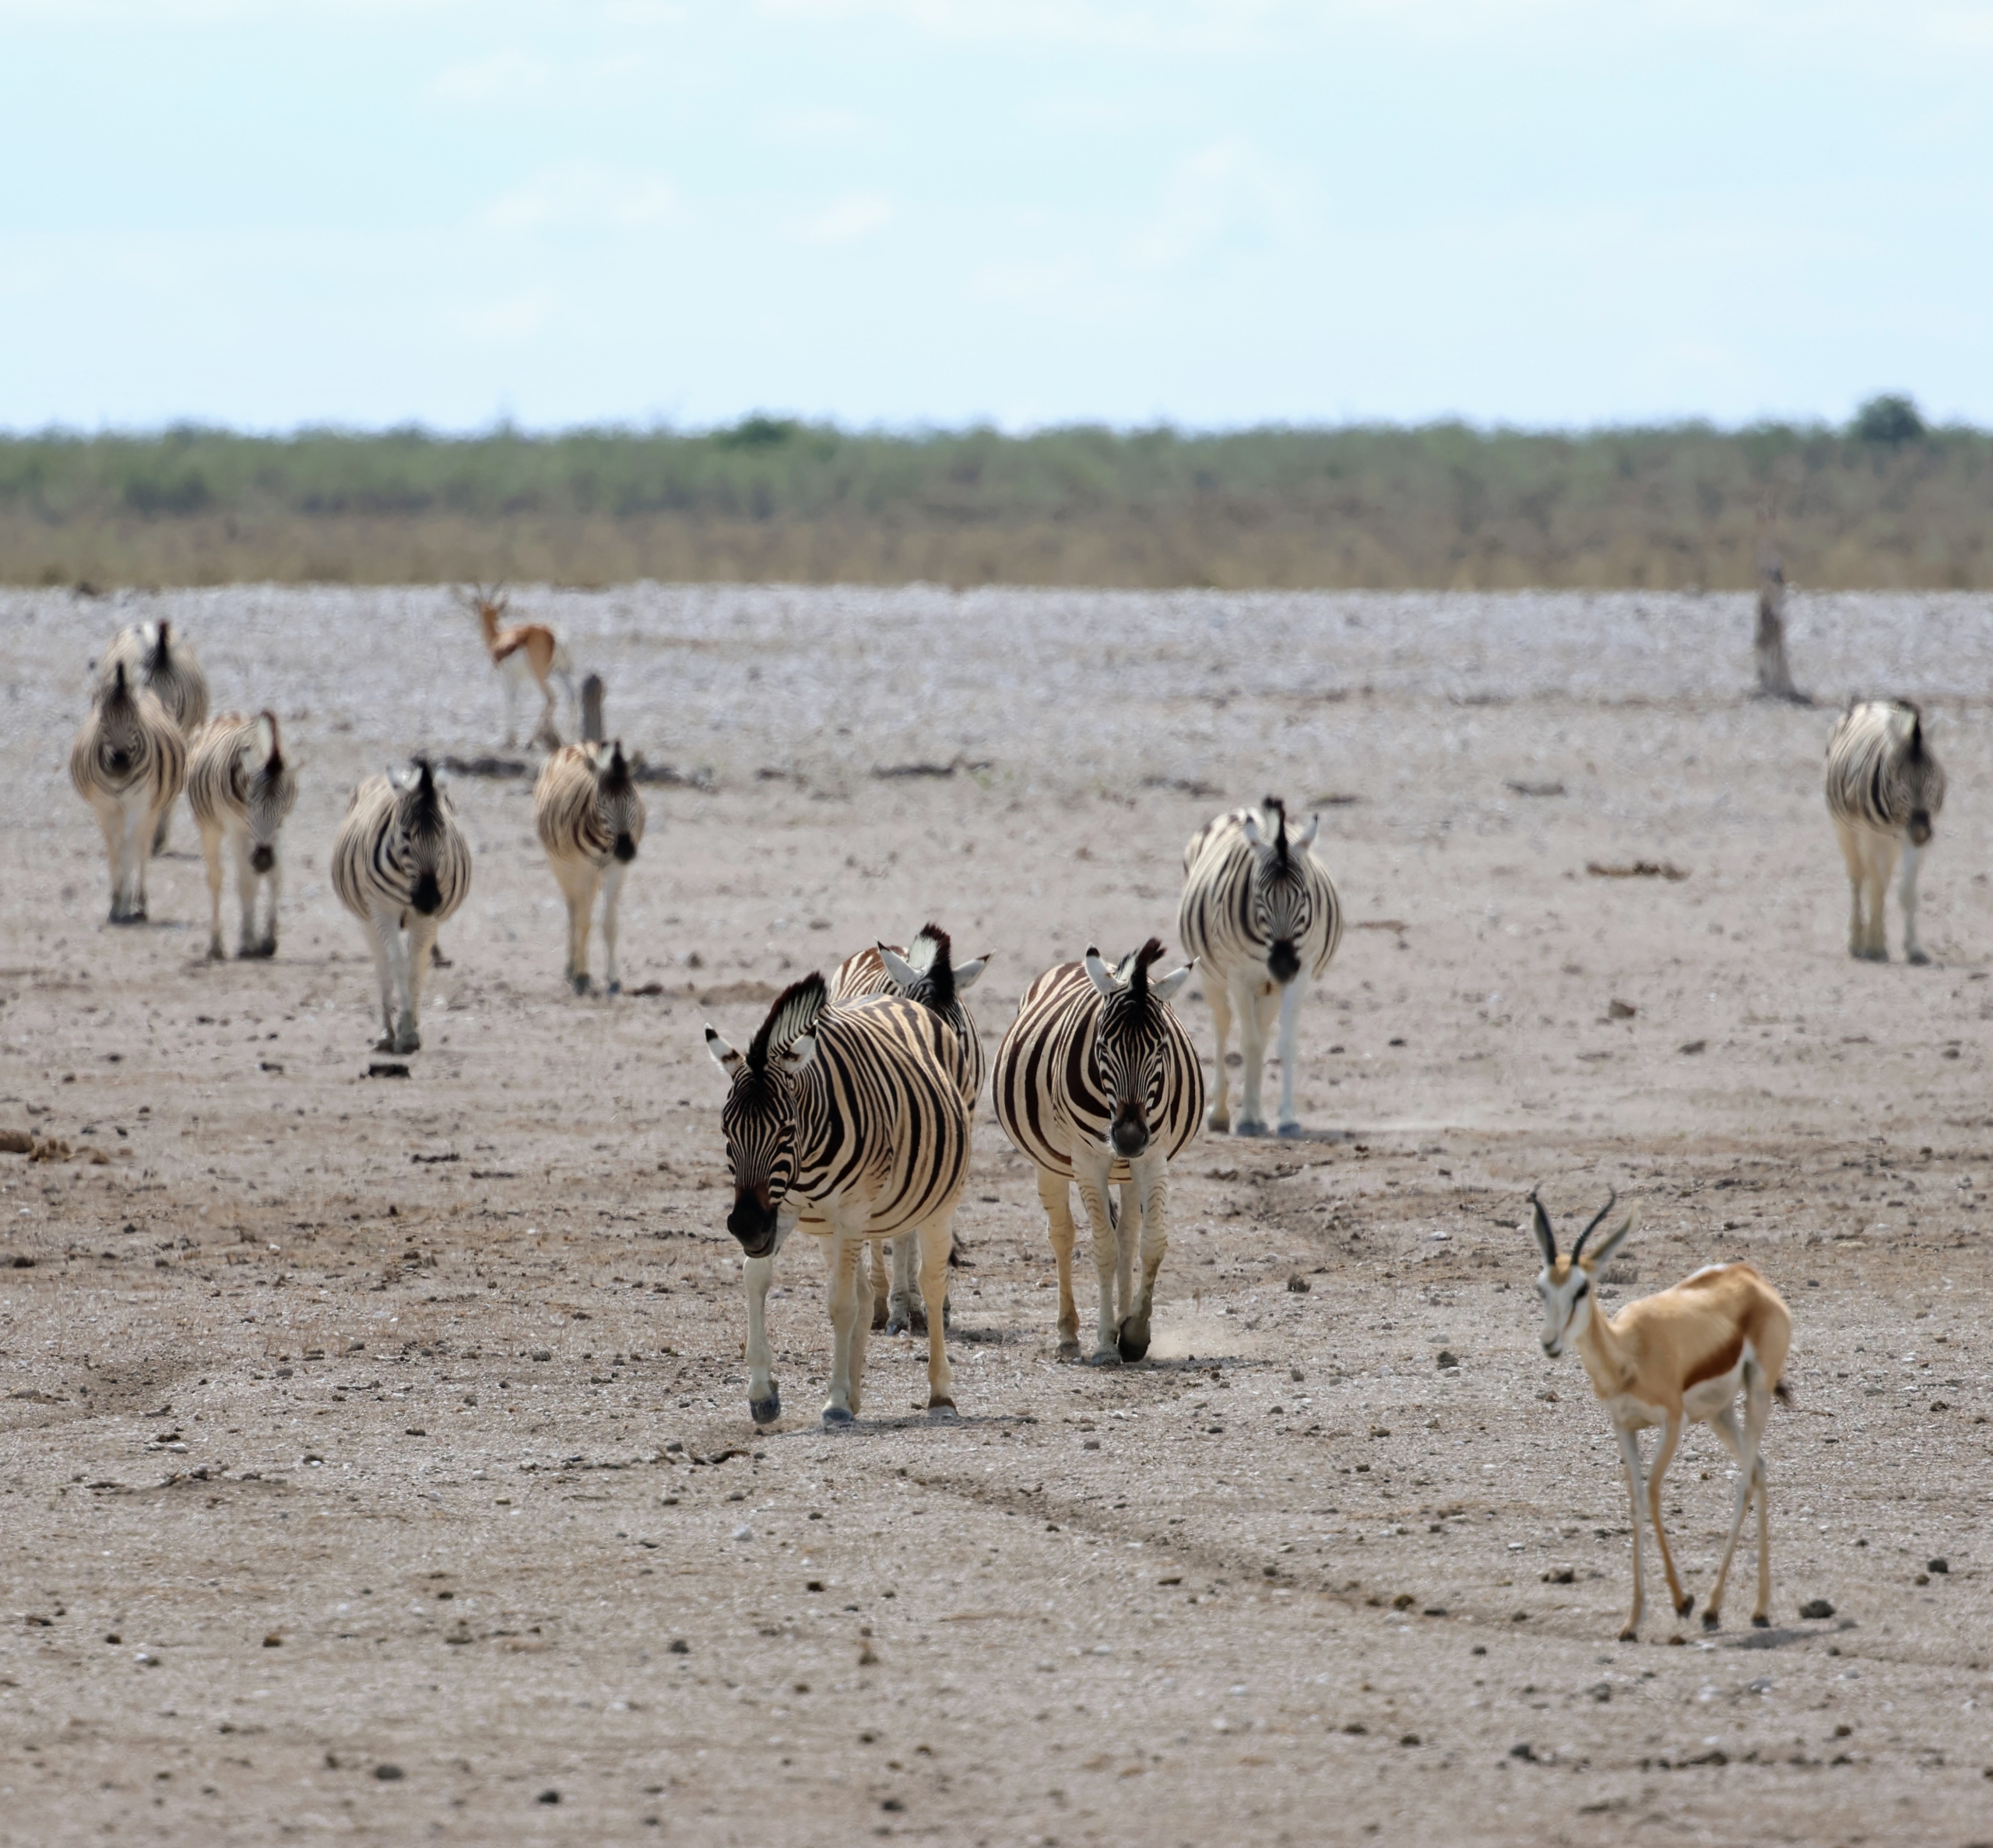
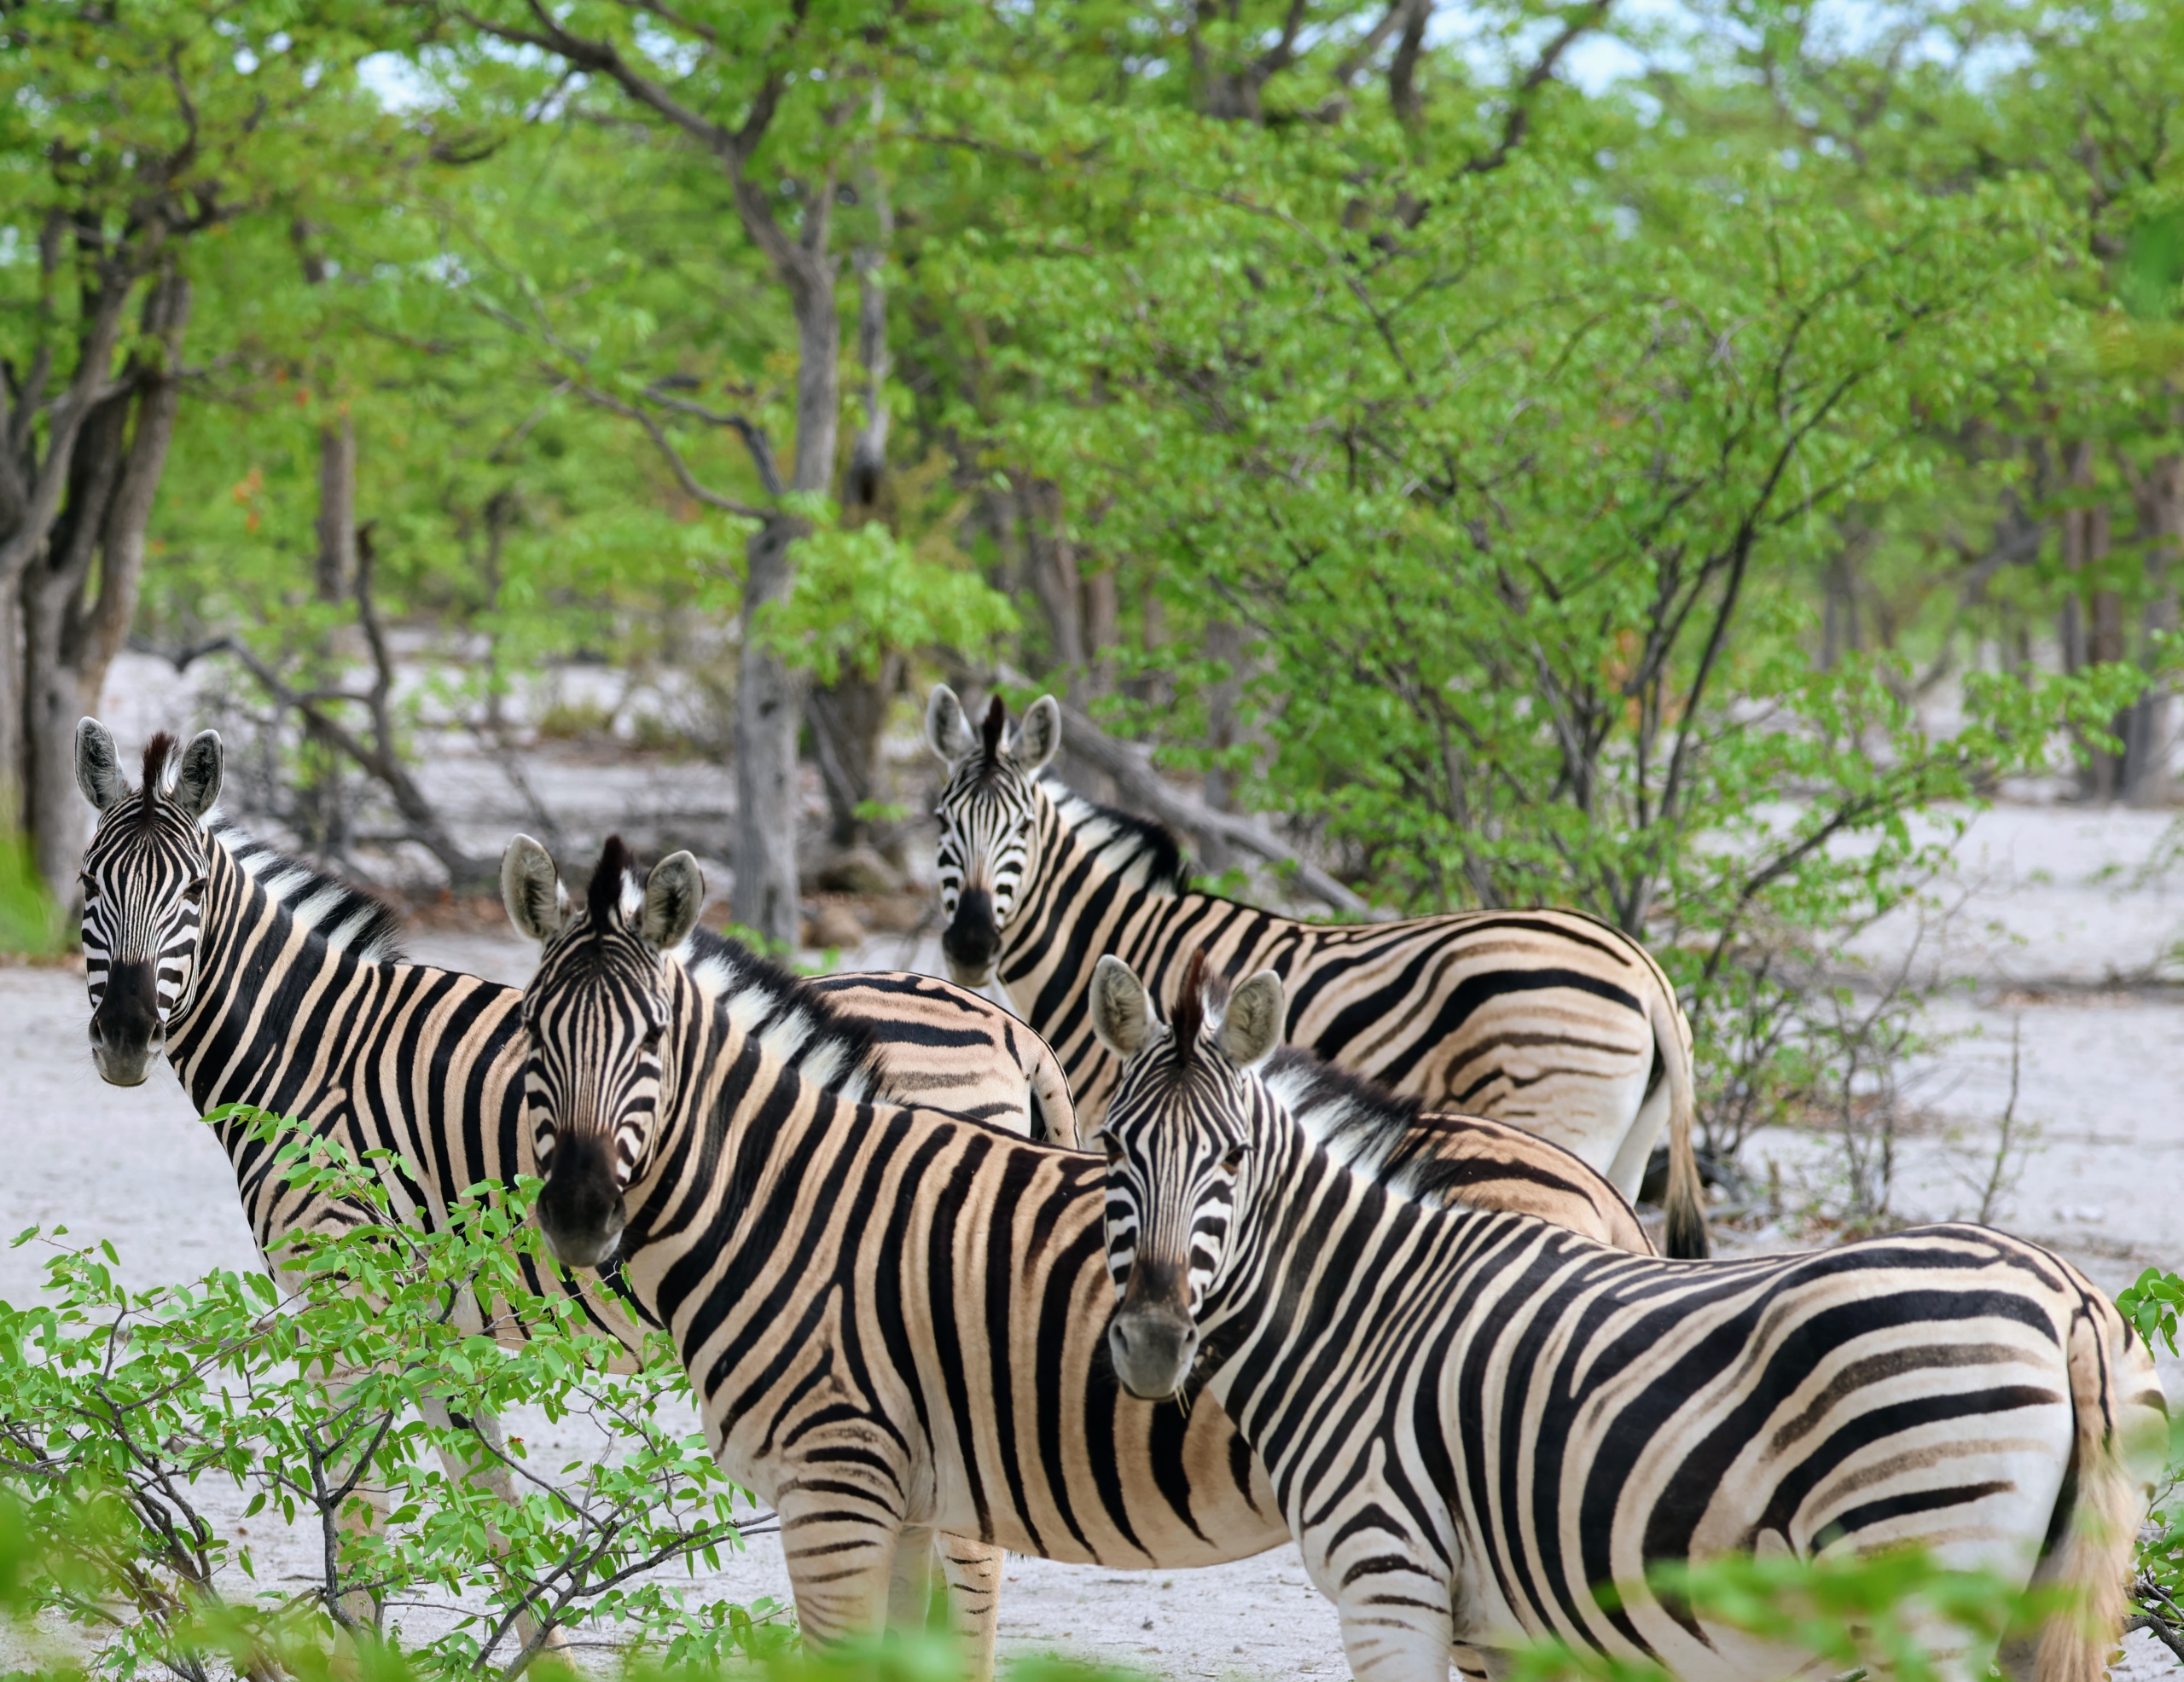
Zebras and springboks can co-exist. It is not unusual to see these animals walking together in their herds.
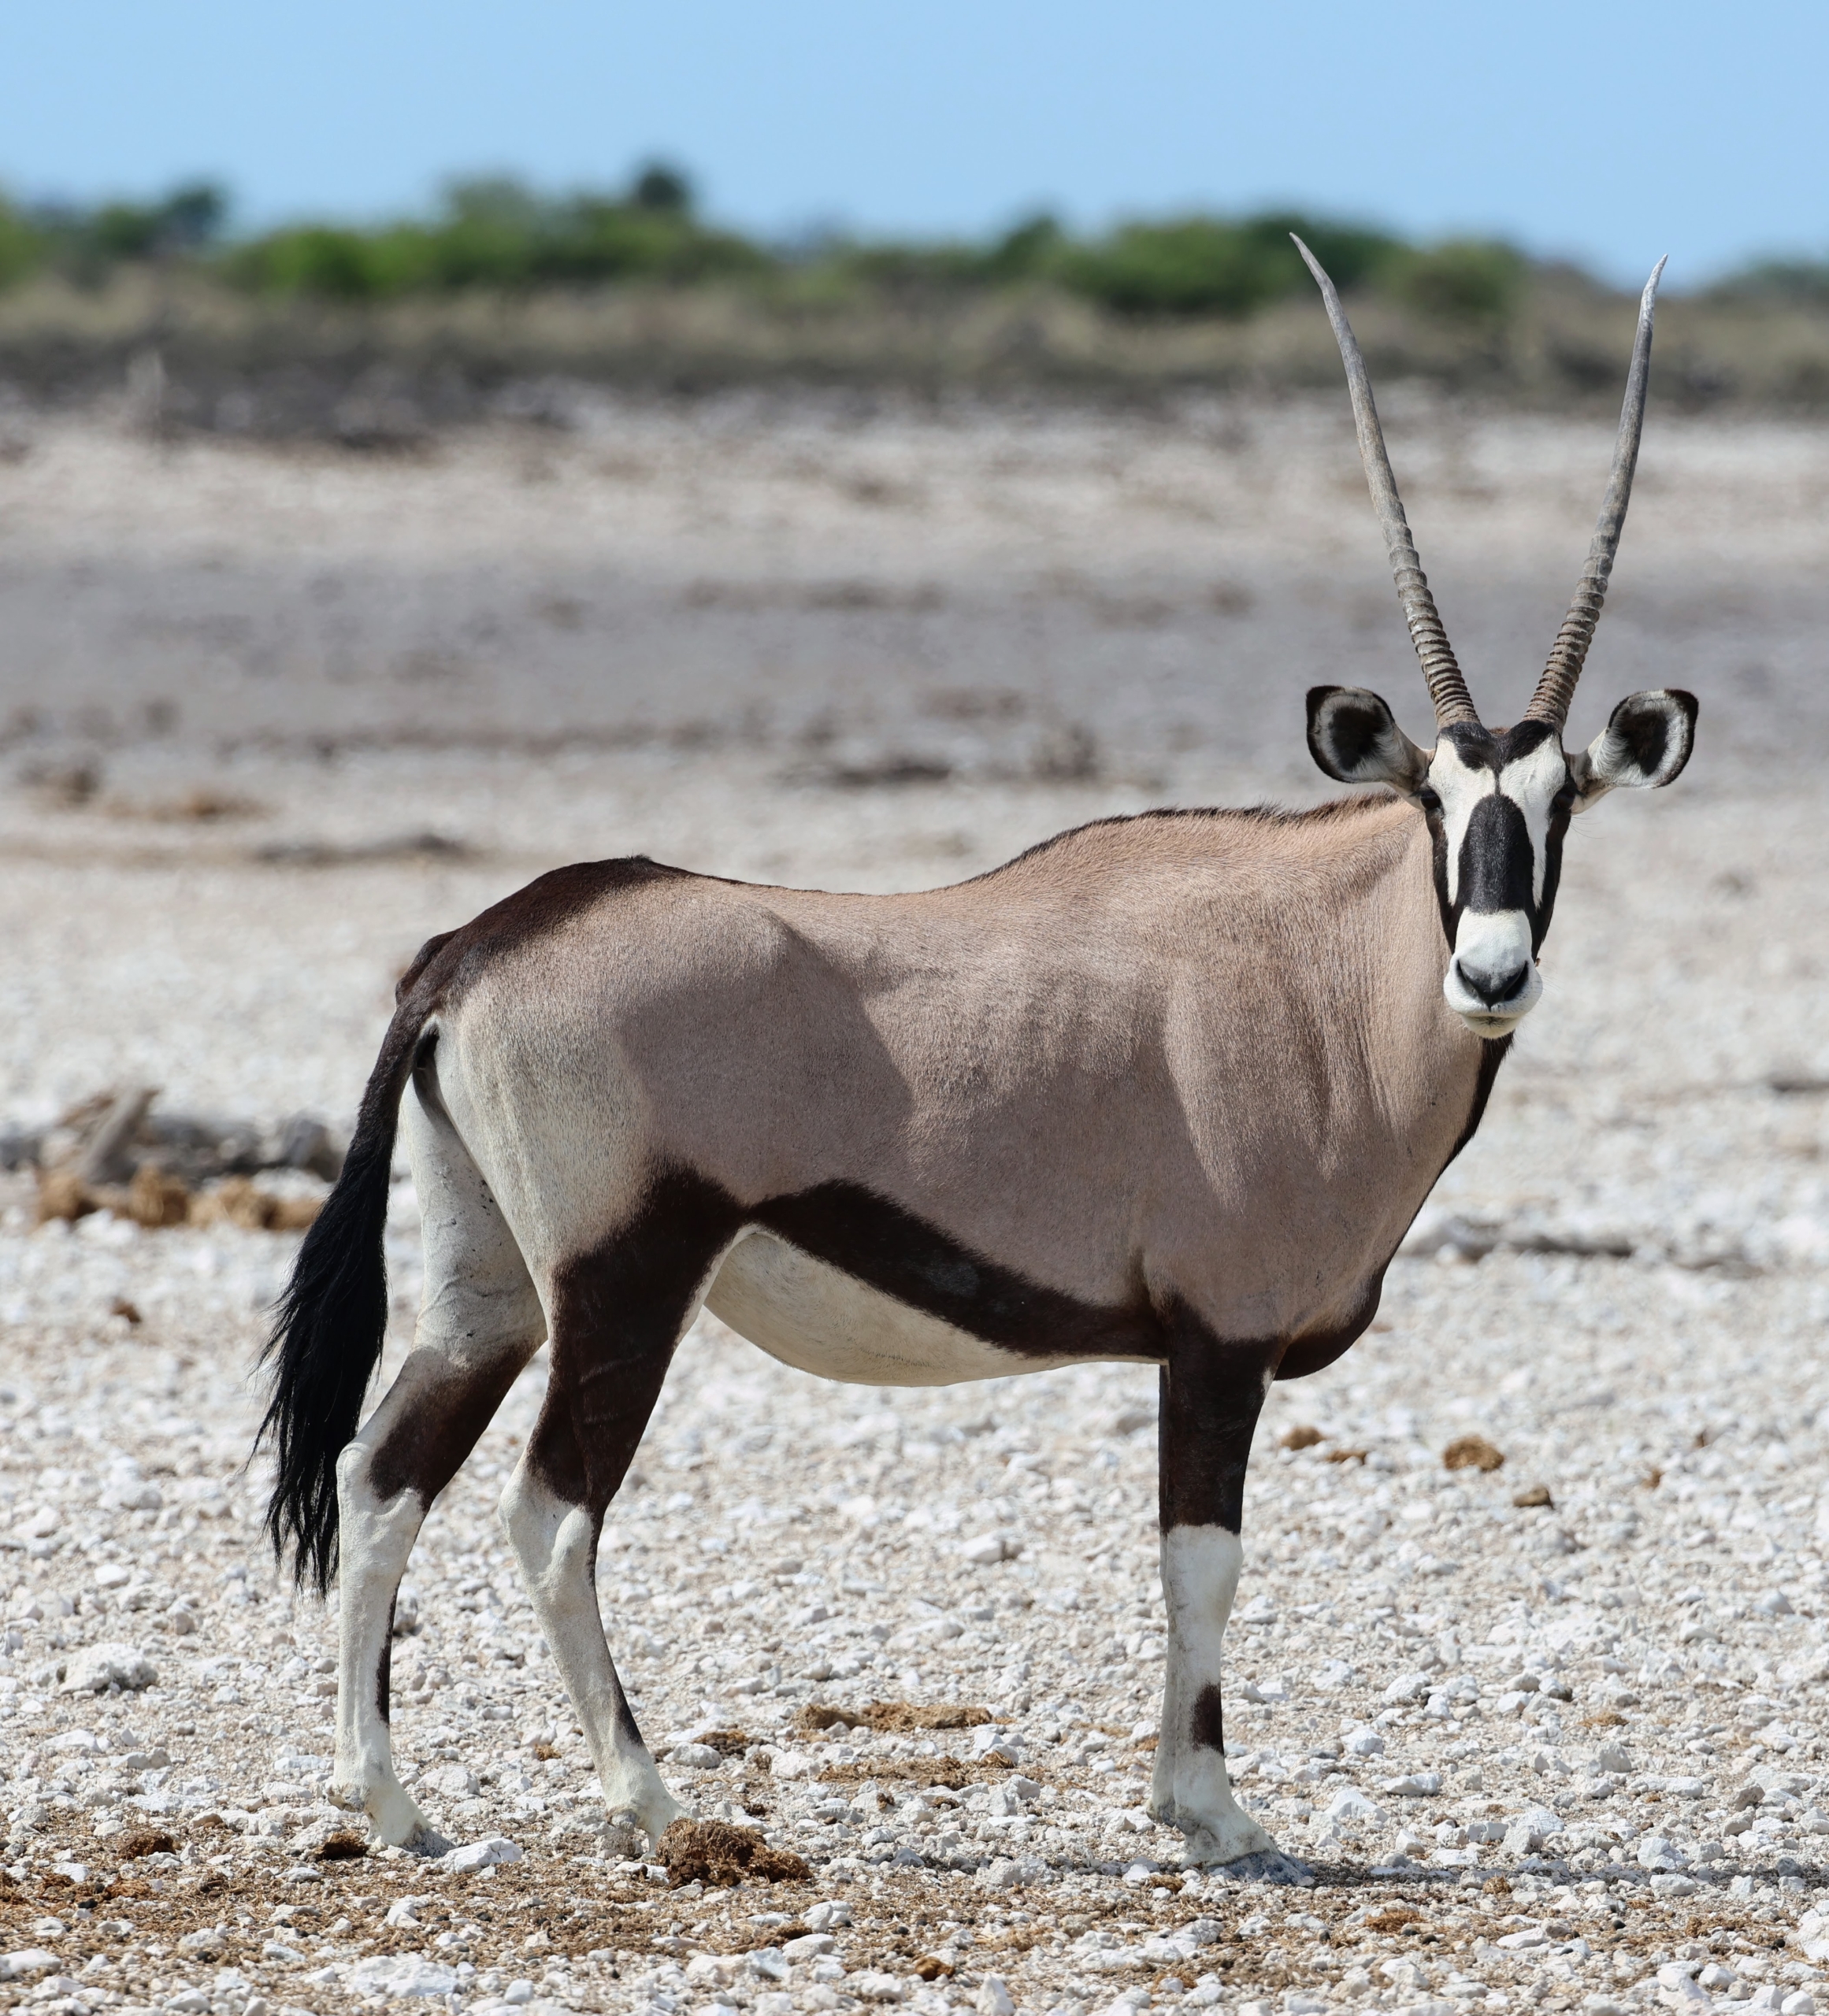
The Oryx, also known as the Gemsbok, is the national animal of Namibia. It is a large antelope with long, straight horns and distinct markings. It is found in the more arid regions of Africa where it feeds on grasses and shrubs most often during the morning and late afternoon when it is cooler.
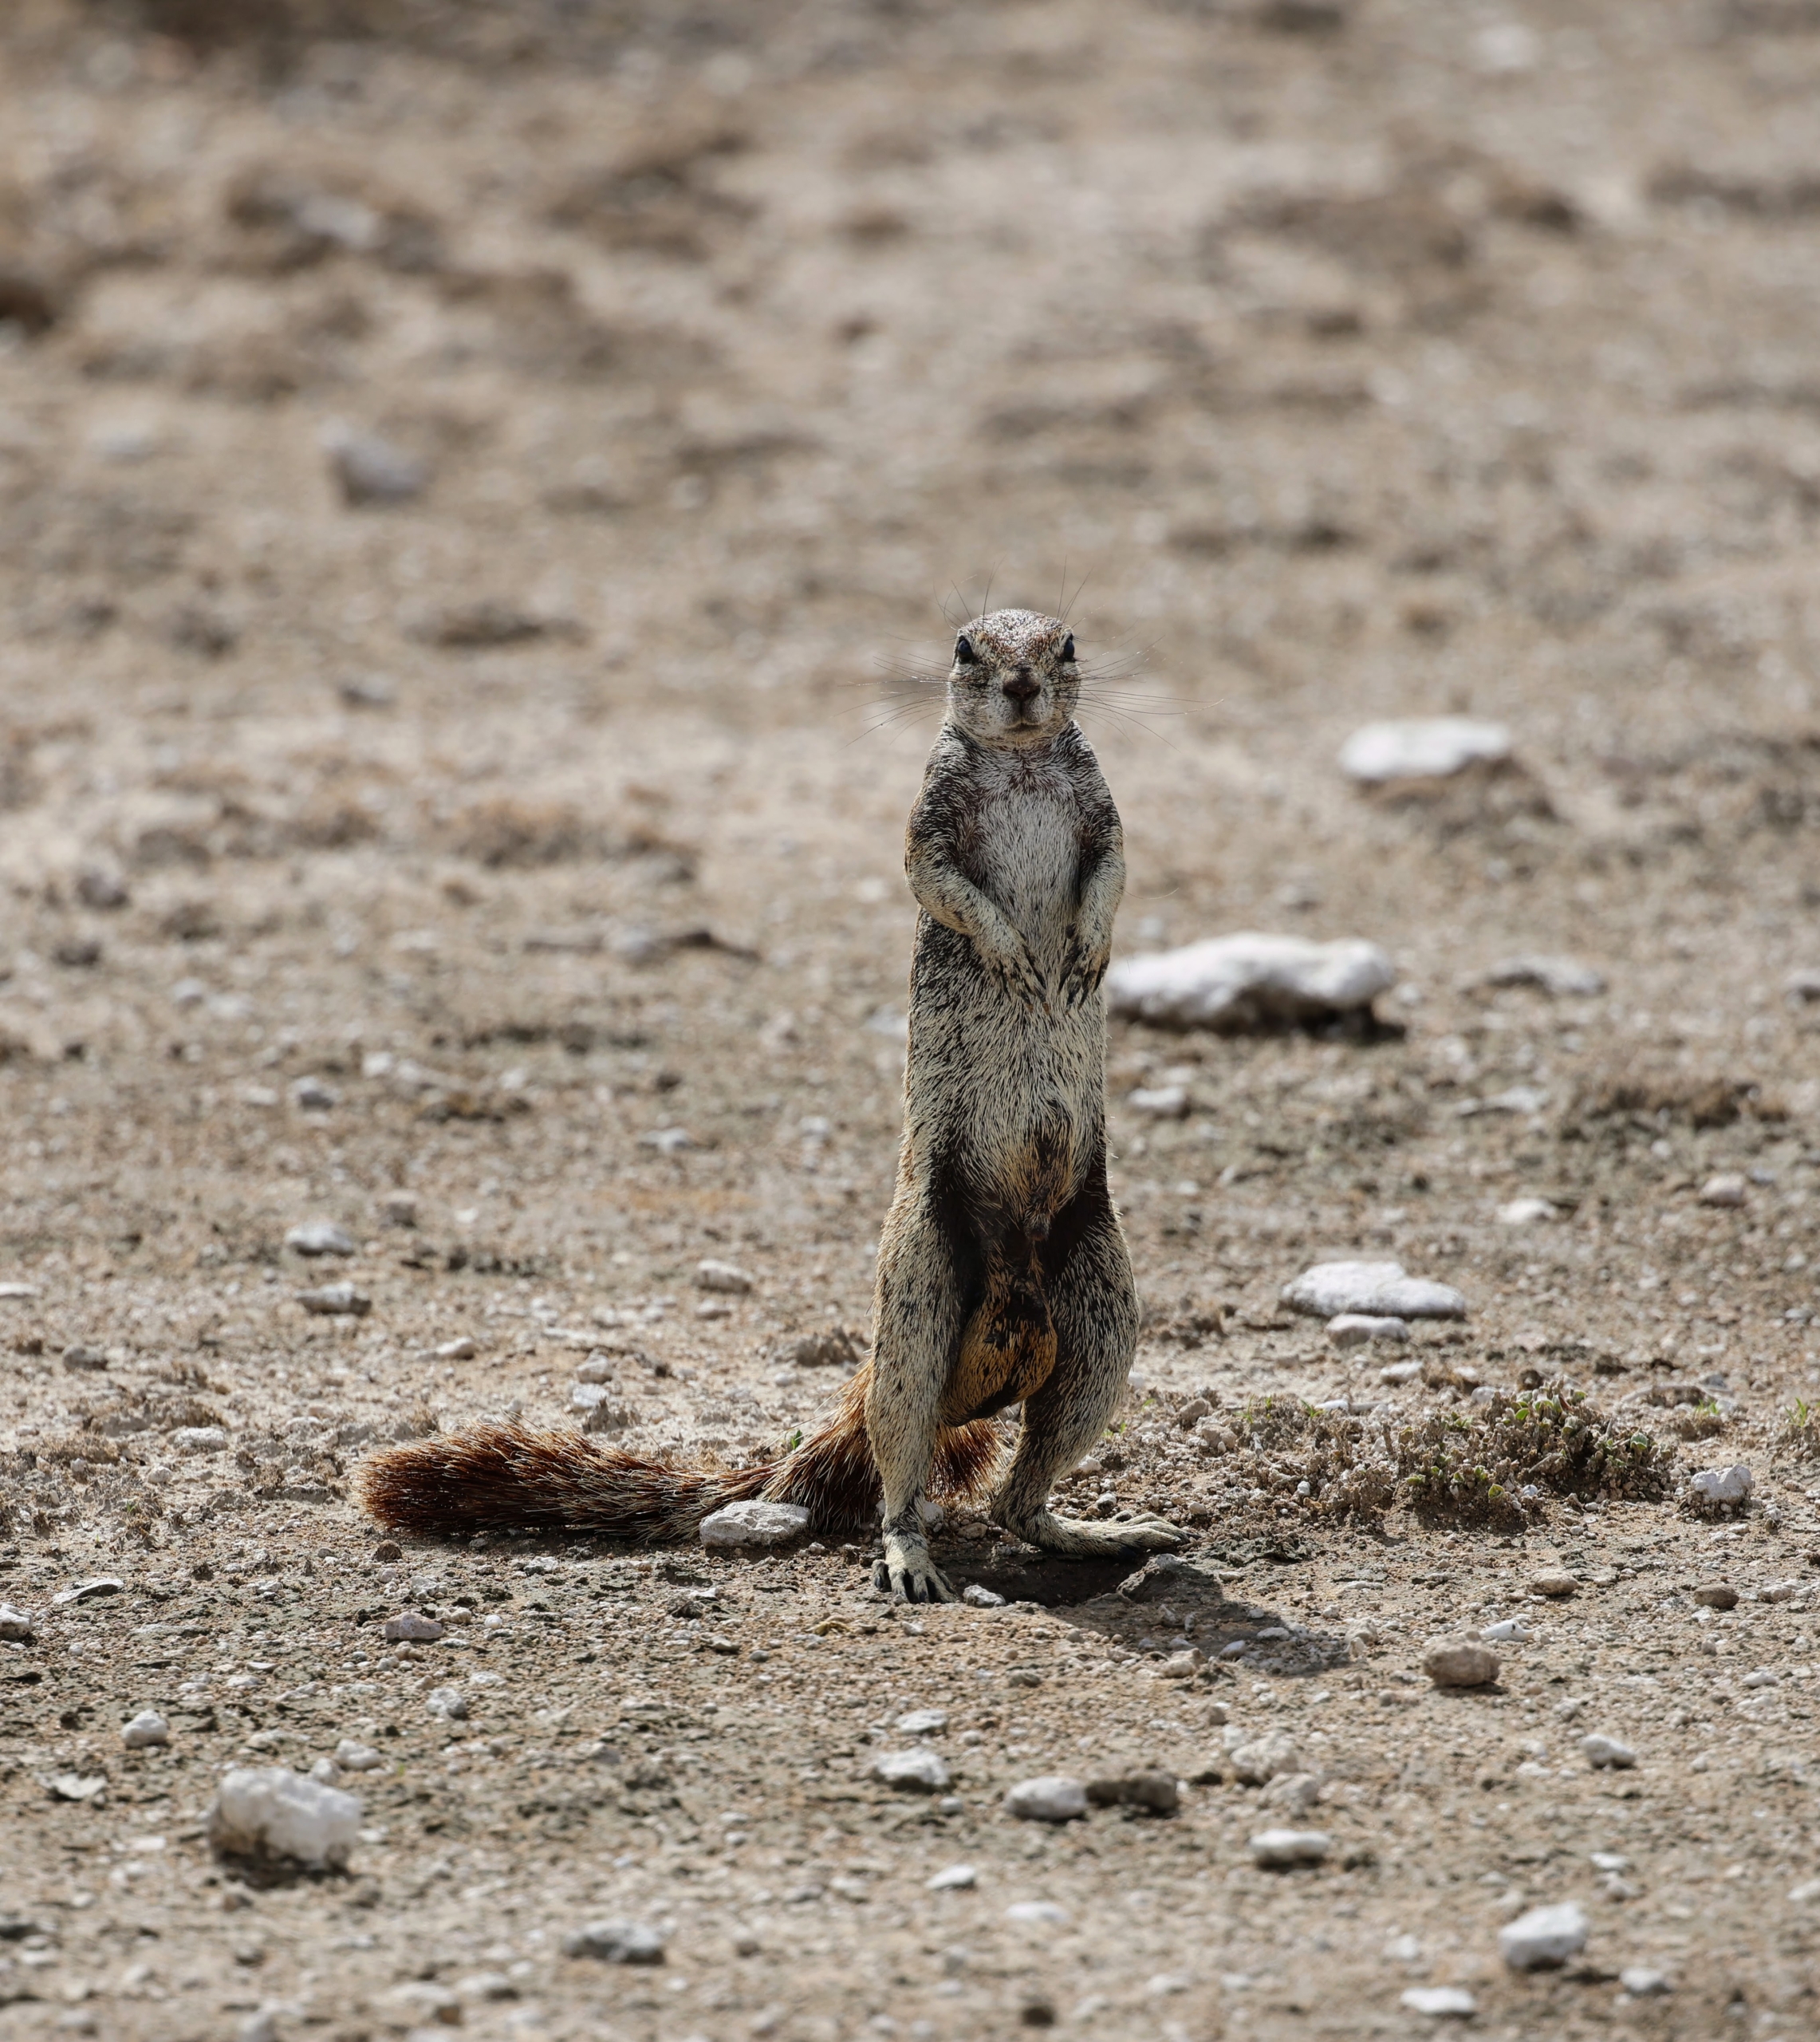
The Cape ground squirrel or South African ground squirrel can be found in drier parts of southern Africa from South Africa, through to Botswana, and into Namibia, including Etosha National Park. They eat bulbs, fruits, grasses, herbs, insects and shrubs and spend most of their day foraging.
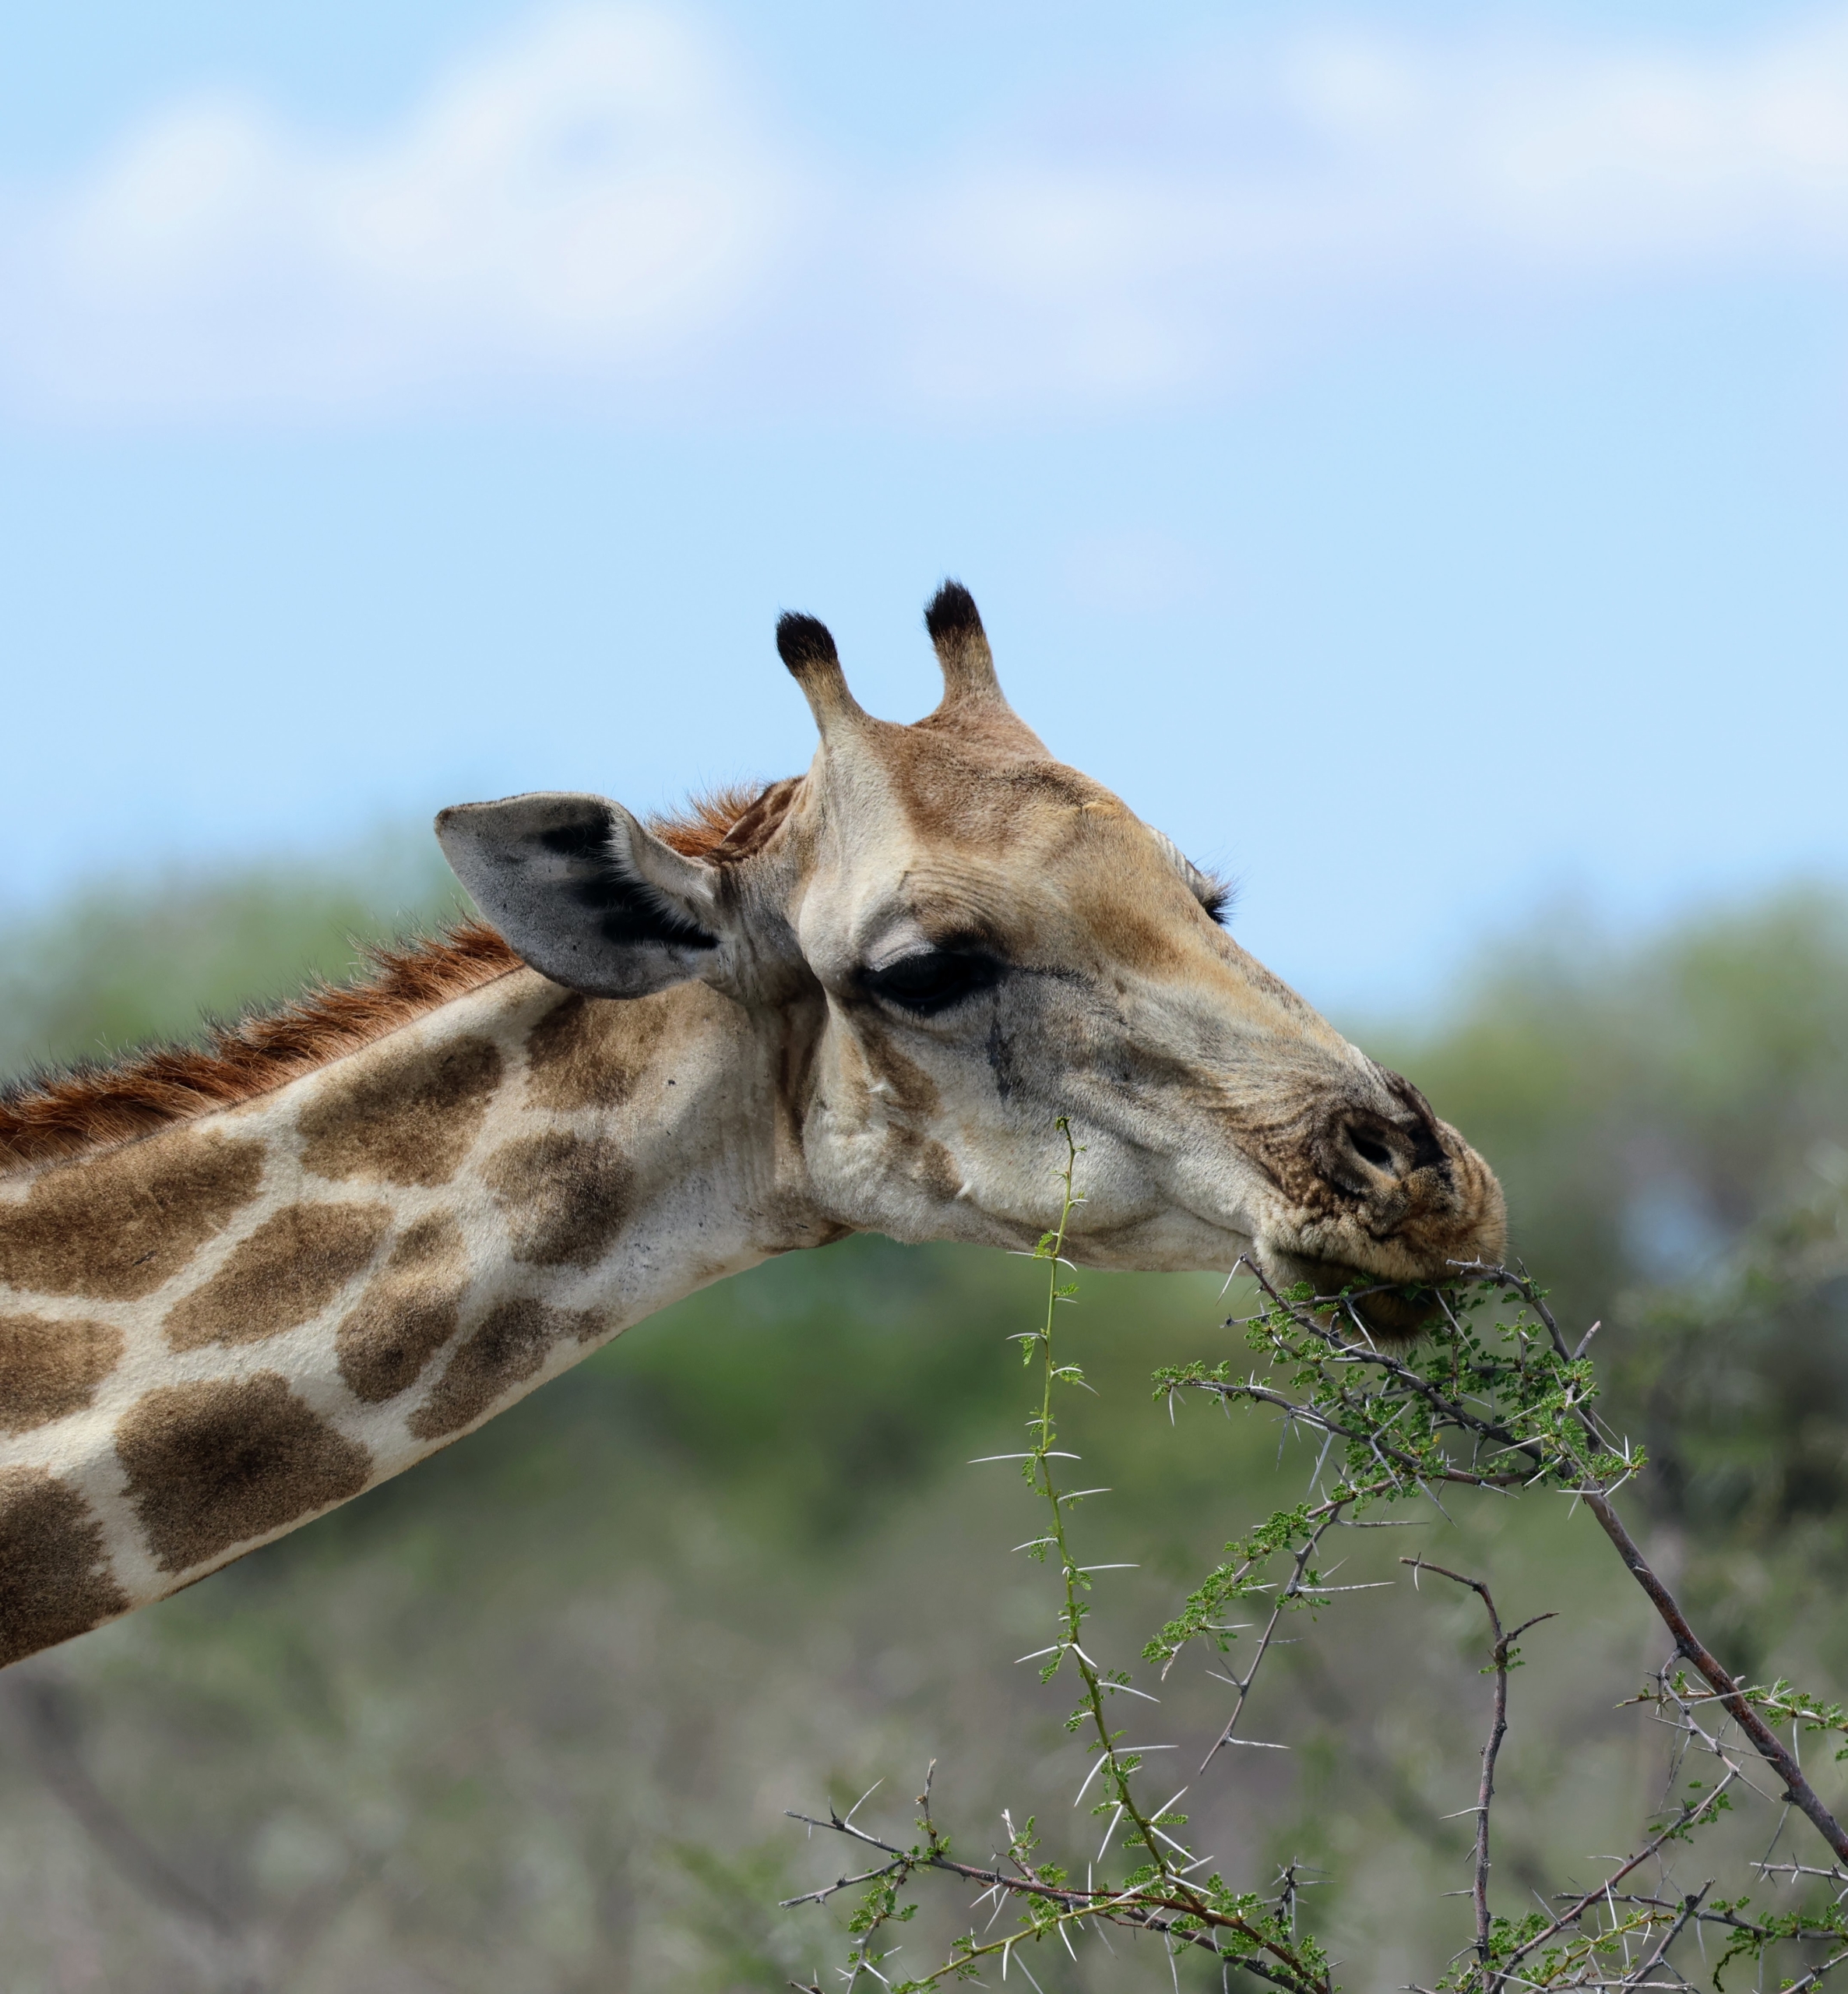
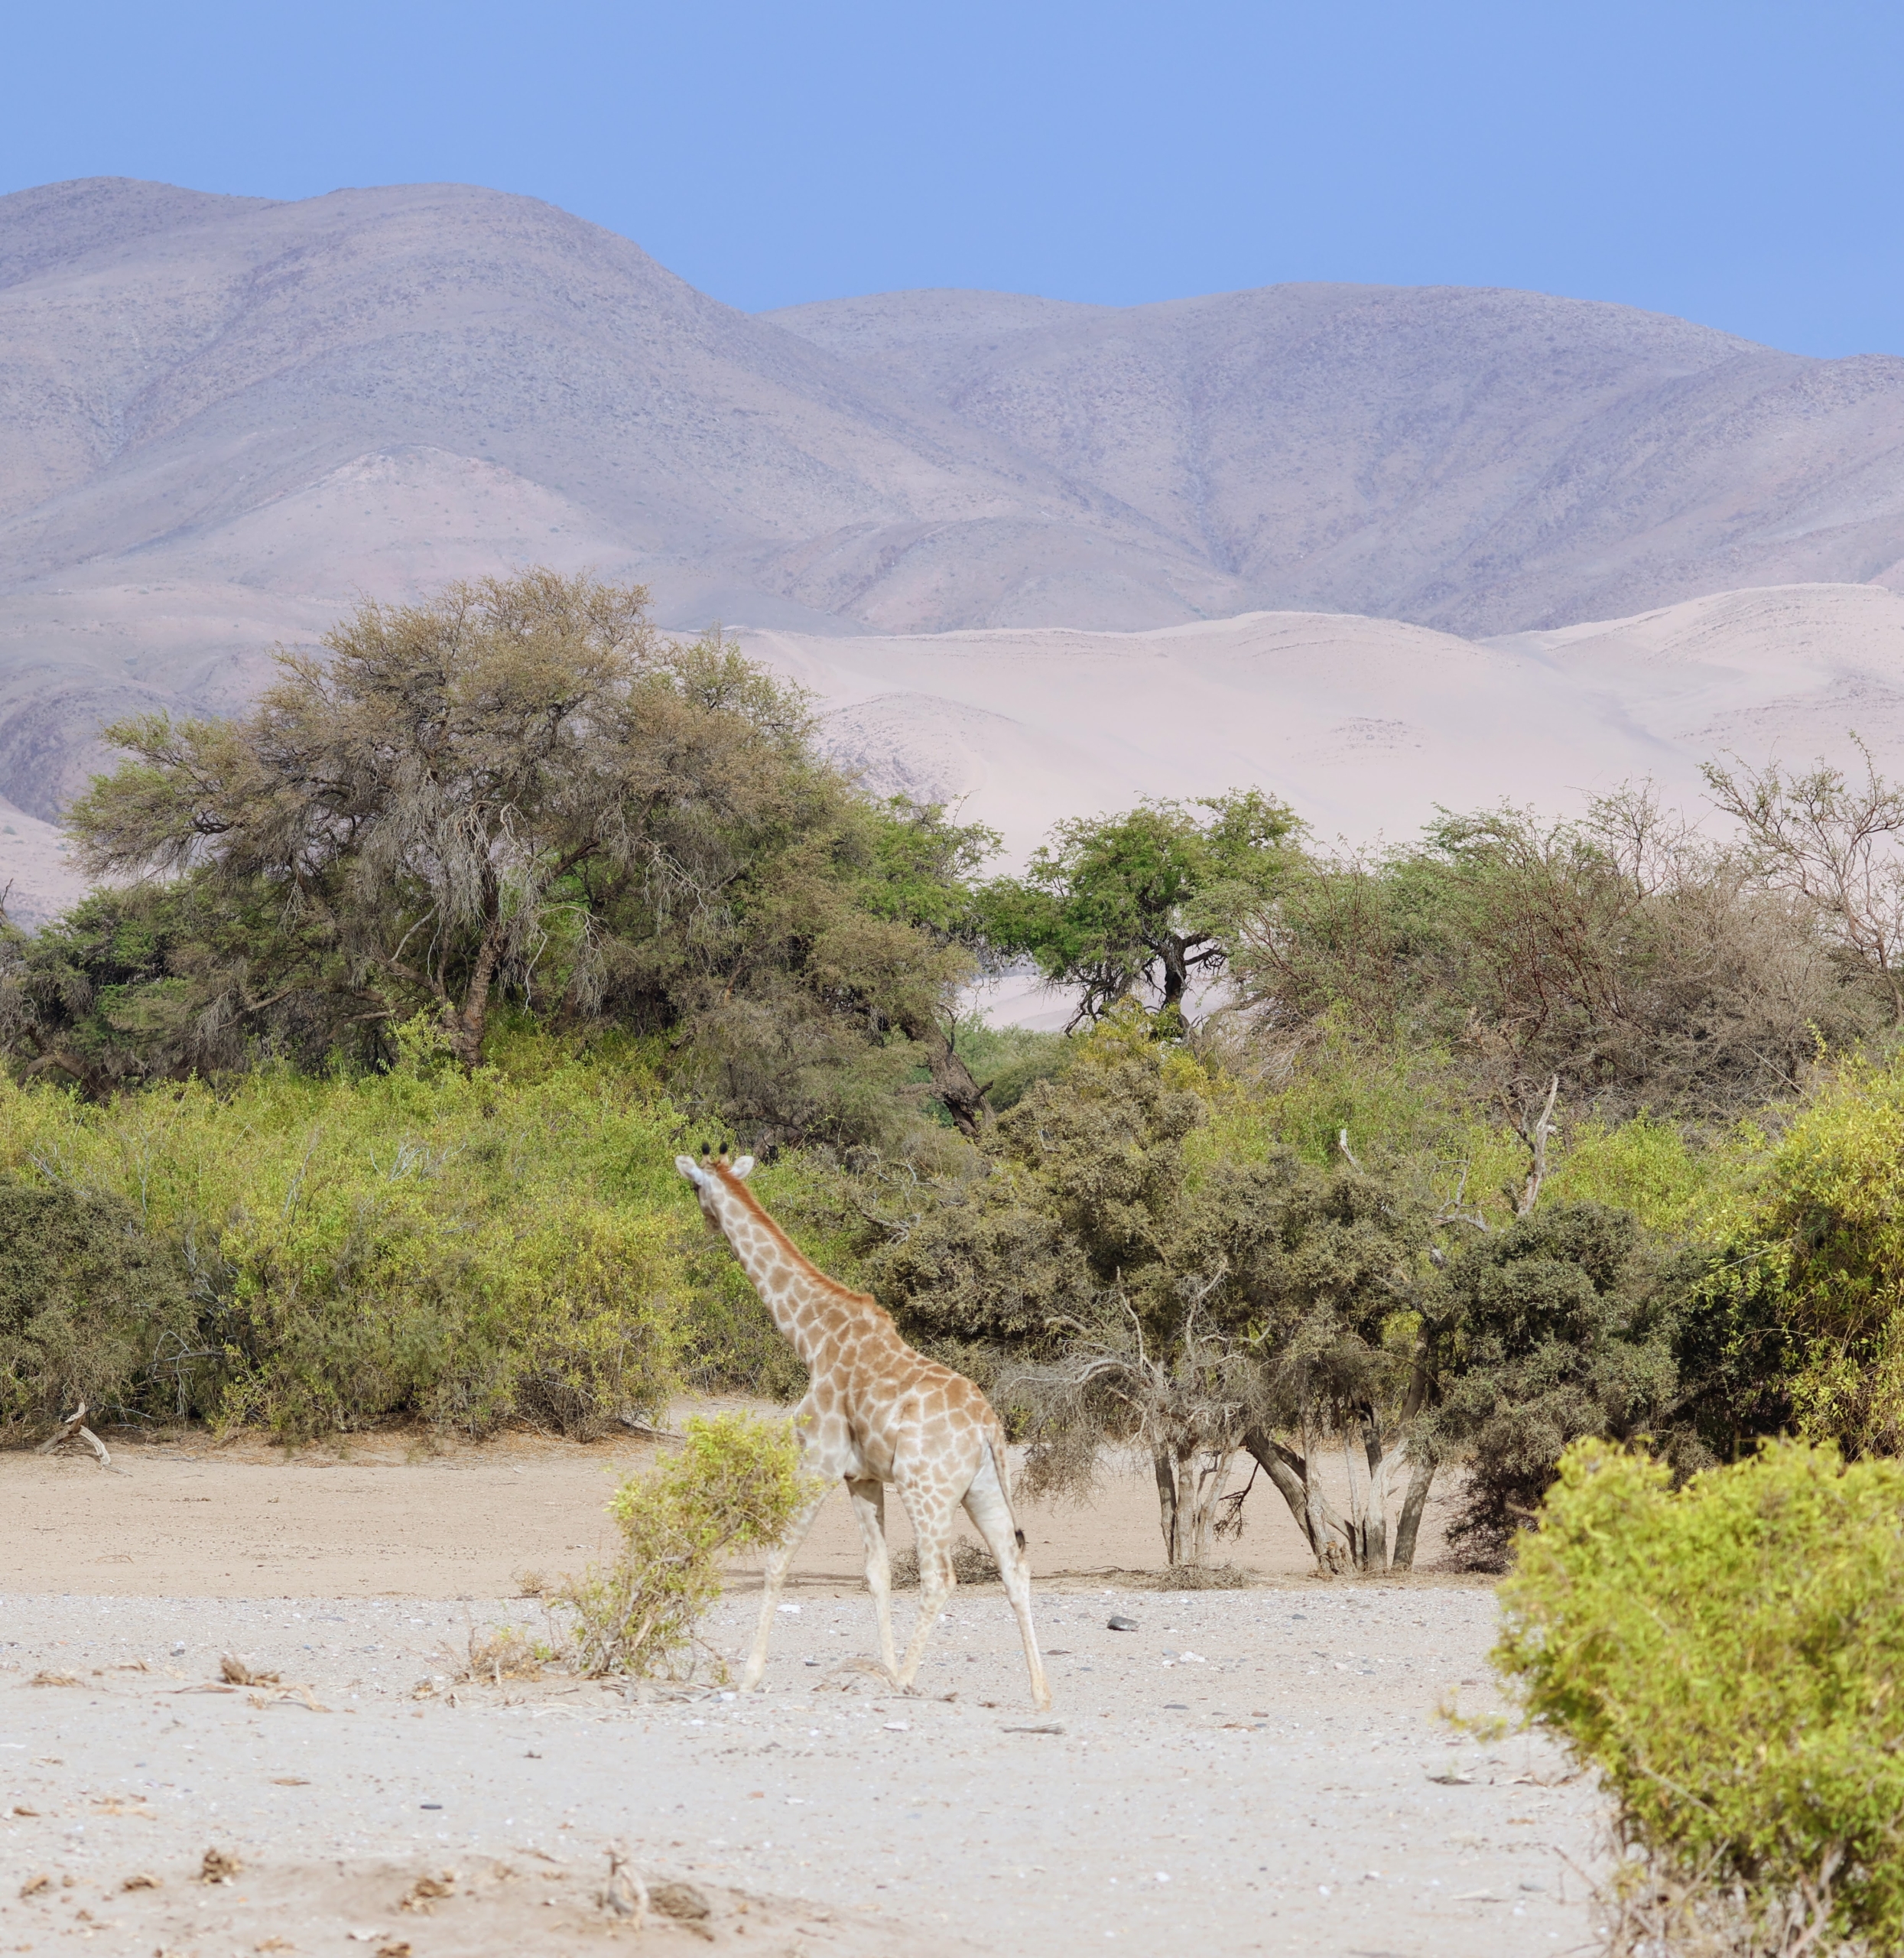
Giraffes are also herbivores, so their diet consists mainly of plant matter. Namibian giraffes eat various leaves, seeds, buds, and some soft branches.
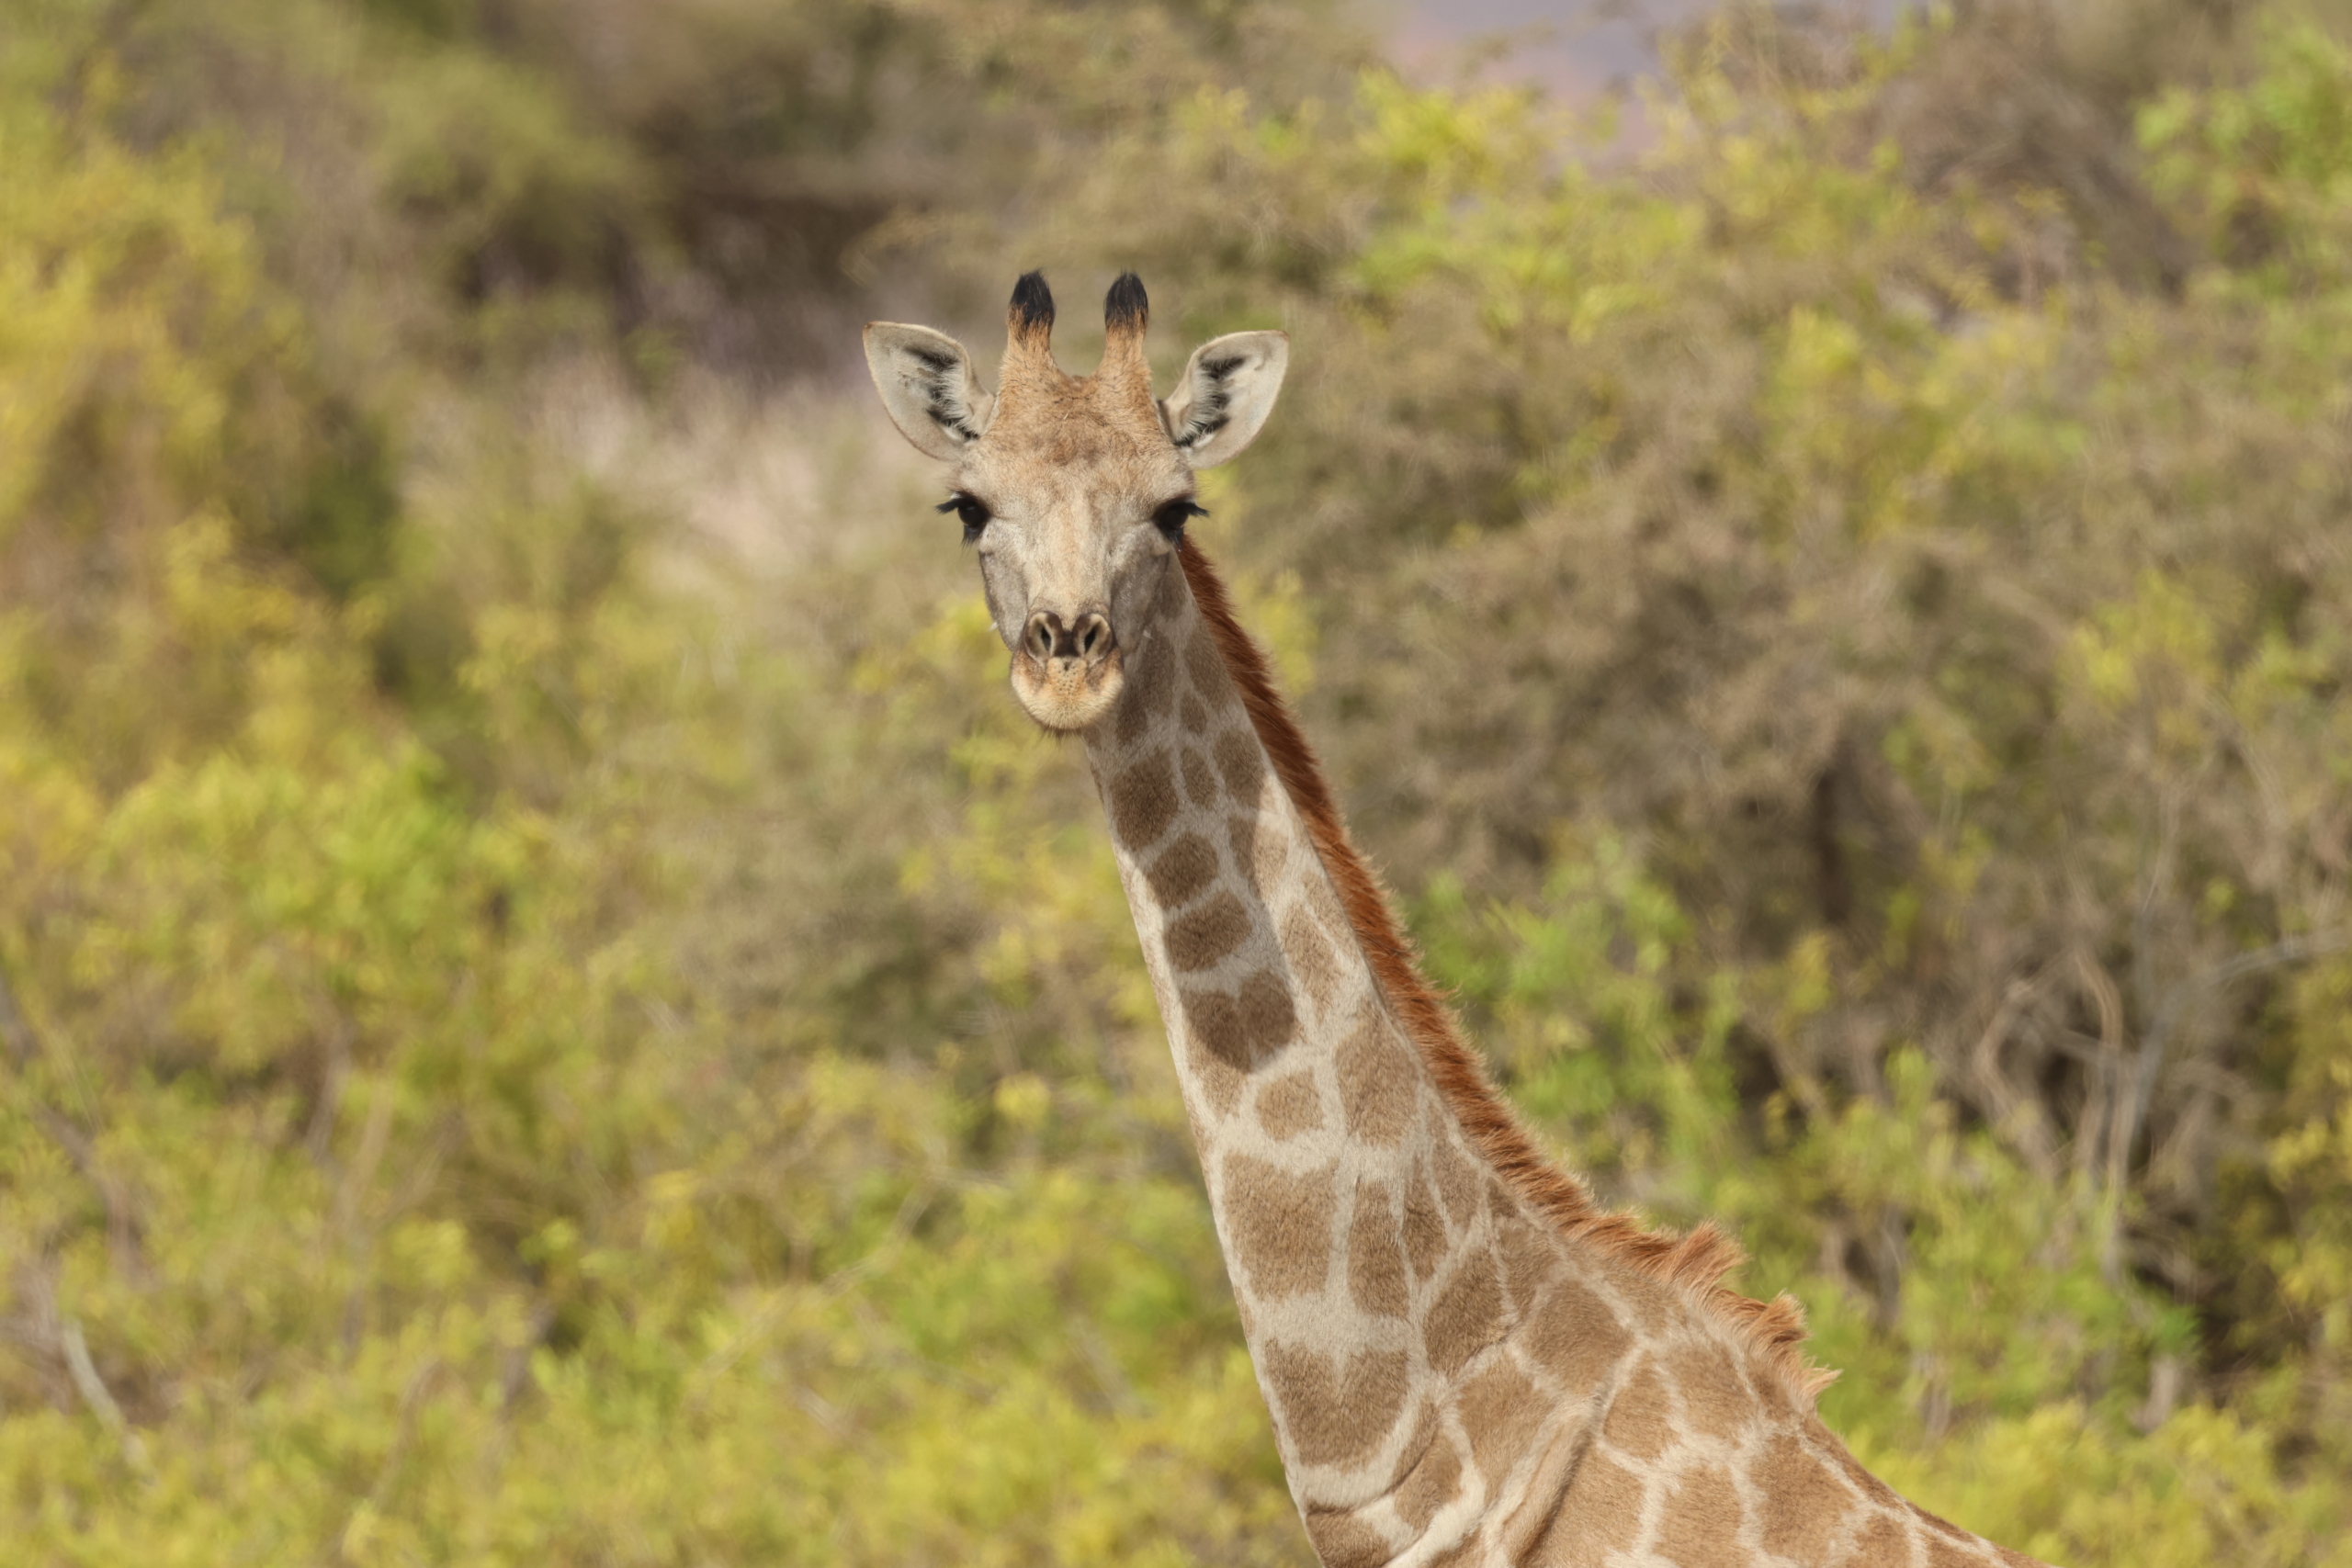
Ari captured this image of a giraffe looking right at his camera. Giraffes are known to be very curious.
They are also very nurturing parents. Young giraffes typically stay with their mothers until they’re between 18 months and two years old. Males may join other herds of males in adolescence.
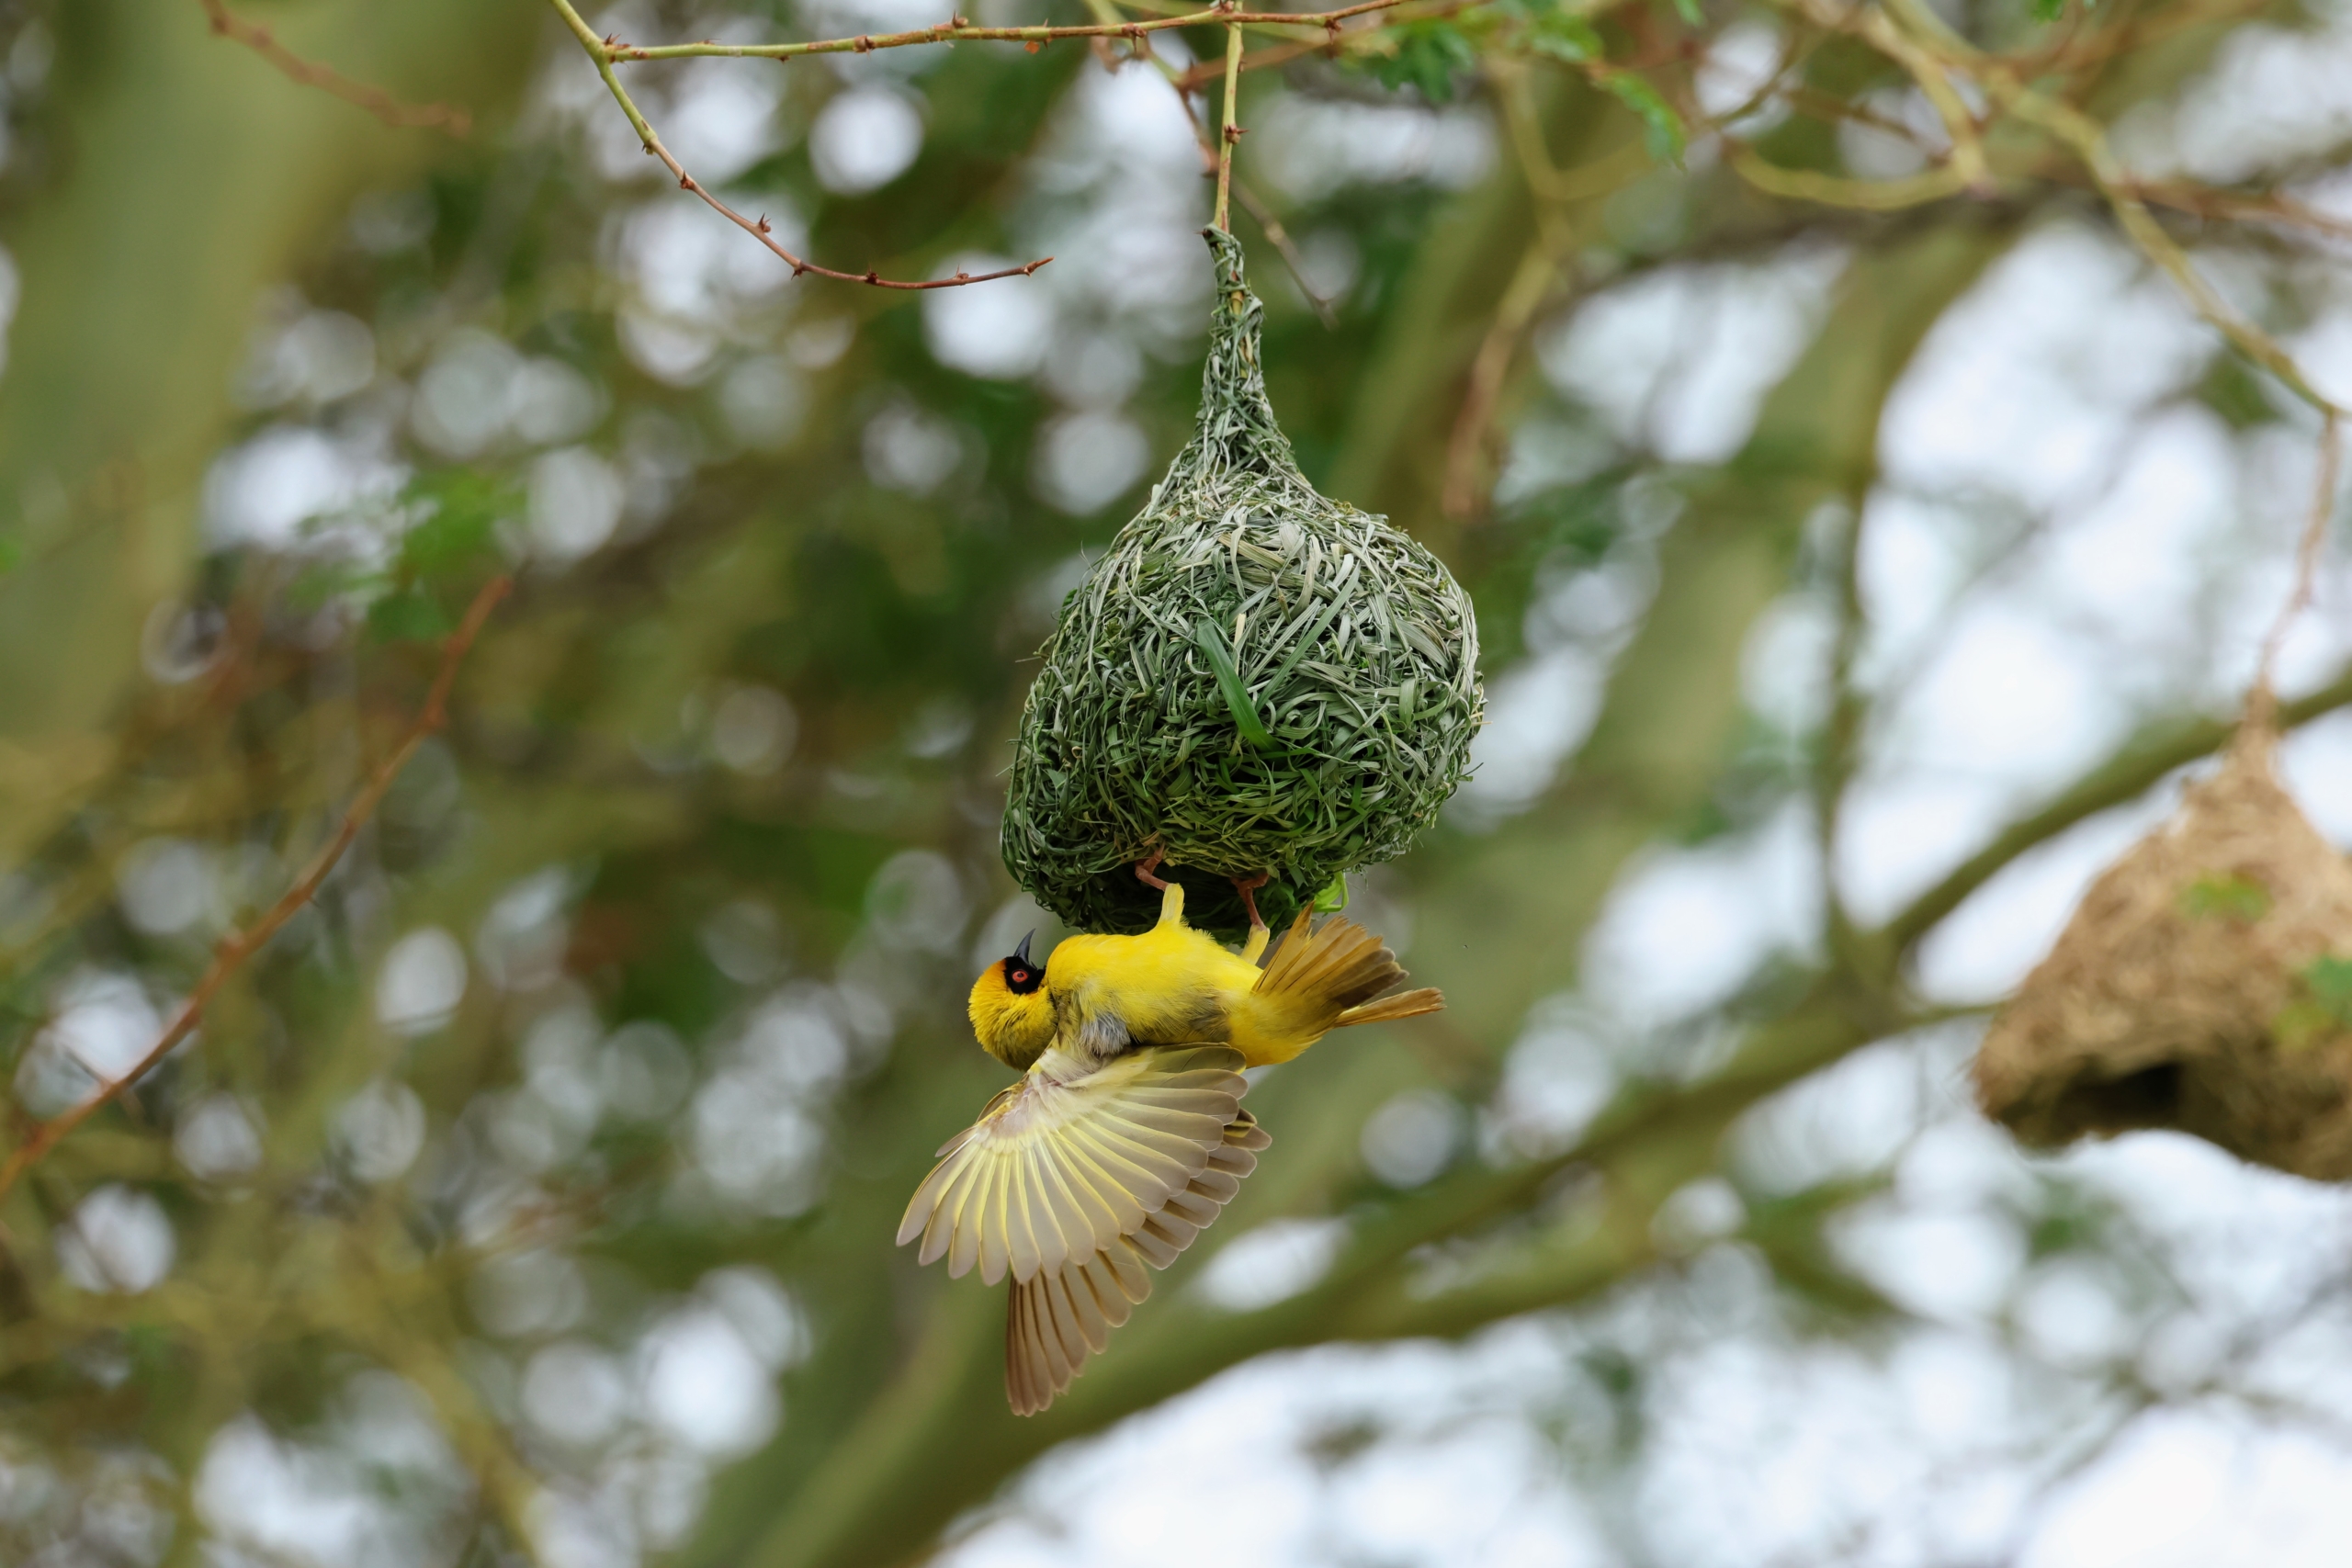
Ari actually took this photo of a masked weaver bird arriving at its nest as well as the photo I shared of a weaver in my last blog. The masked weaver is the most popular bird in Namibia. The adult male has a black face, throat and beak, red eyes, bright yellow head, and a plain yellowish-green back.
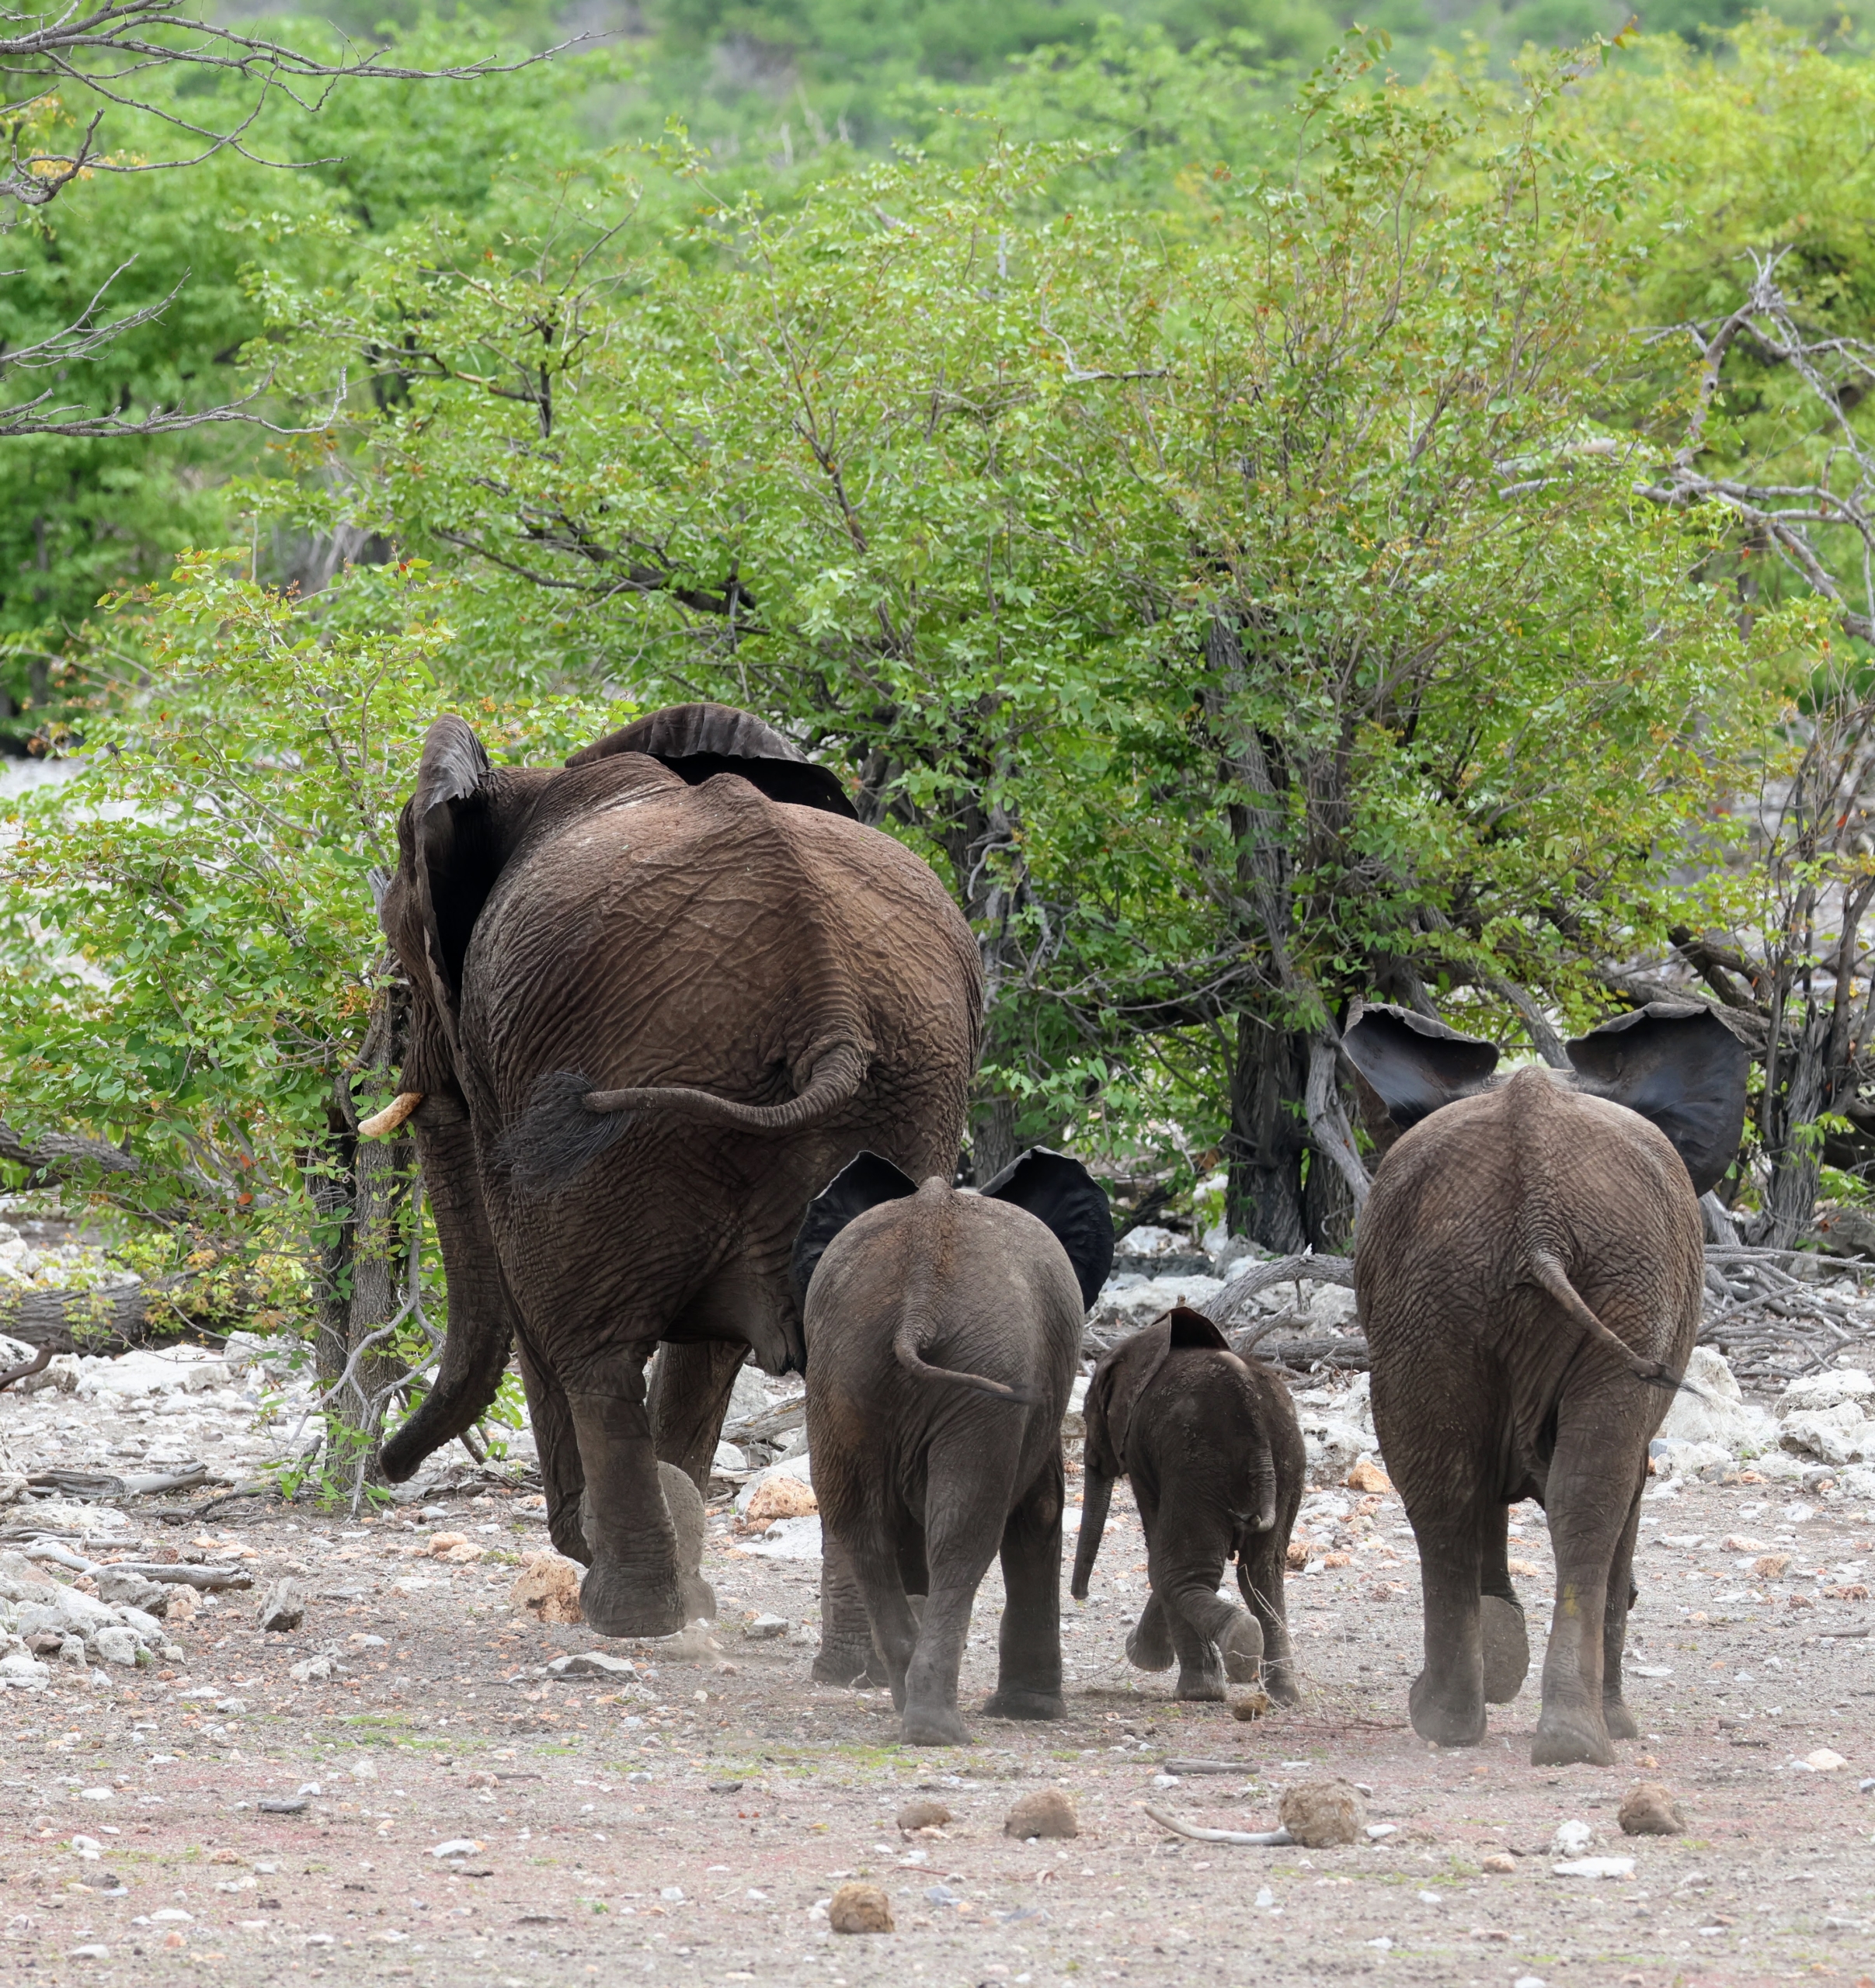
African elephants in Namibia, also known as desert elephants, travel in smaller herds. These elephants inhabit the north western parts of Namibia, notably Kaokoland and Damaraland. They have smaller bodies and longer legs and can travel vast distances between water sources.
Ari caught this photo of a herd of zebras turning back to see him. In general, zebras are not friendly to humans and can be dangerous if threatened – we always remained a safe distance away from the animals.
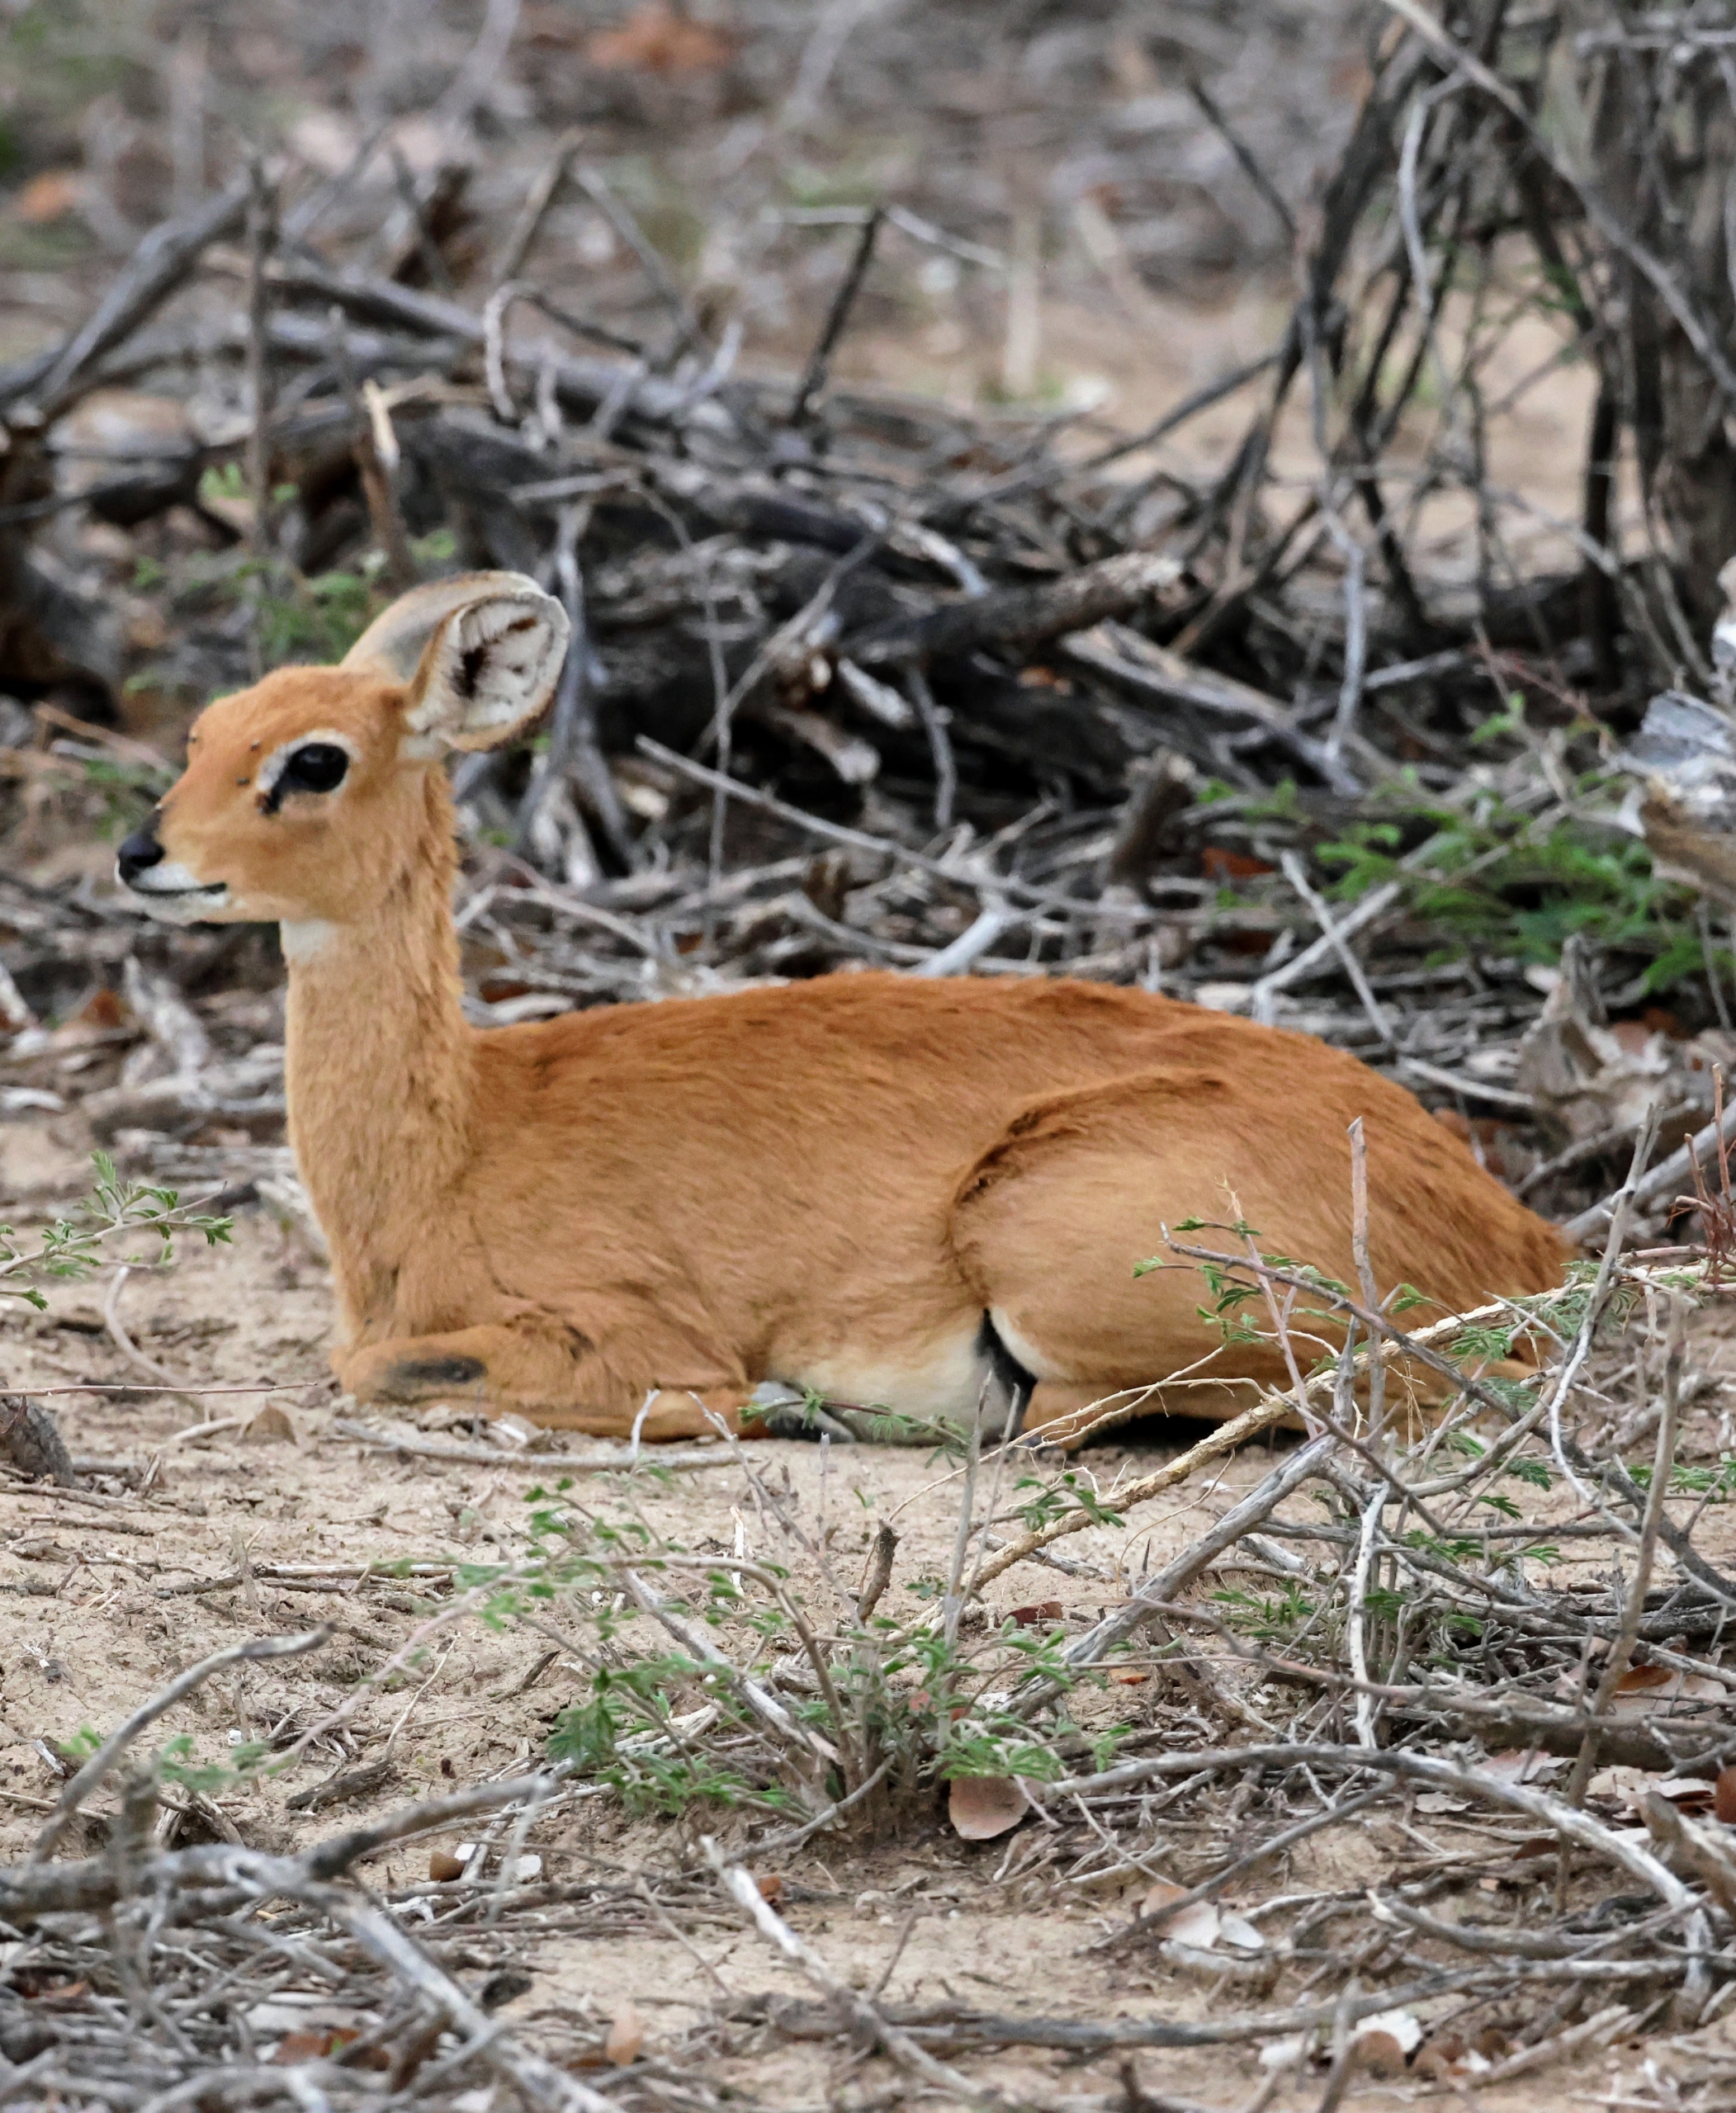
Kirk’s dik-dik is a species of small dik-dik antelope native to the Eastern and Southern parts of Africa. Dik-diks are herbivores, typically of a fawn color that helps camouflage them in savannah habitats. They are also largely nocturnal and seek shade to rest during the day when it is most hot.
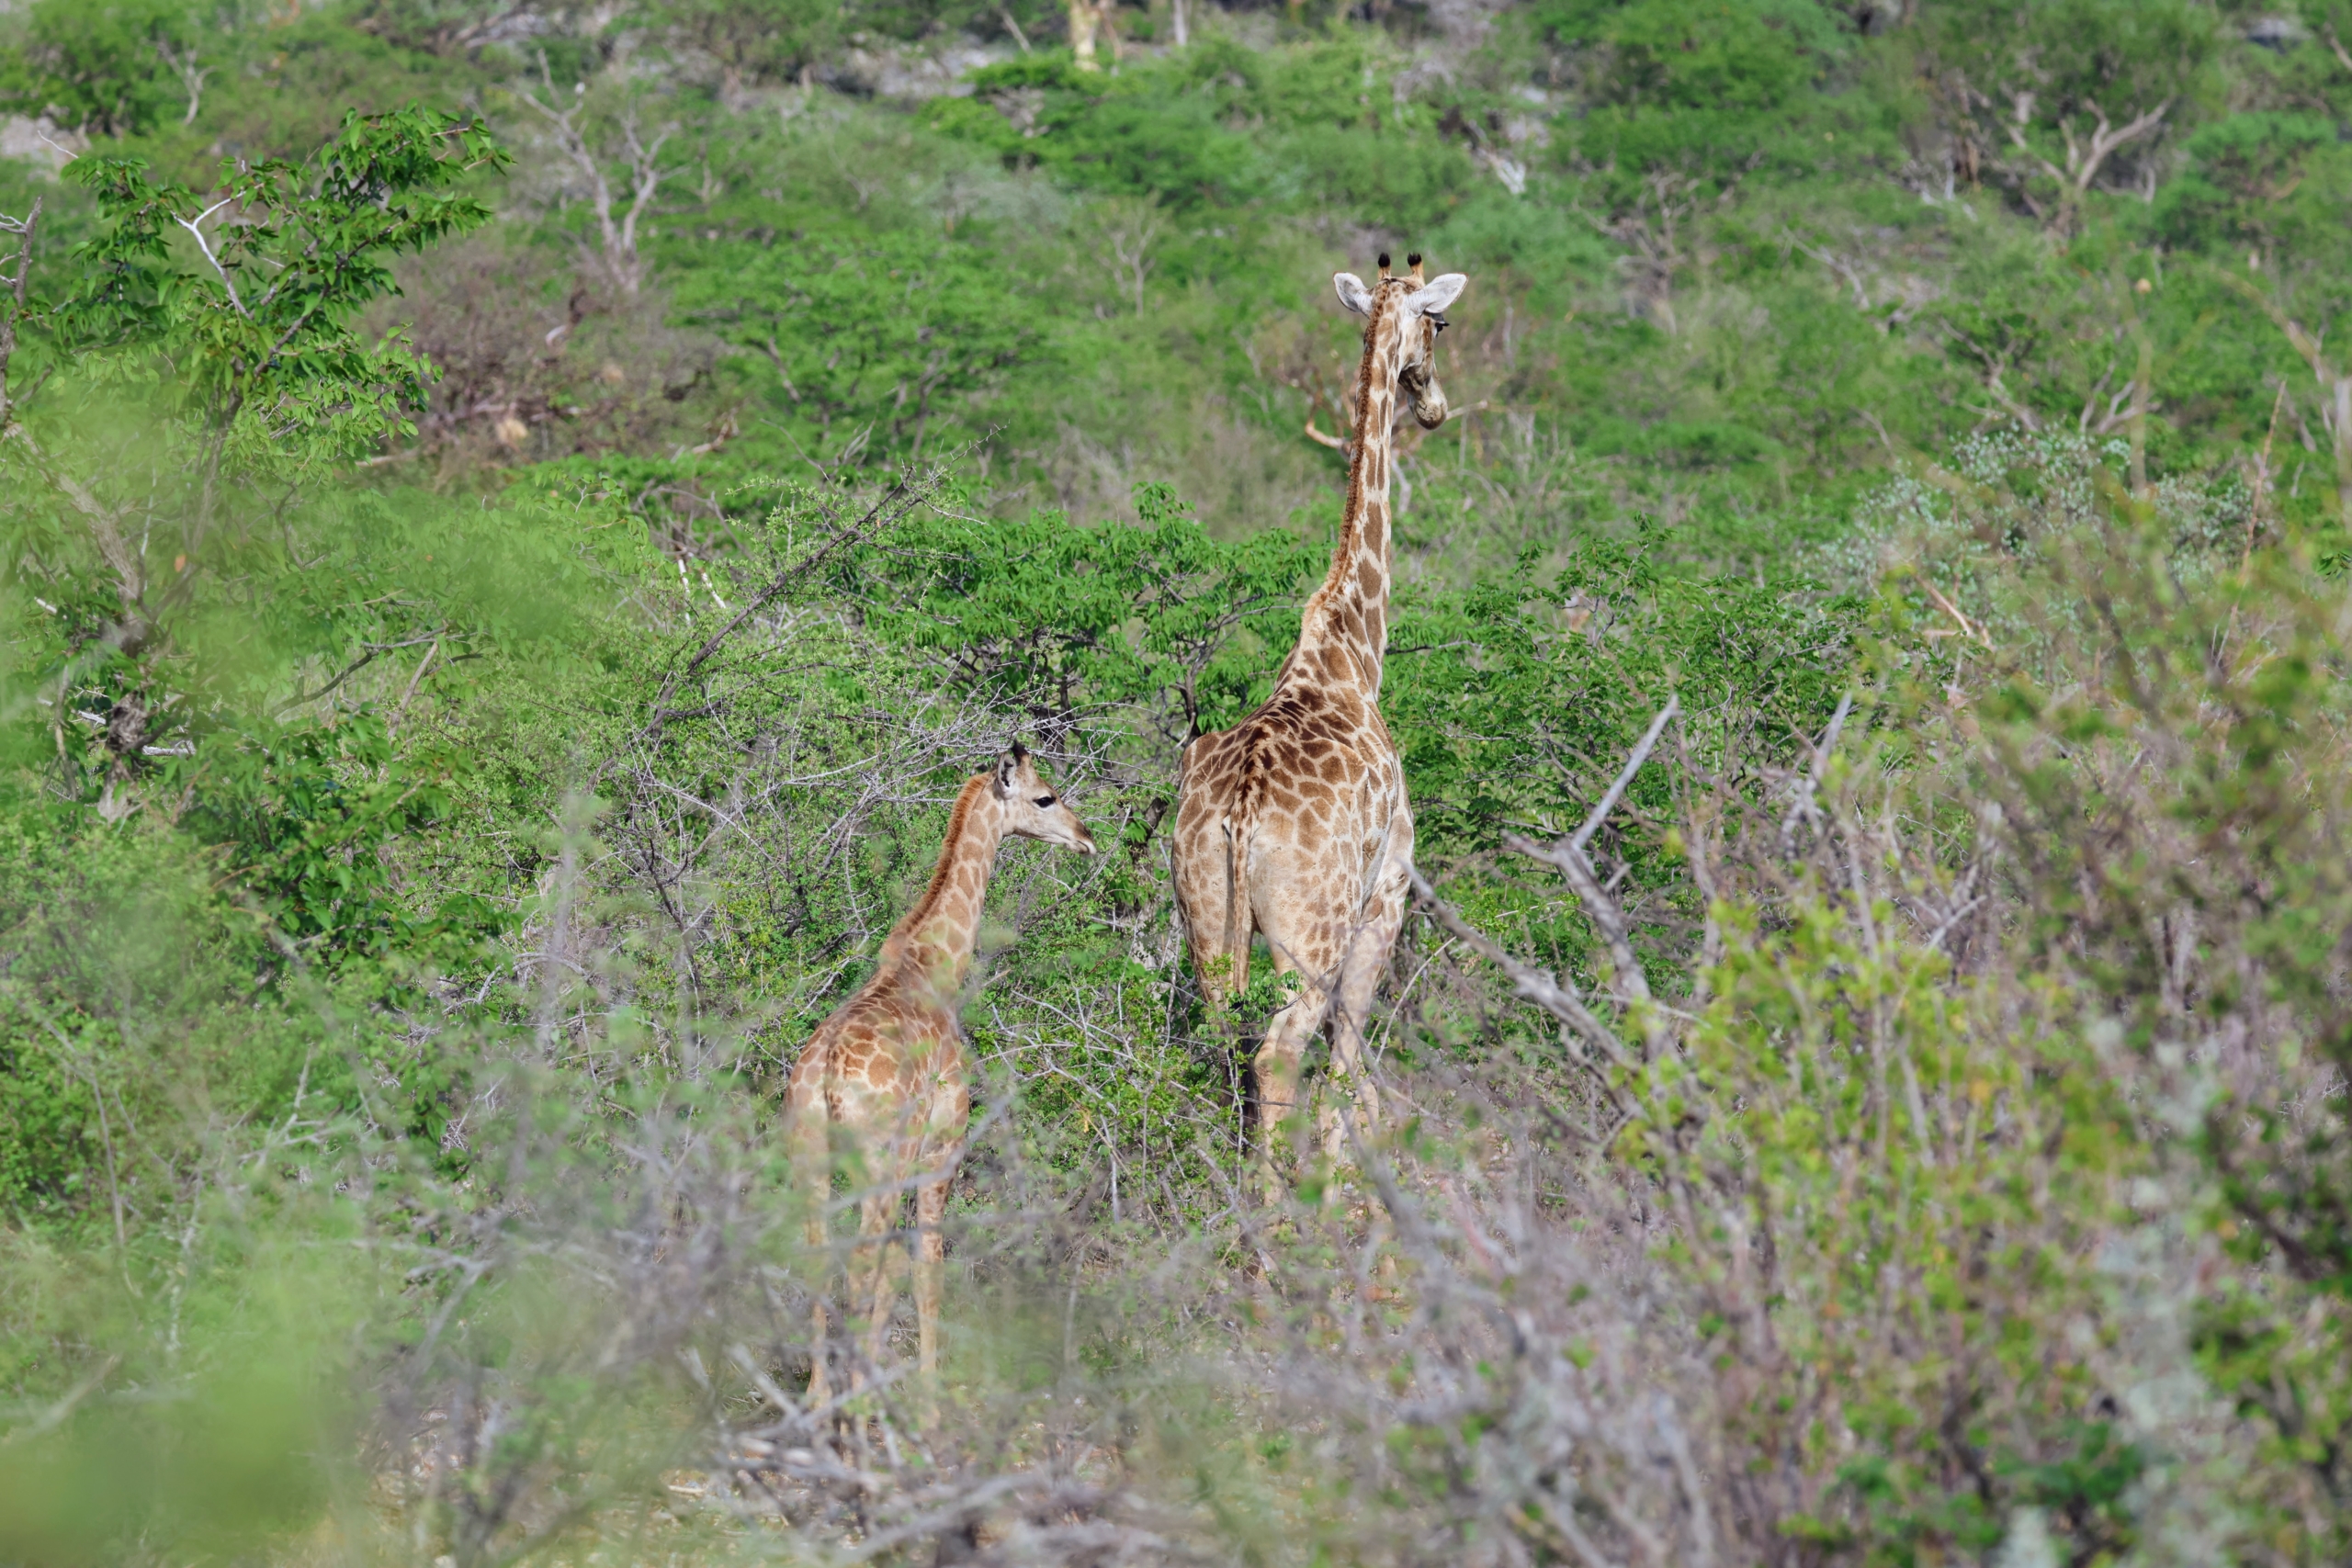
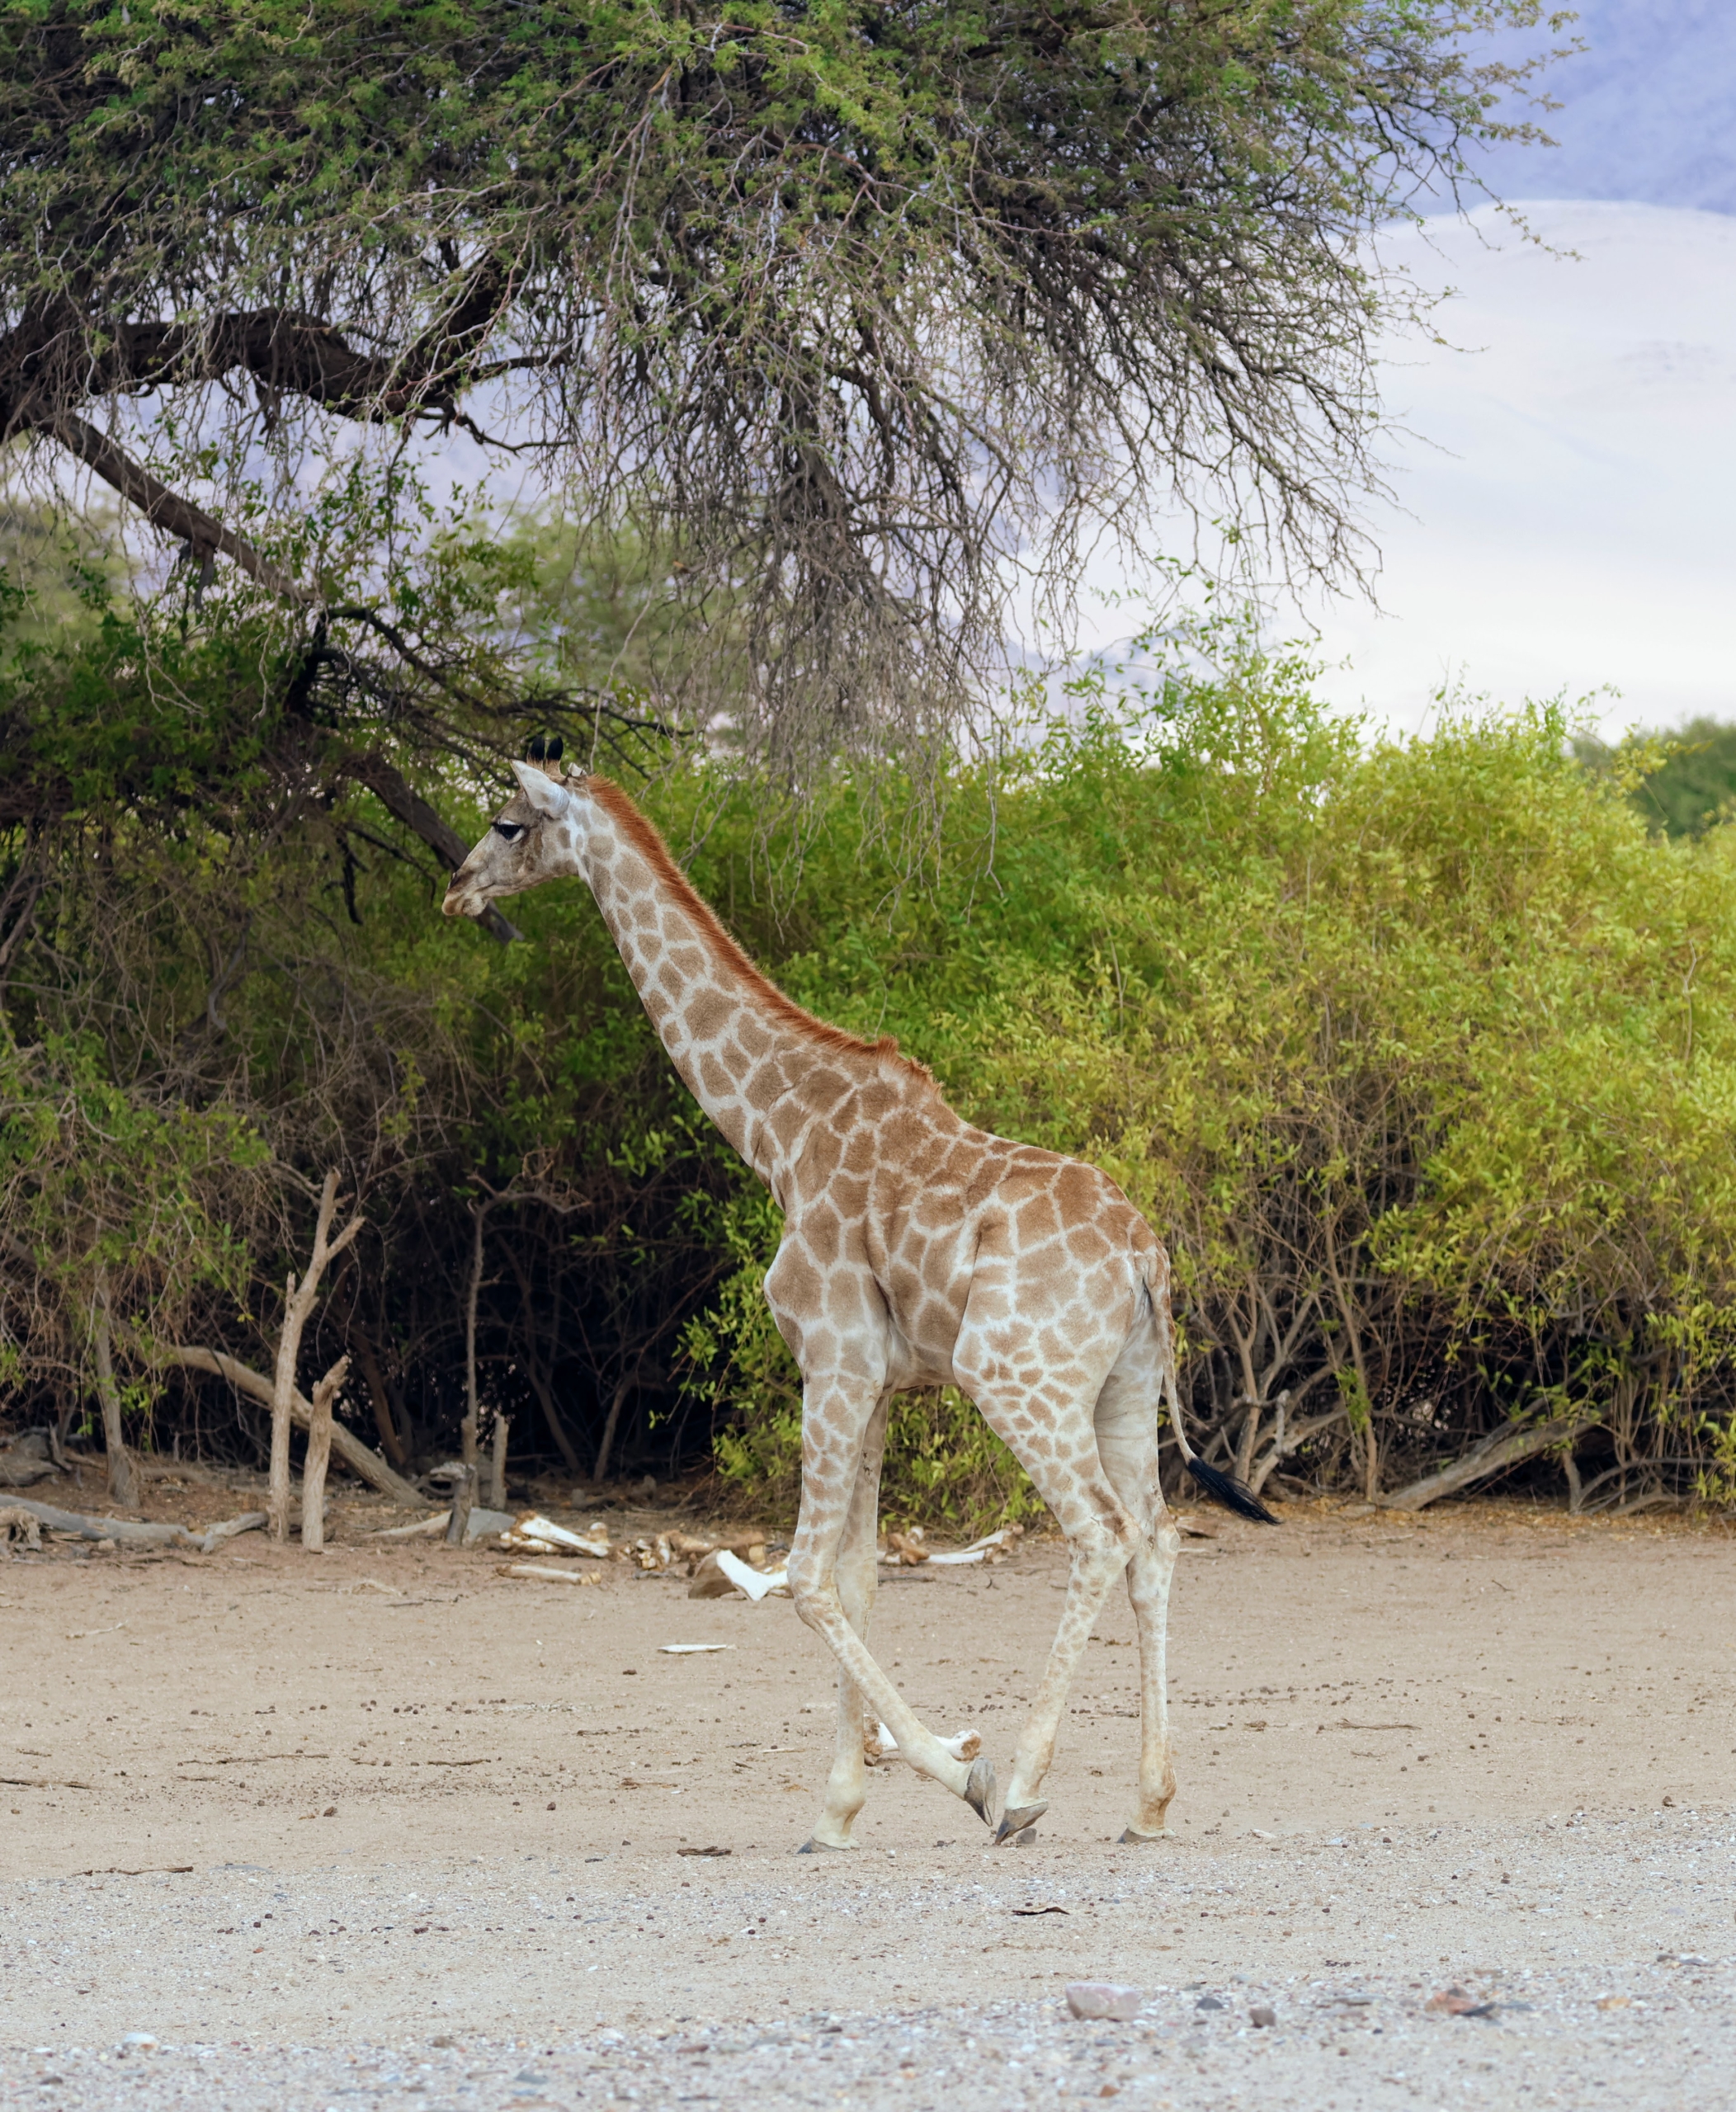
Here’s another giraffe that caught us taking photos. Ari is an excellent photographer.
Giraffes spend about 20-percent of the day walking. They can walk an average of three and a half miles per day, with single young males walking as much as 12 miles to find suitable mates.
Giraffes often travel in herds, but they are also very independent. Giraffes are not known to have strong social ties like other animal species, except the mothers with their offspring.
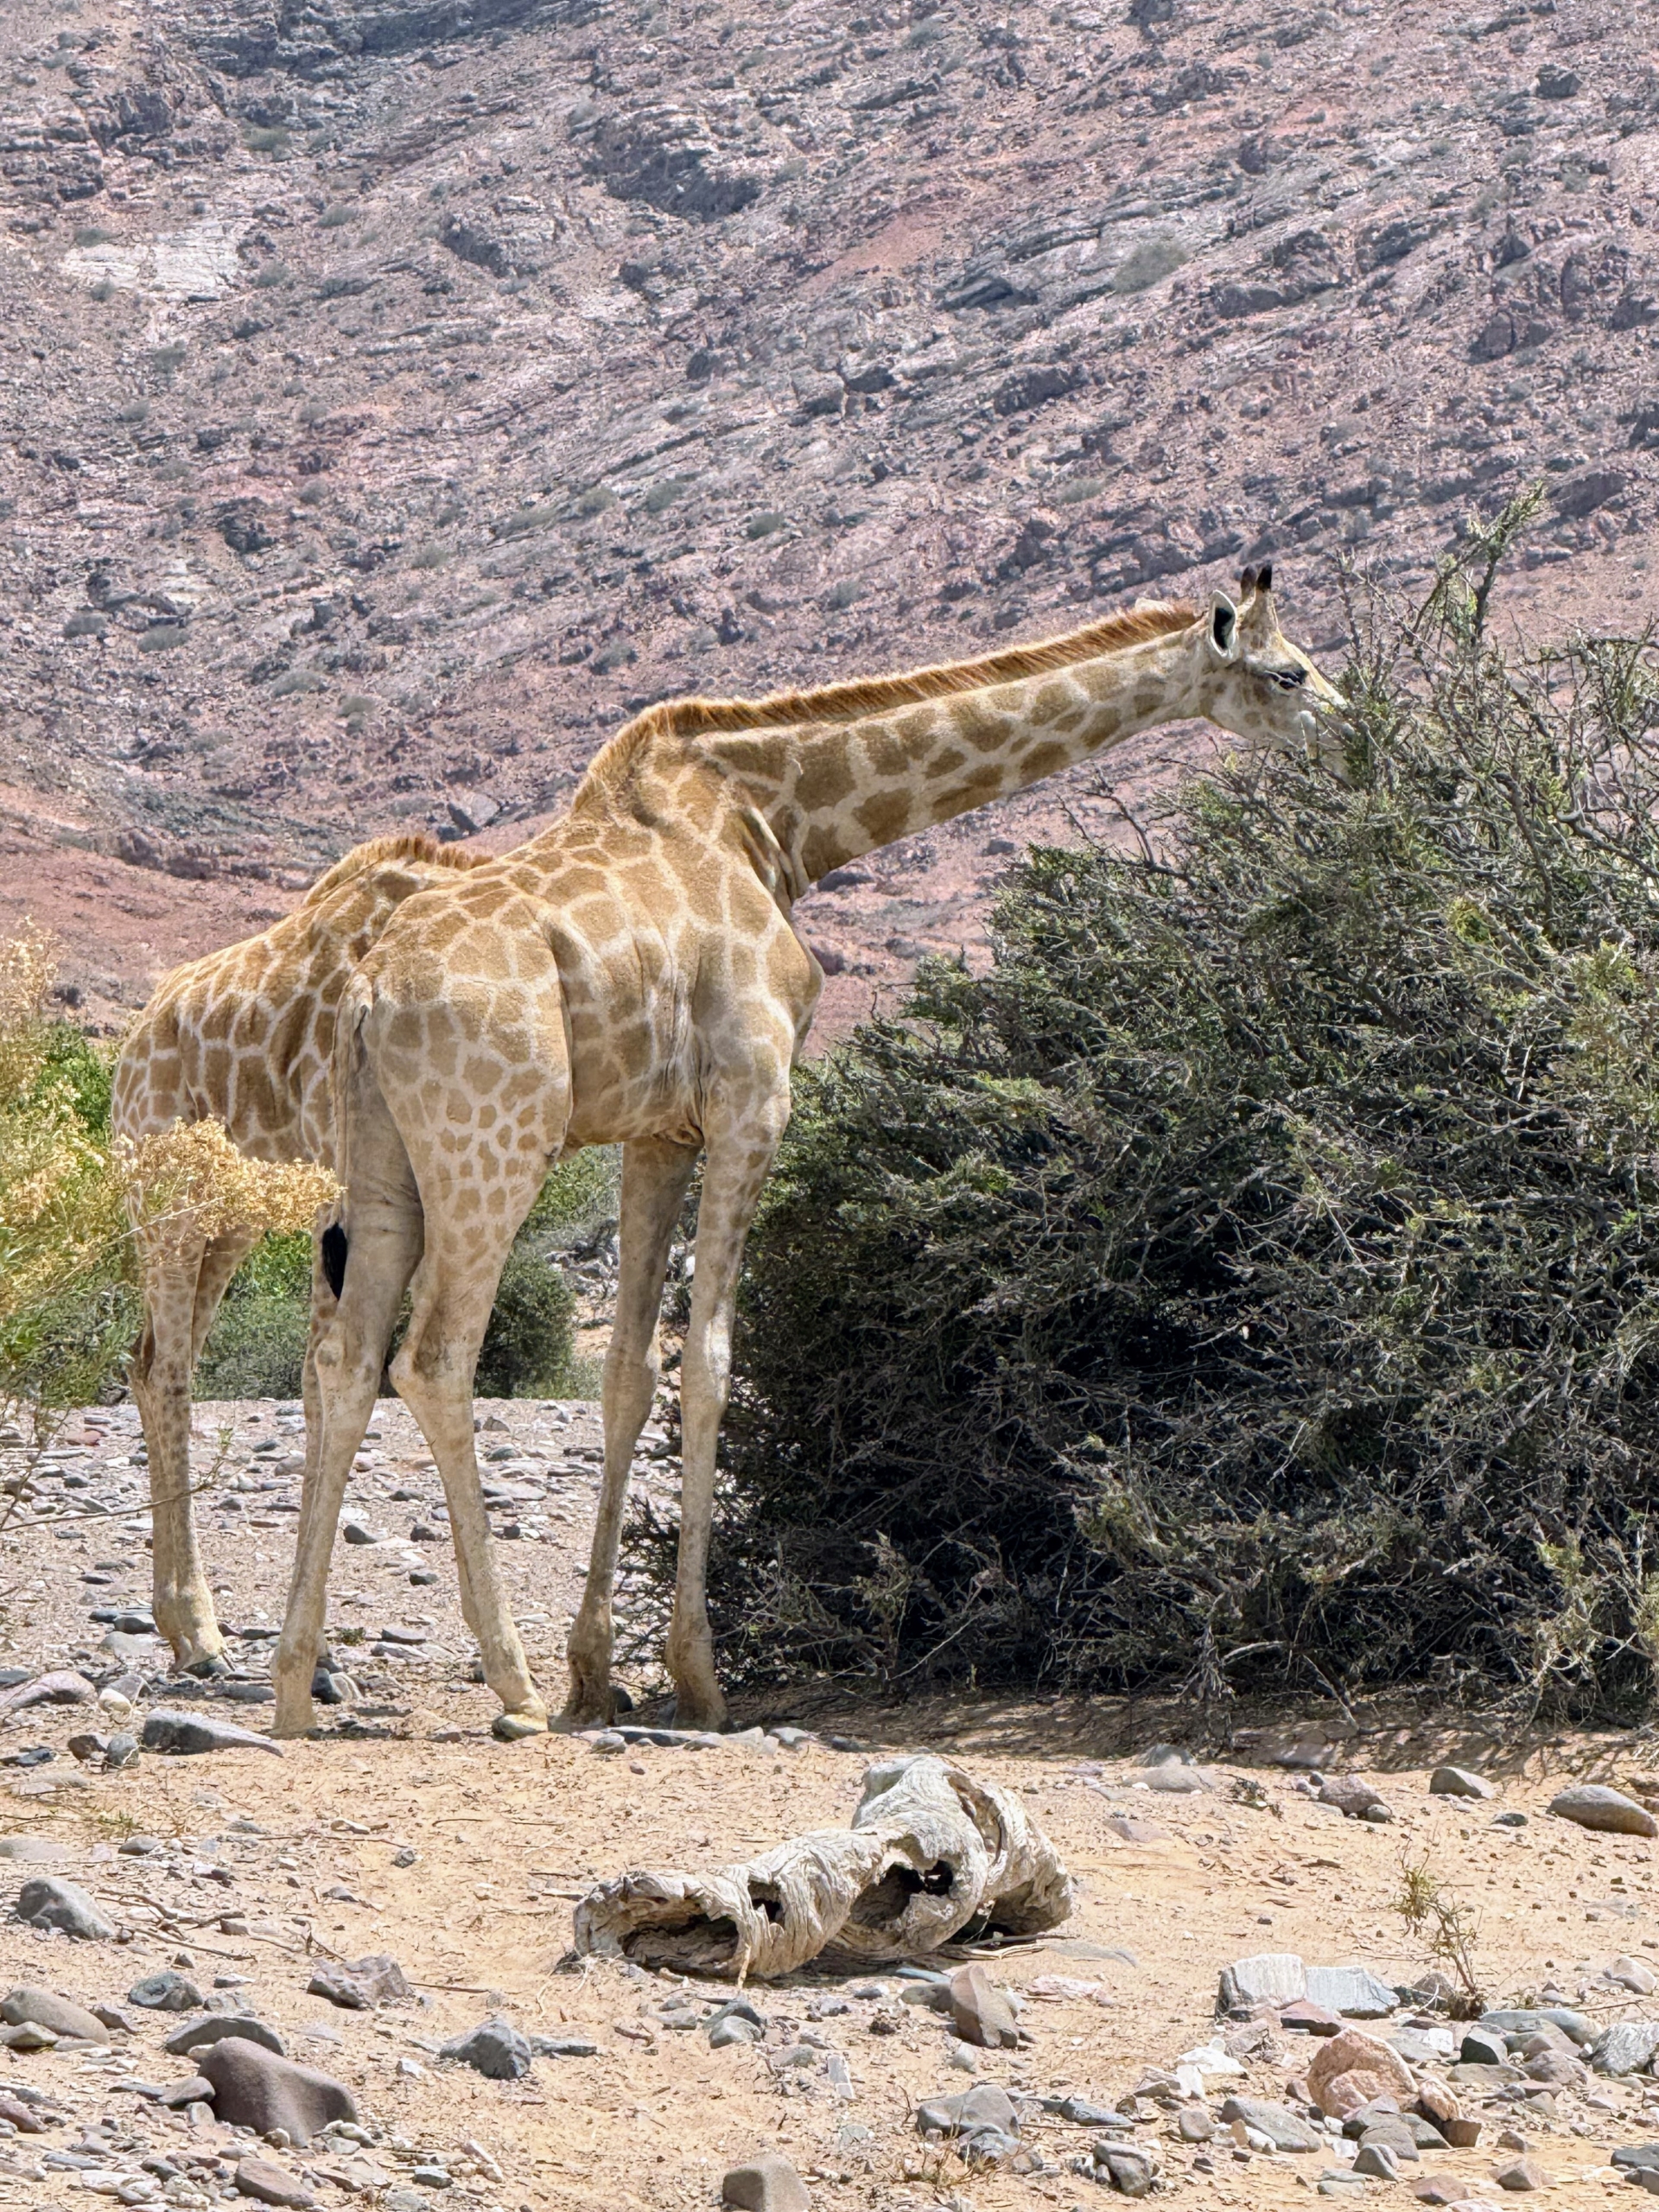
This pair, likely a mother and calf, are eating. They get most of the water they need from the plants they eat.
And here is Ari getting ready to fly over the skeleton coast, the northern part of the Atlantic coast of Namibia. See more of his photos on his Instagram page @aridkatz.