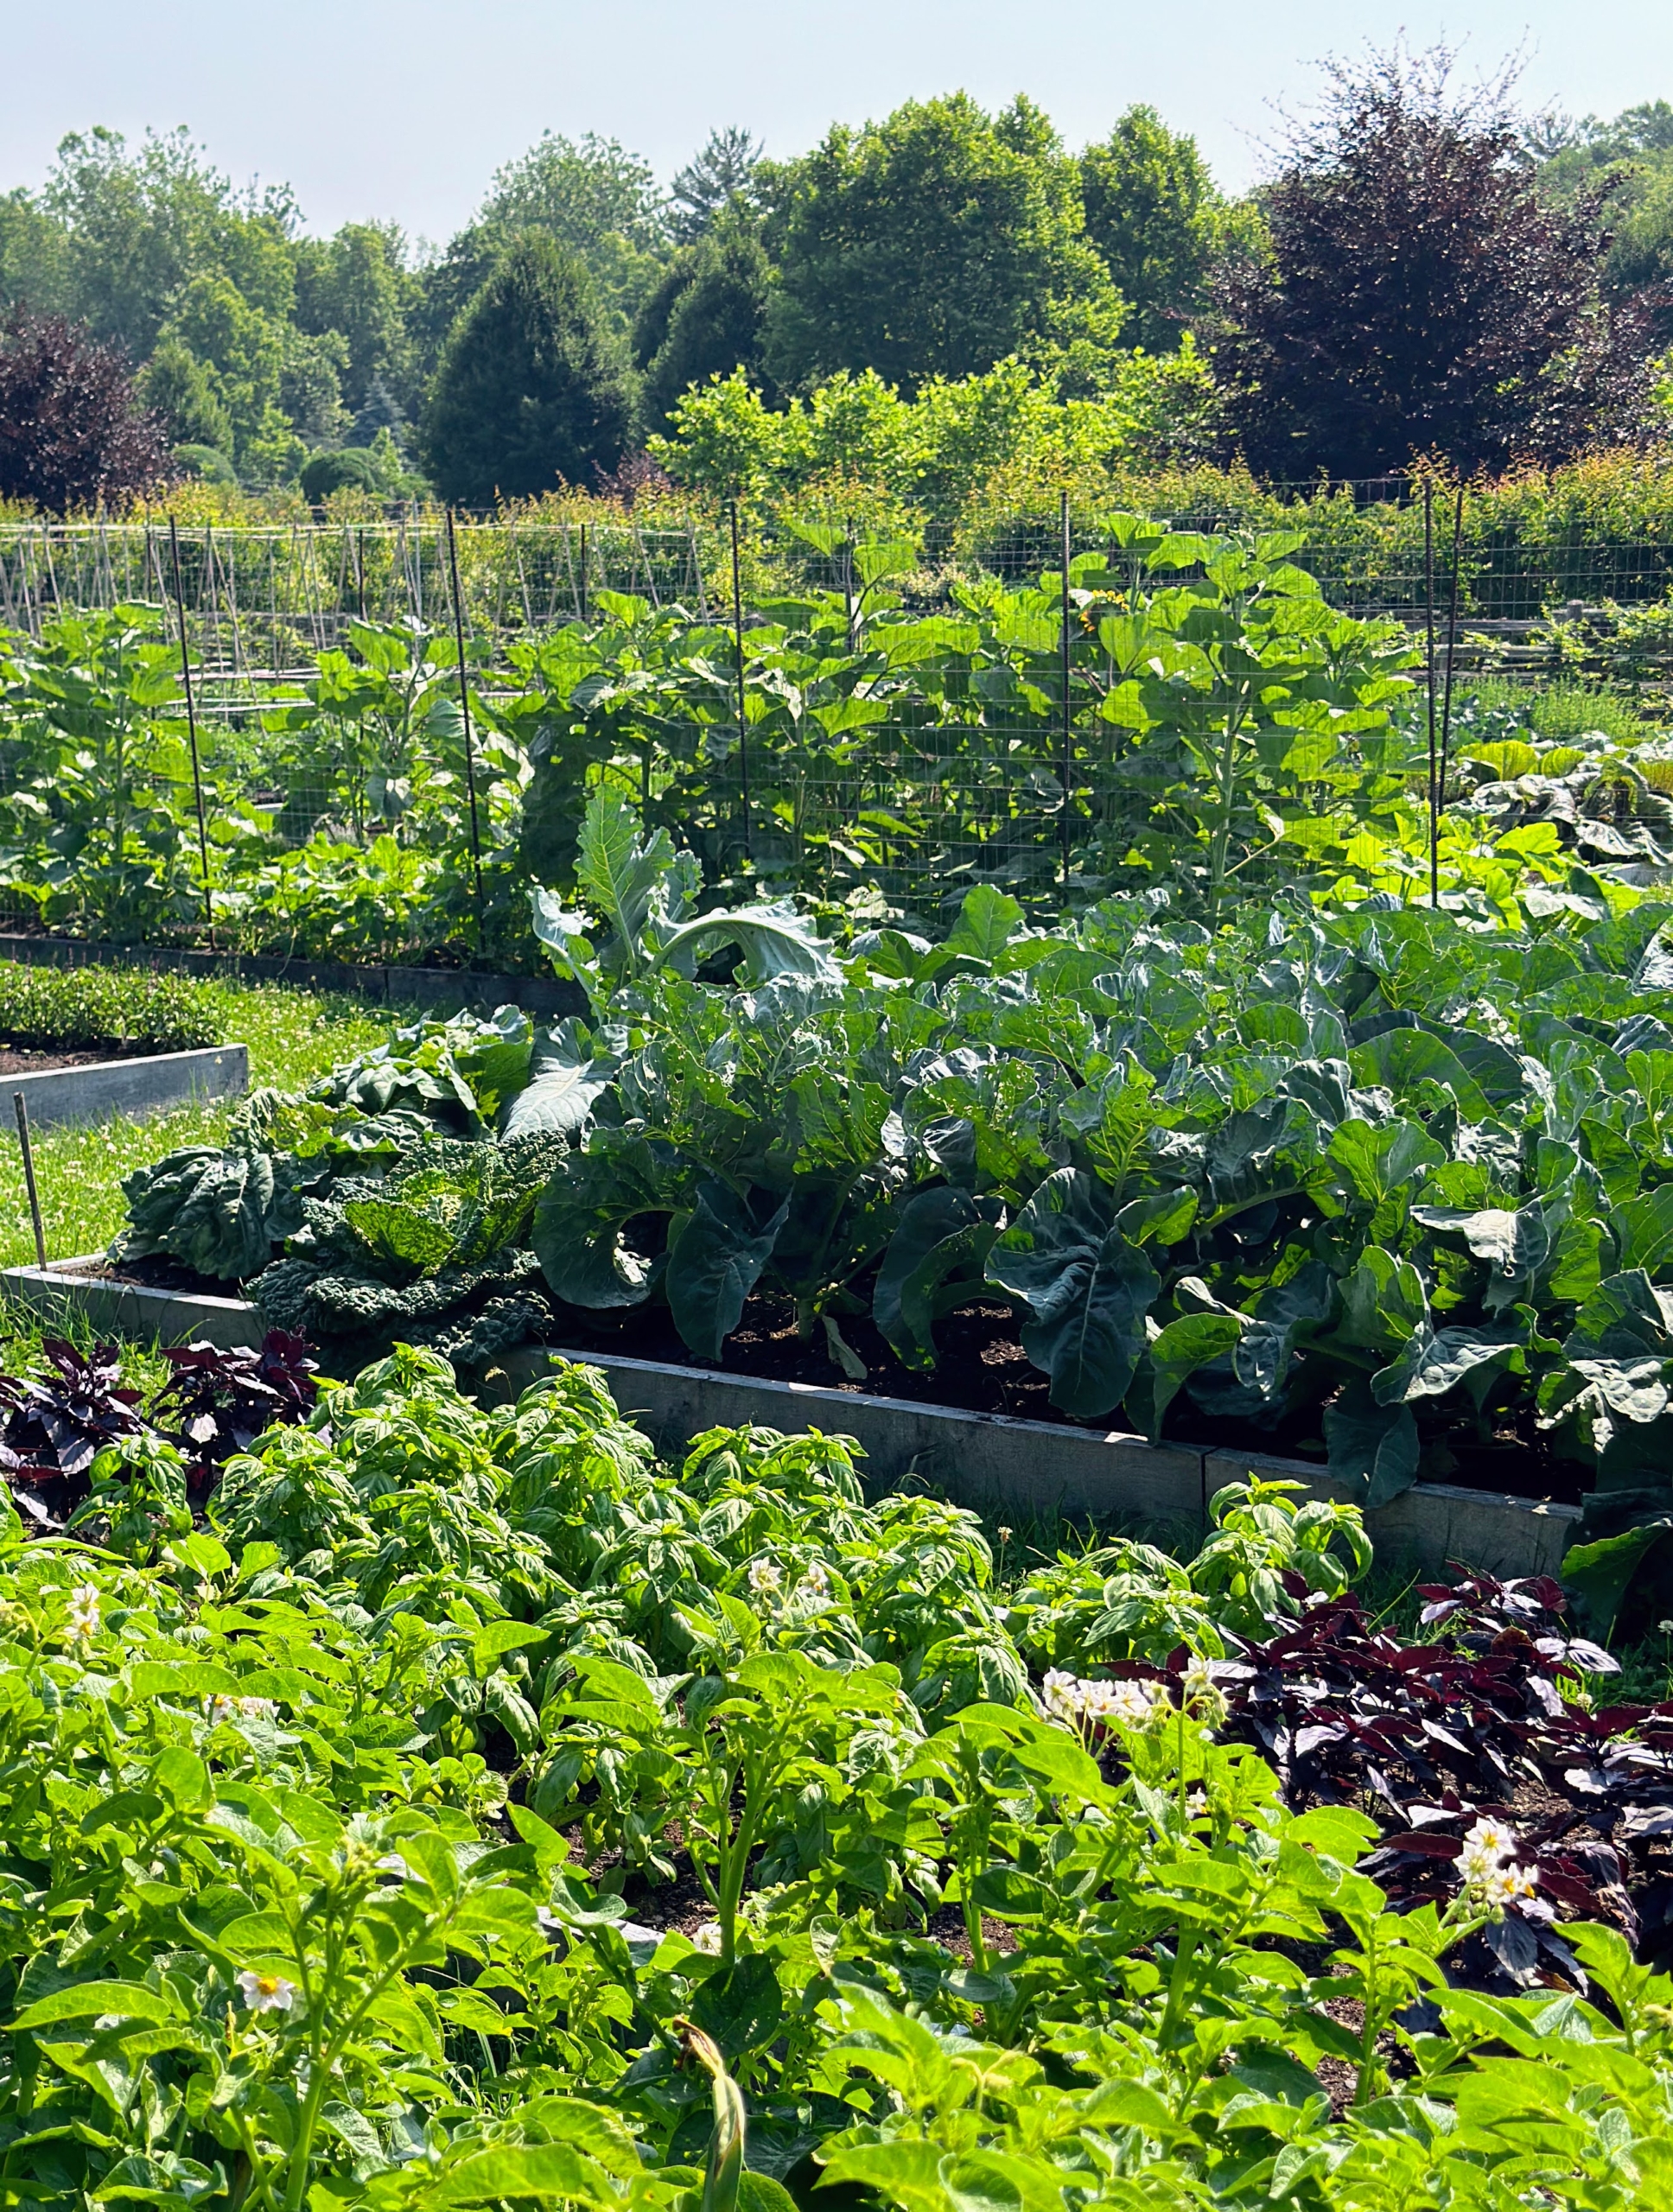
My large half-acre vegetable garden is so much fun to visit right now because of all the growing produce - there’s something new popping up every day.
This garden, which is now in its second growing season, is filled with so many wonderful crops - tomatoes, spinach, brassicas, beets, Swiss chard, sweet and hot peppers, onions, leeks, shallots, potatoes, artichokes, asparagus, all sorts of herbs, and more. I've already picked several vegetables, and every one has been delicious. Check out my Instagram page @marthastewart48. And, I always plant in succession, meaning I seed crops at intervals of seven to 21 days in order to maintain a consistent supply of harvestable produce throughout the summer.
Enjoy these photos.
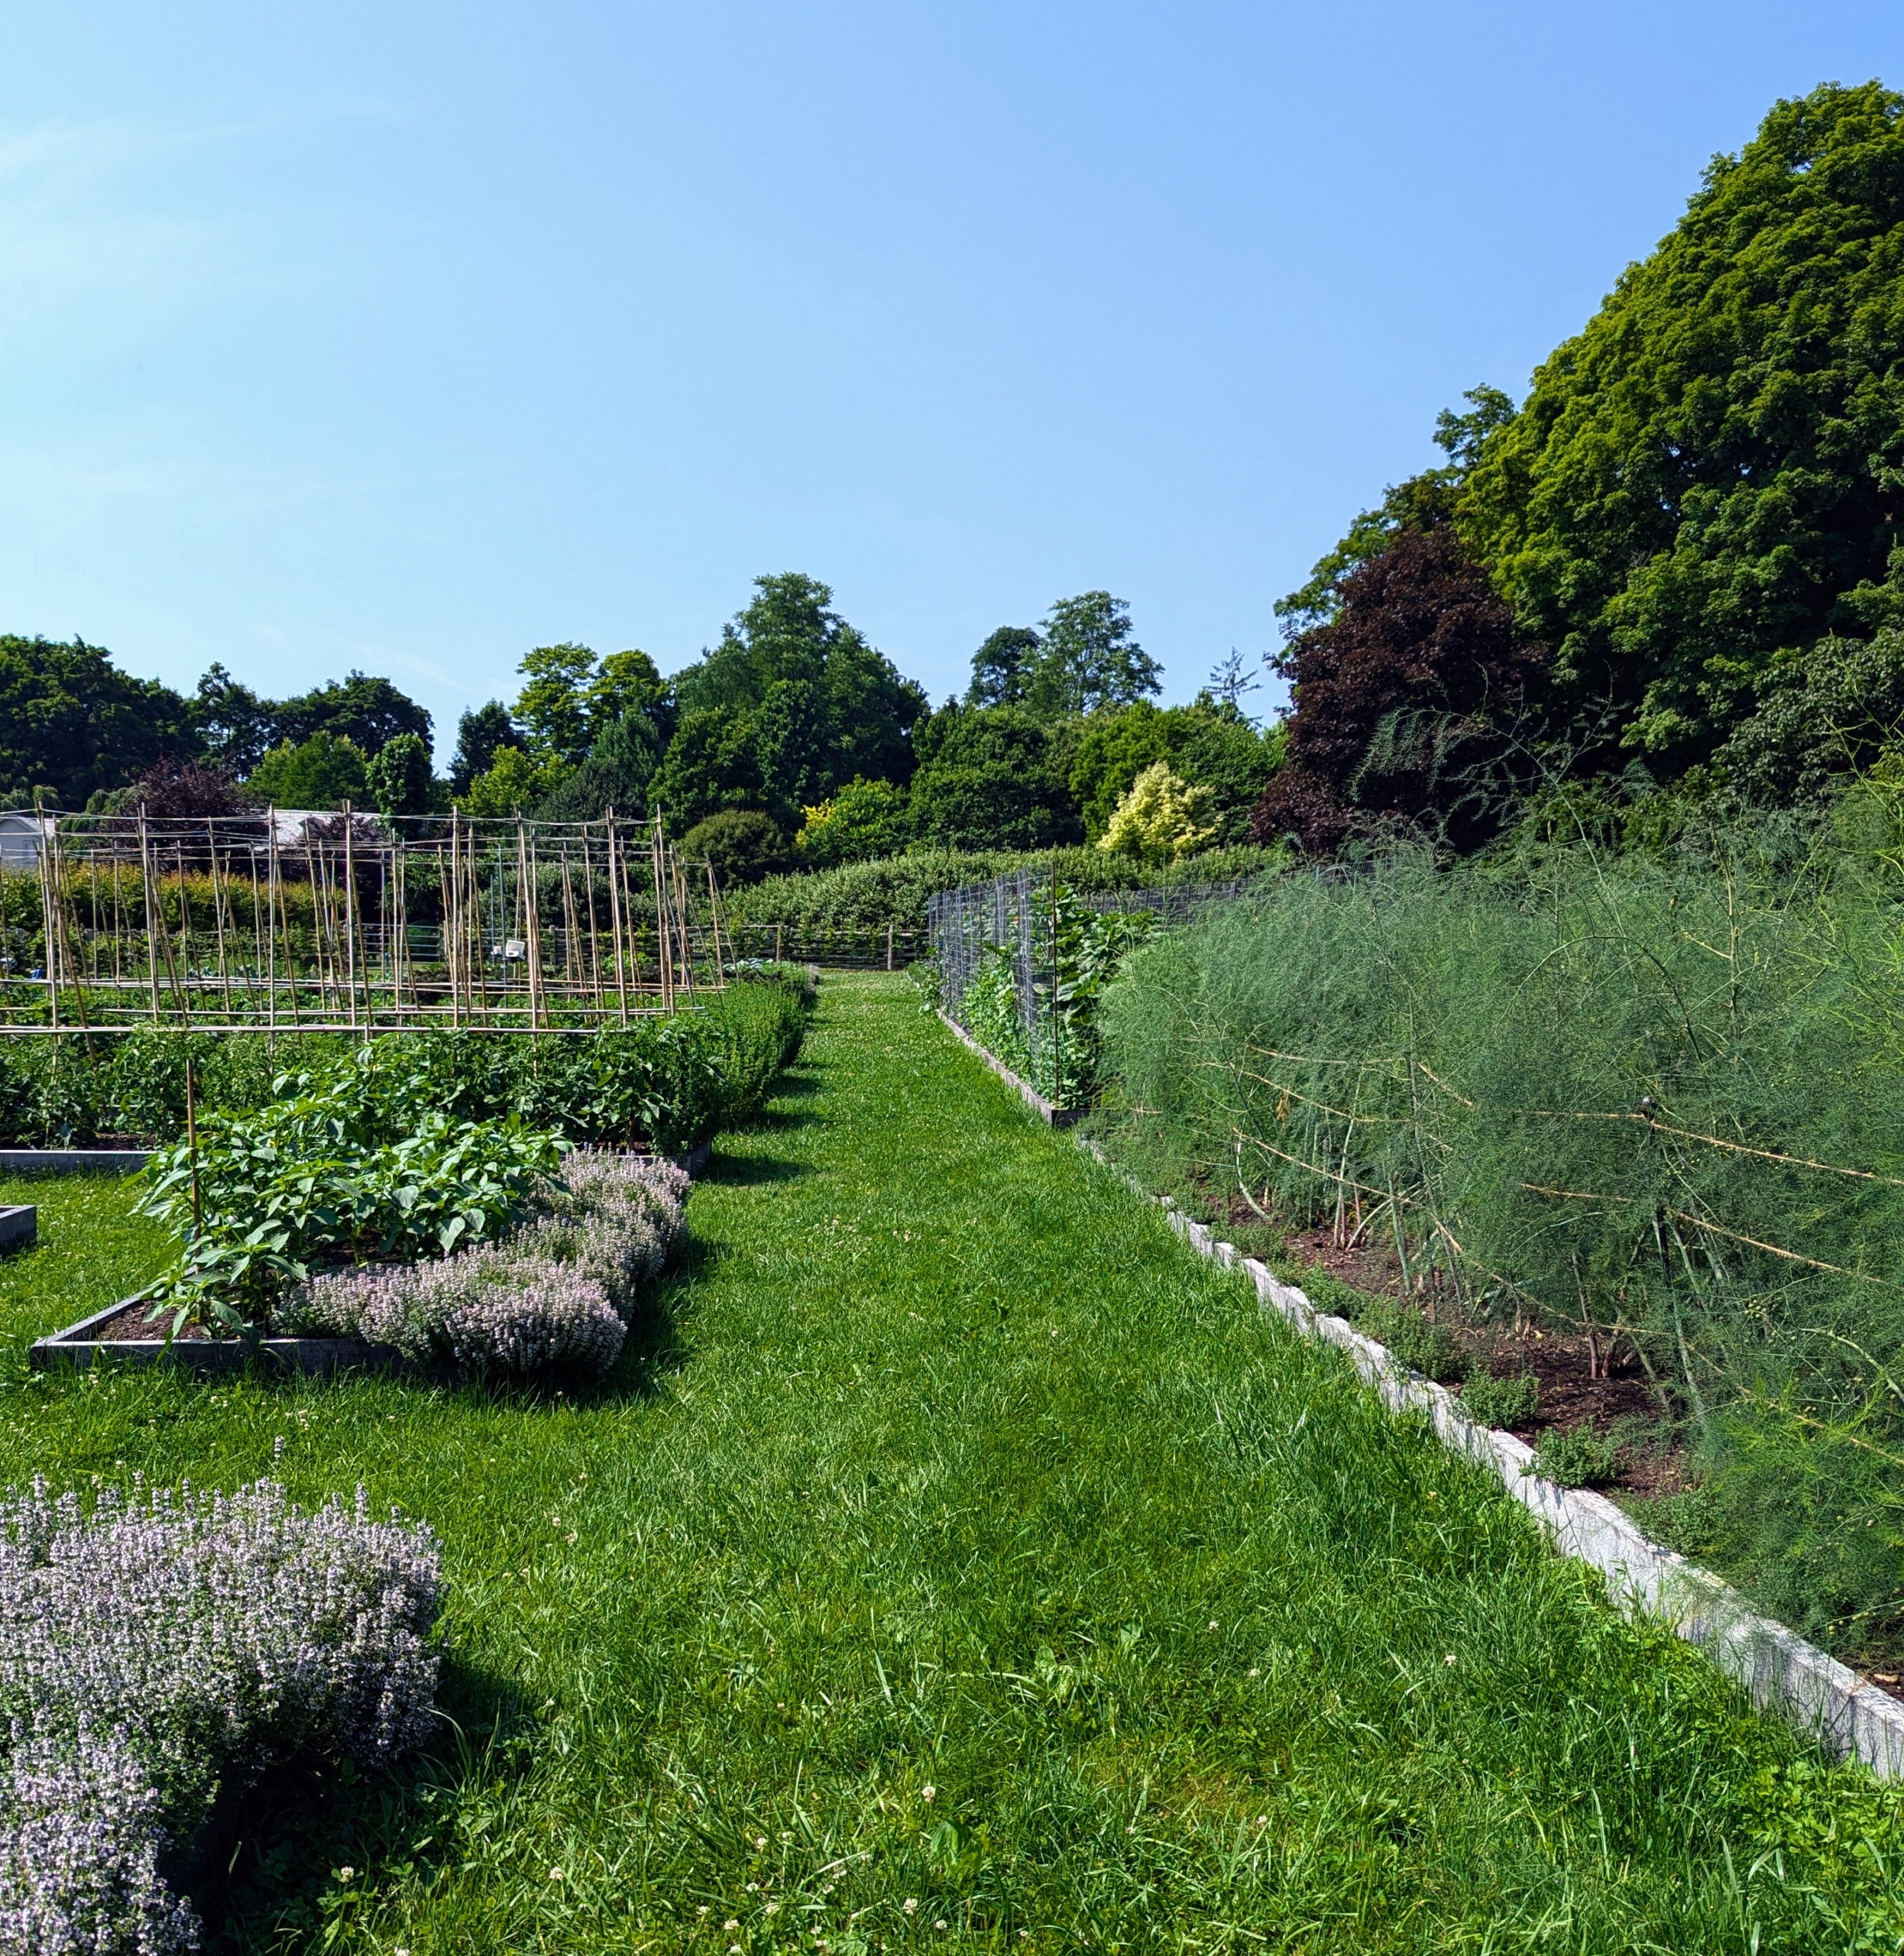
This garden is looking so beautiful. And I planned this new garden close to my Winter House, so I can get to it quickly, see what is growing, and pick what is ready.
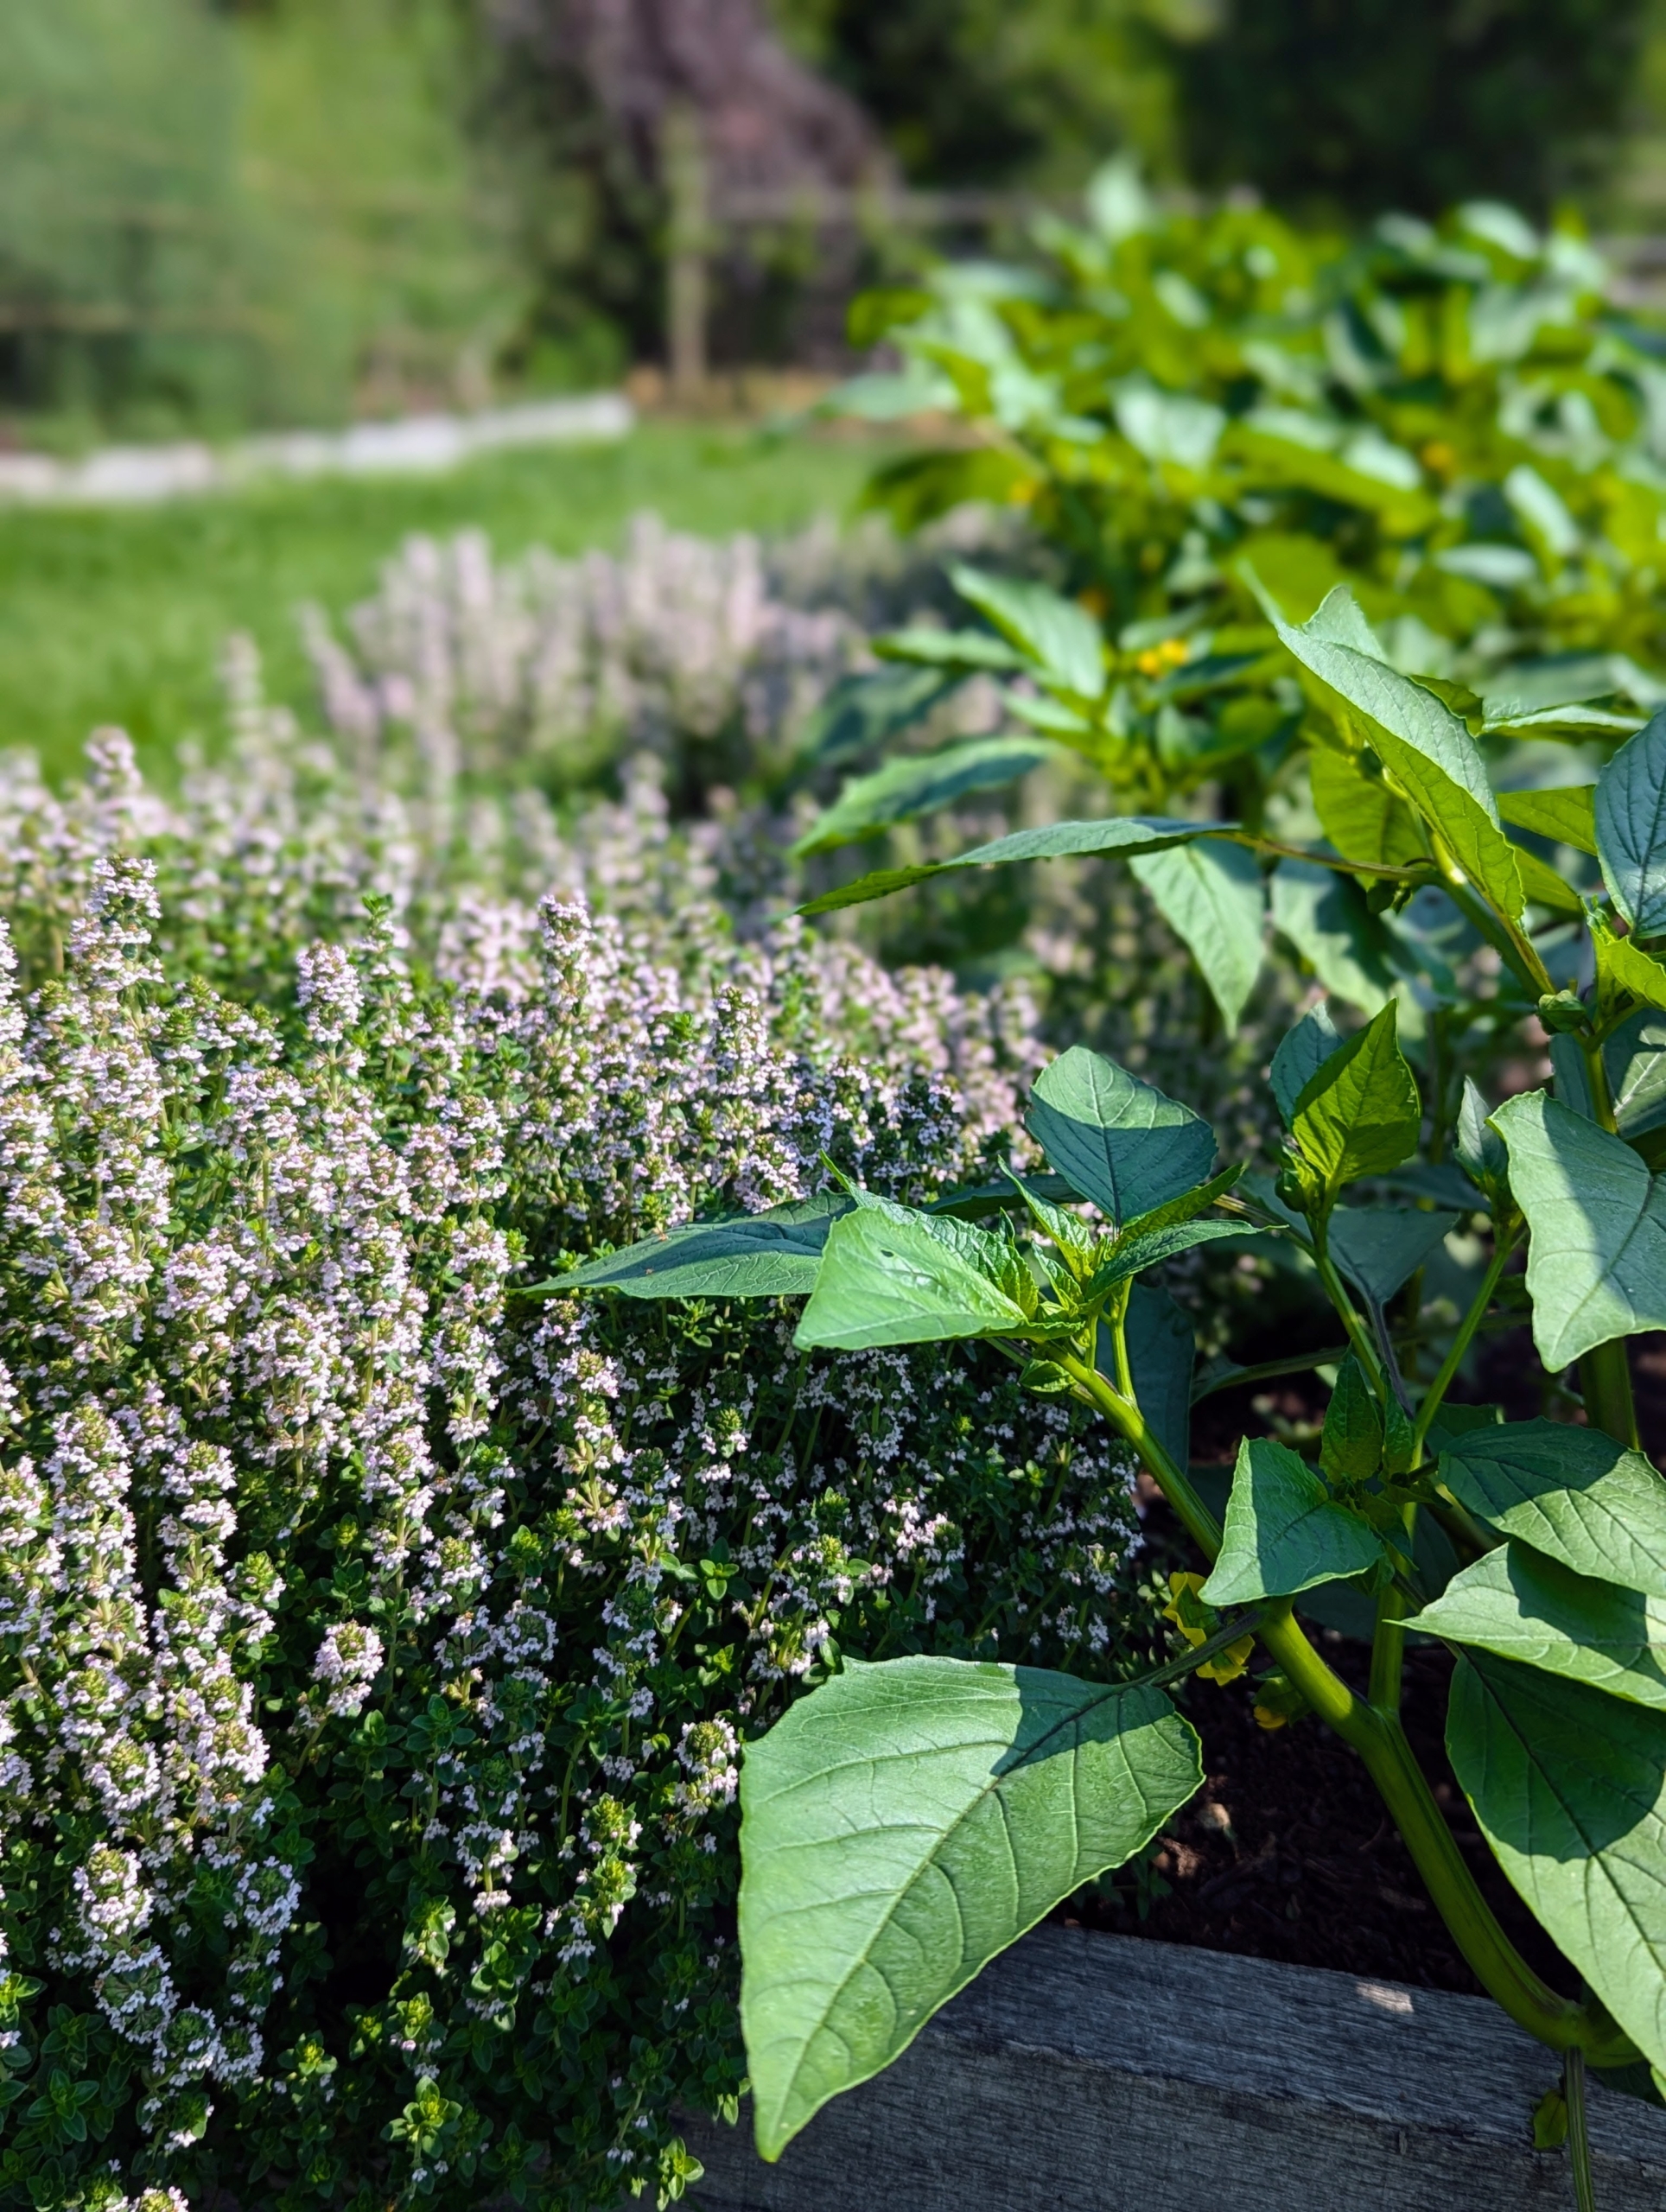
At the edge of all the beds, I planted herbs. Thyme is on the left. Thyme is an herb whose small leaves grow on clusters of thin stems. It is a Mediterranean herb with dietary, medicinal, and ornamental uses. It is delicious with fish or poultry and imparts a lemony flavor. On the right, tomatillos, also known as the Mexican husk tomato.
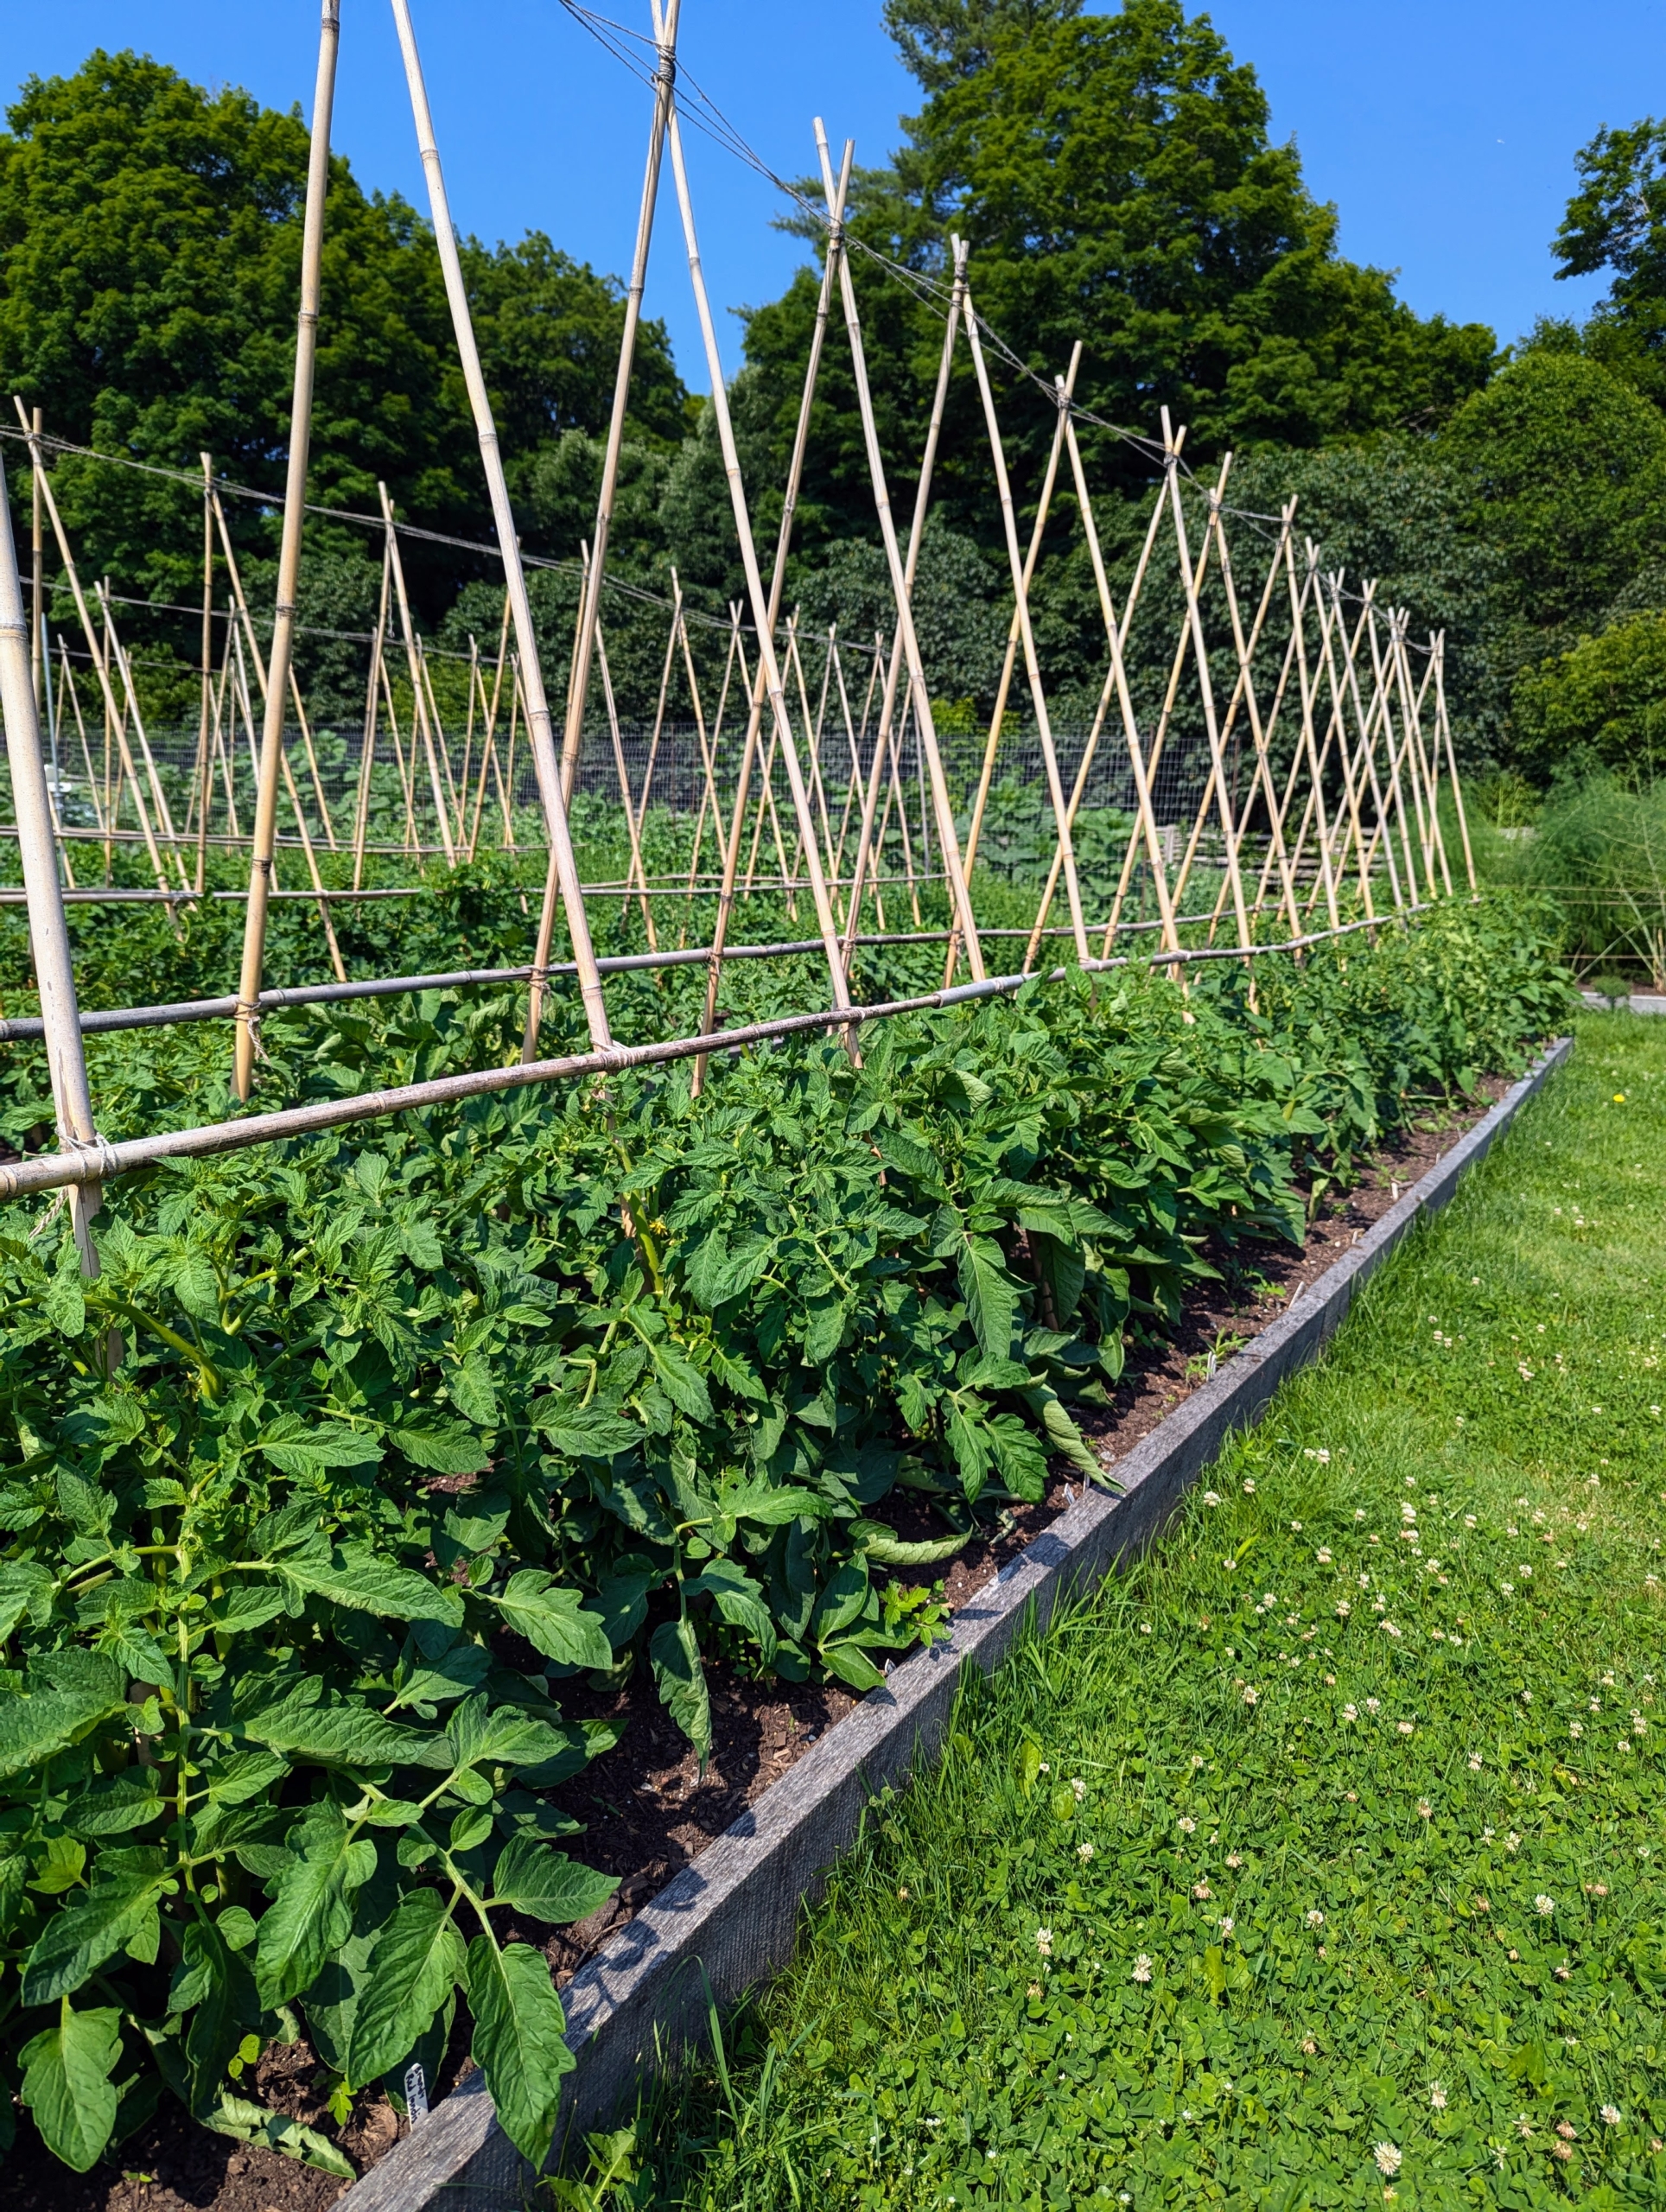
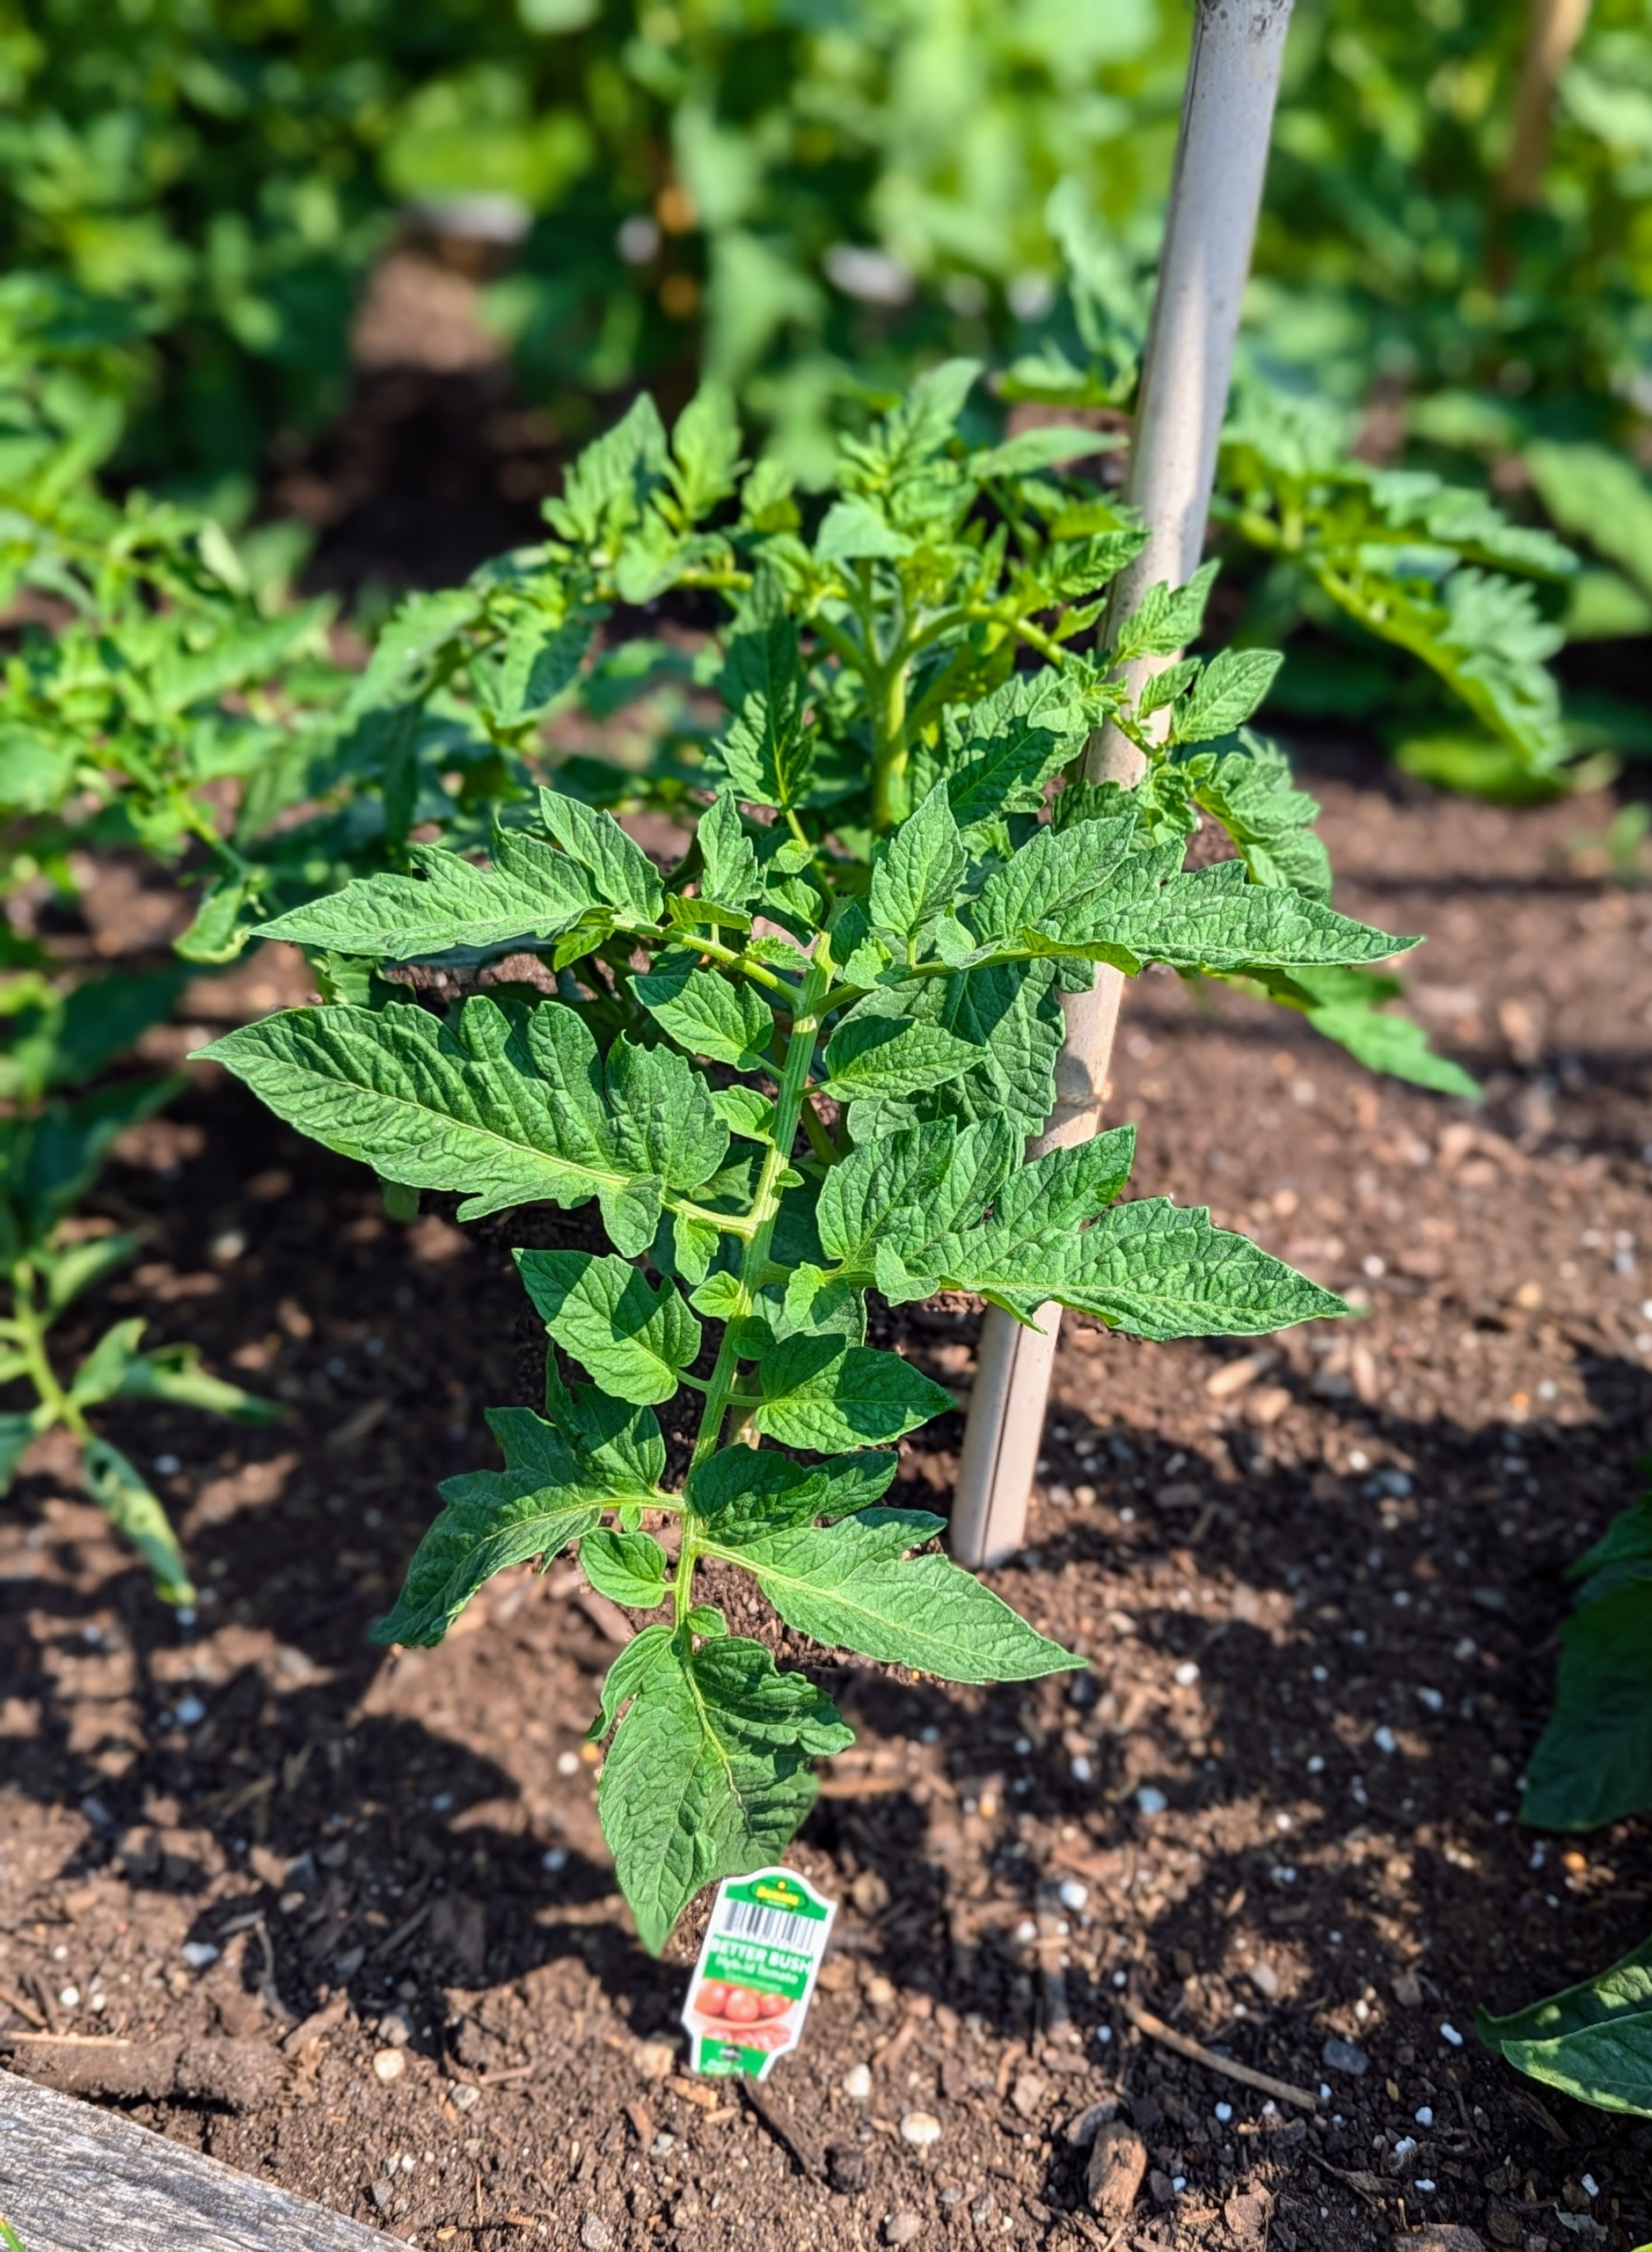
It’s easy to spot where the tomatoes are growing by all the bamboo supports. If you’ve ever grown a vining plant, you know how important it is to provide strong structures to which the vines can cling and climb. Bamboo is strong and easy to find at garden supply stores.
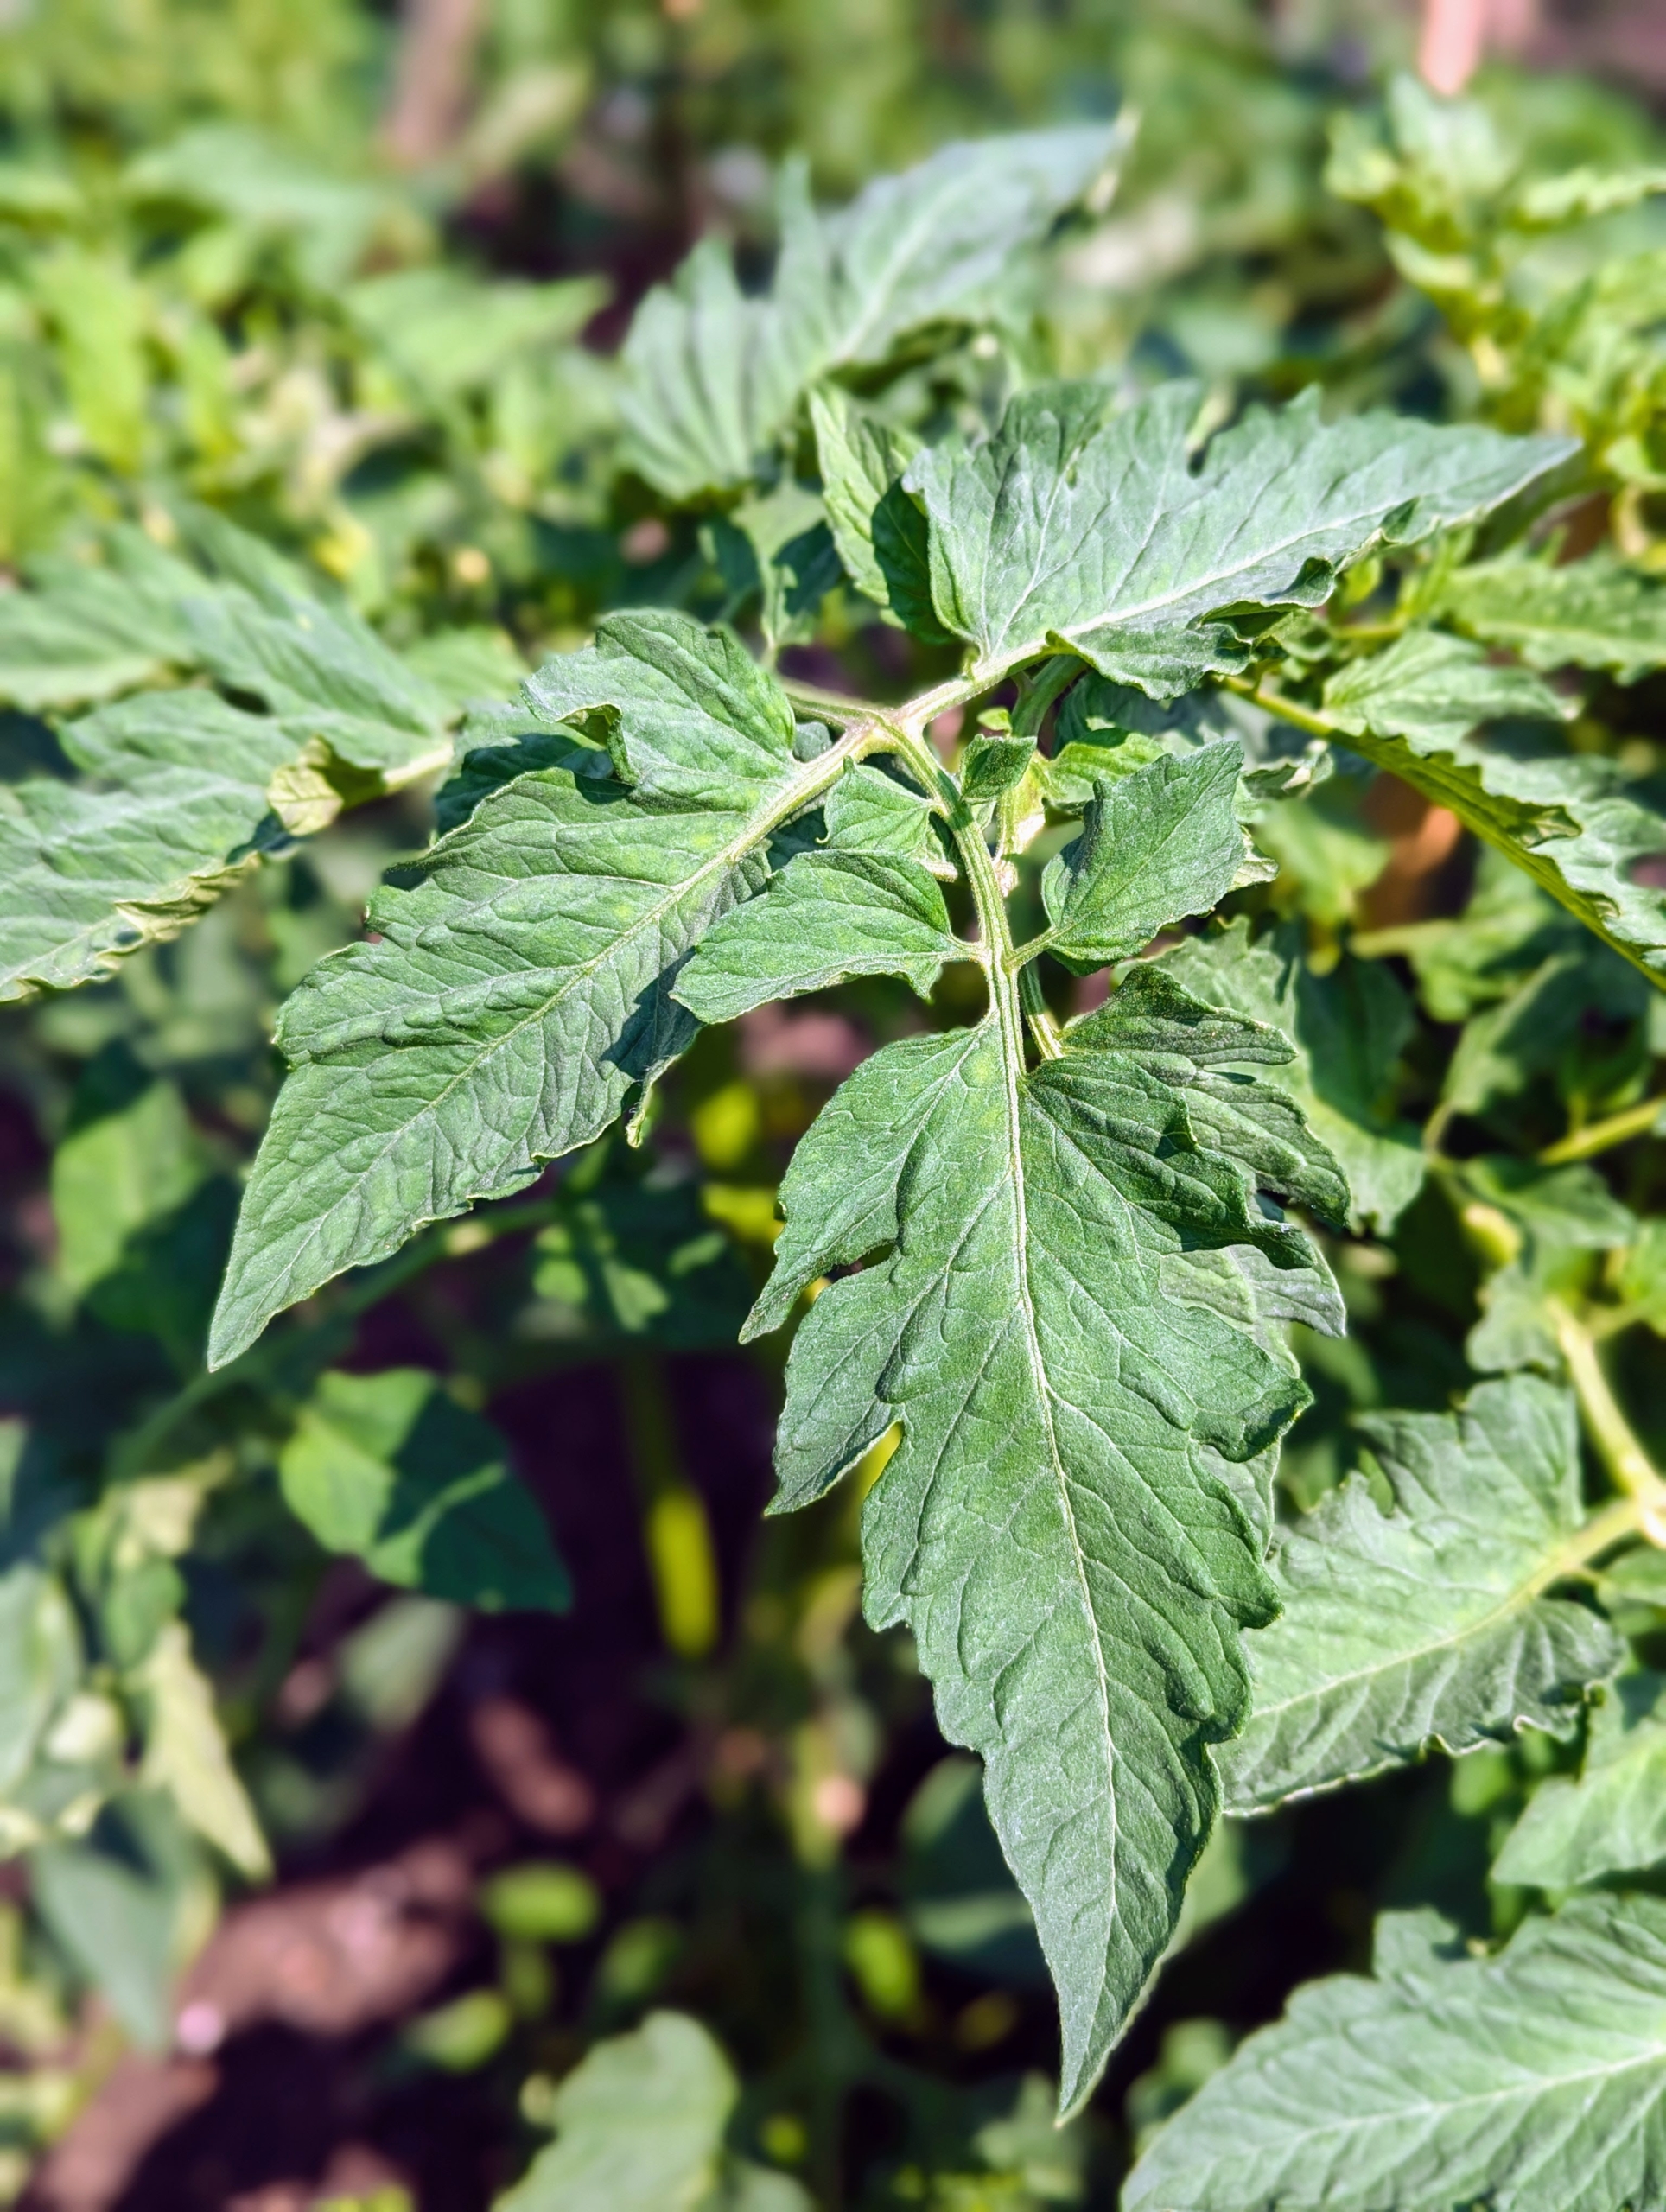
All 120 plants are divided among our four long tomato beds. I always grow an abundance of tomatoes to share and to make all the delicious tomato sauce I enjoy through the year. It’s a good idea to grow a range of varieties, including at least one or two disease-resistant types.
Many of this year’s tomatoes were grown from seed right in my greenhouse. I also have tomato plants that were gifted to me by a friend, and a large variety also came from Bonnie Plants, one of my favorite growers.
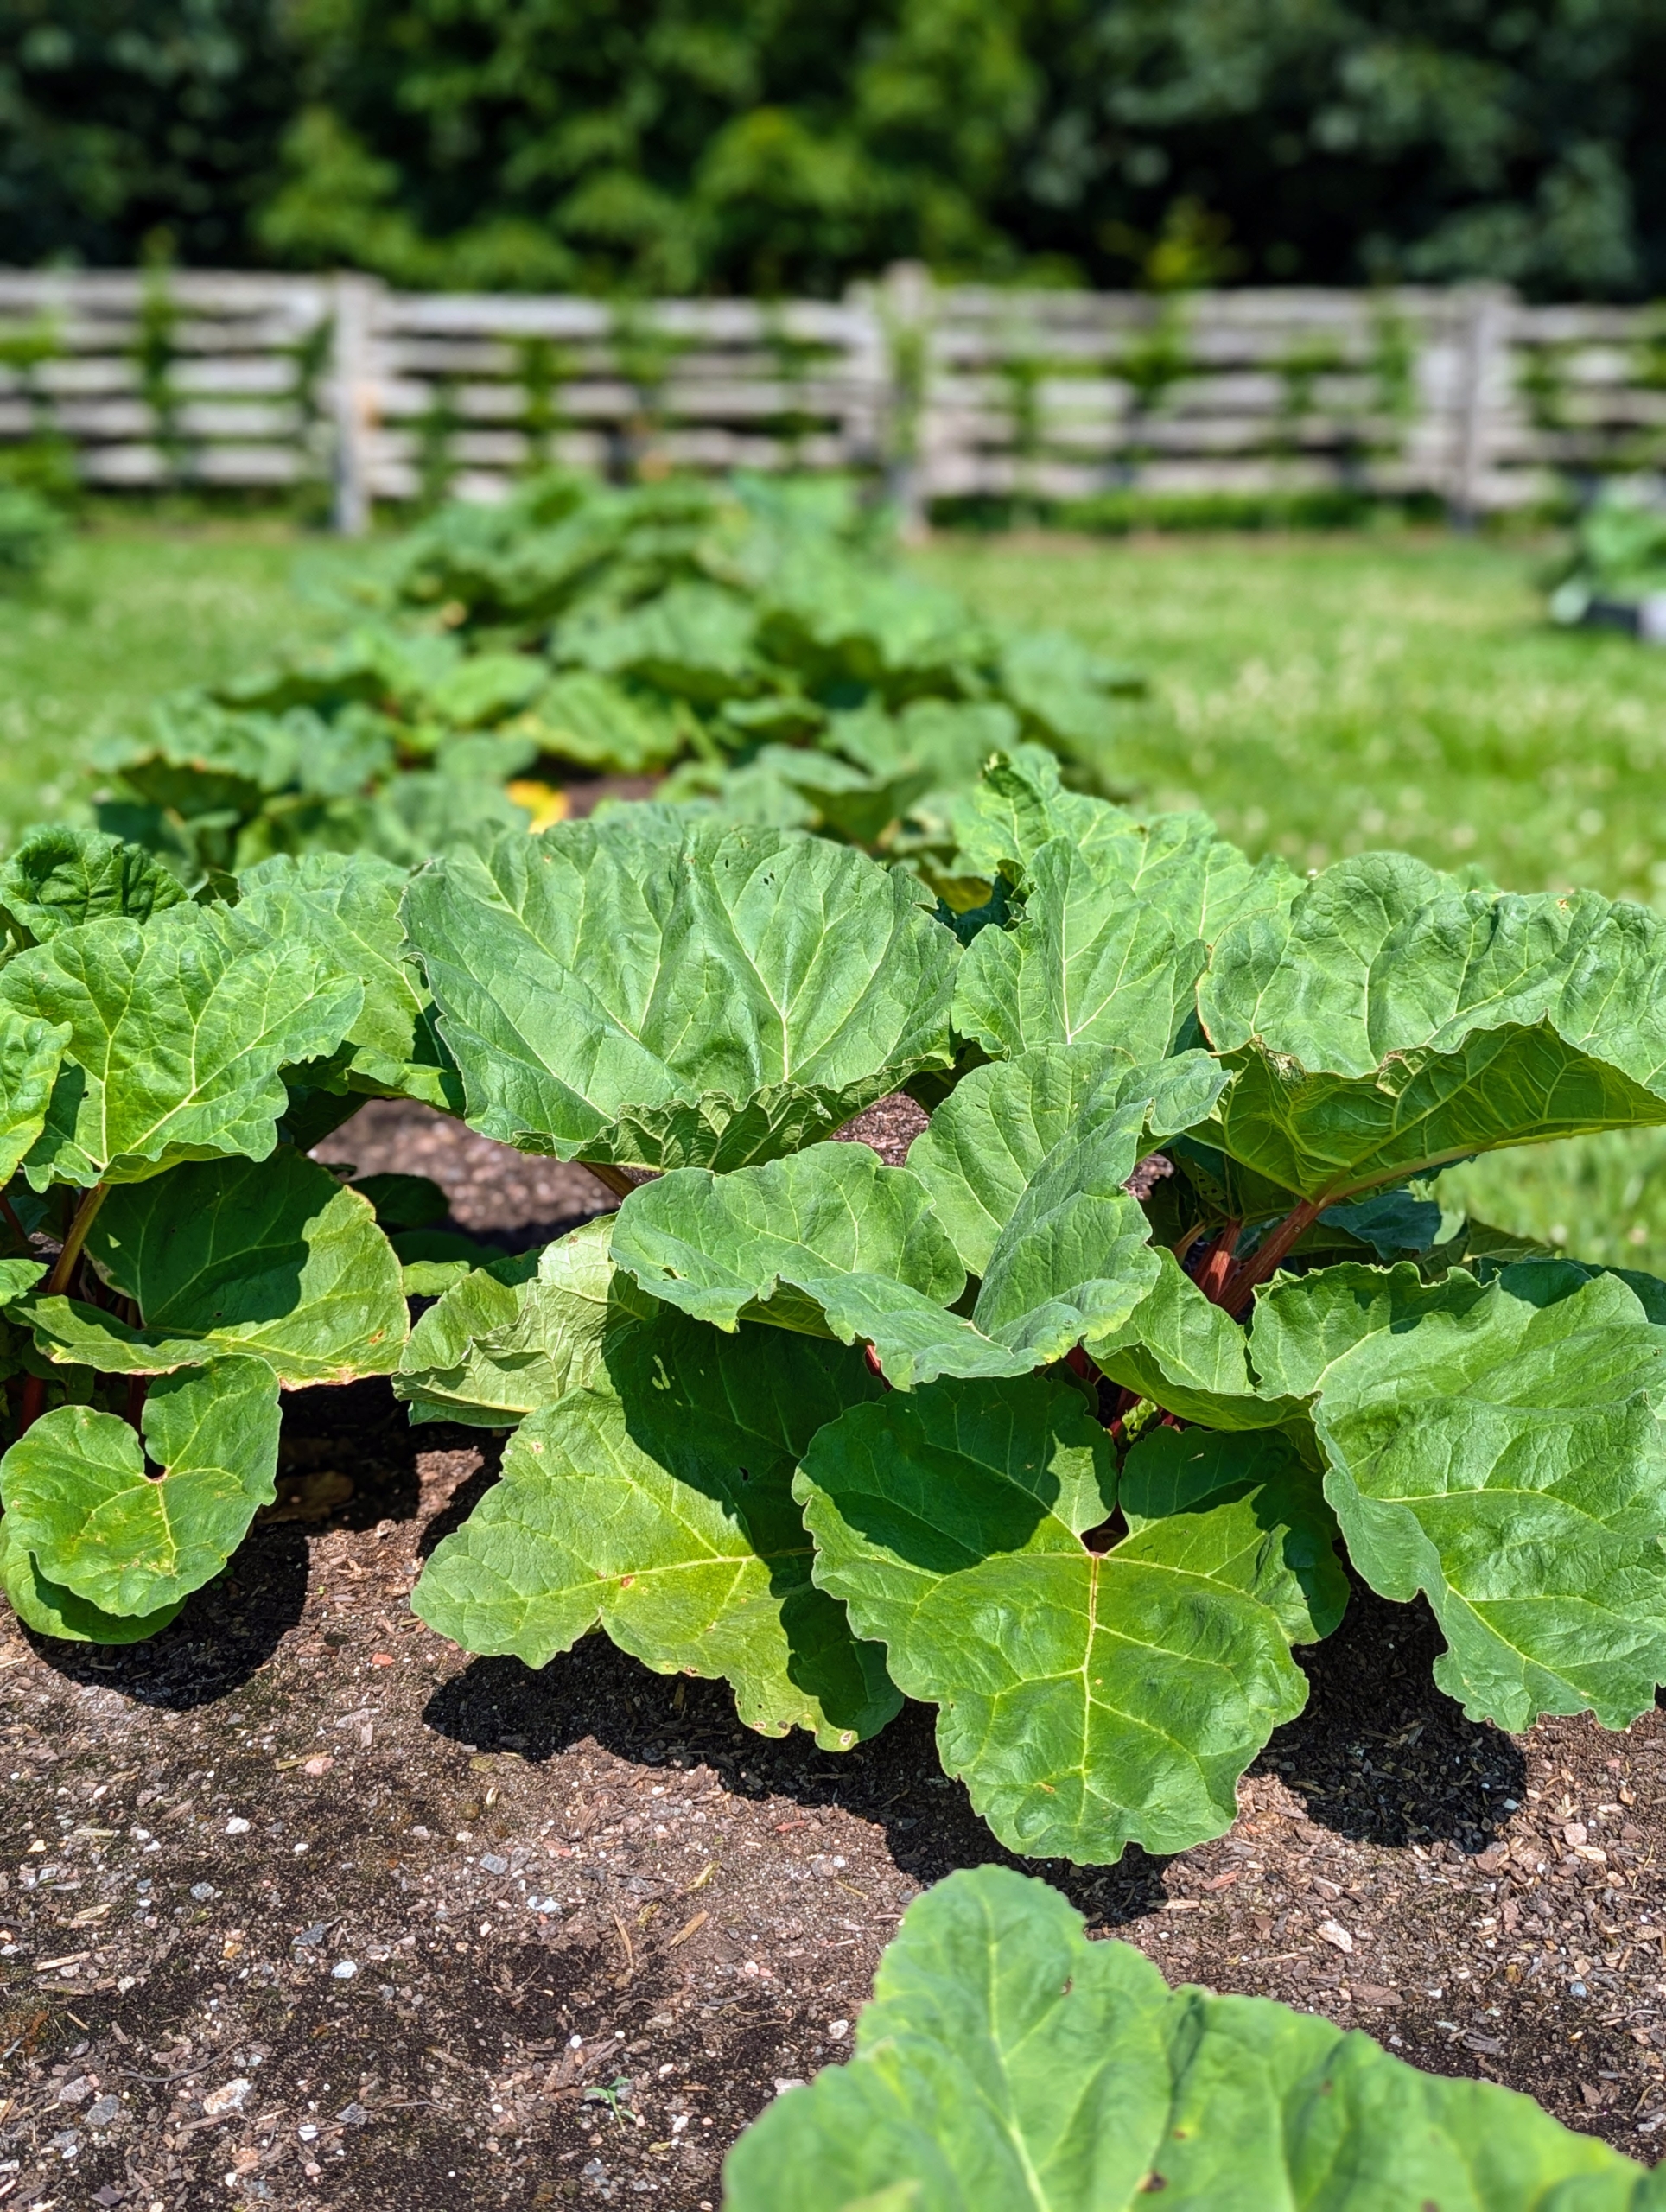
These are the large leaves of rhubarb. The leaves are toxic because they contain high levels of oxalic acid, but the fleshy stalks of rhubarb can be cooked and used to make a variety of delicious pies, tarts, cakes, cobblers, crisps, and pavlovas.
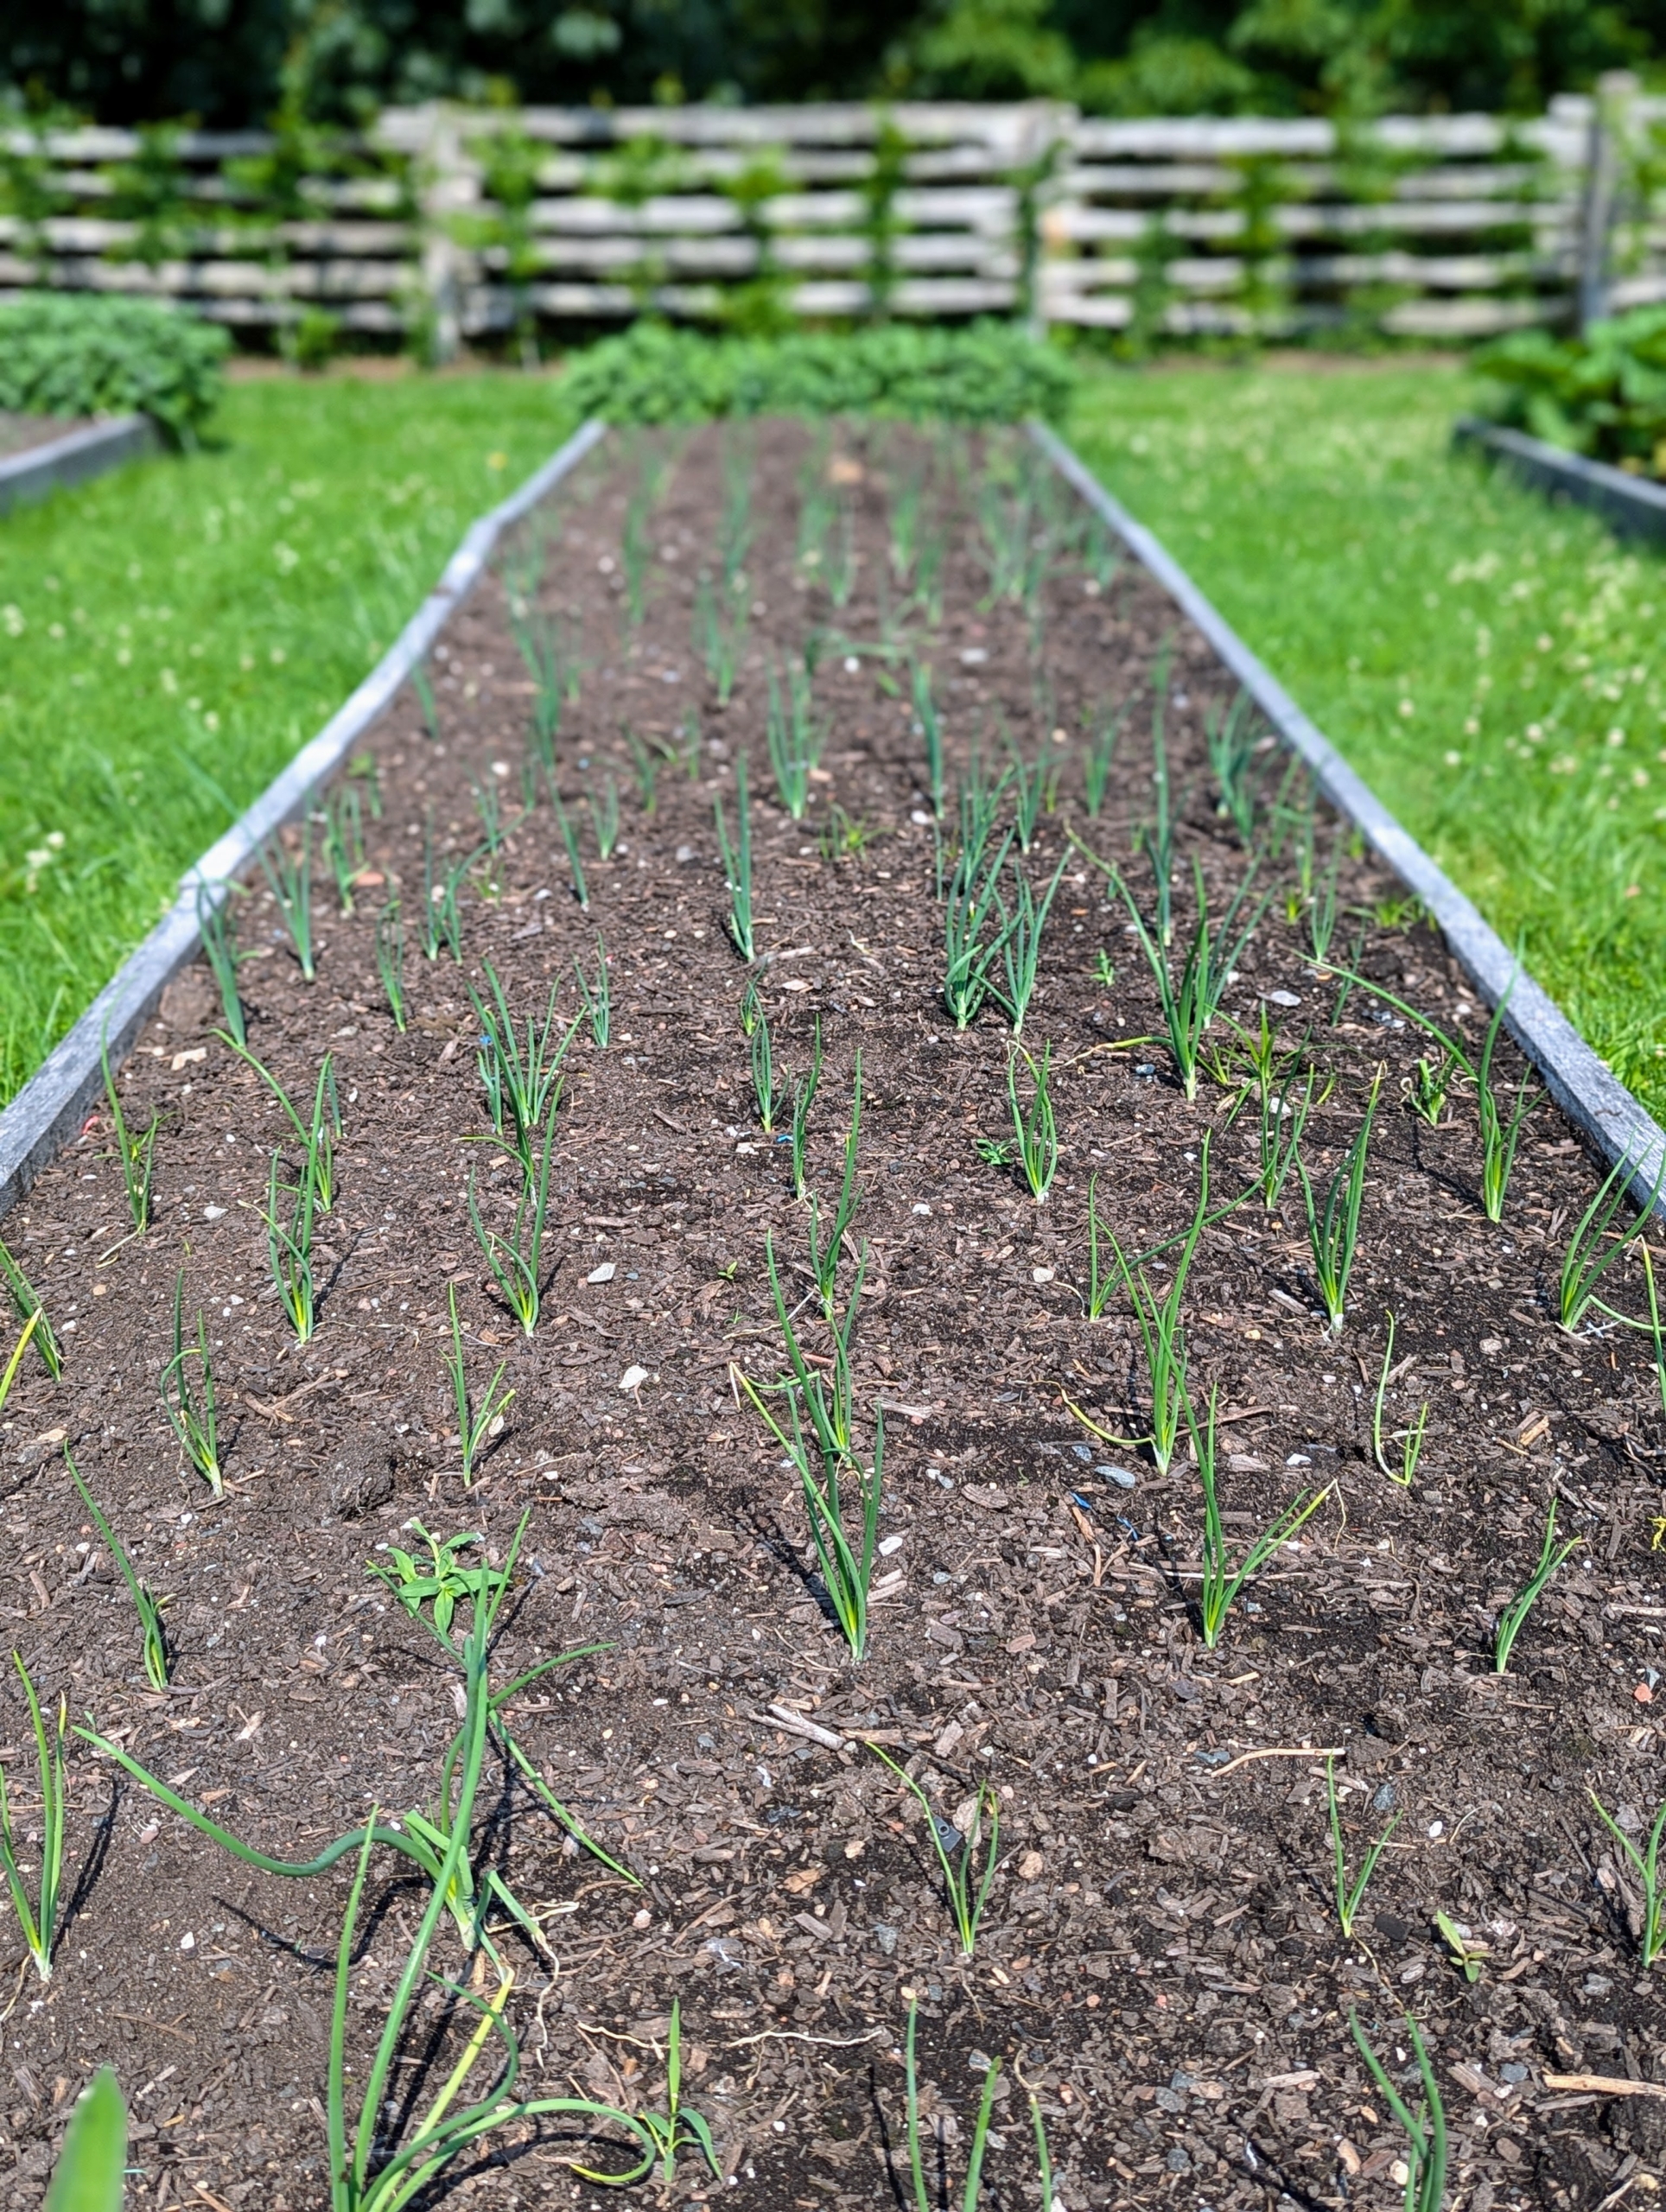
I planted onions, shallots, and leeks a few weeks ago and they are all developing nicely. Onions, shallots and leeks are harvested later in the summer when the underground bulbs are mature and flavorful. I always look forward to this harvest!
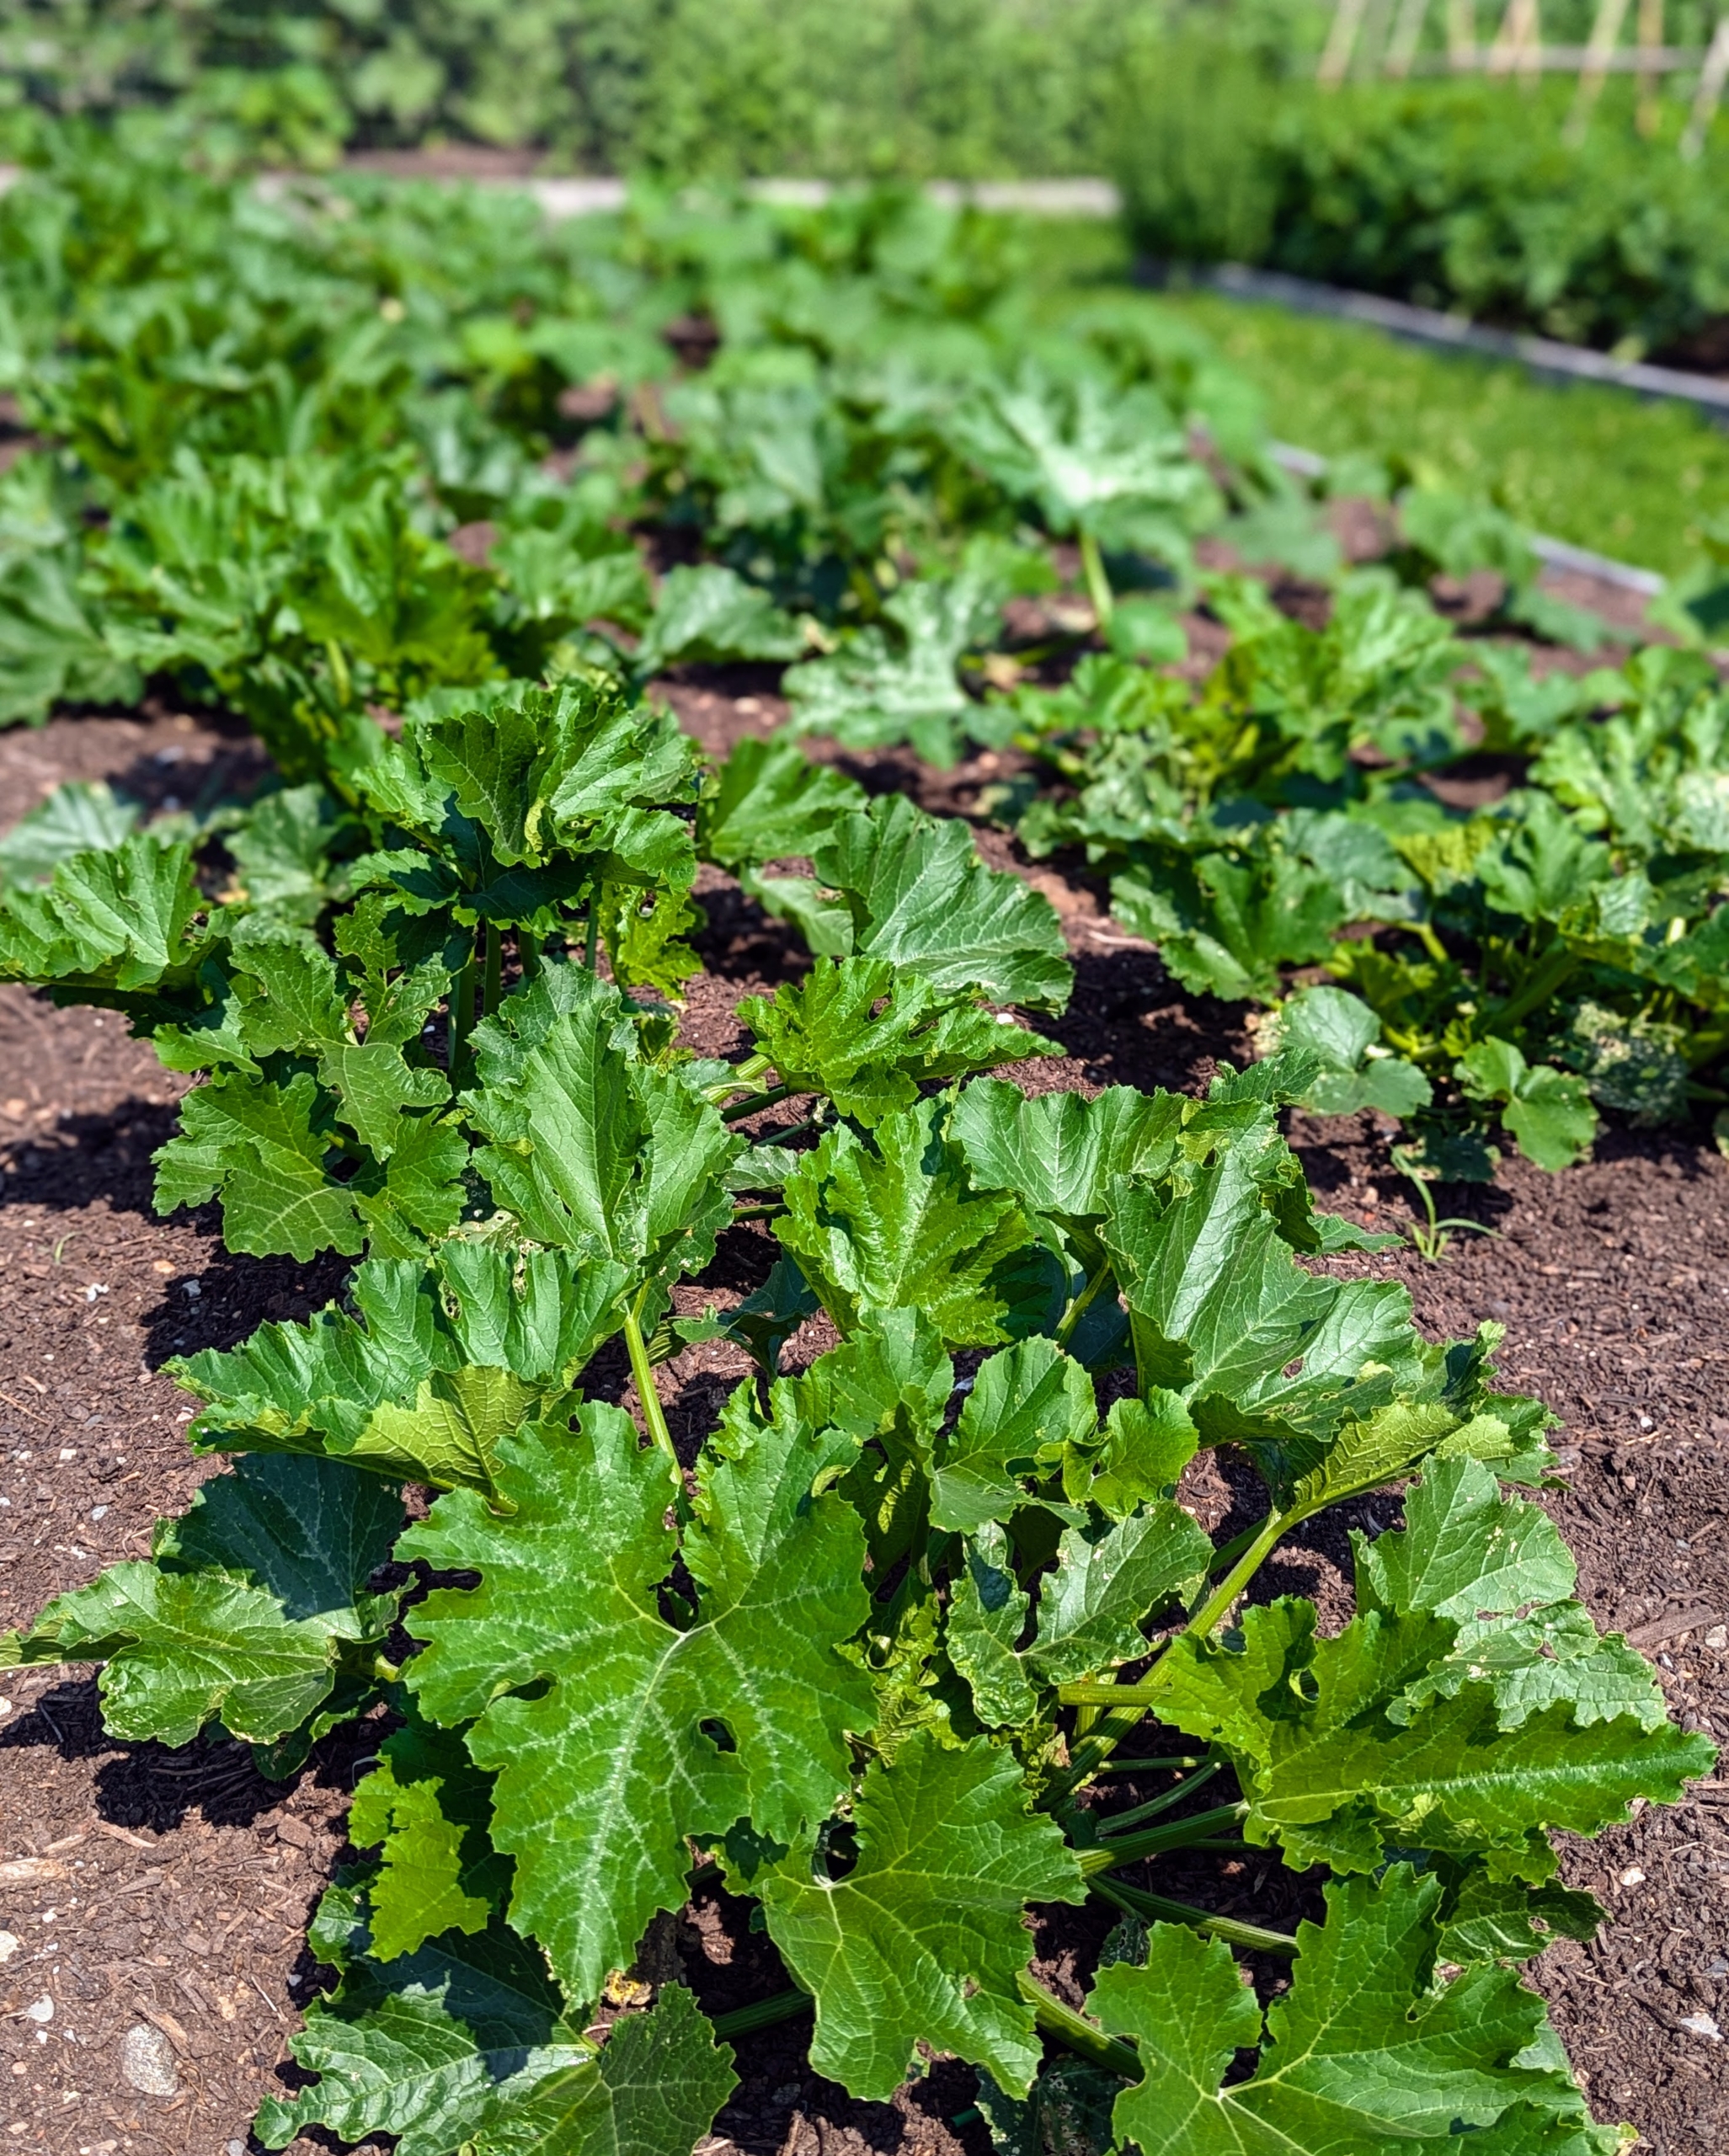
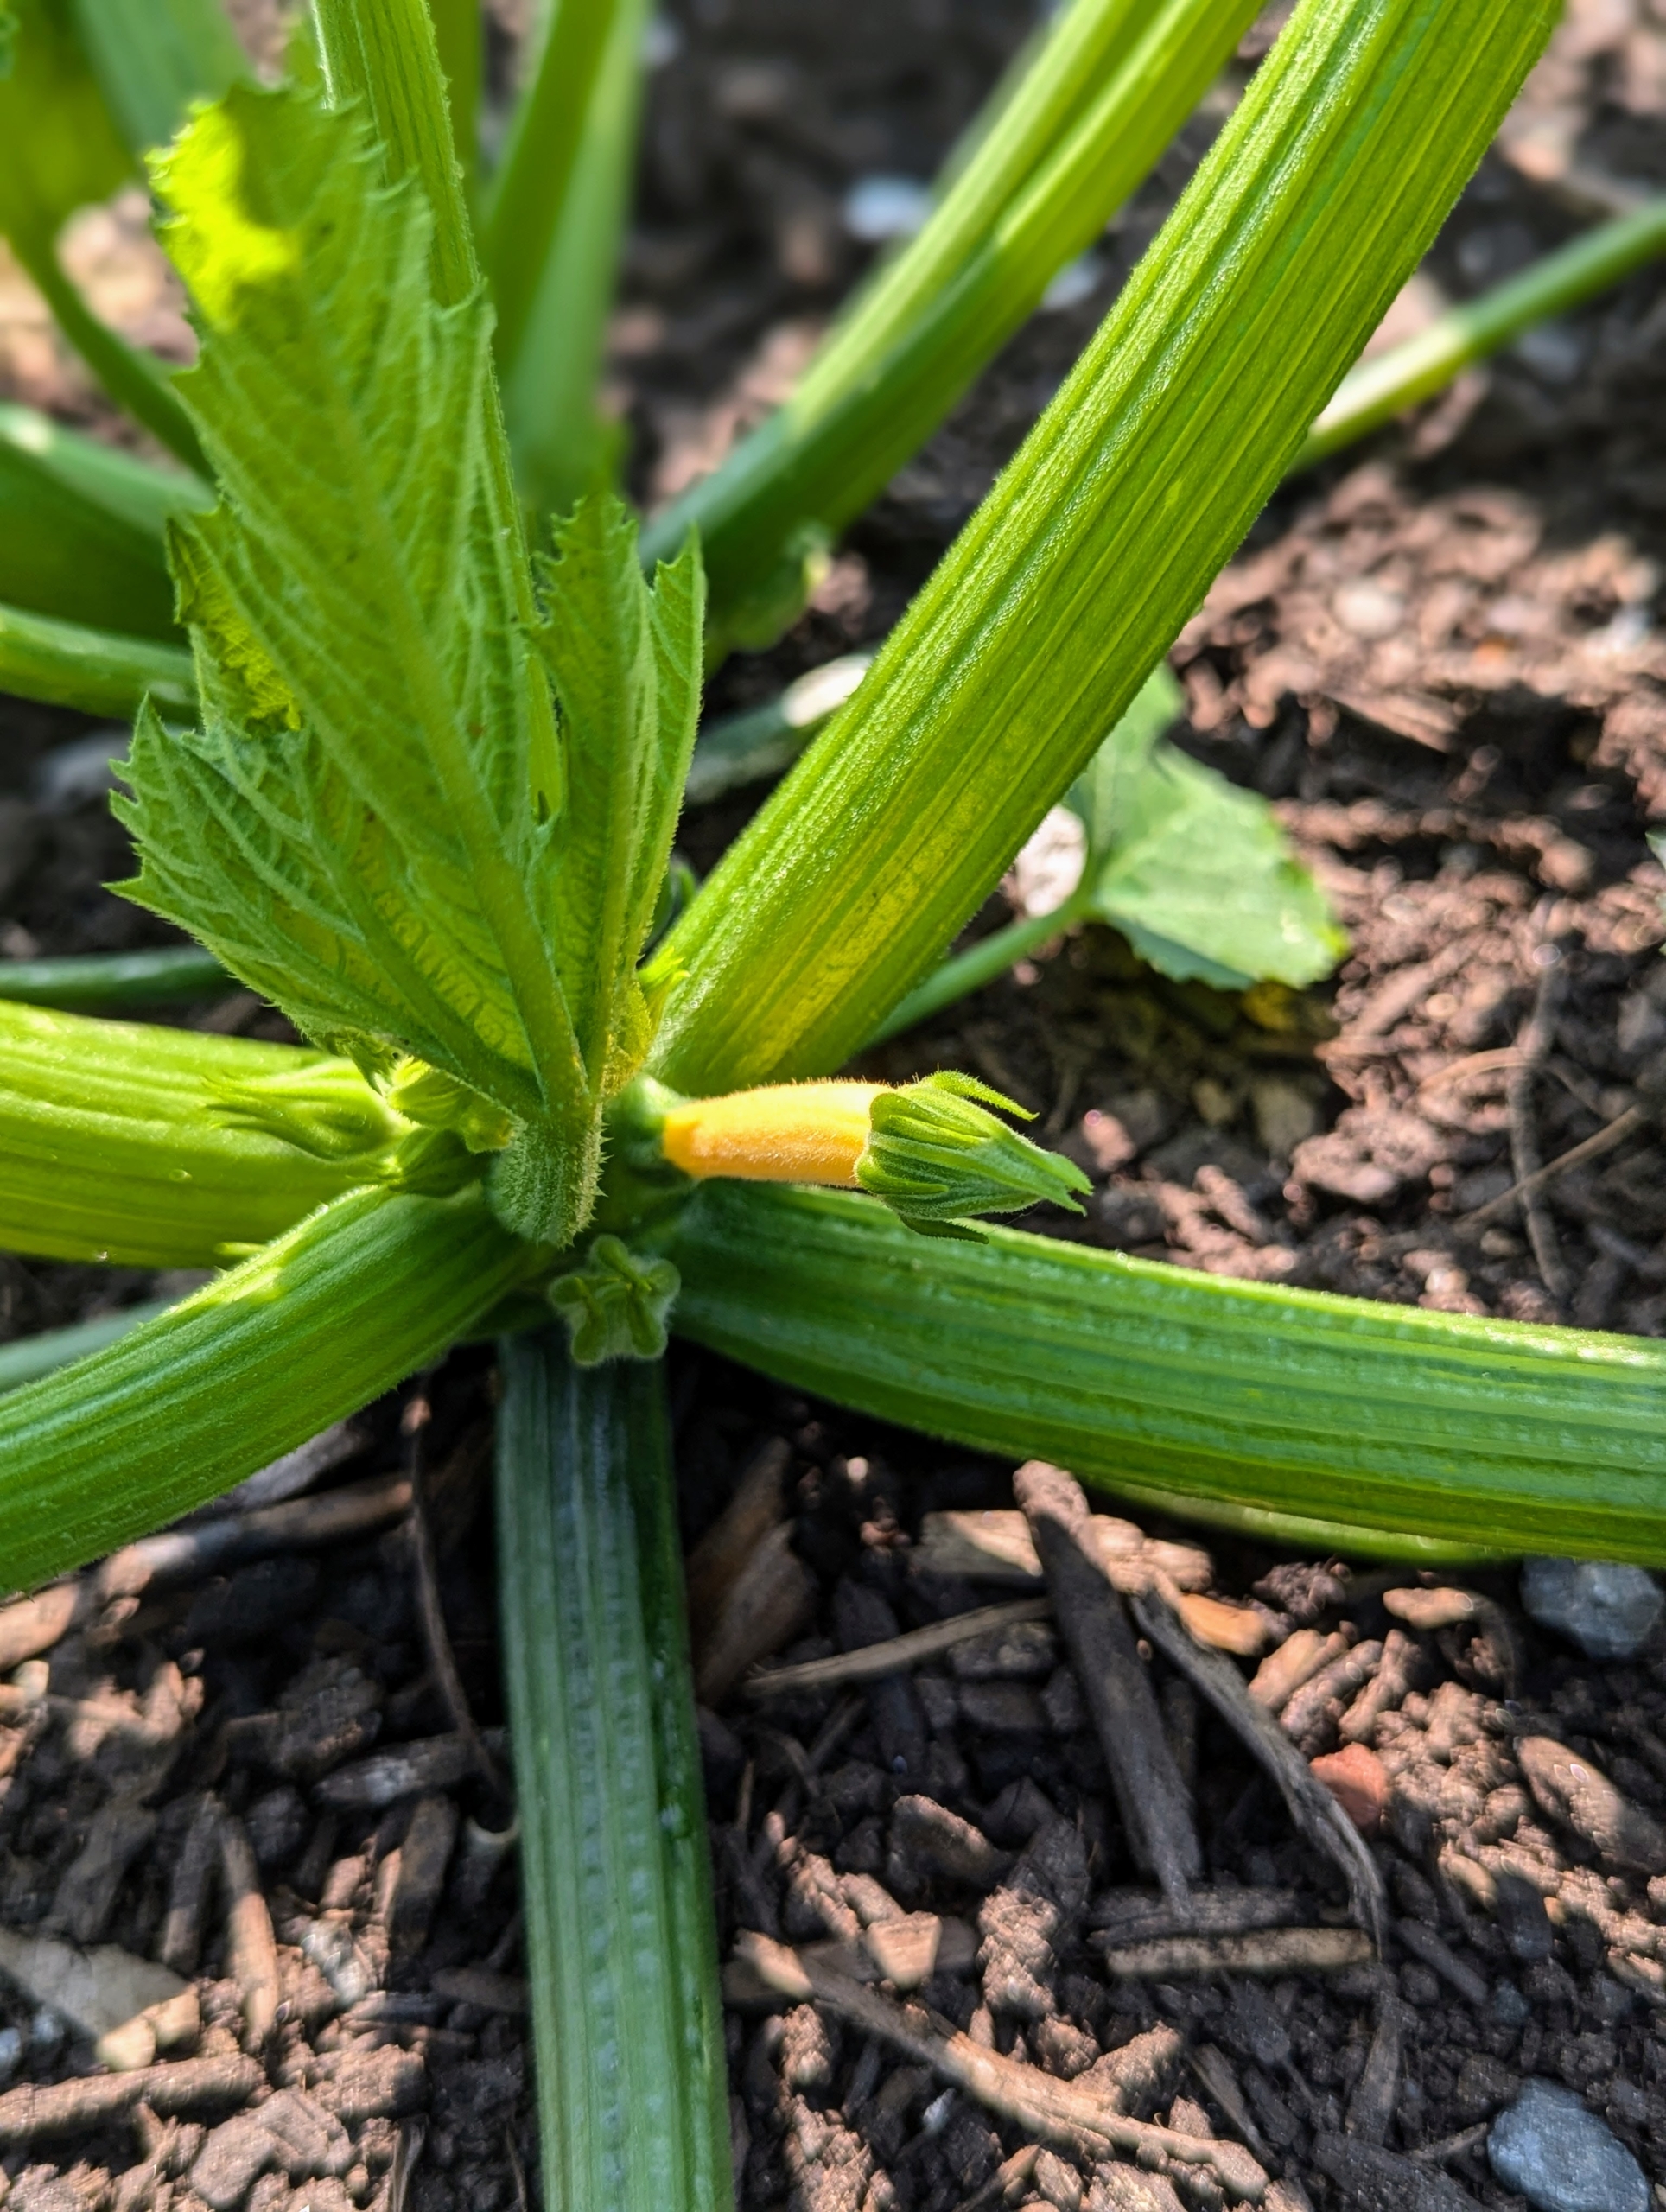
In this long bed, I have summer squash and zucchini.
Looking closely, one can see the squash growing.
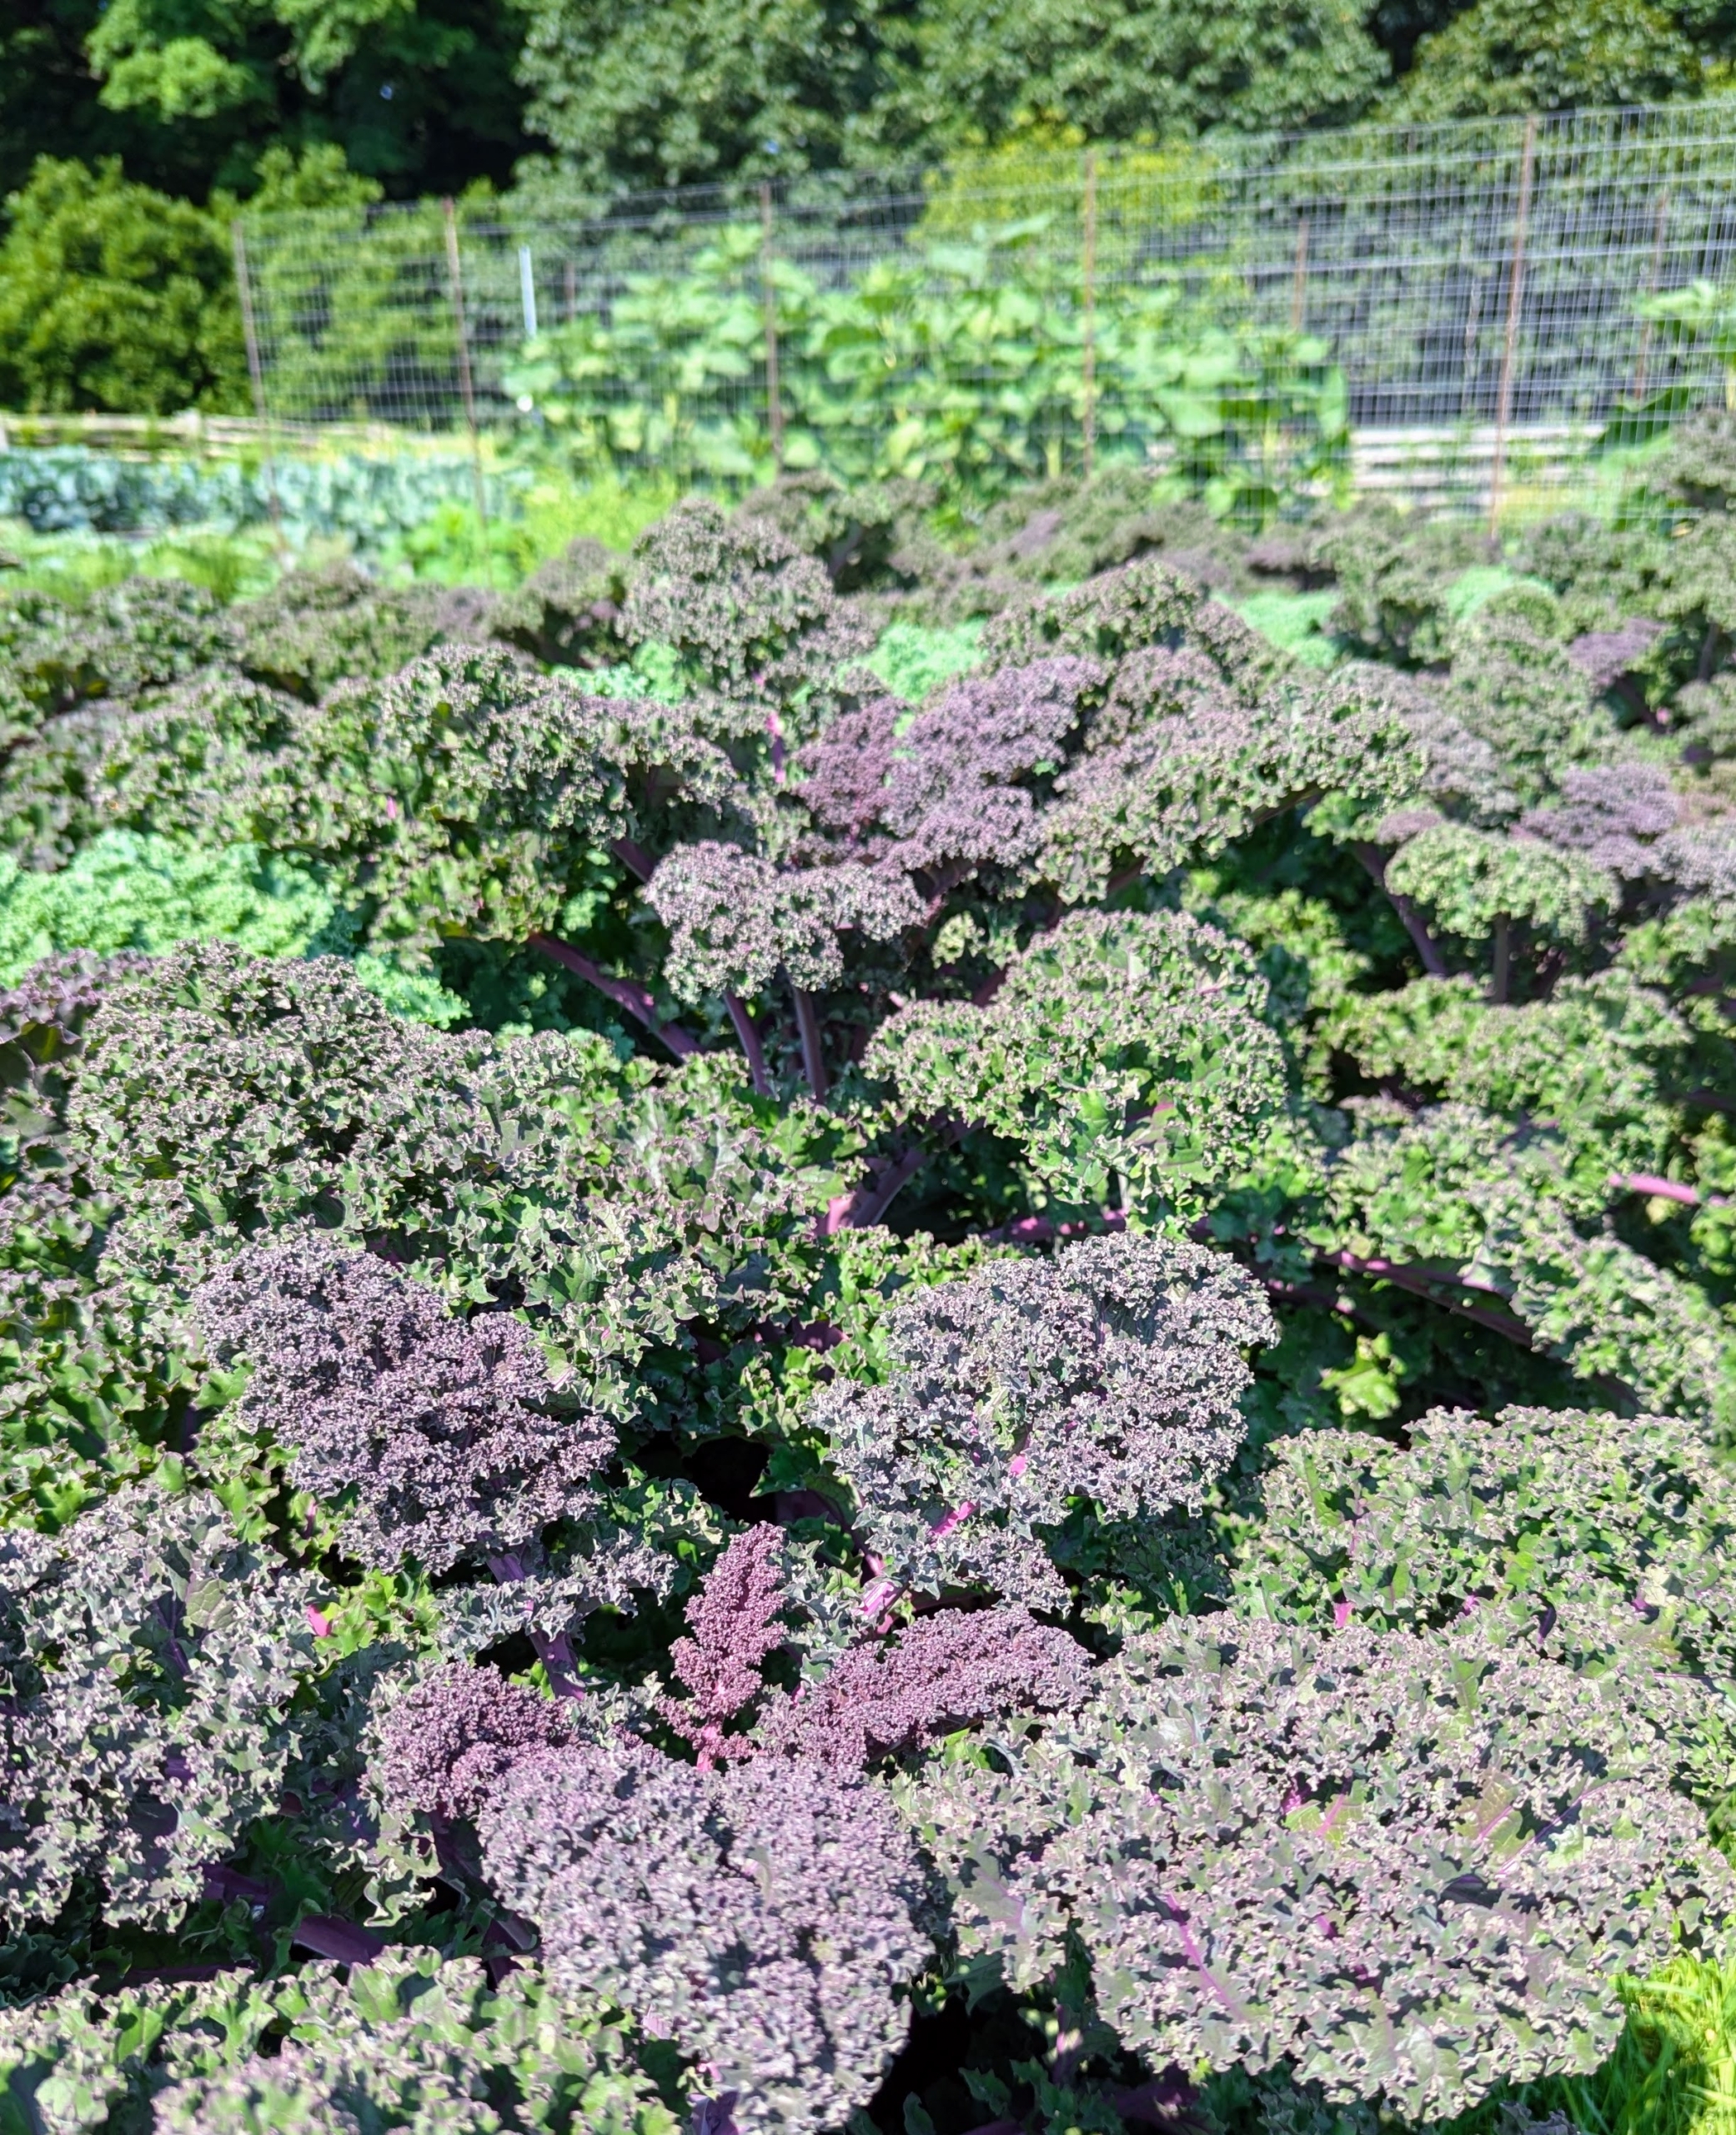
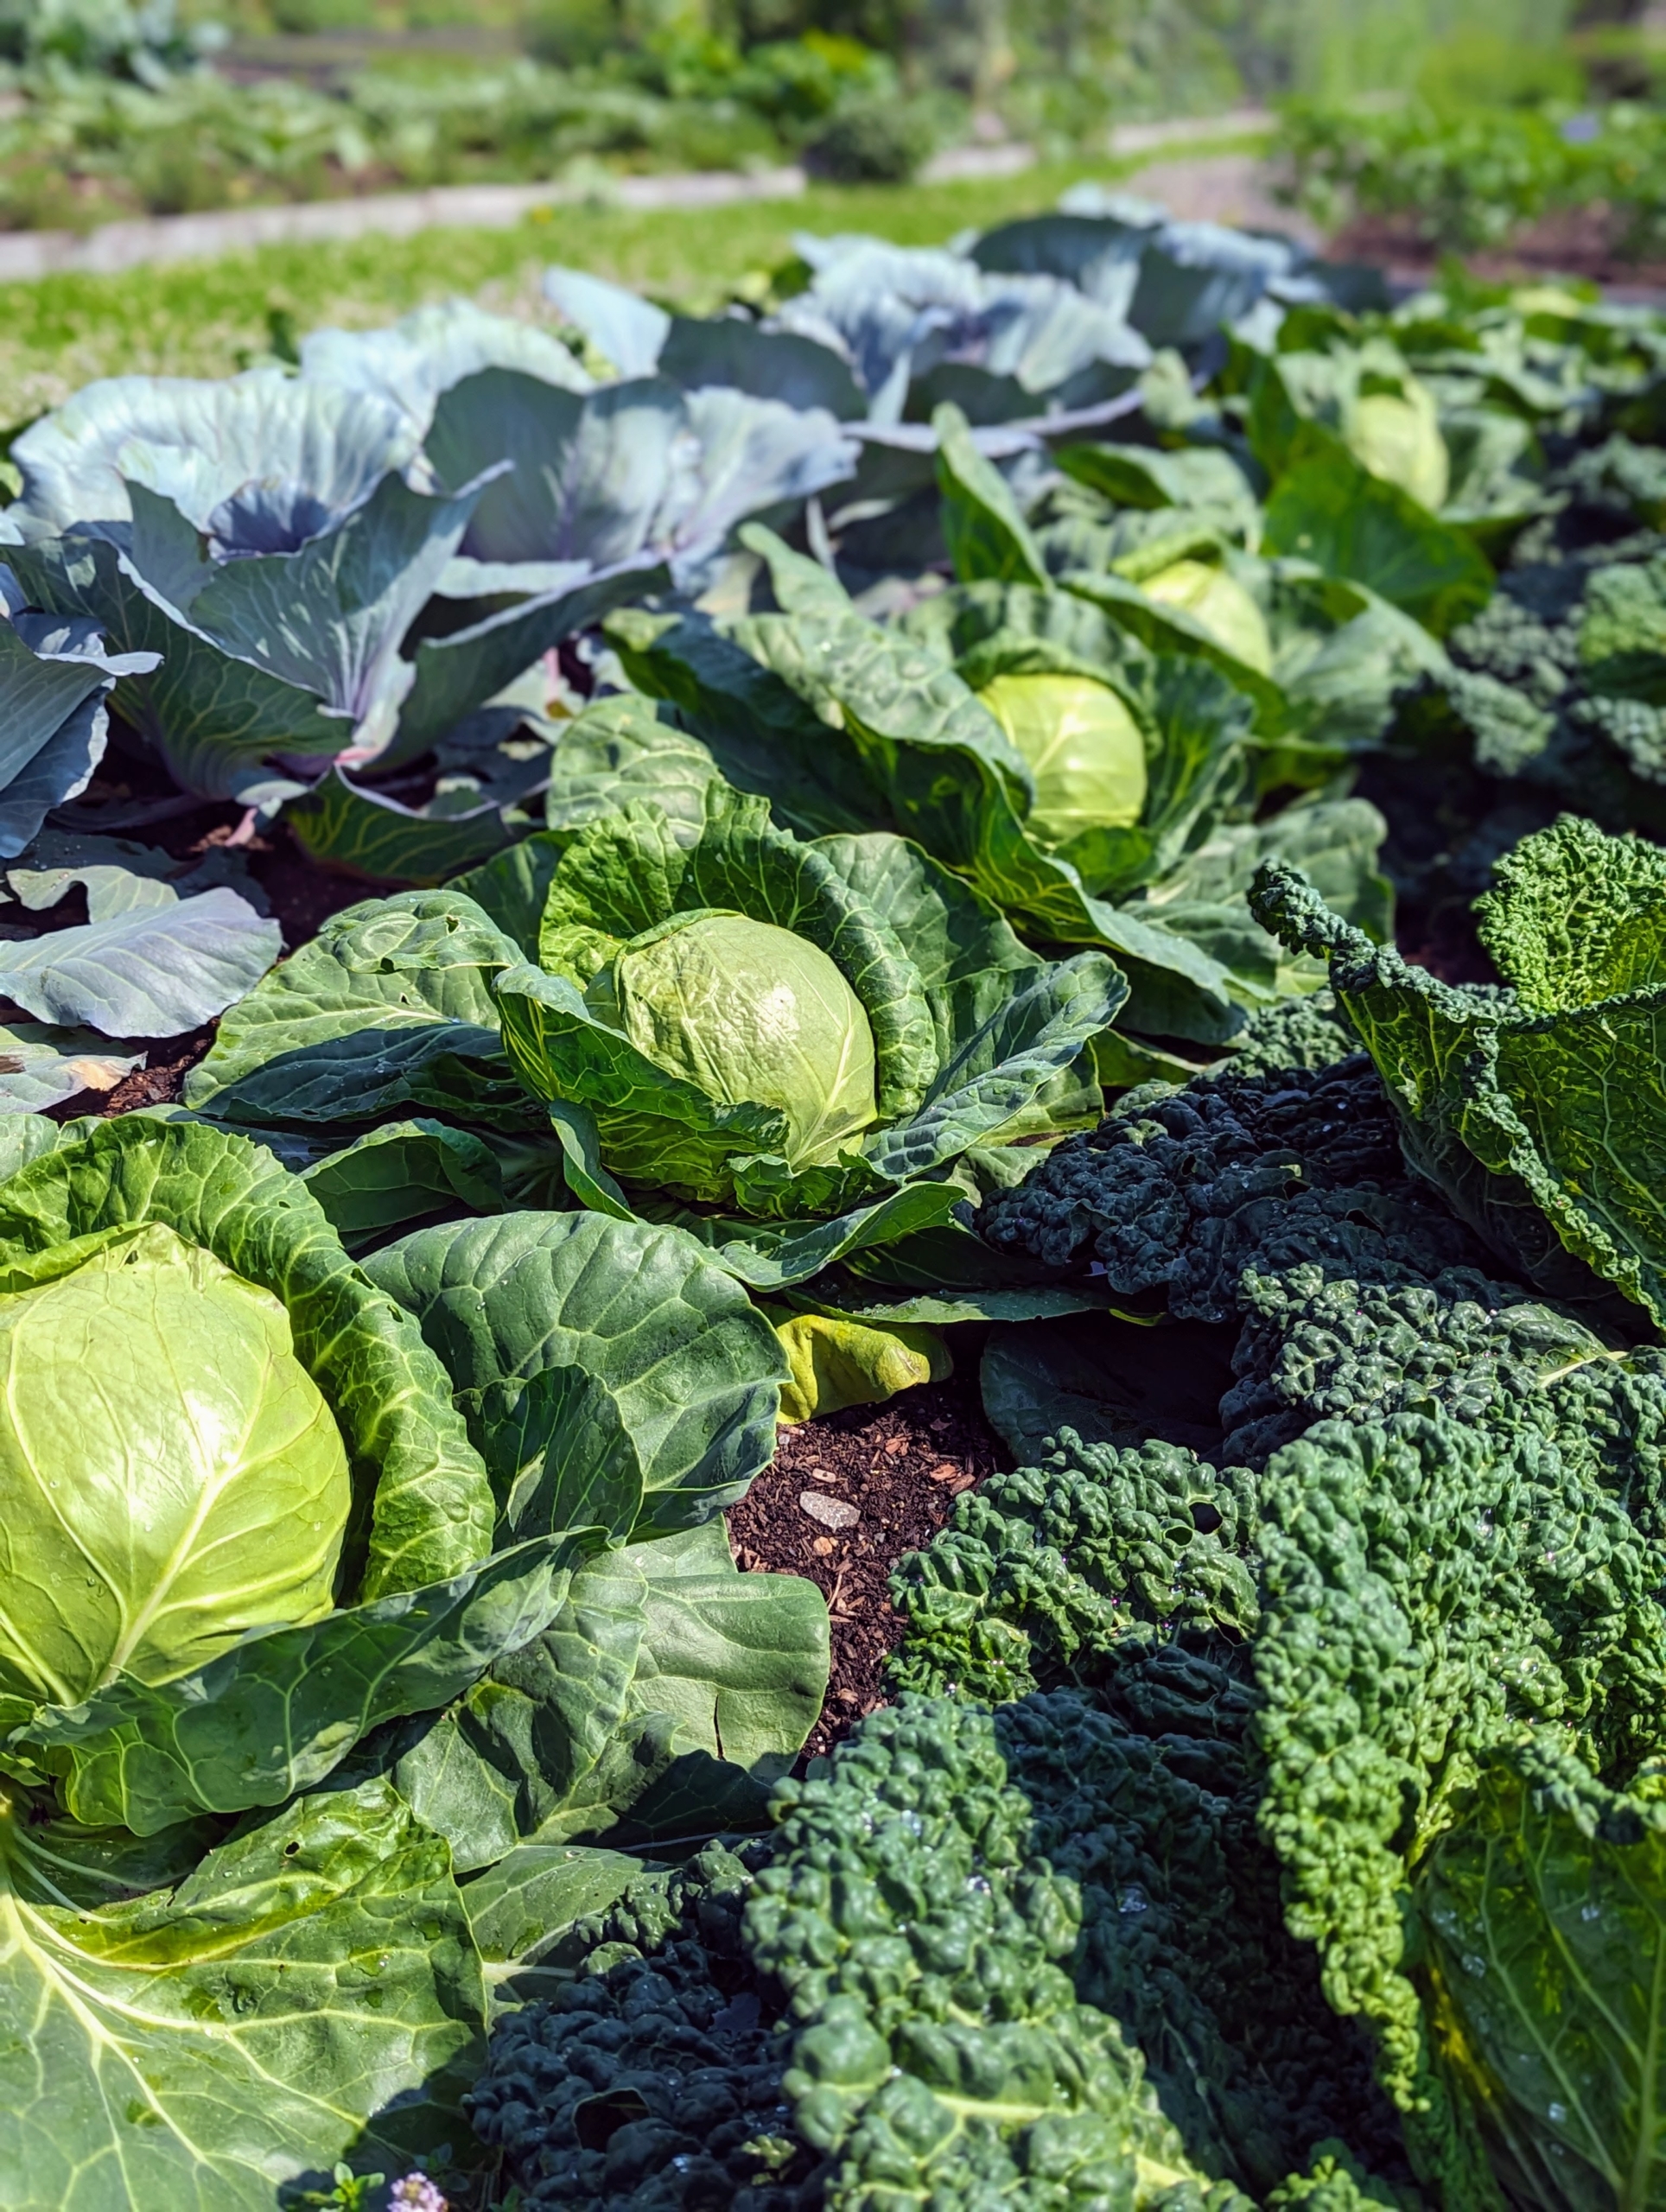
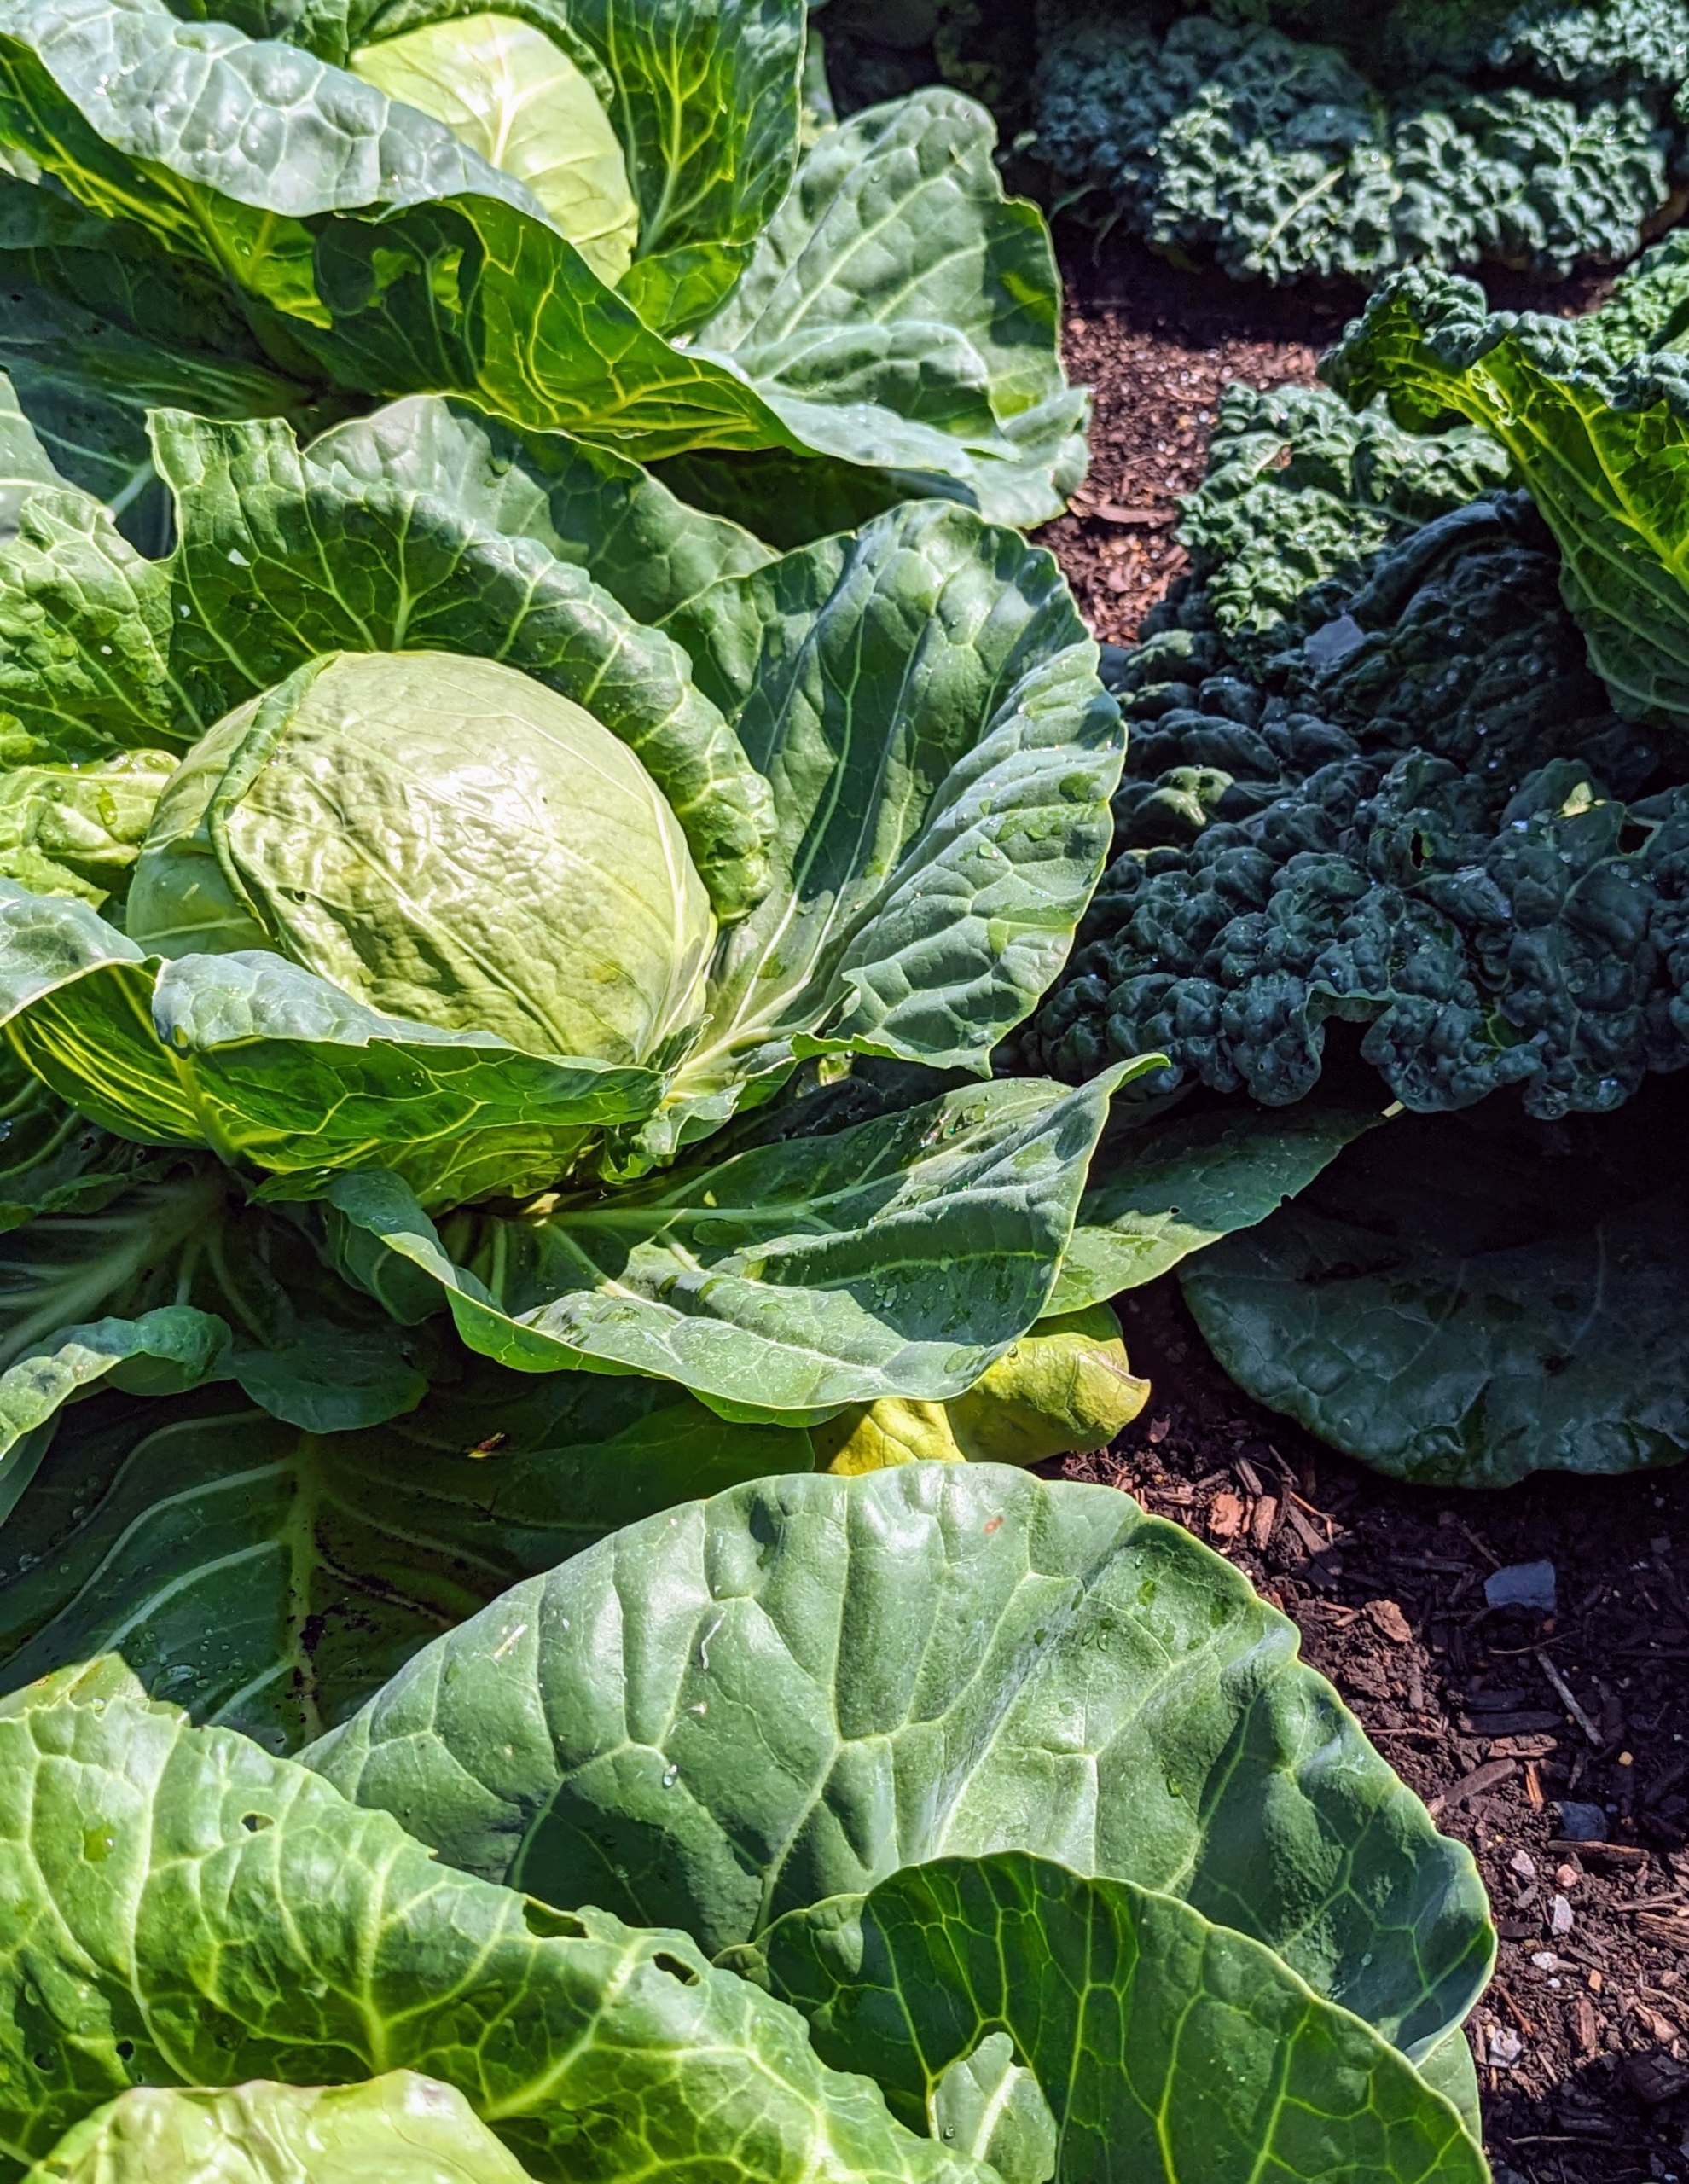
The kale continues to be a big shower – look how beautiful this crop is. Kale or leaf cabbage is a group of vegetable cultivars within the plant species Brassica oleracea. They have purple or green leaves, in which the central leaves do not form a head. One cup of chopped kale has 134-percent of the recommended daily intake of vitamin-C – that’s more than a medium orange, which only has 113-percent of the daily C requirement.
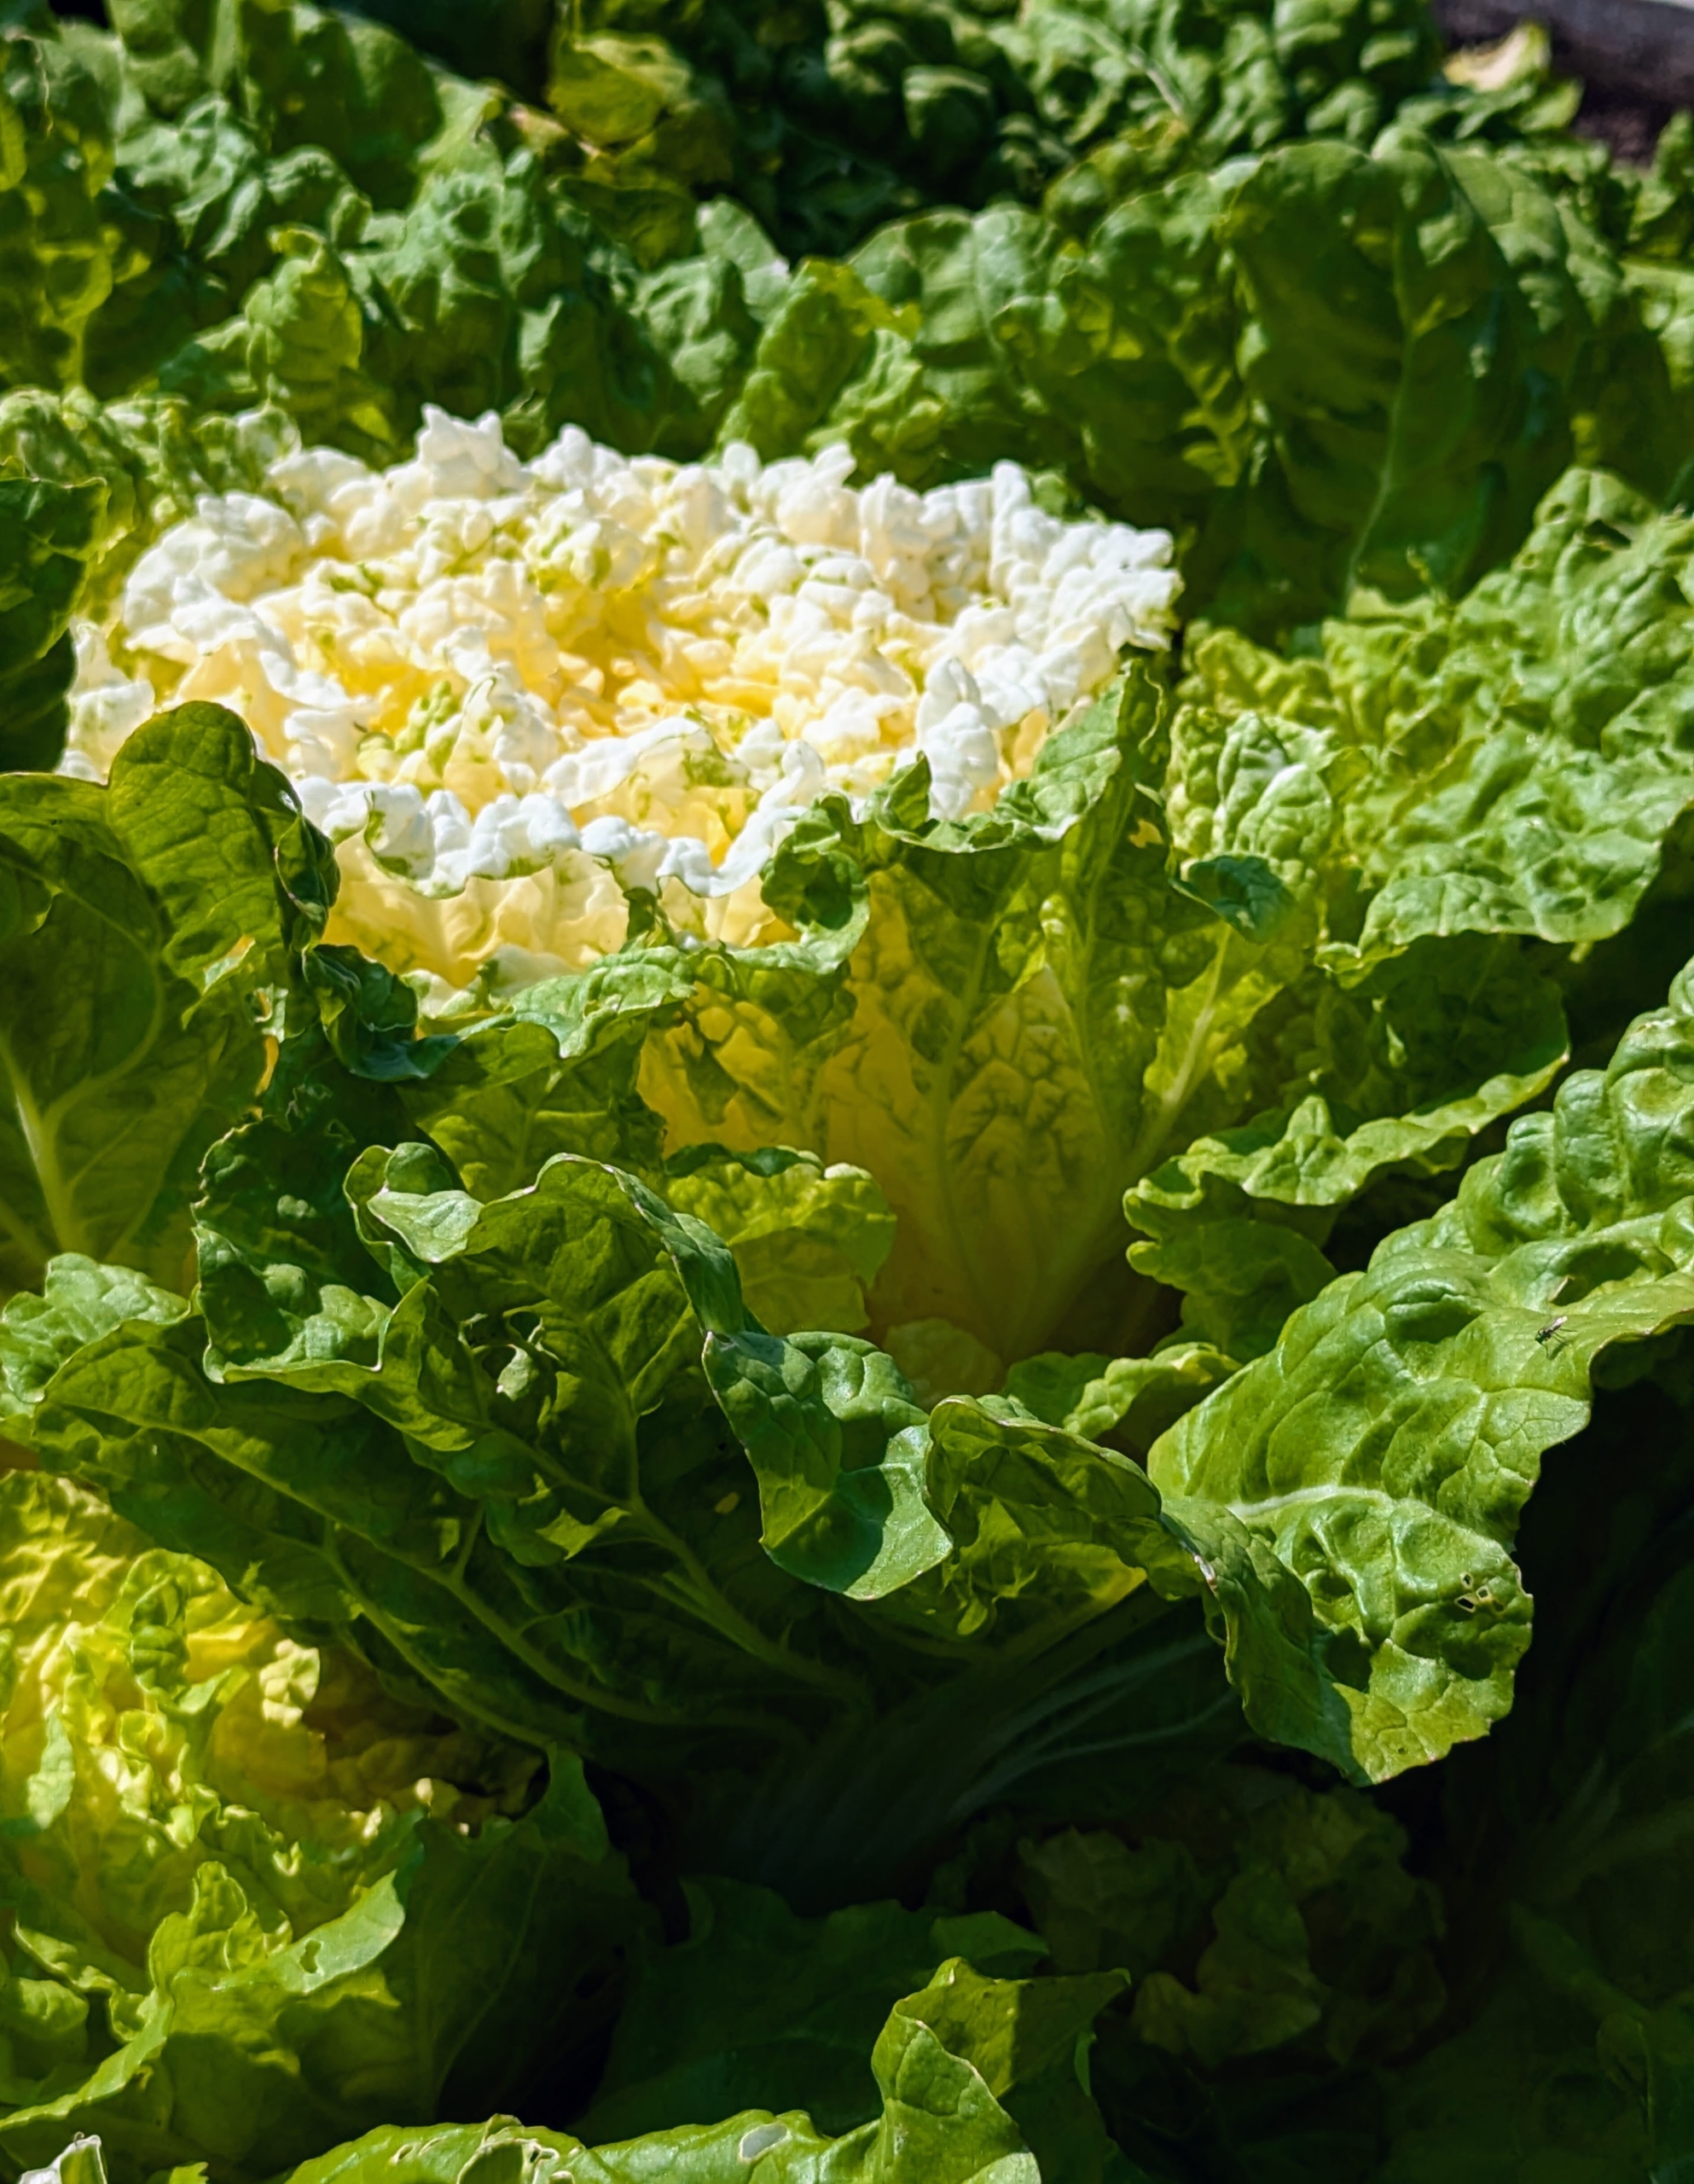
And maybe you saw the Chinese cabbage on my Instagram page @marthastewart48. Also called Napa cabbage, these heads are oblong with green, crinkly leaves on the outside and creamy yellow in the center. I picked one not long ago and it weighed 15 pounds!
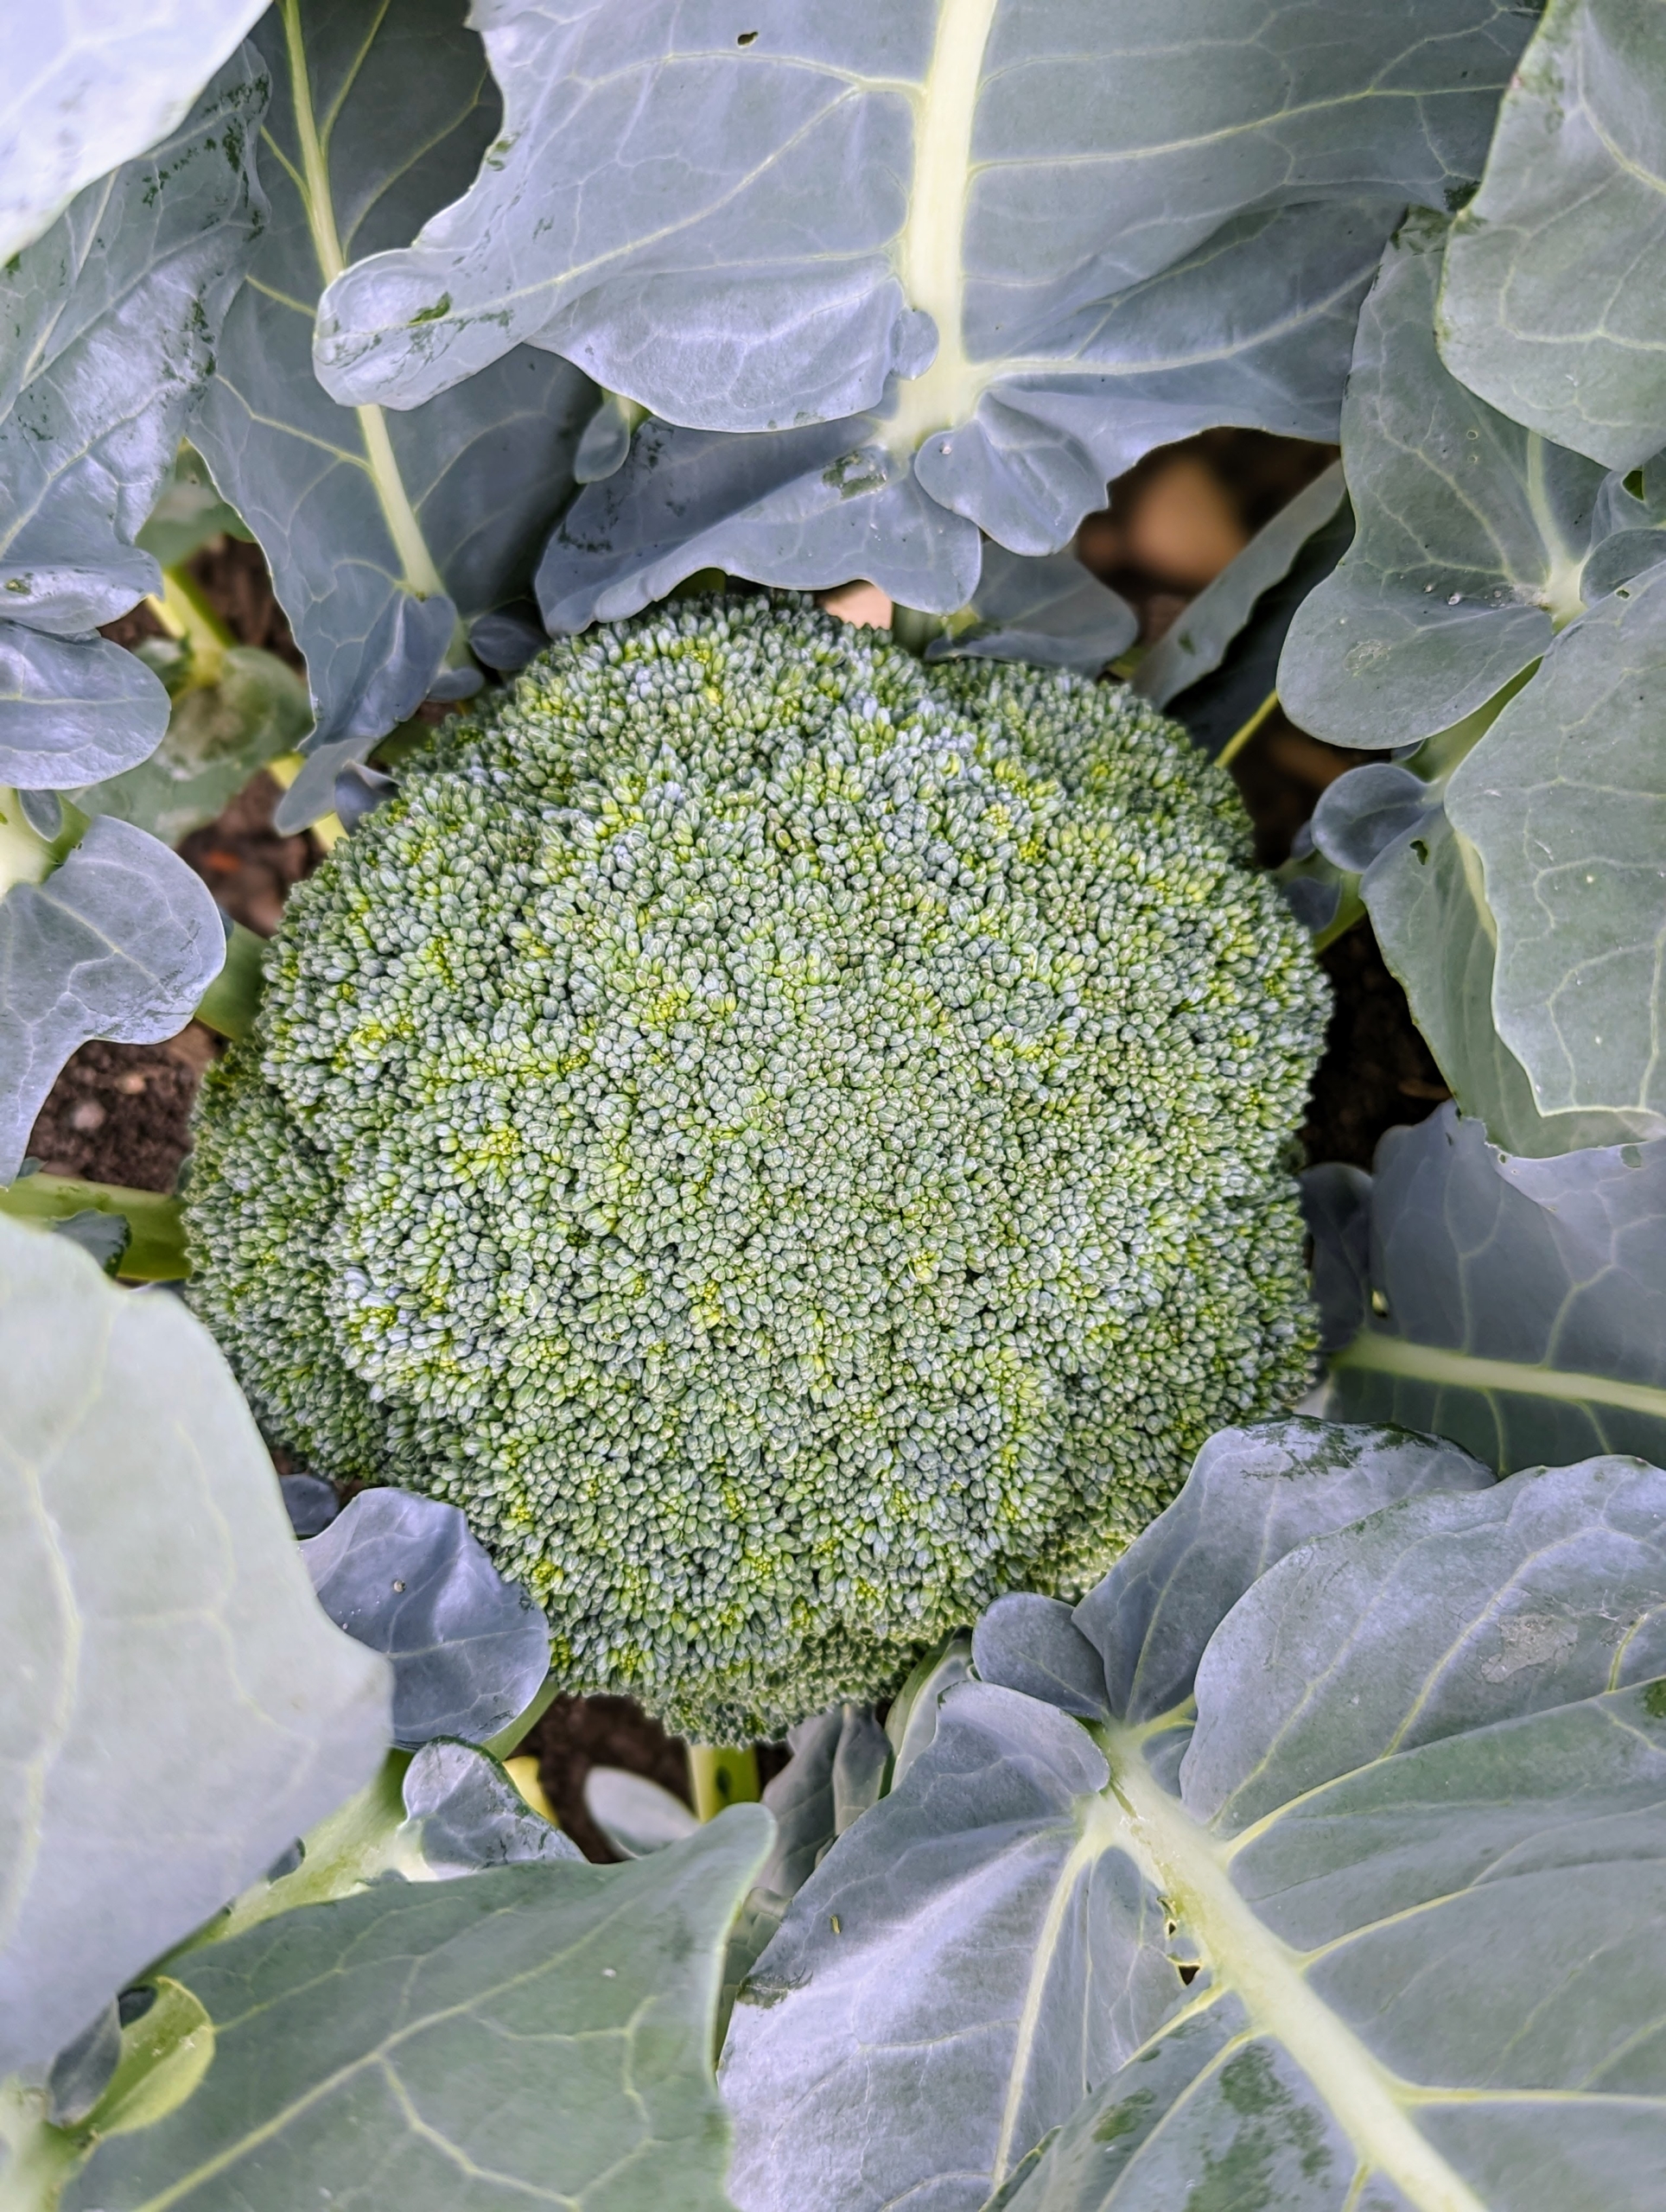
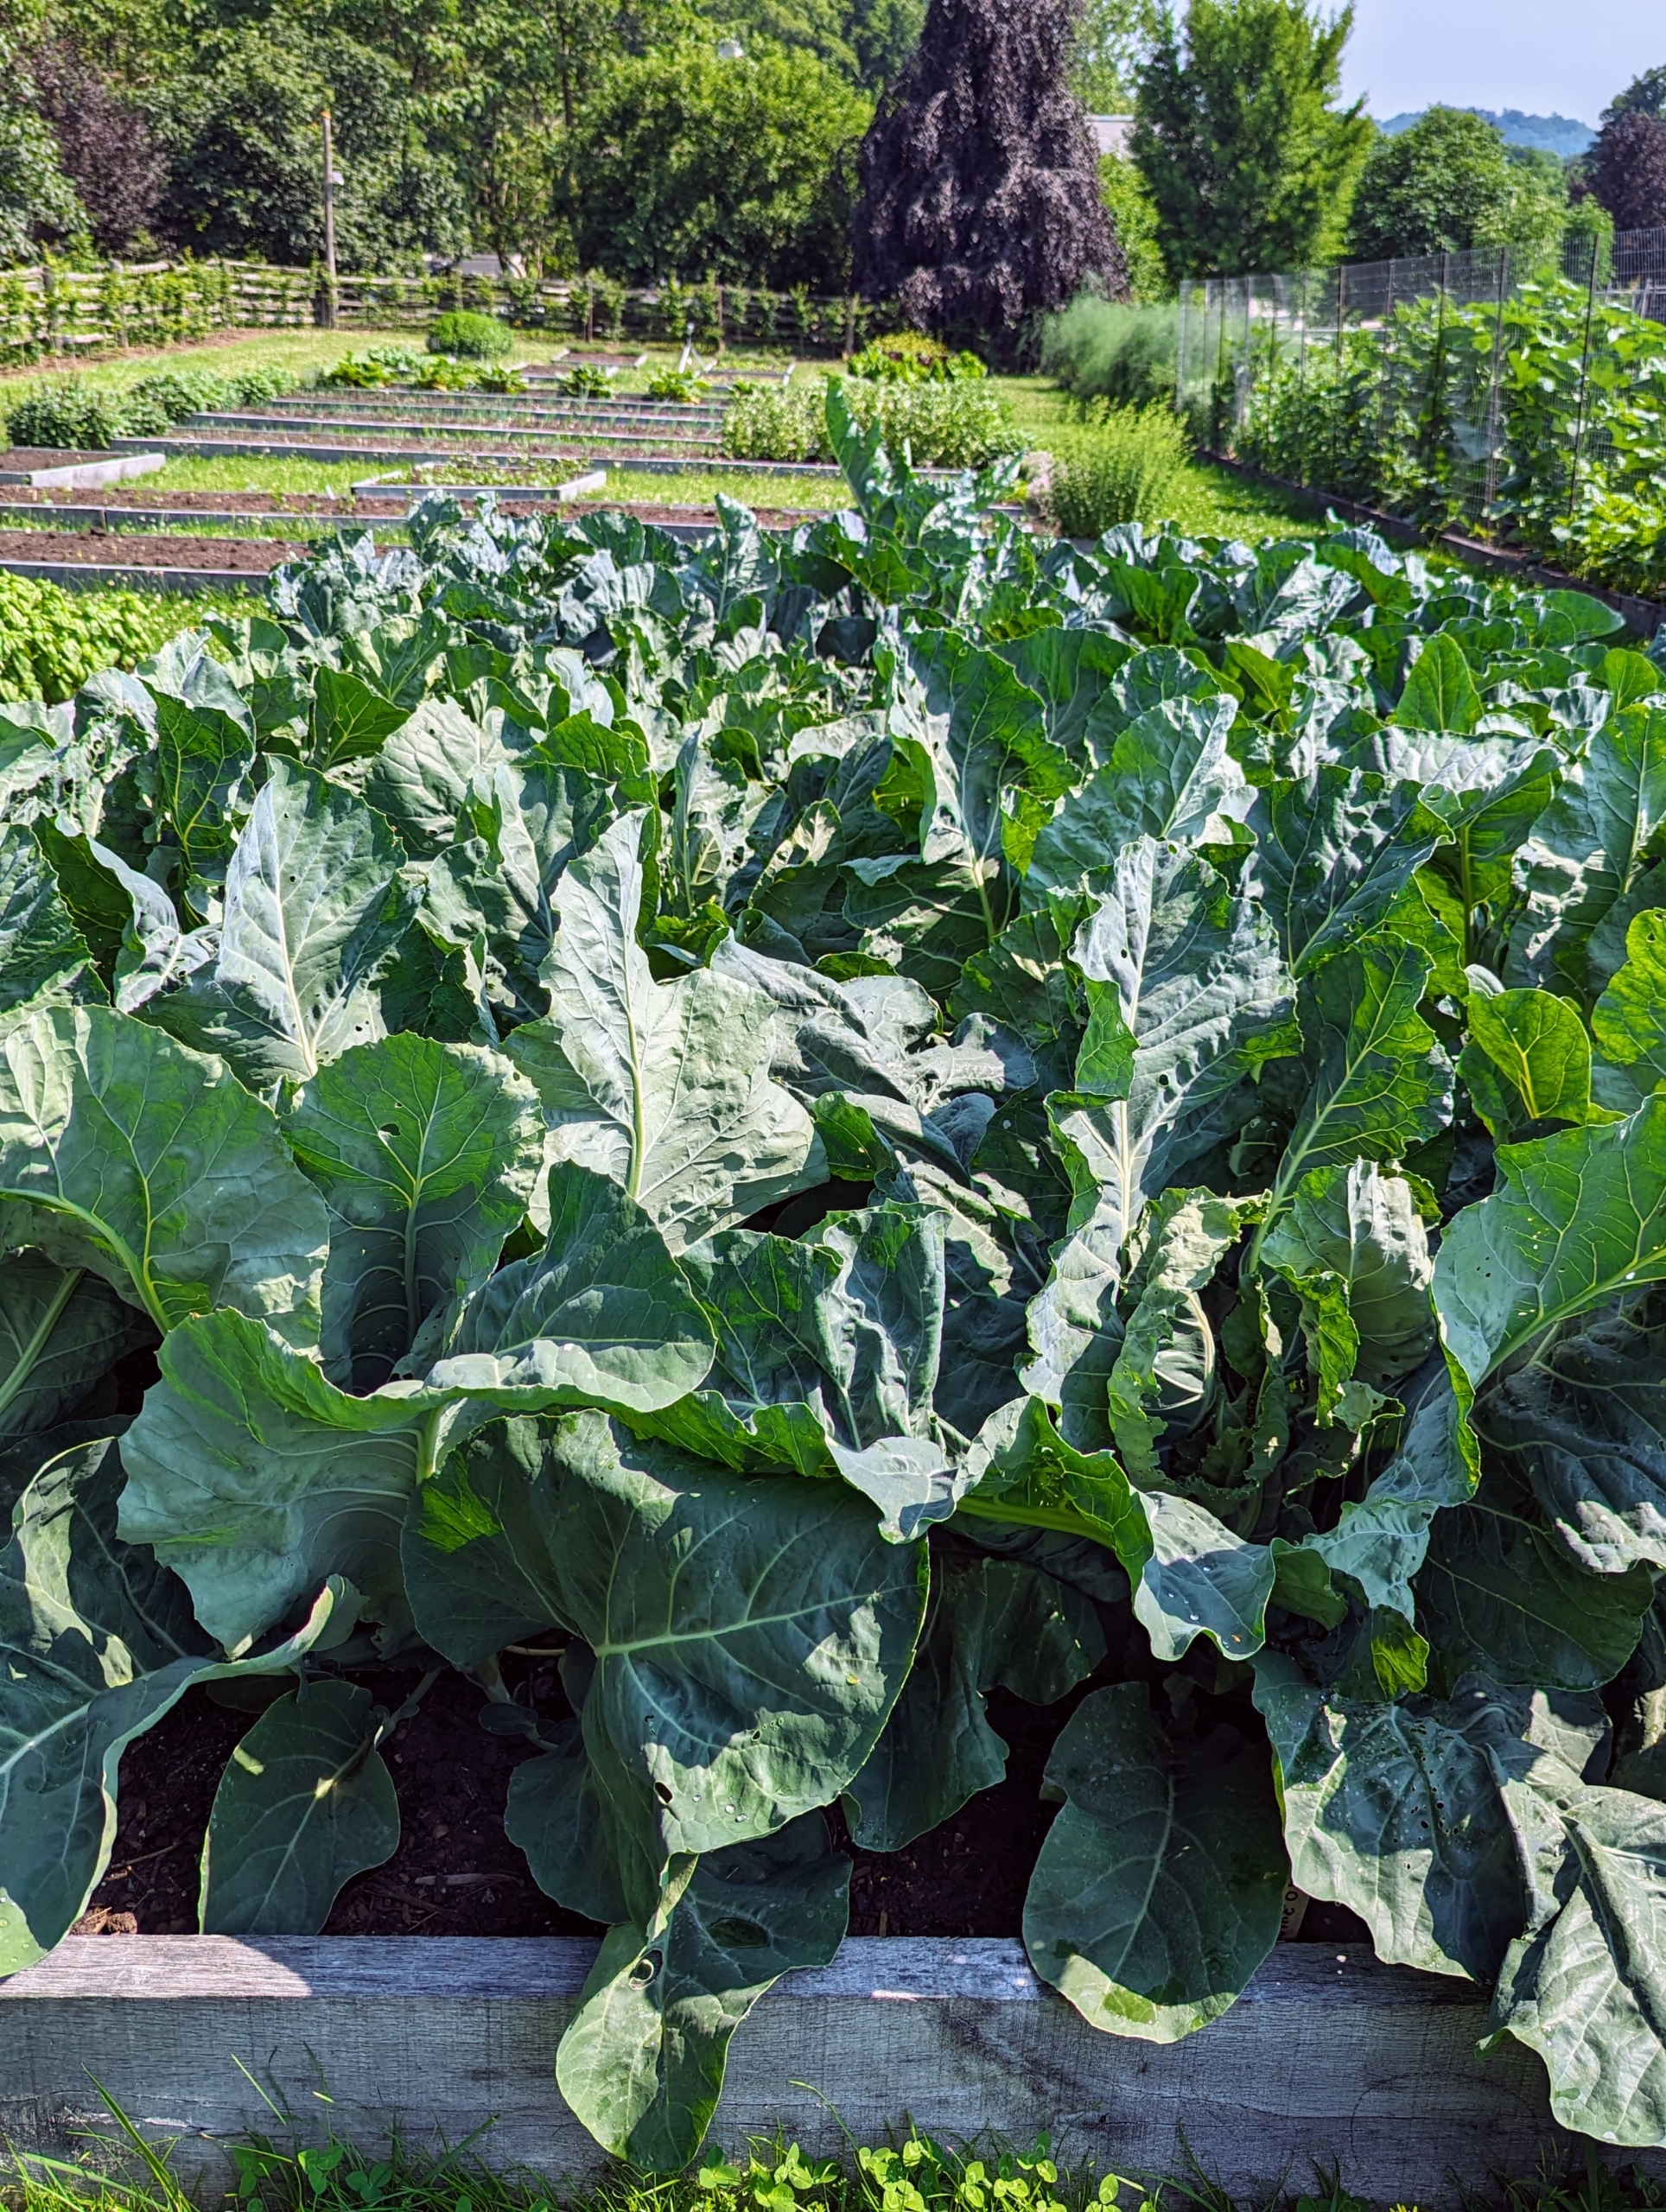
Broccoli is a hardy vegetable of the cabbage family that is high in vitamins A and D. And, according to the National Agricultural Statistics Service, USDA, the average American eats more than four-pounds of broccoli a year. I have so much broccoli ready to enjoy.
Here are the leaves of our cauliflower – so much growth in every bed. We attribute the growth to the excellent soil I have here at the farm. I use Scotts Miracle-Gro Organic Raised Bed & Garden Soil in all the beds.
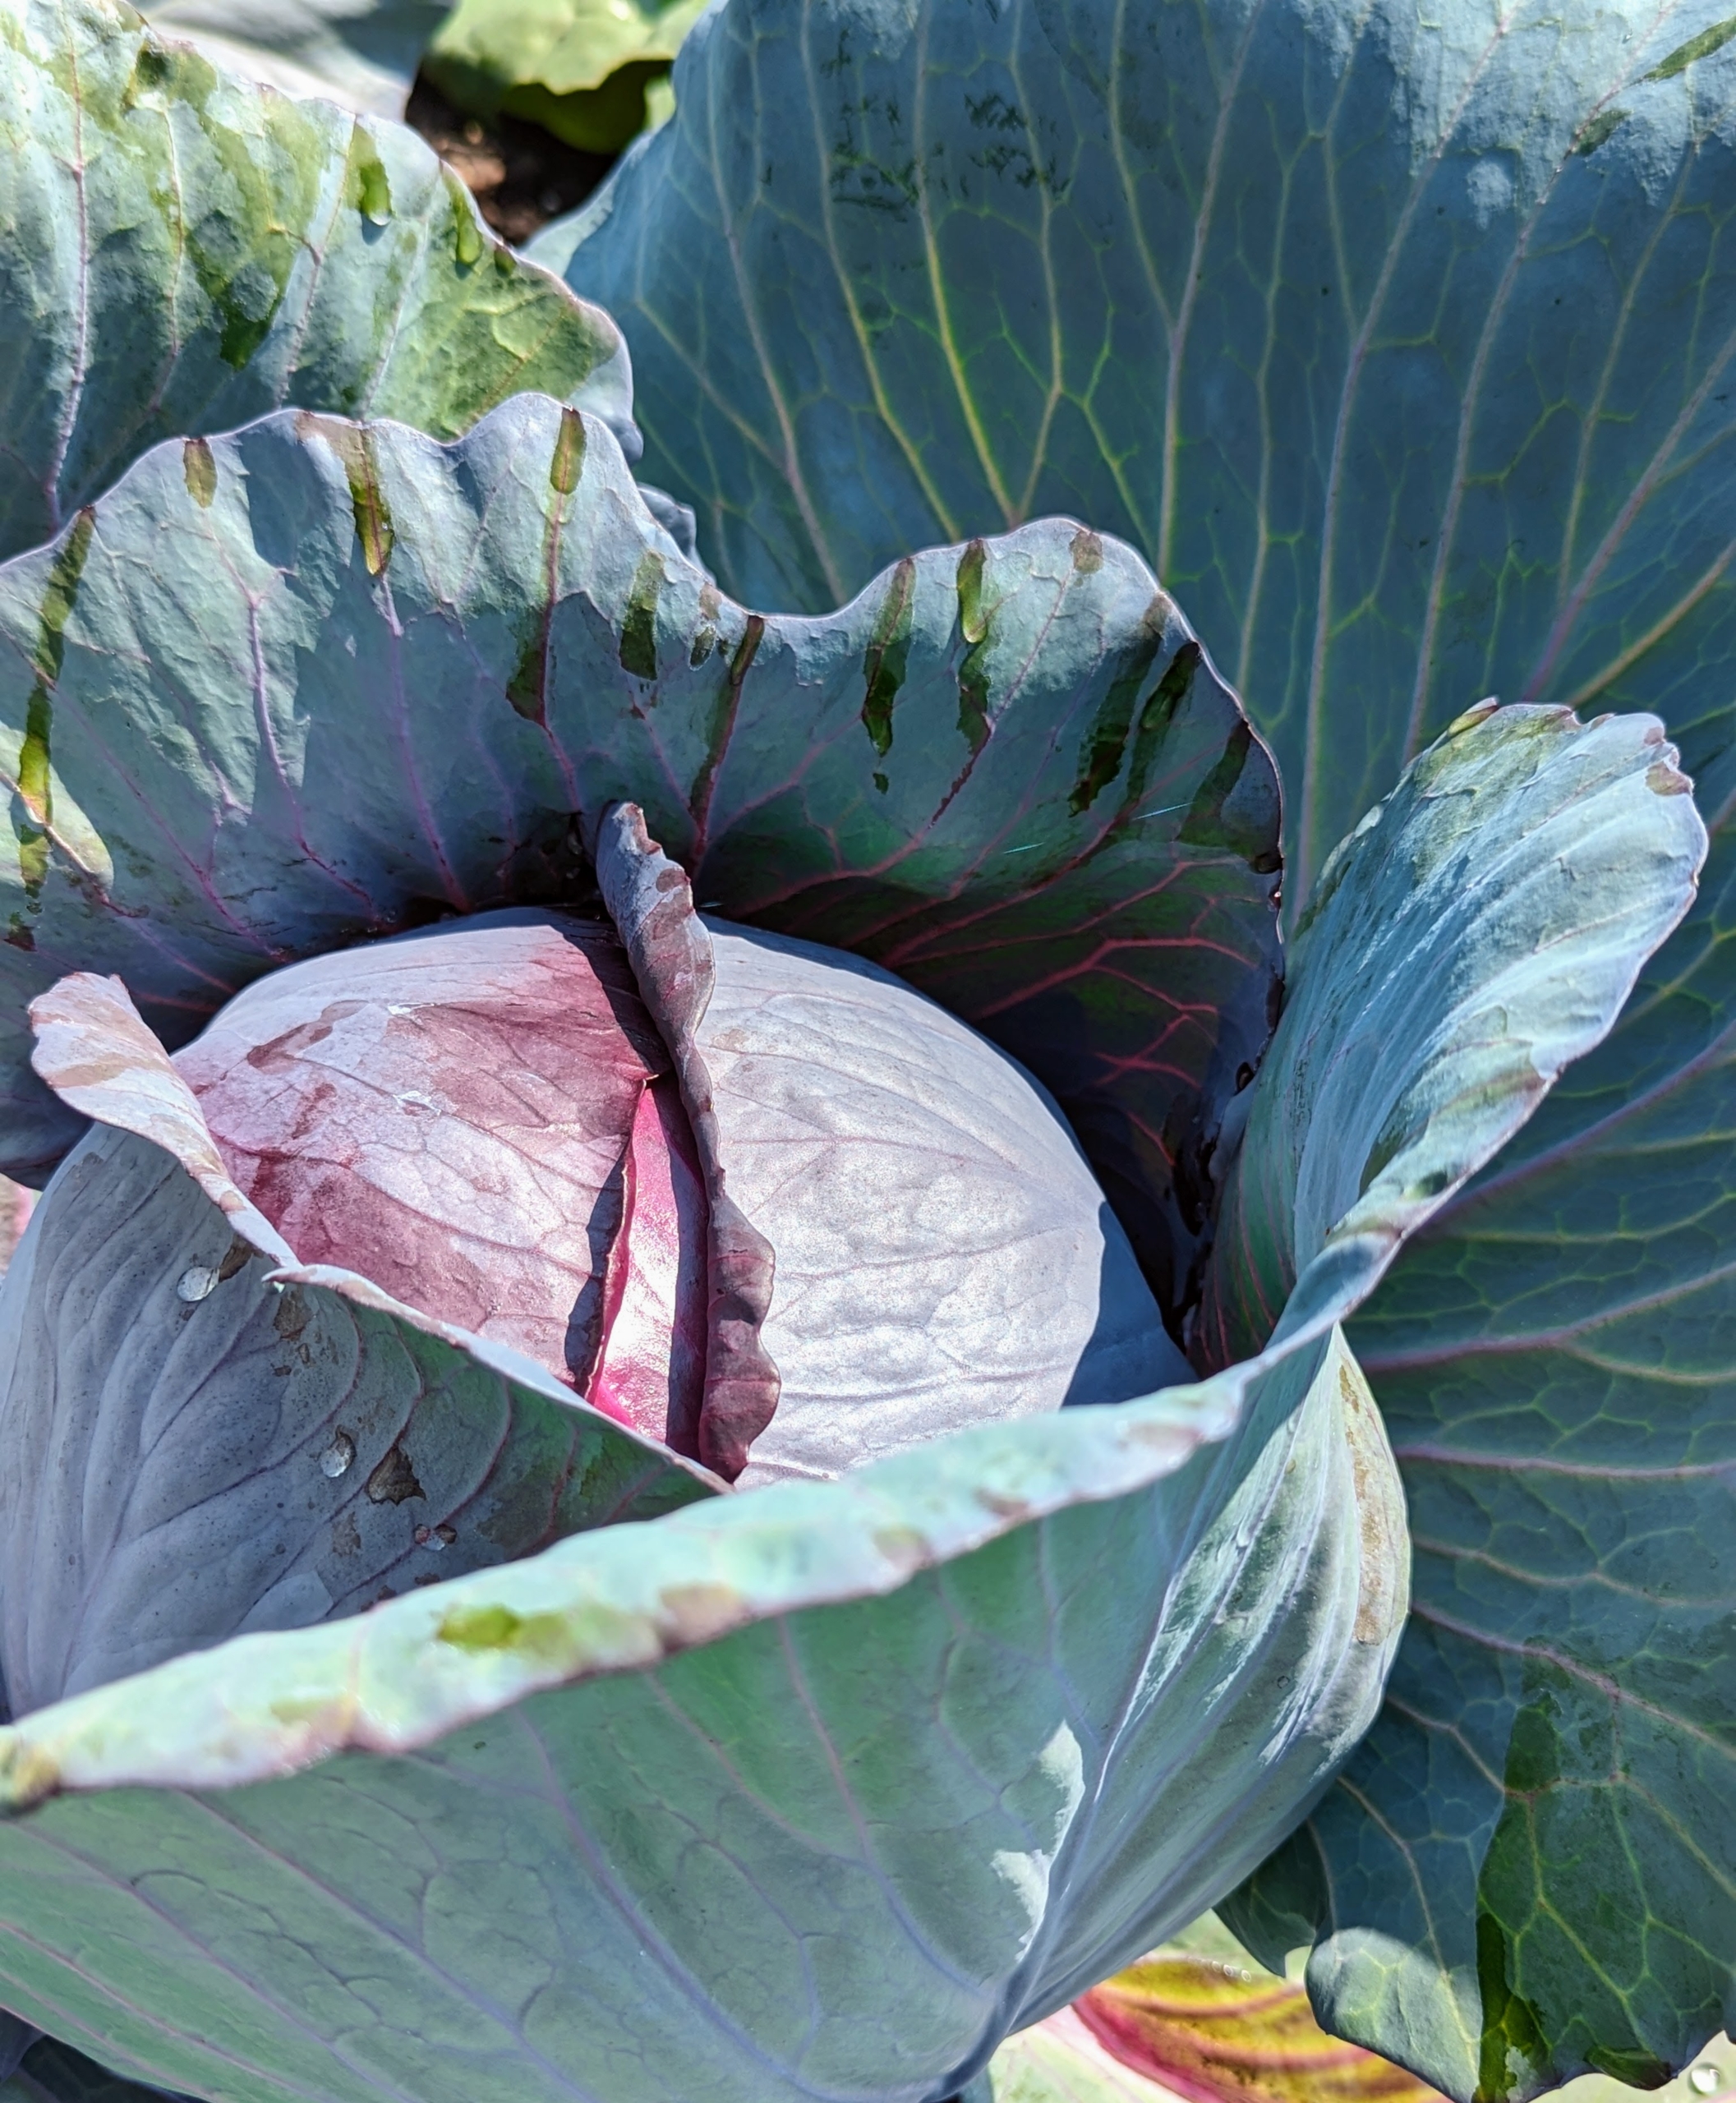
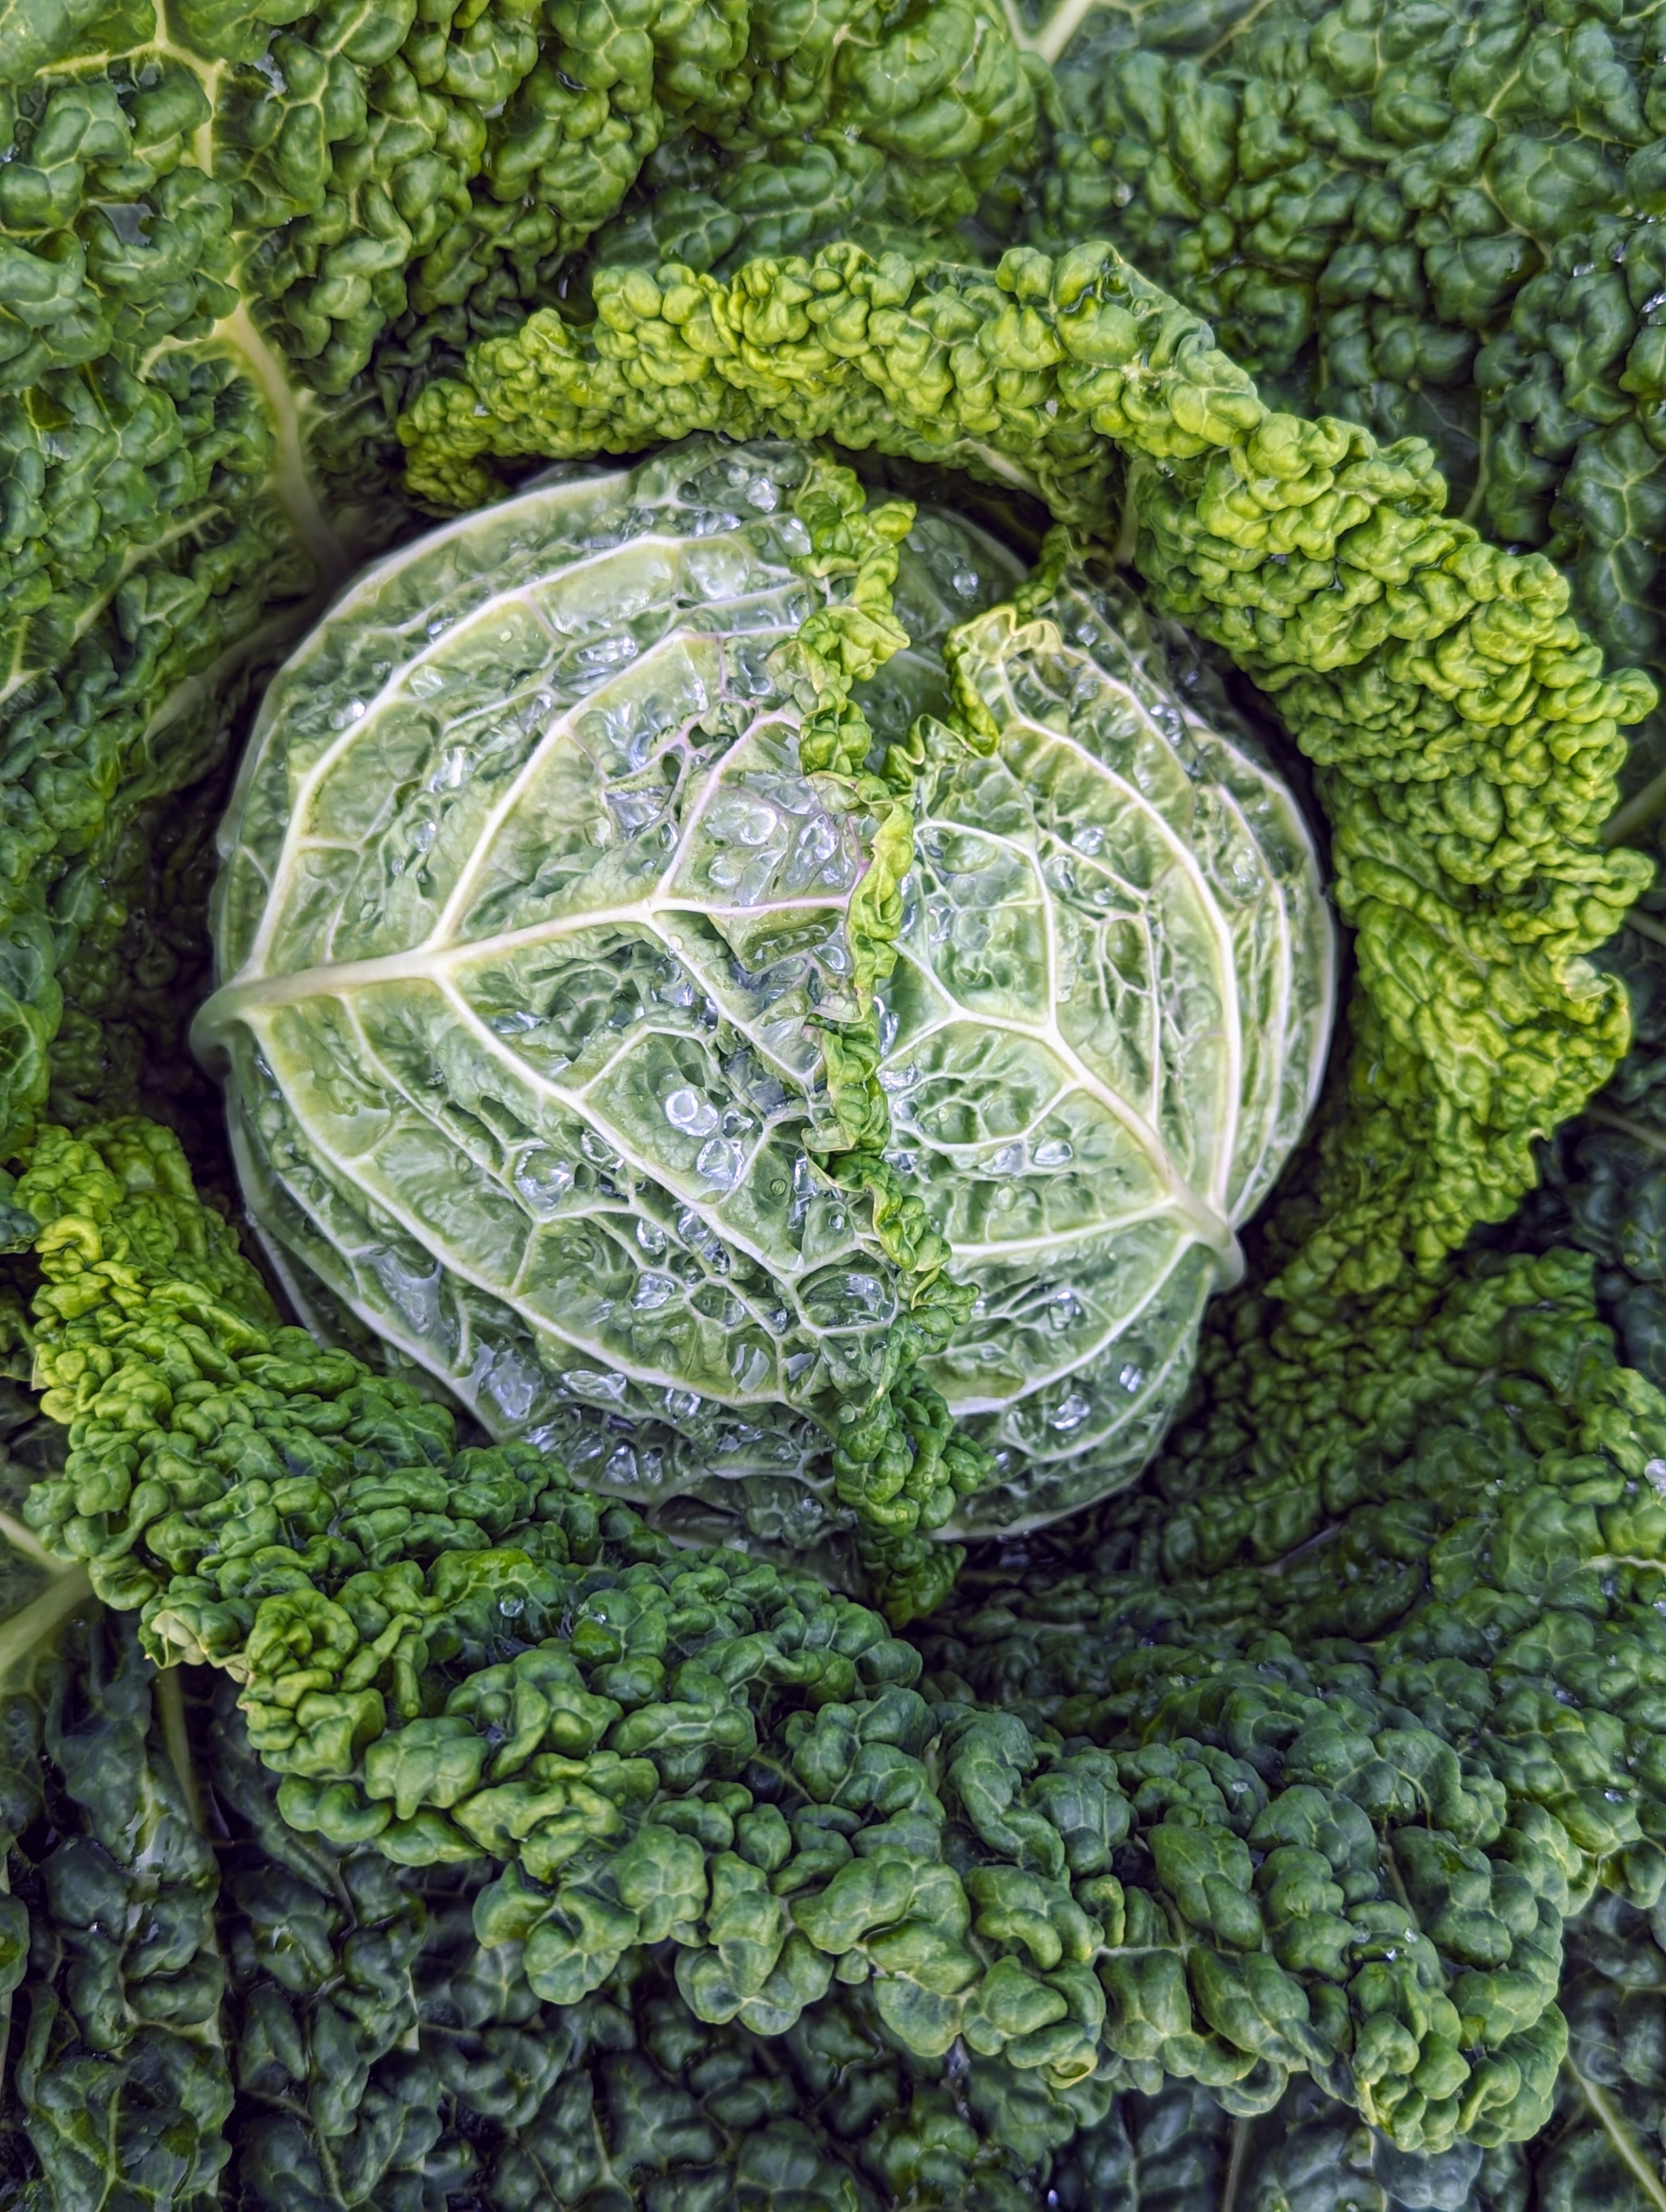
My cabbages are also growing nicely. To get the best health benefits from cabbage, it’s good to include all three varieties into the diet – Savoy, red, and green. I am so pleased with all these vegetables.
Red, or purple, cabbage is often used raw for salads and coleslaw. It contains 10-times more vitamin-A and twice as much iron as green cabbage.
And here is one of my green cabbages – so perfect.
Savoy cabbage has crinkled, emerald green leaves, and a mildly nutty and sweet flavor.
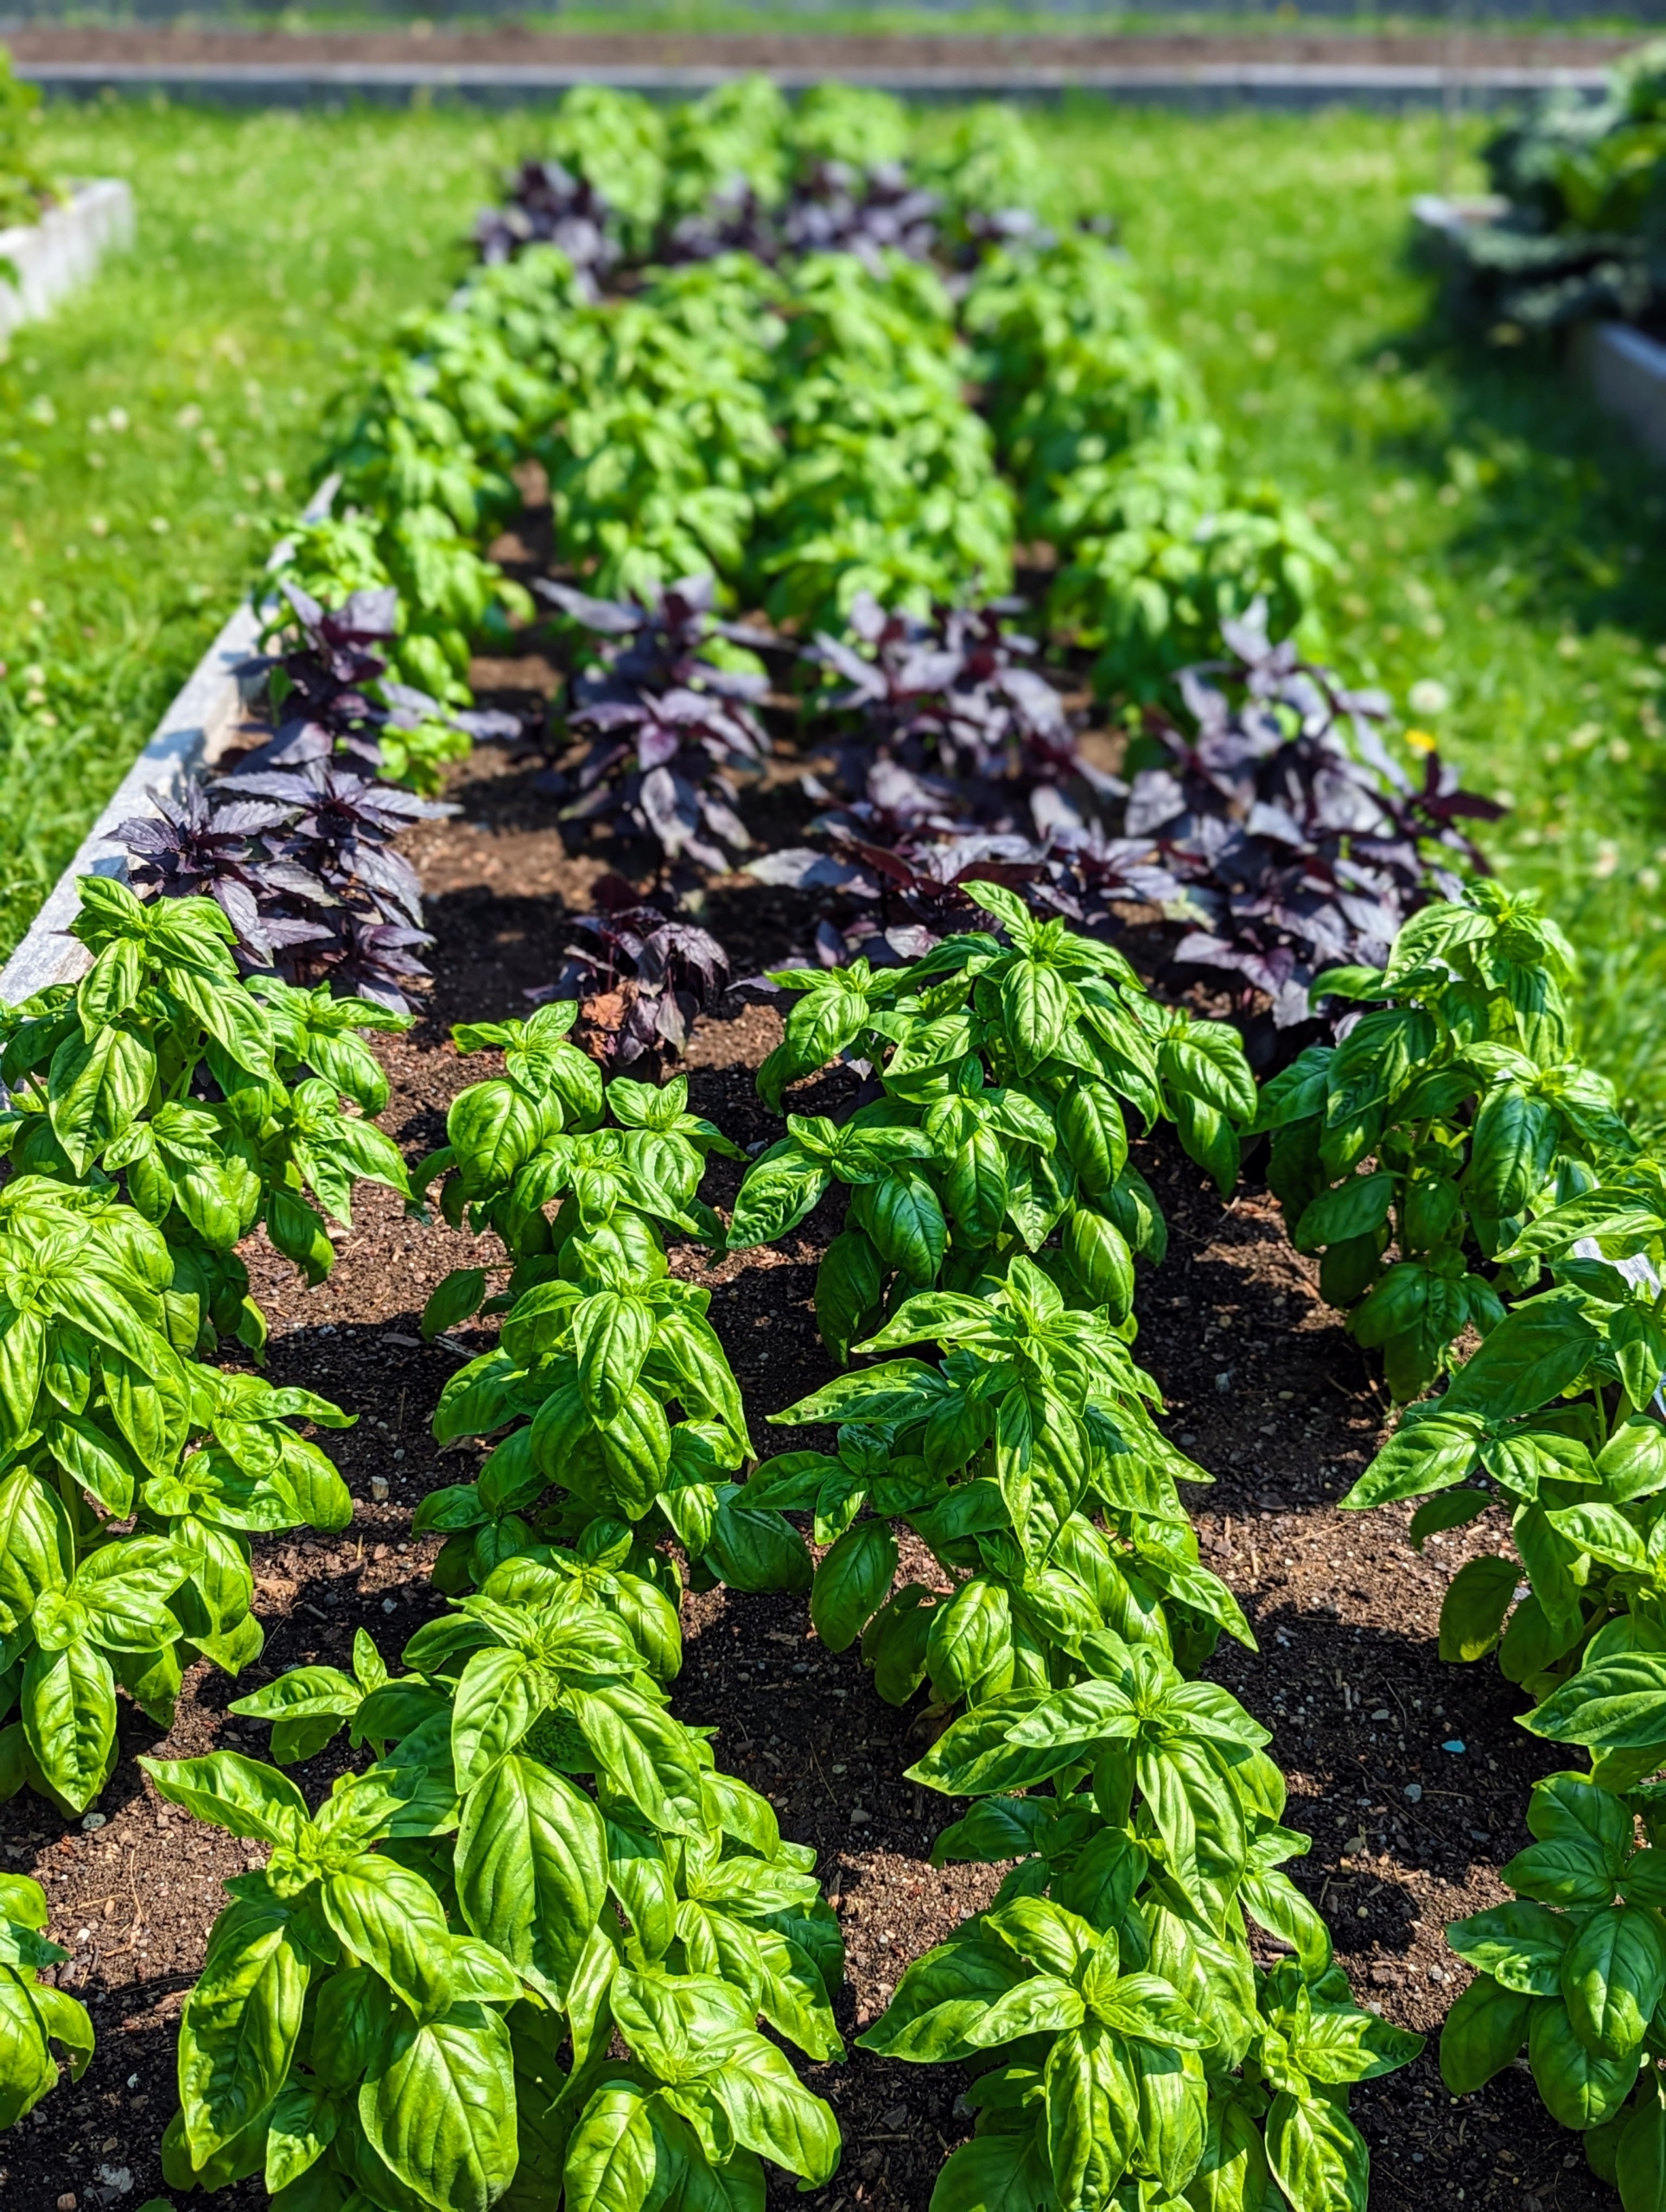
Nearby is my bed of basil – both green and purple. Basil, also called great basil, is a culinary herb of the family Lamiaceae. Basil is native to tropical regions from central Africa to Southeast Asia. It is a tender plant, and is used in many cuisines. Since basil grows in tropical climates, it grows well in hot weather. We’ve had a week of temperatures in the 90s Fahrenheit and my basil is thriving.
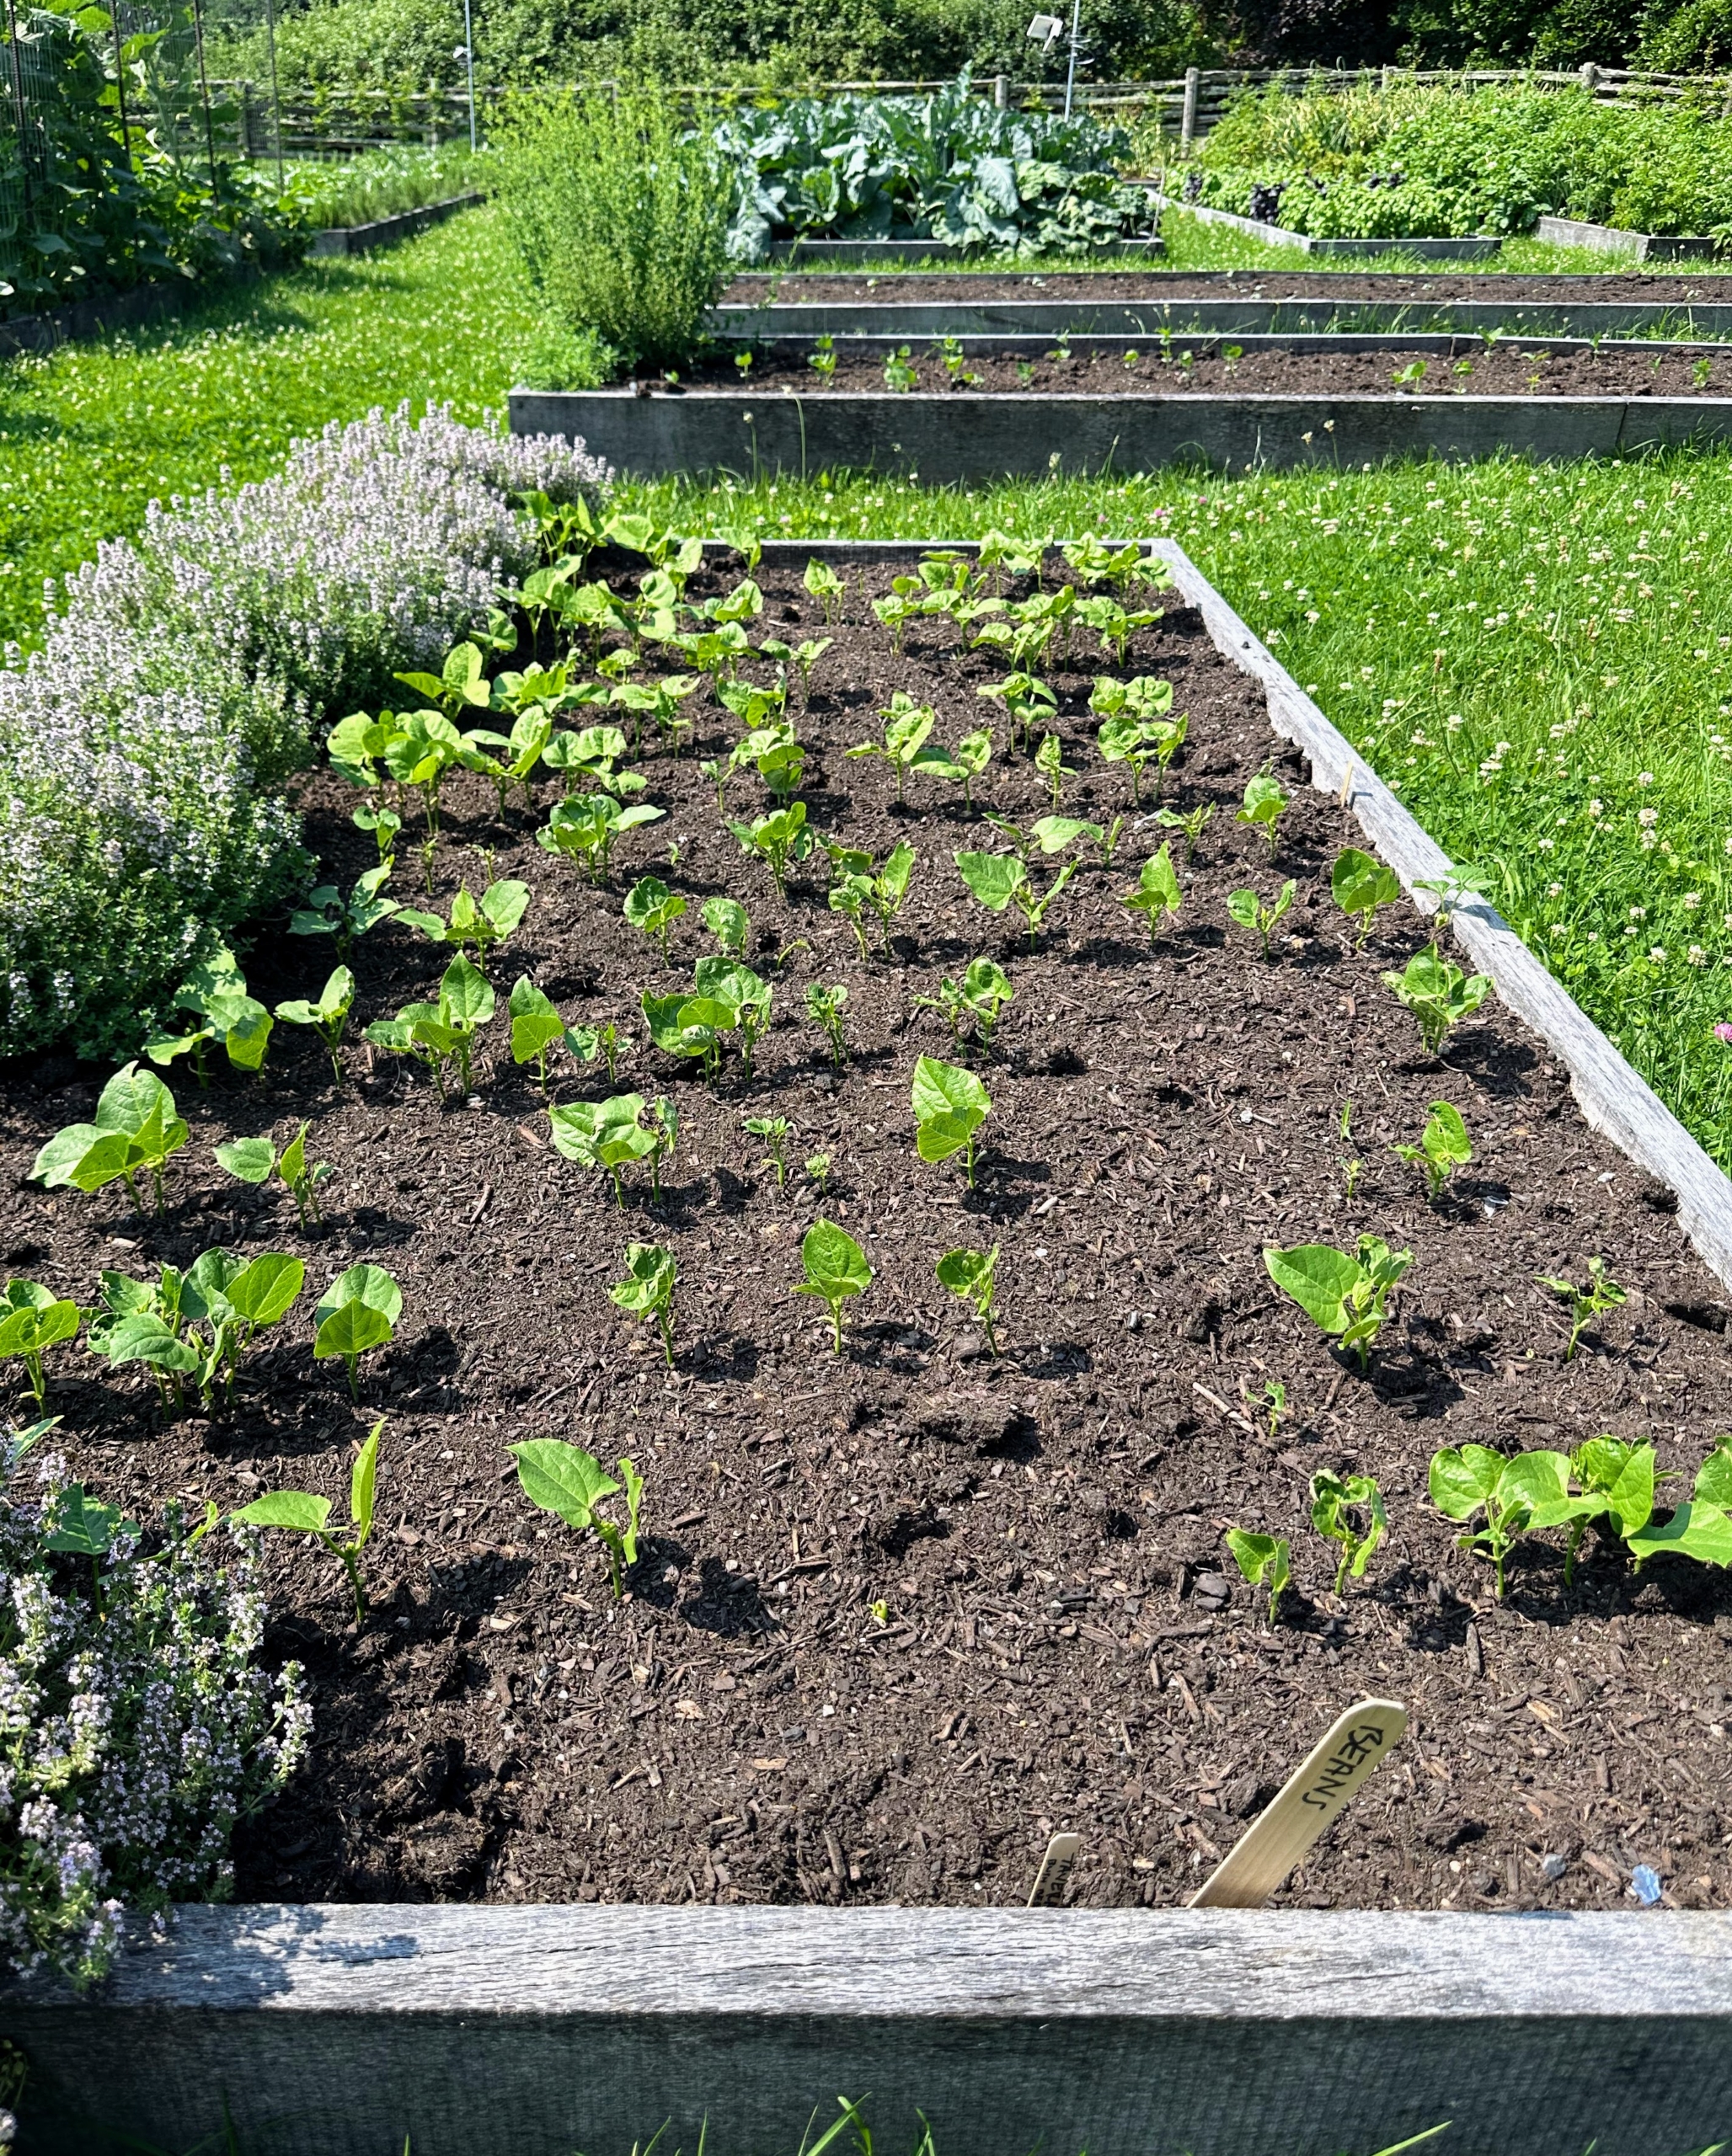
This bed was recently planted with beans. My head gardener, Ryan McCallister, always keeps track of when to plant our crops and we always plant in succession, meaning we plant seeds every few weeks, so there is always something ready to harvest.
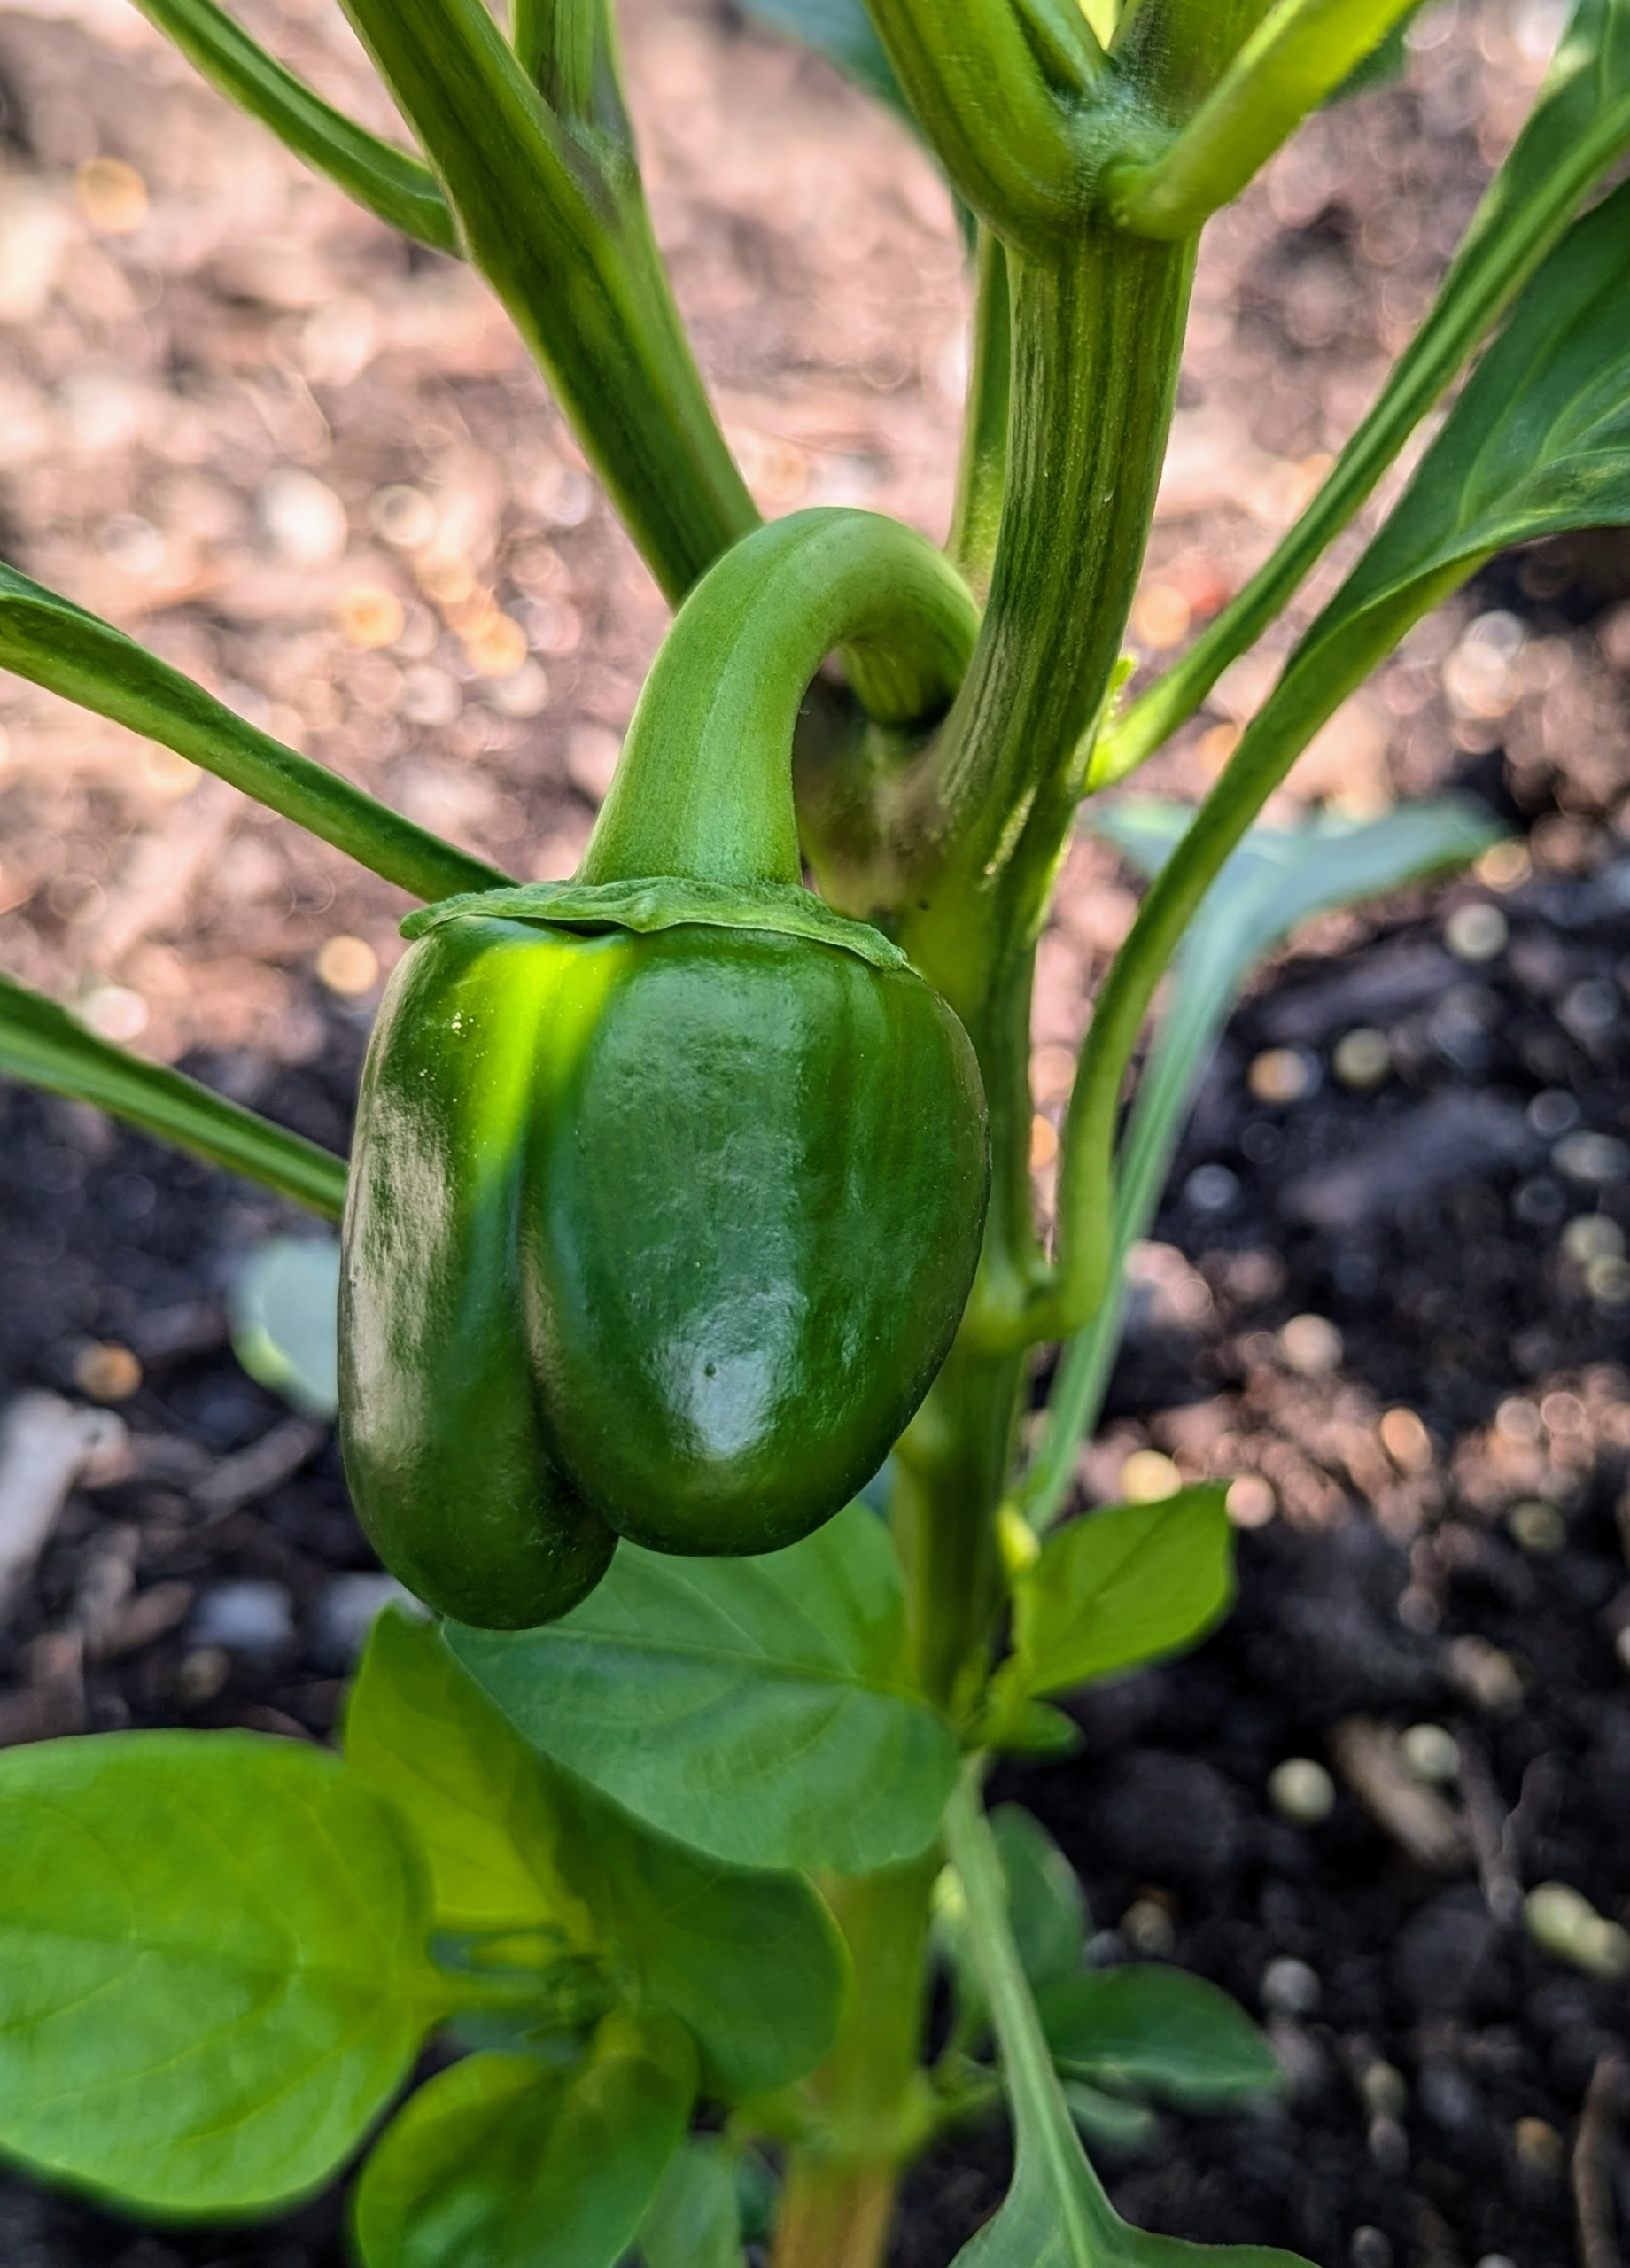
My green peppers are growing too. They are still quite small now, but it won’t be long before I’ll have a bounty of green, red, and yellow peppers.
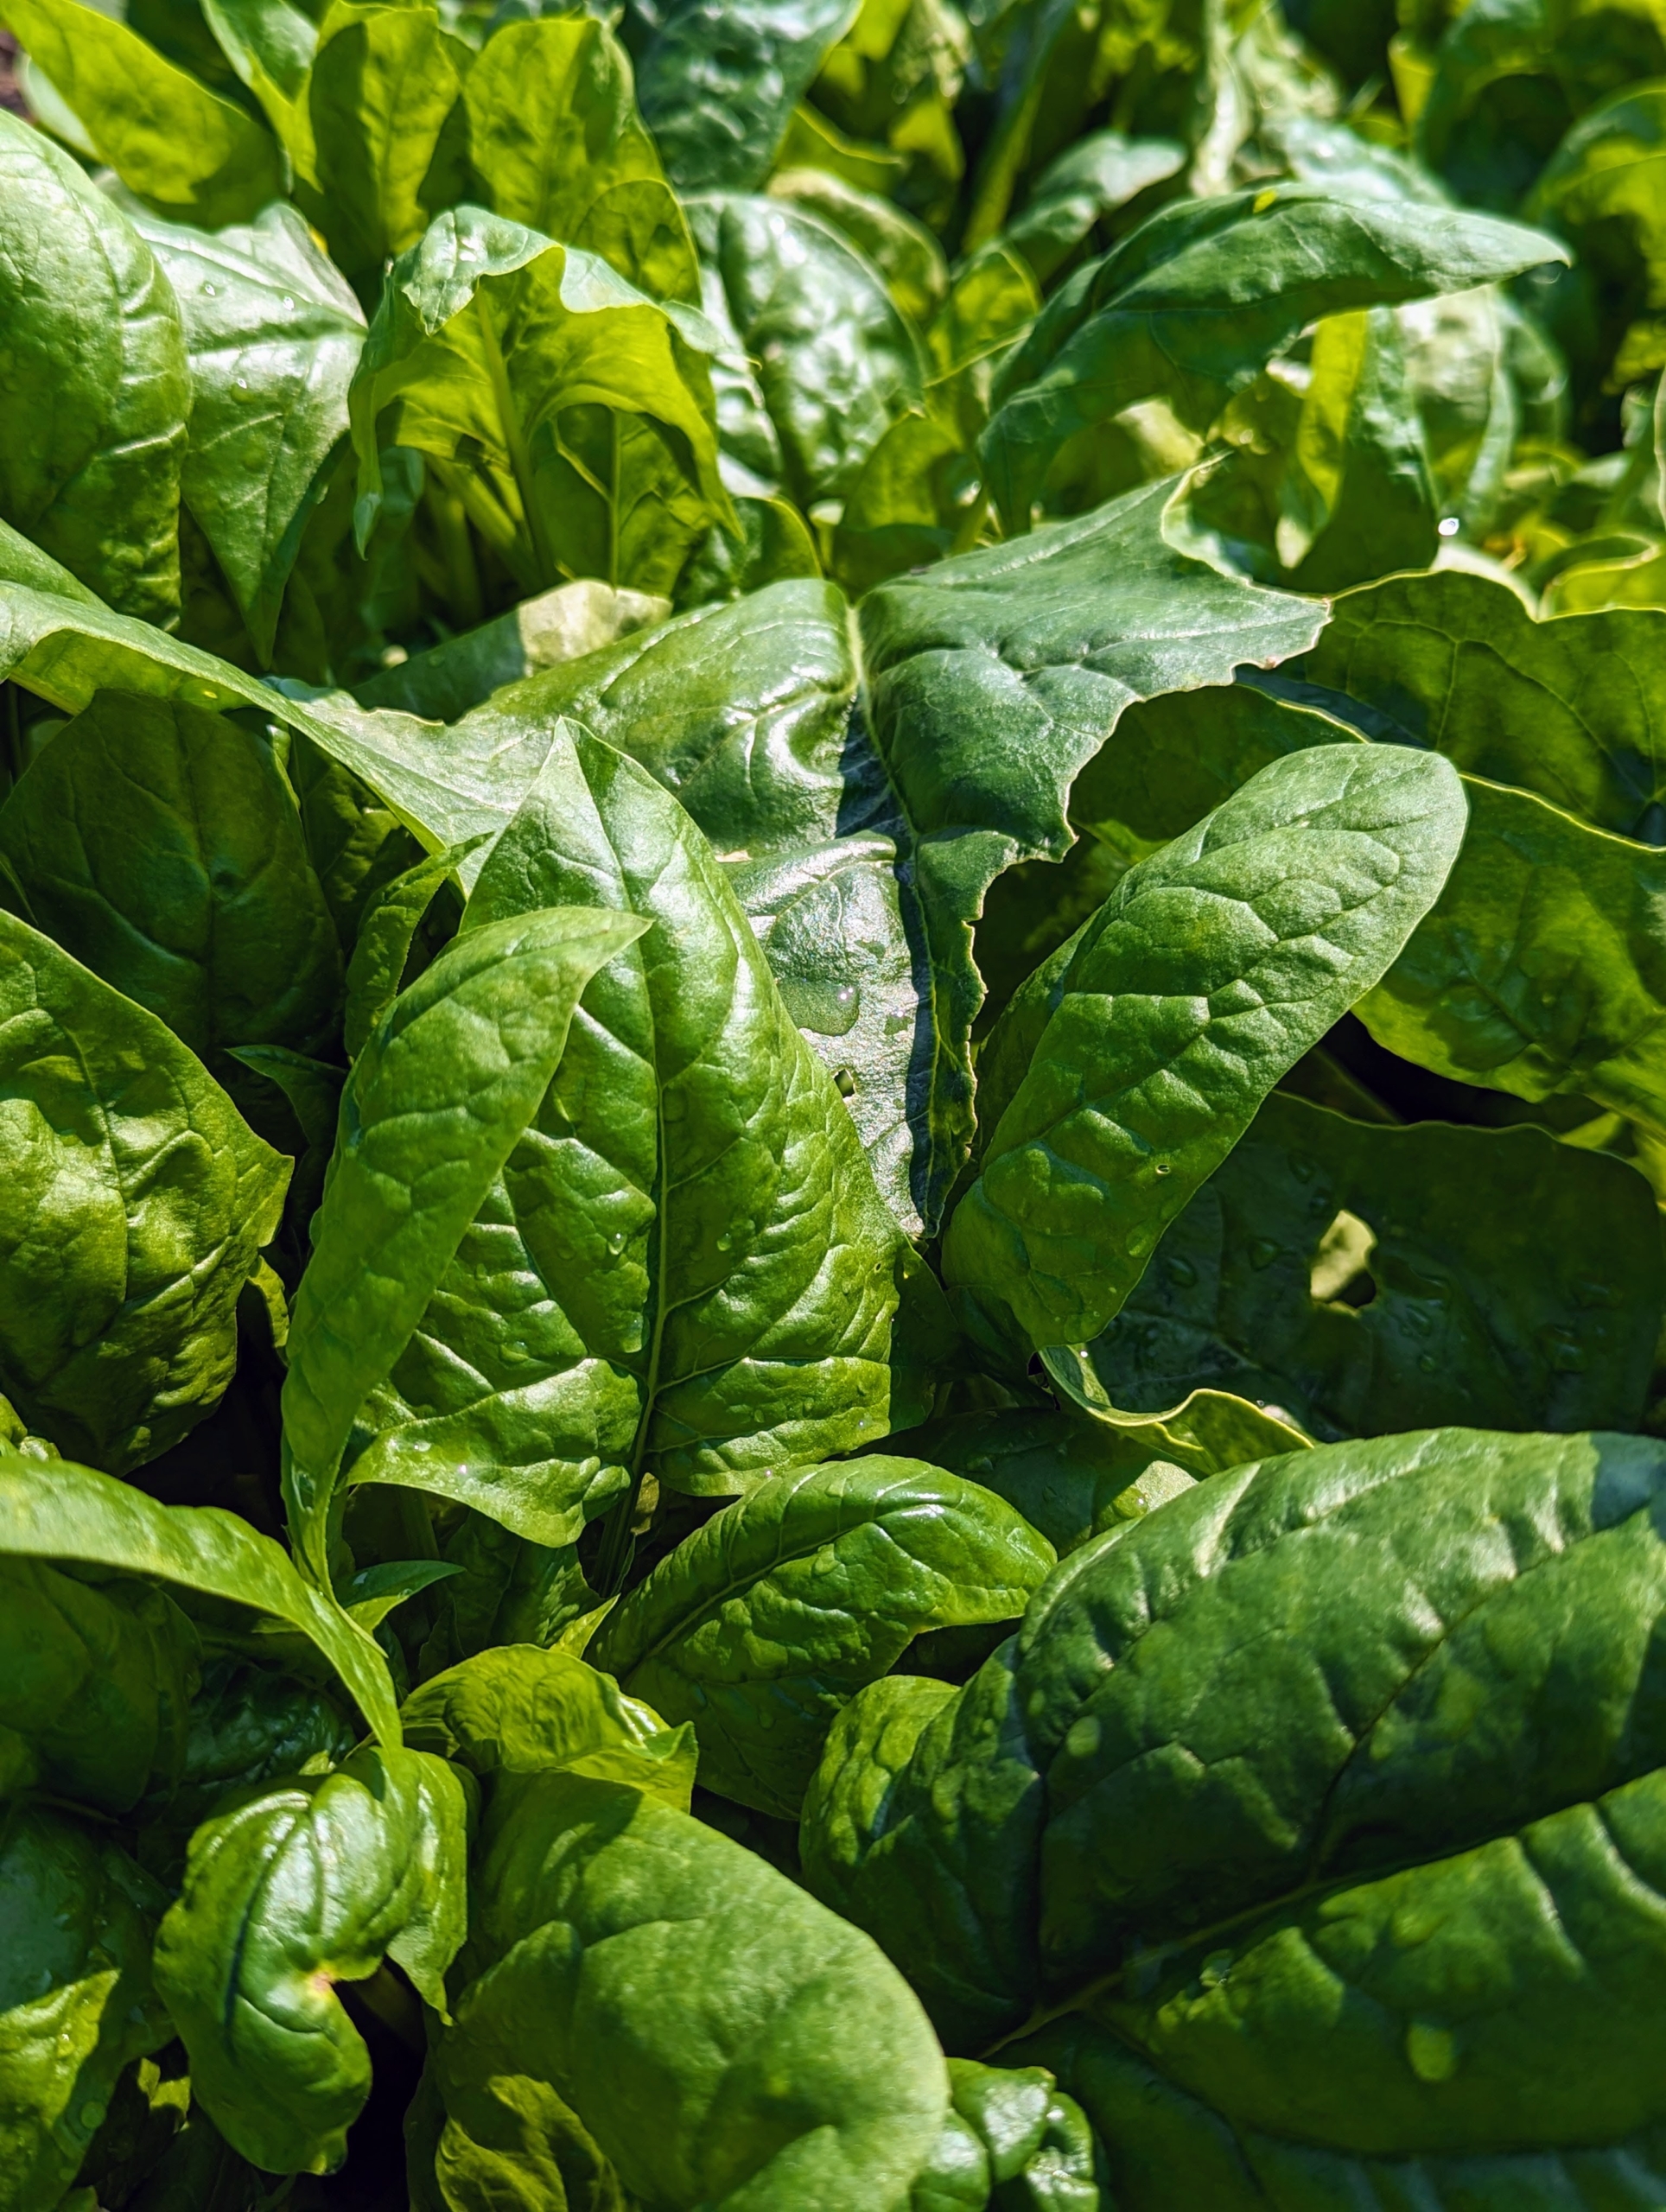
And there is always spinach in my gardens. The leaves are so beautiful and so very tender and tasty. I grow spinach all year long for my morning green juice.
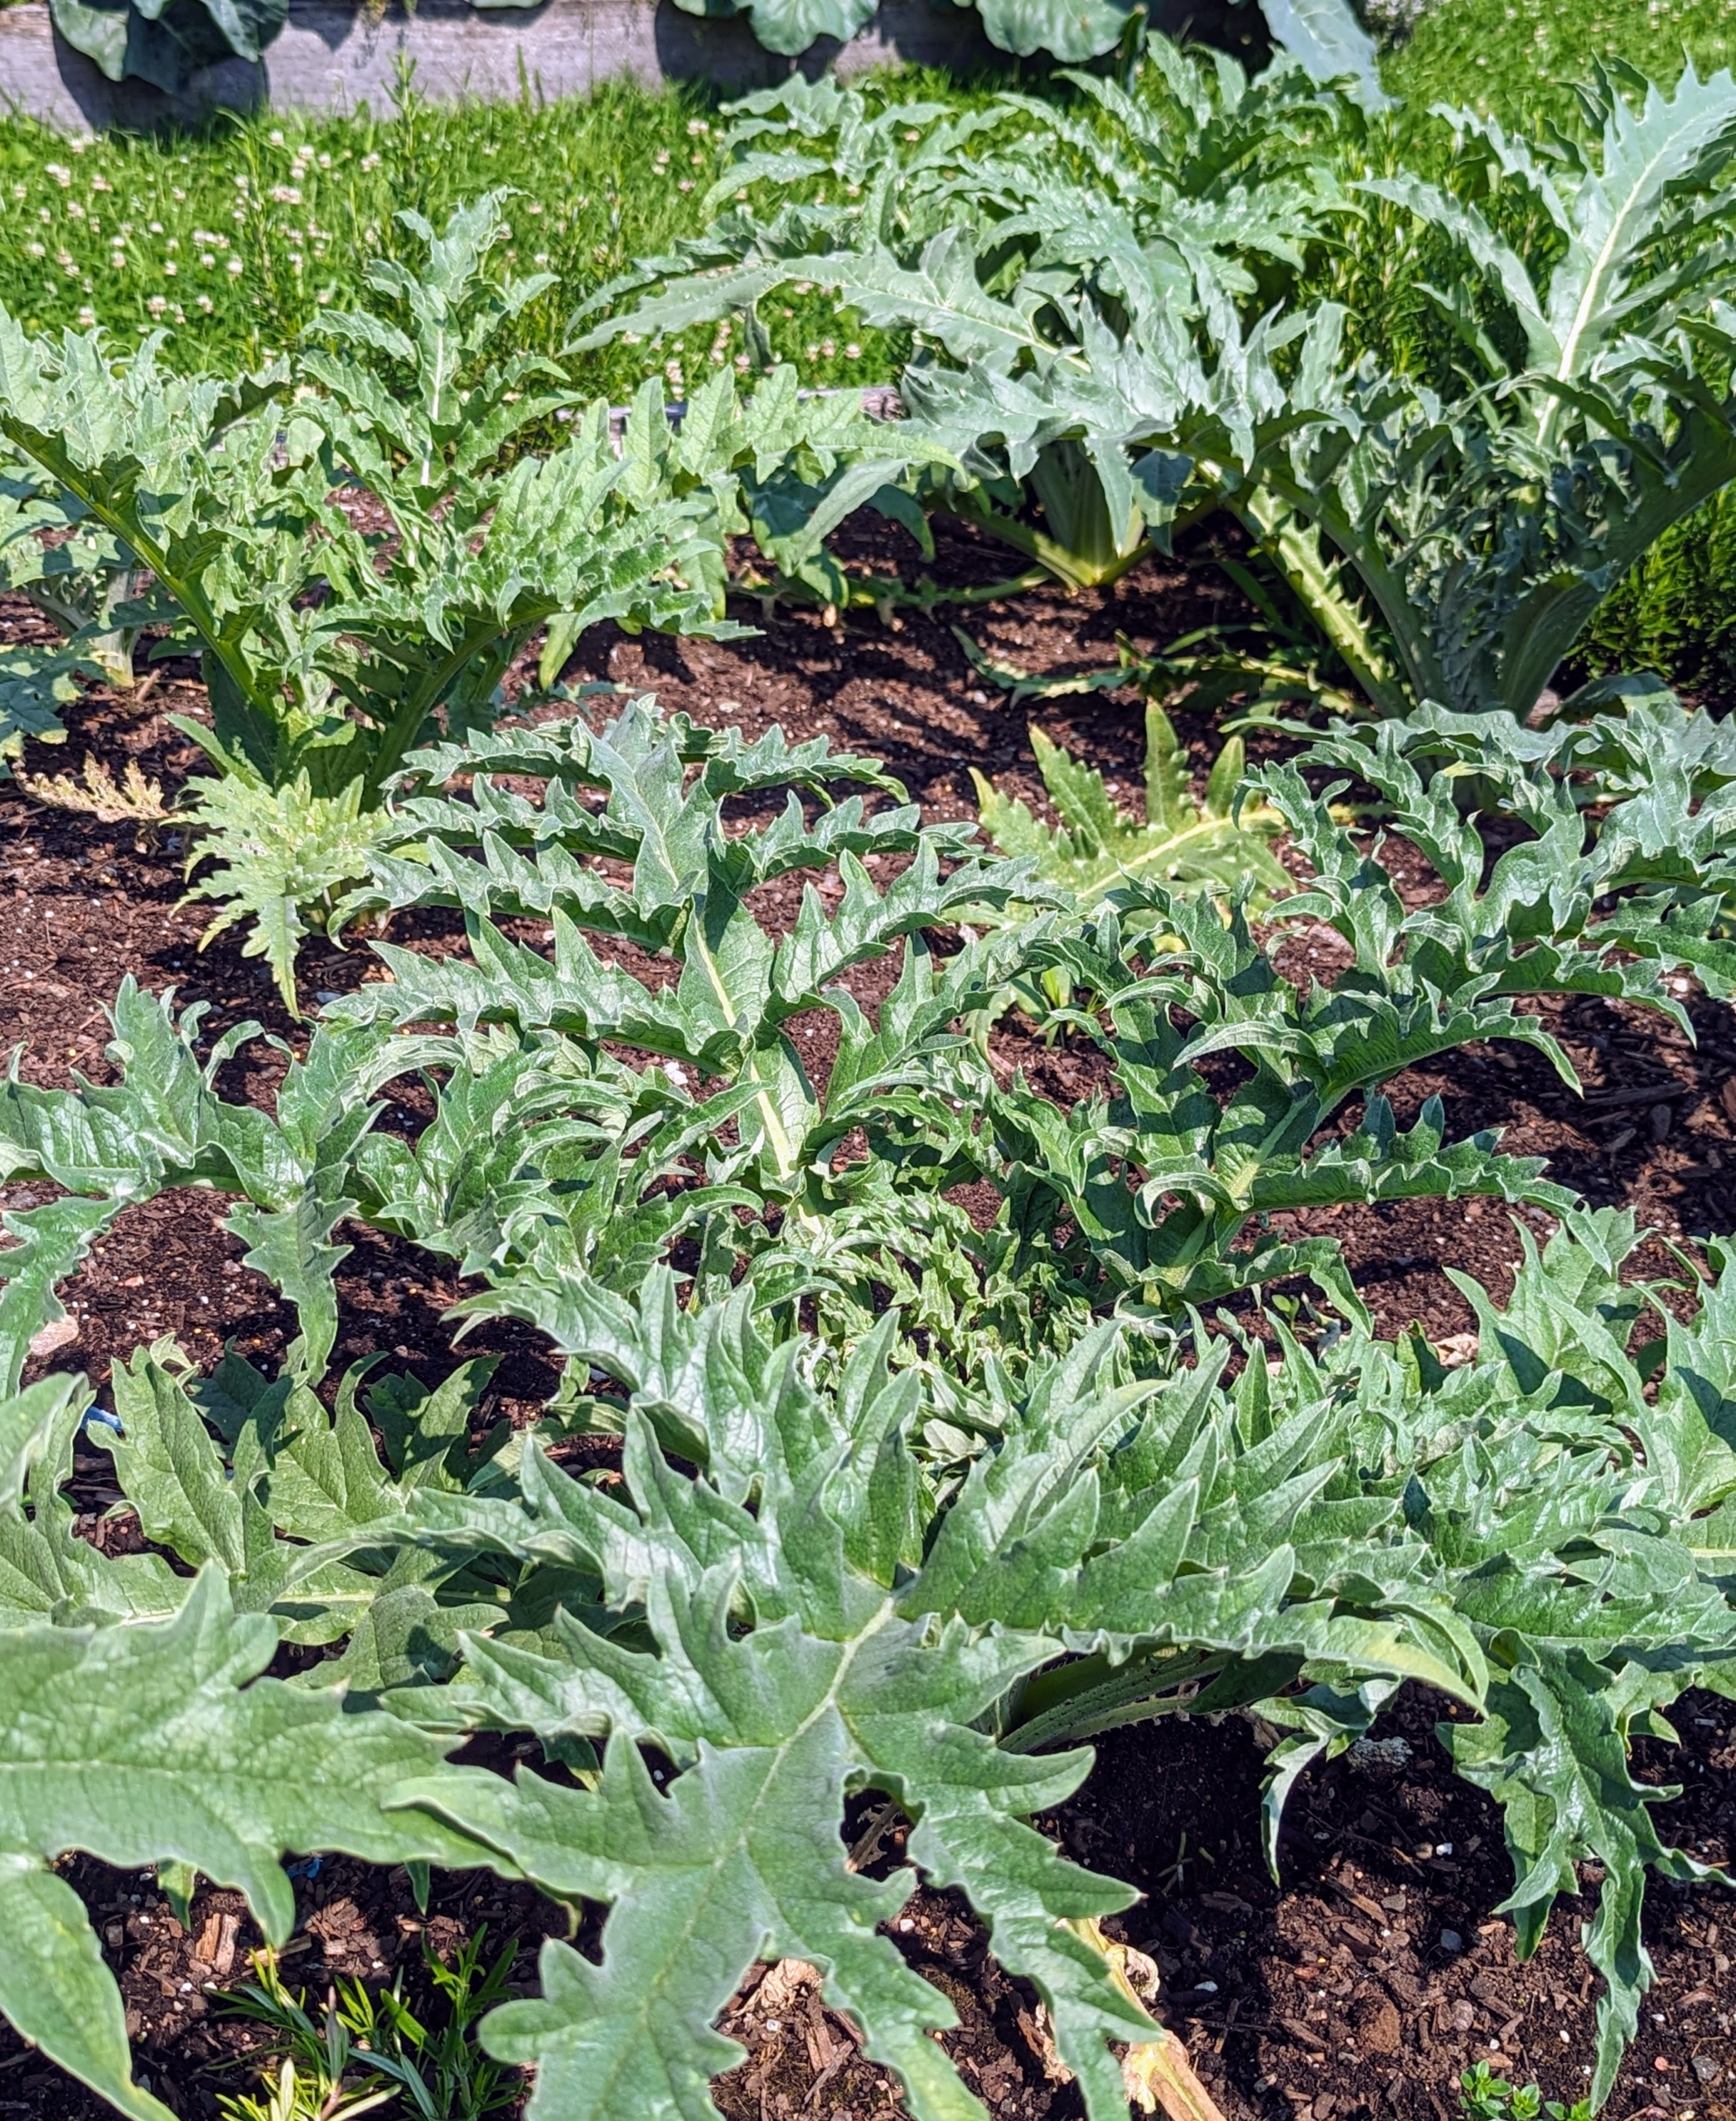
These are the leaves of my artichokes. Globe artichokes, Cynara scolymus, are popular in both Europe and the United States. Artichokes are actually the flower buds, which will emerge from the center of the plants.
Everyone always asks what I do with all the vegetables I grow. I share them with my family, but I also love sharing the bounties with friends, colleagues, and my hardworking crew here at the farm. I also provide fruits, vegetables, and eggs for photography and video shoots. And, of course, all my birds get vegetables too. I hope your gardens are doing well this season.
Early summer is such an exciting time at the farm because so much is growing and blooming, especially in my perennial flower garden.
It takes a lot of time to maintain a garden this large. It measures 150-feet by 90-feet. I, along with my gardeners, are constantly weeding and watering, and then weeding again. Every year, I add a number of flowering plants to this collection. And now, it is so full of color.
Enjoy these photos.
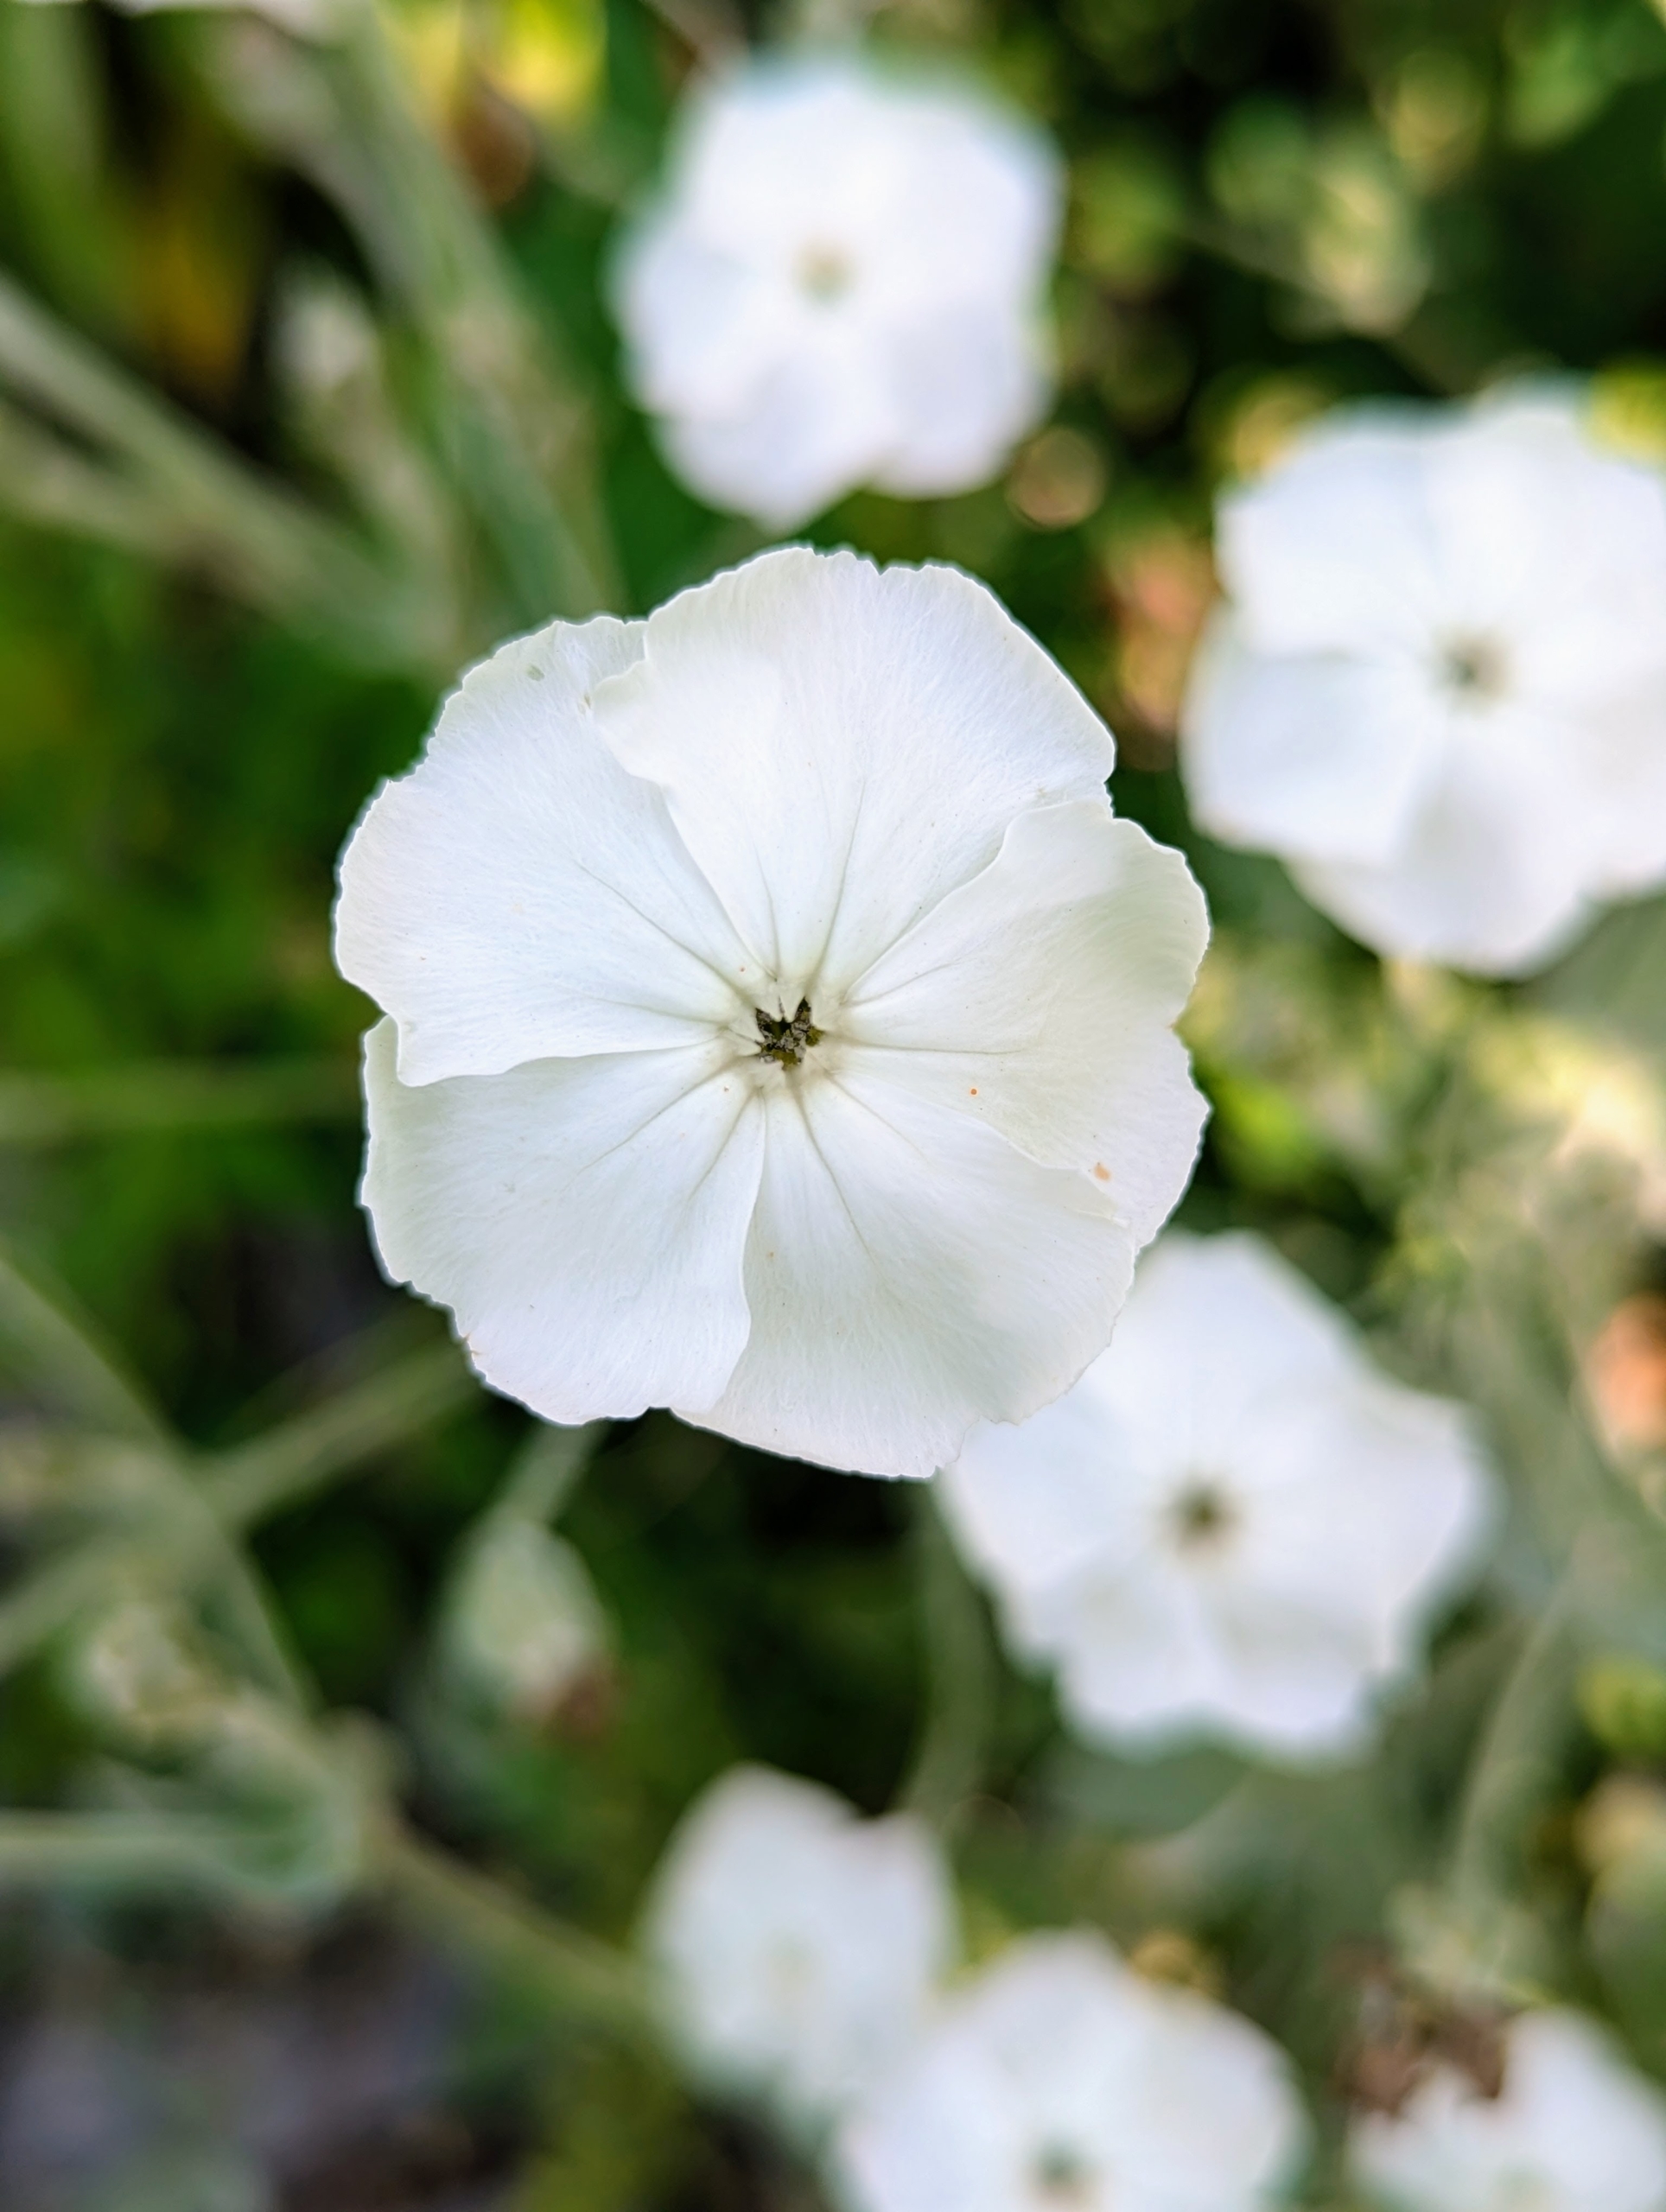
These larkspur are right next to my main greenhouse and are looking so beautiful right now. The larkspur flower is the common name for Delphinium. It is considered an herbaceous perennial and commonly bears purple, blue, white, or lavender flowers.
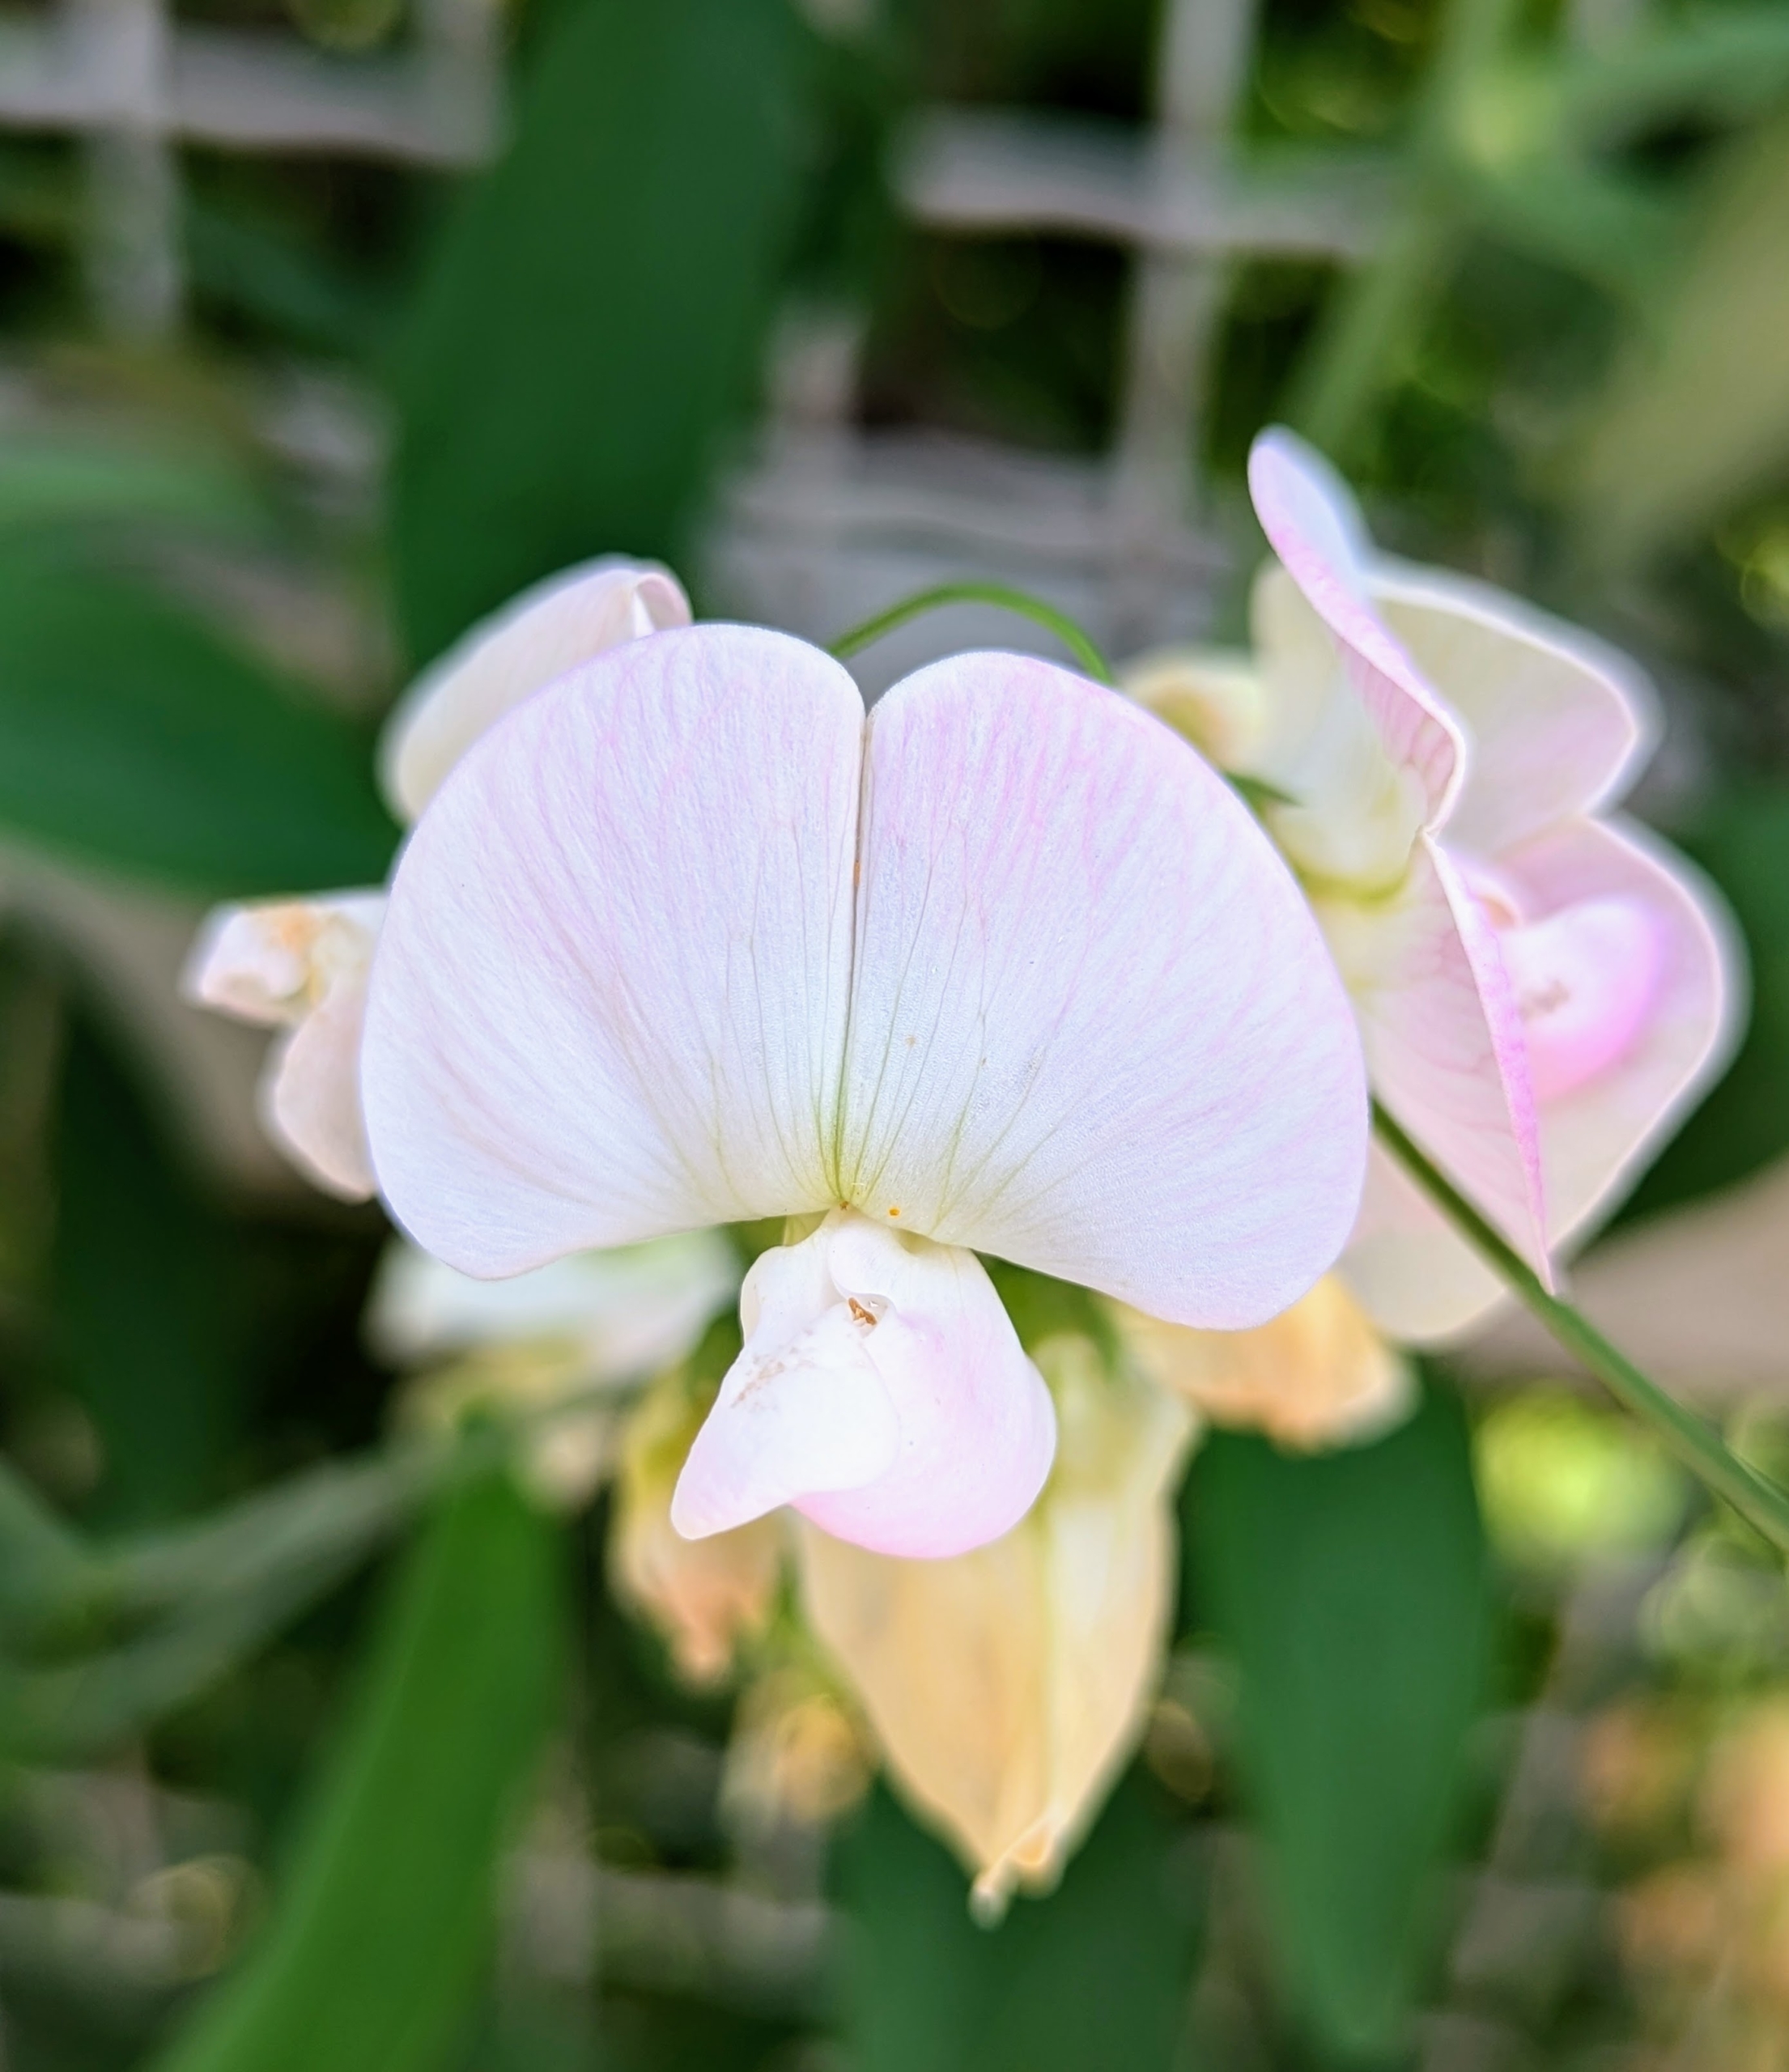
Growing on one side of the fence surrounding the garden are these dainty perennial sweet pea or everlasting pea flowers. The sweet pea is a herbaceous climbing vine with beautiful bright flowers that grow up to 10 feet long.
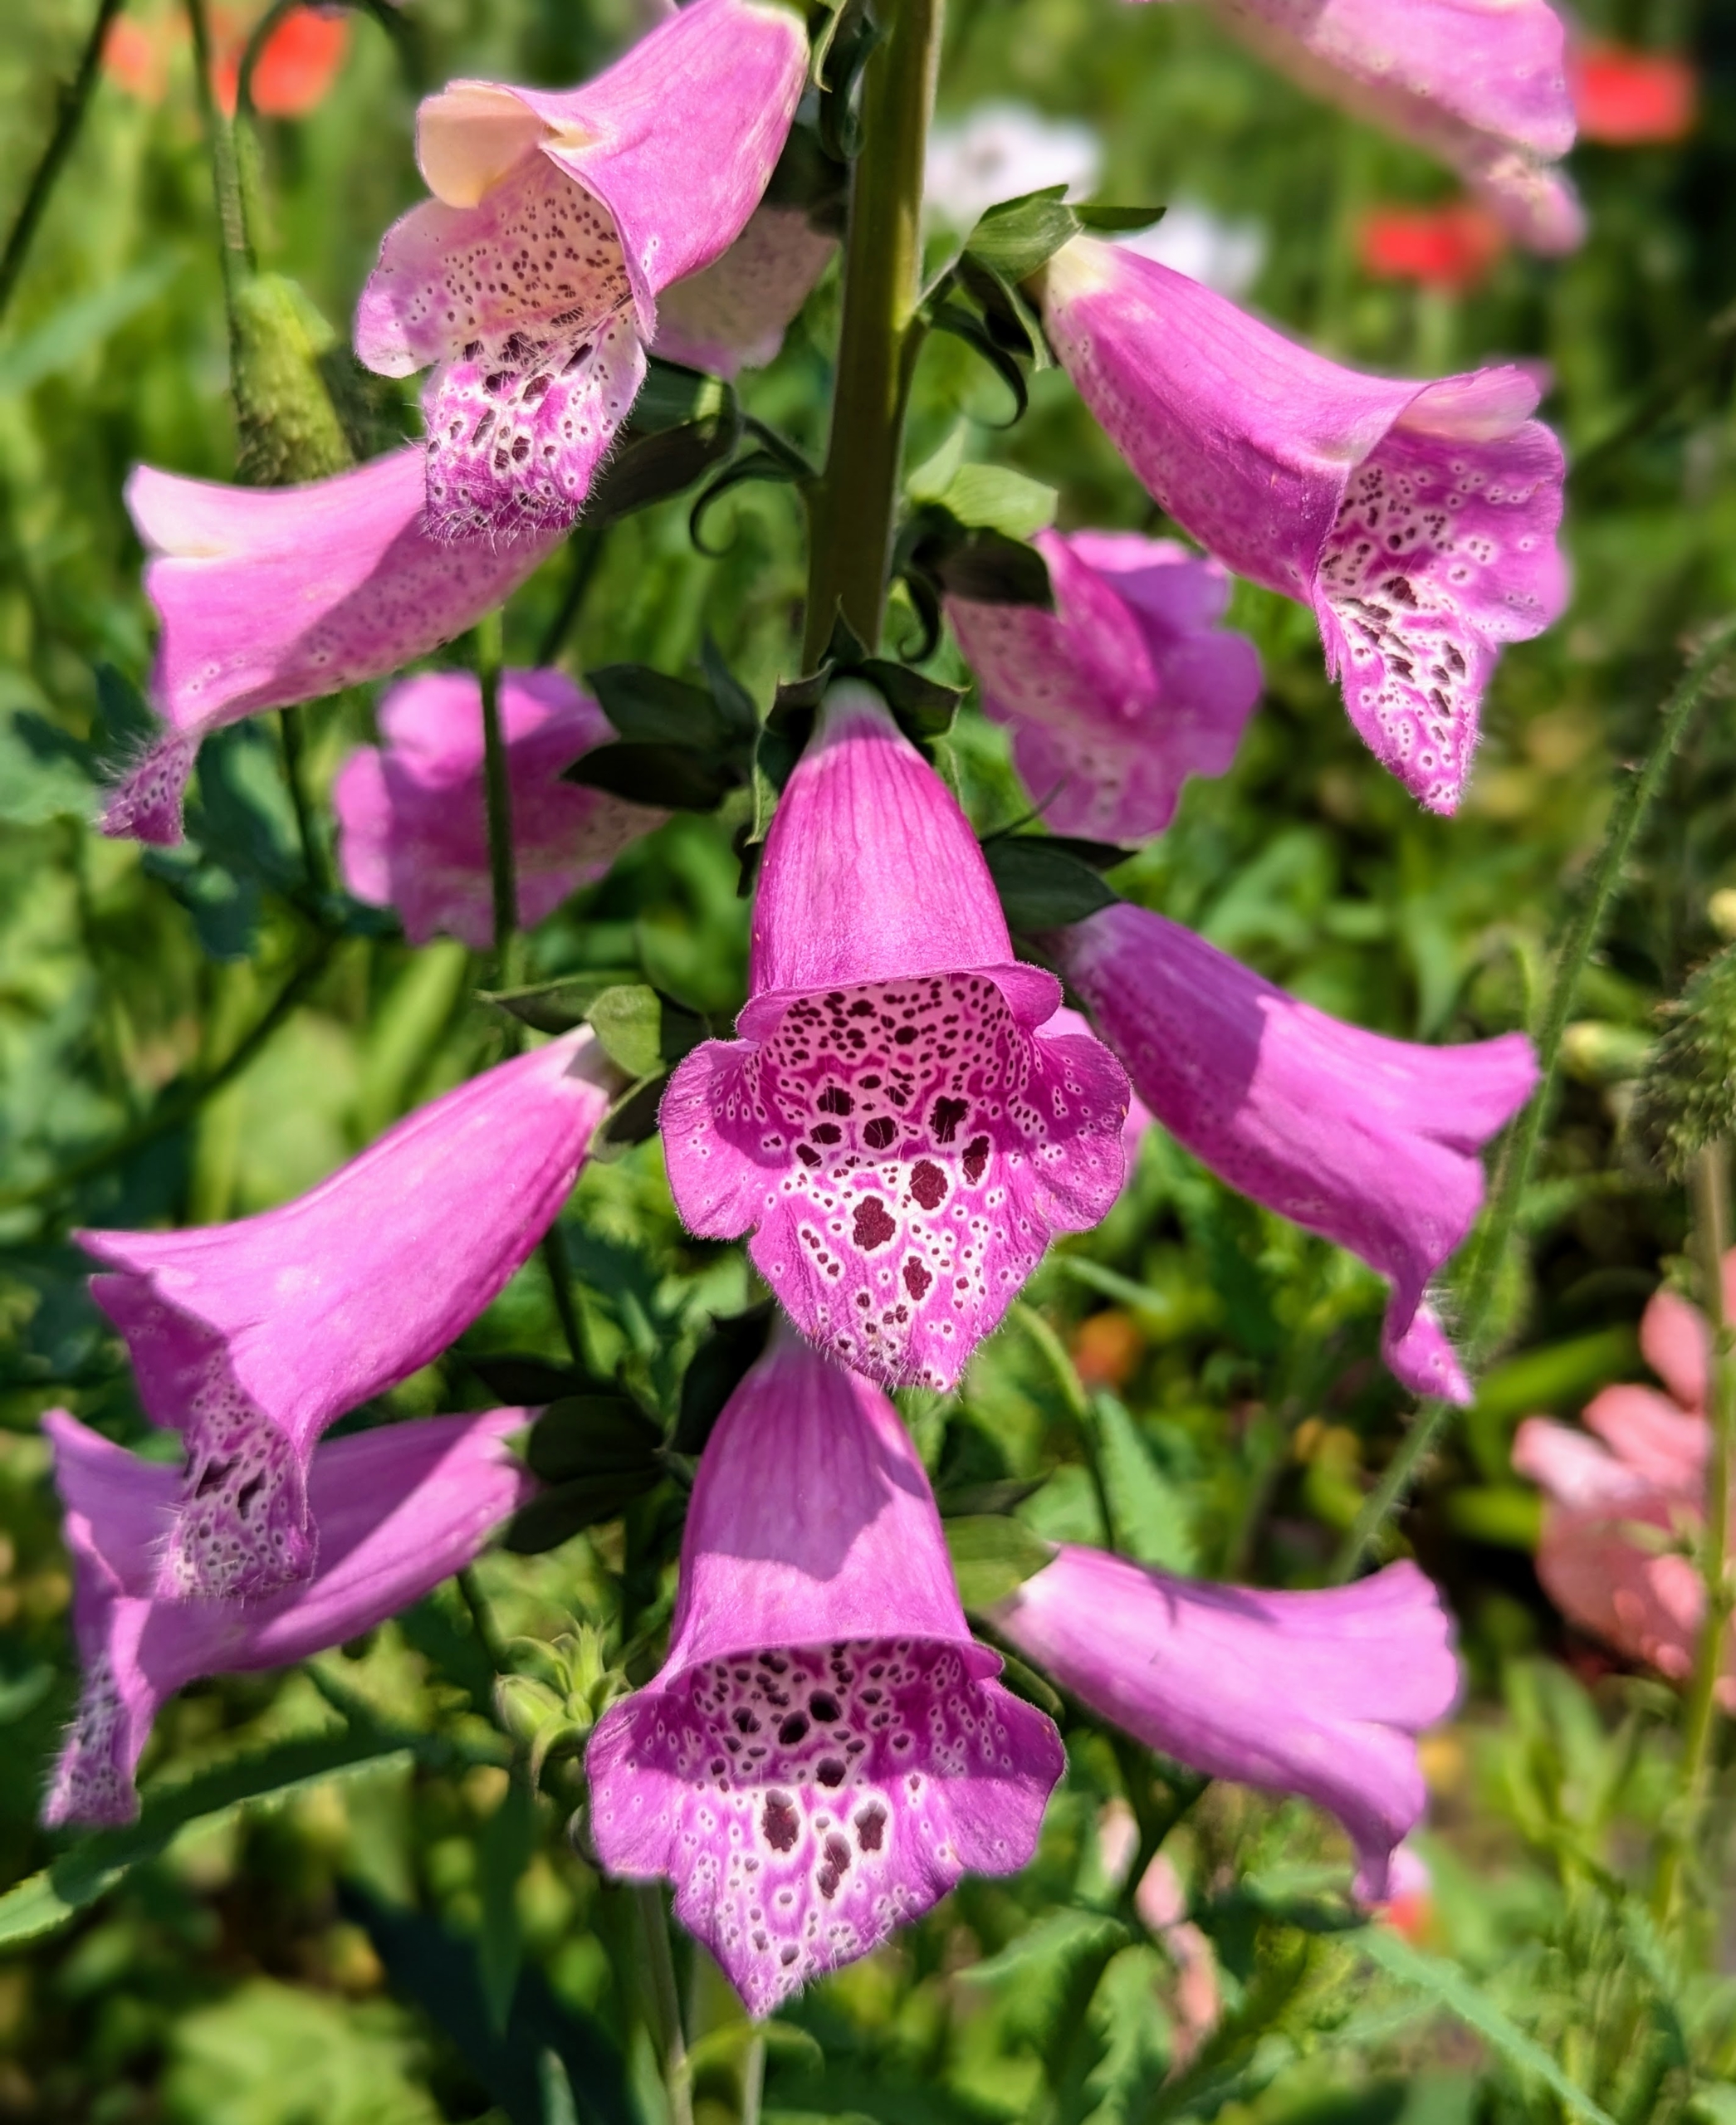
Inside the garden are these tall foxglove plants, Digitalis purpurea. These add lovely vertical interest to any garden. Foxglove flowers grow on stems which may reach up to six feet in height, depending on the variety.
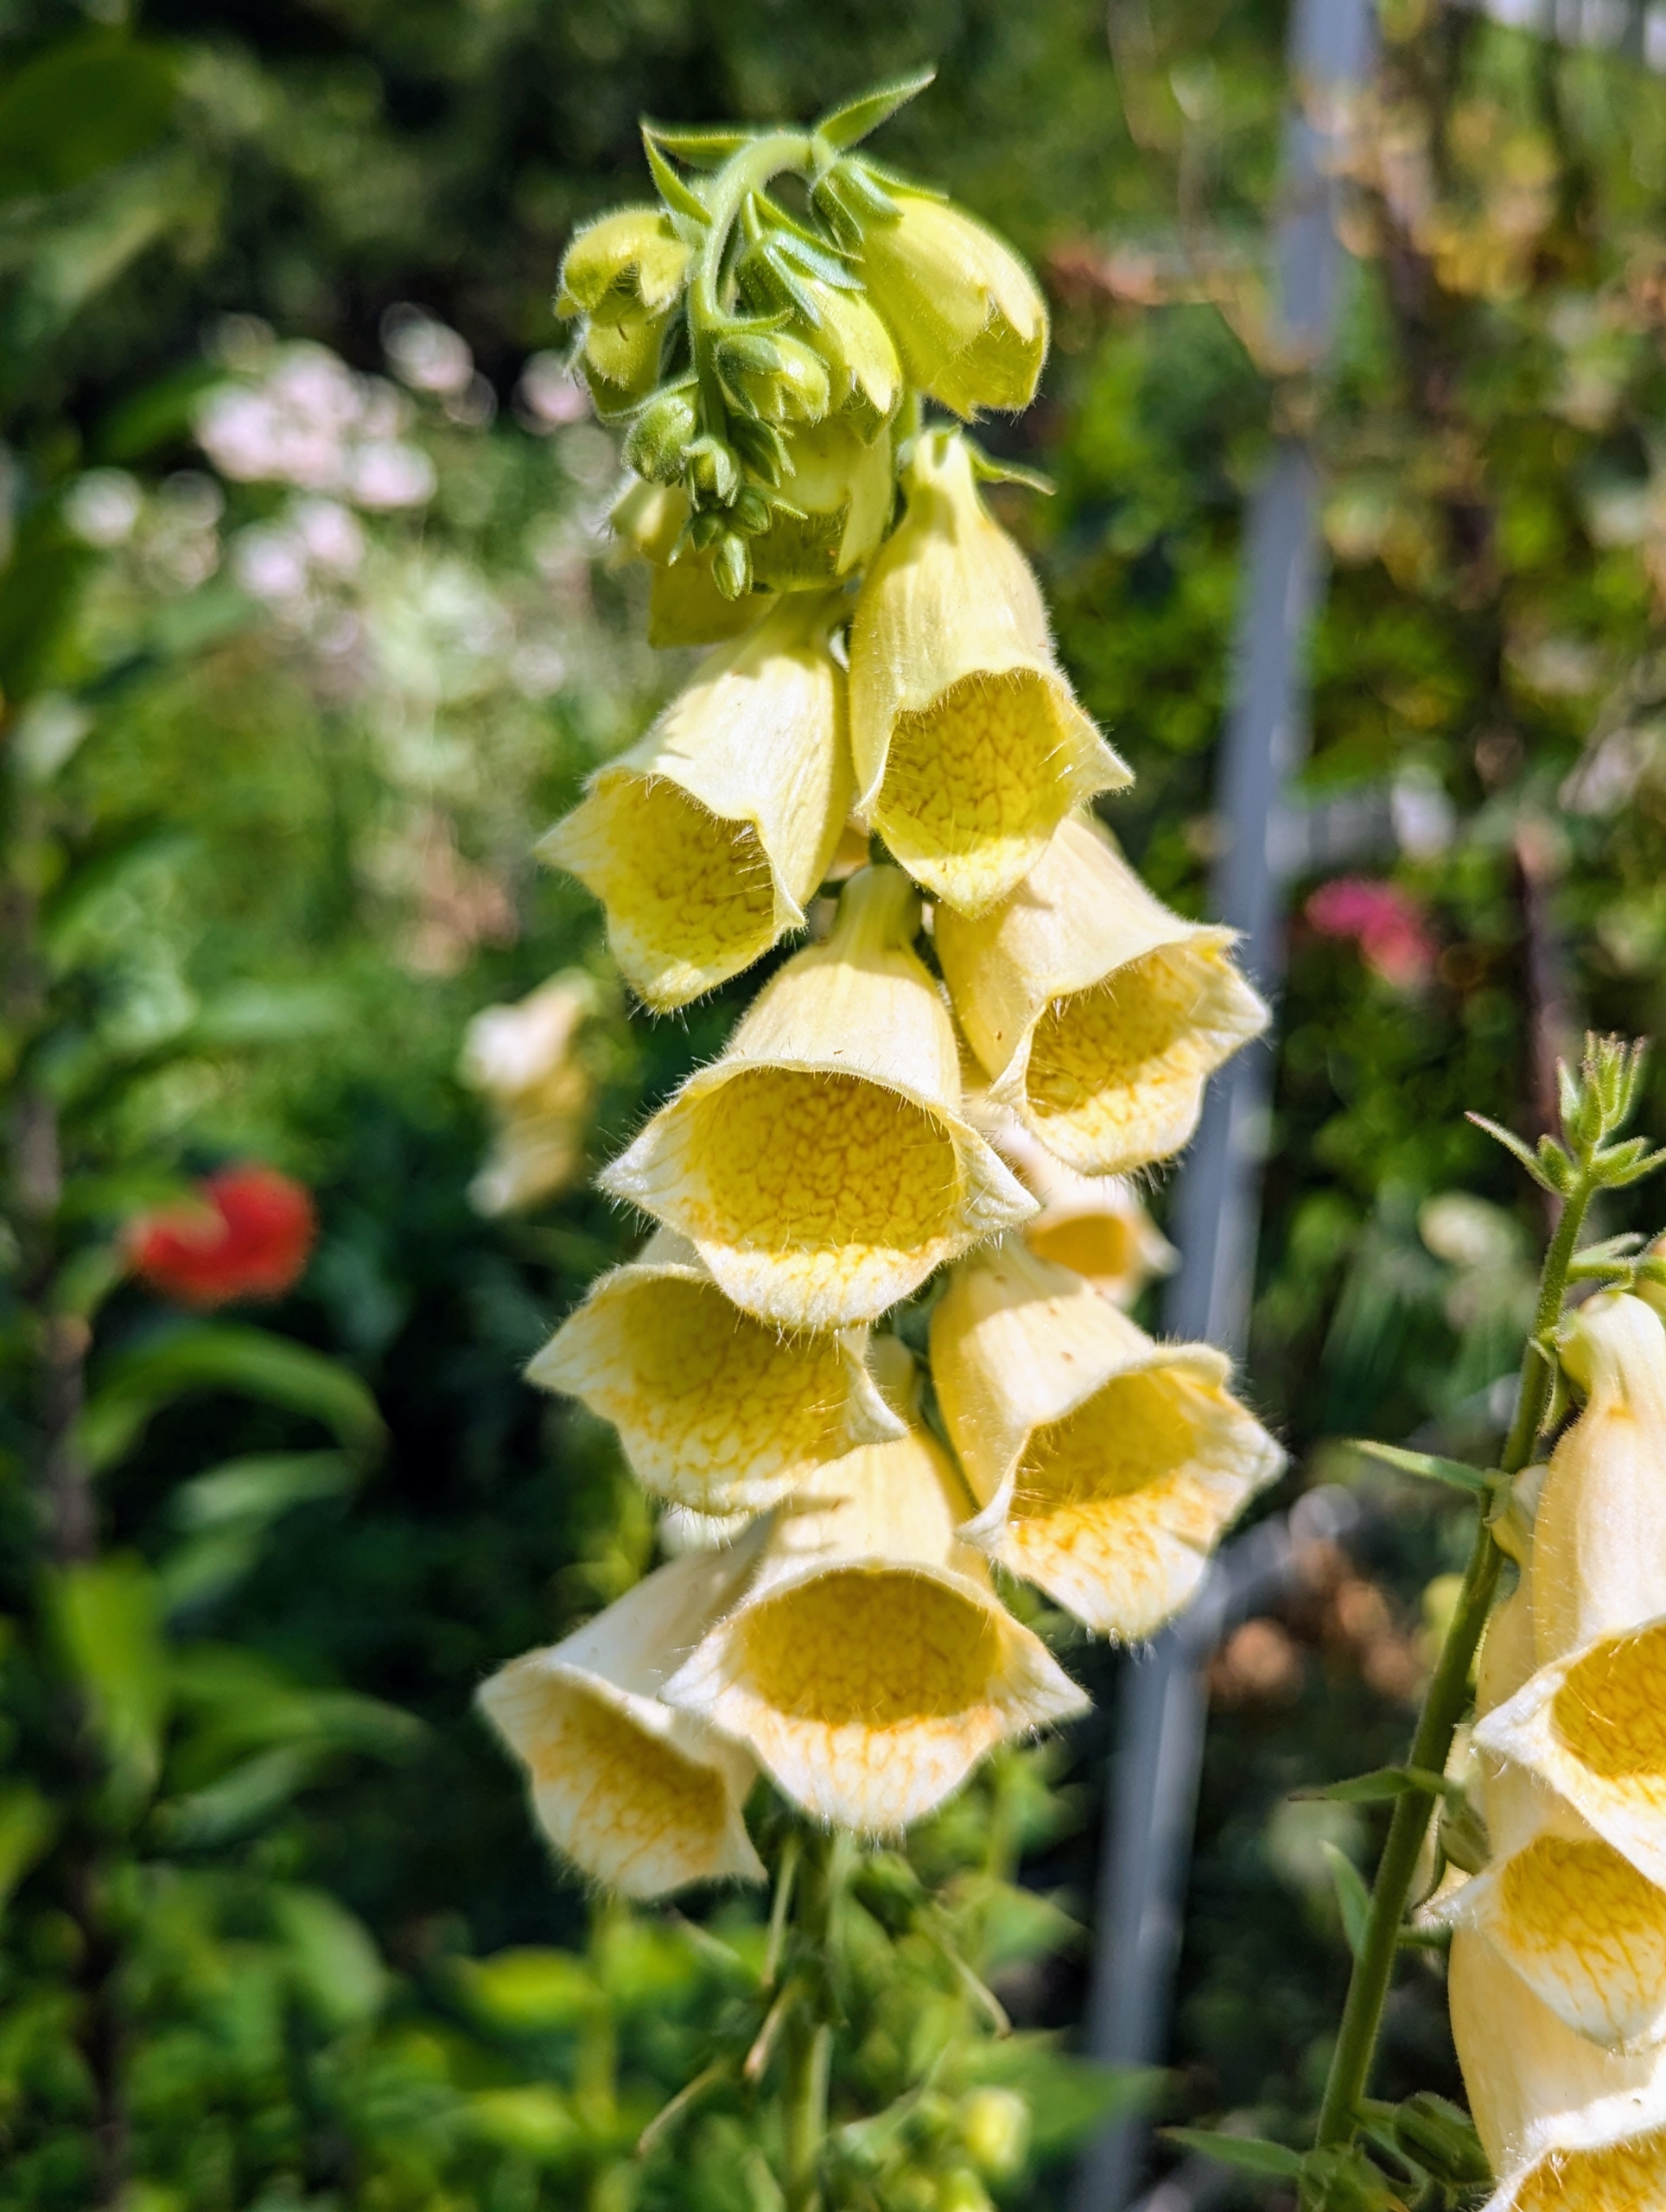
Here is another foxglove in pretty creamy yellow.
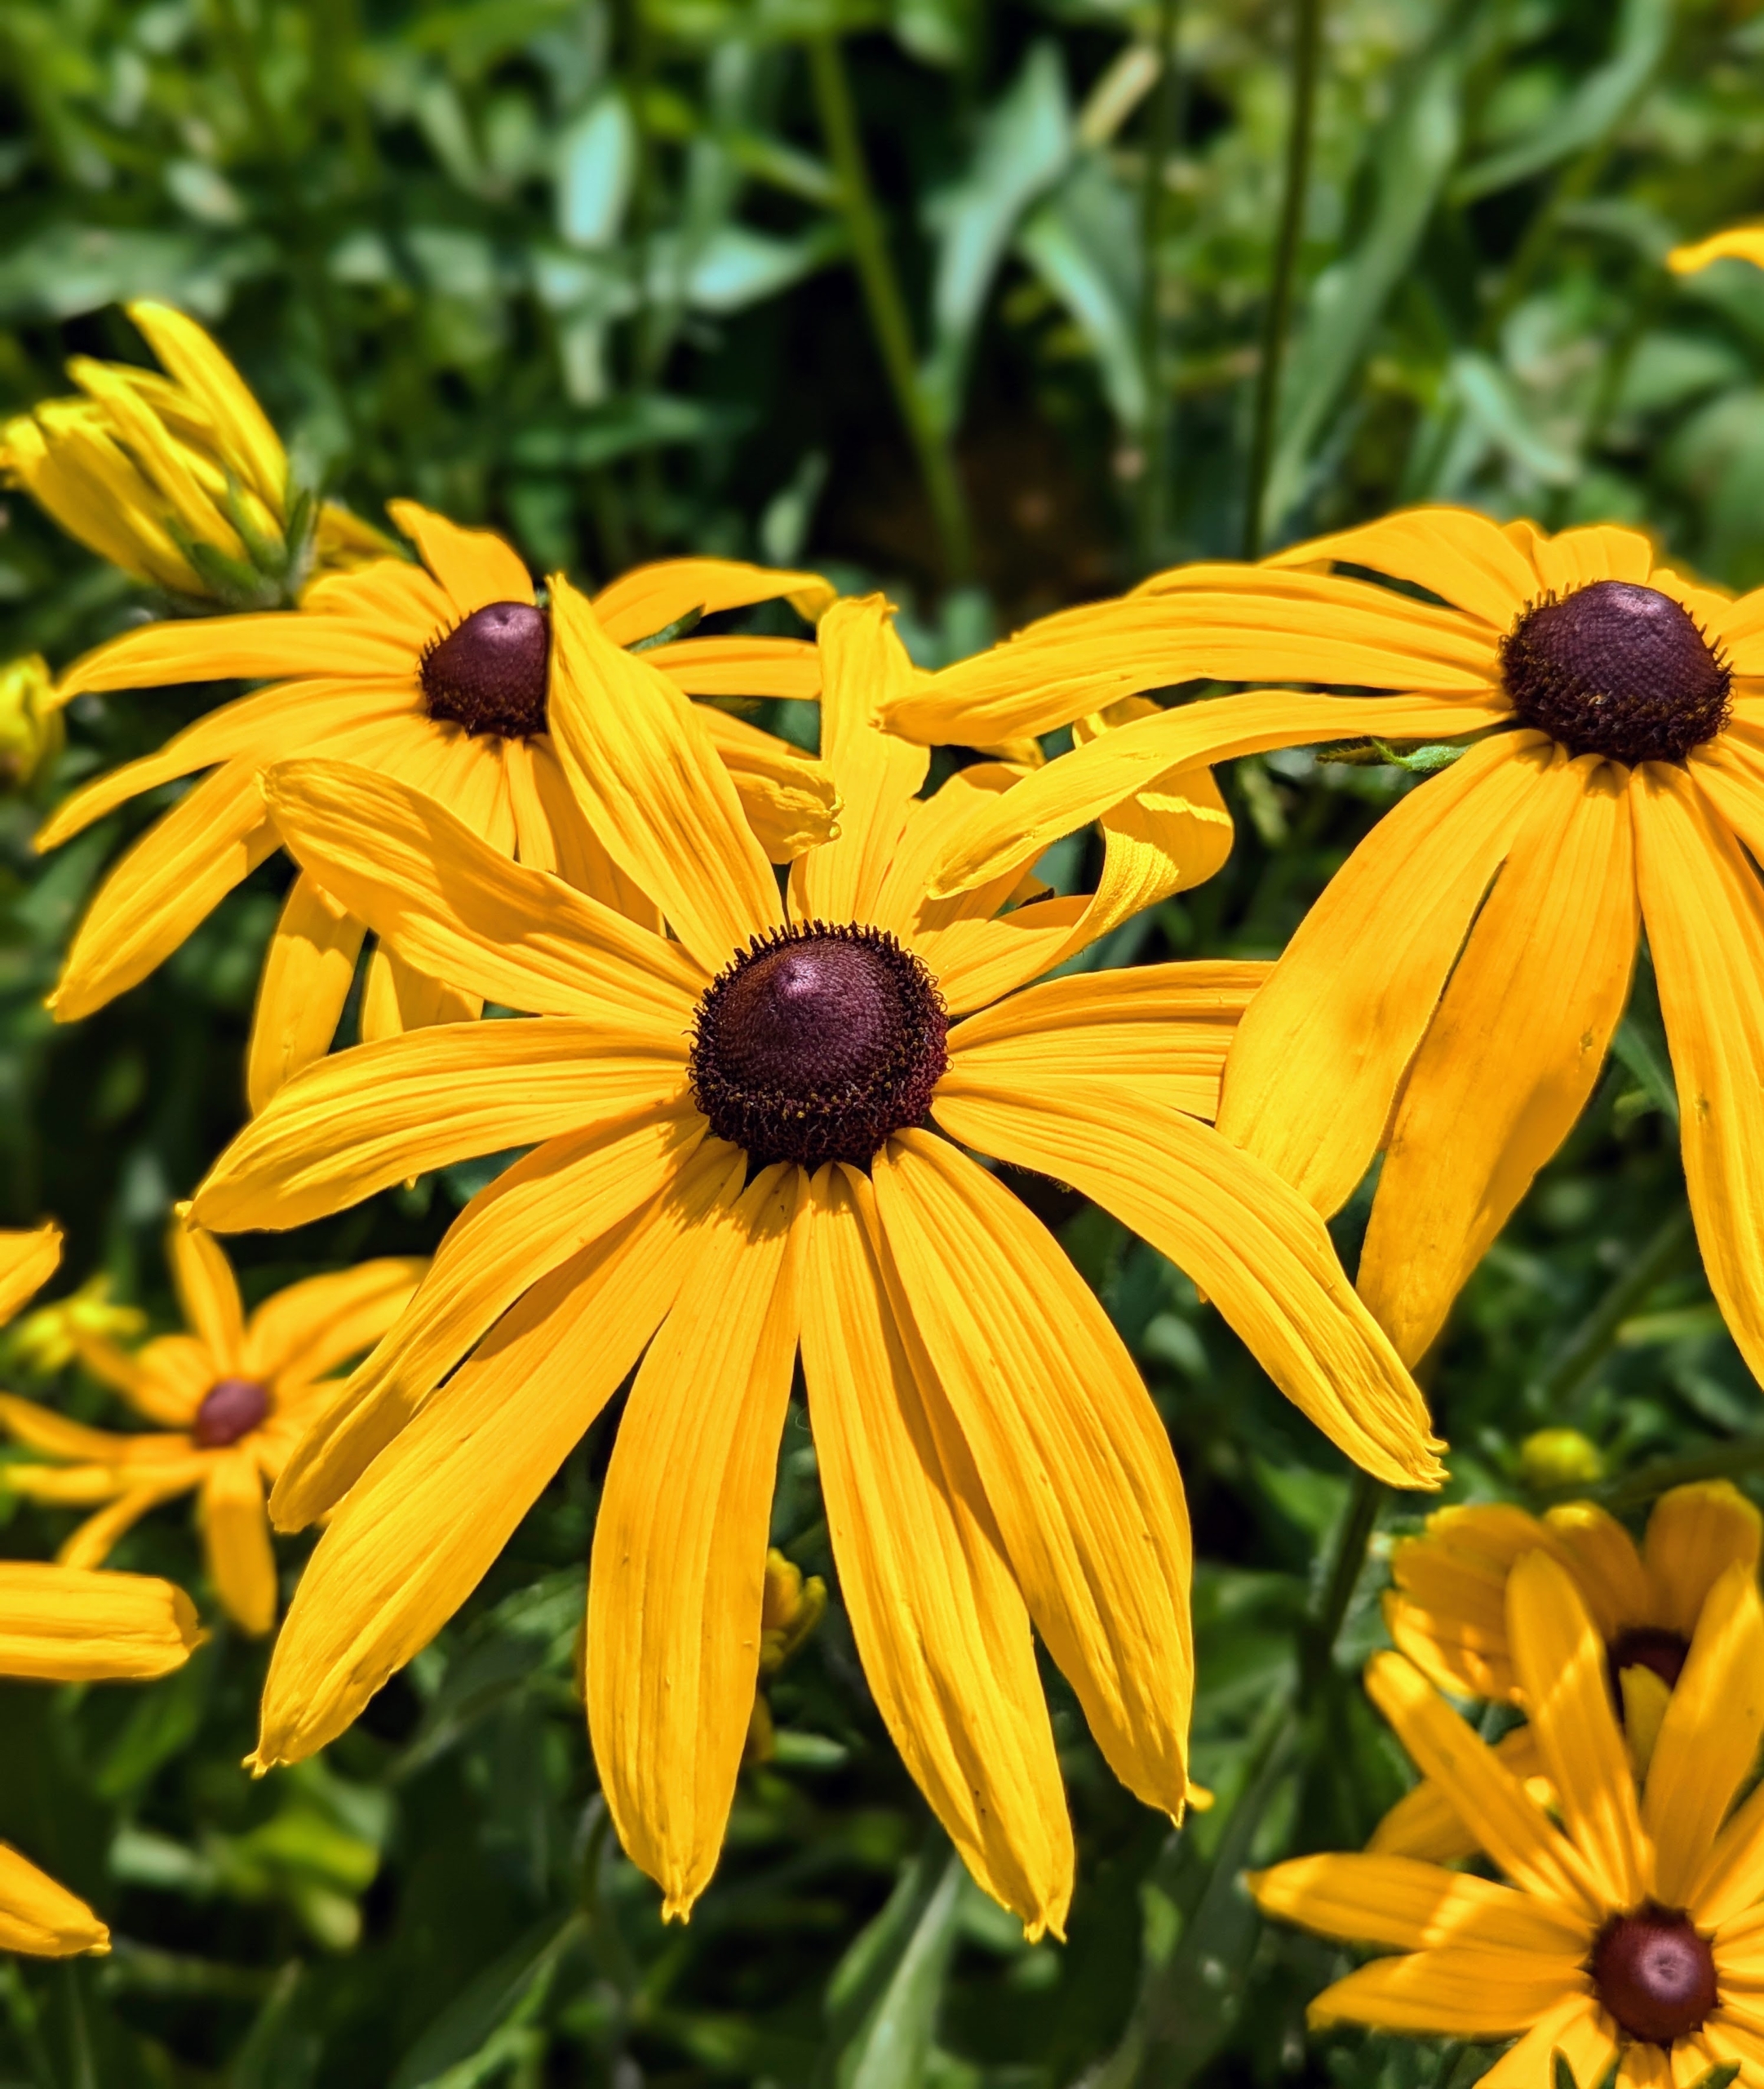
These are the showy flowers of rudbeckia. Rudbeckia’s bright, summer-blooming flowers give the best effect when planted in masses in a border or wildflower meadow.
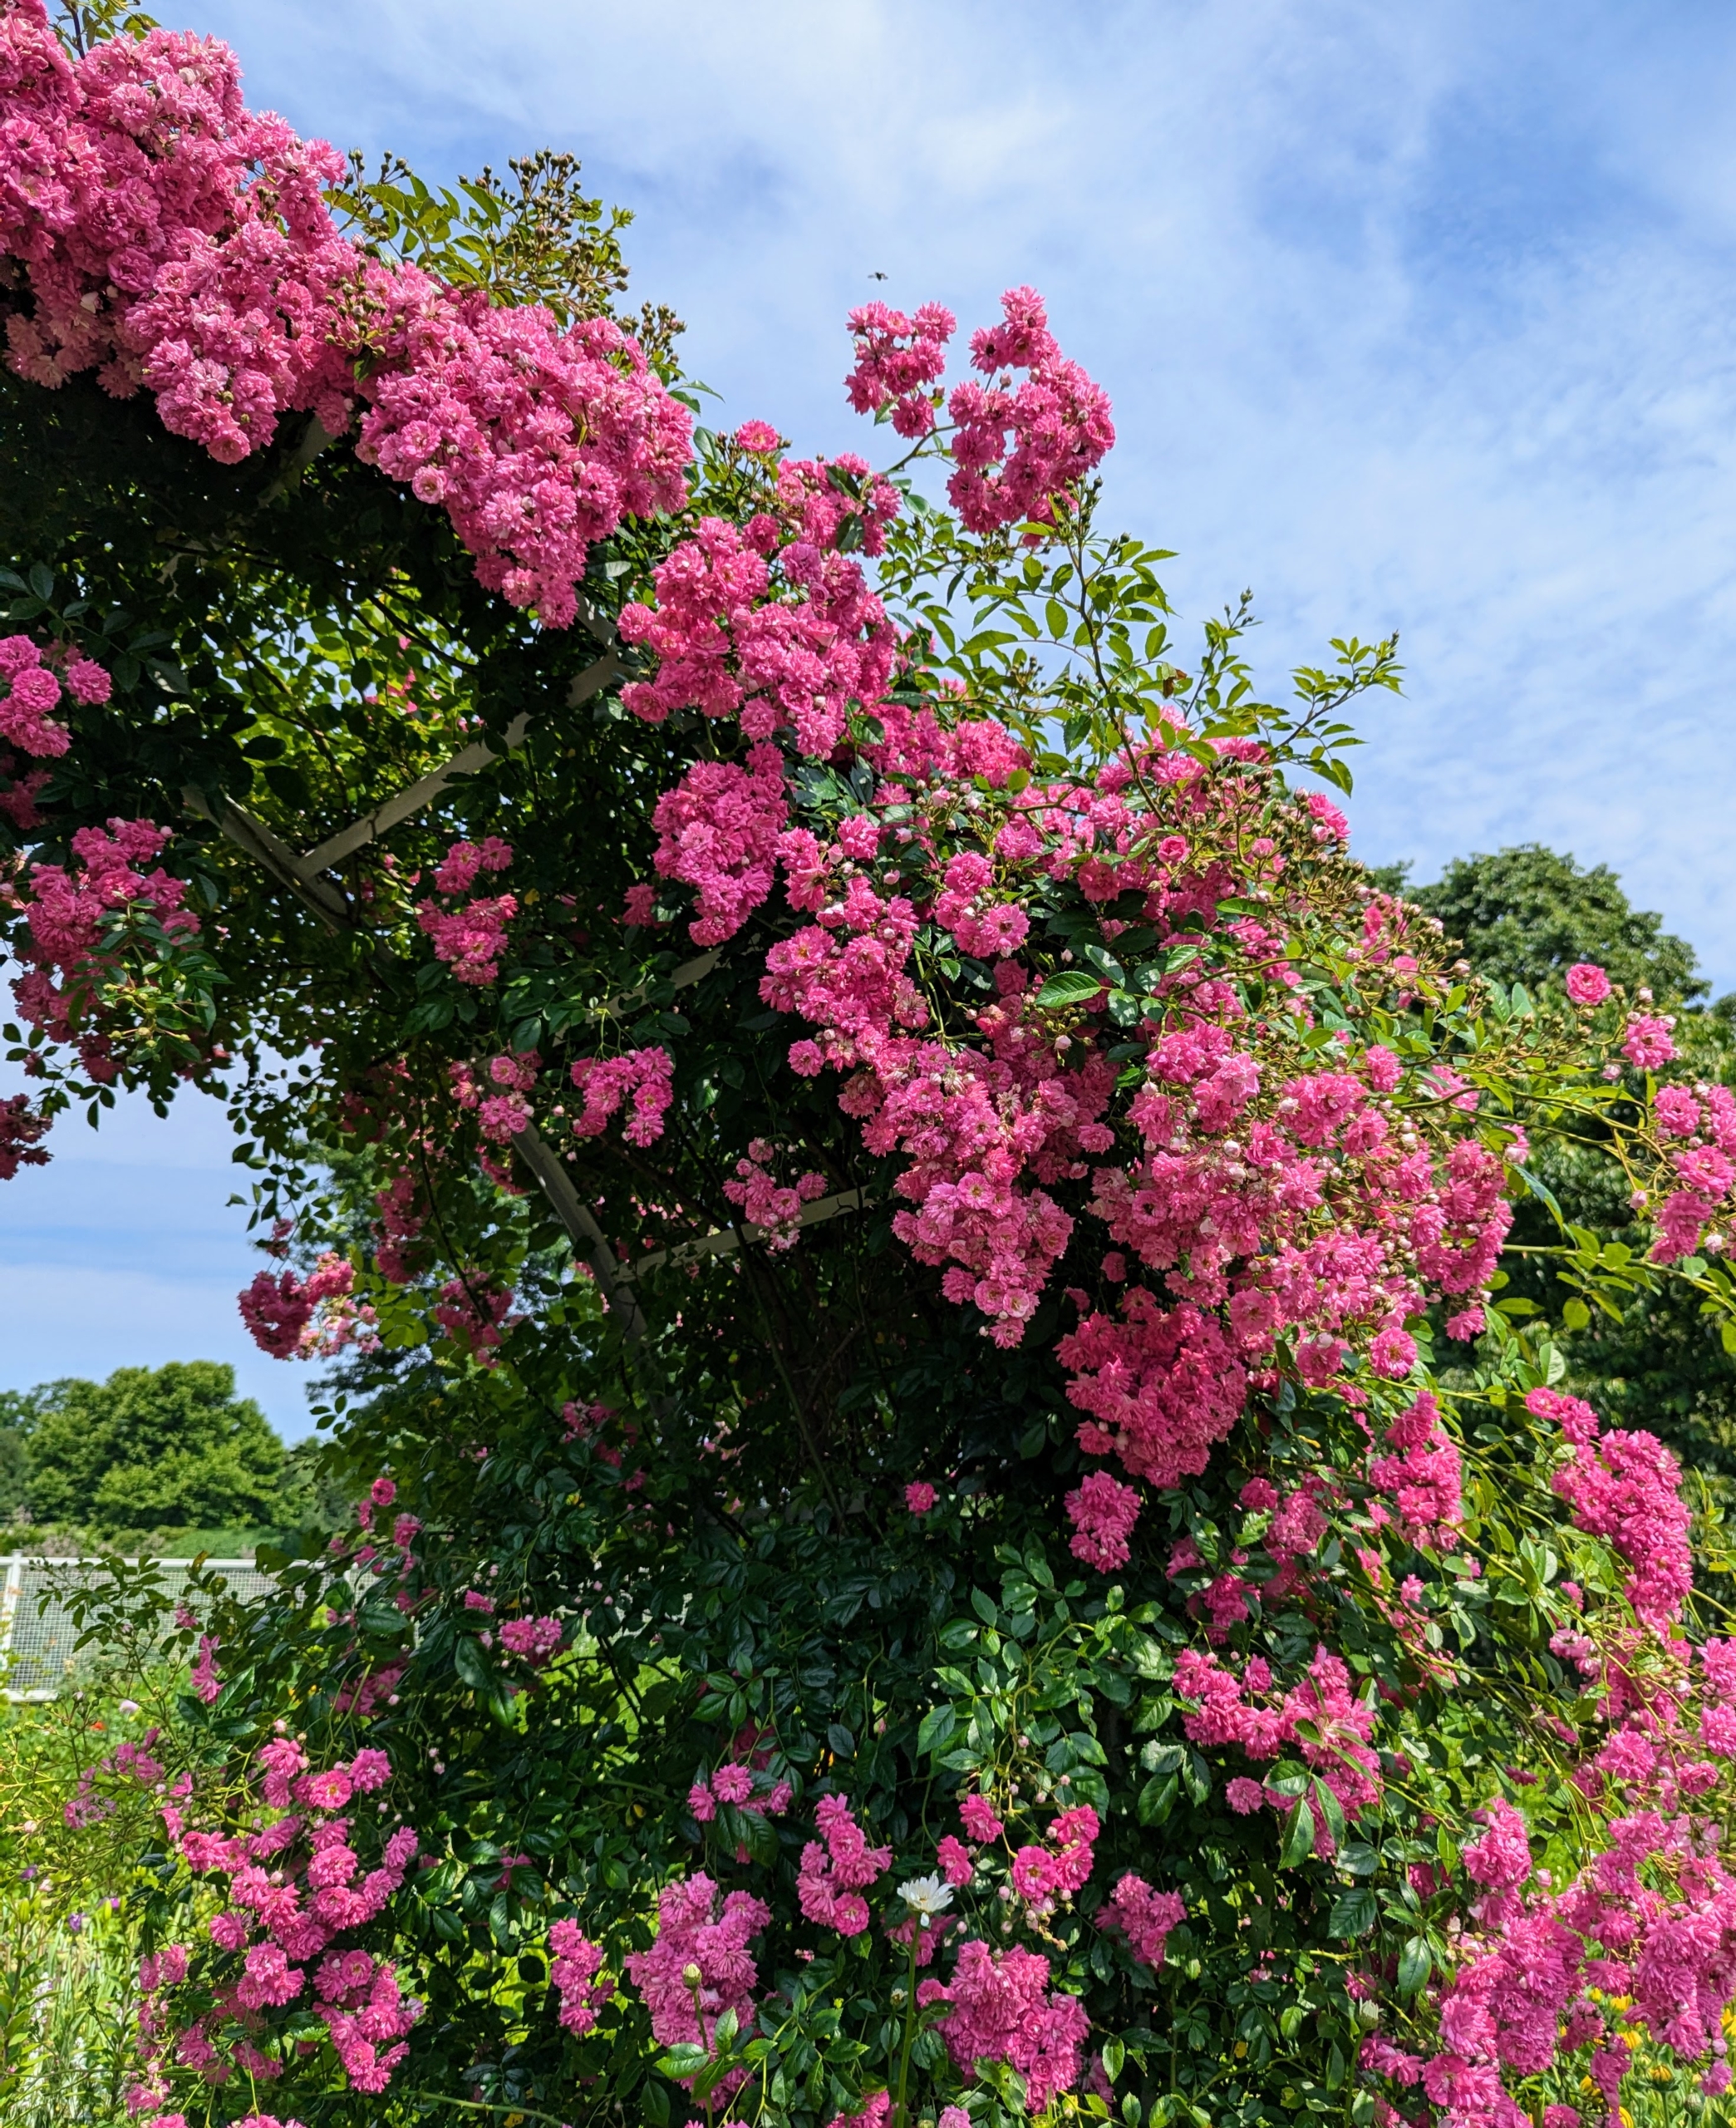
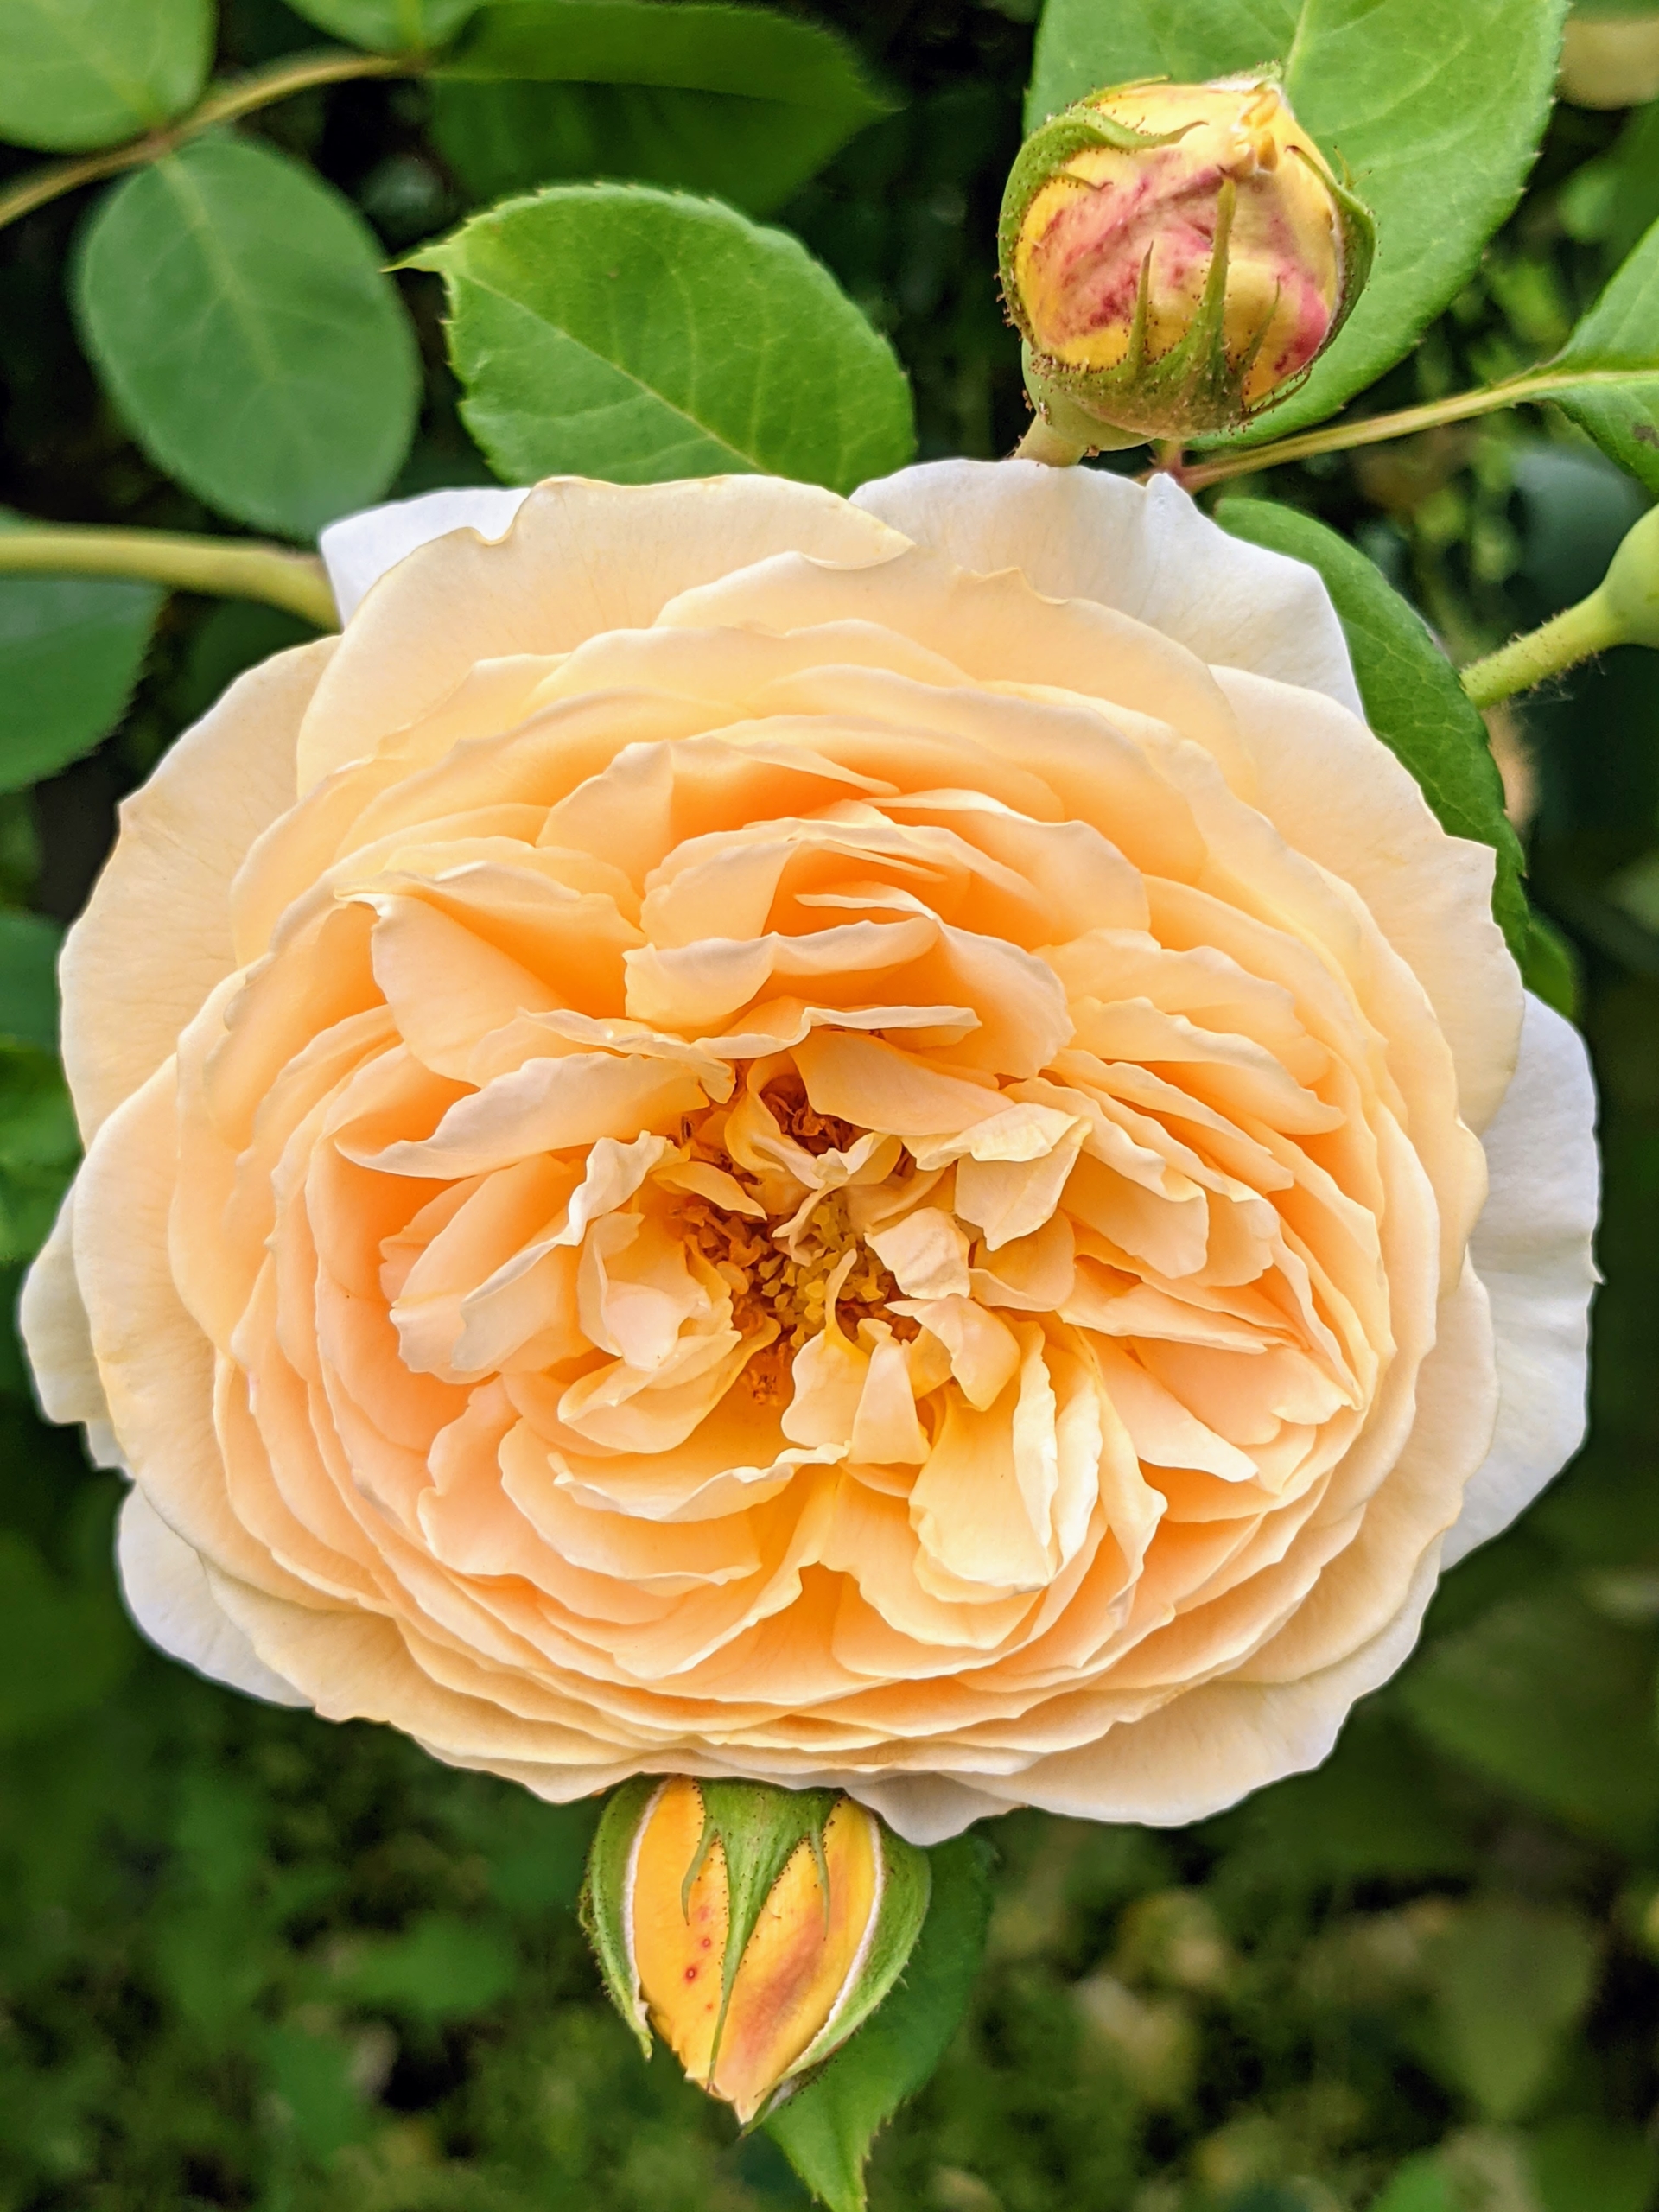
I have many roses in my flower garden. Some of them were transferred here from my former home in East Hampton. I am so happy with how well they’re doing. In the last few years, I’ve added to this collection of roses – David Austin roses and various varieties from Northland Rosarium.
Here is another rose in a delicate pastel peach.
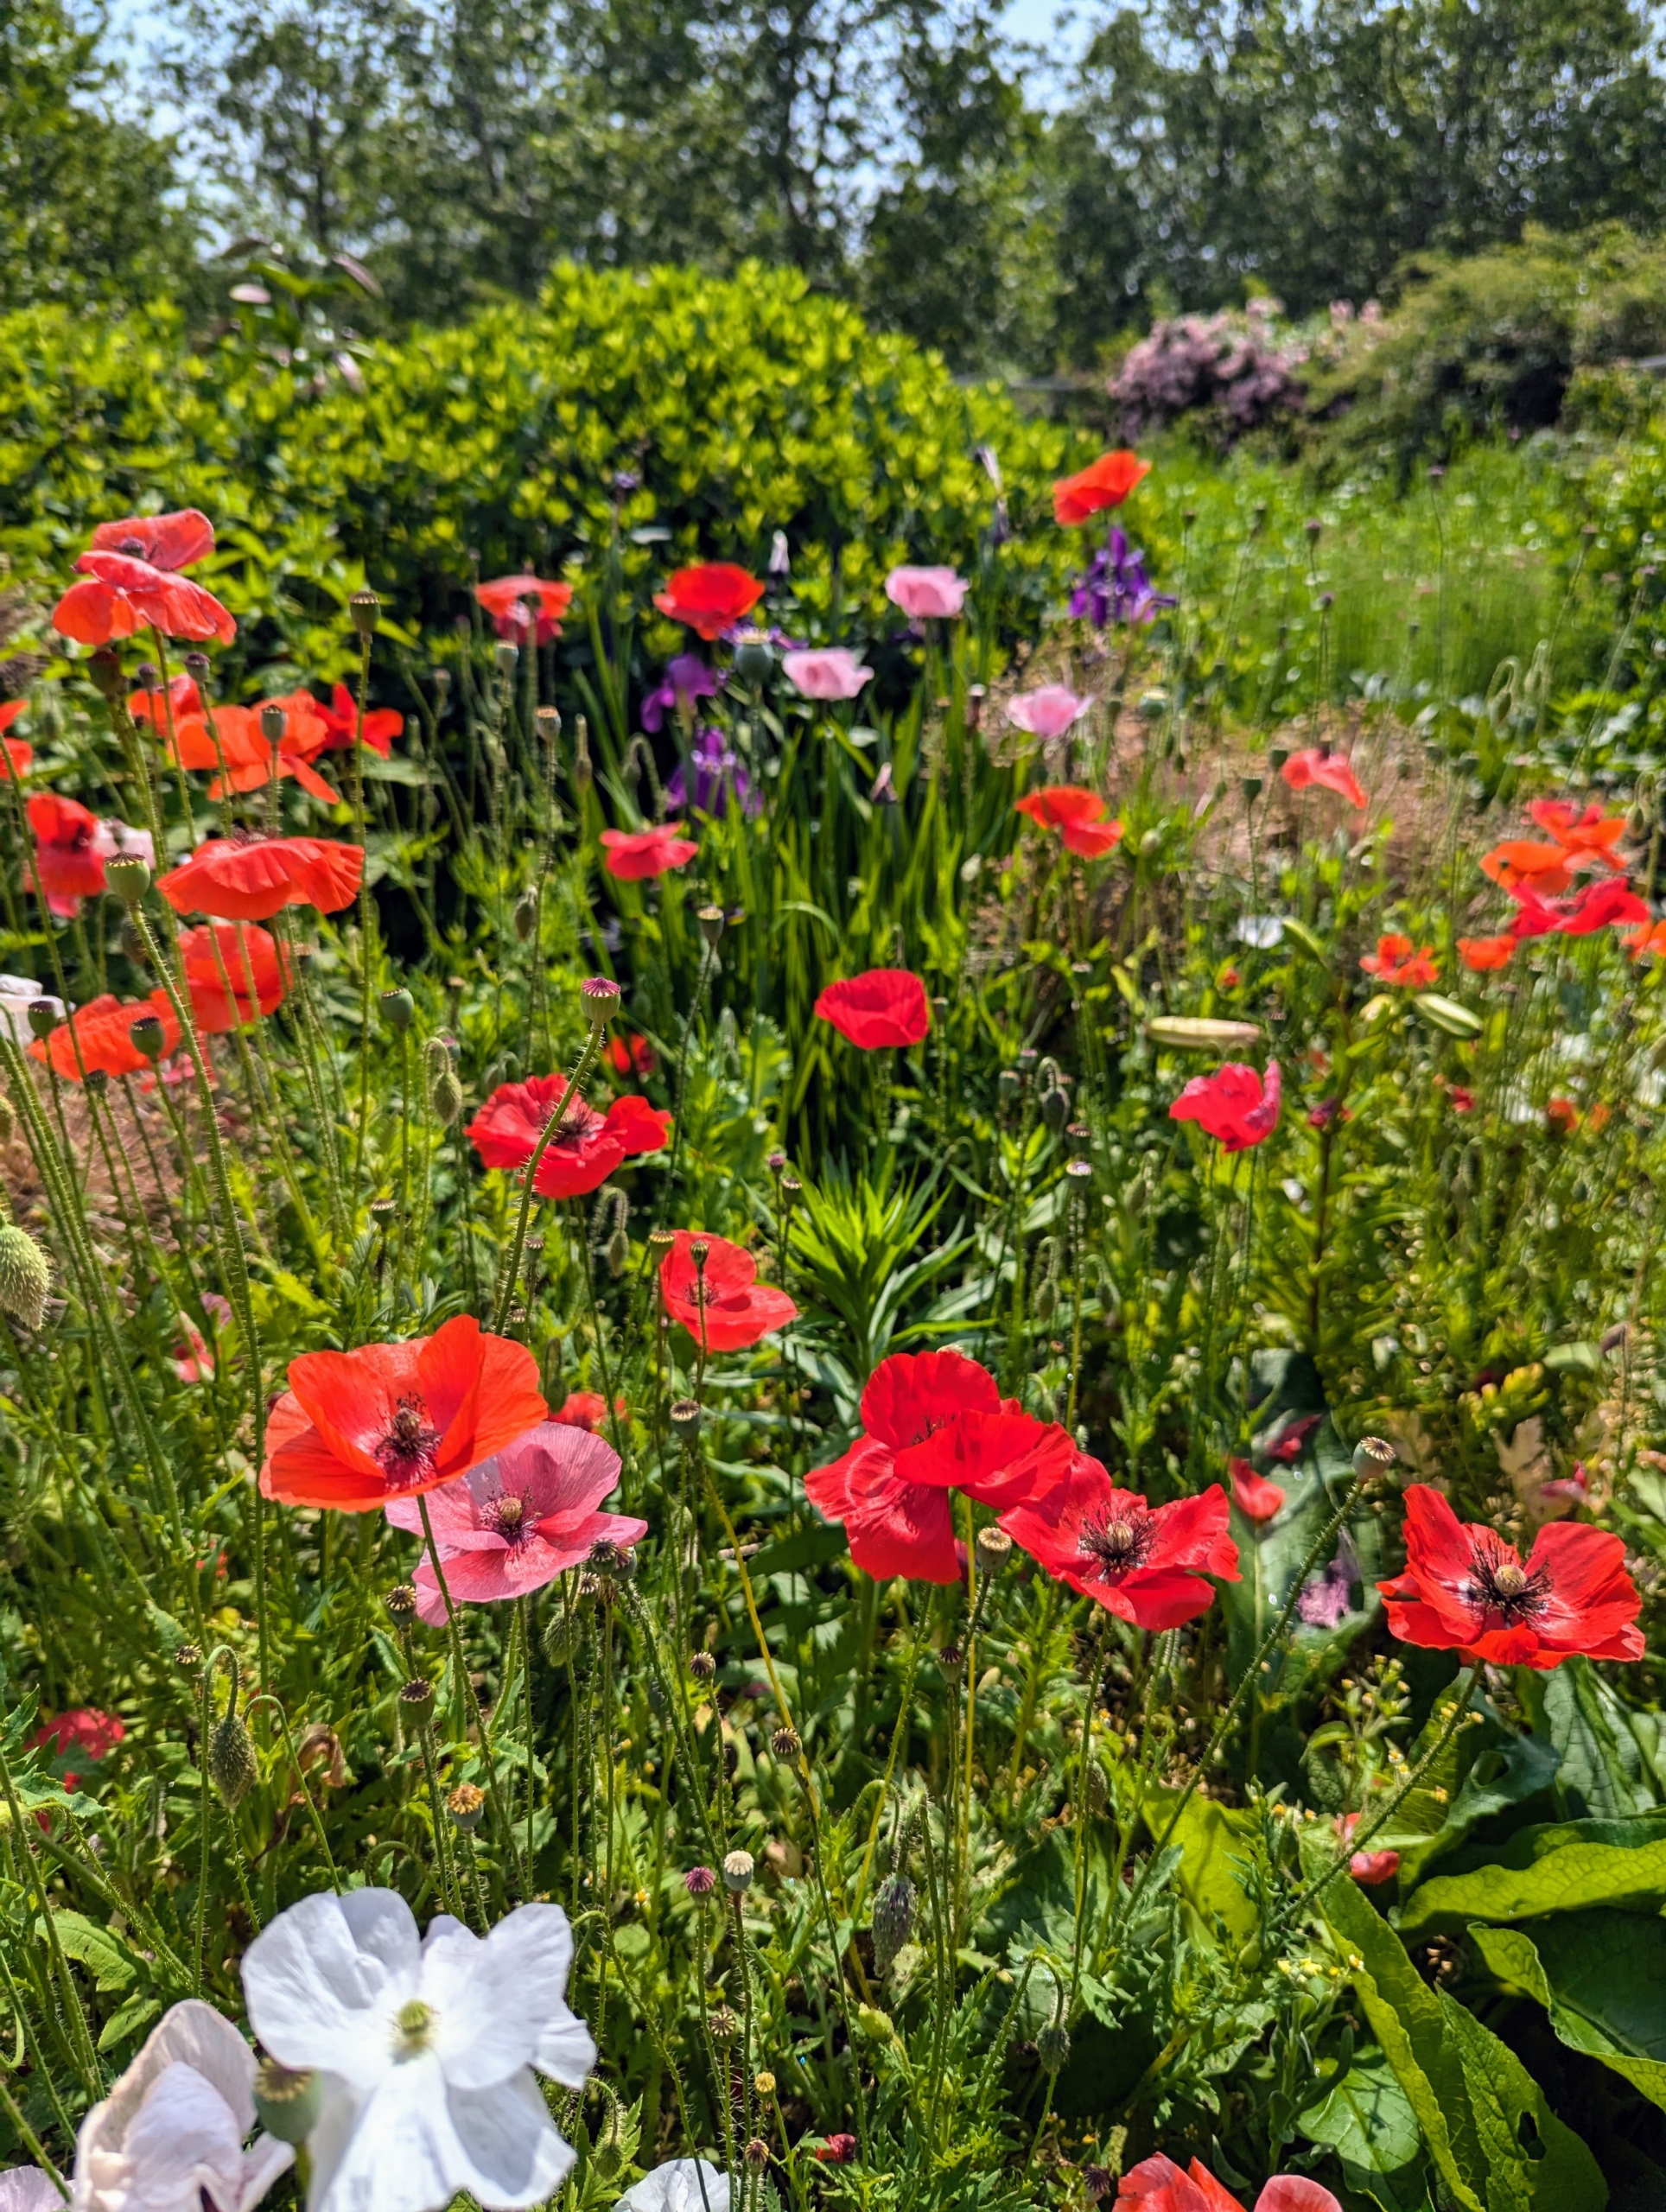
Many of the poppies going strong. Poppies require very little care, whether they are sown from seed or planted when young – they just need full sun and well-drained soil.
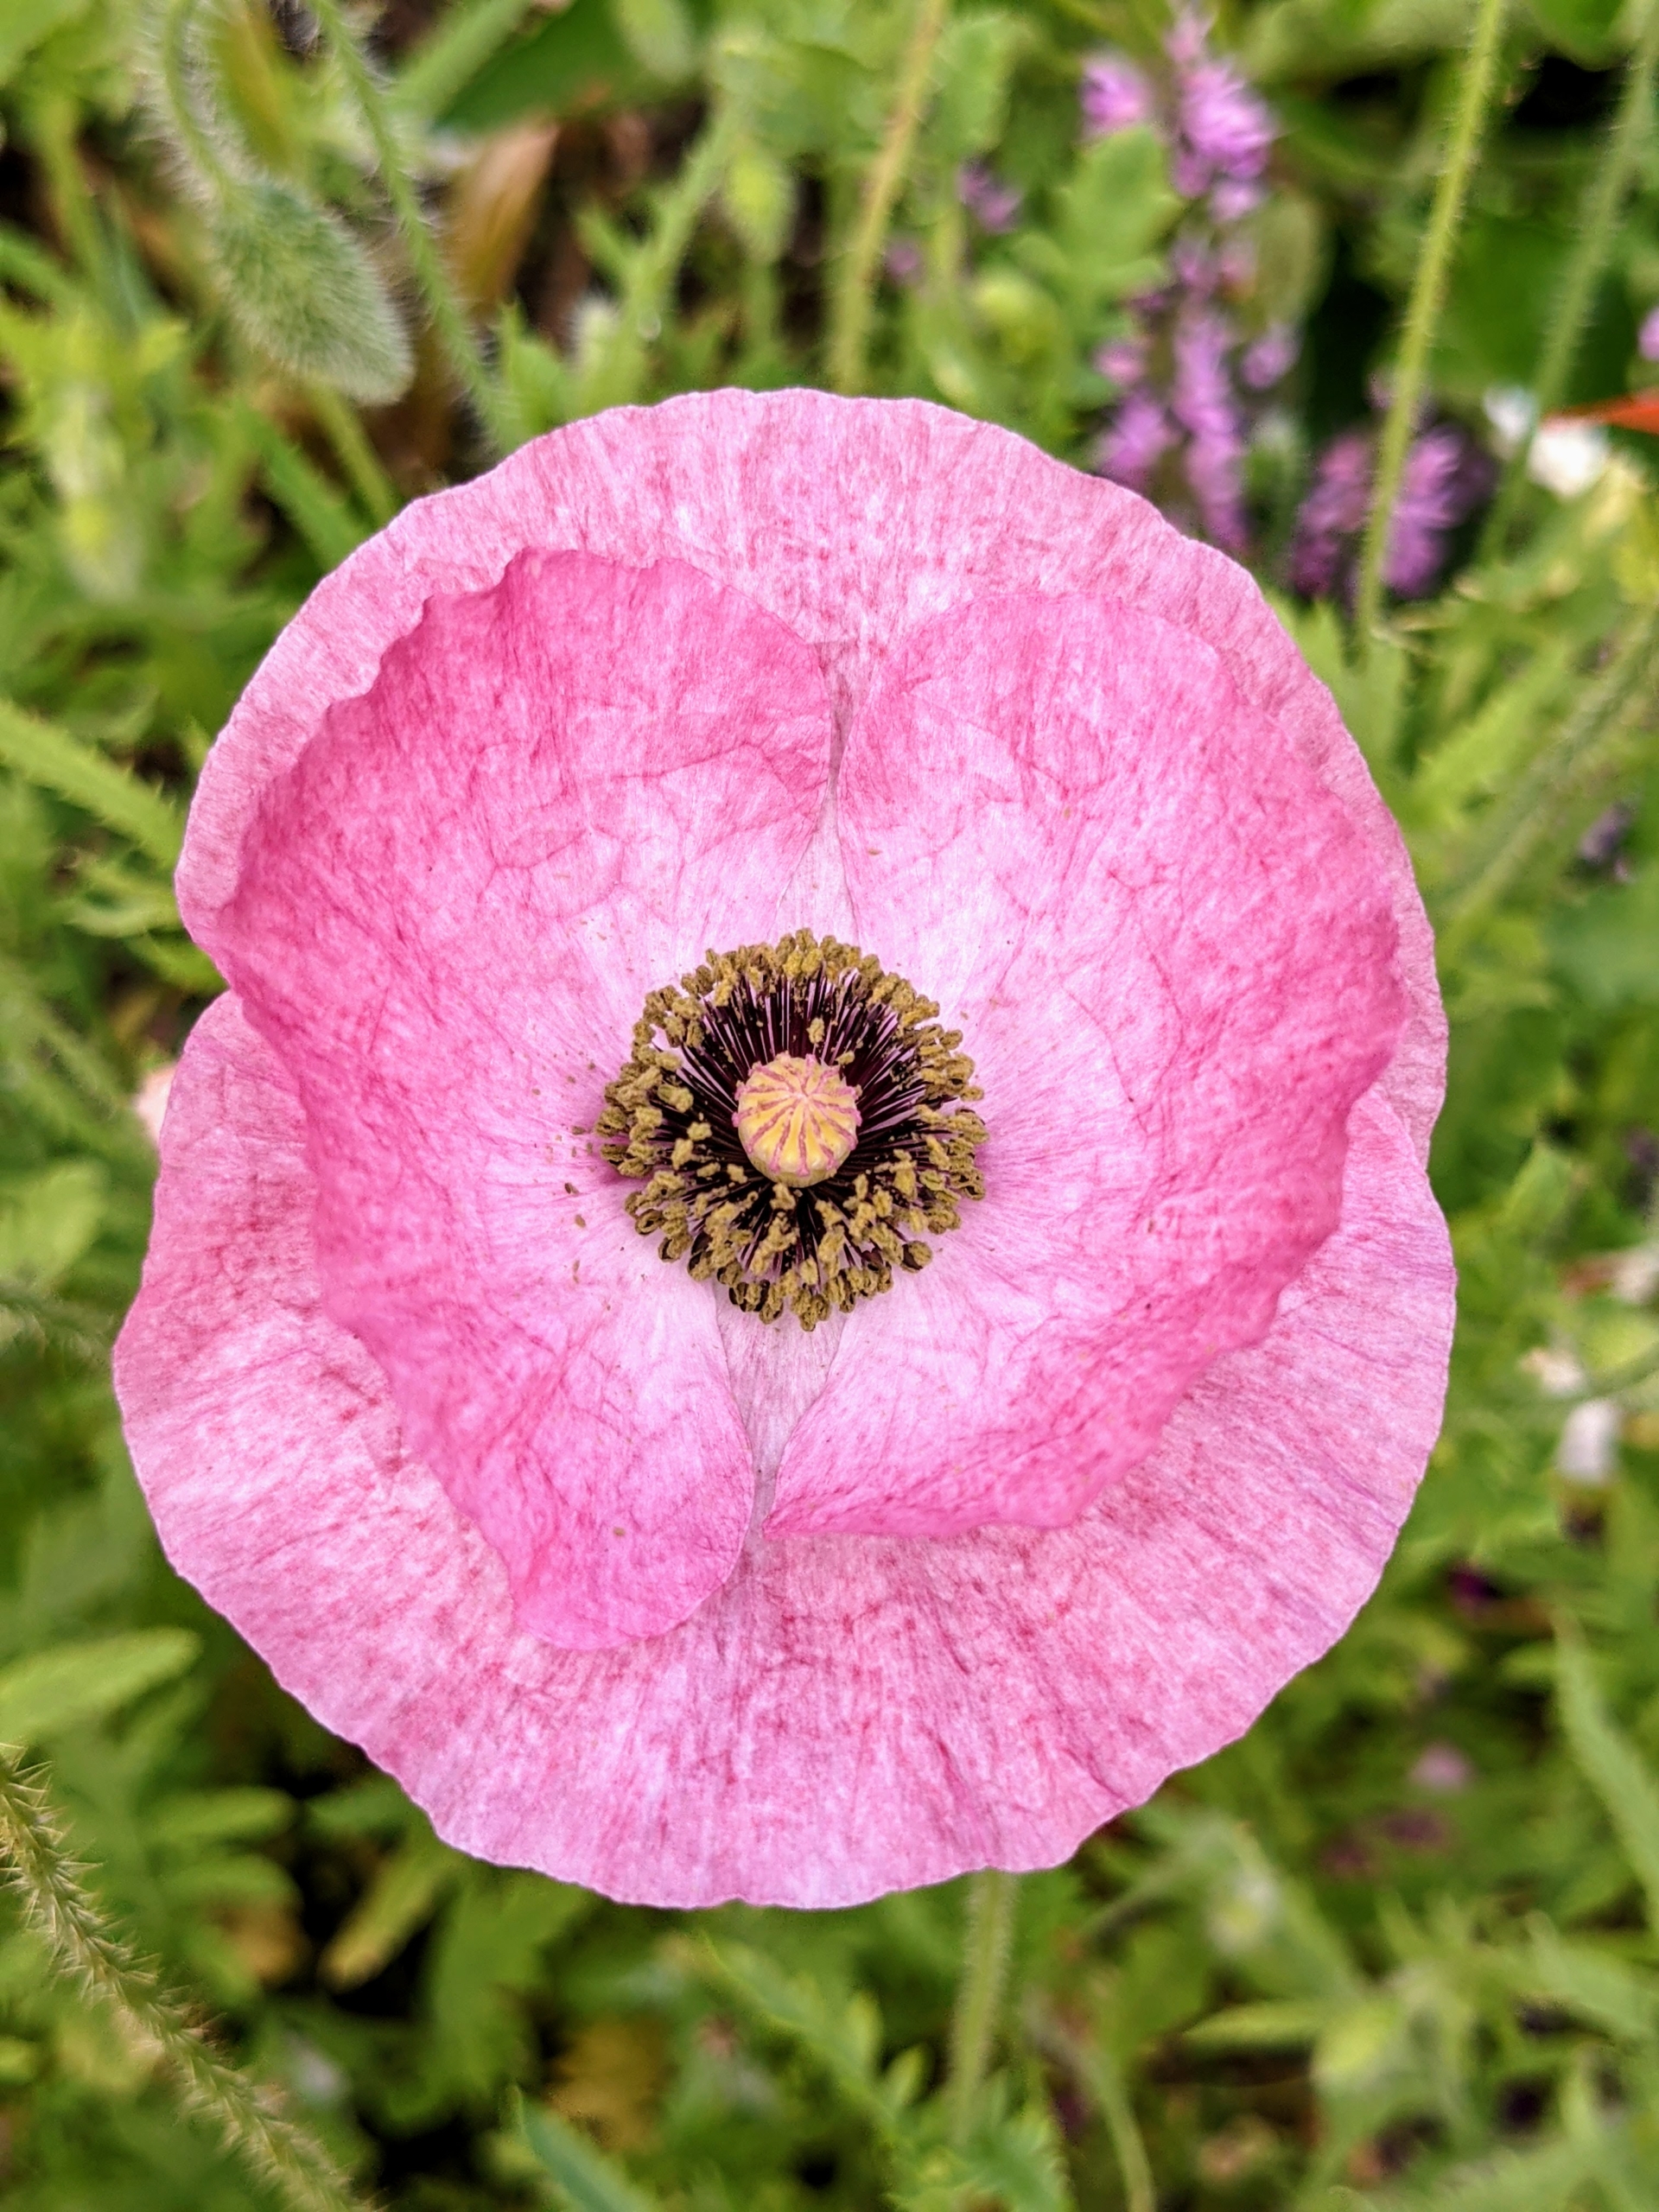
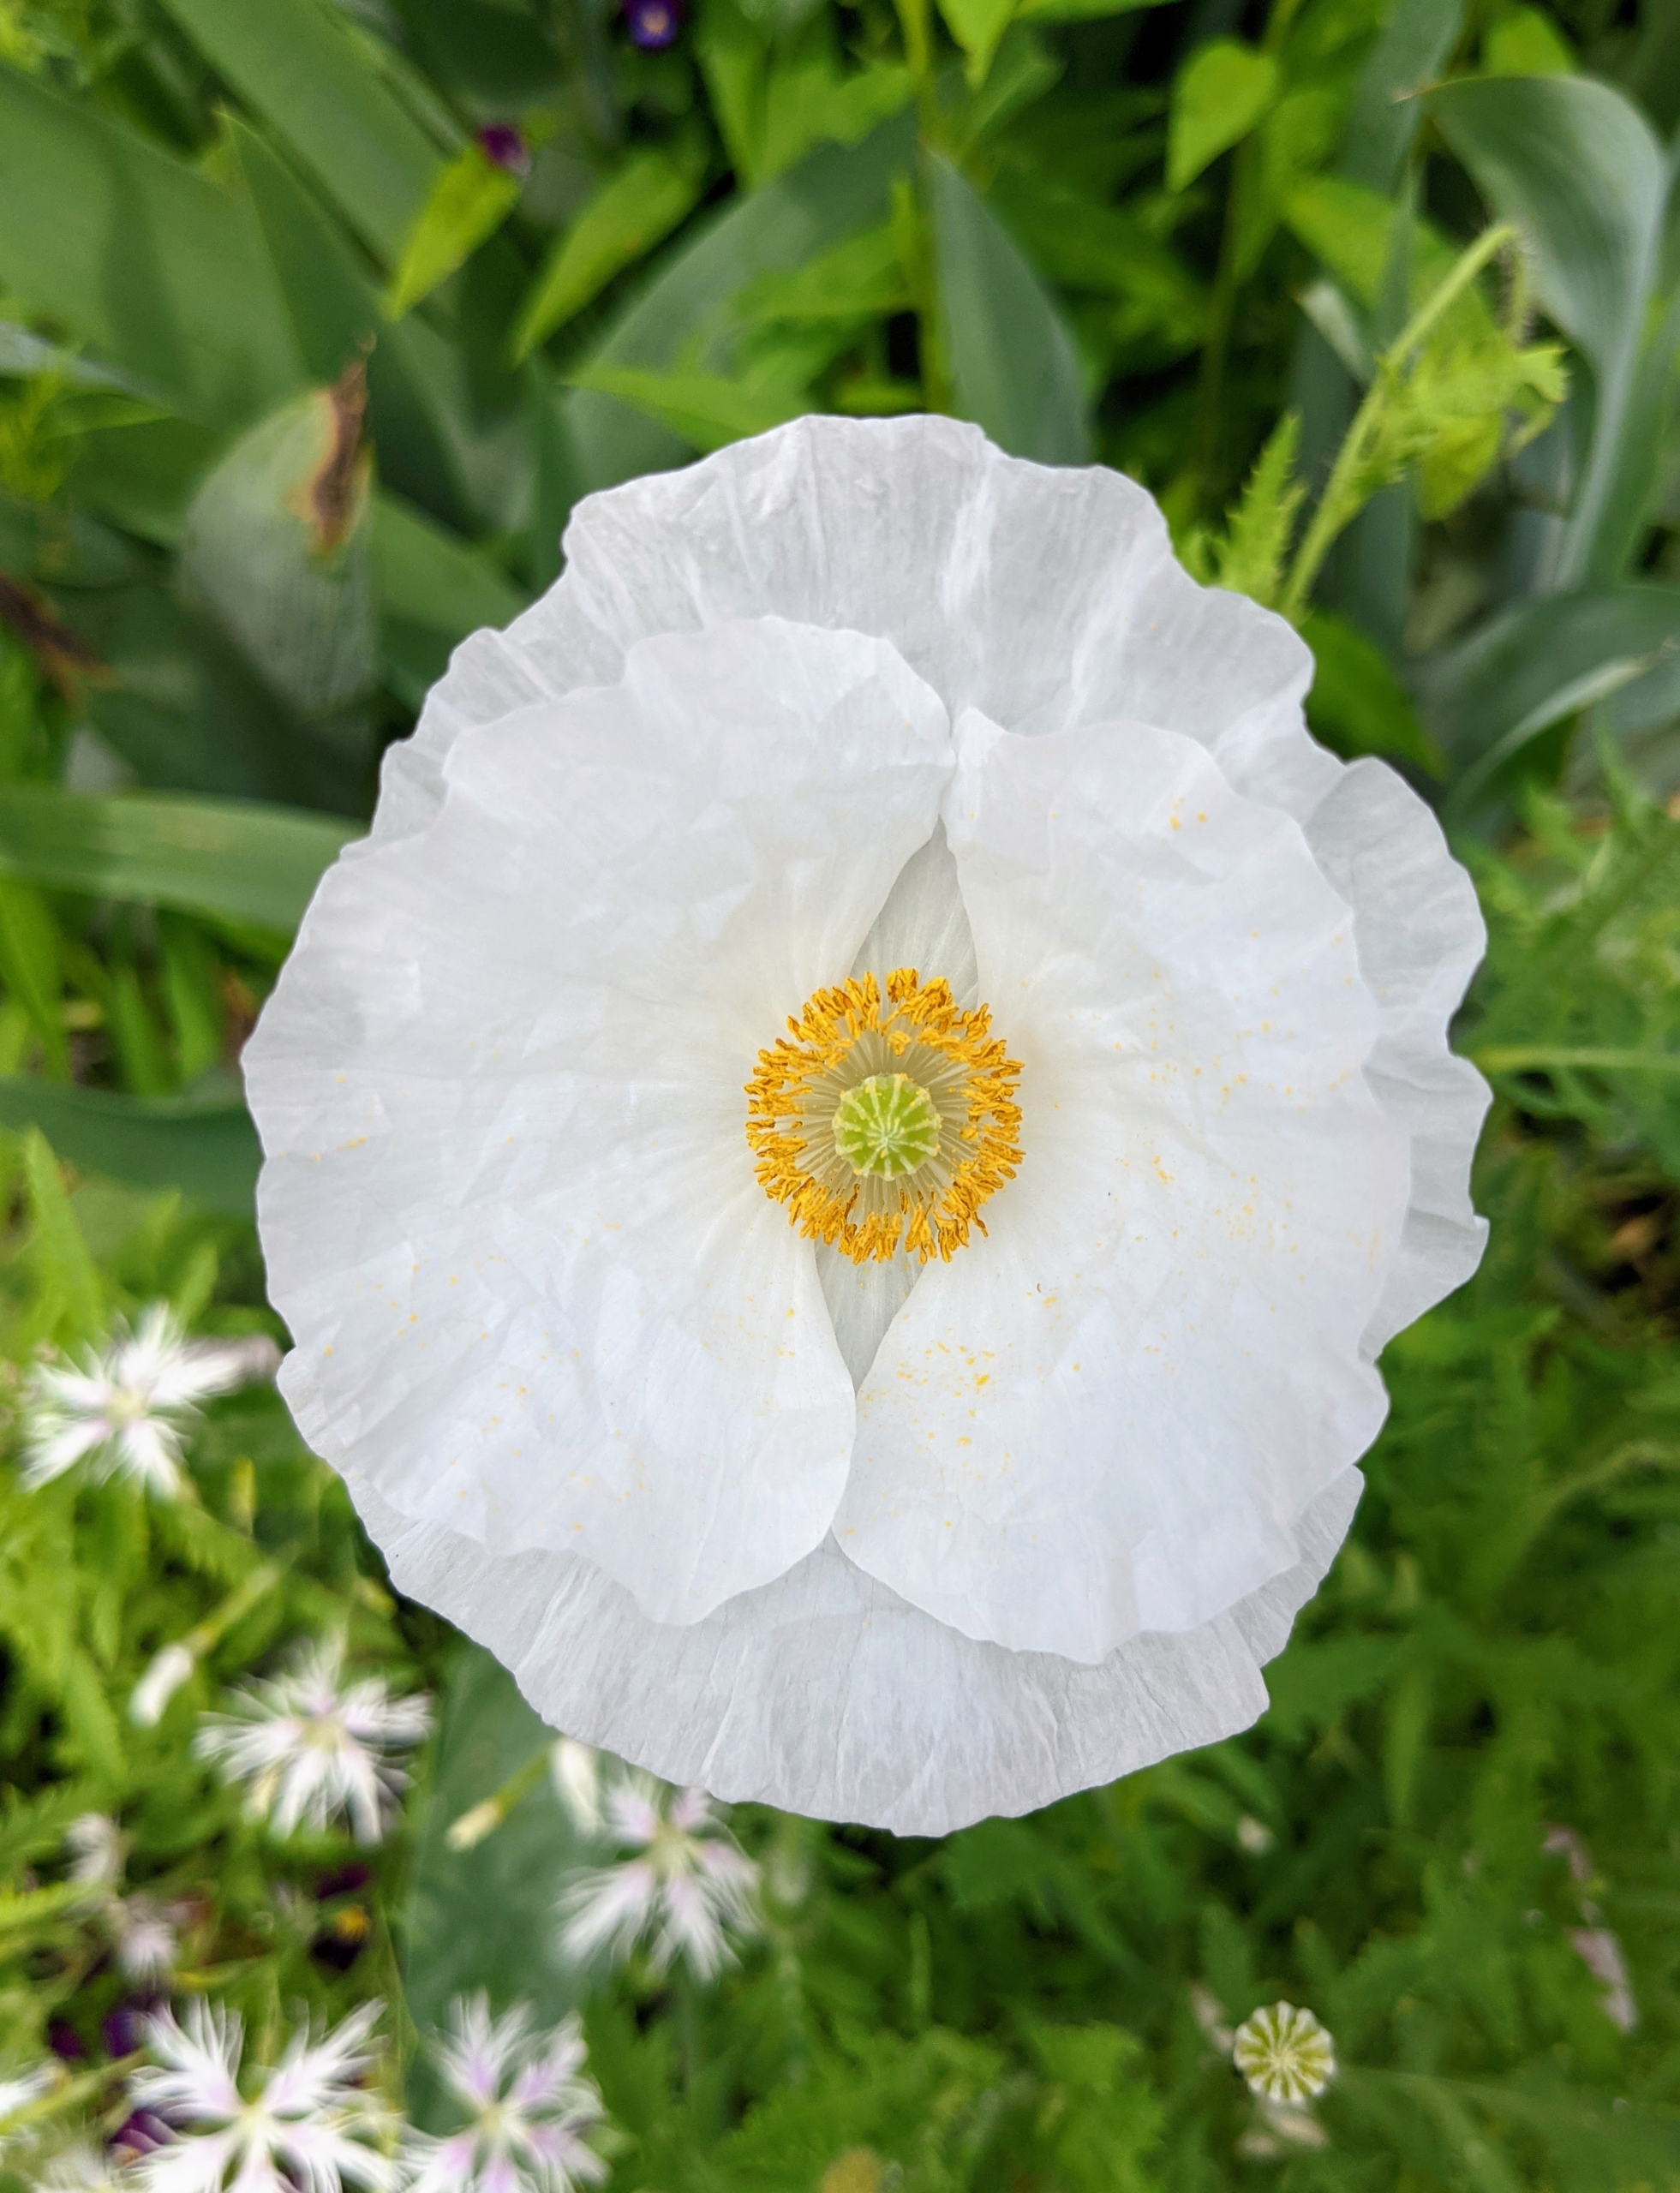
Poppies are flowering plants in the subfamily Papaveroideae of the family Papaveraceae. They produce open single flowers gracefully located on long thin stems.
The flowers have four to six petals, many stamens forming a conspicuous whorl in the center of the flower and an ovary of two to many fused carpels.
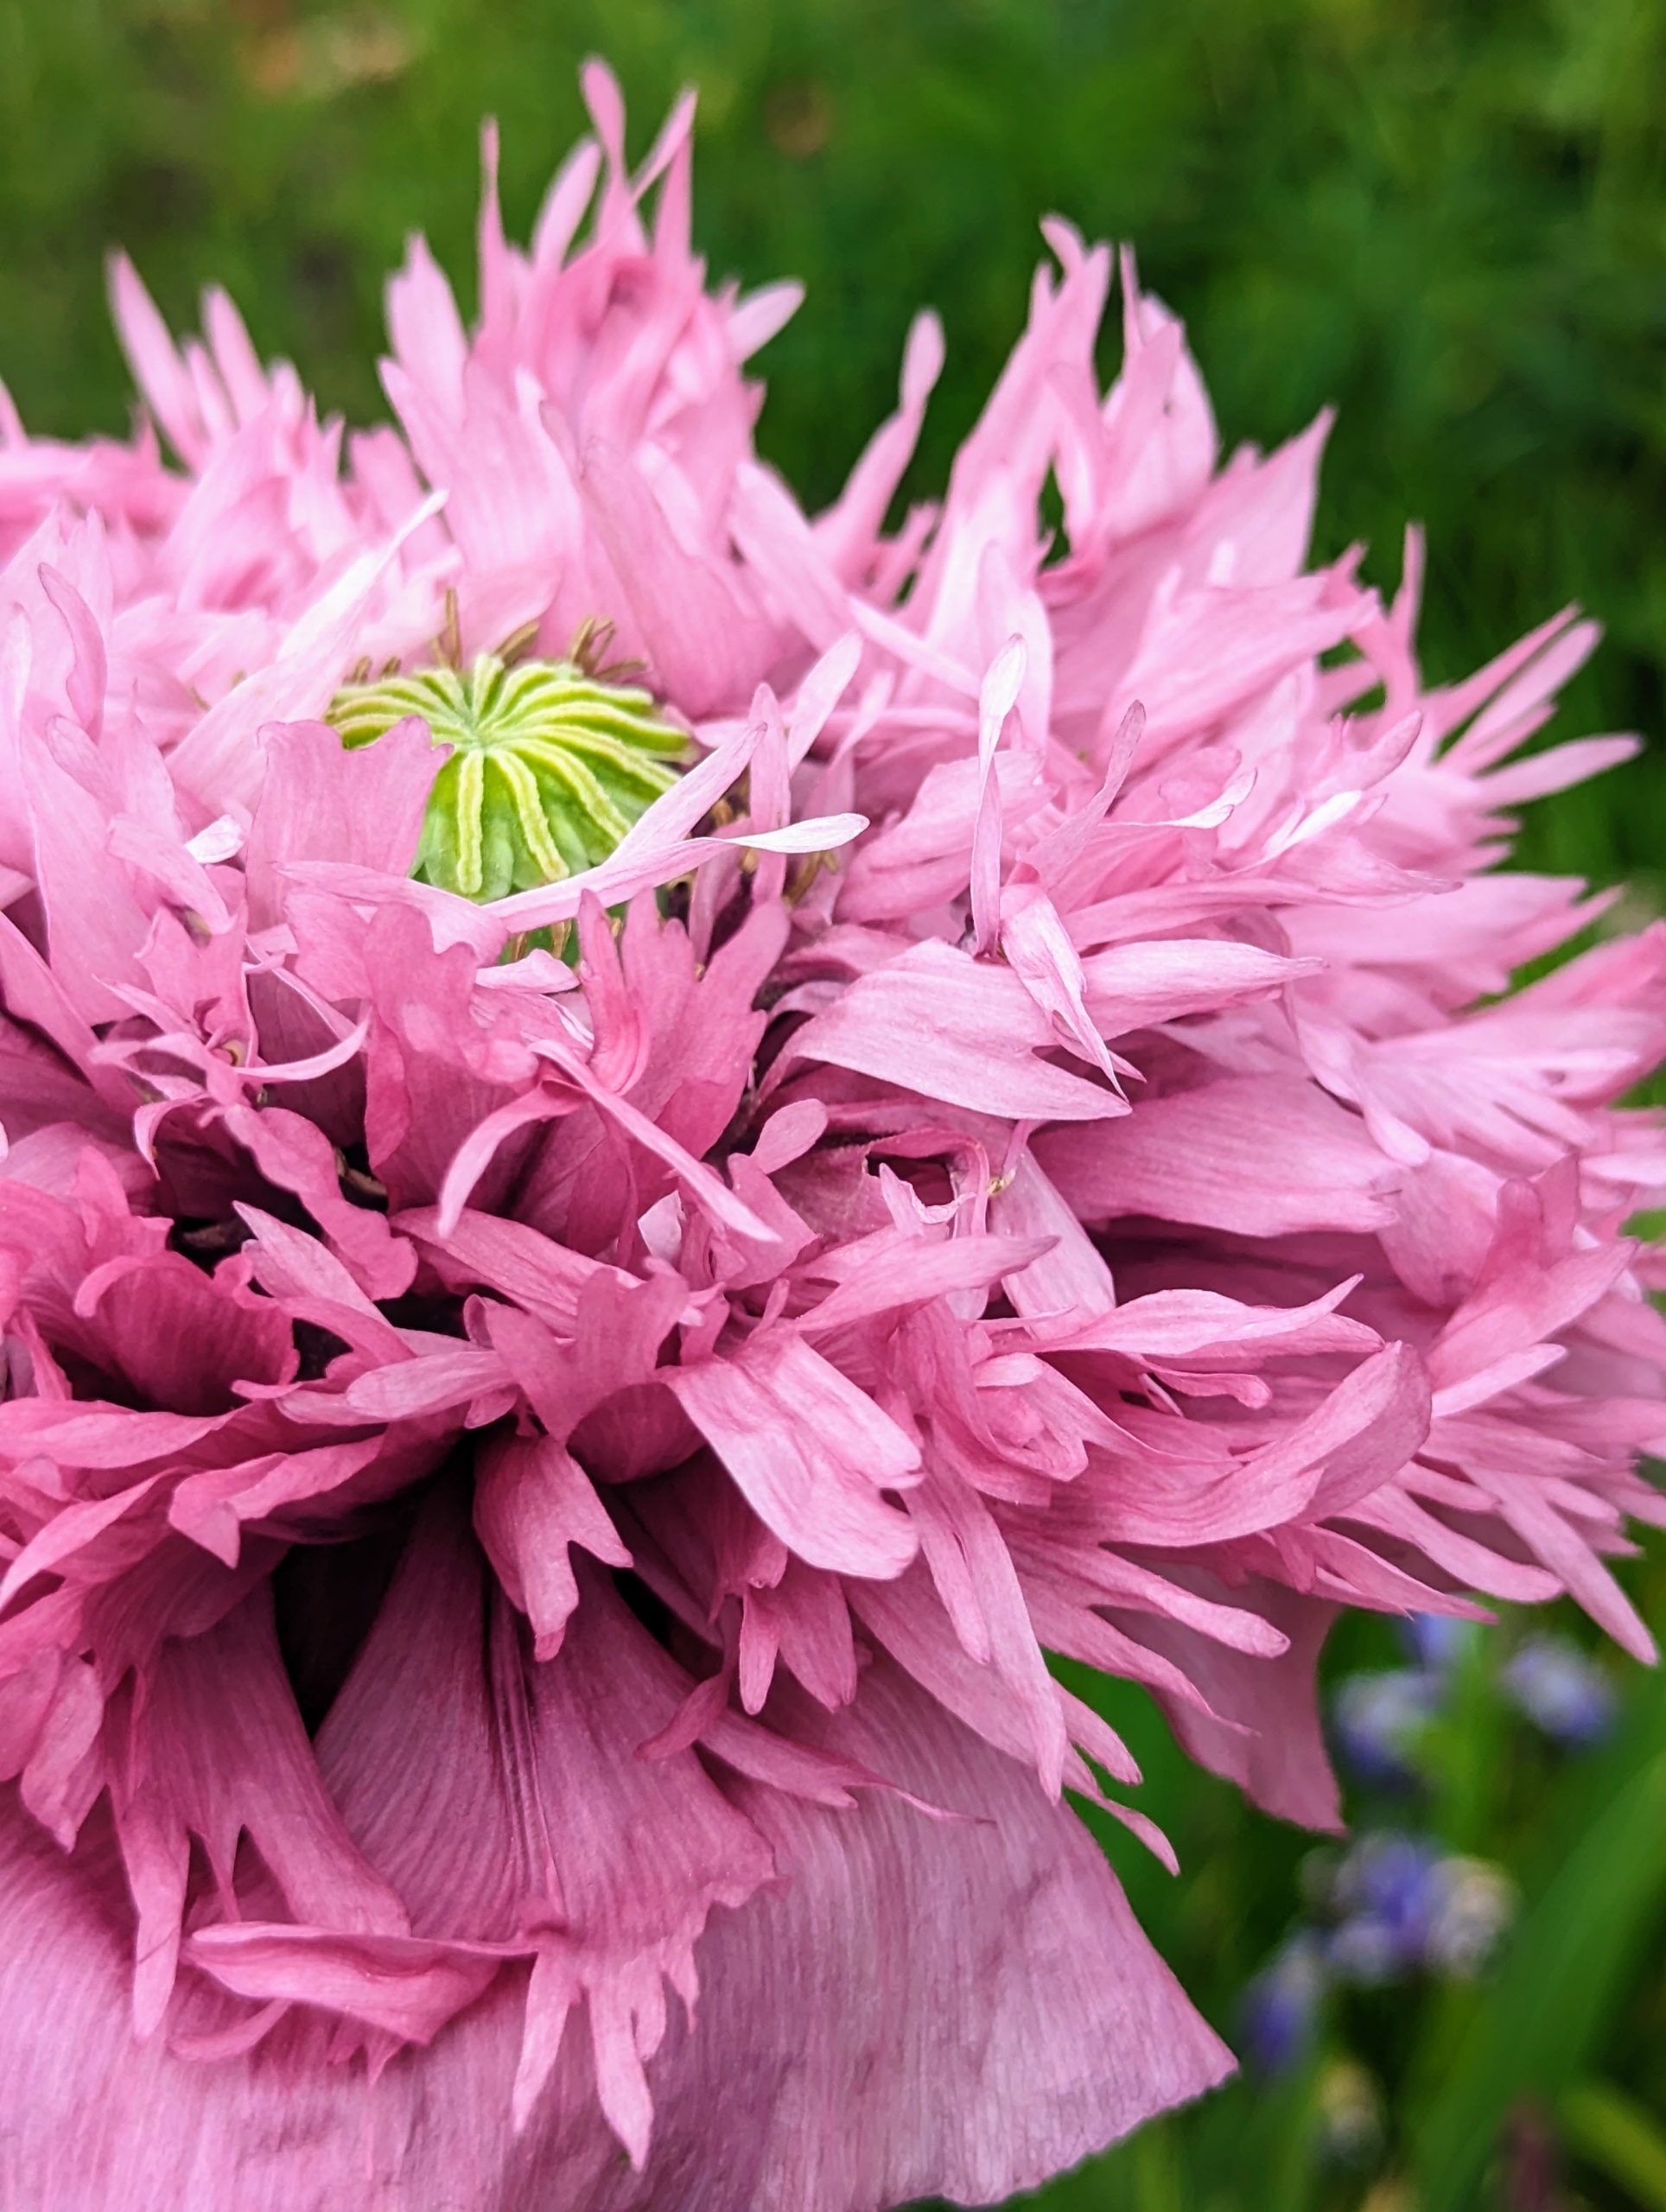
Poppies are an attractive, easy to grow flower in both annual and perennial varieties, and they come in nearly every color of the rainbow and can take on different forms like this more fluffy variety.
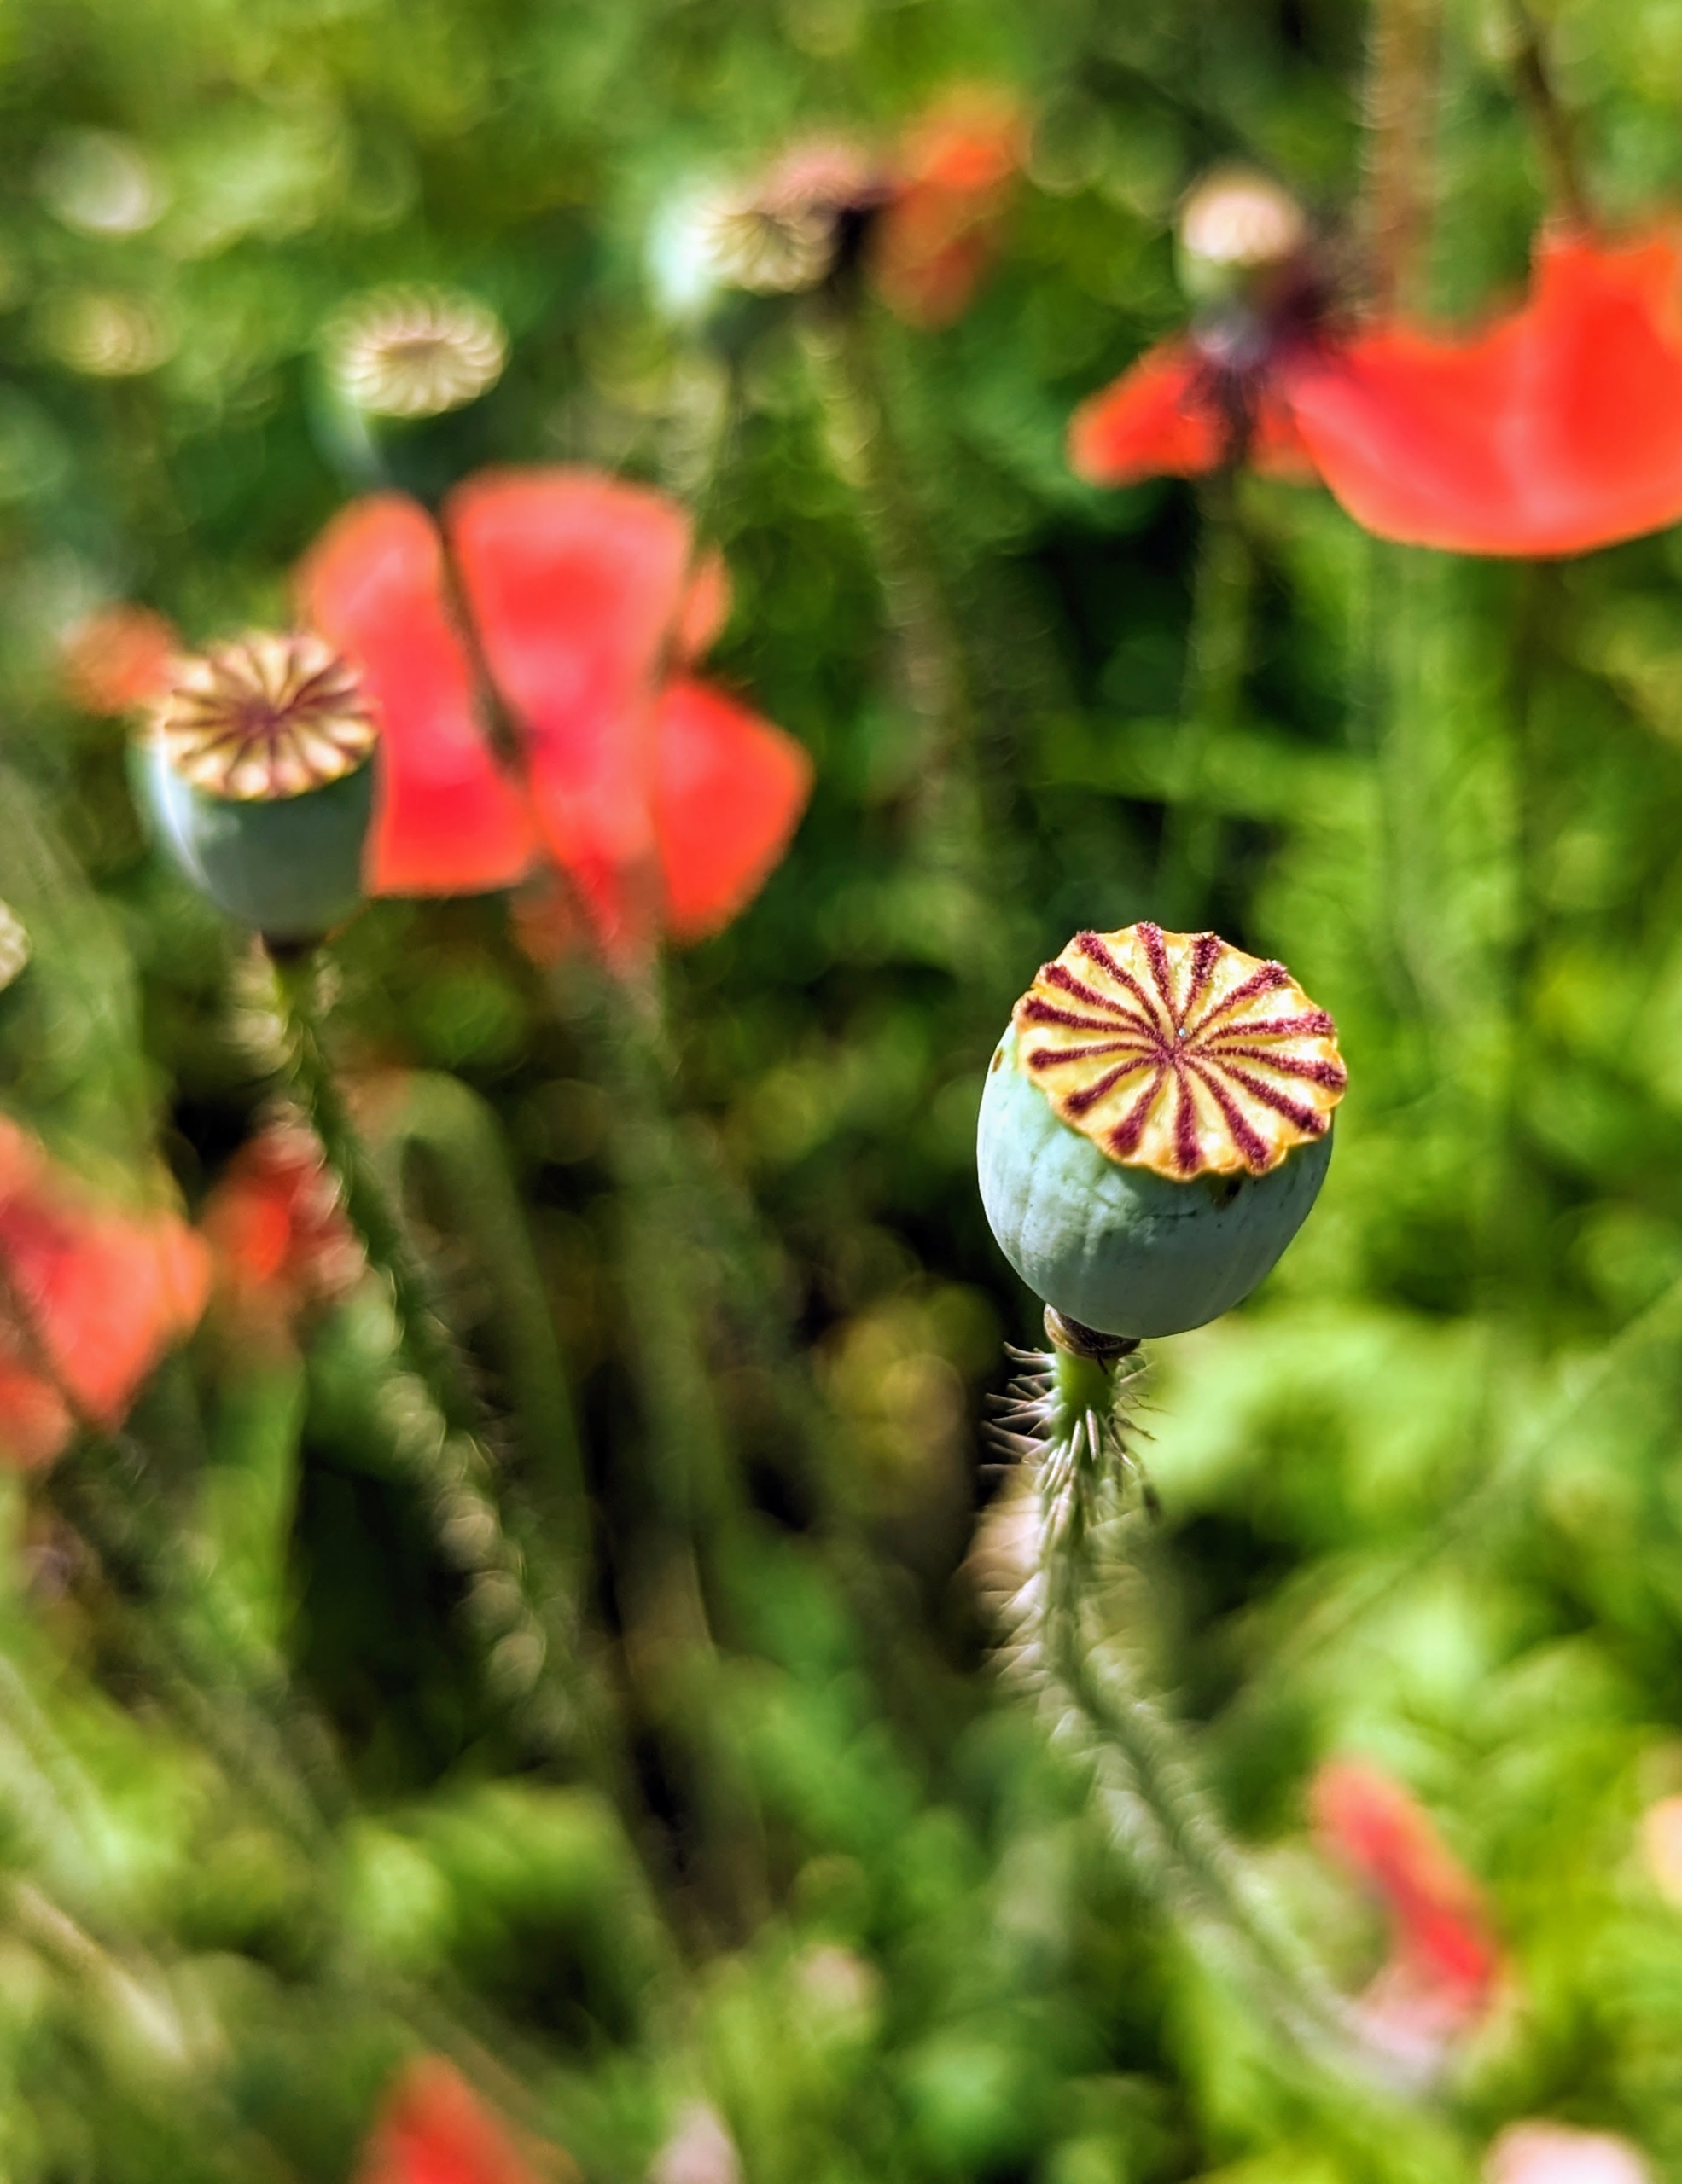
Here is a poppy seed pod, which is what’s left on the stem once the flower blooms and the petals fall off. As the seed heads turn brown with ripeness, it’s time to cut them and harvest the seeds. One can tell when pods are ripe by shaking the stem. If the pod rattles, it’s ready.
Alcea rosea is also known as hollyhock. These plants can reach five to eight-feet tall and up to about four feet across. Hollyhocks grow with single or double flowers that bloom from the bottom up and butterflies, bees, and hummingbirds love them.
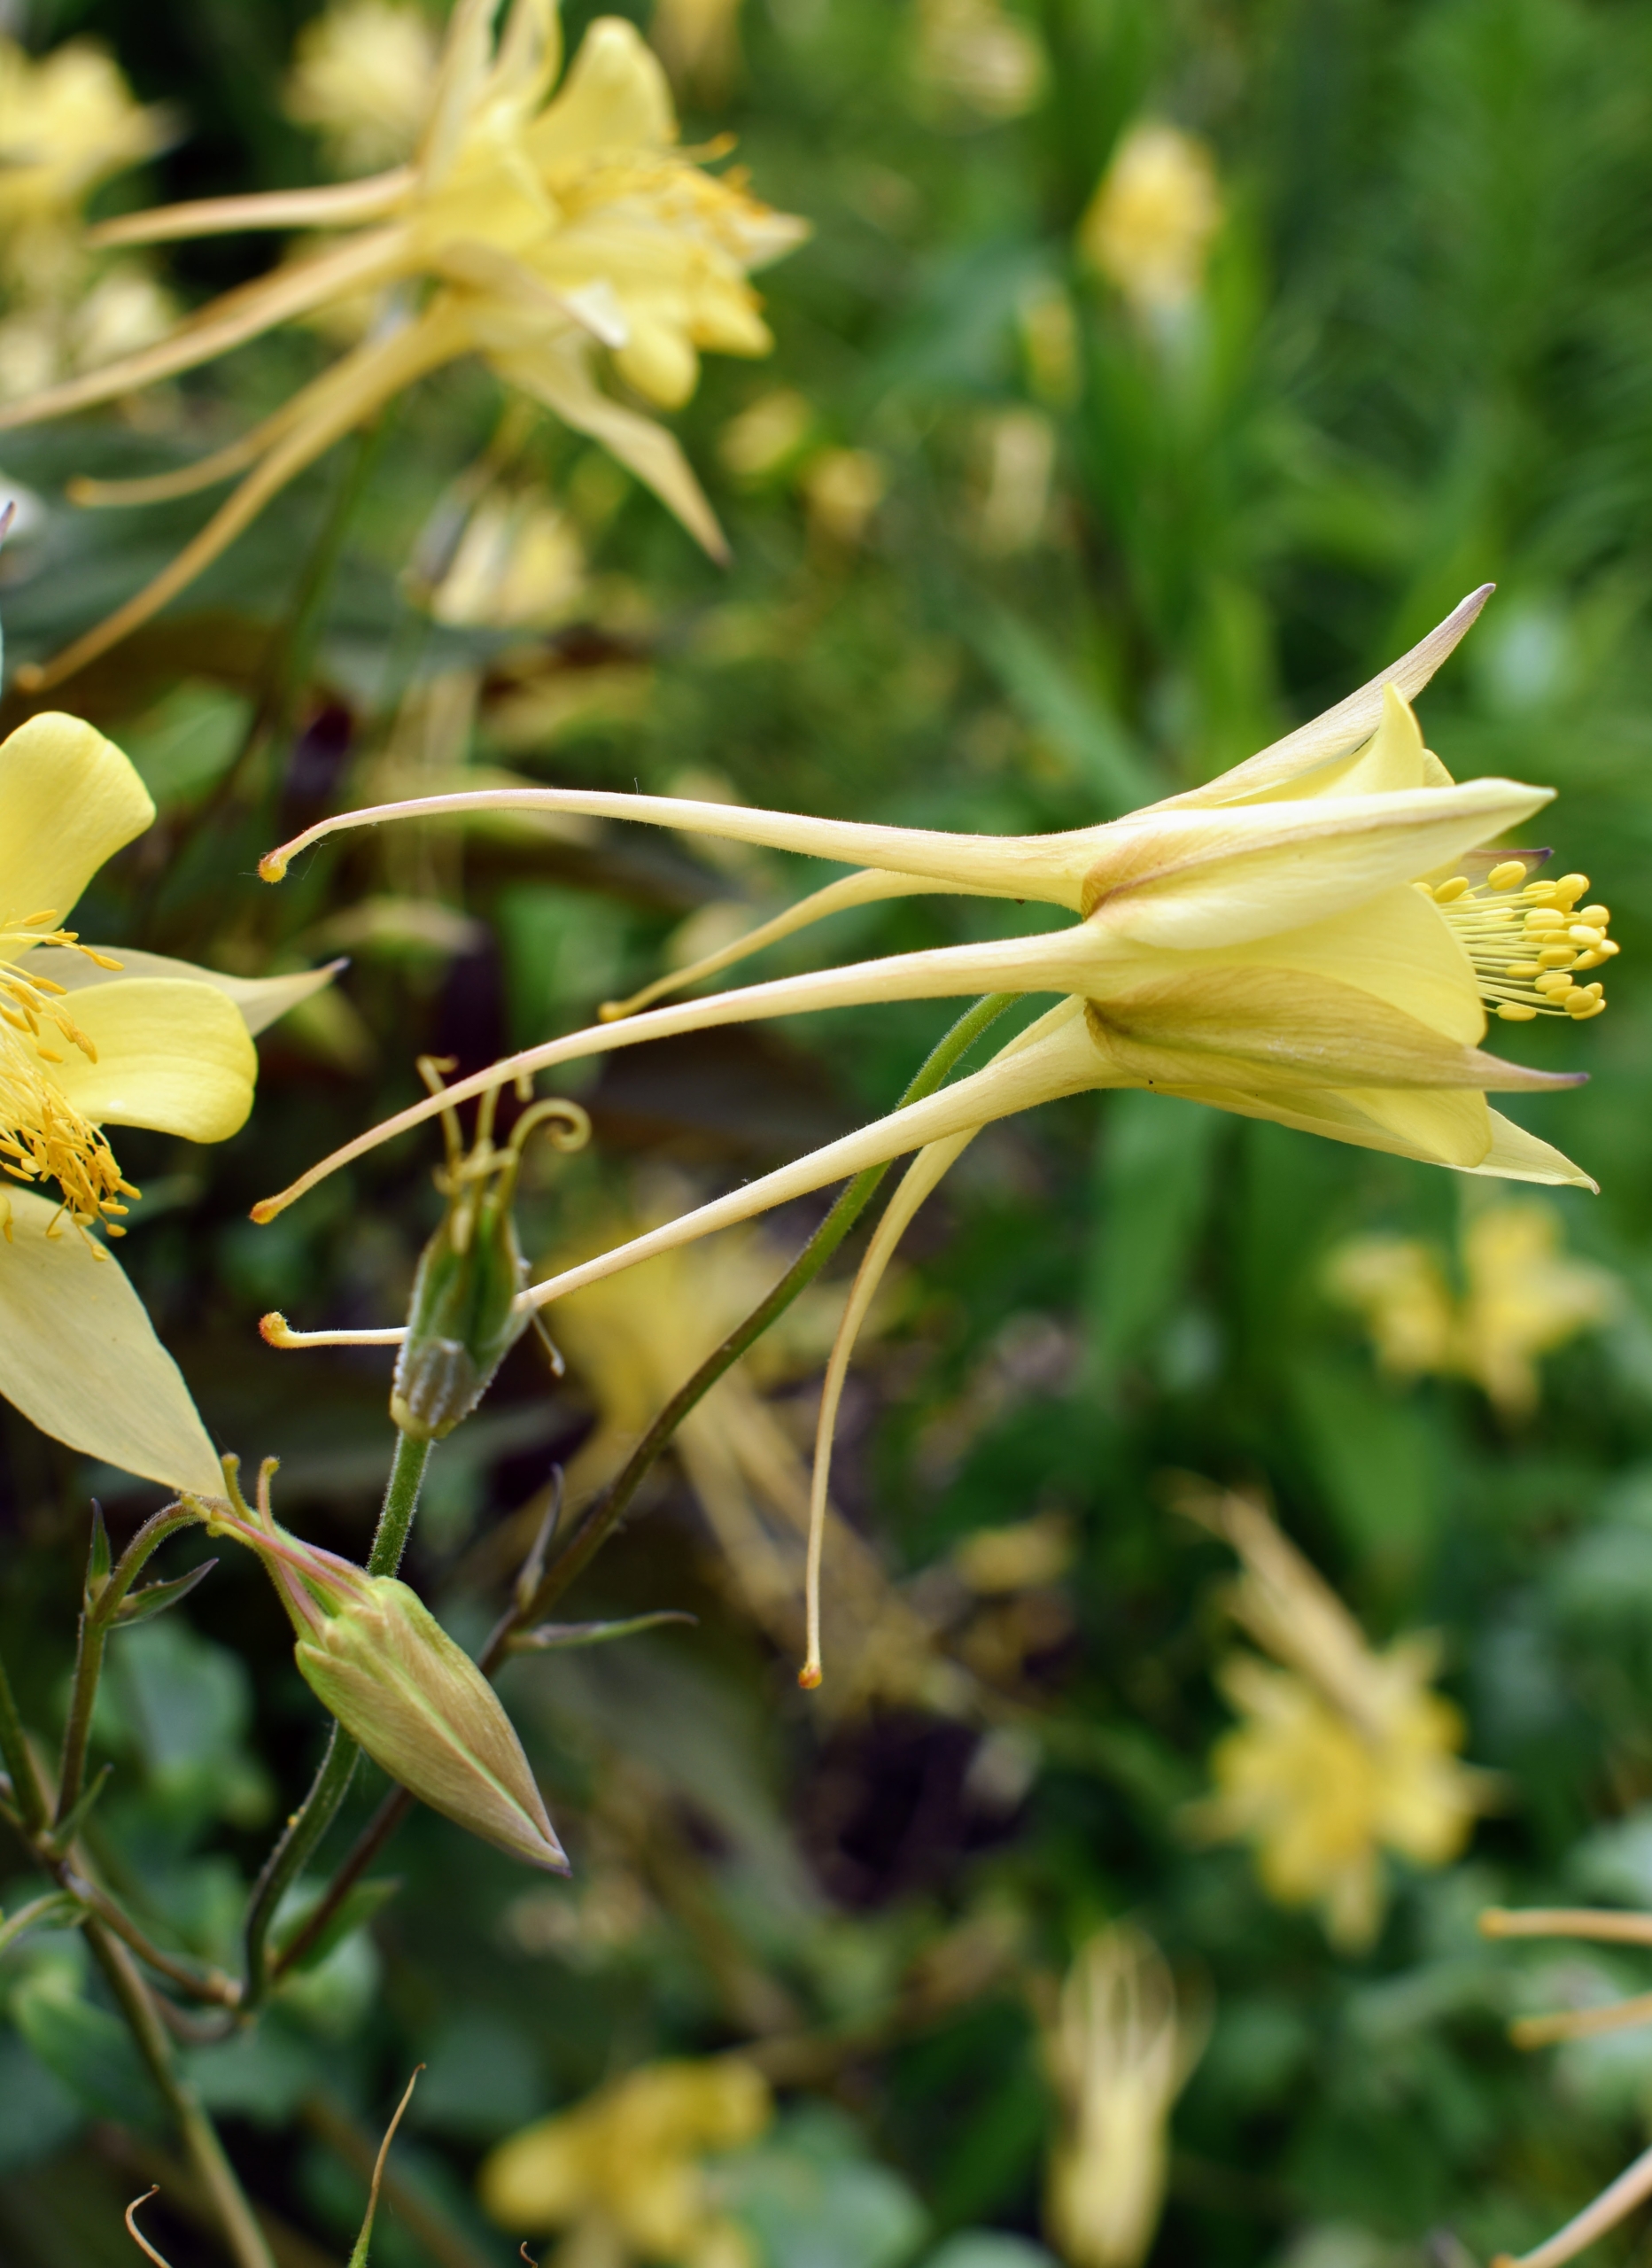
The columbine plant, Aquilegia, is an easy-to-grow perennial that blooms in a variety of colors and forms during spring and early summer. The most striking feature of columbine flowers is the collection of five backwards-projecting spurs. Each spur is a petal that has developed into what appears to be a tall, slender, hollow hat. At the very top of each spur, inside, is a gland producing sweet nectar.
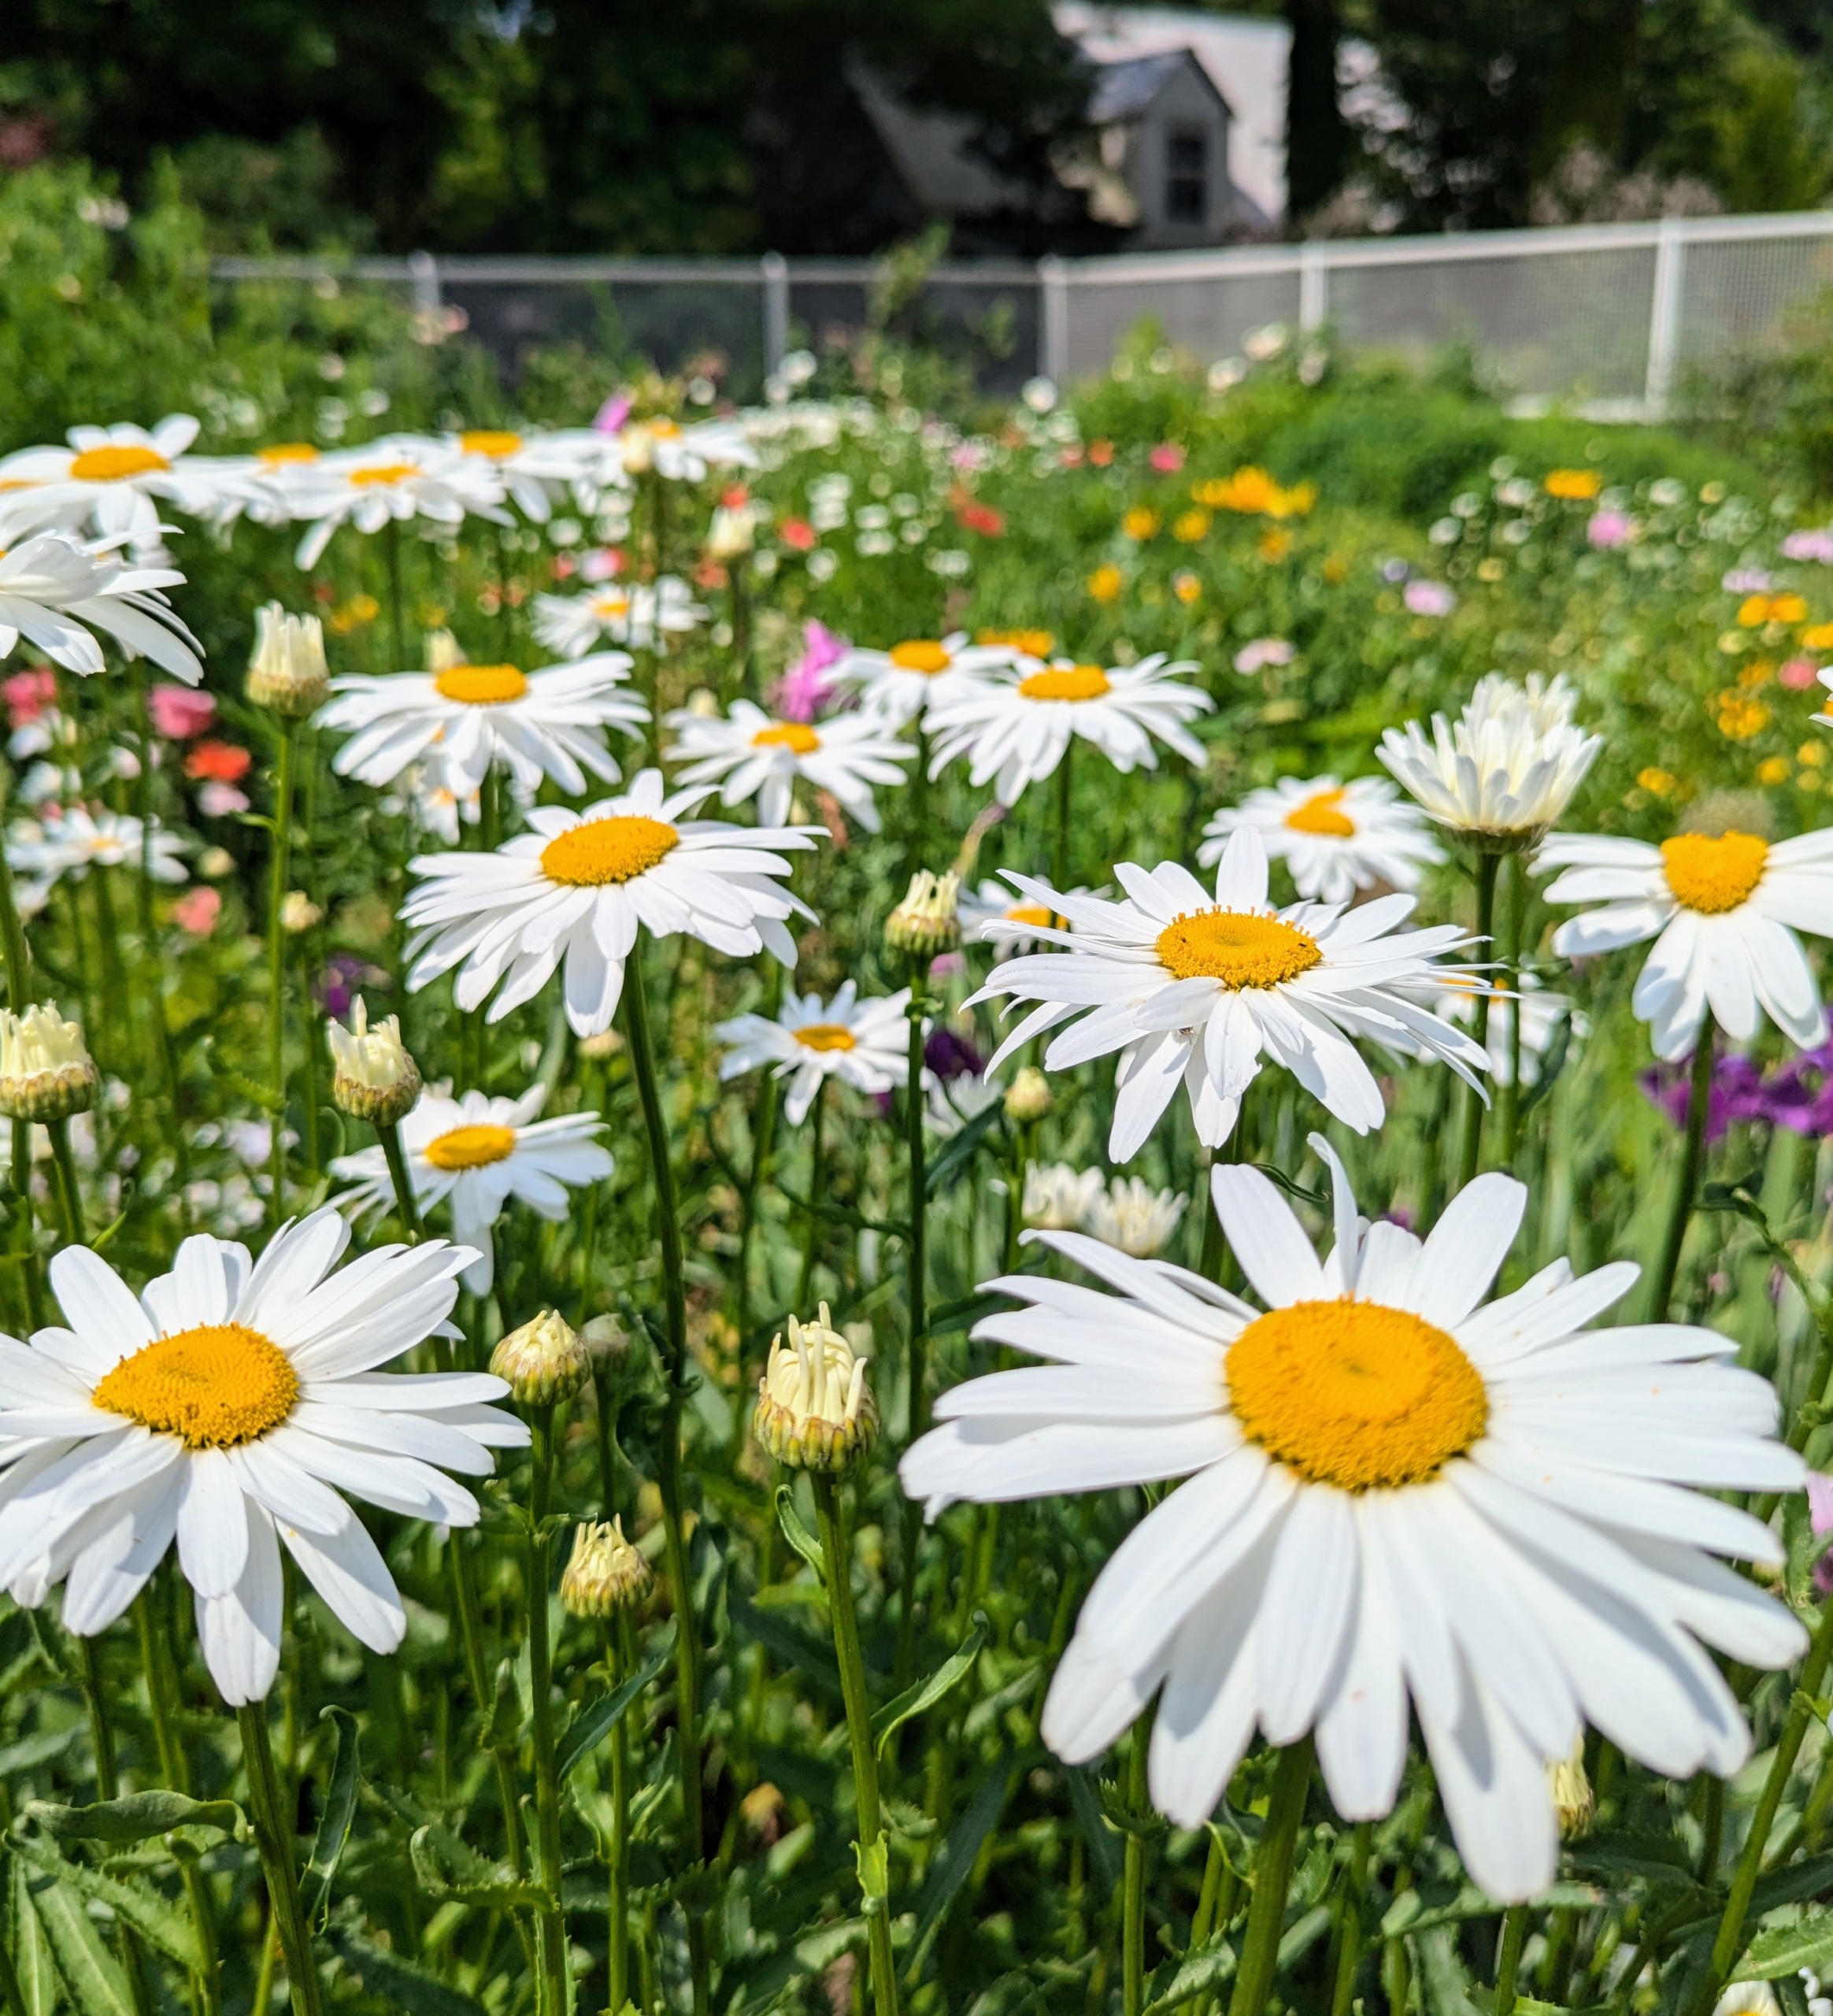
Shasta daisy flowers provide perky summer blooms, offering the look of the traditional daisy along with evergreen foliage. They are low maintenance and great for filling in bare spots in the landscape.
Phlox has superb heat and mildew resistance. Phlox is a tall and upright grower that’s great for the back of the border, or even planted at the edge of the garden among the shrubs. Phlox also comes in a range of colors from pure white to lavender to even red, and grows happily in most parts of the country. If properly planted and sited, phlox is largely pest and disease free too – a perfect perennial.
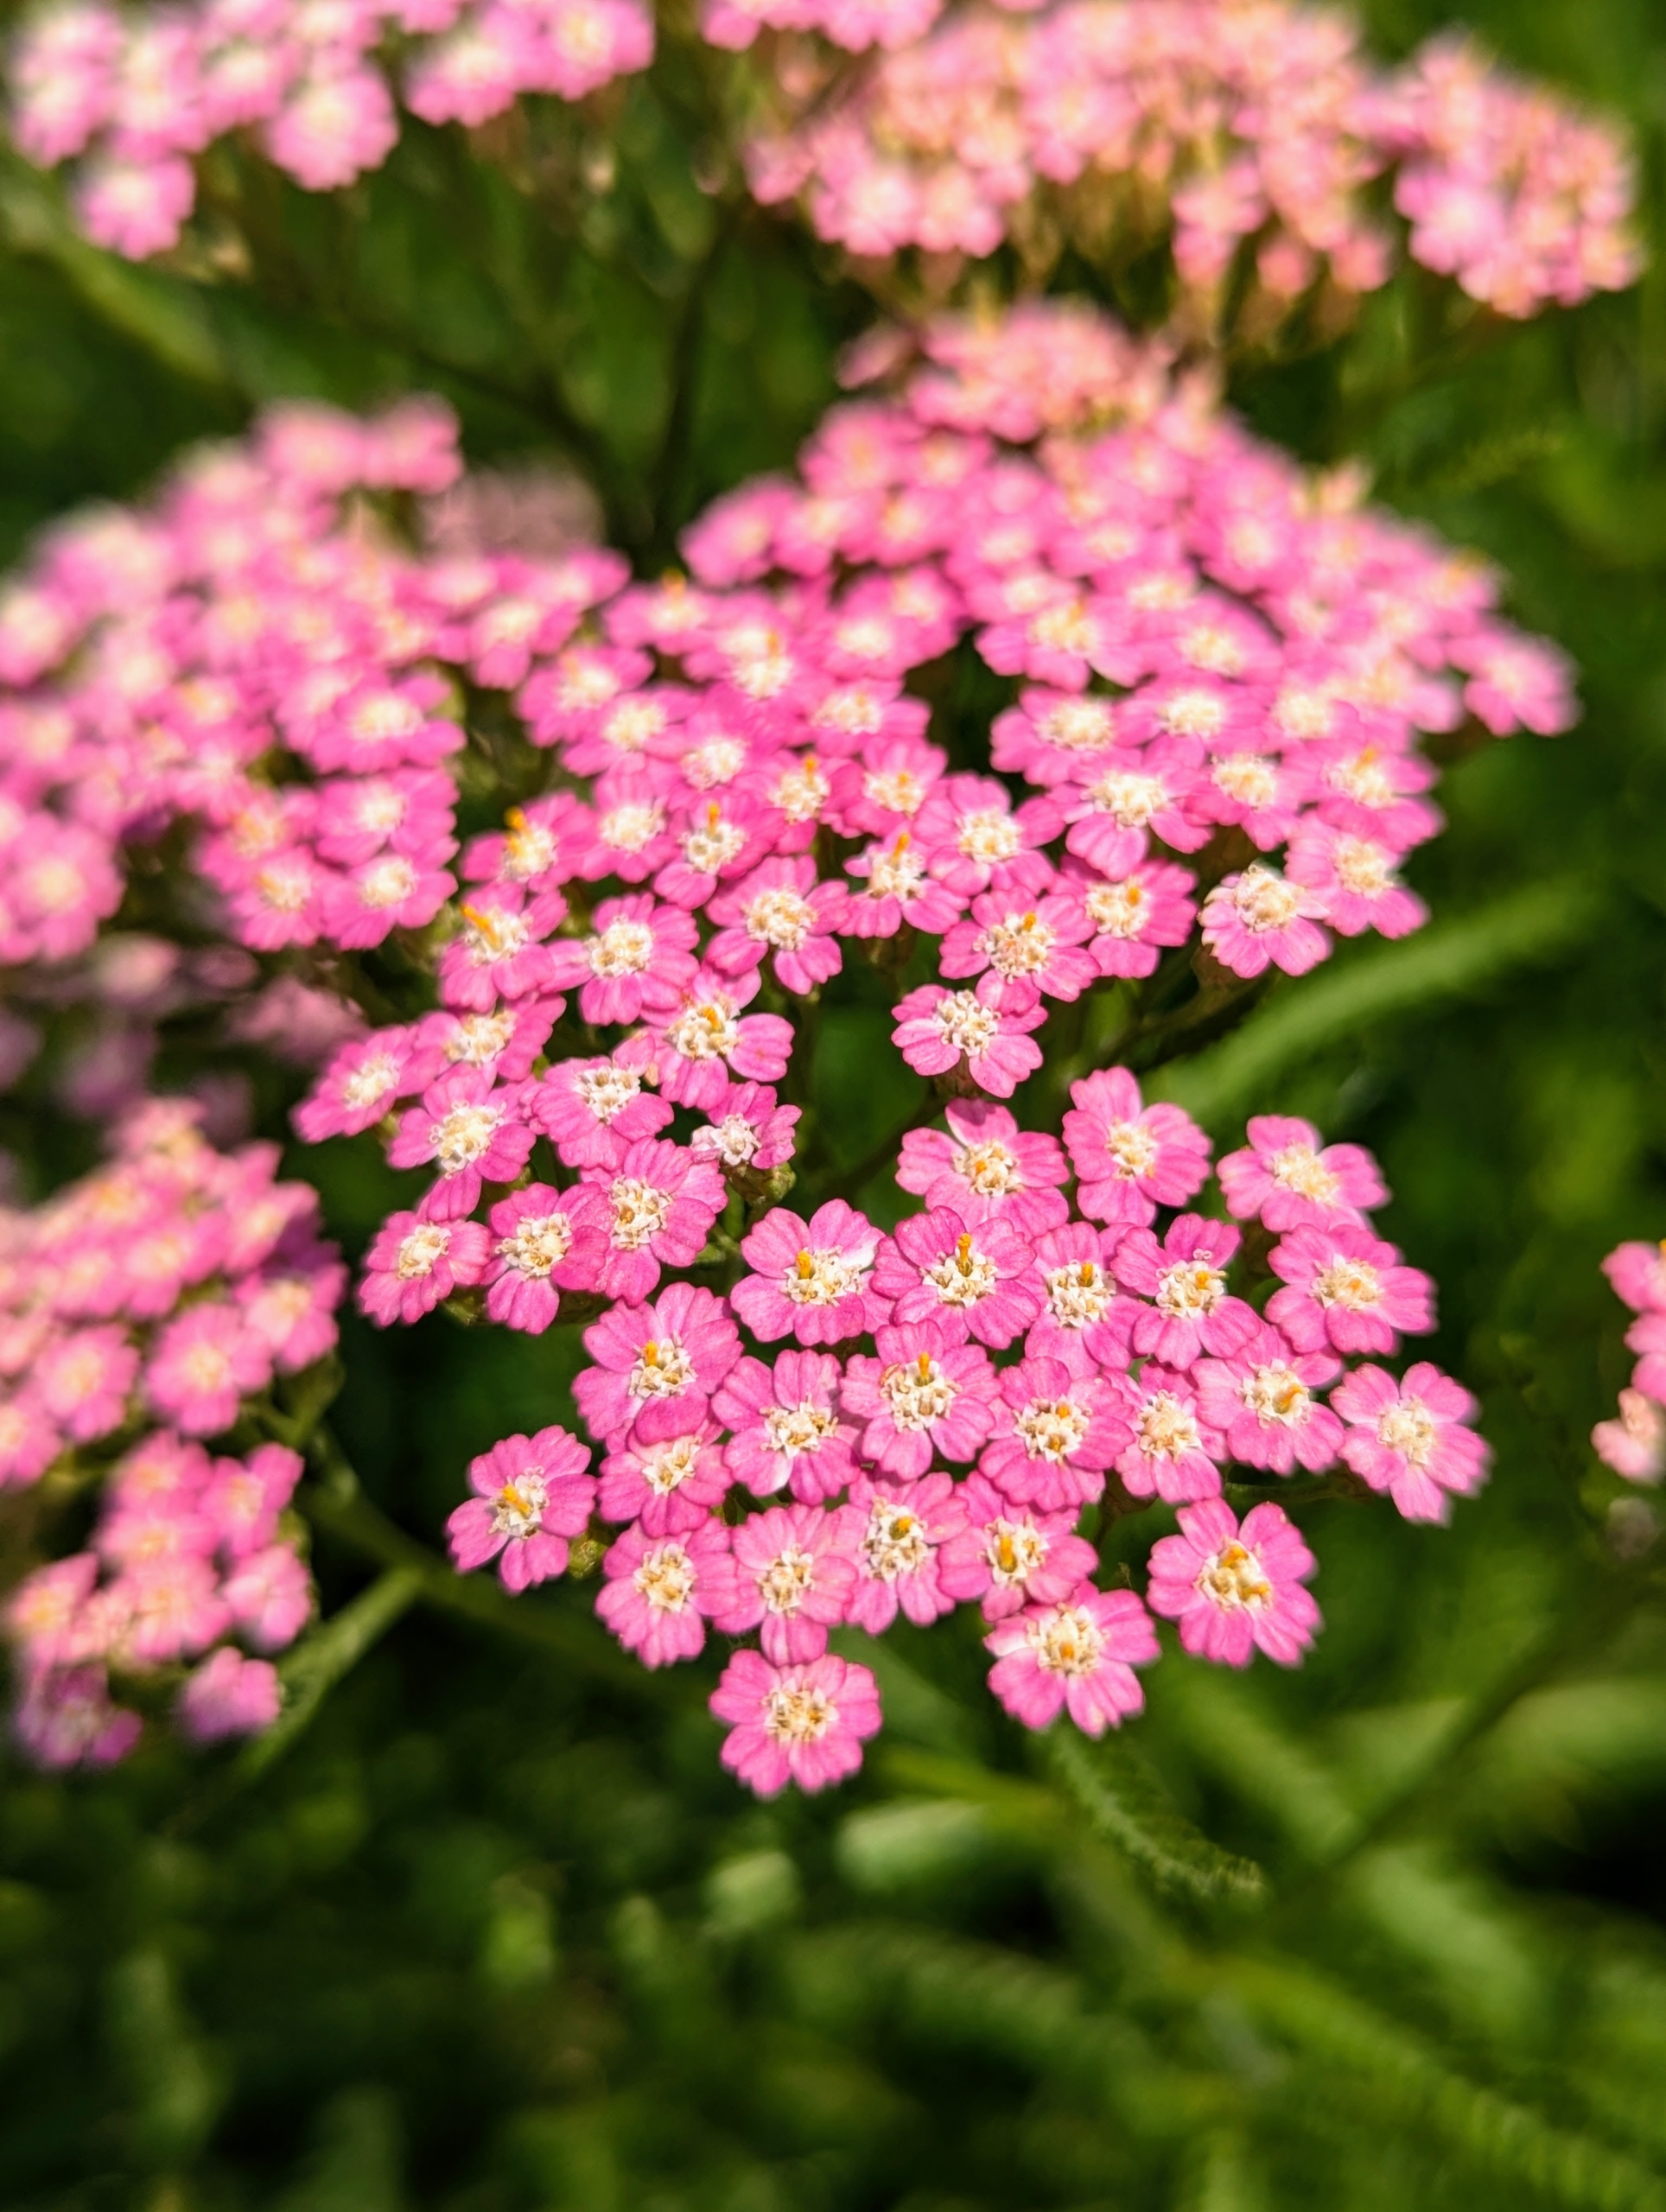
Achillea millefolium, commonly known as yarrow, is a flowering plant in the family Asteraceae. It is a hardy perennial with fernlike leaves and colorful blooms. The large, flat-topped flower clusters are perfect for cutting and drying.
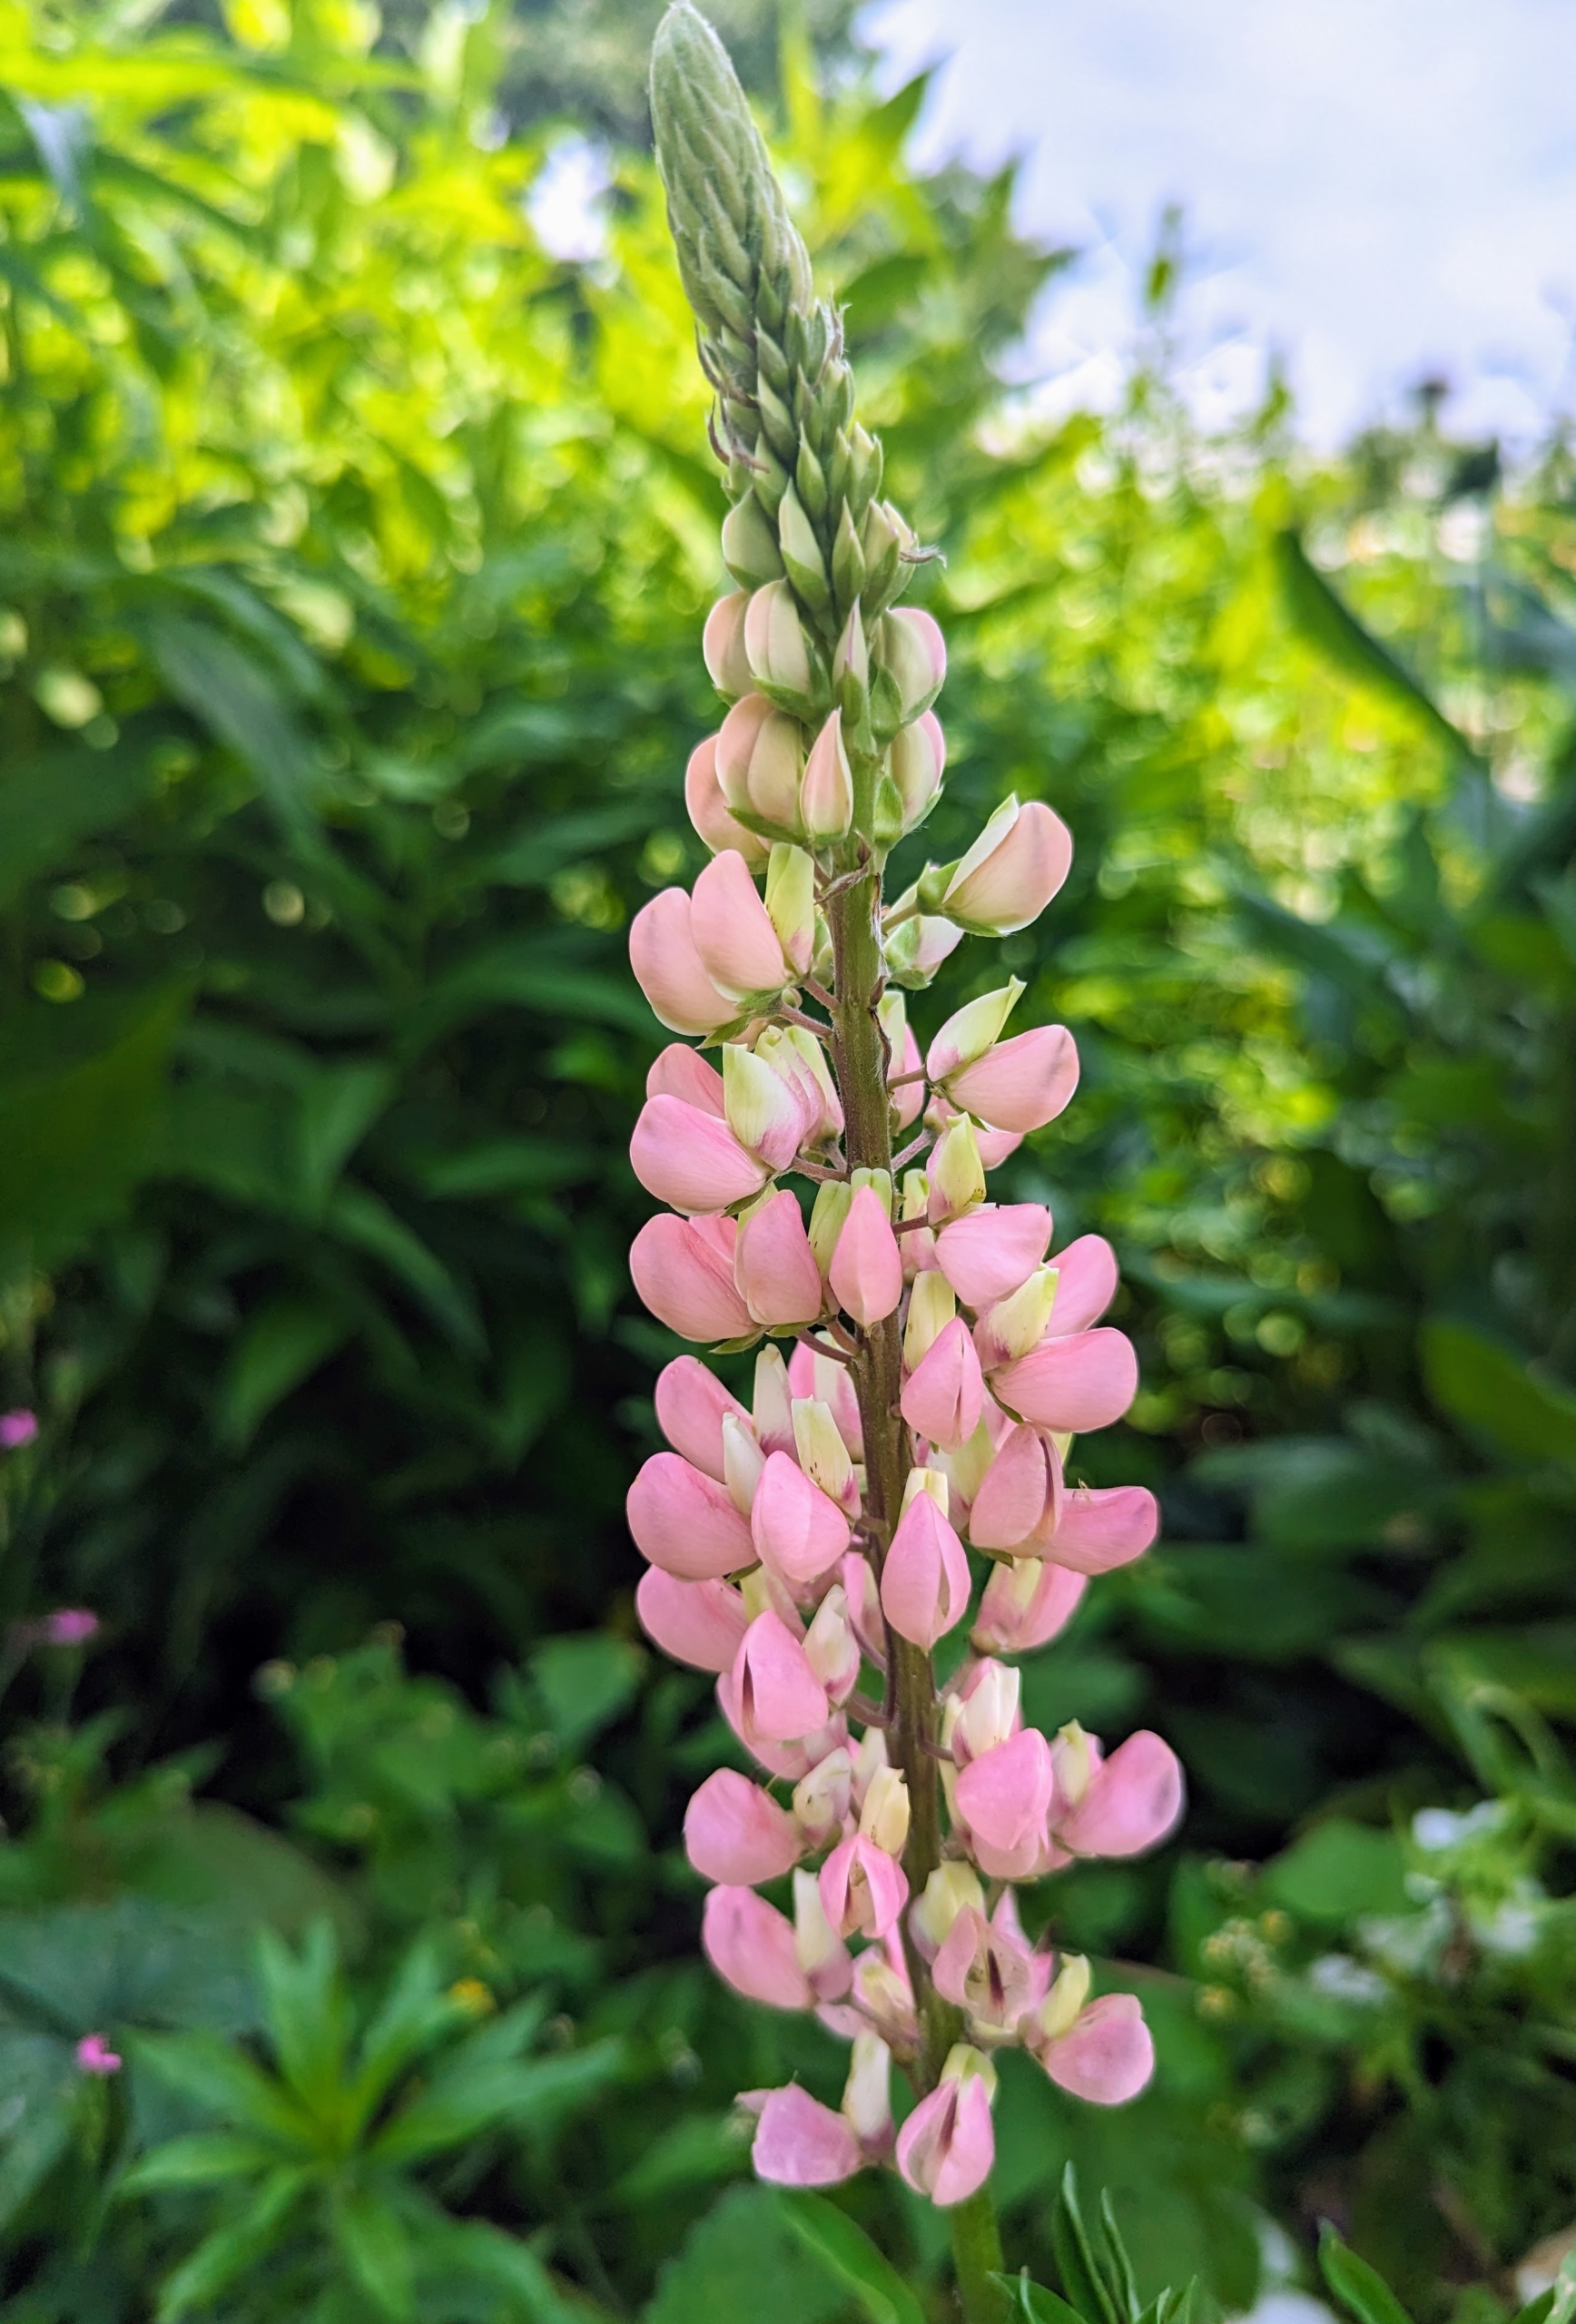
Lupinus, commonly known as lupin or lupine, is a genus of flowering plants in the legume family, Fabaceae. The genus includes more than 200 species. Lupines come in lovely shades of pink, purple, red, white, yellow, and even red!
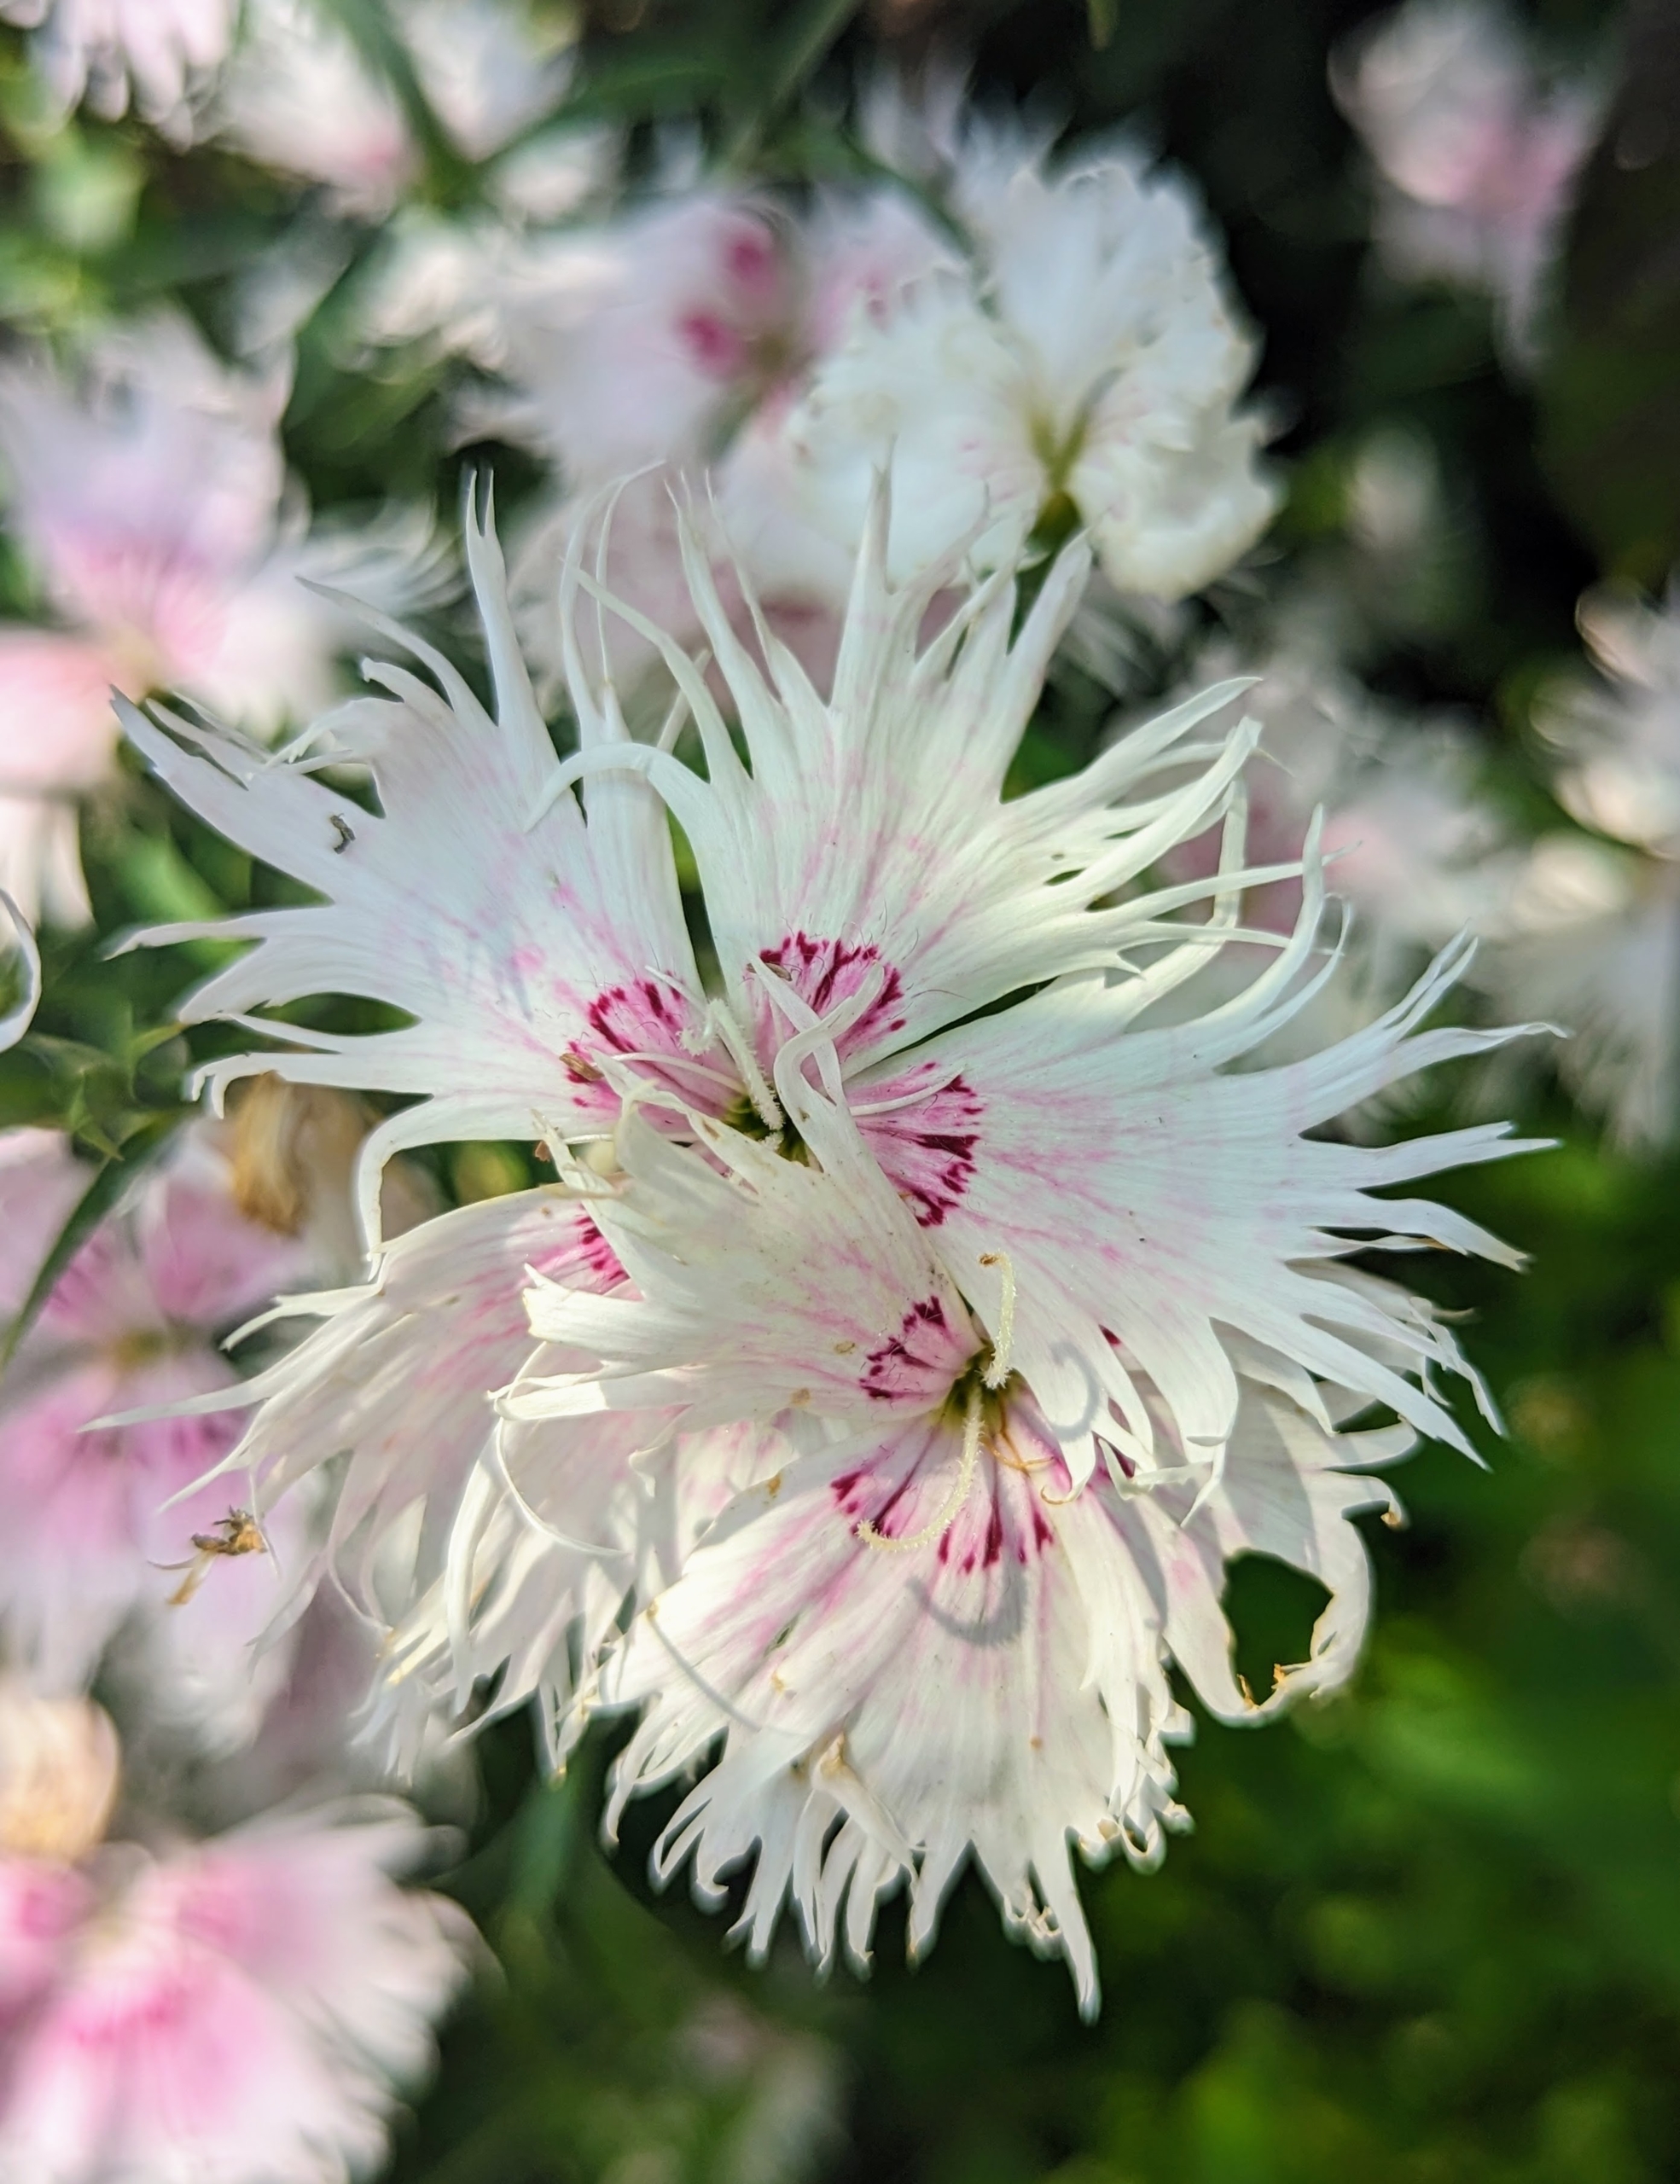
There are numerous types of dianthus – this one with its fringed blooms. Dianthus flowers belong to a family of plants that includes carnations and are characterized by their spicy fragrance. Dianthus plants may be found as a hardy annual, biennial, or perennial and most often used in borders or potted displays.
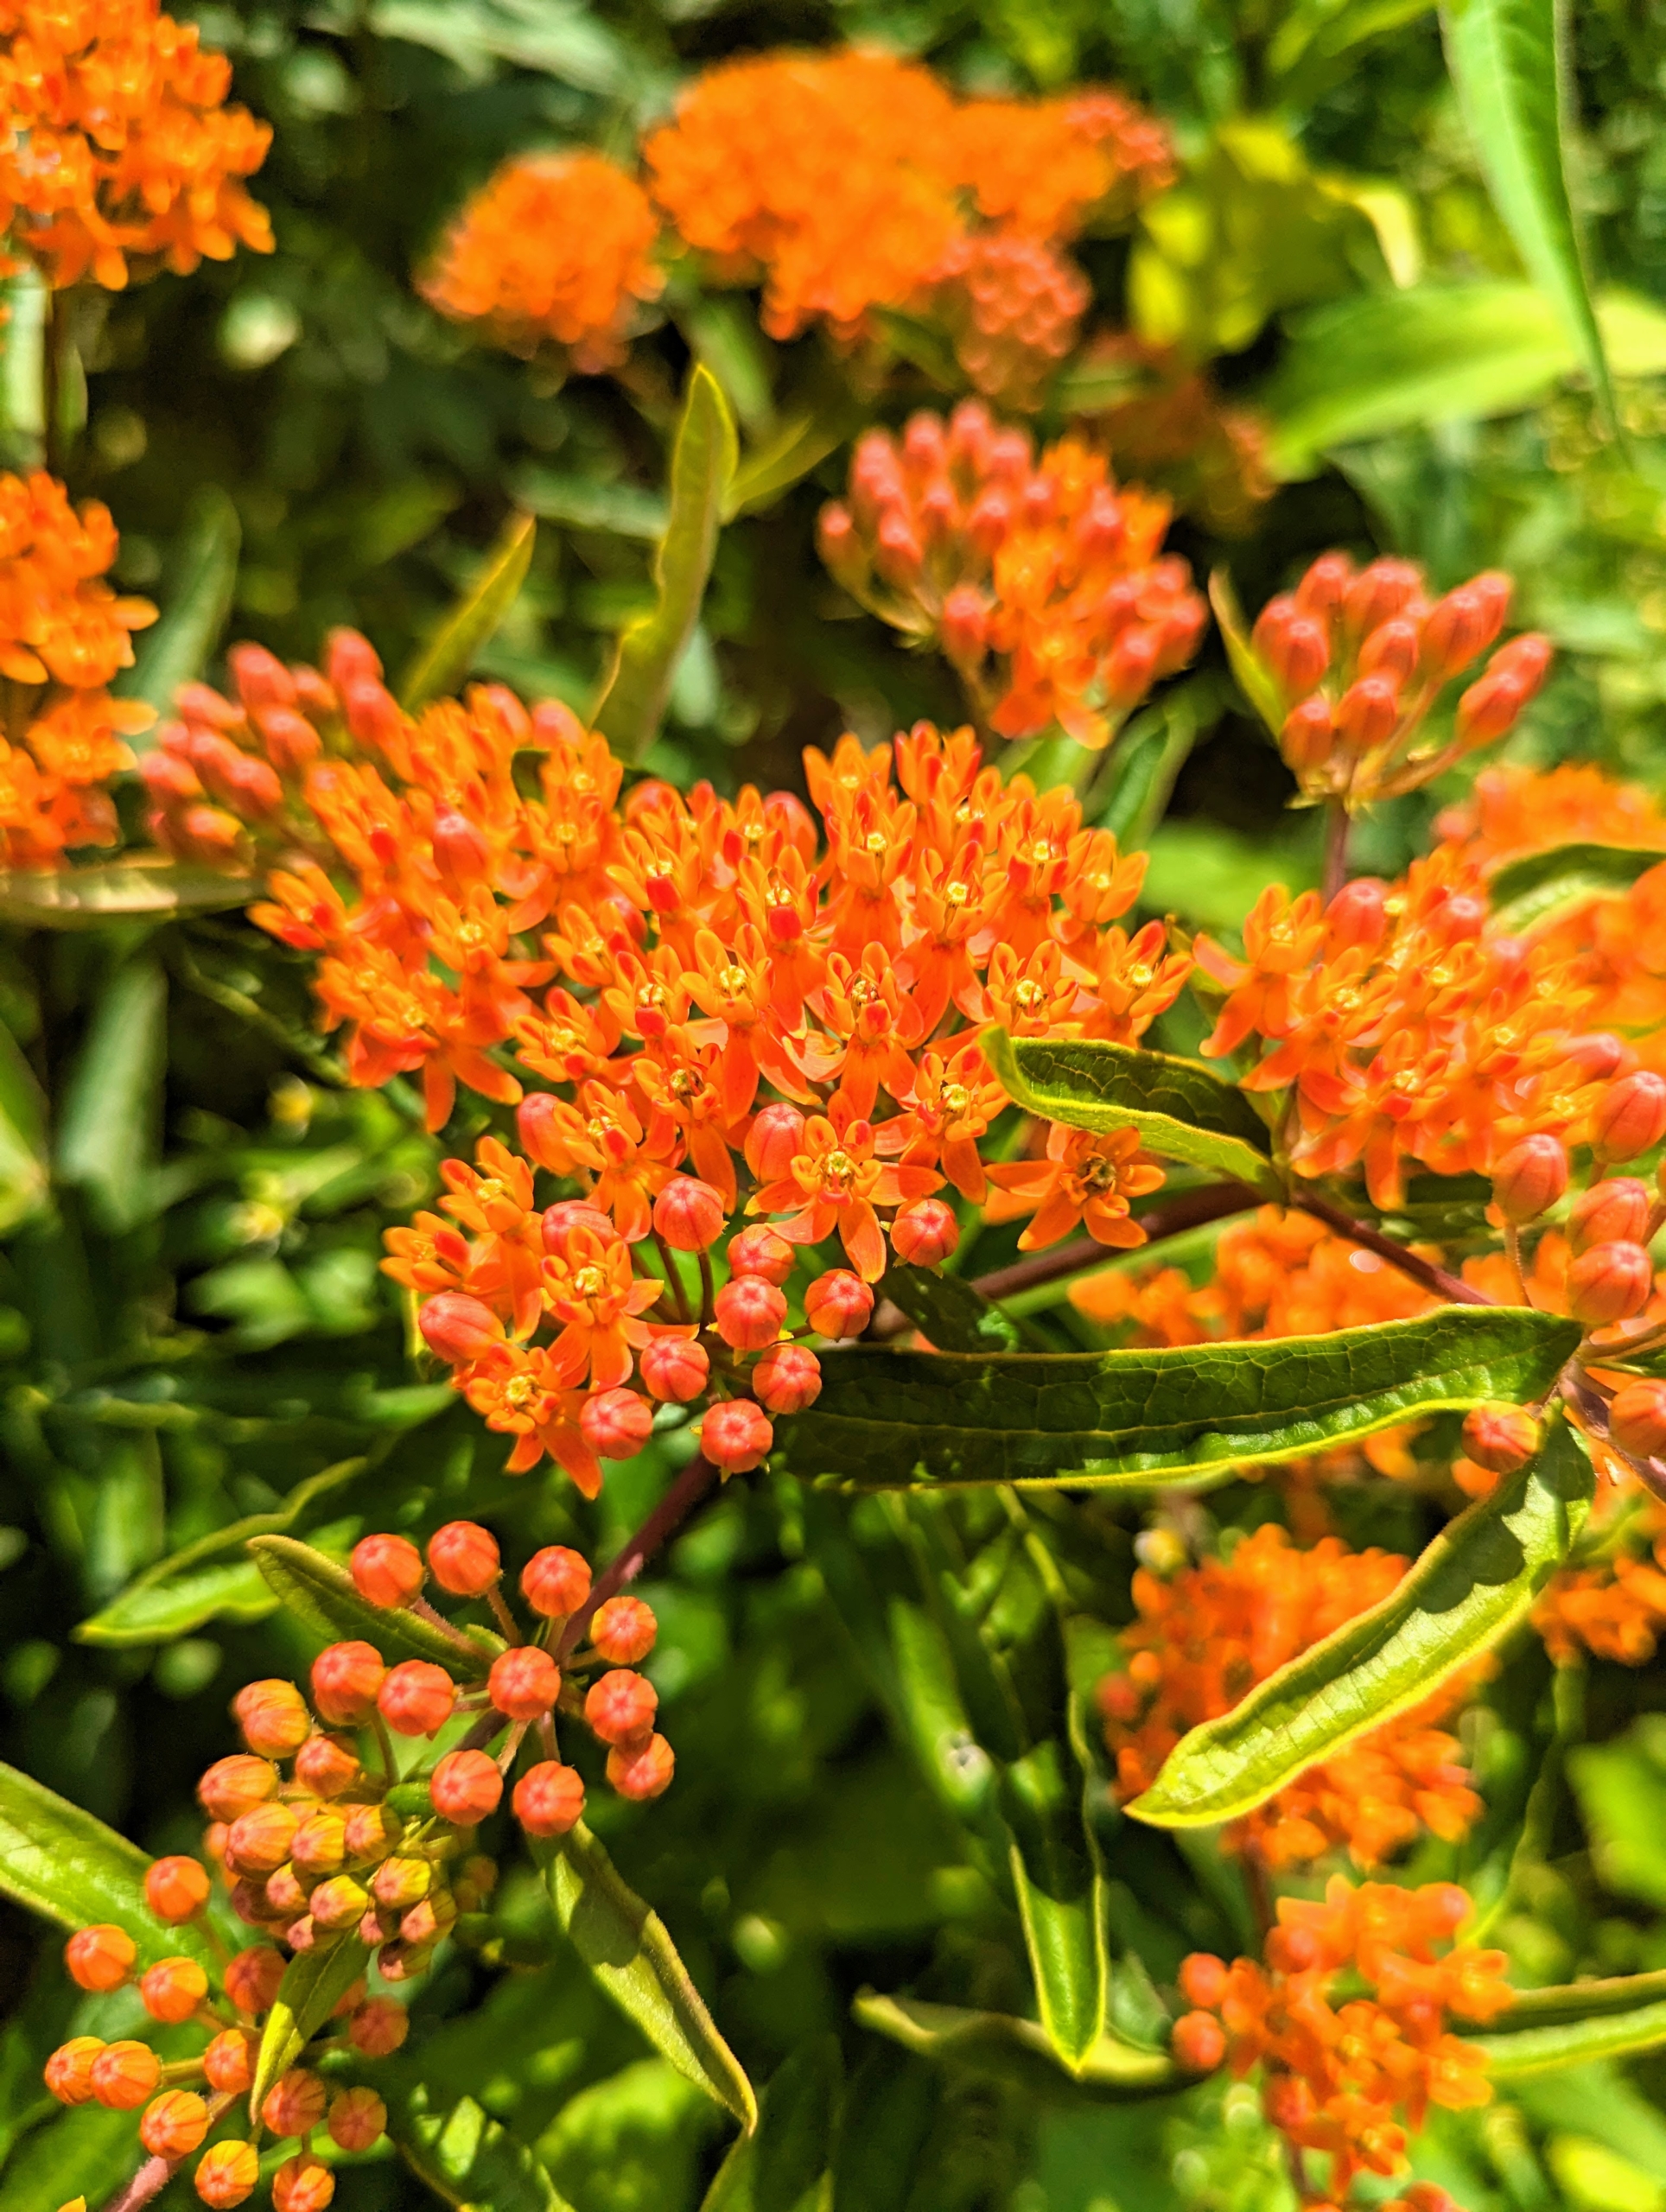
Butterfly Weed is a bright orange showy native wildflower that’s easy to grow, cold hardy, and does well in poor, dry soils. Long-lasting clusters of small, flat-topped flowers are crowned with a yellow, sun-kissed “corona” and blooms from June through August. Butterfly Weed is an important nectar source for Monarch butterflies and its leaves provide essential food for developing Monarch caterpillars.
And down the center footpath of the garden is Lady’s mantle, Alchemilla vulgaris. In late spring and early summer, the plant produces lovely chartreuse colored blooms.
I am always on the lookout for innovative, sensible, and easy-to-operate tools and supplies to use around my Bedford, New York farm. It's important that my gardeners and outdoor grounds crew have “the right tool for the right job.”
I've been using STIHL products for many years. STIHL is recognized as a worldwide leader in outdoor power equipment and offers an extensive lineup of more than 80 different pieces including professional-grade chainsaws, blowers, string trimmers, hedge trimmers, pruners, and more. Not long ago, I received one of STIHL's new push mowers. It's great for using in between the raised beds in my vegetable garden, under the pergola, along the various allées, and any other flat, narrow spaces around my home. It gets into tight areas and provides good, precise cuts.
Enjoy these photos.
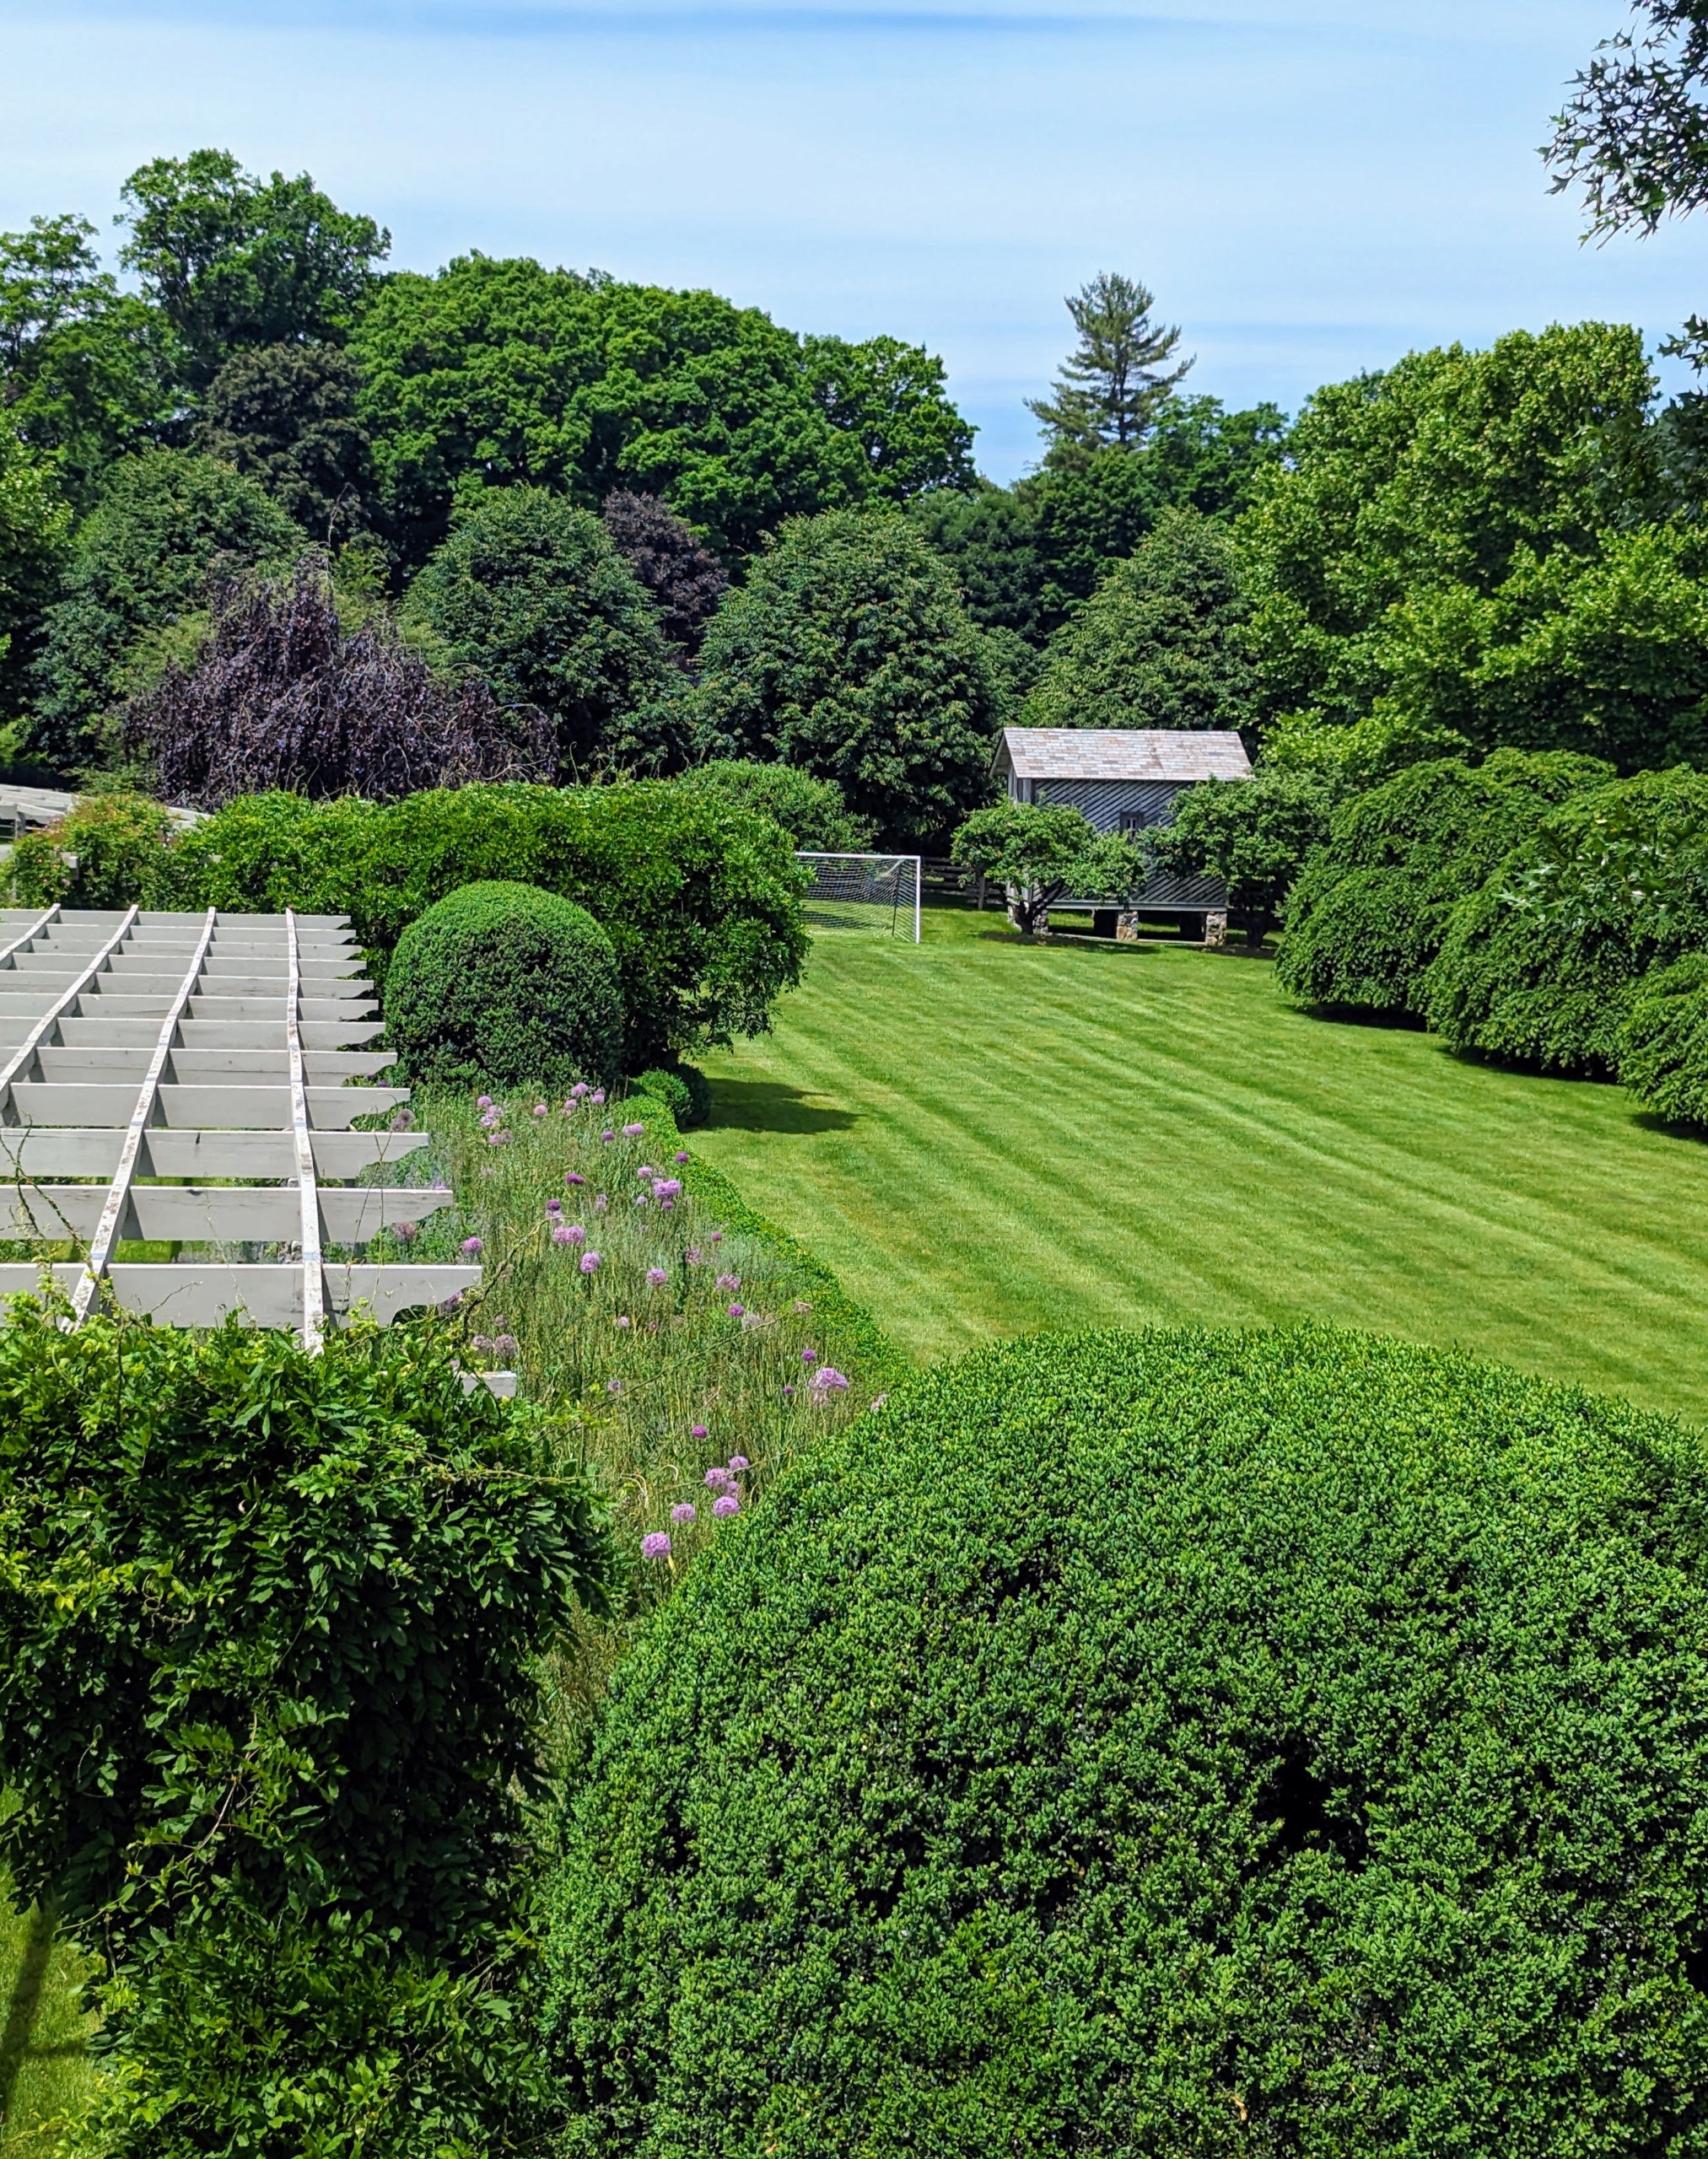
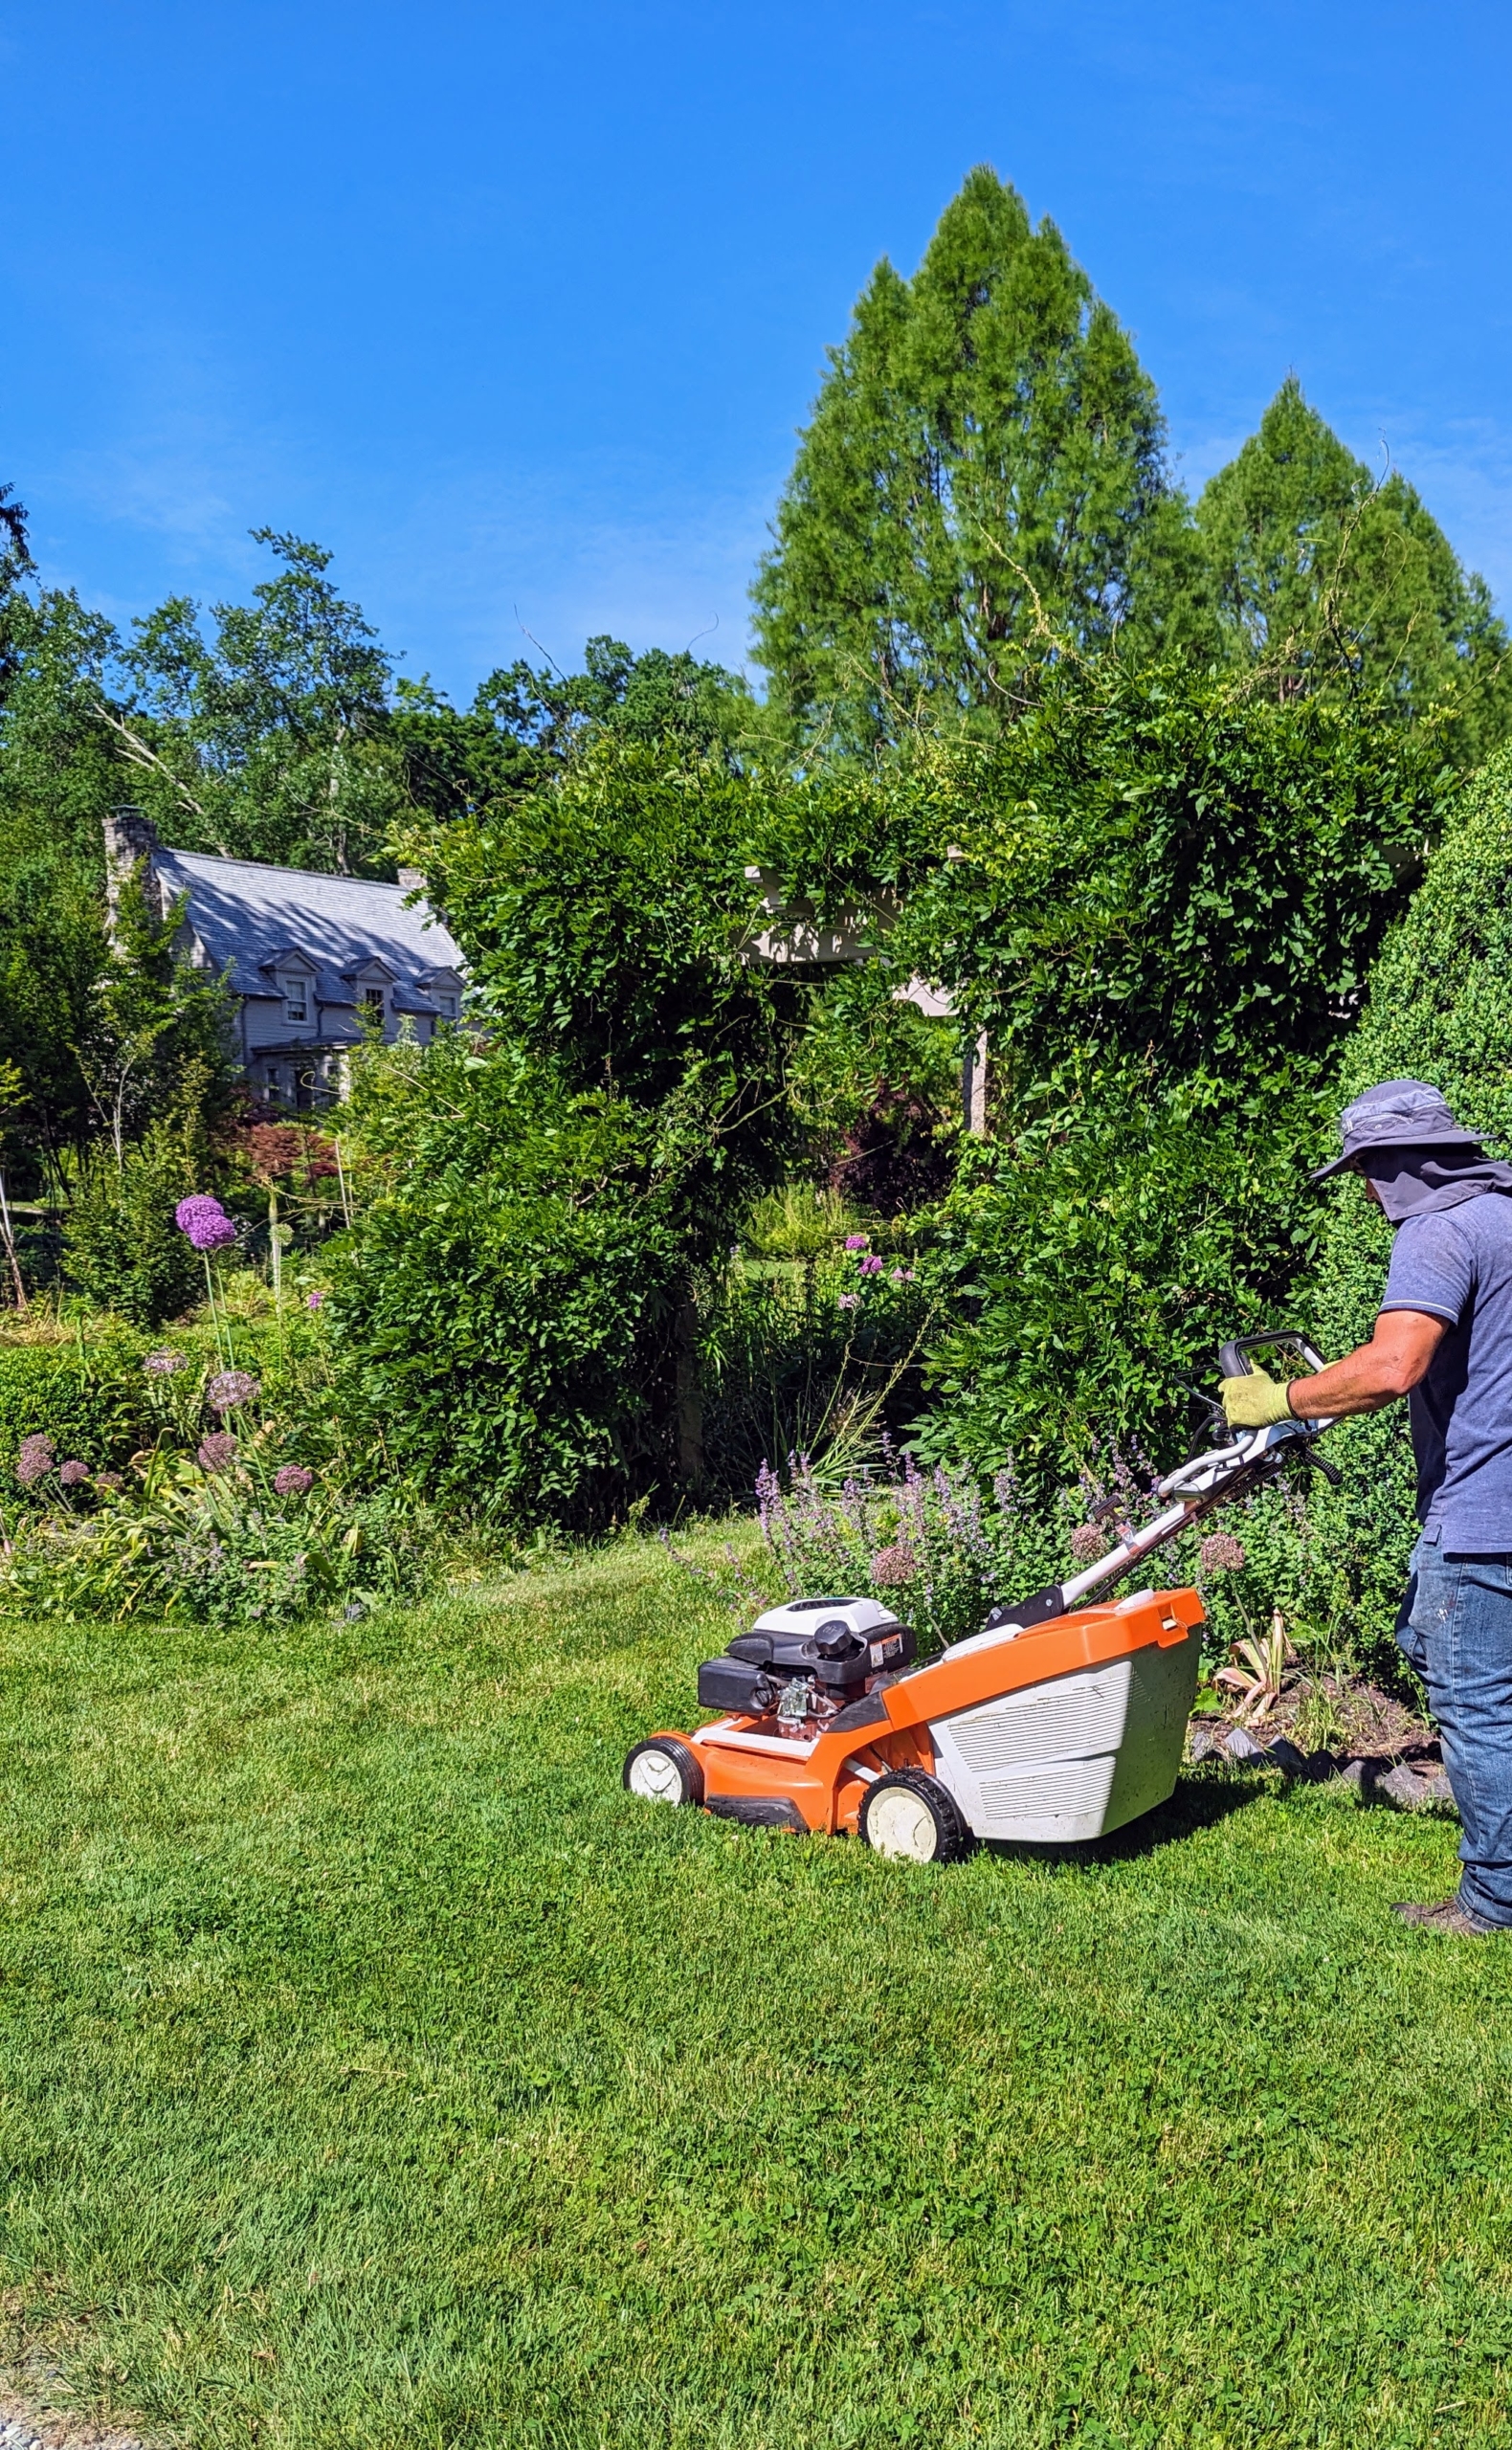
It’s officially summer and that means it’s mowing season! And while I have replaced many grassy areas with mulch to reduce the amount of mowing around my farm, there is still a lot of mowing to do. This open space is what I call the “soccer field” or “party lawn” where my grandson loves to play when he visits. It is adjacent to my long and winding clematis pergola on the left.
Here is the narrow path between my herbaceous peony garden and my fenced in living maze.
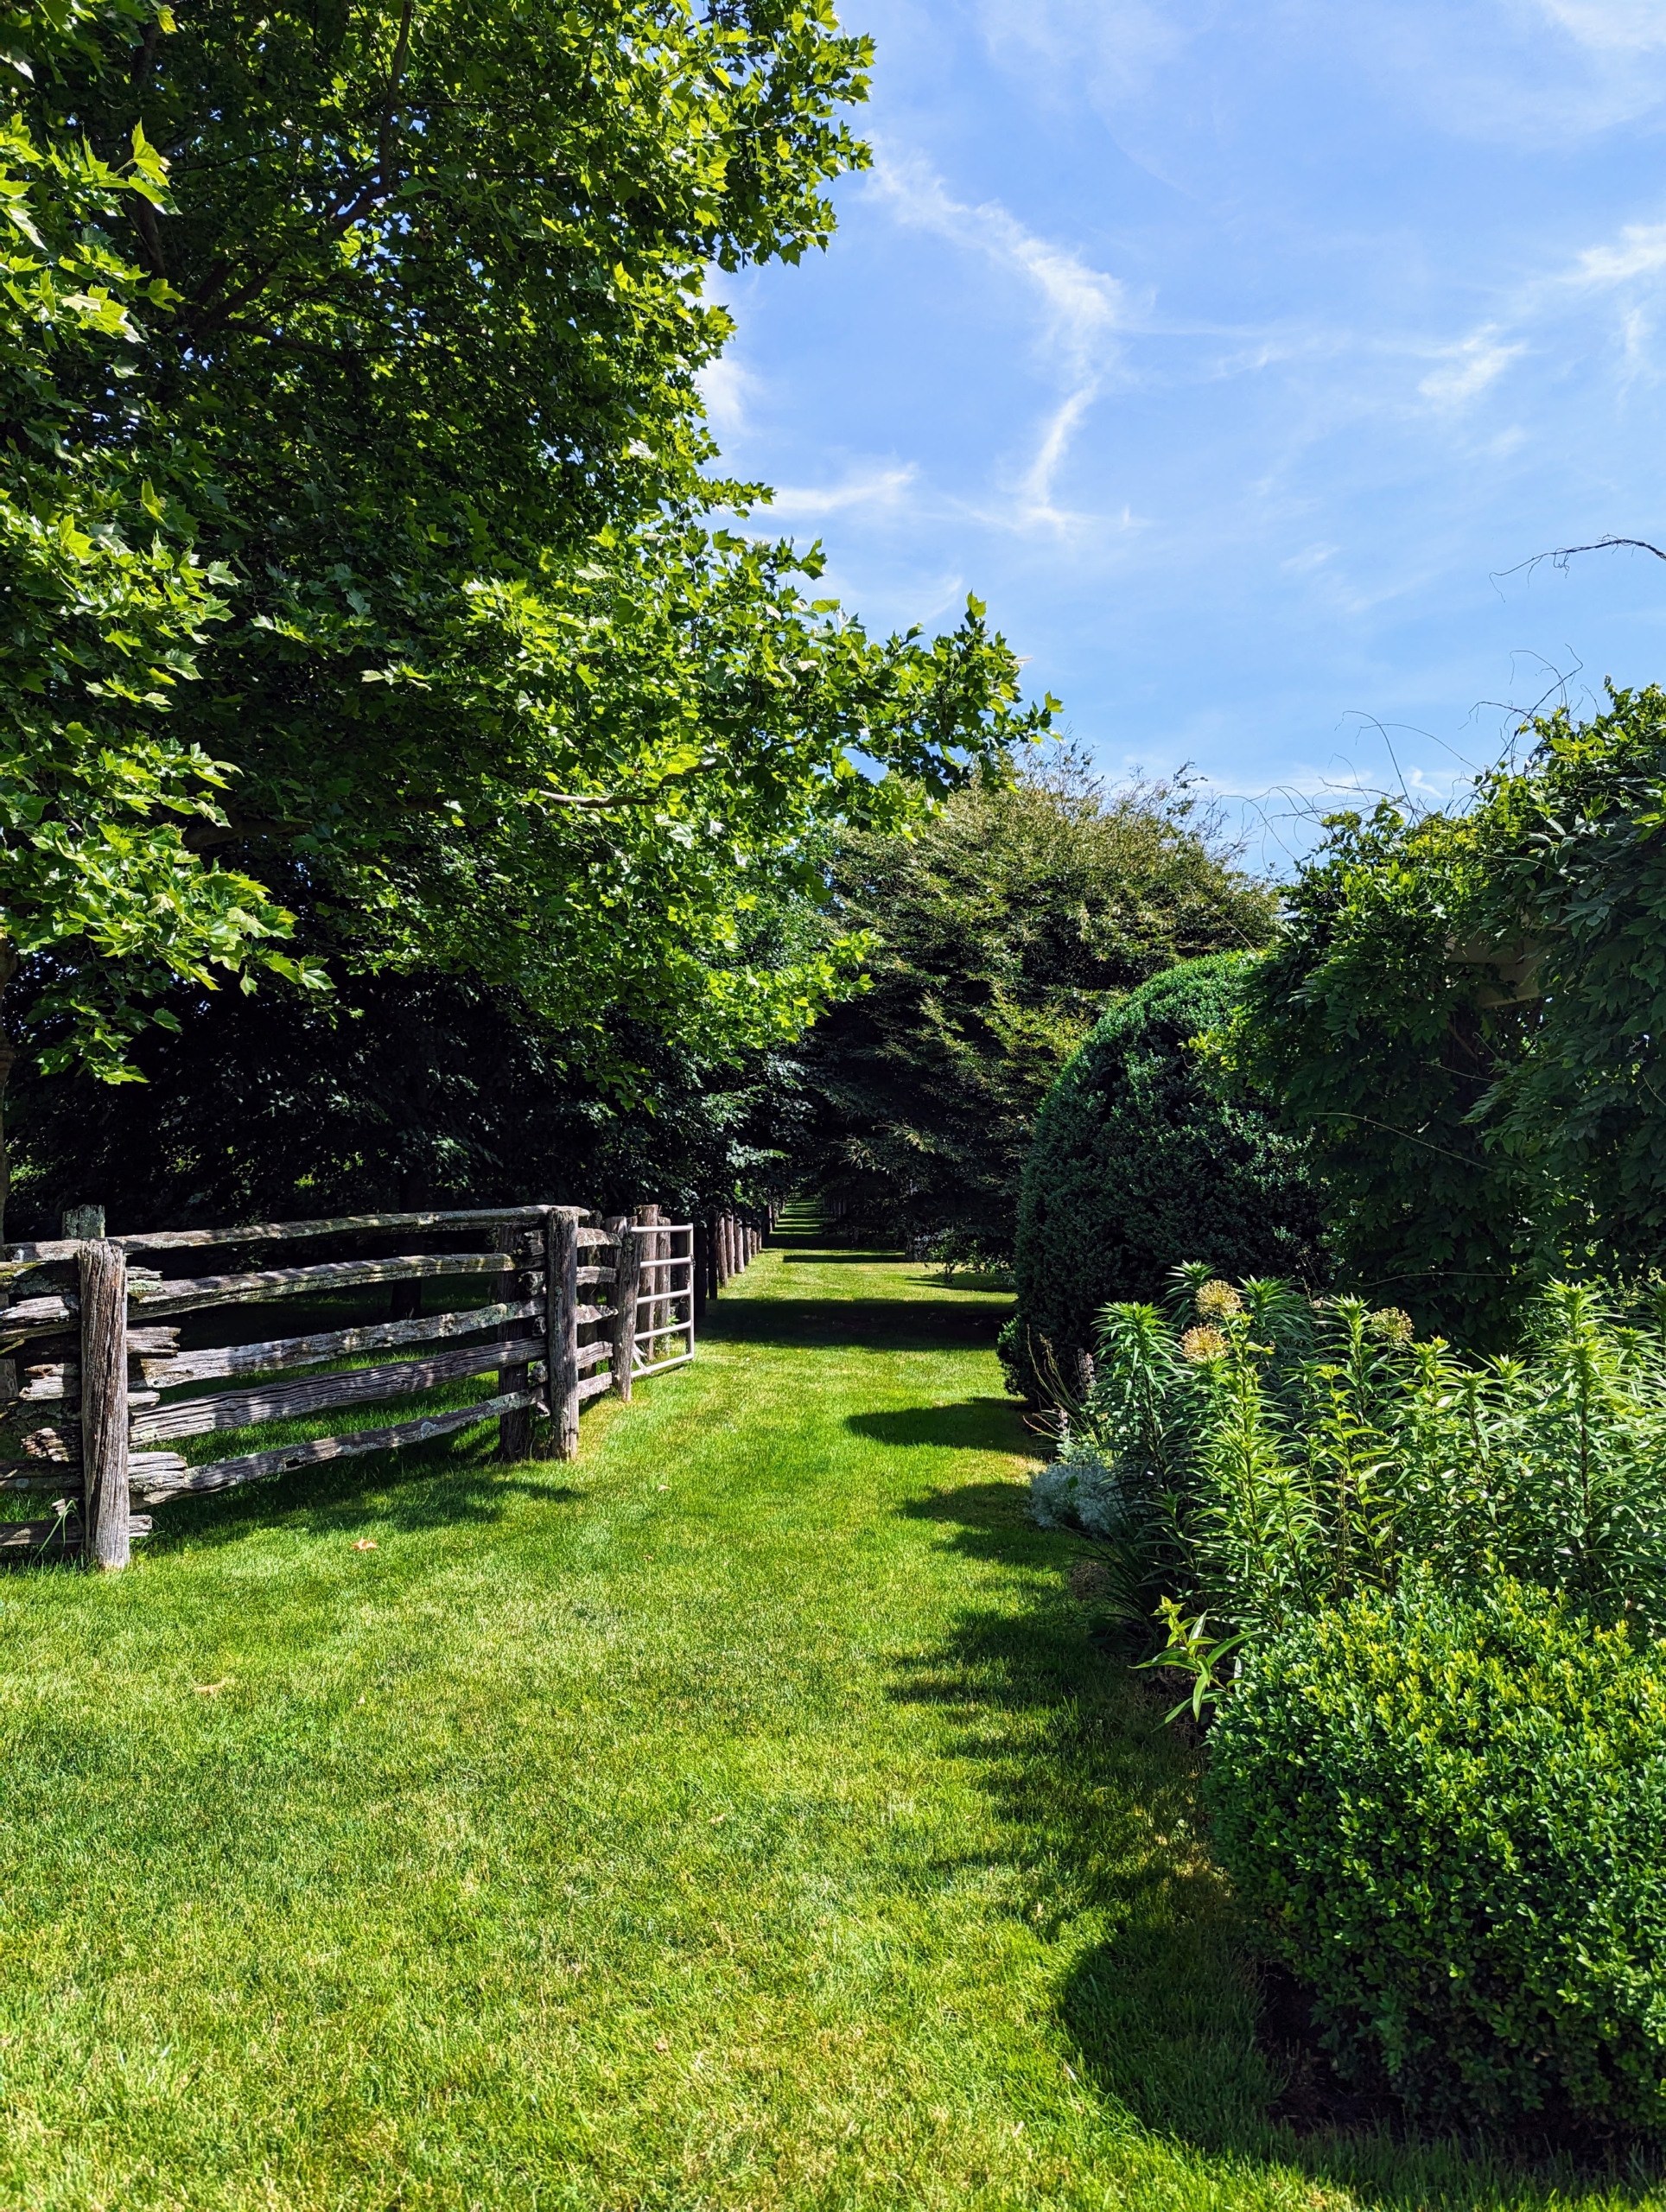
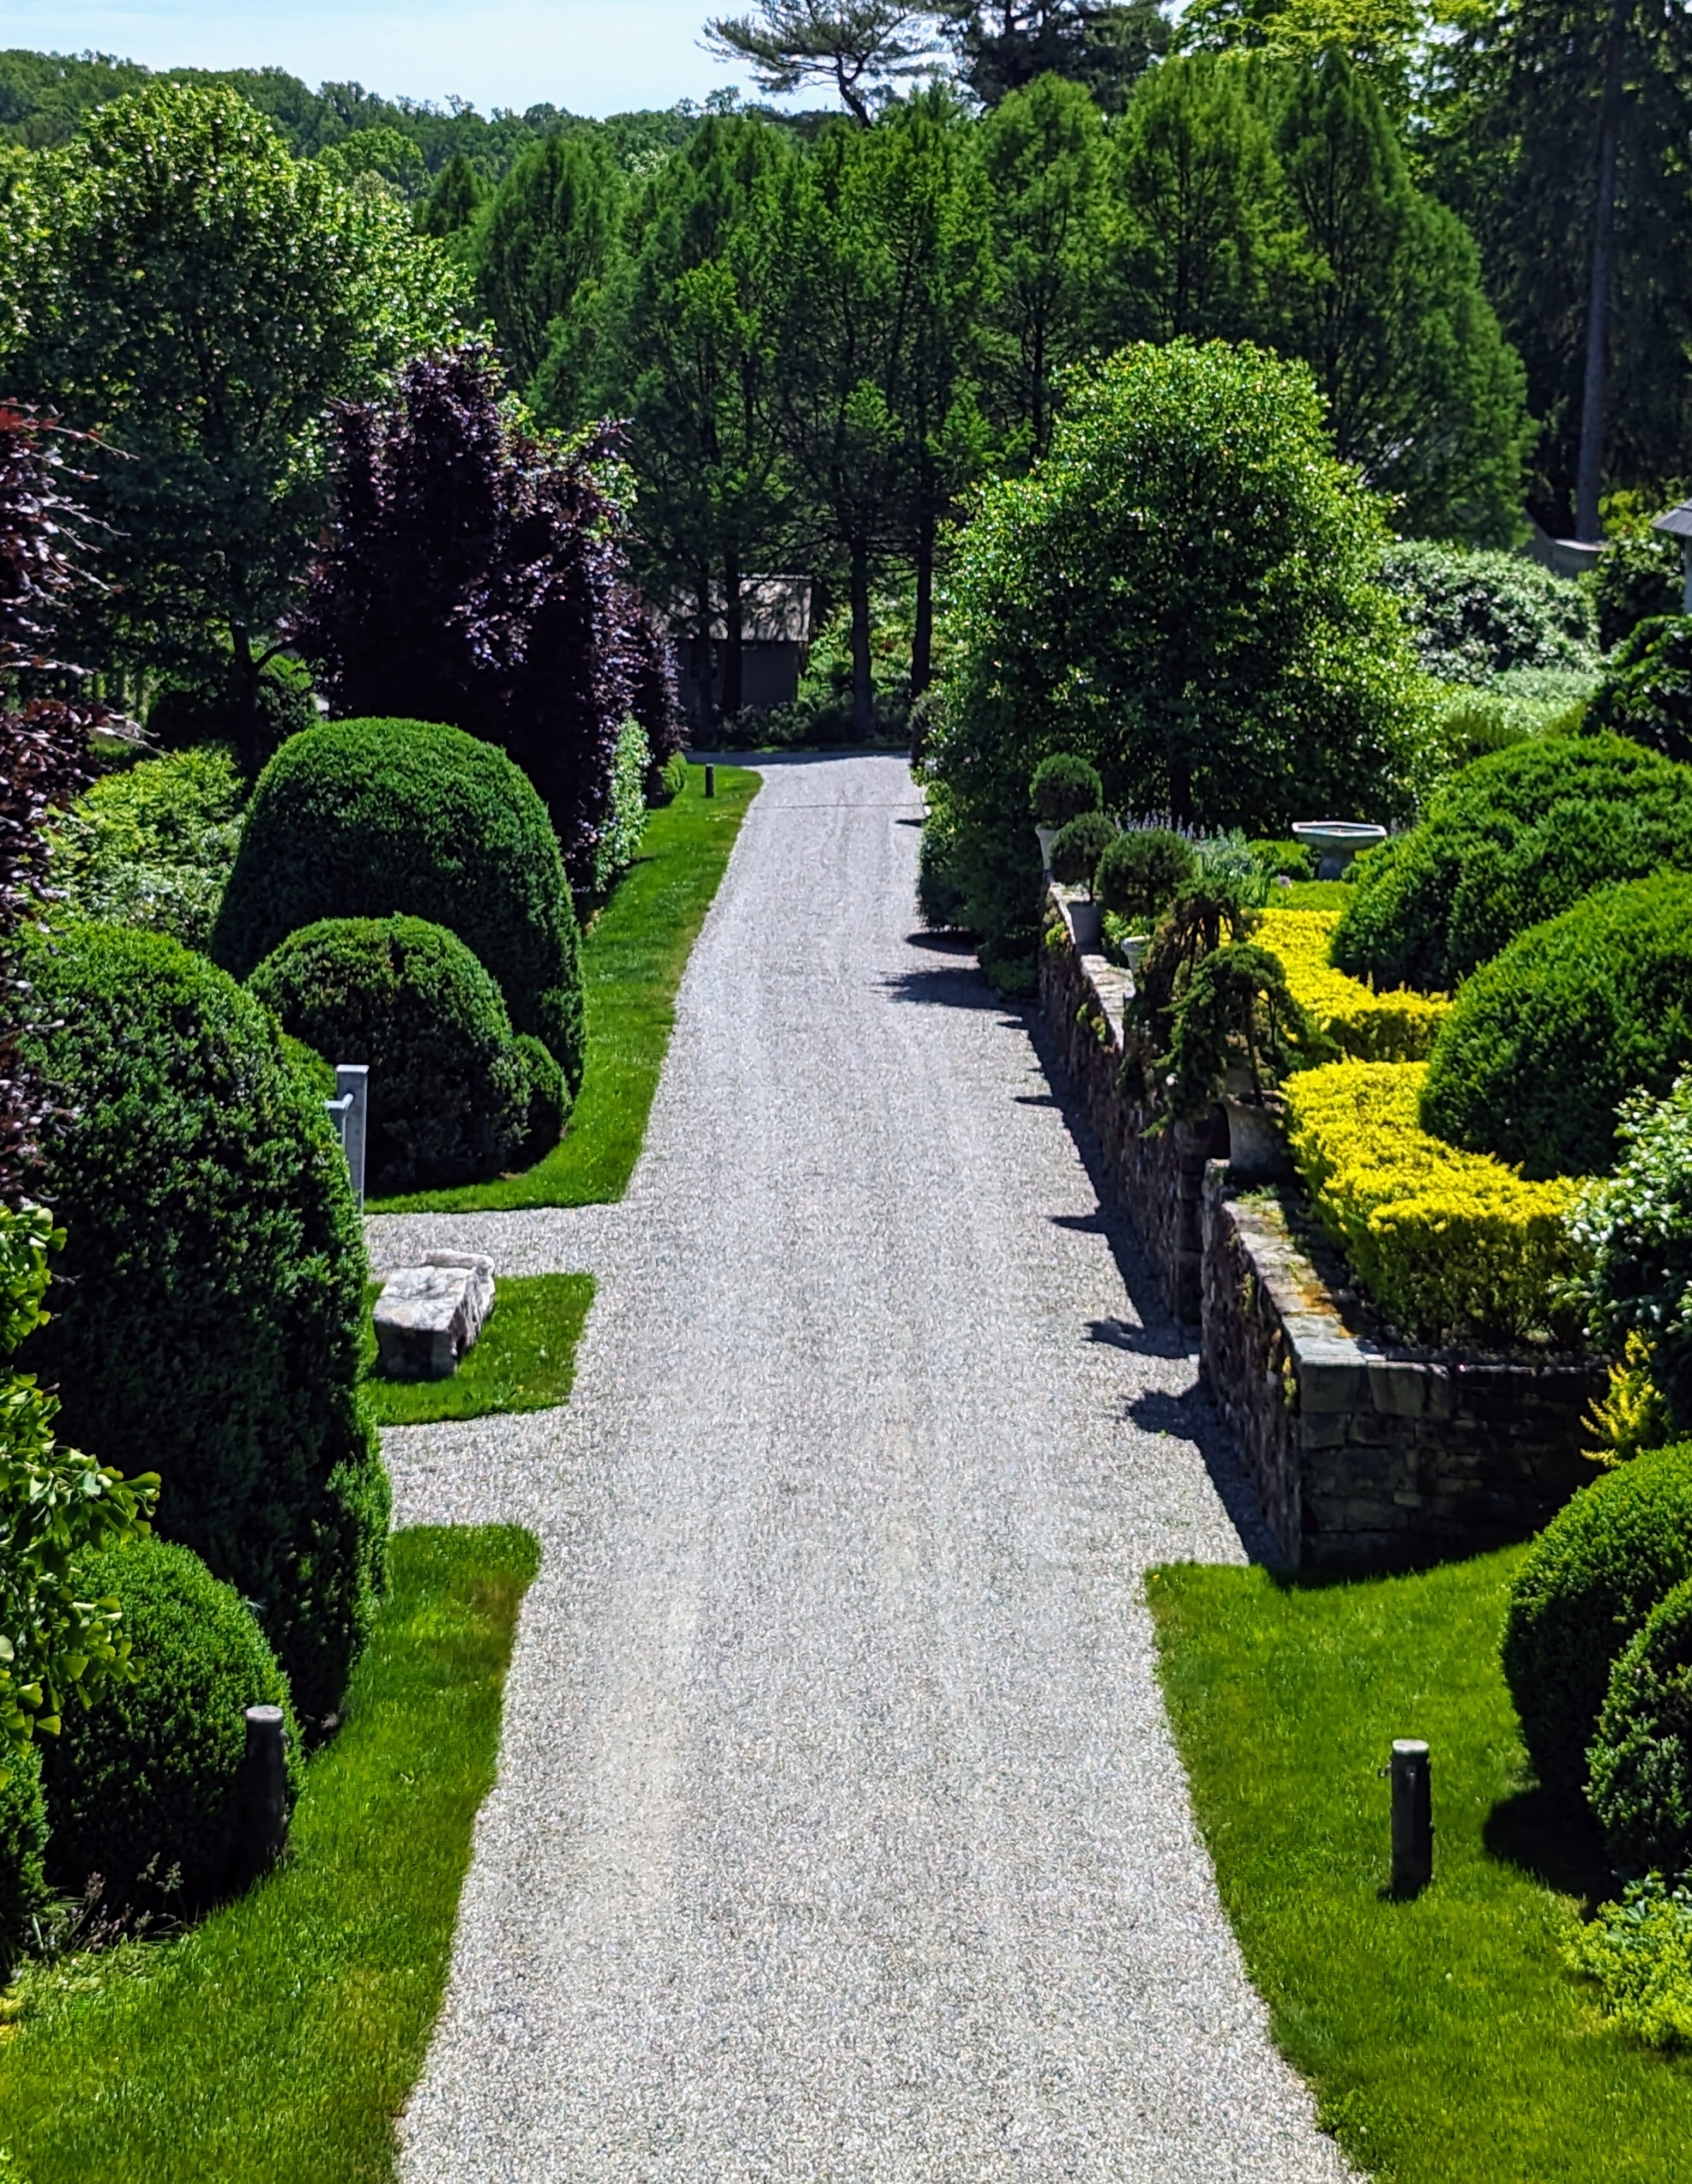
This narrow path heads toward my Boxwood Allée.
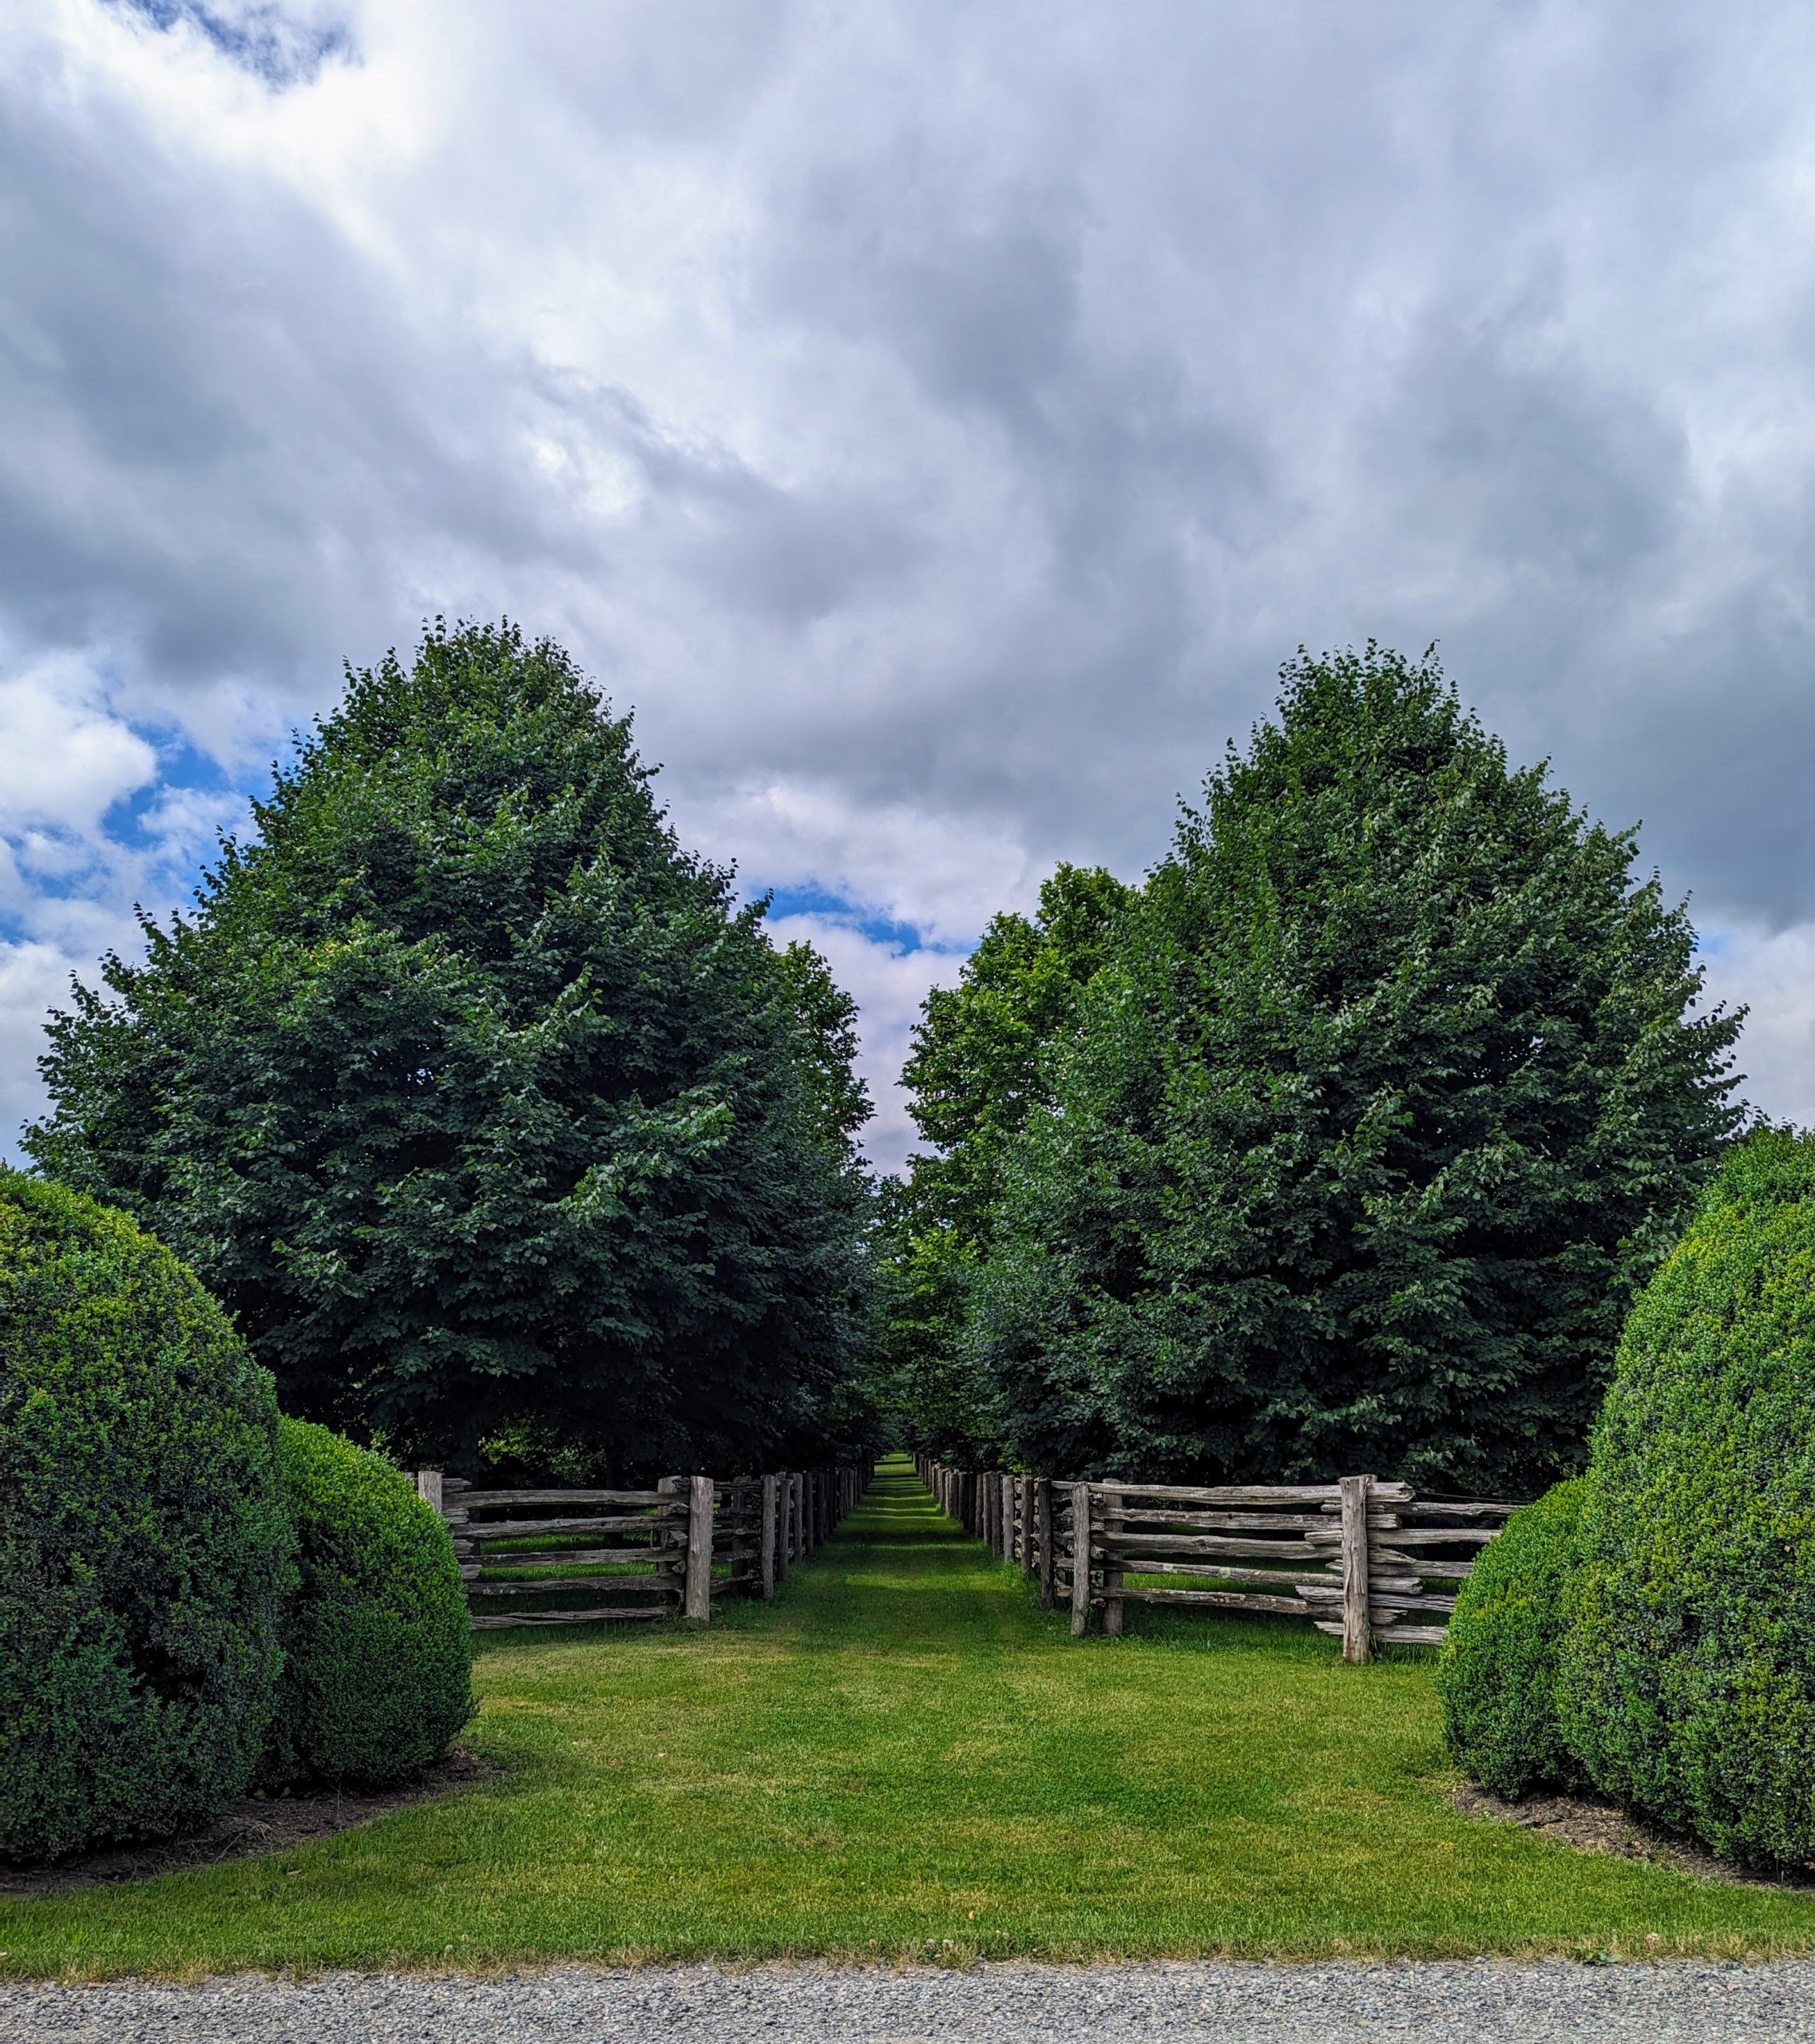
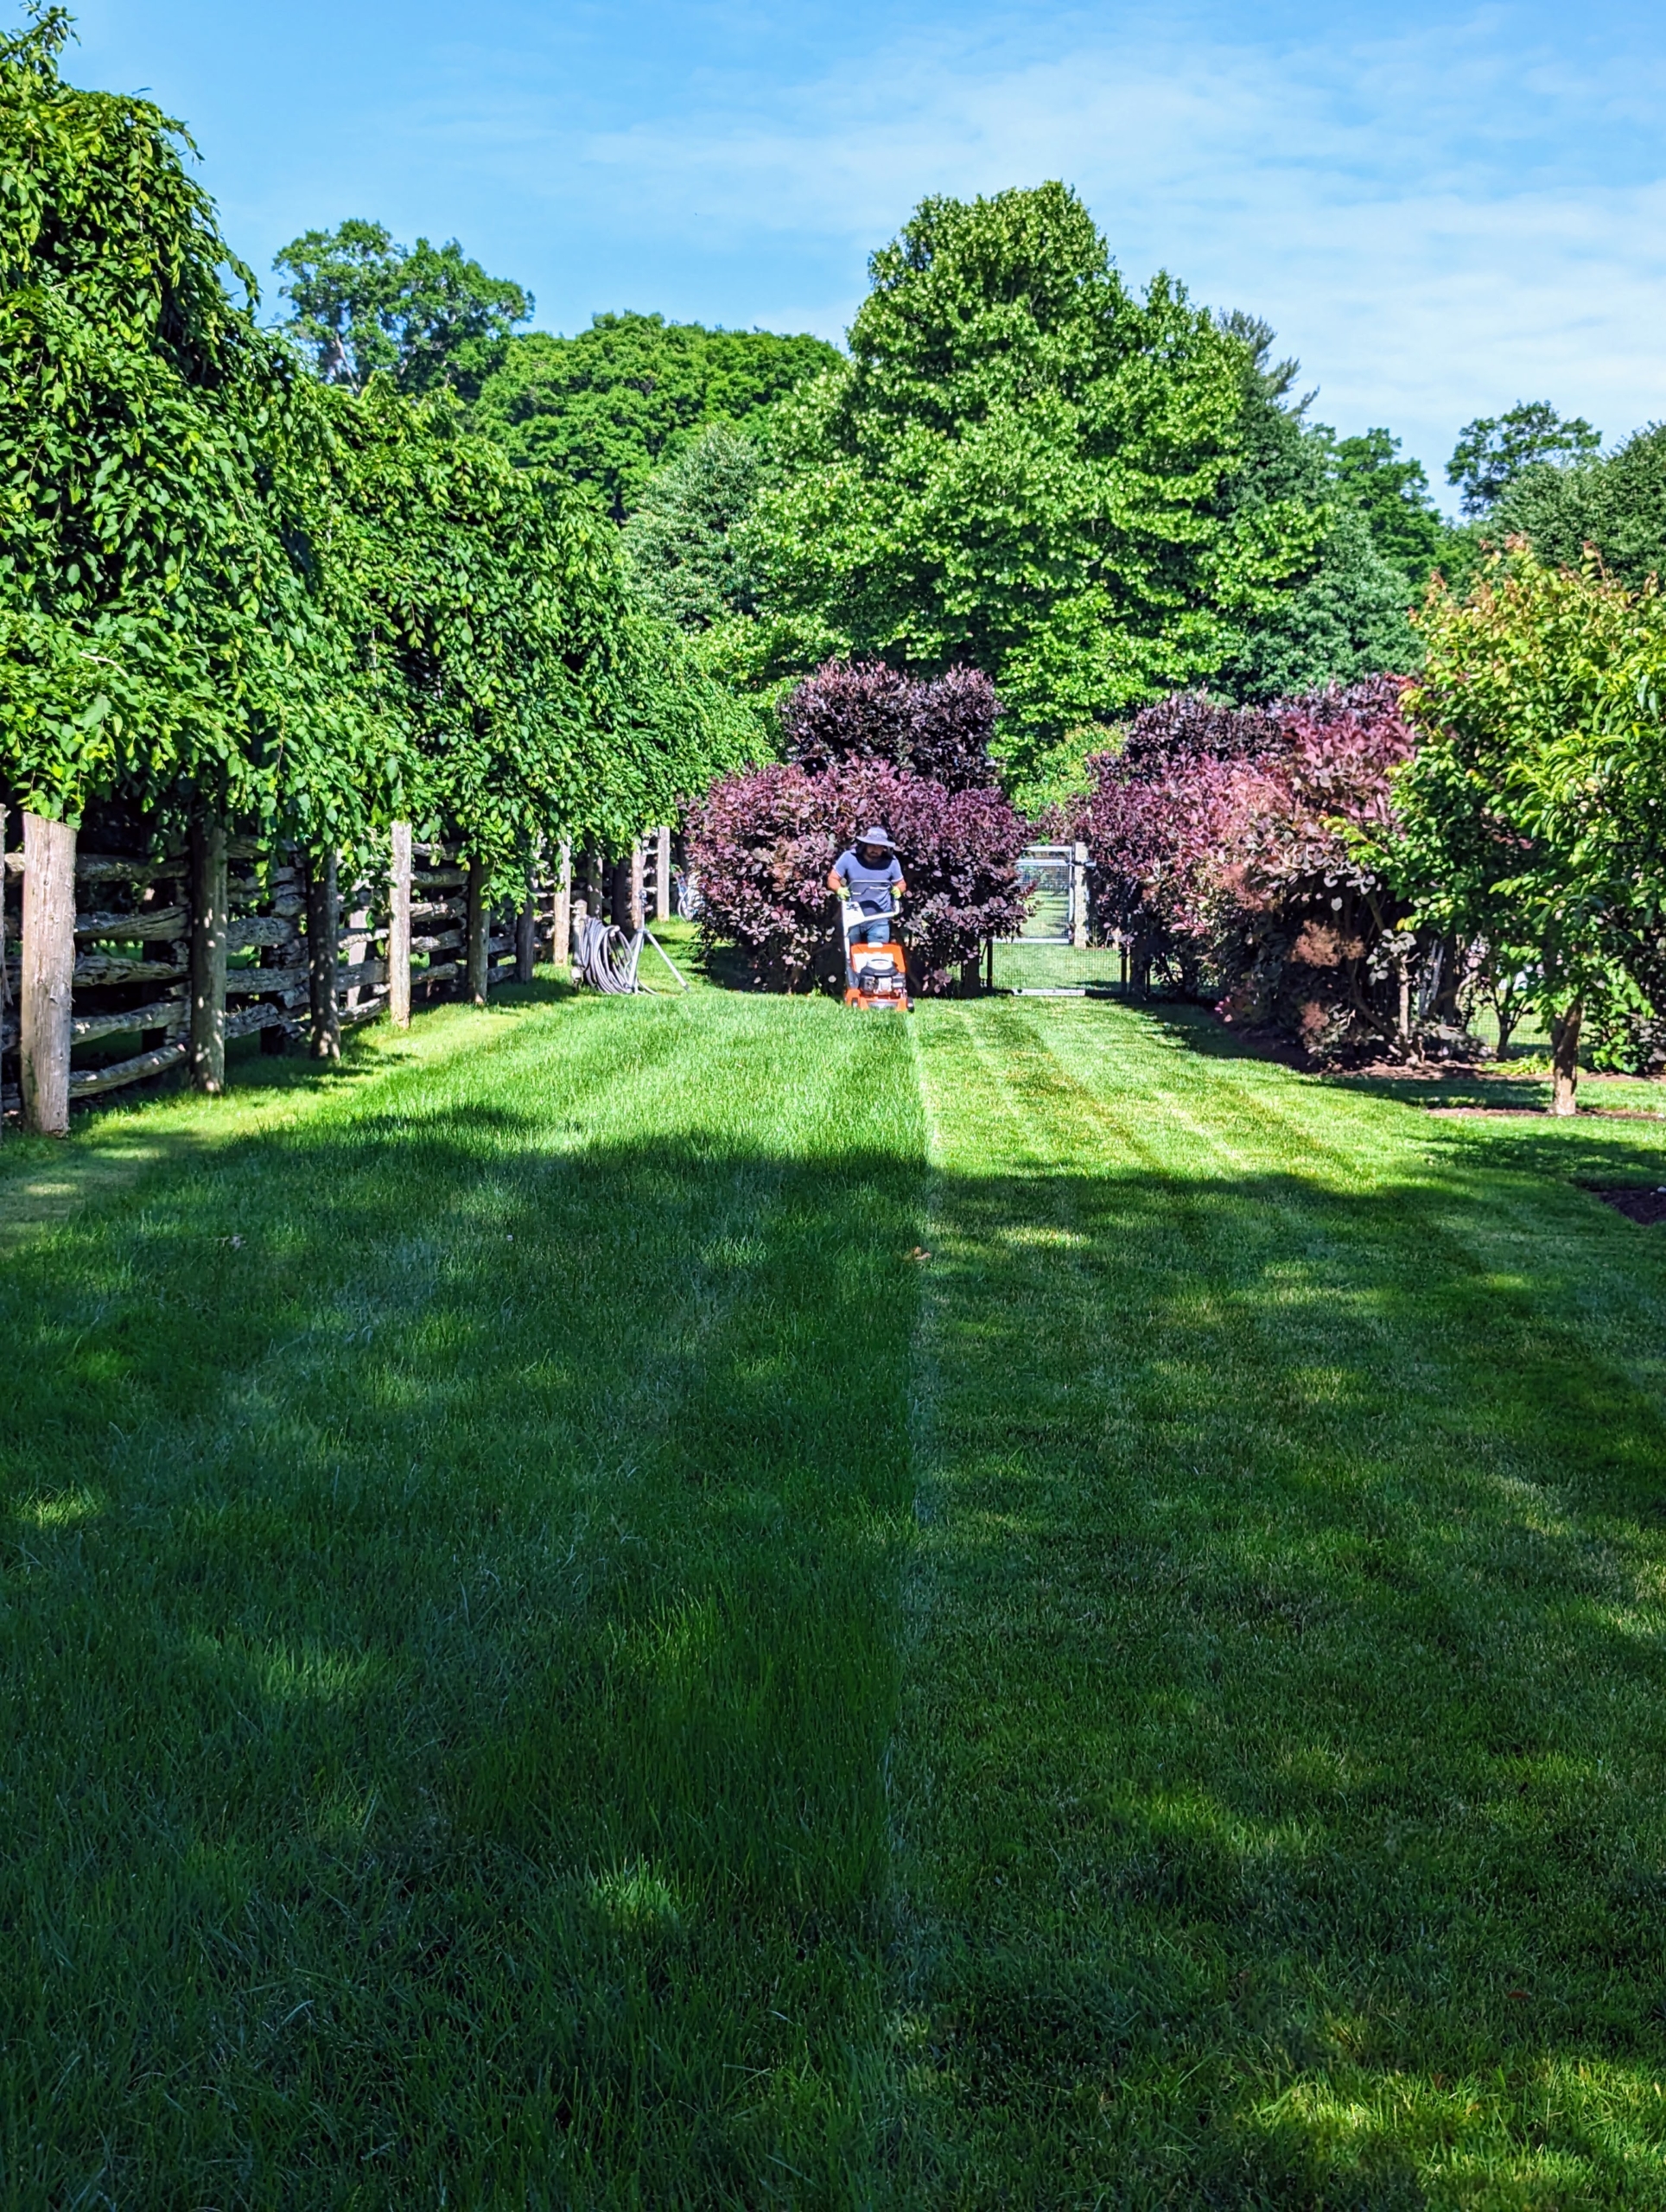
This view looks south from the Boxwood Allée through the allée of lindens between my paddocks.
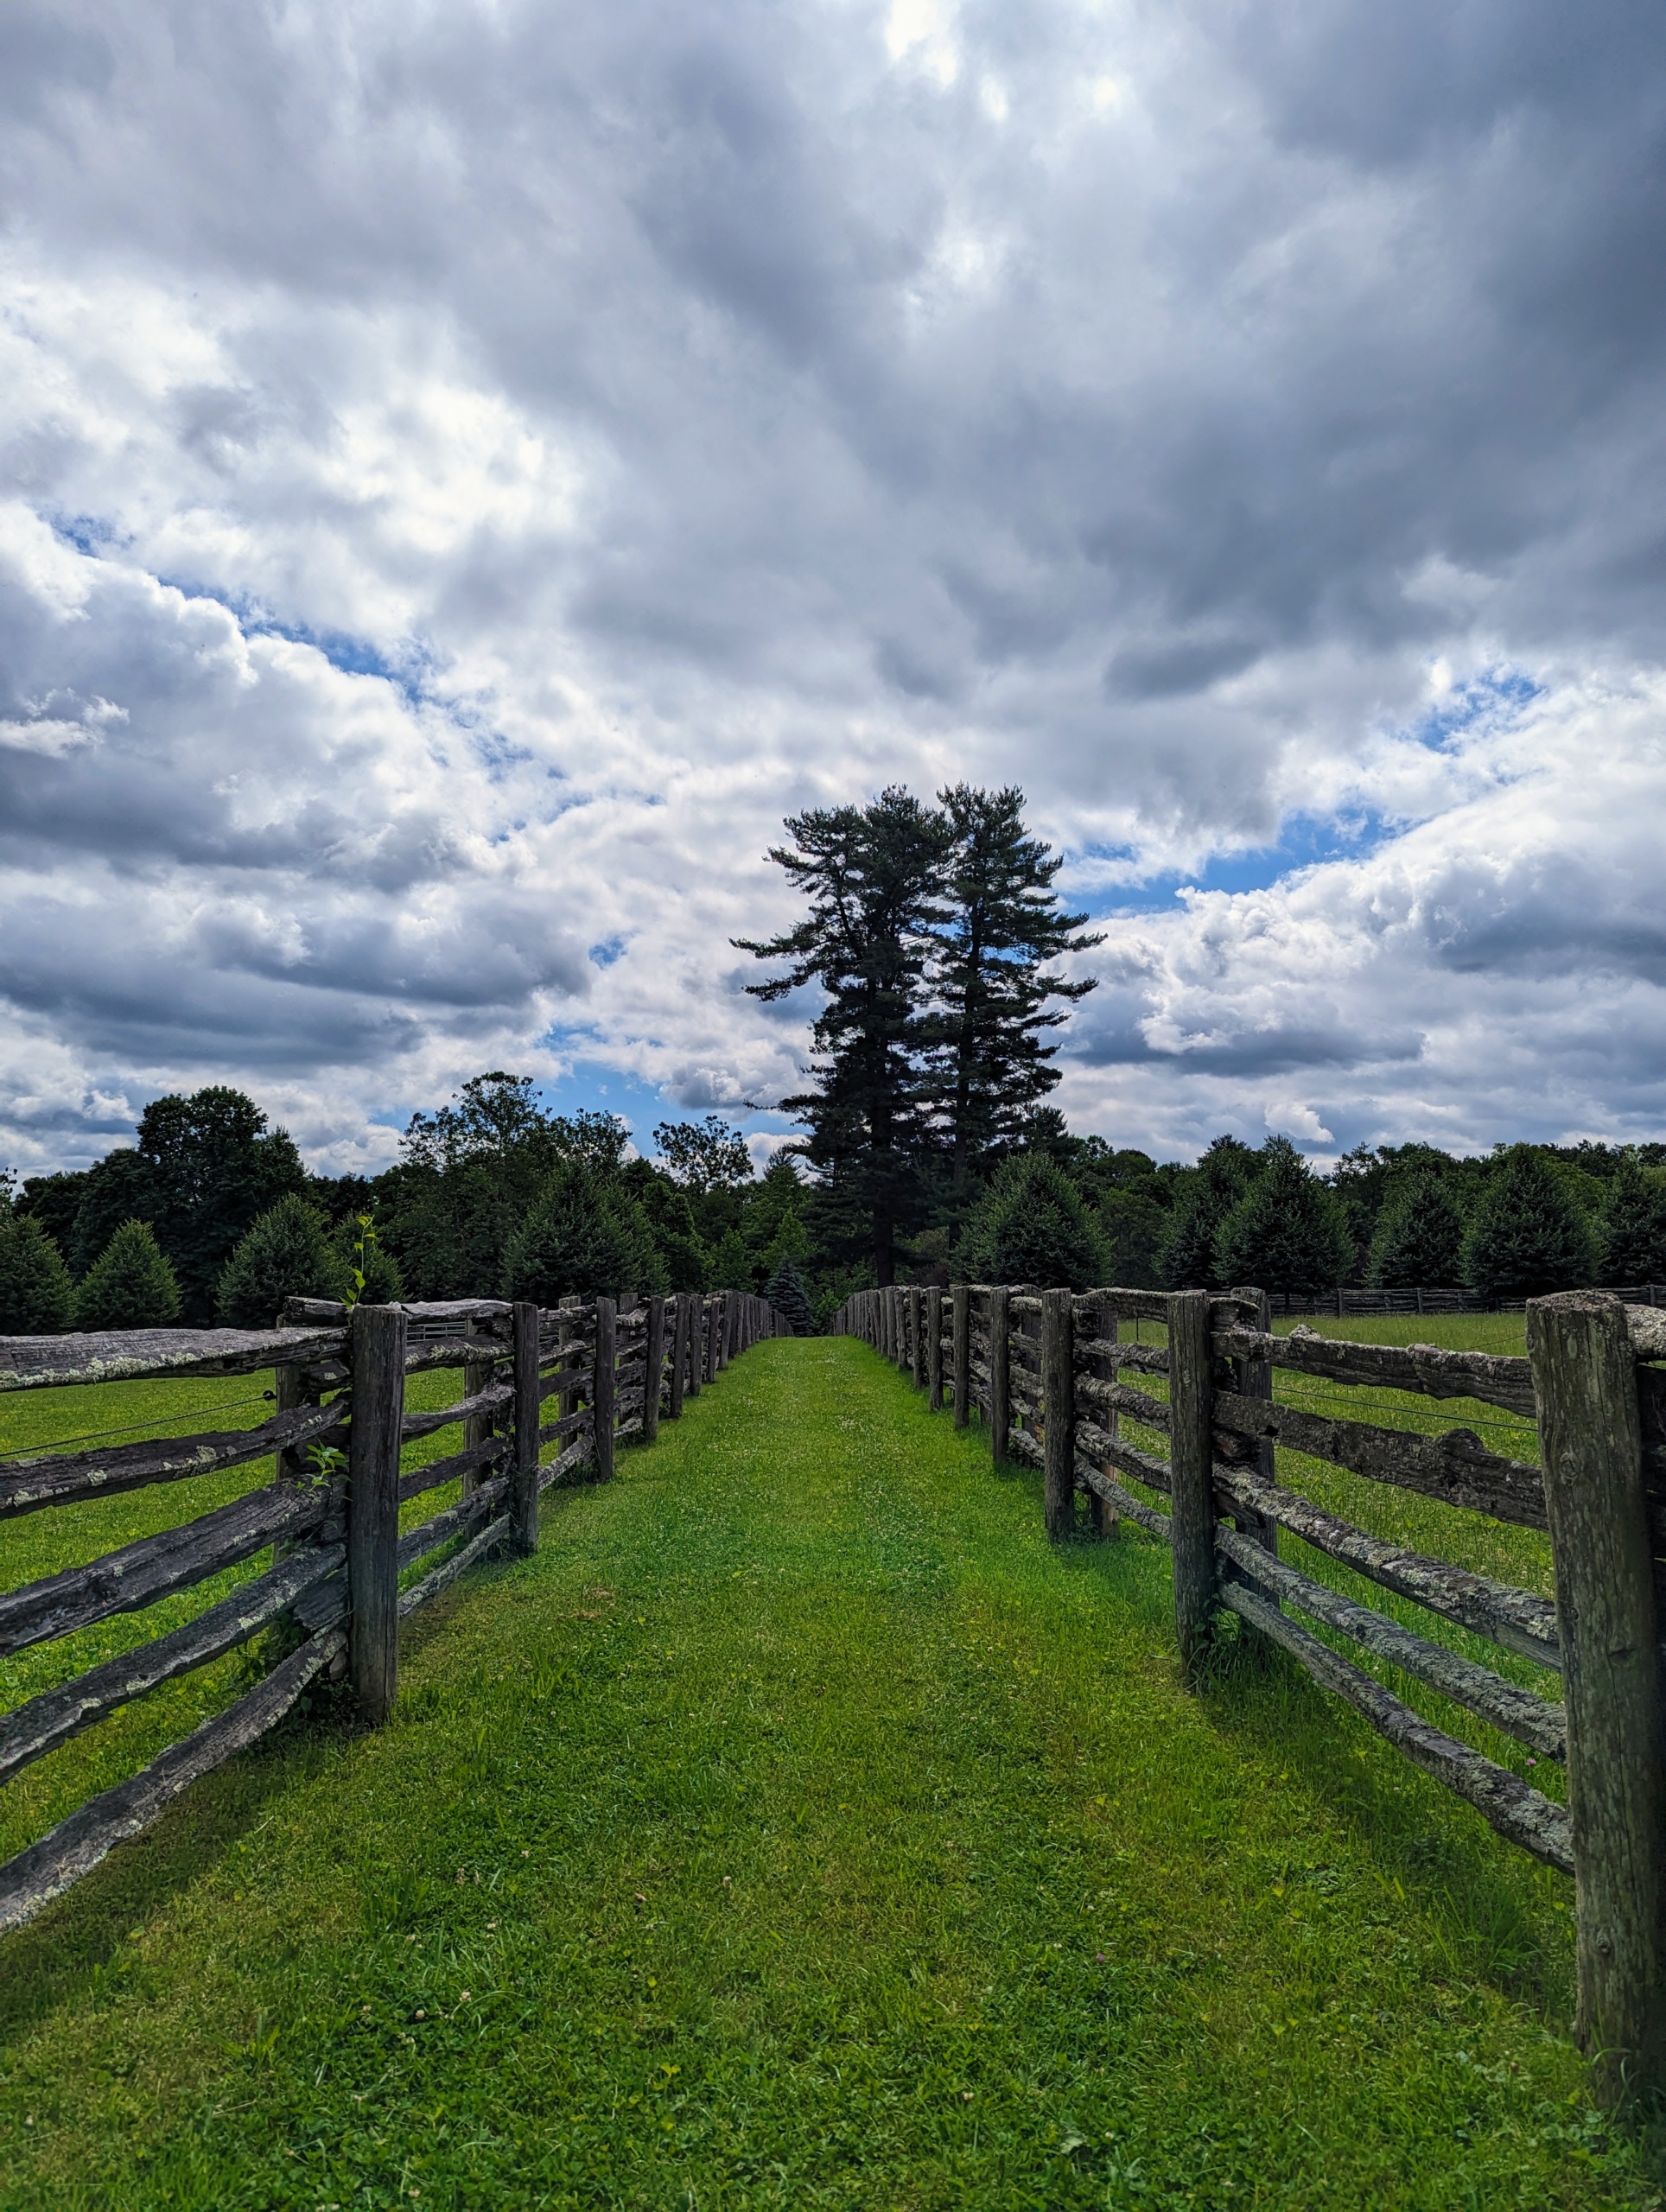
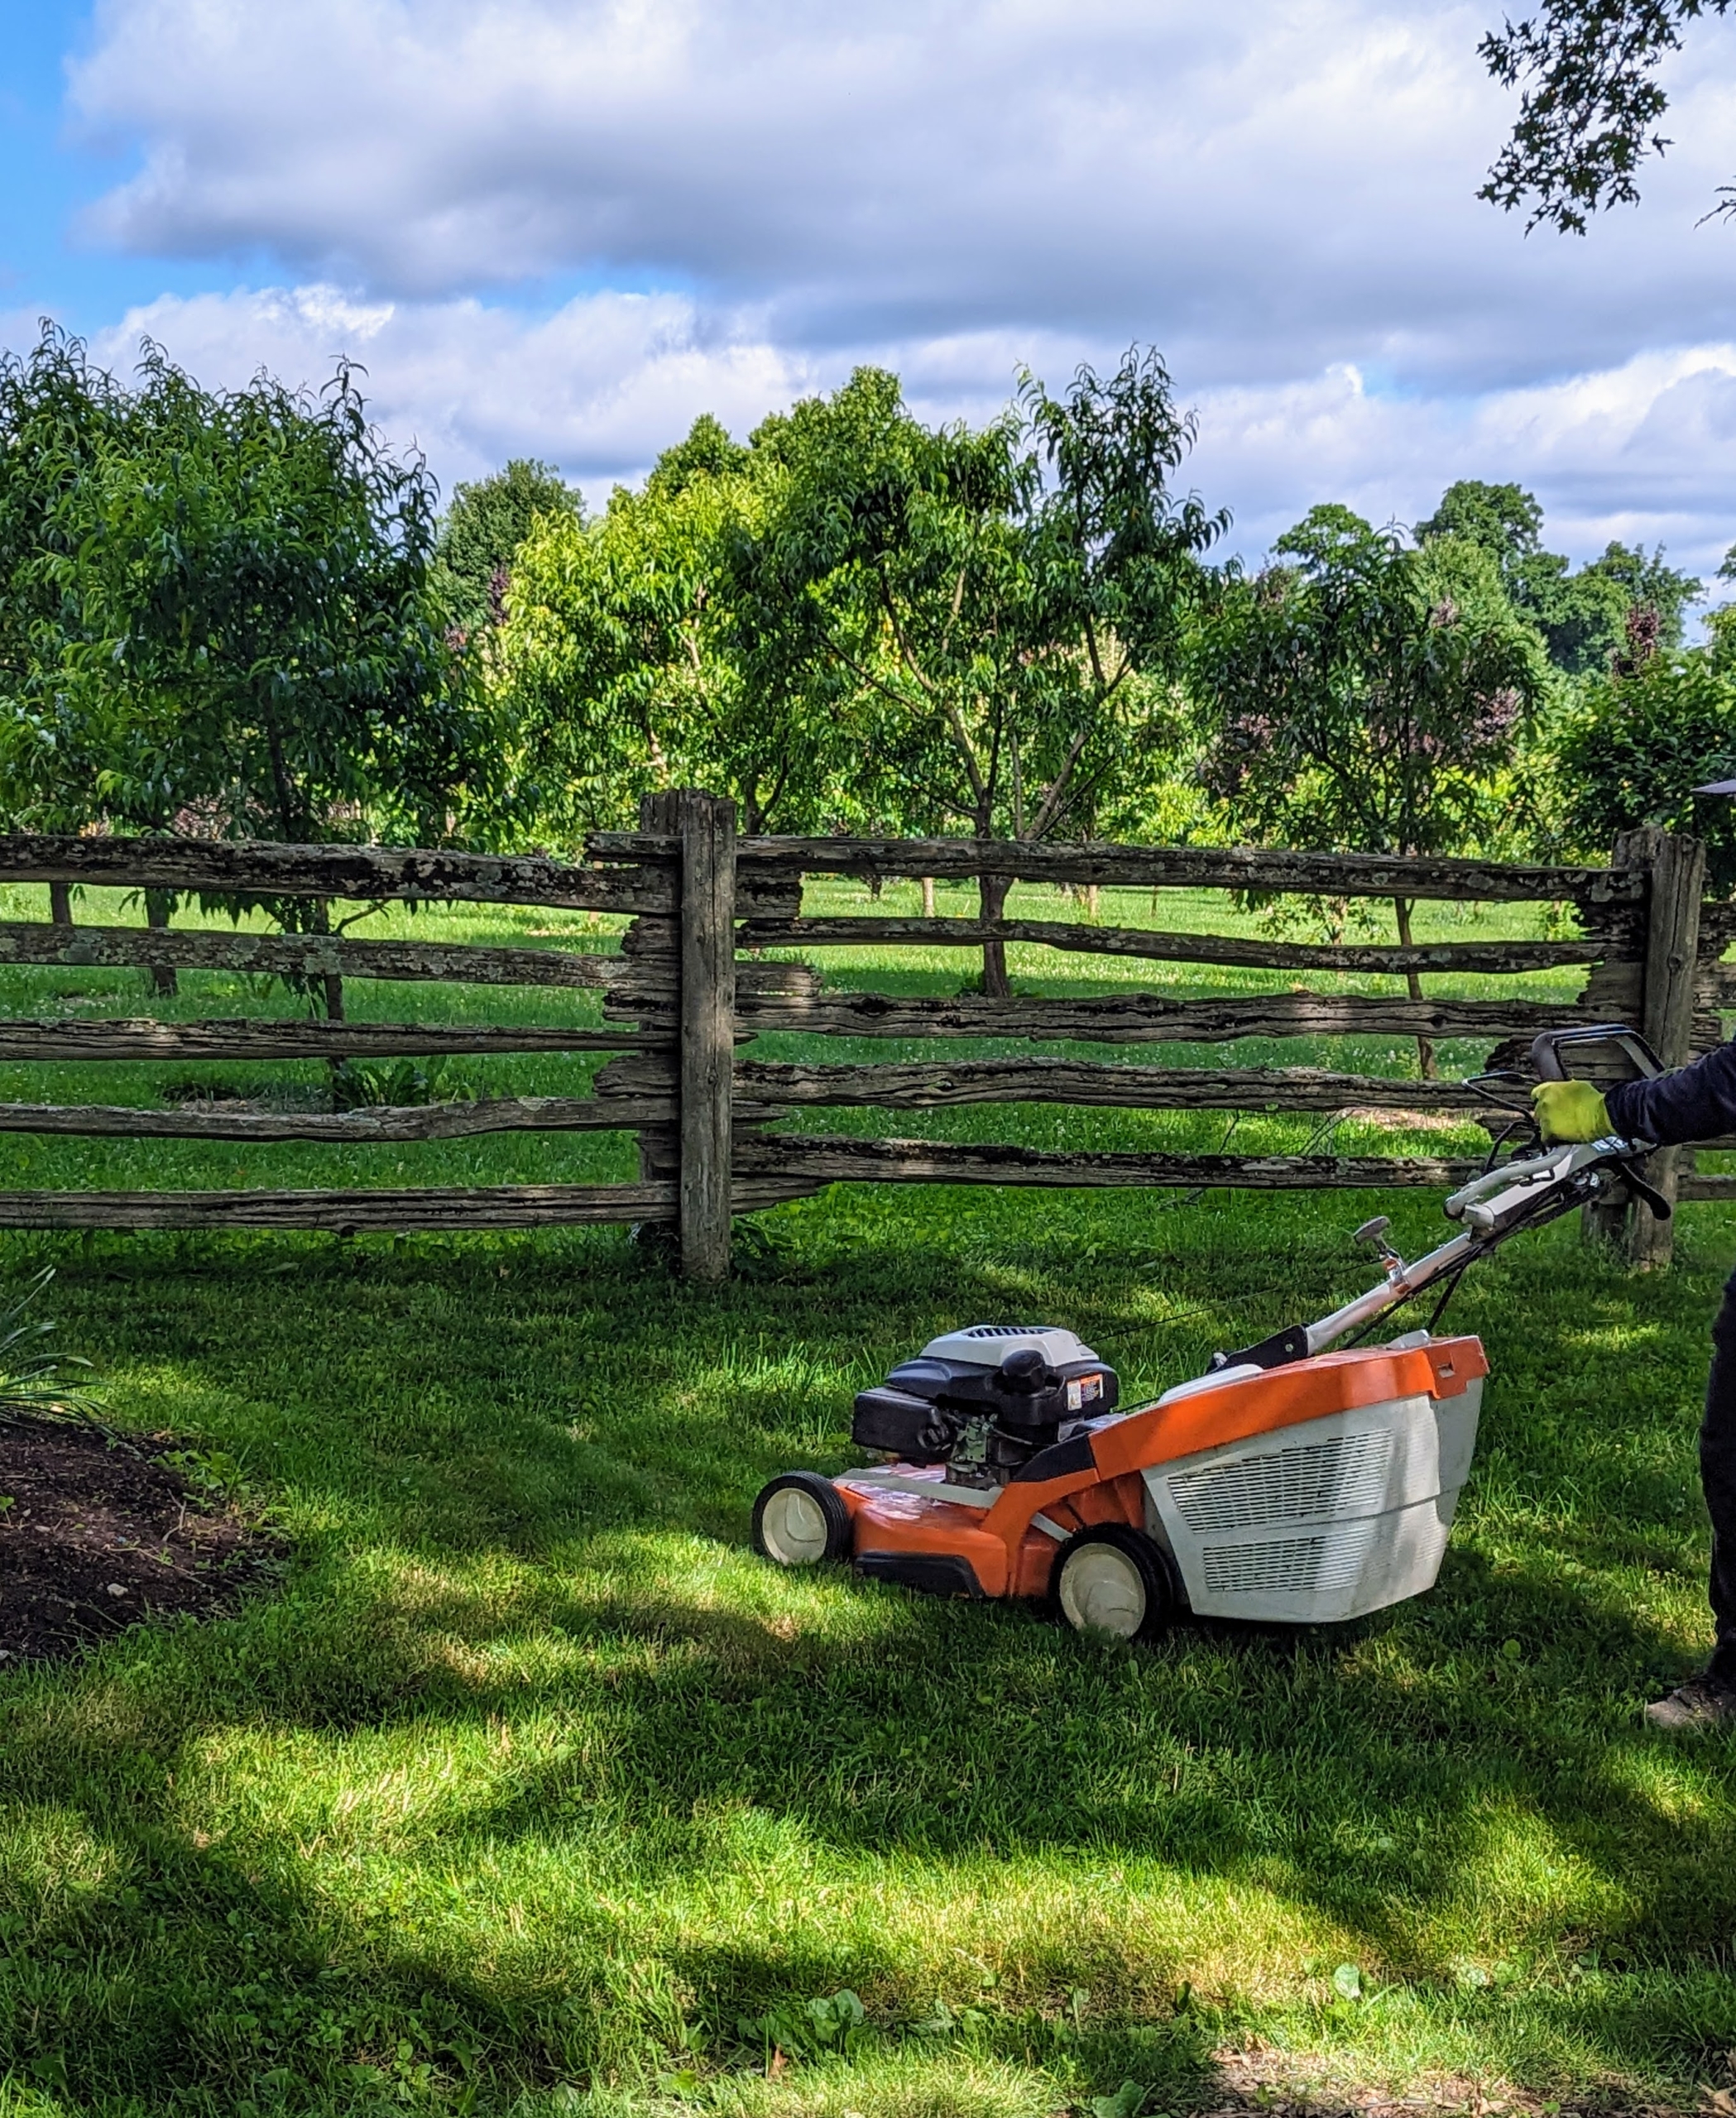
And here’s another view of lawn between the horse pastures with the tall eastern white pines in the distance. I have a fleet of ride-on mowers to mow the large open spaces, but they cannot access the more narrow areas…
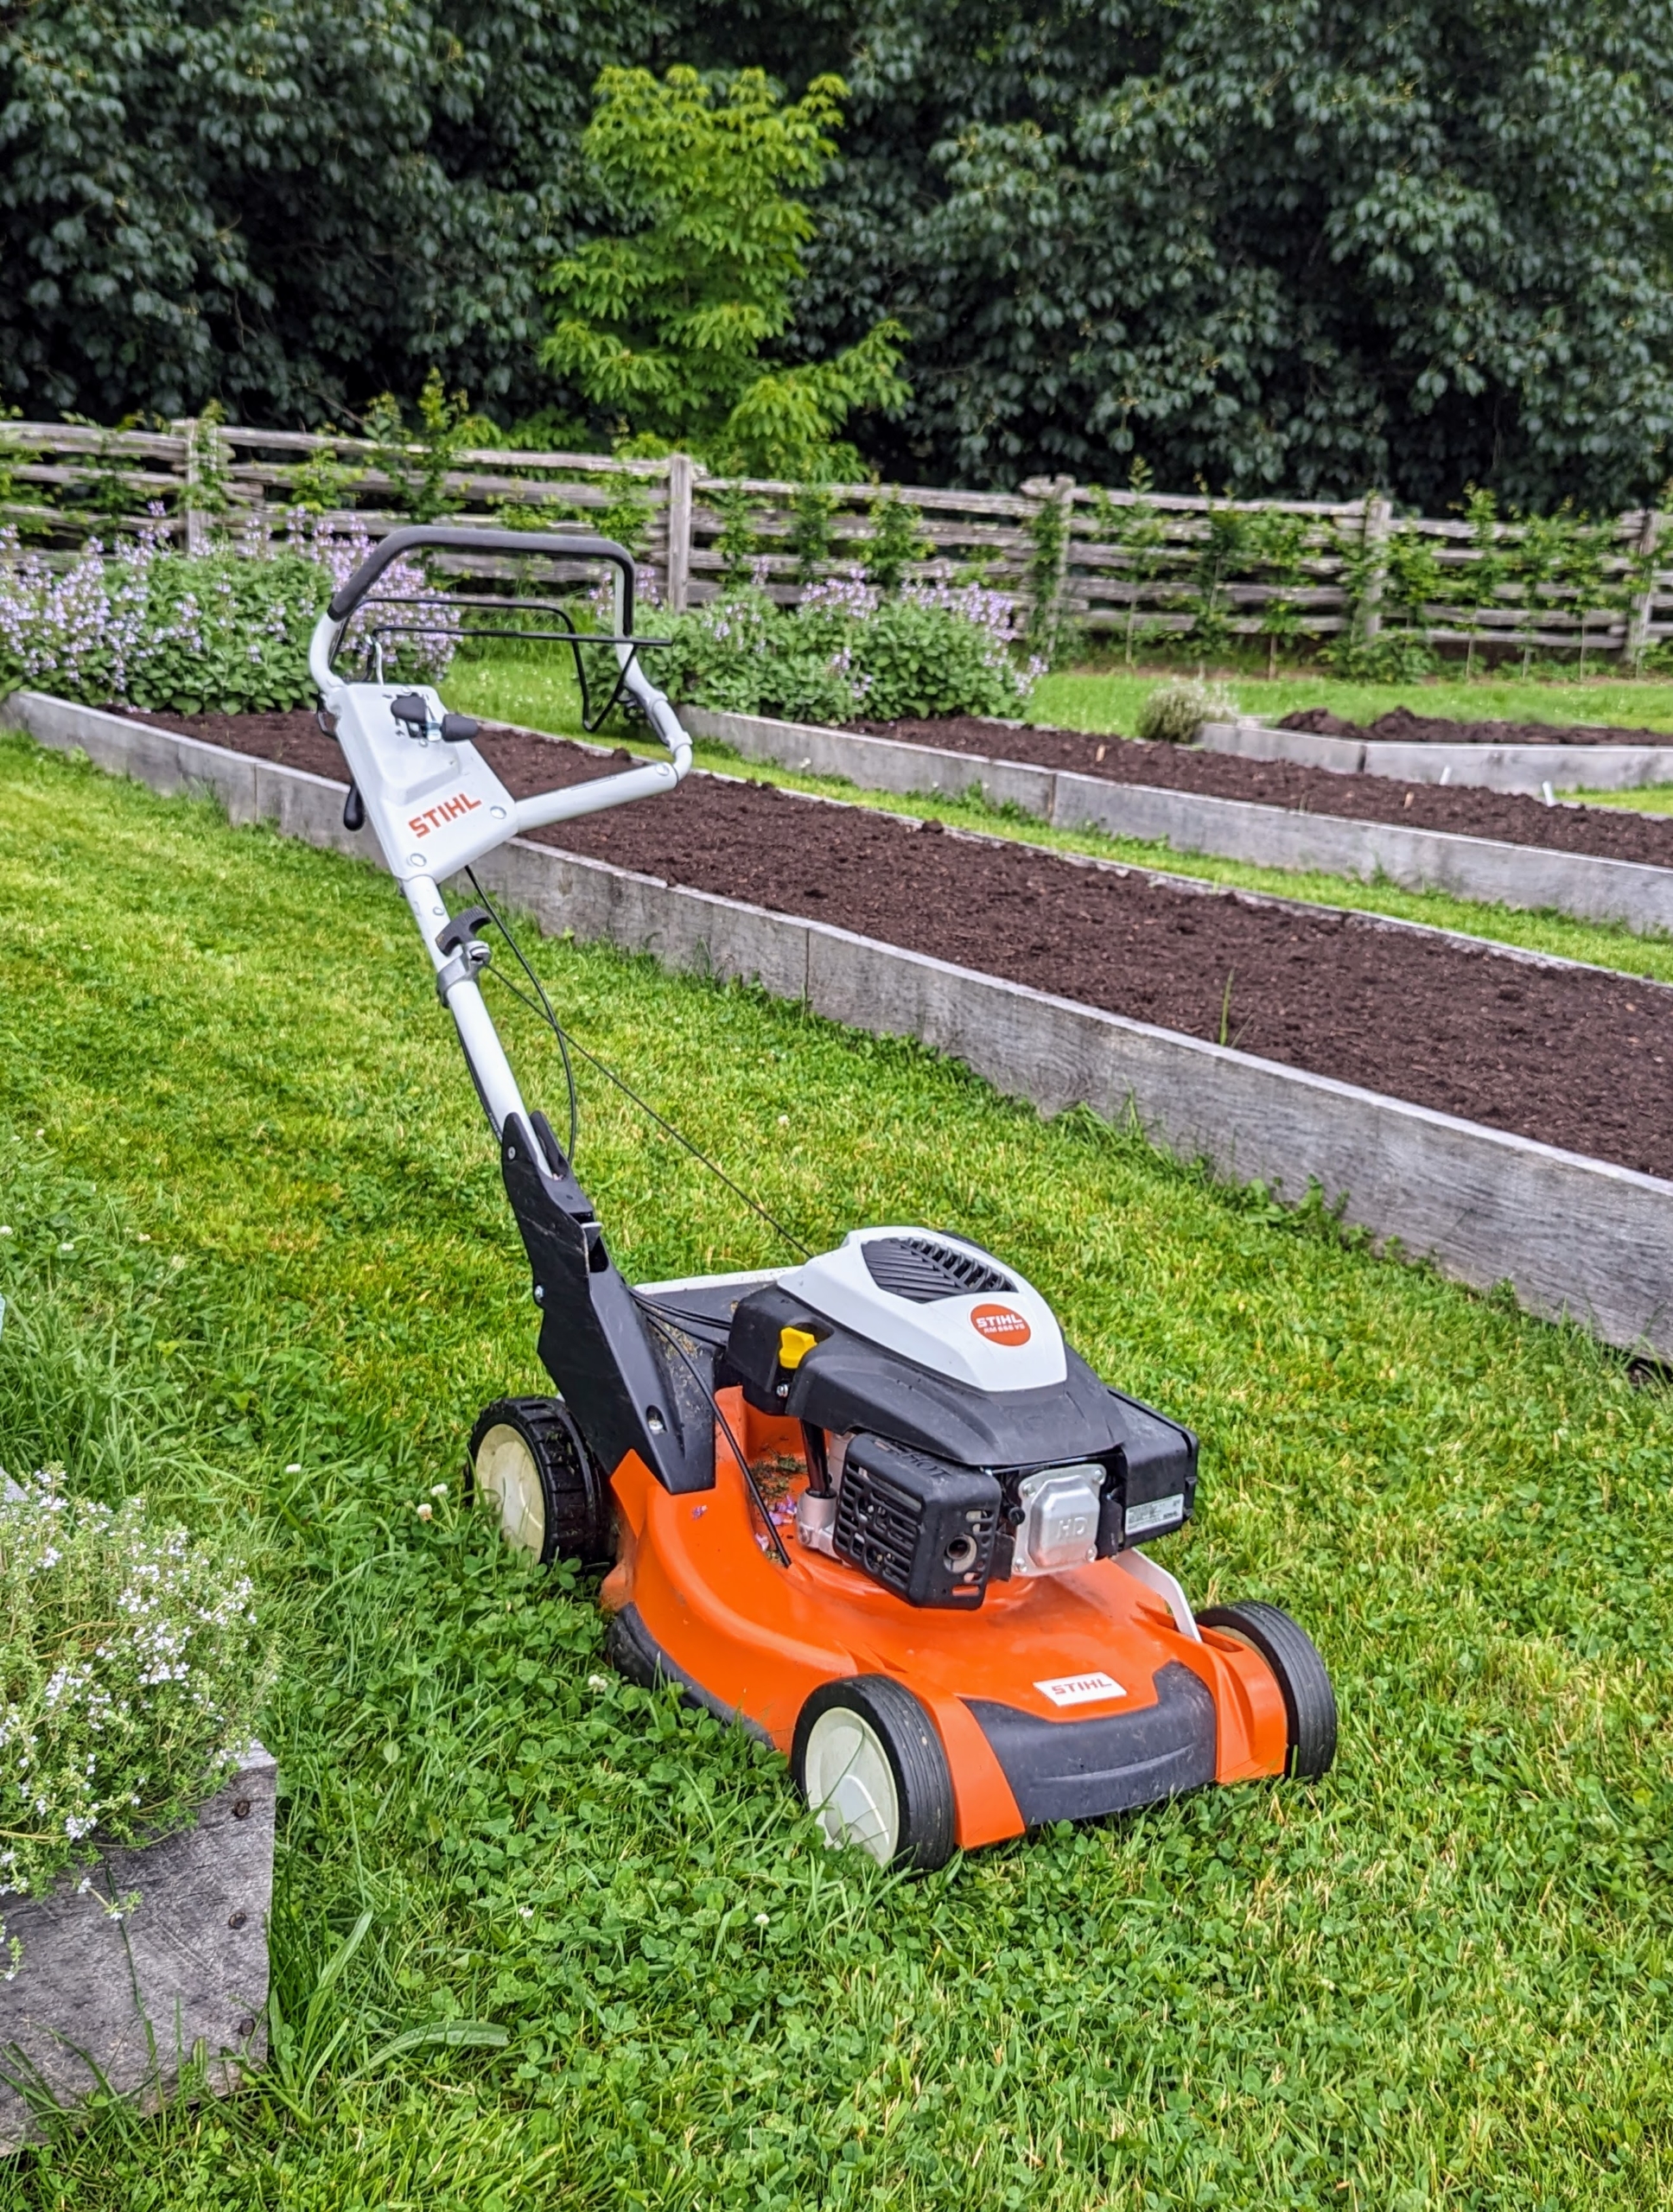
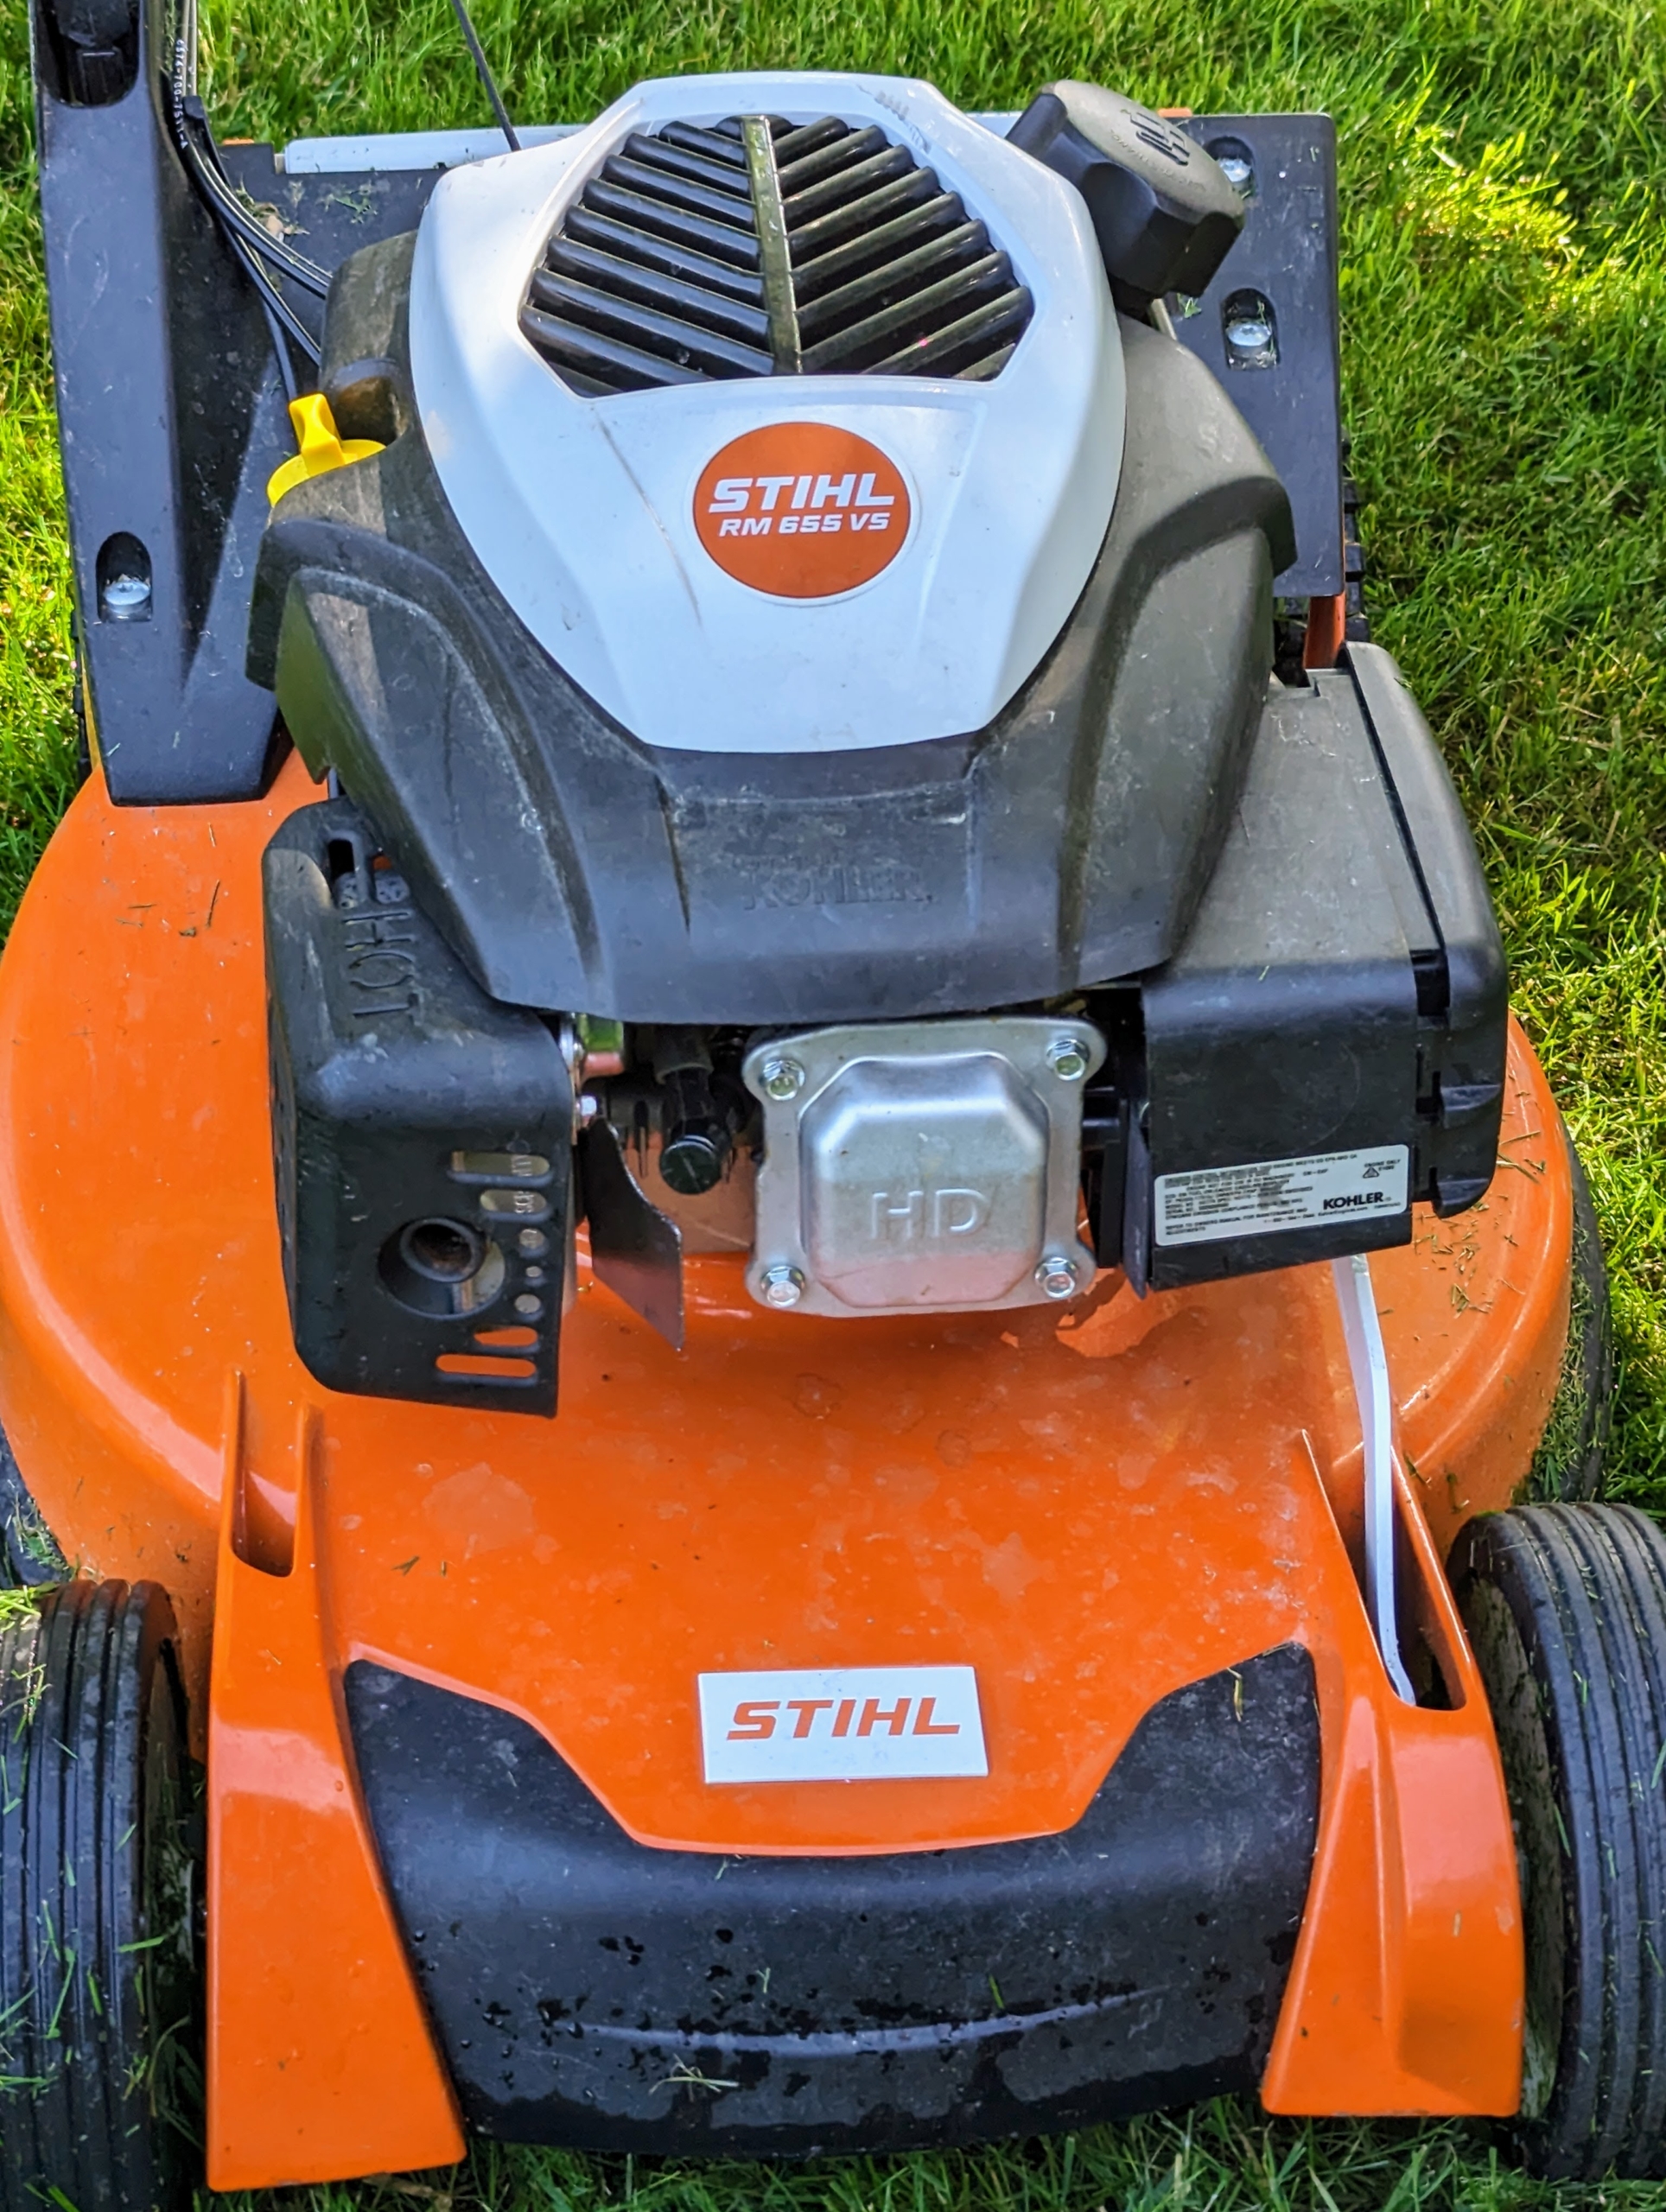
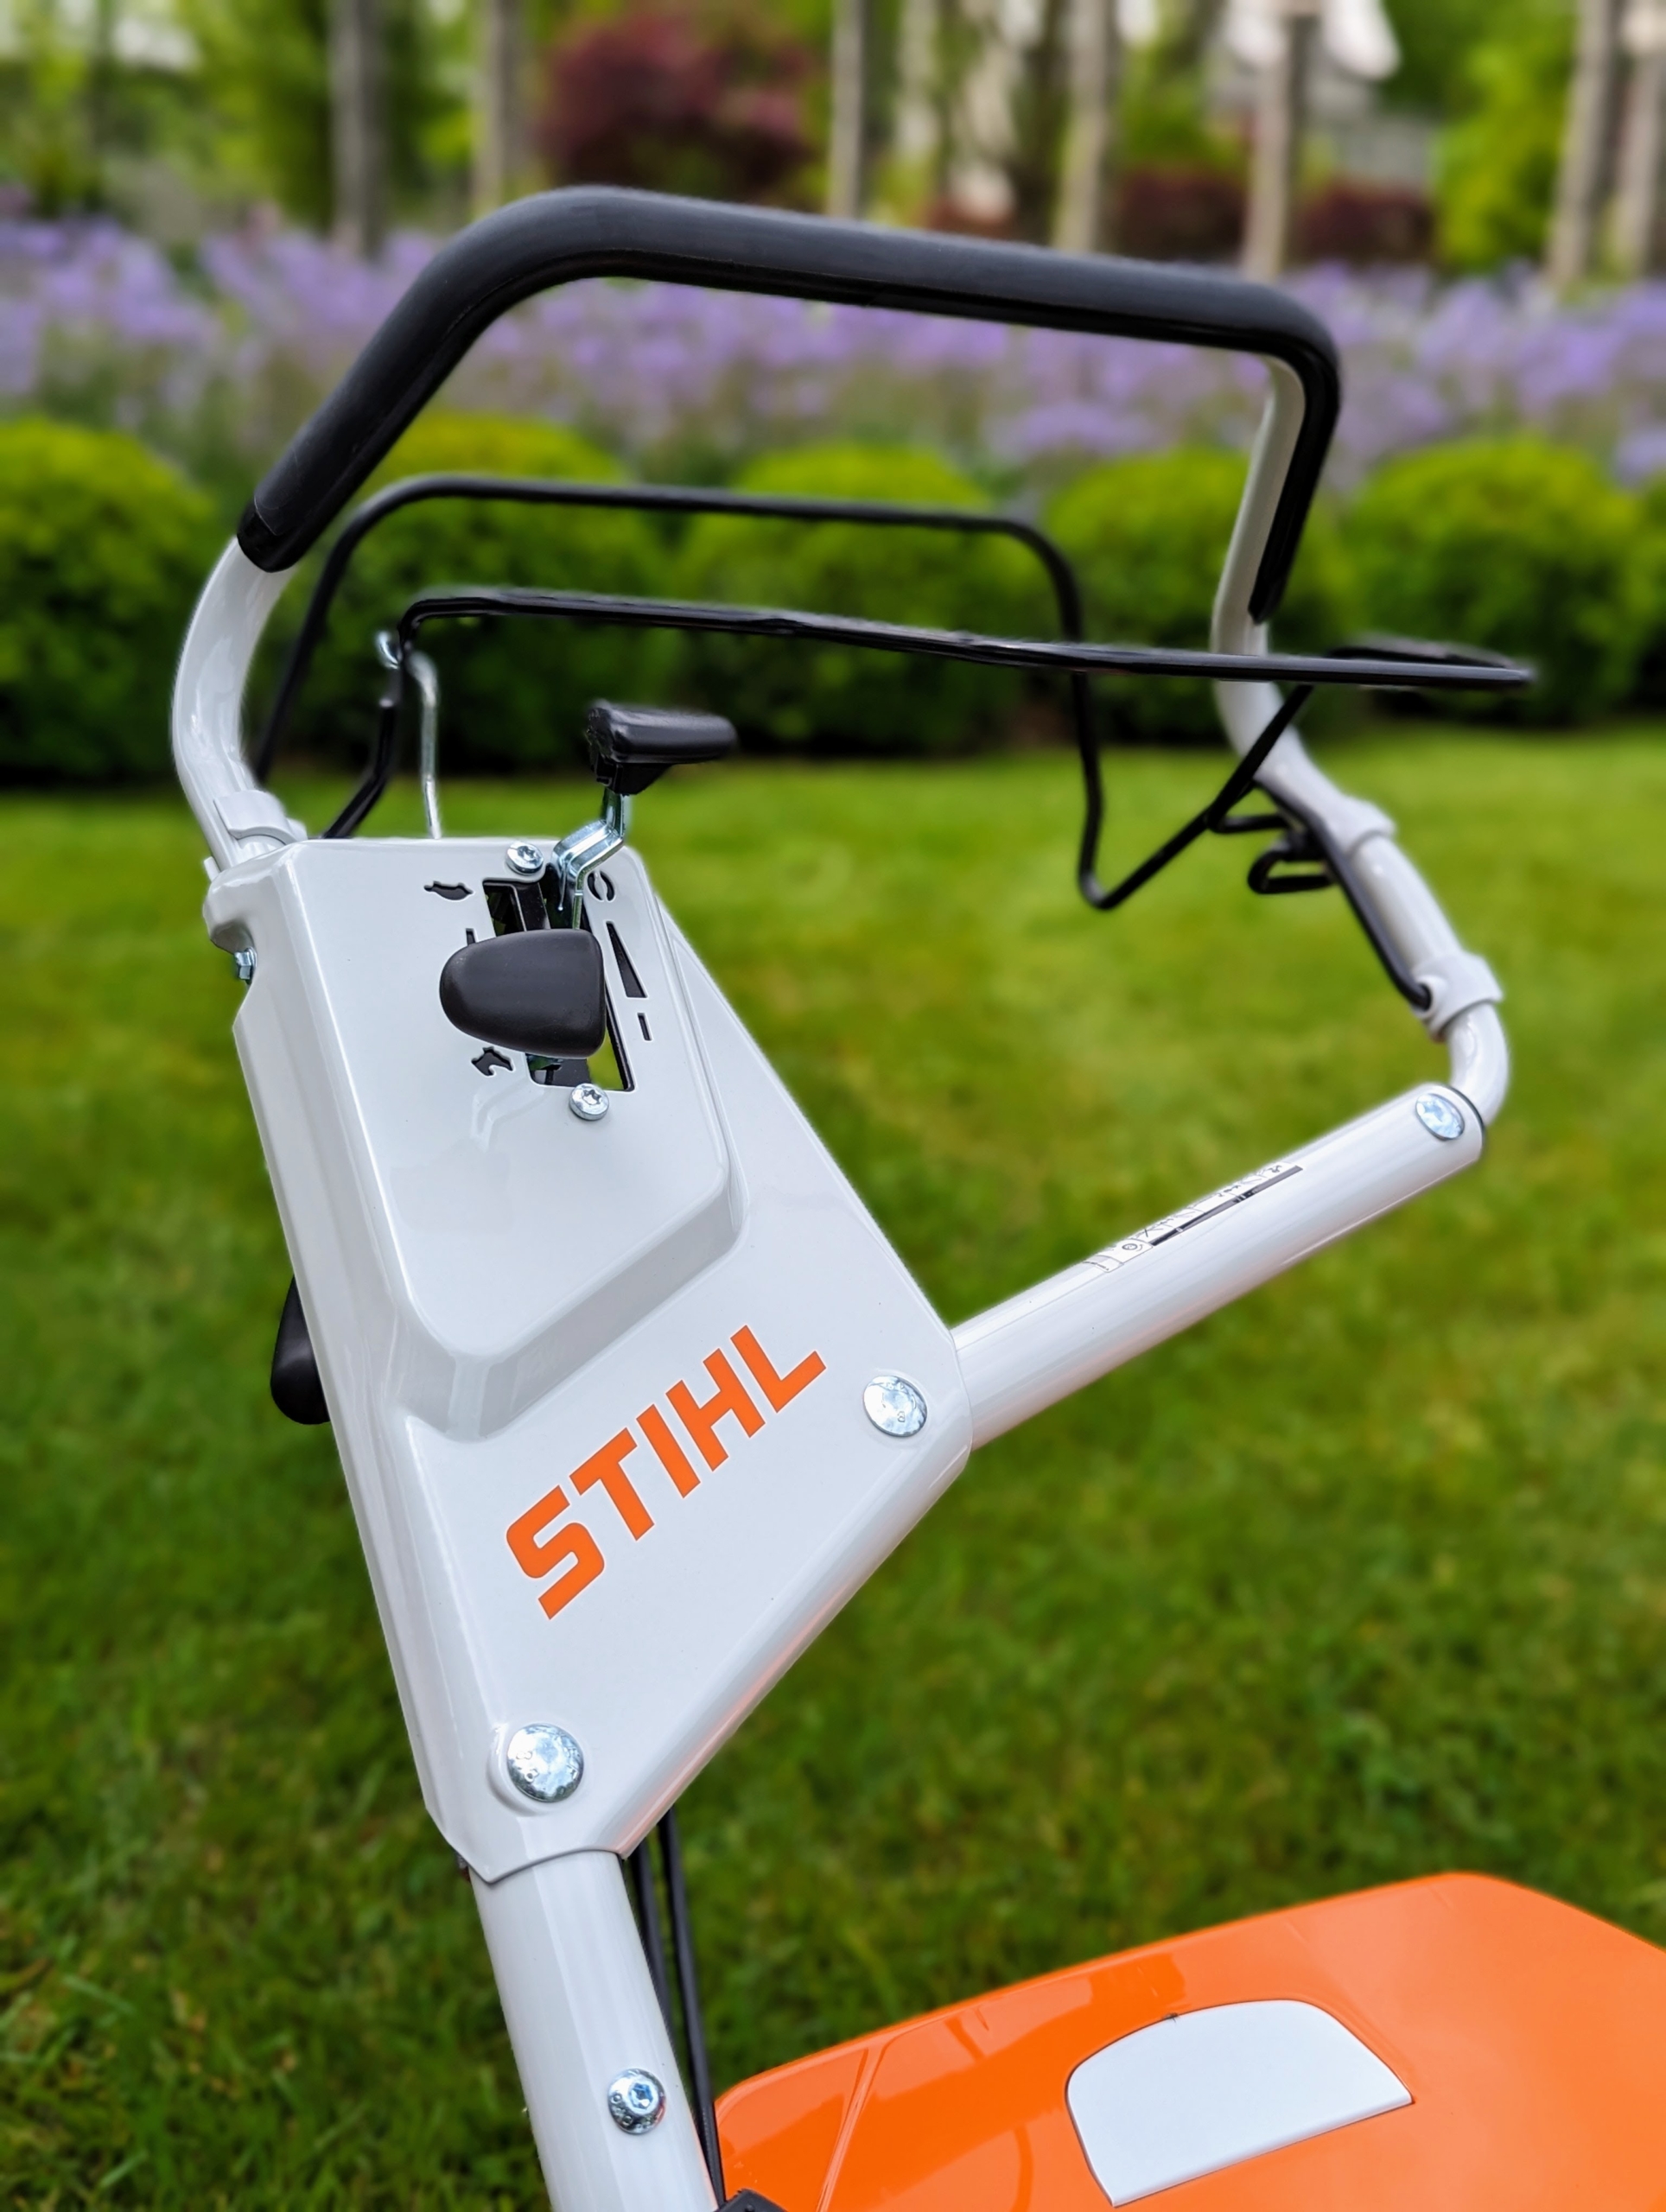
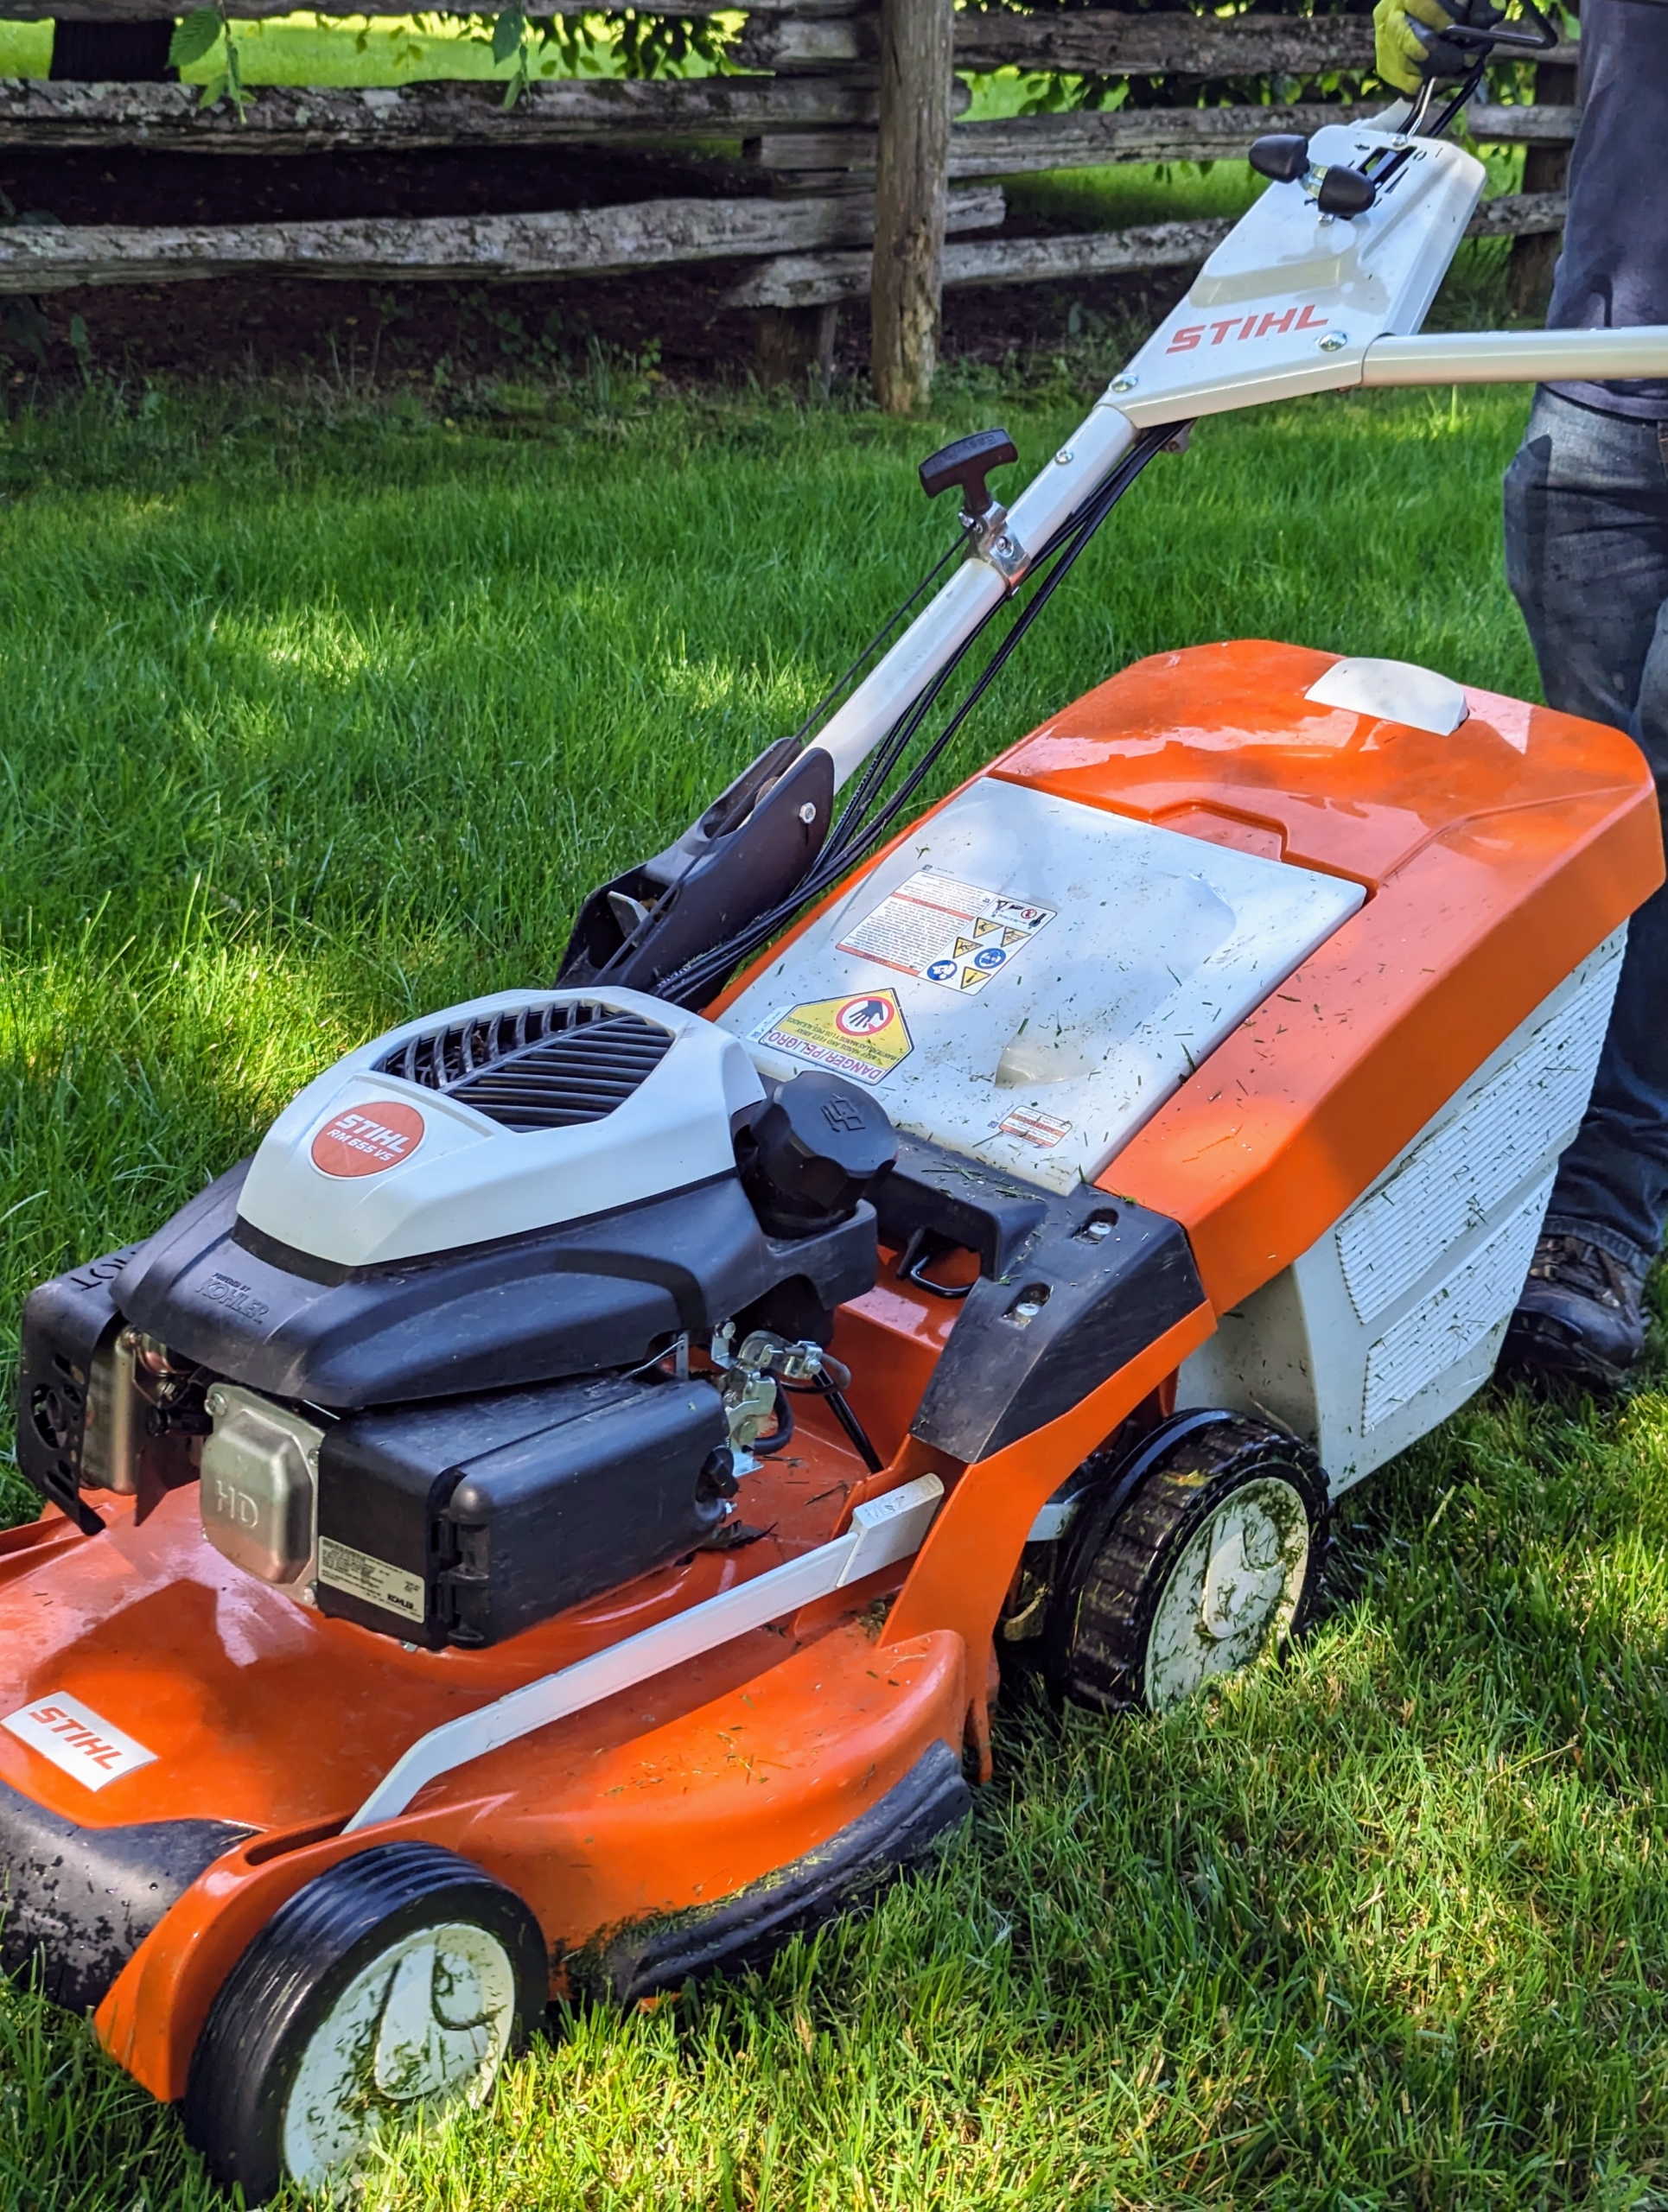
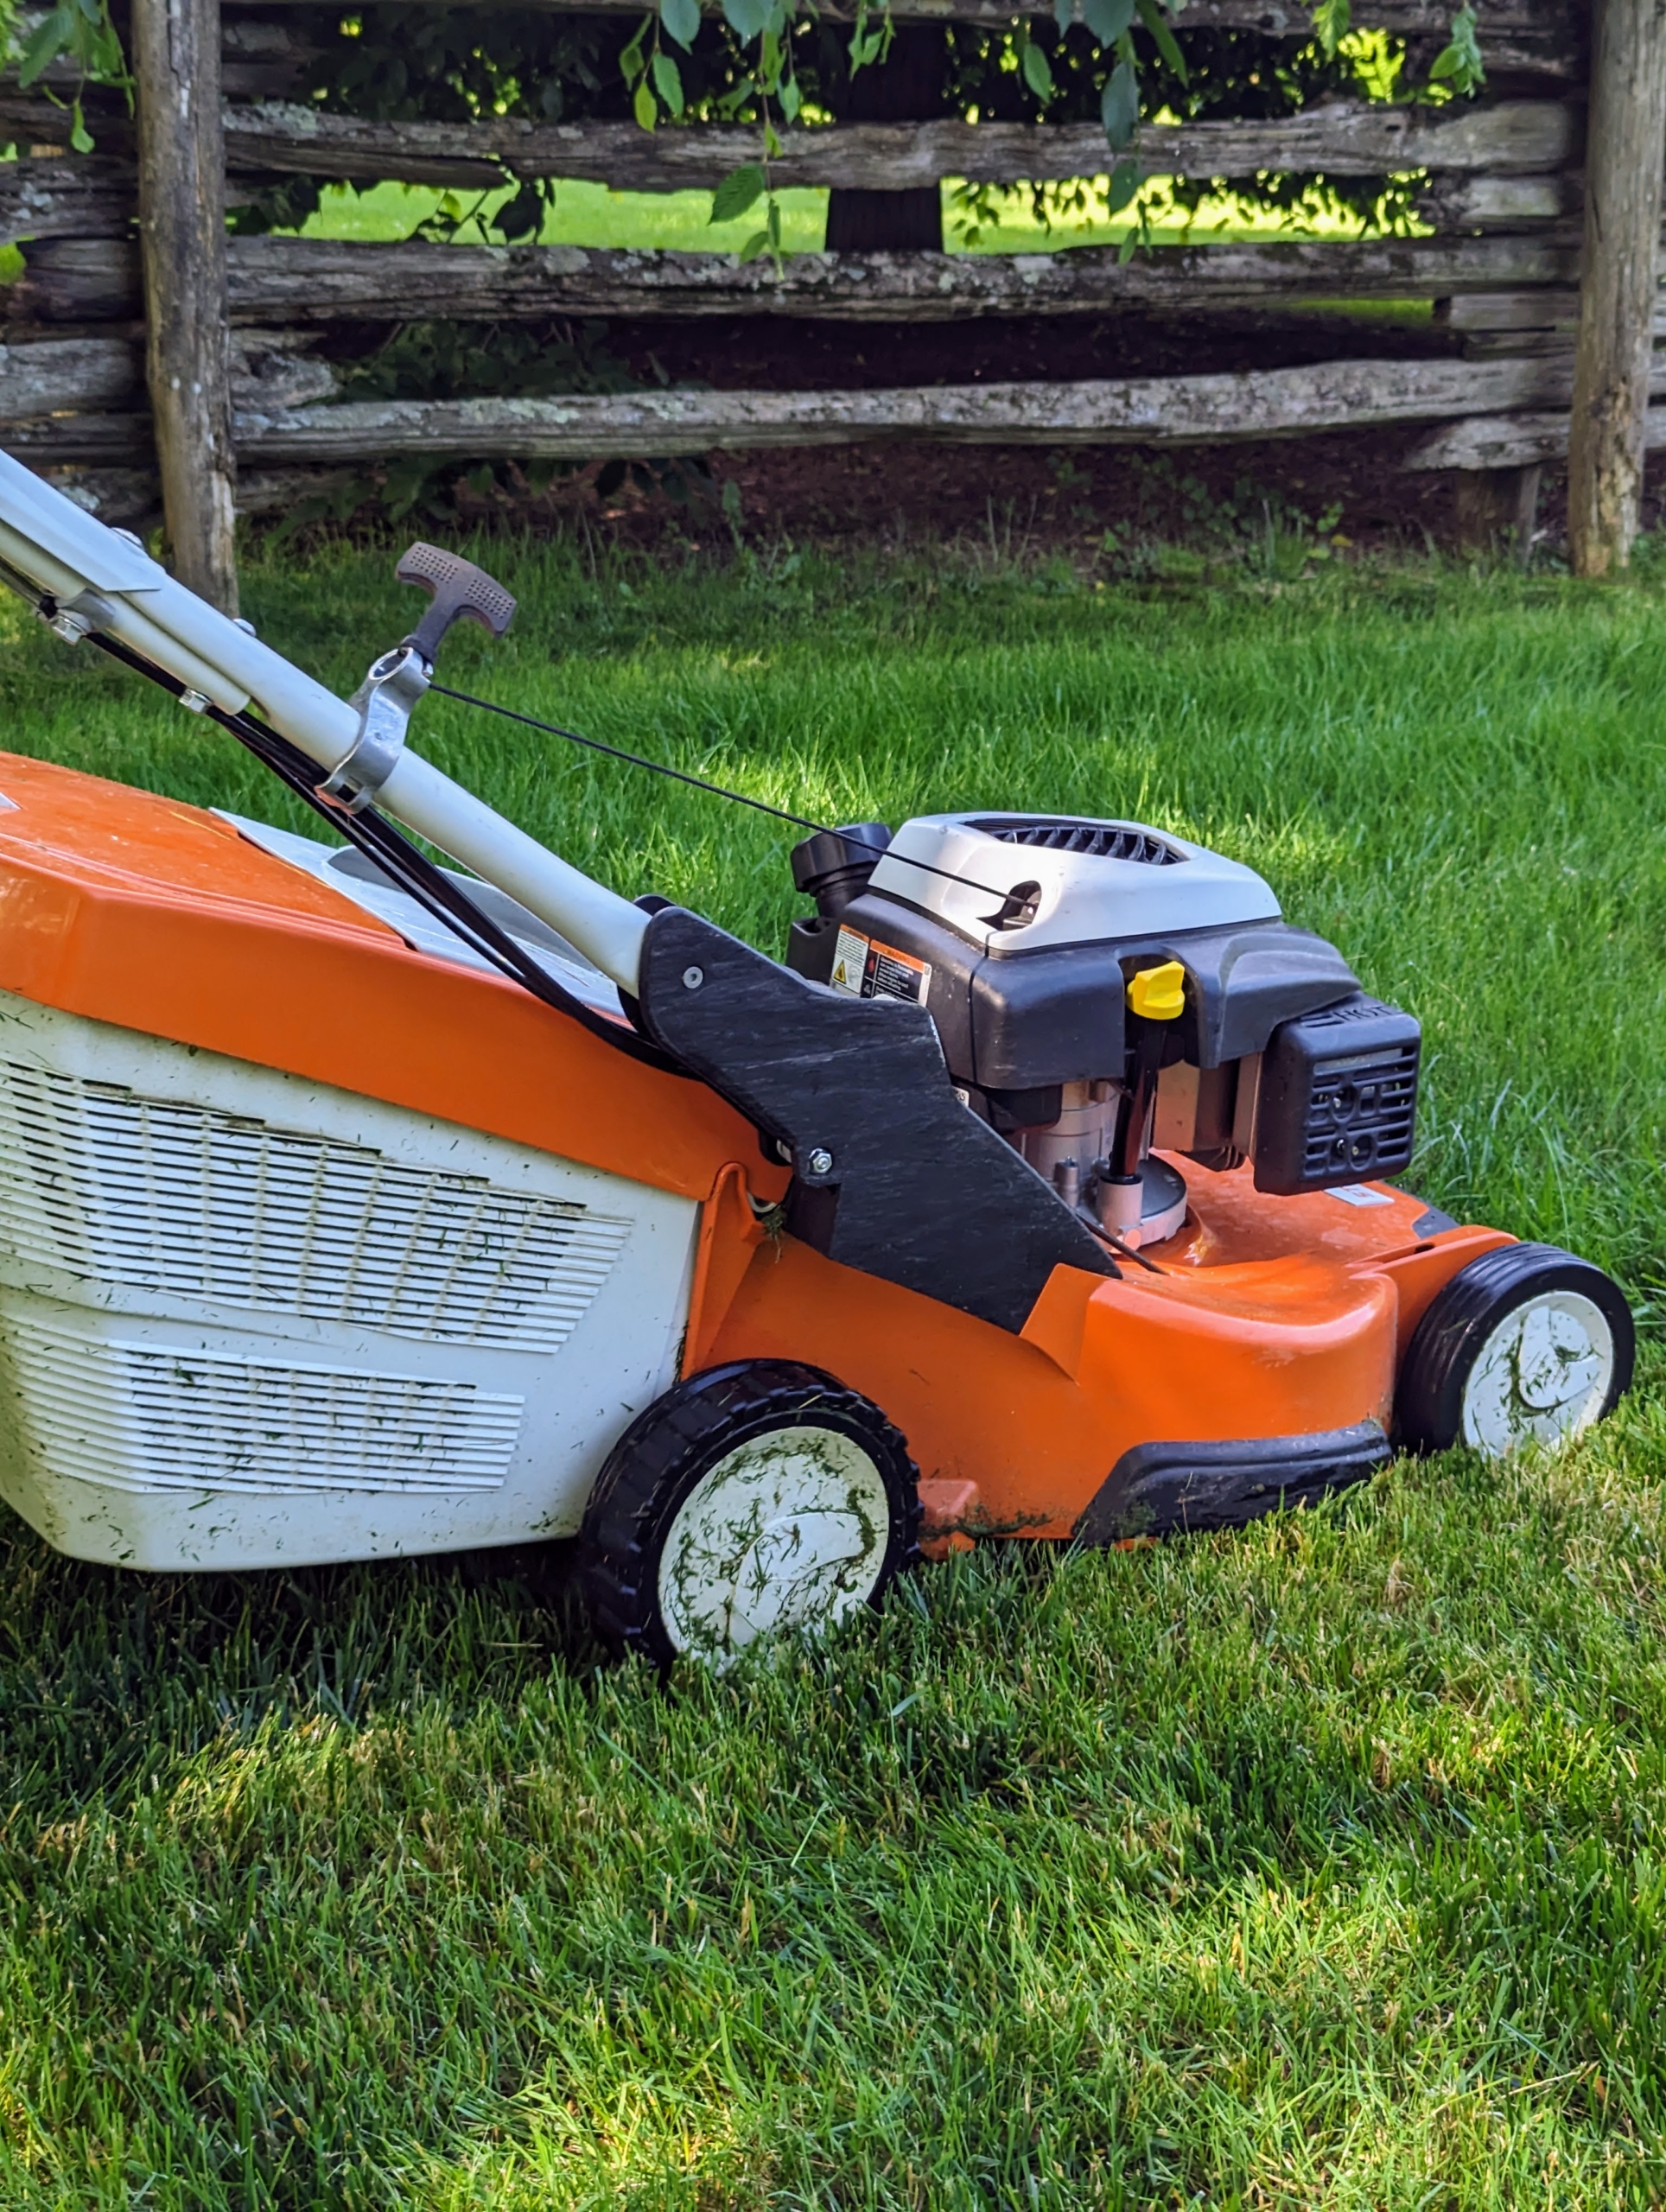
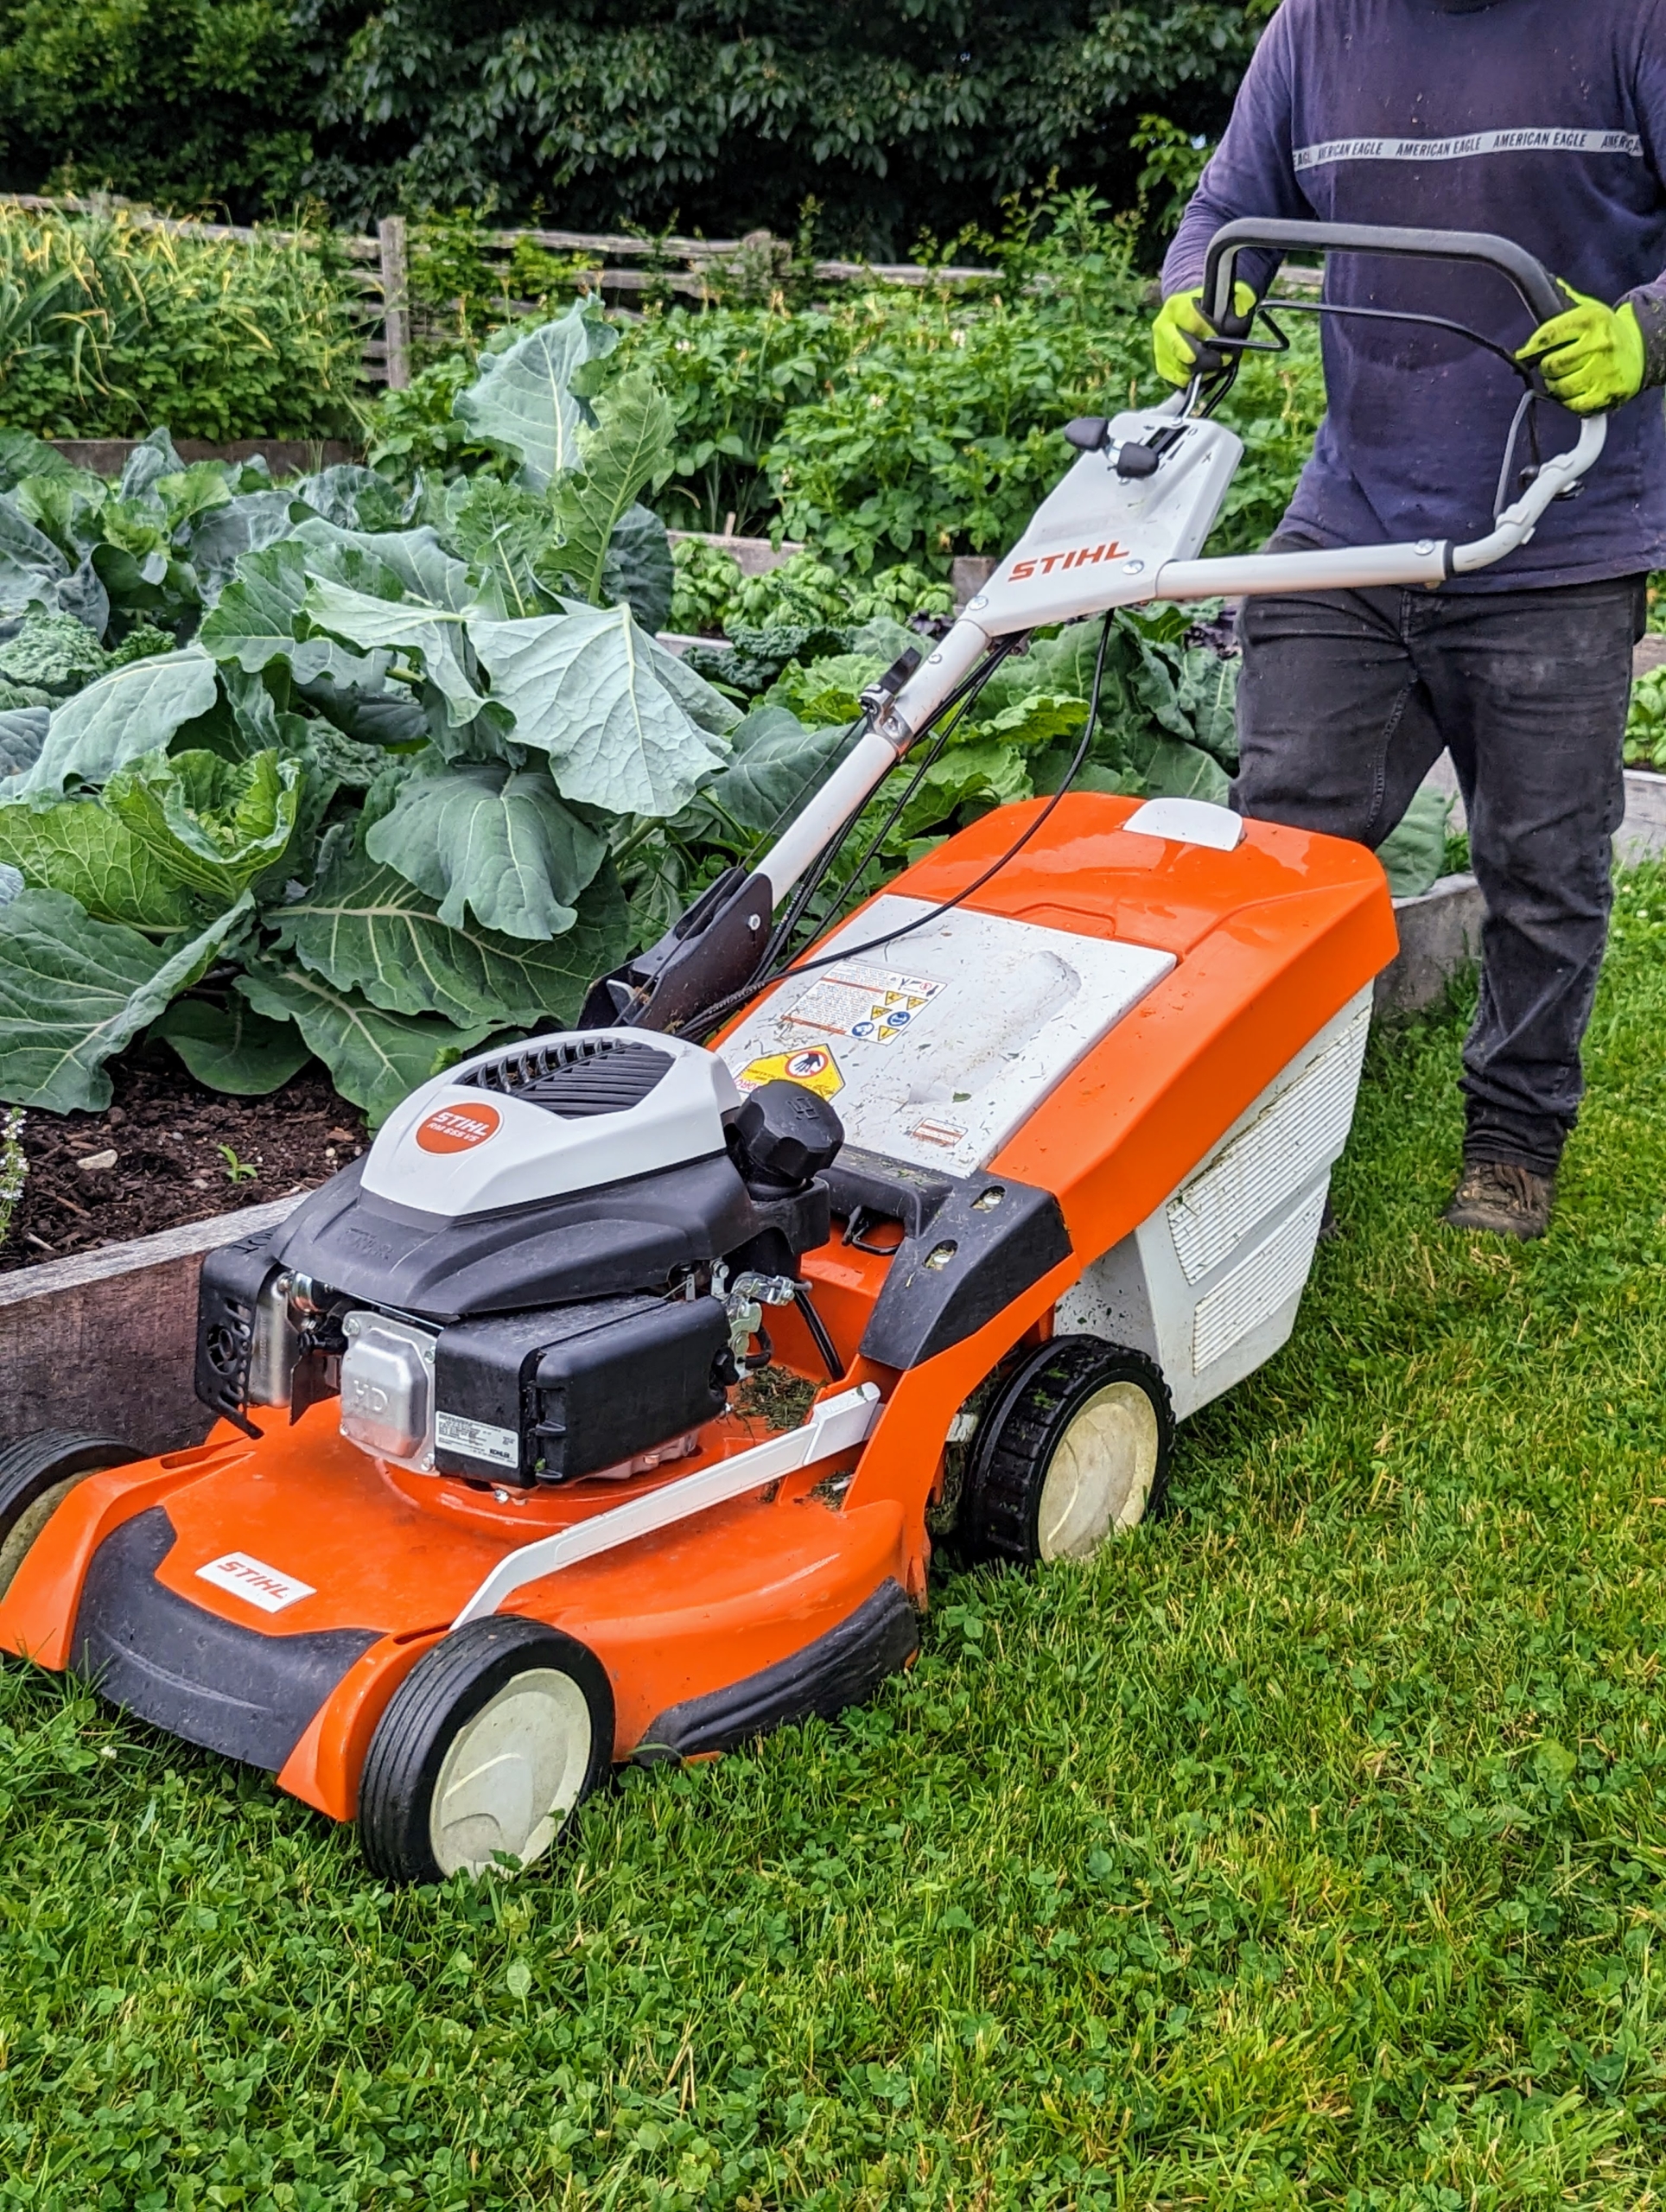
For those places, such as between my raised garden beds, we use this STIHL RM 655 VS push mower. A push mower is a walk behind unit that an operator pushes forward or backward to mow the lawn.
This 21-inch gas powered mower provides really sharp, accurate cutting and easy bagging.
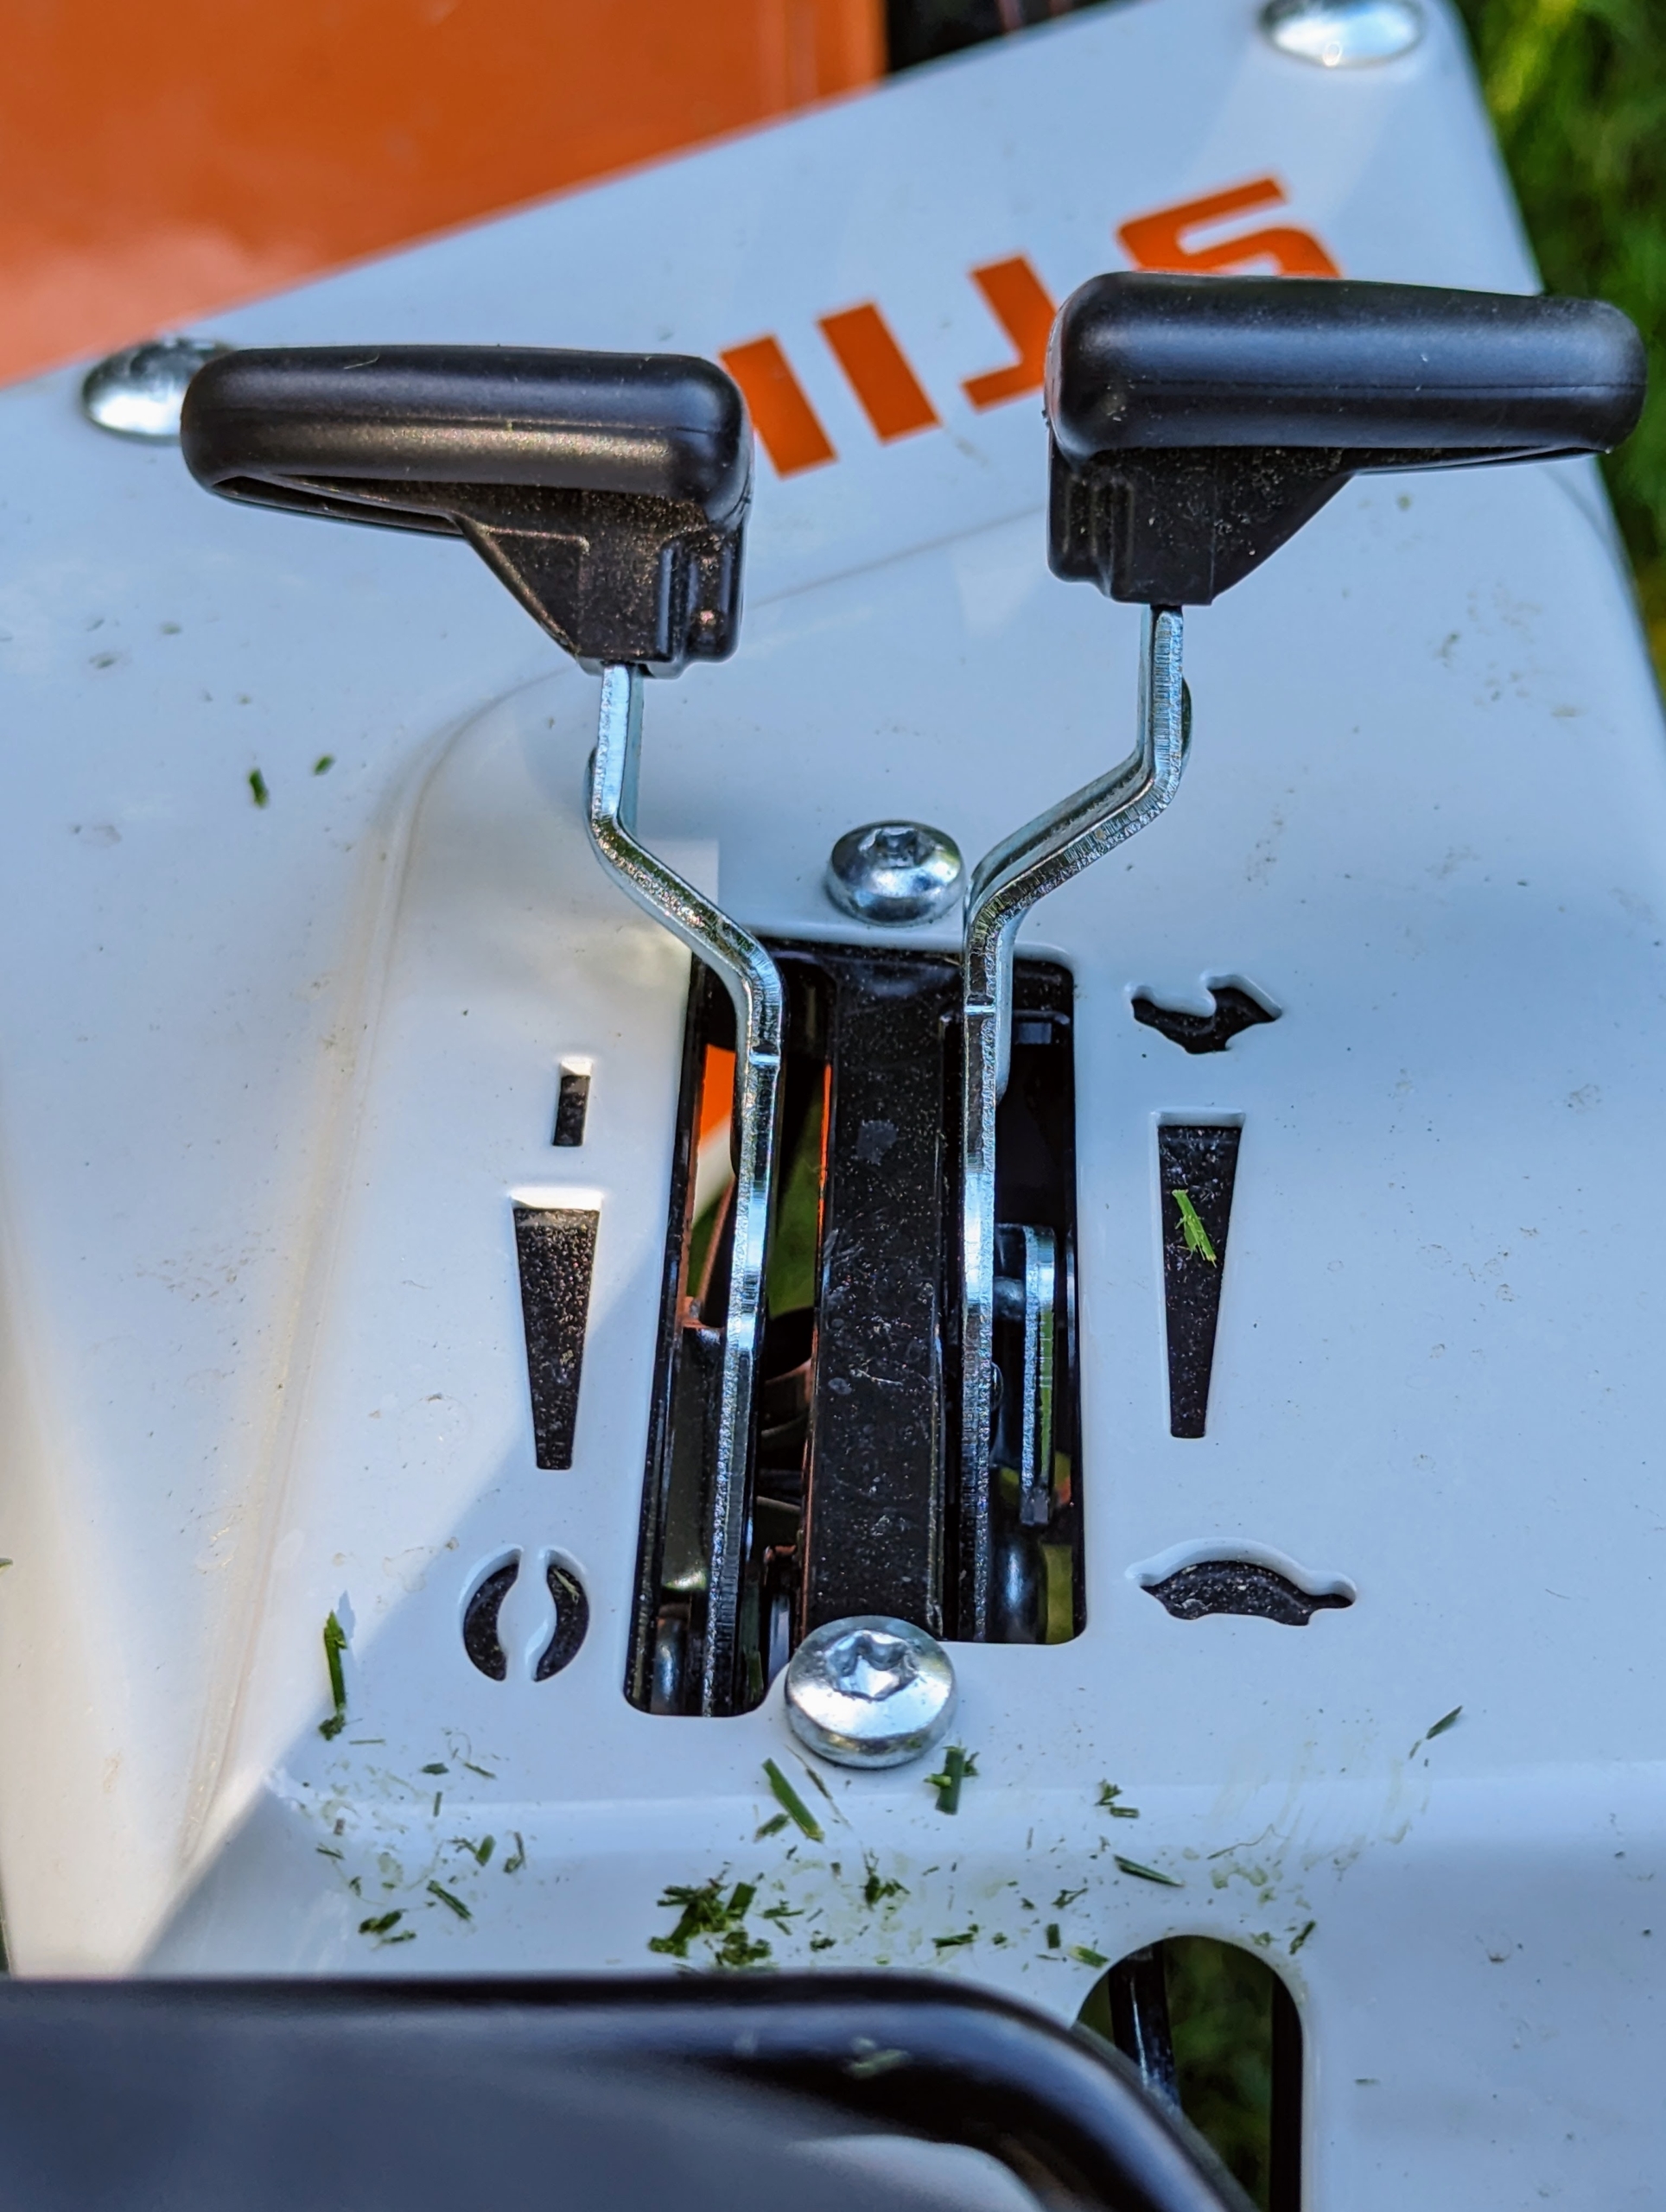
The controls are easy to access and use…
…And there is a mono-comfort handlebar, which is sturdy and secure.
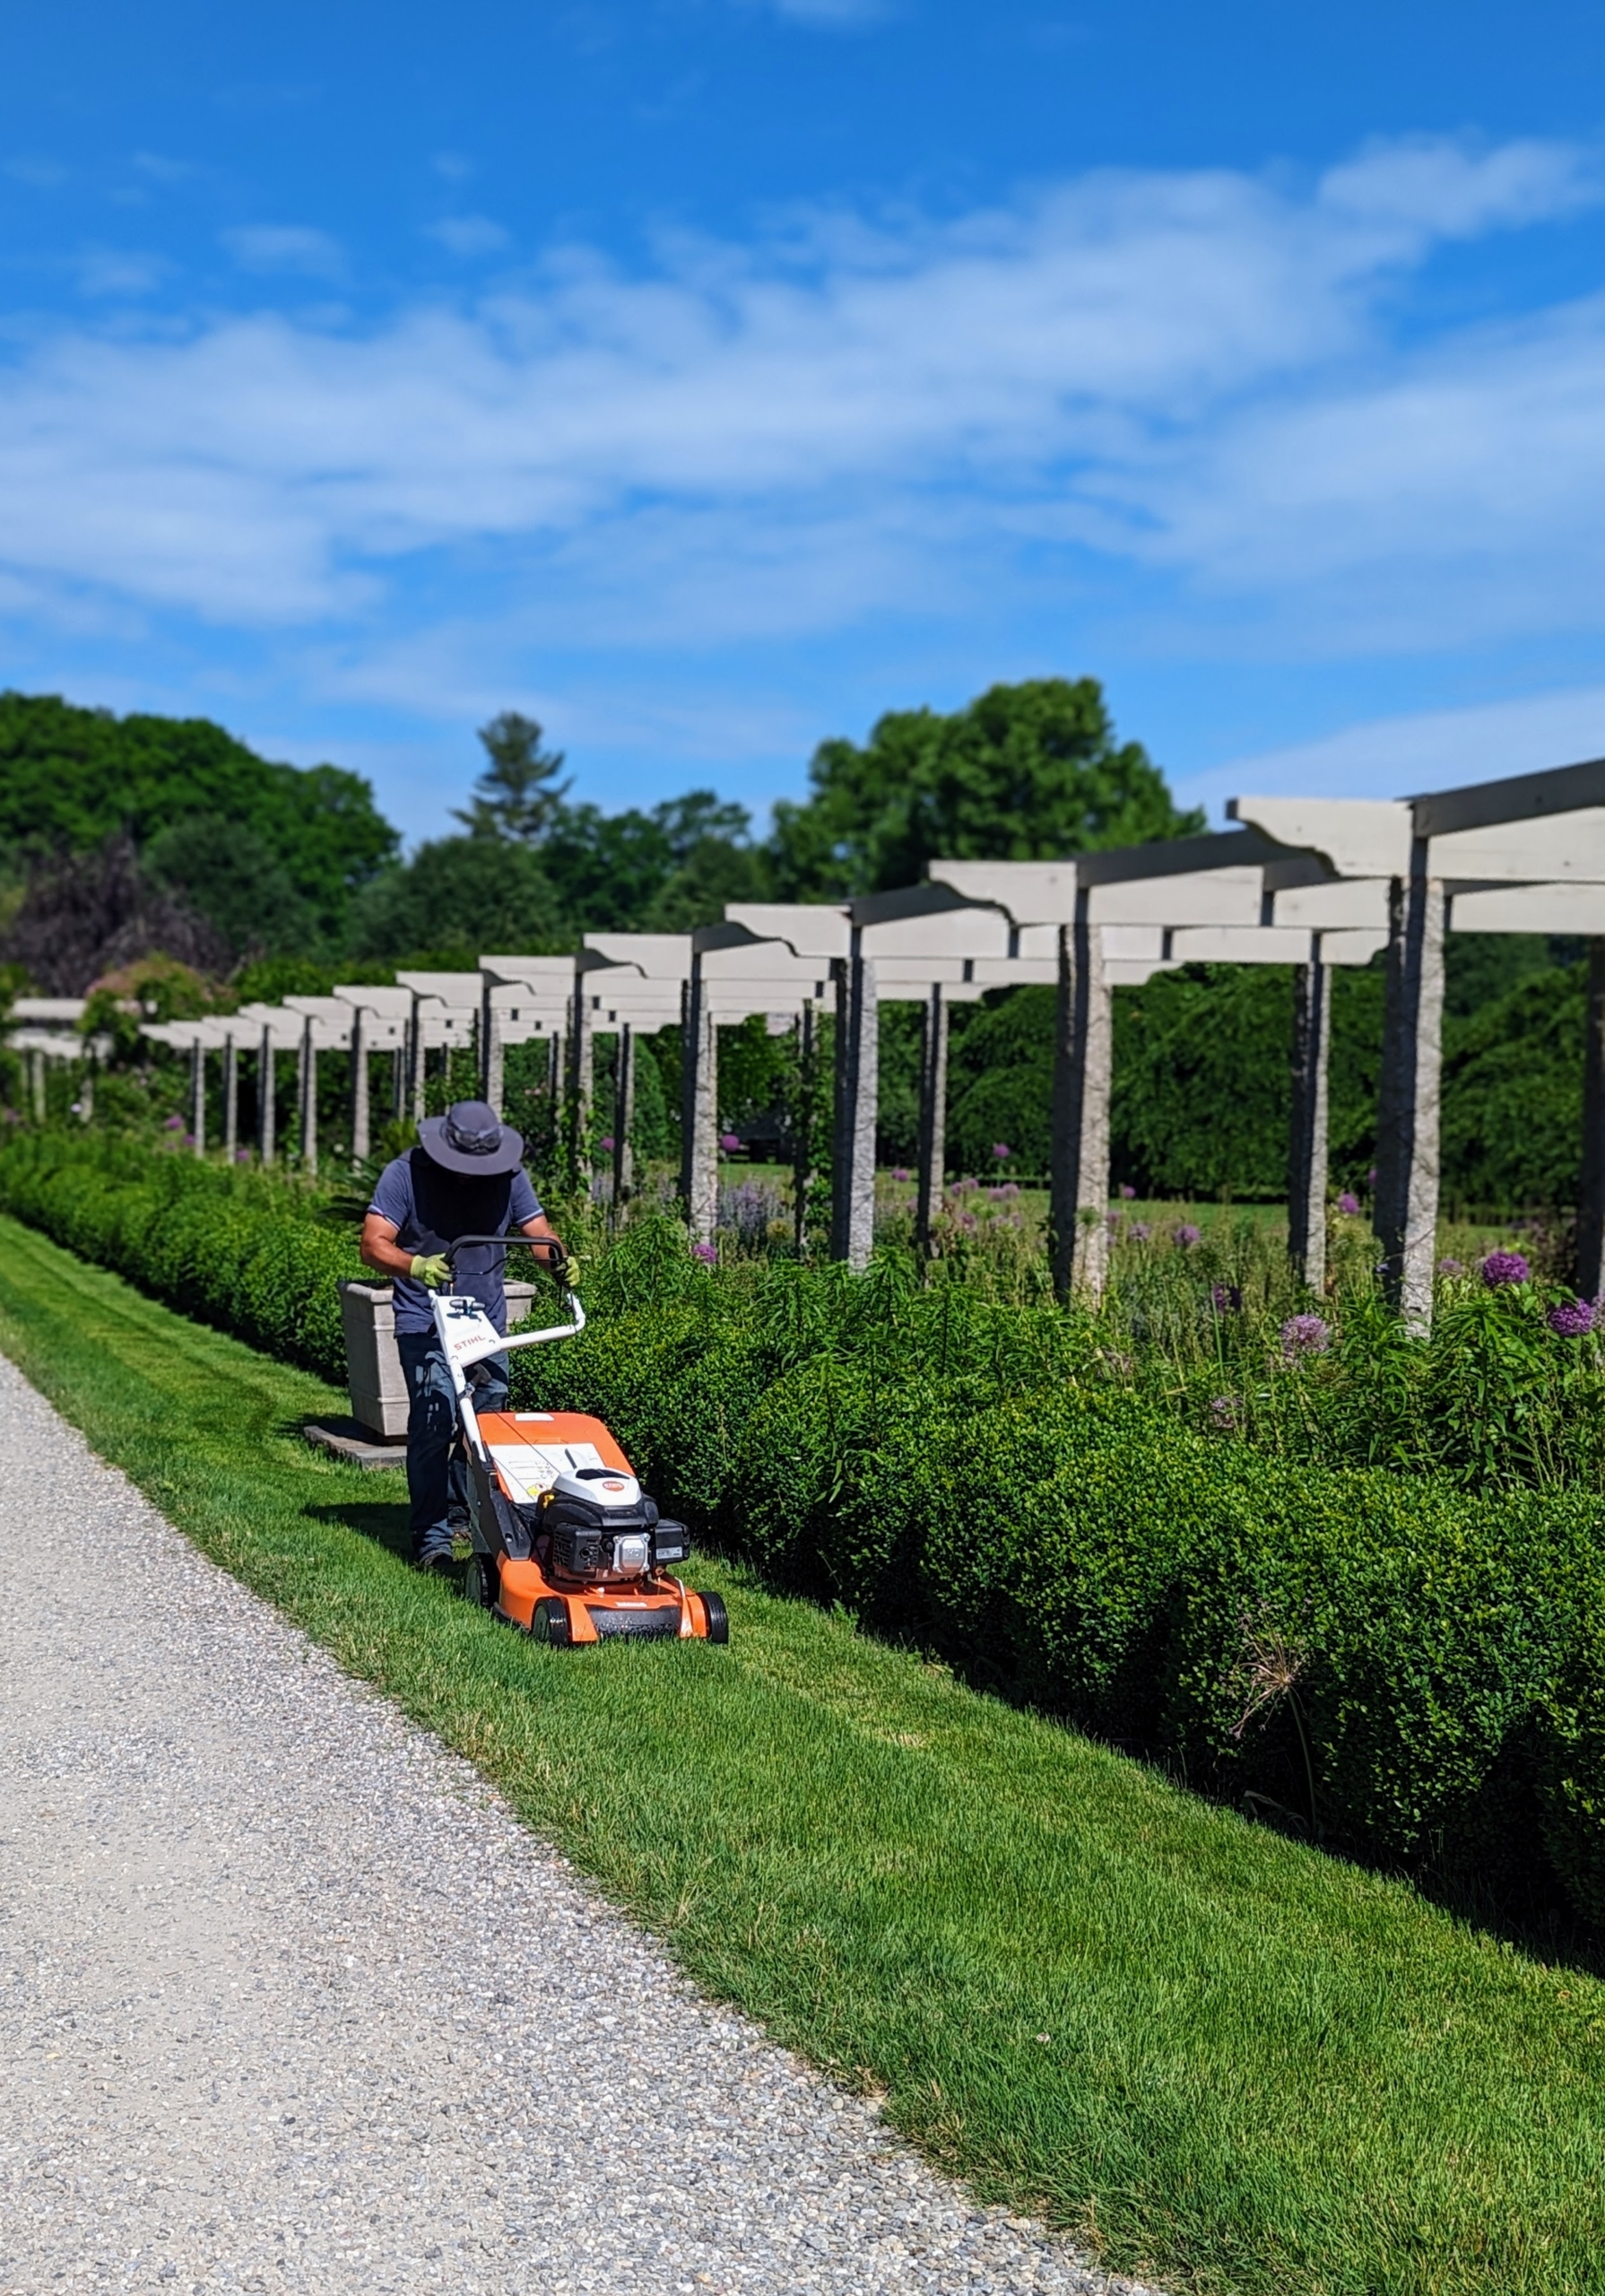
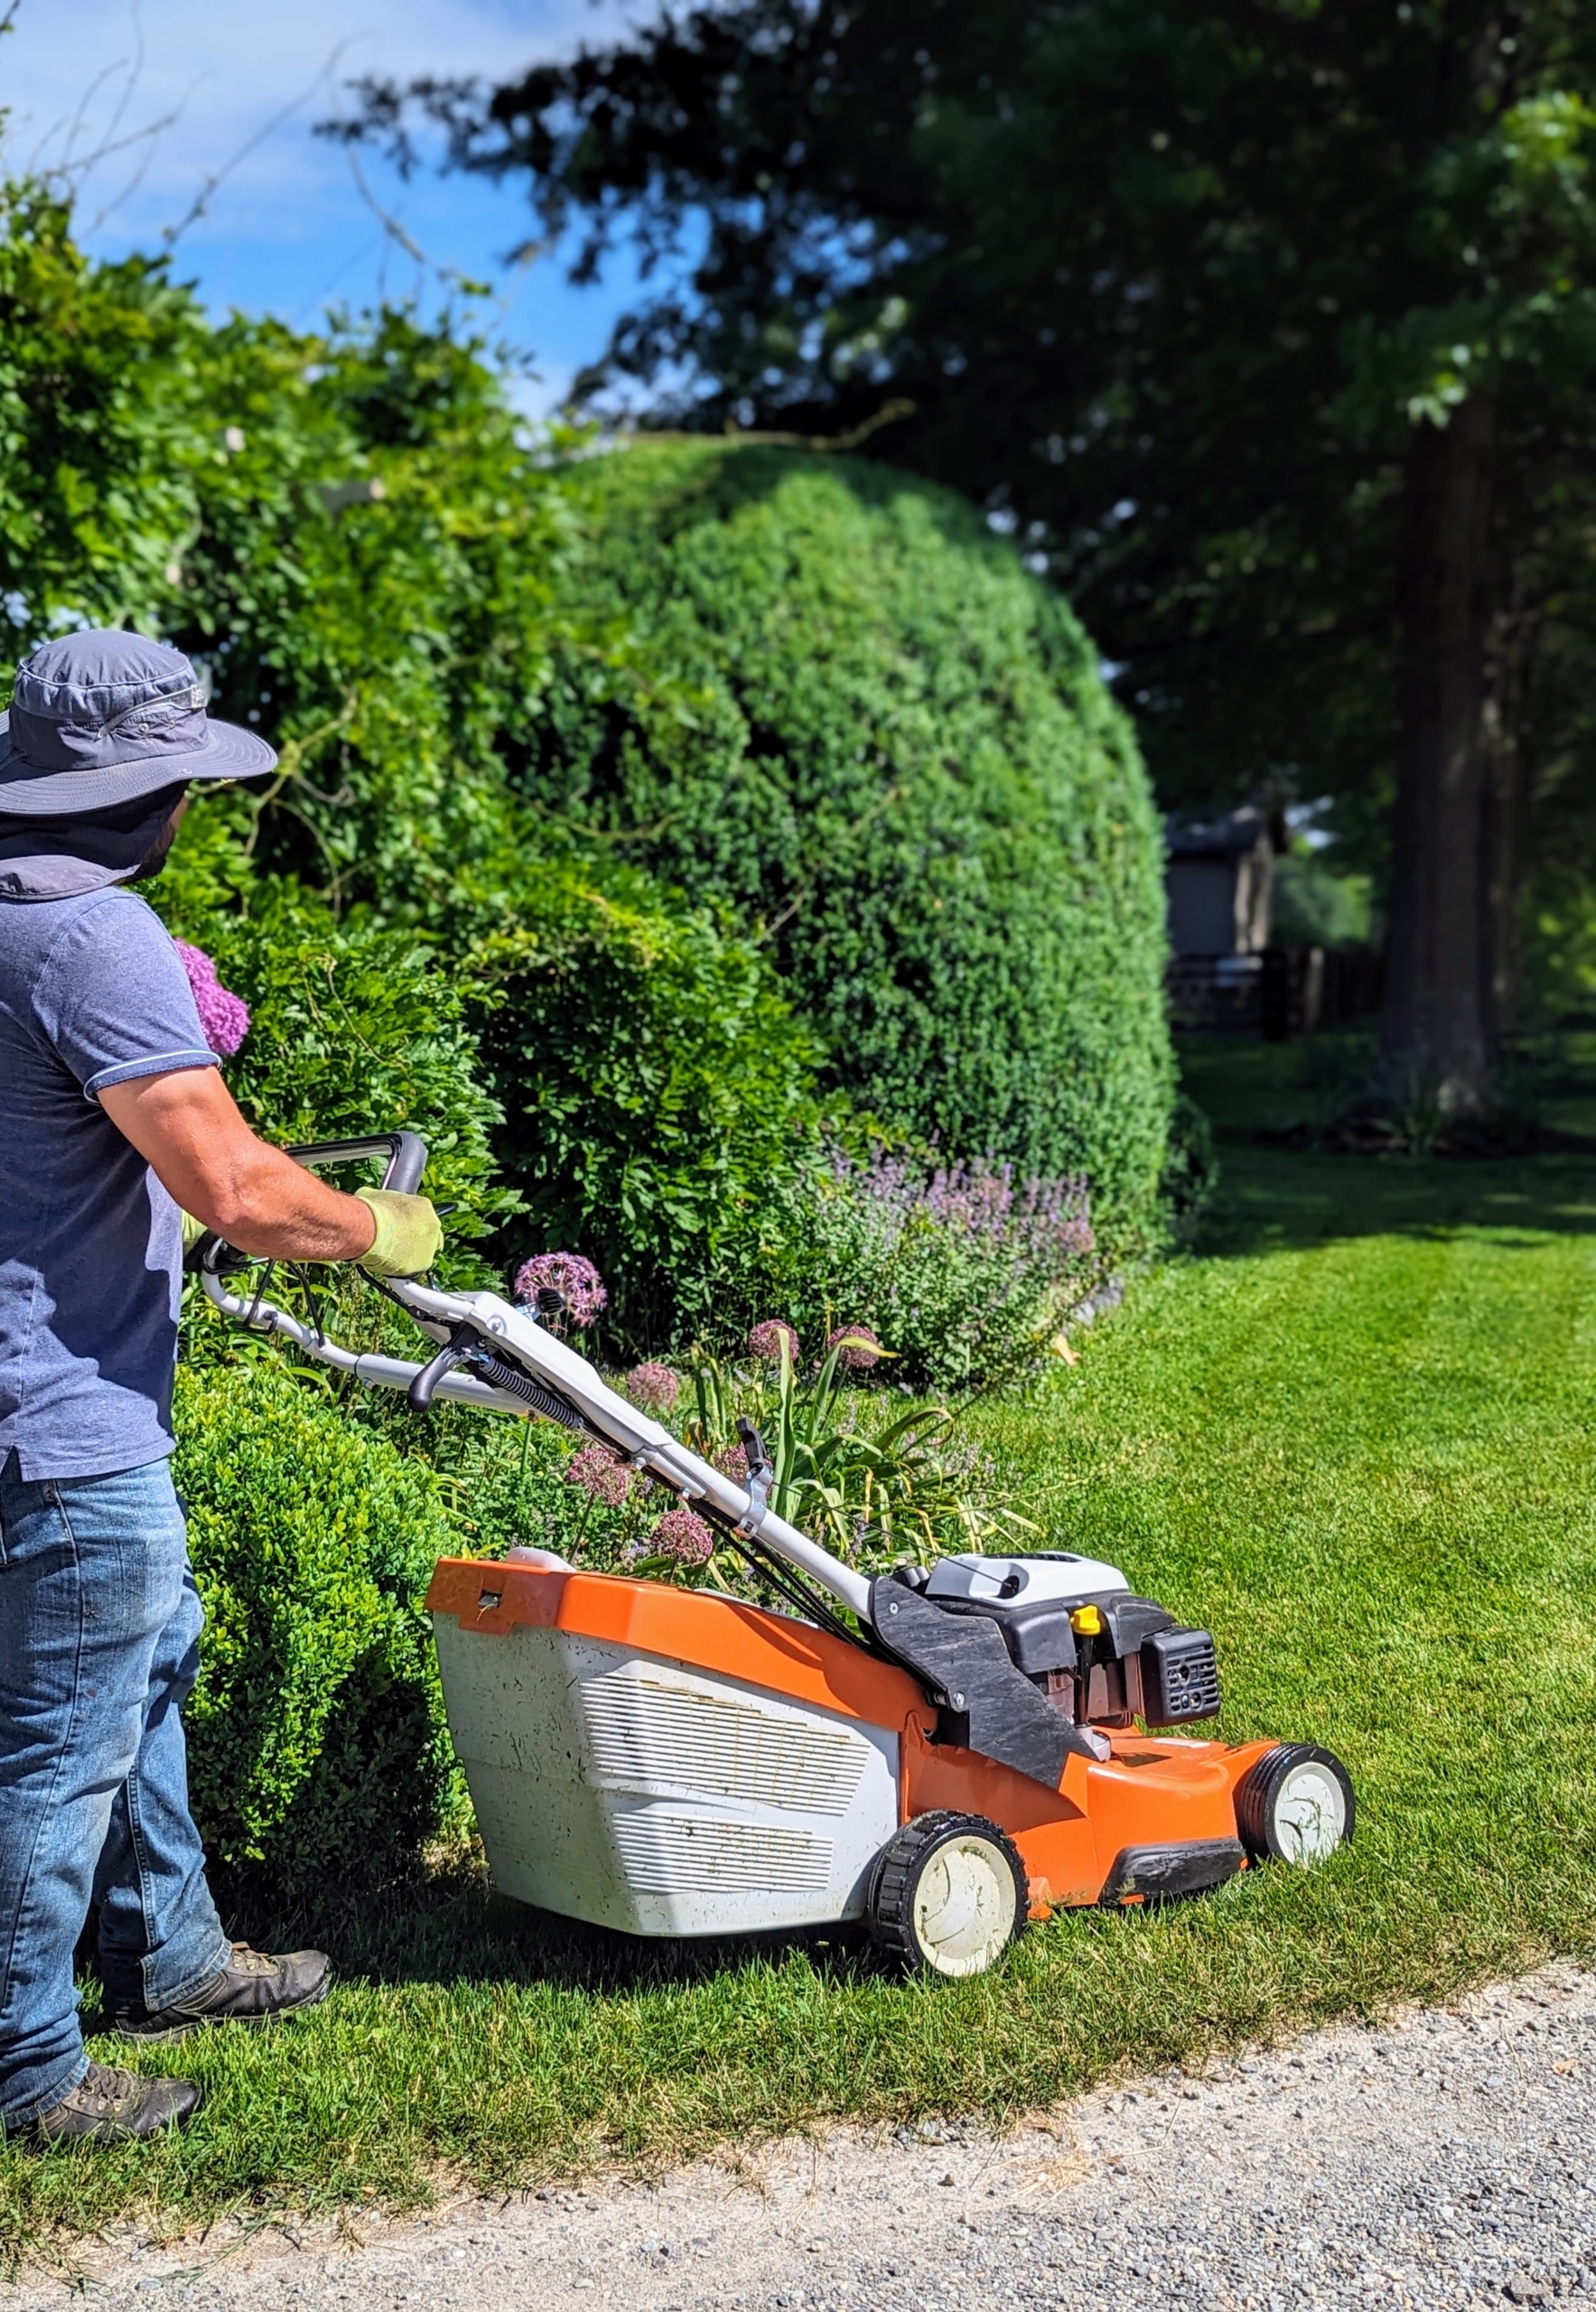
Adan Morales is my resident mower. He knows exactly which mowers are best for every area of the farm. Here he is mowing the narrow strips of grass next to my pergola. Another benefit of this mower is that it is equipped with a blade brake clutch system that allows one to stop the blade without restarting the engine to remove obstacles in the path.
This machine has a cutting height range from .98 to 3.35 inches to accommodate a variety of different grass types, terrains, seasons, and weather conditions.
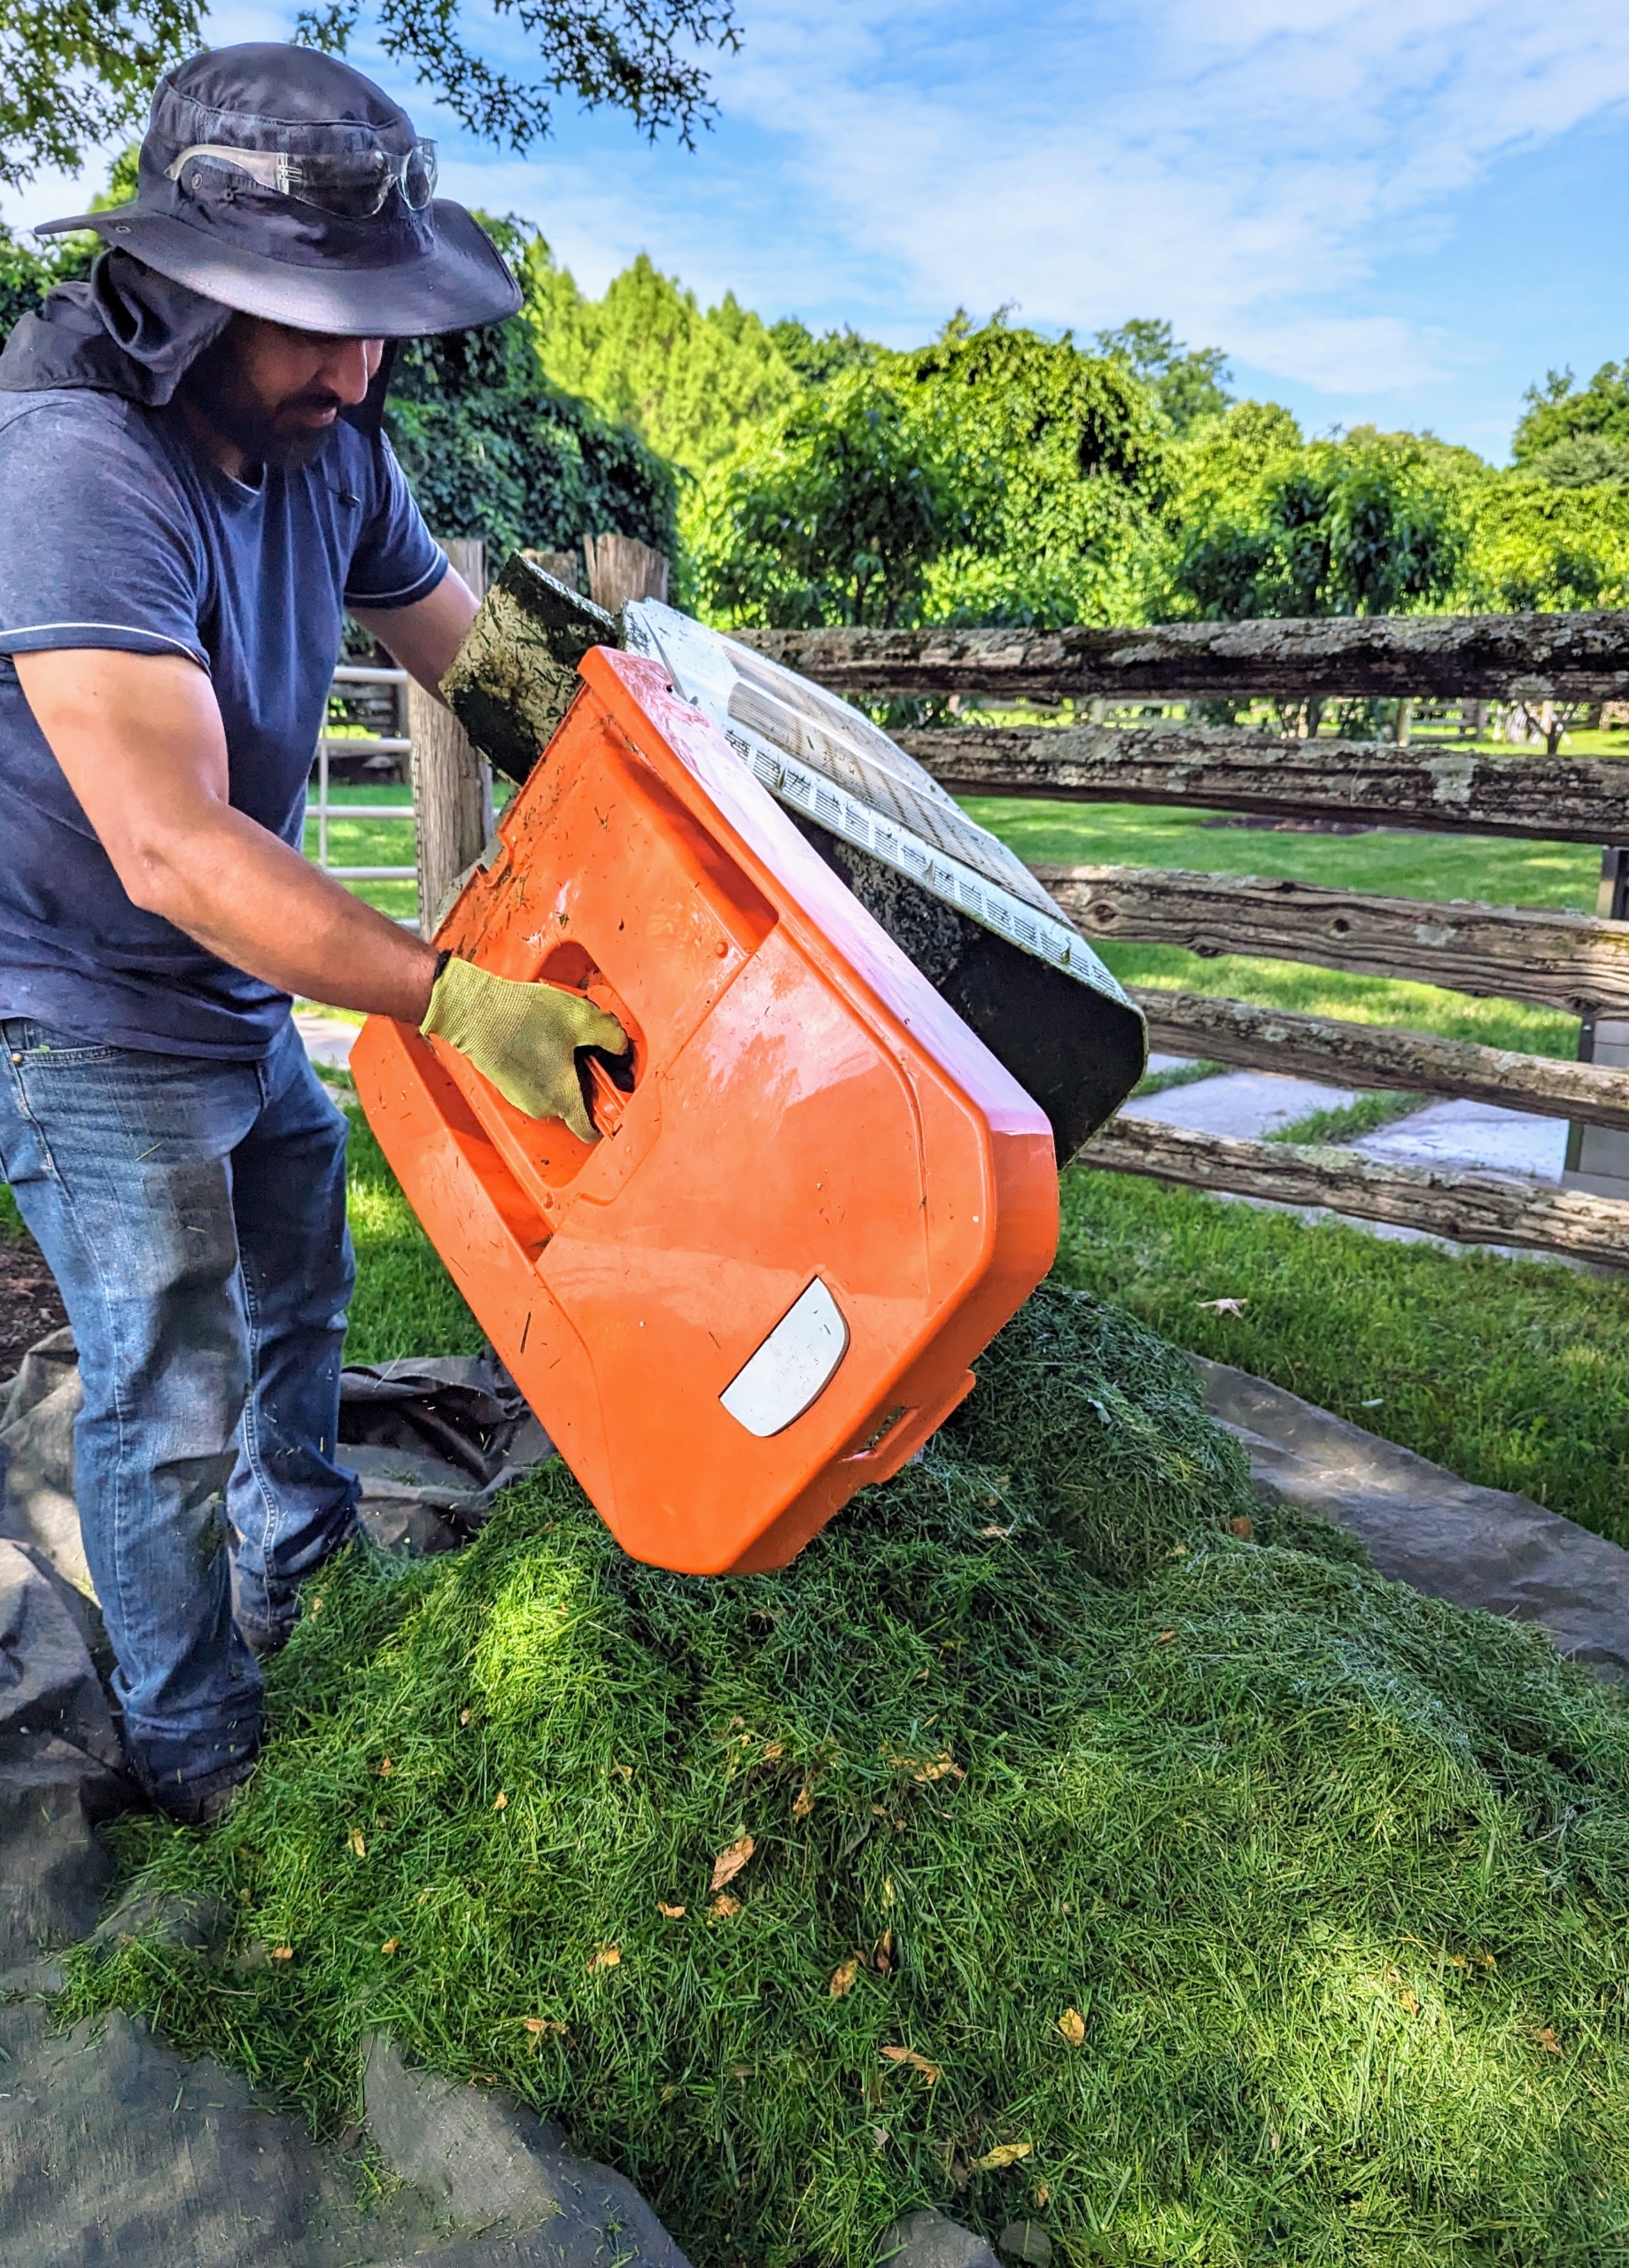
The polymer grass bag also helps to direct air and dust away from the operator.
When mowing, remember to avoid scalping the grass, which means cutting it too short. A scalped lawn is vulnerable to grass burn, diseases, and weed infestation. Scalped turf also tends to be more weak and sparse.
Adan is careful to always adjust the cutting height accordingly. Grass that’s consistently cut too short will have a poorly developed root system, which makes the lawn more susceptible to serious damage from drought or high temperatures.
Another tip is to adjust the mower height throughout the growing season. Shift higher in summer and allow the grass to grow longer. Taller grass helps shade the soil, which prevents weed growth and slows water evaporation. Taller grass also develops deeper roots, which help the lawn to withstand drought better. In late autumn lower the cutting deck for the last mowing of the season to help prevent snow mold from forming on the grass.
And try to always mow when the grass is dry. We only mow dry grass at the farm. Mowing a wet lawn doesn’t harm the grass, but it can fill and clog a mower, and make the cut look uneven. Mid-morning mowing is the healthiest for your grass – it’s cooler, drier and allows time for the grass to recover after cutting.
On this STIHL RM 655 VS mower, the Vario Drive self-propel system also enables one to select the proper ground speed. On a push mower, 3mph is the average speed. Going too fast can actually result in an uneven cut.
This mower is lightweight – just a little more than 100-pounds, making it easy to maneuver. And the controls are built to be ergonomic in design, so it is comfortable to use all day. And don’t forget safety equipment – gloves, hat, eye and ear protection.
Here, Adan can get close to the vegetable bed without hurting any plants or the wooden bed frame.
When it’s time, Adan simply lifts the polymer grass bag out of the mower and empties it onto a nearby tarp, so it is easy to load onto the dump truck.
Having the right tool, the right push mower, for the job… it’s a good thing.