Here at my Bedford, New York farm, we're always working off a long list of gardening tasks. This time of year, these projects include potting plants in outdoor ornamental containers.
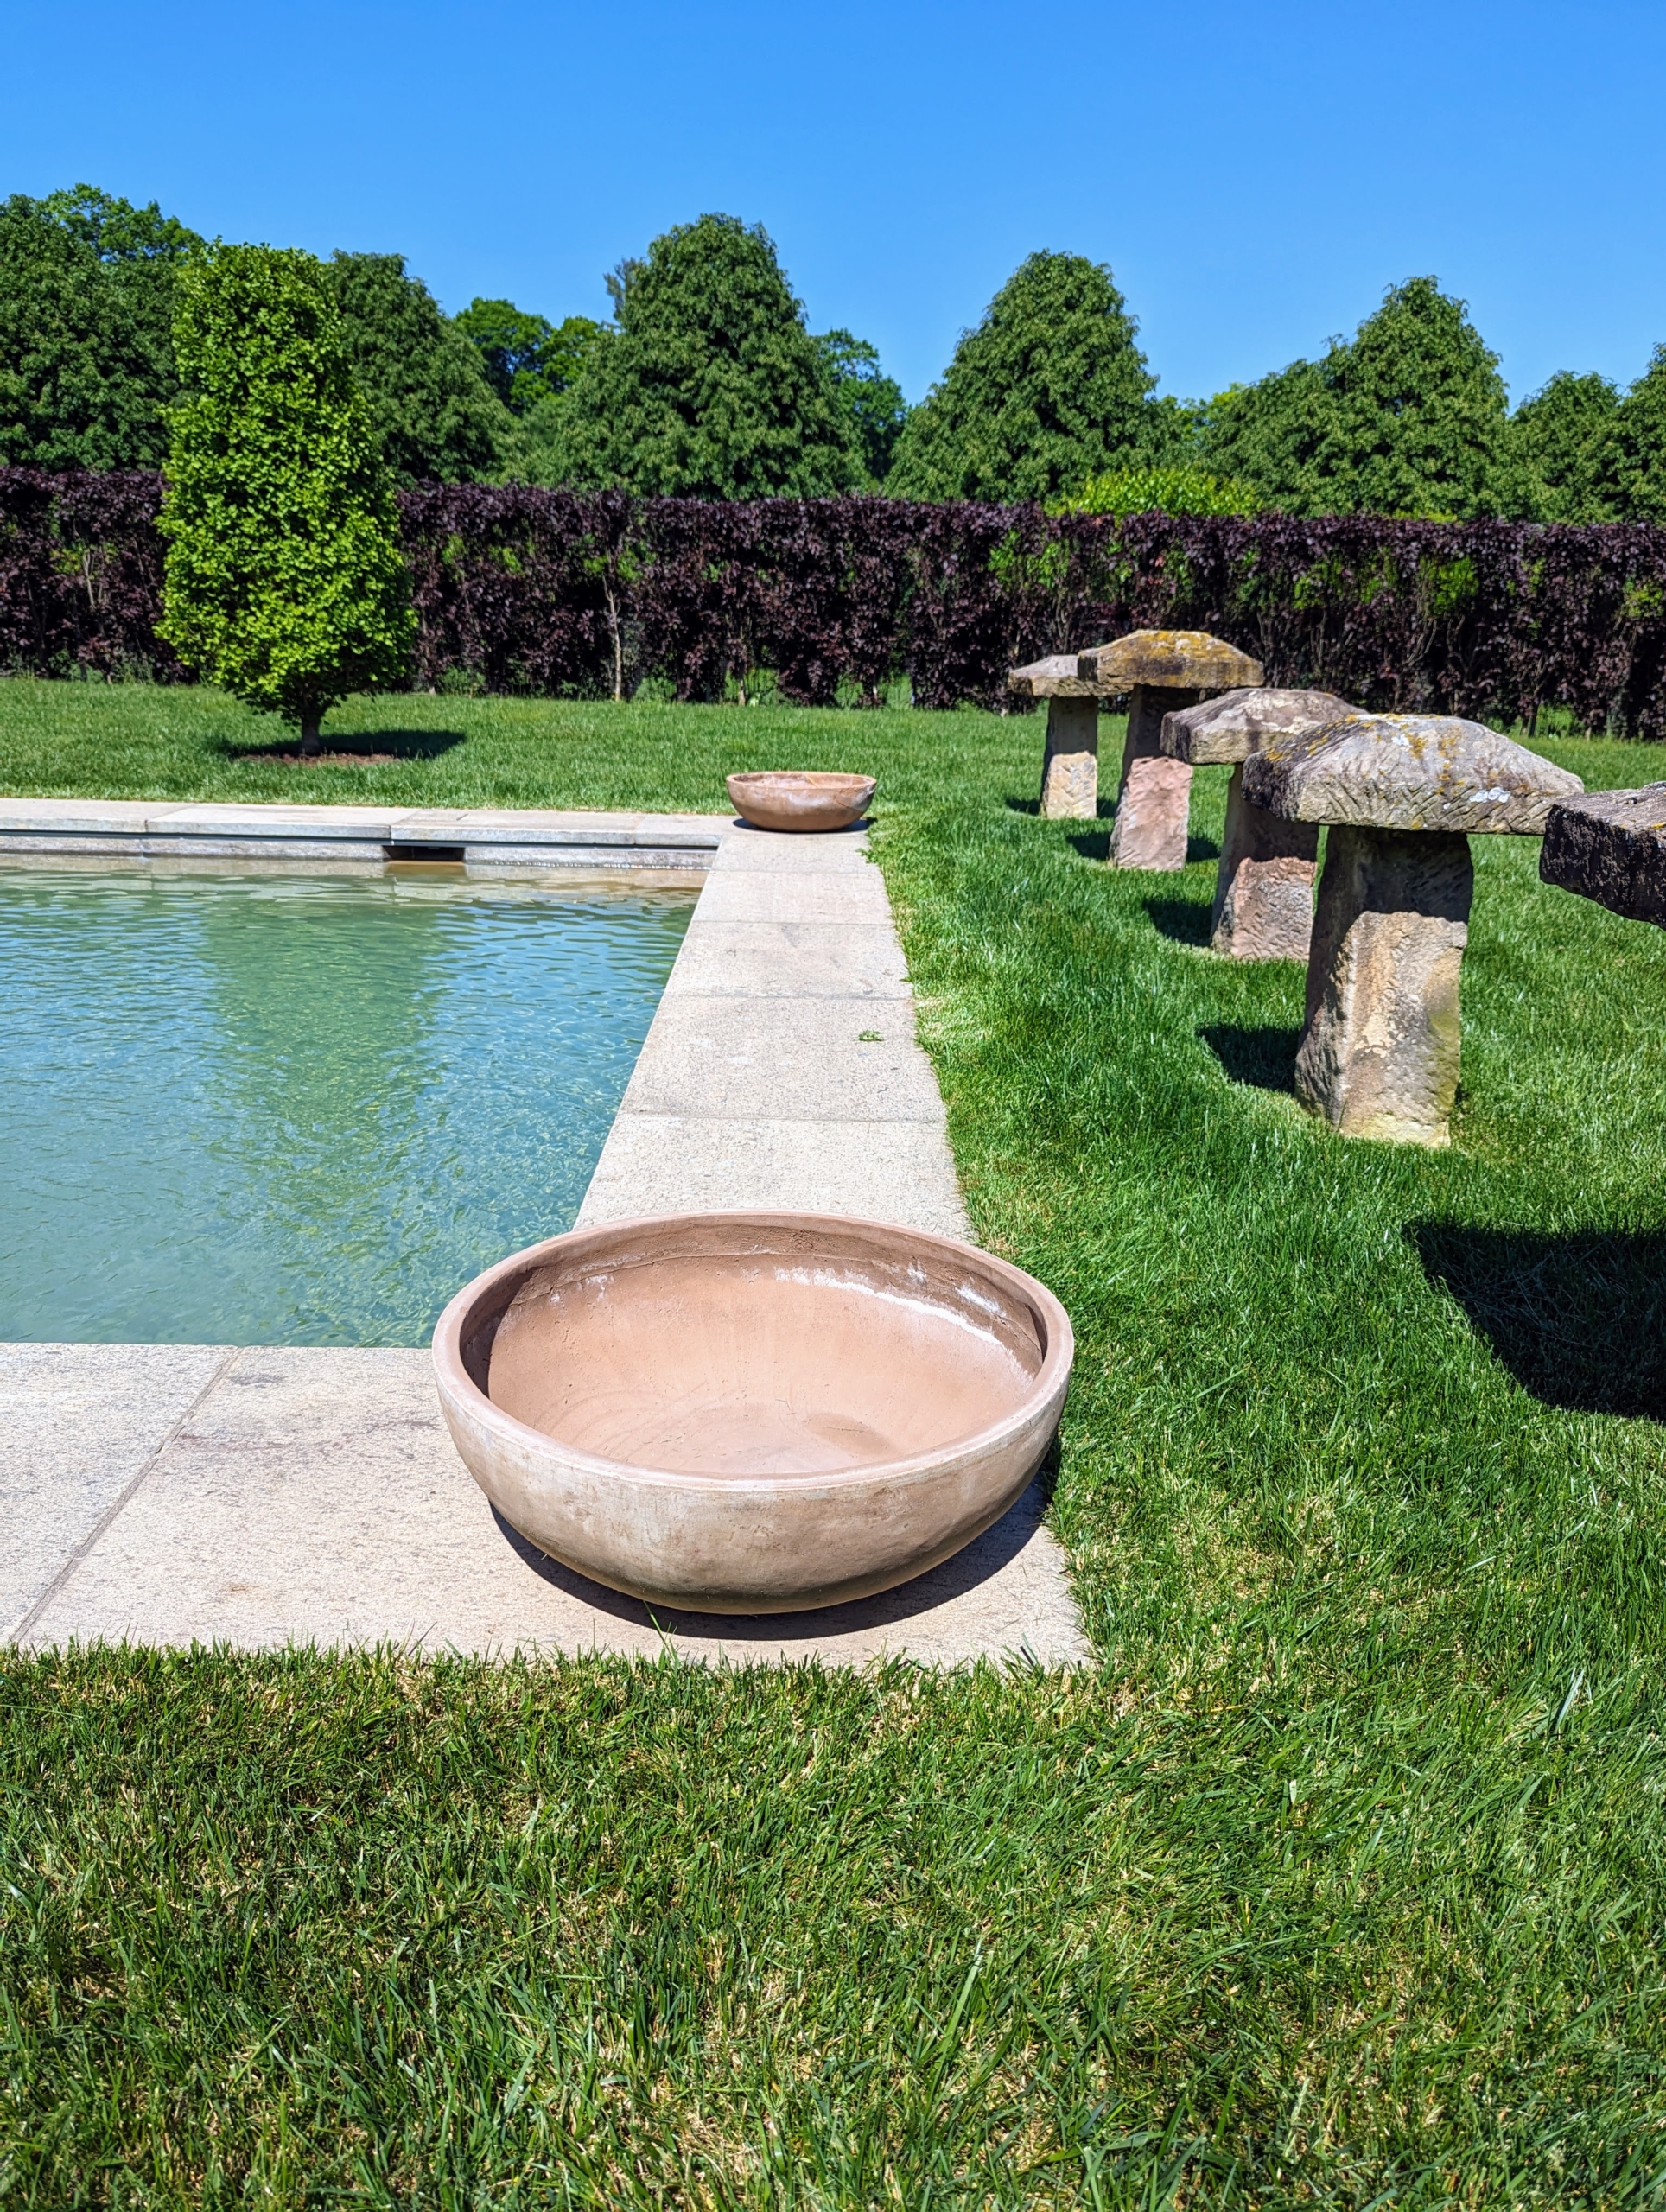
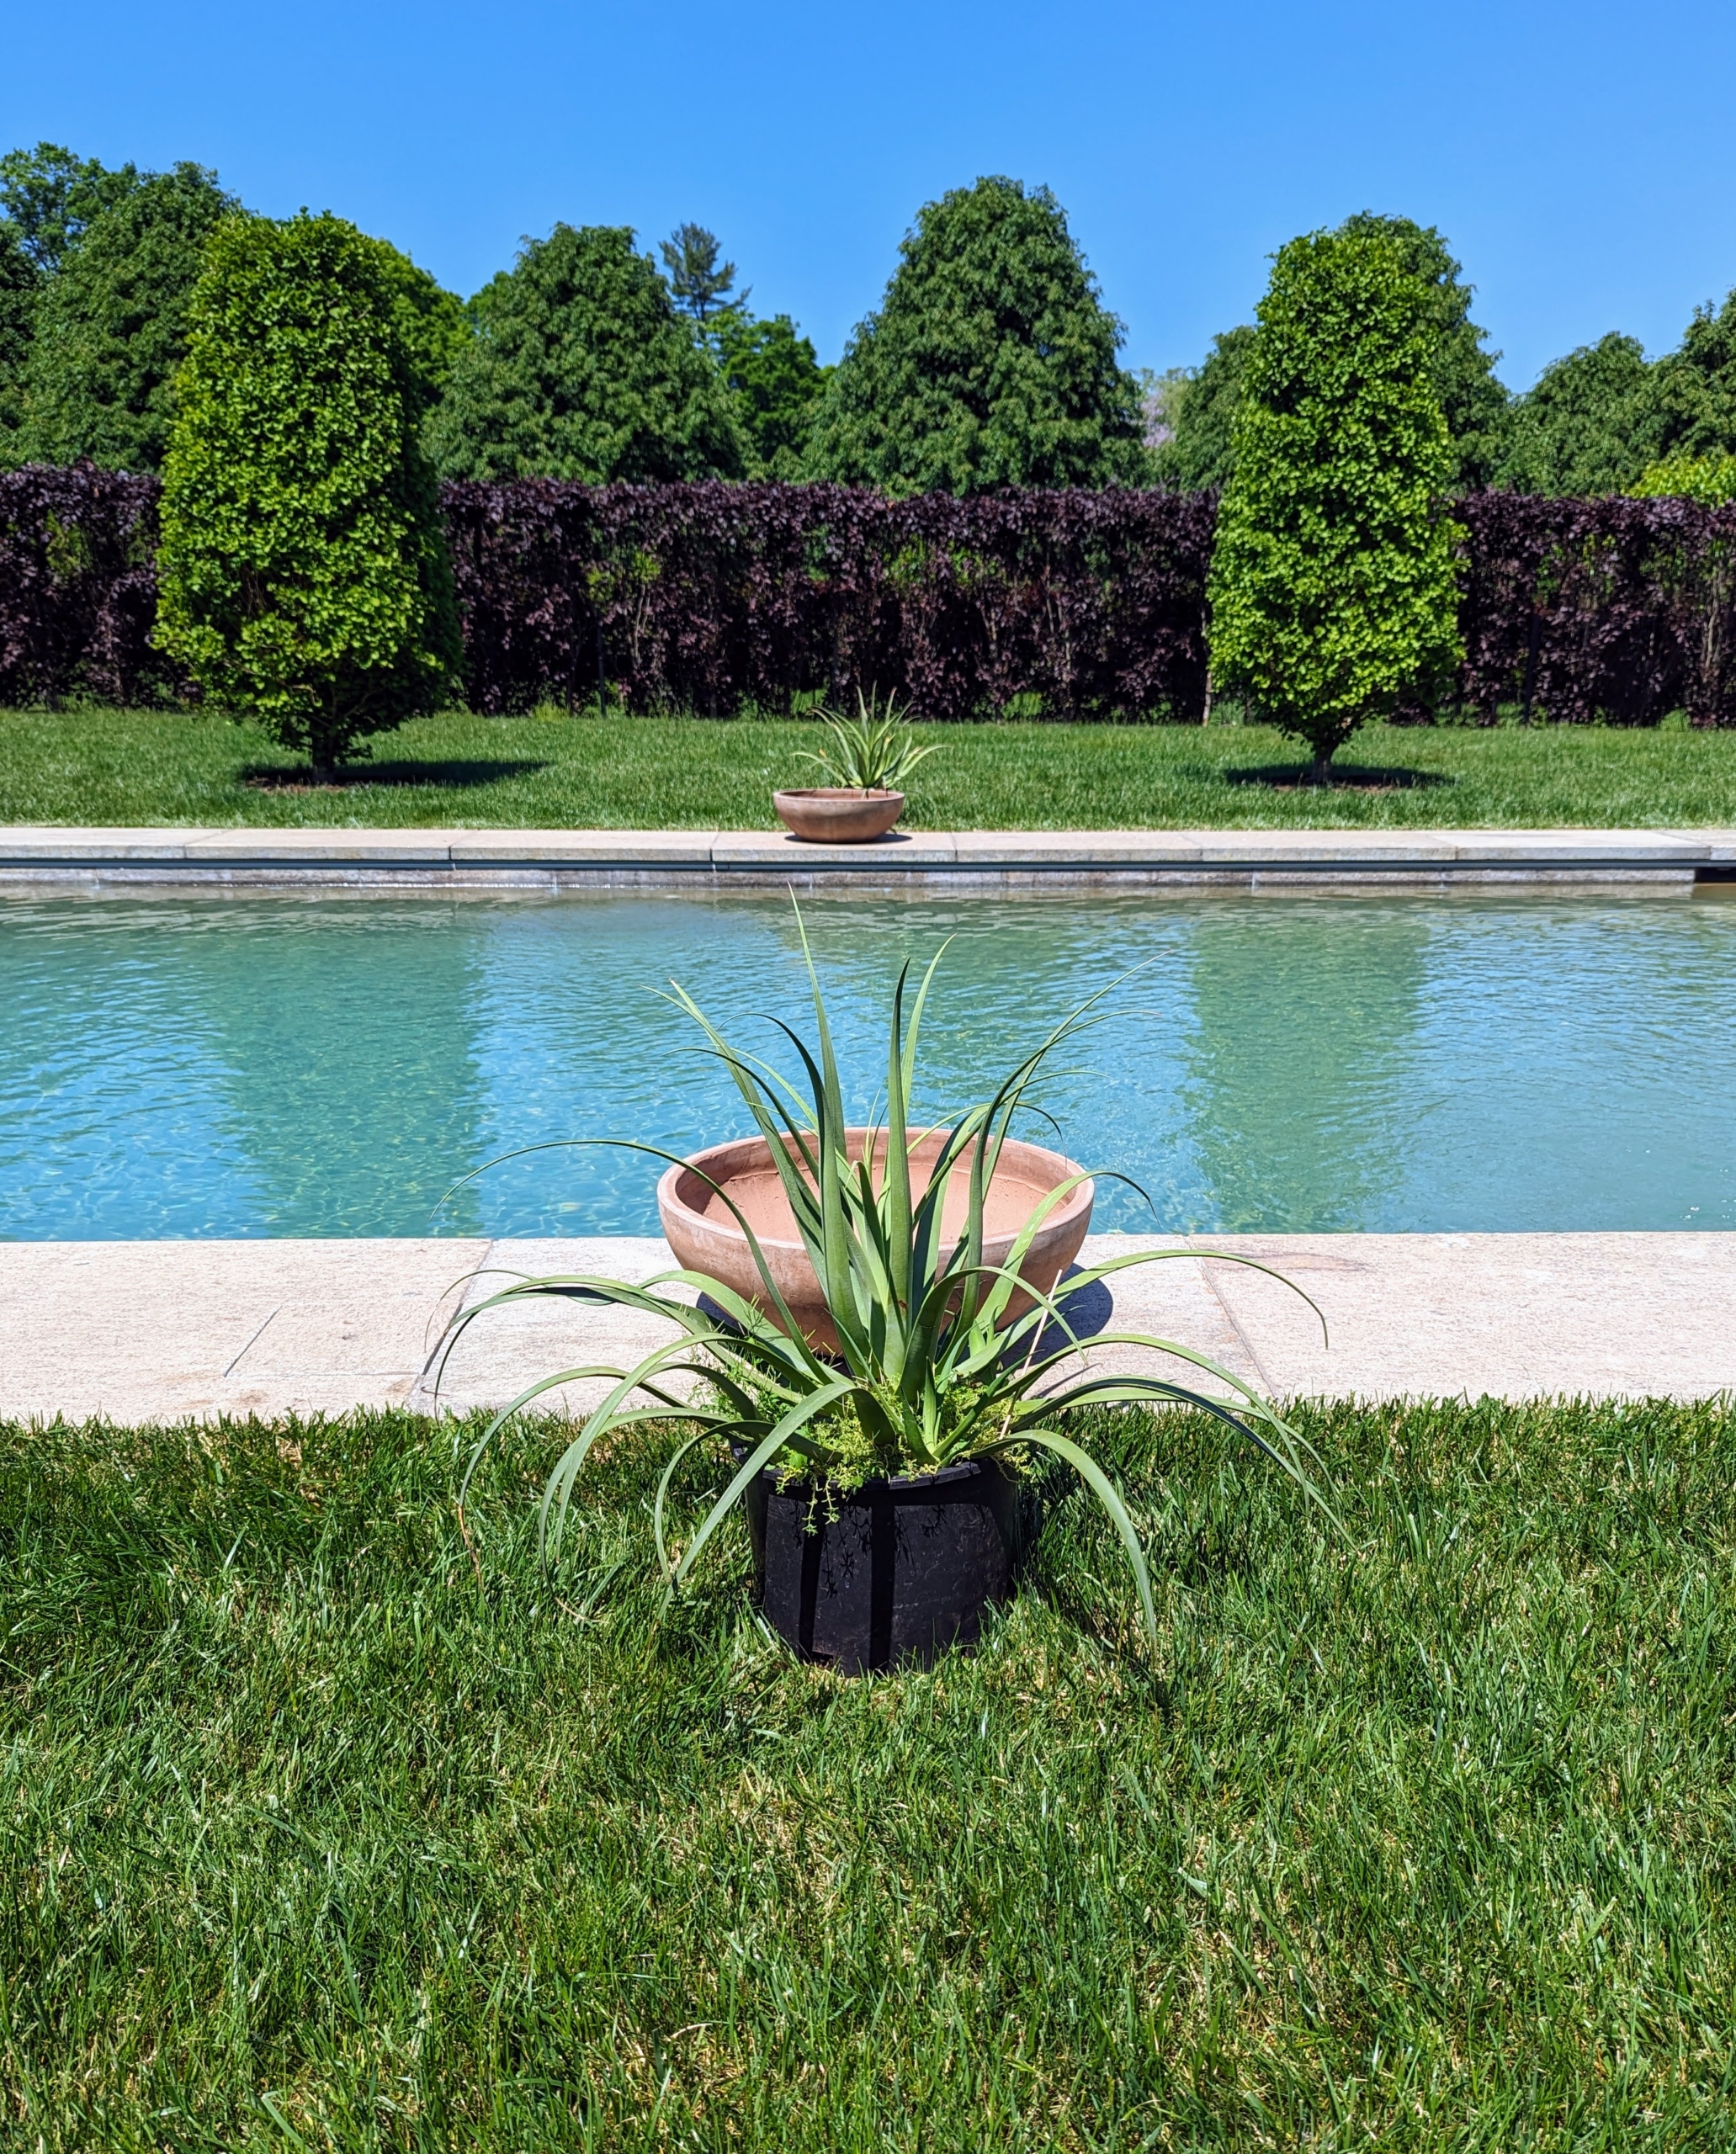
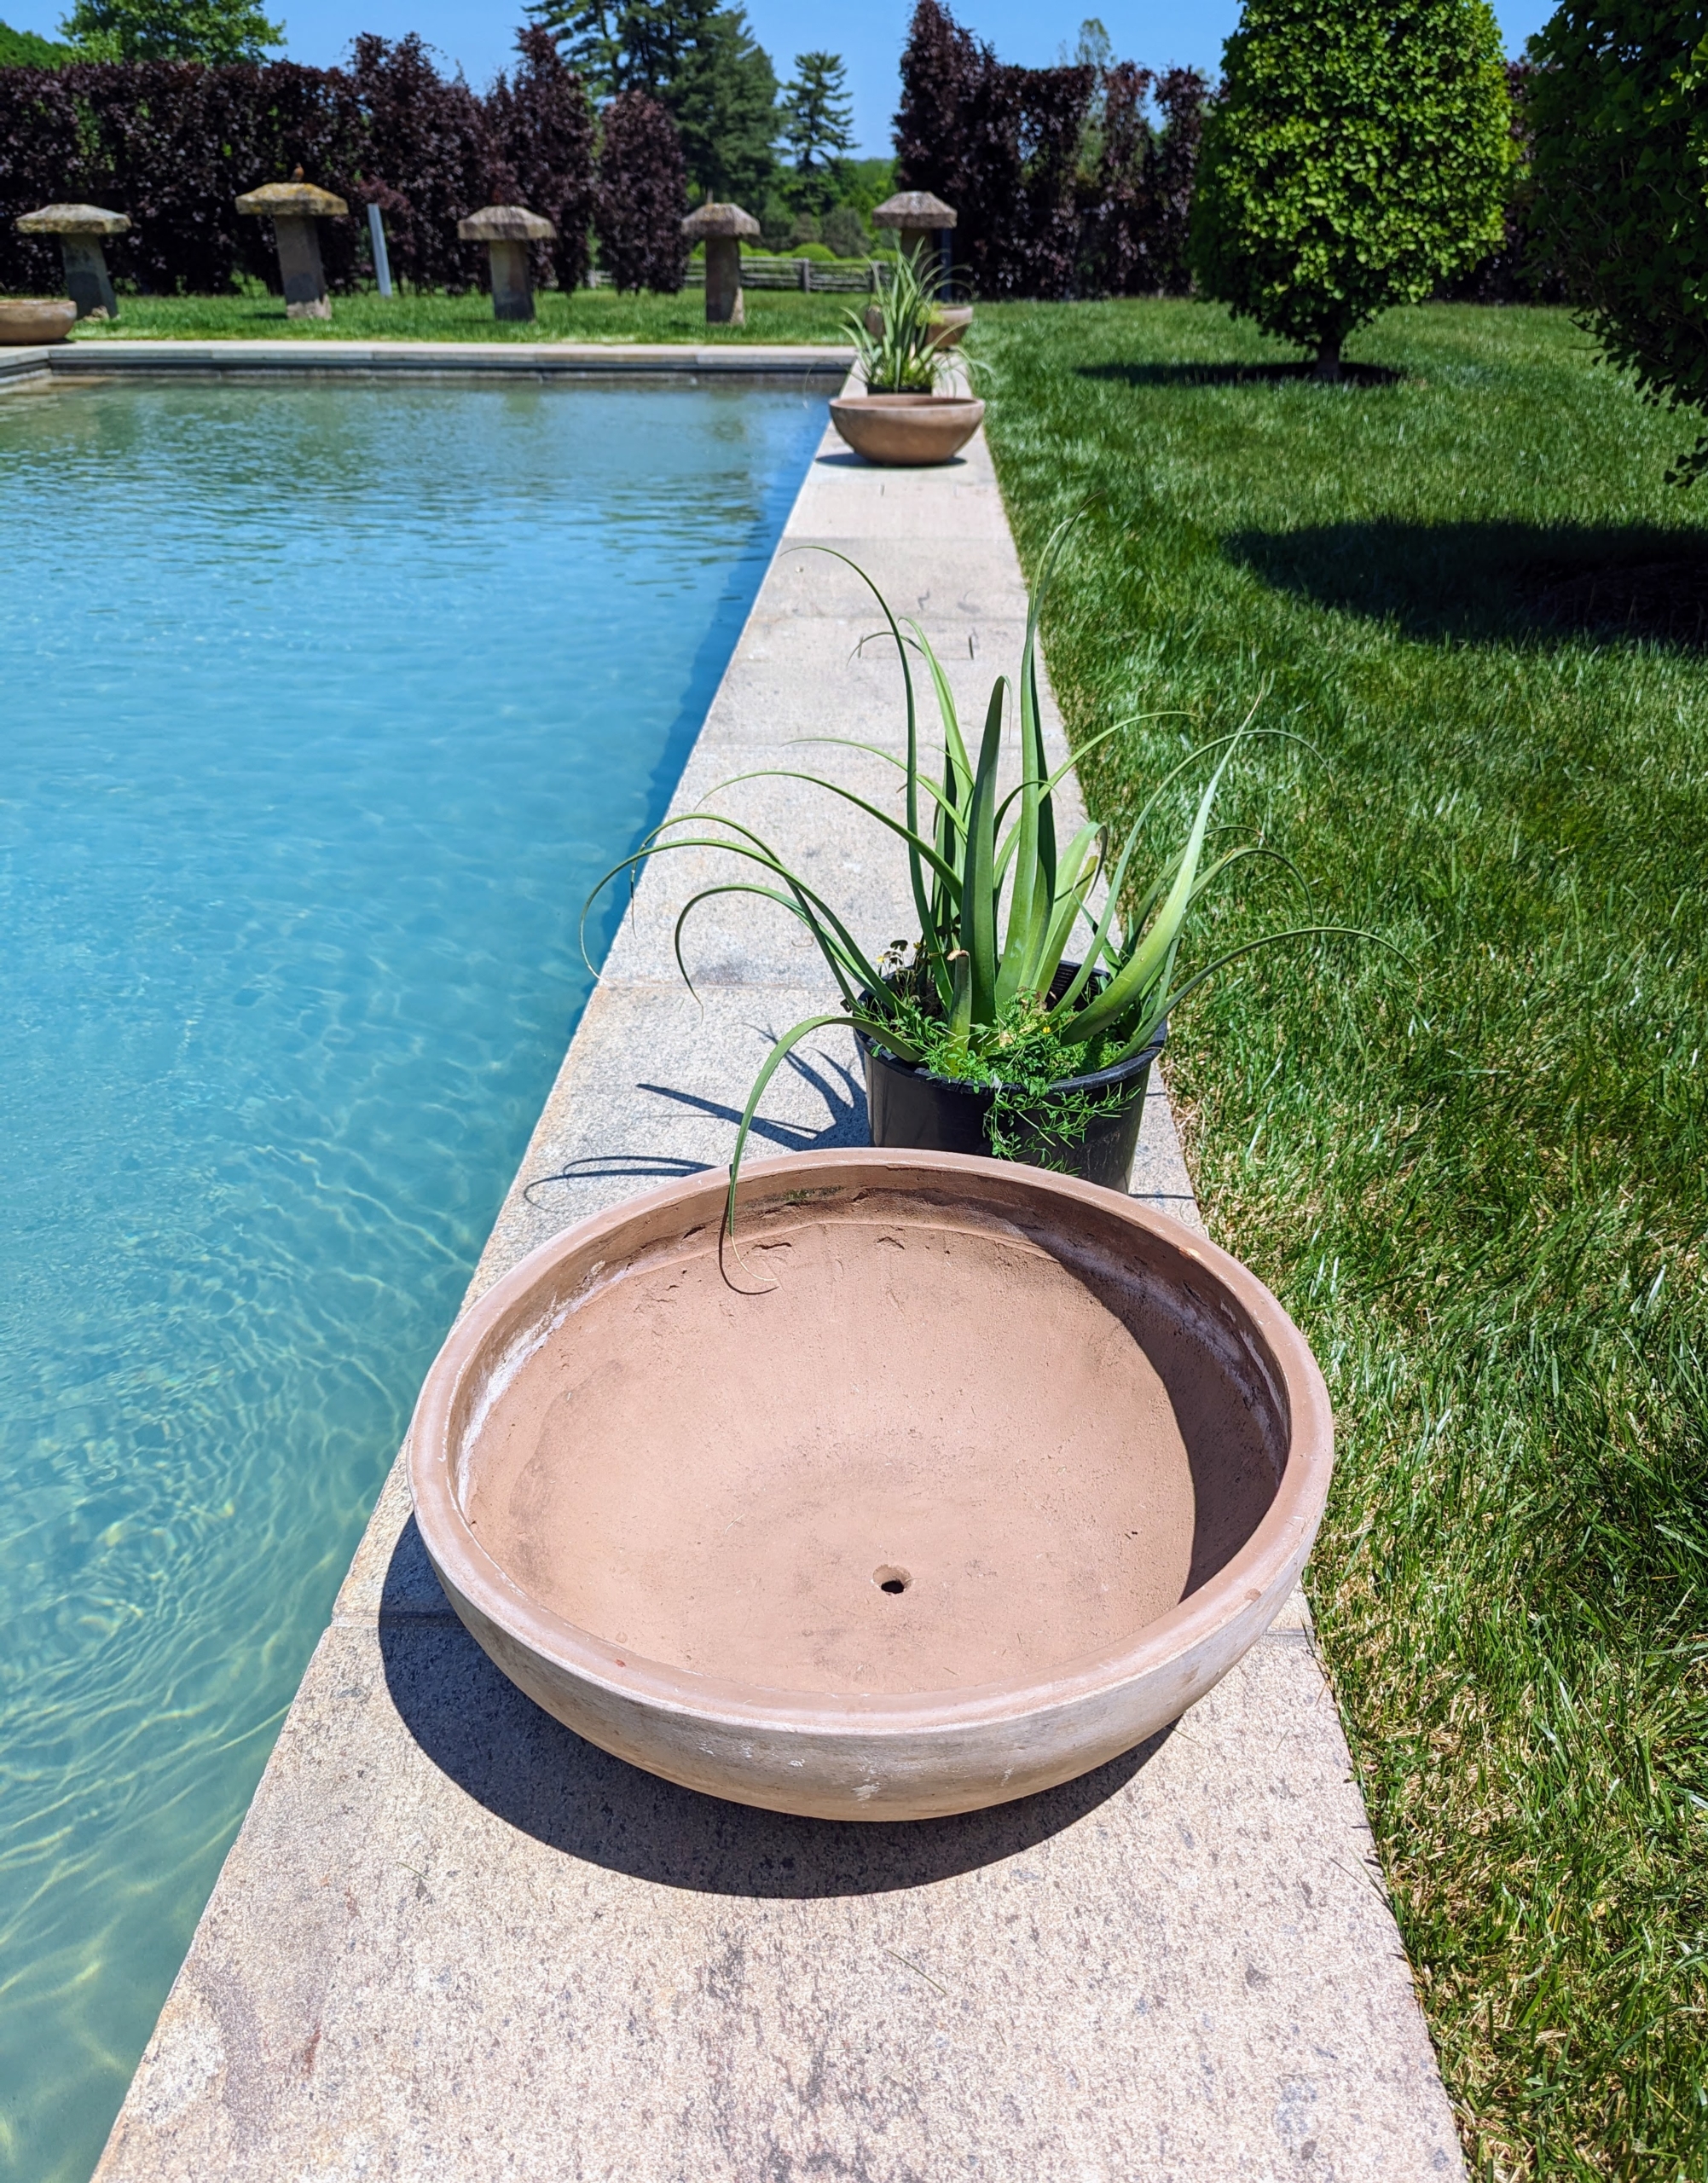
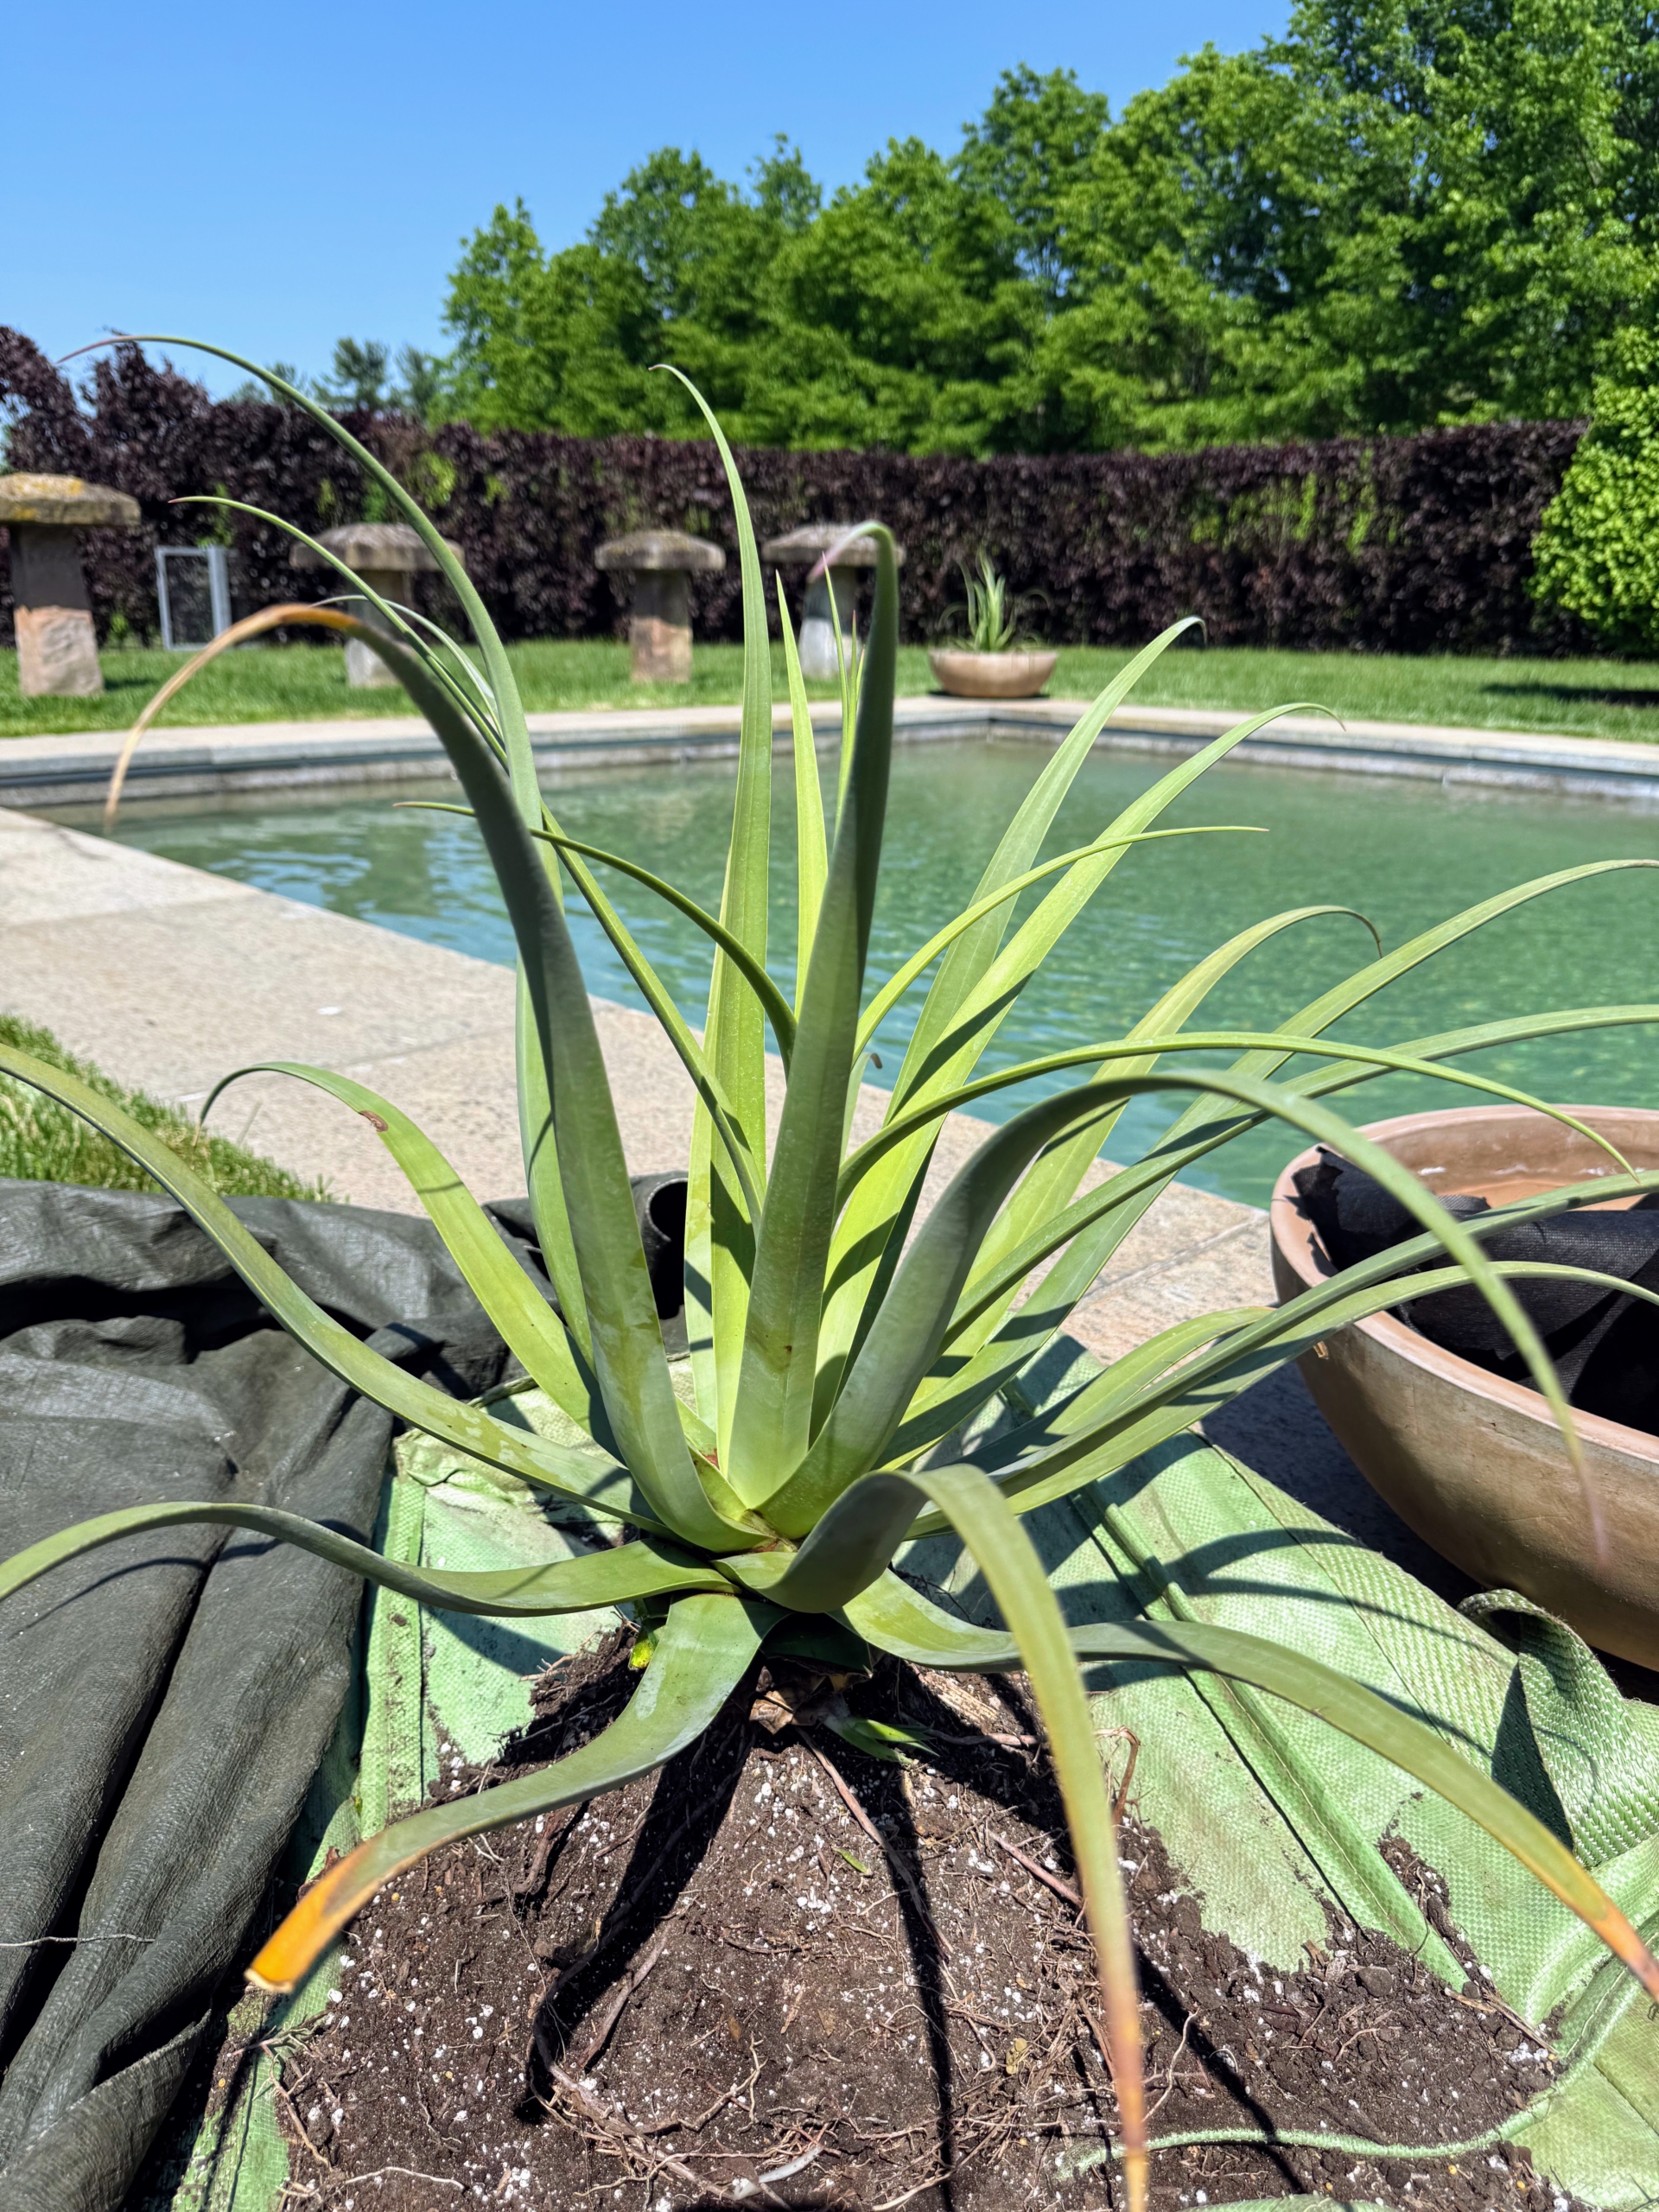
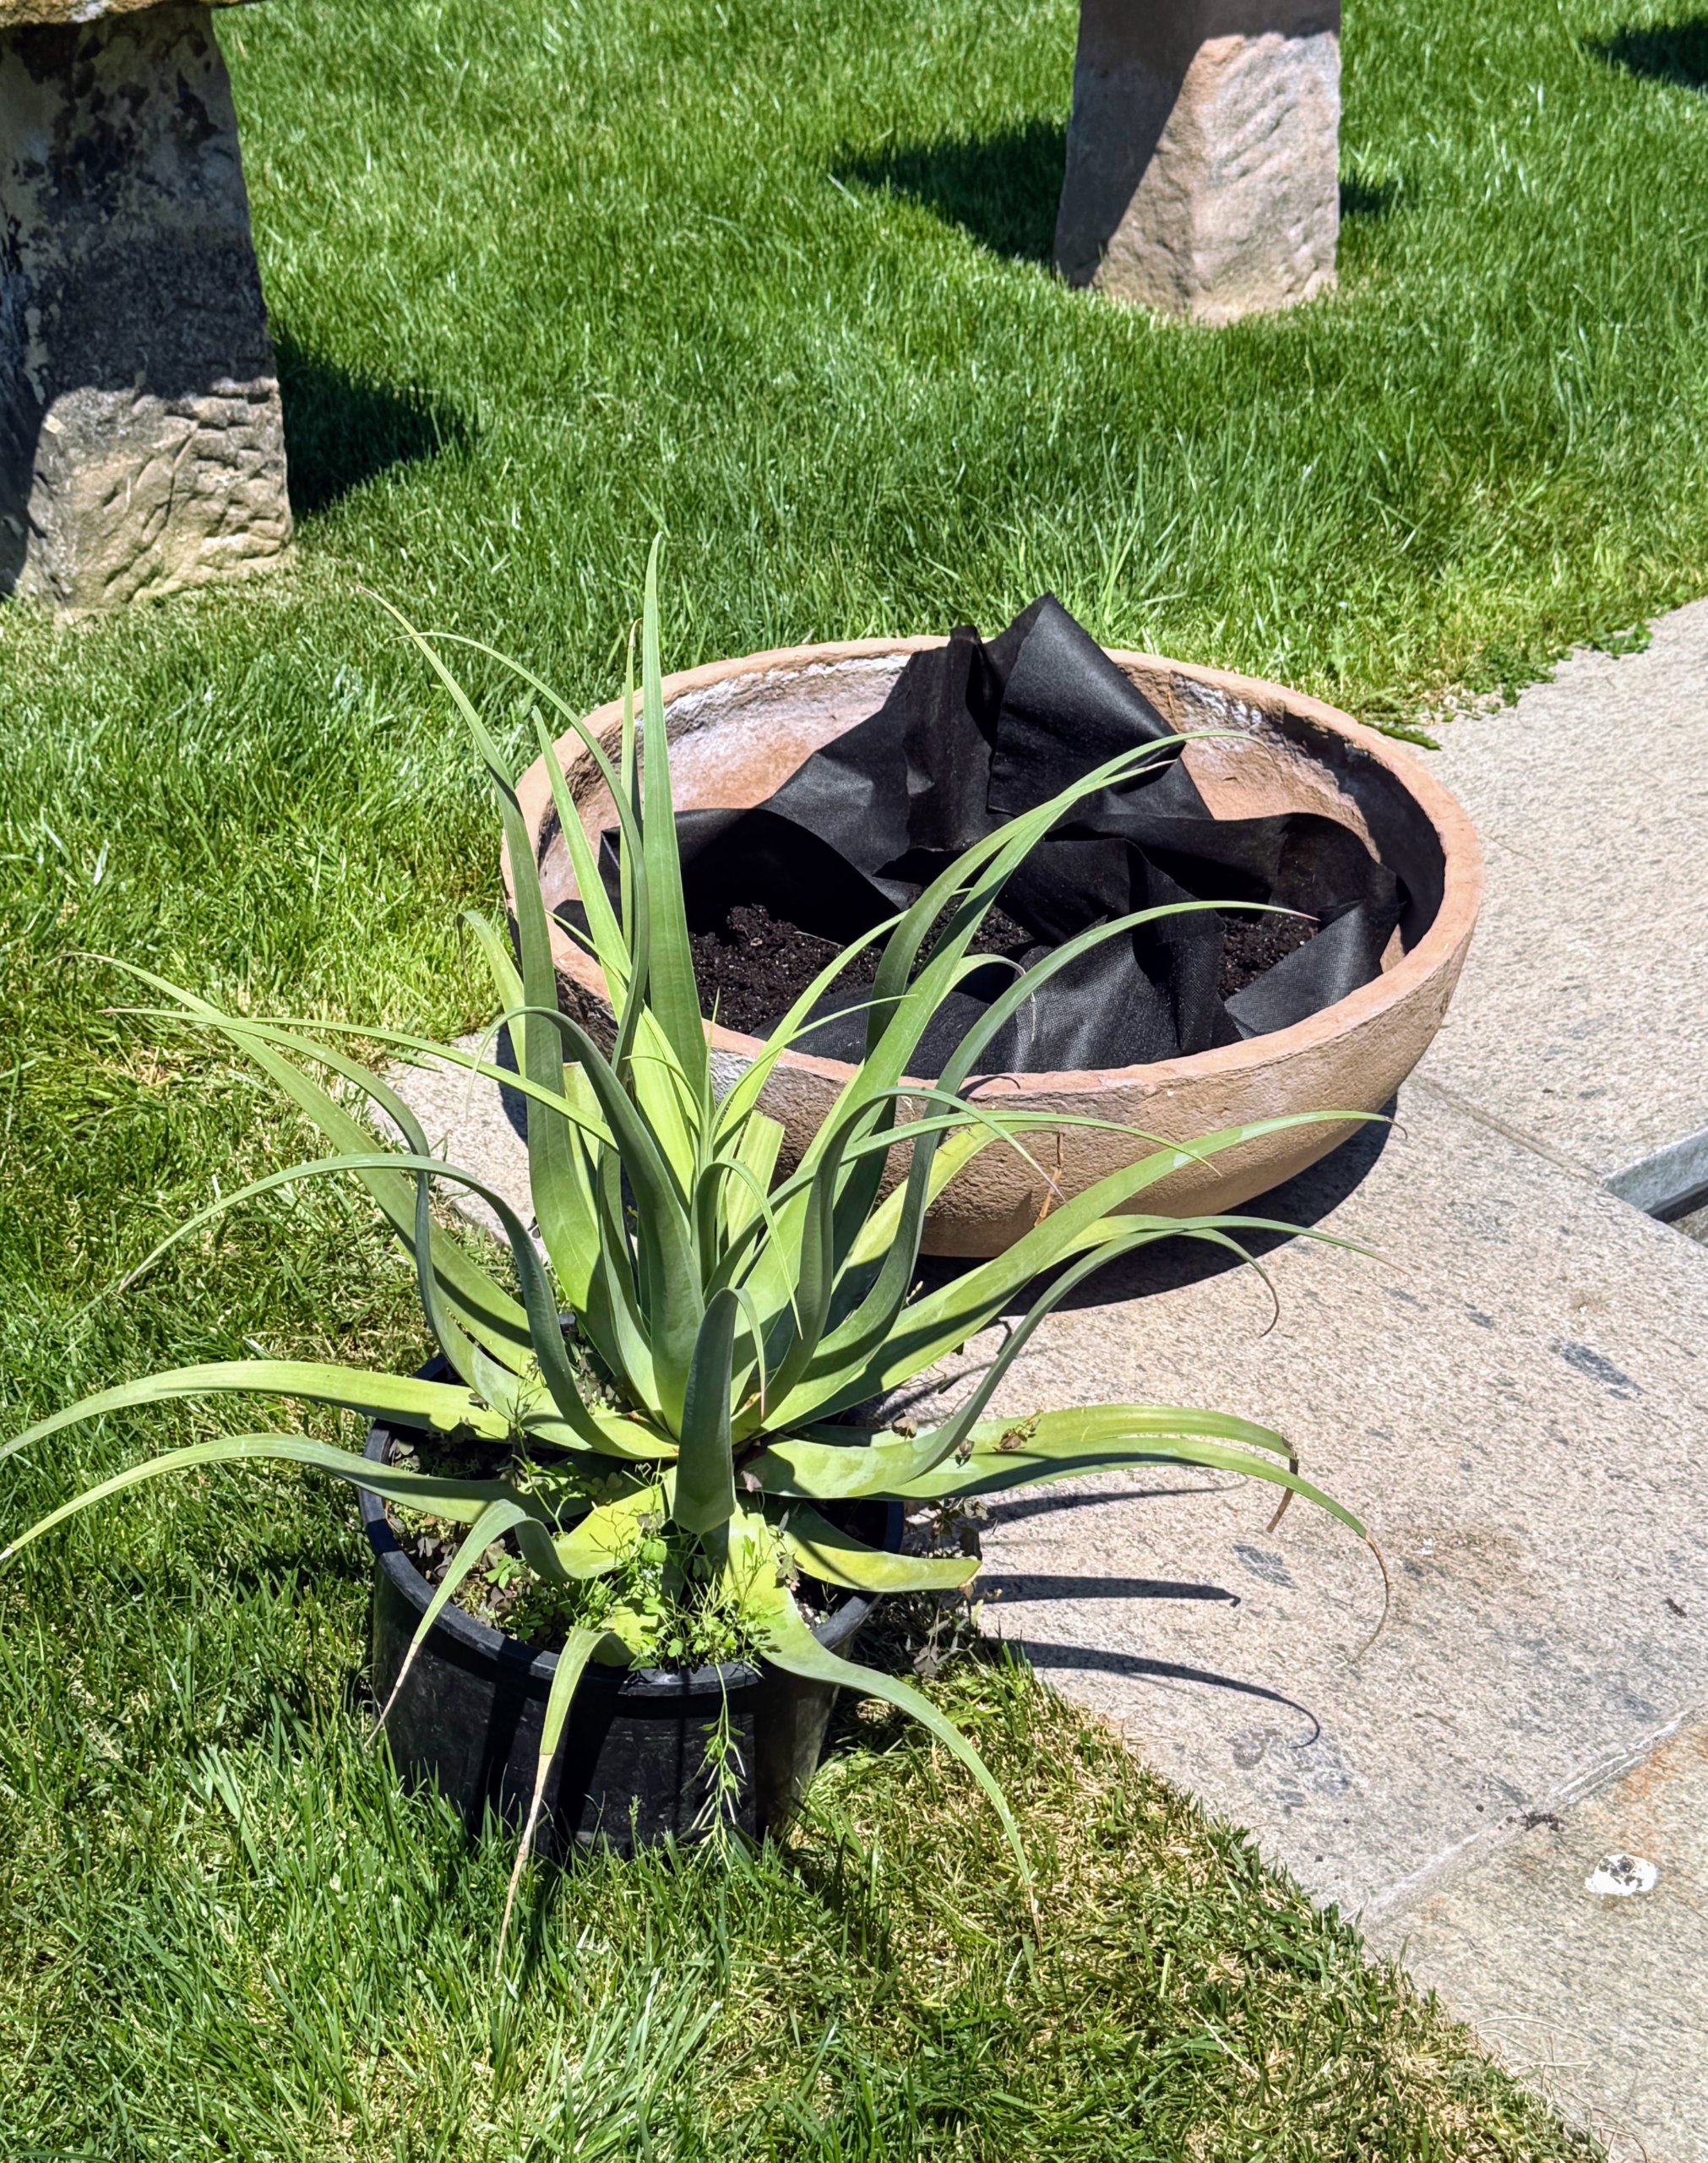
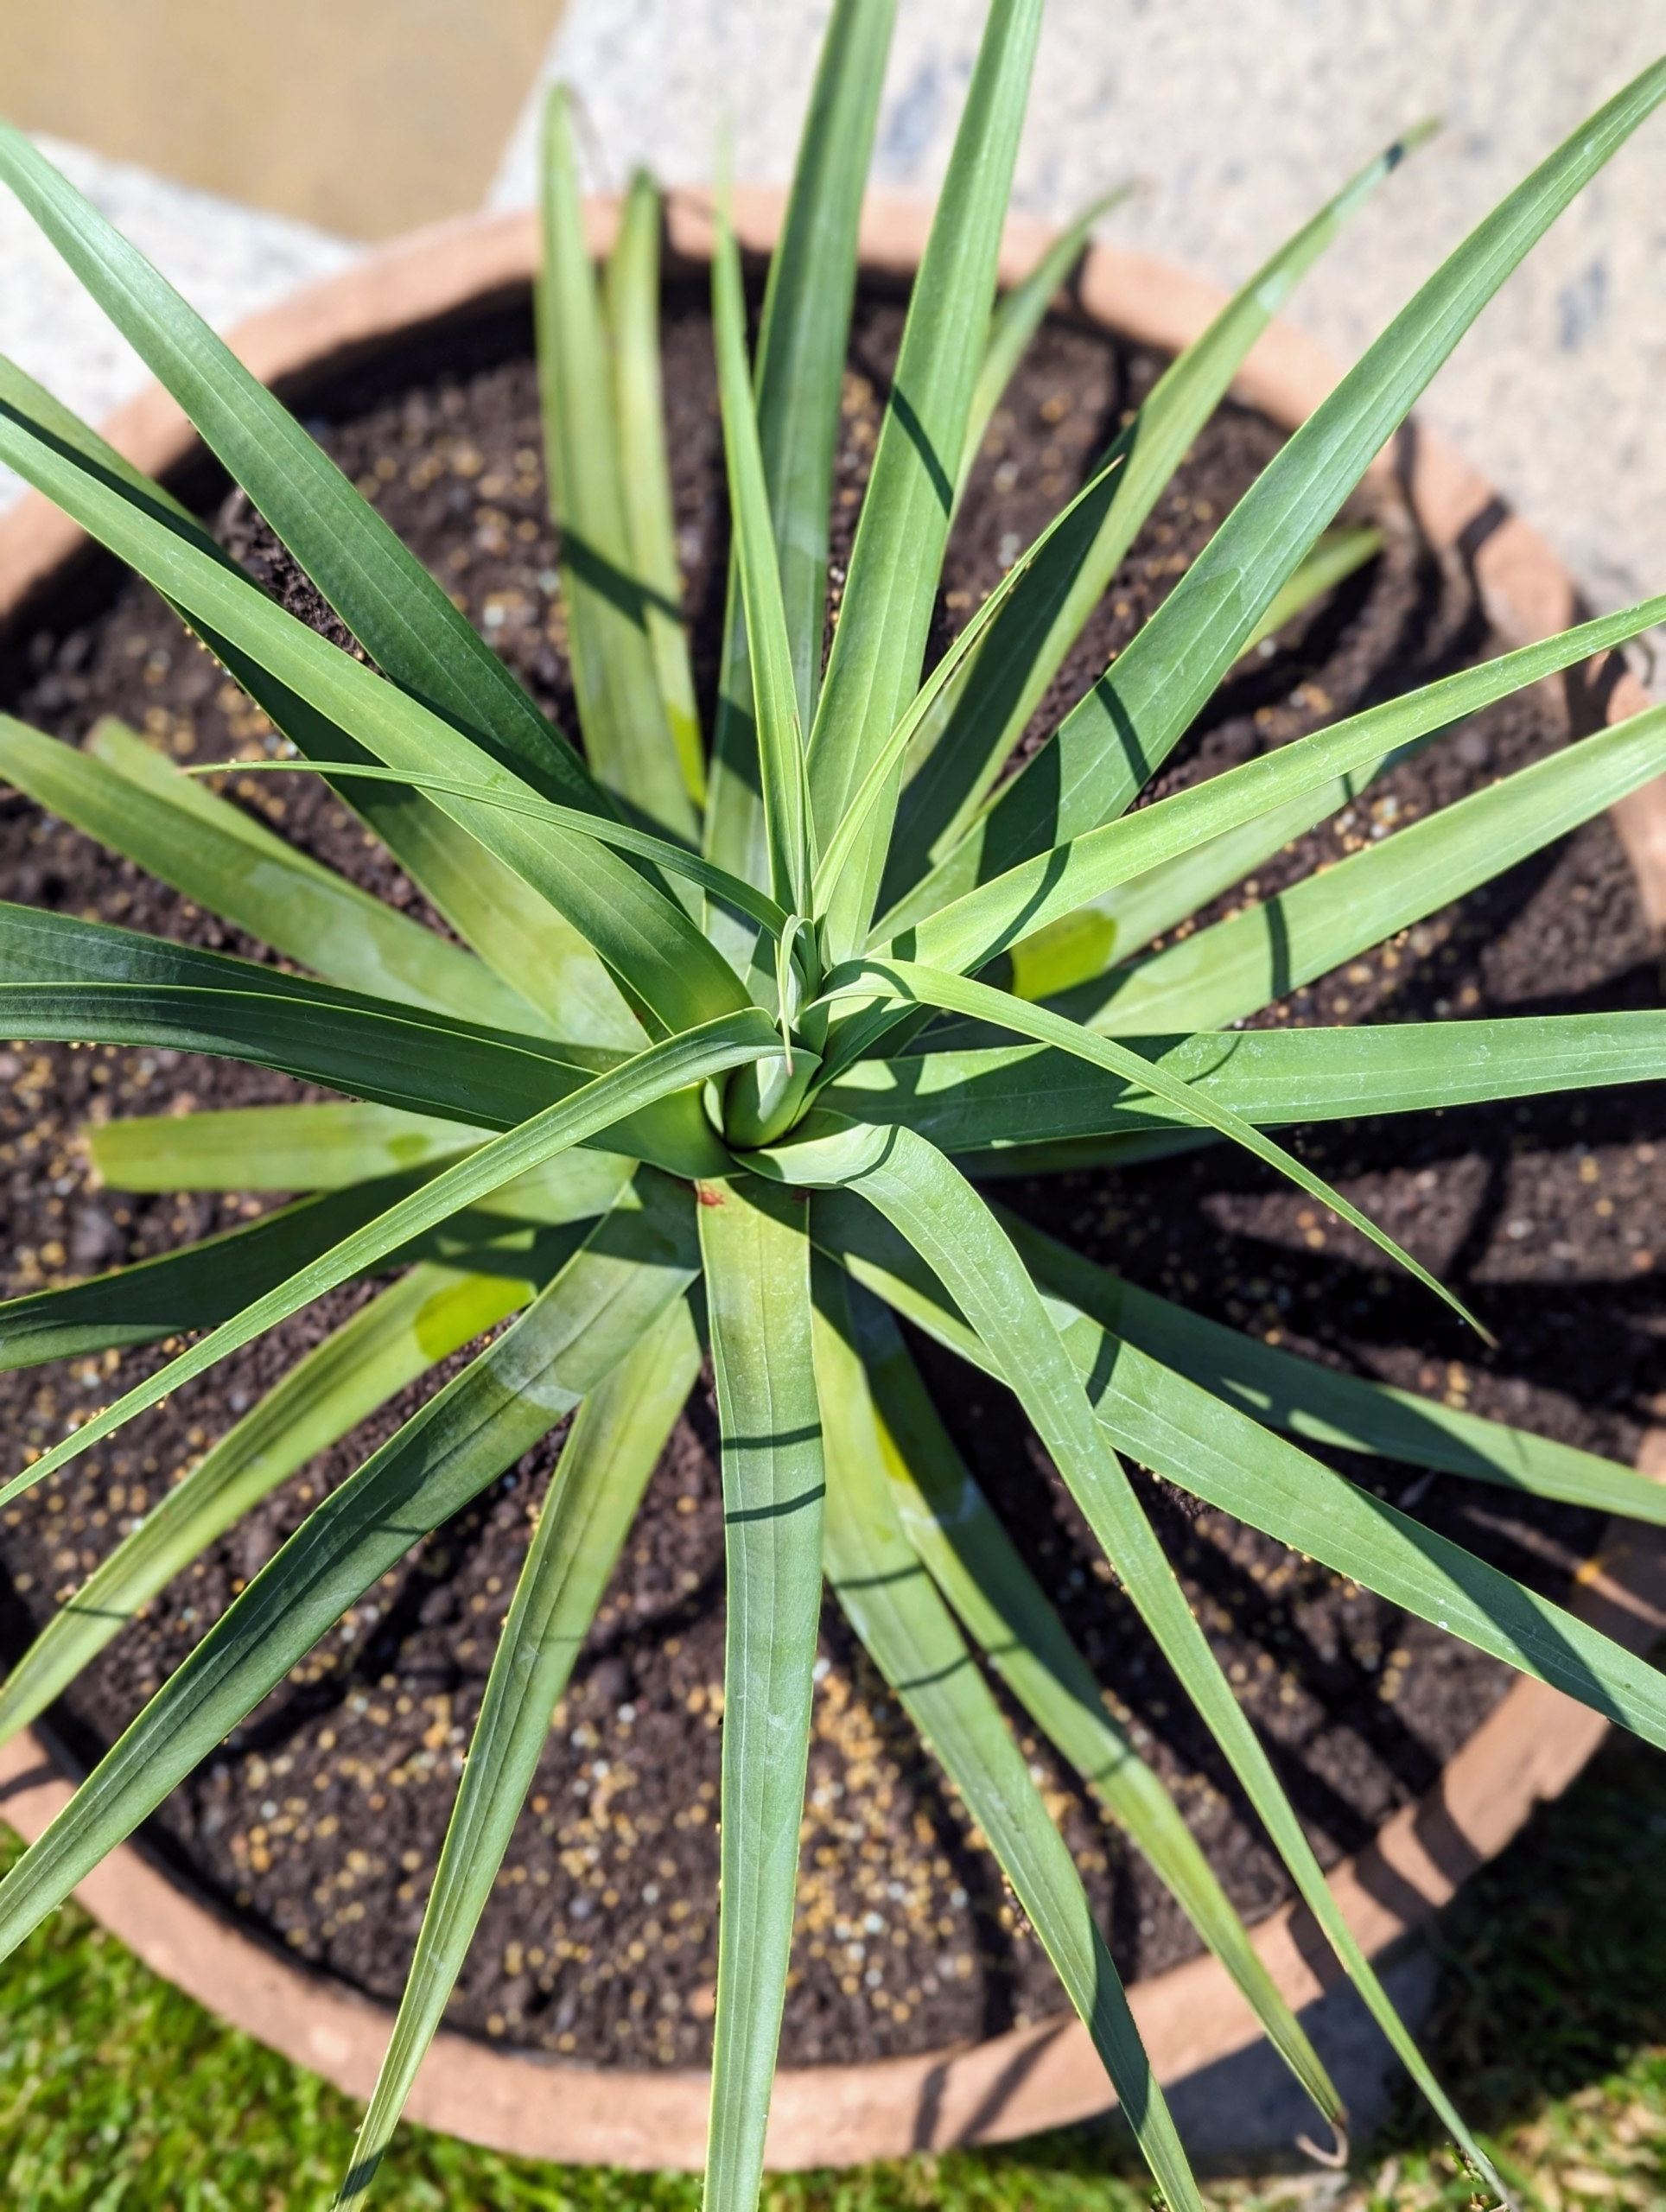
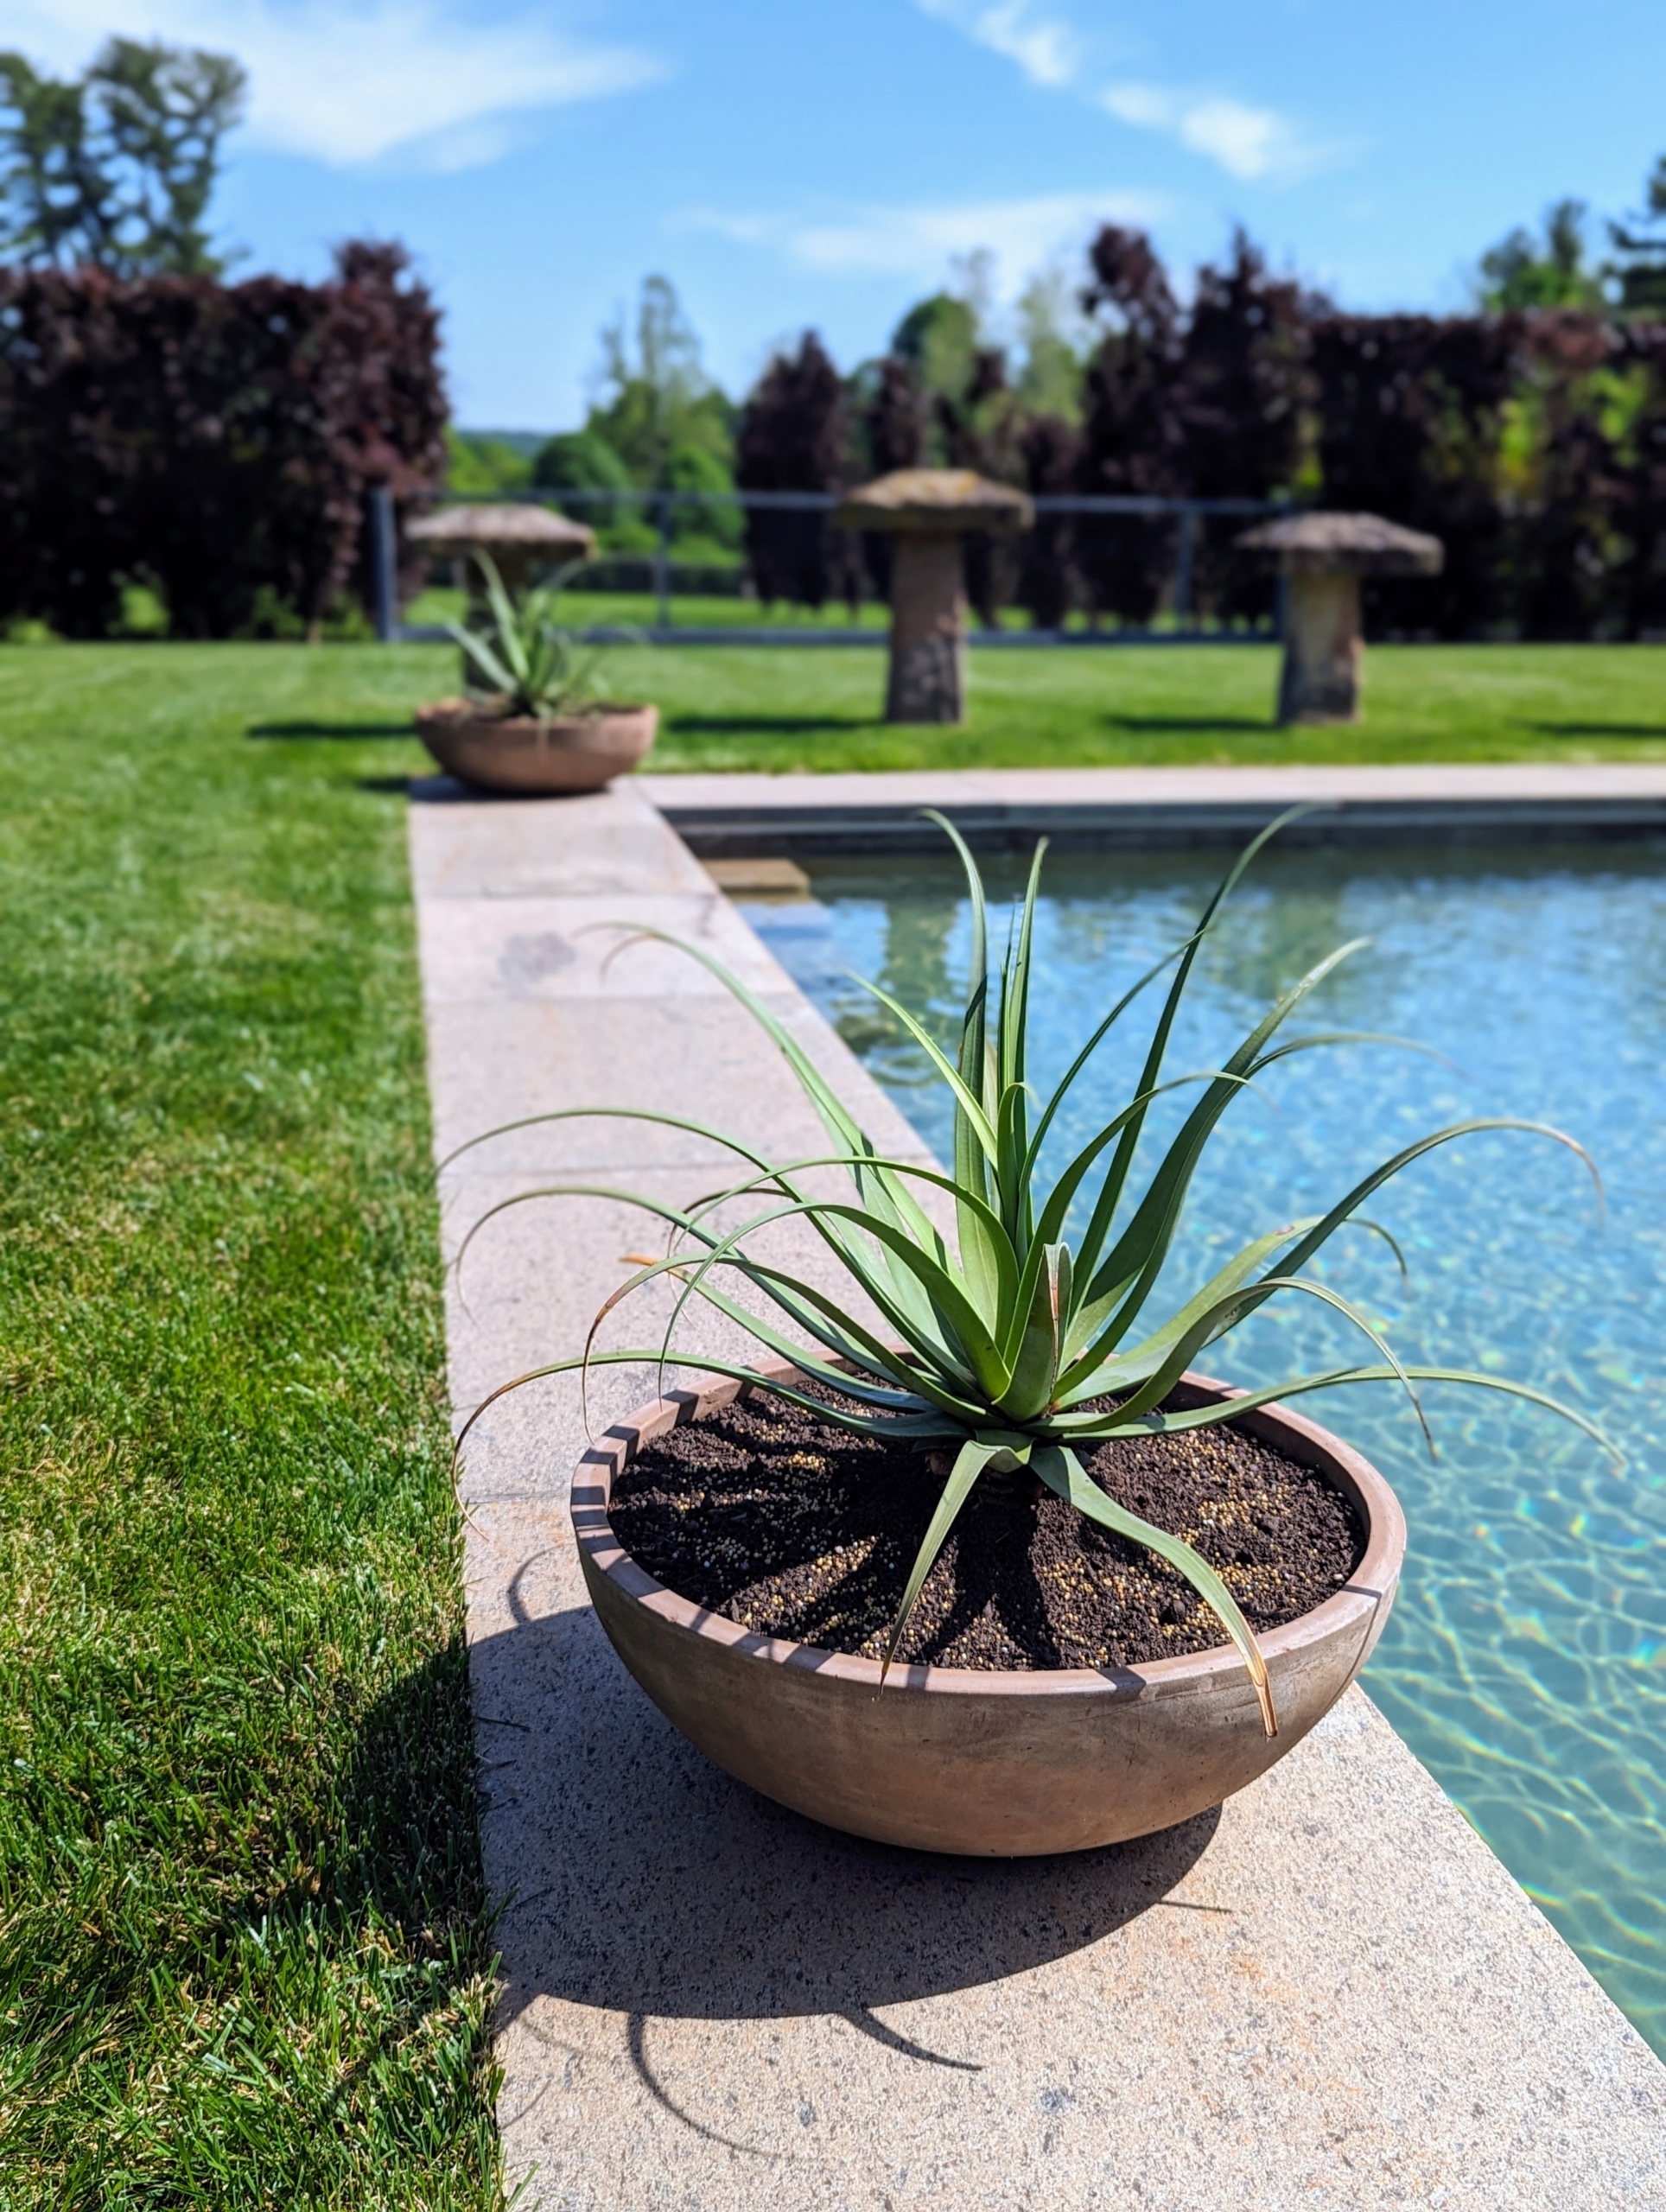
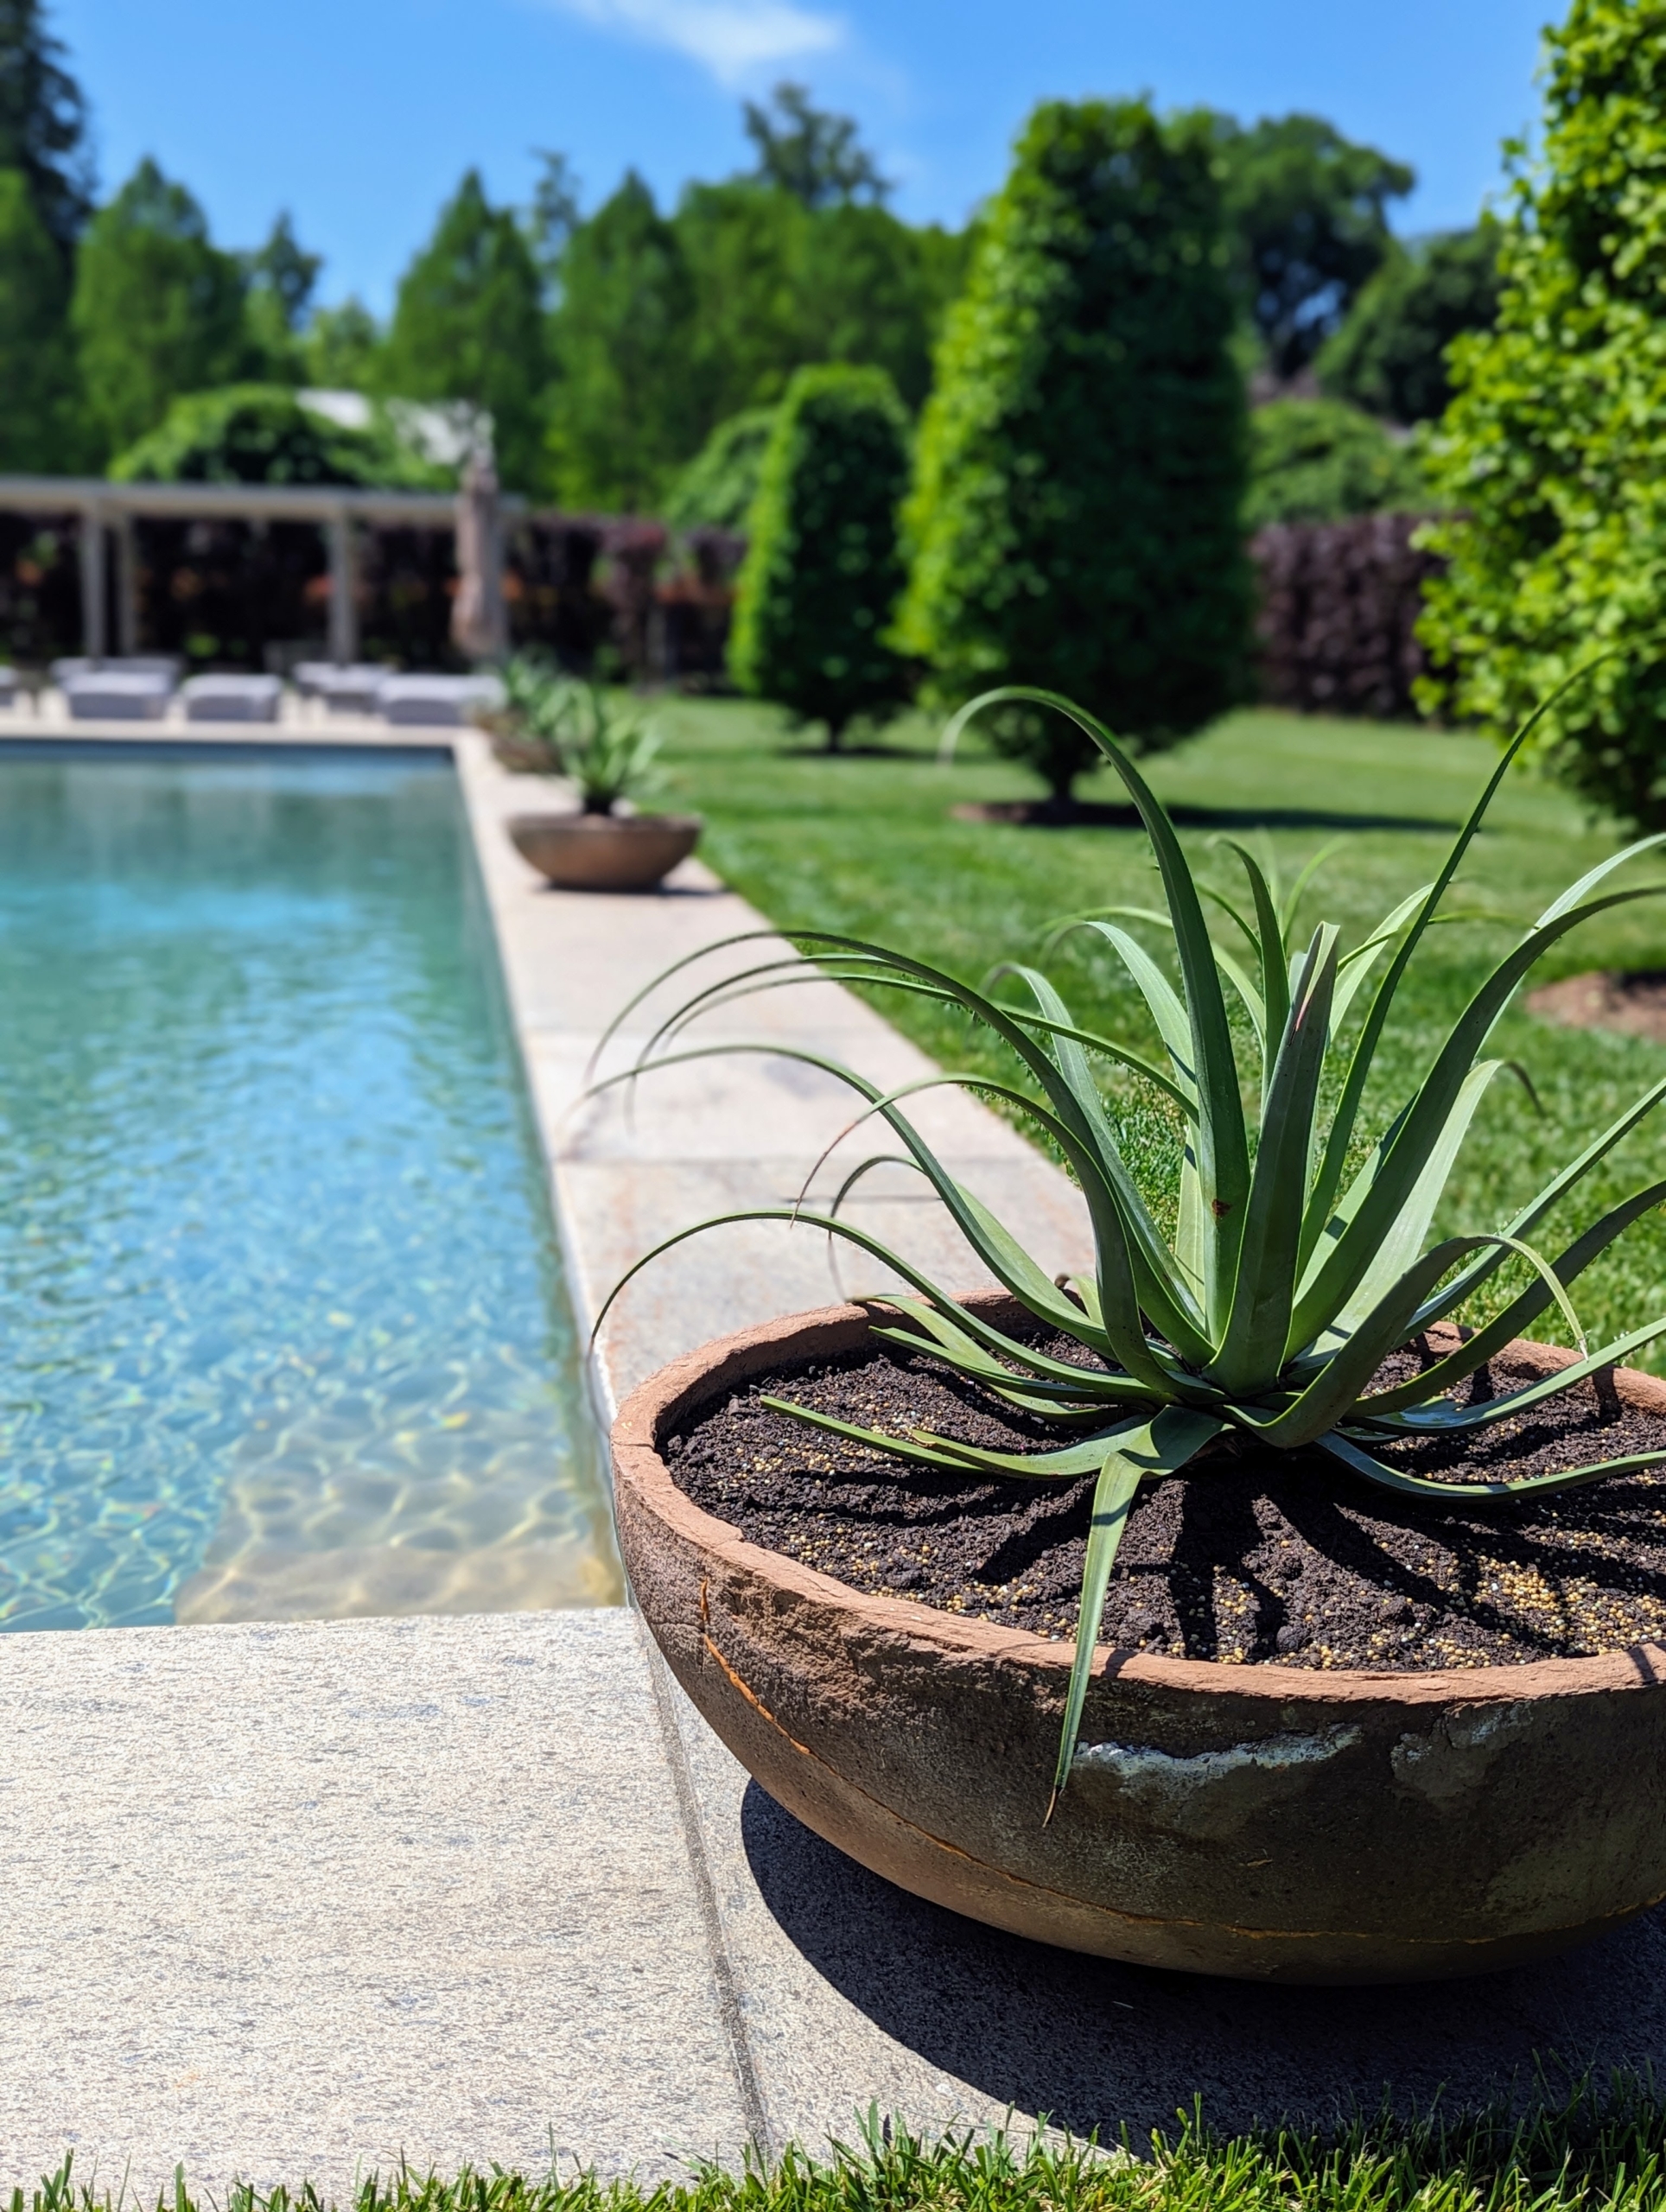
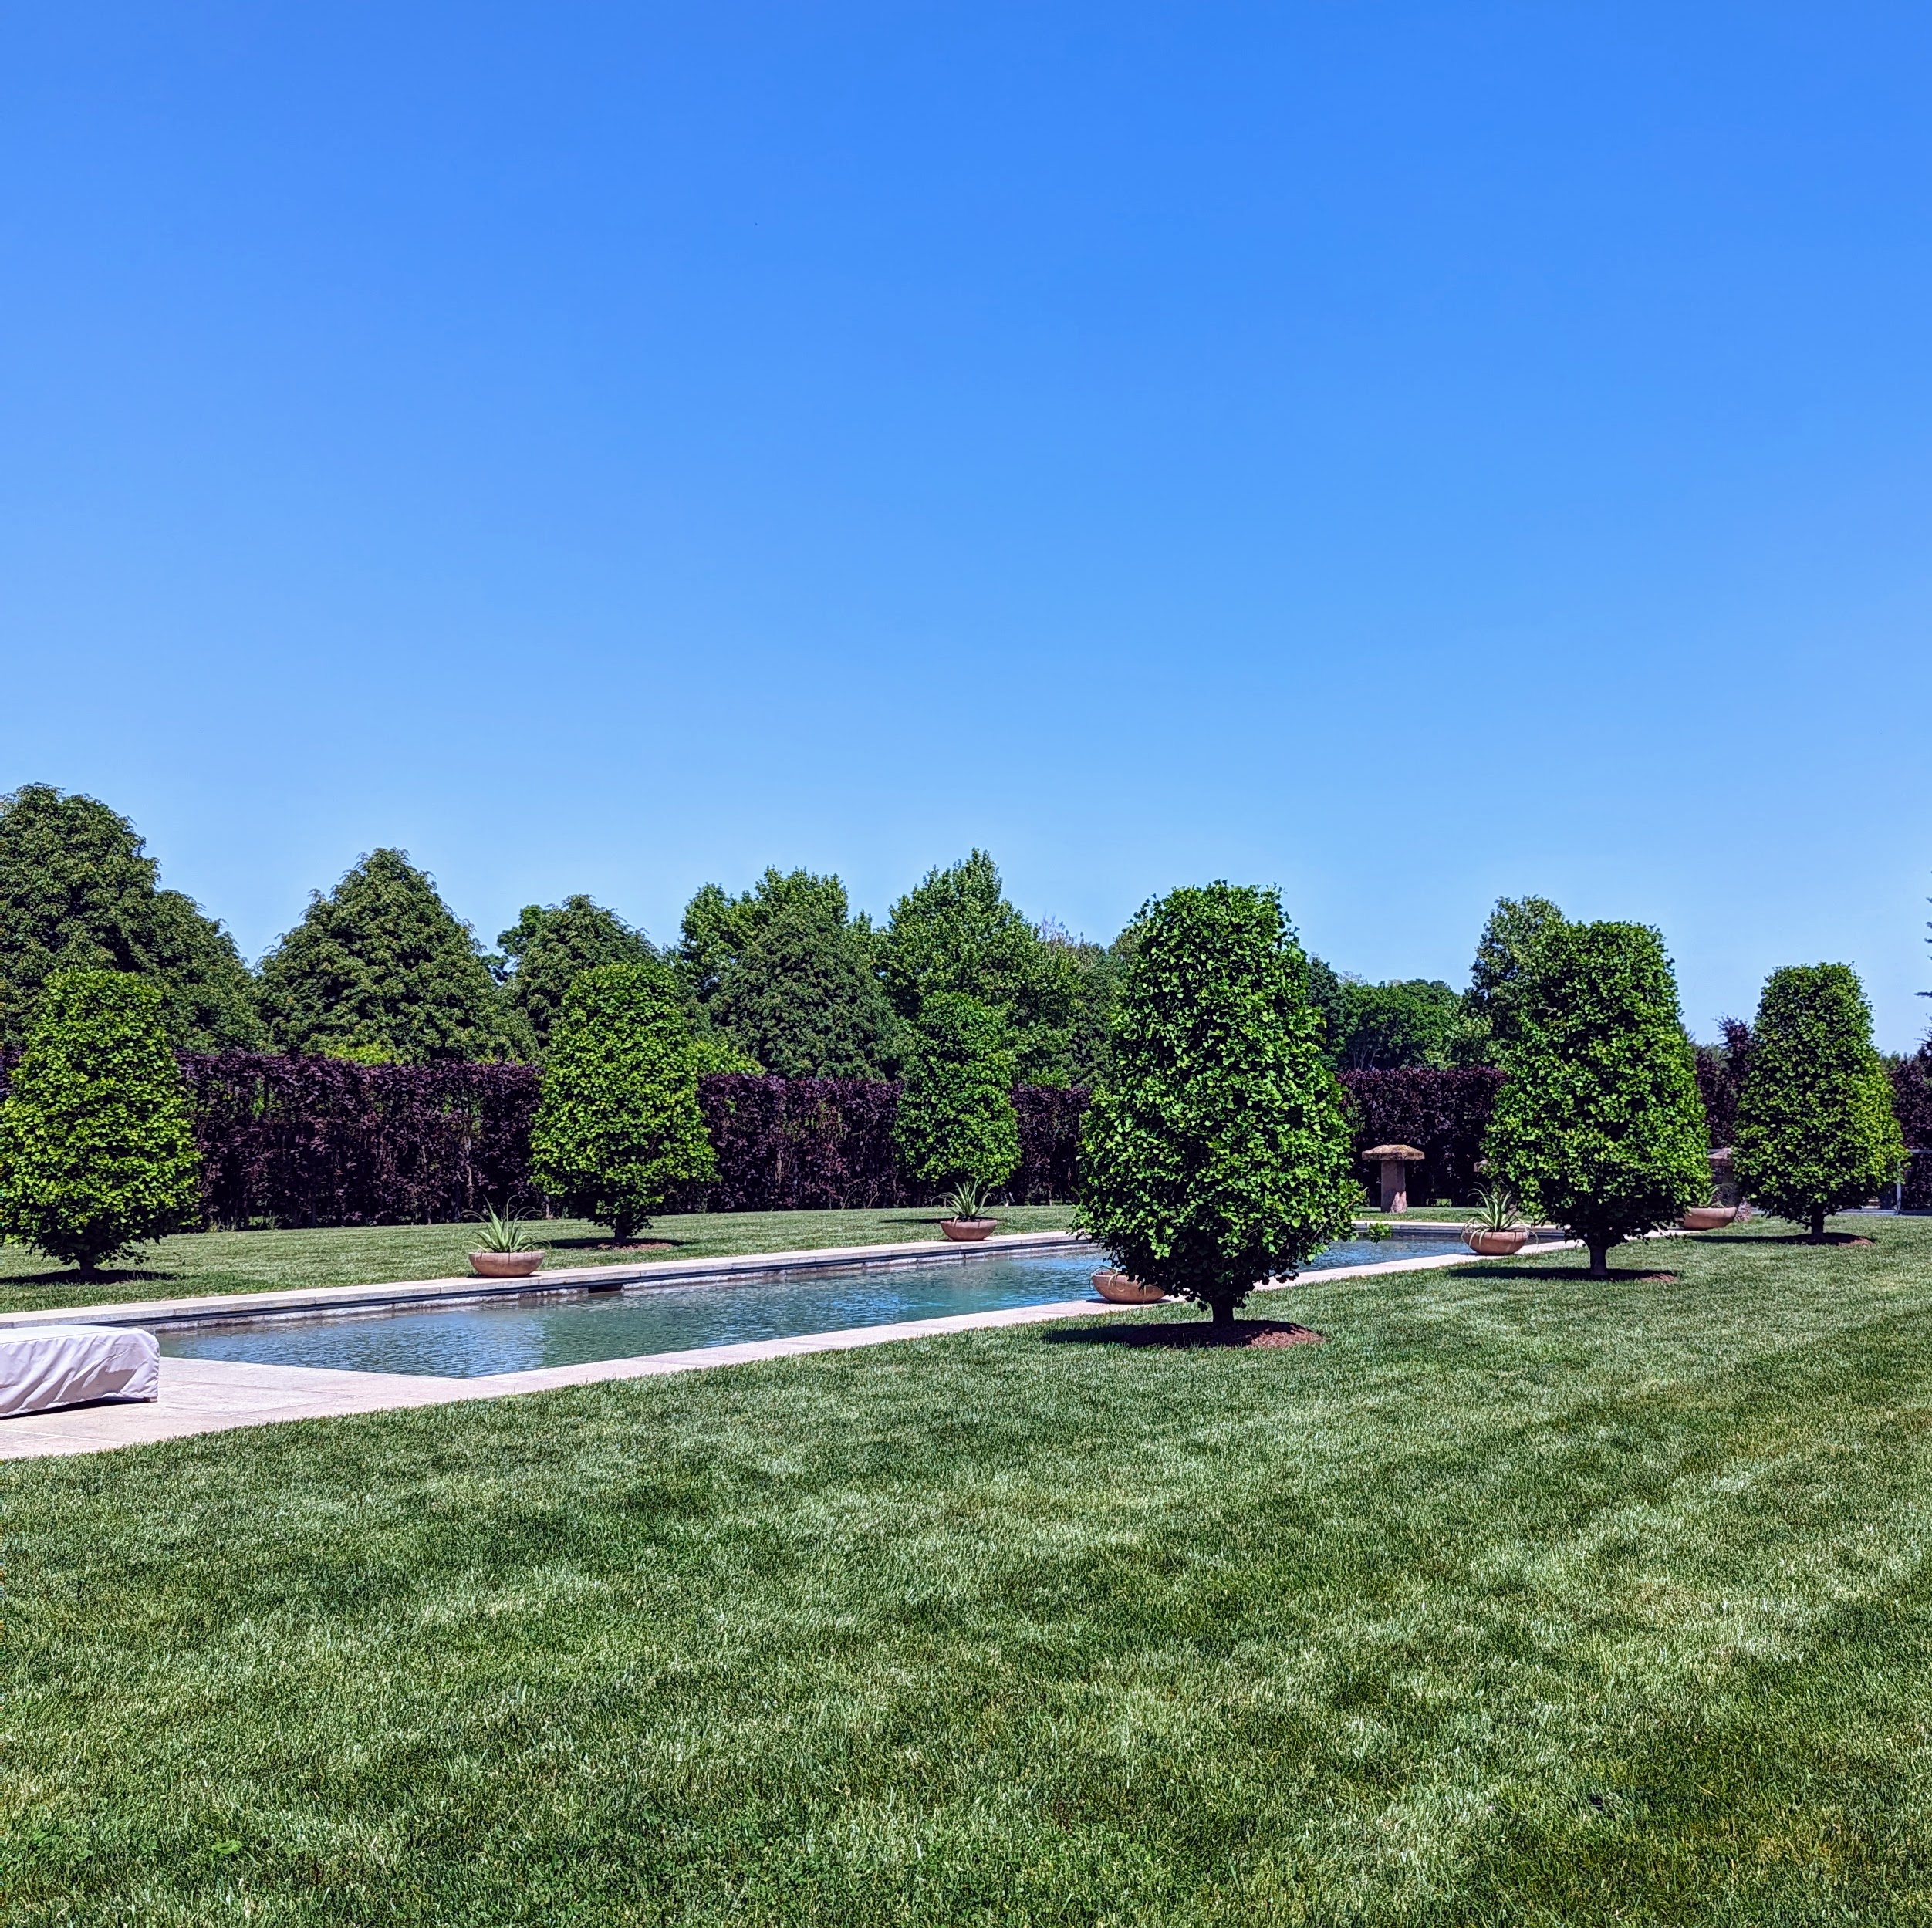
During the warmer months, I always display lots of potted plants around my home - on the terrace parterre, in the courtyard behind my Winter House, on the stone ledges around my carport, along the carriage roads, and various other locations. Last week, my gardeners planted a collection of Agave bracteosa, or Squid Agave to display around my pool. Agaves are succulents, meaning they store water in their fleshy leaves, enabling them to thrive in arid and semi-arid regions.
Here are some photos, enjoy.
Every spring, I take out many of my outdoor ornamental urns and fill them with plants. They do so well outside in the summer months. On this day, my gardeners are planting these round urns with lush, green agaves.
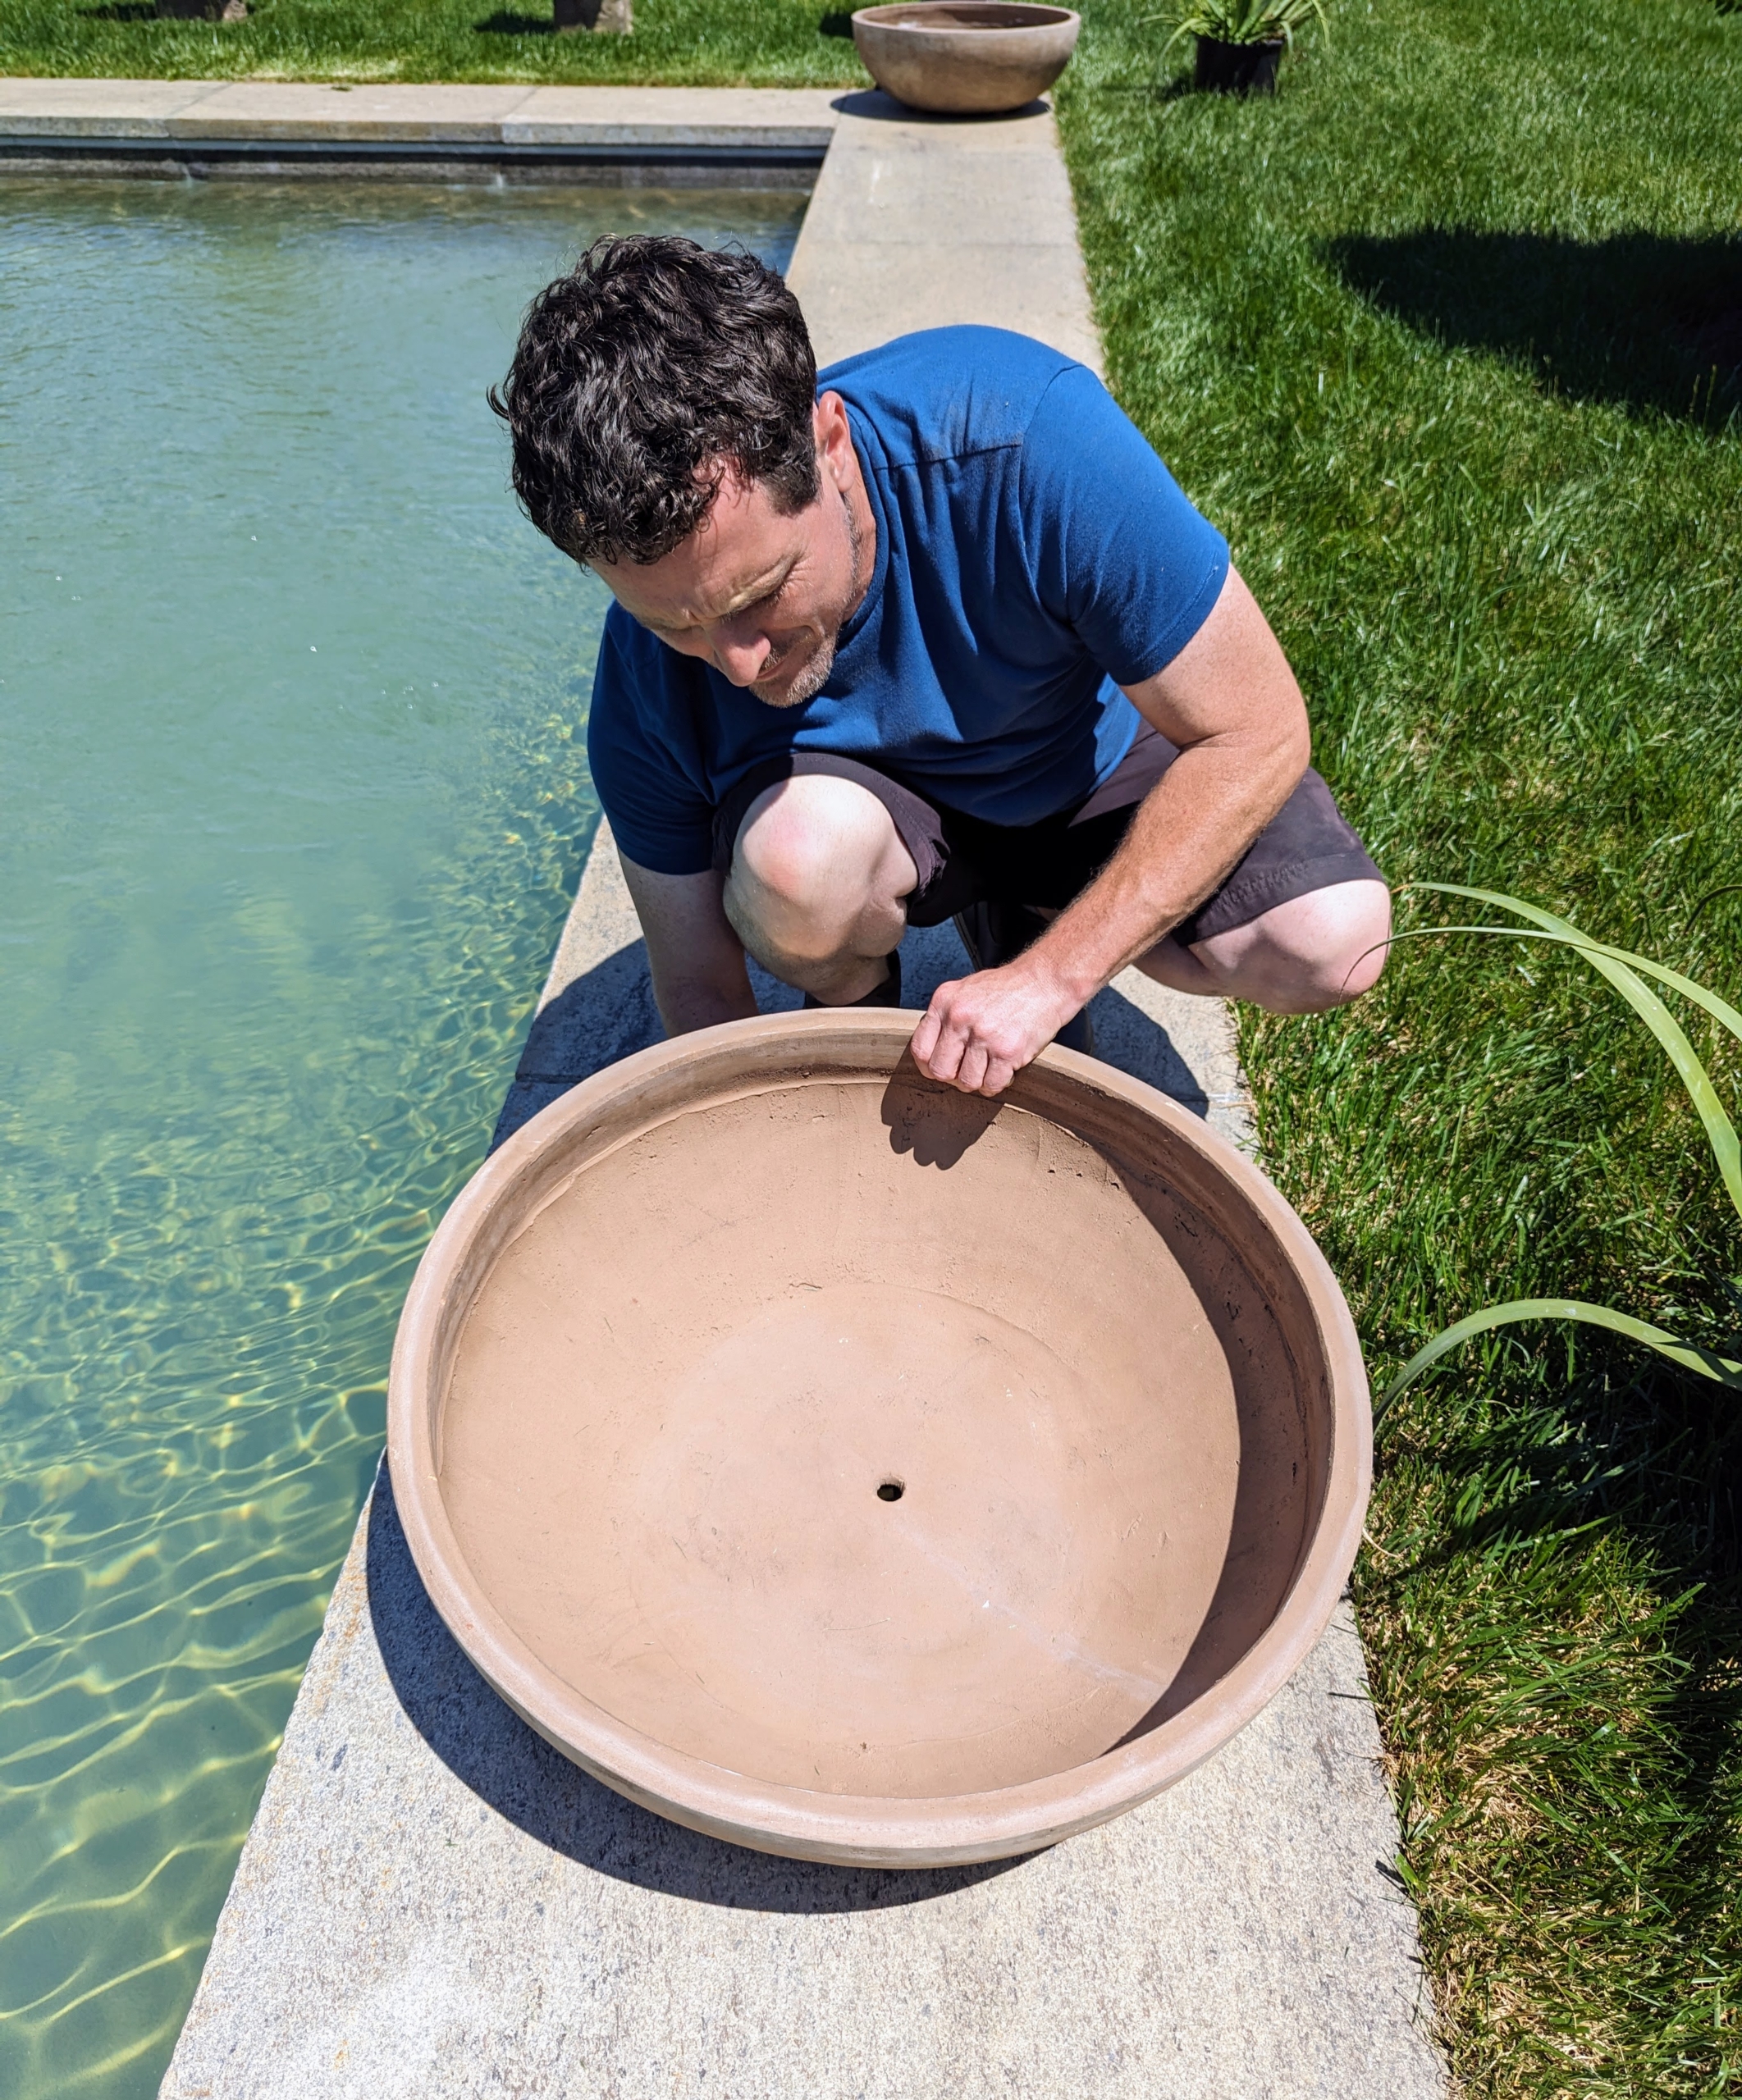
Here are Ryan and Josh carrying one of the very heavy round bowl planters poolside.
Ryan assesses each plants’s size and form and places one next to each ornamental urn ready for planting.
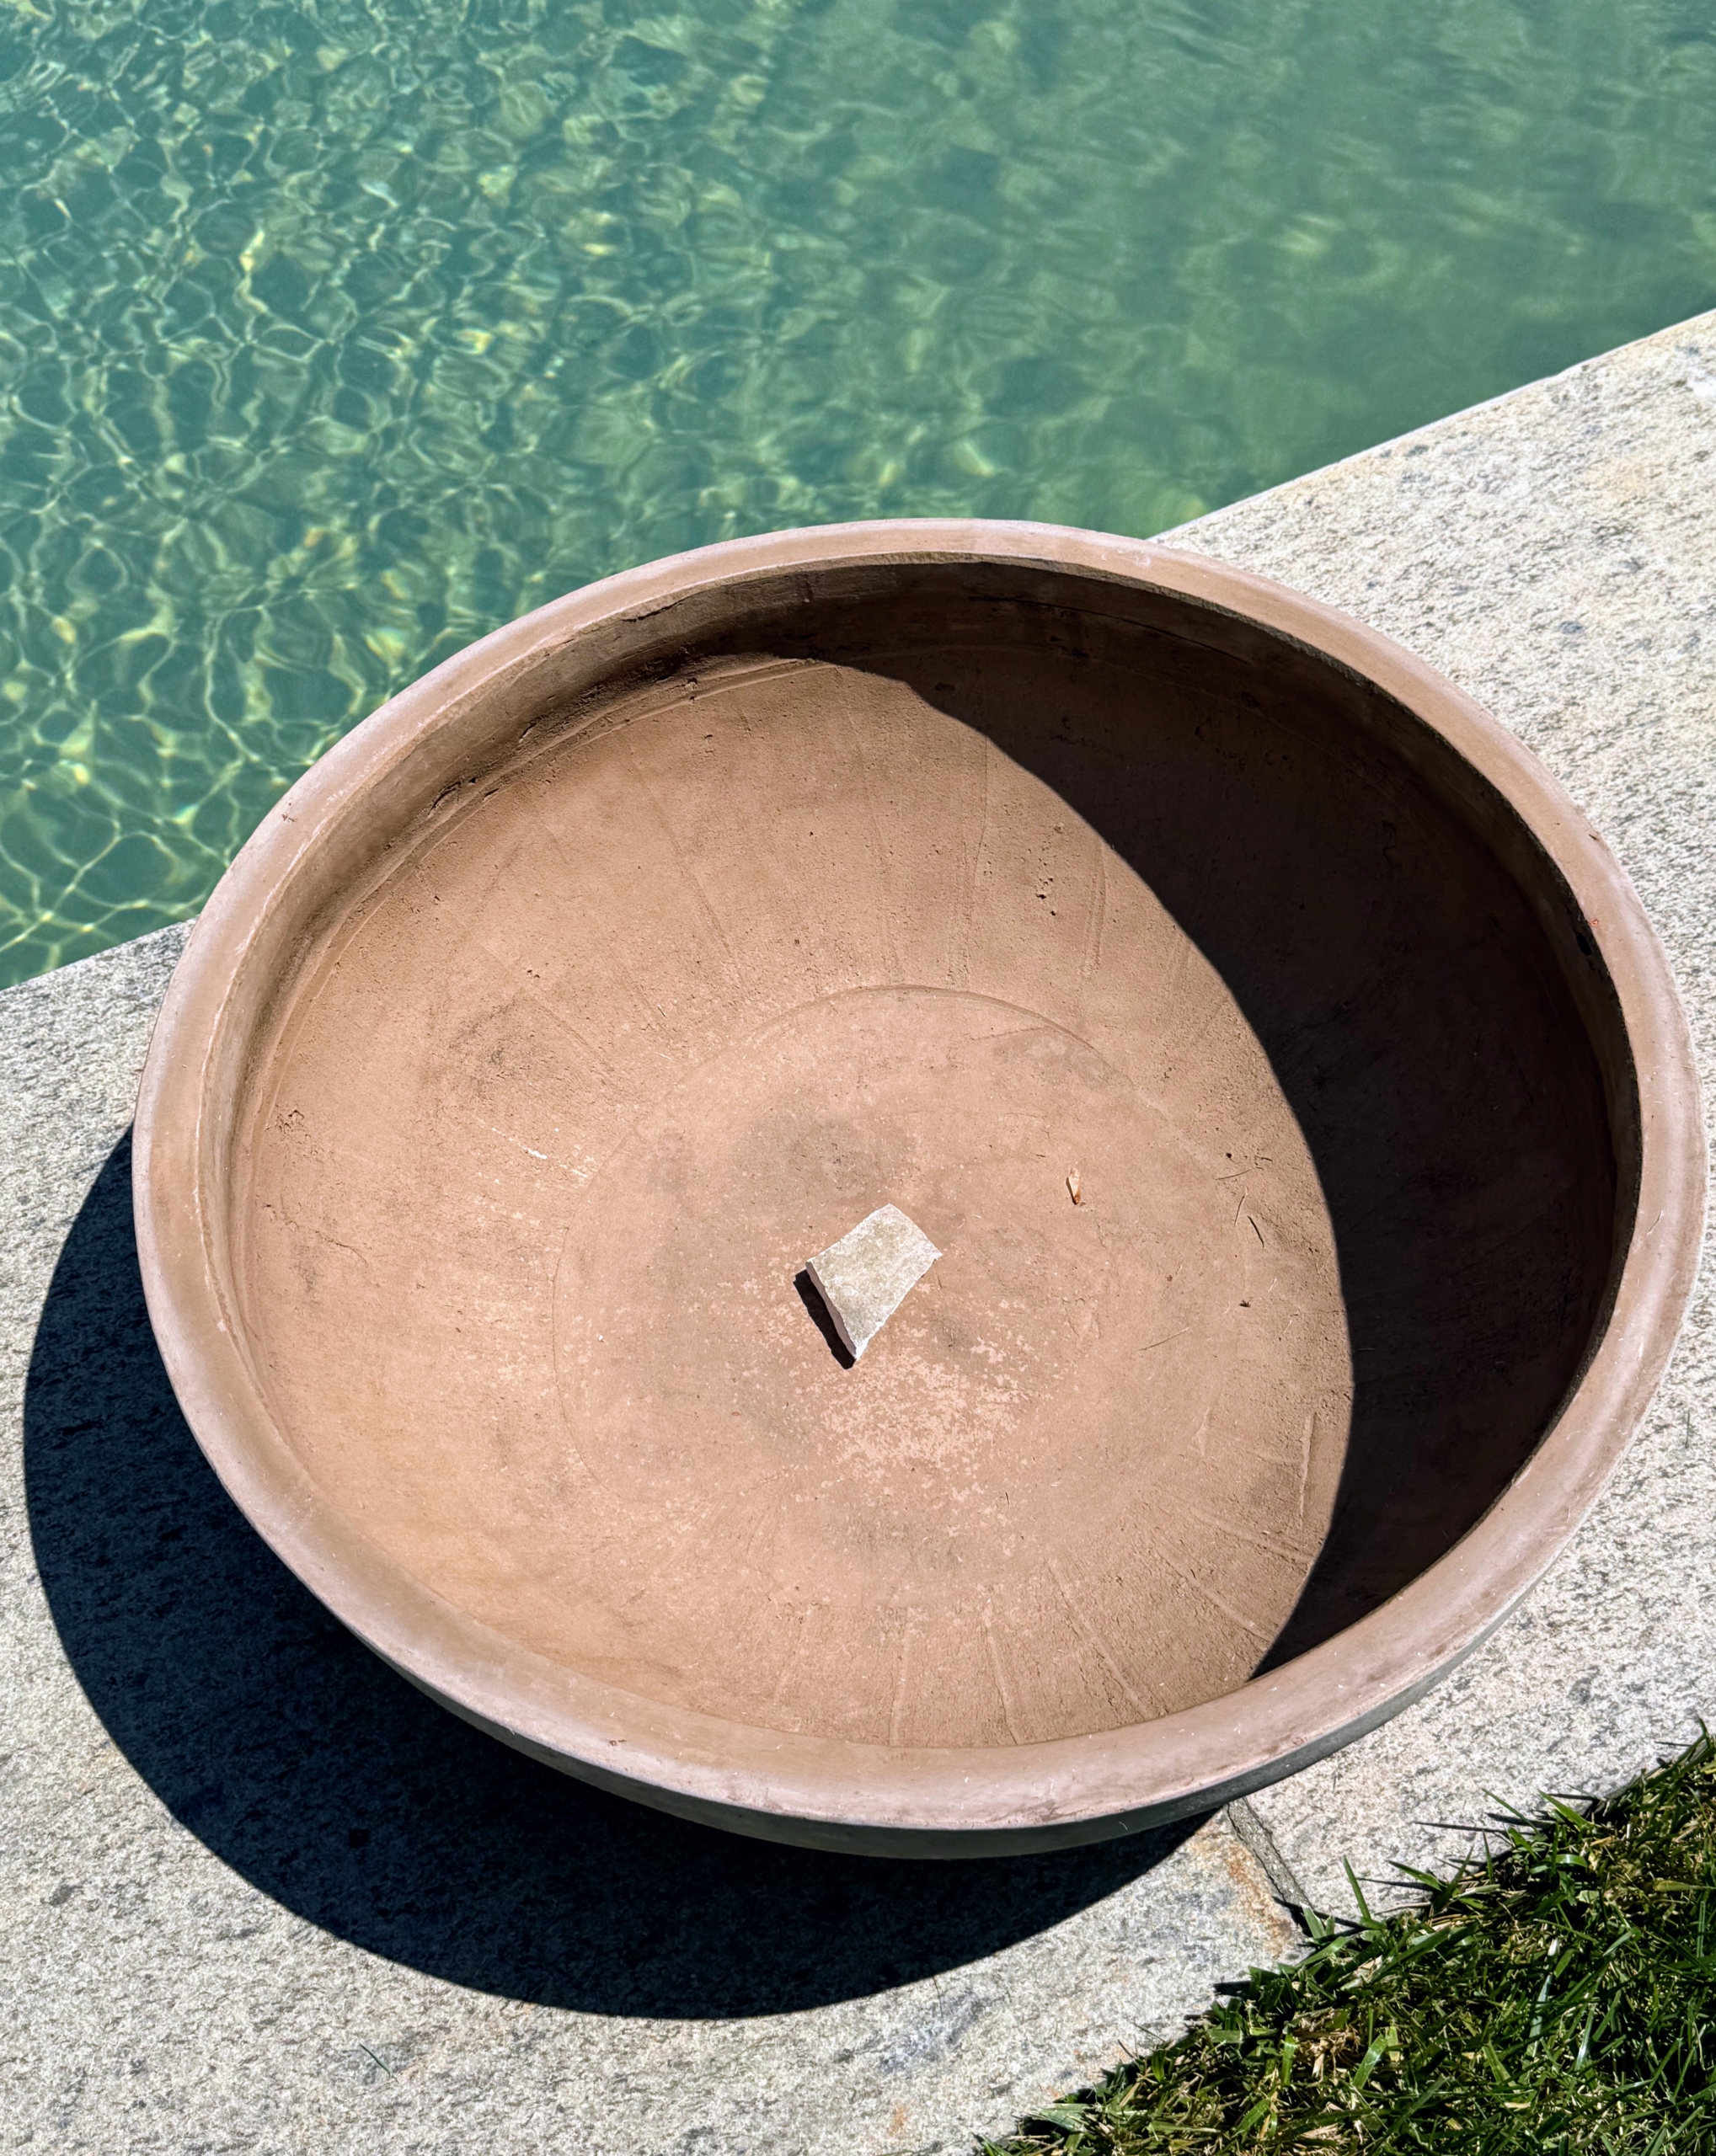
Some of the urns are larger than others, but all have drainage holes at the bottom.
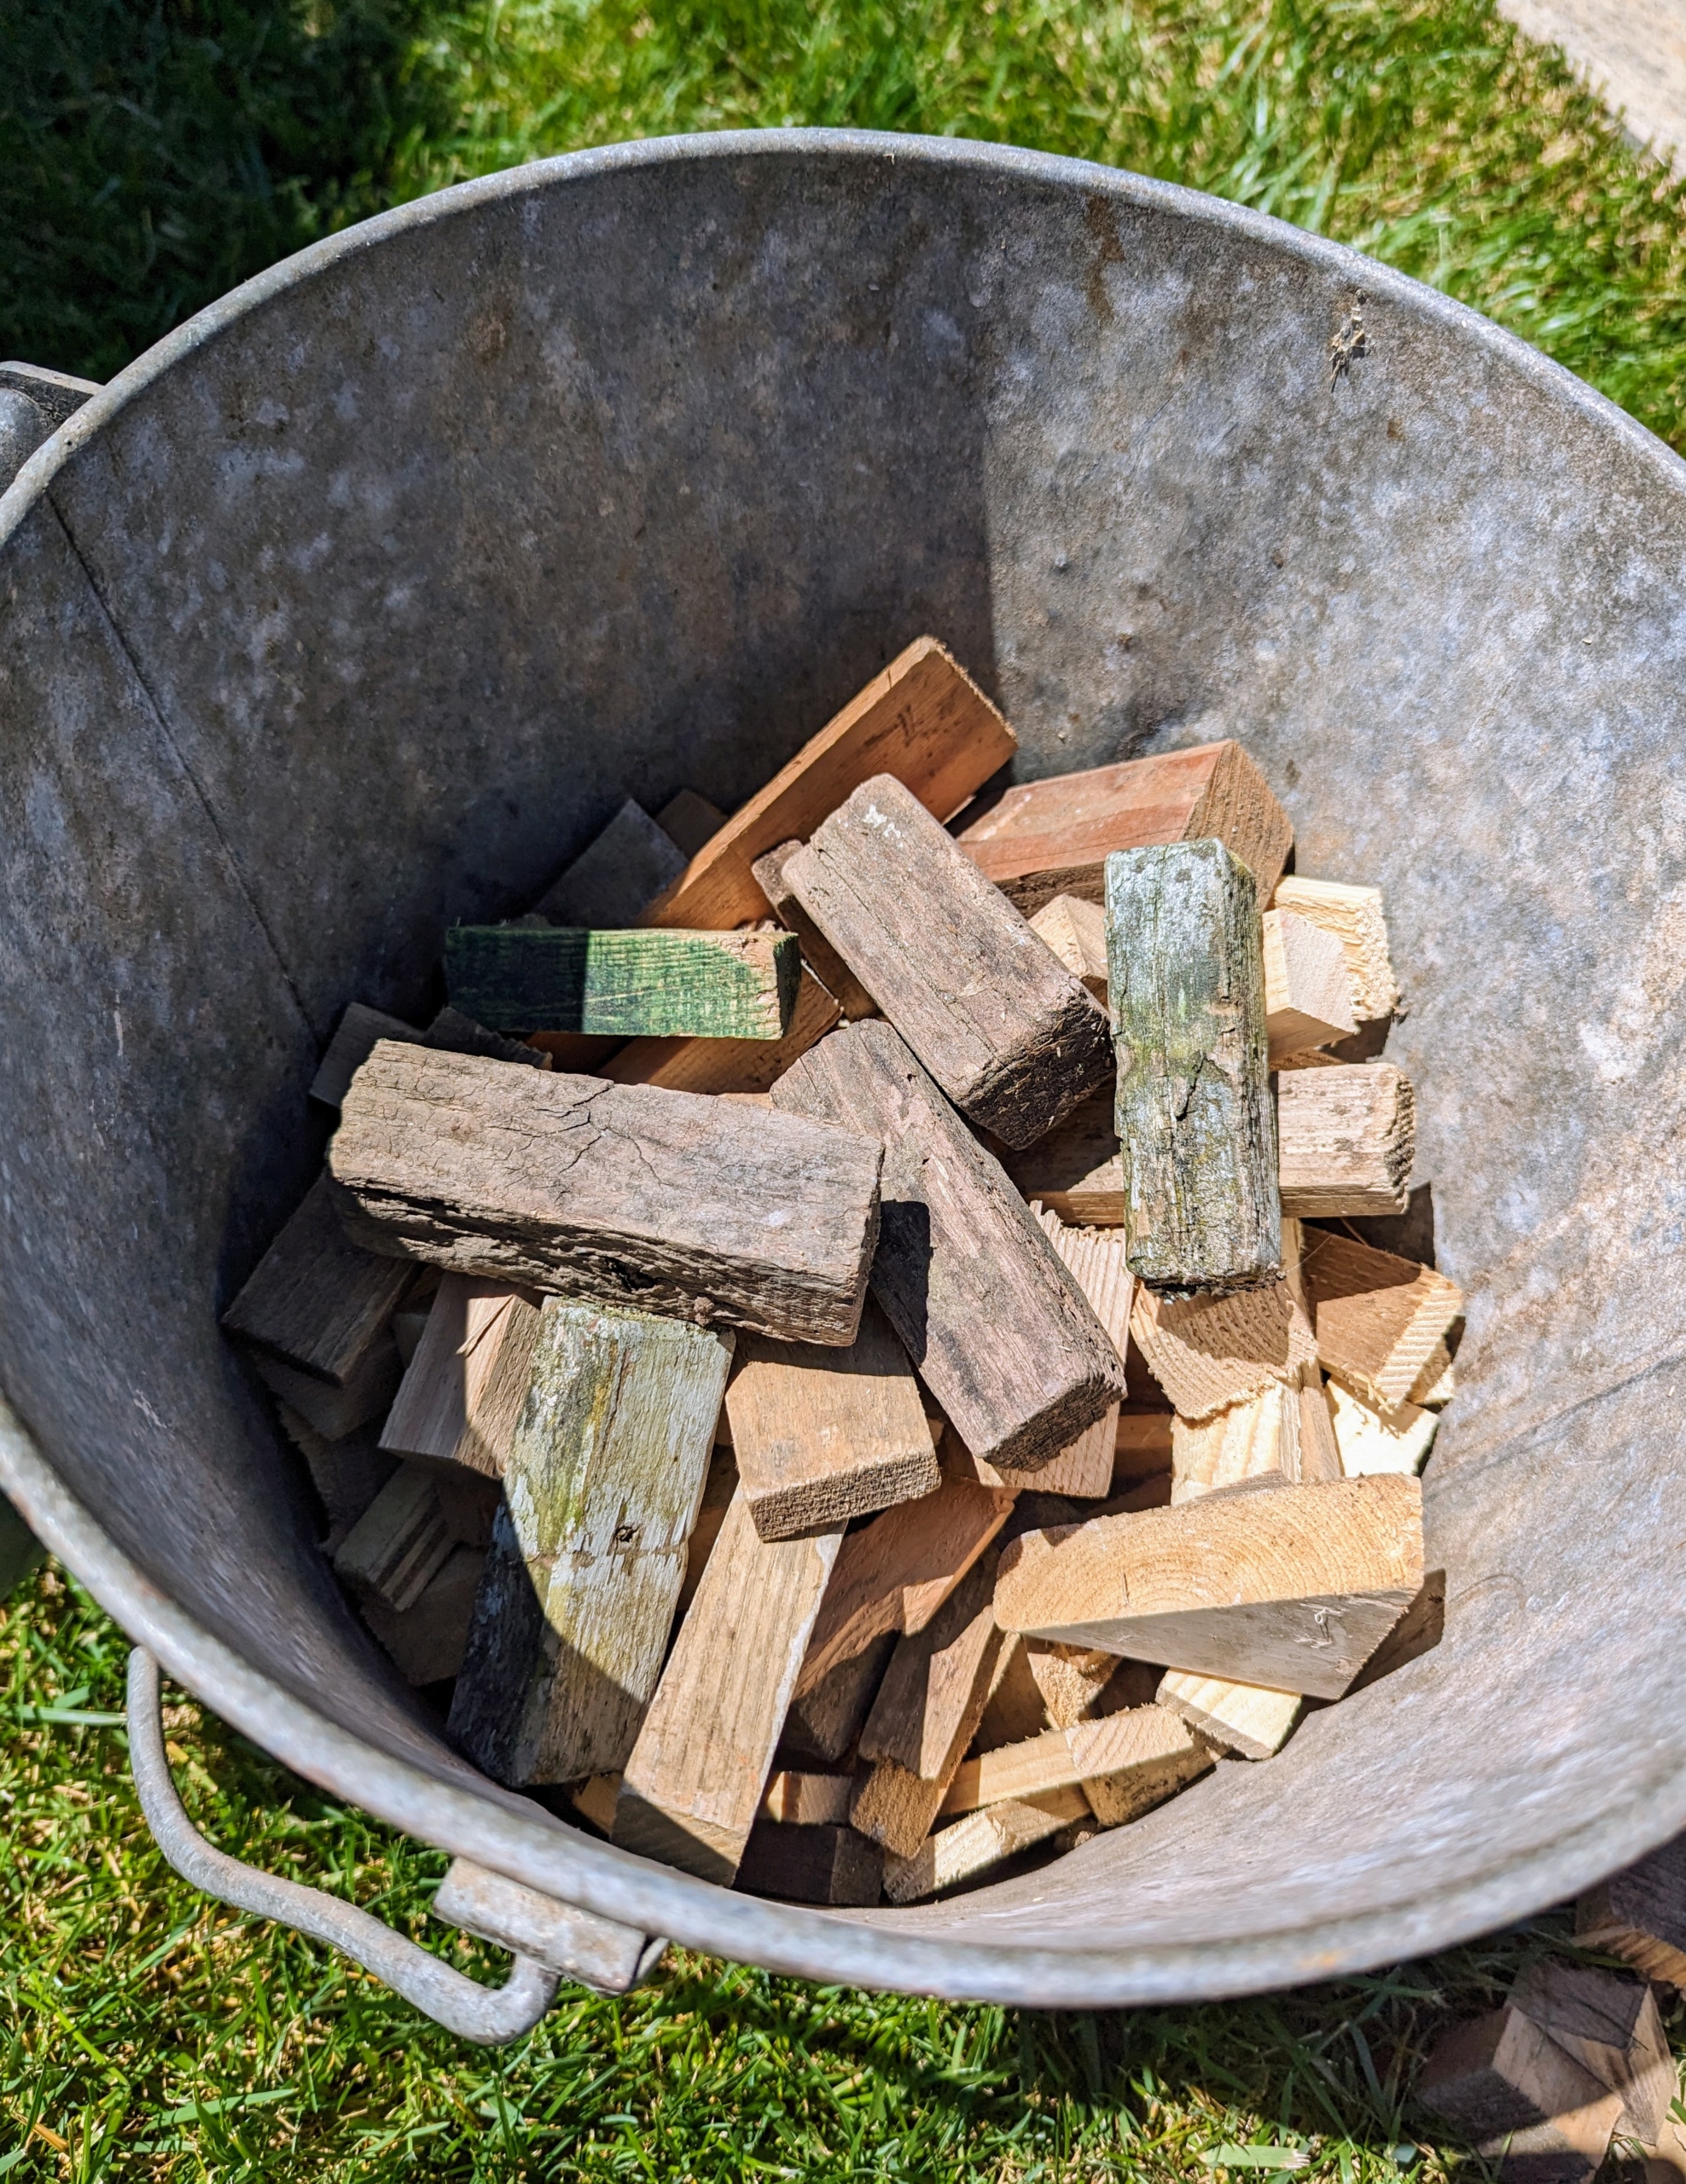
Ryan brings a collection of wooden shims which are used to raise the pots off the ground just enough for the water to properly drain.
He places several shims of similar size under each pot. I have shims of some kind under every pot here at the farm.
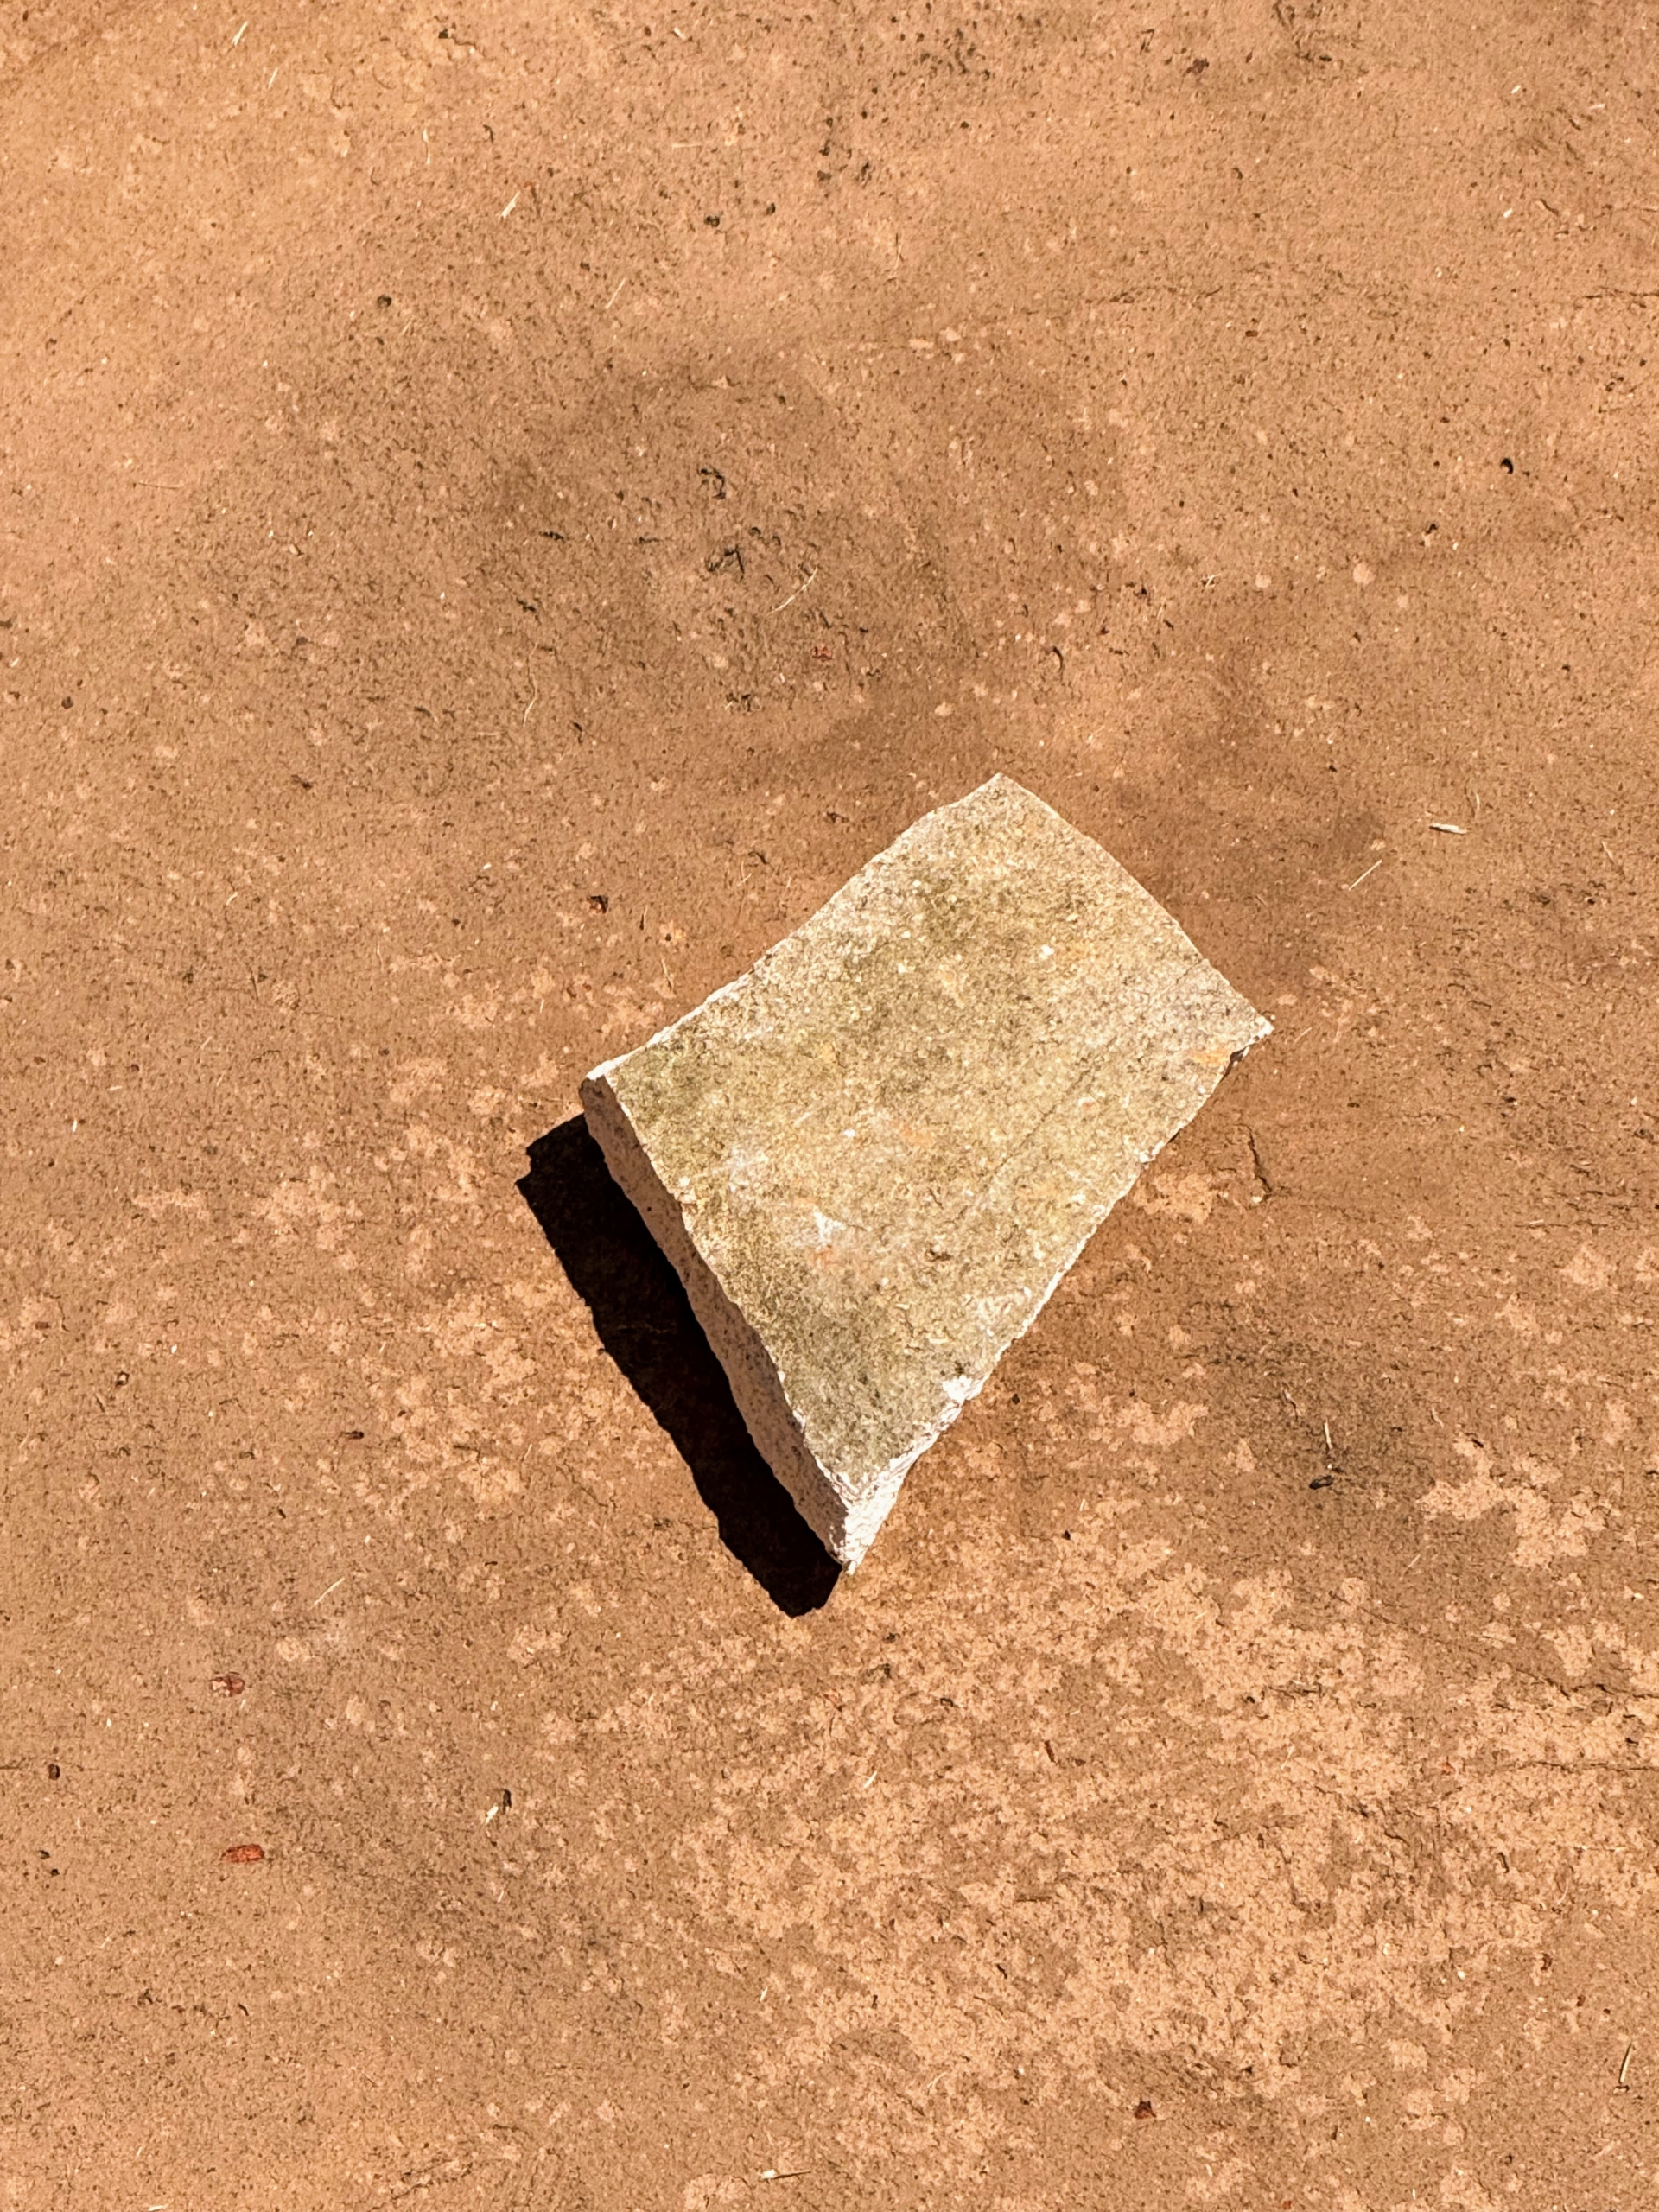
Next, he places a shard at the bottom of each planter. It keeps dirt from falling through the hole while making sure there is still room for proper drainage.
Saving the shards from broken pots and using them to cover drainage holes is a great way to repurpose those pieces.
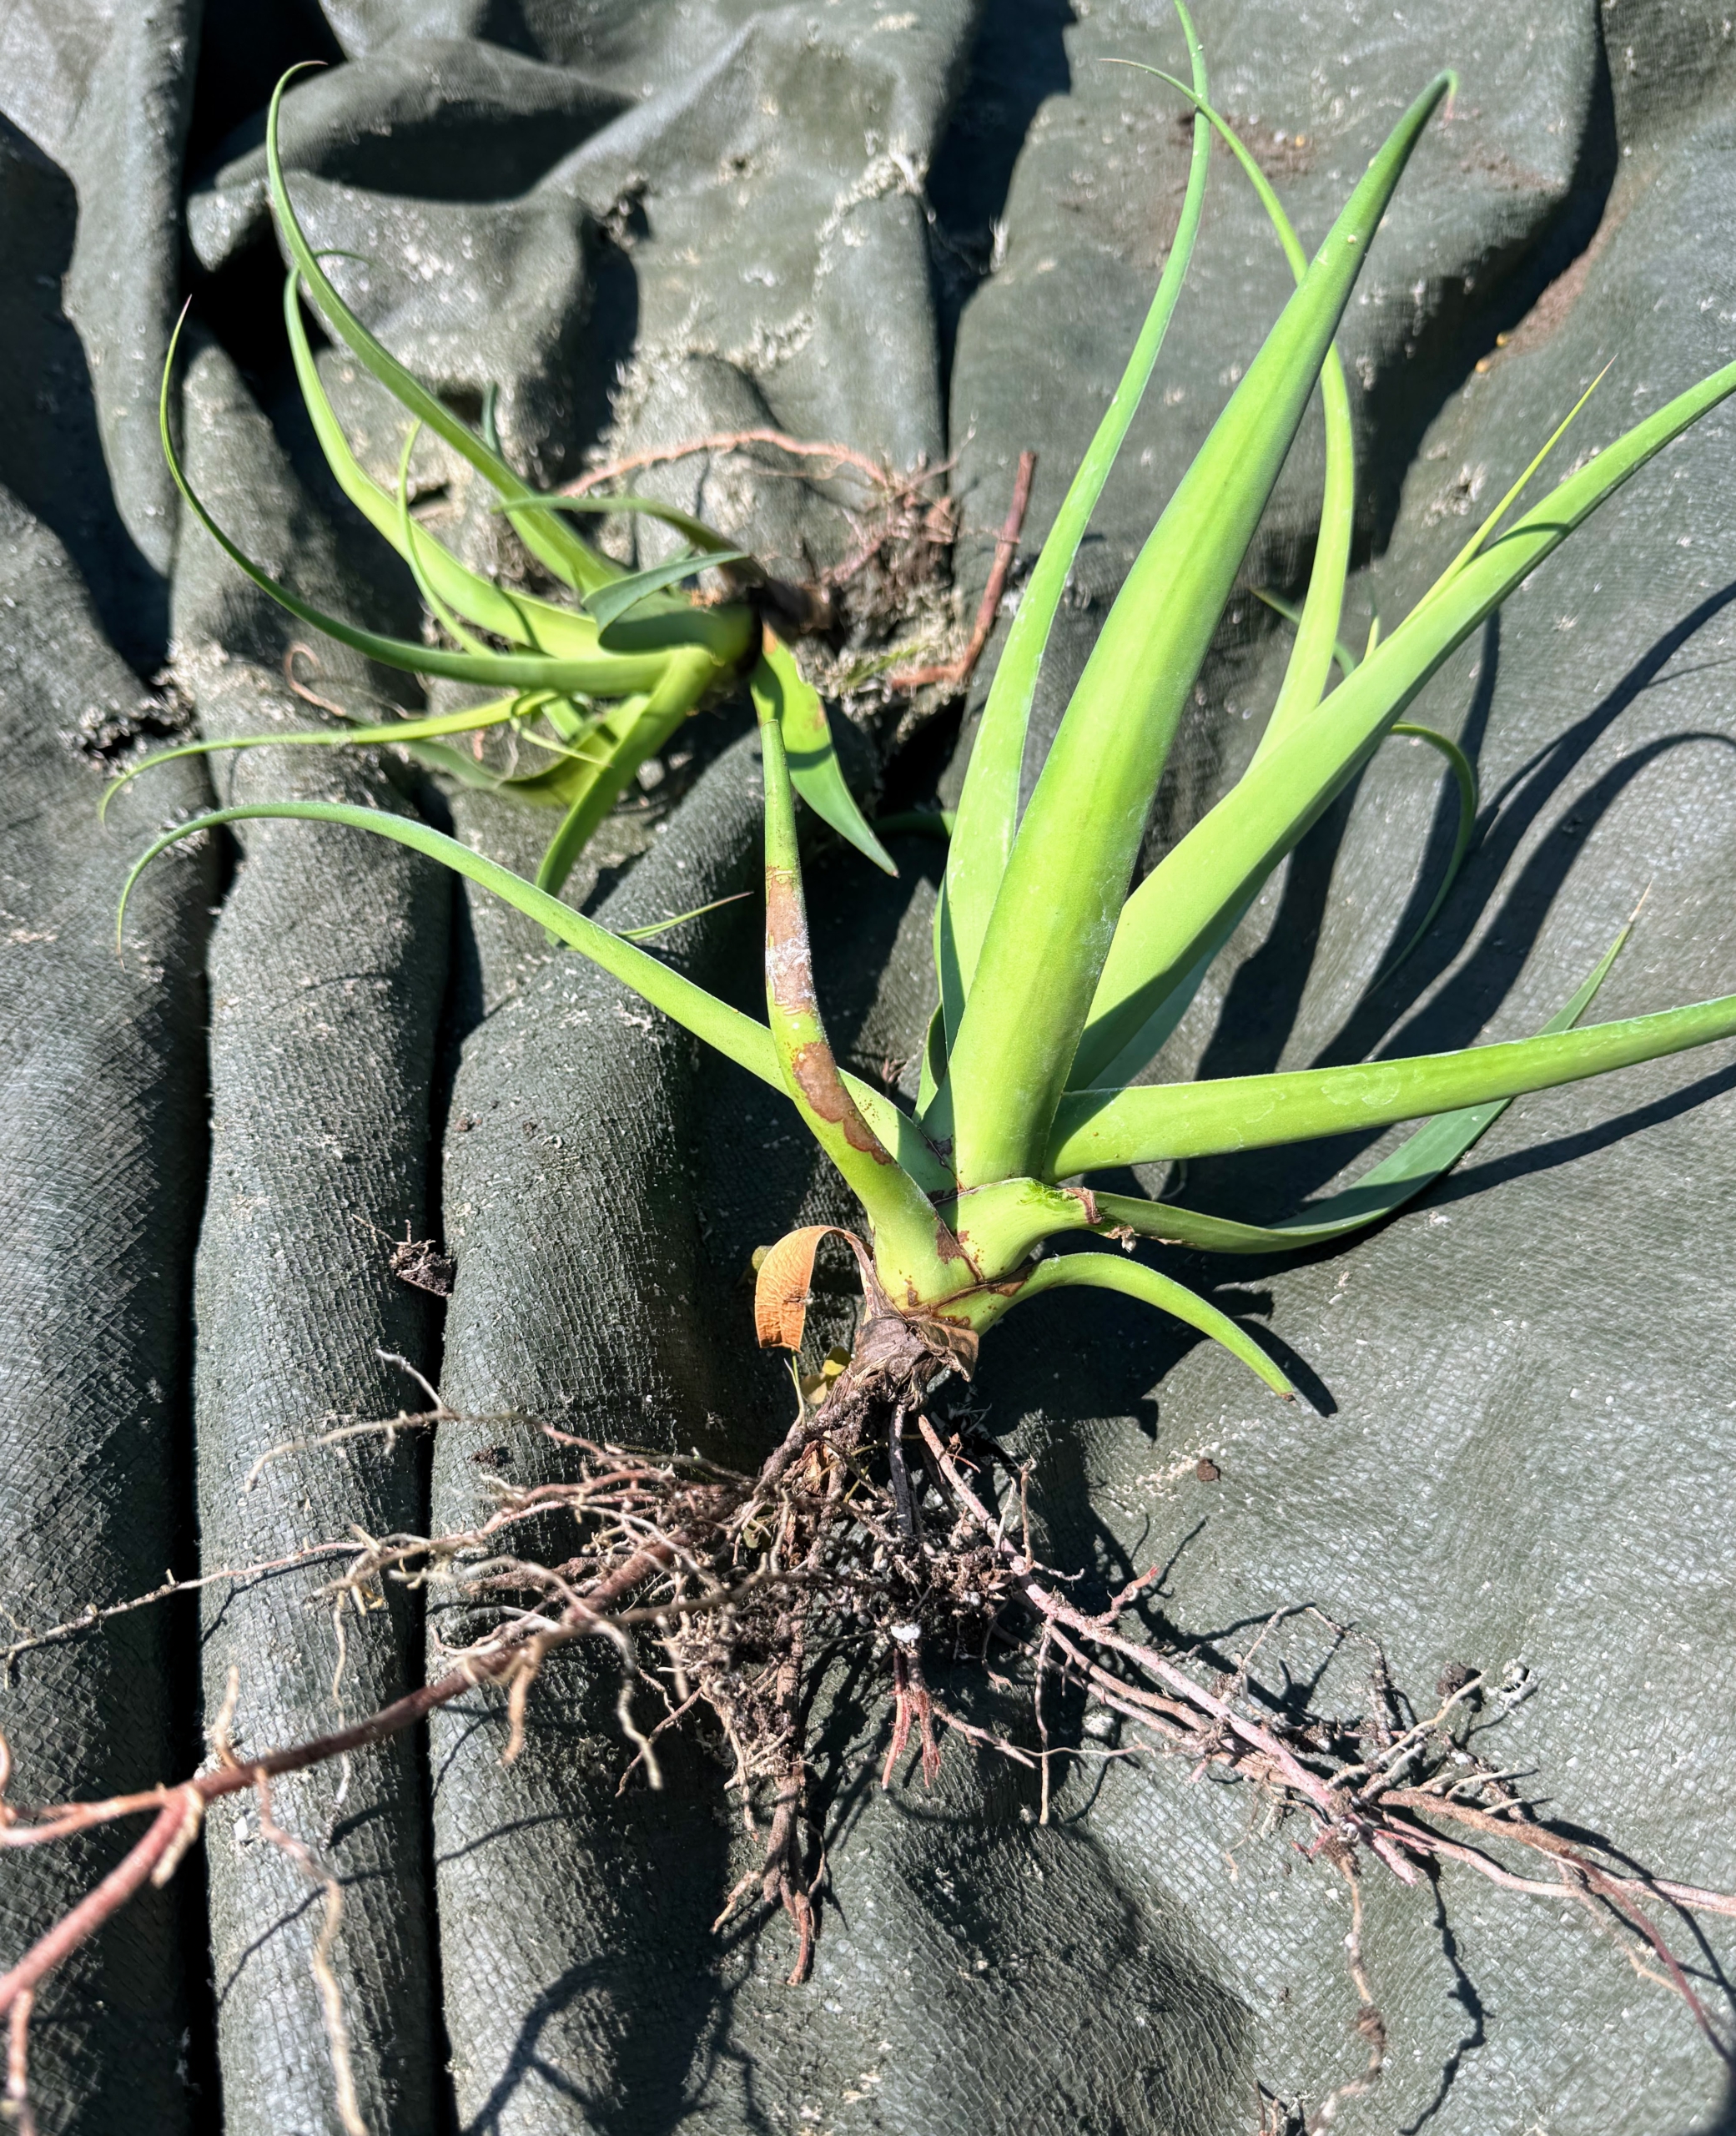
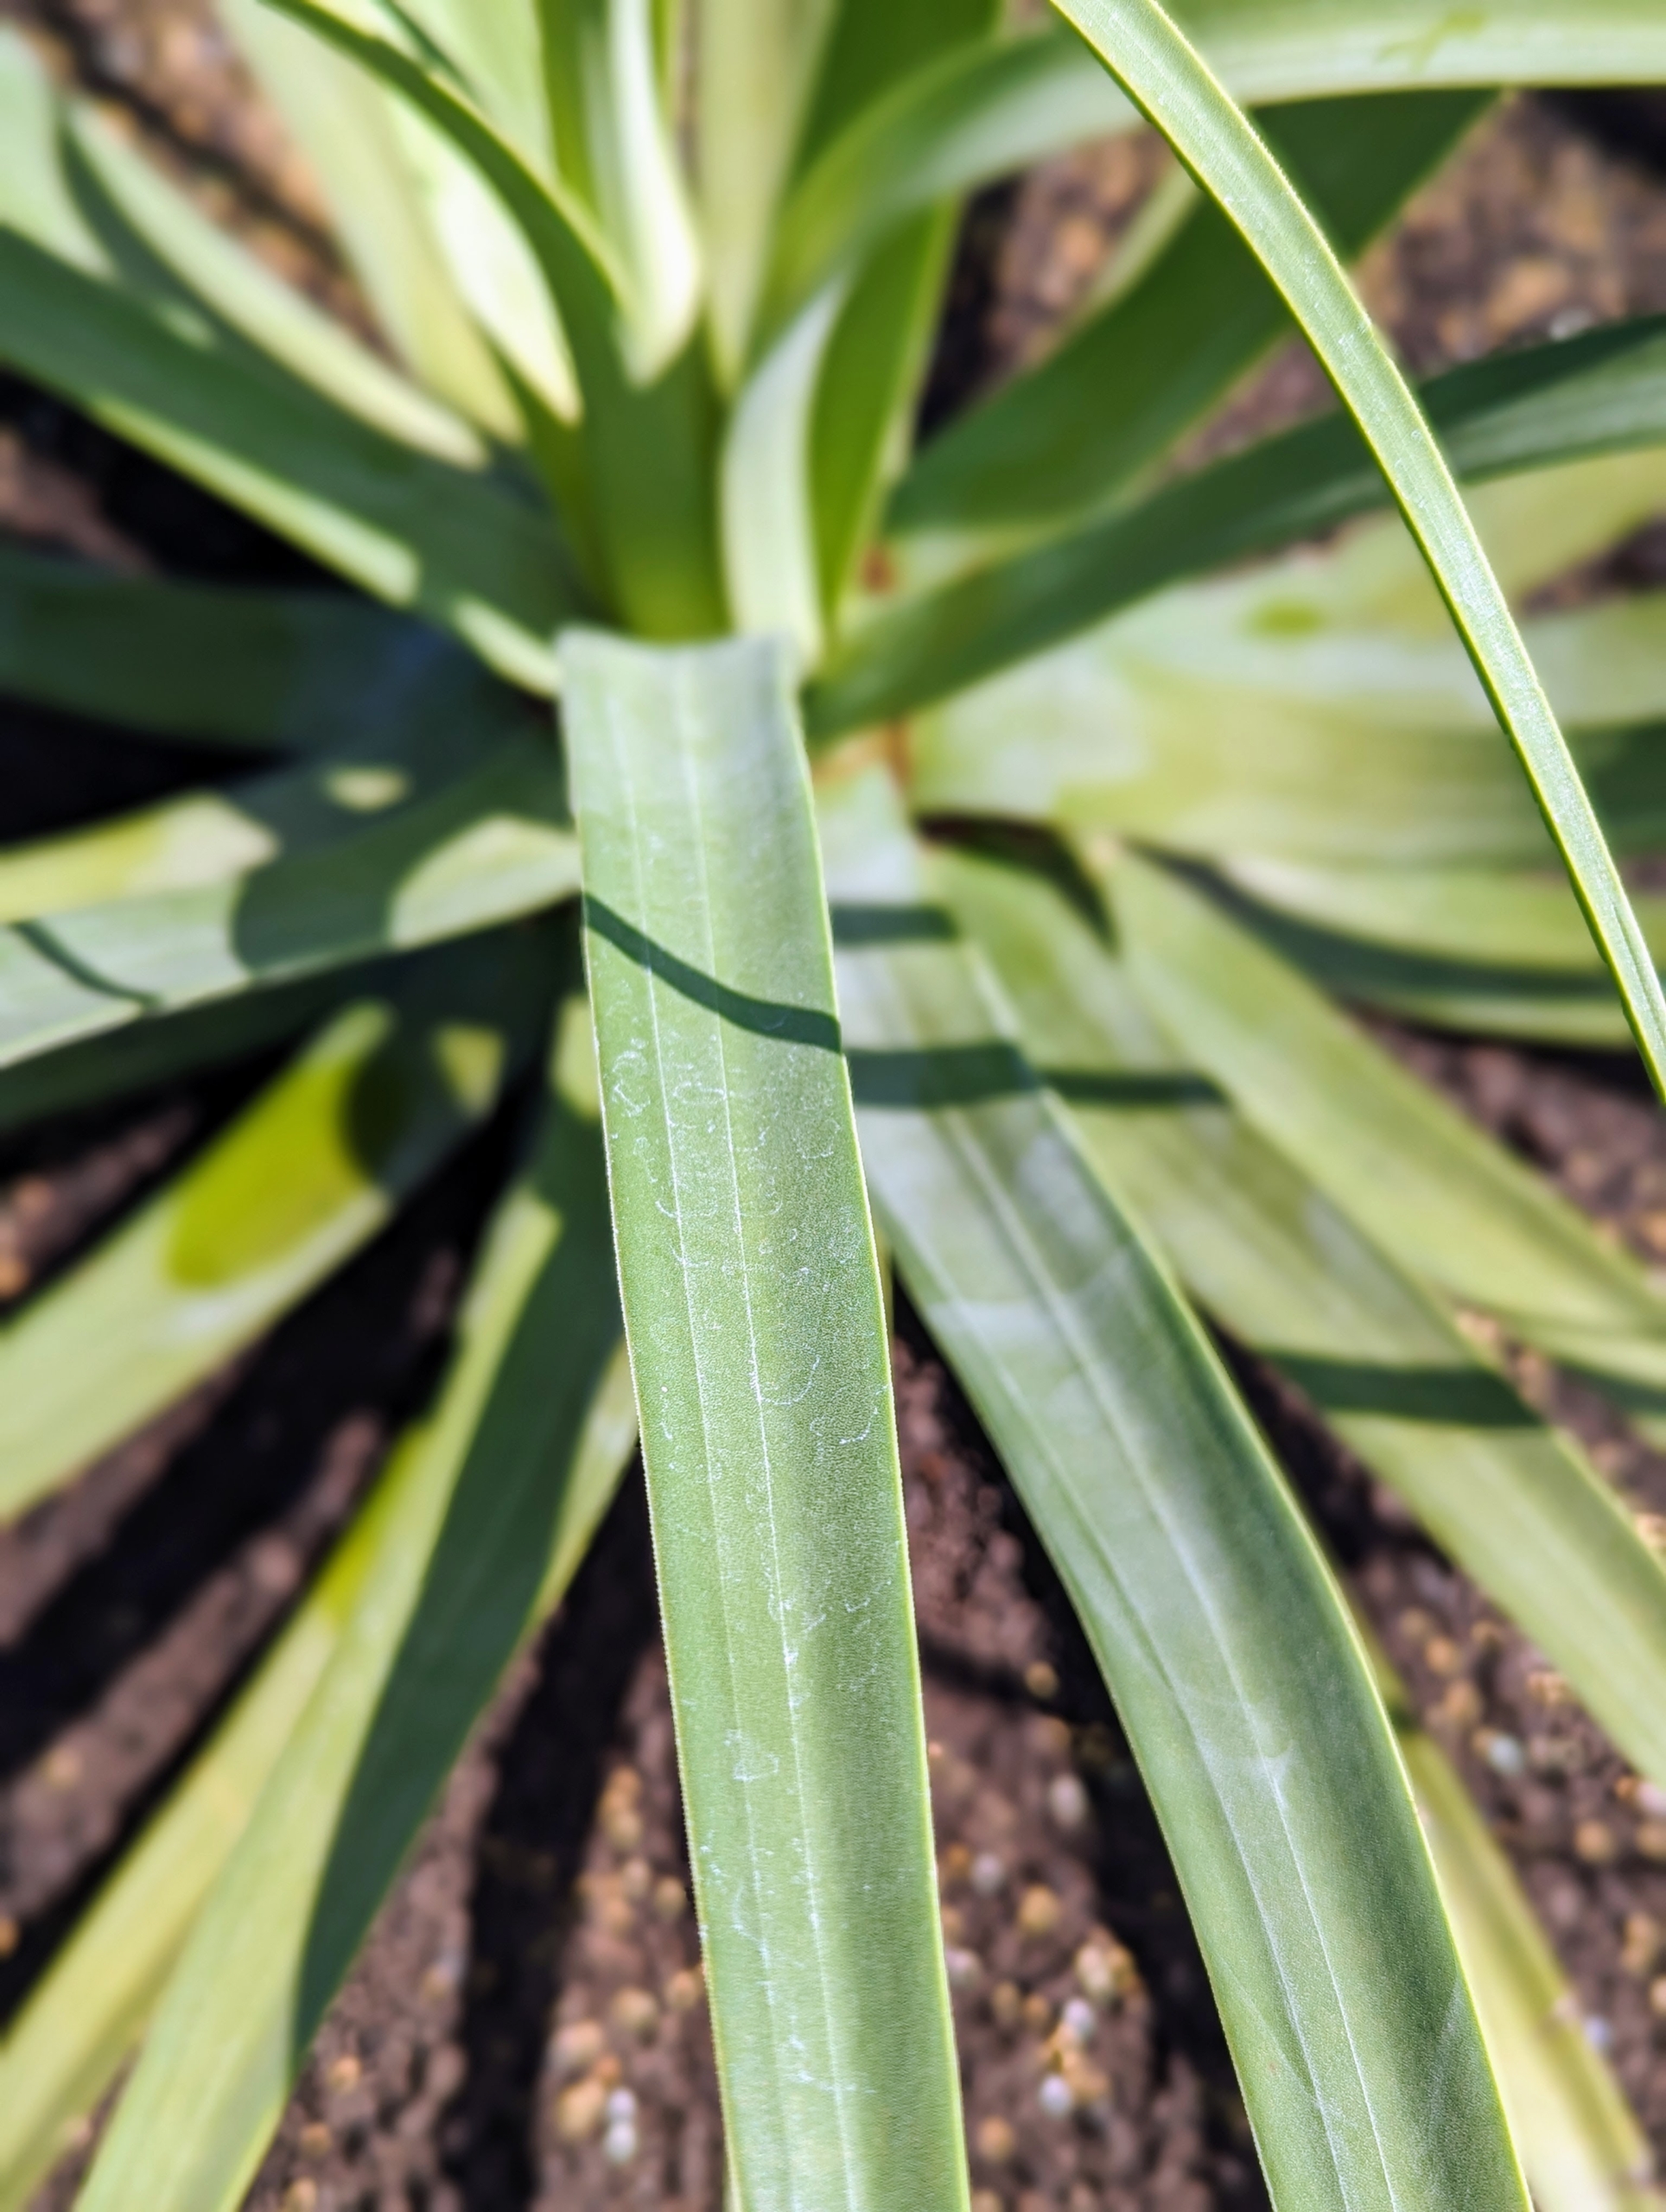
Agave plants have rosettes of fleshy leaves, some soft and smooth, while others have sharp spines.
Agaves form so-called offshoots. These offshoots are connected to the mother plant by a stem but form their own roots. Ryan removes the “babies” from their mother and saves them for replanting.
In the pot, Ryan places a layer of weed cloth in the bottom to protect the vessel itself. This will also make it easier to remove the plant next autumn, when it is put back in the greenhouse for the cold season.
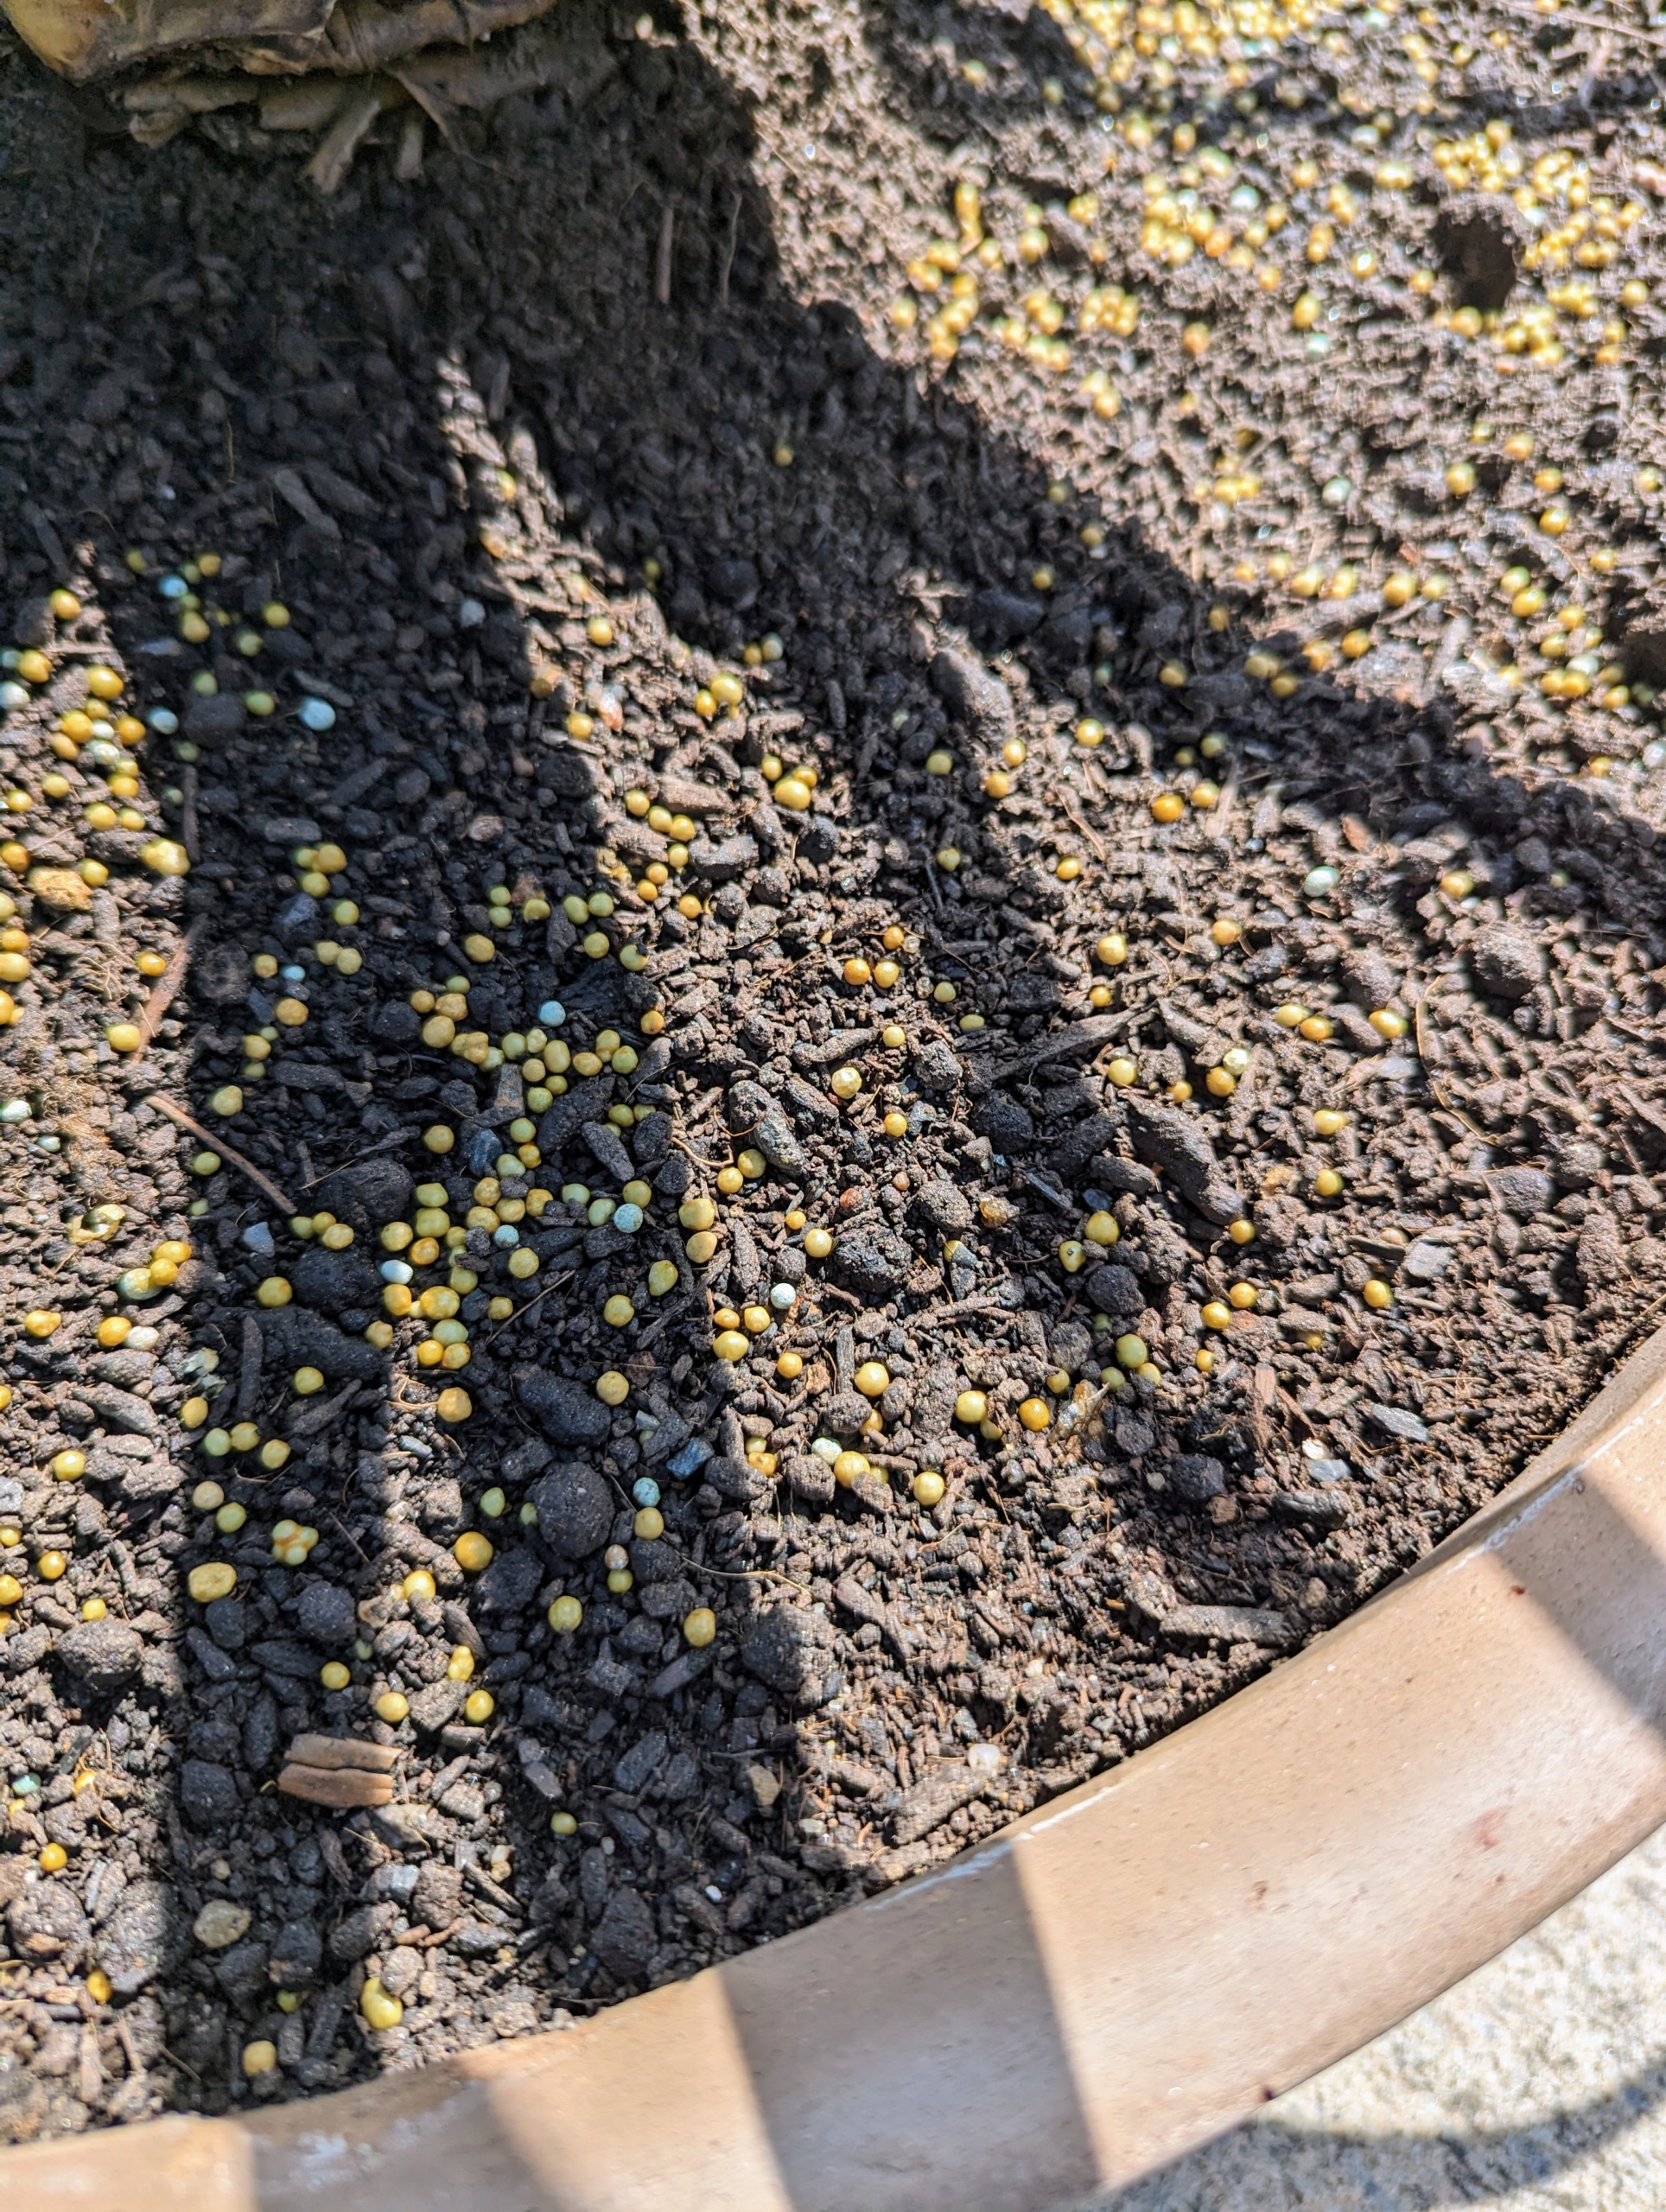
Ryan fills the container with a fast-draining potting soil that holds moisture but drains well. Then he sprinkles a generous amount of all-purpose plant fertilizer from Scott’s.
Agave leaves are filled with gel allowing the plant to survive in extreme dry conditions for a period of time.
Agave prefers a sunny location with at least six hours of direct sunlight. Full sun plants always do so nicely here by the pool. The tough skin of the leaves is able to withstand even harsh solar rays without burning.
Here are two planters already done – they will fill out these pots well during the summer.
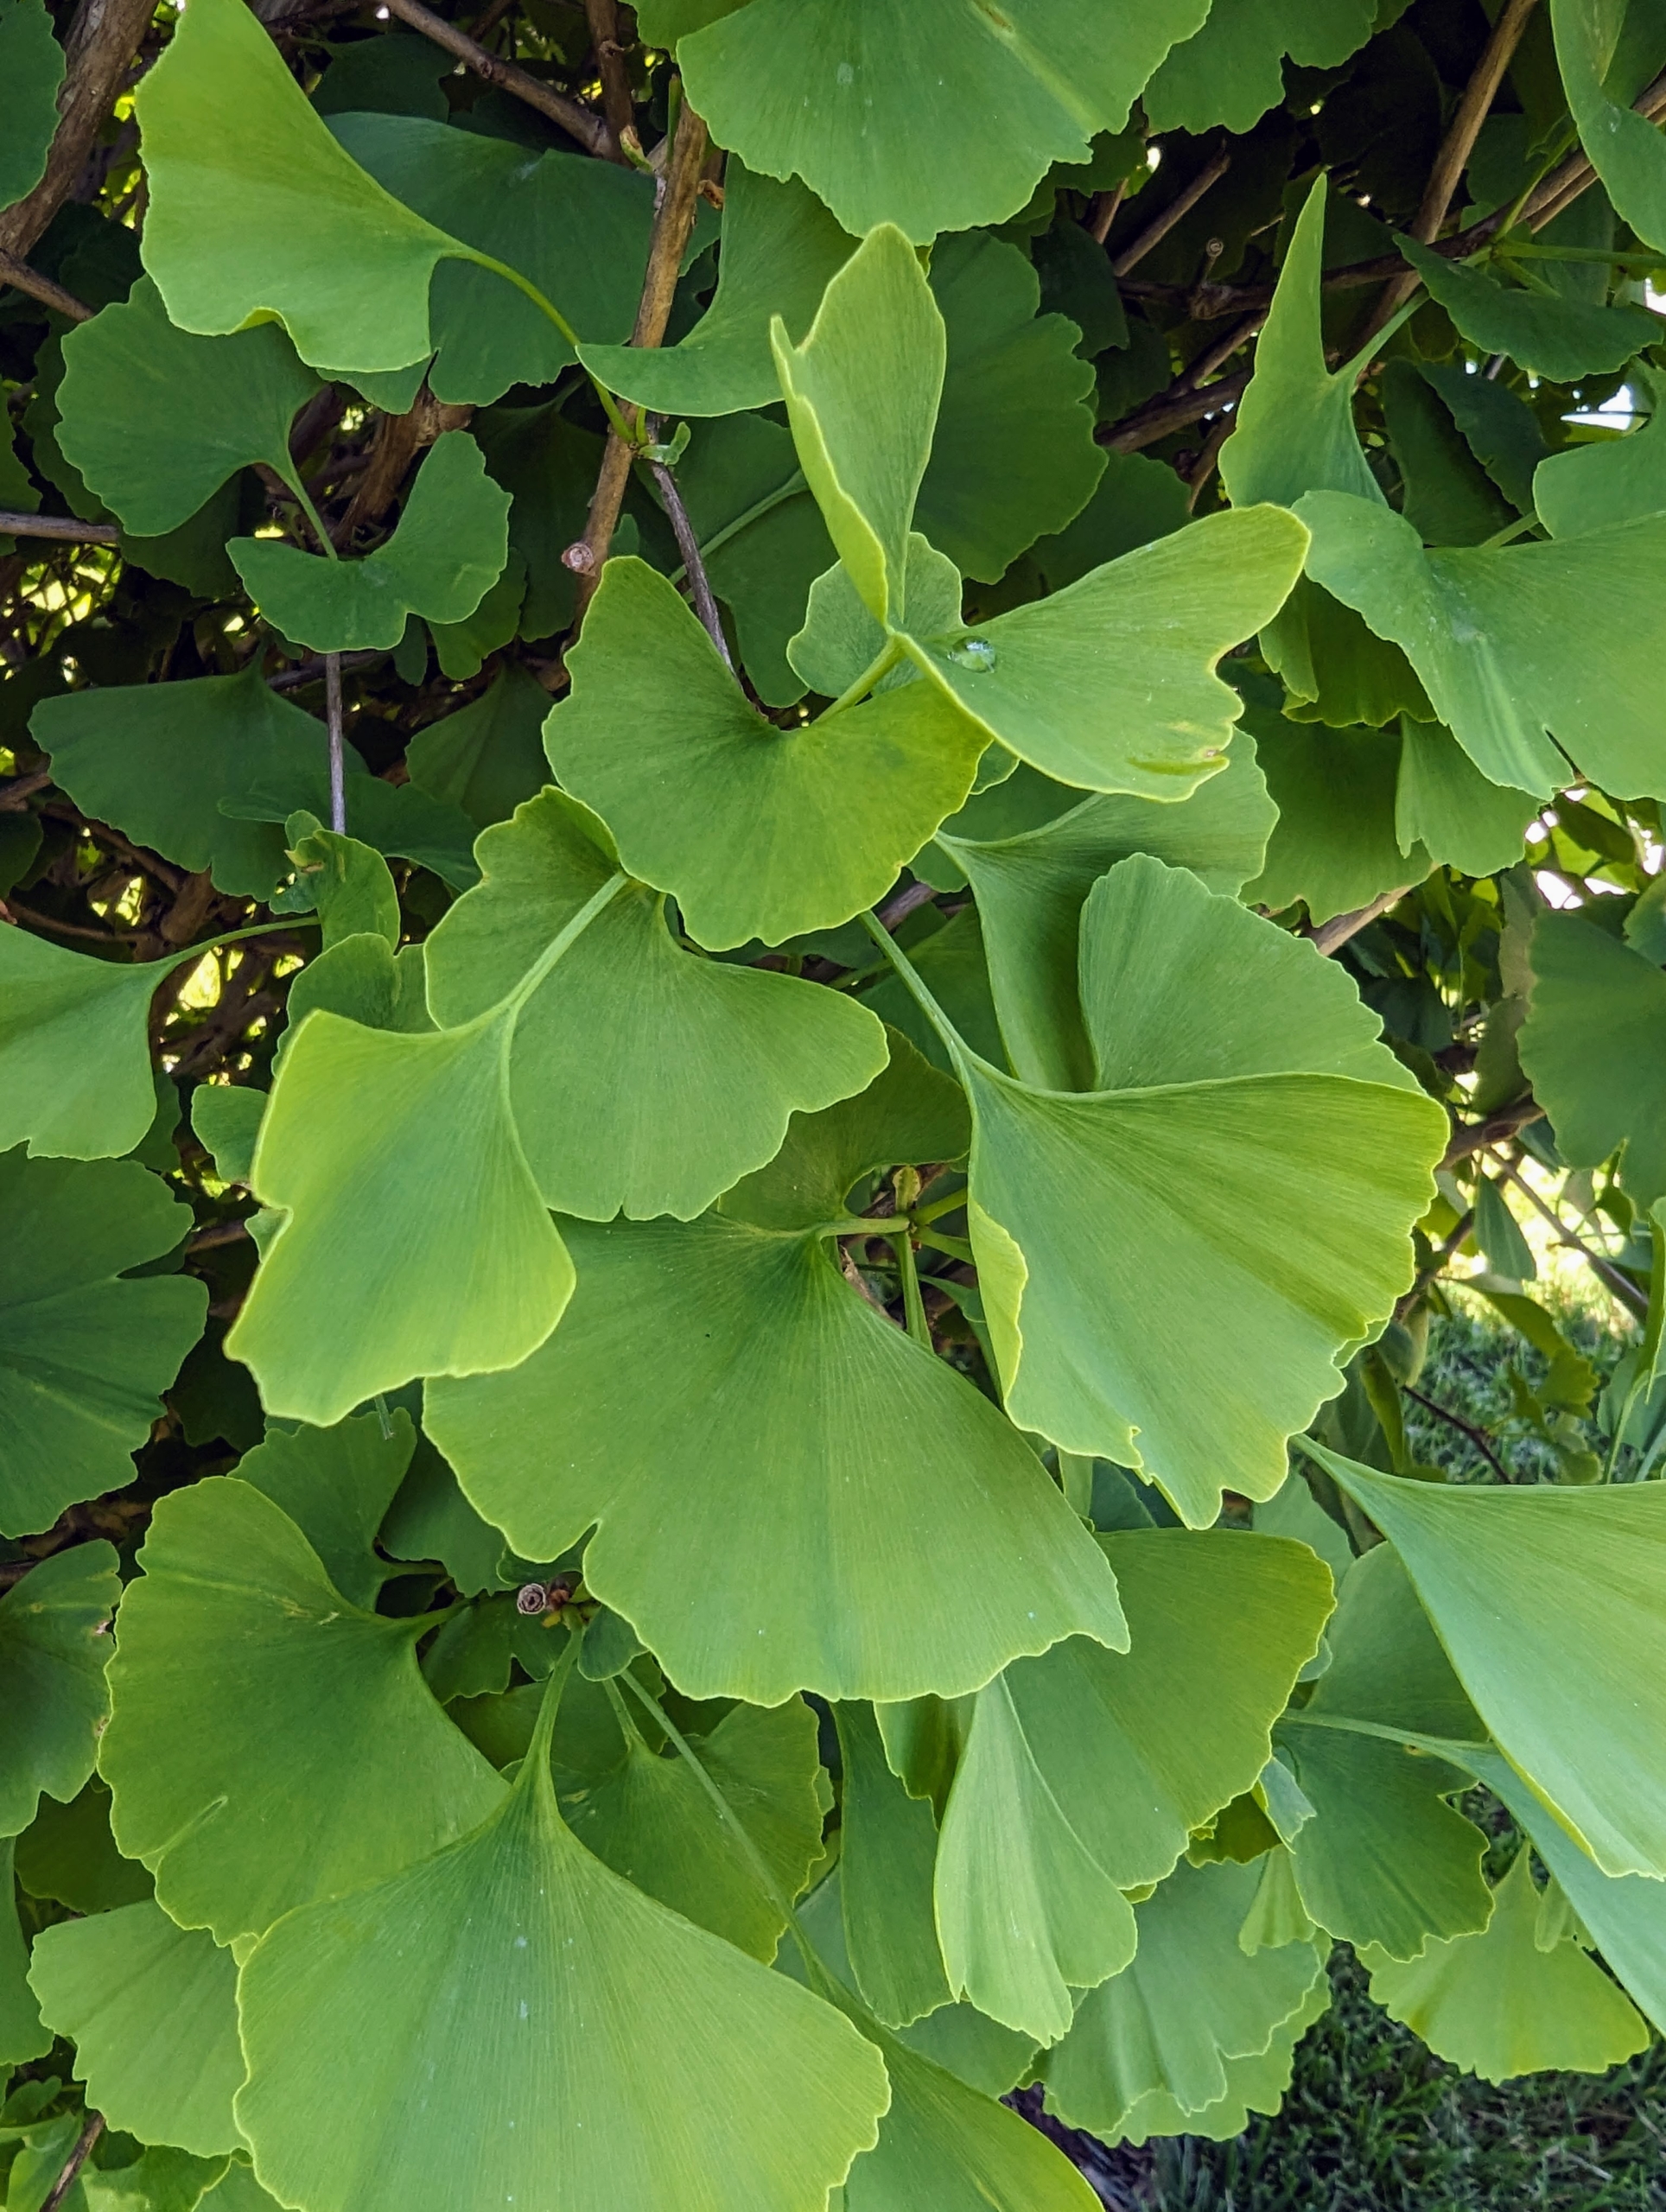
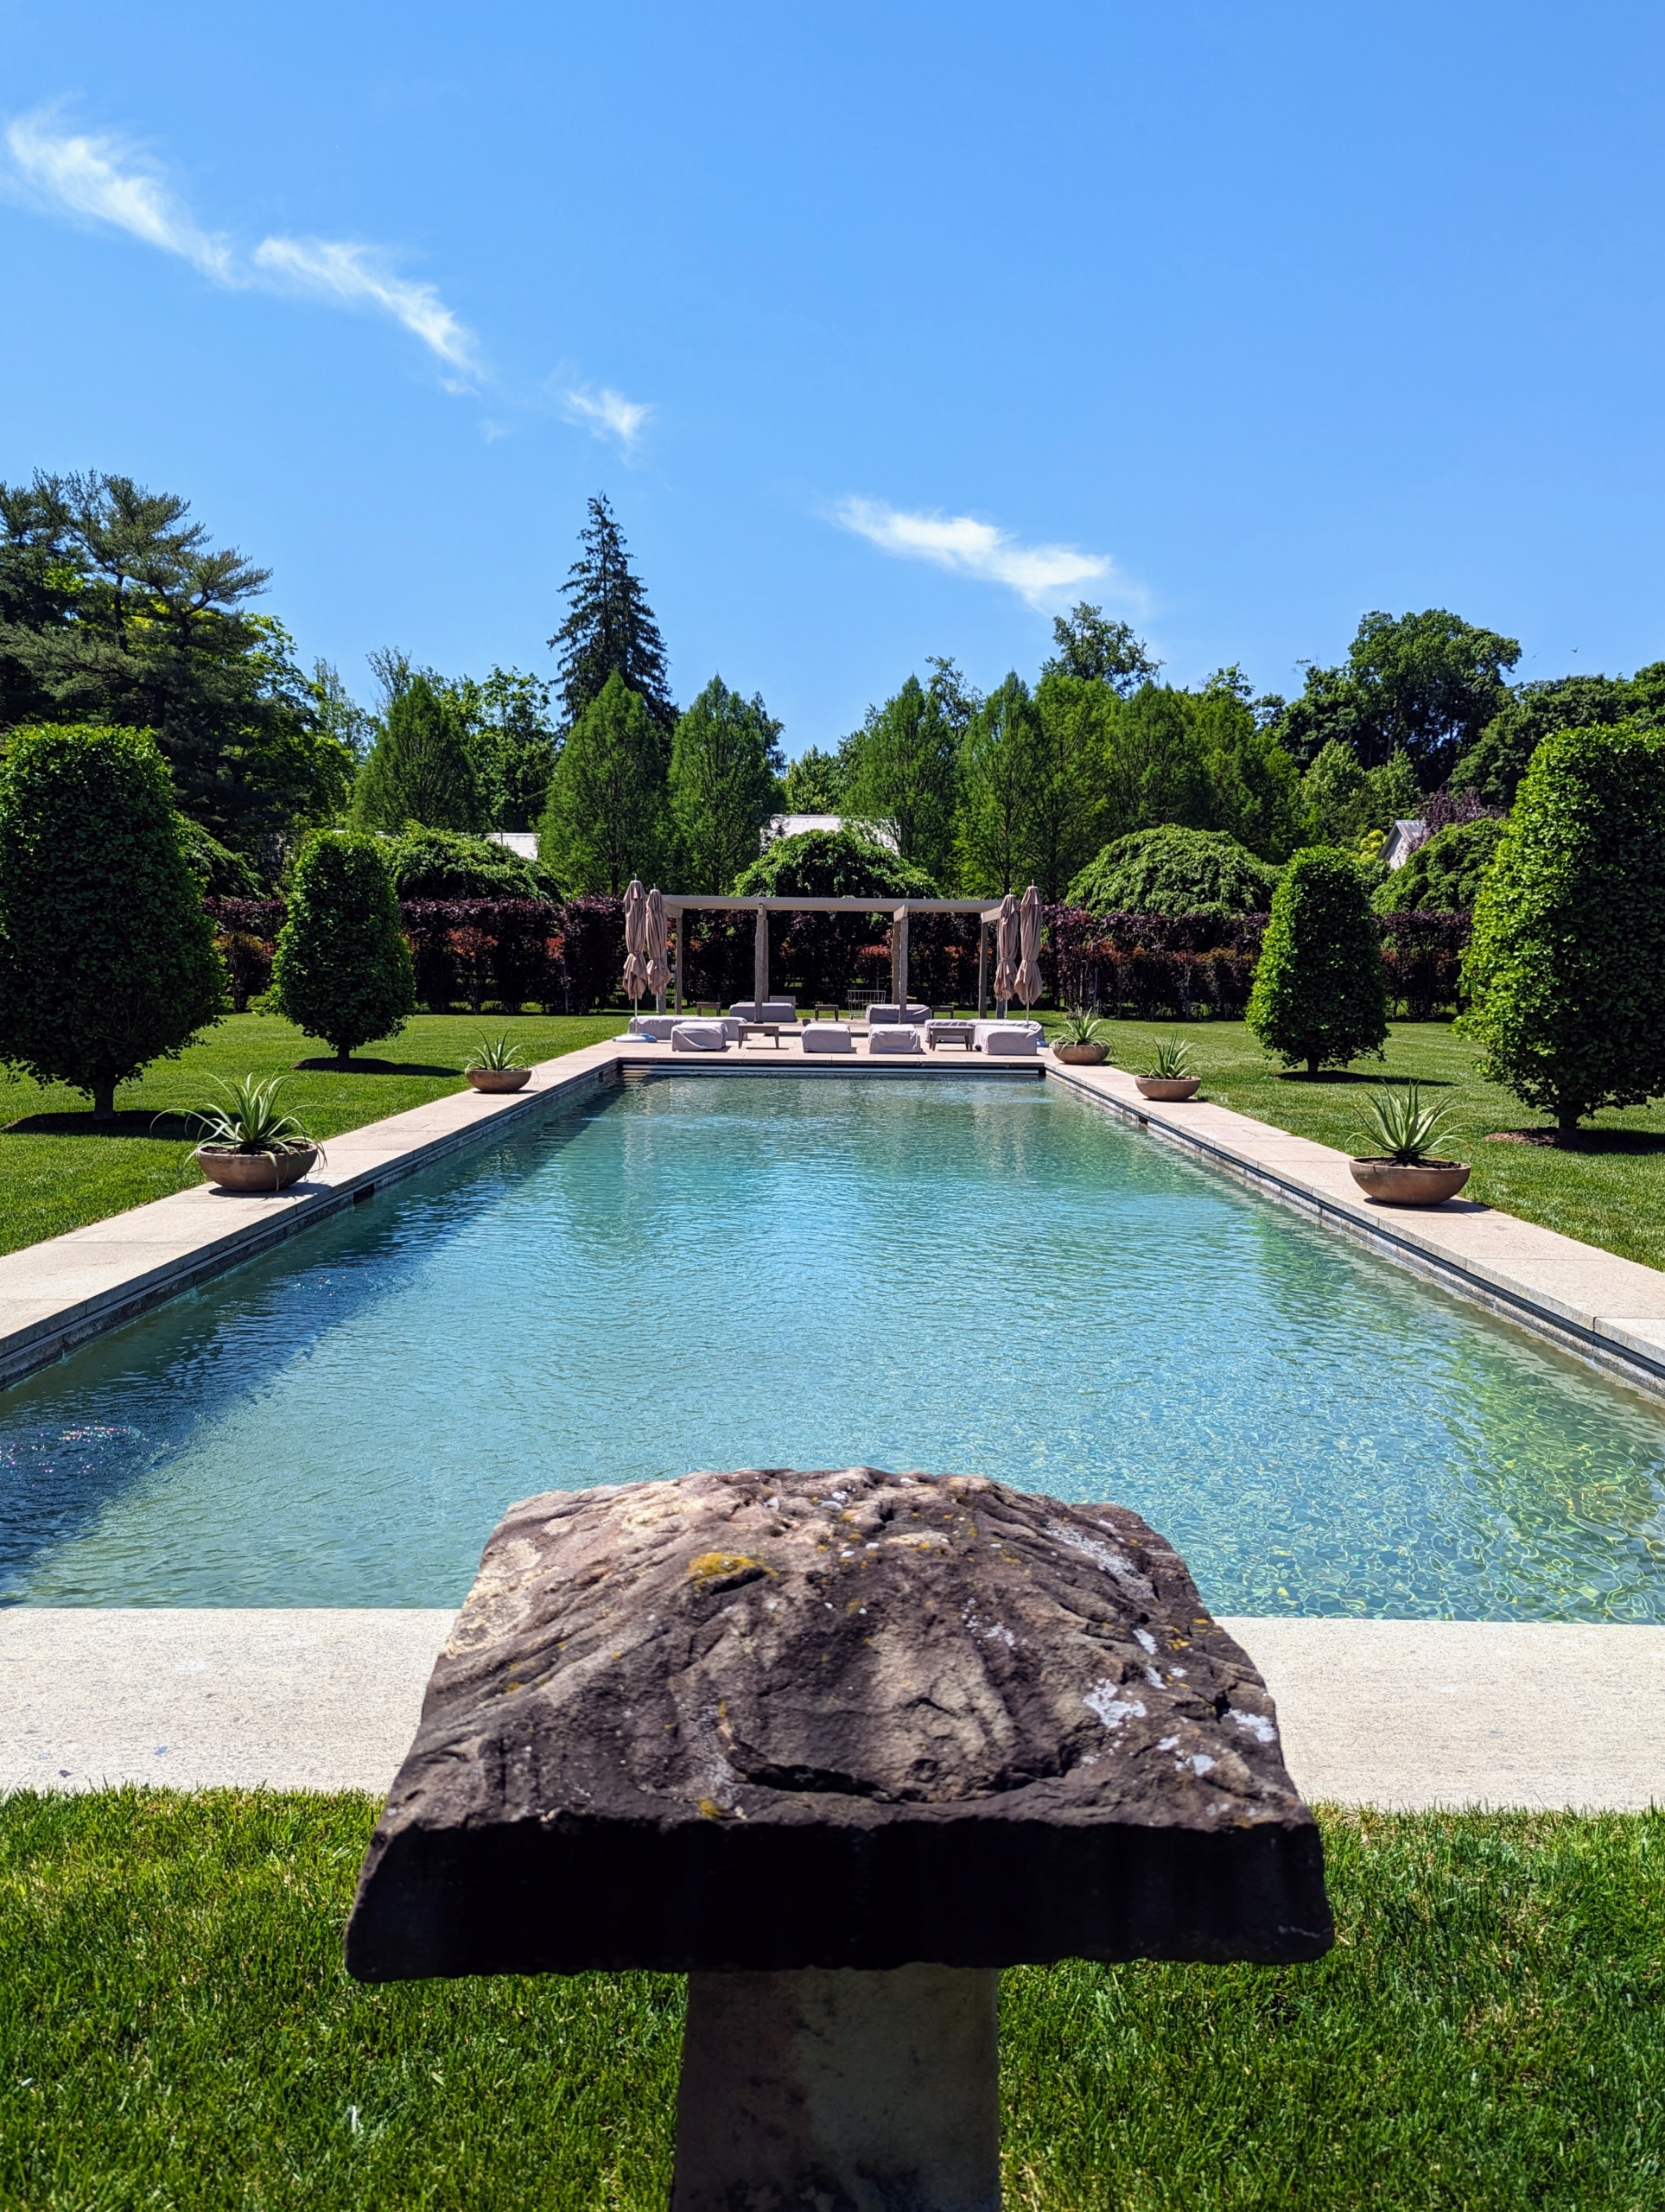
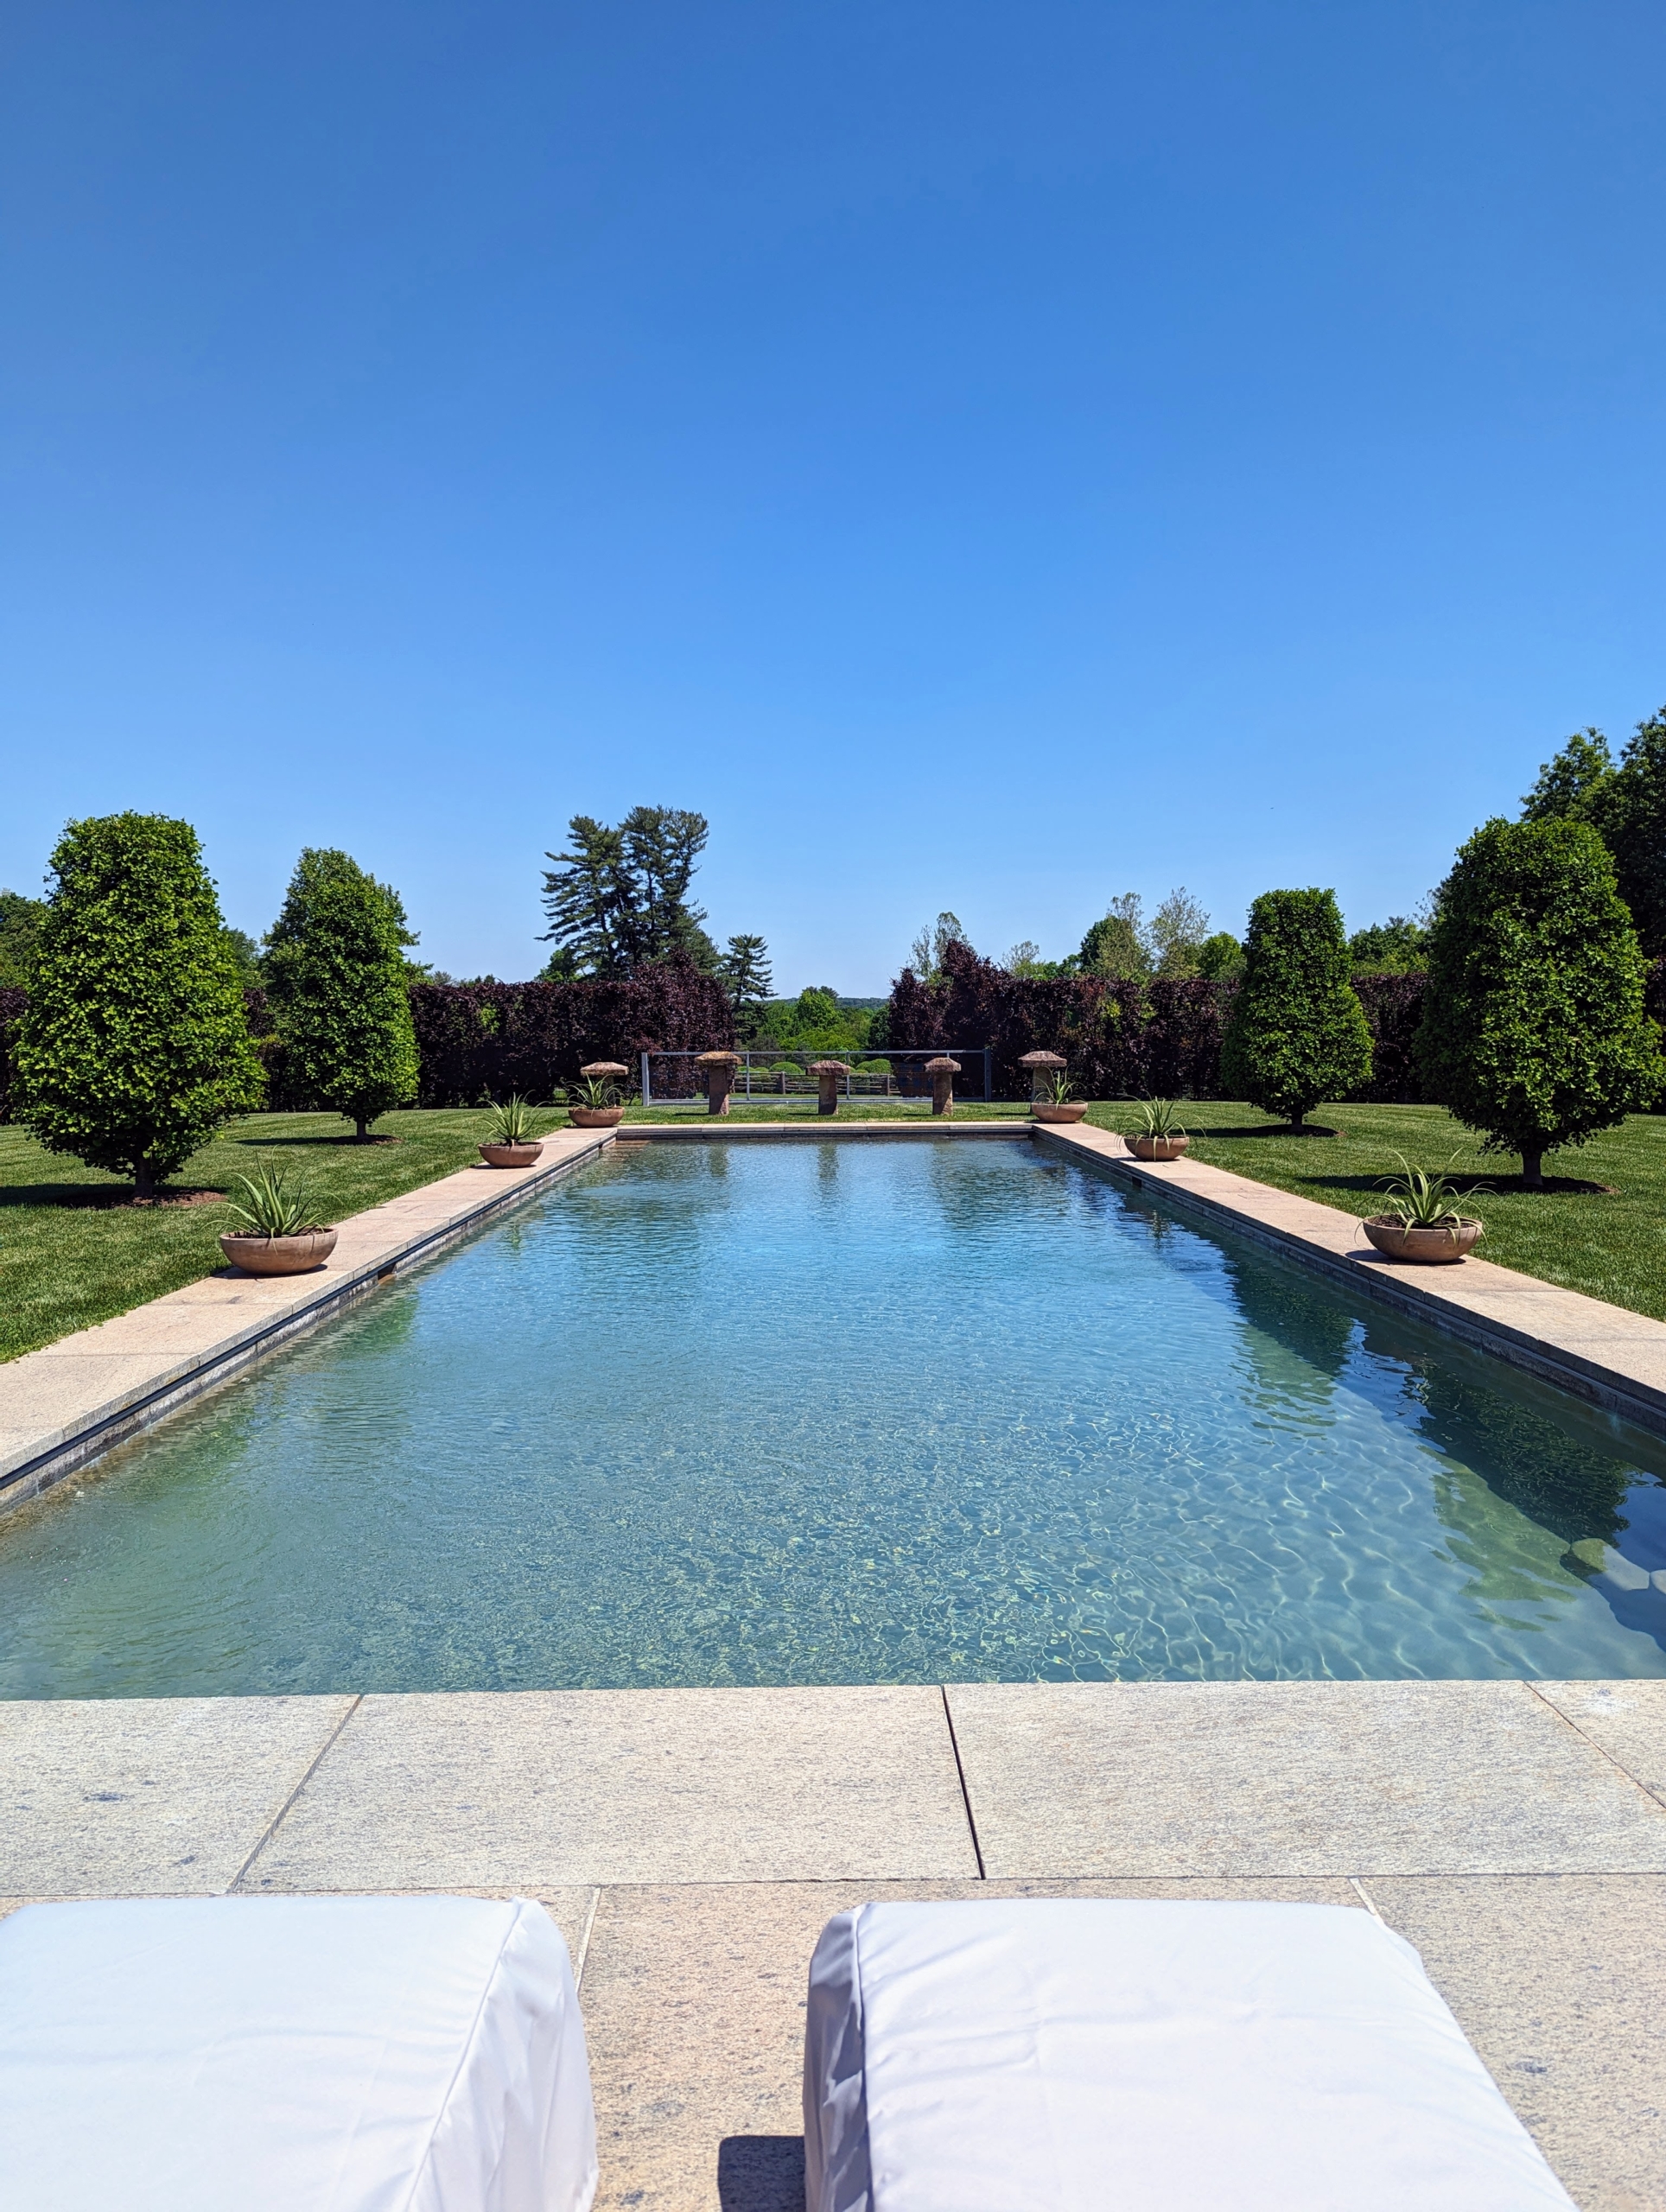
In total, there are seven of these containers around the pool. They look great near my newly planted Ginkgo biloba Goldspire™ Obelisk trees.
I purchased six of these trees. Ginkgo Goldspire™ is a highly ornamental, non-fruiting male tree originating in Italy. It has a very upright, tight fastigiate habit, and the foliage tends to be smaller than other species.
New foliage on the Ginkgo Goldspire™ emerges a rich shade of green, fan-shaped, and slightly curled. It keeps its color through summer, then turns buttery shades of yellow and gold in autumn before dropping.
Here’s a view of all six. The term “obelisk” refers to the tall, four-sided, narrow tapering which ends in a pyramid shape at the top.
At north end of my pool I have these staddle stones – the top of one is in the foreground. Staddle stones were originally used in the 17th and 18th centuries as support bases for granaries, hayricks, and game larders. They typically looked like giant stone mushrooms, but mine are square – a more rare and unique version.
Here’s a look from the other end. When I built this pool, I wanted to make sure it had unobstructed views of the landscape beyond. I think the potted agave and all the surrounding trees and hedges will look so pretty through the season.
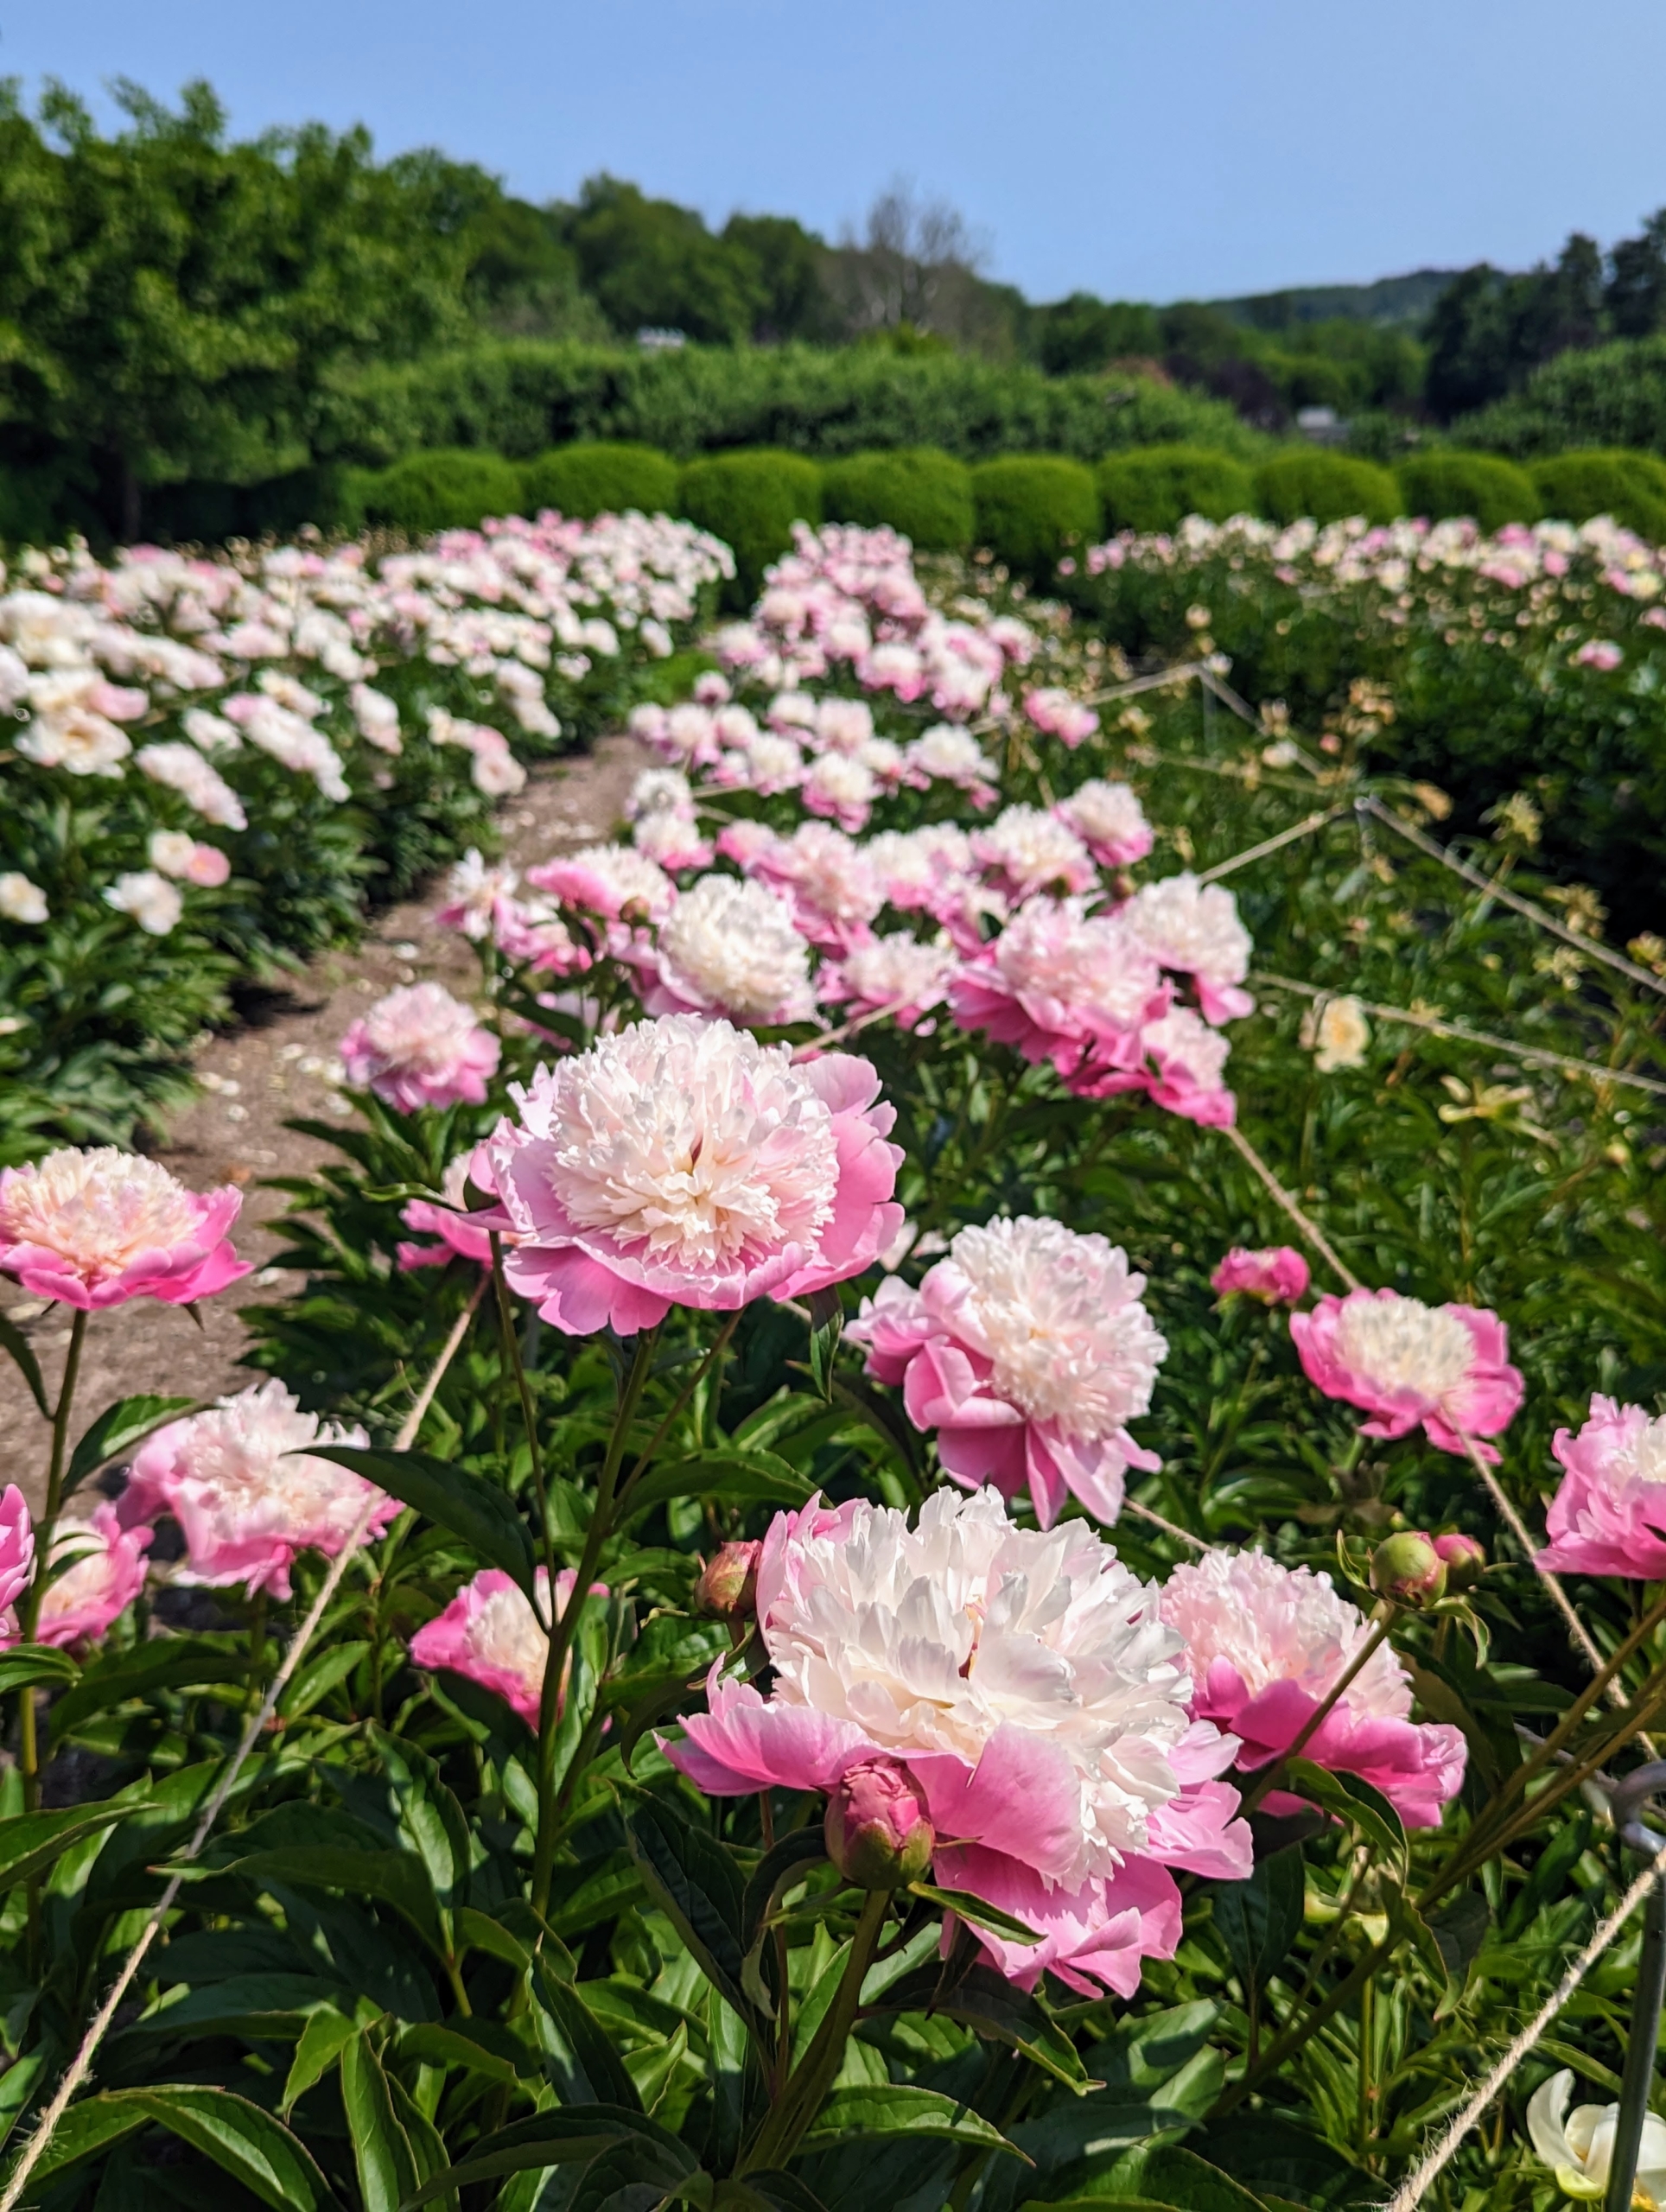
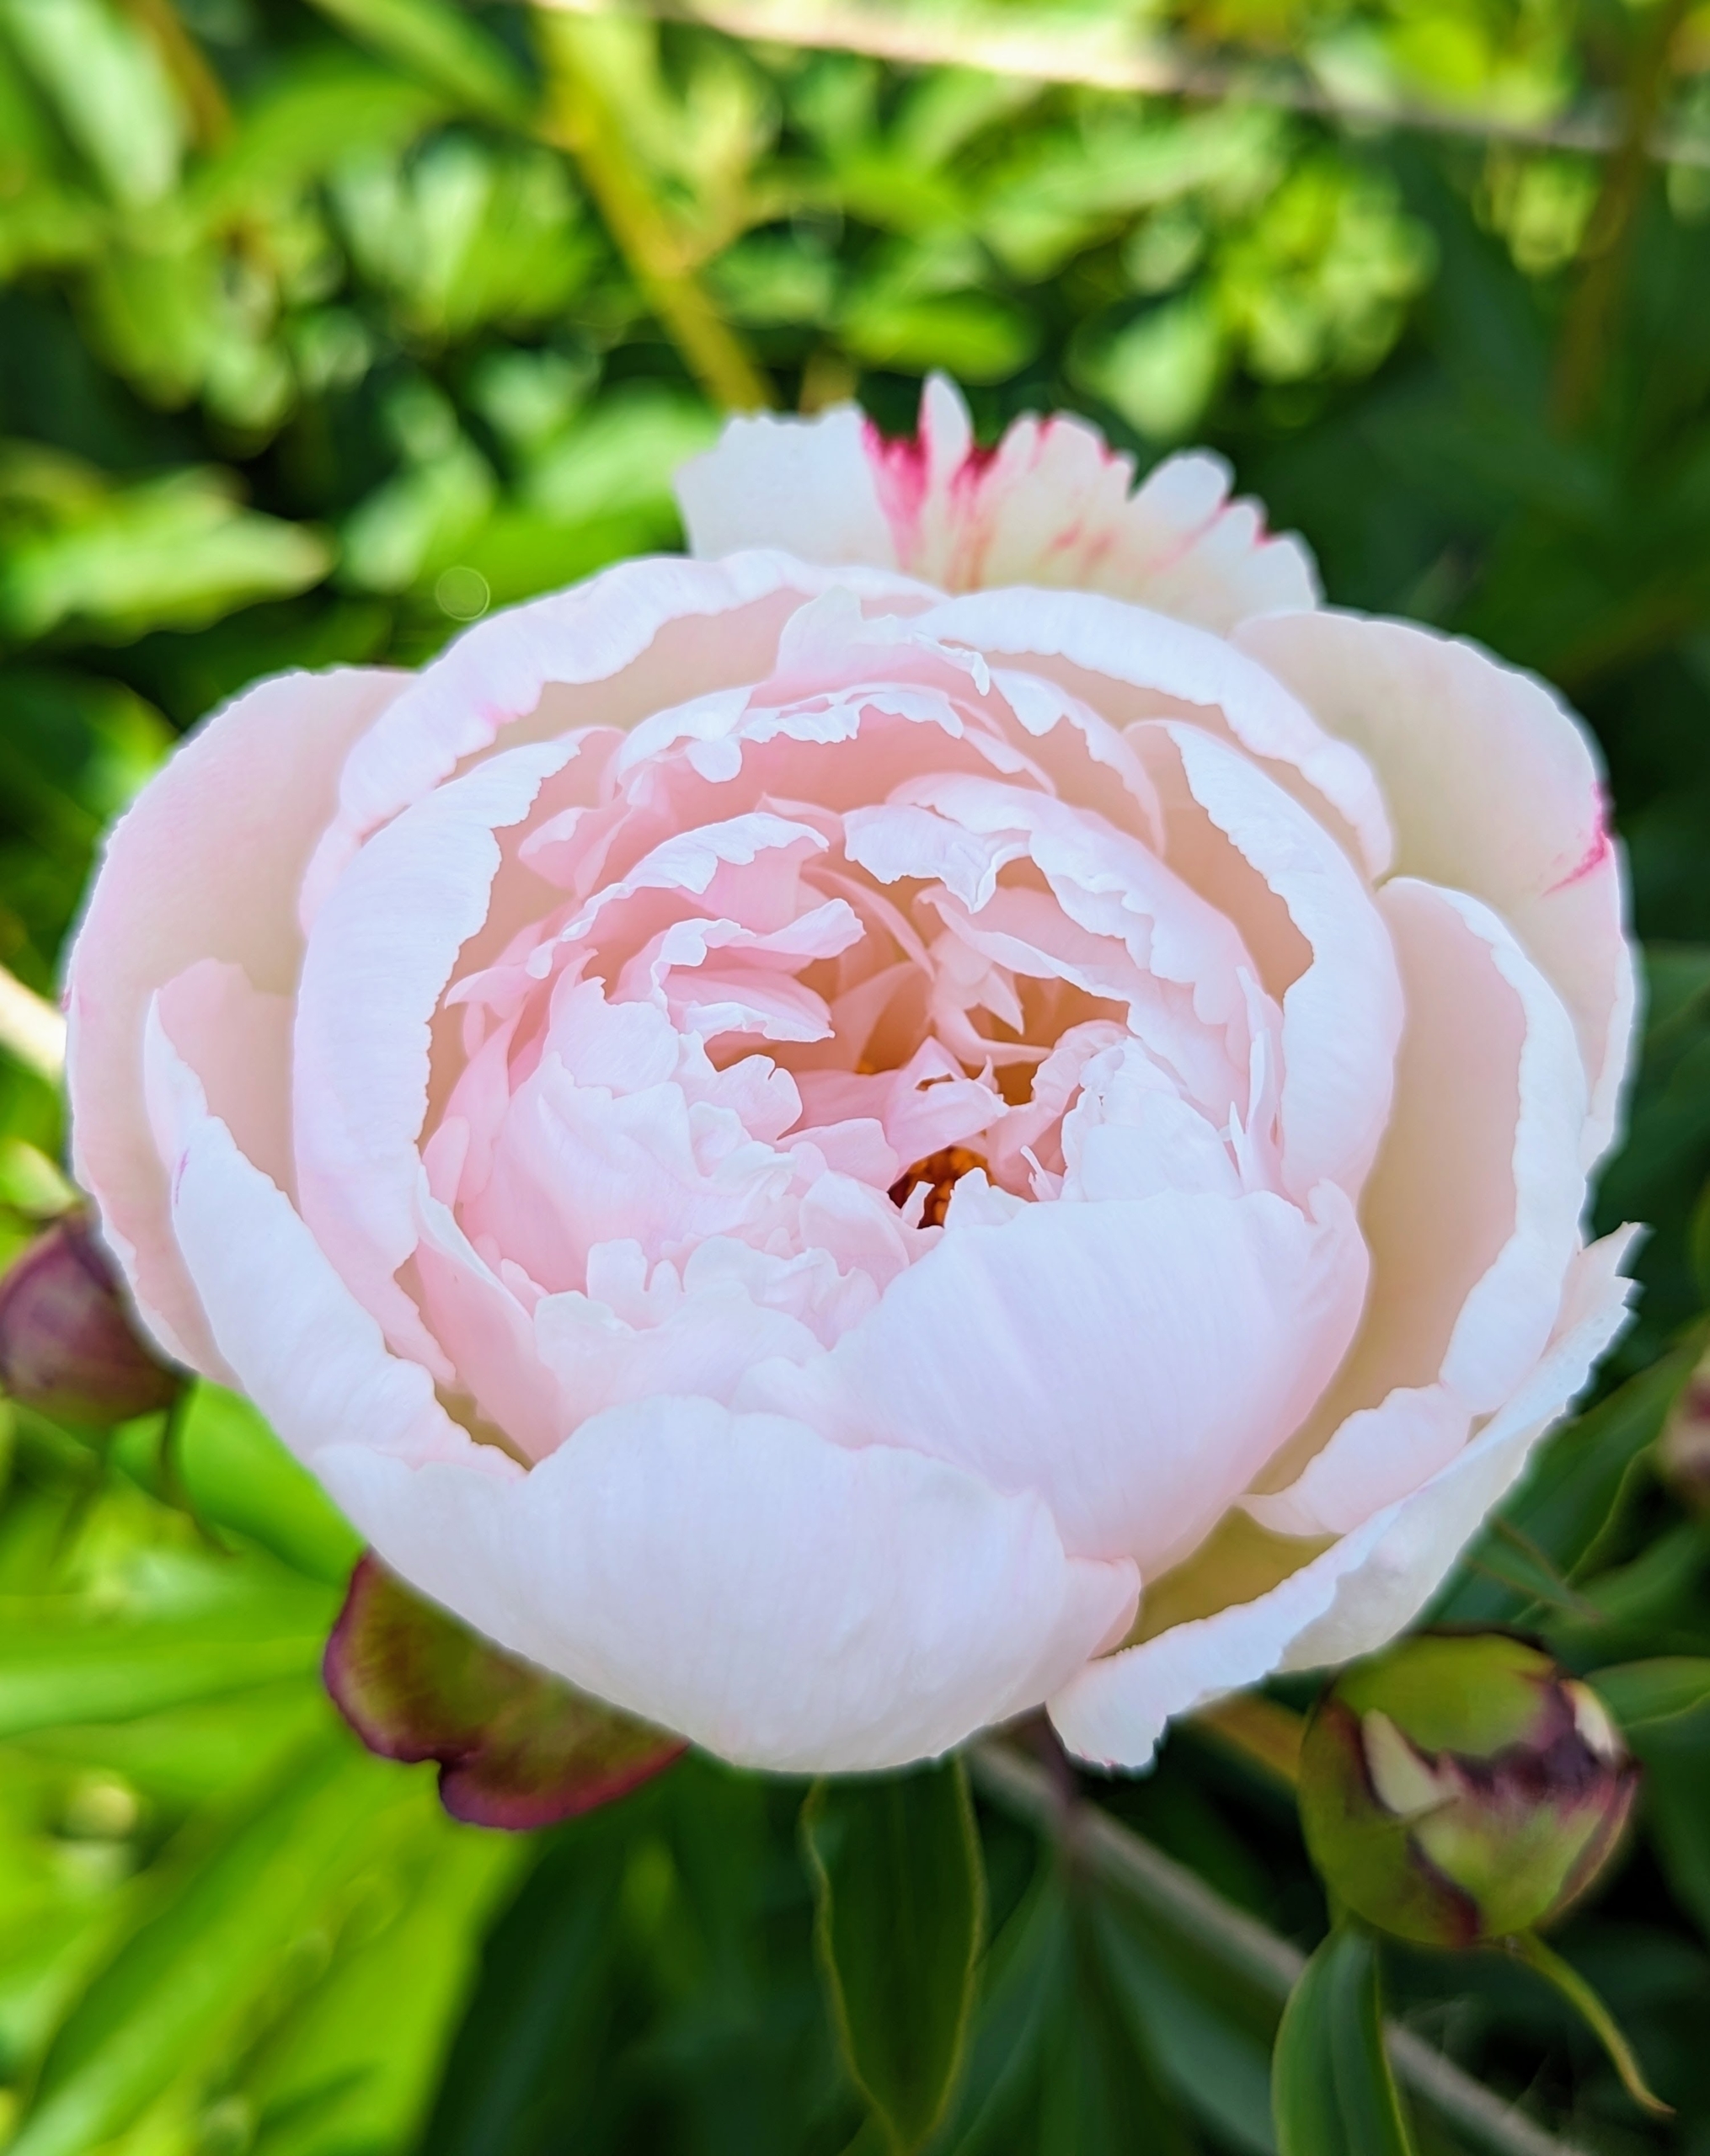
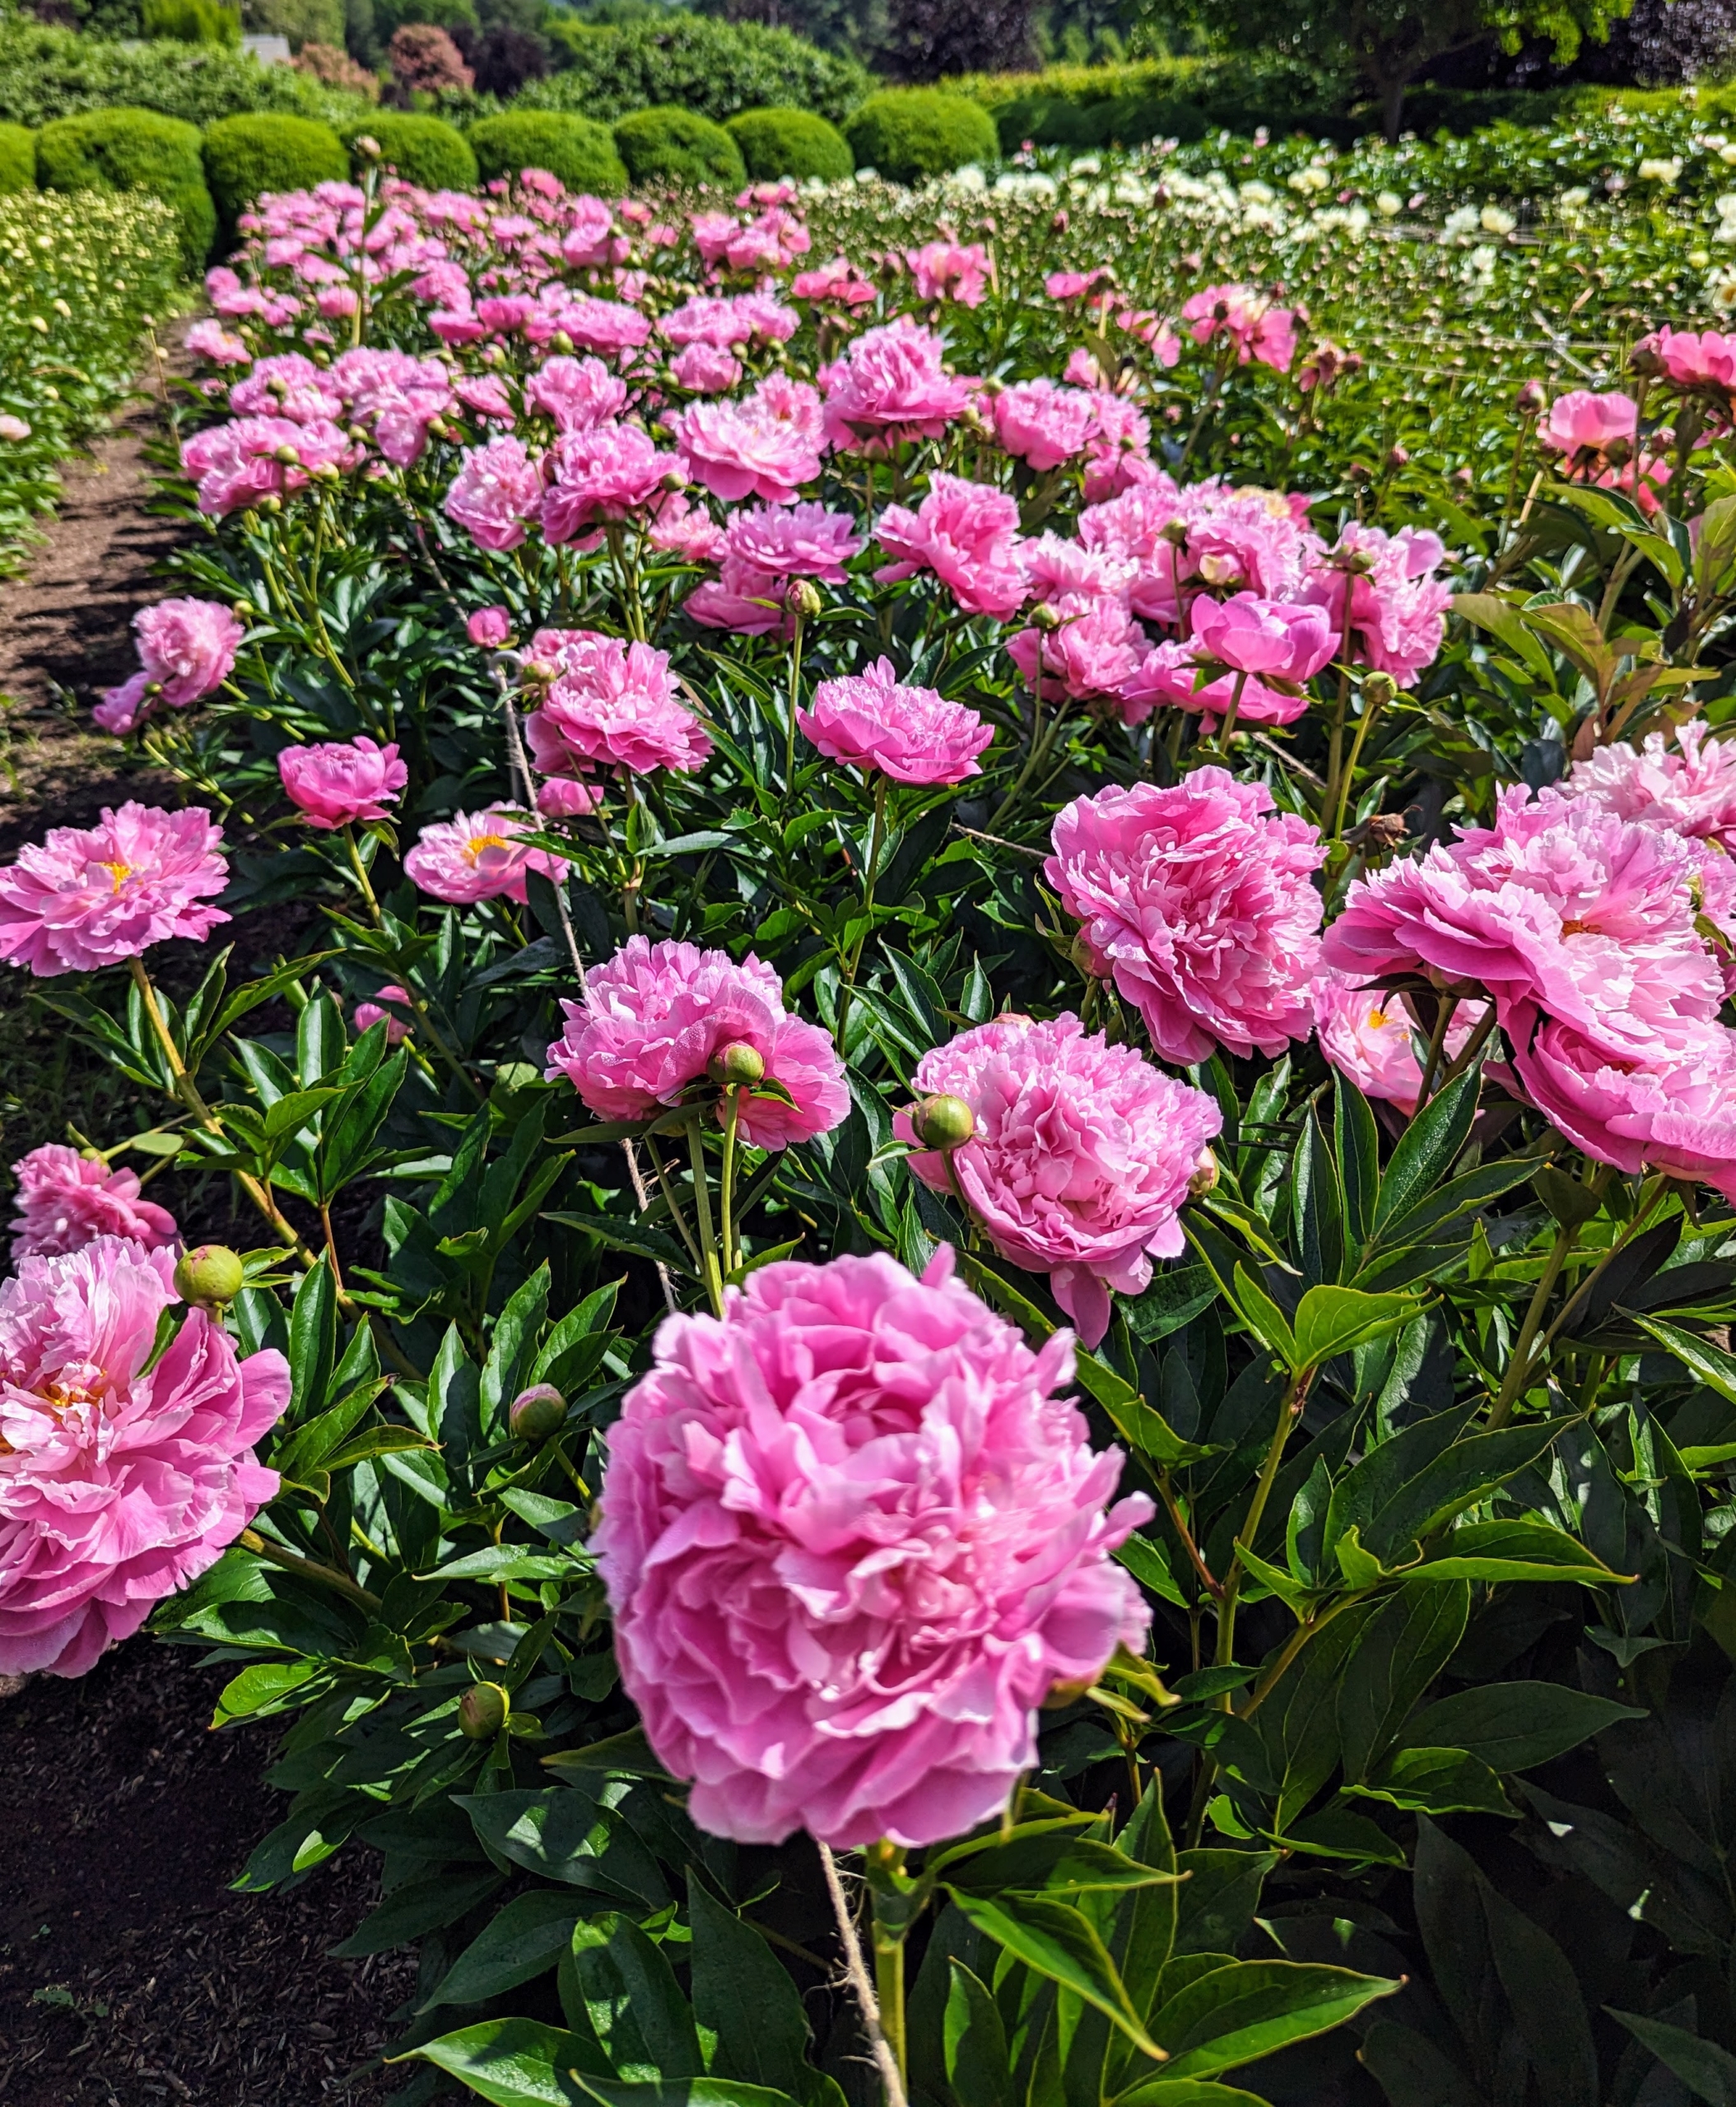
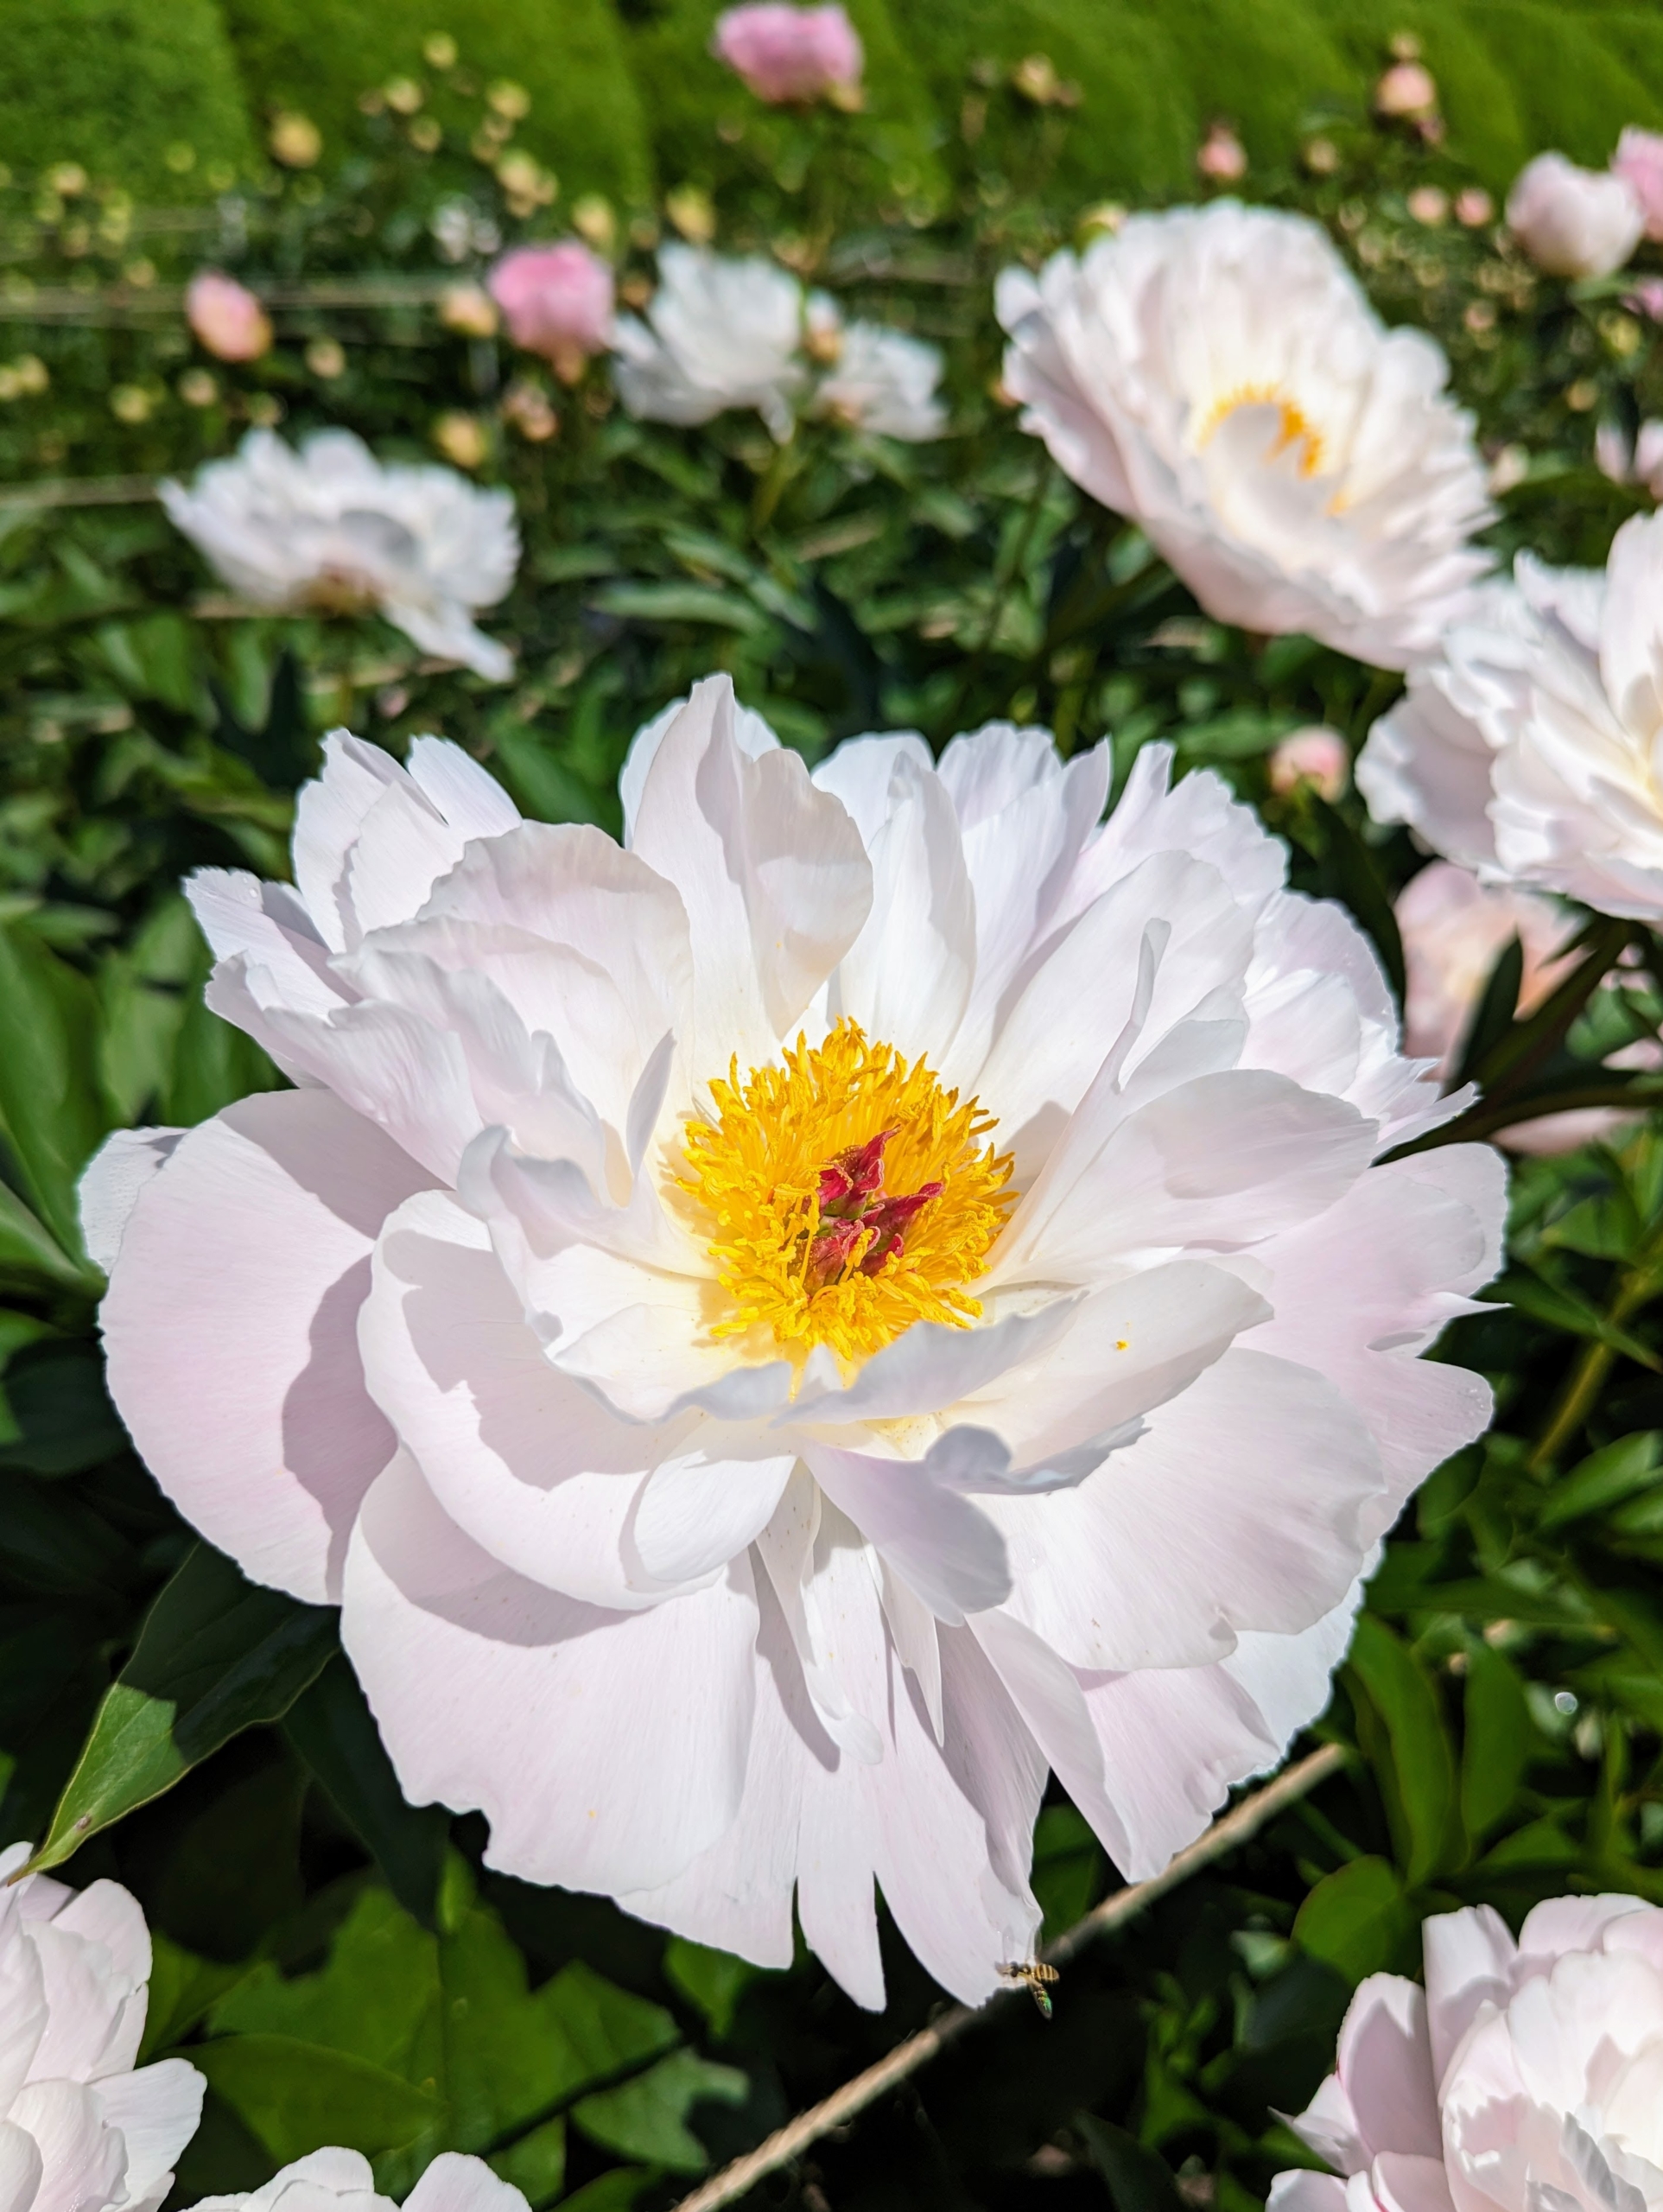
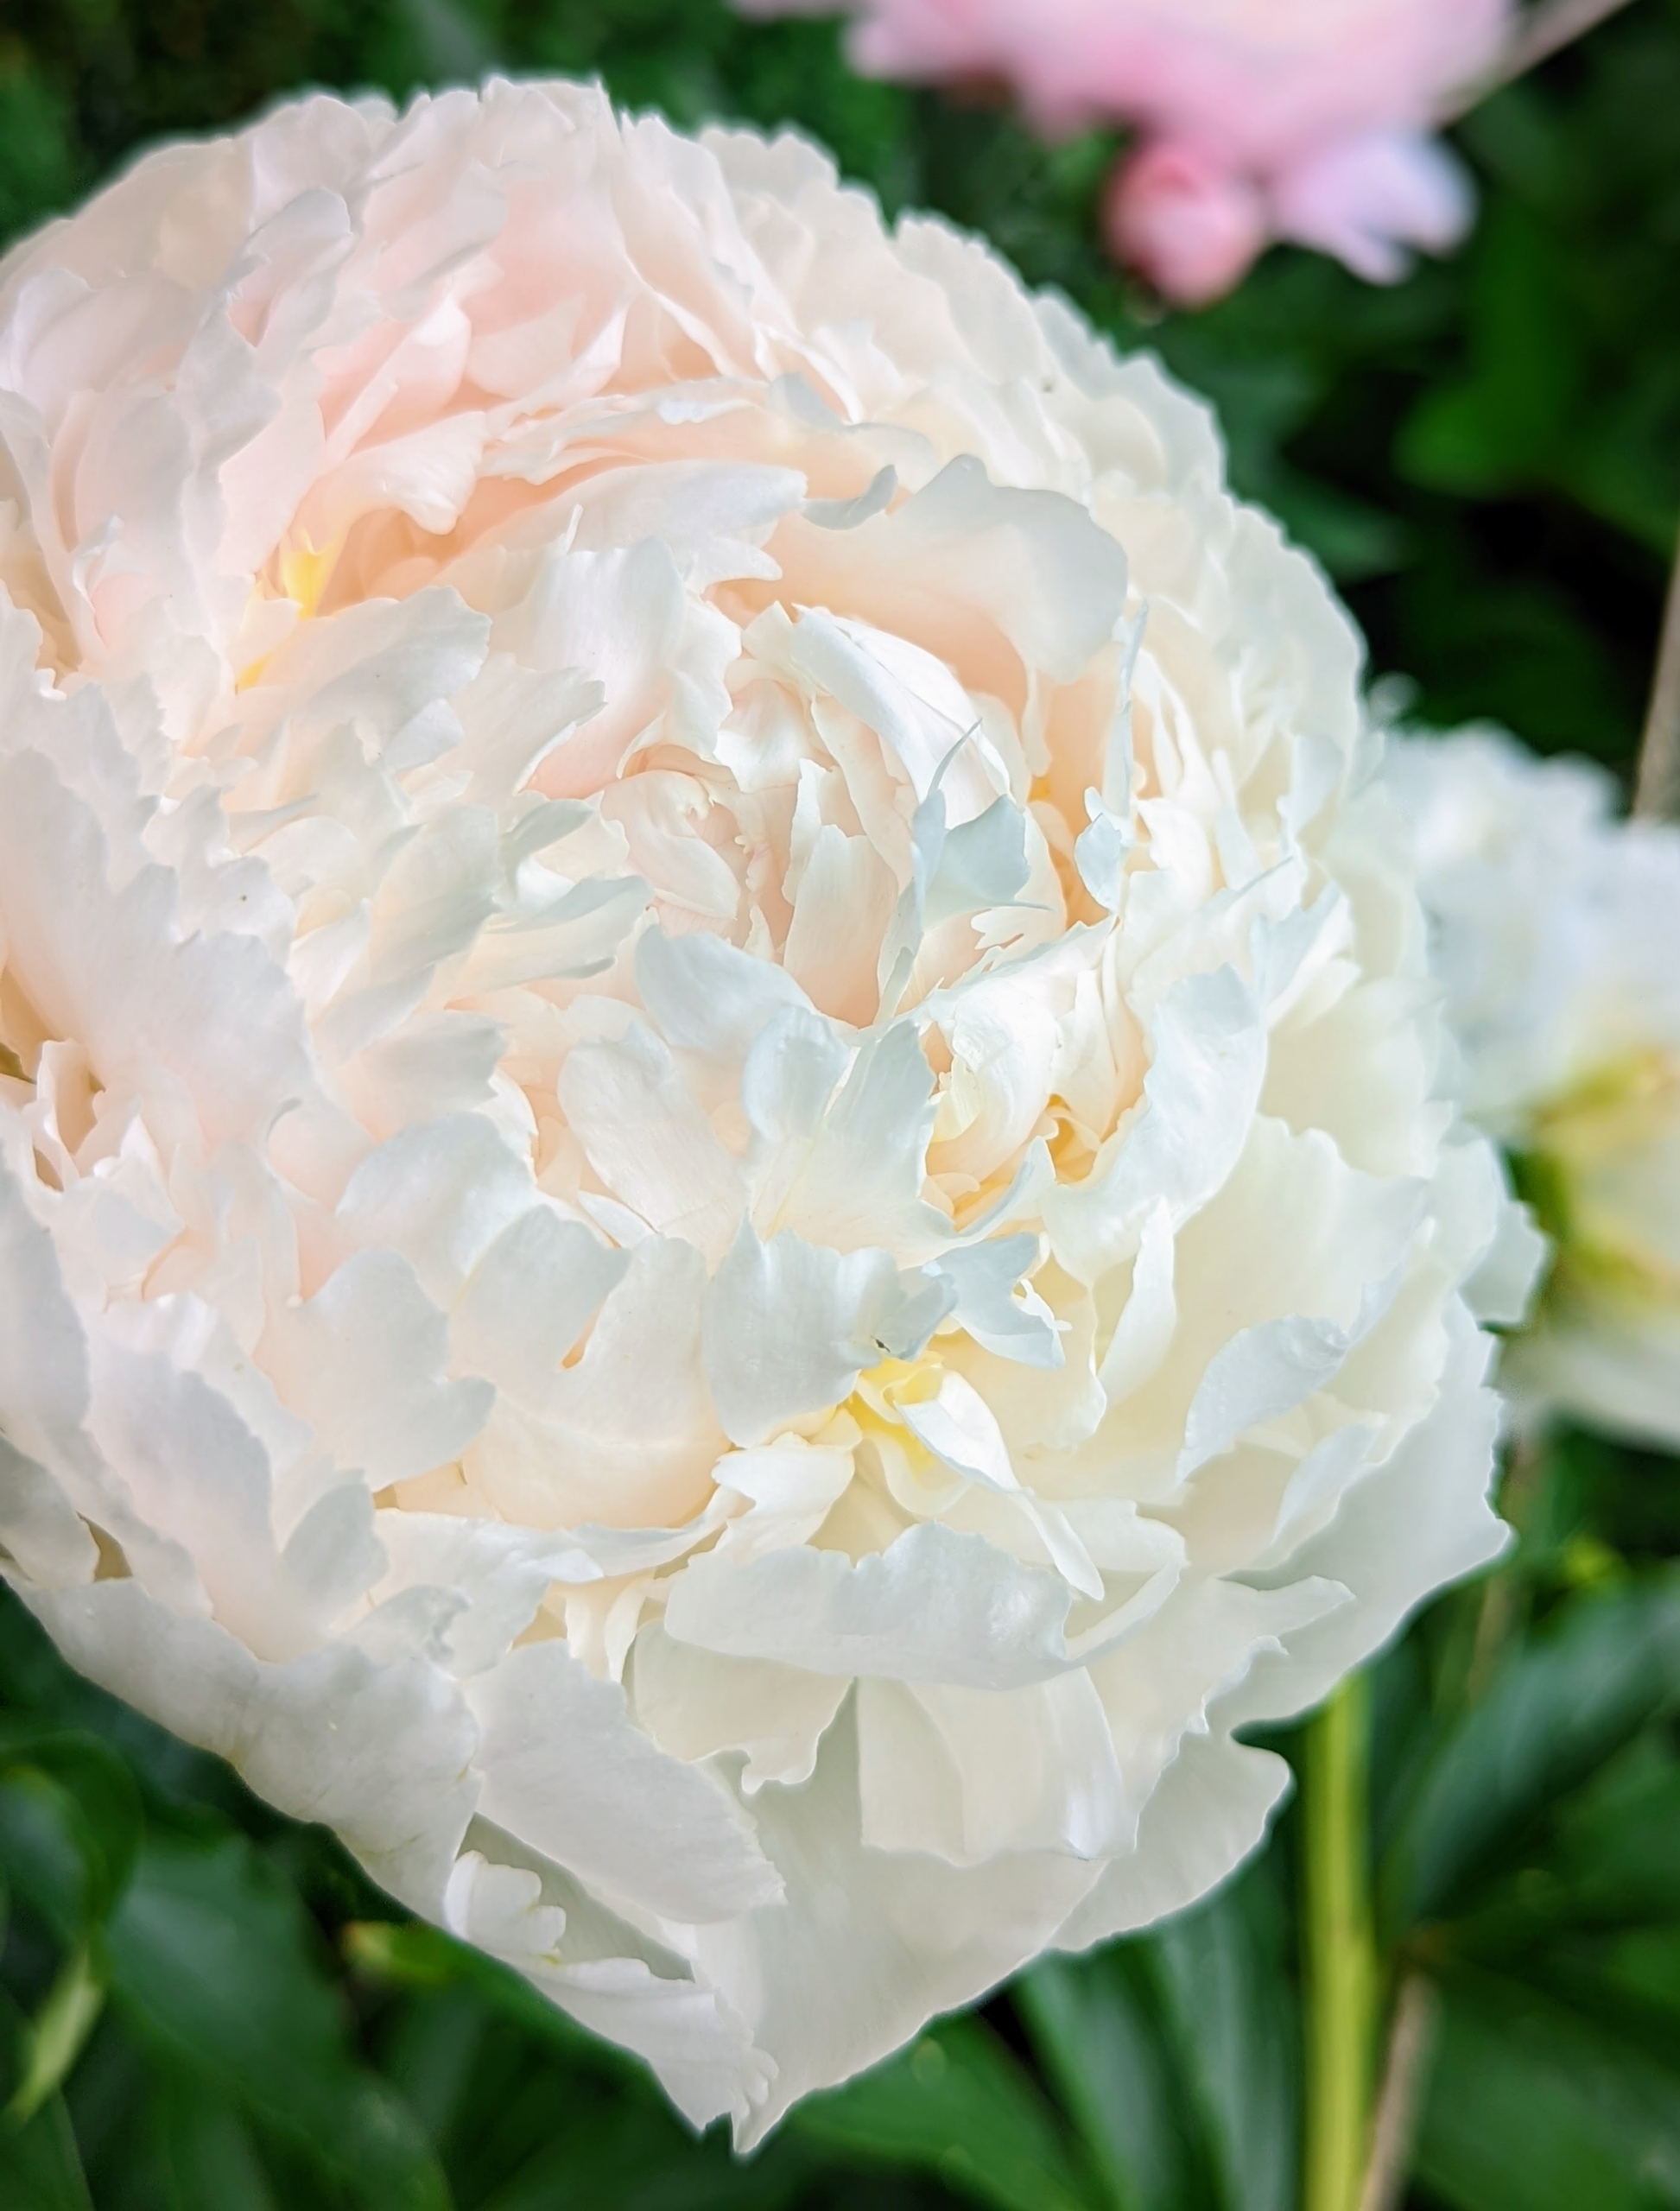
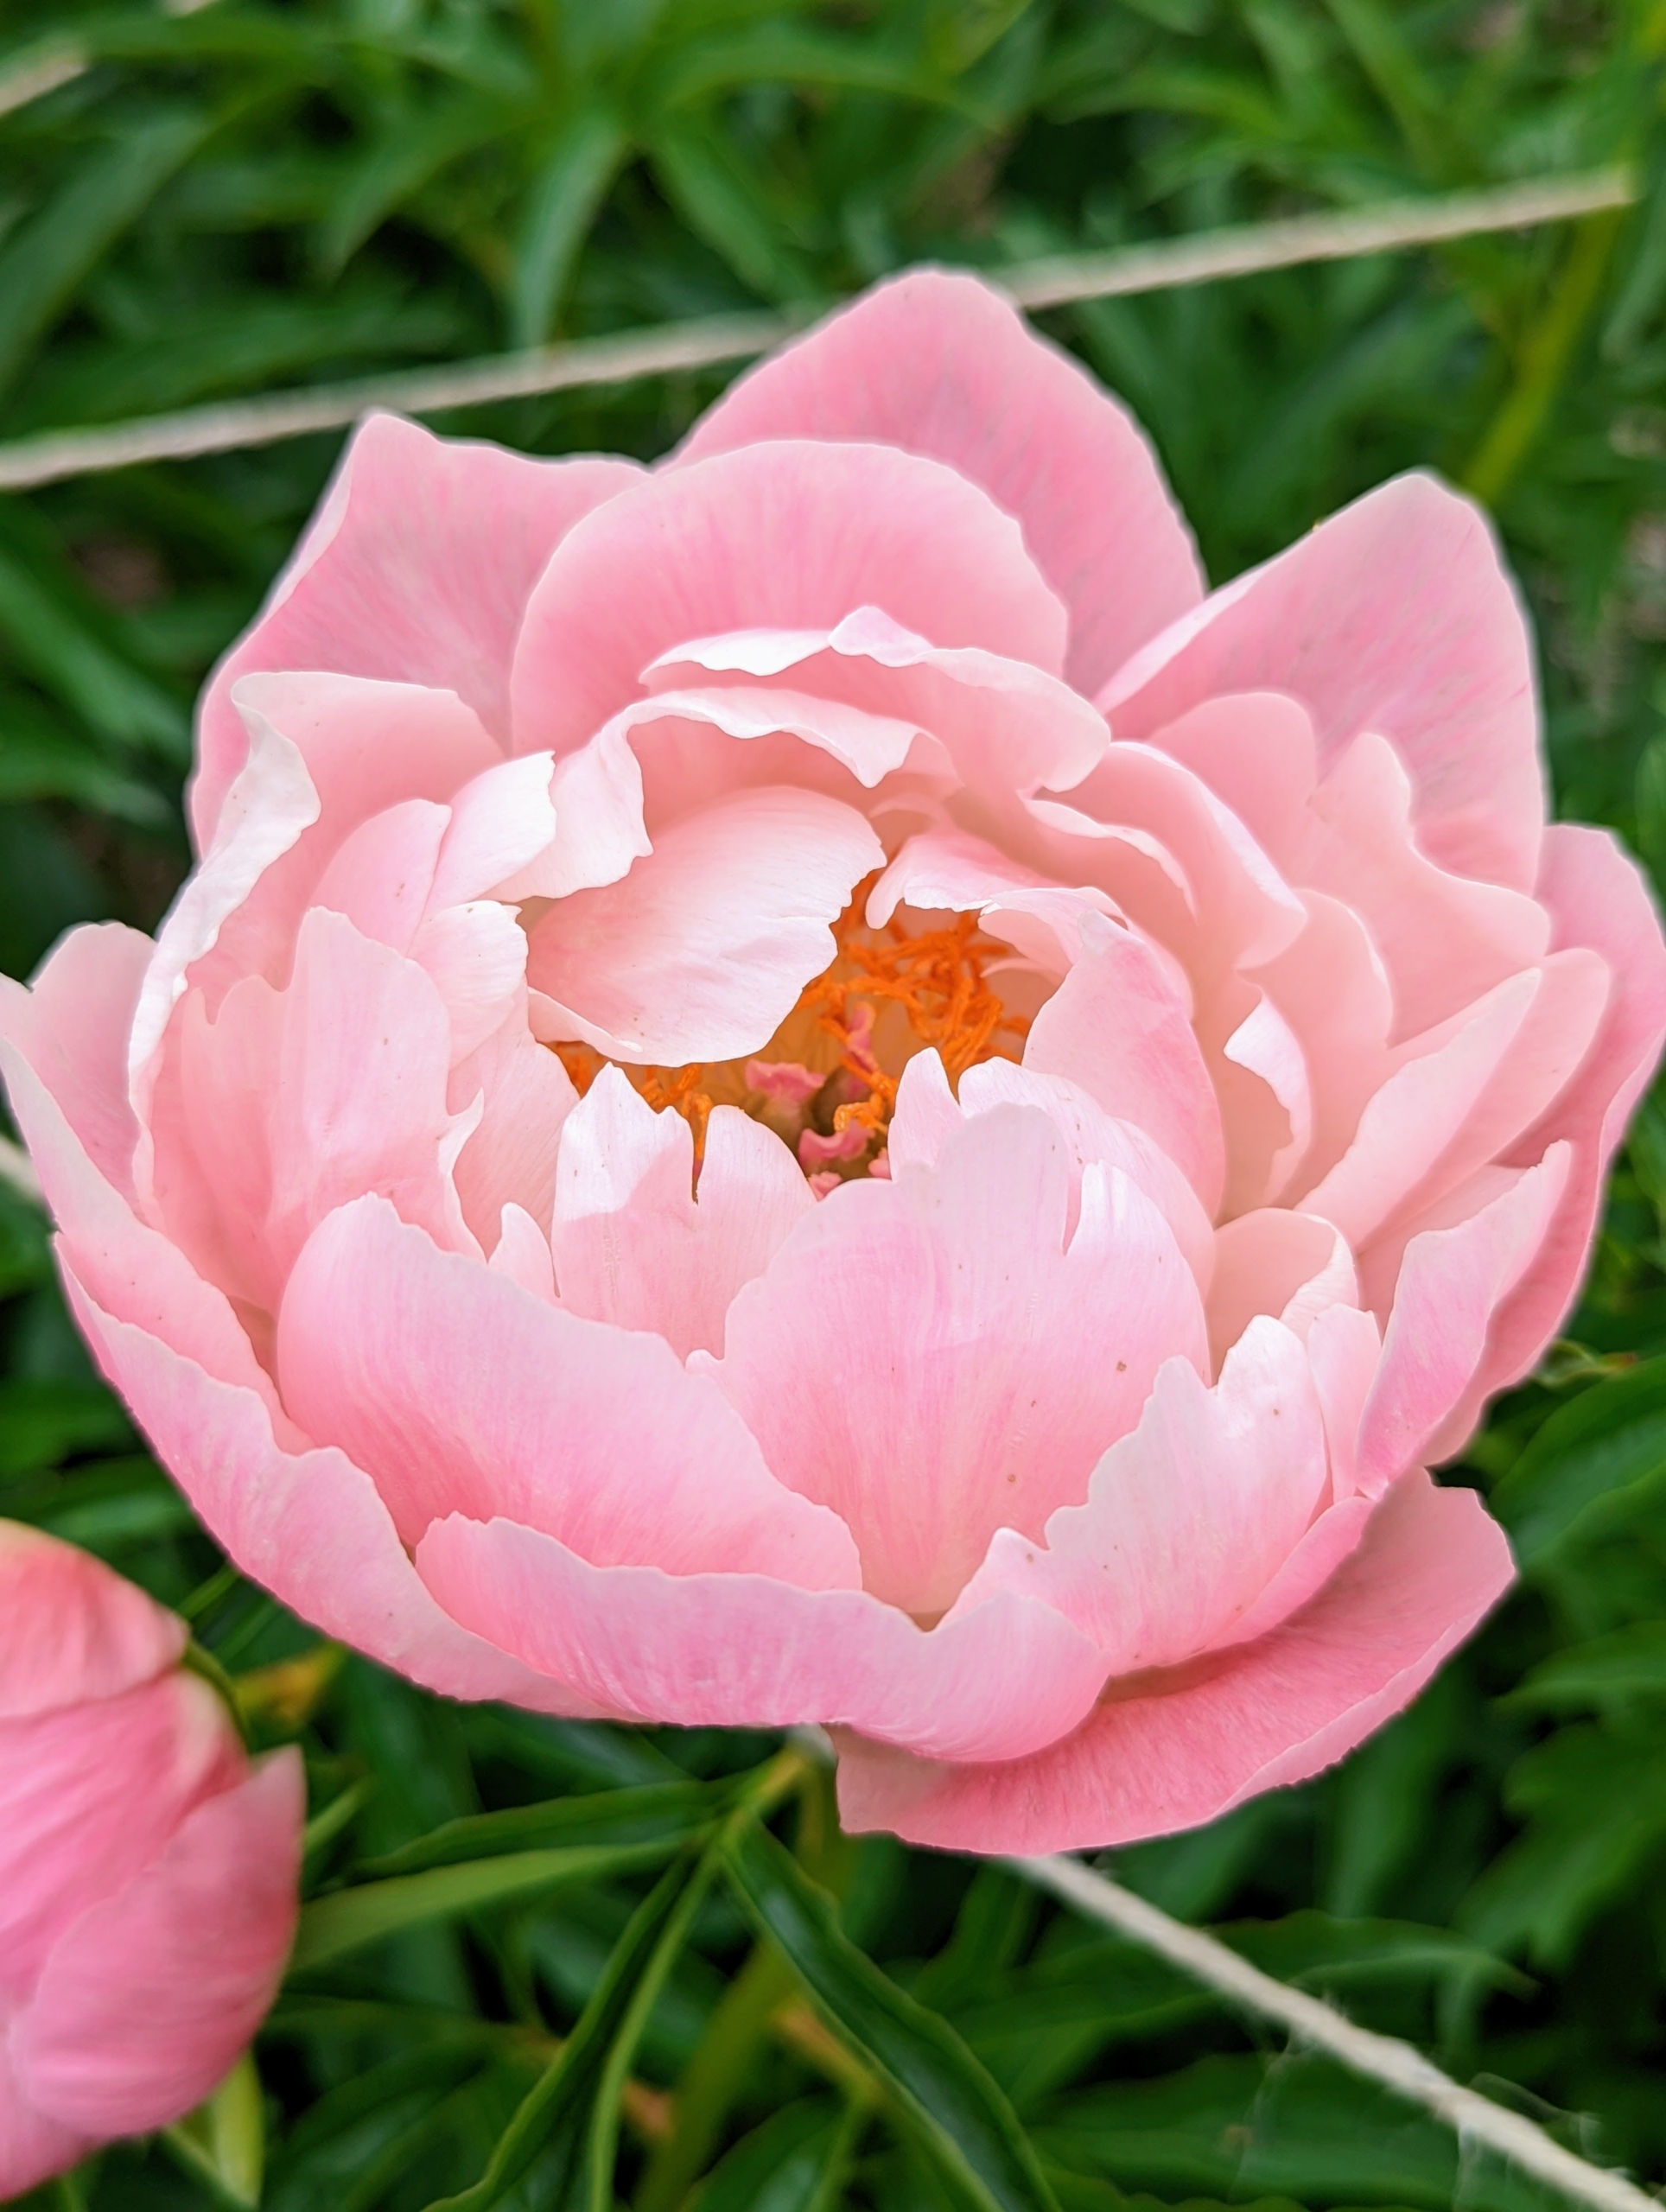
It's that time of year when my herbaceous peony garden is blooming!
I’m always amazed by the dazzling display of these beautiful flowers - it’s one of the most anticipated sights at my Bedford, New York farm. Friends and family love the peonies as much as I do and rush to see them in all their splendor. When I first planted this garden, I knew I wanted many, many peonies in one large area. I chose a location across from my Winter House, where there's lots of room and full sun - a spot where I could also see the floral show from my window.
Enjoy these photos.
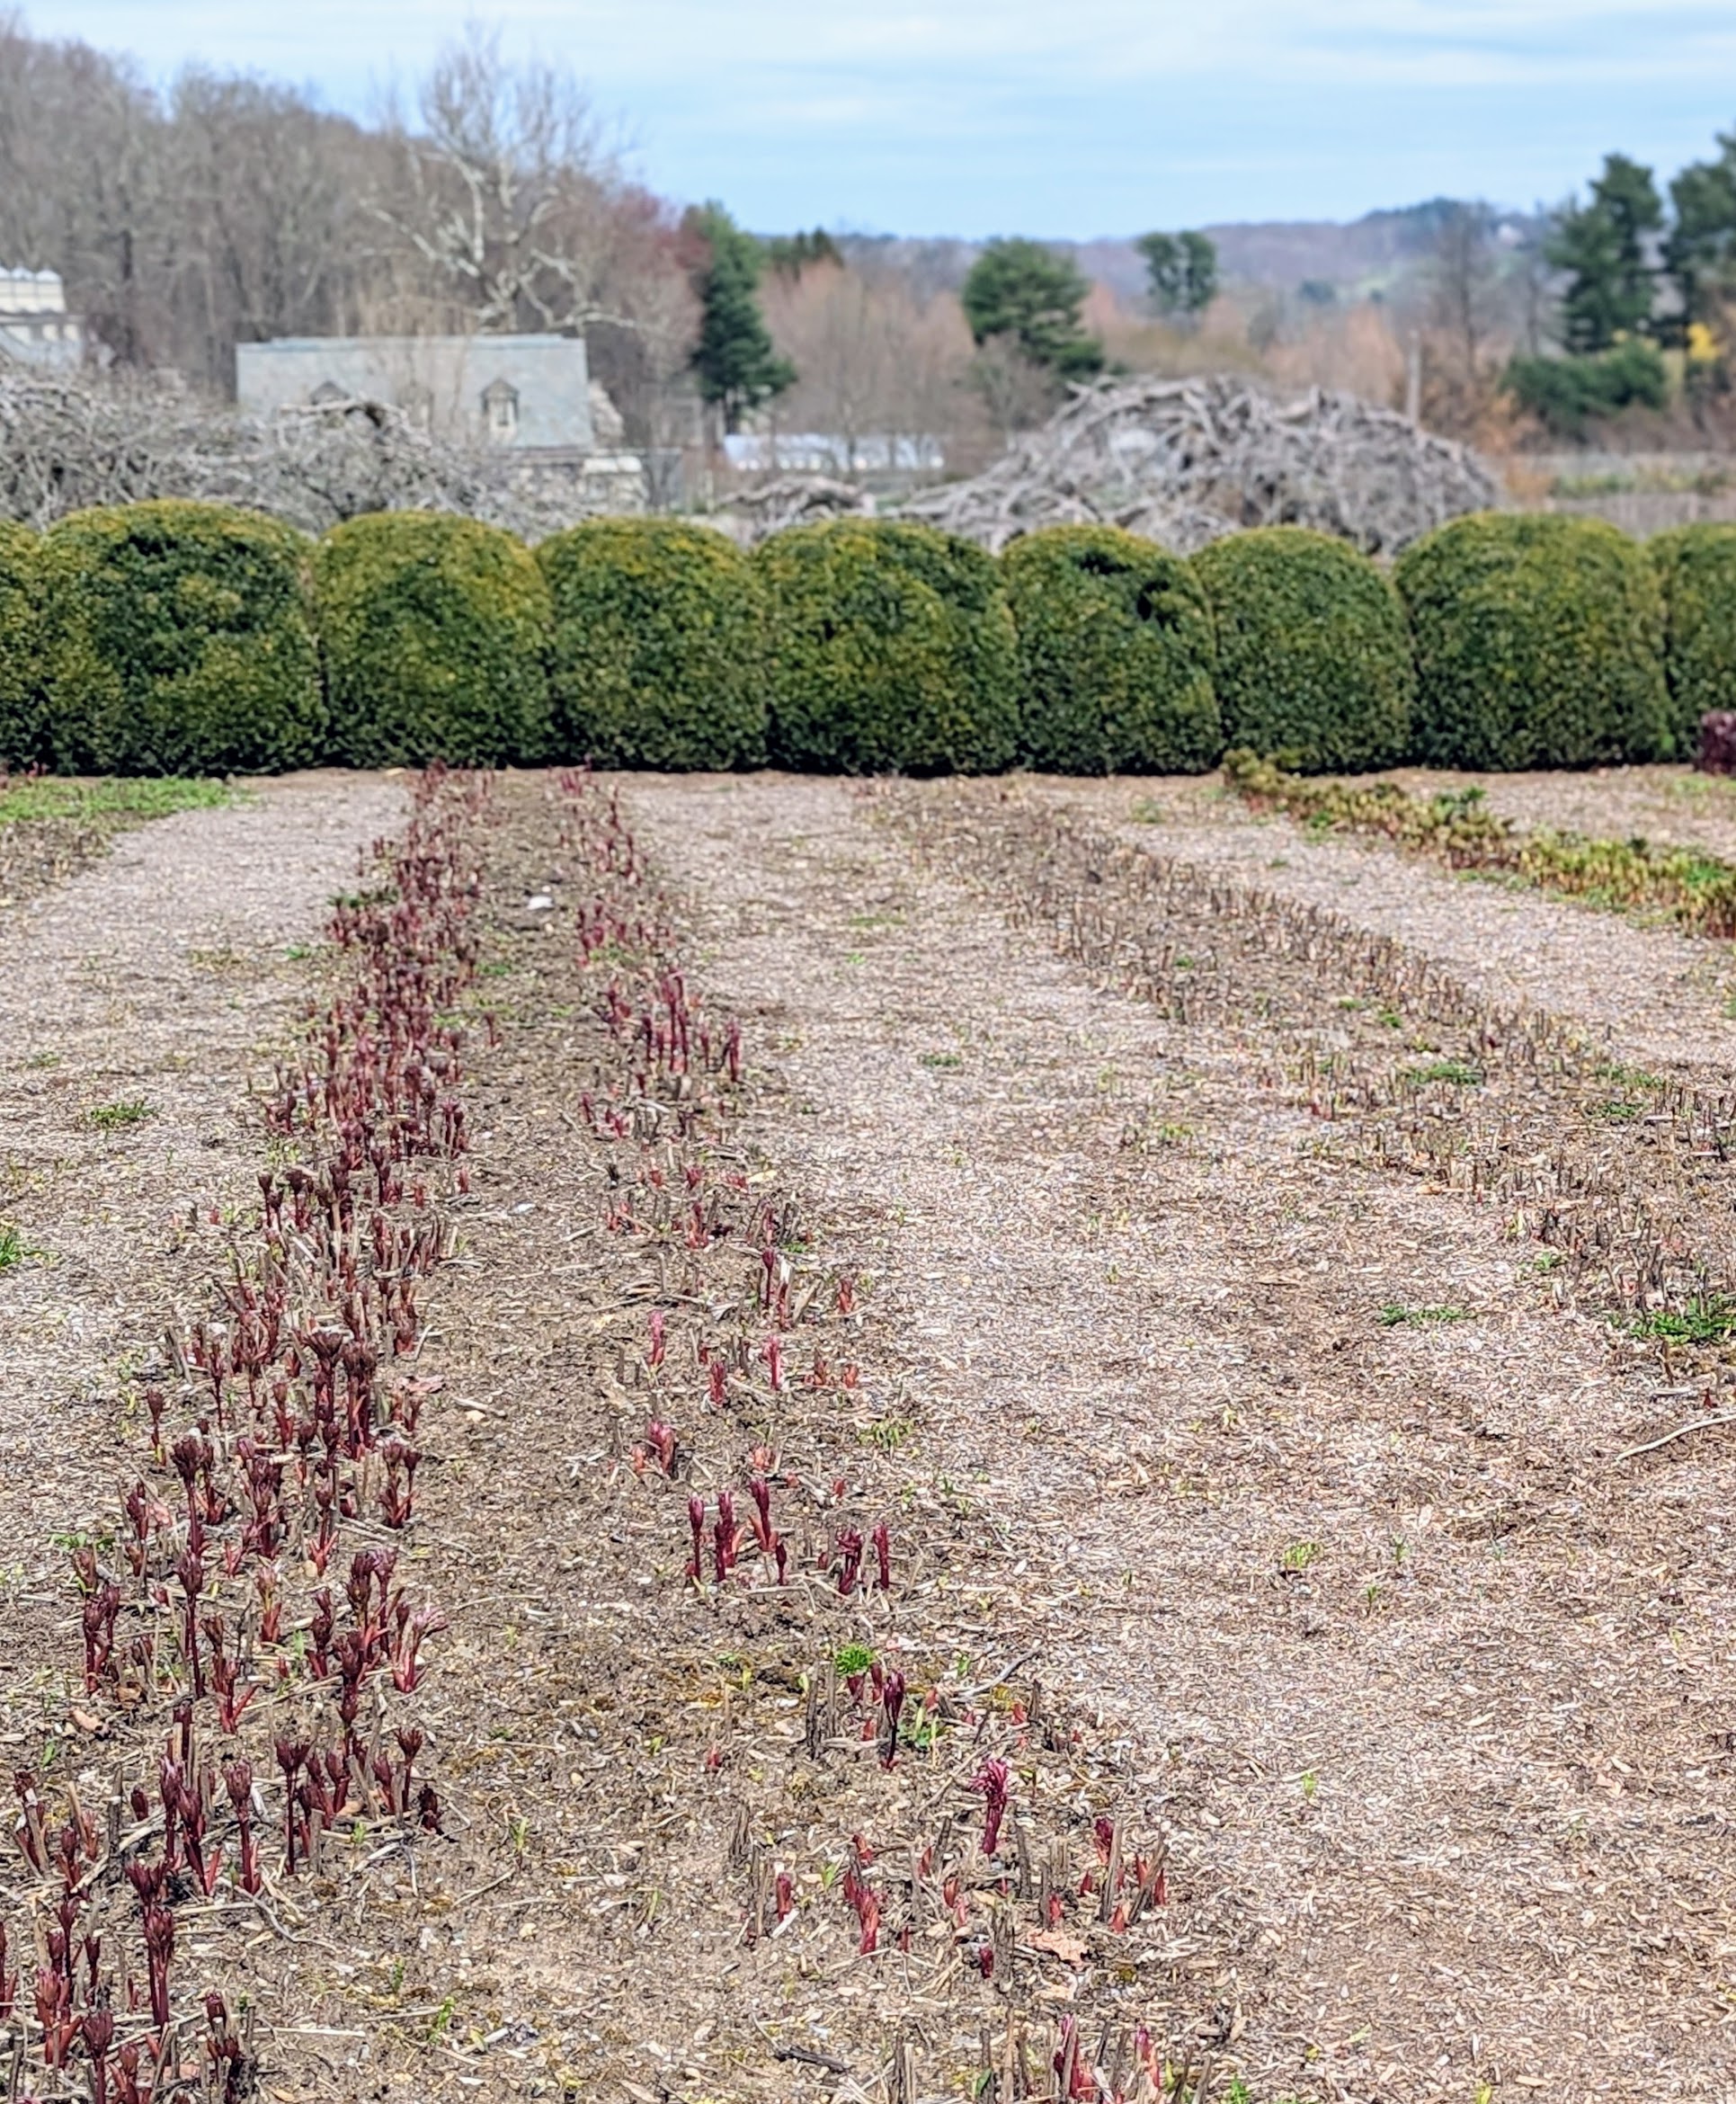
Hard to believe this is the peony garden in early April. The tips of the plants are just poking through the soil
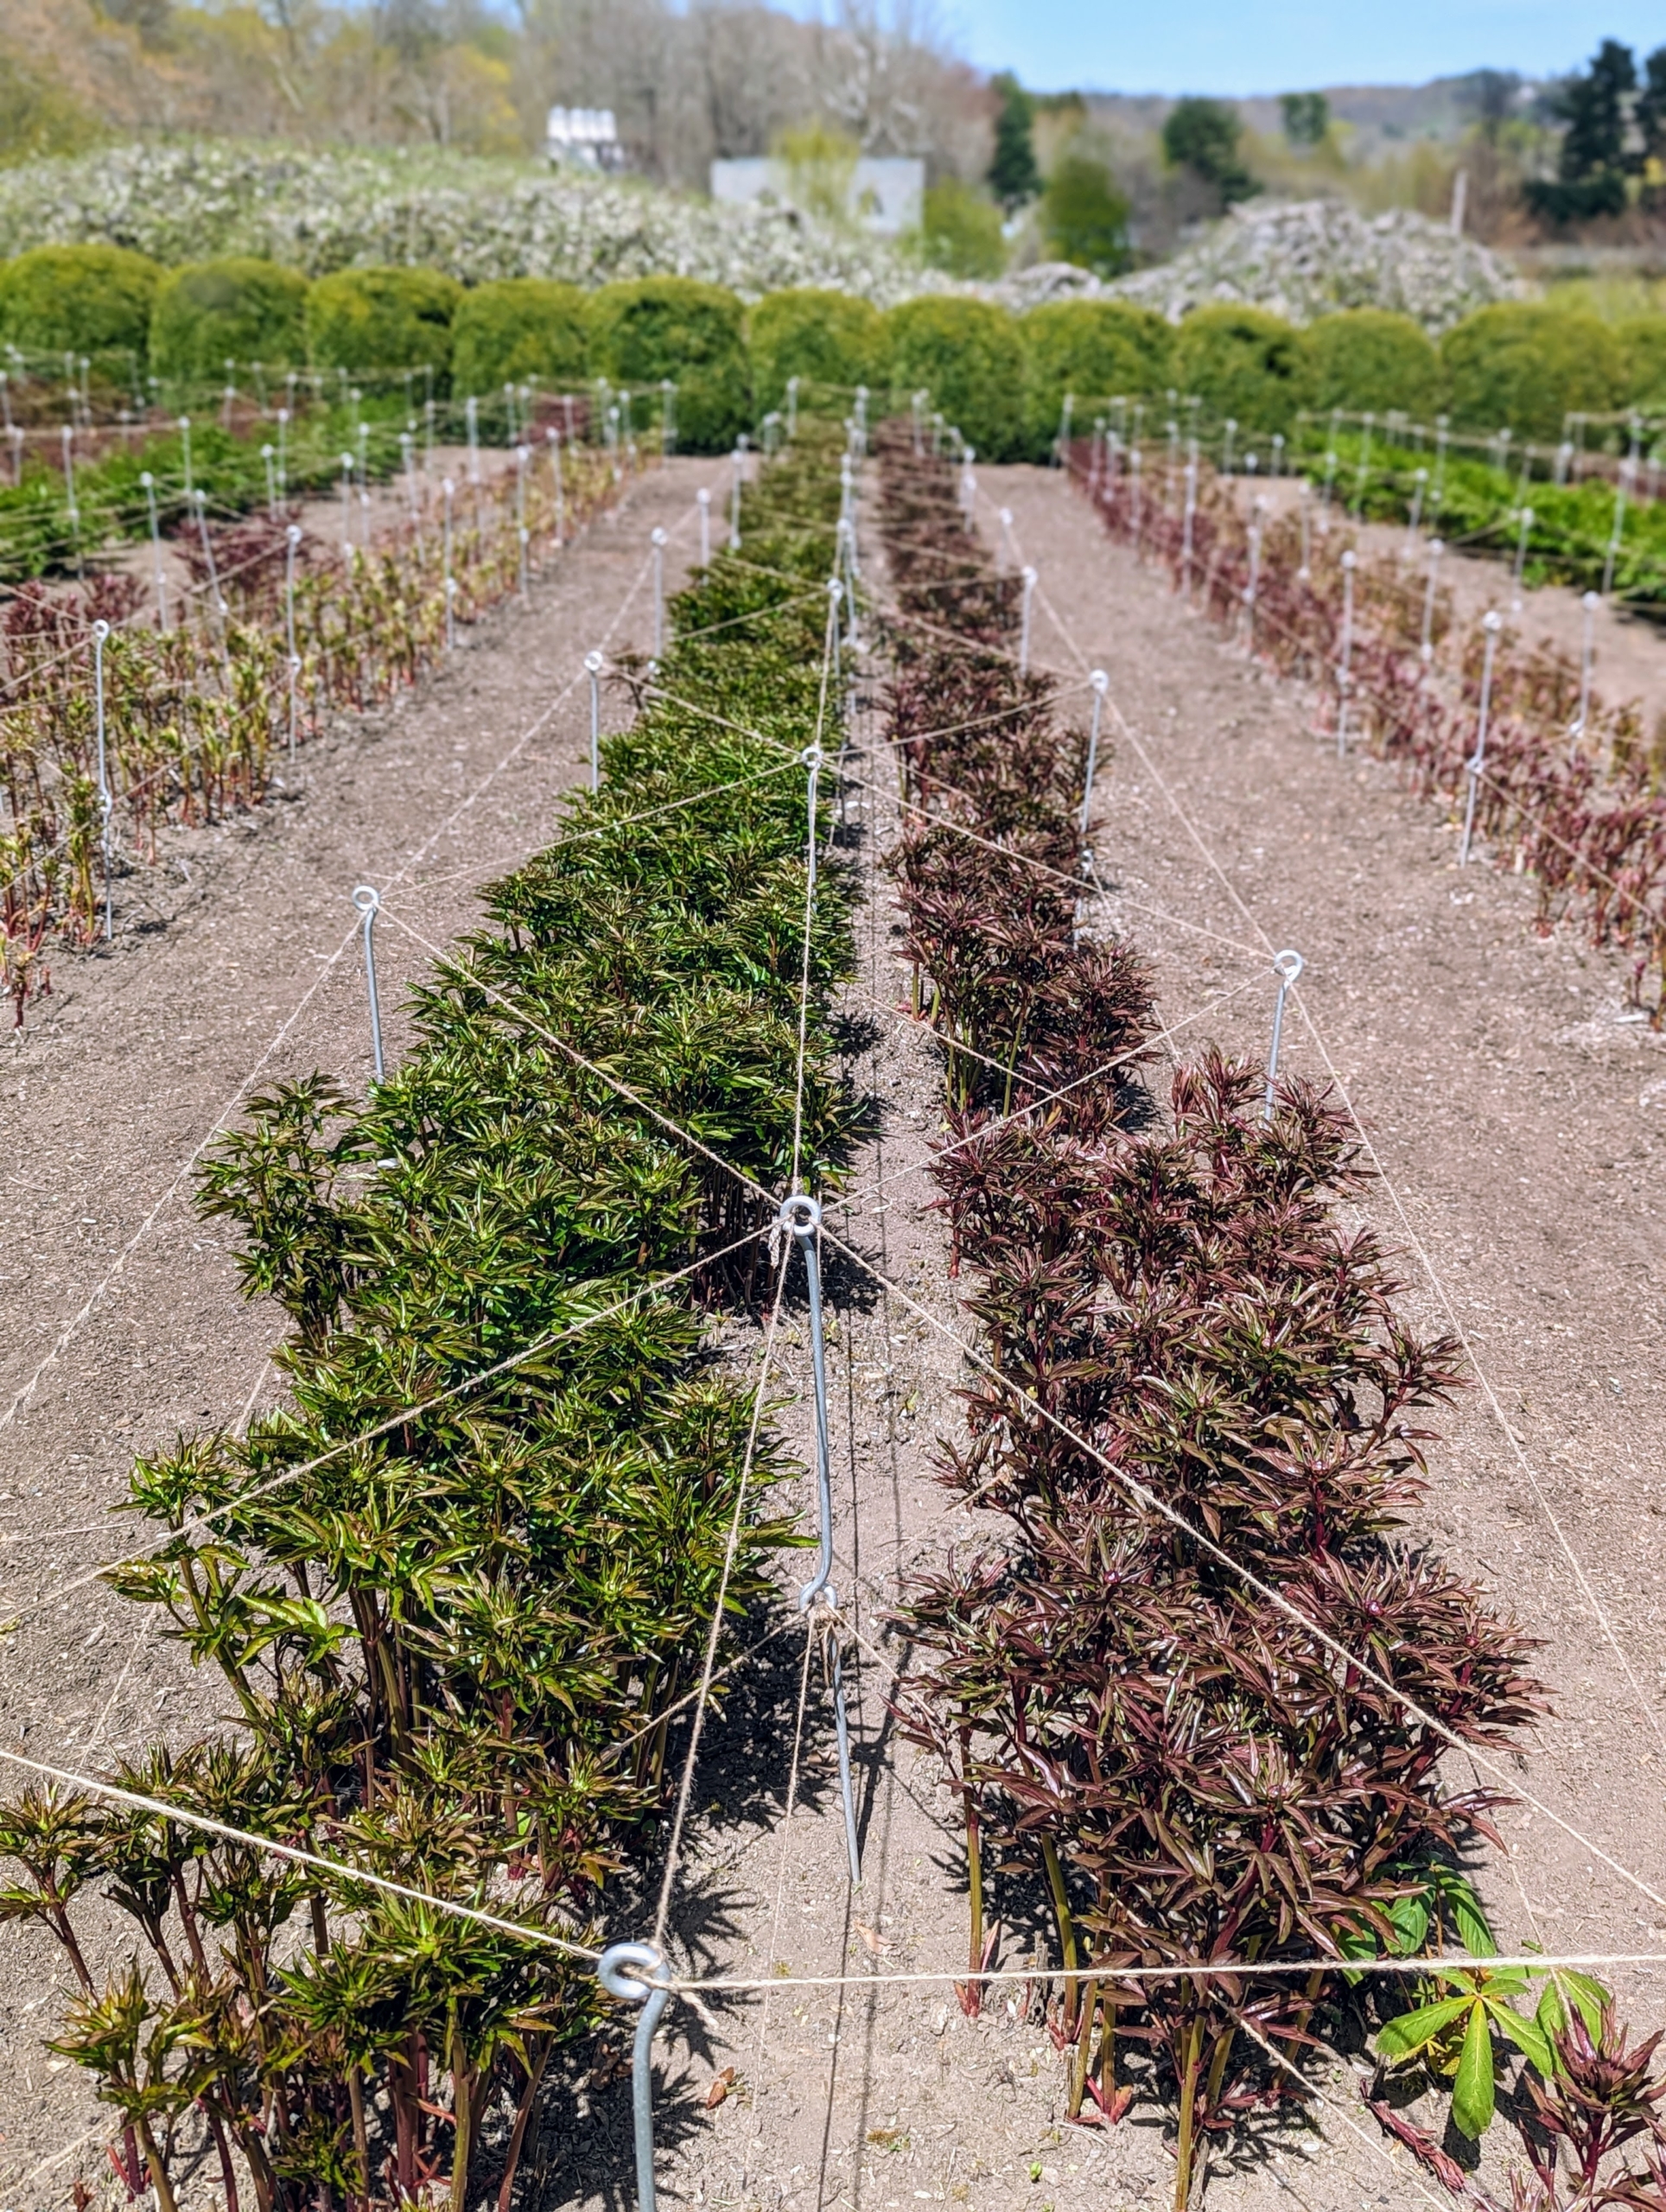
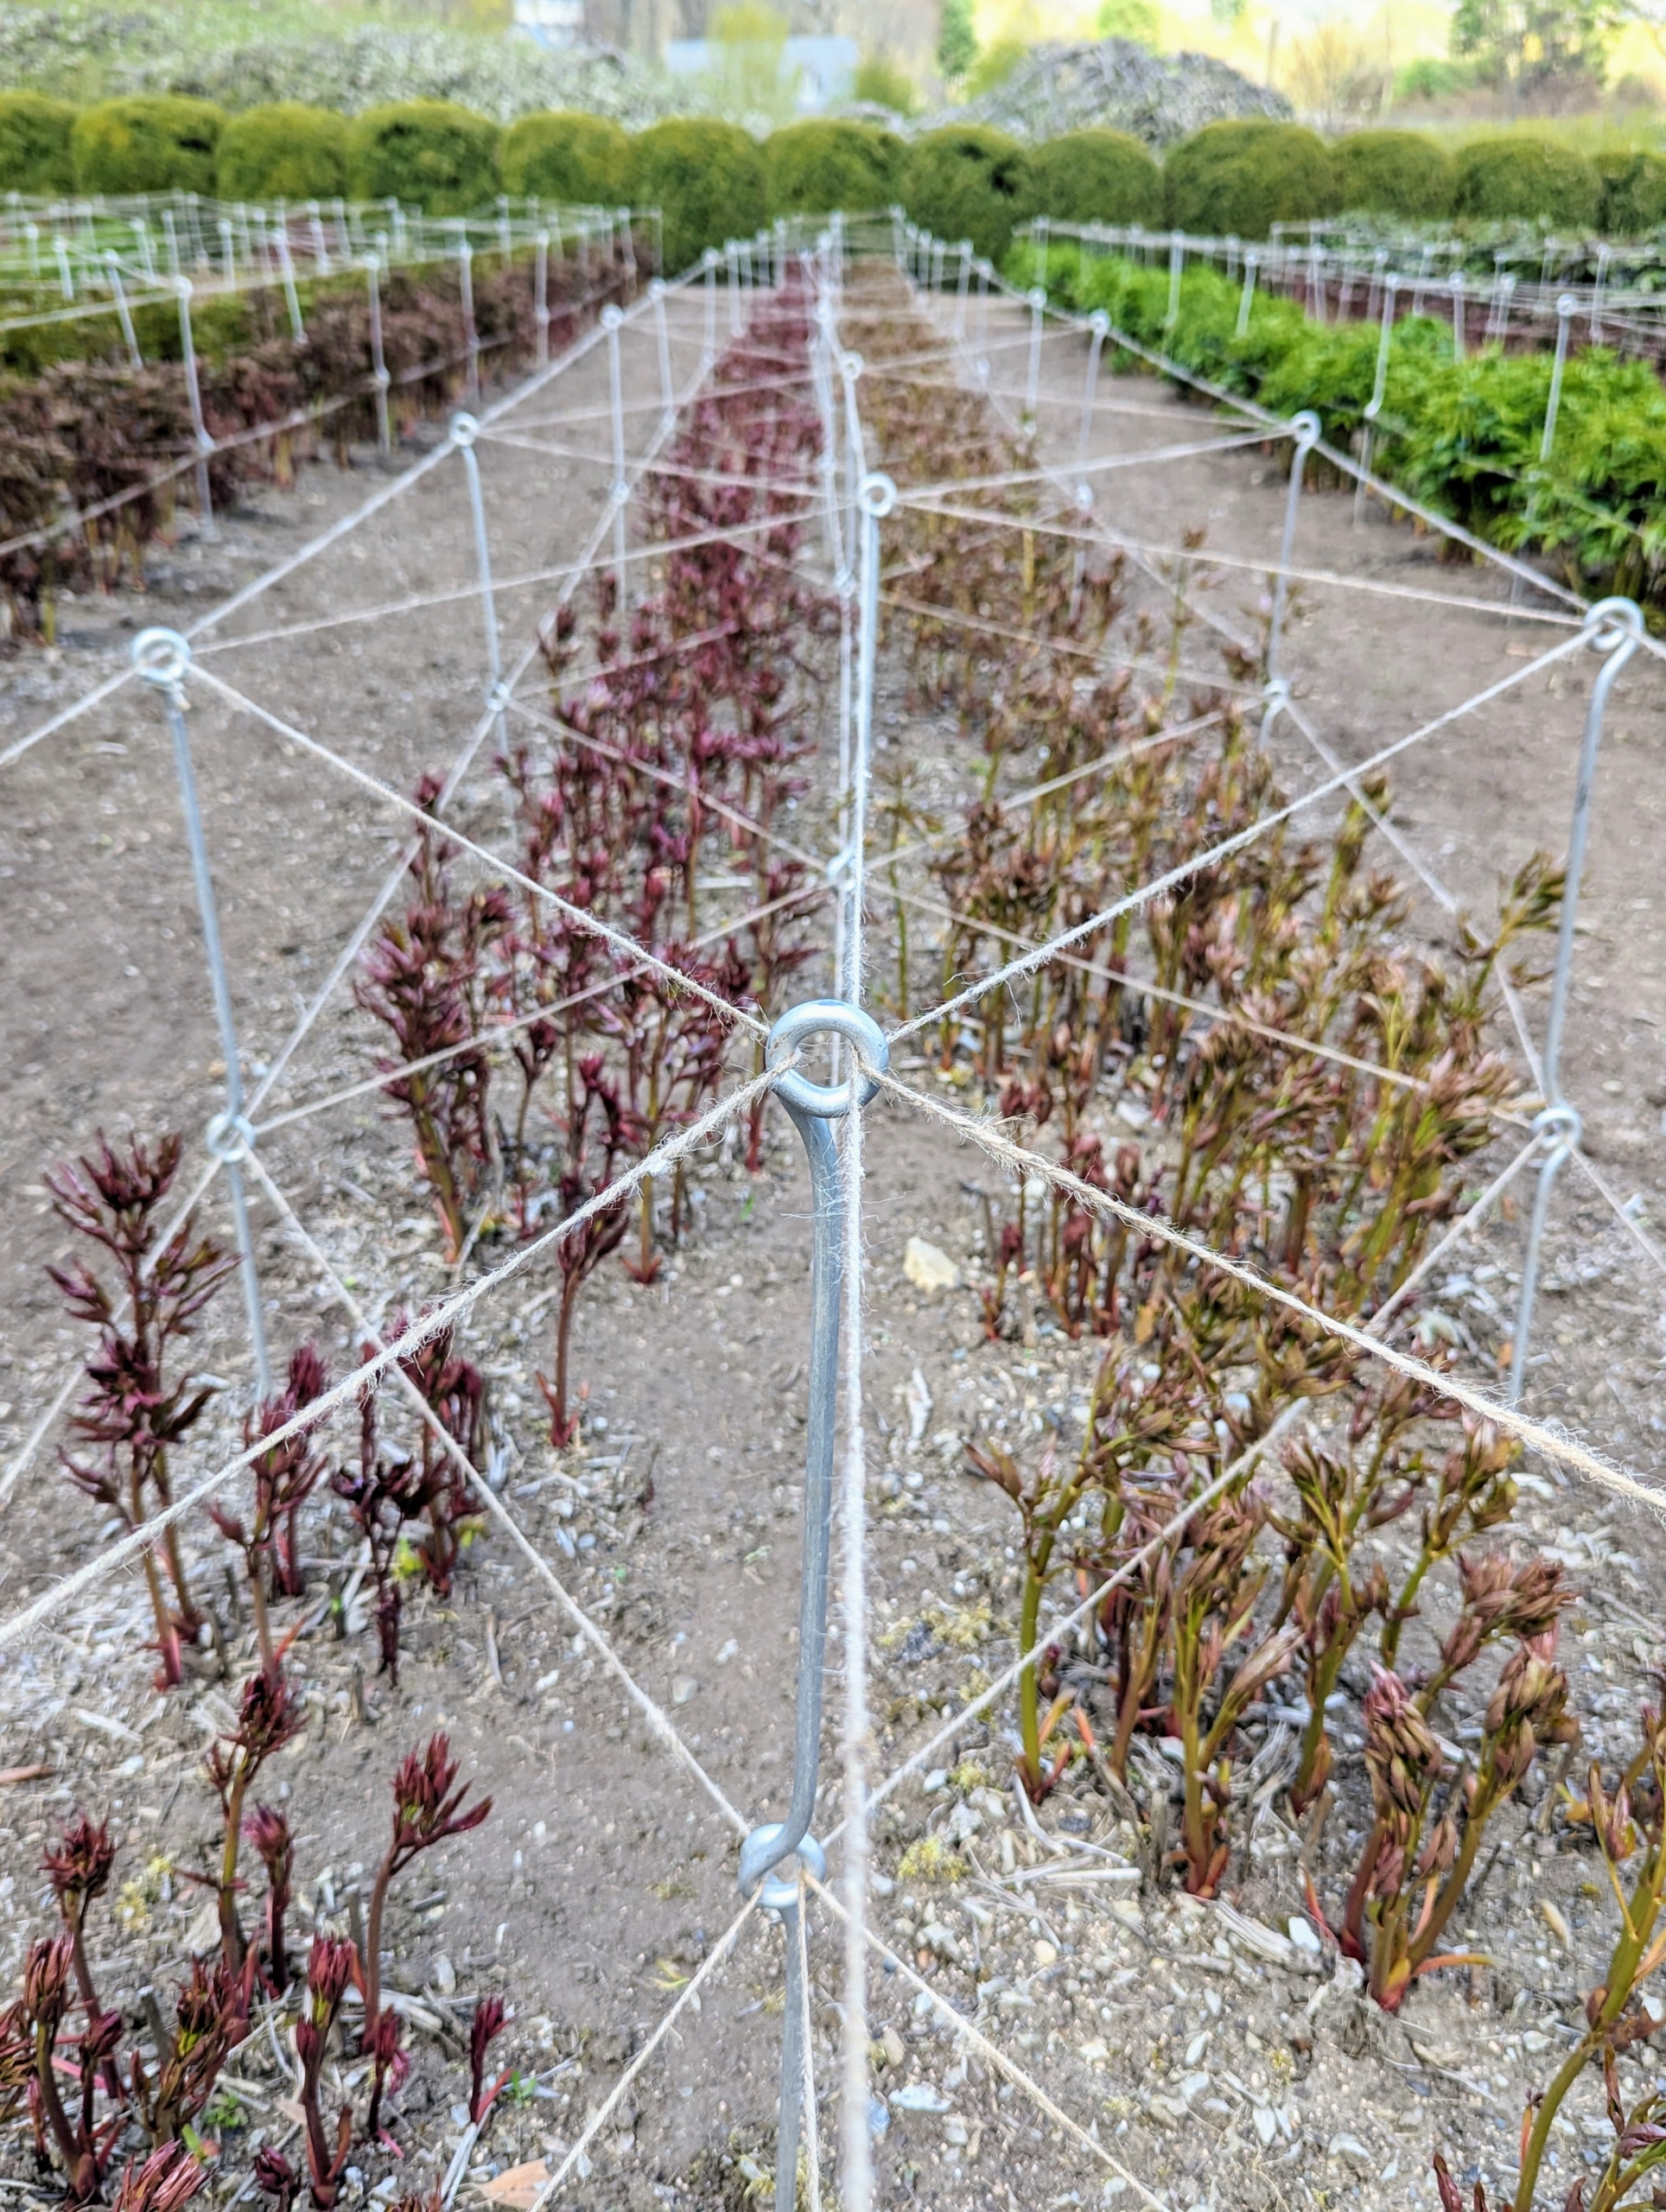
In early May, my herbaceous peony bed is filled with knee-high stems and dense green foliage. Everyone is always so excited to see this peony garden explode with color. Before the flowers appear, my outdoor grounds crew puts up stakes, so the peonies are well-supported as they grow. We use natural twine and metal uprights I designed myself for this purpose.
My design includes strong steel stakes with two eye holes – one at the top and one midway. This allows for two levels of supportive twine.
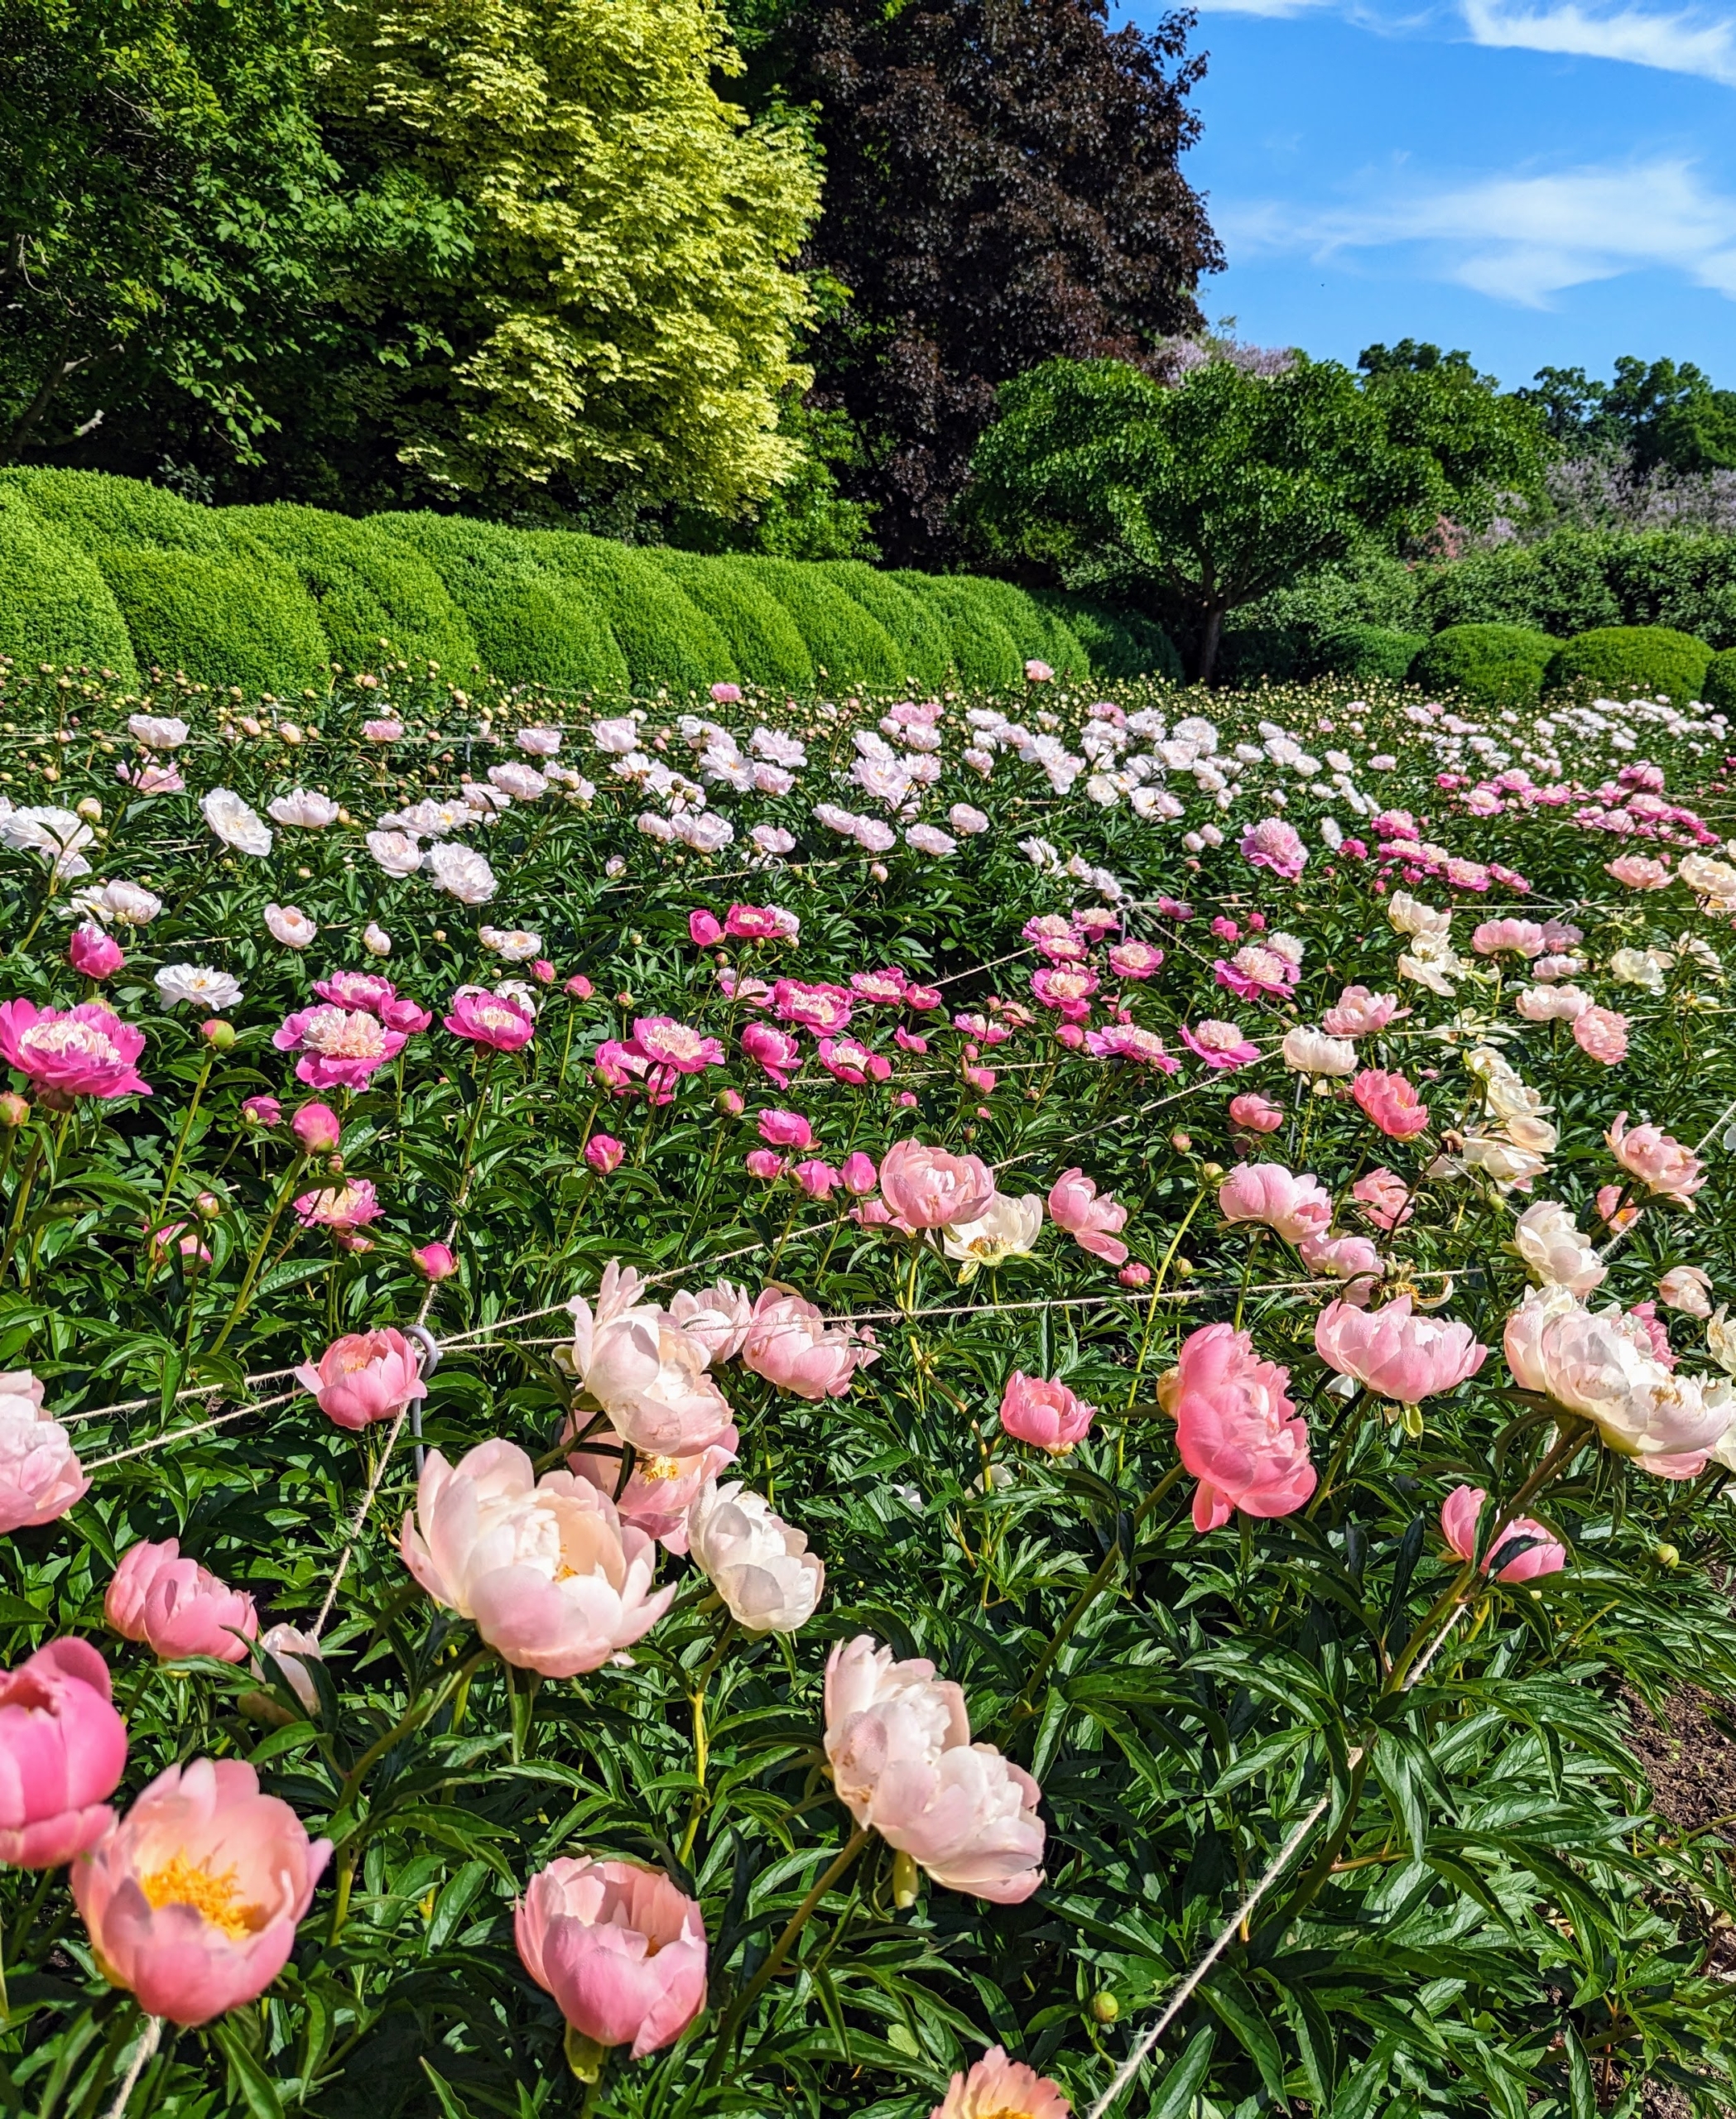
Not long after, one can see all the buds atop the stems. When I first planted my peony garden, I focused on pink varieties, and planted 11-double rows of 22-peony types. I chose the varieties for their colors, their forms and their long blooming periods.
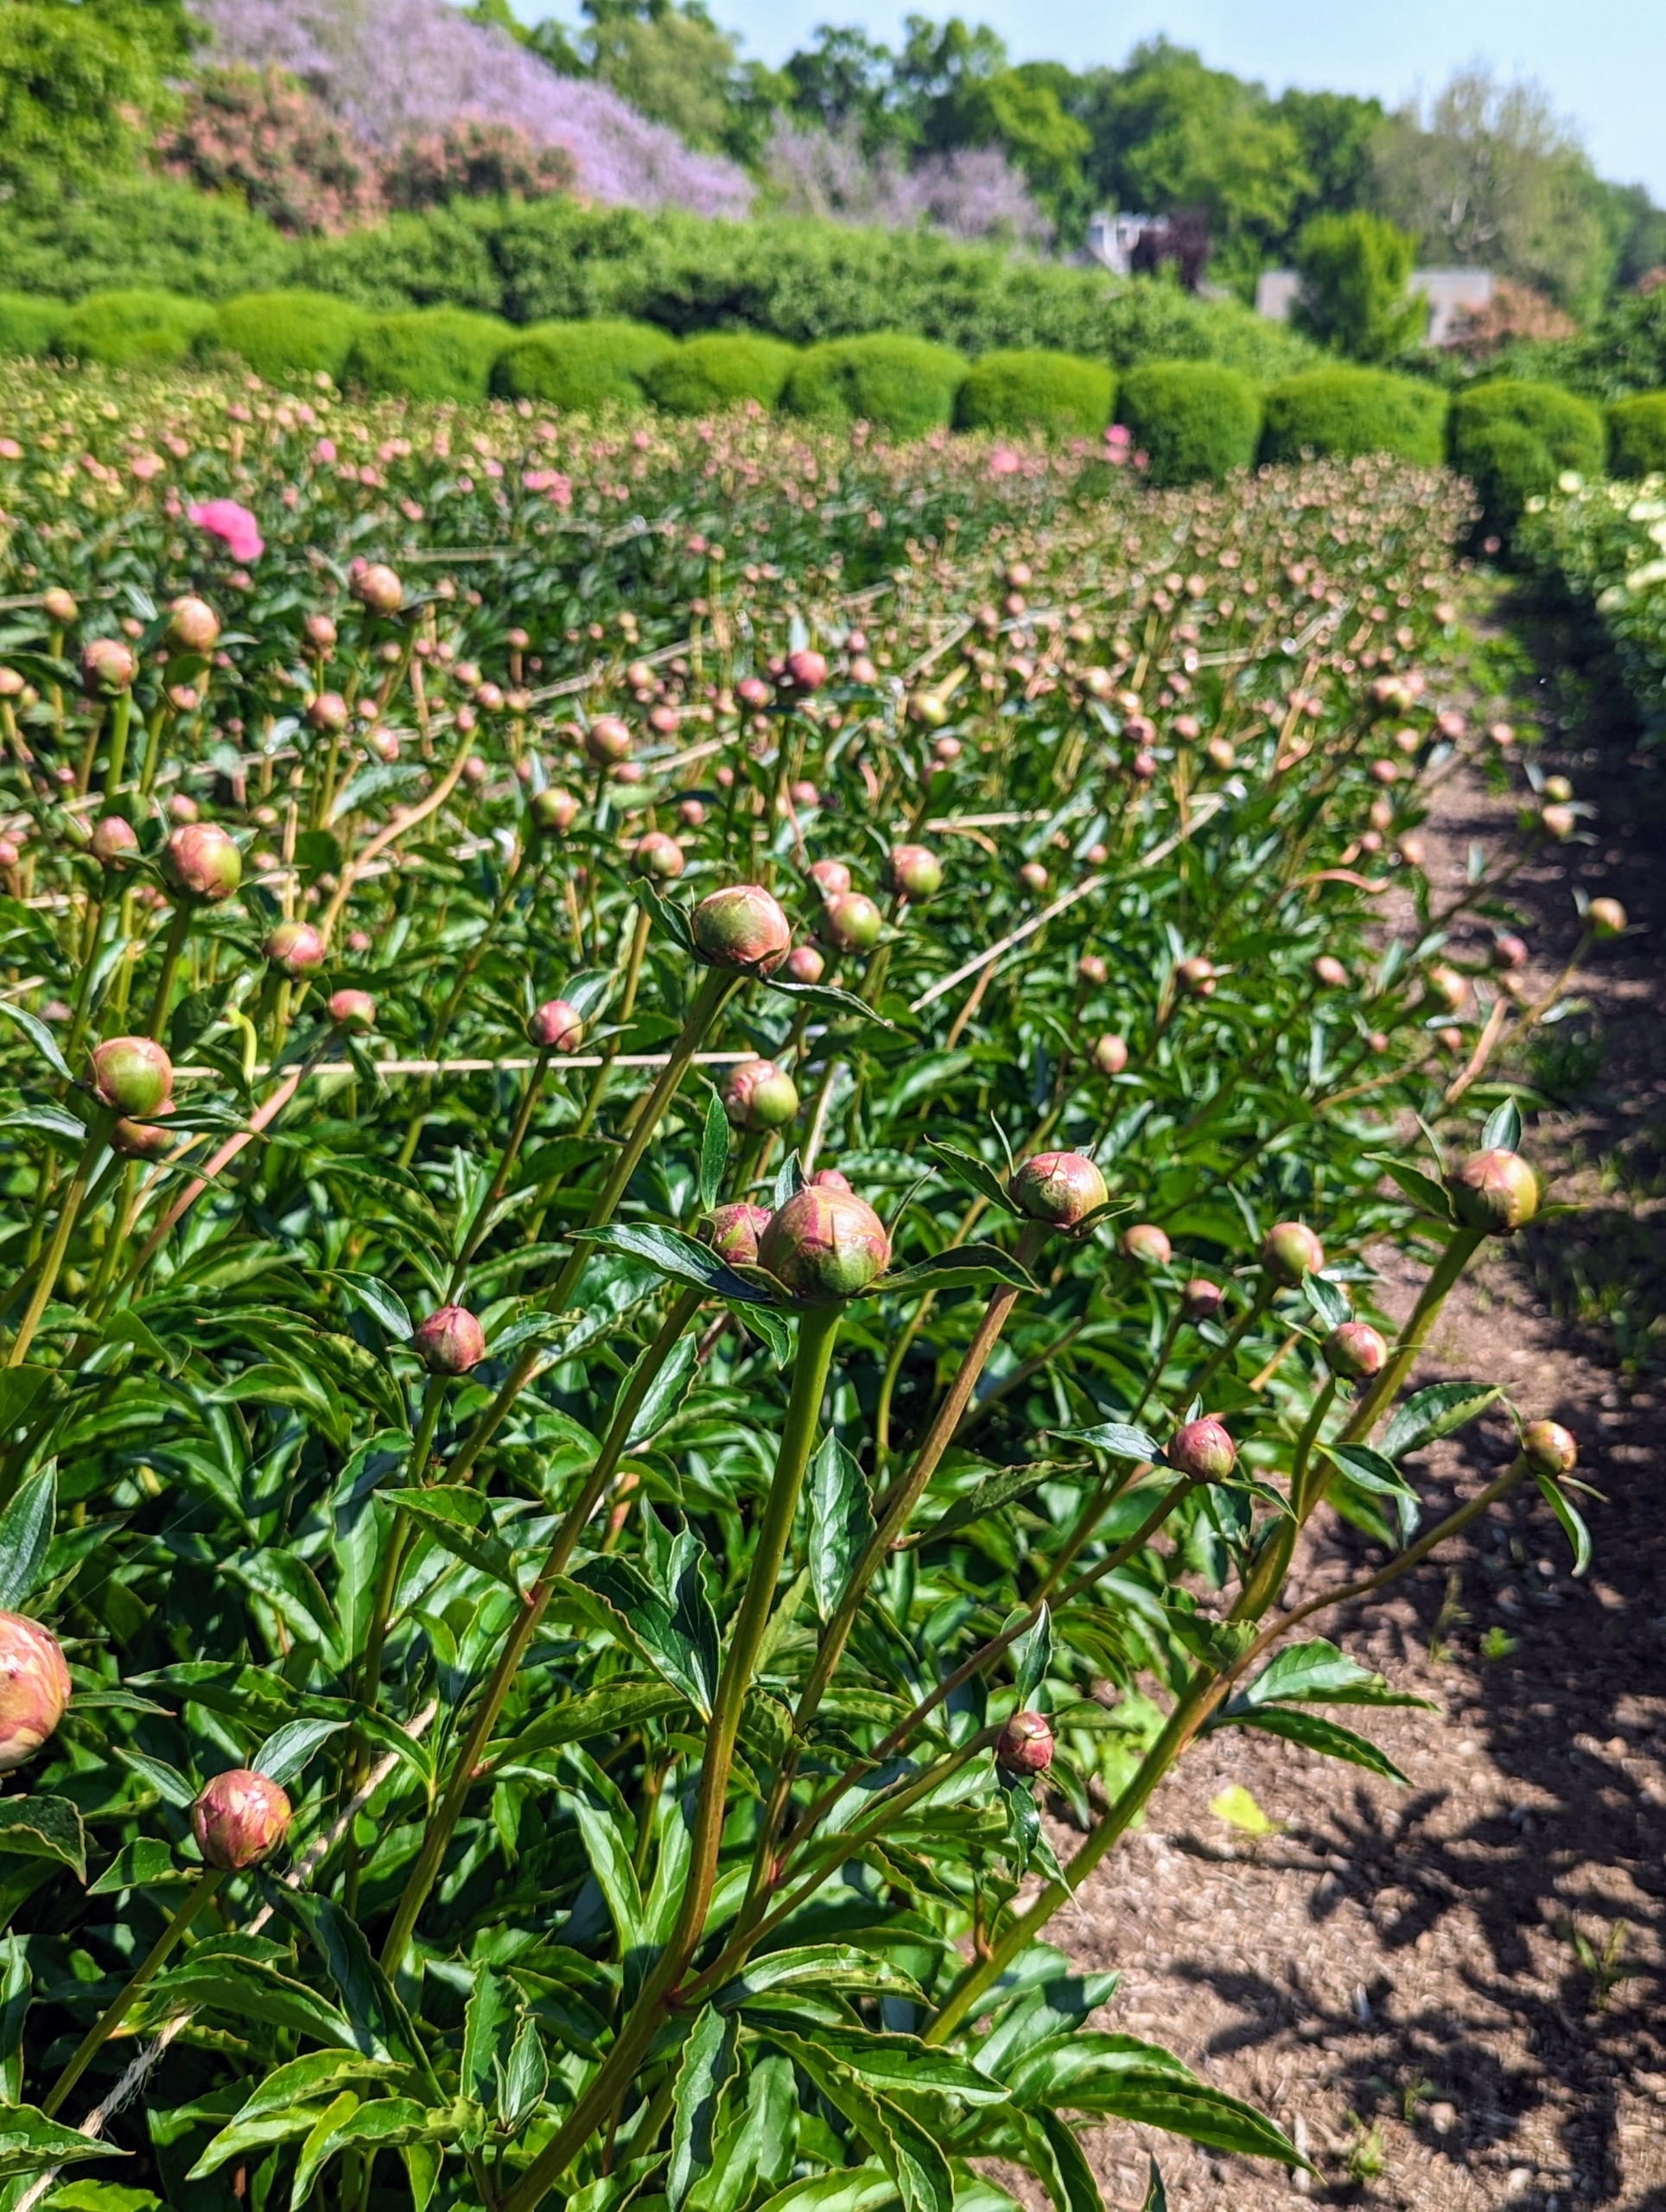
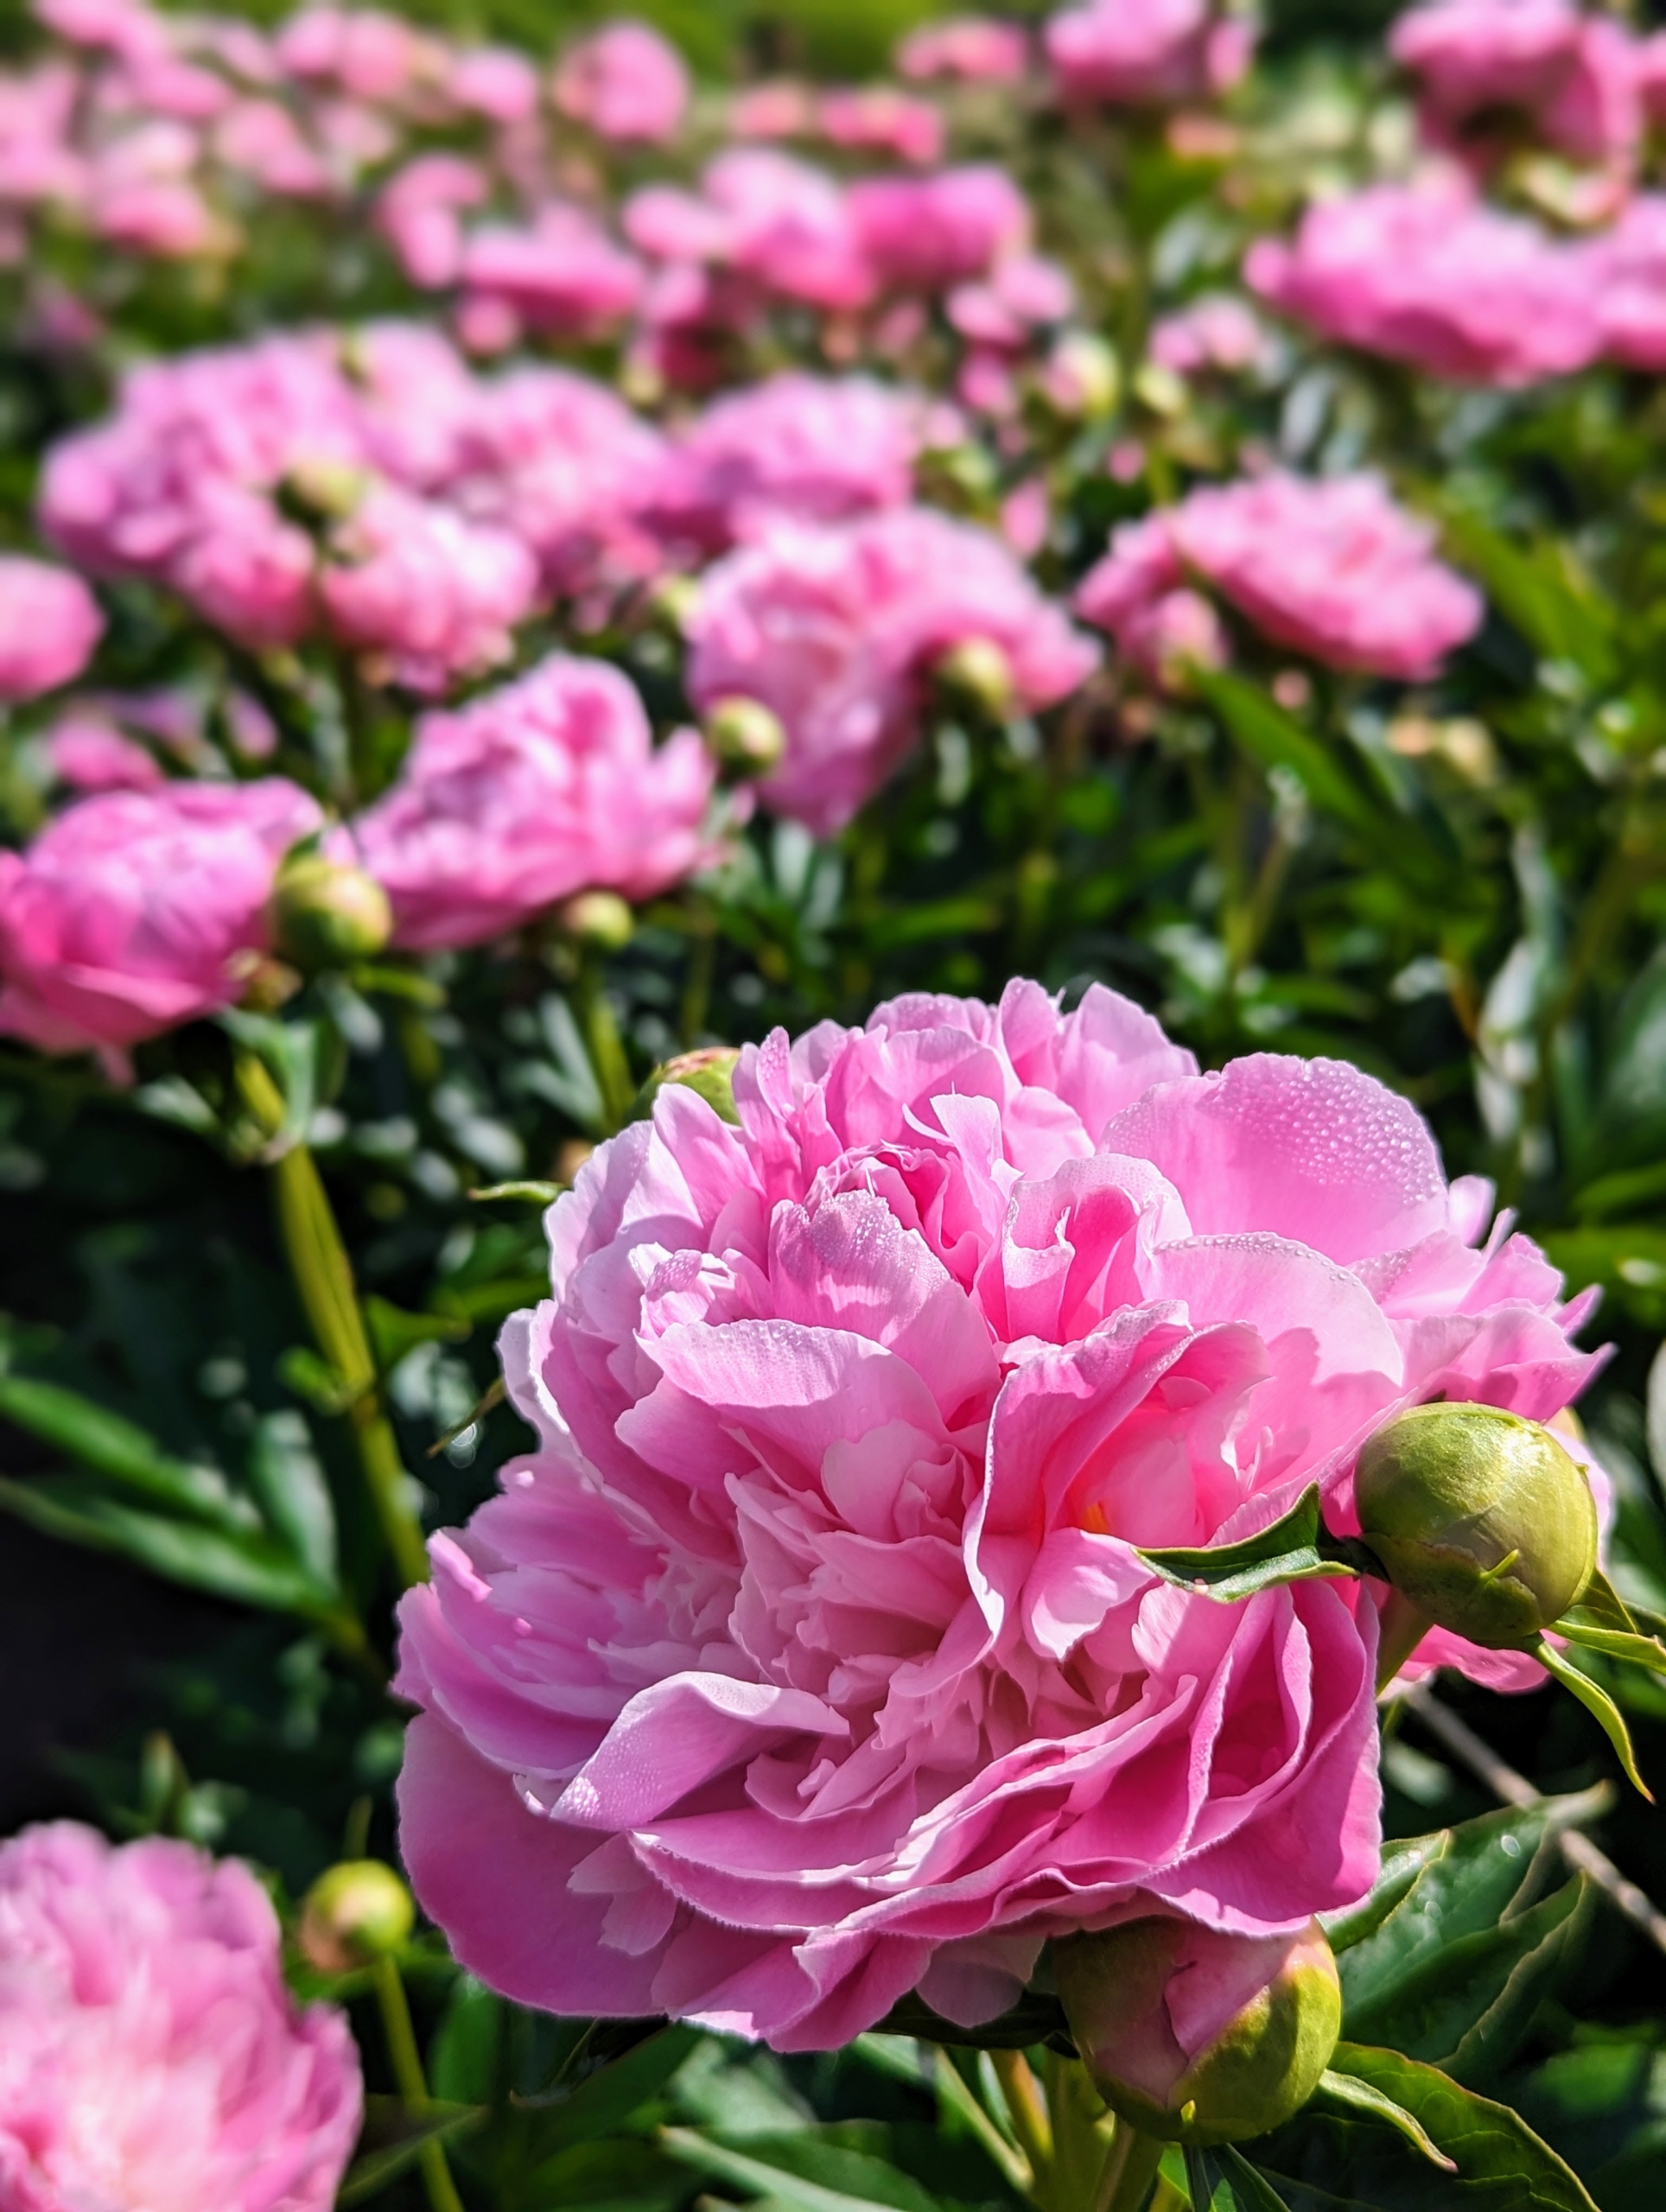
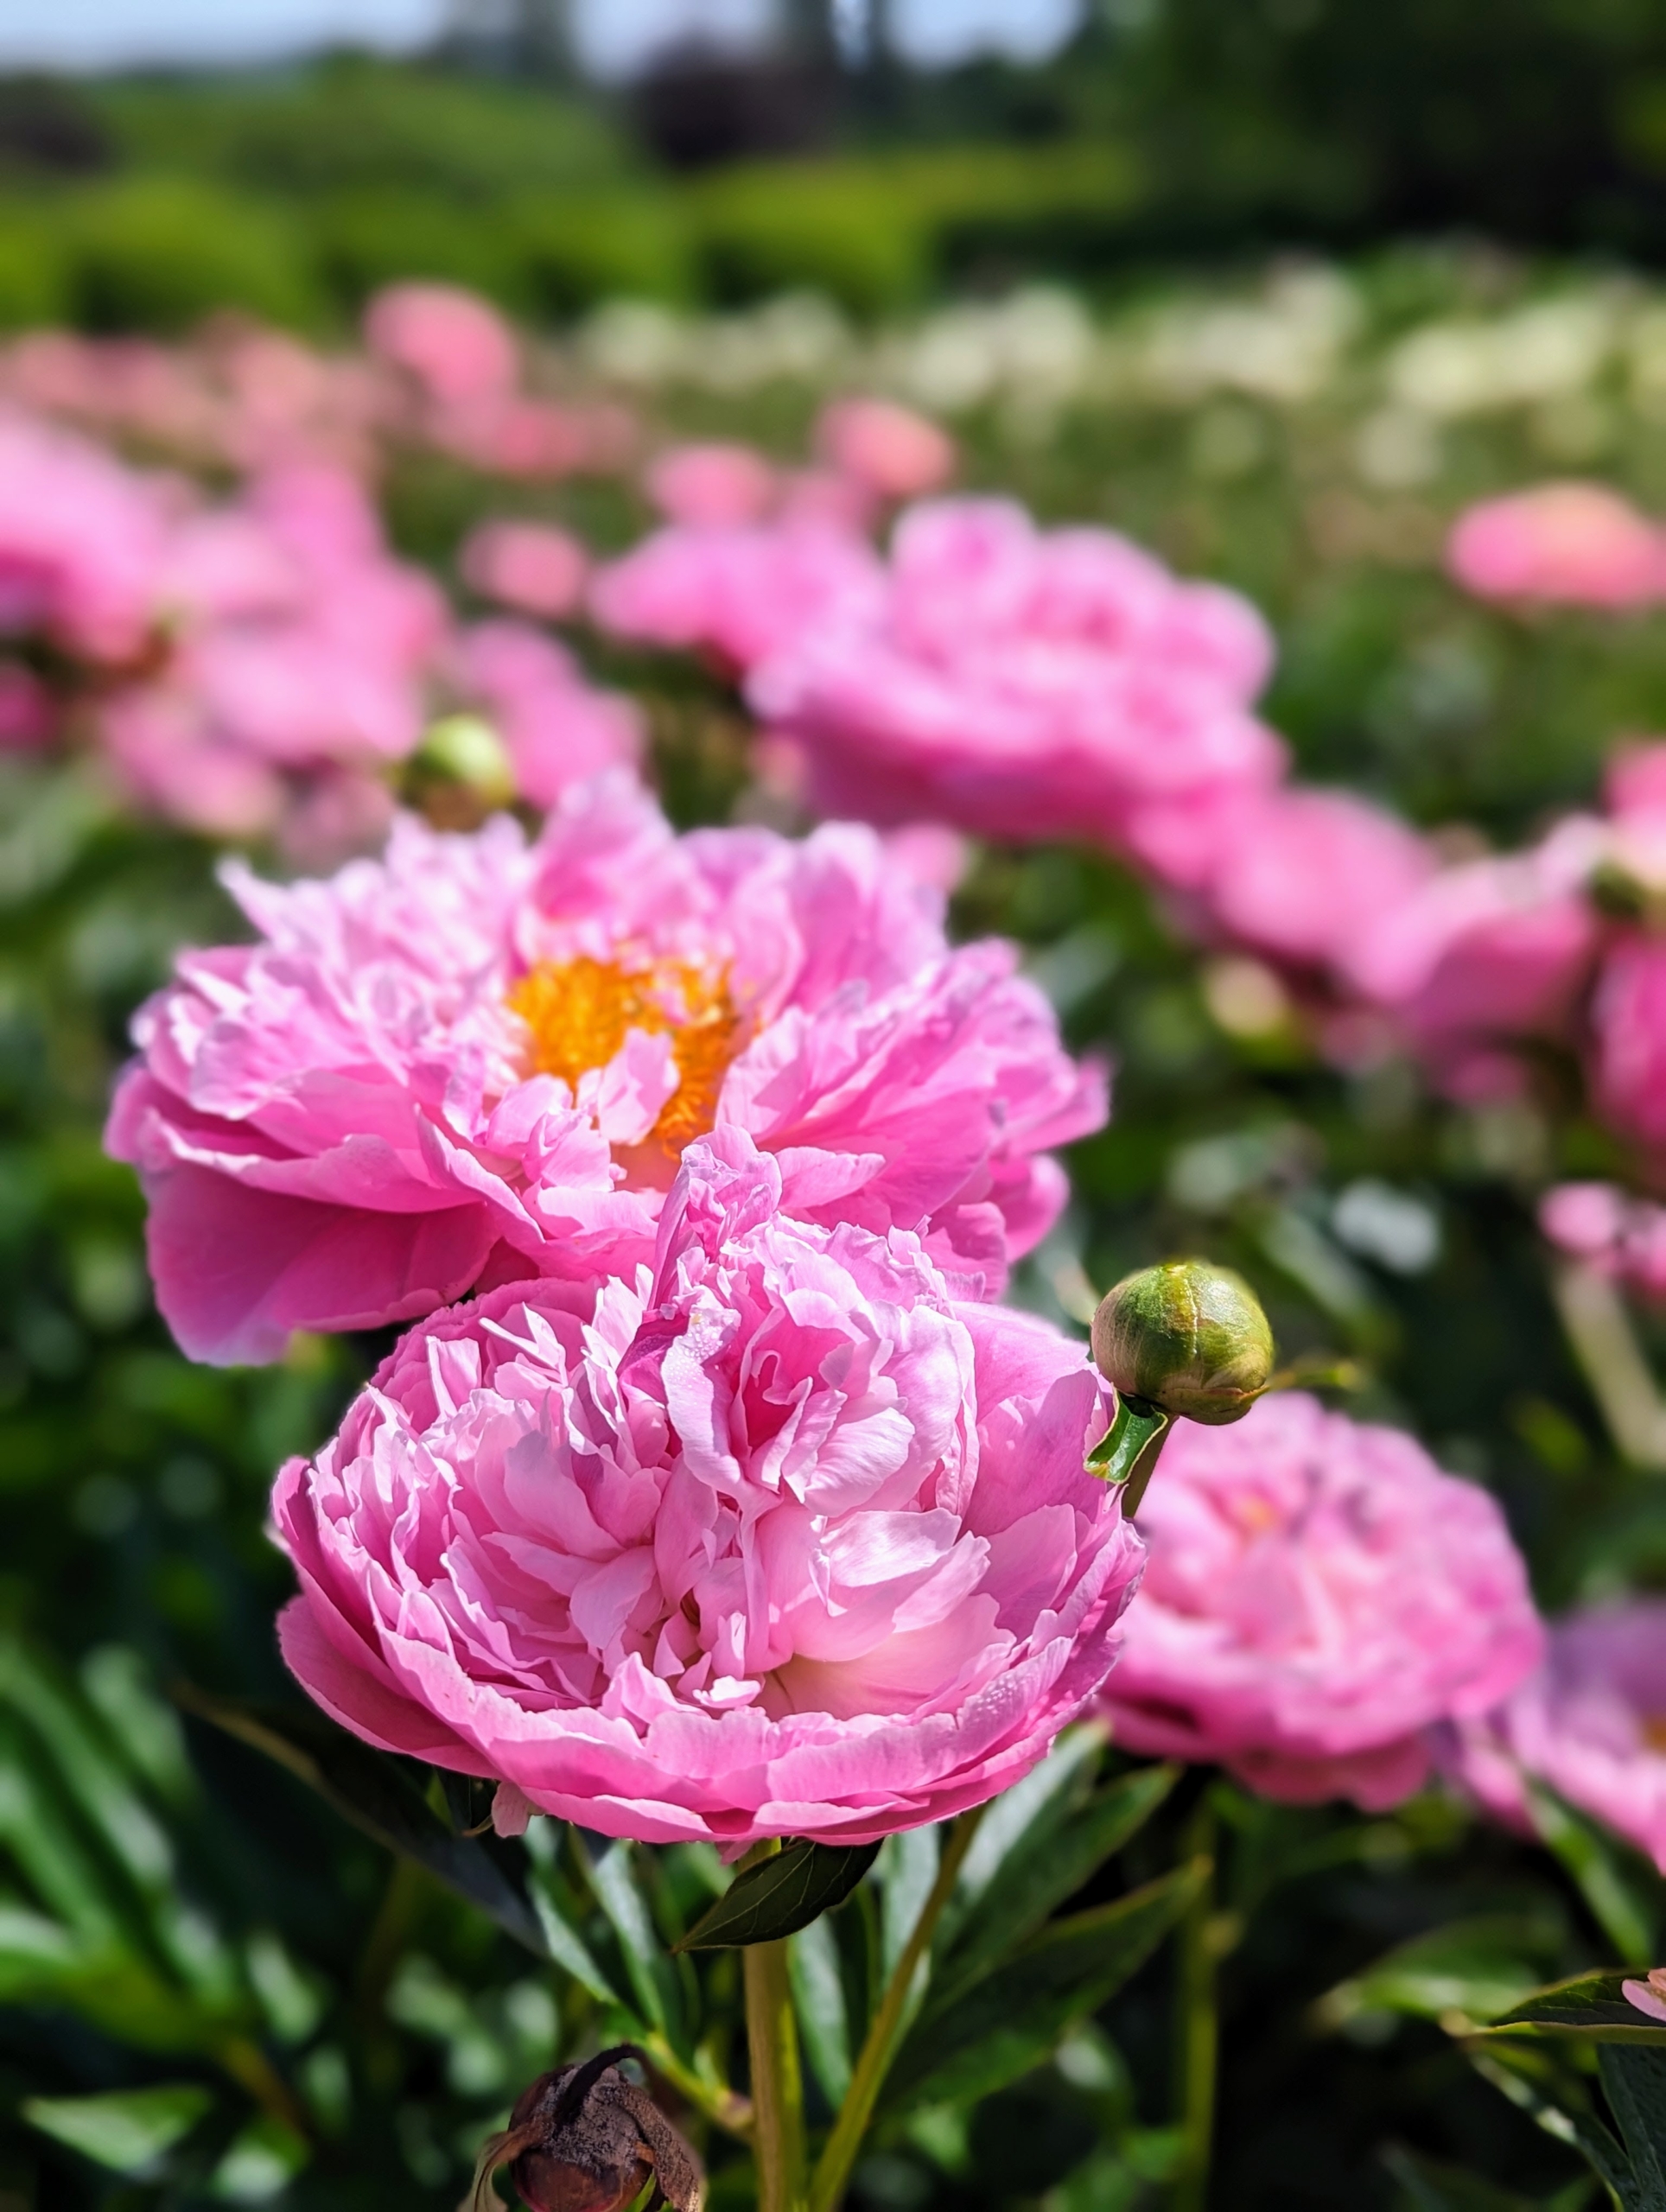
By the third week of May, the blooms appear. One of the reasons these peonies thrive here at my farm is because of the soil. It has a pH of 6.5 to 7.0, which is ideal. It is also amended with superphosphate and Azomite, a natural product mined from an ancient mineral deposit in Utah. These natural additives improve root systems and overall plant vigor, resulting in this fantastic profusion of blooms.
Look at the transformation – rows and rows of gorgeous blooms. The view inside this boxwood hedged garden is breathtaking.
The peony is any plant in the genus Paeonia, the only genus in the family Paeoniaceae. They are native to Asia, Europe, and Western North America.
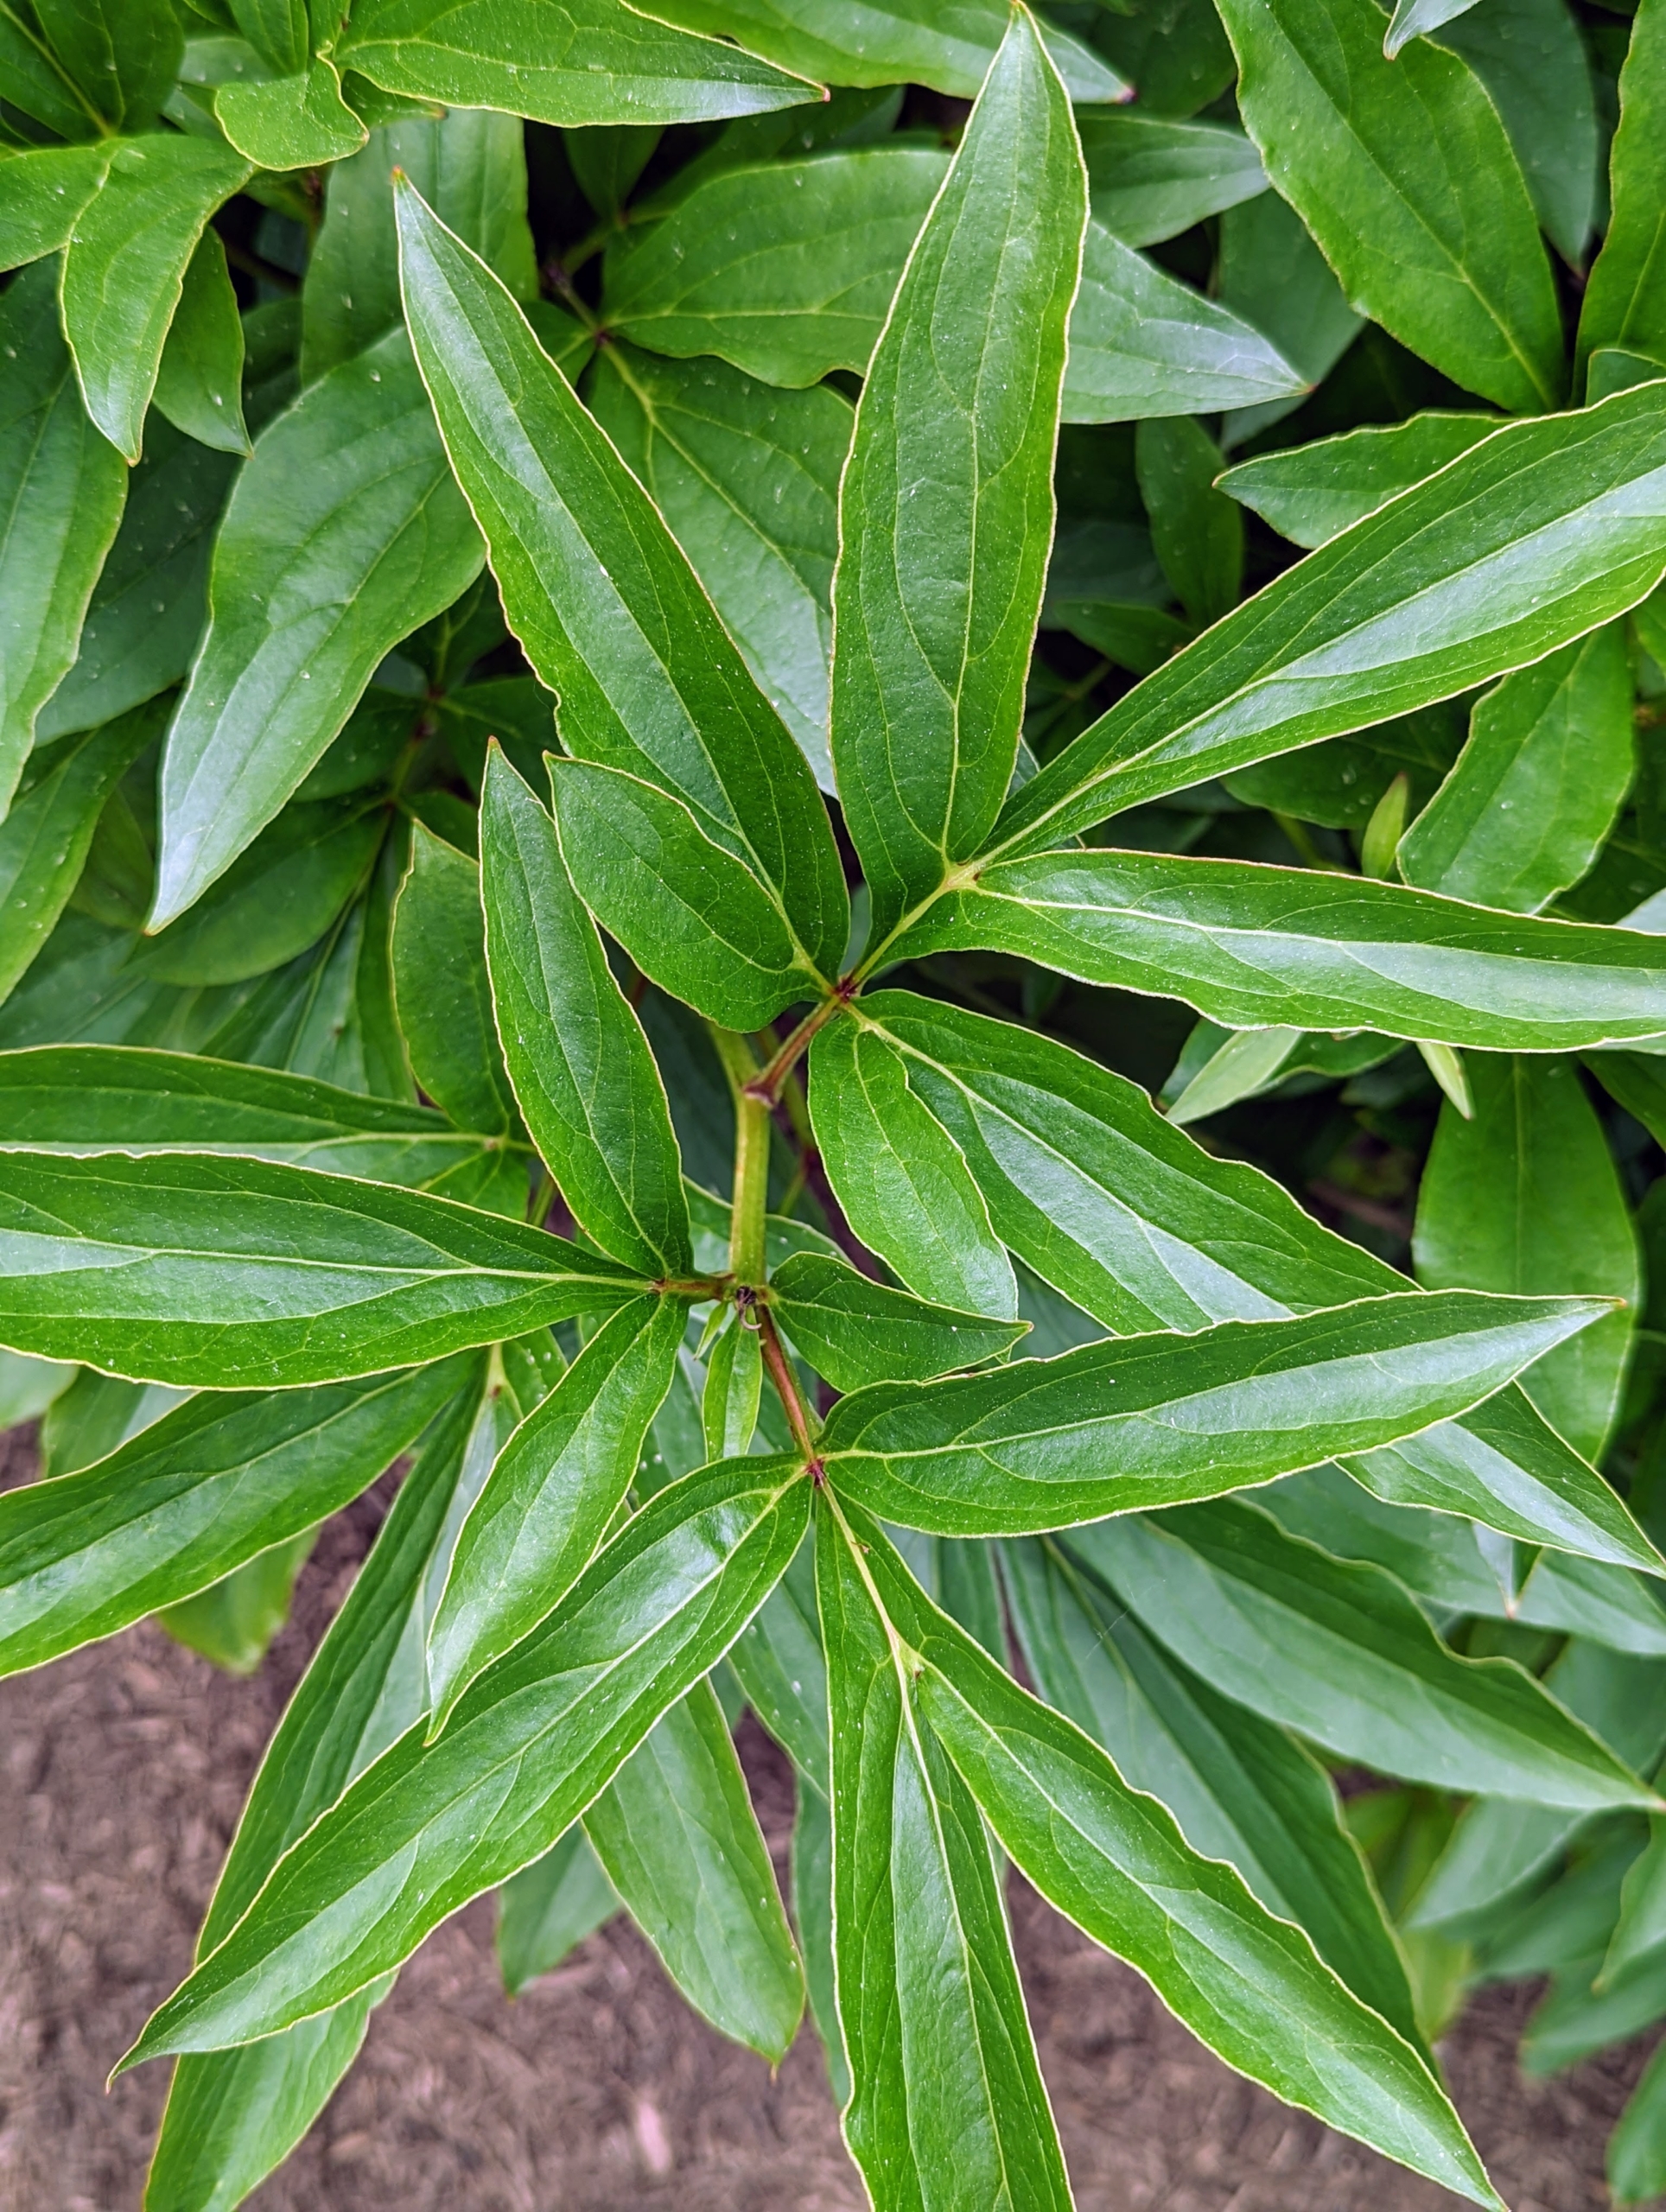
The leaves of the herbaceous peony are pointed with a shiny, deep green color.
Peonies are one of the best-known and most dearly loved perennials – not surprising considering their beauty, trouble-free nature, and longevity.
Herbaceous peonies grow two to four feet tall with sturdy stems and blooms that can reach up to 10-inches wide. We spaced the plants about three to four feet apart to avoid any competing roots.
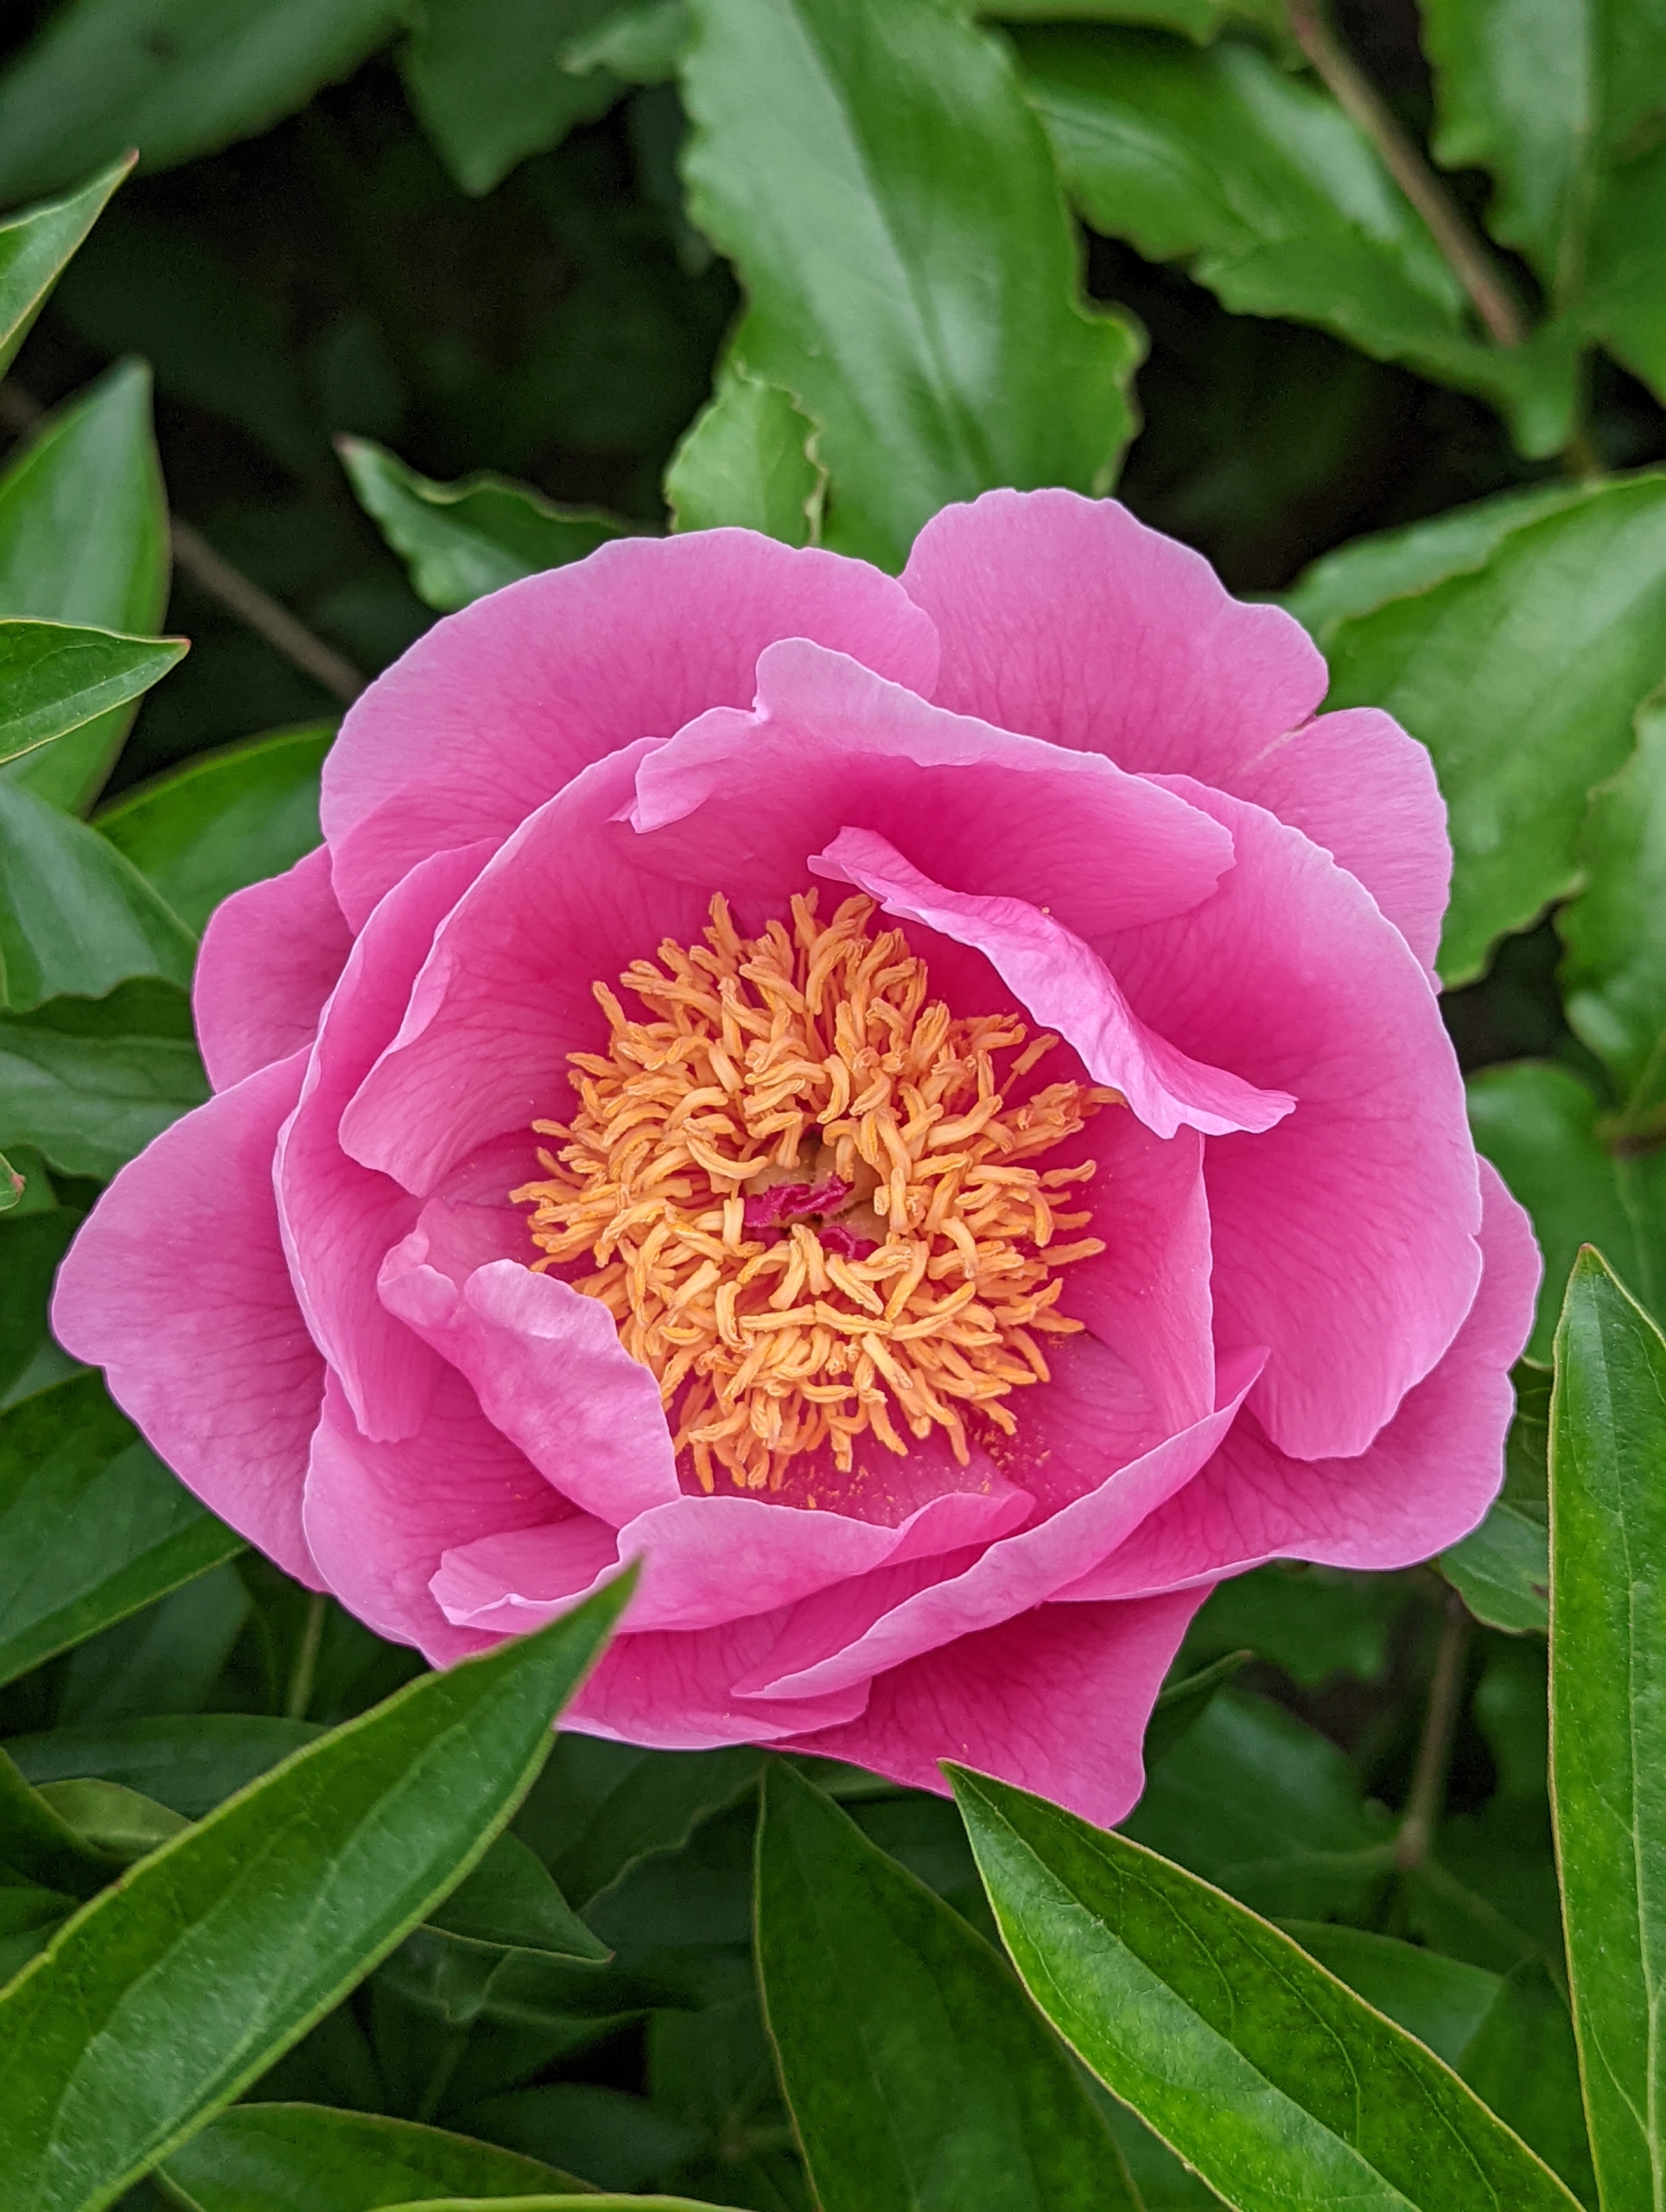
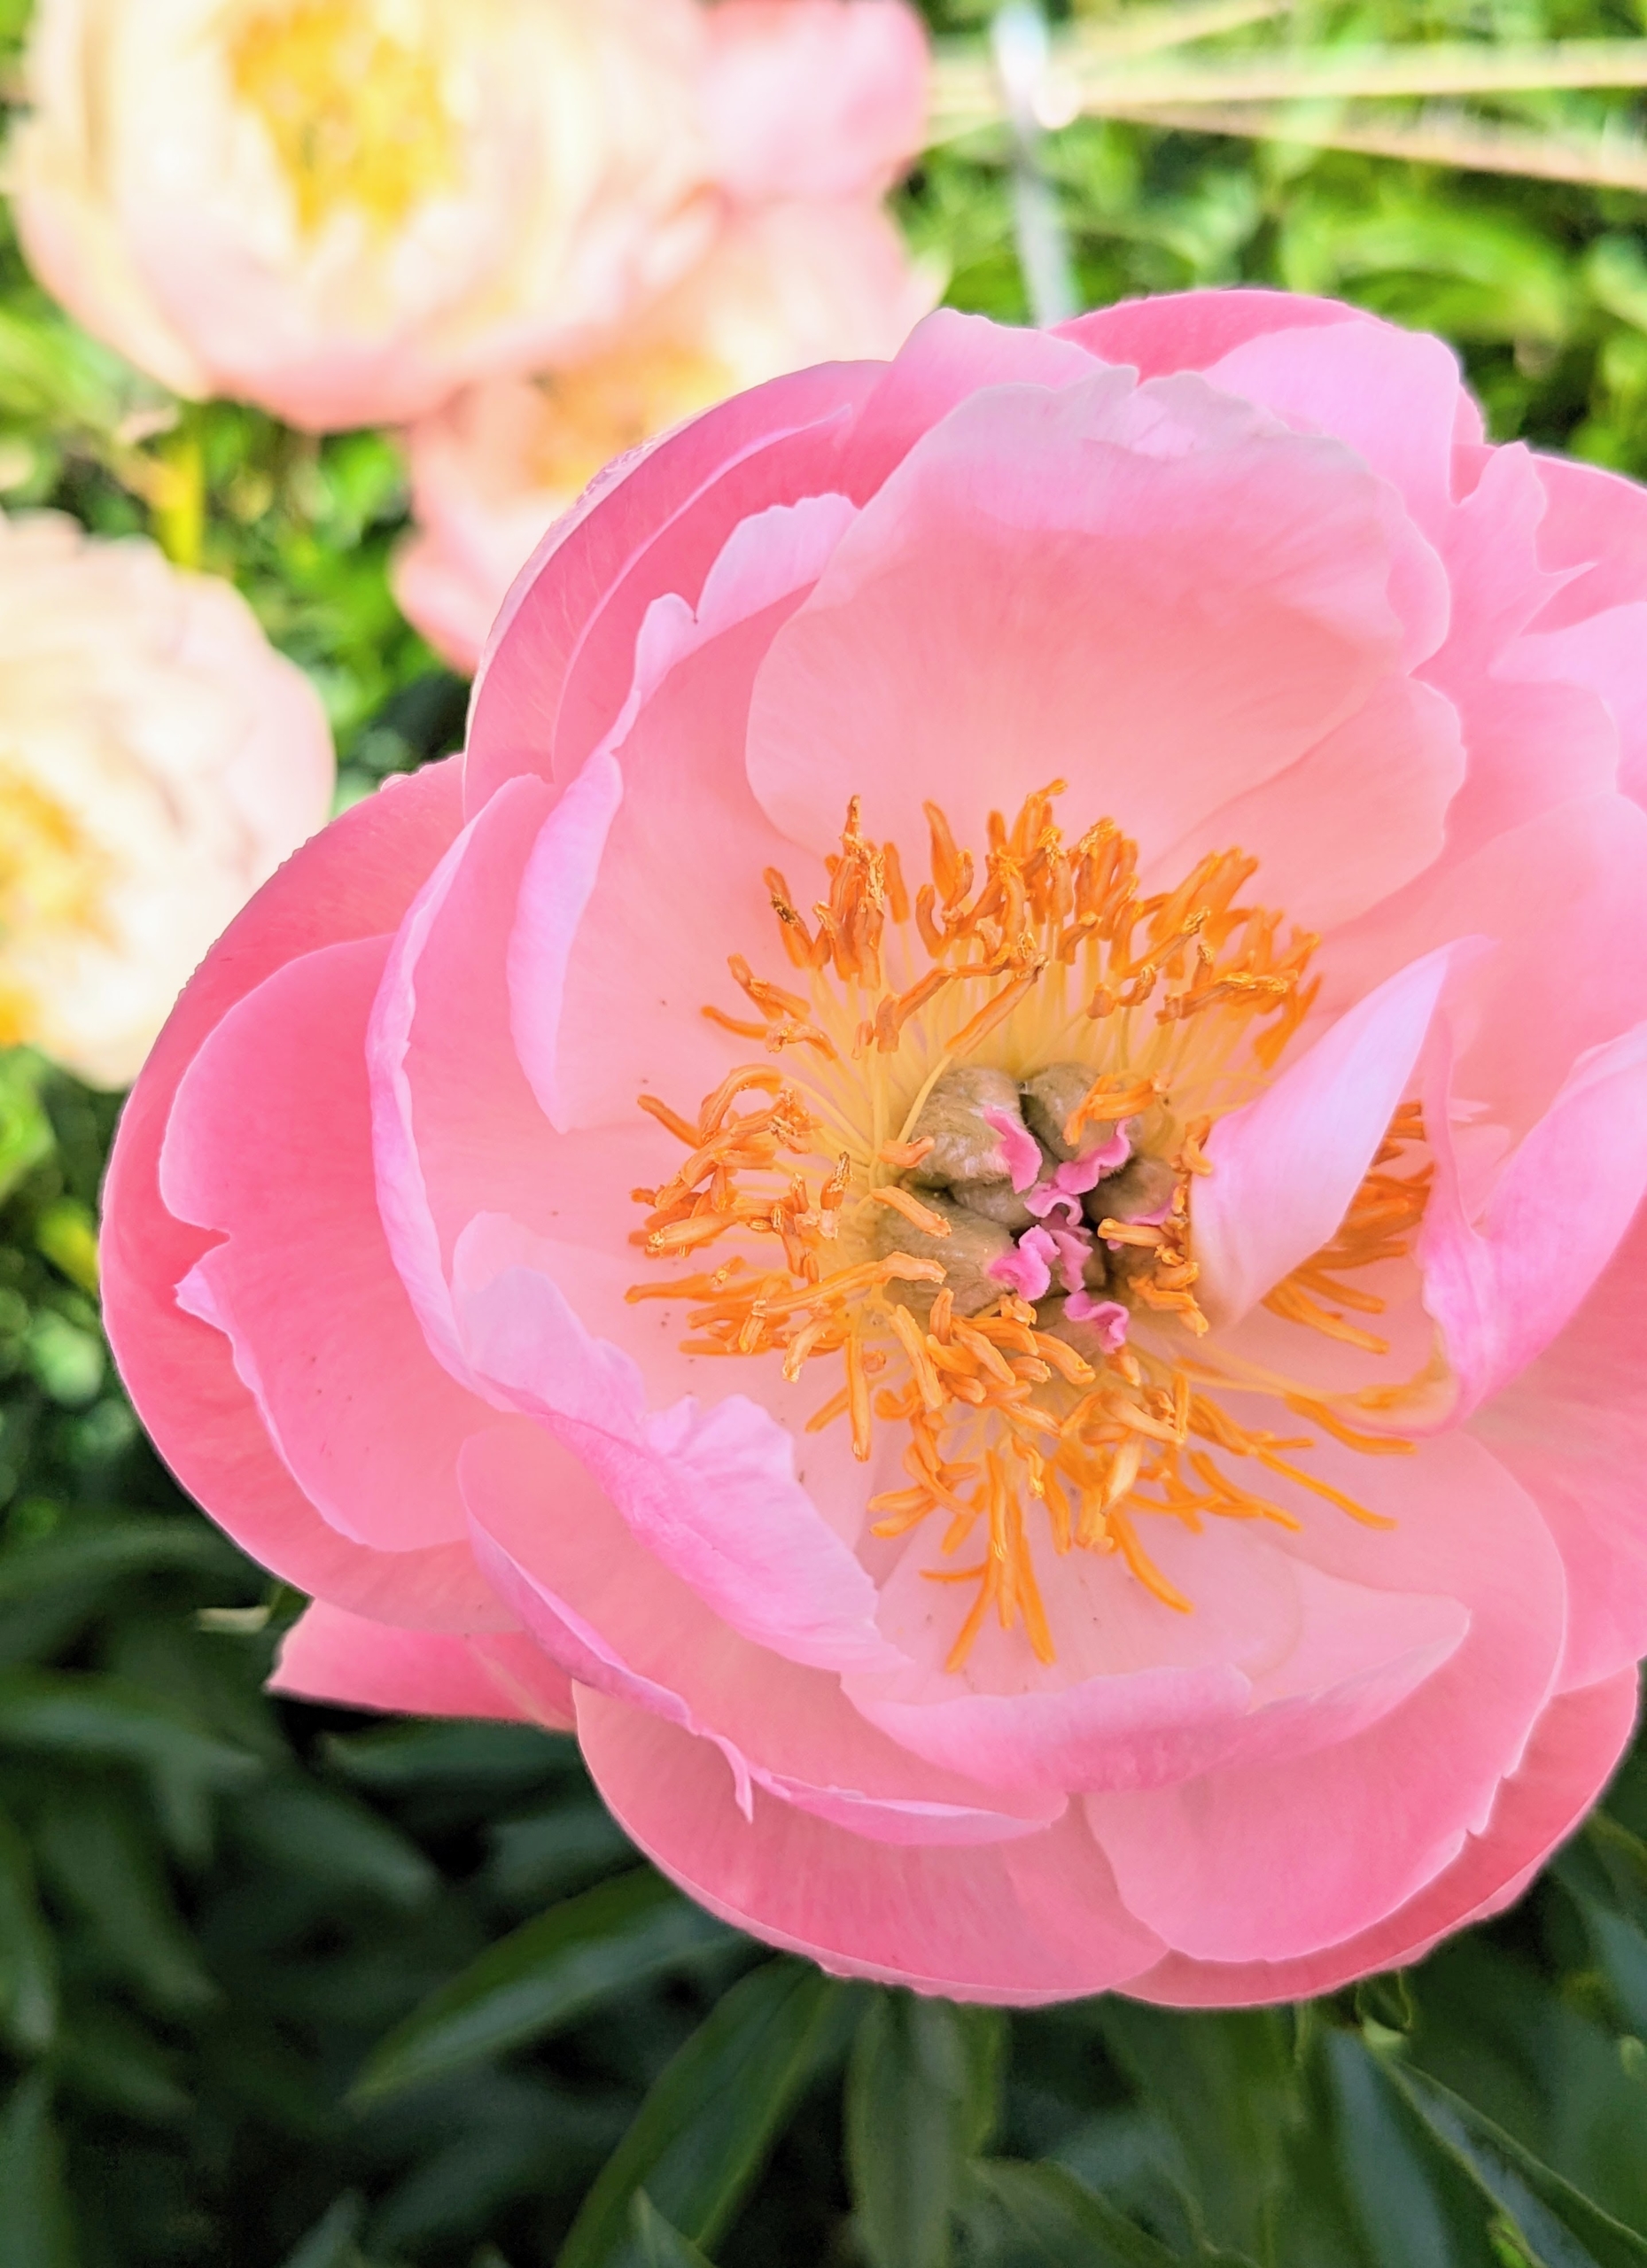
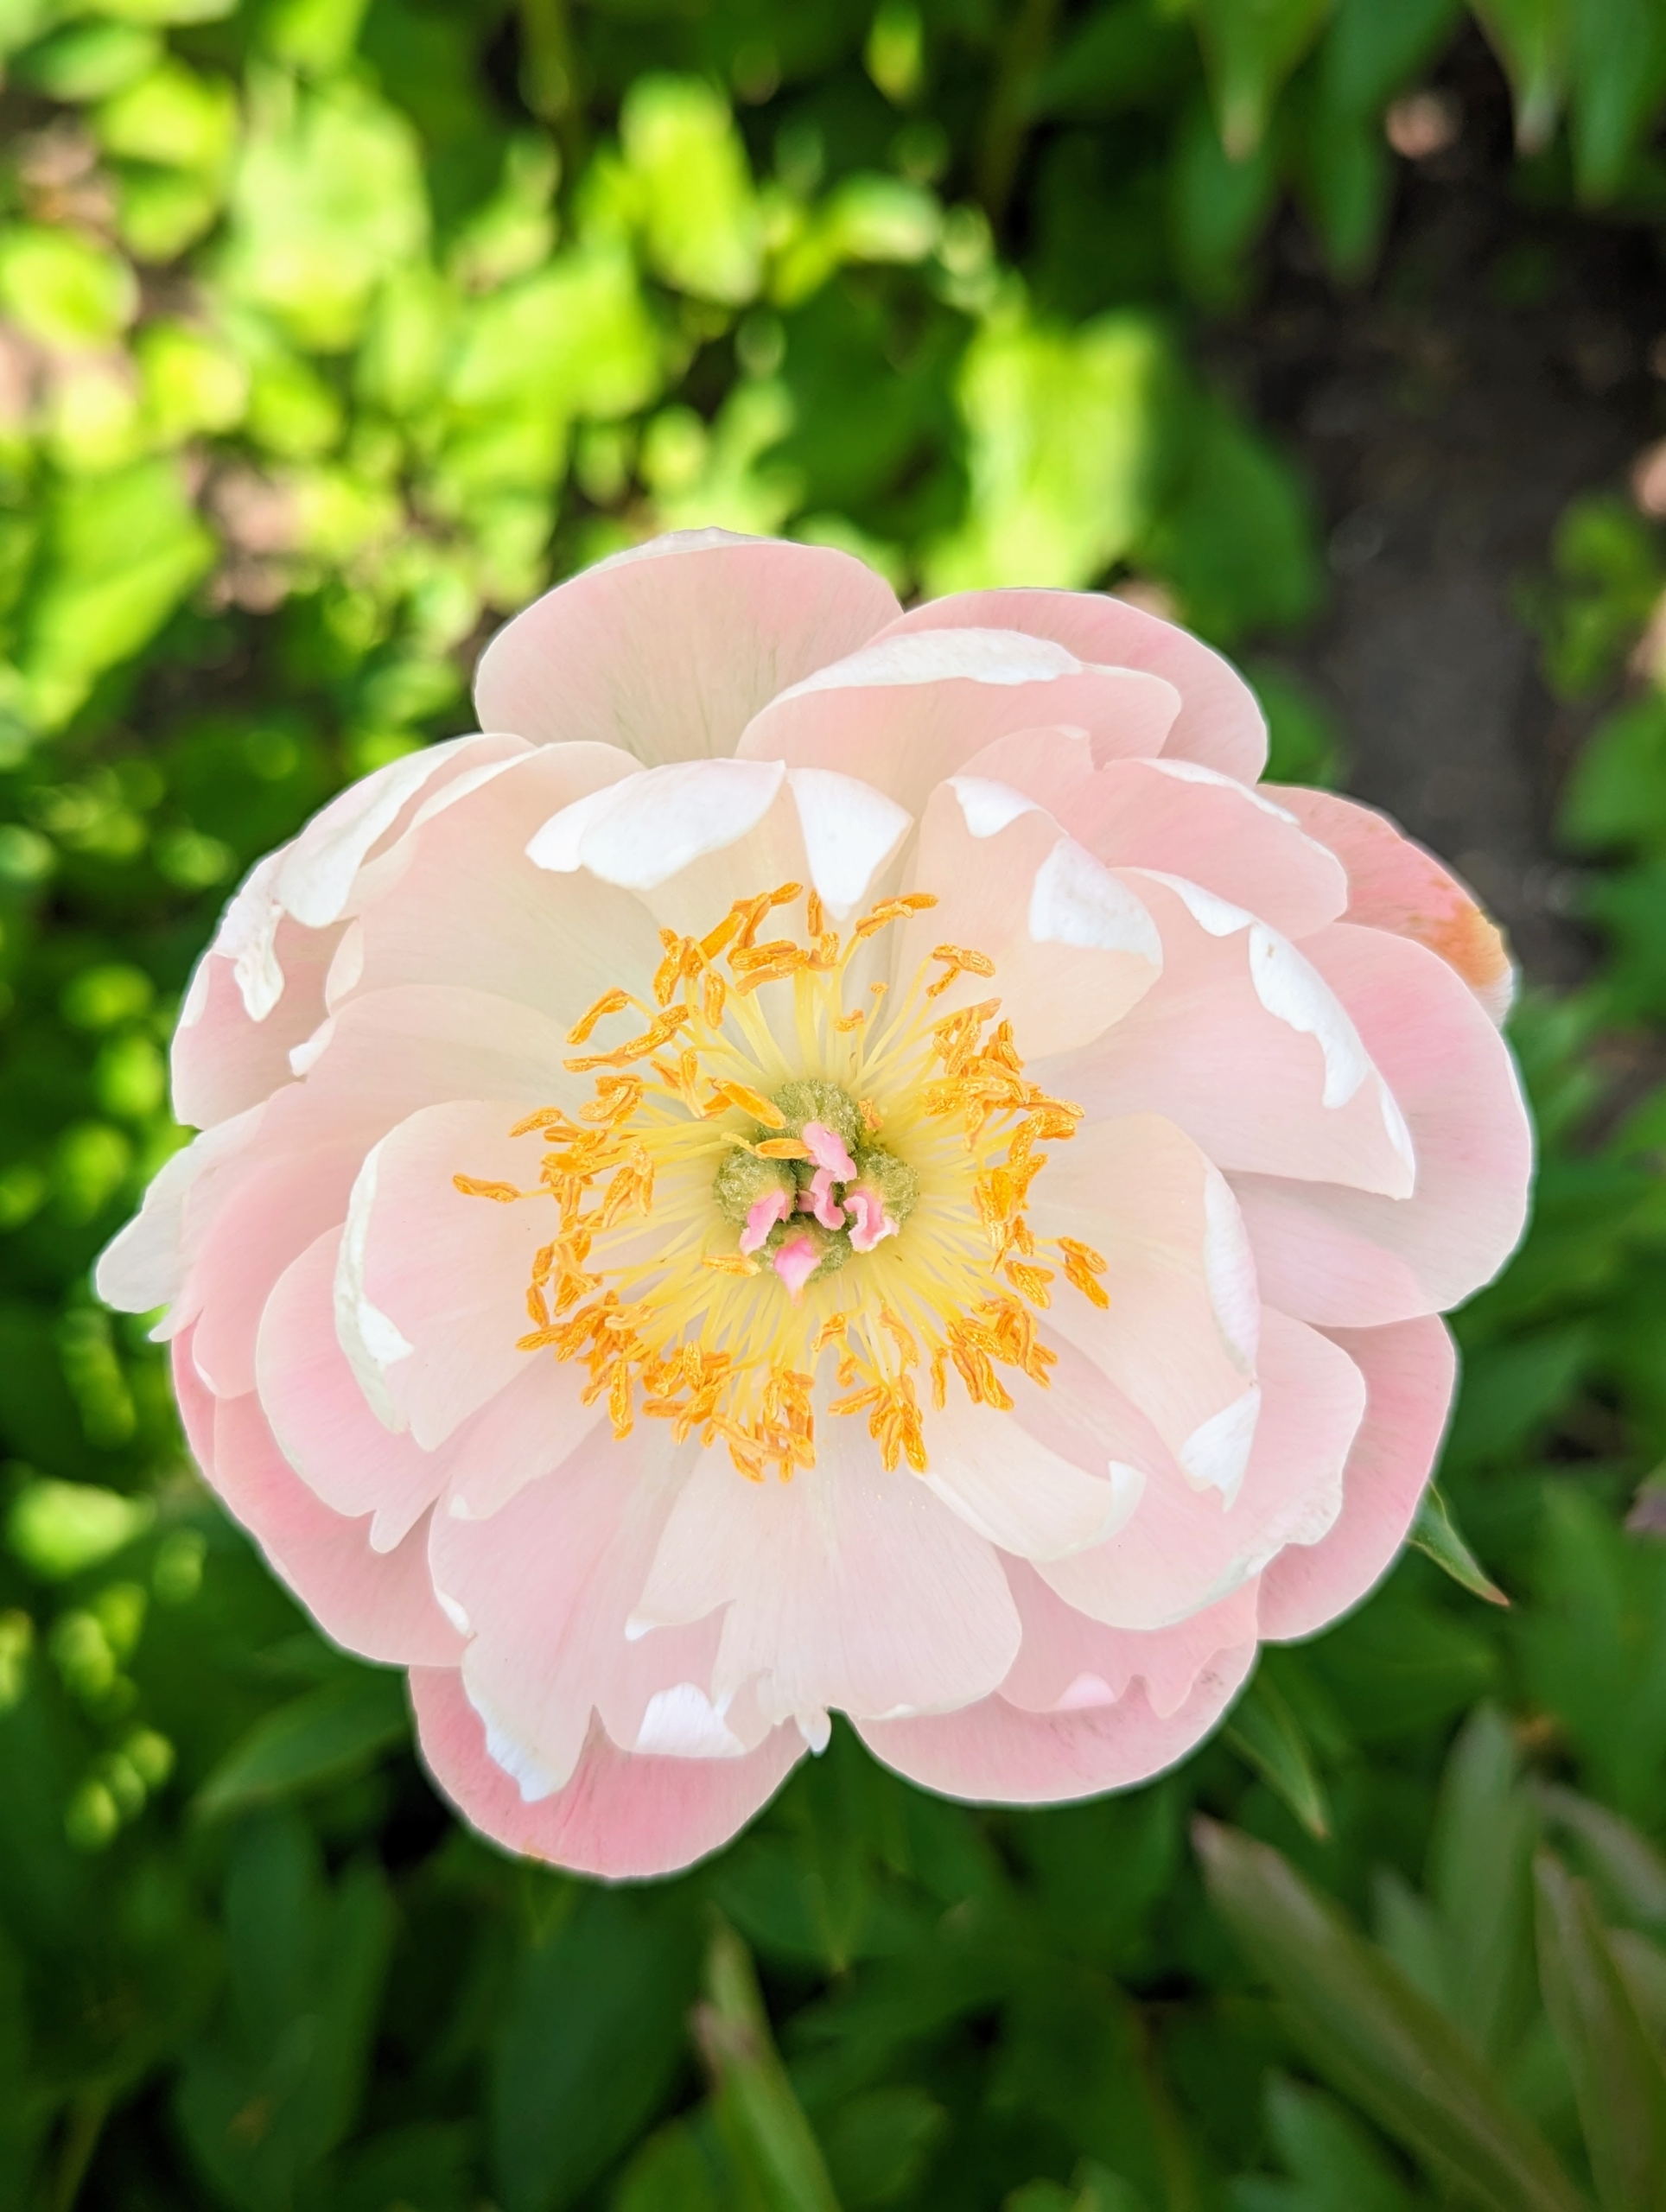
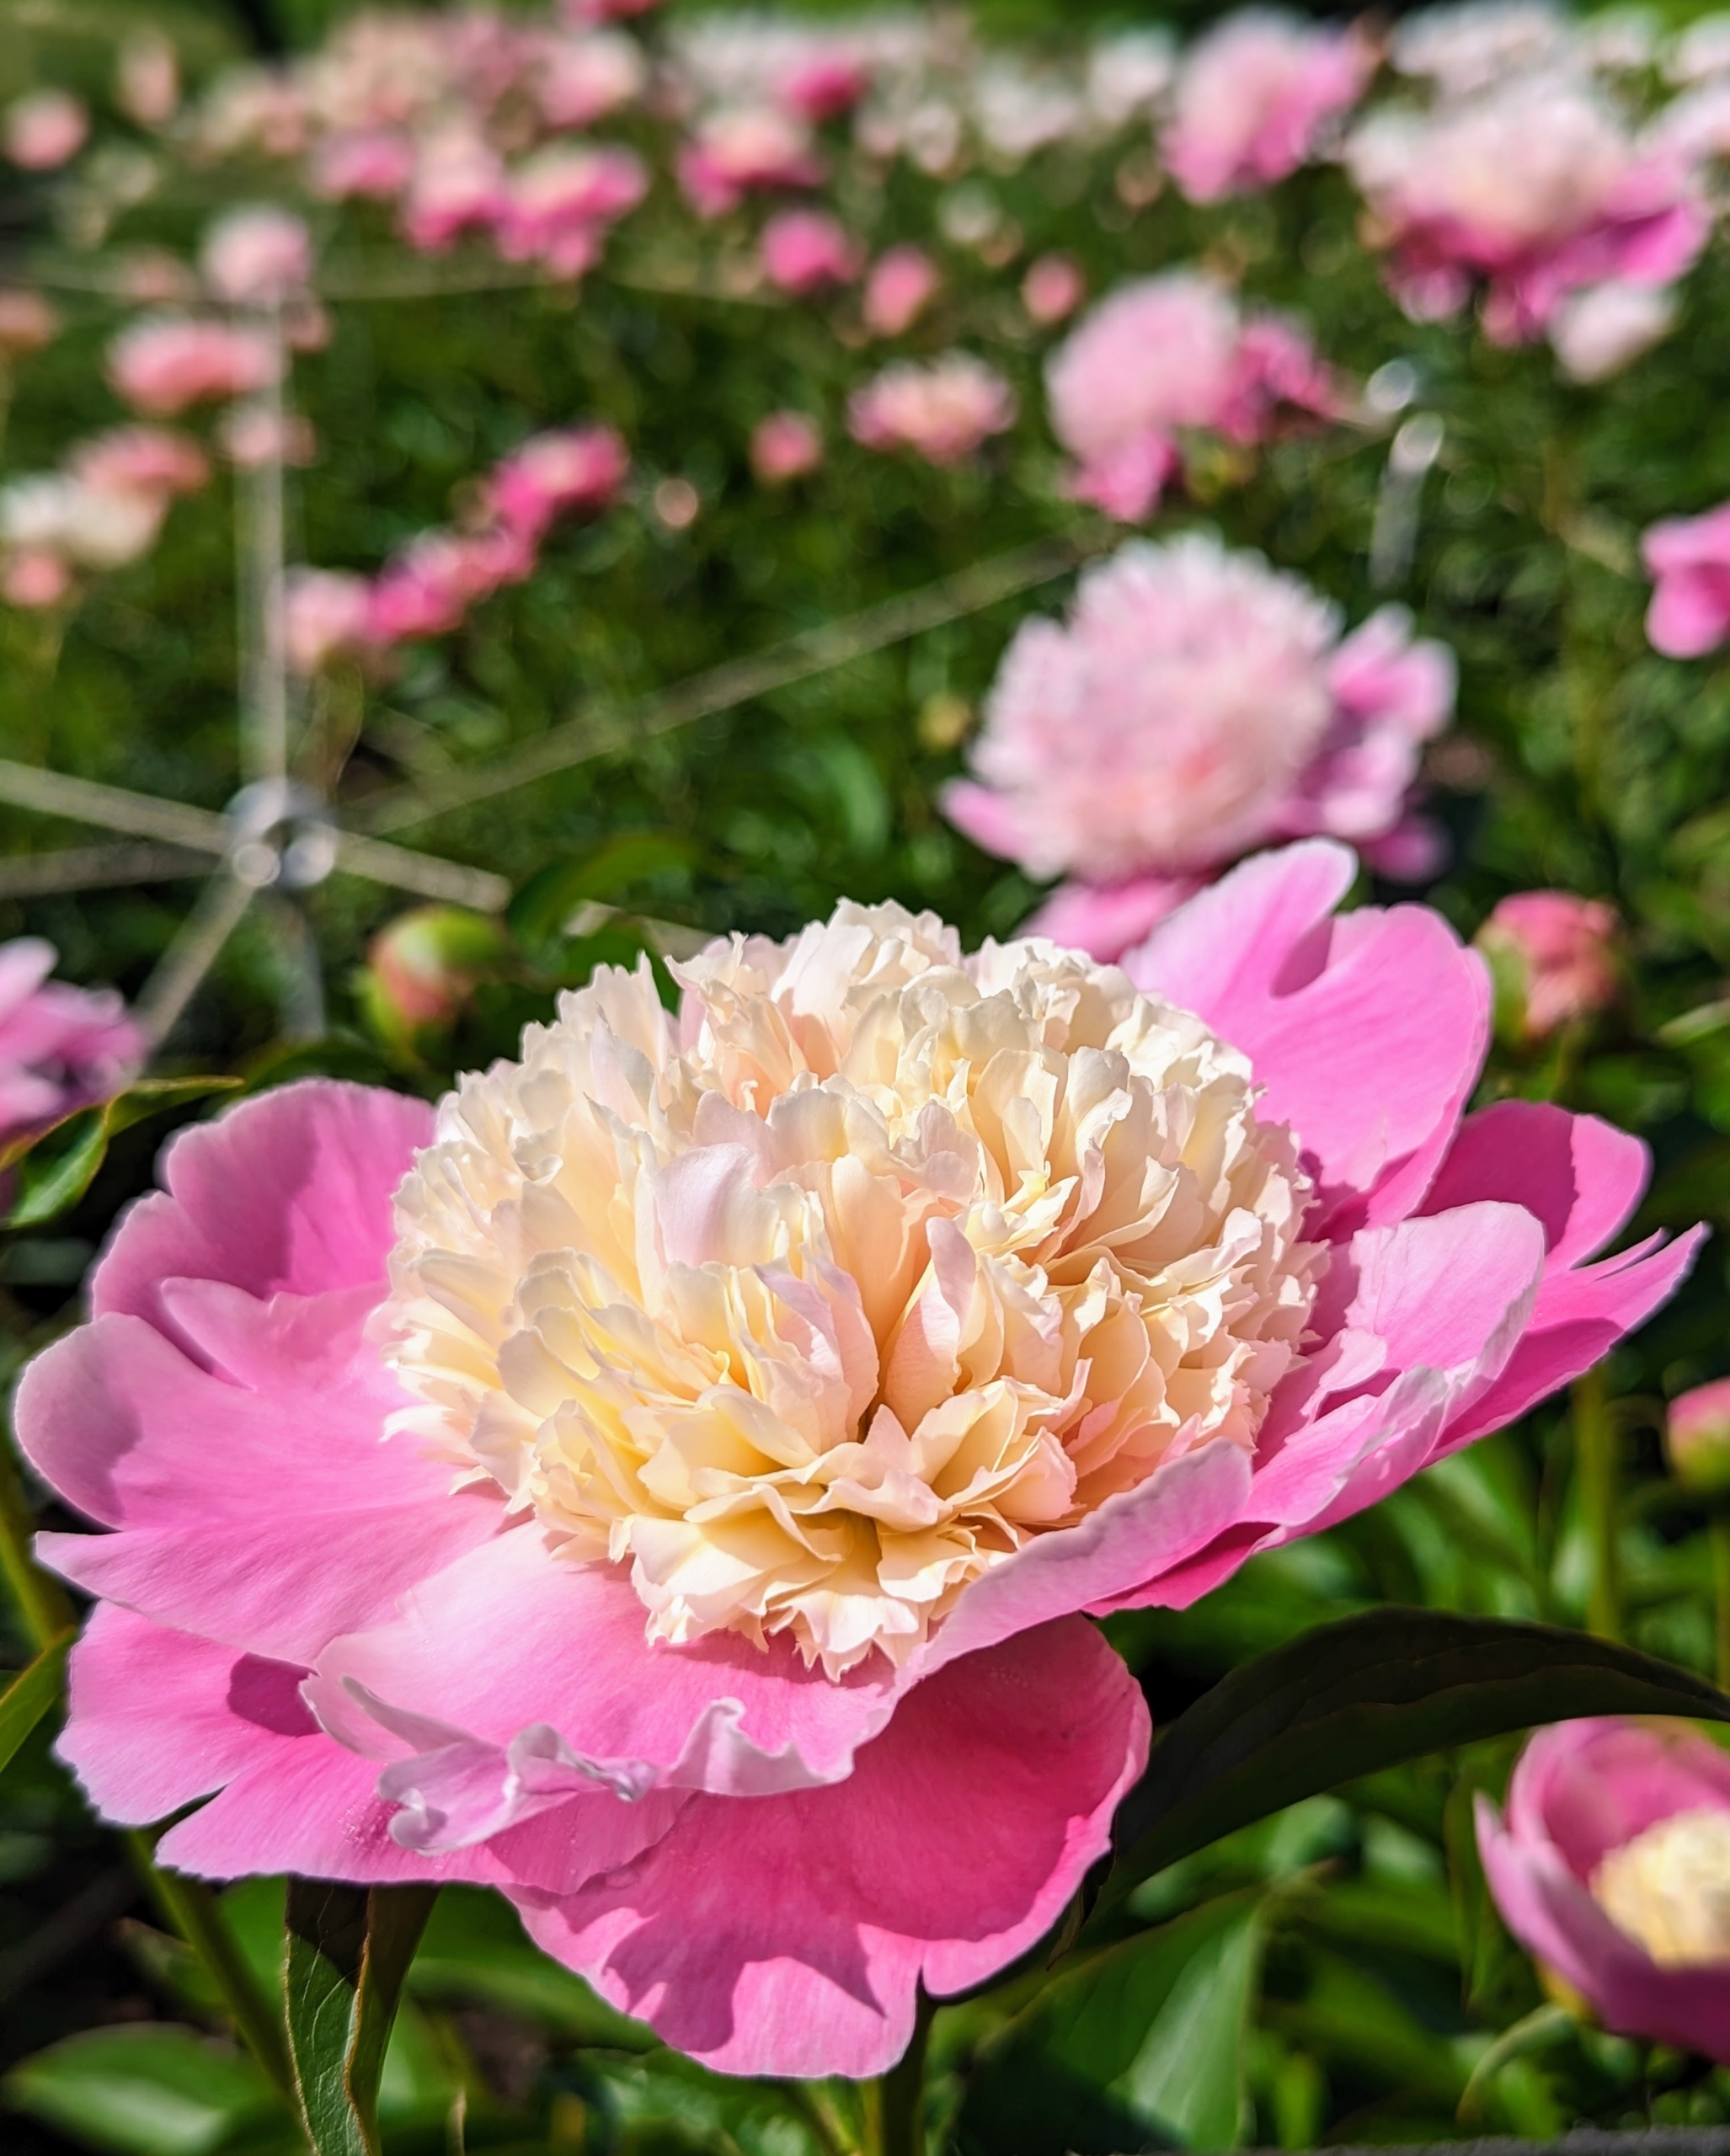
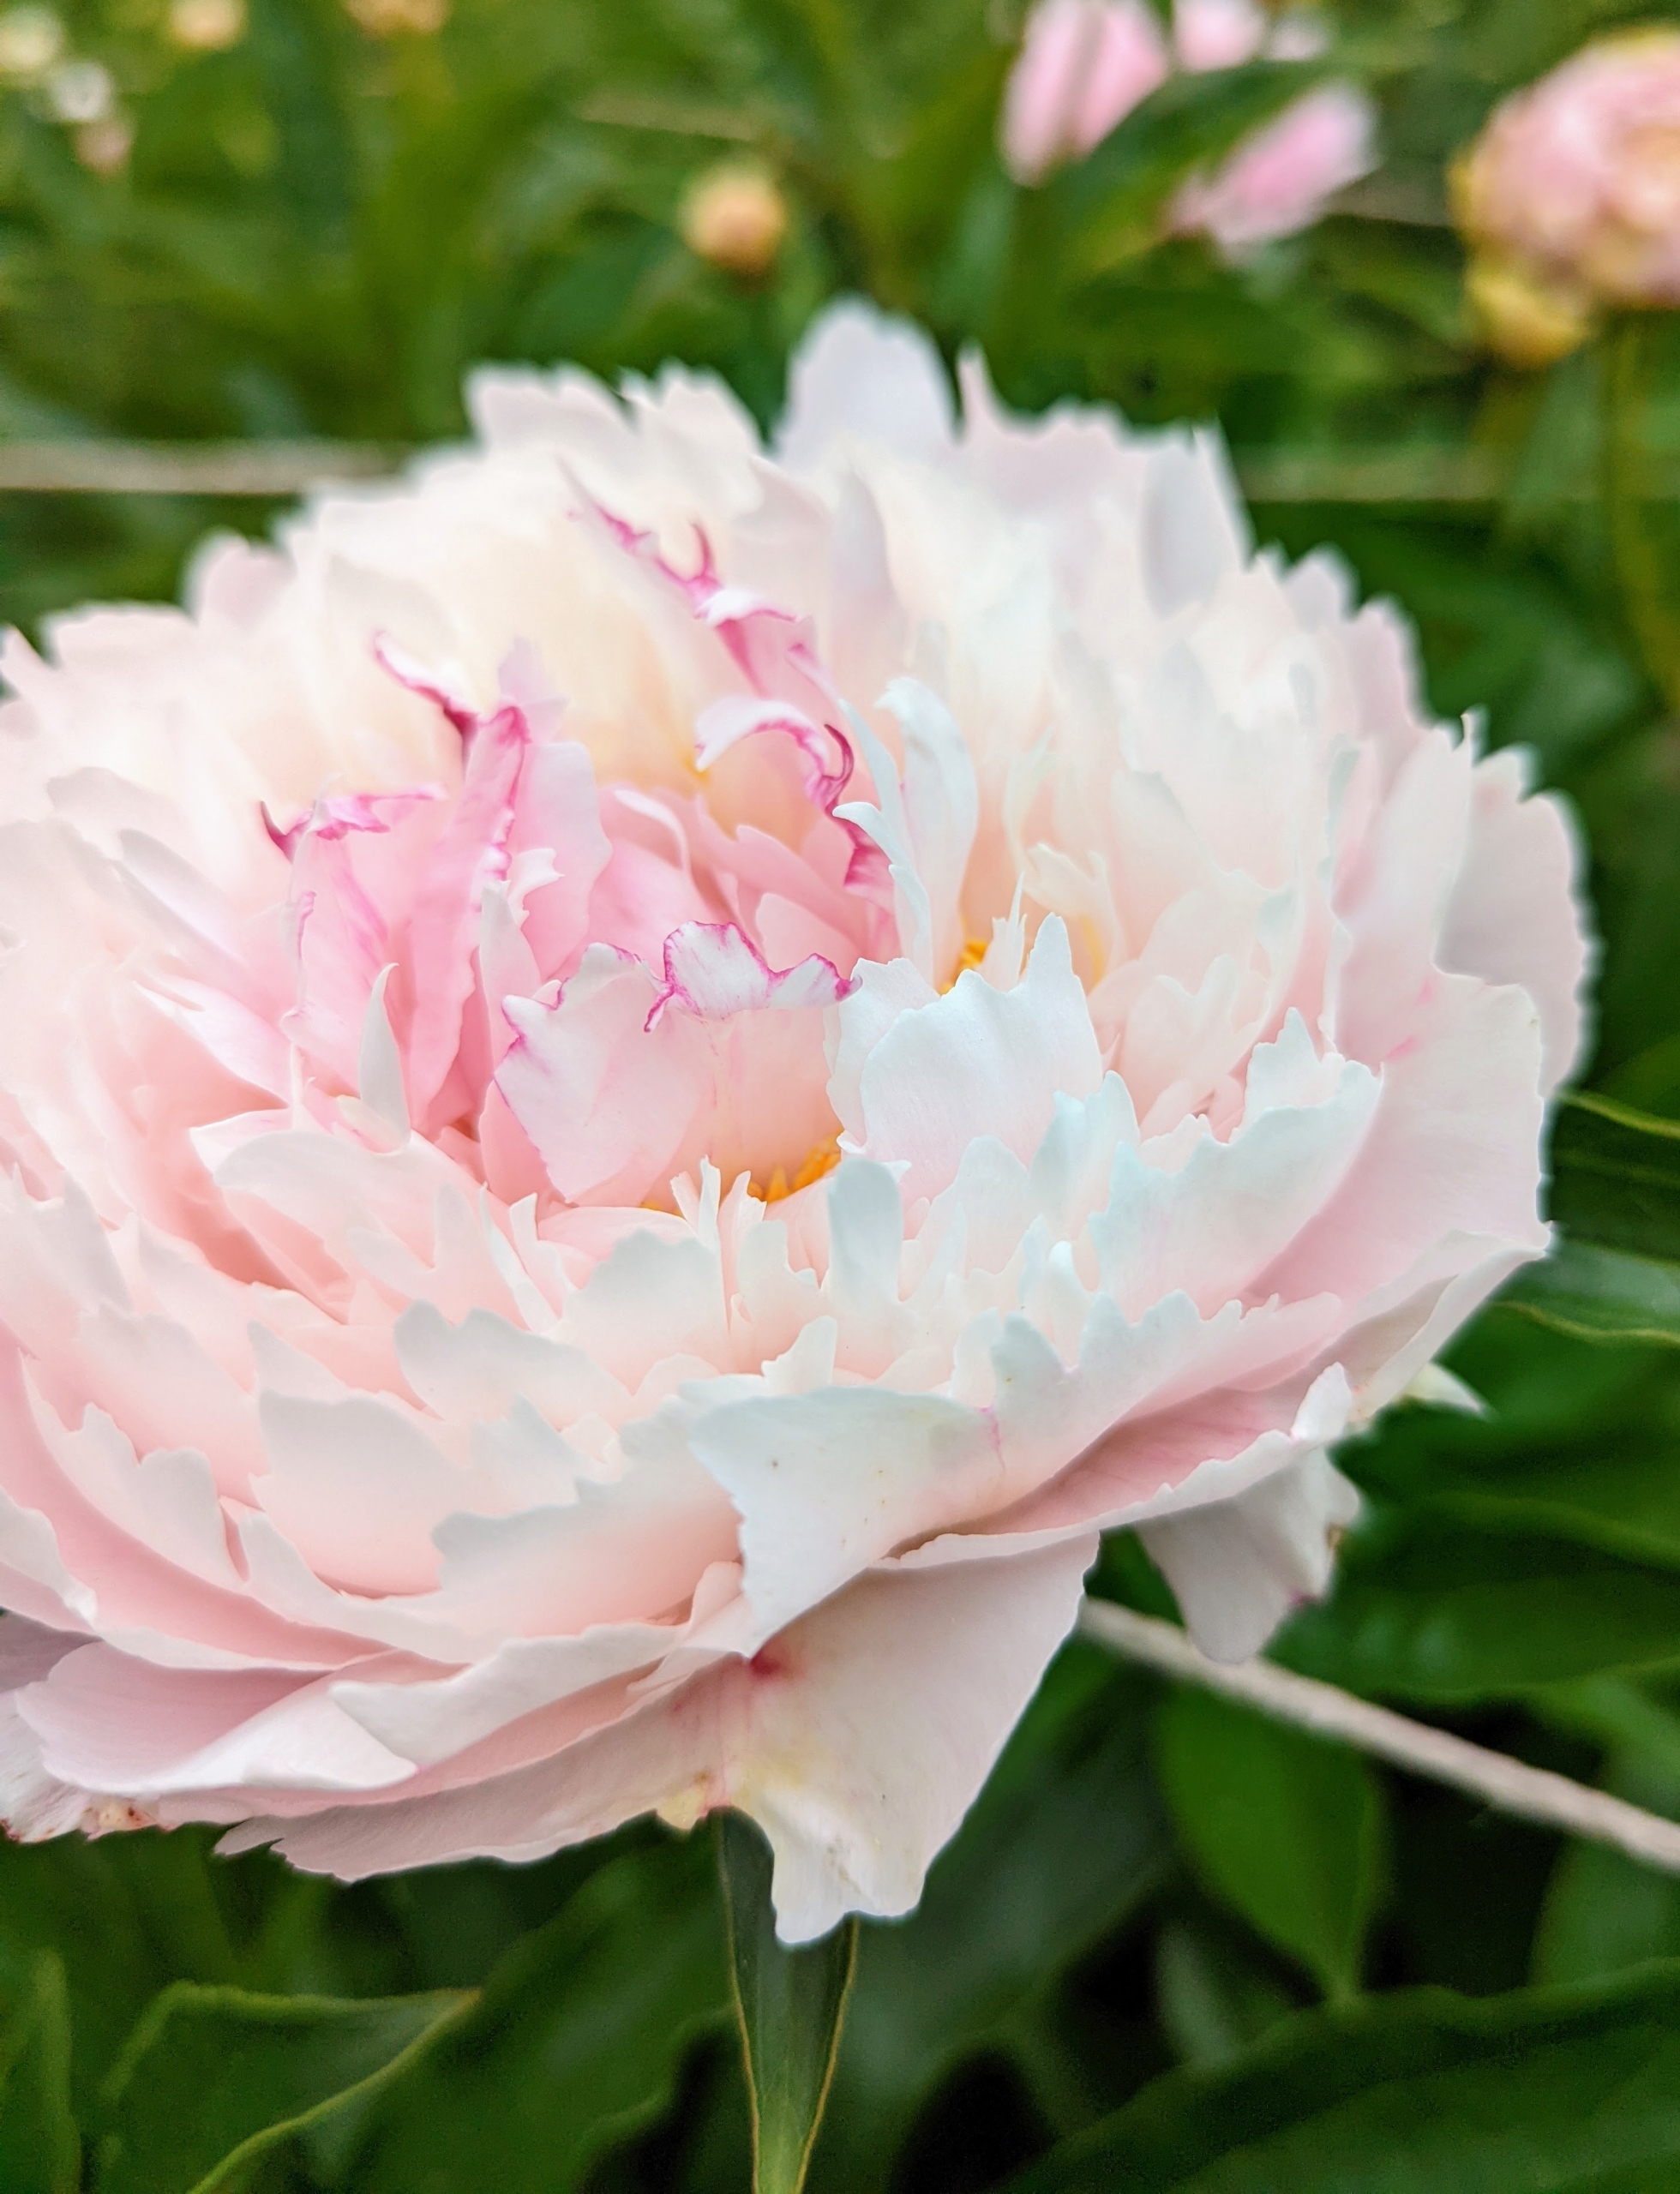
Peony blooms range from simple blossoms to complex clusters with a variety of petal forms.
The peony’s fragrance can vary, but most have sweet, clean scents. And, do you know… pink peonies tend to have stronger fragrances than red peonies? Double form white peonies are also very aromatic.
Semi-double peonies are those which have single or double rows of broad petals encircling more broad petals and an exposed center crown.
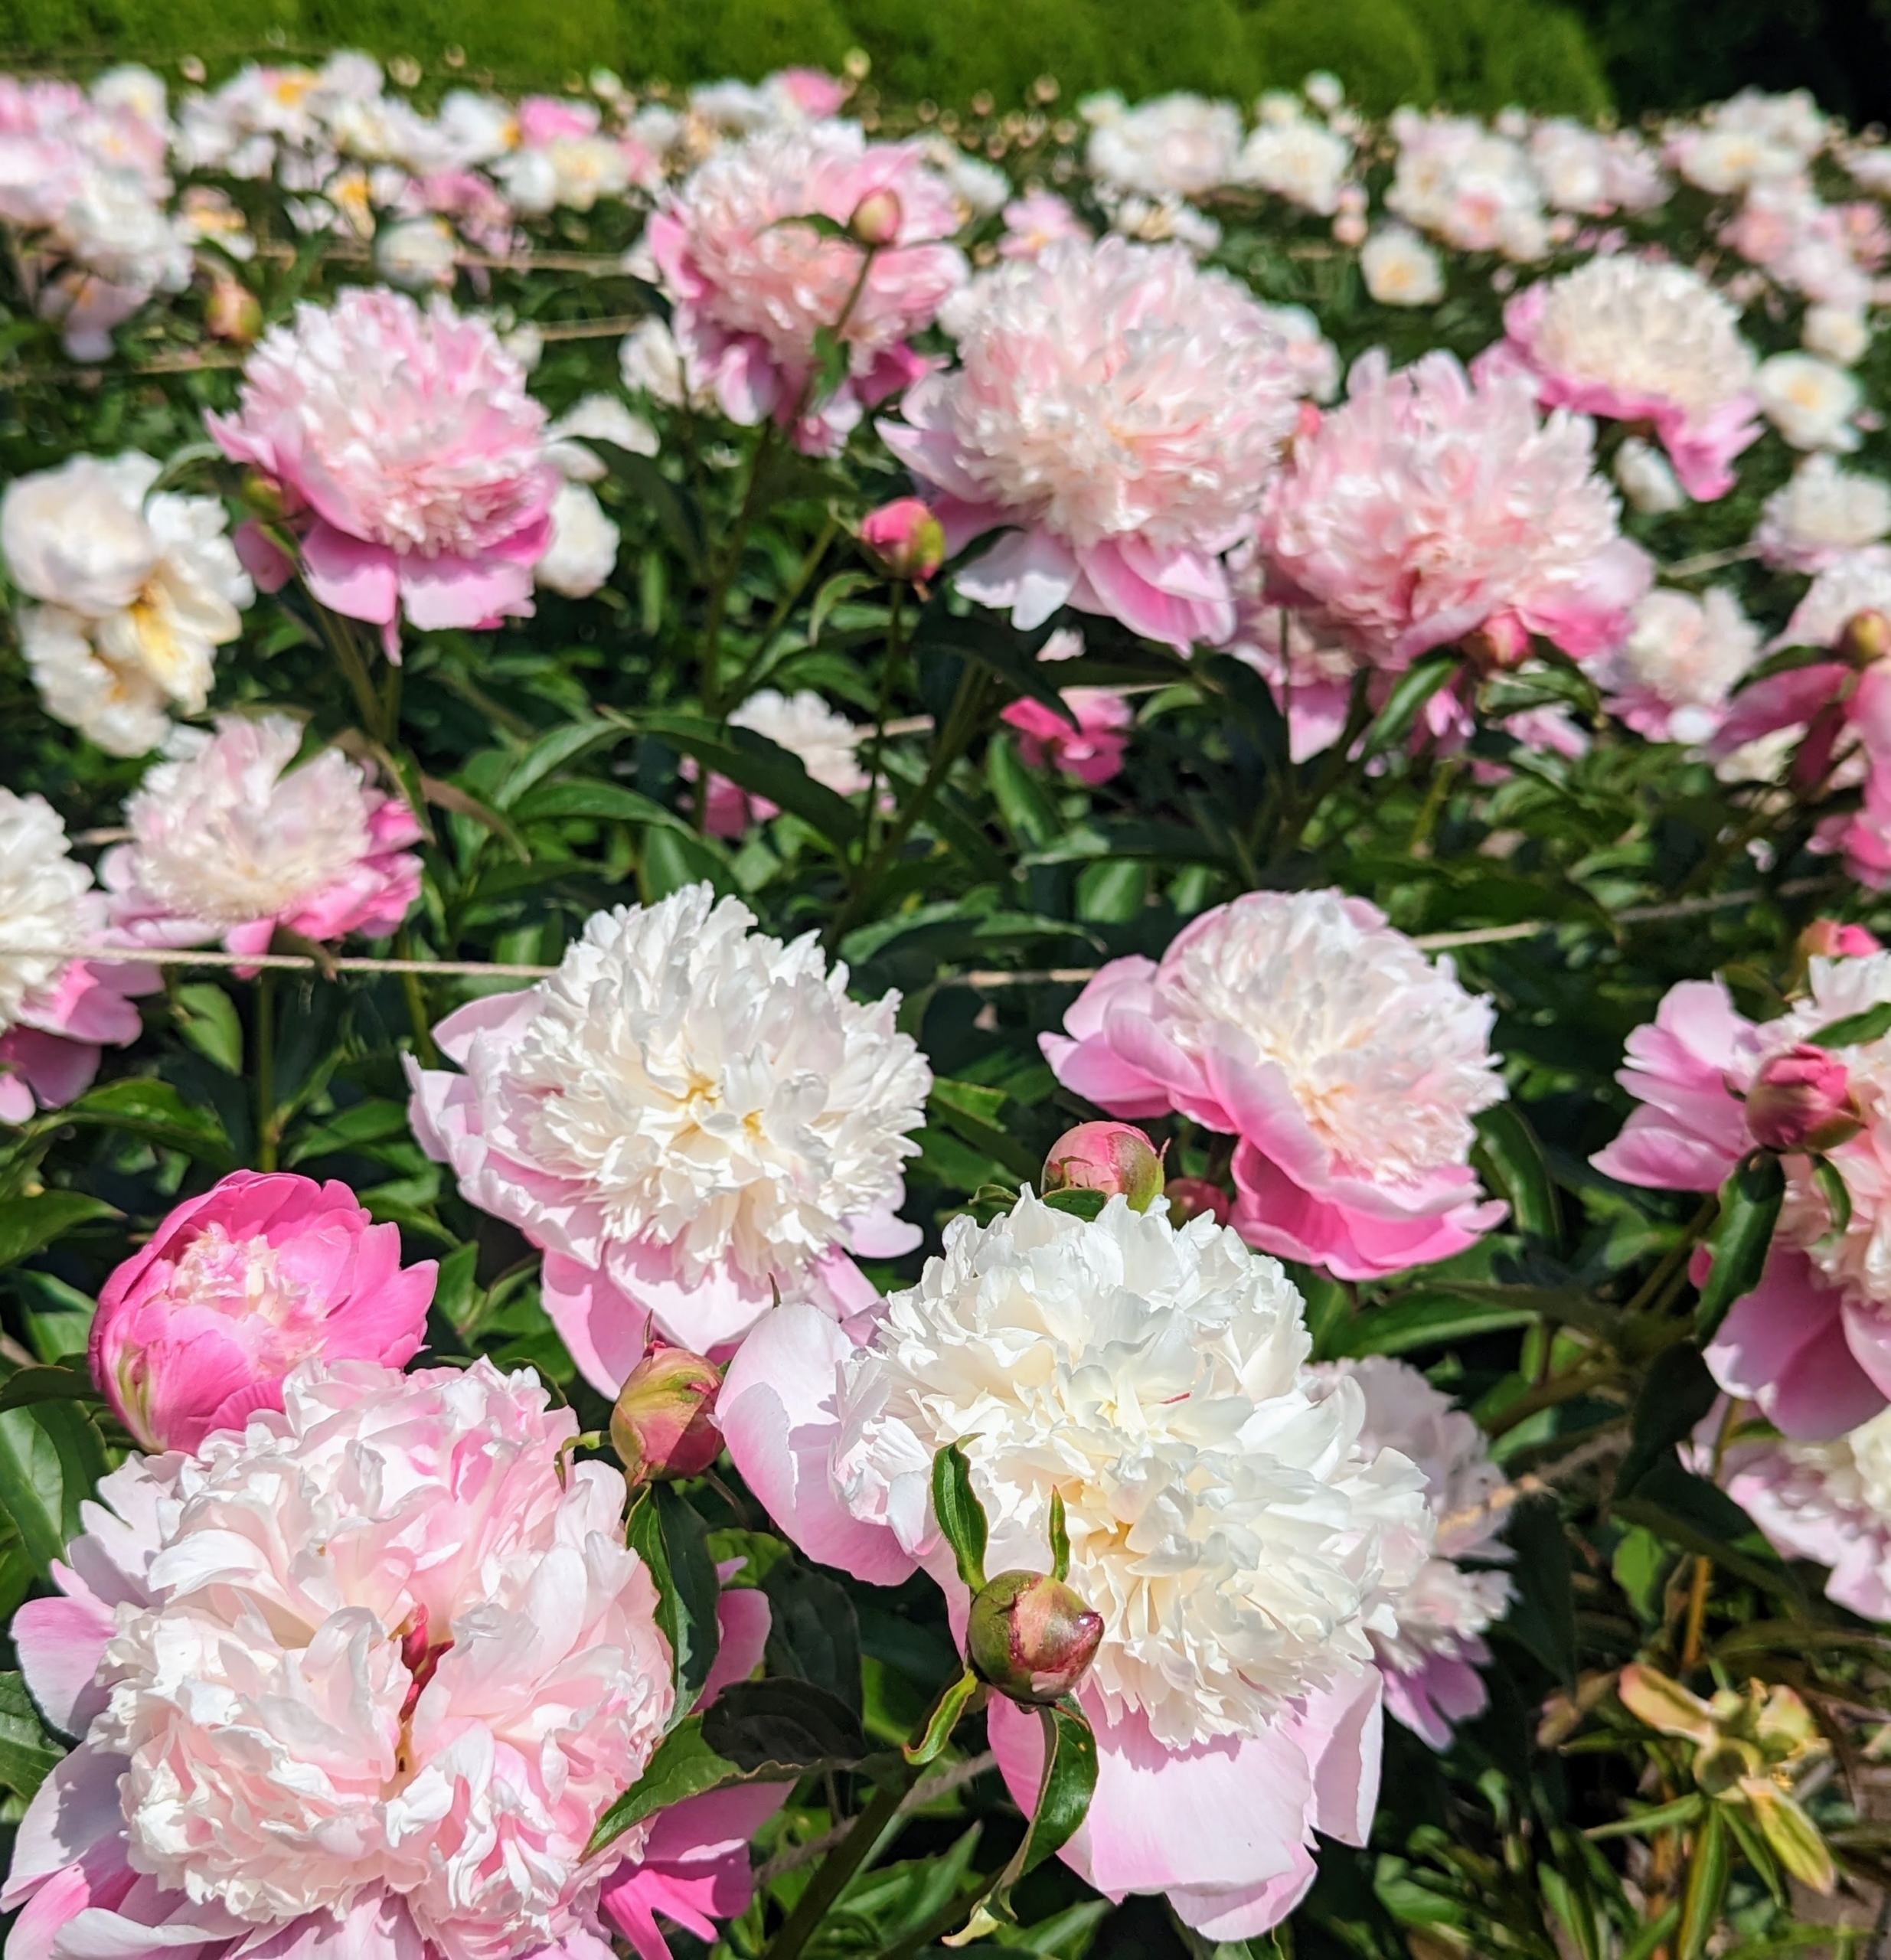
Flower colors come in white, pink, yellow, red, and coral and the various shades and tints of each.
The majority of peonies are hybrids and classified as herbaceous, or as deciduous tree peonies. The peony is showy, frilly with tuberous root systems.
Peonies are considered northern flowers – they tolerate and even prefer cold winter temperatures. They are hardy in zones 3 through 8 and need more than 400-hours of temperatures below 40-degrees Fahrenheit annually to break dormancy and bloom properly.
For the most part, peonies are disease resistant. They do, however, take some time to get established, so be patient. And if you happen to see ants crawling on your peonies, don’t worry. The insects are attracted to the sugary syrup produced by the buds. Once the flower opens fully, and the sucrose has been finished, the ants disappear.
Among the varieties in my collection – ‘Elsa Sass’, ‘Victorian Blush’, ‘Fringed Ivory’, ‘Martha’, ‘Madylone’, ‘Lullaby Coos’, ‘Vivid Glow’, ‘Angel Cheeks’, ‘Miss America’ and ‘Flying Pink Saucers’.
This is ‘Star Power’. It has pure white, large blossoms with bold round guard petals and red tipped stigmas. When using peonies for display, cut those whose buds are beginning to show color and feel similar to firm marshmallows. Always cut the stems at an angle and change the water daily.
This flower form is more rounded with a large number of petals rising in the center to form a distinct mound.
The only disadvantage of peonies is that each field yields one crop of cut flowers for a couple of weeks only once a year, and then that’s it – until the next season when they bloom with splendor once again.
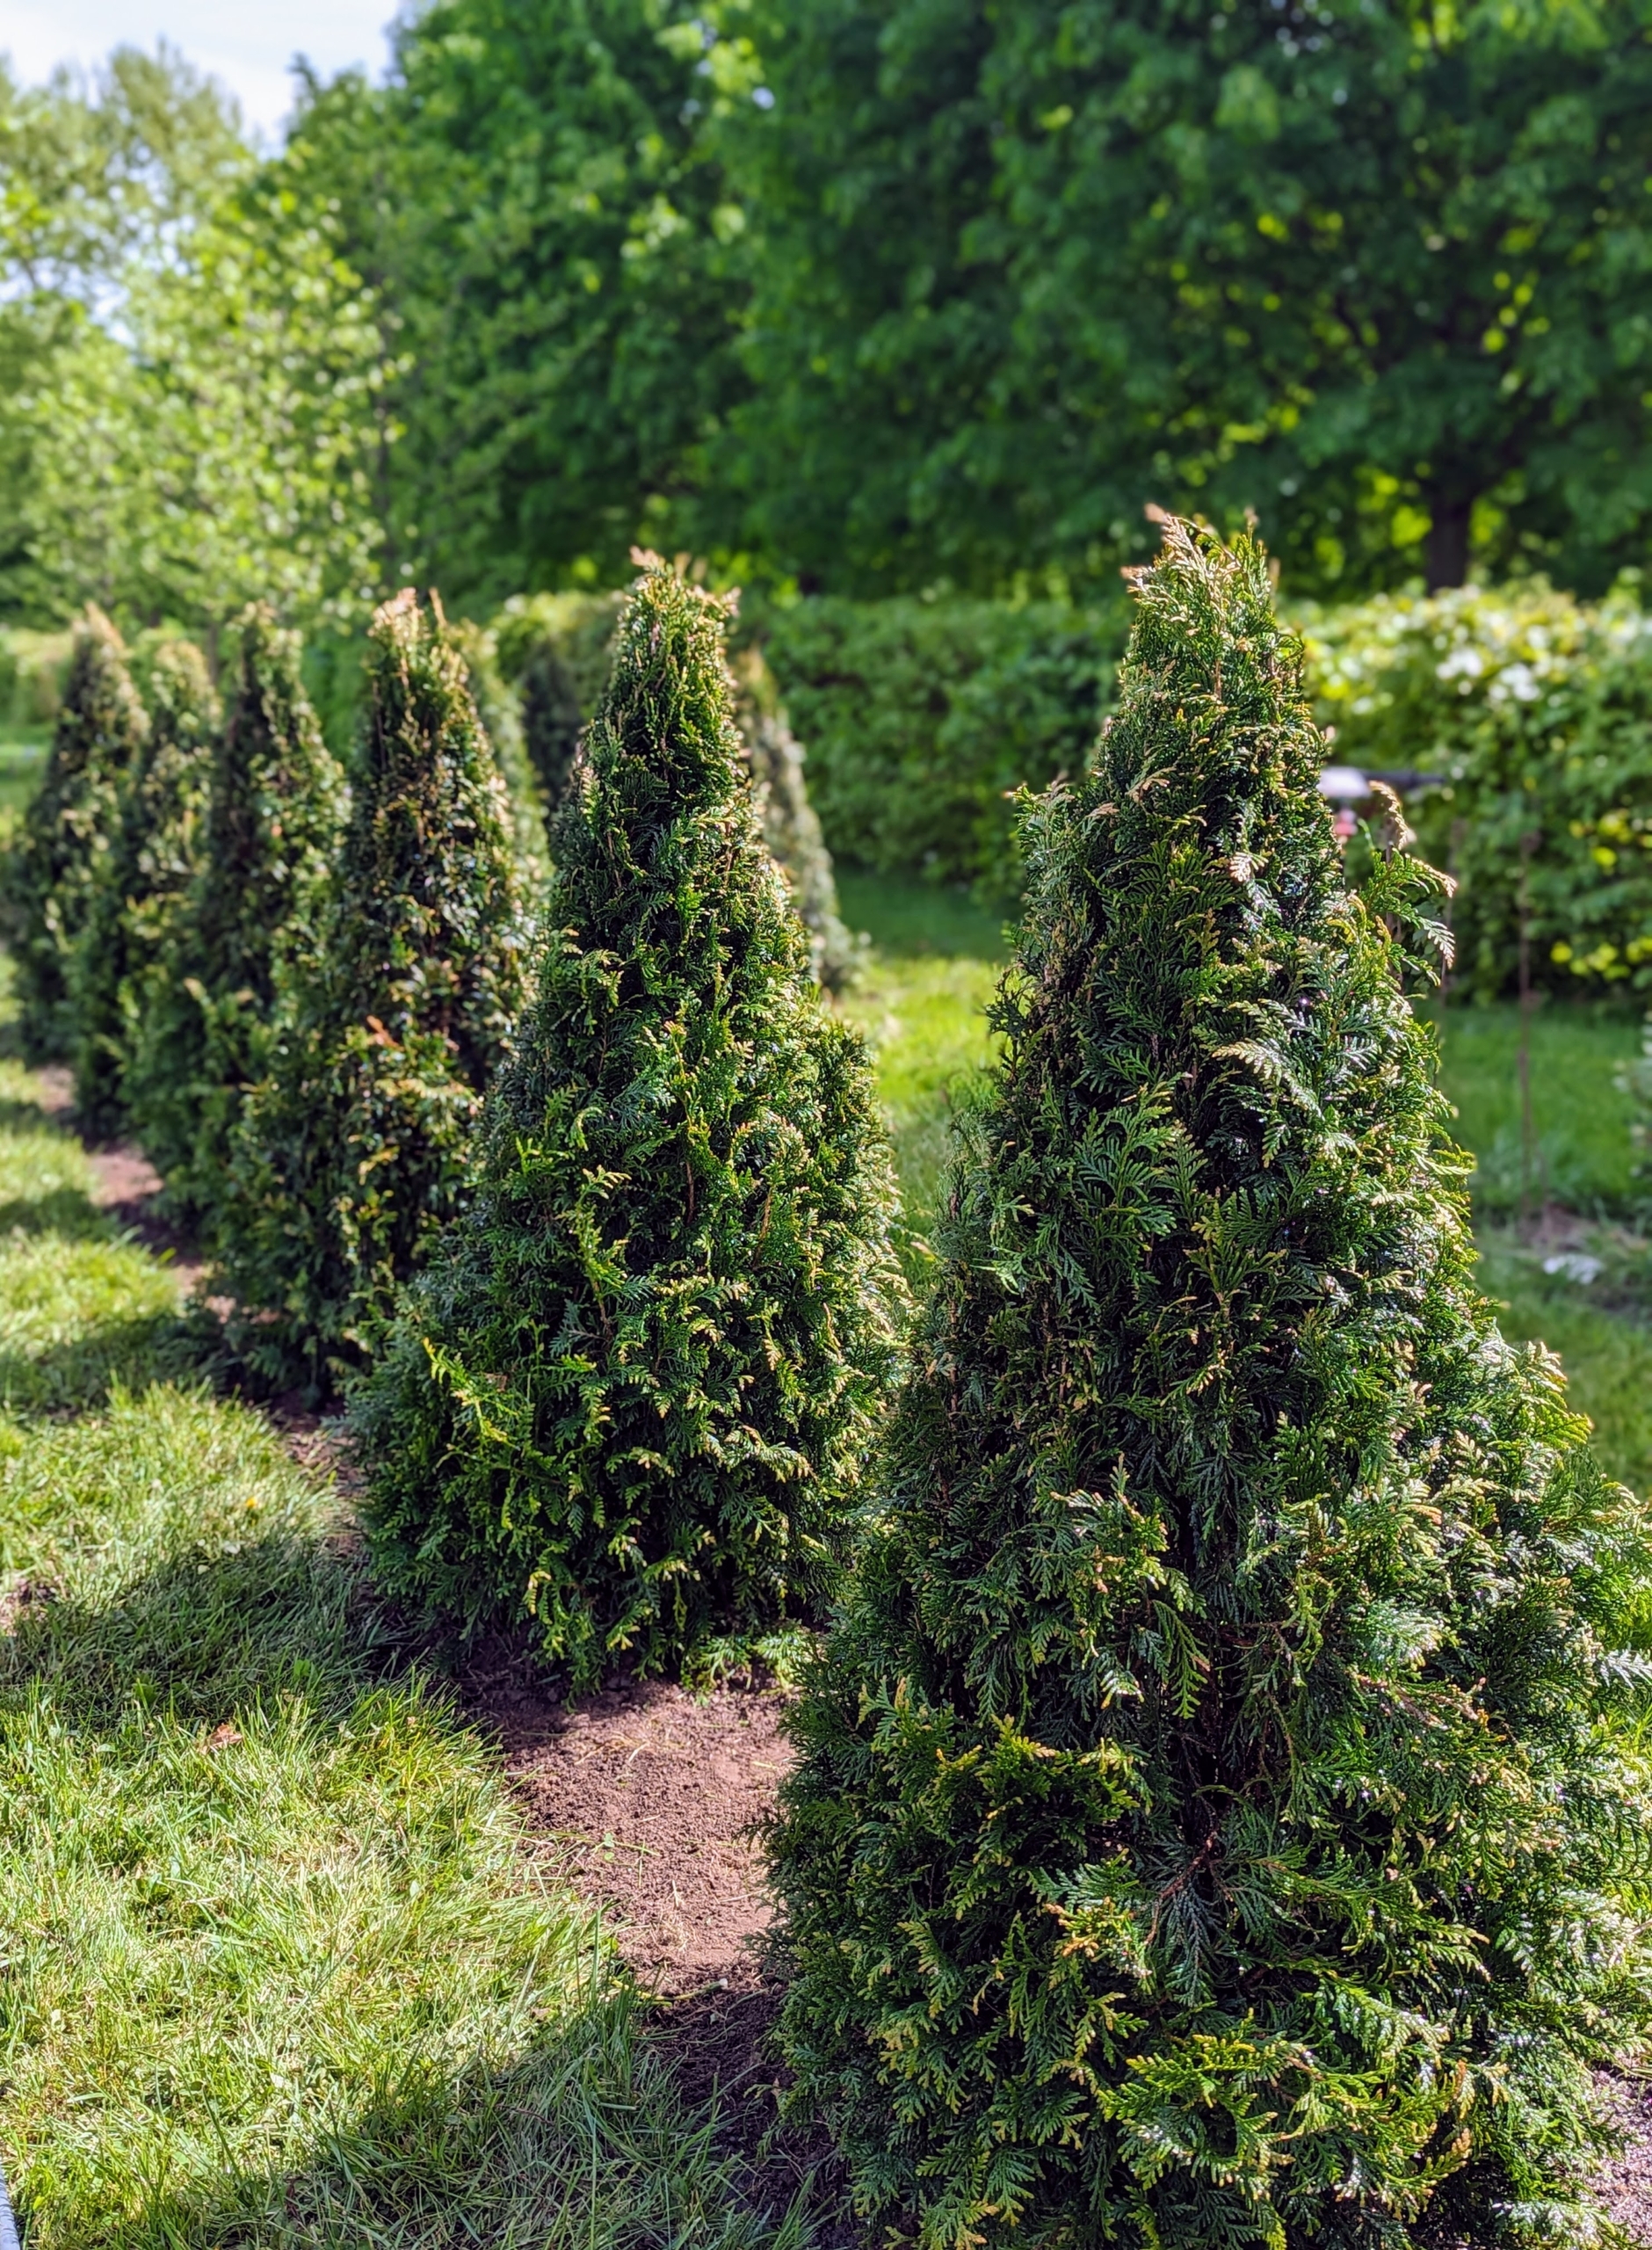
My garden maze now includes arborvitae, western red cedar, false cypress, cherry laurel, and more interesting varieties of yew, holly, and boxwood.
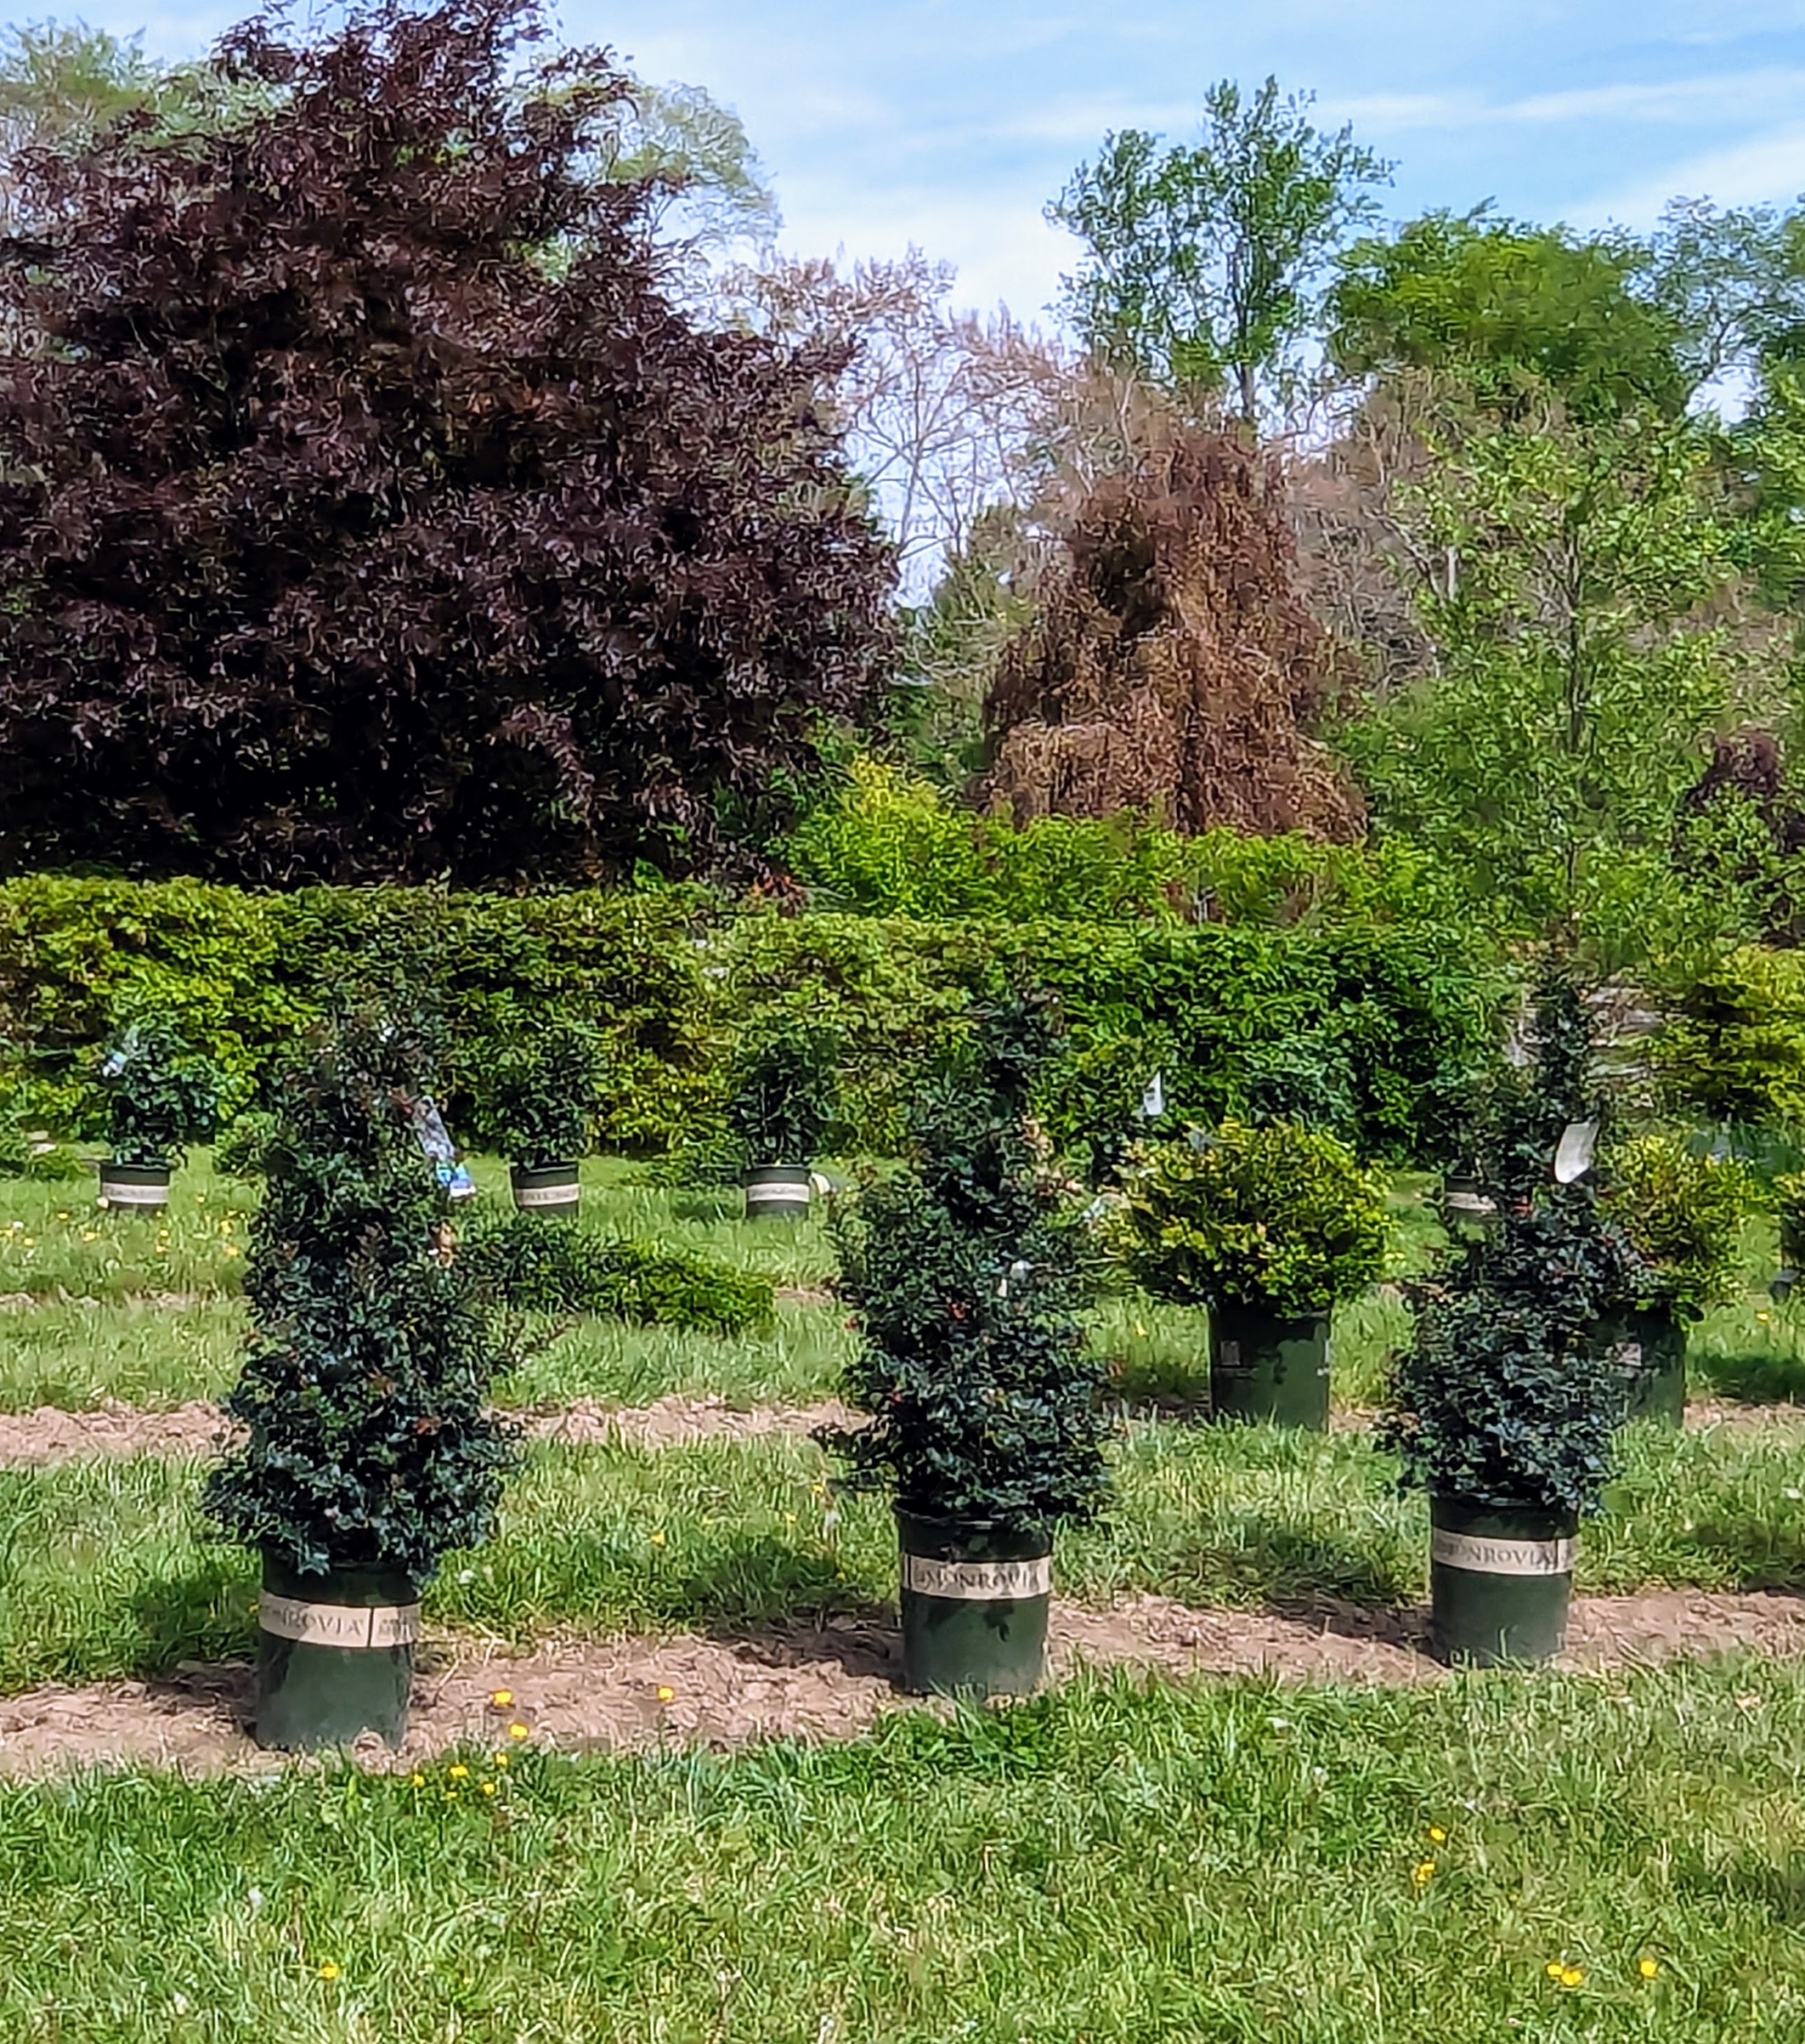
As many of you know, I am in the process of planting a living maze in a lush pasture just outside my Winter House. More than two-thirds of the three-acre area is completed and growing nicely. As each puzzling path bed is cleared of sod, the spaces are measured and marked, the plants are carefully counted and placed, and then planted, watered and top dressed with nutrient-rich mulch.
Here are some photos, enjoy.
I knew these specimens would make excellent additions to my maze. I designed the maze with a variety of interesting trees, hedges, espaliers, and shrubs that would all grow tall enough to prevent walkers from seeing the paths ahead.
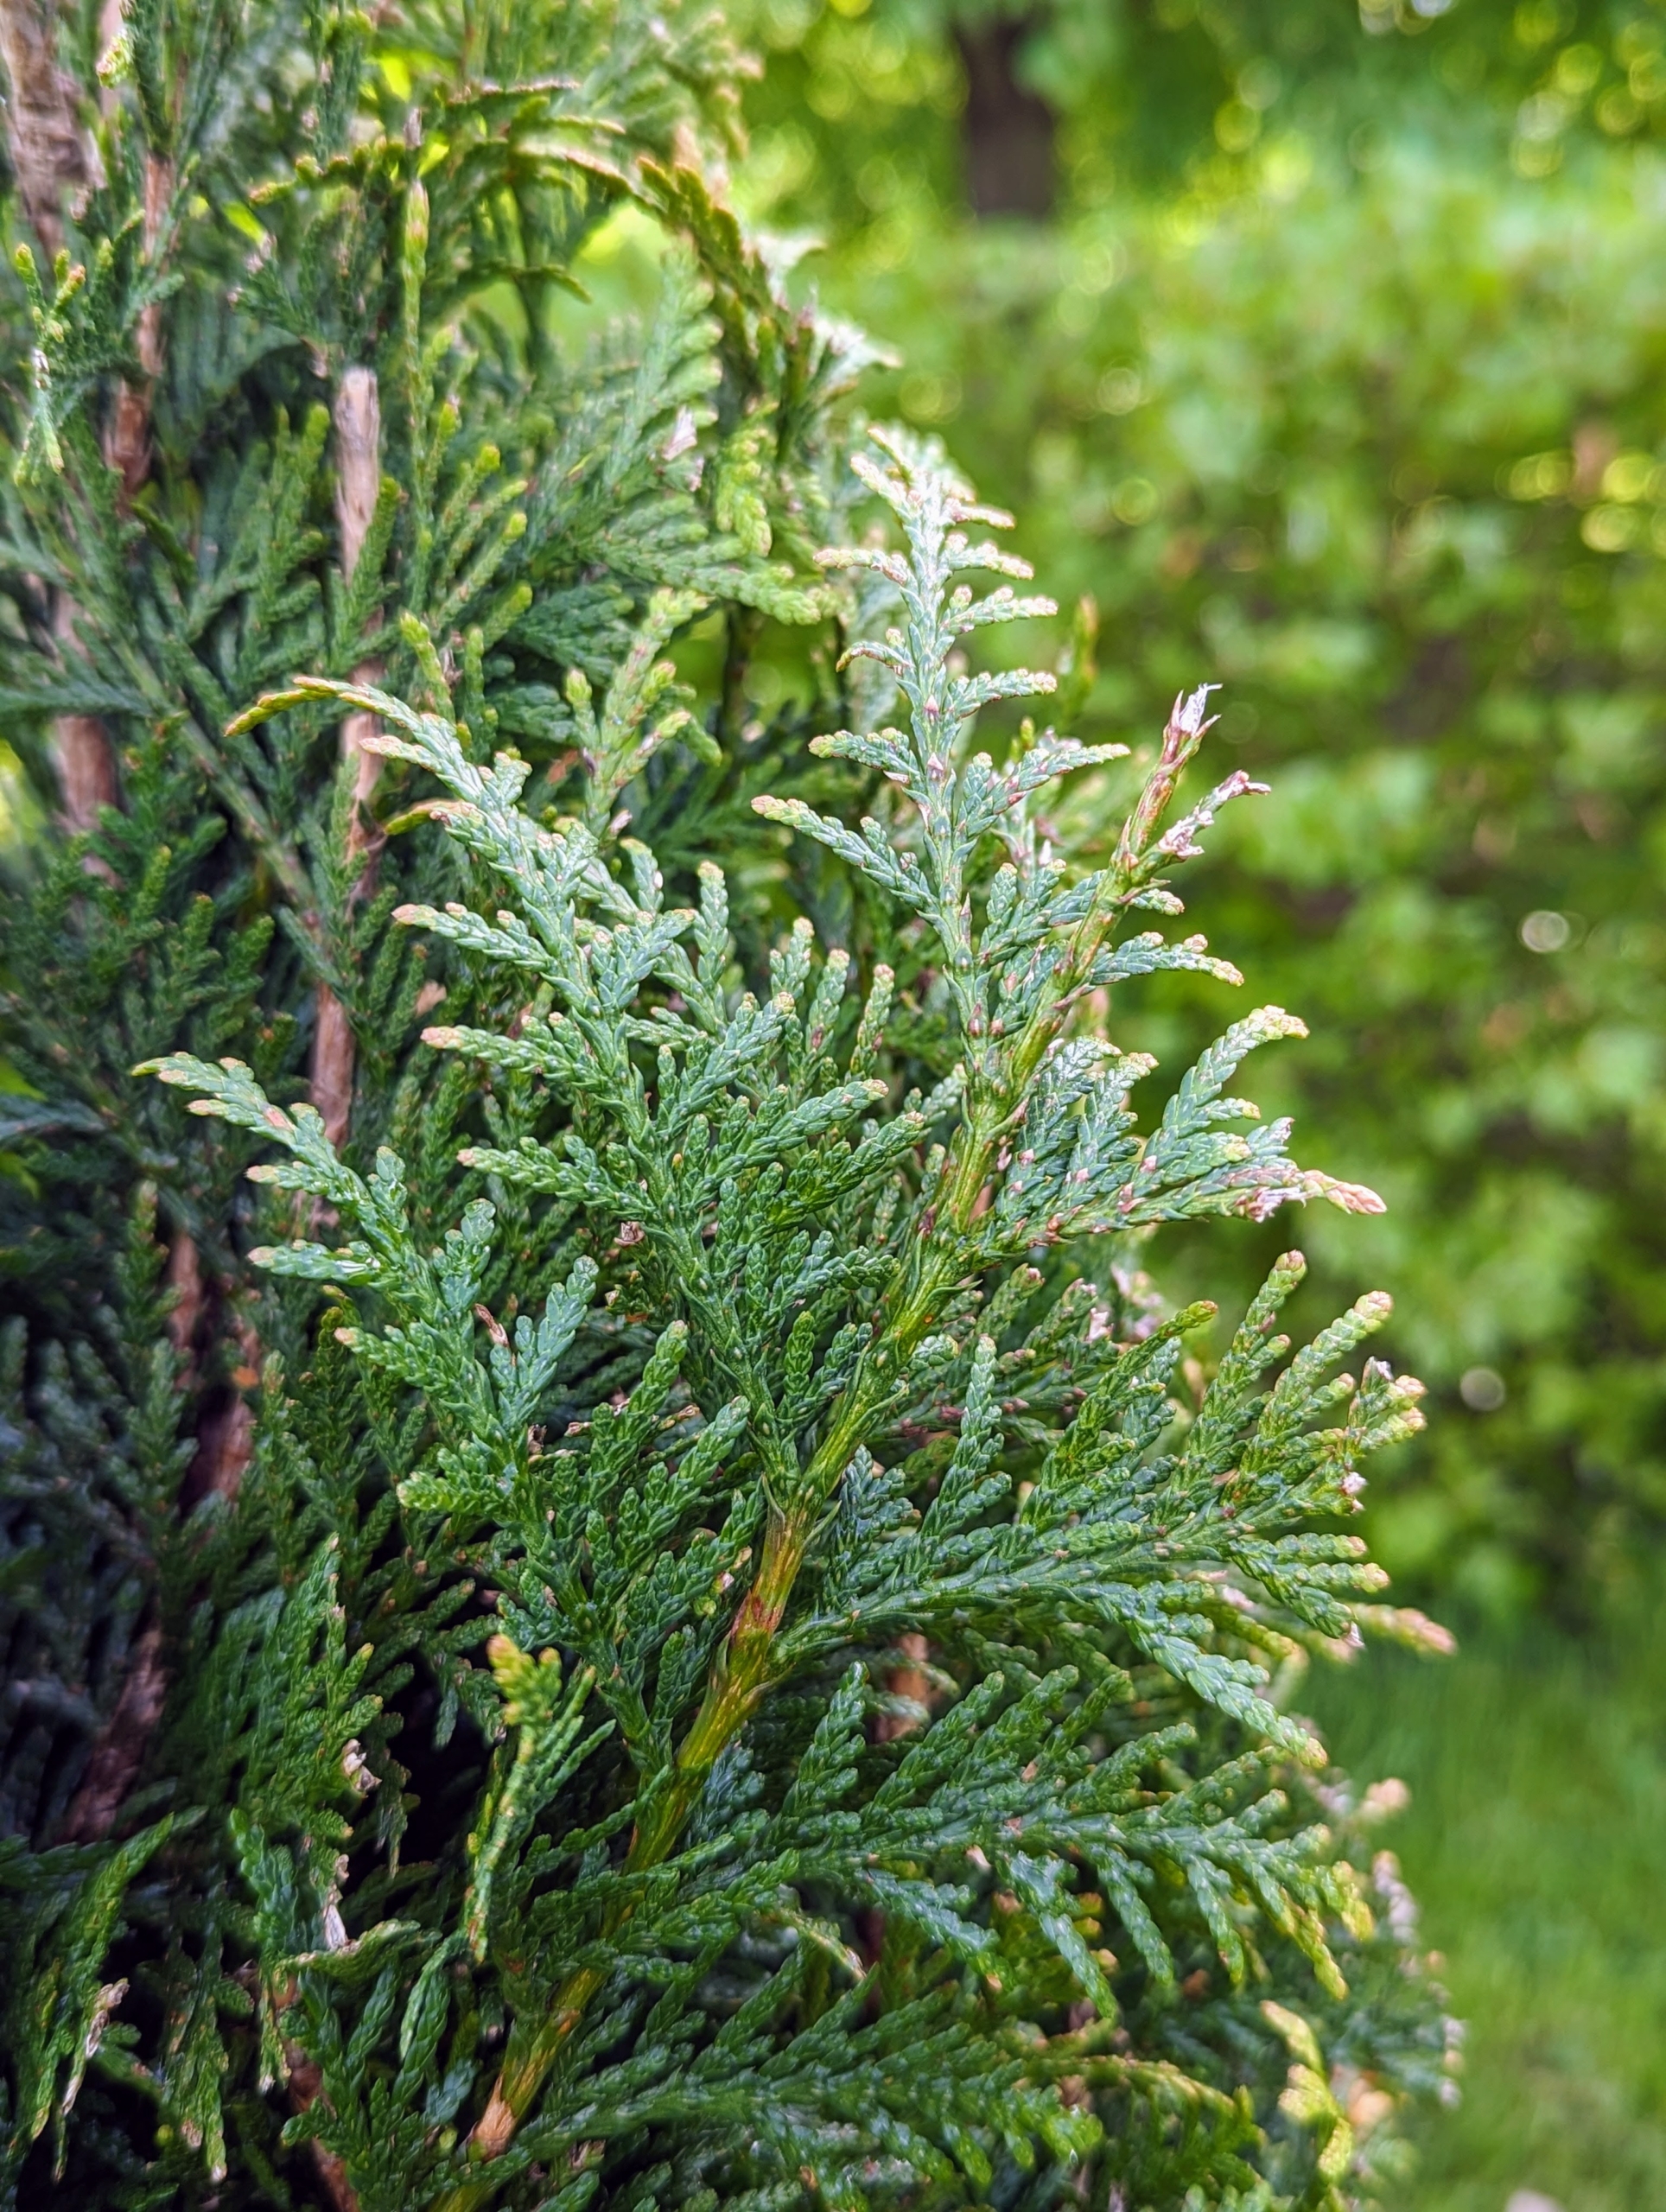
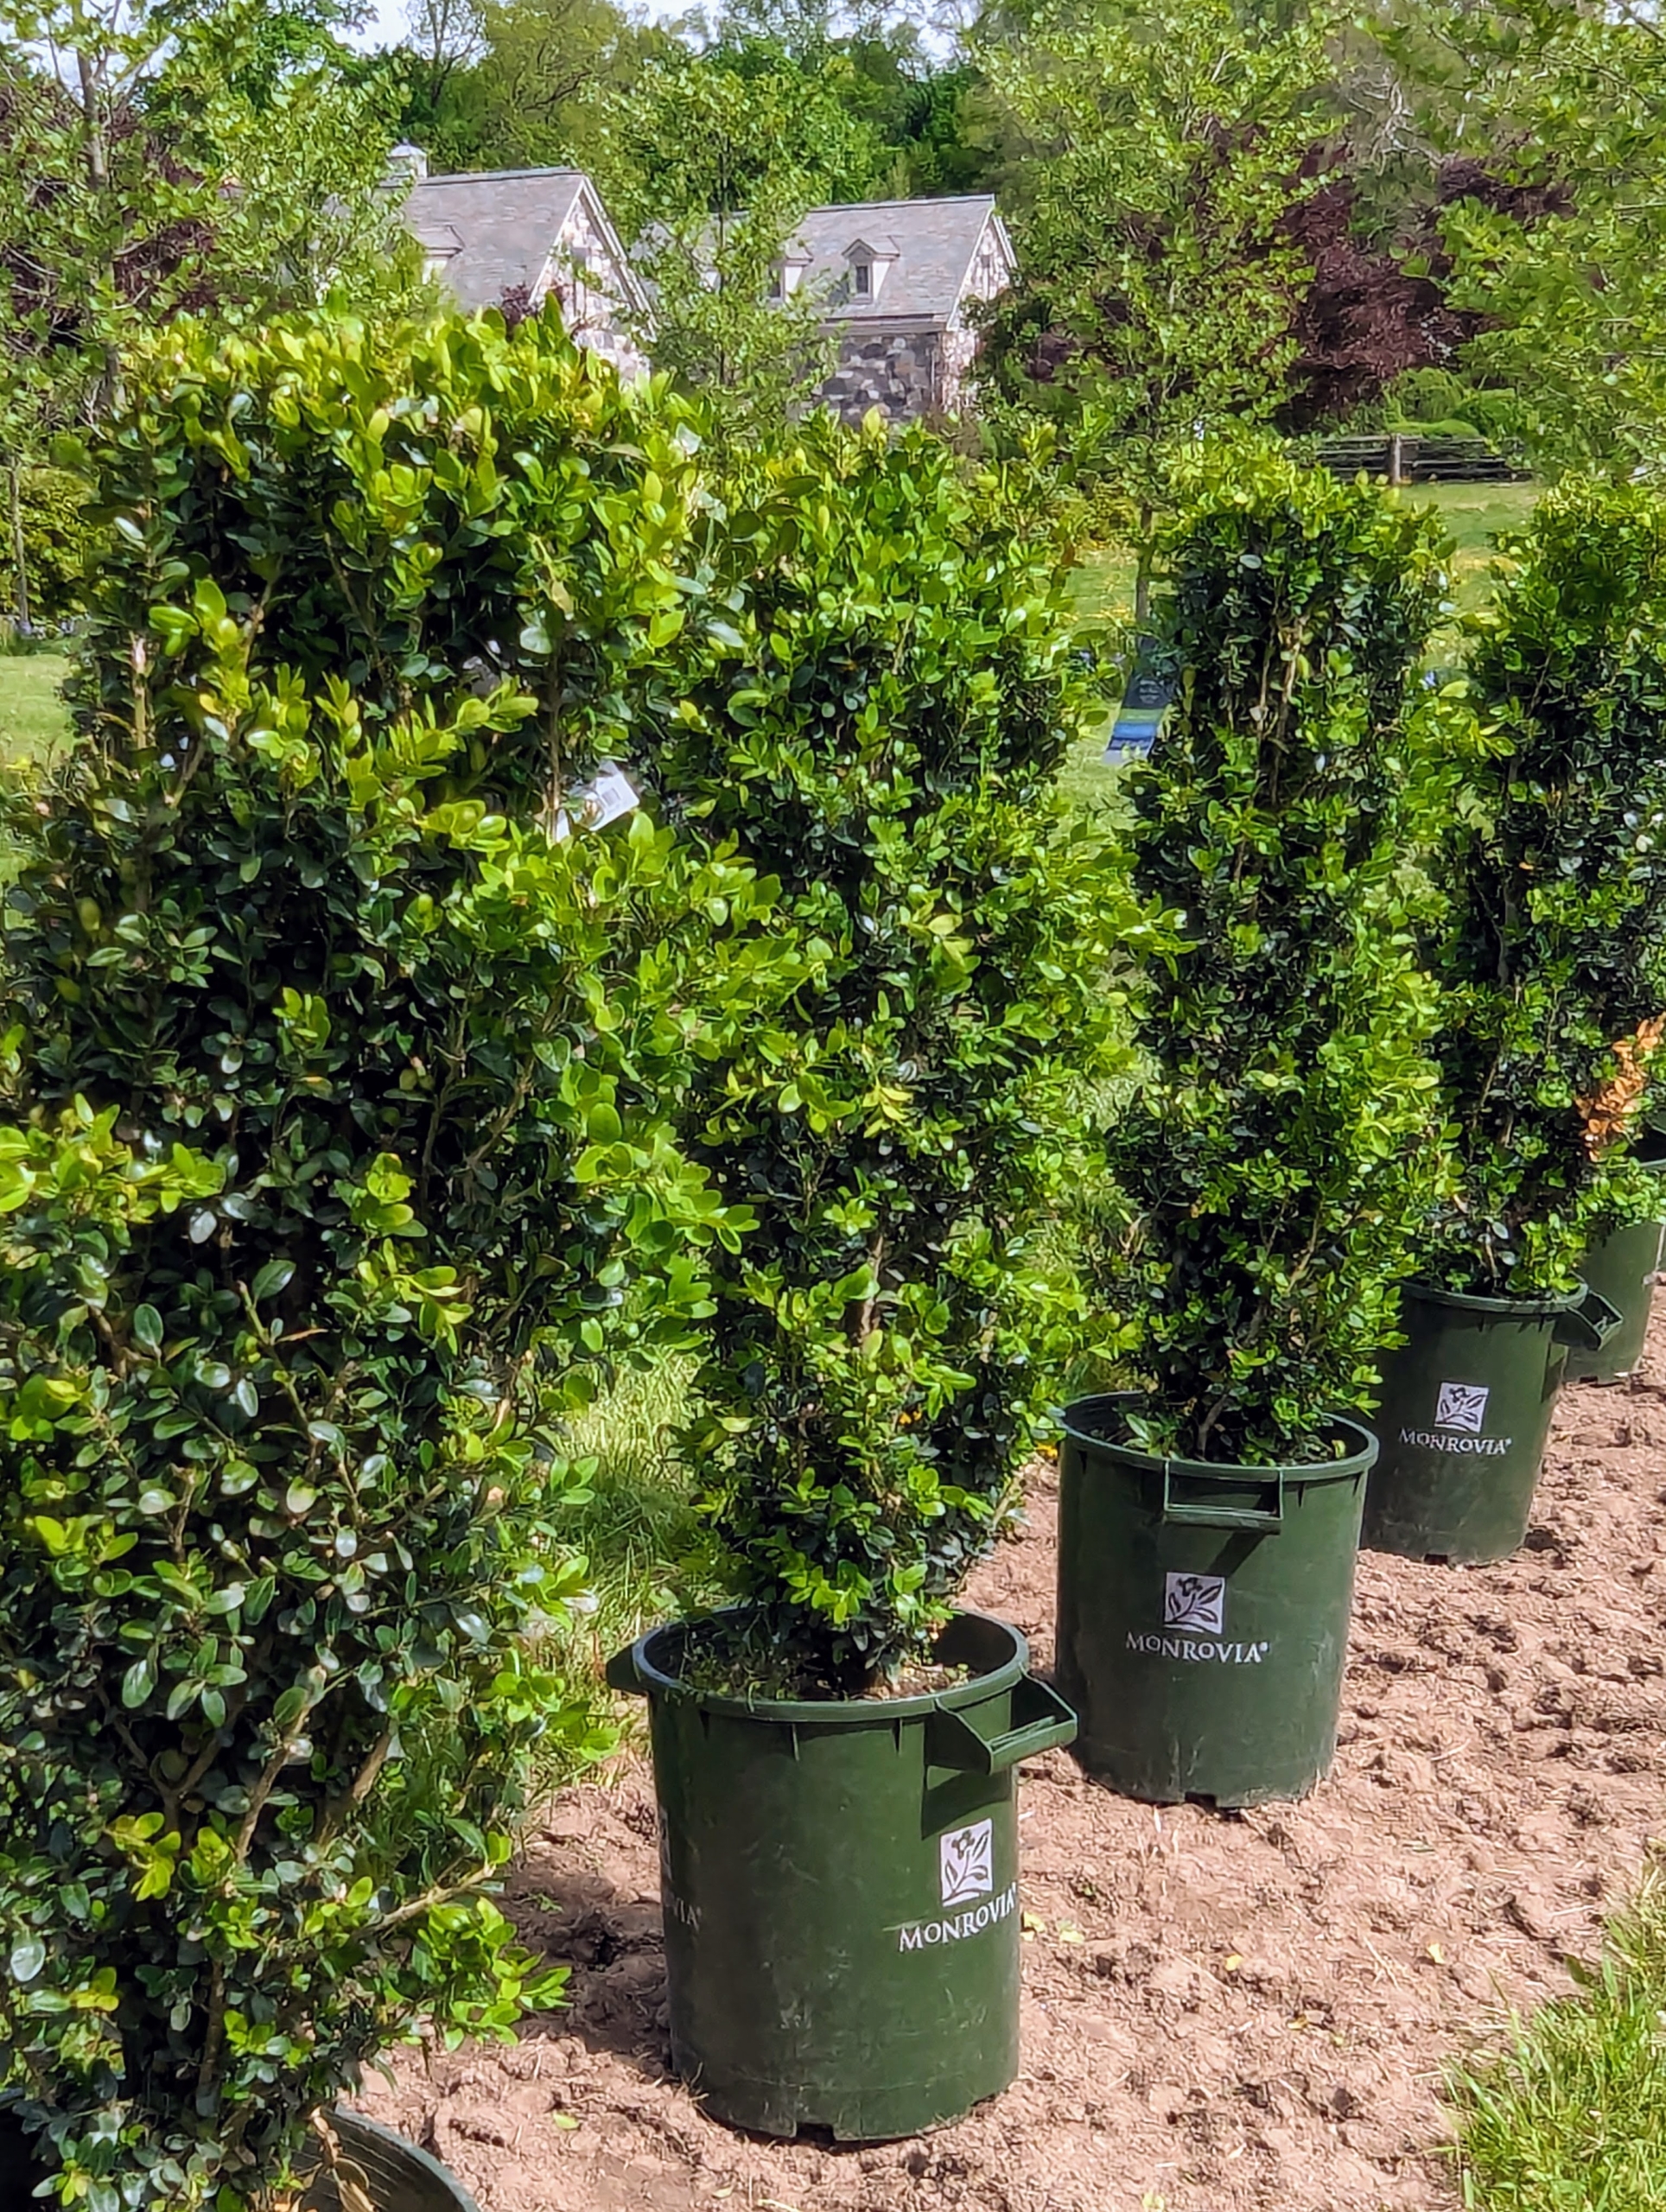
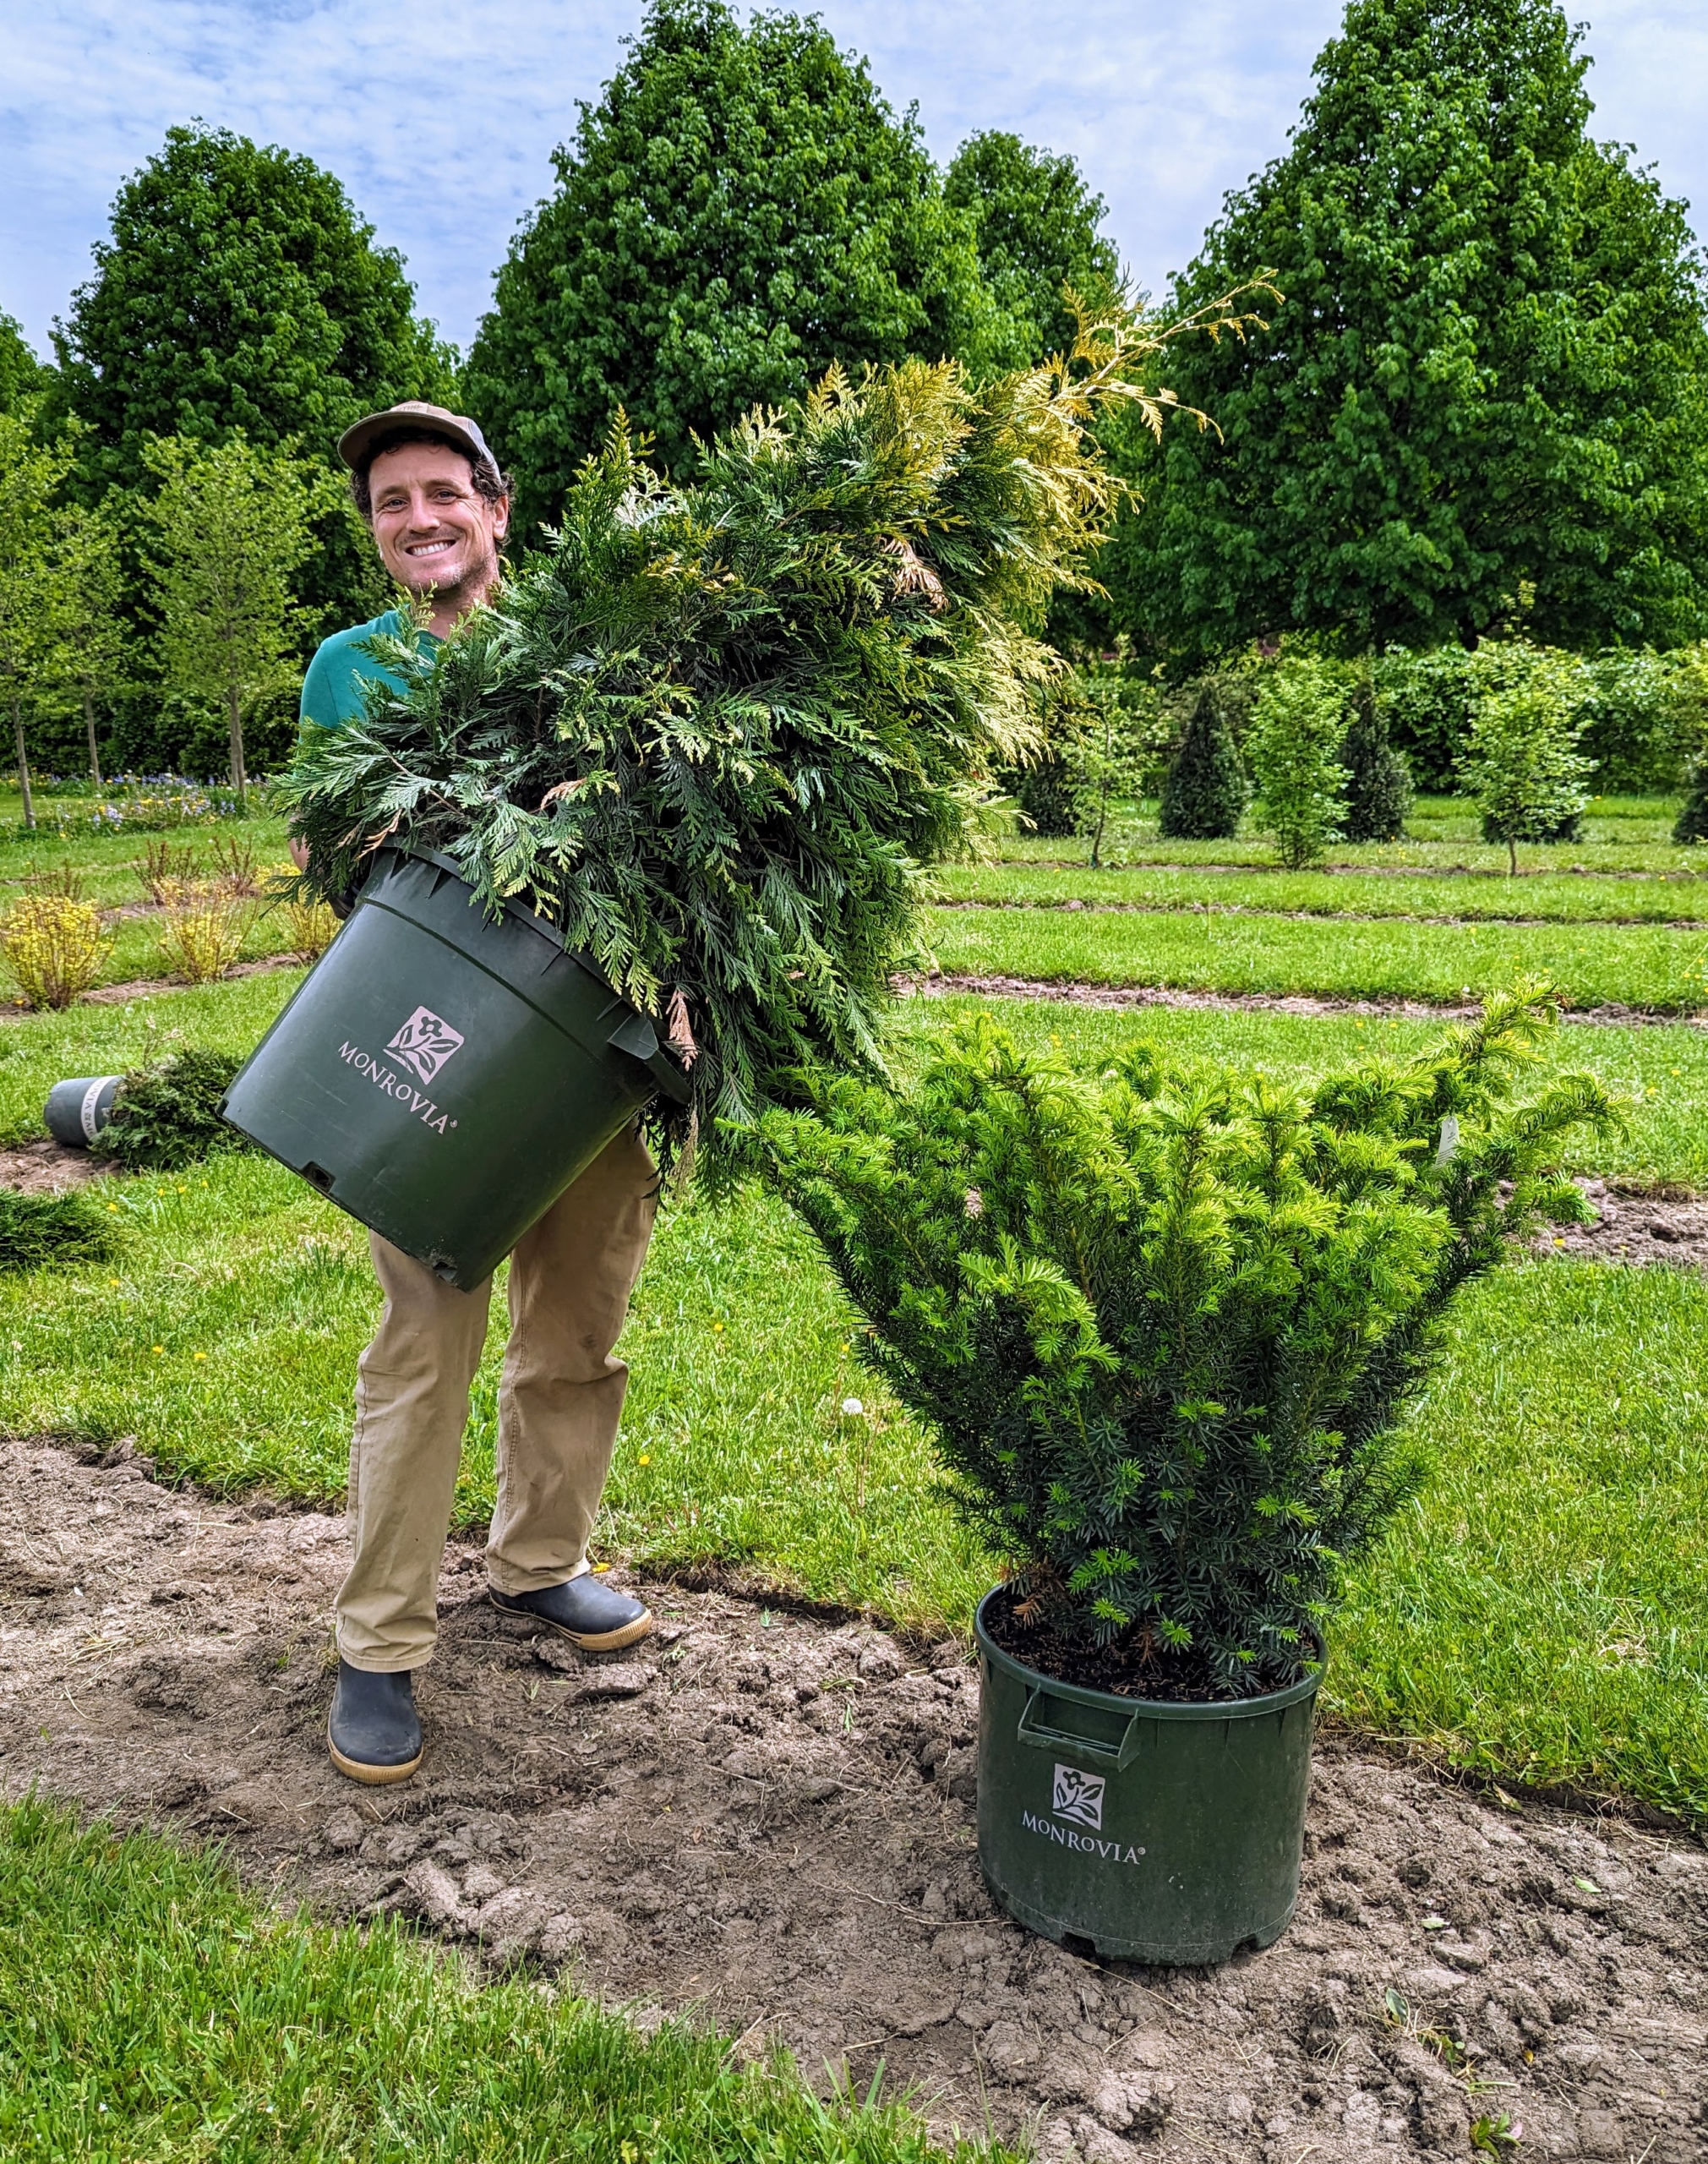
Many of our new plantings are from Monrovia, a wholesale plant nursery specializing in well-nurtured shrubs, perennials, annuals, ferns, grasses, and conifers with several nursery locations across the country. Tiny Tower® Green Giant Arborvitae is noted for its upright, compact habit with lively green foliage that is soft to the touch.
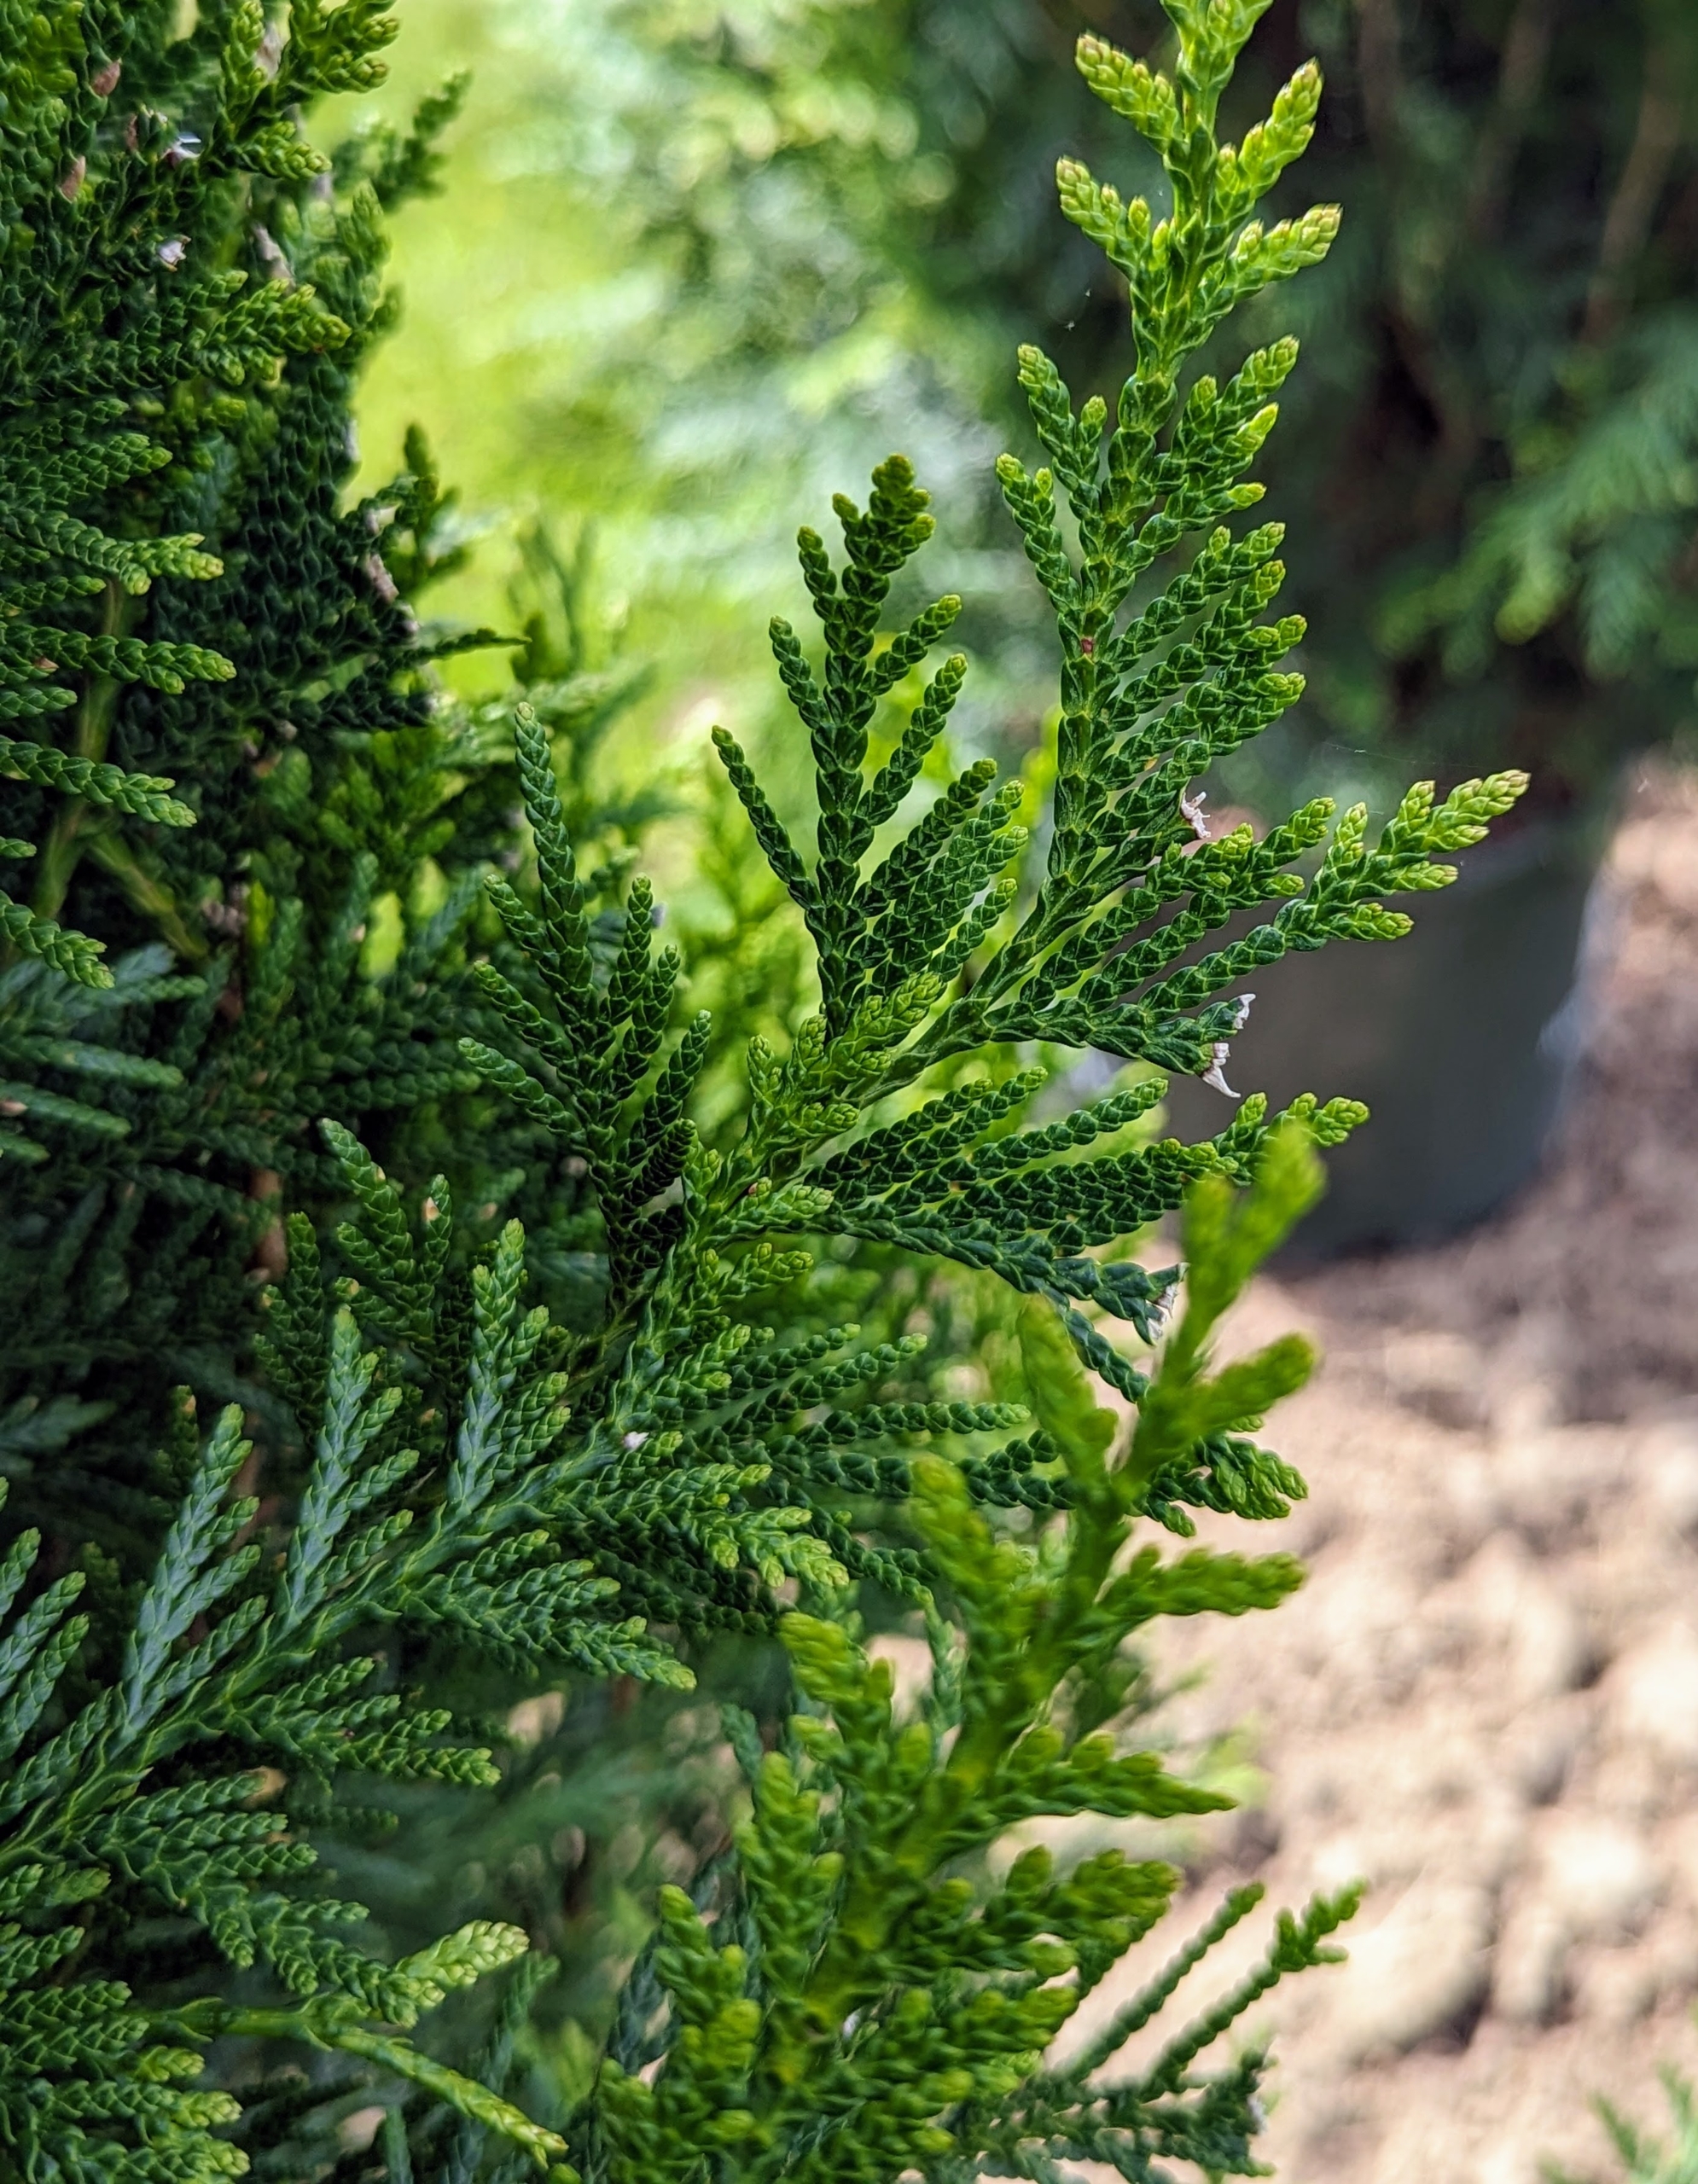
Here is a closer look at its rich green evergreen sprays which remain green through winter.
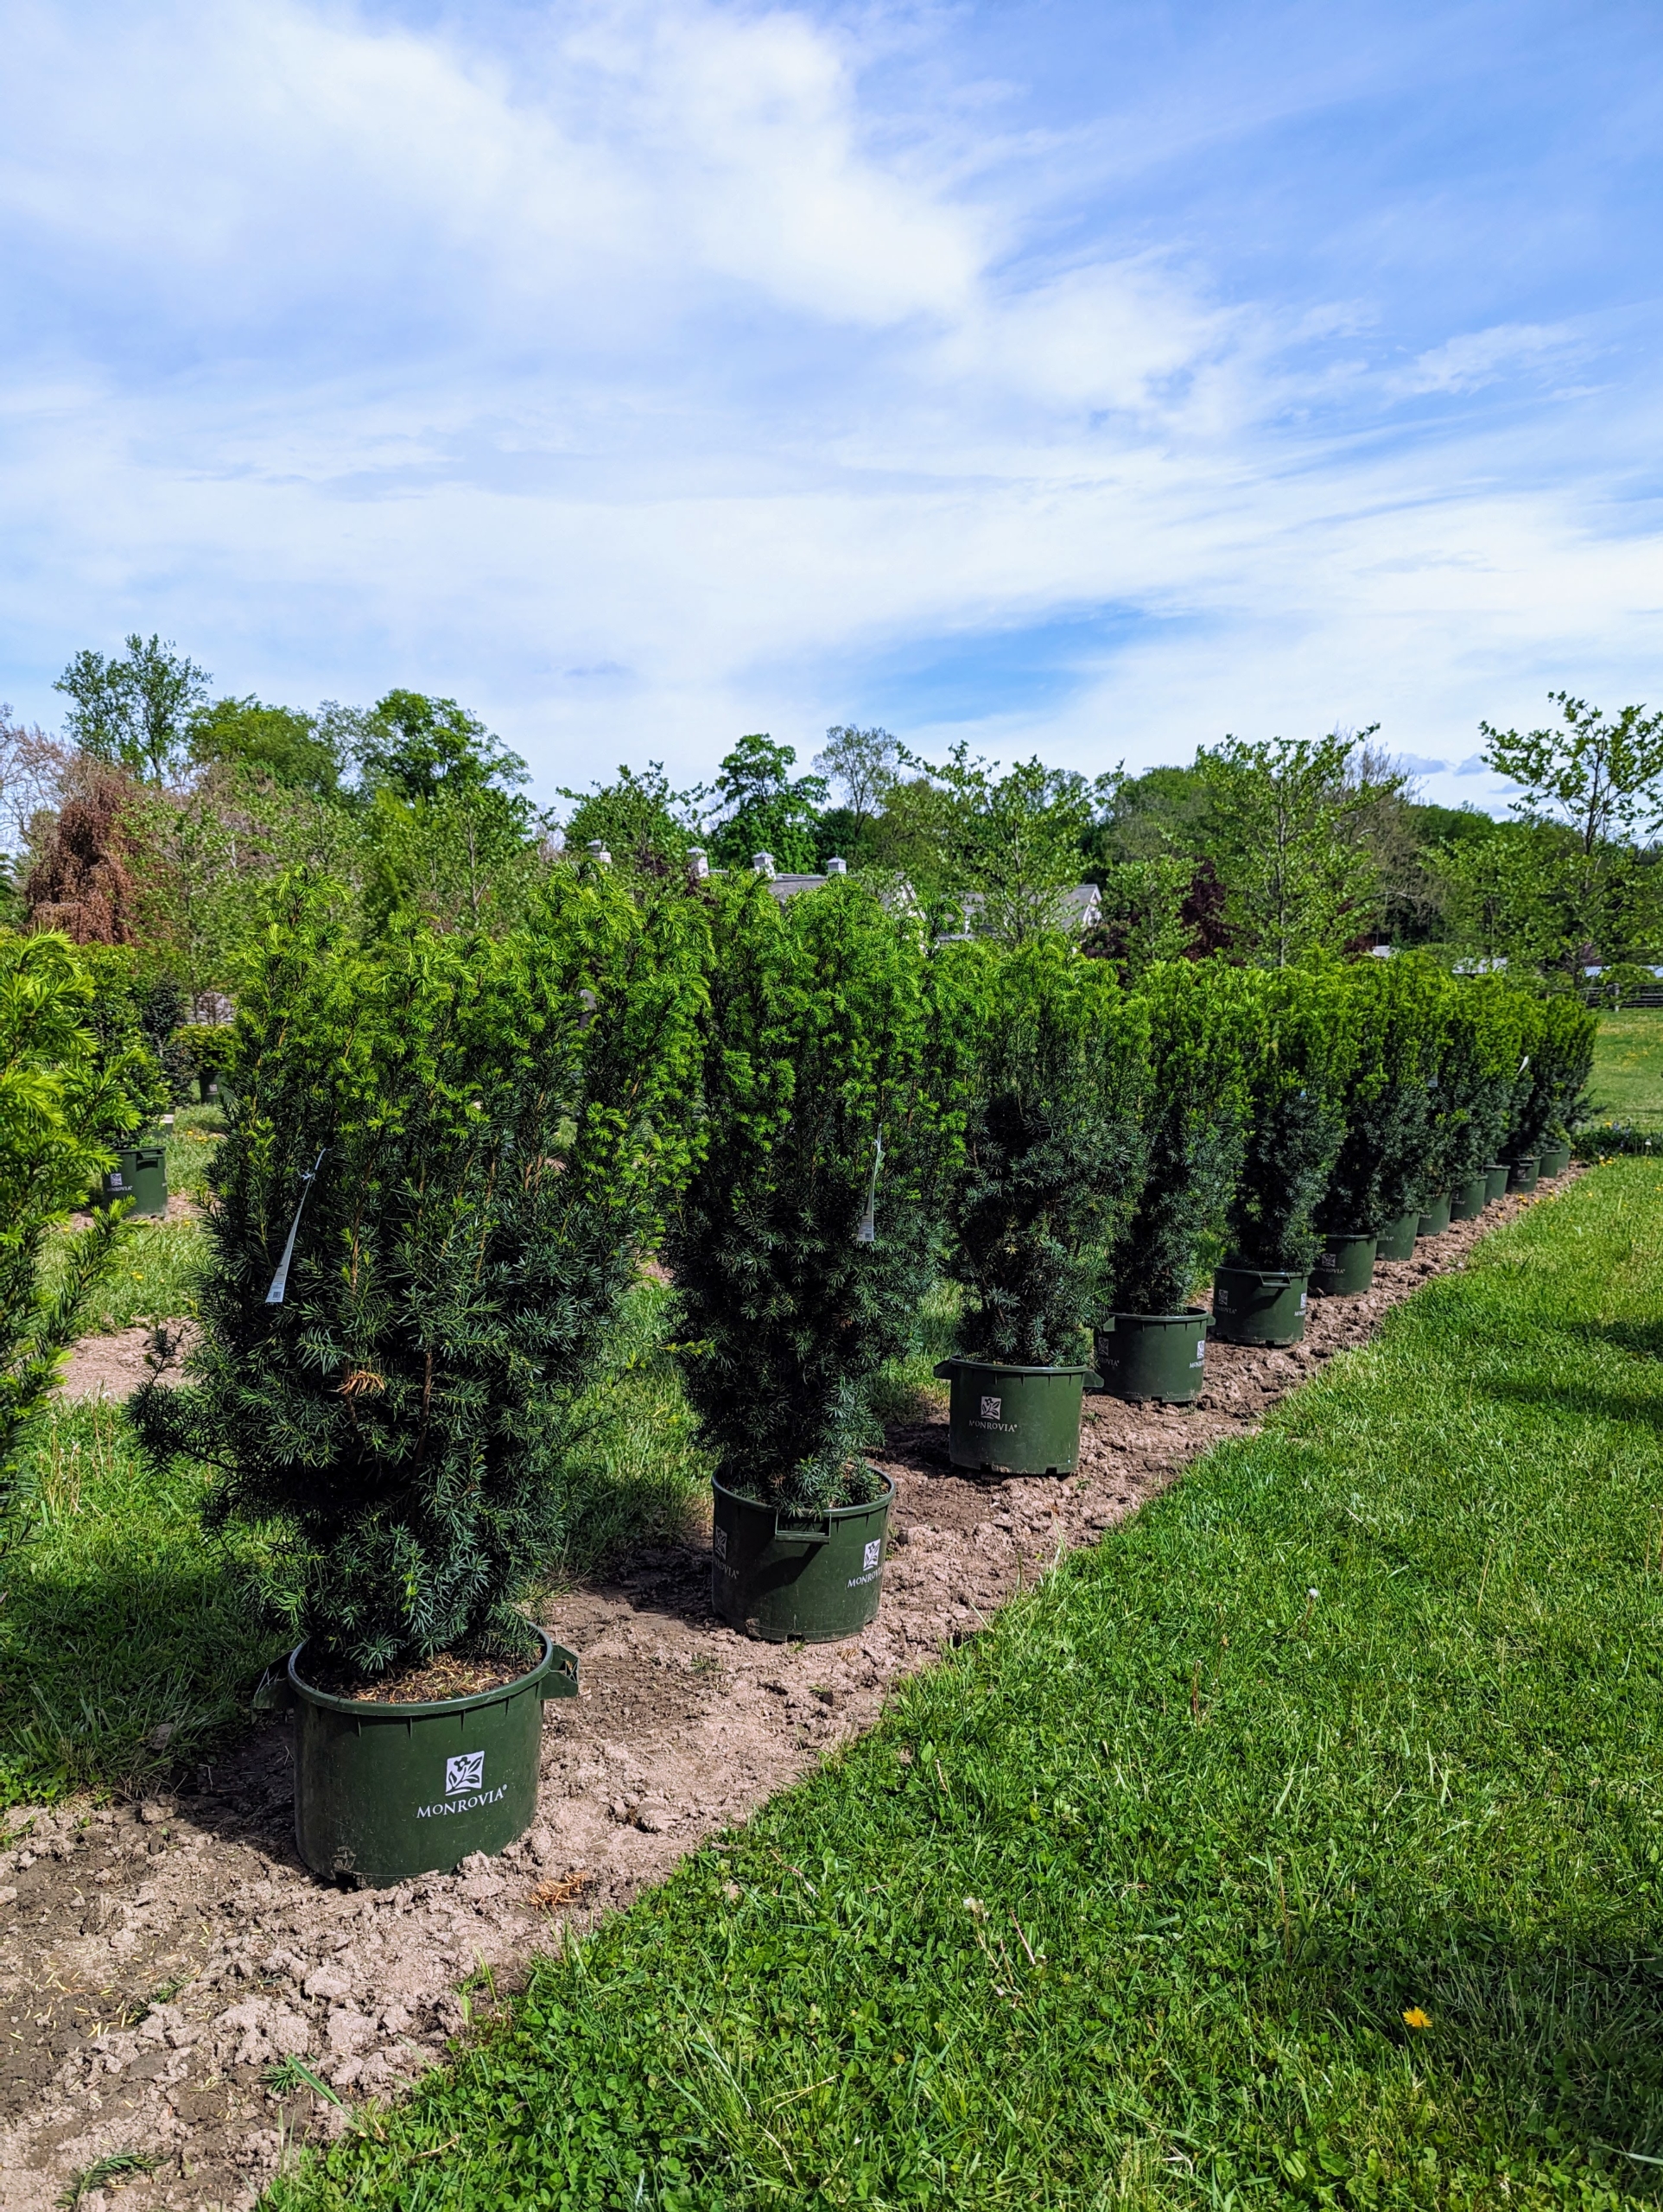
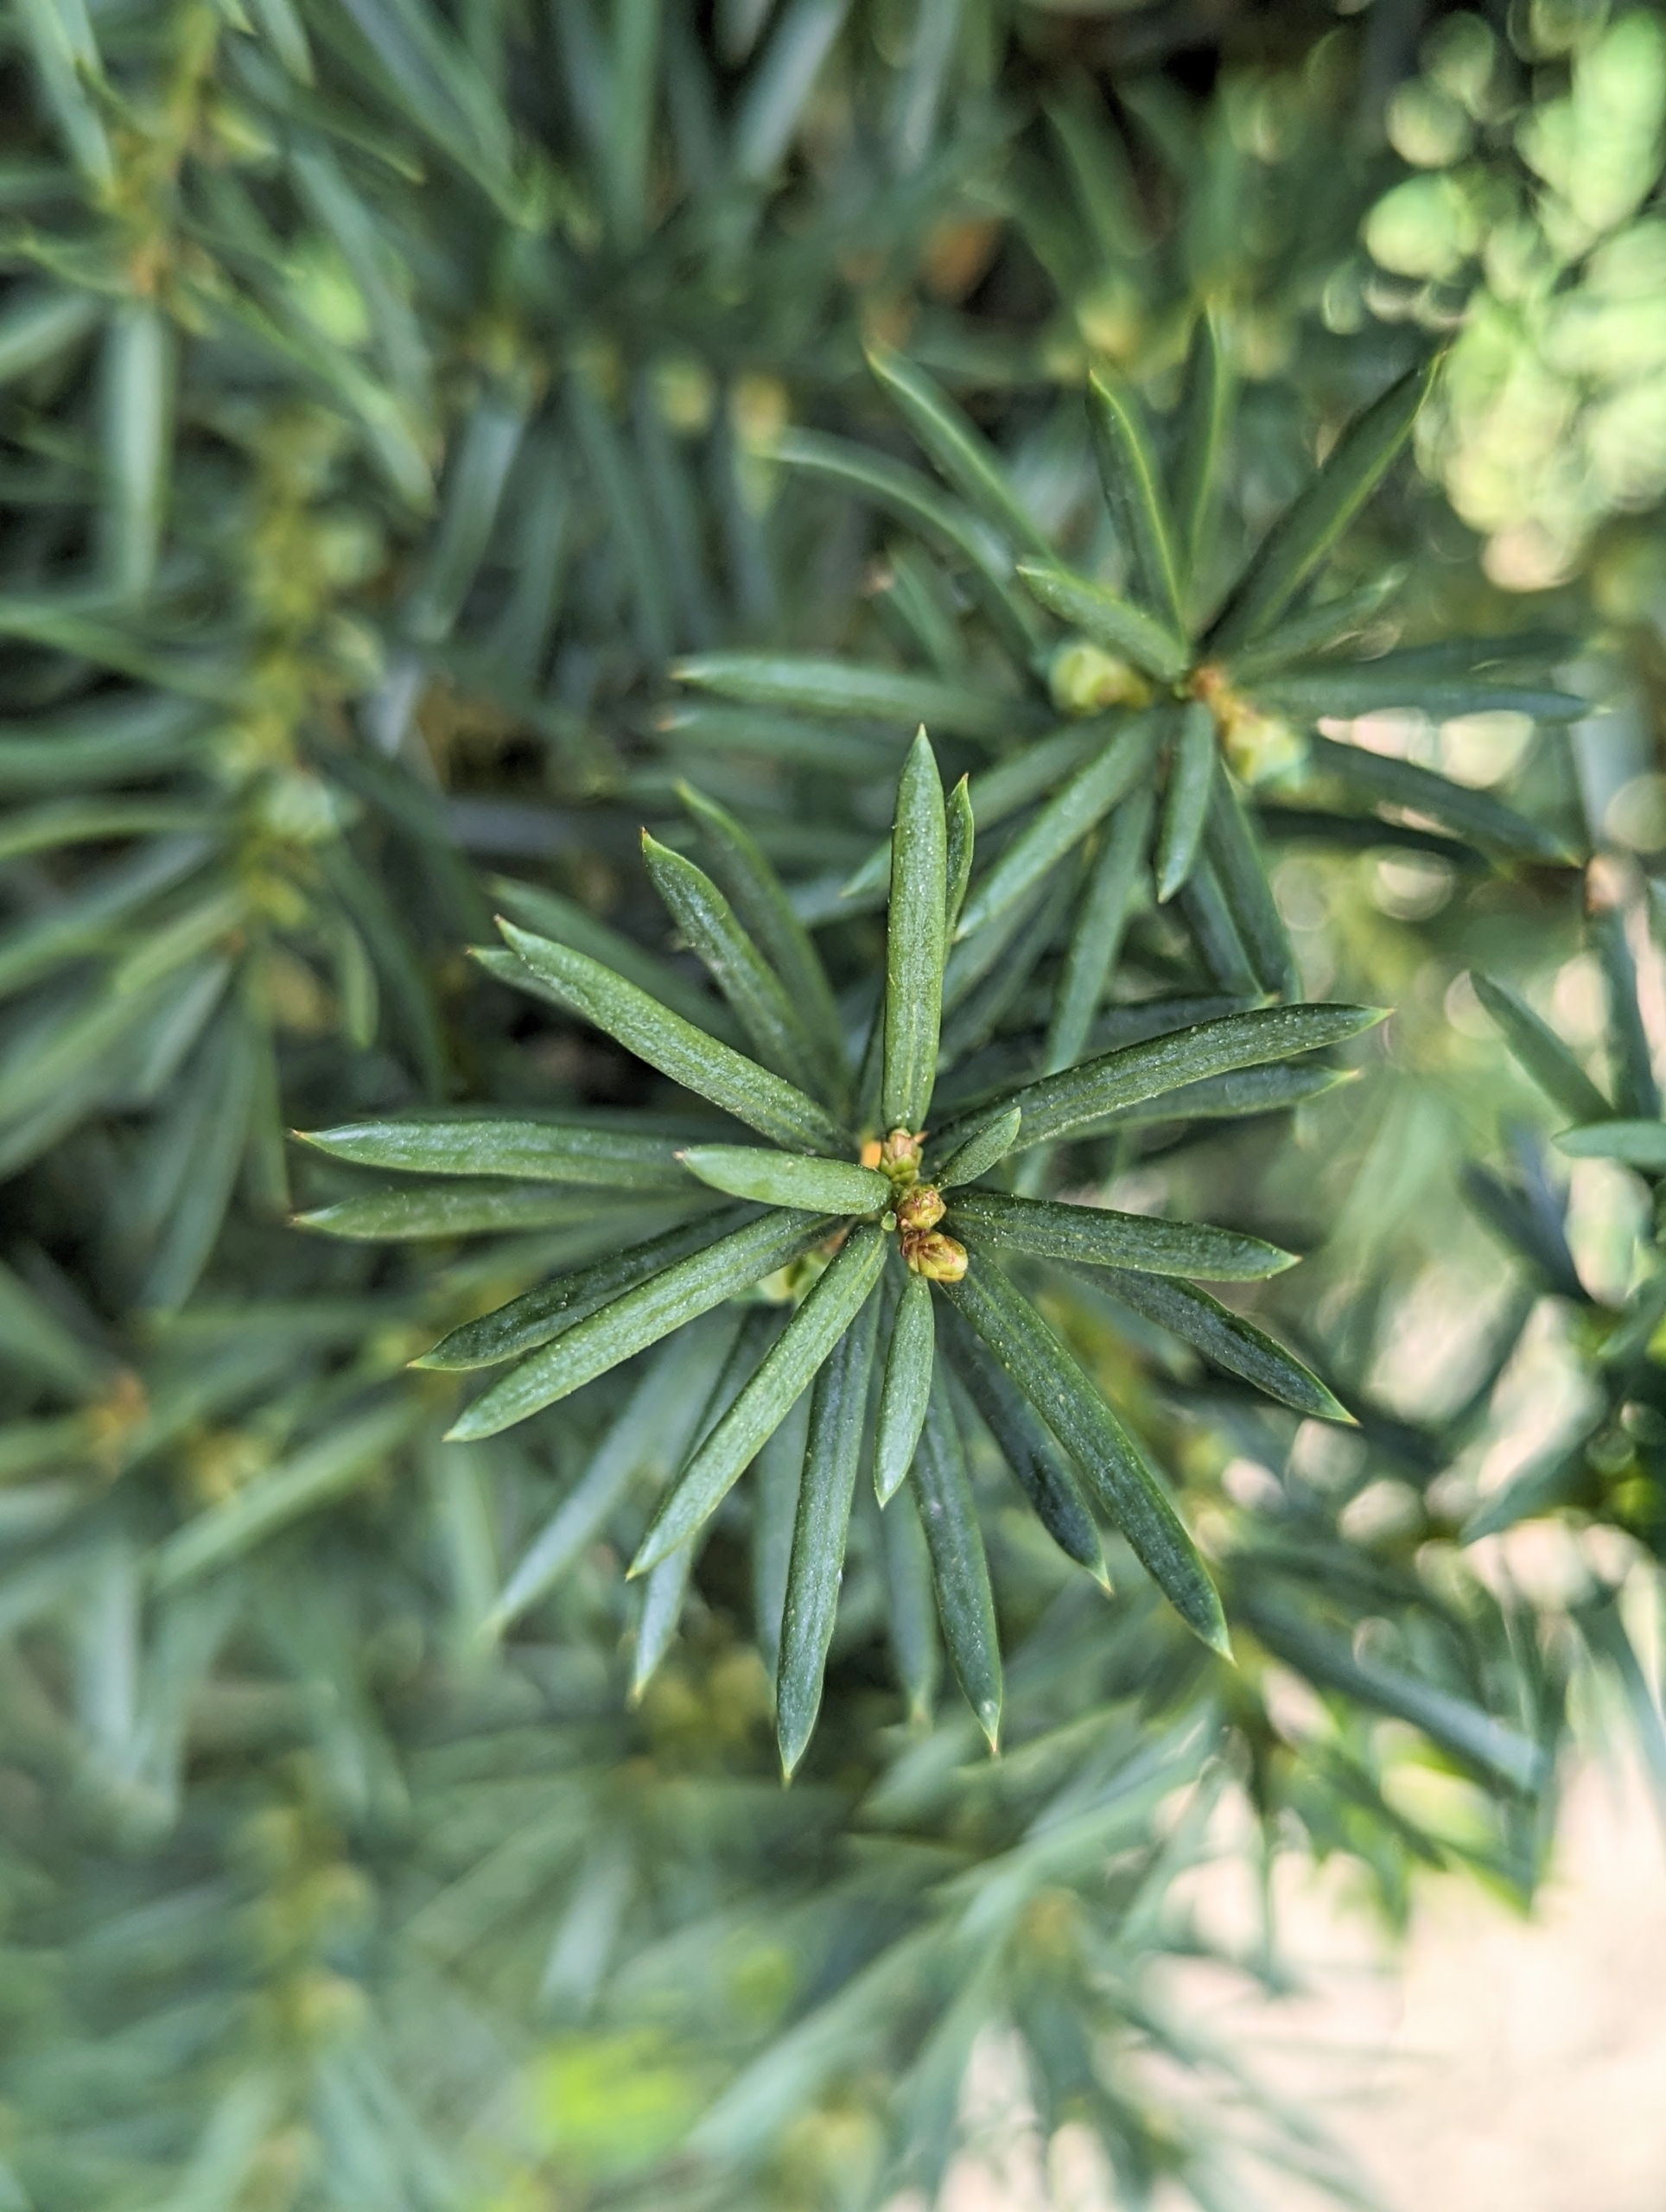
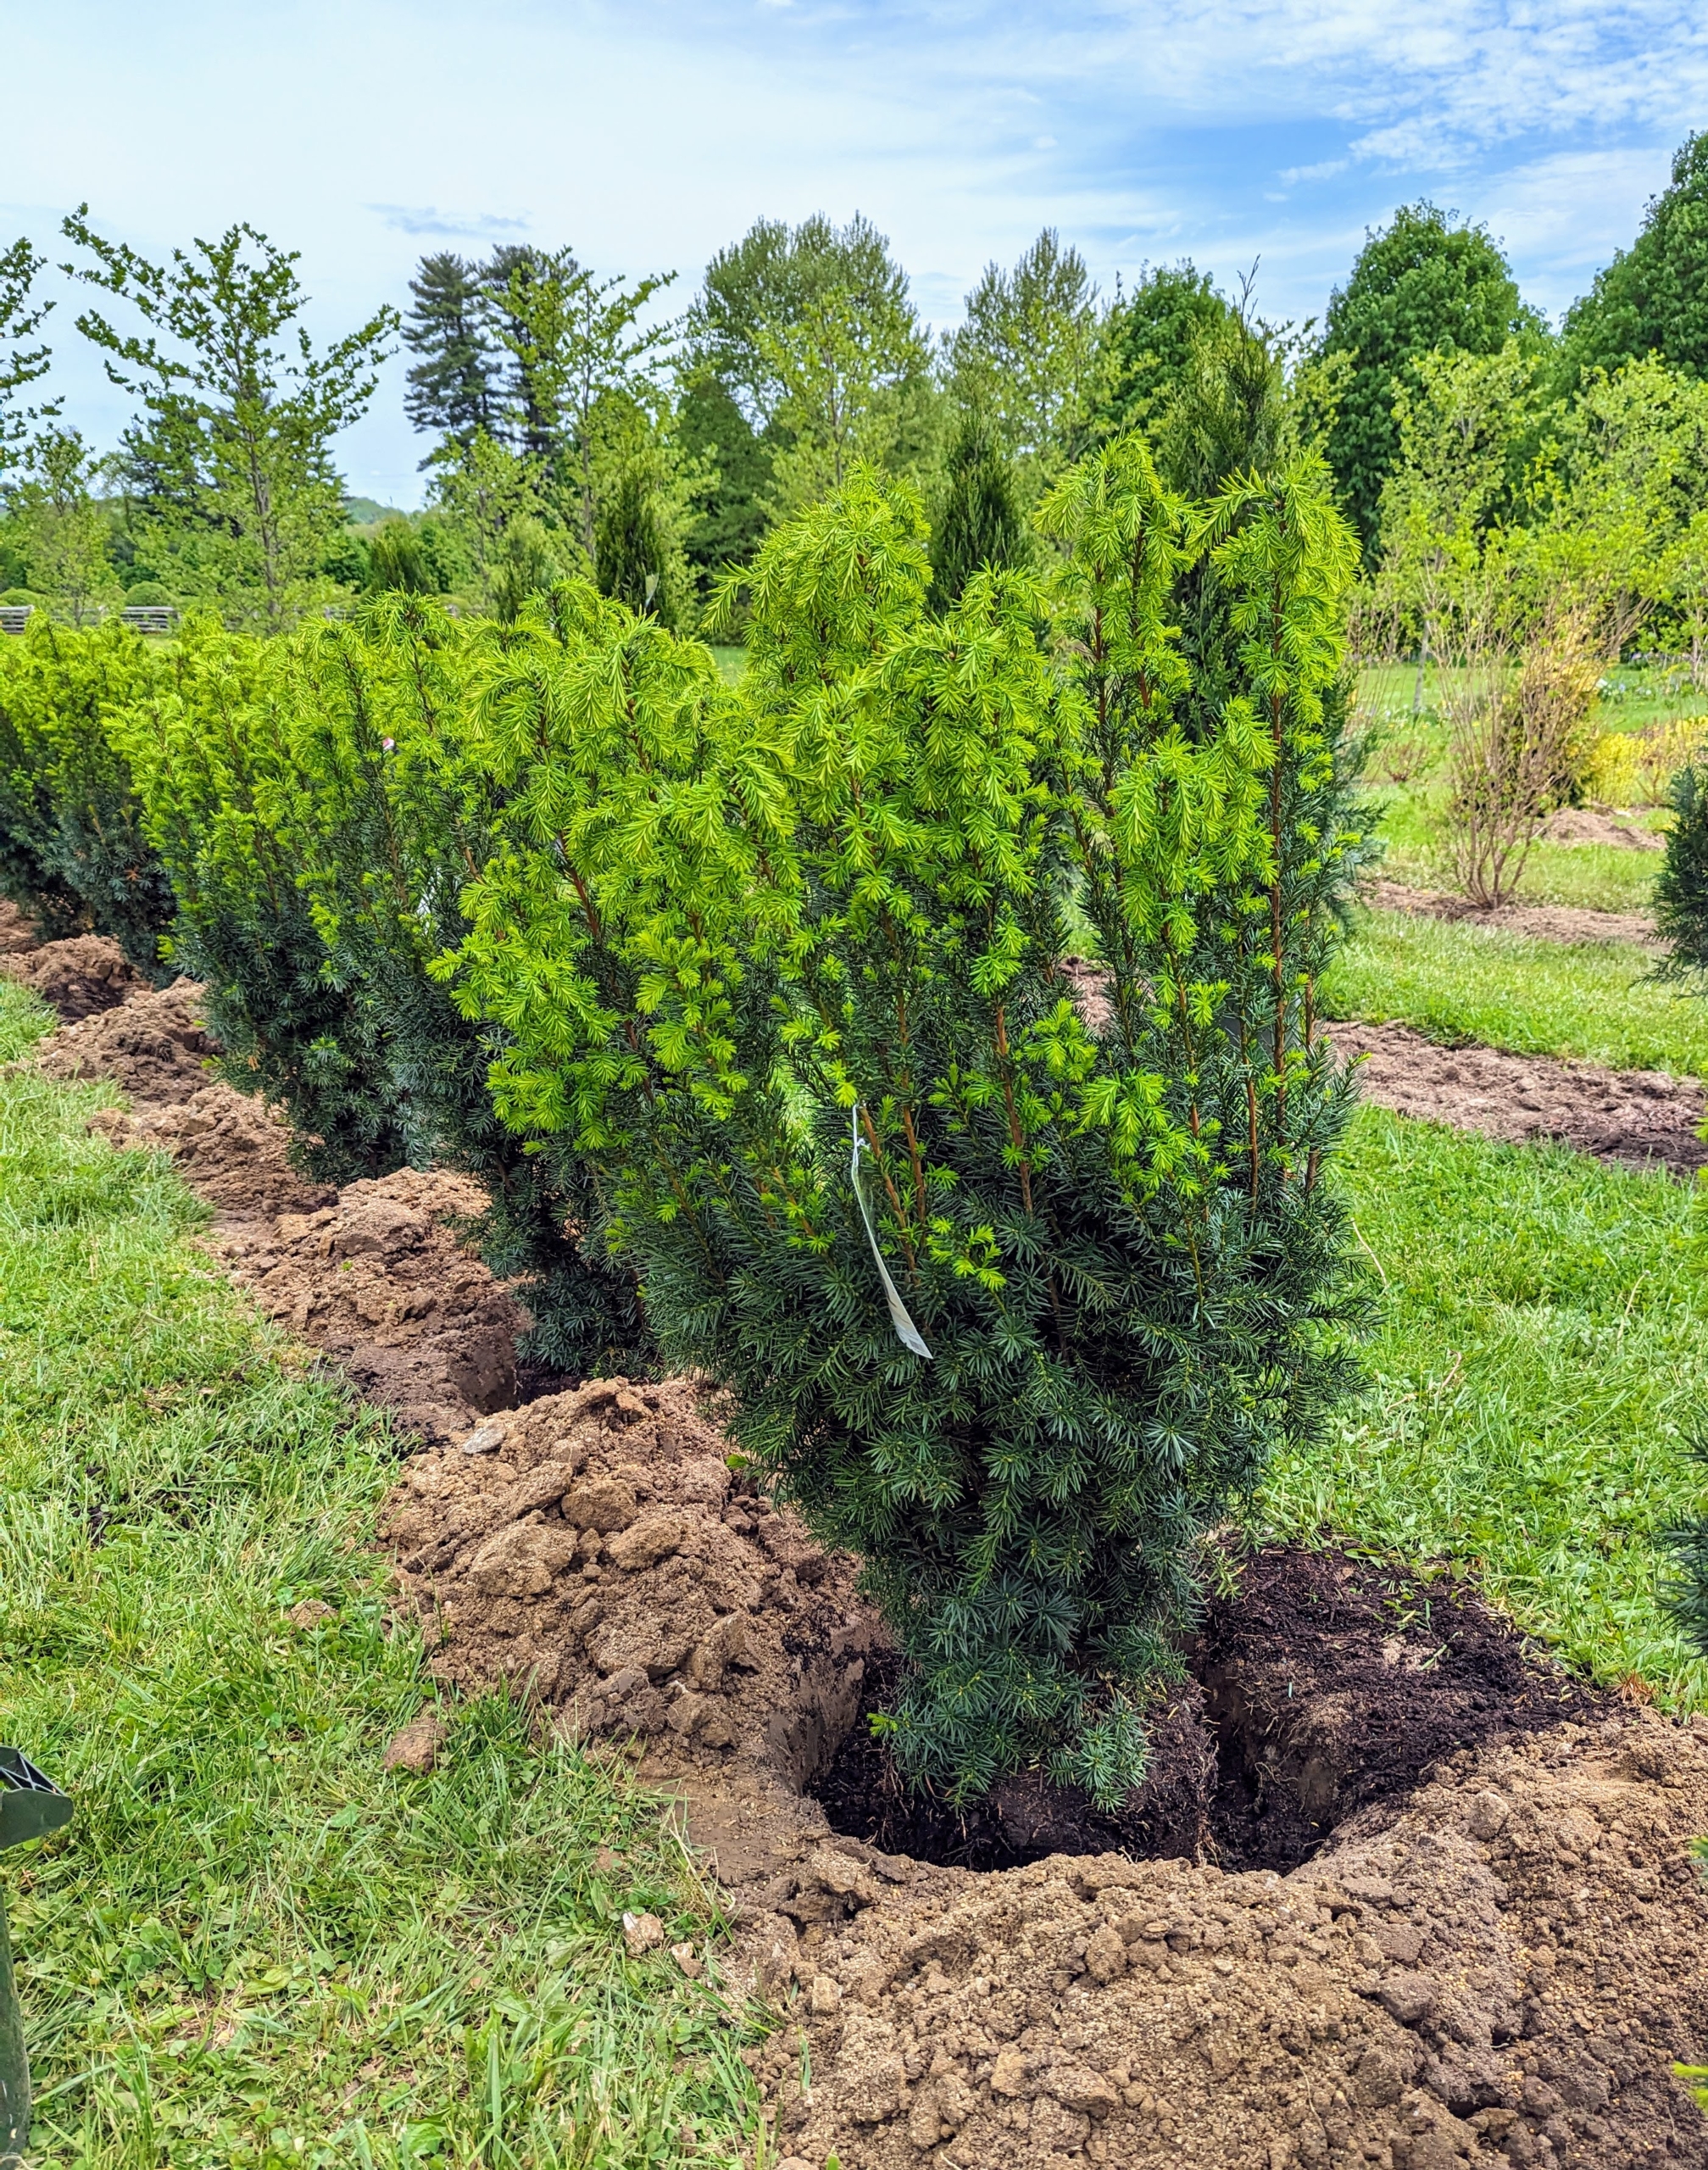
We’re also planting Hick’s Yews. Yews are known for being slow-growing, but in the right conditions, yew hedge trees can grow about a foot per year. These yews are spaced closely, so they become a closed hedge in time.
The long, upright-growing branches of Hick’s yew have dense, glossy, green foliage that naturally forms a narrow habit.
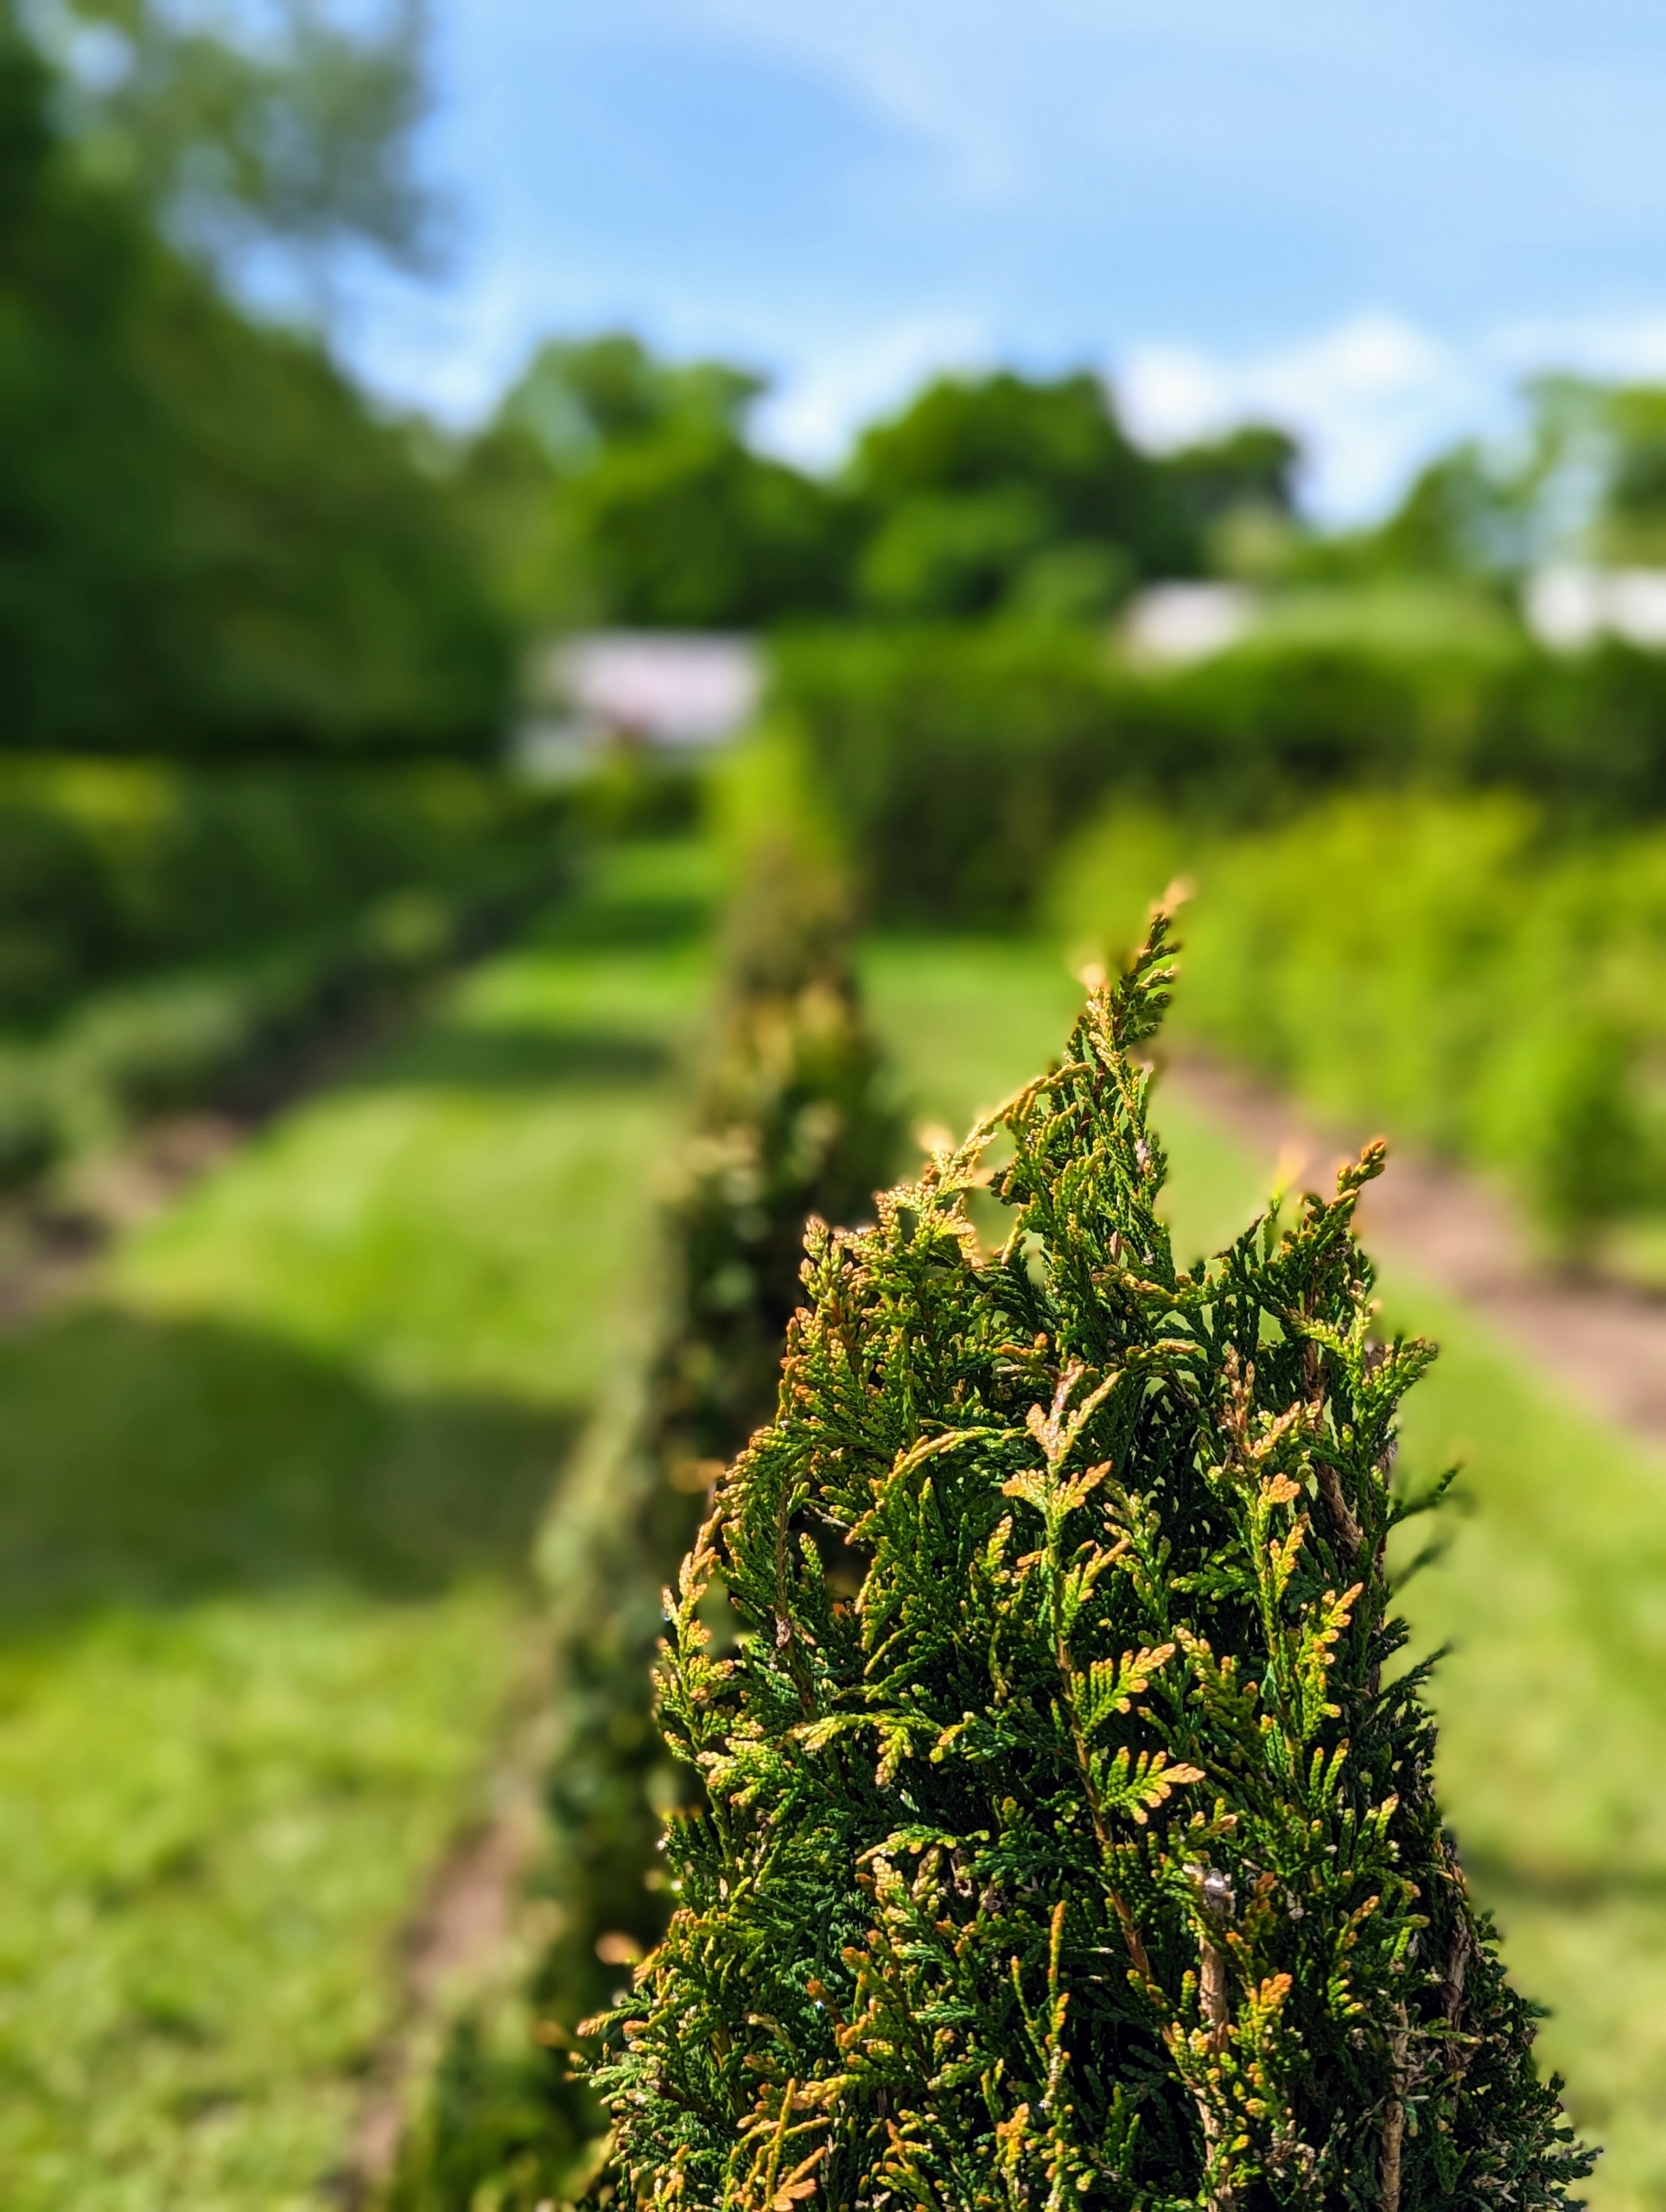
This is Tight Squeeze Western red cedar. This evergreen has a great, compact growth habit that develops into a uniform, narrowly conical tree with shiny foliage.
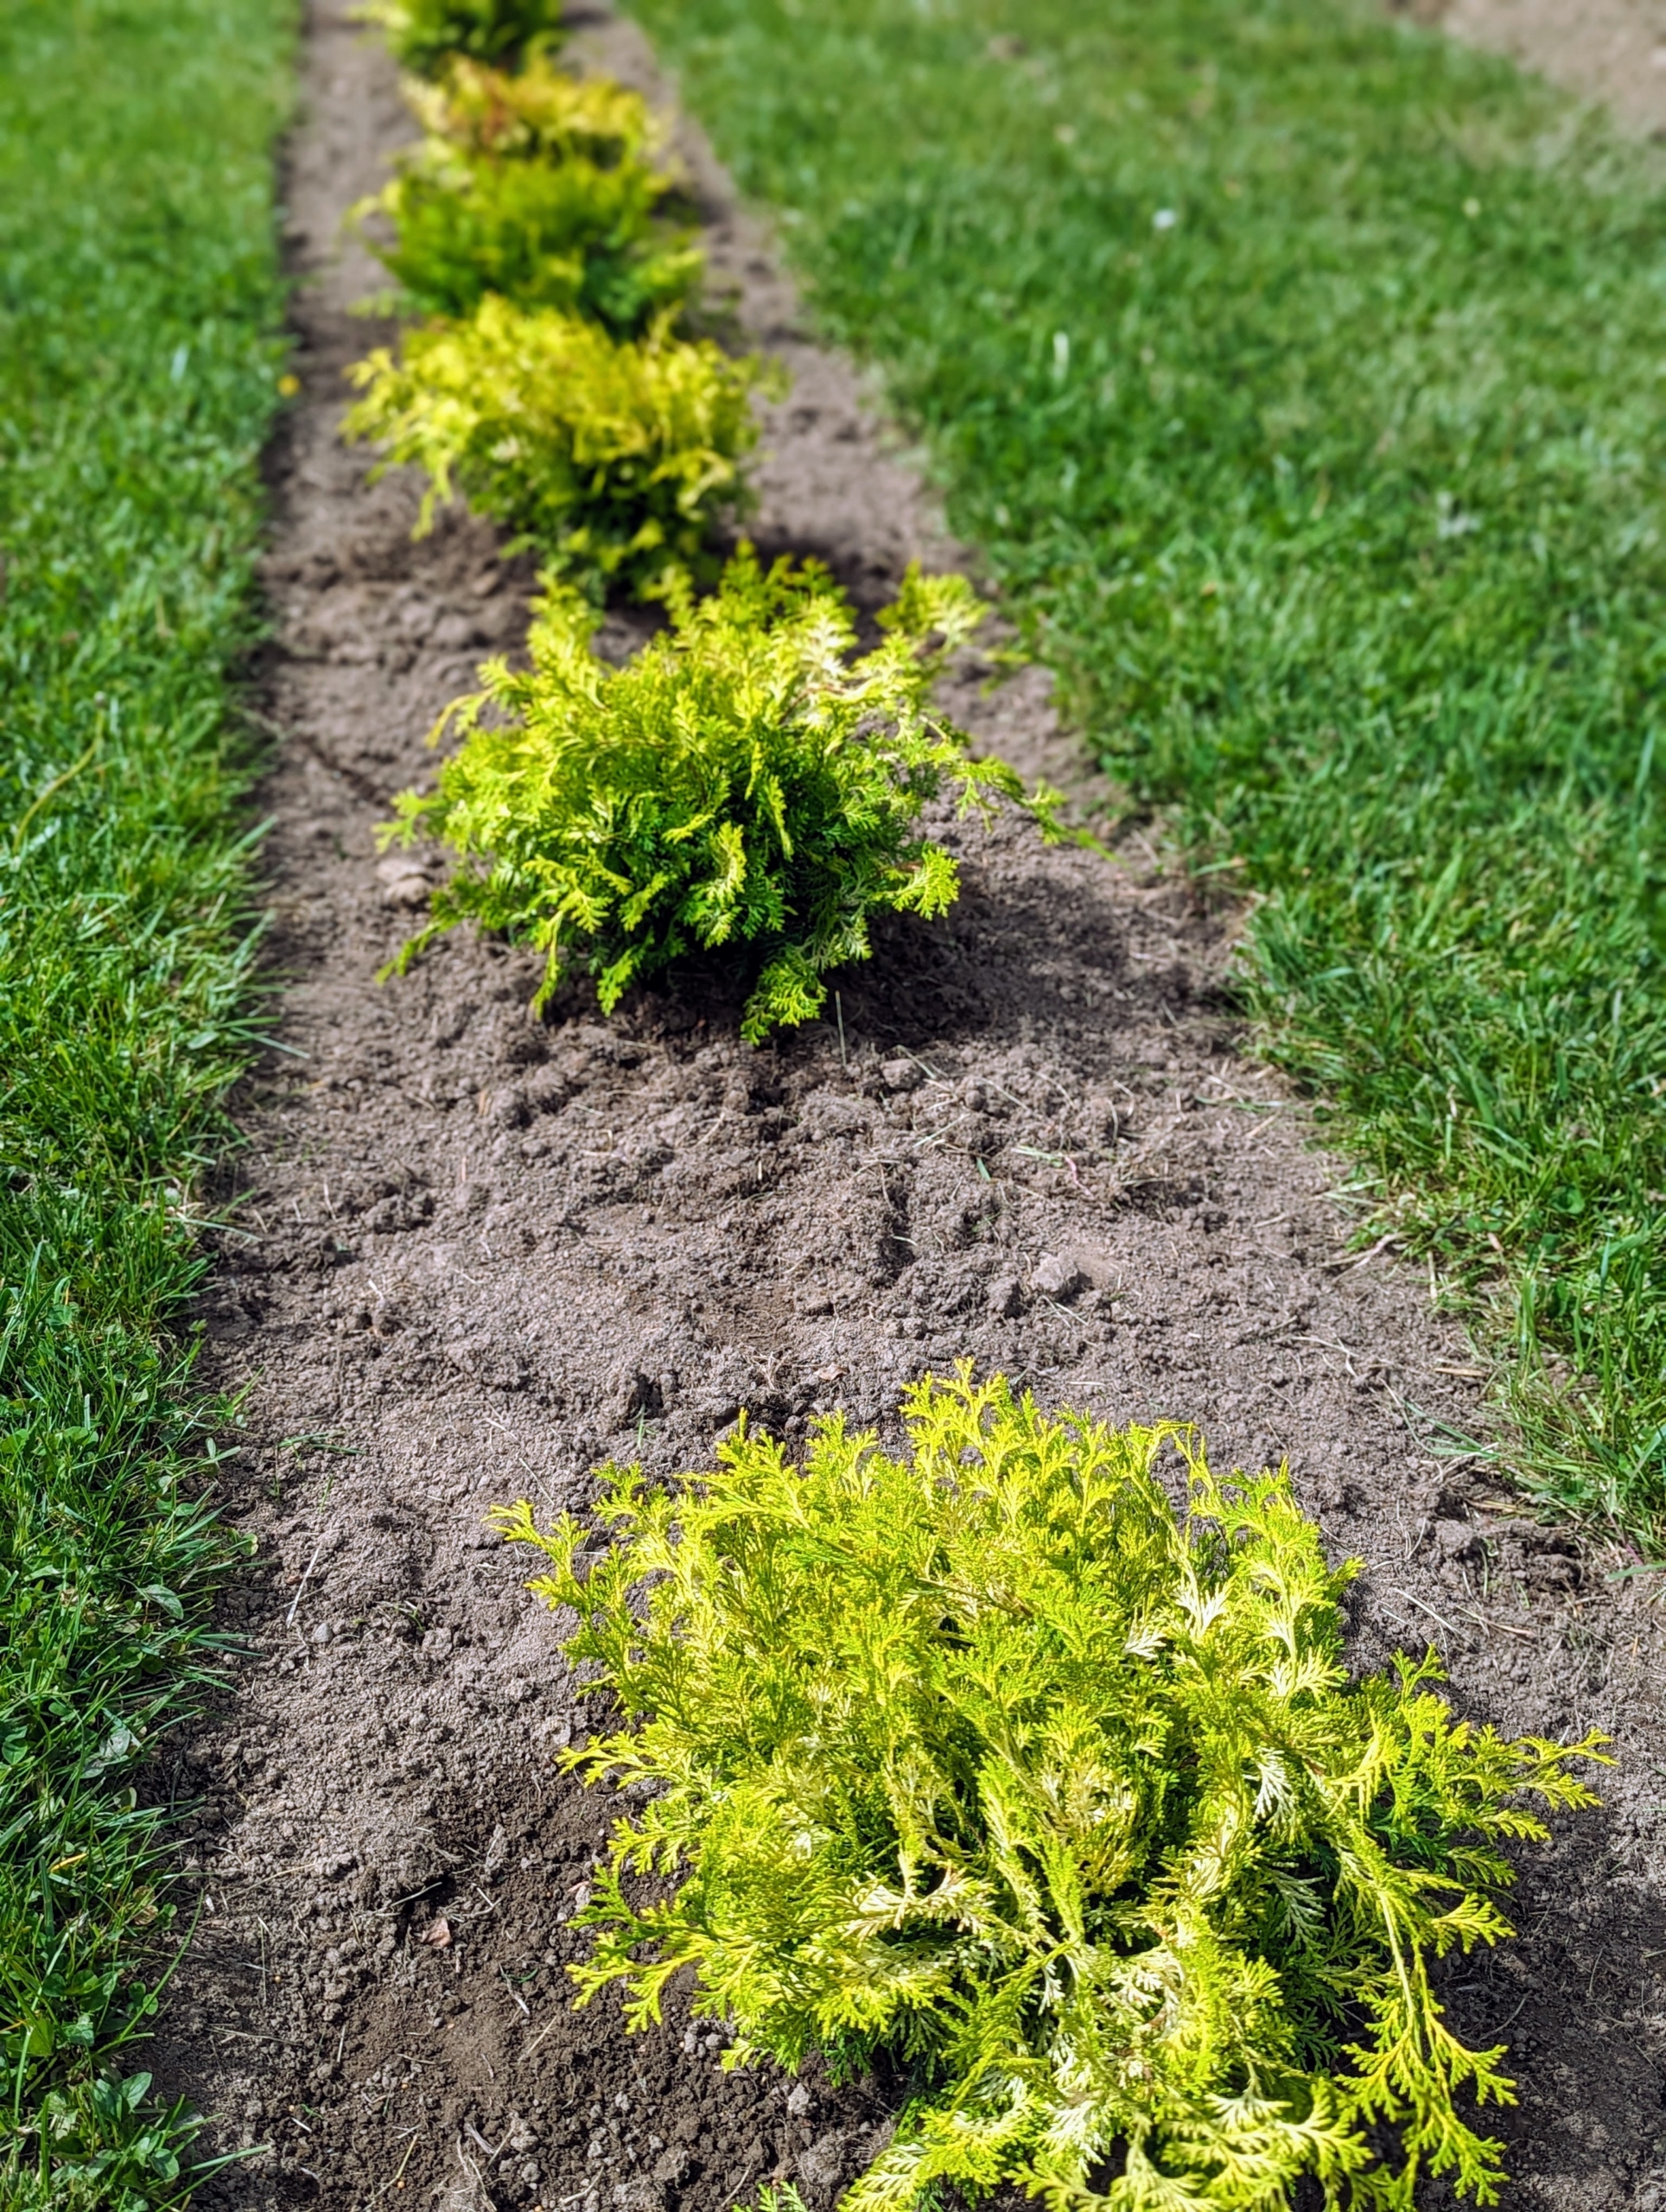
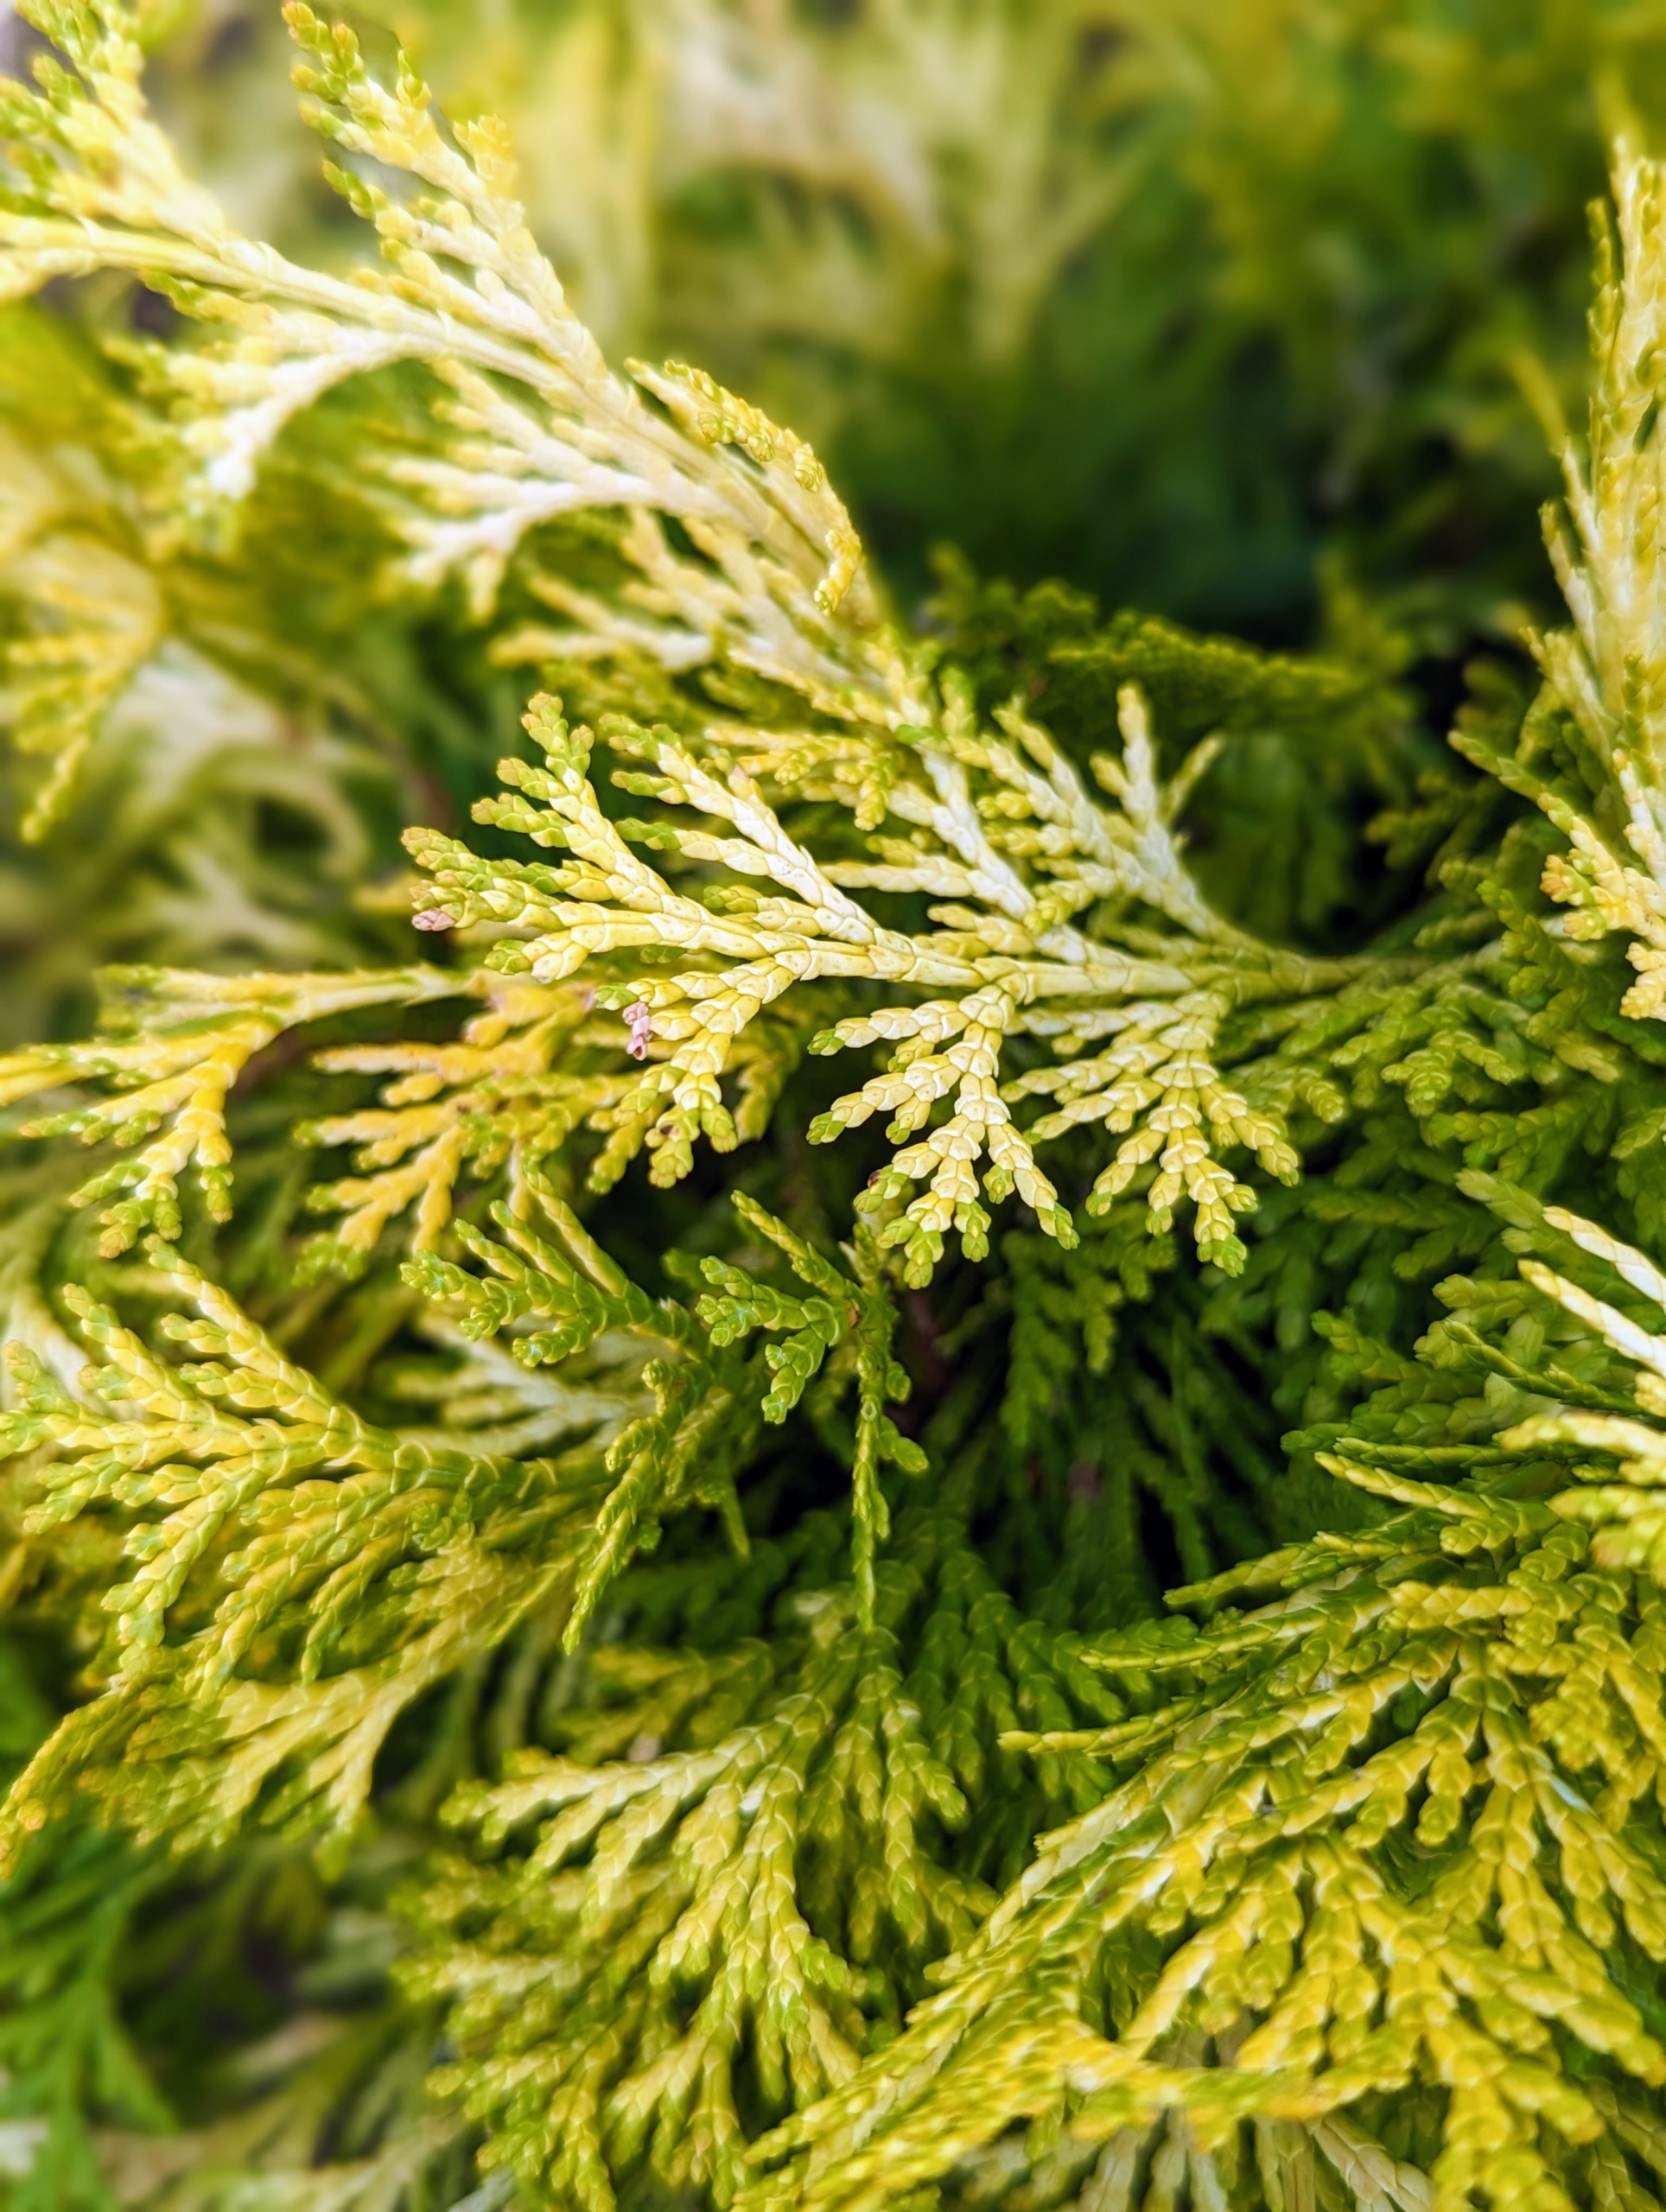
Paul’s Gold threadleaf false cypress, Chamaecyparis pisifera, has year-round golden green foliage and is a great contrast to the darker green specimens.
The soft sprays of Paul’s Gold threadleaf false cypress emerges yellow in the spring and retains its gold color throughout the winter.
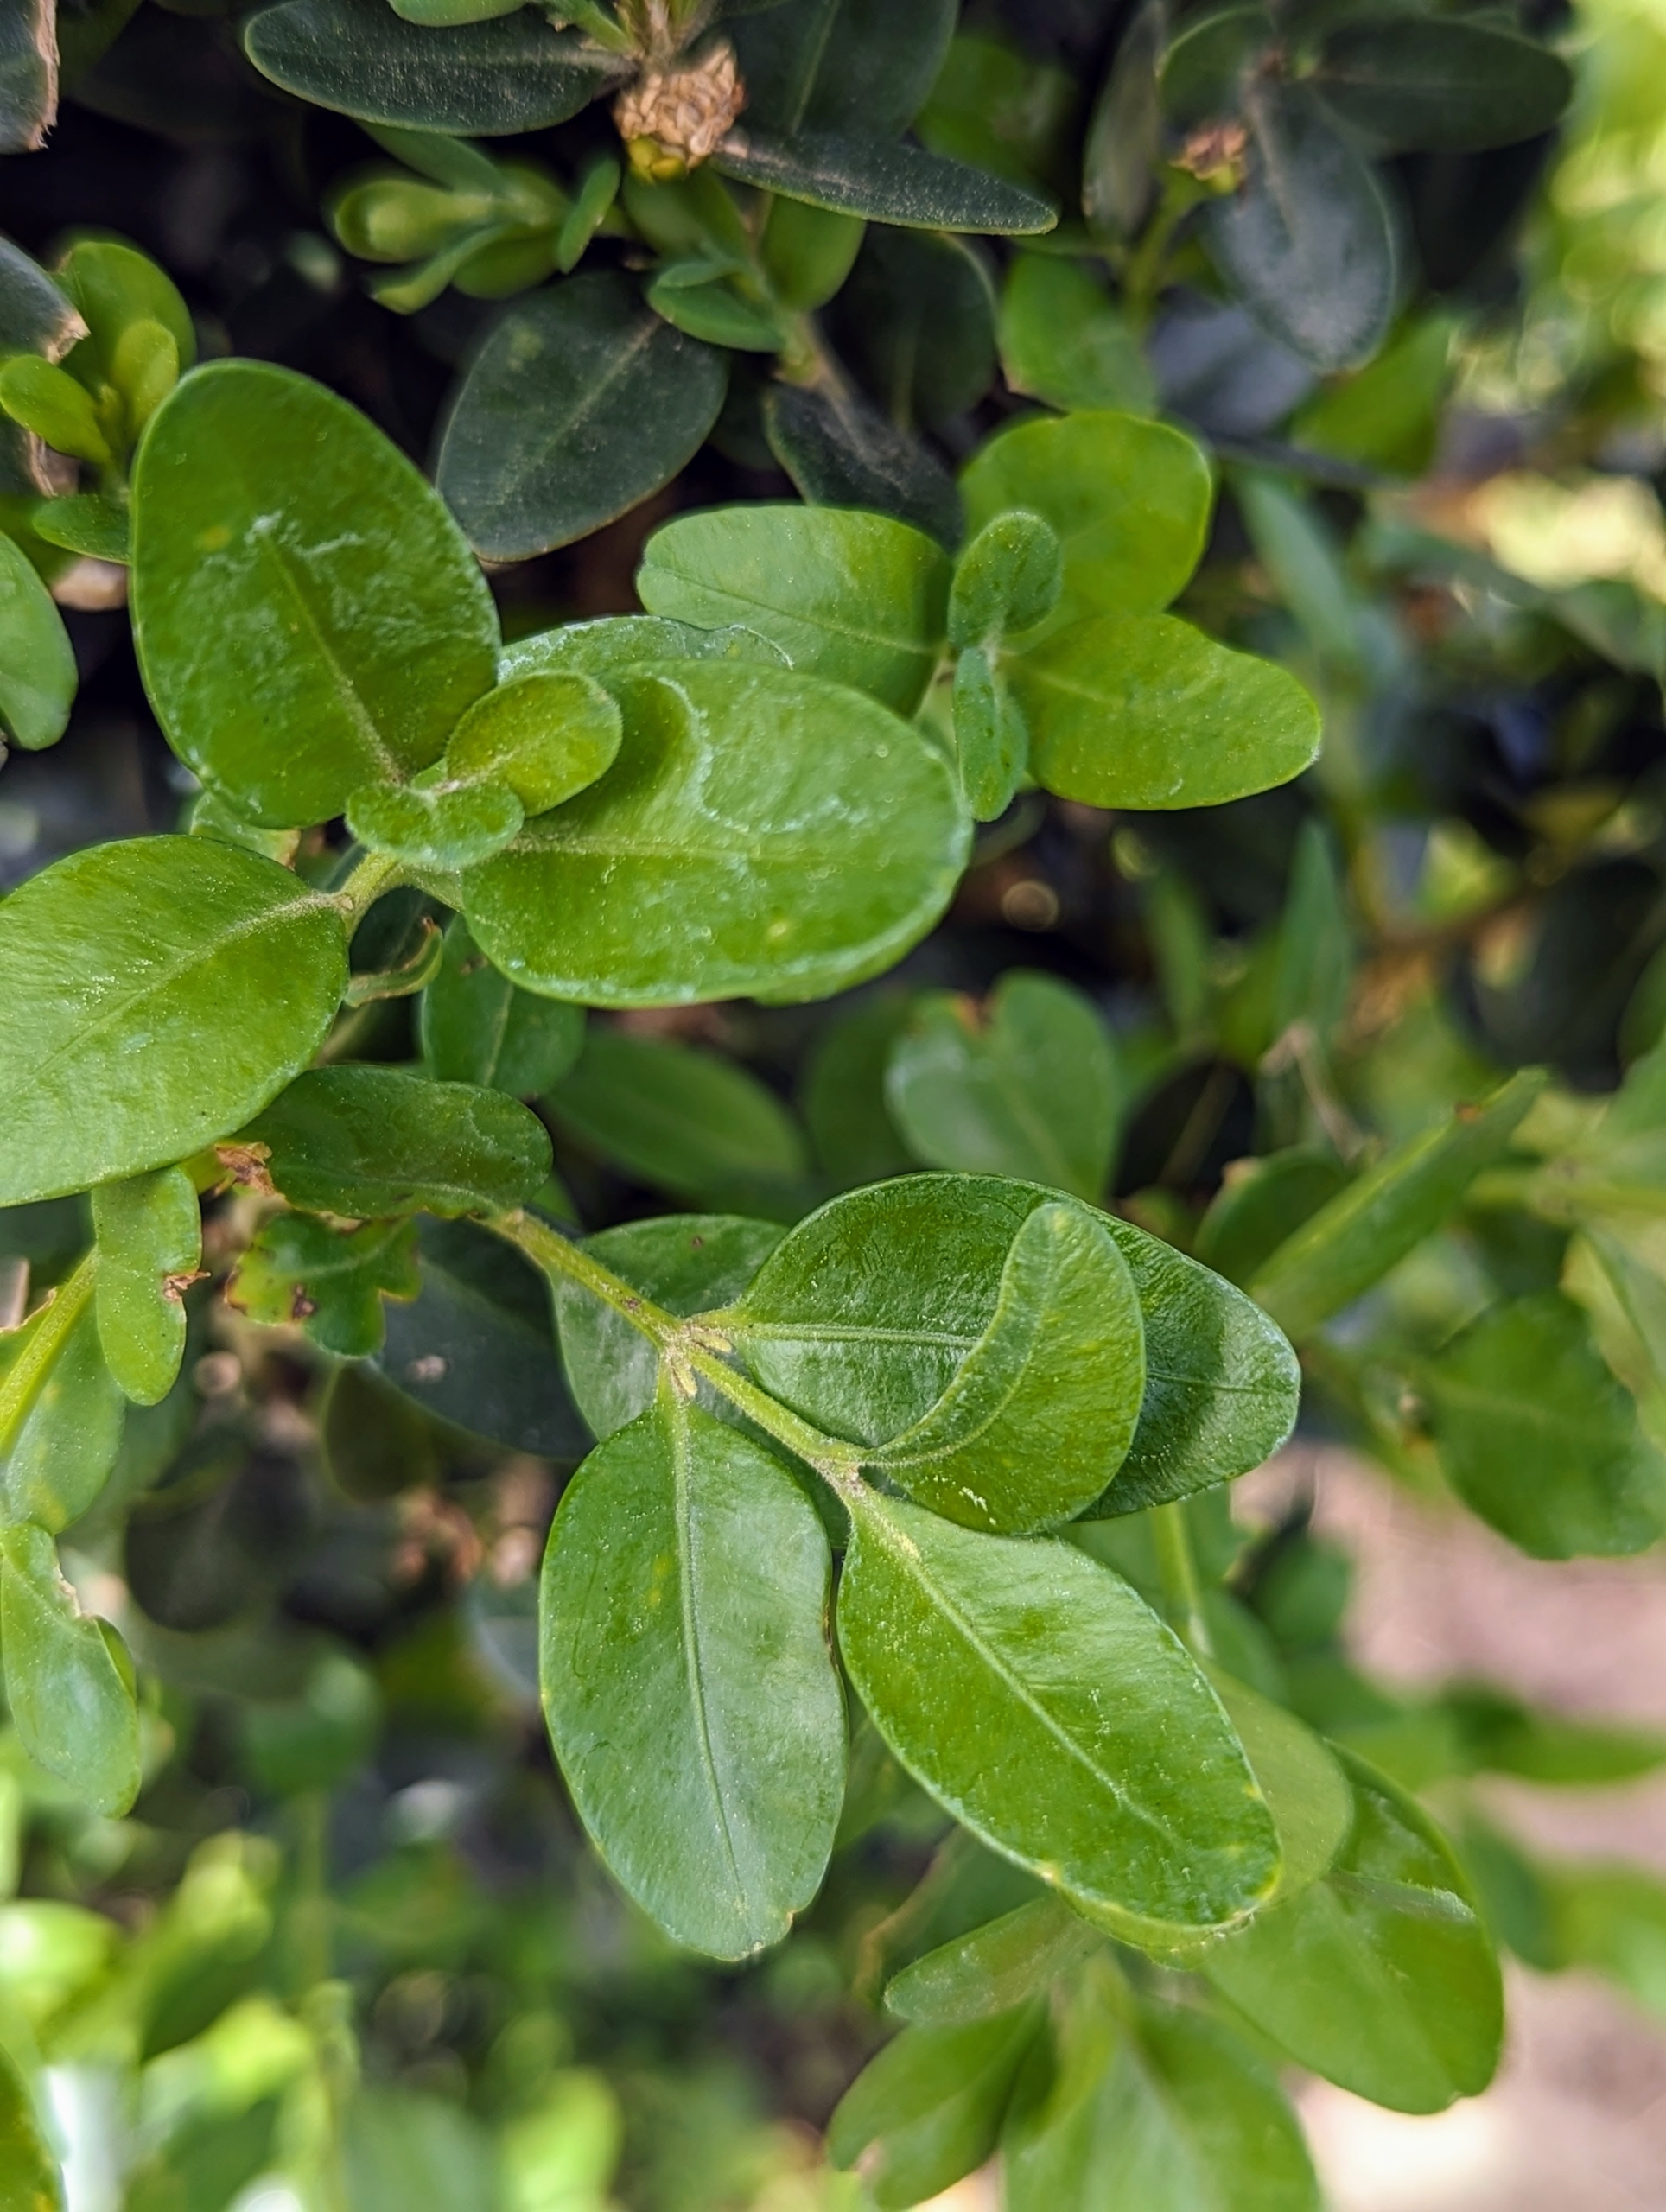
Green Tower boxwood is a nice evergreen hedge for tight spaces because of its upright and narrow growth habit.
It features lustrous dark green leaves with lighter green undersides.
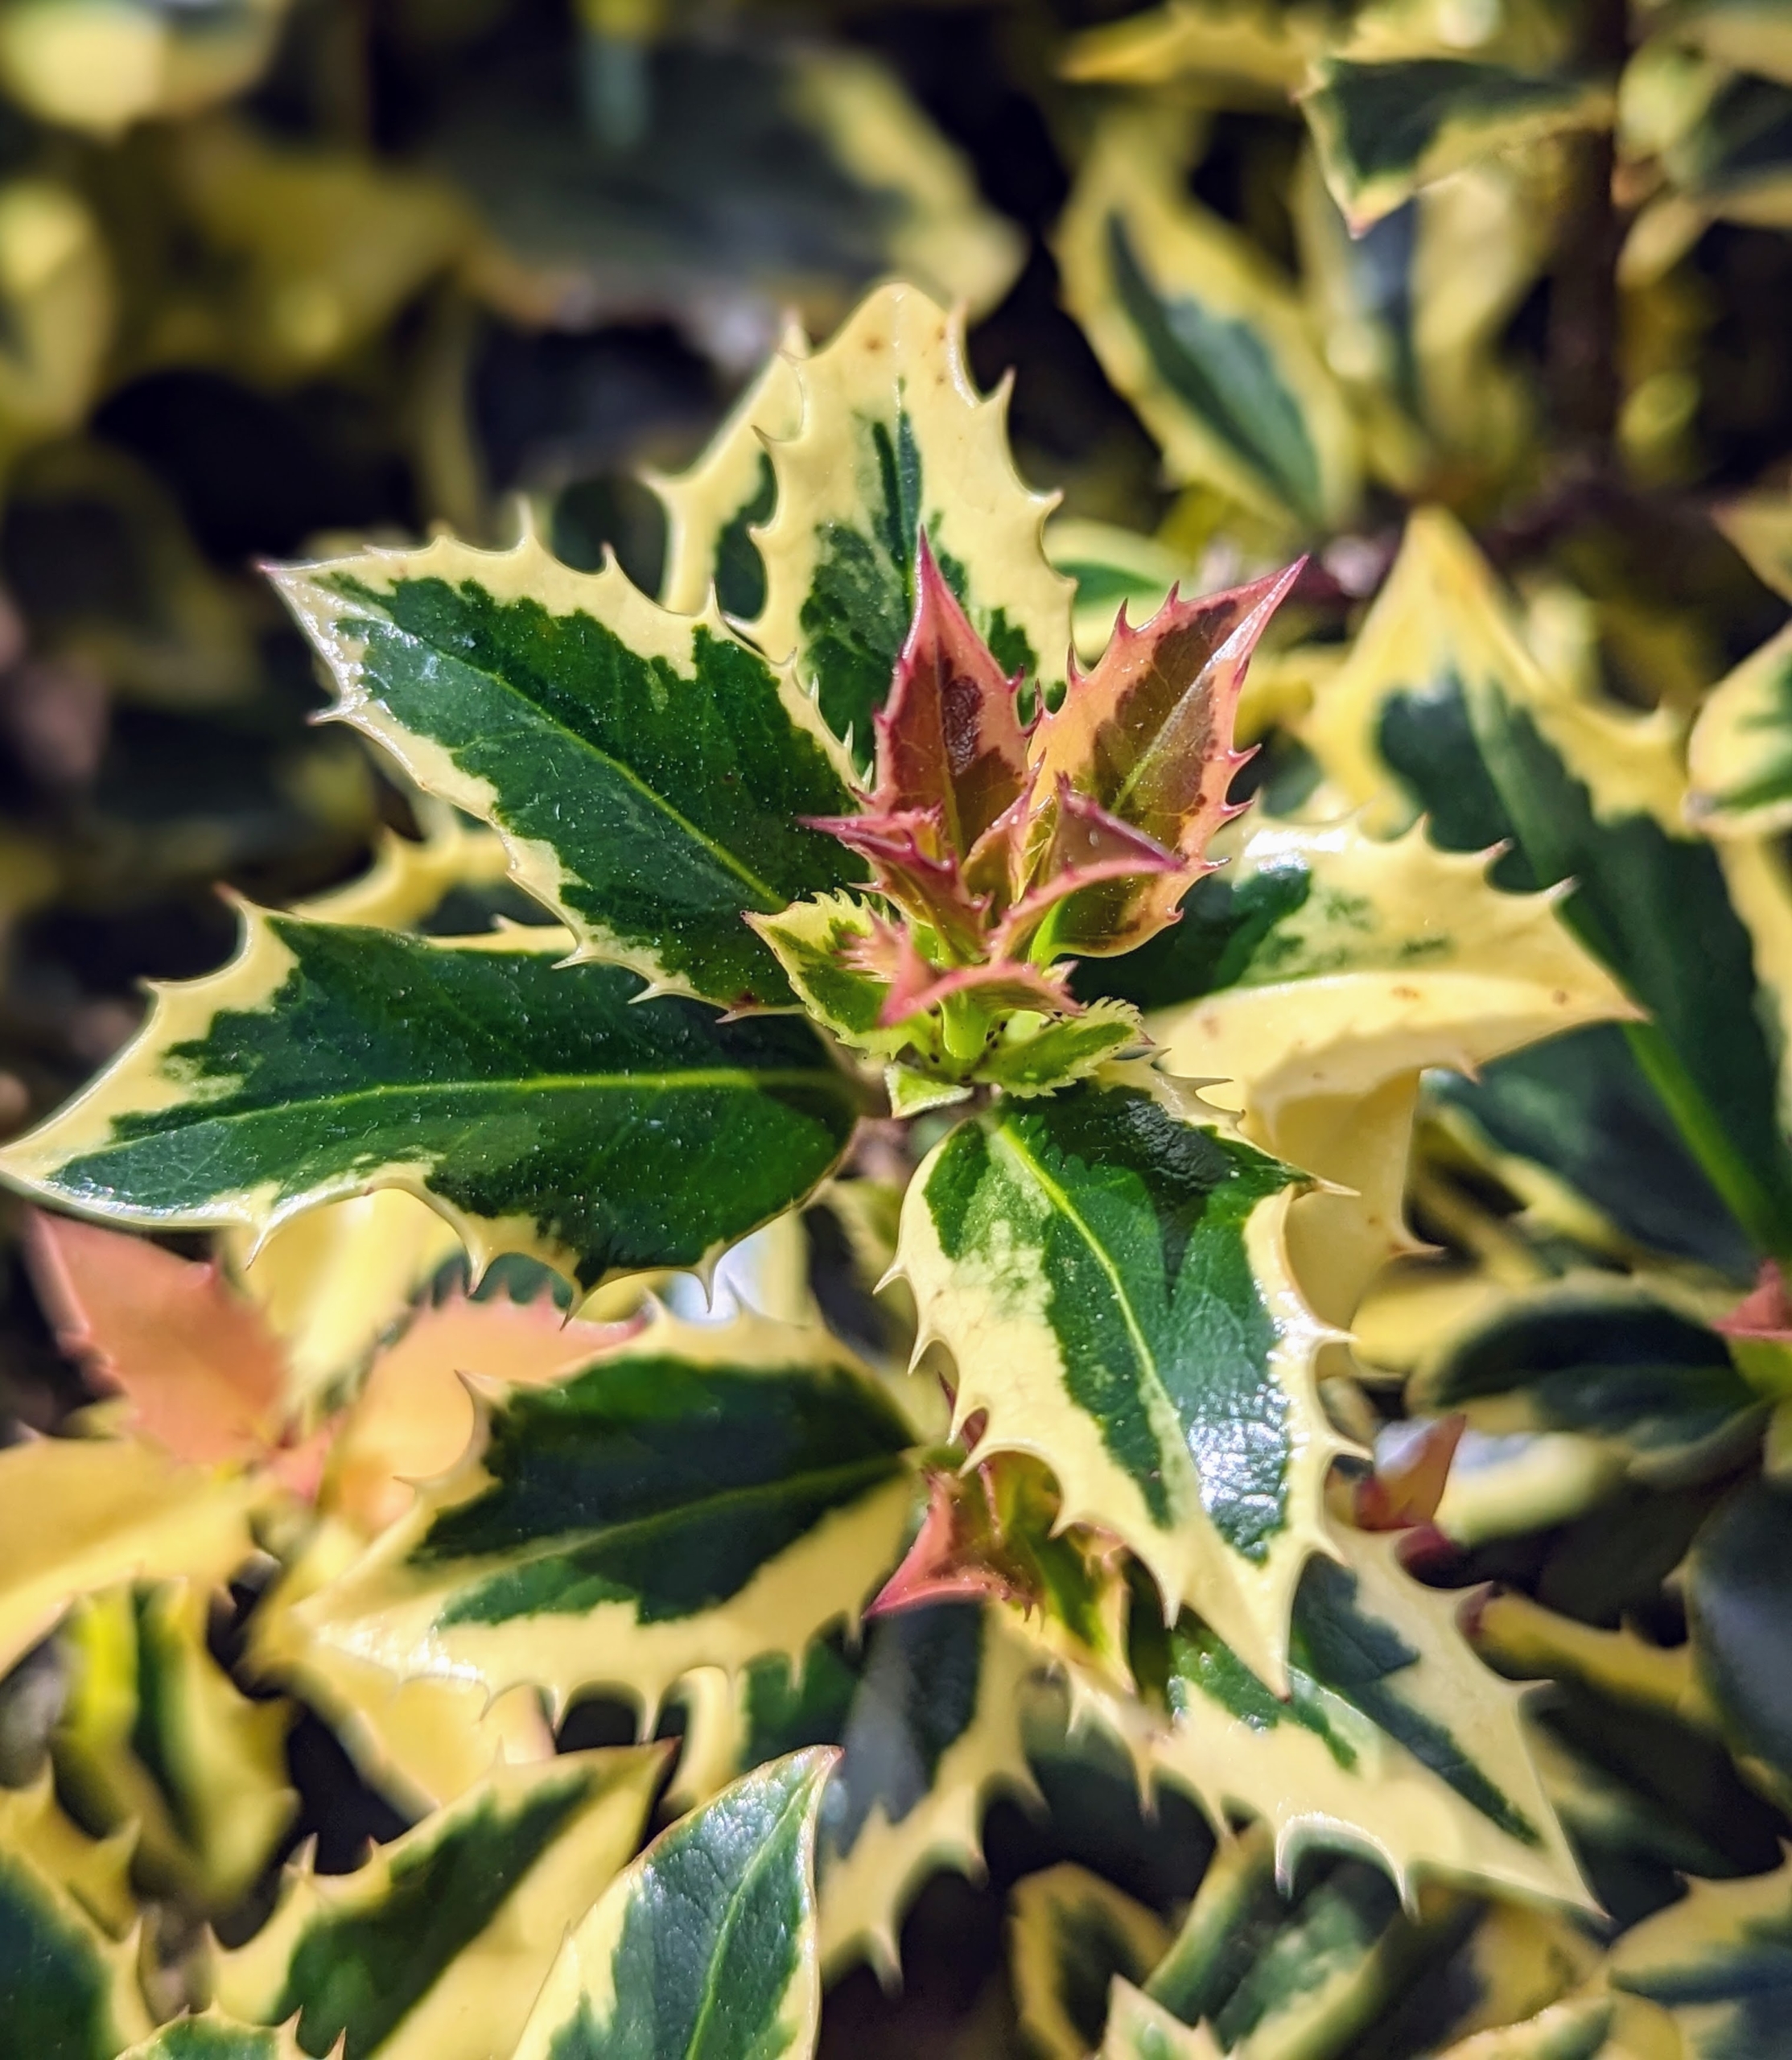
Gold Coast English holly is a small evergreen shrub that holds many branches of dense, small, toothy, dark green leaves edged in bright golden yellow.
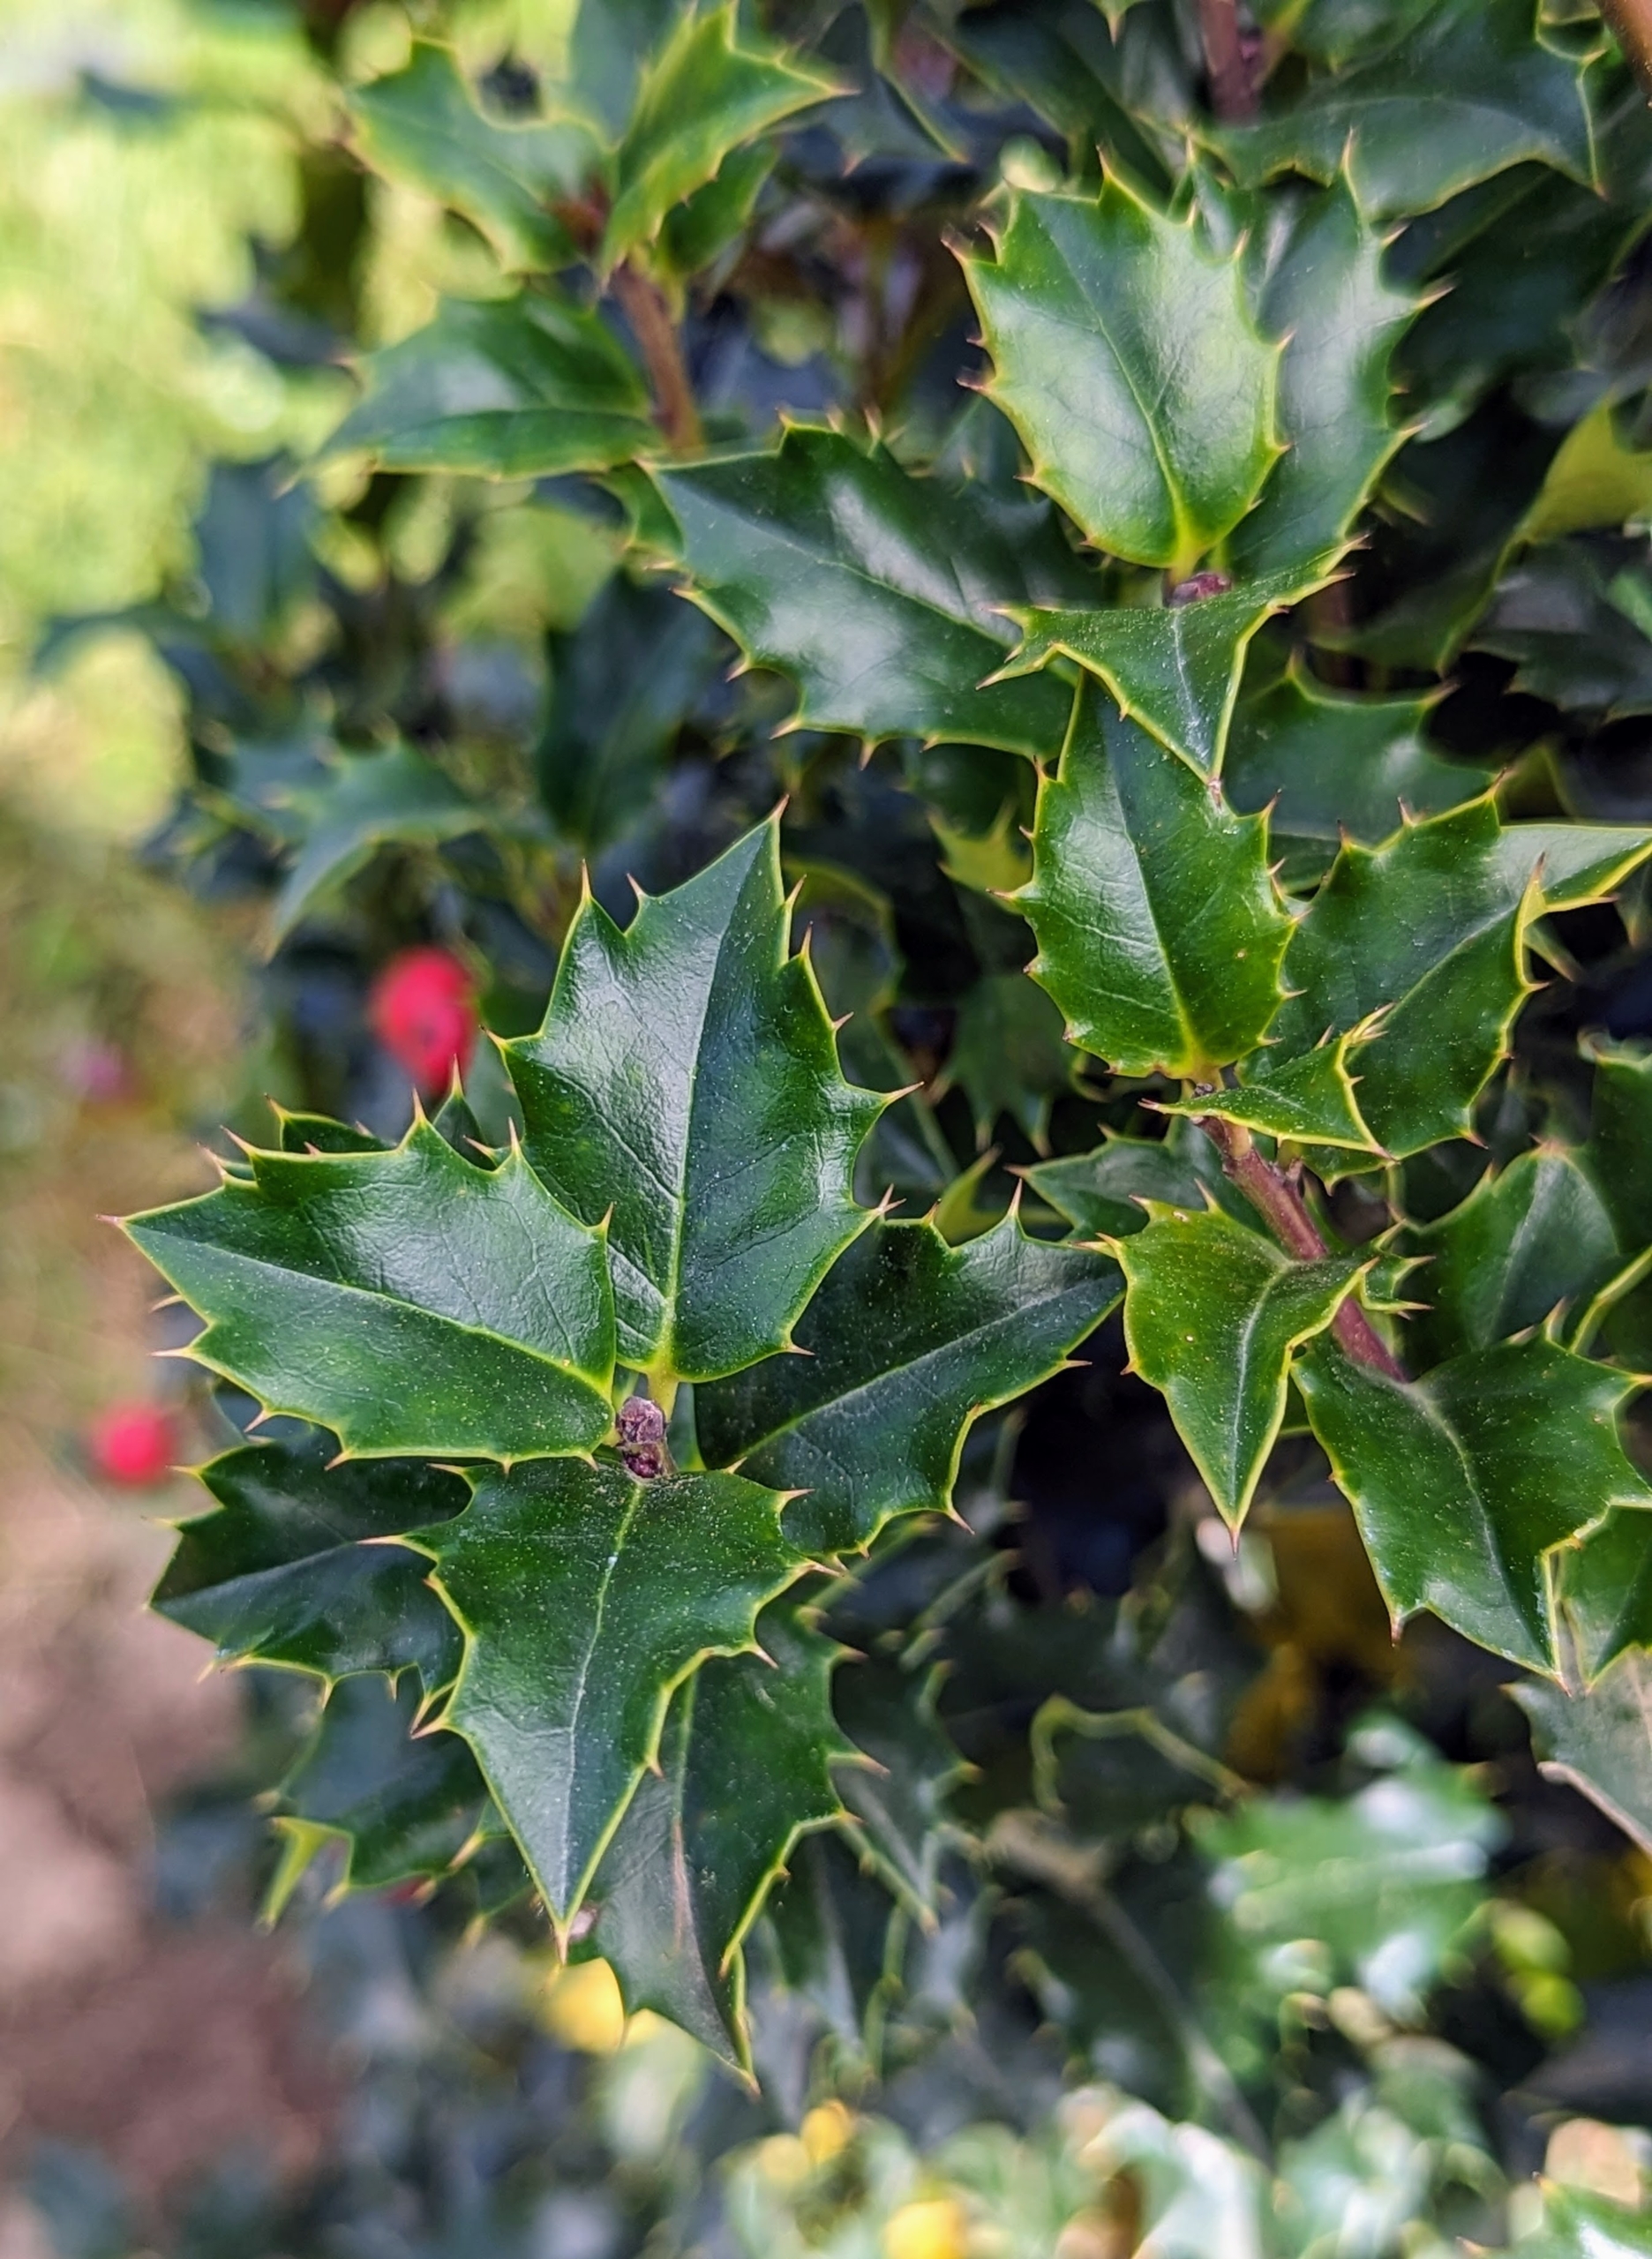
Red Beauty holly has
bright red berries combined with glossy, dark green foliage. Many varieties of holly, Ilex, have compact habits and glistening leaves that’s excellent for hedges, borders, and yes, mazes.
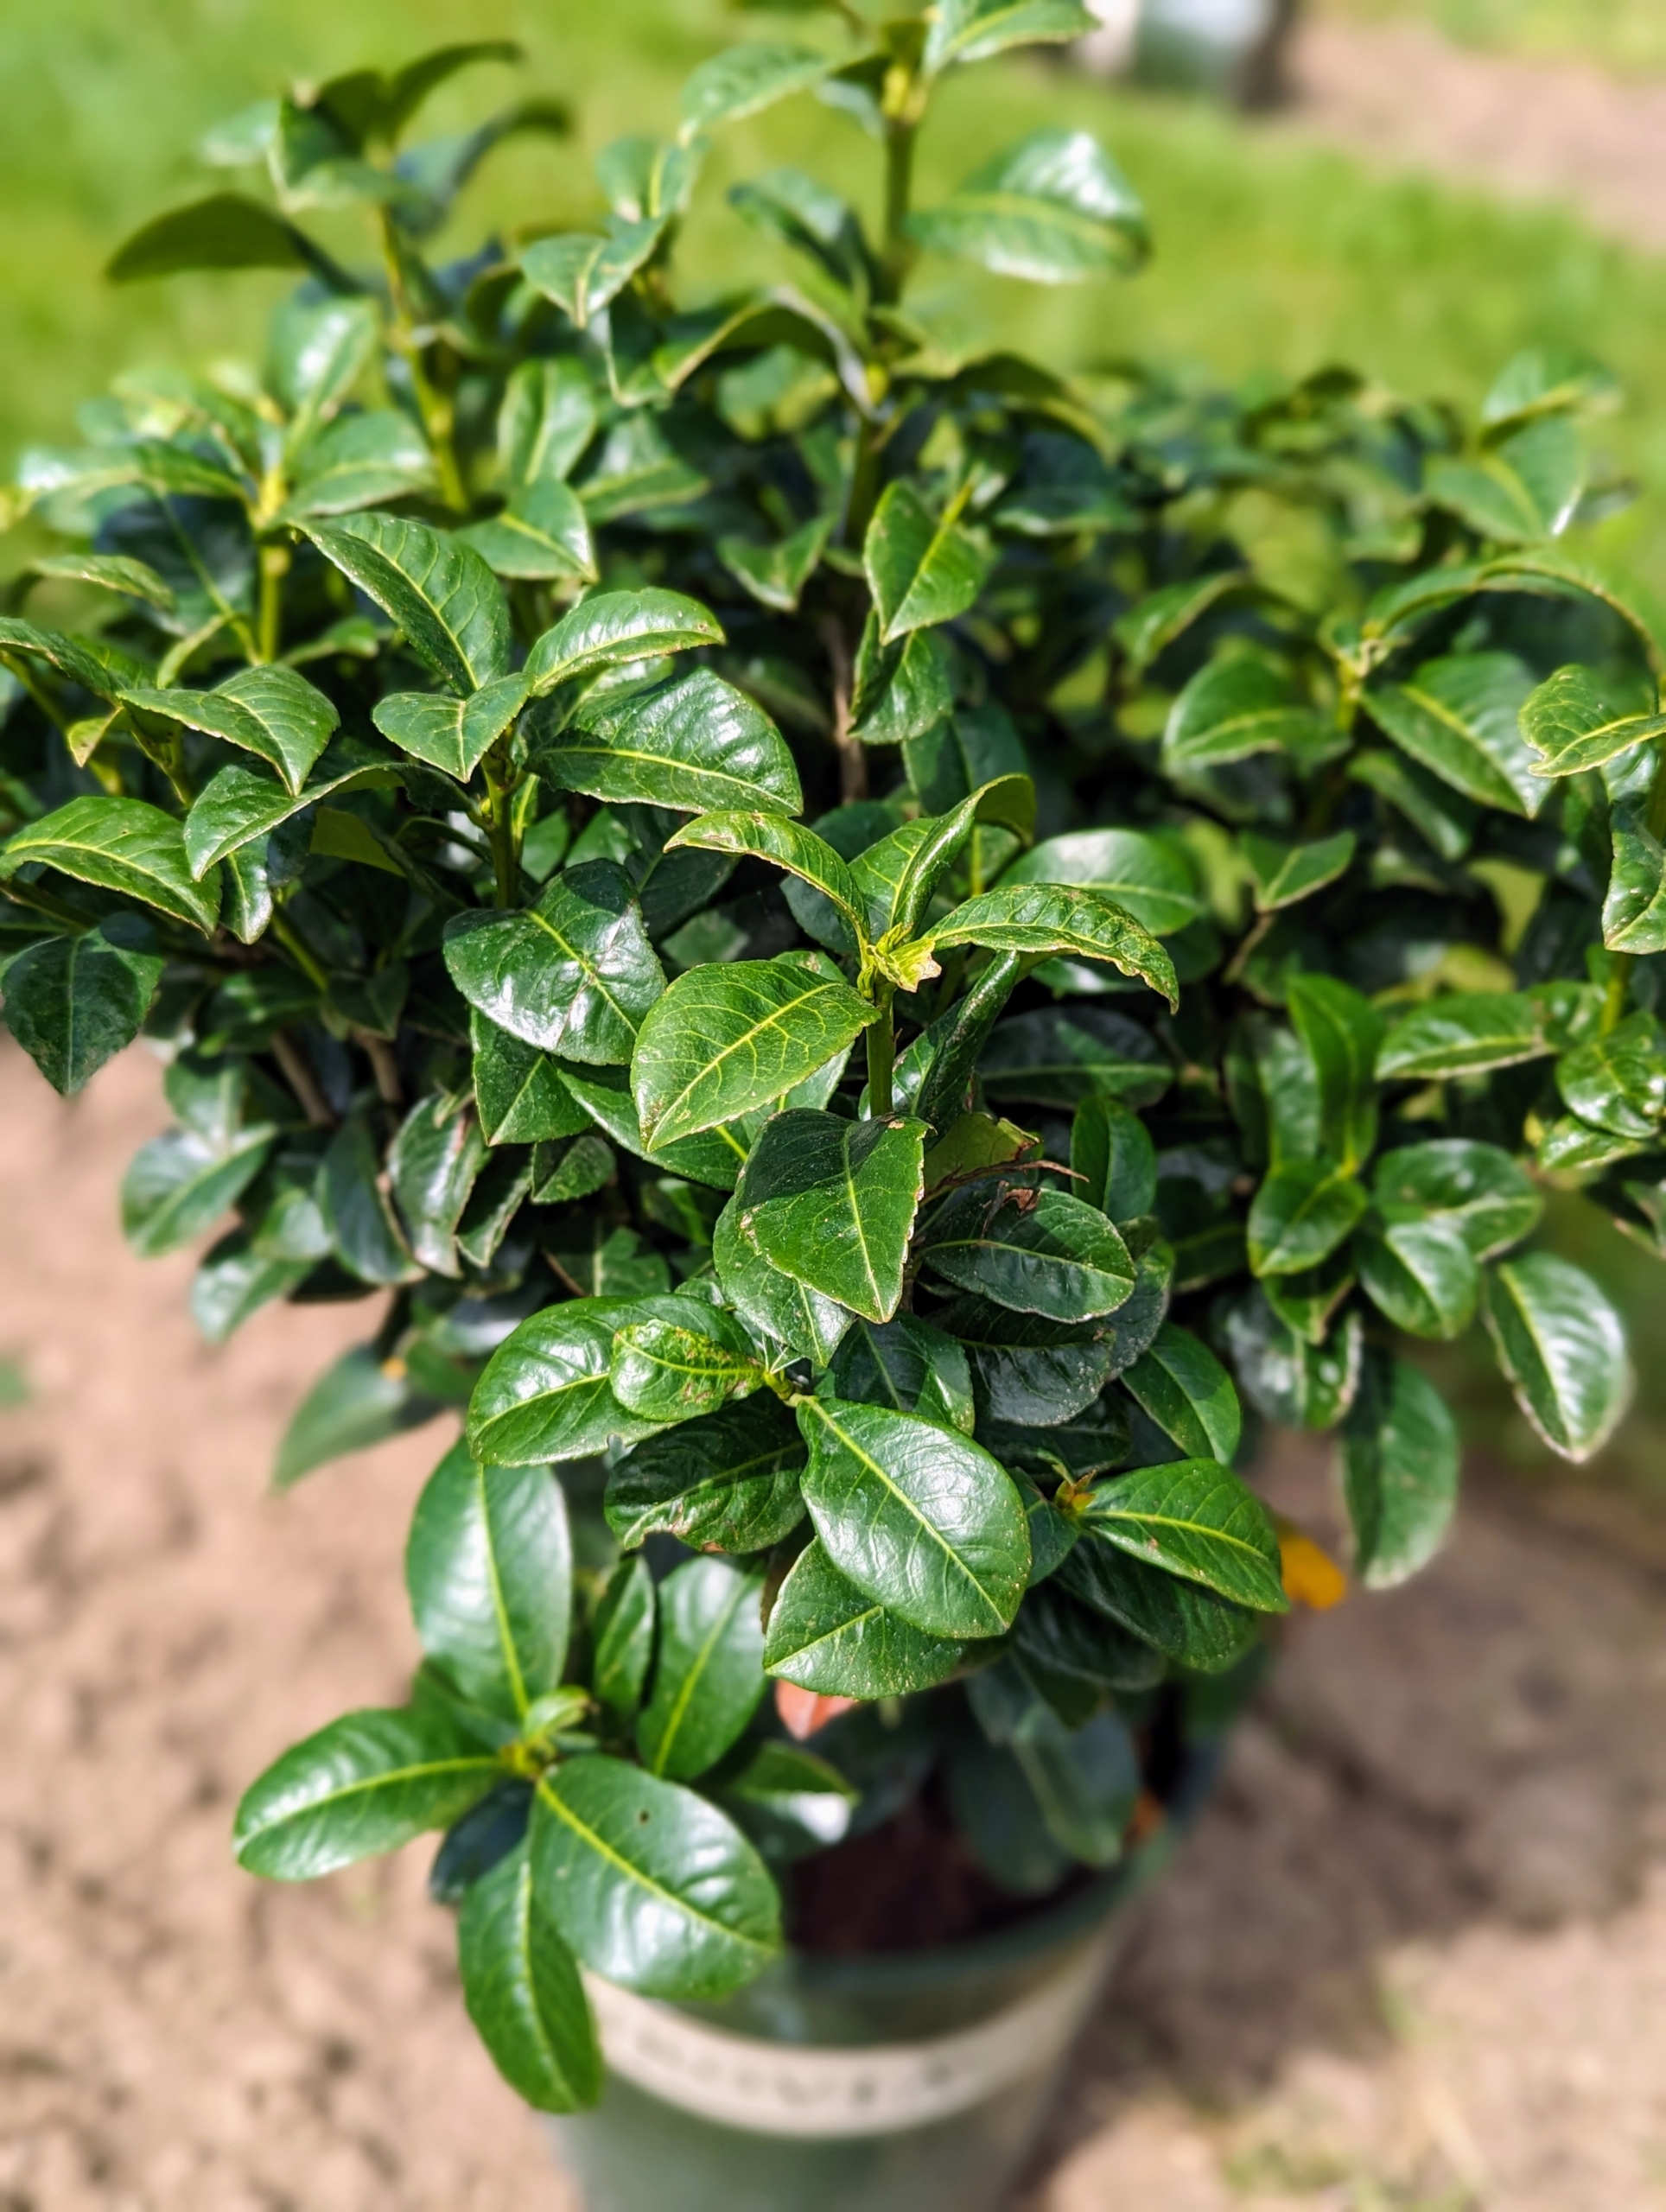
Volcano cherry laurel is a versatile evergreen shrub with a rounded, compact form and attractive, dense, leathery, glossy foliage.
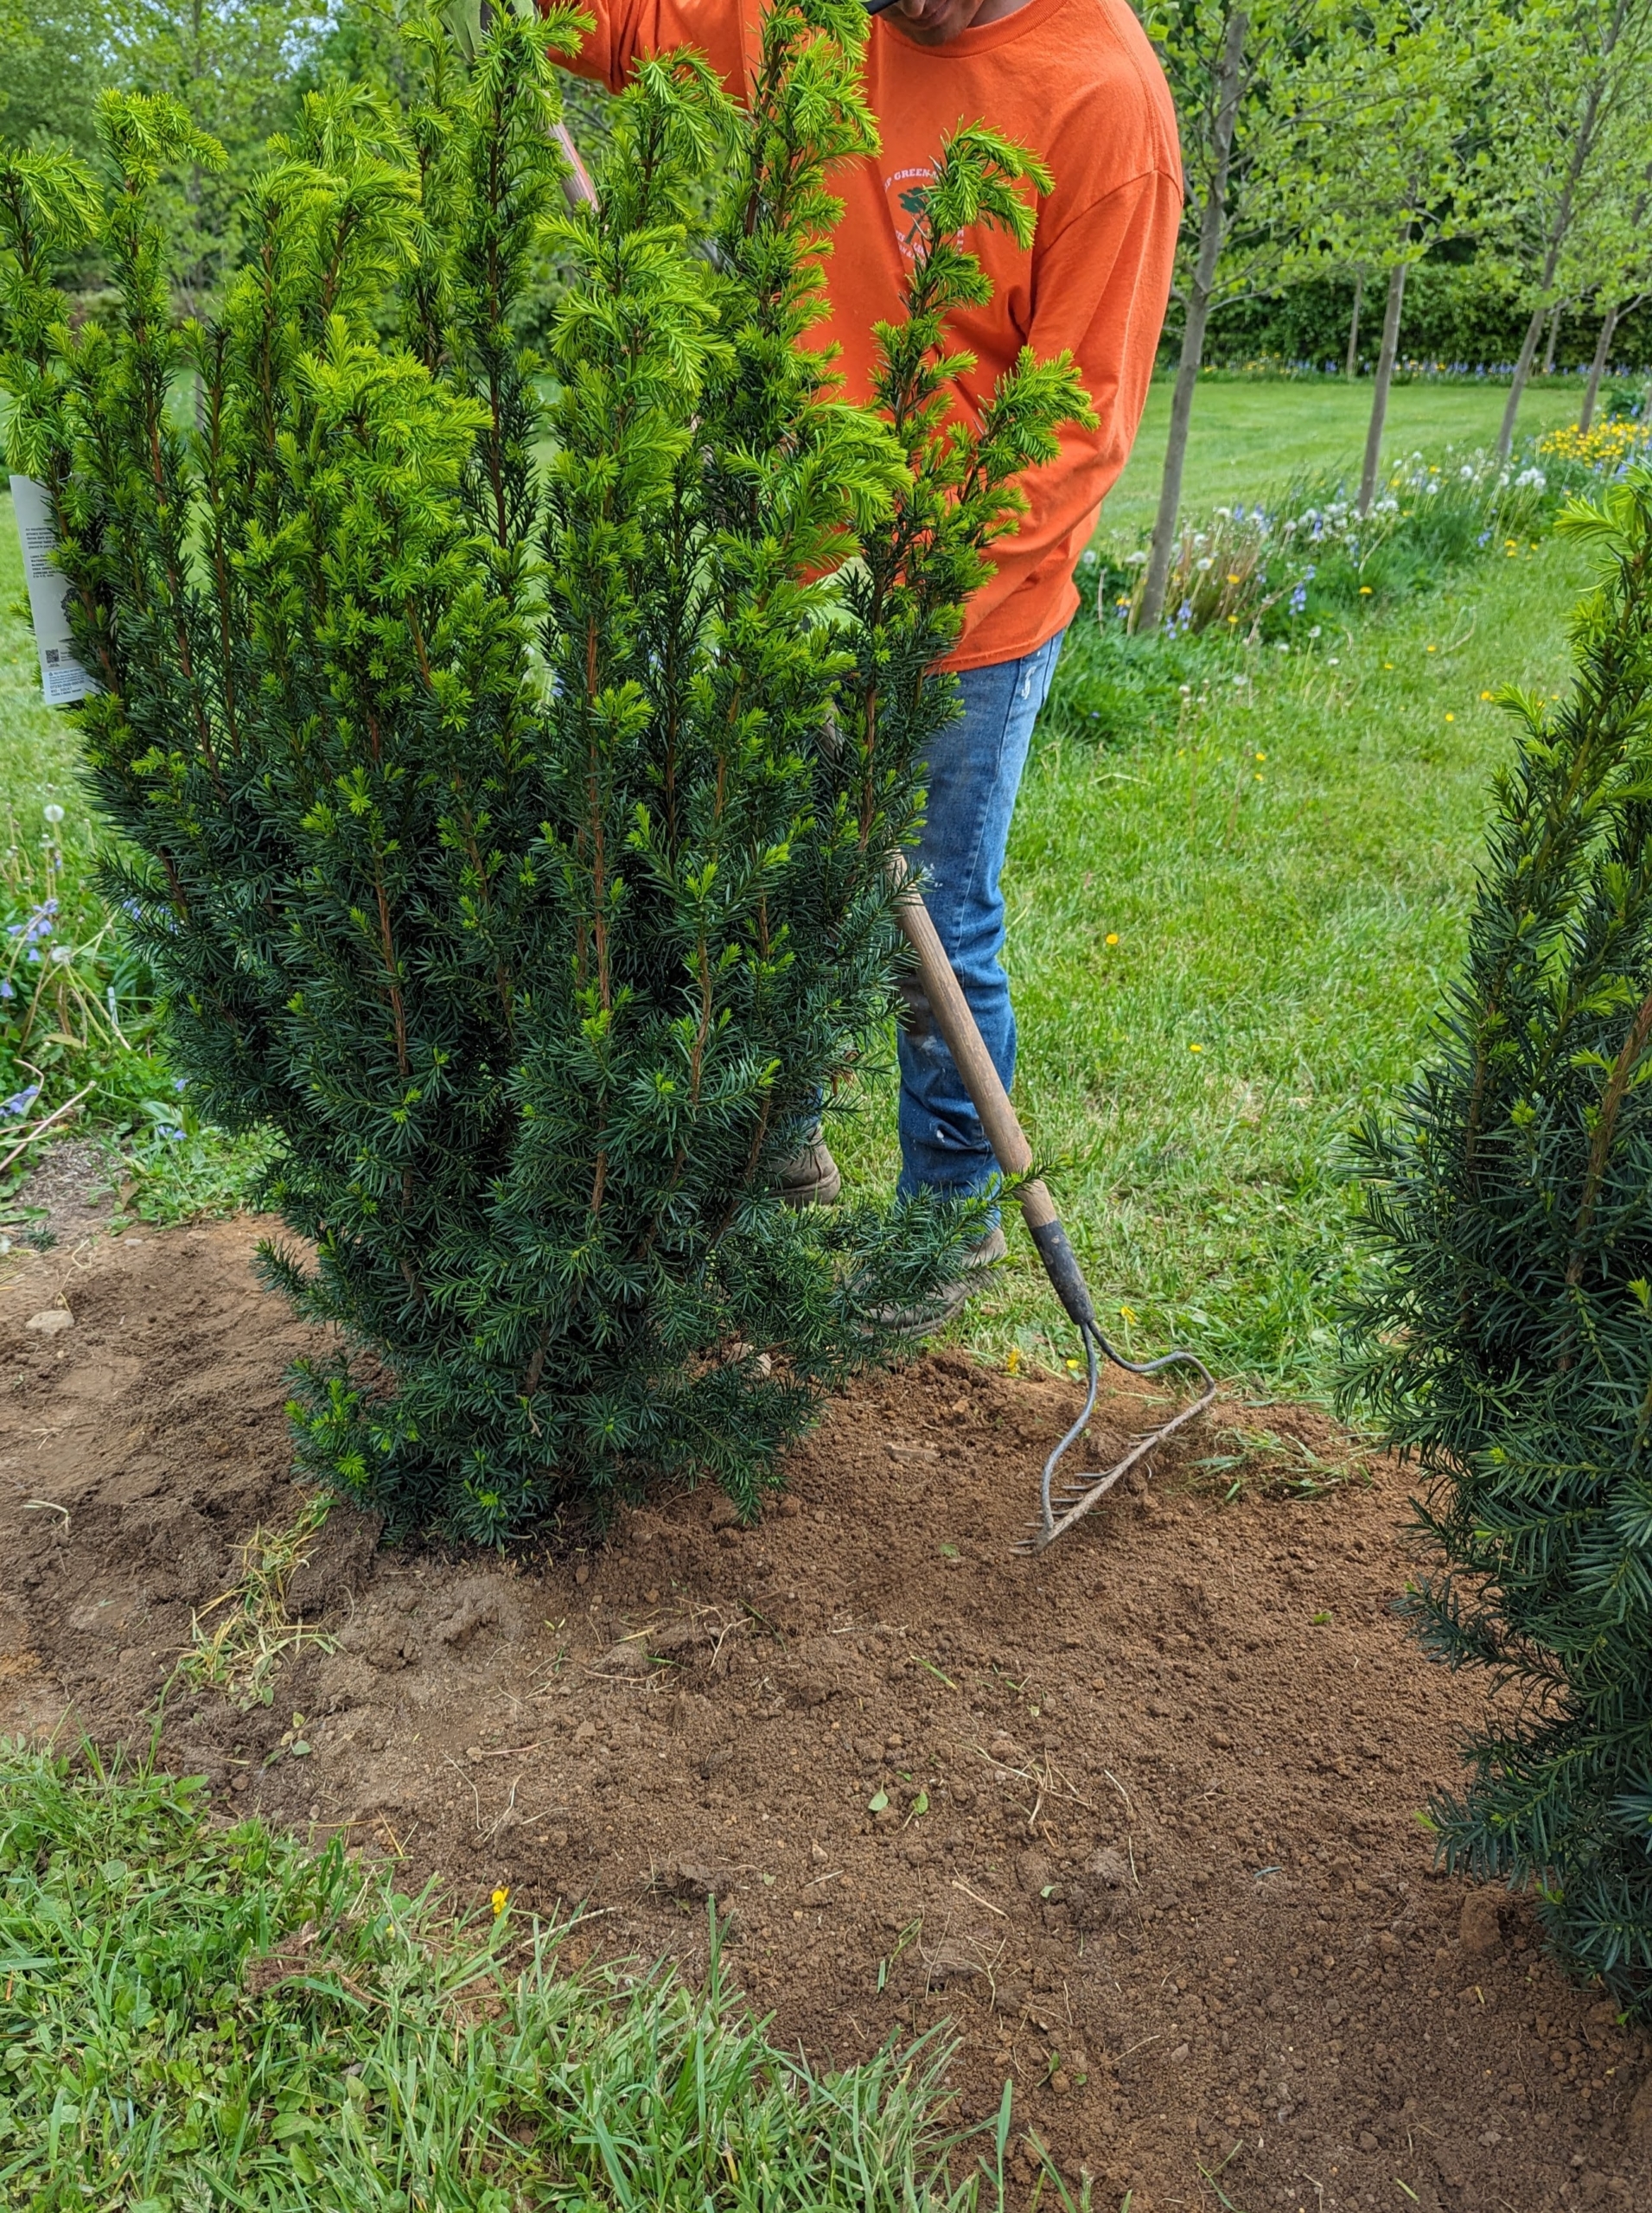
Here’s Ryan placing nicely sized dense spreading yews which are low maintenance and do excellently in well draining soil.
For each section of plantings, the first step is to remove the sod from the designated area. The sod is used in another section of the farm, so nothing is wasted.
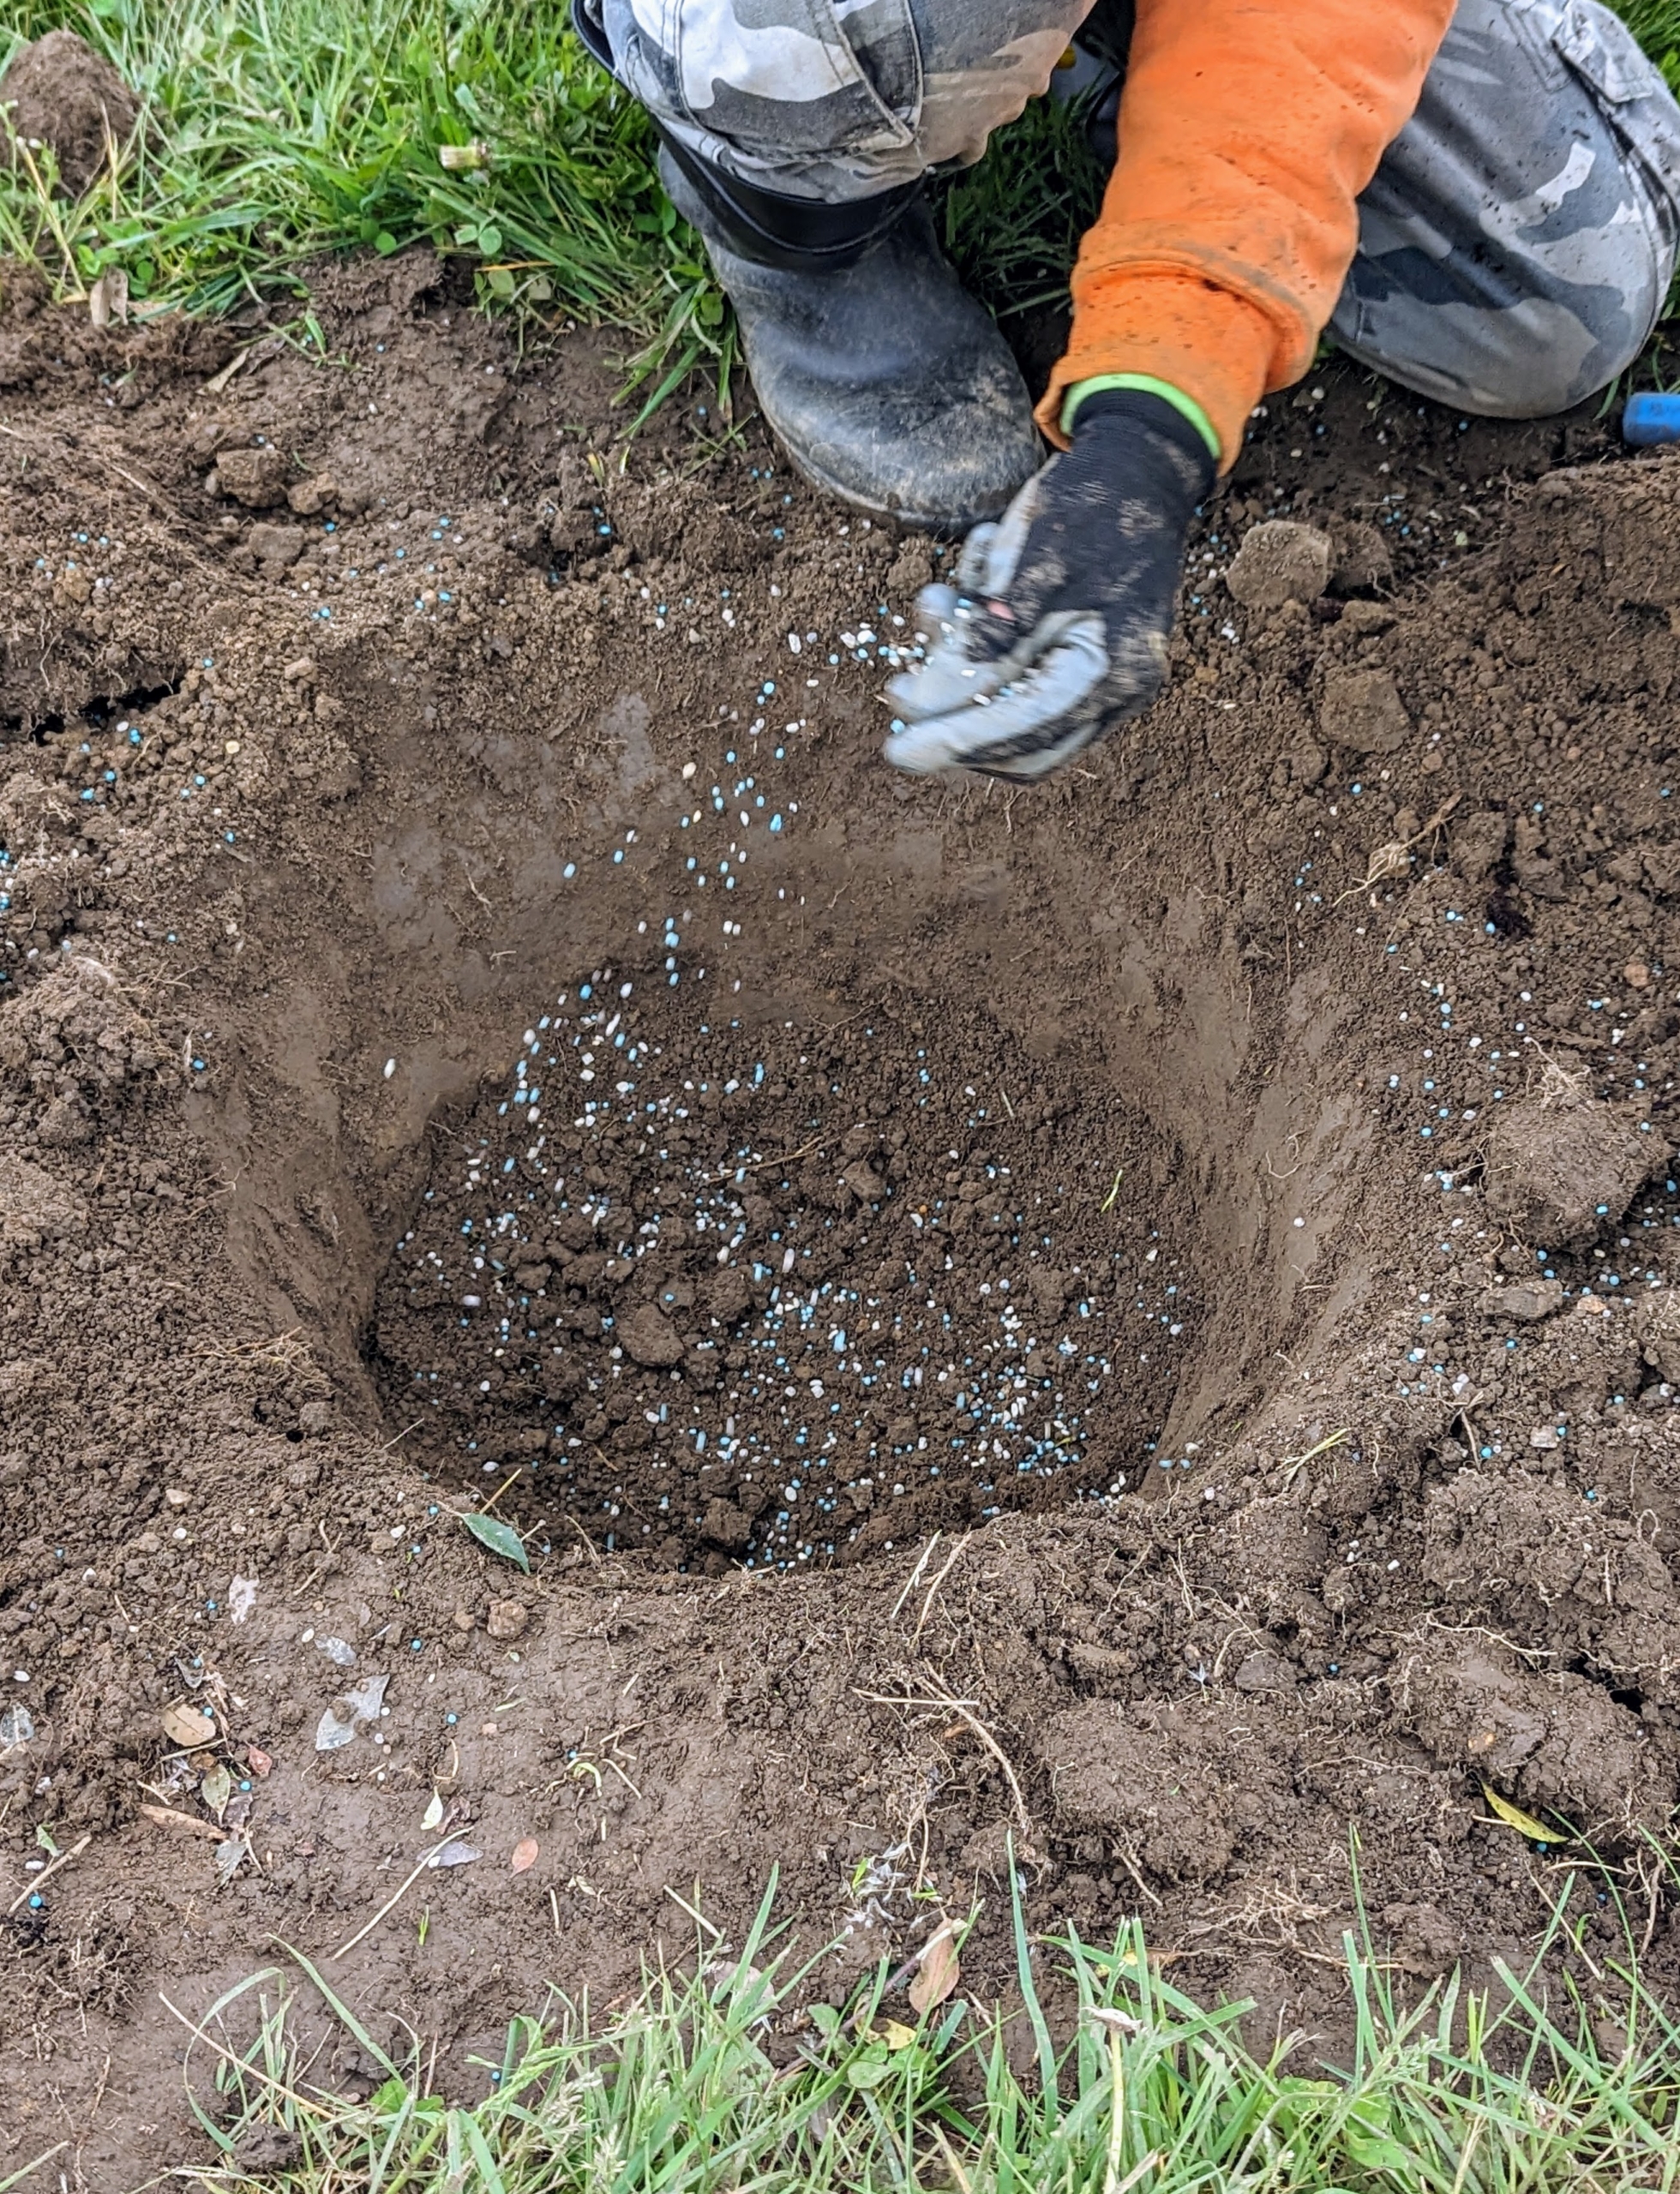
Each hole is dug precisely with enough room for the plant’s root ball. The rule of thumb when planting is to dig the hole two times as wide as the rootball and no deeper than the bottom of the rootball, similar to how it is in its pot.
Each potted specimen is placed into the hole to ensure the hole is the right size and depth. When planting, always check that the plant is positioned with the best side facing out, or in this case, facing the path.
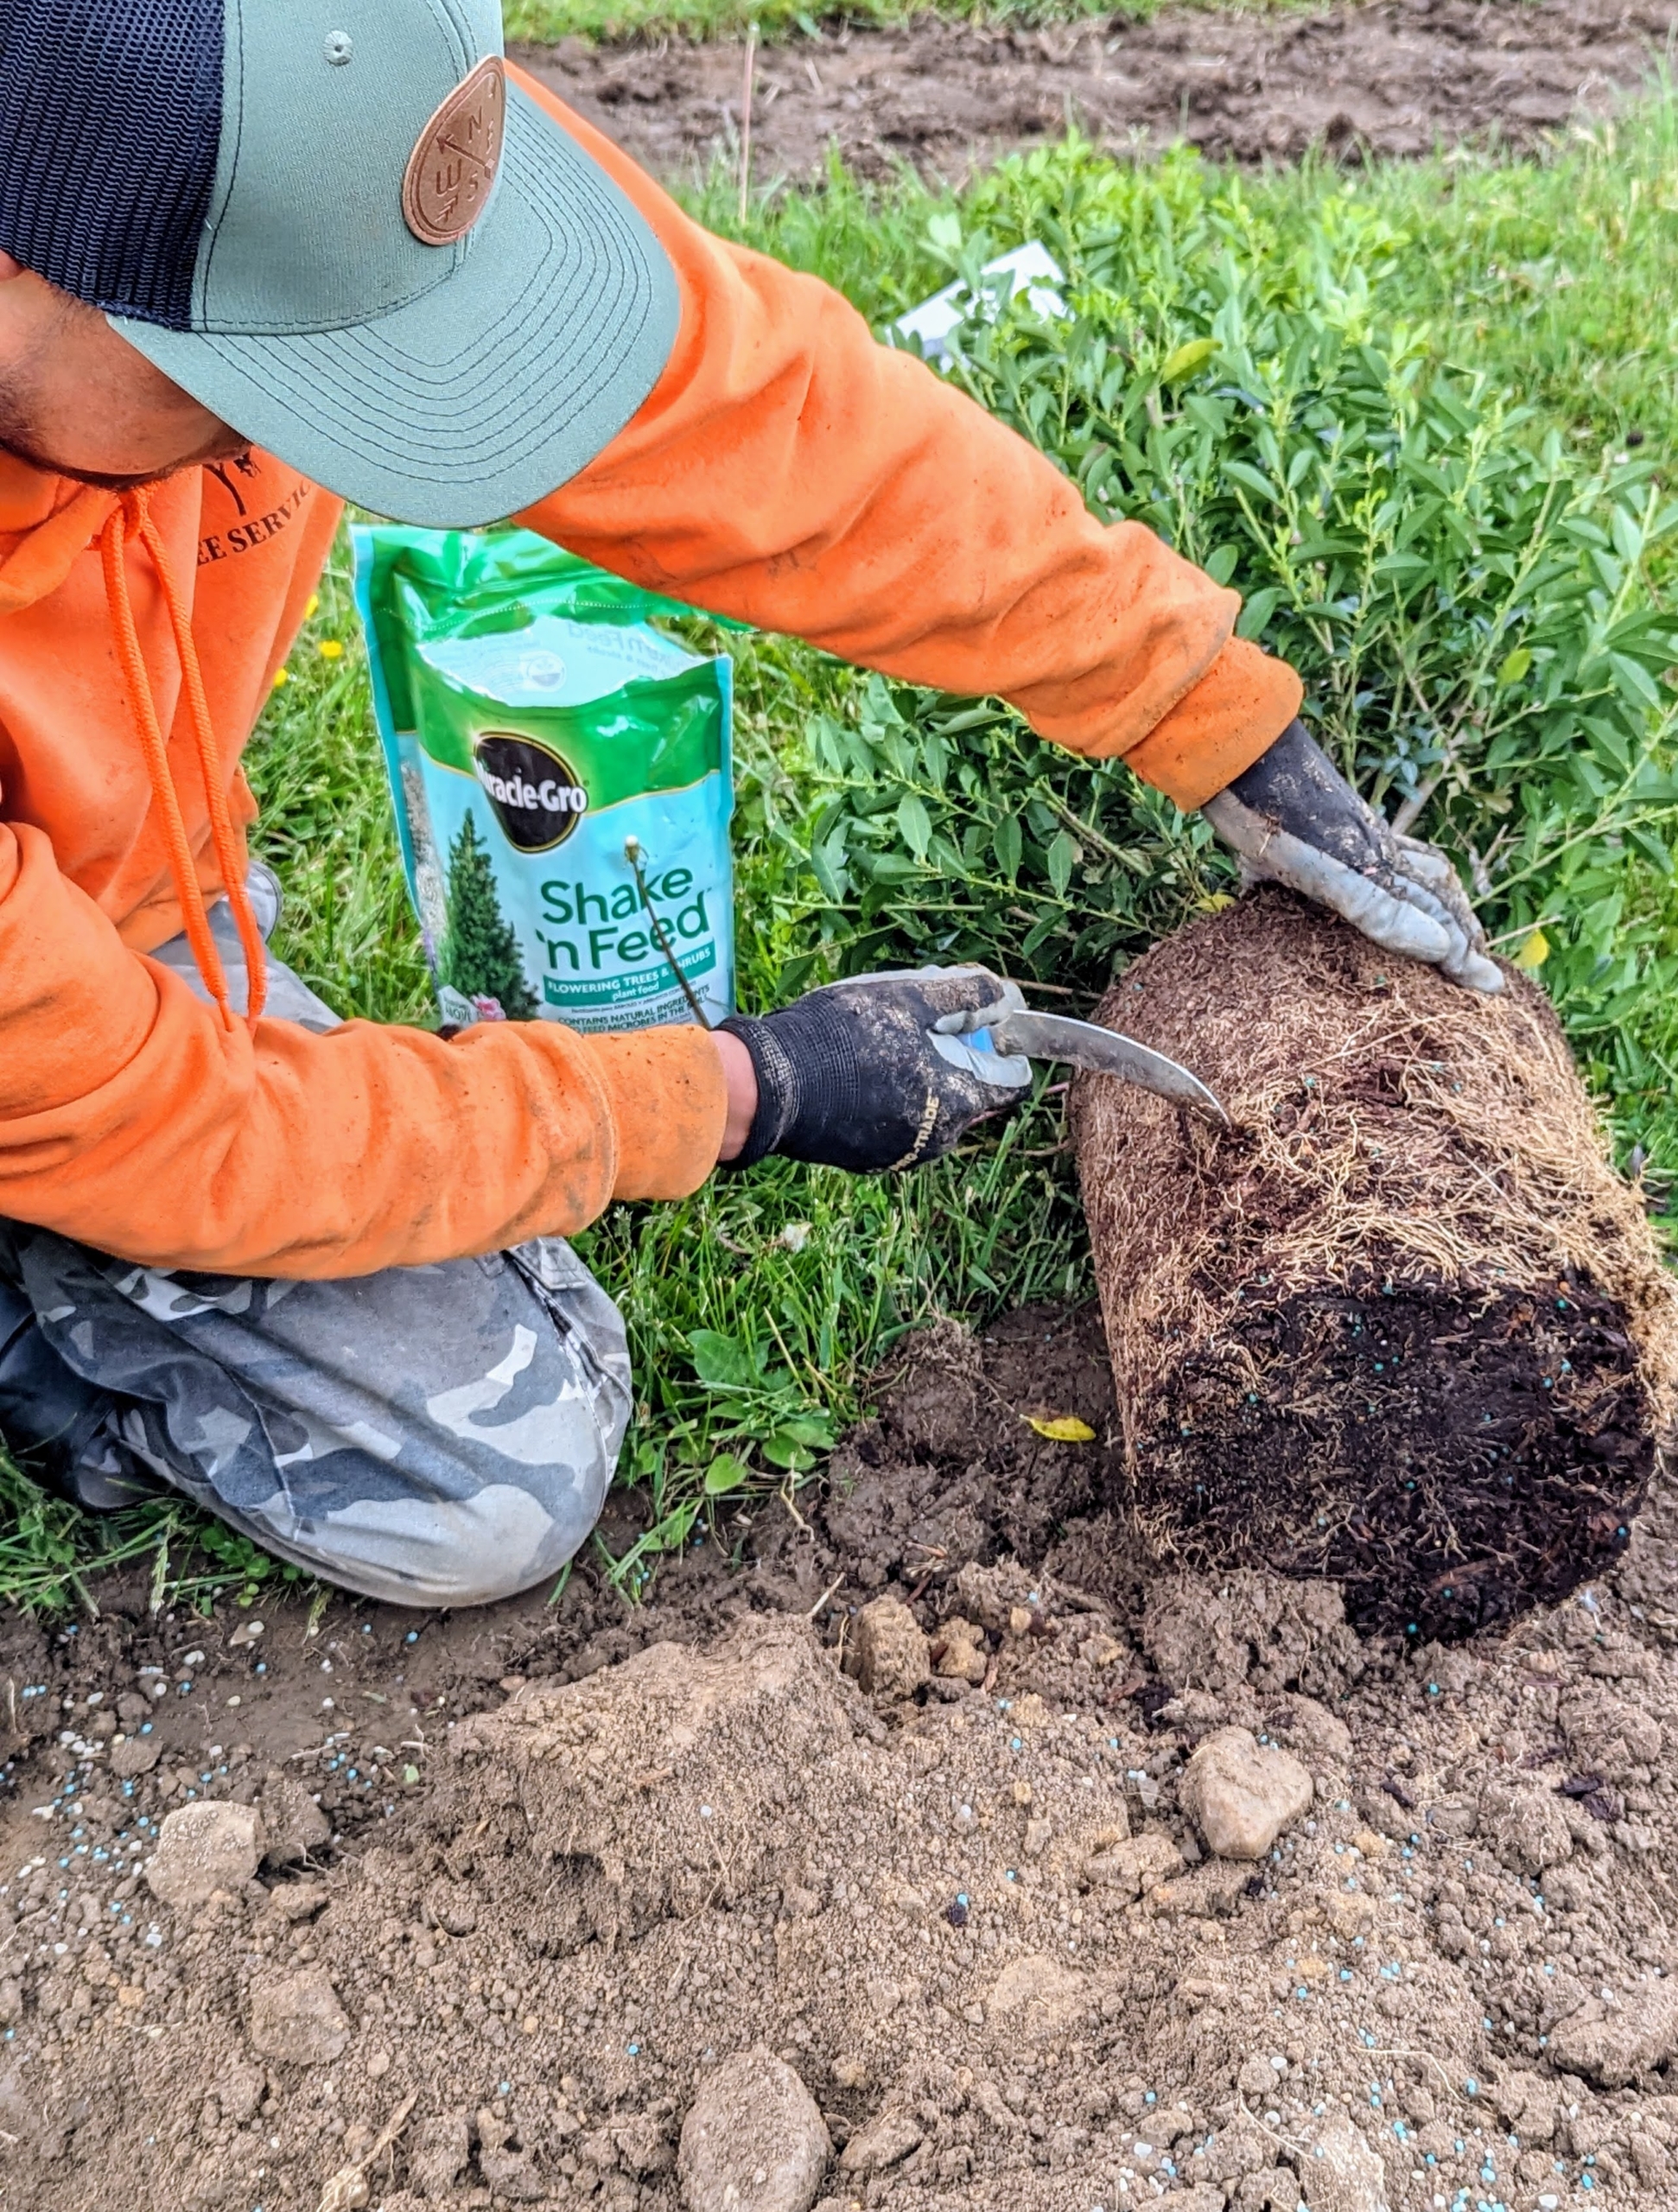
The plant is taken out of its pot and the rootball is scarified. Scarifying stimulates root growth. Essentially, small portions of the root ball are cut to loosen the roots and stimulate growth.
The specimen is then placed into the hole and backfilled with soil. It’s that easy to plant! Next, all the surrounding soil is raked, so the bed looks neat, tidy, and finished.
My overall plan is to plant as many interesting trees, hedges, espaliers, and shrubs as possible in this space and to create a fun and challenging living maze. Follow along and see it develop with me!