Smoke bushes, Cotinus, are among my favorite of small trees - they have superlative color, appealing form, and look excellent in the gardens.
I have many smoke bushes around my Bedford, New York farm - paired with London plane trees in an allée through a hay field, in the sunken garden behind my Summer House, around my pool, in the beds outside my Tenant House where my daughter and grandchildren stay when they visit, and near the front entrance to the property where family and friends can see their beauty right away.
Here are some photos, enjoy.
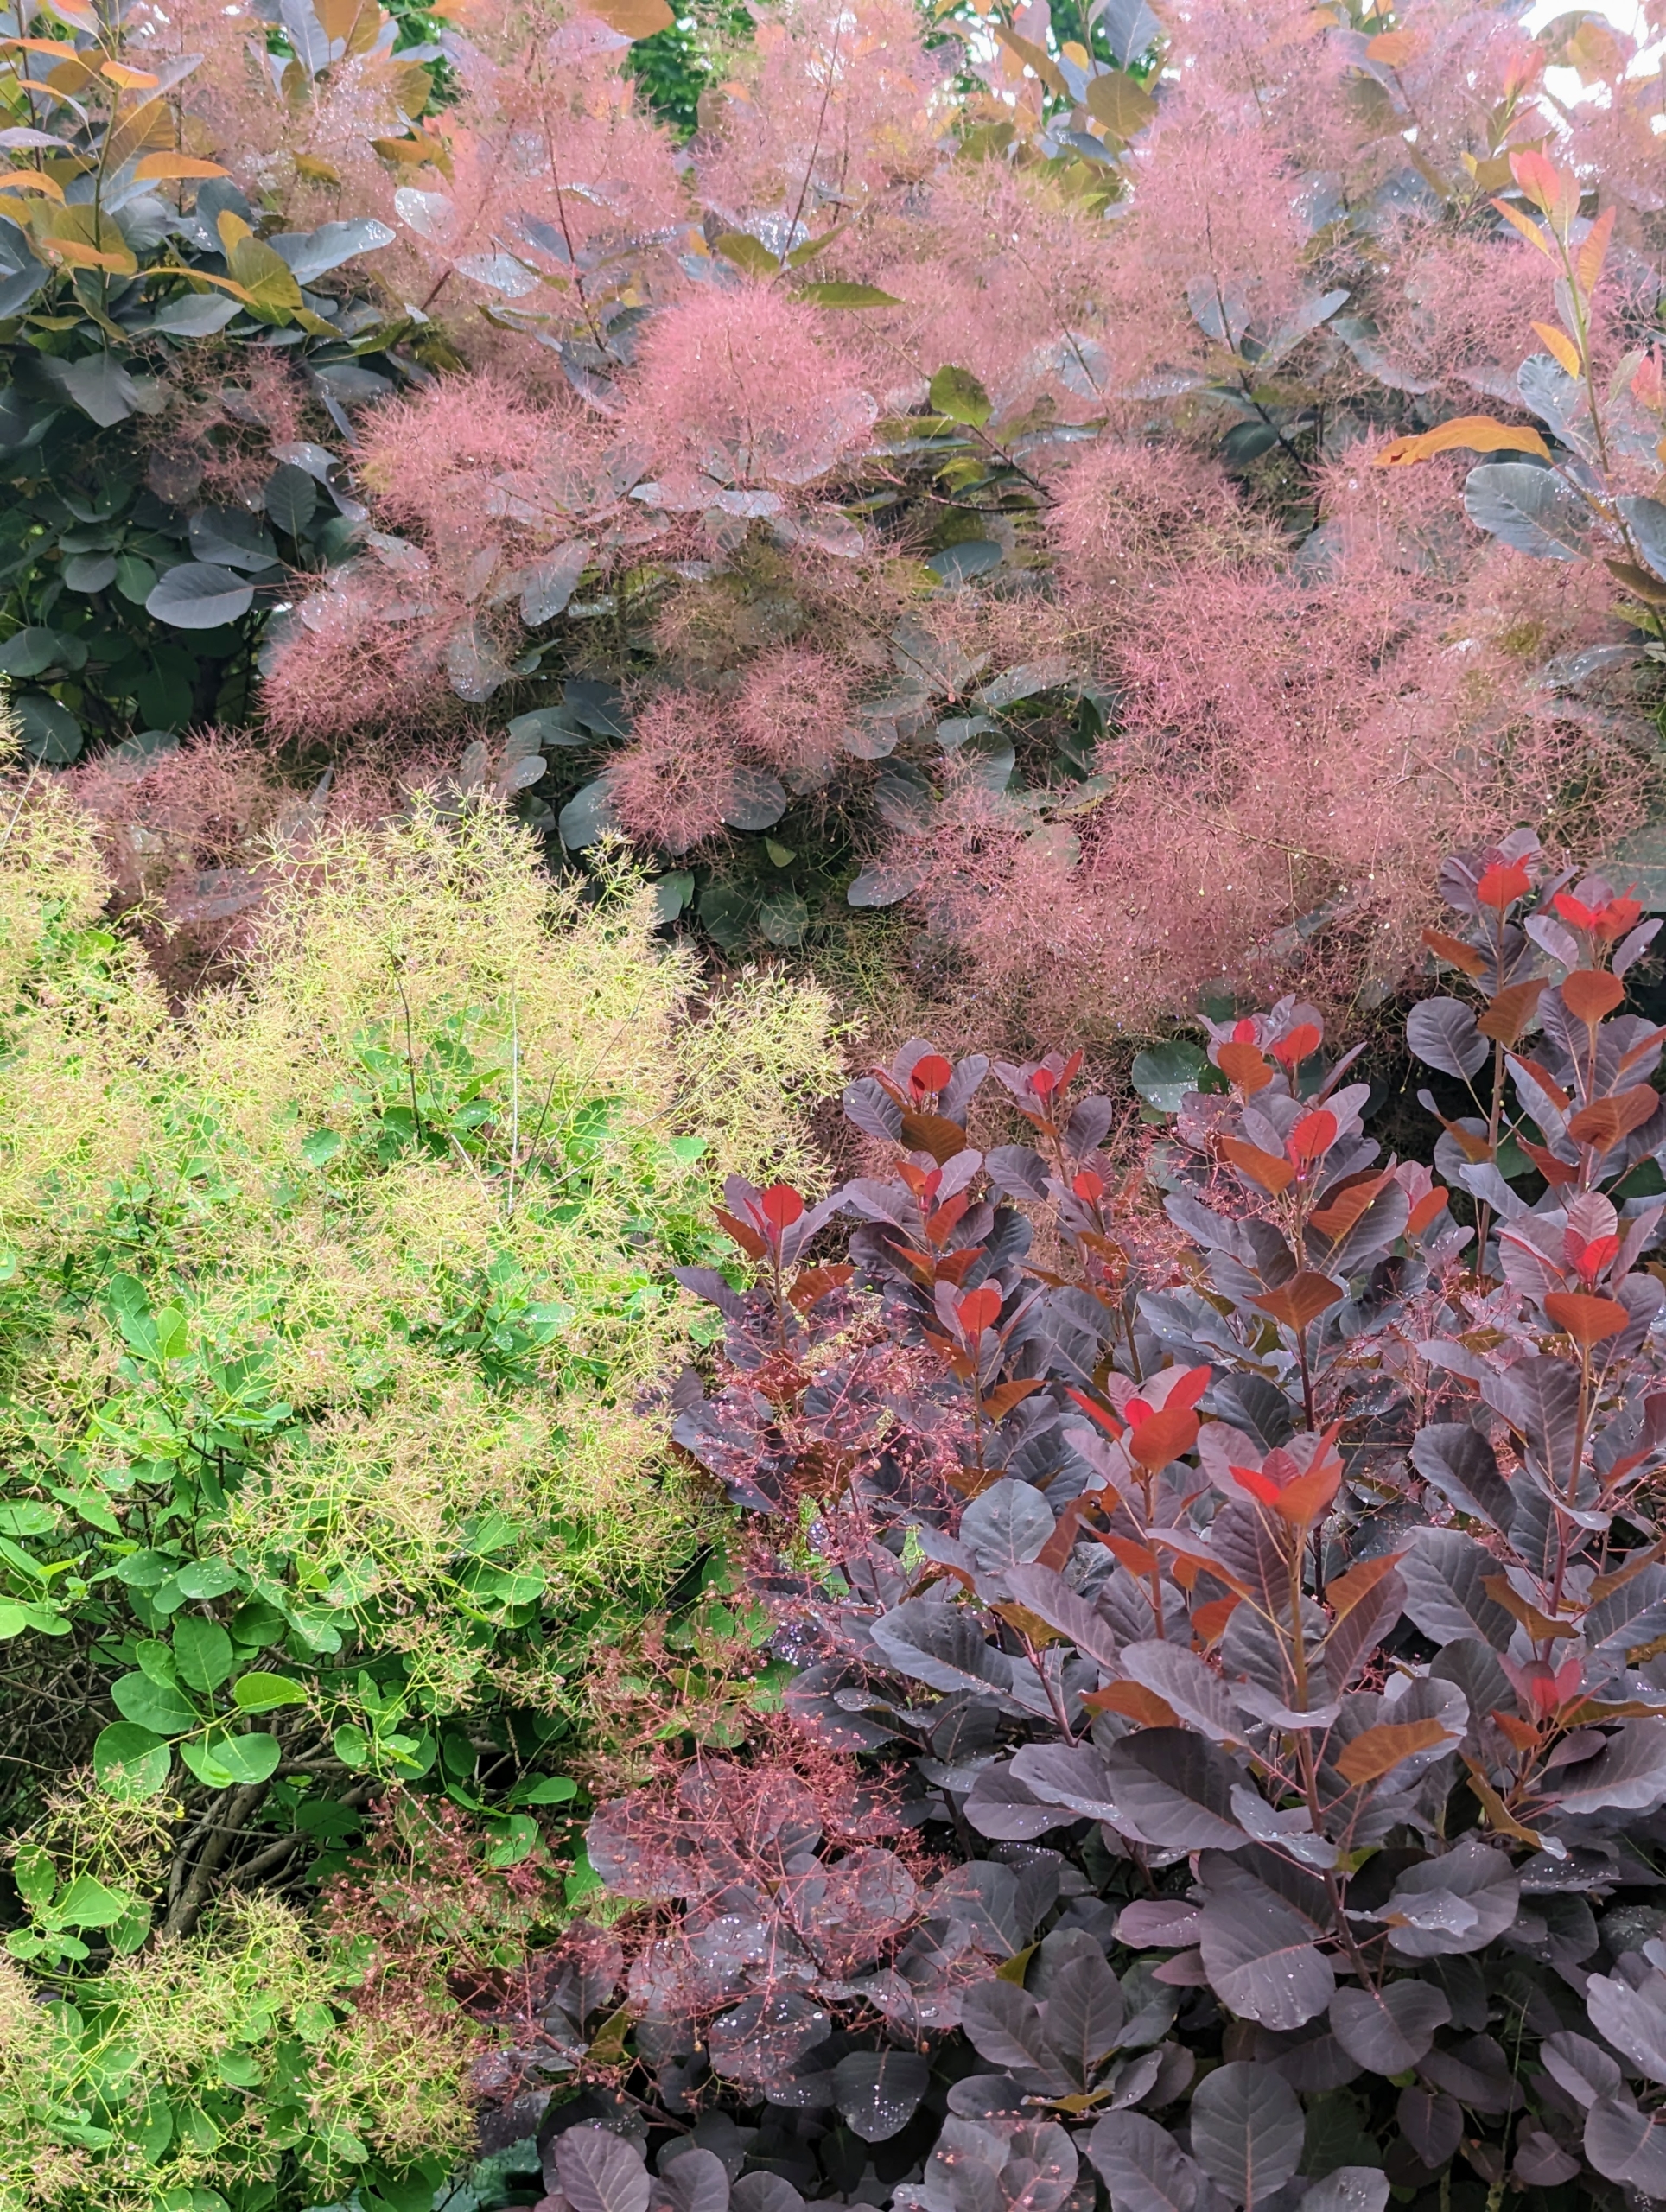
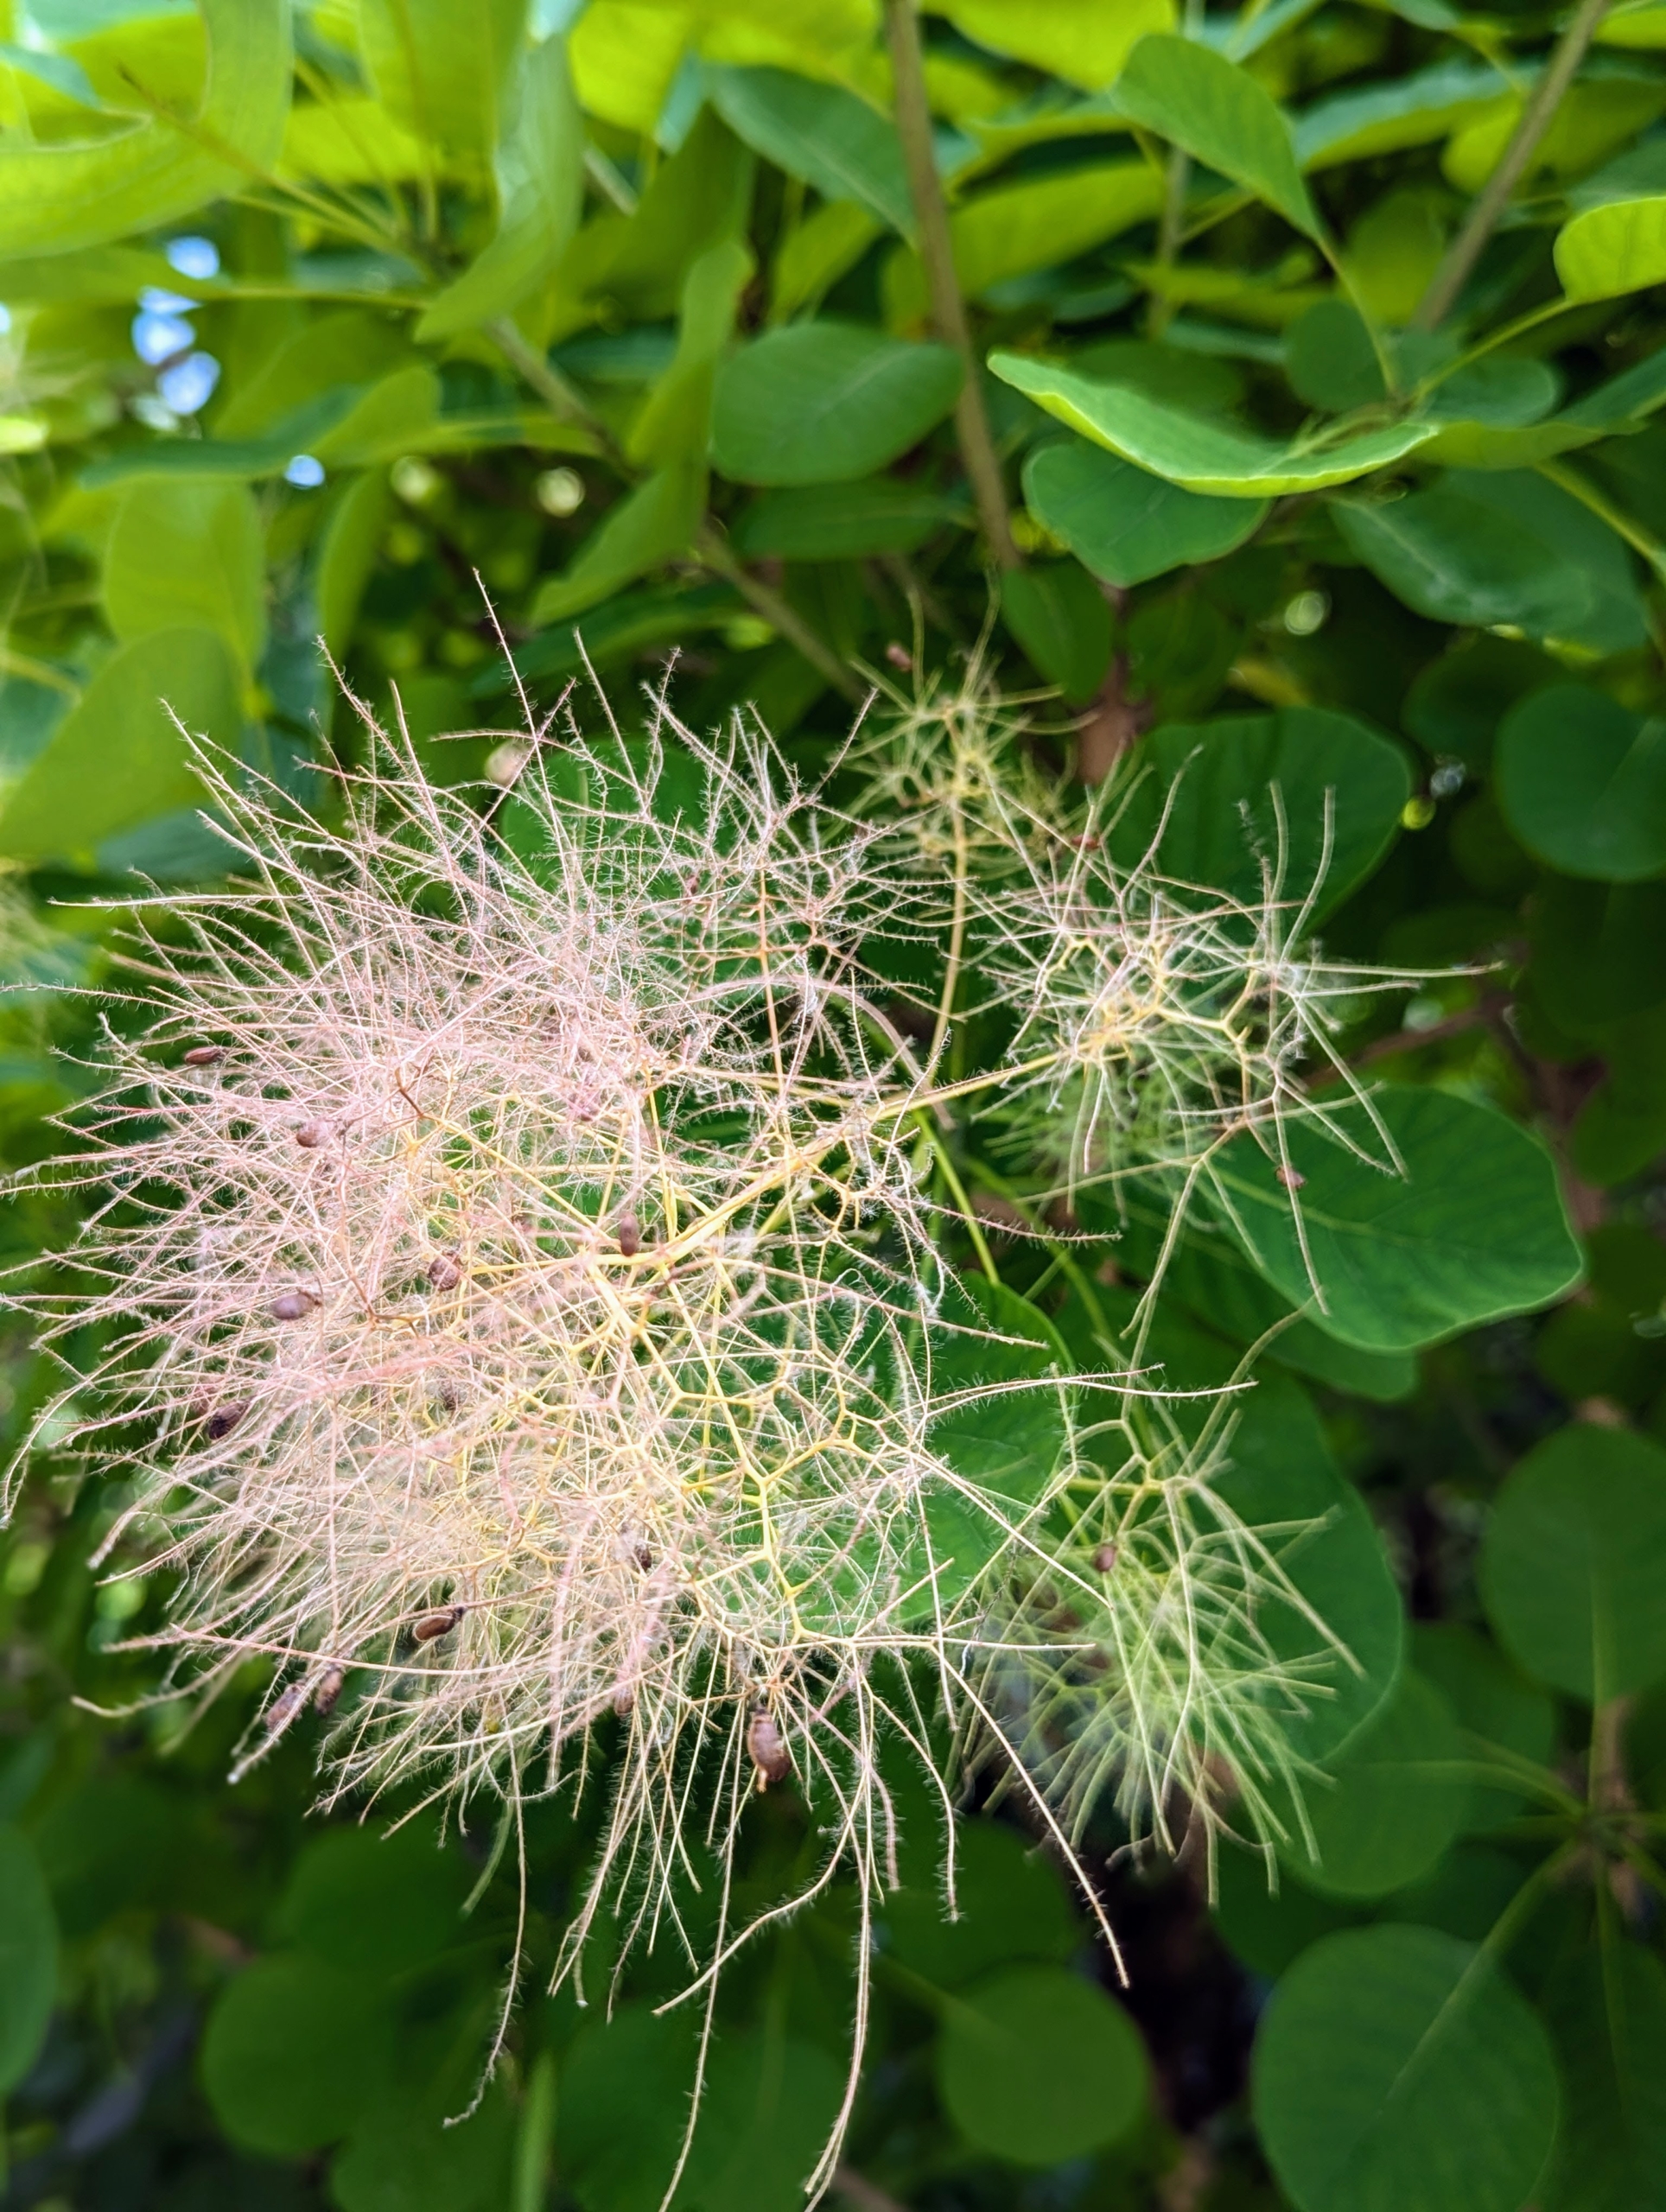
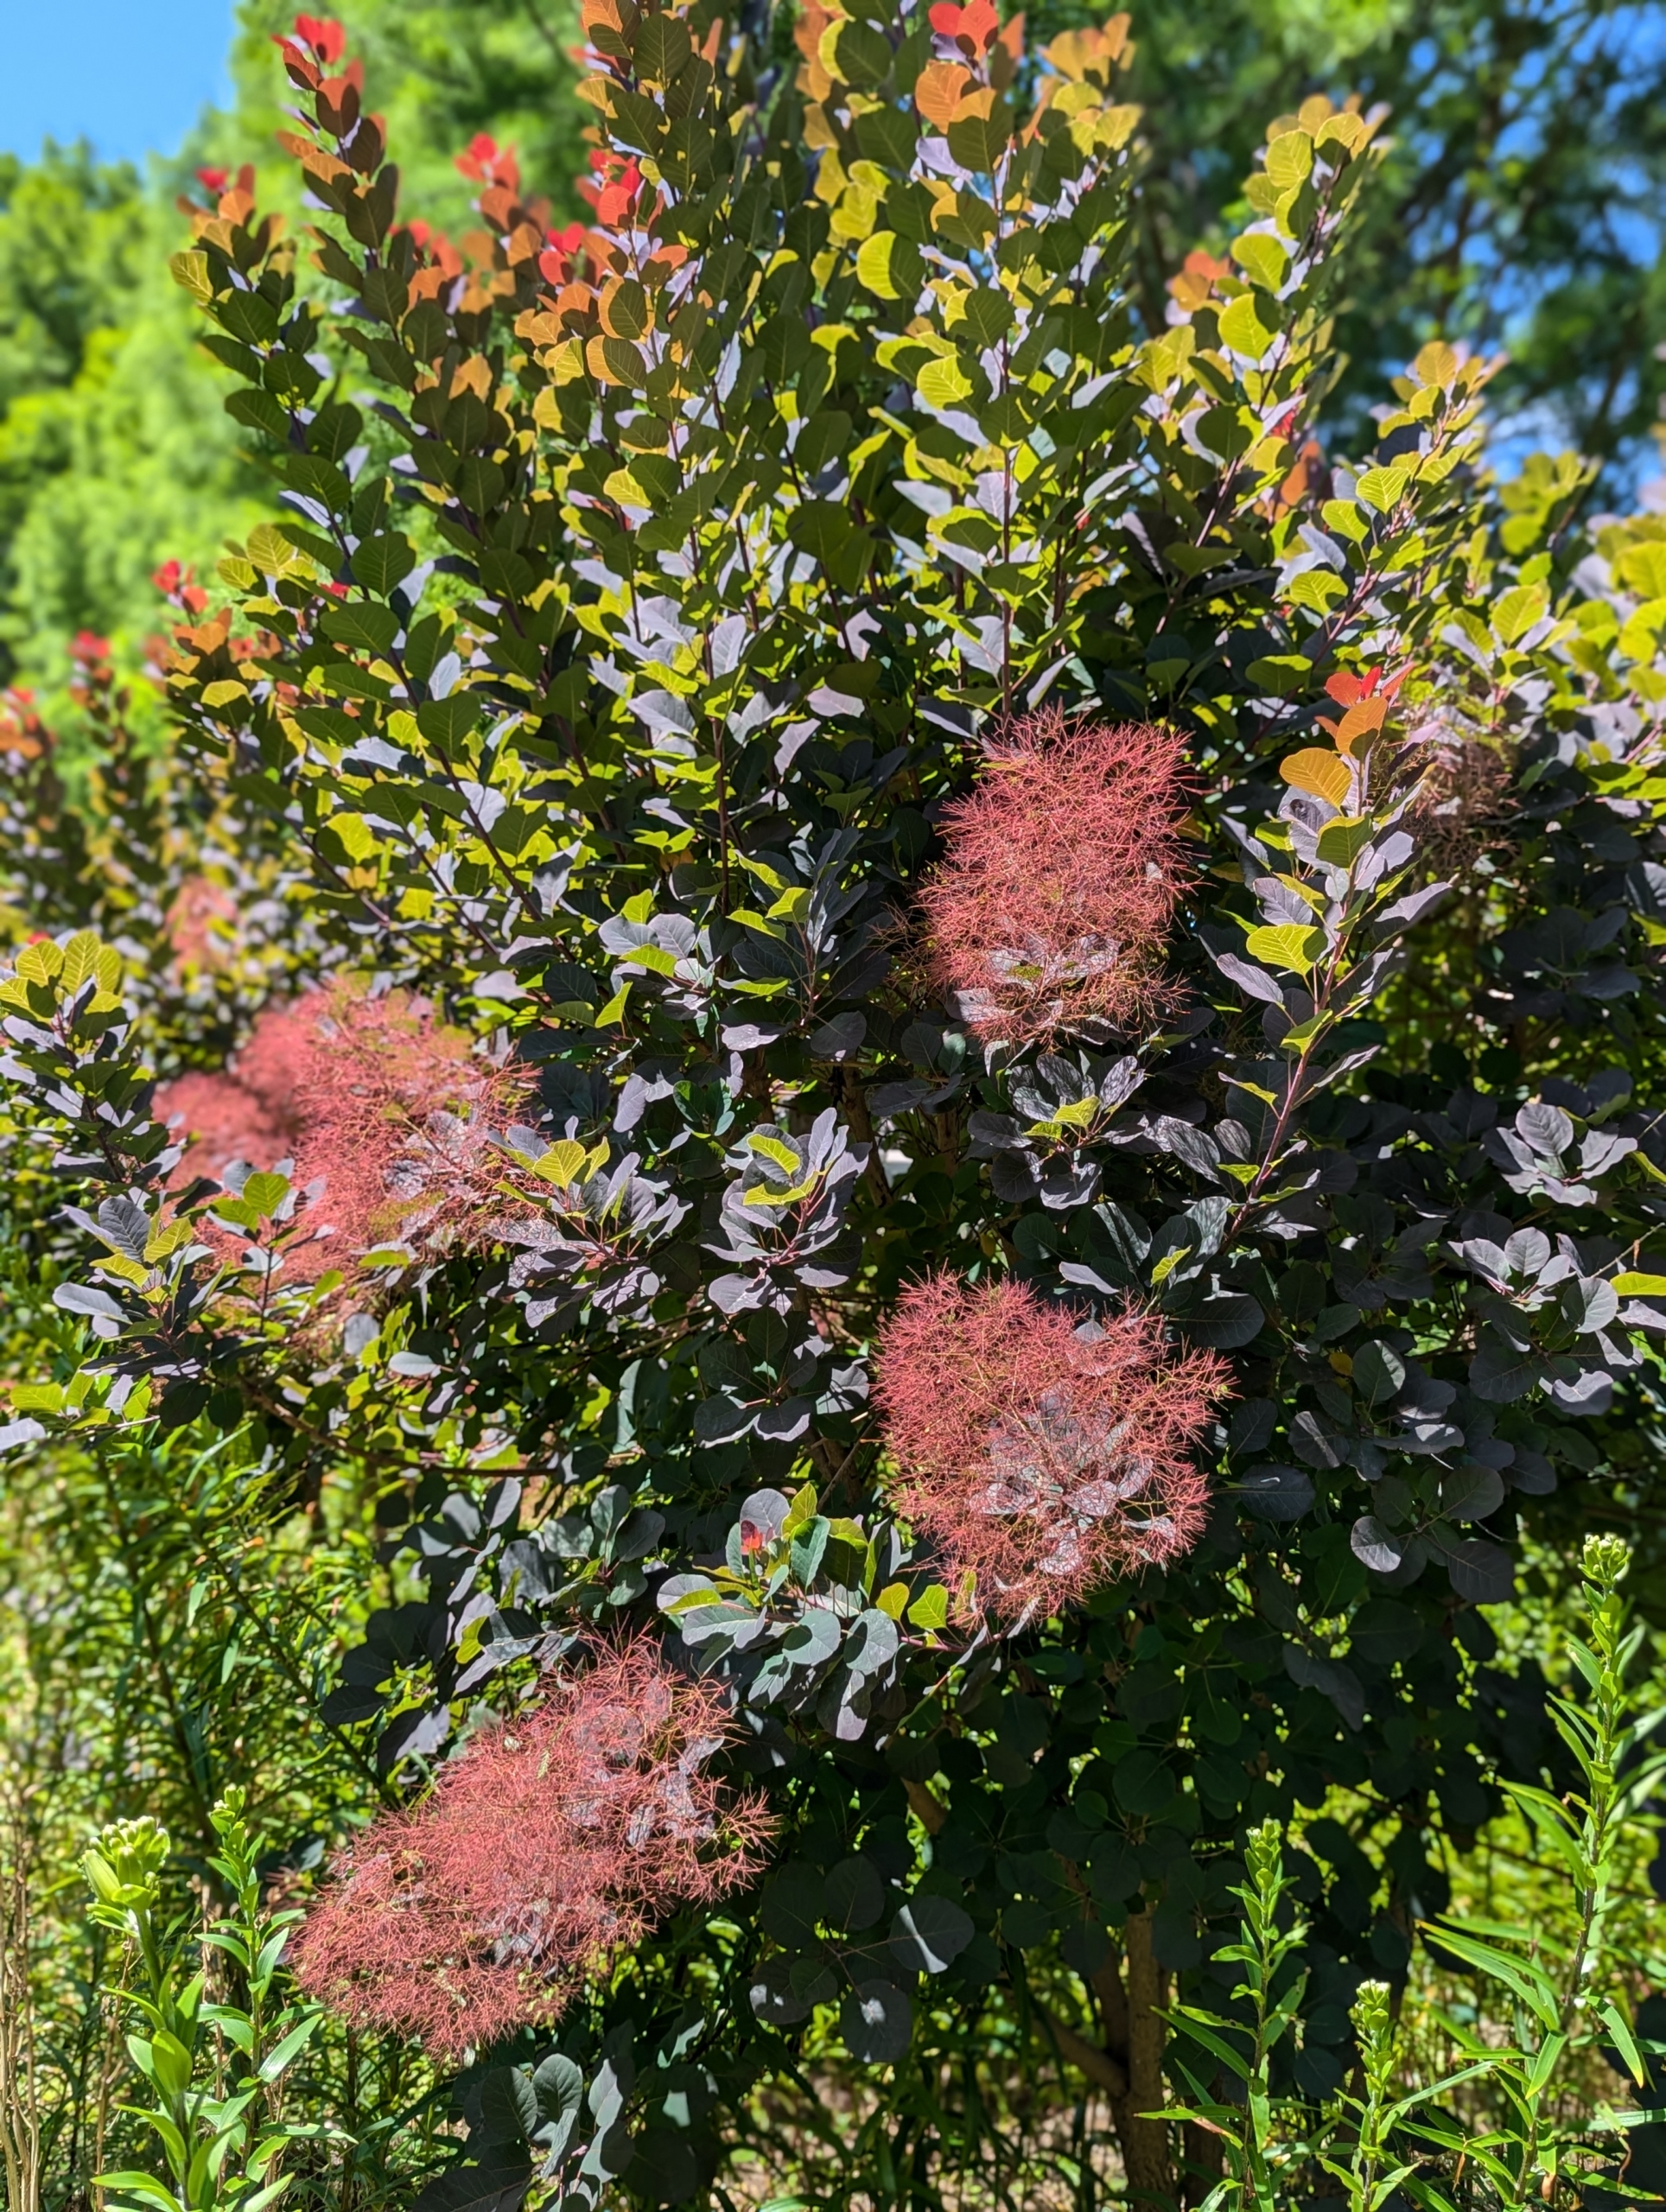
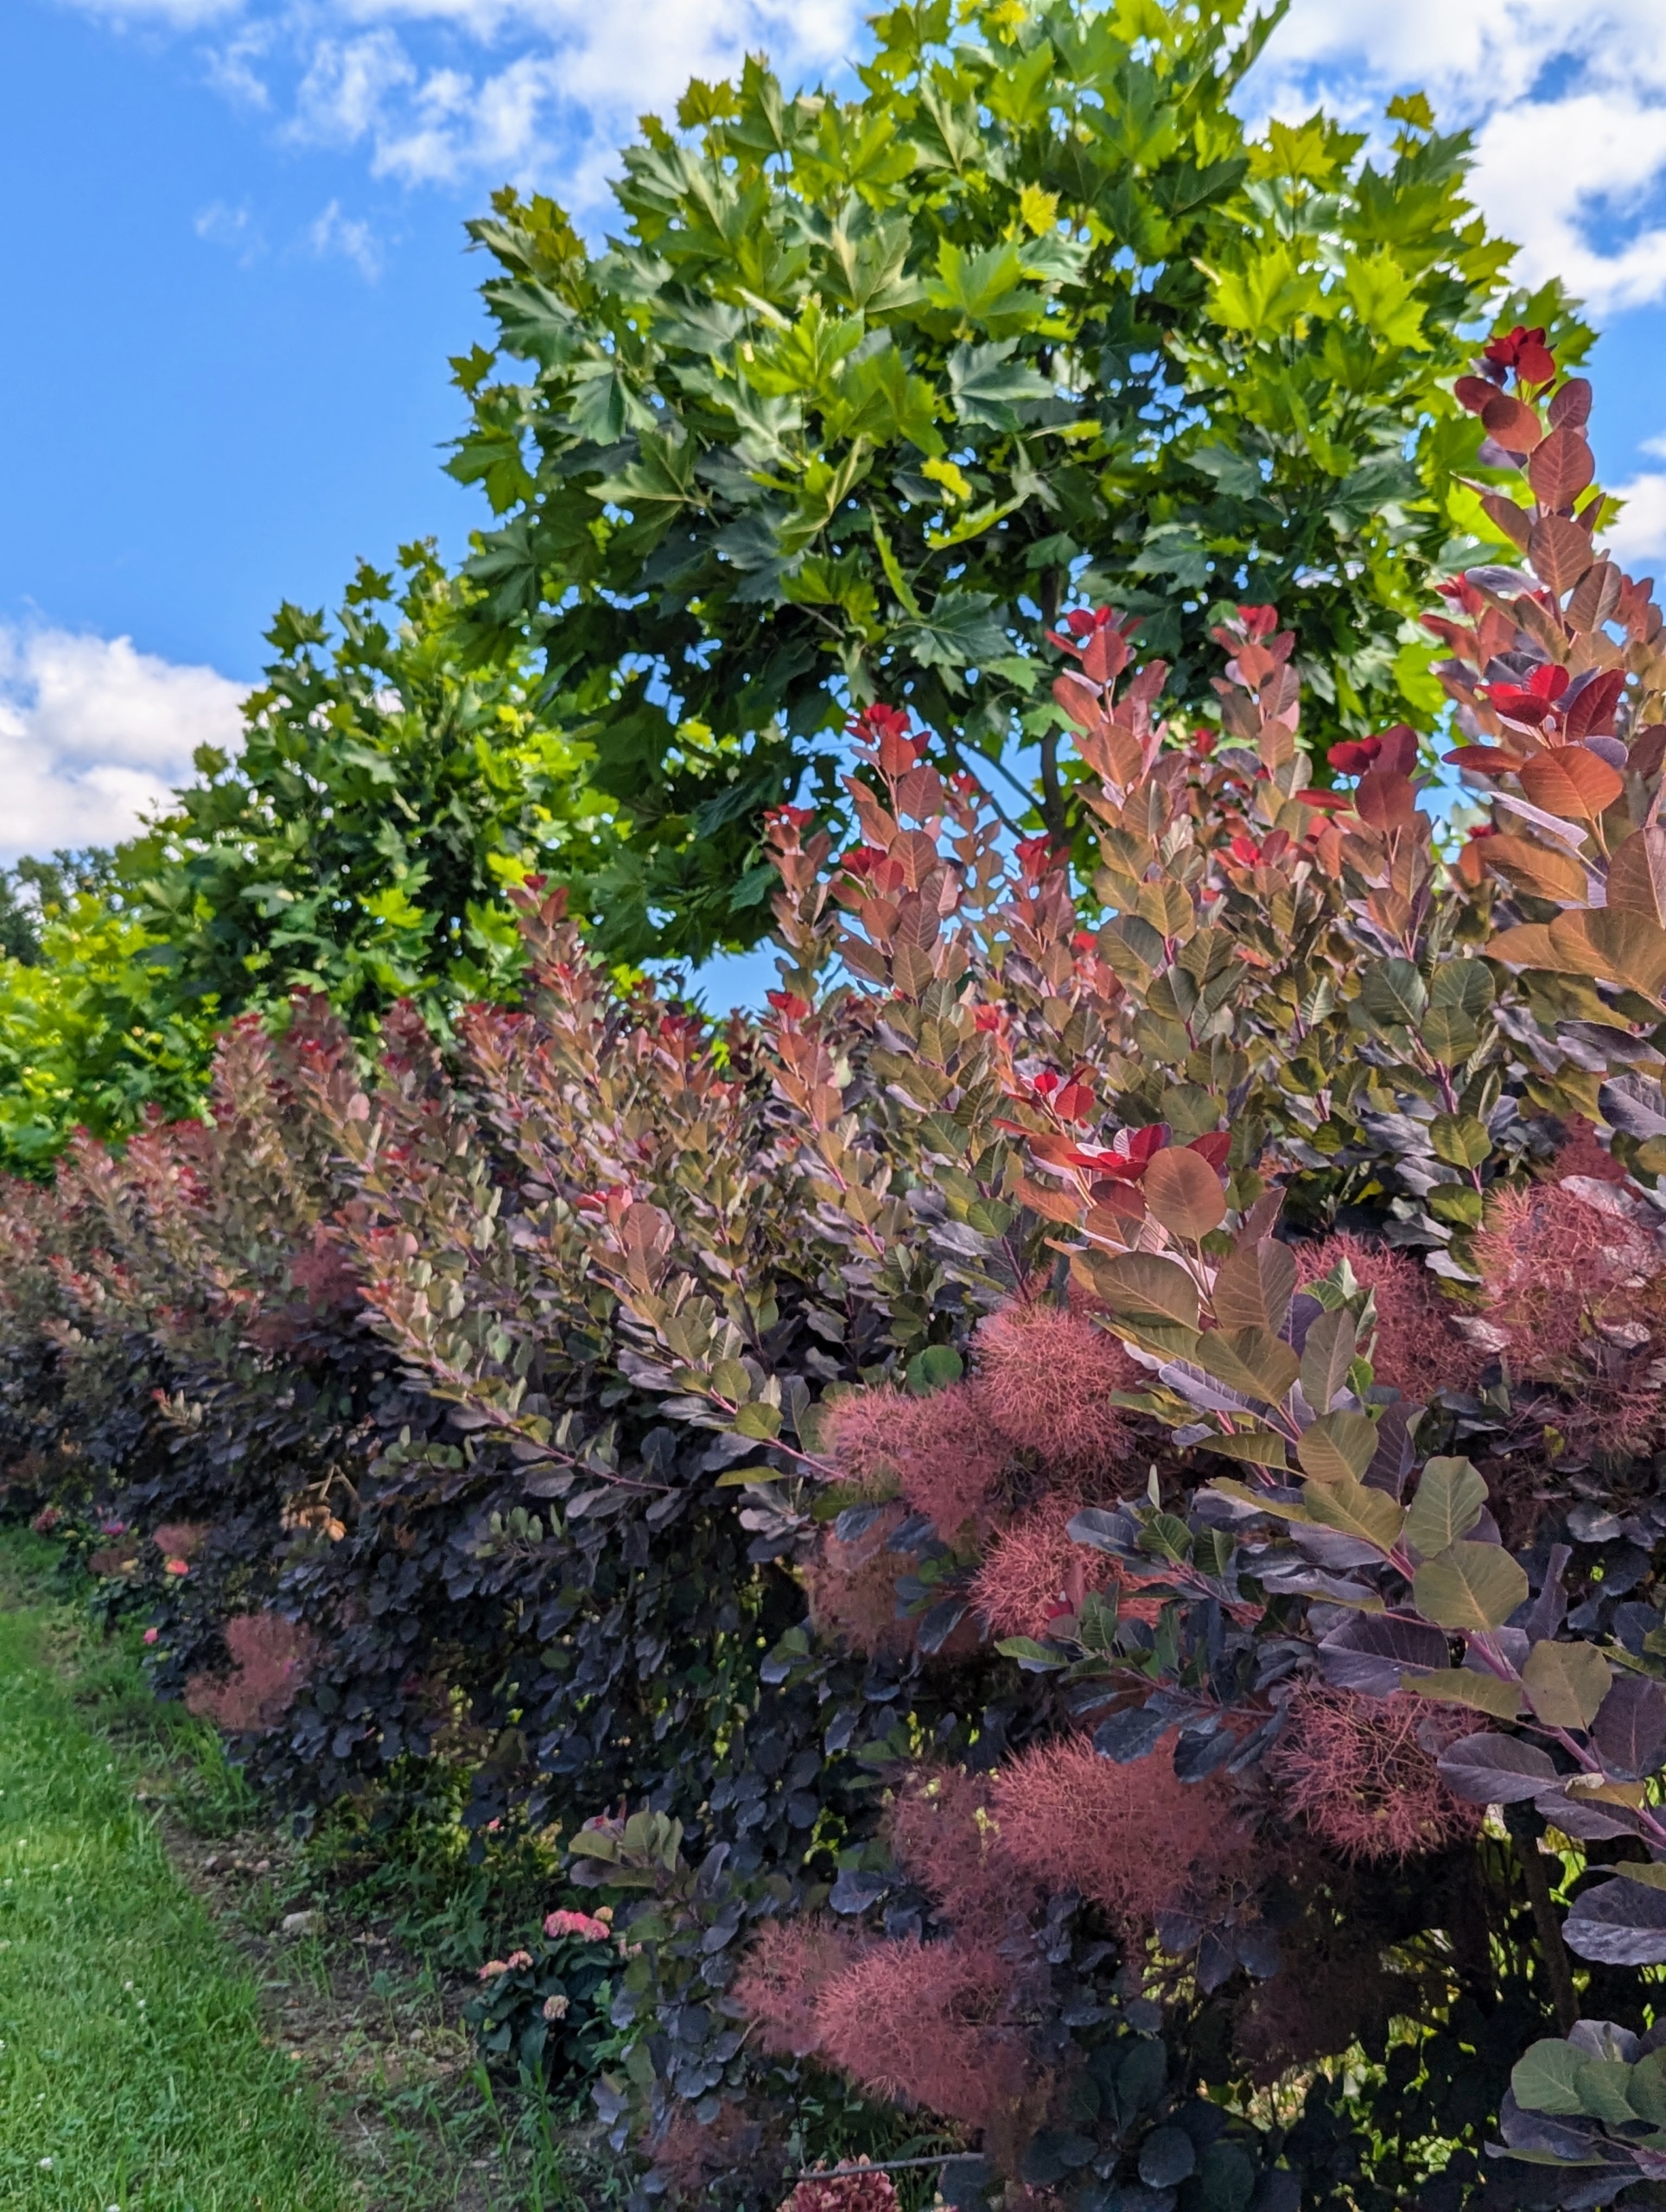
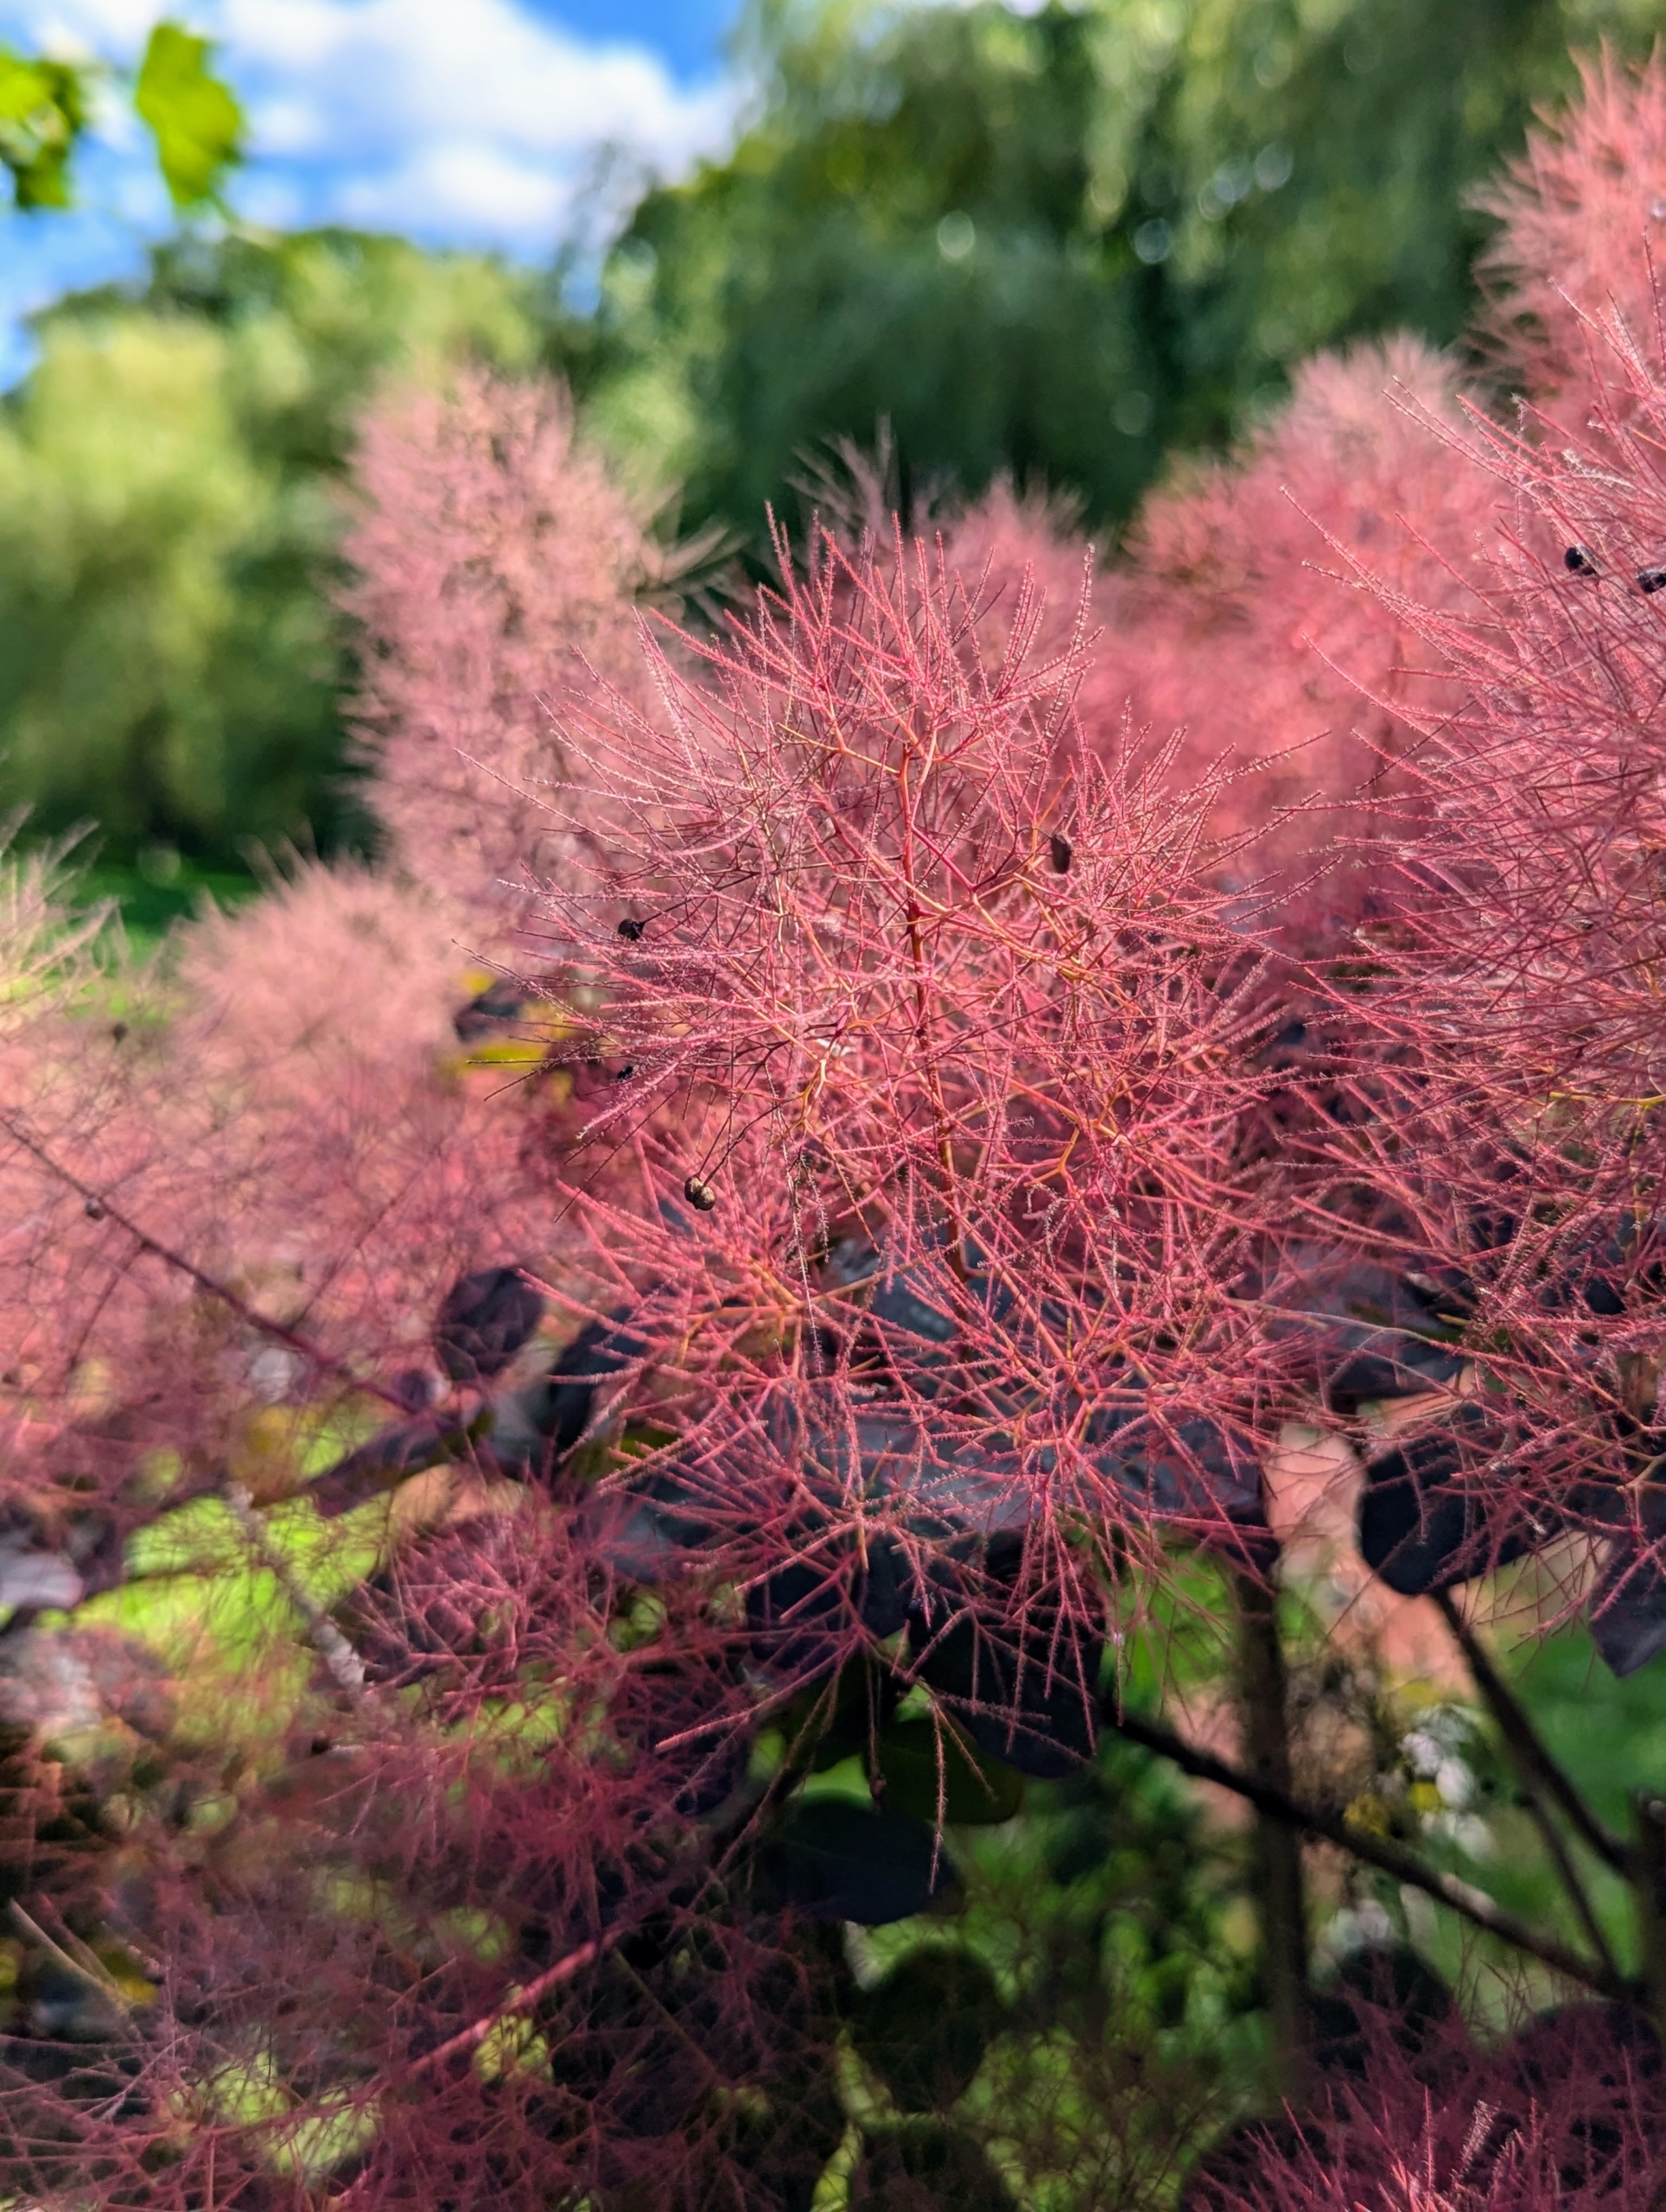
This time of year, many of the Cotinus bushes around my farm are covered with fluffy, hazy, smoke-like puffs.
Cotinus, the smoketree or smoke bush, is a genus of seven species of flowering plants in the family Anacardiaceae, closely related to the sumacs. It has an upright habit when young and spreads wider with age.
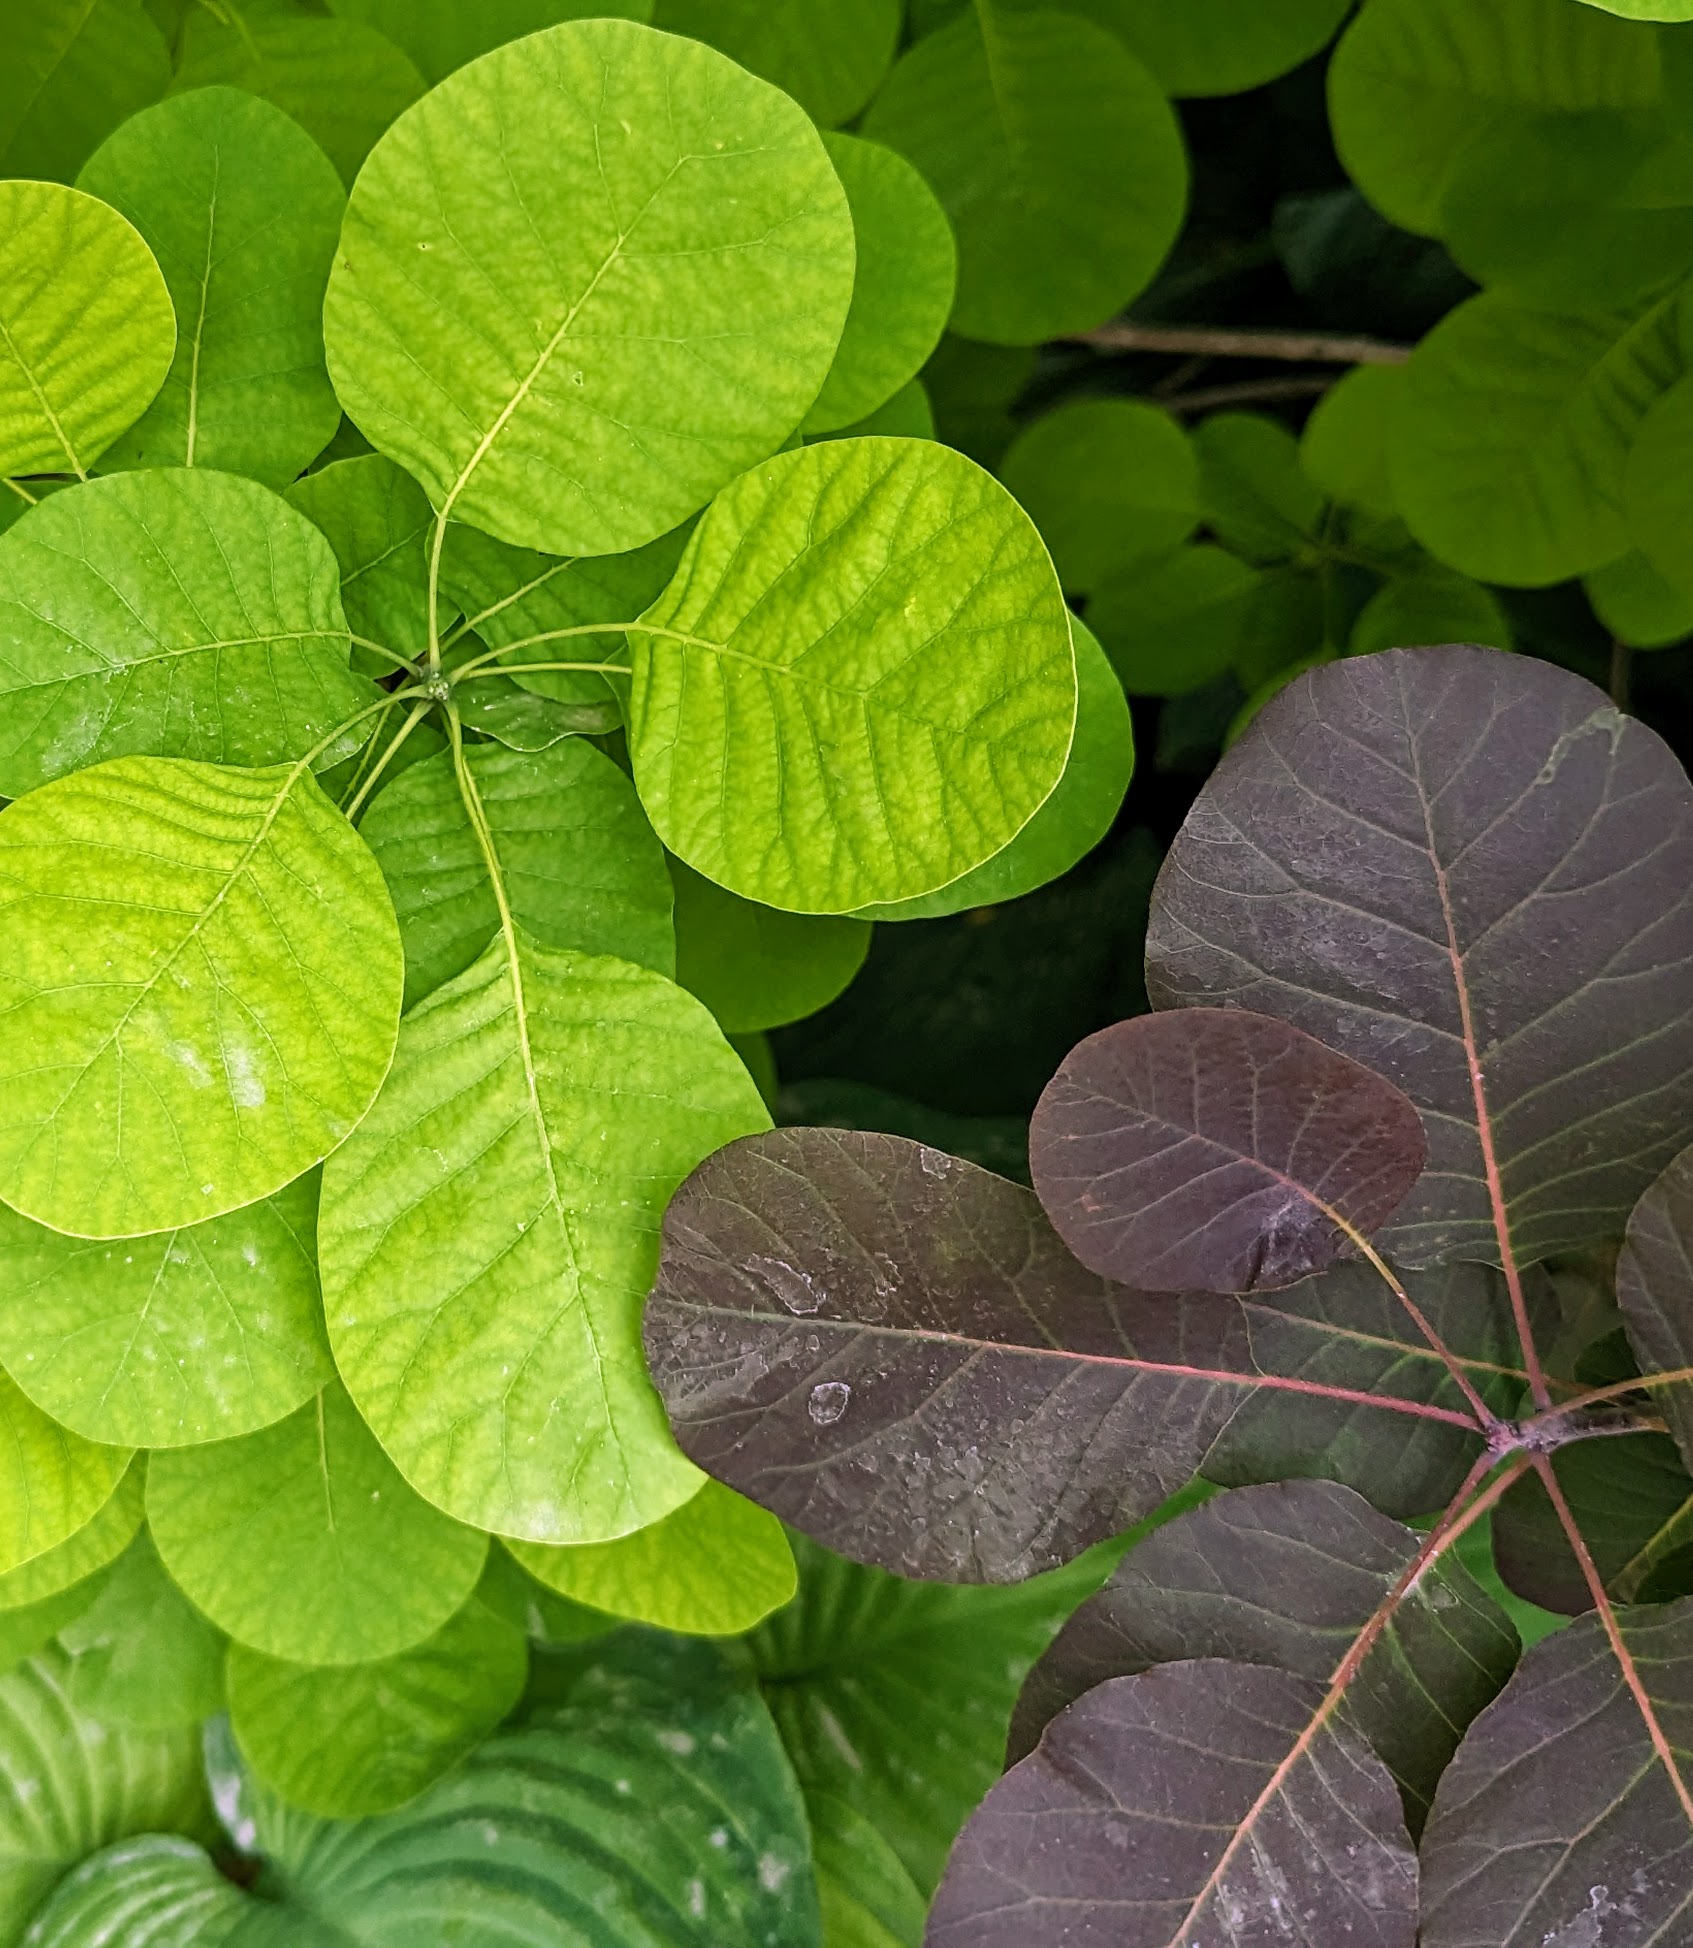
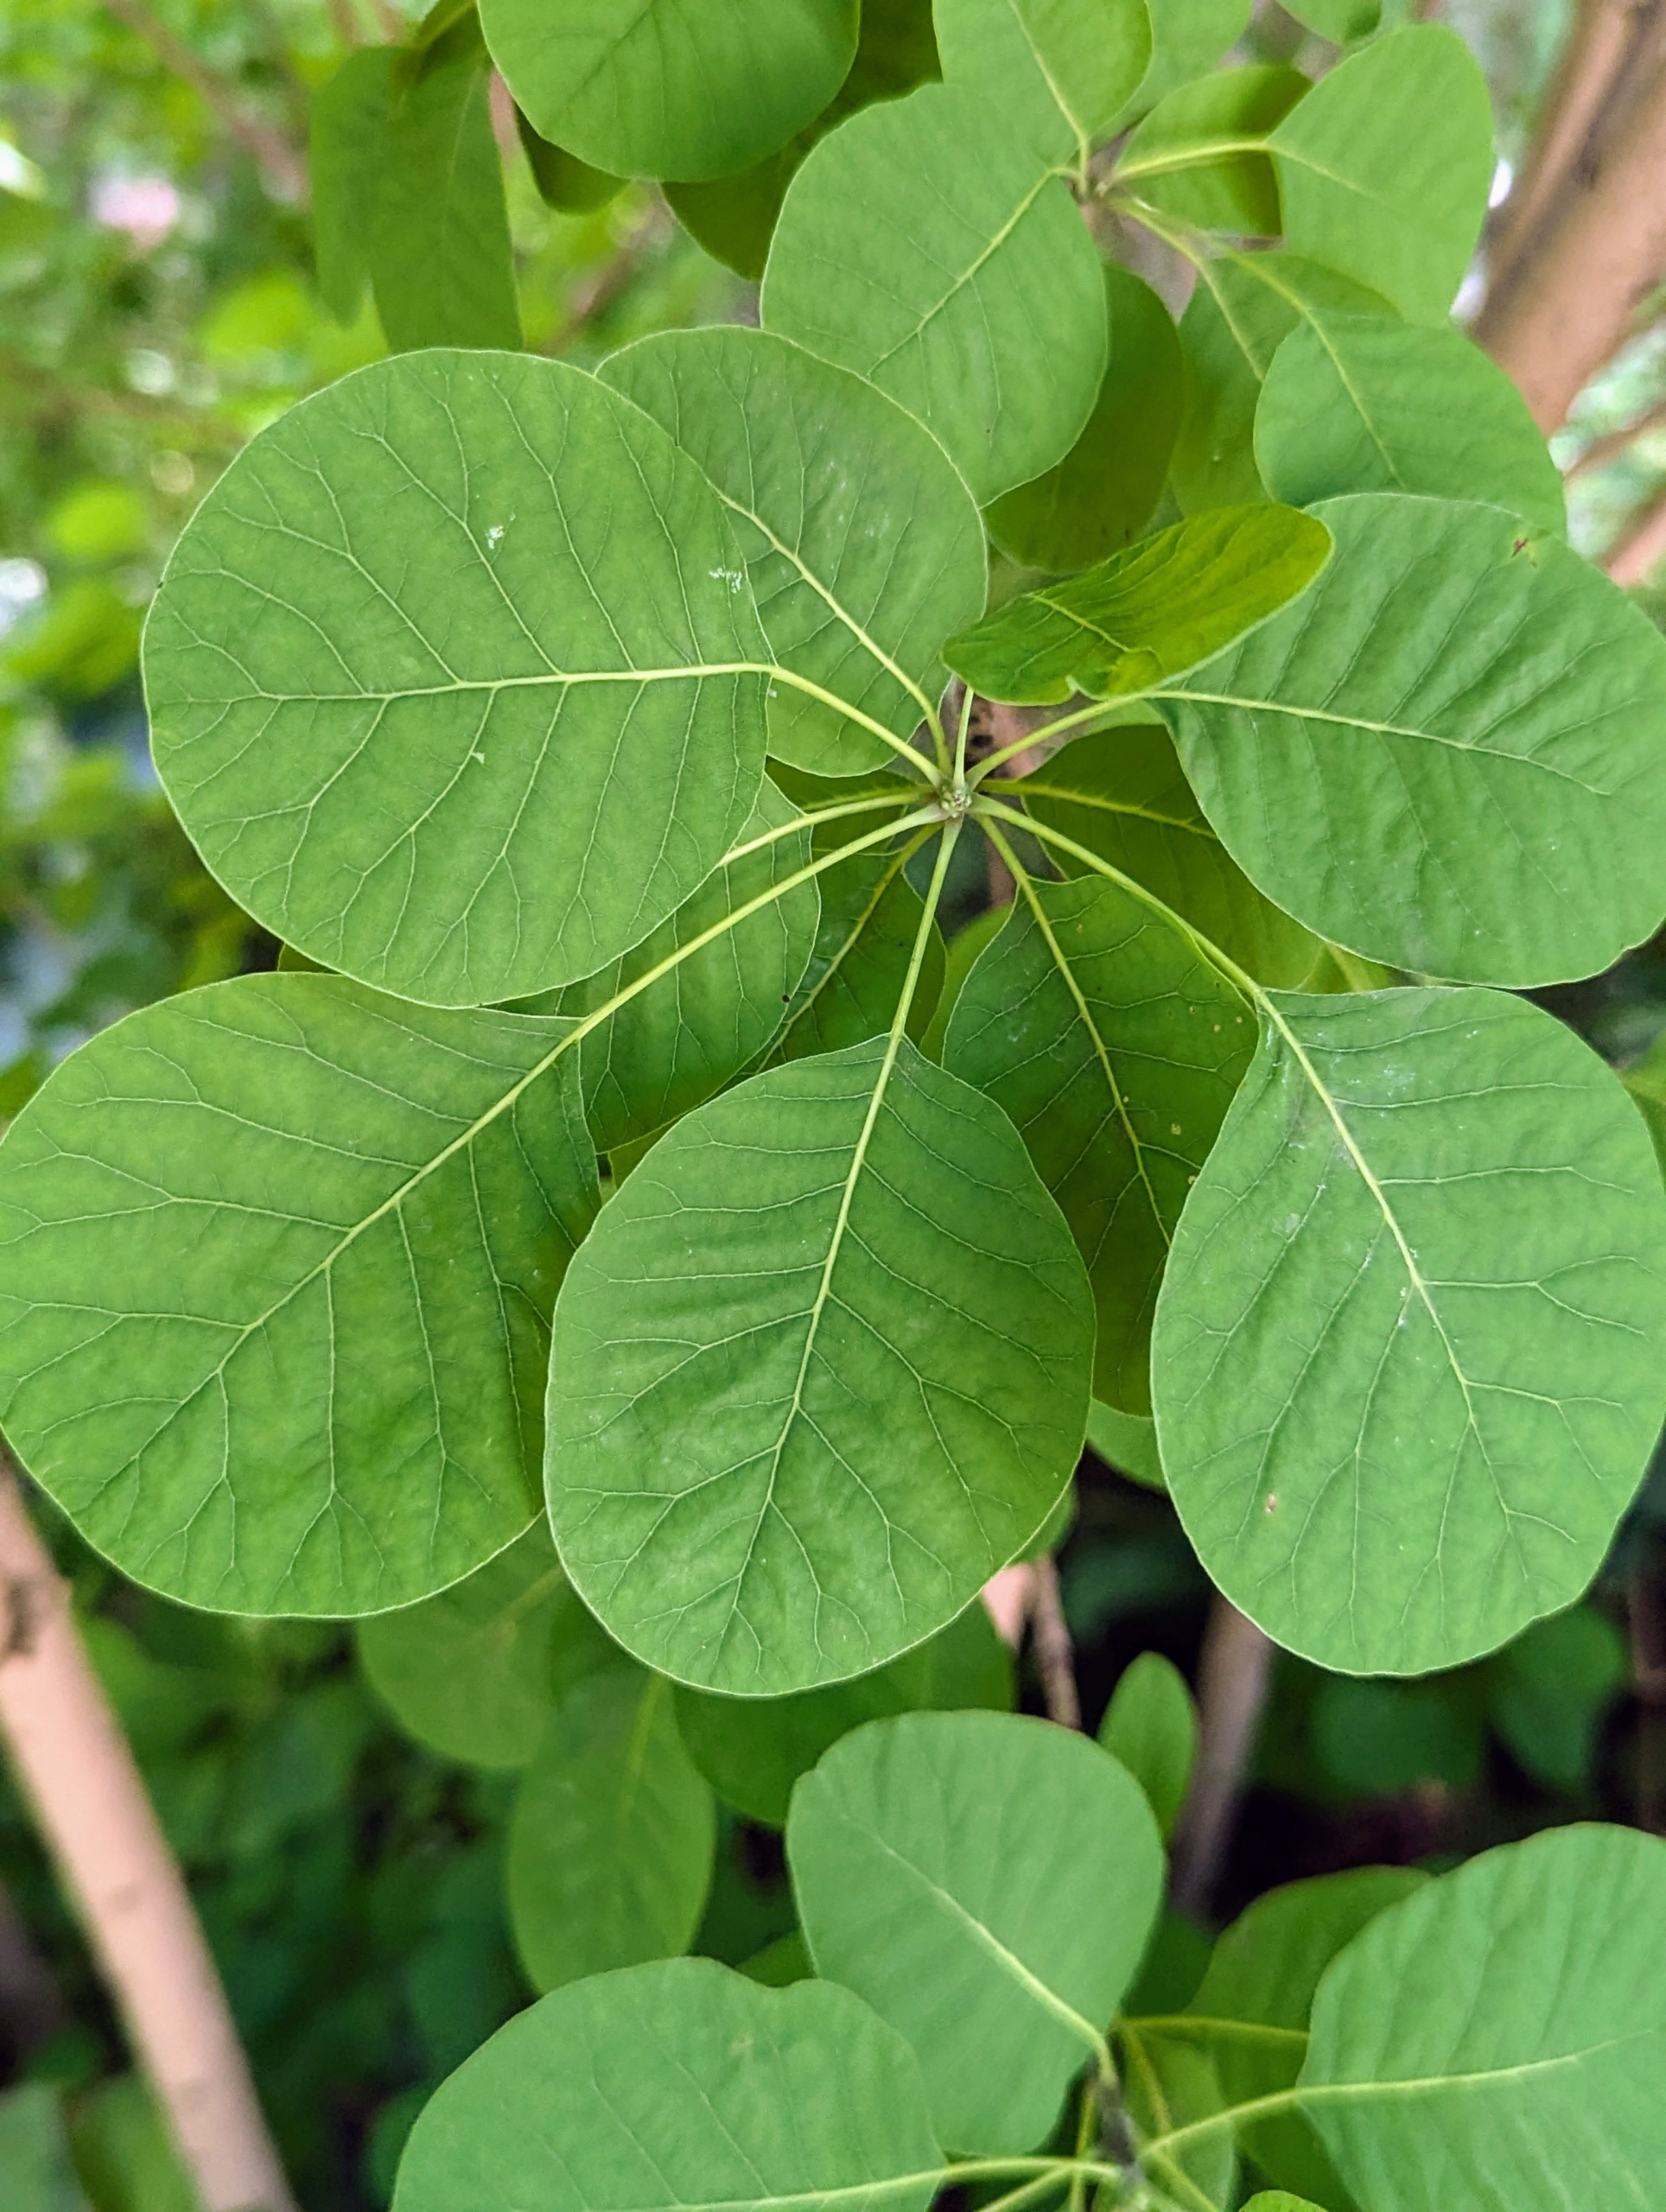
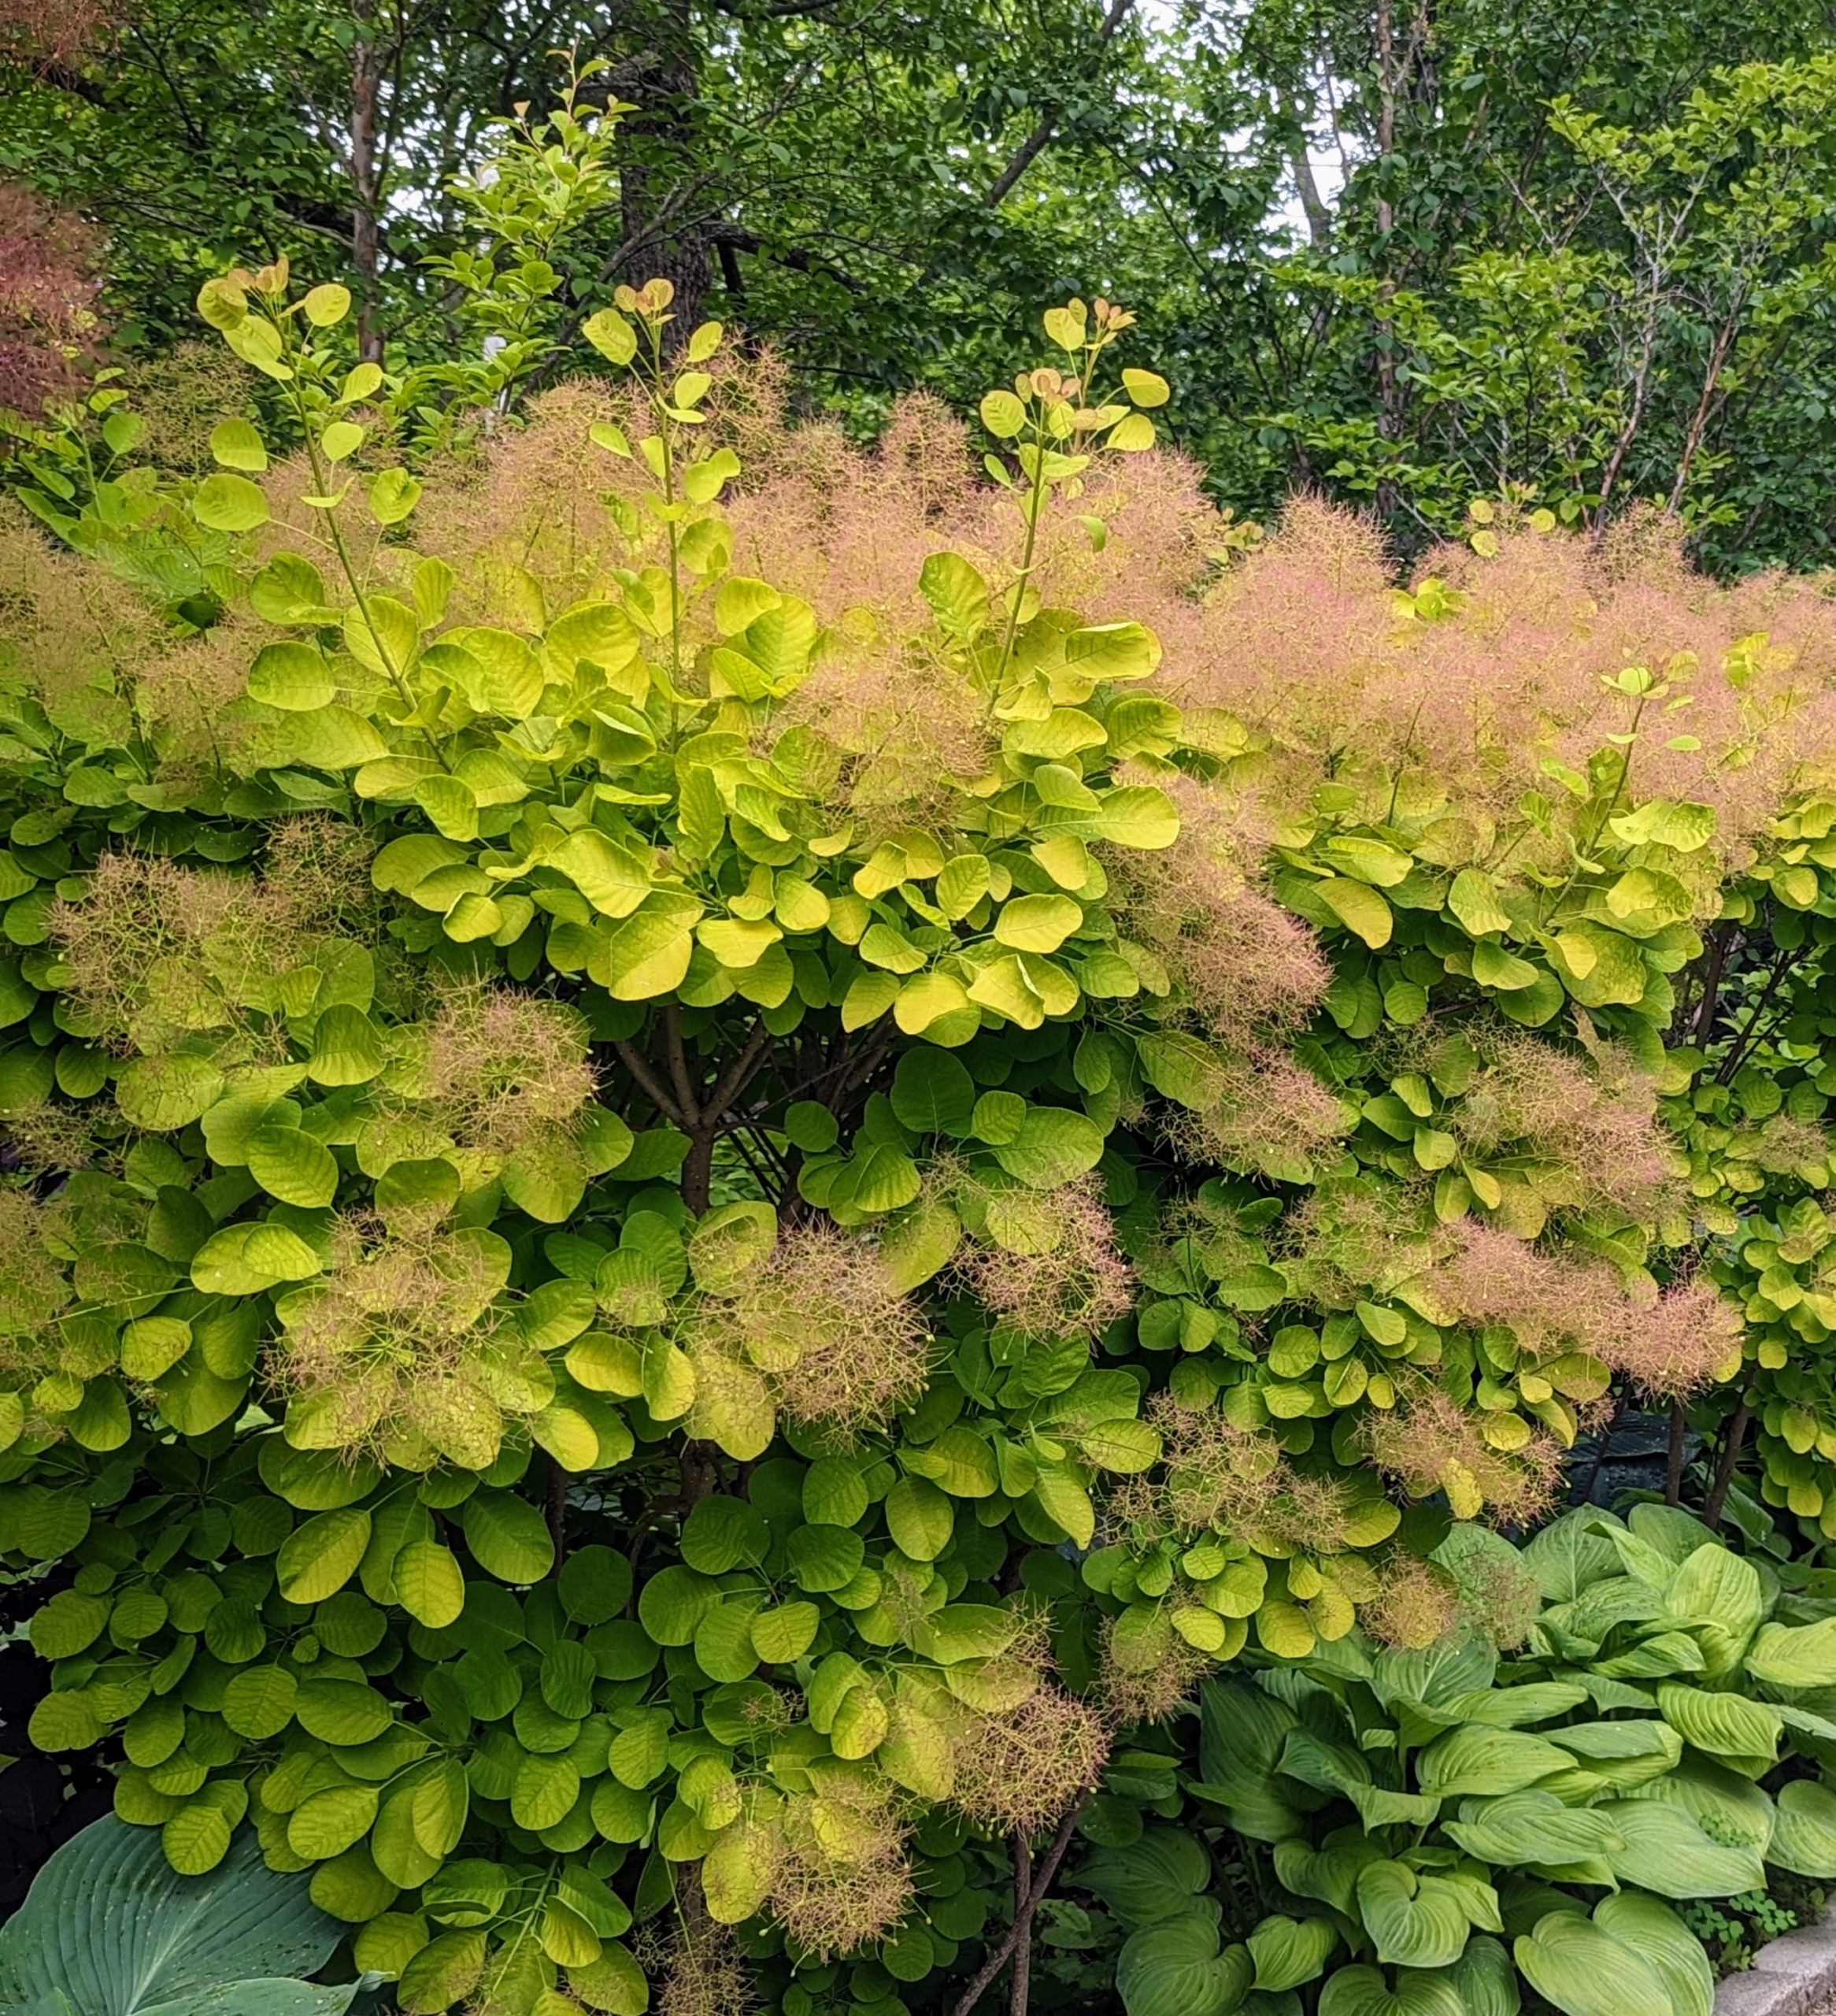
They have rich colored foliage in dark purple or bright green.
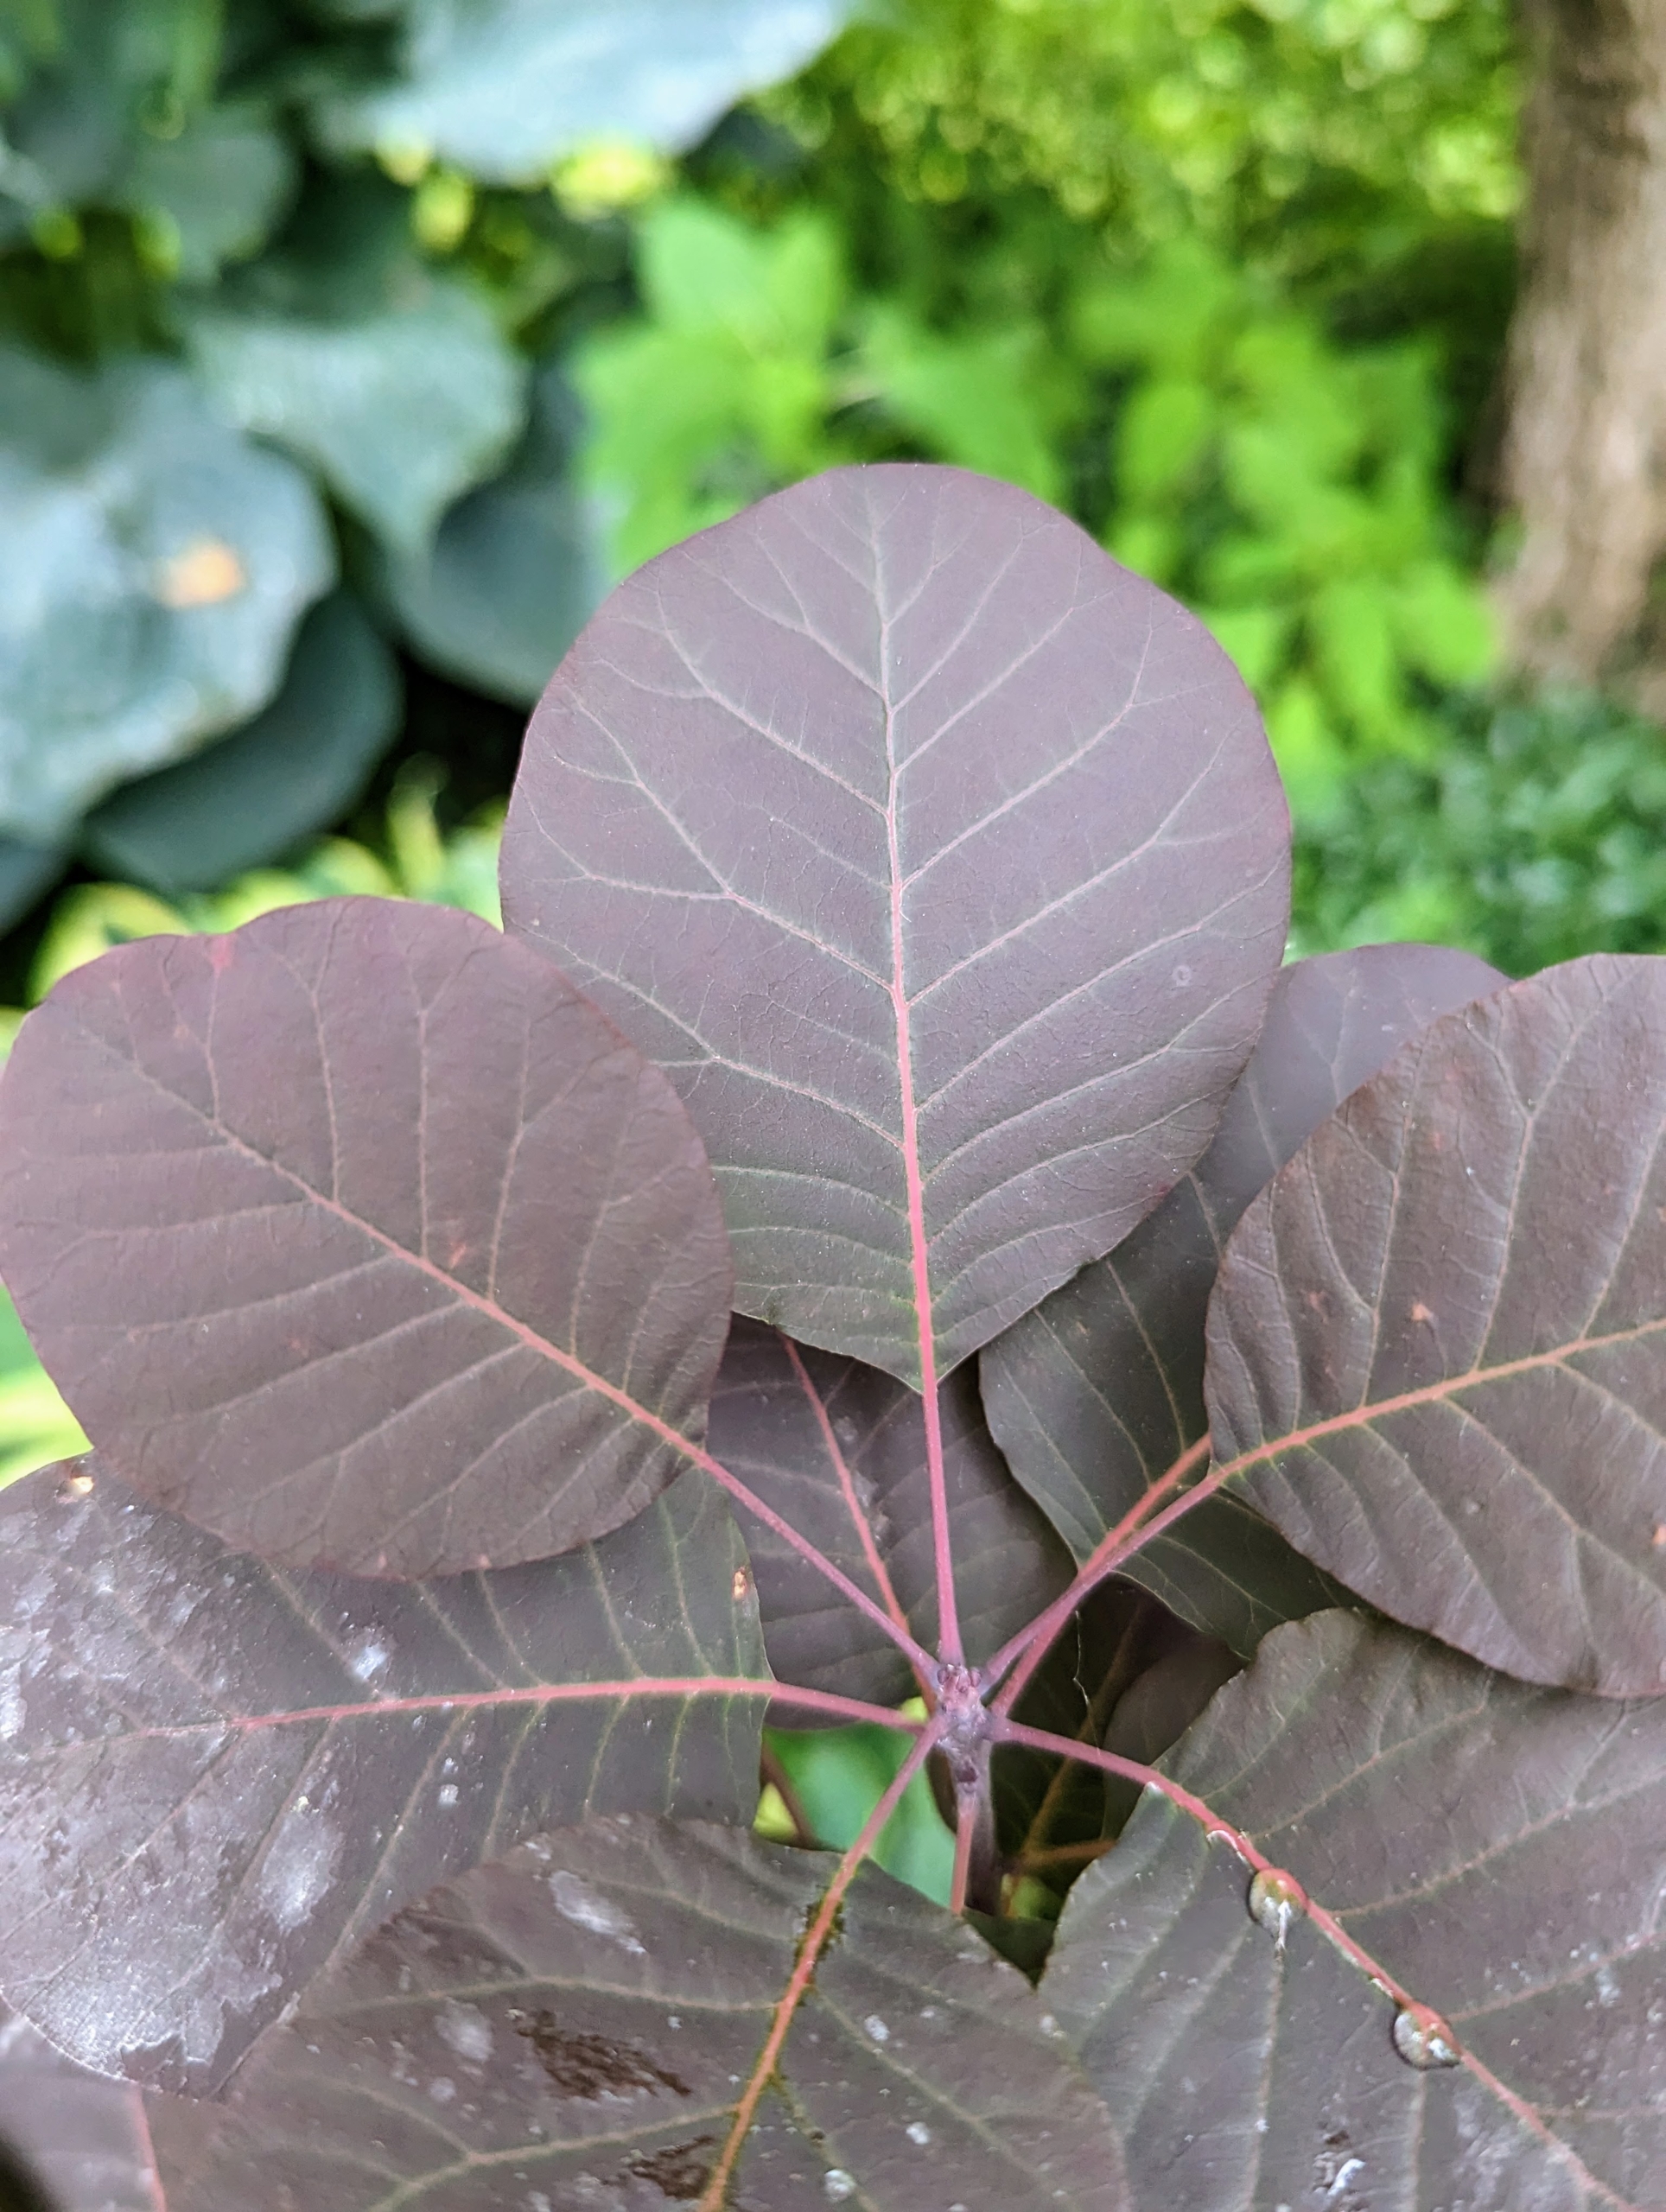
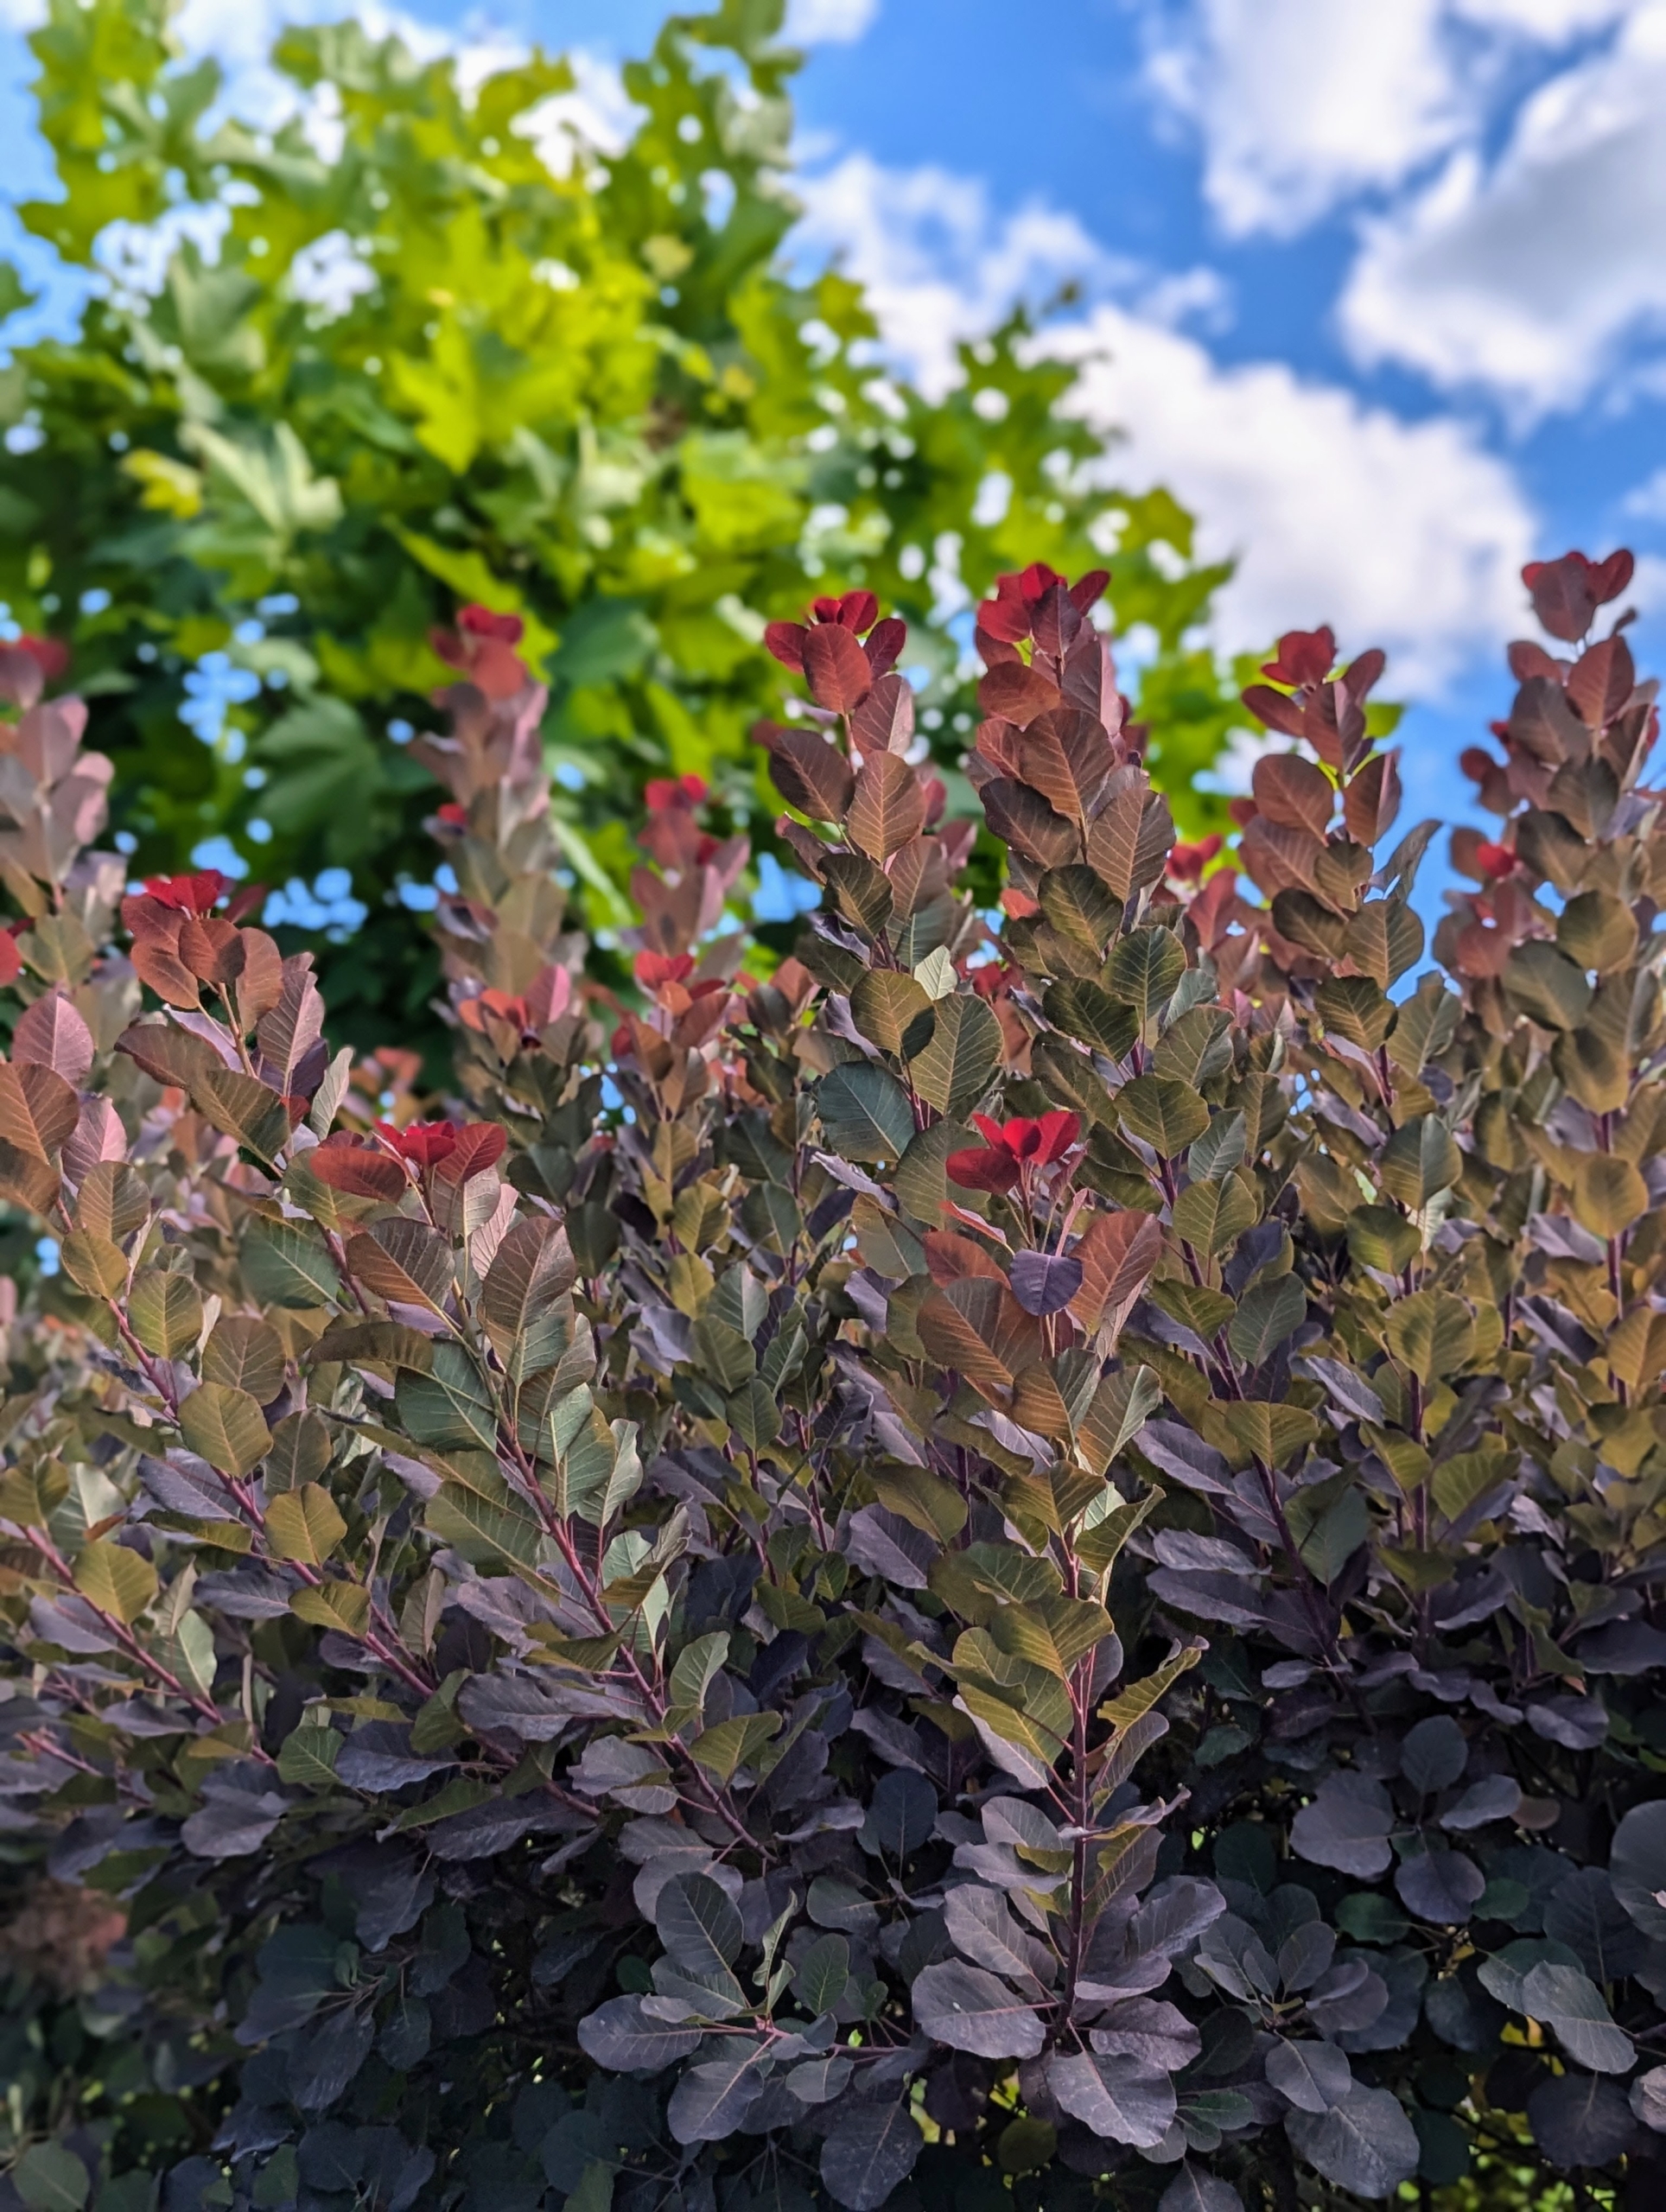
The leaves of the smoke bush are about one-and-a-half to three inches long and ovate, or oval like, in shape.
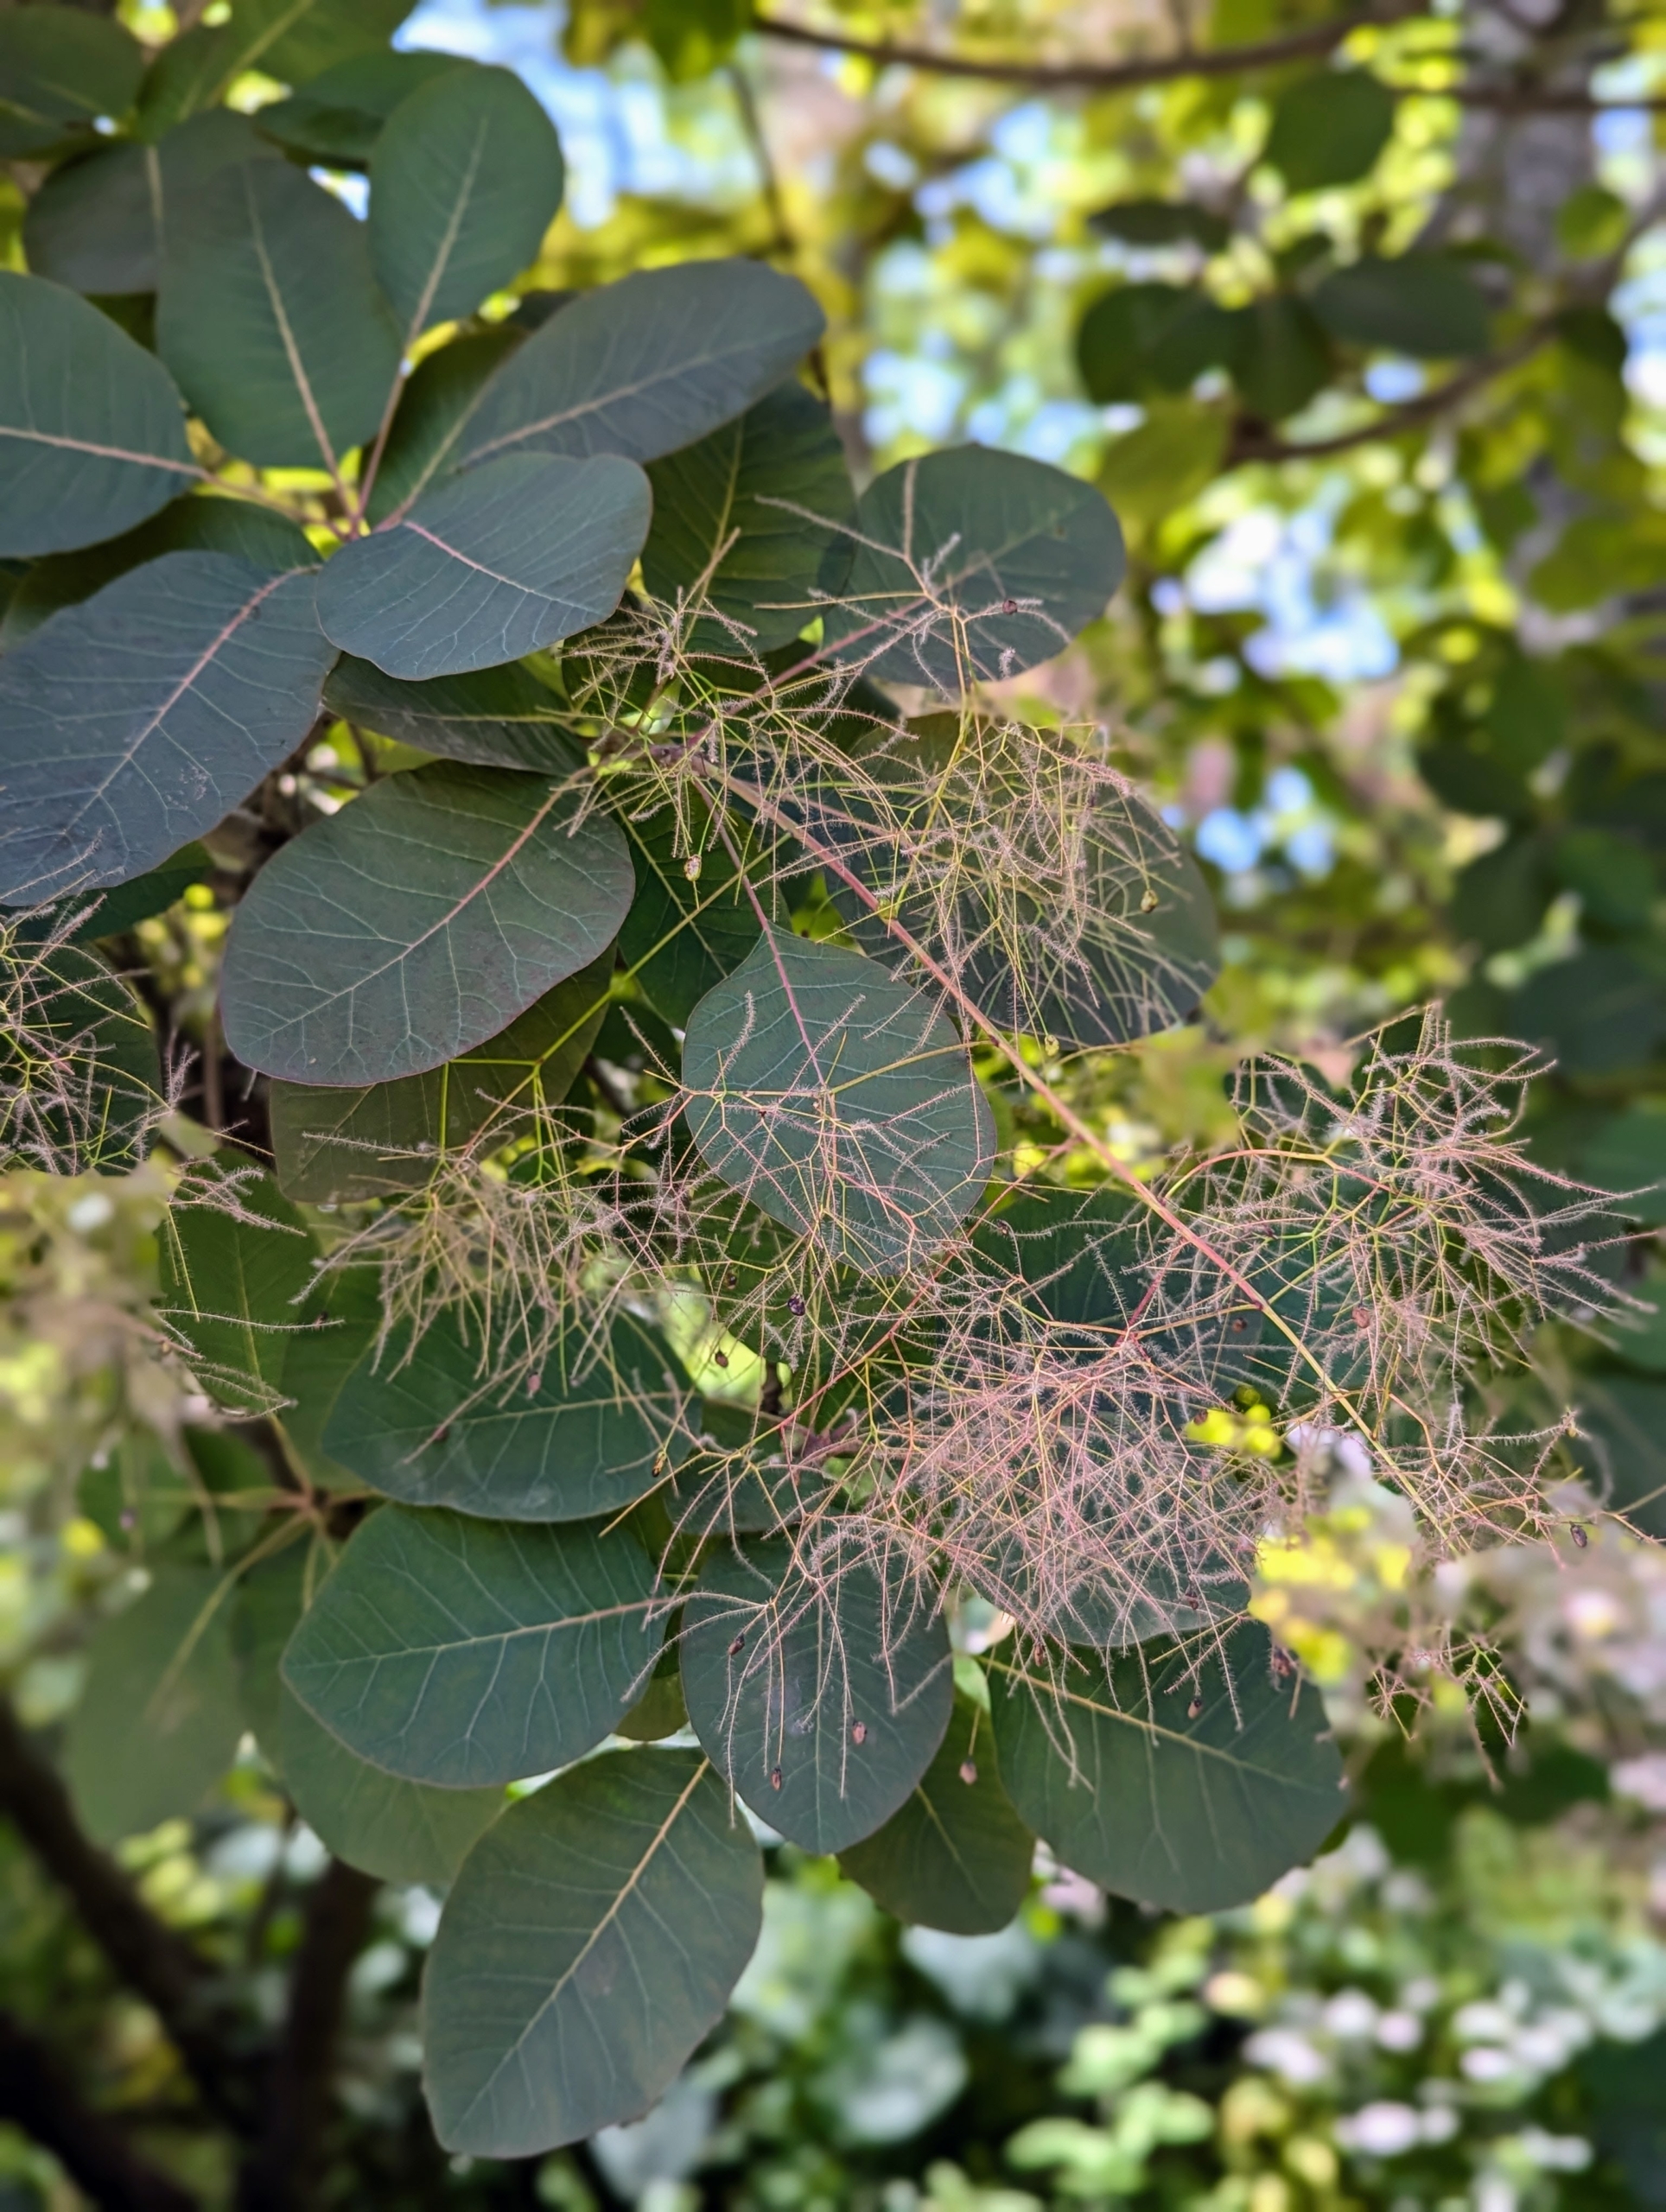
Here, these leaves have turned a beautiful deep dusky purple color.
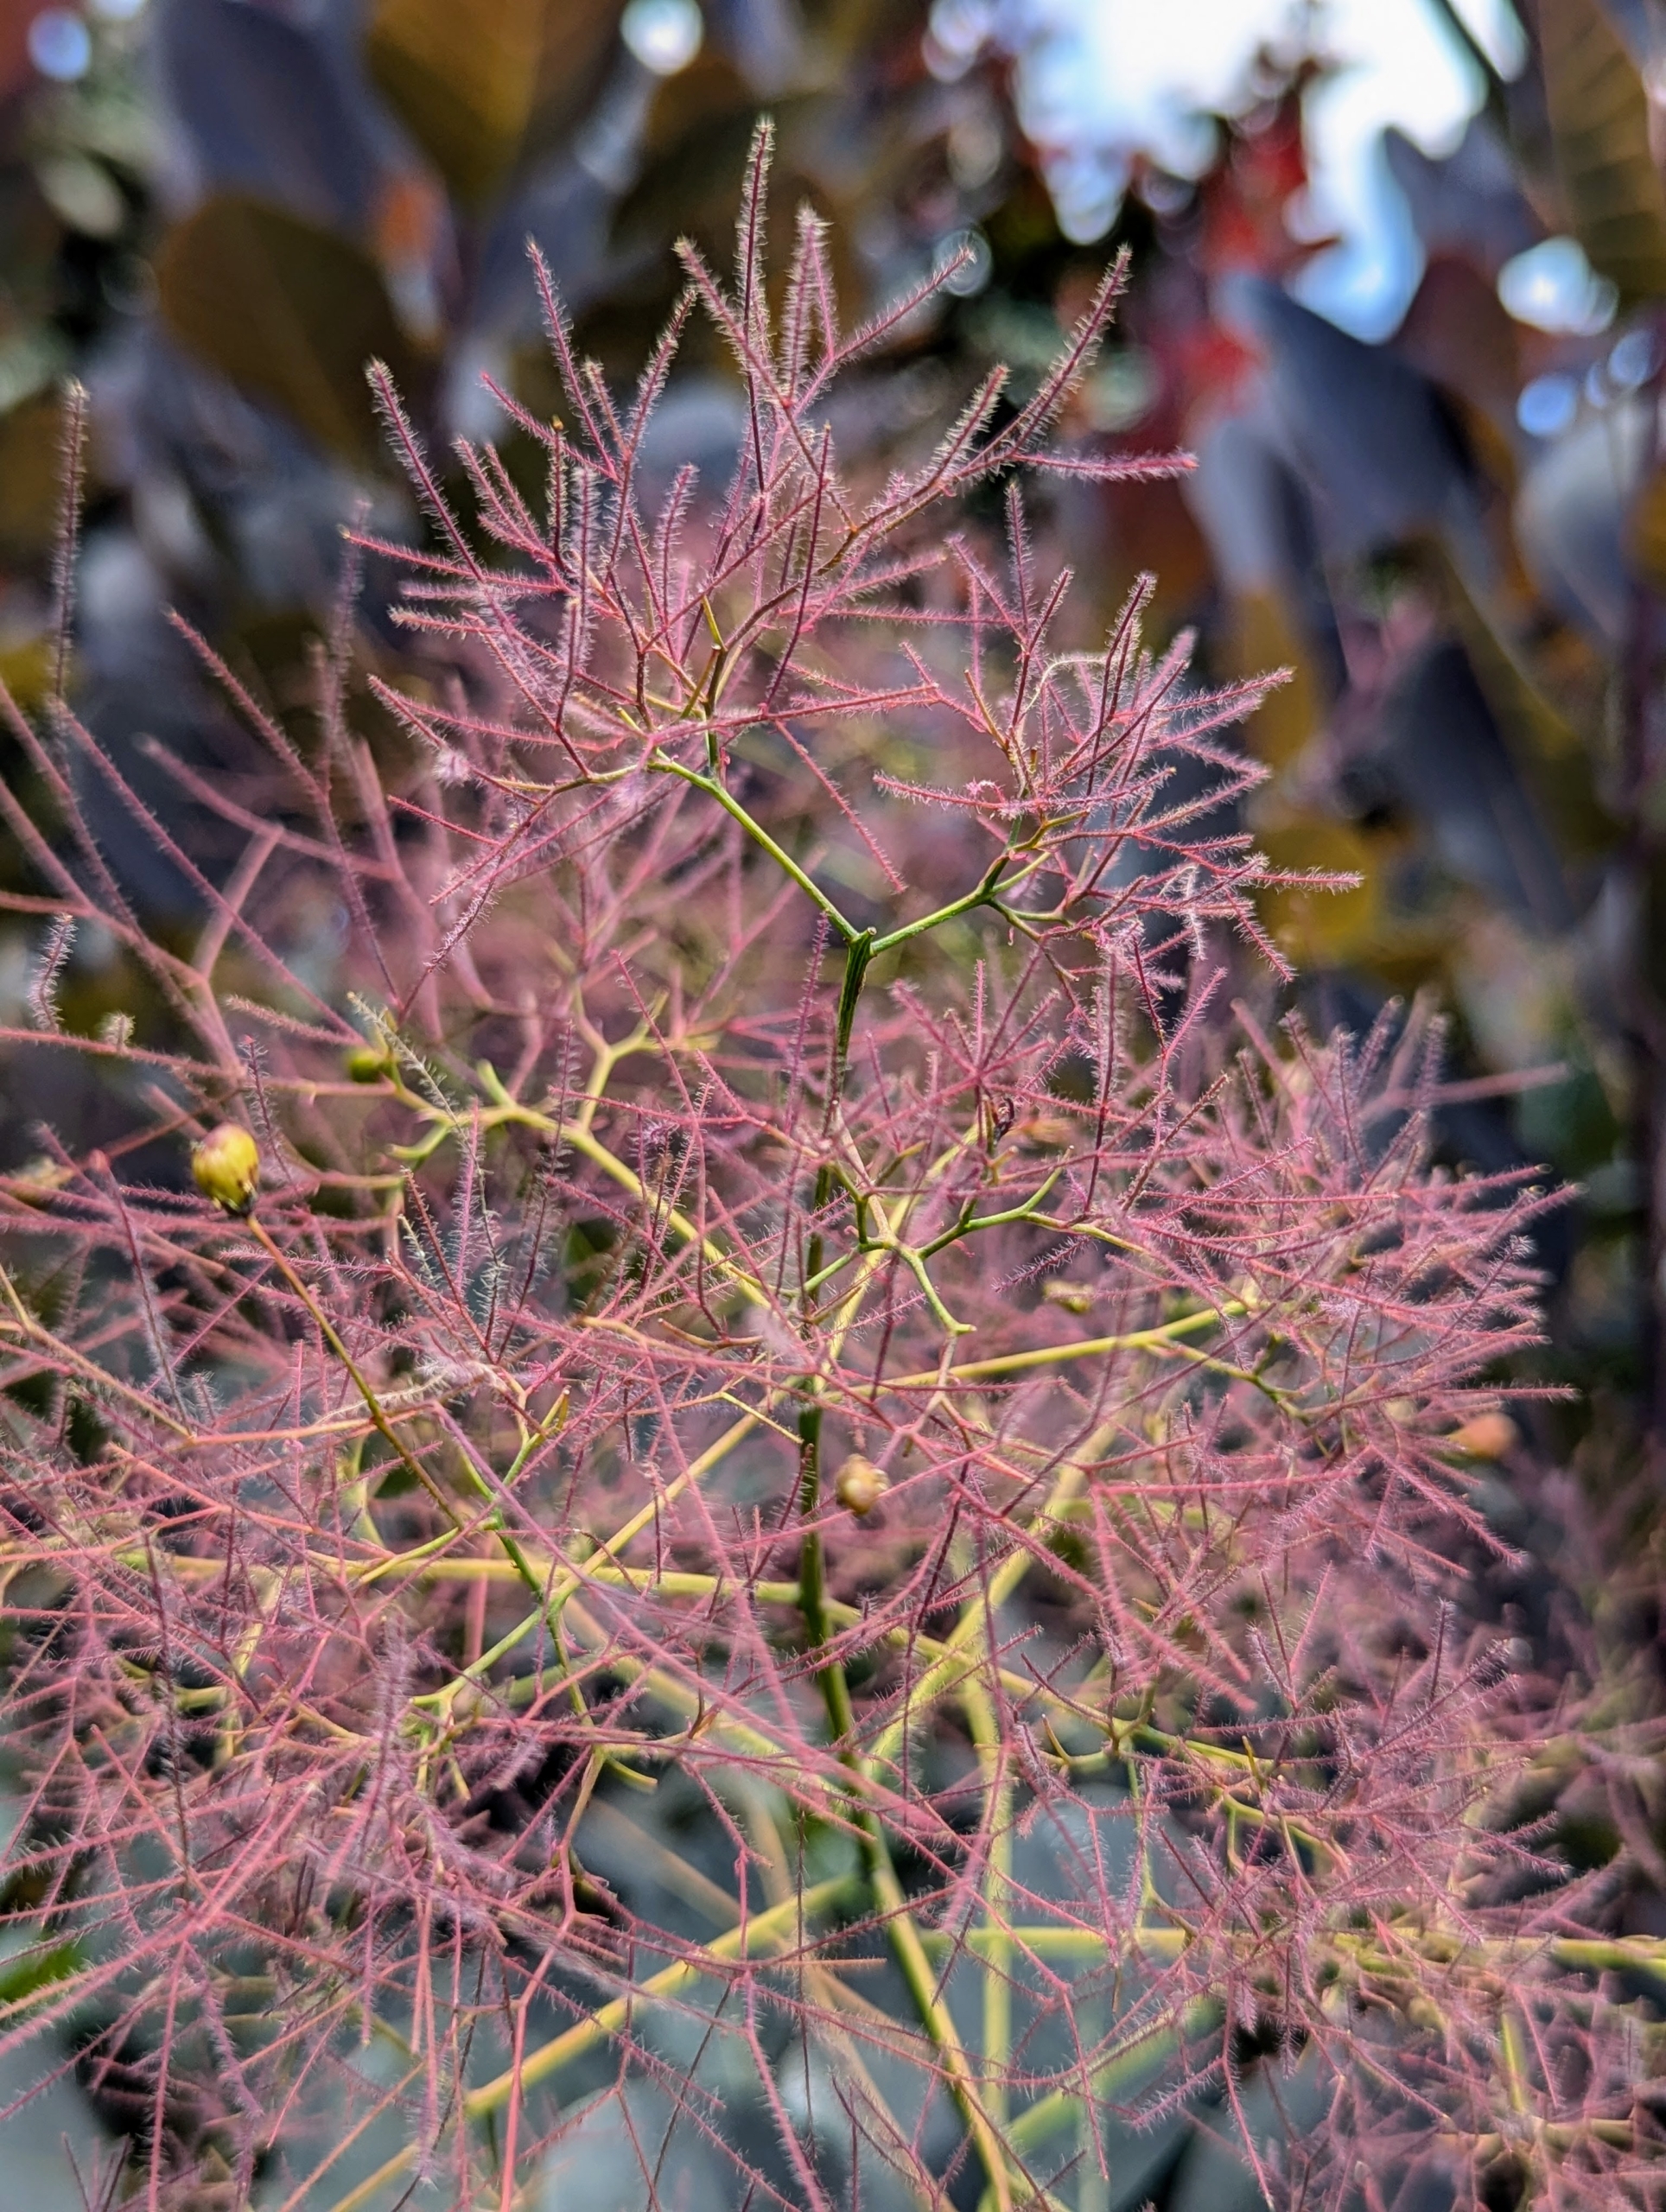
The name “smoke bush” comes from the billowy hairs attached to the flower clusters which remain in place through the summer, turning a smoky pink to purplish-pink as the weeks progress.
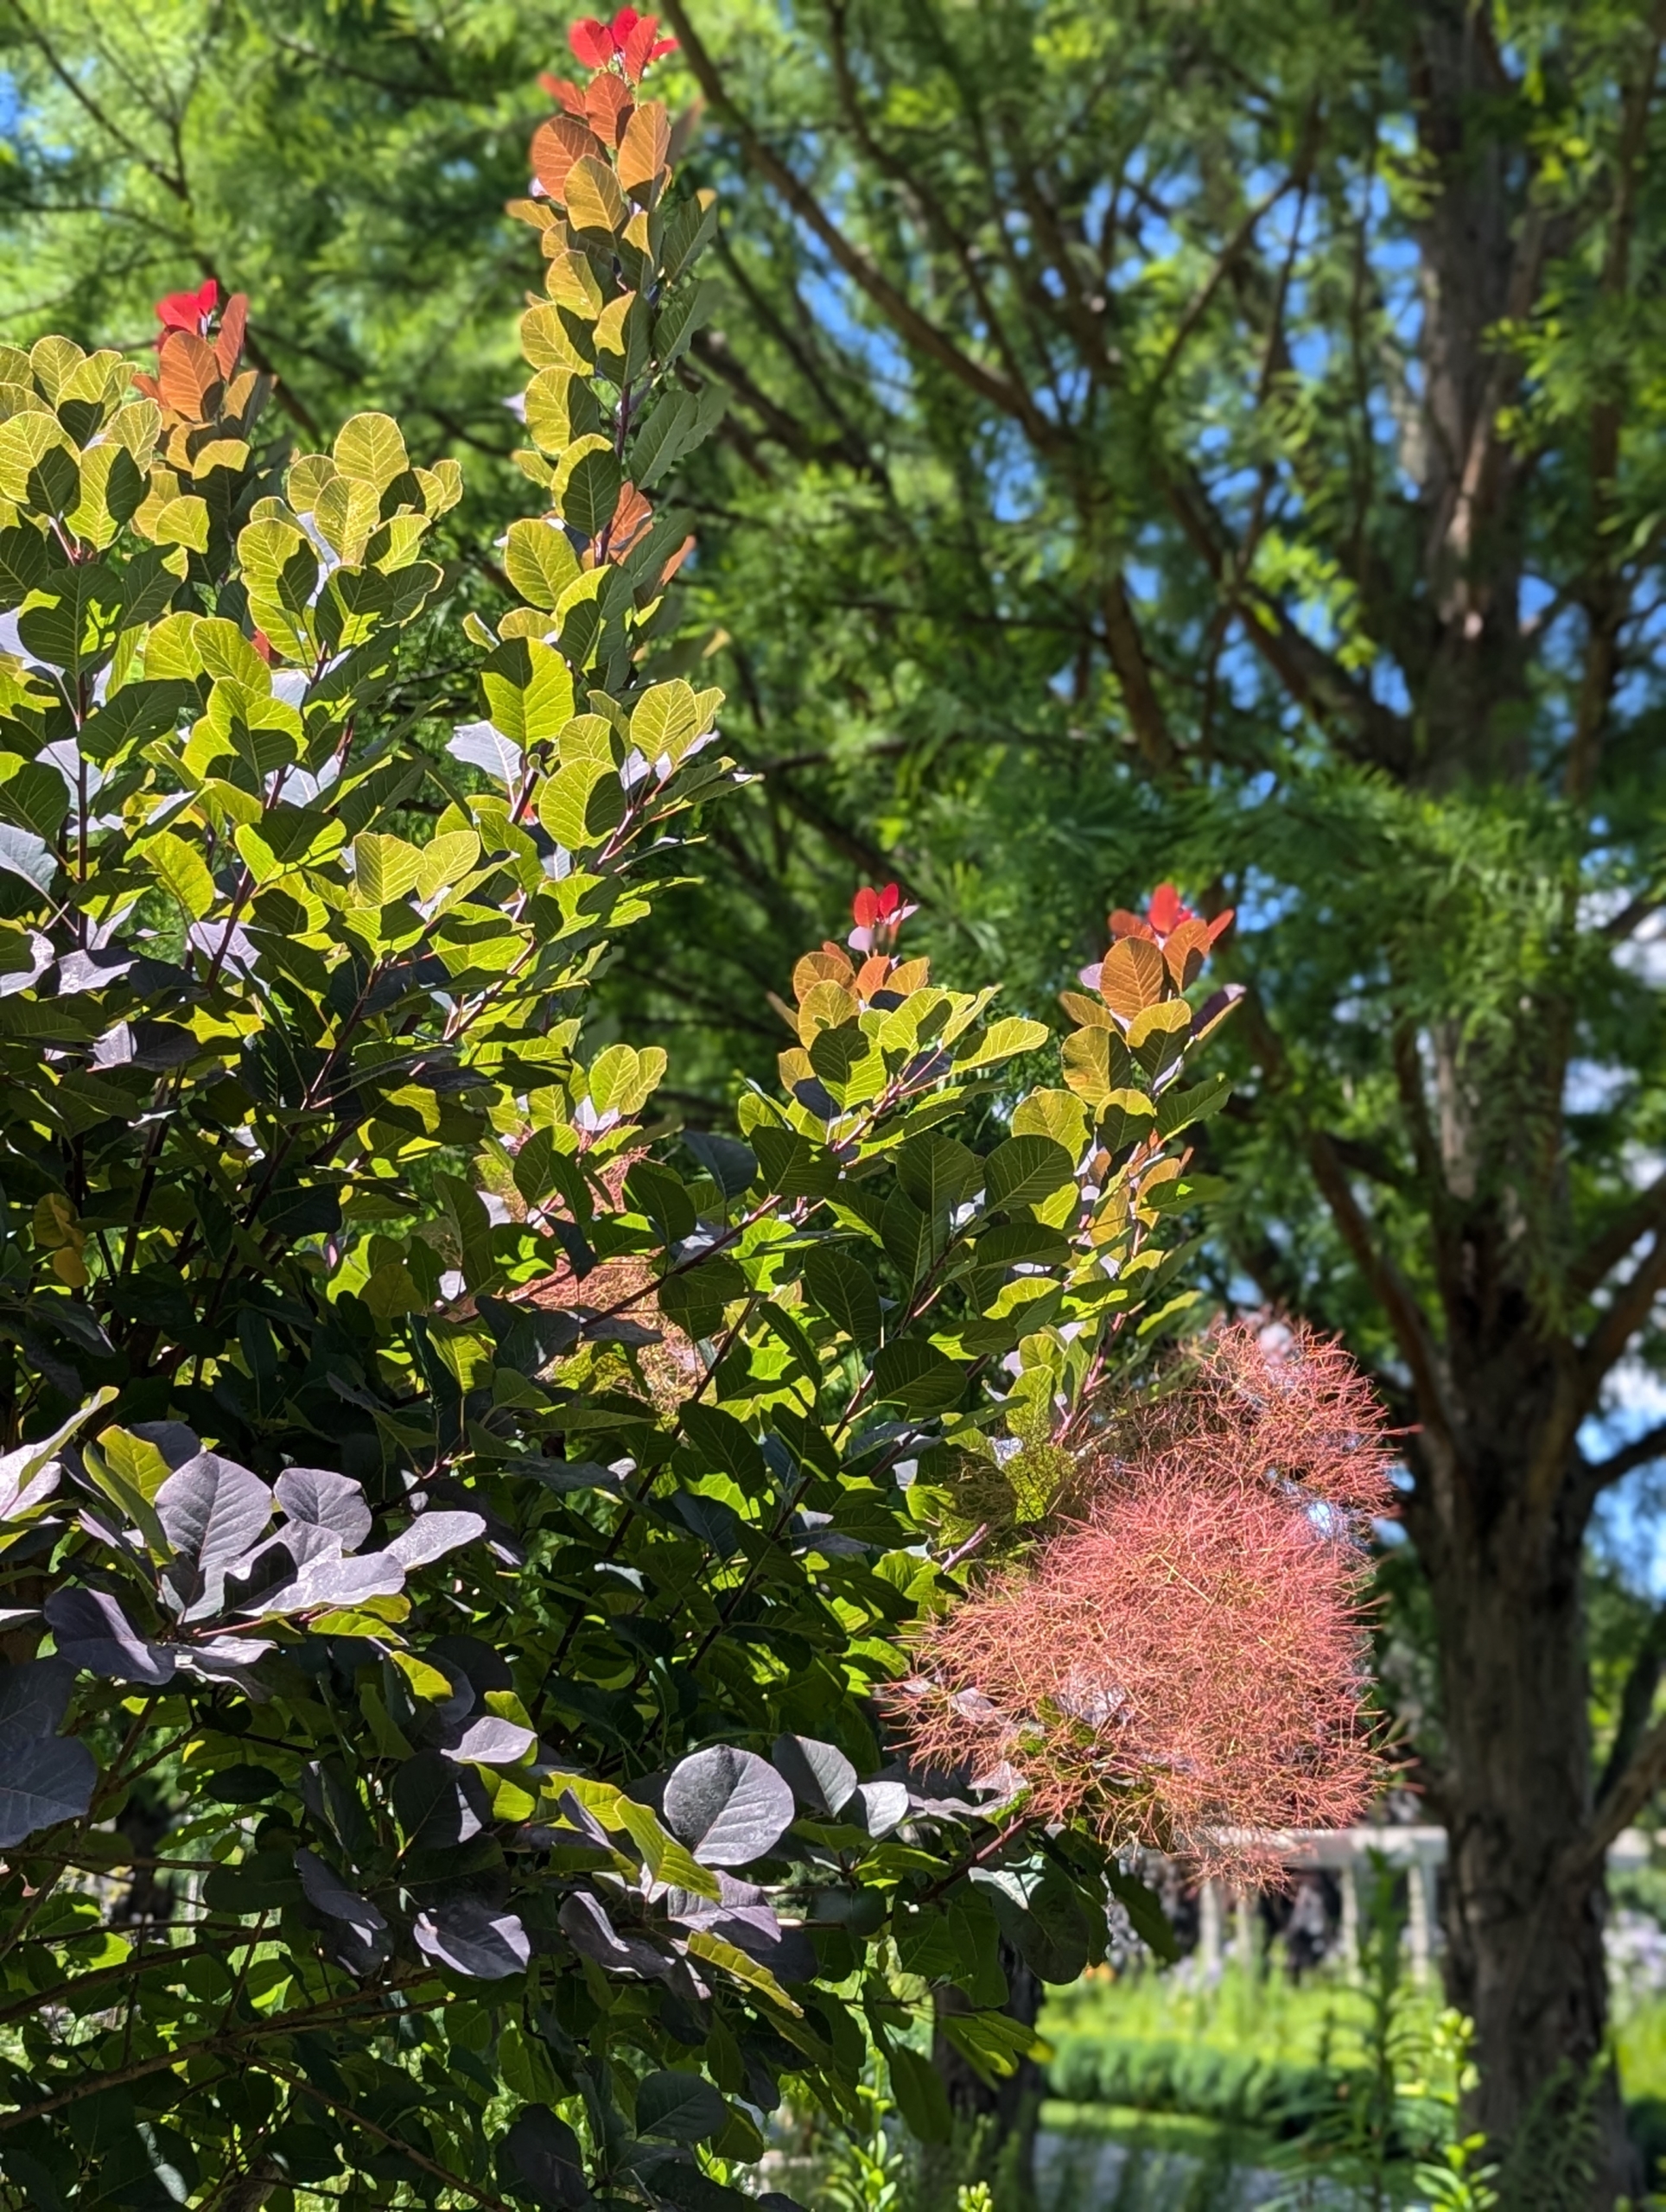
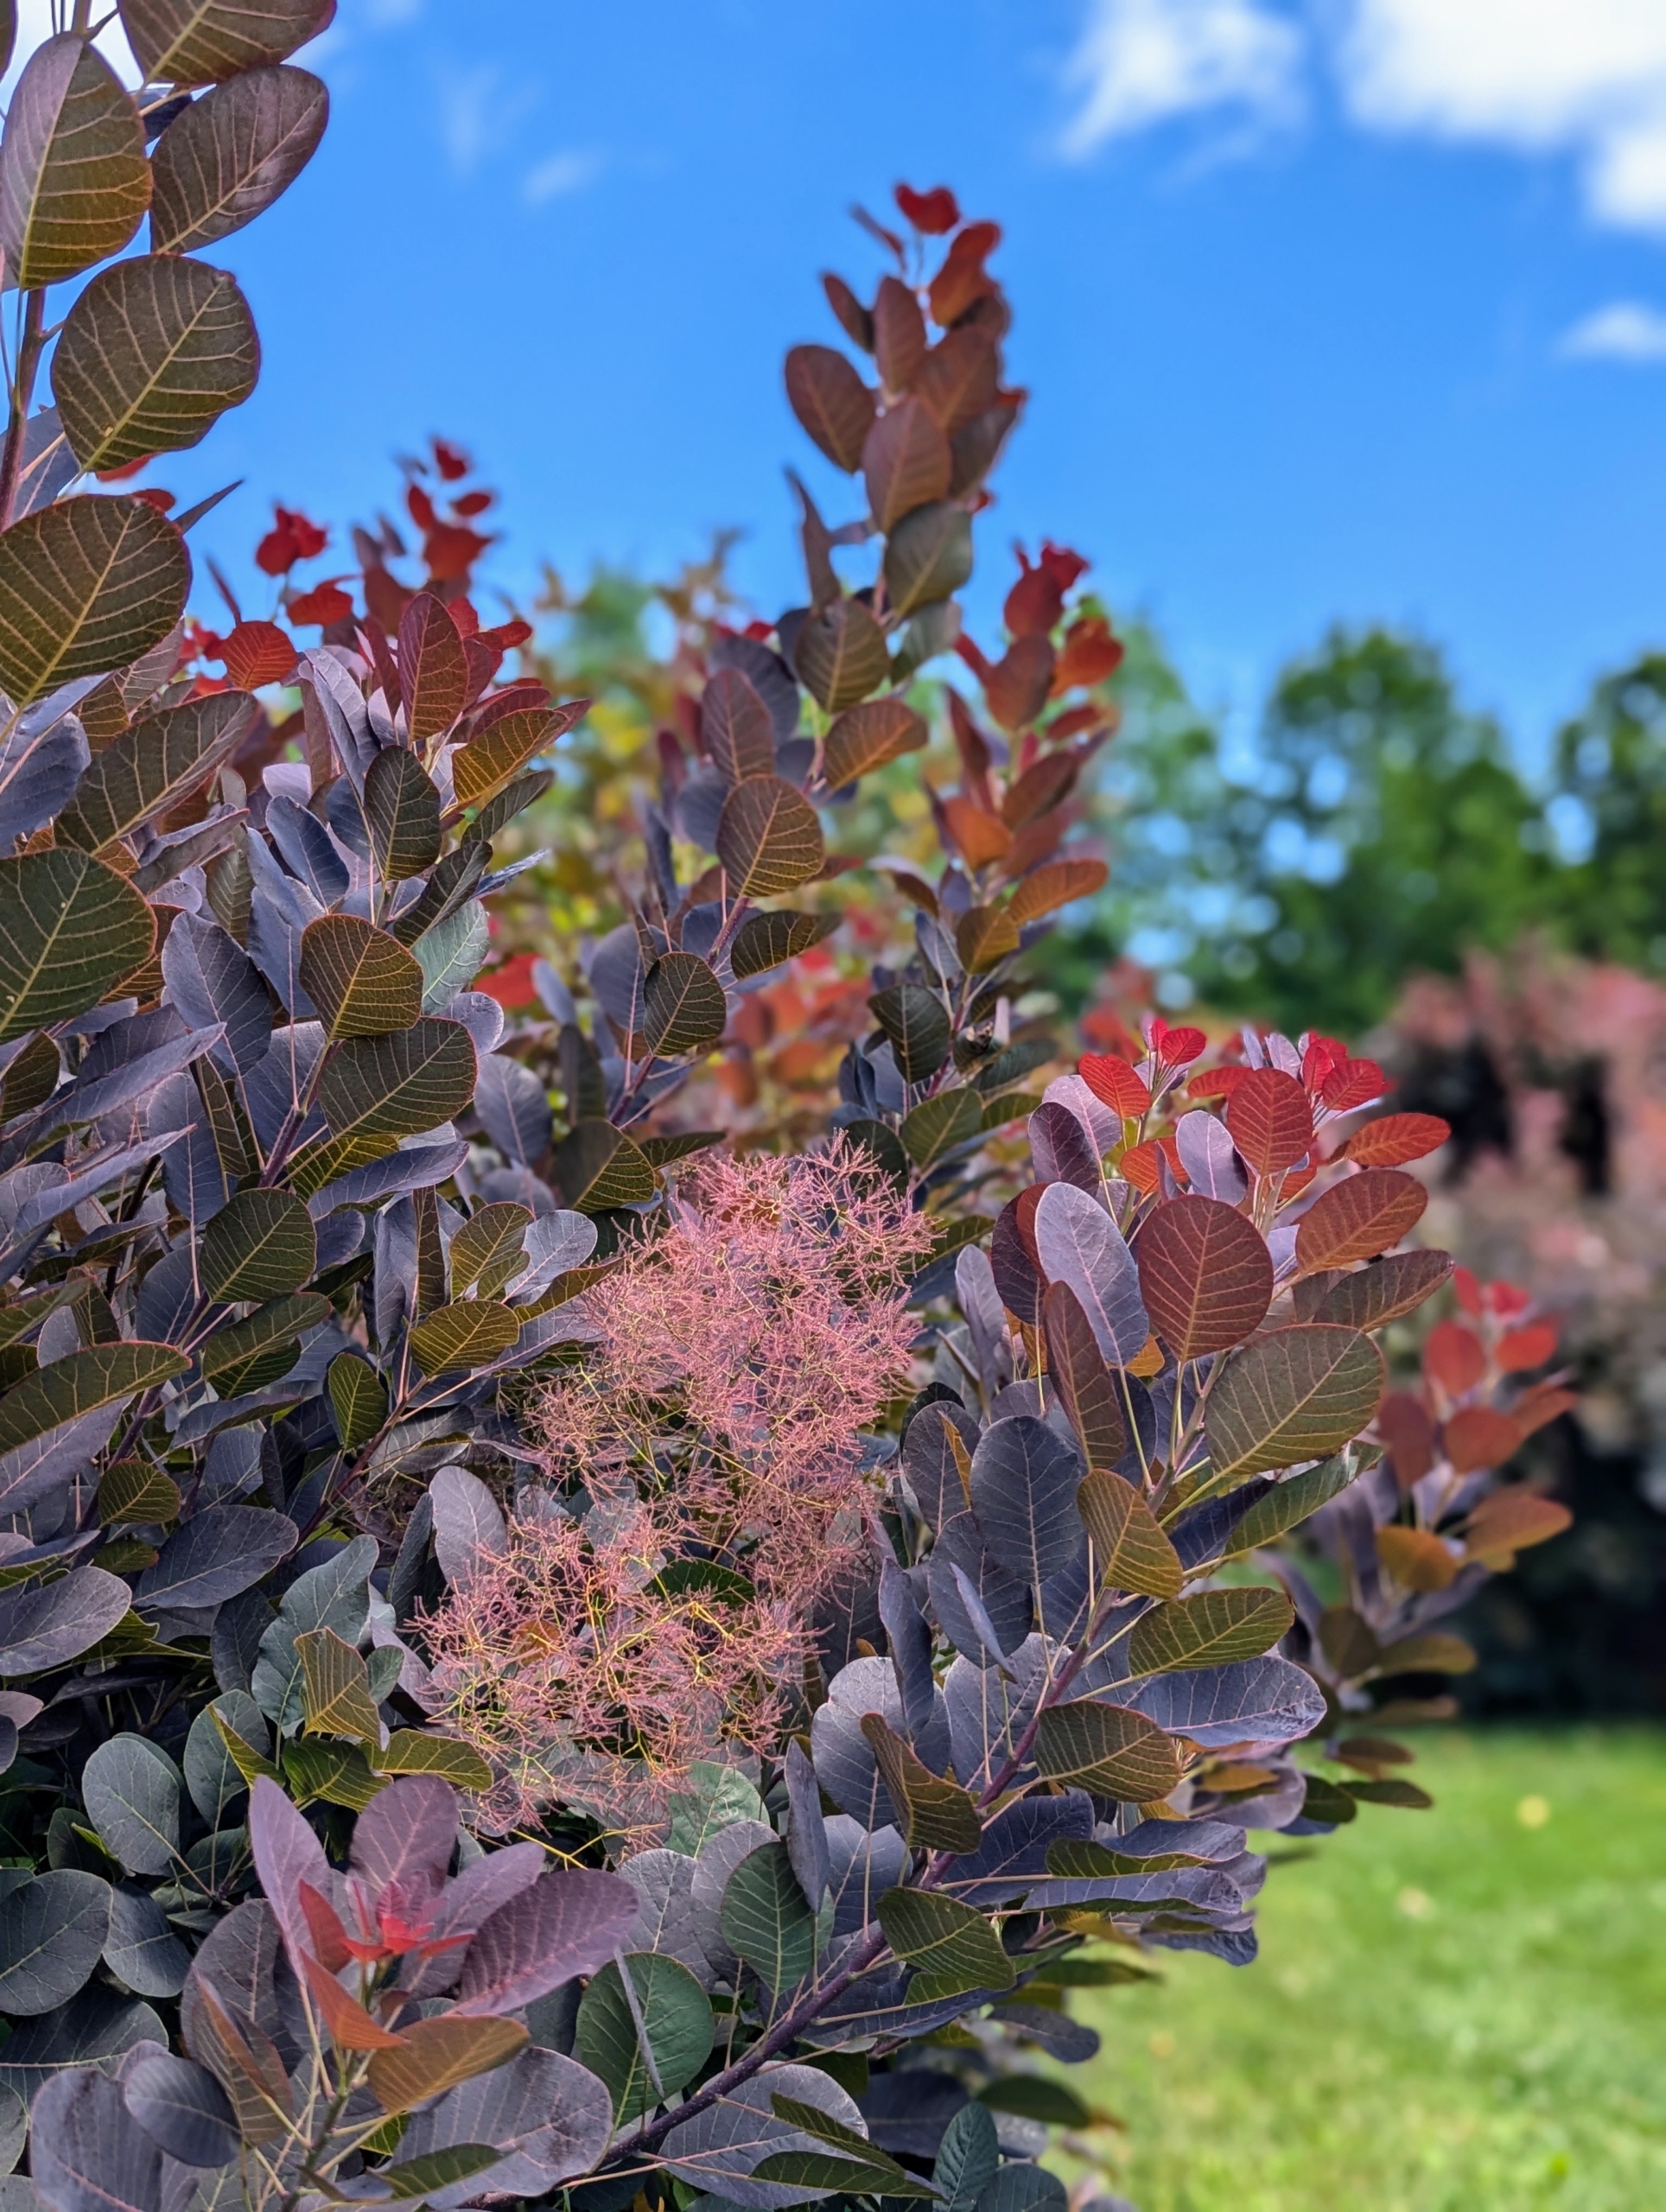
These smoke bushes are near the front of my home, where guests can see them when they arrive.
These colorful tufts extend from the foliage and can be seen from afar.
Cotinus prefer full sun and well-draining soil, but some varieties can tolerate dappled shade. Growth rates also vary, but fast-growing varieties can add three to five feet per year.
This smoke bush is planted in the garden outside my Tenant House. Smoke bushes do well in almost any soil type and most any pH level. The ideal circumstance is slightly sandy loam, but they can thrive in rocky soils.
In colder climates, where winter winds can damage the plants, it’s also a good idea to plant smoke bushes where they can be protected. When grouping plants, they should be well spaced to give them enough room to grow.
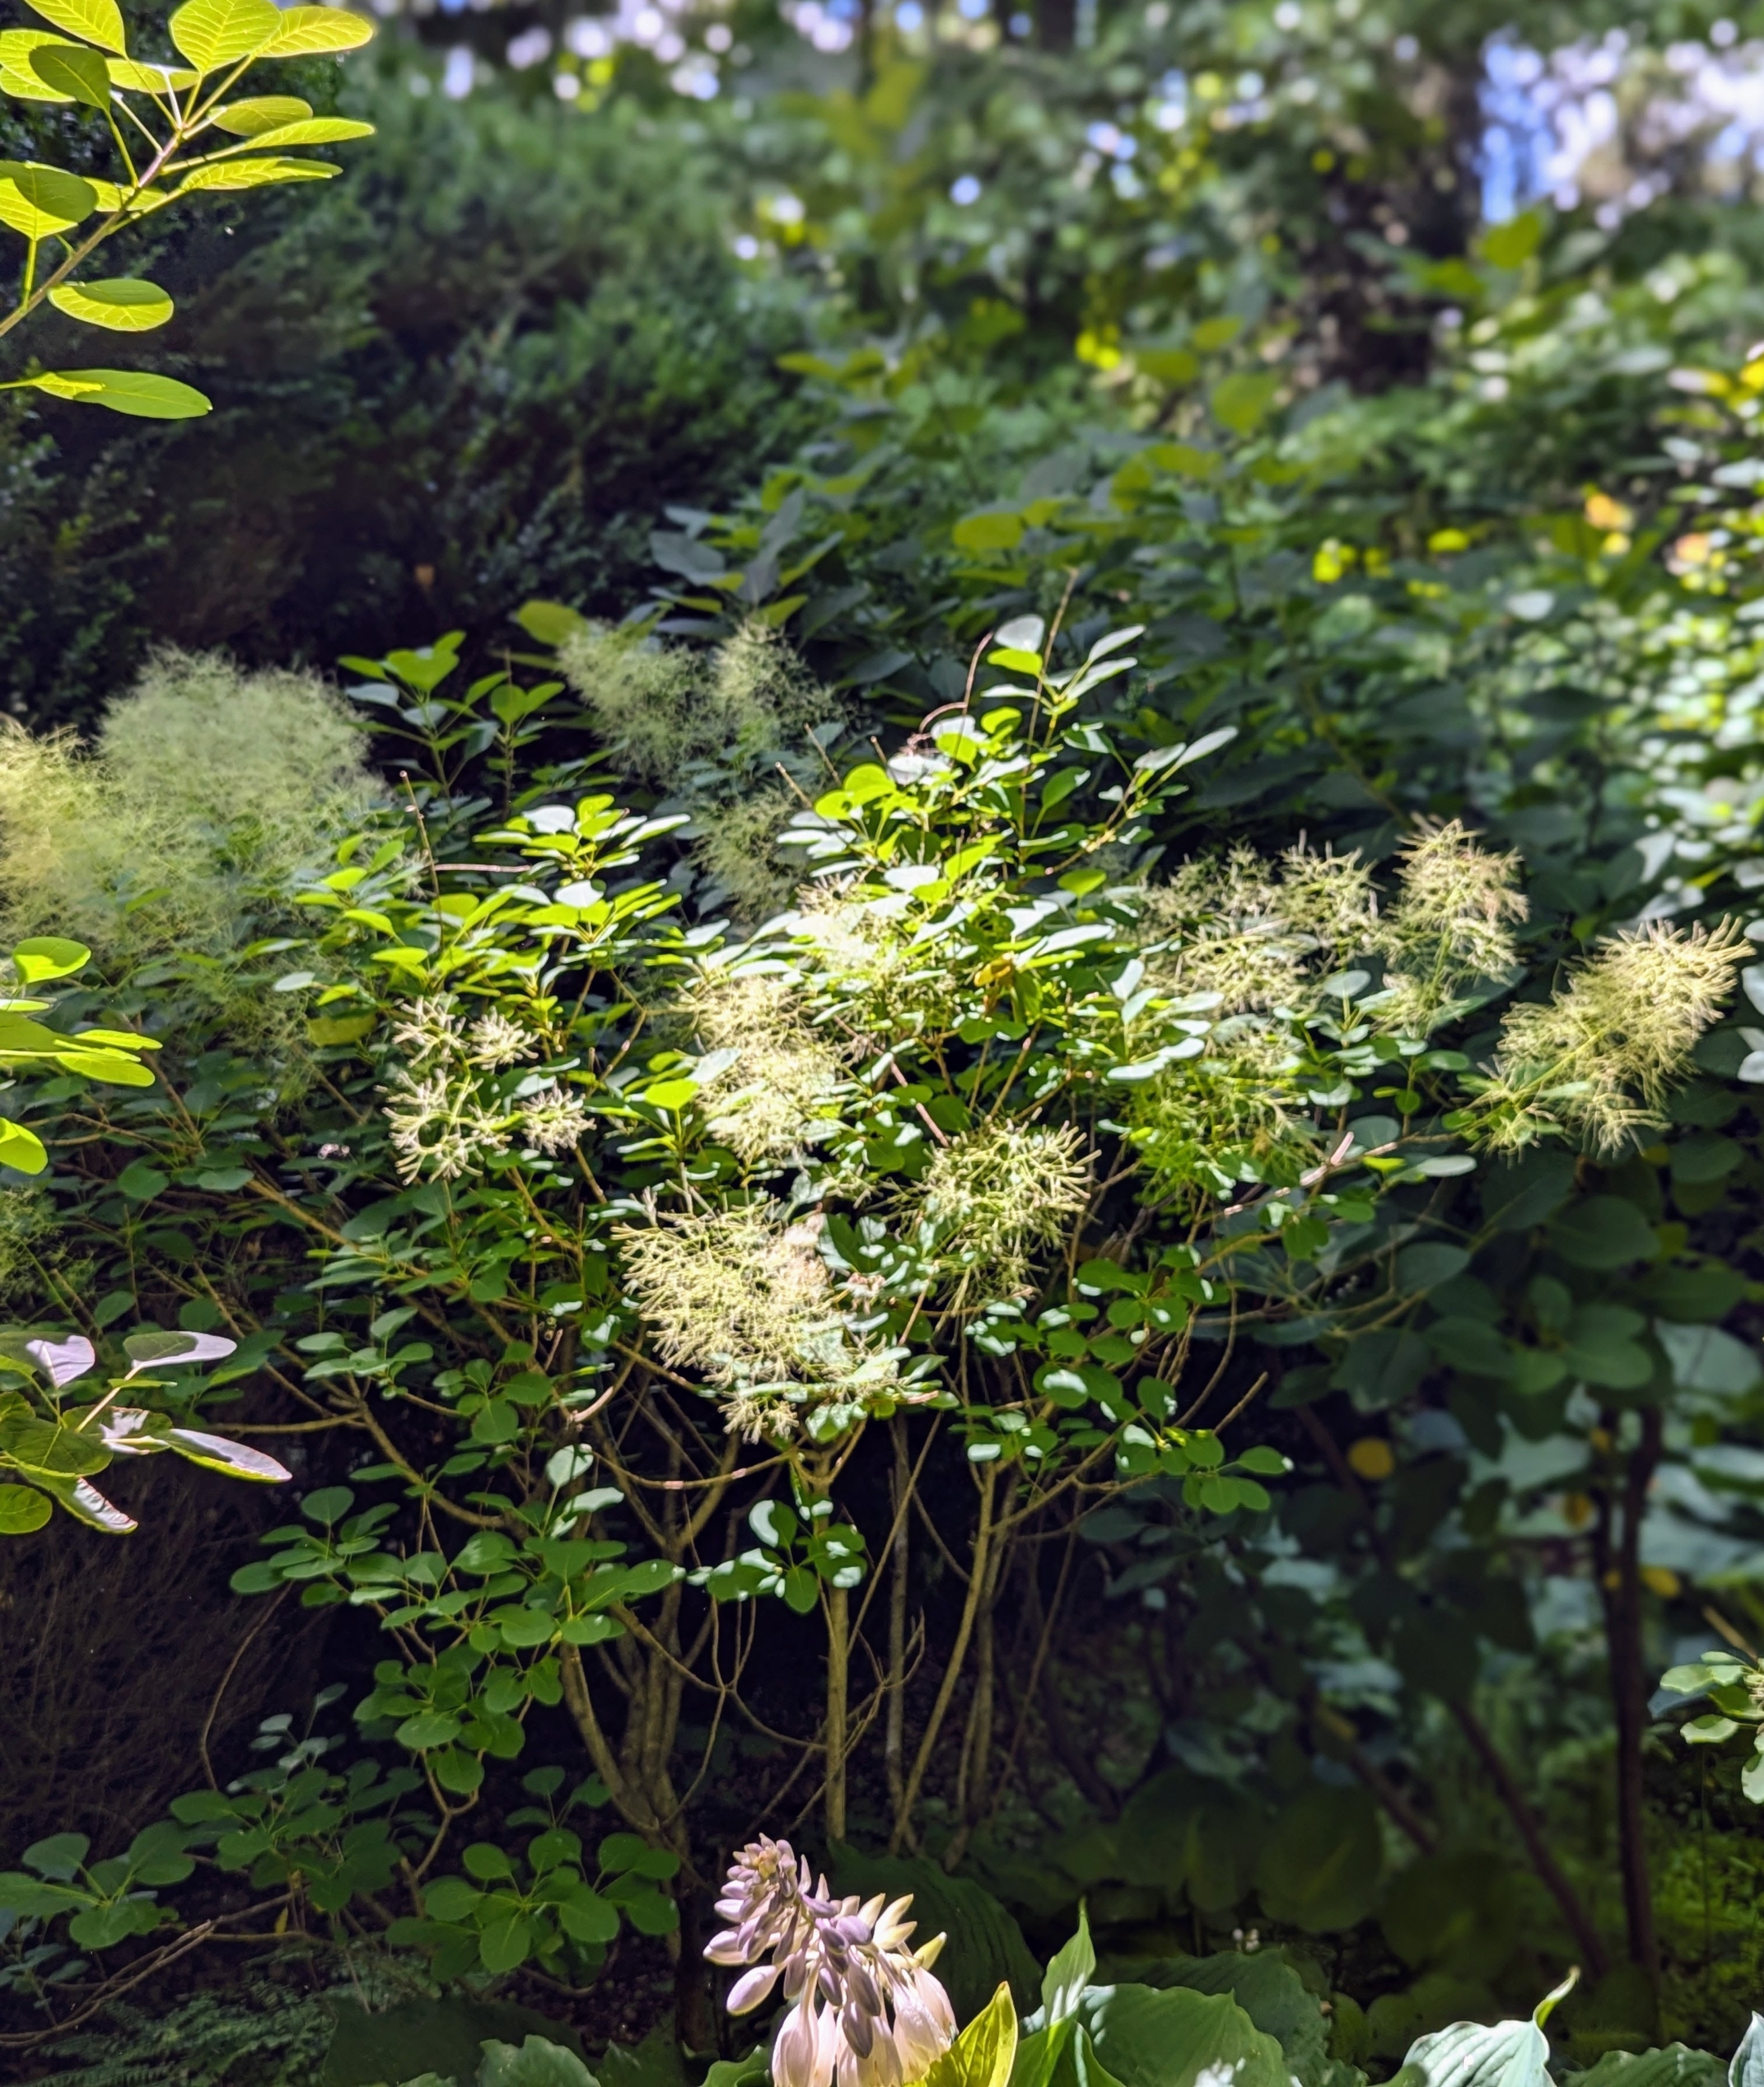
This smoke bush is on one side of my Summer House garden terrace.
This one in the back of the Summer House garden is showing off brilliant light colored puffs.
These fine, feathery clusters remain attractive for many weeks from now to fall.
I also have smoke bushes surrounding my pool on one side of the fence.
Alternating are Physocarpus opulifolius ‘Diabolo’ and Cotinus coggygria ‘Royal Purple’. These have done so well here – they disguise the fence completely.
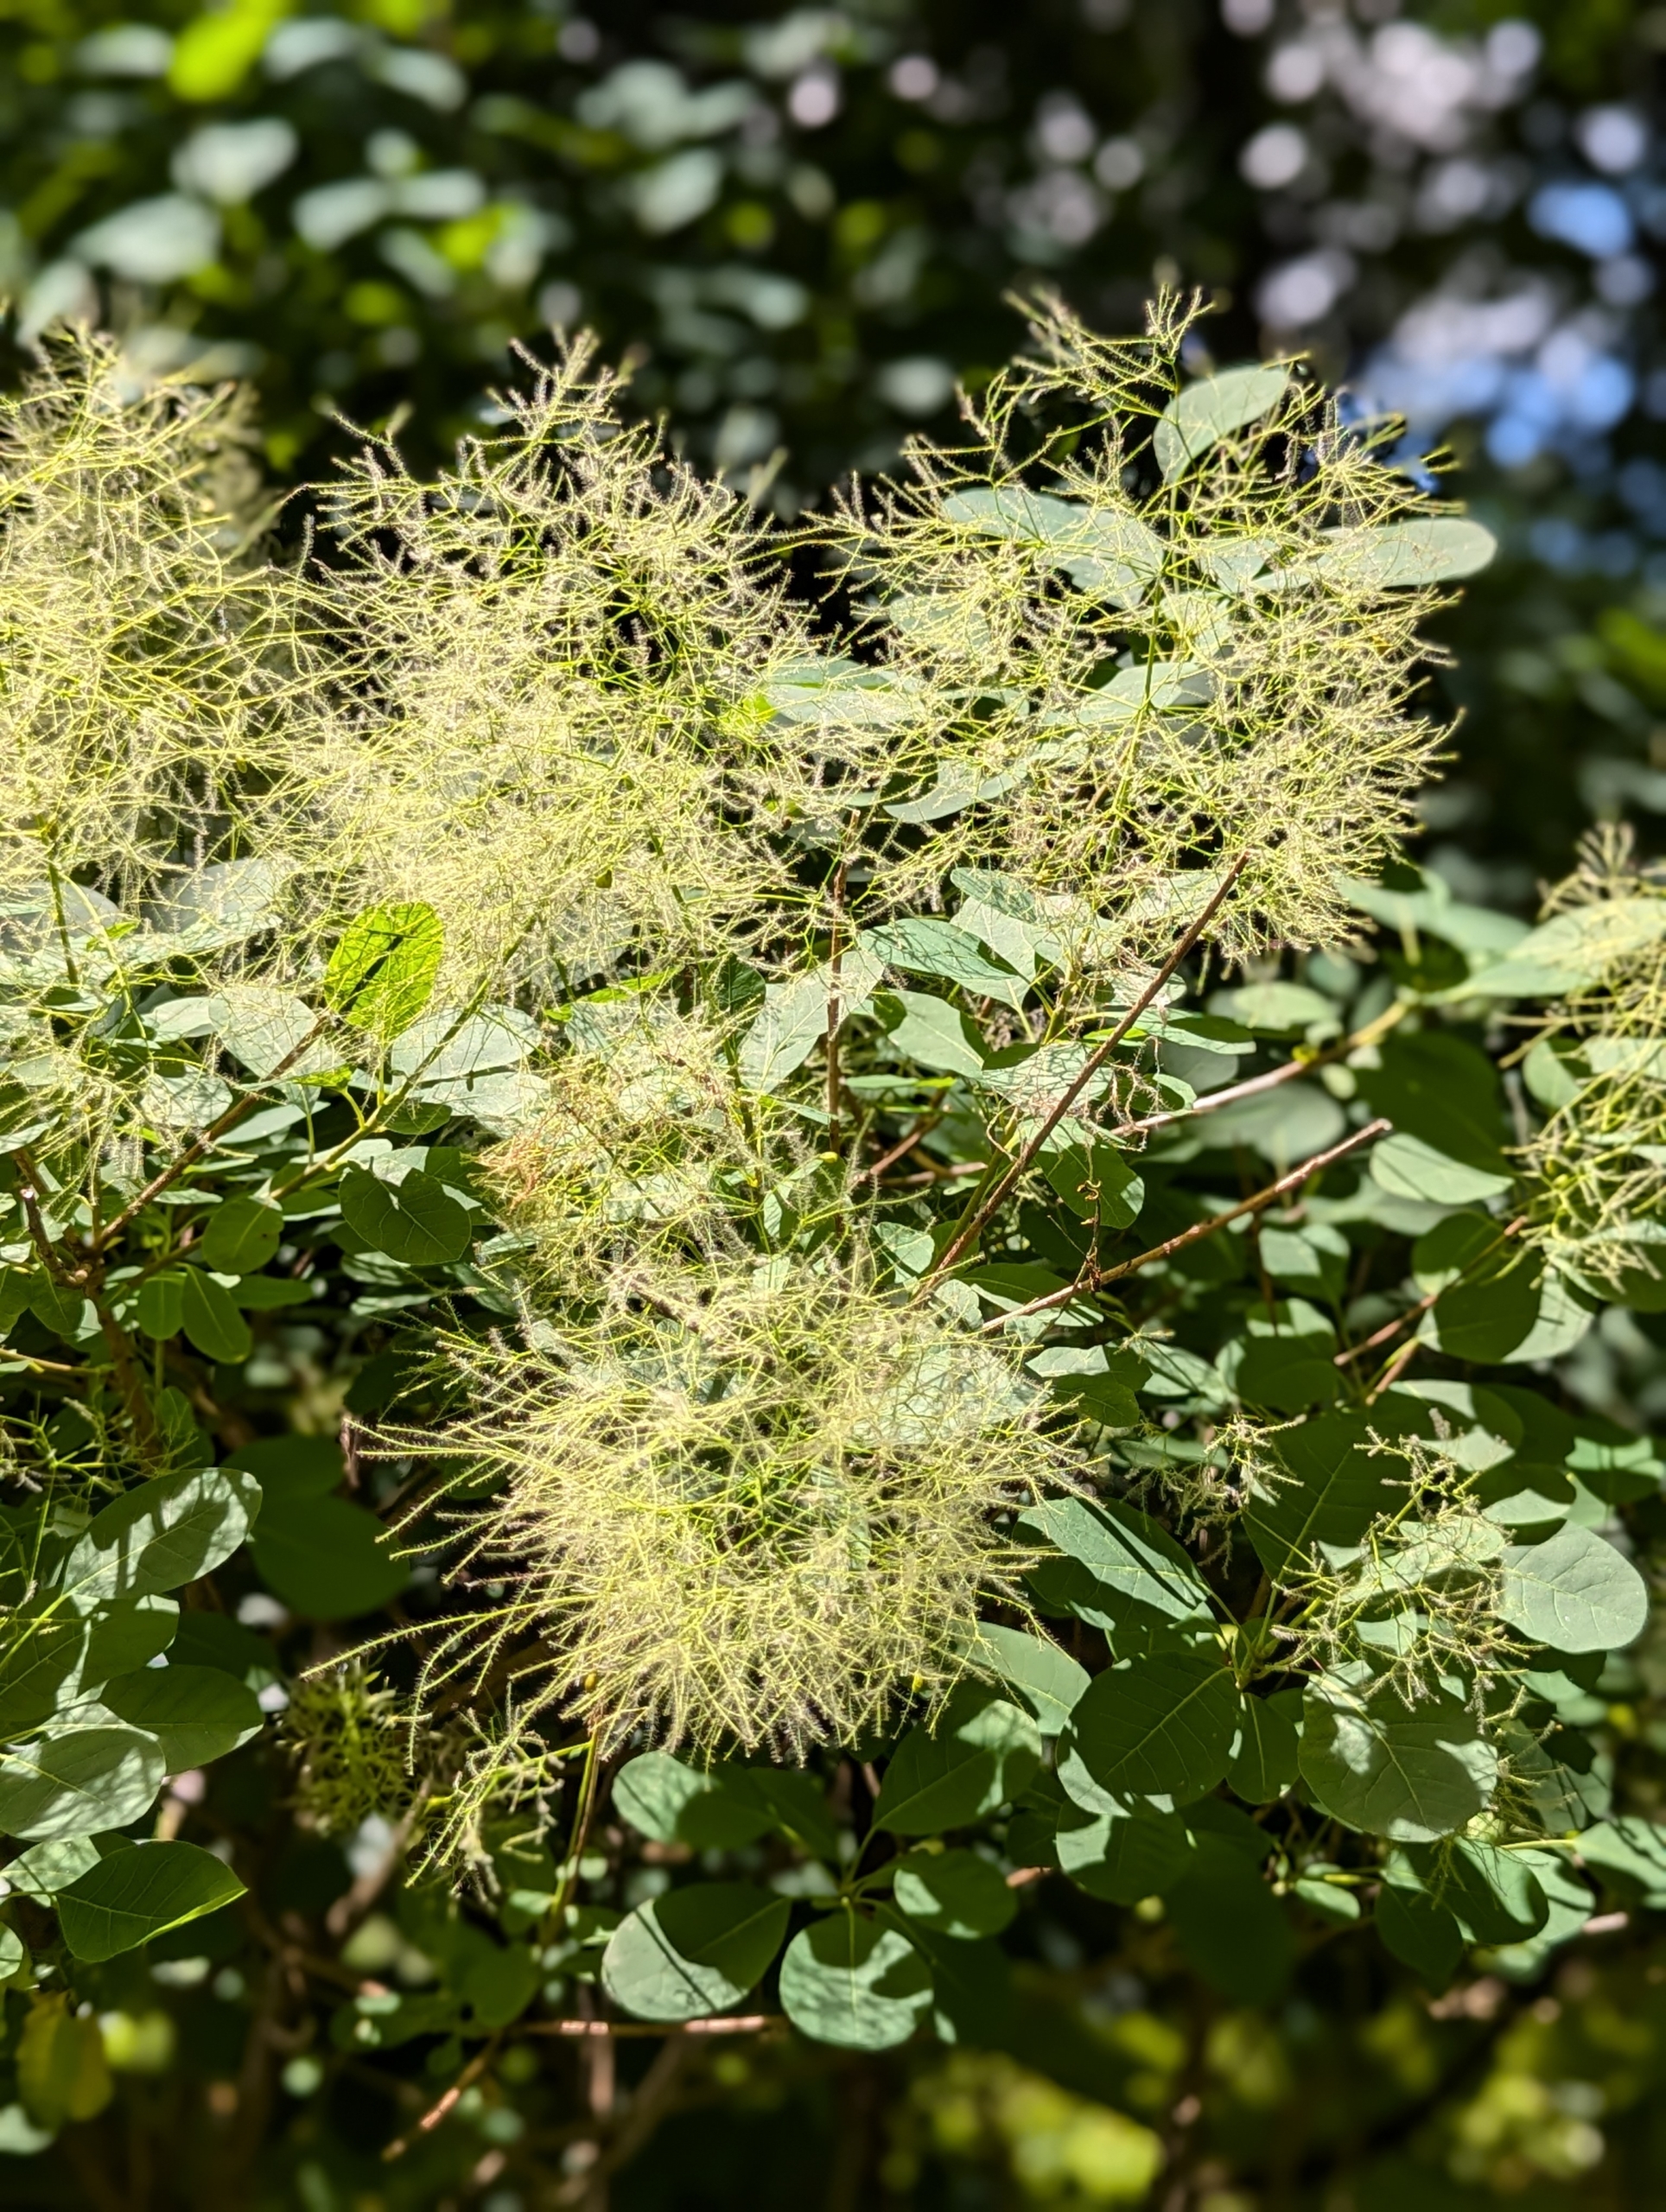
Here’s a close look at one of the delicate “smoke” clusters. In some areas, the tree is also called Wig Tree because of these puffs.
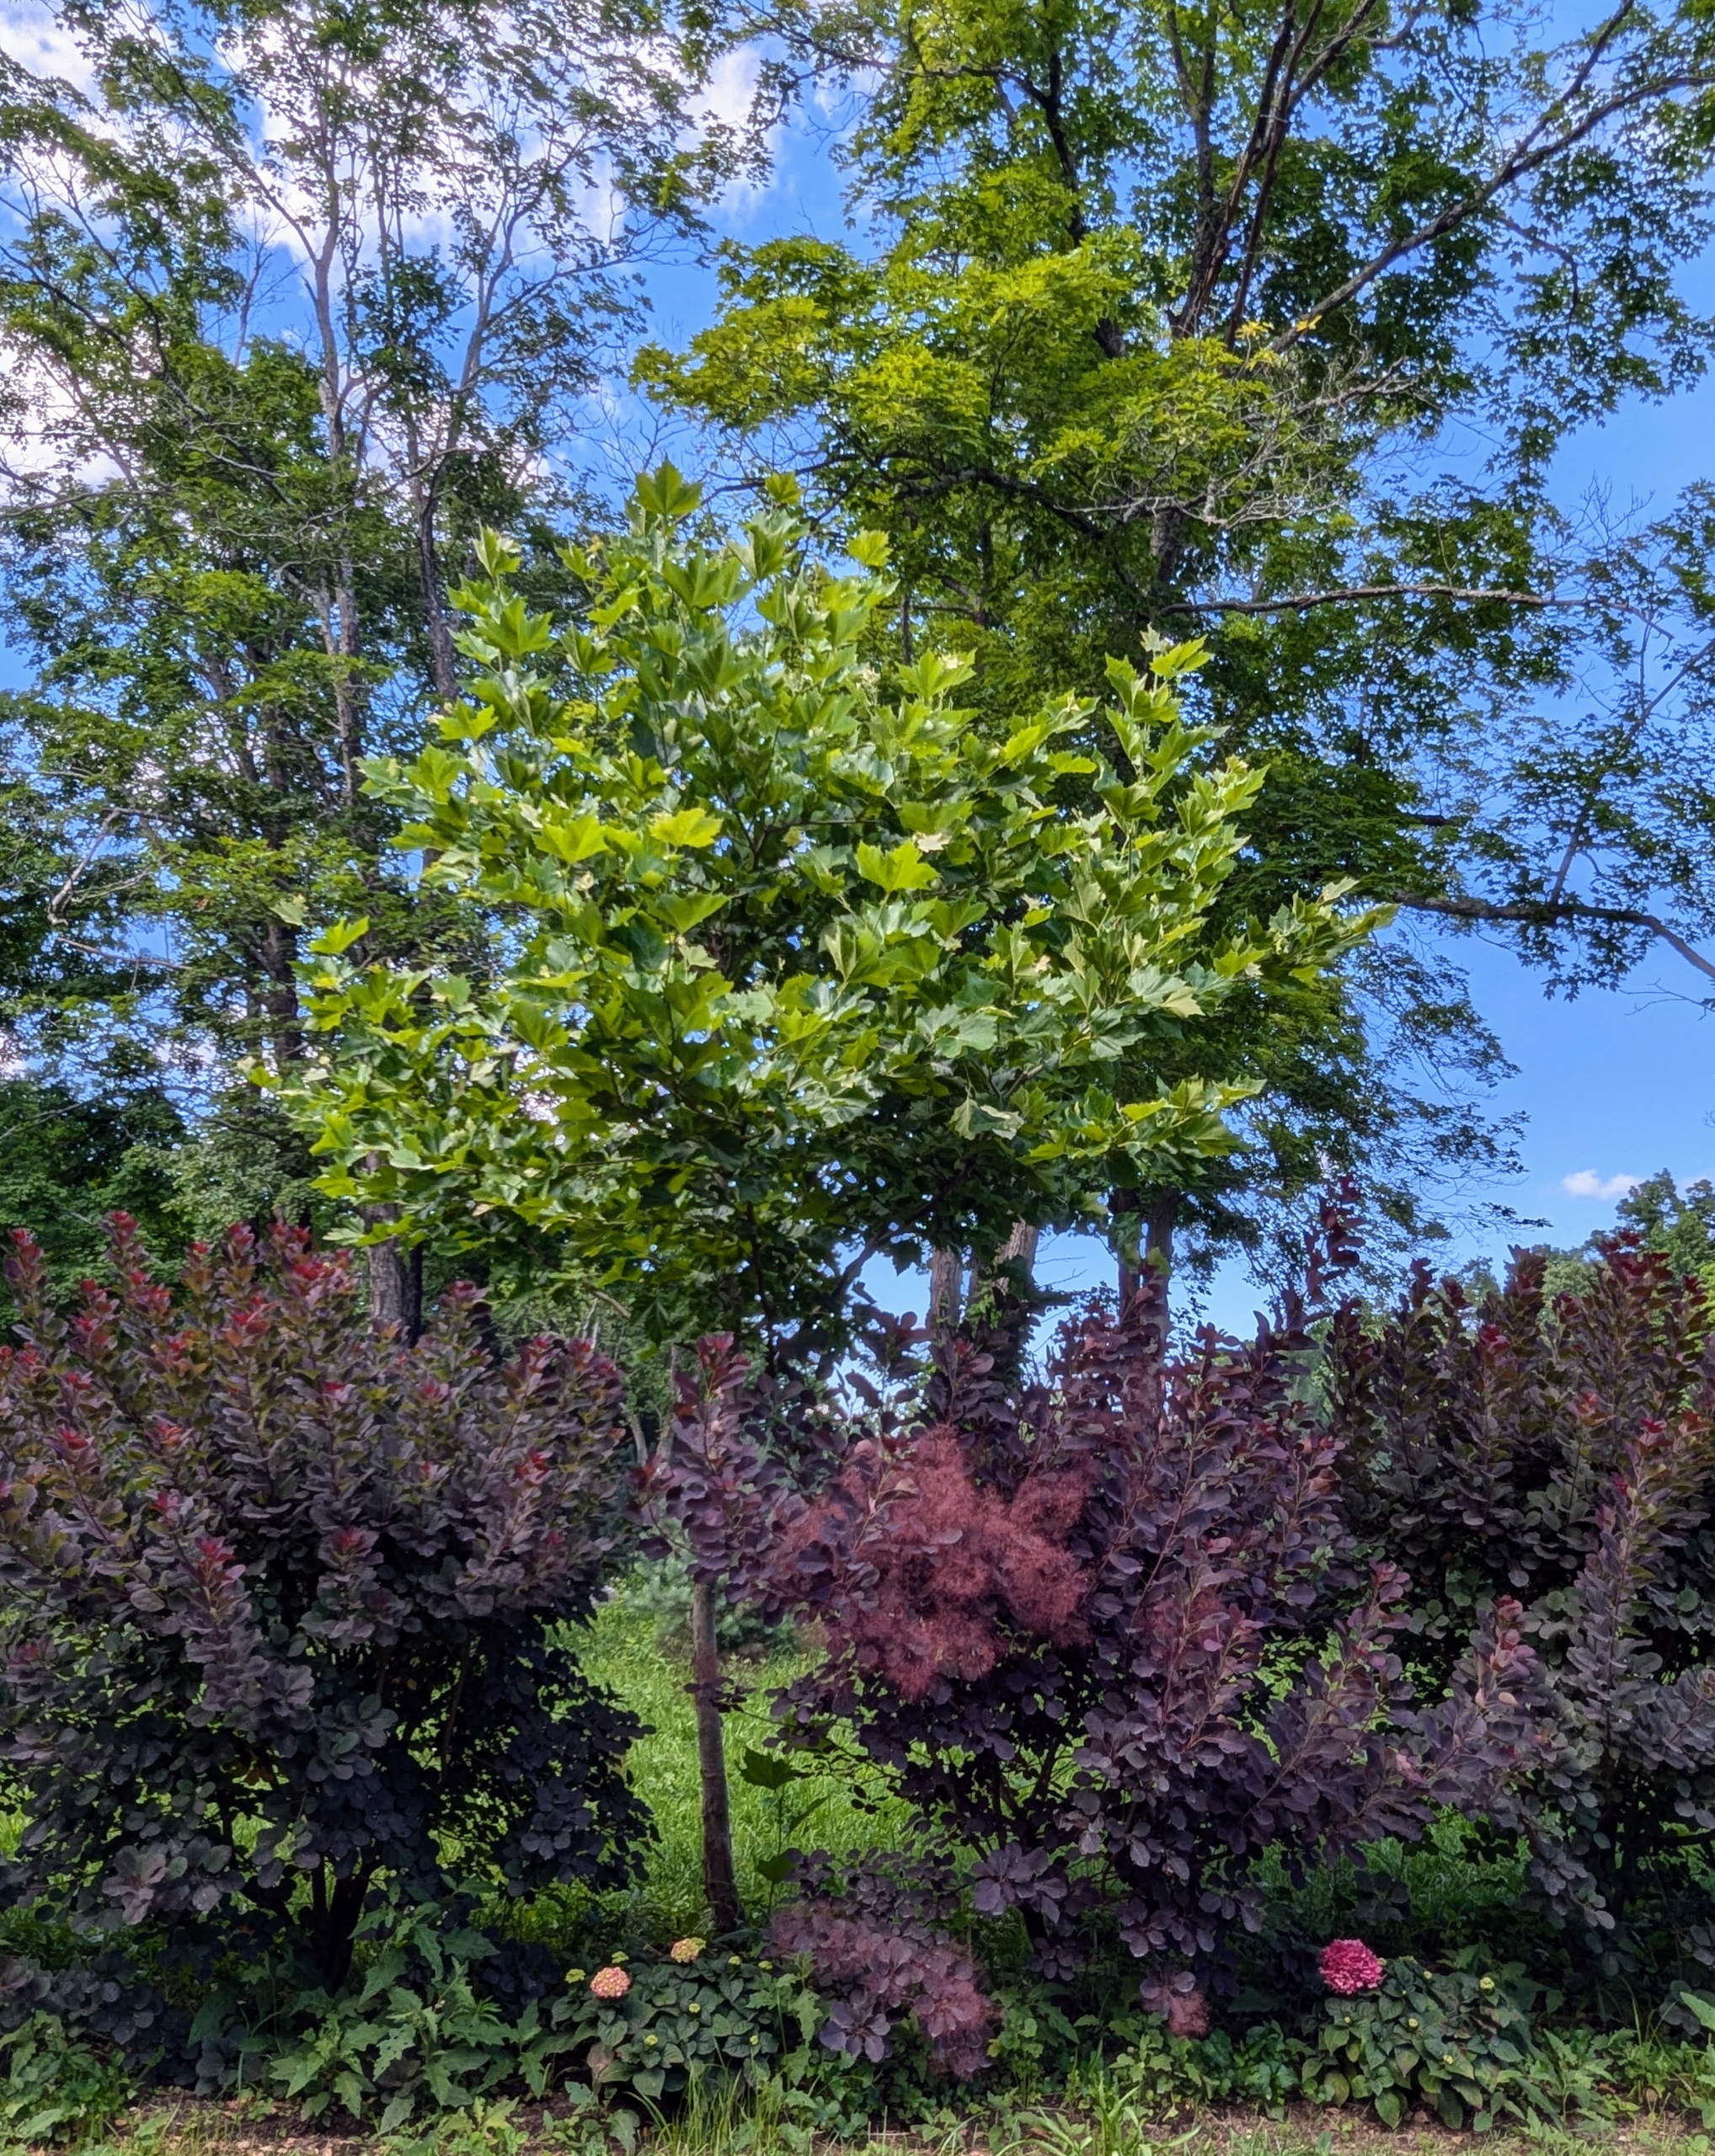
And in the middle field, an allée of smoke bushes paired with tall London plane trees.
I planted this allée in 2019. All 100 smoke bushes are thriving.
And look at the new growth. Remember the gardener’s adage, “sleep, creep, leap” which describes how perennials grow over the first three years. These smoke bushes are now well-established and thriving.
I hope this inspires you to add a smoke bush in your garden – it is easy to care for and provides so much natural beauty in return.
Clematis are among the most decorative and spectacular of all the flowering vines - it's always exciting to see them bloom year after year.
I have grown many varieties of this wonderful plant. Soon after I bought my Bedford, New York farm, I built a long pergola along the front carriage road leading to my home, where I could grow lots of clematis. I concentrated on creating a palette of blue and purple flowering cultivars. And every summer, they provide a graceful and colorful display.
Enjoy these photos.
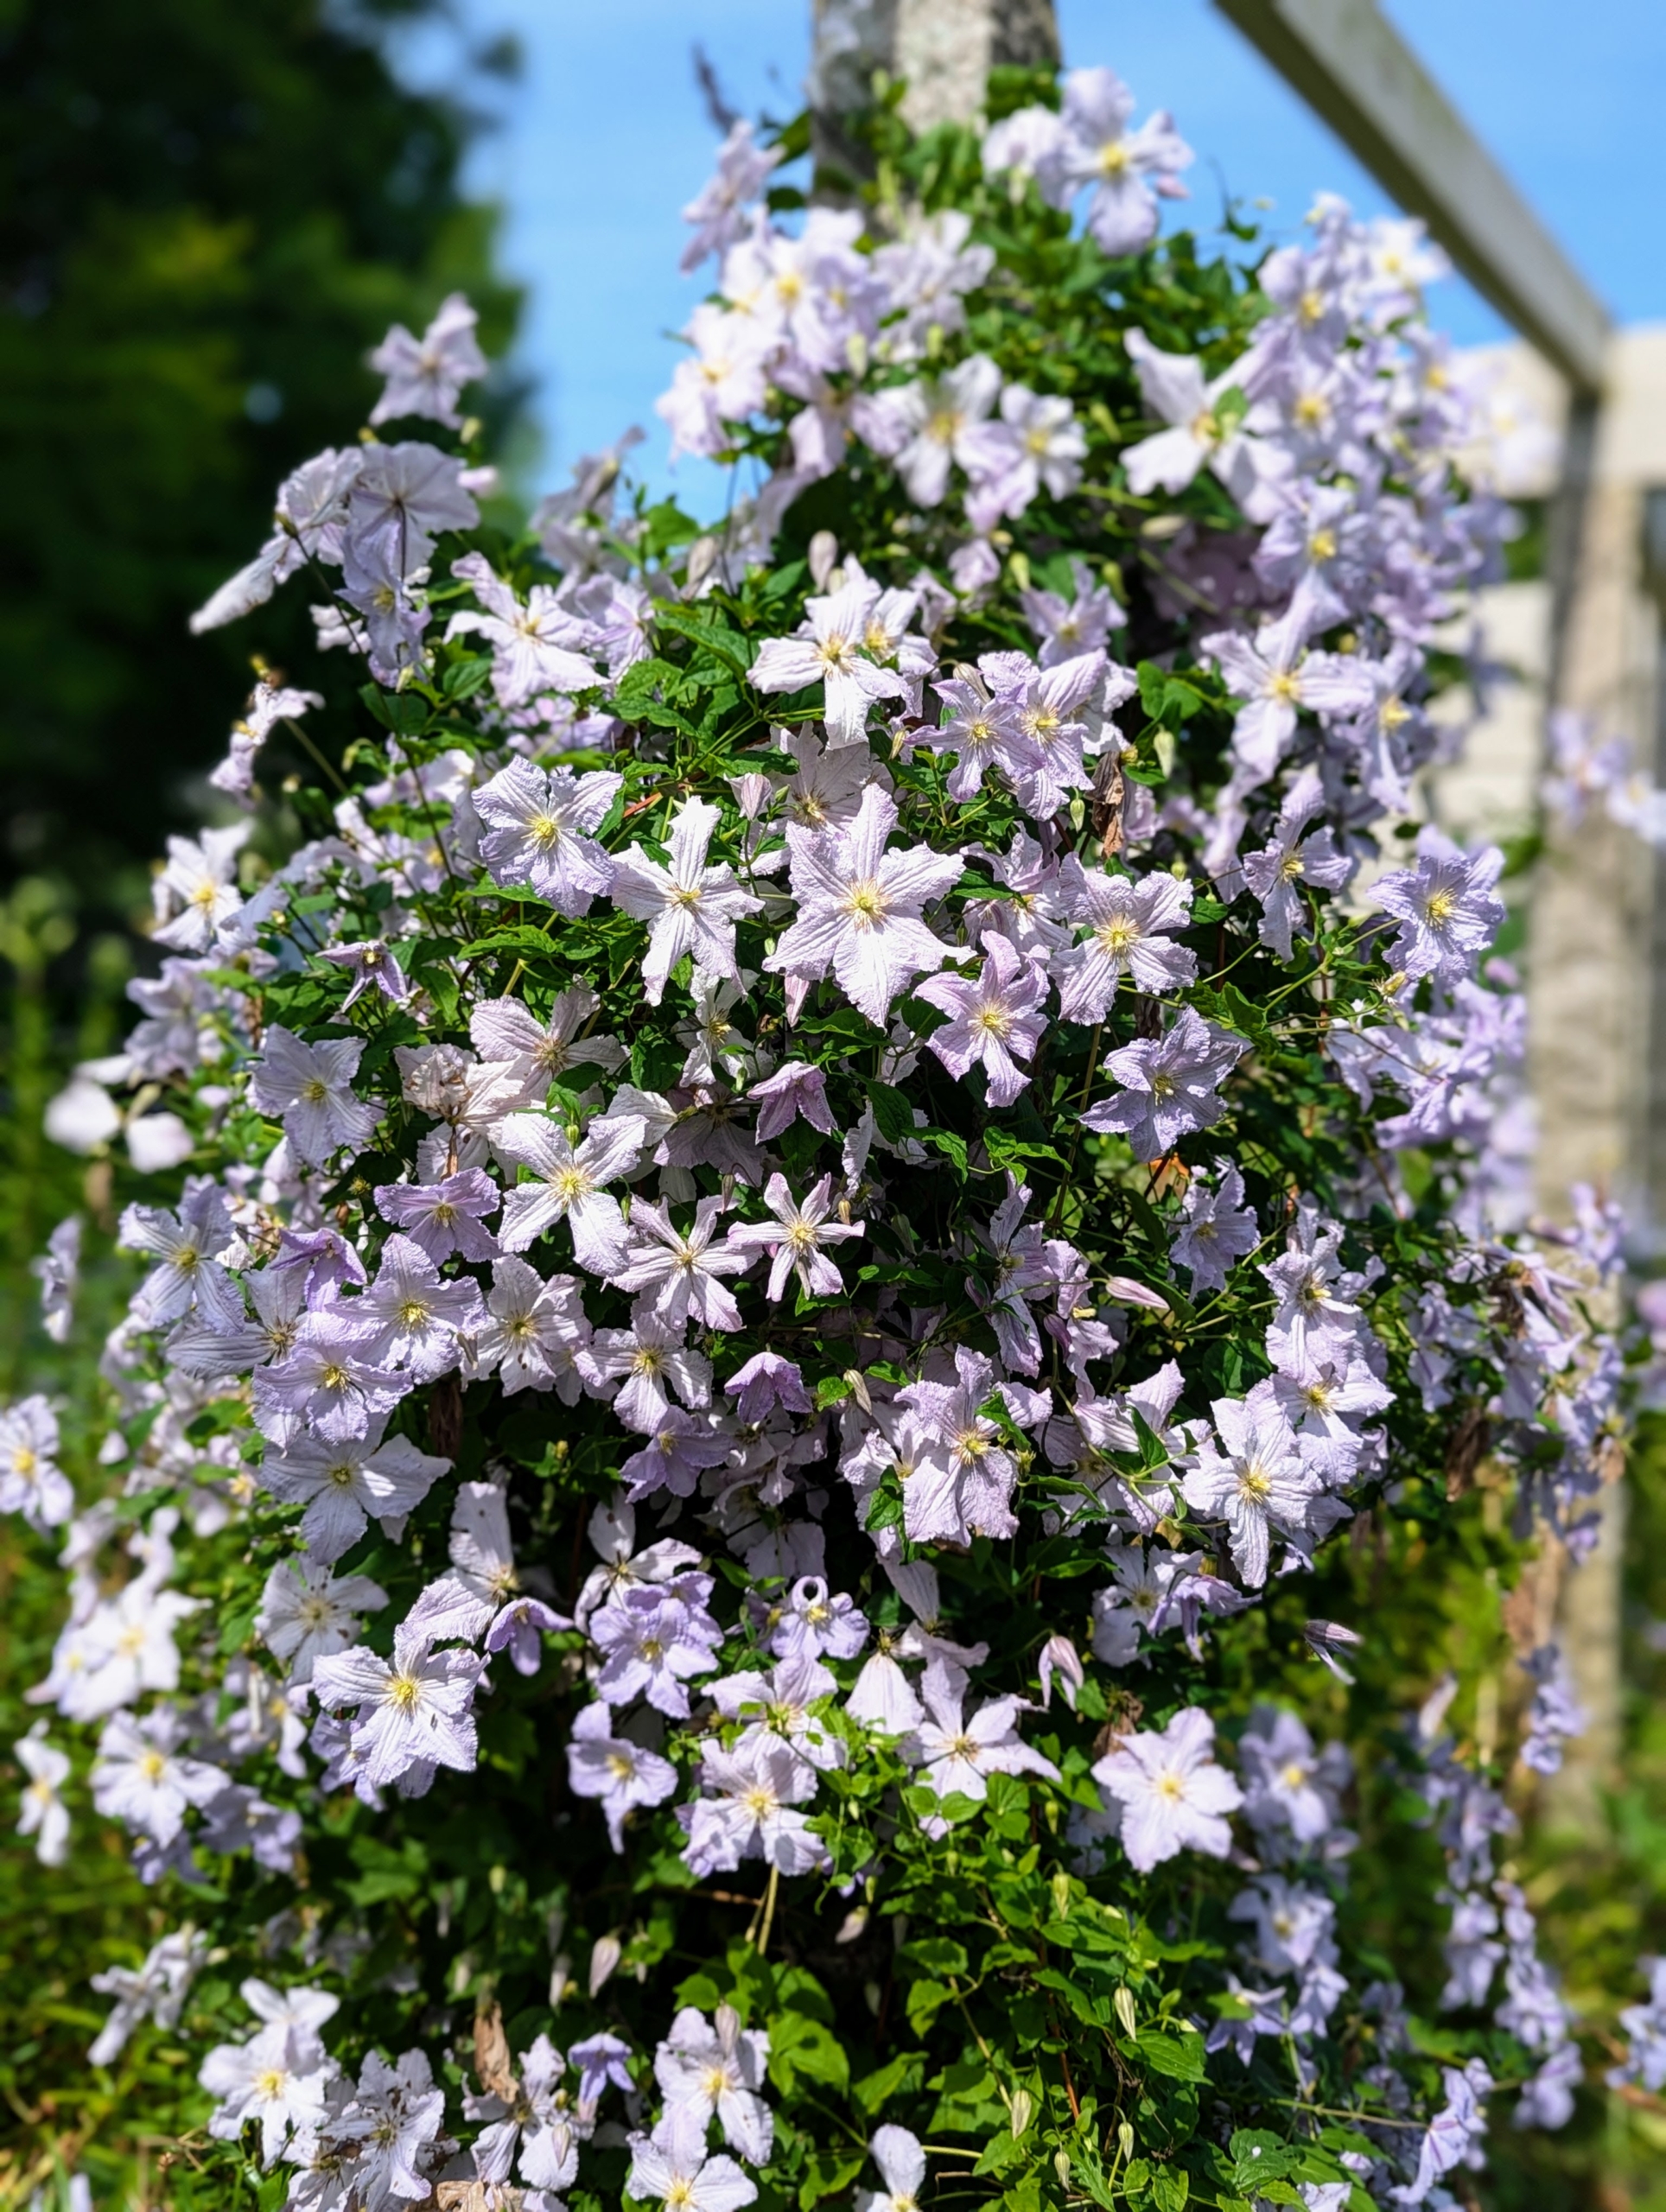
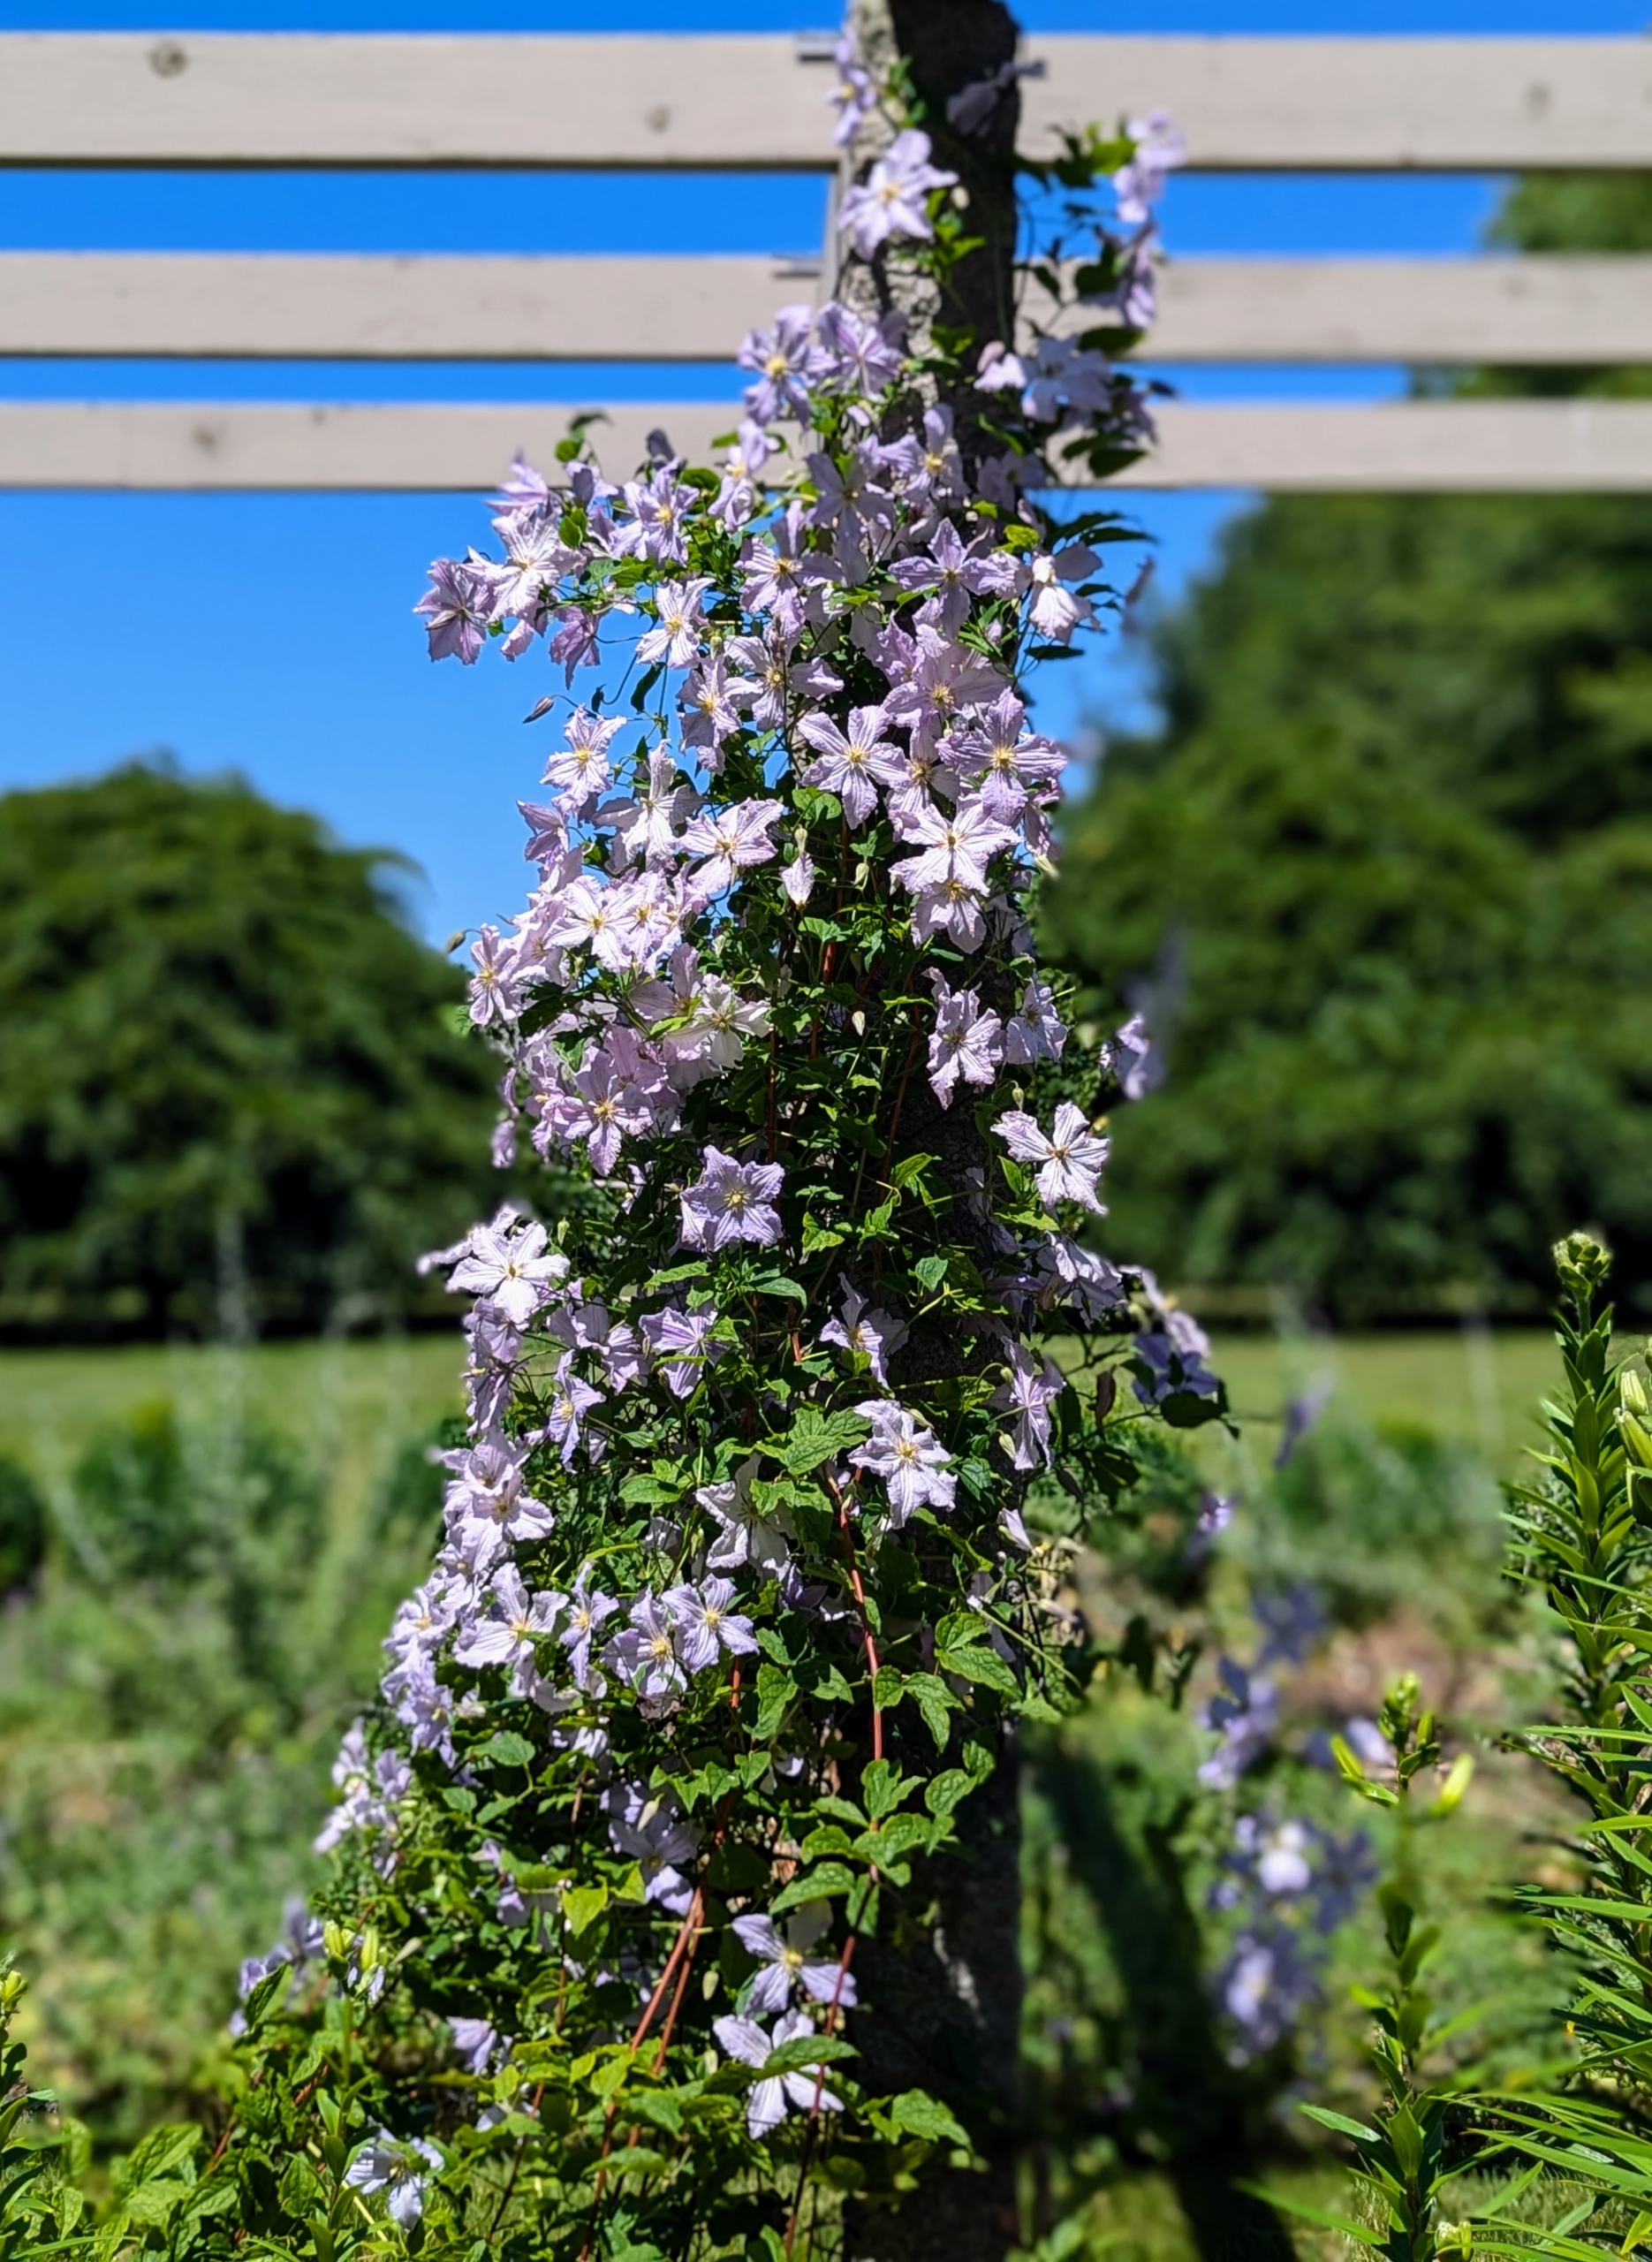
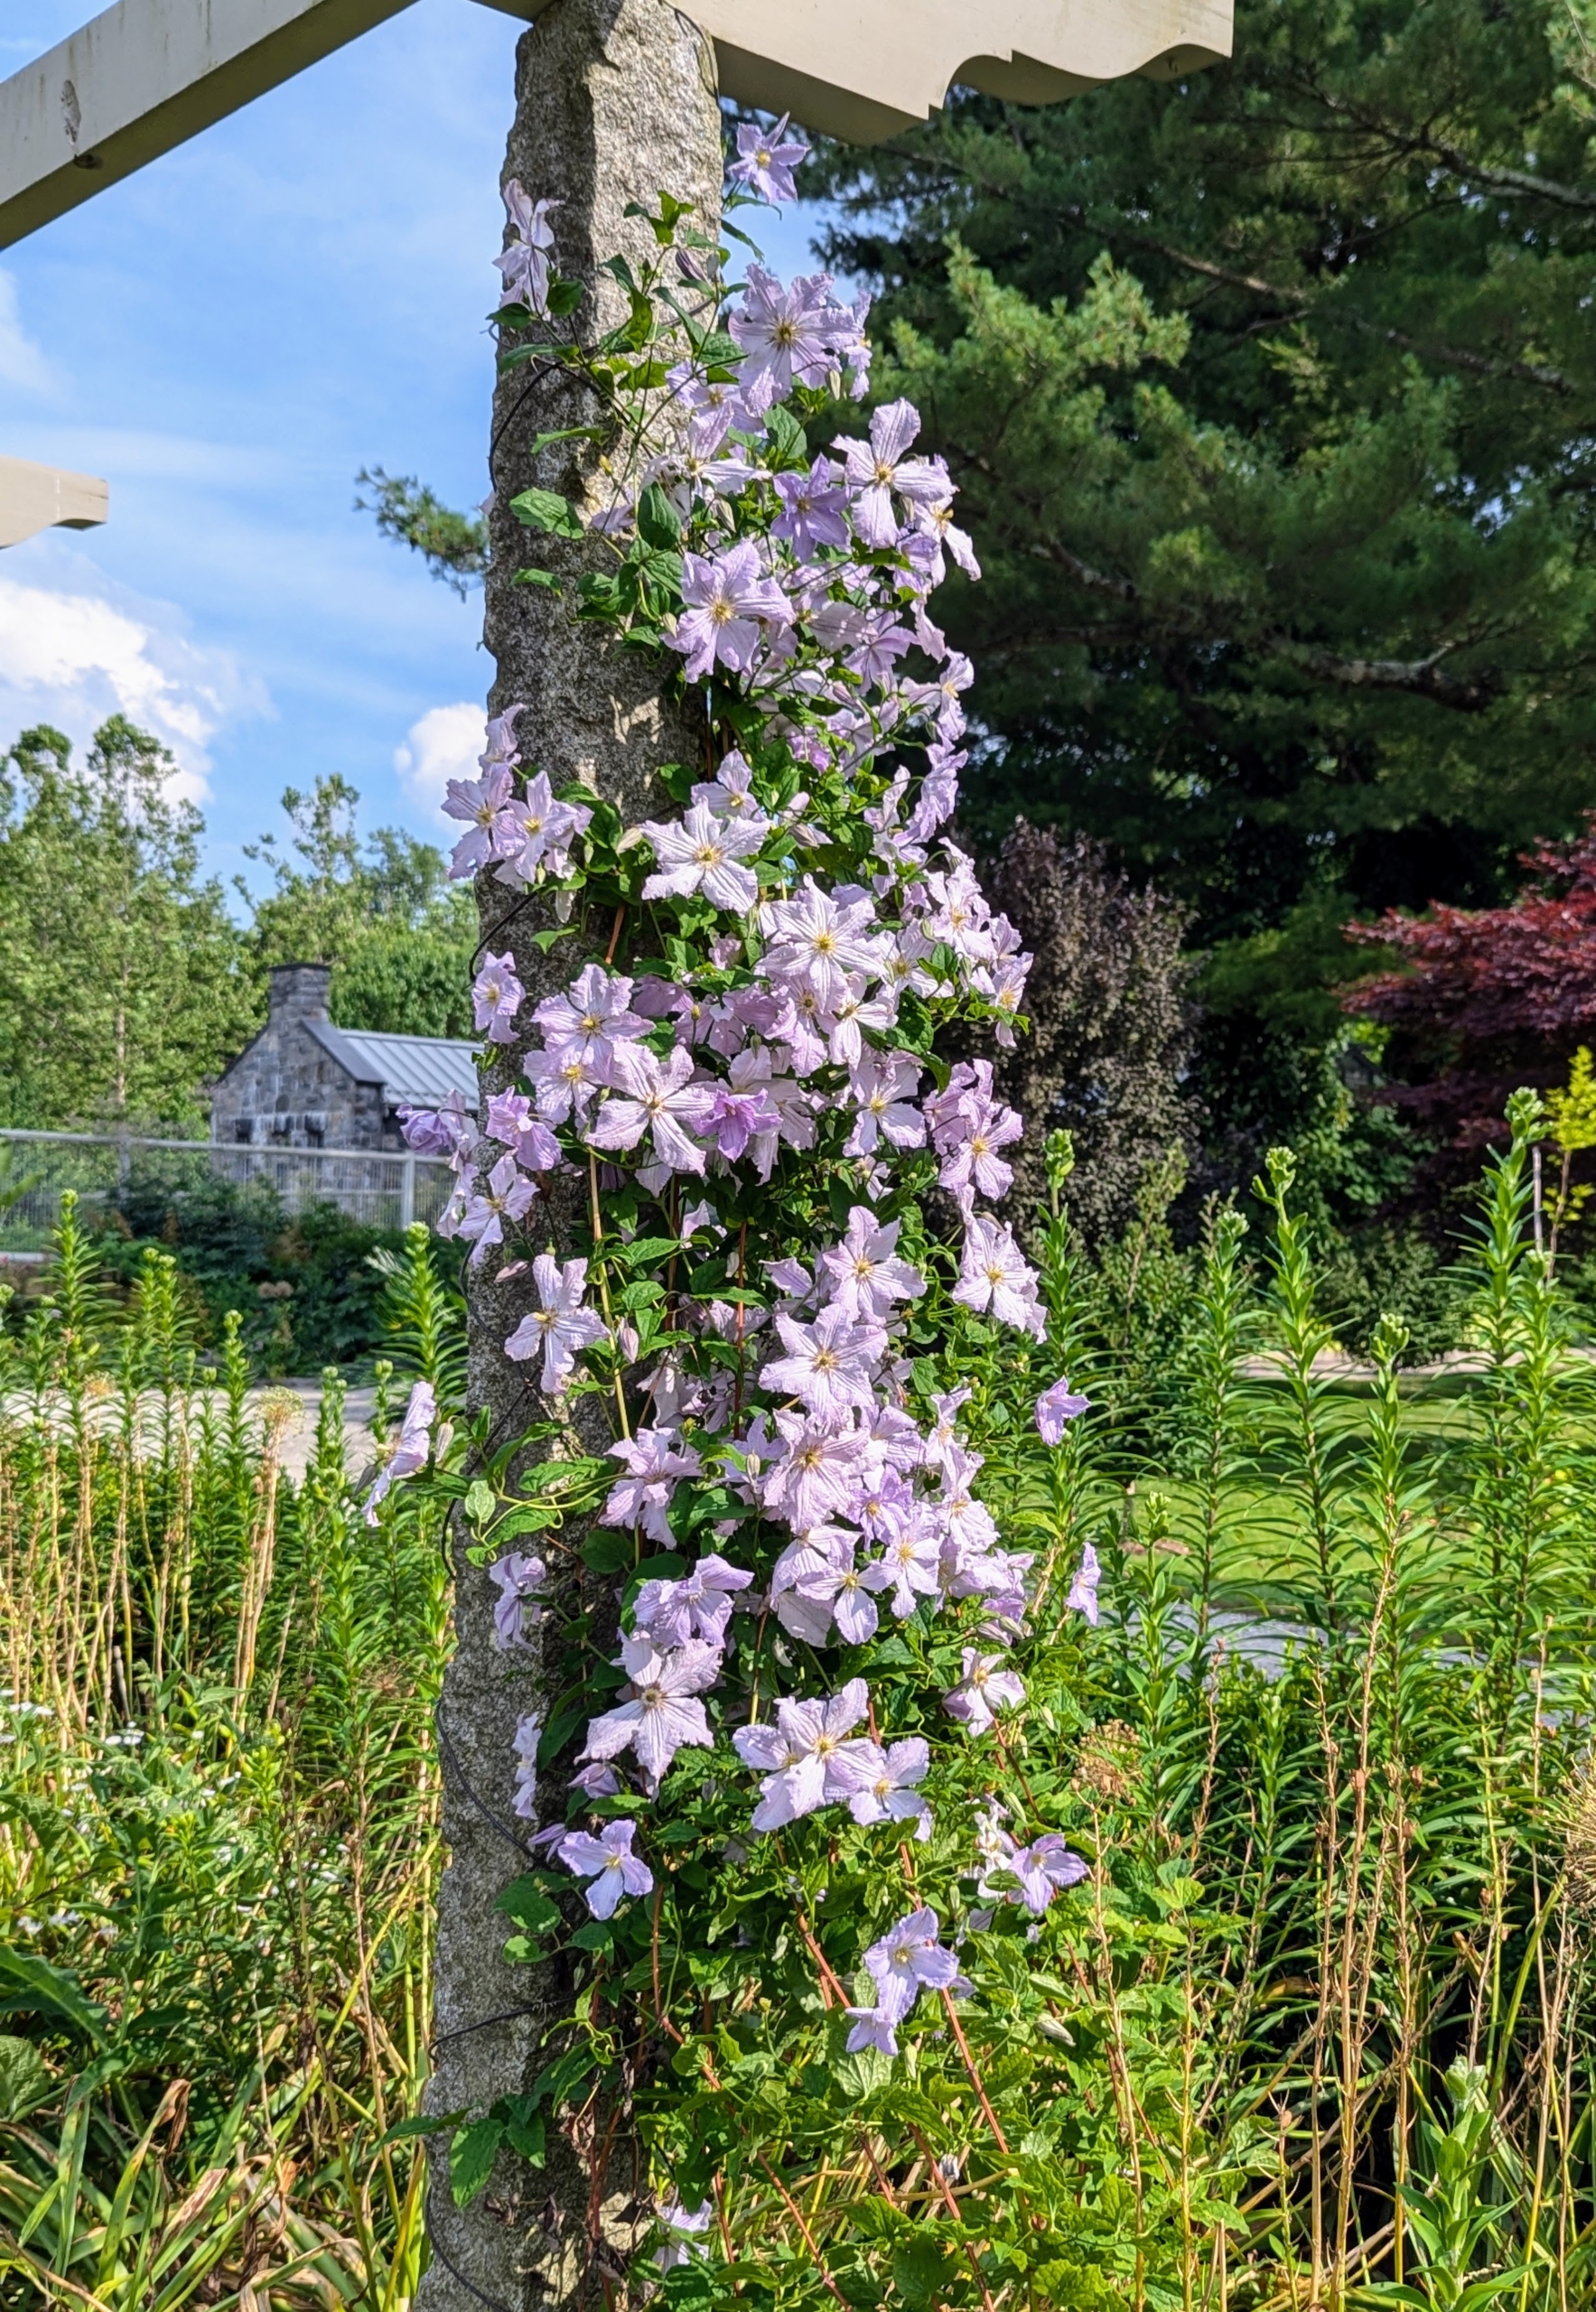
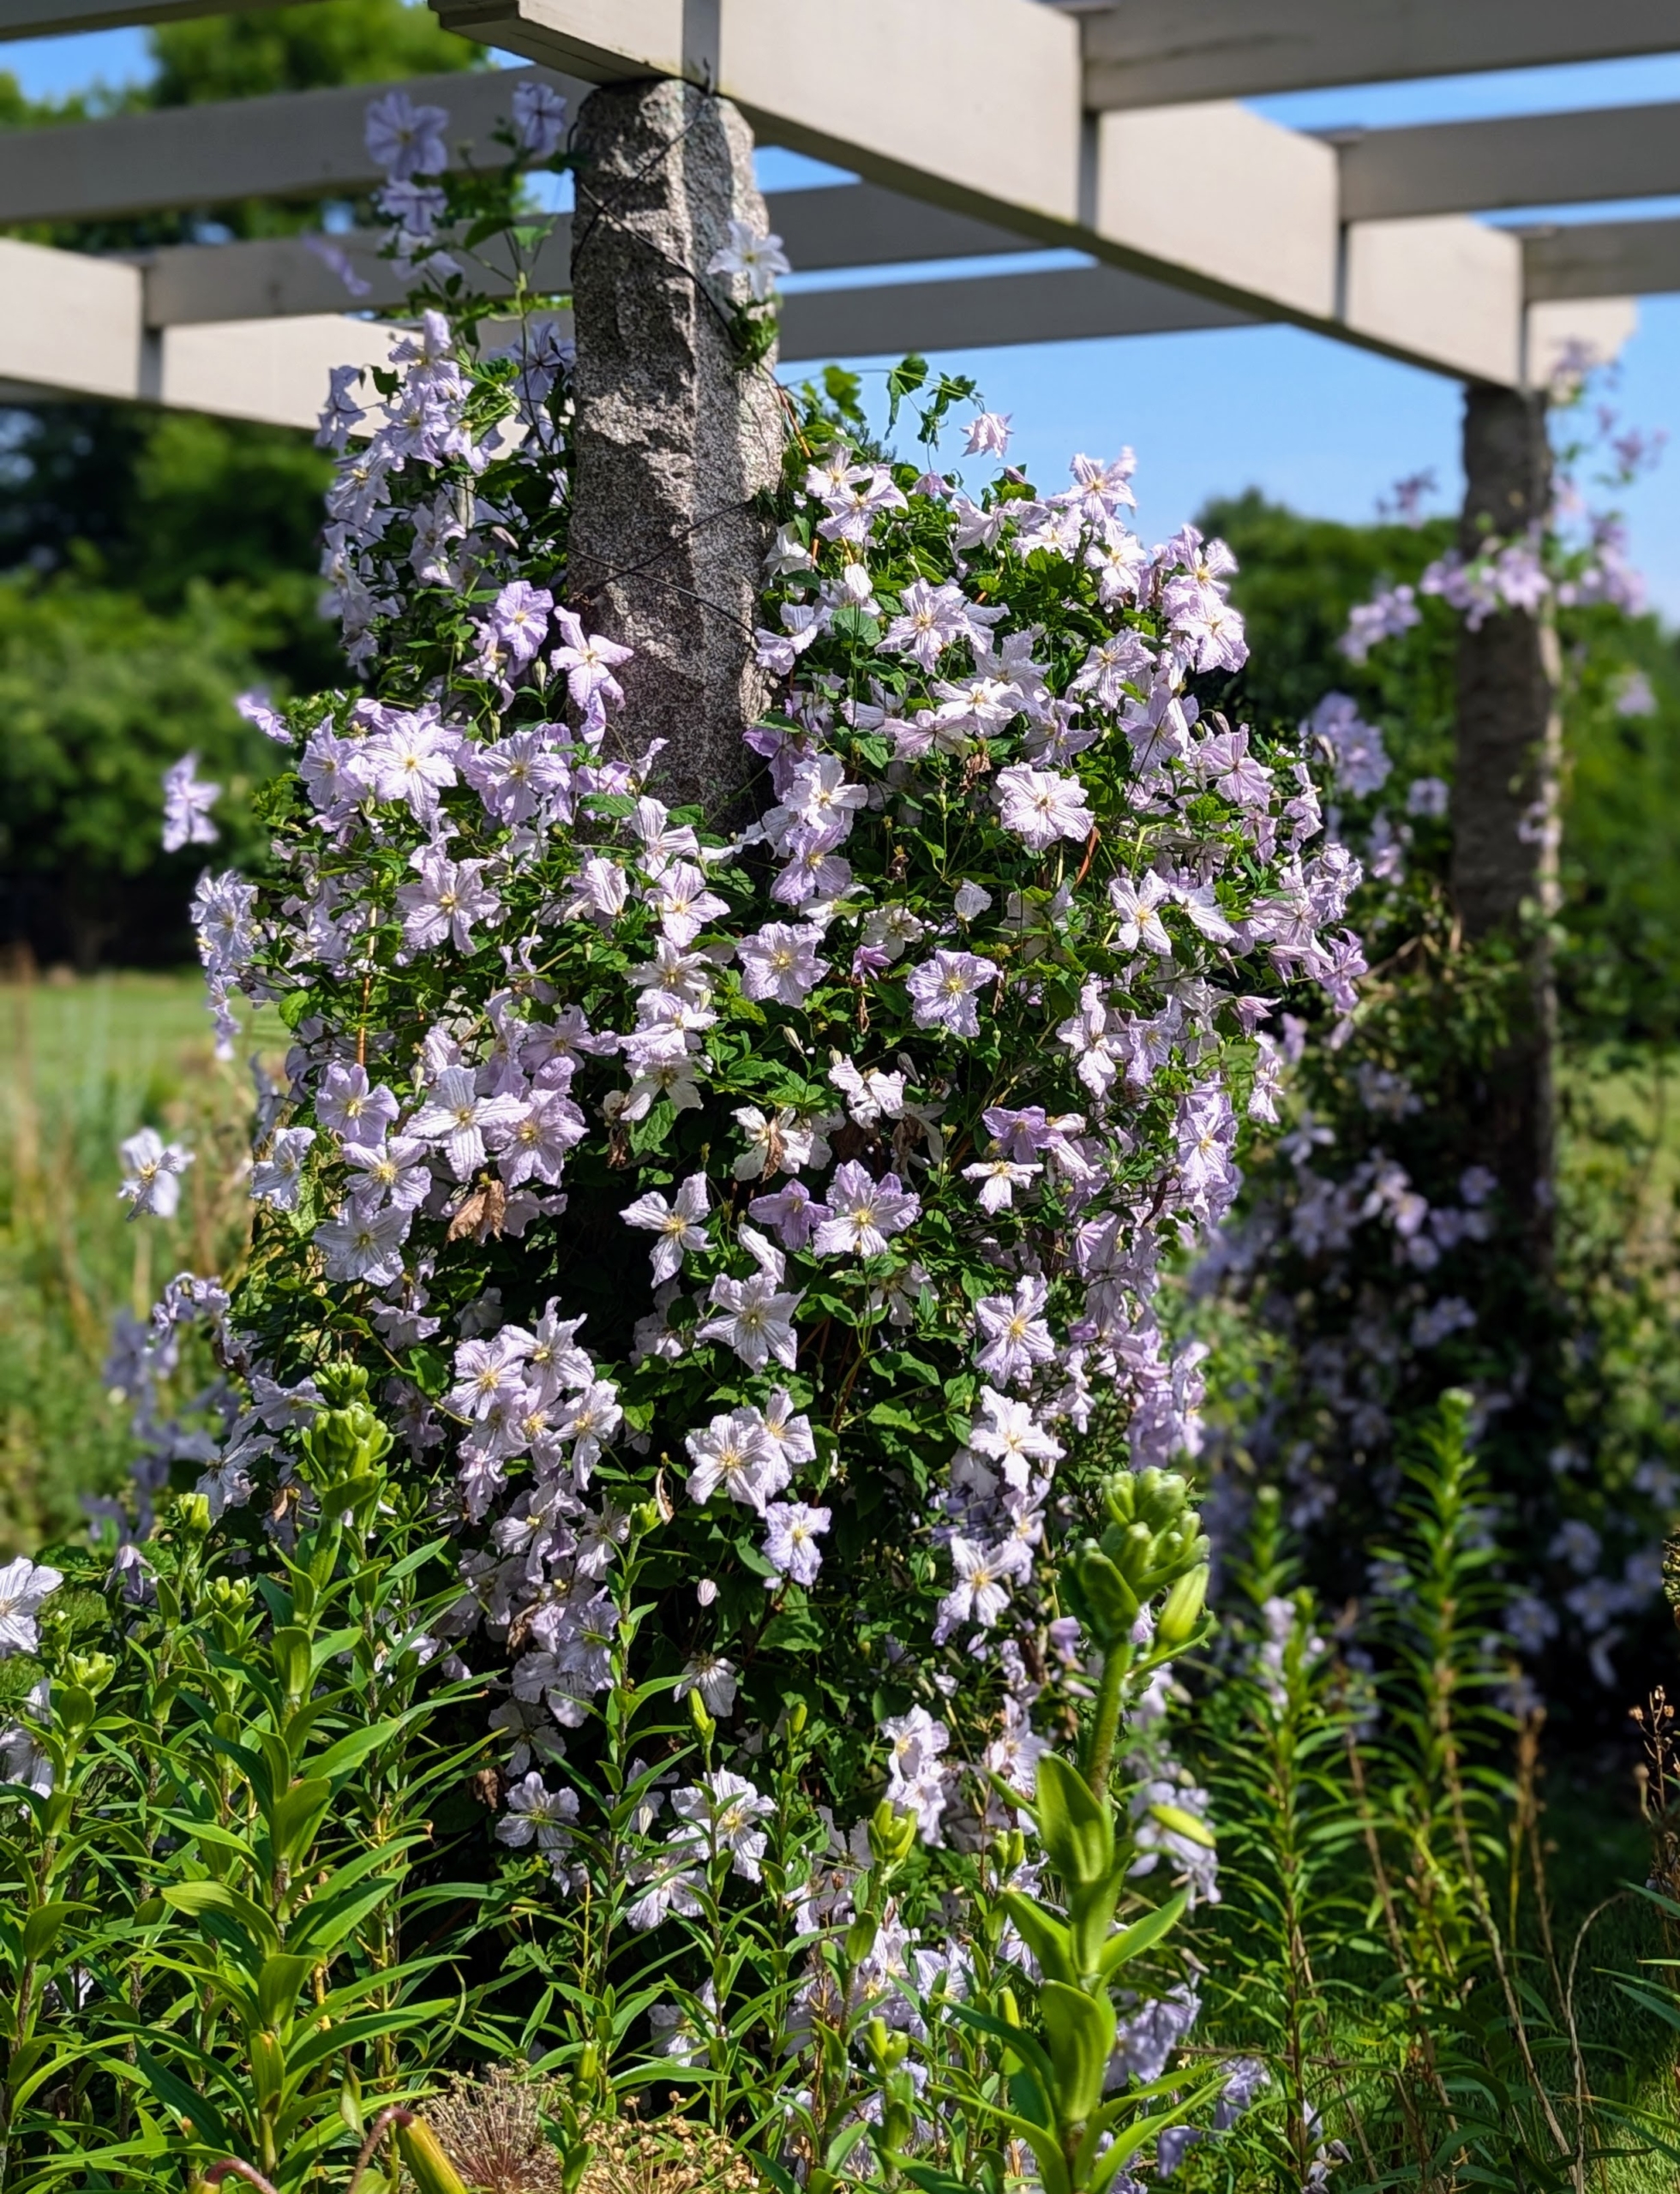
There are several different varieties of clematis planted along my winding pergola that extends from the carriage road in front of my flower cutting garden all the way to the west end of my soccer field. Each pair of posts supports the same variety and every year around this time, they stand out in all their gorgeous colors.
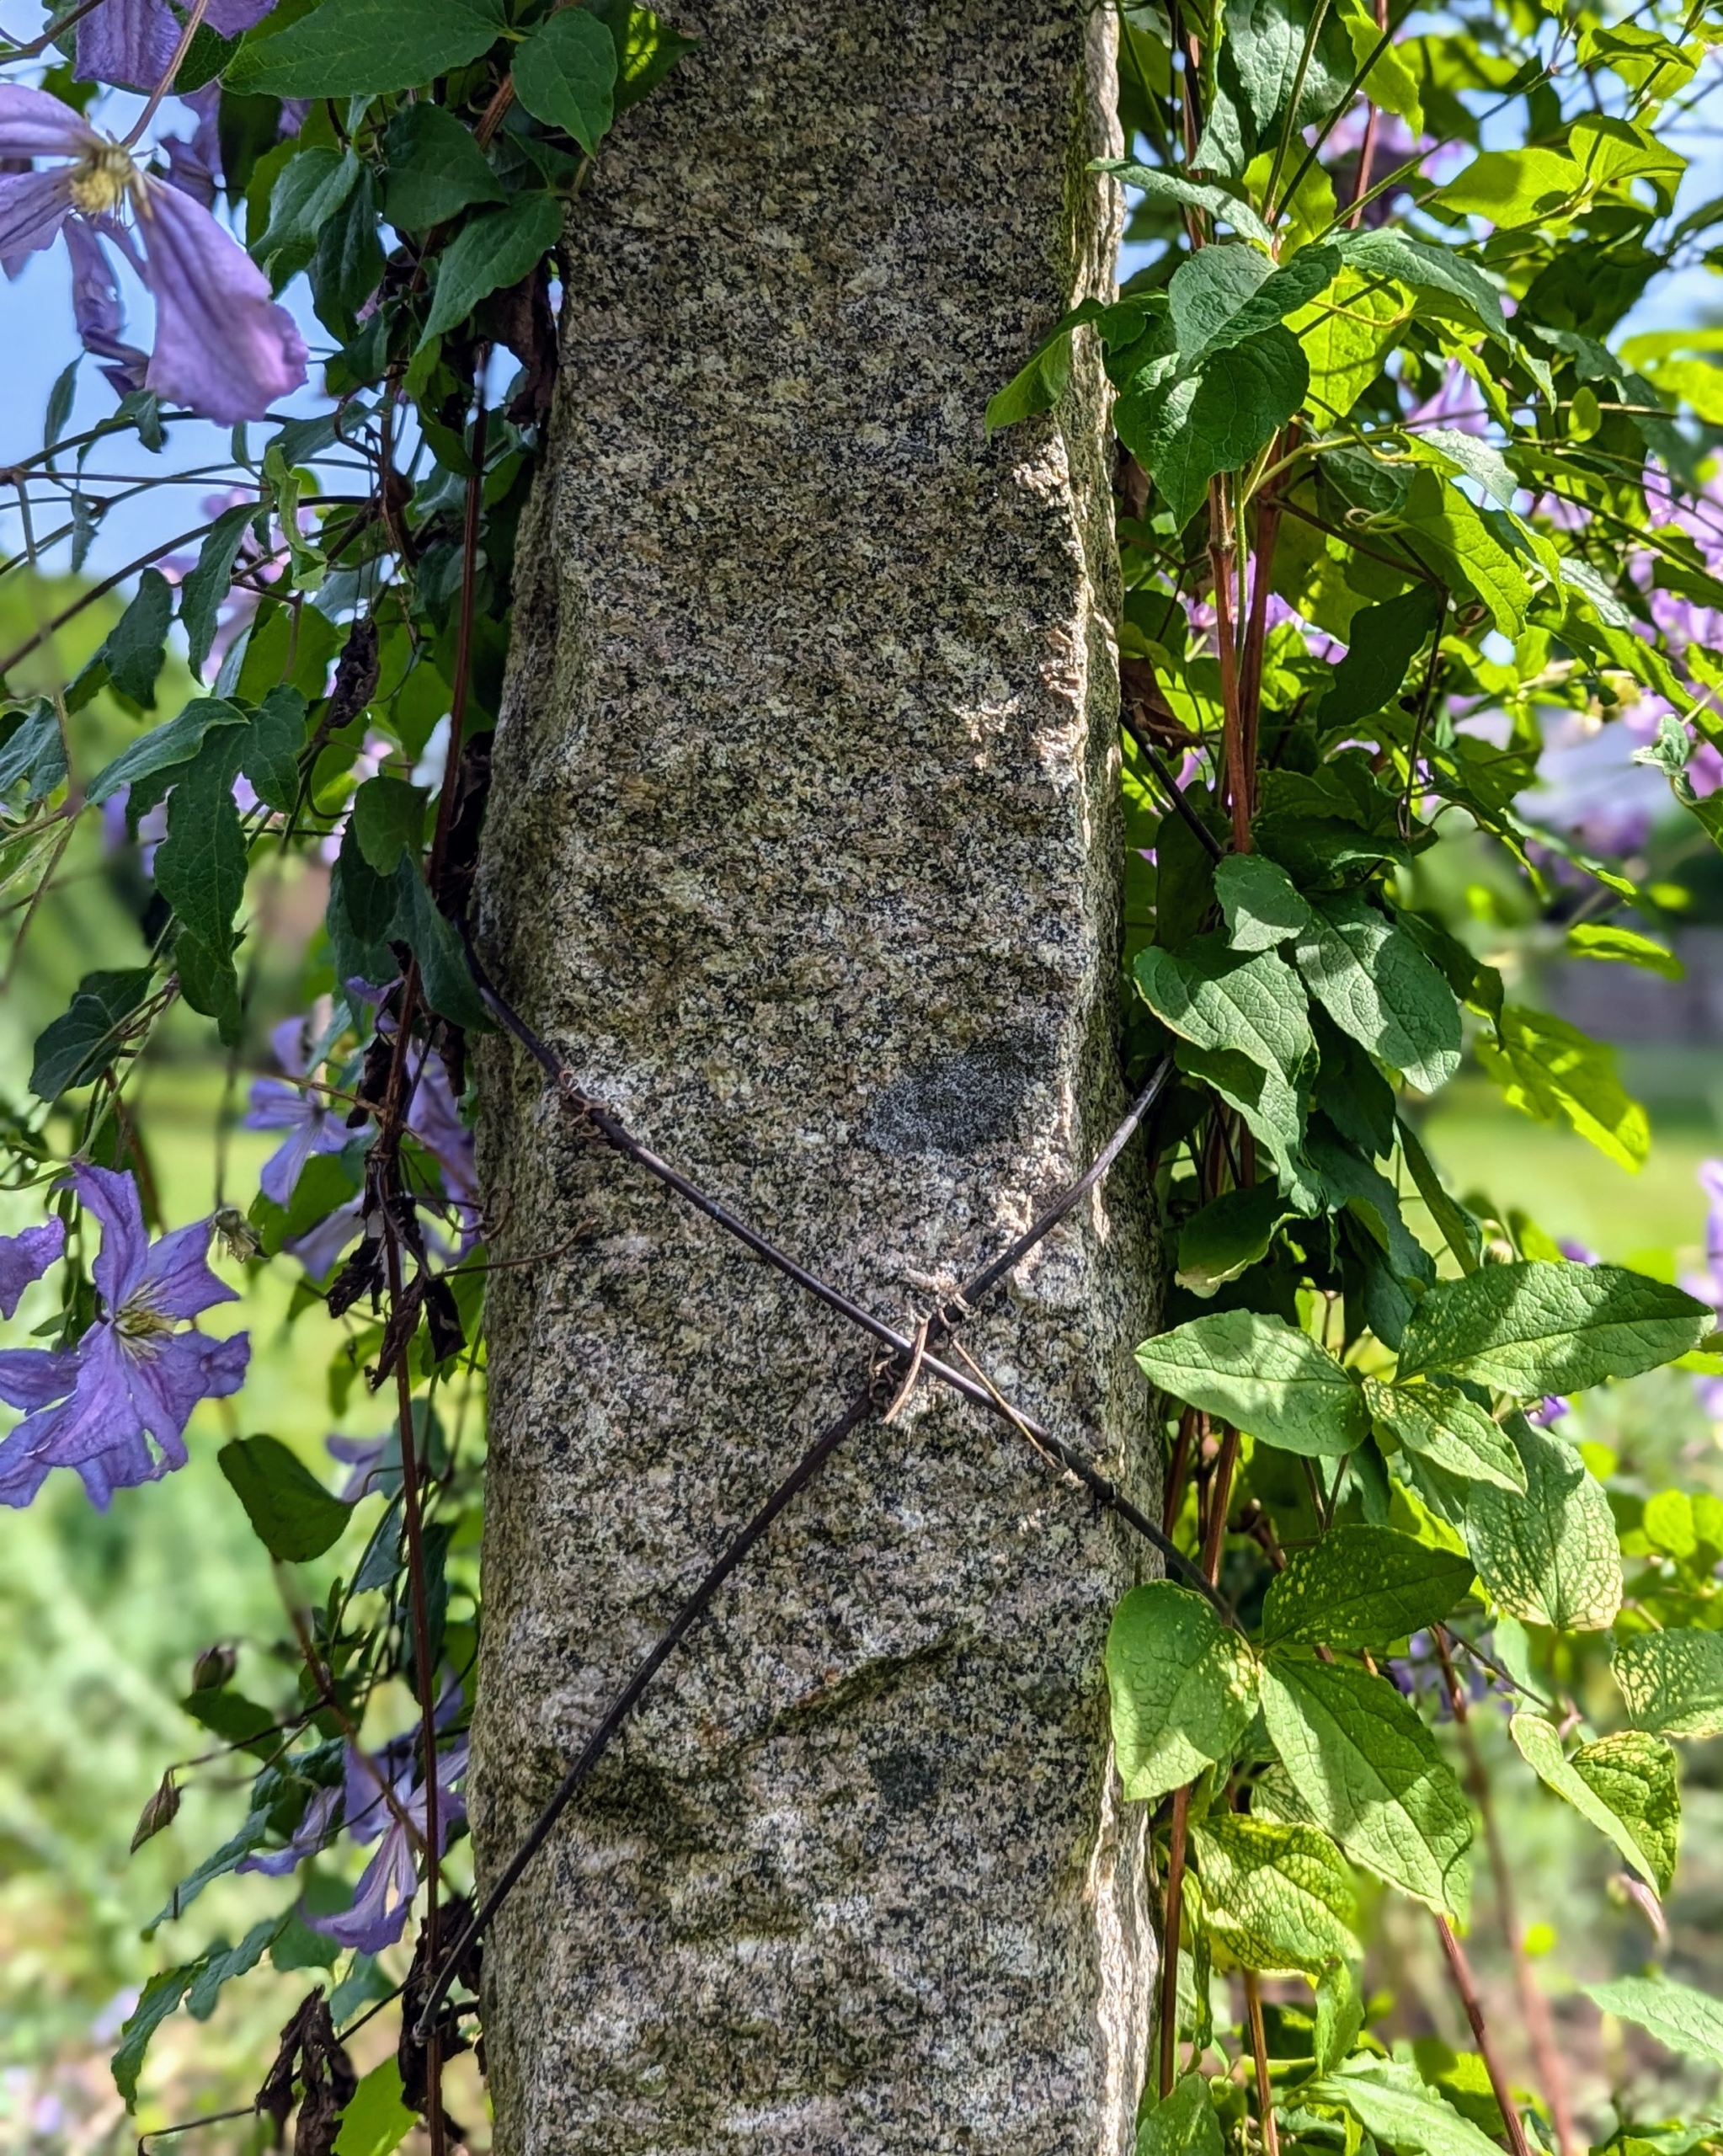
Copper wire is wrapped around each post, so the climbing tendrils of the clematis vines could attach easily. The uprights for this pergola are antique granite posts from China originally used as grape supports. They’re perfect as posts because they don’t rot over time like wood does. A friend of mine acquired a lot of stone from this valley and I purchased a couple hundred of these posts. I only wish I had bought more of them.
Clematis is a genus of about 300-species within the buttercup family Ranunculaceae. The name Clematis comes from the Greek word “klematis,” meaning vine.
Clematis are native to China and Japan and are known to be vigorous, woody climbers.
Most species are called clematis, but it has also been called traveller’s joy, virgin’s bower, leather flower, or vase vine. It’s also been called “Old Man’s Beard,” because of the long fluffy seed heads that look similar to an old man’s beard.
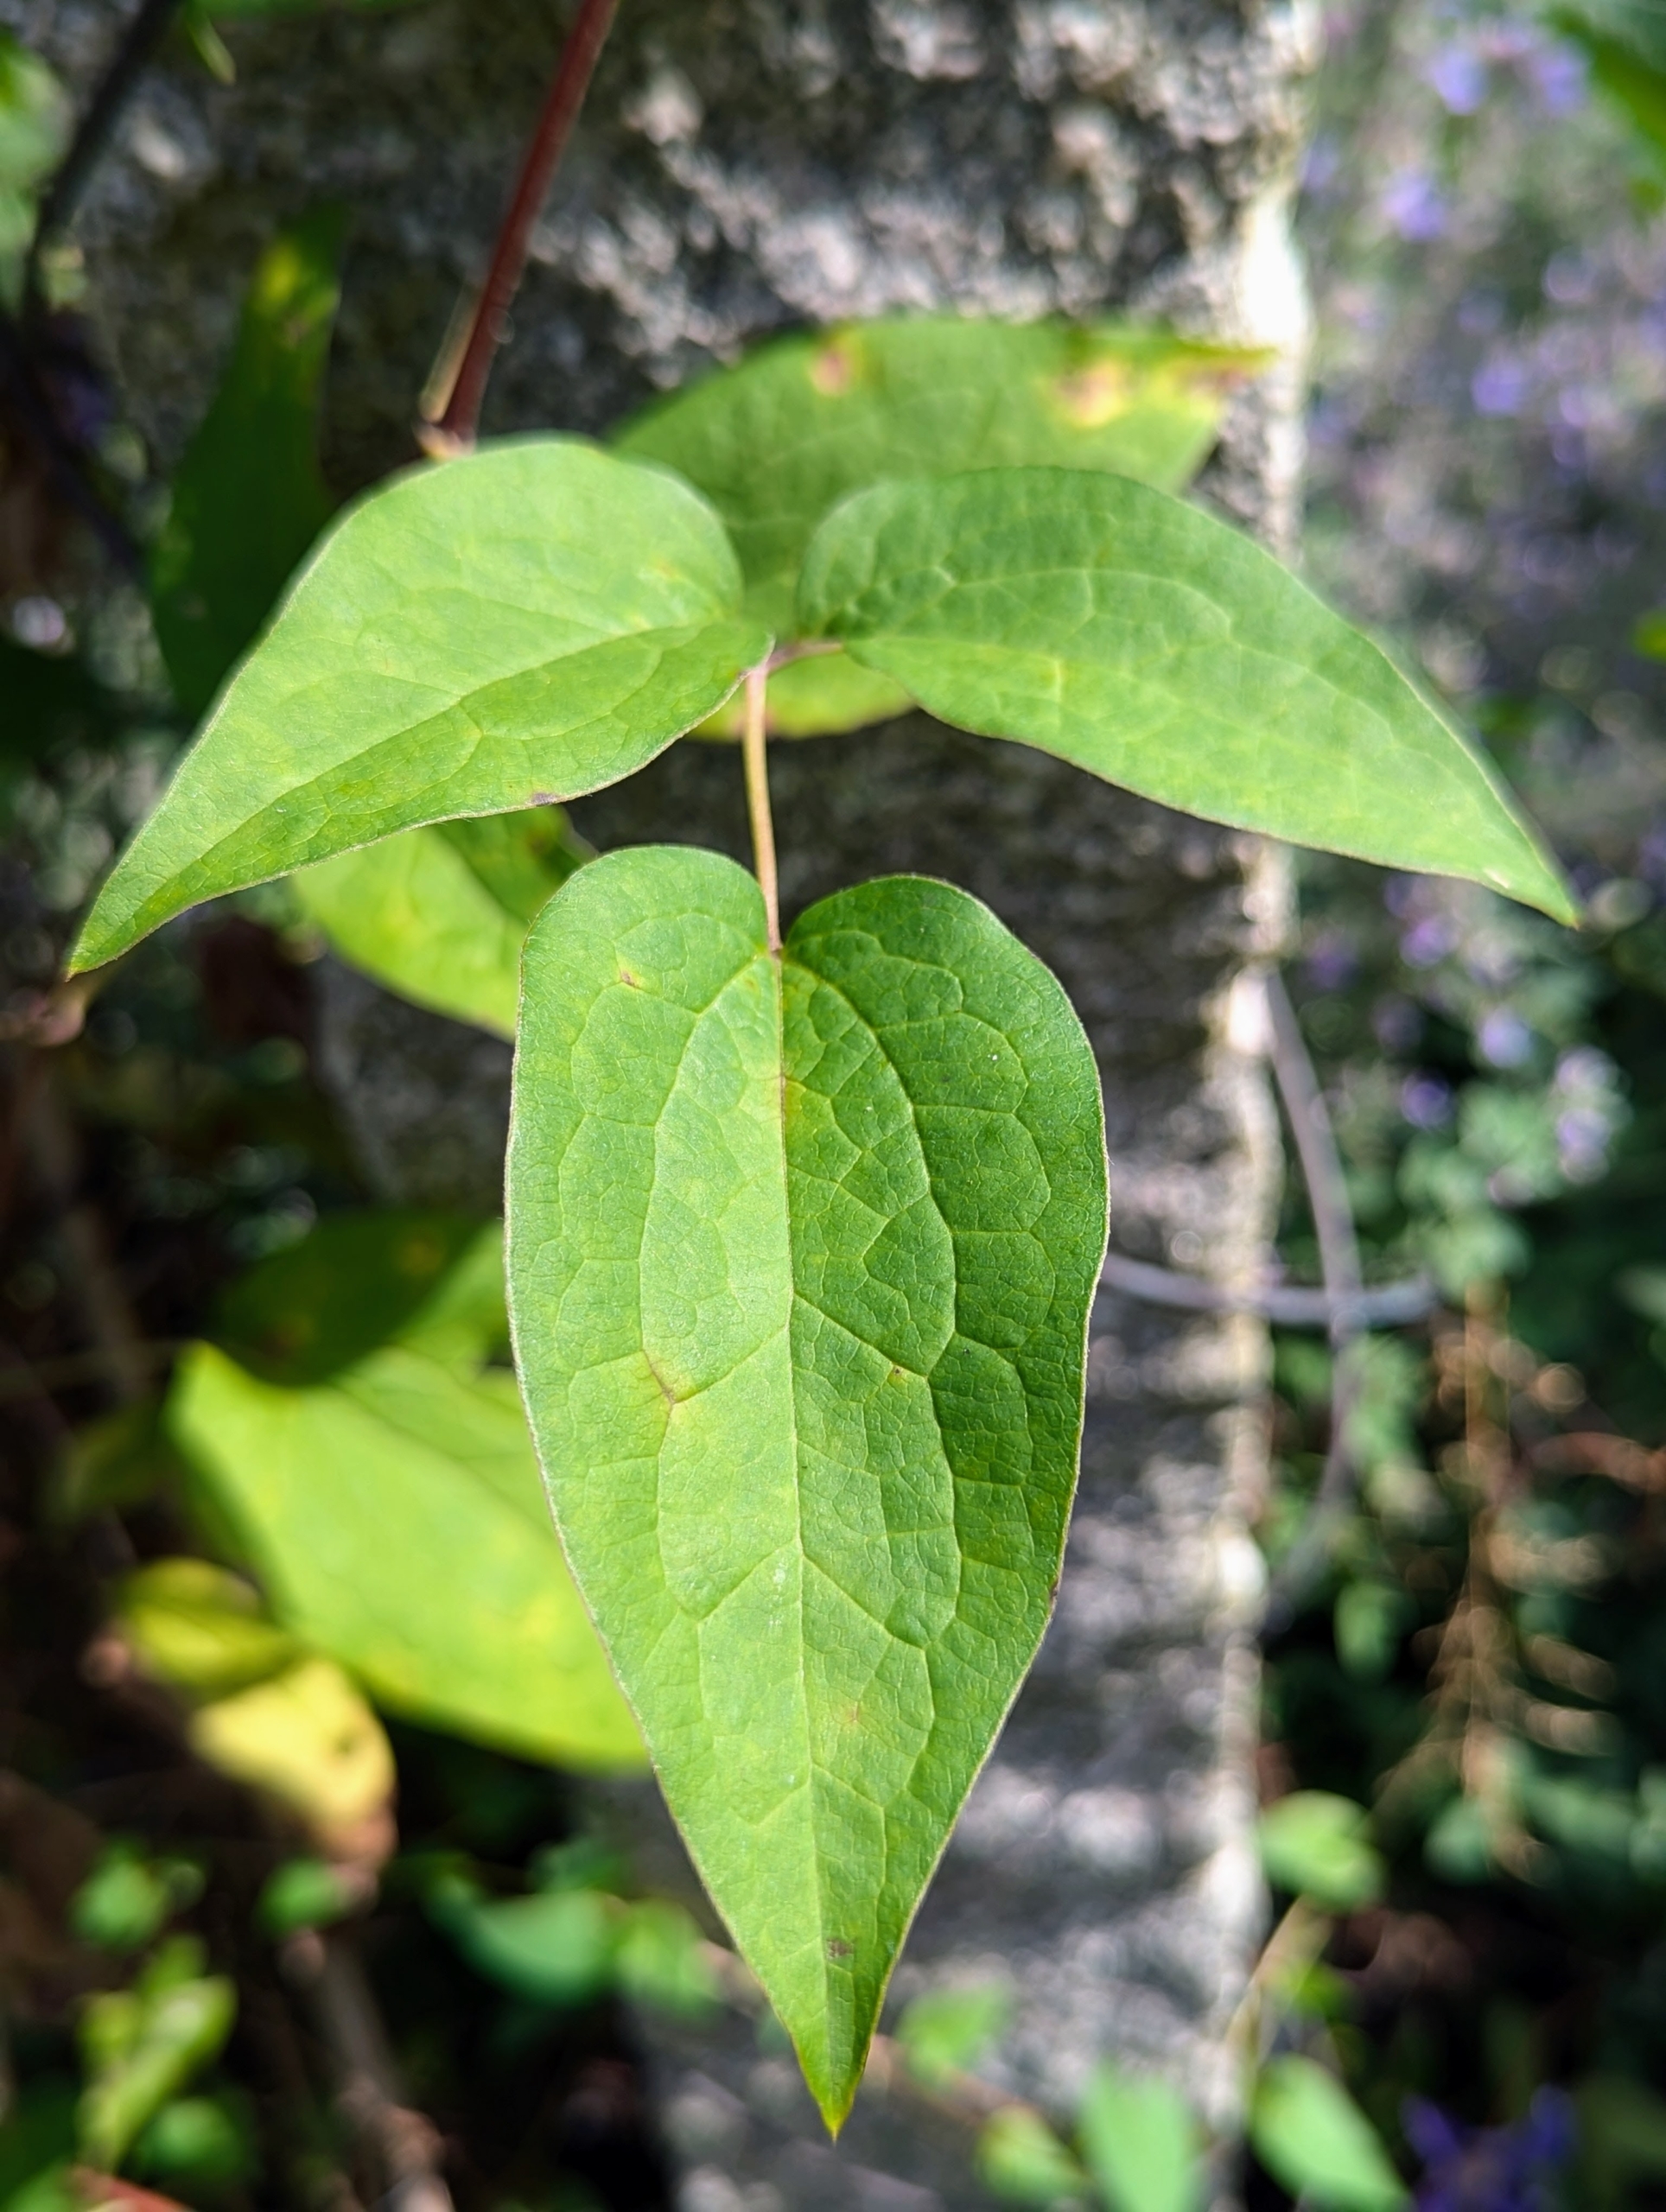
Clematis leaves grow in pairs along the stems. The clematis leaf shapes vary with different varieties, but knowing how they grow can help differentiate them from other vines.
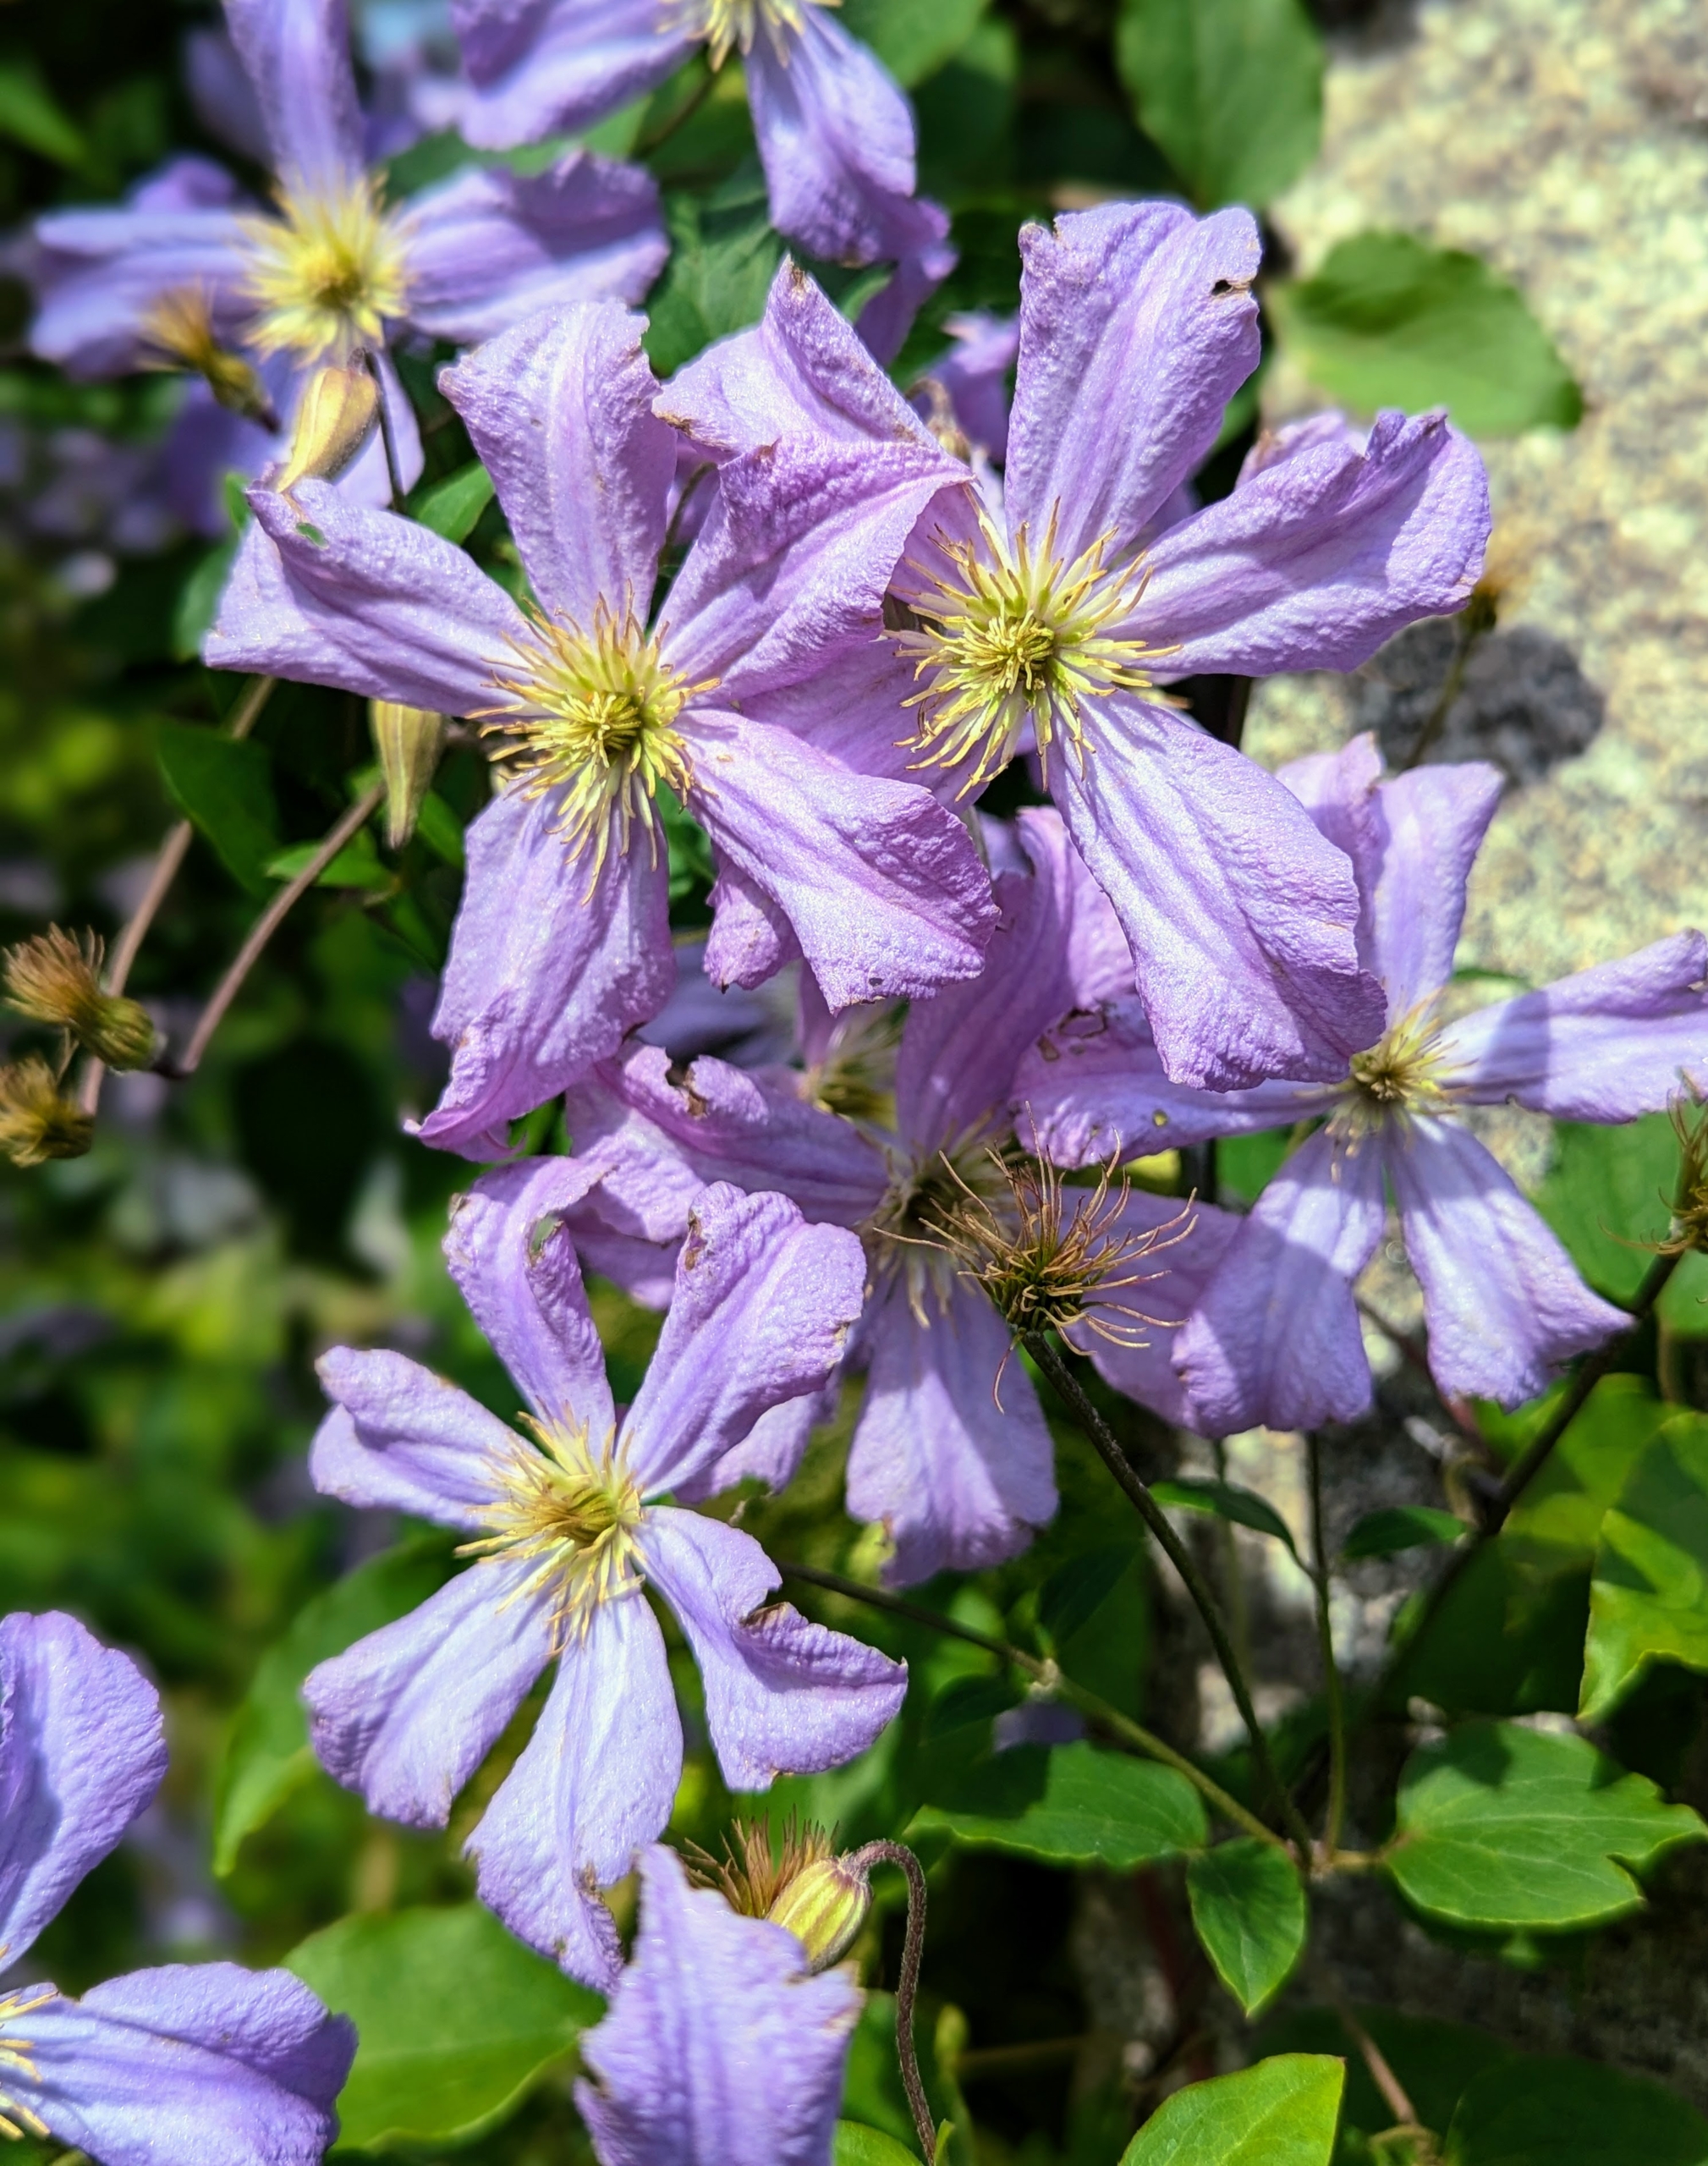
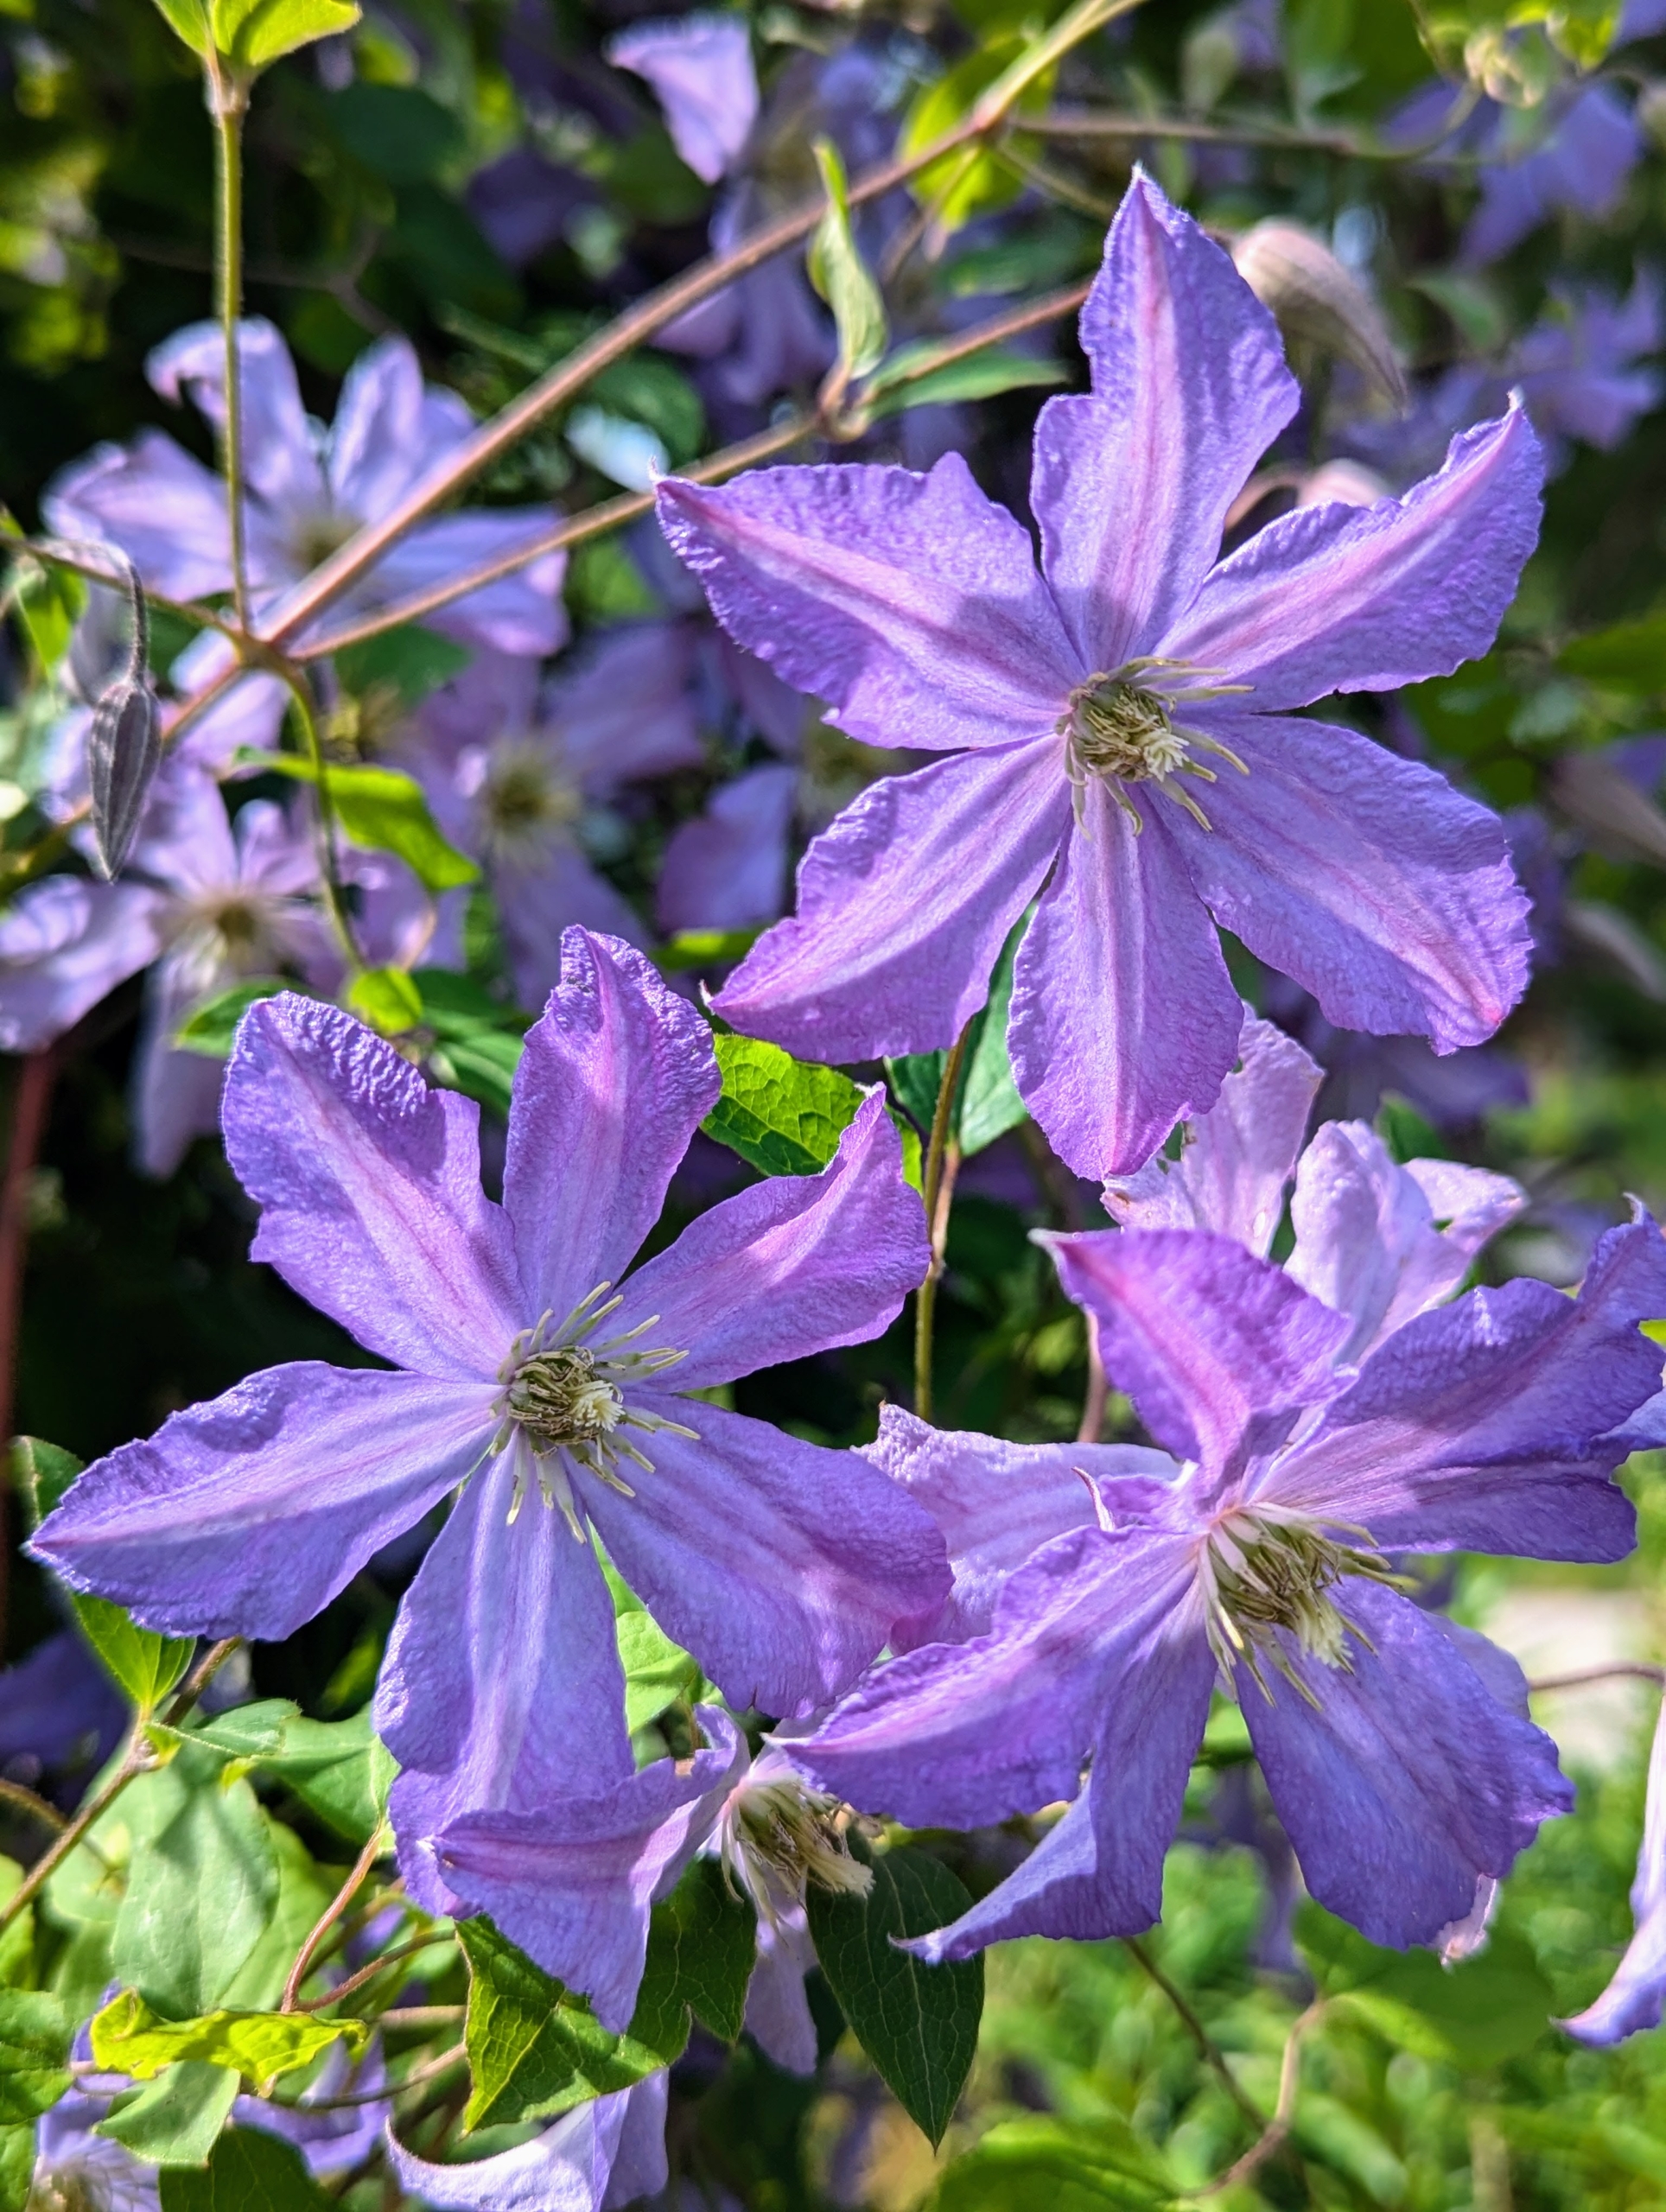
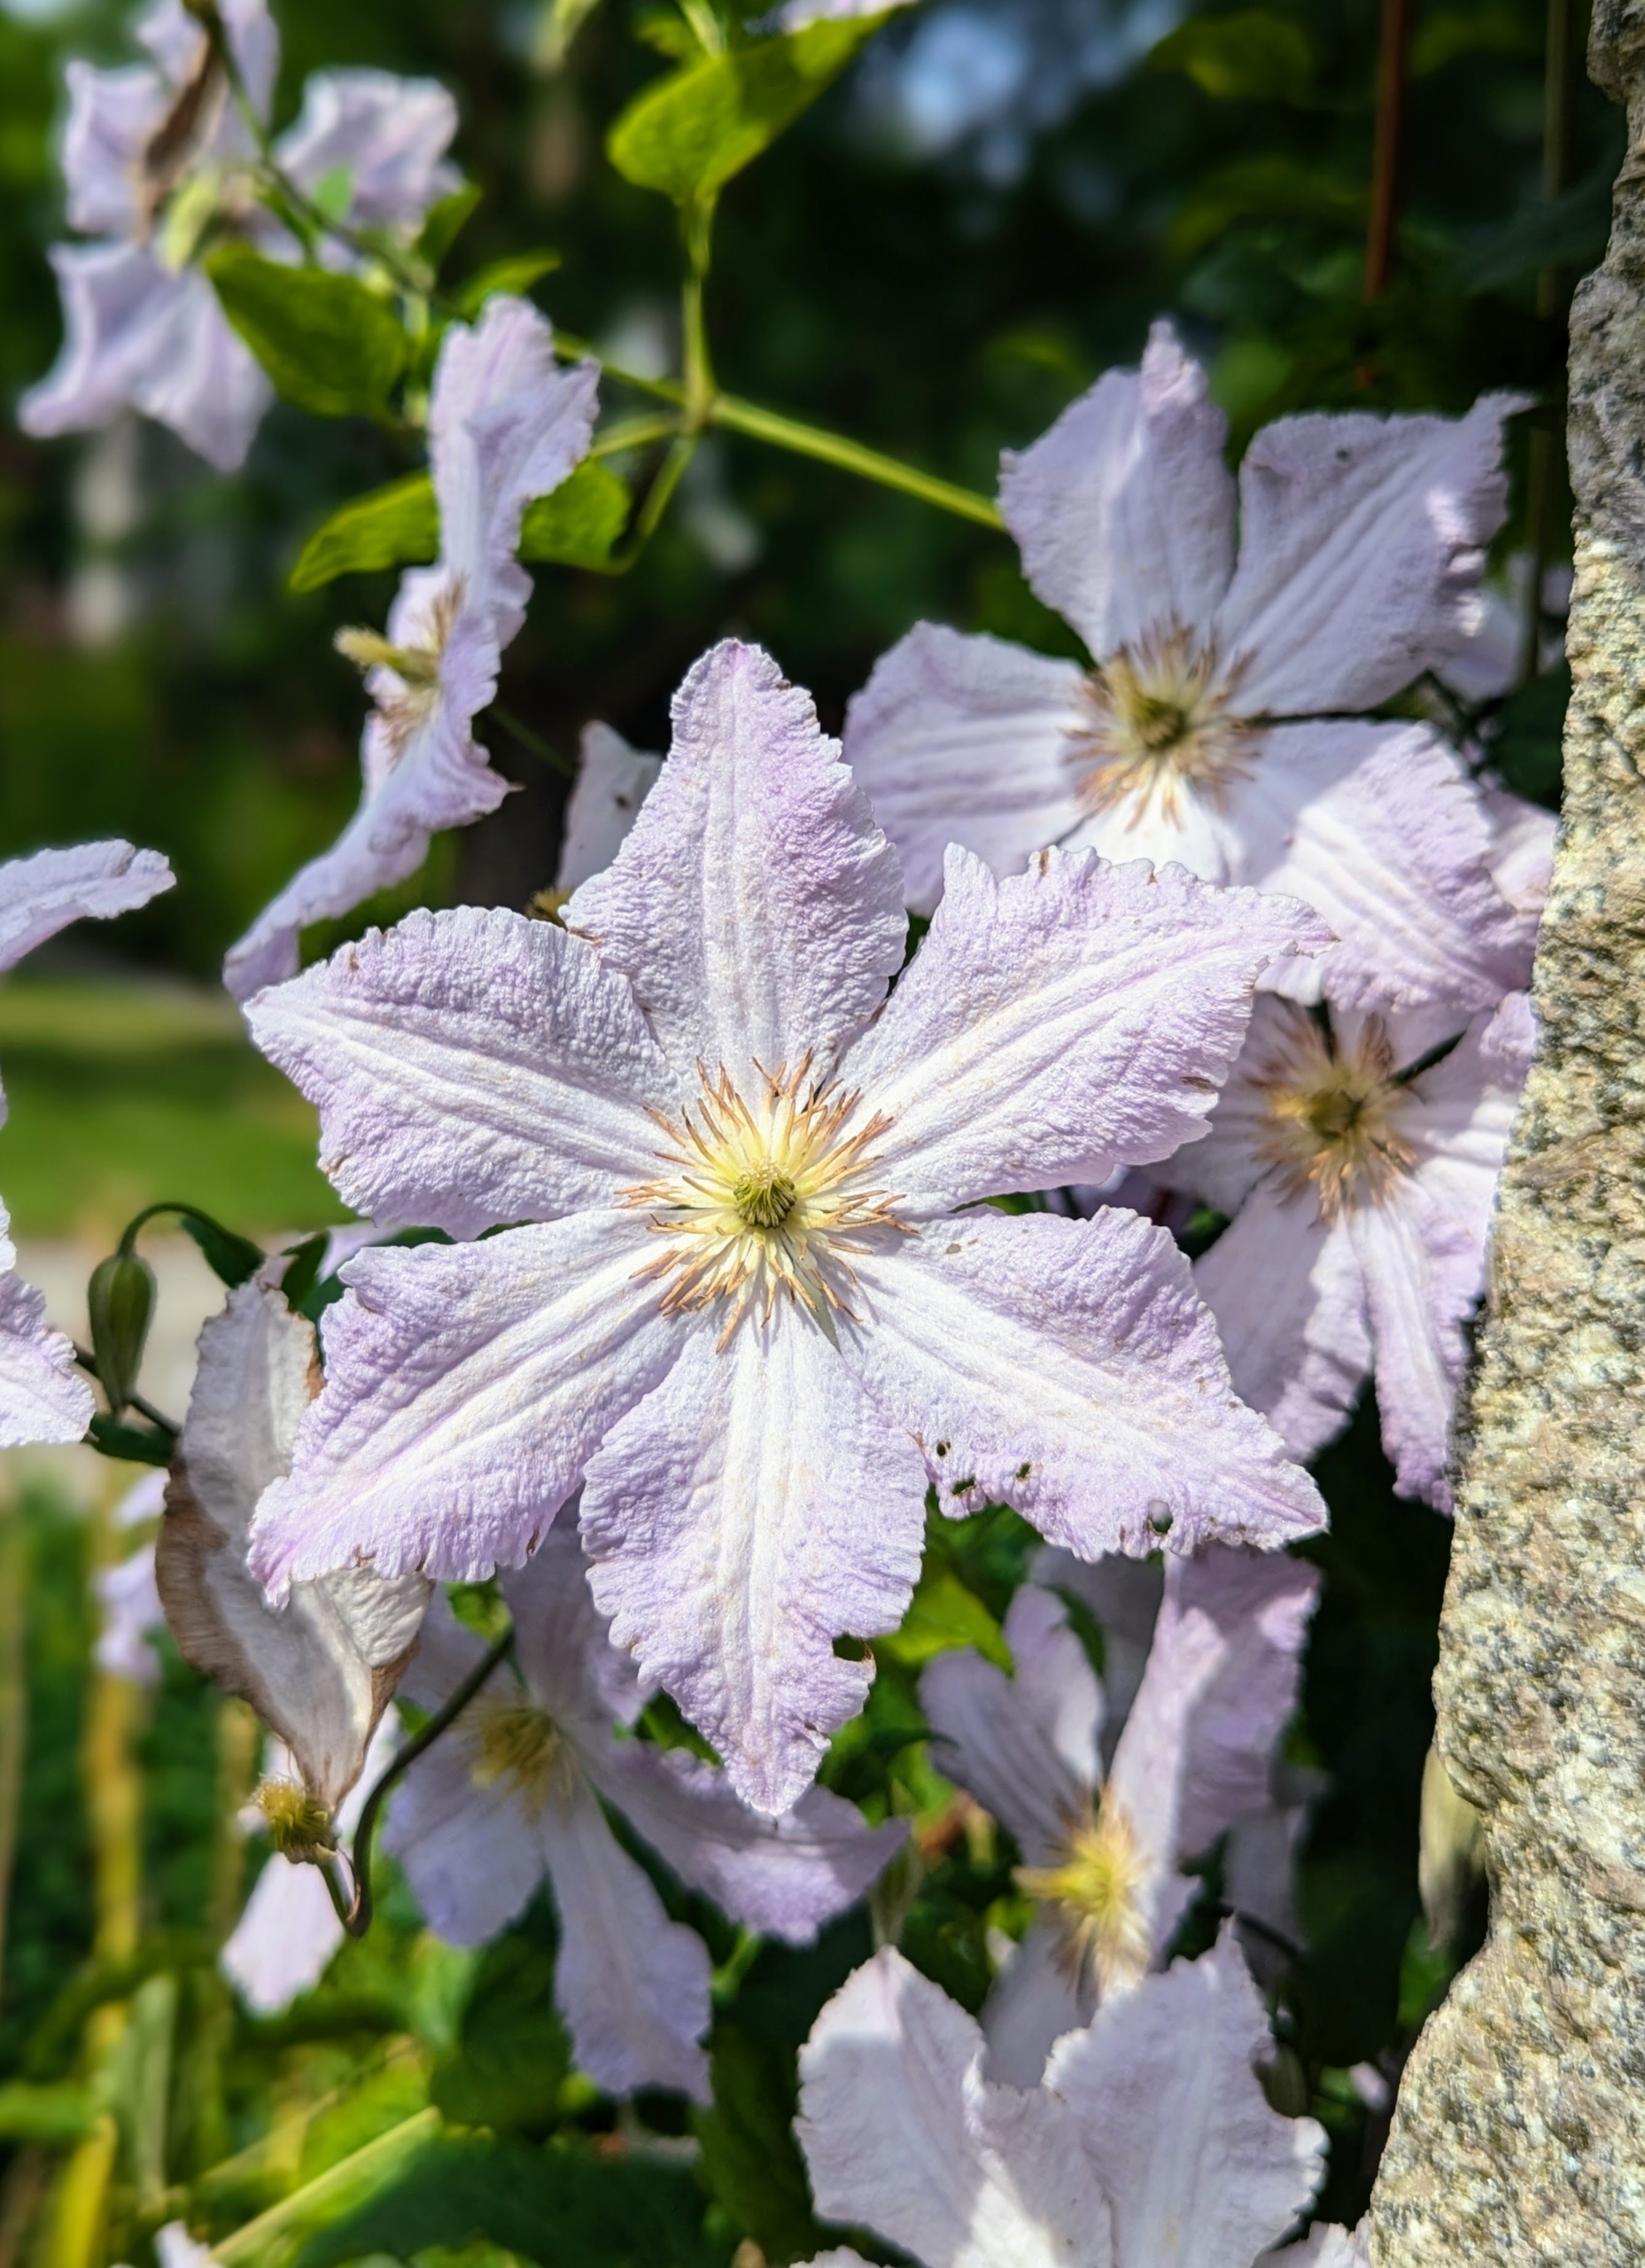
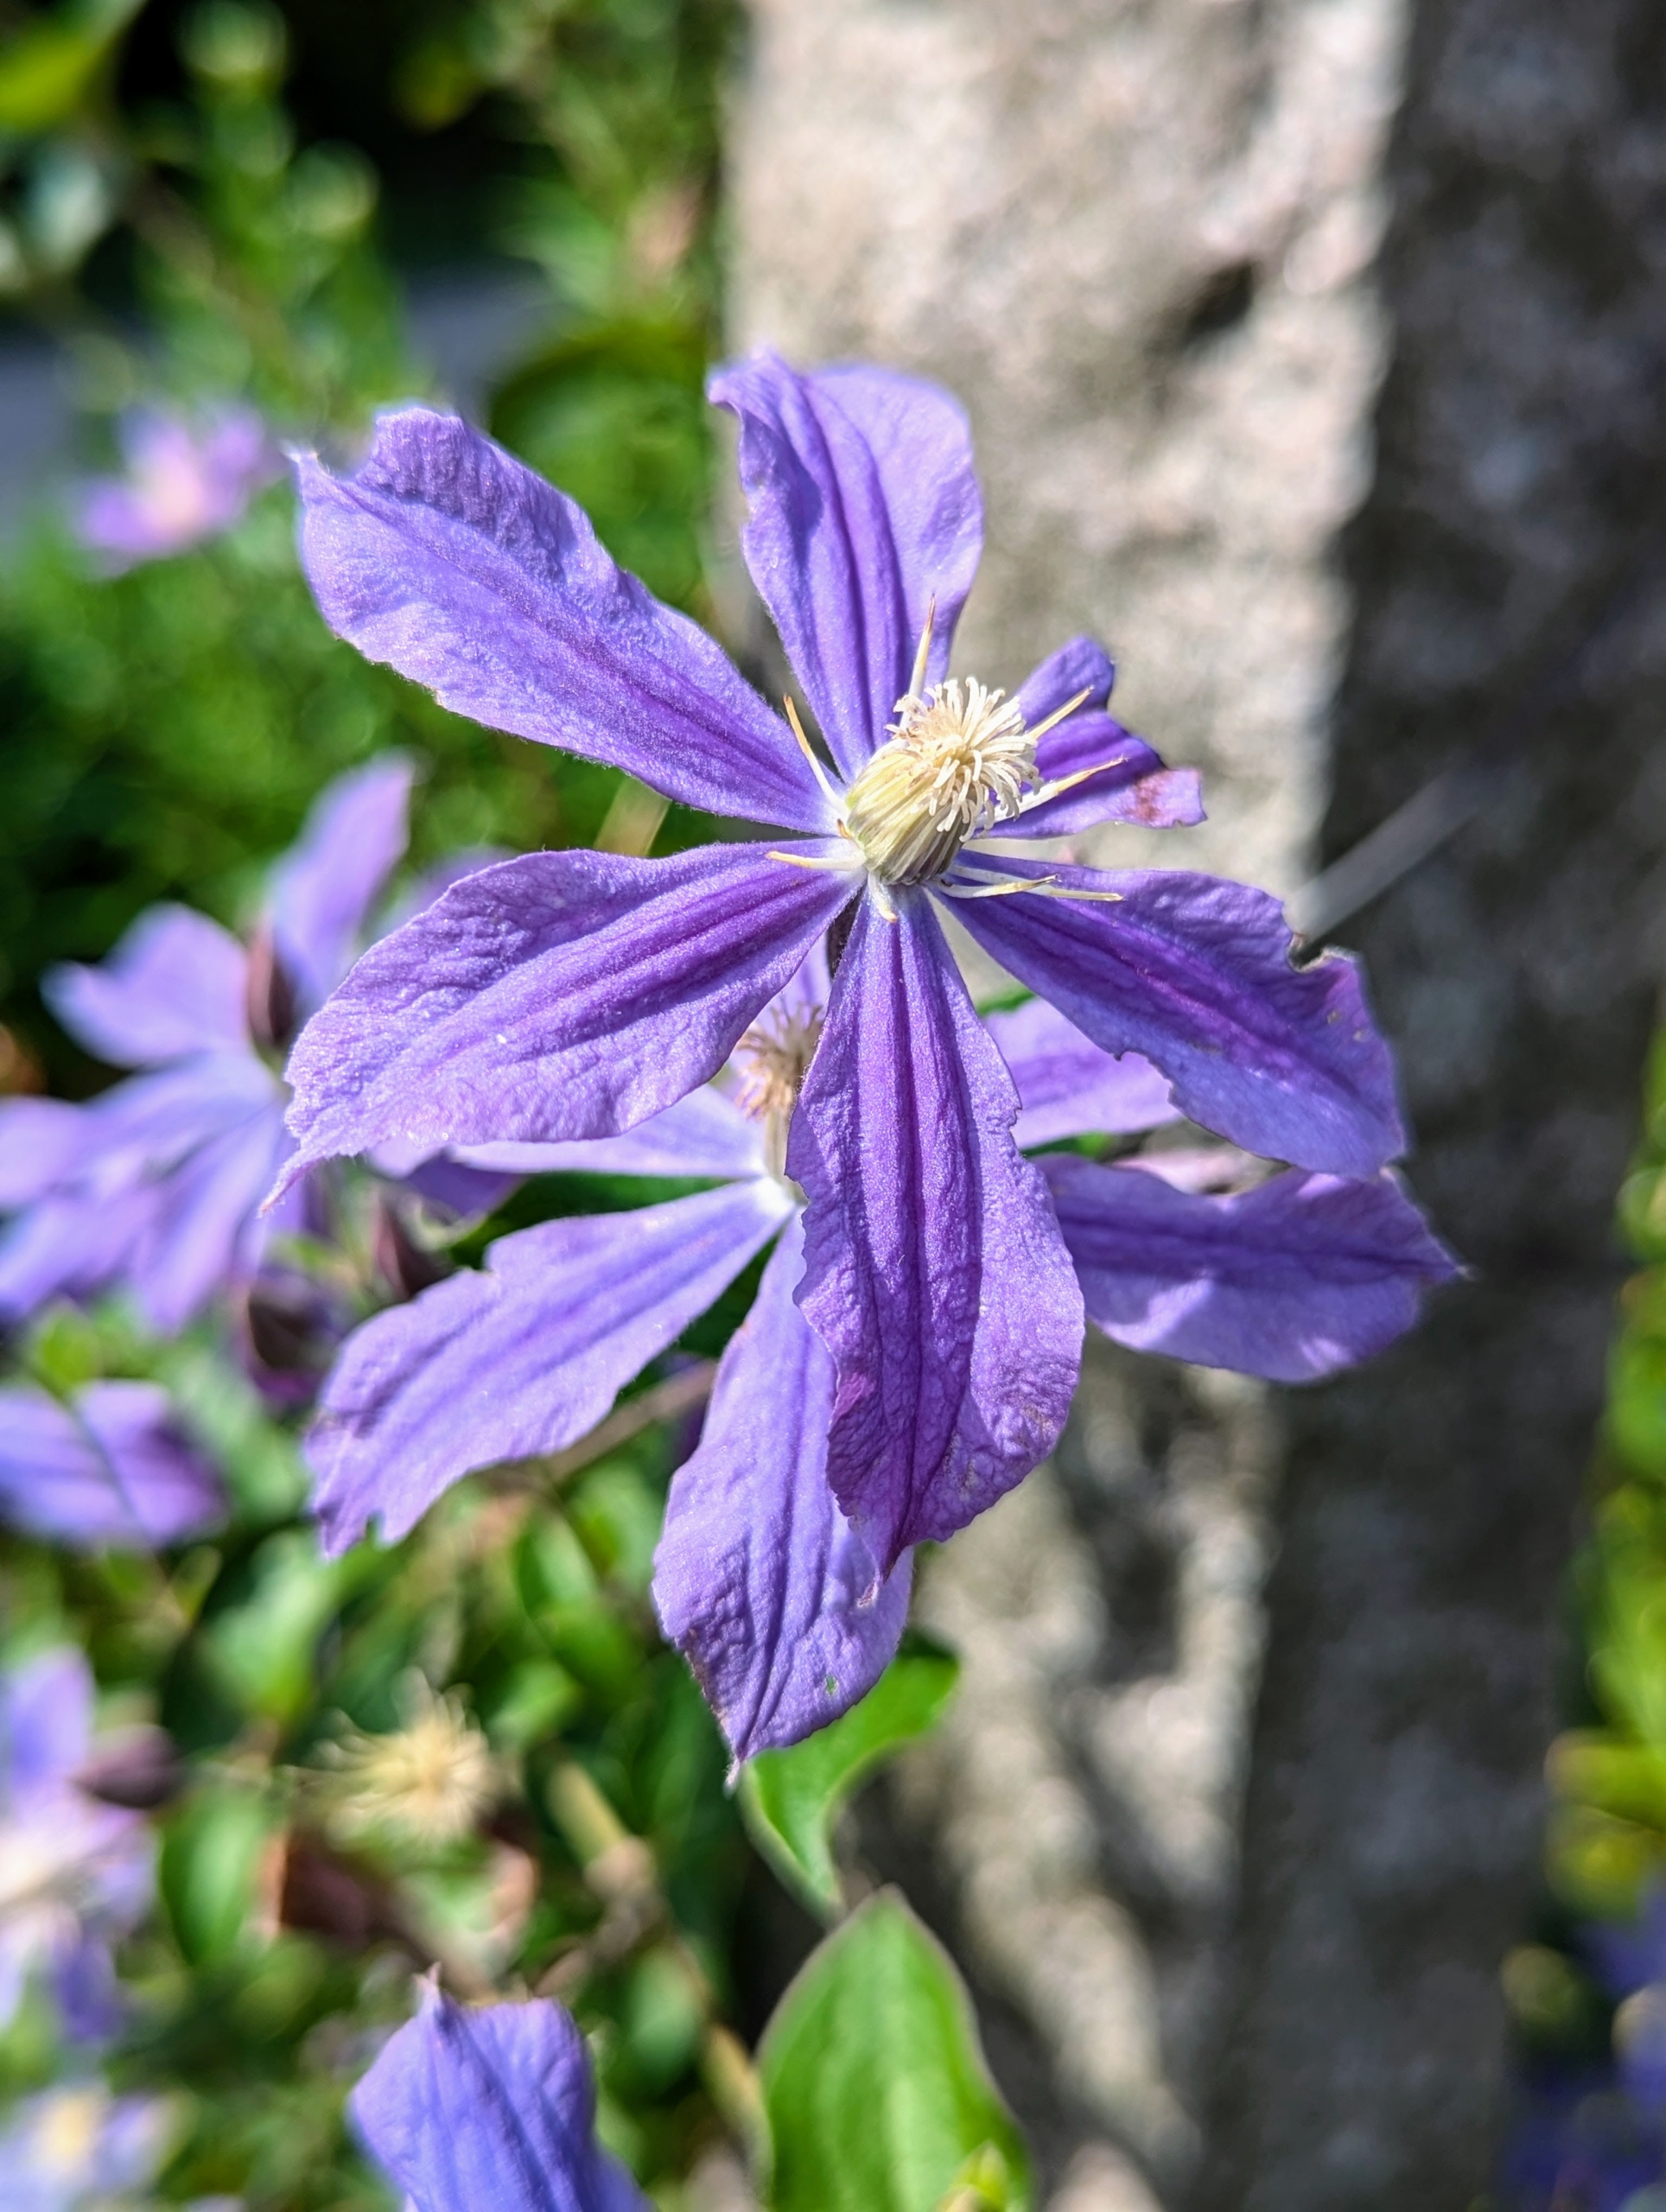
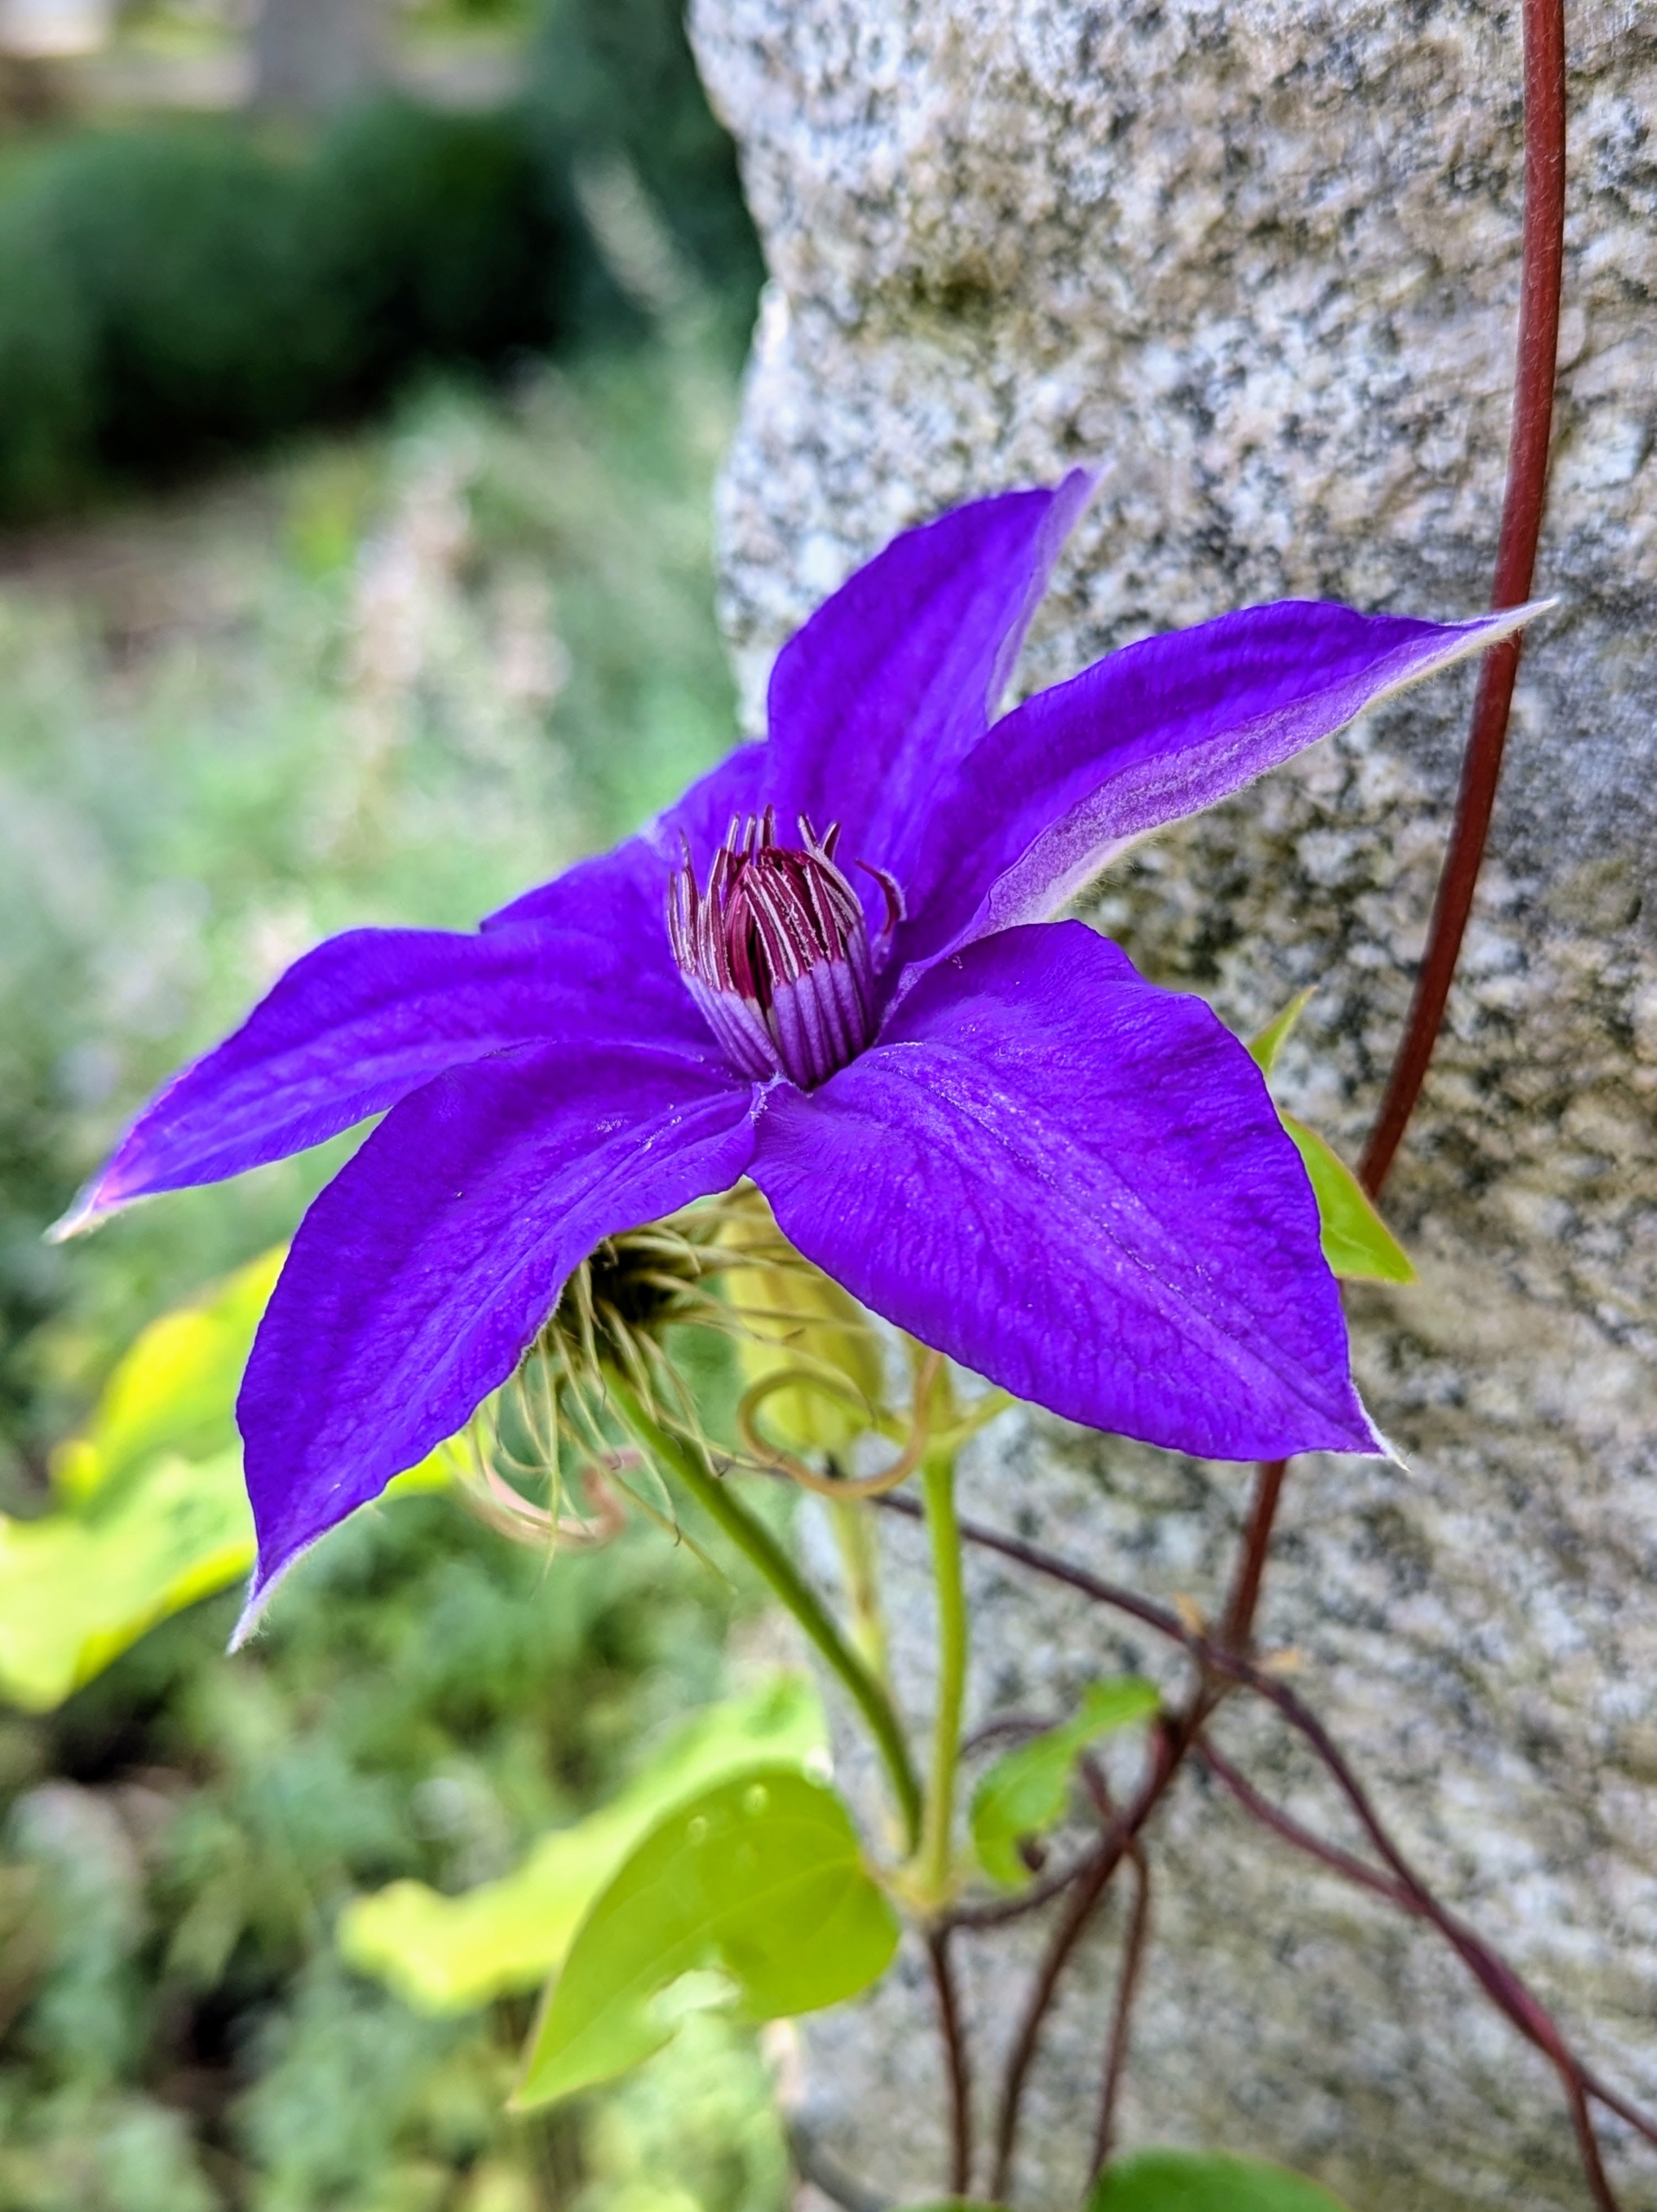
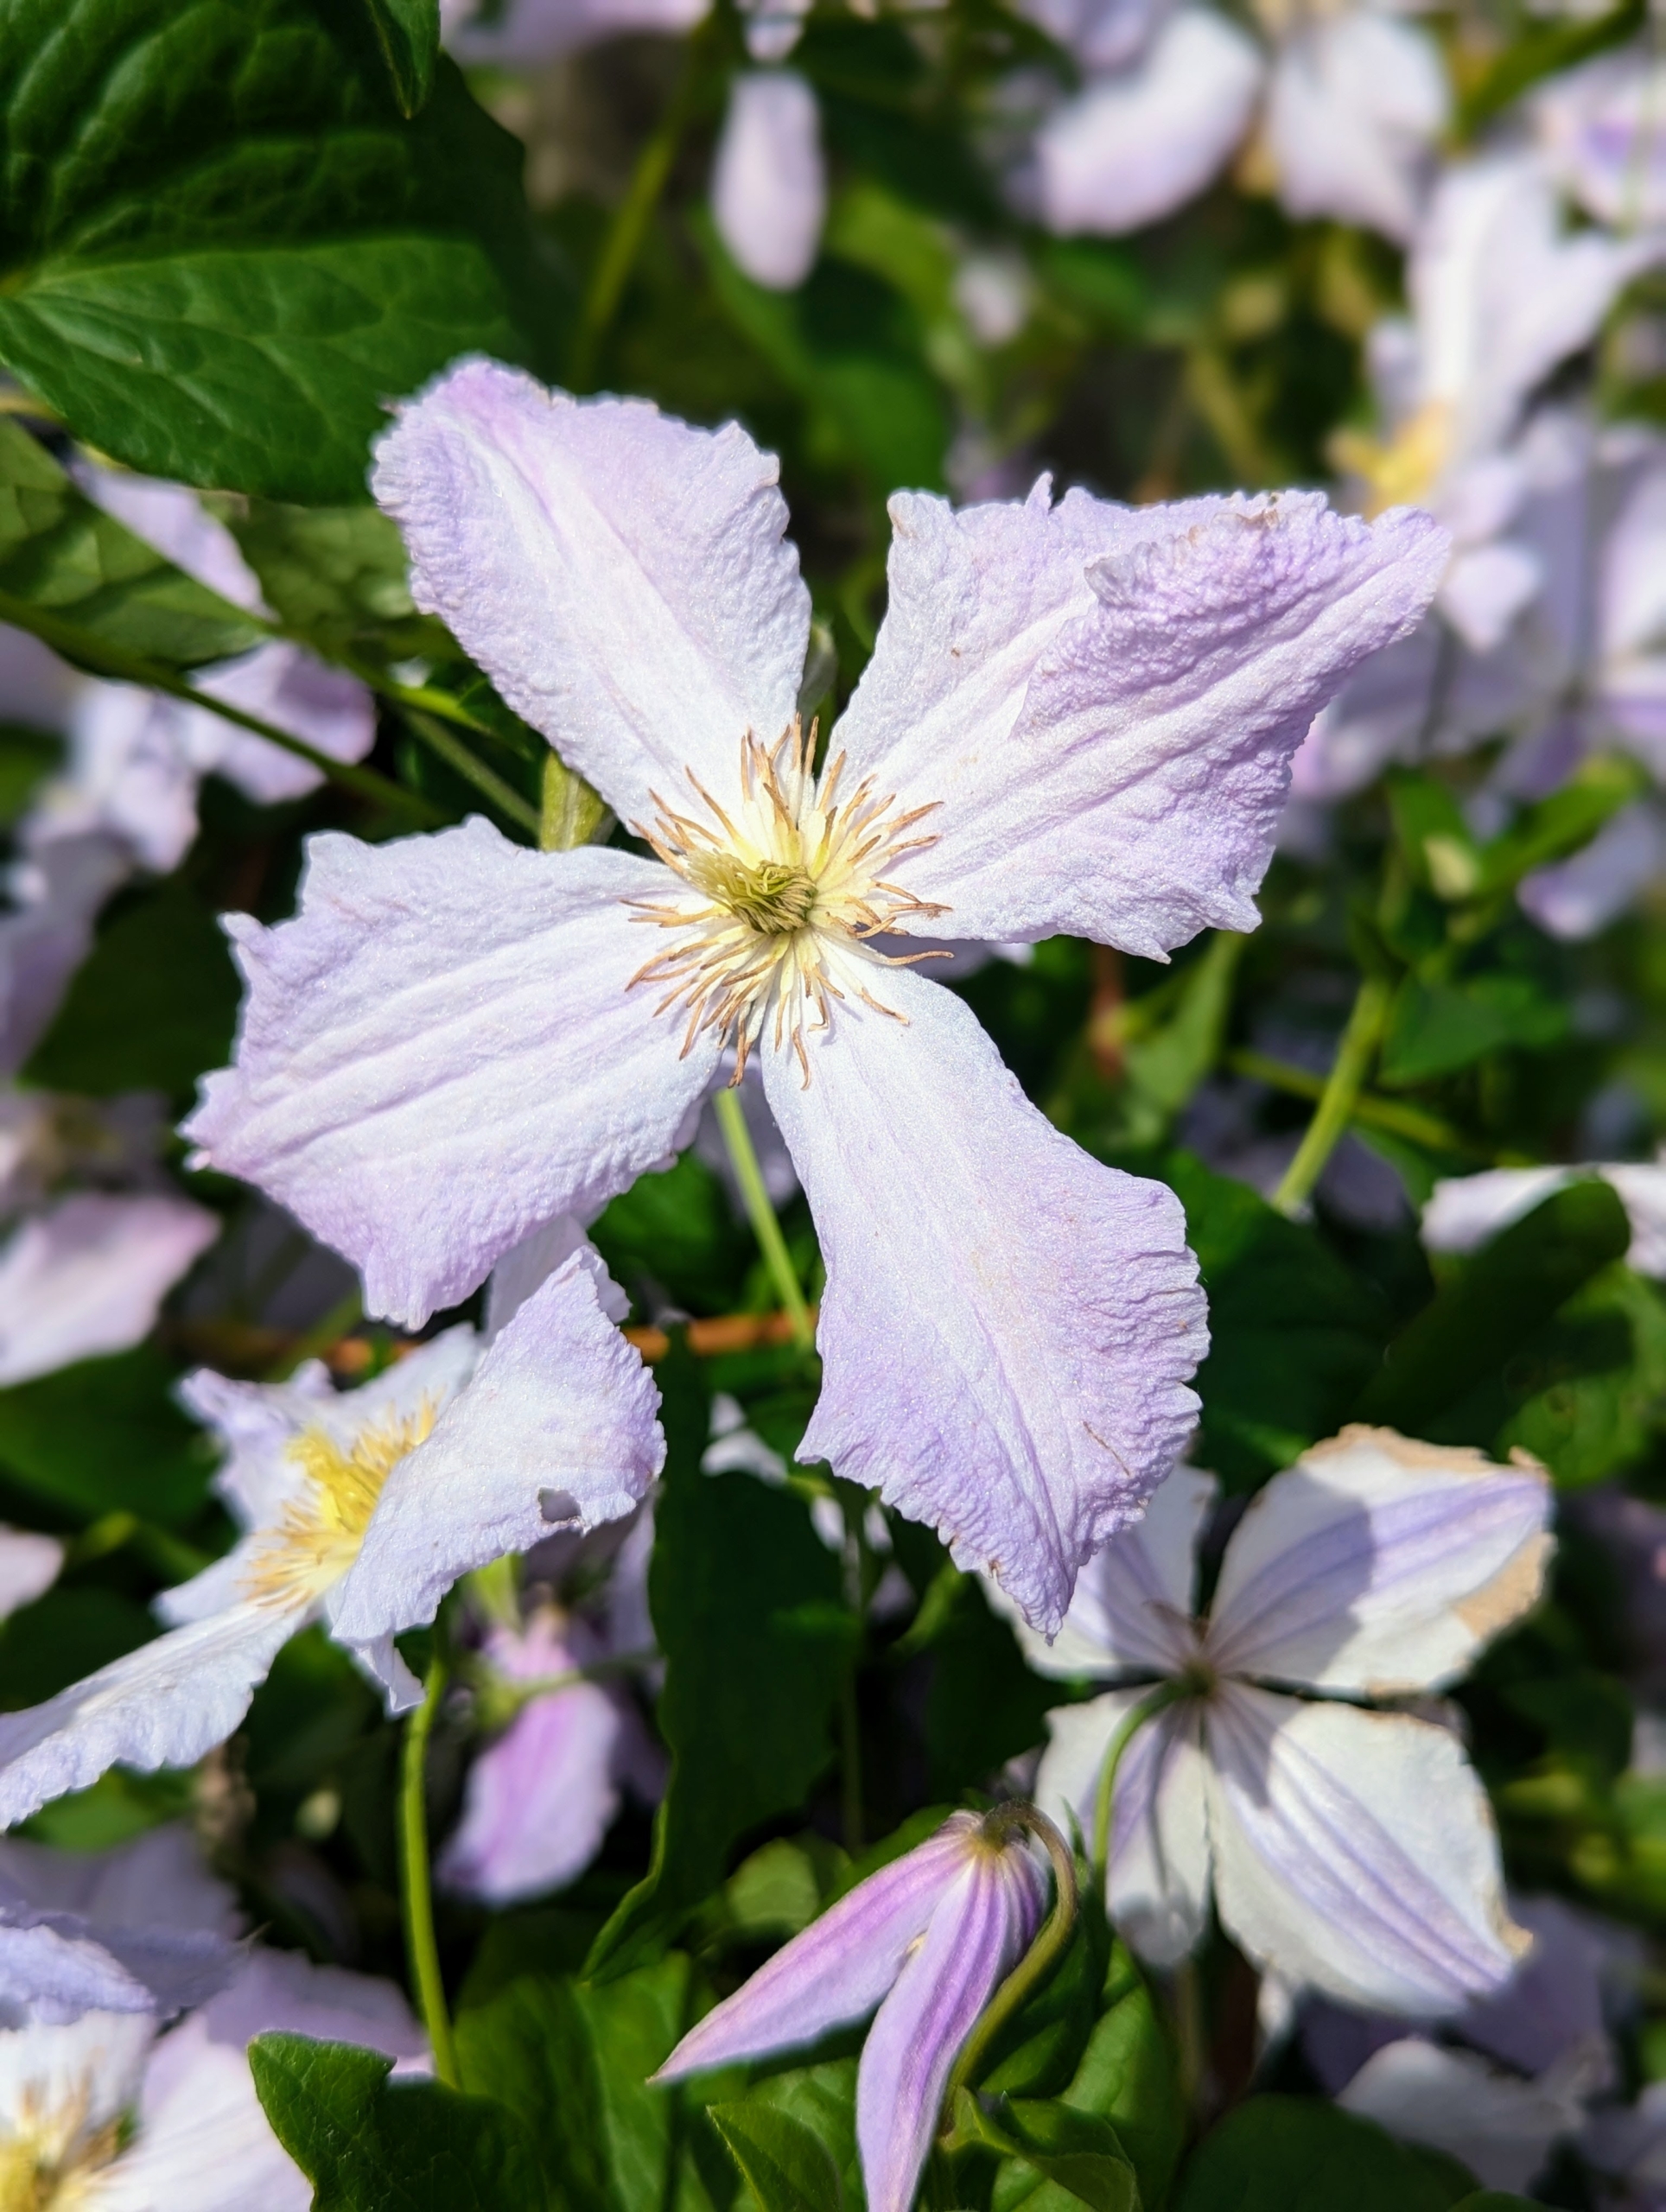
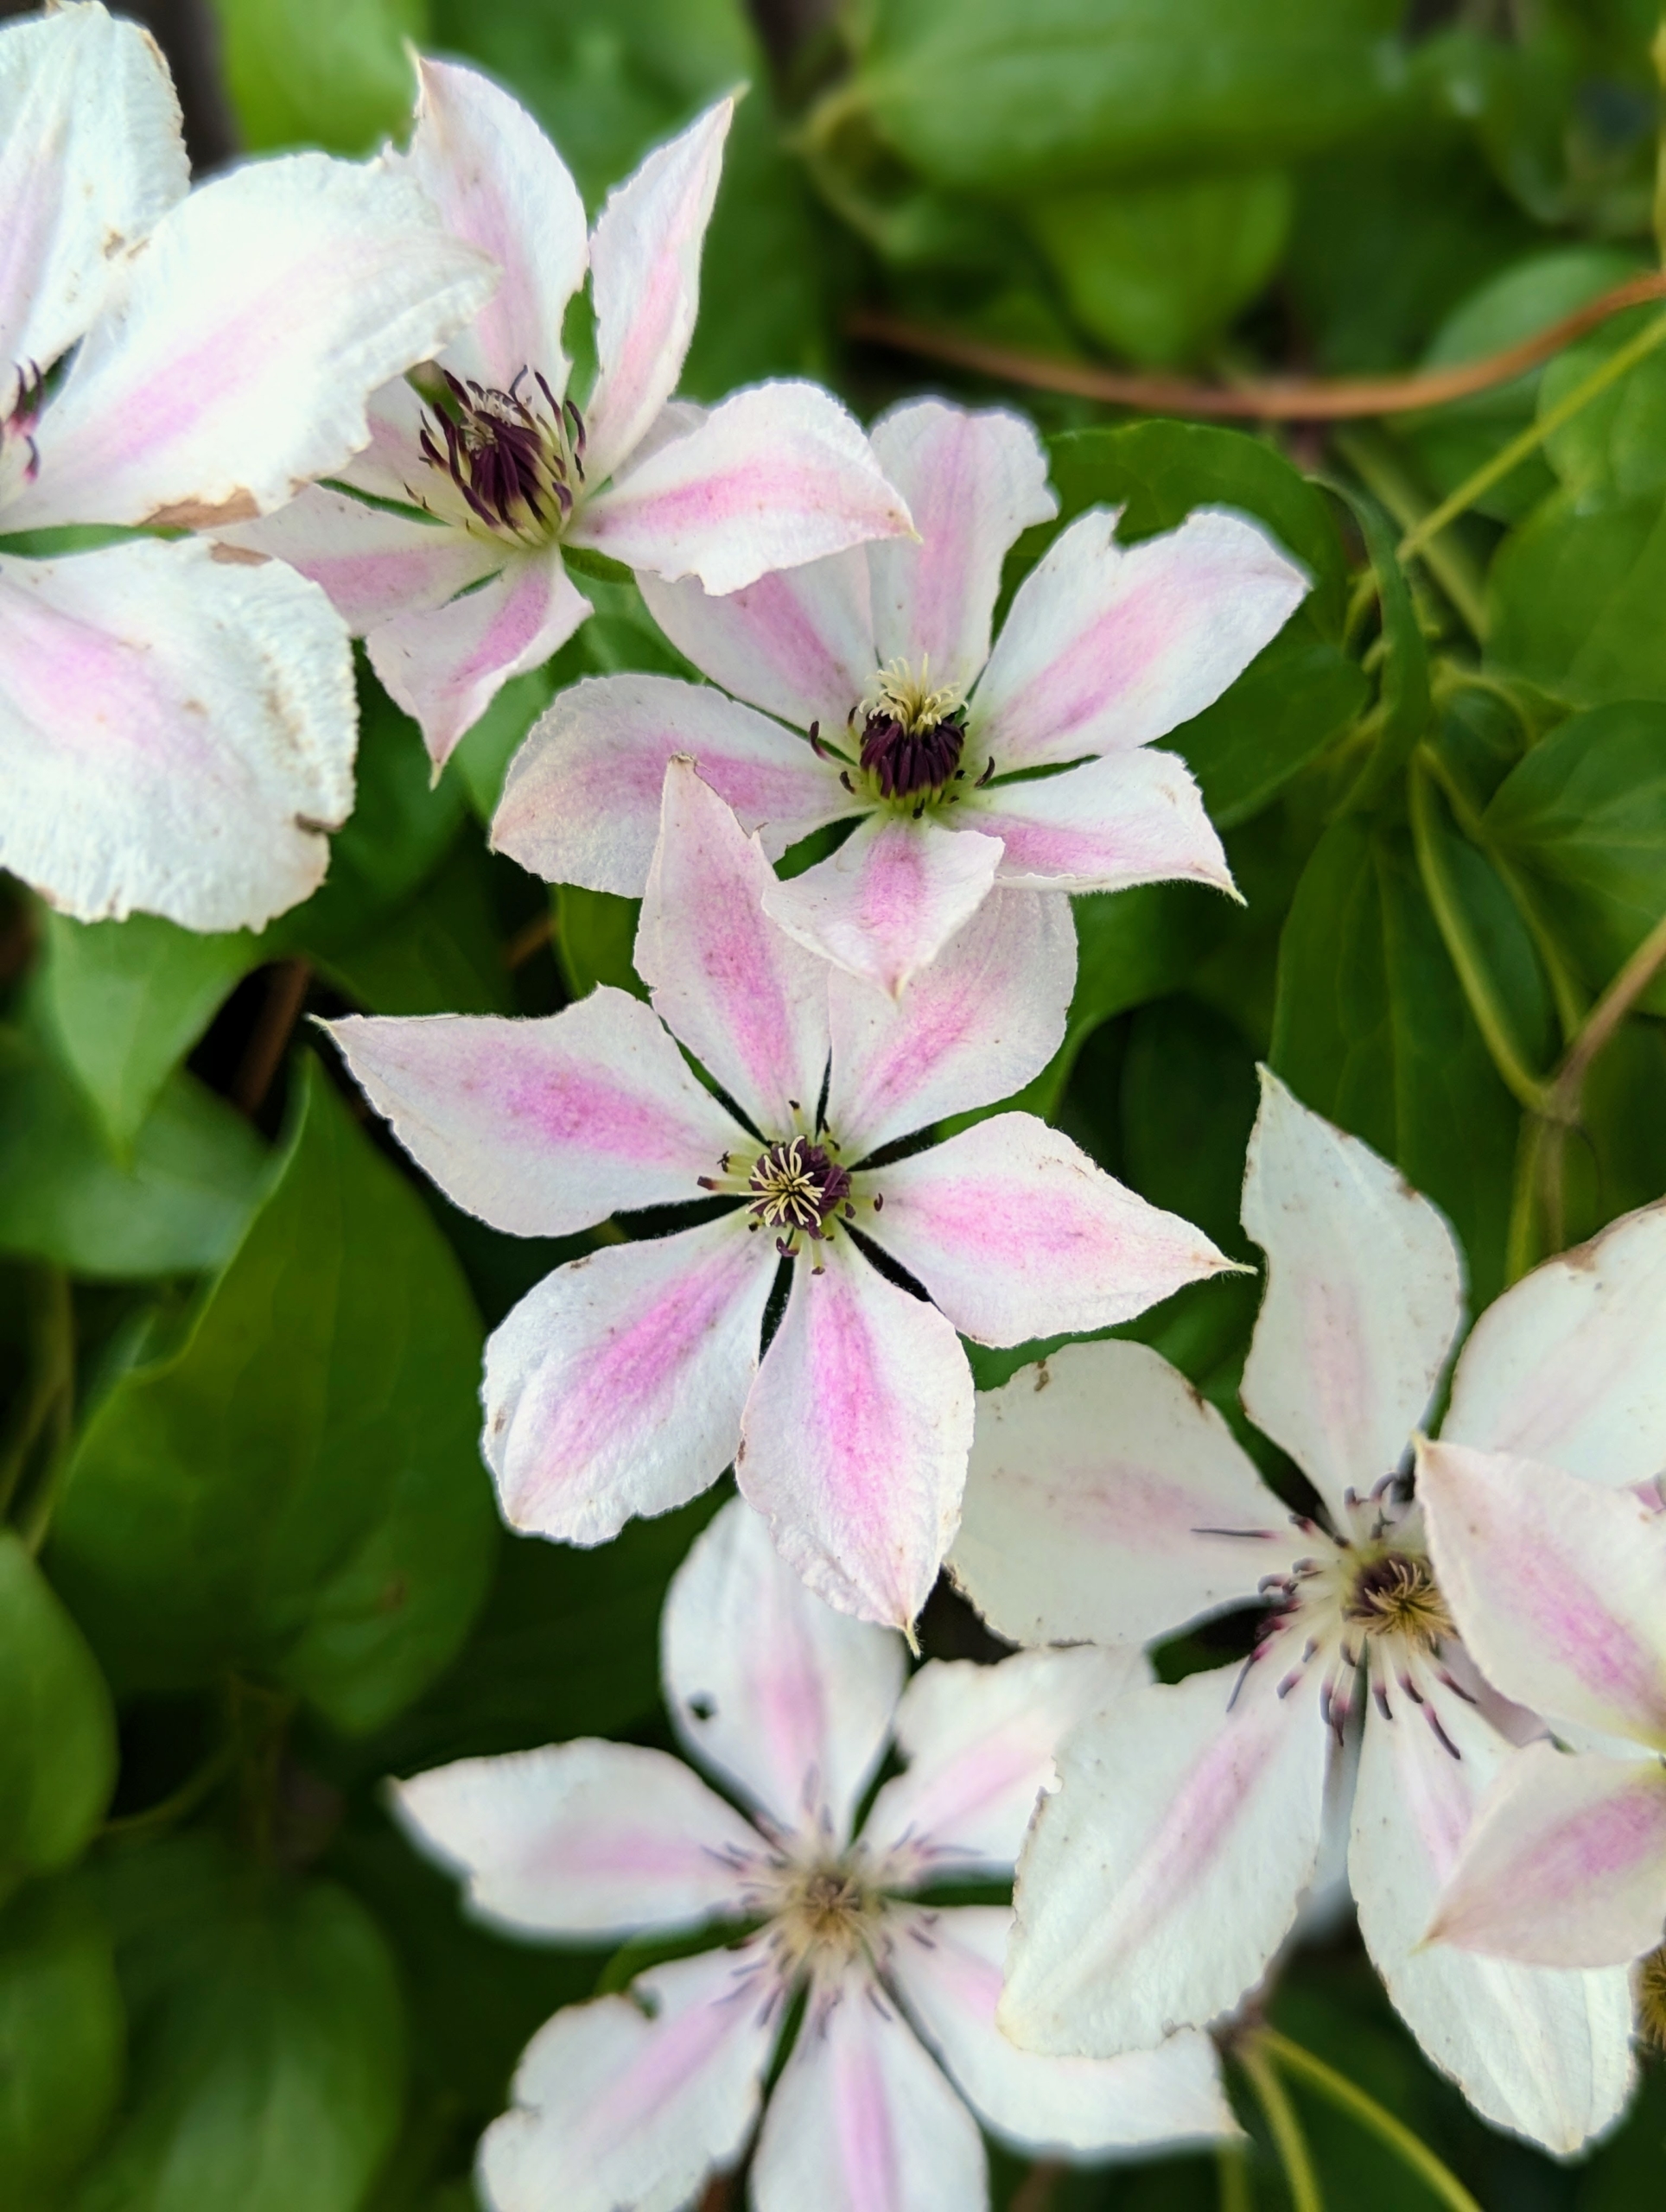
The standard clematis flower has six or seven petals, measuring five to six inches across. Colors range from light lavender to deep purple, white to wine red, and even a few in yellow.
For this area, I chose various shades of lavender, purple, and blue.
Some of the cultivars grown here include ‘Parisienne,’ ‘Blue Angel,’ ‘Jackmanii,’ and ‘Eyers Gift.’
It can take several years for a clematis vine to mature and begin flowering prolifically. To shorten the wait, one can purchase a plant that’s at least two-years old. Clematis also prefer soil that’s neutral to slightly alkaline in pH.
Both butterflies and hummingbirds are attracted to clematis flowers.
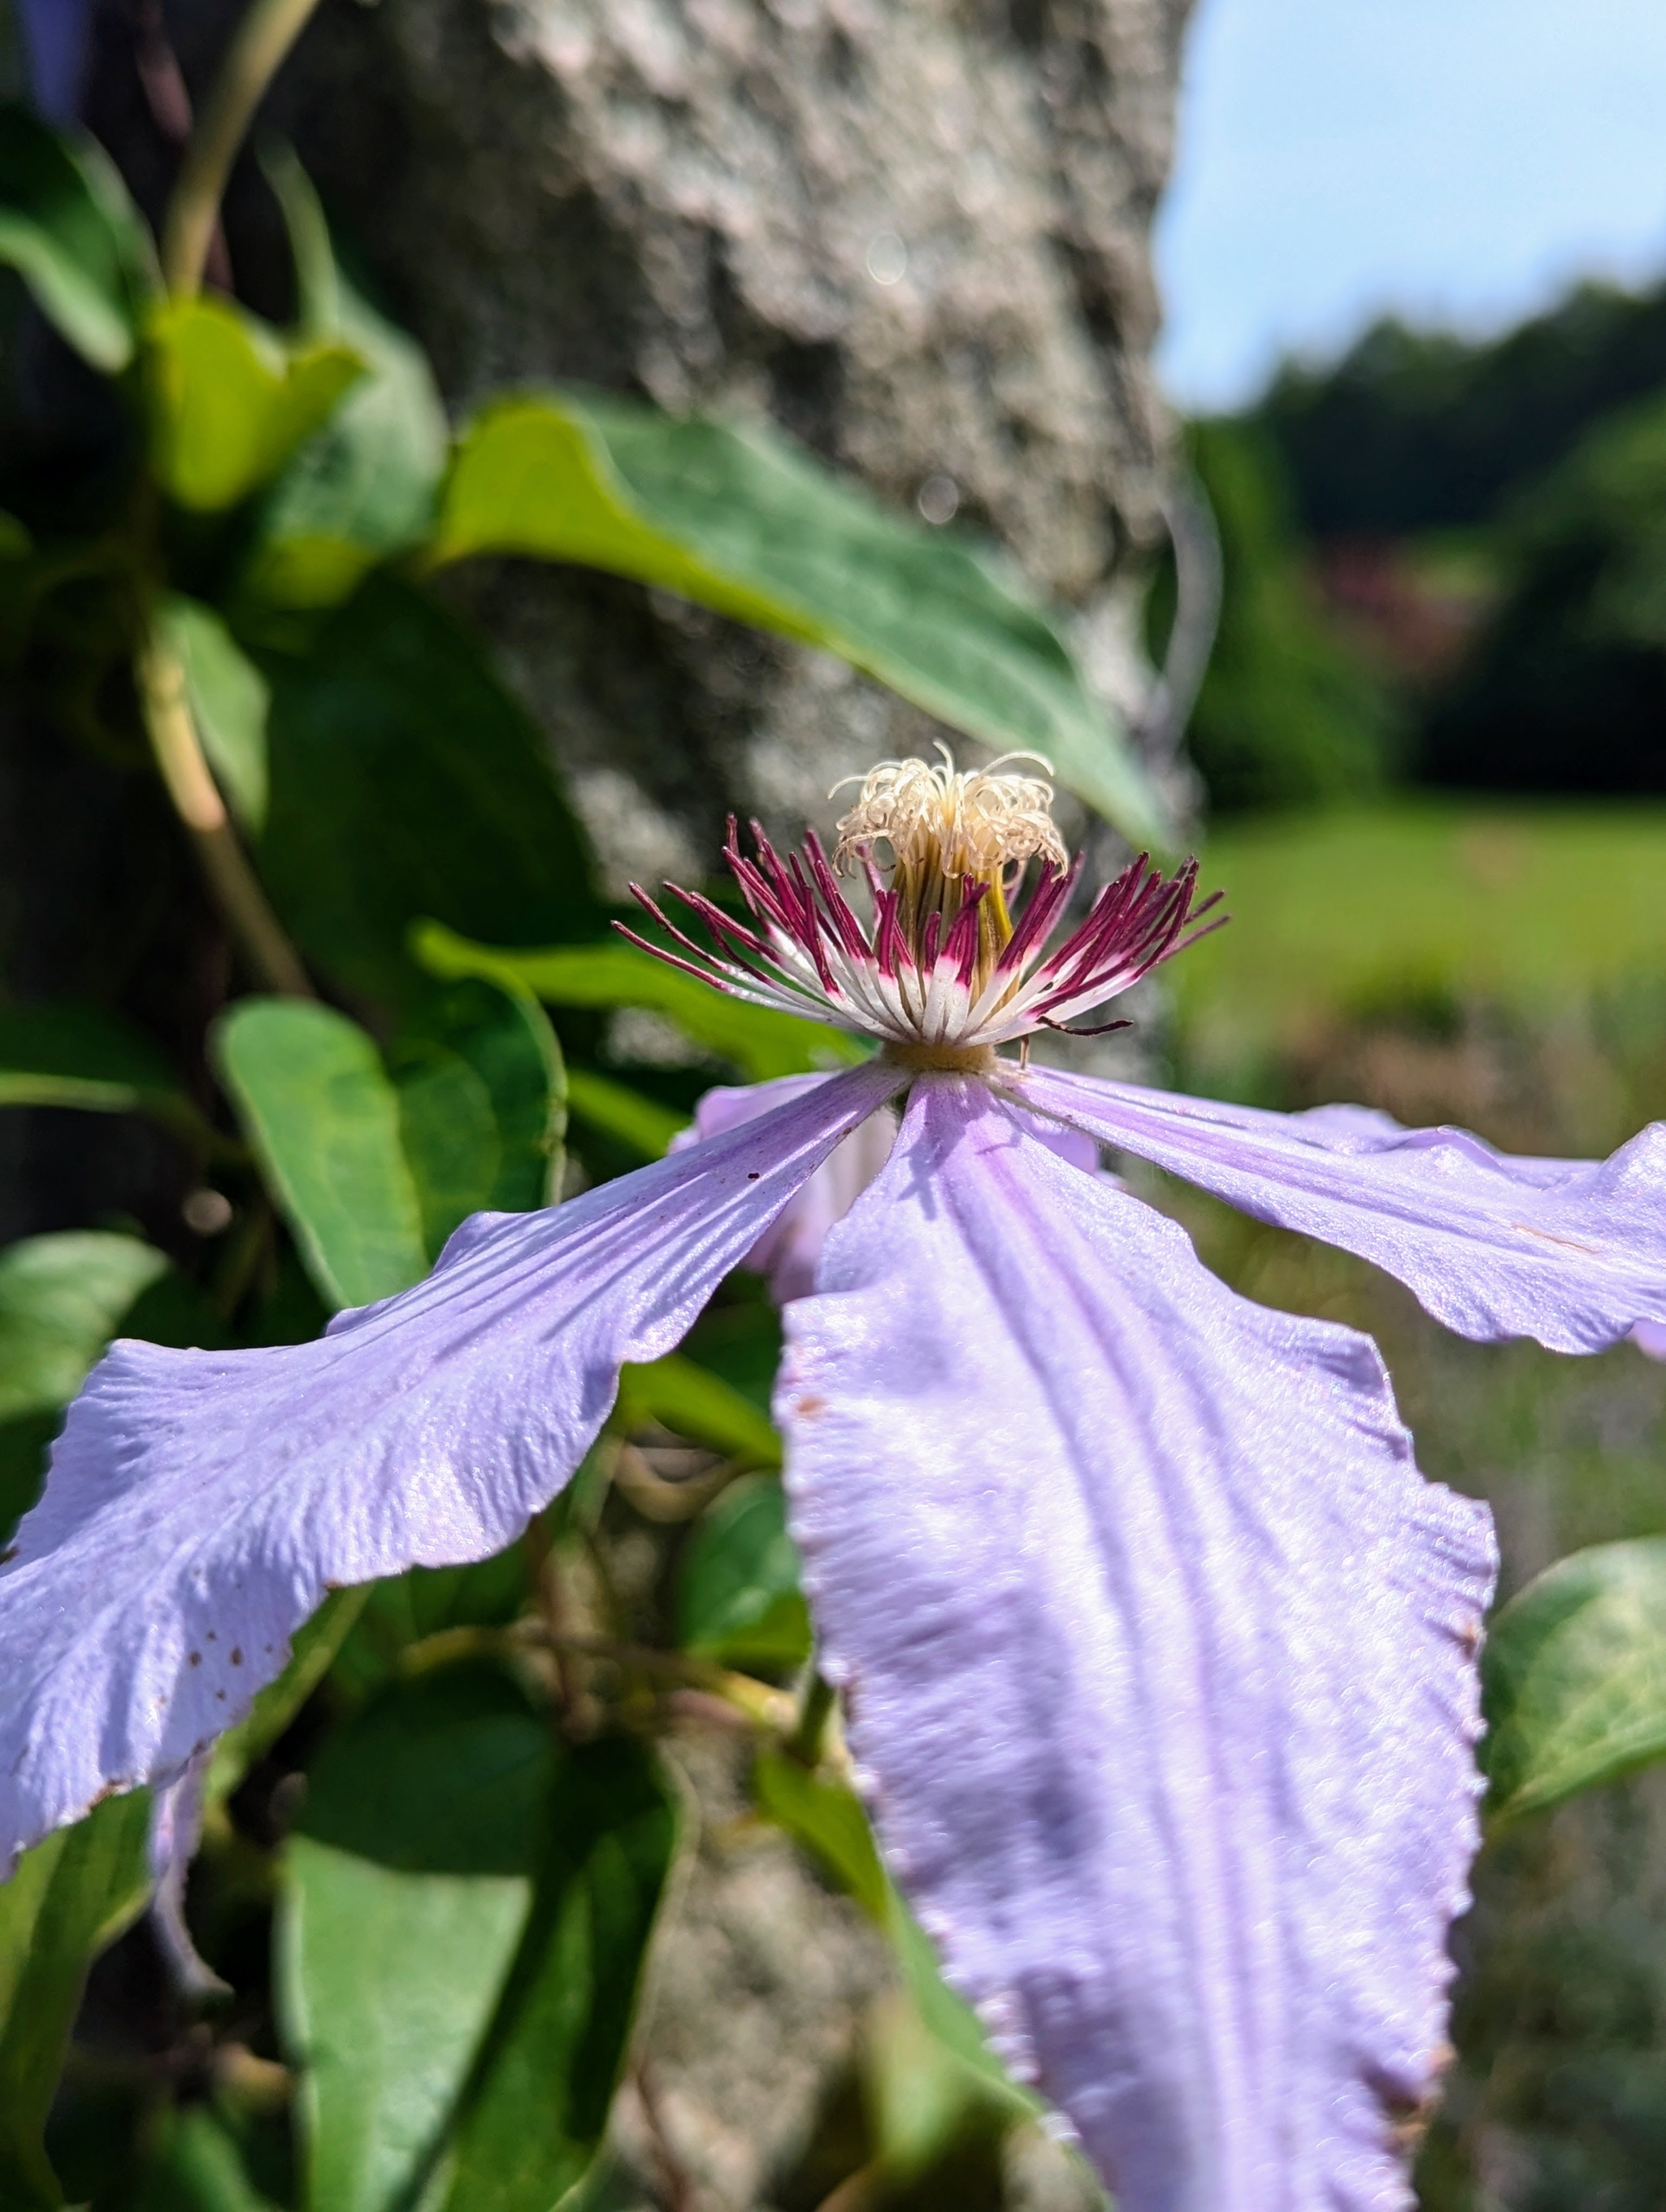
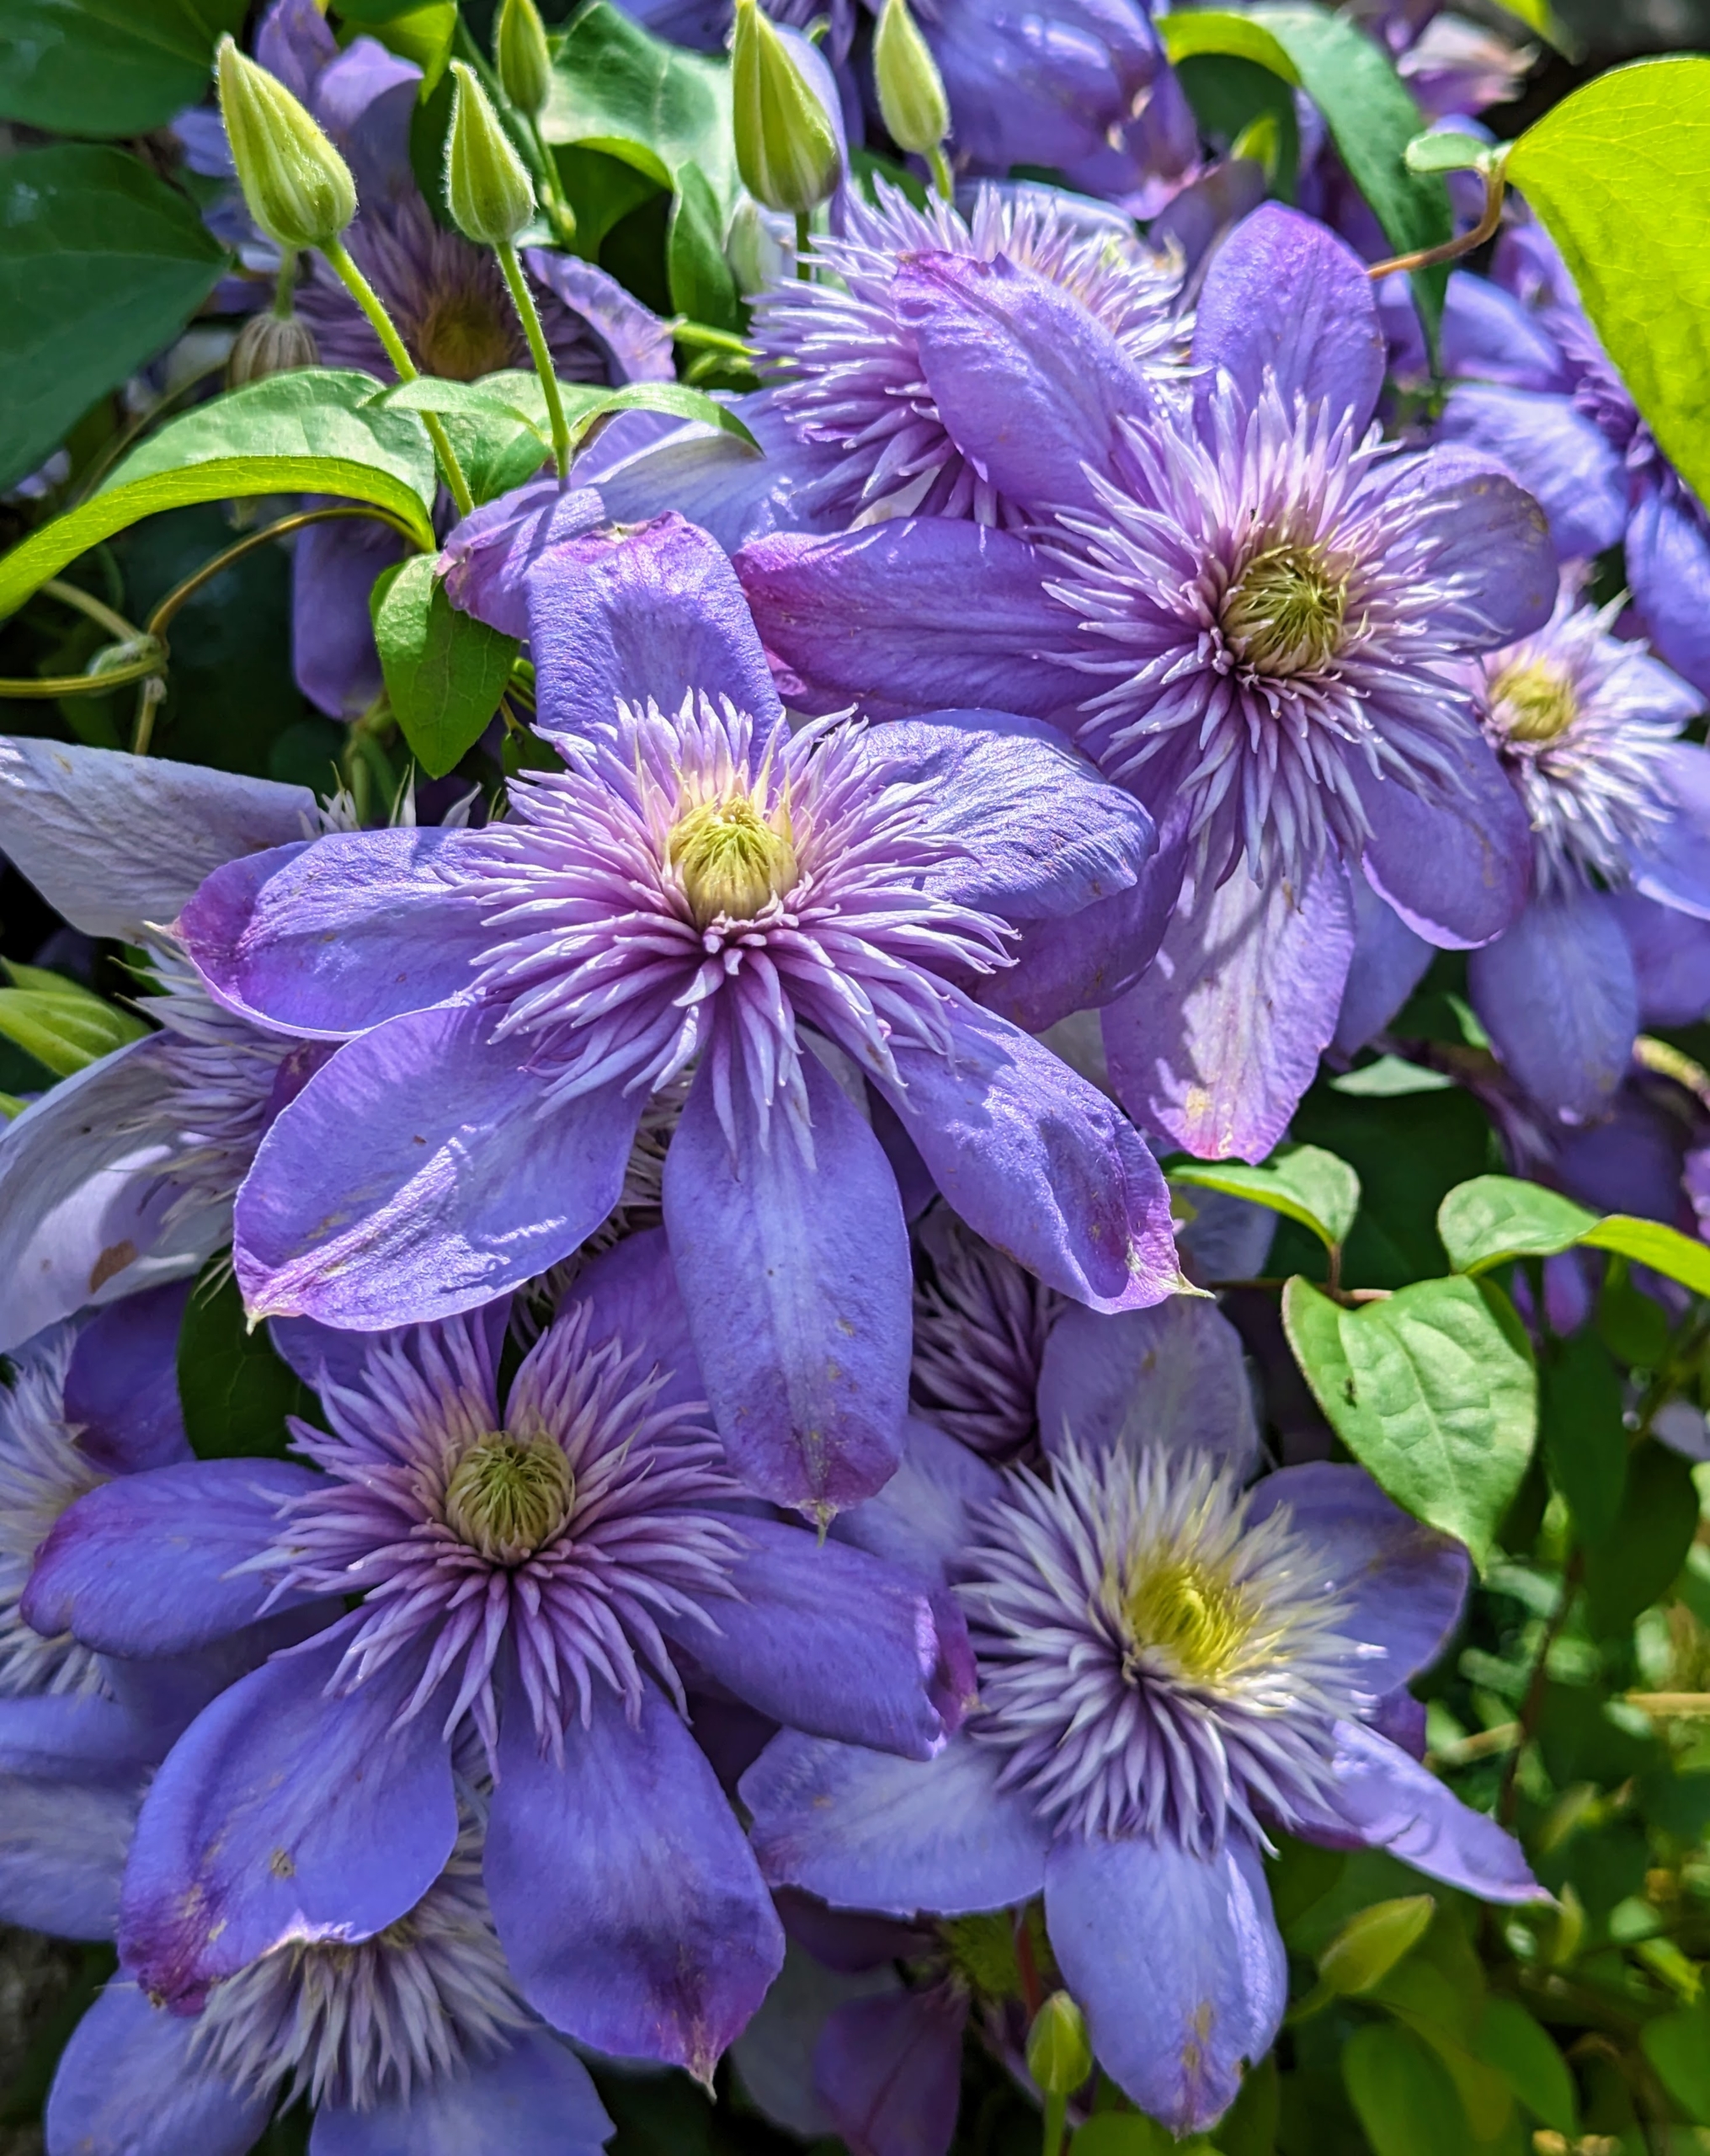
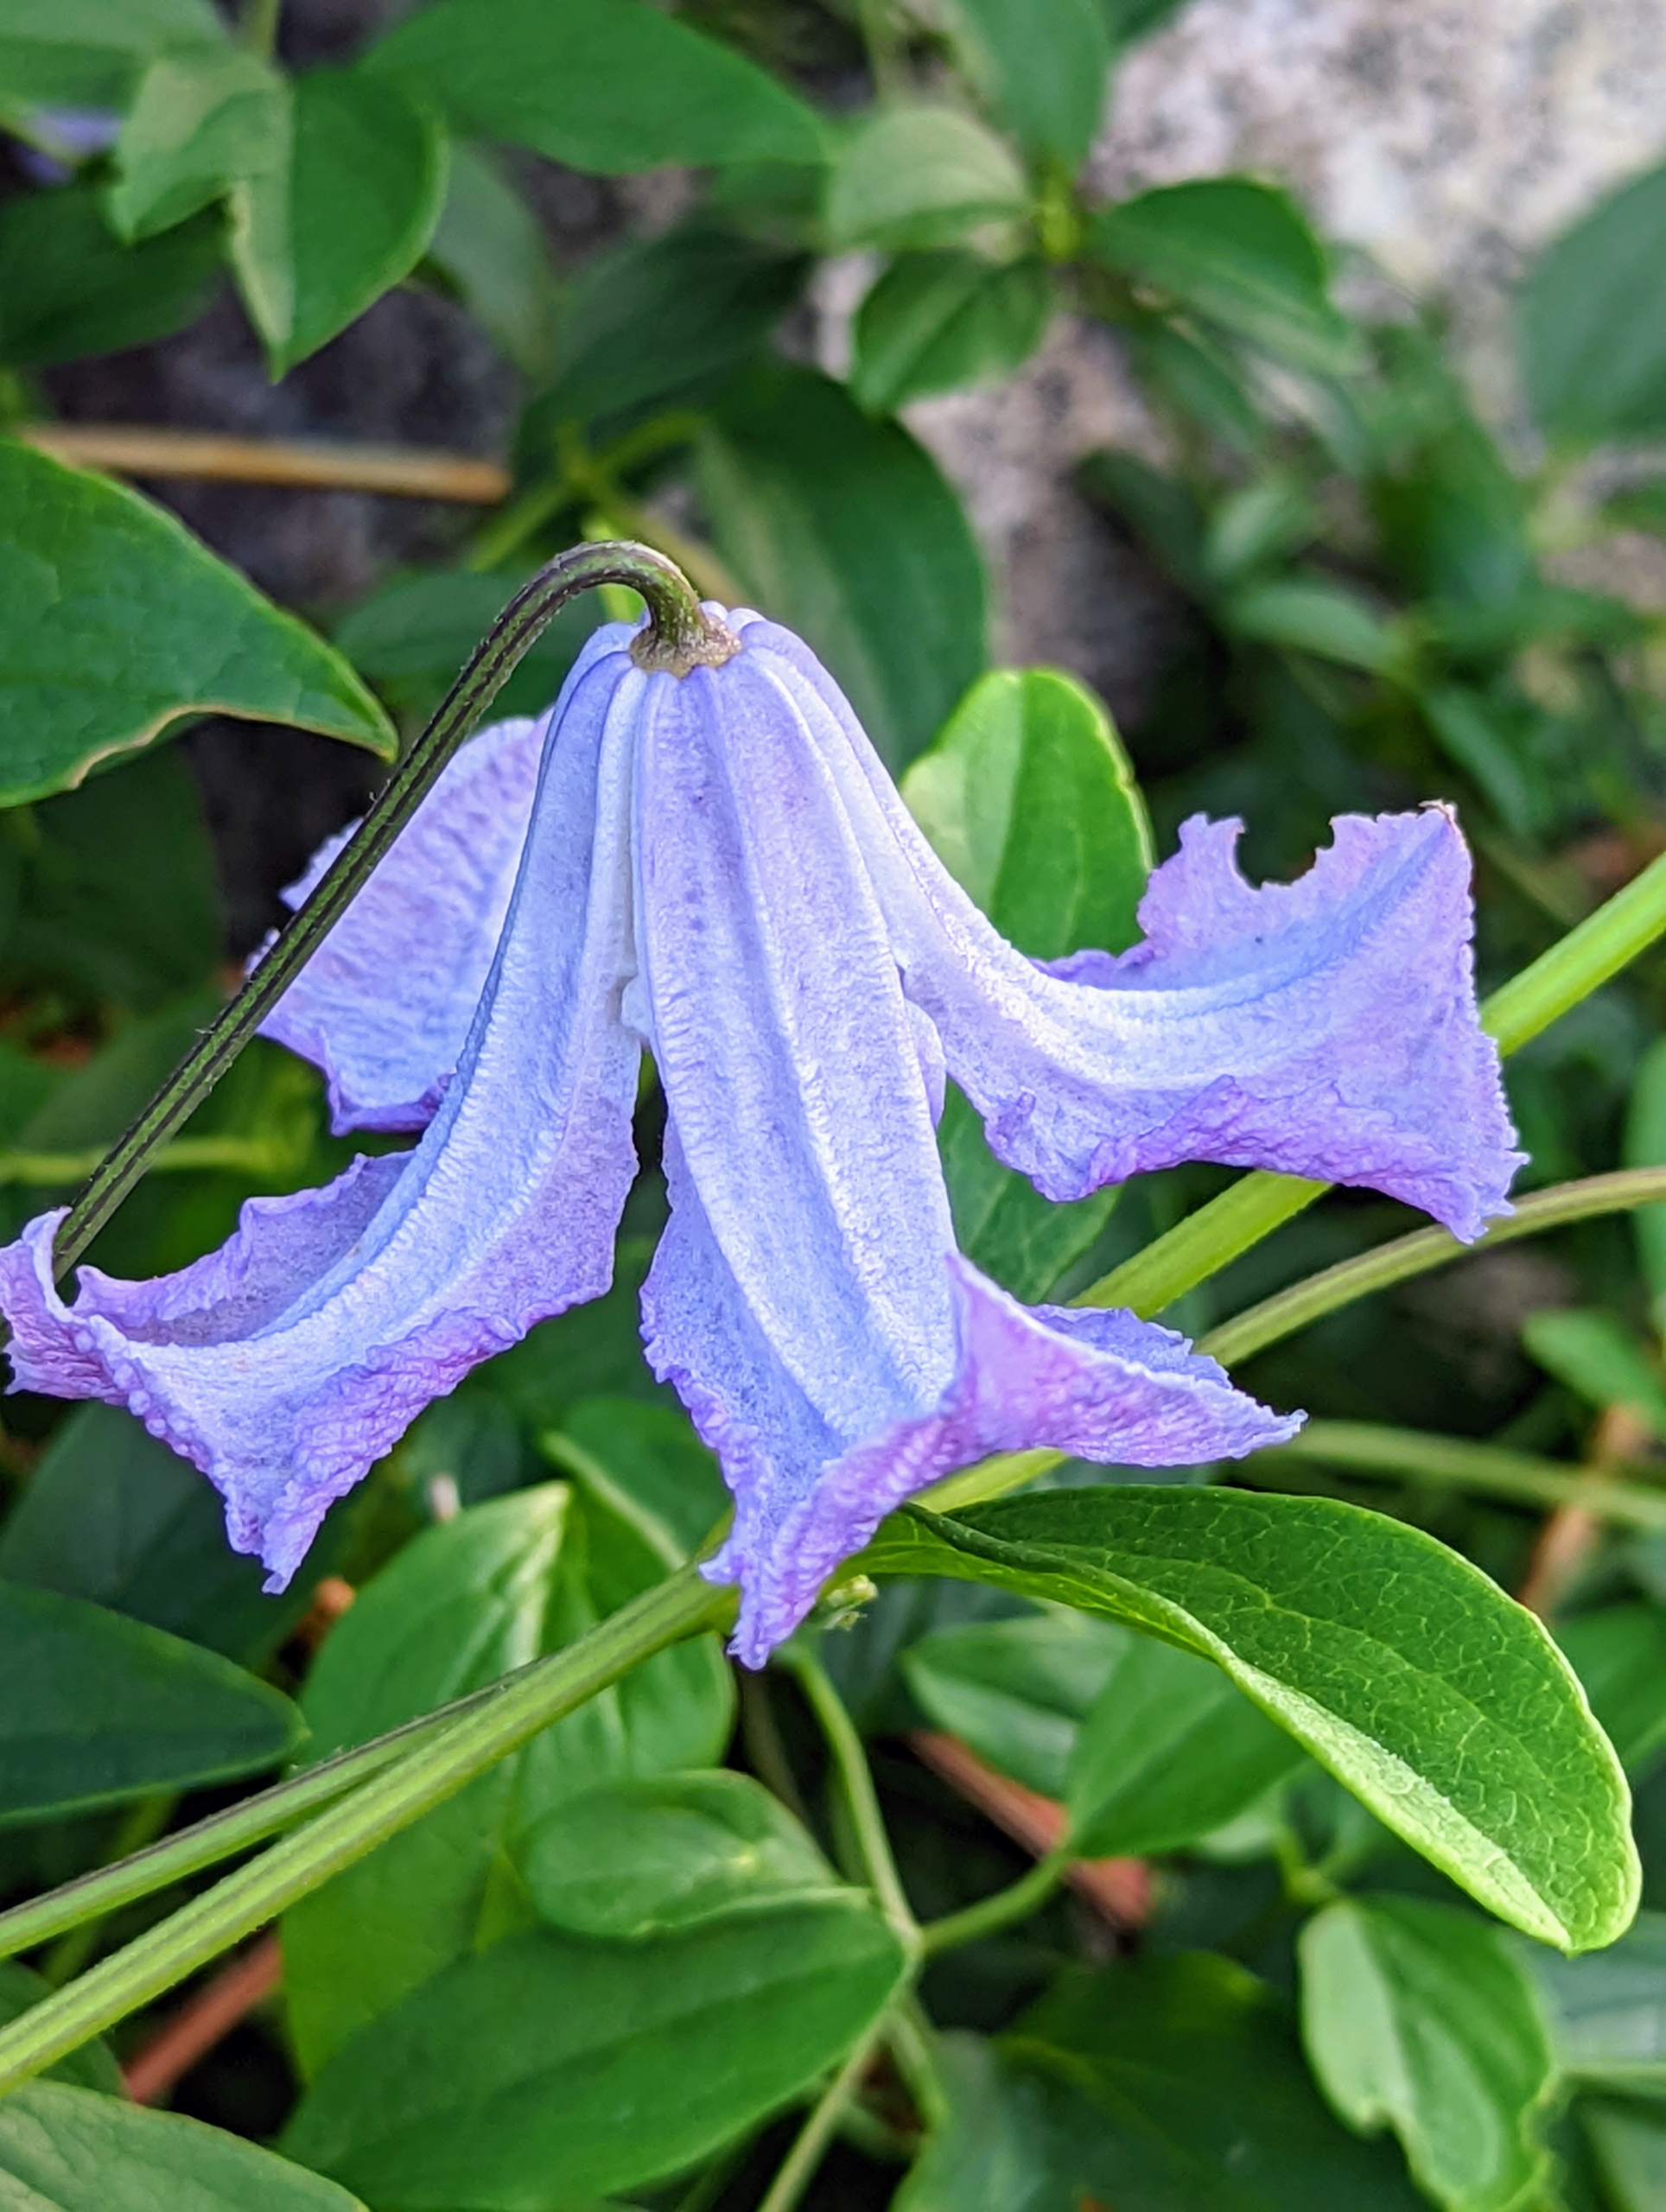
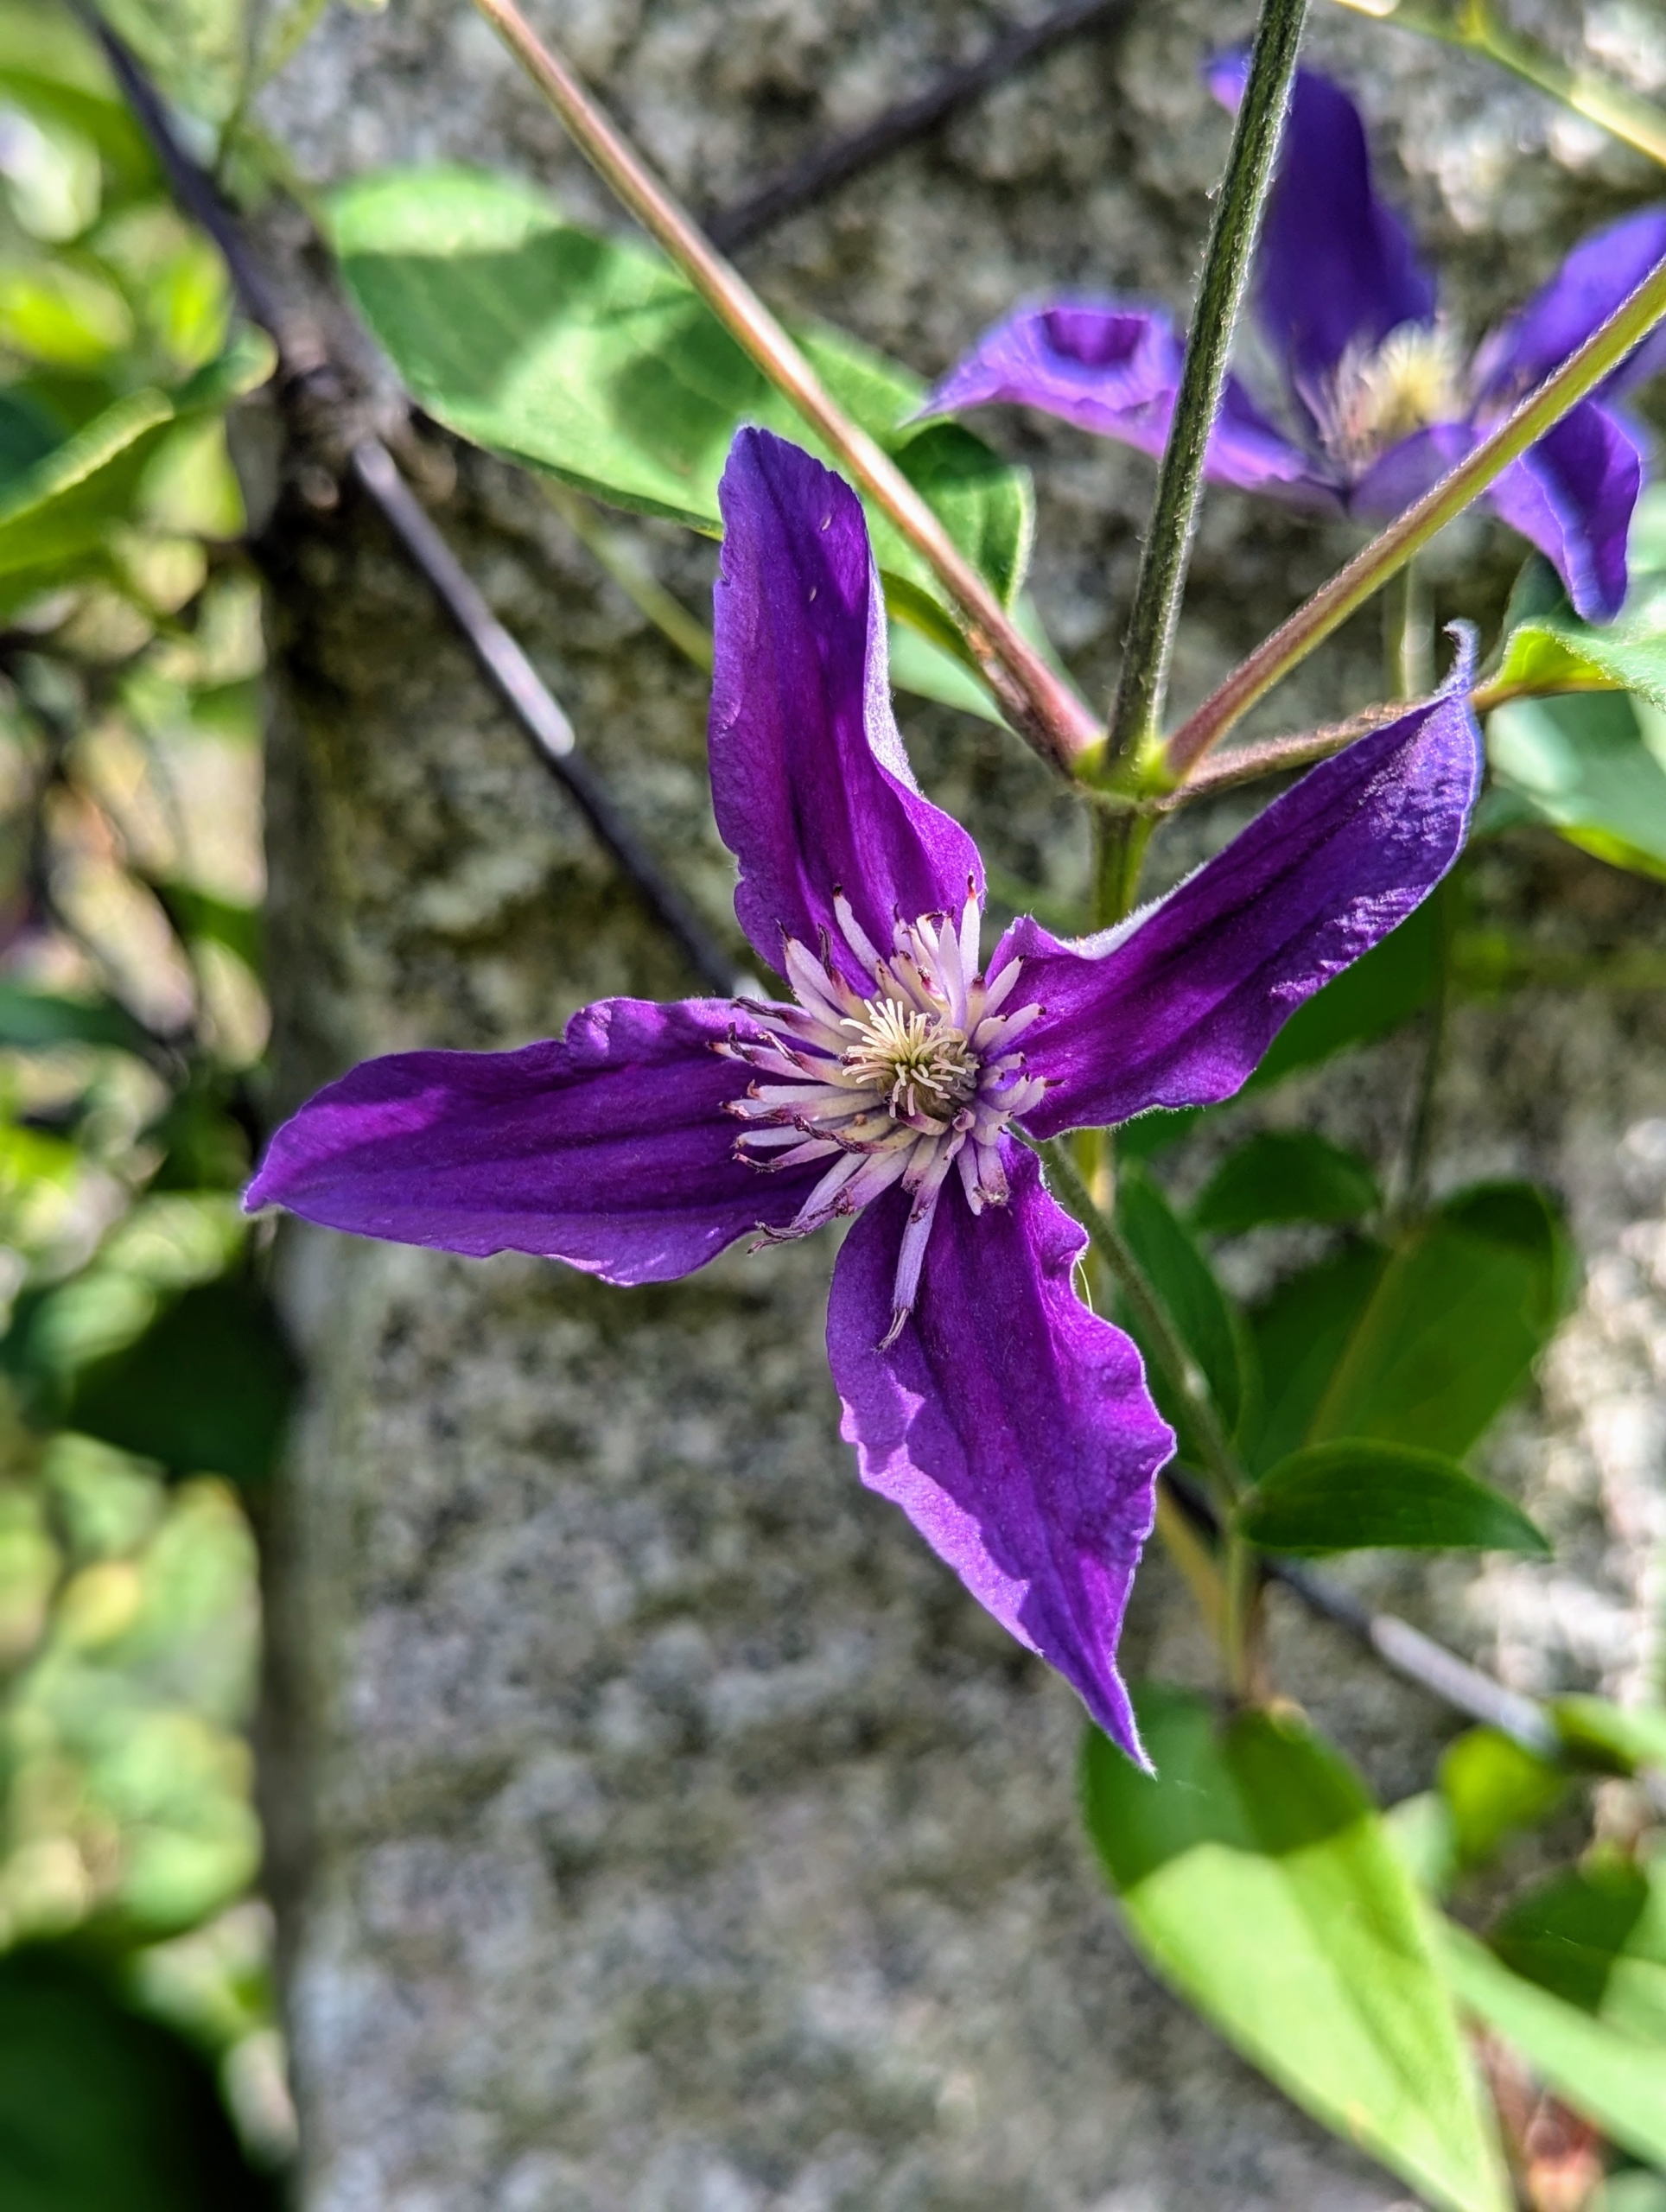
This is Clematis viticella ‘Betty Corning’, which has slightly fragrant, bell-shaped flowers that bloom from summer to fall.
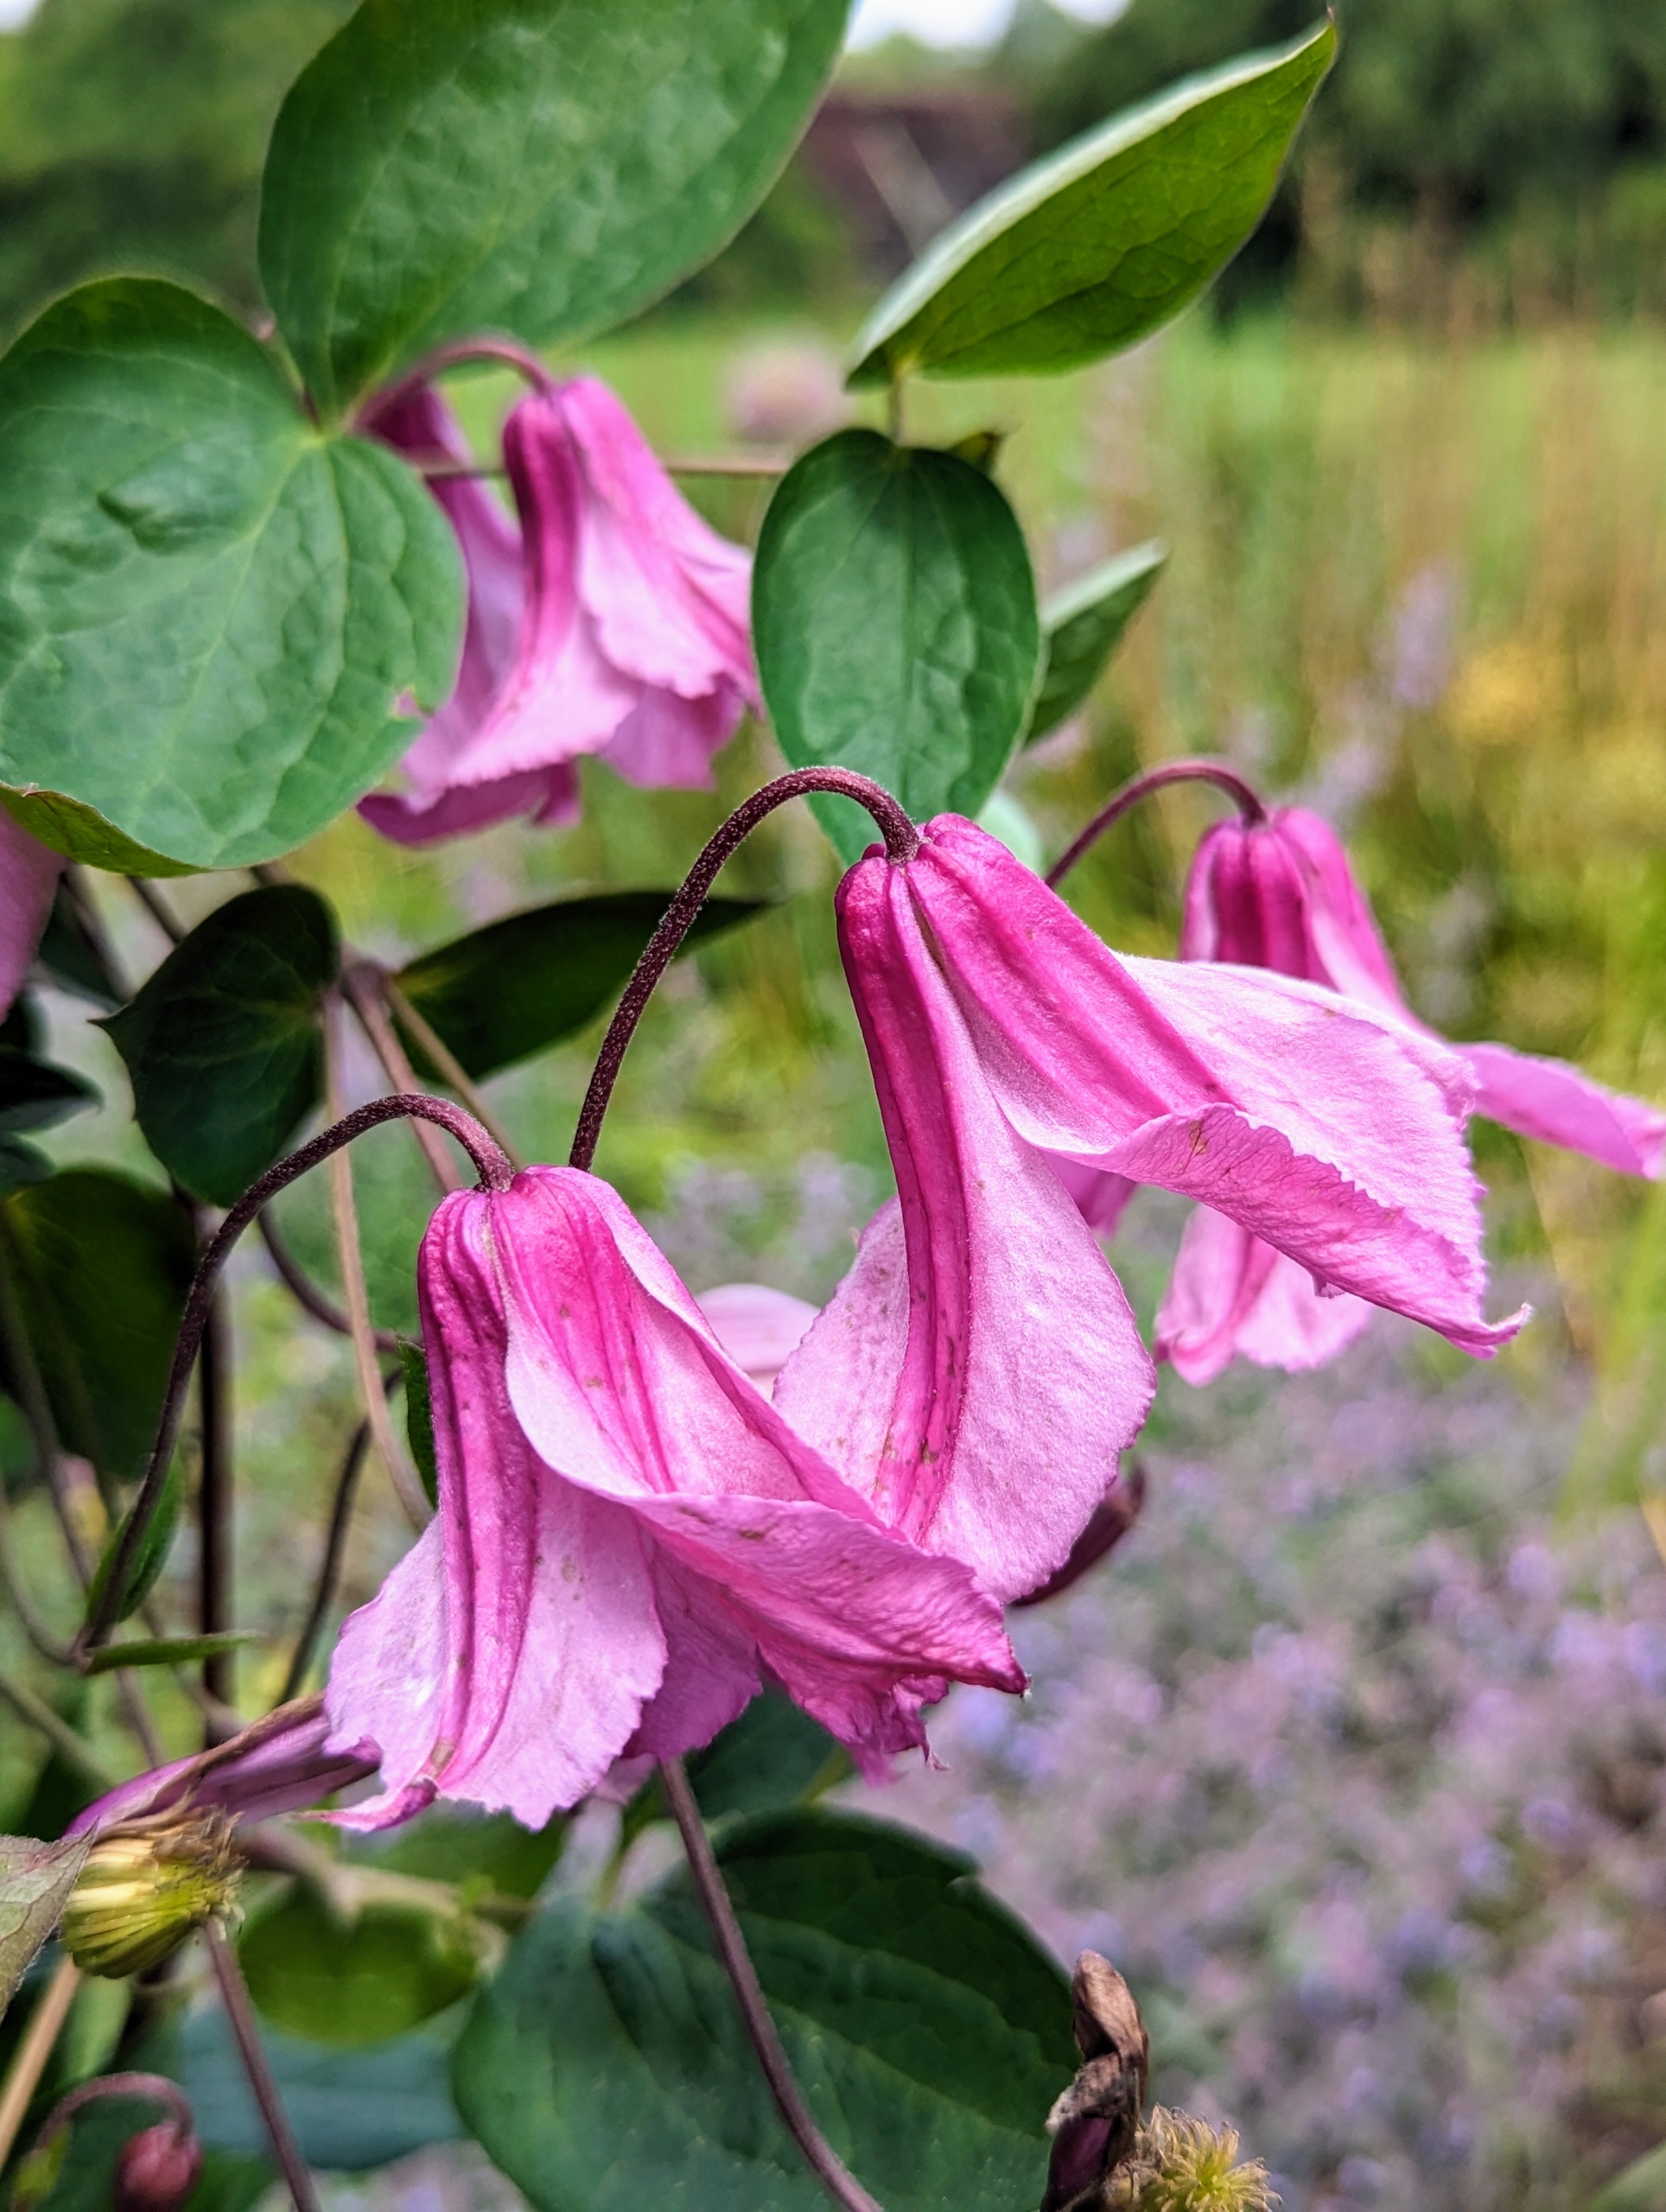
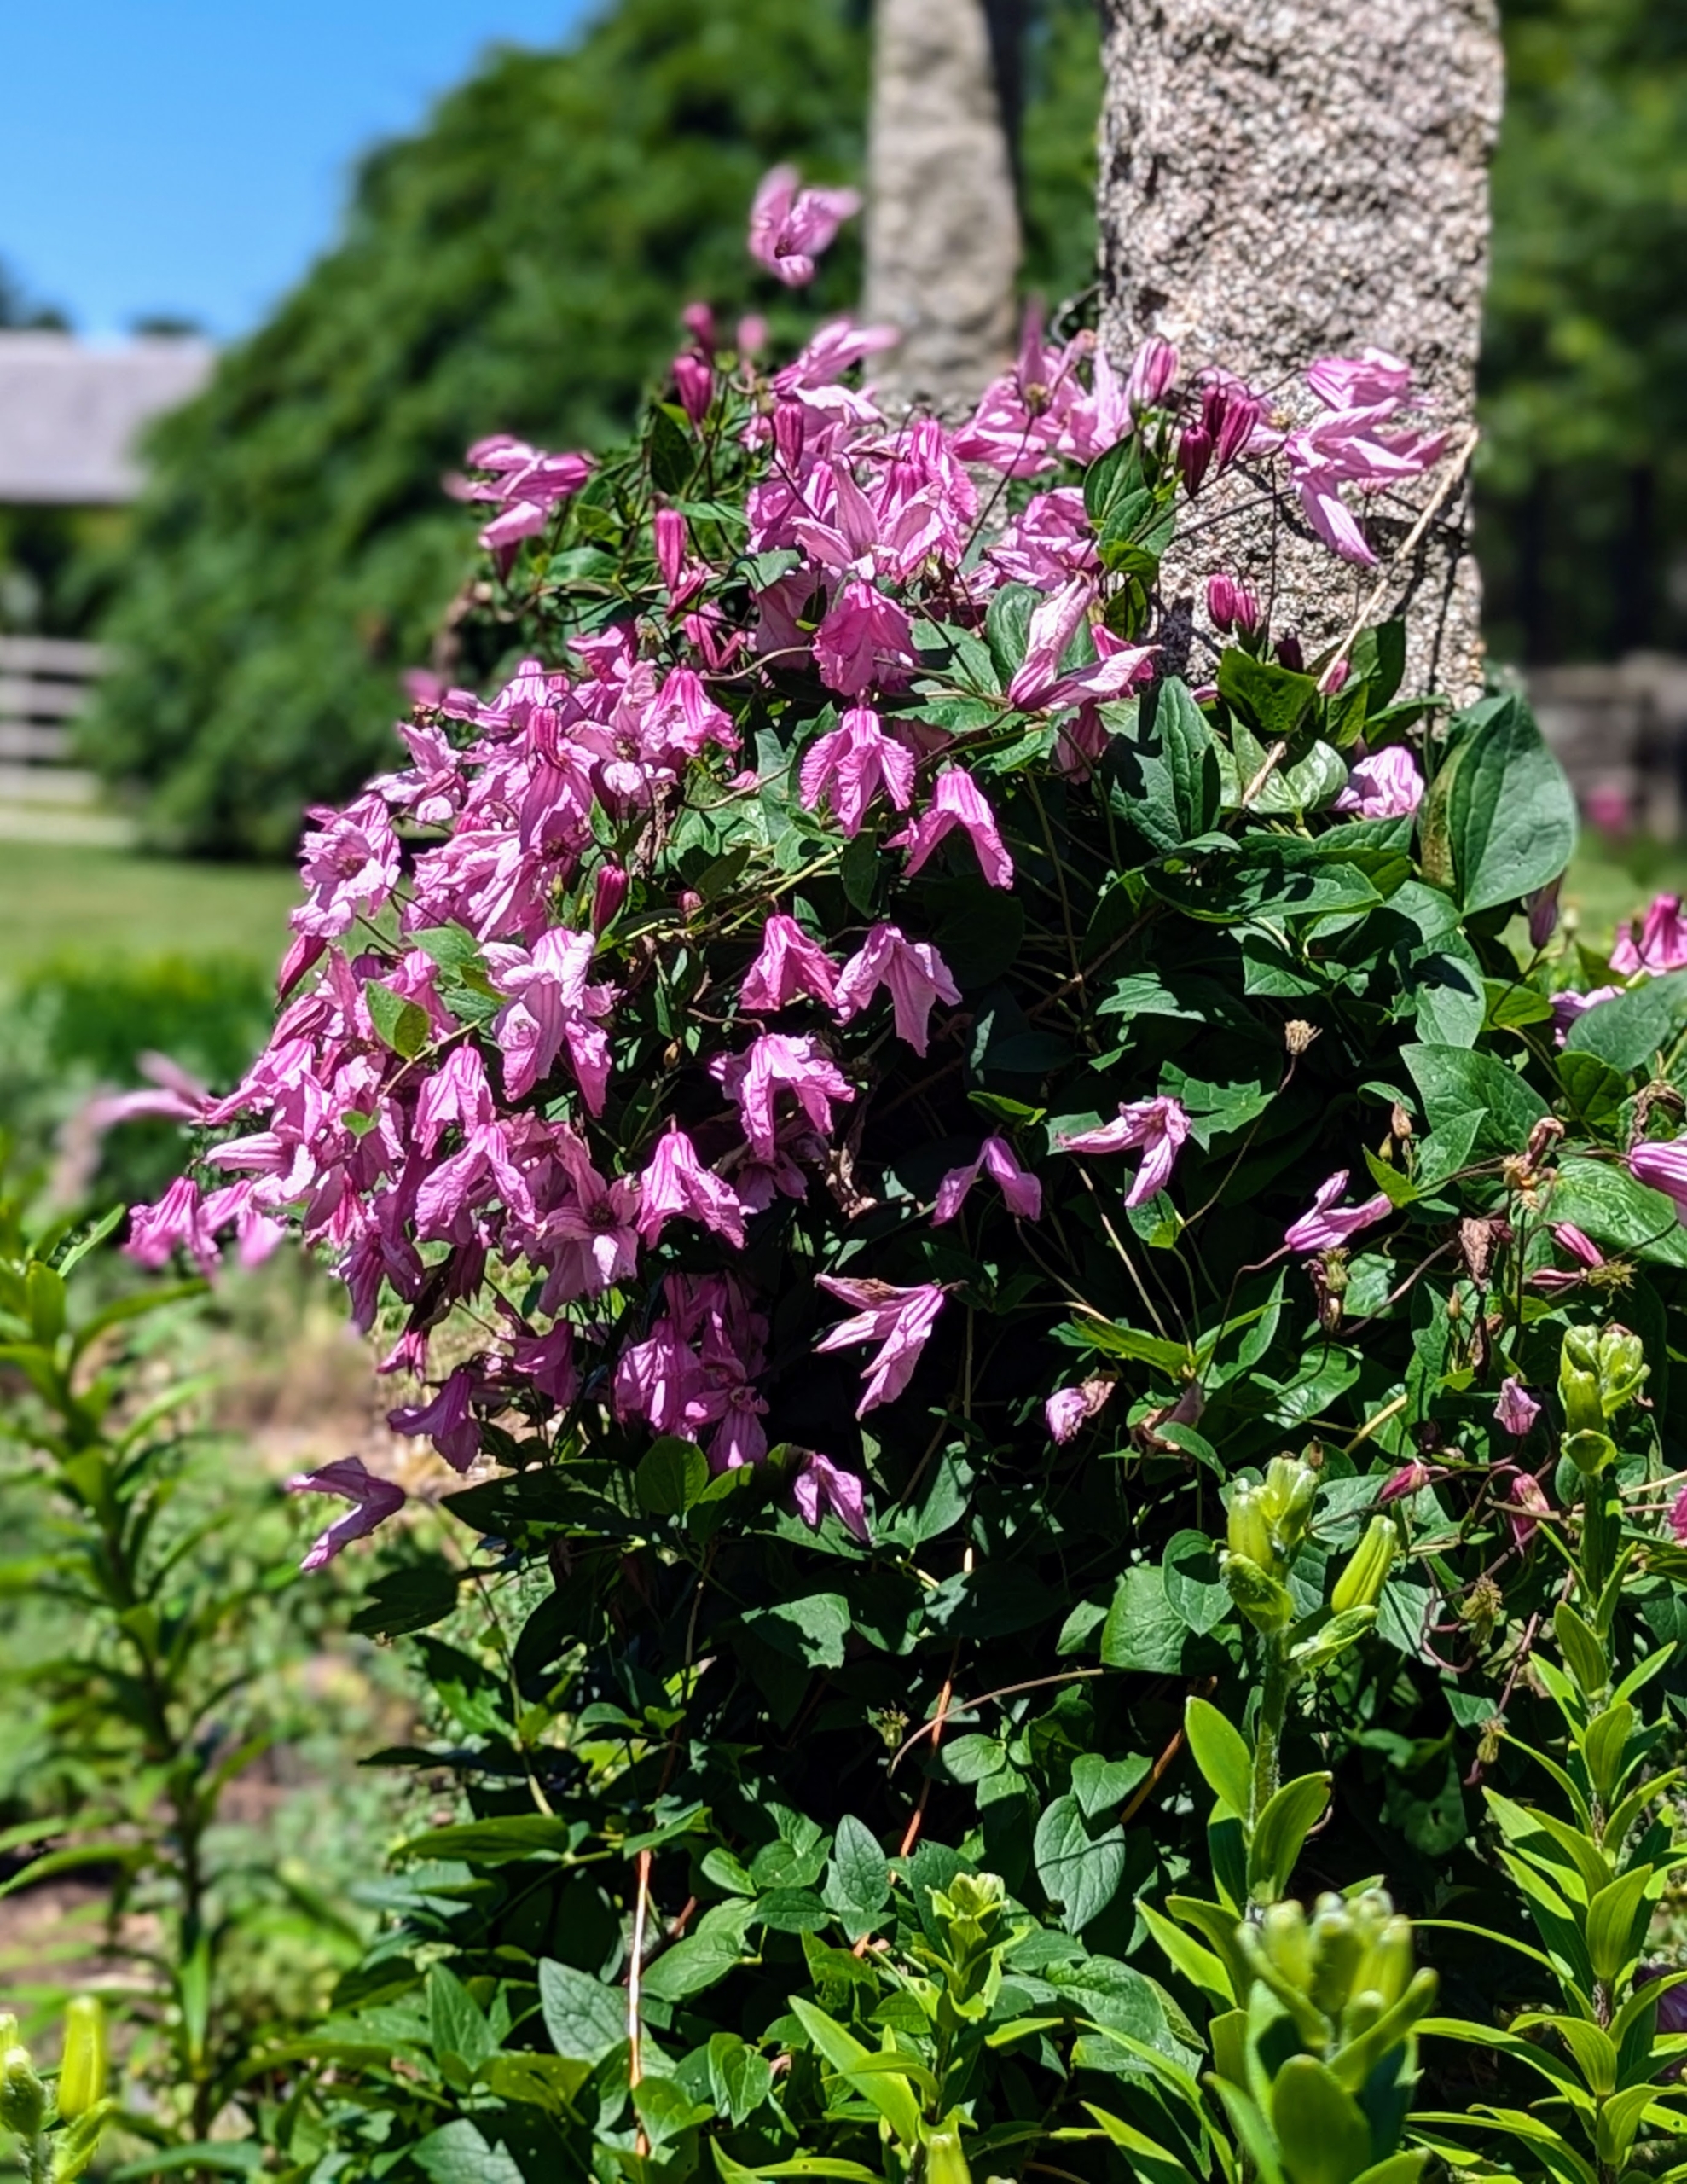
Here is a similar variety in deep pink.
Both produce a multitude of blooms every year.
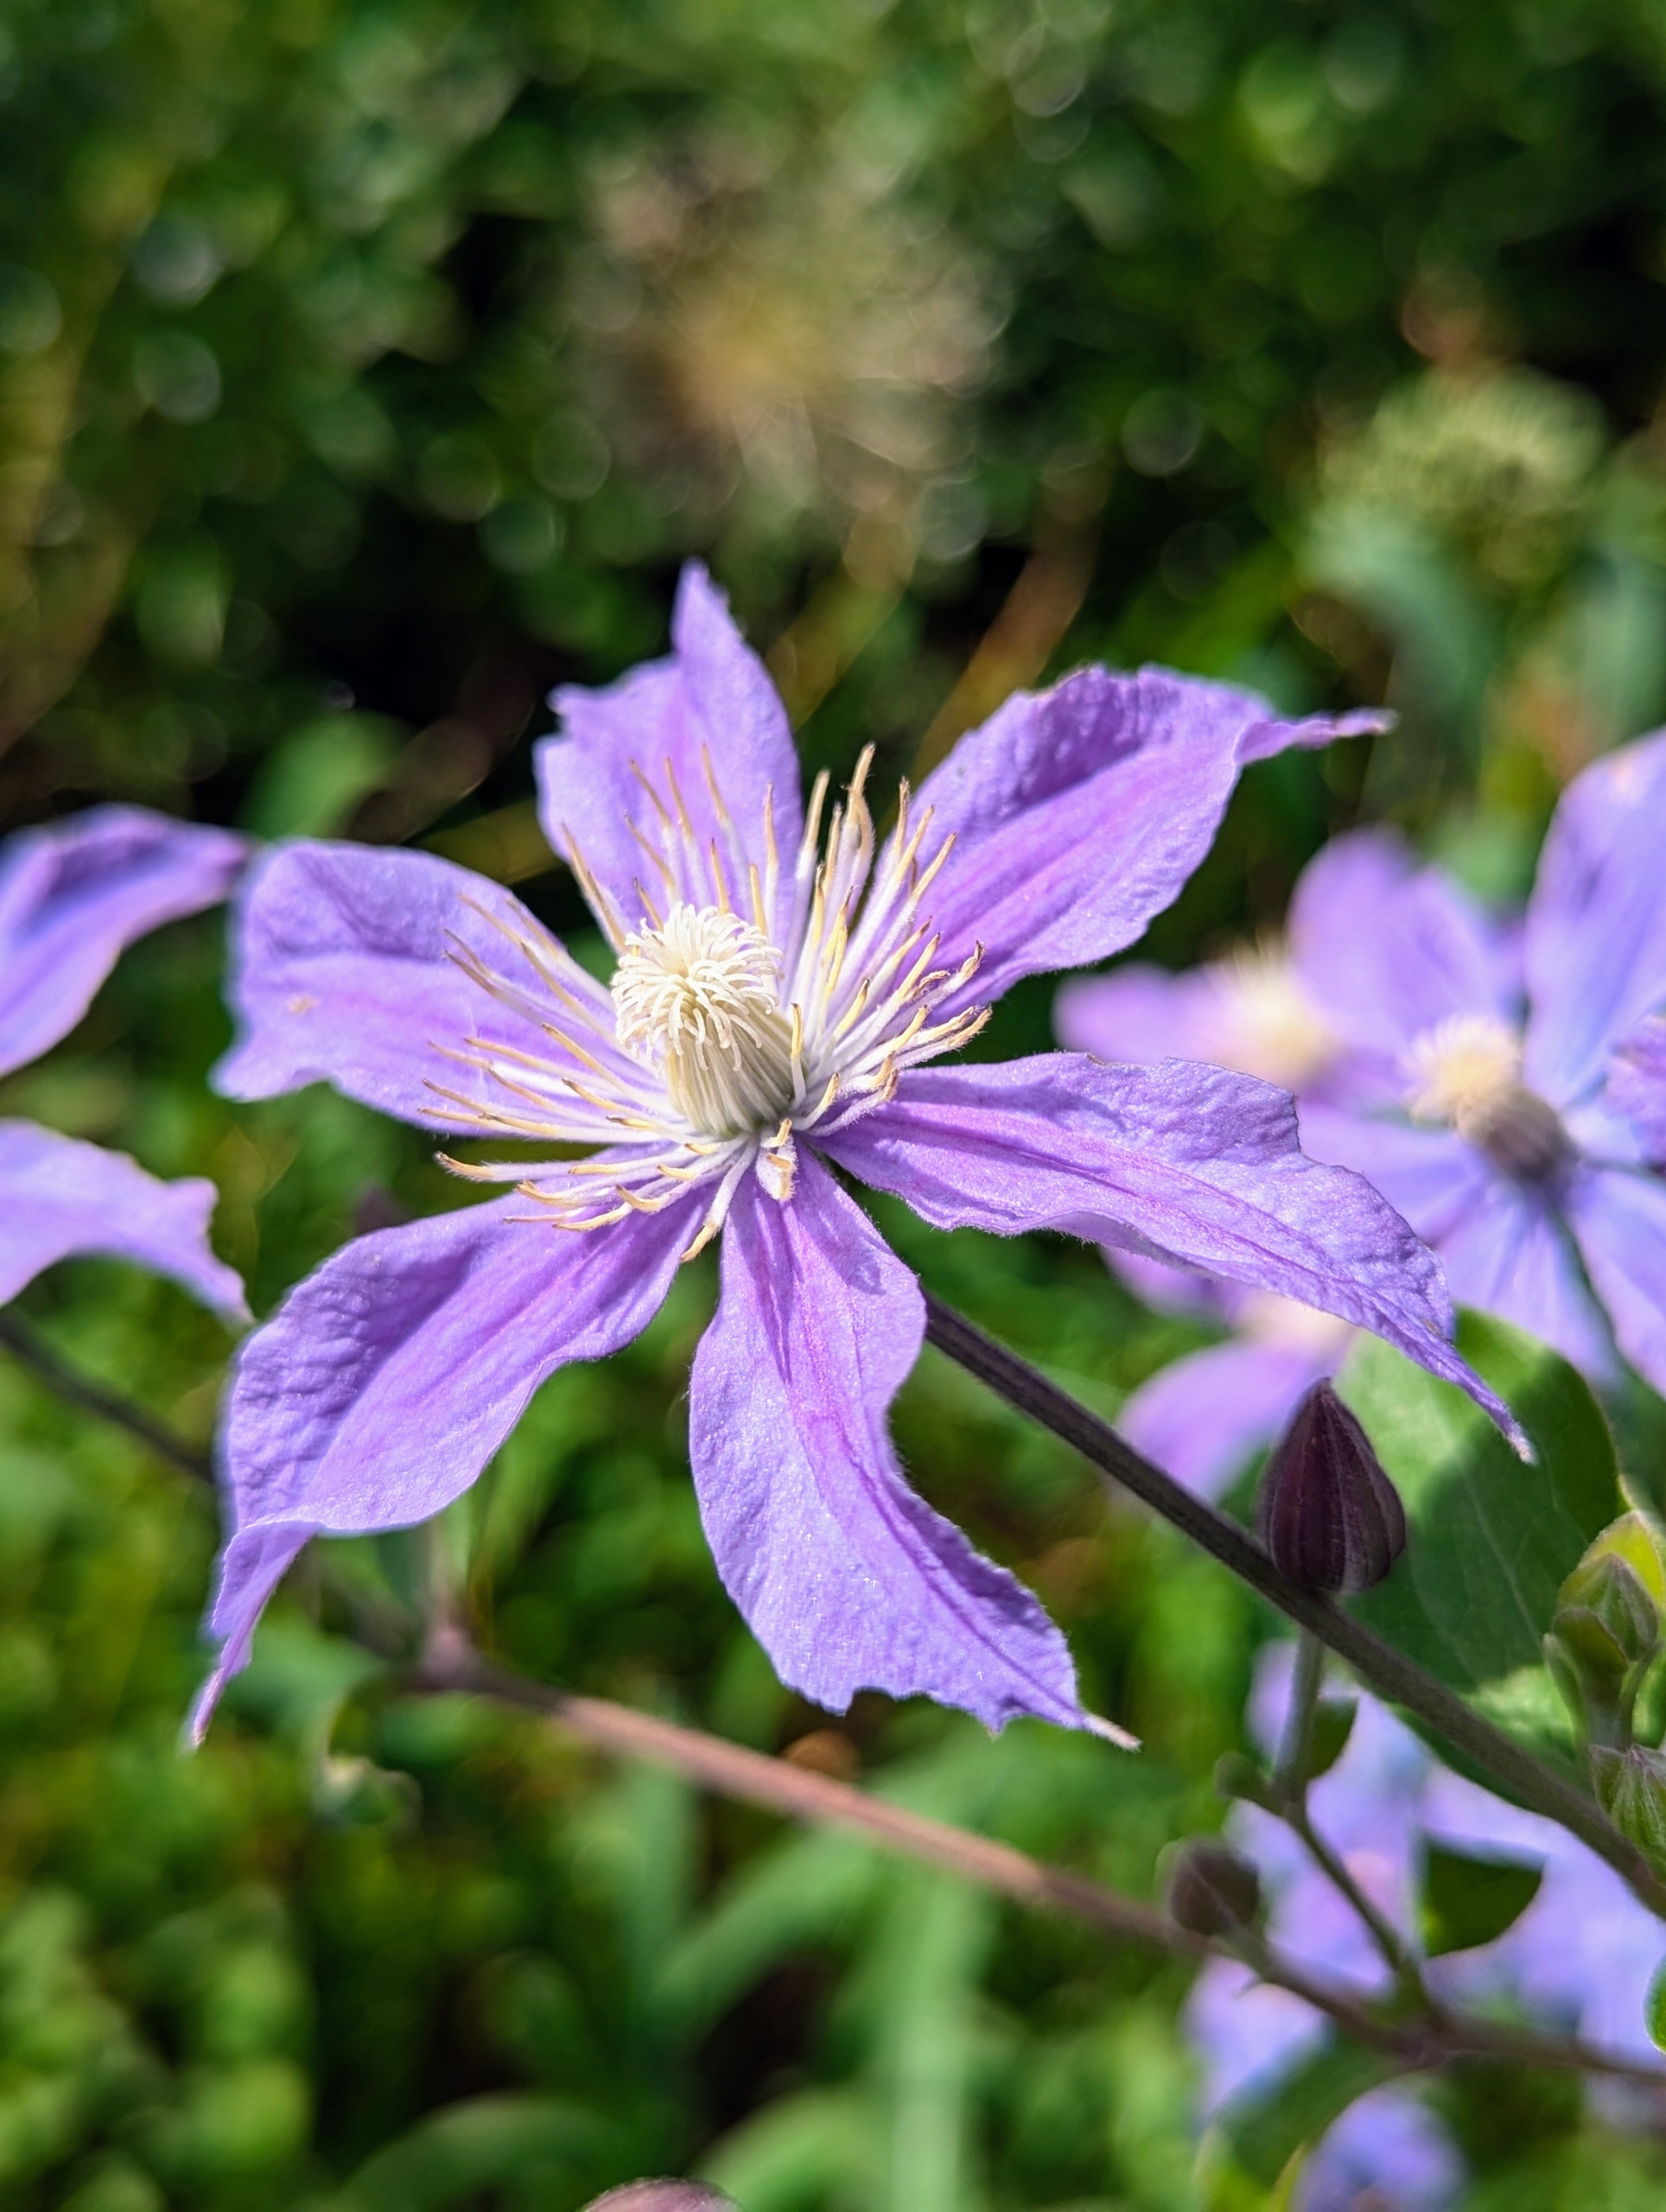
Many clematis are lightly scented. Flowers vary in shape and sizes. They can be flat, tubular or bell-shaped and can be as small as one-inch wide.
The timing and location of clematis flowers varies – spring blooming clematis flower on side shoots of the old season’s stems. Summer and fall blooming vines flower on the ends of only new stems.
As a perennial, clematis are vigorous vines that return yearly and are hardy in USDA zones 3 to 9.
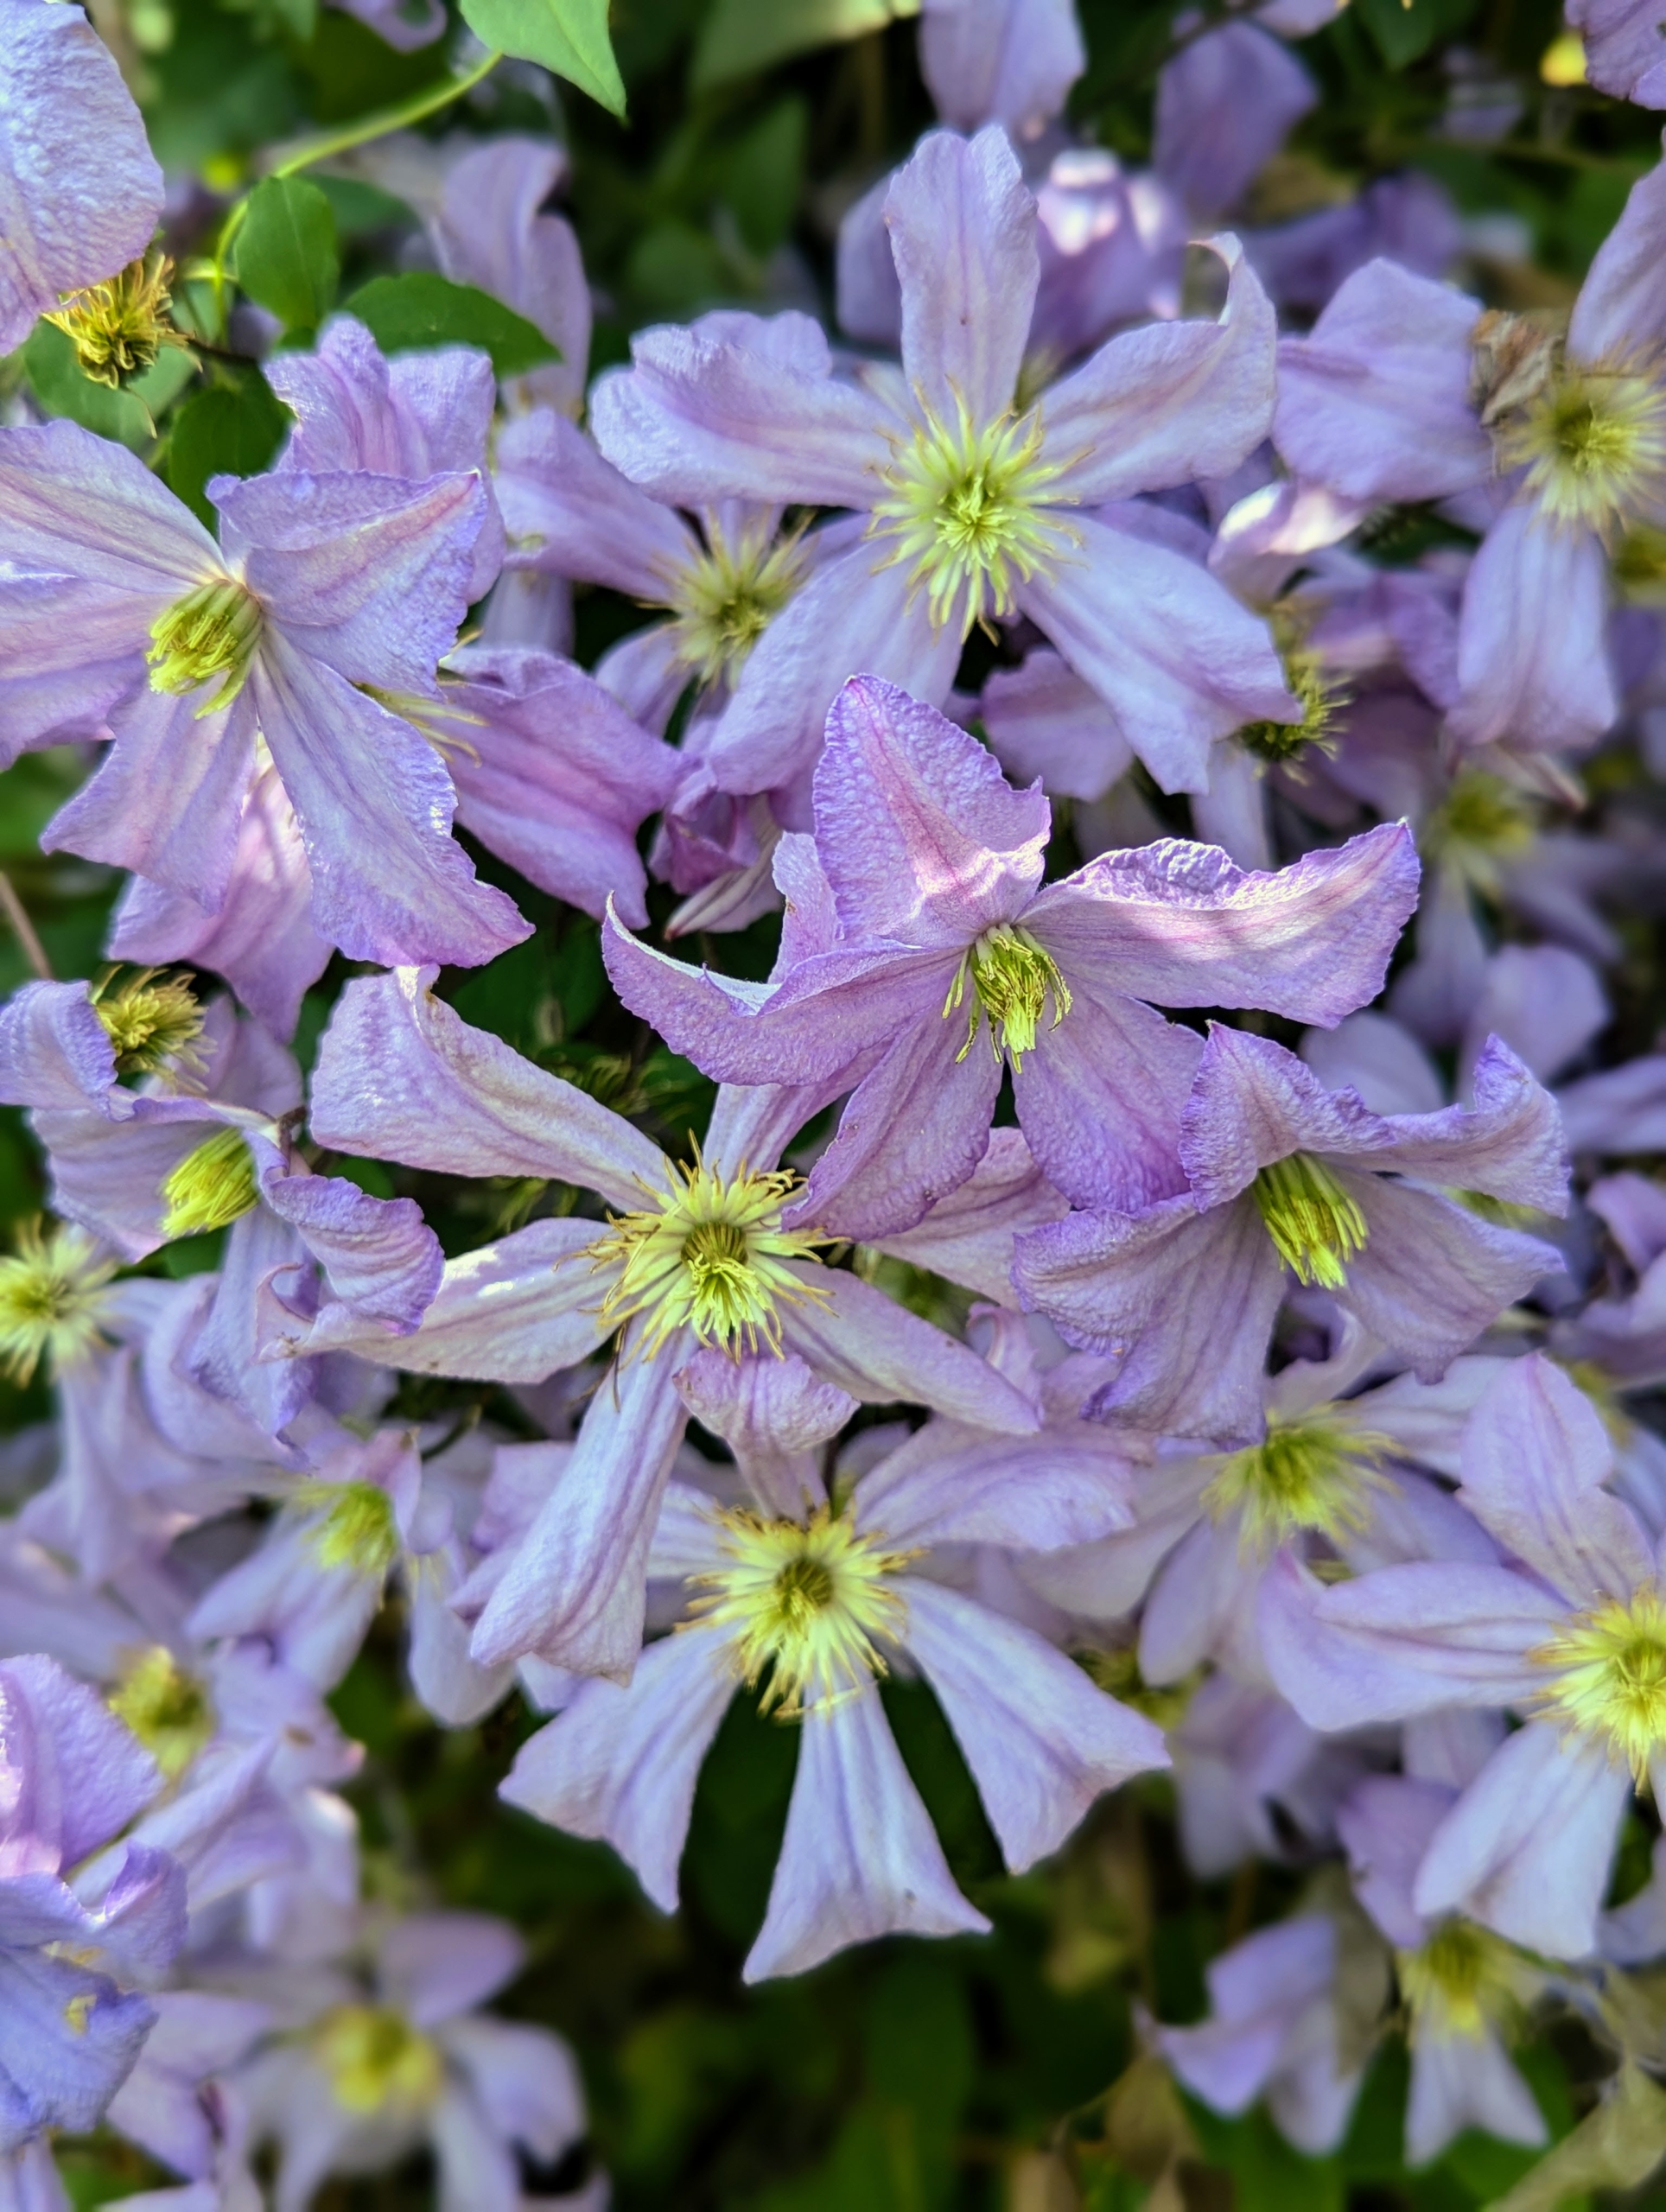
Some clematis cultivars will bloom in partial shade, but to really thrive, they need at least six-hours of sun each day. Just think, “head in the sun, feet in the shade.” The vines like sun, but cool, moist soil.
Clematis plants are also heavy feeders and benefit from a low nitrogen fertilizer such as 5-10-10 in spring, when the buds are about two-inches long. Alternate feedings every four to six weeks with a balanced 10-10-10 fertilizer and then continue this alternate feeding until the end of the growing season. The blooms appear constantly for many weeks making their everblooming nature a must-have in any garden.
Once established, clematis should be watered about an inch or so weekly, and more deeply during dry spells.
Across the carriage road from my pergola, I also have some clematis vines planted at the base of several bald cypress trees. On these trees, we used twine to secure the climbing vines. Known as the “Queen of the Climbers”, Clematis plants will train onto almost any upright support and will bloom beautifully for years.
Here at my Bedford, New York farm, I always encourage my crew to "use the right tools for the right jobs." Among our favorites are the tractors from Kubota, a leading manufacturer of all kinds of farming machinery, tool attachments, and utility vehicles.
My Kubota equipment is used all over the property every single day - to mow the pastures and fields, transport compost and mulch, dig holes for trees, maintain the carriage roads, and many, many other important outdoor tasks. The machines are dependable, efficient, and great additions to my working farm. #KubotaUSA #KubotaCanada #KubotaTractor #Loan #LandPrideDoesThat
Here are photos of my tractors at work, enjoy.
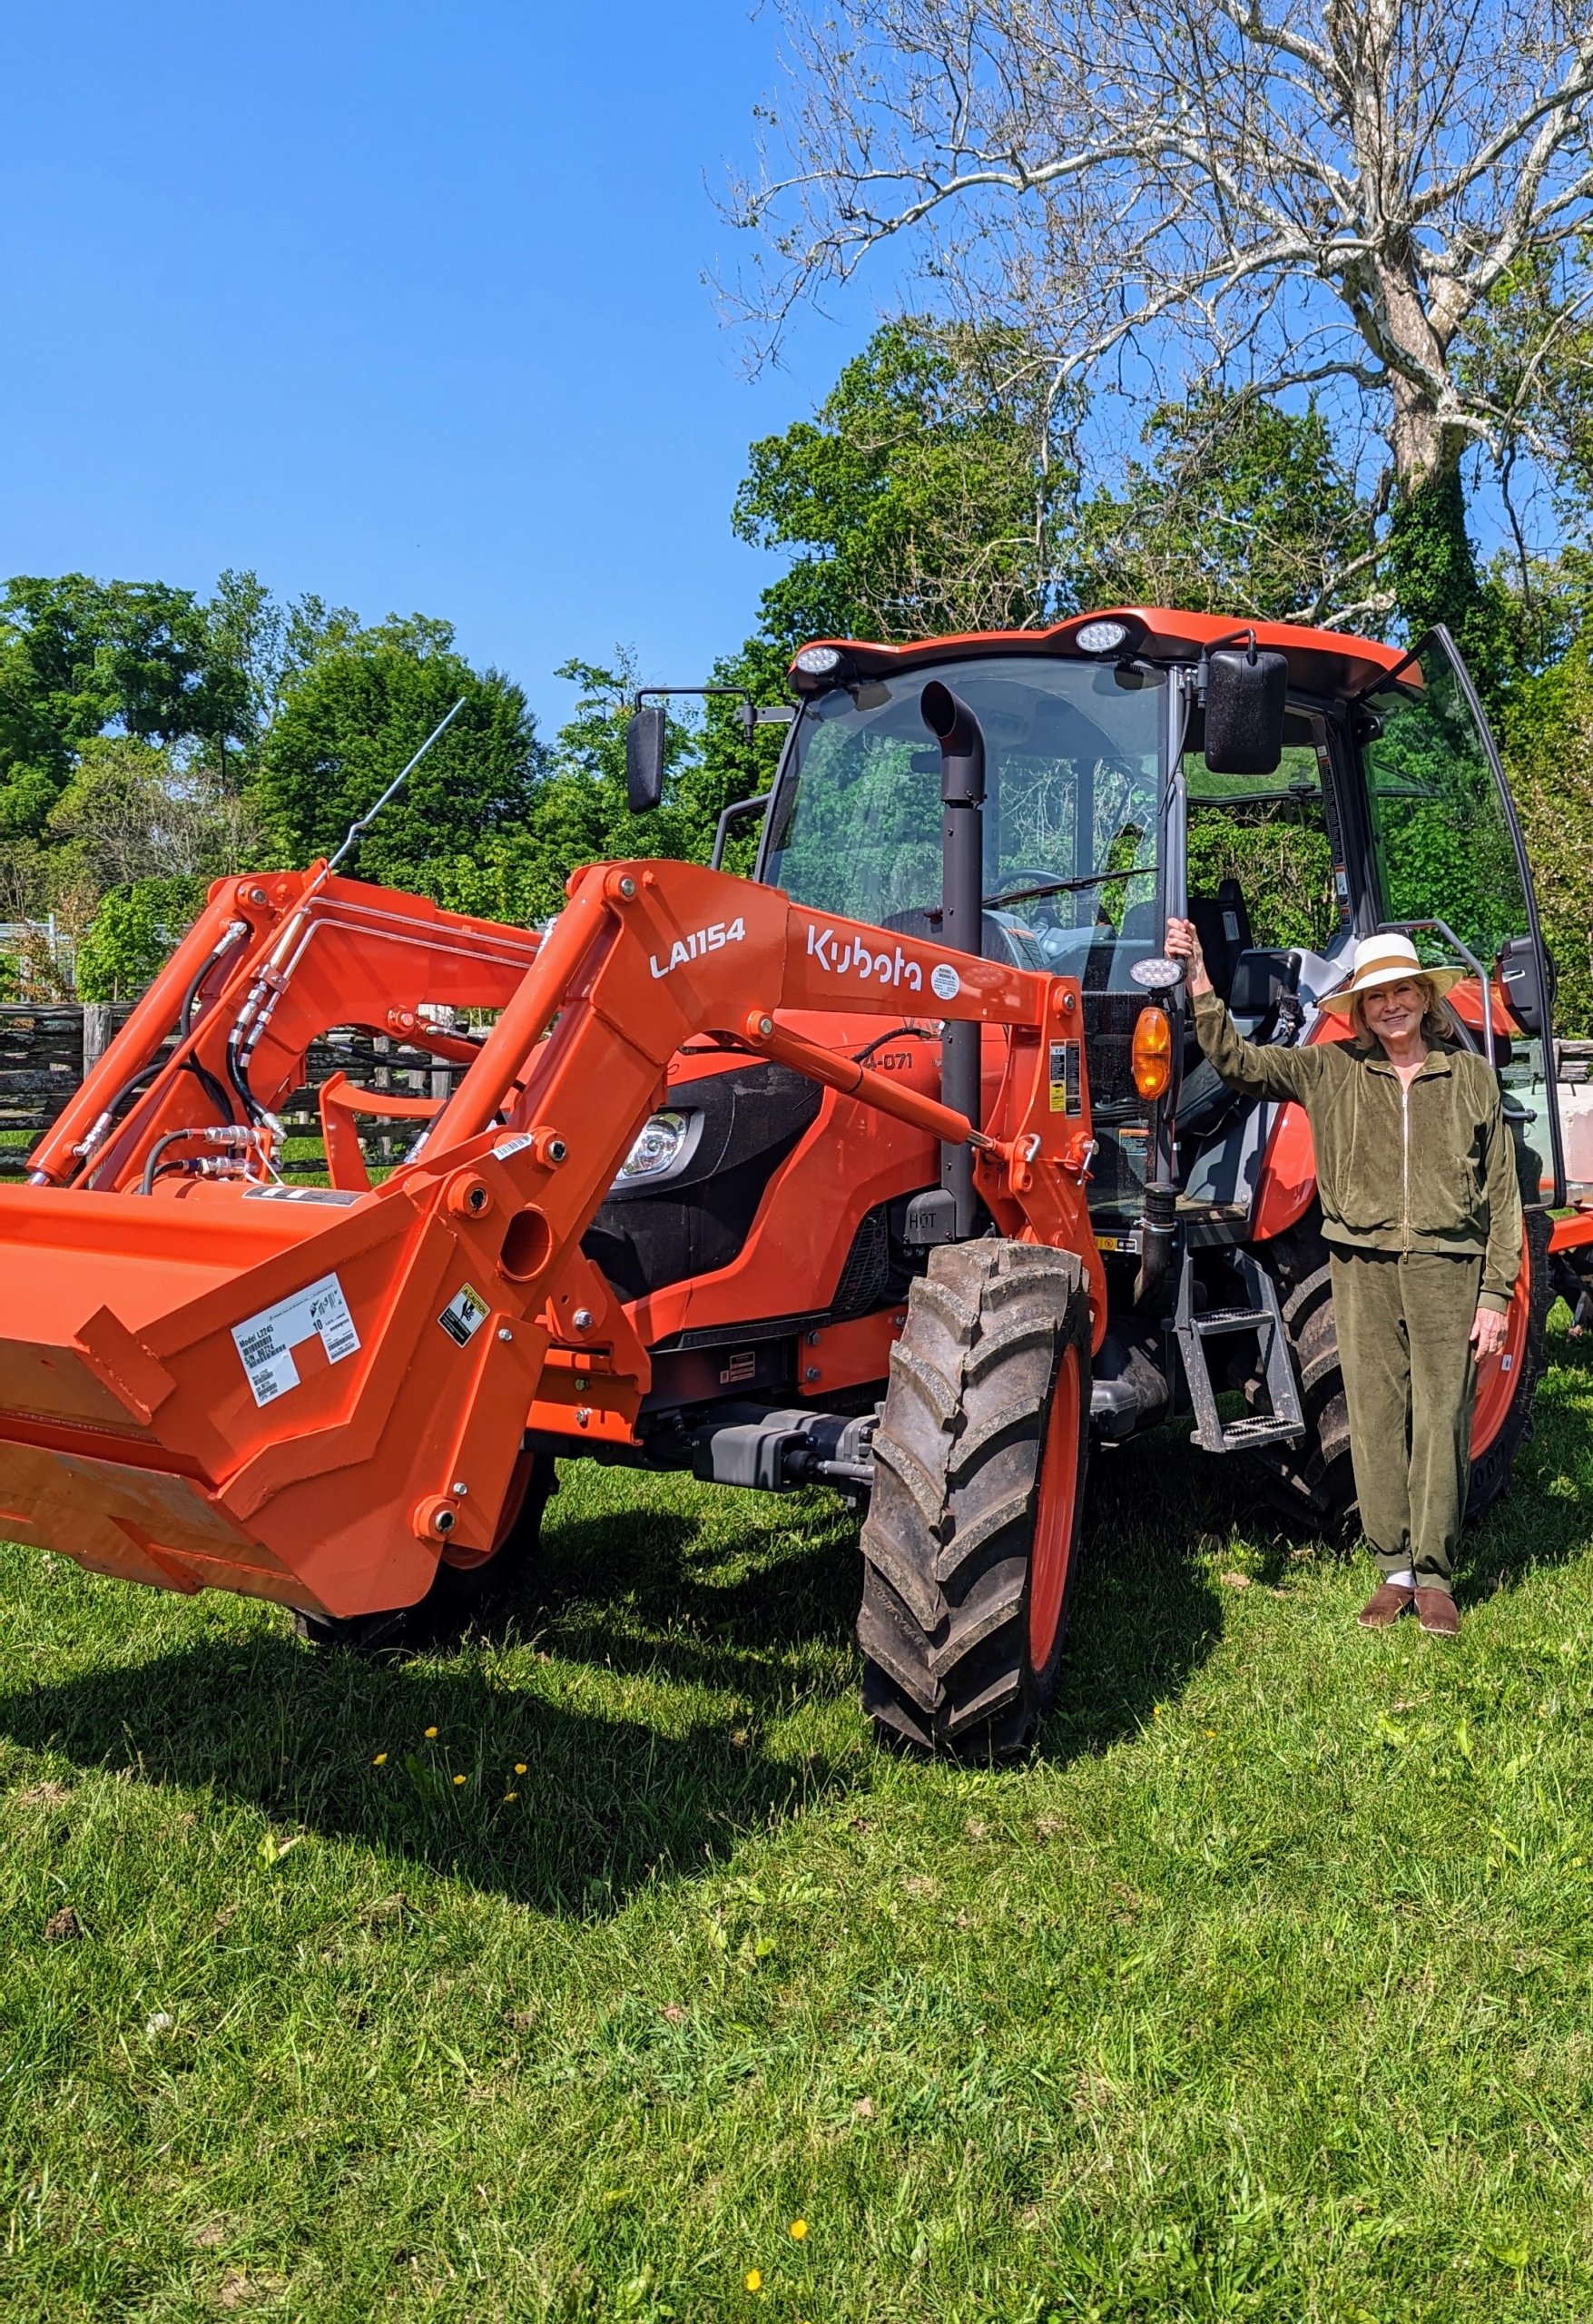
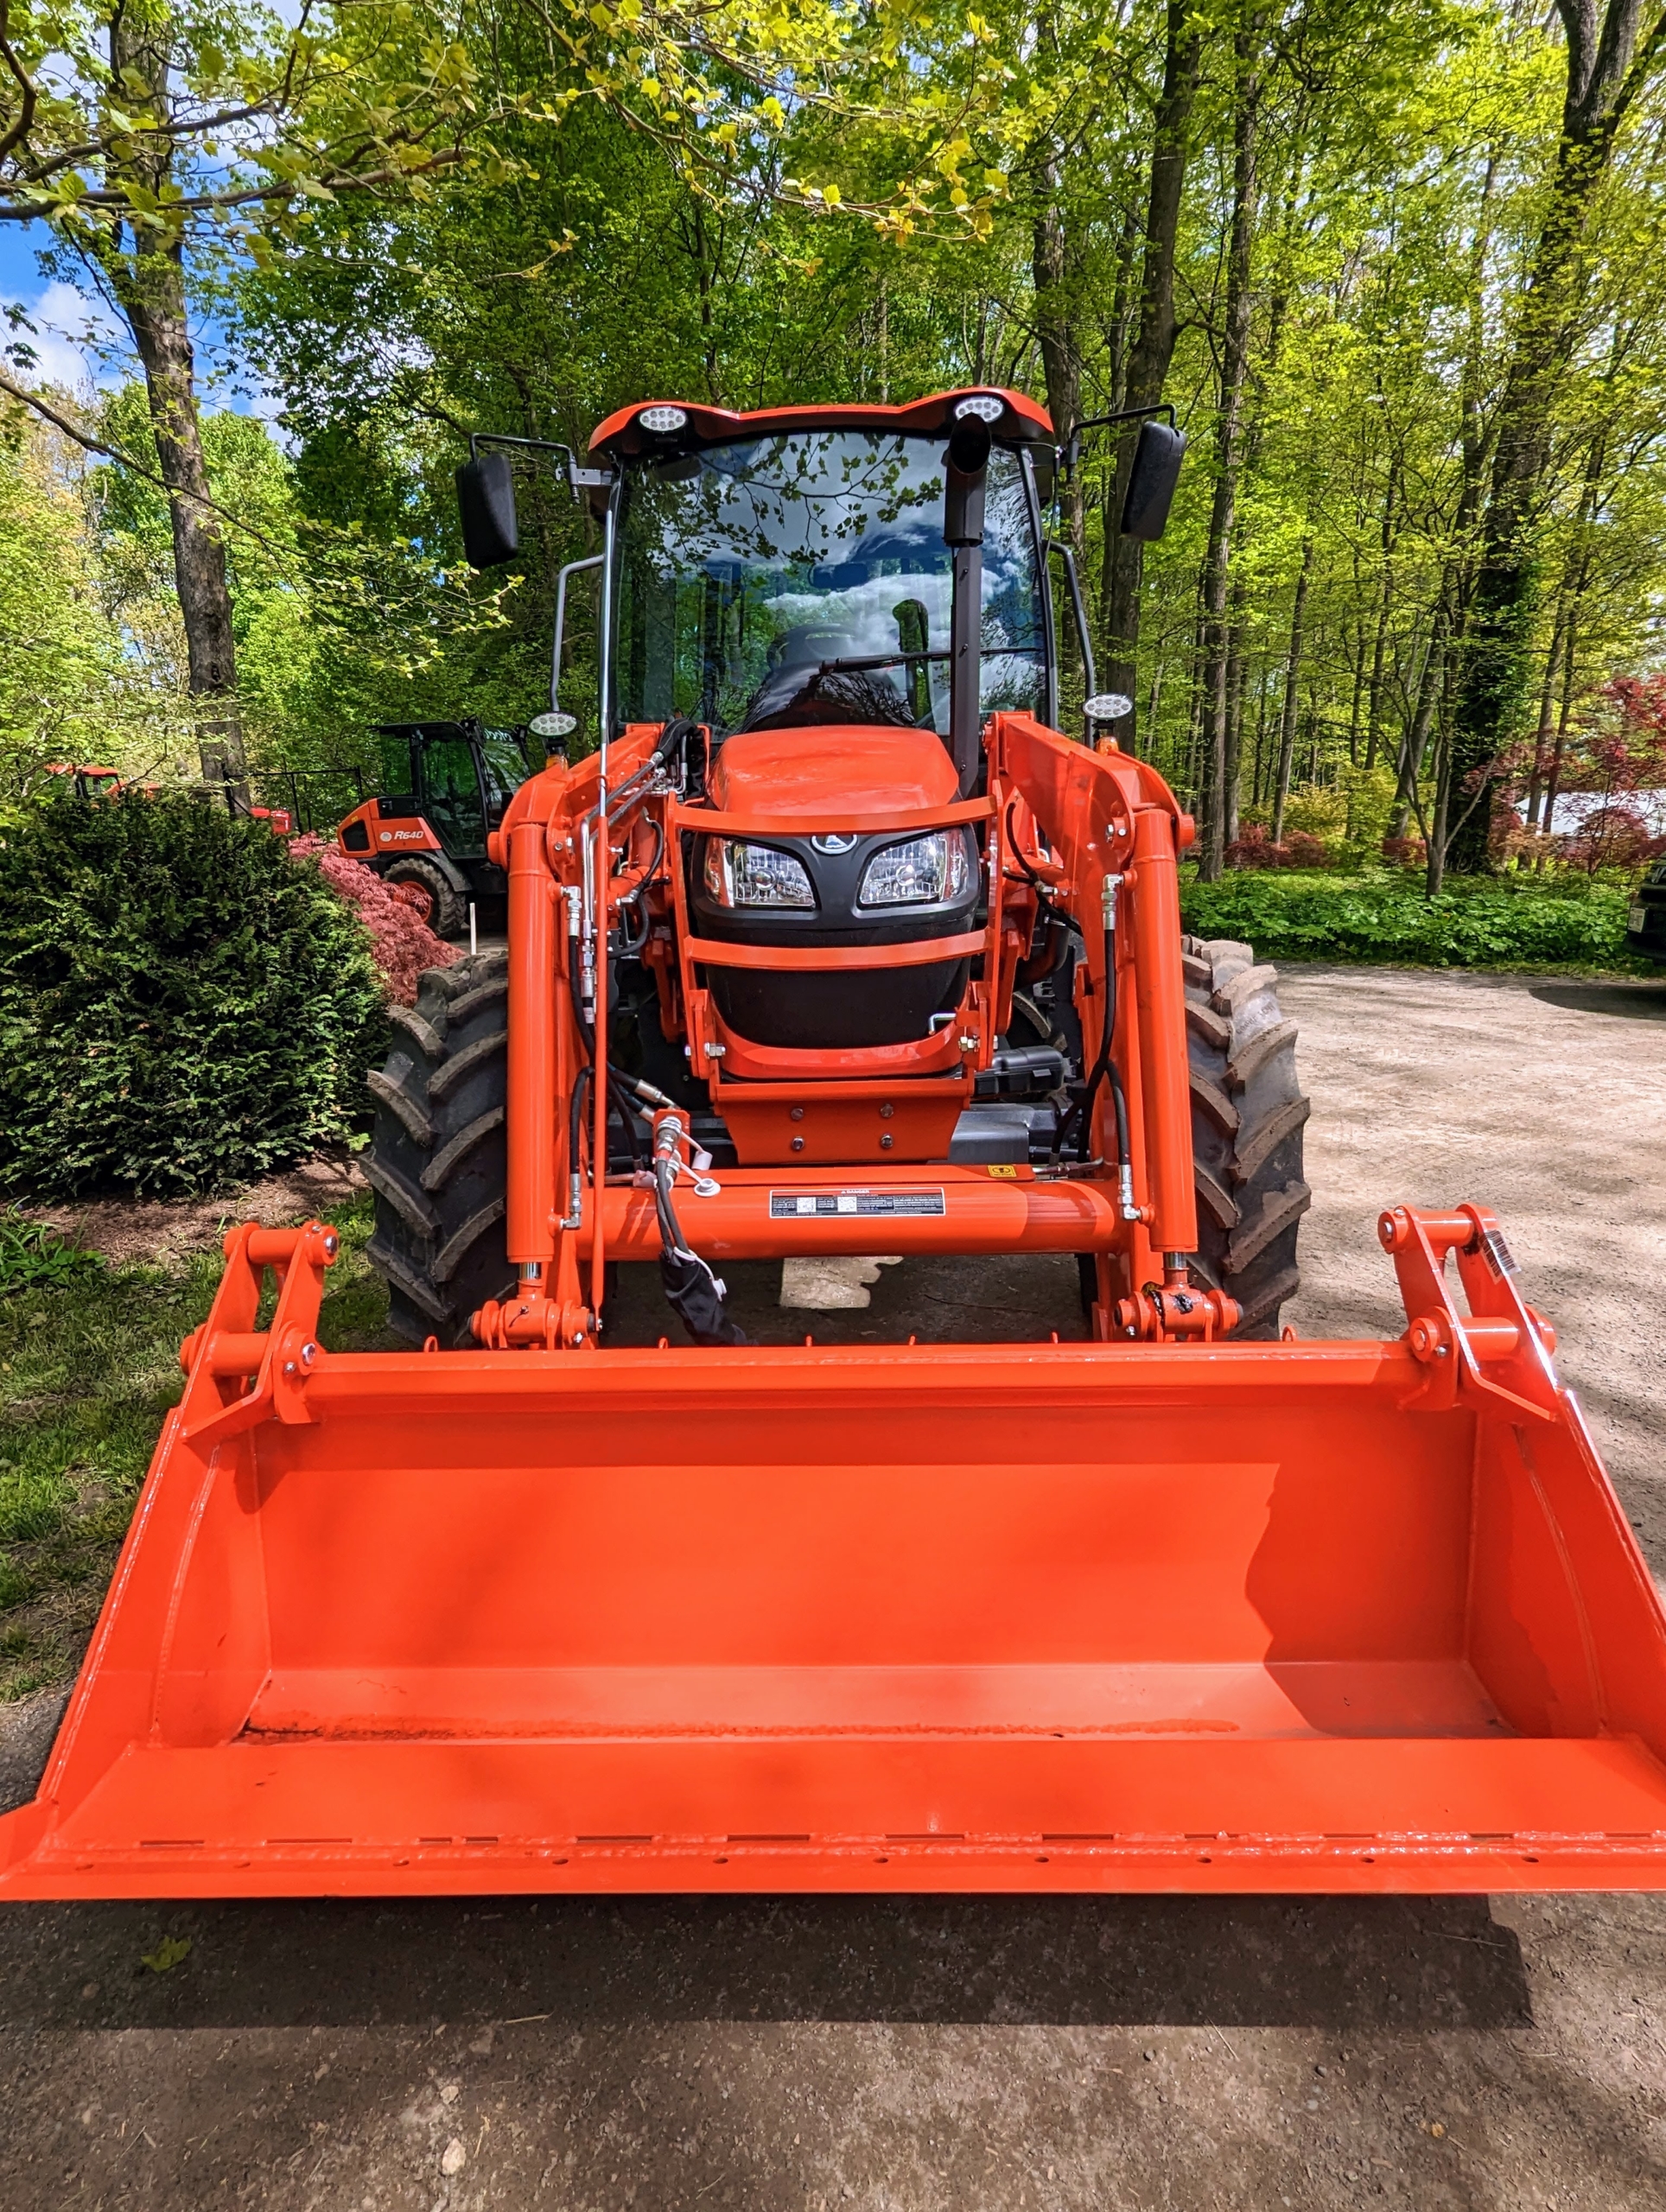
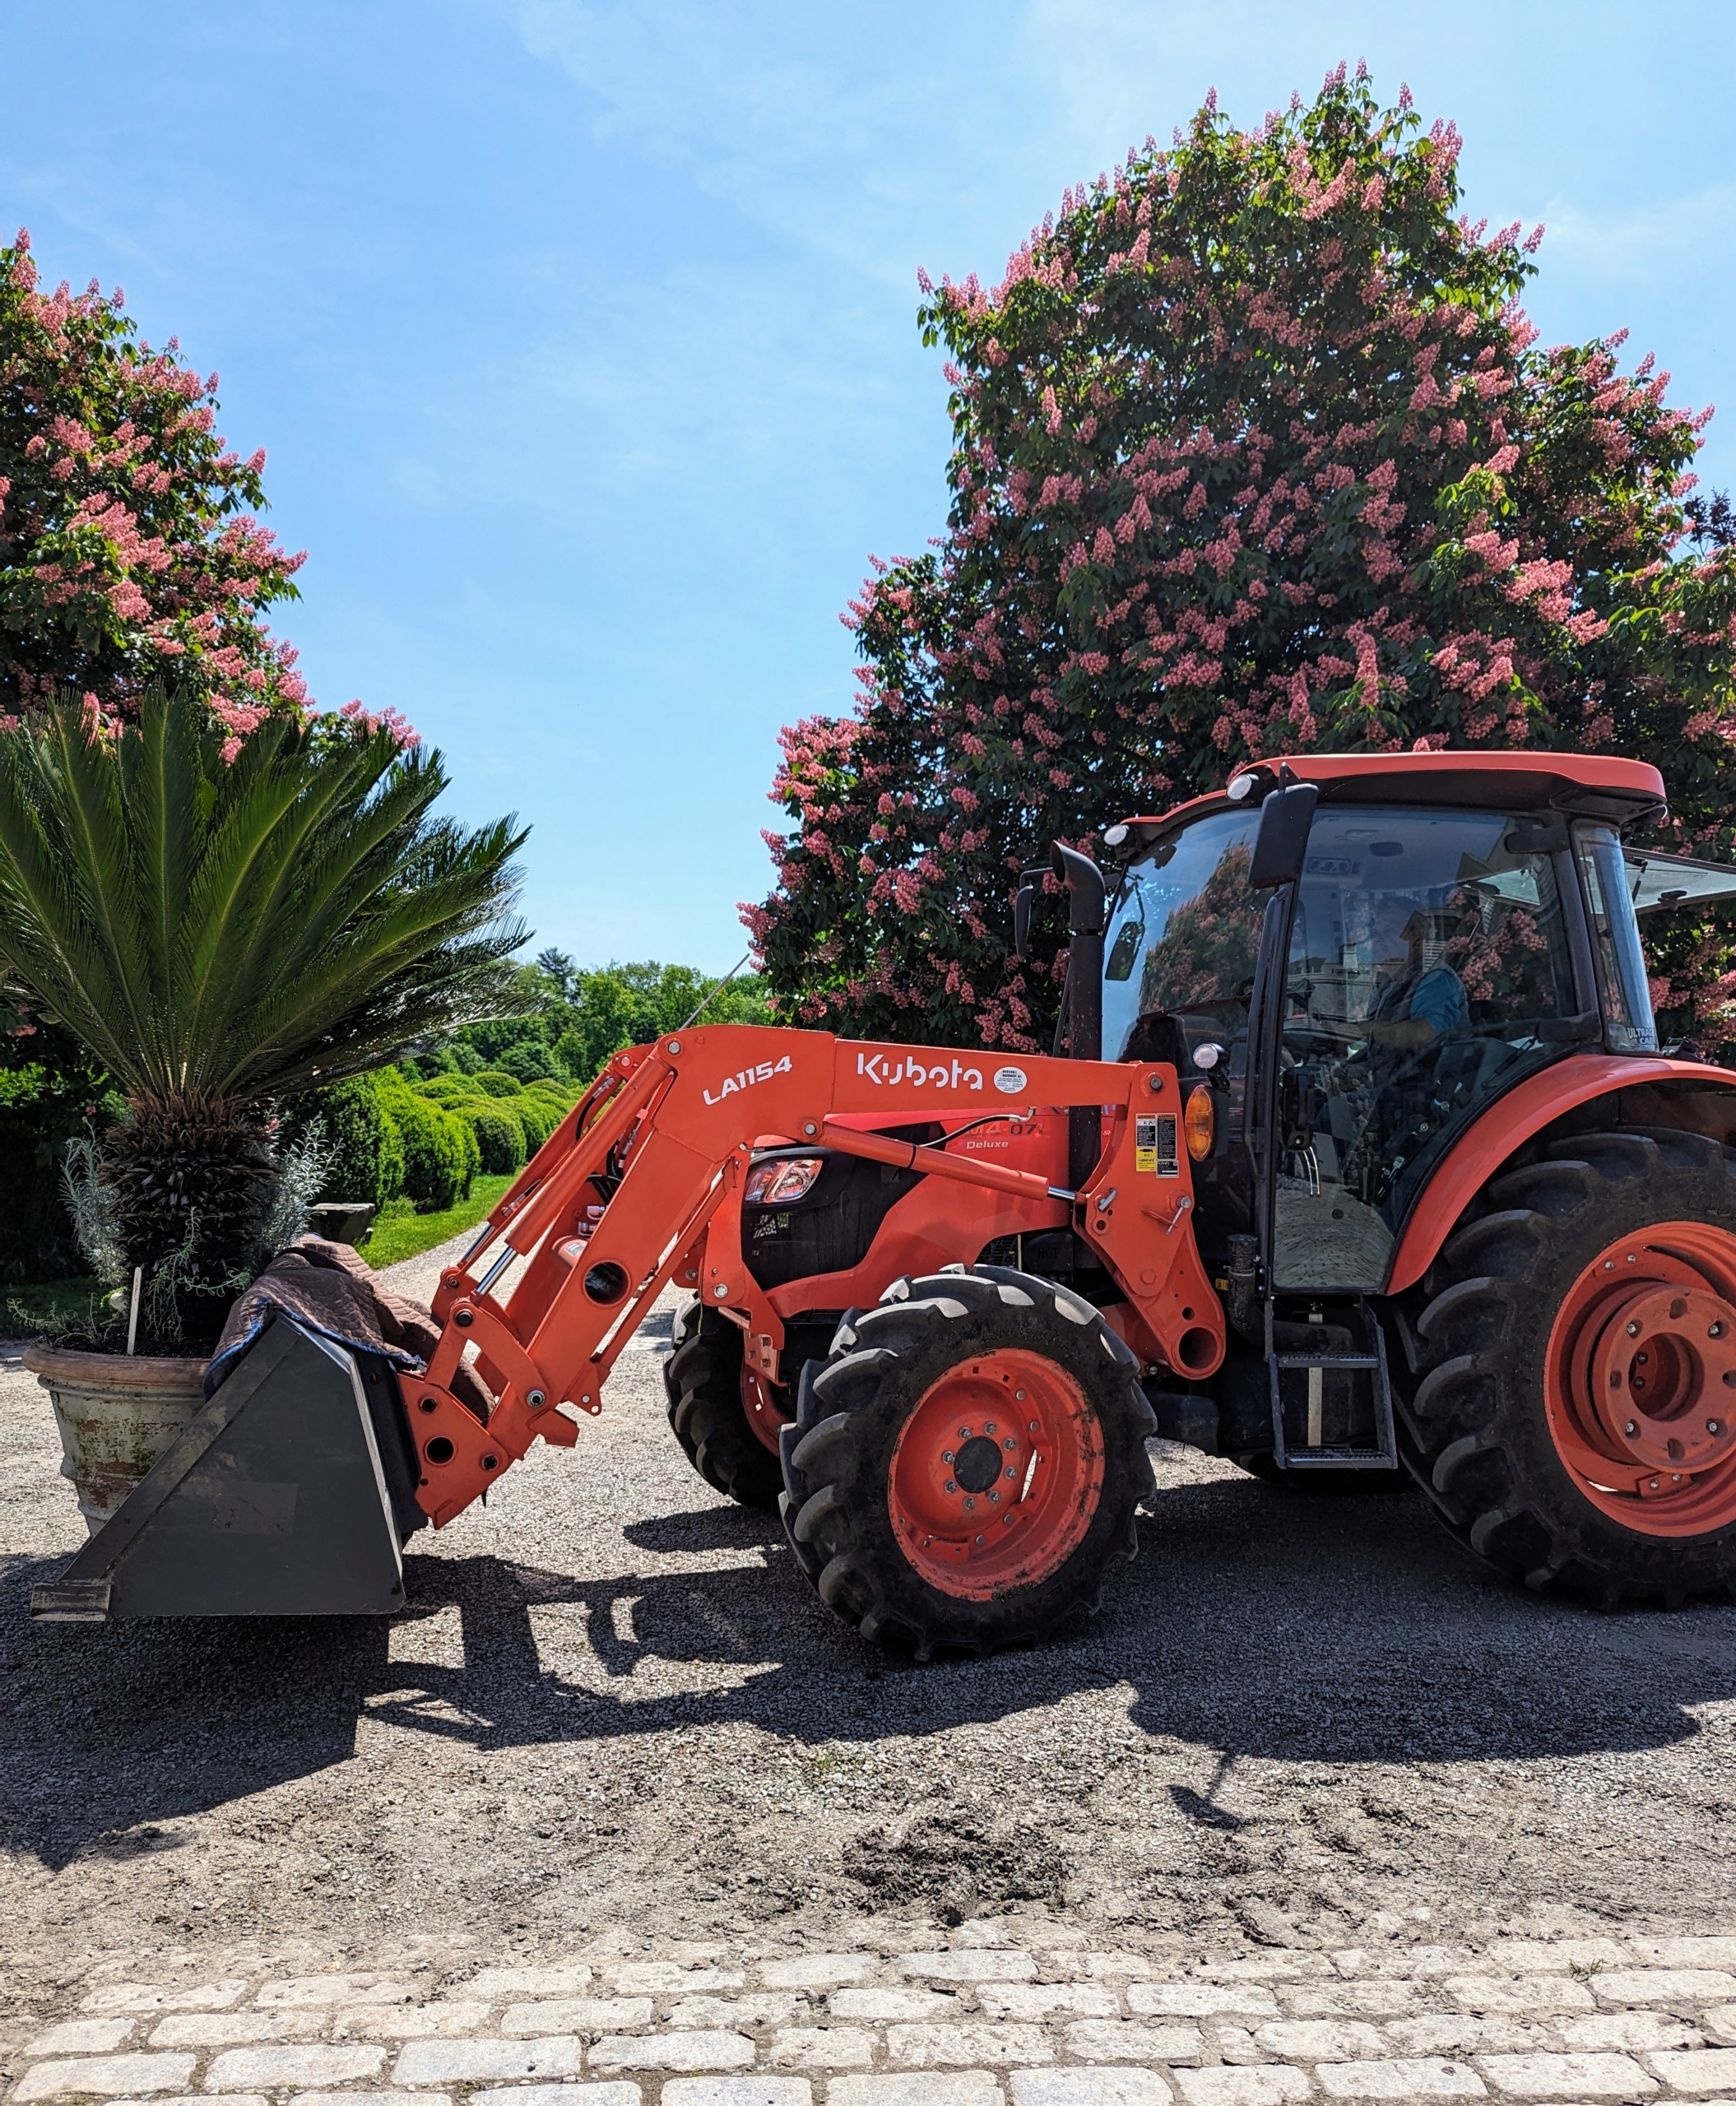
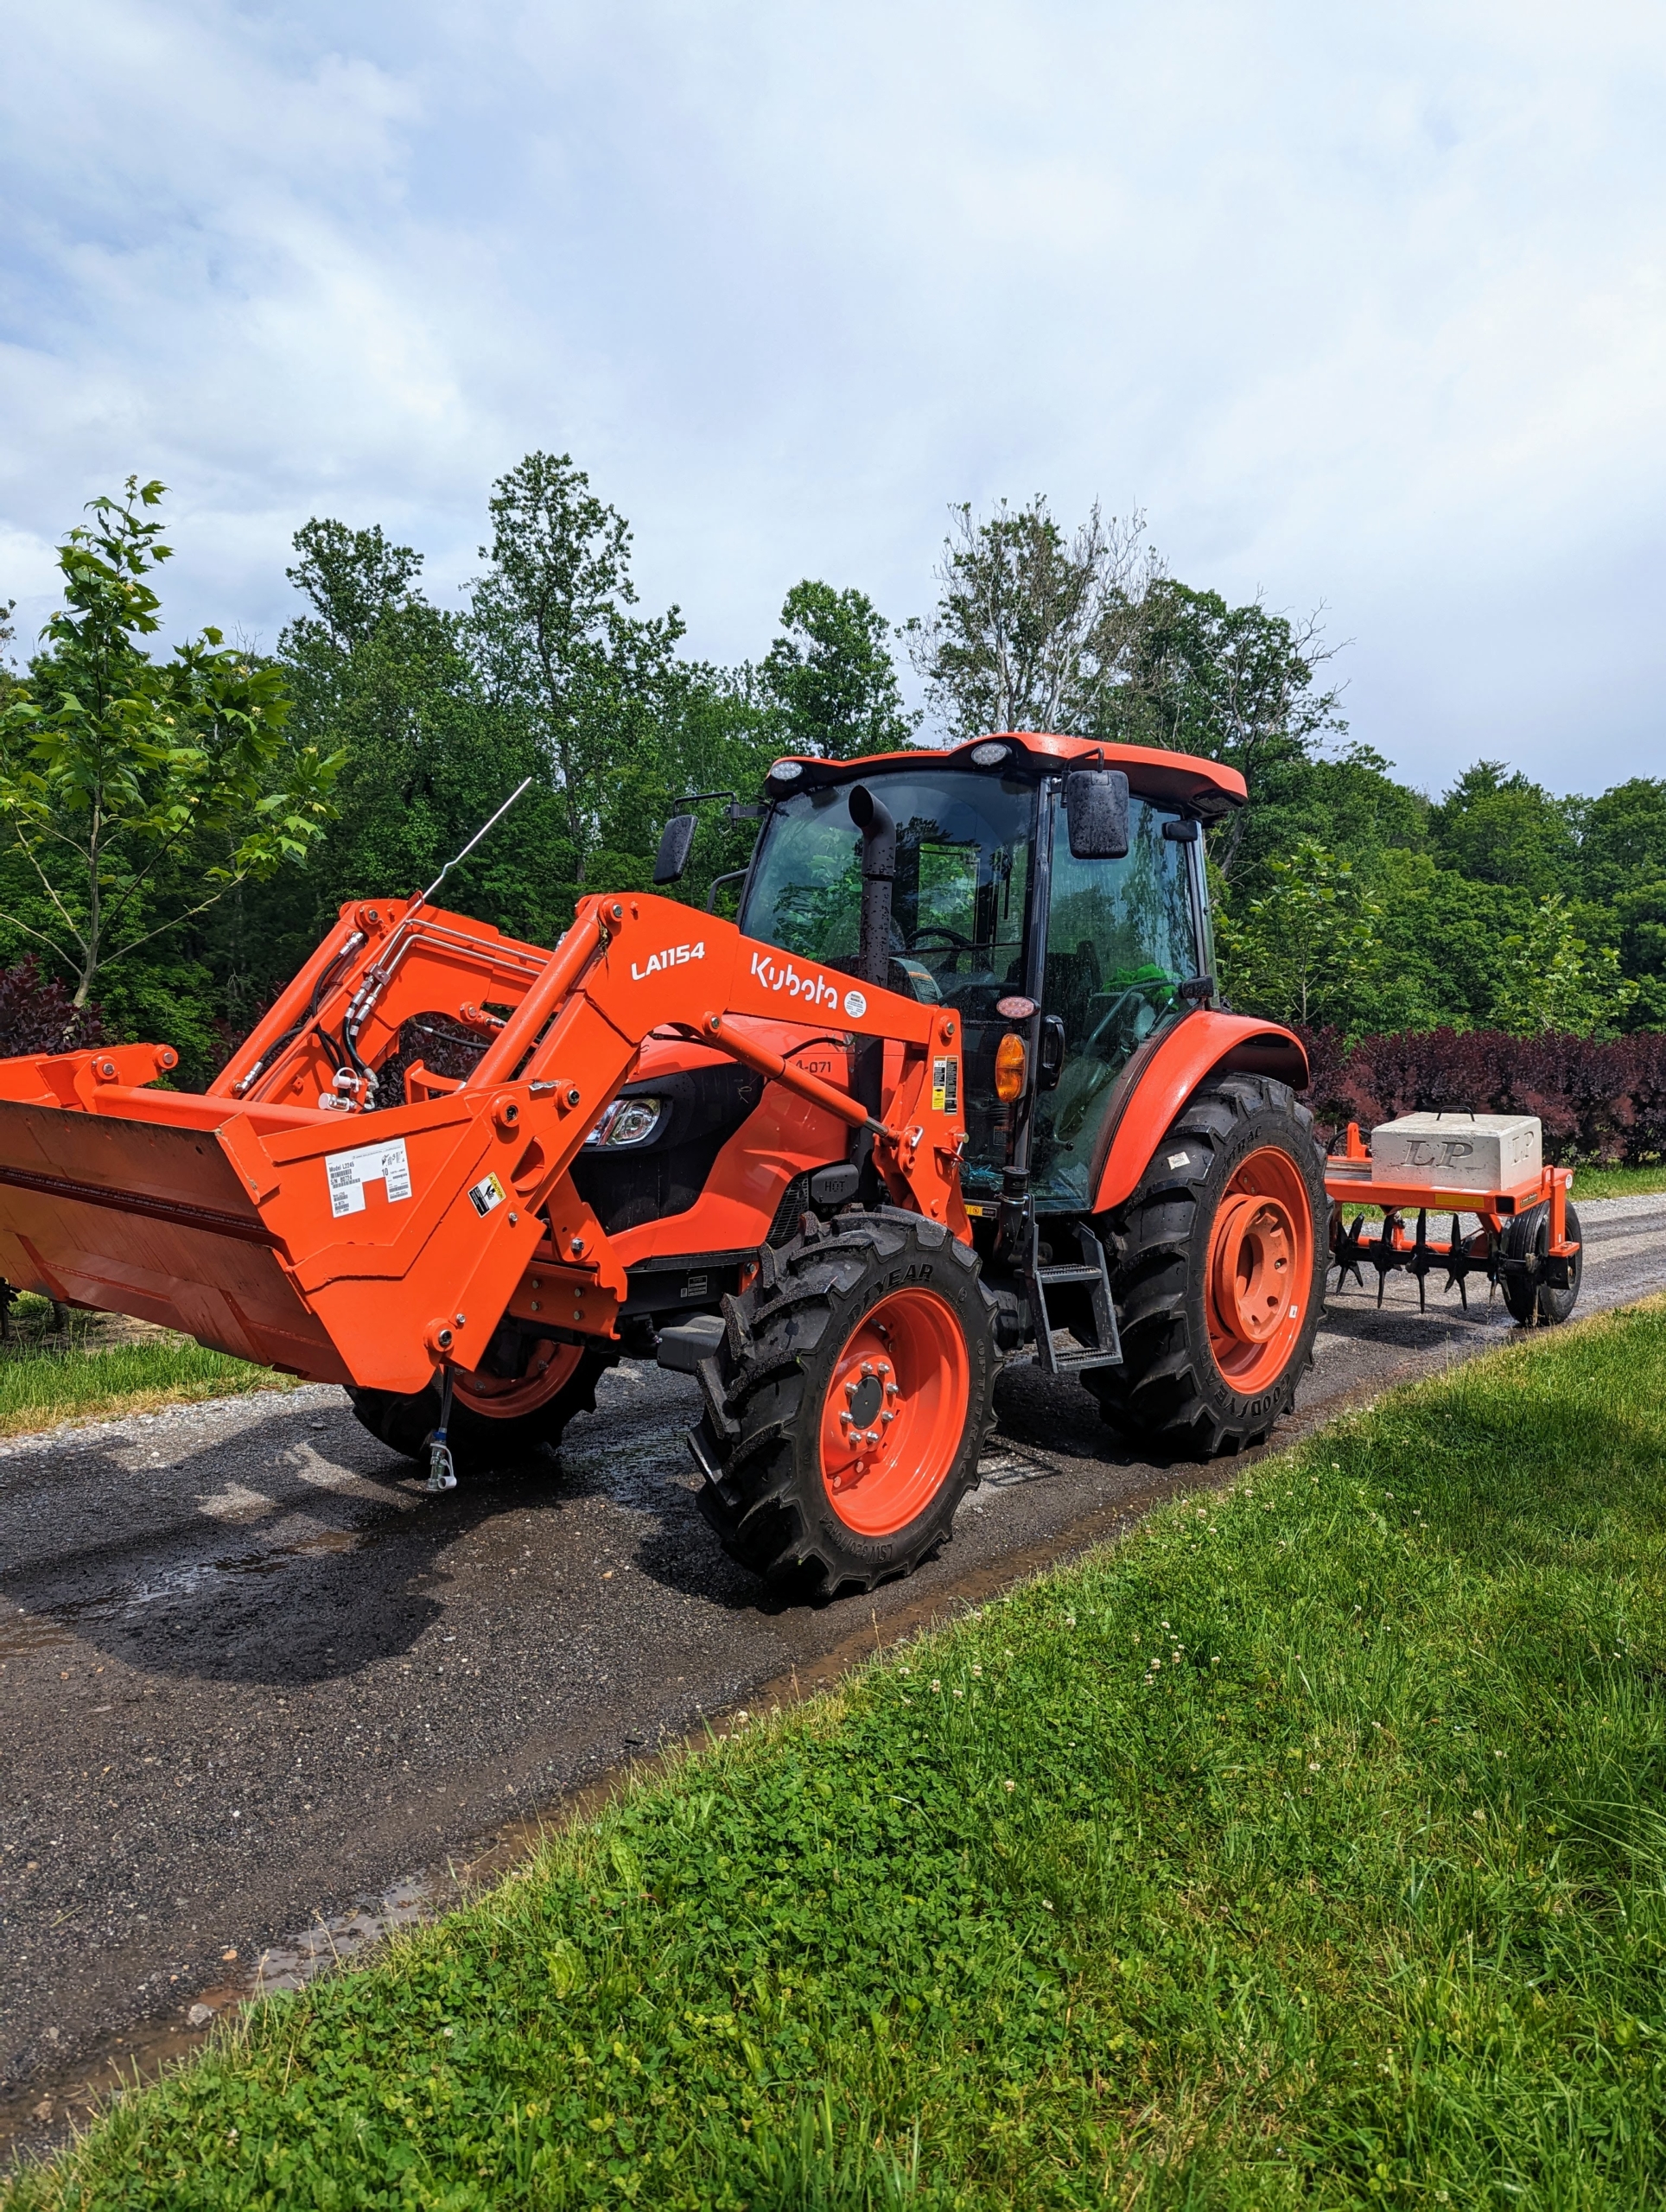
I am out and about around my farm several times a day – checking the gardens, pruning trees and shrubs, weeding, watering, and working with our big agricultural equipment. Here I am with my Kubota M4-071 tractor in one of my horse pastures.
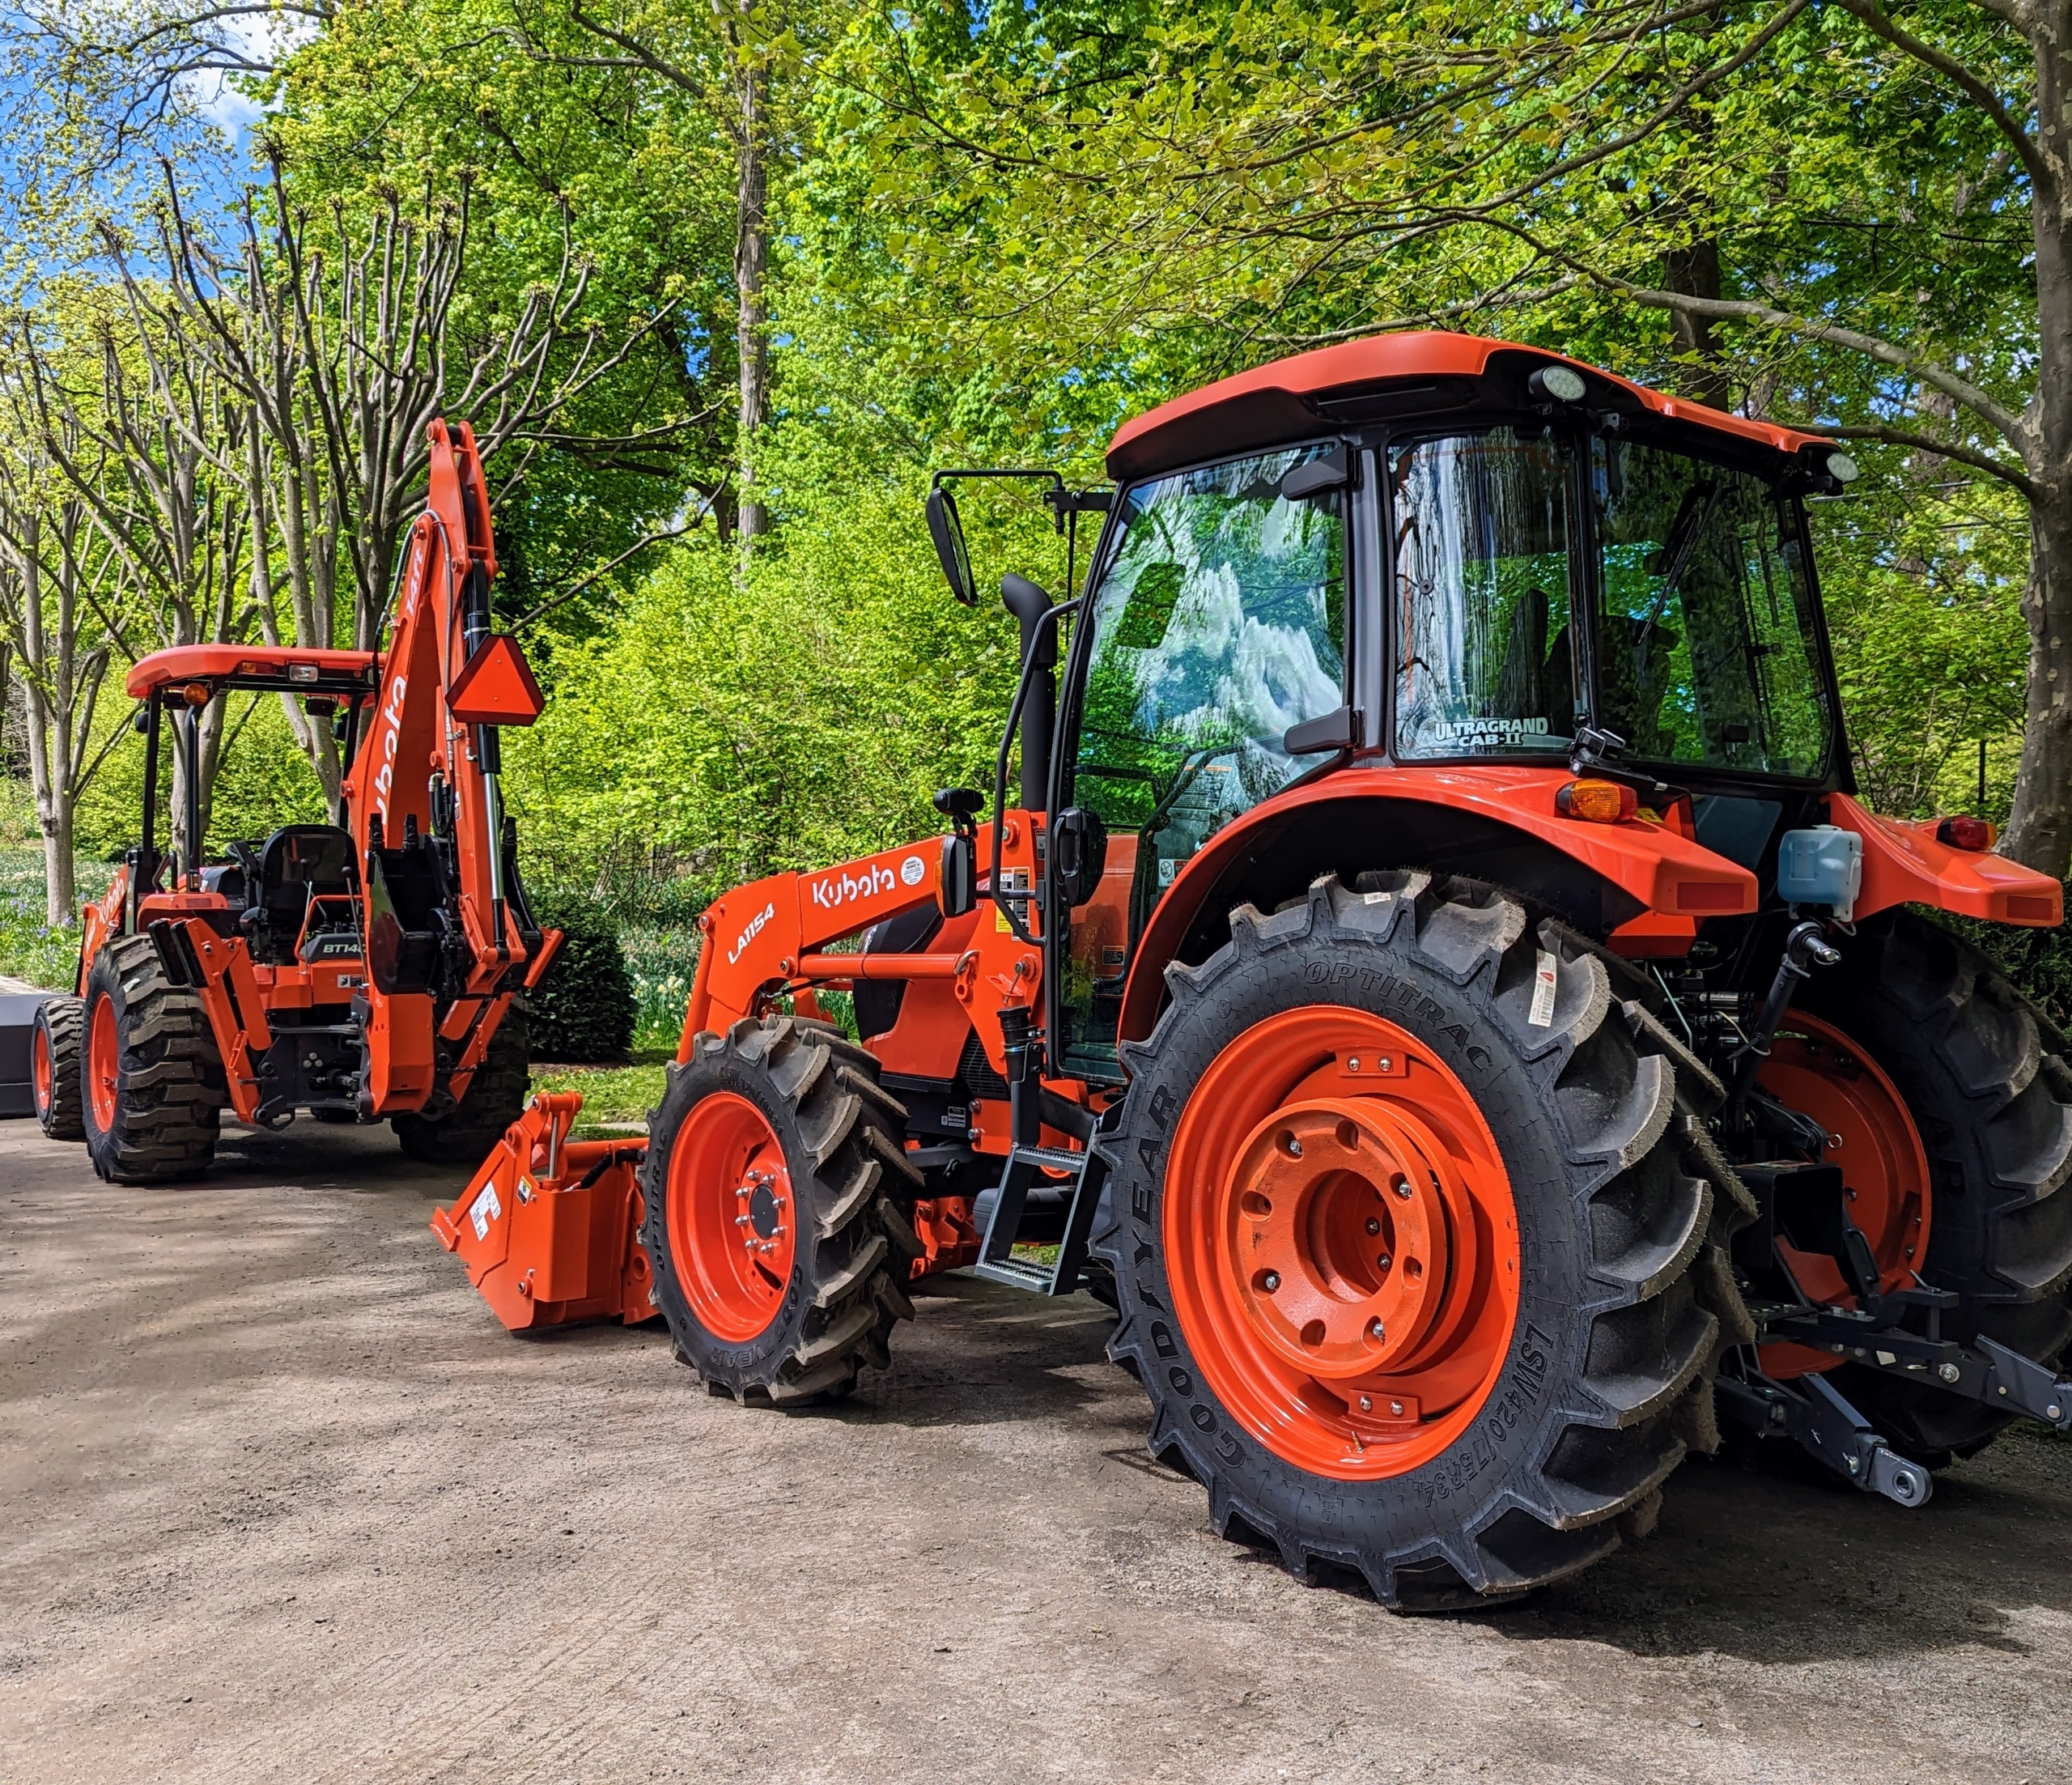
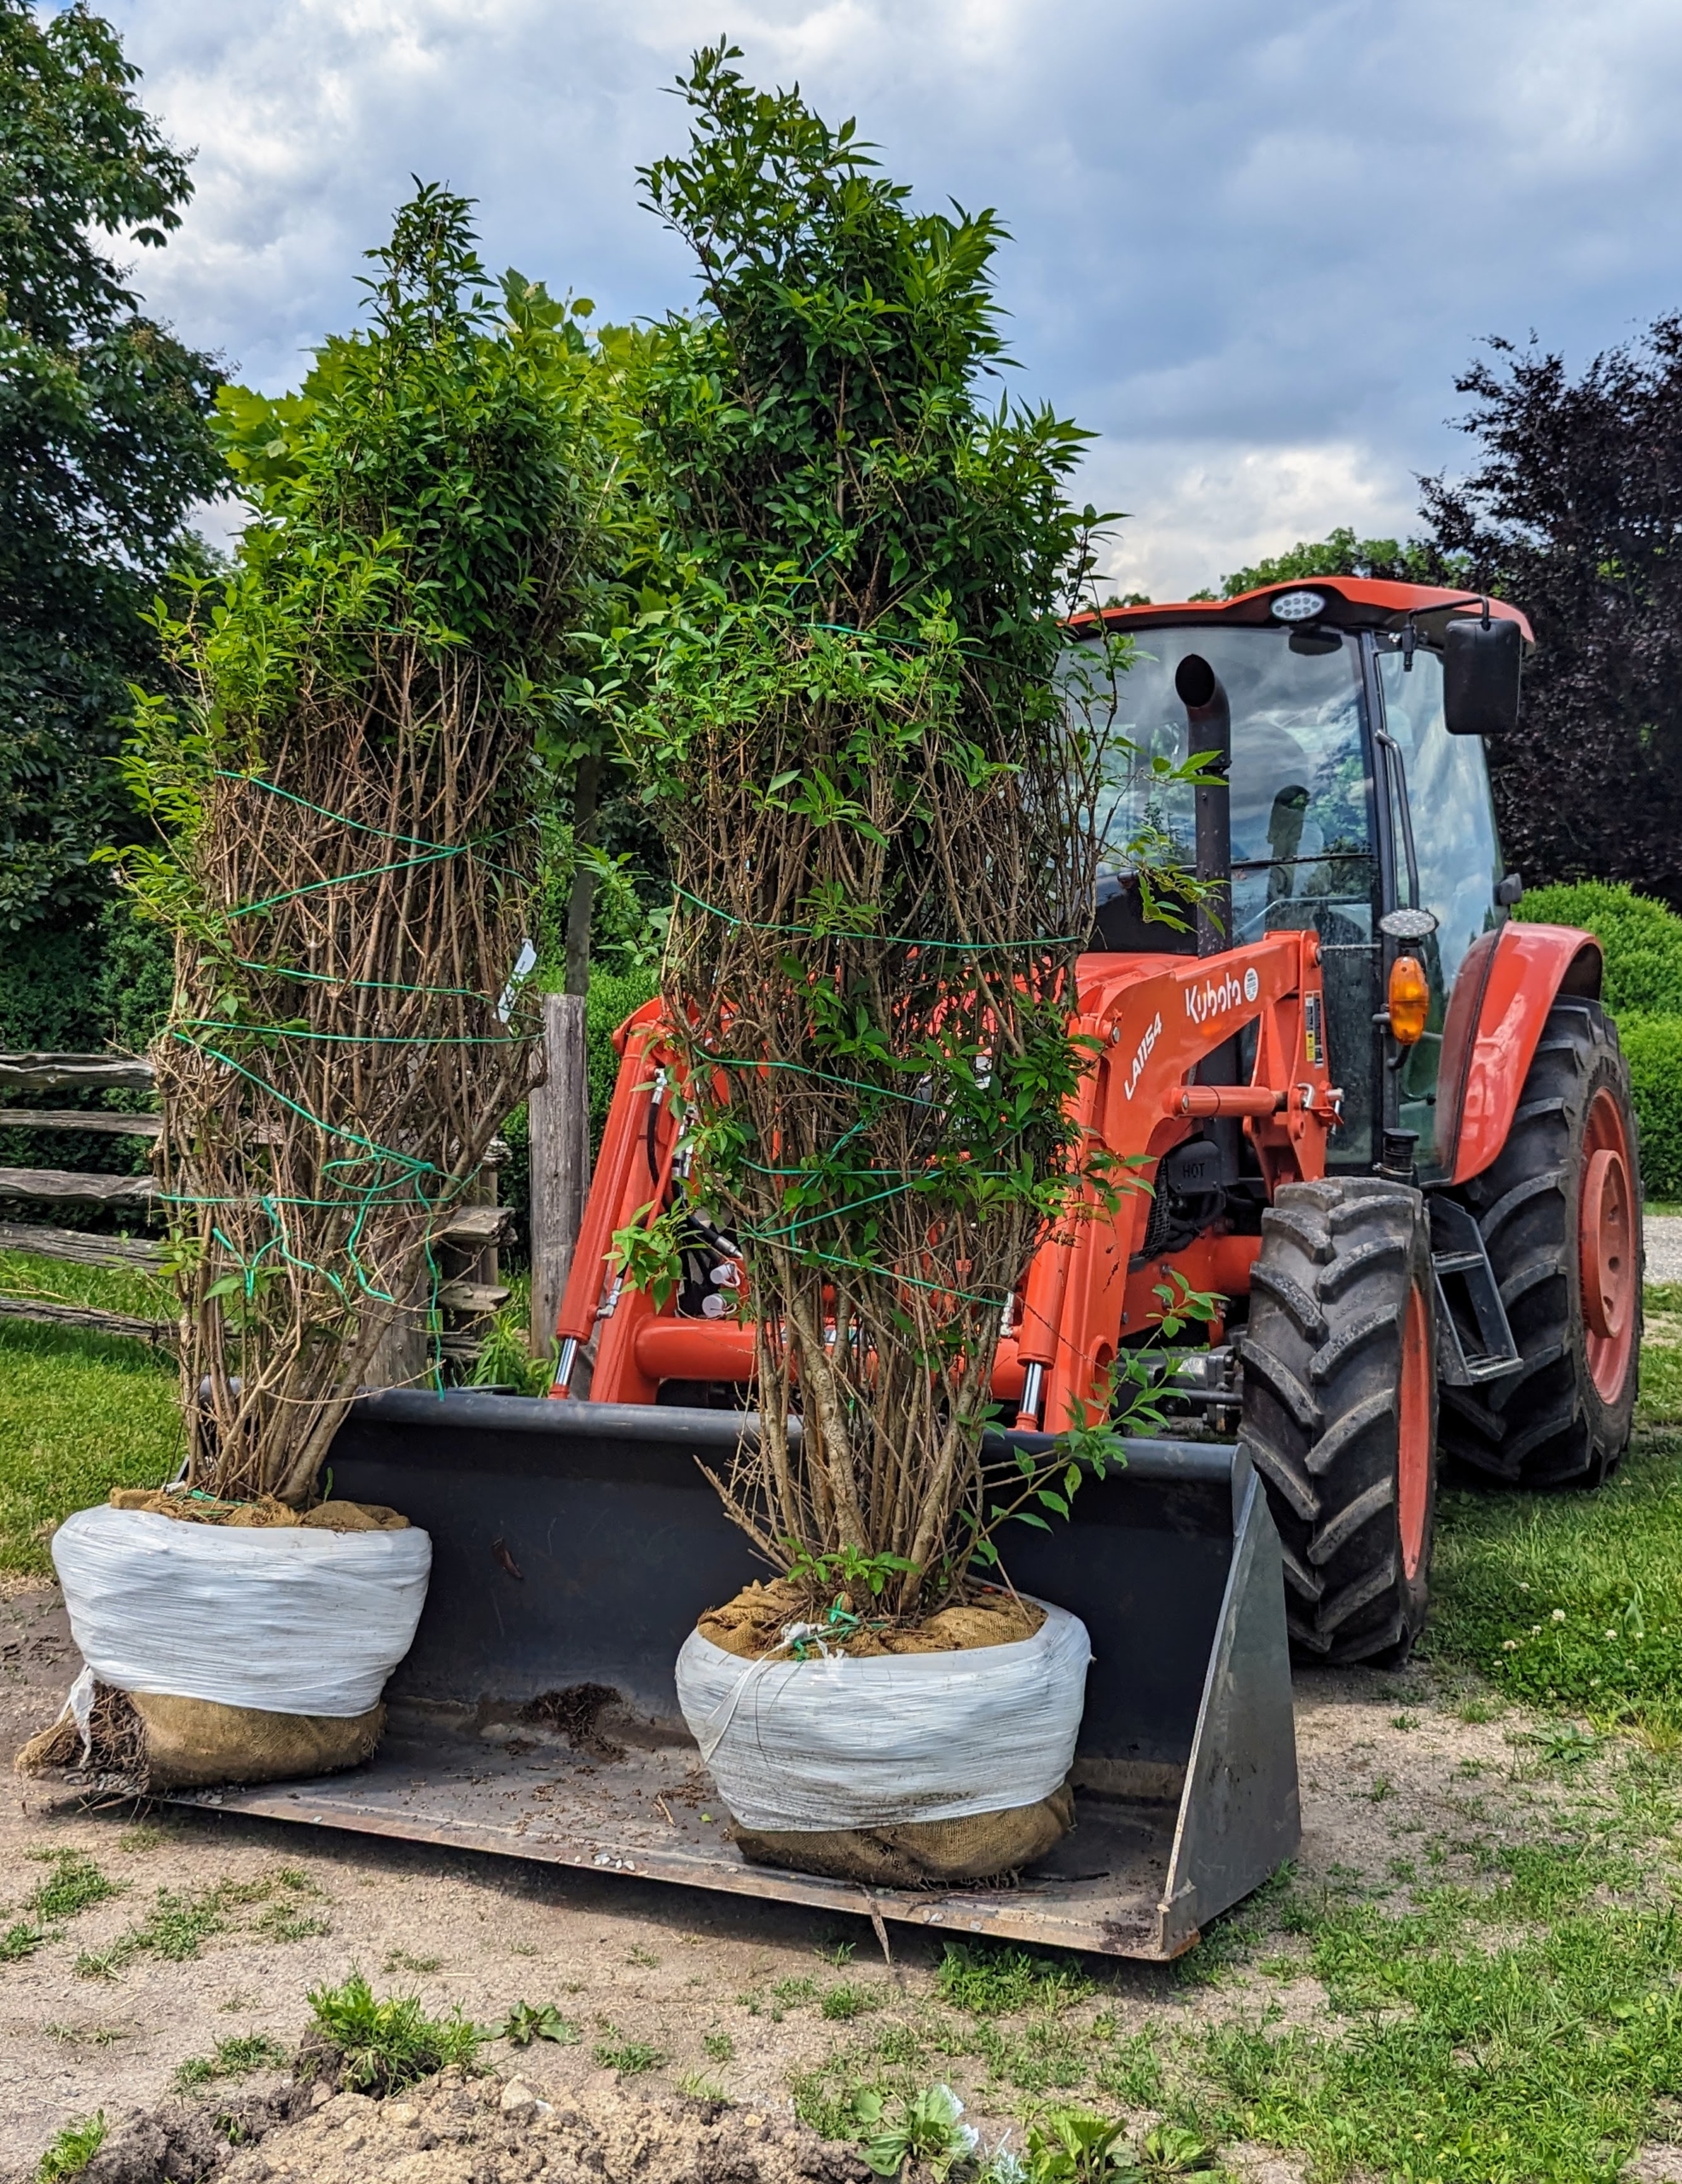
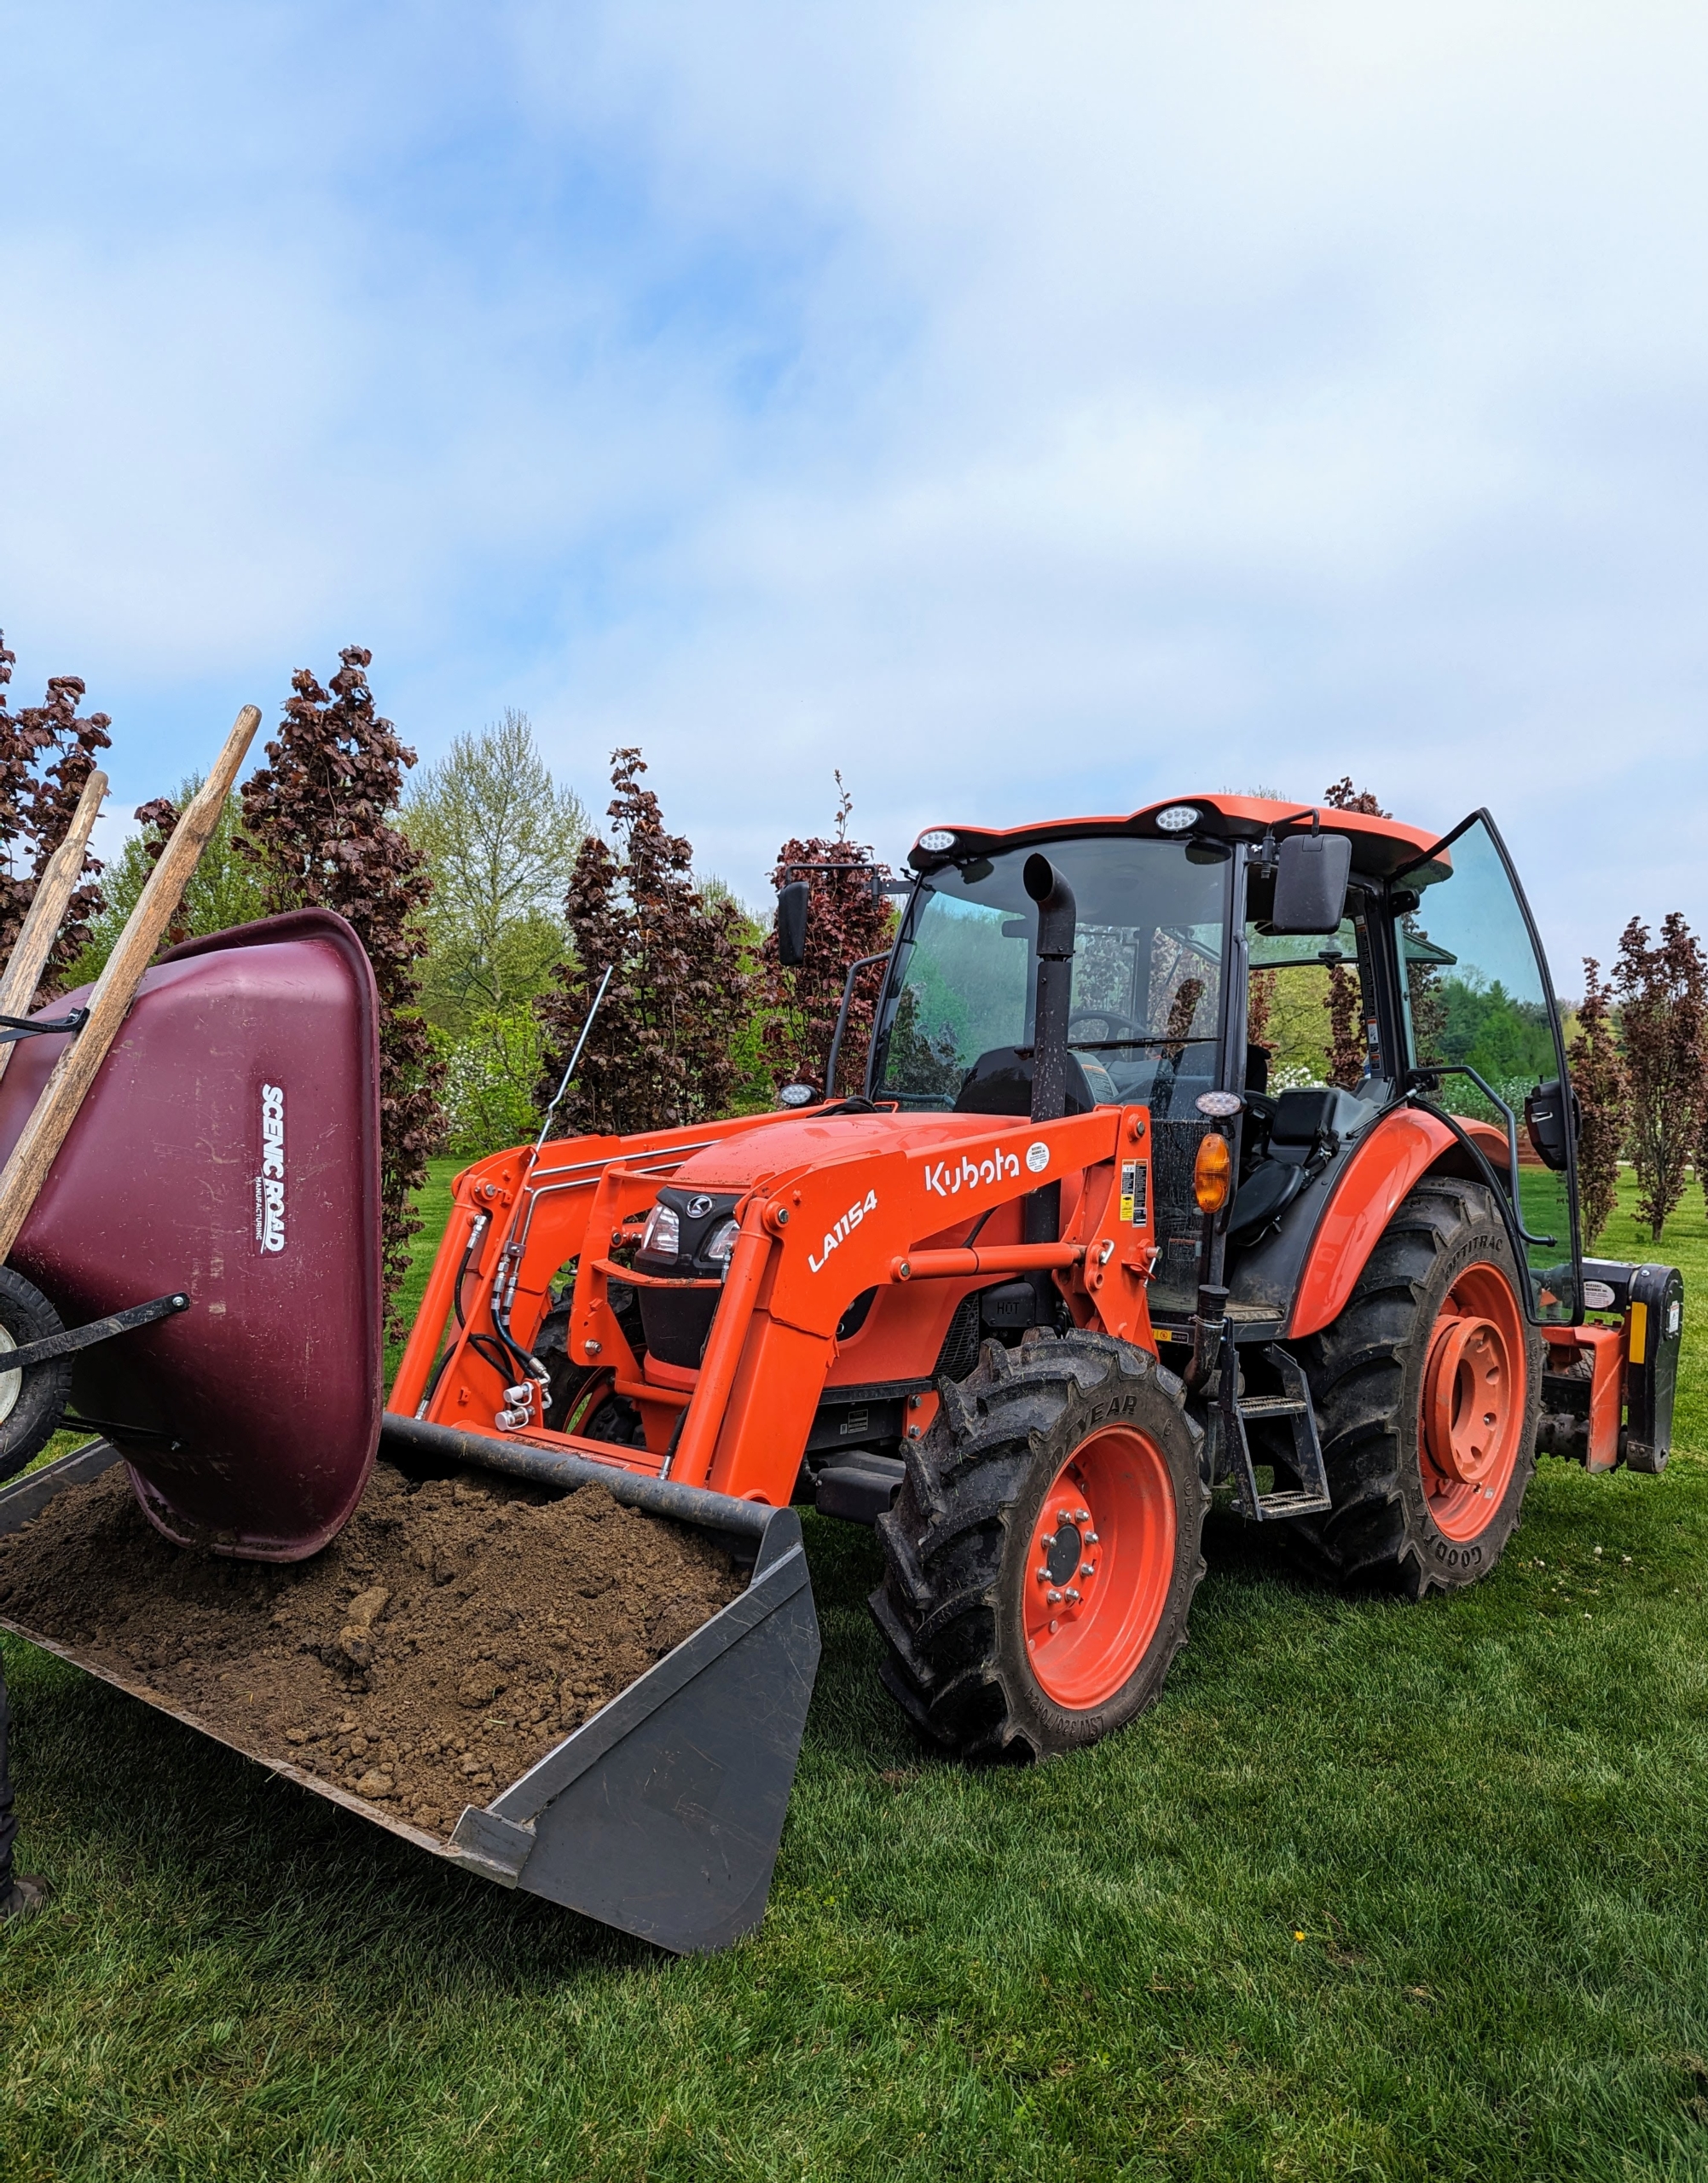
I am very fortunate to have two Kubota tractors – the M4-071 and the M62. Both of them have front loaders, and one of them is equipped with a backhoe.
The bucket attachment is used for so many things – from transporting mulch and compost to carrying heavy potted plants to delivering heavy stone and logs.
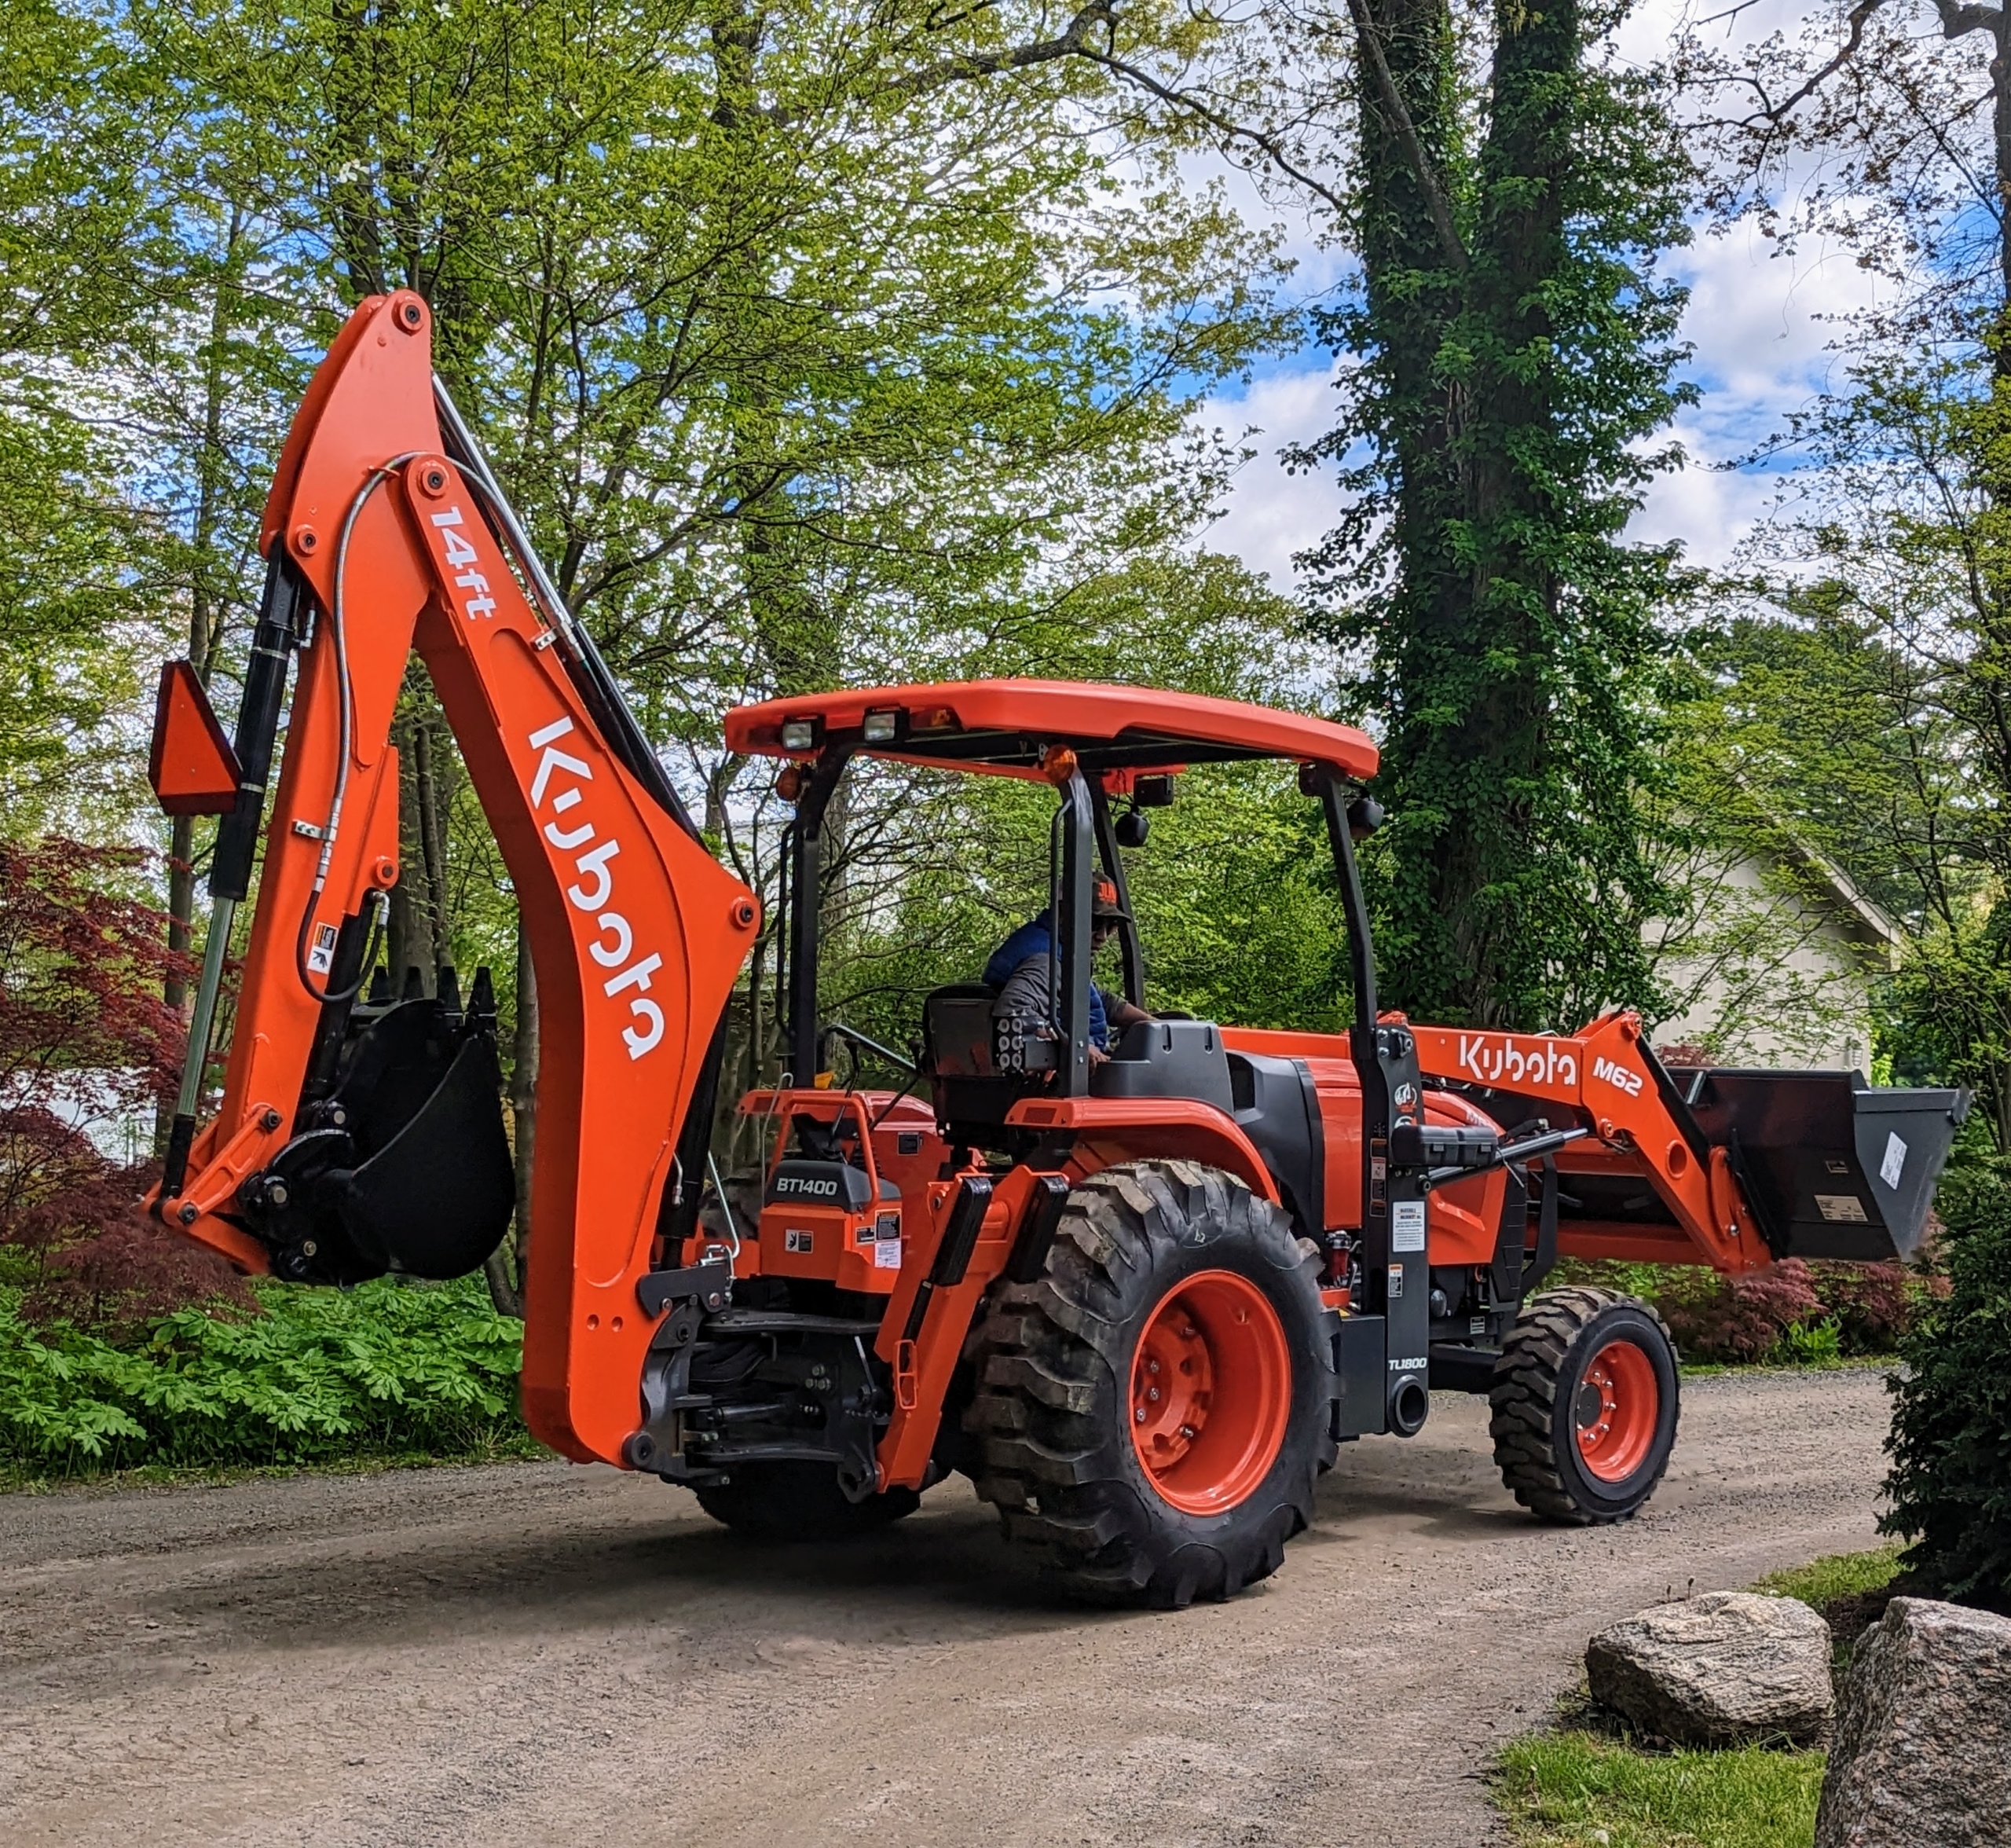
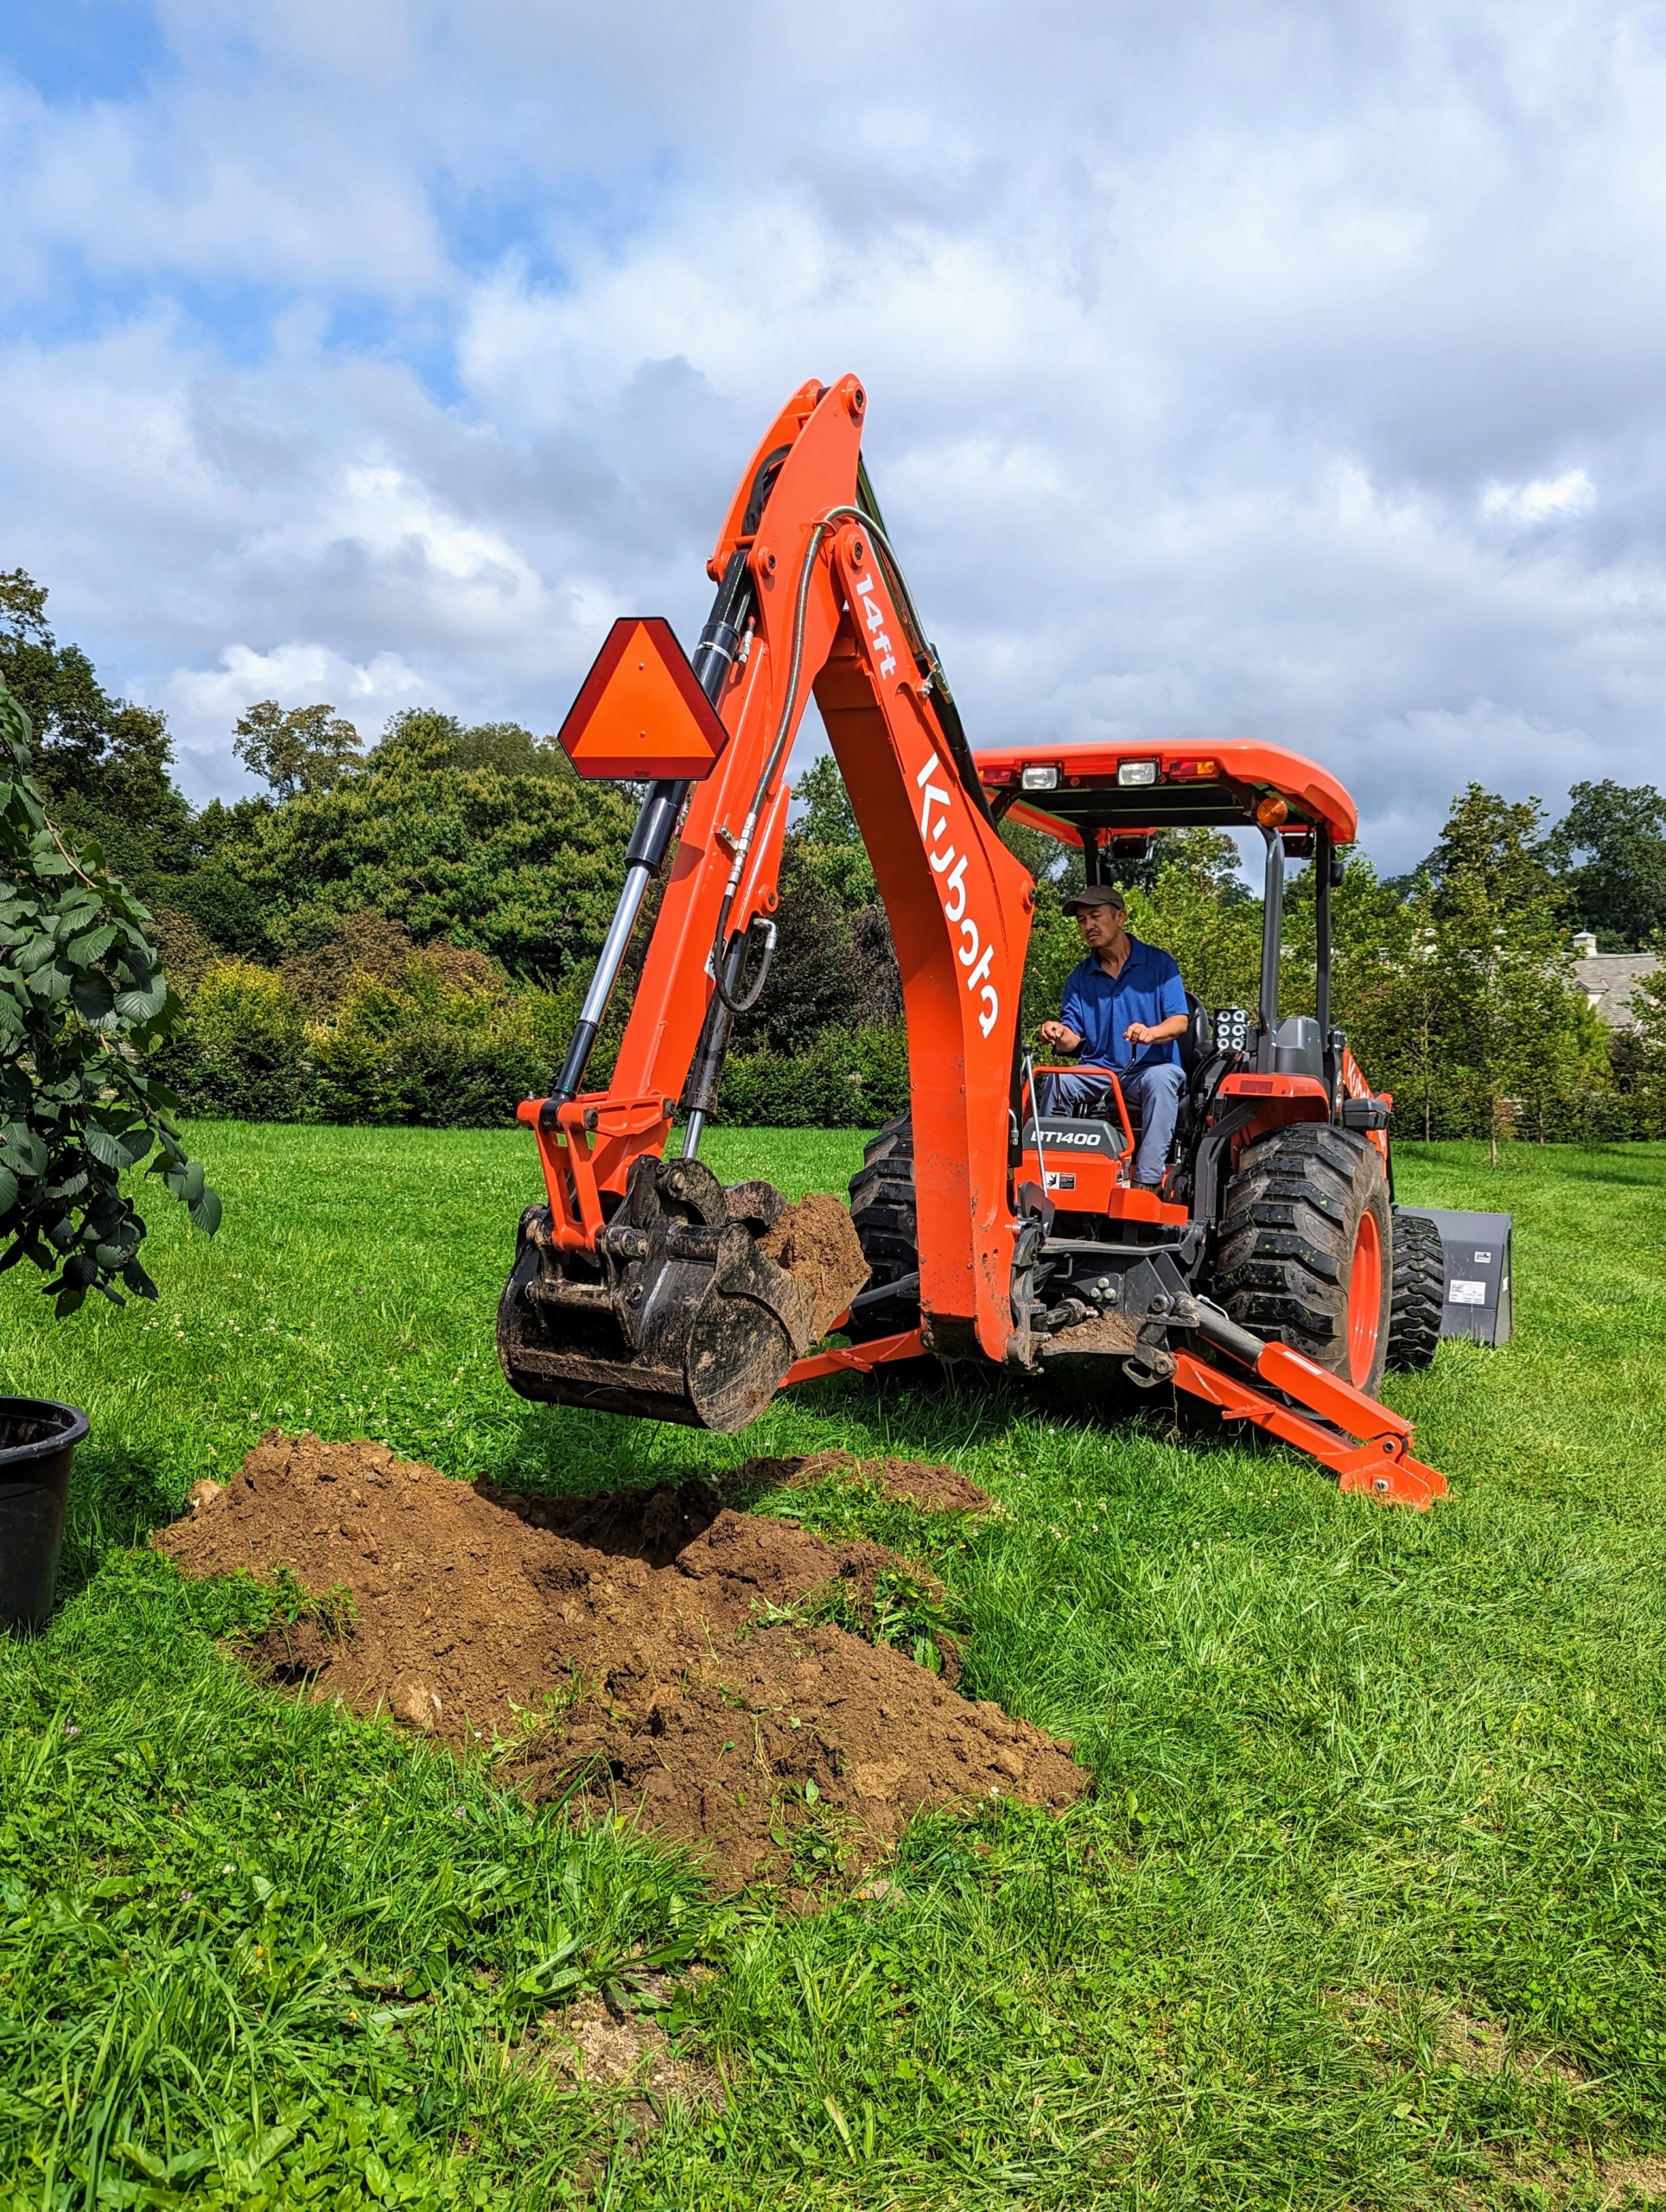
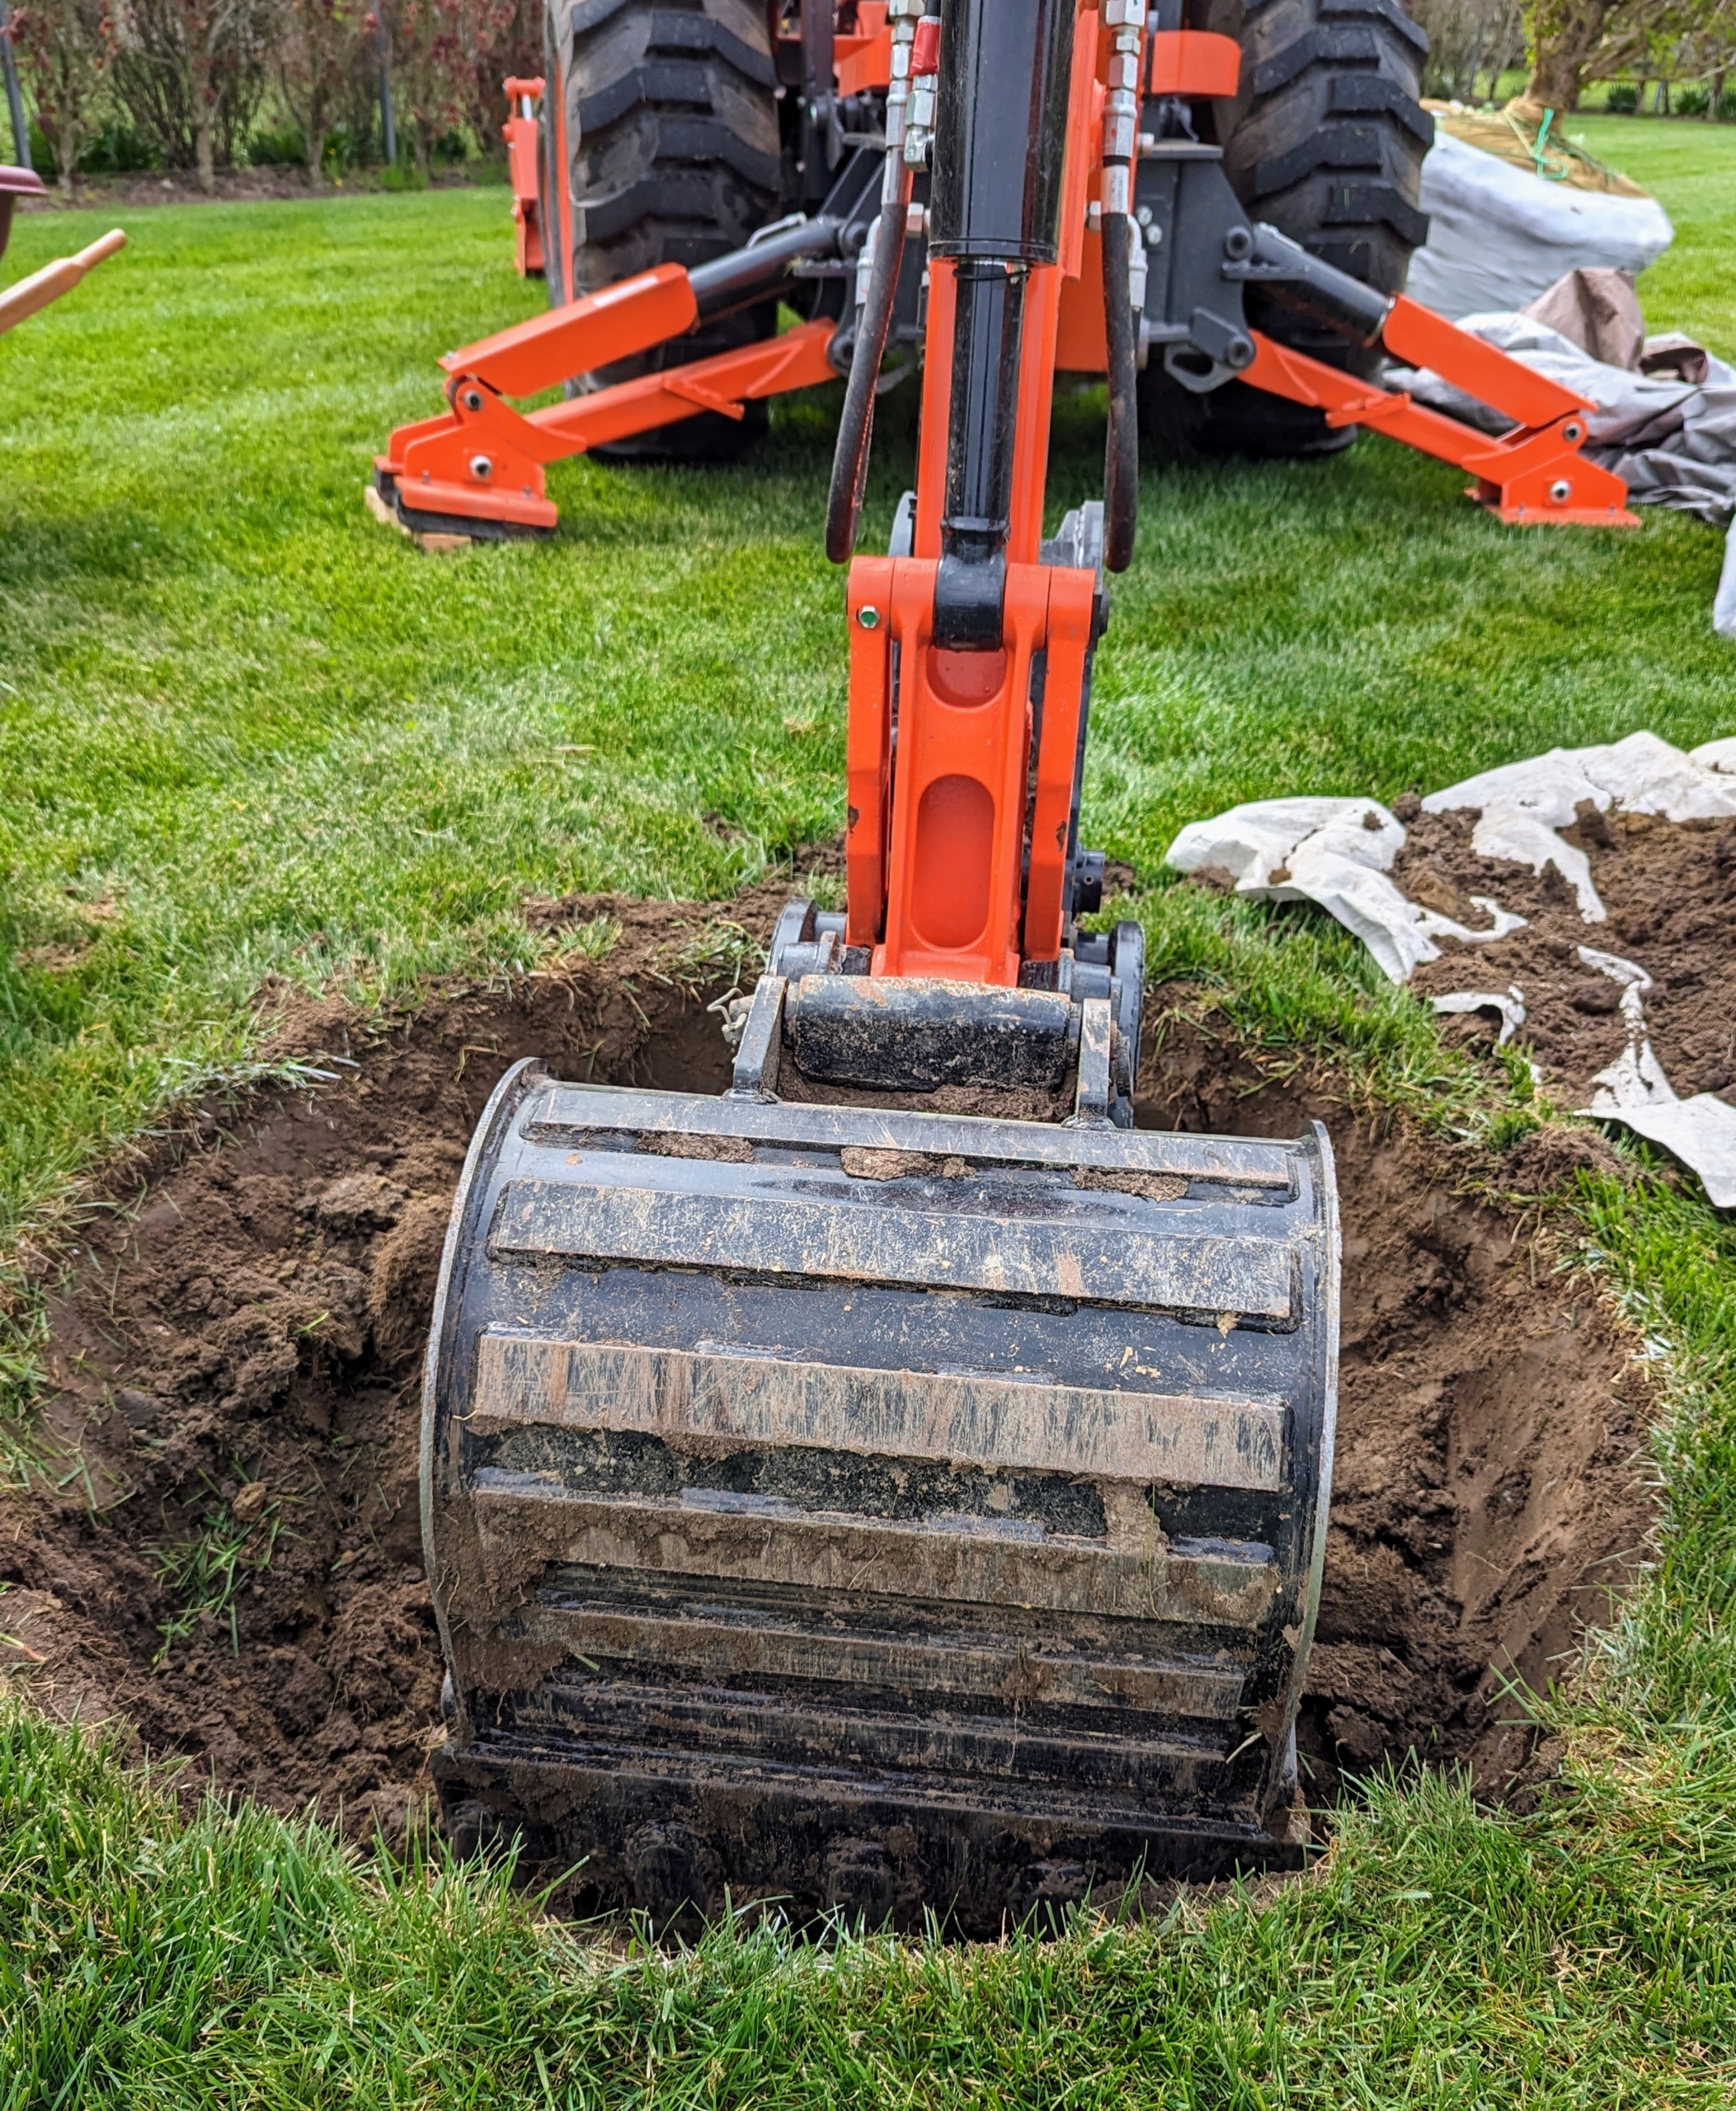
This is the Kubota M62 Tractor Loader Backhoe. This is essential for digging holes and planting large trees. It has a 63 horsepower engine, a front loader with a lift capacity of 3,960 pounds, and a powerful backhoe with 169.8 inch digging depth.
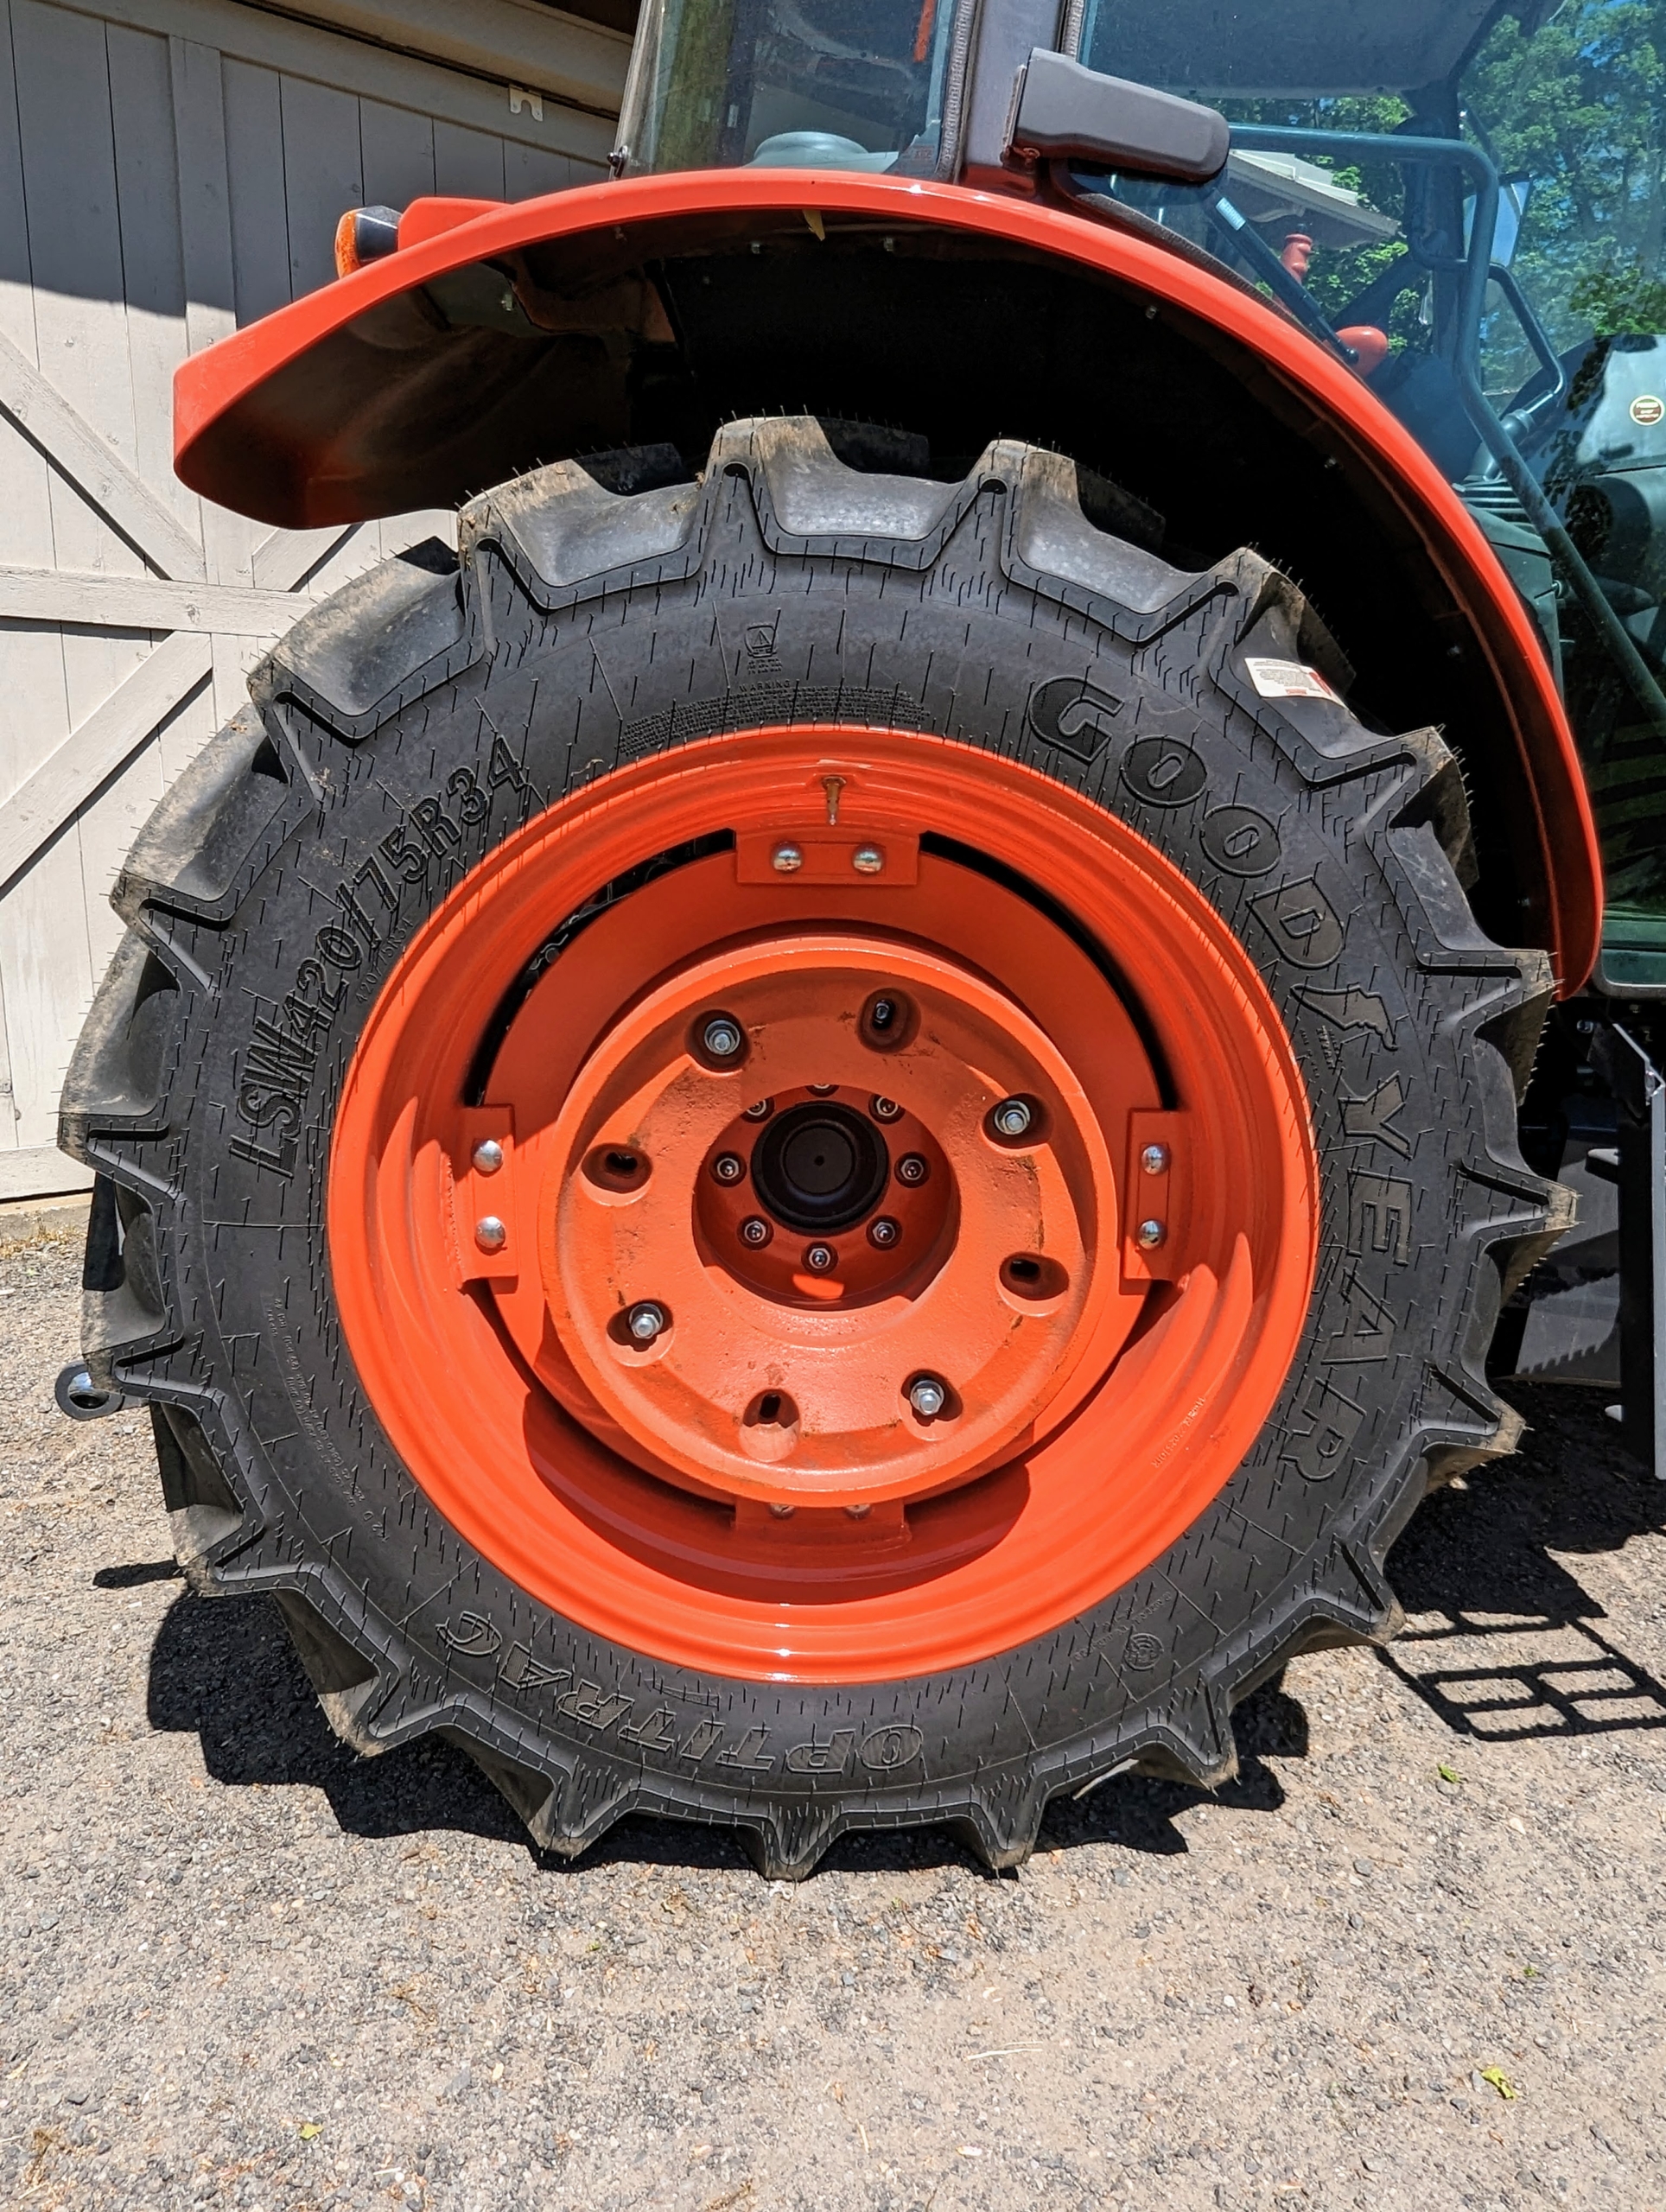
And look at the size of these wheels. The tractor wheels are five feet in diameter.
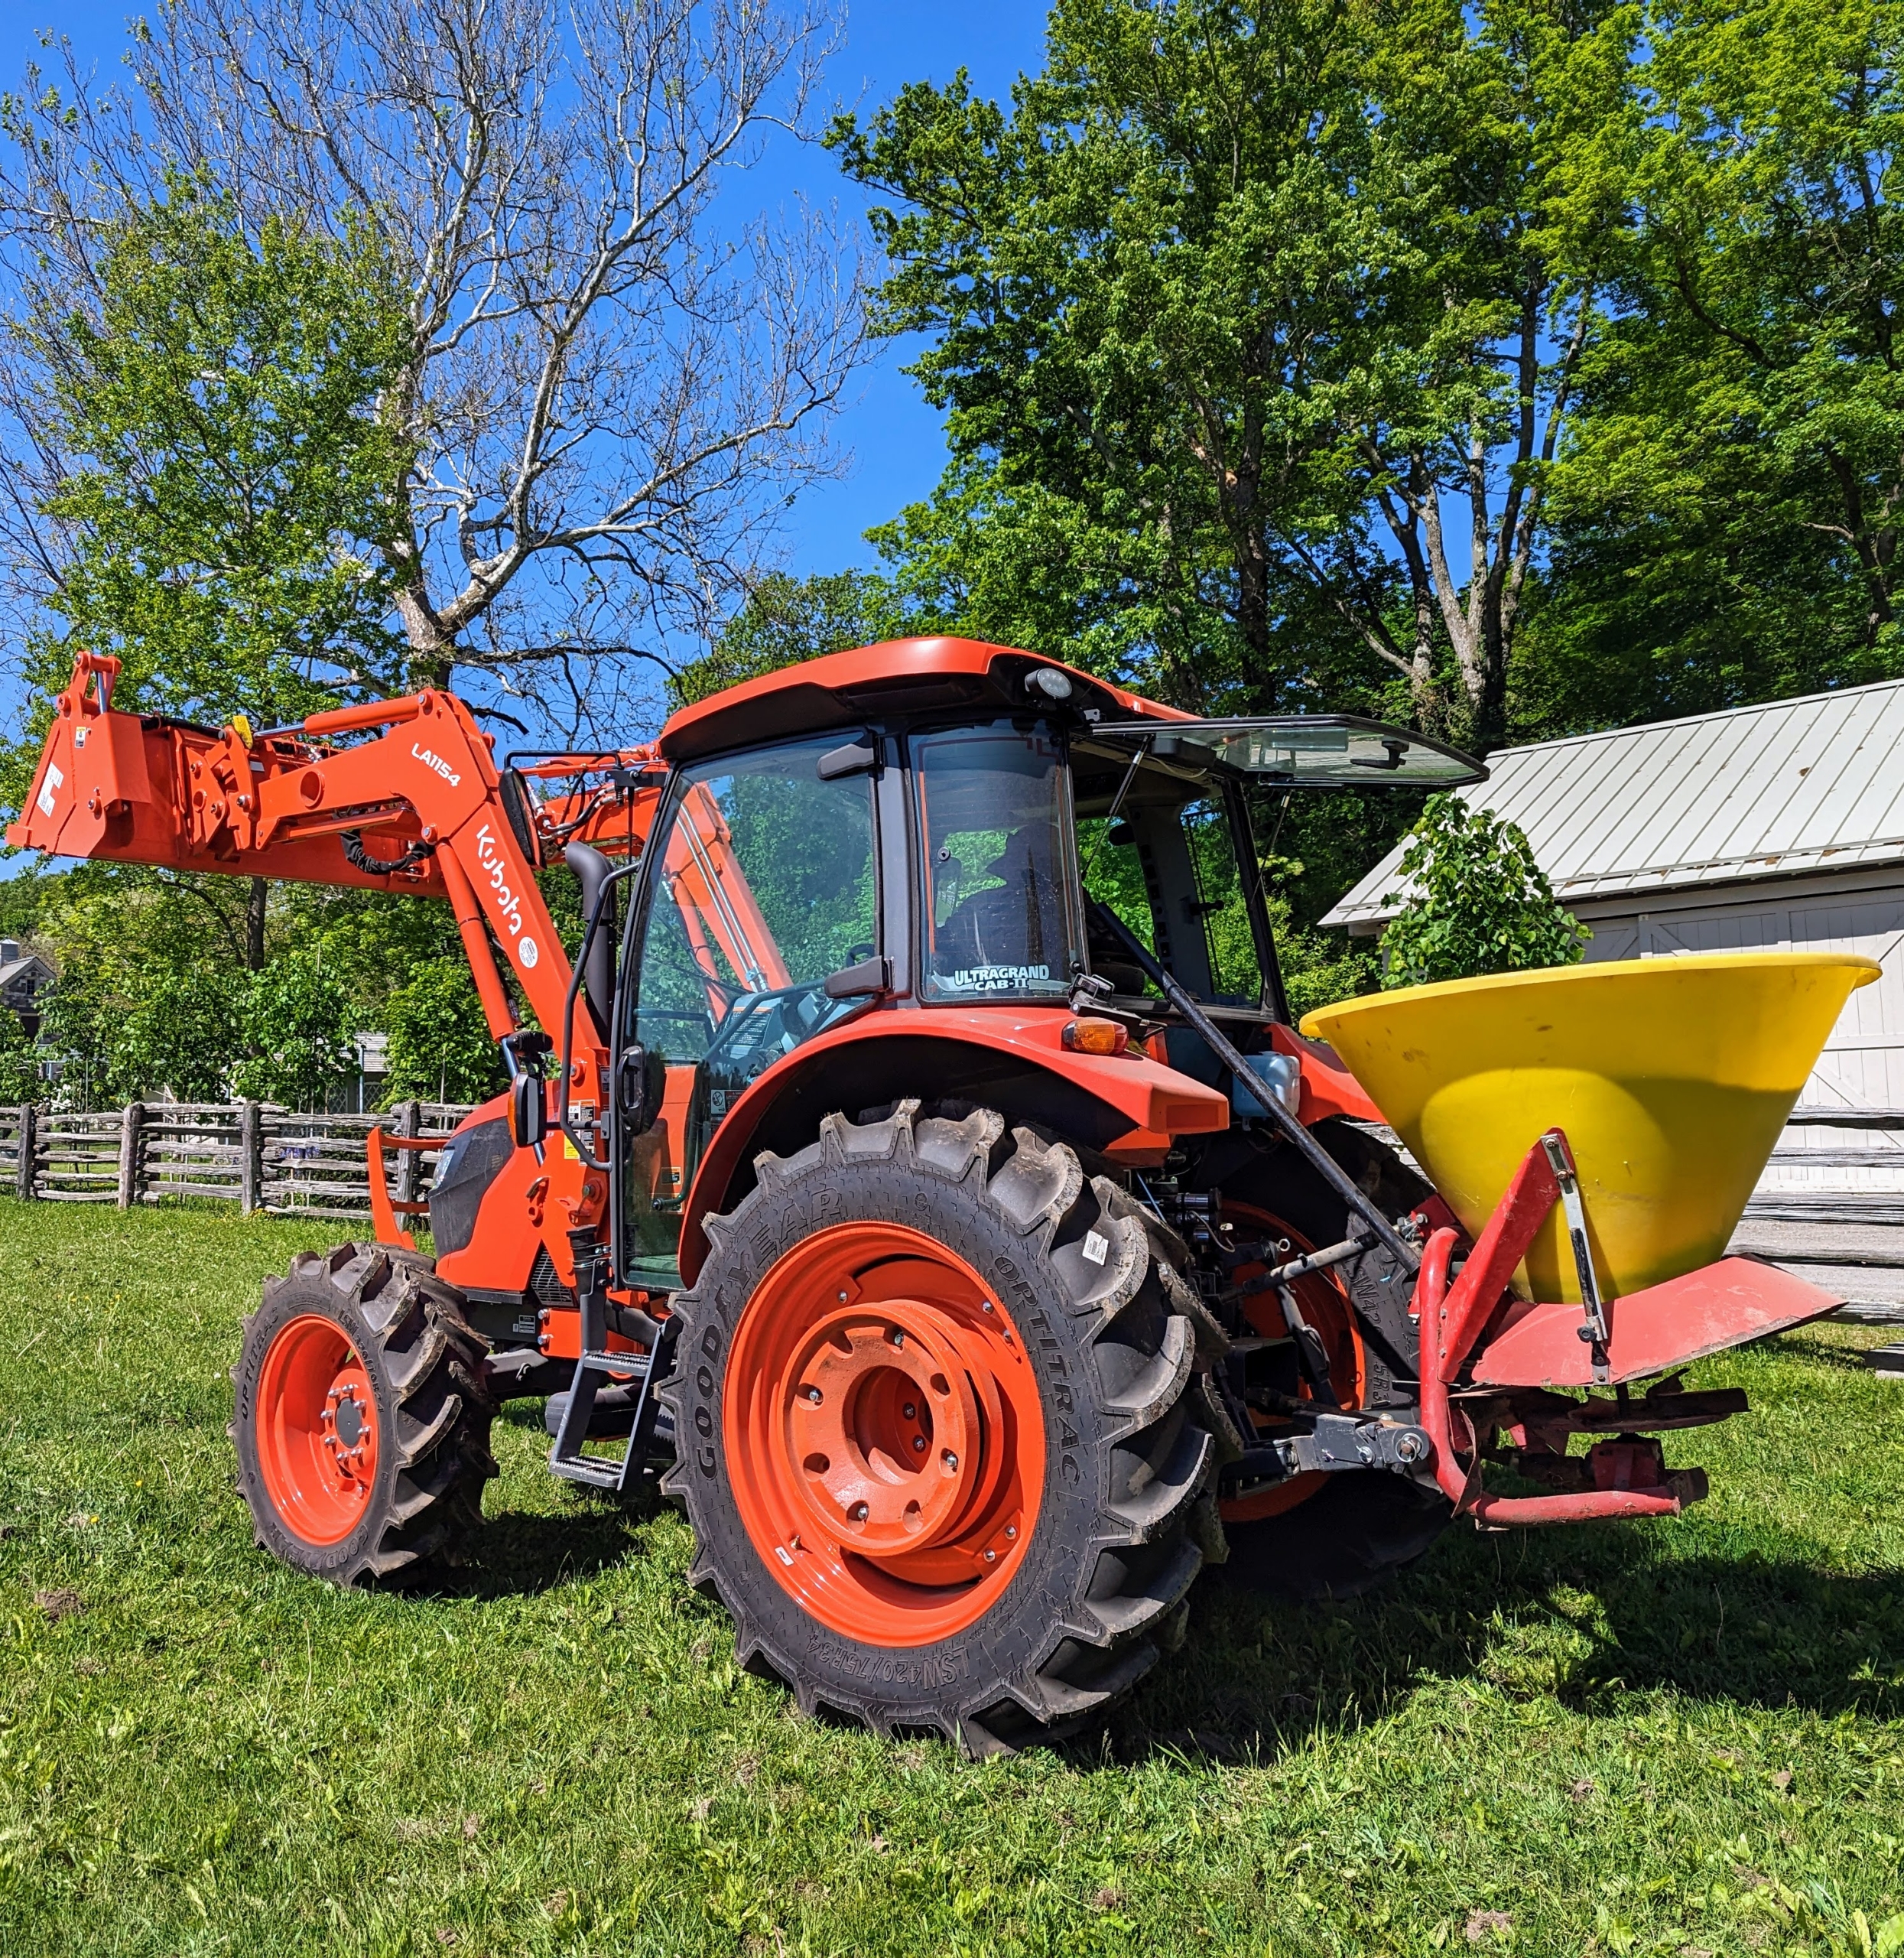
On this day, the tractor is used with a 3-point spreader to drop the grass seed in one of my paddocks.
Here, the large bucket is used to carry new forsythia shrubs to their planting locations.
… And to move my tropical plants and their heavy urns from winter storage in the hoop houses to areas around the farm for display.
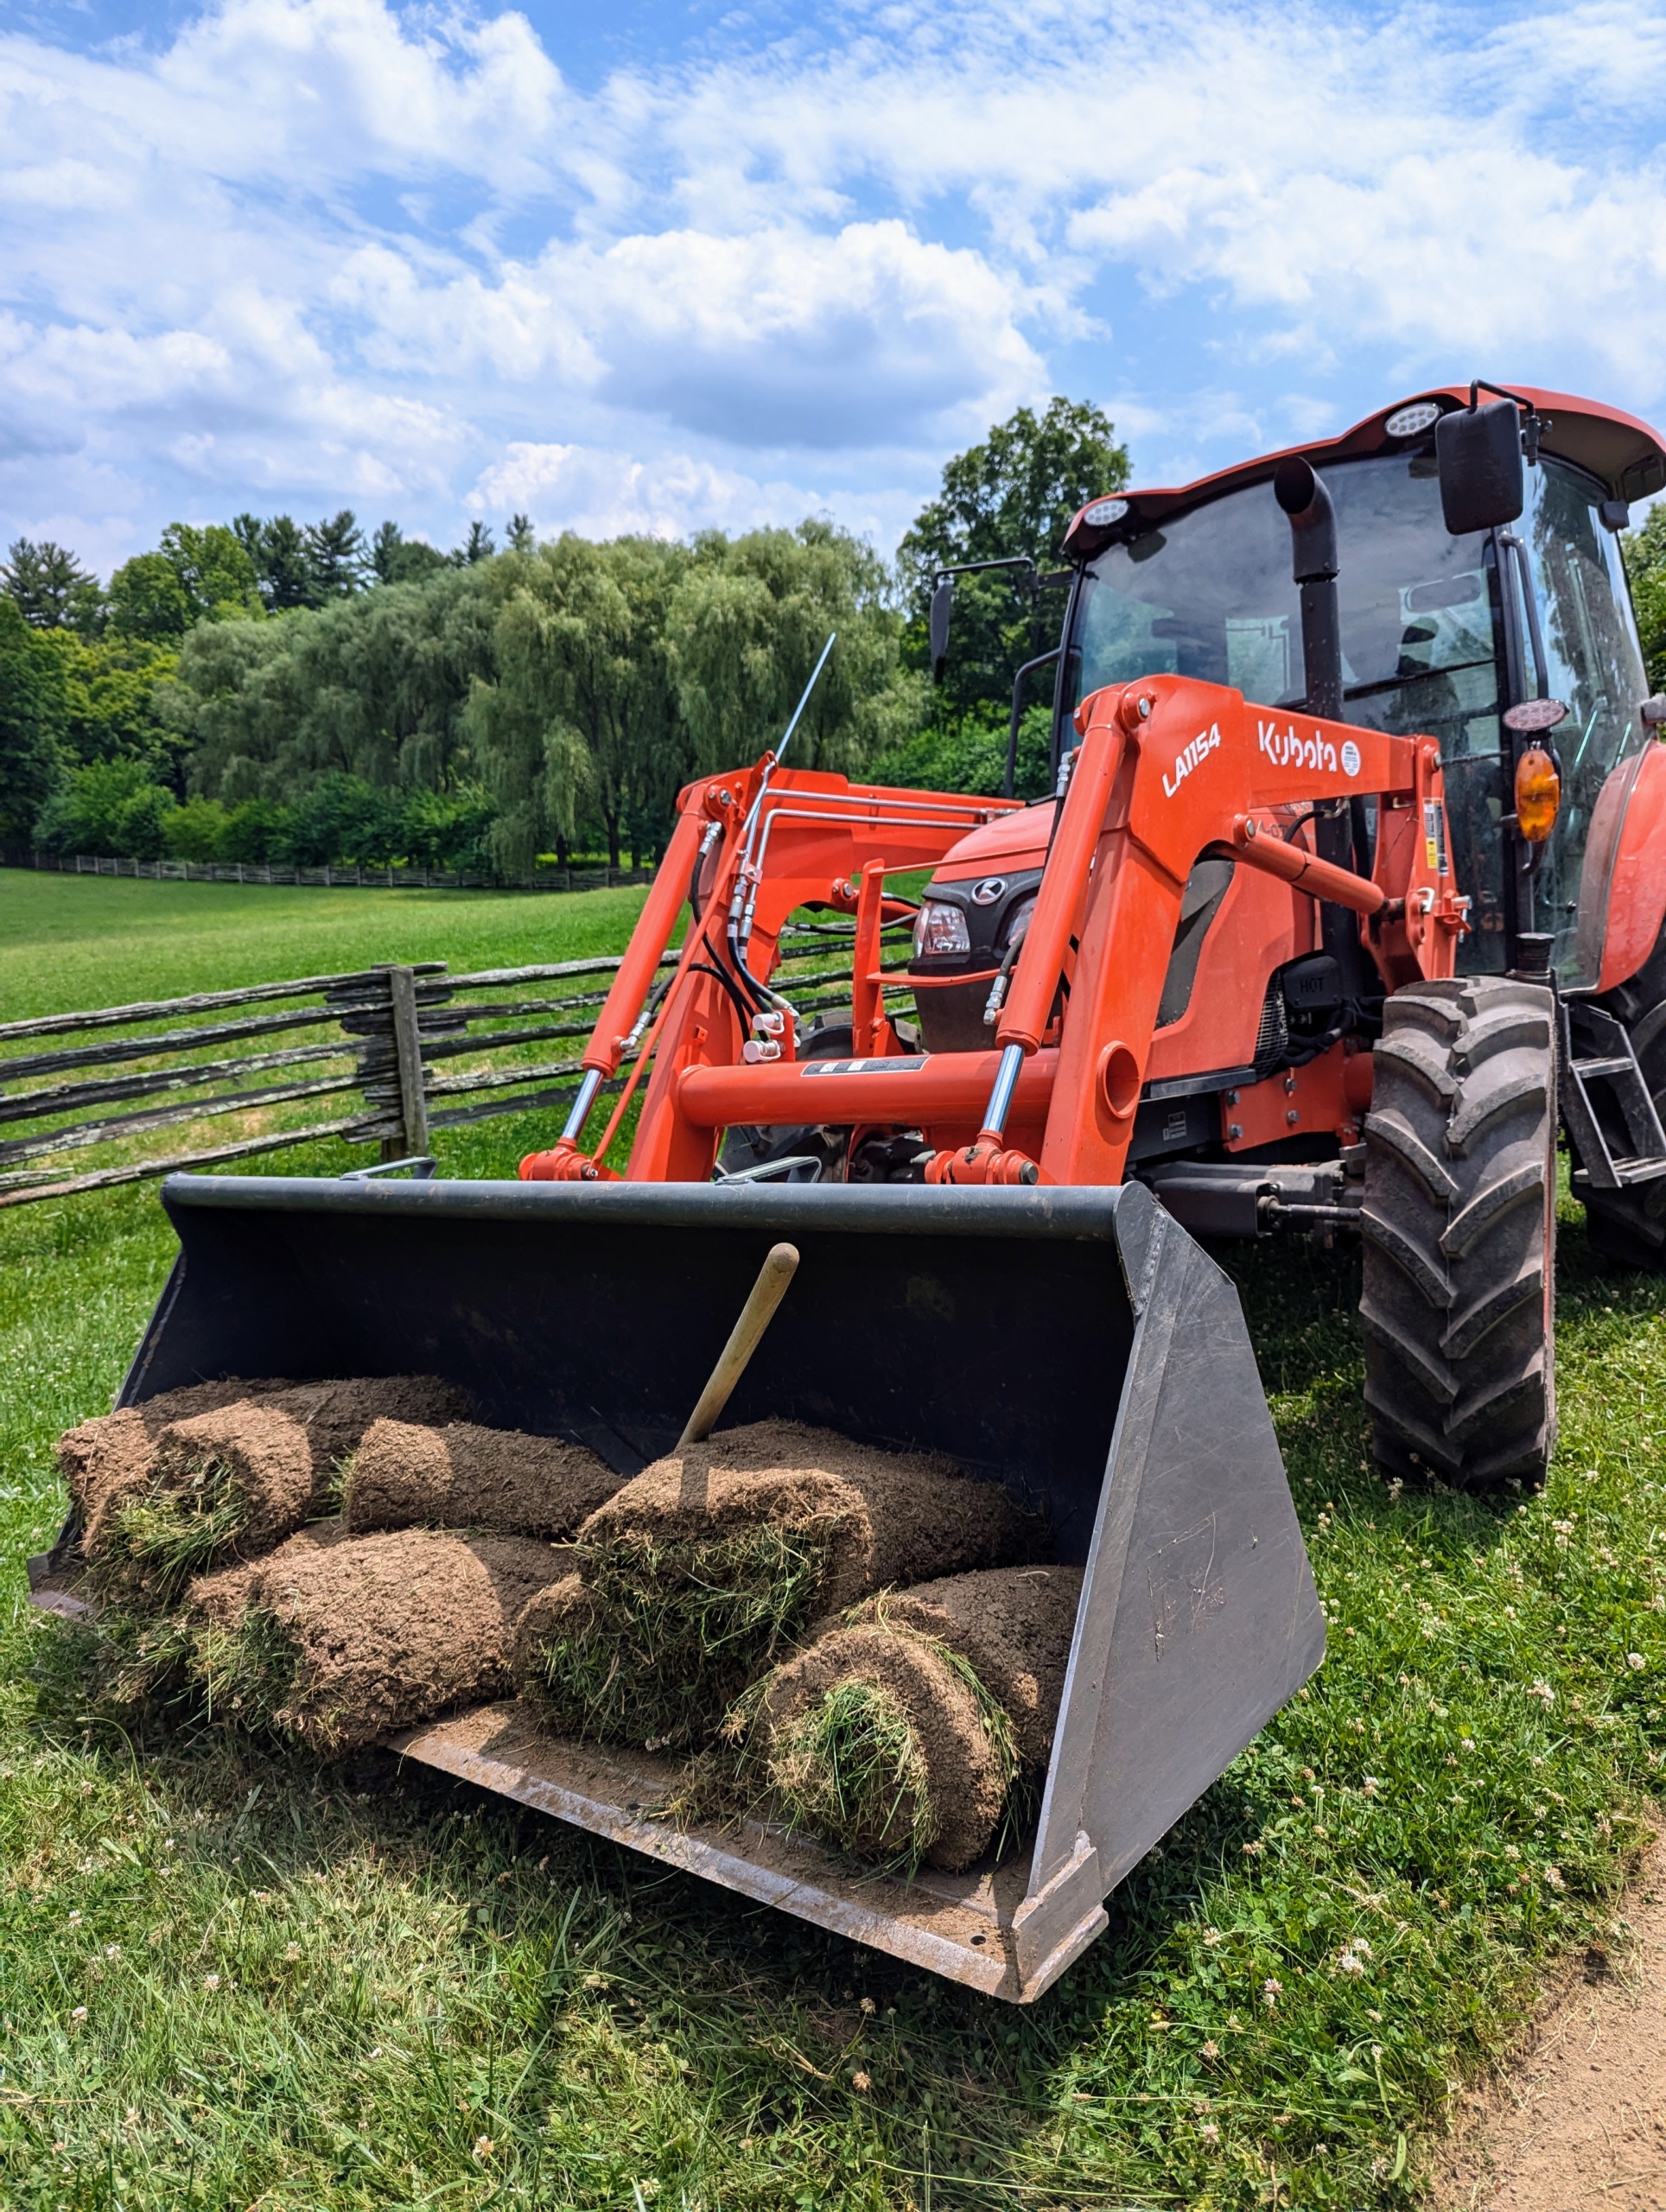
And here, the tractor bucket is loaded with pieces of heavy sod removed from a designated space, so new specimens can be planted.
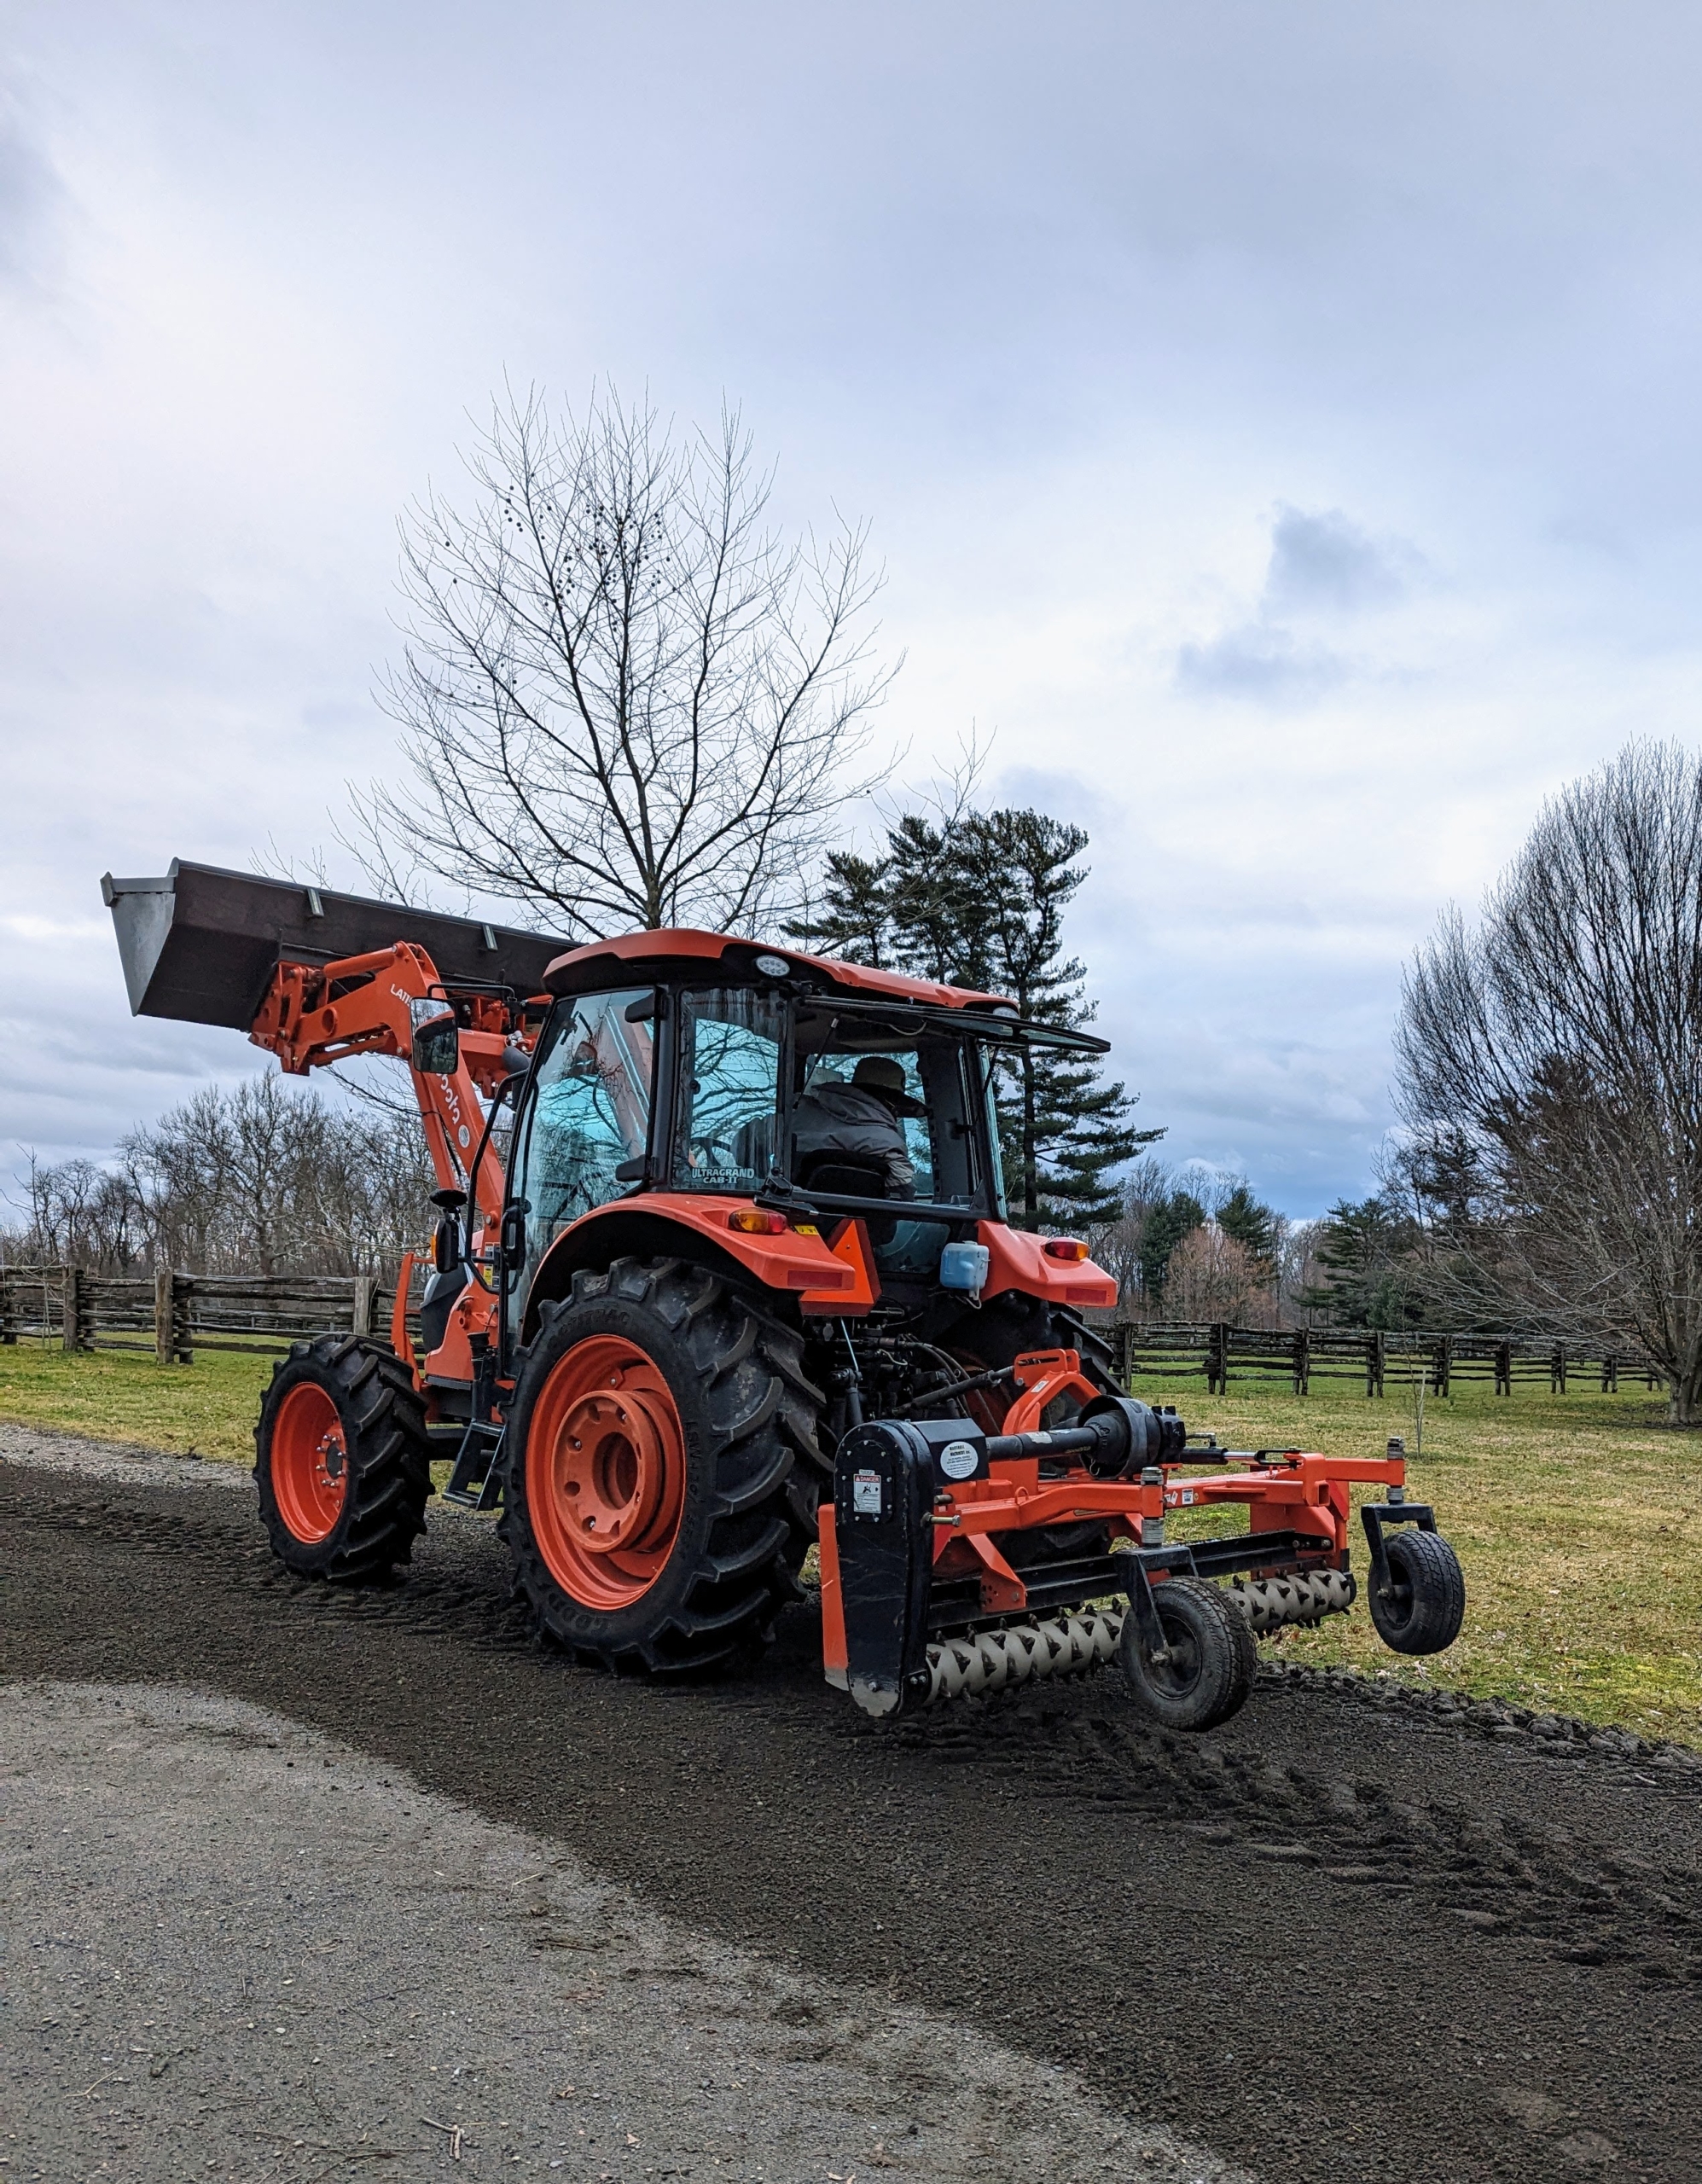
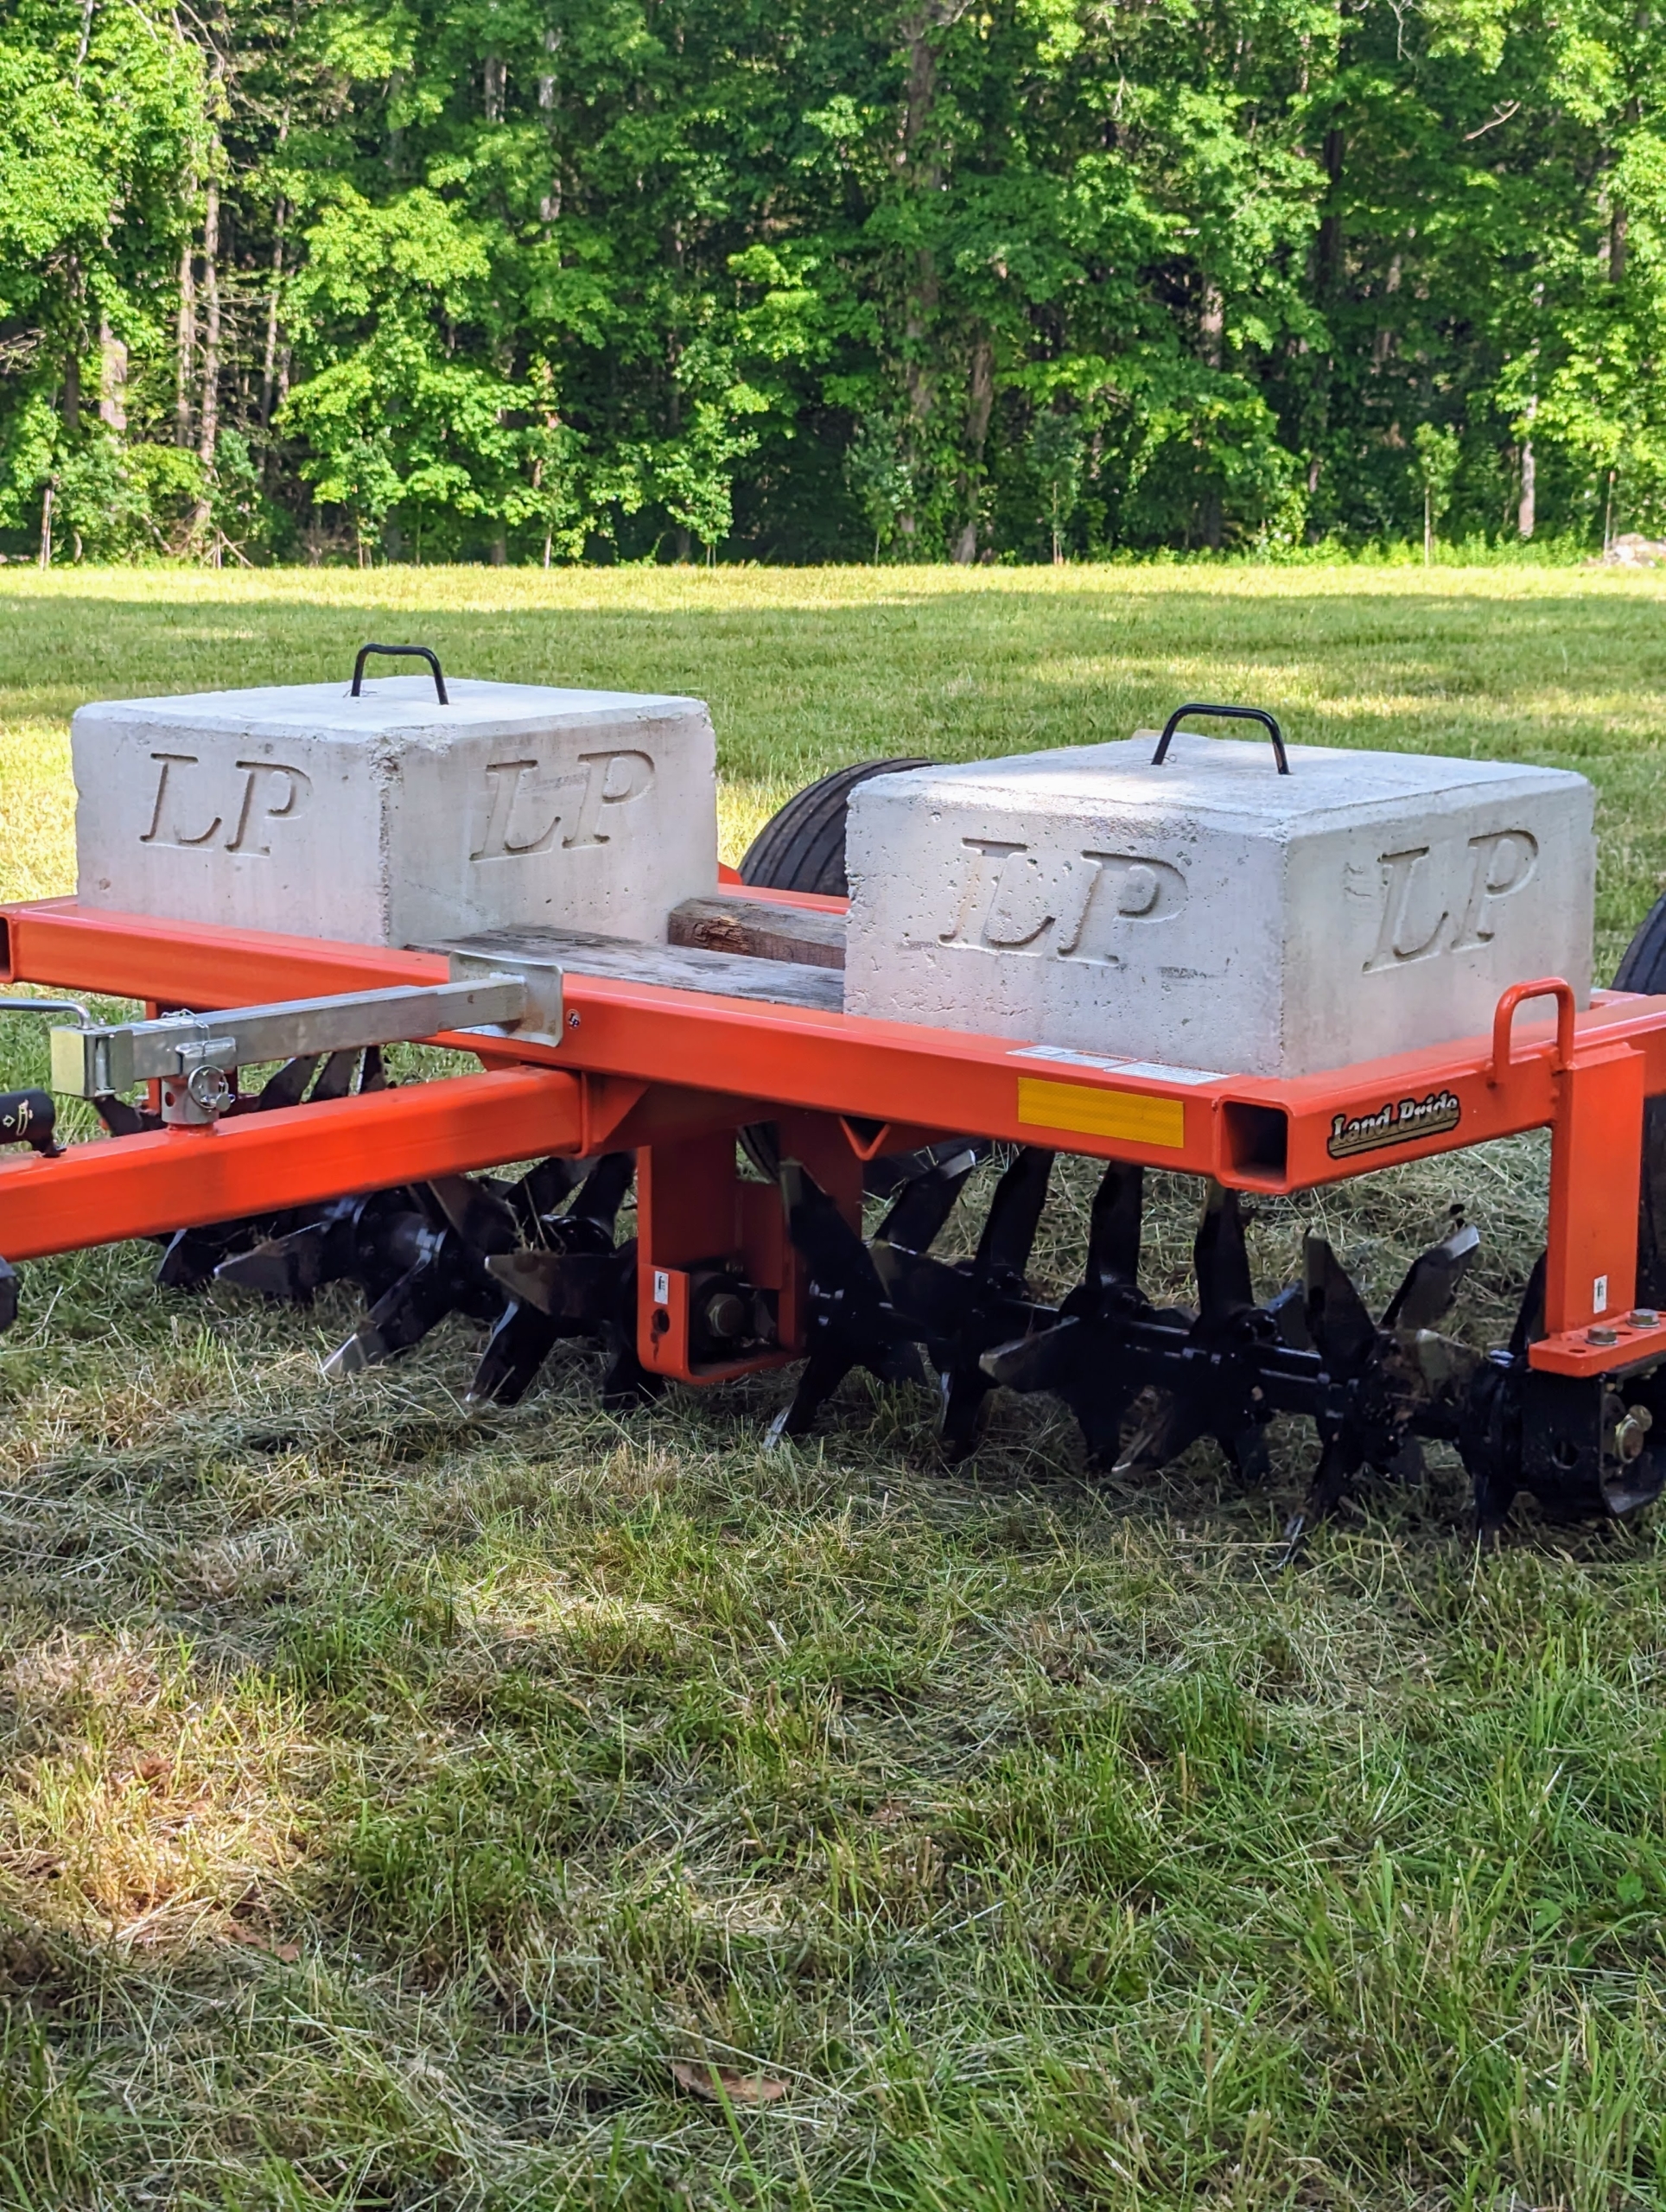
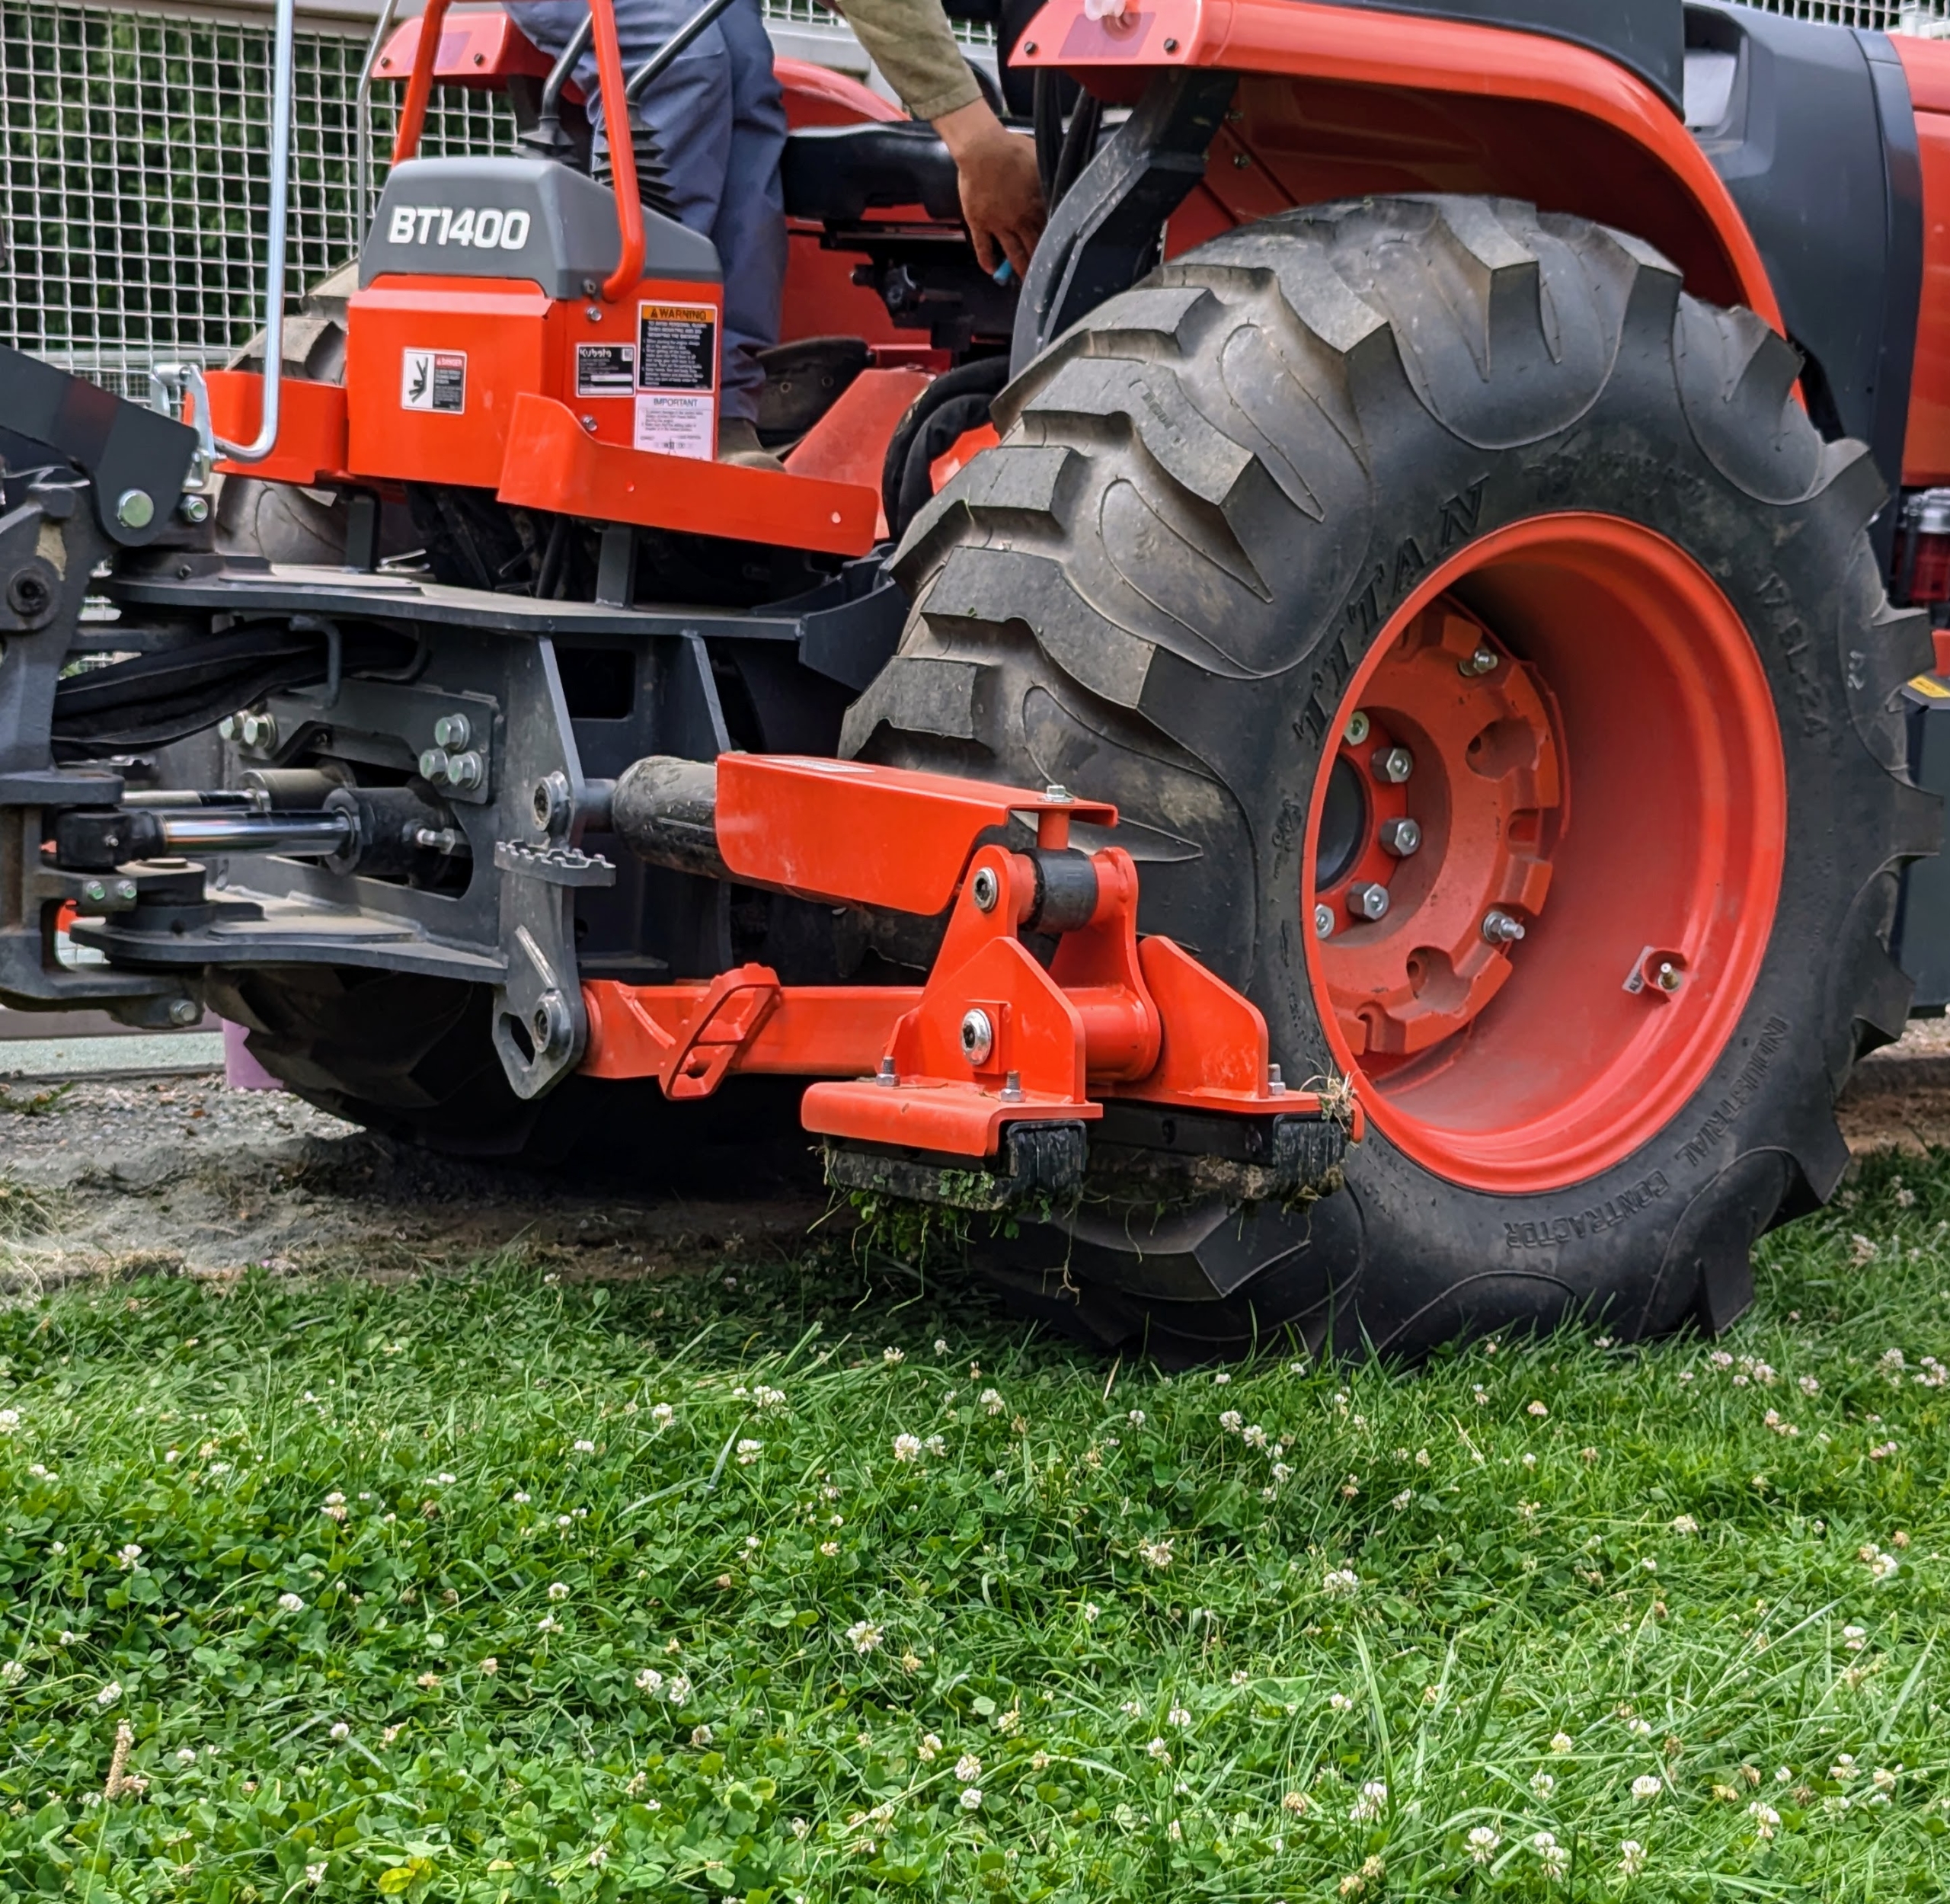
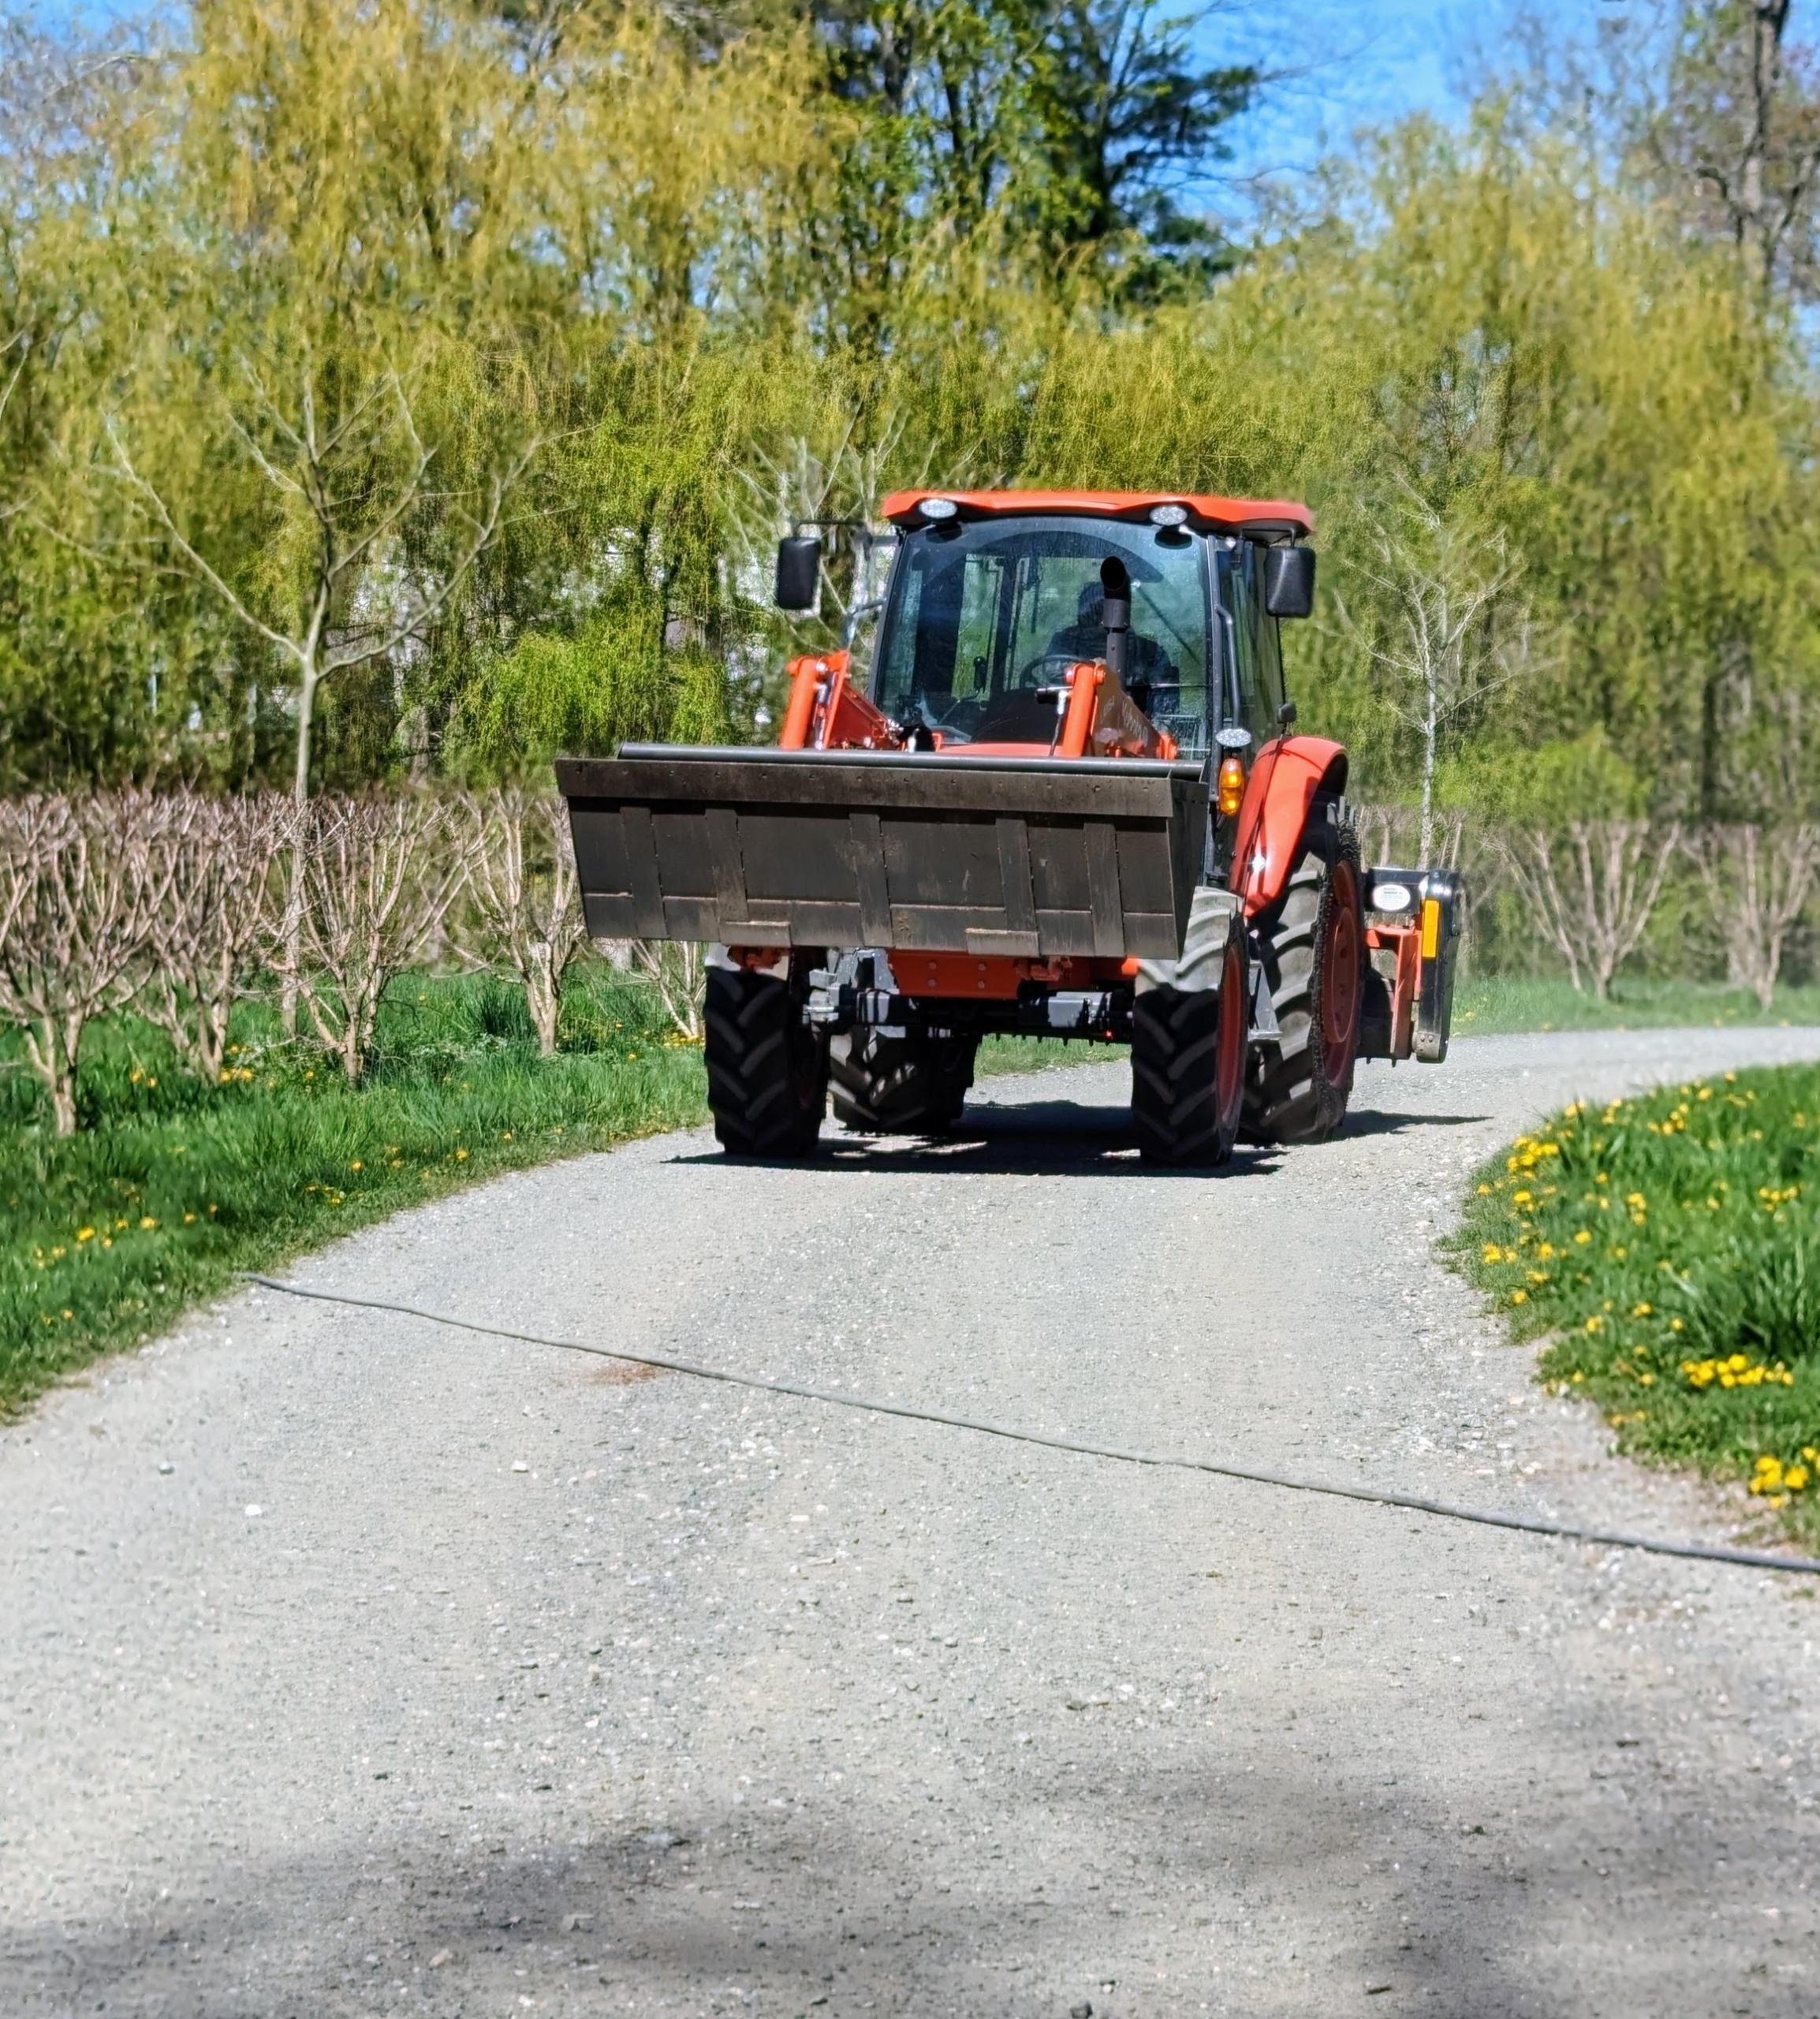
The tractors are also essential for maintaining the four miles of carriage road around my farm. The Land Pride PR1690 Power Rake is secured to the back of our tractor in order to rake and grade the carriage roads, but it is also capable of windrowing soil, rocks, and debris in a field.
When the rake is lowered onto the road surface and tilted to the proper angle, this attachment moves the gravel and road dust to the center, creating a crown. On less used roads, the power rake freshens up the existing gravel as it turns and brings any compacted gravel to the surface.
Weights are used on the aerator to help maintain even piercing in the soil.
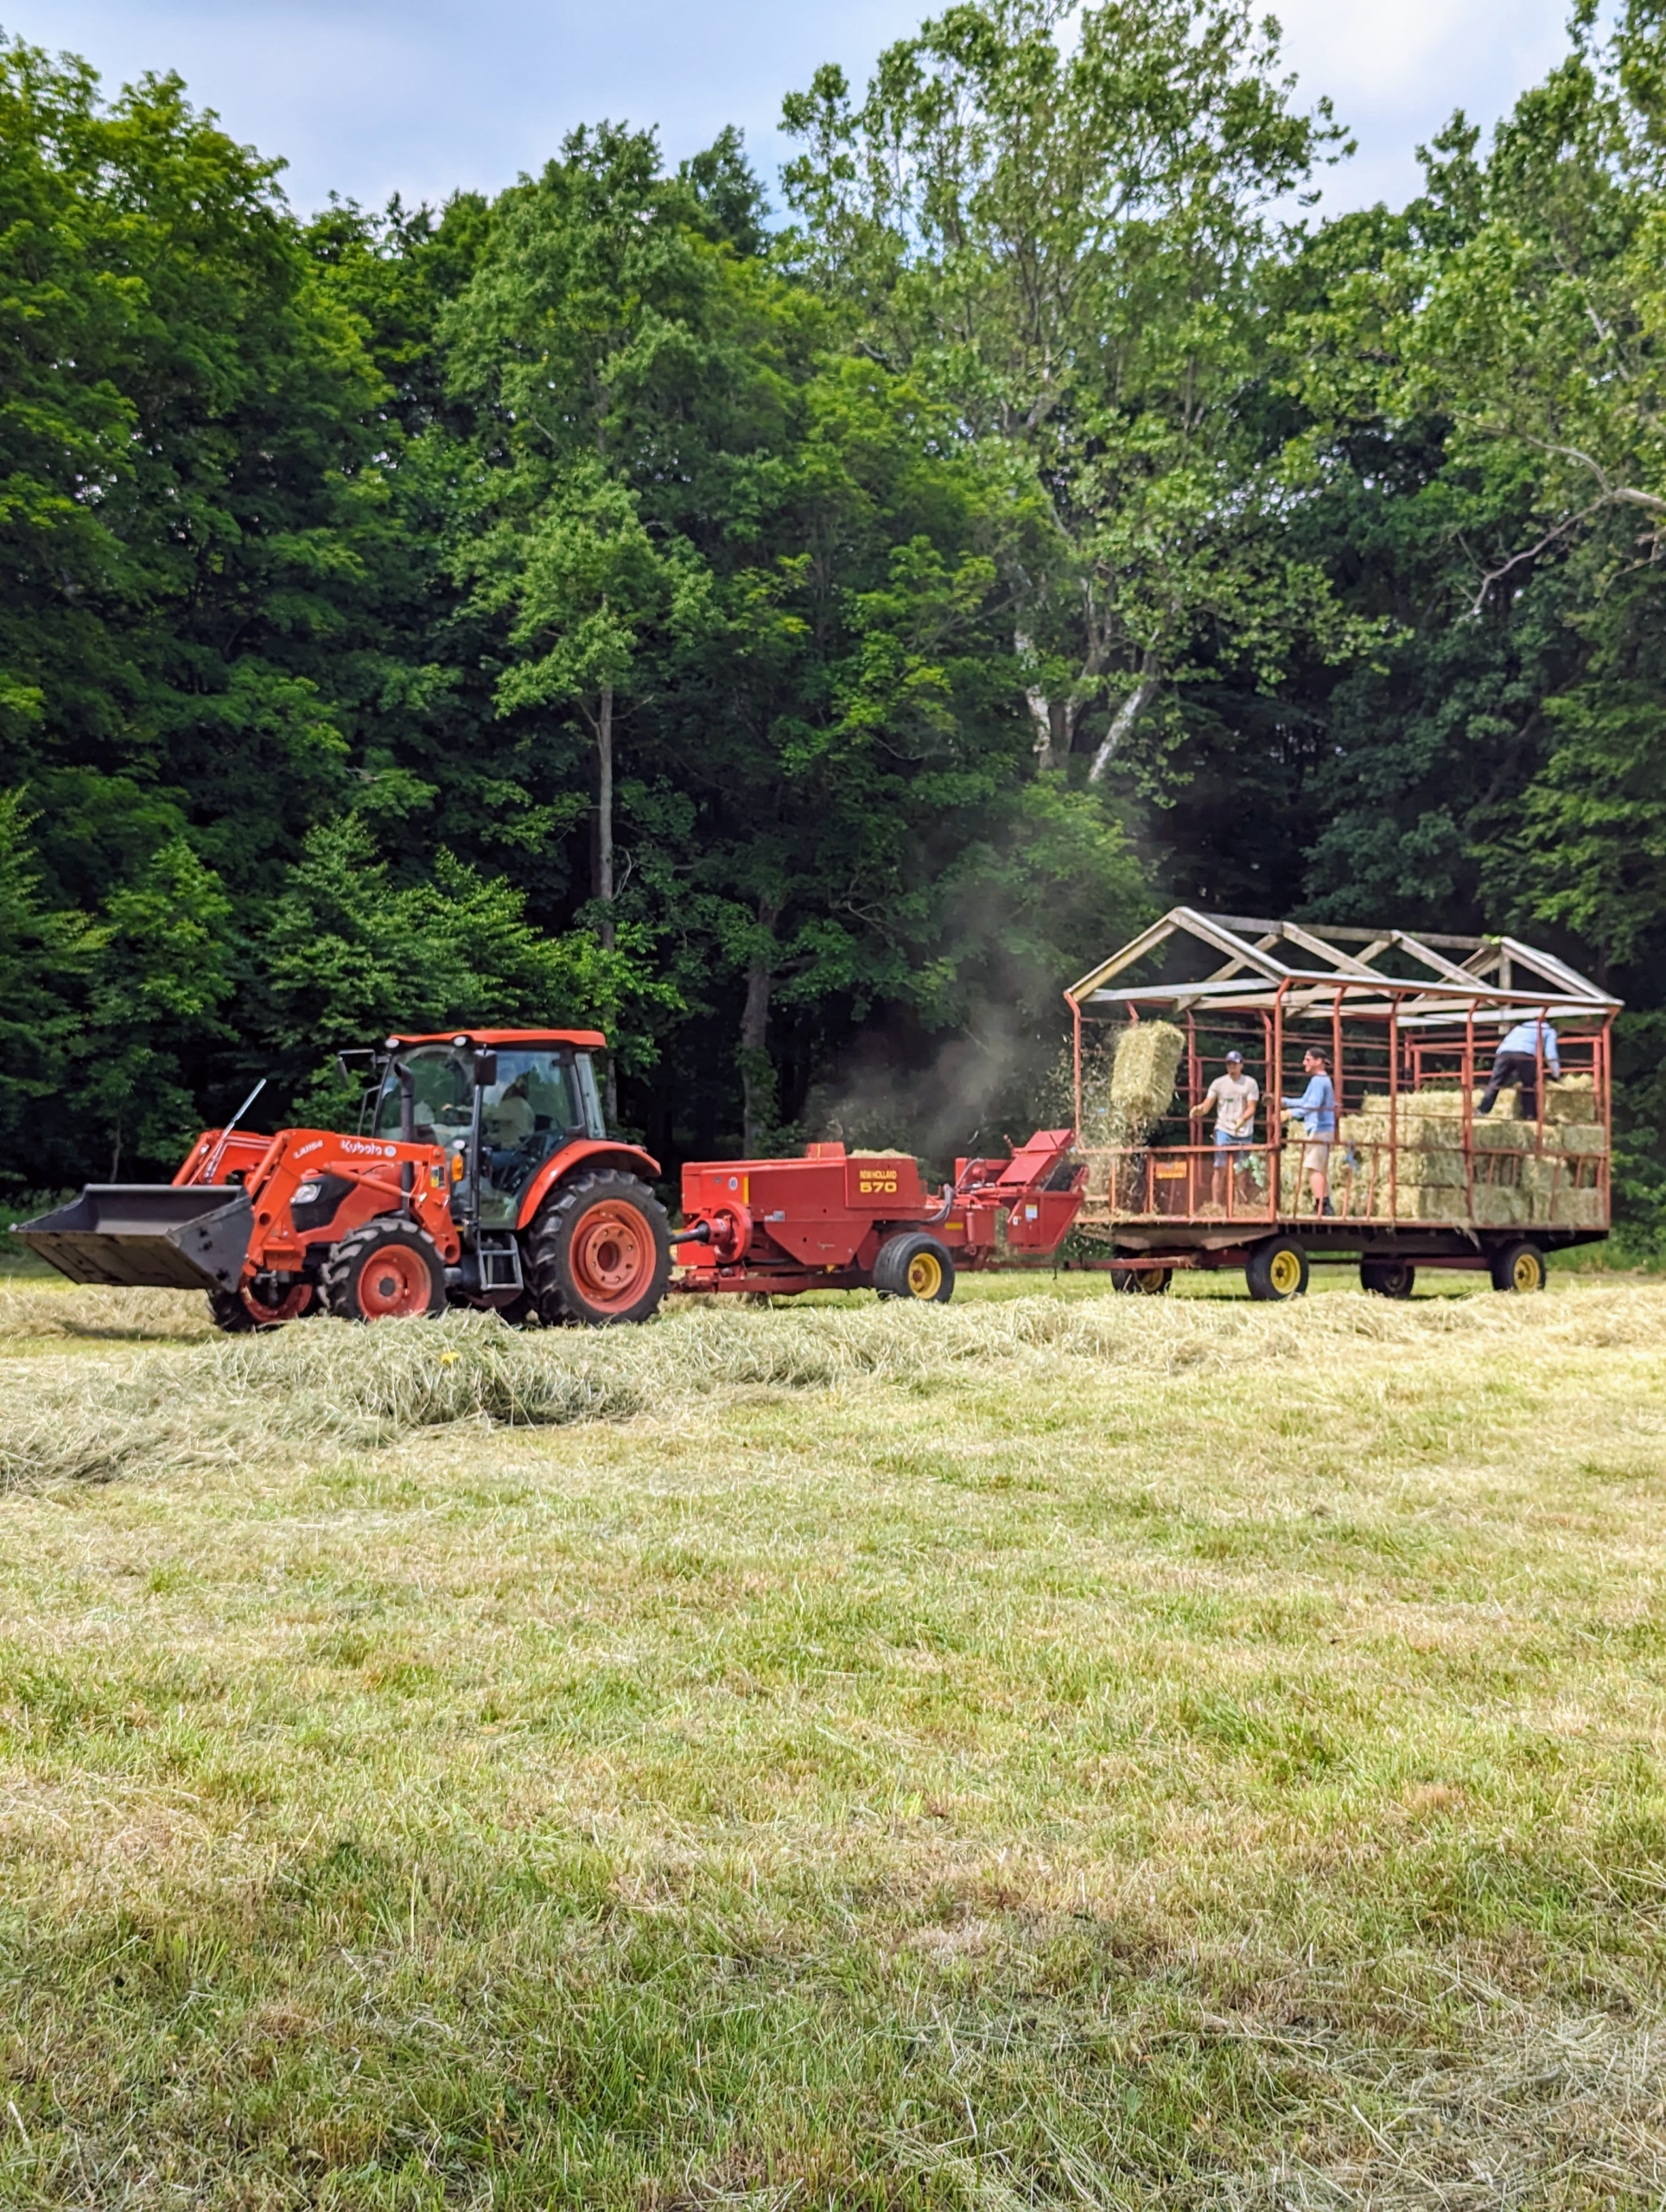
The same tractor is used to bale. Here it is pulling the baler and the hay wagon.
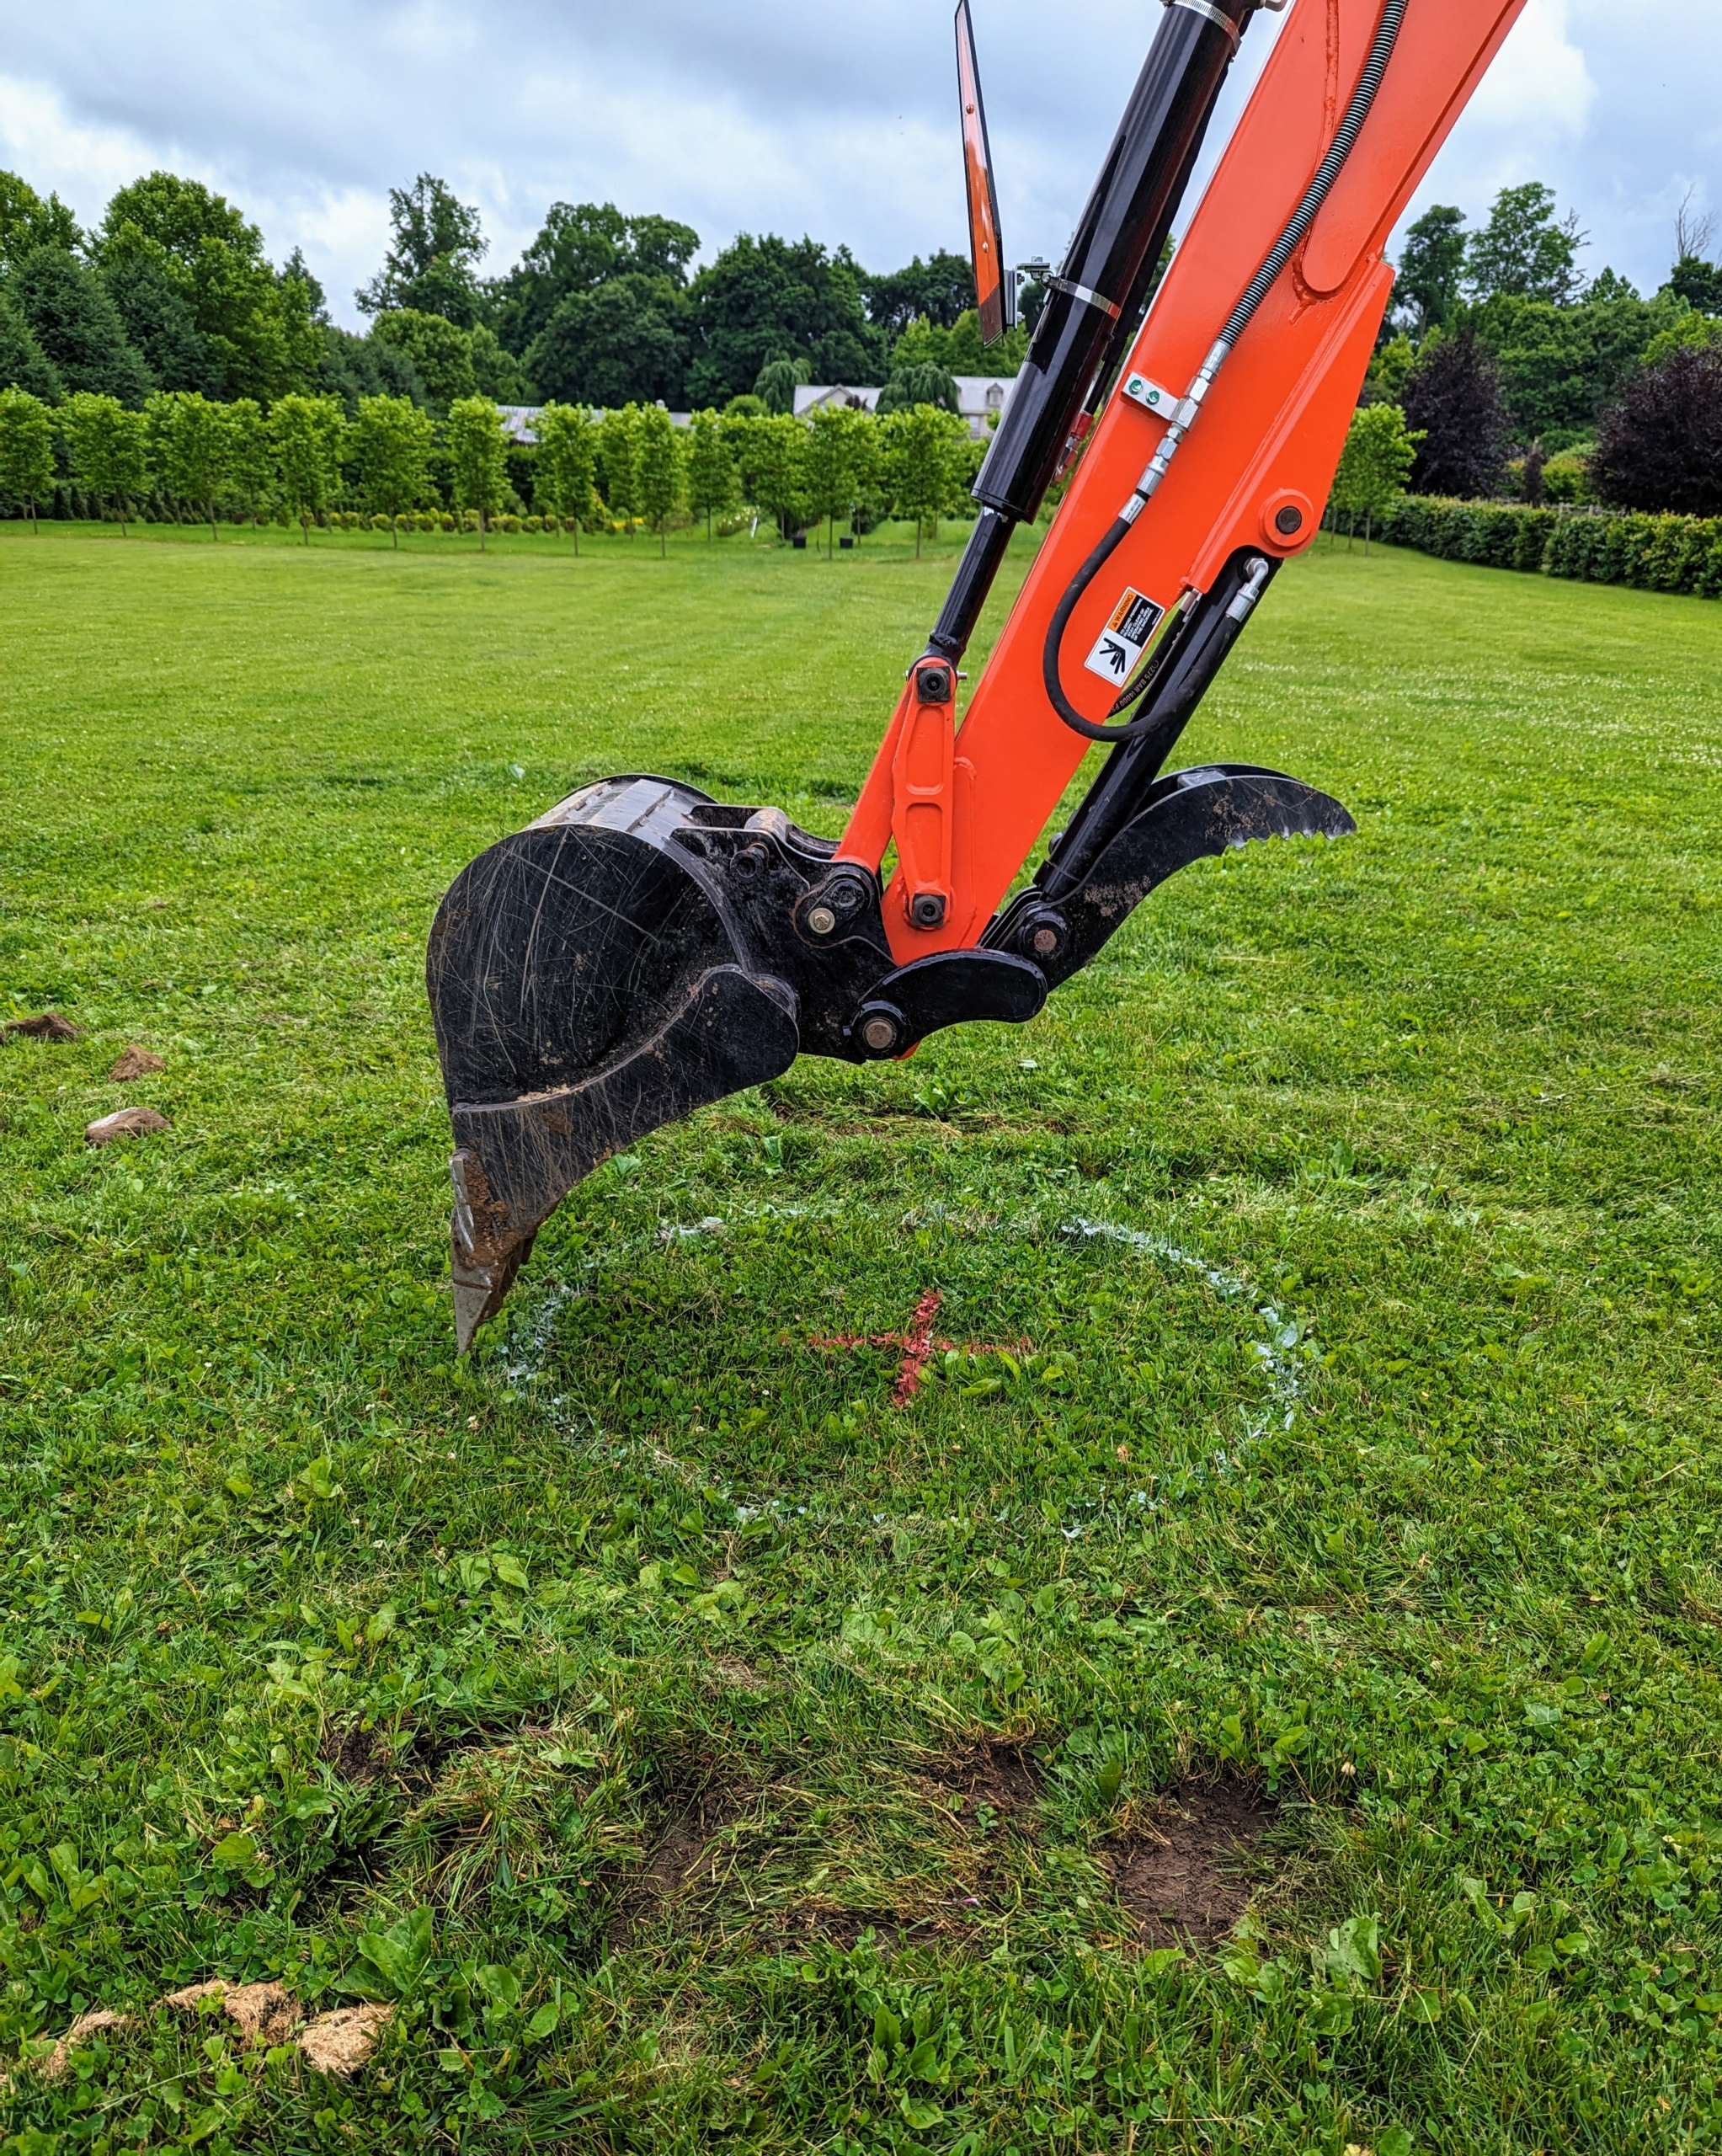
The backhoe is controlled from the safety of the tractor’s cab. The operator can turn and sit facing either direction to maneuver the backhoe or the loader.
The backhoe is guided so easily and so precisely, so it cuts the soil and digs the hole right where “x” marks the spot.
The backhoe works quickly, digging several holes in less than an hour.
Here, the tractor’s stabilizing feet are extended to keep it well balanced and safe.
Any unneeded soil is hauled away in the tractor’s bucket.
It’s a lot of work to maintain a farm – there’s always a long list of chores to complete. I’m glad we can get so many of them done with the help of our trusted Kubota equipment.