Most of the garden tours at my farm are conducted in the spring and early summer. Late last week, I welcomed a group from Hortulus, a member of the Garden Club of America based in nearby Greenwich, Connecticut. Founded in 1930, the group's mission is to stimulate the knowledge and passion for gardening and creative design and to protect, restore, and improve the environment through education and conservation. I was very happy to have this group from Hortulus at my farm. I walked them through my gardens and allées, showed them my pool and fruit orchard, and introduced them all to my horses, geese, and peafowl.
Enjoy these photos.
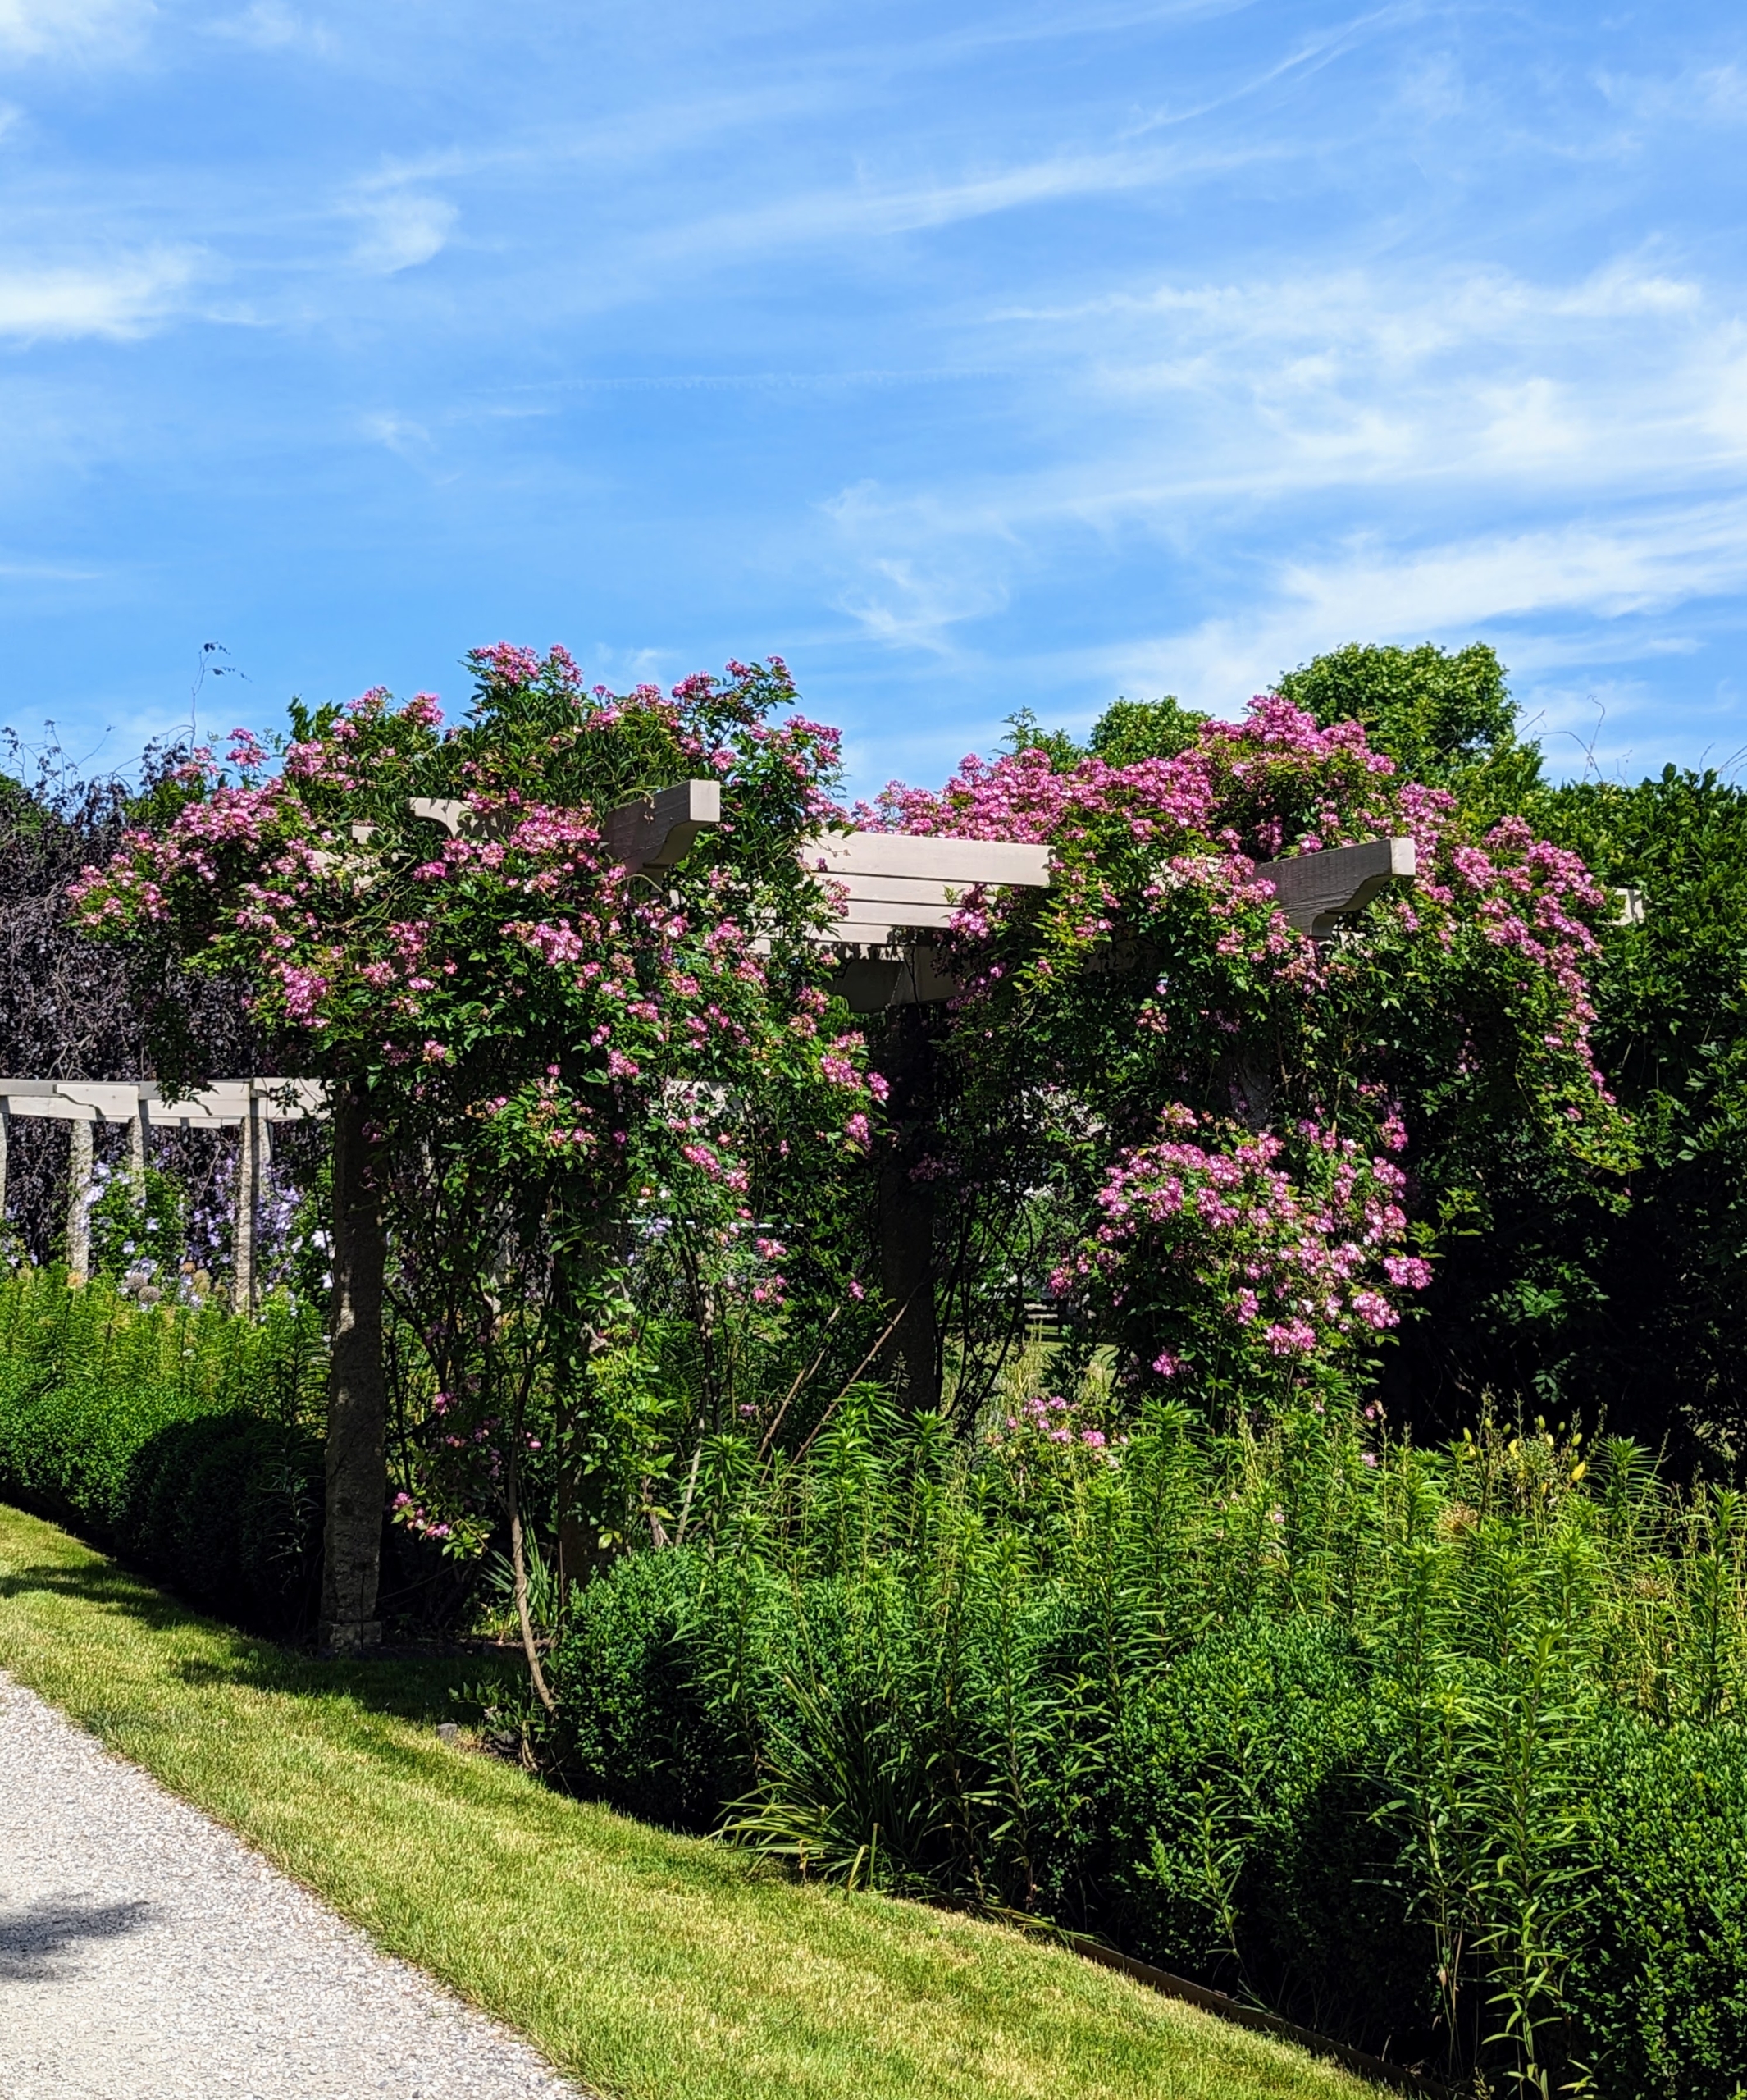
I like to walk through the gardens in the morning before it gets too warm for my guests. This day was just perfect. My beautiful Rosa ‘Veilchenblau’ – the violet rambler also known as ‘Bleu-Violet’, ‘Blue Rambler’, ‘Blue Rosalie’ and ‘Violet Blue’ is still blooming so excellently.
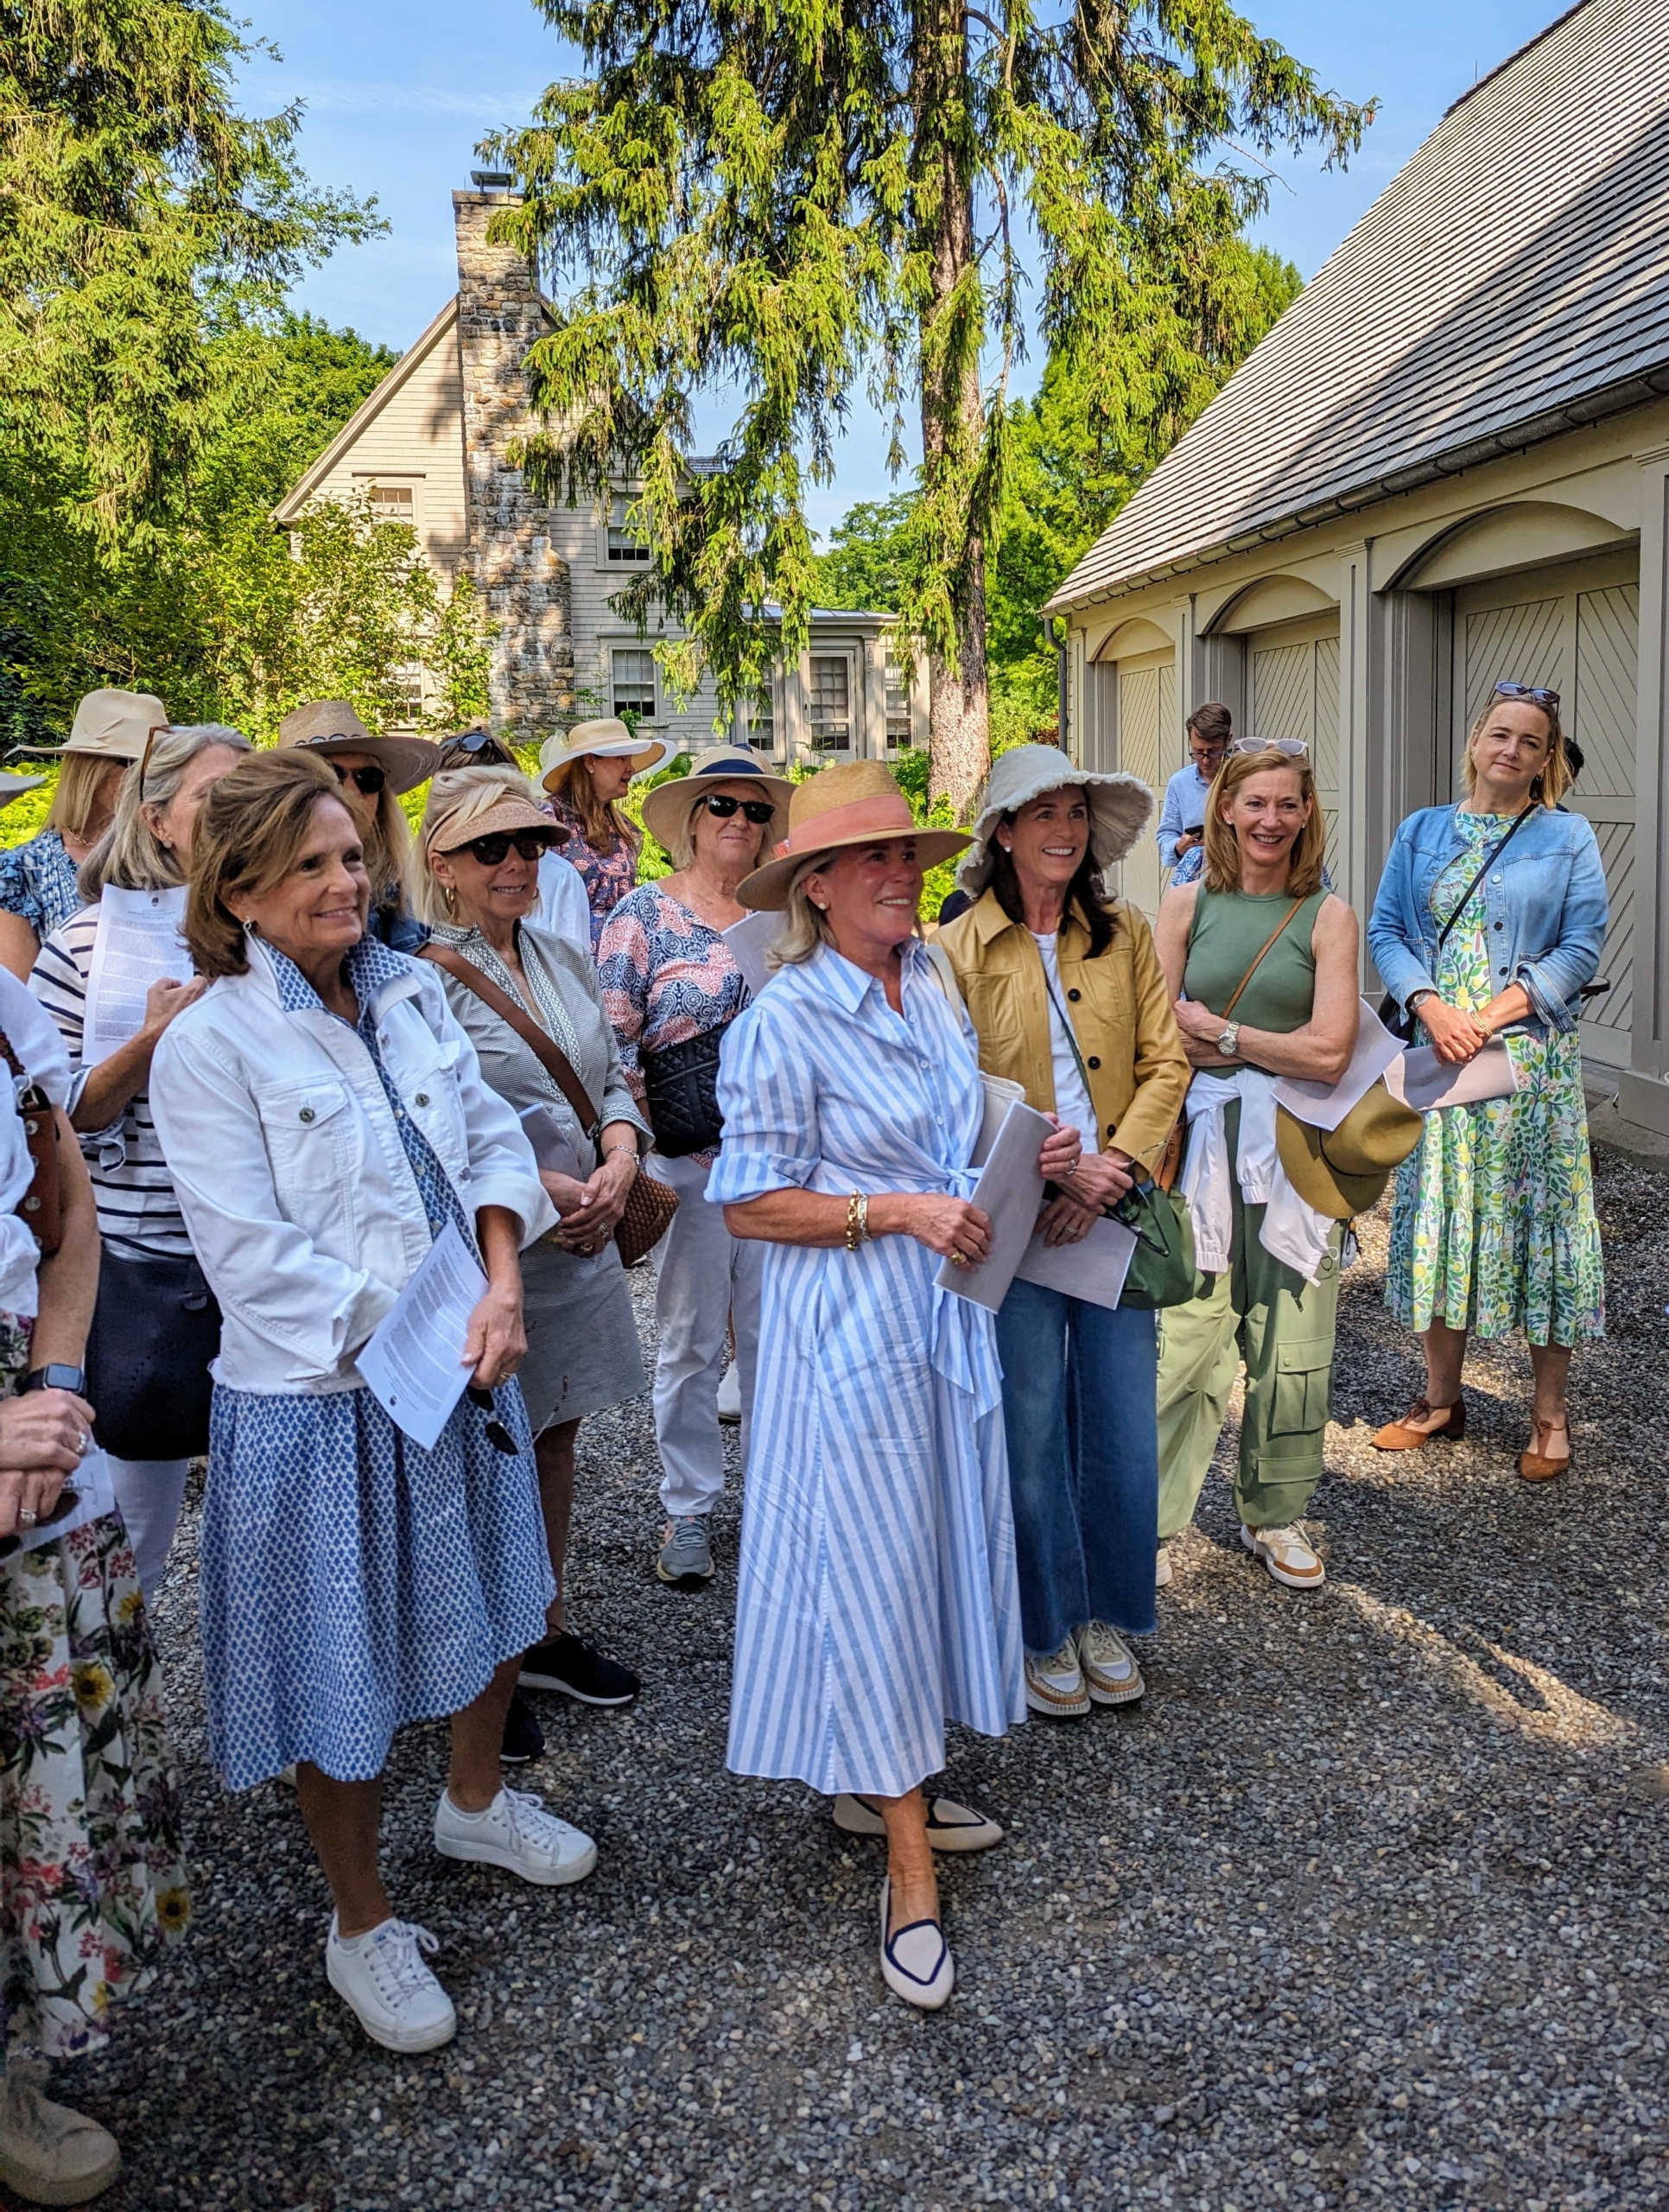
I welcomed the group of 25 and started with a little introduction about the history of the farm and how it has evolved over the years. I also gave them a brief rundown of what they would see during a guided tour. I am glad everyone wore comfortable, cool clothing – there’s always a lot of walking during my tours.
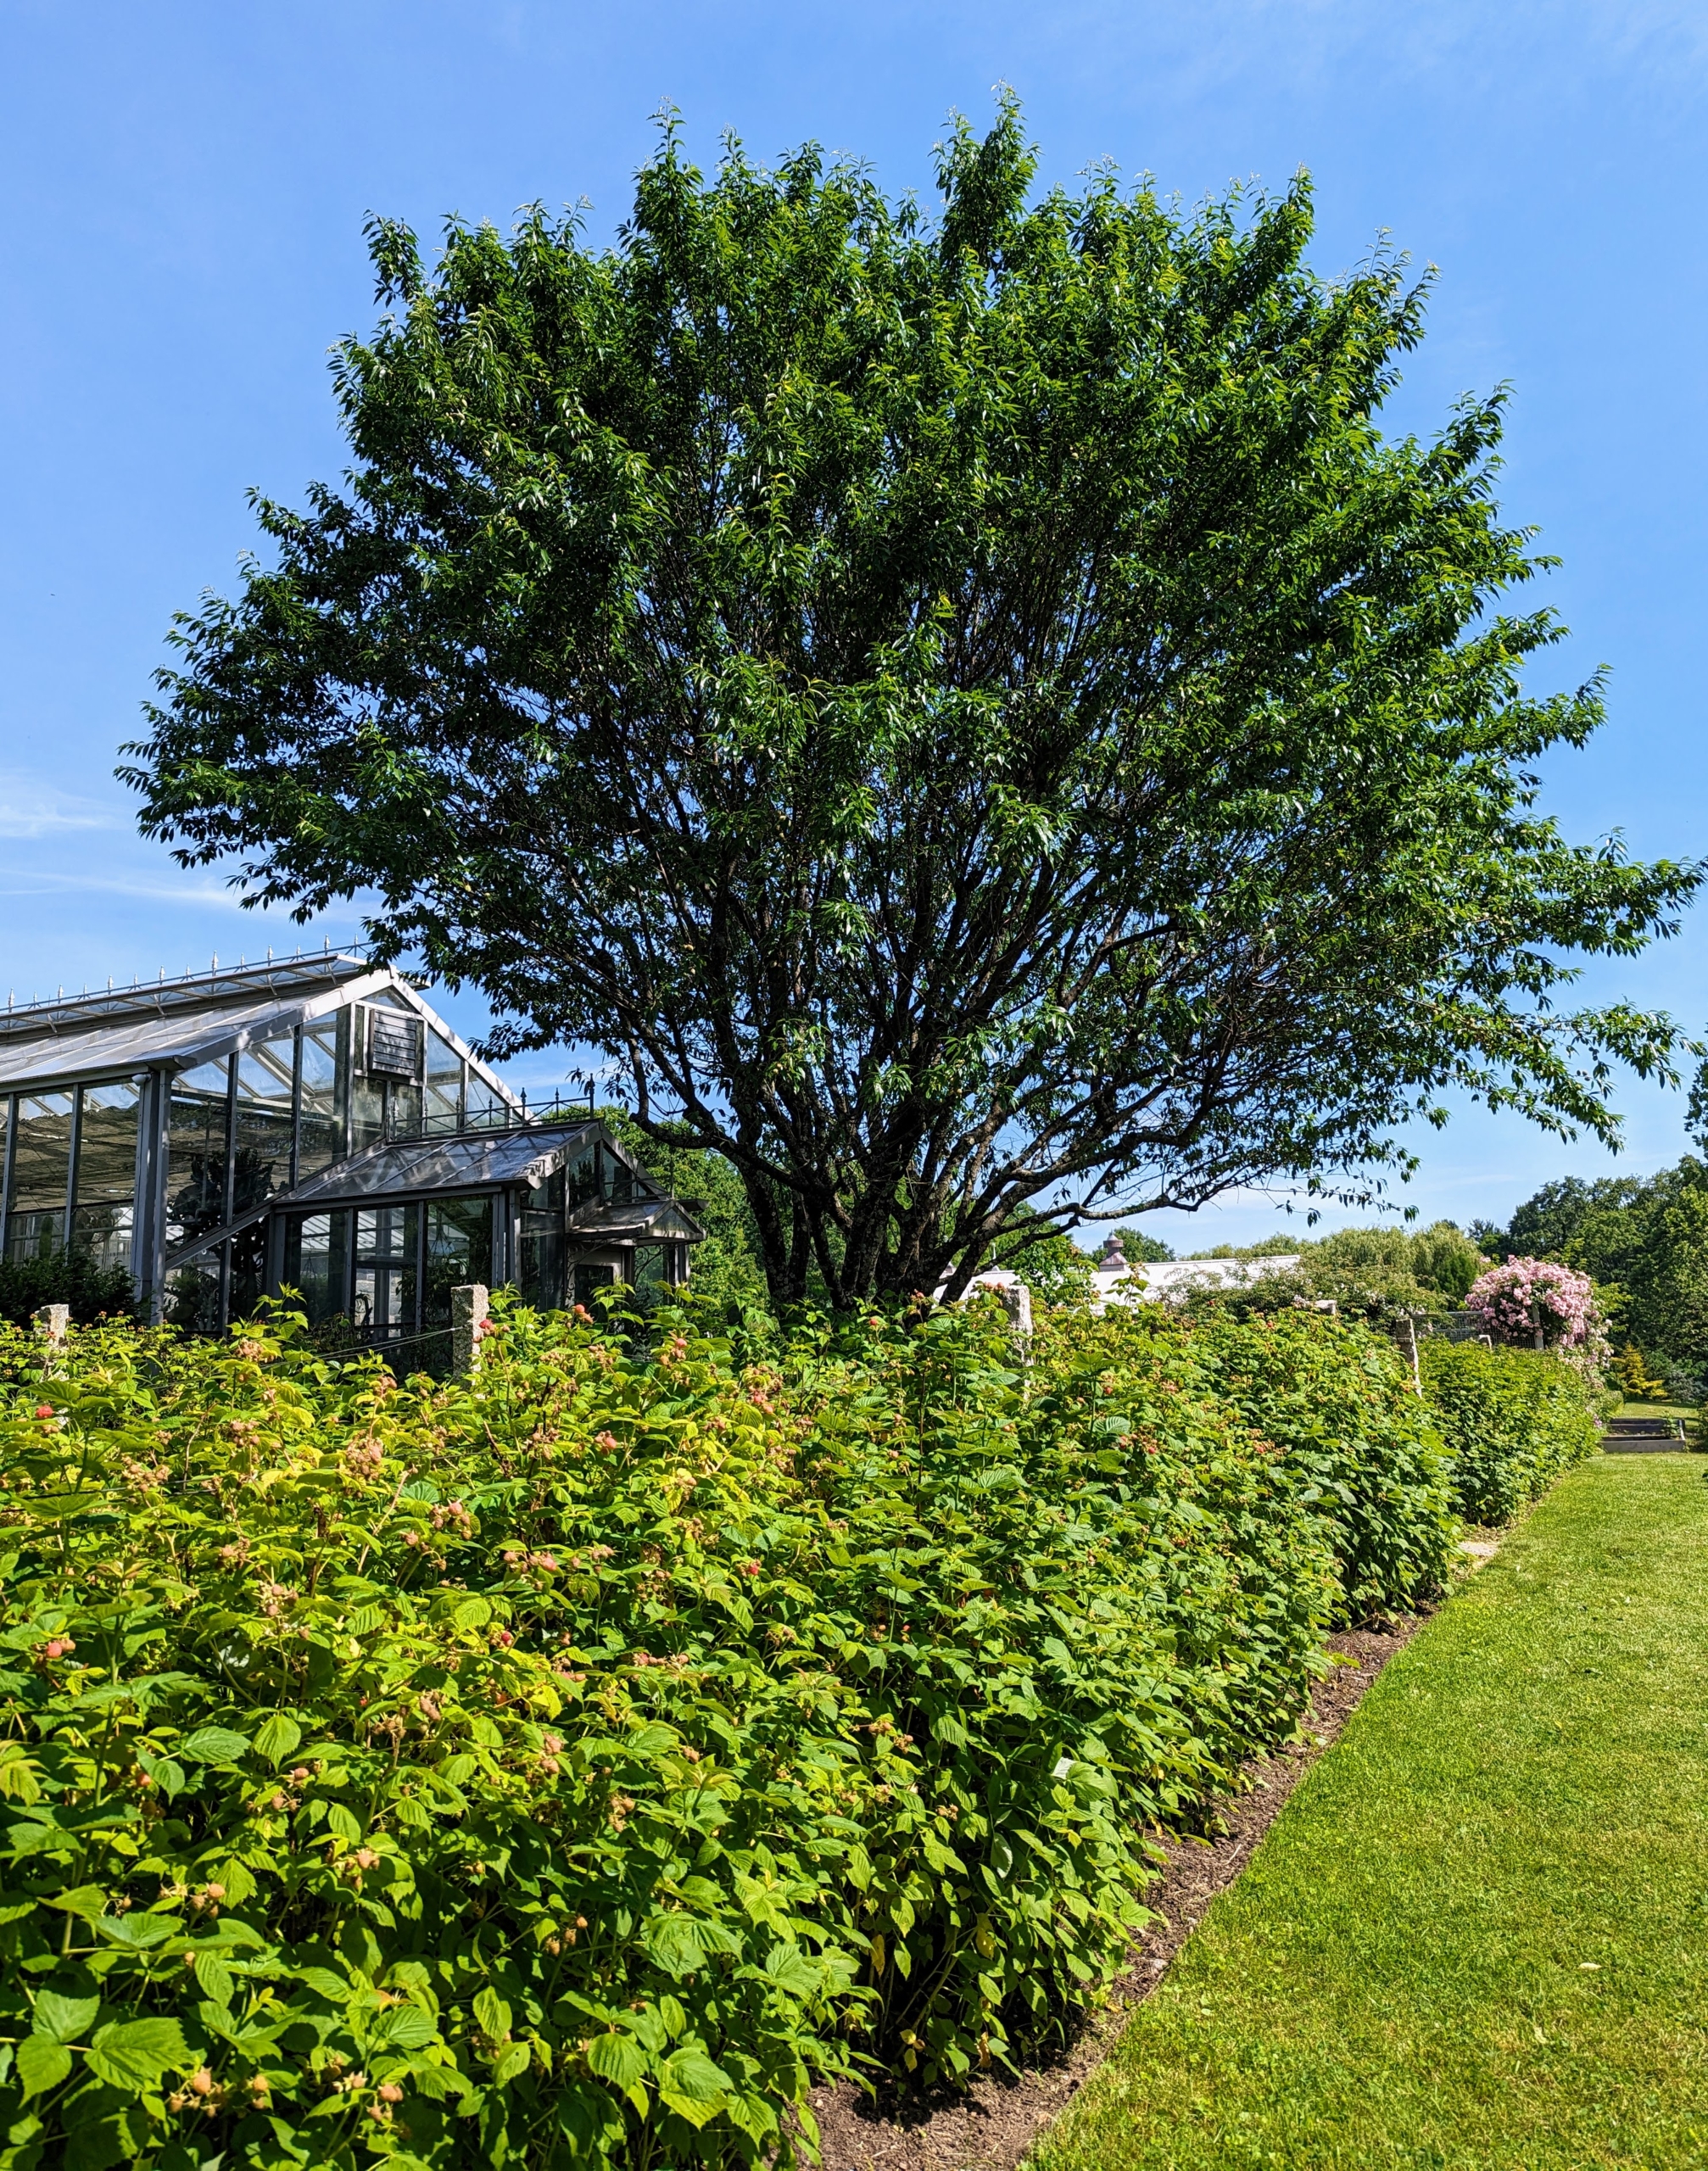
I led the group behind my main greenhouse to see all the growing berries – raspberries, gooseberries, currants, and strawberries. The tree is one of two almond trees, which are thriving here at the farm. We harvest so many flavorful almonds every year.
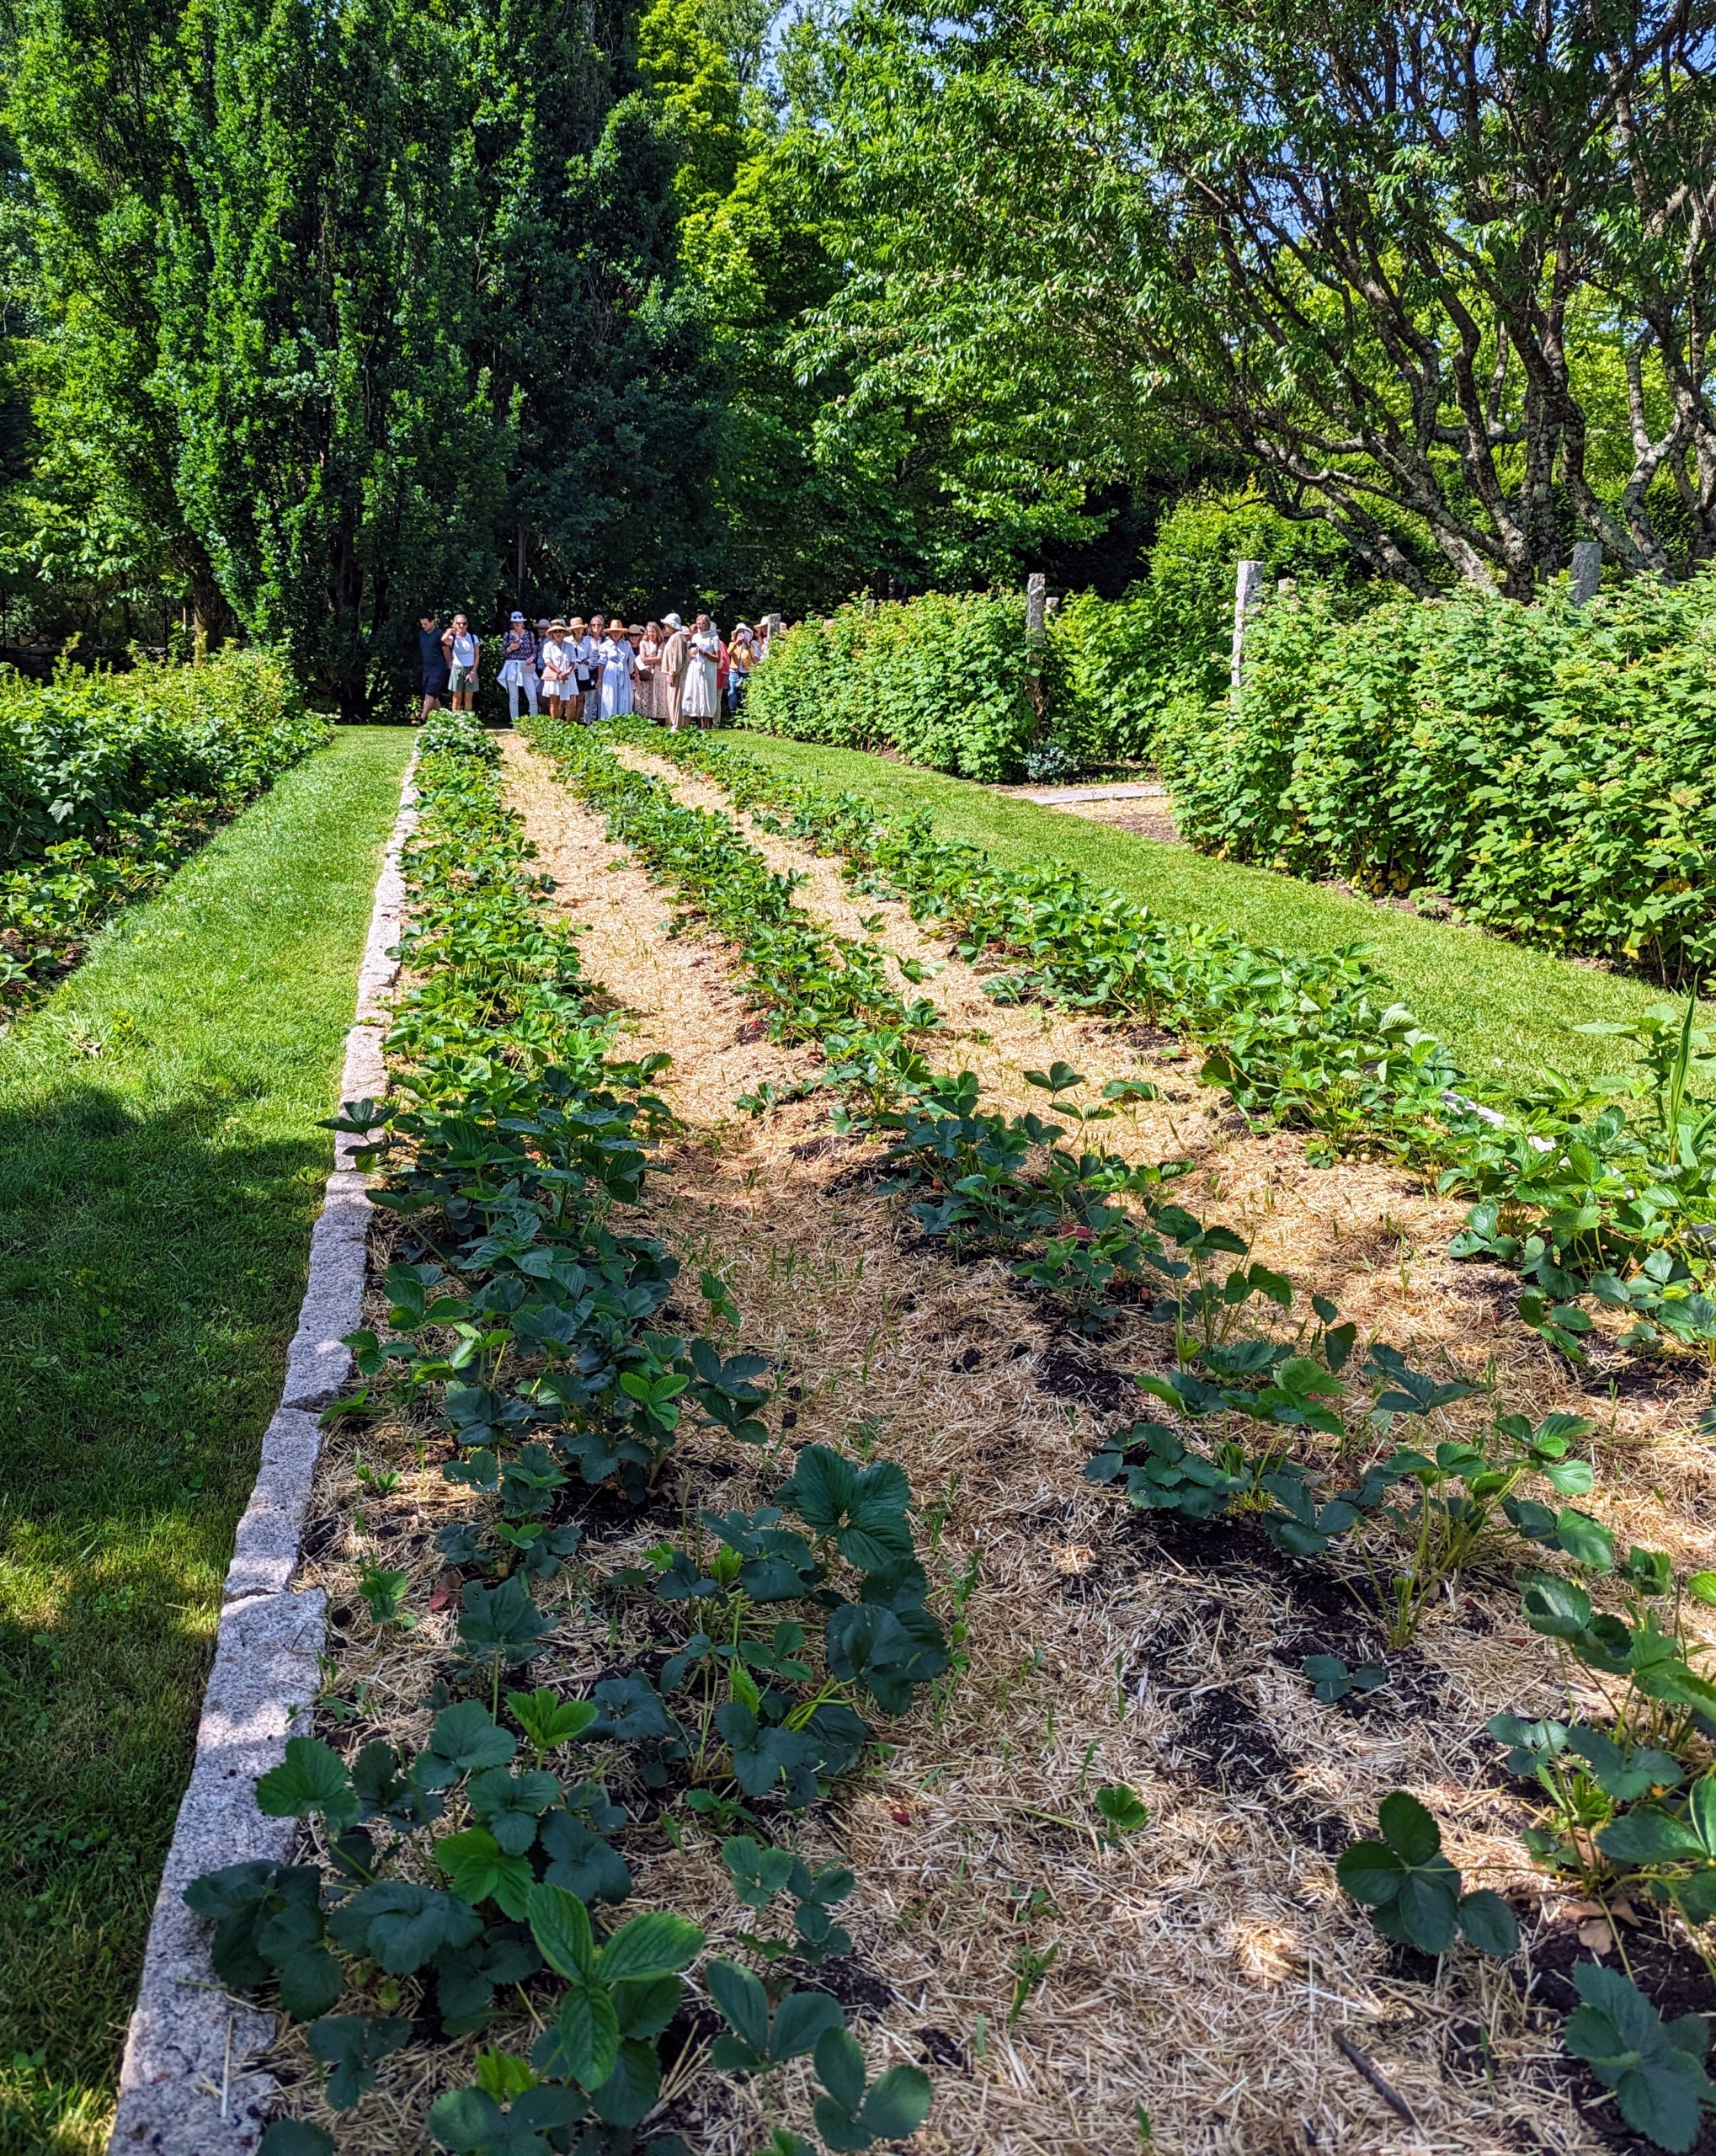
Here is my long strawberry patch – we’ve already picked so many wonderful fruits from this bed.
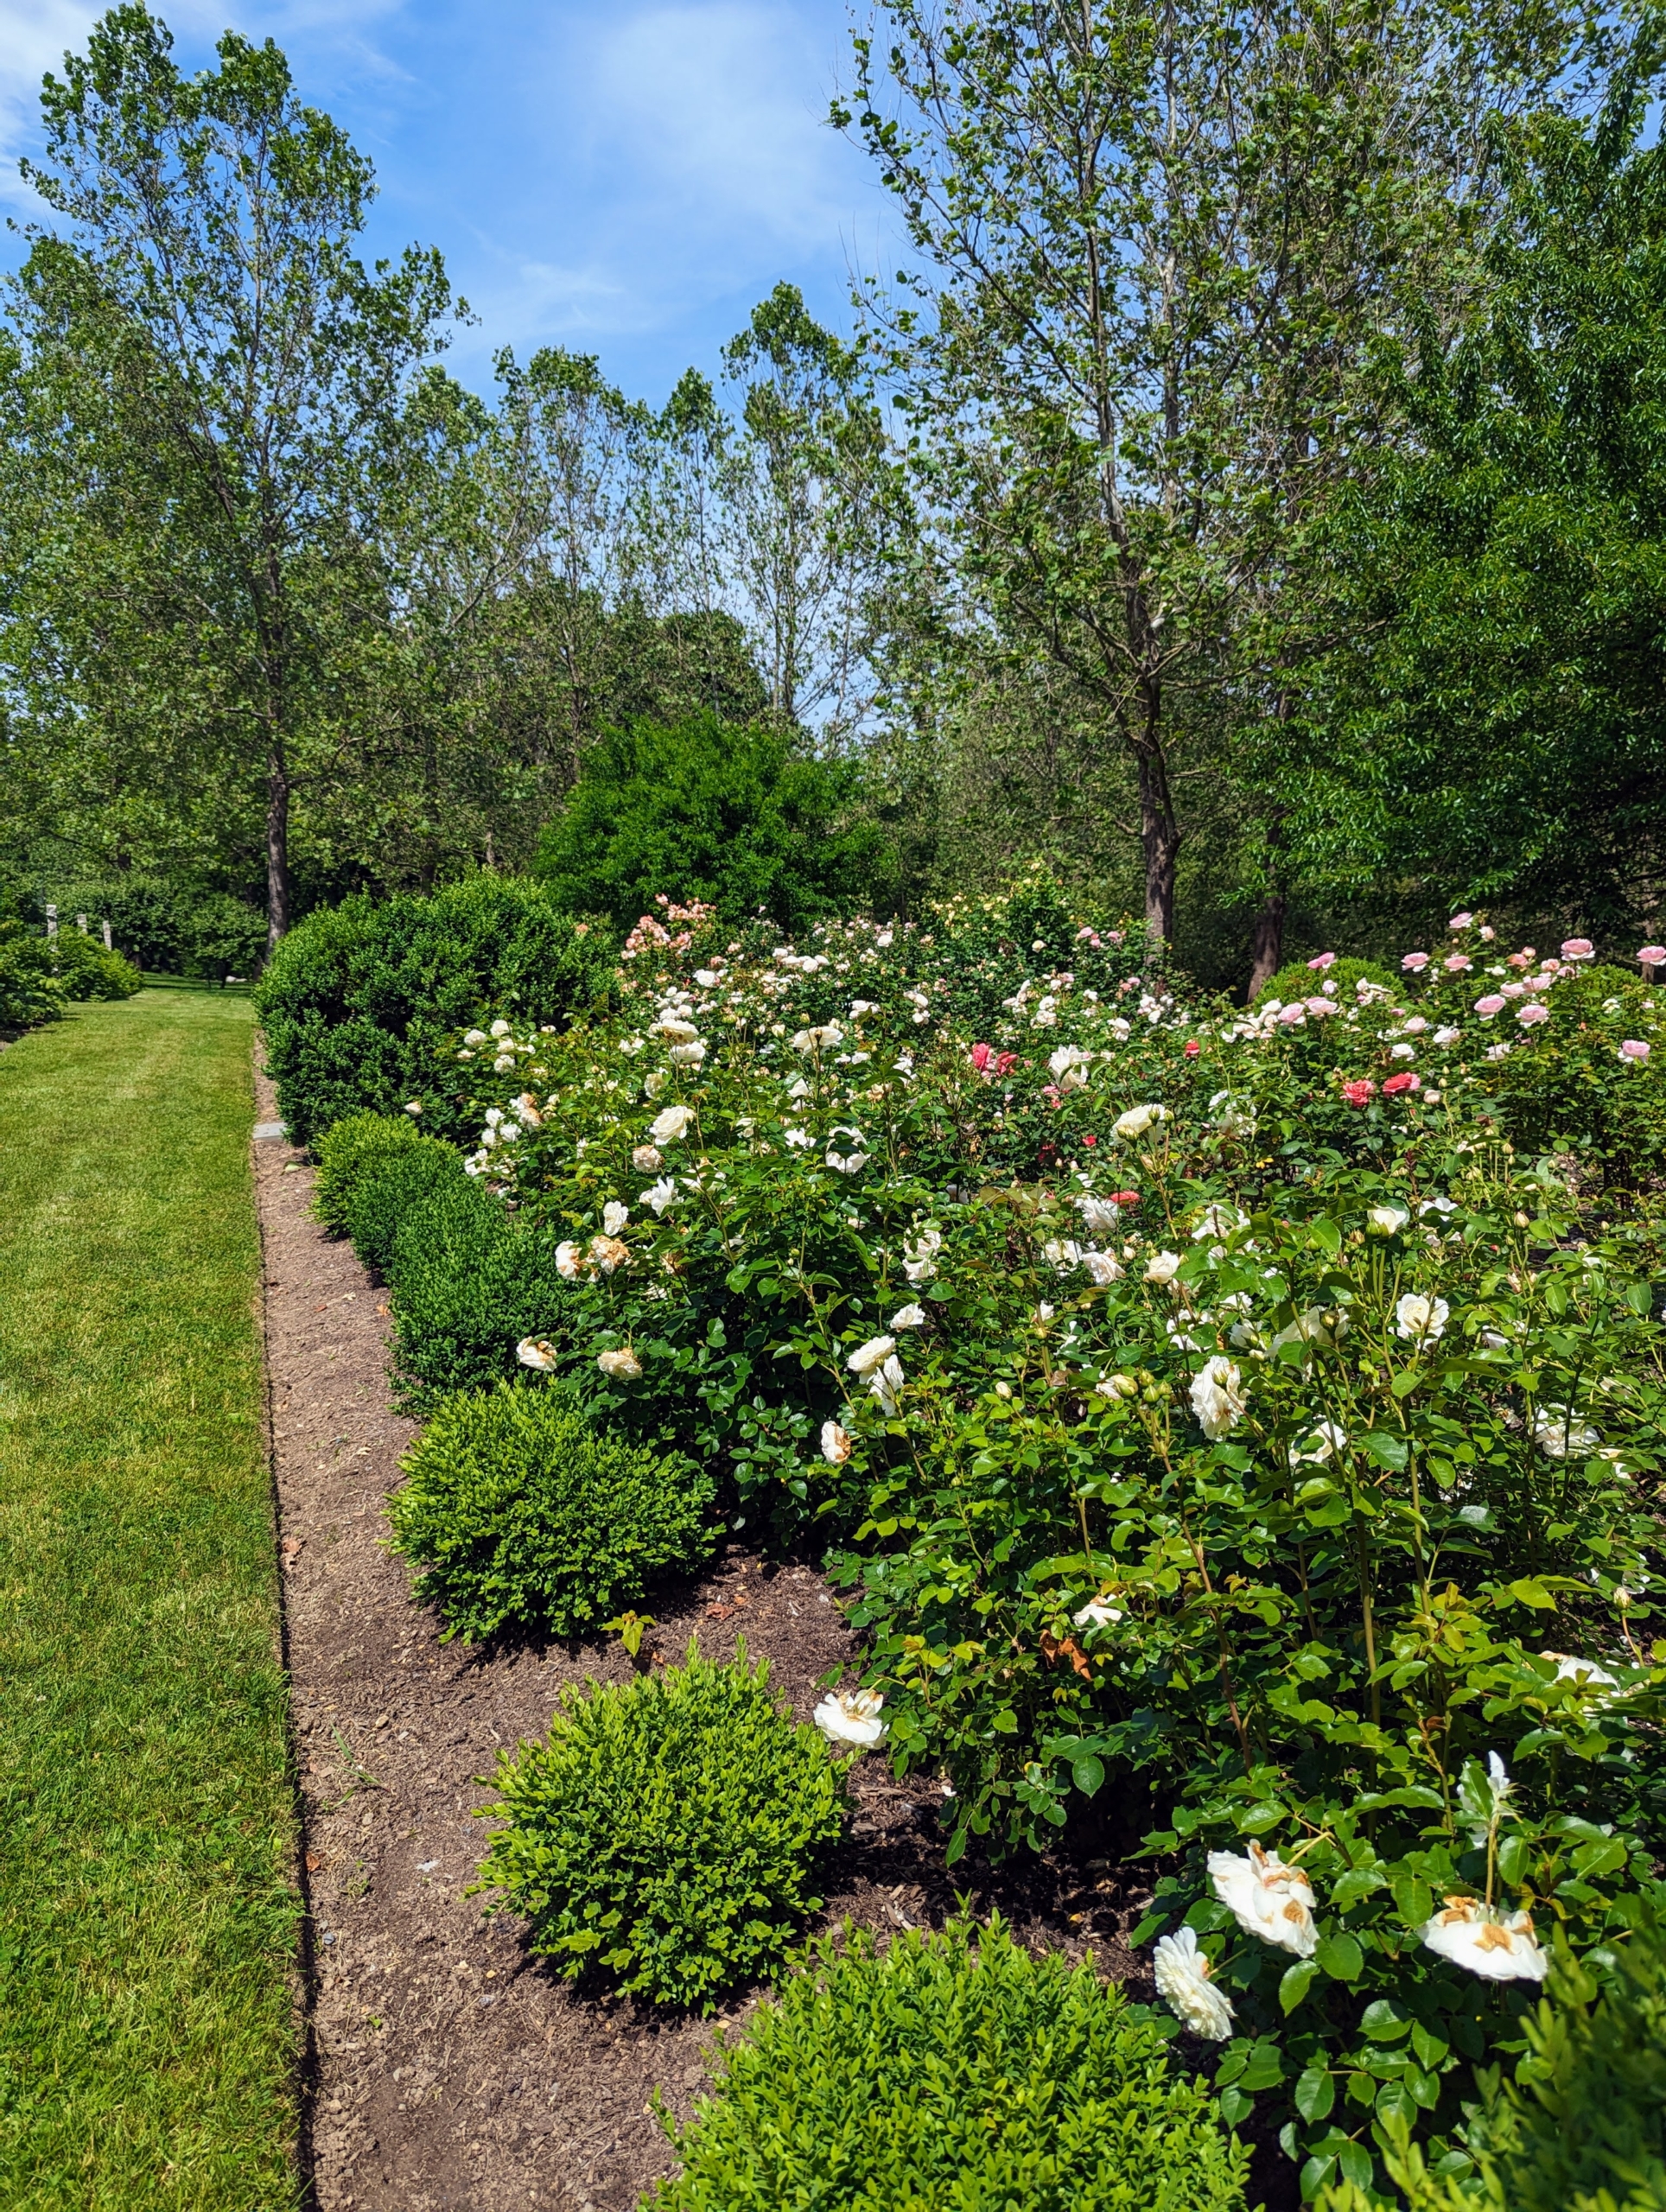
At the back of this field is a formal rose garden filled with more than a 120-rose plants. I redesigned the 68-foot by 30-foot rose garden last year for three types – floribunda, hybrid tea, and shrub roses – all with gorgeous color, form, and fragrance.
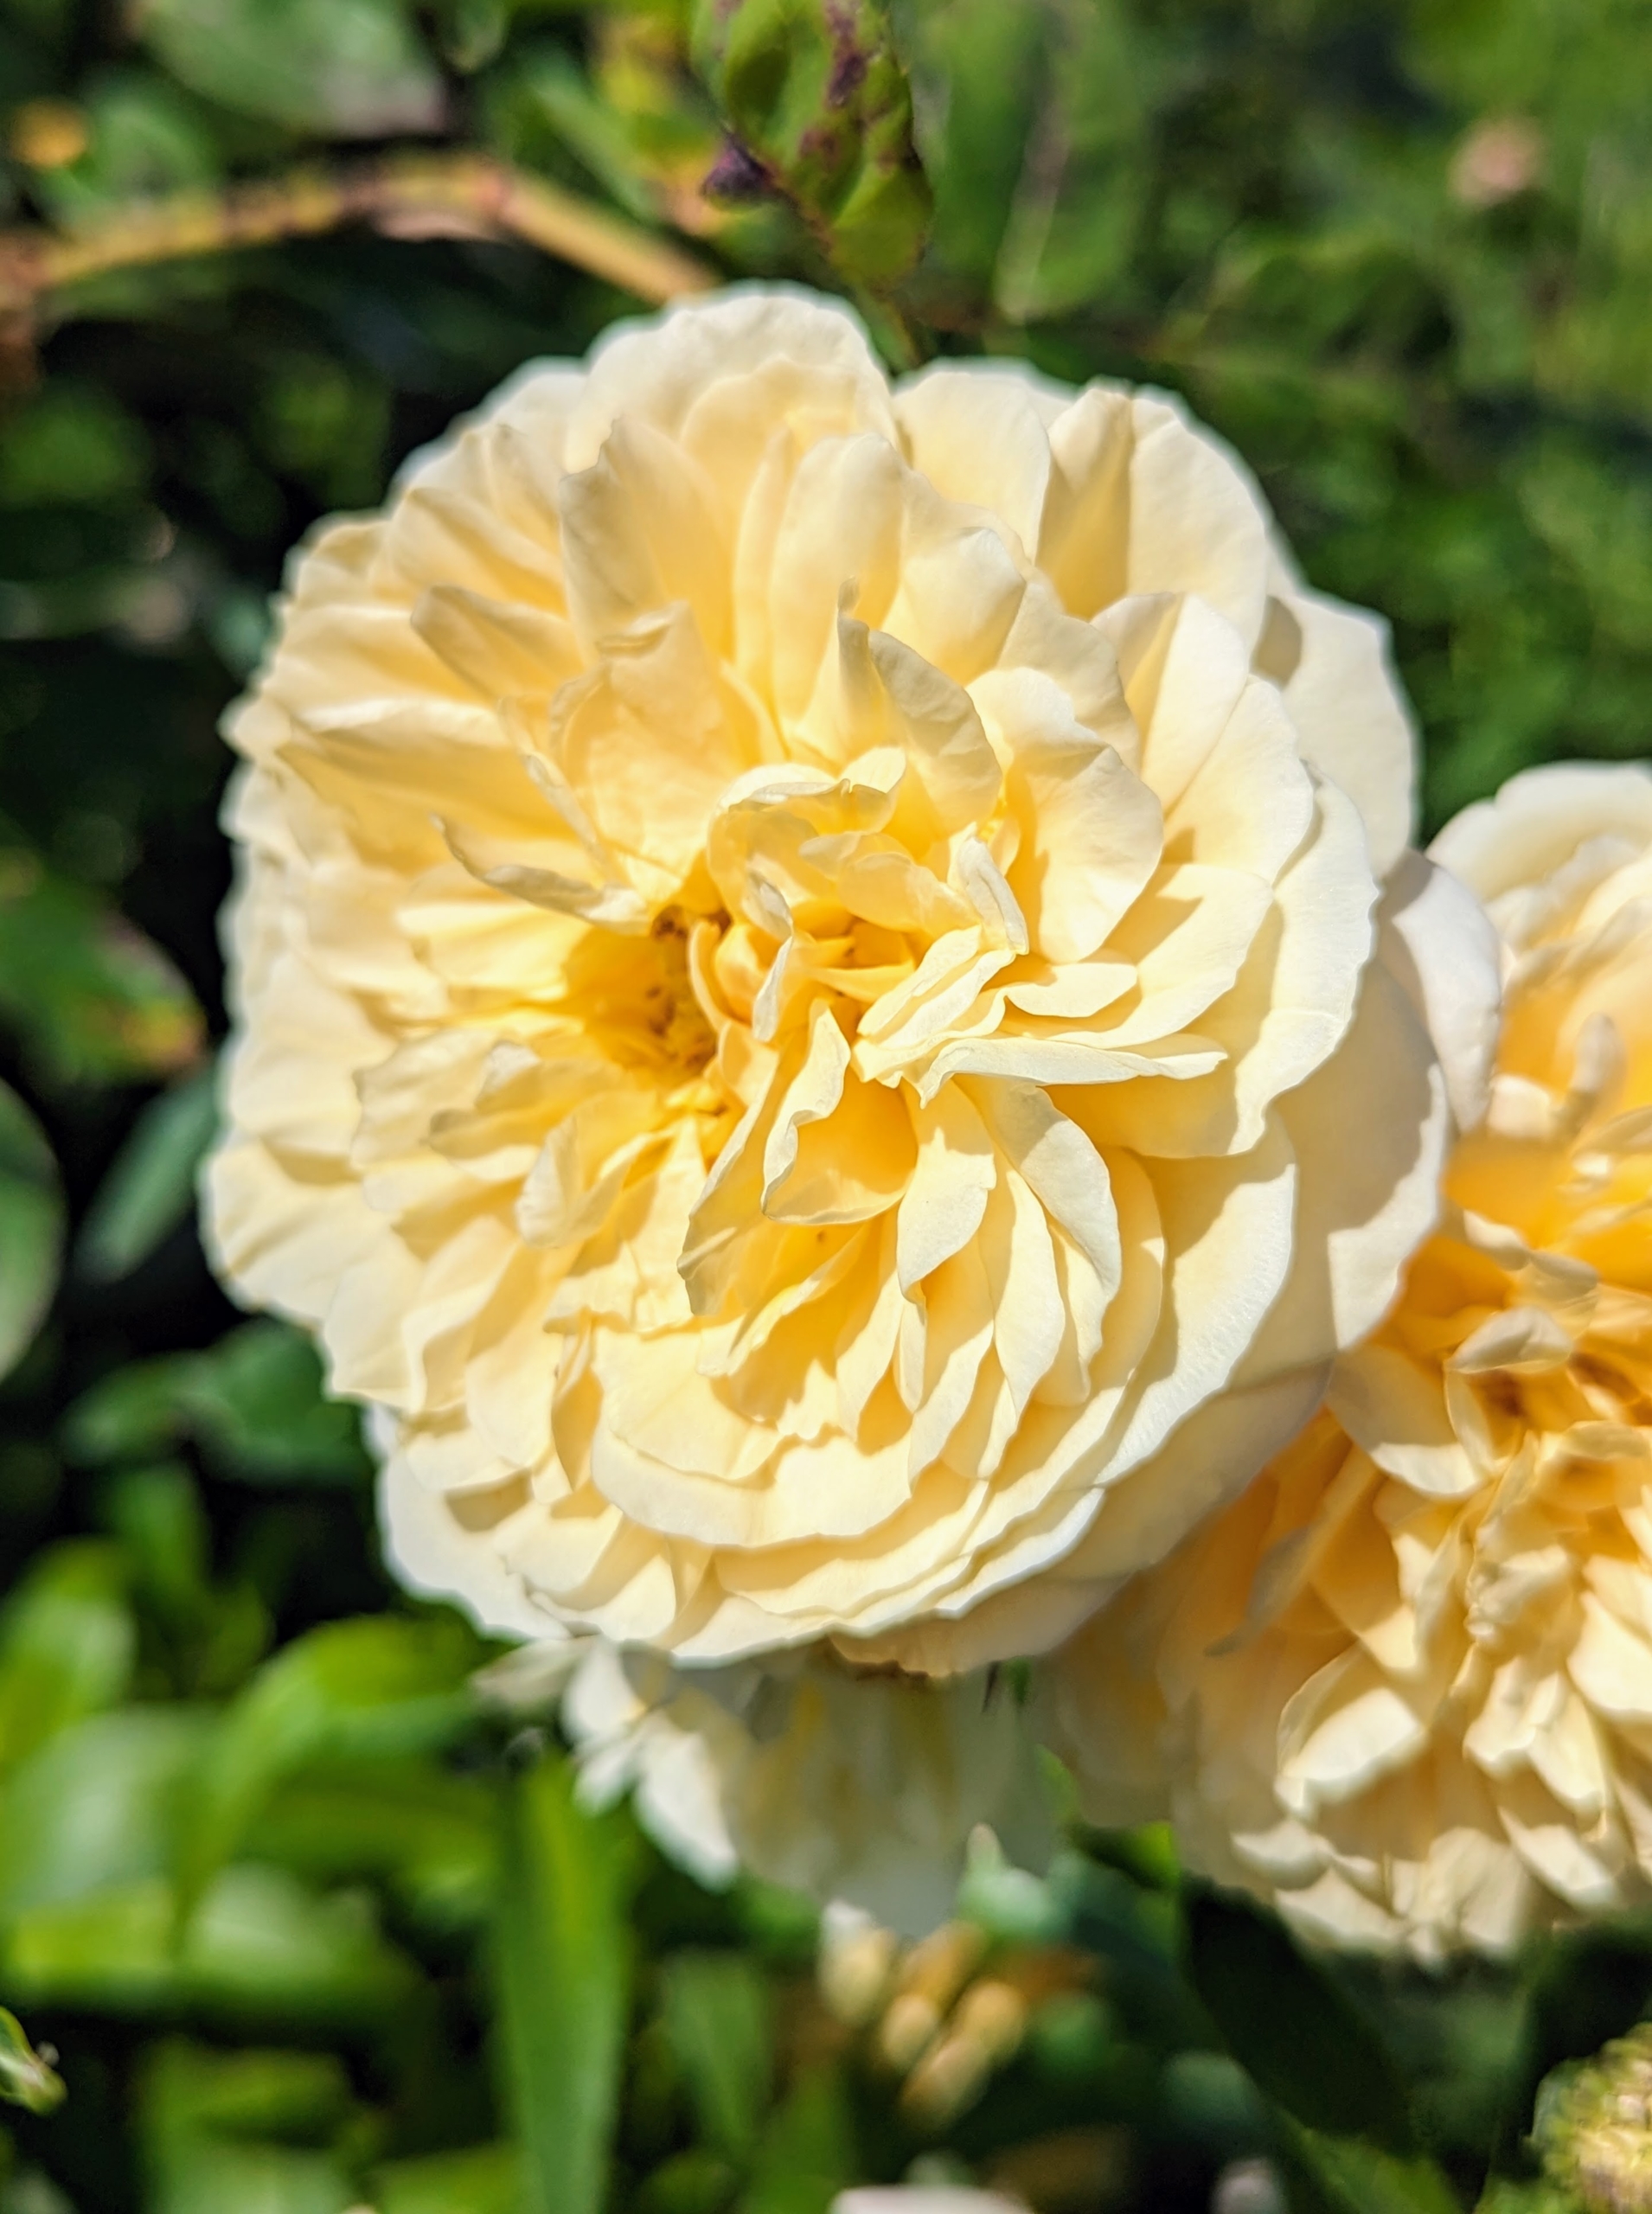
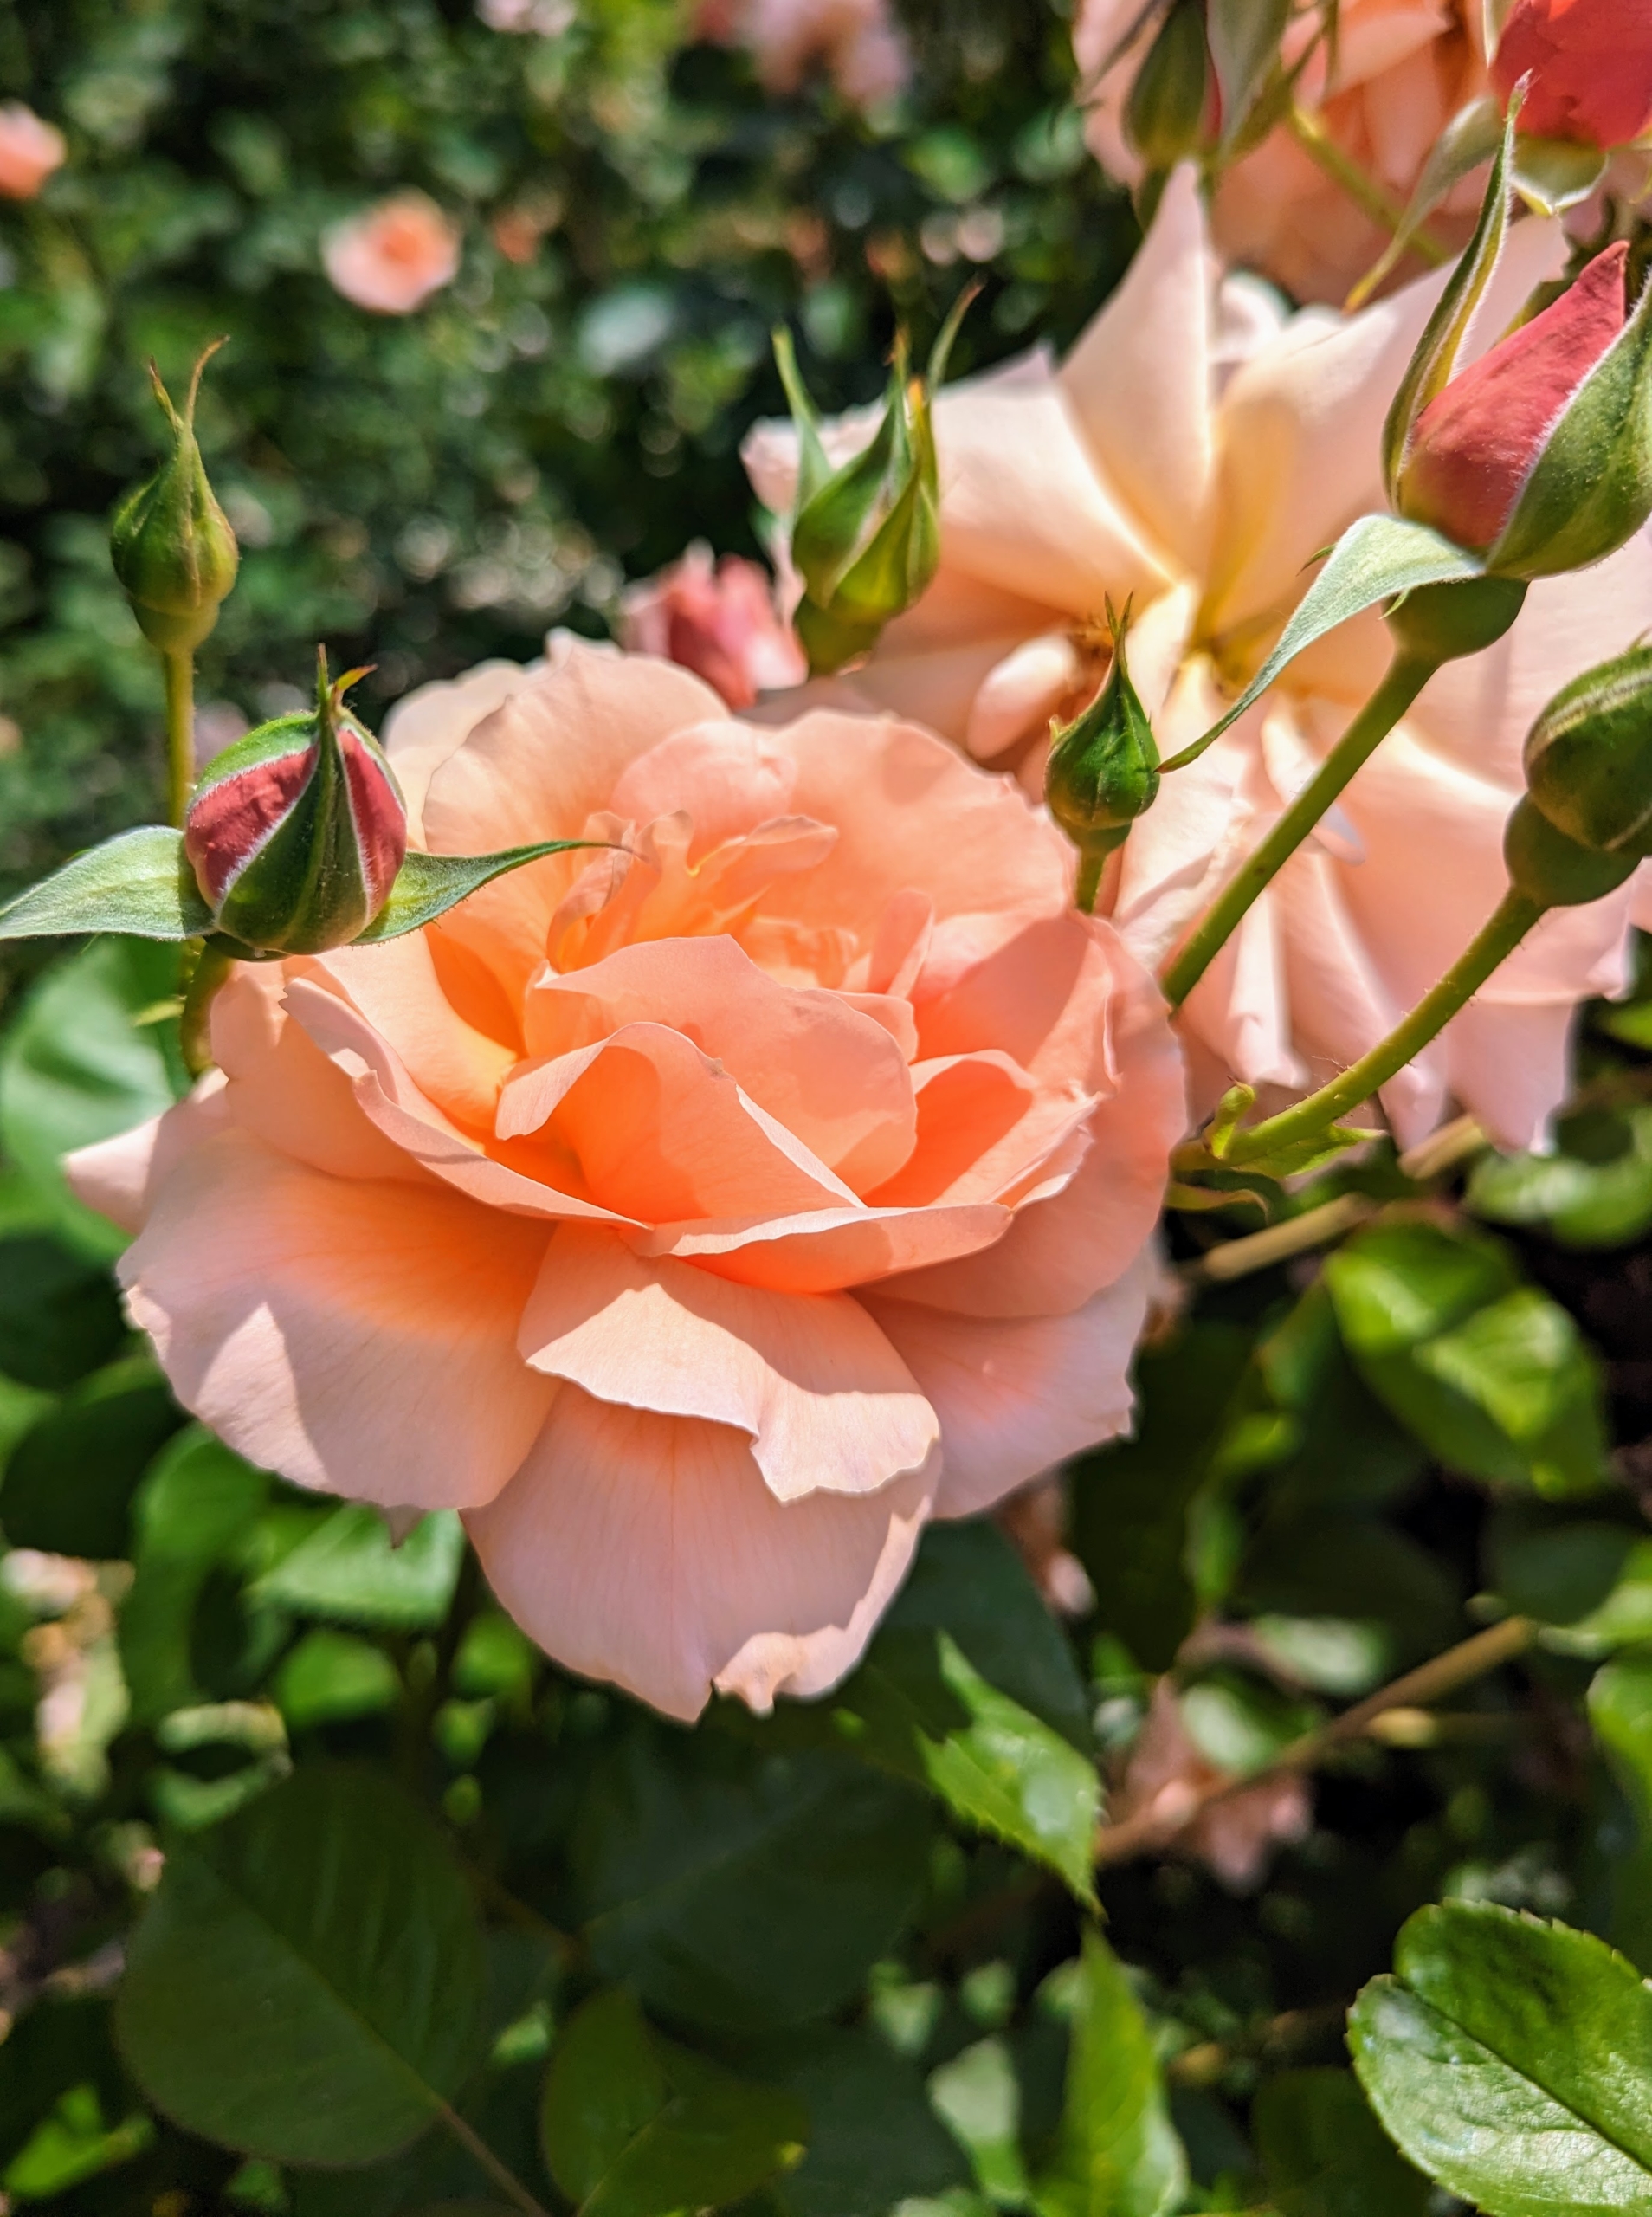
This garden includes a variety of different colors from yellow and cream to dark pink, apricot and lavender.
Garden roses are mostly grown as ornamental plants and bloom for several weeks. Here at the farm, I often see roses flowering through summer and sometimes even into fall.
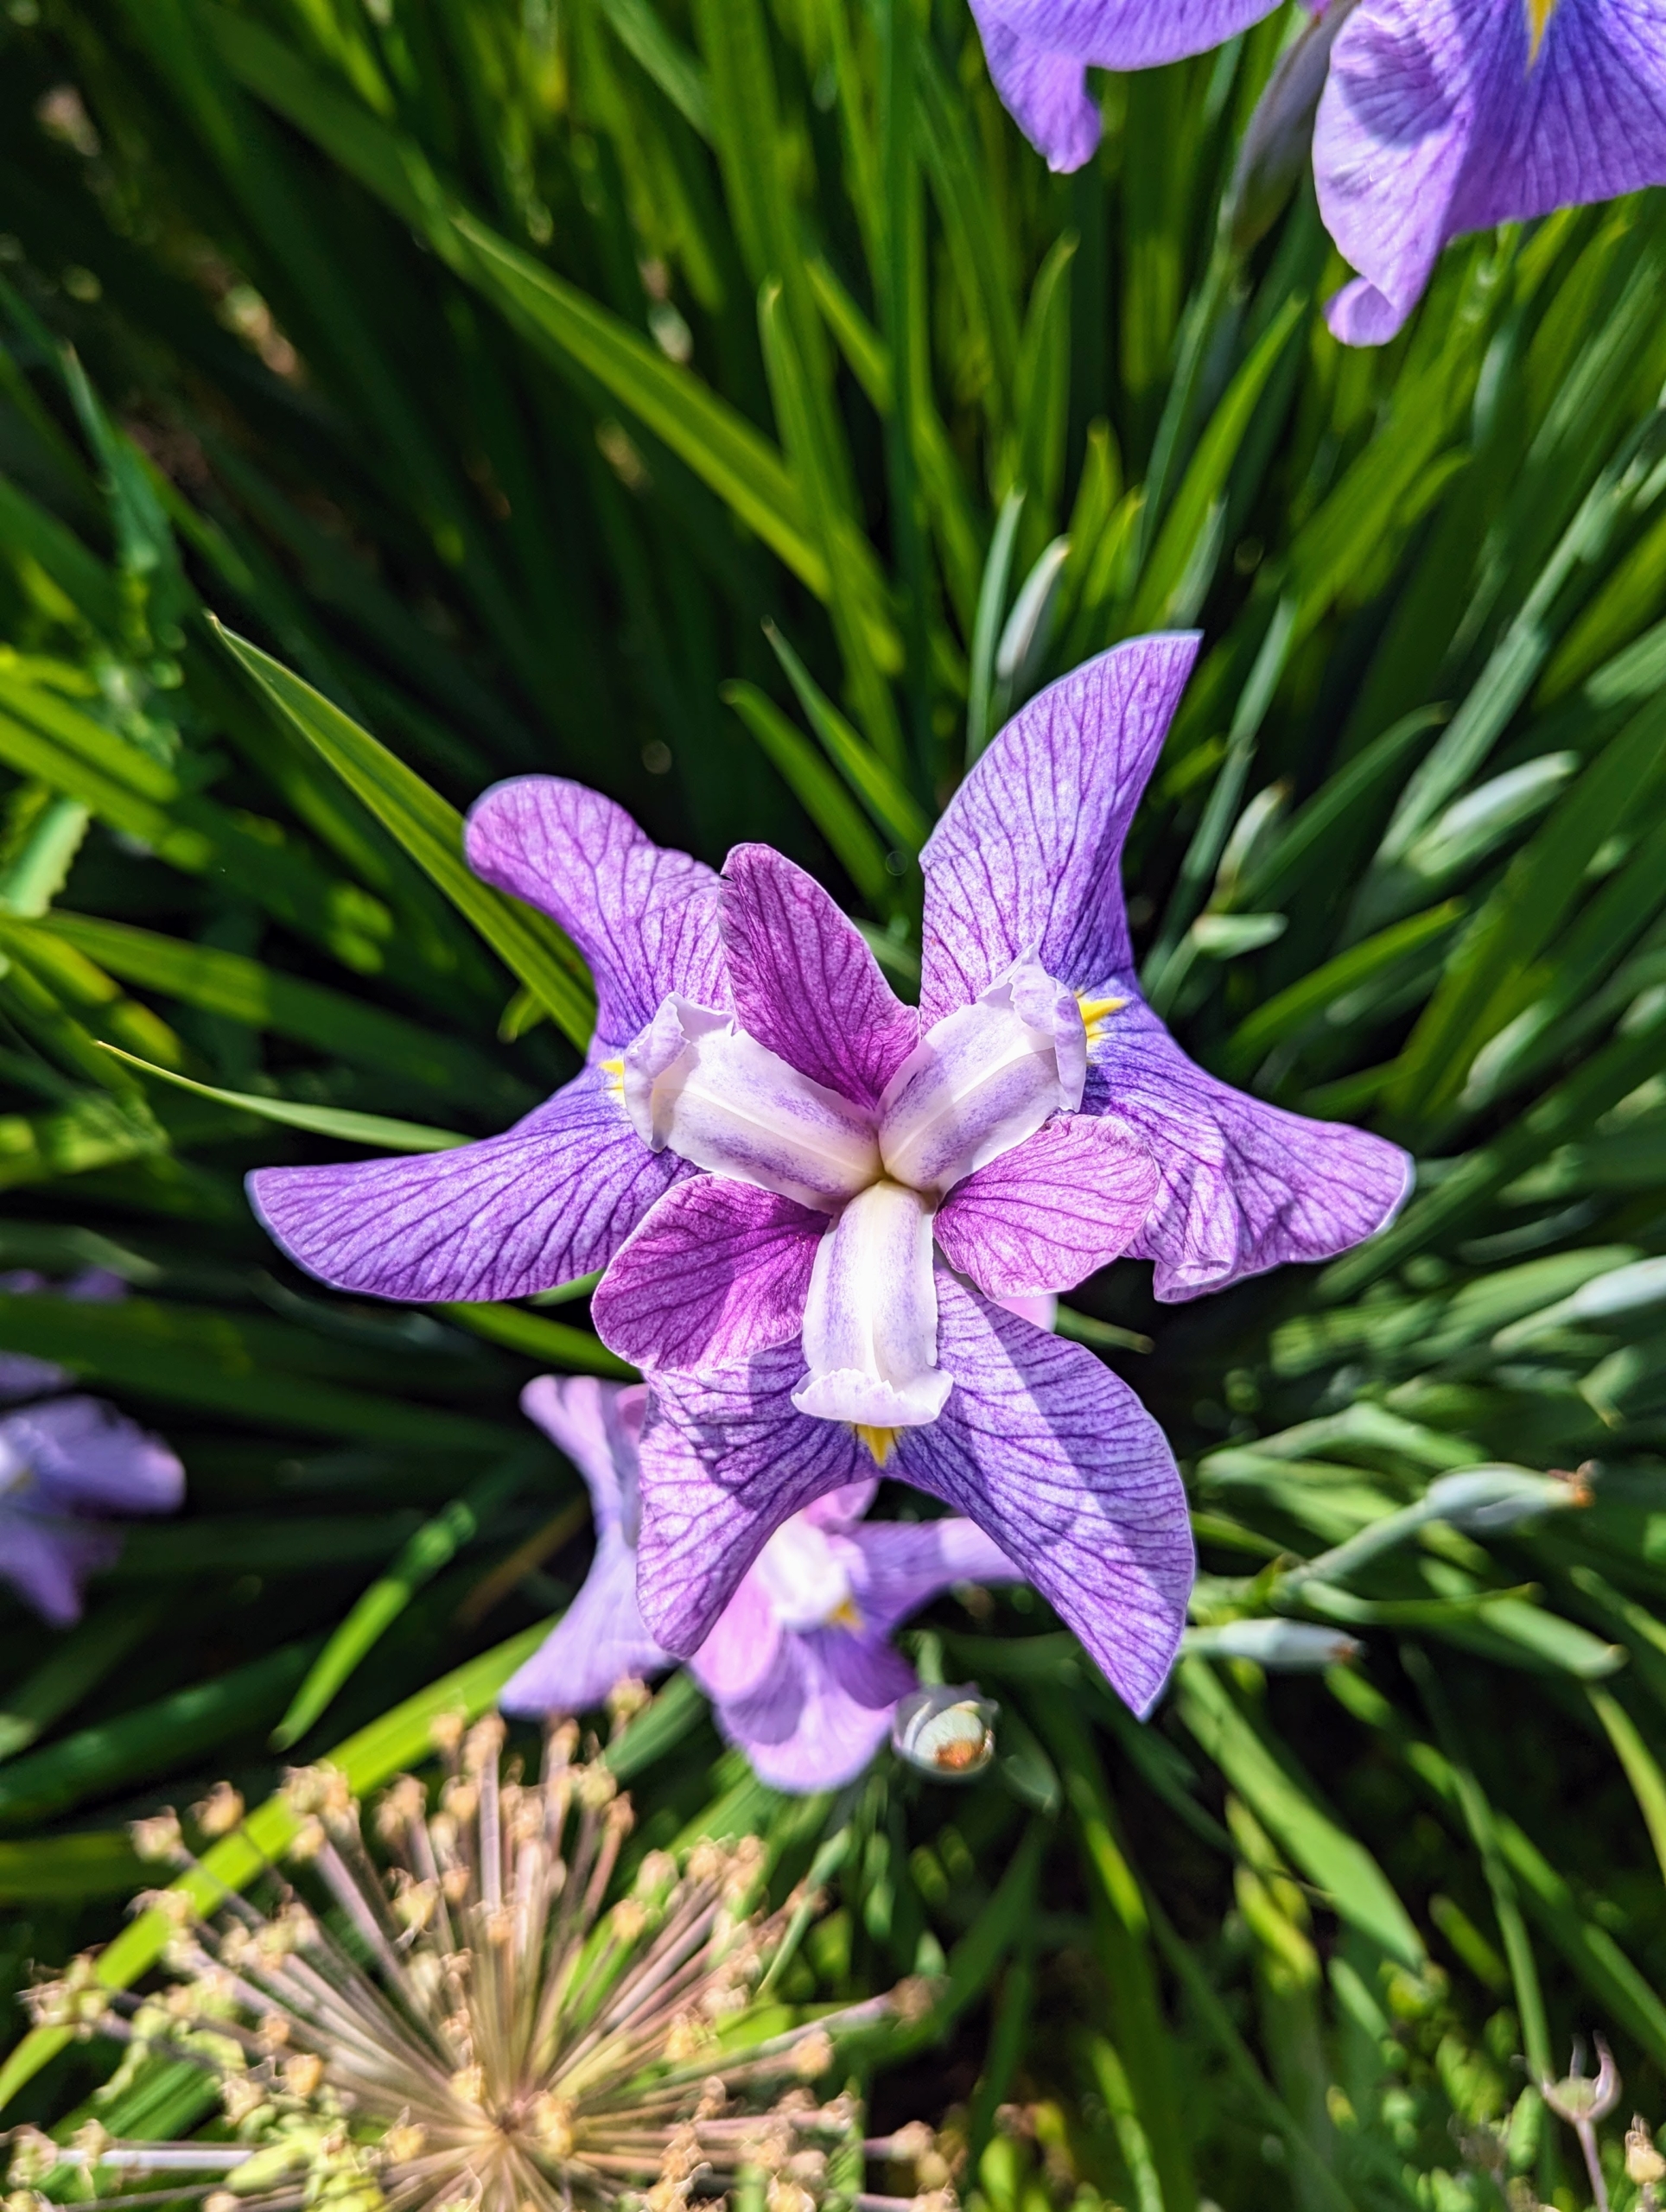
We walked through my perennial flower cutting garden – also brimming with beautiful blooms. Look at this purple iris.
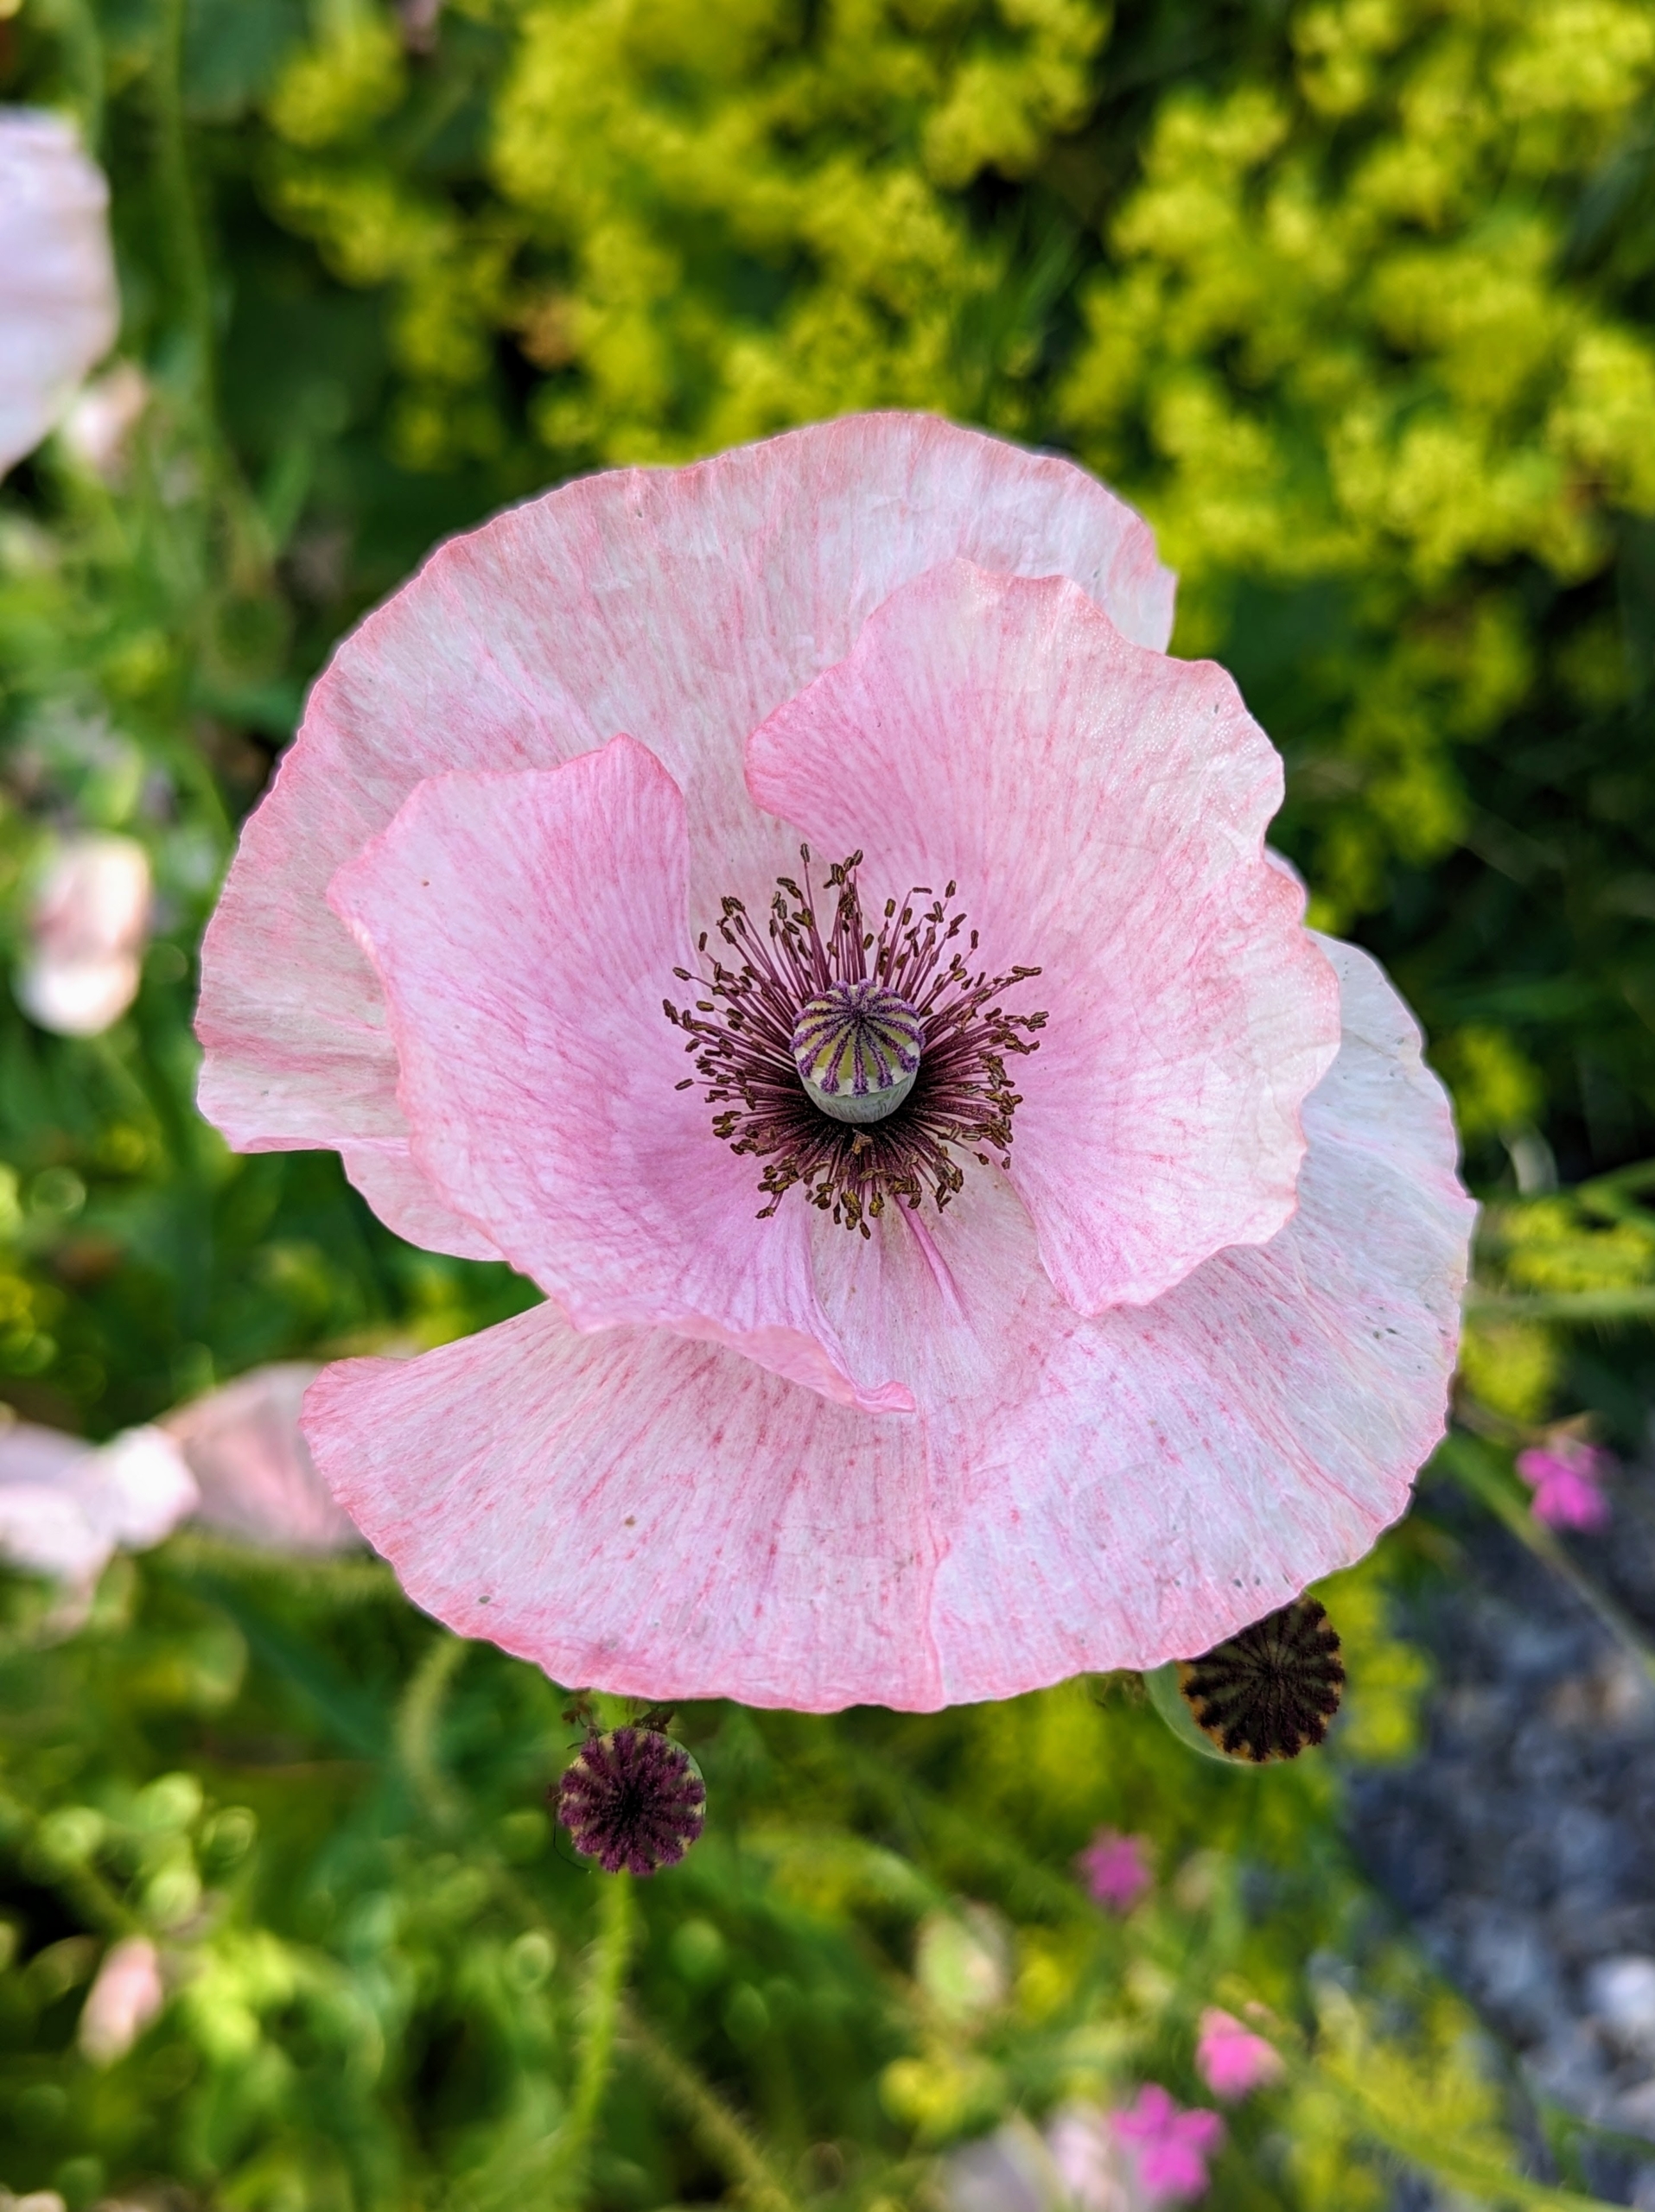
And the poppies are so plentiful this season.
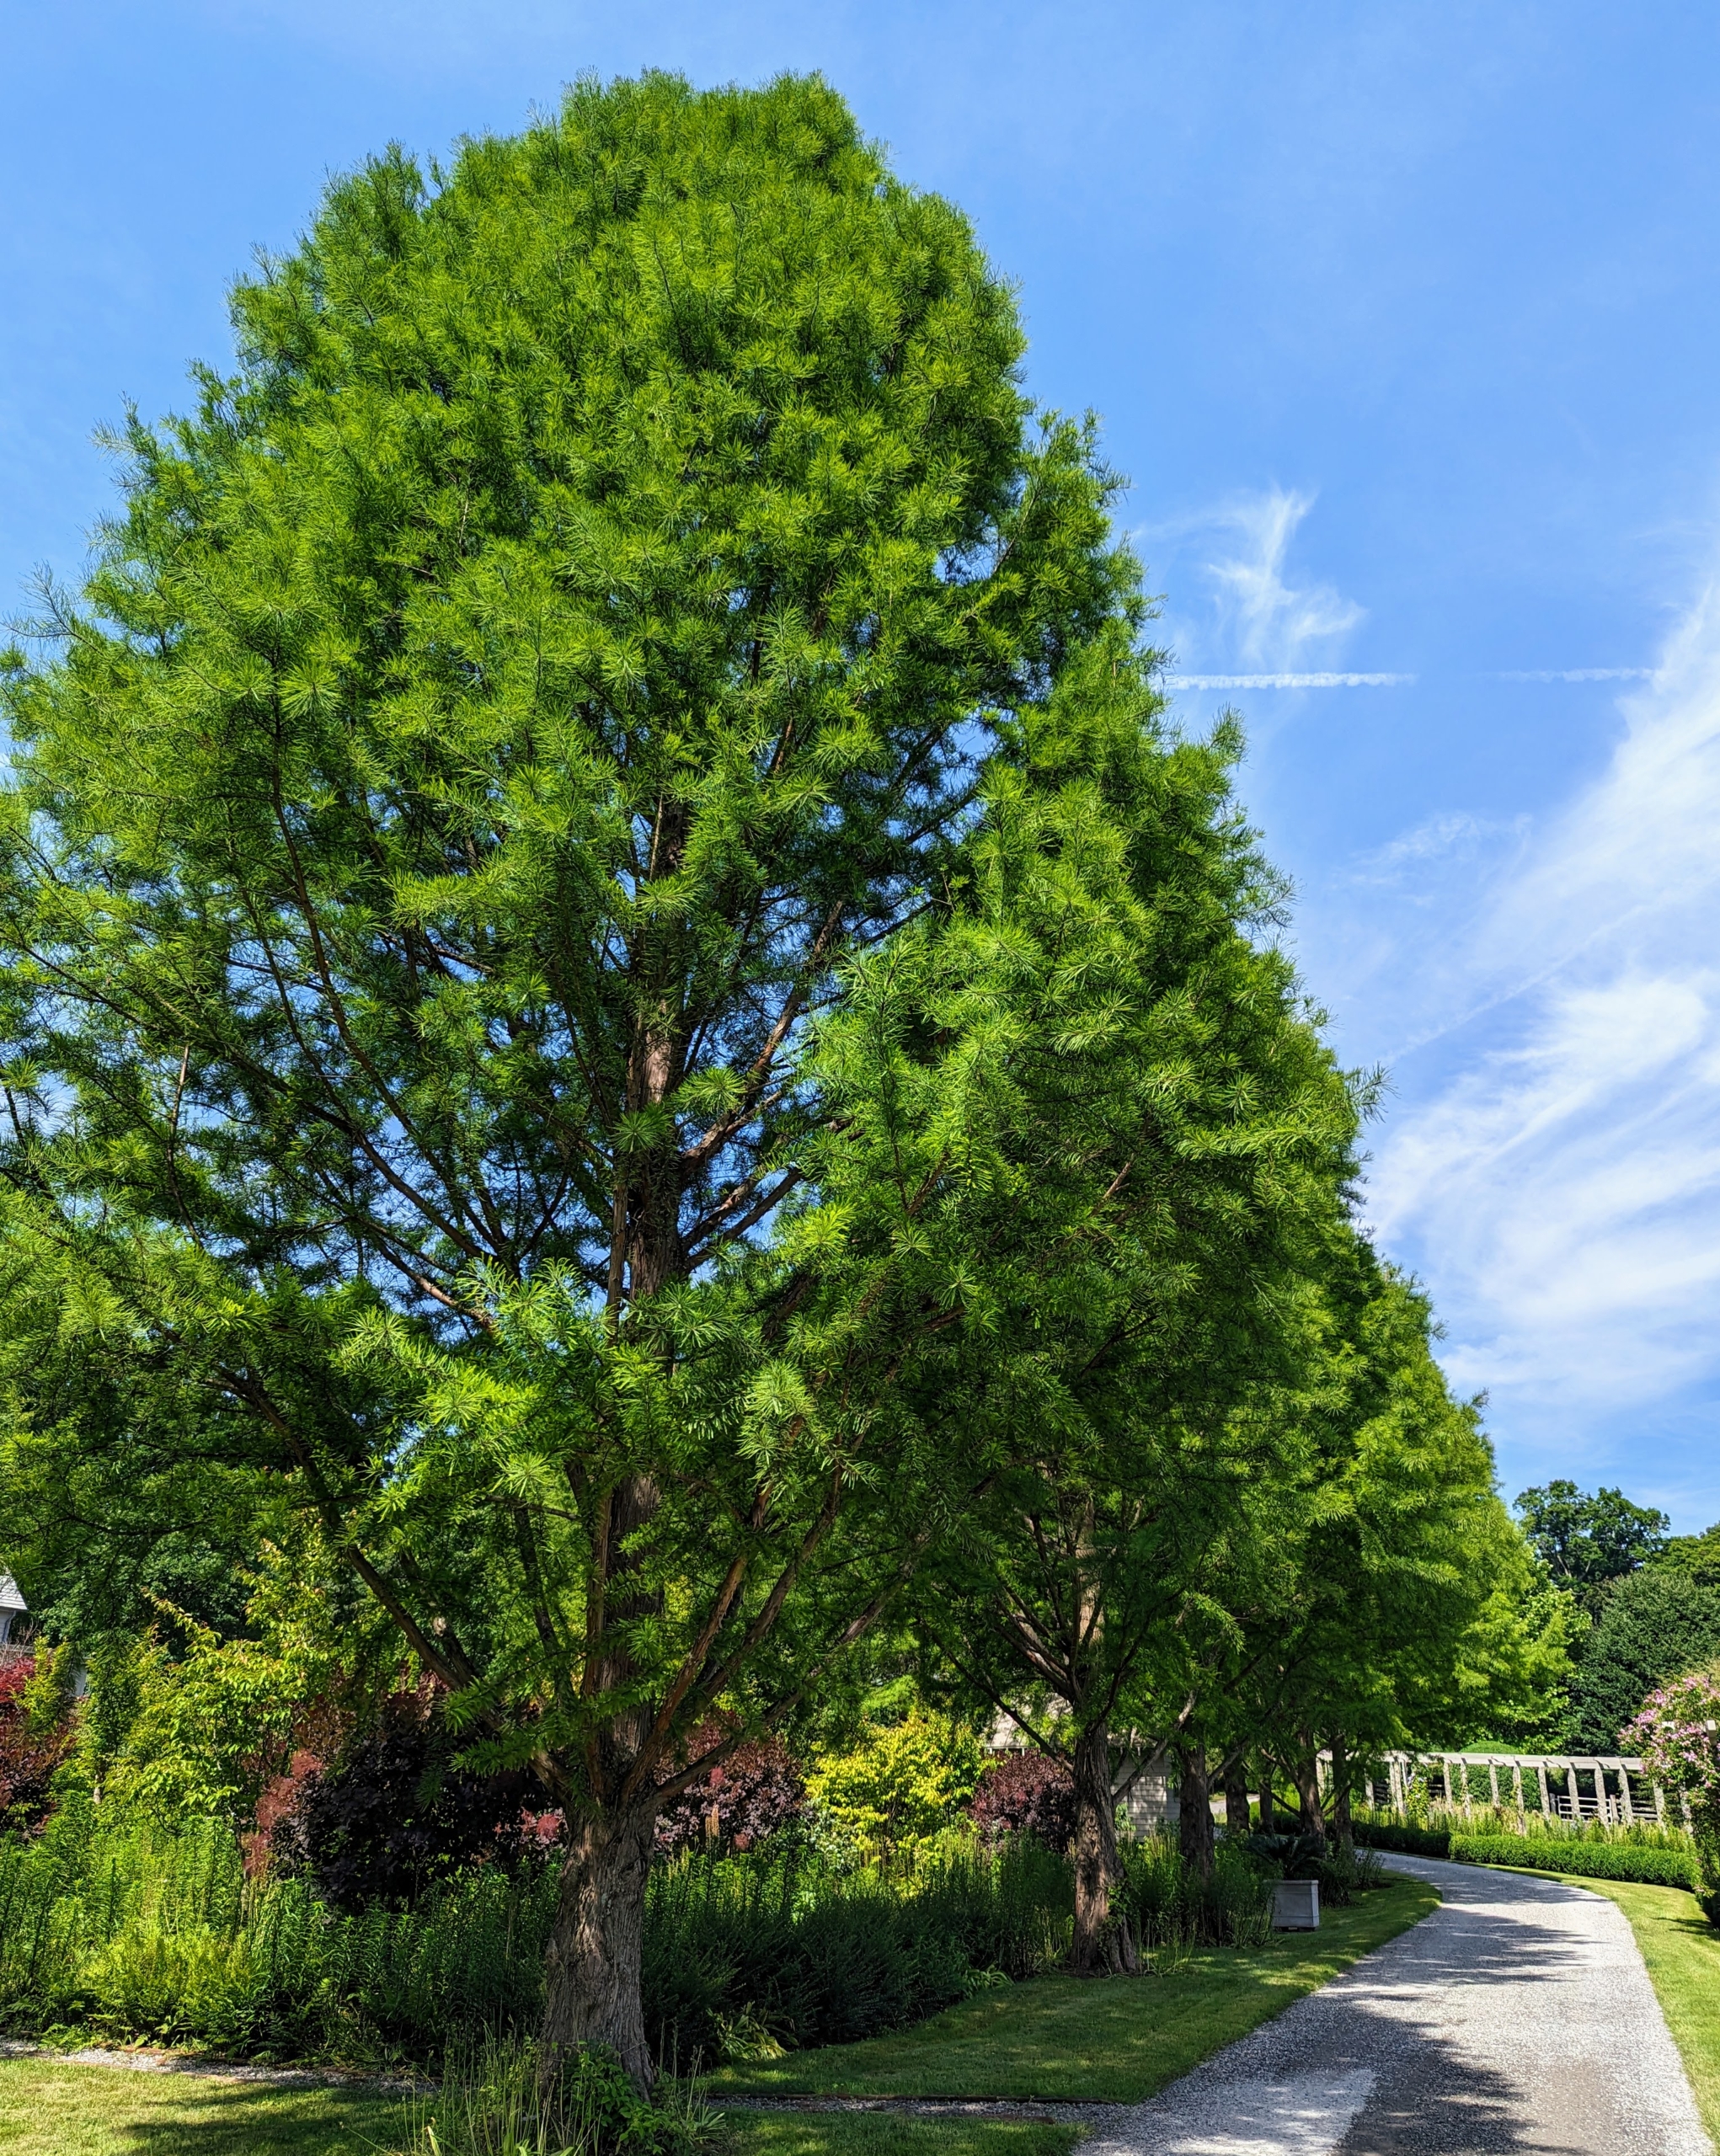
As we left the flower garden, the group admired my stand of bald cypress trees along this carriage road. Taxodium distichum is a deciduous conifer. Though it’s native to swampy areas, the bald cypress is also able to withstand dry, sunny weather and is hardy in USDA climate zones 5 through 10. These trees do so well here at the farm.
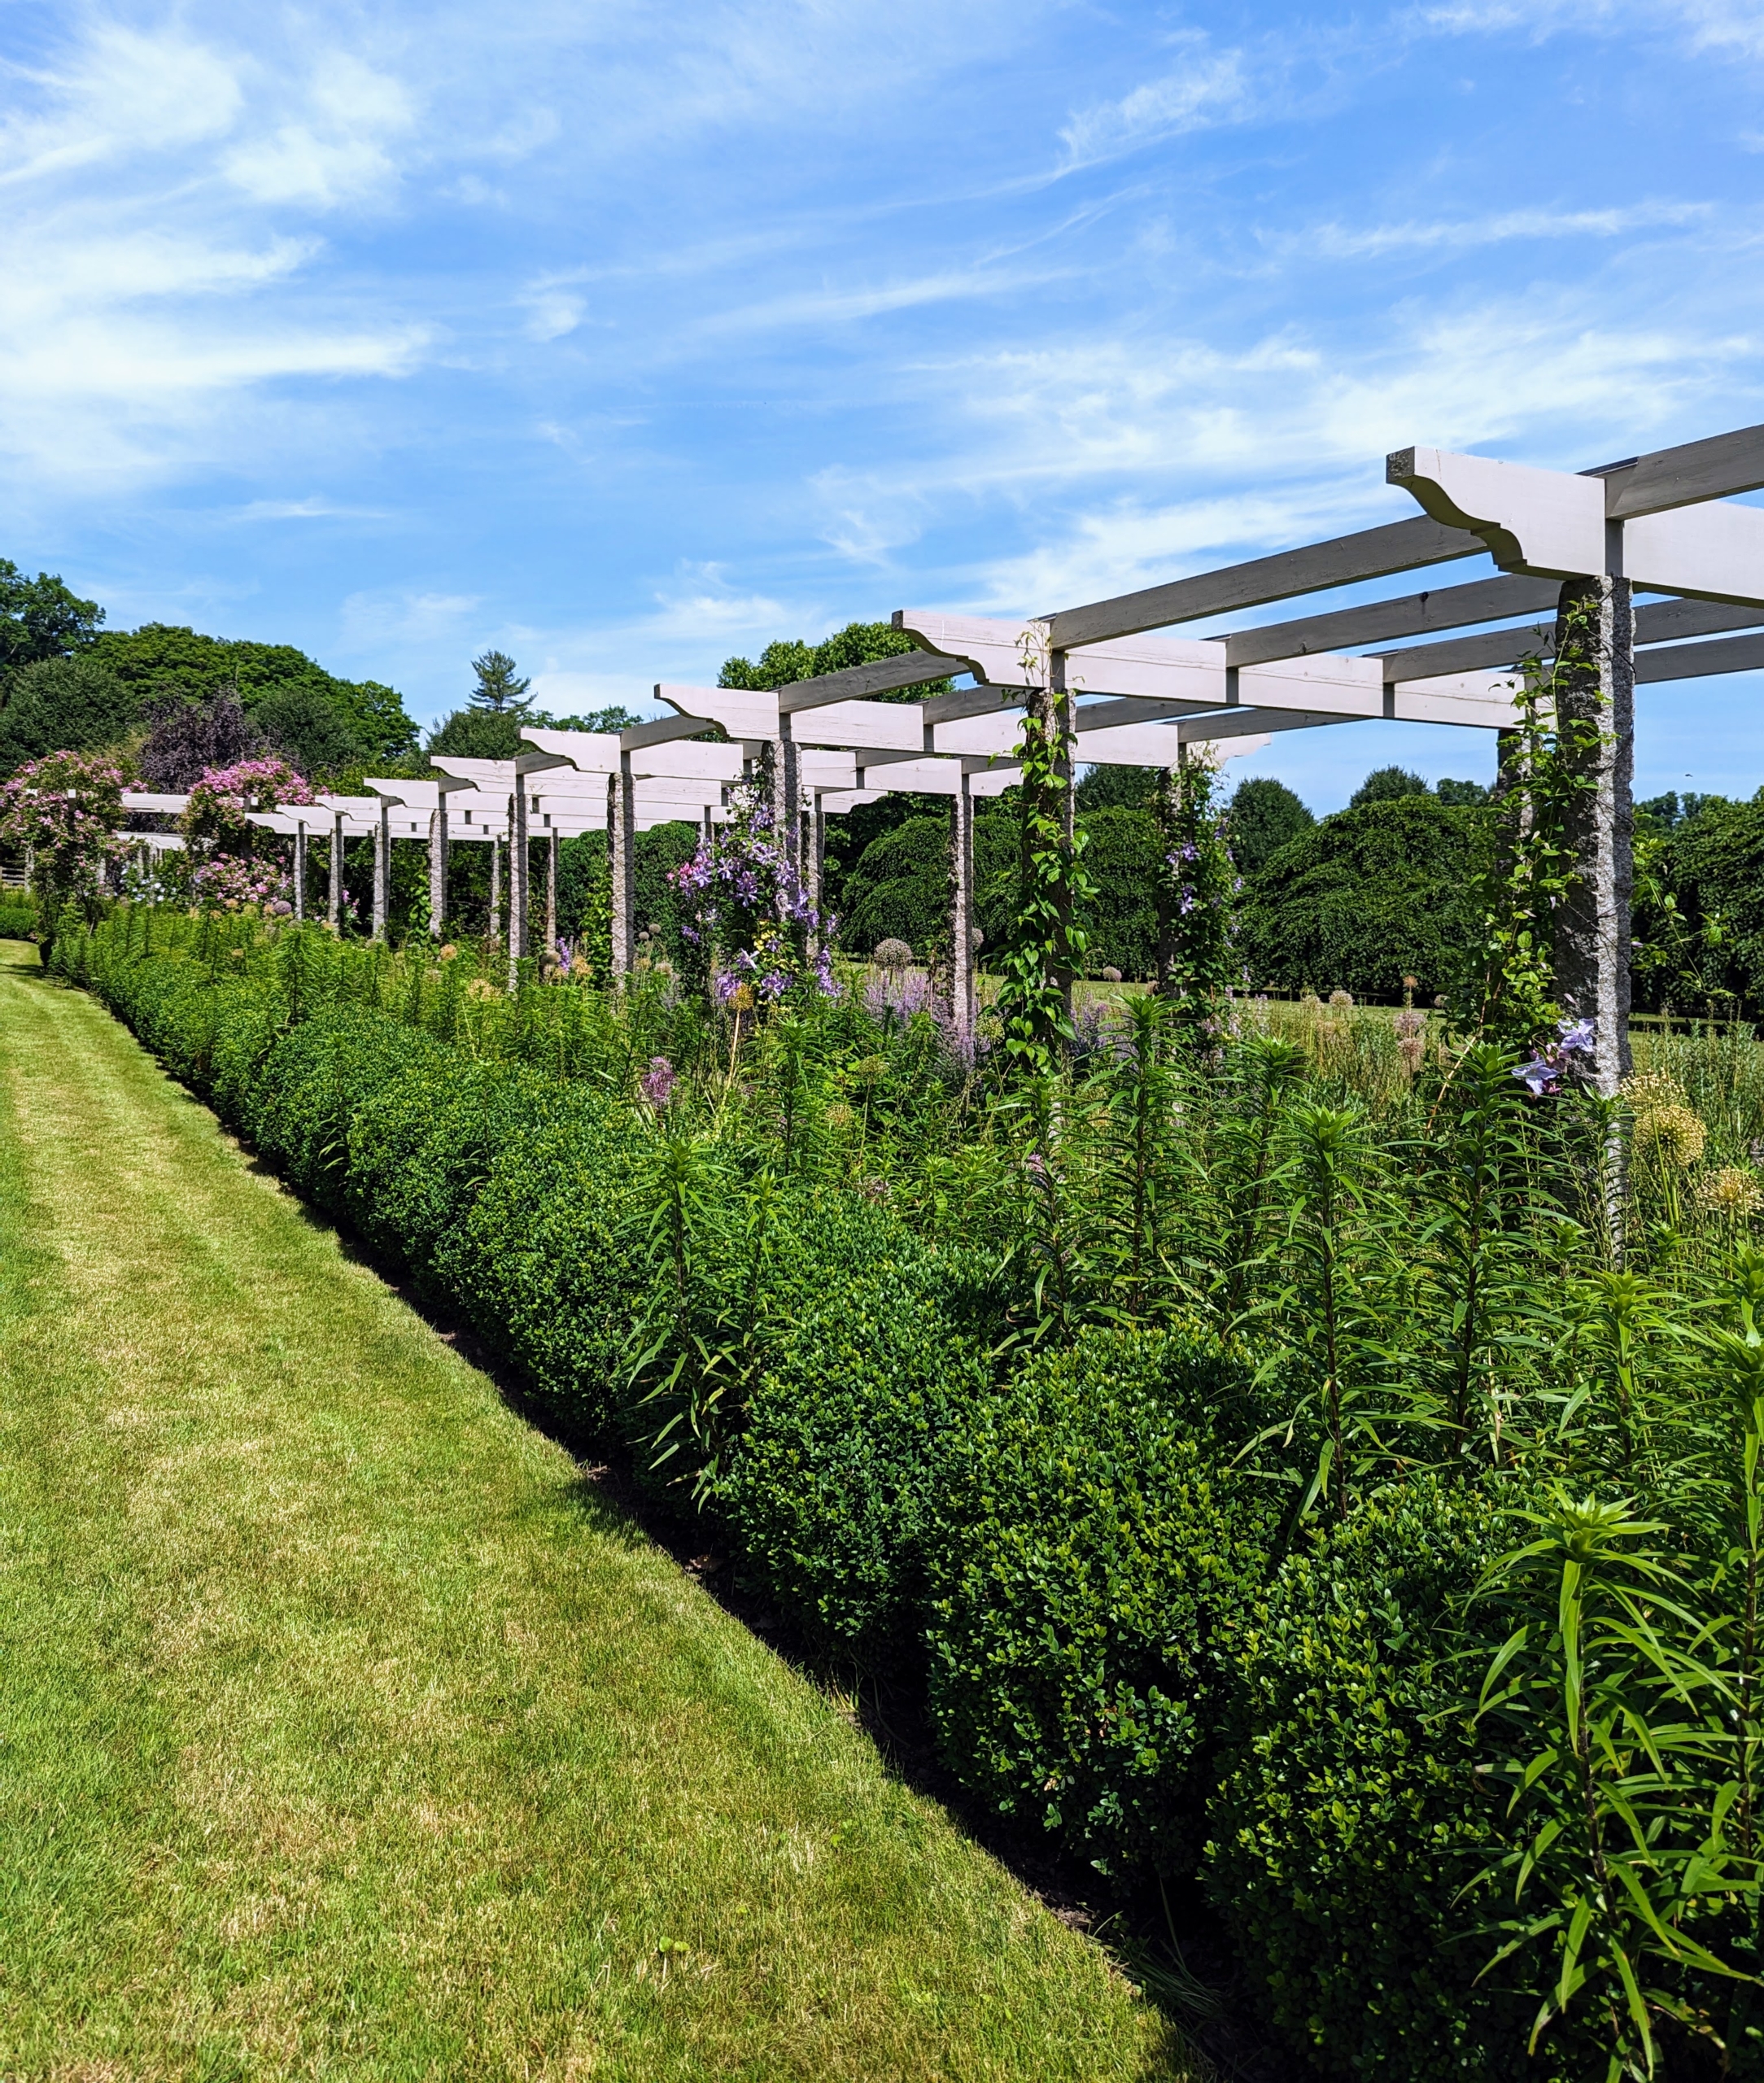
Across from the bald cypress is my long pergola underplanted with bulbs and perennials that bloom at different times throughout the season.
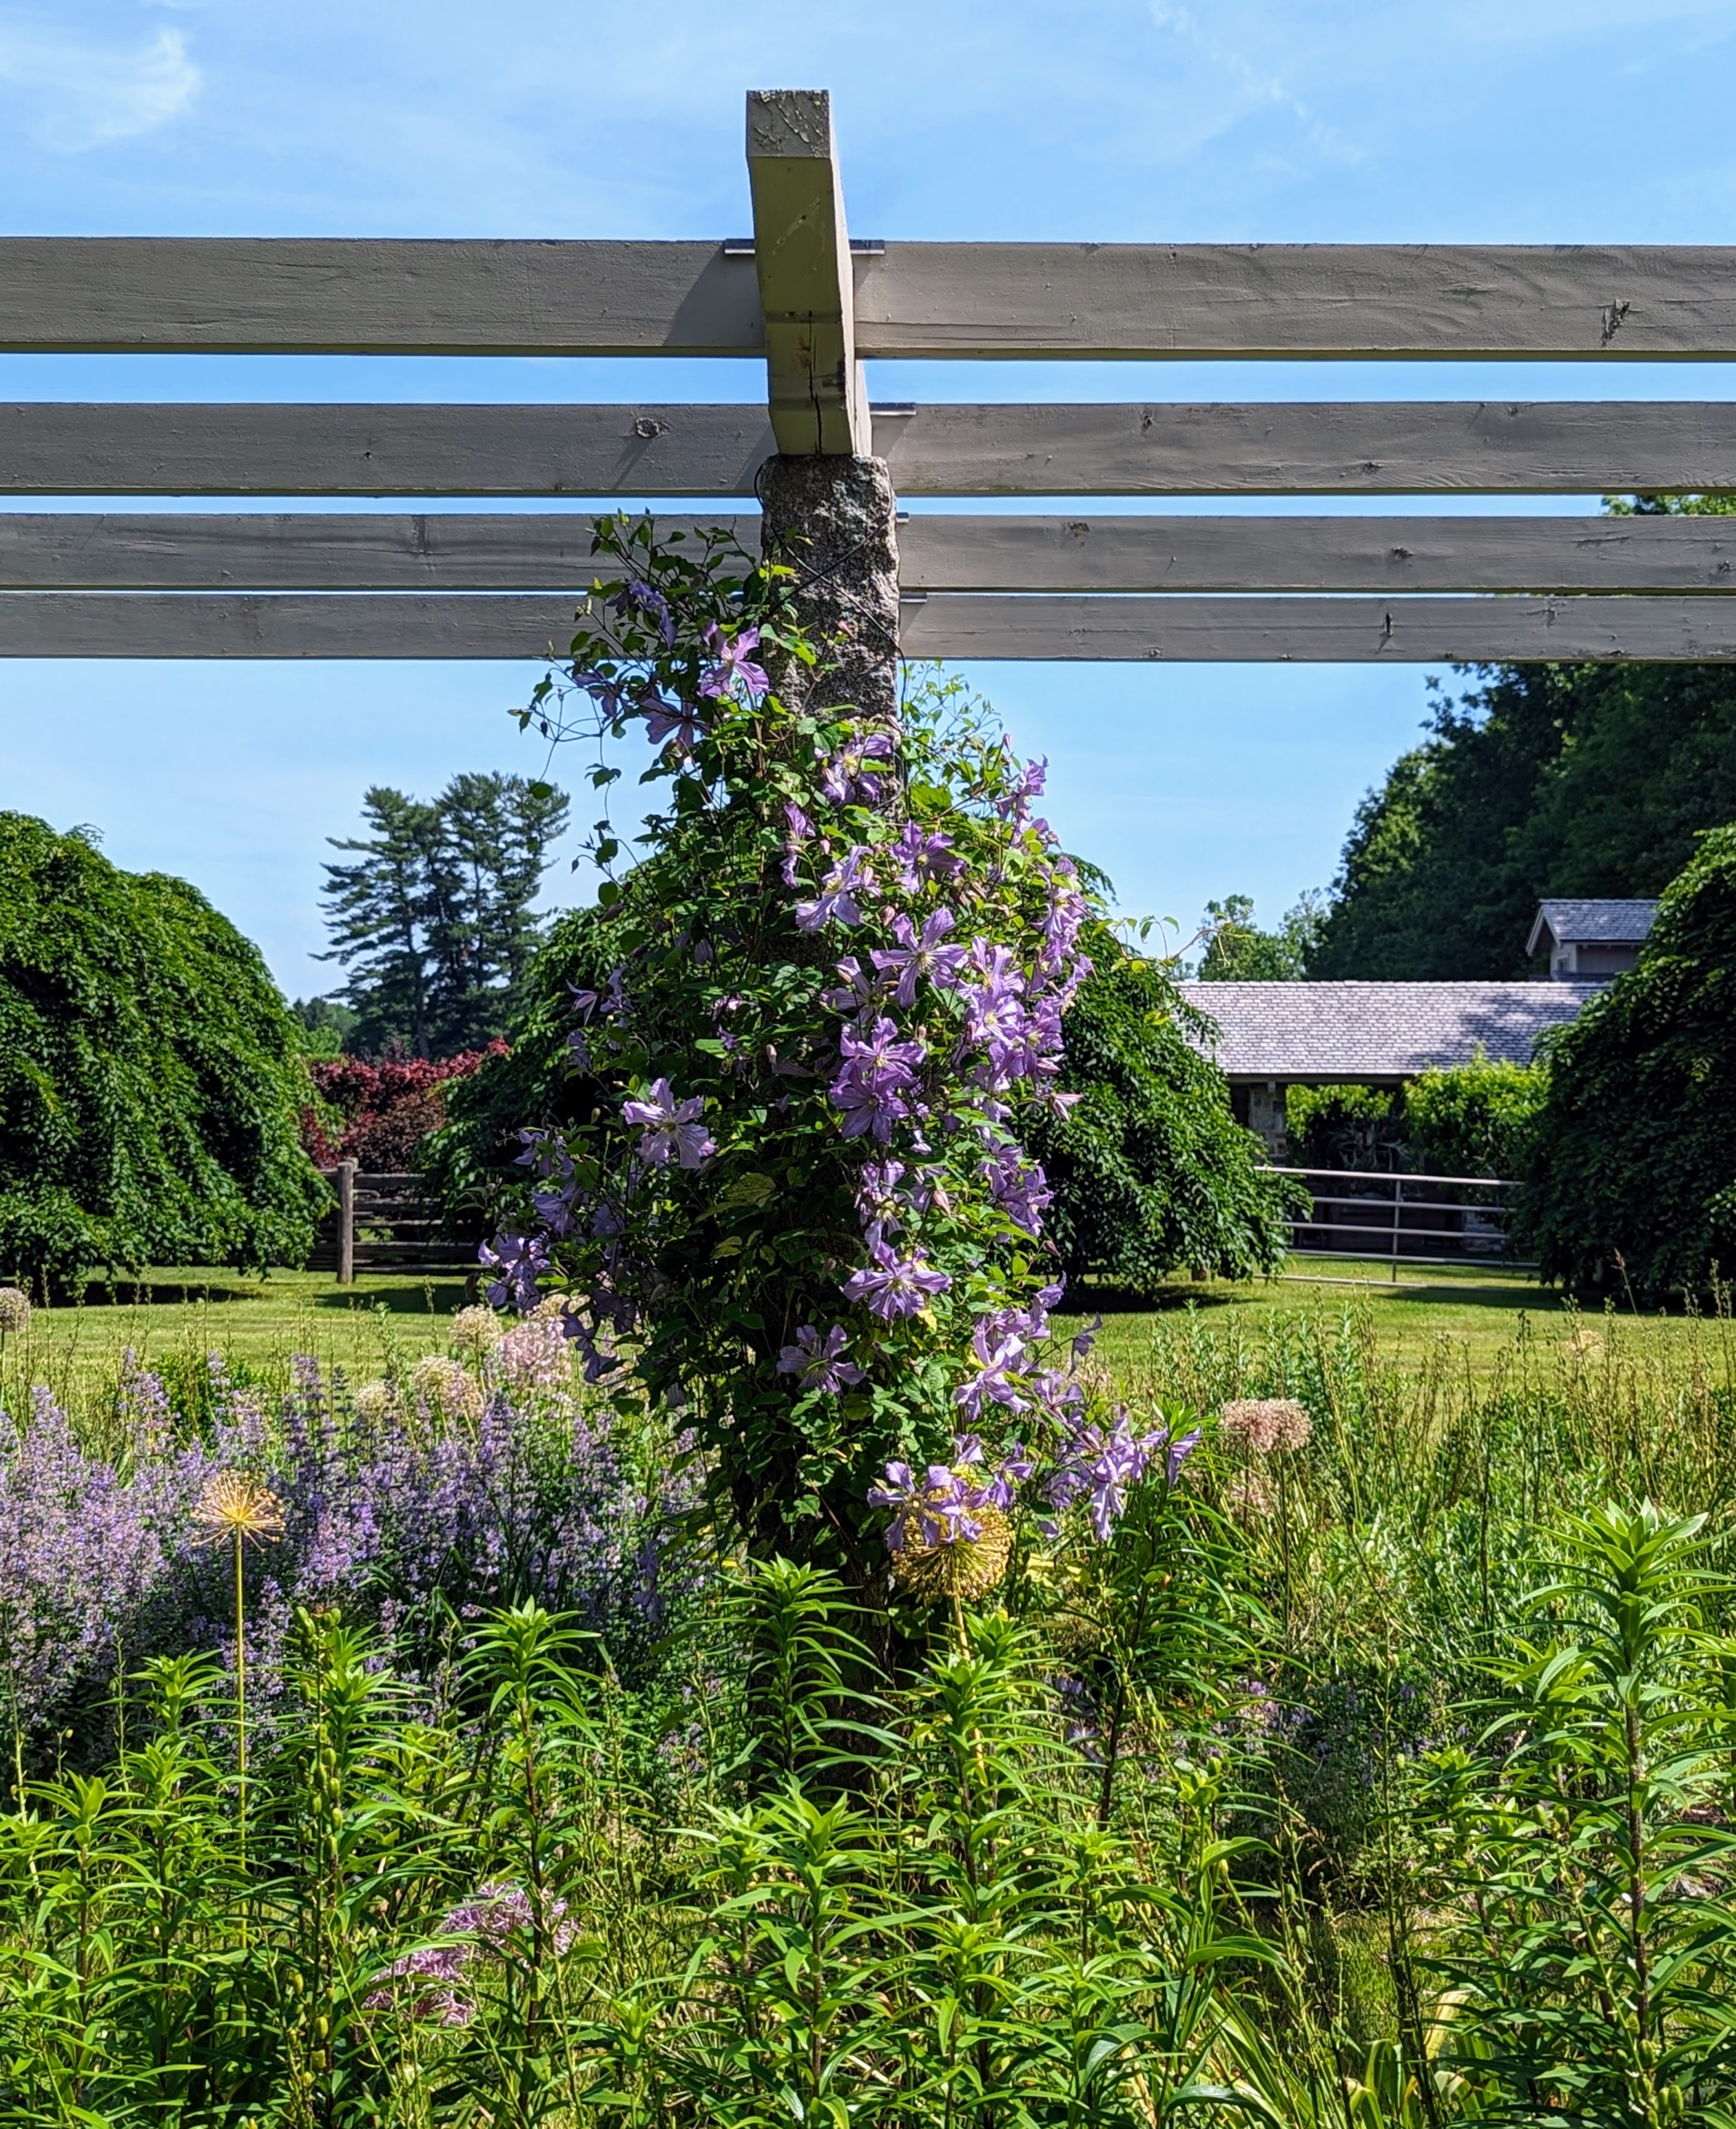
On the upright granite posts, I planted clematis, in a palette of blue-flowering cultivars. Every year they give a vivid floral display.
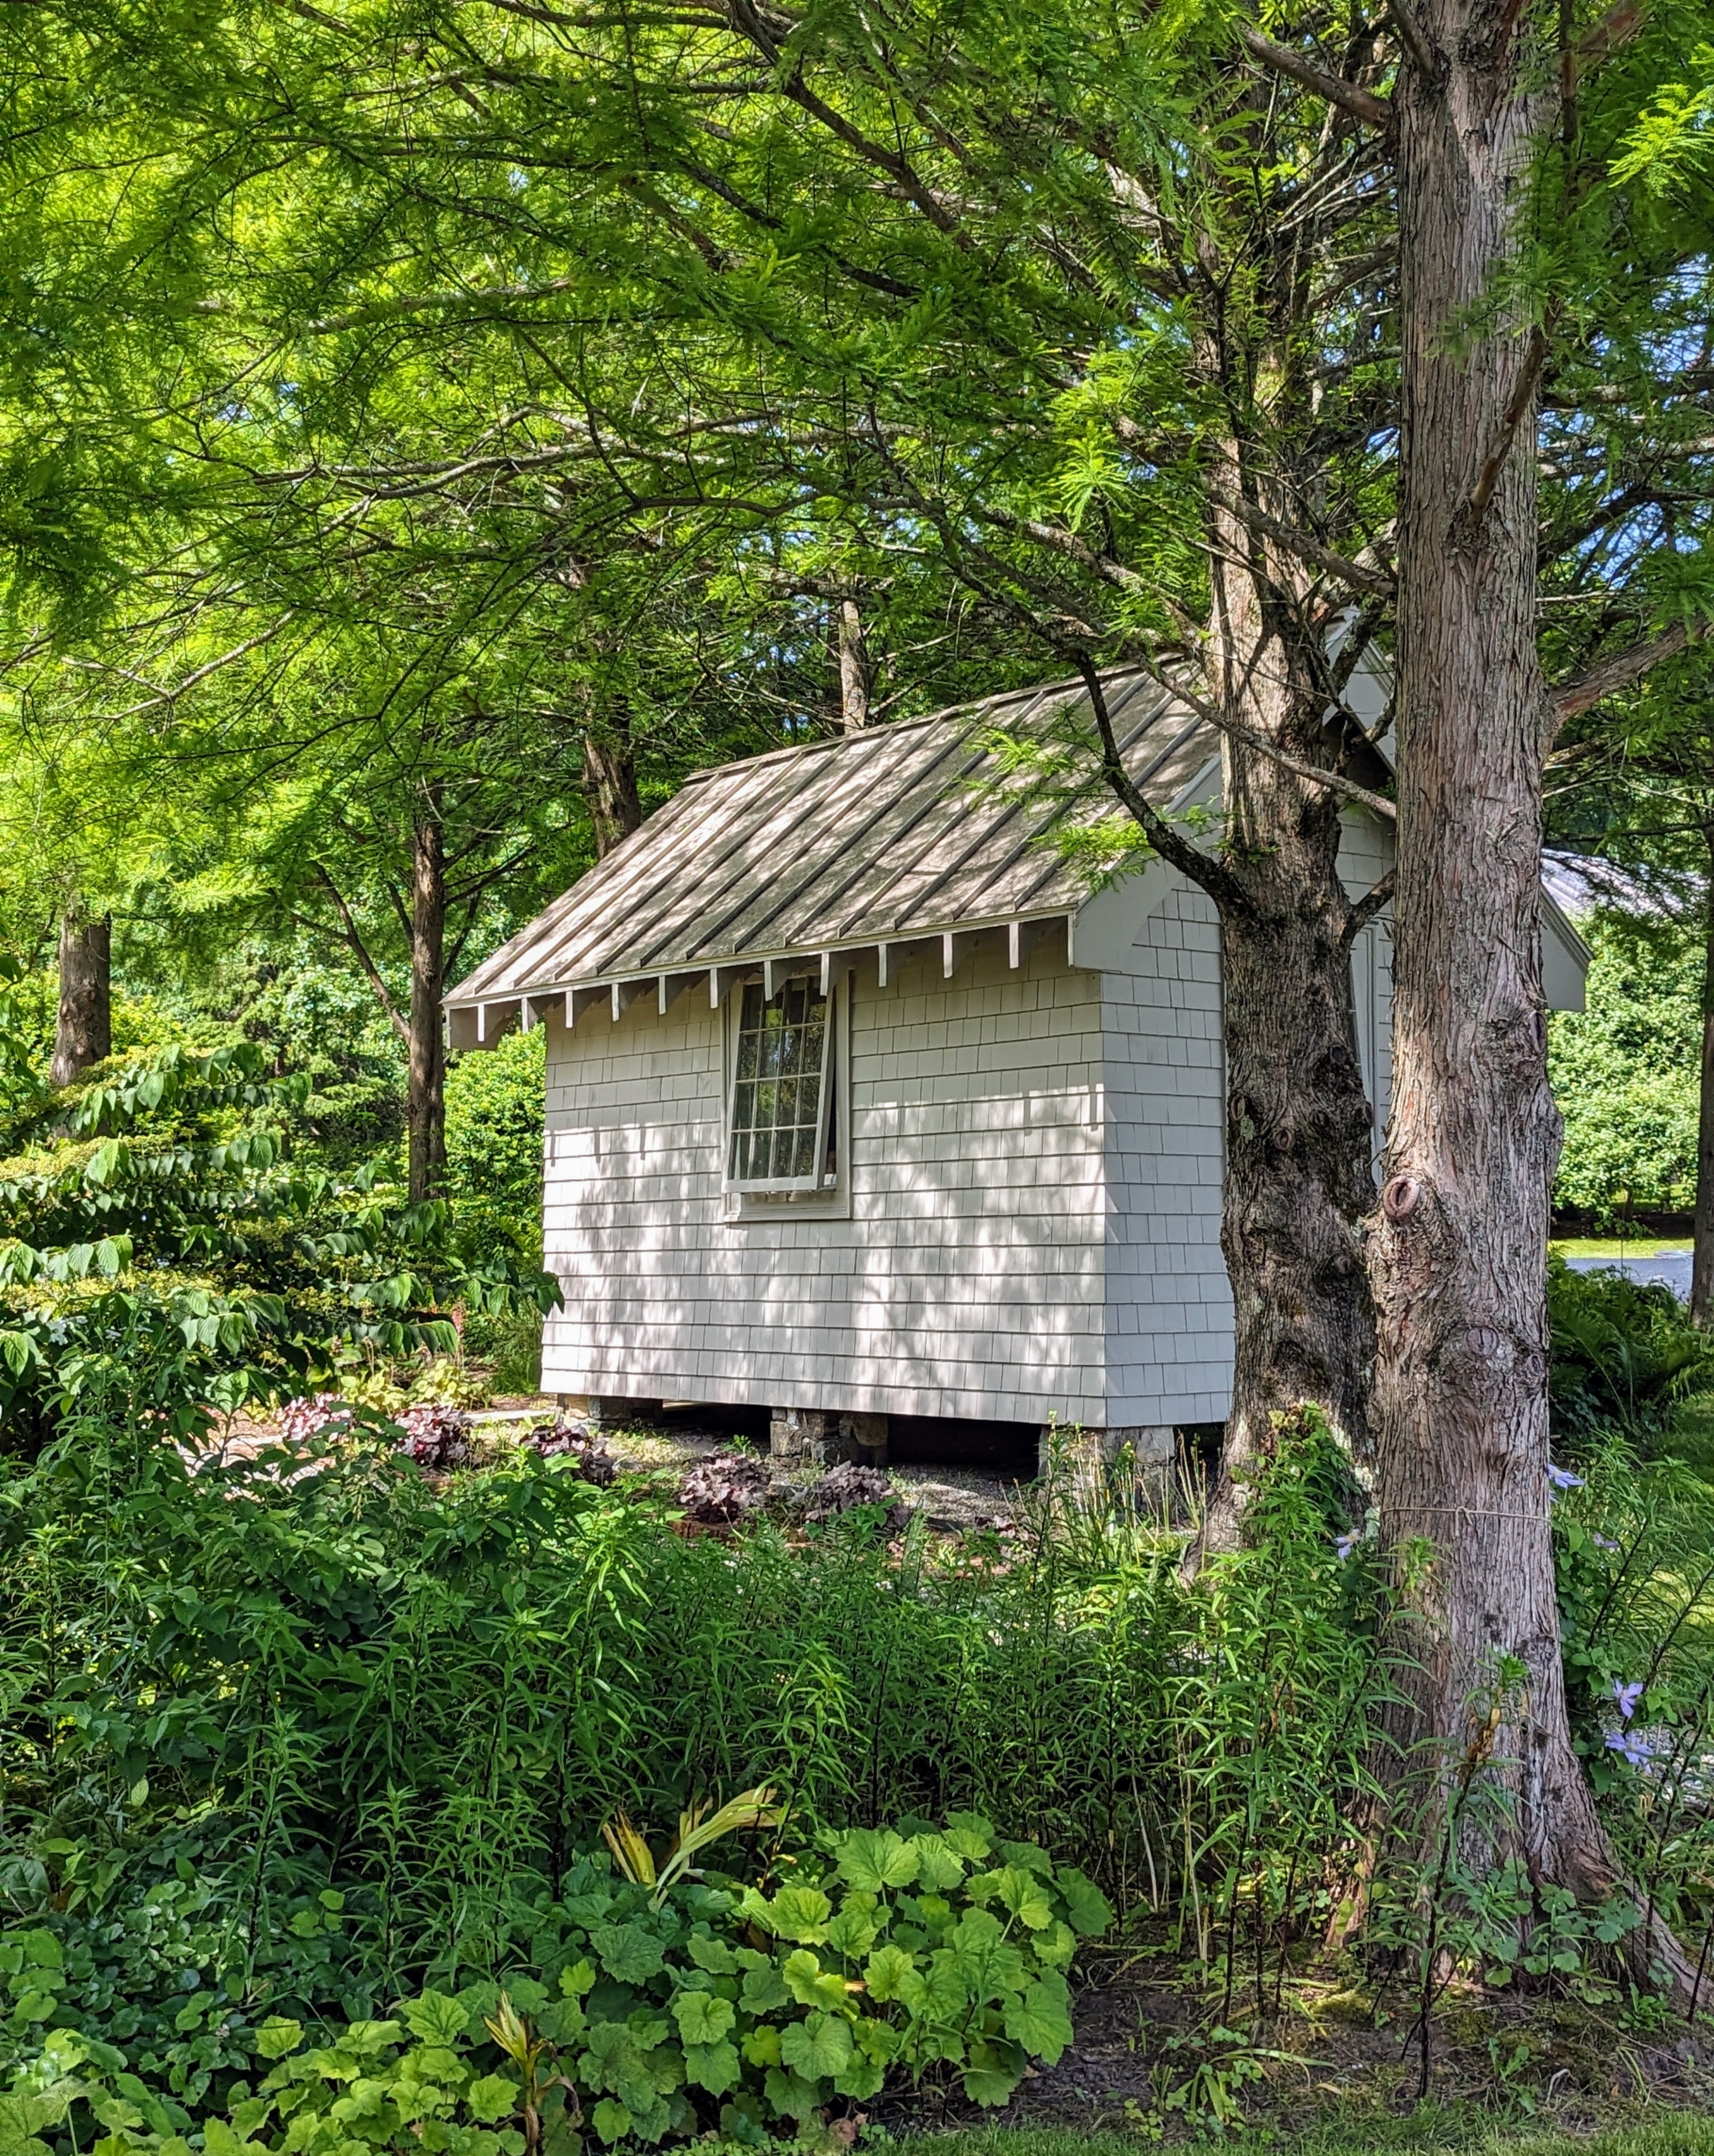
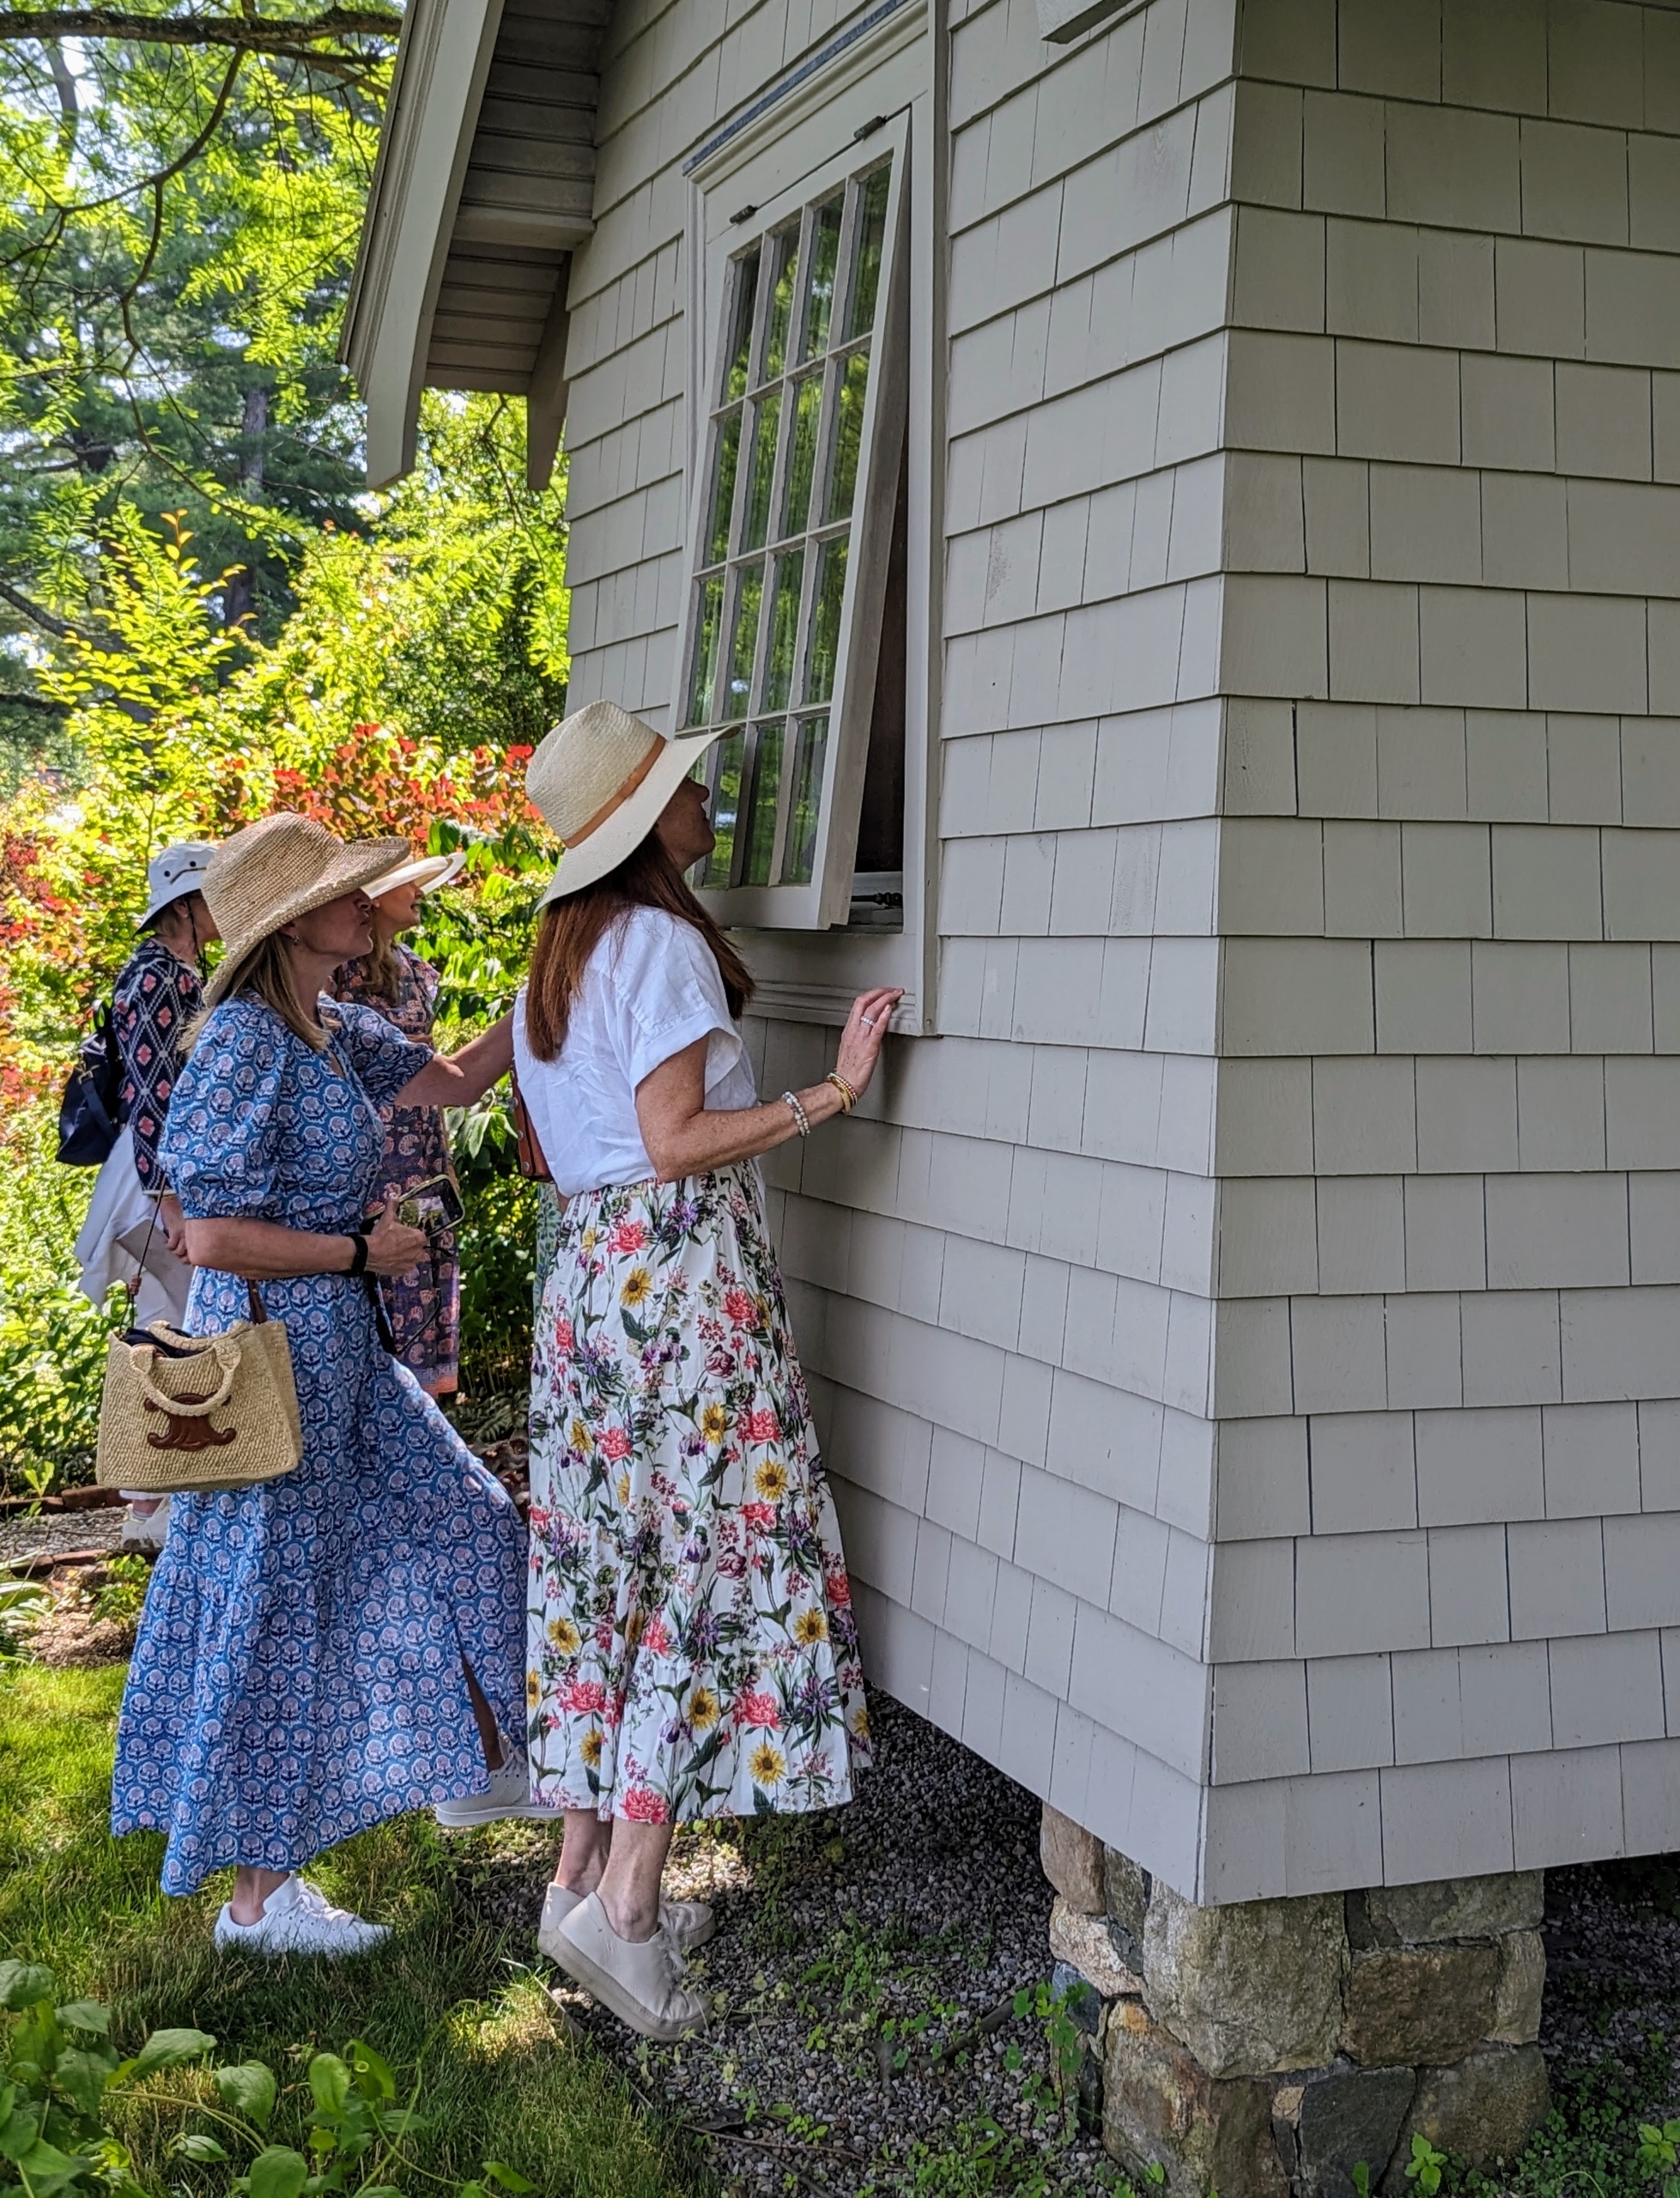
Another interesting stop is my Basket House, where I store my basket collection. I have hundreds of baskets – some are rare and antique, some are vintage, and some are more contemporary.
Many stopped to peer in the window. Perhaps they also saw some of the baskets I used during my early catering days – they’re in there.
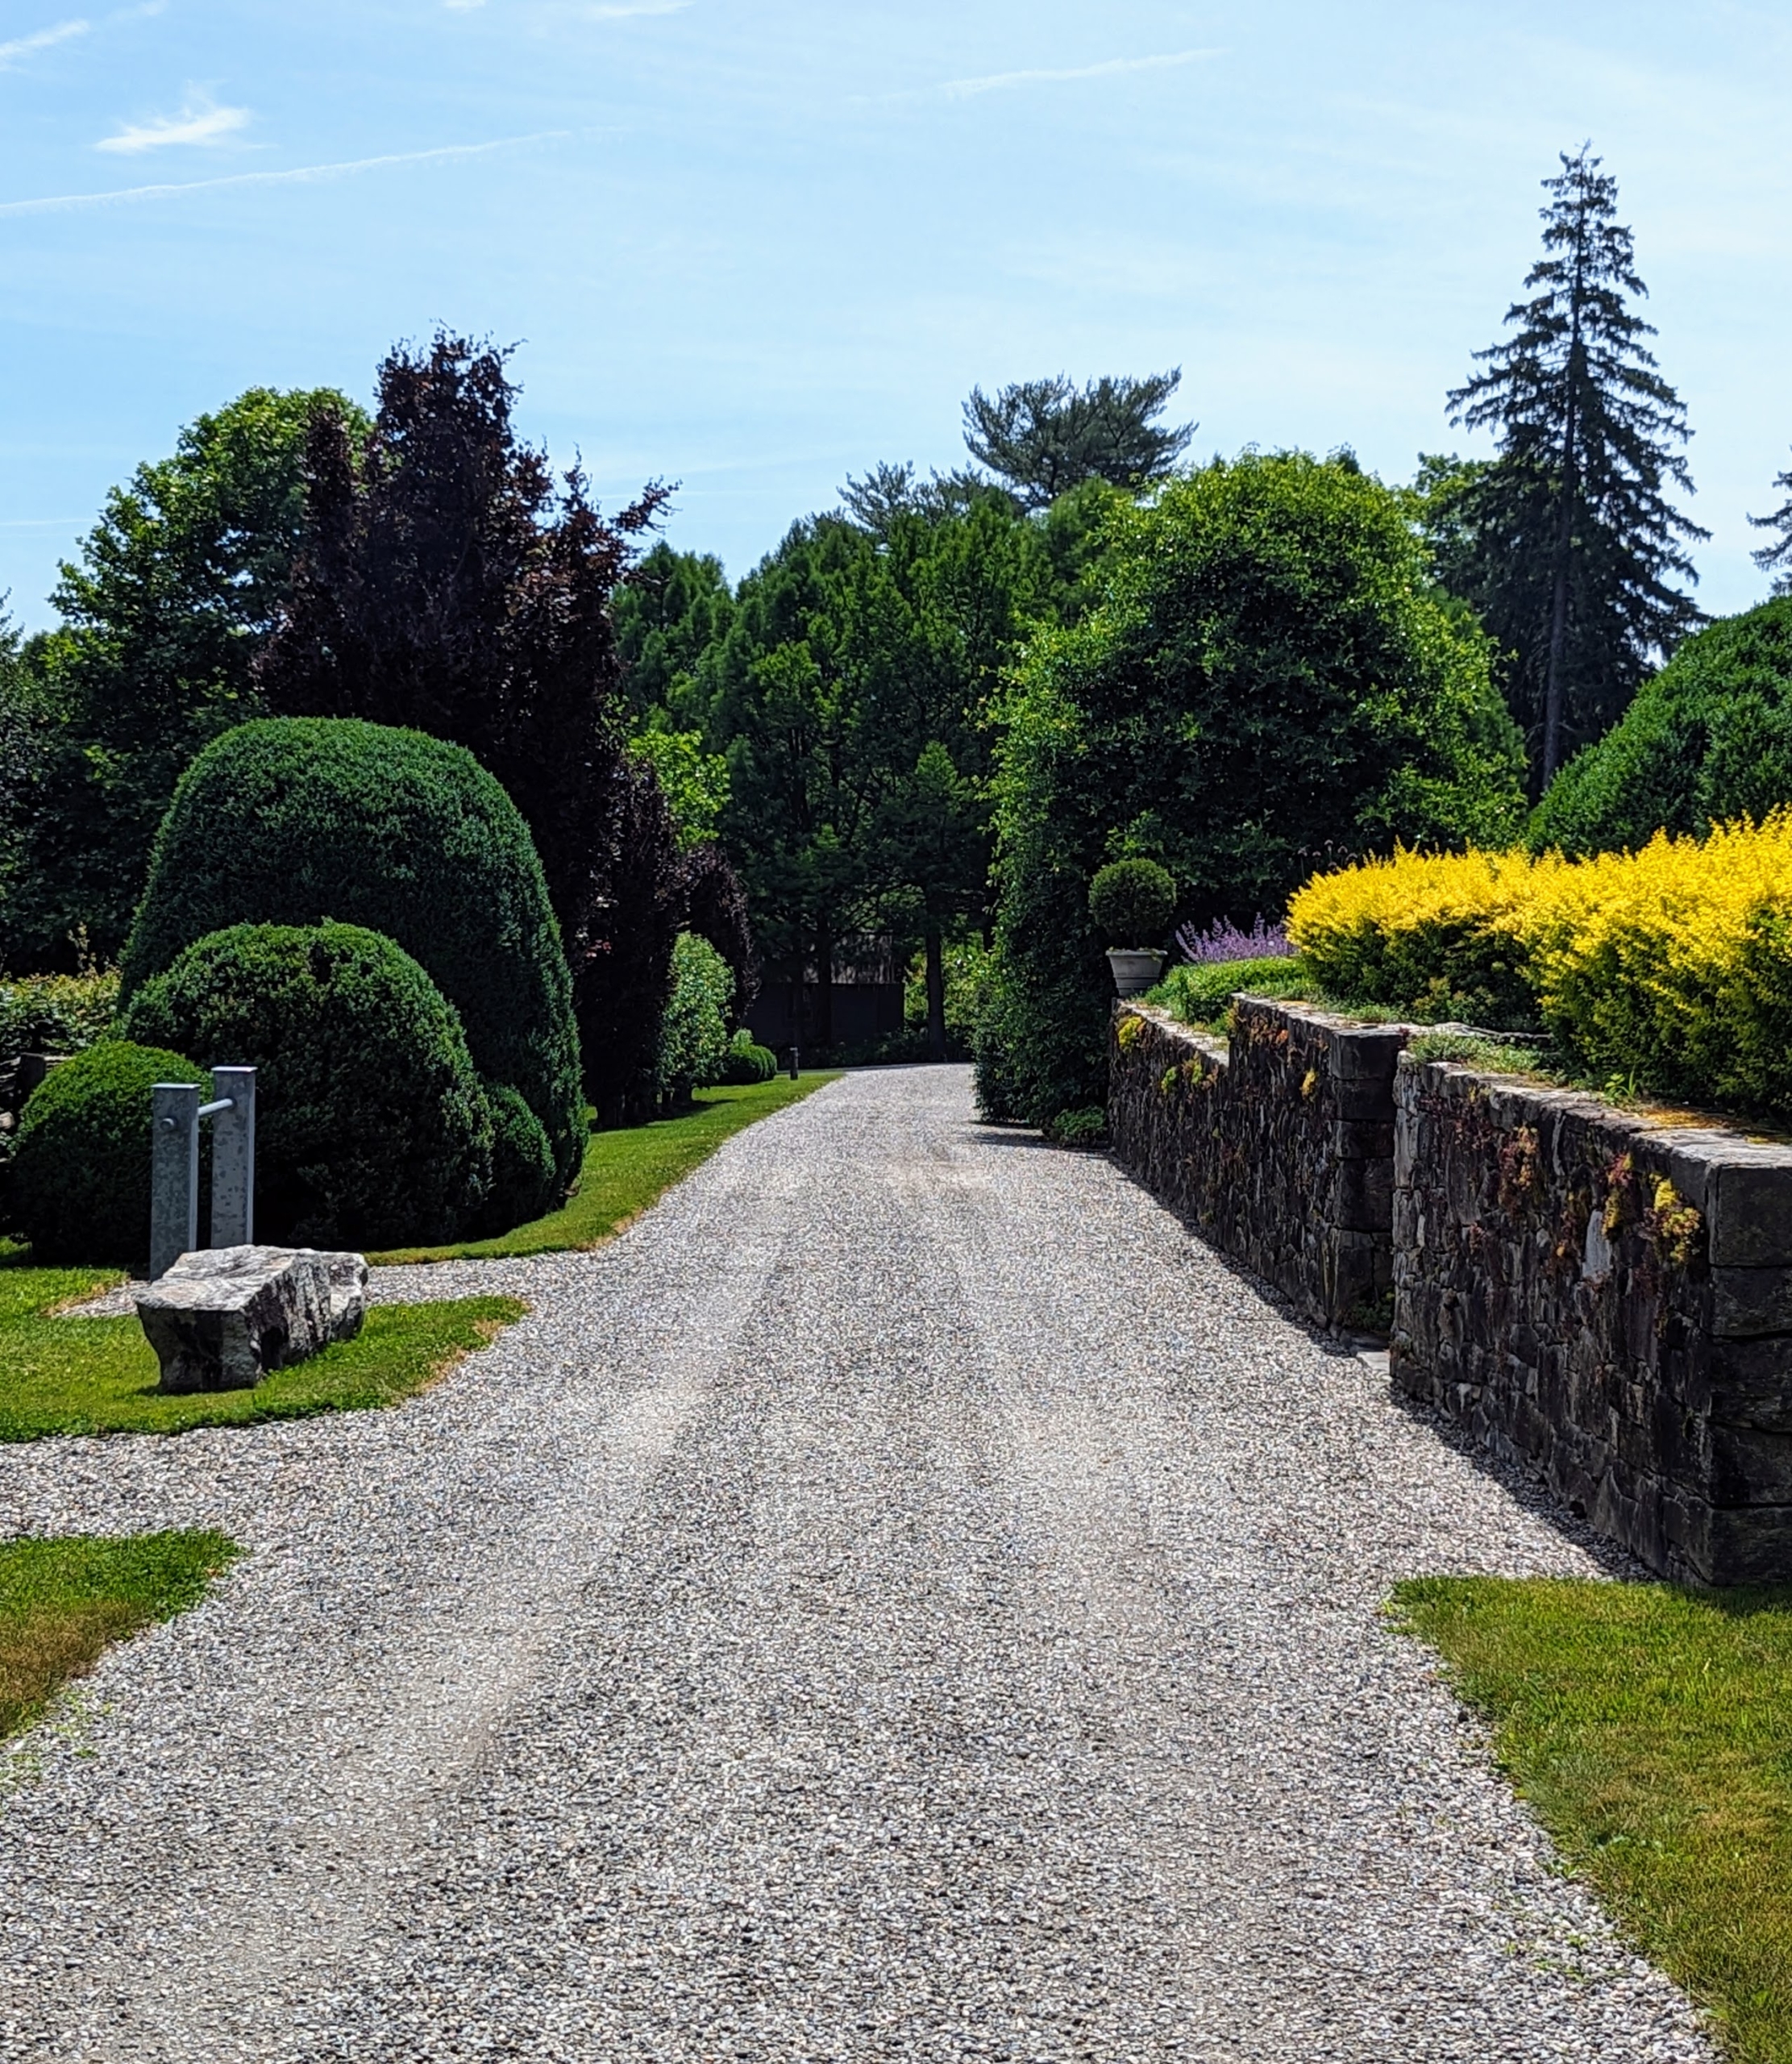
Here at the farm, I have four miles of carriage road that meander around my homes, my gardens, my pastures, and through the expansive woodland. They are 12-feet wide and covered with native washed stone.
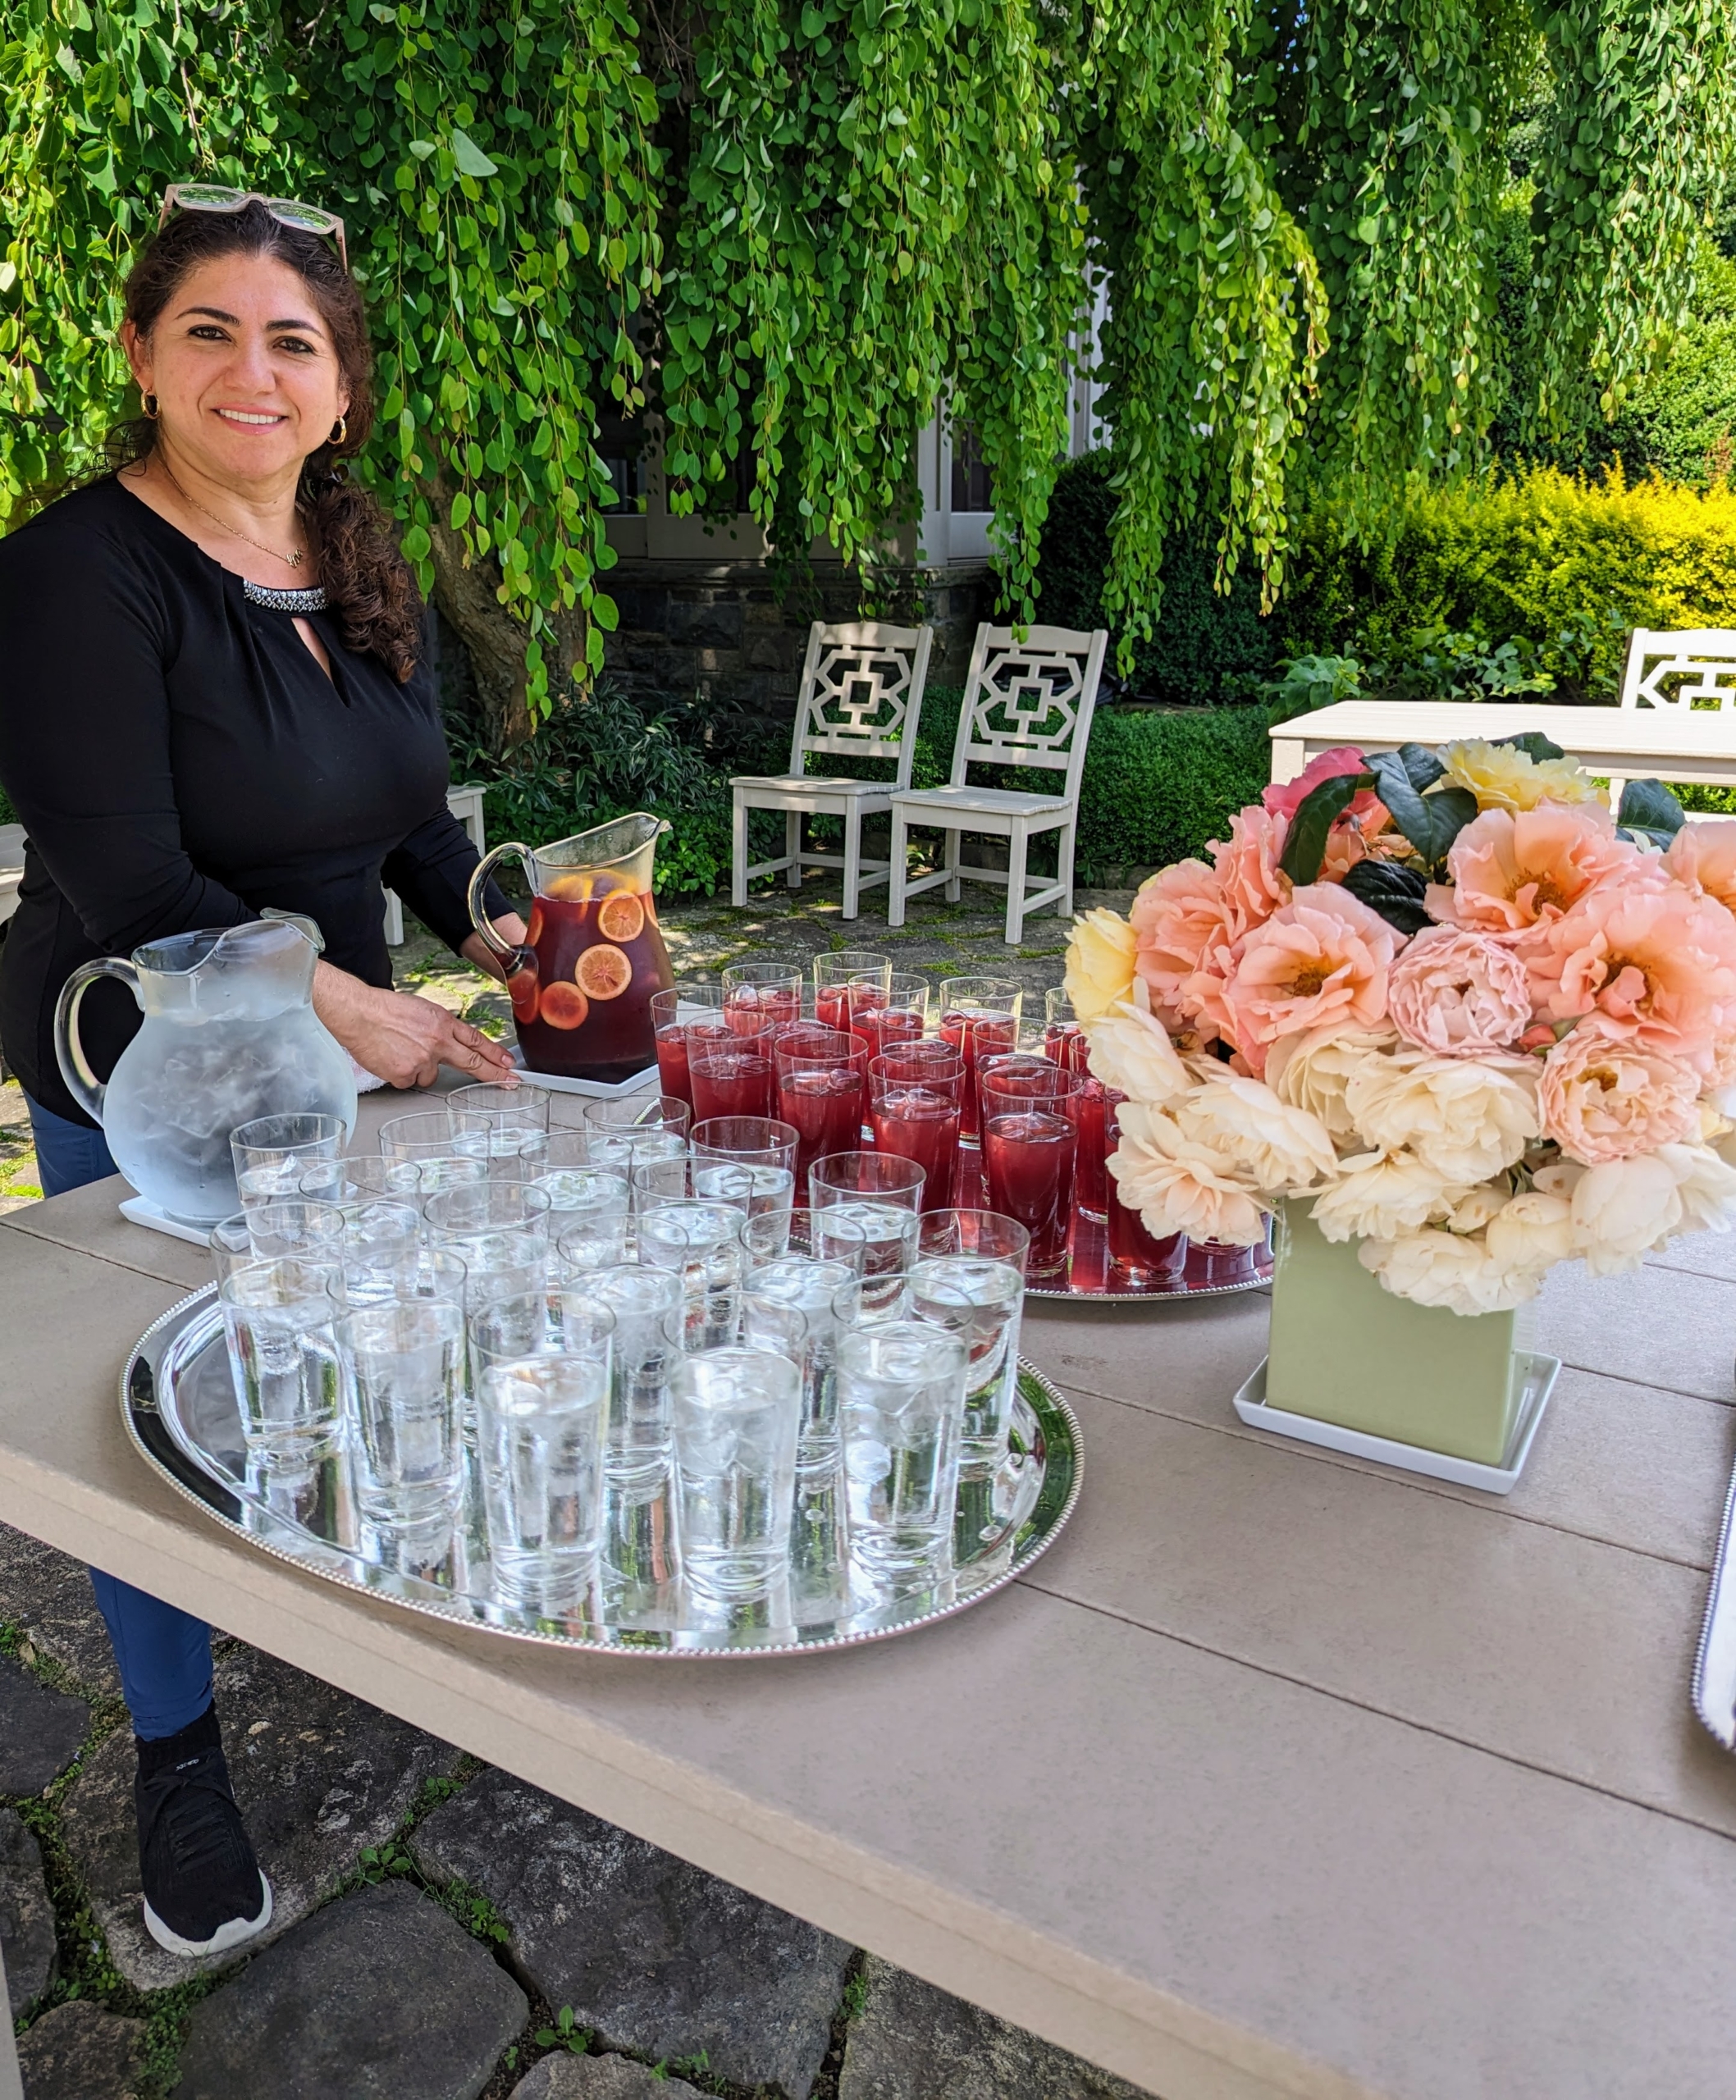
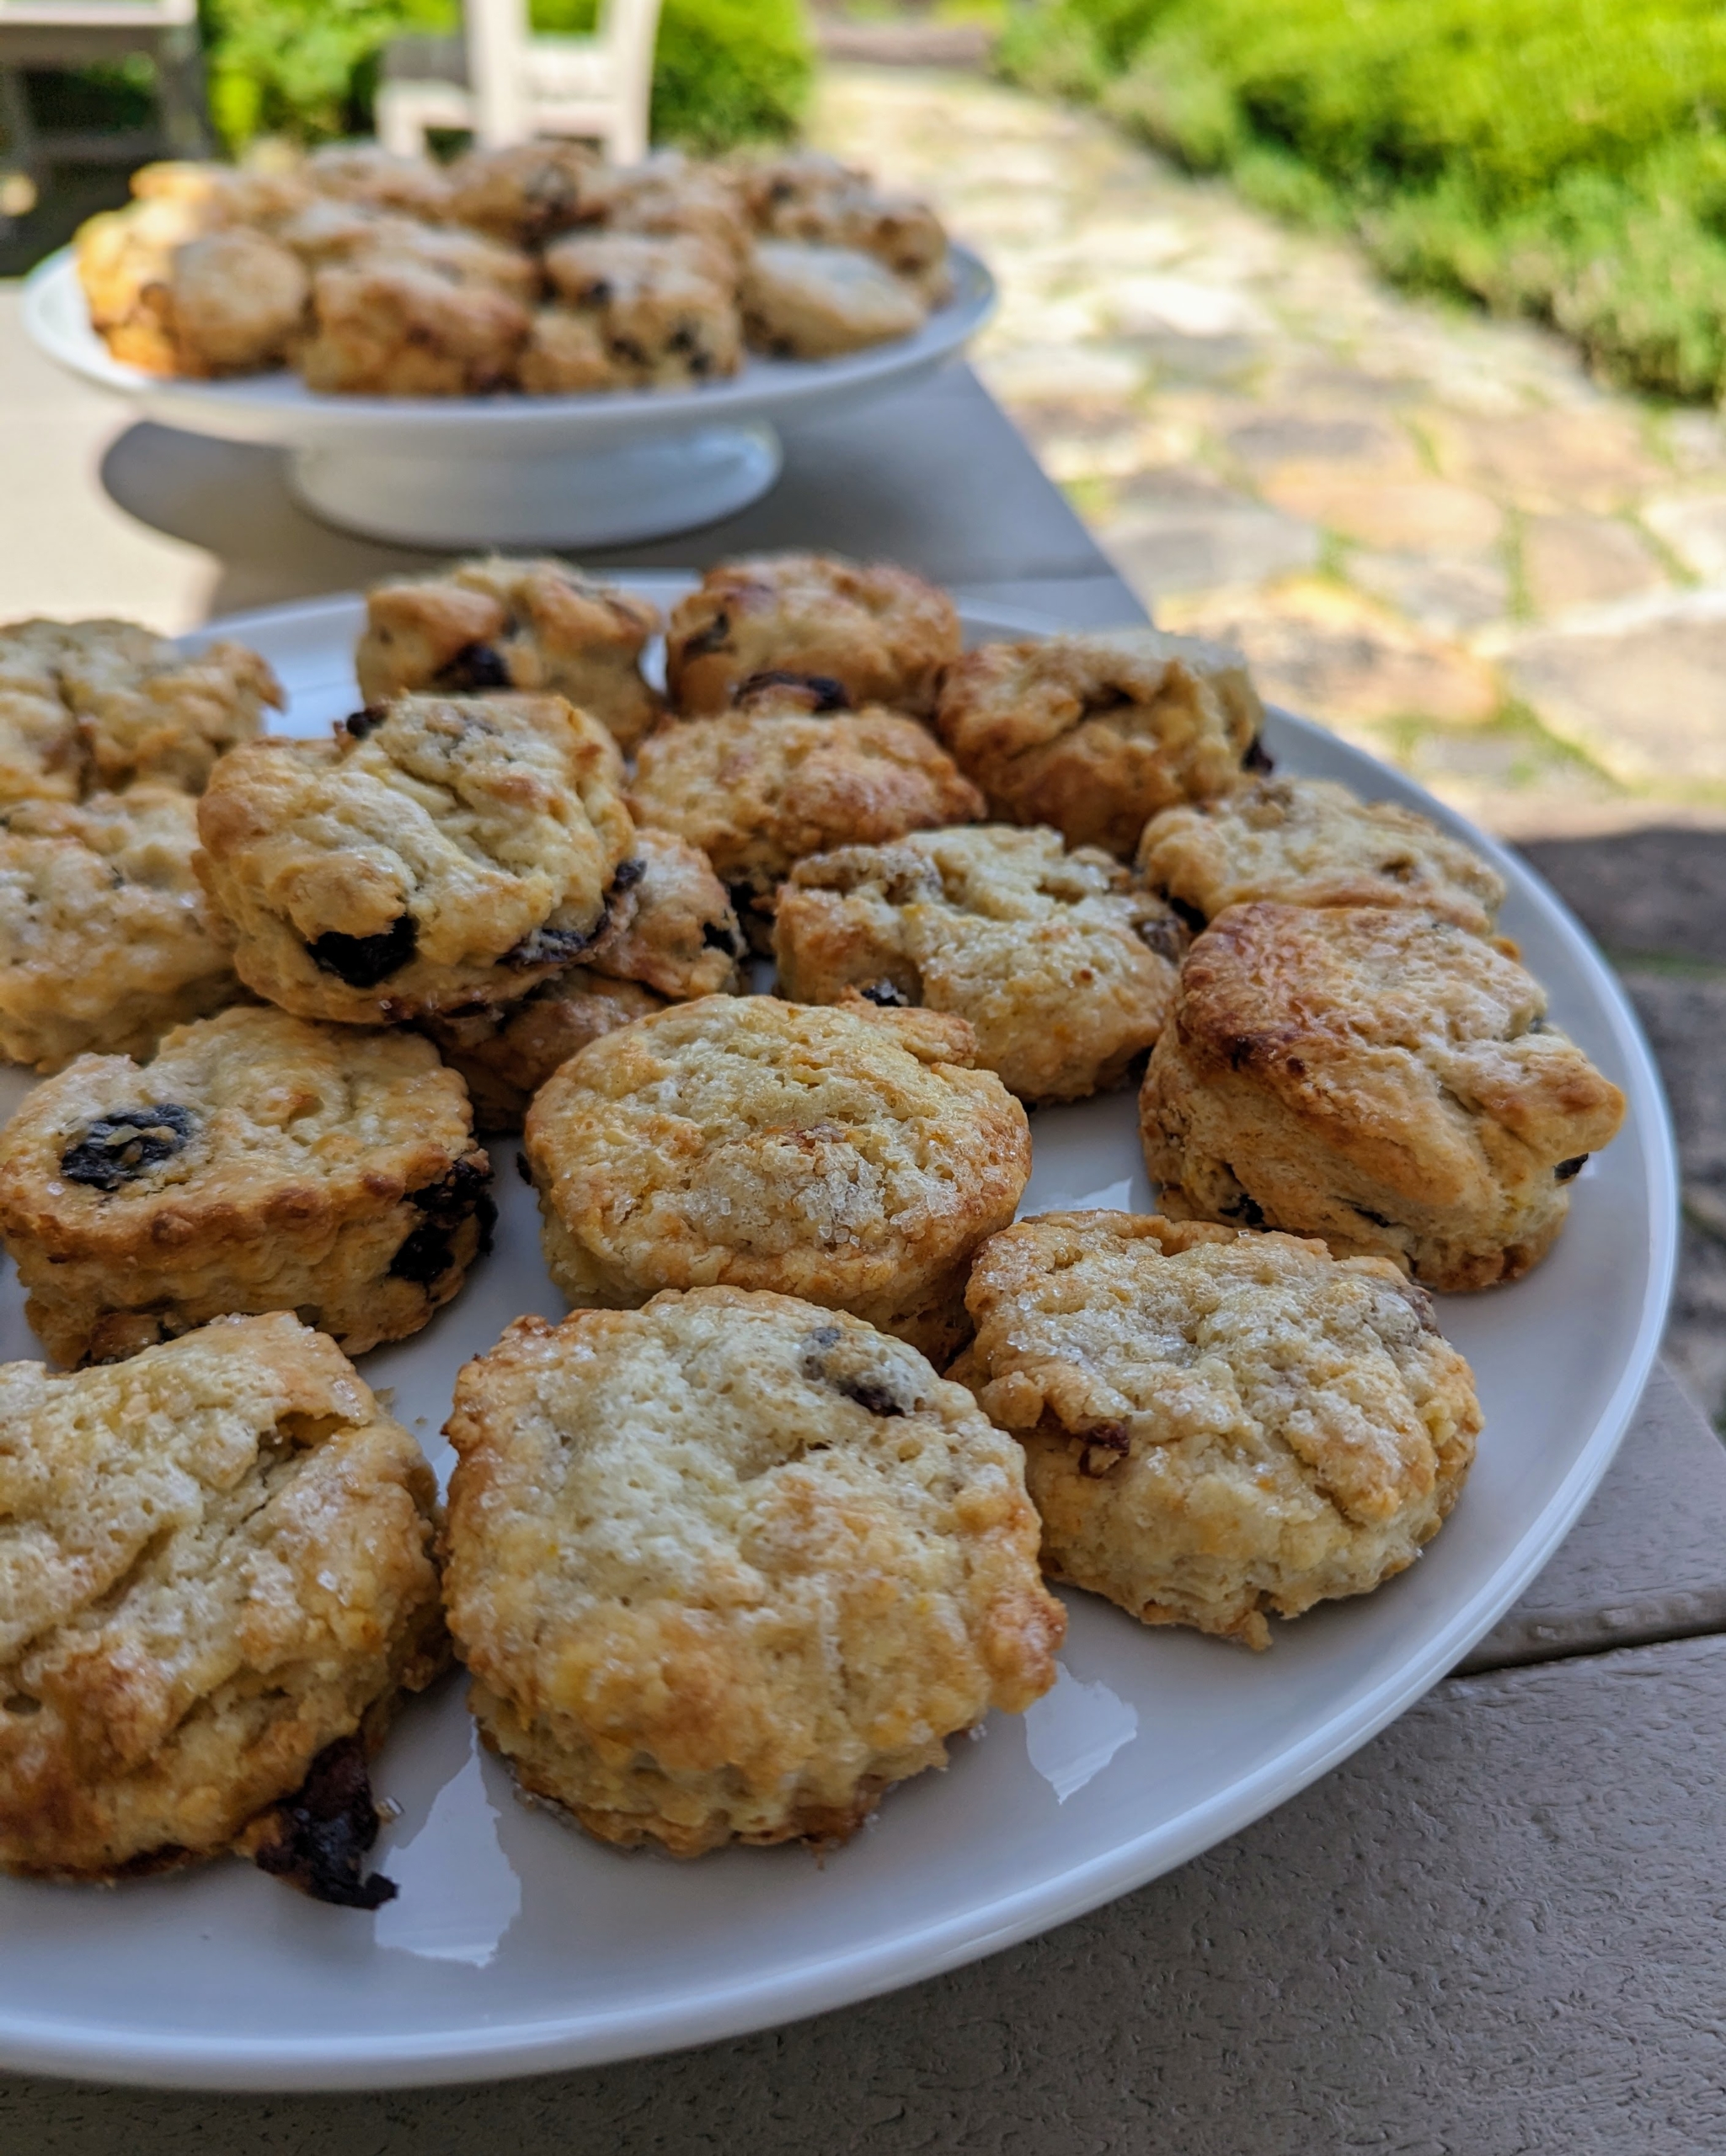
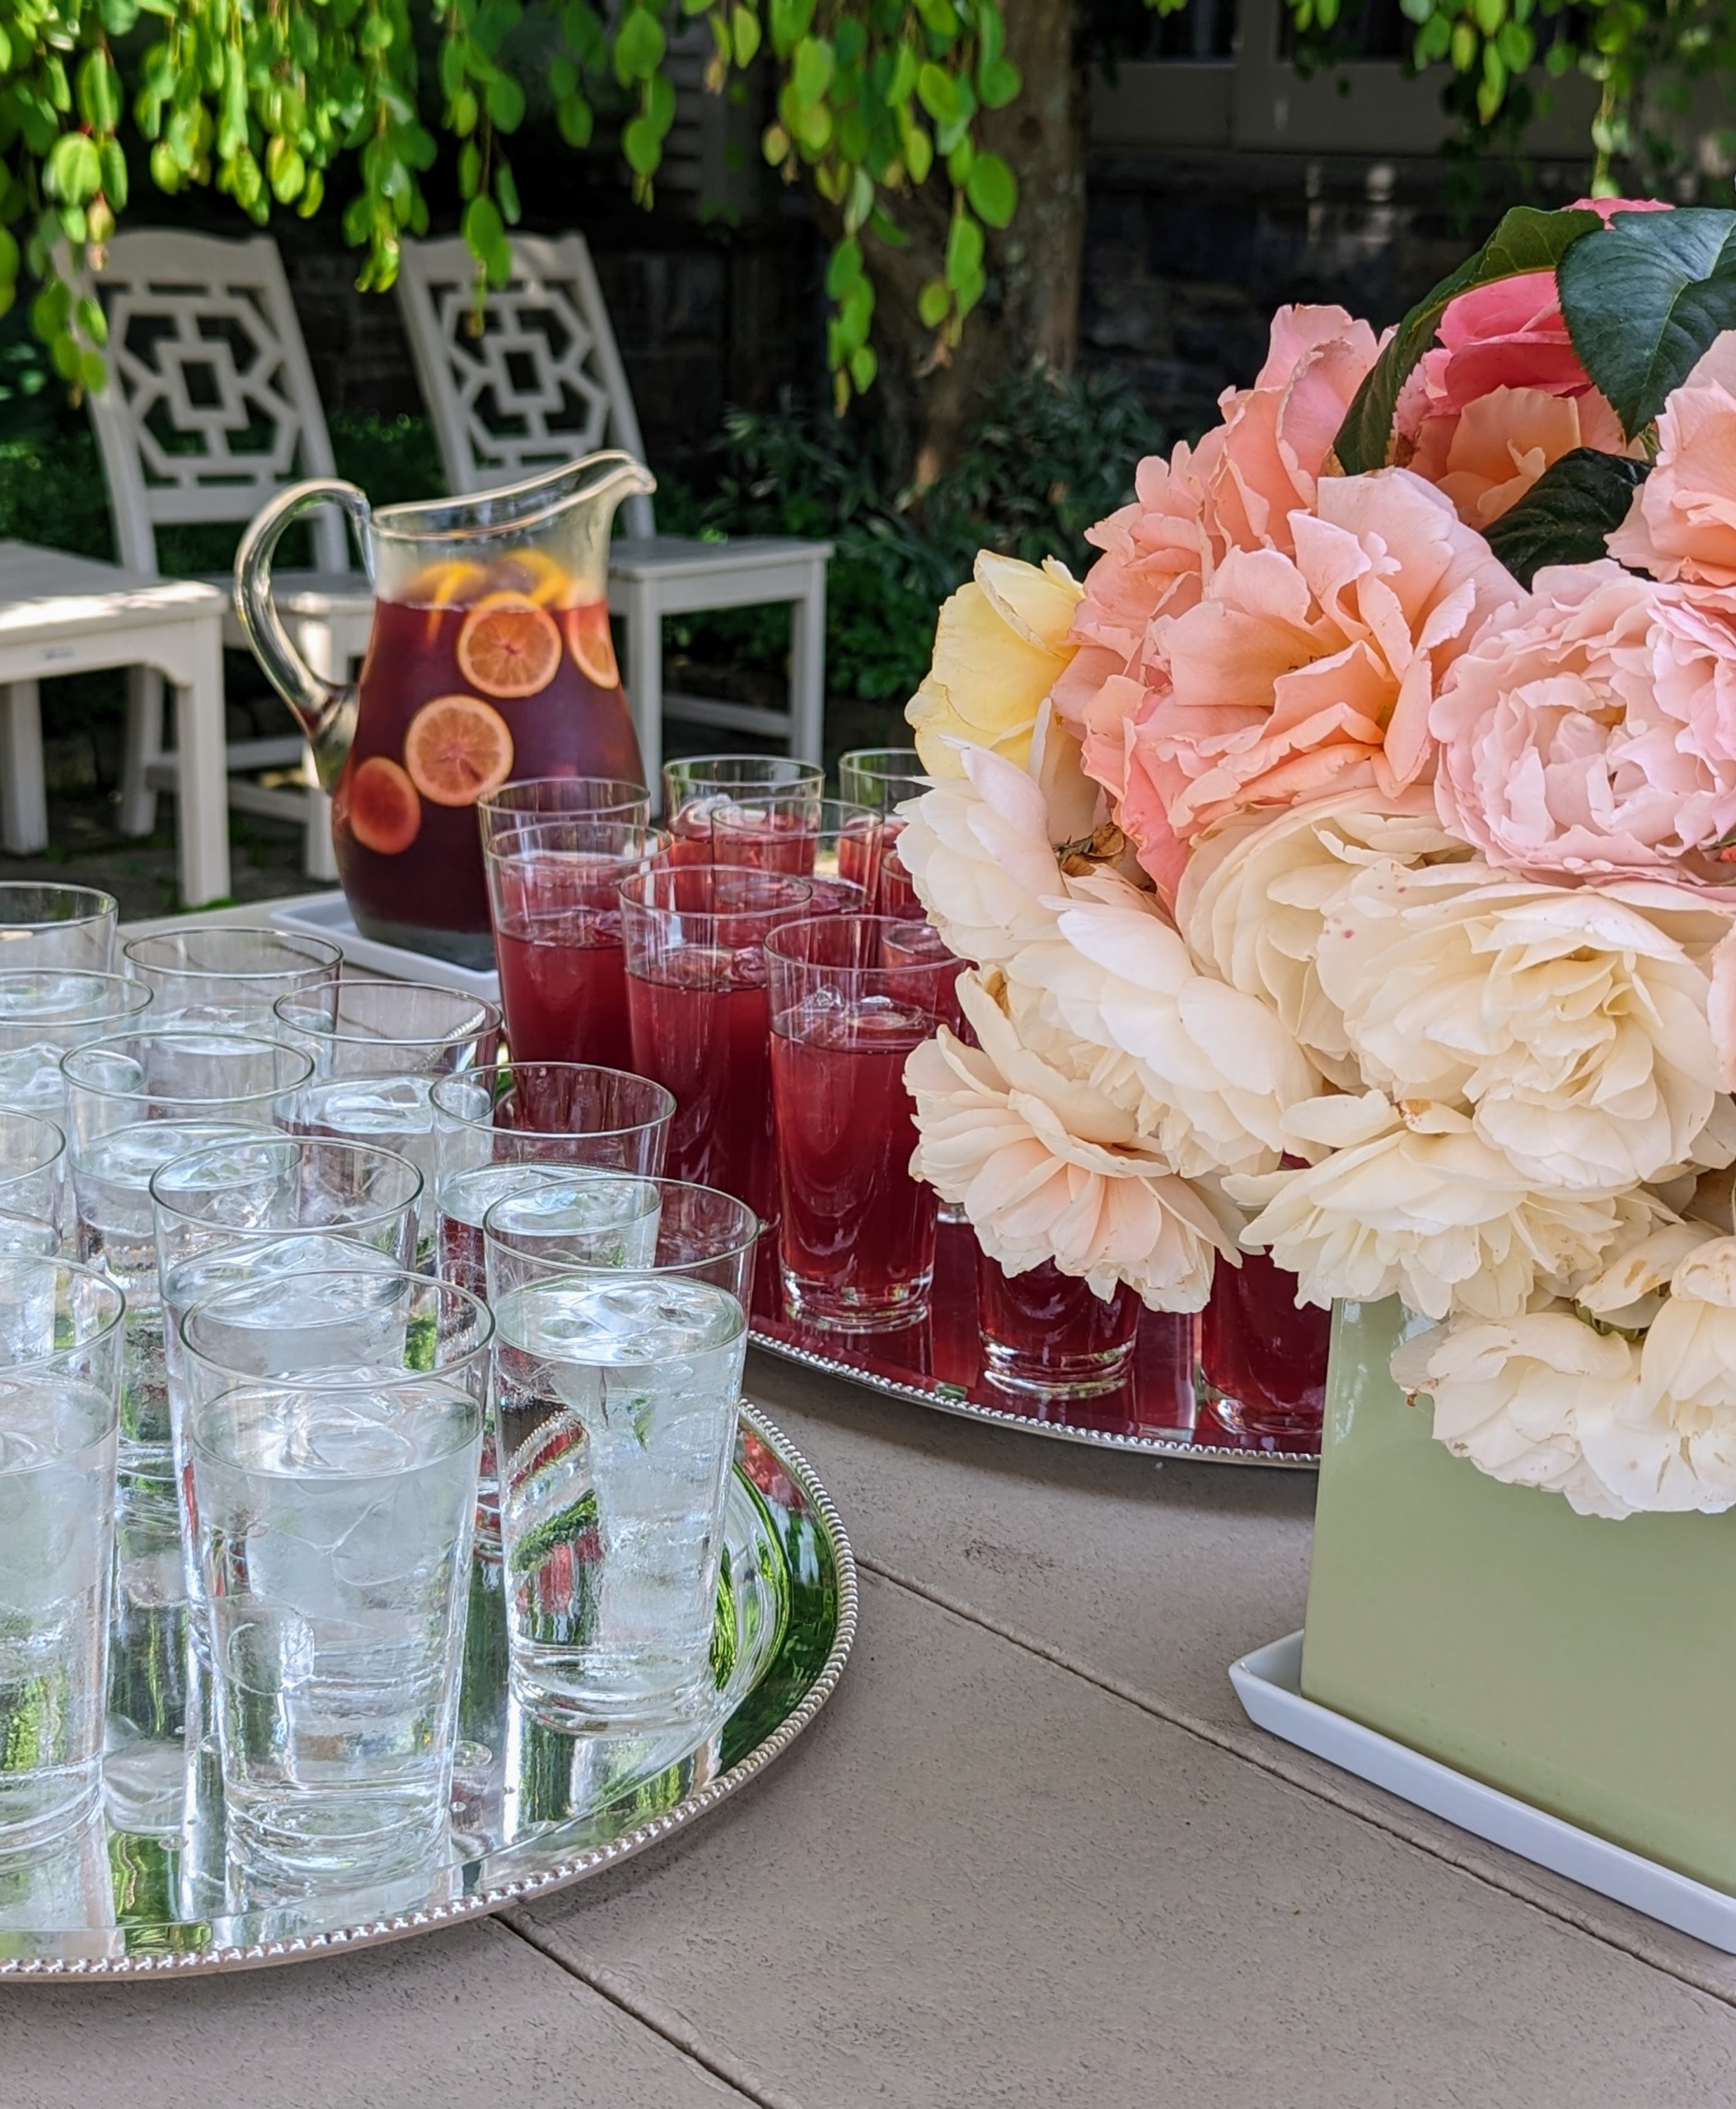
Here’s Enma ready with our refreshments. I always like to offer my guests a snack and cool beverage during these guided tours.
For this tour, I made currant scones from “The Martha Stewart Cookbook: Collected Recipes for Every Day.”
Enma also made tea – this time, raspberry pomegranate. The roses were picked early in the morning from my garden.
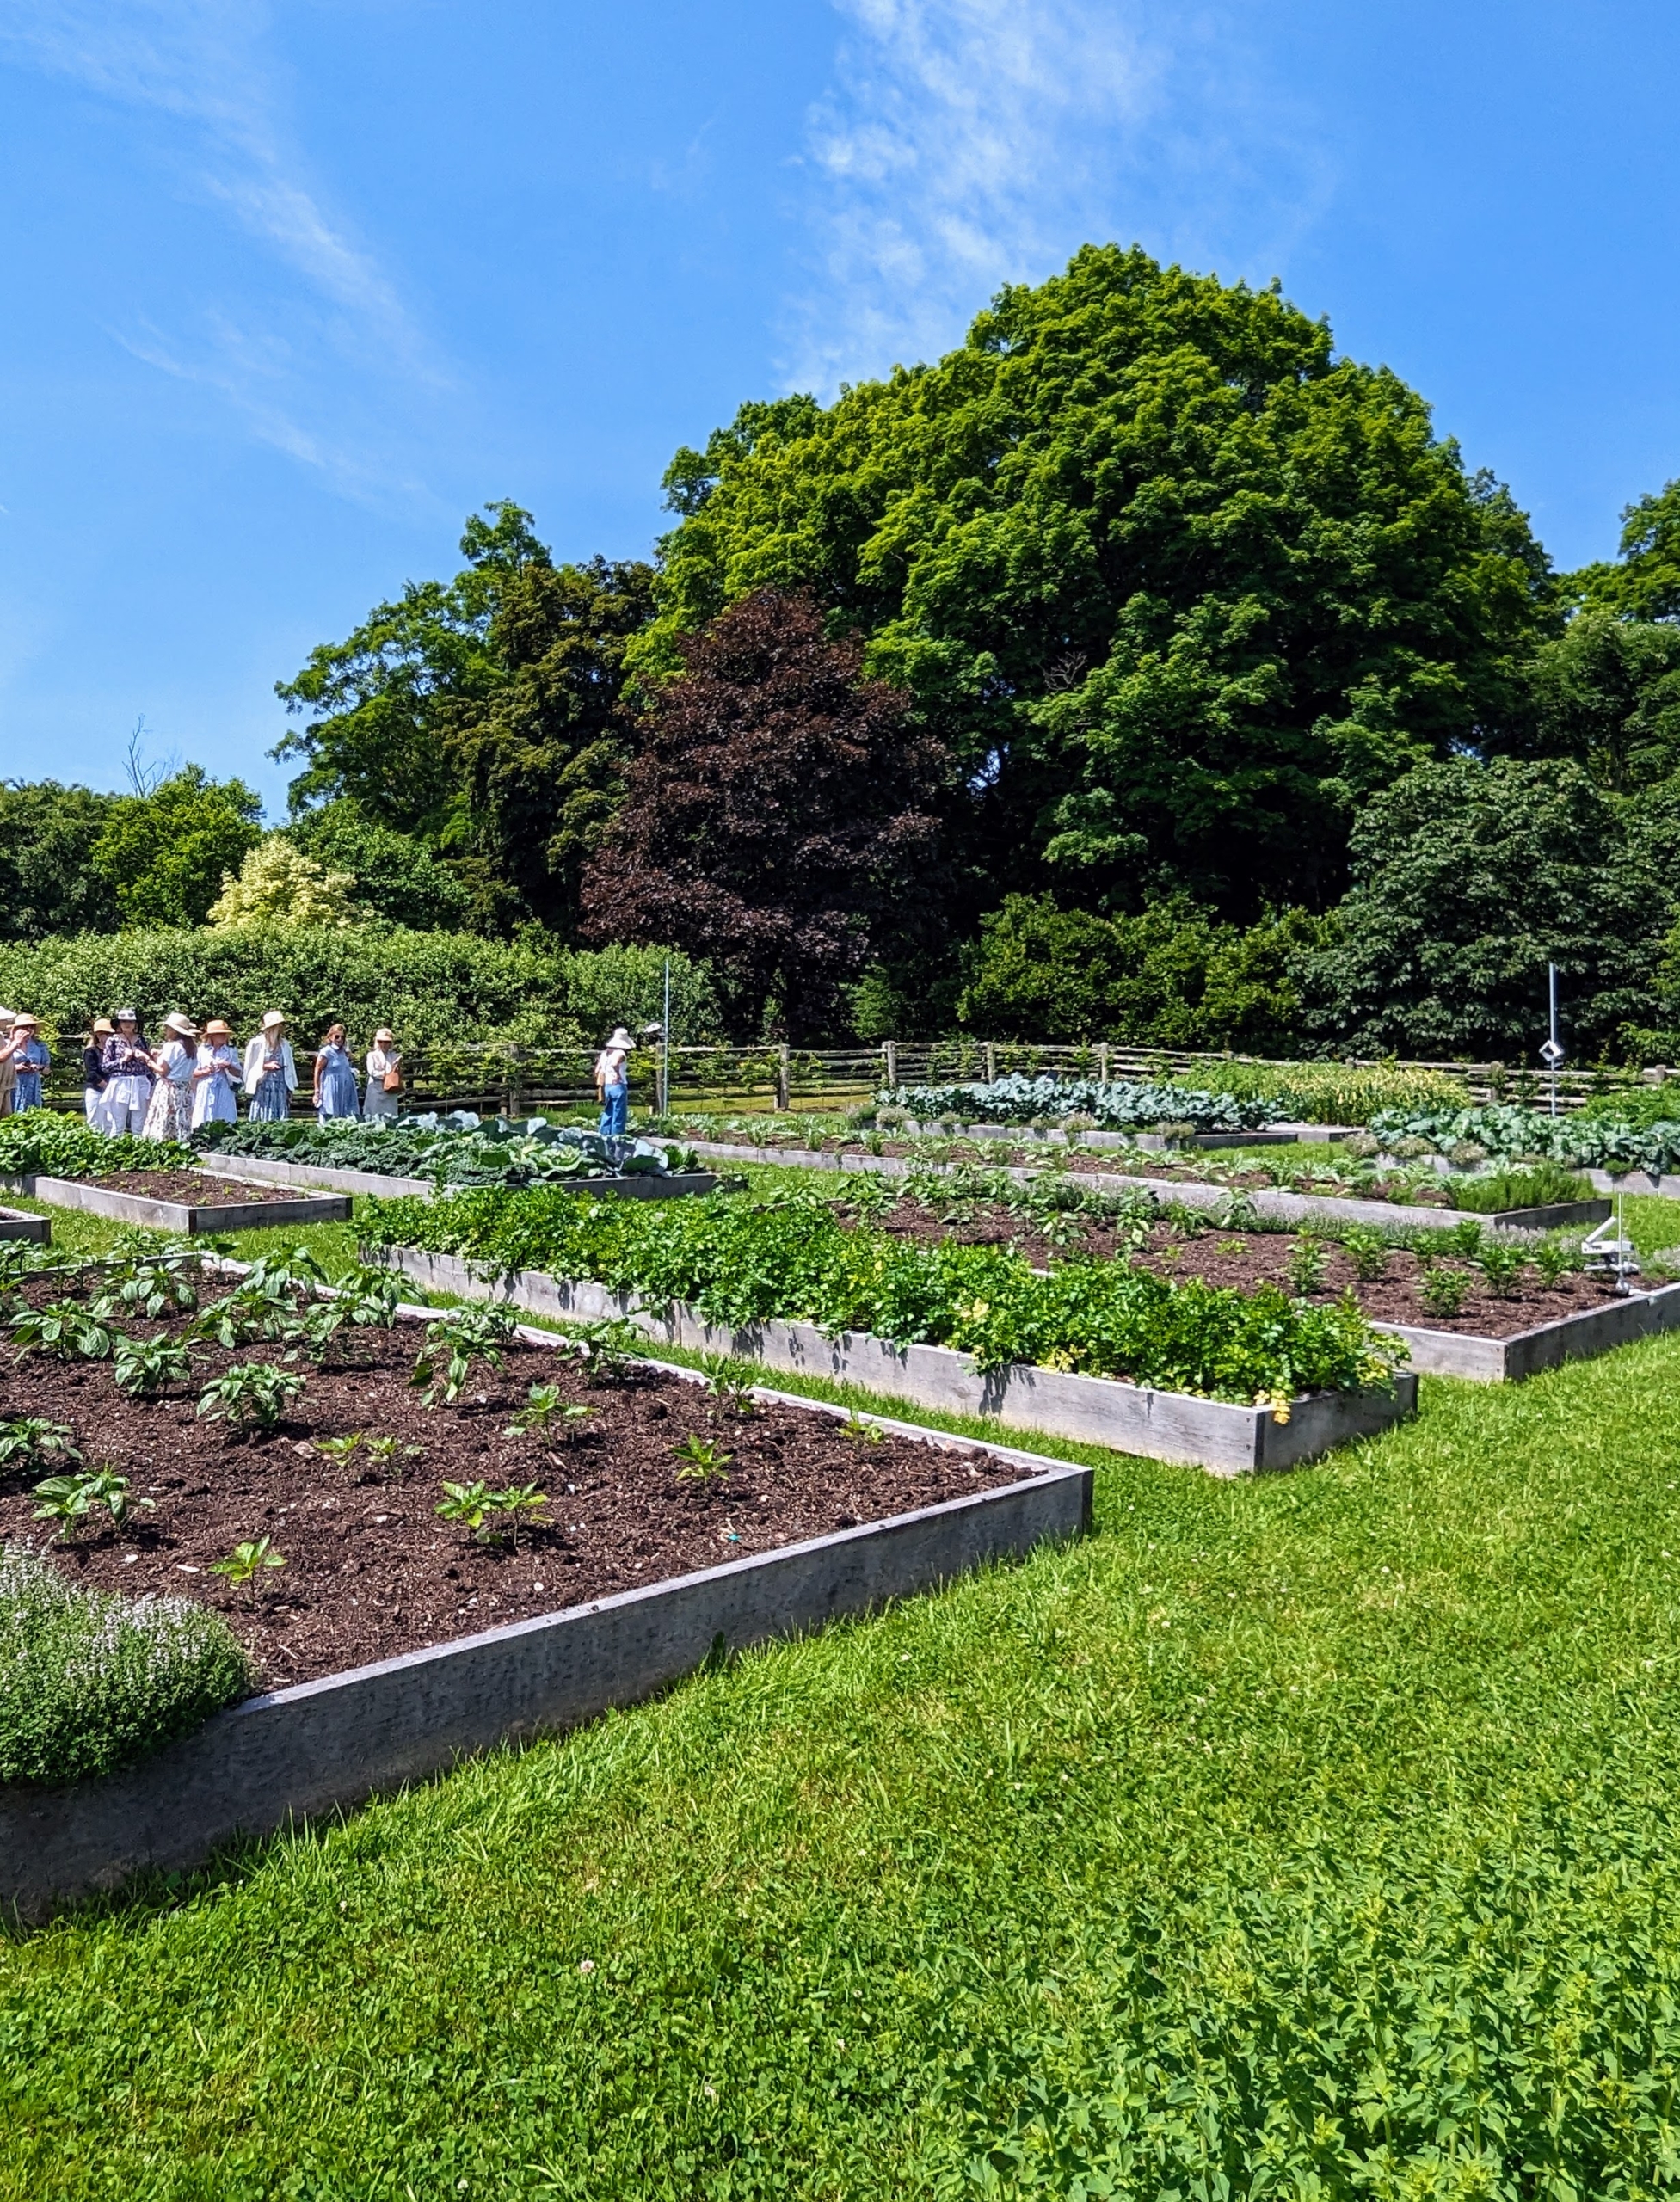
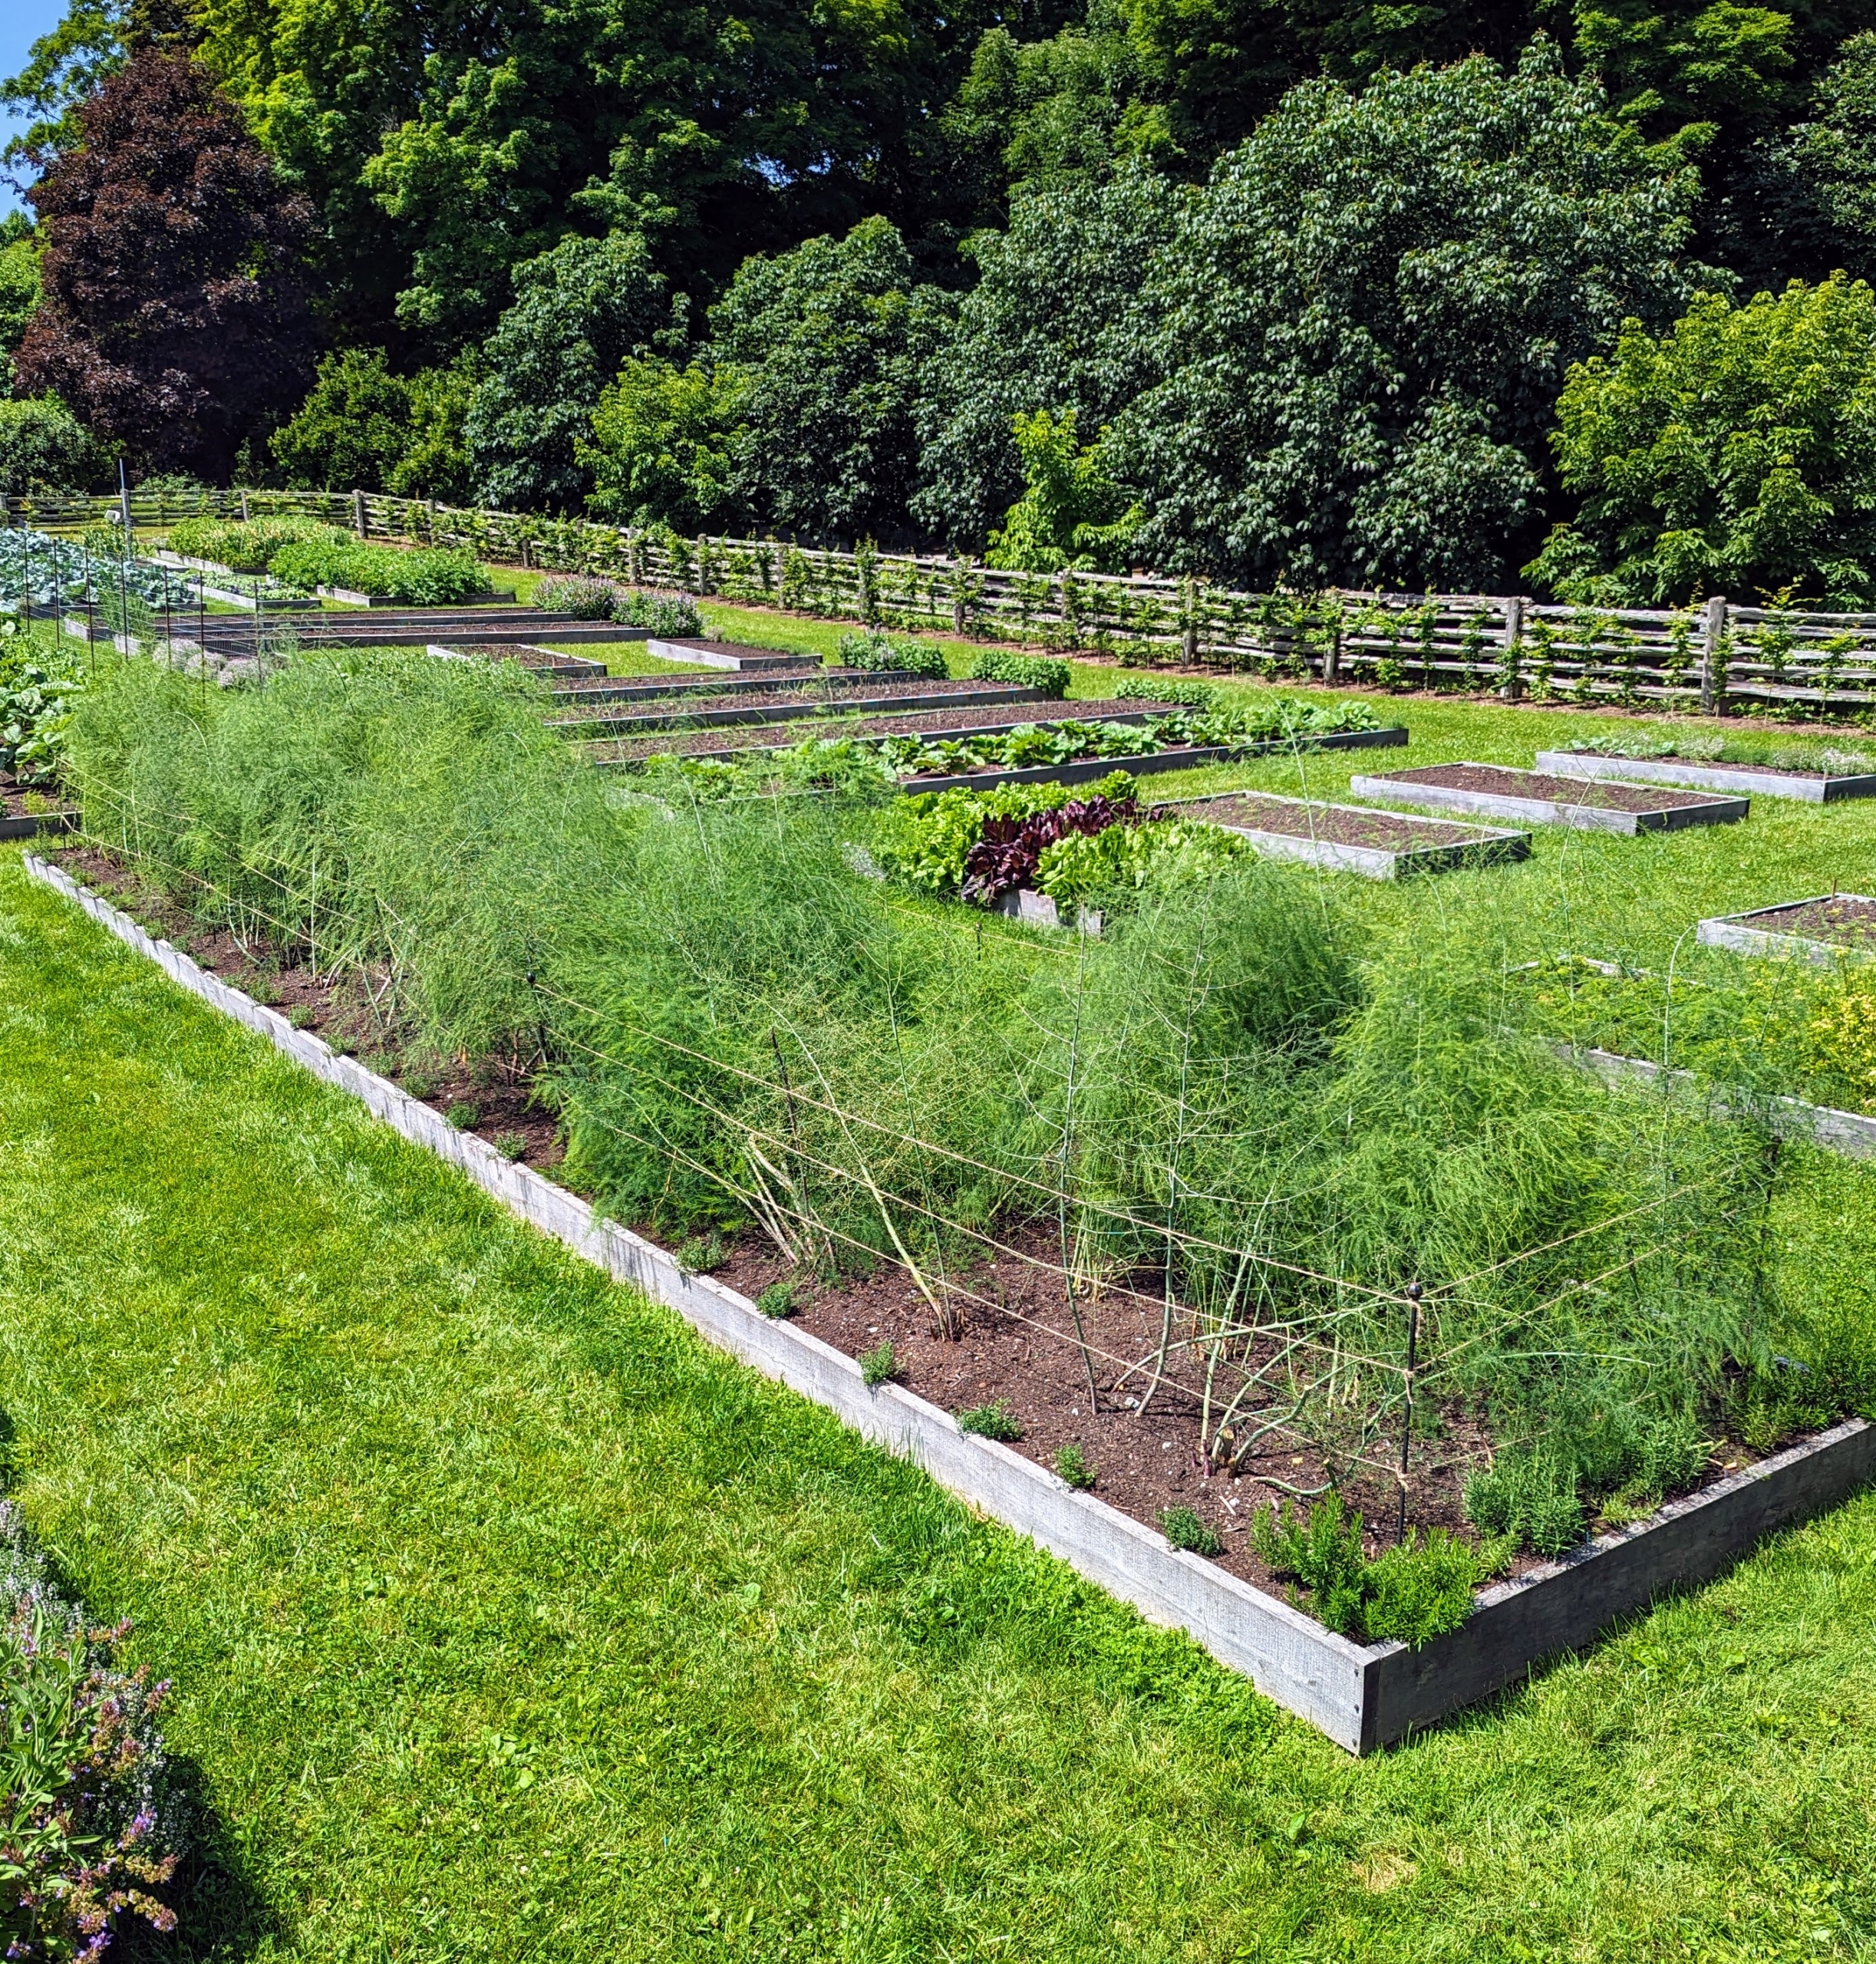
Then the group walked through my giant half-acre vegetable garden. Every day, there is something ready to harvest.
This is the first year for this asparagus. Typically, one should wait three years before picking asparagus, so the plants have time to develop properly; however, these have been so productive, I’ve already enjoyed fresh, delicious stalks of asparagus this season.
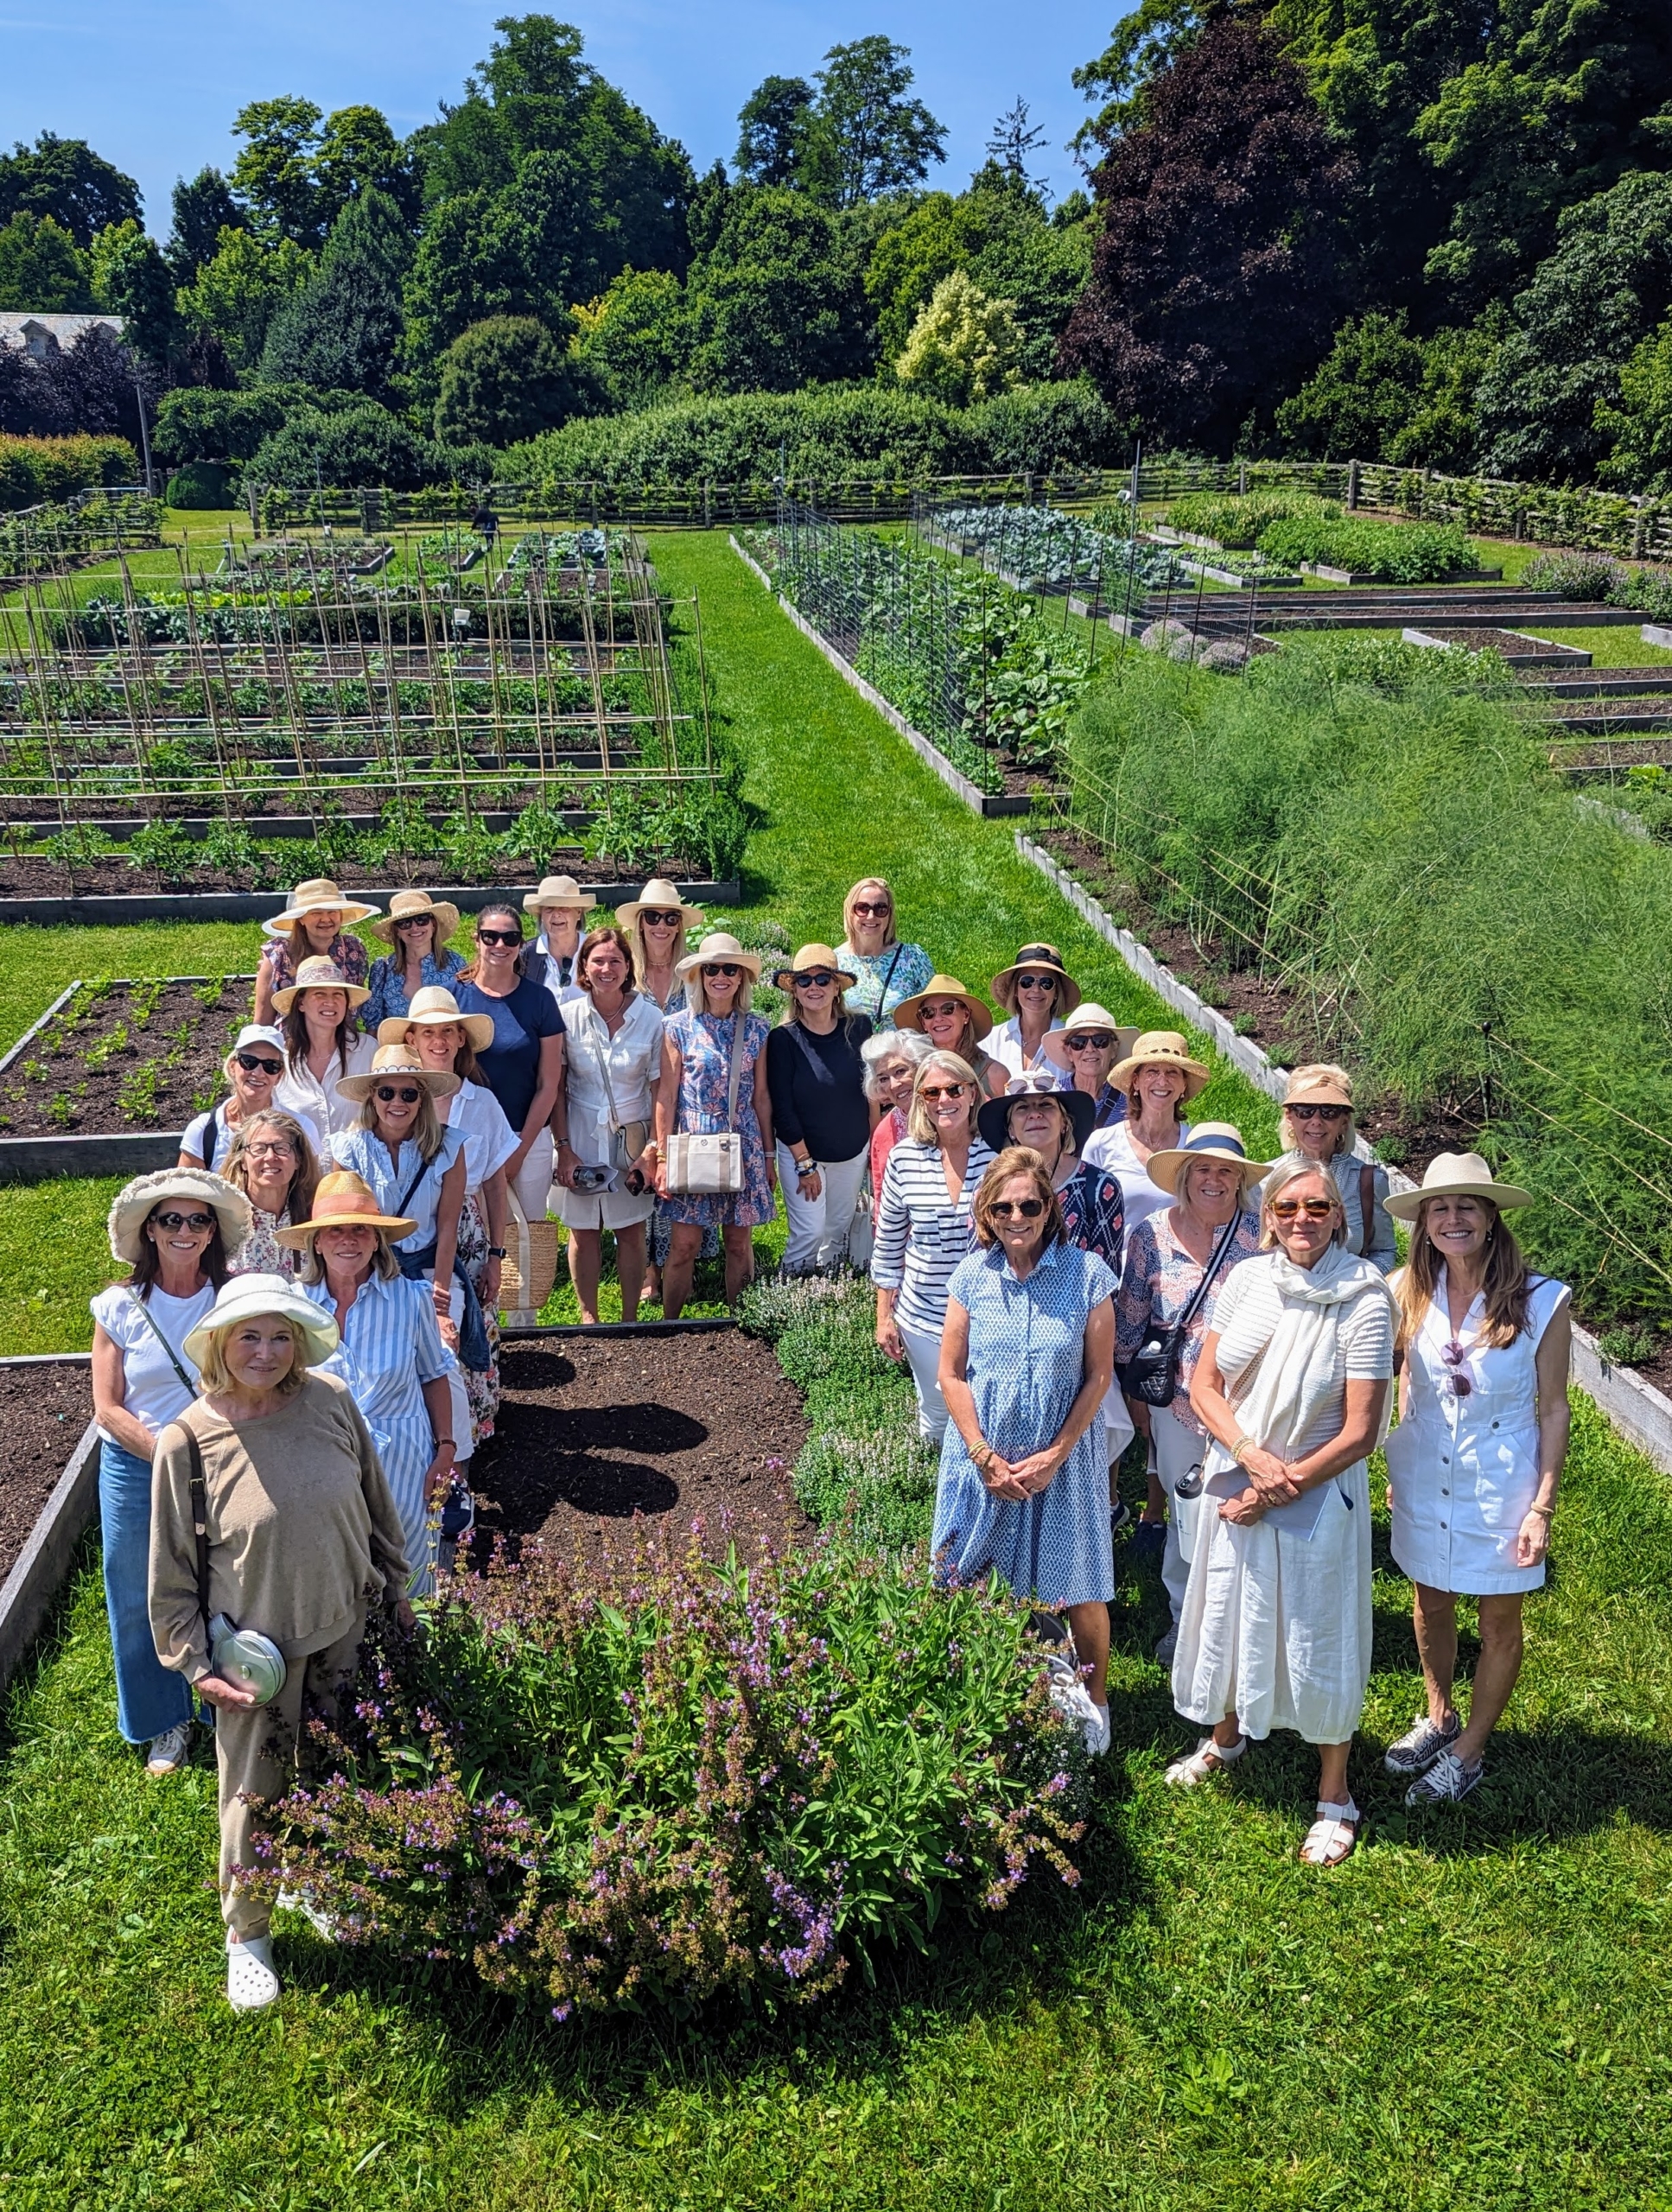
And here I am with the Hortulus group. We stopped here for a quick snapshot before heading to the stable and pool. What a wonderful and fun tour. Thank you Hortulus, for visiting Cantitoe Corners.
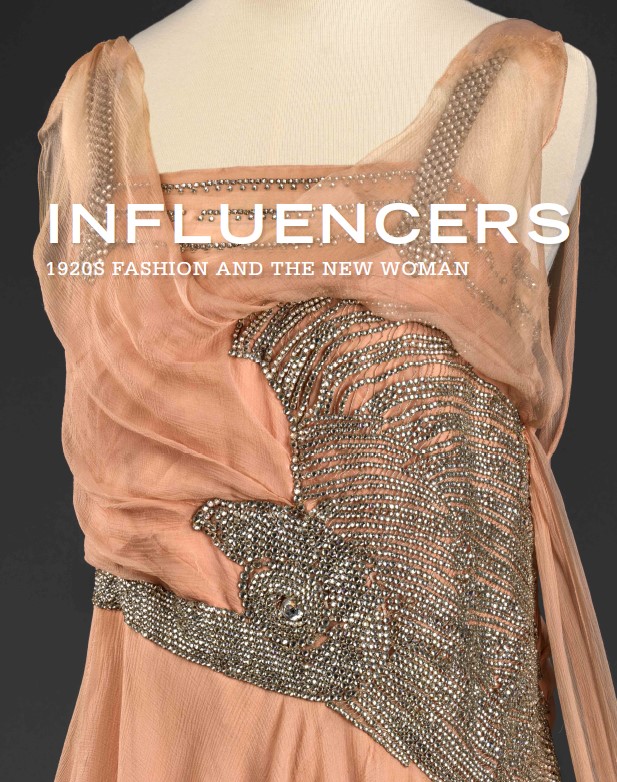
A new and informative exhibit featuring the impact of three major fashion innovators of the 1920s is now on display at the Gothic Revival Lyndhurst Estate in Tarrytown, New York.
Presented inside the mansion's exhibition gallery, the fascinating "Influencers: 1920s Fashion and the New Woman" show highlights how Coco Chanel, Irene Castle, and Edna St. Vincent Millay crossed racial, cultural, and global barriers to change the way women dressed and to help provide them with more creative control over the pieces they wore and how they presented themselves in public. The exhibit features the interesting progression from restrictive, elaborate, and heavy garments to lighter, more comfortable wear for both daytime and evening outings. It shows the shifts in design, fabrics, and body coverage, and details the history behind these fashion modifications. If you're in the area, I hope you stop to view this collection, which is open now through Monday, September 23rd.
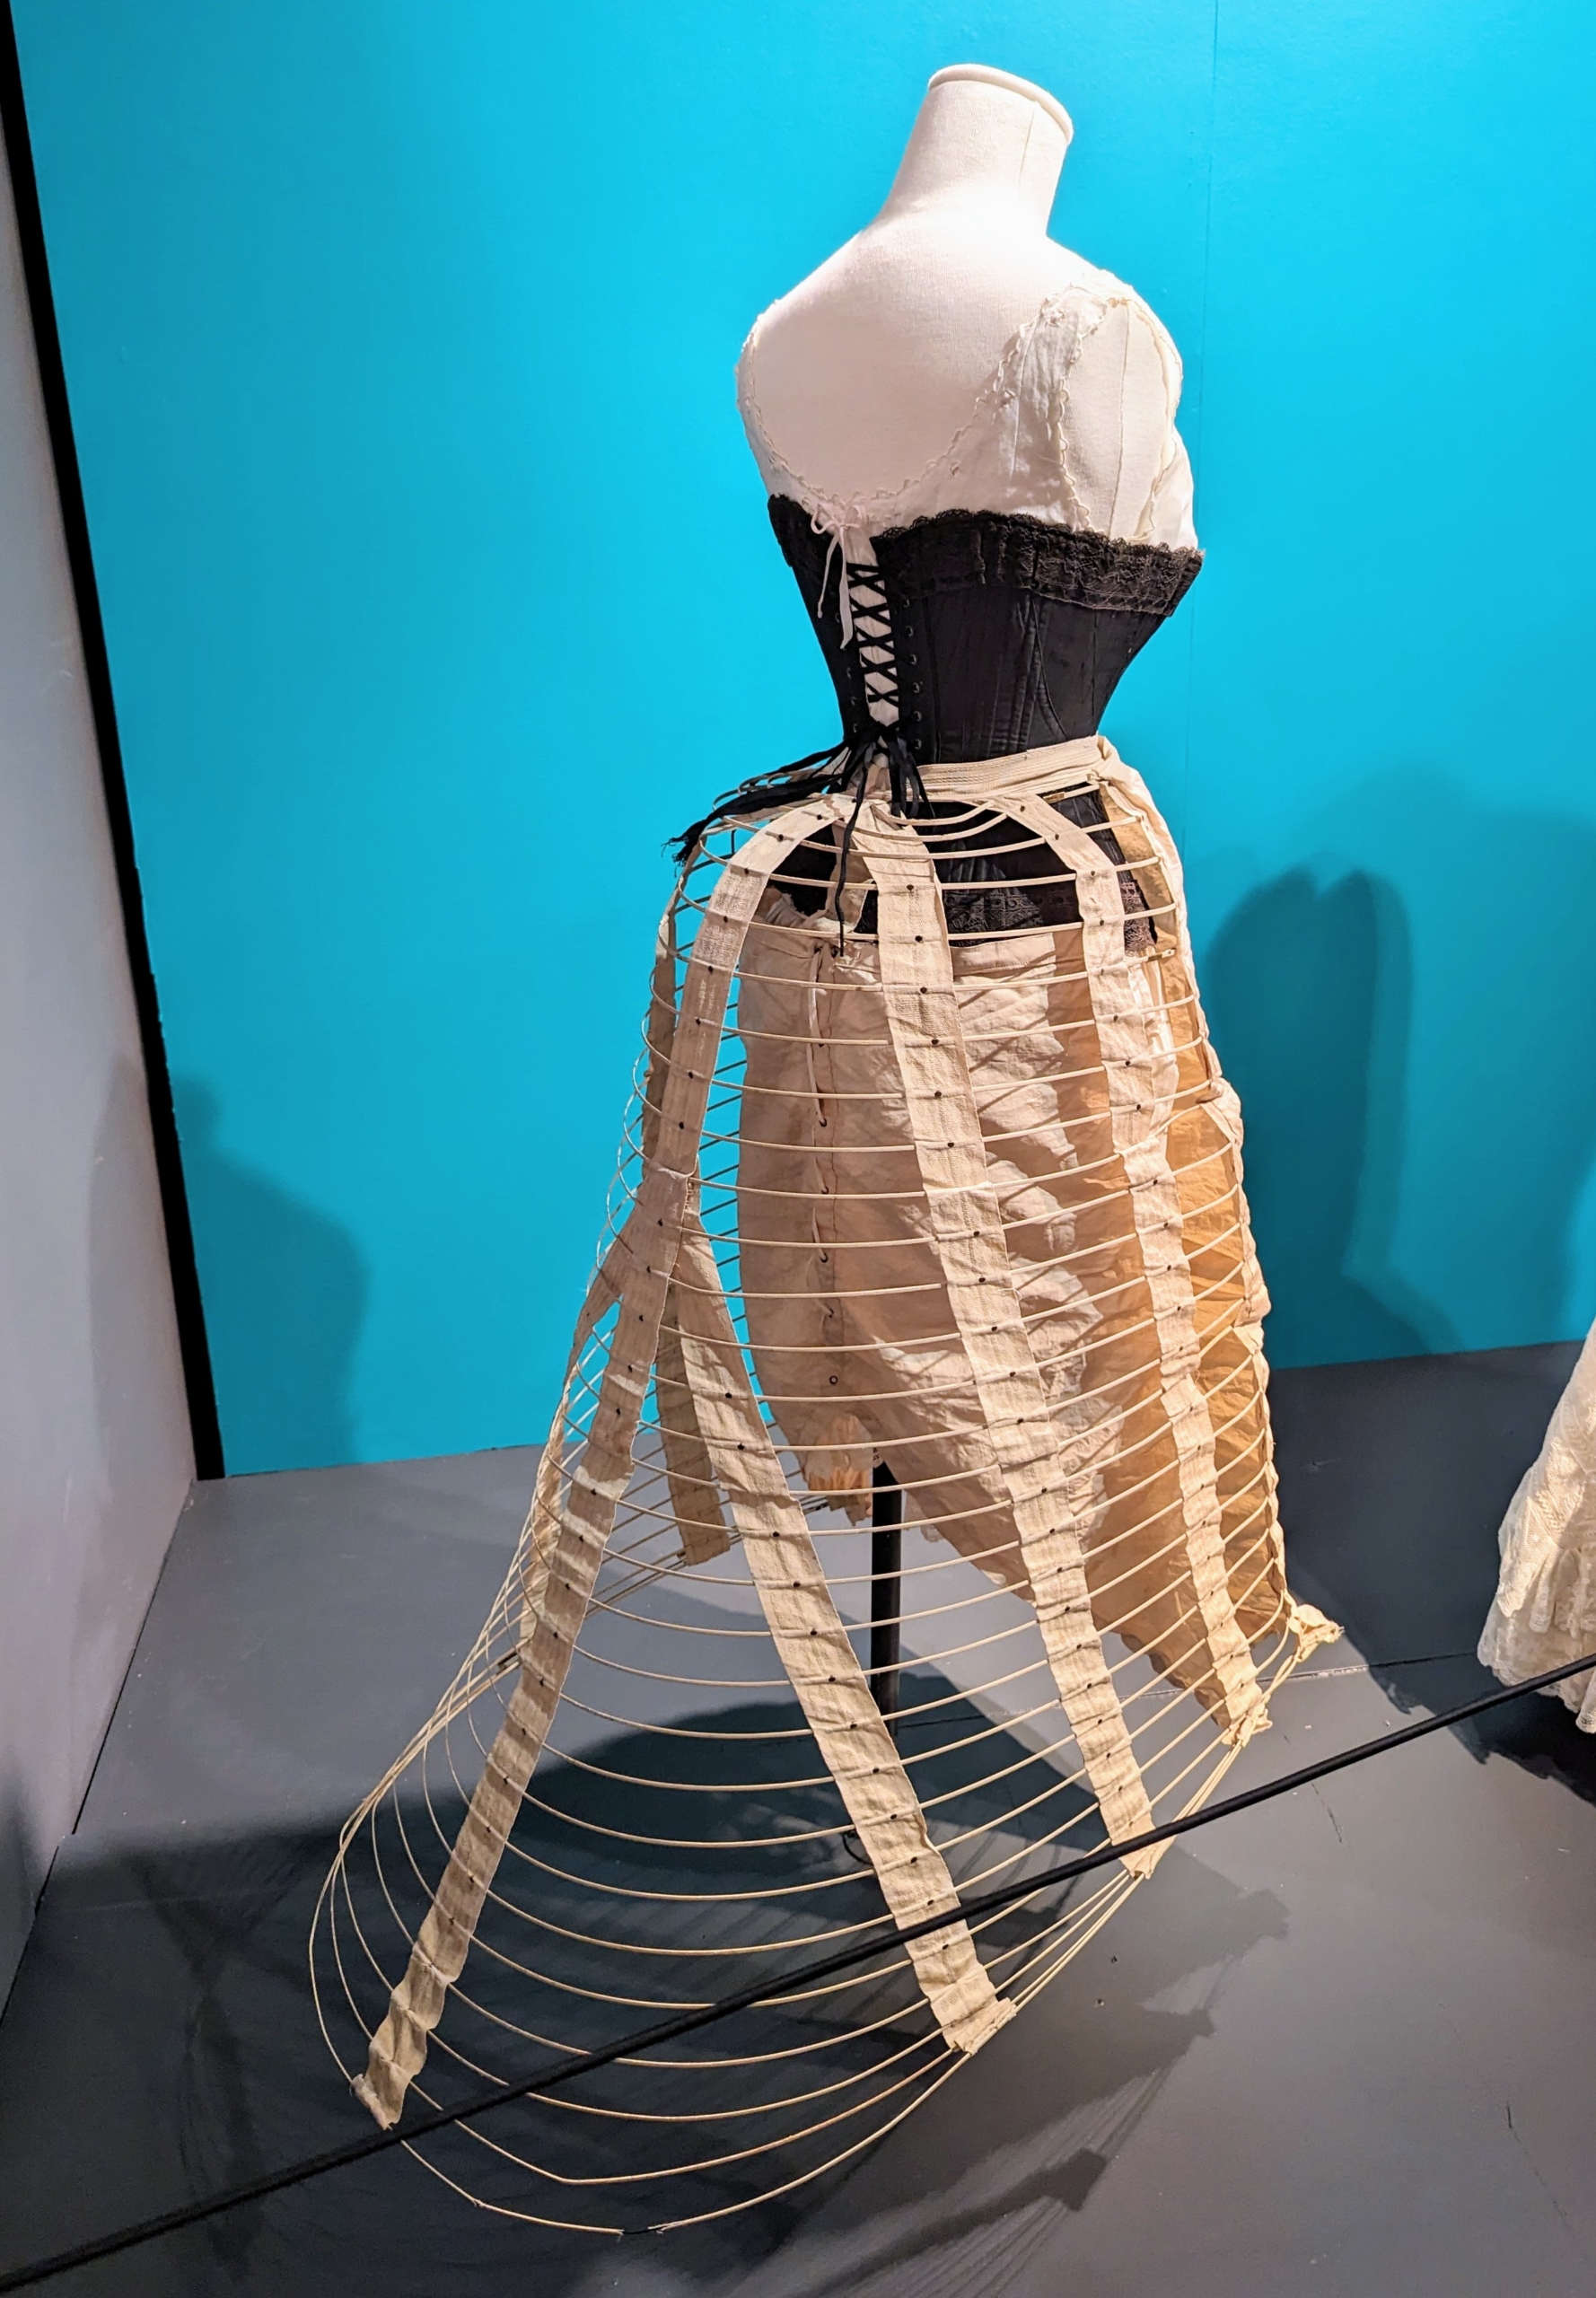
Among the earliest pieces shown are these foundations – a chemise, pantaloons, cage crinoline, and corset from the 1880s, which demonstrate how much the undergarments influenced the overall exterior silhouette of the times. Women were required to dress in these layers in part because corsets were not washable.
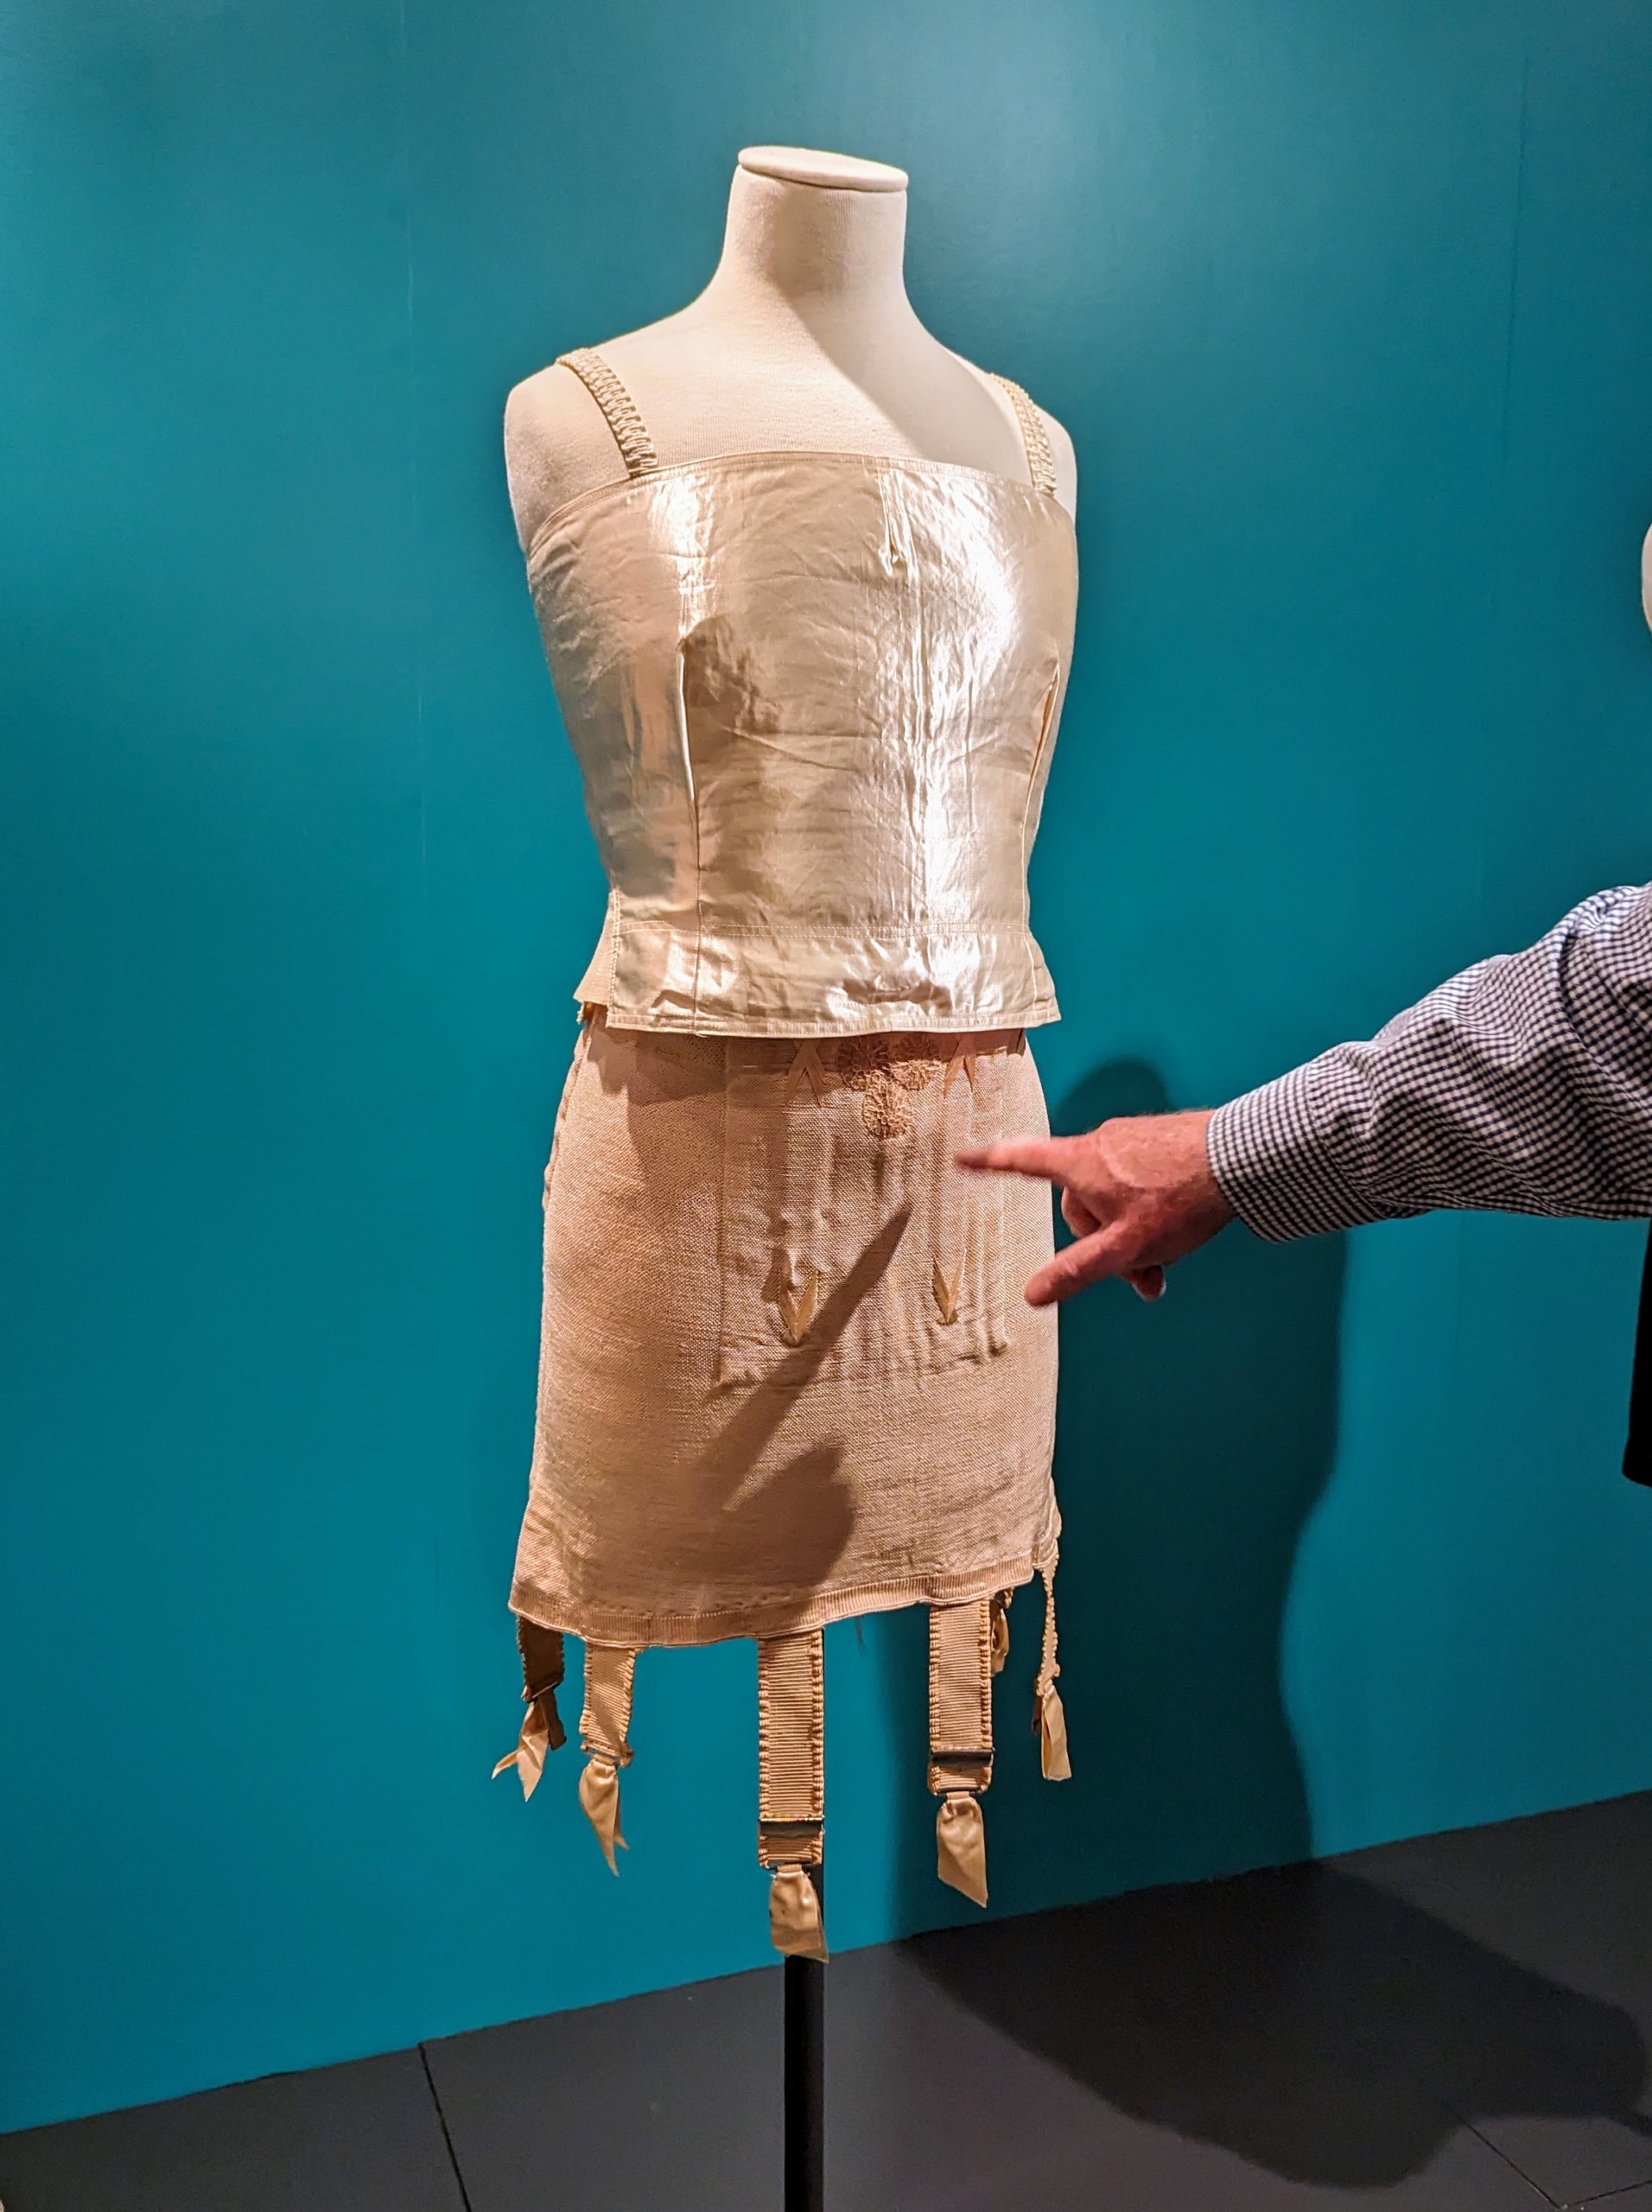
By the 1920s, undergarments became less bulky and less heavy, but still maintained shaping qualities such as a stomach flattening girdle and chest suppressing brassiere.
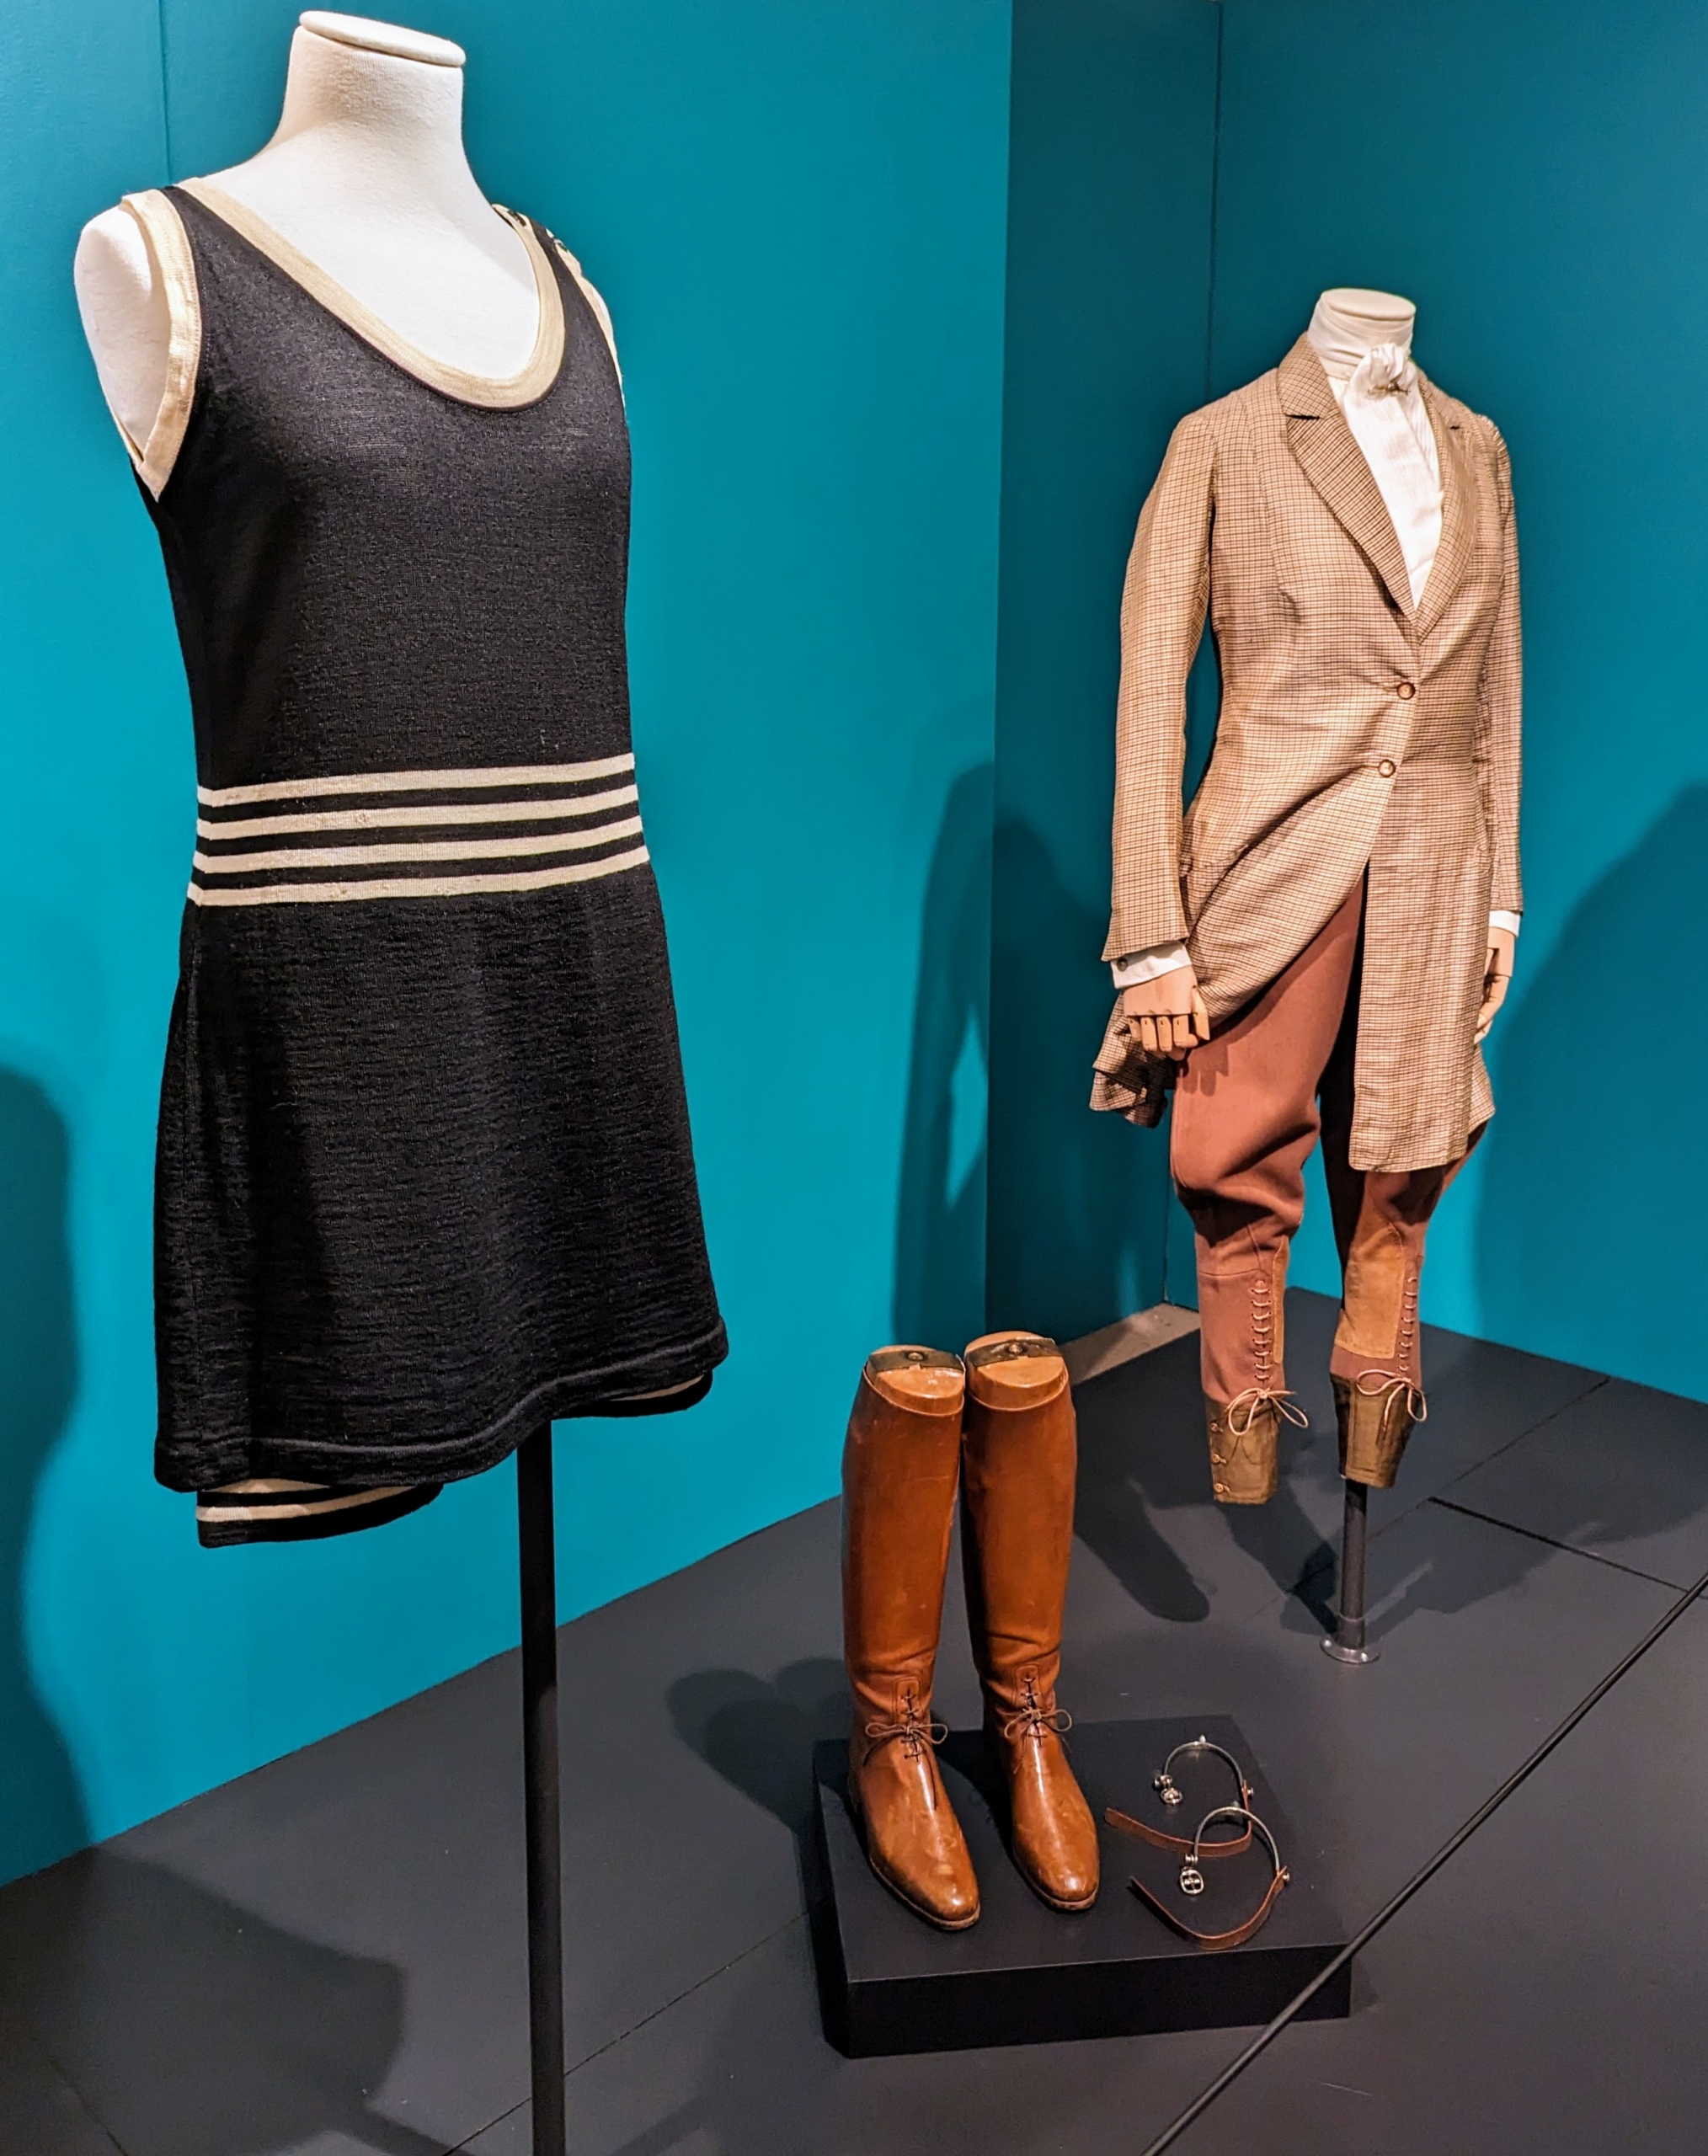
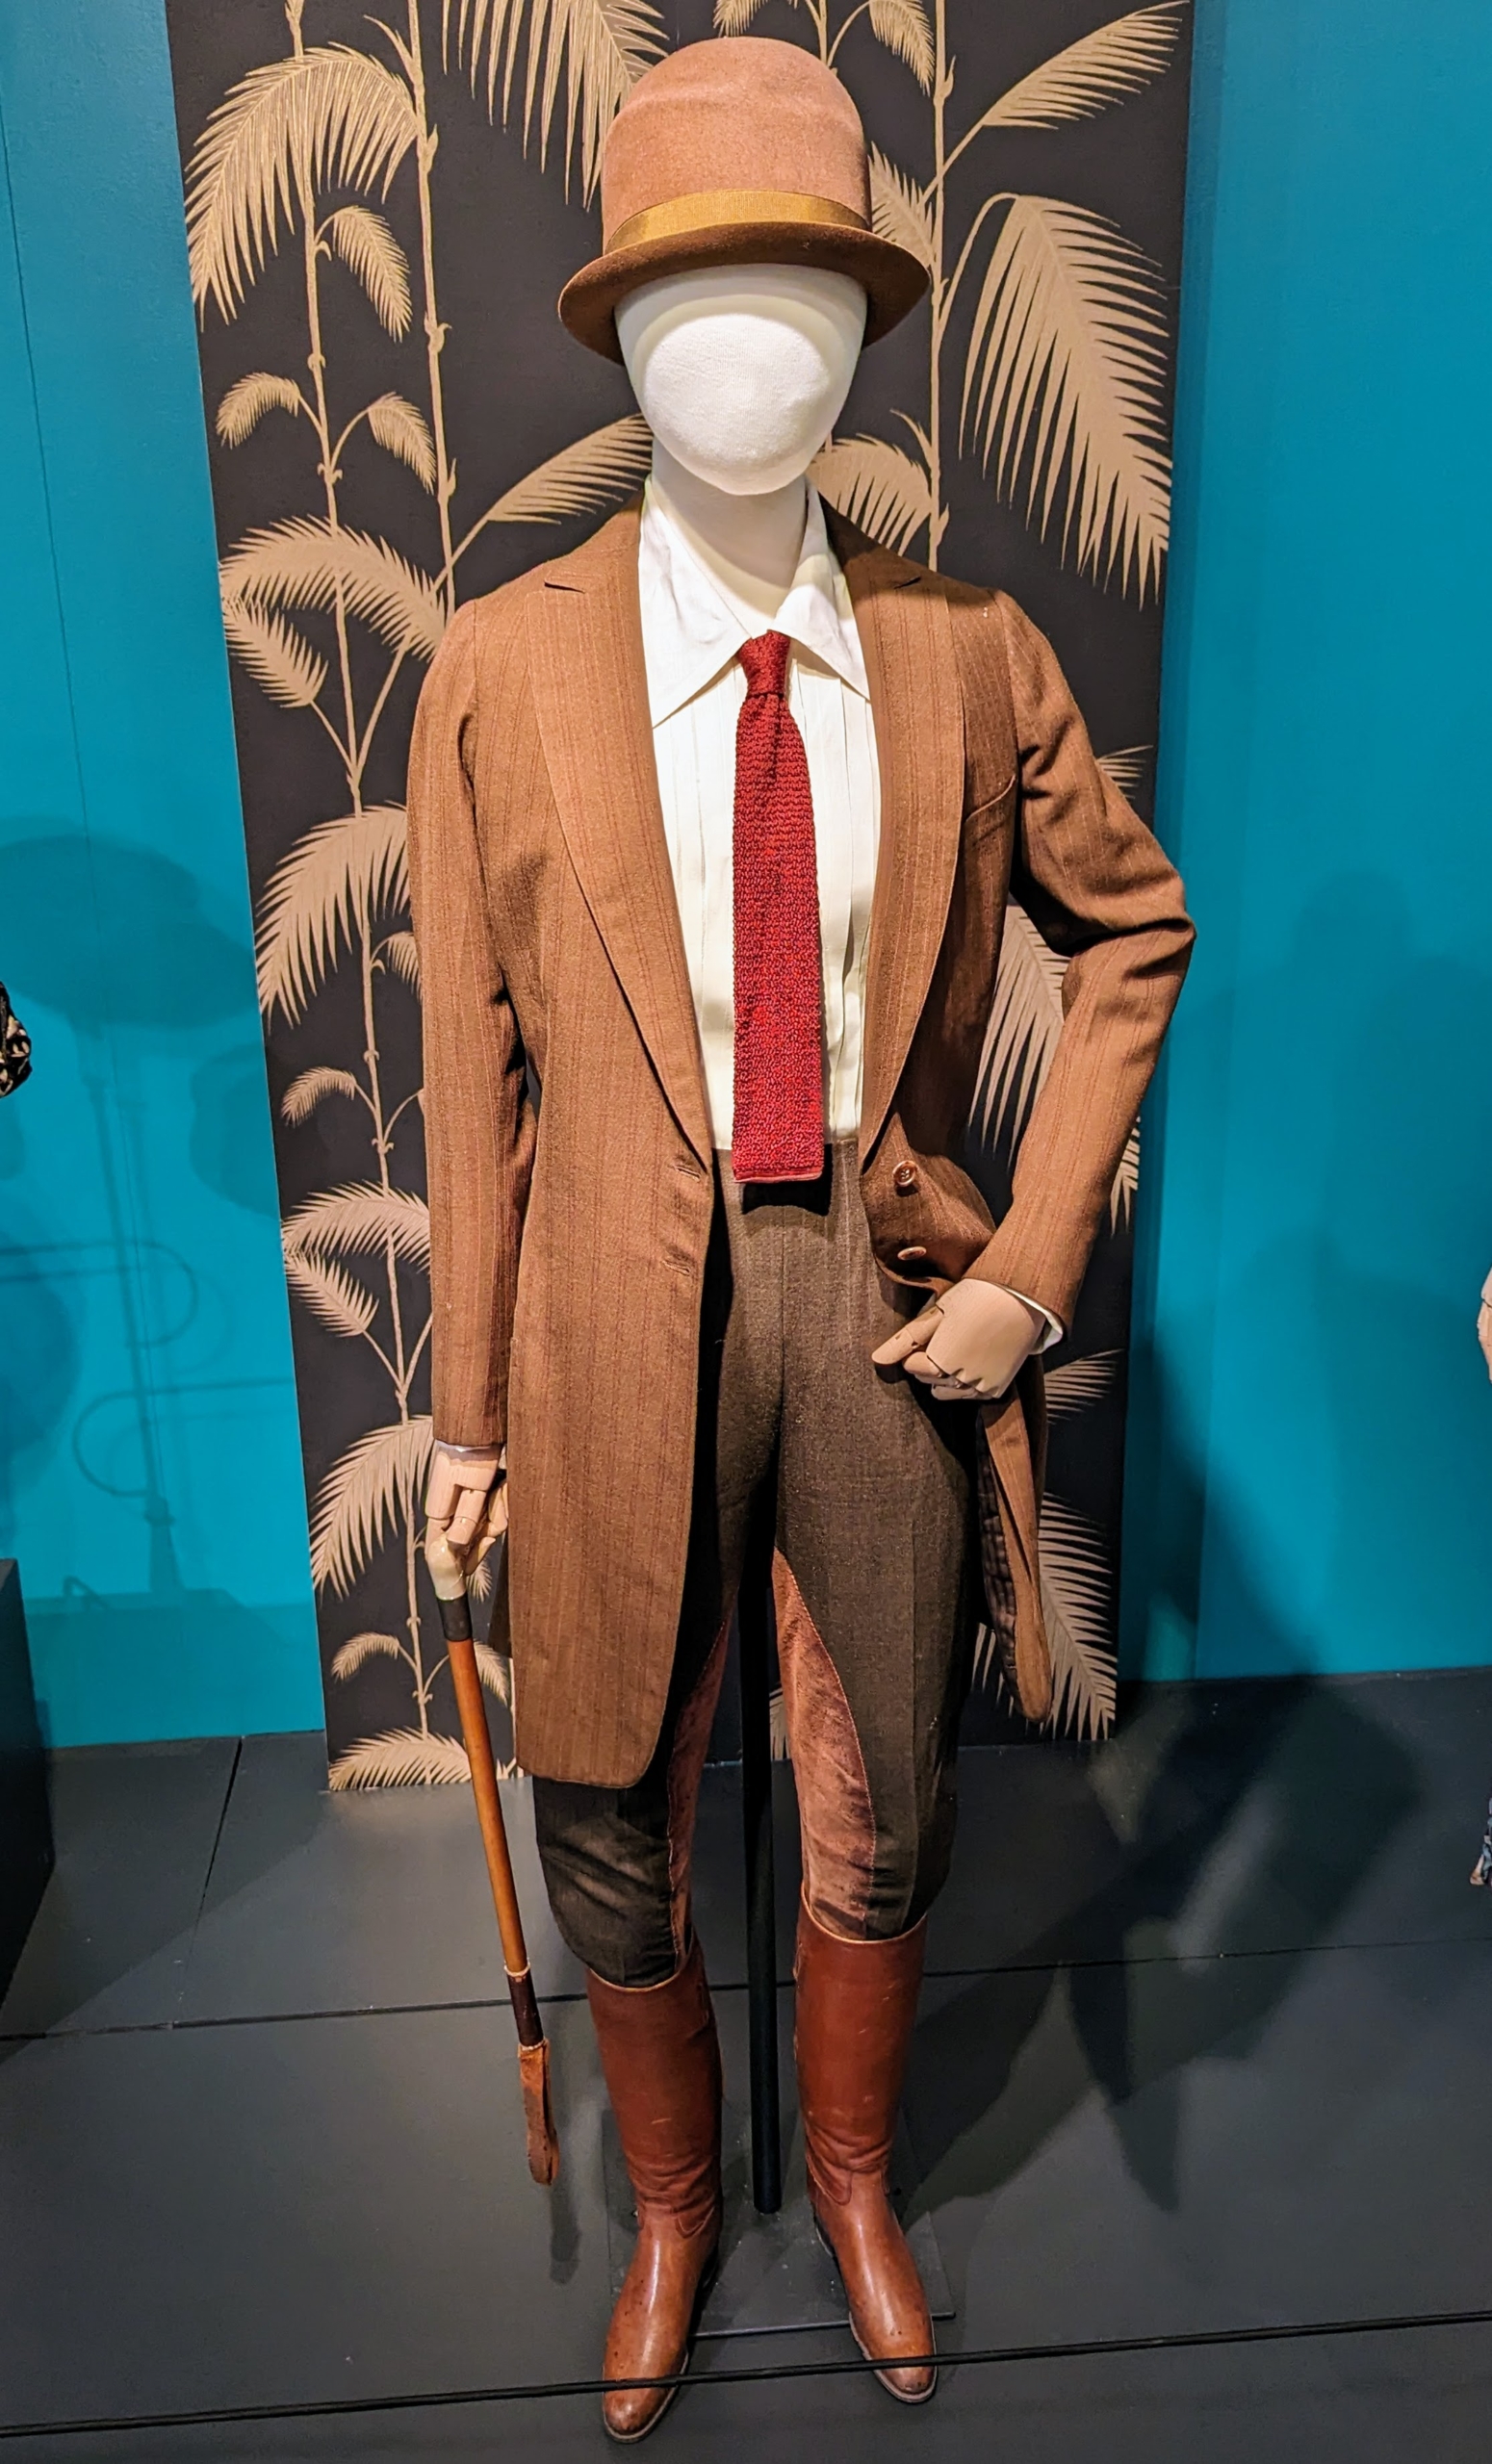
The piece on the left is a bathing suit resembling a simple black dress and bloomers. Fashion designer Coco Chanel often used these styles in her collections – remember her “little black dress,” invented in 1926? On the right is a riding ensemble showing how women could wear tailored clothing and trousers during the 1920s. Silent film star and dancer, Irene Castle, wore a riding outfit in the film, Patria.
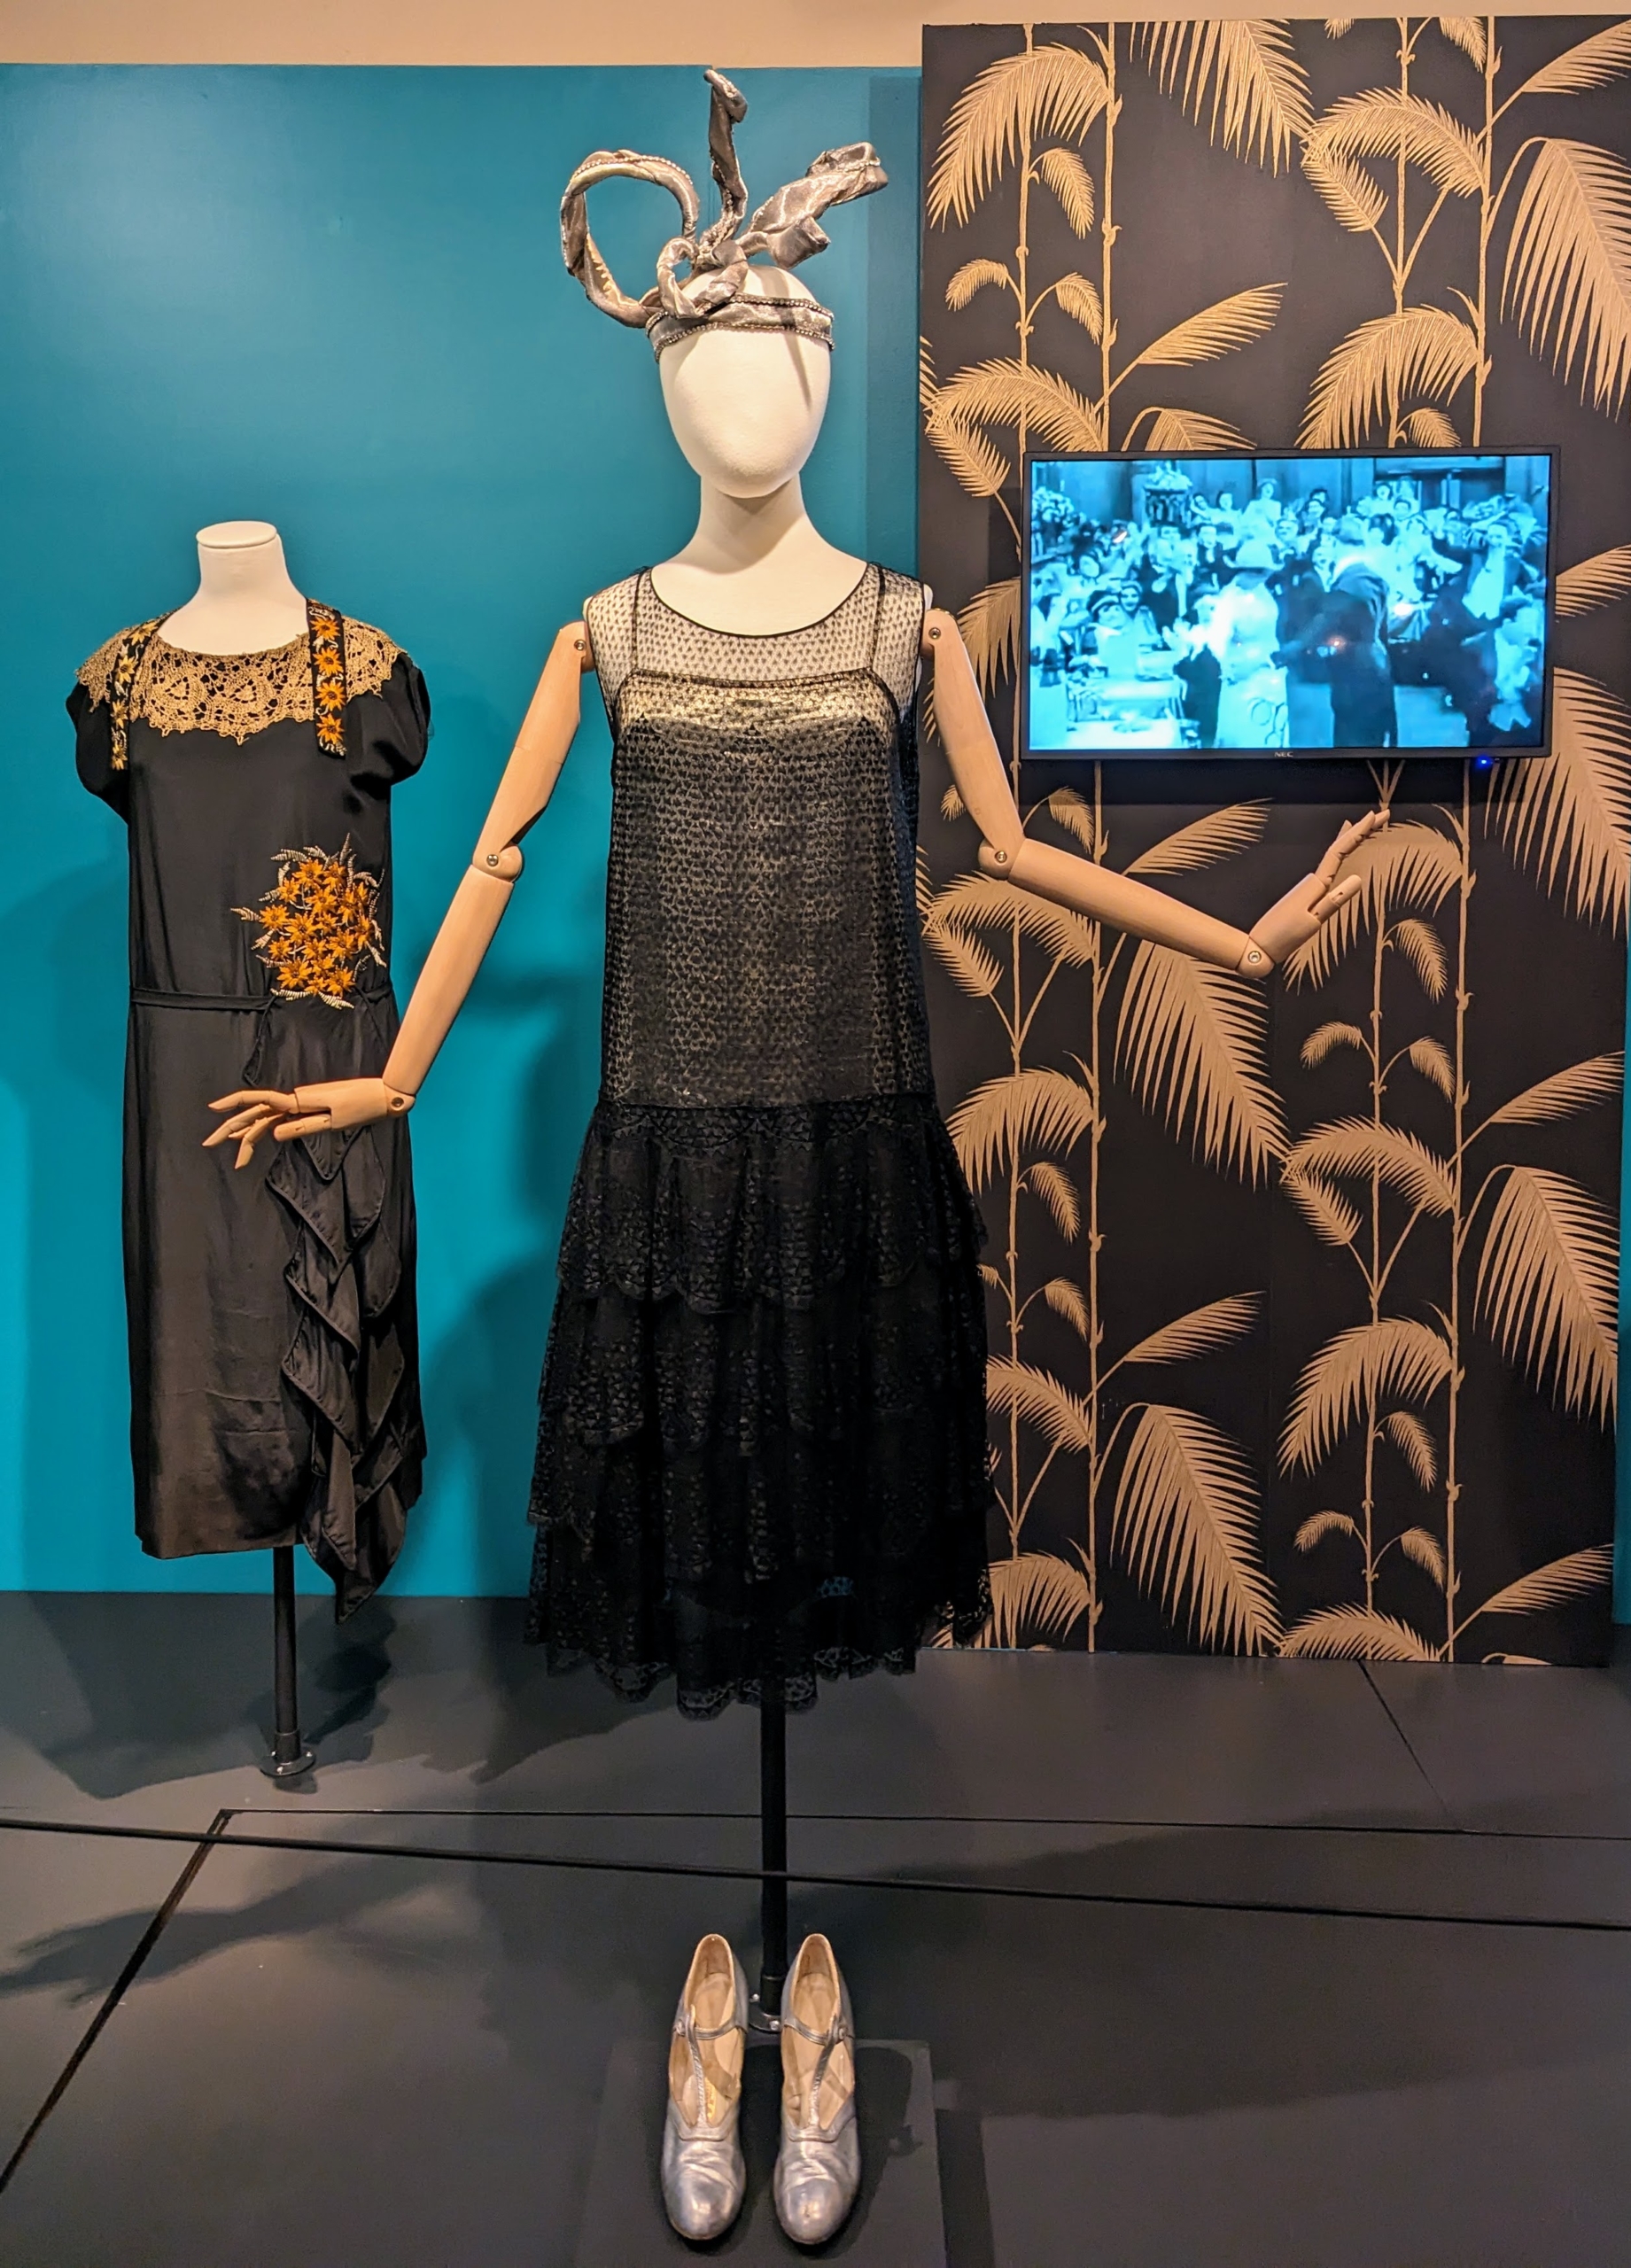
The headdress was a gift from the Irene Castle Collection. Castle was a pioneer in the creation of the ready-to-wear fashion movement. This black dance costume dates to around 1928 and is much more free and comfortable for the active wearer.
This day dress design shows another example of Irene Castle’s ready-to-wear line with the Corticelli Silk Company – very loose fitting and very detailed, similar to what was found in French couture houses.
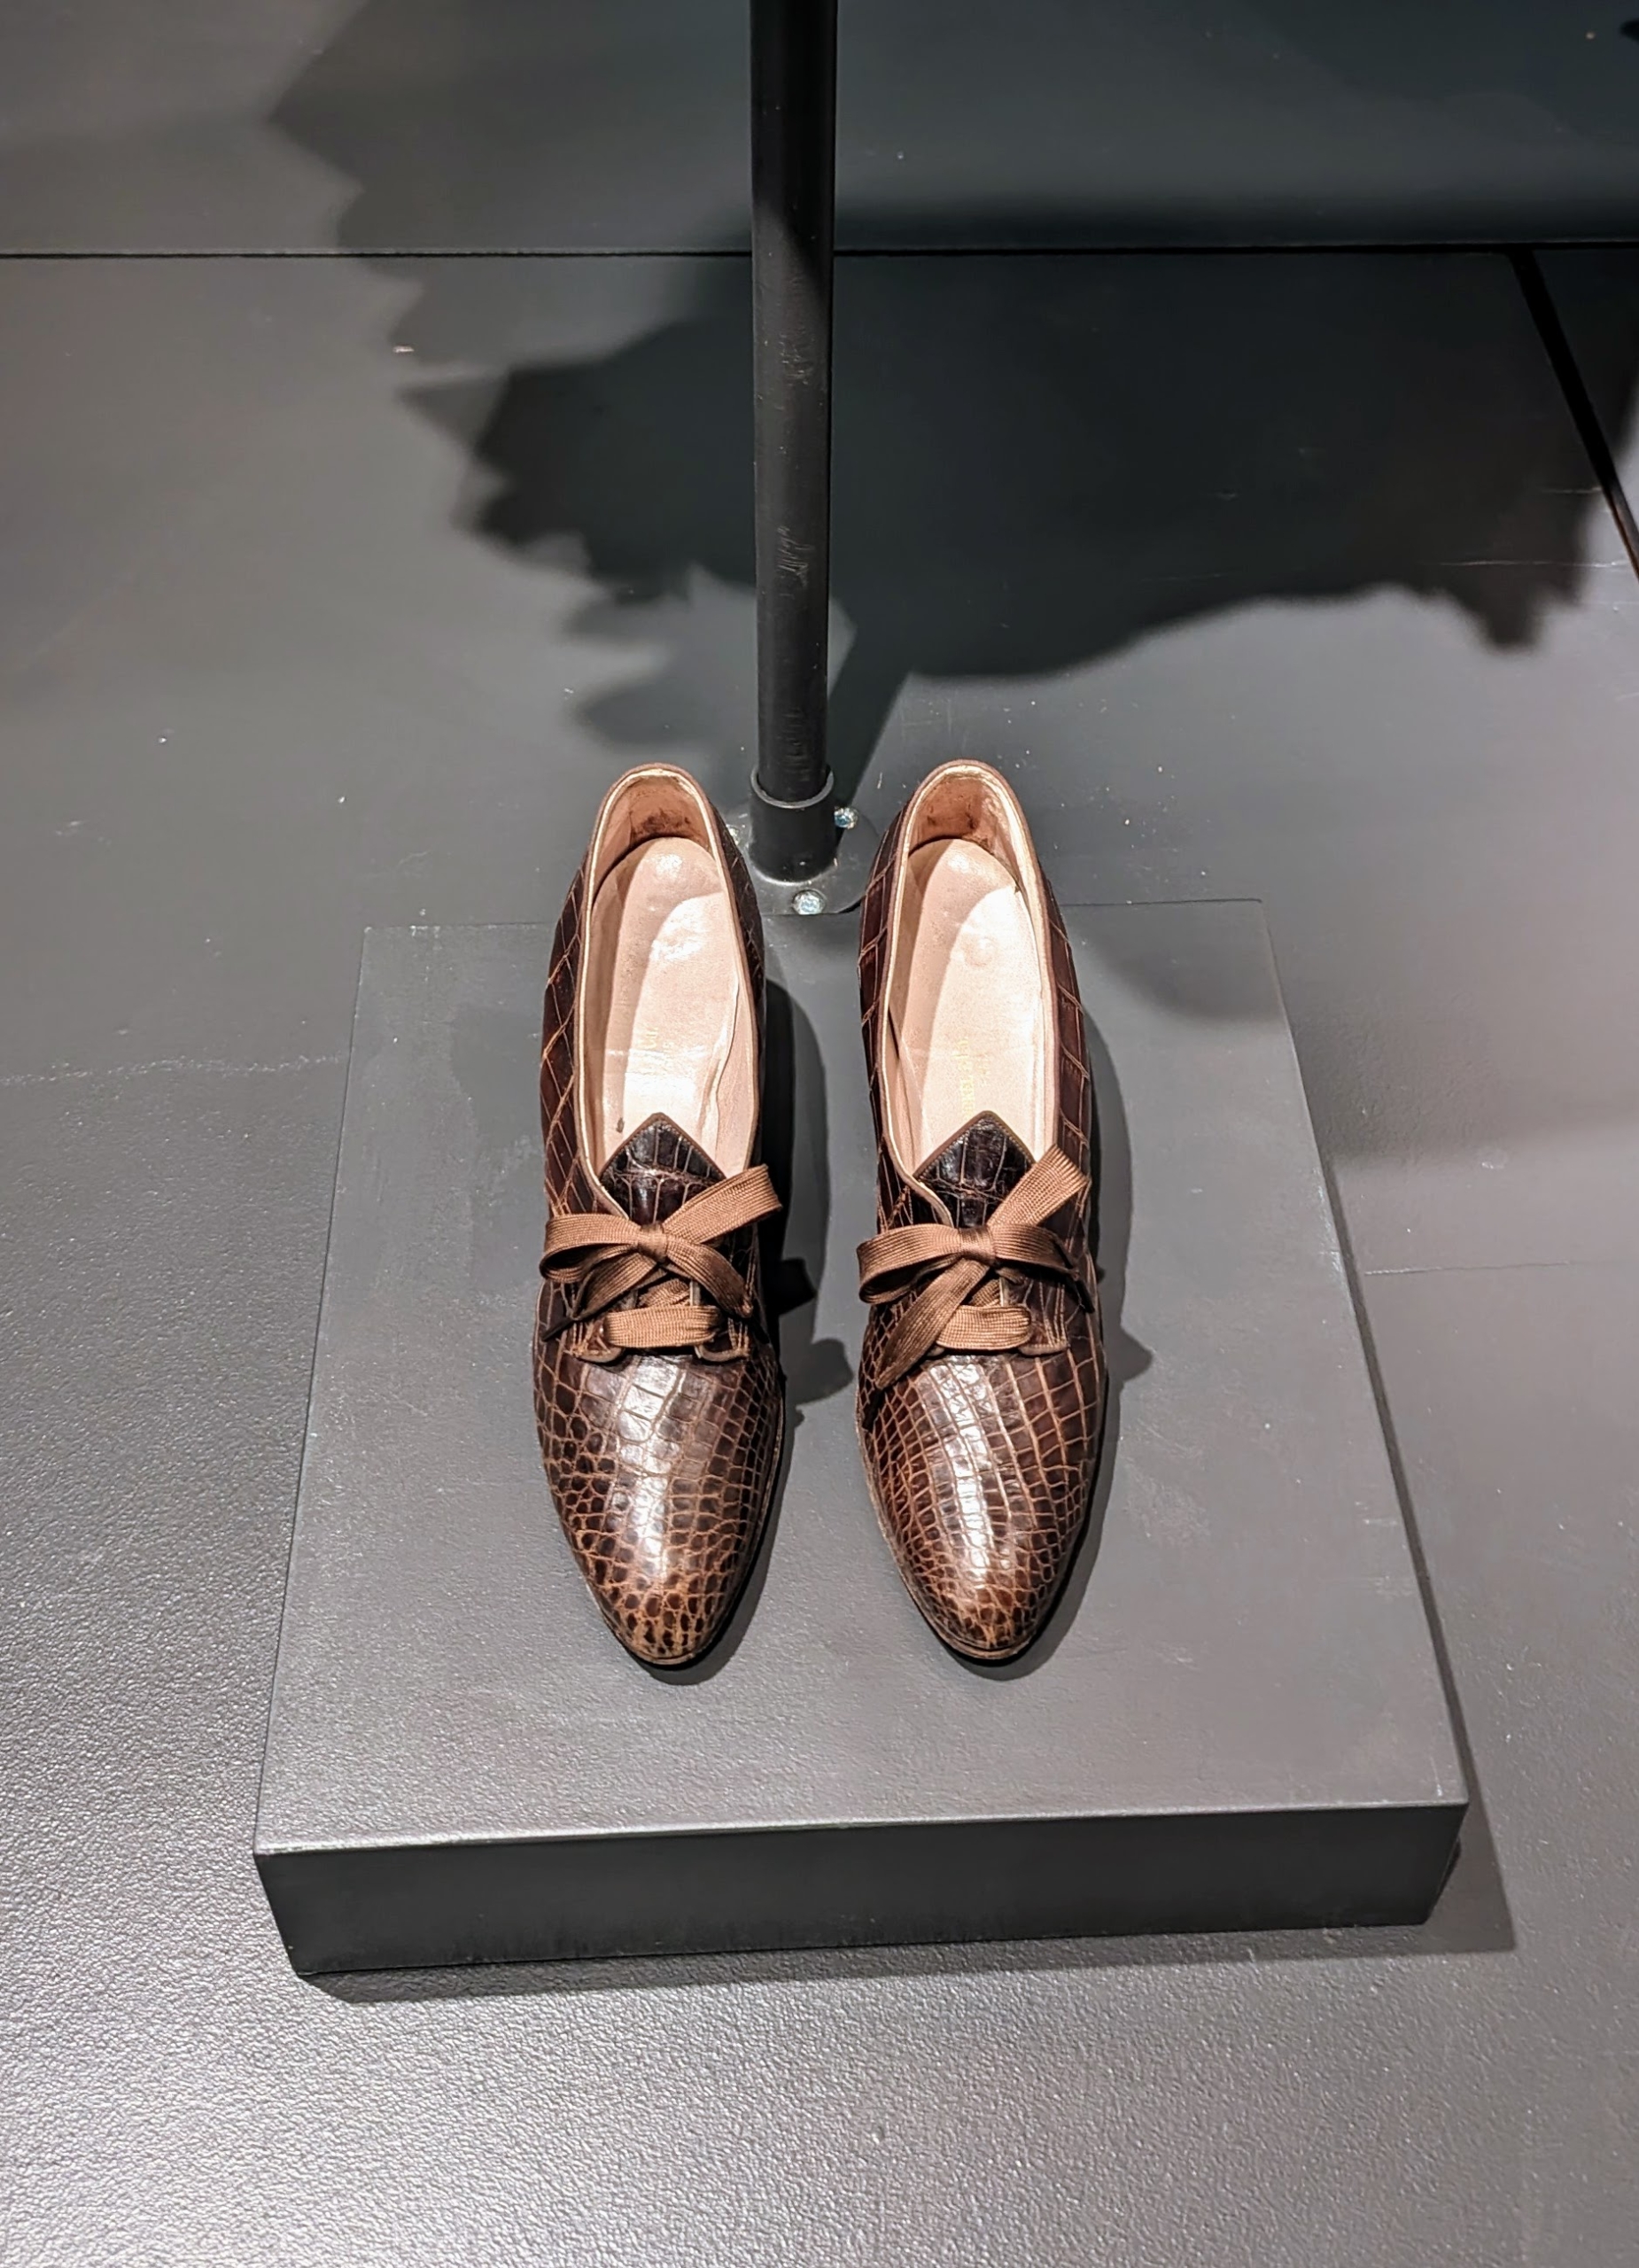
The shoes had narrow toe boxes and medium heels, but these oxfords show a significant change, allowing women to wear shoes more akin to men’s comfortable and functional styles.
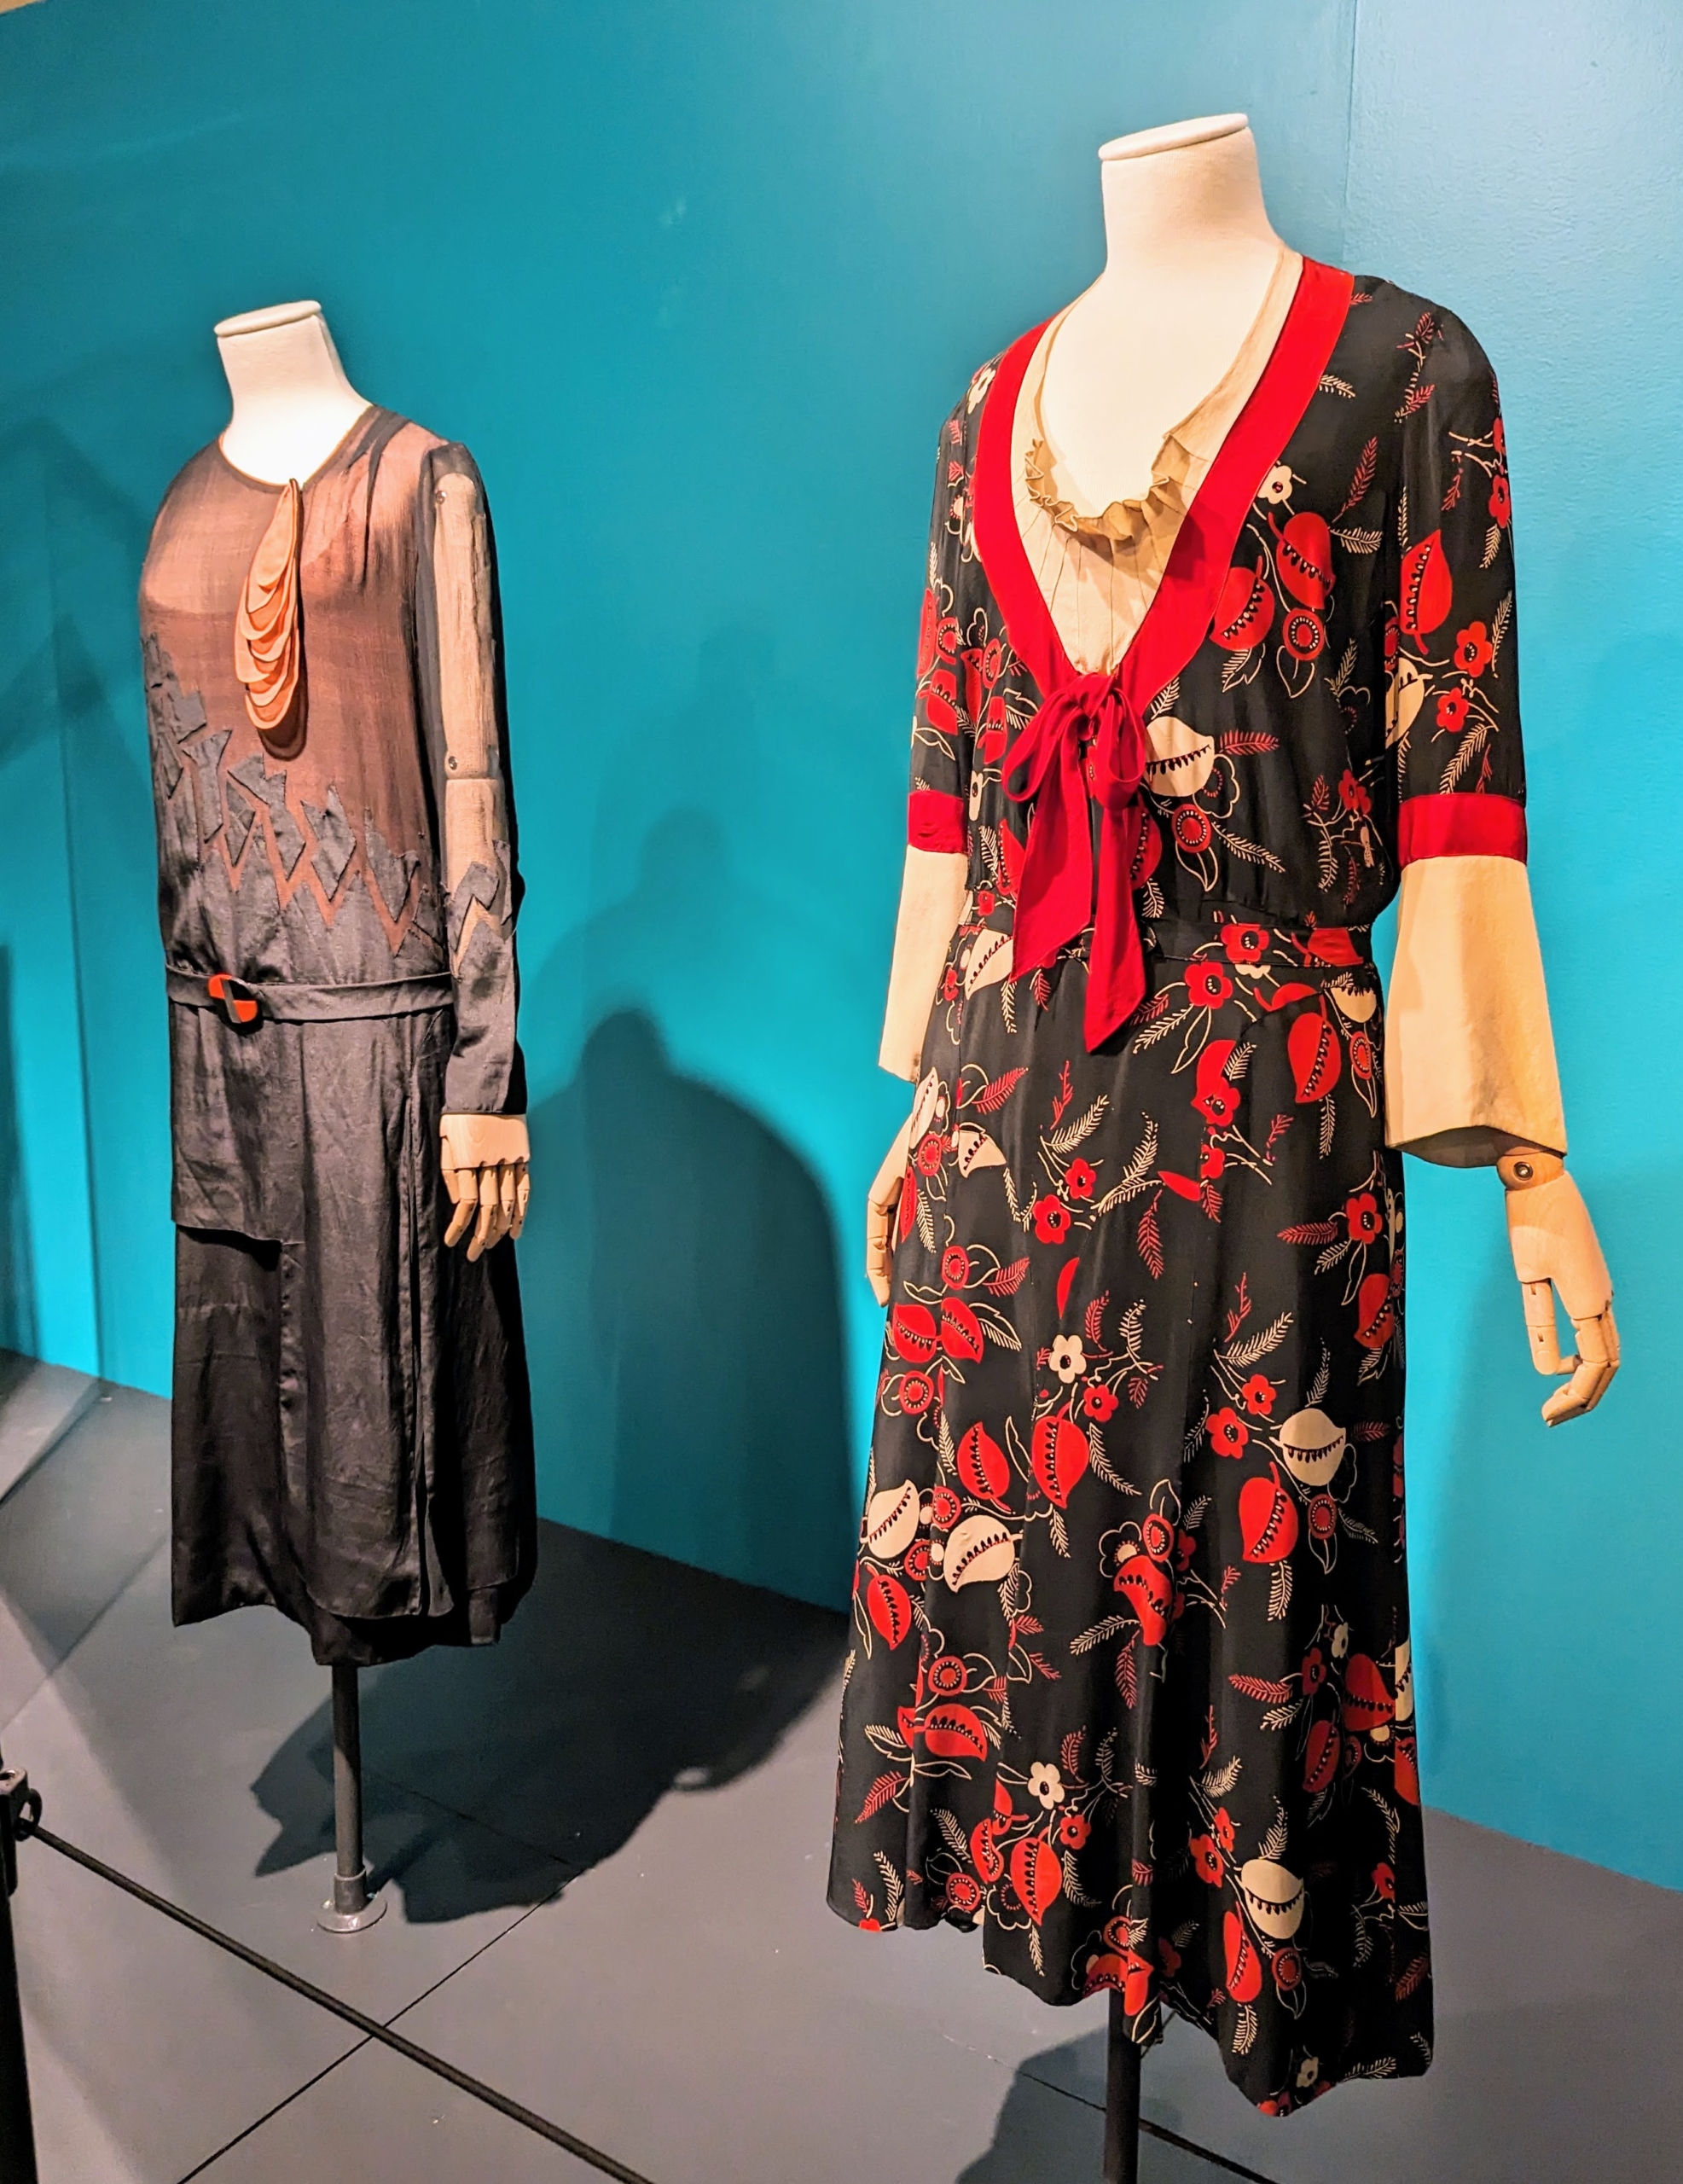
After 1926, the hemlines on dresses lengthens like on these day dresses. Notice the subtle detailing and interesting necklines.
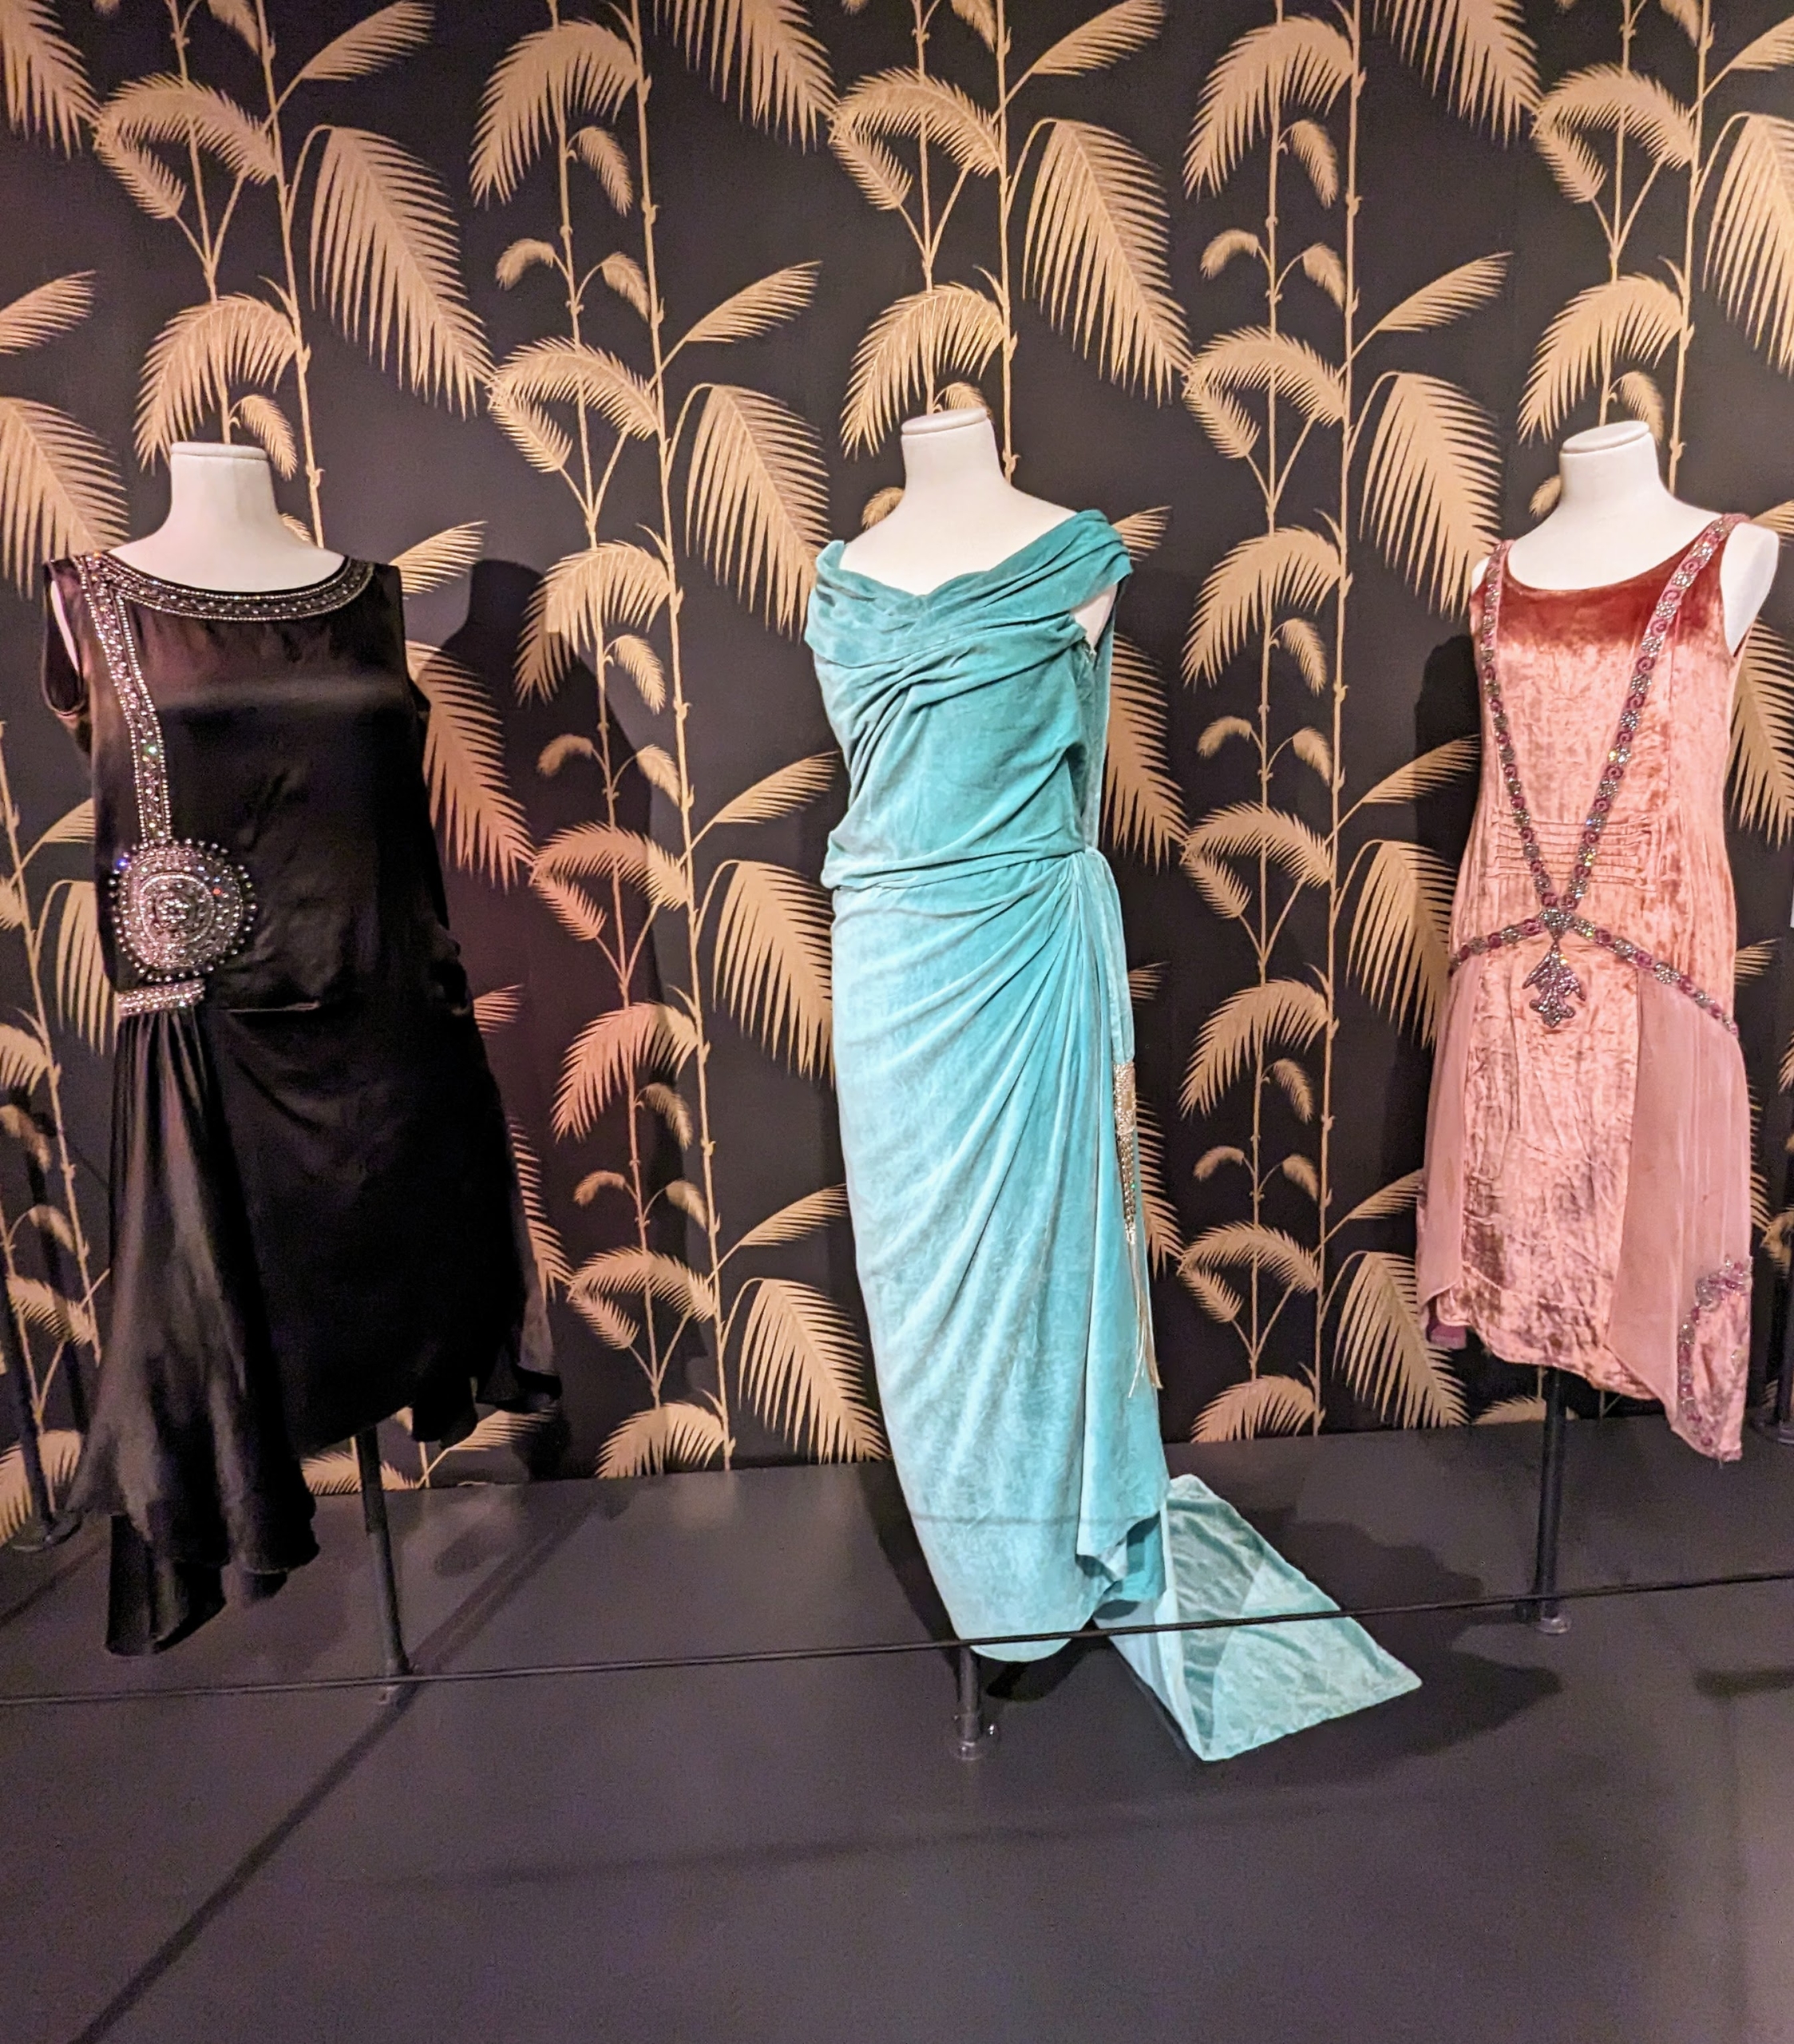
The blue evening gown belonged to Anna Gould, which she wore in her 50s. The style elongated her silhouette with its dangling passementerie and train. This gown is one of five recently acquired by the Lyndhurst and inspired this exhibit.
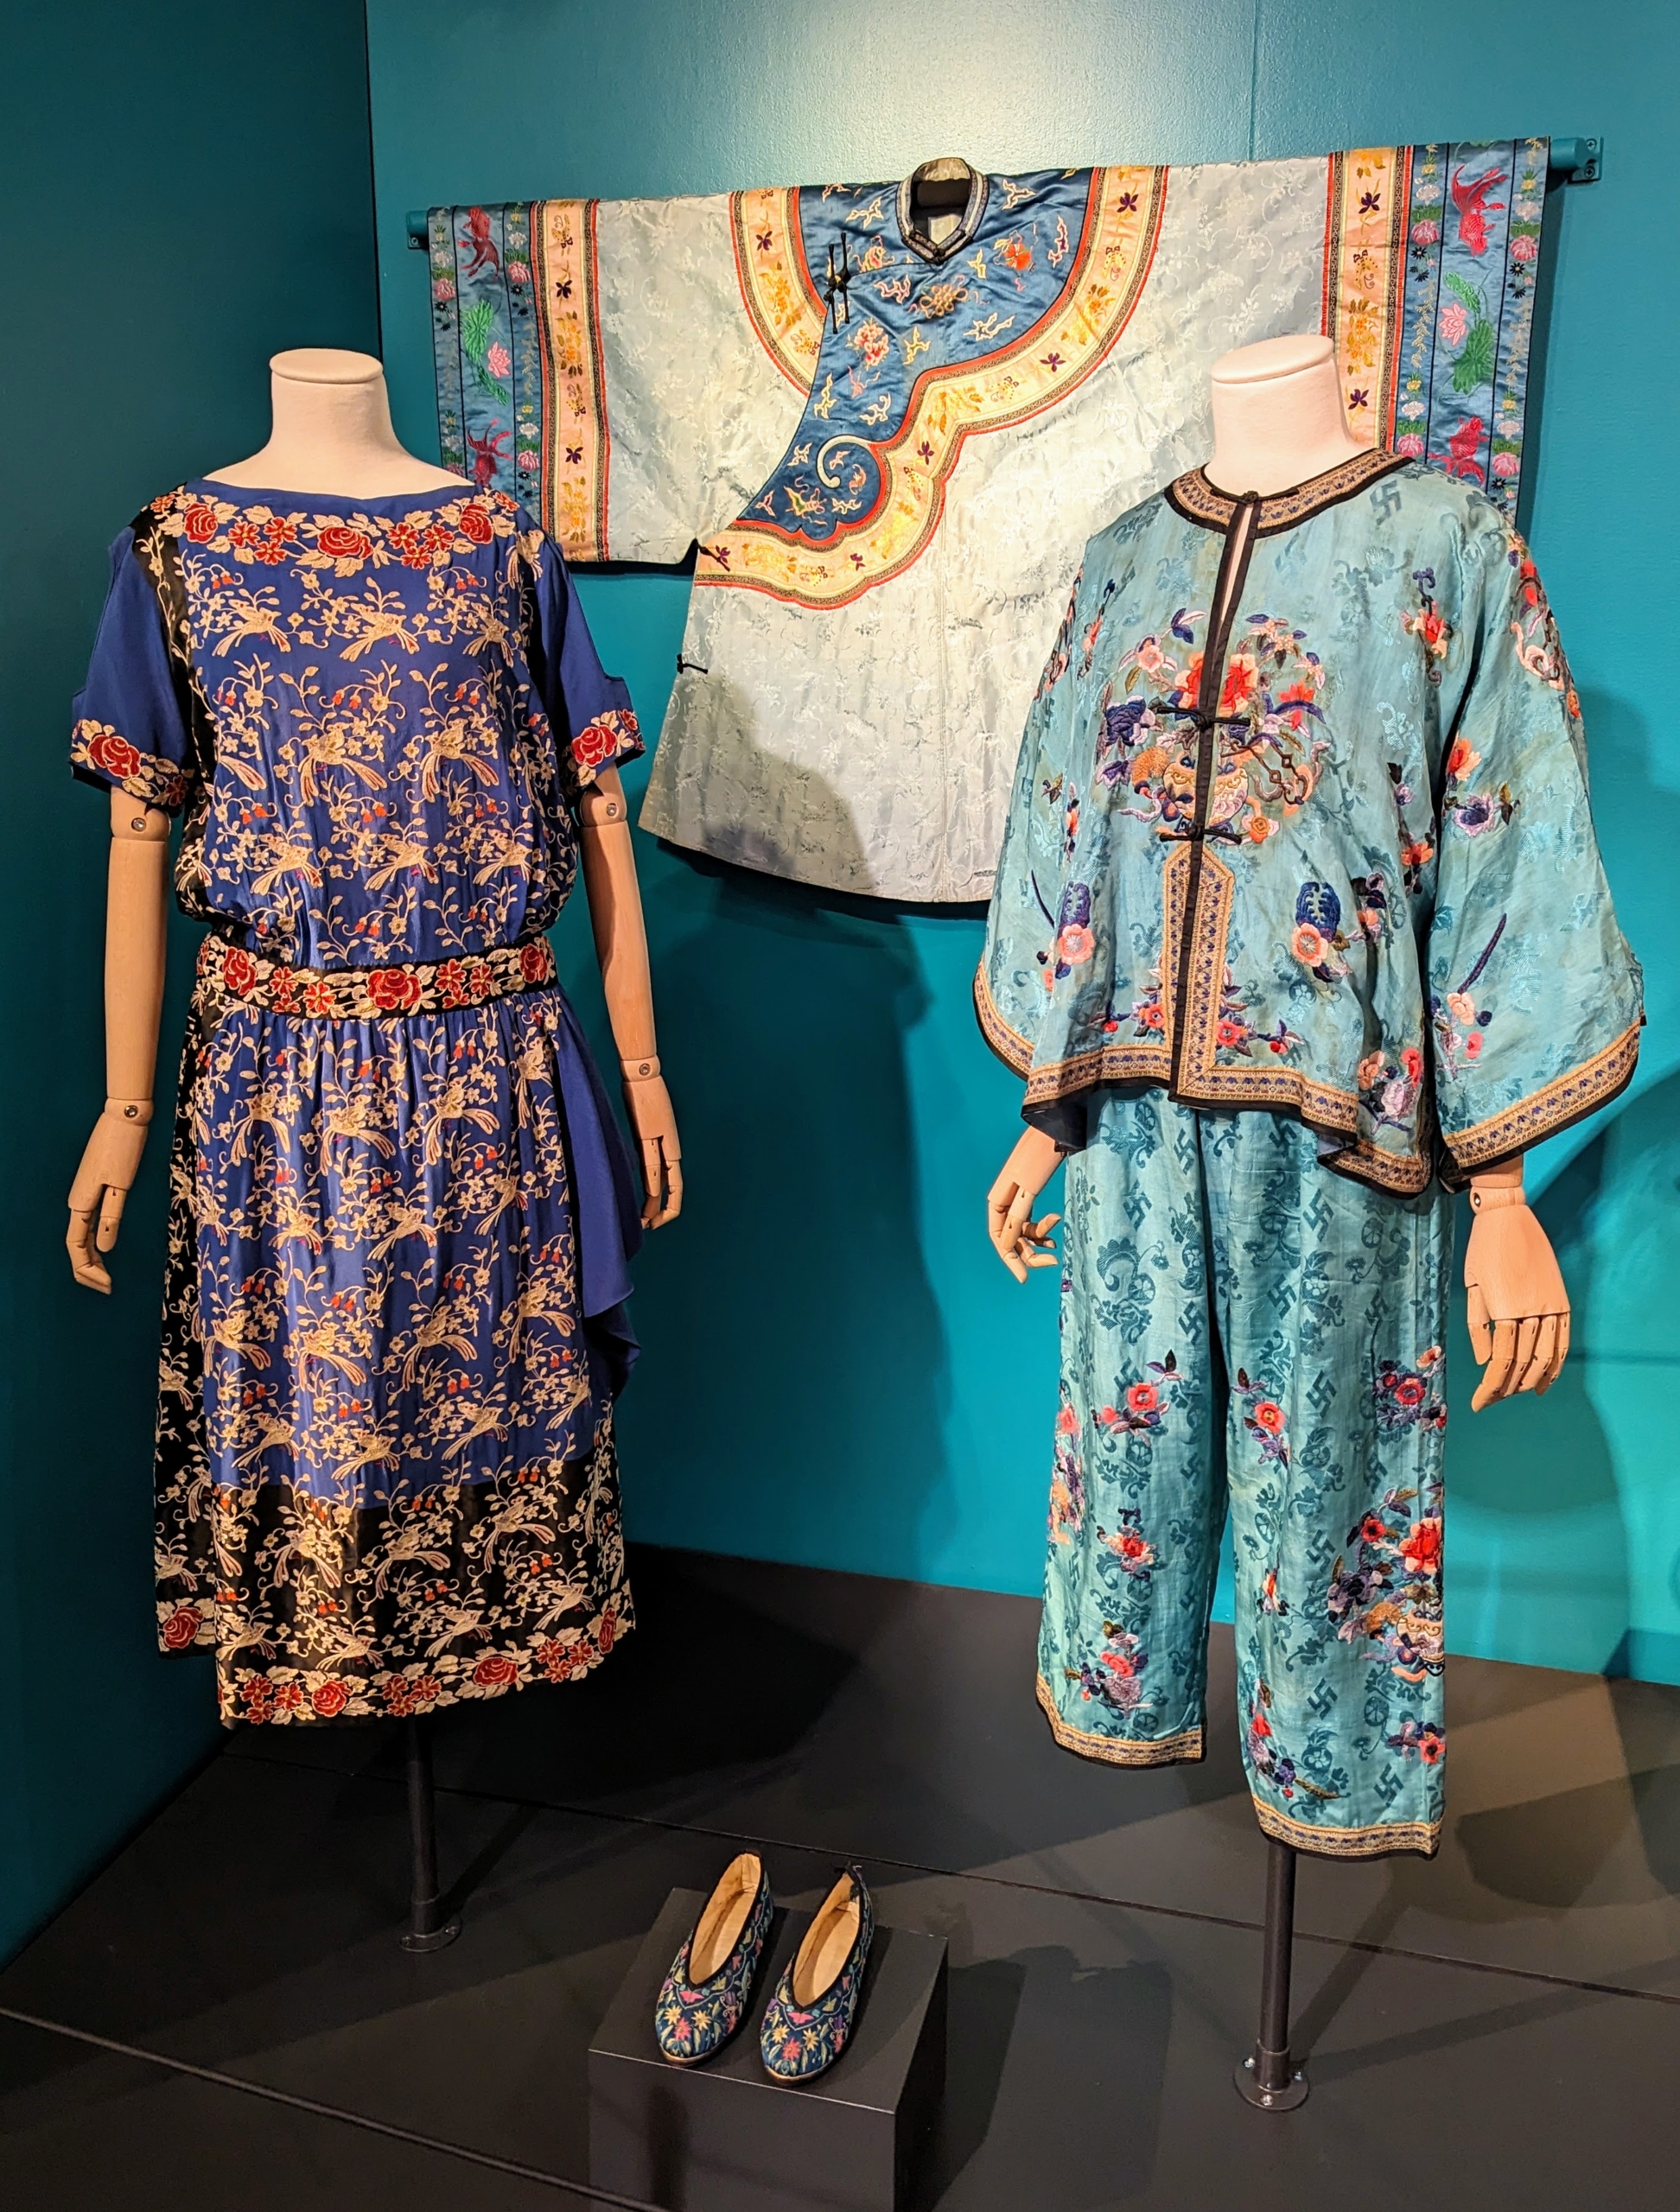
The Chinese embroidered silk outfit on the right belonged to poet Edna St. Vincent Millay. They show her fondness for different cultures and styles. On the left, an American made garment featuring the influence of Chinese patterned textiles. This dress could have been worn in the afternoon or for dinner.
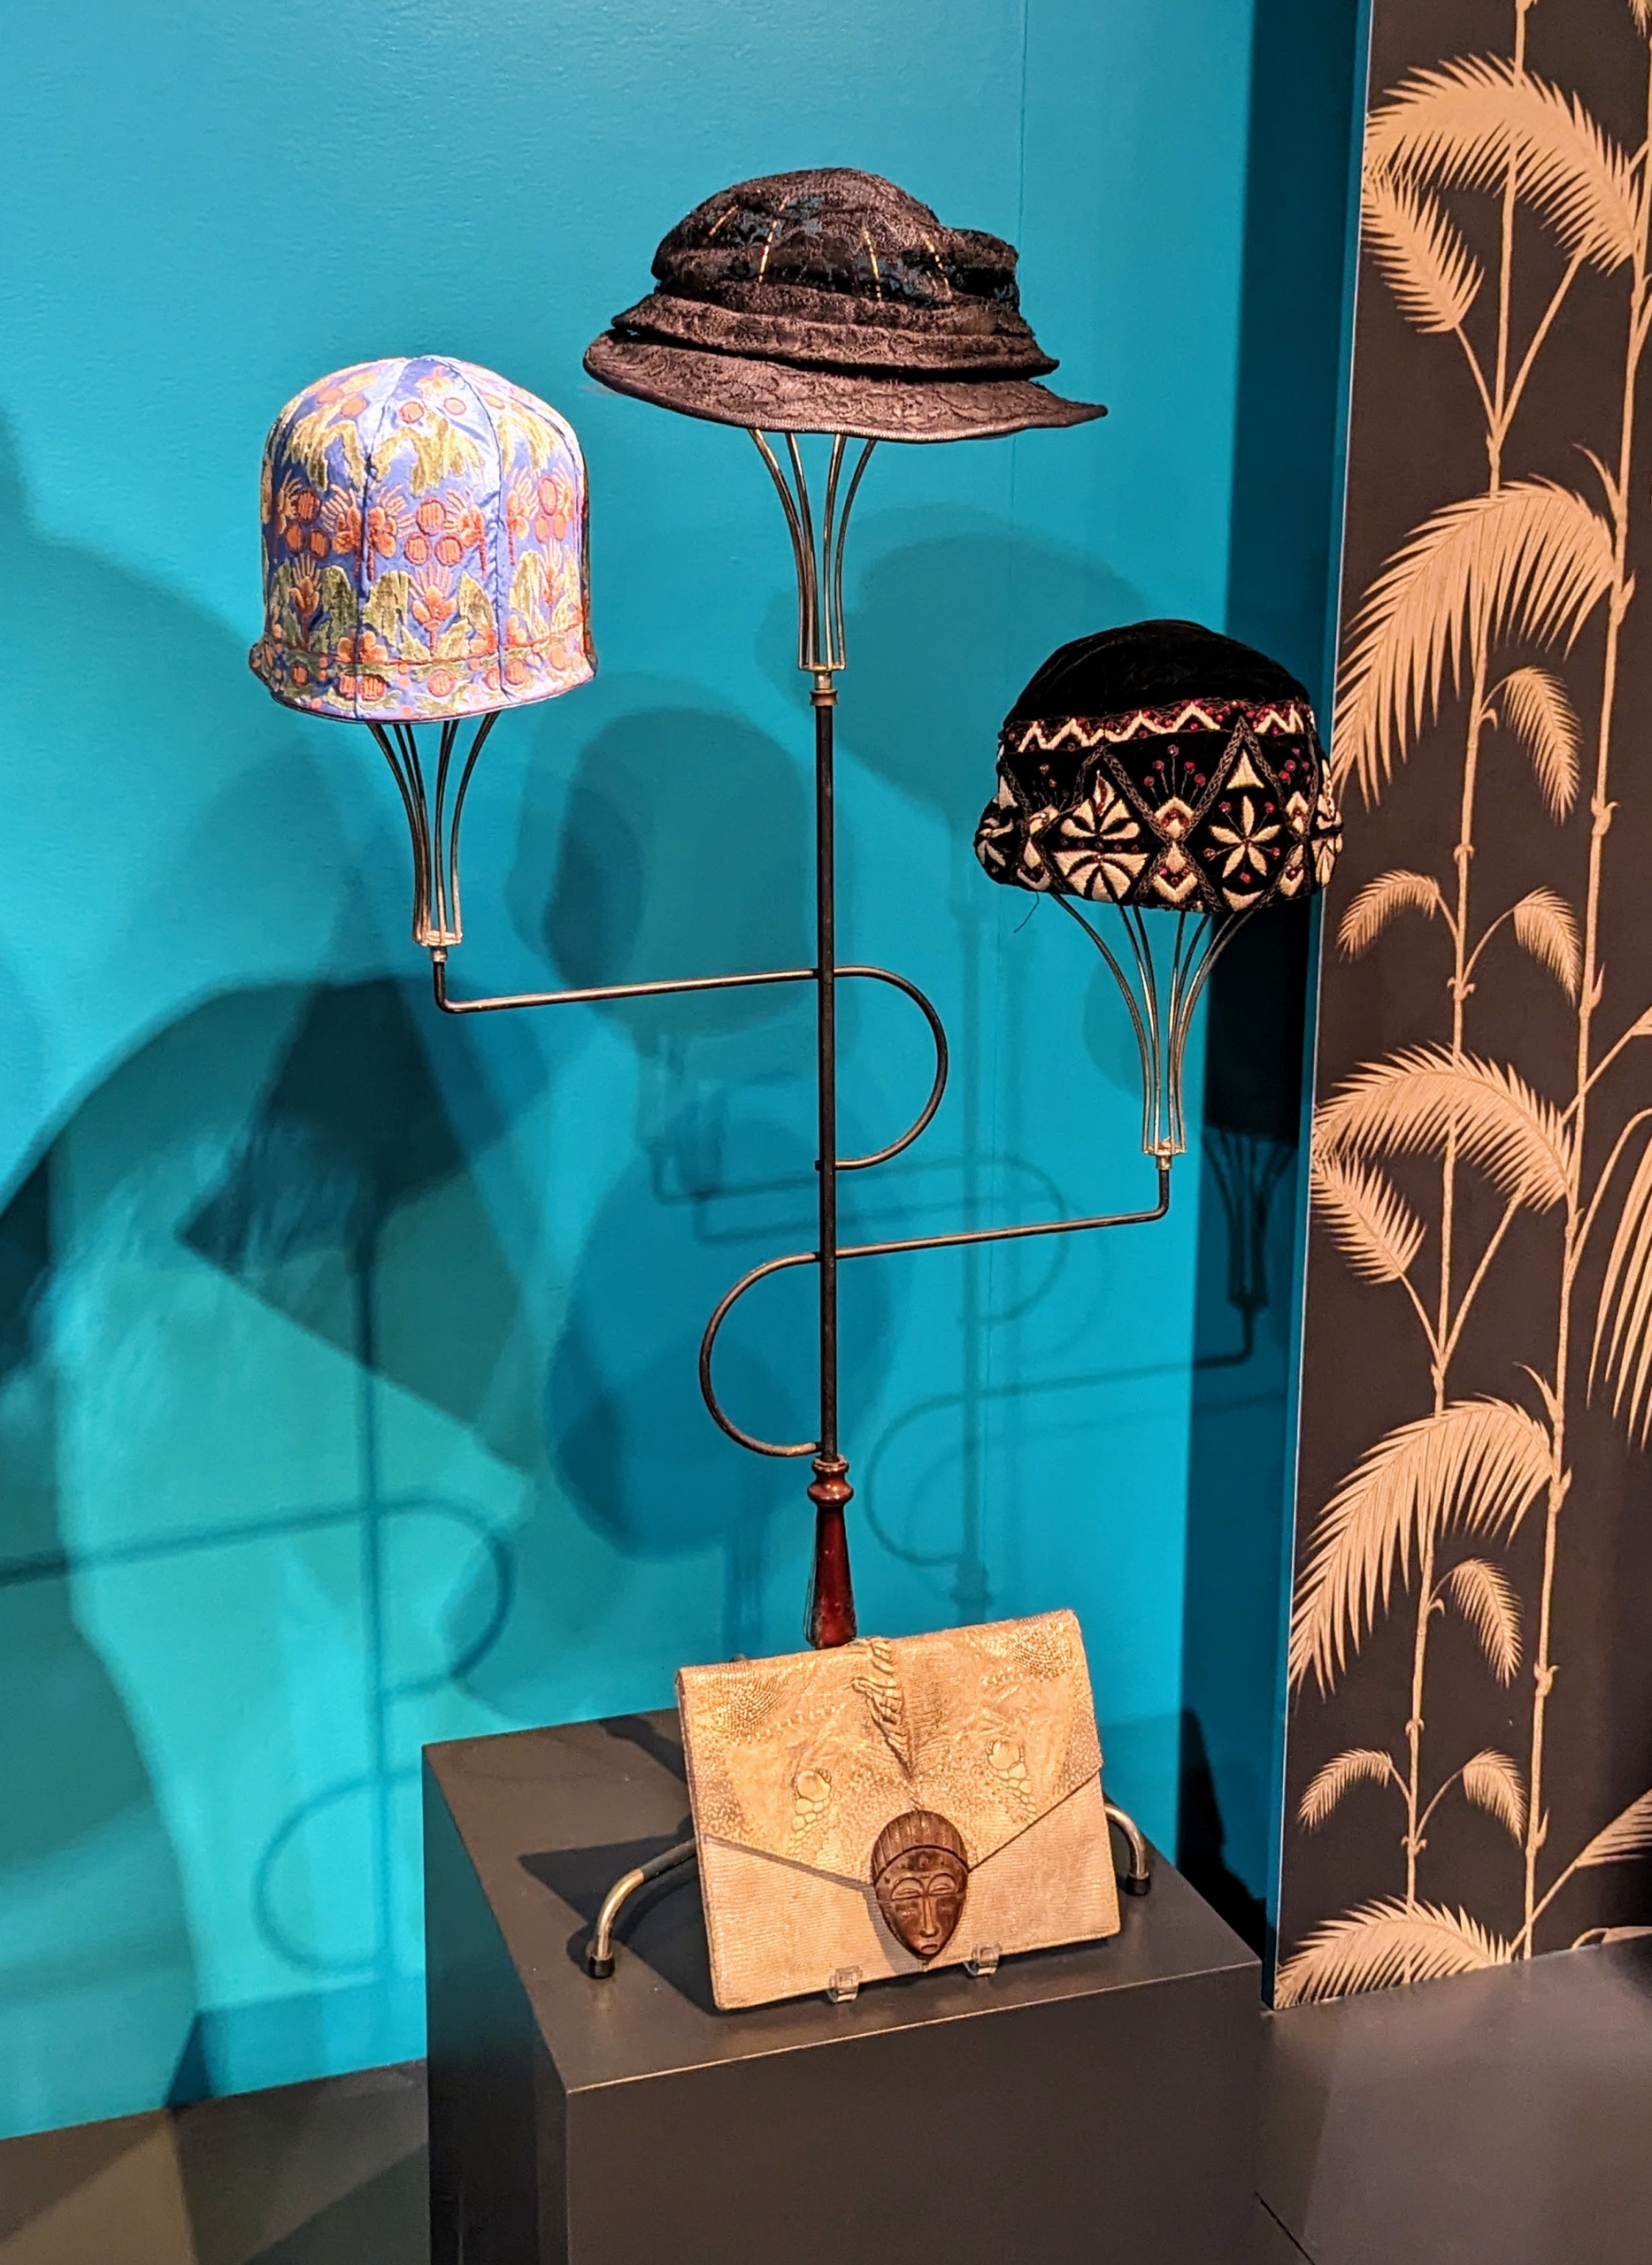
Hats were also popular with Edna. She owned these three. During the 1920s, women preferred bob hairstyles and smaller brimmed hats to show them off.
Edna also favored men’s tailored clothing and could often be seen wearing riding ensembles with pointed collared blouses and ties.
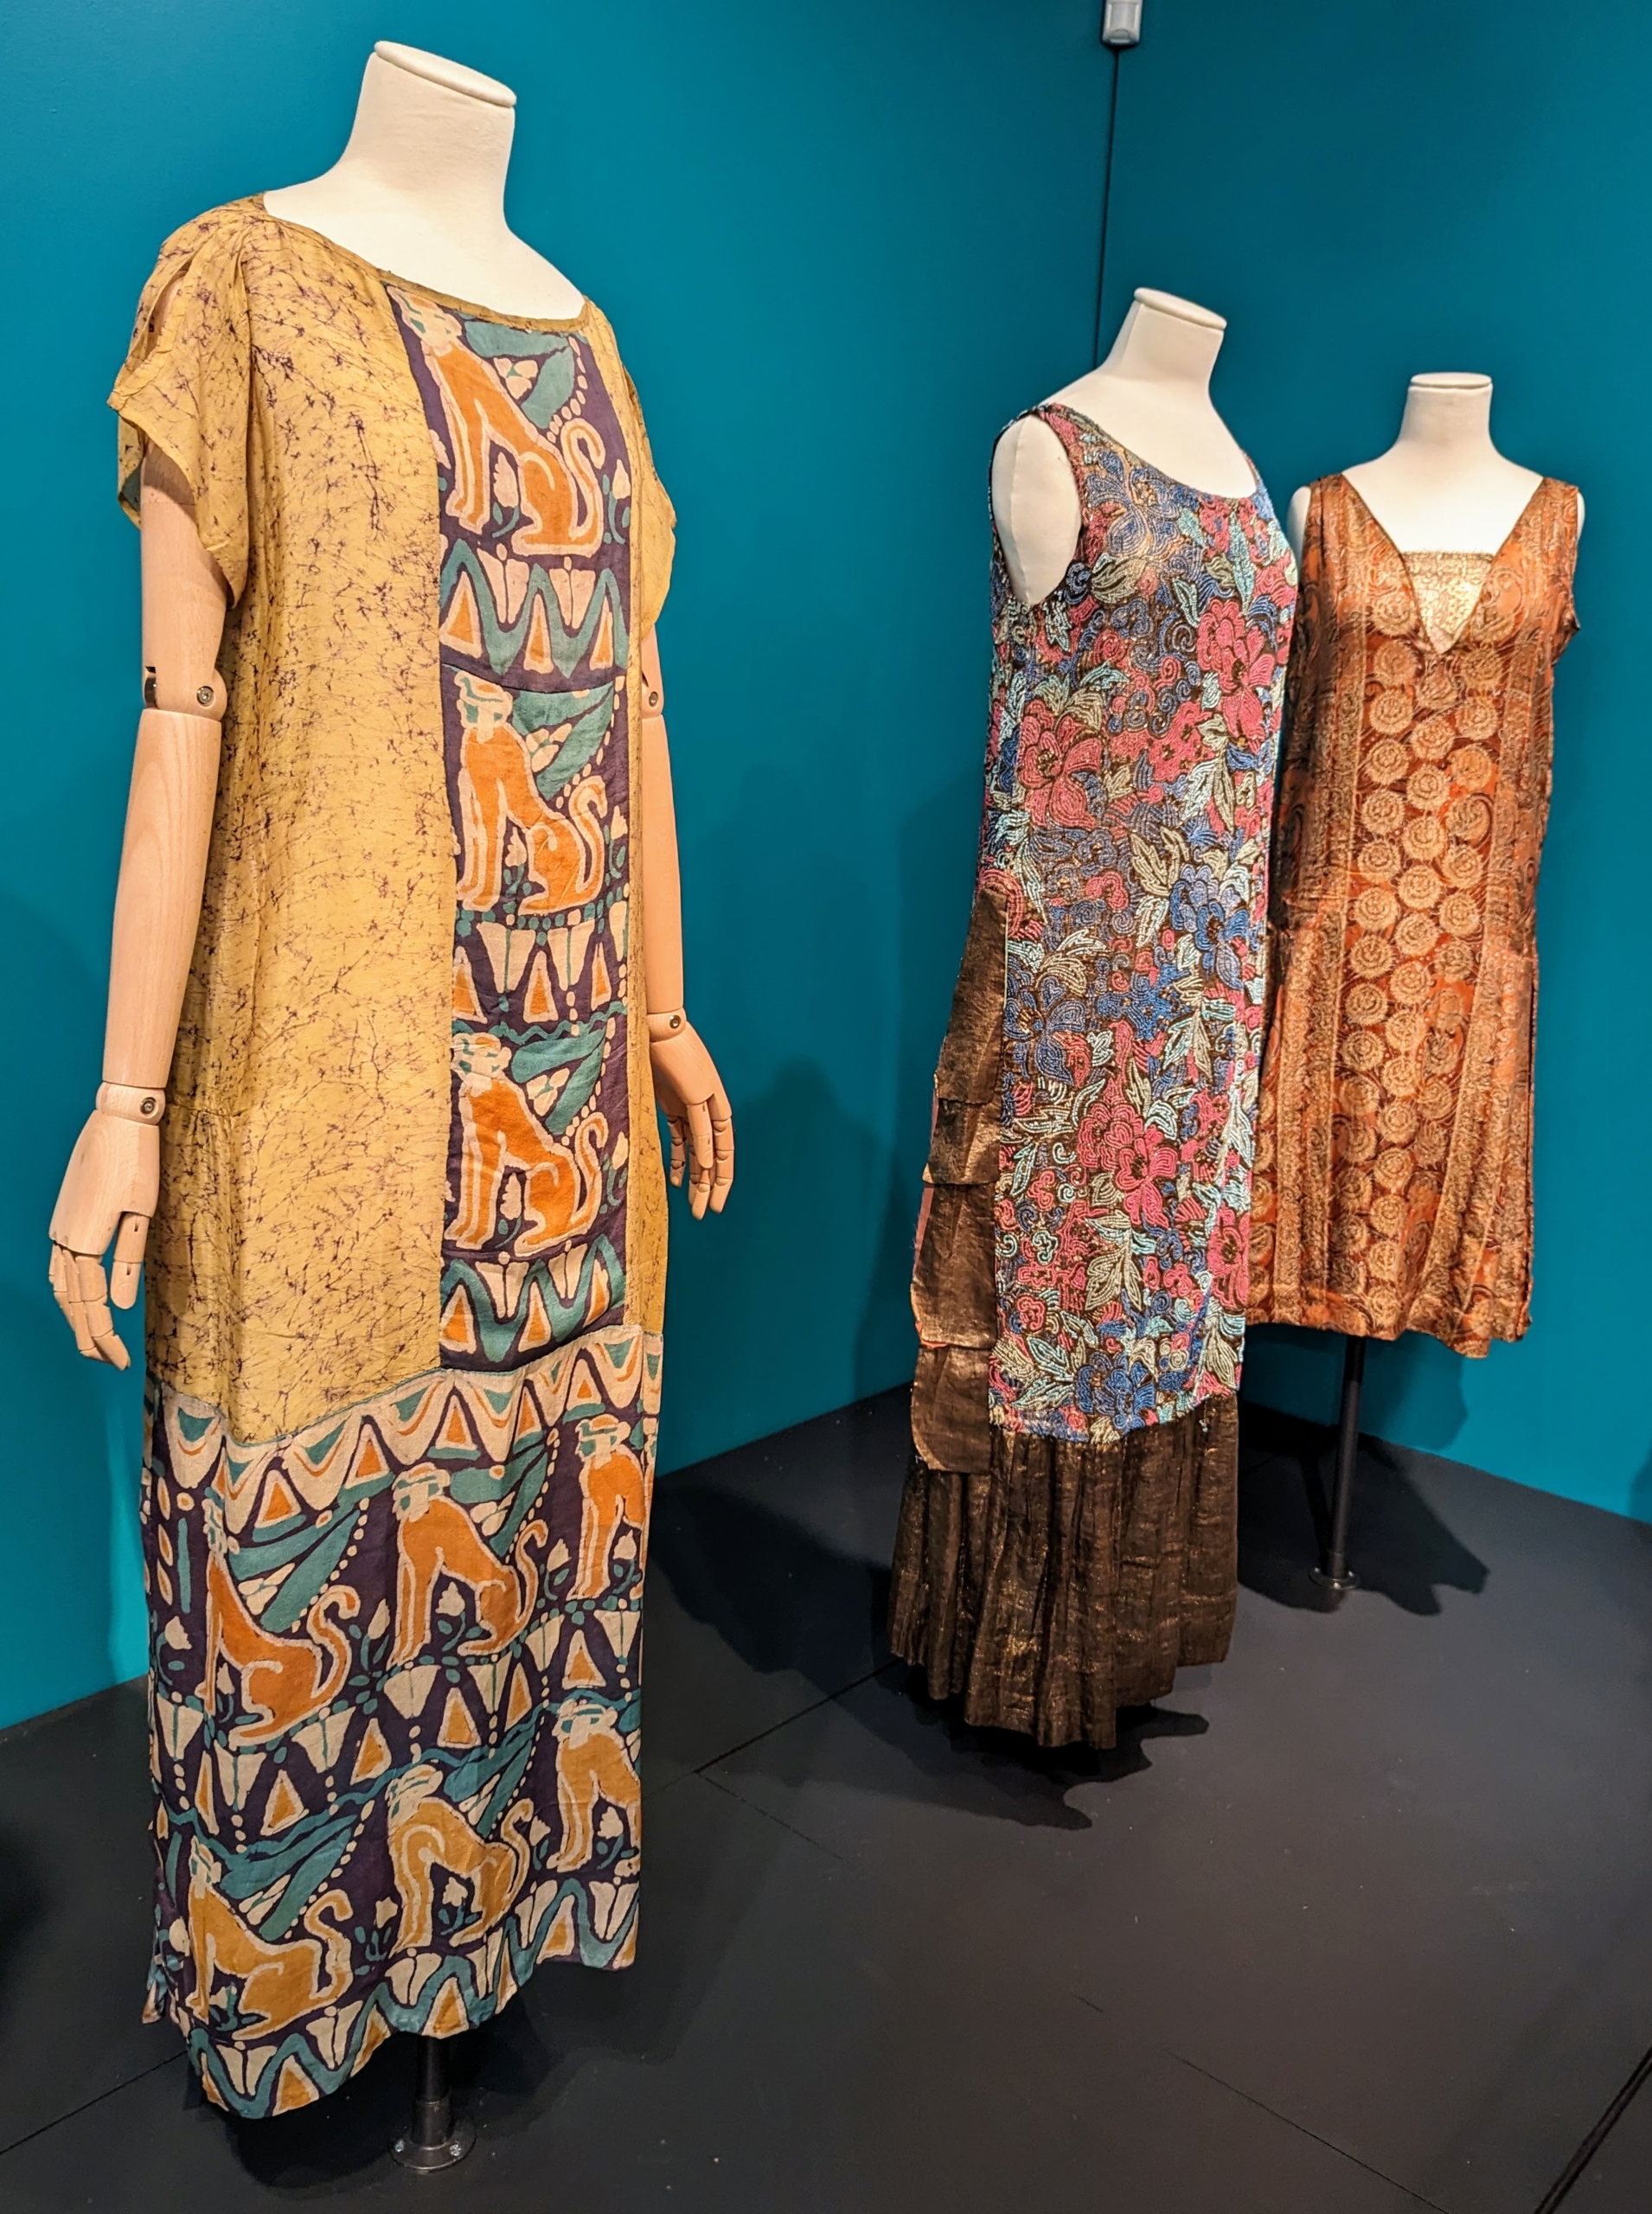
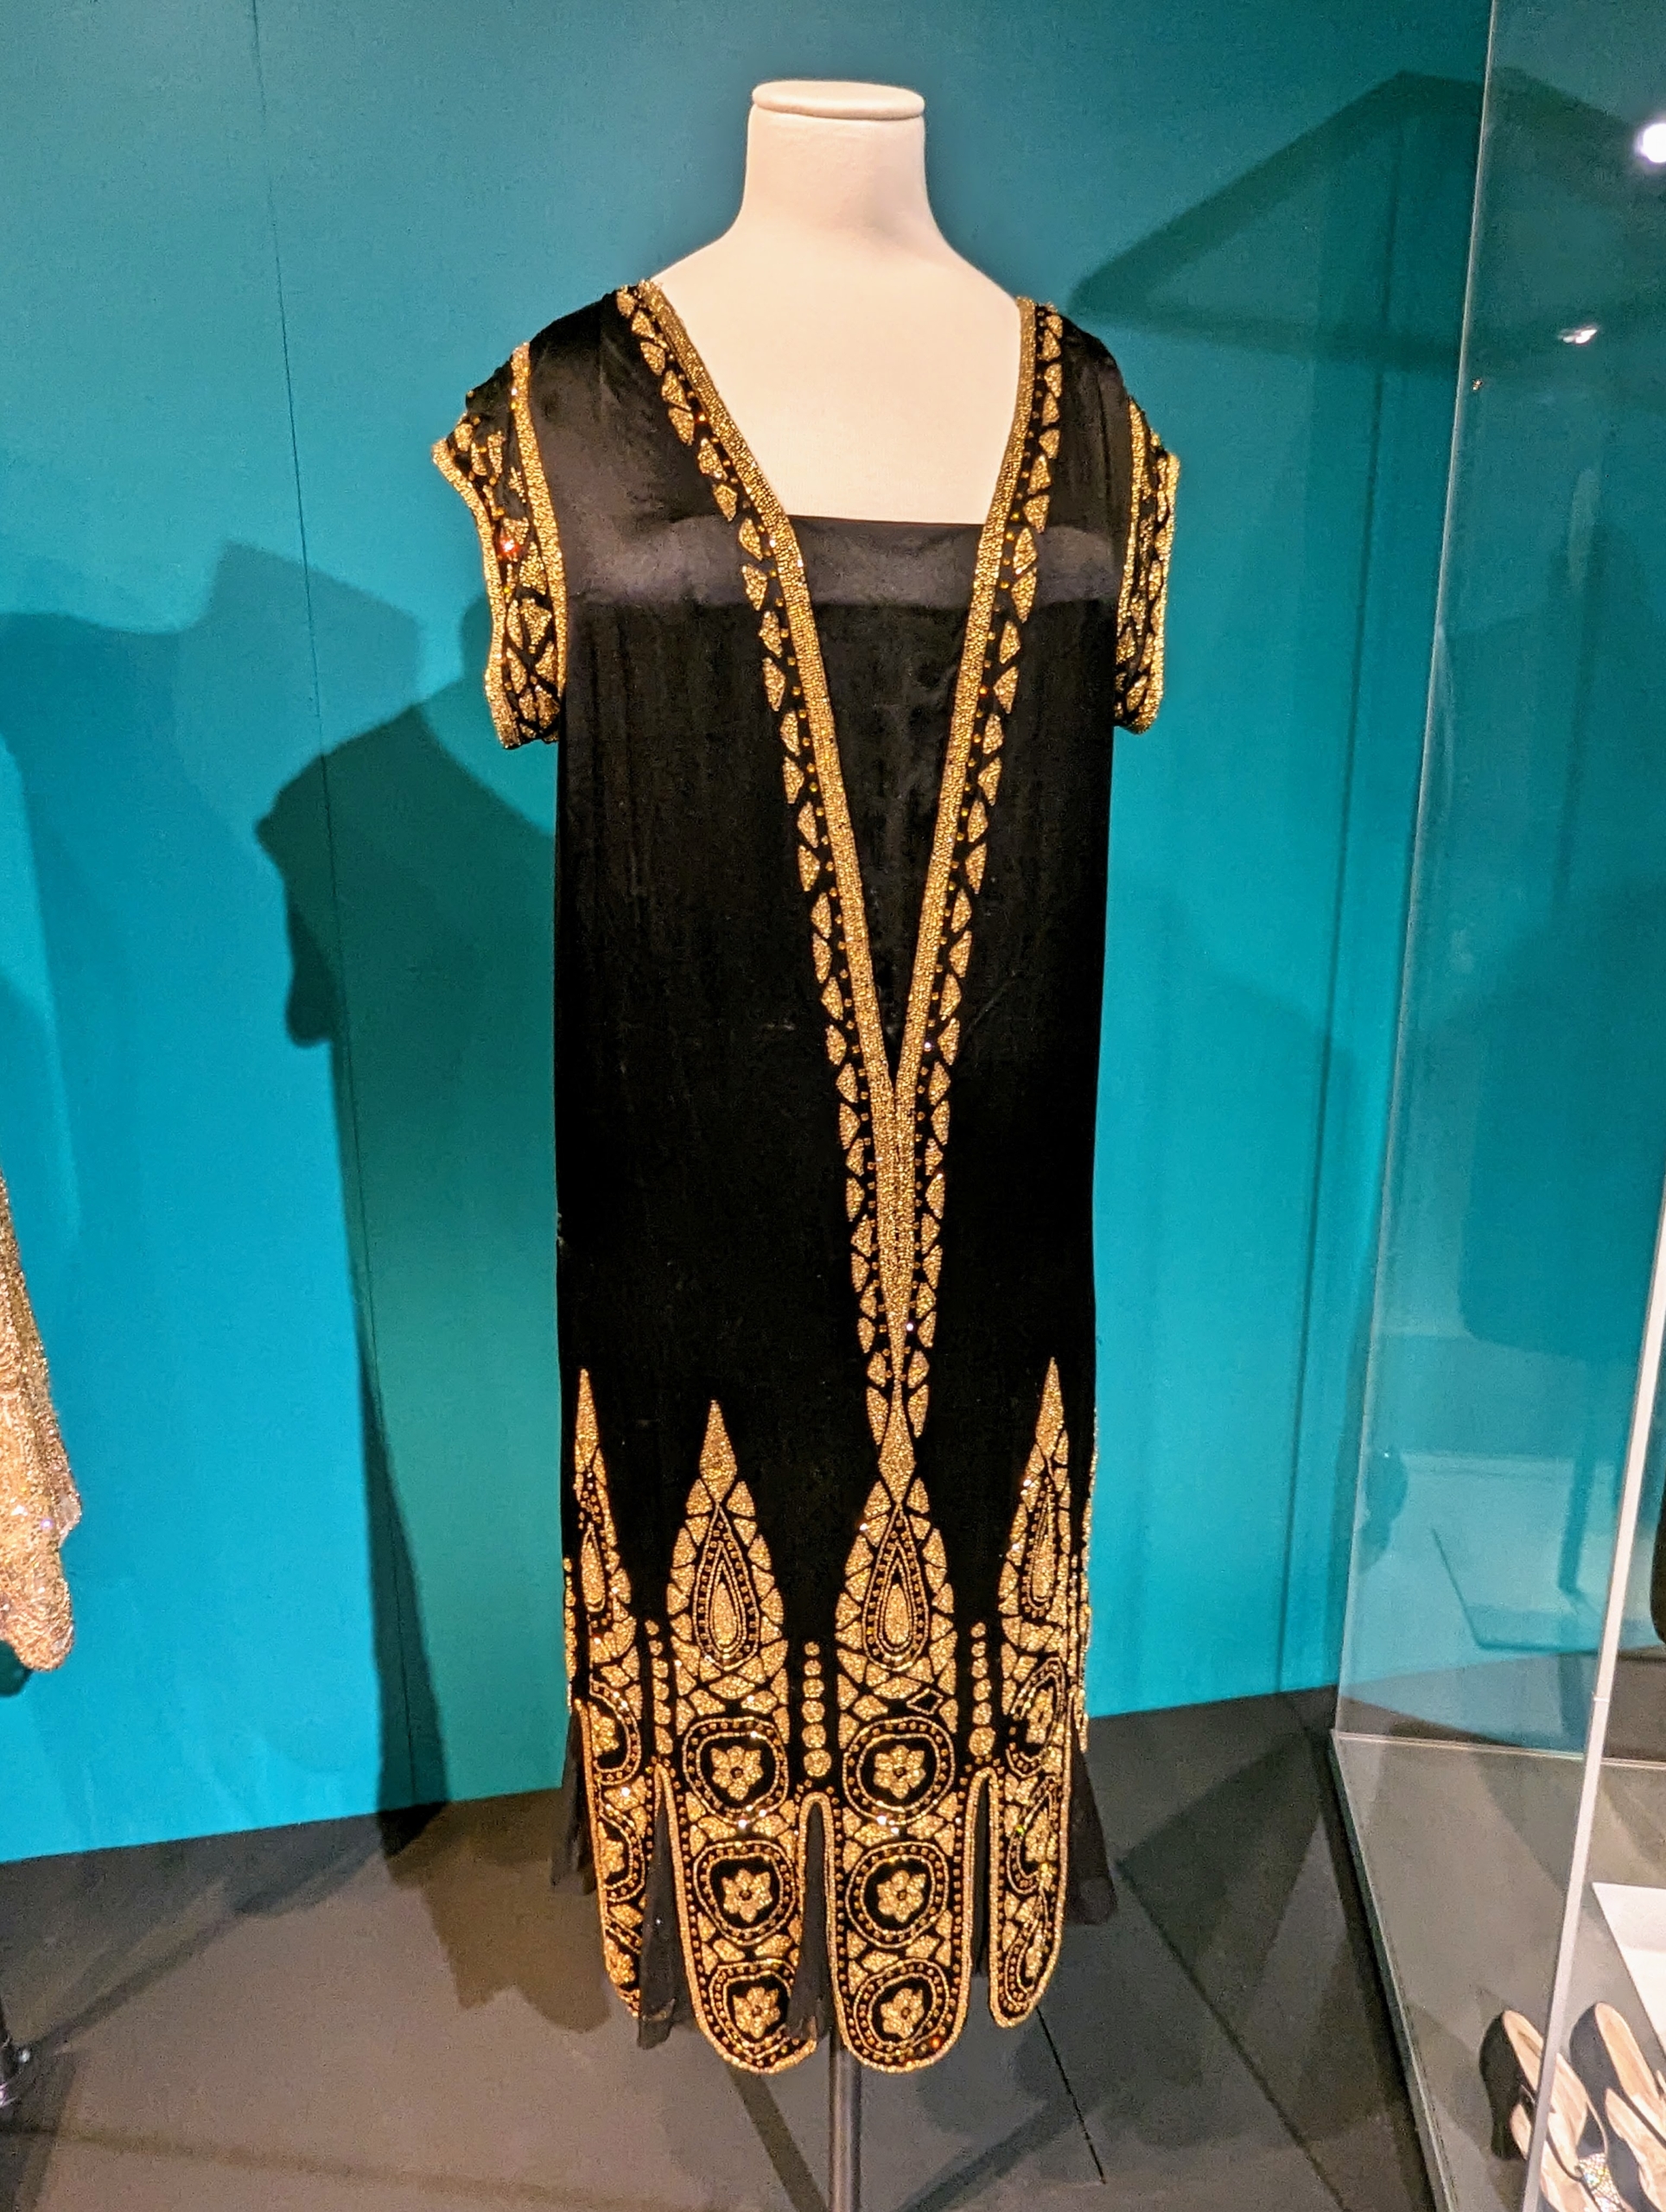
On the left – a simple, loose-fitting dress showing the use of dye resist fabrics. It was not unusual for women in the 1920s to tie-dye their own clothes at home. The other two evening dresses show the use of more luxurious materials and beadwork.
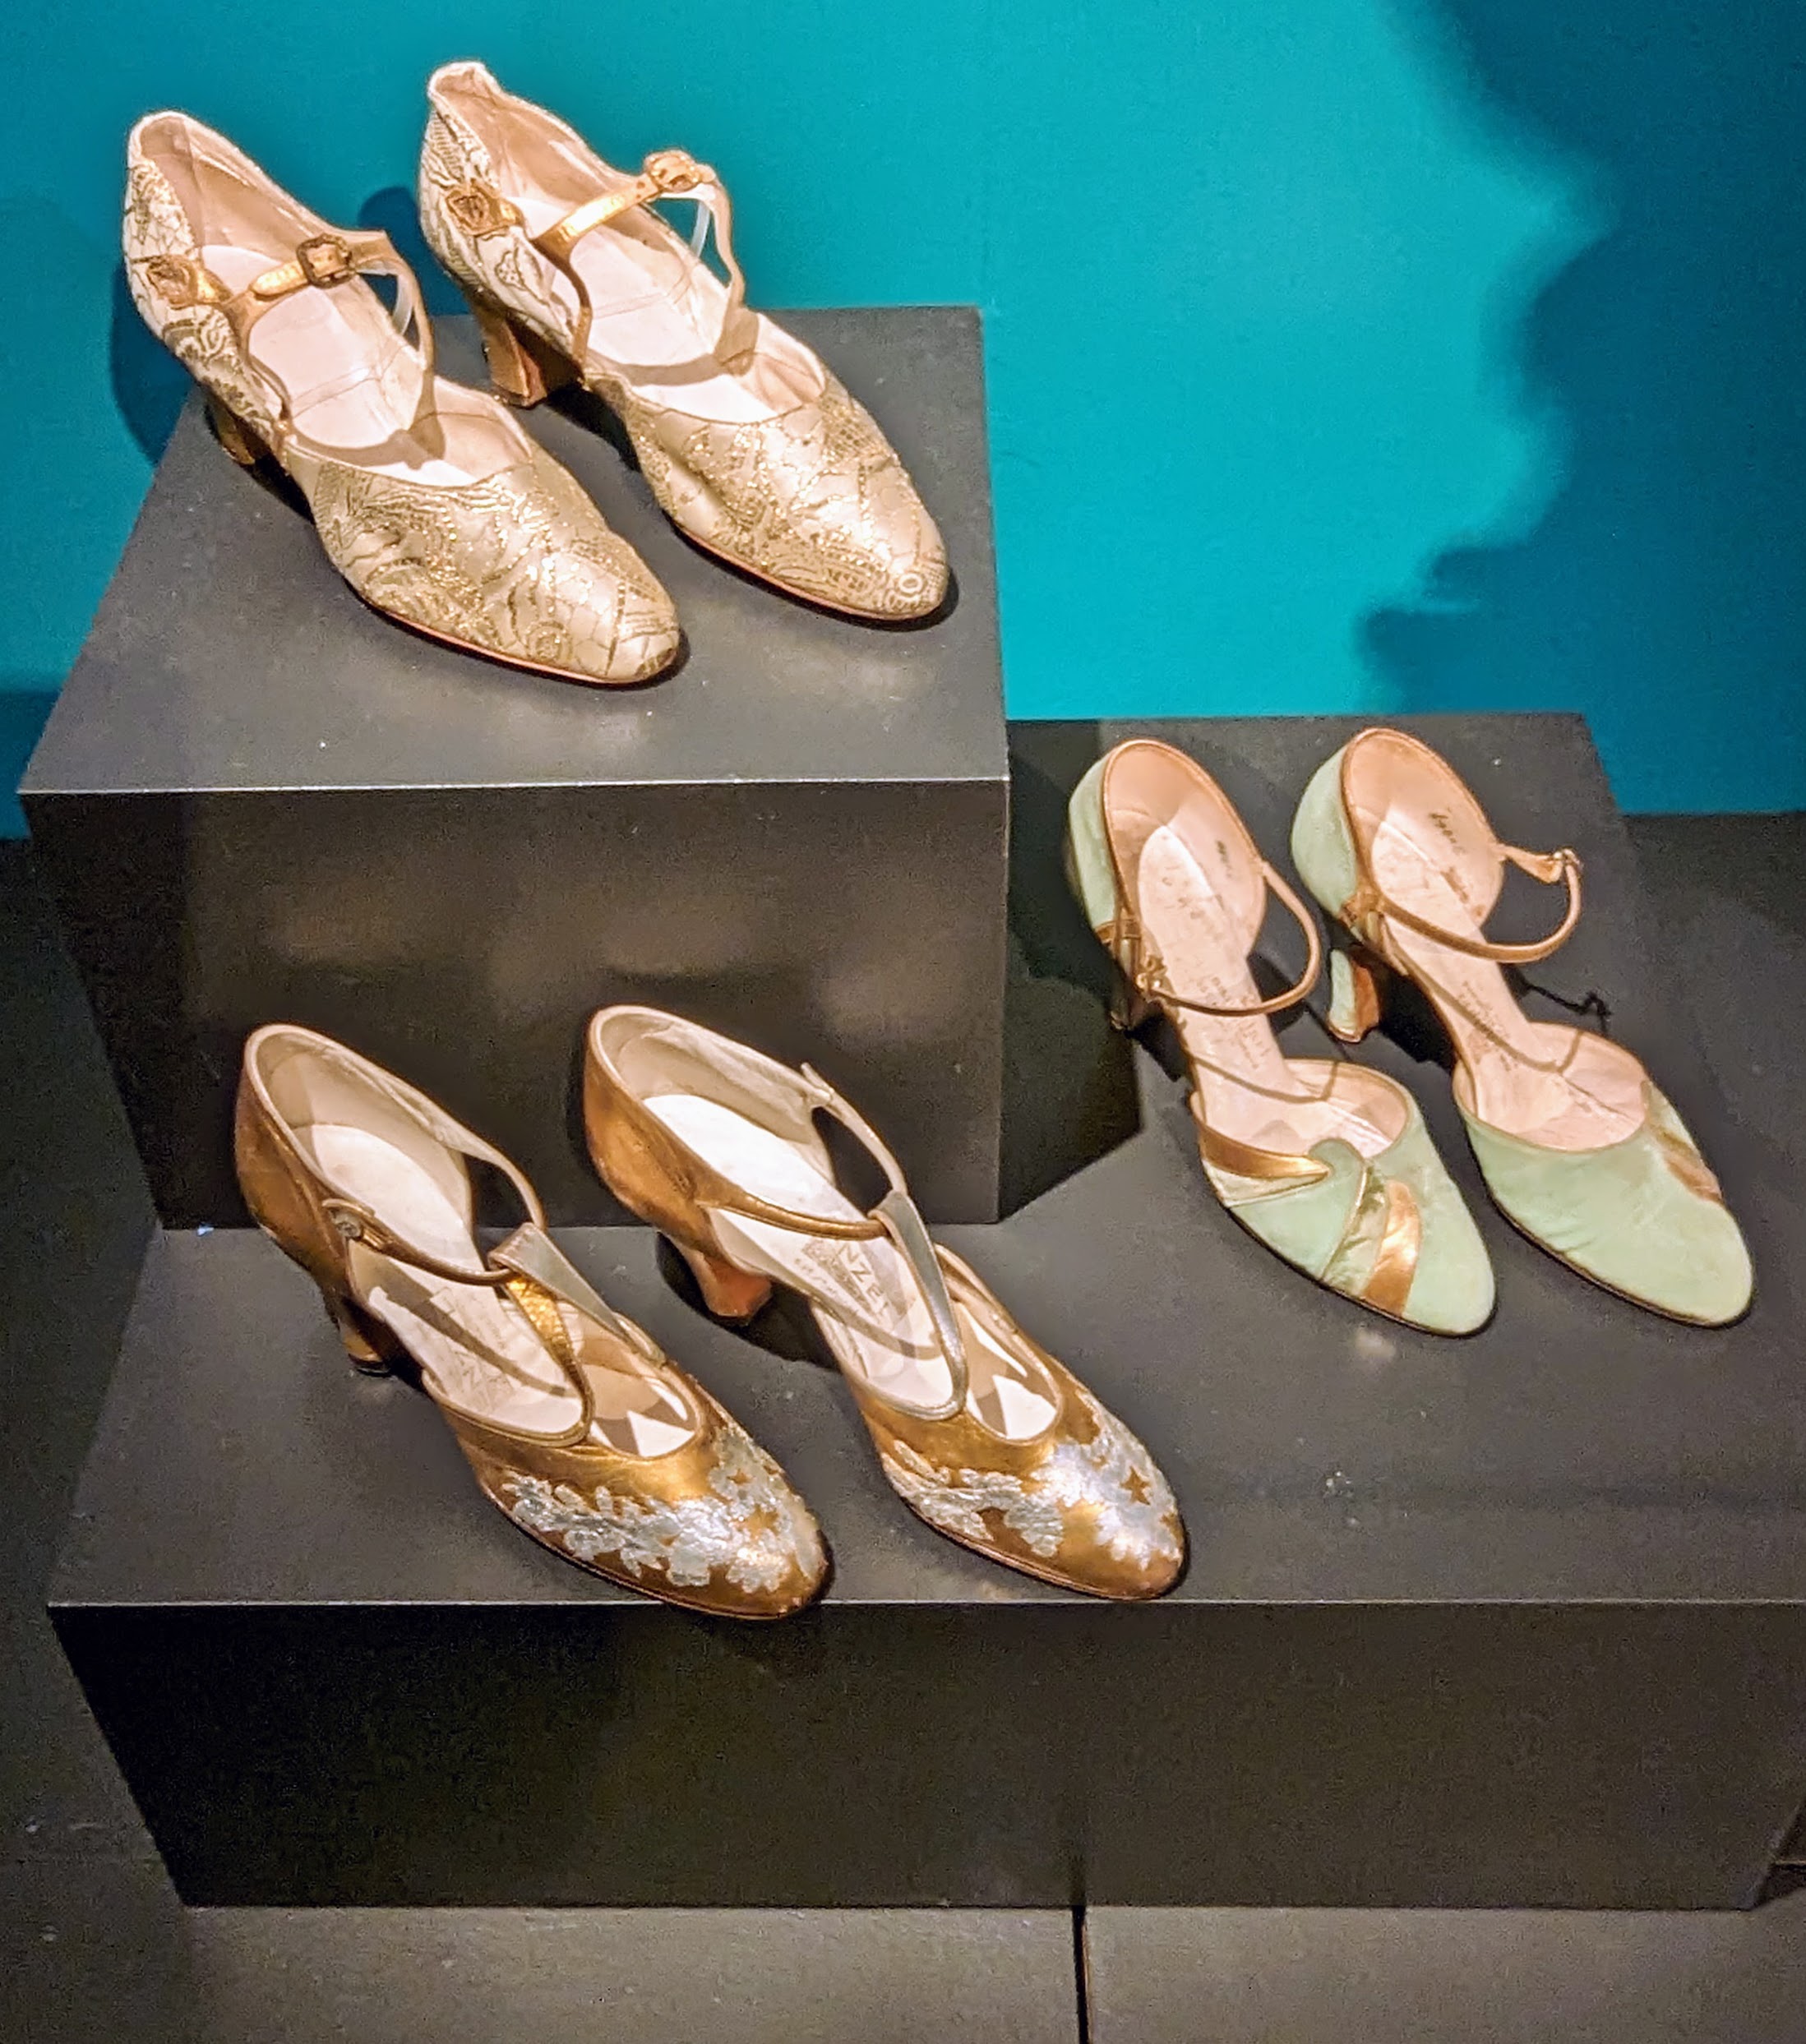
These evening pumps are also medium heeled, but with embellished leather straps that extended higher on the foot.
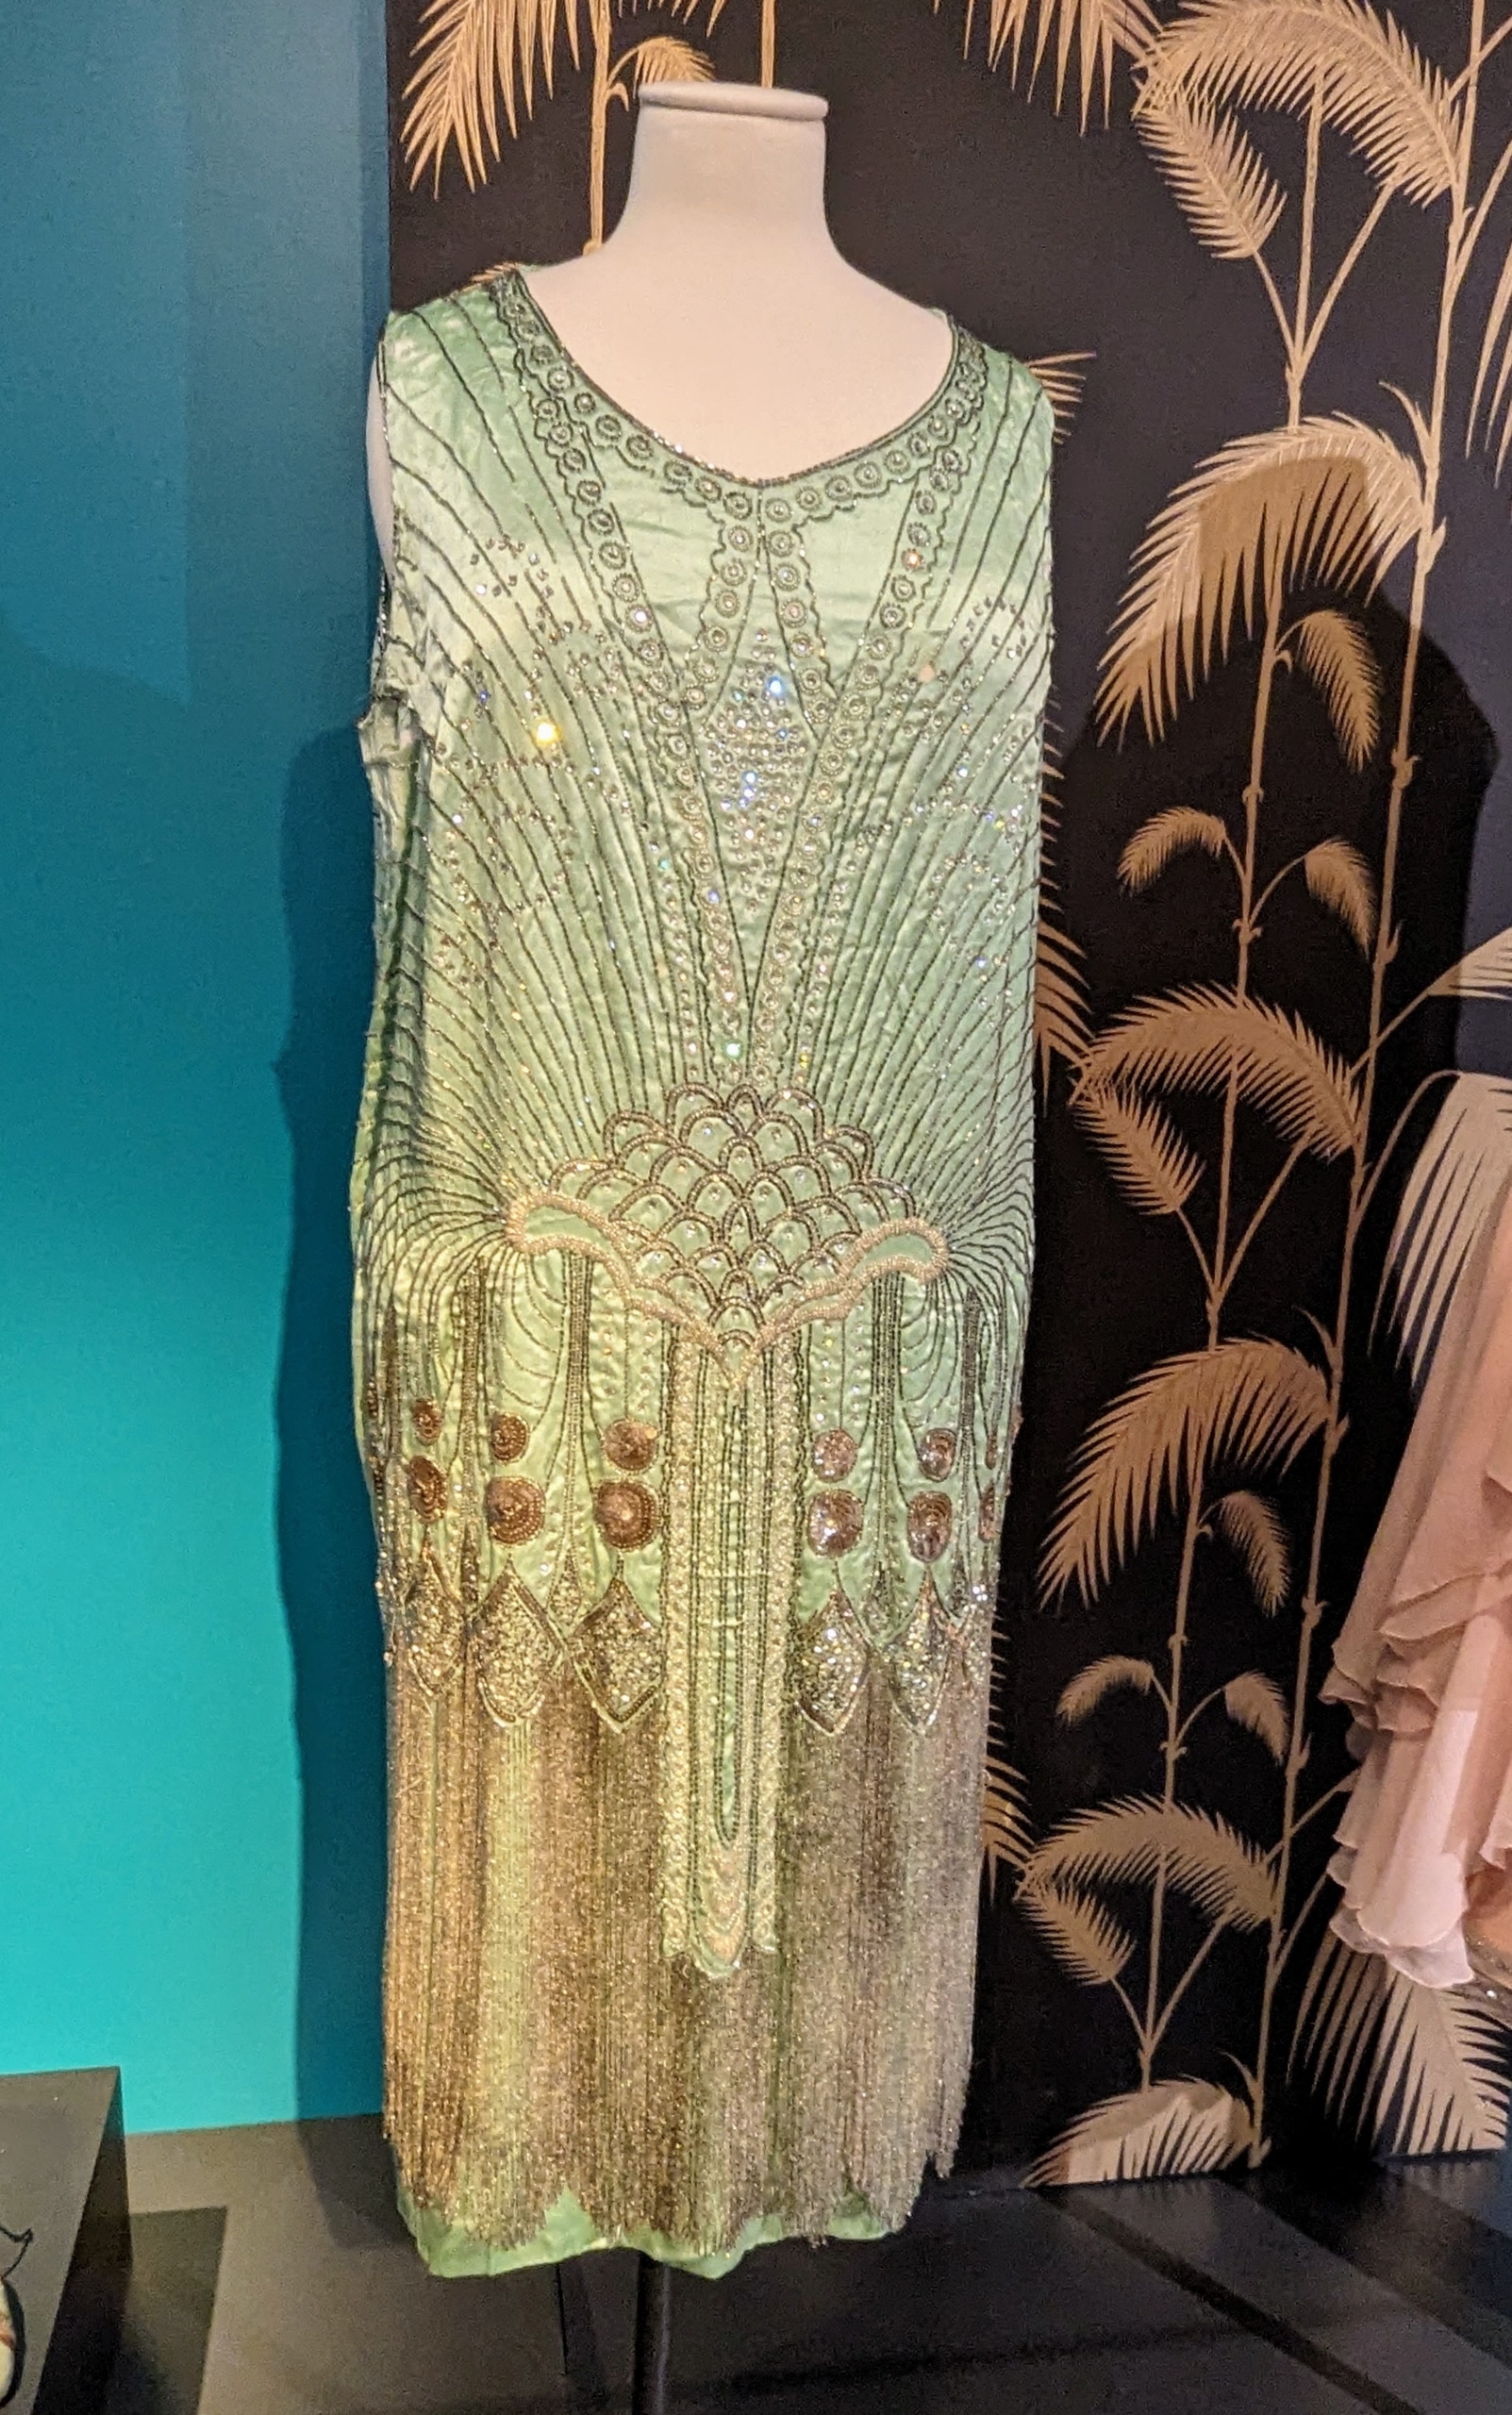
This seafoam green dance dress is made from rayon satin made to imitate silk and last longer than silk chiffons and silks weighted with metallic salts. Made in America, this dress shows the quality of dresses made in the US influenced by World War I and the inability to obtain European garments quickly.
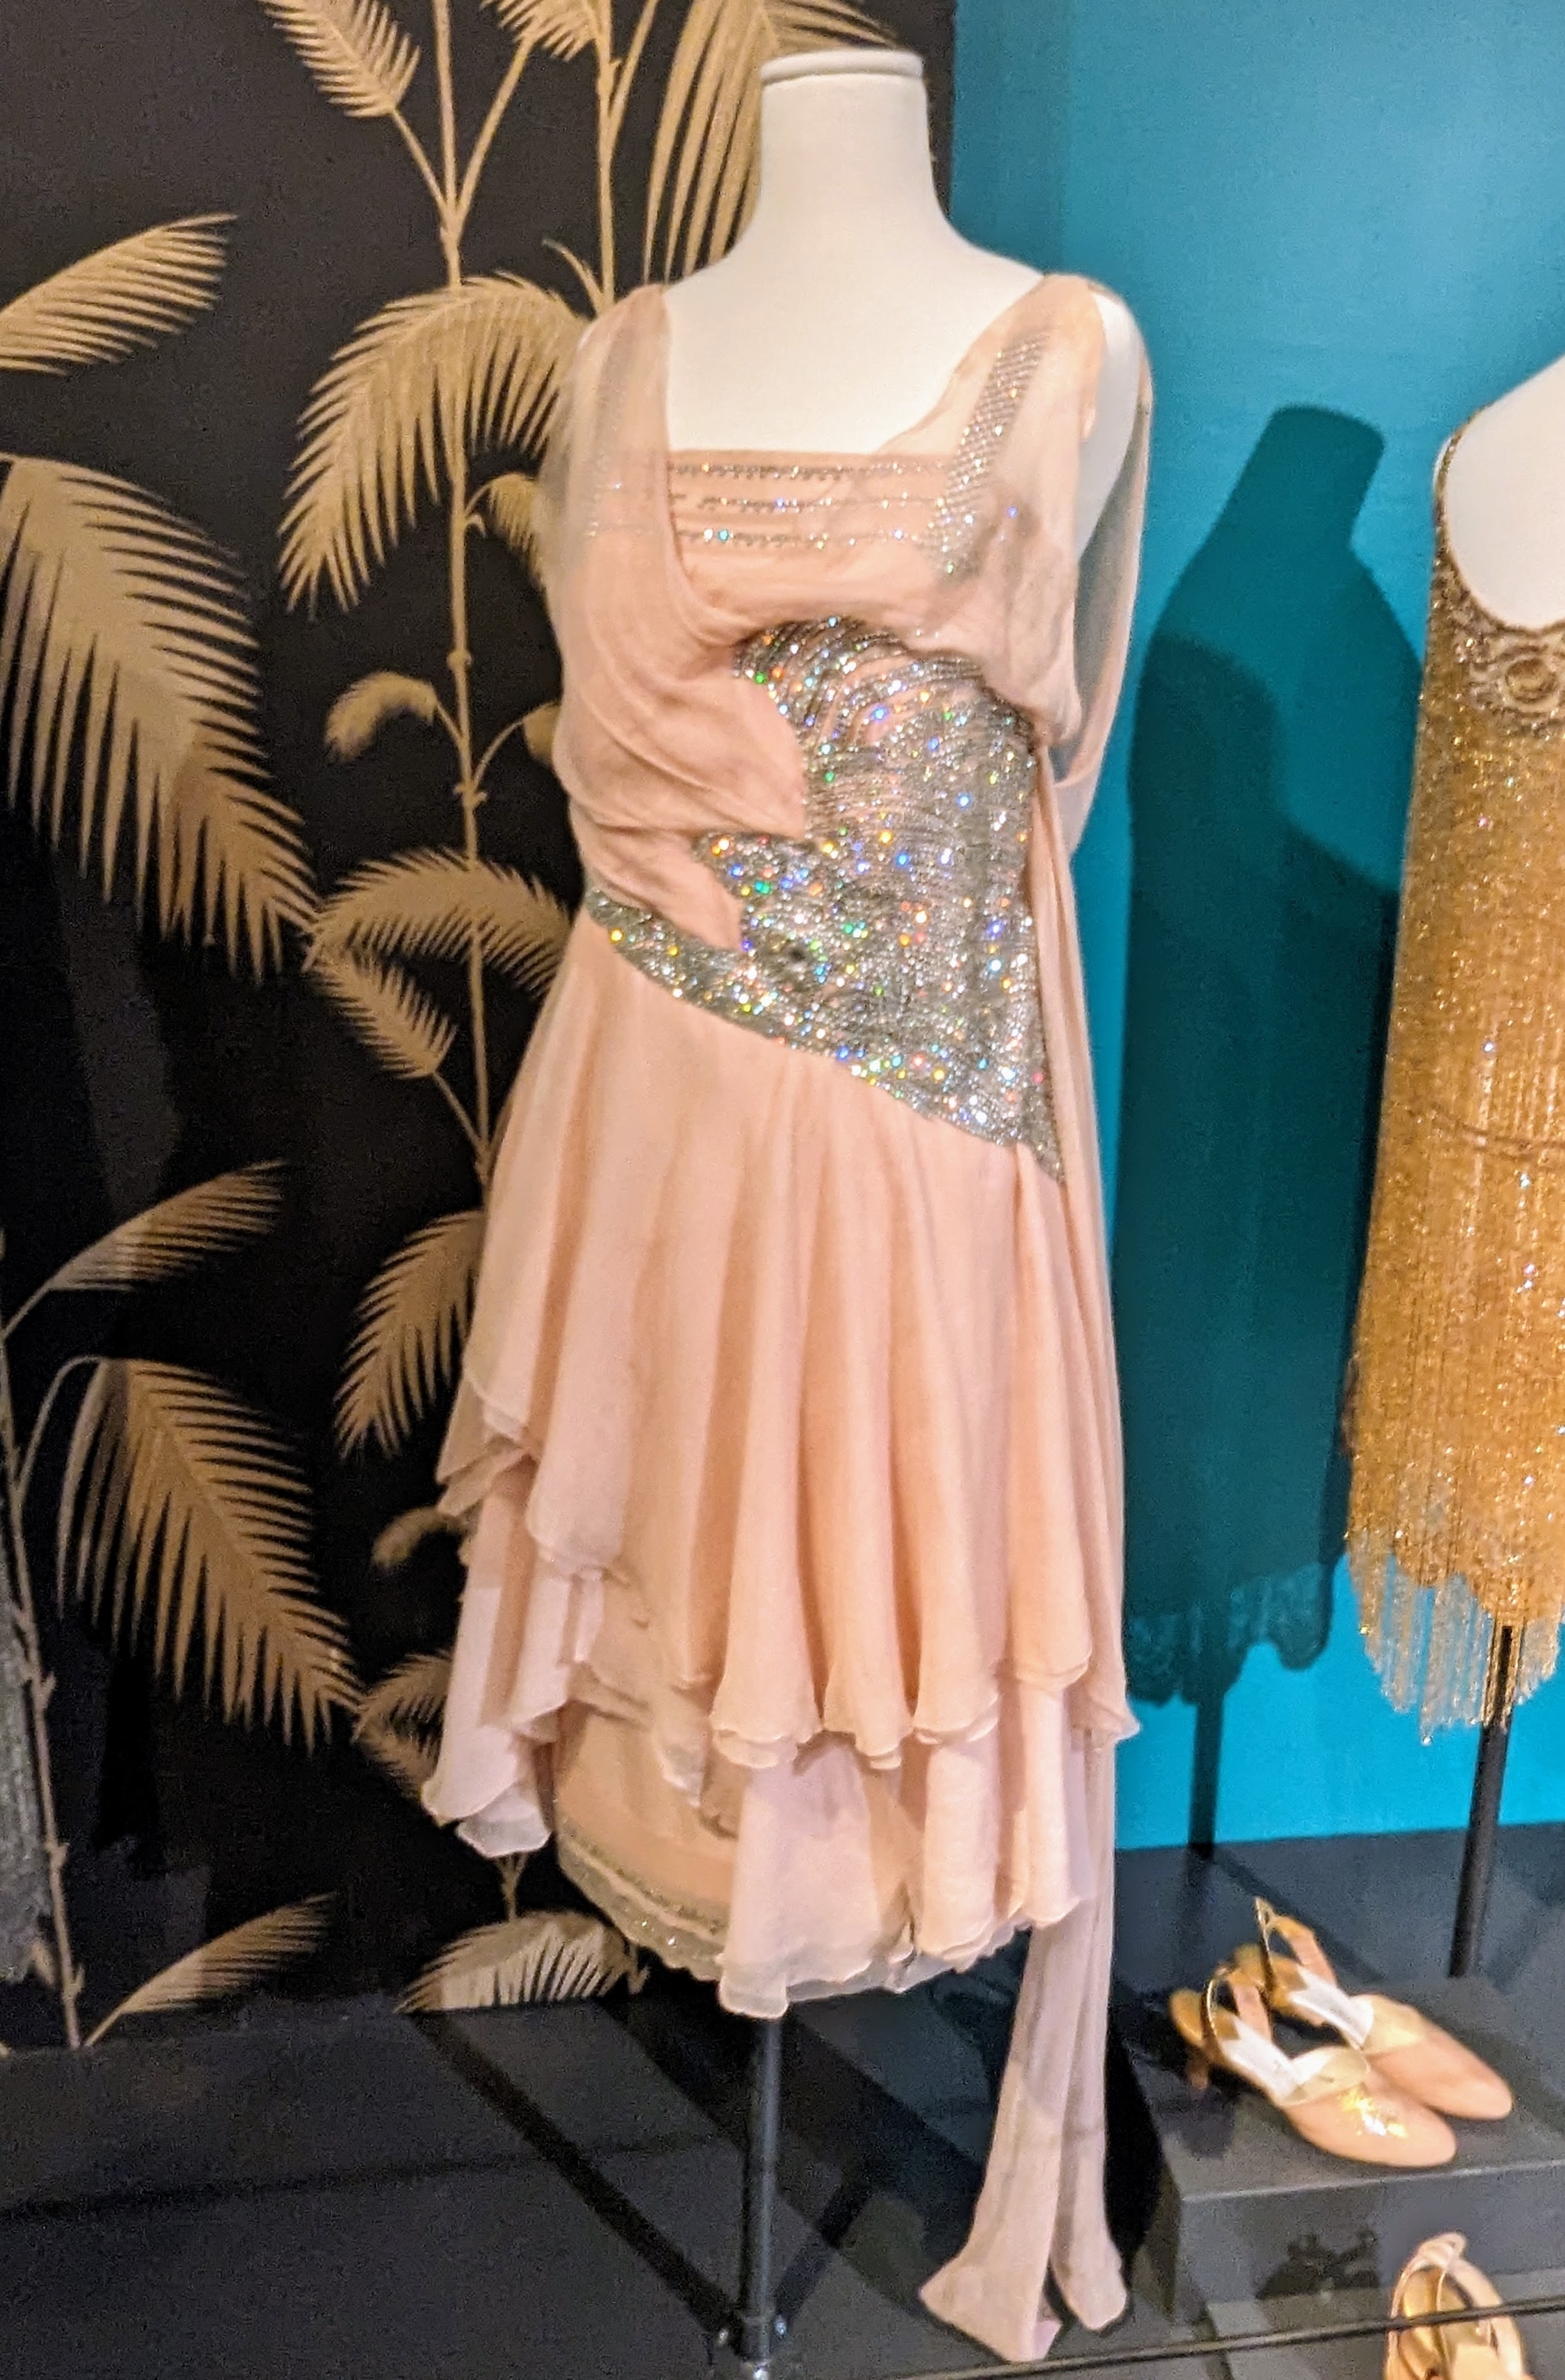
This is another evening dress owned by Anna Gould. She loved this peach-colored heavily beaded piece – it was one item she personally brought to Lyndhurst in 1939.
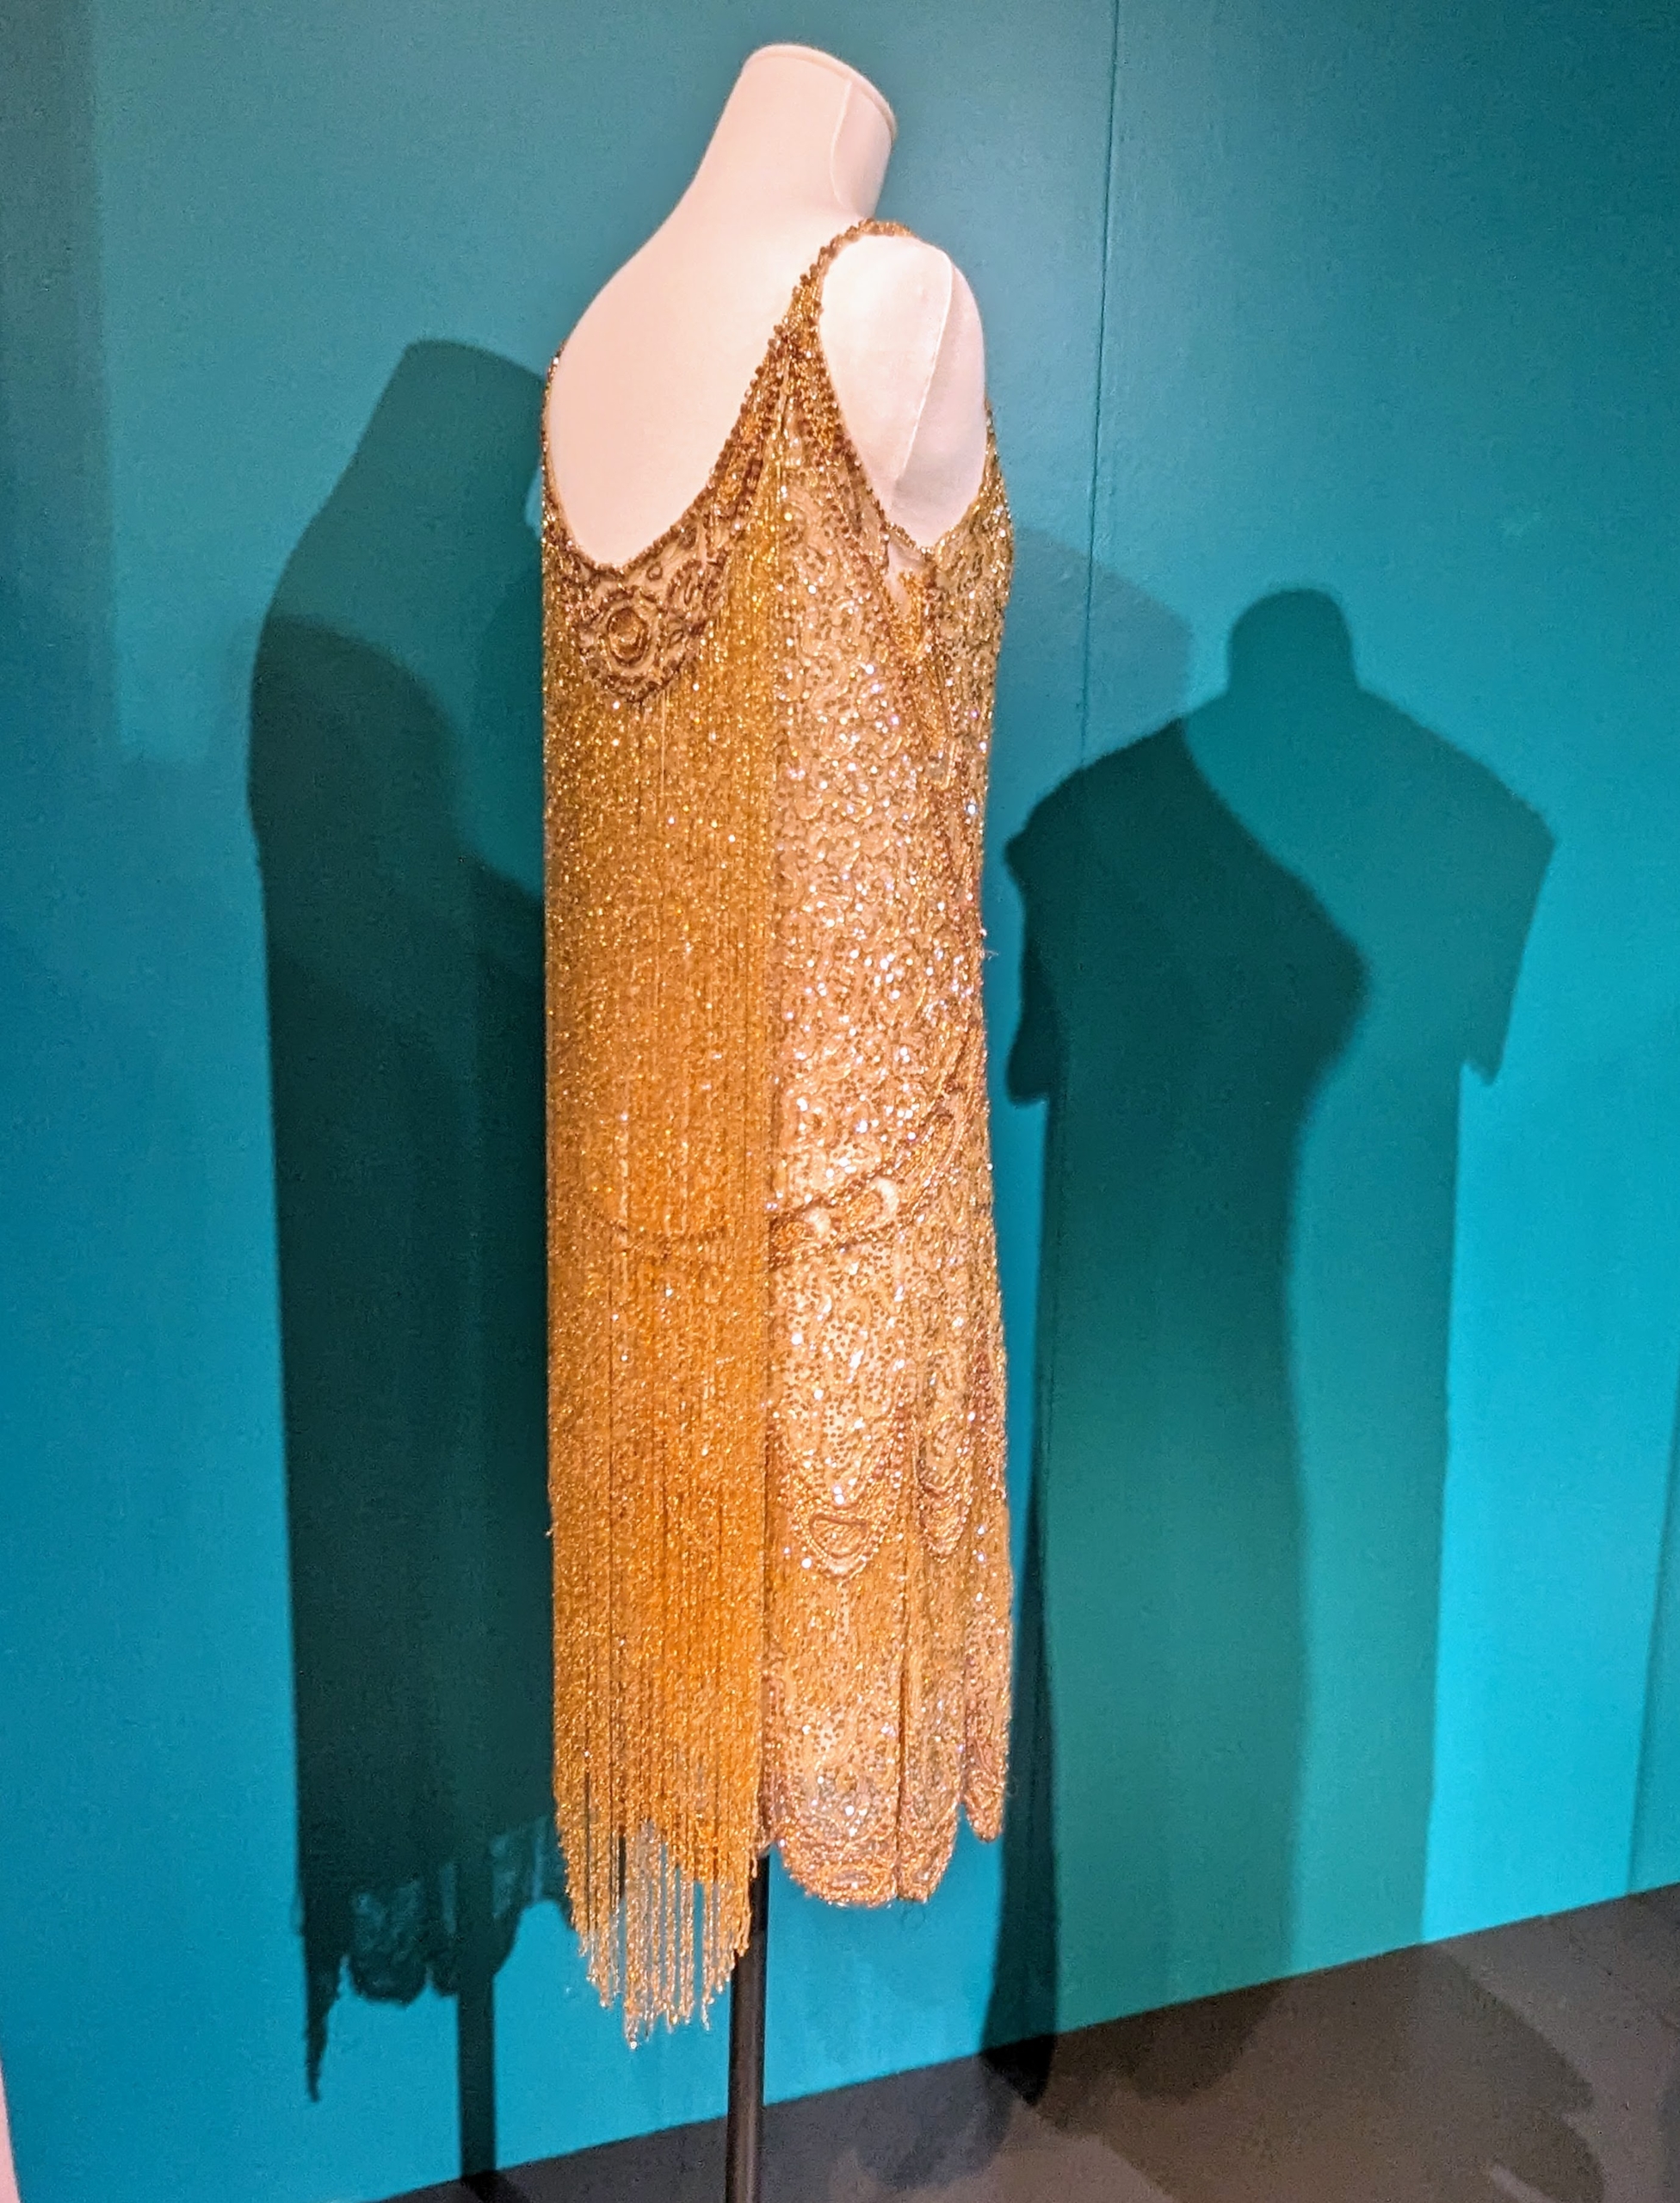
This “Waterfall” dress was likely made in Paris. It features a fringe of beads in back and a base of glass beads and sequins.
Many evening dresses of this time were decorated with beads, sequins, and rhinestones and were made specifically to stand out, especially on the dance floor.
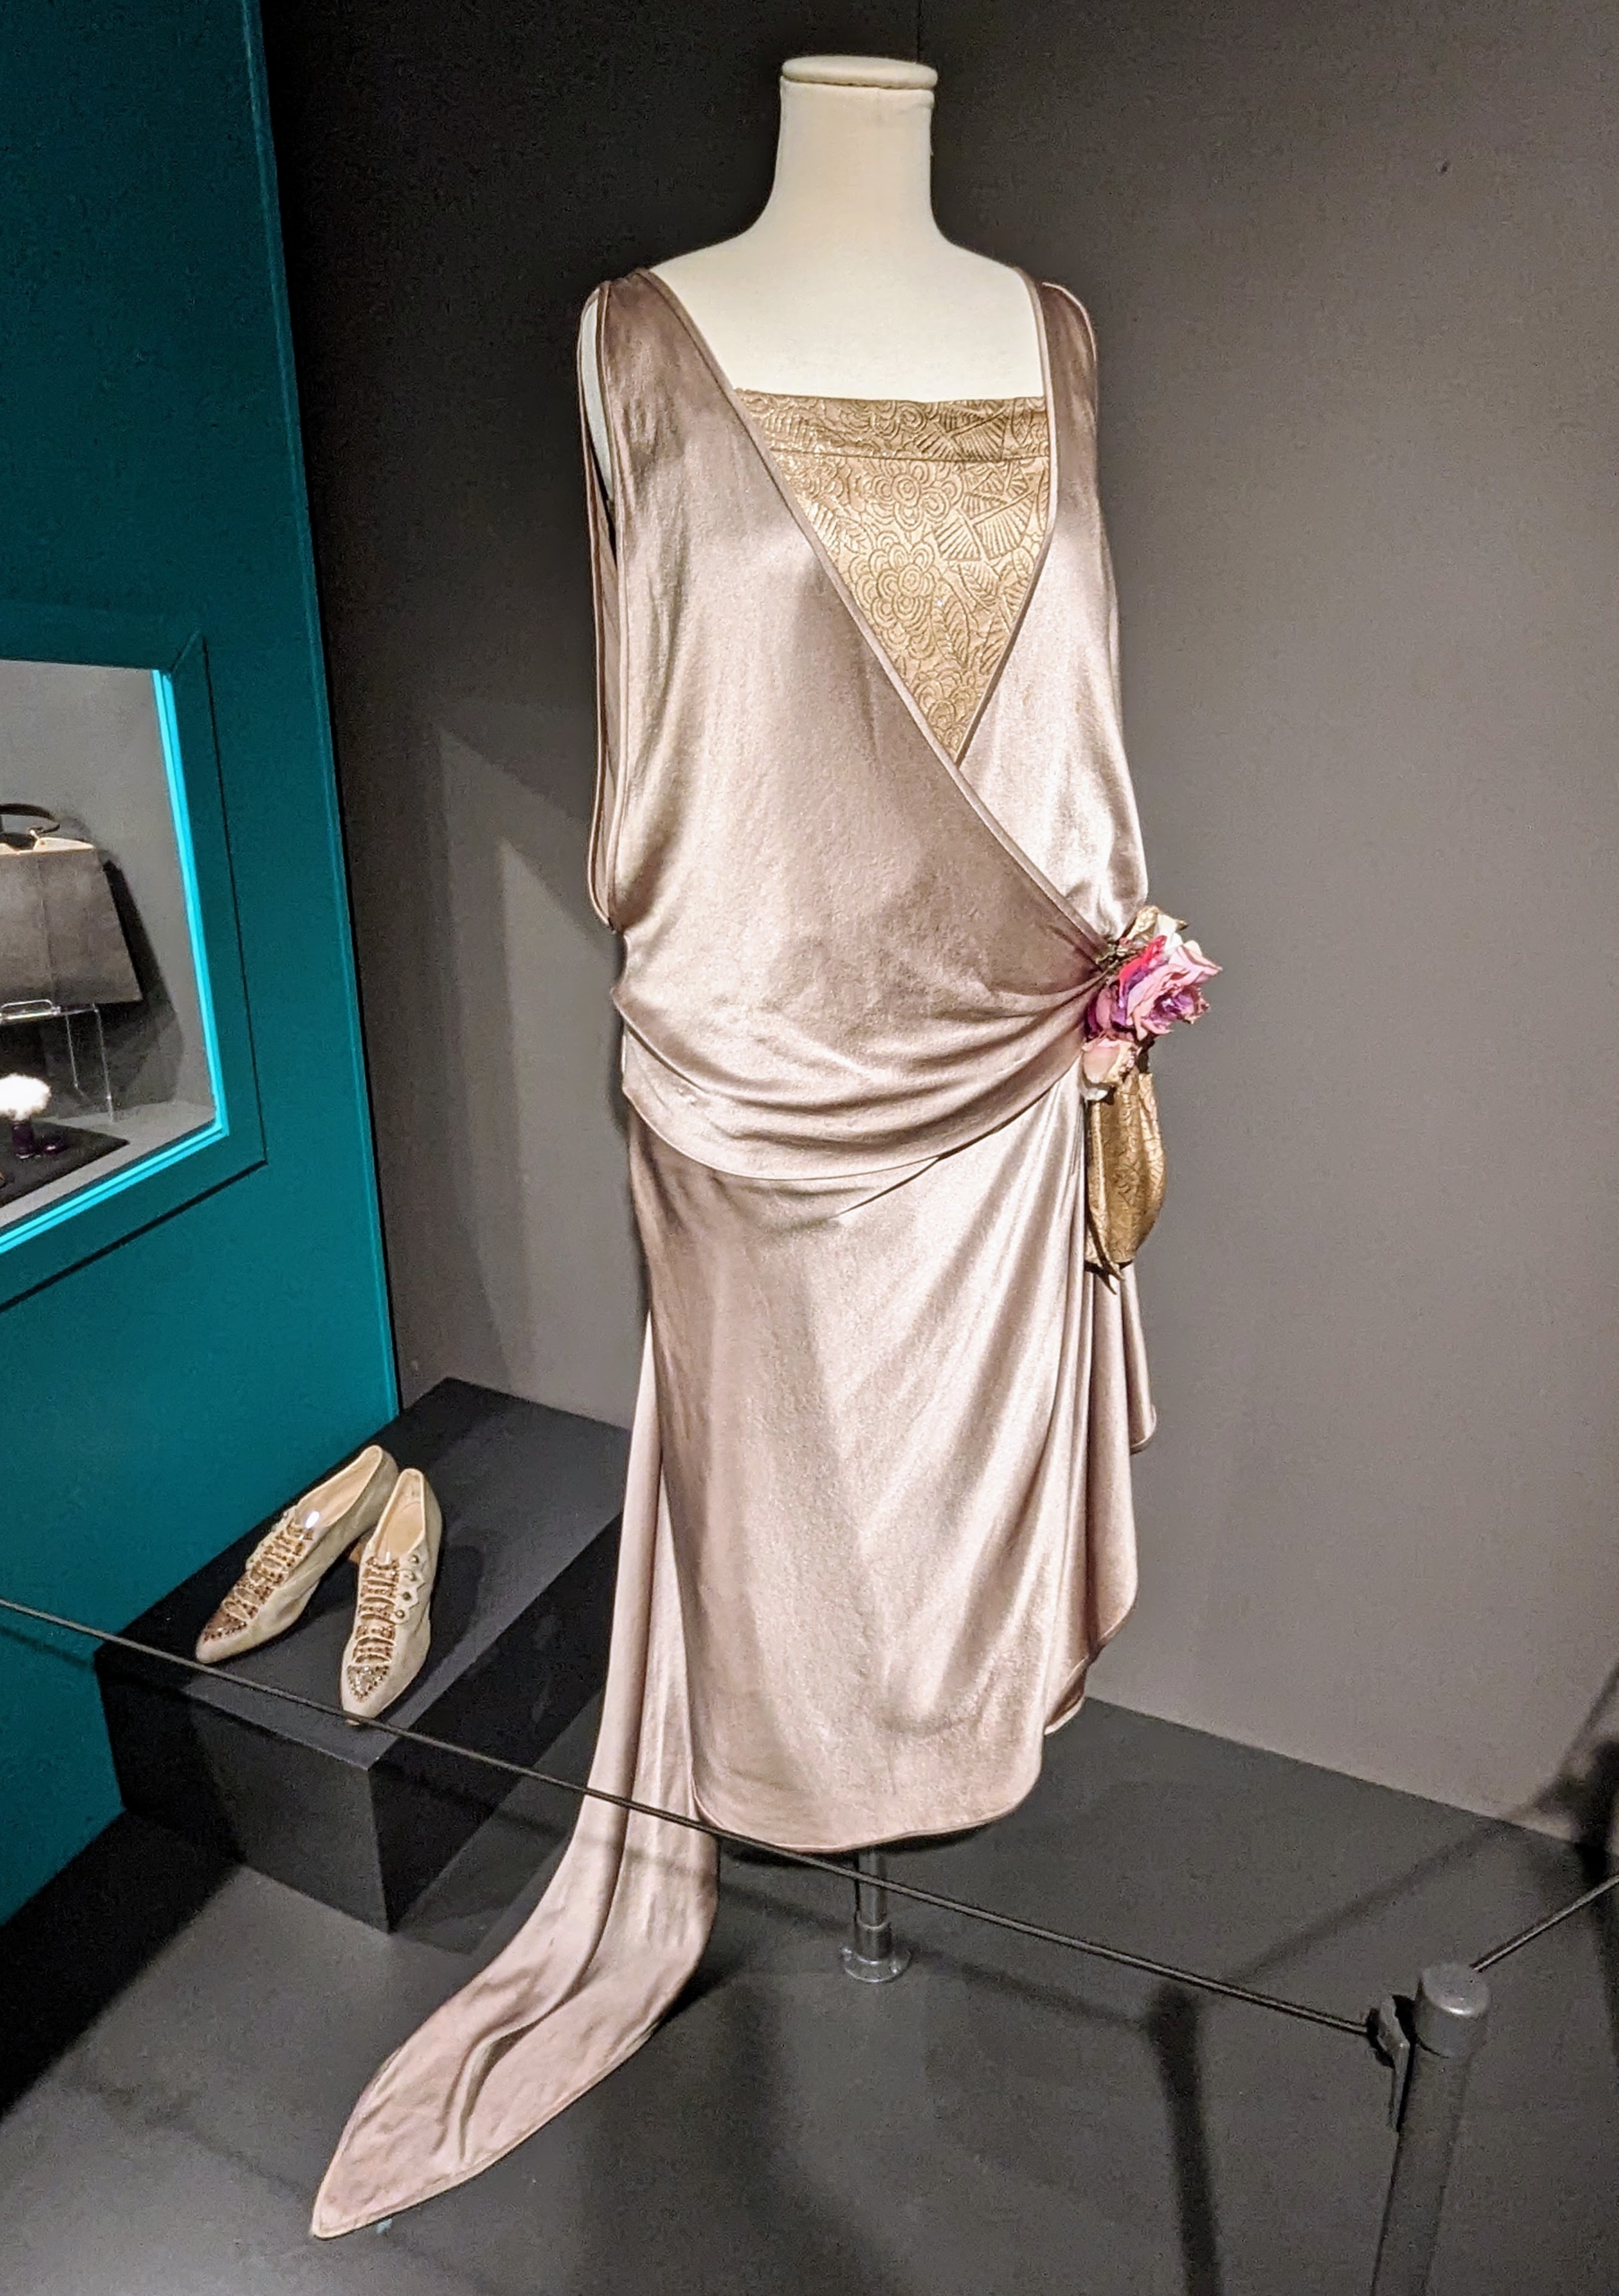
And this gray satin and metallic brocade dress was worn by Martha Van Rensselaer when she met the Queen of Belgium in 1923 when they were there as part of the Commission for Relief in Belgium after WWI.
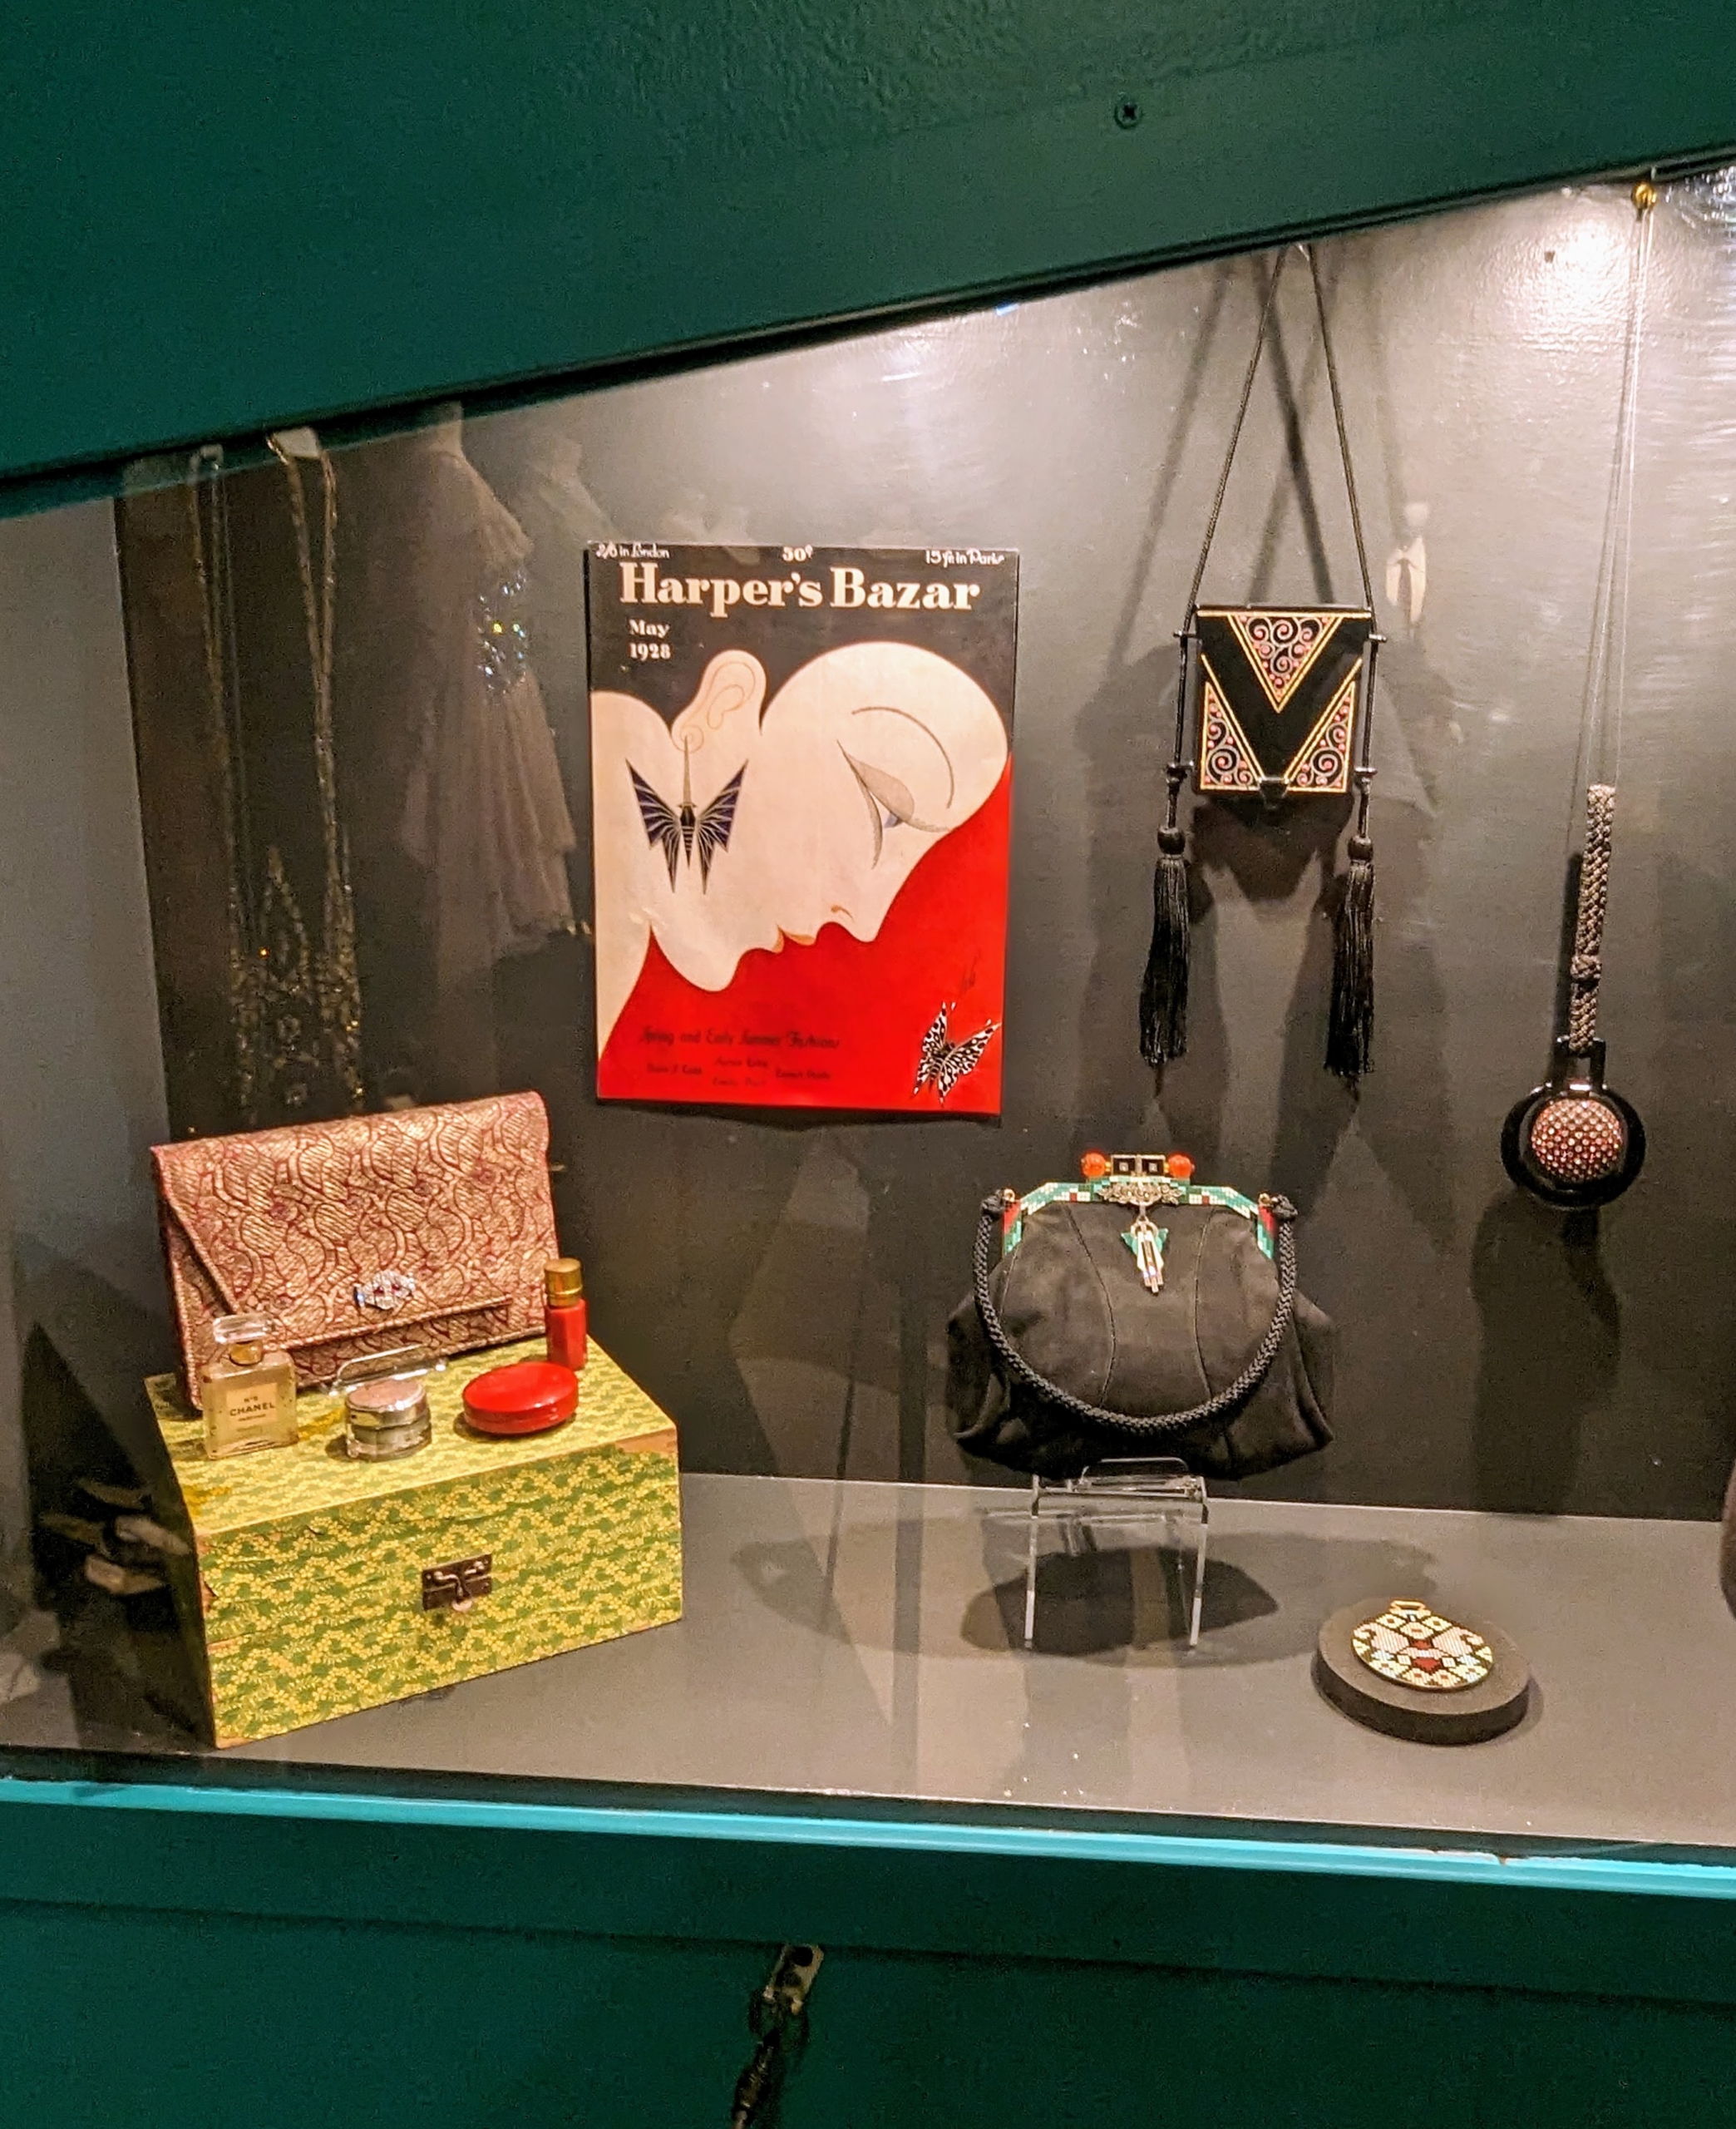
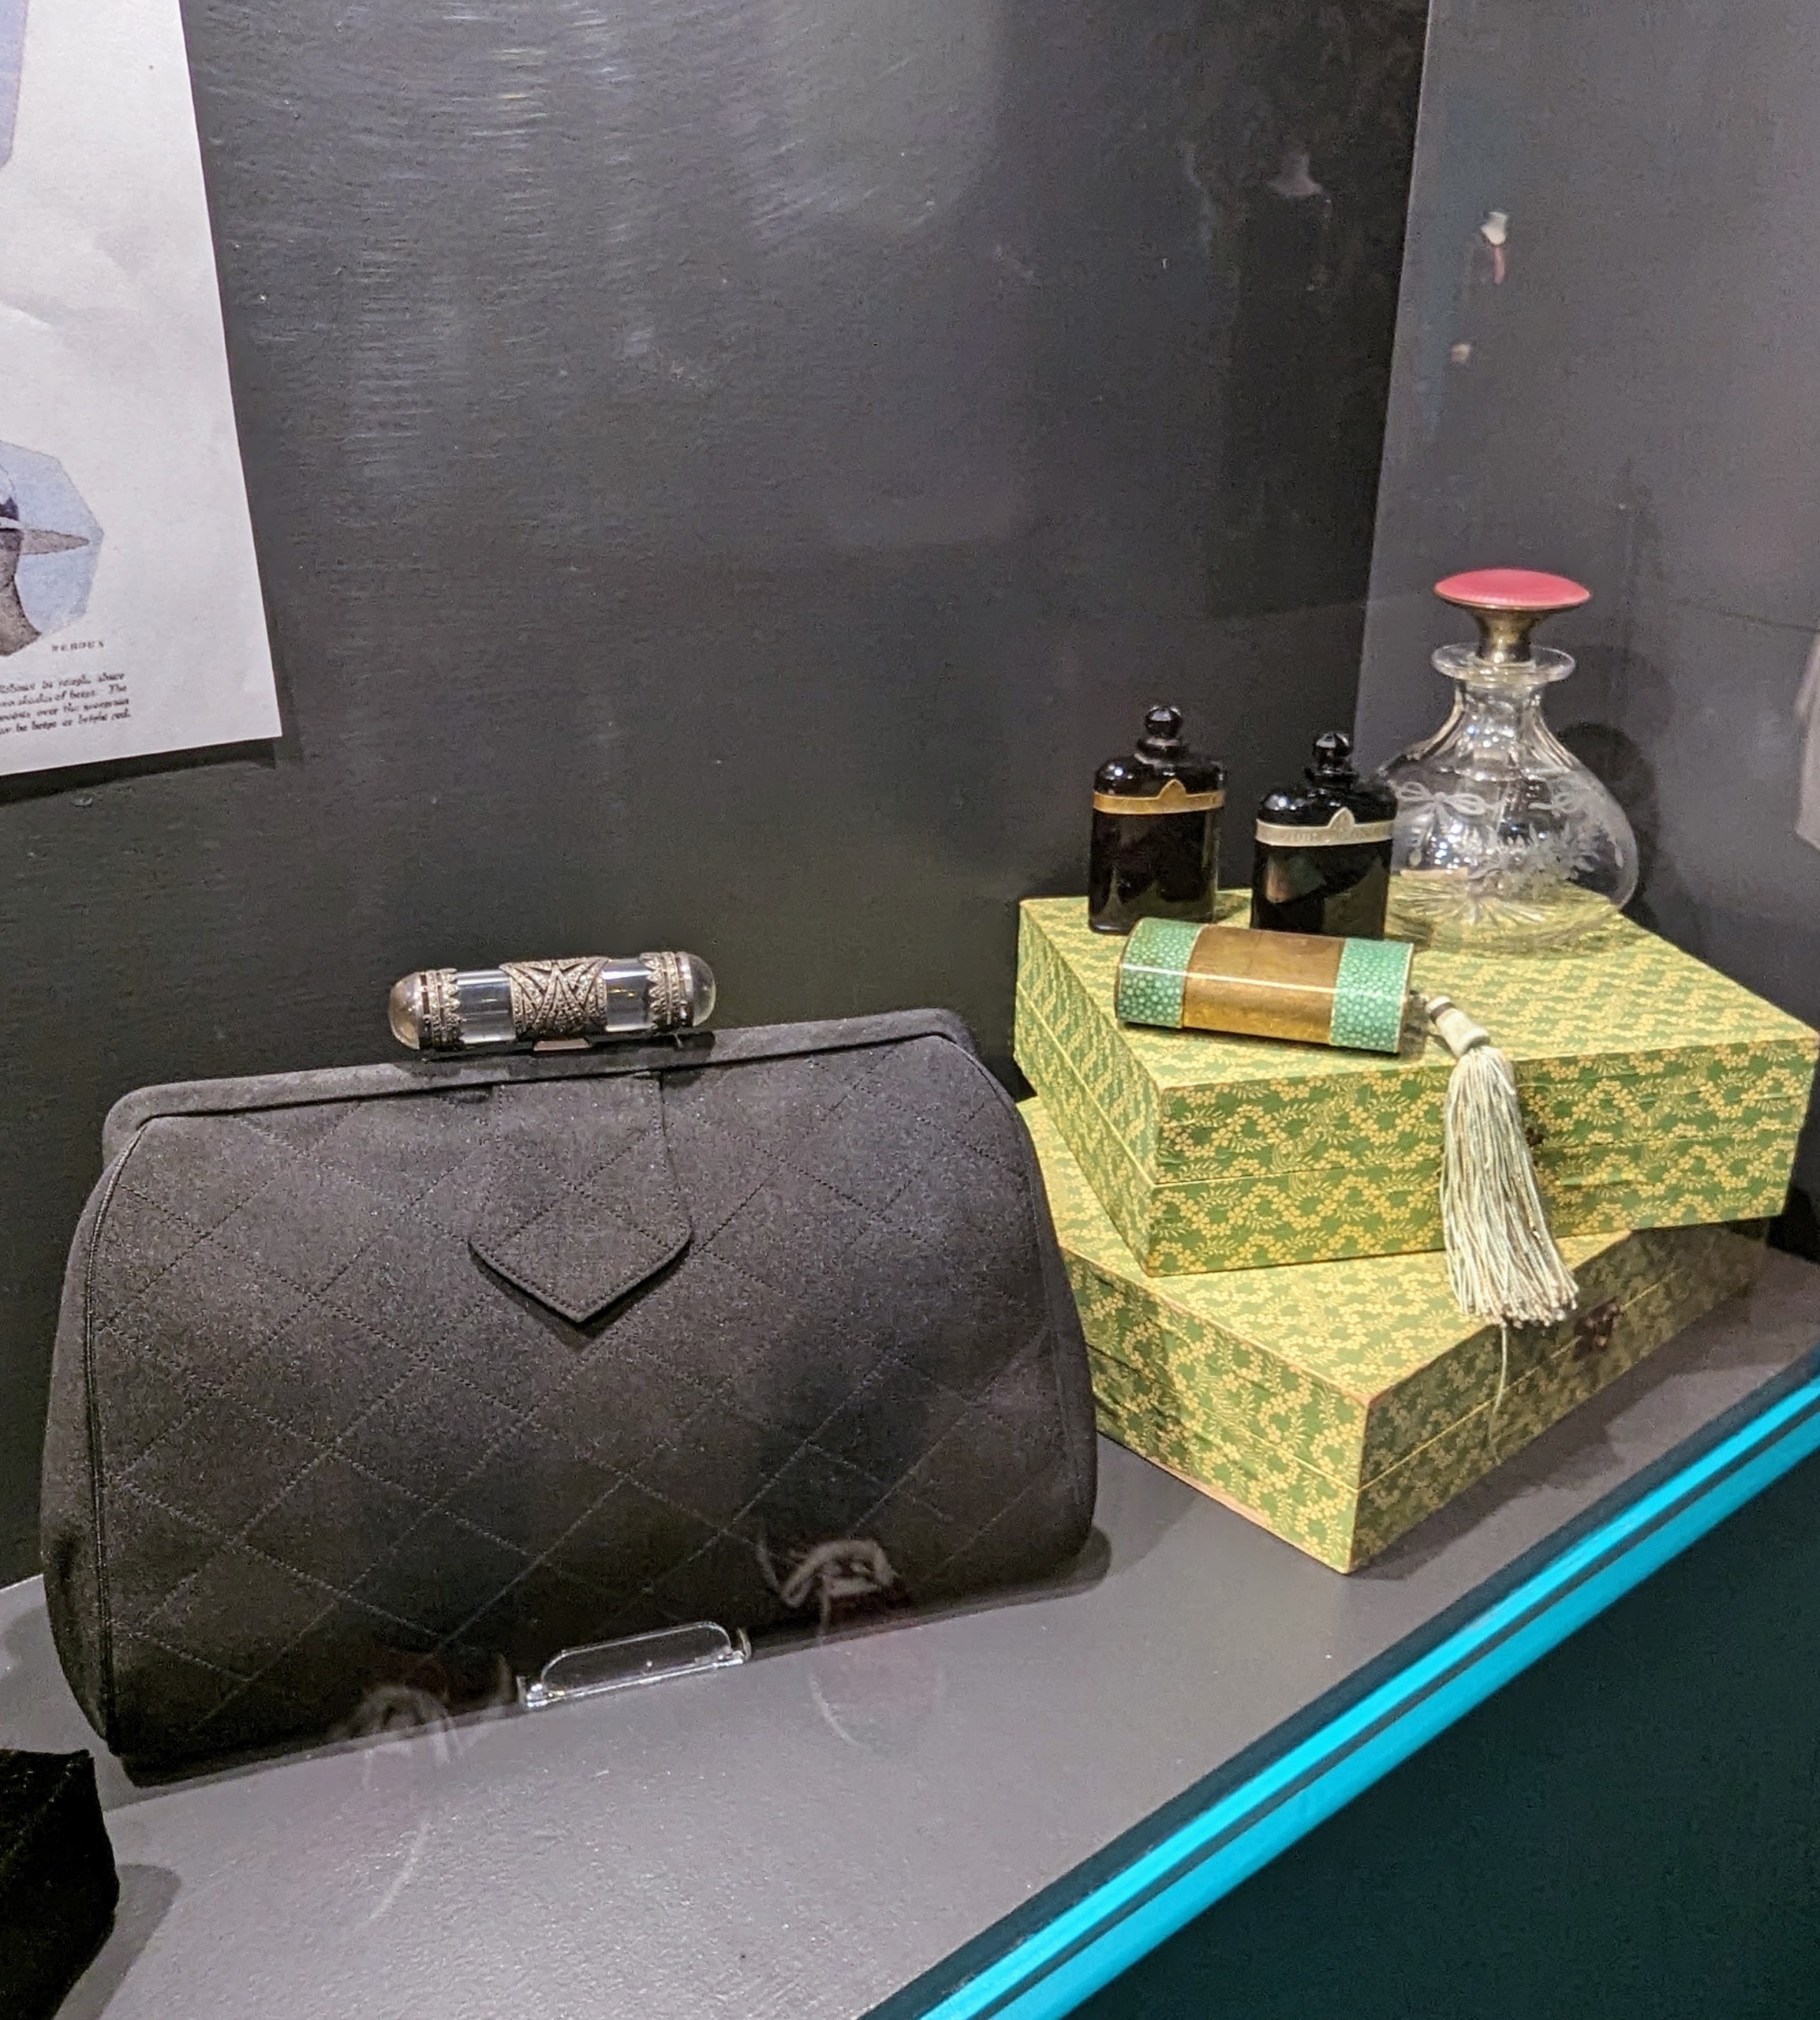
Clutches and small purses became more popular in the 1920s. In 1921, Chanel invented her signature No. 5 fragrance. These handbags often carried makeup, money, and perfume.
The black faille purse has a top of rock crystal and cut steel. Made a little larger, these handbags could hold more personal items as well as a little money.
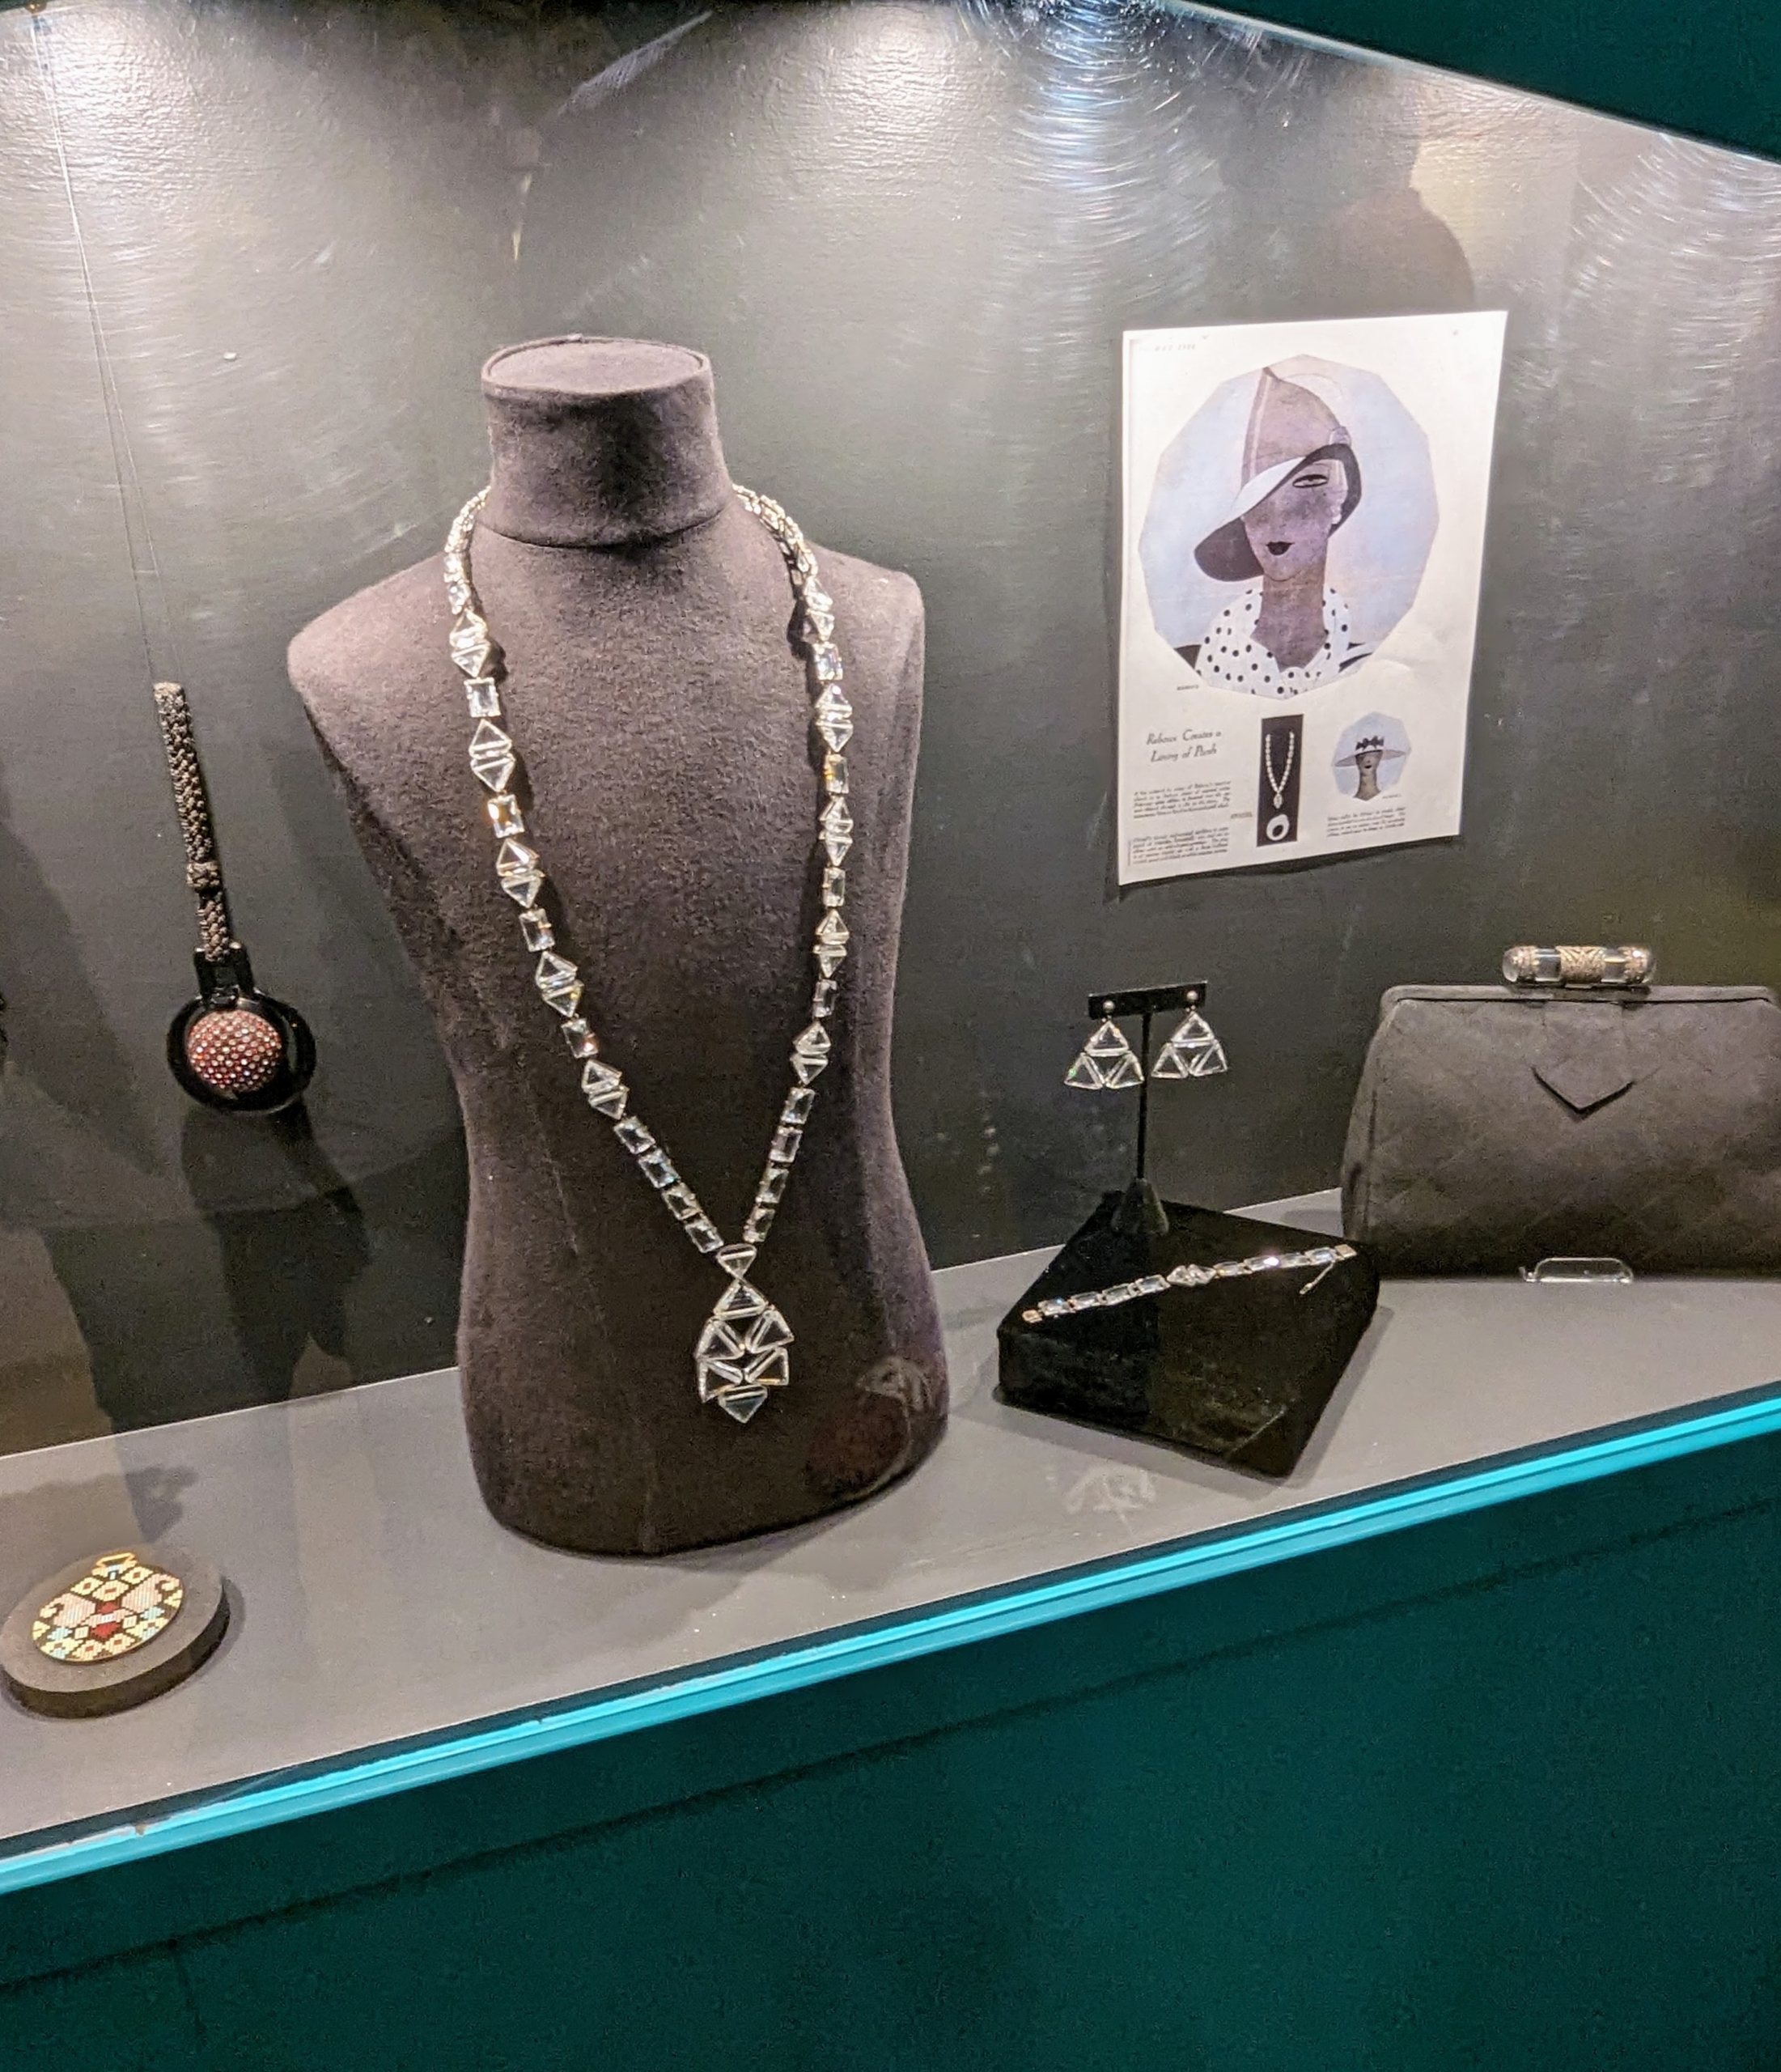
Chanel also created costume jewelry lines for both day and evening wear. Some of these pieces were featured Harper’s Bazaar in 1928. Women in the late 20s were heavily jeweled and were free to carry accessories. See this “Influencers: 1920s Fashion and the New Woman” exhibition at the Lyndhurst if you can – it’s interesting, informative and fun.
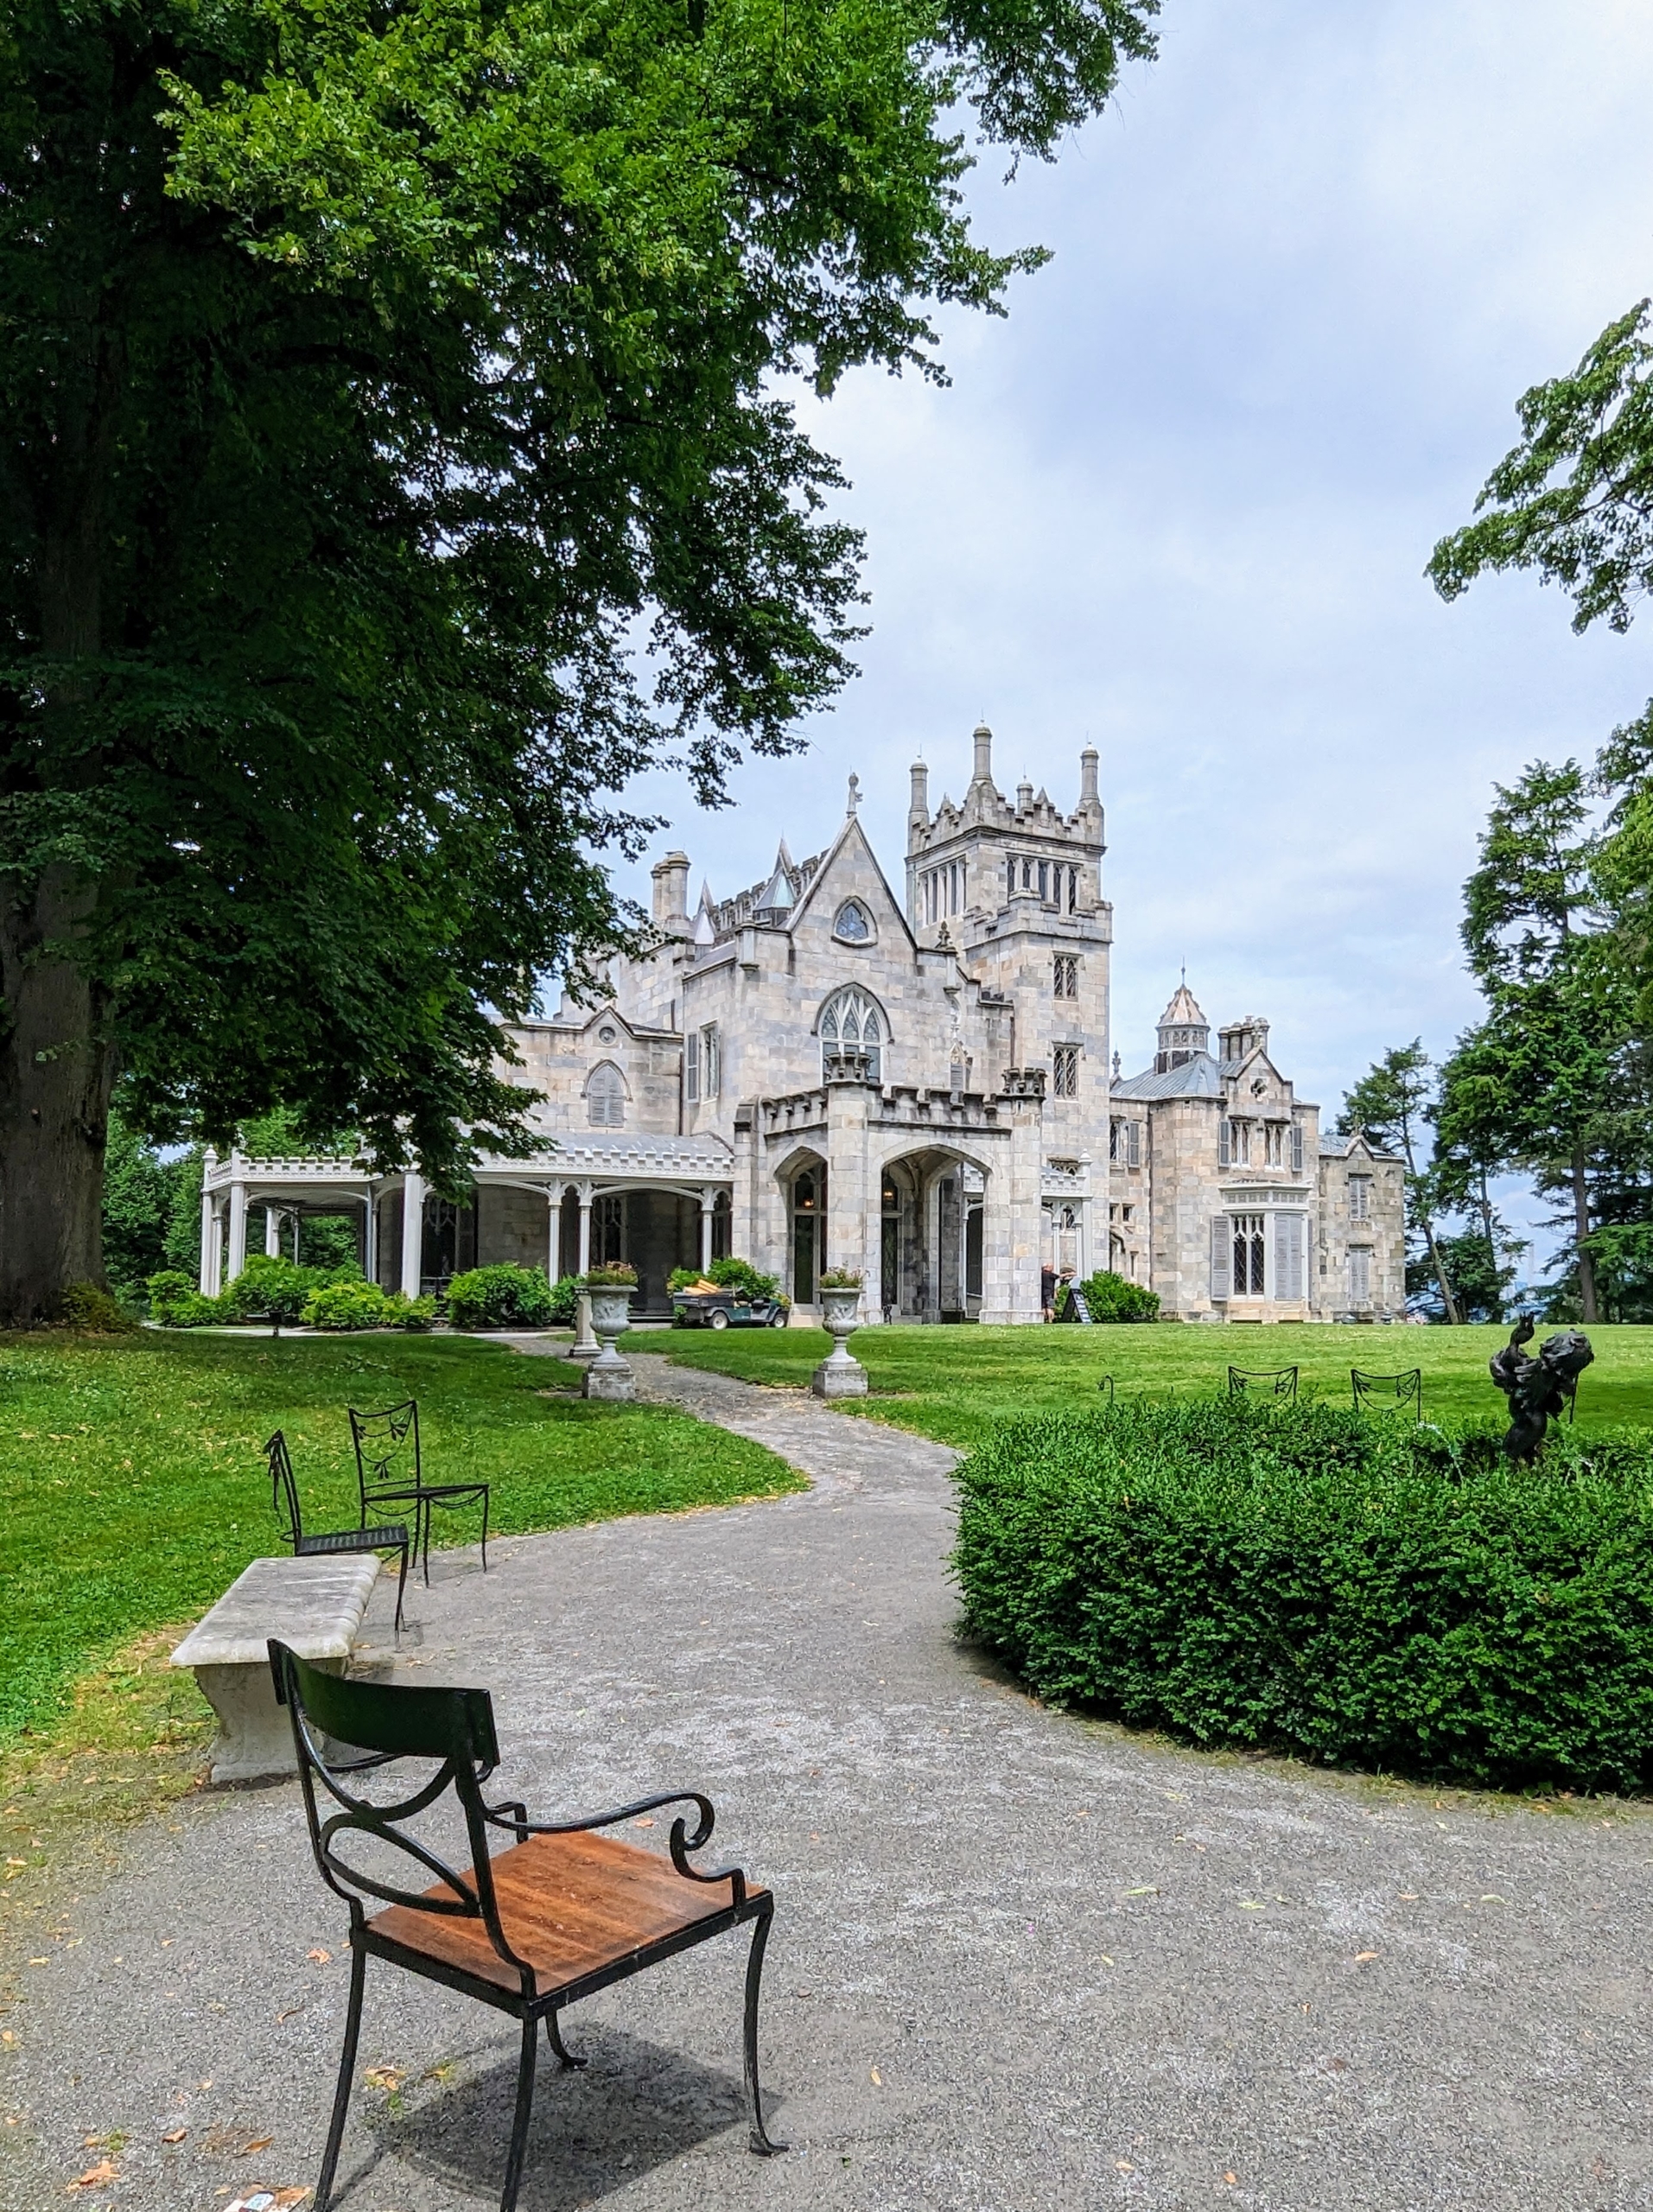
If you're planning to be in or near Westchester County, New York this summer, try to visit Lyndhurst, a magnificent Gothic Revival country estate and National Historic Landmark located on 67 sprawling acres beside the Hudson River in Tarrytown.
Lyndhurst, which is also known as the Jay Gould estate, was owned and shaped by three prominent area families - The Pauldings, The Merritts, and lastly, by railroad tycoon and financier, Jay Gould. Purchased in 1880, Jay occupied the home until his death in 1892. In 1961, his daughter Anna Gould donated it to the National Trust for Historic Preservation. The estate features 16 elaborately decorated rooms - many lovingly restored and including original furniture left in the home. The surrounding park is an outstanding example of 19th-century landscape design with expansive lawns, specimen tree groves, and curved carriage roads. The property also includes a children's cottage, a bowling alley, a laundry building, a pool house, and the exterior of what was once considered the largest private greenhouse complex in the country.
Here are some photos, enjoy.
The mansion was designed in 1838 by architect Alexander Jackson Davis in a romantic Gothic Revival style. The original structure was doubled in size between 1864 and 1867 to what is seen today.
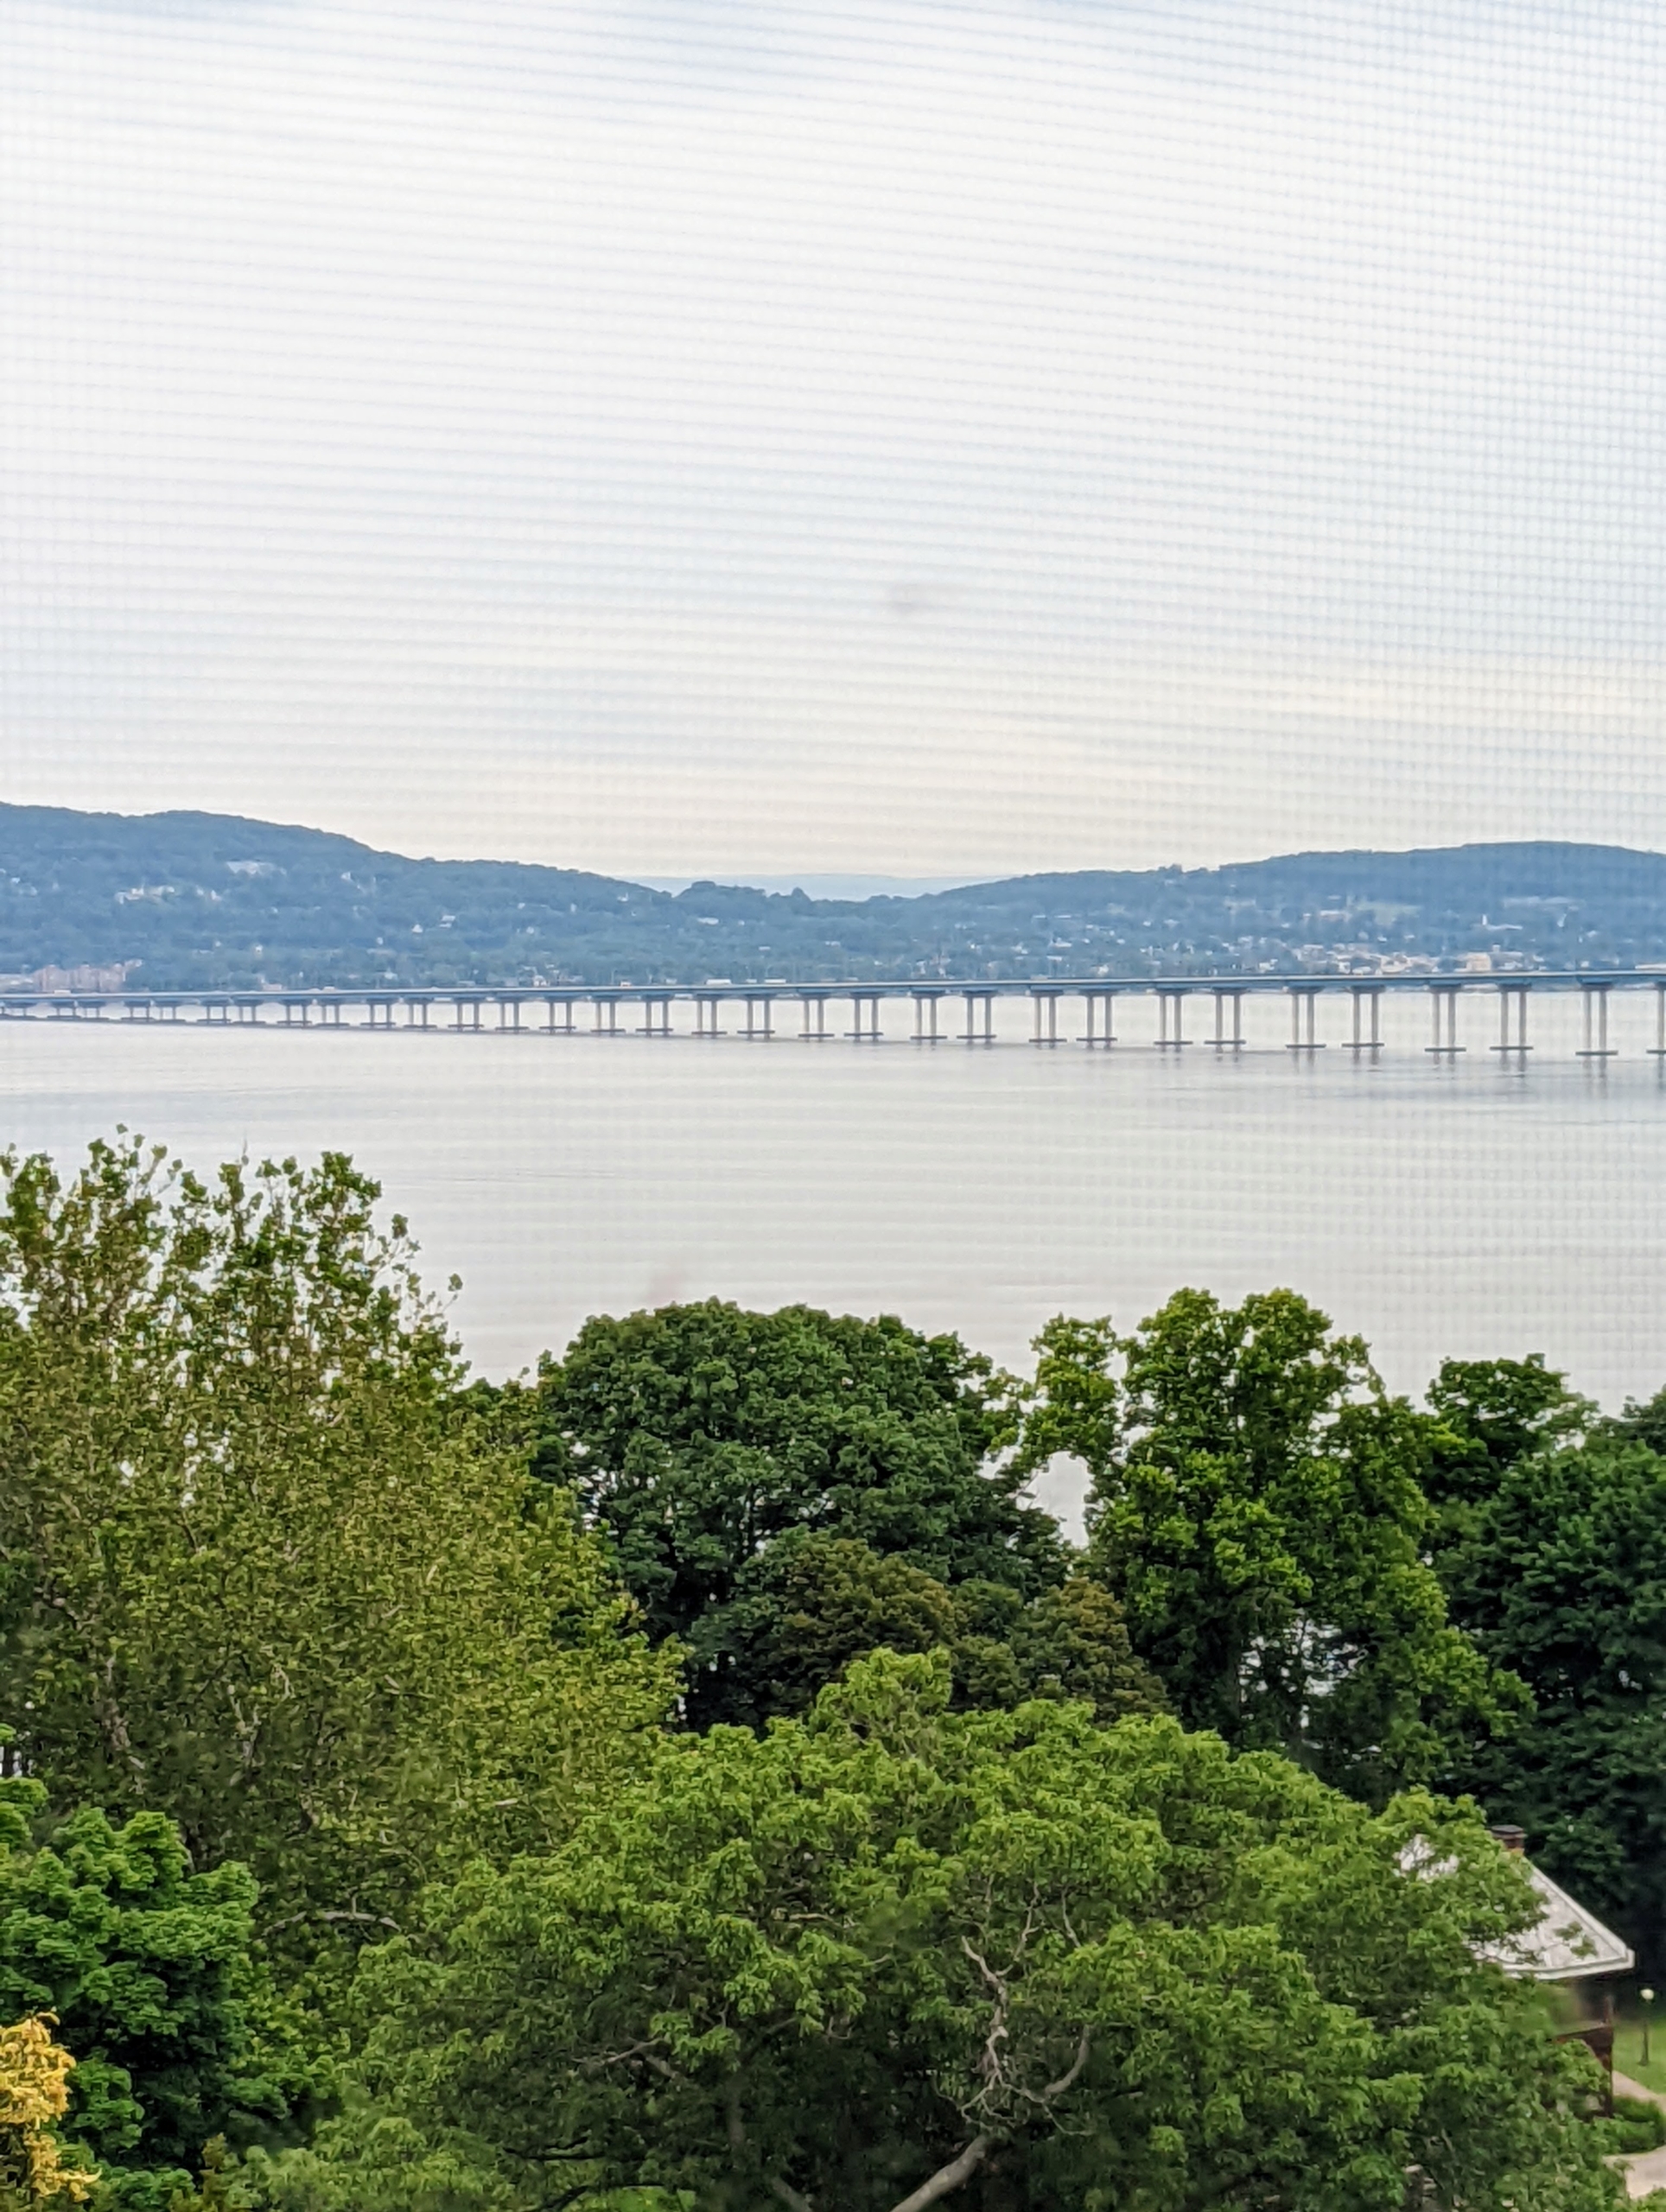
Lyndhurst is situated beside the Hudson River about a half mile south of the Governor Mario M. Cuomo Bridge, formerly known as the Tappan Zee Bridge. On a clear day, one can see New York City.
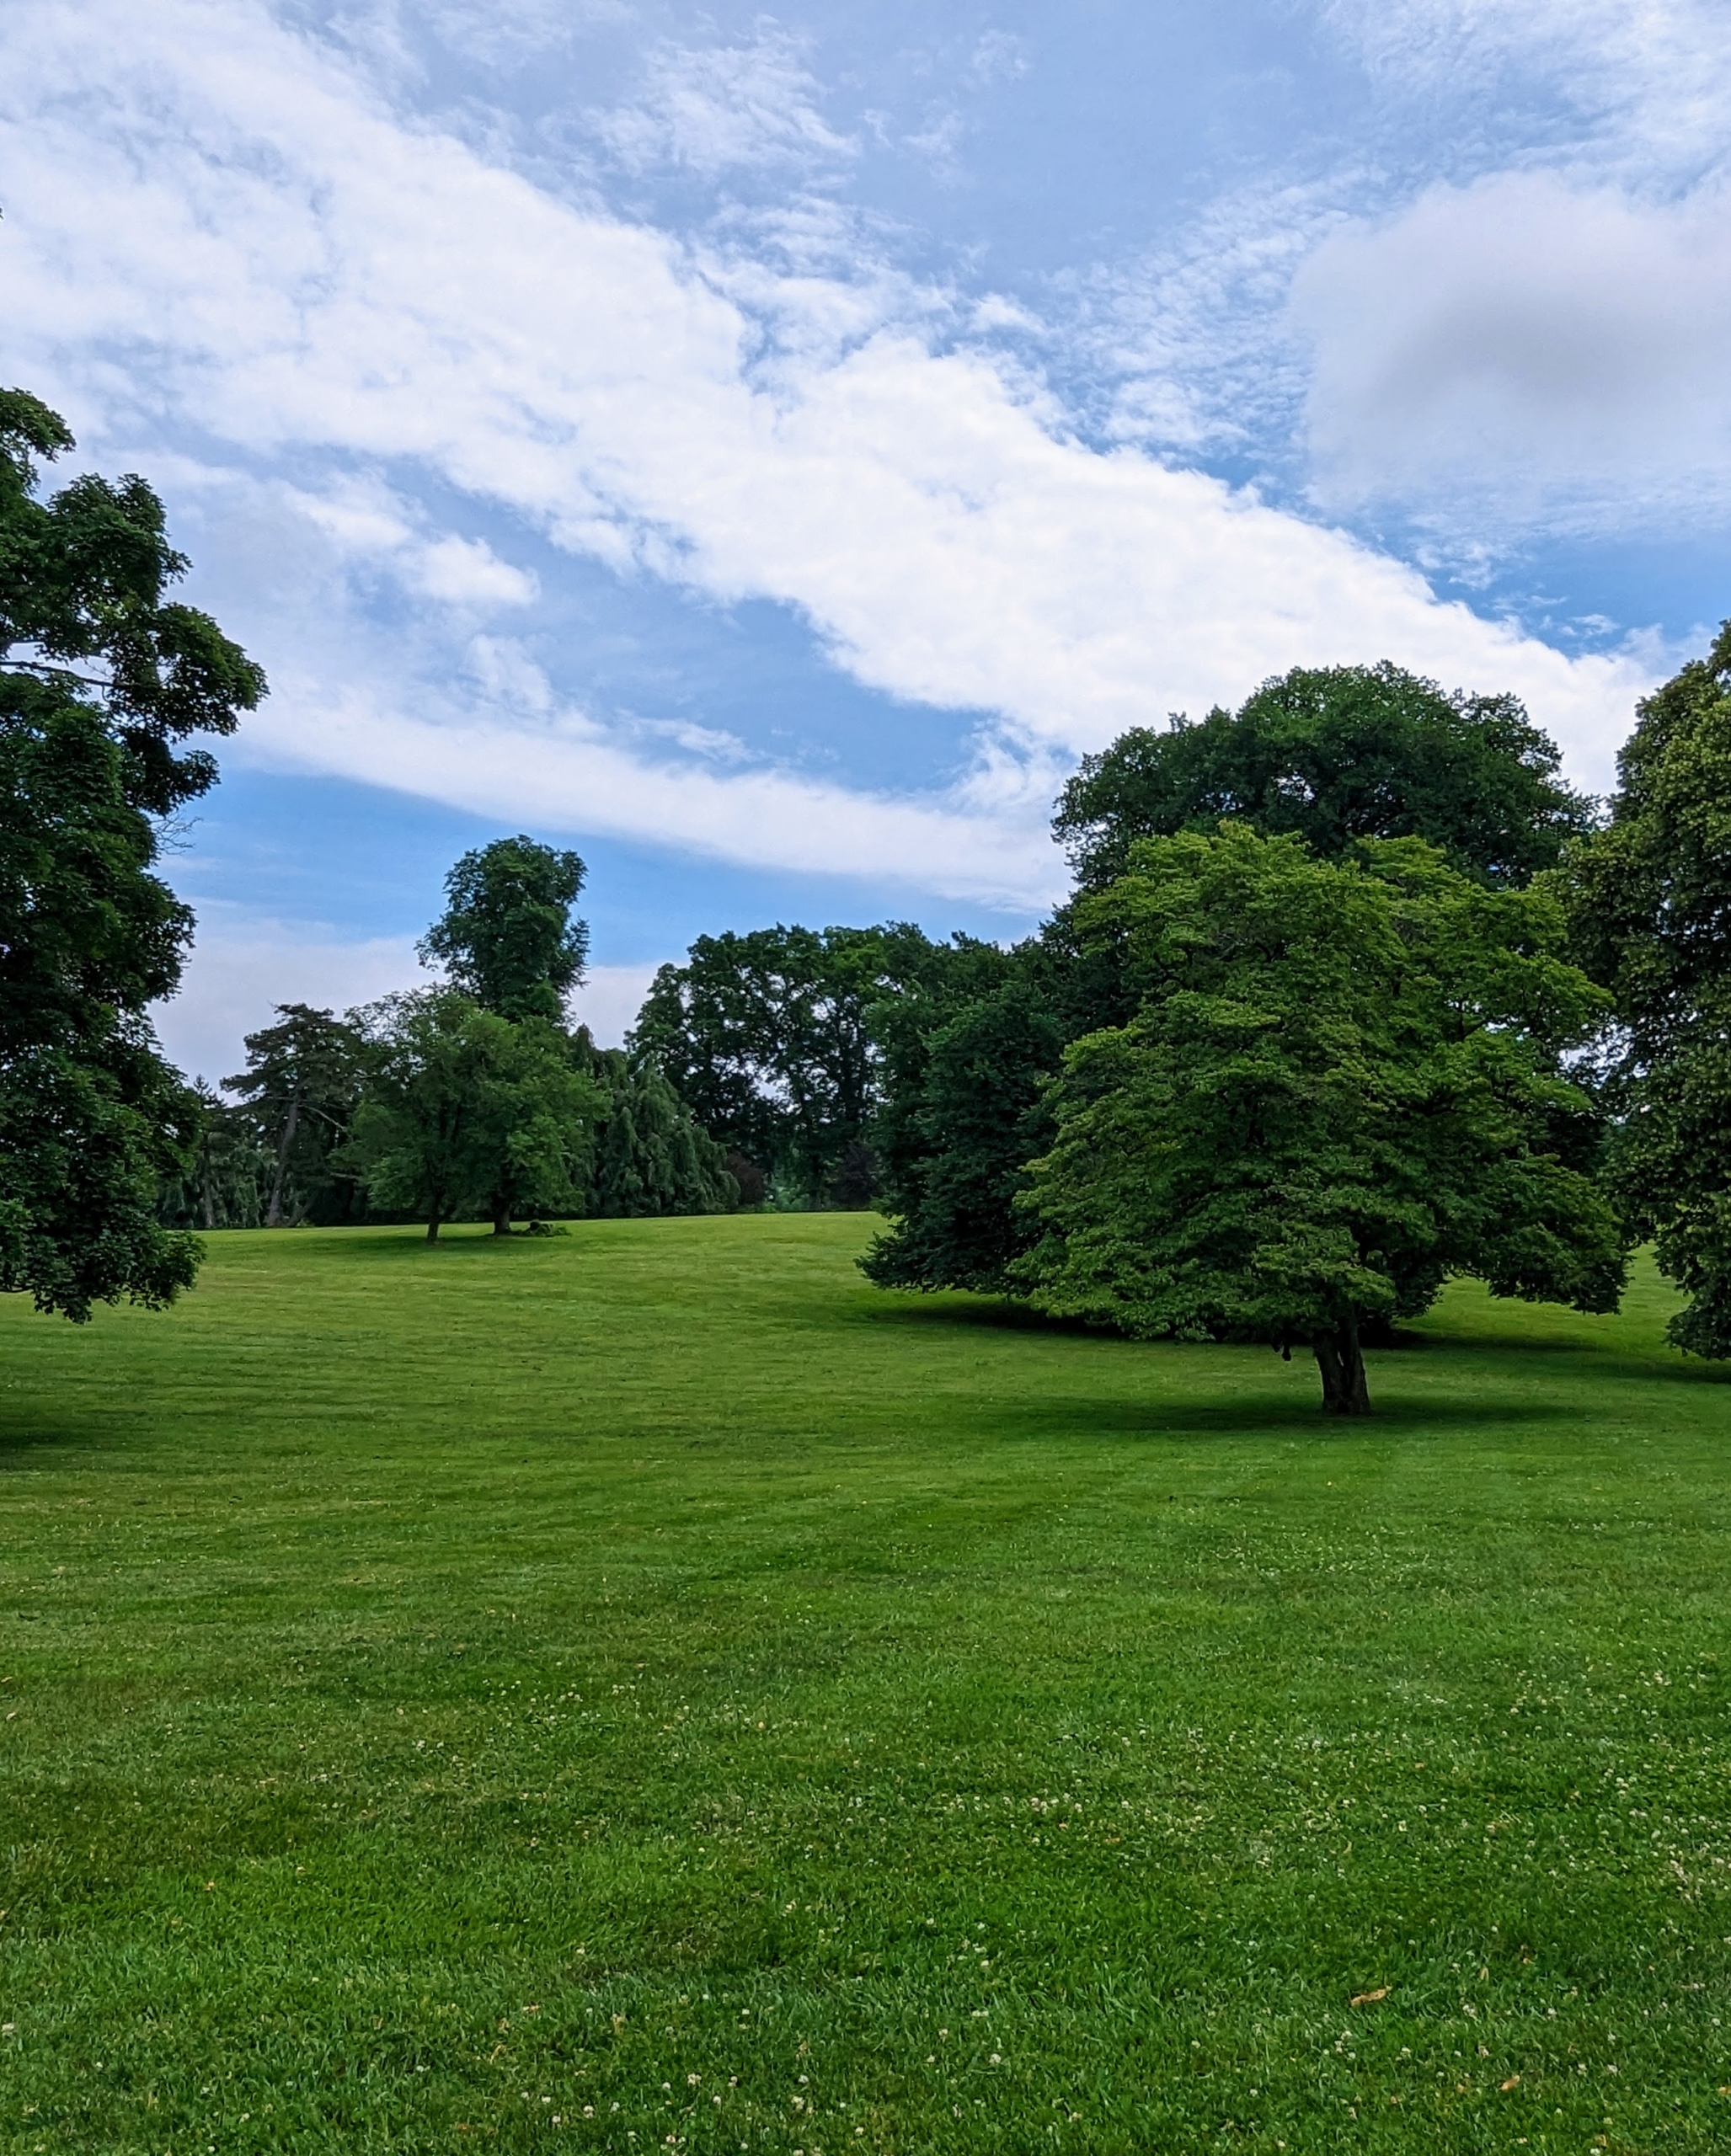
The property boasts some beautiful mature trees – some planted in groves and stands and some singly.
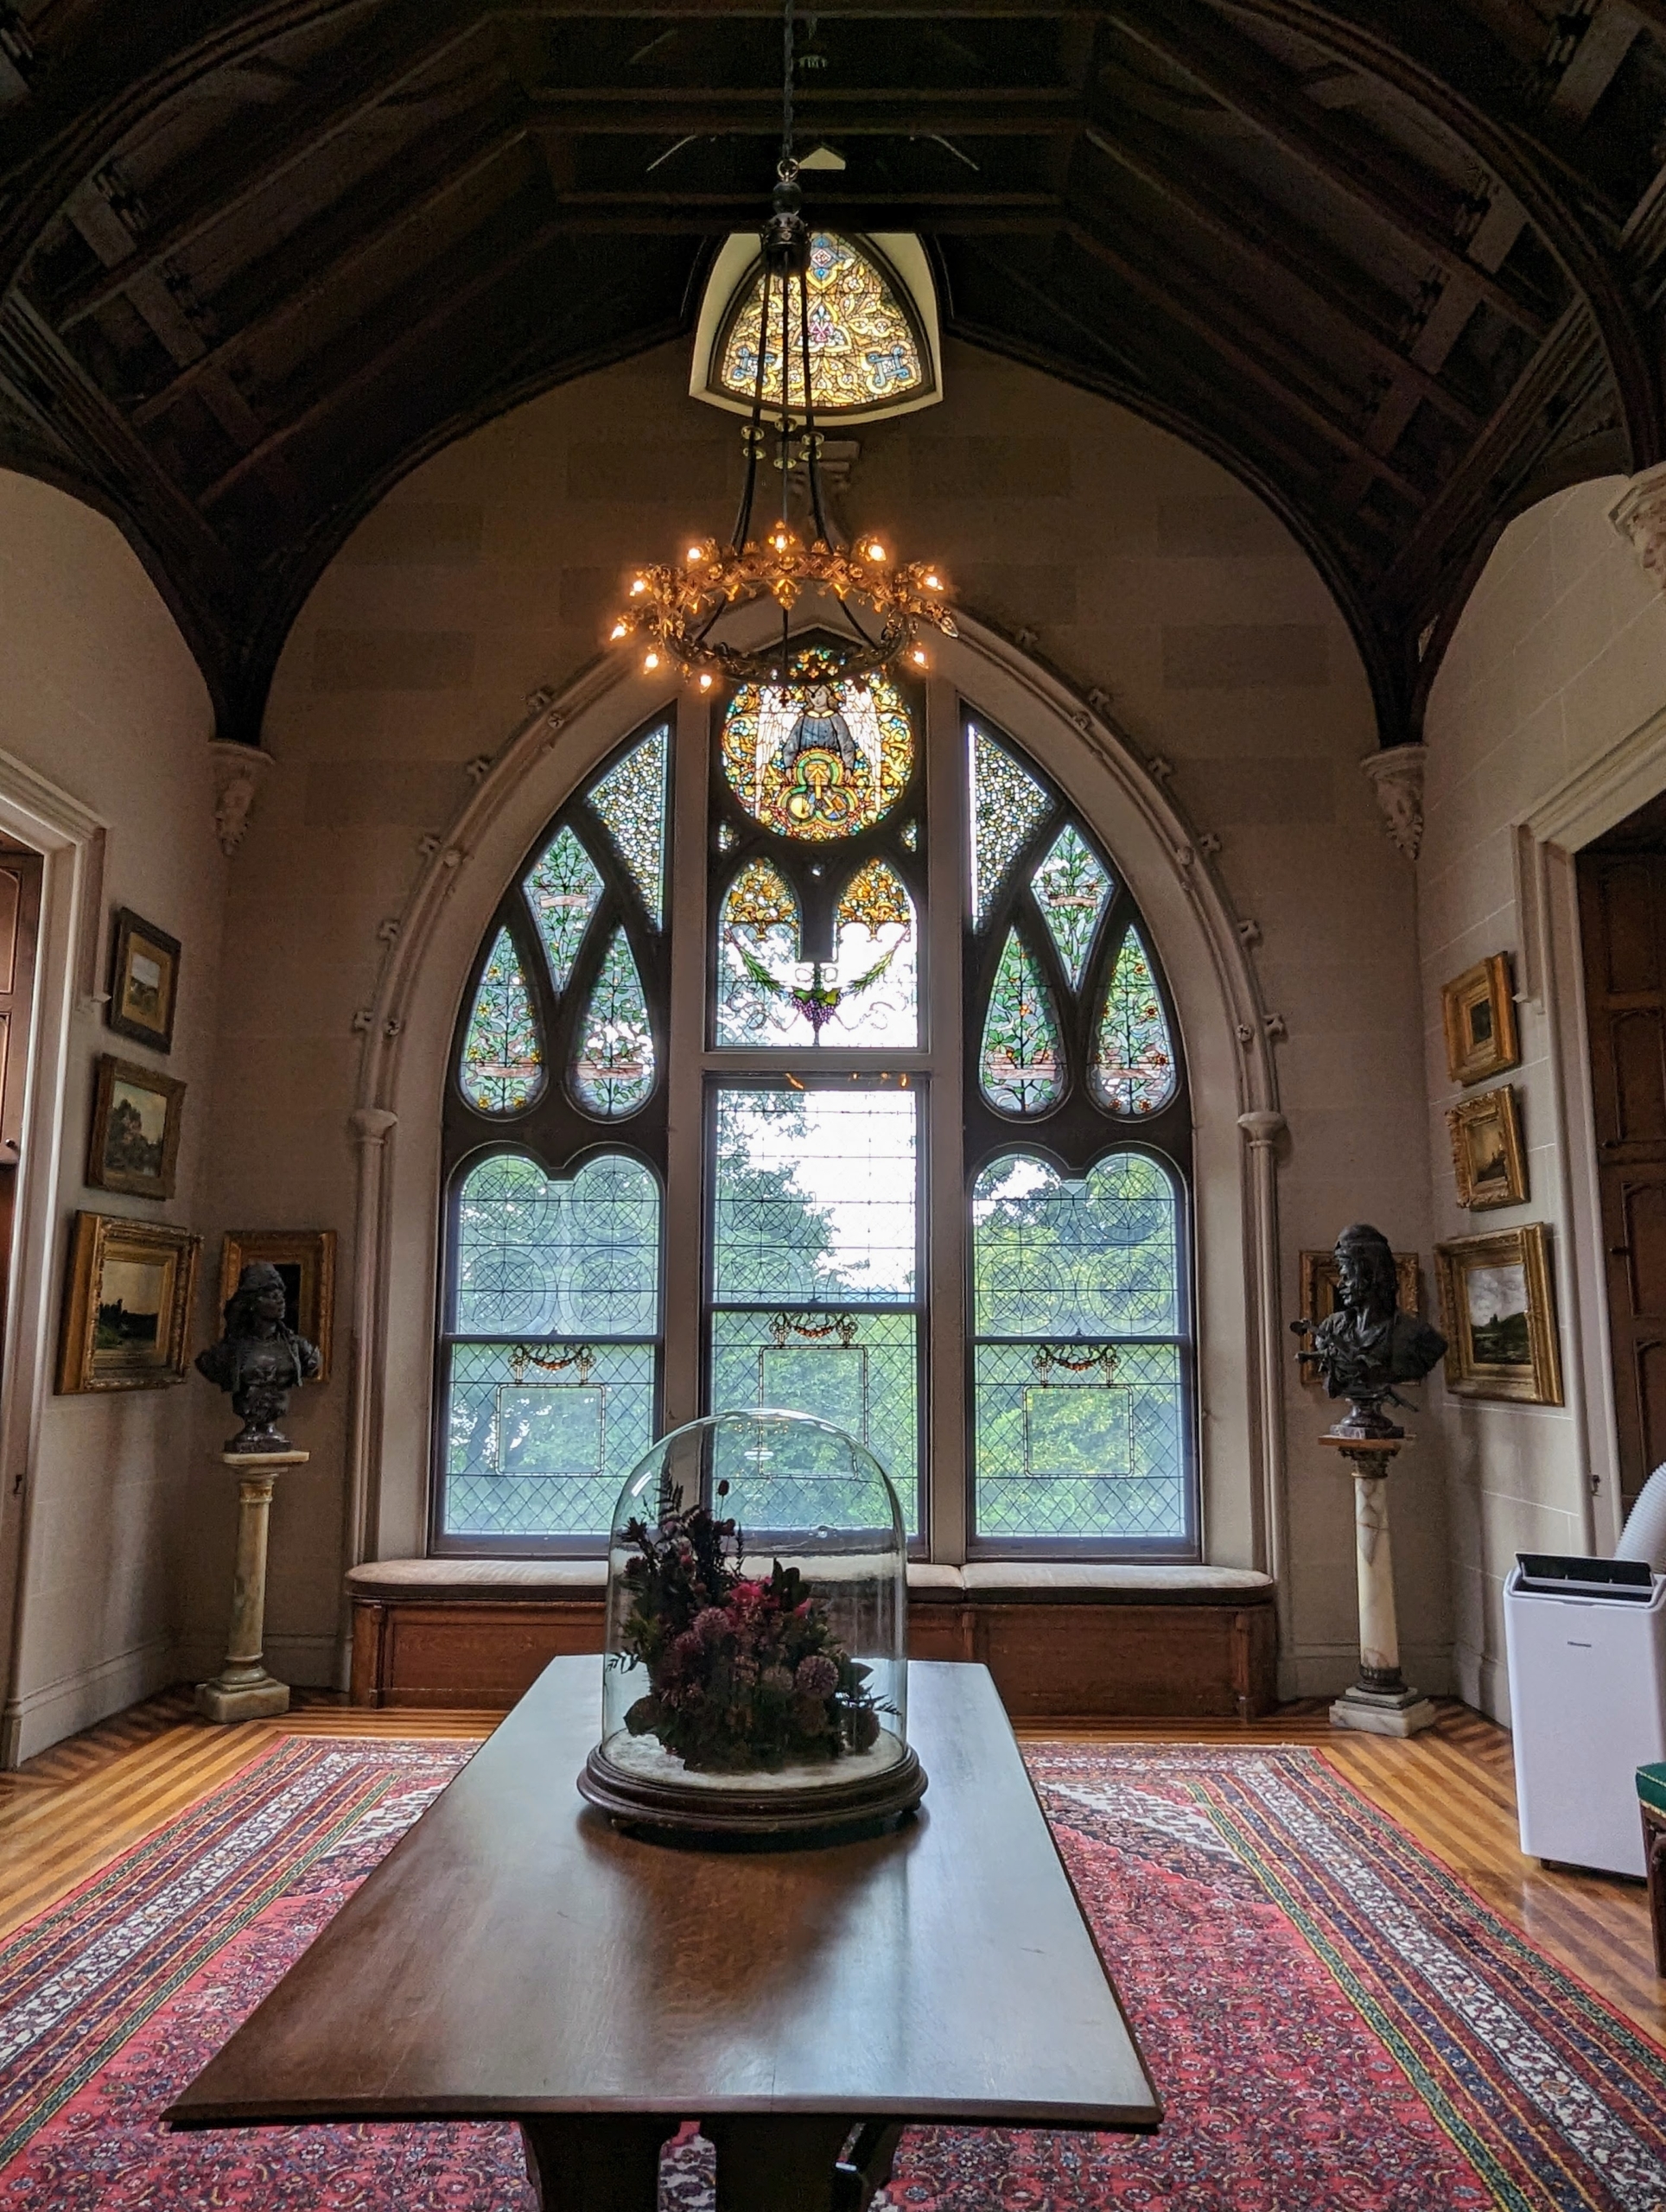
The main house has a soaring two-floor Art Gallery, which was once also used as a library and billiards room. Today, the room is filled with 19th century academic paintings along with Tiffany glass windows and other period furnishings designed by Davis.
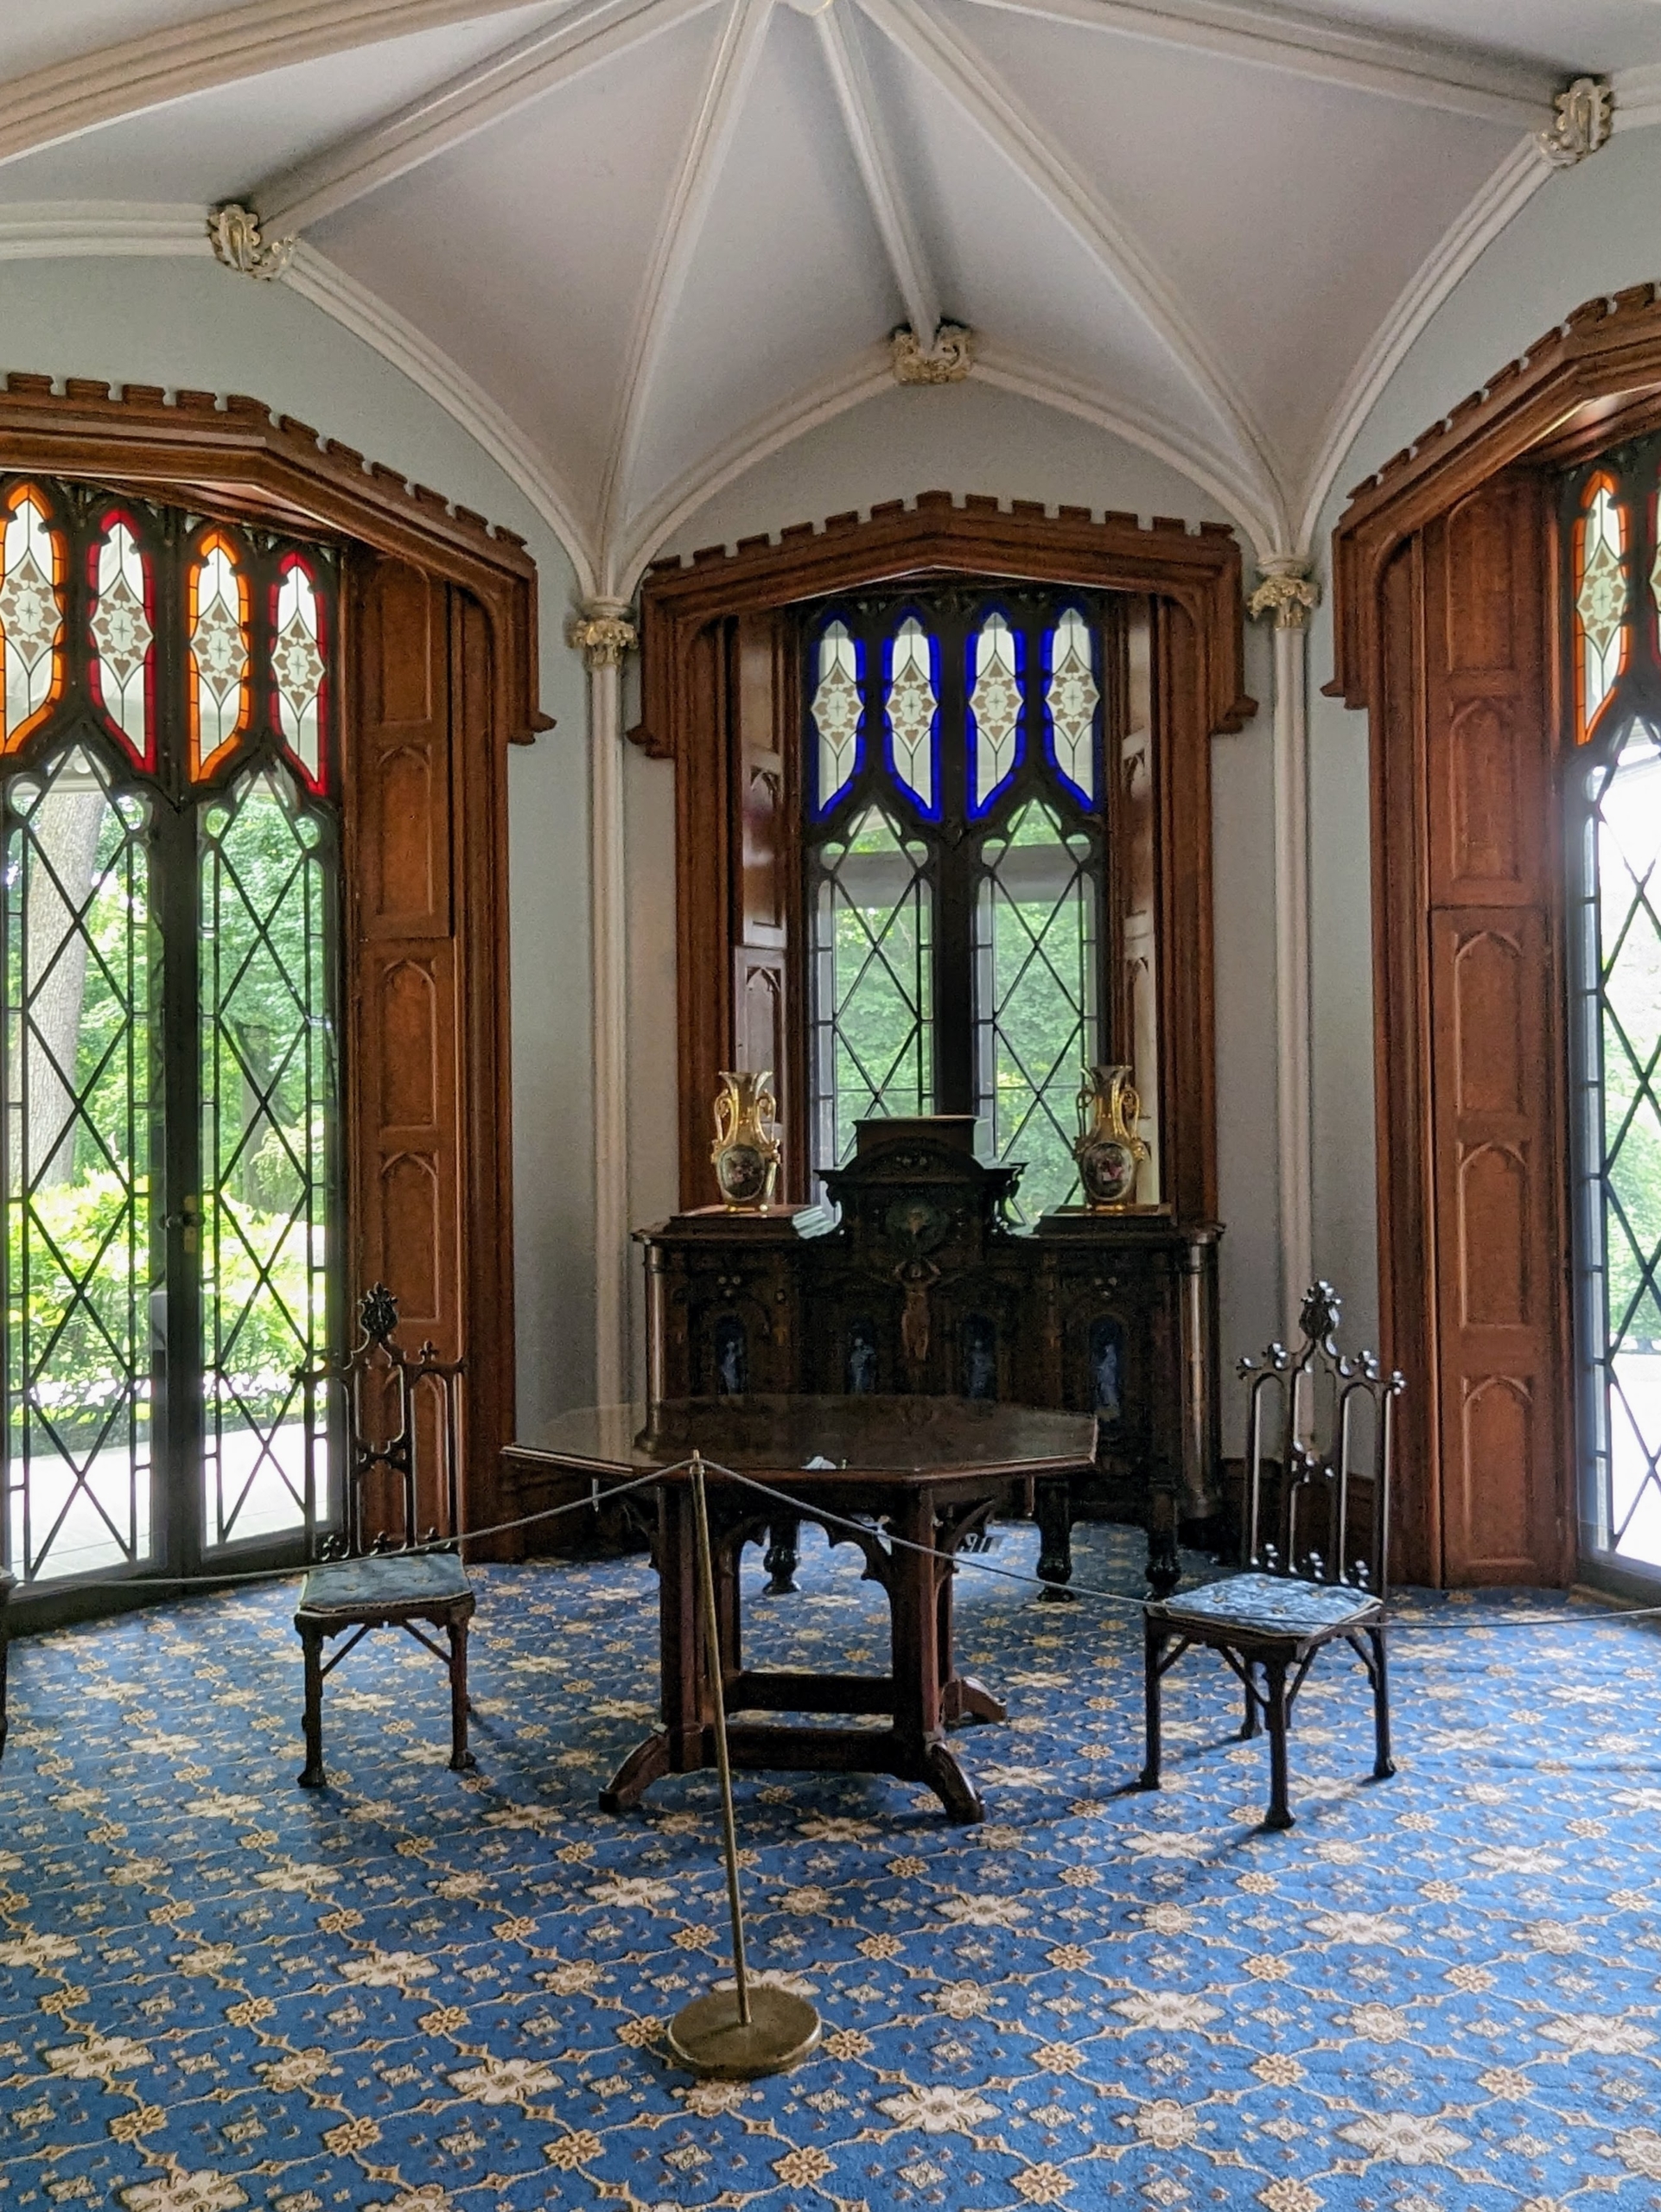
On the first floor are several sitting areas and parlors – all meticulously maintained.
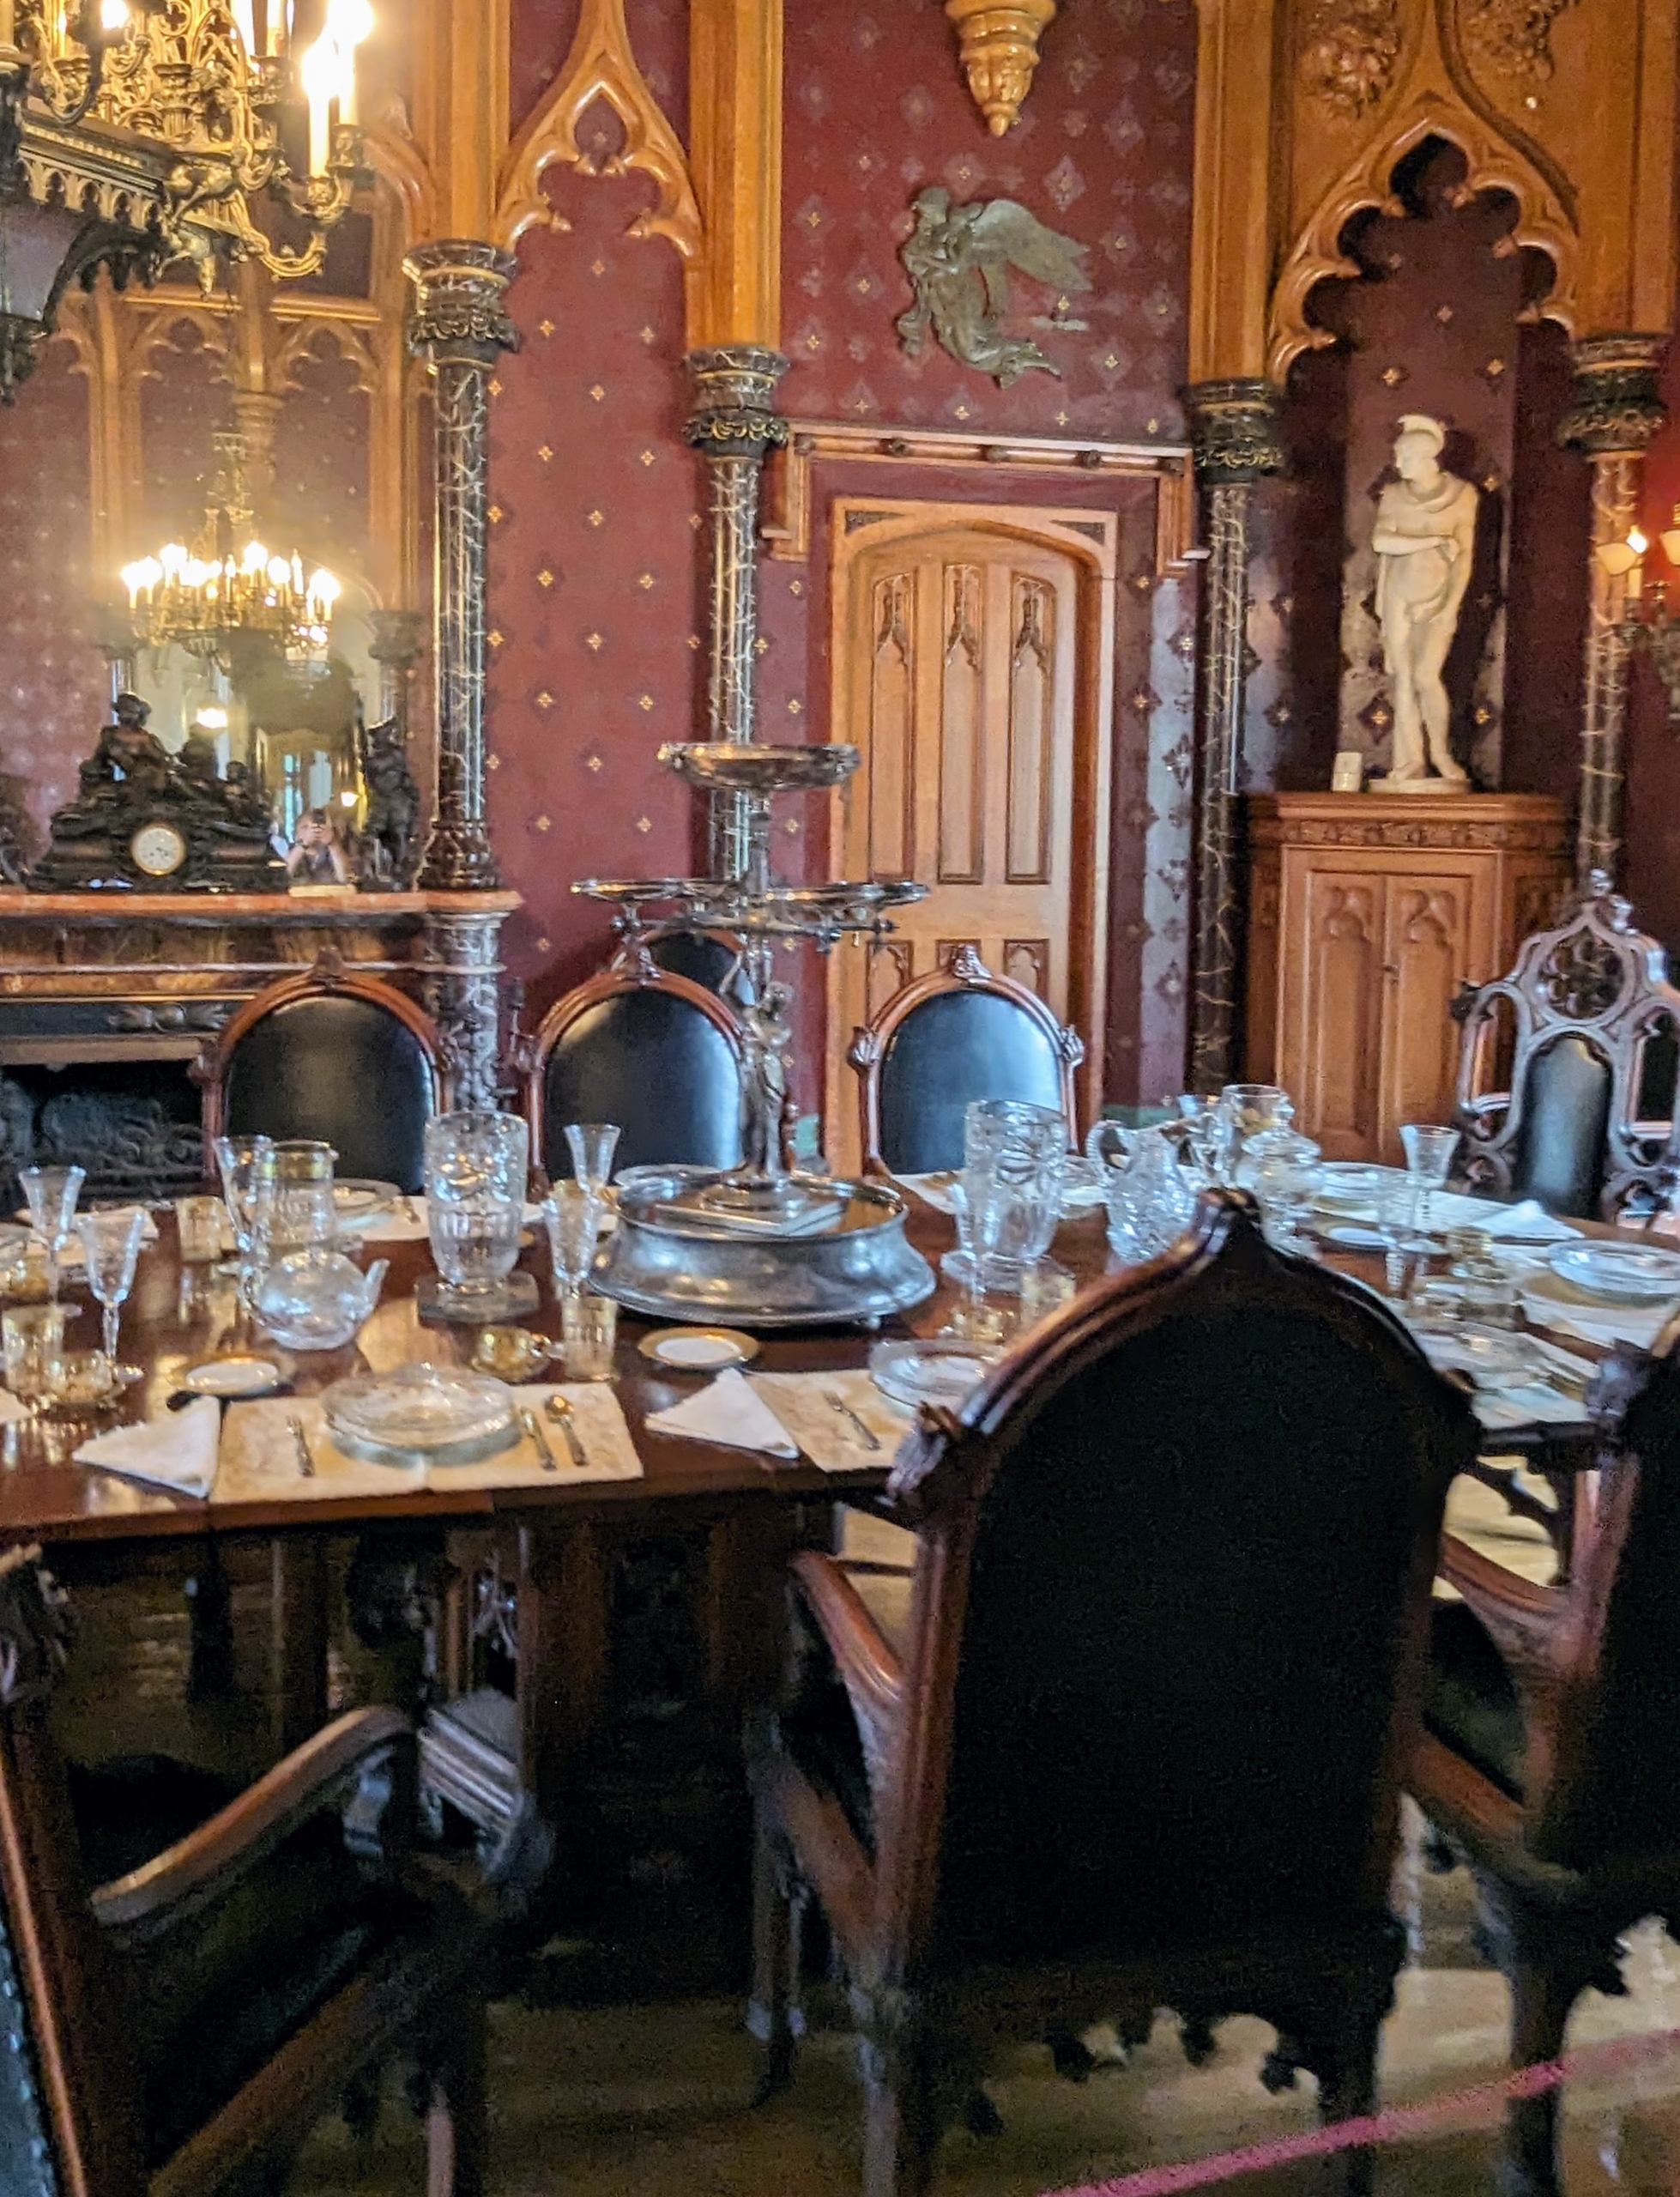
The Dining Room at Lyndhurst still contains the original Gothic Revival dining table and chairs designed by Alexander Jackson Davis for the Merrit Family in 1865.
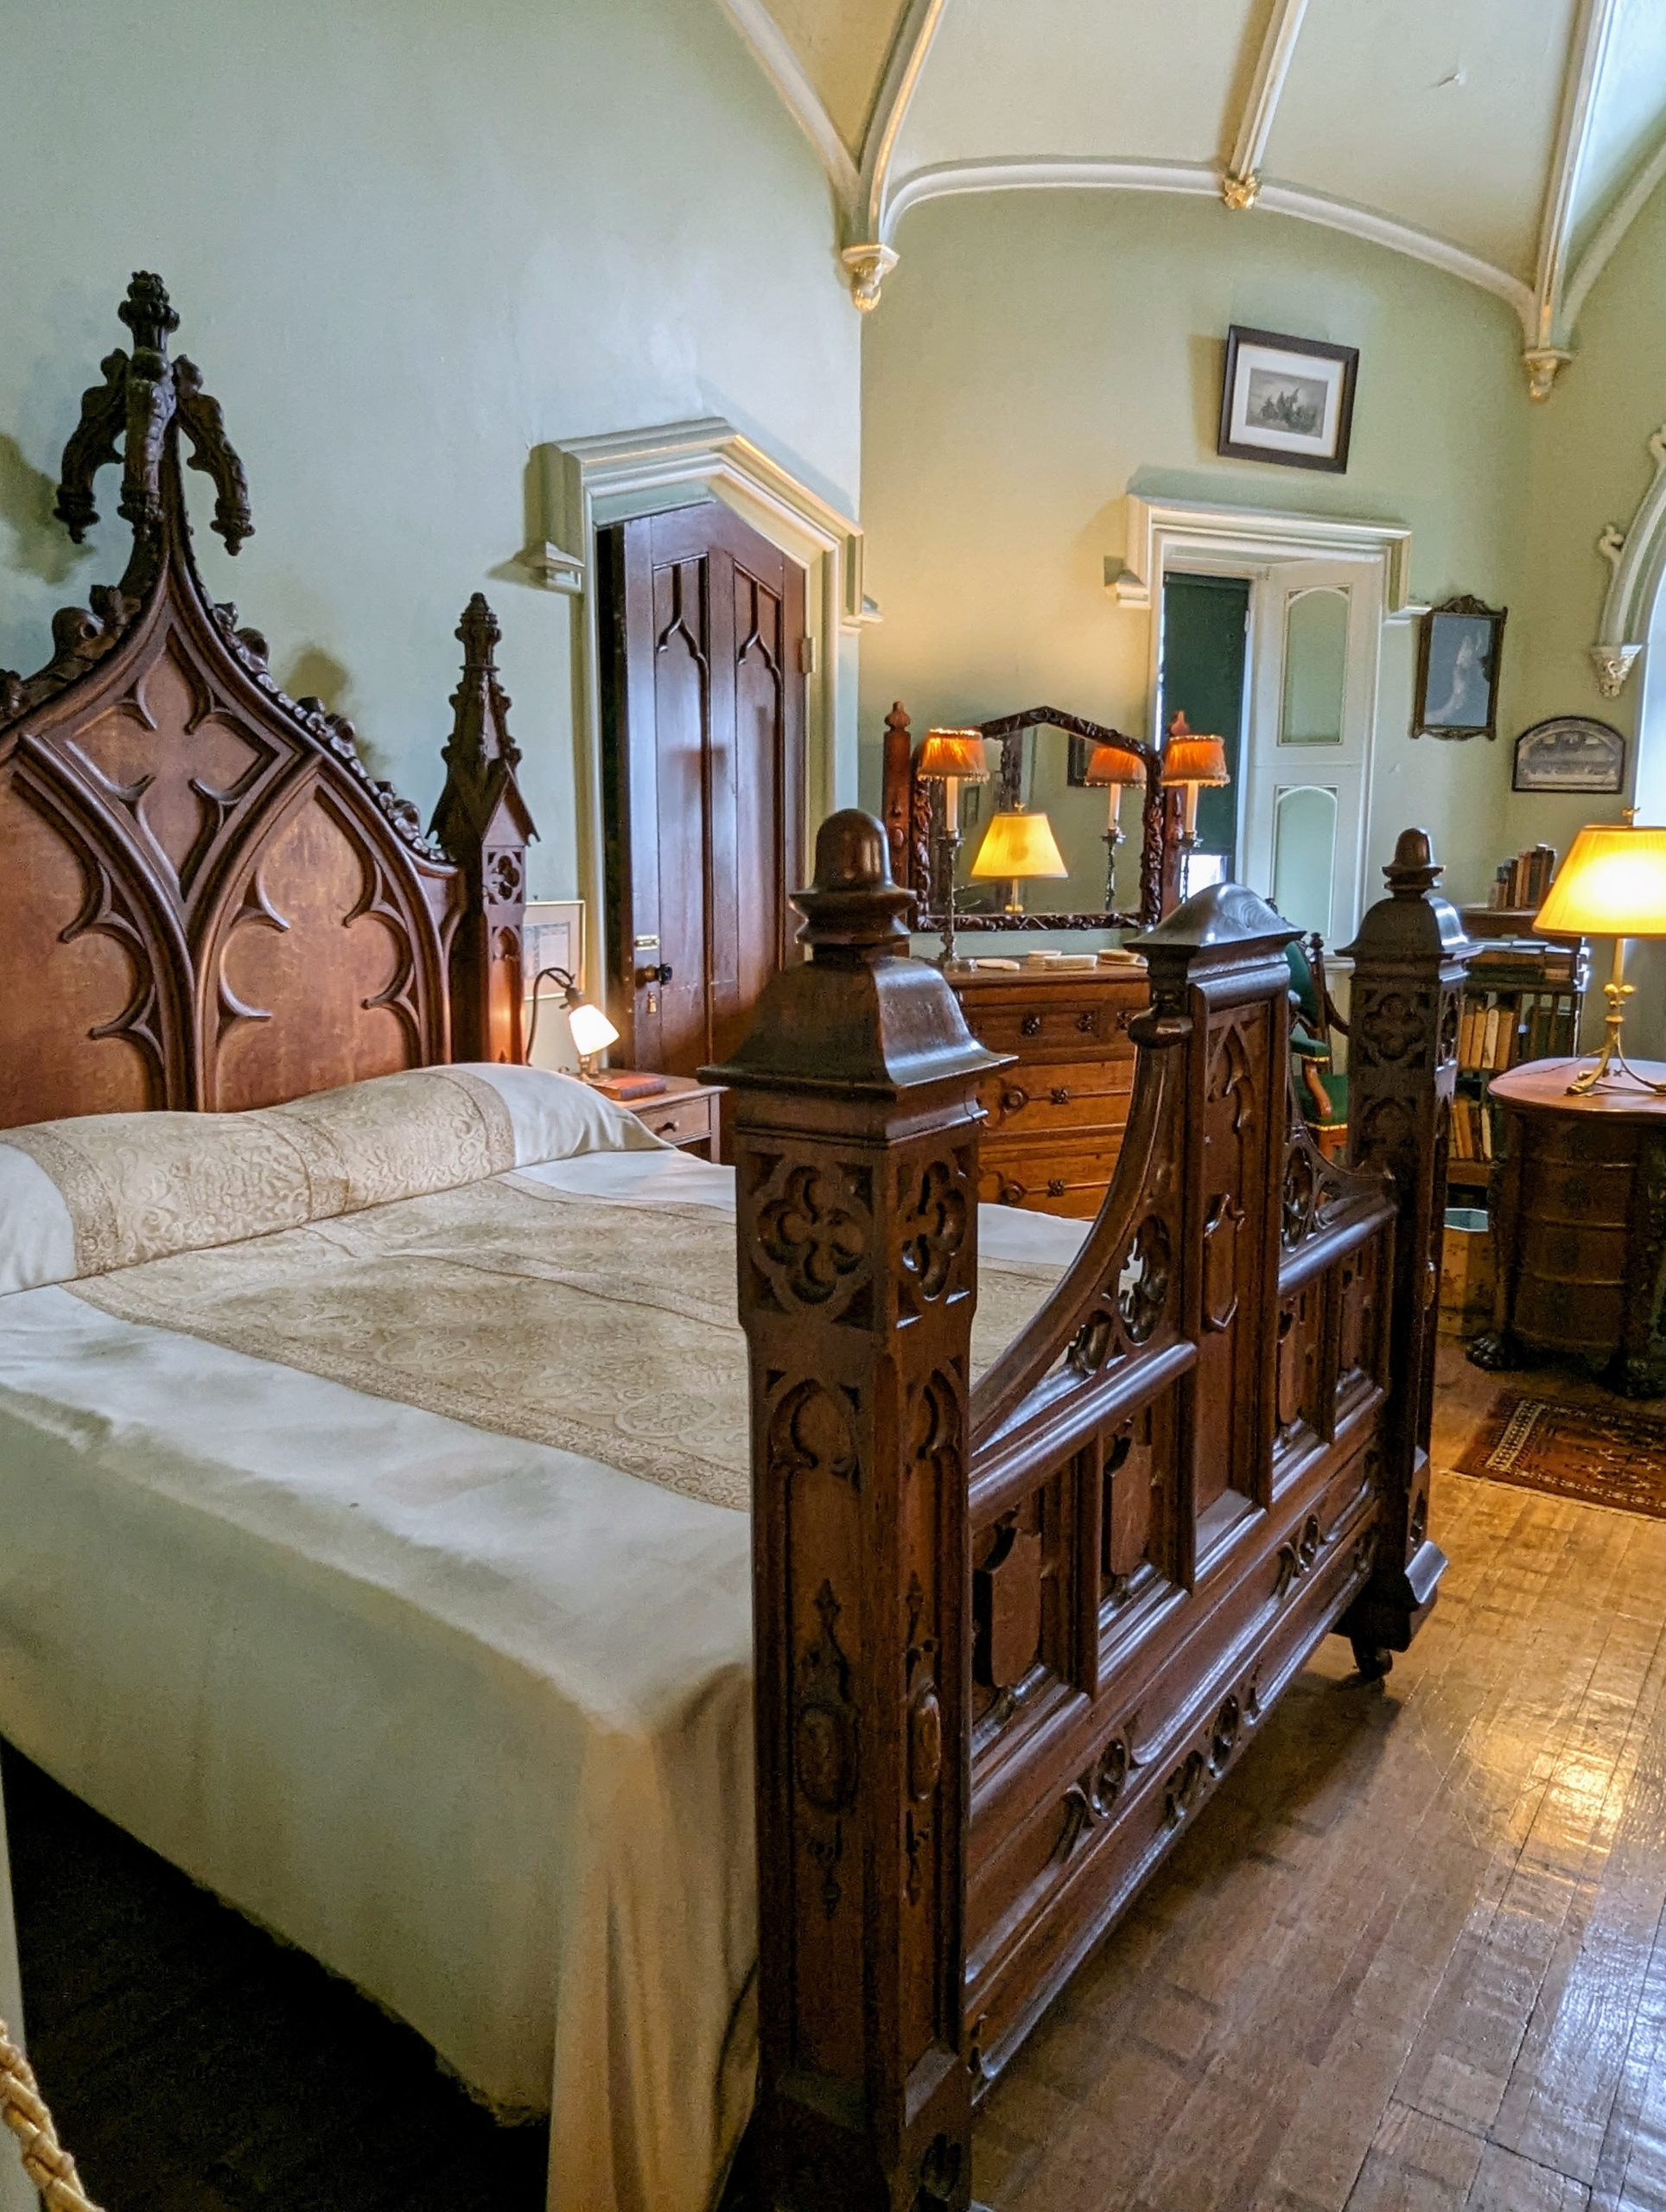
This is one of the bed chambers in the home. It includes a very ornate period bed.
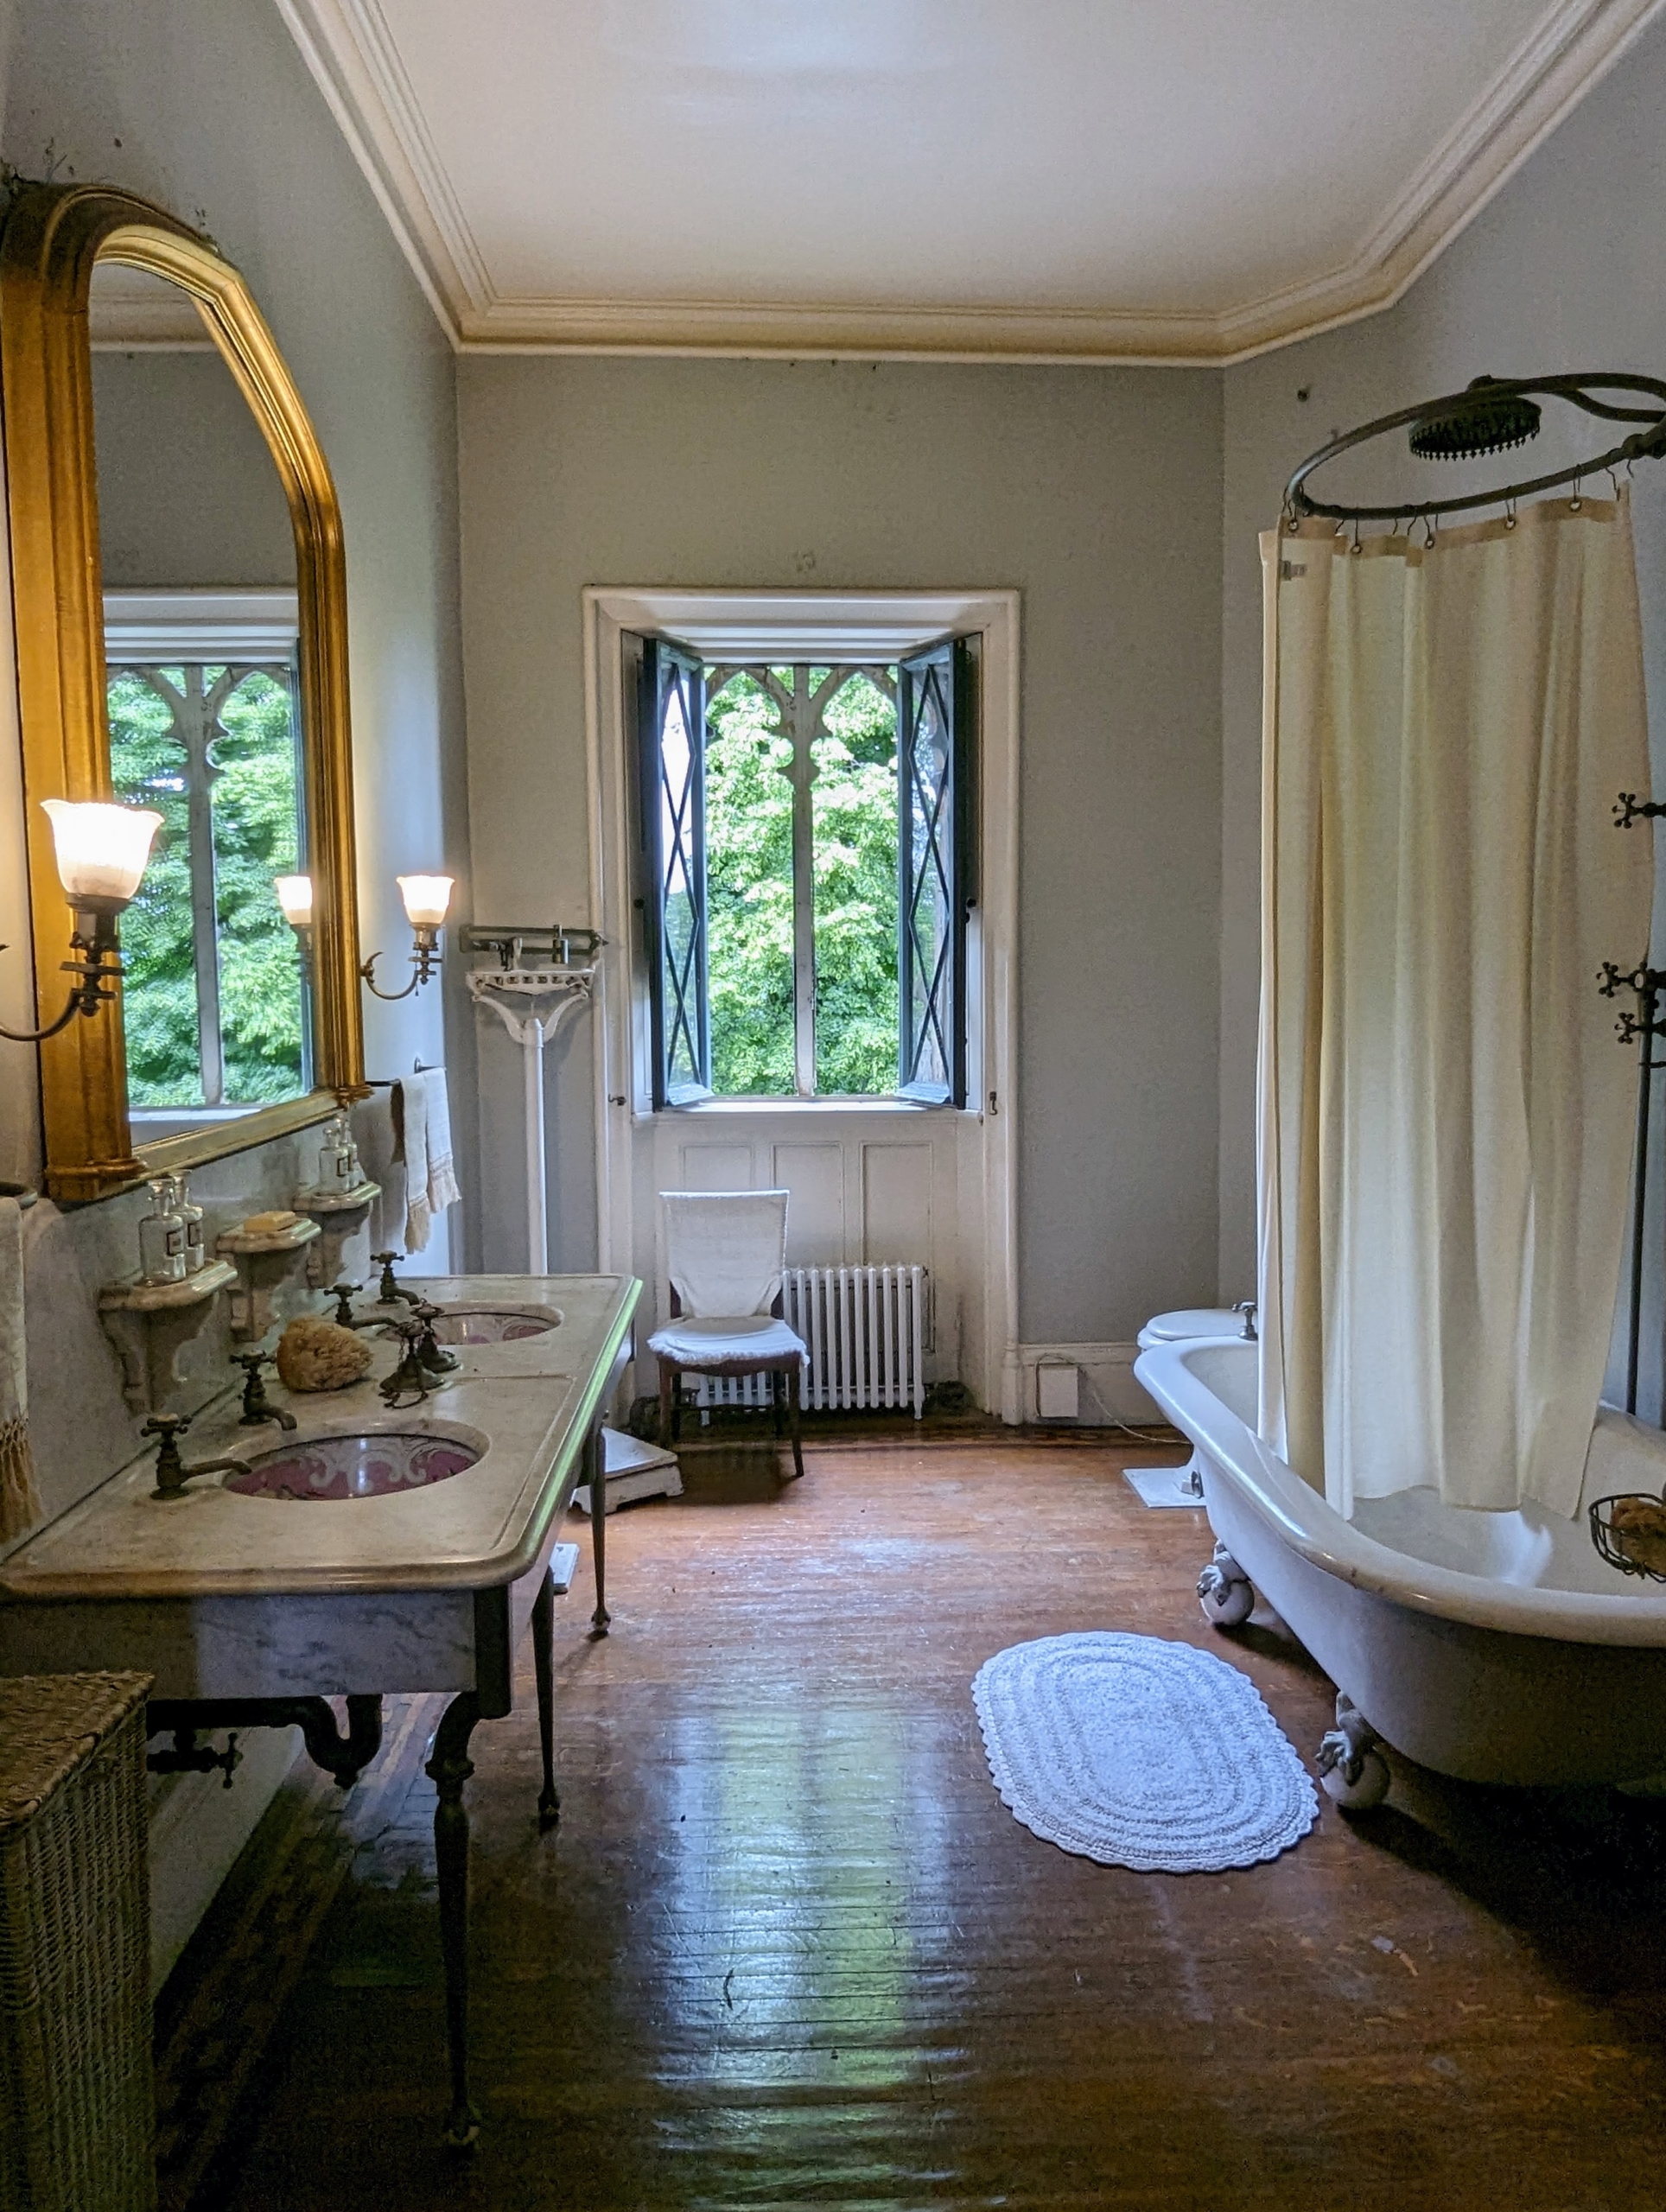
The family bathrooms were large in its day with marble sink counters and claw foot tubs.
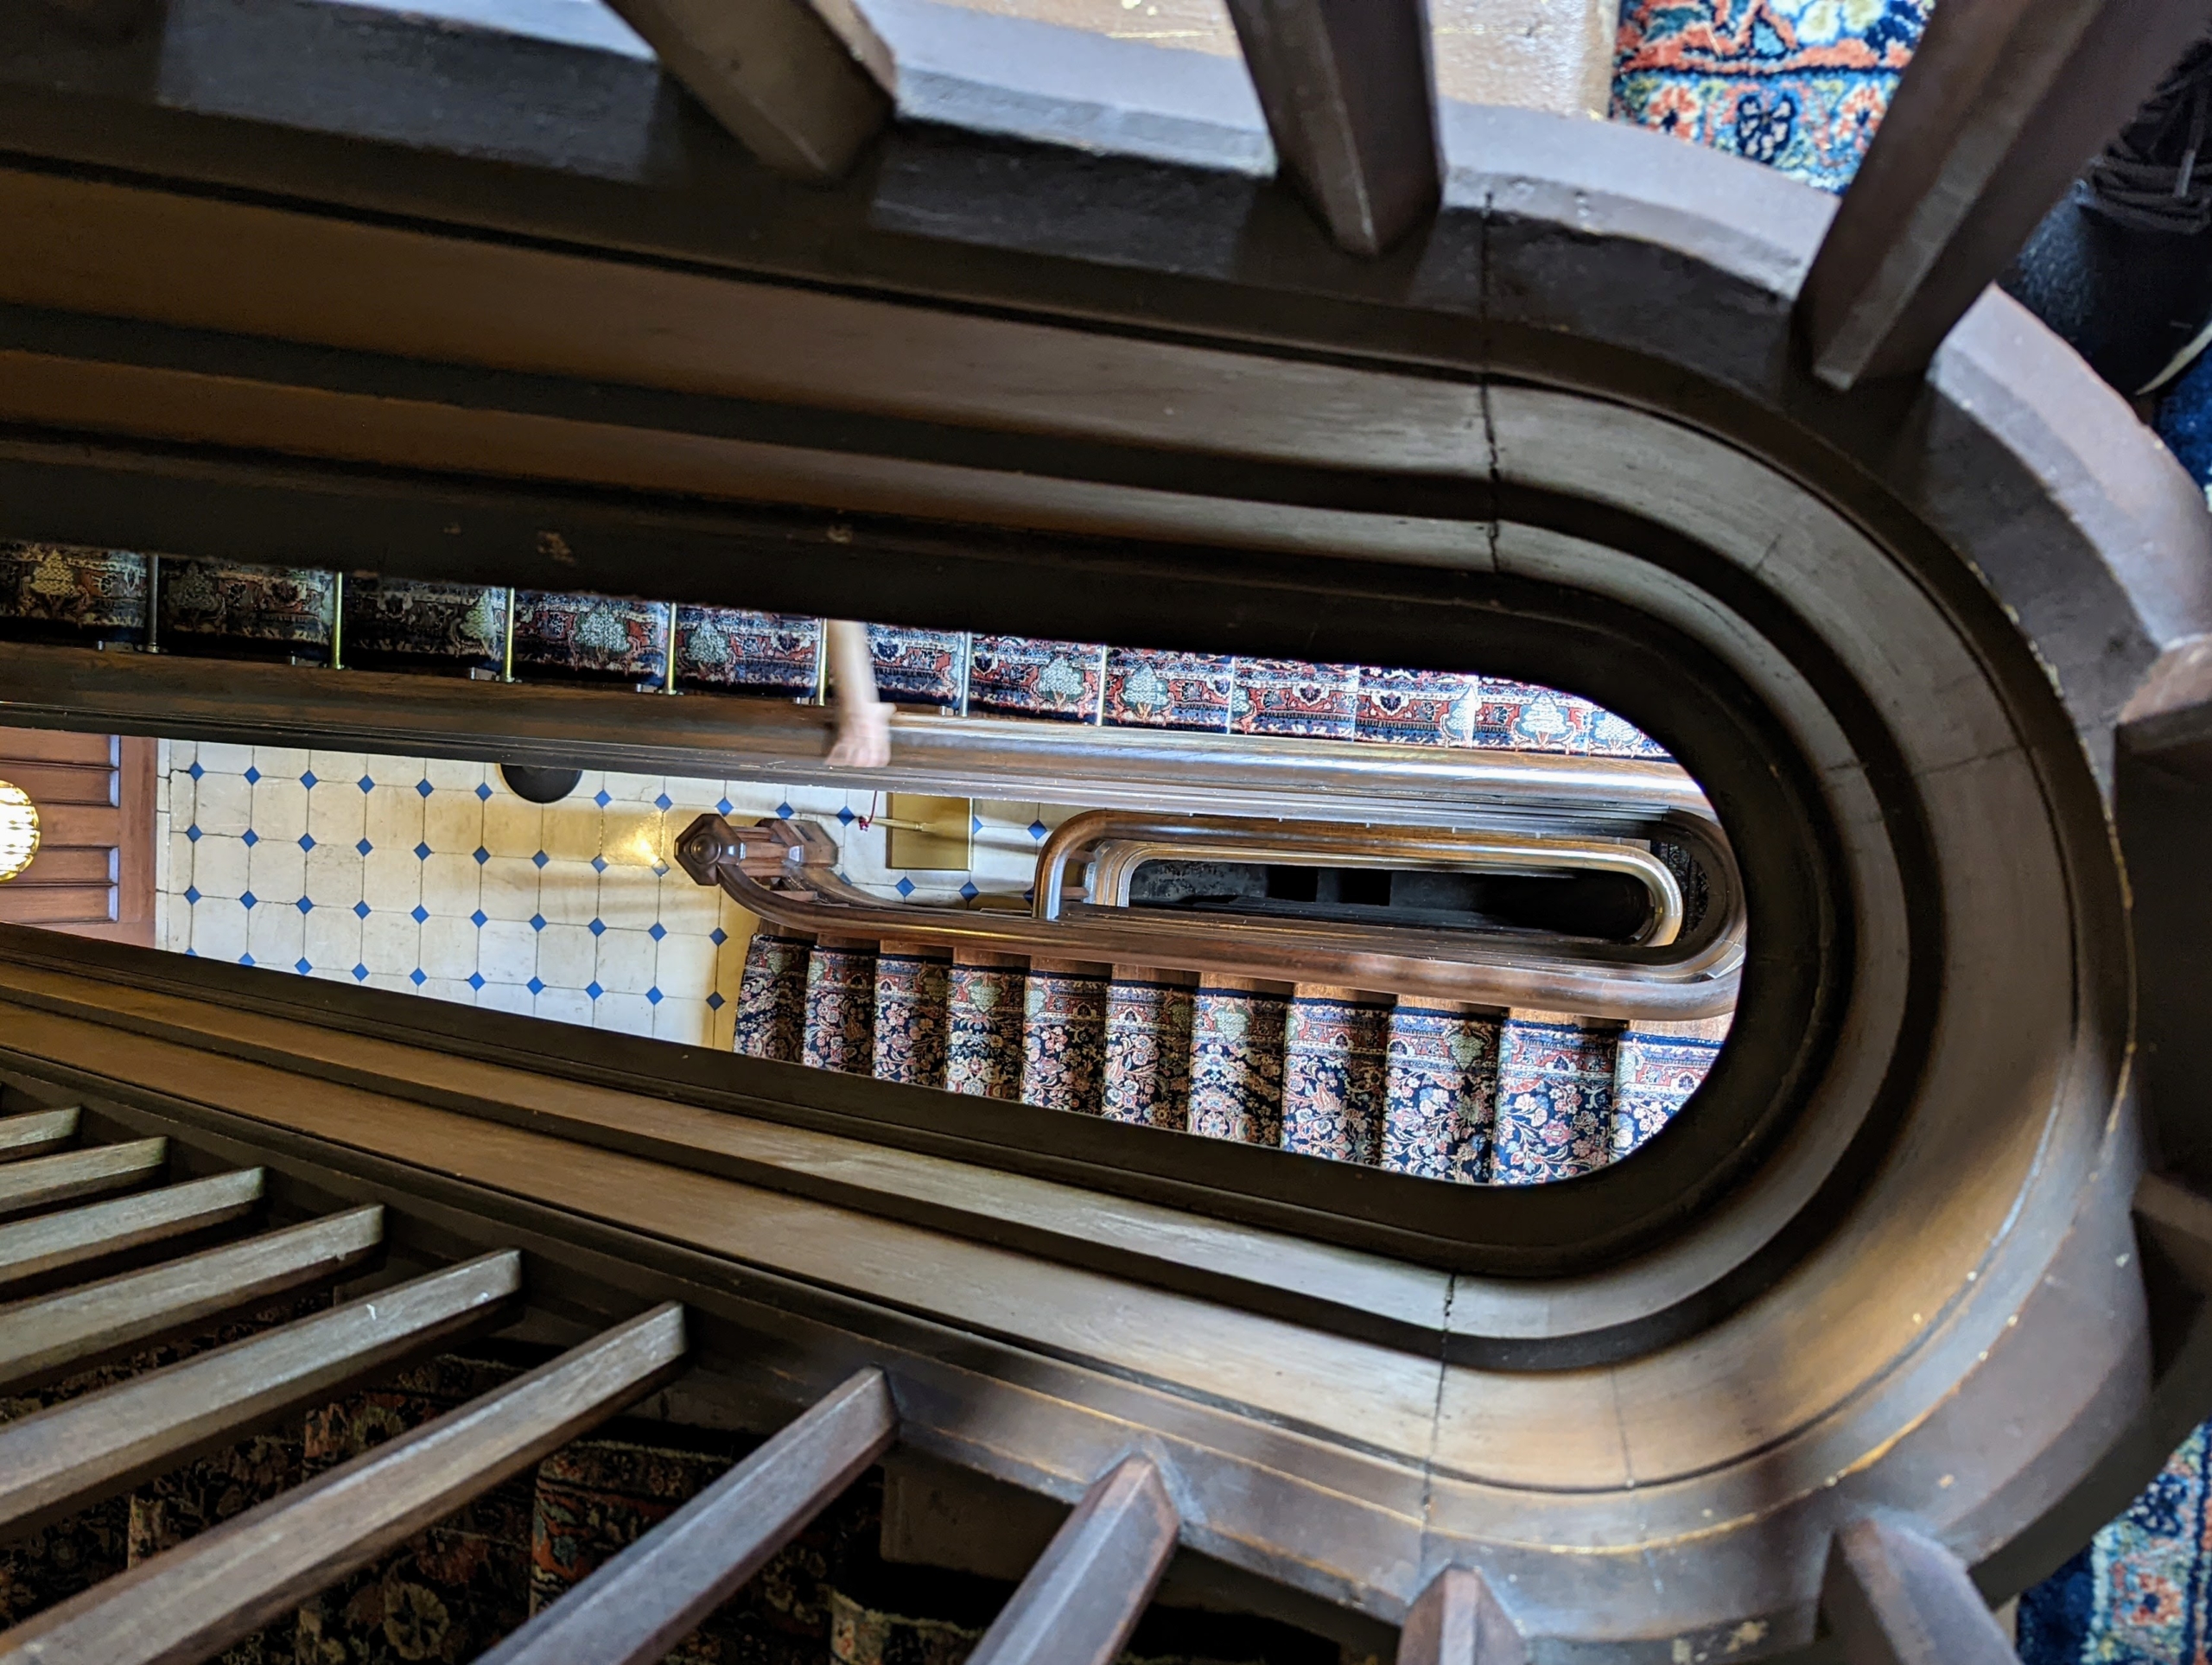
This beautiful spiral wood back staircase takes visitors up to the fifth floor tower where one can see panoramic views of the Hudson River and New York City as well as all the way down to the basement kitchen.
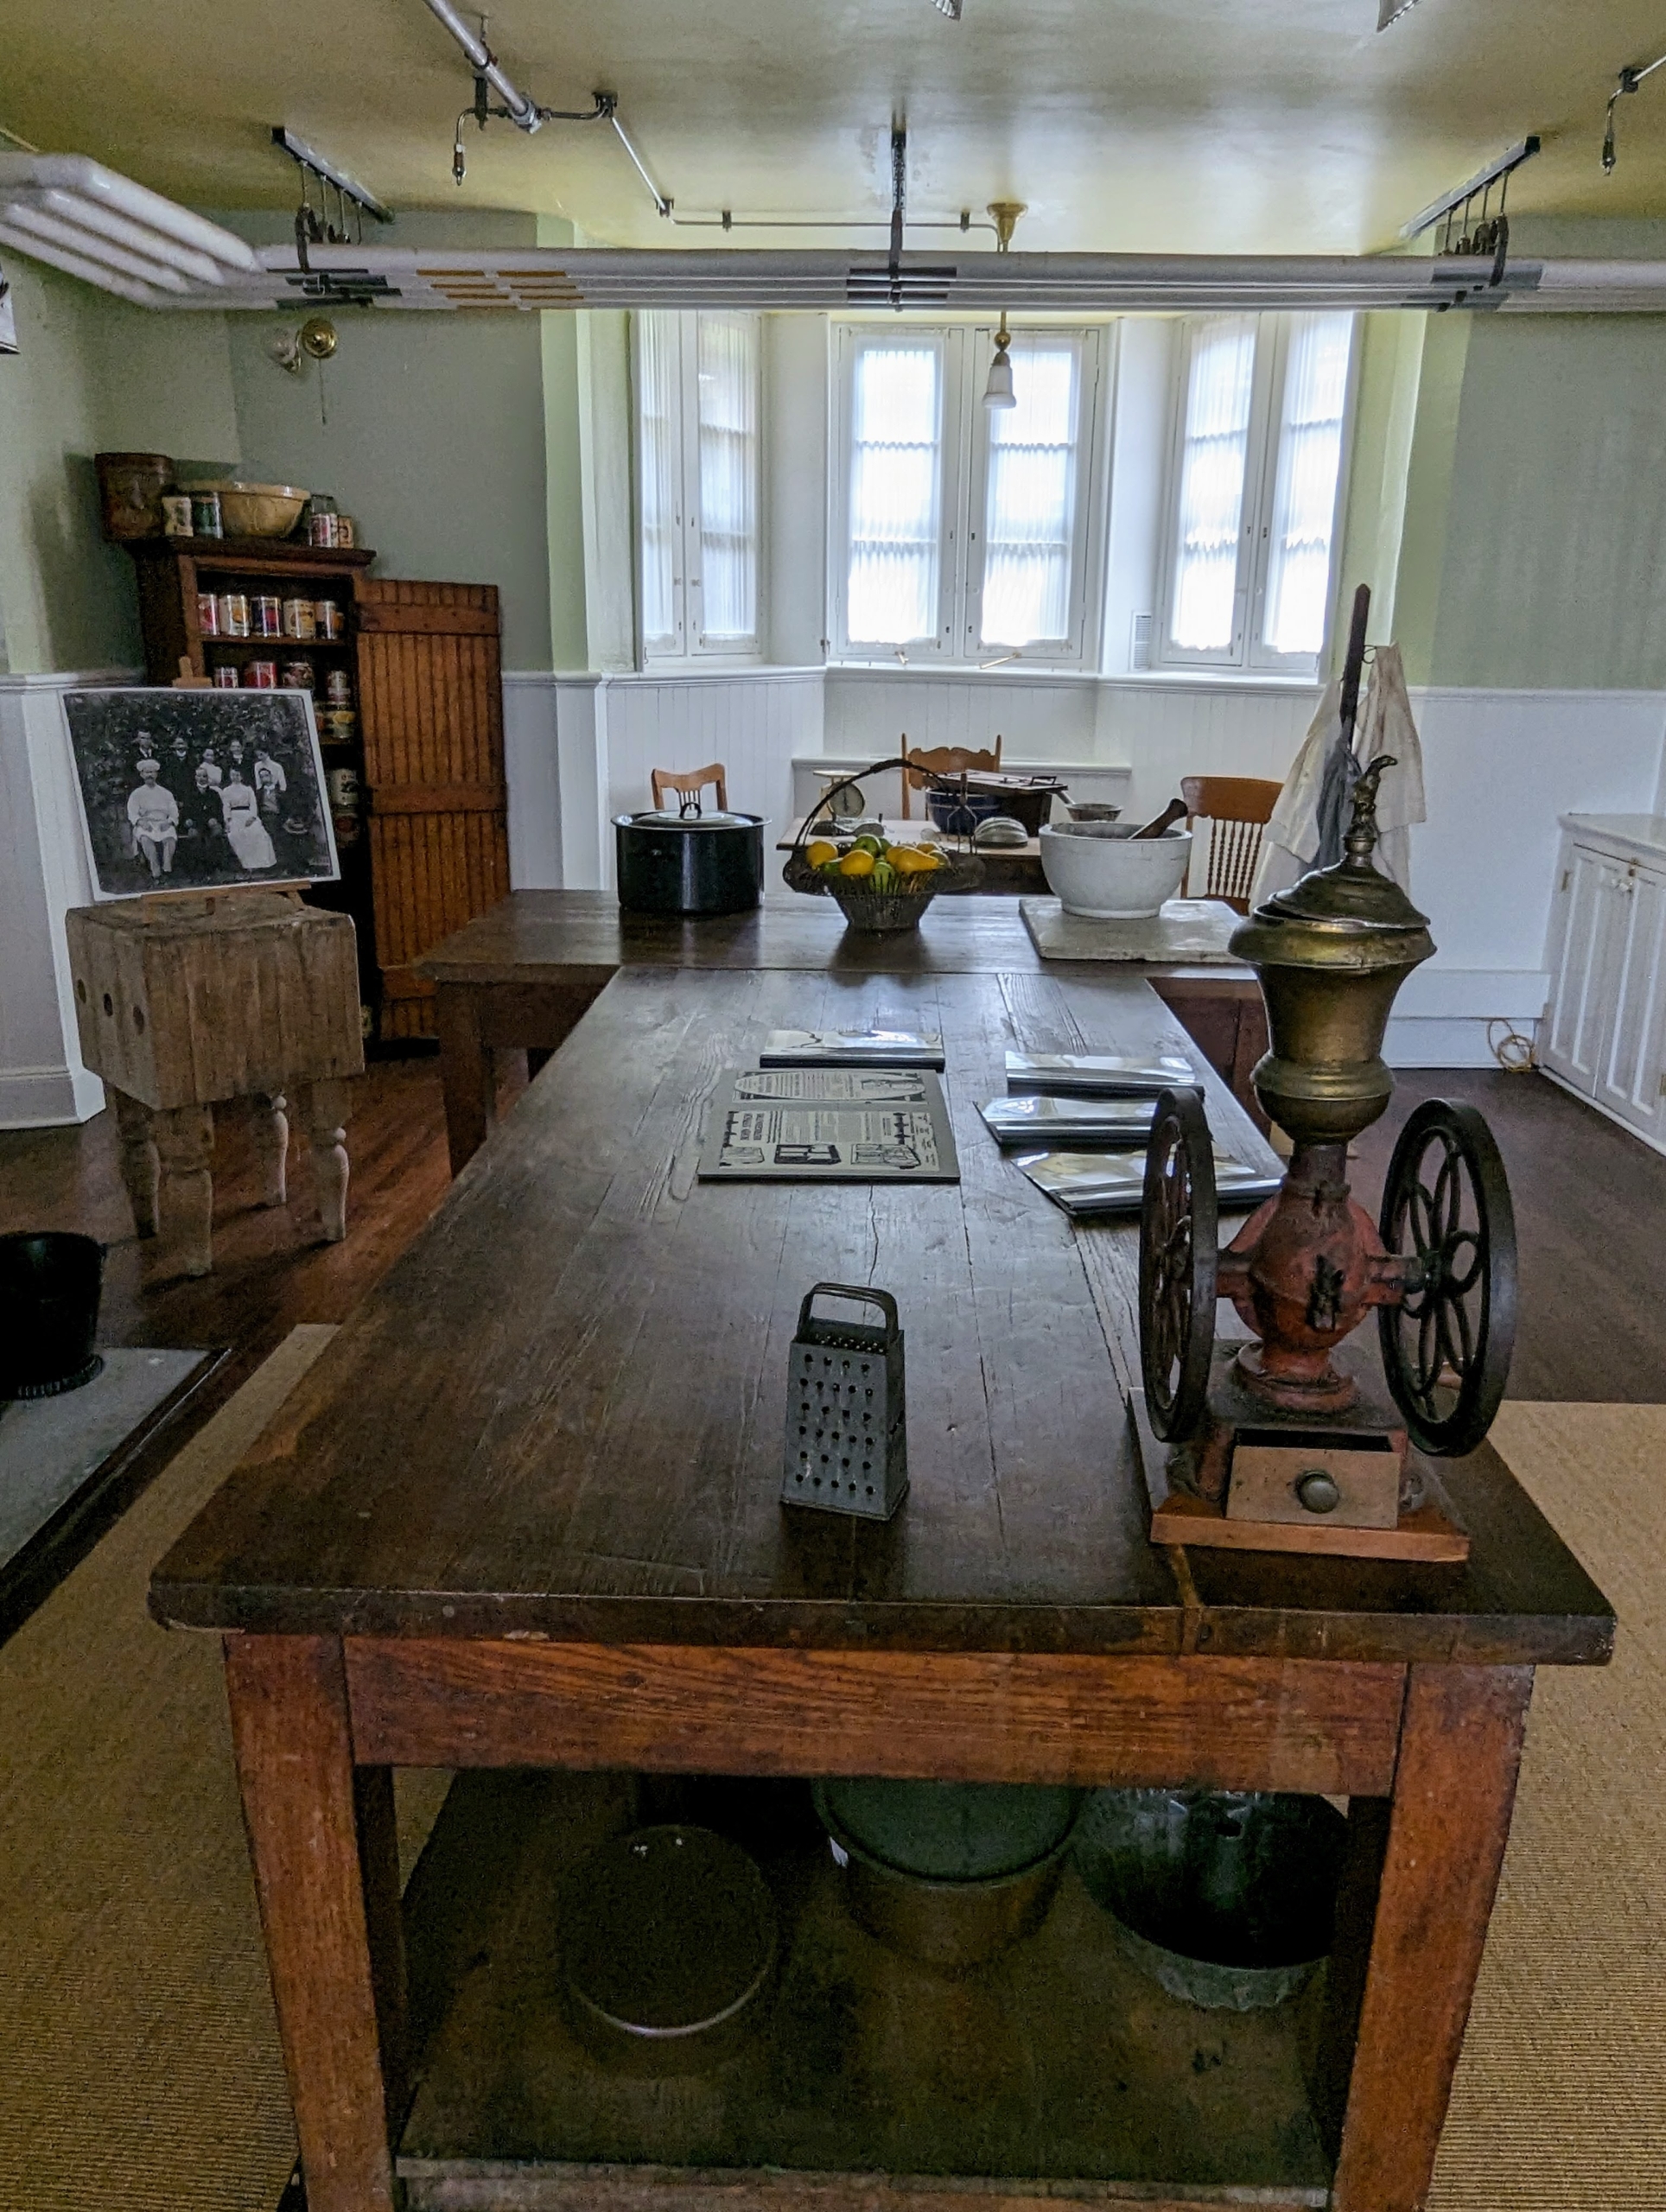
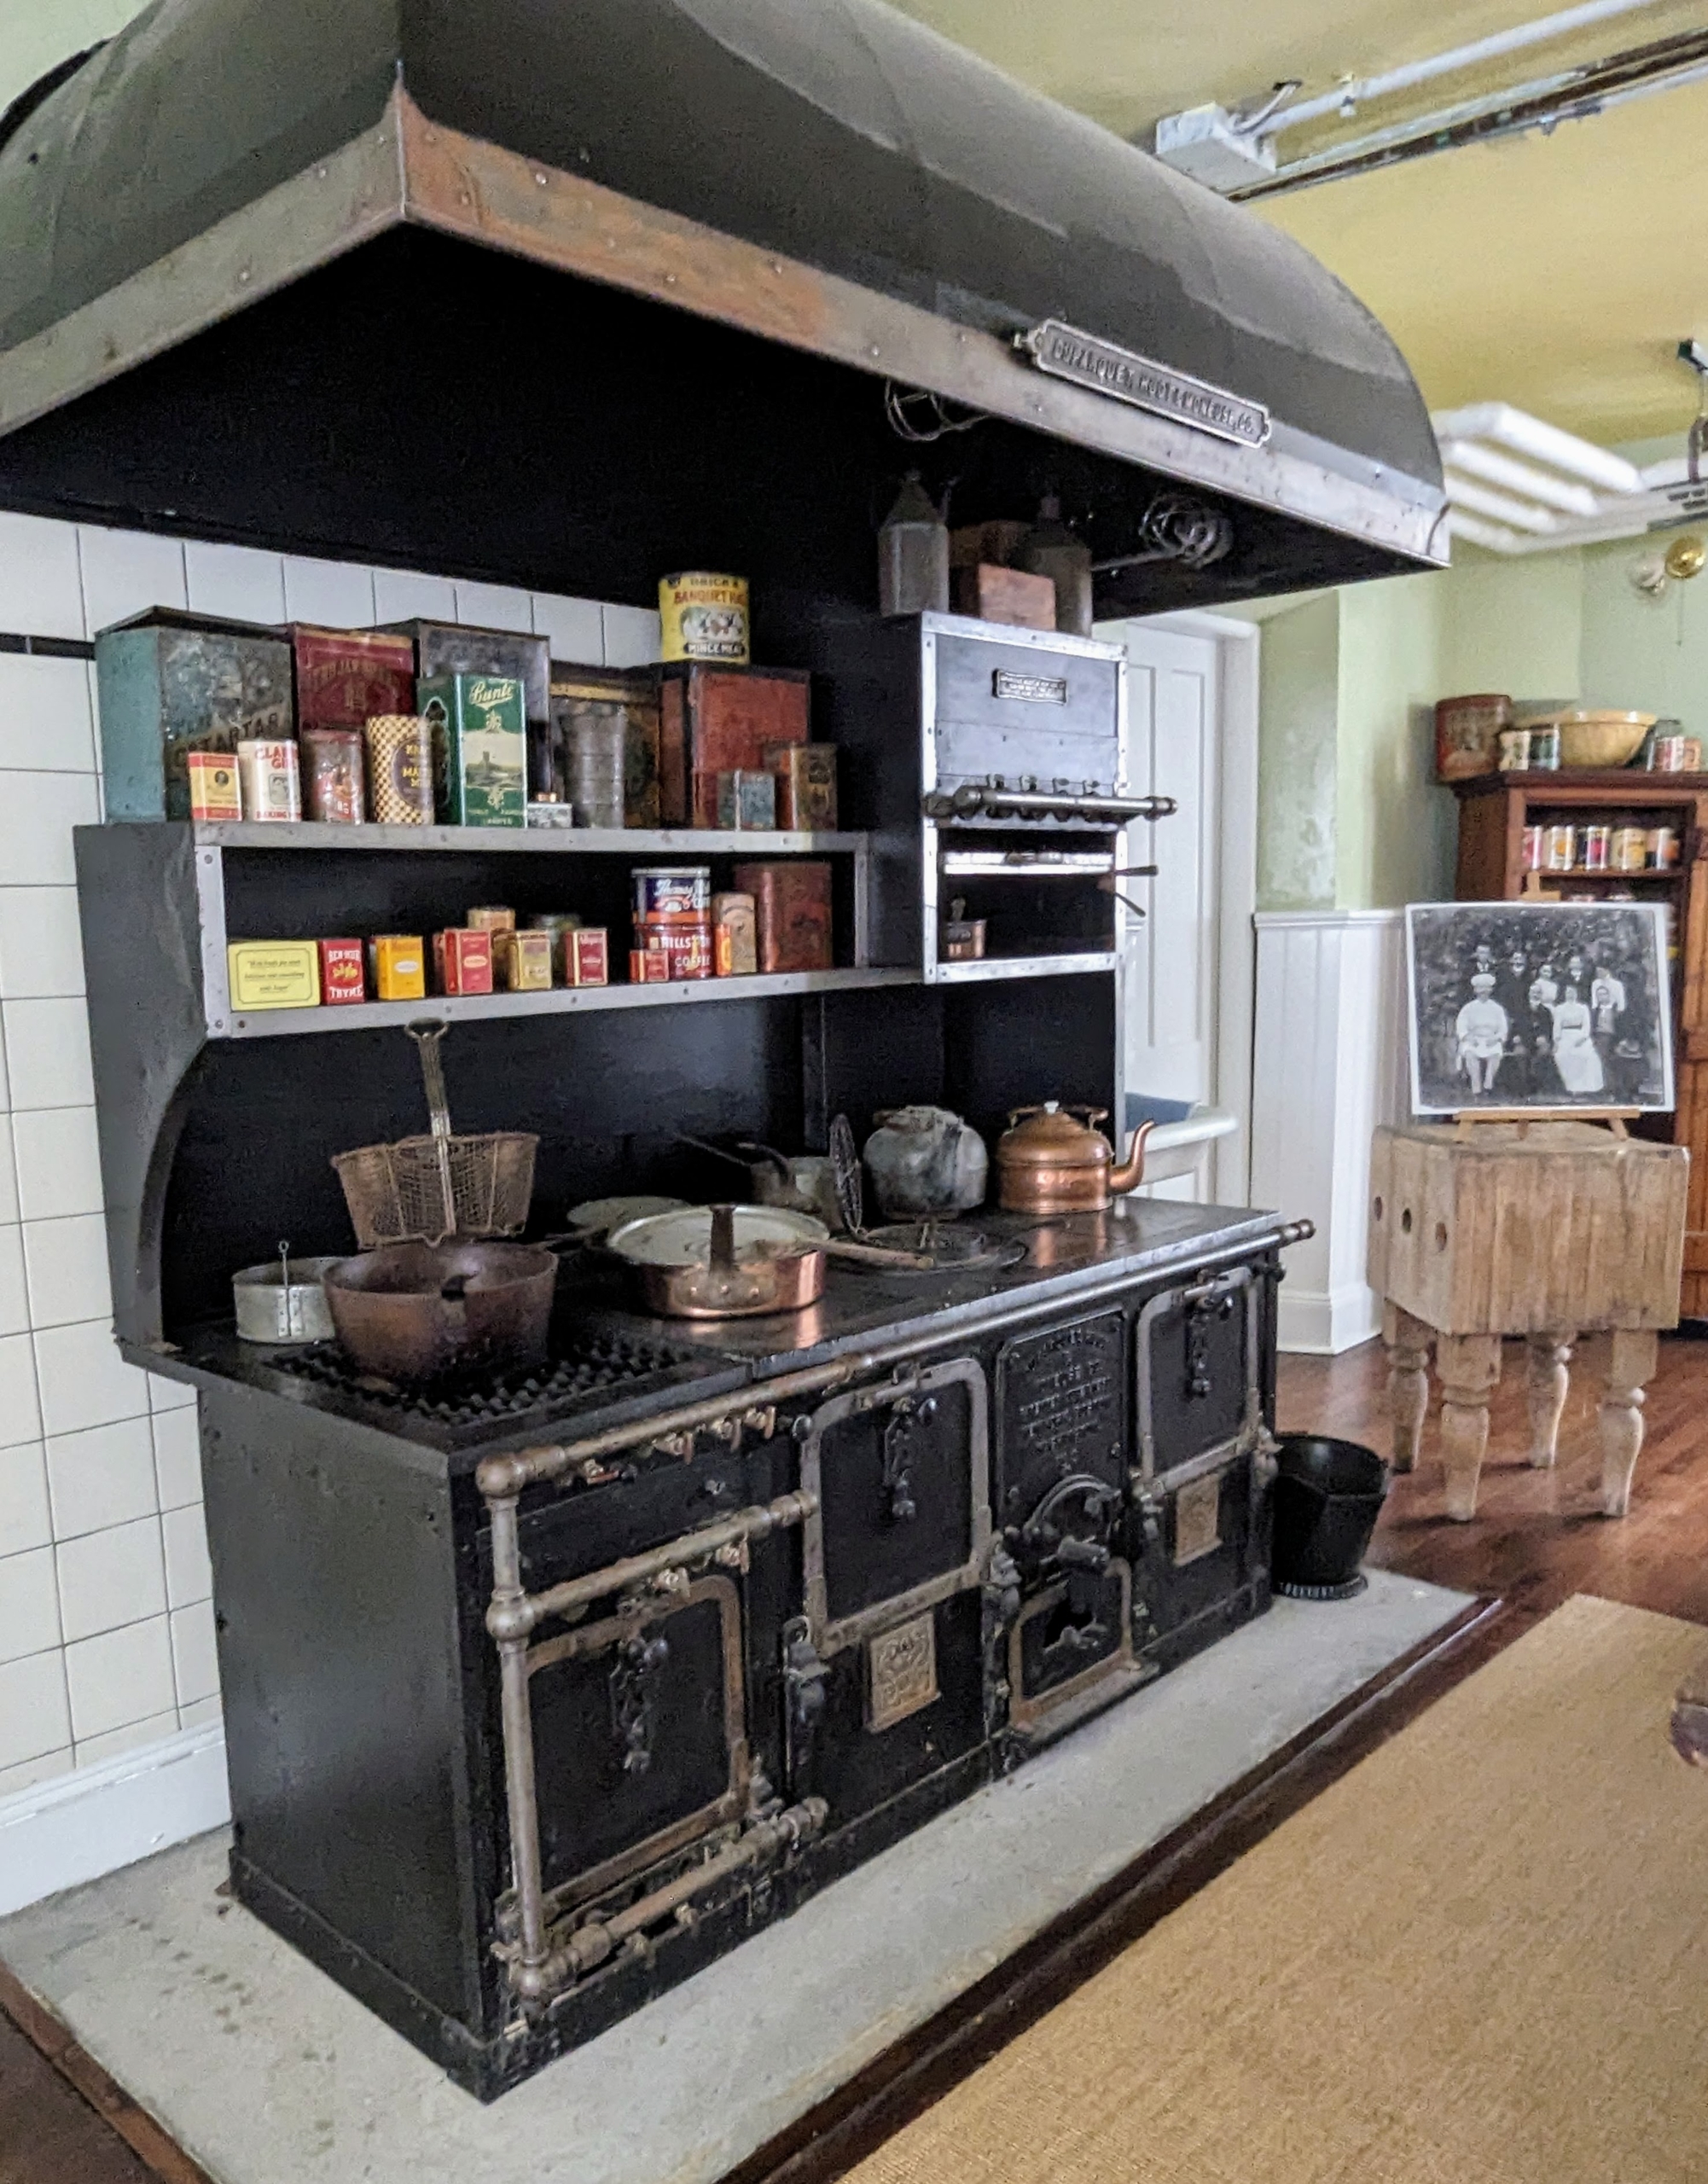
Here is the main kitchen – still decorated with many of the 19th century cooking elements, tools and supplies. This room had great light and ample space.
This is the large stove behind the kitchen table.
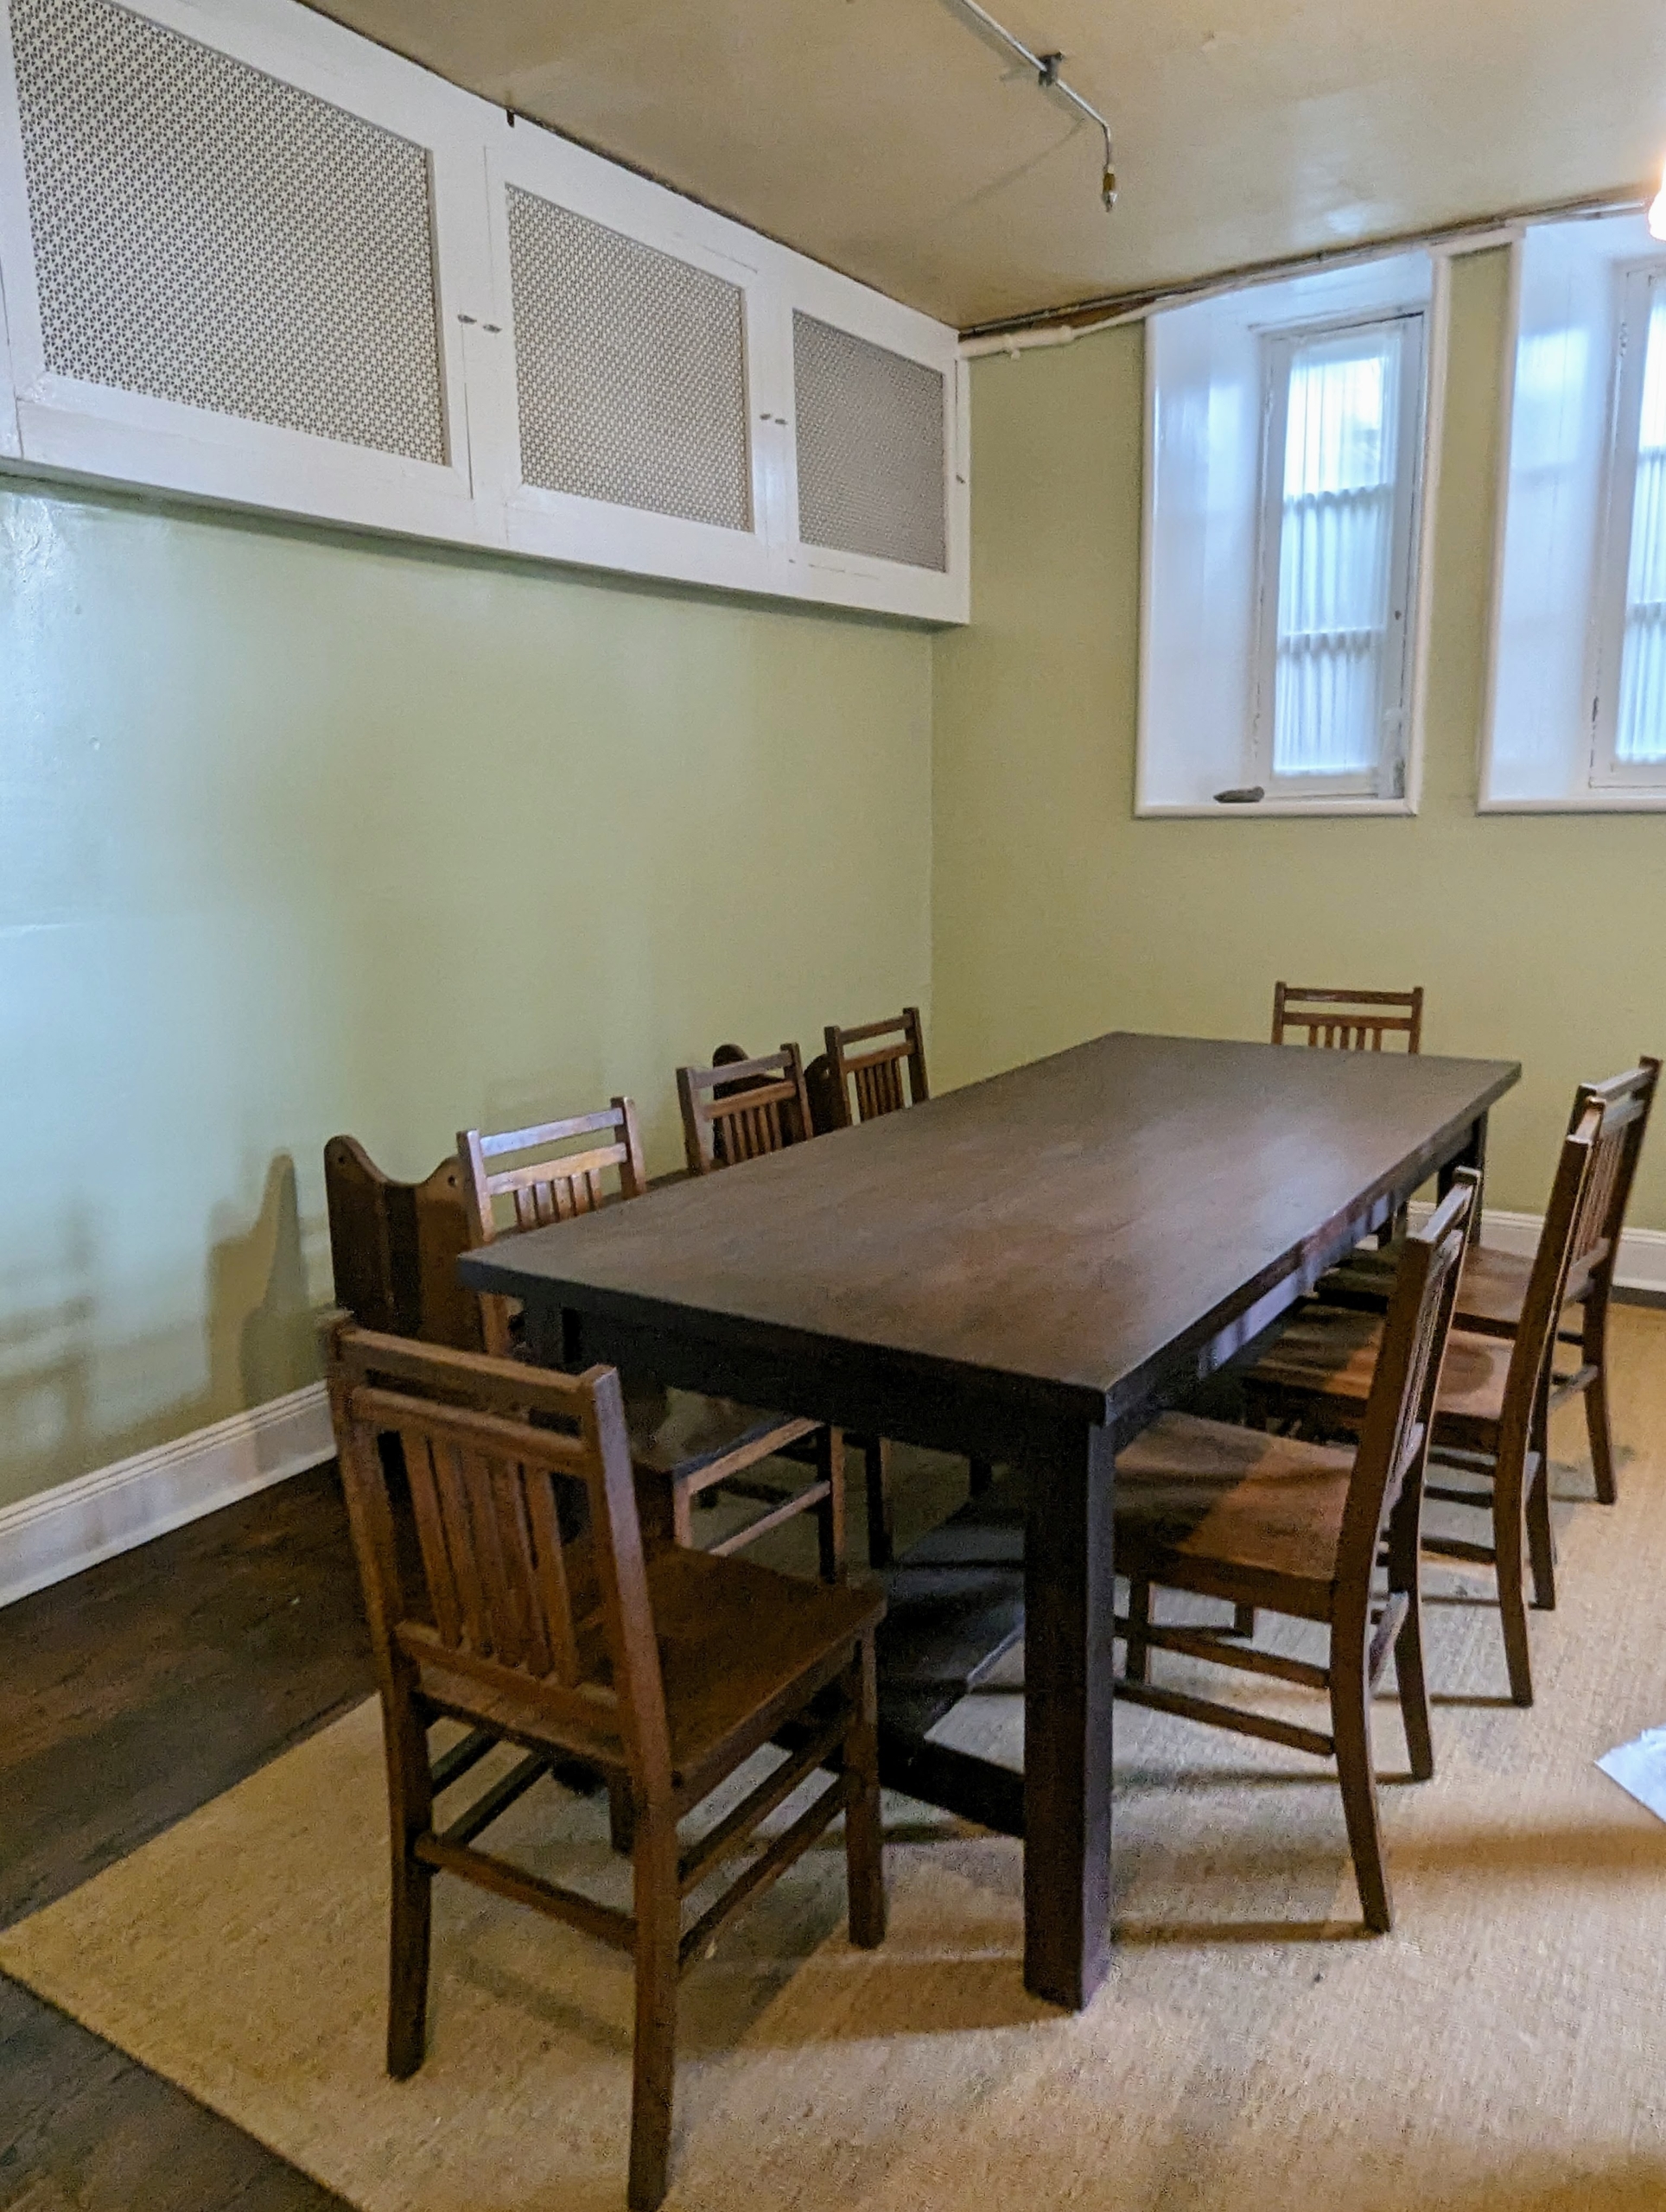
Staff would gather and eat at this table – it was a dream to work in a kitchen like this one in its time.
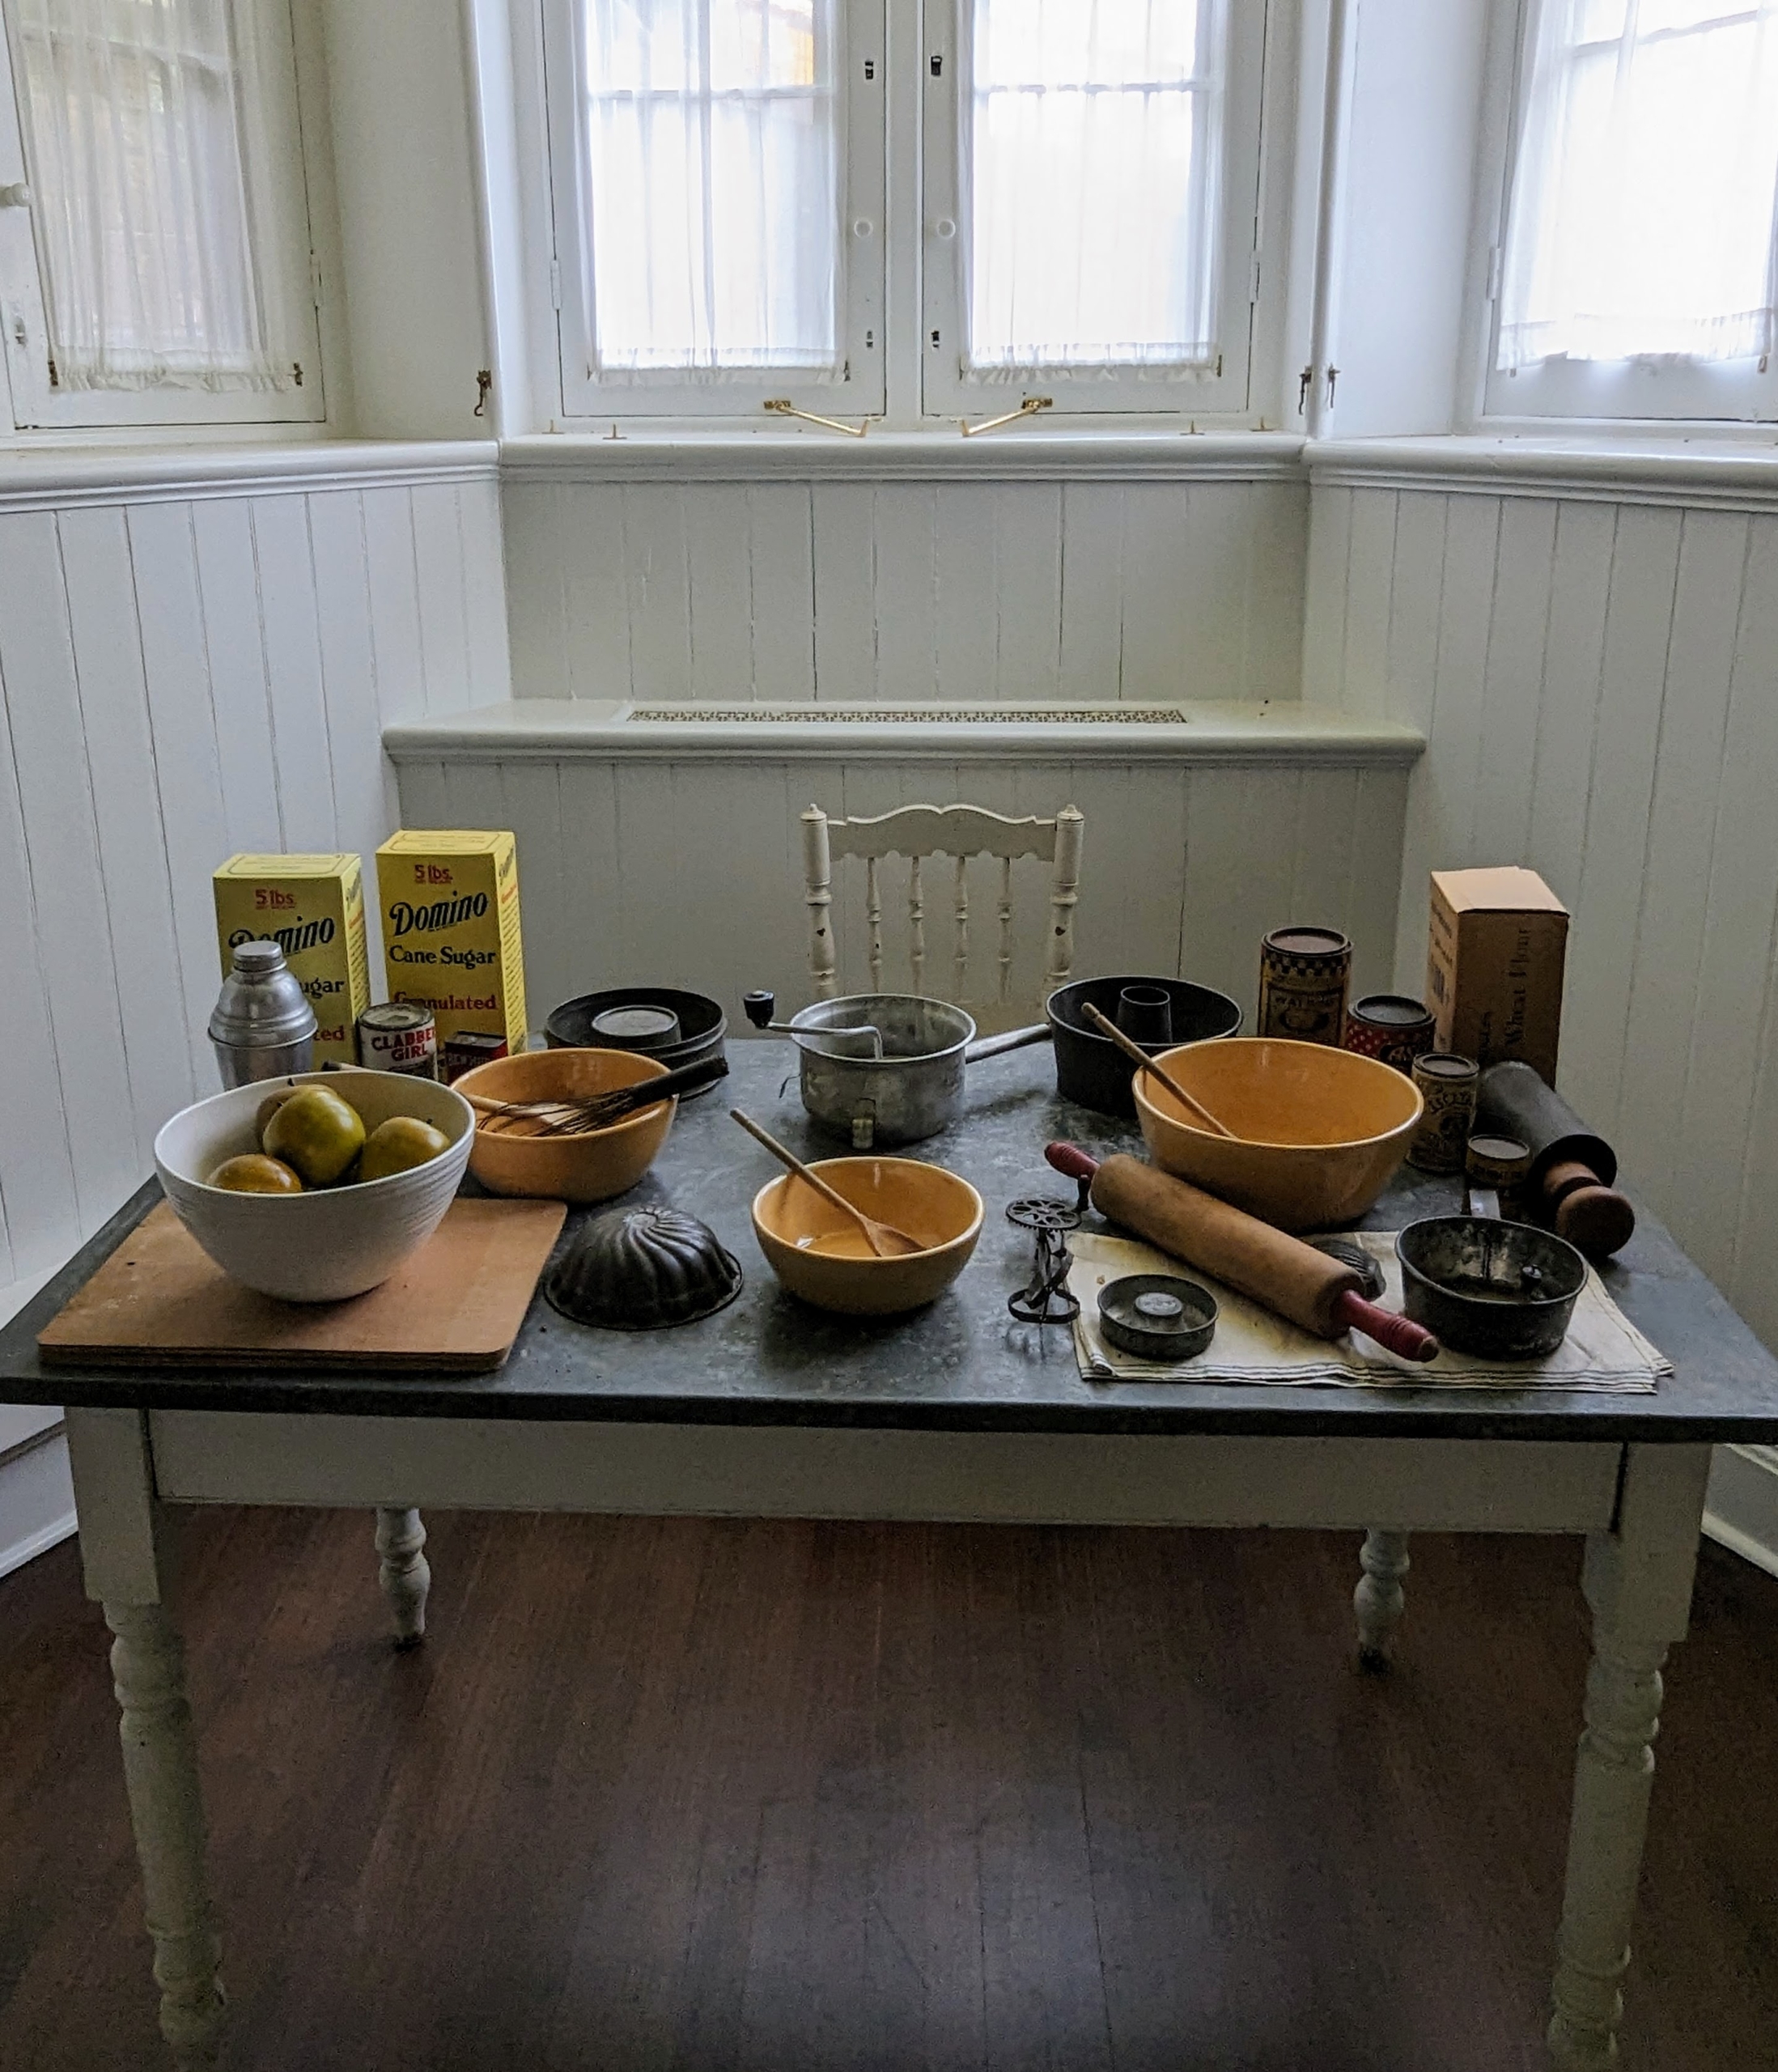
Various tables are filled with types of items possibly used during that era.
Just outside the kitchen is where pickling and preserving was done.
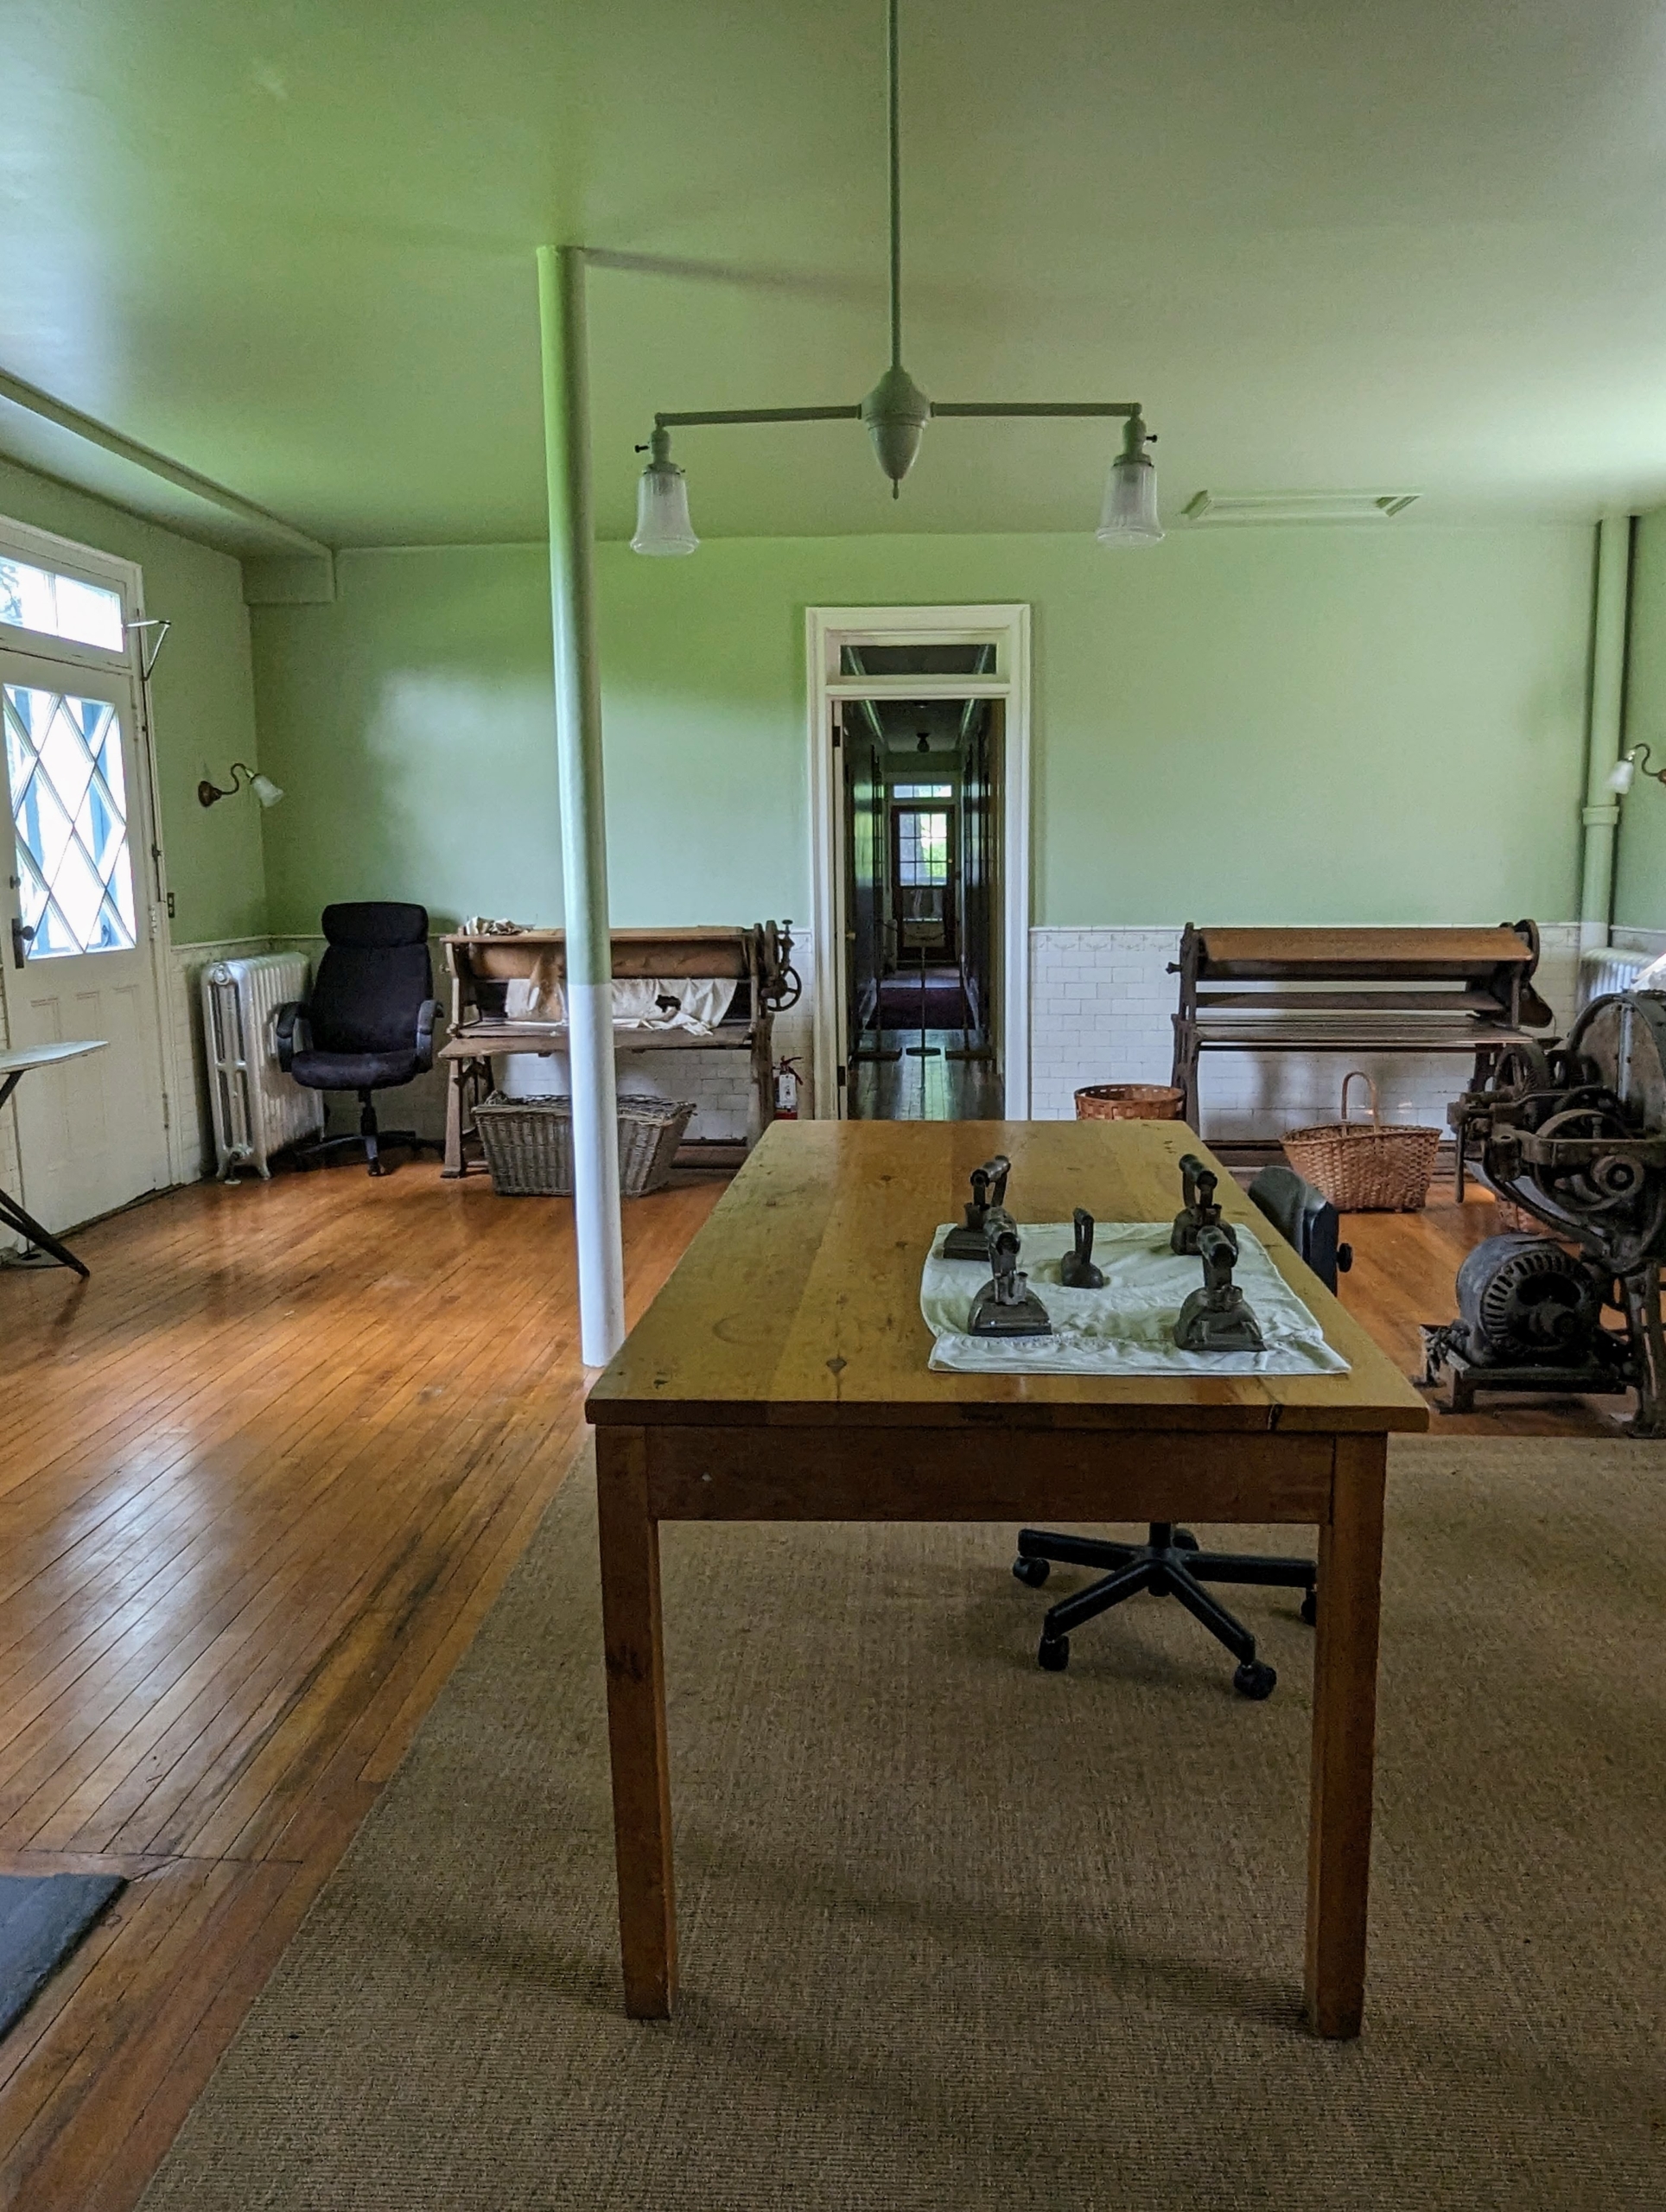
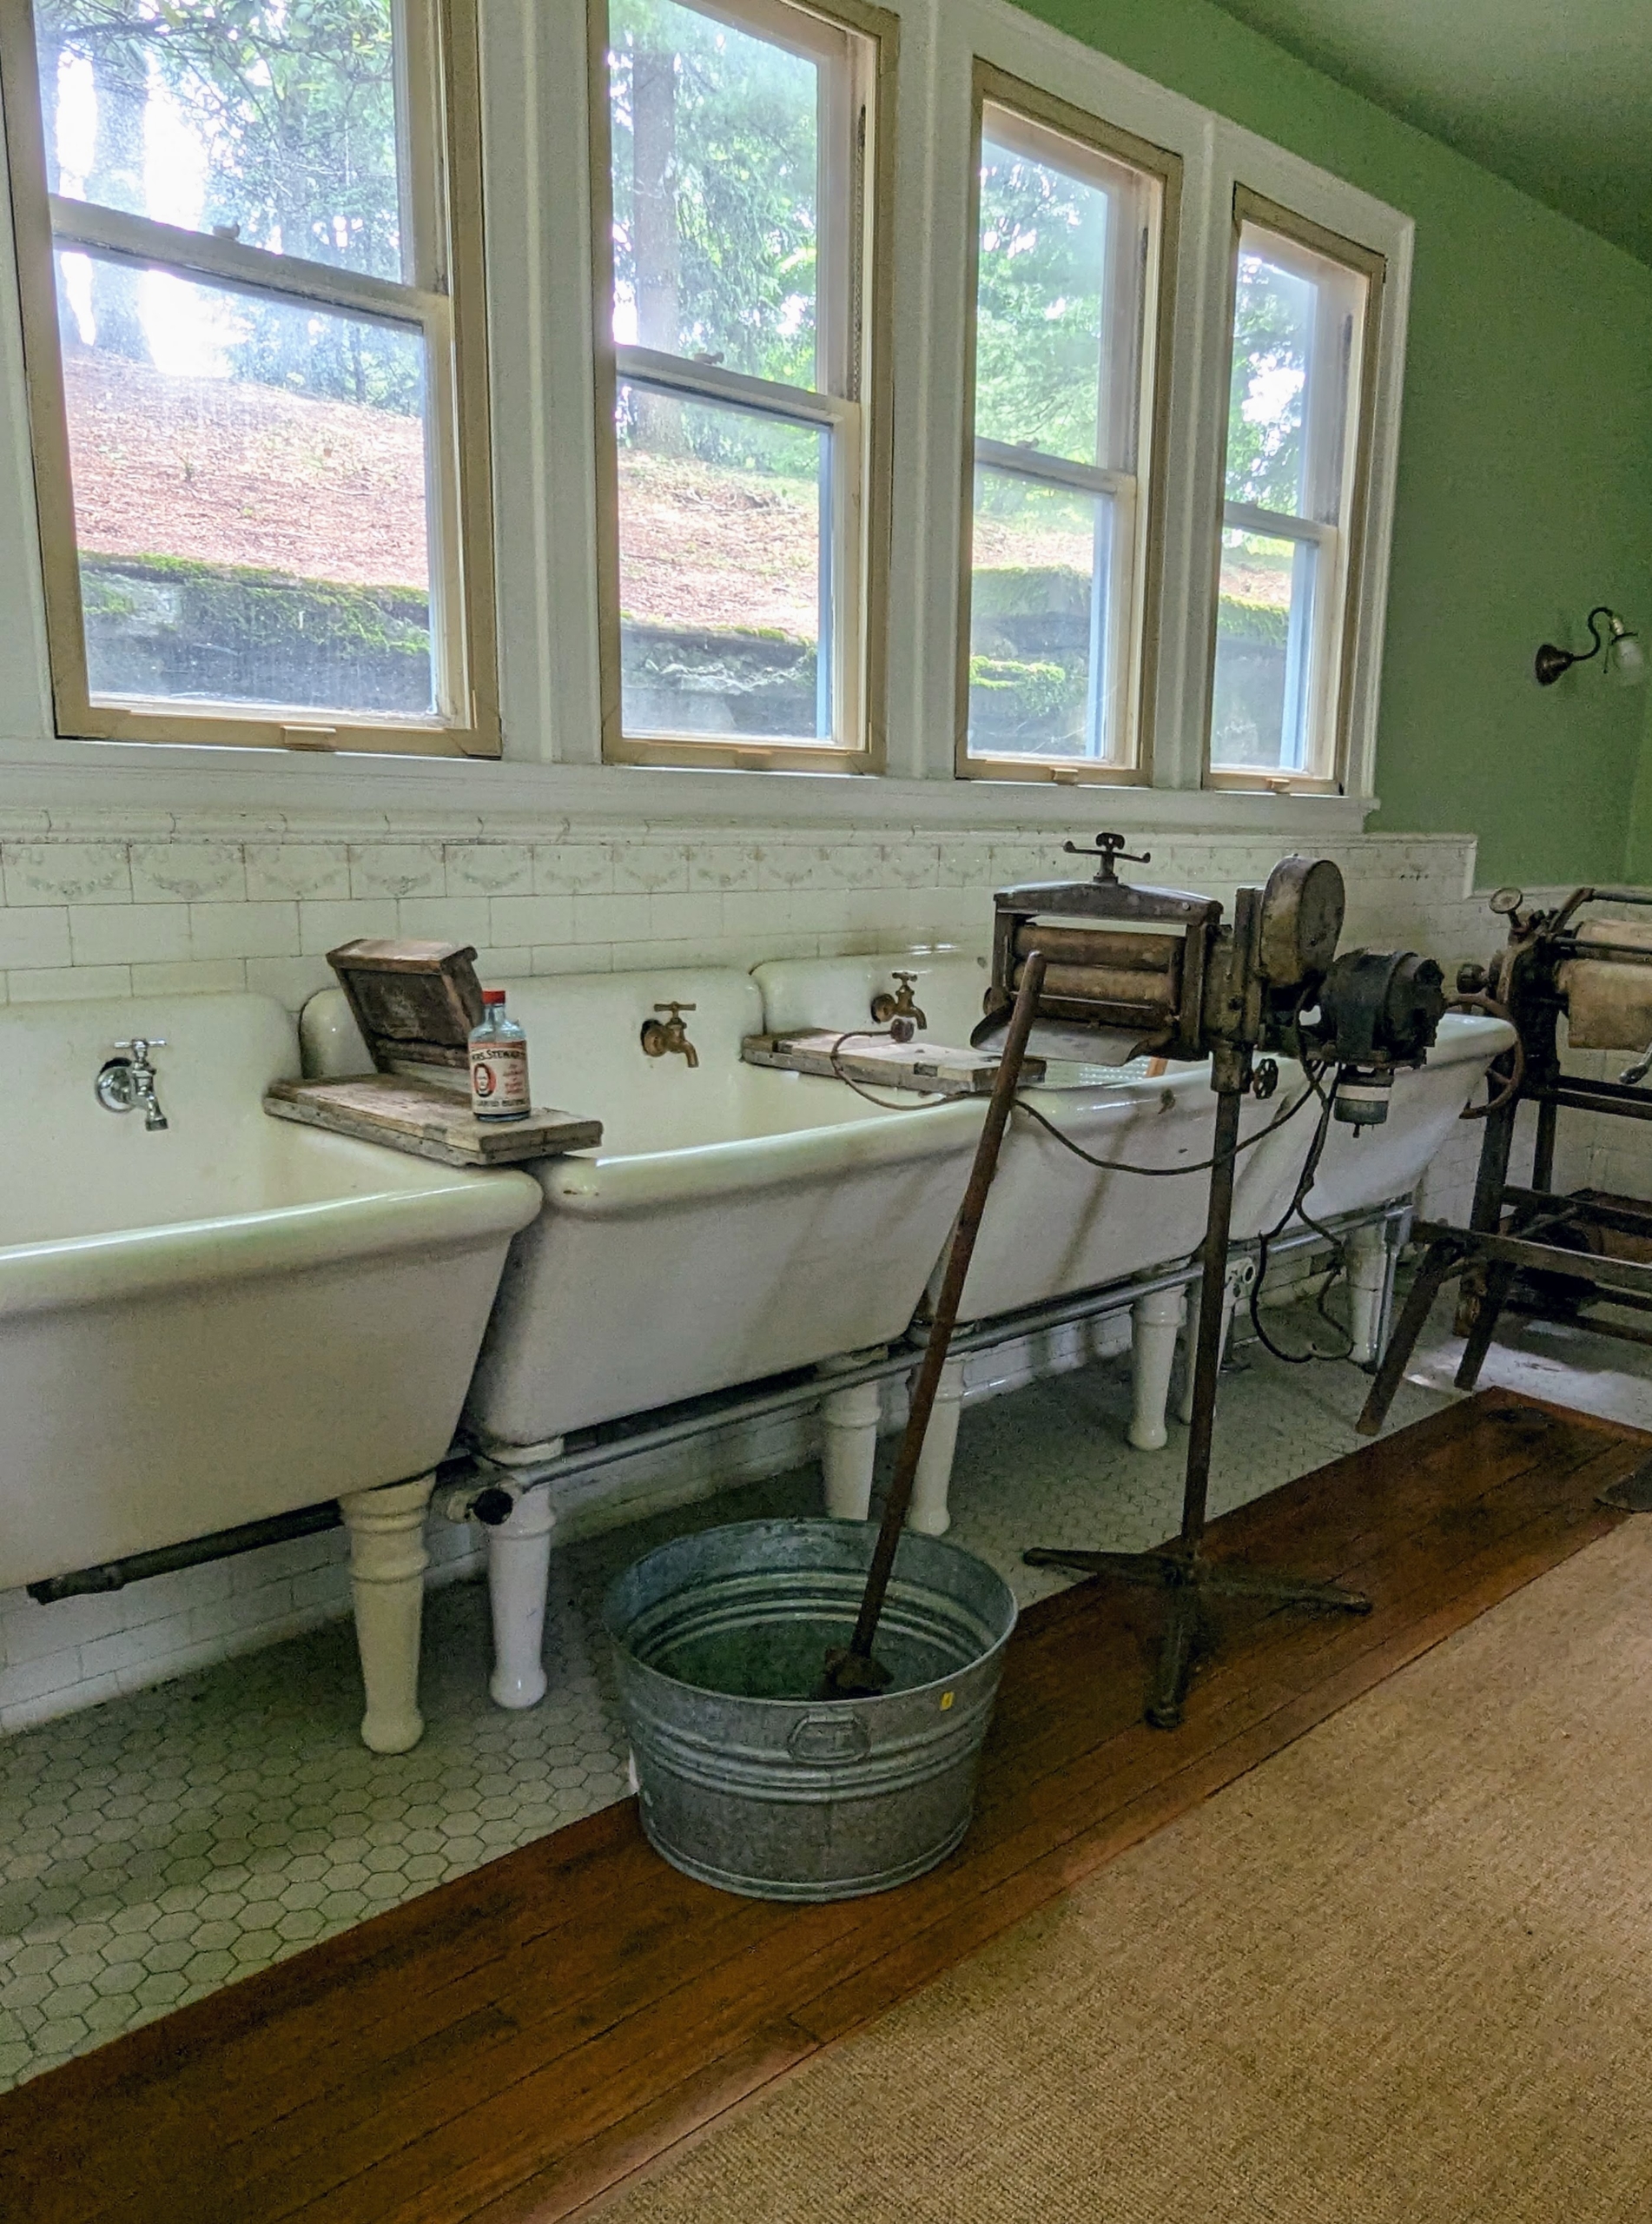
And across the carriage road is the Laundry Building, where the housekeeping staff would wash, iron and mend cloth items.
This wall is lined with large, deep sinks for washing delicates.
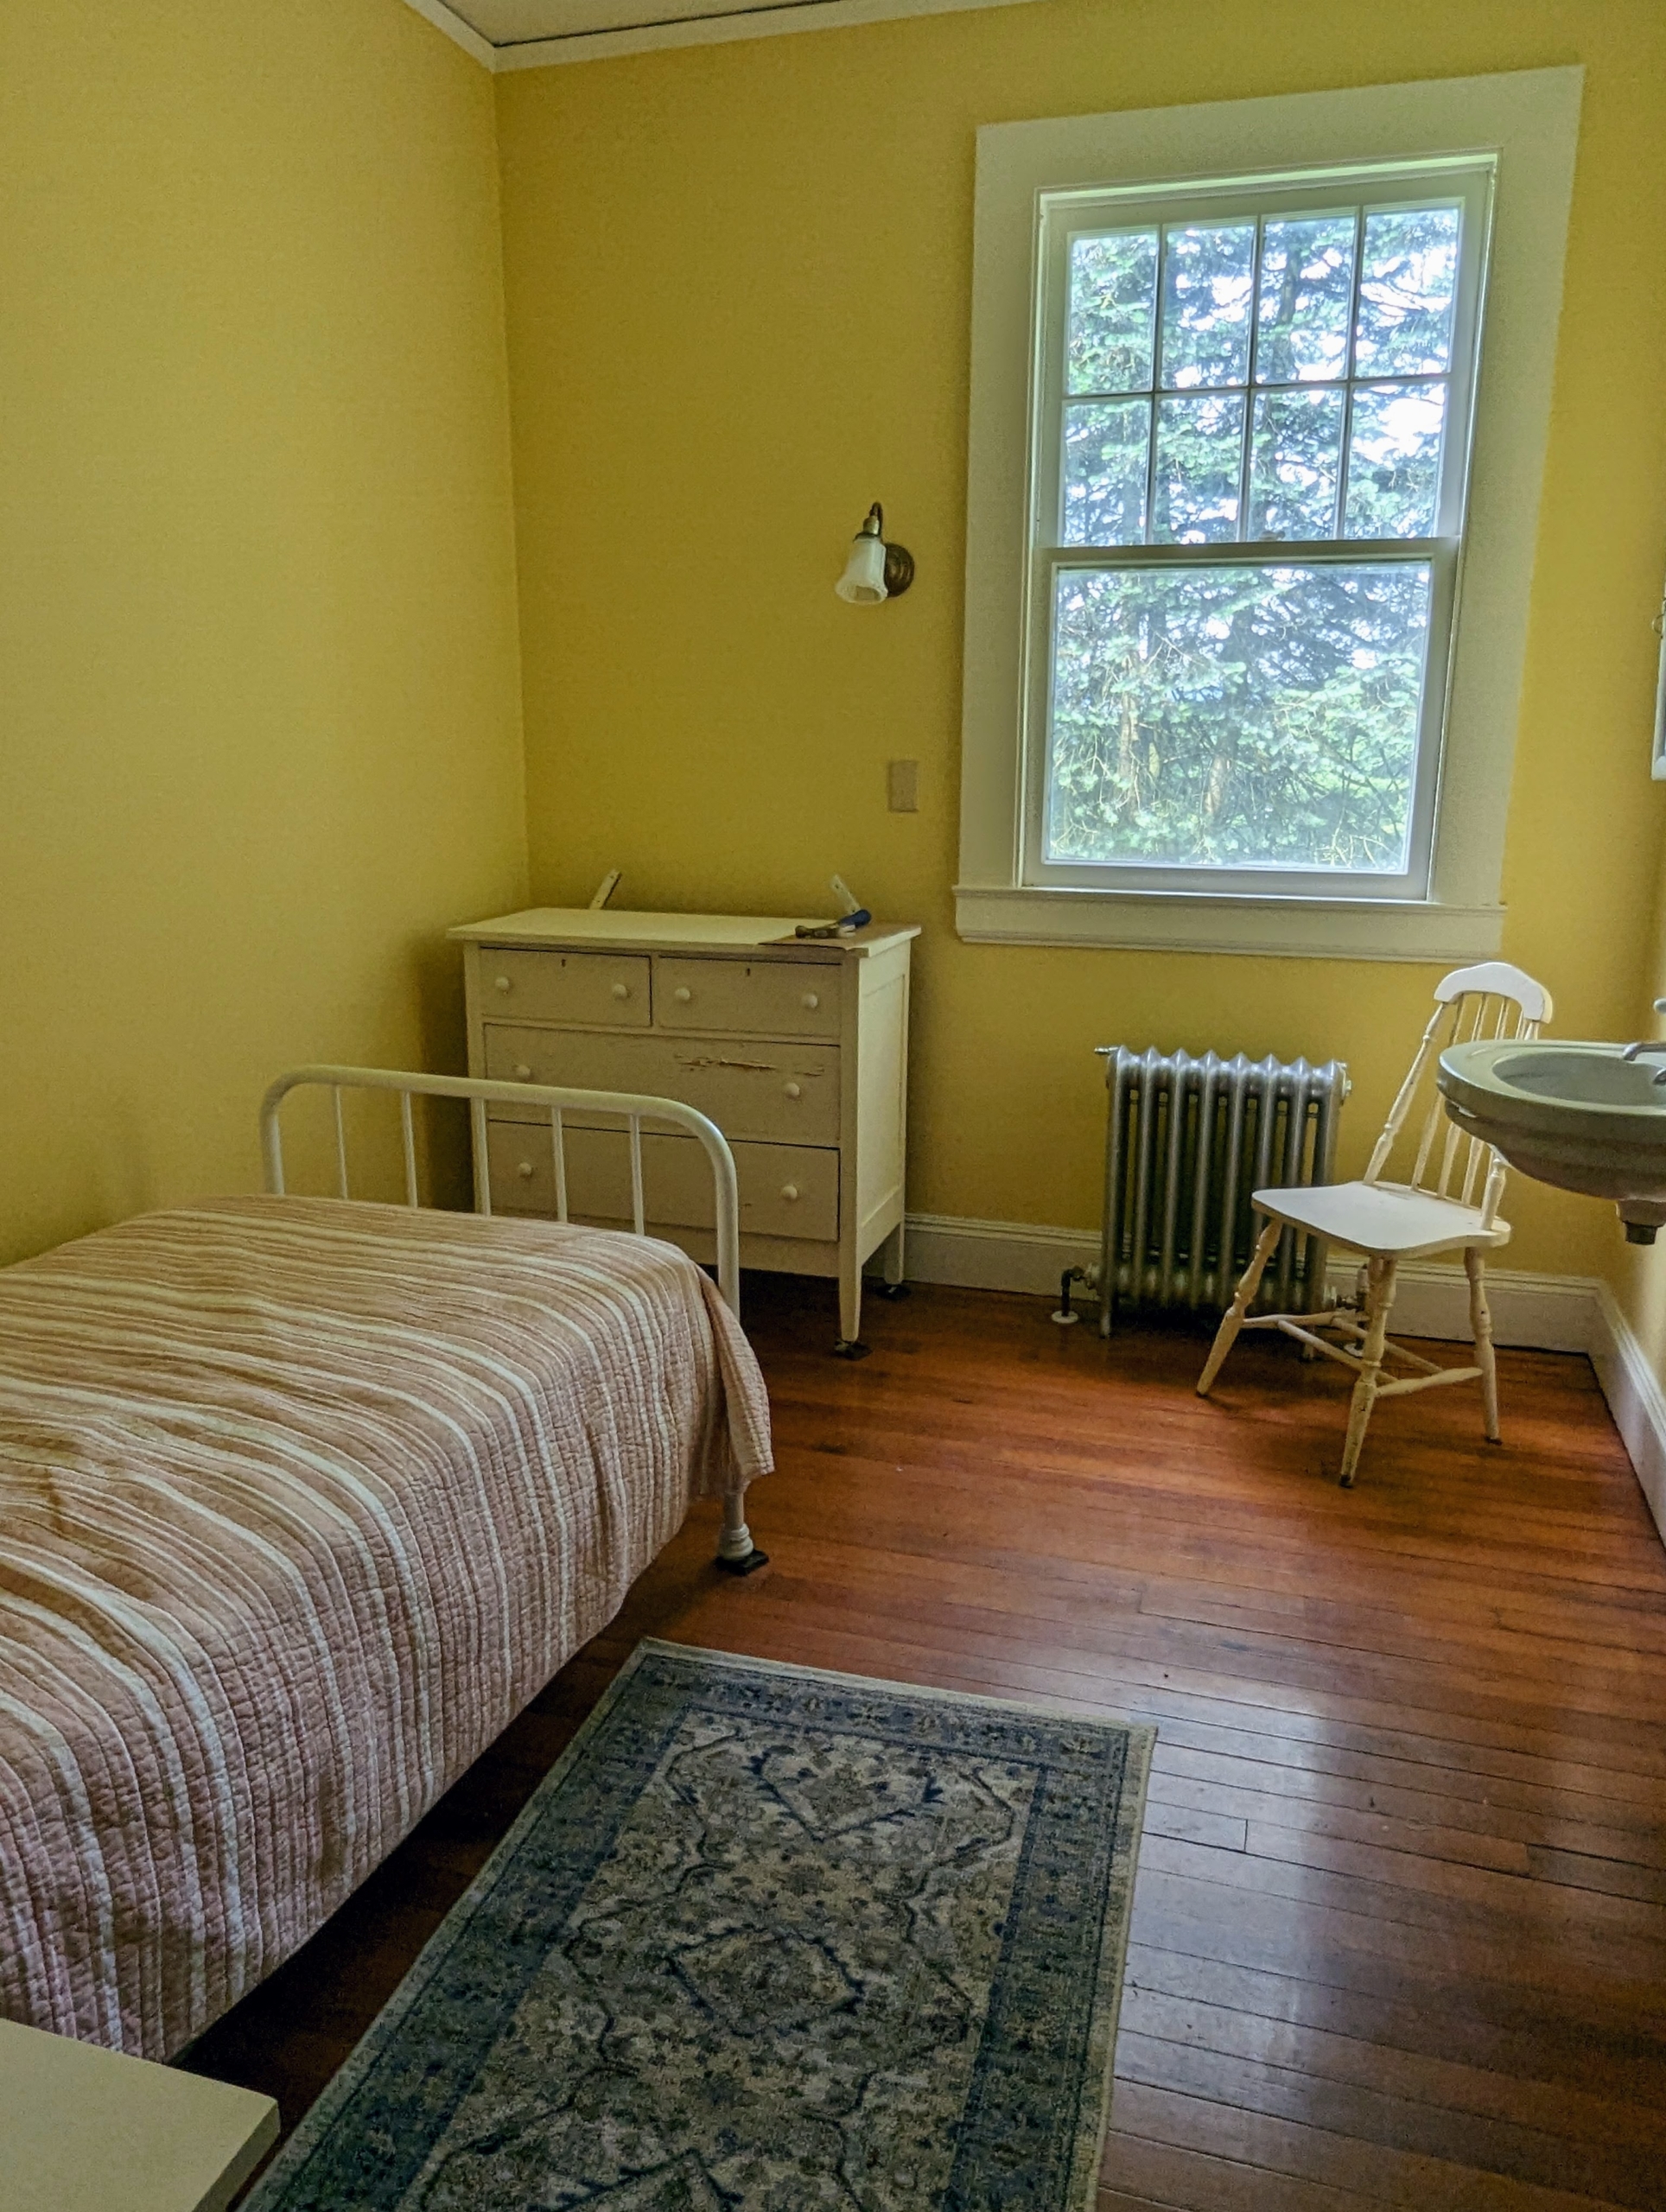
The servants’ rooms were also rather spacious. This one was likely occupied by the head of staff – it includes a bed, a small sitting area and a private bathroom.
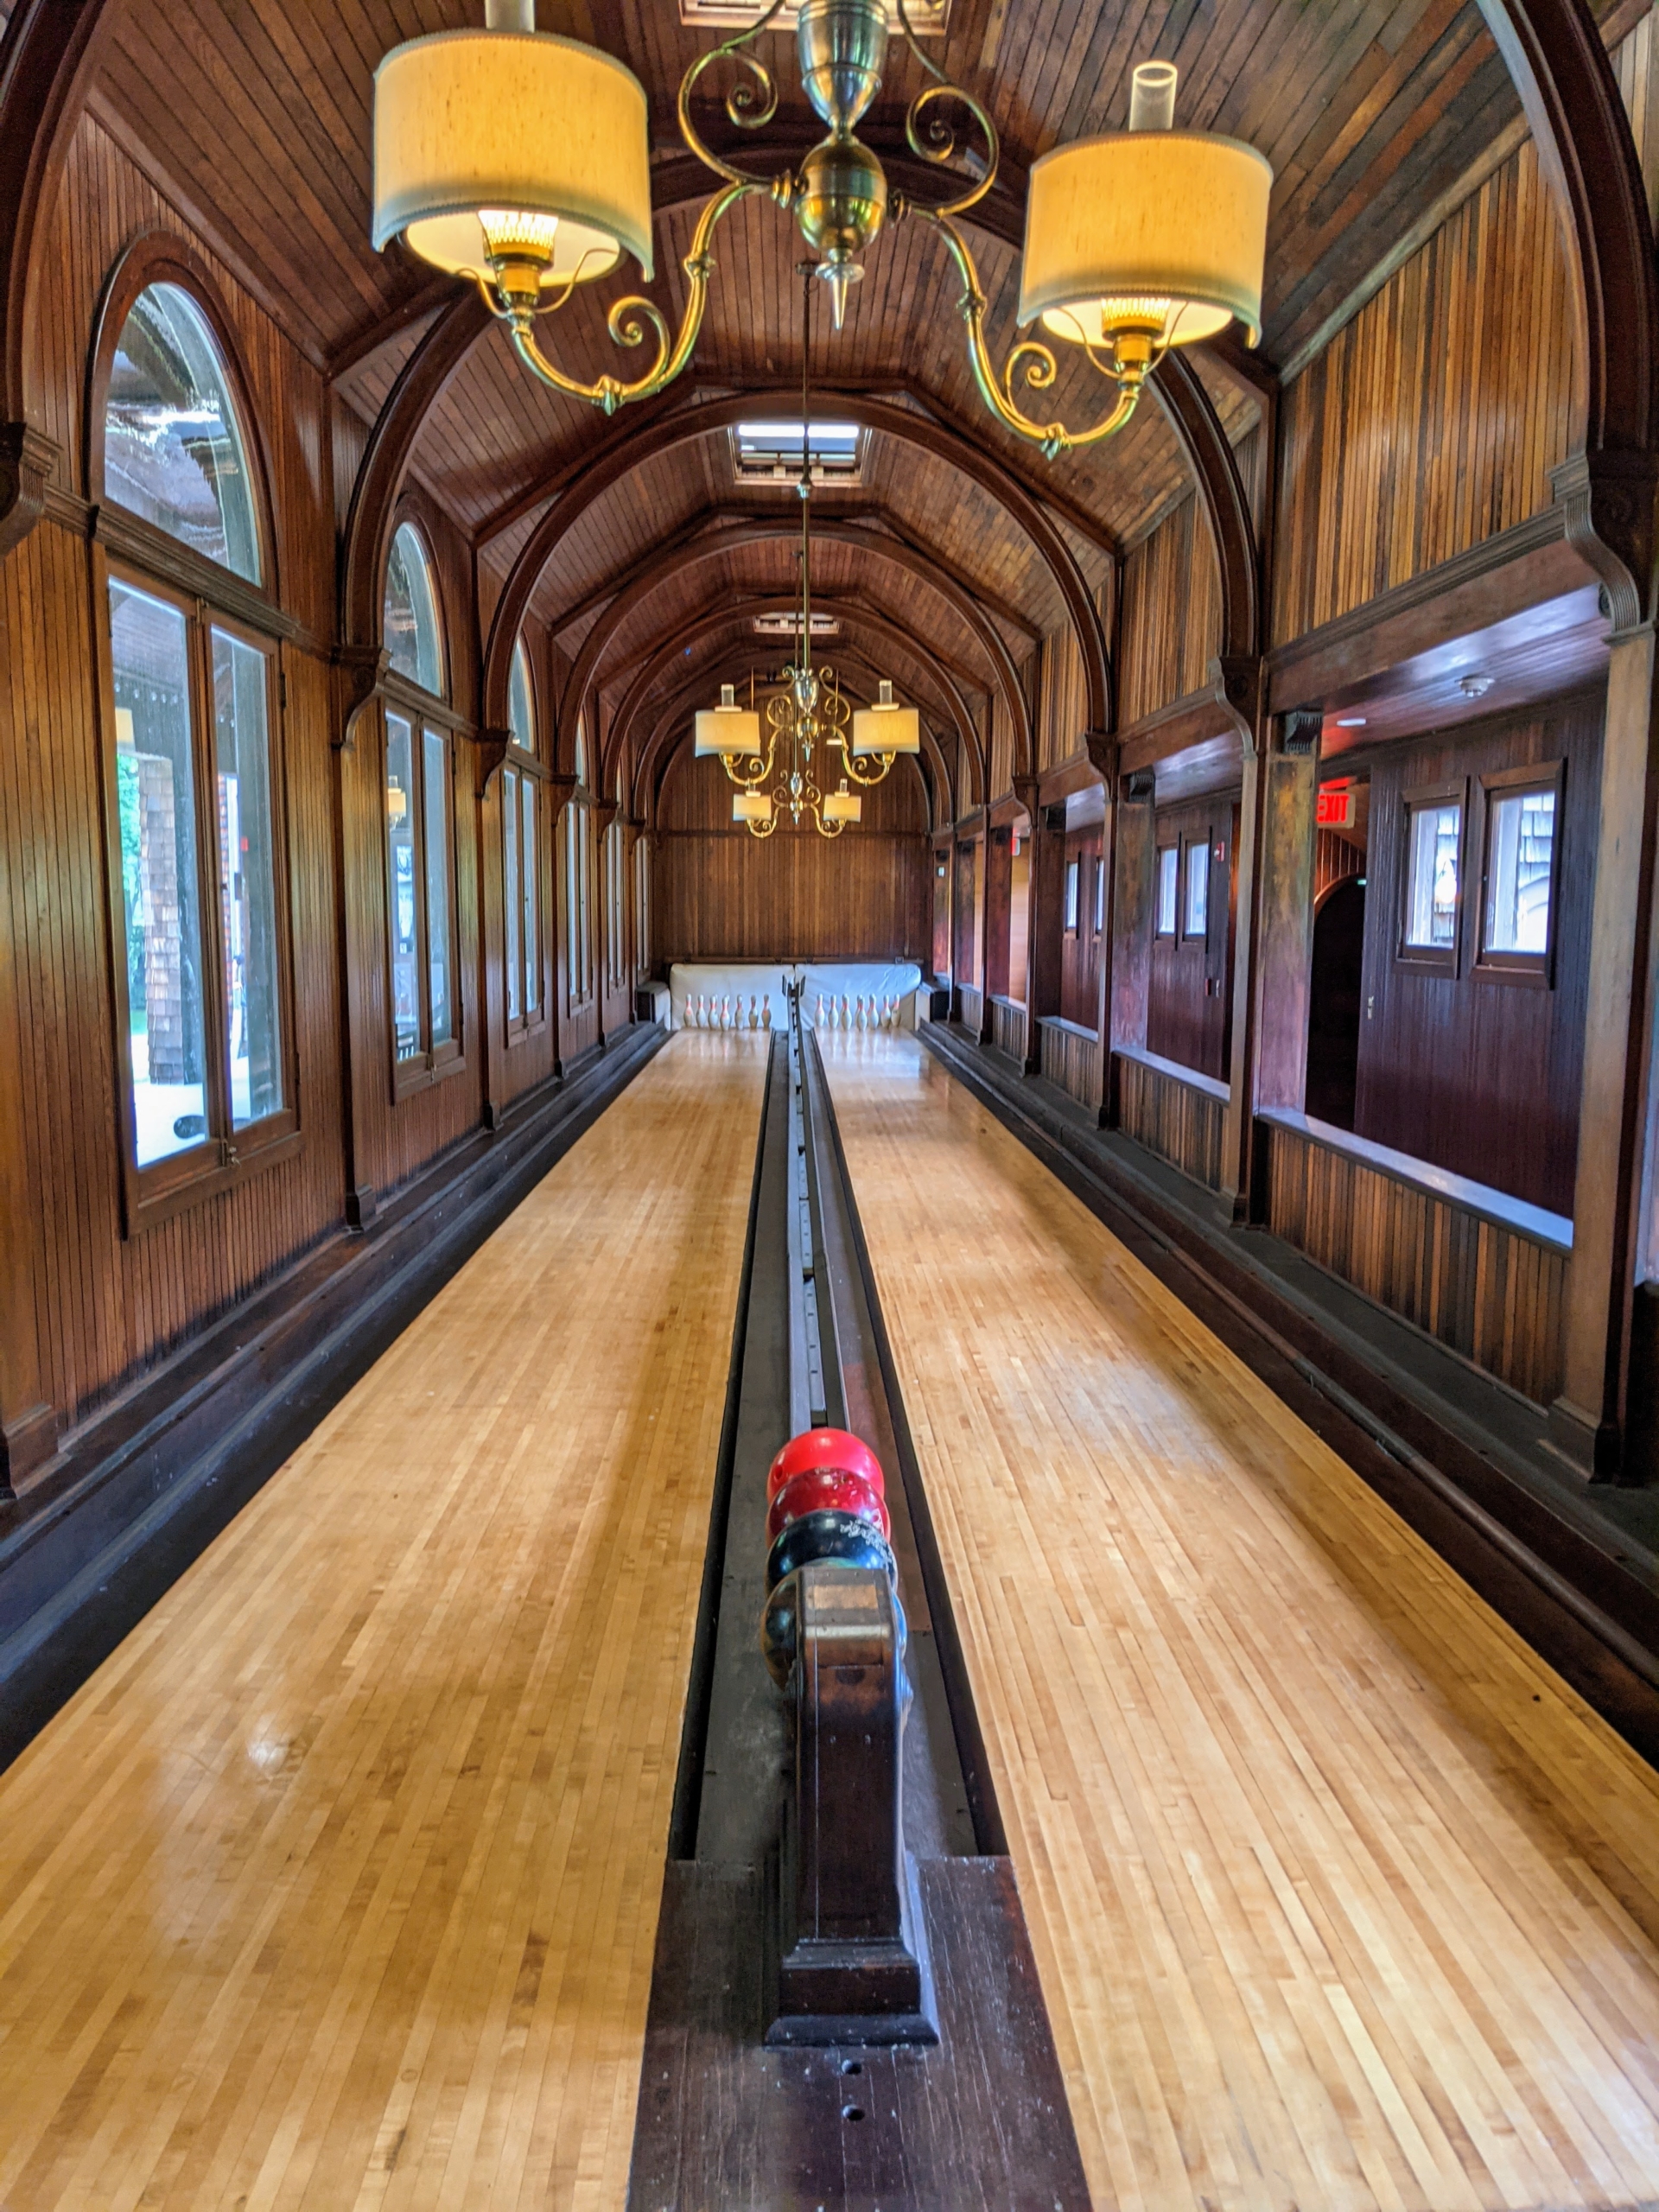
And not far from the main house is the Bowling Alley, one of the earliest bowling lanes in the United States. Anna Gould used the bowling alley for visiting soldiers during World War II. Although the structure fell into disrepair in the 1950s, it was restored and opened for public tours. The building was also used as a school where local women could learn sewing and other skills.
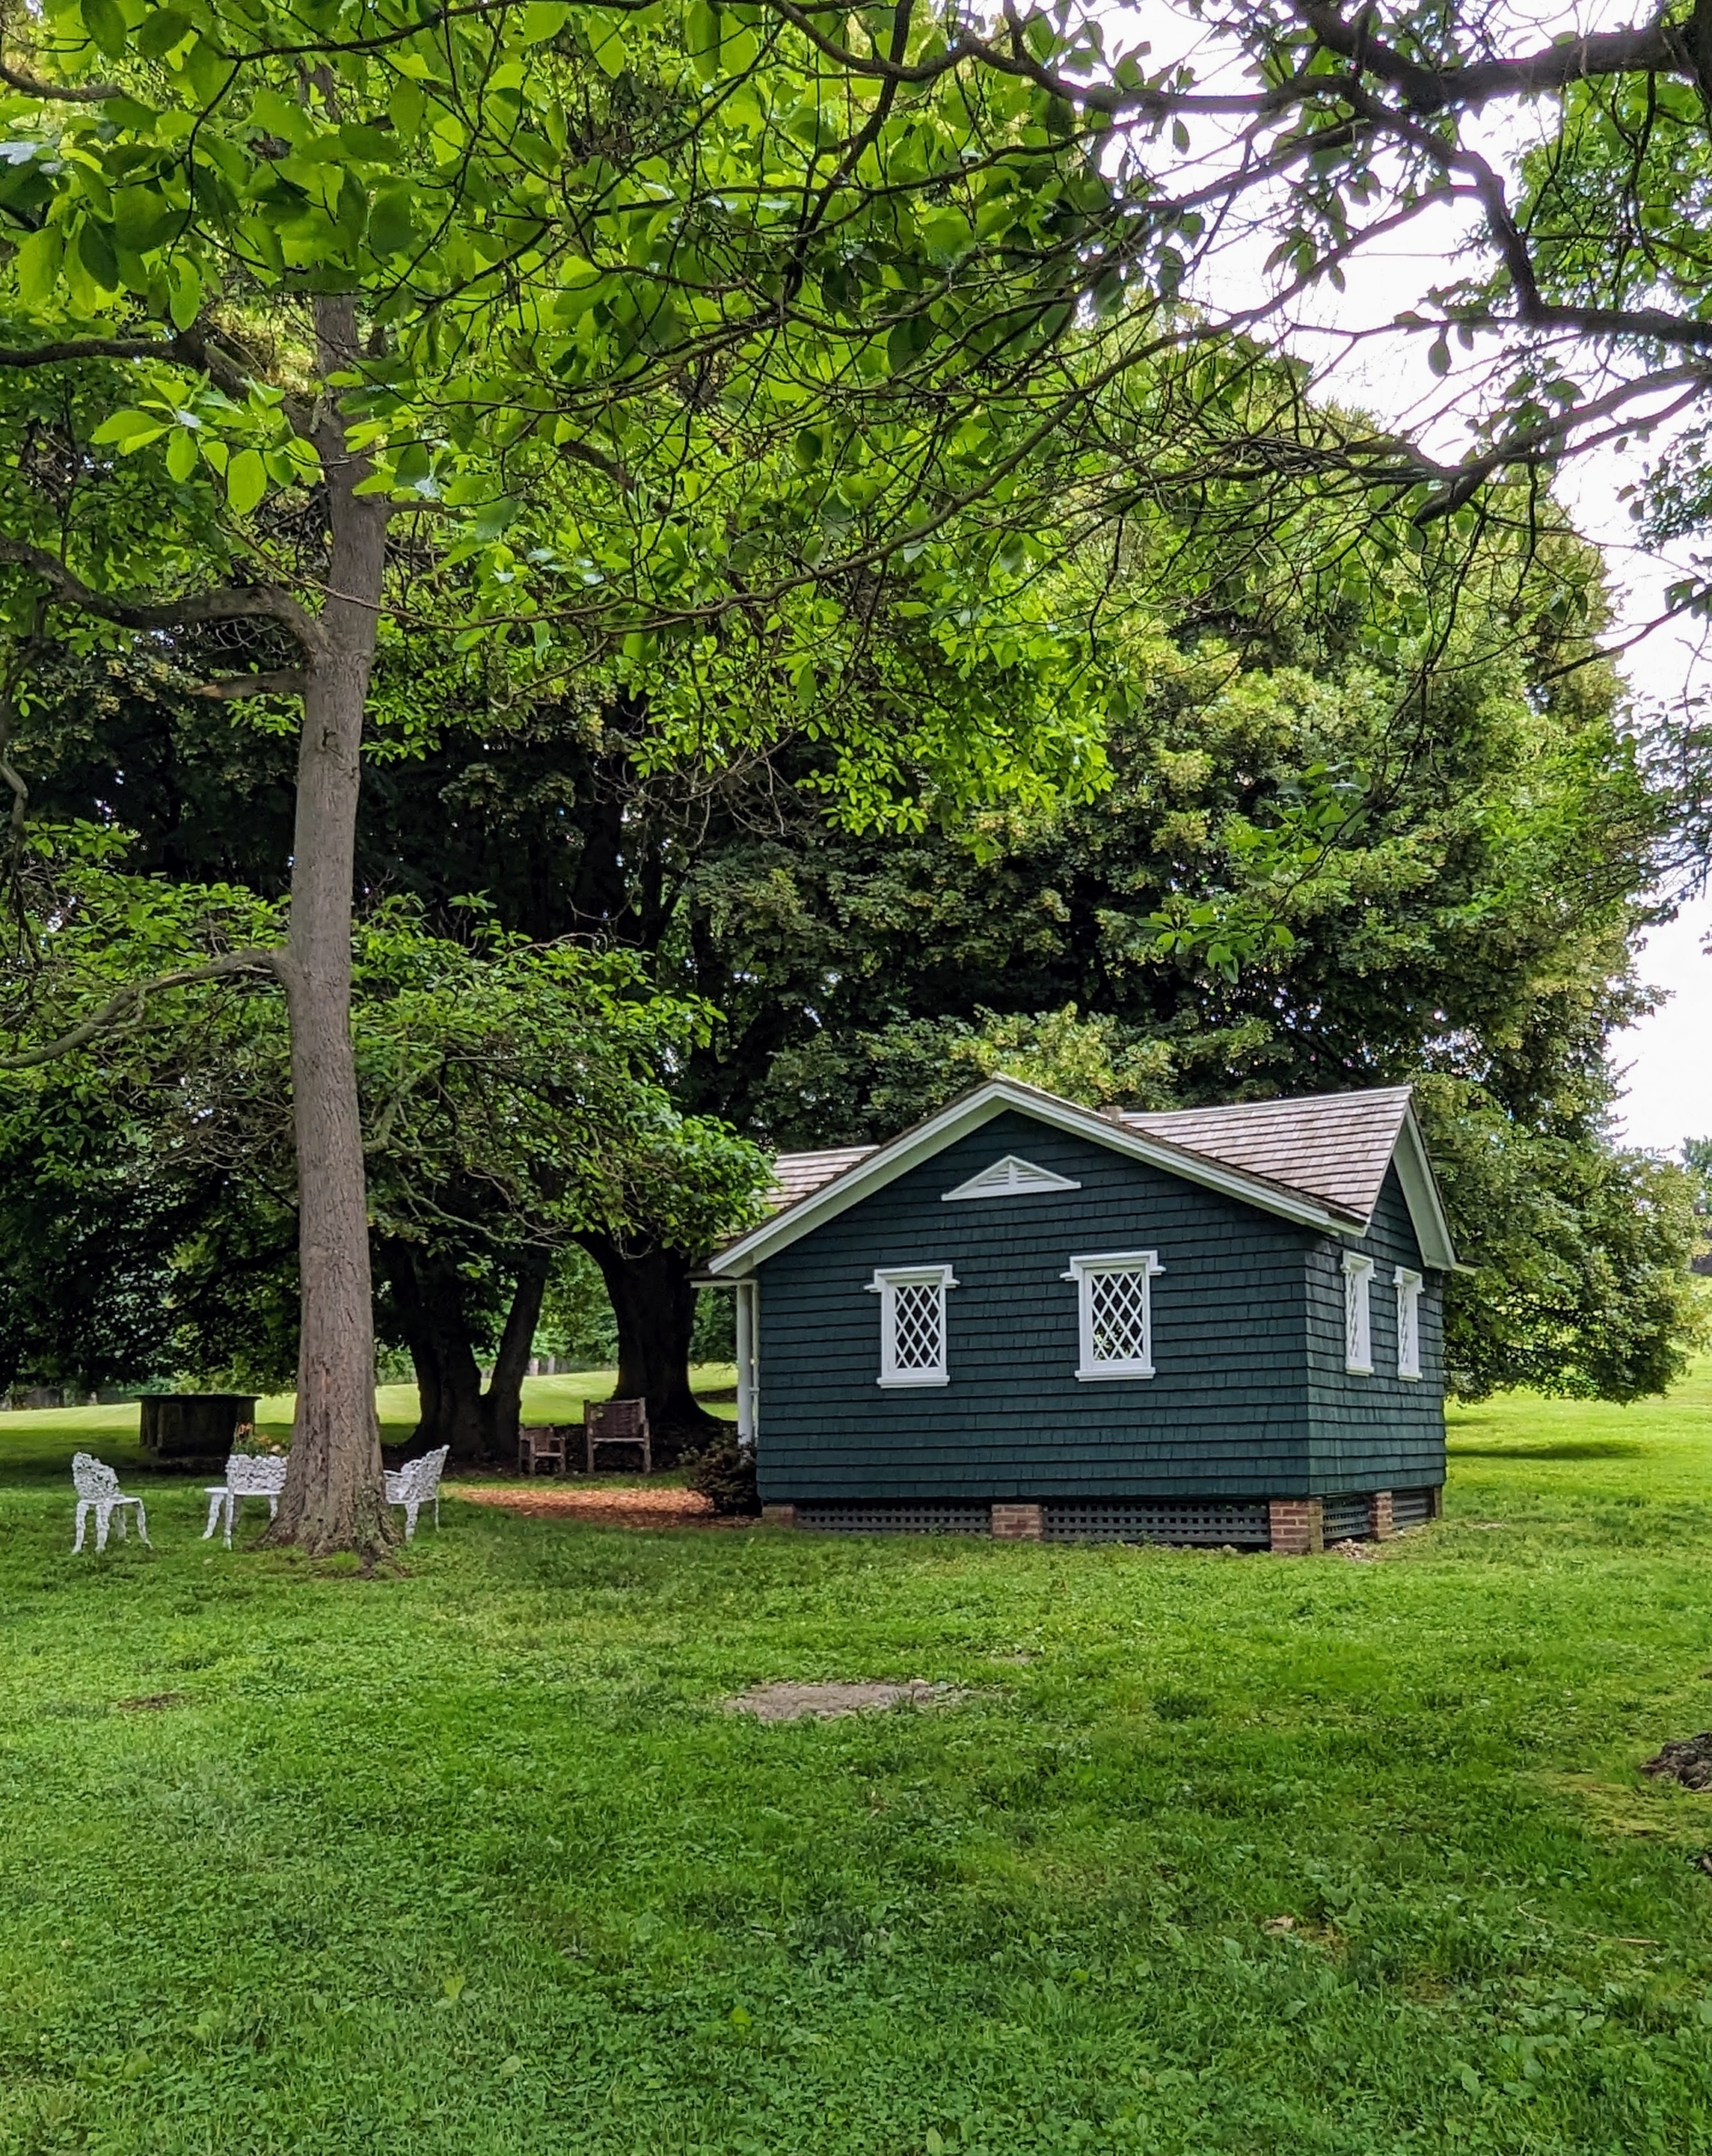
Here is the children’s playhouse, the Rose Cottage. It is nestled beneath the shade of mature trees just steps from the main house.
Inside there was full sized furniture where the children could rest after playing in the warm summer sun.
Here is the cottage from afar. The entire Lyndhurst estate is a wonderful and picturesque escape from the busy city – still as beautiful now as it was in the 1800s. Please visit the next time you are in the area. You can learn more about Lyndhurst on their web site at lyndhurst.org.