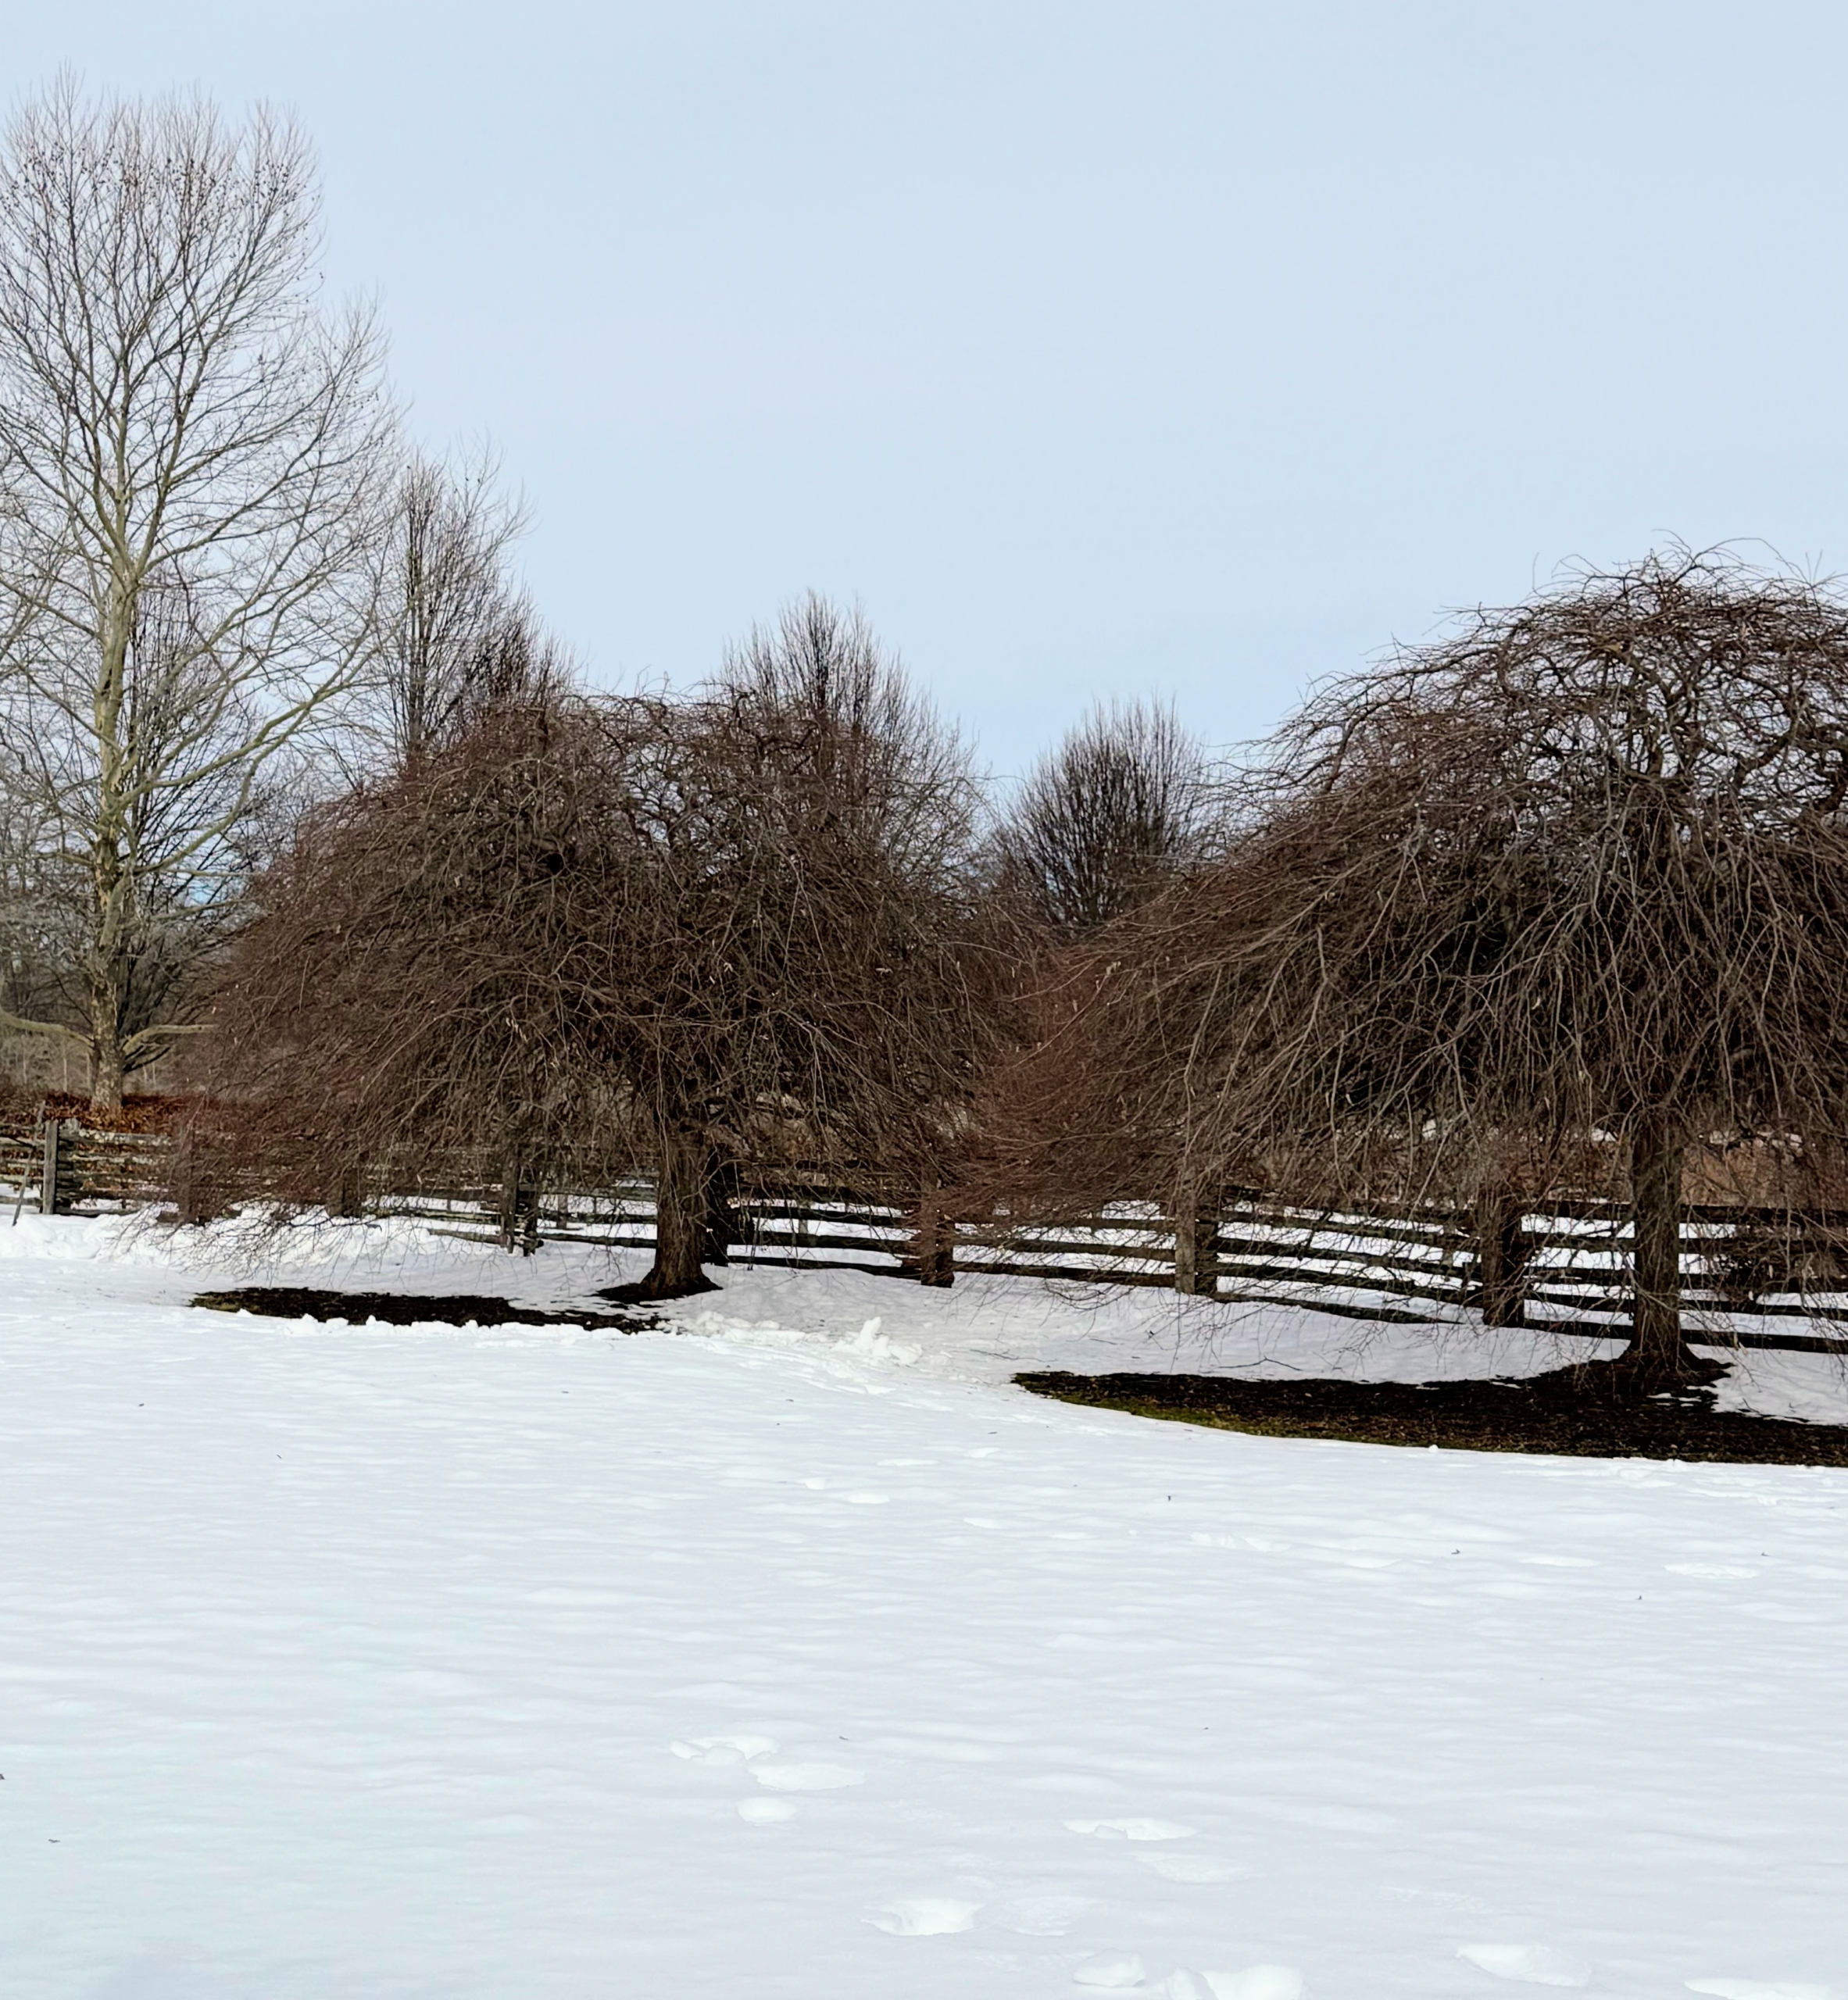
Outdoor winter chores continue at my farm with the grooming of six standard weeping hornbeams.
Even though there's still snow on the ground, the mild weather is allowing us to get lots of outdoor work completed. The team from The Arborist, Inc. in nearby Bedford Hills, New York took on the task of lightly pruning and grooming my rare weeping hornbeams, Carpinus betulus 'pendula,' that grow on one side of my "party lawn." I keep a close eye on my hornbeams - it’s crucial that they be pruned regularly, so they never look too overgrown and unruly.
Here are some photos, enjoy.
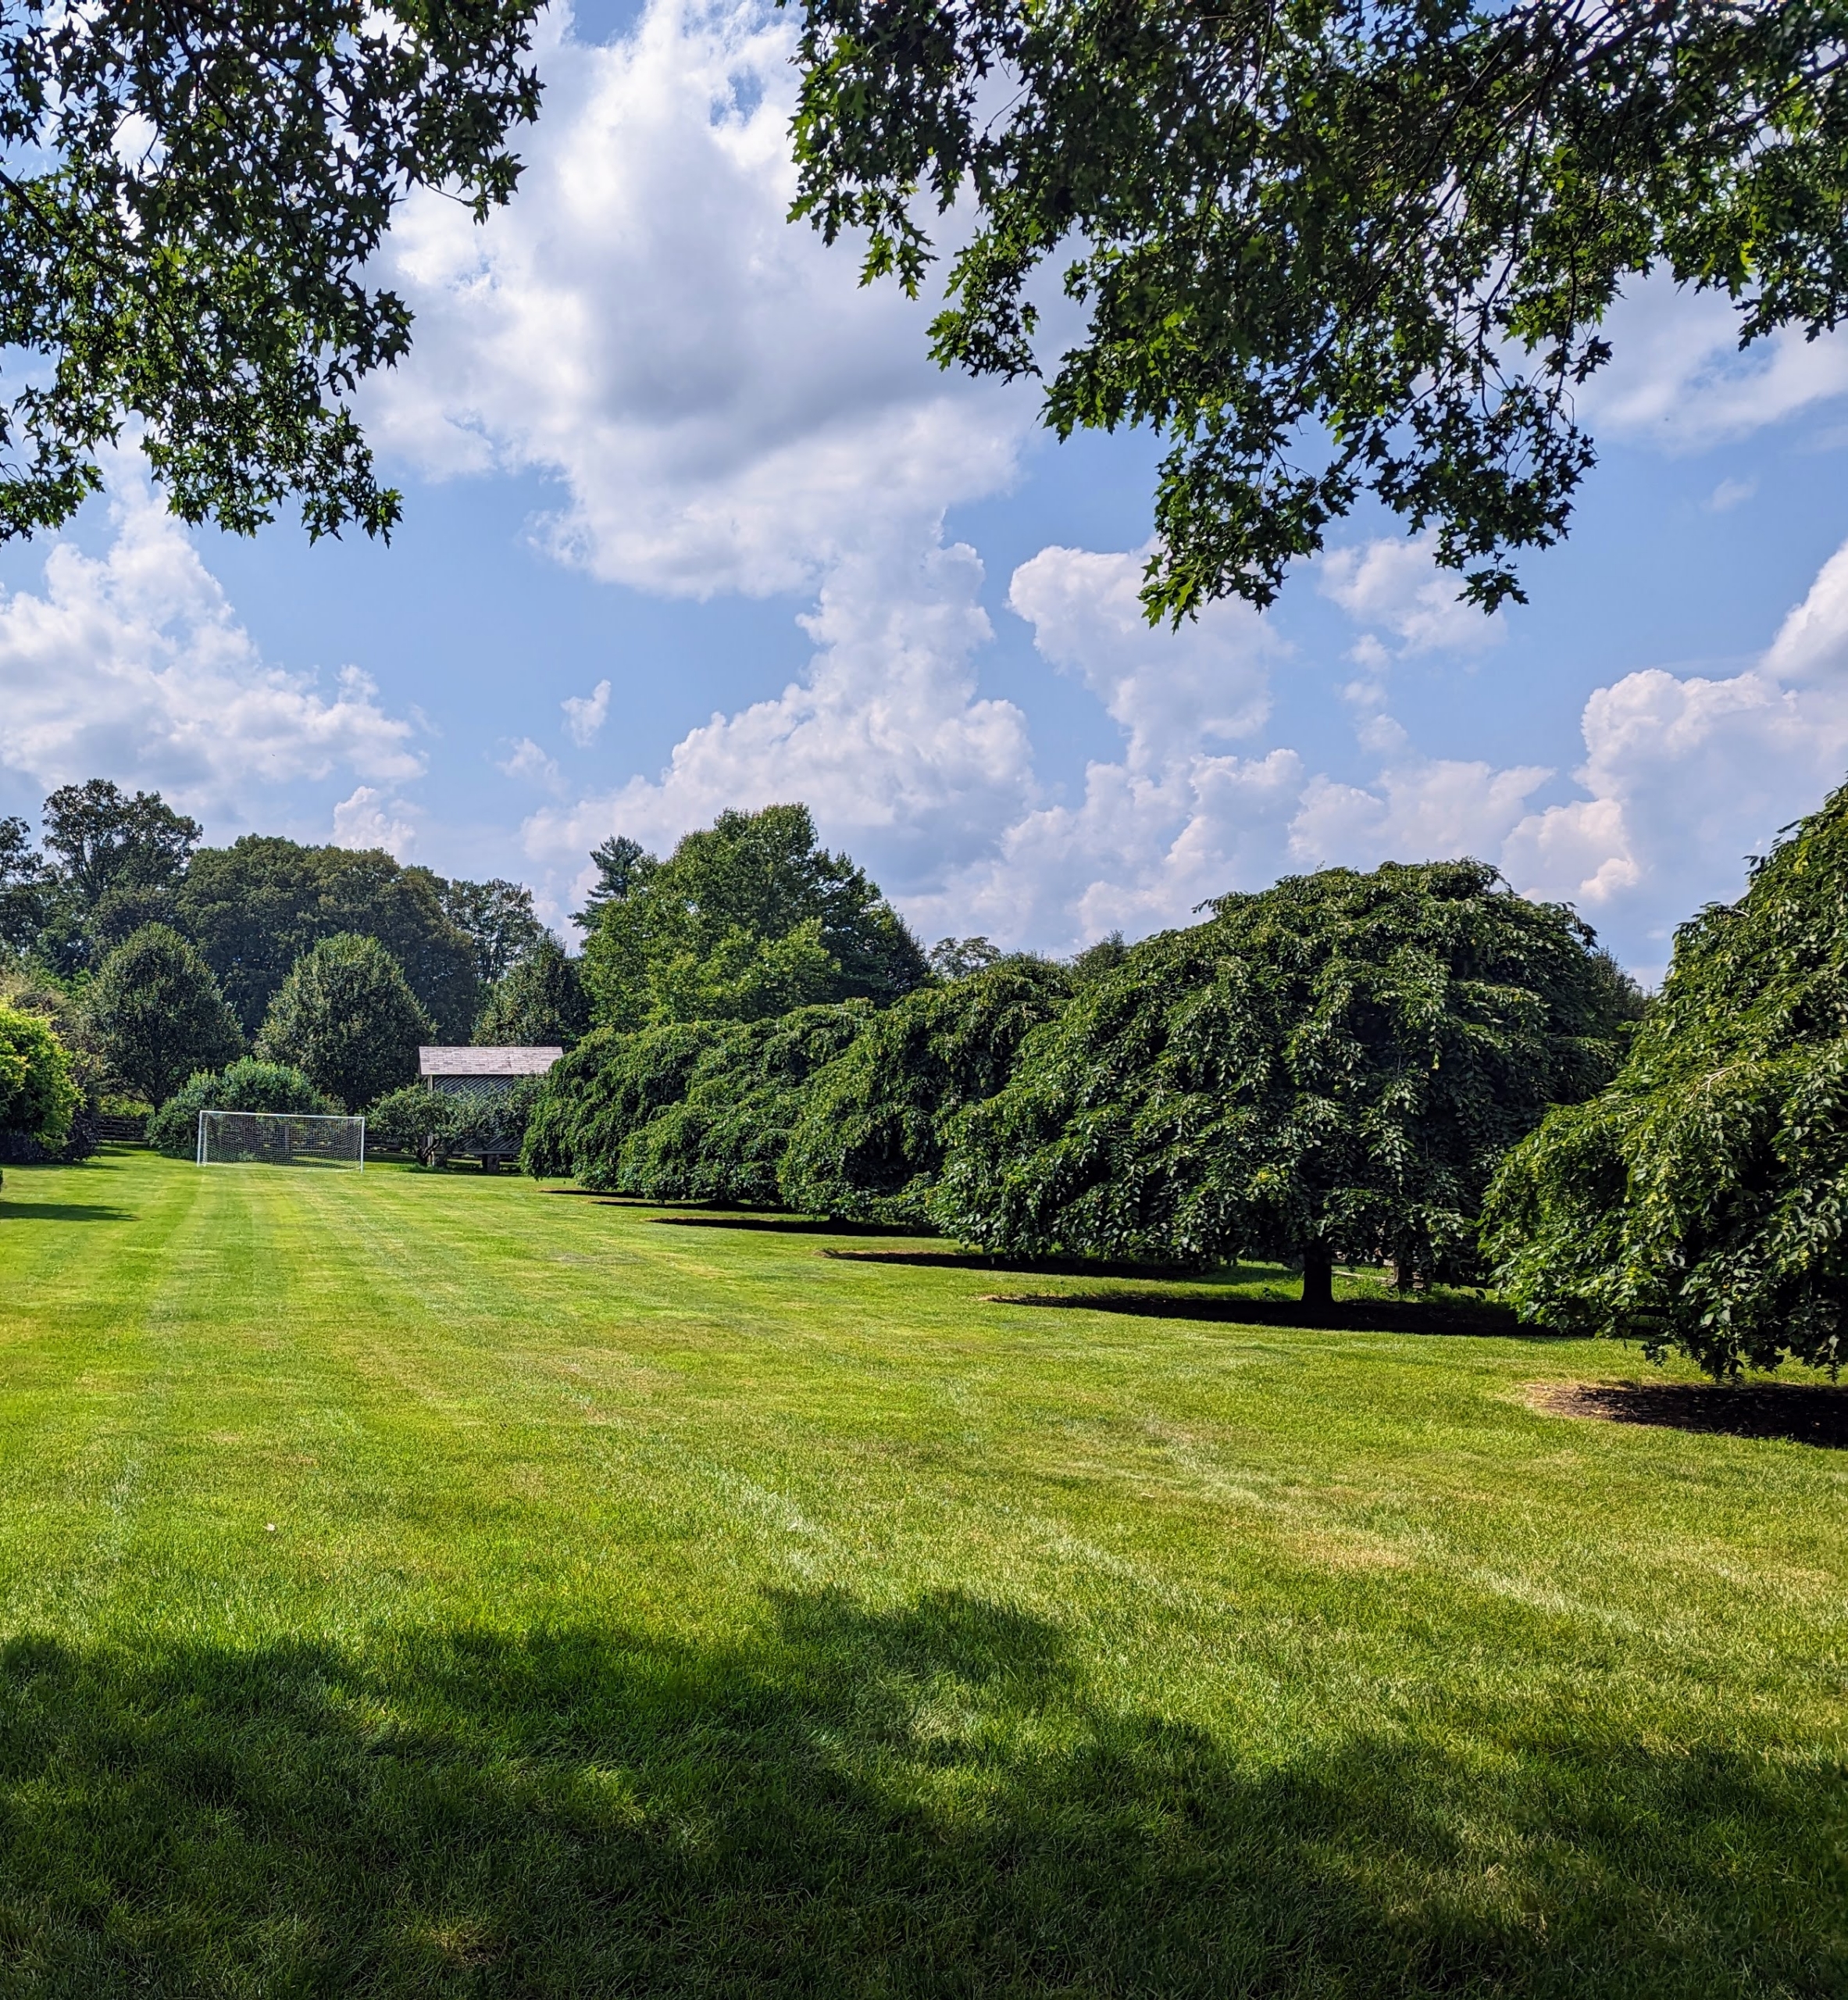
In the area between my orchard and my long pergola are six matched standard weeping hornbeams, Carpinus betulus ‘Pendula’. These are very precious trees and I am so happy they continue to grow well here.
Here they are lush green with foliage in summer. Carpinus betulus ‘Pendula’ is a dense tree with a strong center, a shapely form and gracefully arching branches.
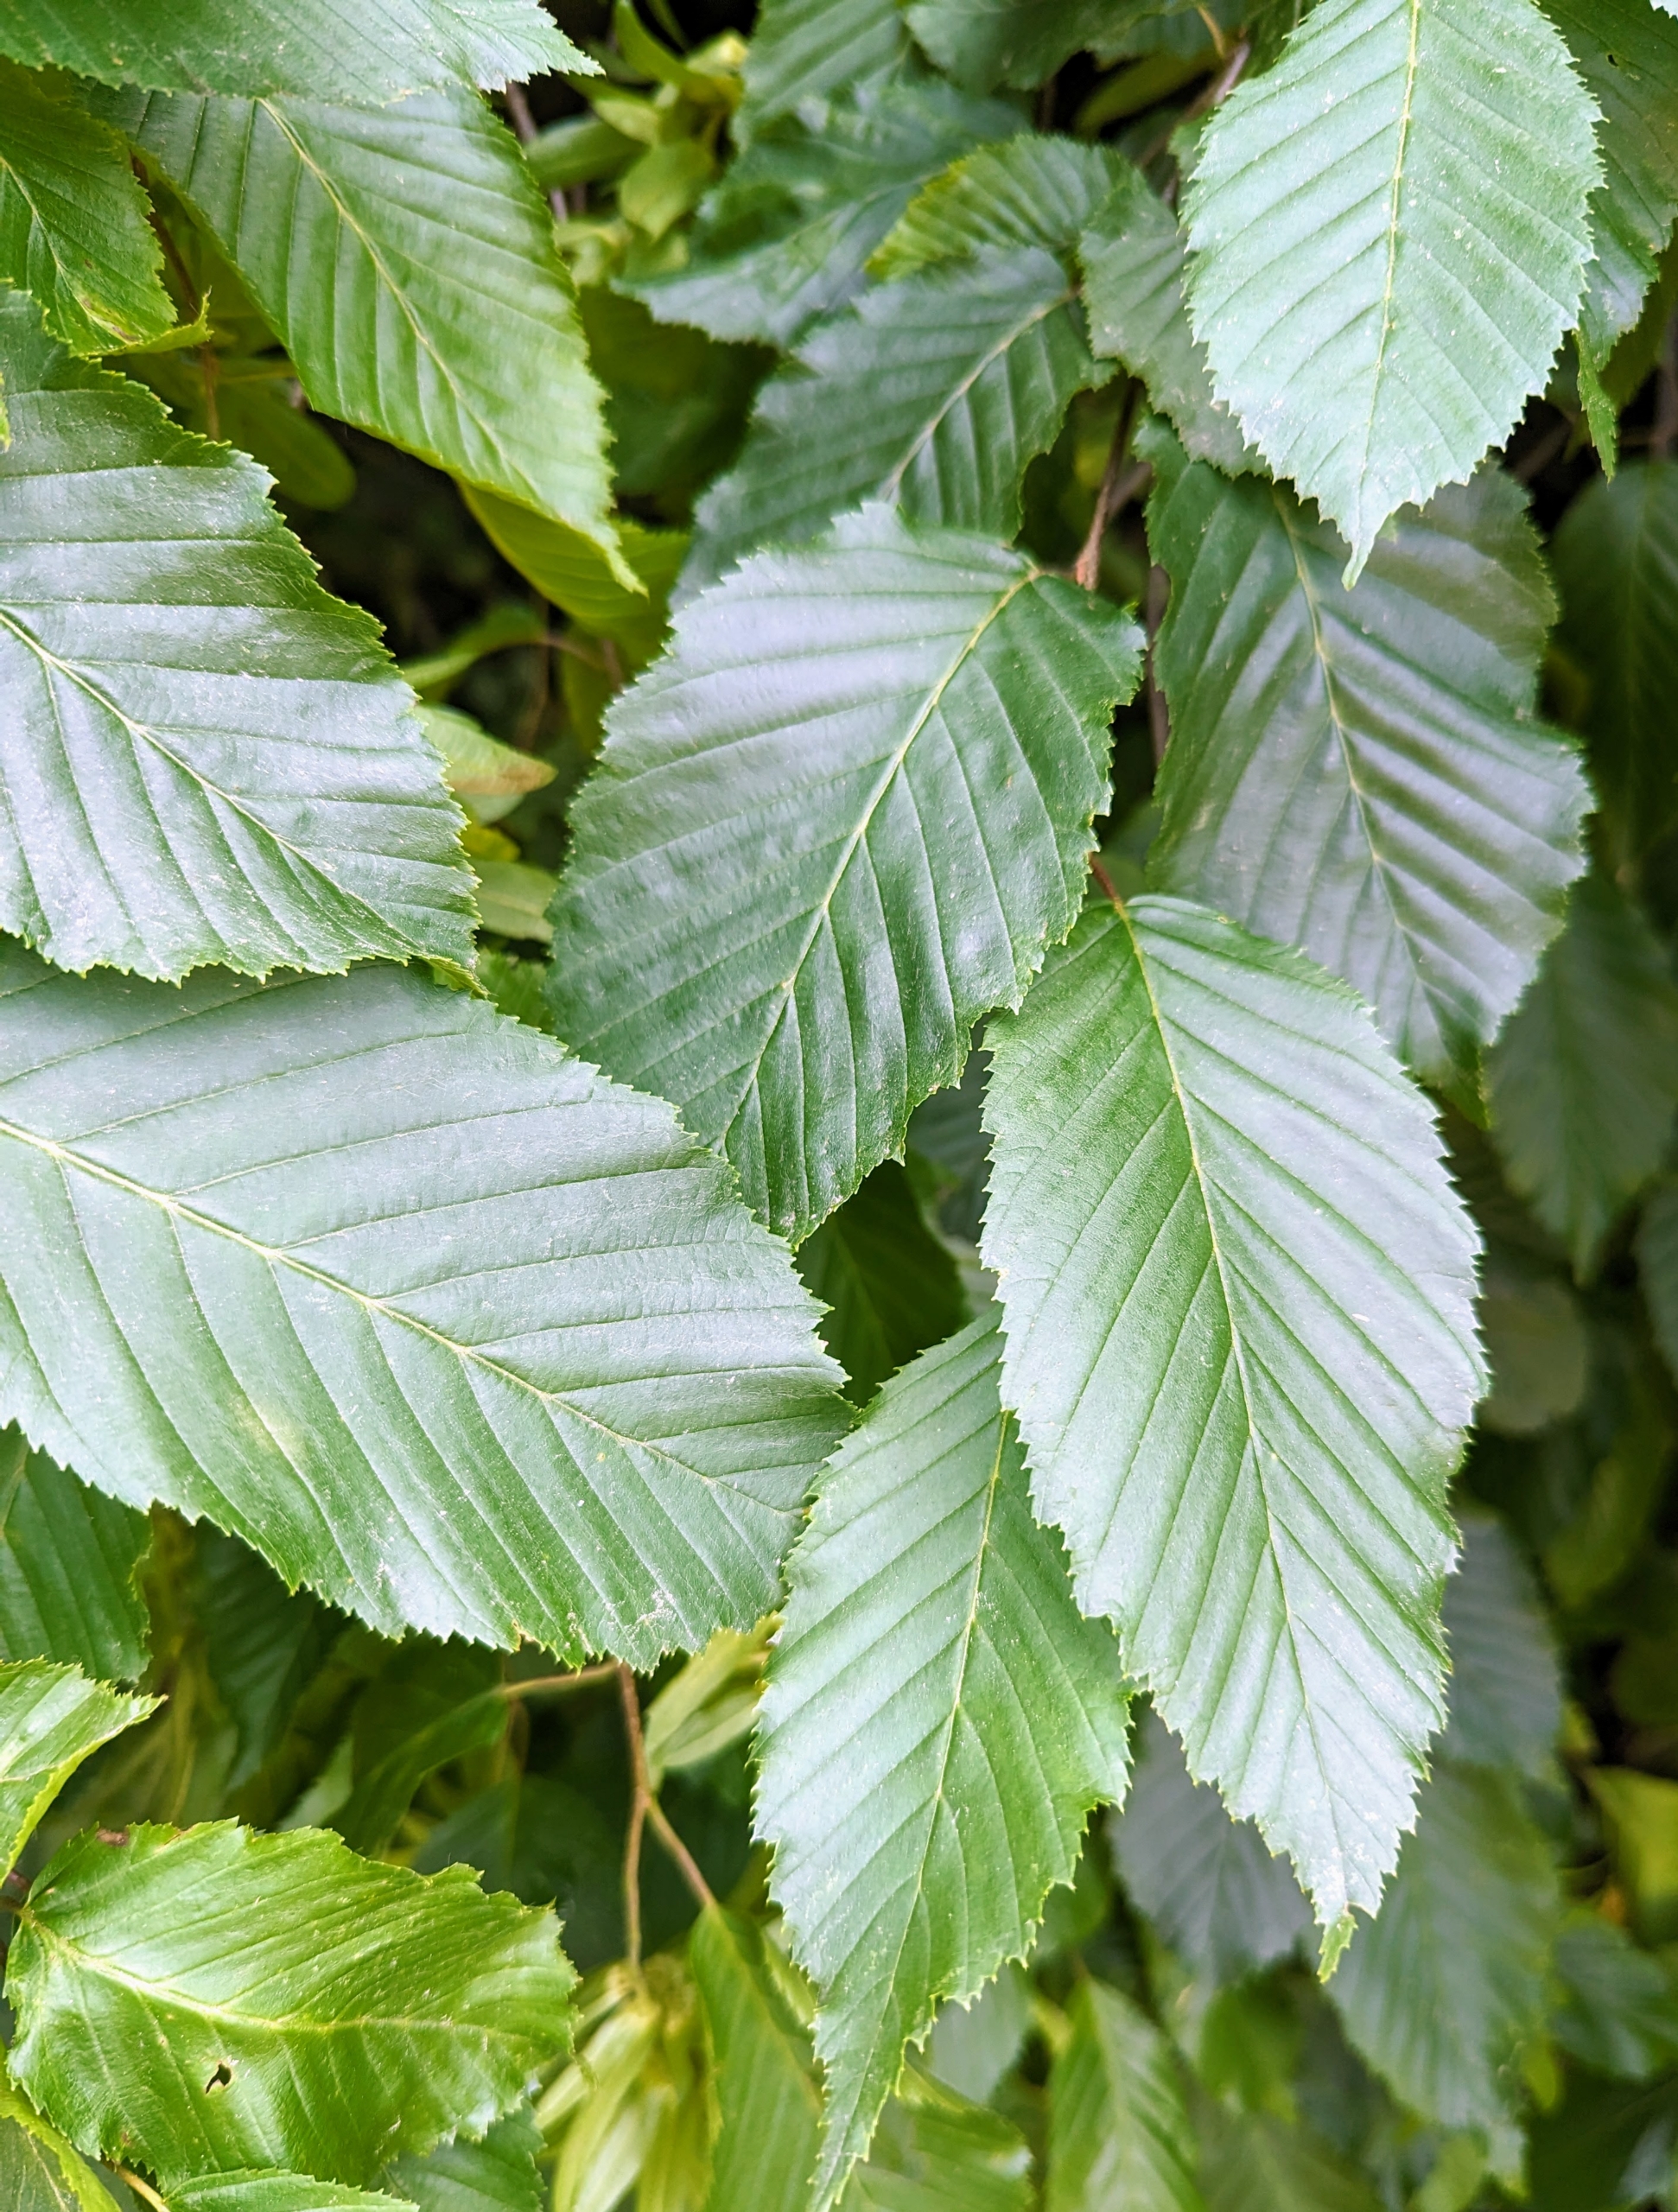
The leaves are a vibrant green color in the spring and summer. Each leaf has a sharply double serrated edge and a top that tapers to a point.
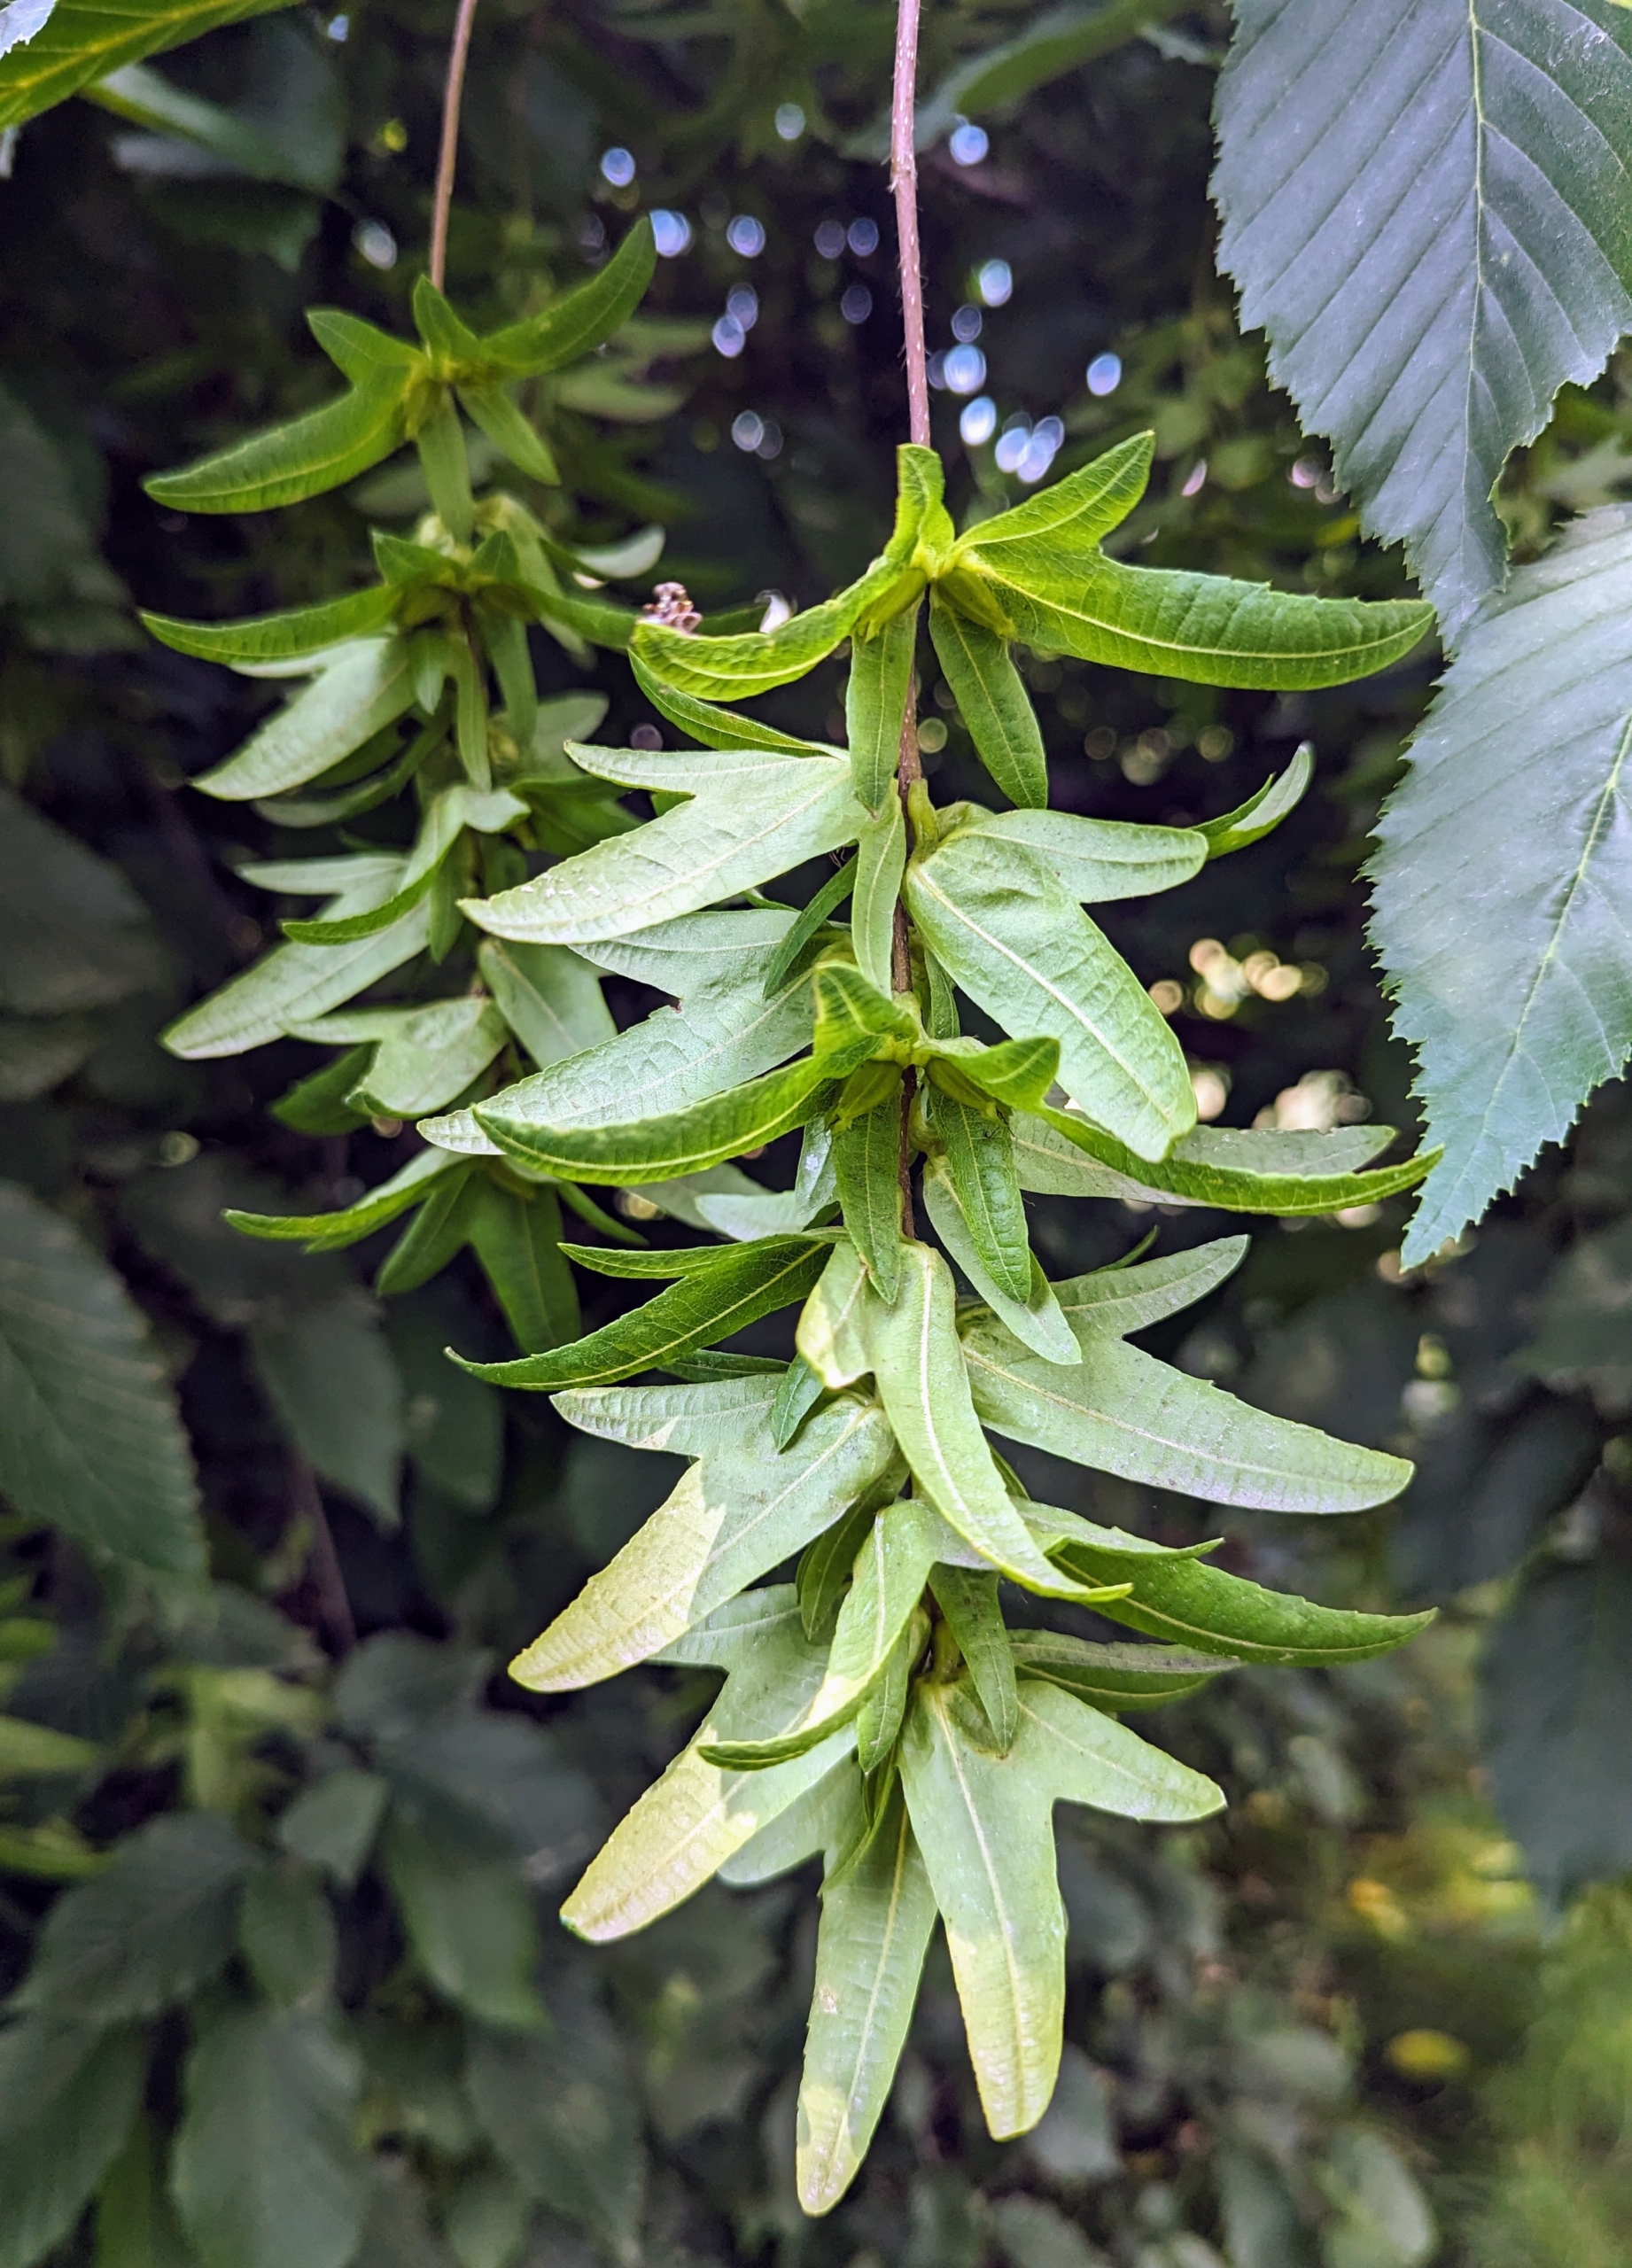
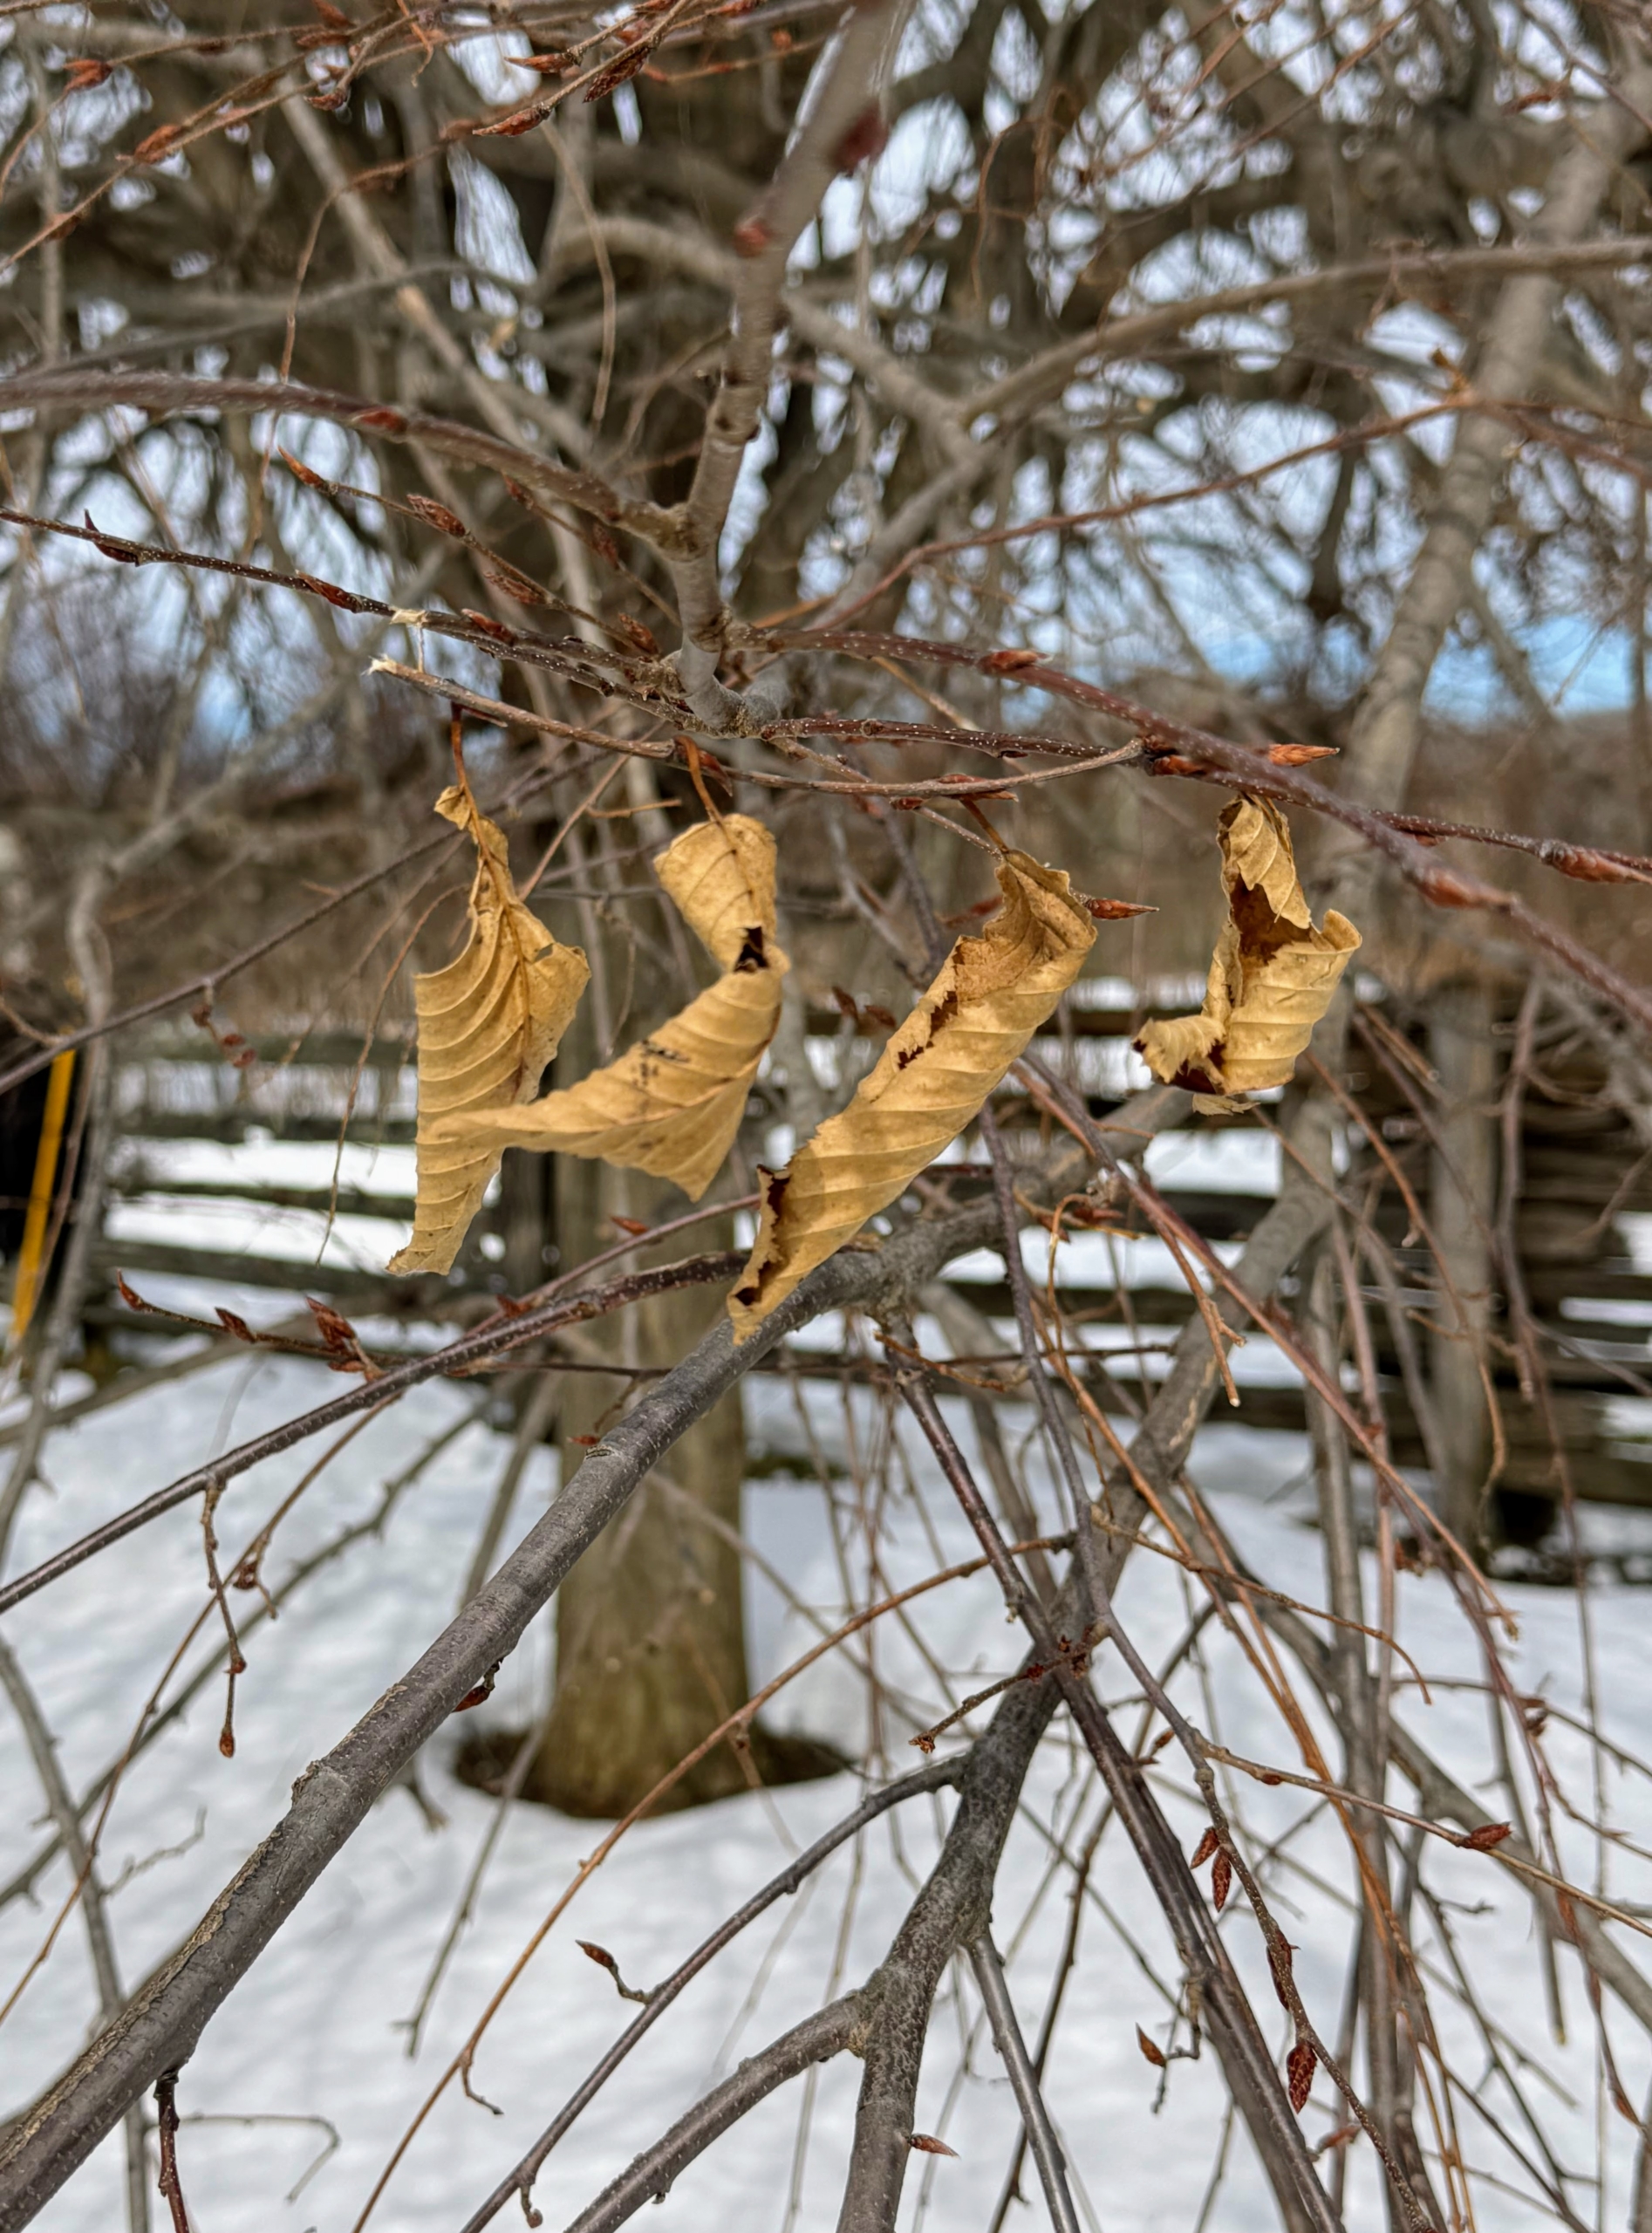
These are the seed catkins hanging from the branches, holding about 10 to 30 seeds each.
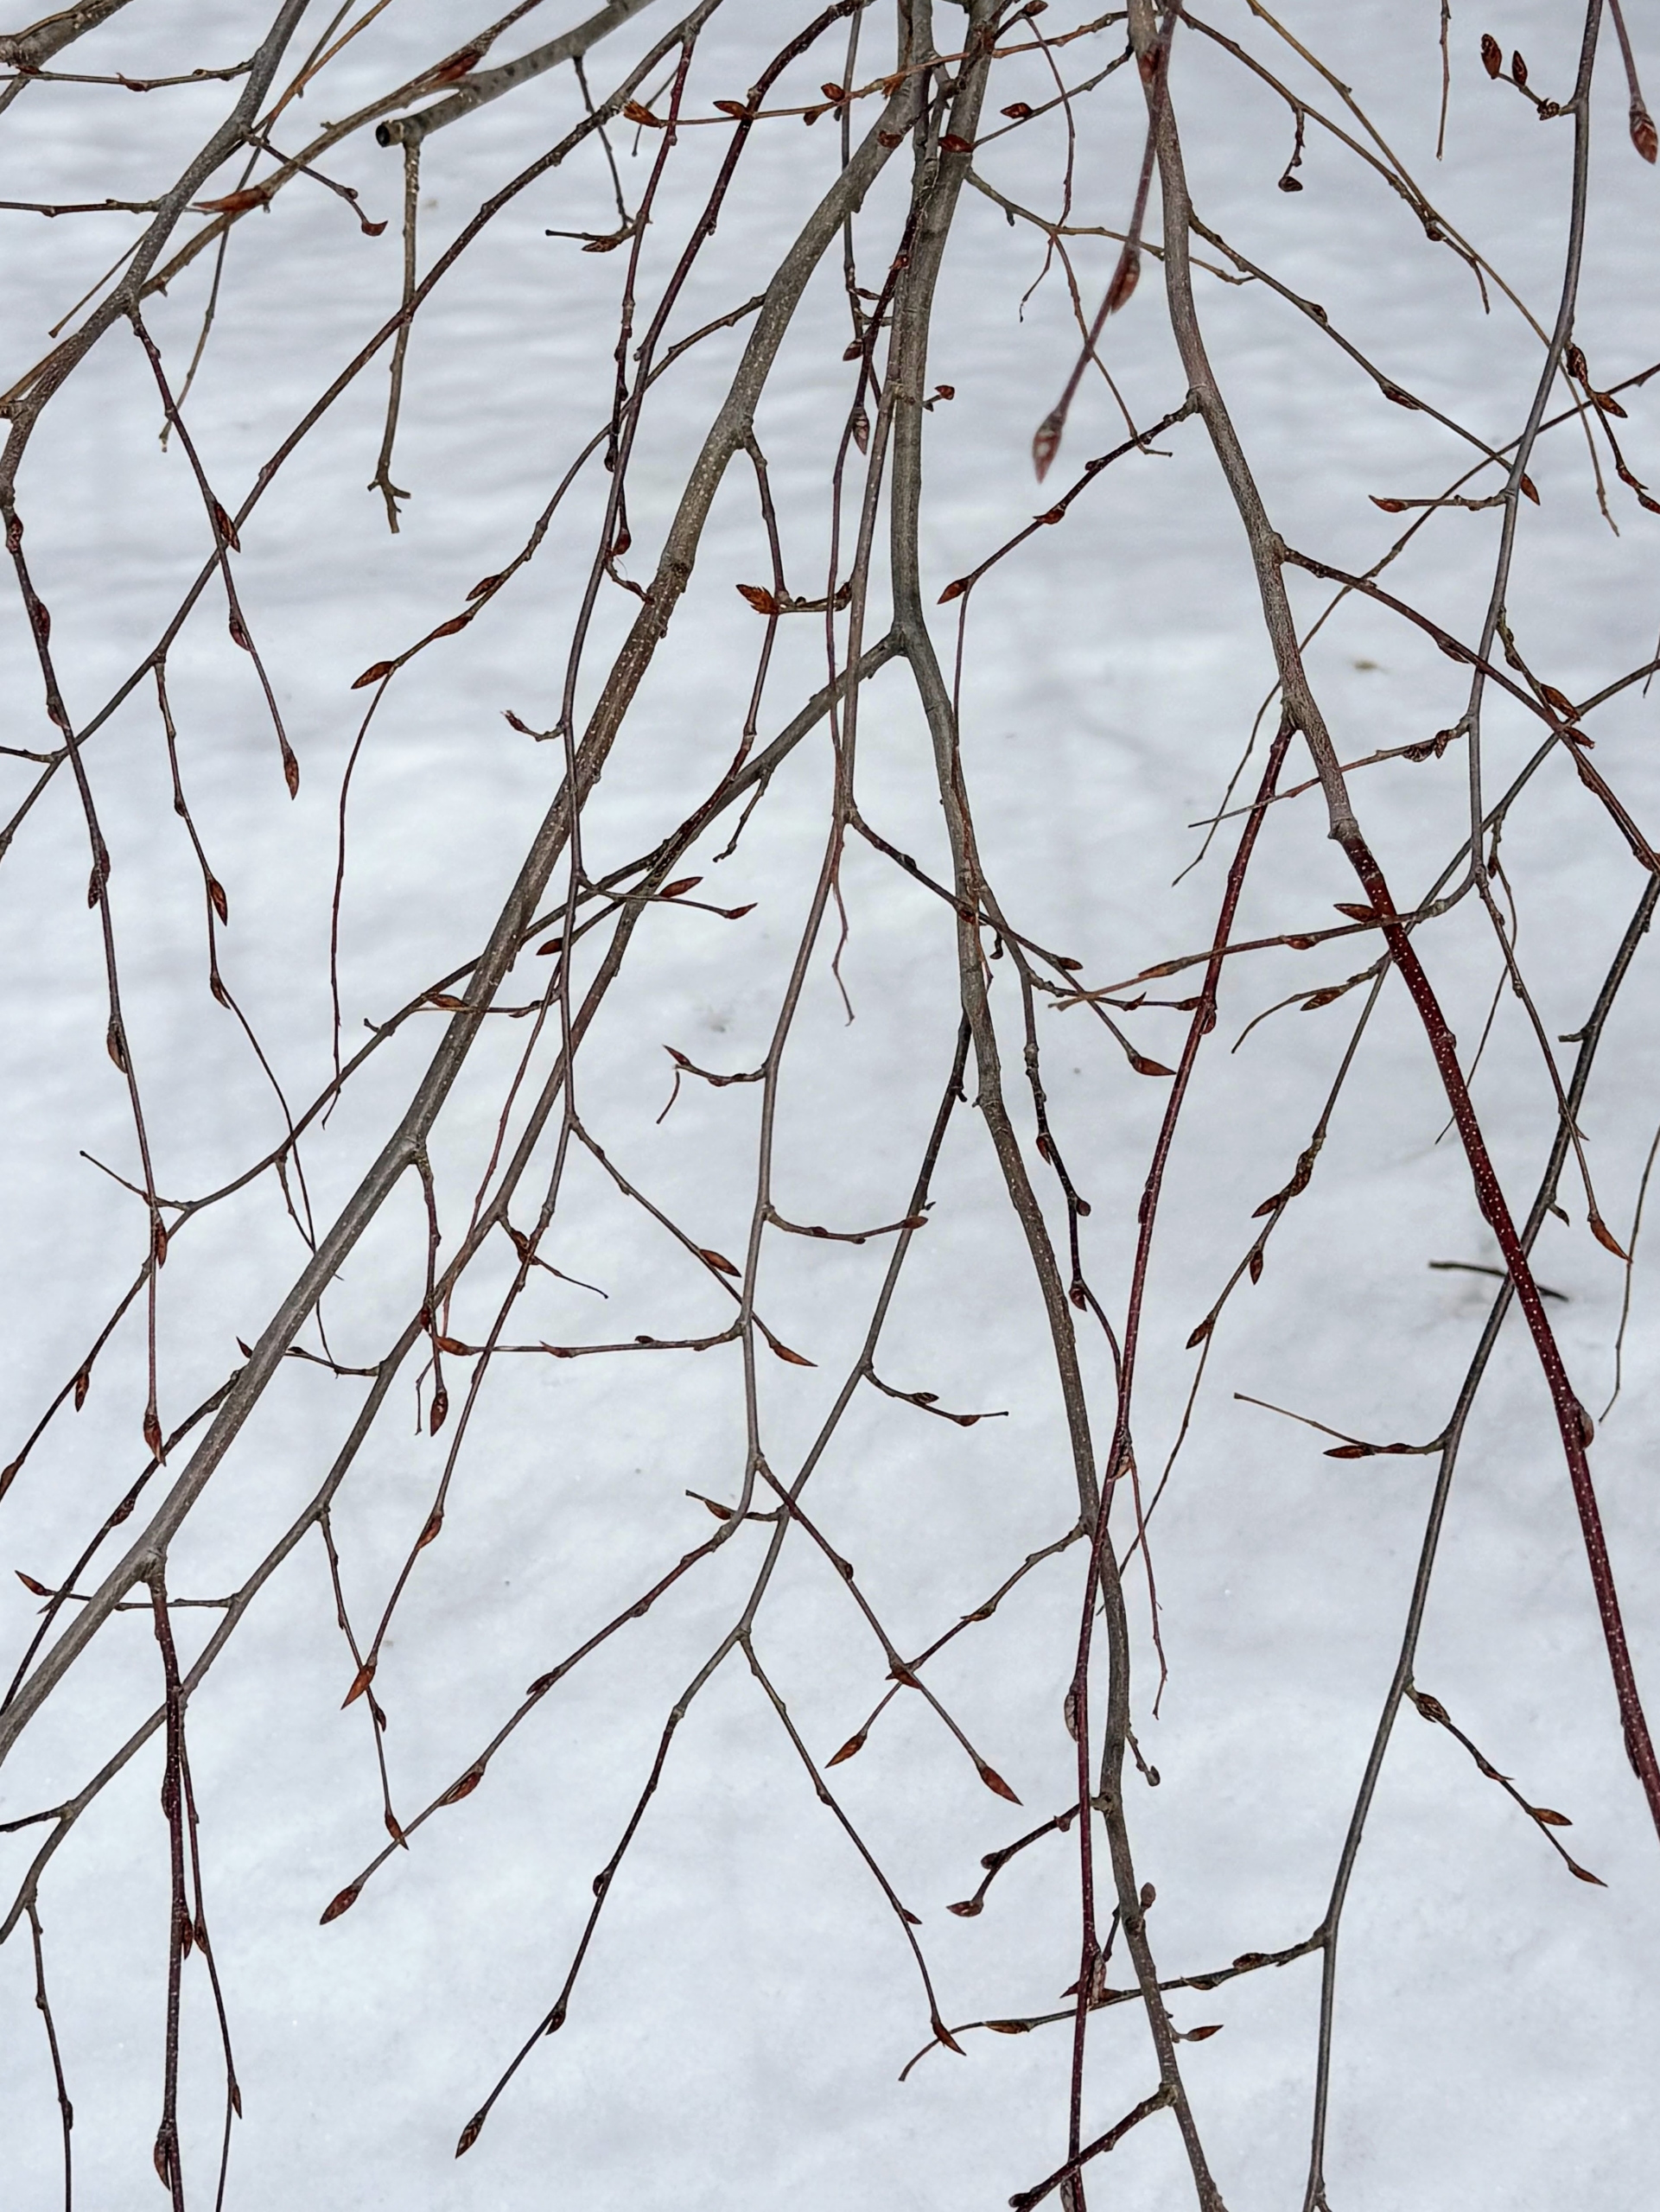
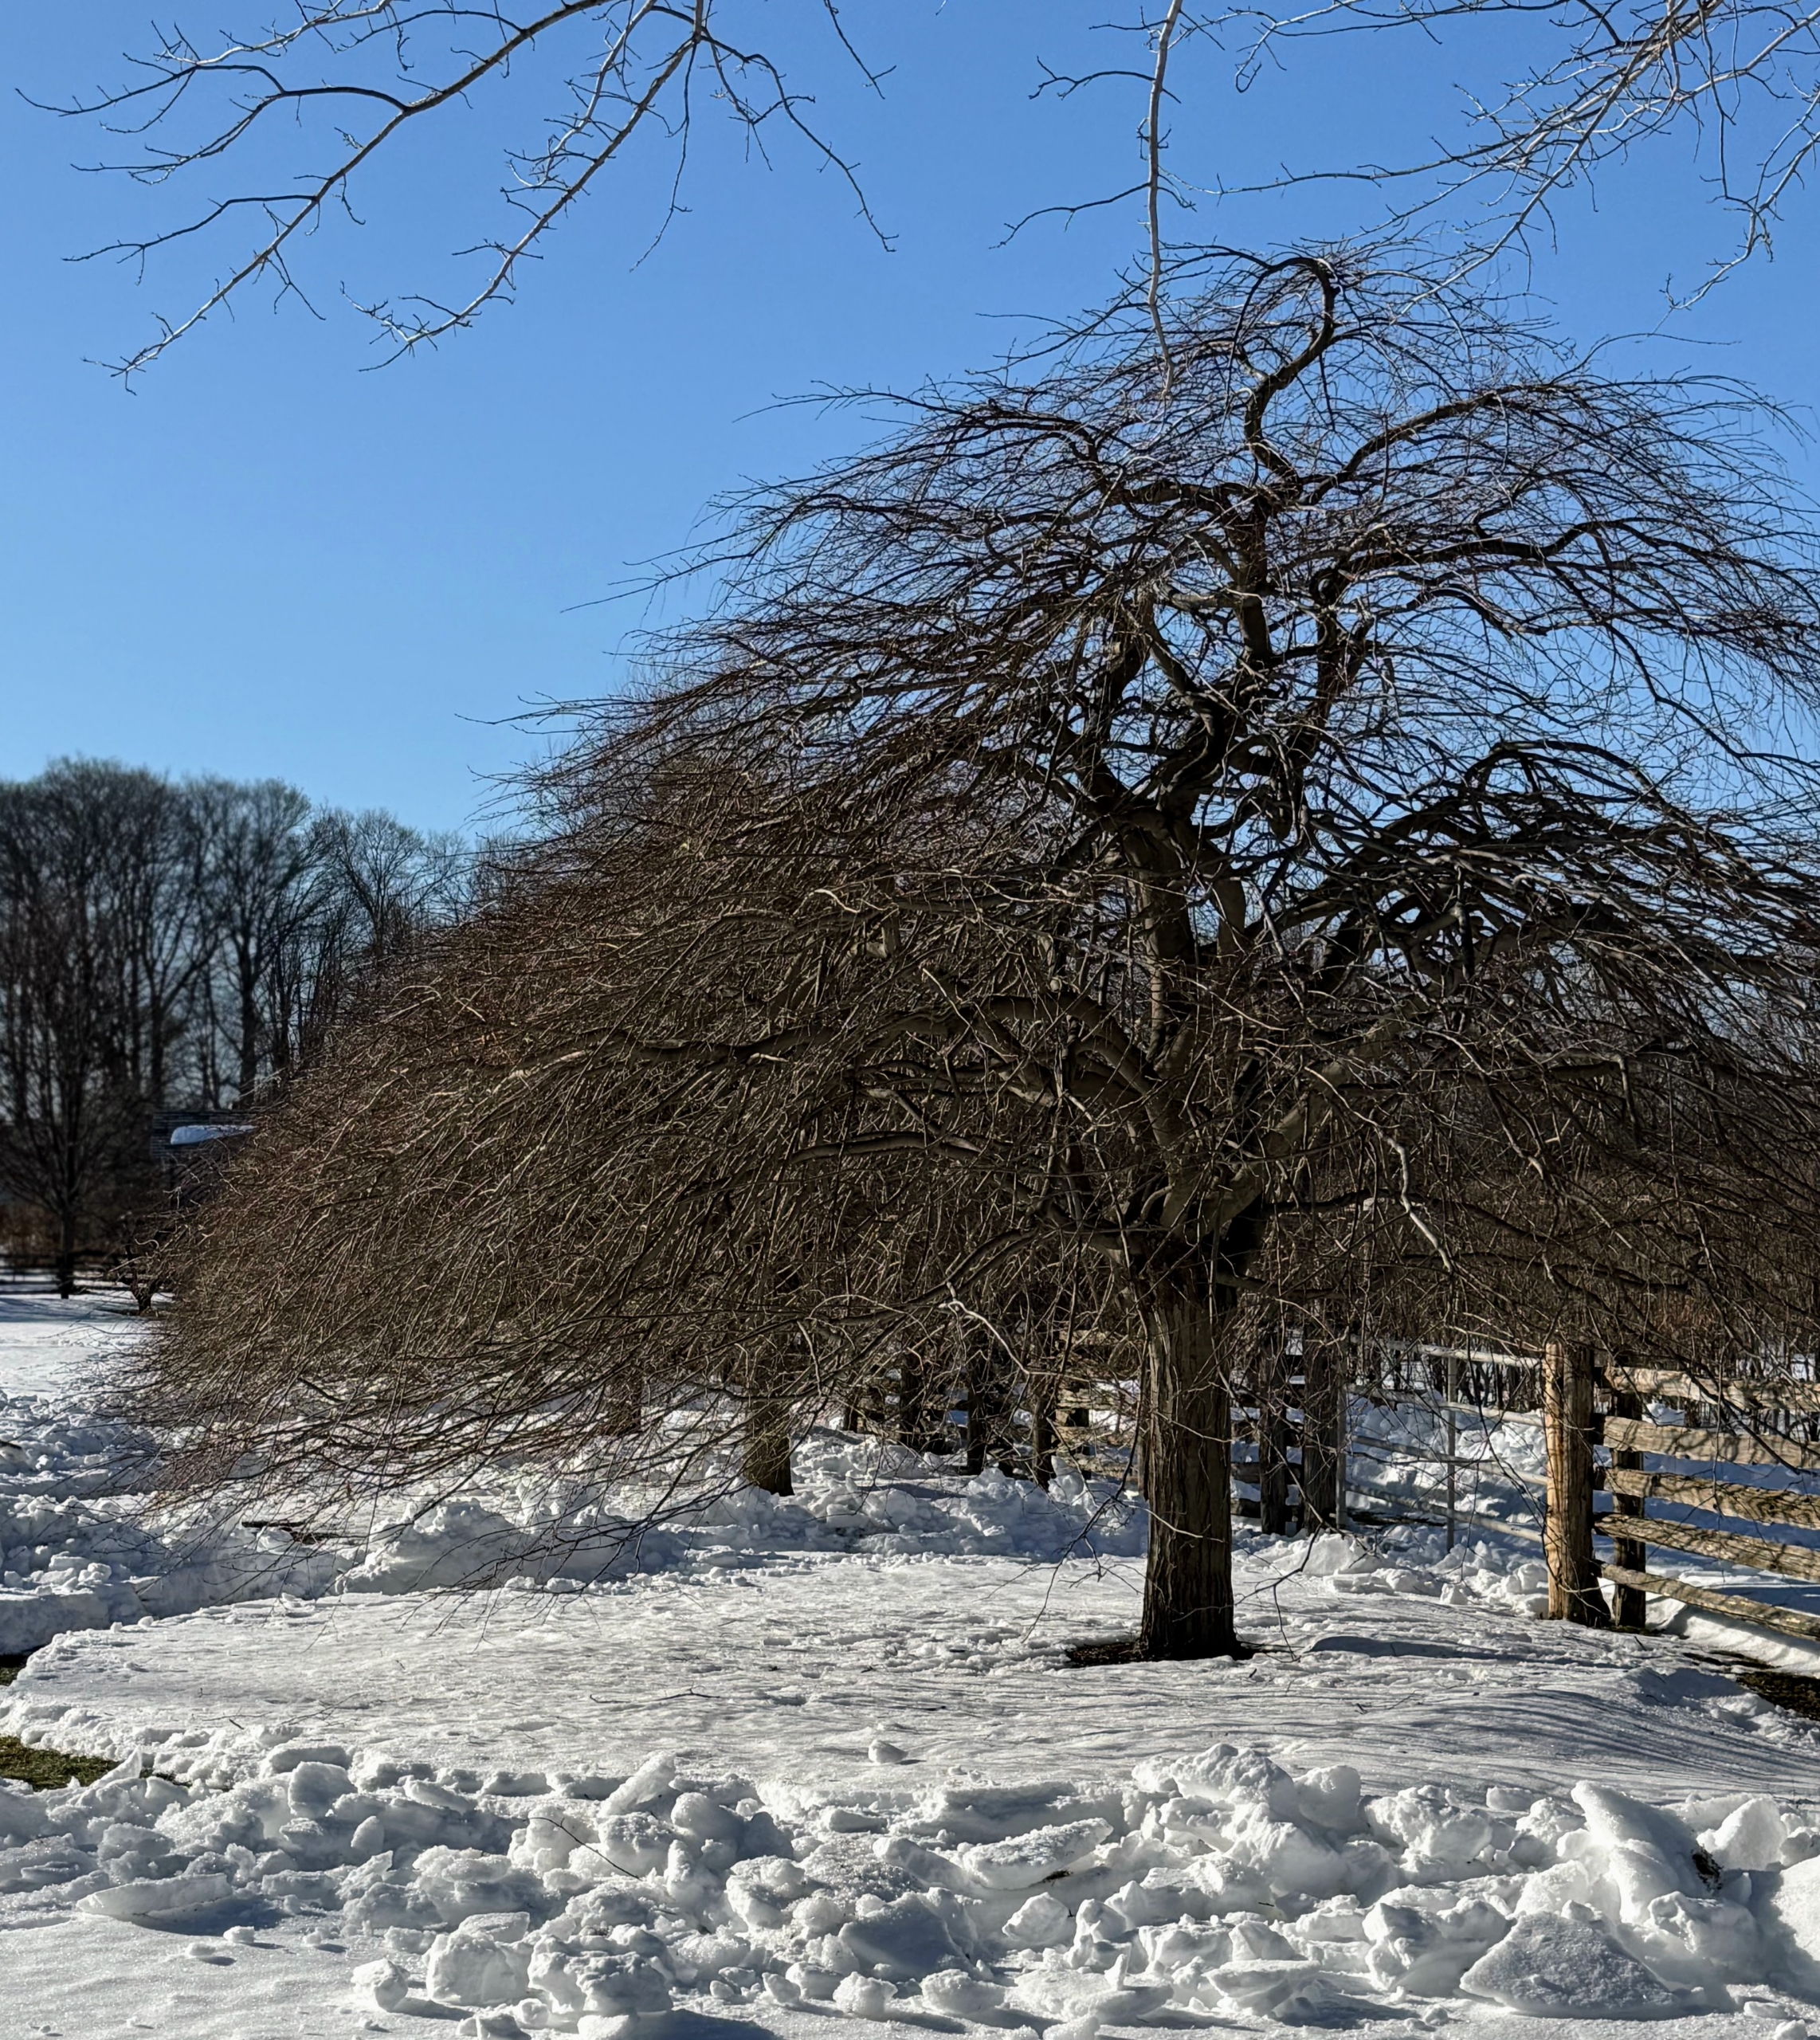
Because they are deciduous, they lose their leaves in winter, leaving them bare – except for these few leaves which have held strong through the season.
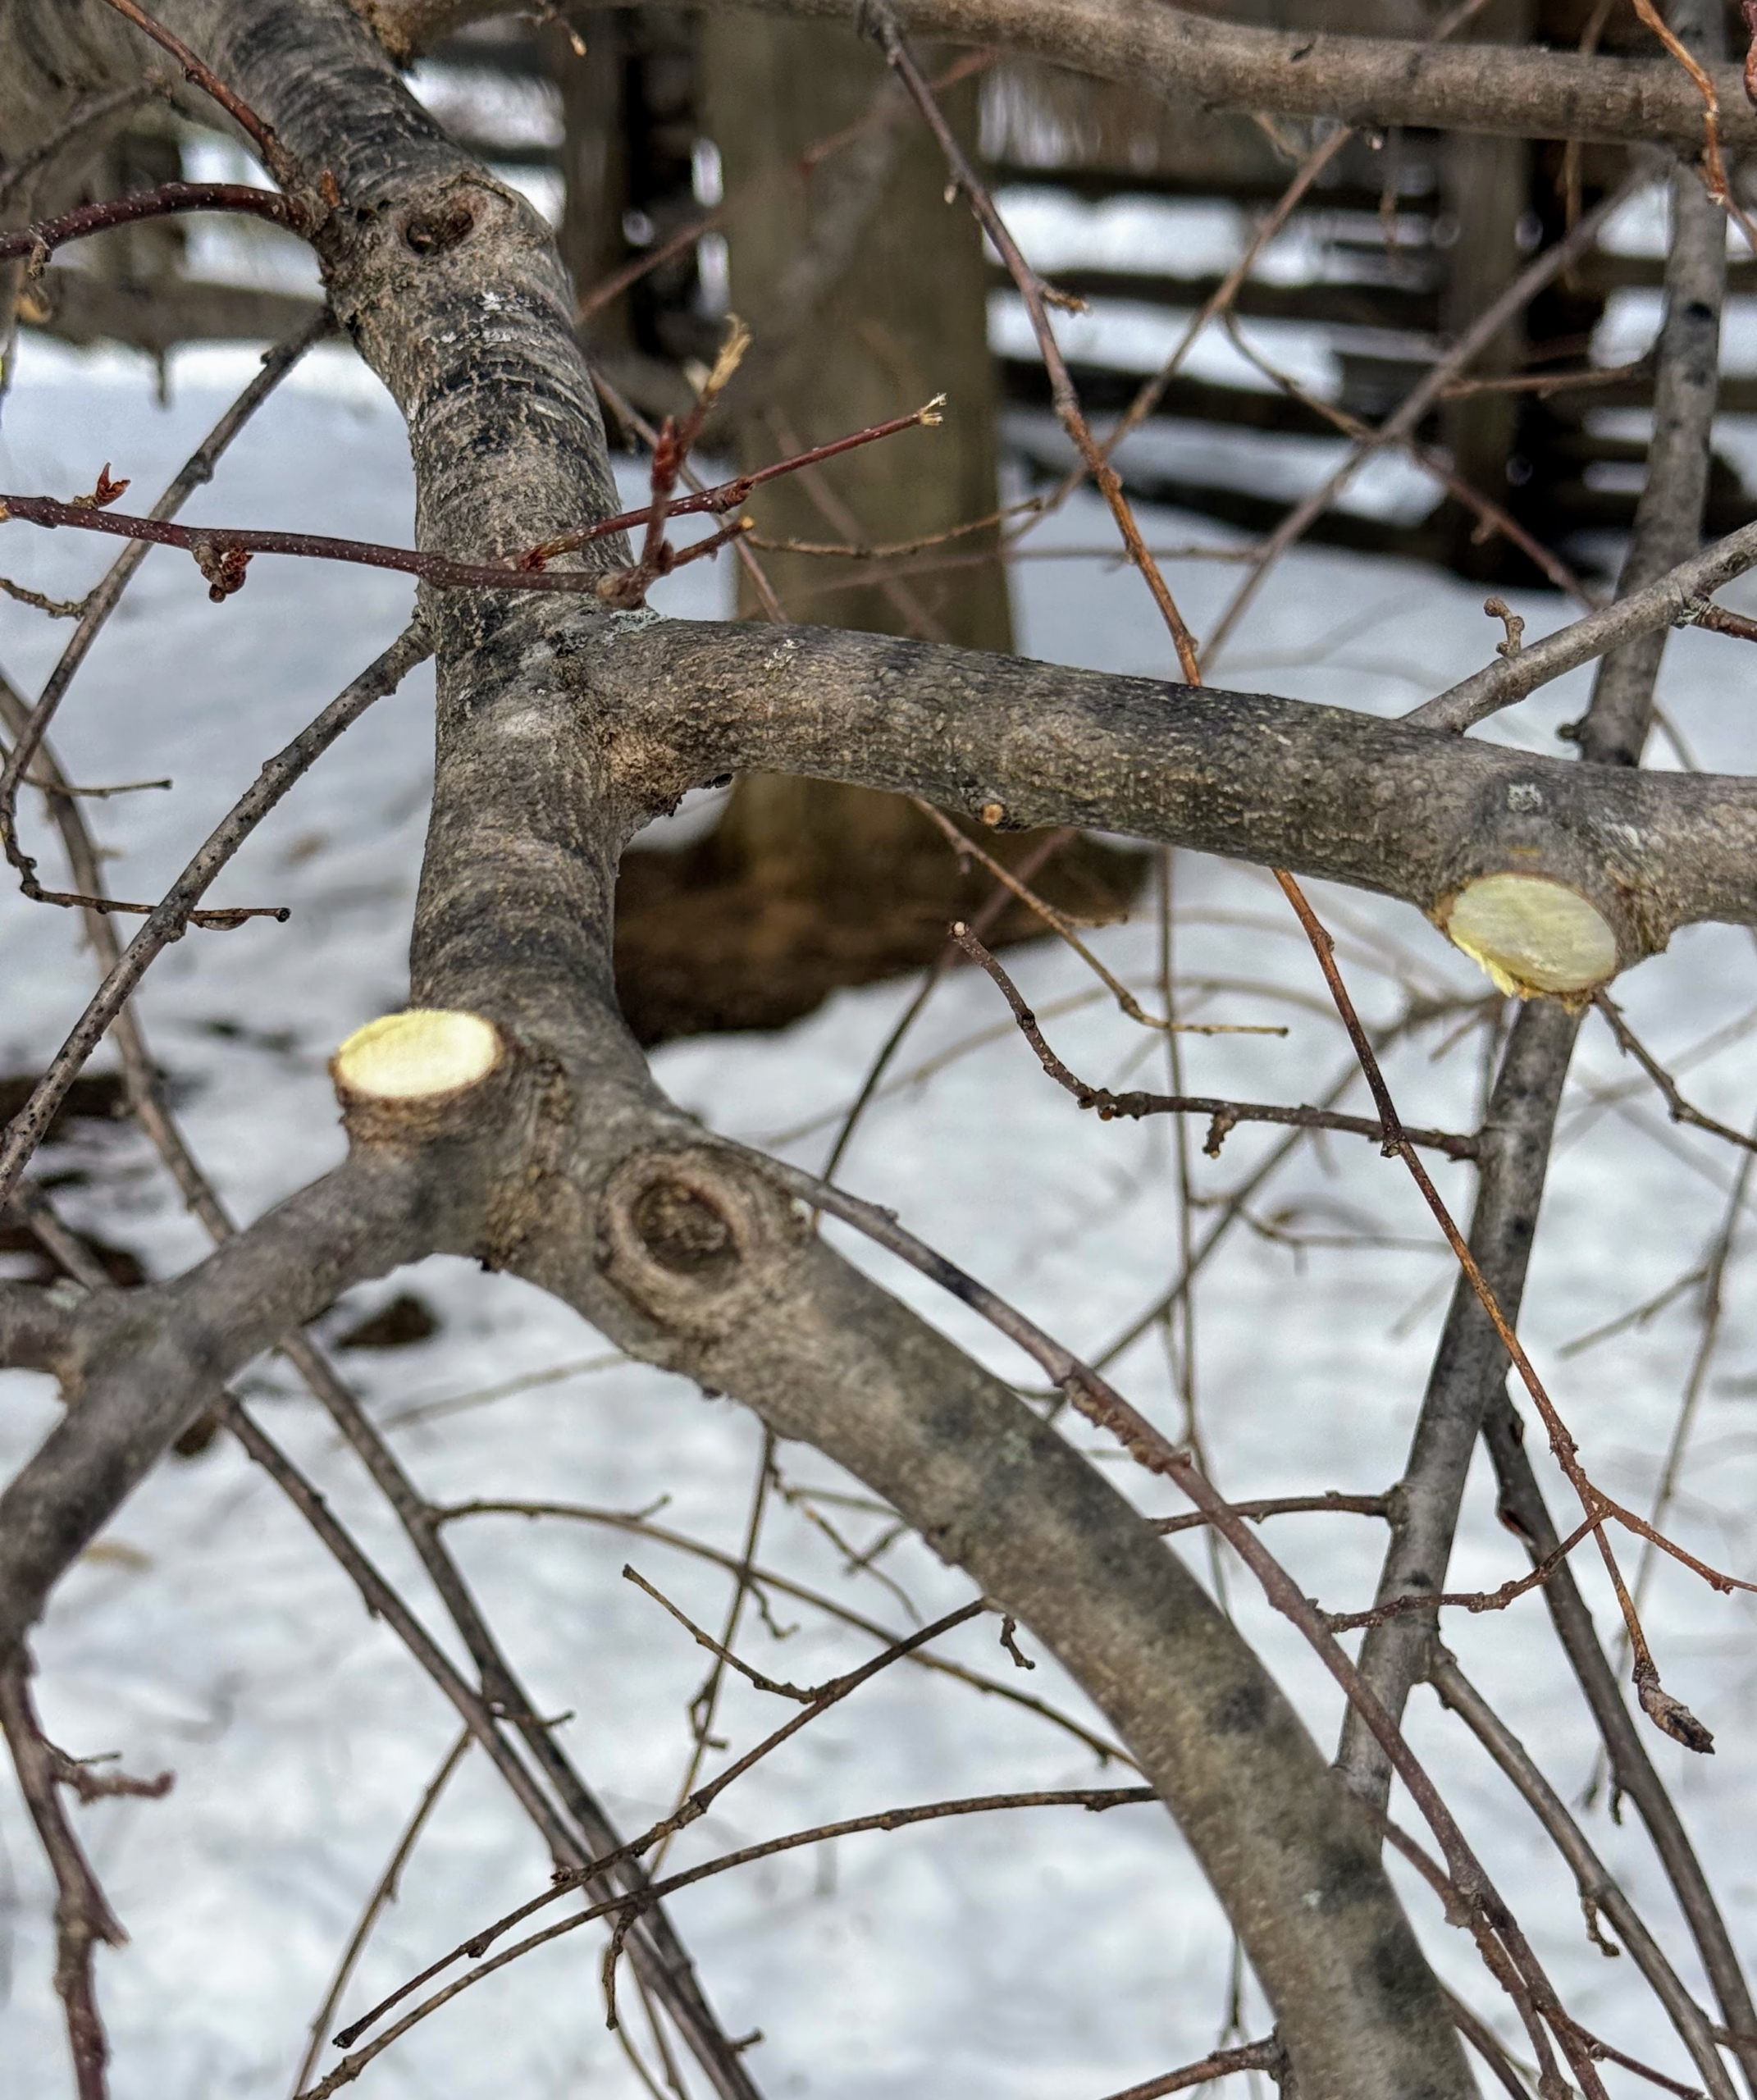
Healthy buds can be see on on the branches now.
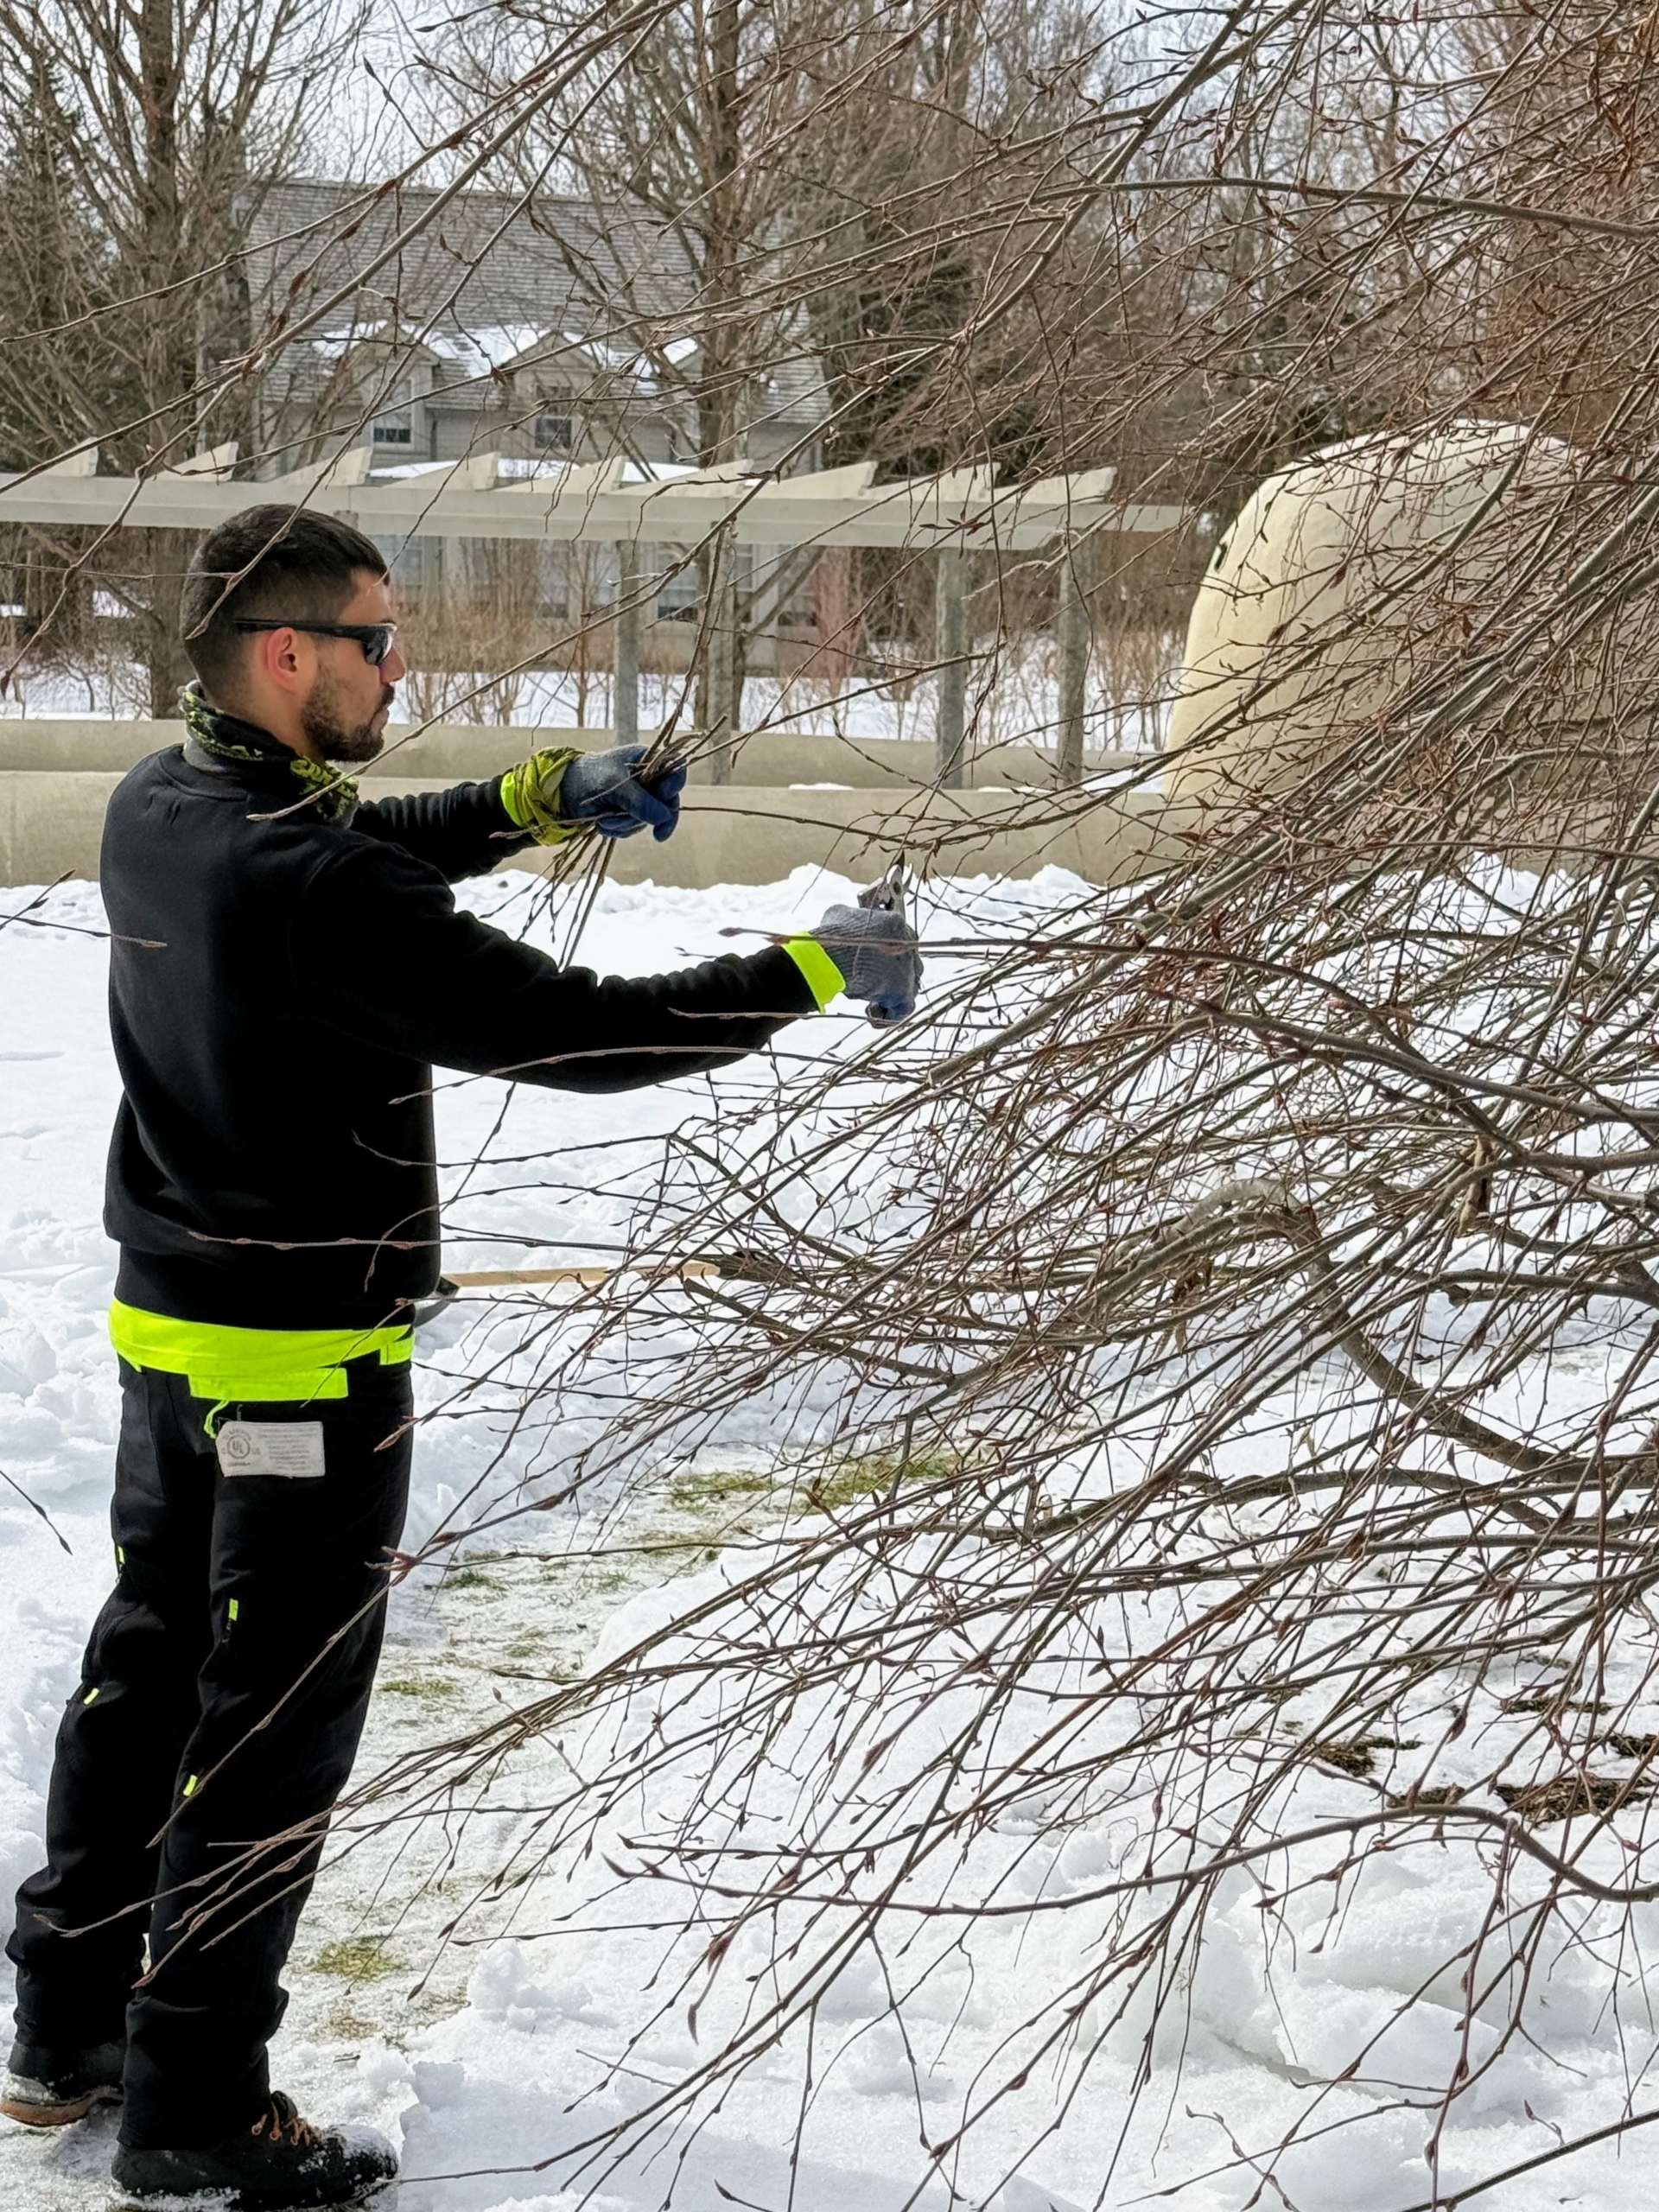
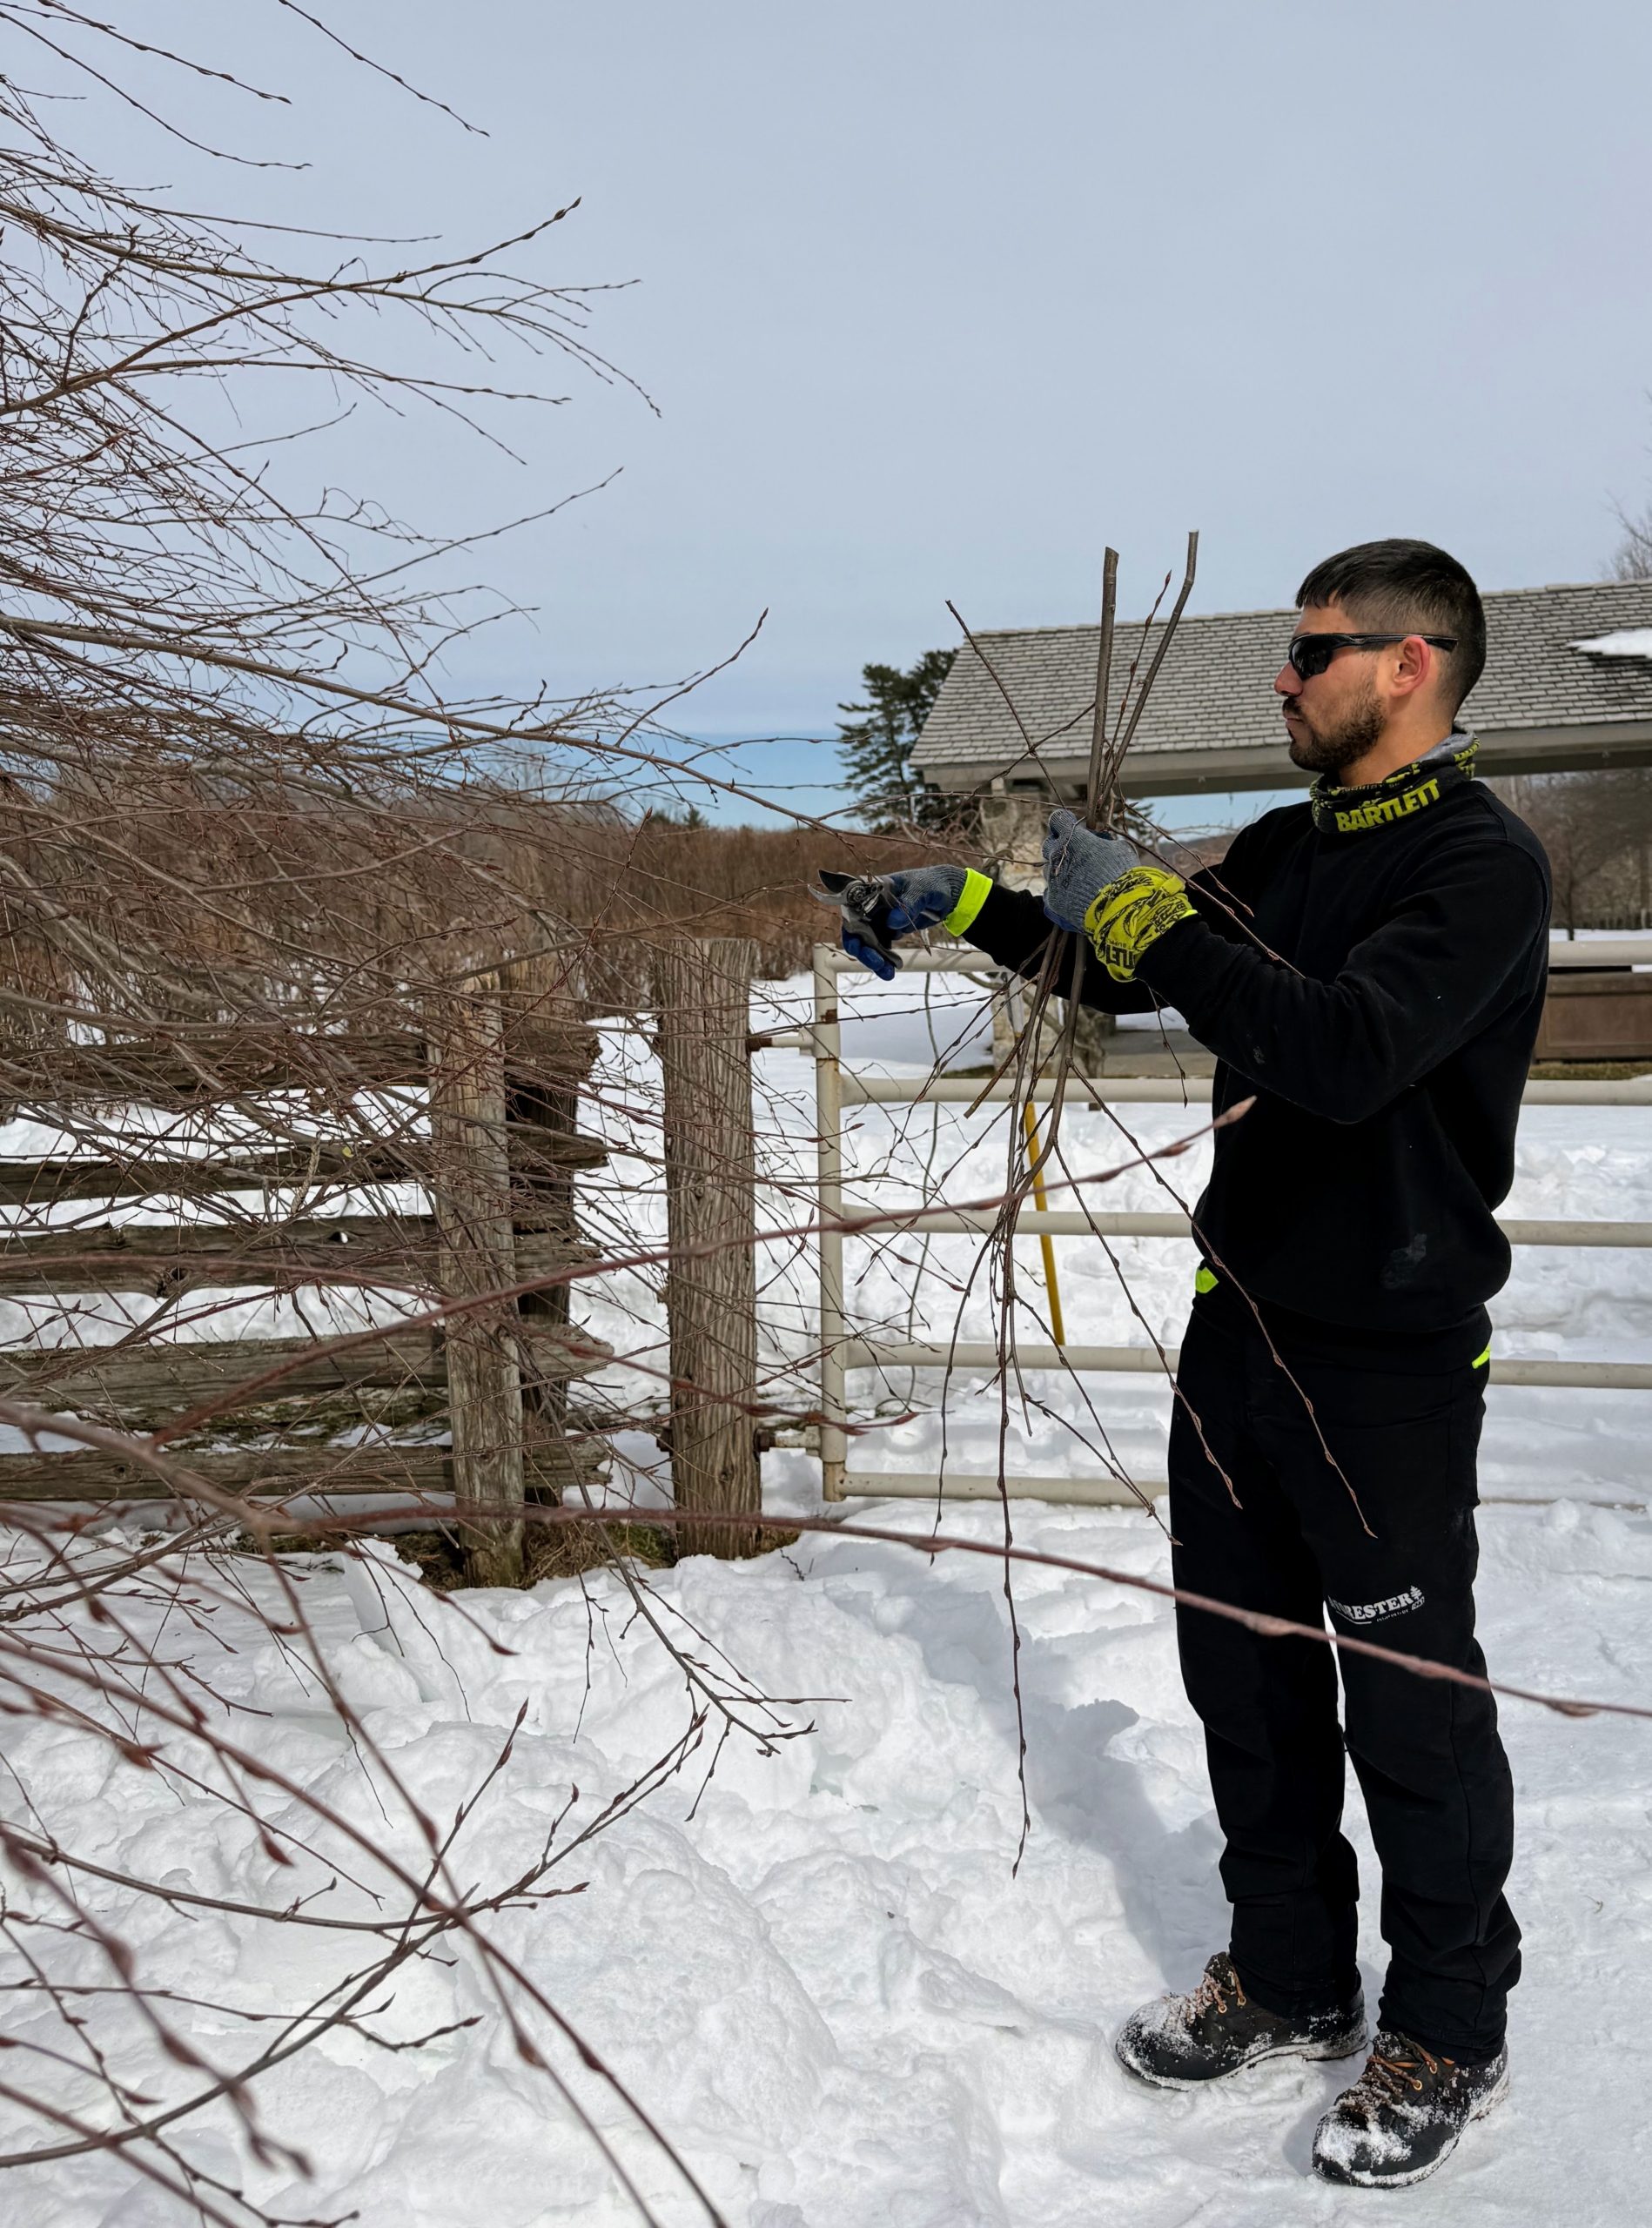
I asked these expert pruners to do some light grooming on these trees to keep them looking their best.
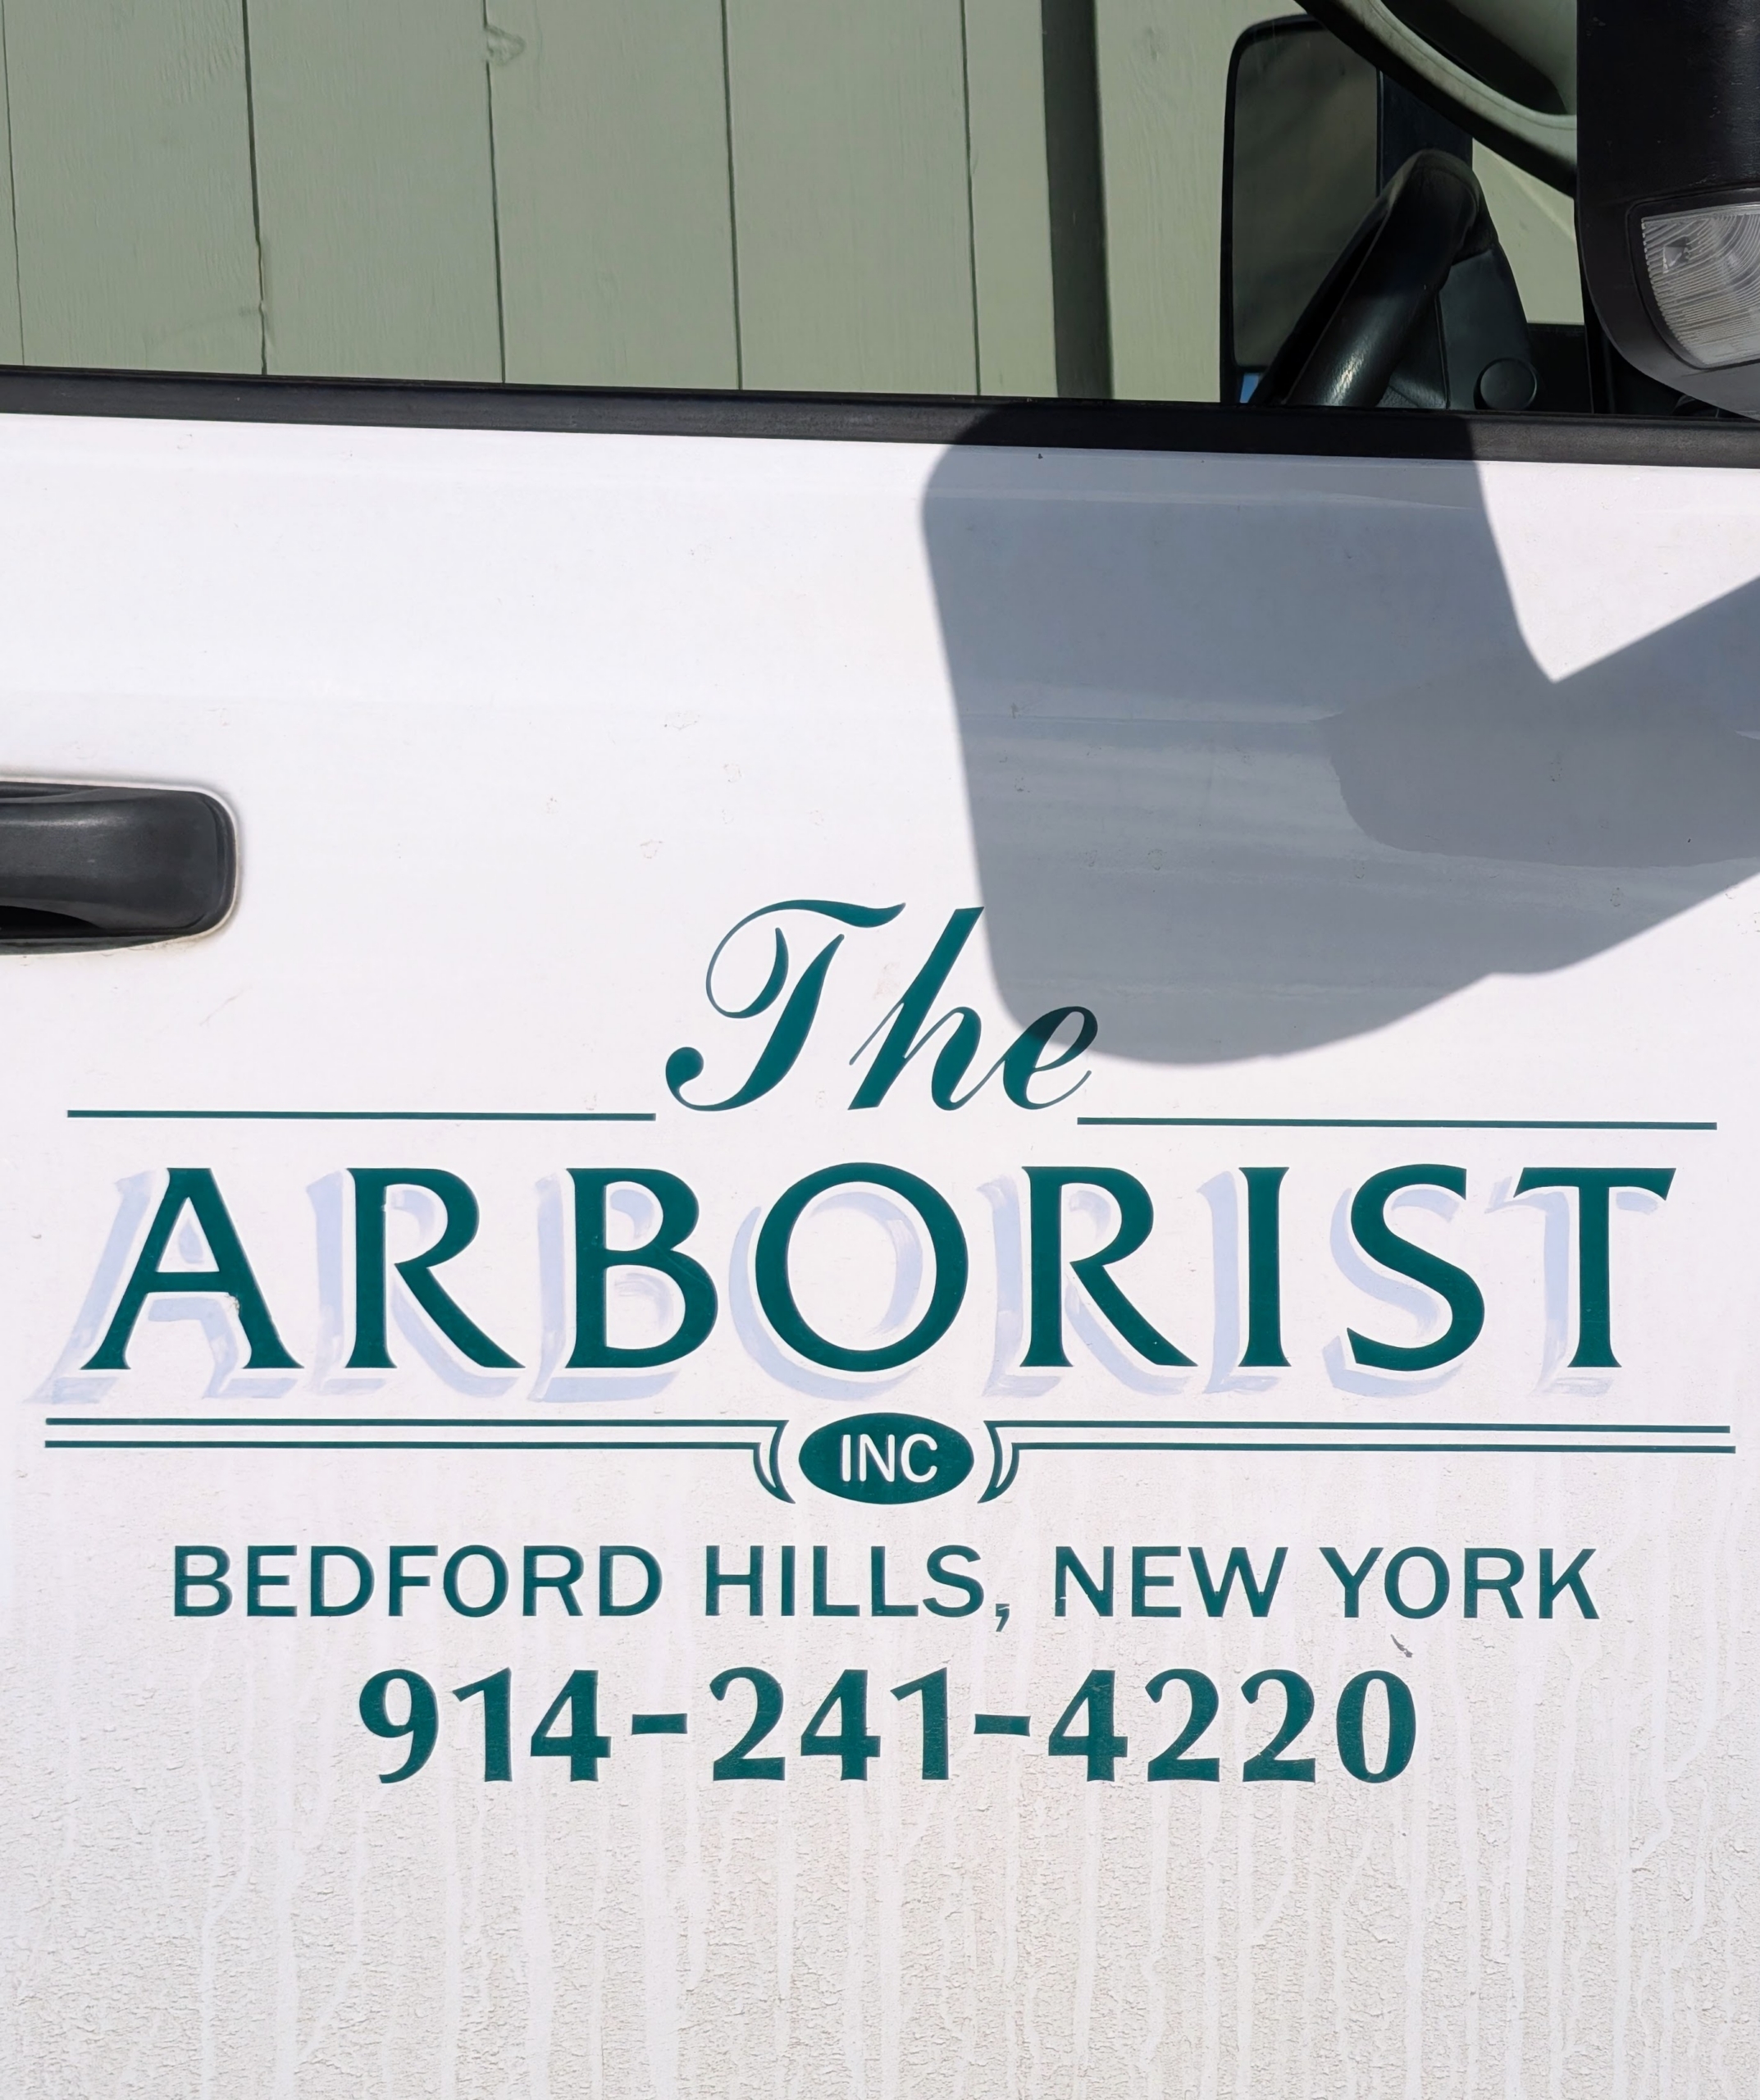
The tree experts at The Arborist specialize in pruning and have done excellent work on many of my trees already.
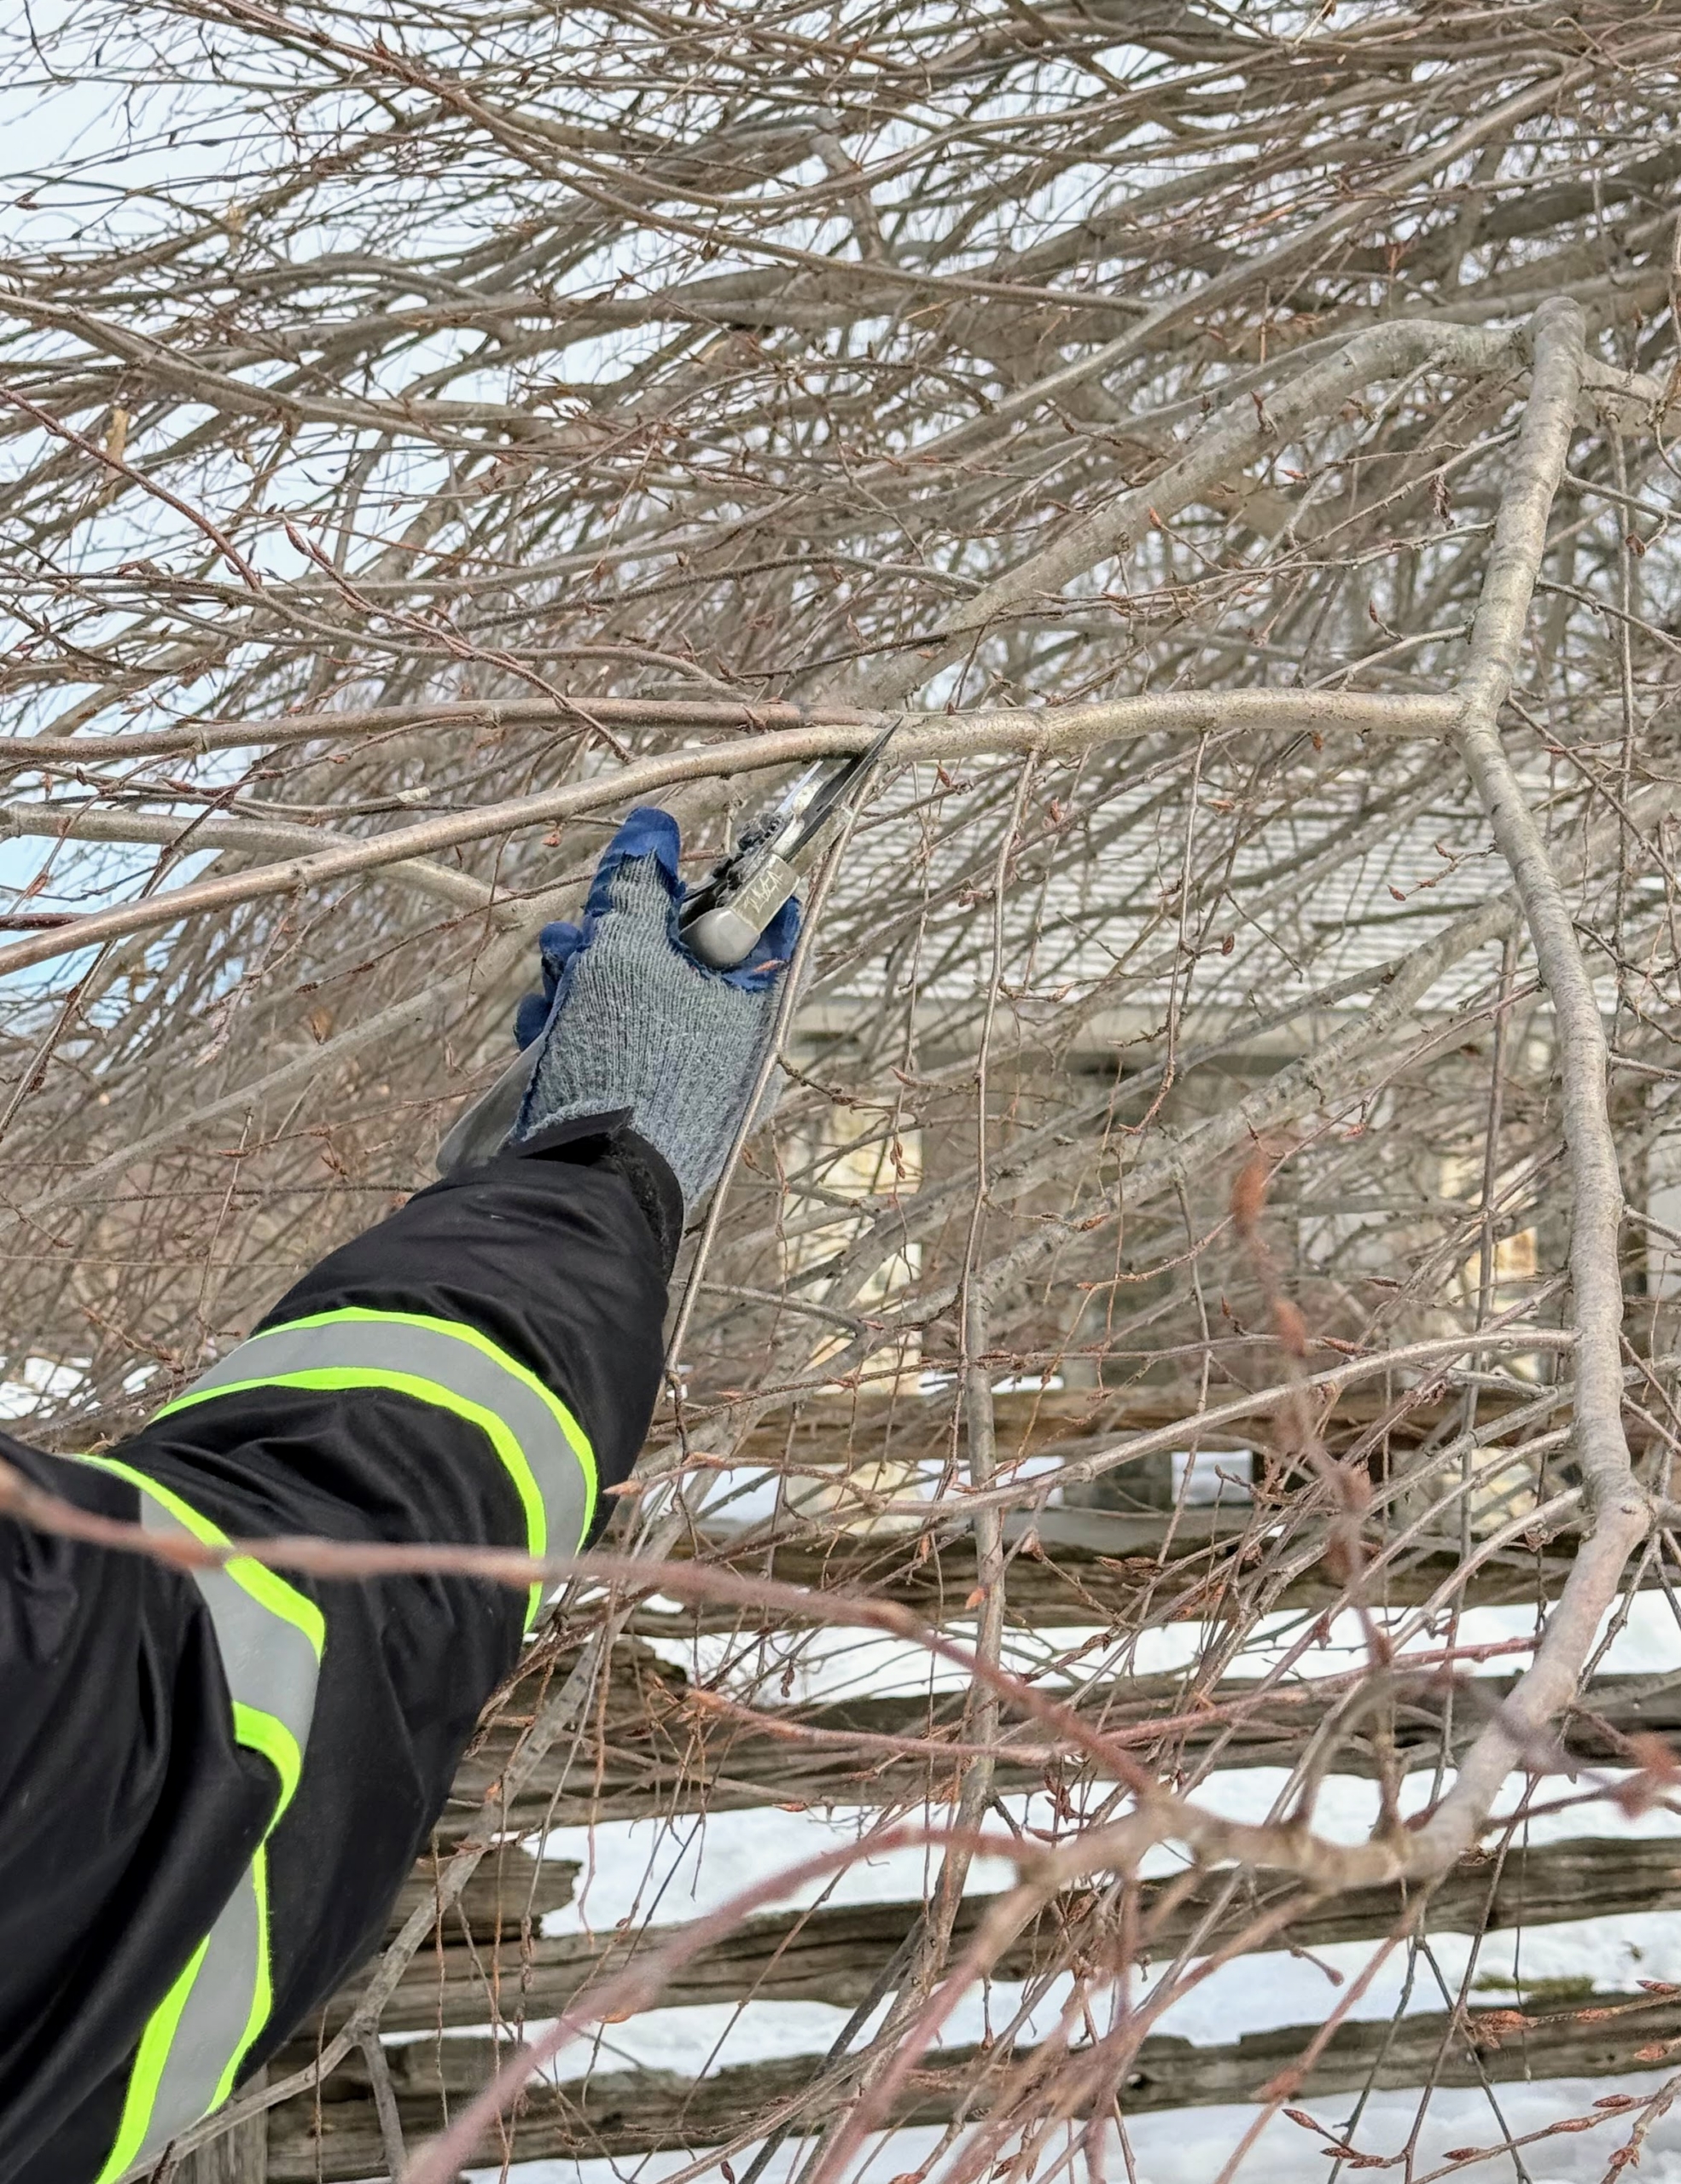
Ray starts from the bottom, removing any branches that are touching the wood fence nearby.
The team also focuses on the Ds of pruning – removing any dead, diseased, damaged, defective, or deranged branches.
They cut branches that are rubbing or crisscrossing each other, preventing any healthy new growth. Basically, the goal is to create a tree with well spaced lateral branches. Any branches which interfere with the tree’s shape or create a dense framework should be removed. Hornbeams are very dependable cultivars and don’t need much pruning except when necessary for shaping or for removing dieback.
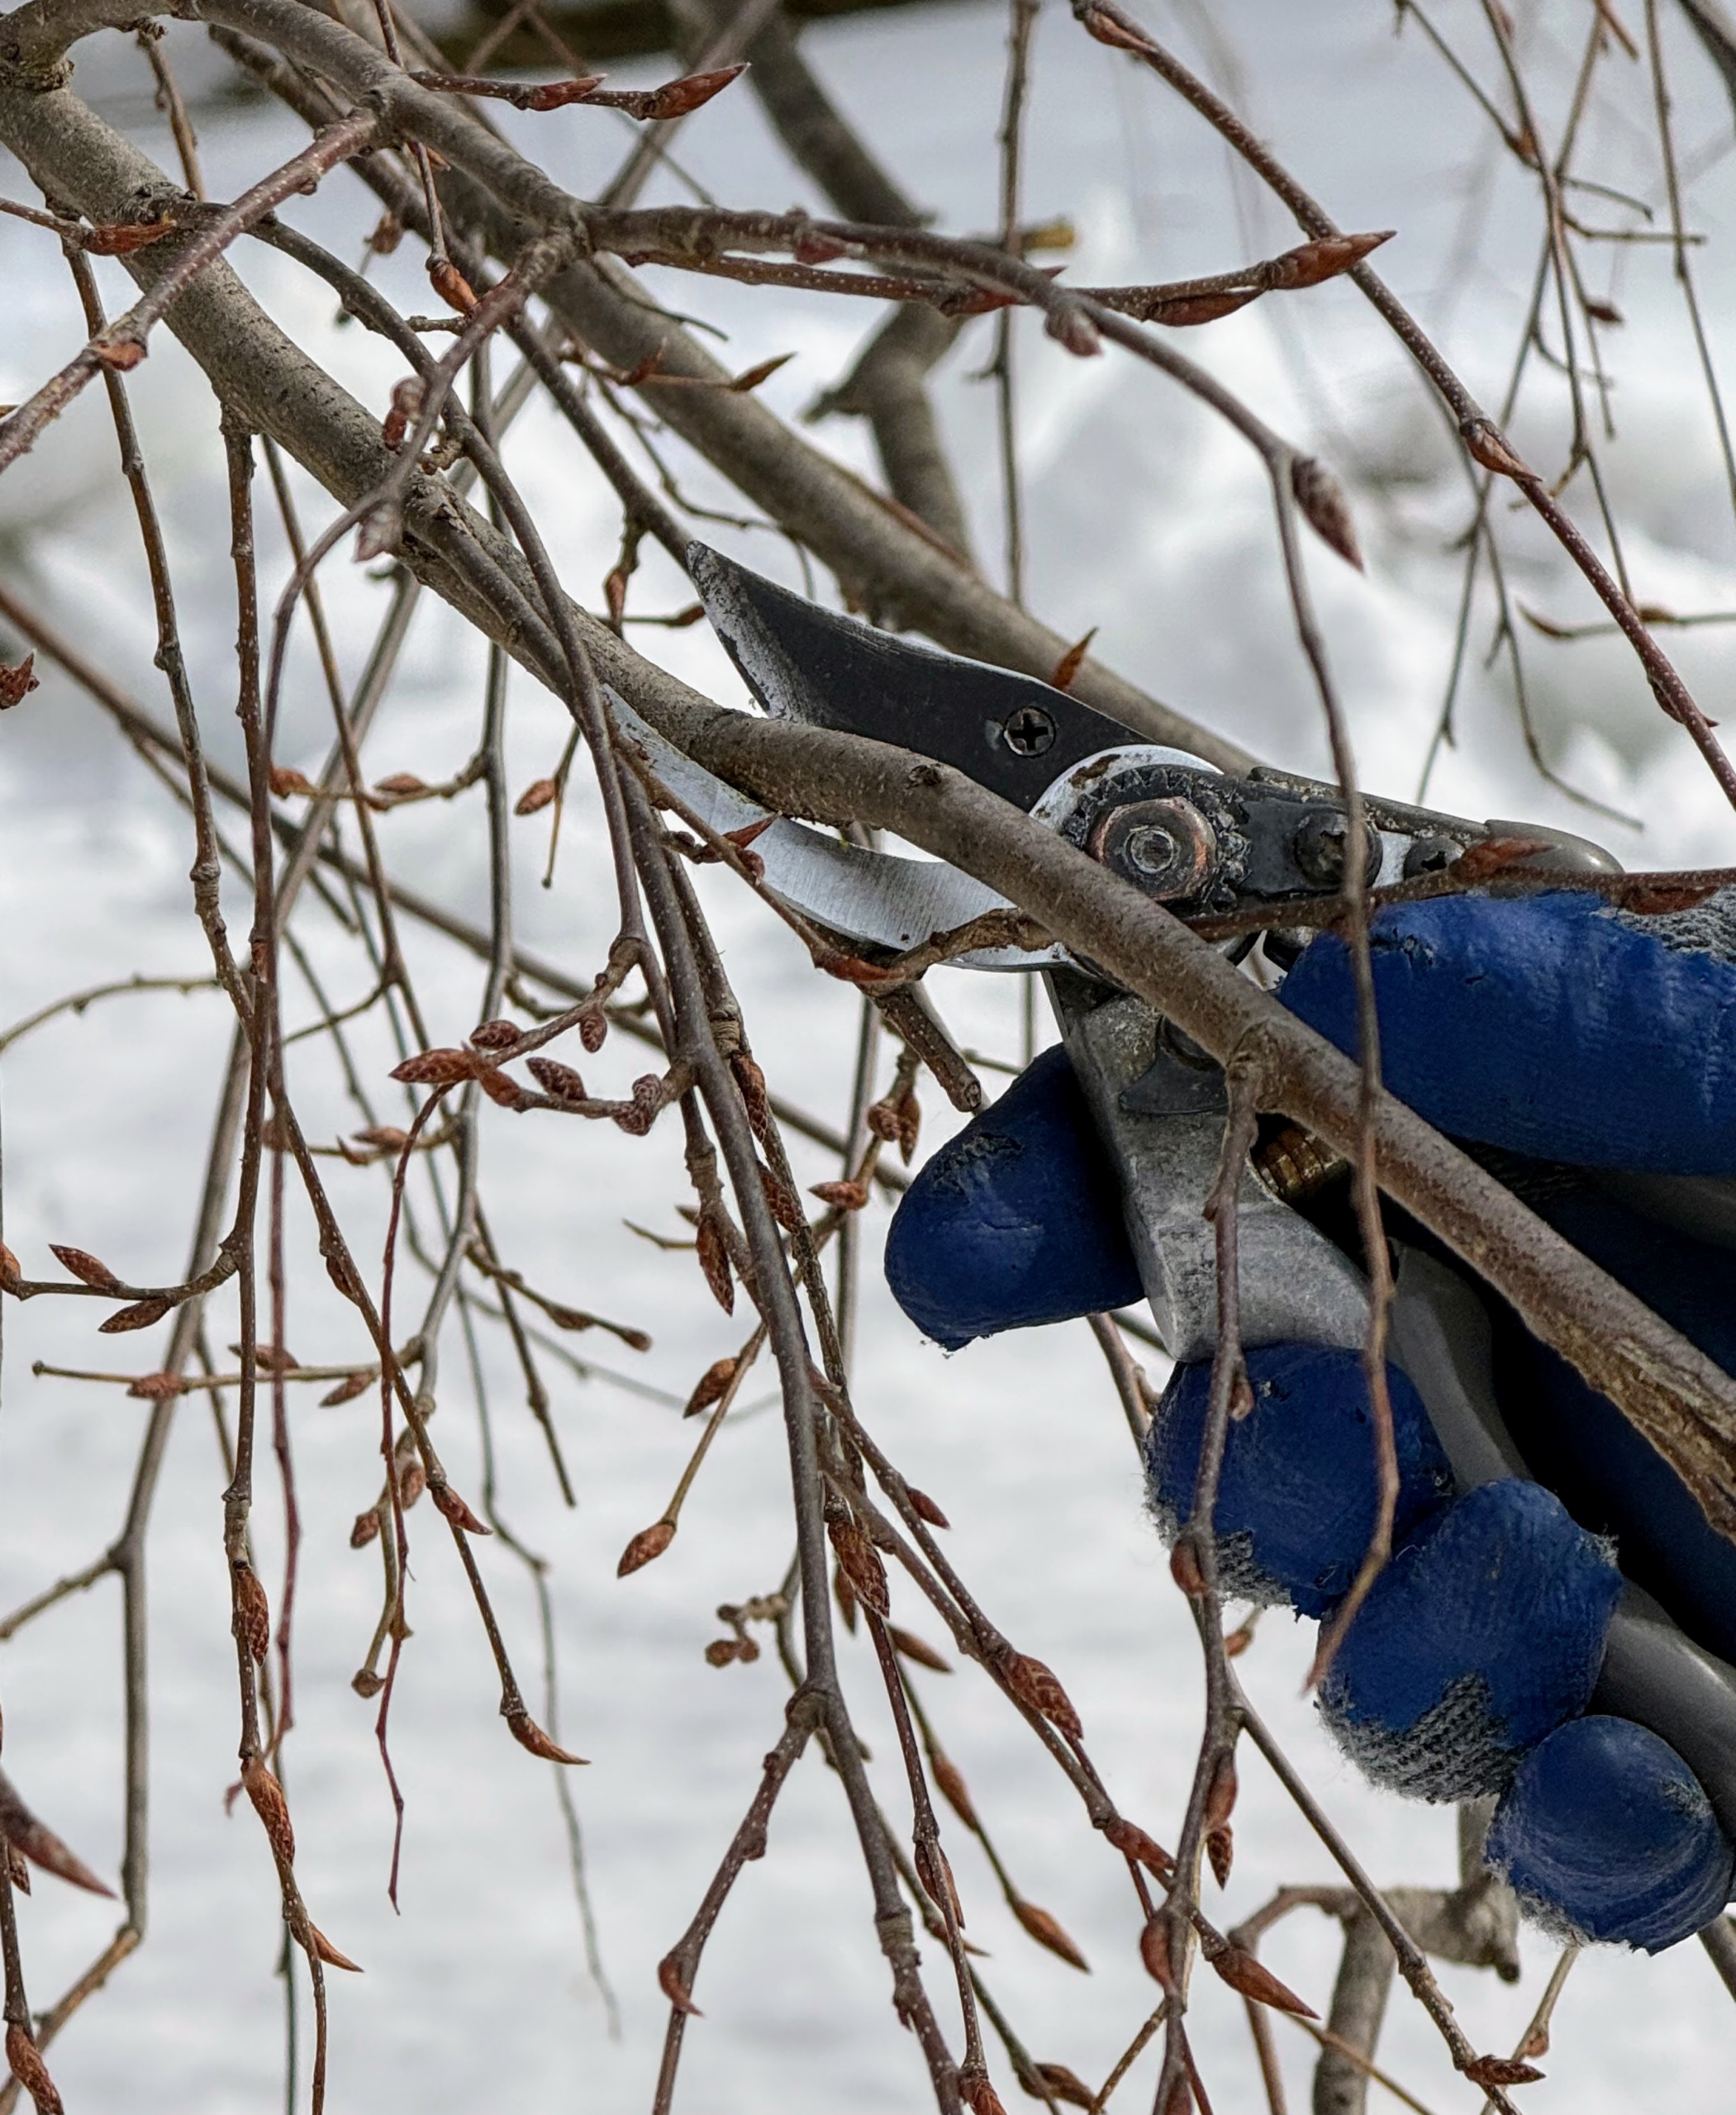
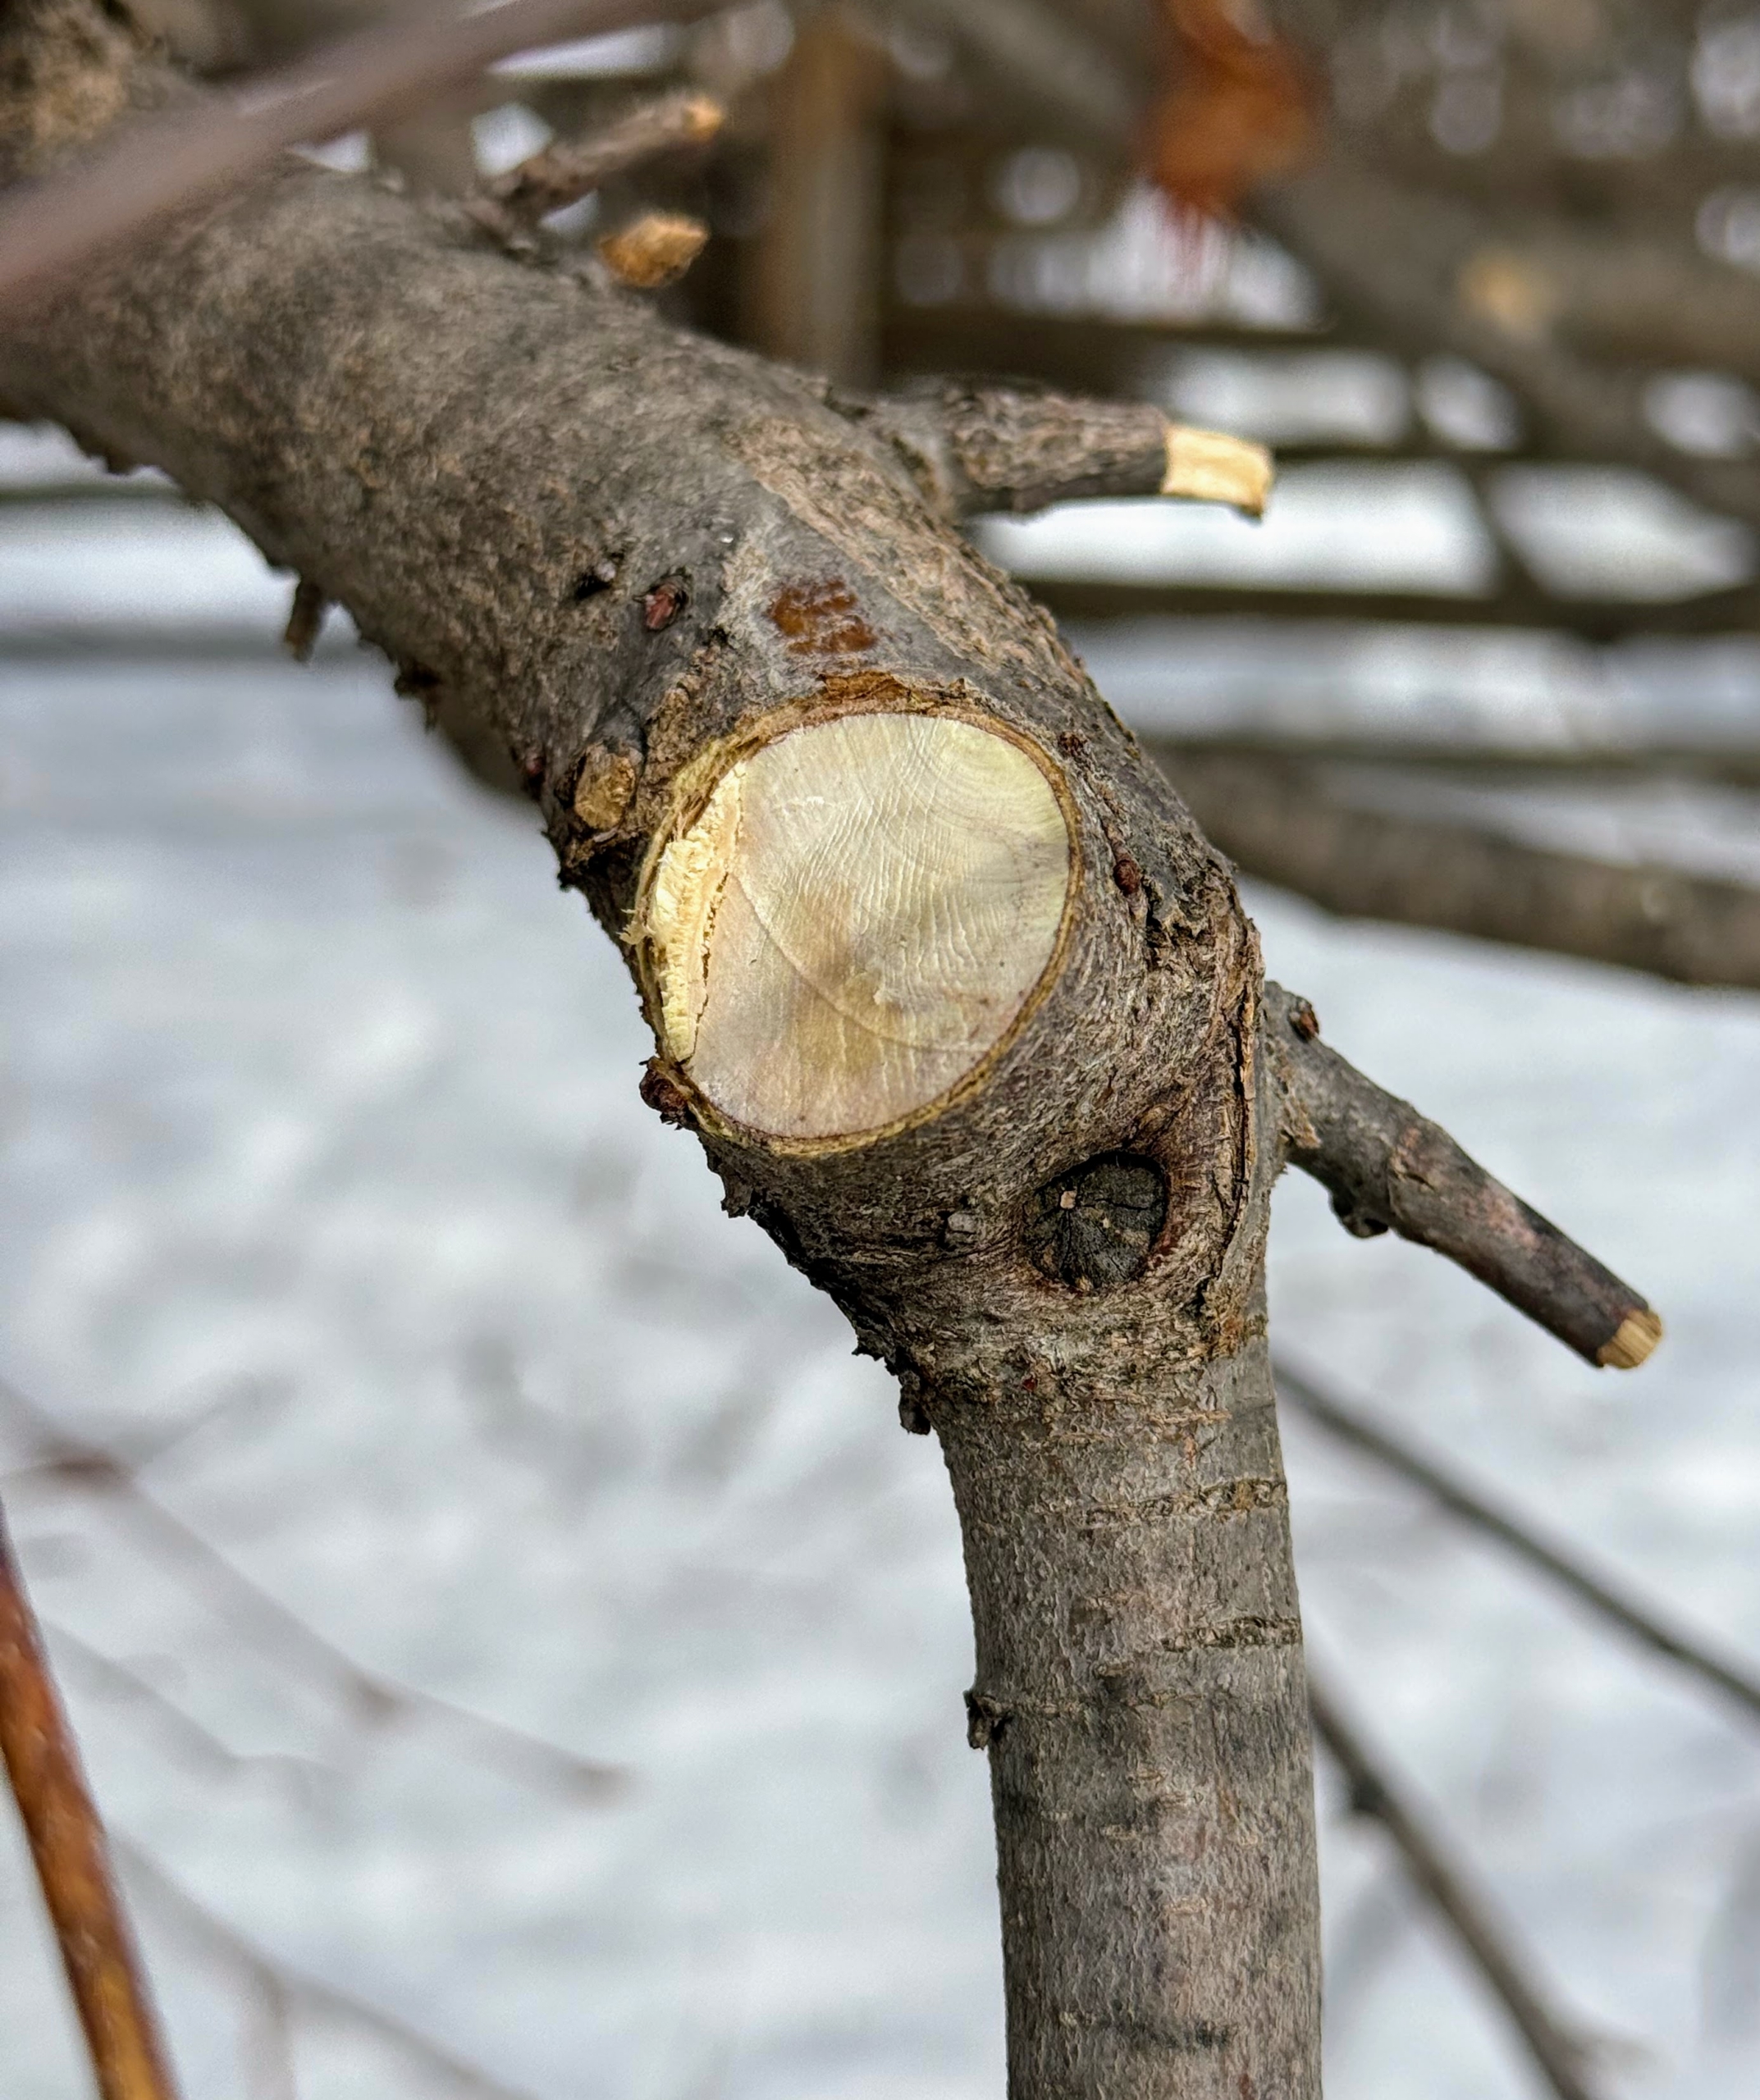
Cuts are always made clean and should be made fairly flush to the branch from which it grew. The idea is to leave slight stubs. By removing any more, the remaining branch has too much of an opening for disease to enter.
And cuts should be clean and straight – something that can only be done with good, sharp tools.
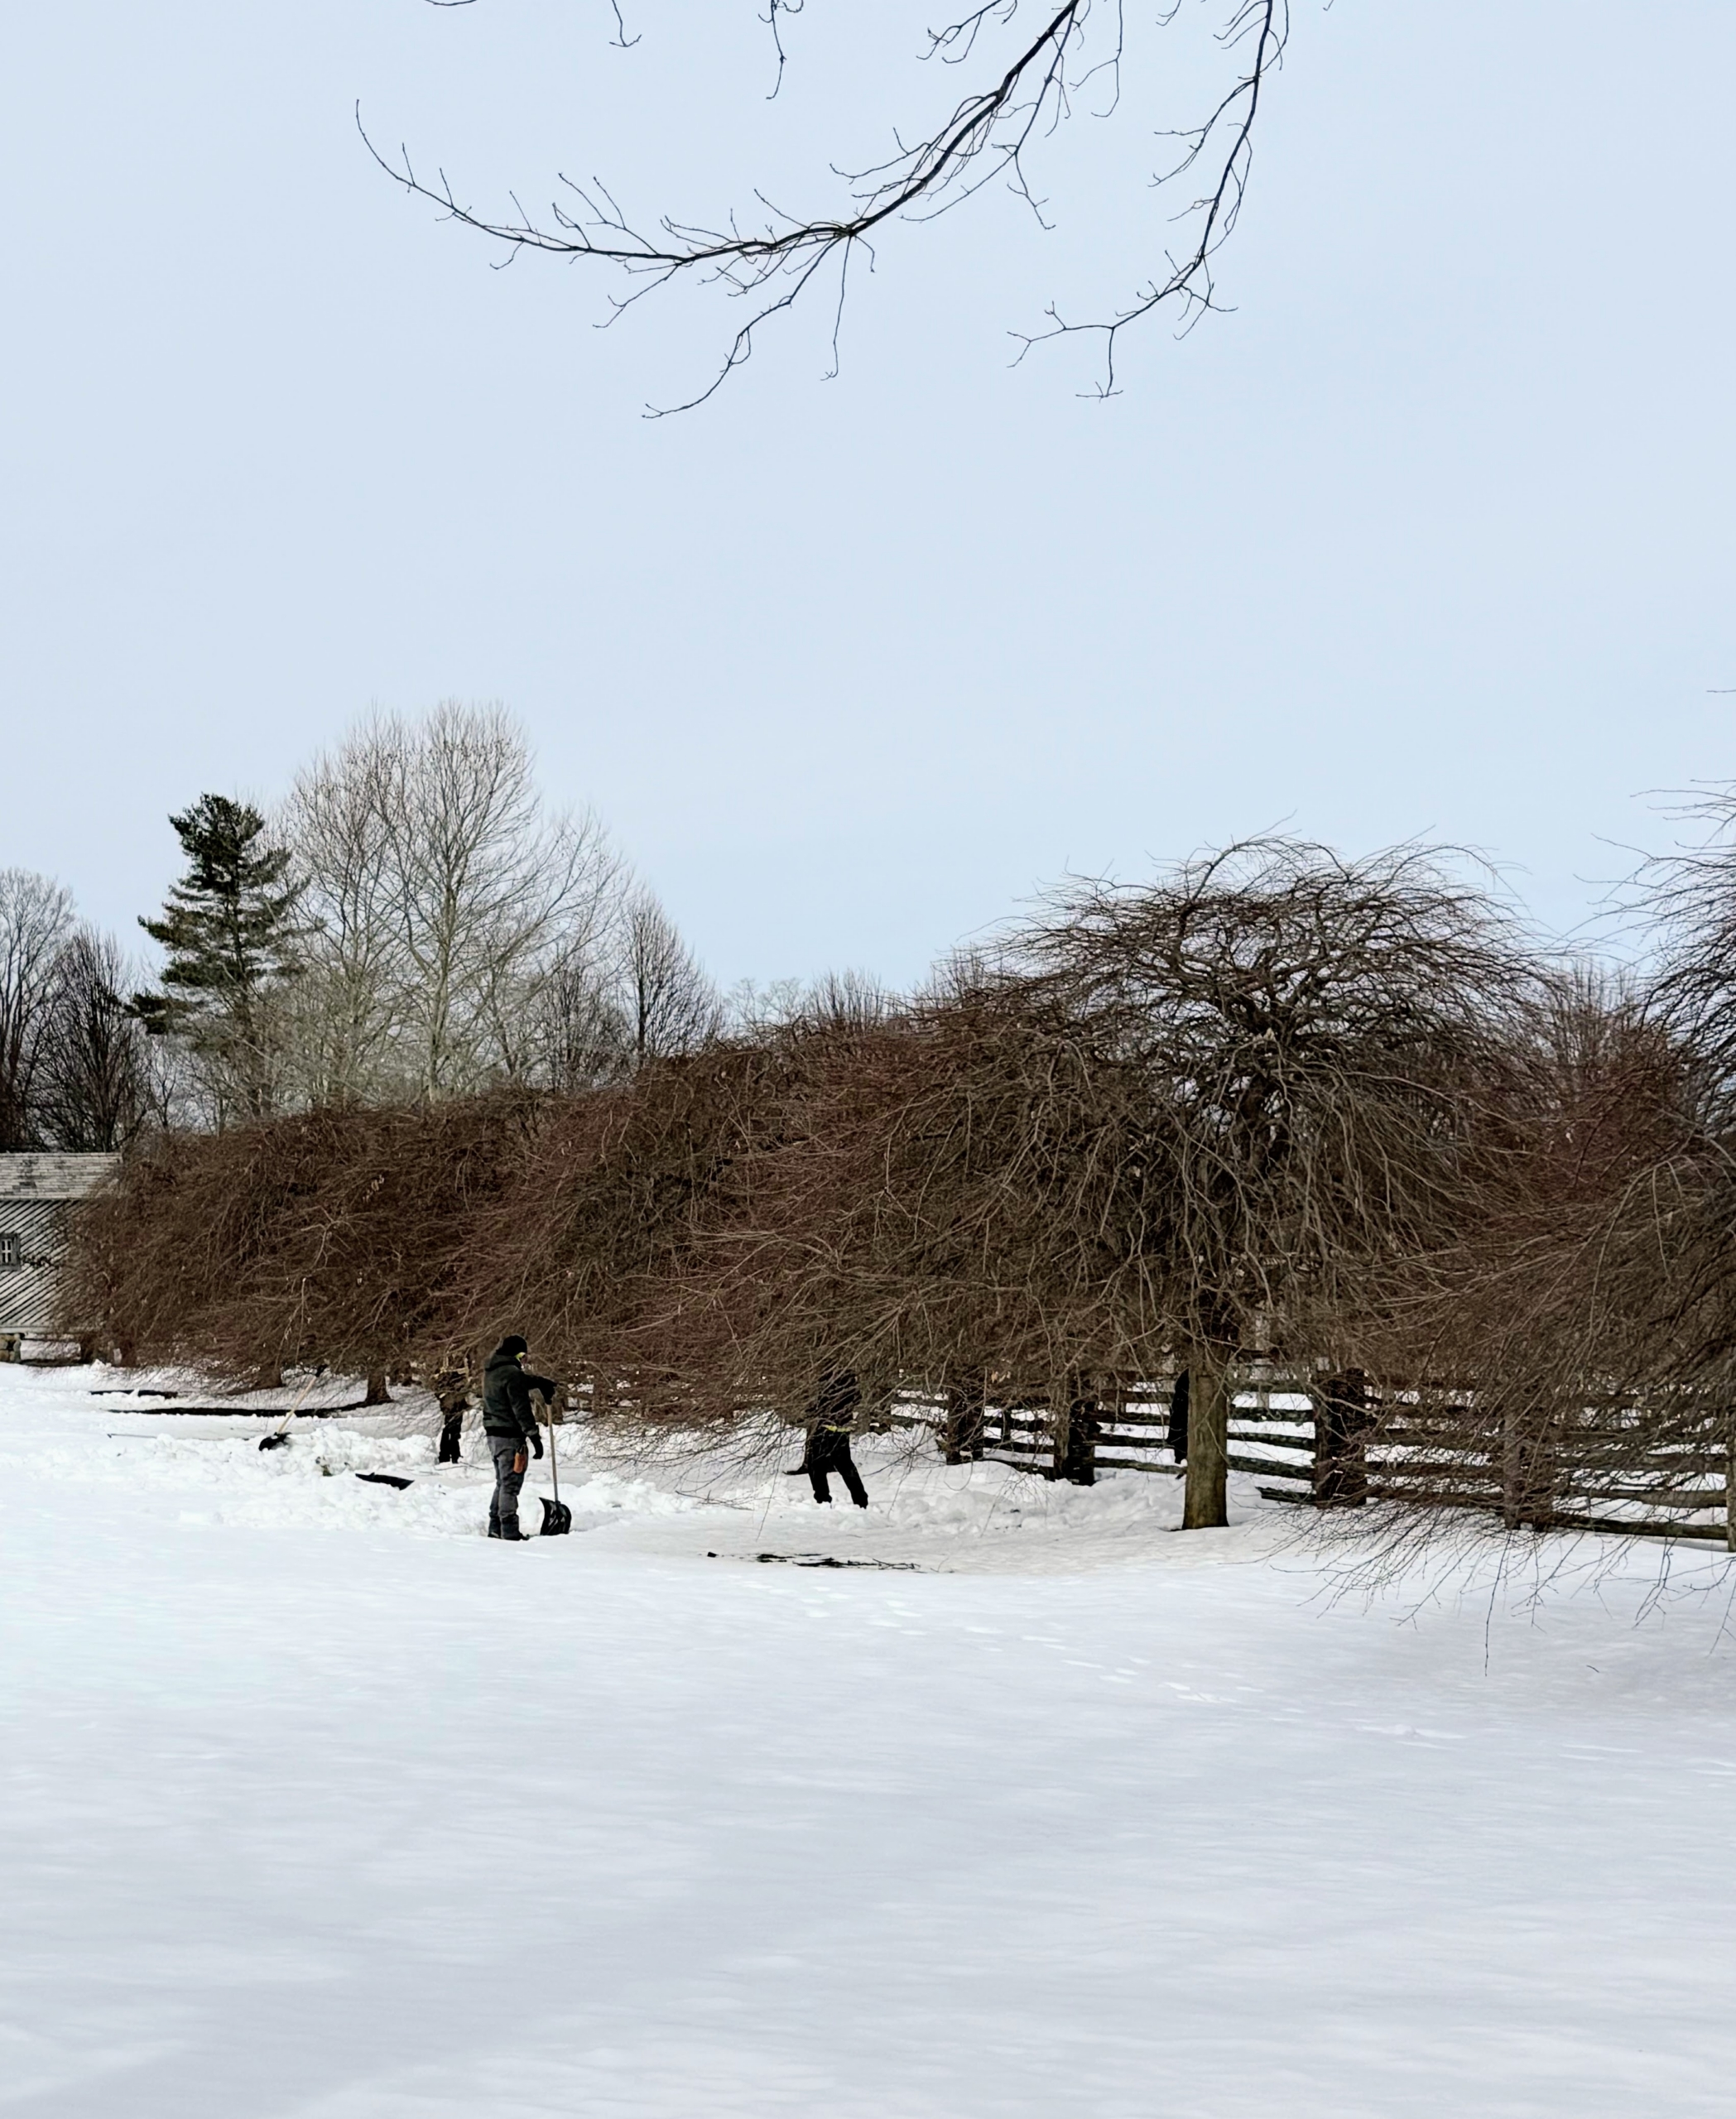
With all the snow on the ground, it is also necessary to shovel a path, so the crew can work on each tree and safely set up their ladders. We’ve had a very snowy season.
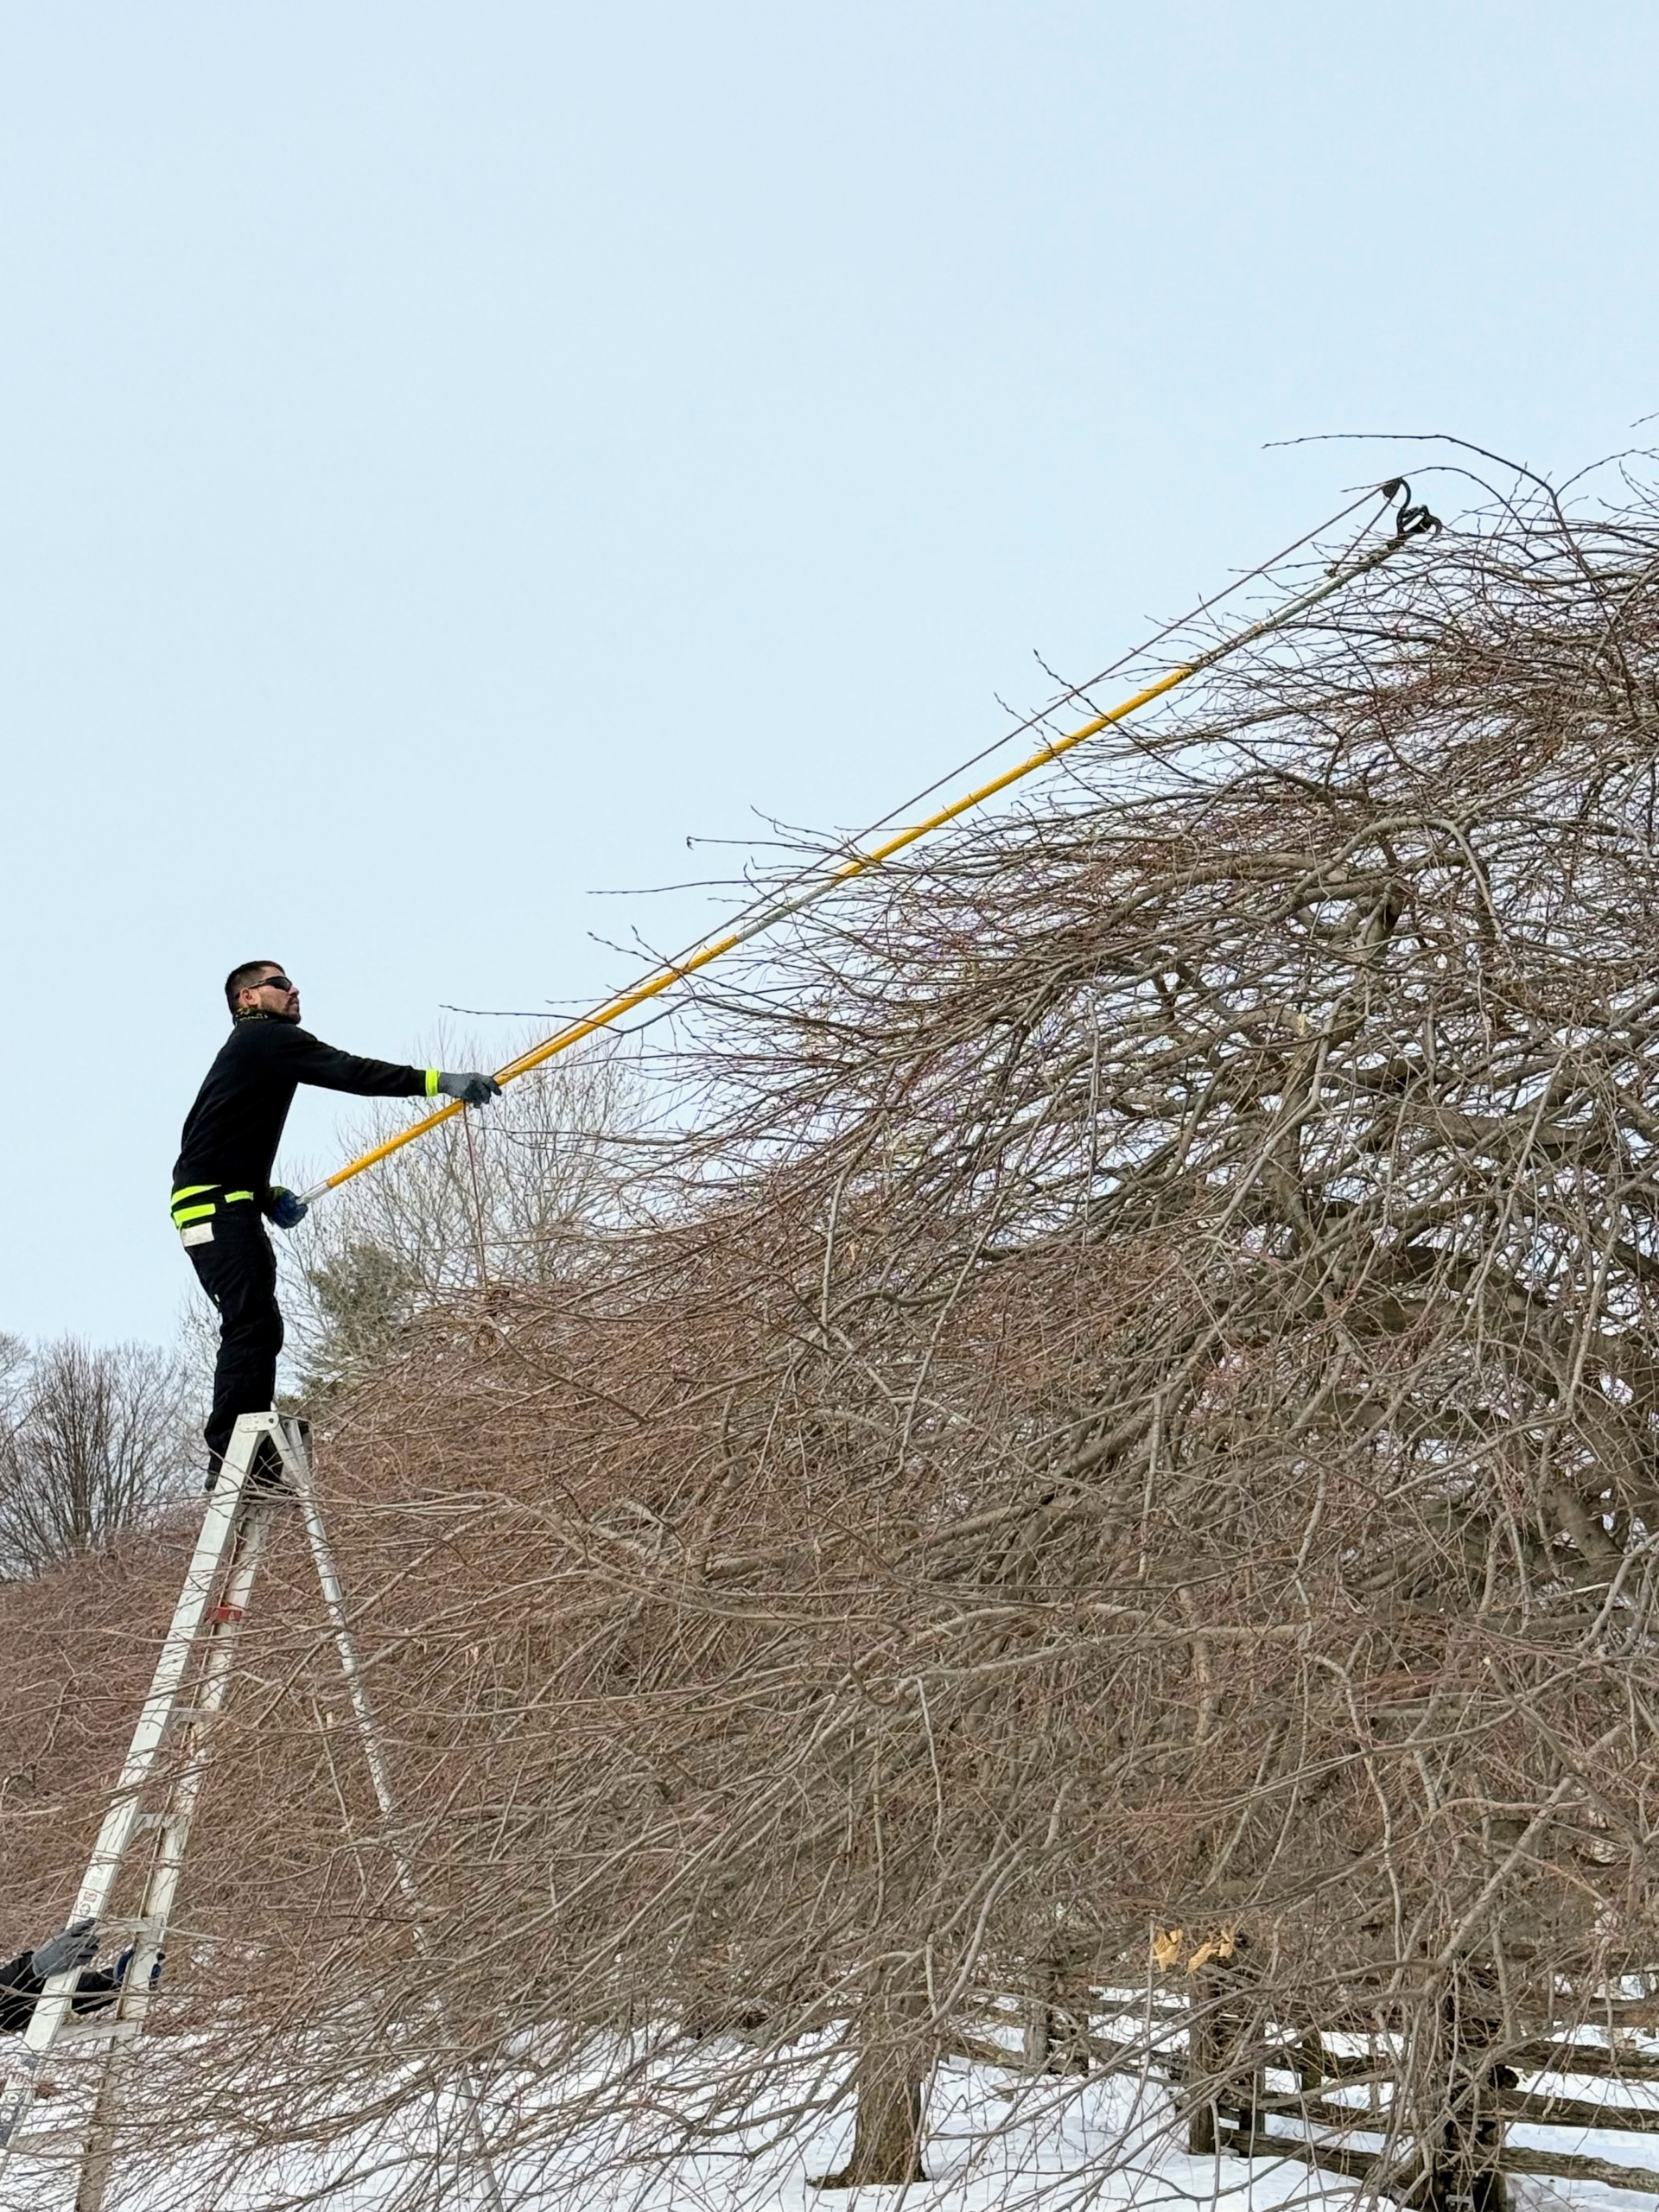
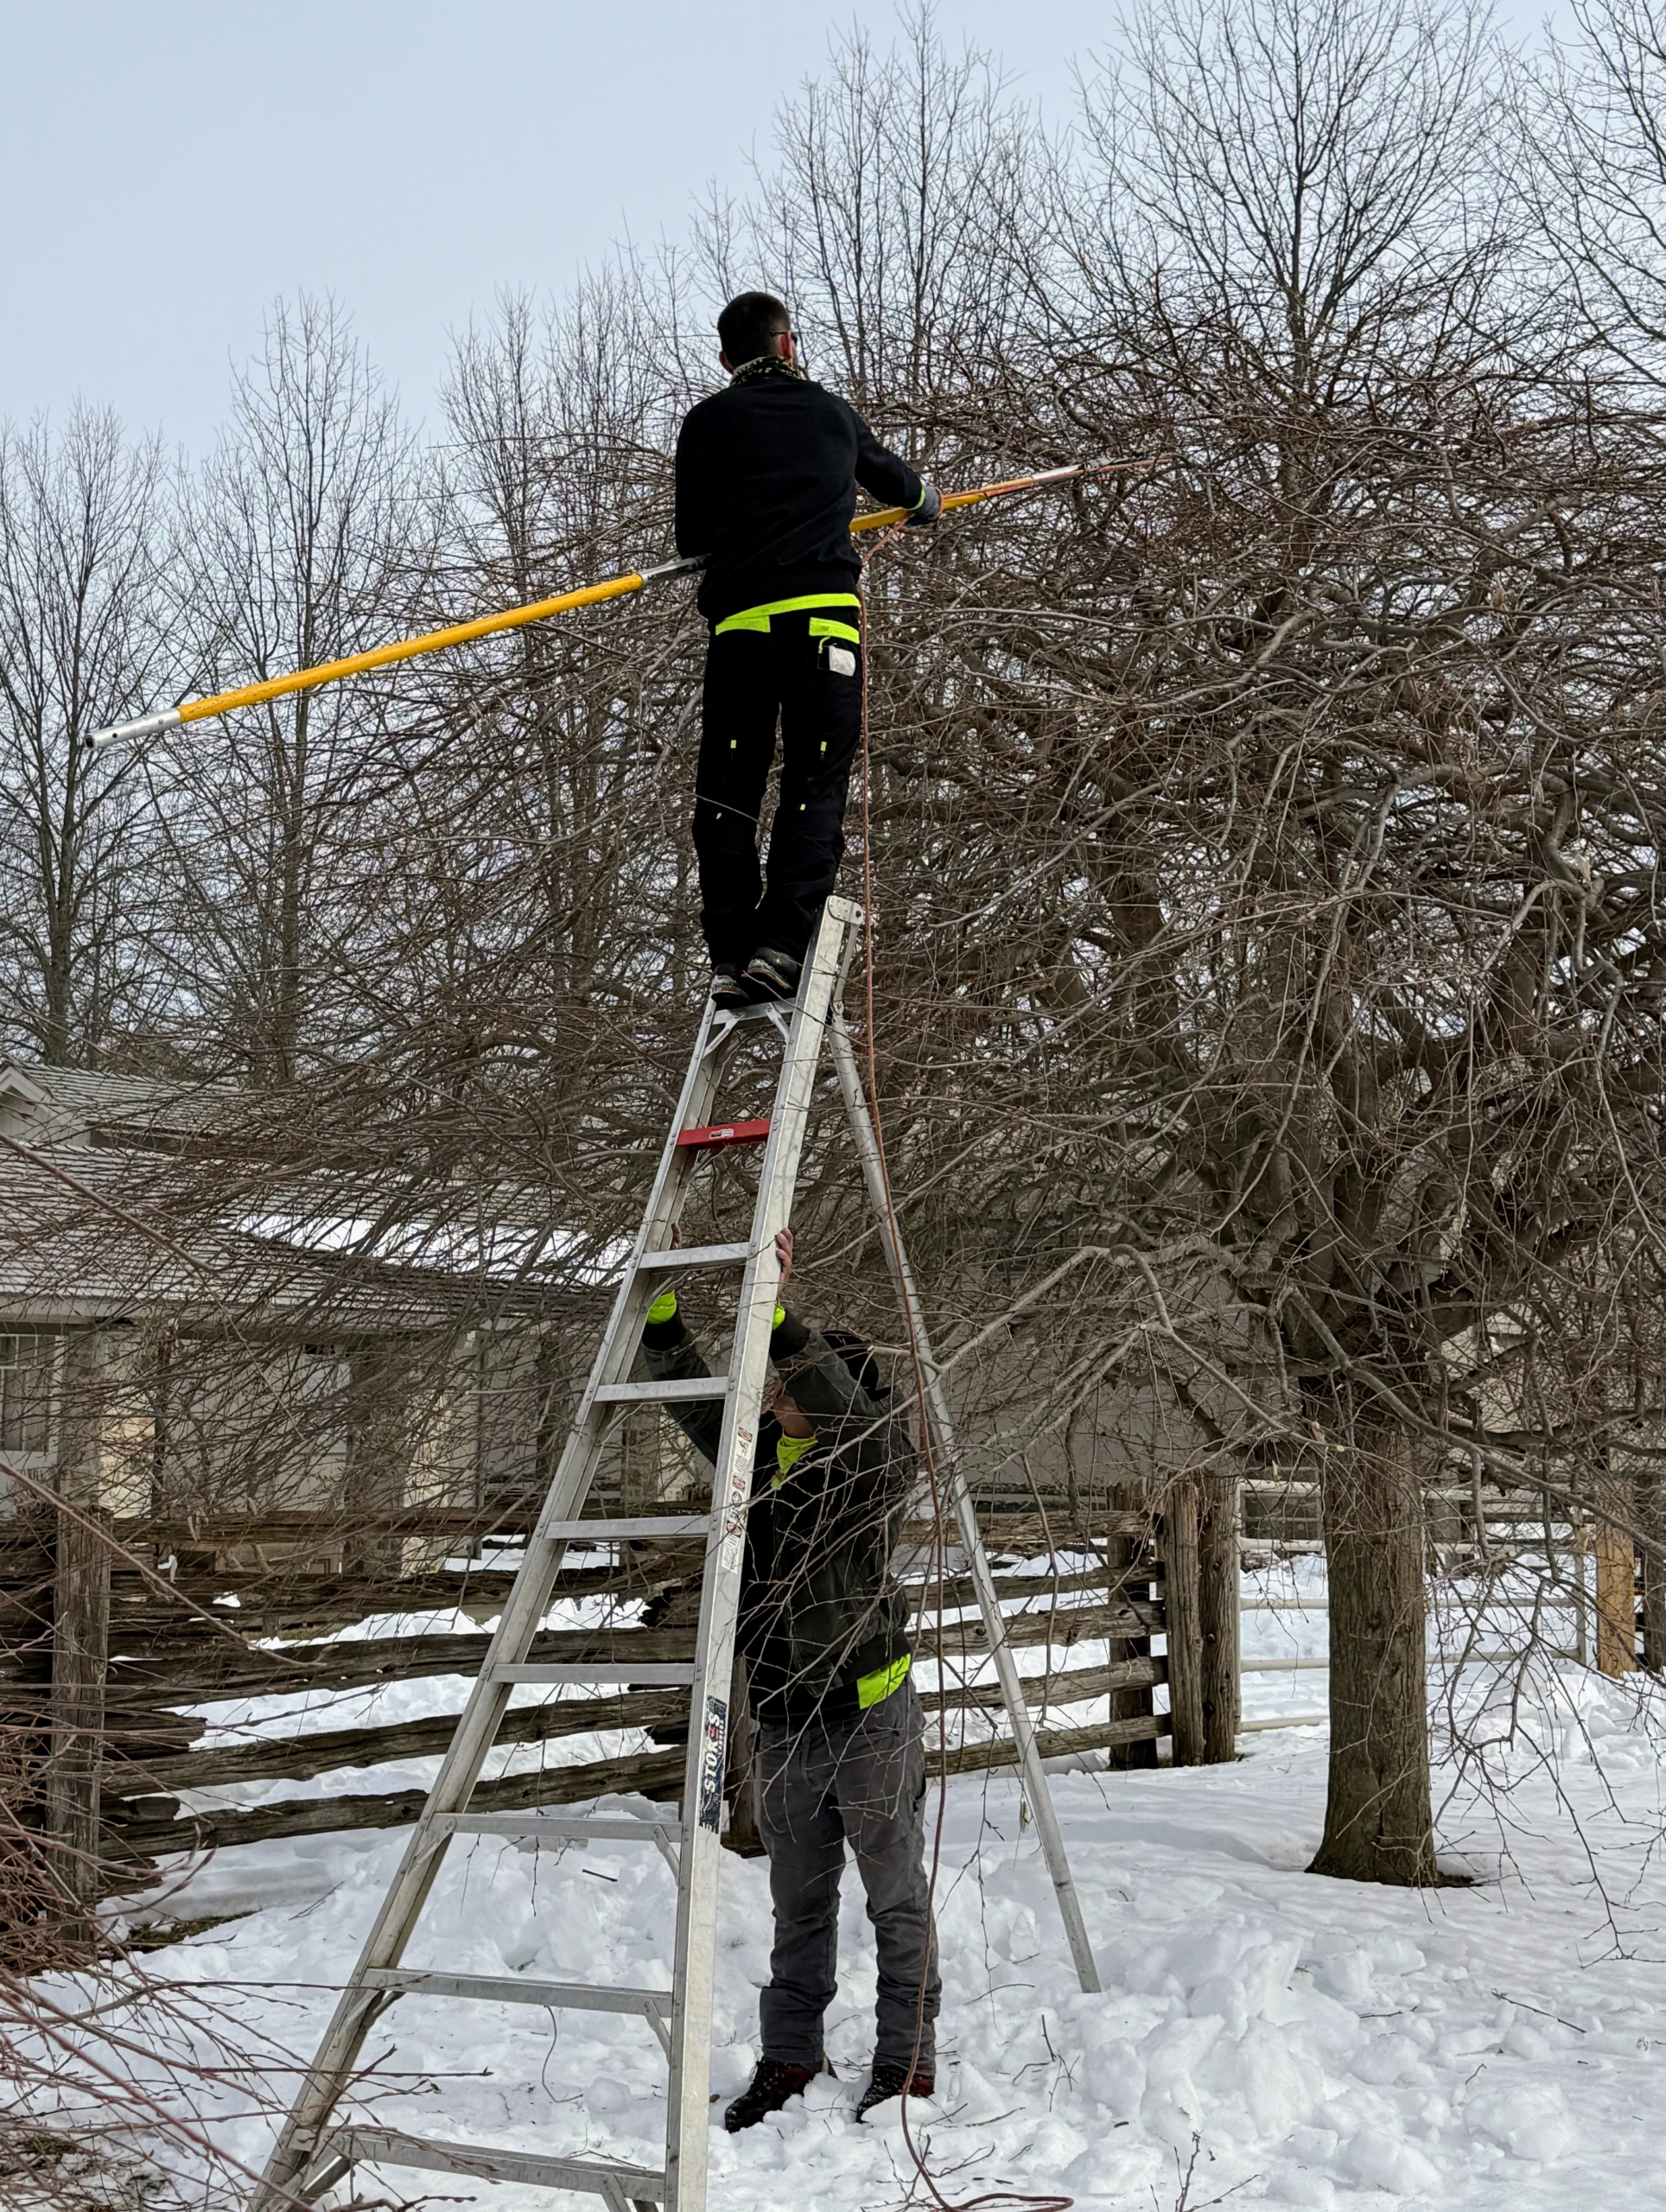
While Ray works from the ground…
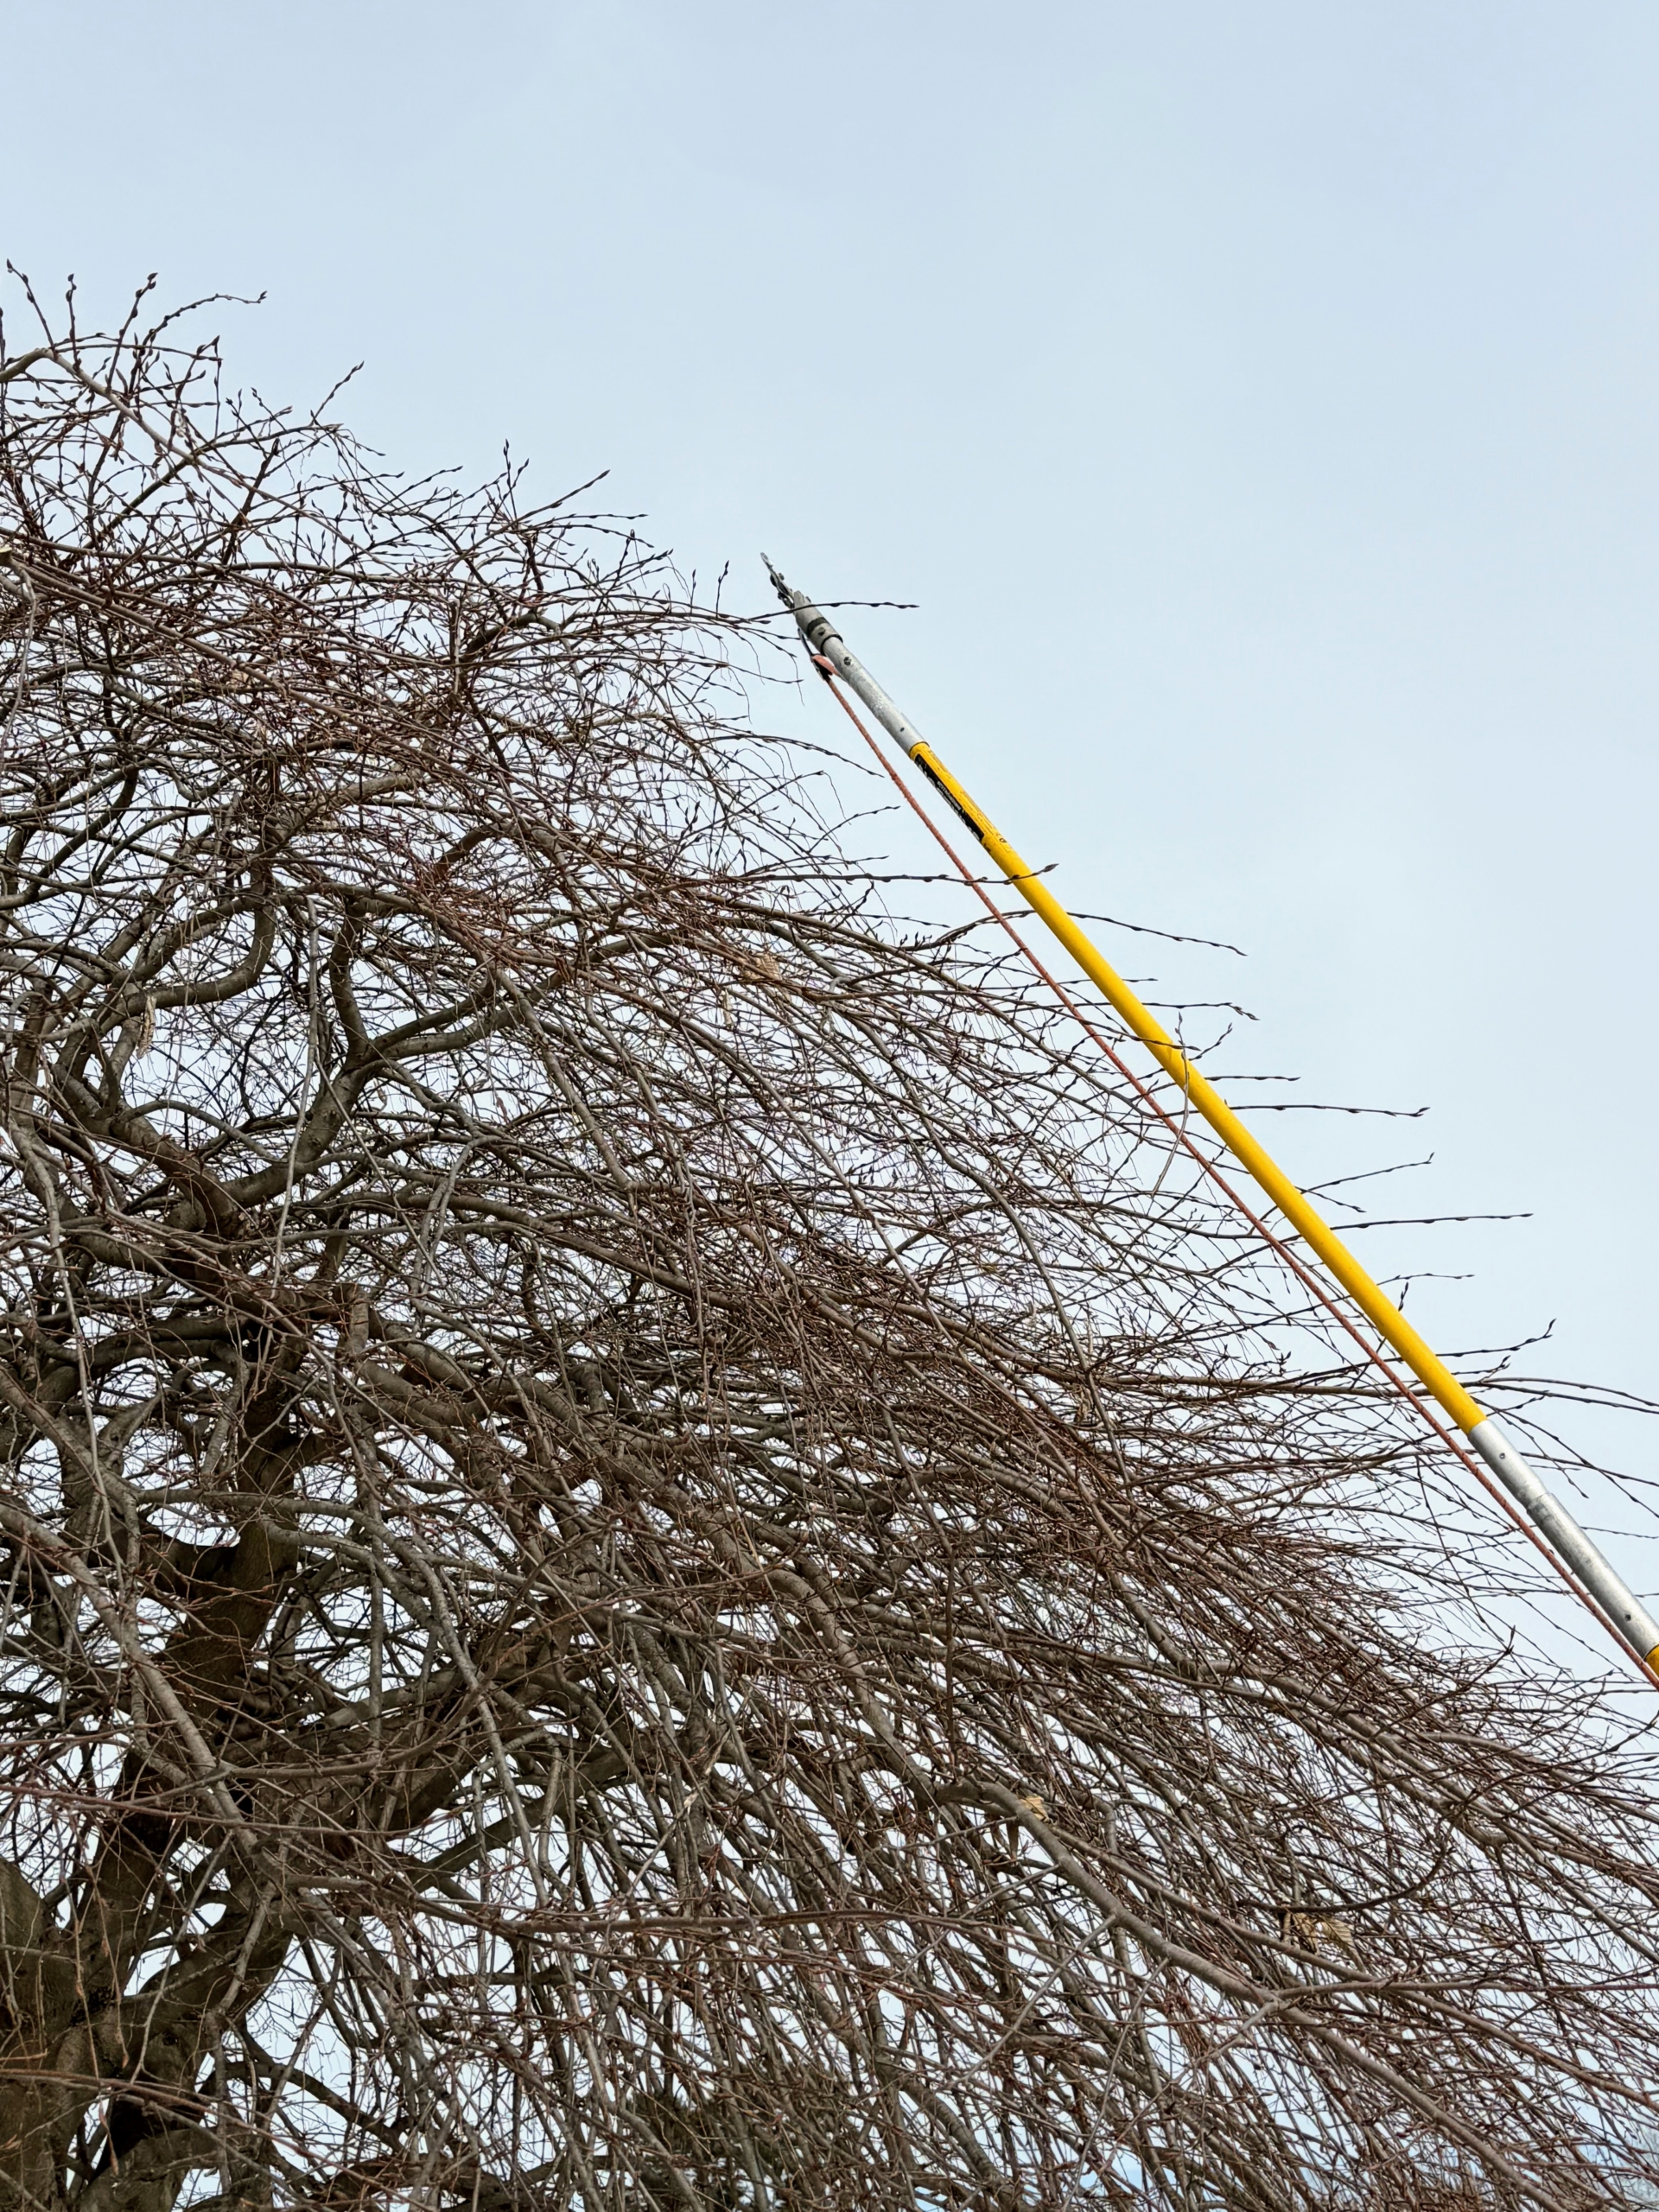
… Rudy attaches an extension to his pole saw, so he can work from the top.
The extensions allow them to reach high branches from below.
Ray periodically steps back to look at the work done from afar. He assesses where trimming is still needed to create the best shape.
Sometimes a ladder is still necessary. Here, Ray reaches branches at the very top center of the tree.
And whenever someone is on the ladder, someone else is at its base ensuring the ladder is stable and safe.
Branches are neatly gathered and piled so they can be easily transported to the wood chipper.
Under ideal conditions, weeping hornbeams can live up to 120-years or more. I am so pleased these trees are thriving here at my farm – they are among my favorites.
A visit to Italy should include a stop in Milan - a beautiful metropolis in the country’s northern Lombardy region.
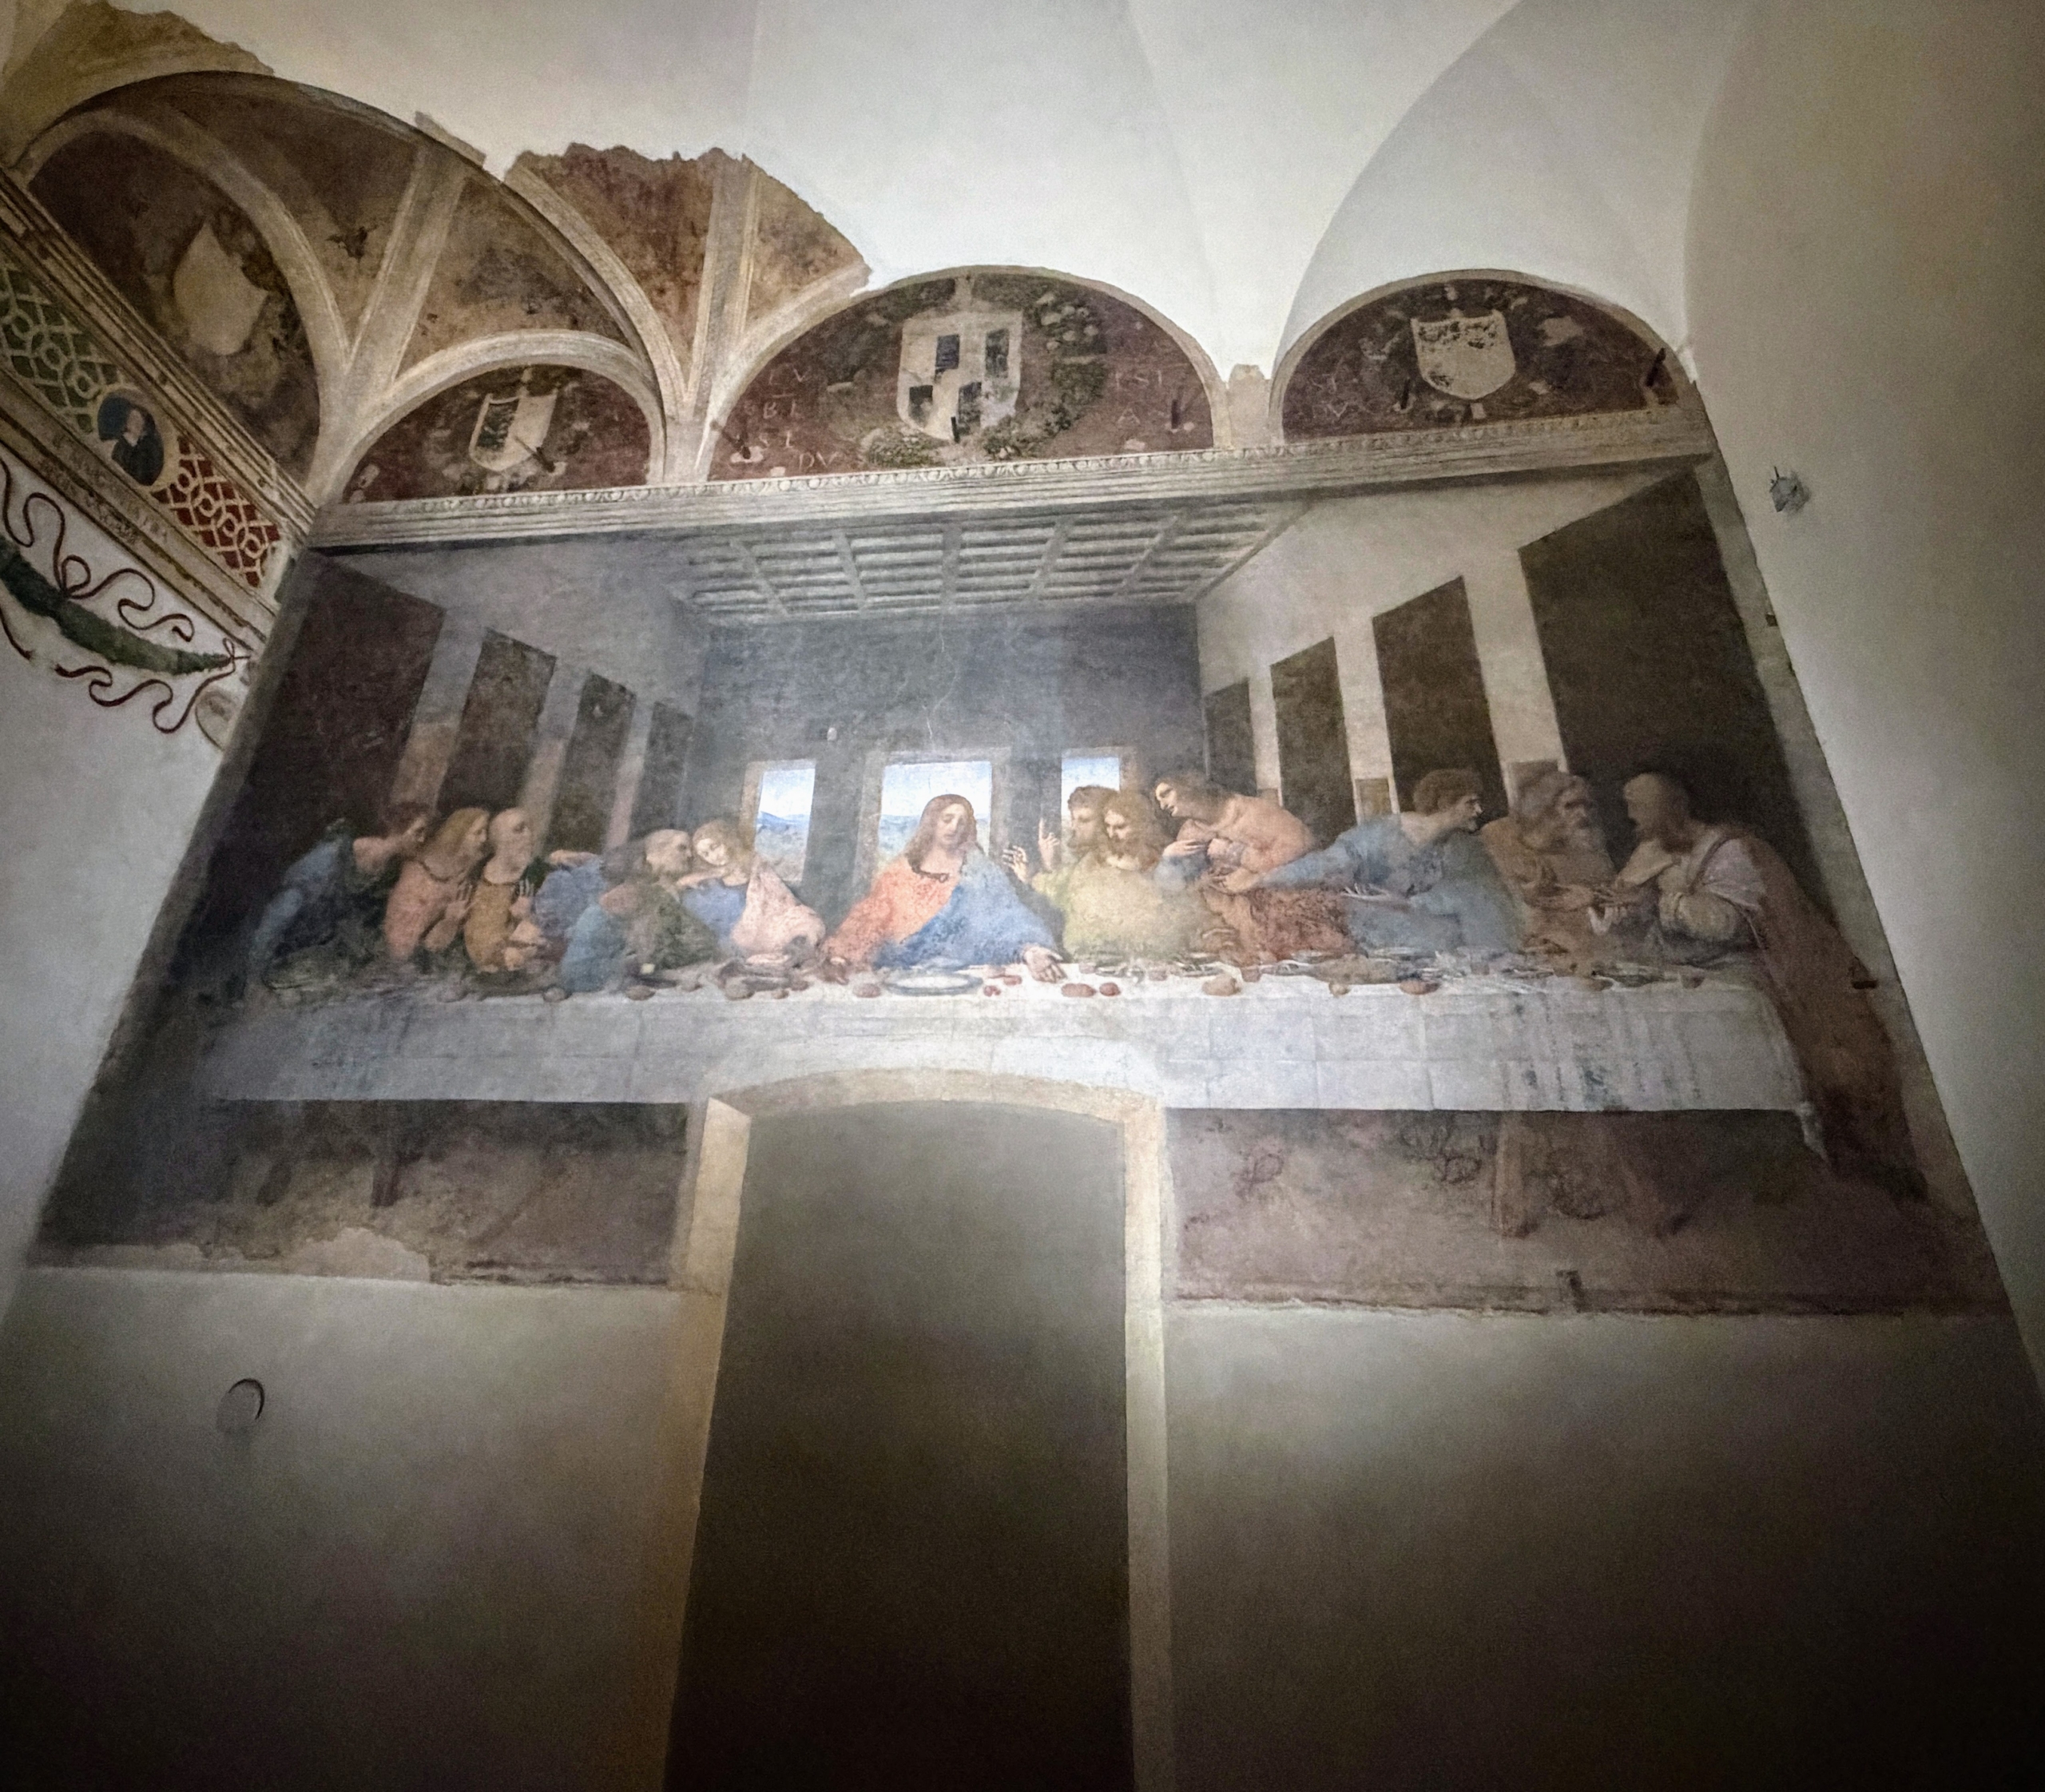
Last month, we all enjoyed watching more than 3500 athletes from 93 different countries compete at the 2026 Winter Olympics in Milan And Cortina d'Ampezzo. I had the honor of attending the Games and serving as commentator for the Women's Figure Skating Short Program with my friend, Snoop Dogg. In between television appearances, video tapings, and interviews, I also had the opportunity to tour the hosting city. I, along with my team, visited various shops, ate at delicious restaurants, walked through the Milan Cathedral, stood inside the grand opera house La Scala, and saw The Last Supper, the famous mural painting by Leonardo da Vinci. It was a most exciting and productive trip.
Enjoy these photos.
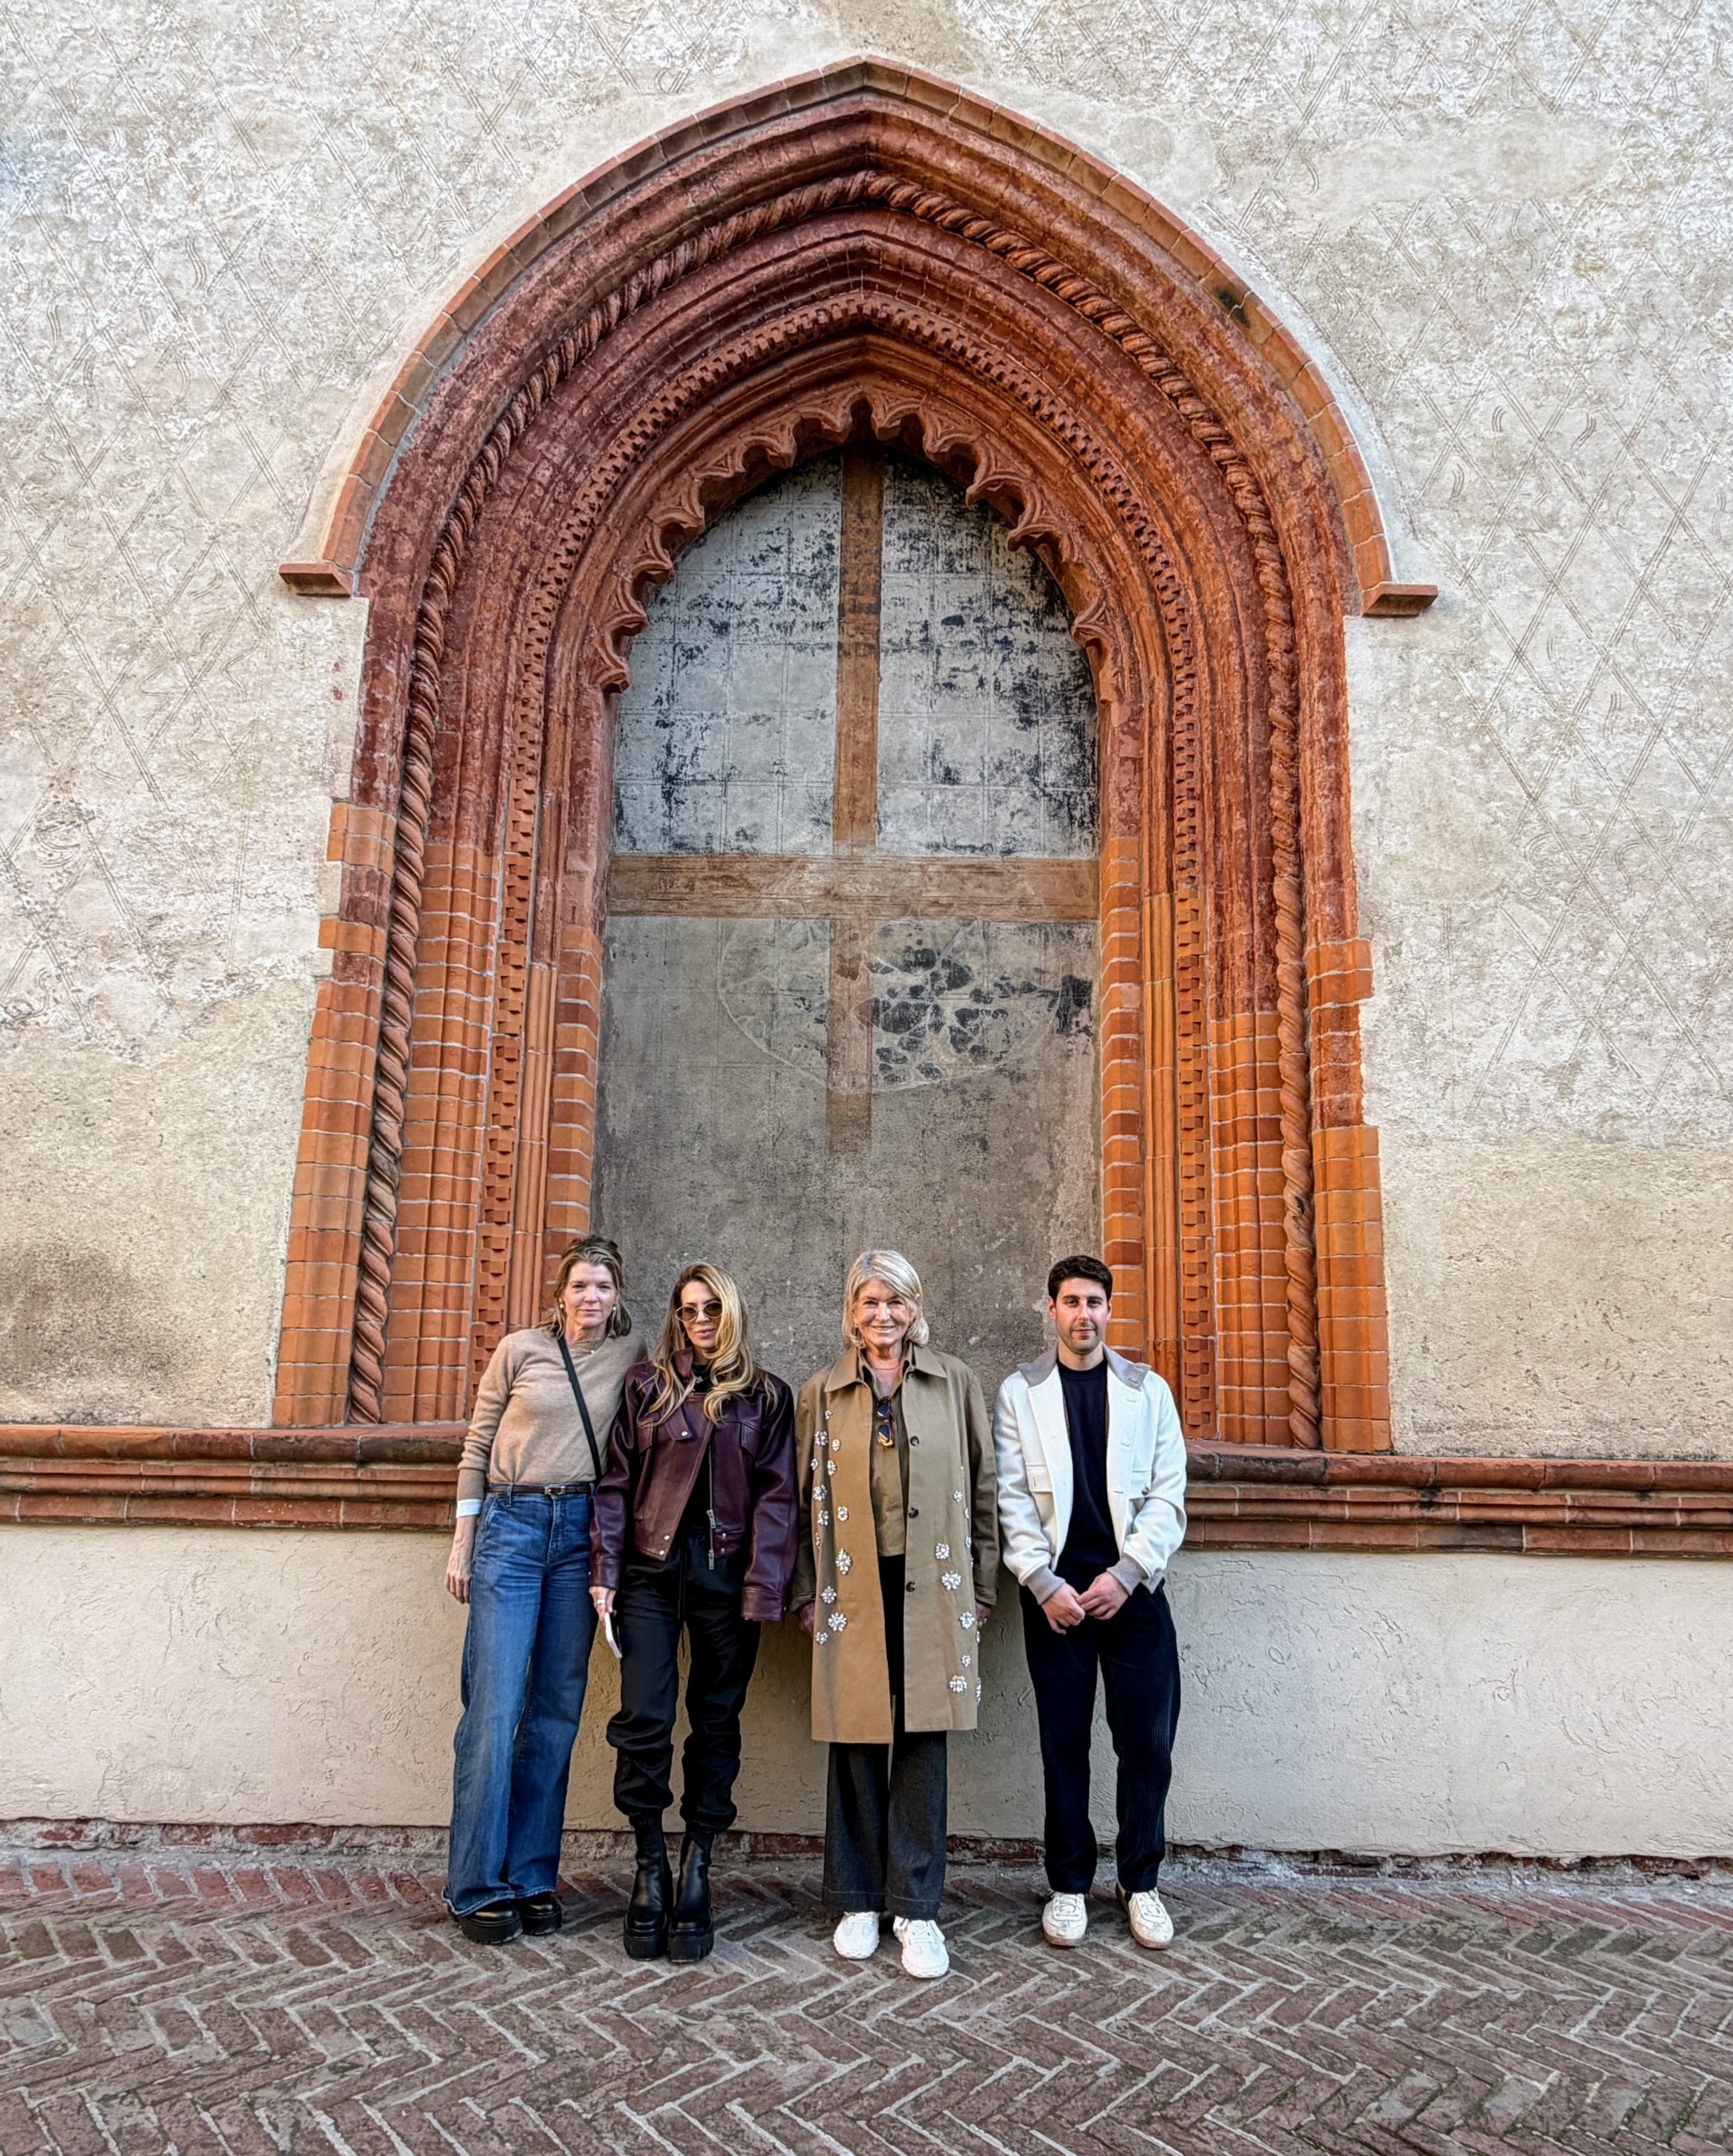
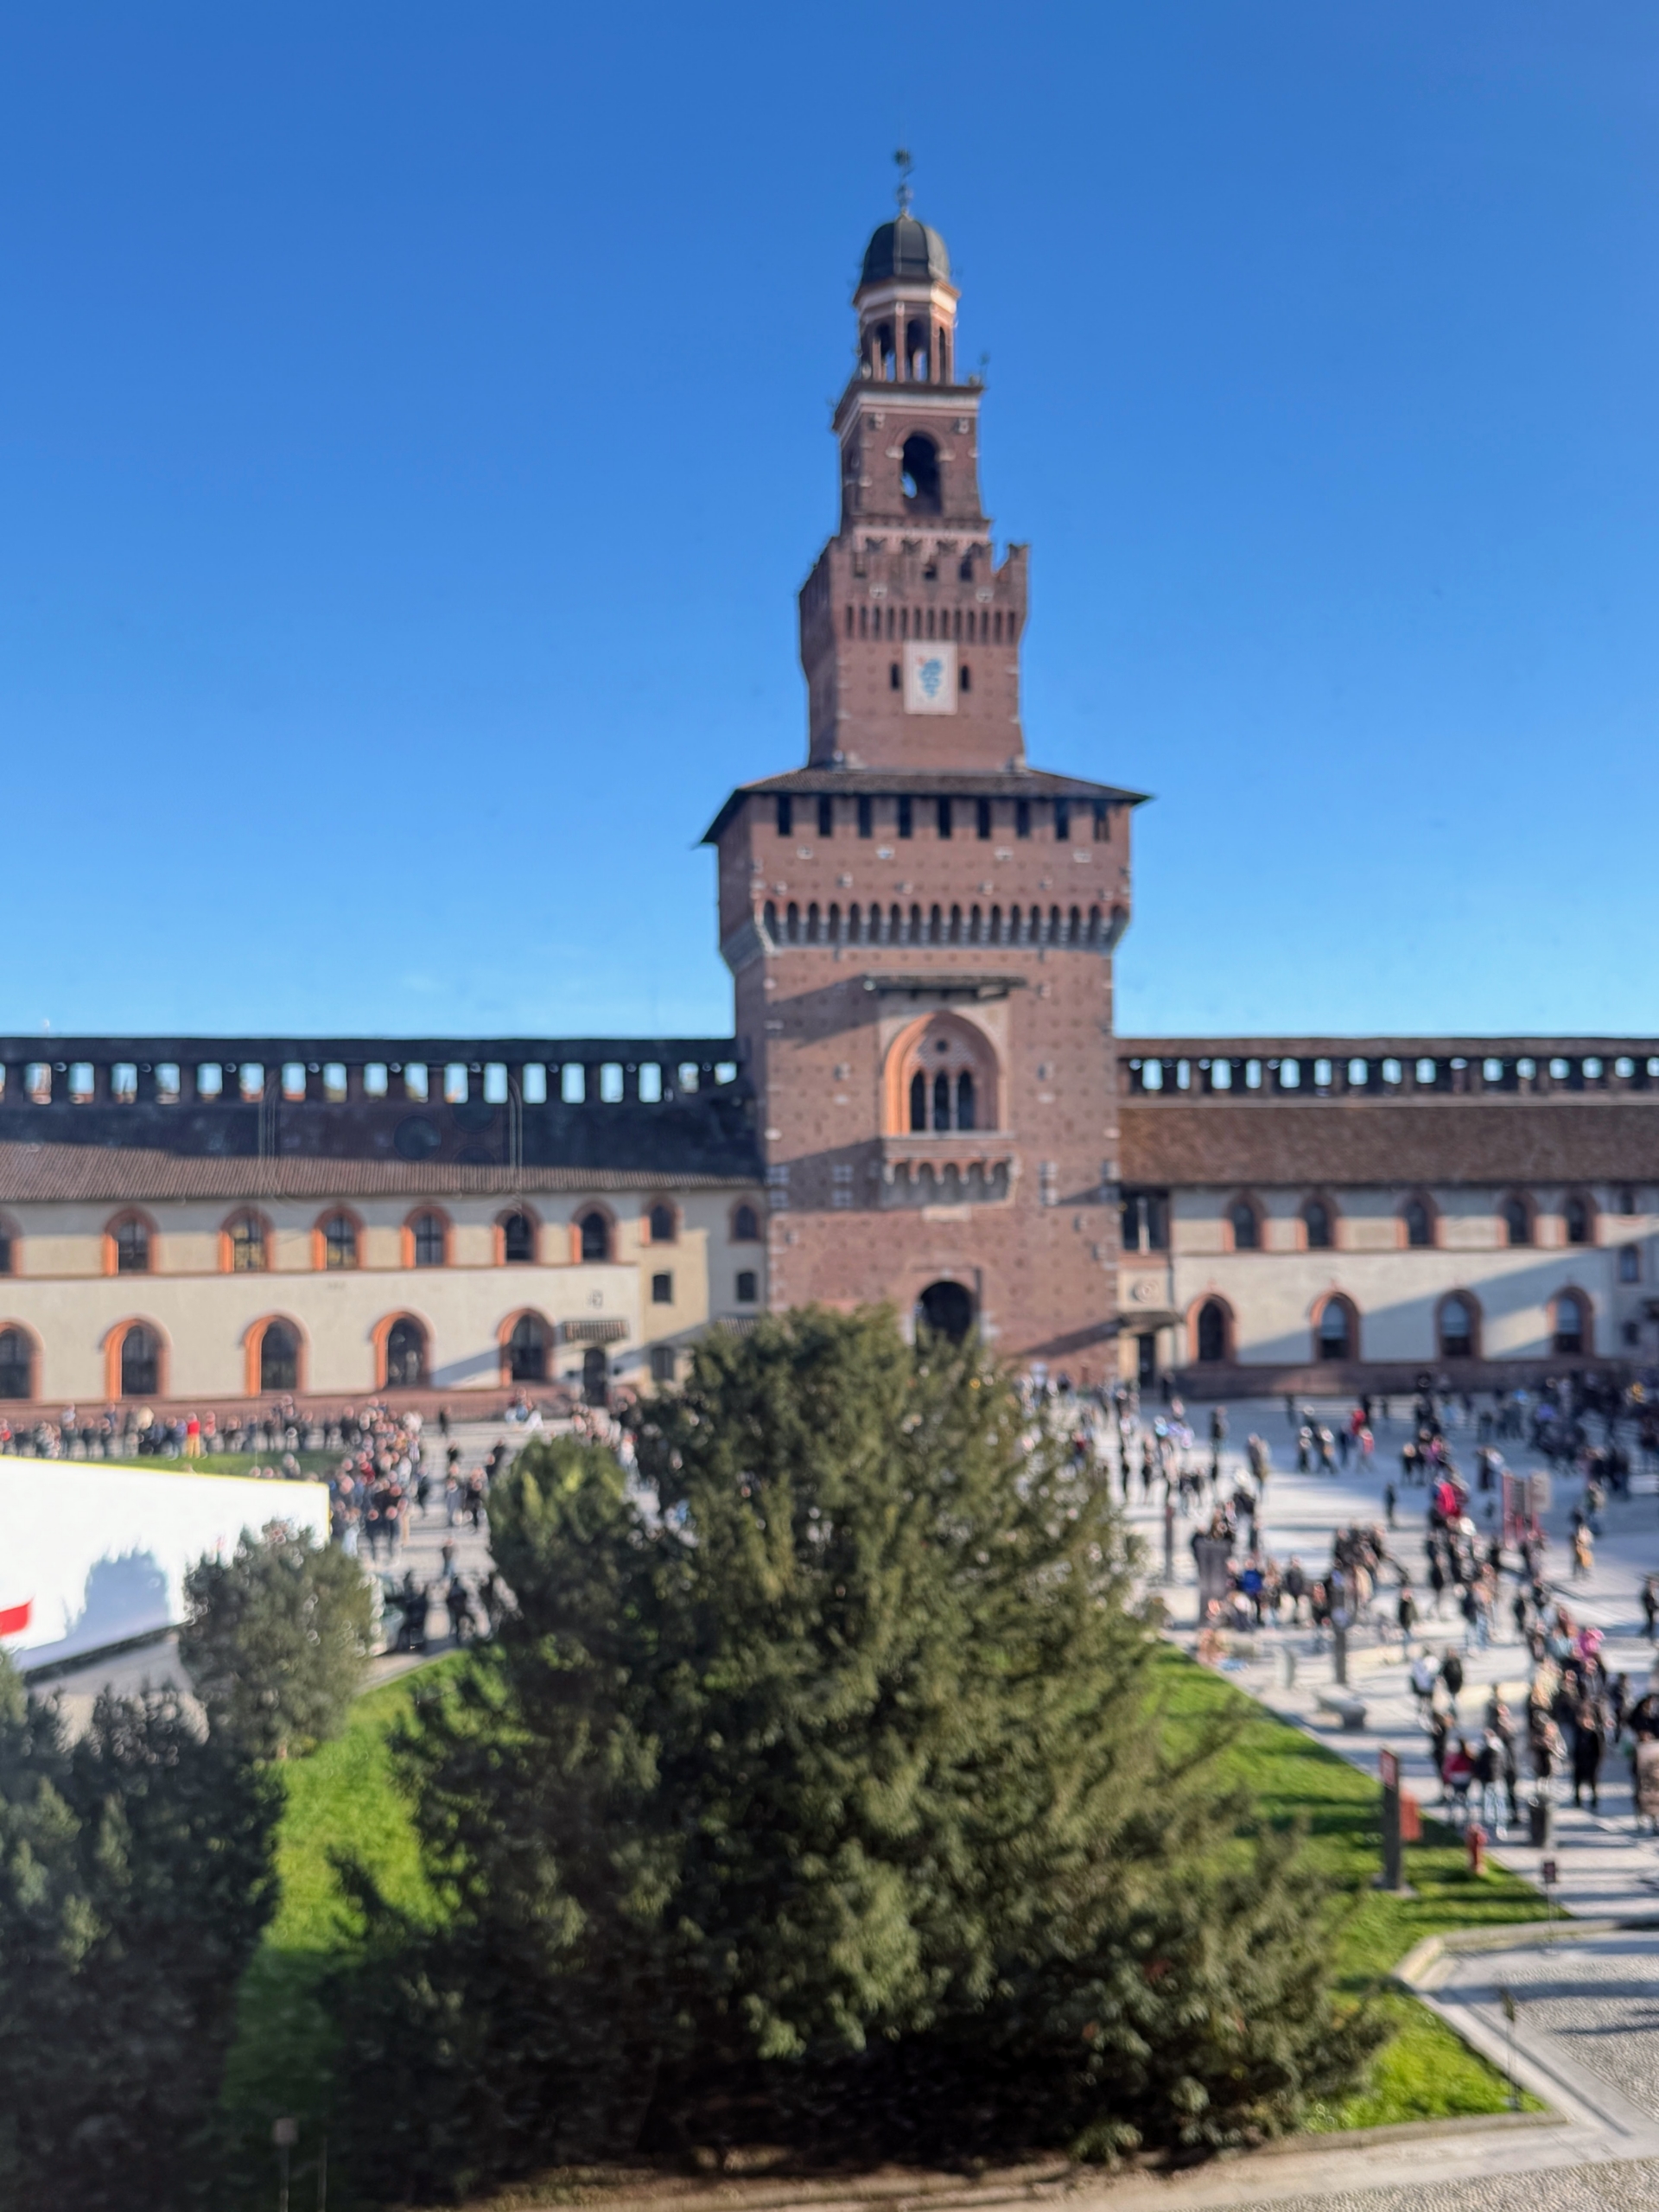
Here I am with my team in front of Castello Sforzesco, the Sforza Castle. This medieval fortification was built in the 15th century and later enlarged in the 16th and 17th centuries.
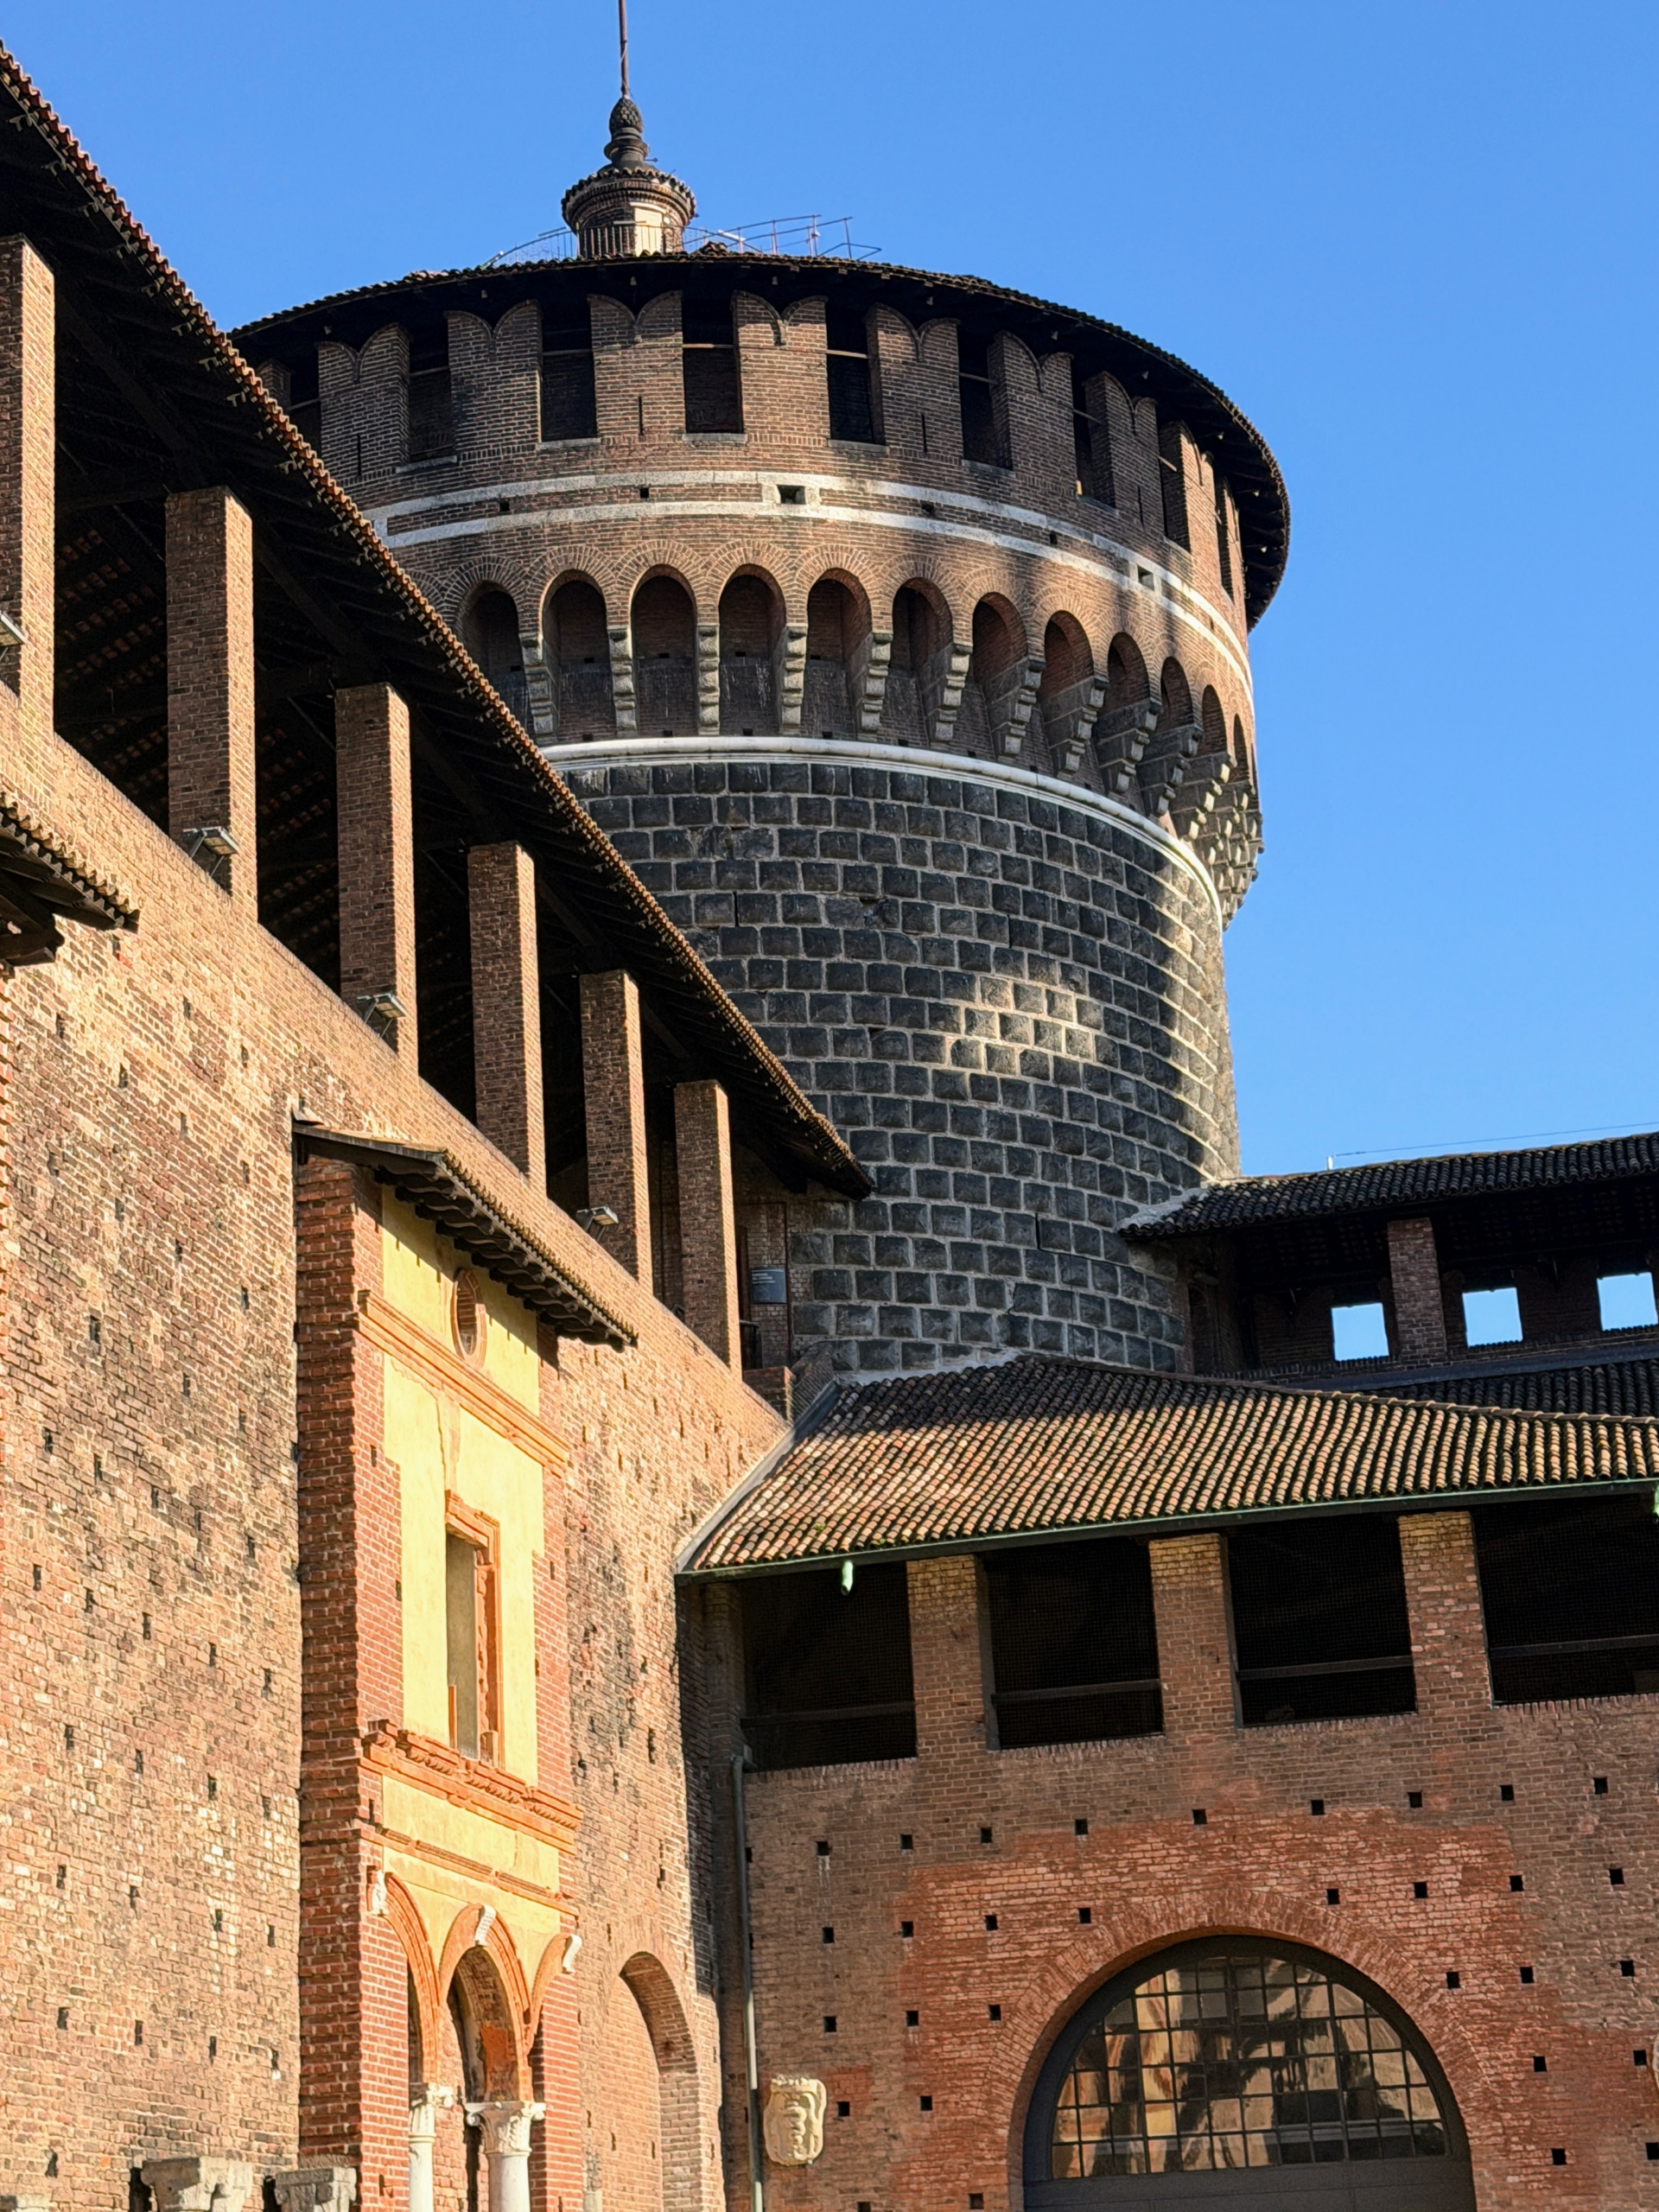
This is one of two round towers of the castle from where soldiers could patrol the grounds.
Today, the castle is home to eight different museums including the Museum of the Pietà Rondanini which houses Michelangelo’s last unfinished sculpture.
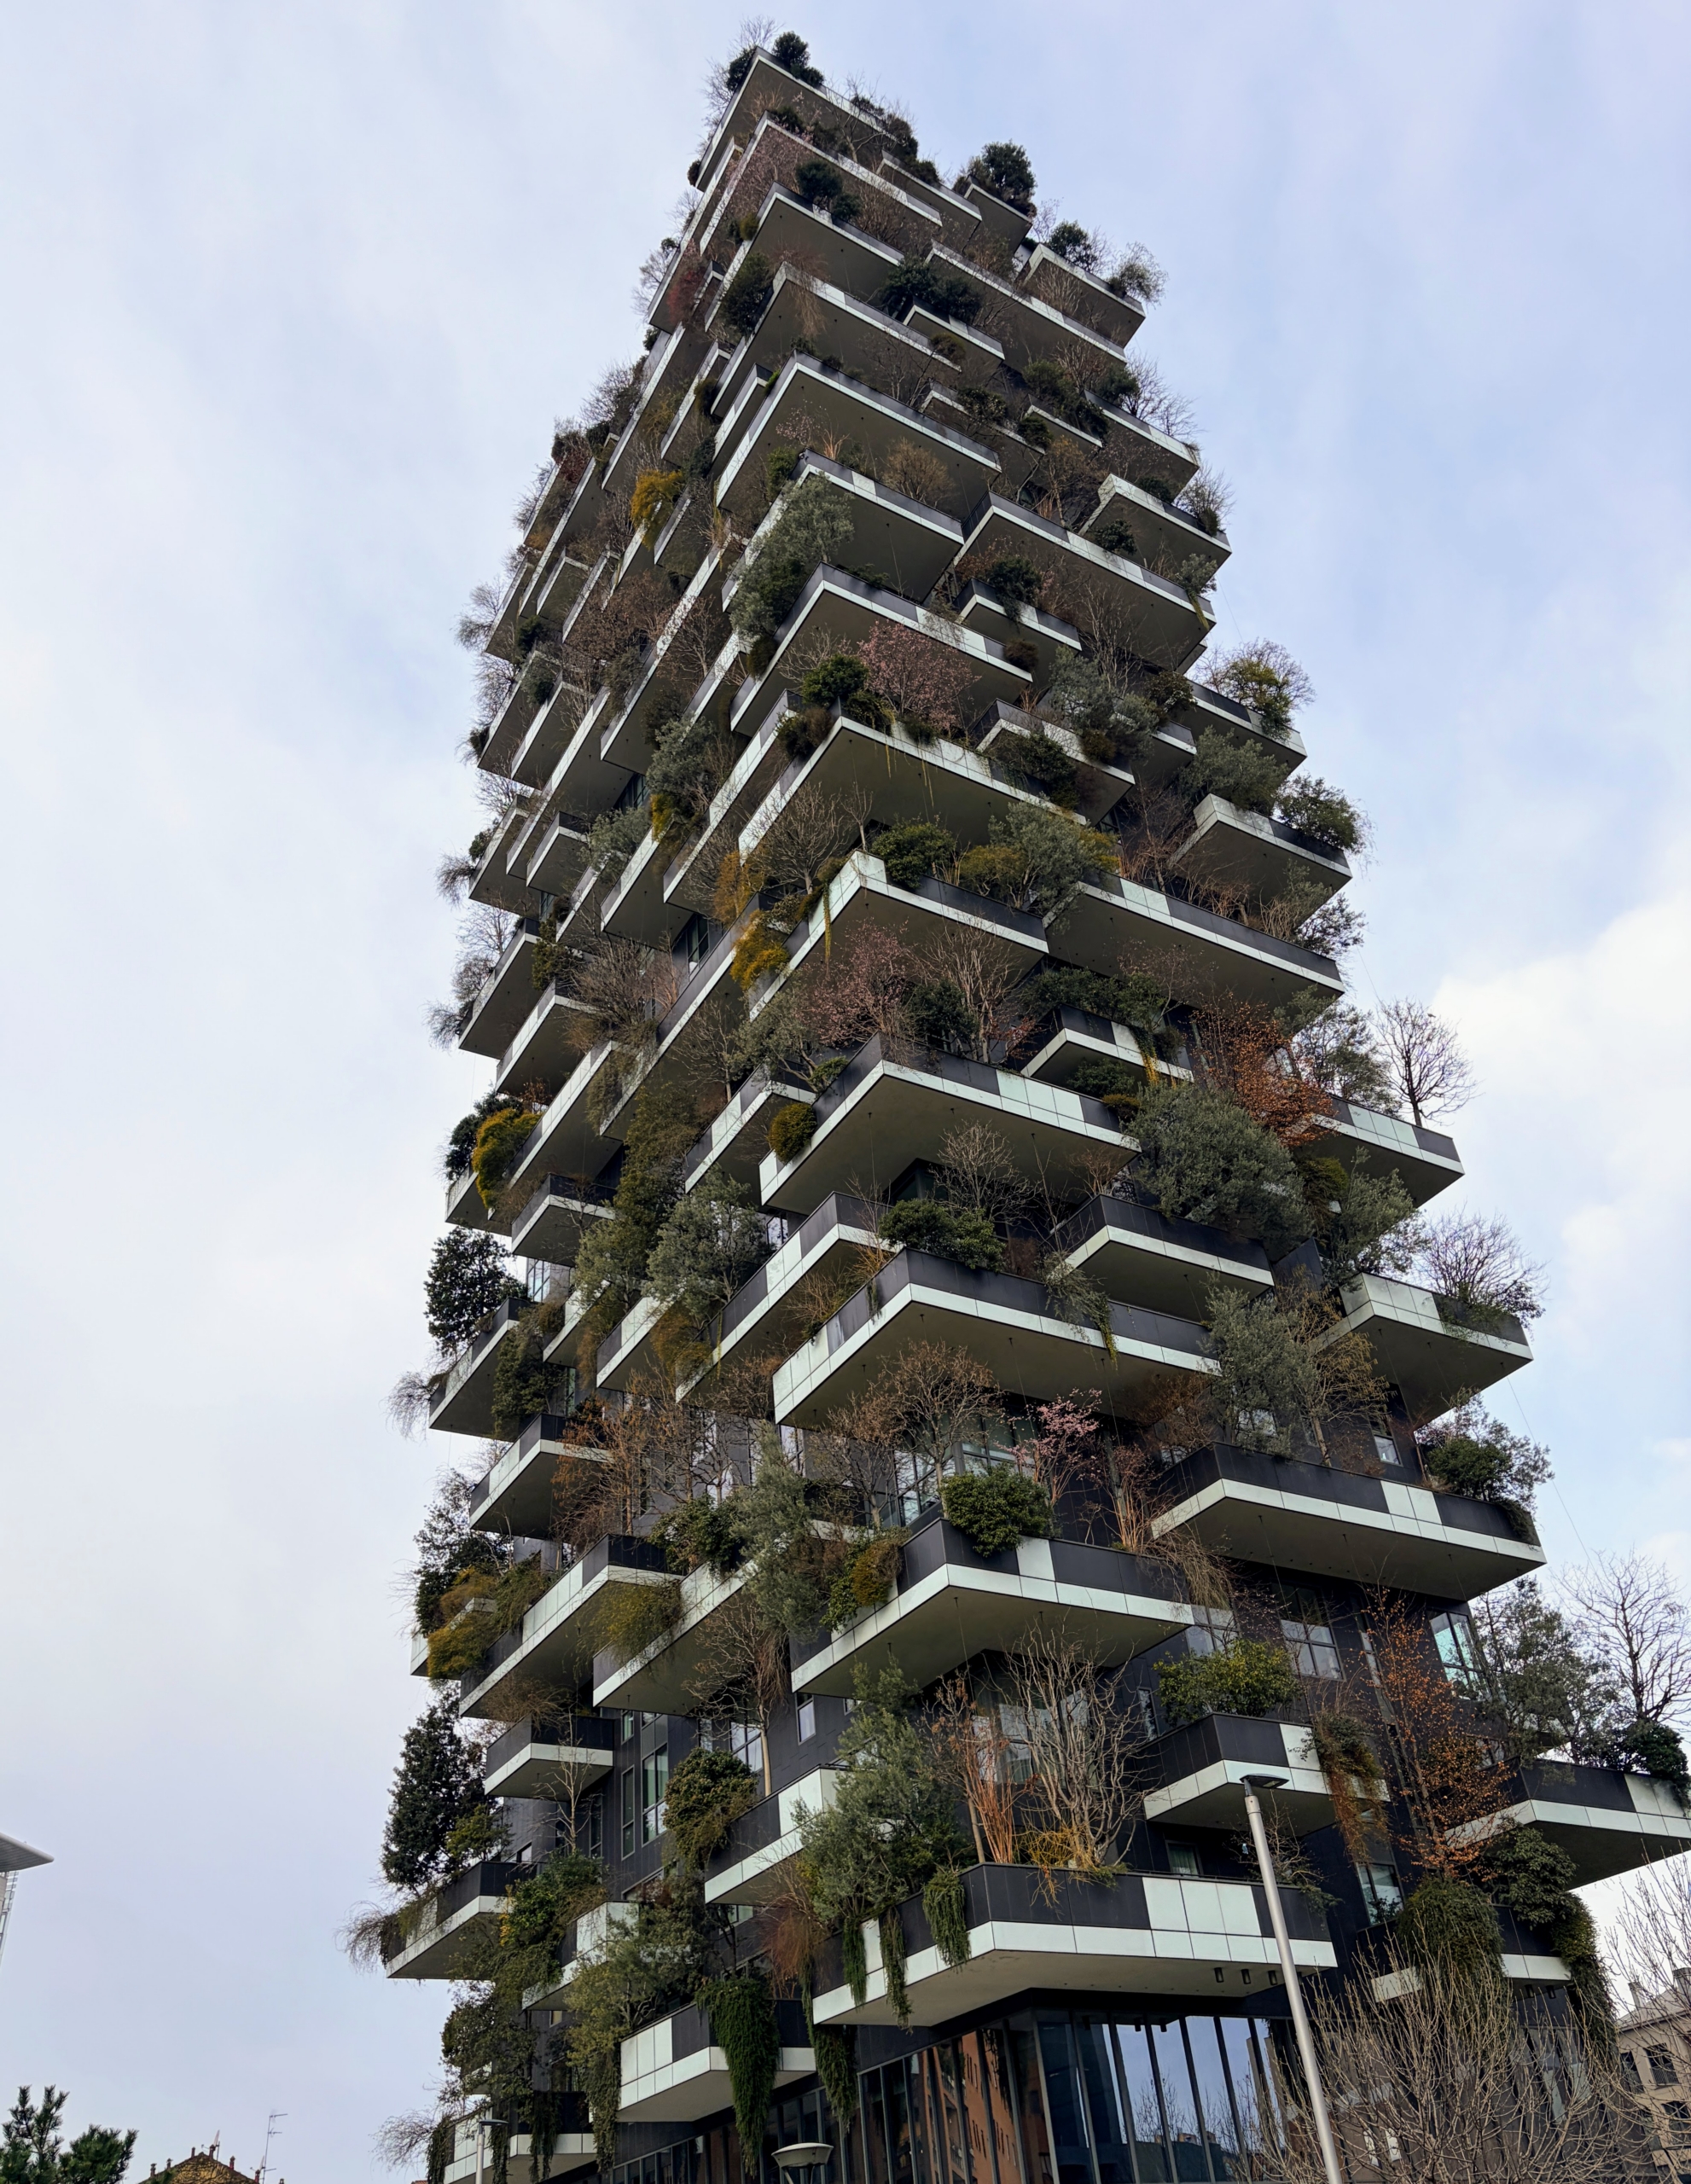
We drove through Milan’s Porta Nuova district where we saw Bosco Verticale, a pair of residential skyscrapers covered with more than 20-thousand plants on cantilevered balconies that were built specifically to support the green facade and provide natural filters to sunlight, dust, and other pollutants.
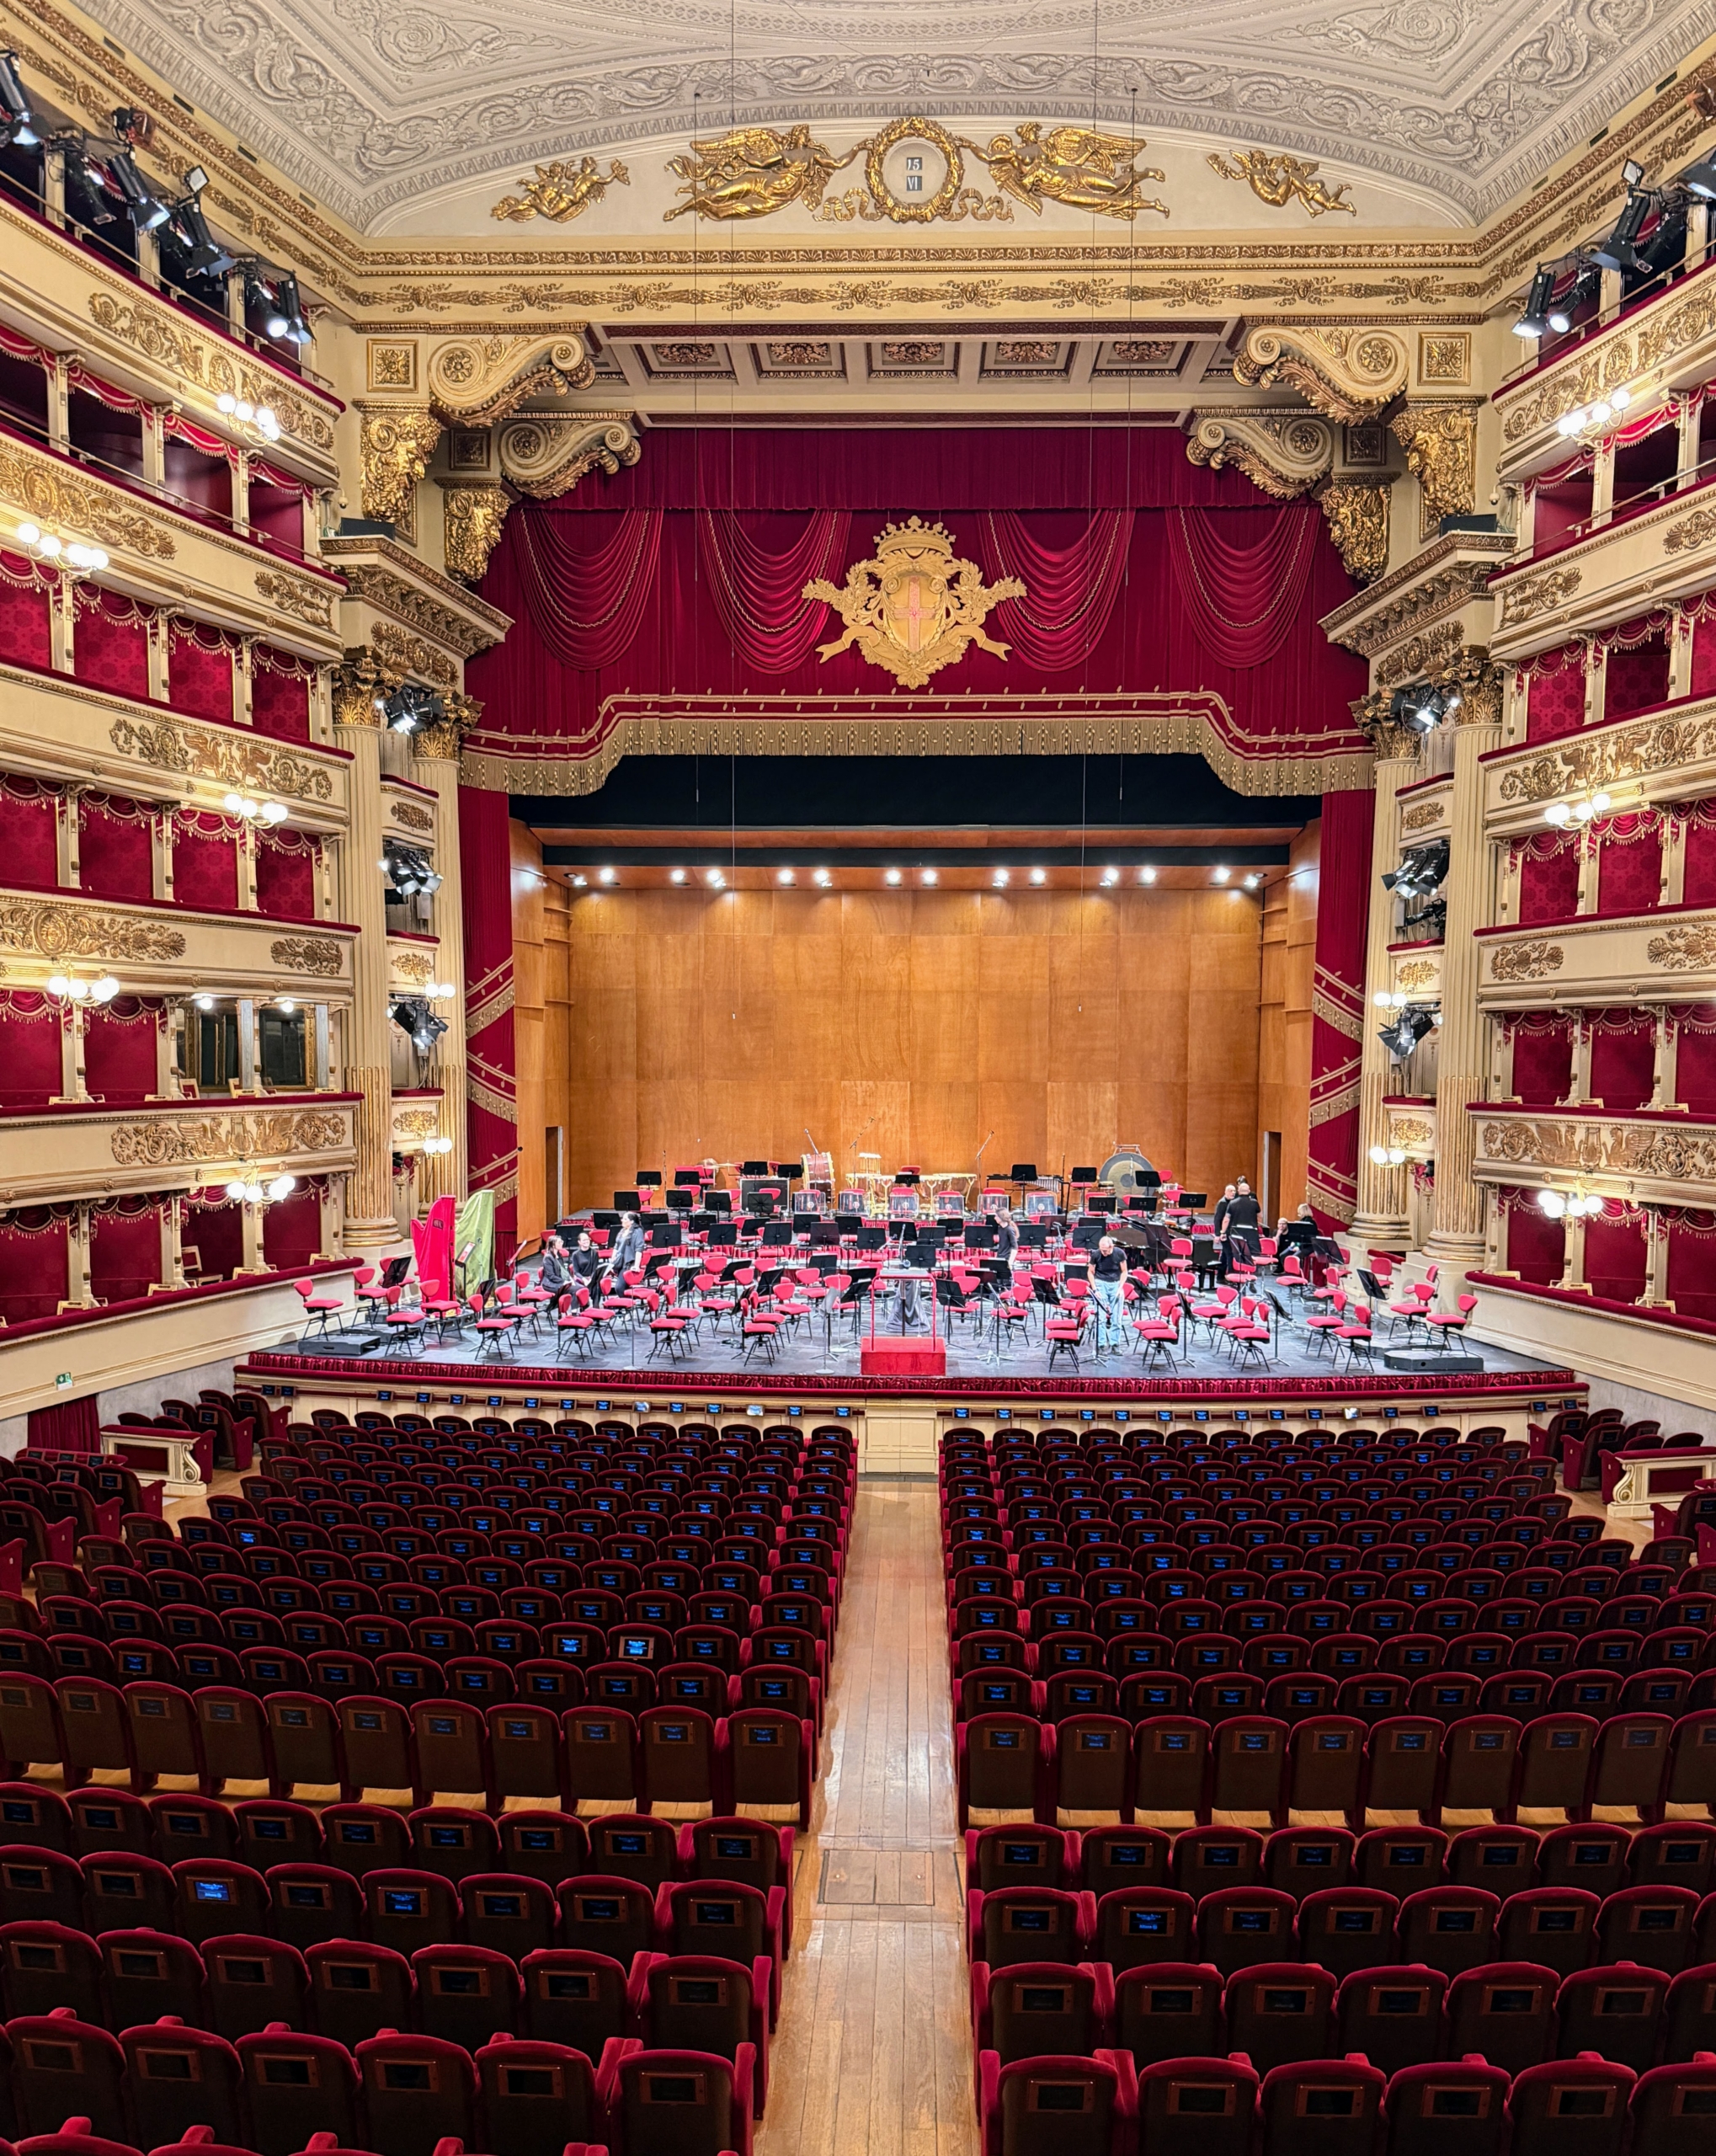
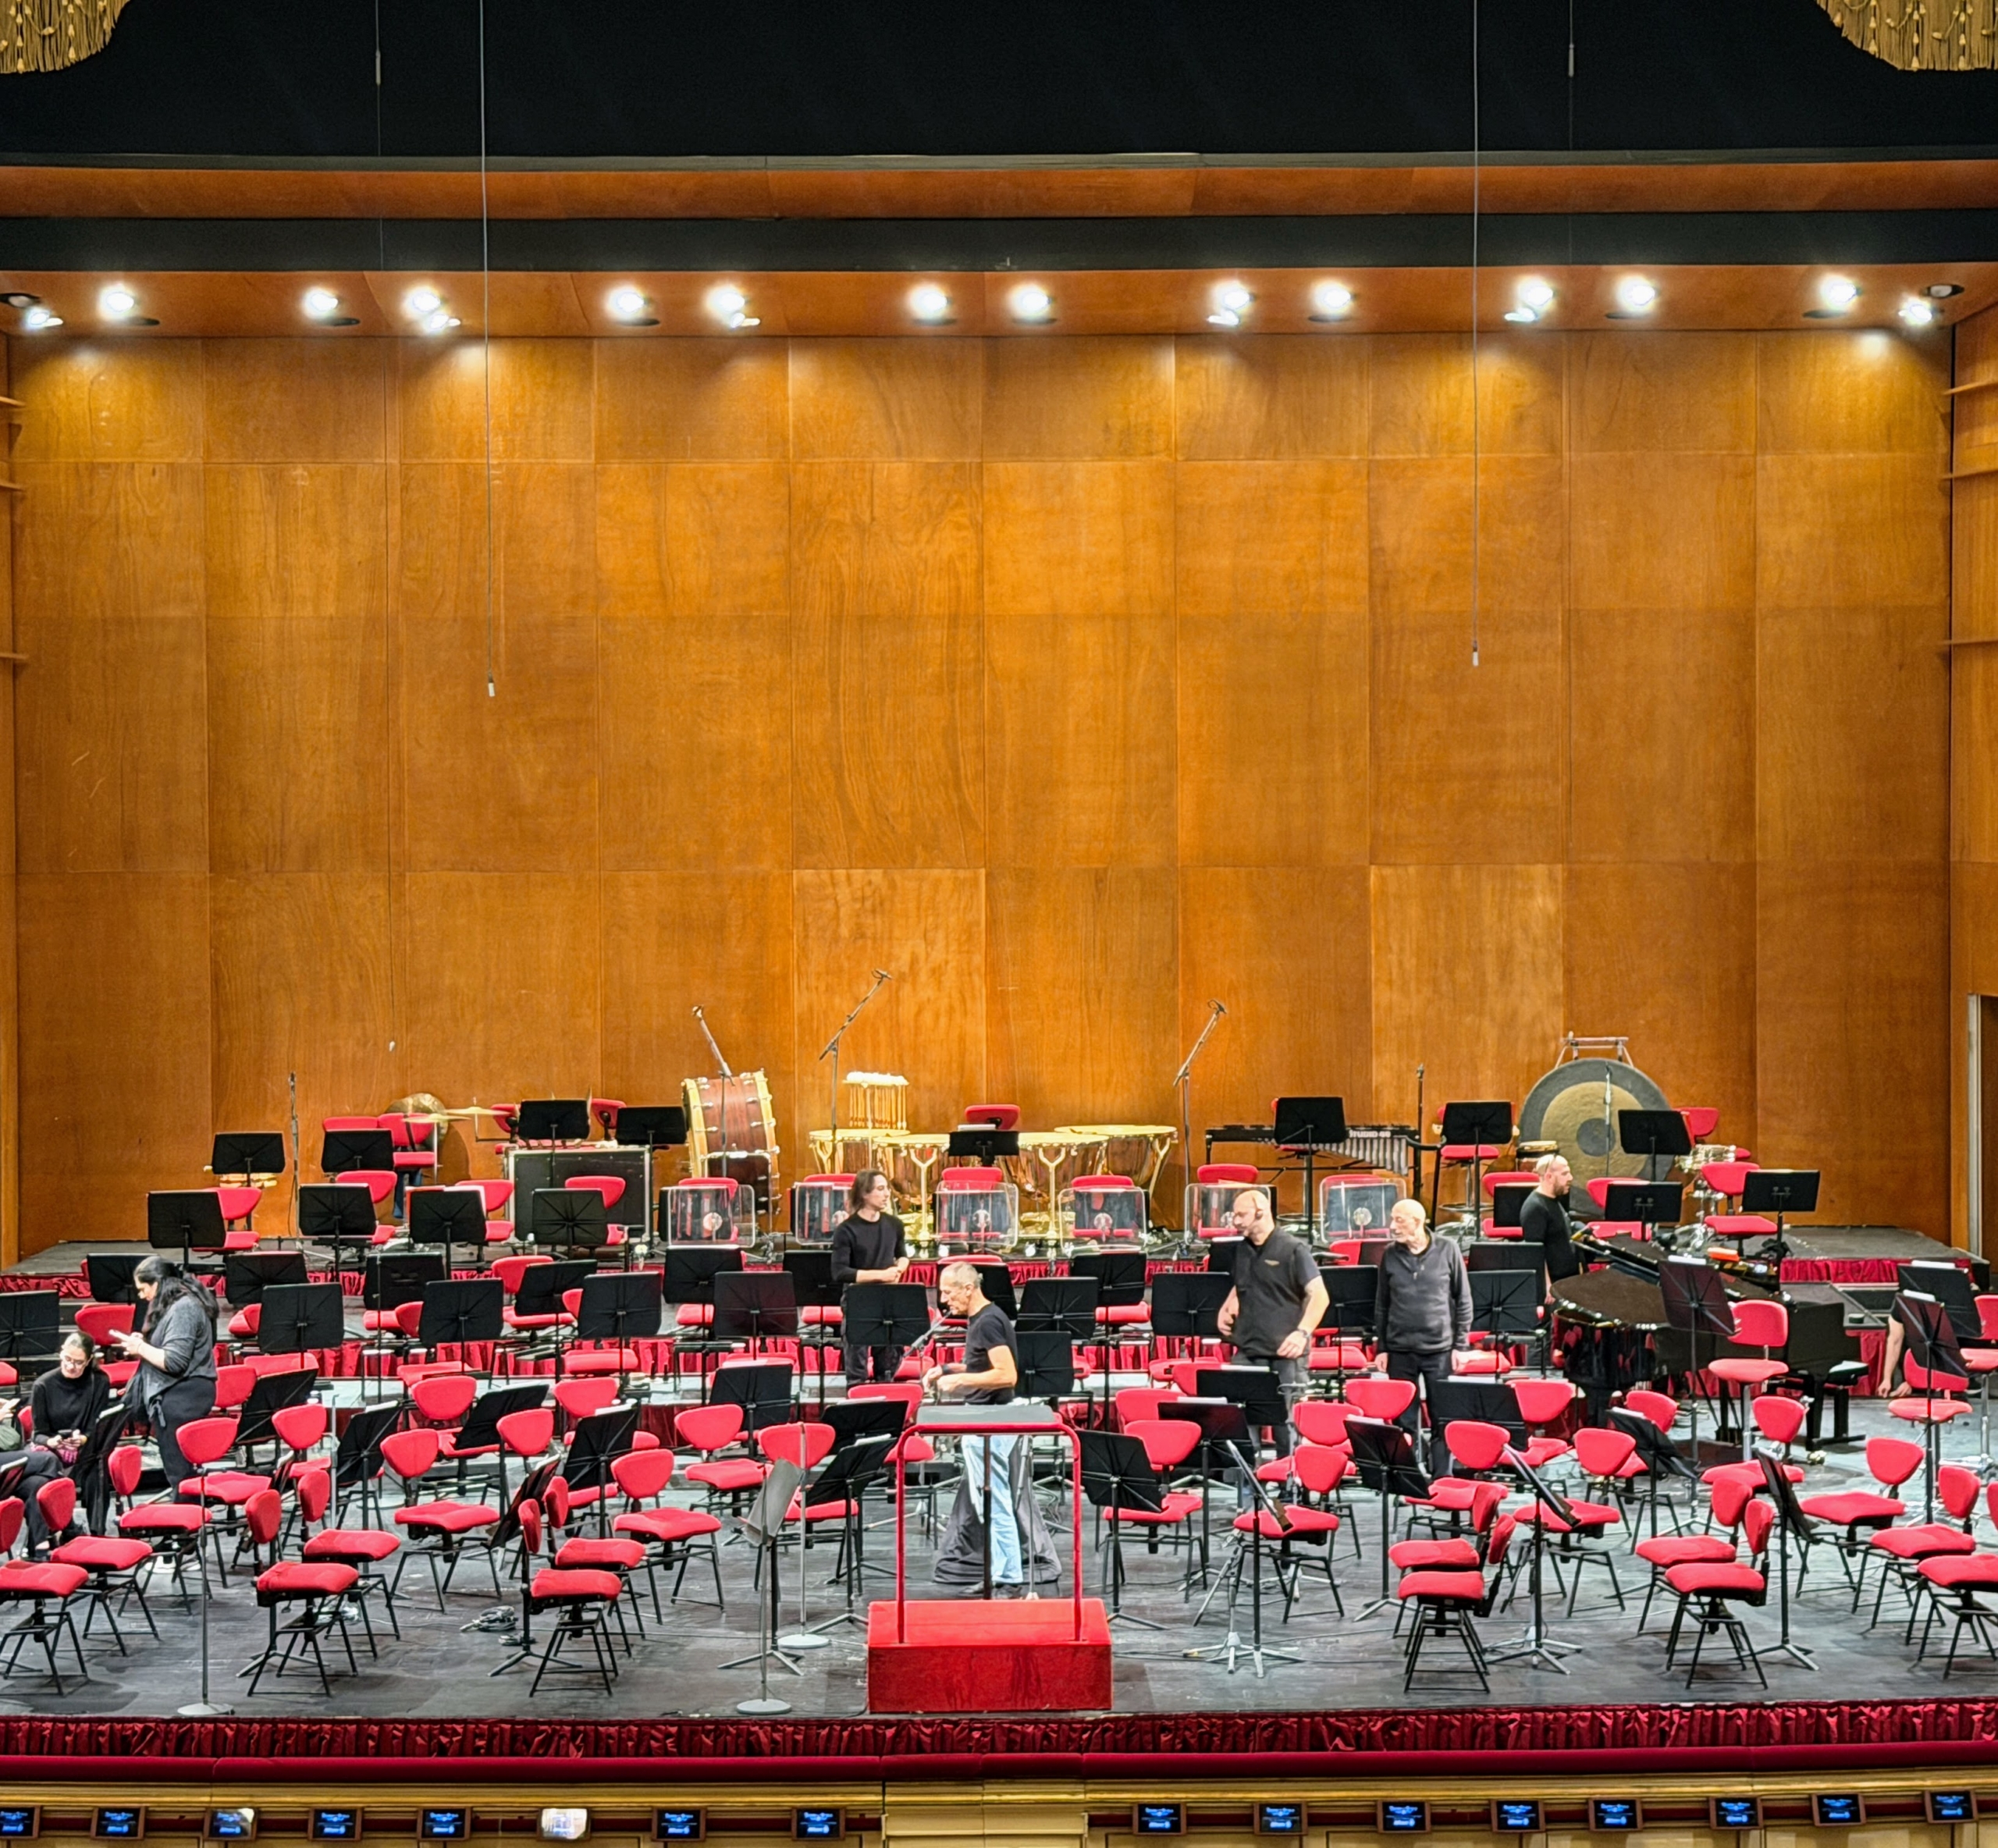
And then there was La Scala, officially known as Teatro alla Scala, the historic opera house. It is renowned for hosting some of the most famous operas and performances in the world.
La Scala has a horseshoe shaped auditorium with 2800 seats facing the stage.
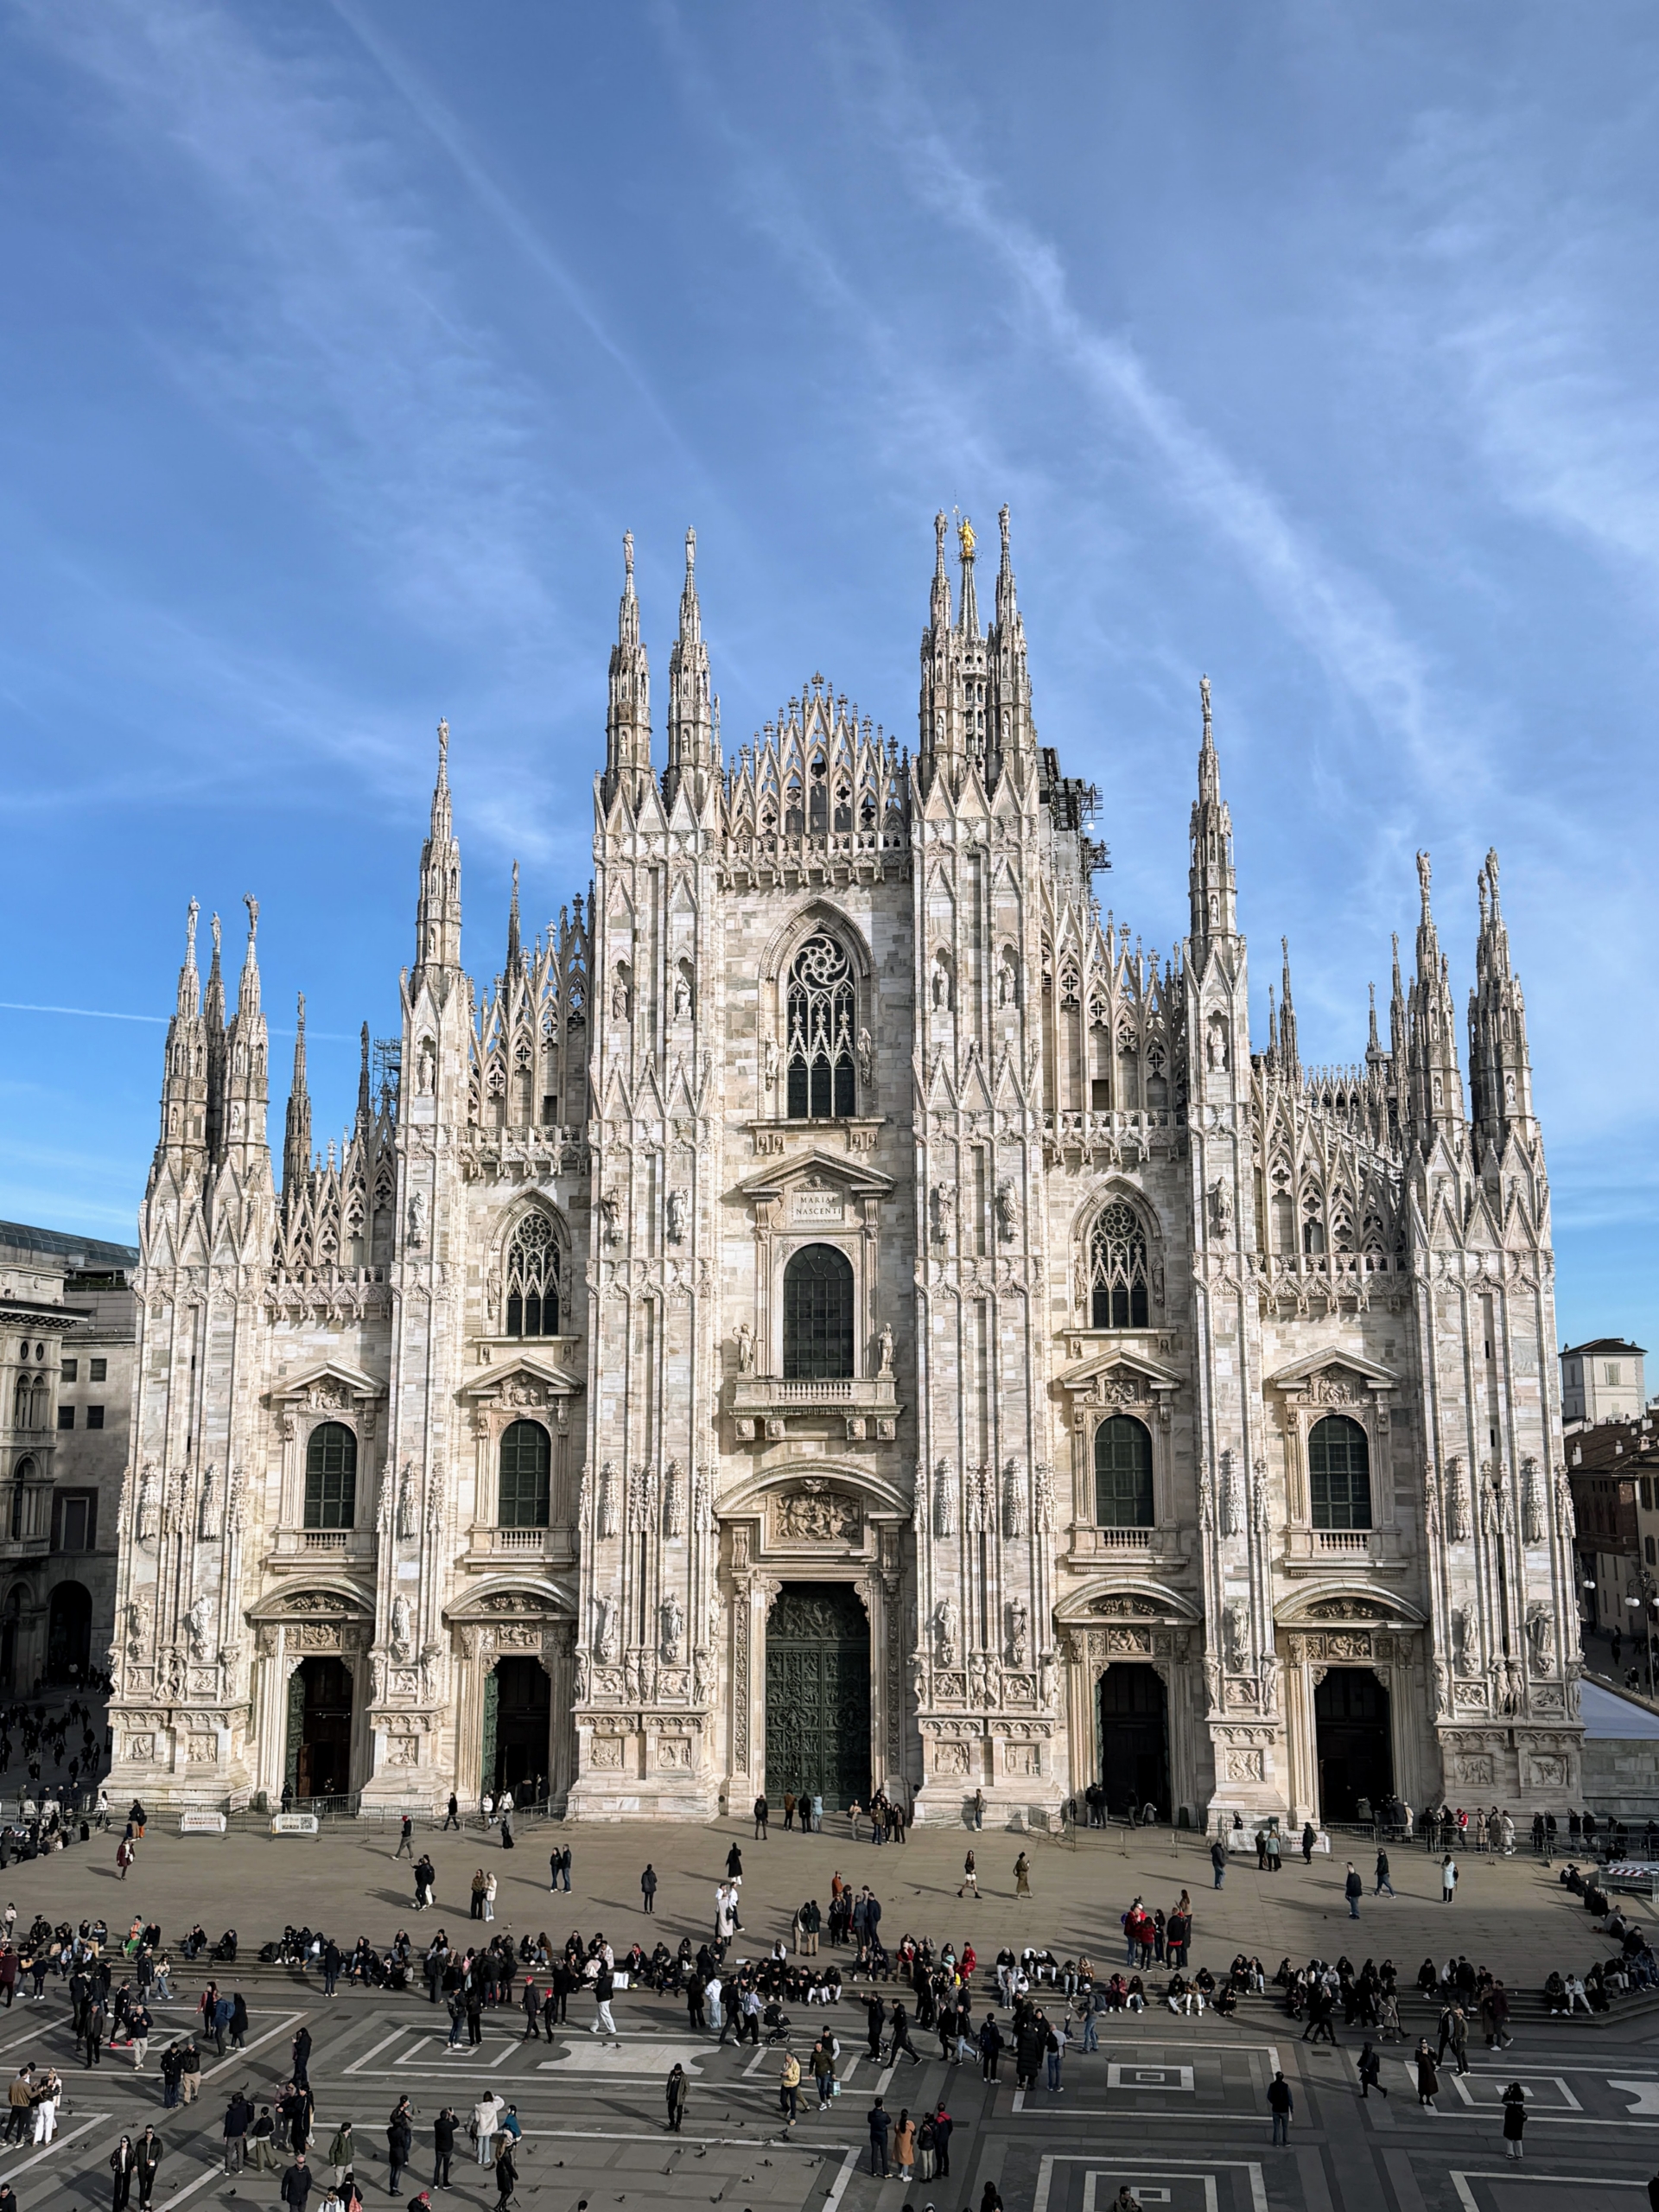
The Milan Cathedral or Duomo di Milano is the cathedral church of Milan. It took nearly six centuries to complete.
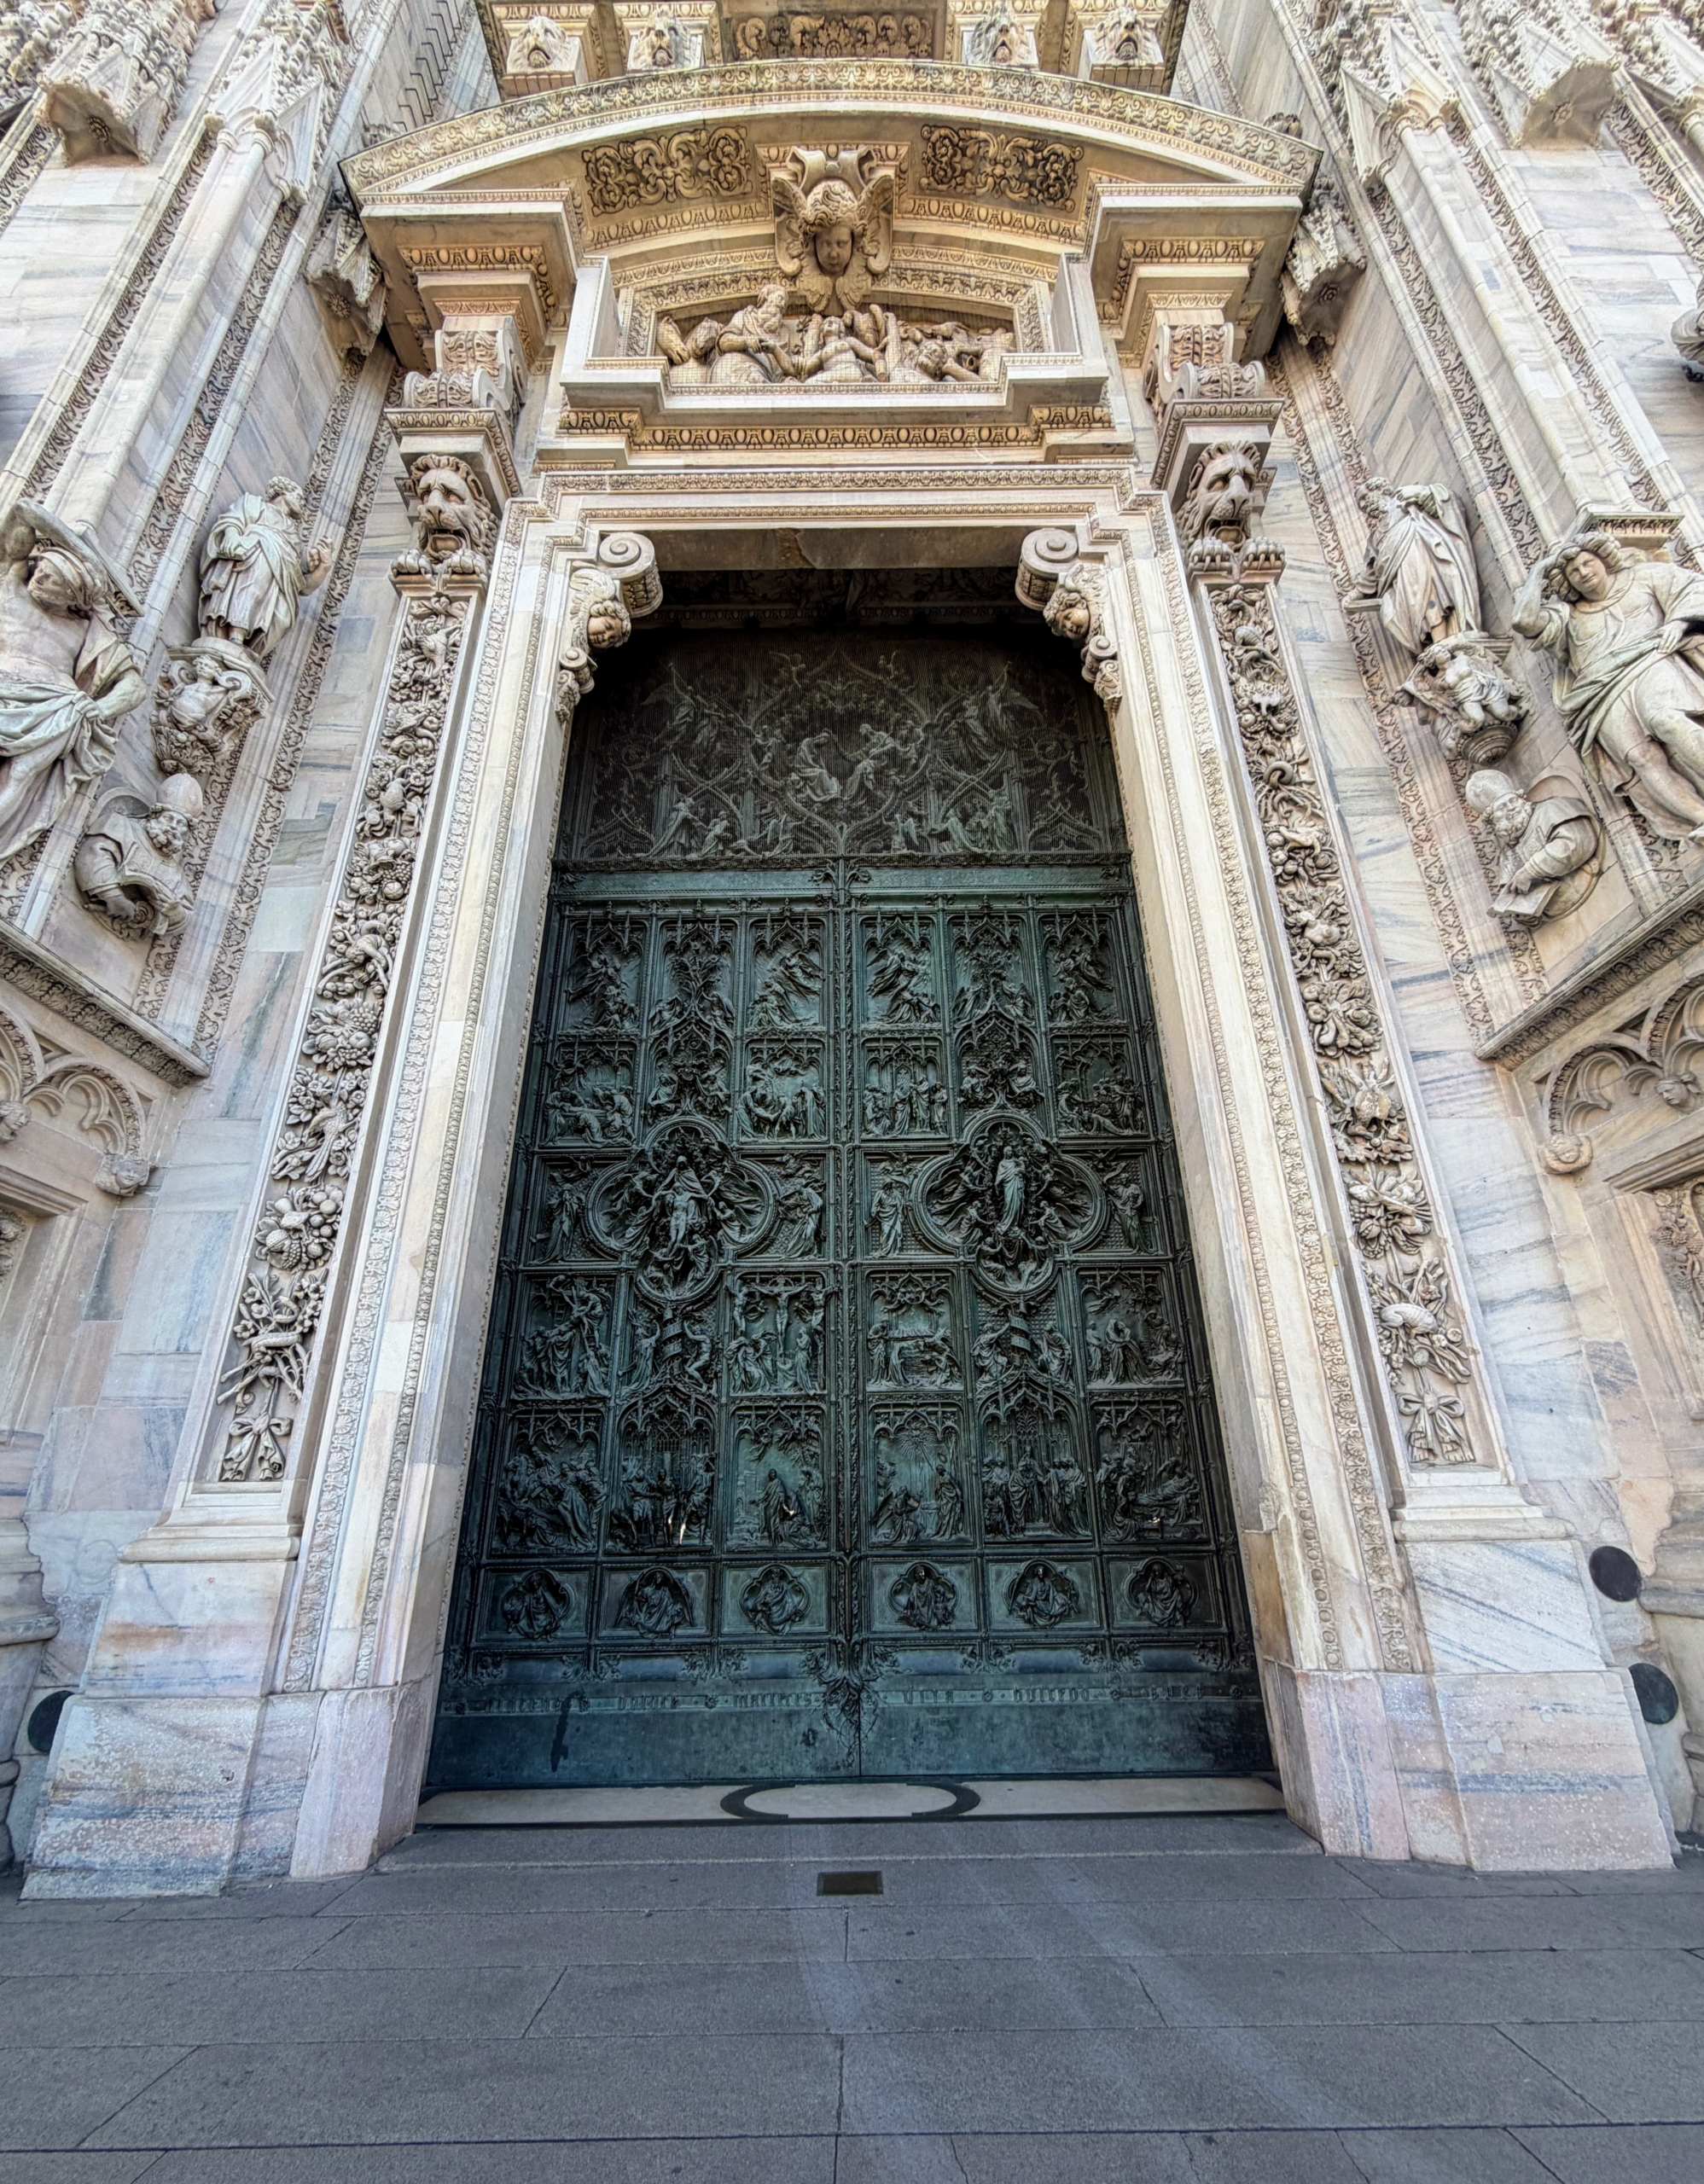
The grand bronze doors of the cathedral are masterpieces of Gothic and Renaissance art. These front doors depict the “Joys and Sorrows of the Virgin Mary” and were made by Ludovico Pogliaghi in 1906.
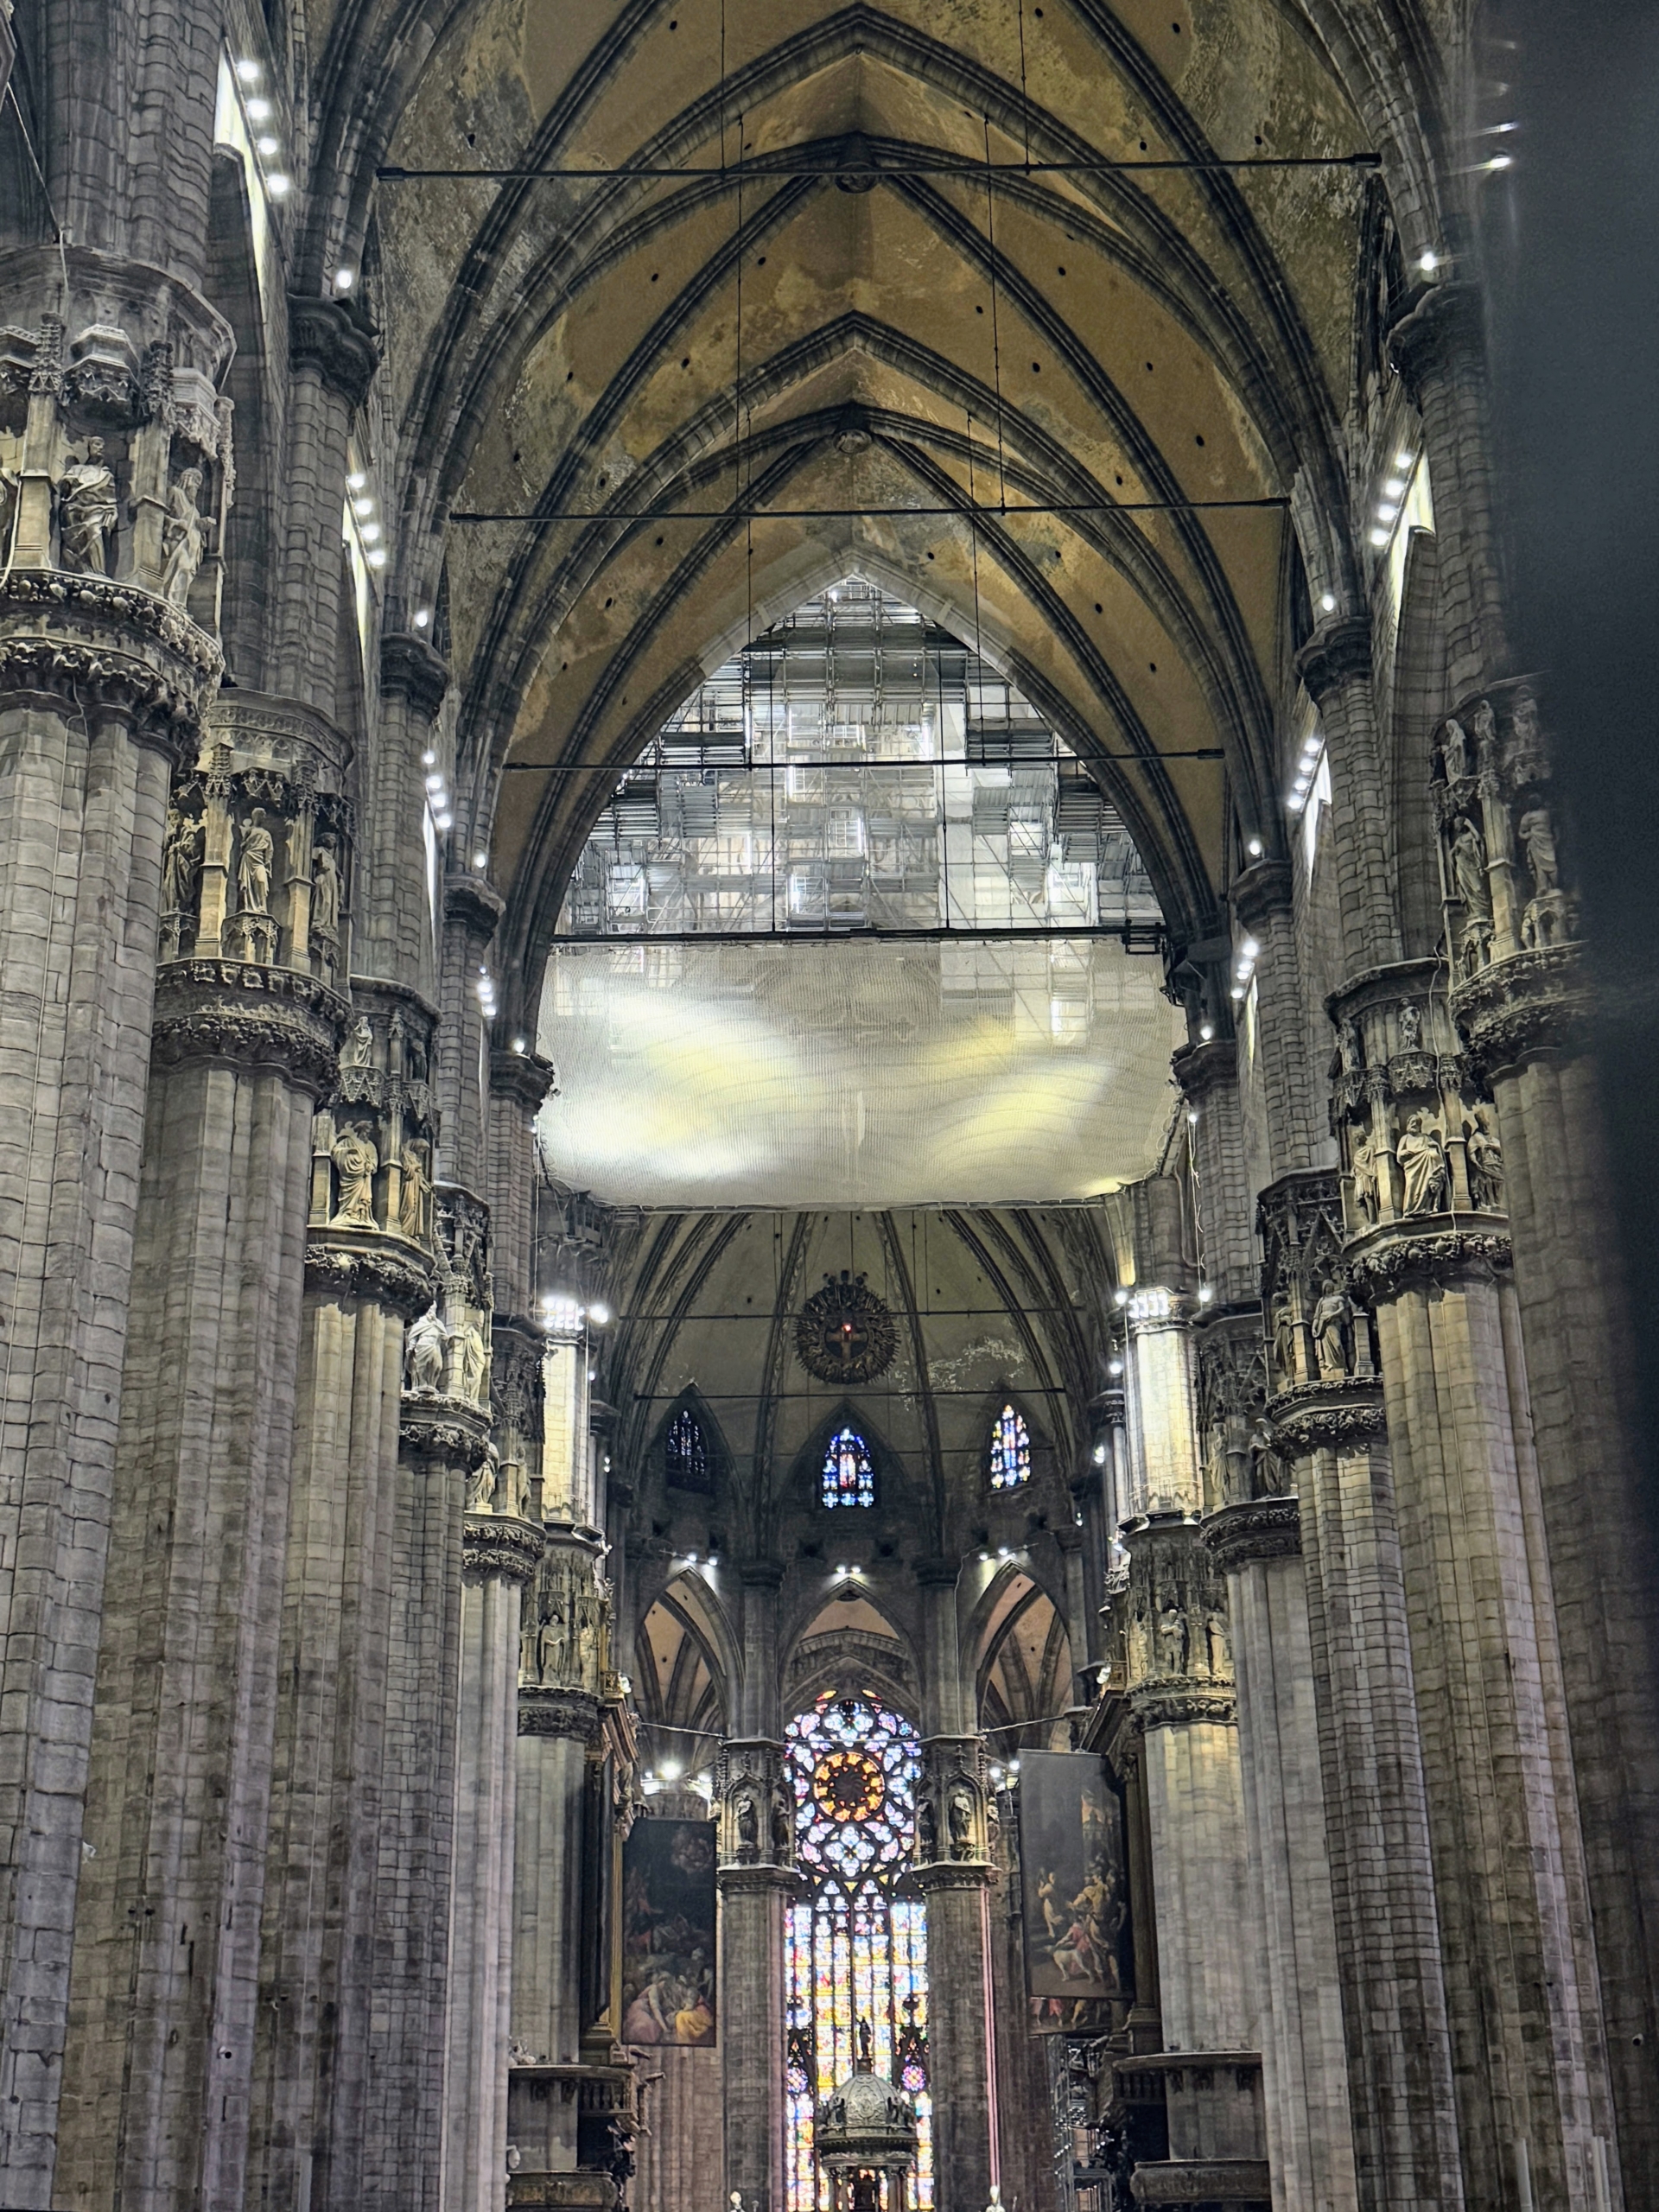
This is the largest Gothic cathedral in Italy. Here is the main sanctuary of the church with its extraordinary stain glass windows.
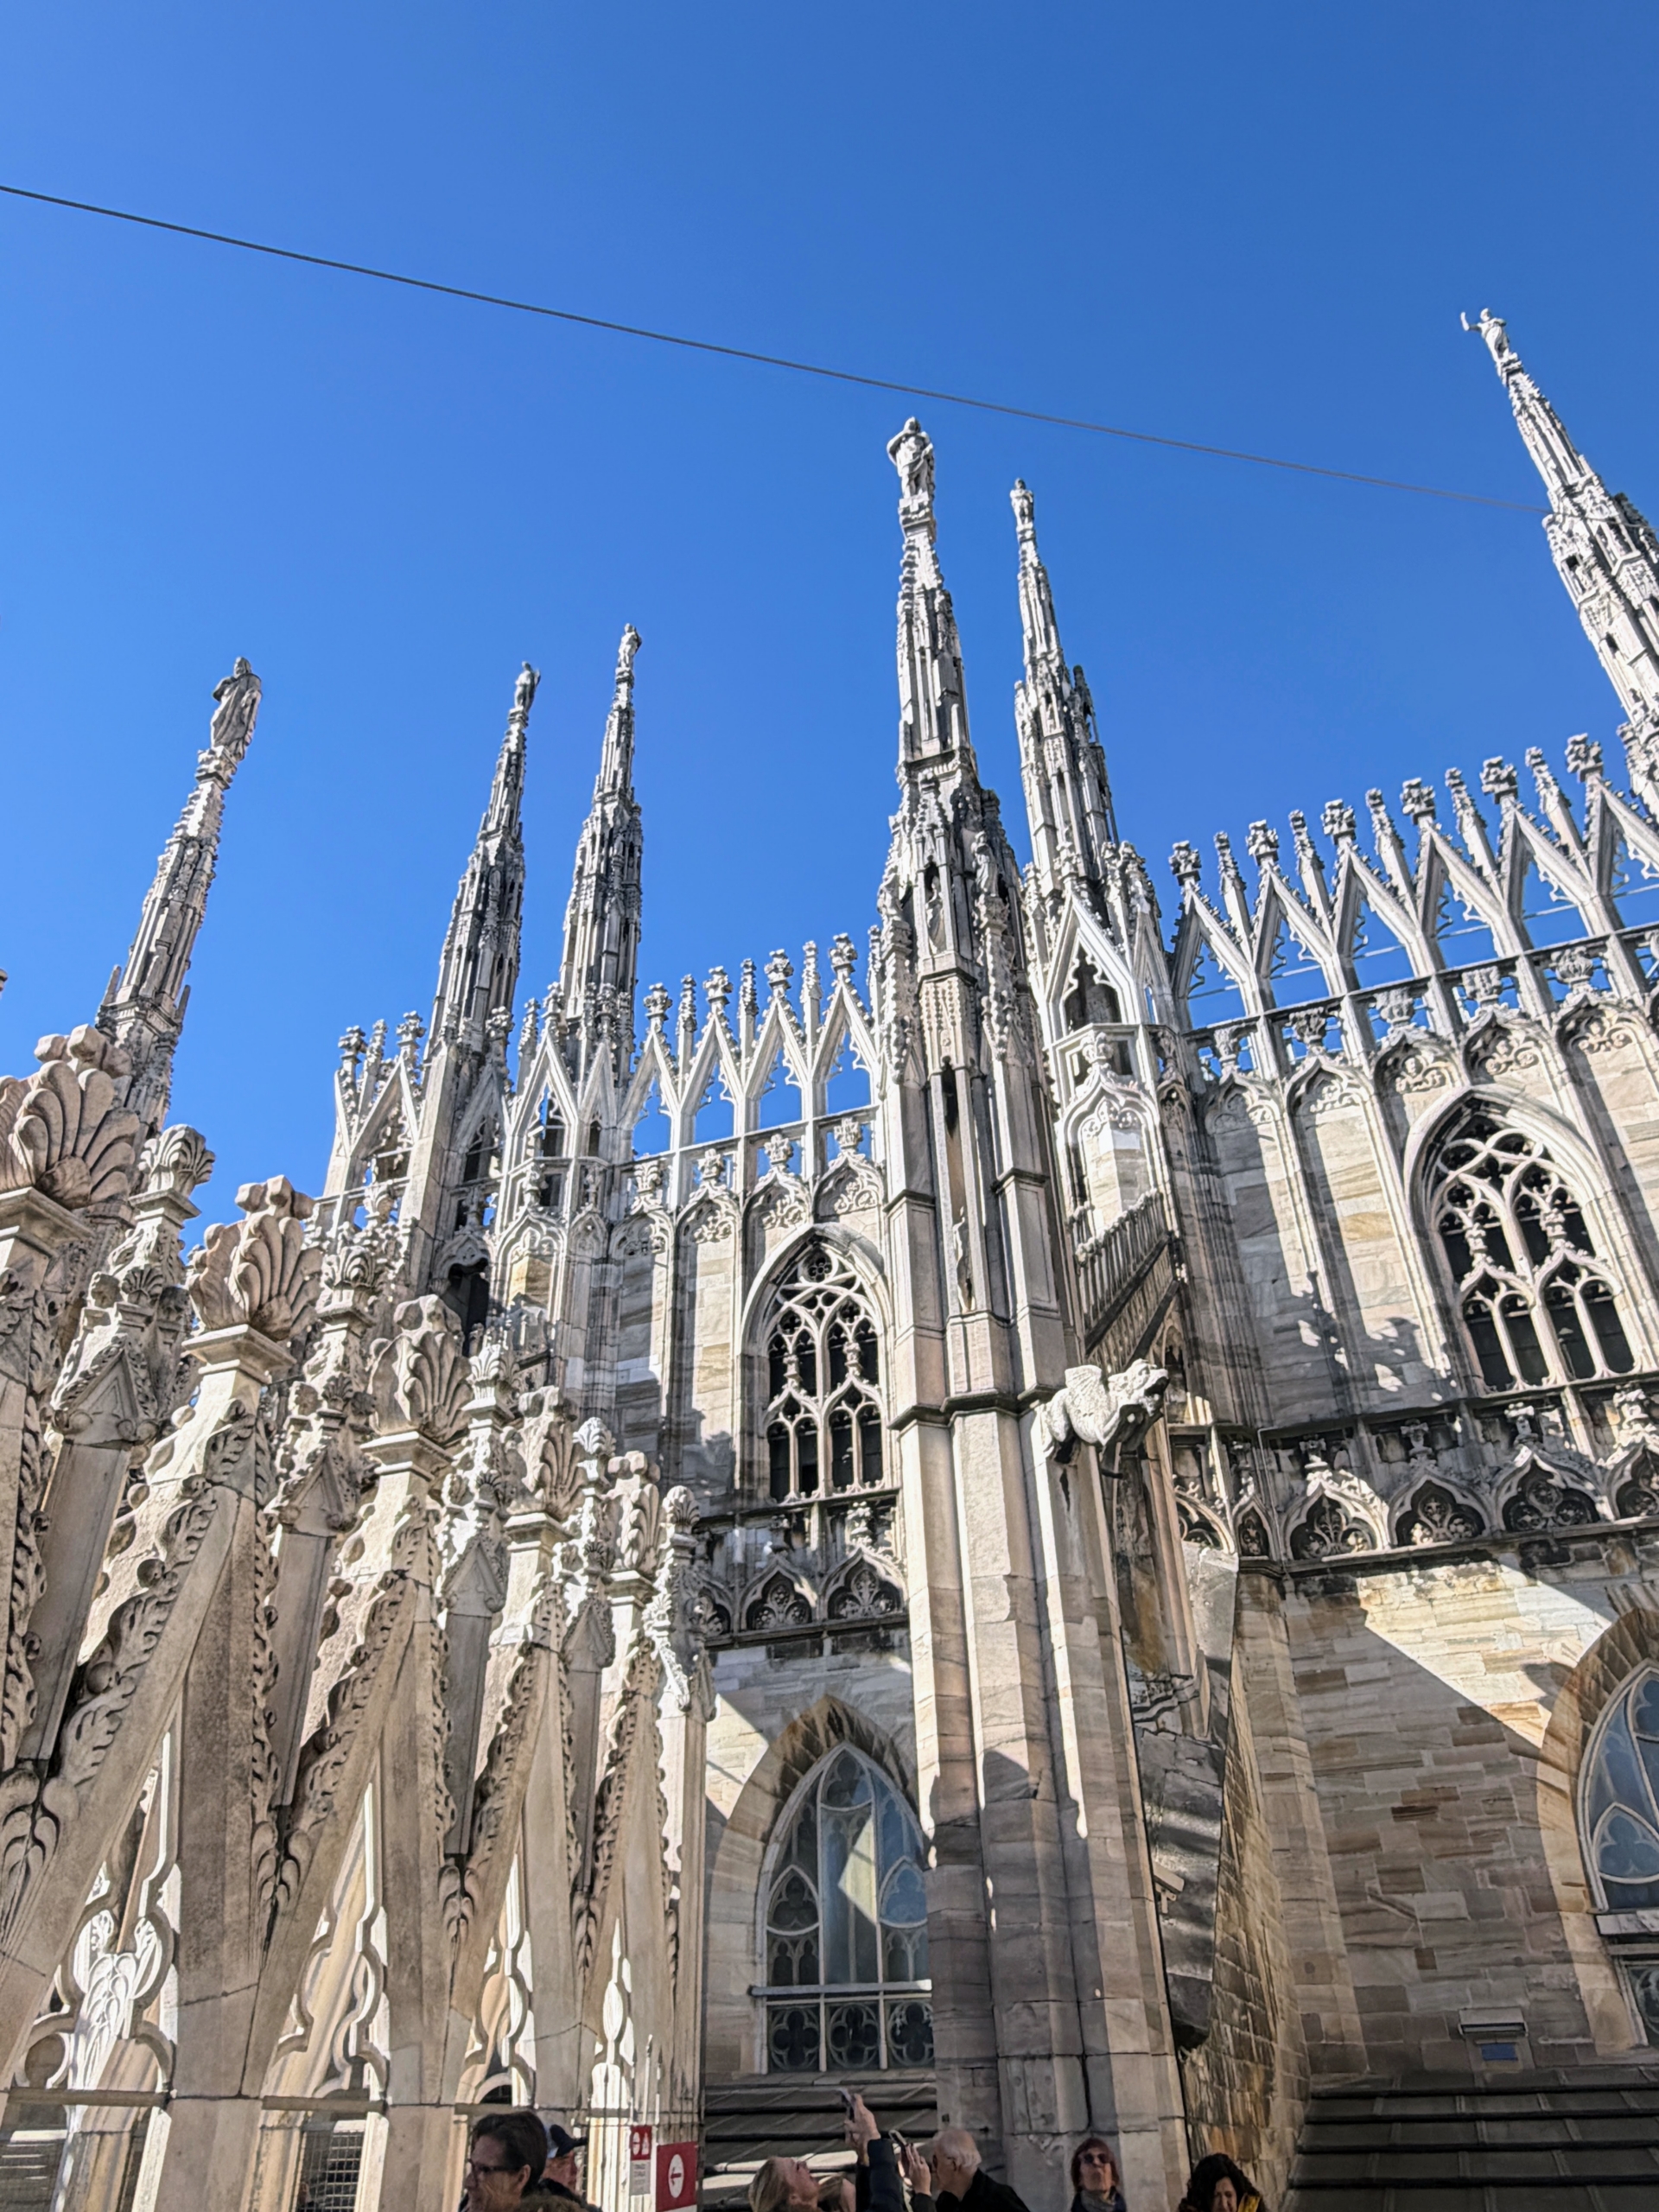
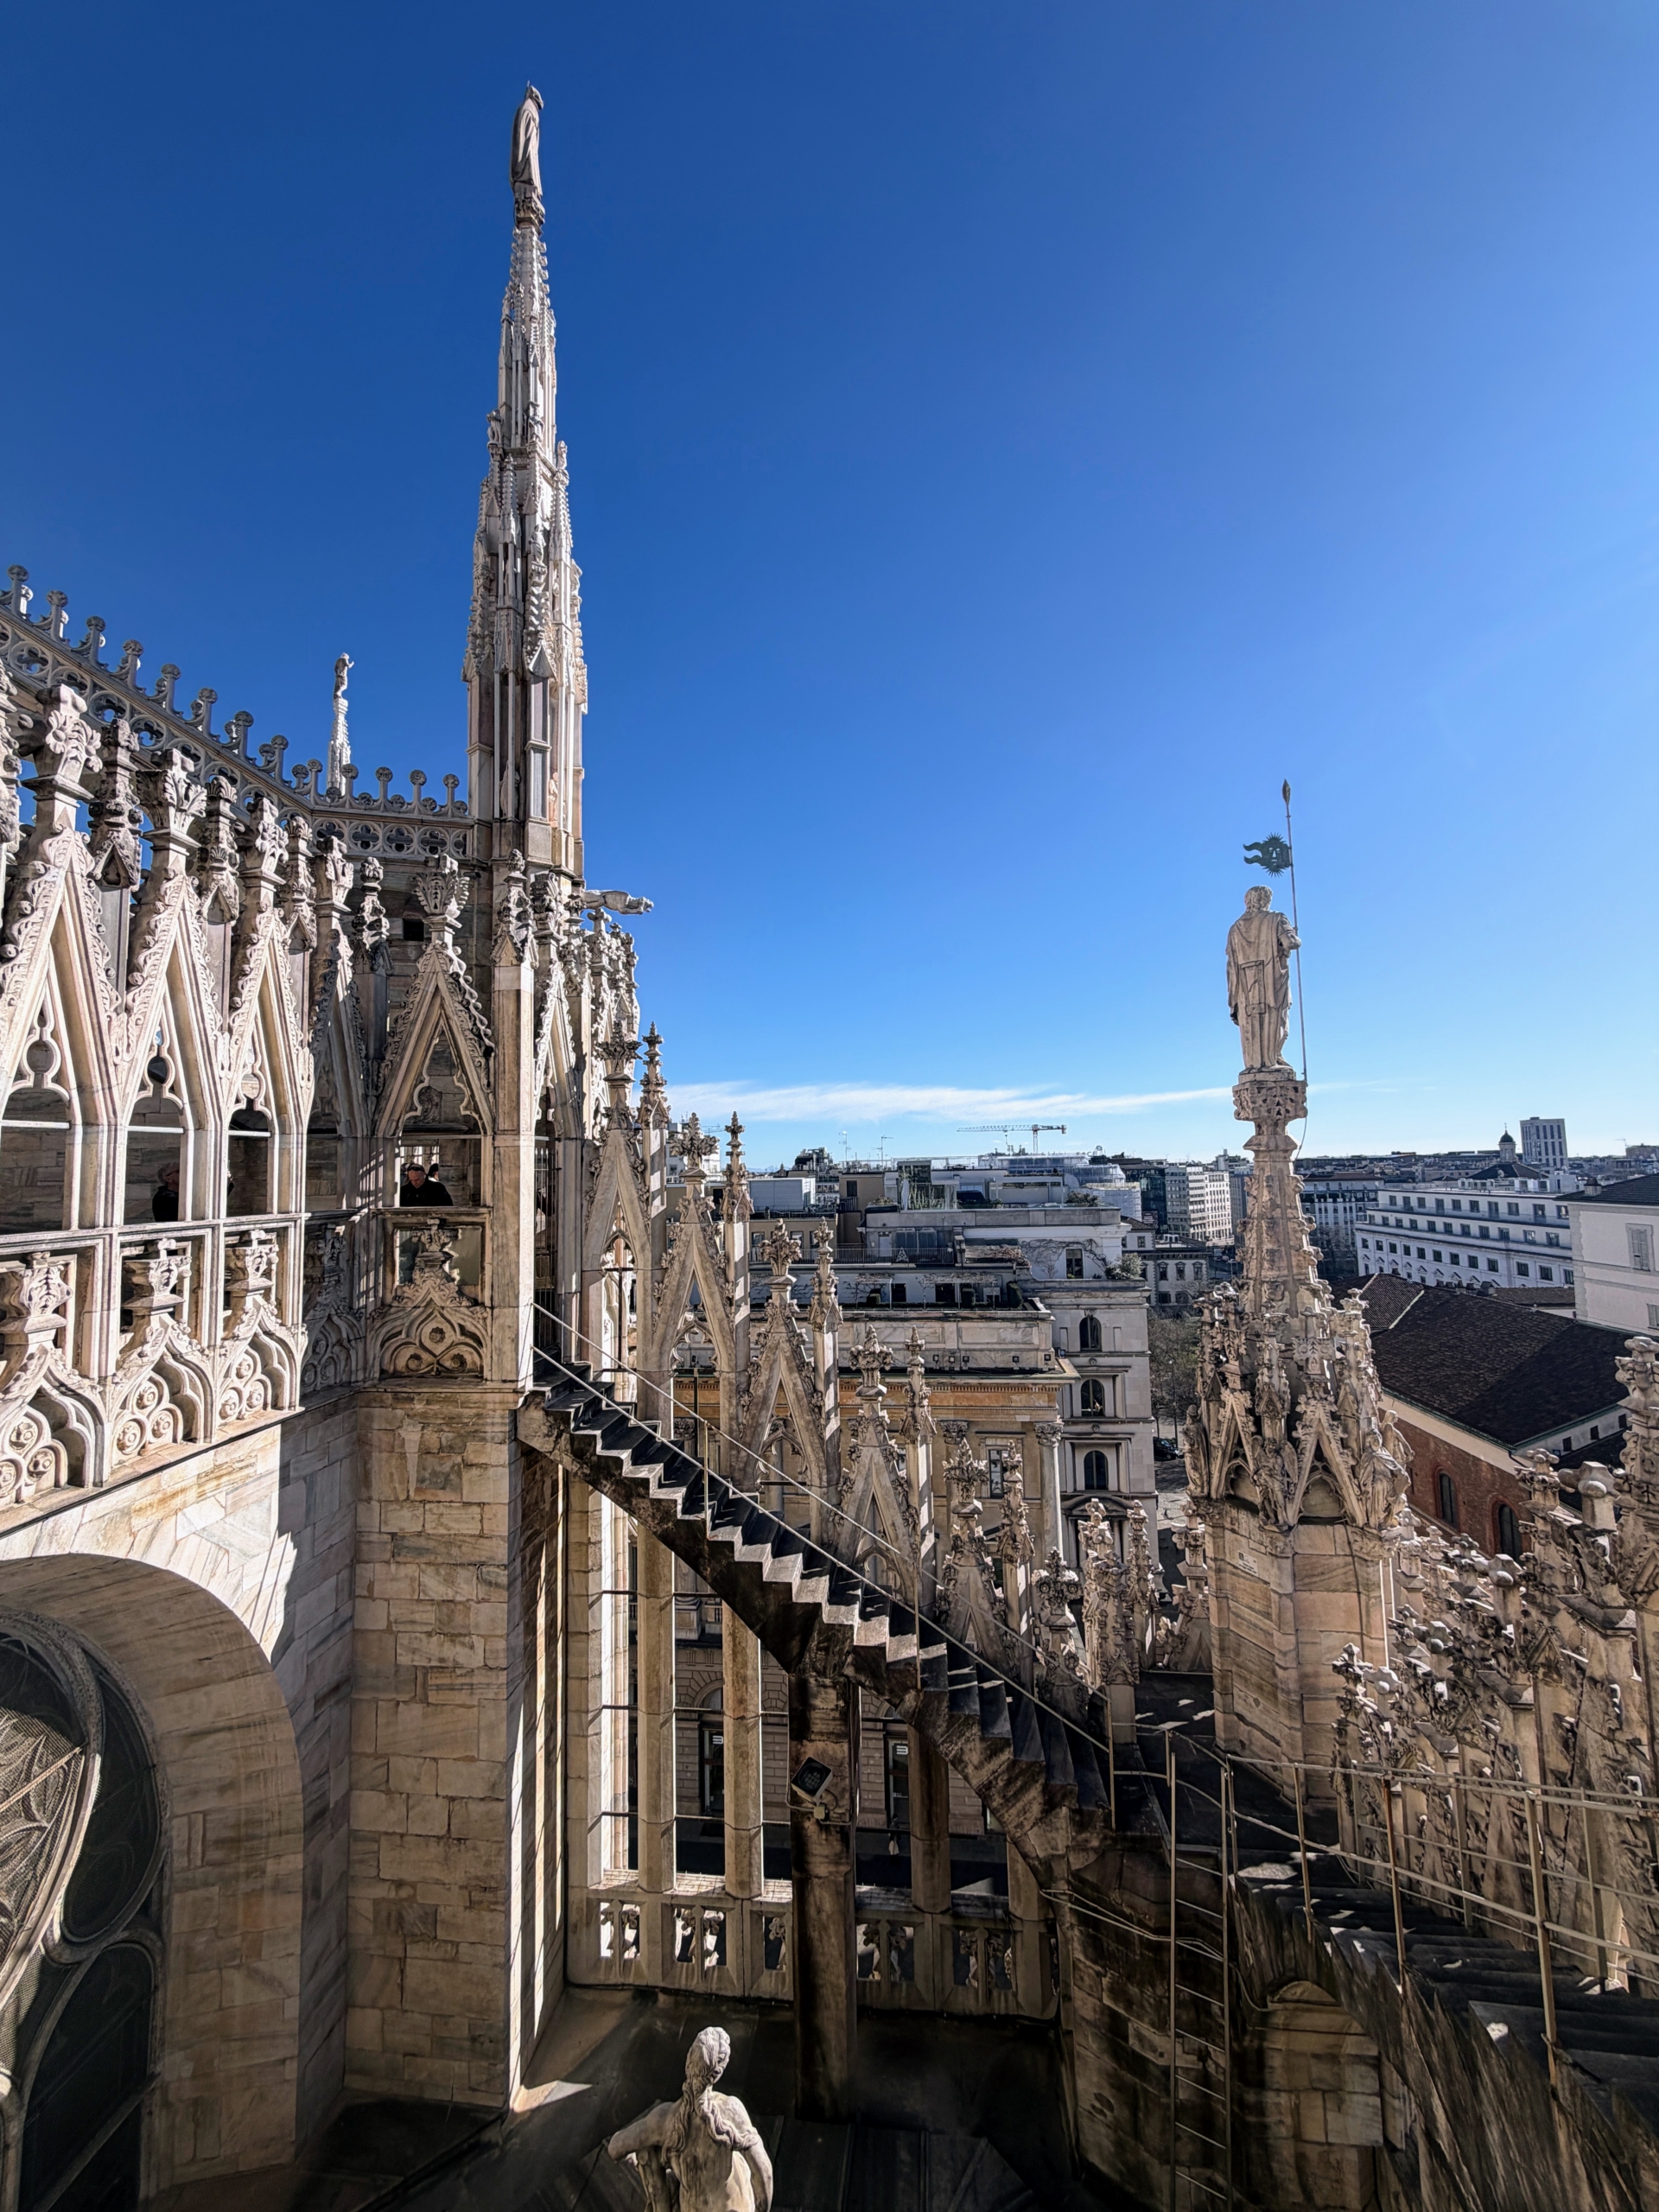
The cathedral’s architecture includes pointed arches and hundreds of flying buttresses with more than 130 spires on its decorated rooftop.
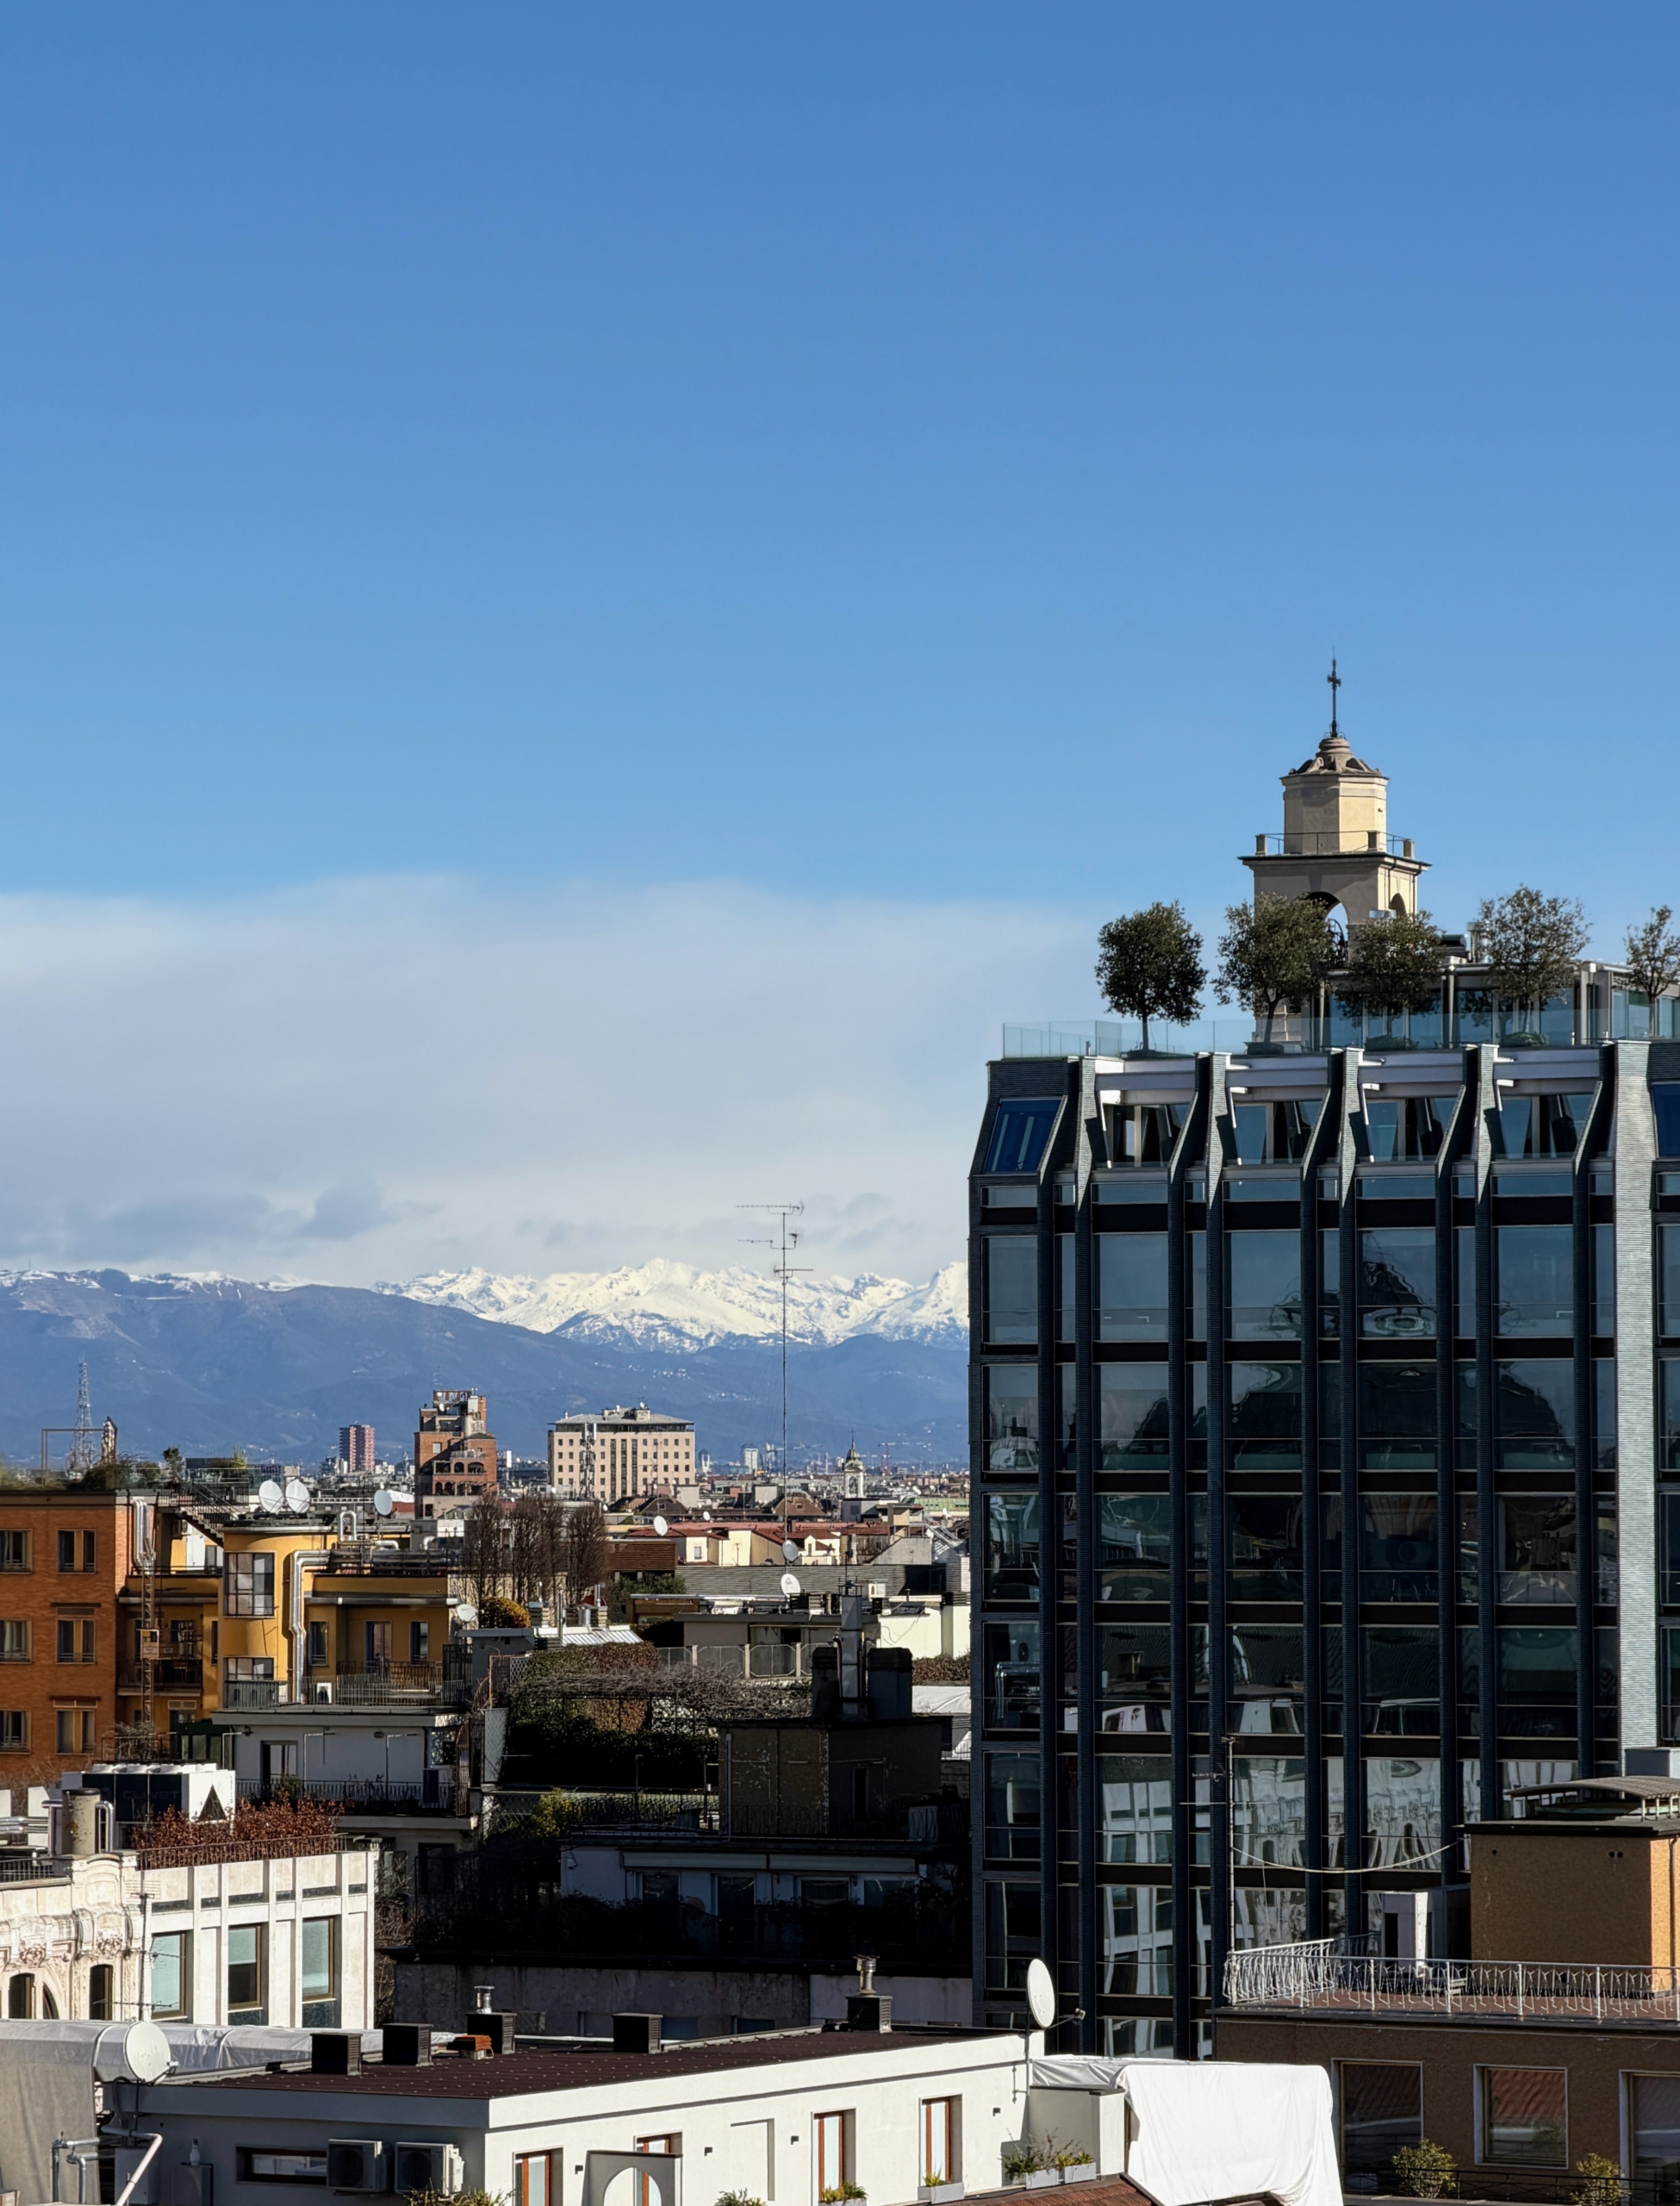
The roof is adorned with gargoyles and marble statues and stunning views of the city.
And from the top of the cathedral, we could see the snow-capped peaks of the Alps, including Monte Rosa, the highest mountain in the city.
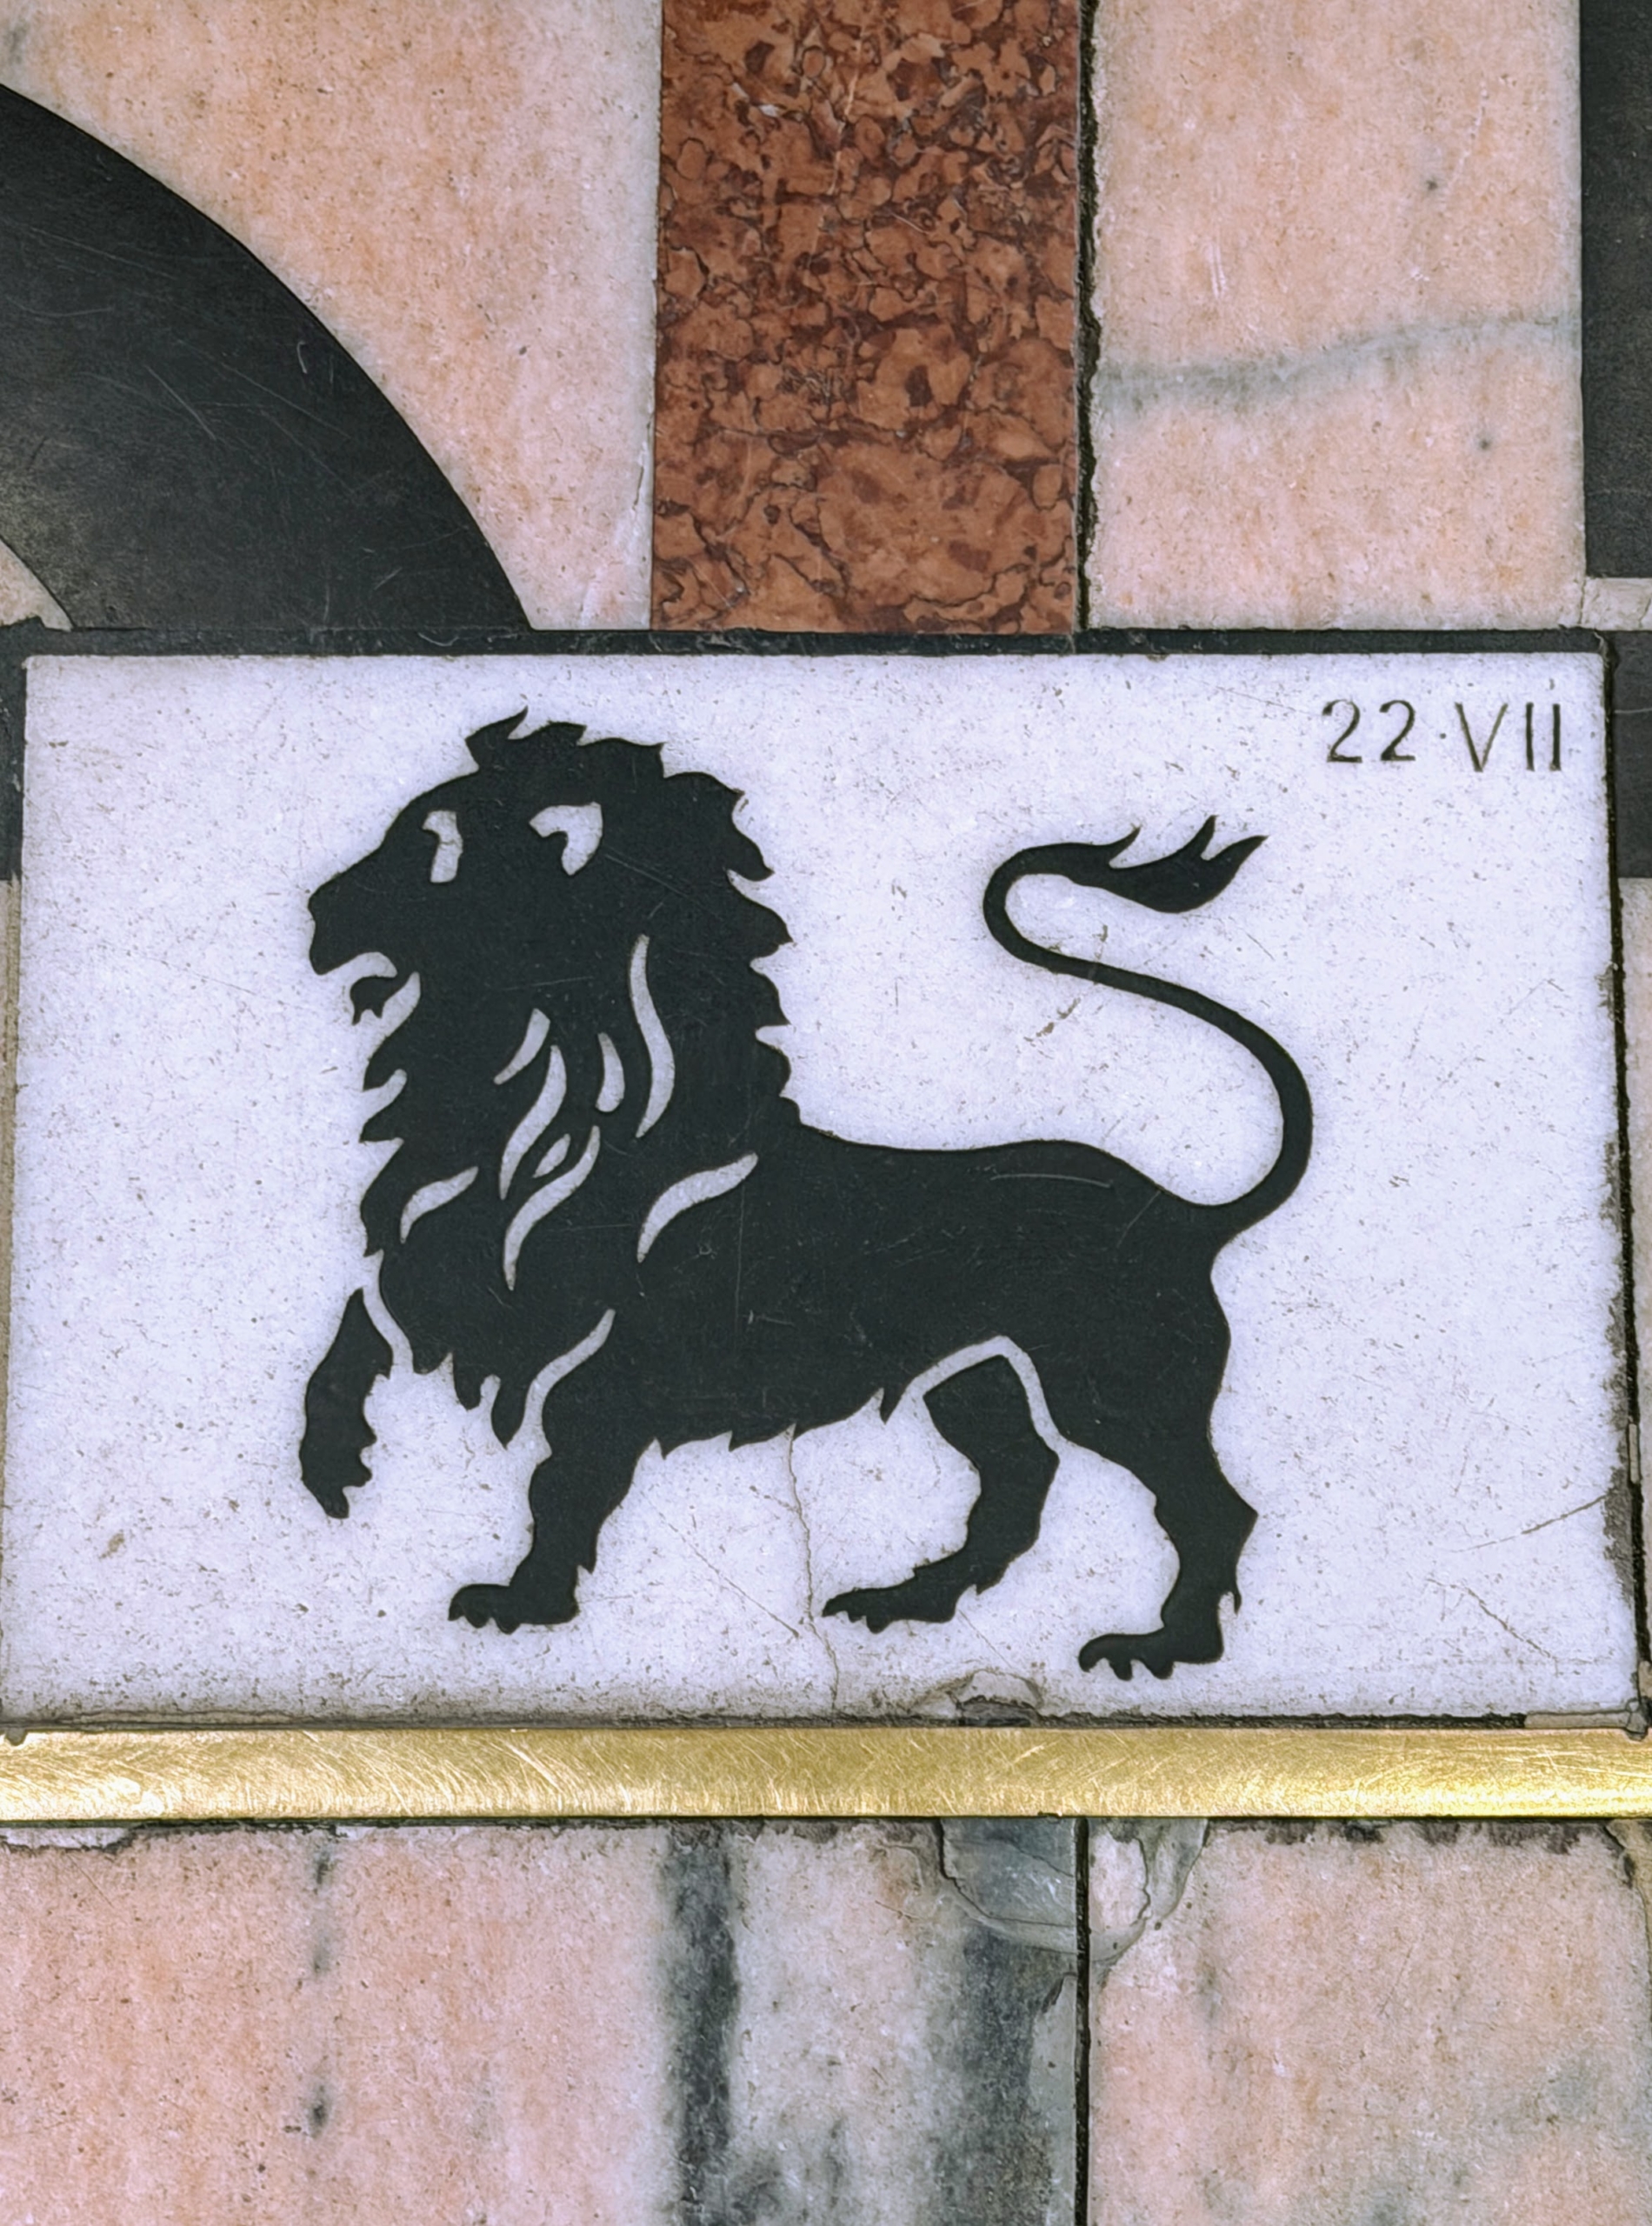
I also noticed this on floor – Leo, my zodiac sign. The zodiac signs are black on white marble and run along a brass strip set in the floor.
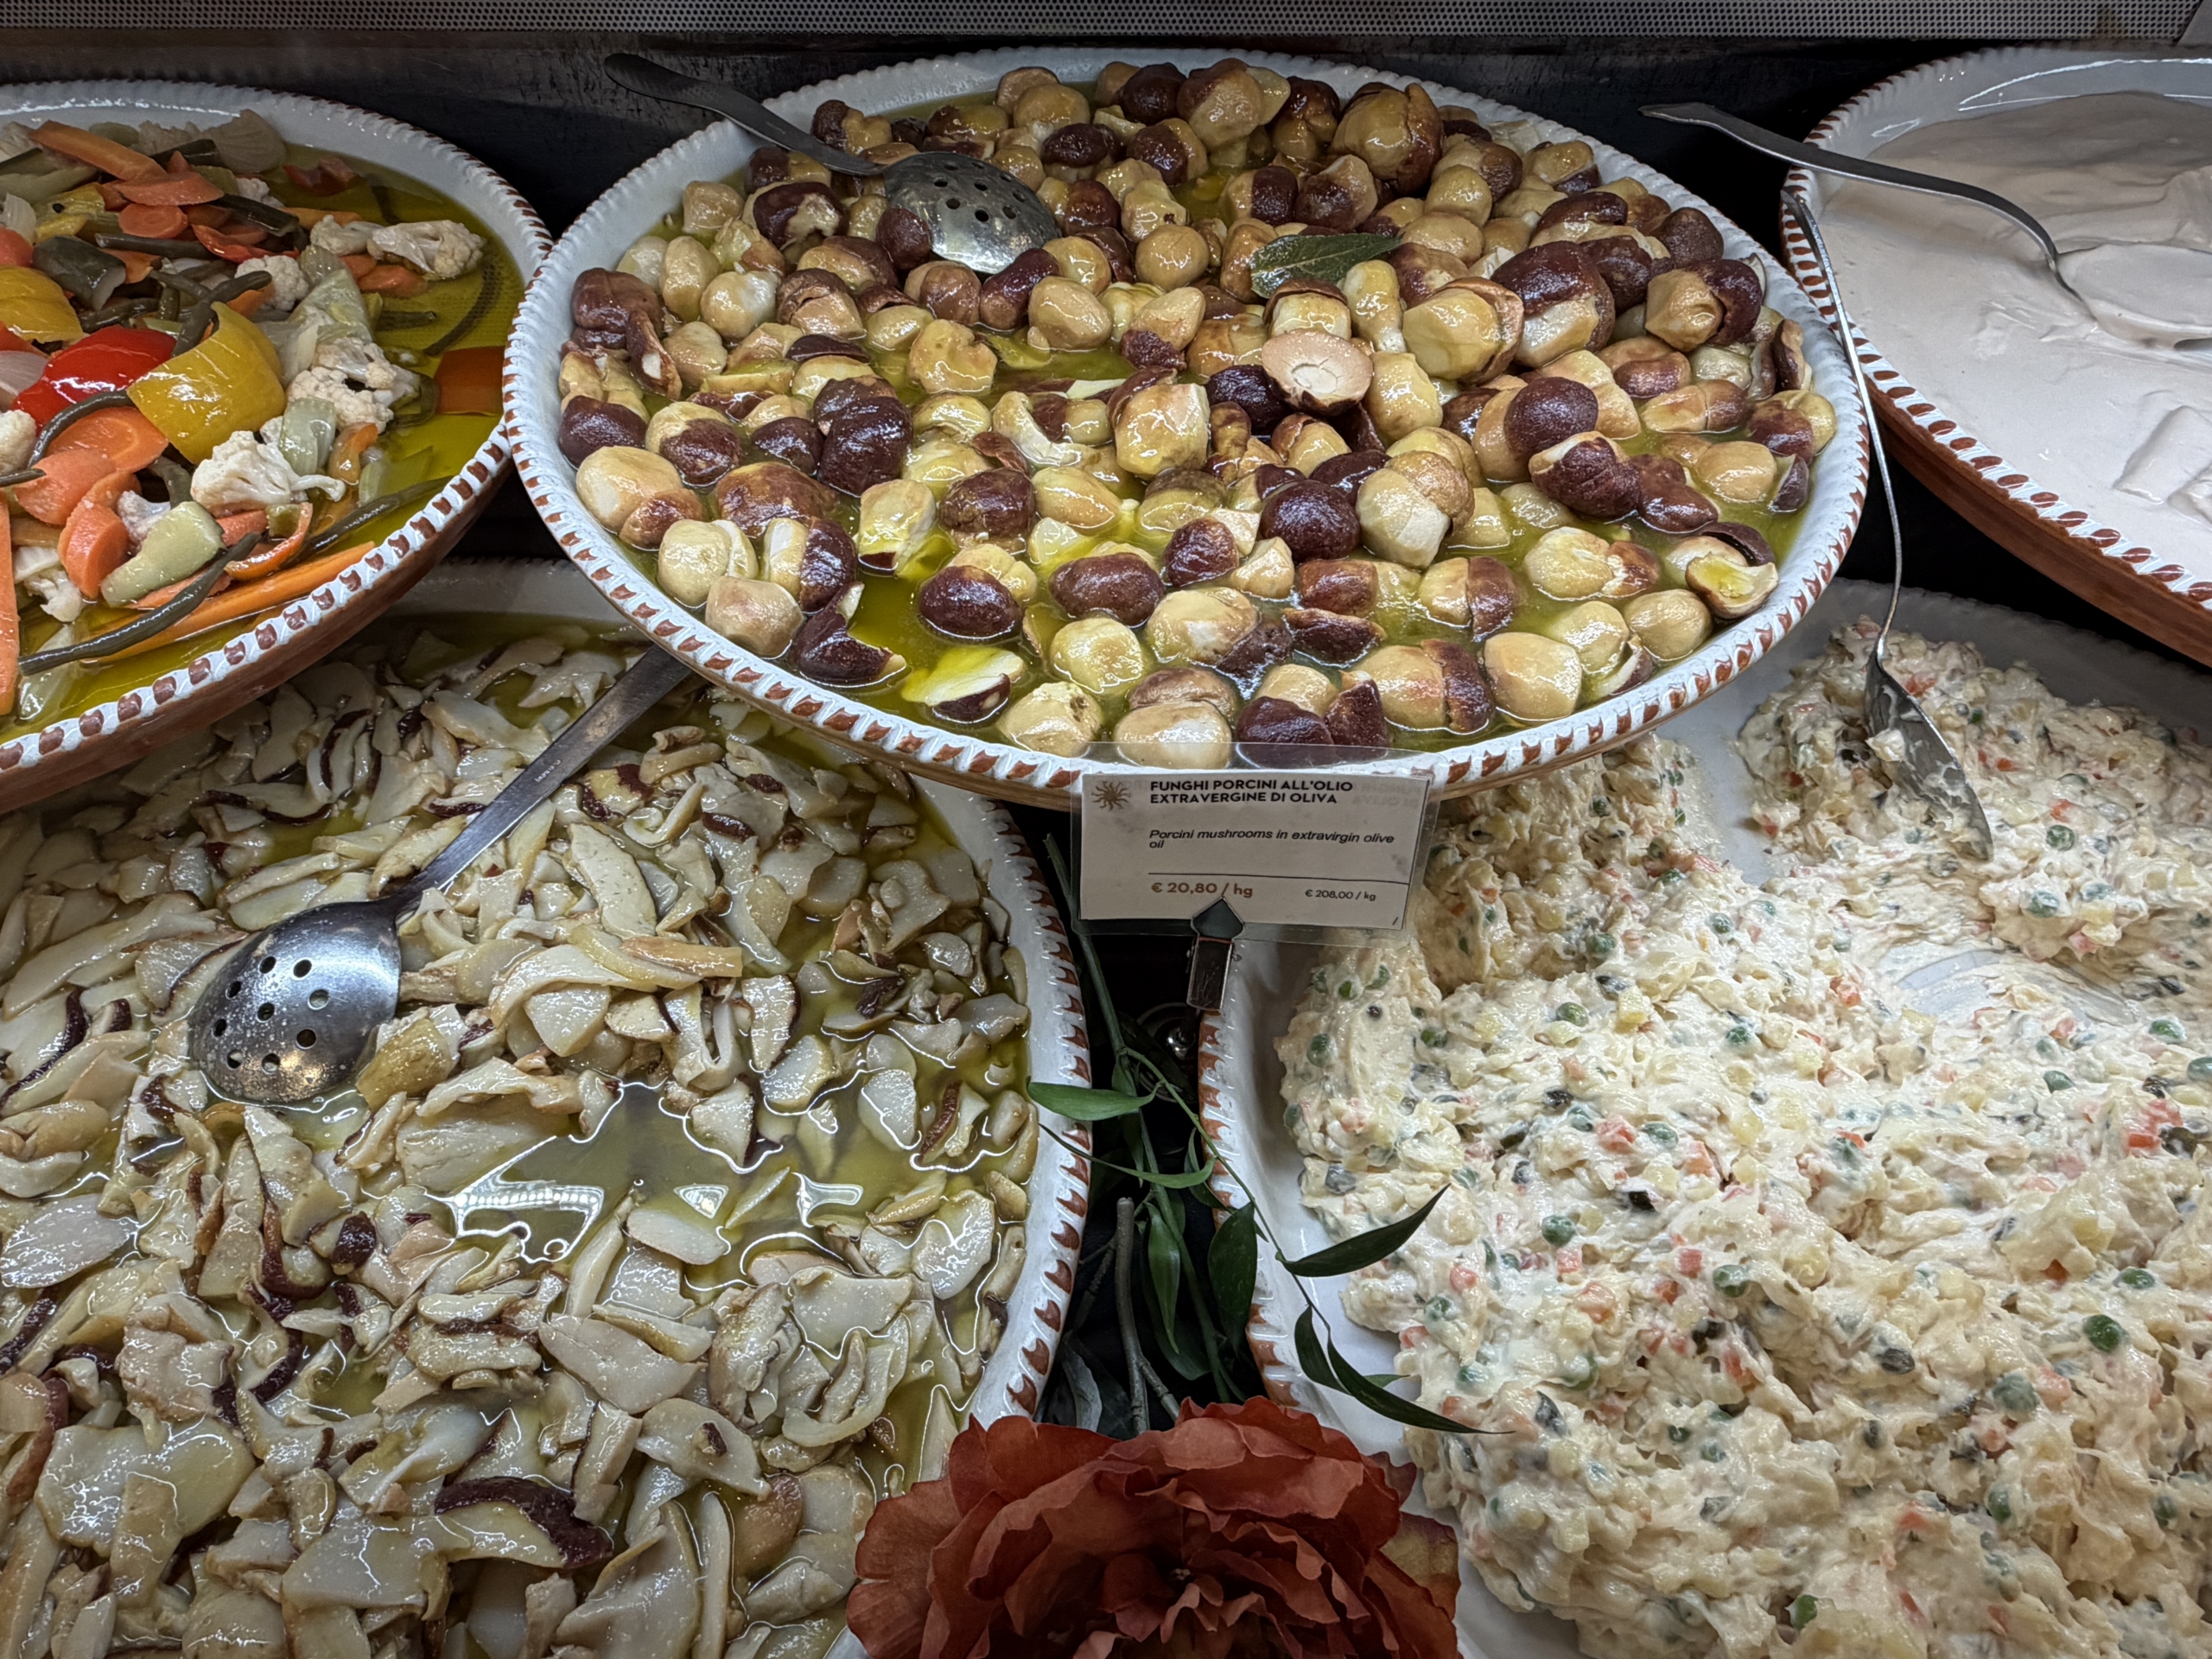
We also visited Peck in Milan – one of the largest food and wine shops in the world. Here is just one section of meat display. There are dozens of prosciutto and salami choices.
And platters of delicacies in the glass cases. On top is a platter of mushrooms in olive oil.
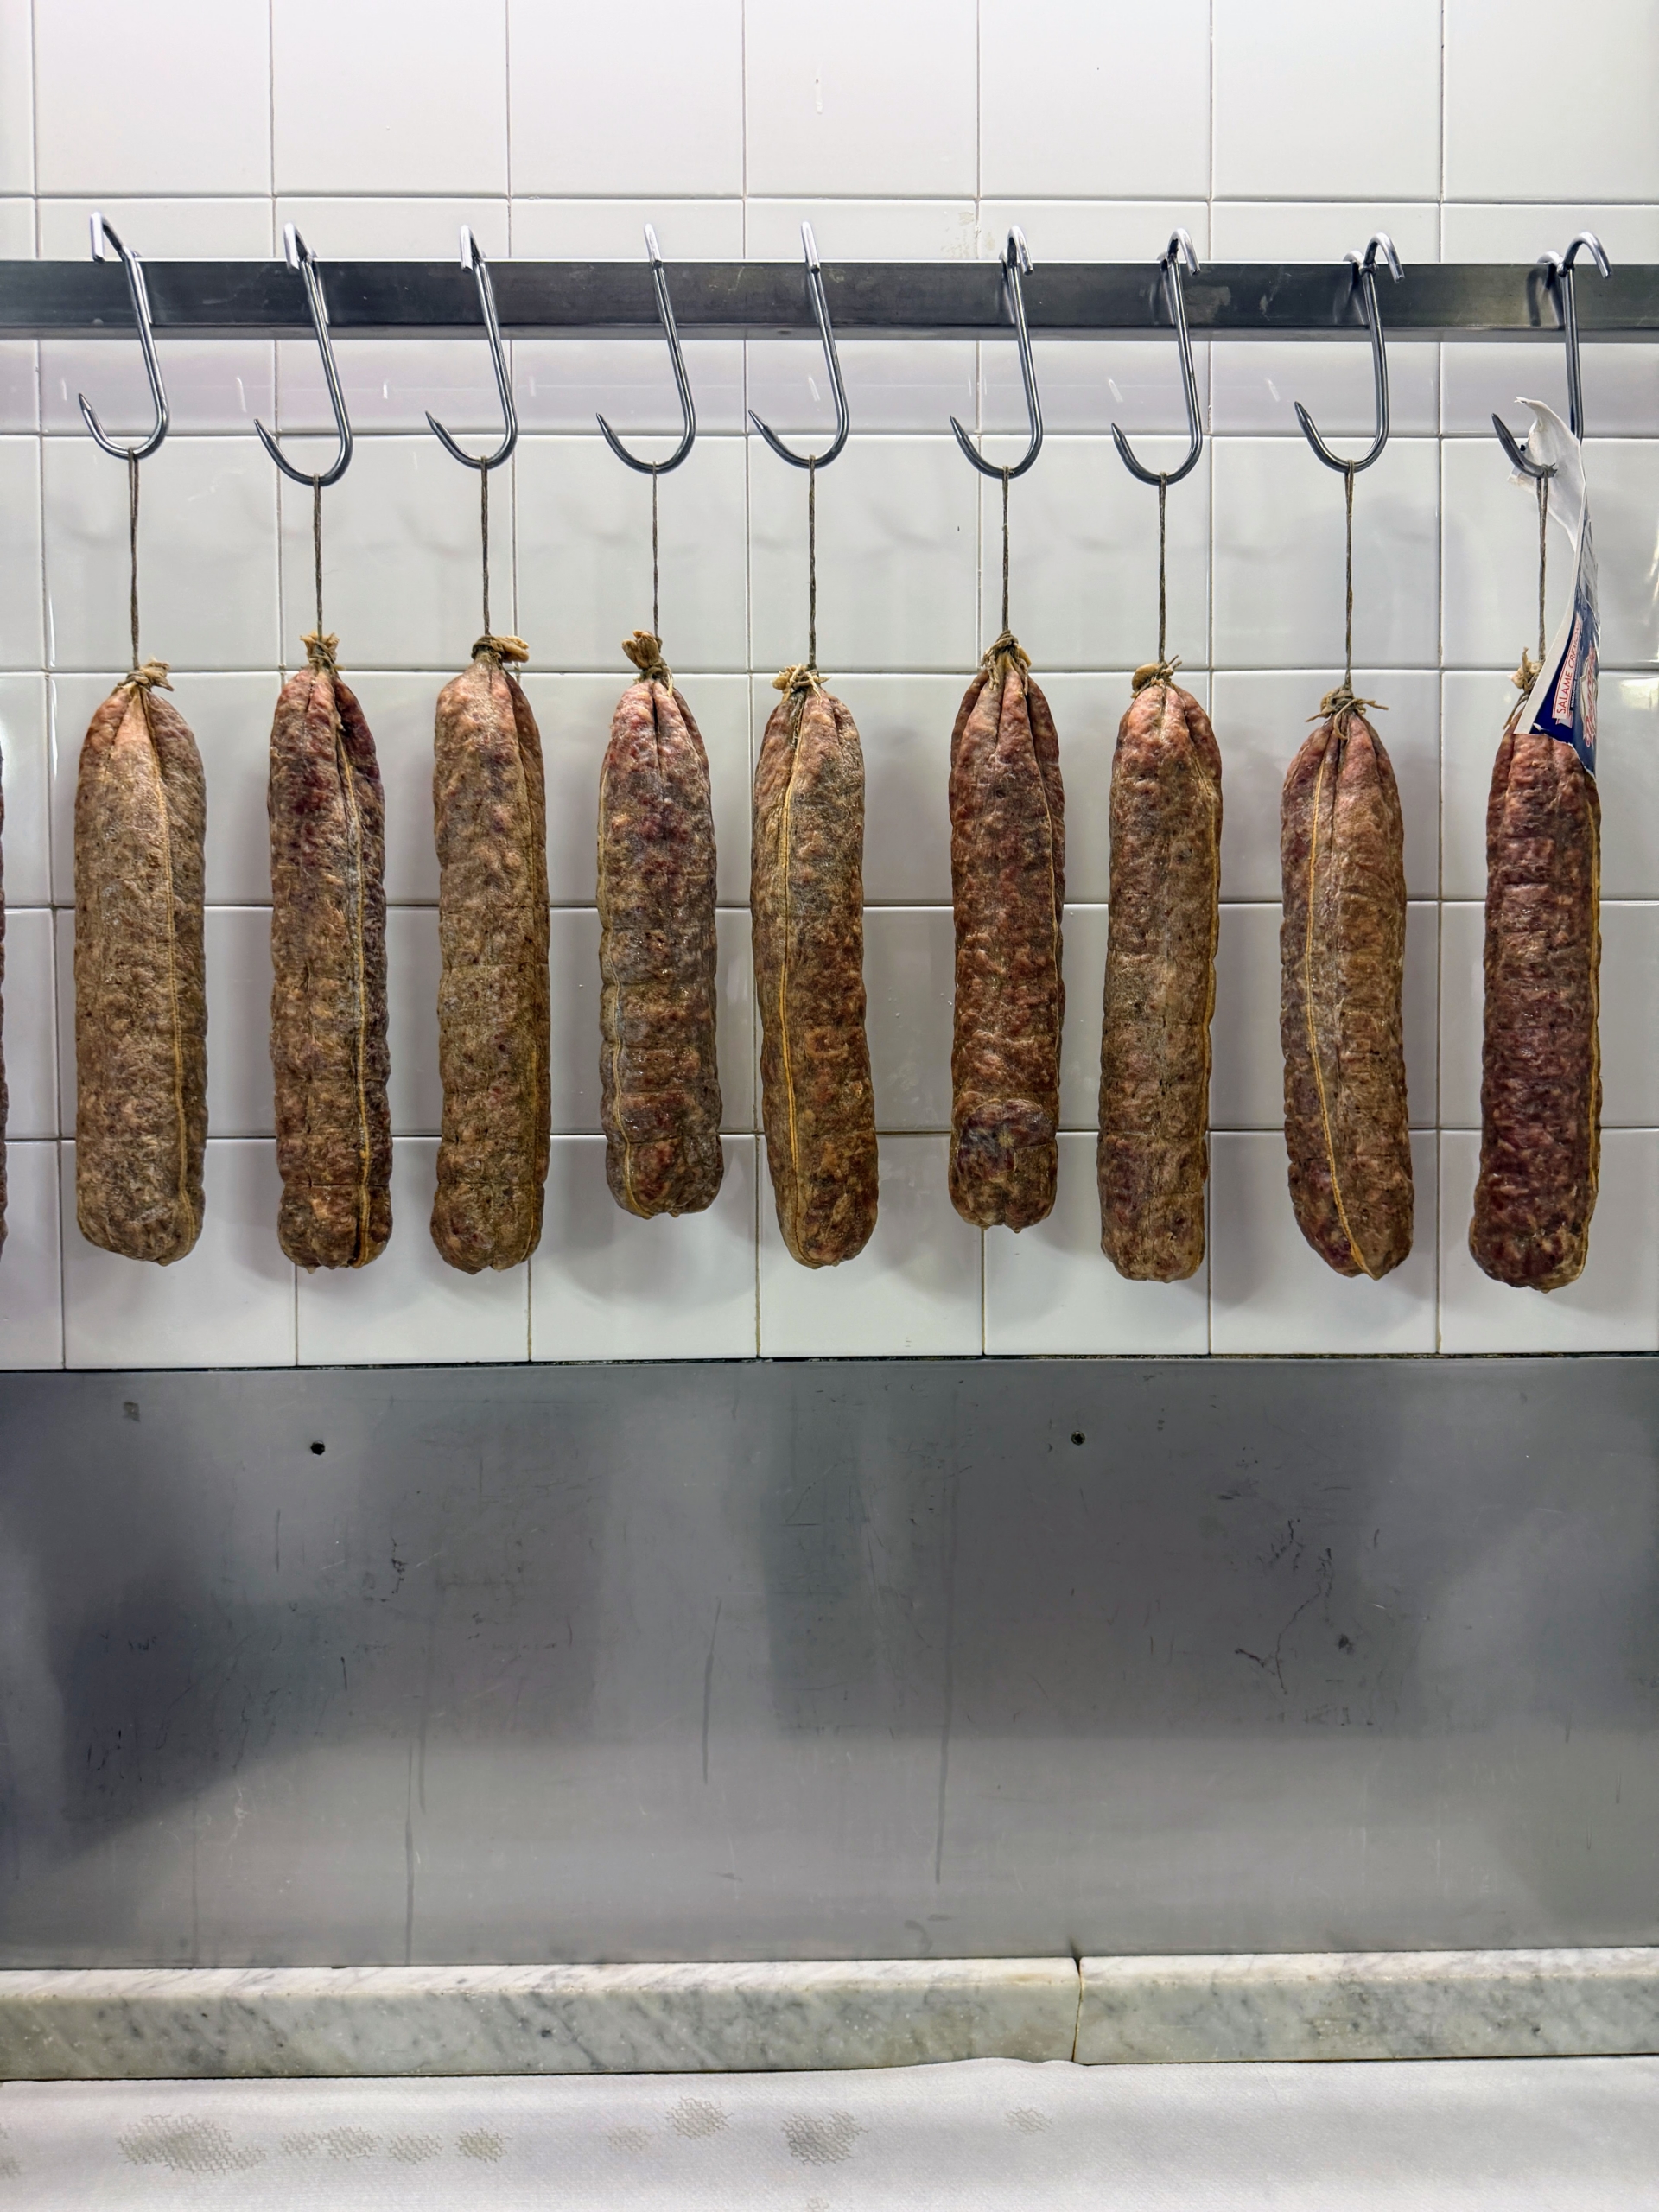
The meats are cured specially by Peck. Here are some hanging in the back kitchen.
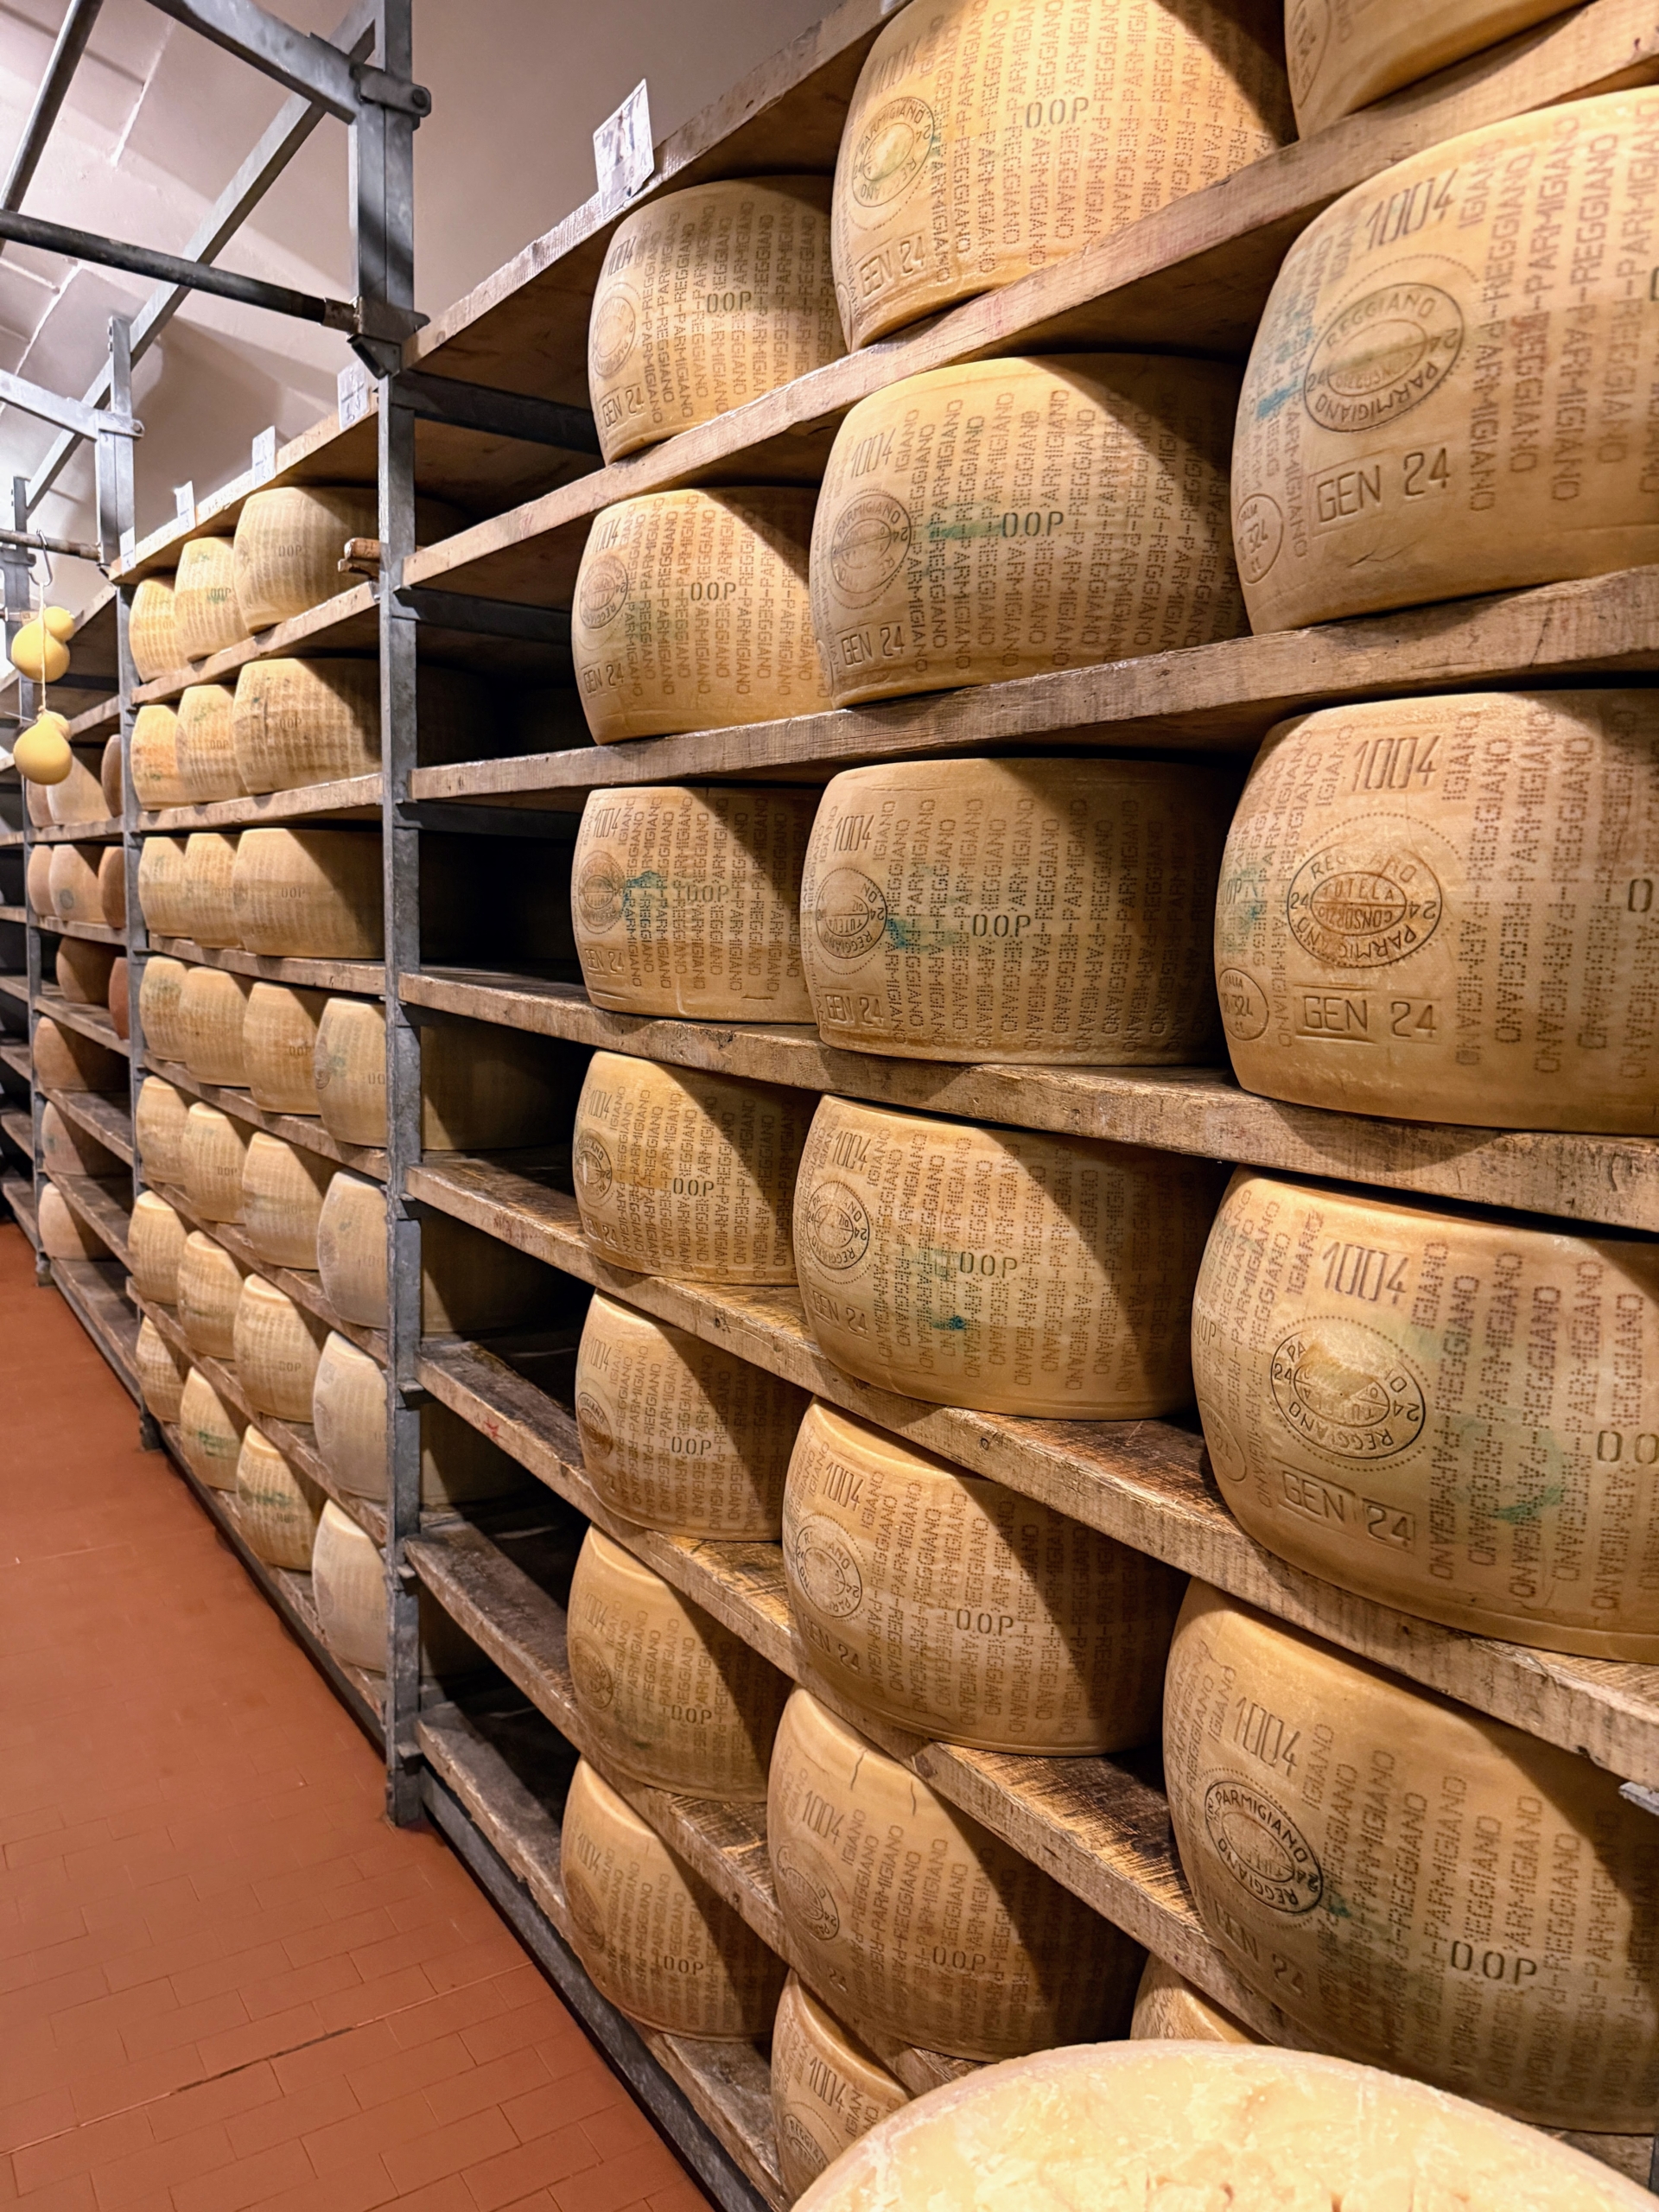
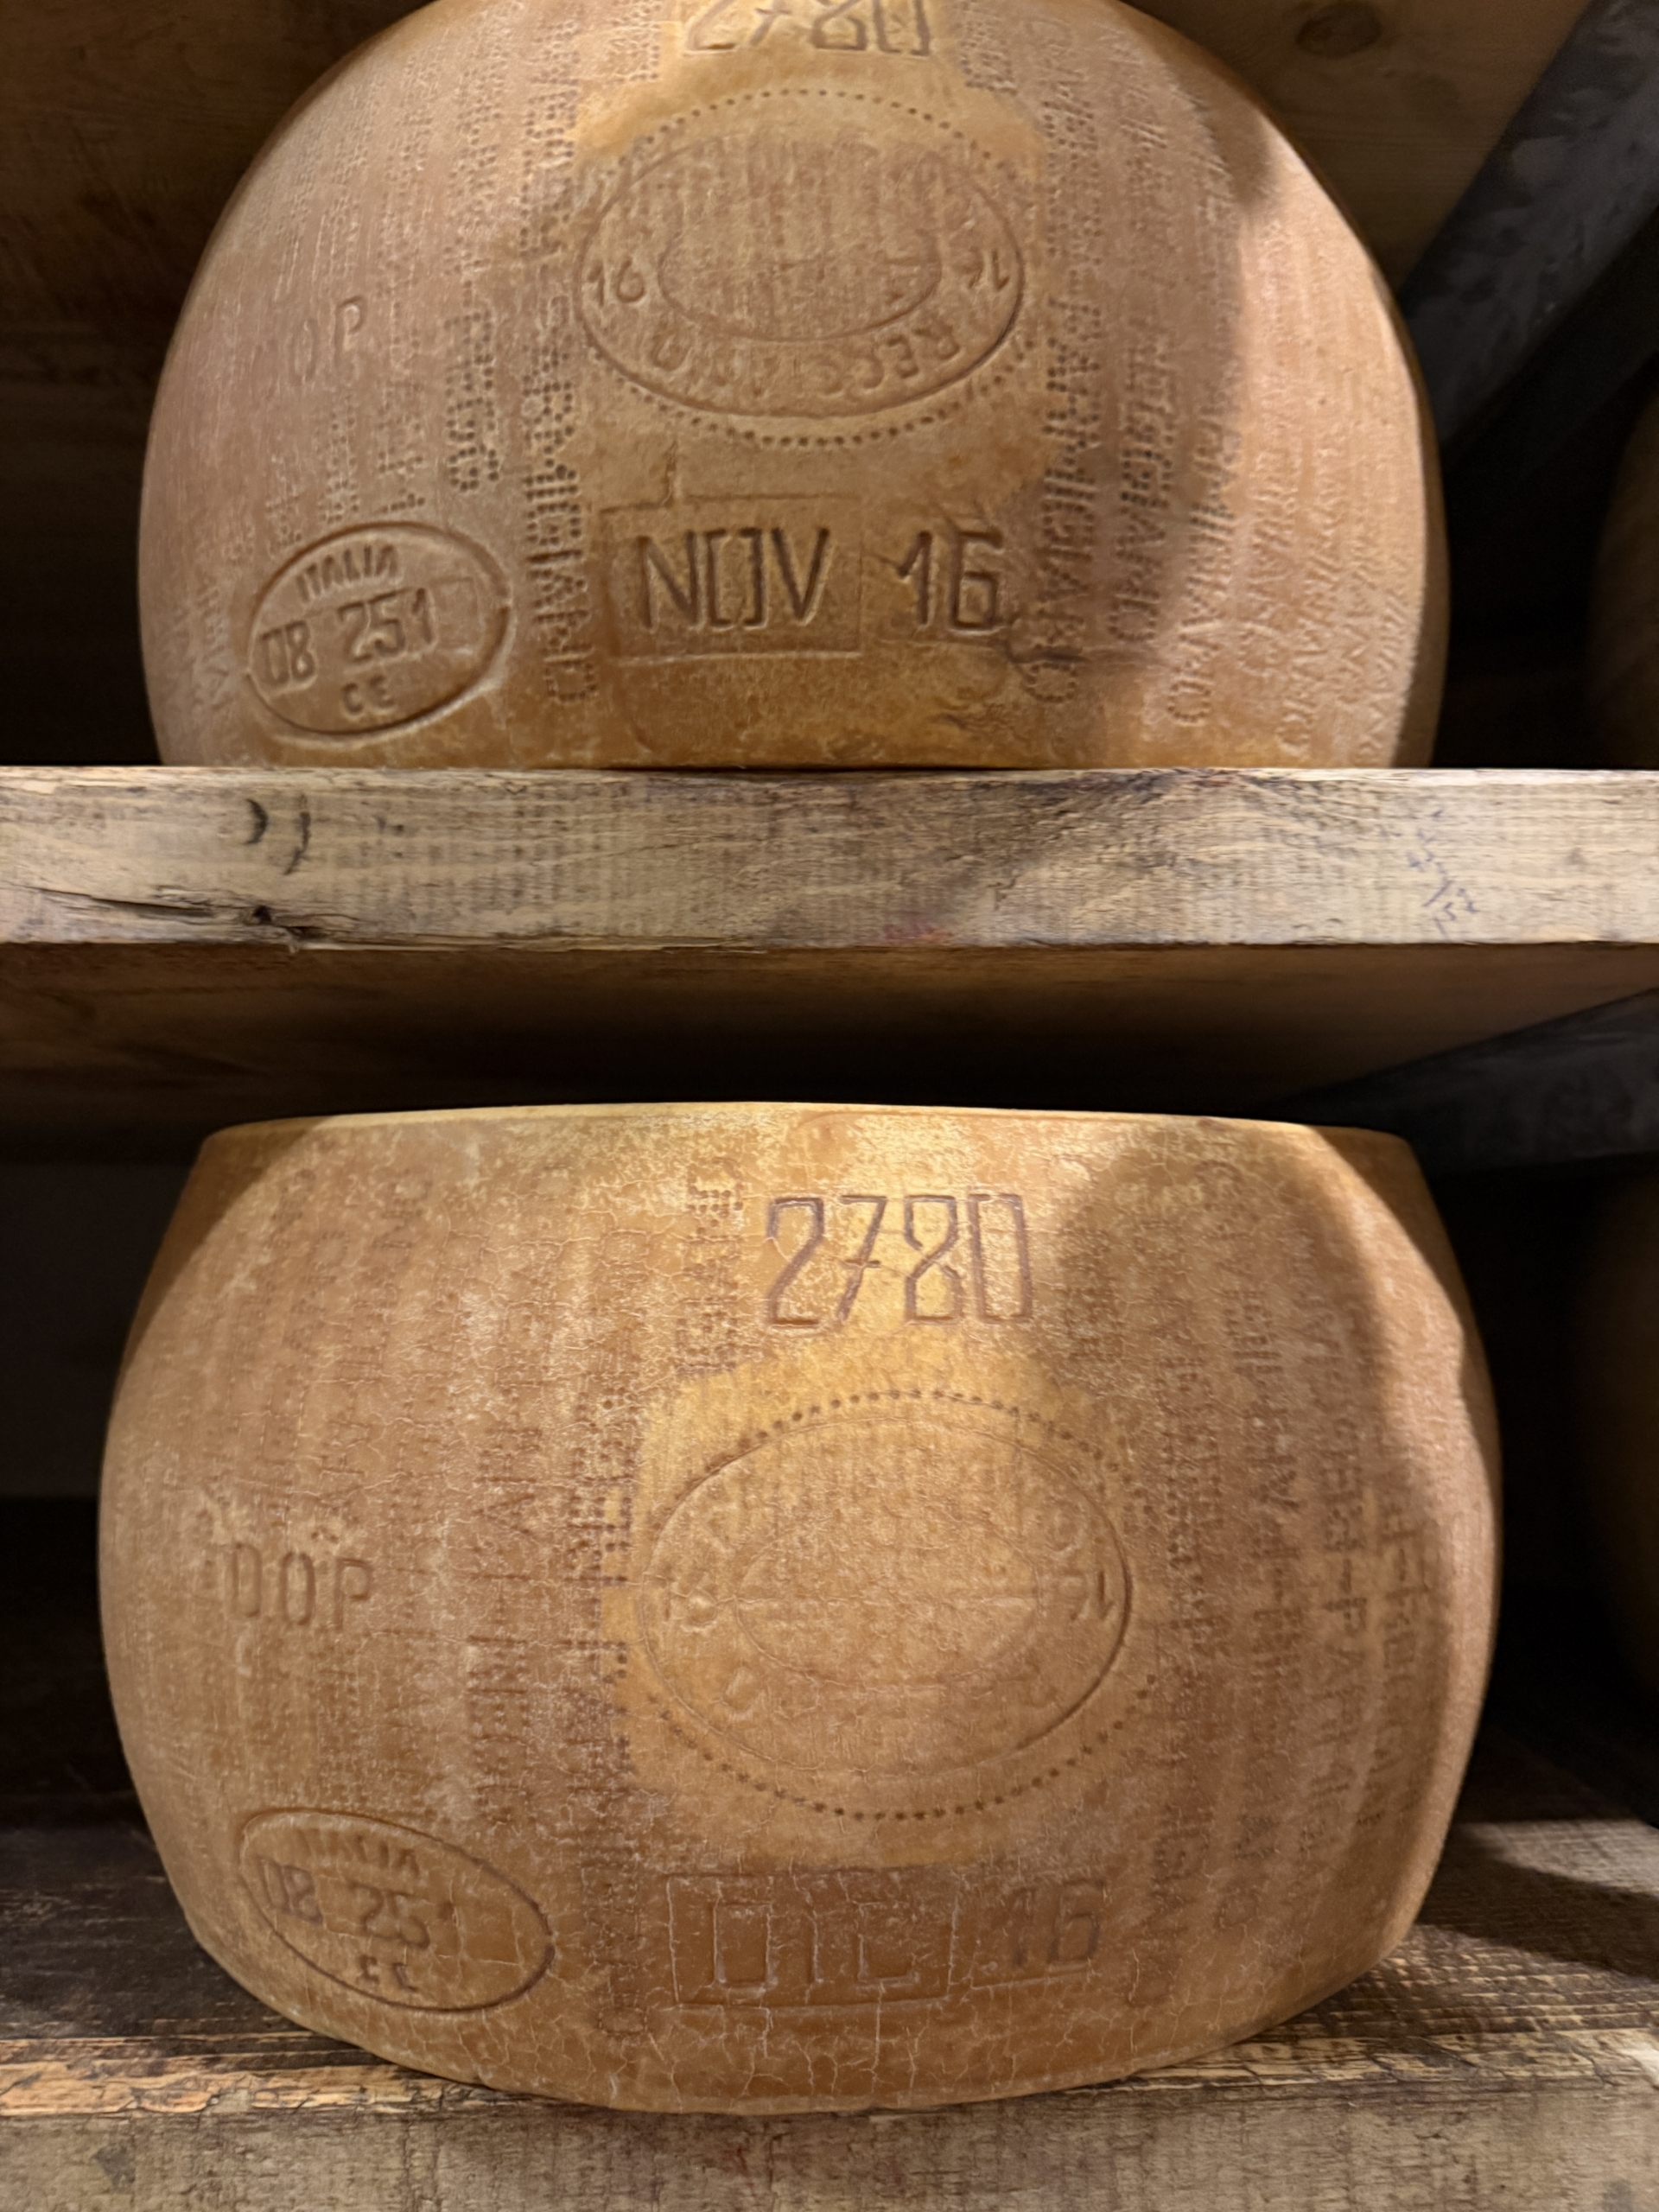
There is also a cheese cave, this aisle set to the perfect temperature for storing parmigiano reggiano cheese.
These cheese rounds are ready to be cut and sold.
And here it is, The Last Supper, painted by Leonardo da Vinci. It is located in the refectory of the Santa Maria delle Grazie convent in Milan. The painting was done between 1494 and 1498. It is a wall fresco that depicts the final meal of Jesus with his desciples.
Can’t leave Italy without a proper cappuccino. Thanks, Milan – it was a great Olympics and a great visit. See you again soon!
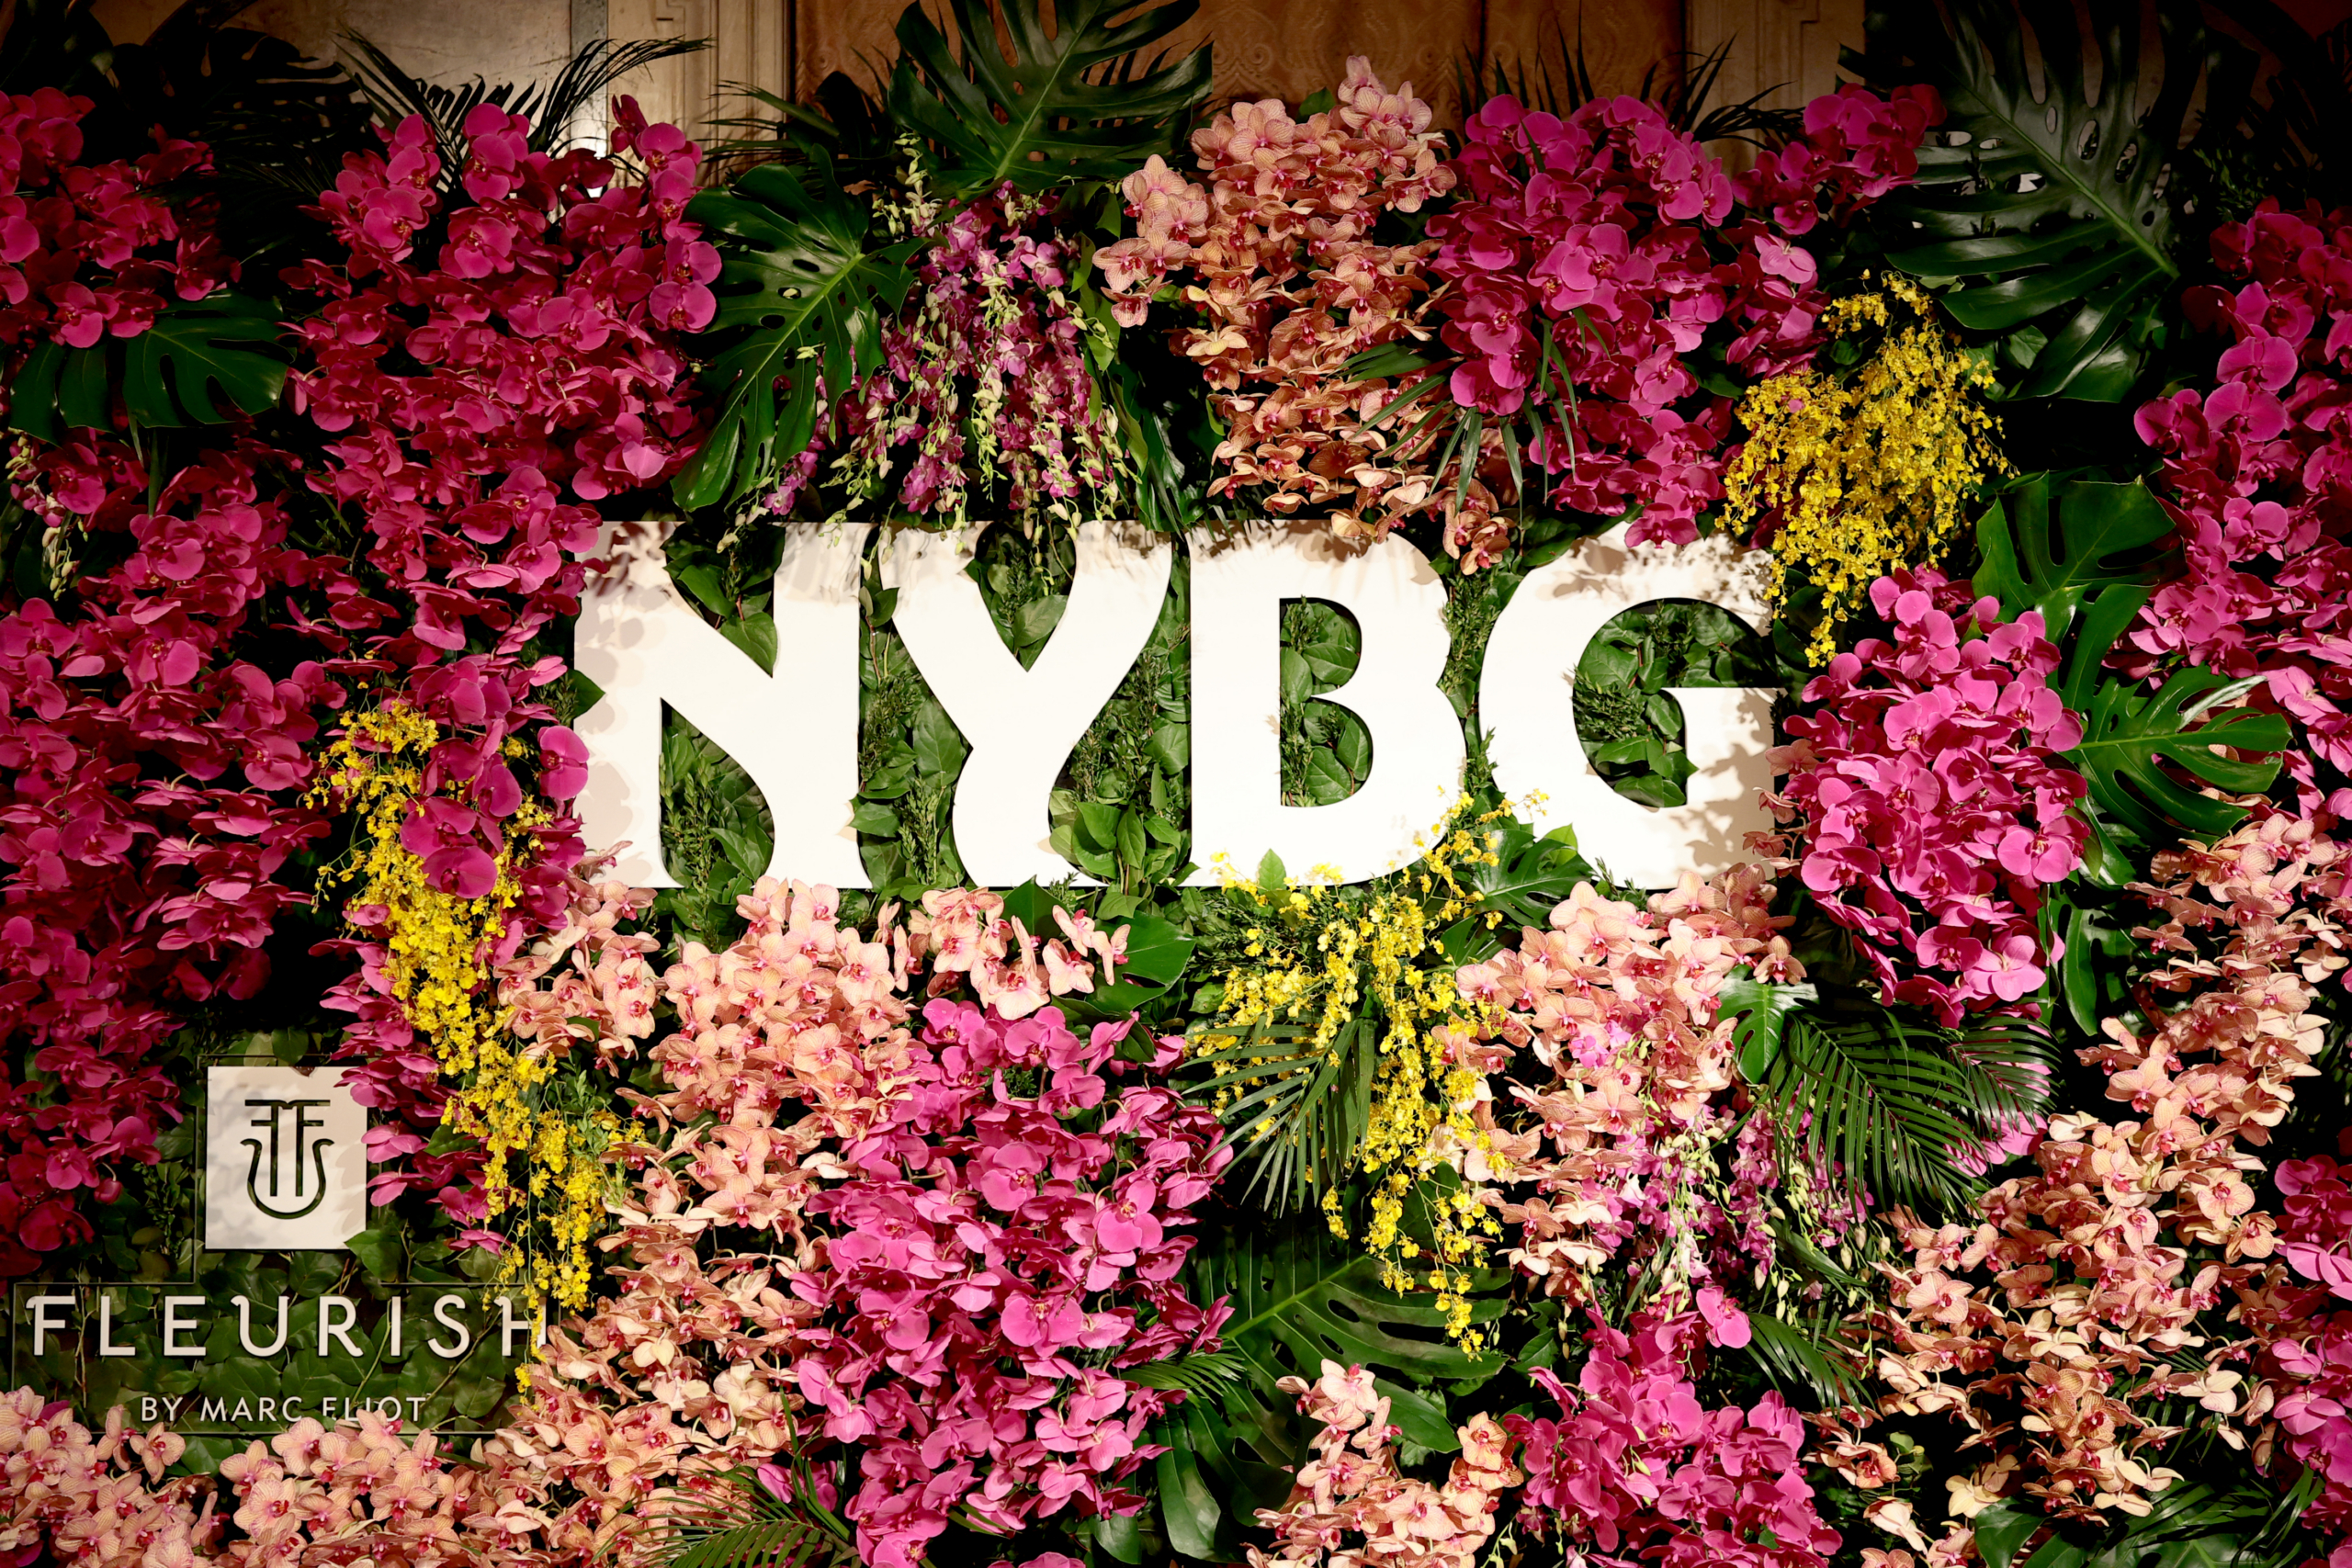
If you’re in the New York City area now through April 26, please stop by The New York Botanical Garden for their 23rd annual Orchid Show - it's truly a feast for the eyes.
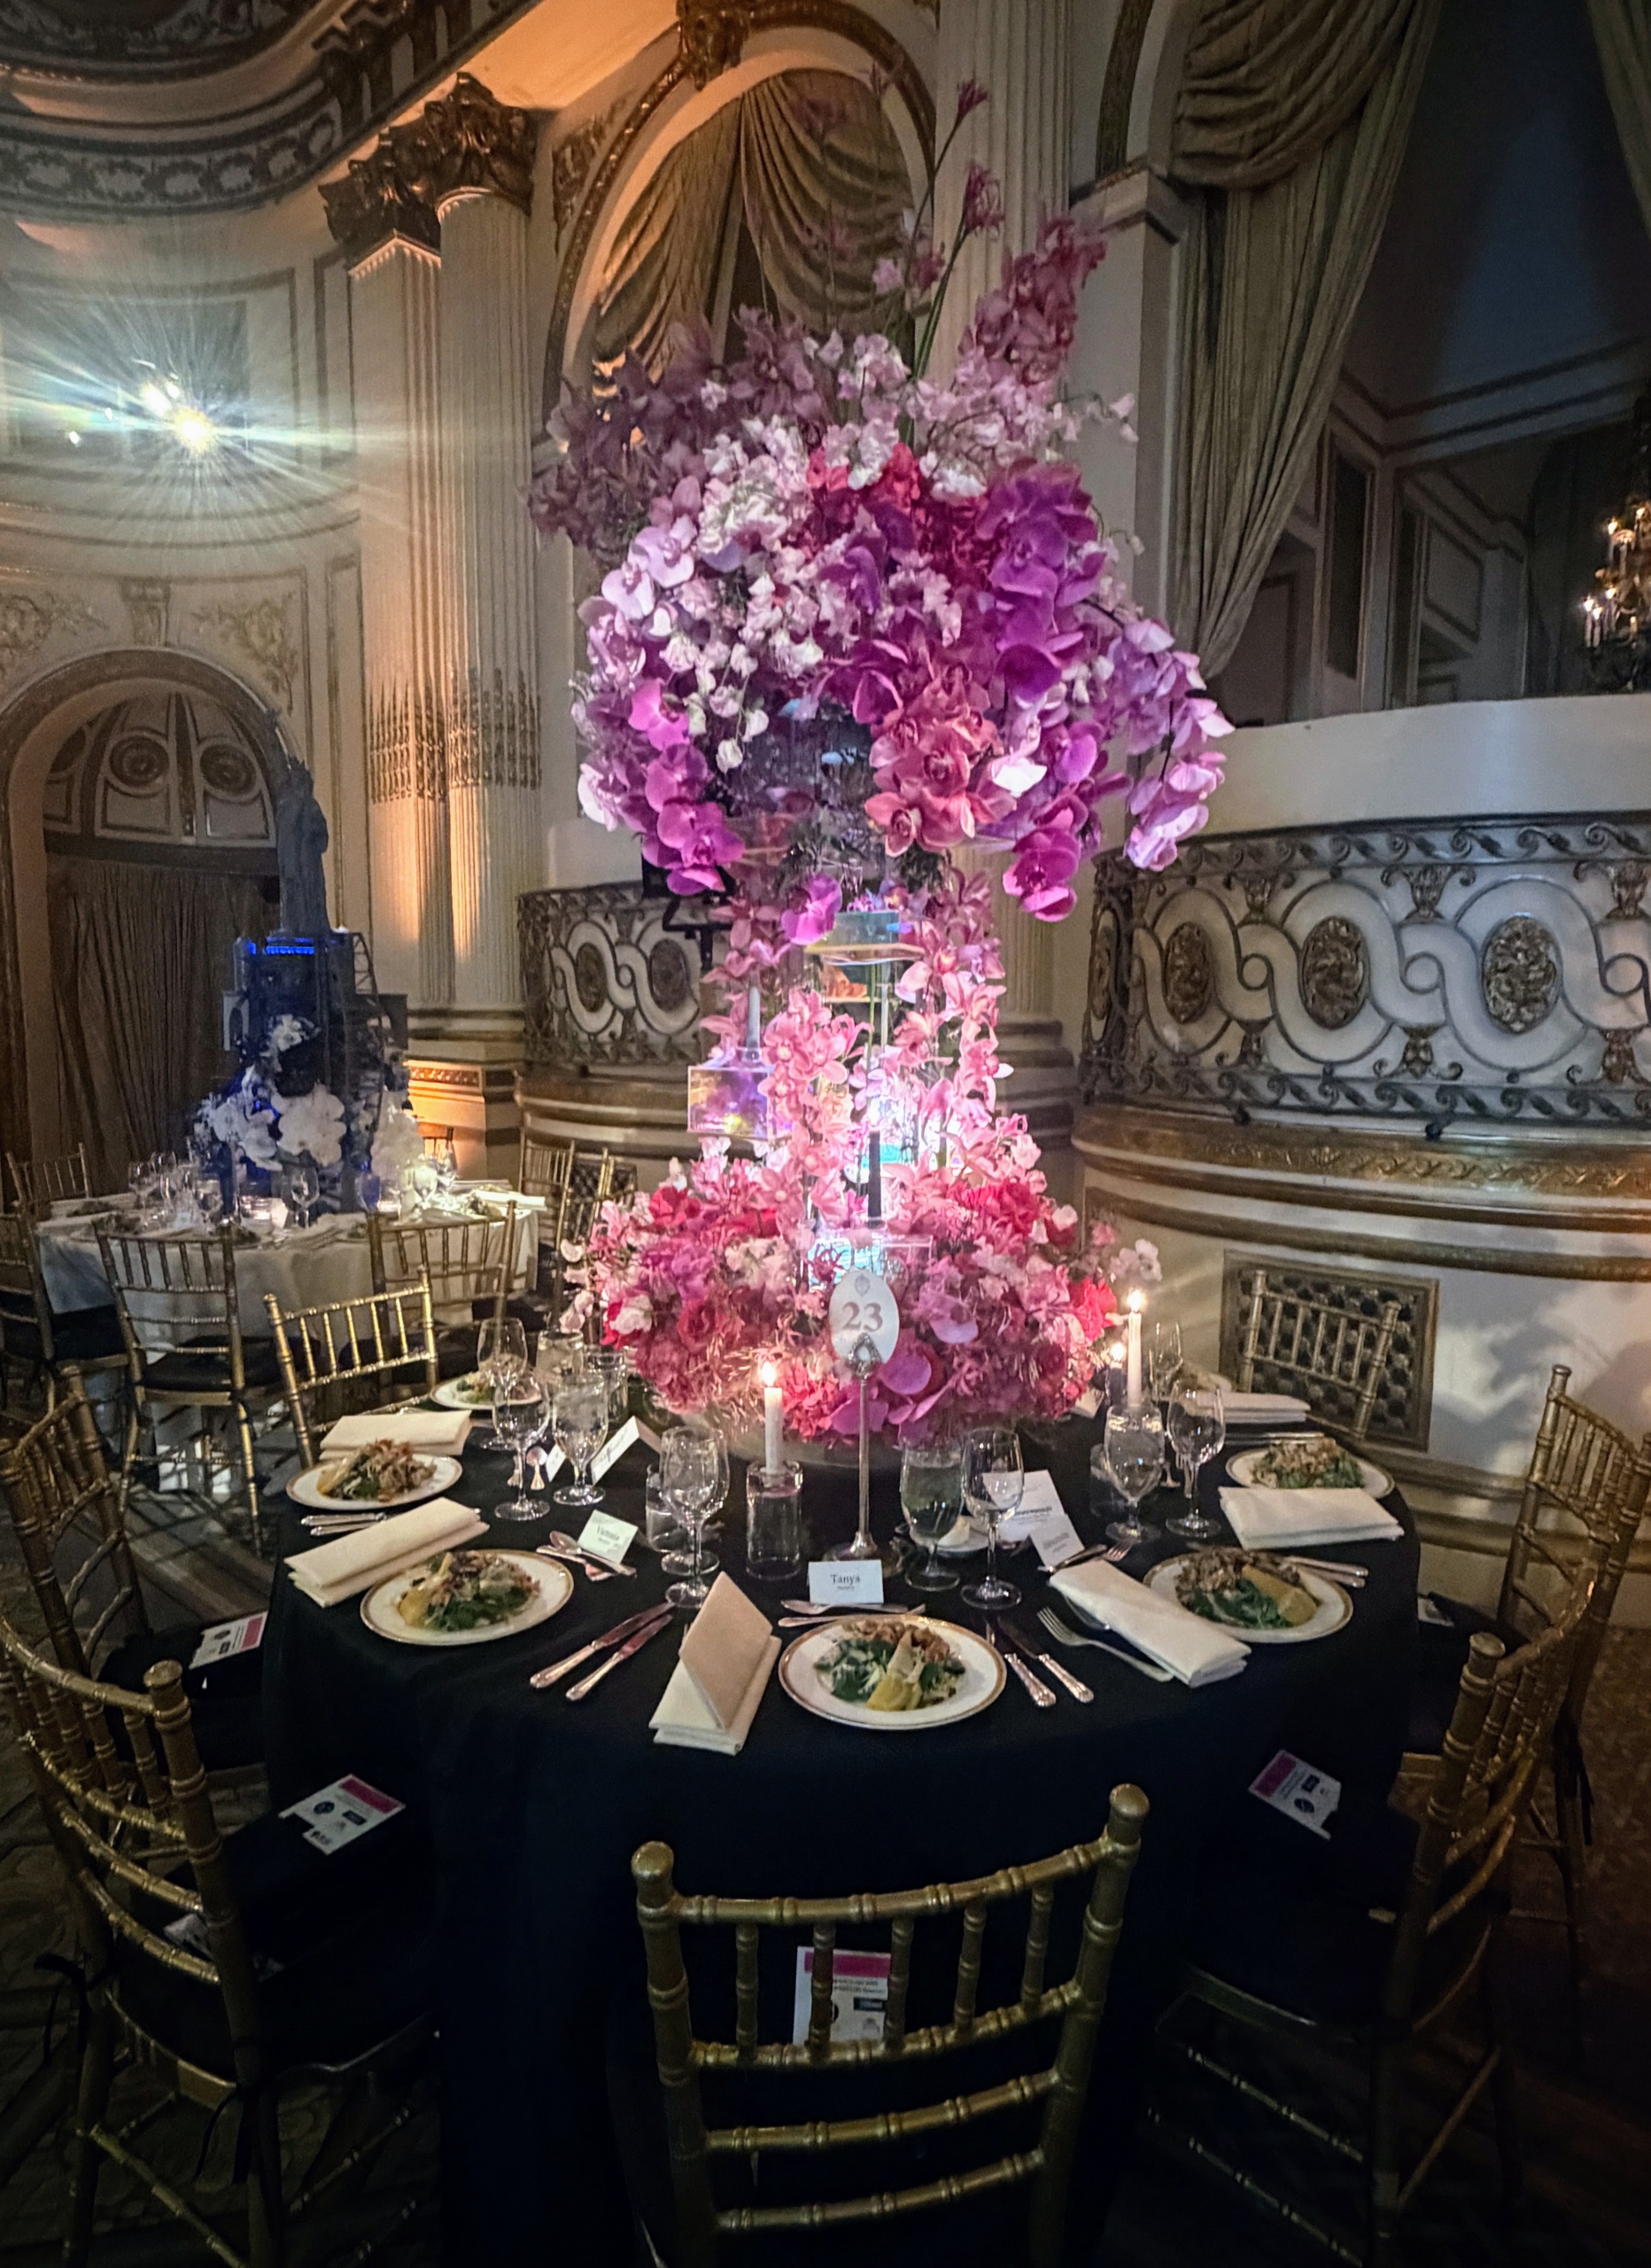
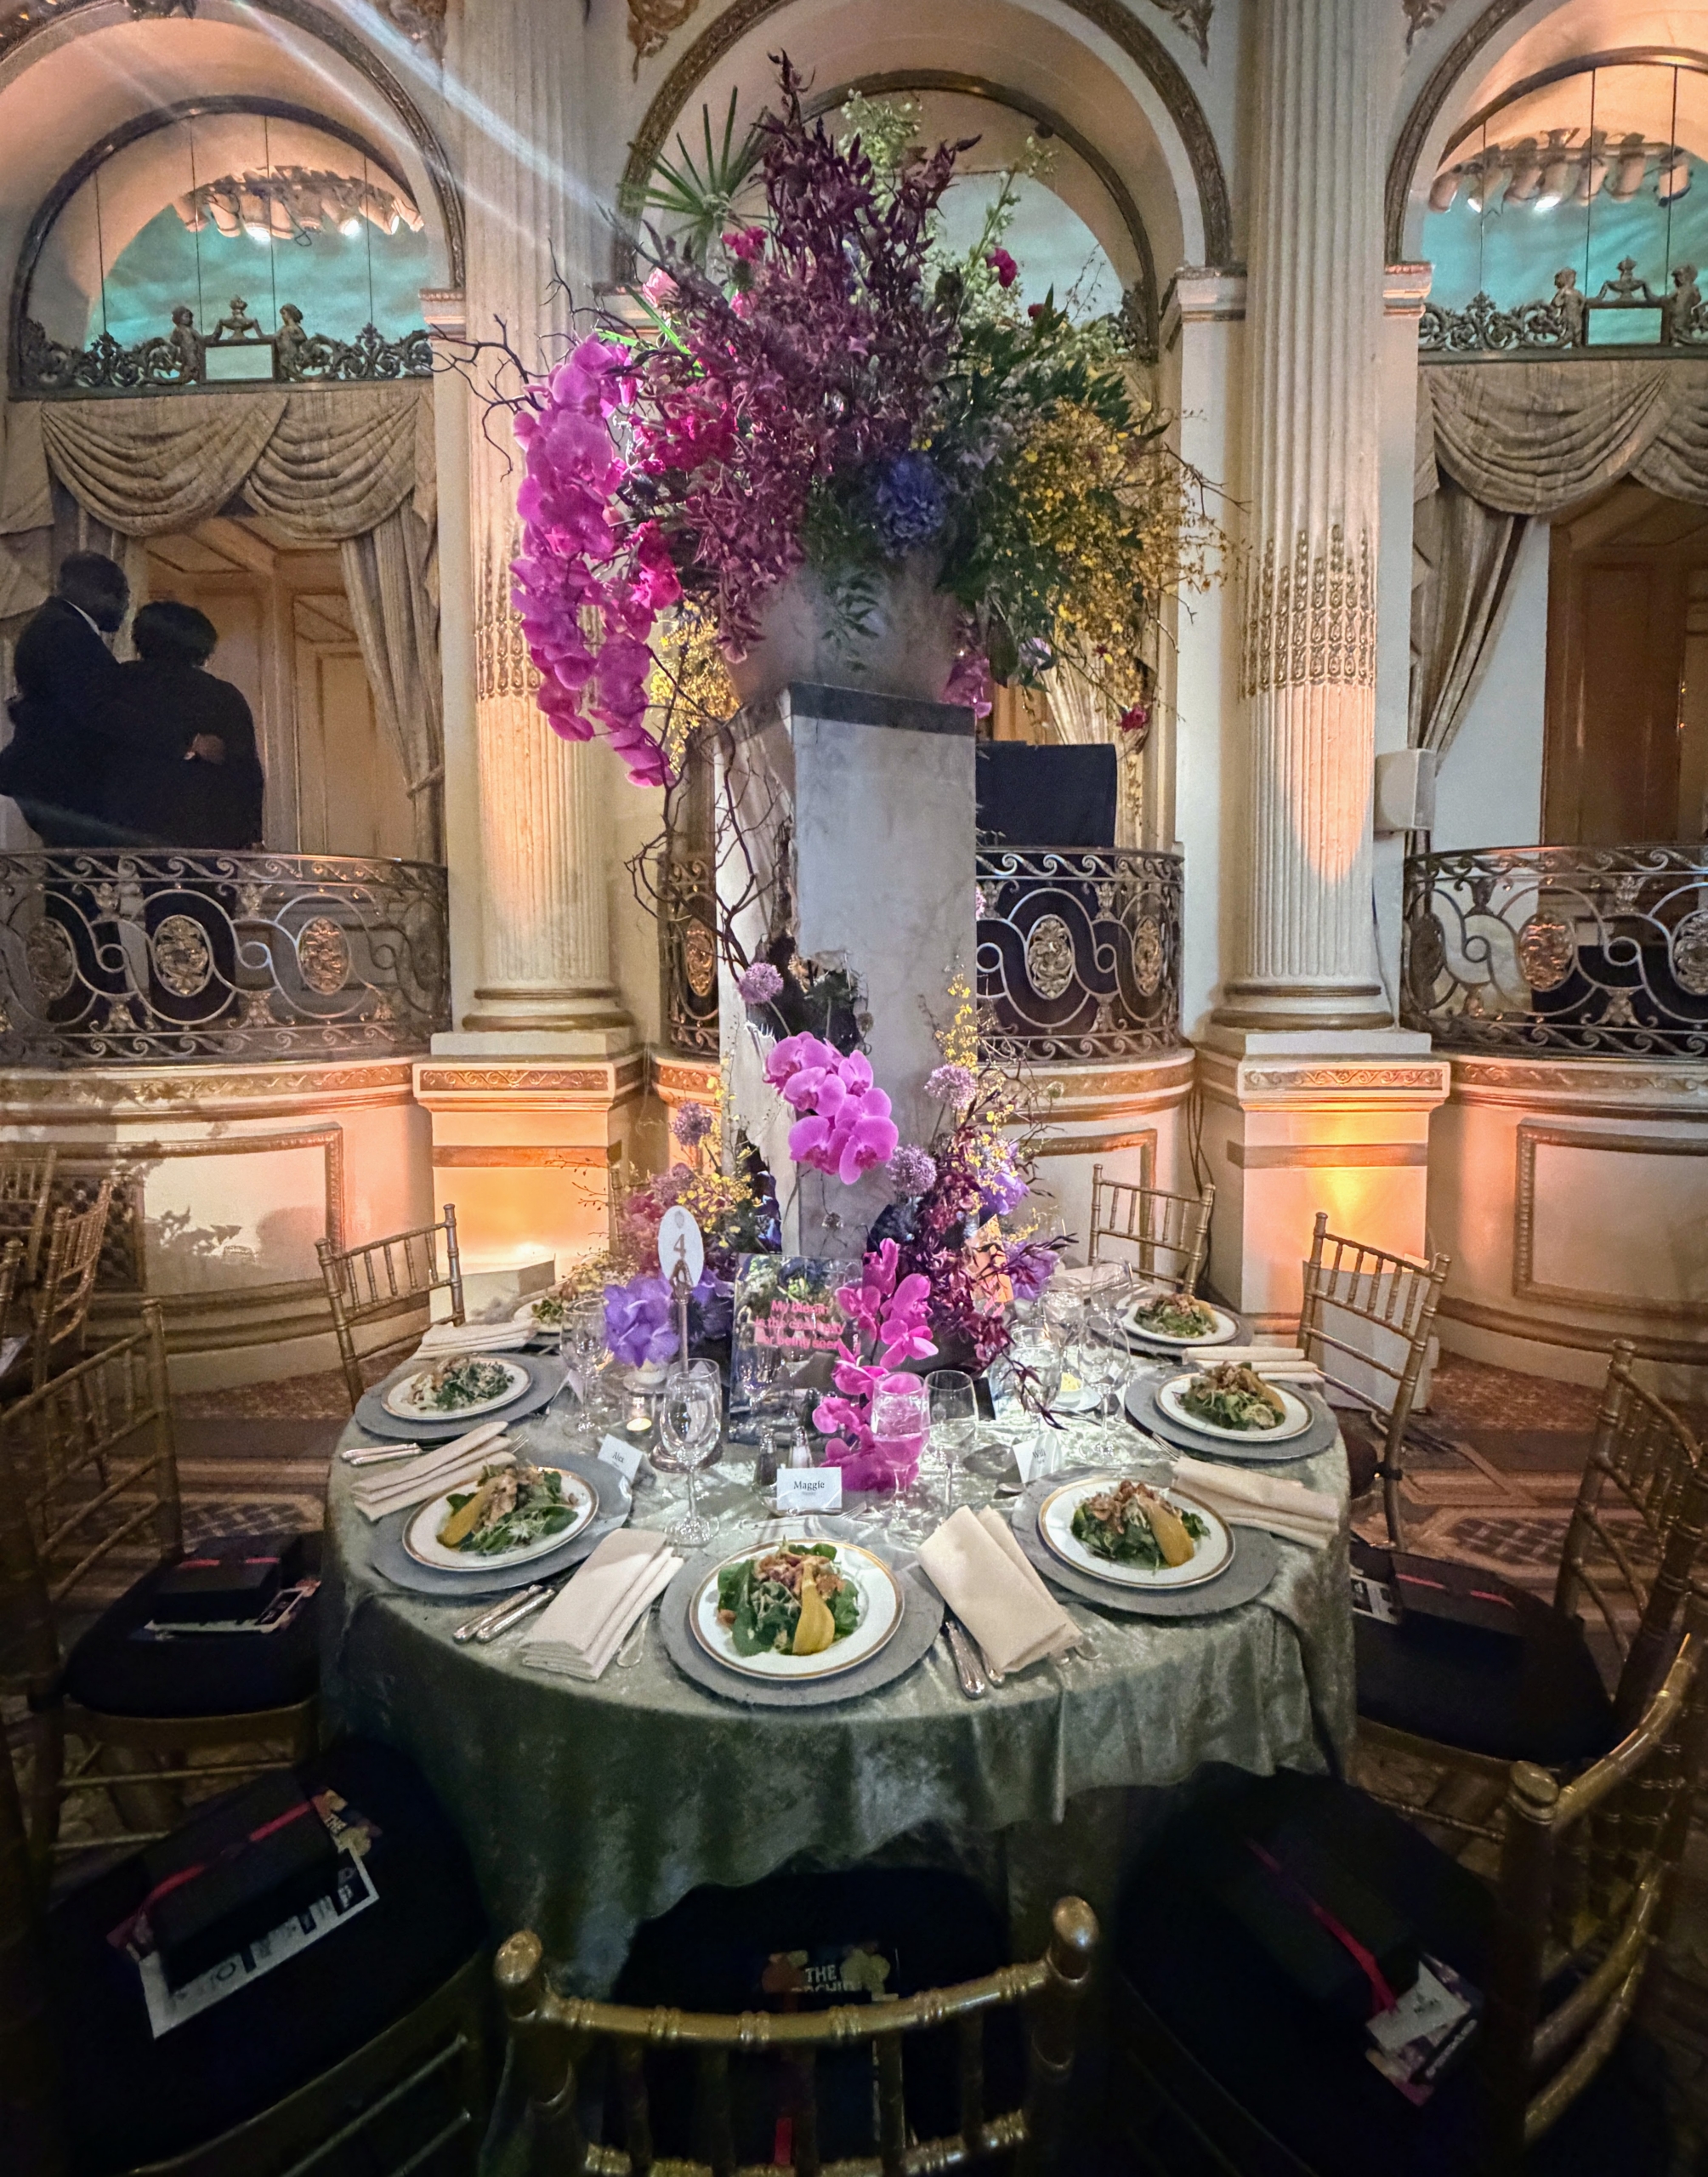
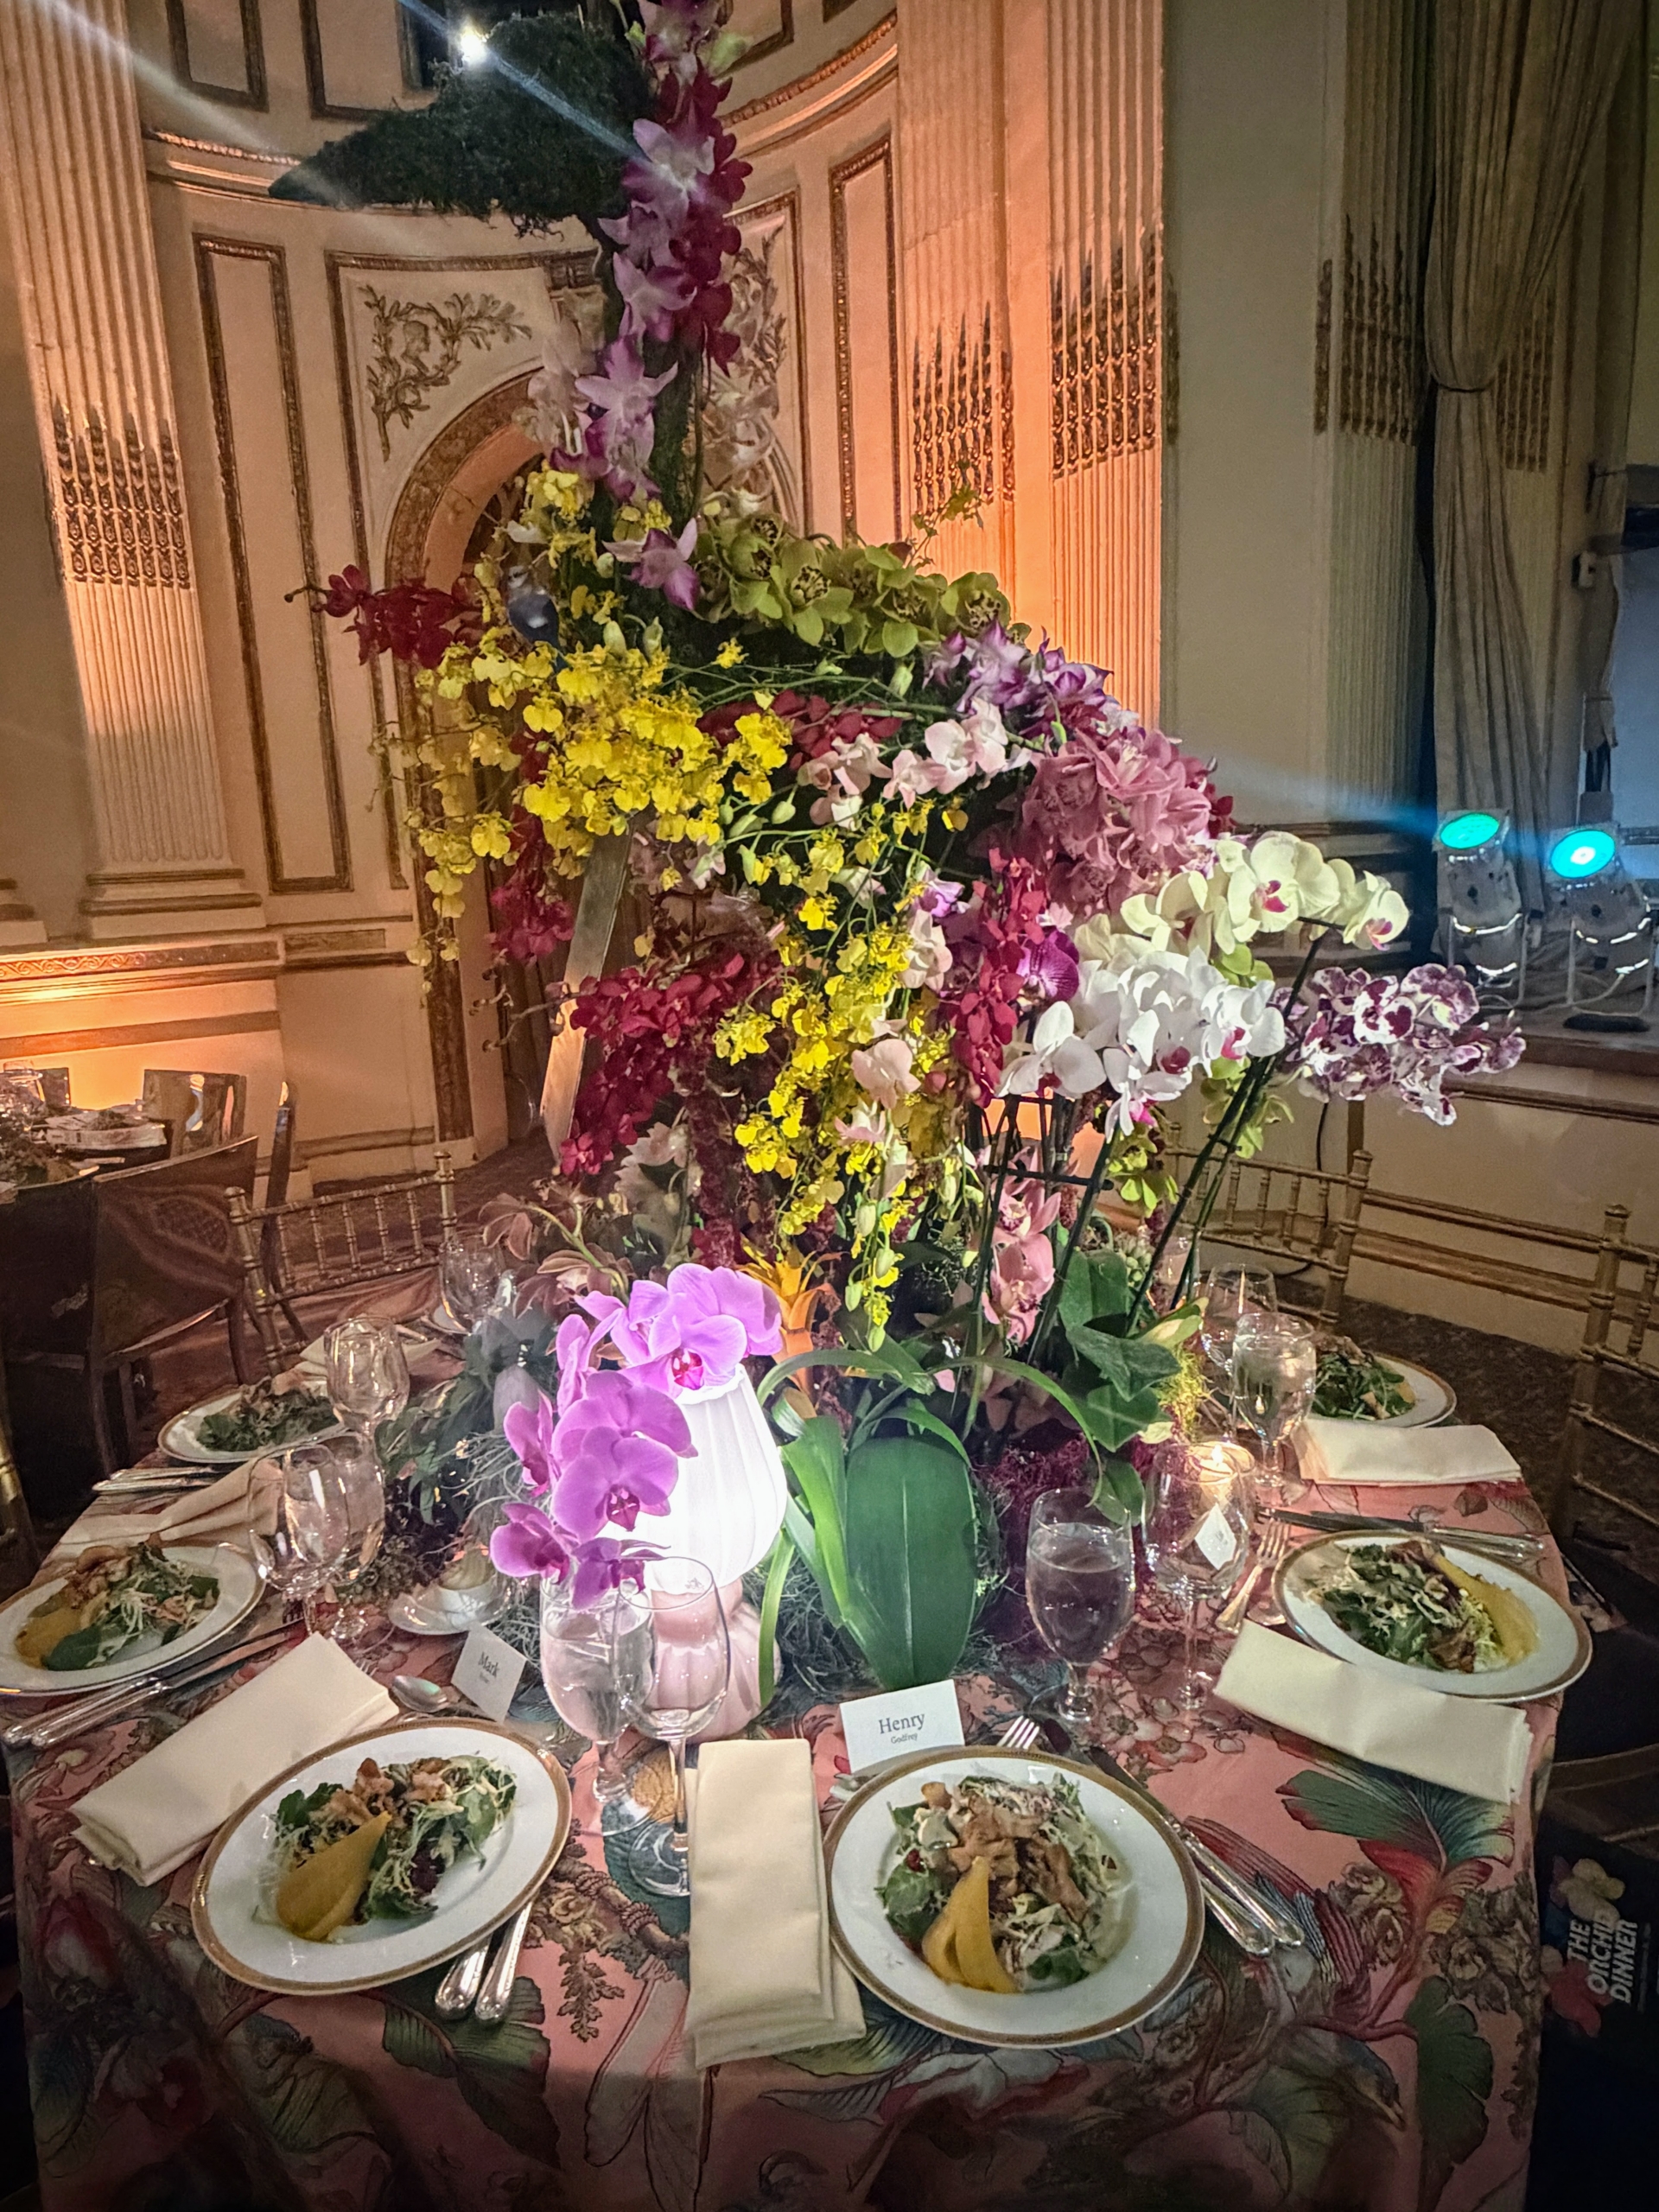
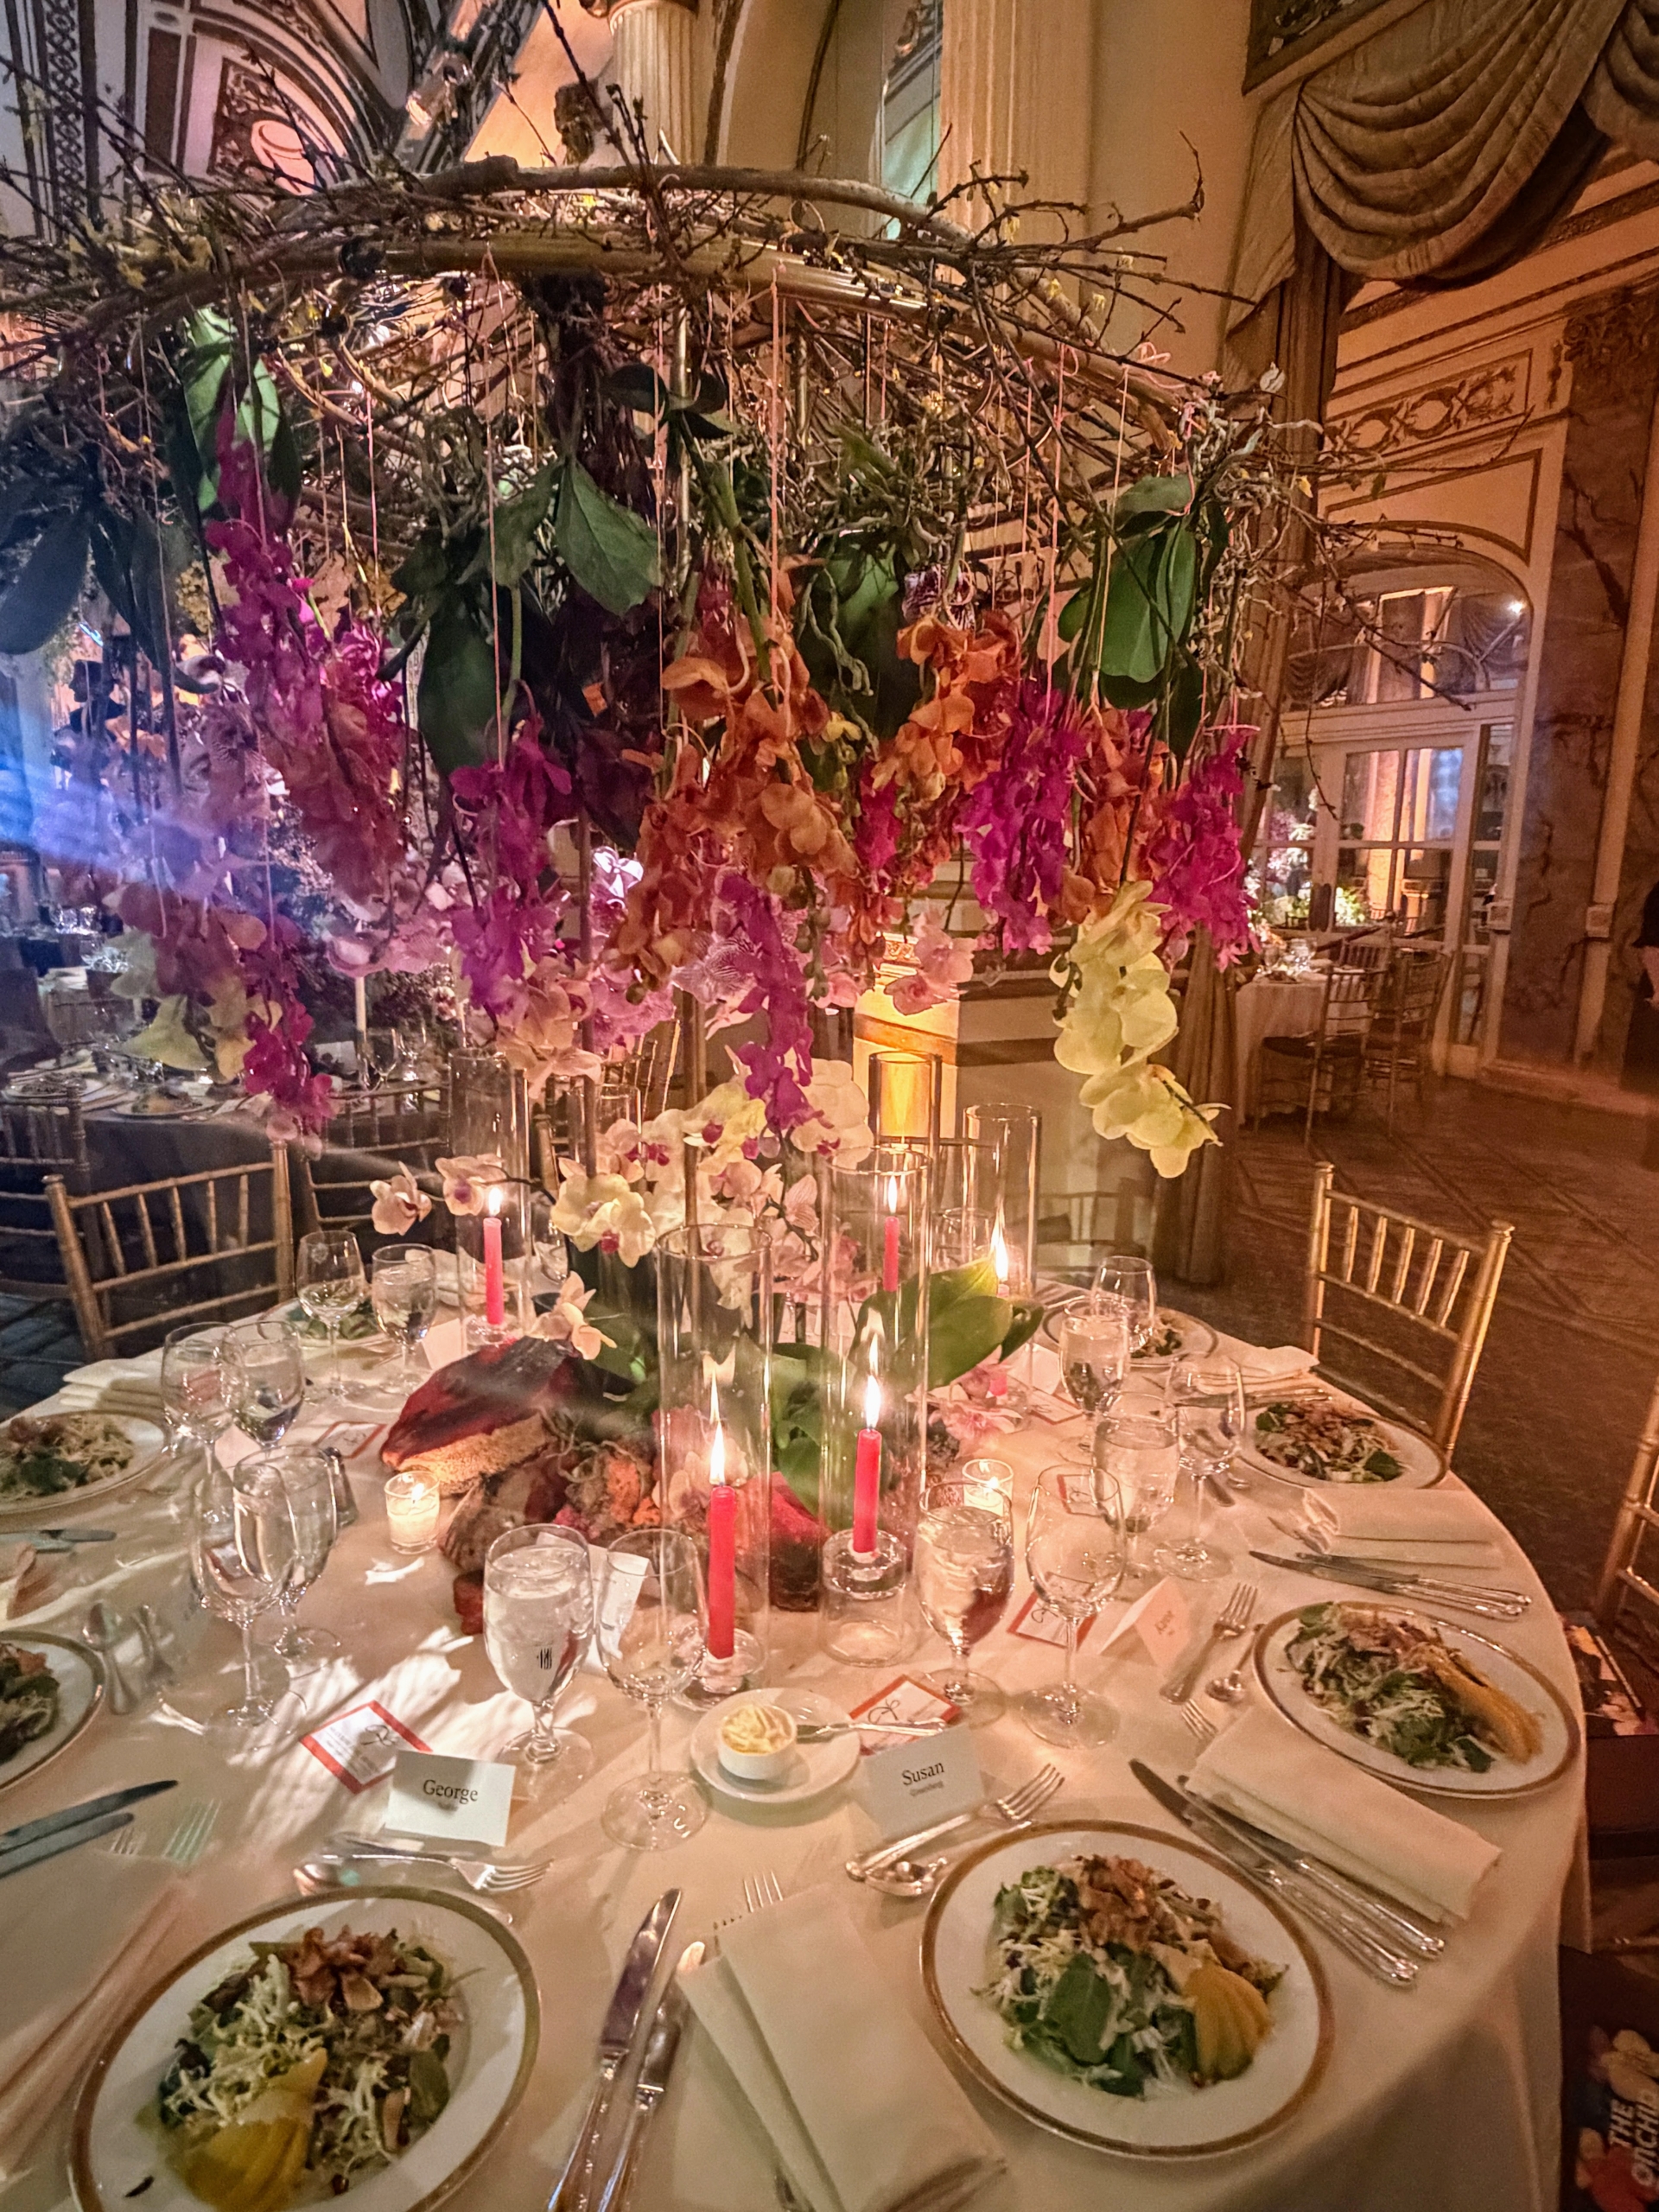
Known as the nation’s largest exhibit of its kind, this year’s show is entitled The Orchid Show: Mr. Flower Fantastic’s Concrete Jungle. You’ll be amazed at the garden’s transformation of the Enid A. Haupt Conservatory showcasing thousands of beautiful orchids in a striking variety of colors, shapes, and sizes - all in tribute to New York City. This week, I attended NYBG’s annual Orchid Dinner in the Grand Ballroom of The Plaza Hotel. The dinner included stunning large-scale table centerpieces created by a group of leading artists from across the country. The displays were full of color, creativity and inspired by the exhibit's theme and NYC's iconic landmarks. The event also allowed guests to shop a selection of rare and unique orchid specimens for their own personal garden collections, with proceeds supporting the NYBG’s research, education, and outreach missions.
Enjoy these photos.
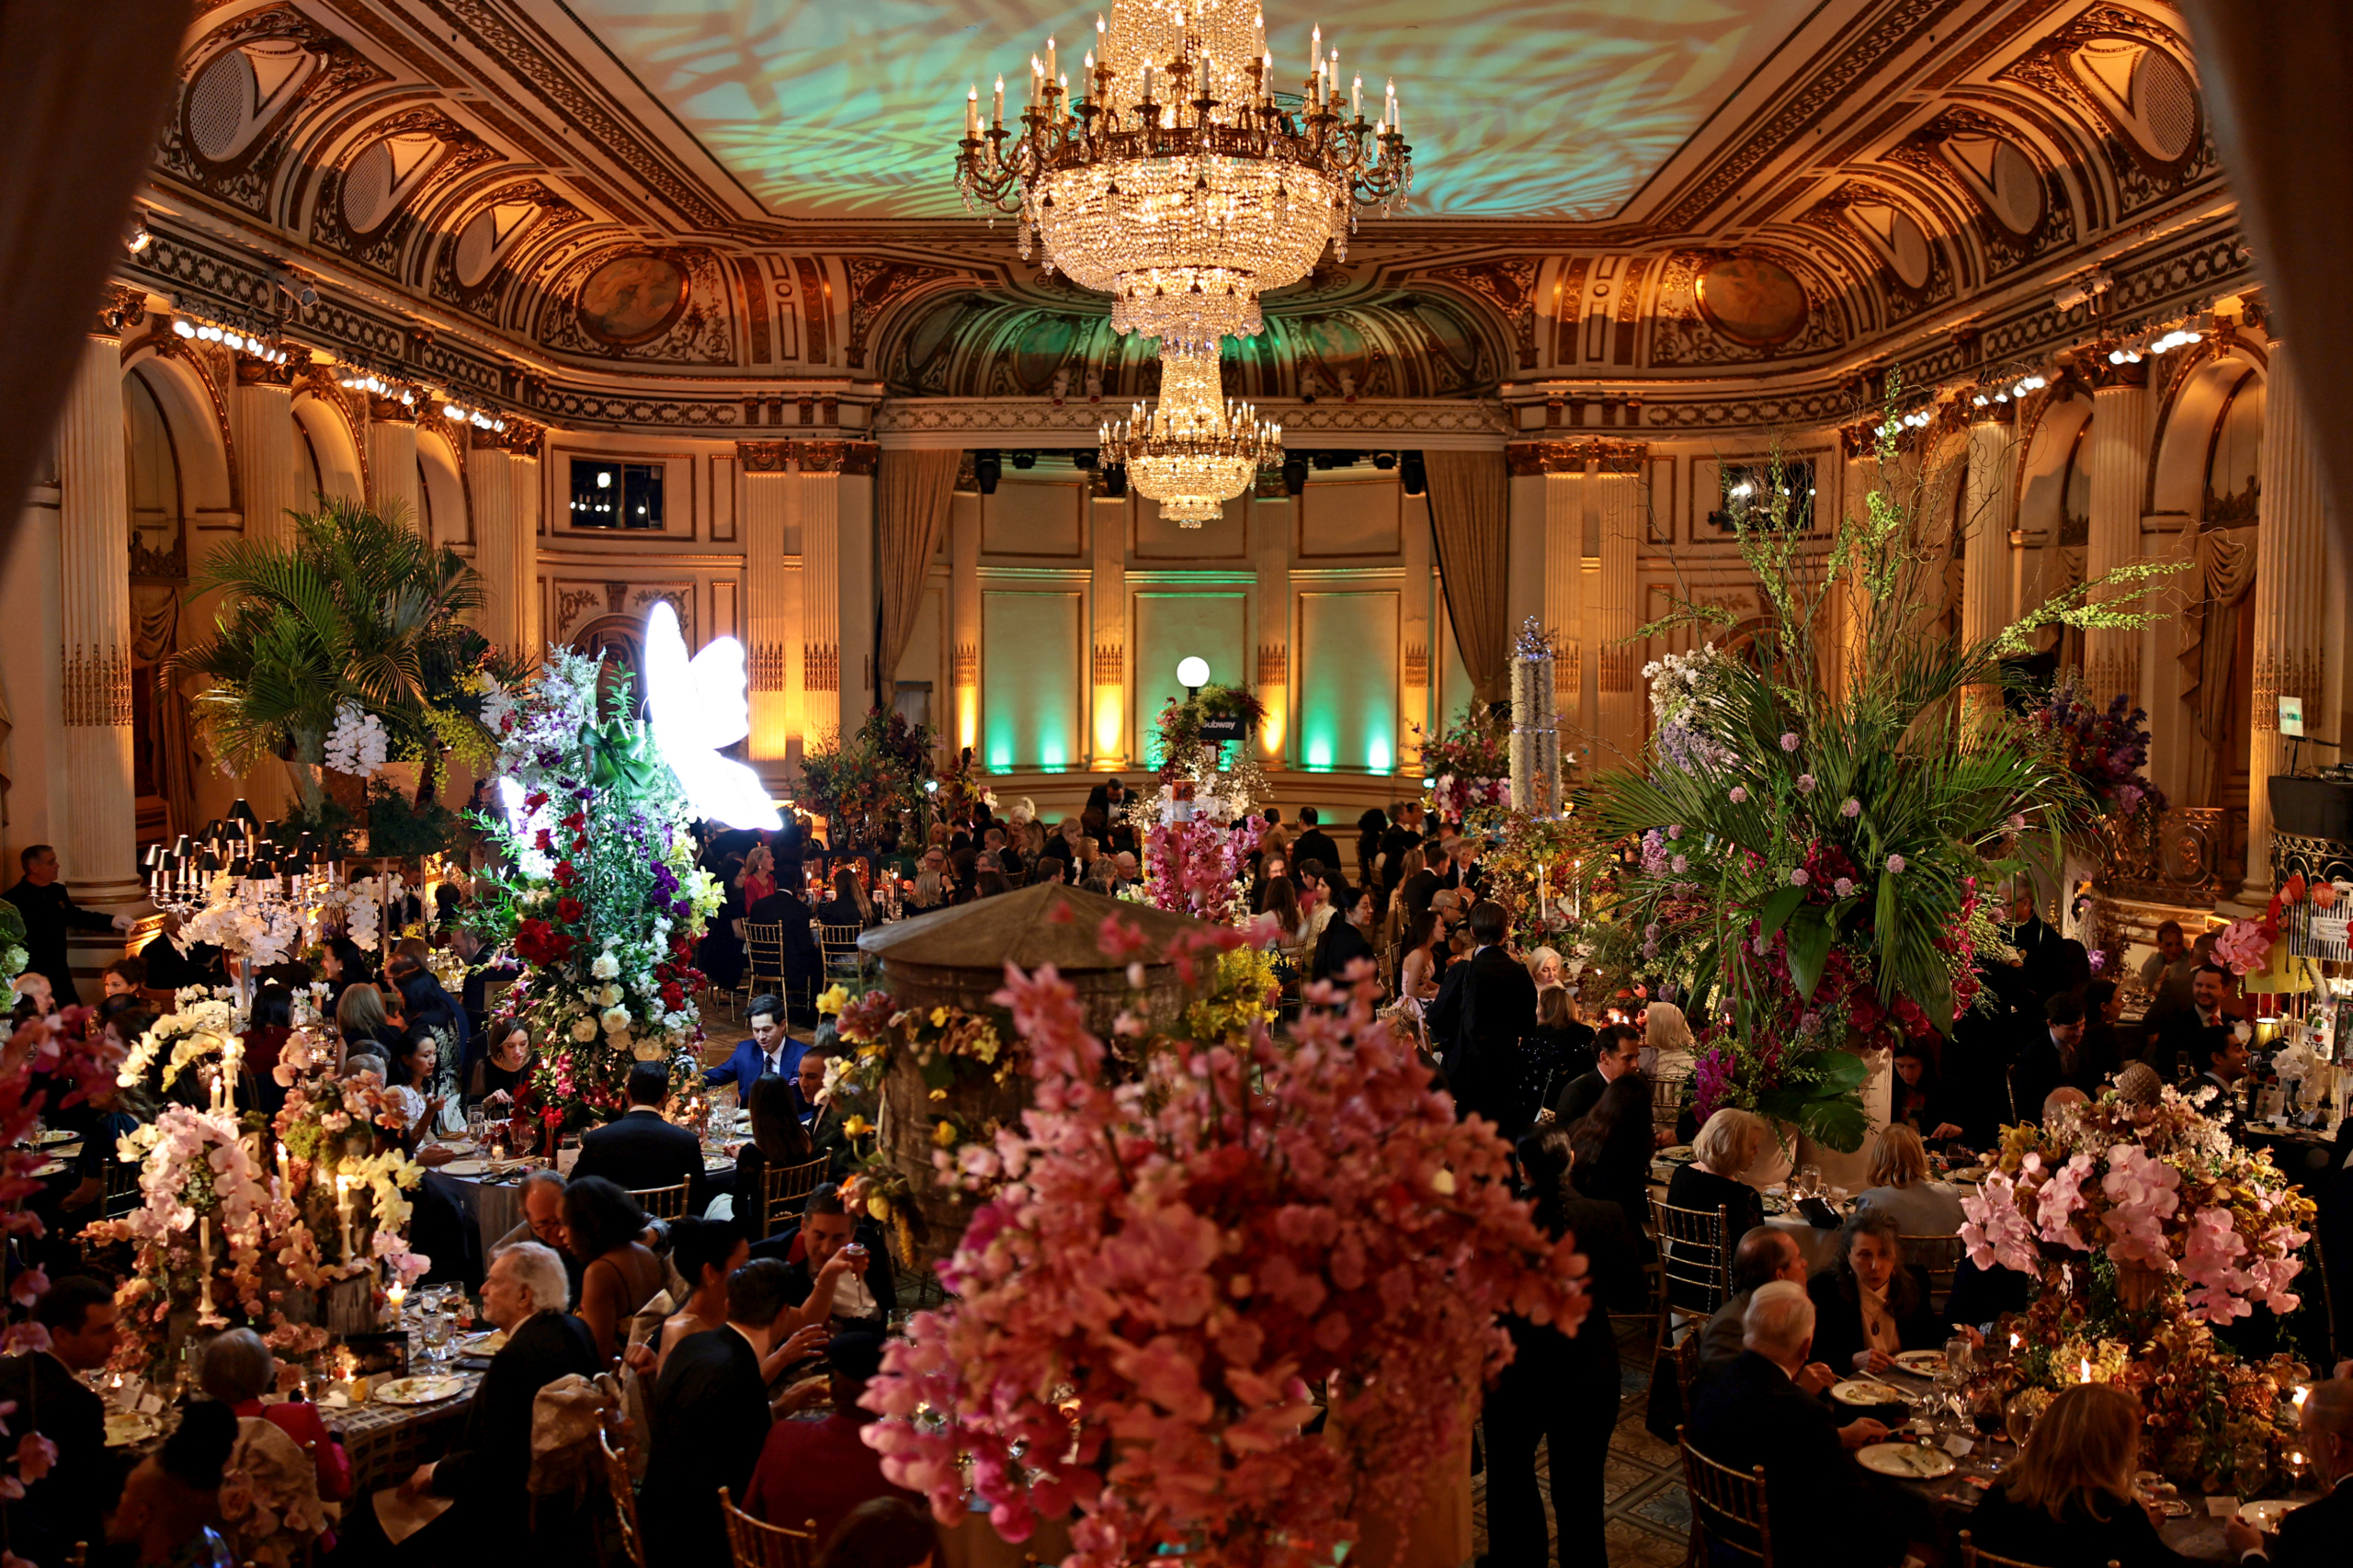
Held every year to celebrate the annual Orchid Show, this year’s event welcomed hundreds of guests to New York City’s iconic Plaza Hotel. (Photo by Dimitrios Kambouris/Getty Images for The NYBG)
One way the NYBG raises money is to have an orchid sale prior to the dinner. All the orchids for sale were displayed near the entrance to the ballroom. (Photo by Bryan Bedder/Getty Images for The NYBG)
Marc Hachadourian, NYBG’s Director of Glasshouse Horticulture and Senior Curator of Orchids, hand picks the orchids for the sale that he knows will appeal to the collectors and aficionados who attend the dinner. I brought home one Vanda orchid. (Photo by Bryan Bedder/Getty Images for The NYBG)
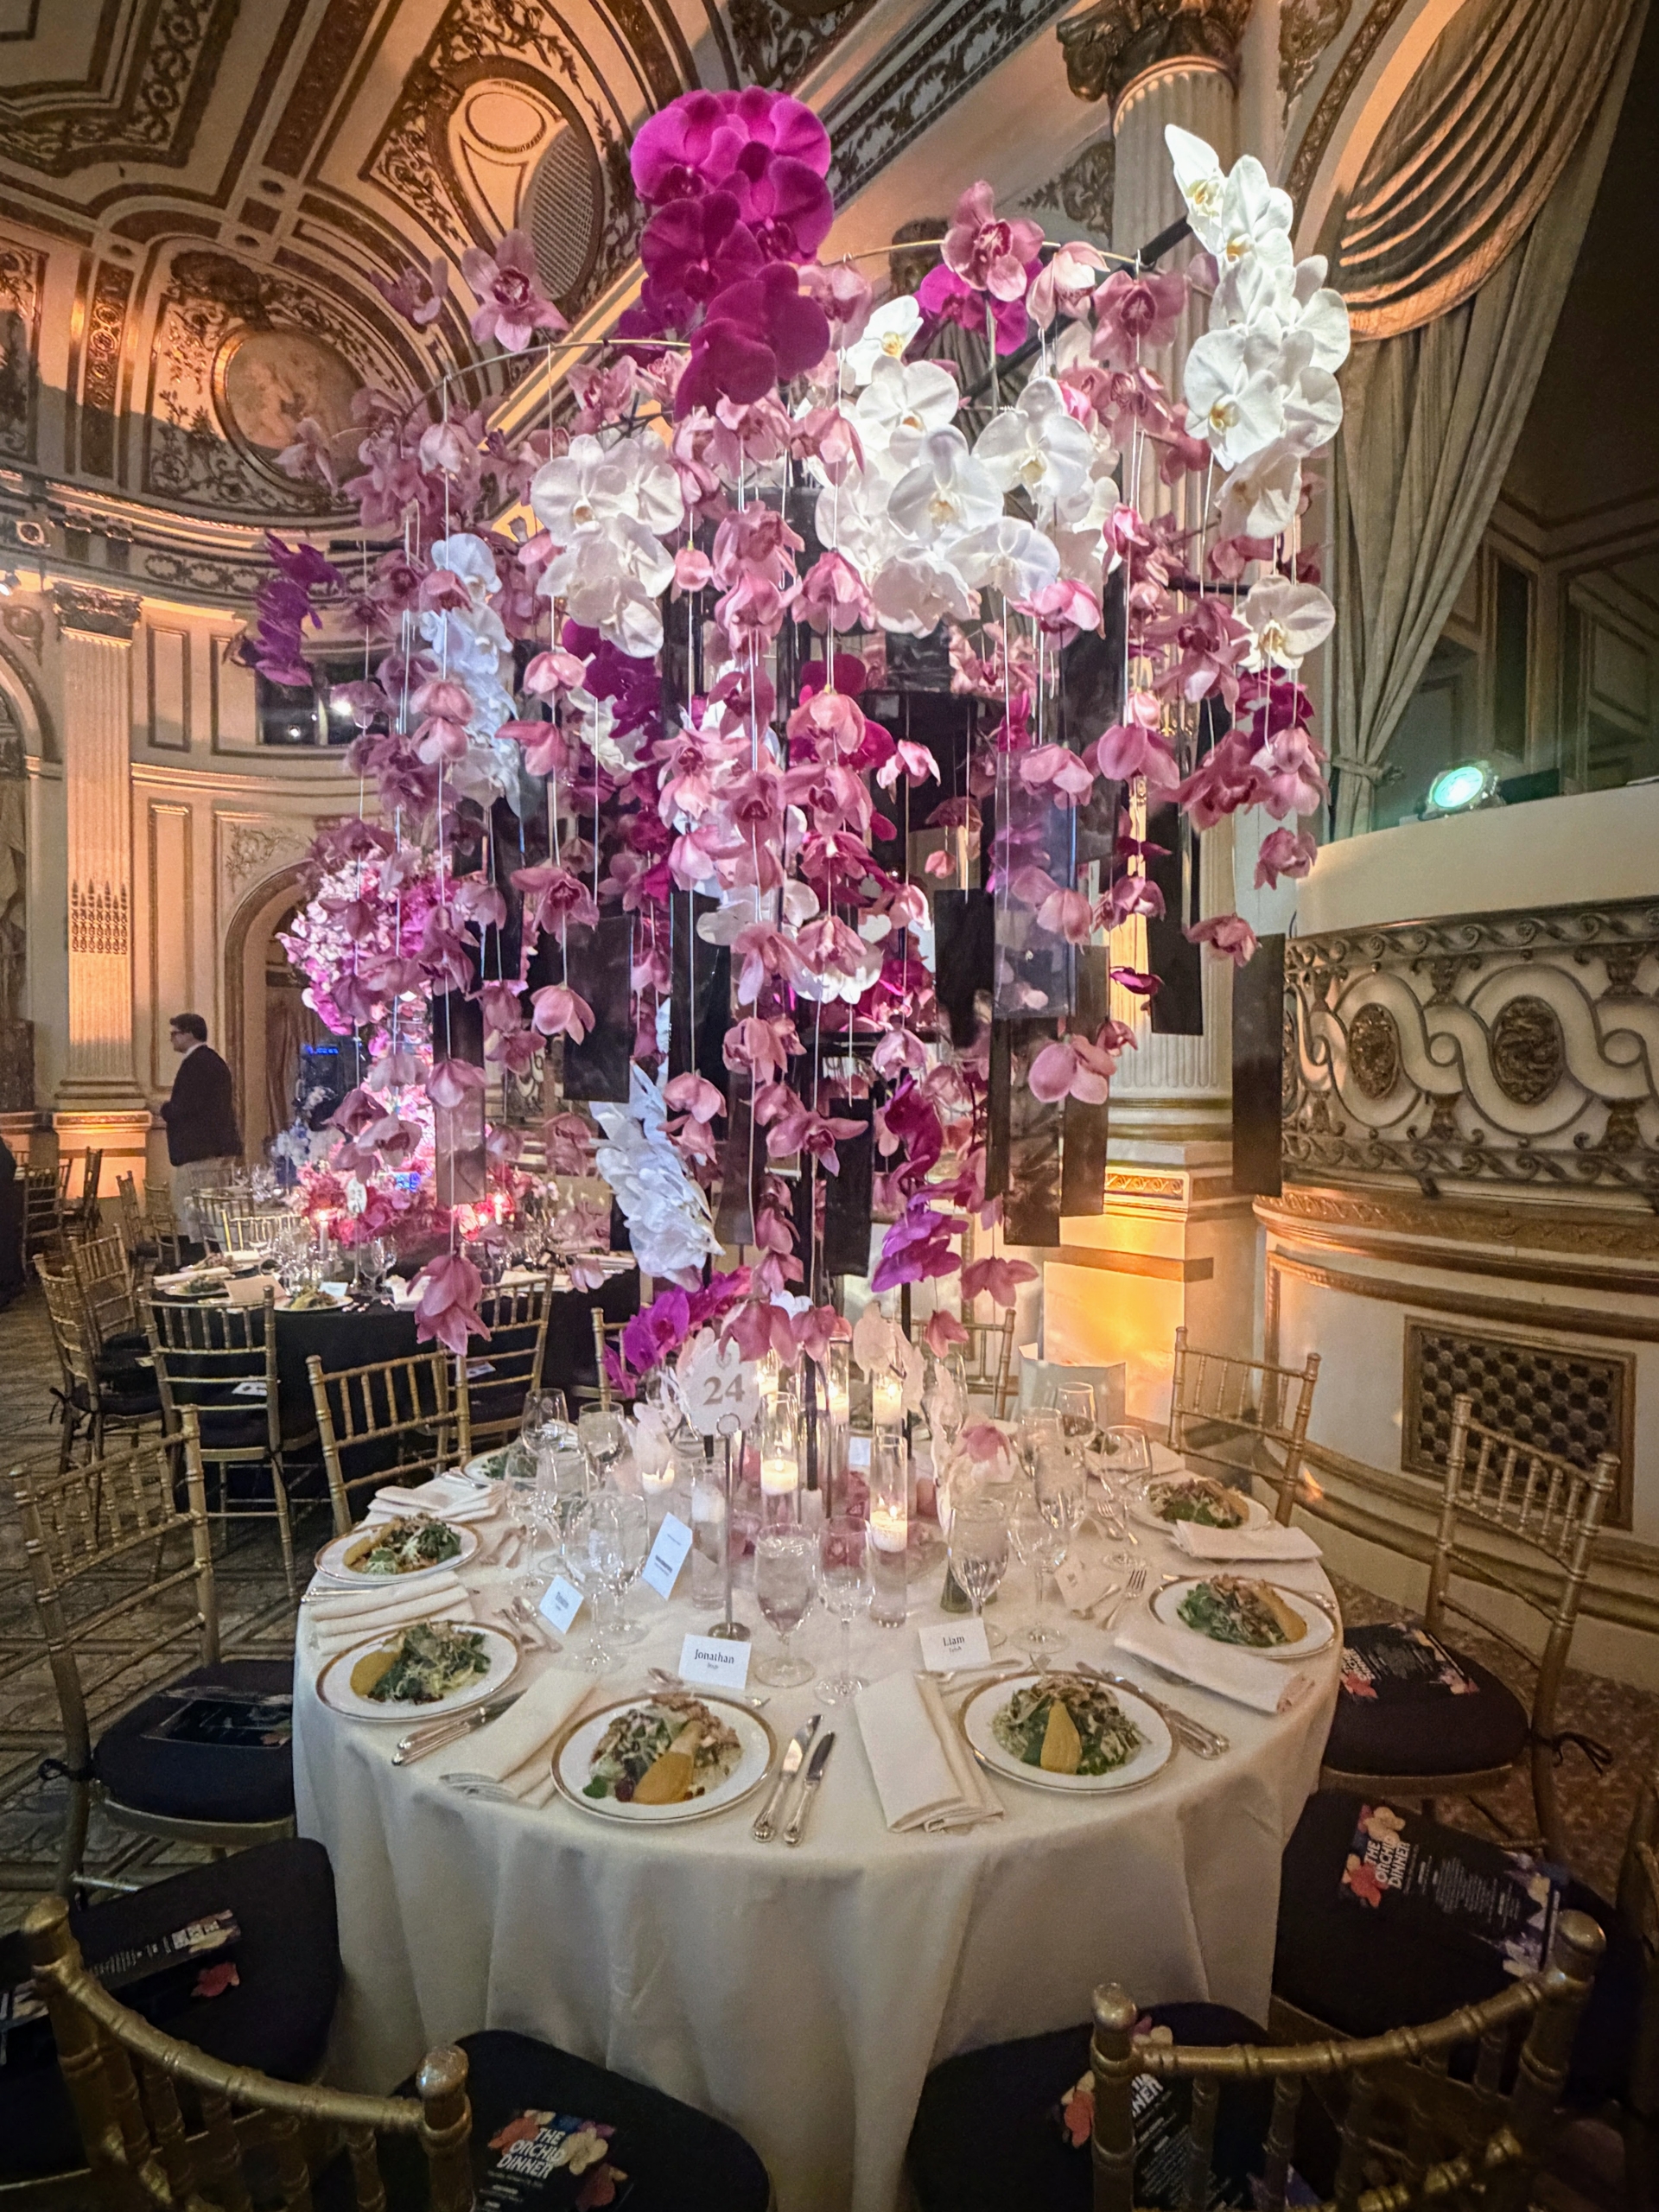
Around the ballroom, tables are decorated in beautiful orchid colors. This one was done by Flower Girl NYC.
This colorful table centerpiece of flowers was completed by Anna Dementieva, Luxury Flowers Miami.
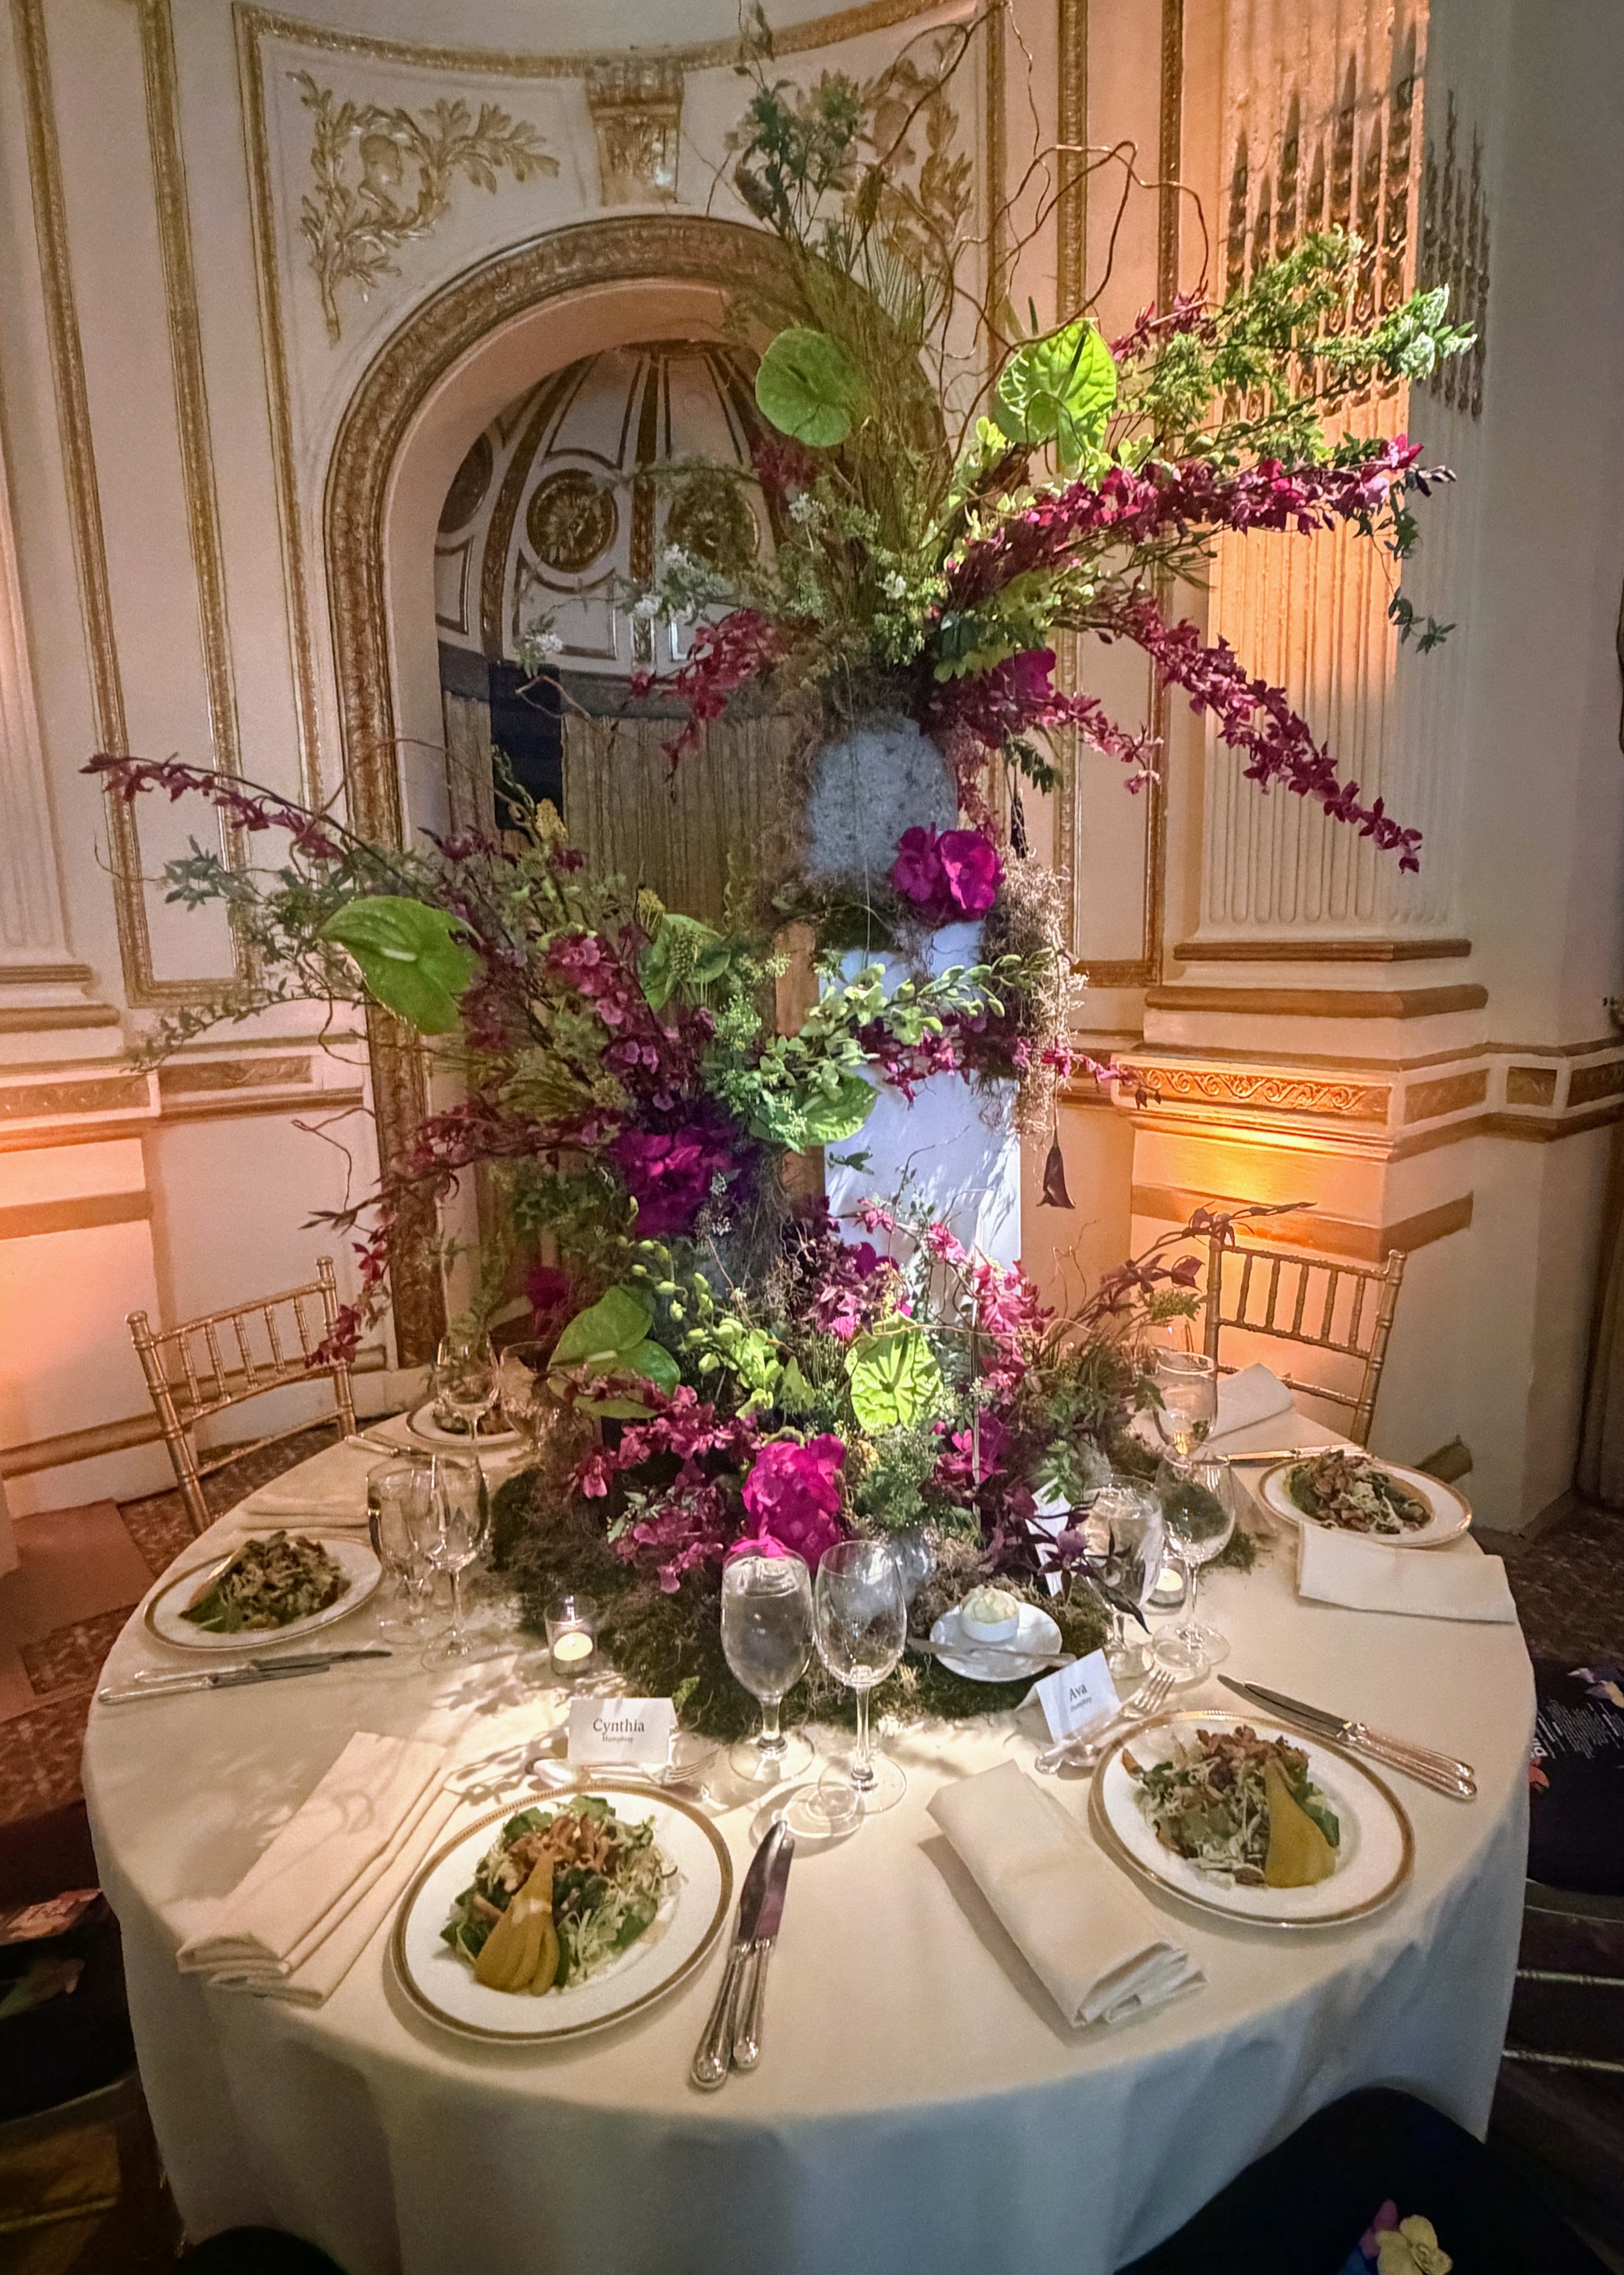
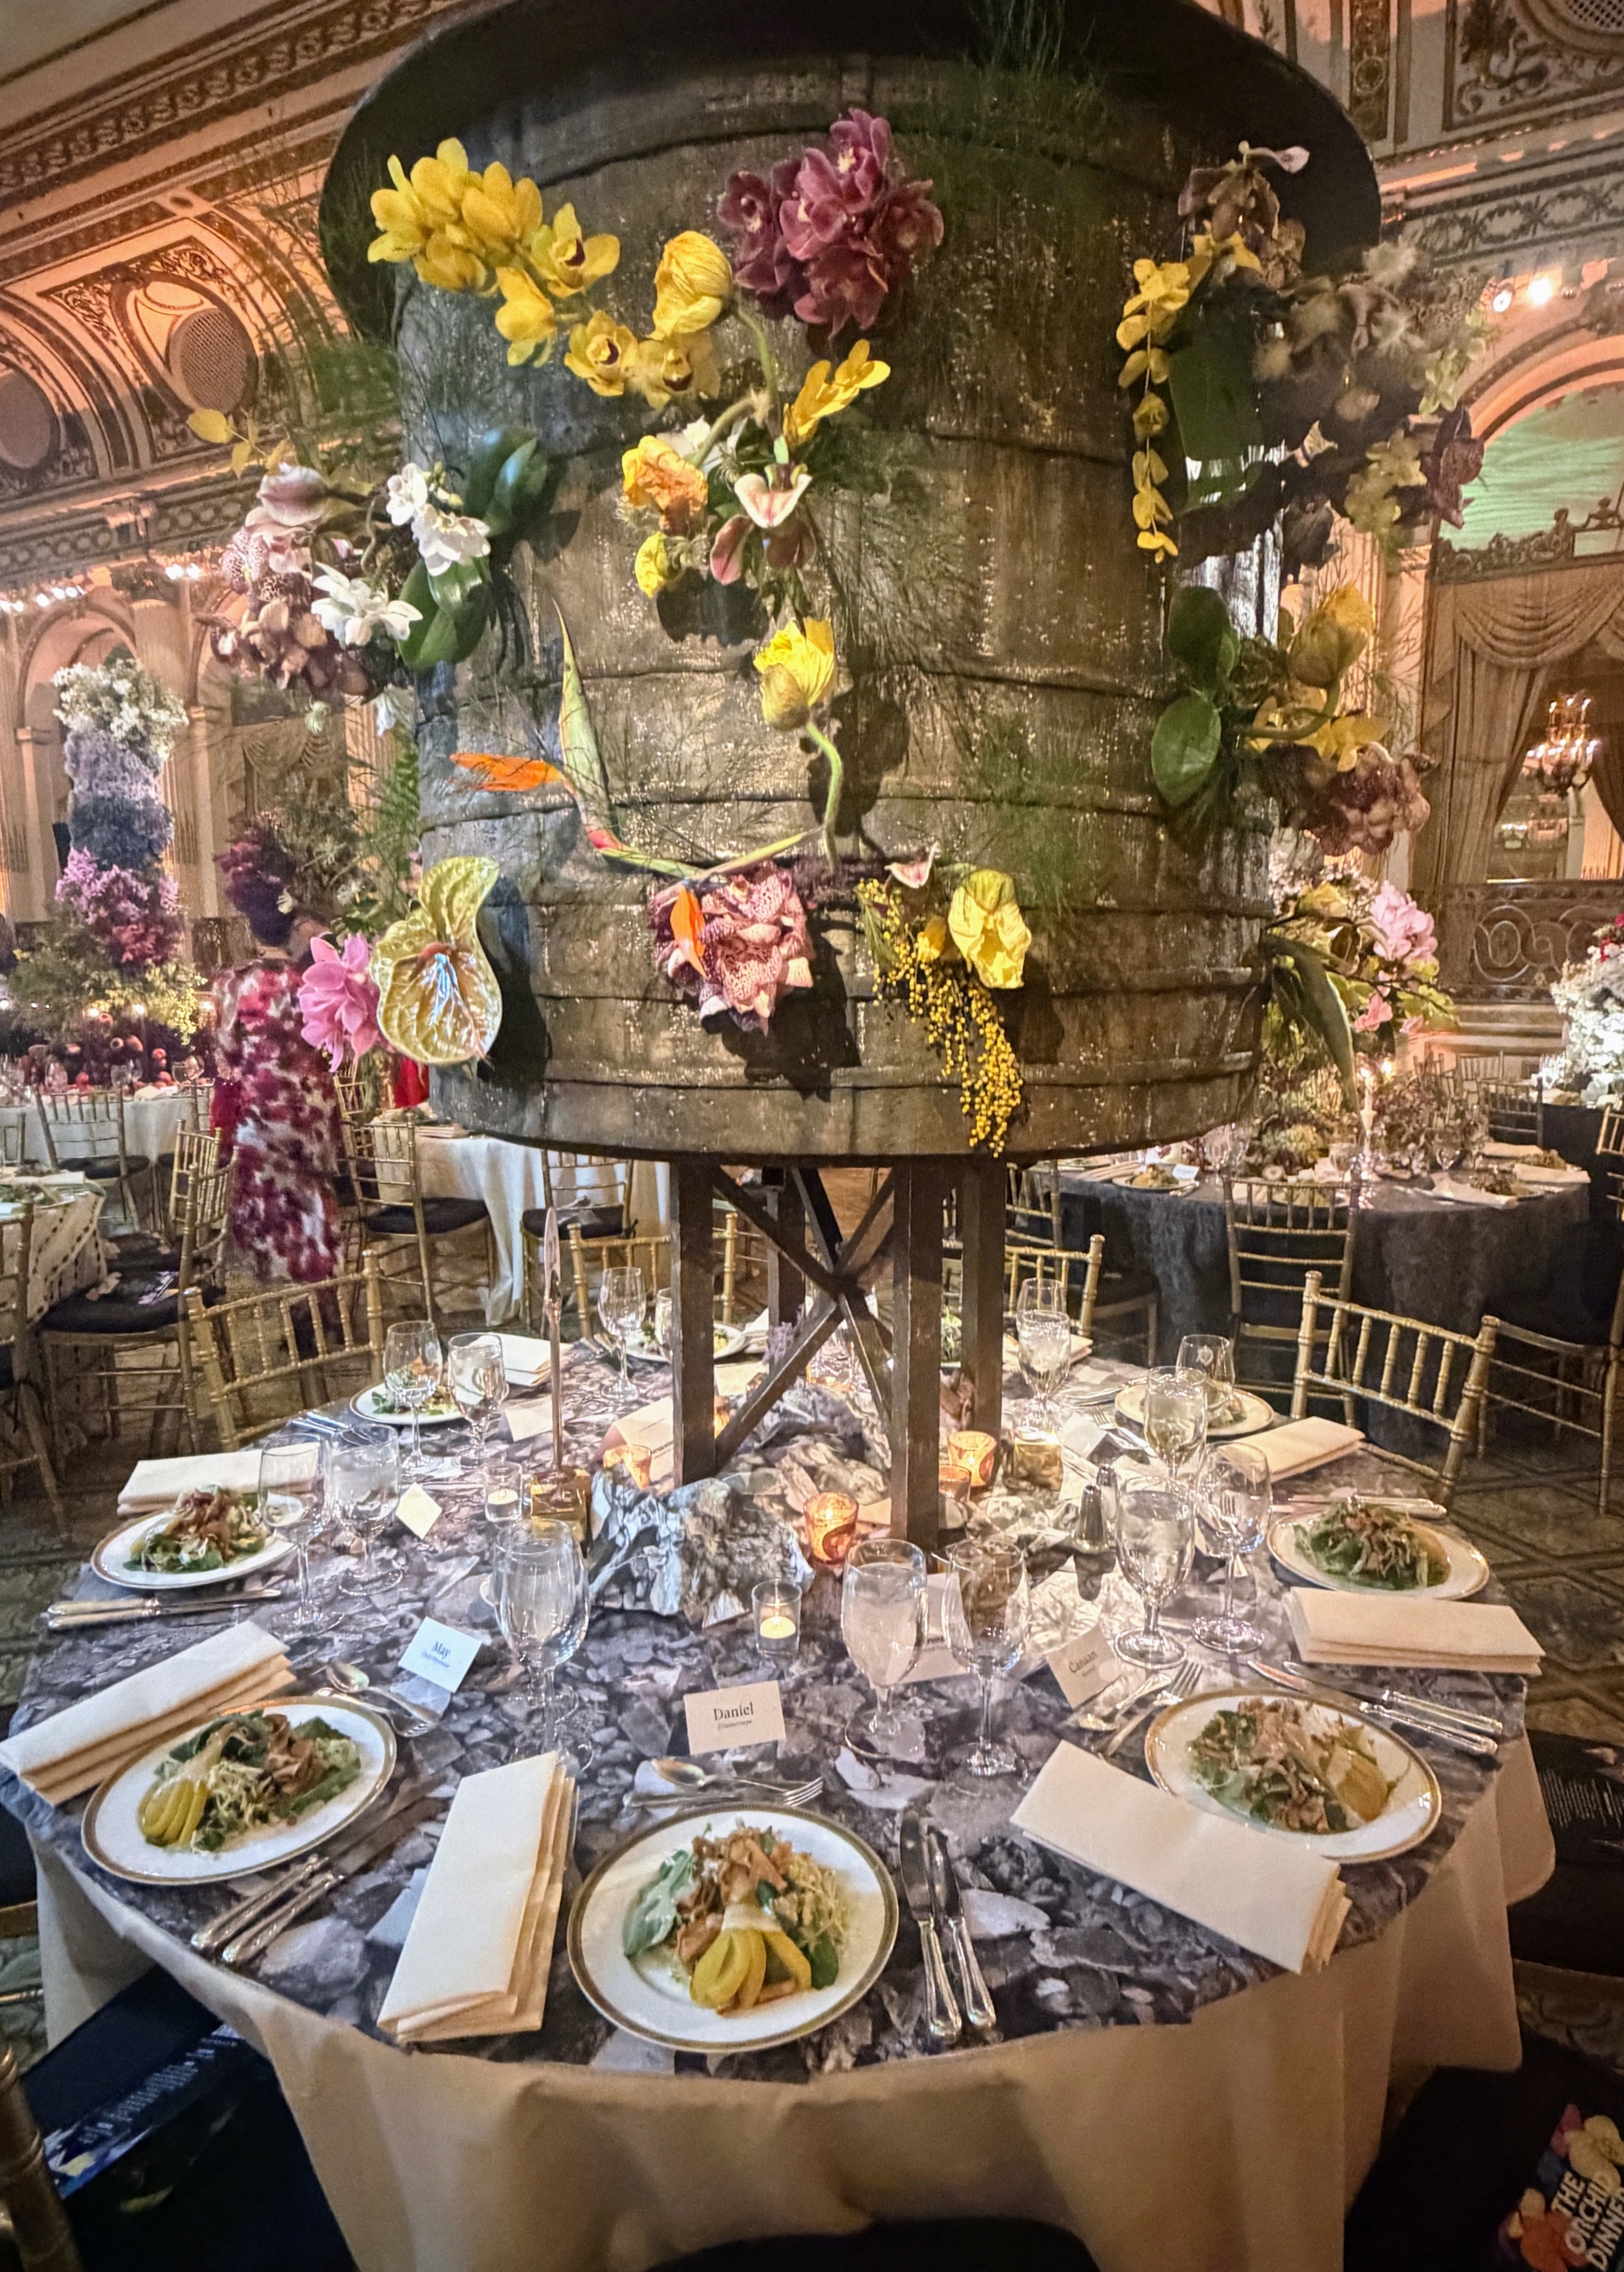
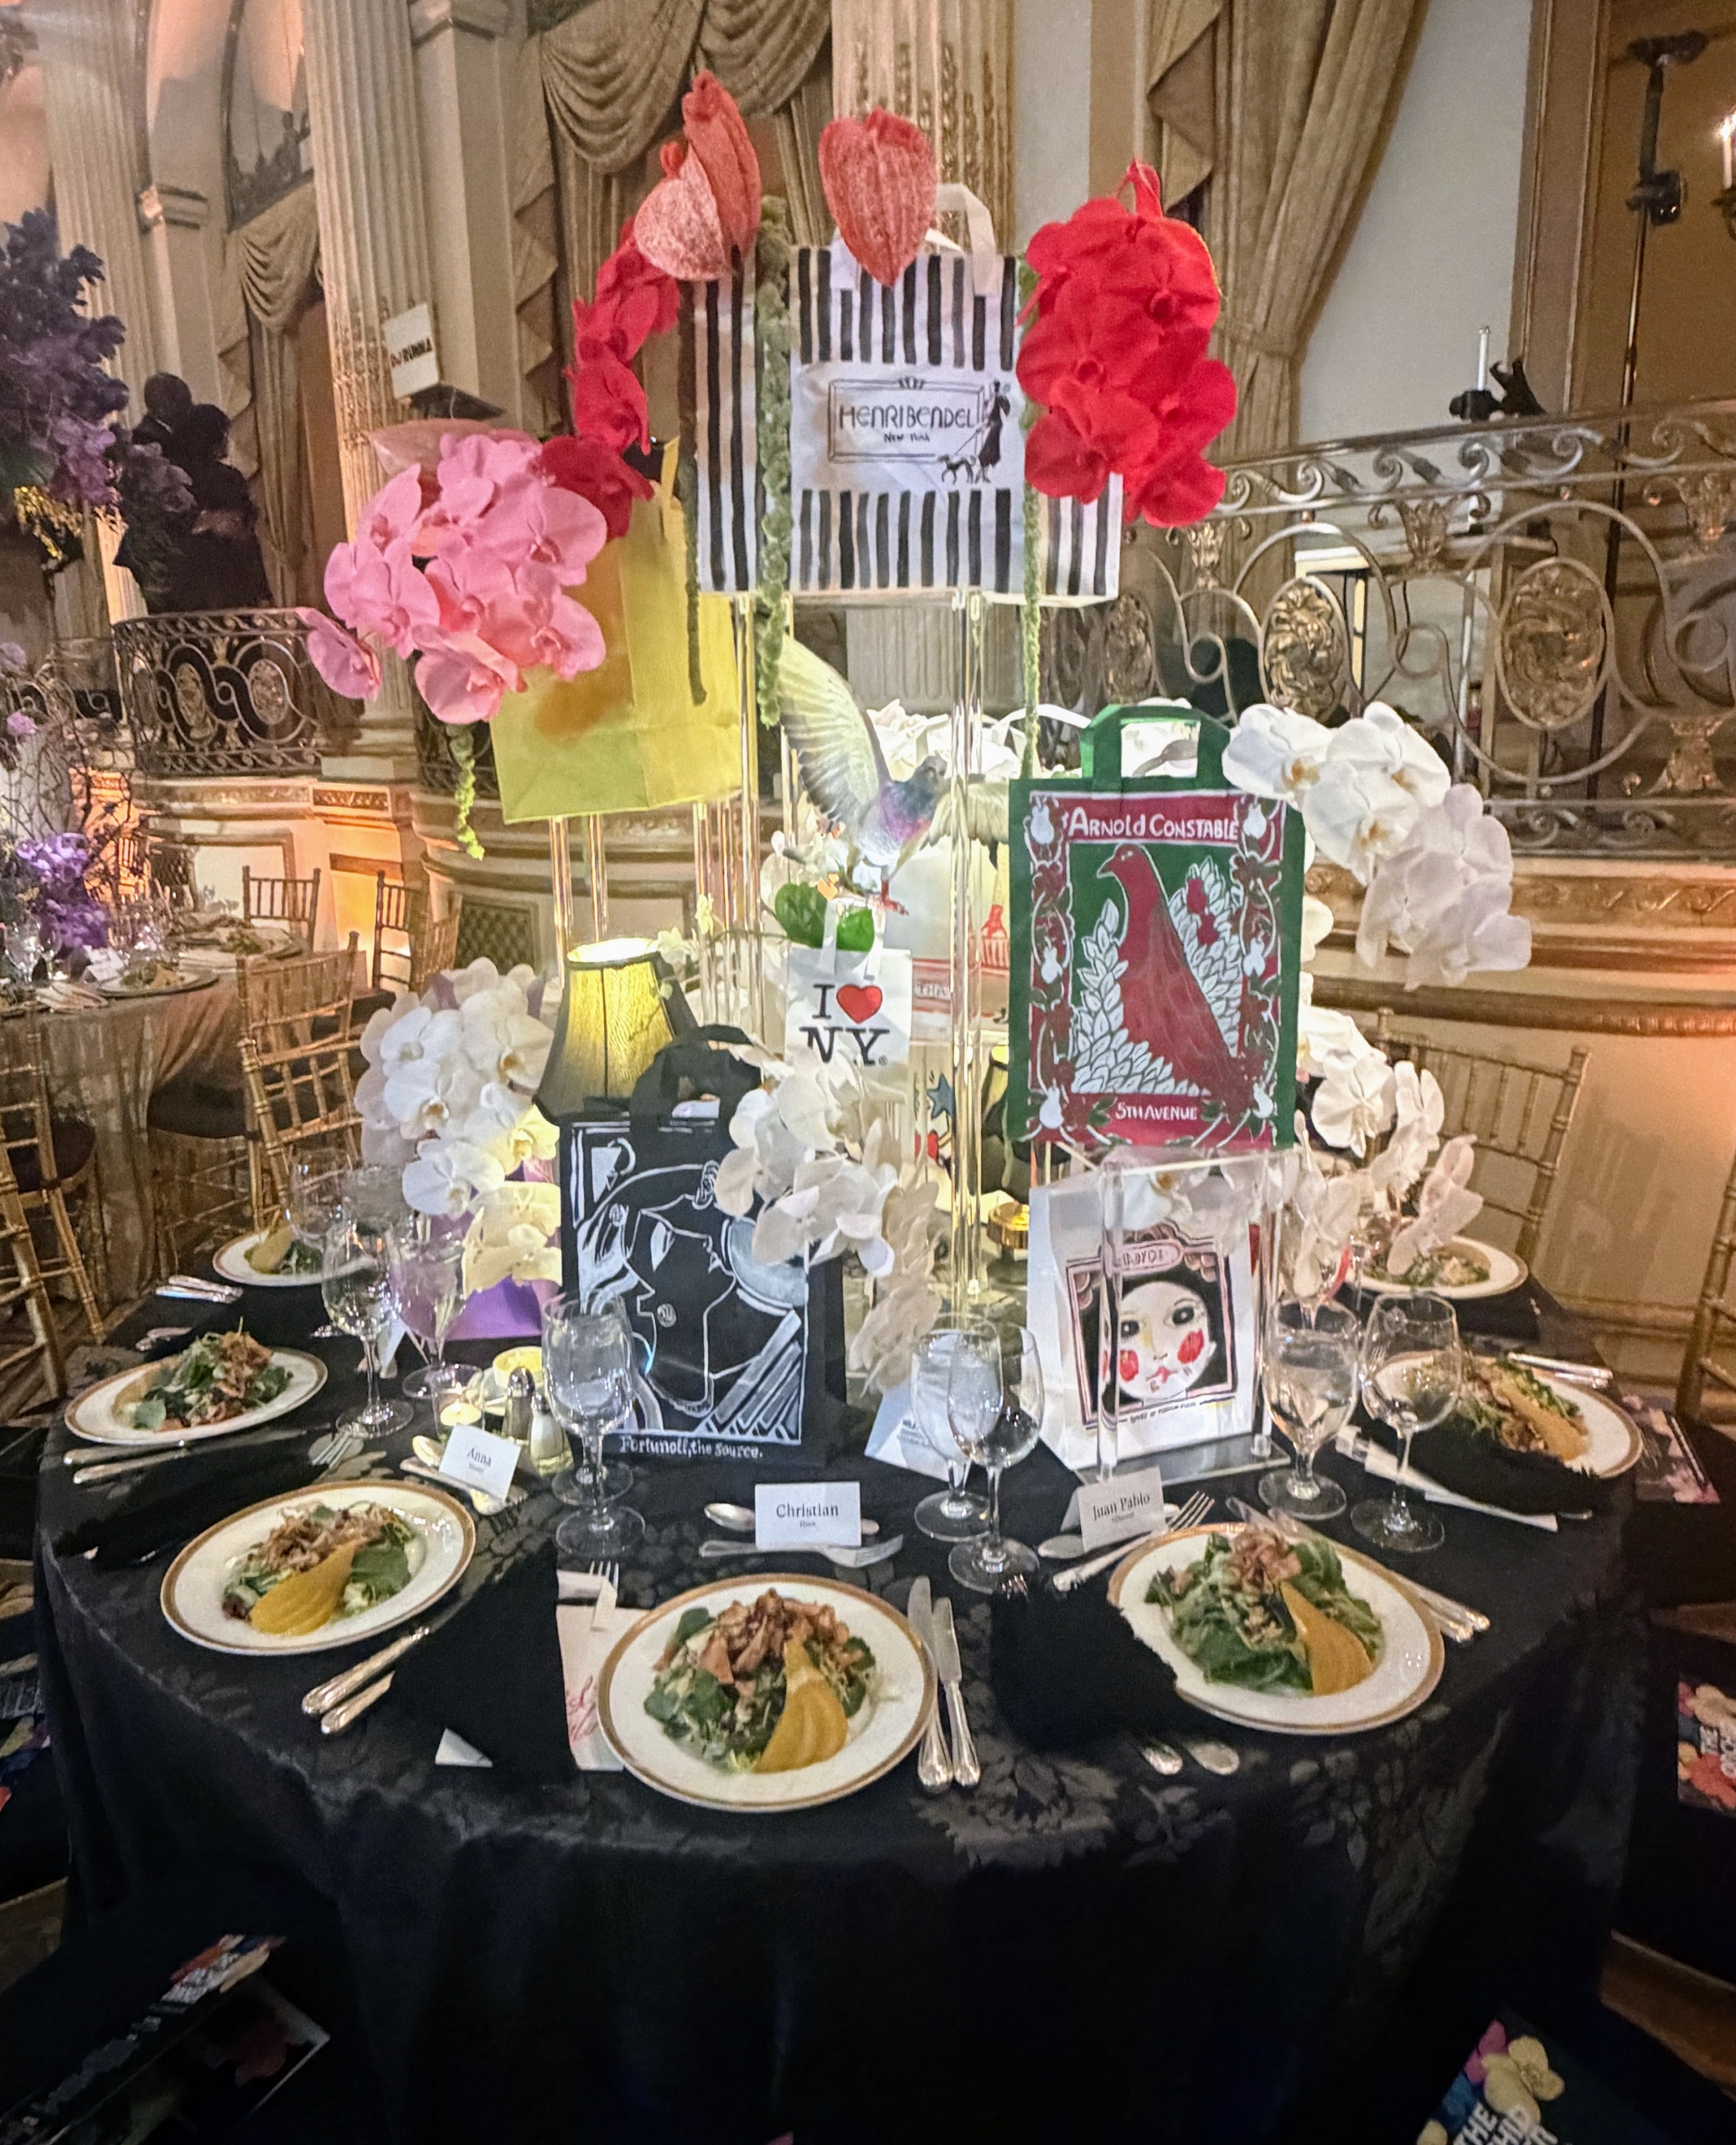
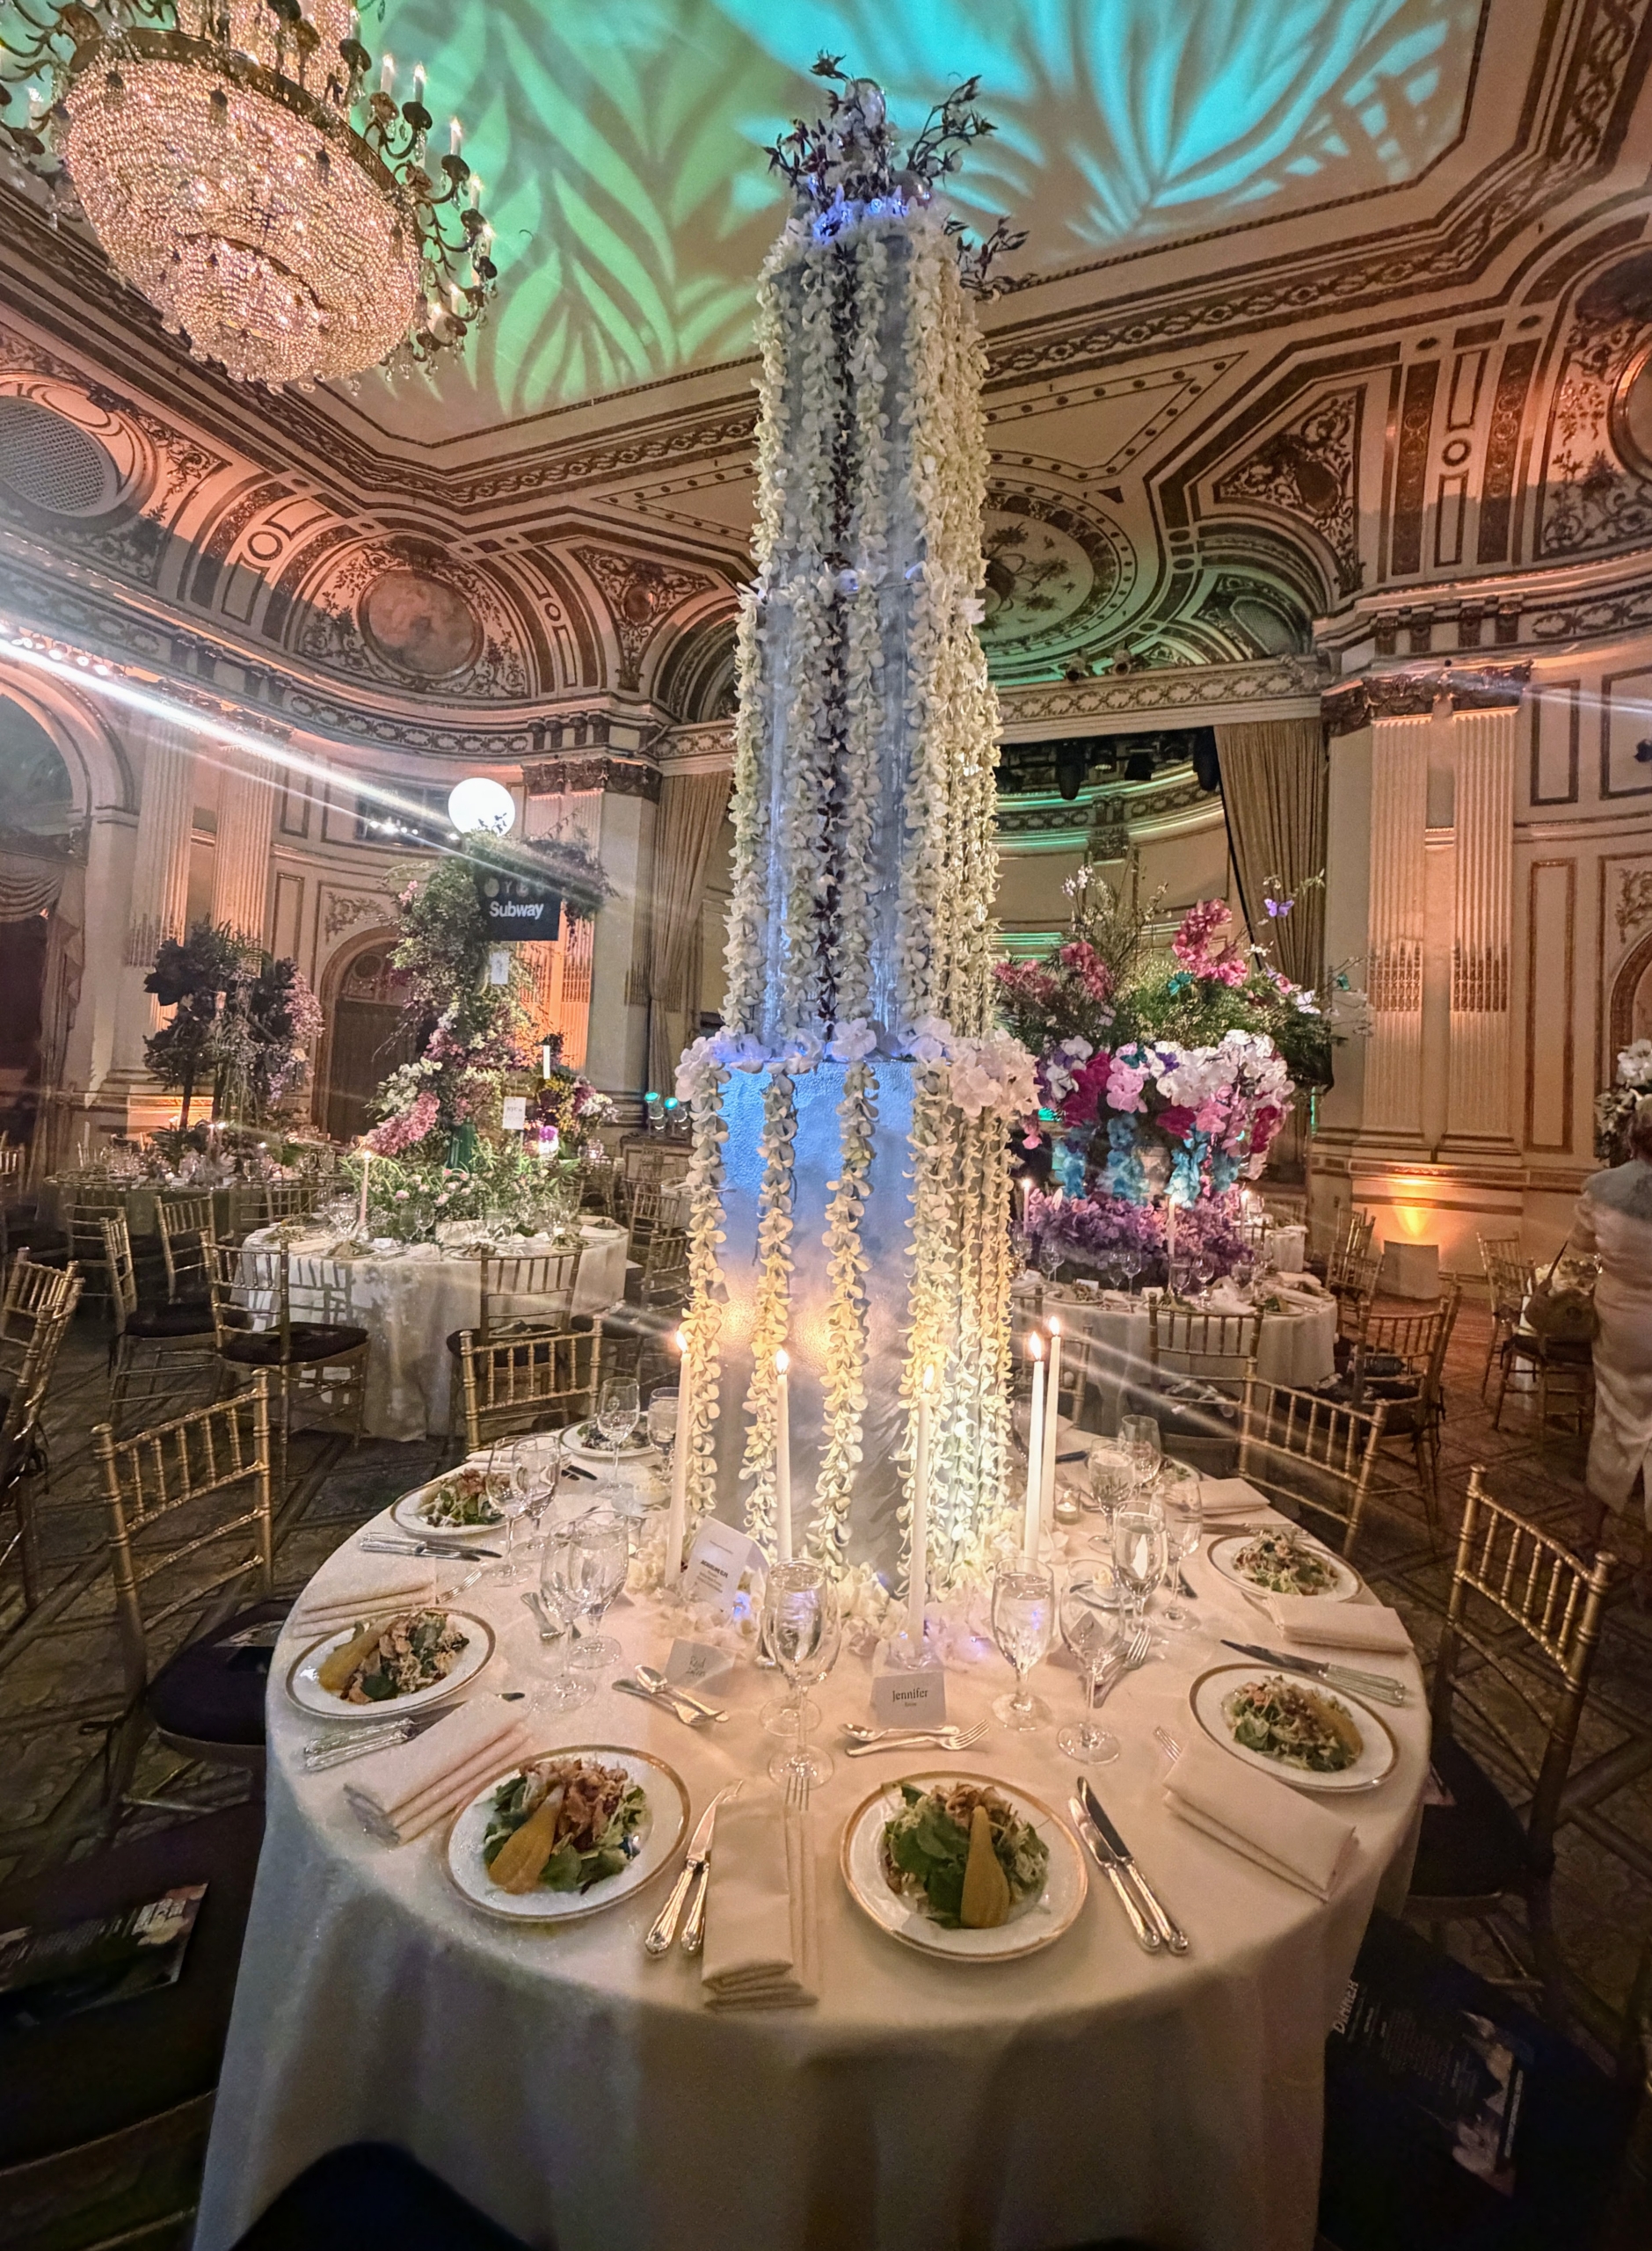
Do you know what this centerpiece shows? It’s a copy of one of New York City’s iconic water towers. These towers were first built on top of buildings in the 19th century to meet the rising demand for water in vertical spaces. This orchid arrangement was presented by Cynthia Humphrey, Via Amendola Botanical Designs.
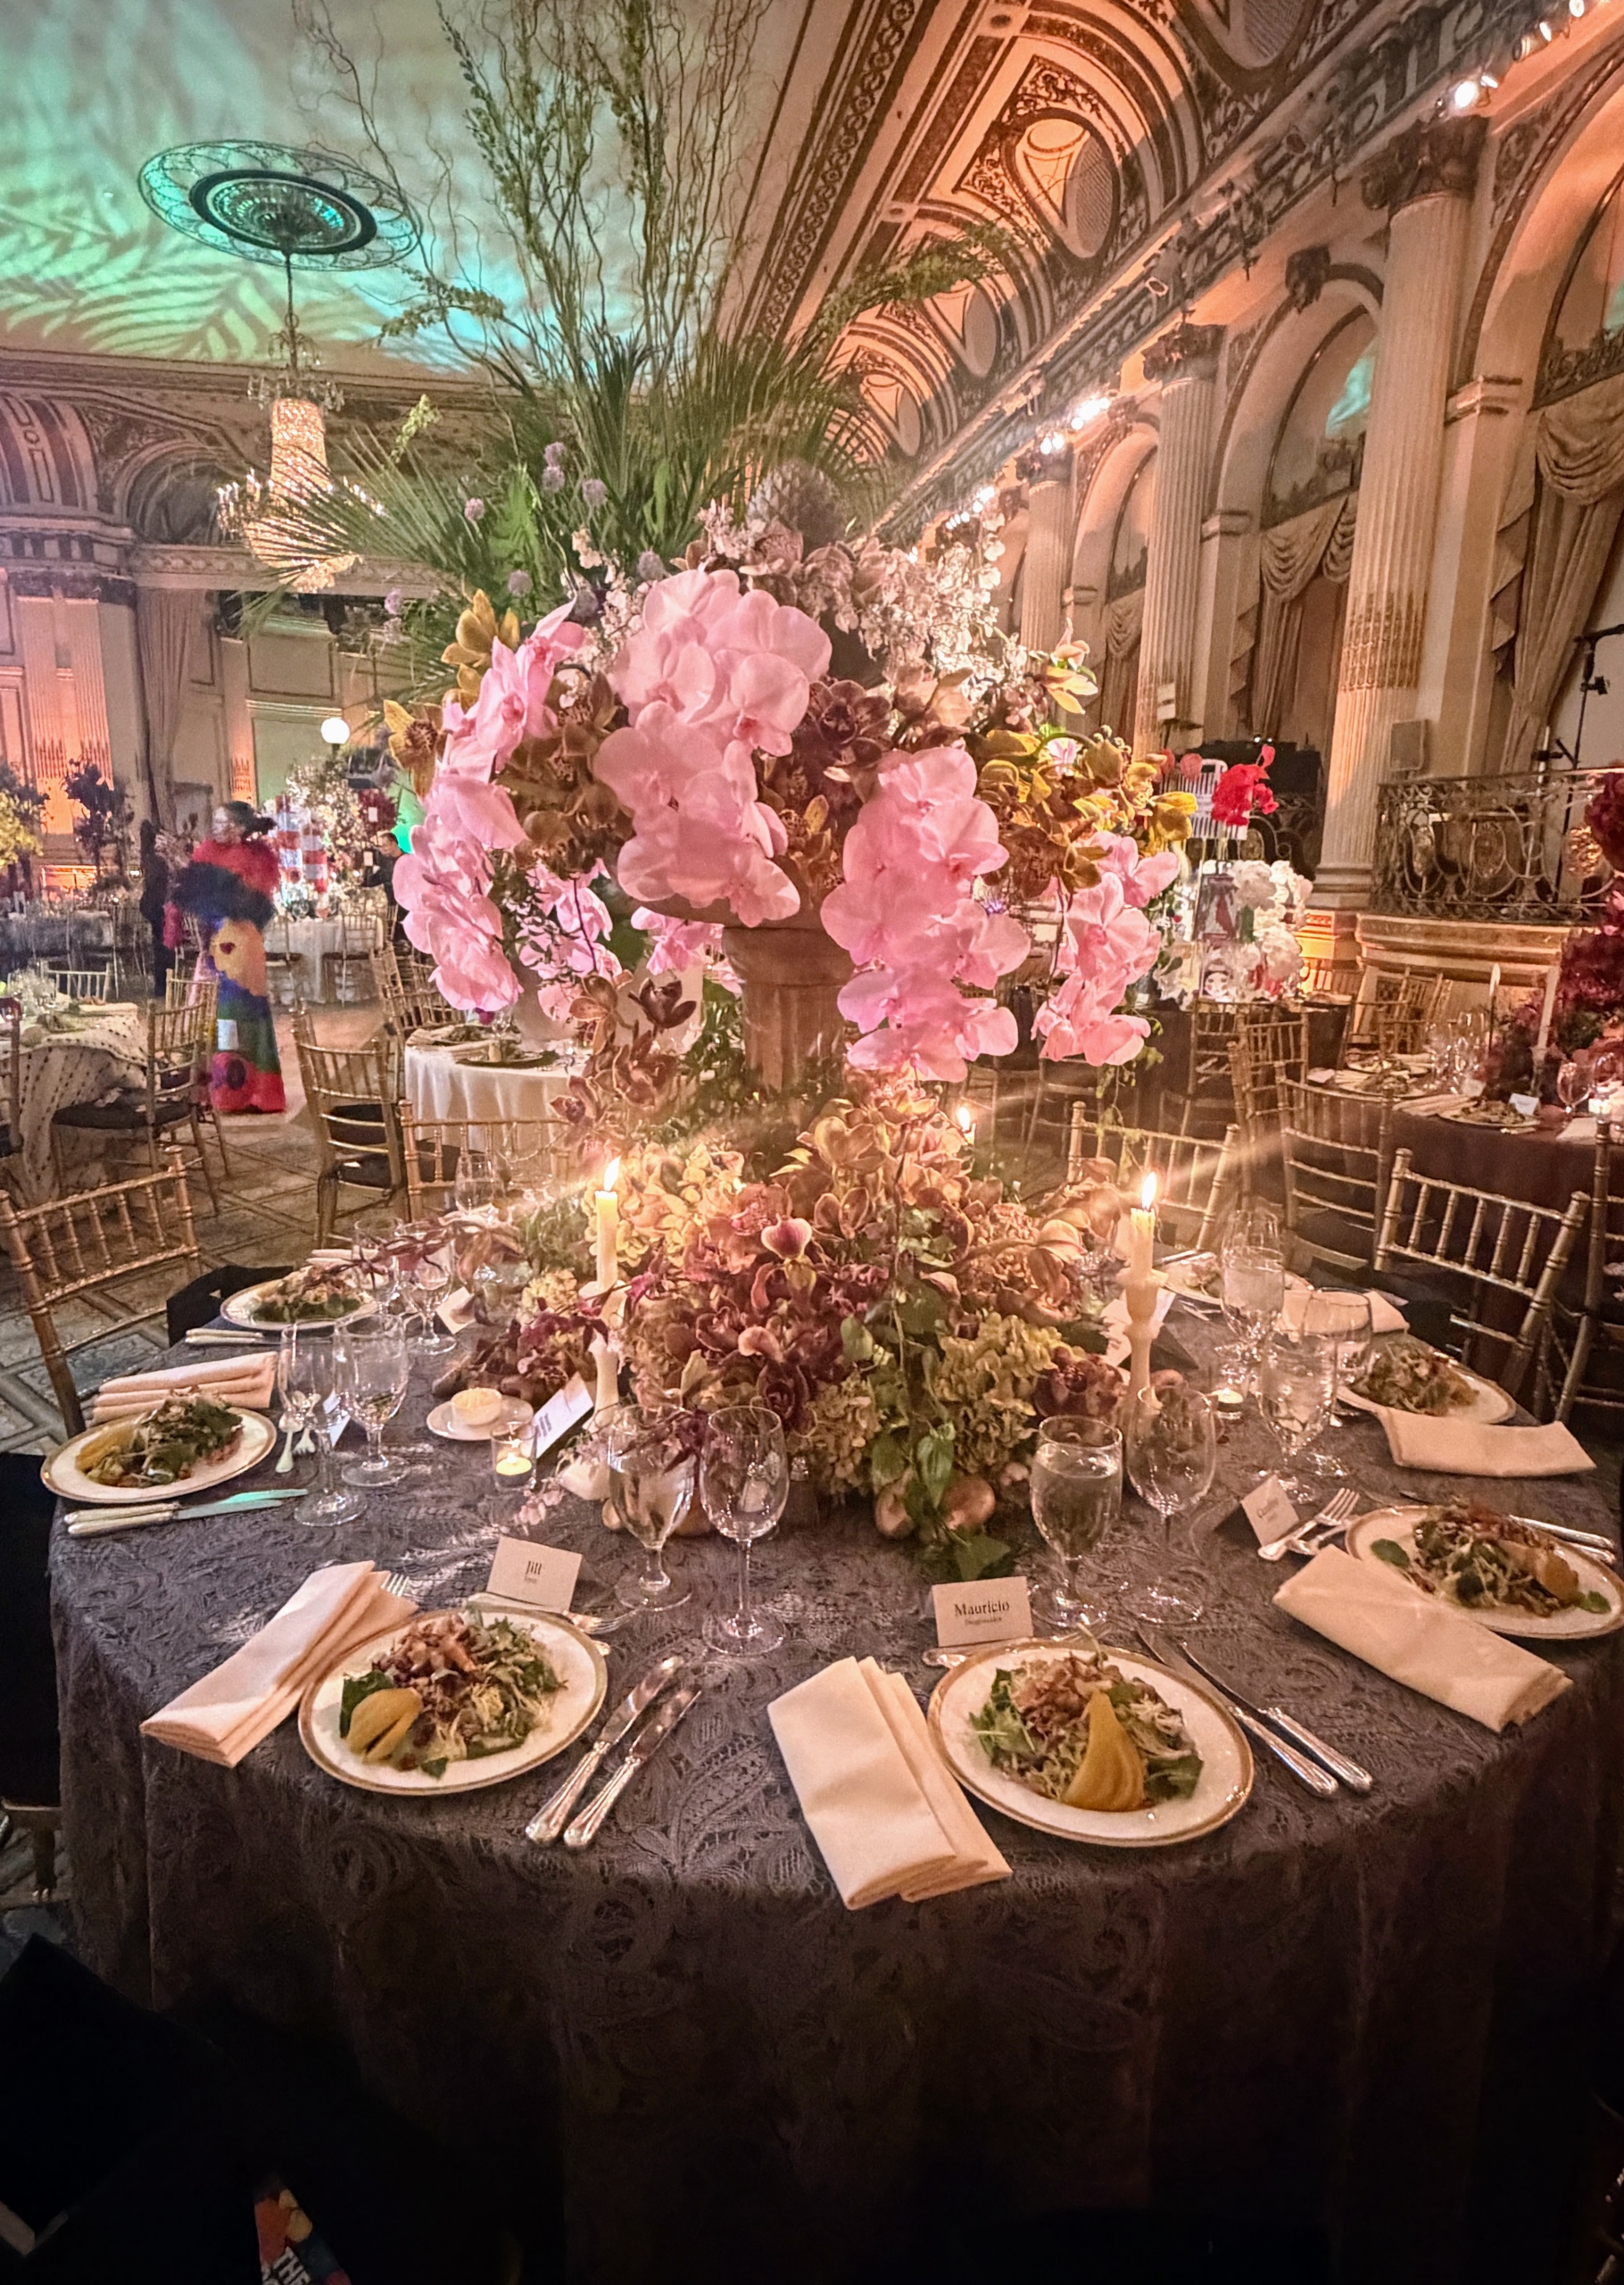
This glorious pink orchid arrangement was created by Pennylyn Woosley, Blossom and Bee Floral and Event Design.
John Goodman of JL Goodman used the Statue of Liberty as part of his centerpiece.
This table creation is by Tara Khattar of Maison Tara New York.
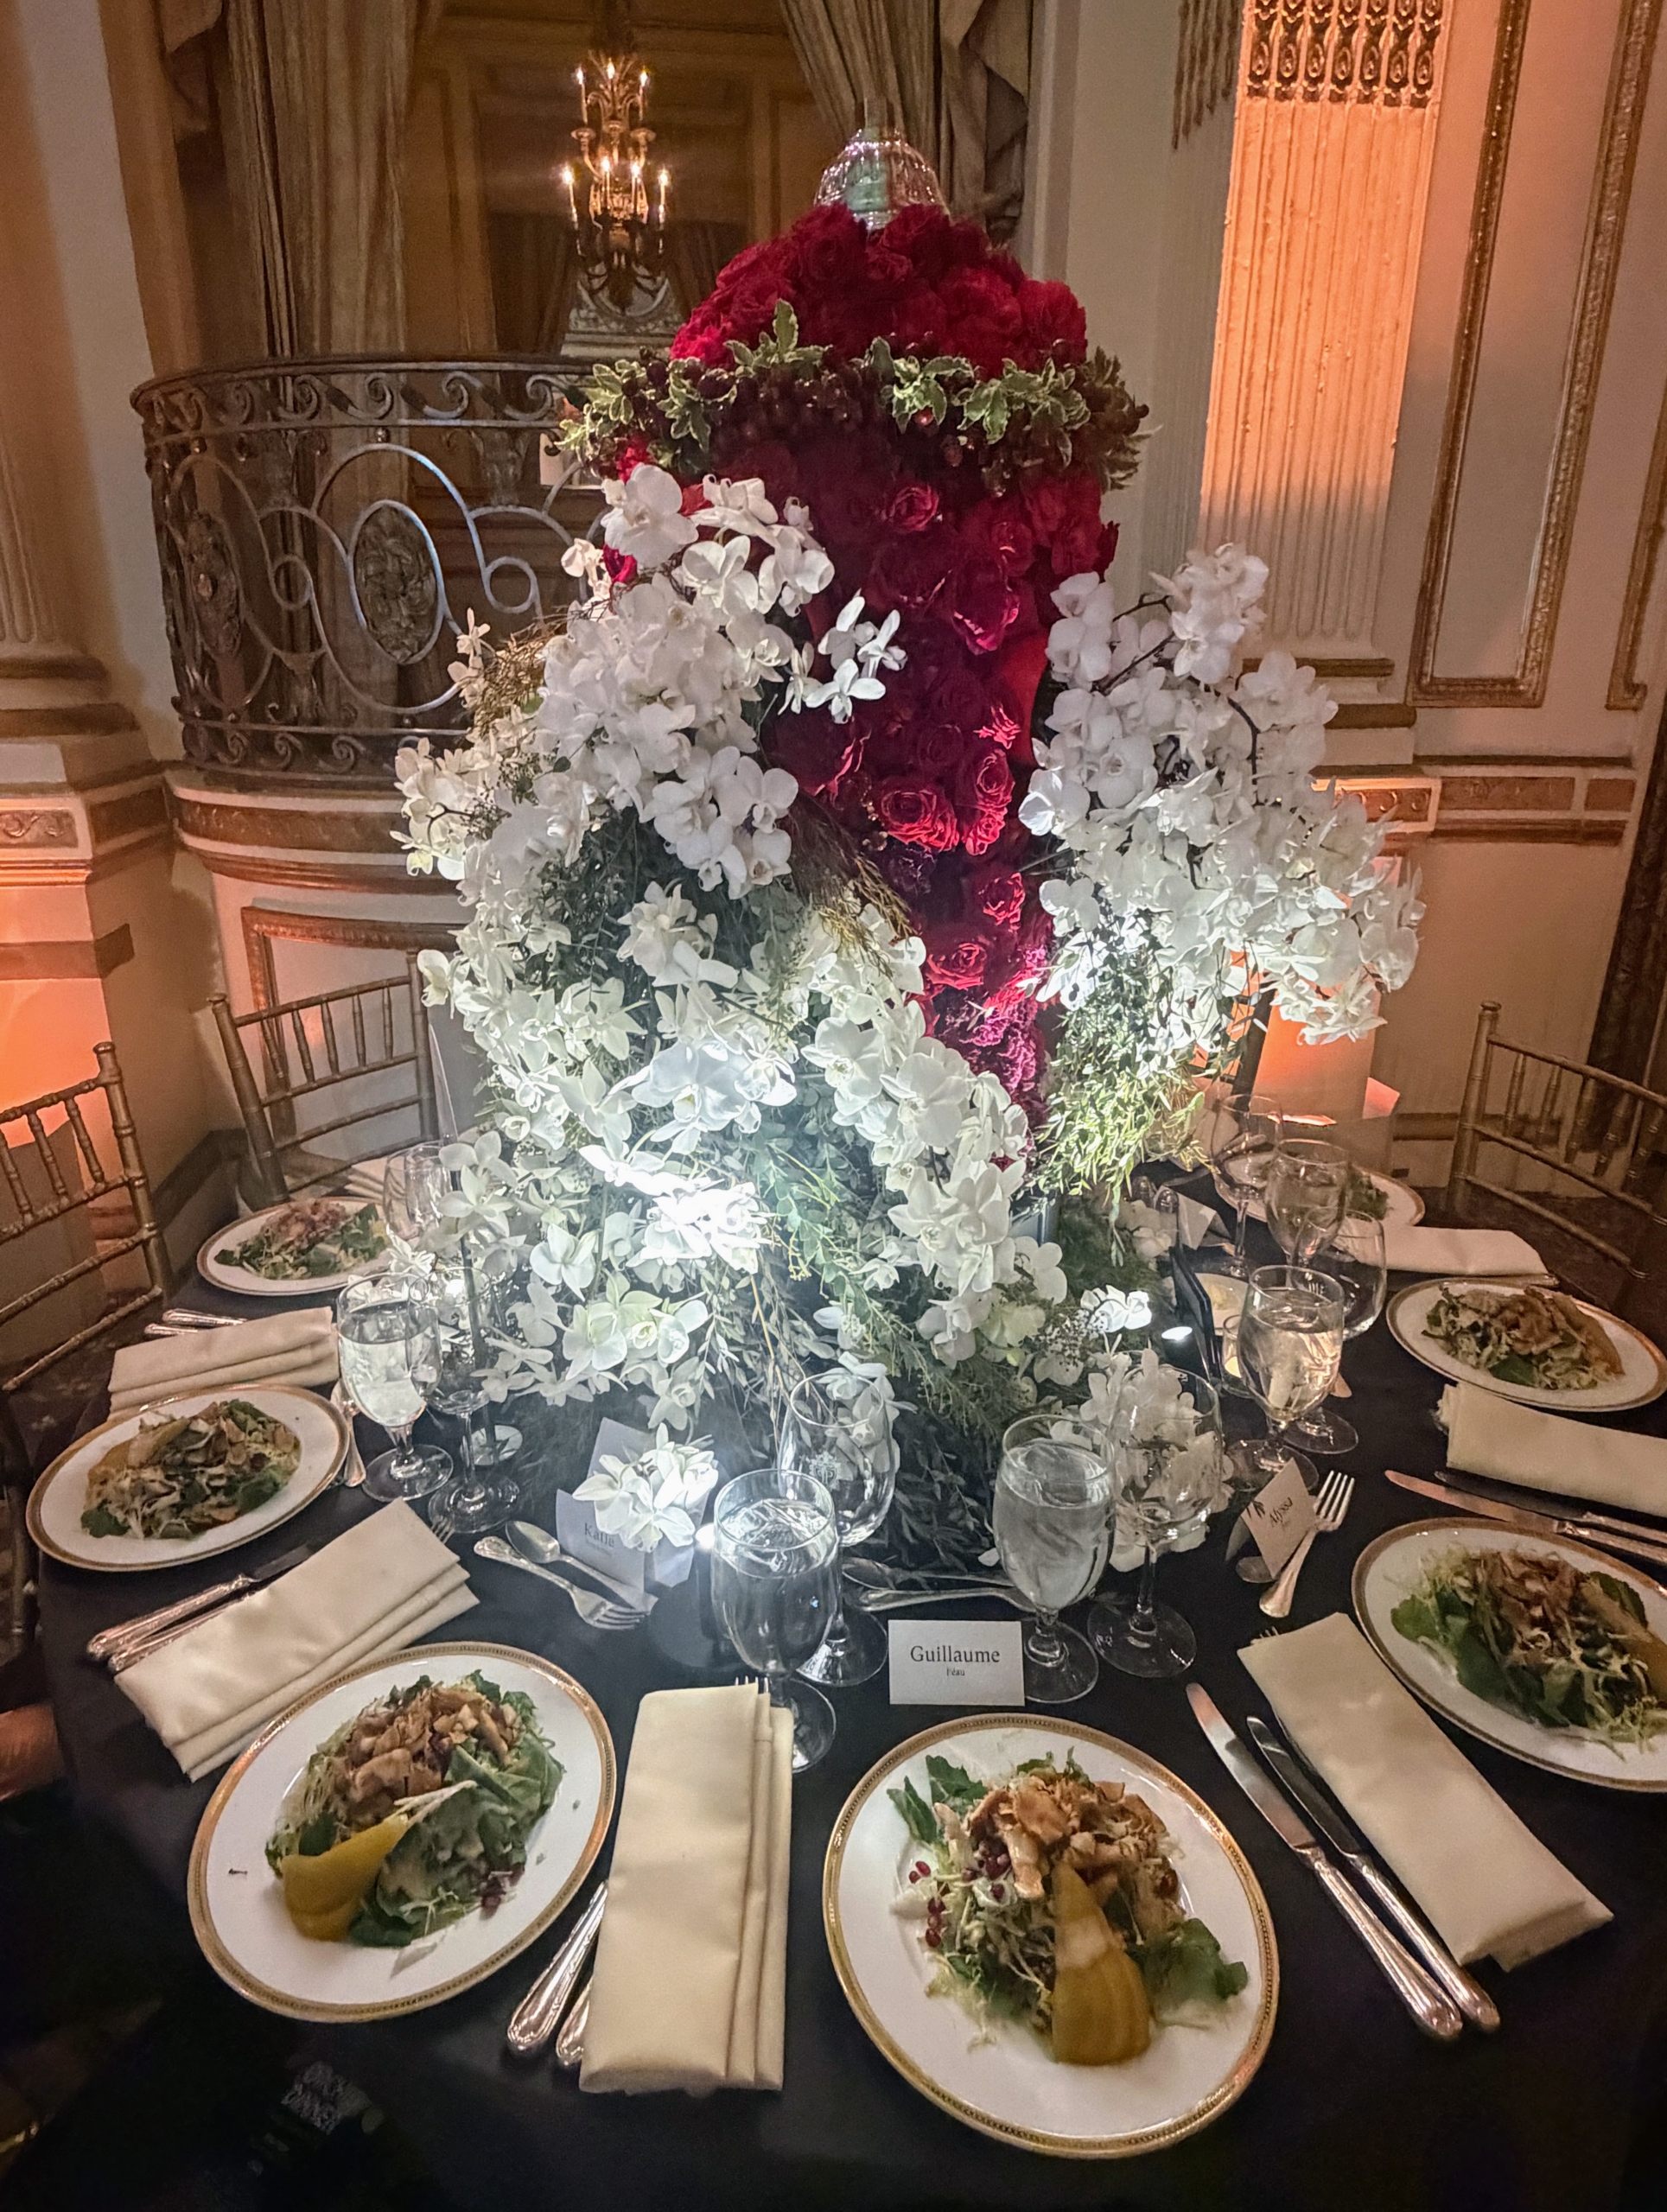
Red and white are the primary colors of this arrangement by Robin Cheasty, House of Westbrook.
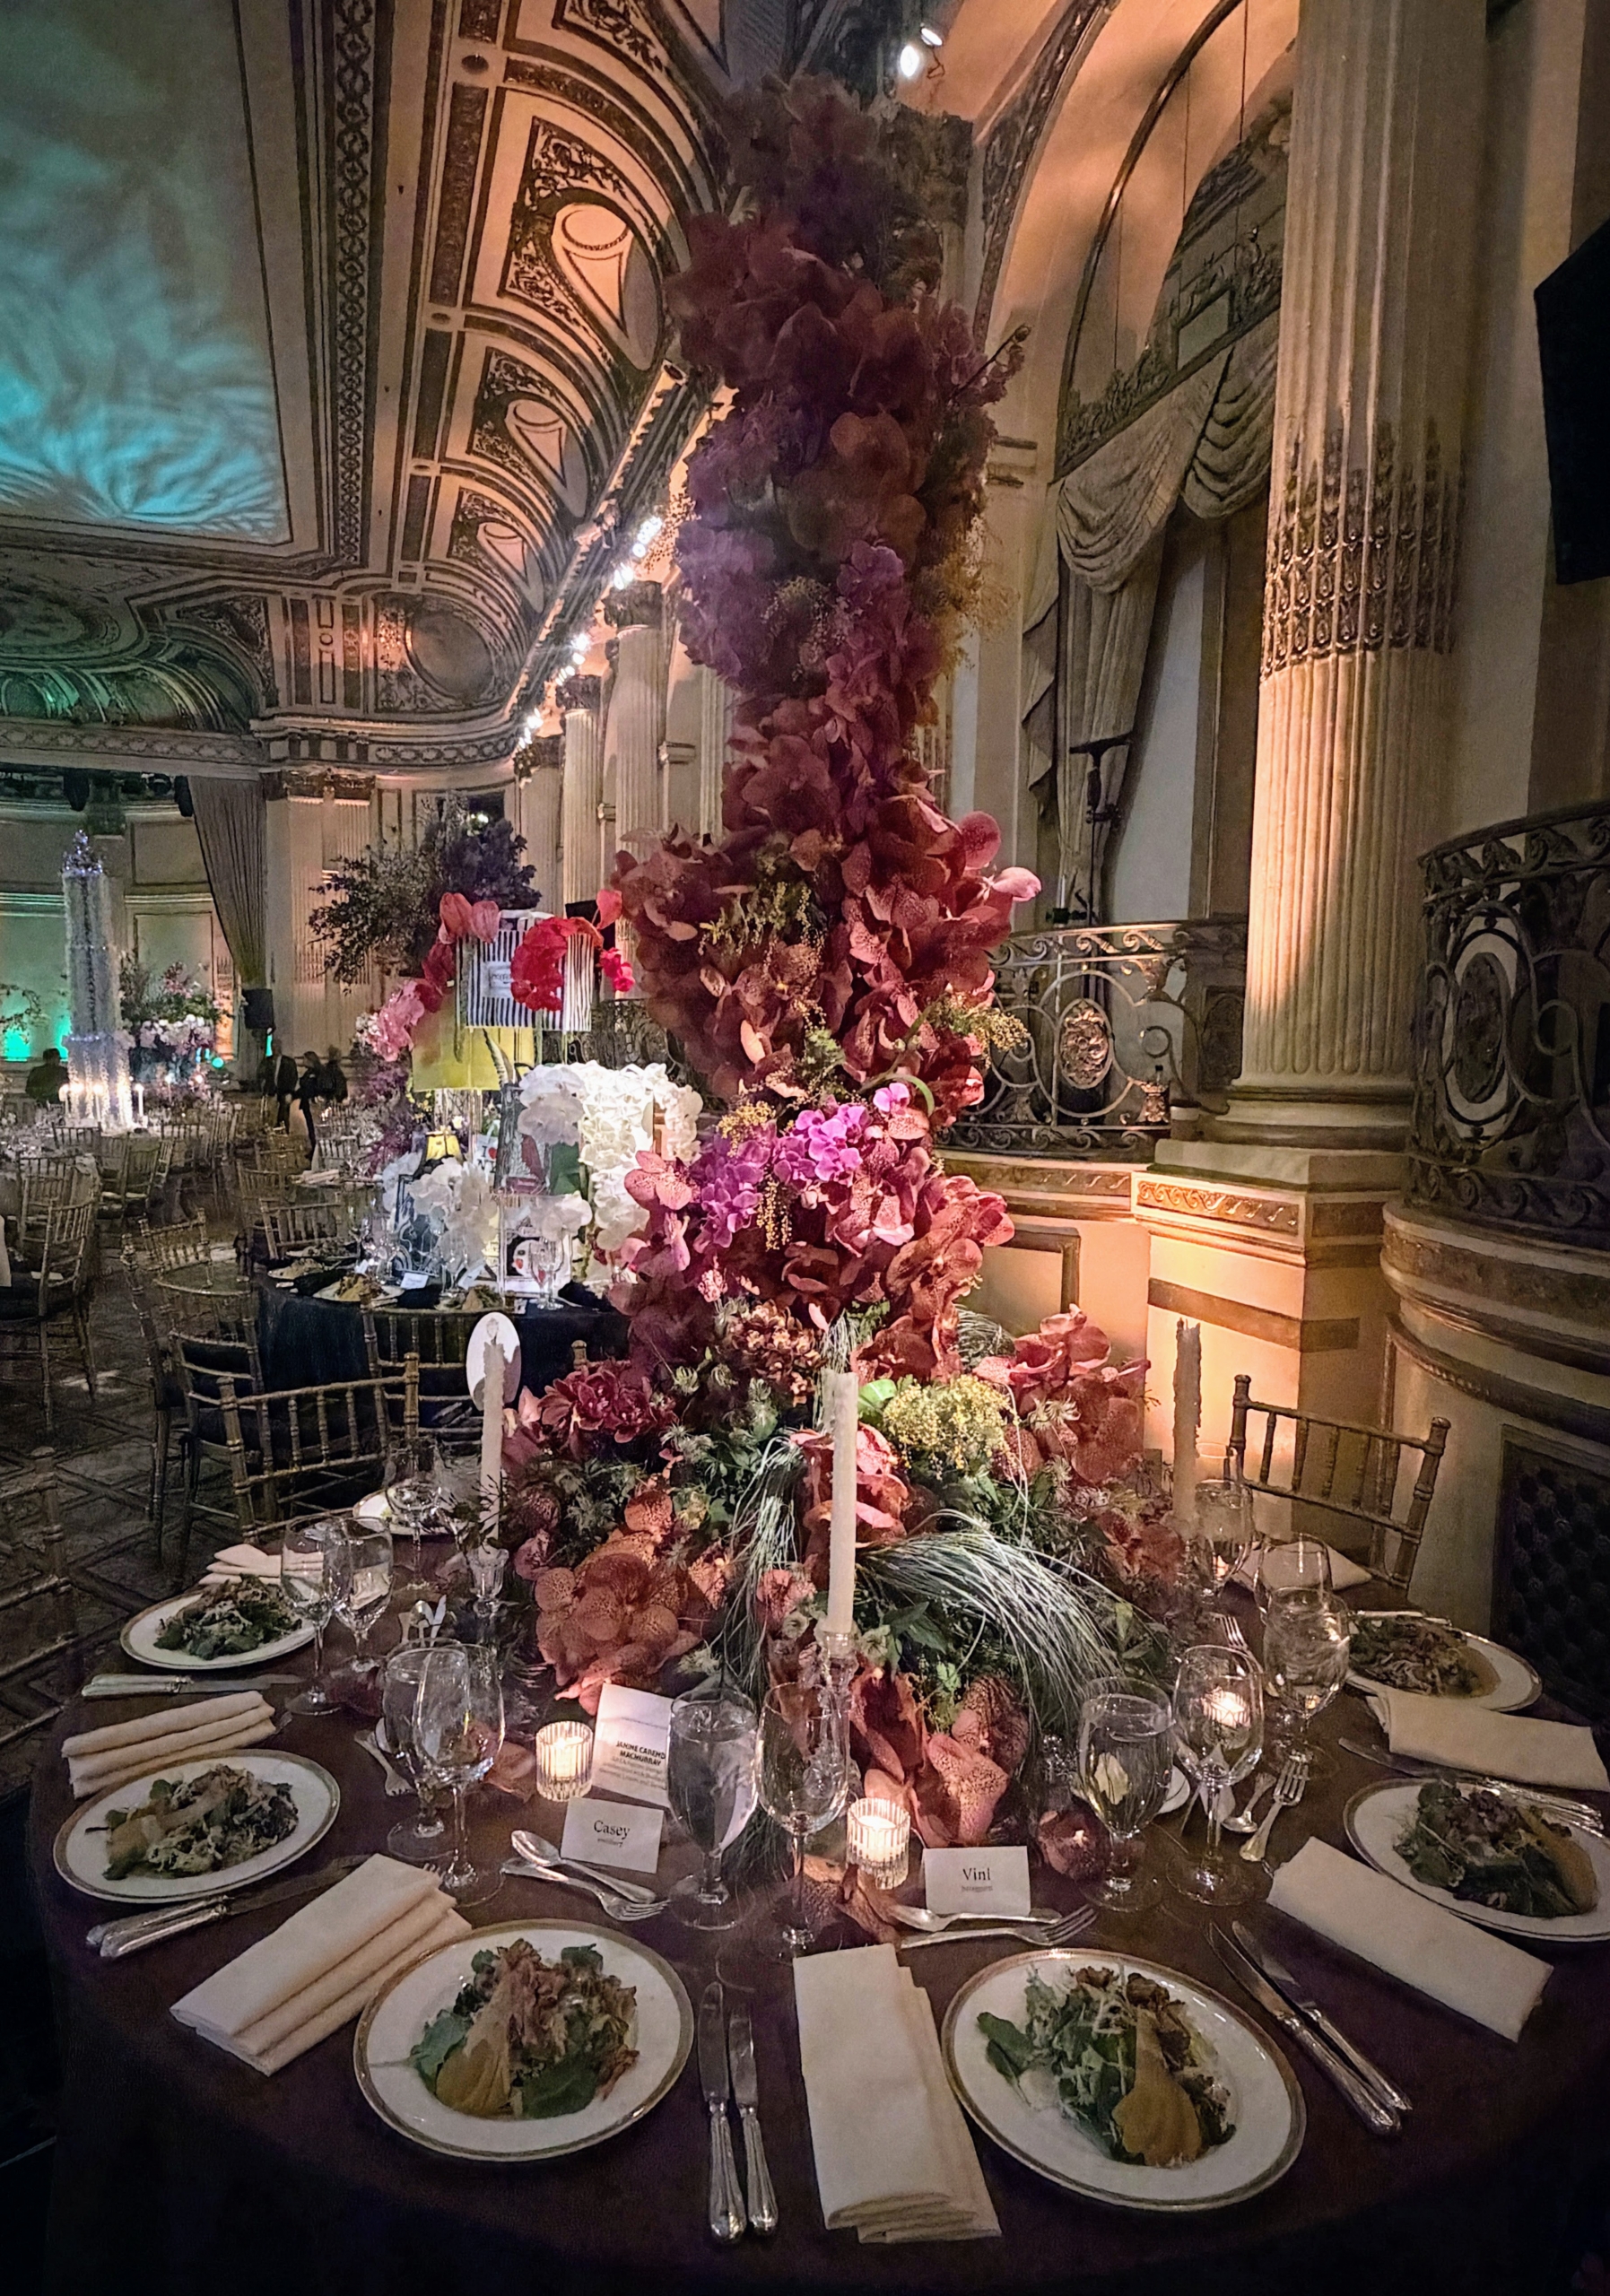
Janine Carendi MacMurray, AREA Interior Design and Studio Jones donated this display.
This centerpiece uses a striking combination of flowers and foliage by Canaan Marshall, Canaan Marshall Design LLC.
This whimsical New York City themed display centerpiece was donated by designer Hilzy Pereira.
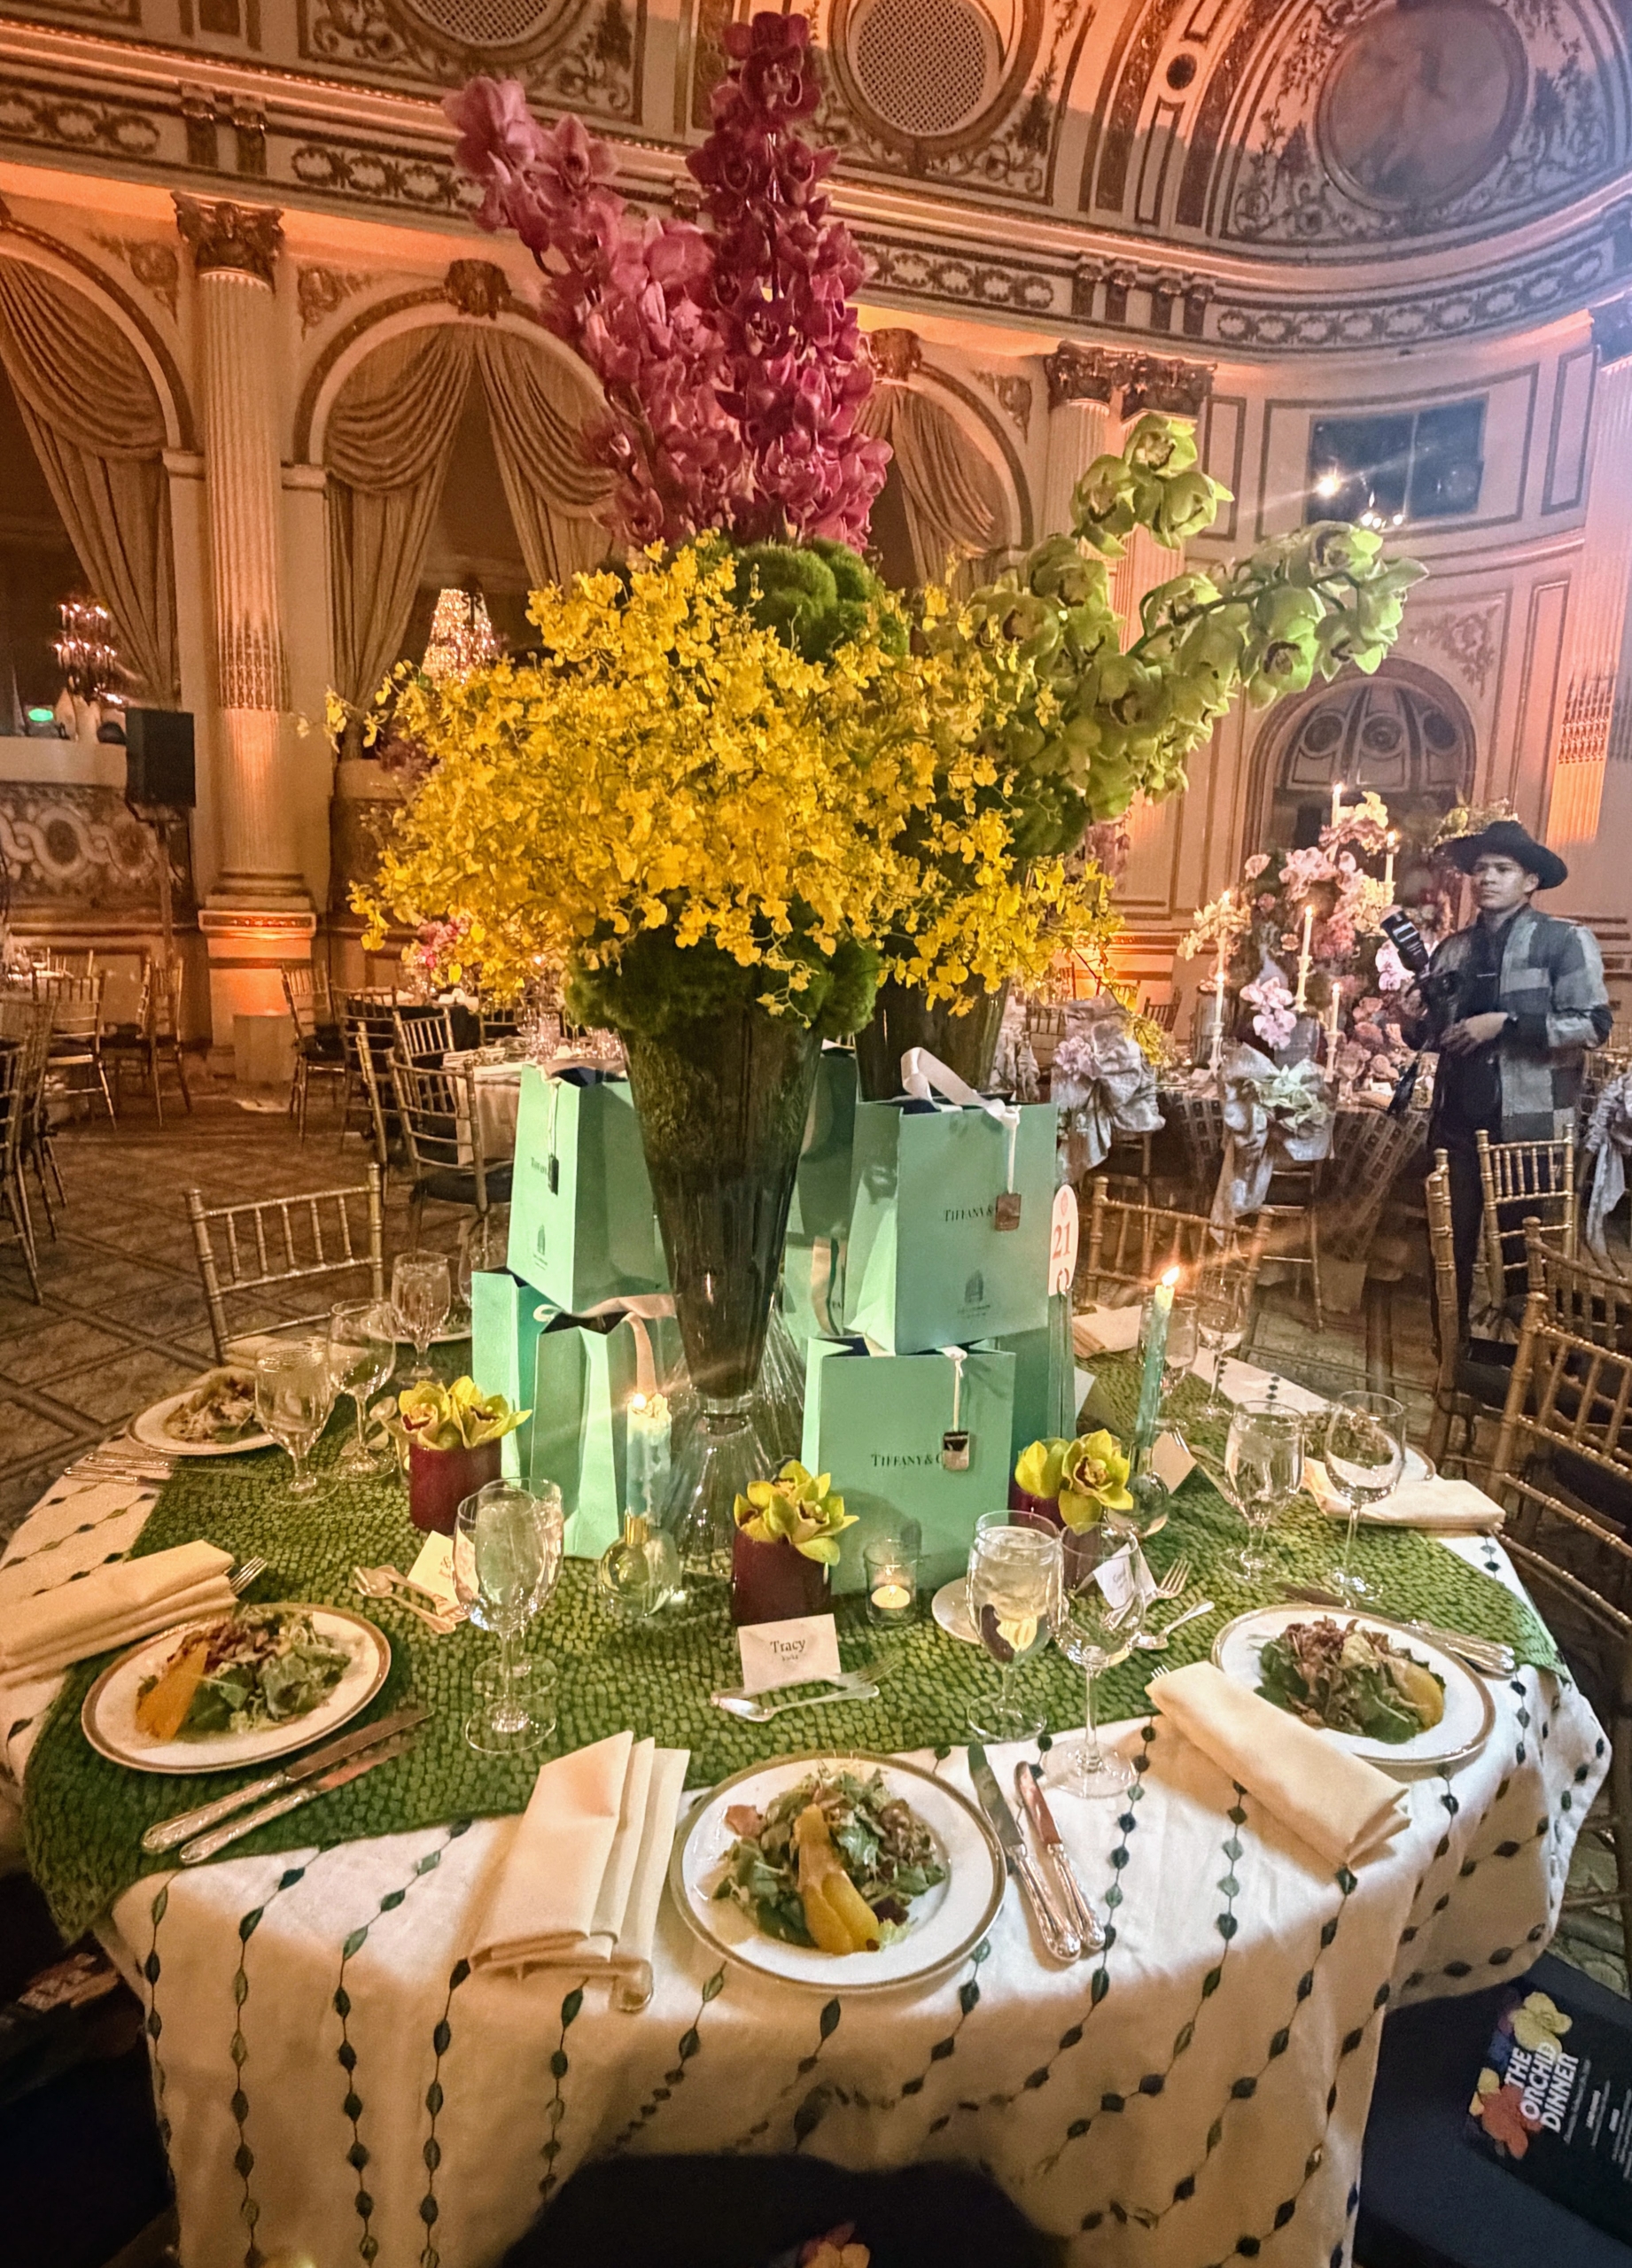
This centerpiece shows a base of iconic Tiffany & Co. blue bags. This was done by Nadia Watts Interior Design.
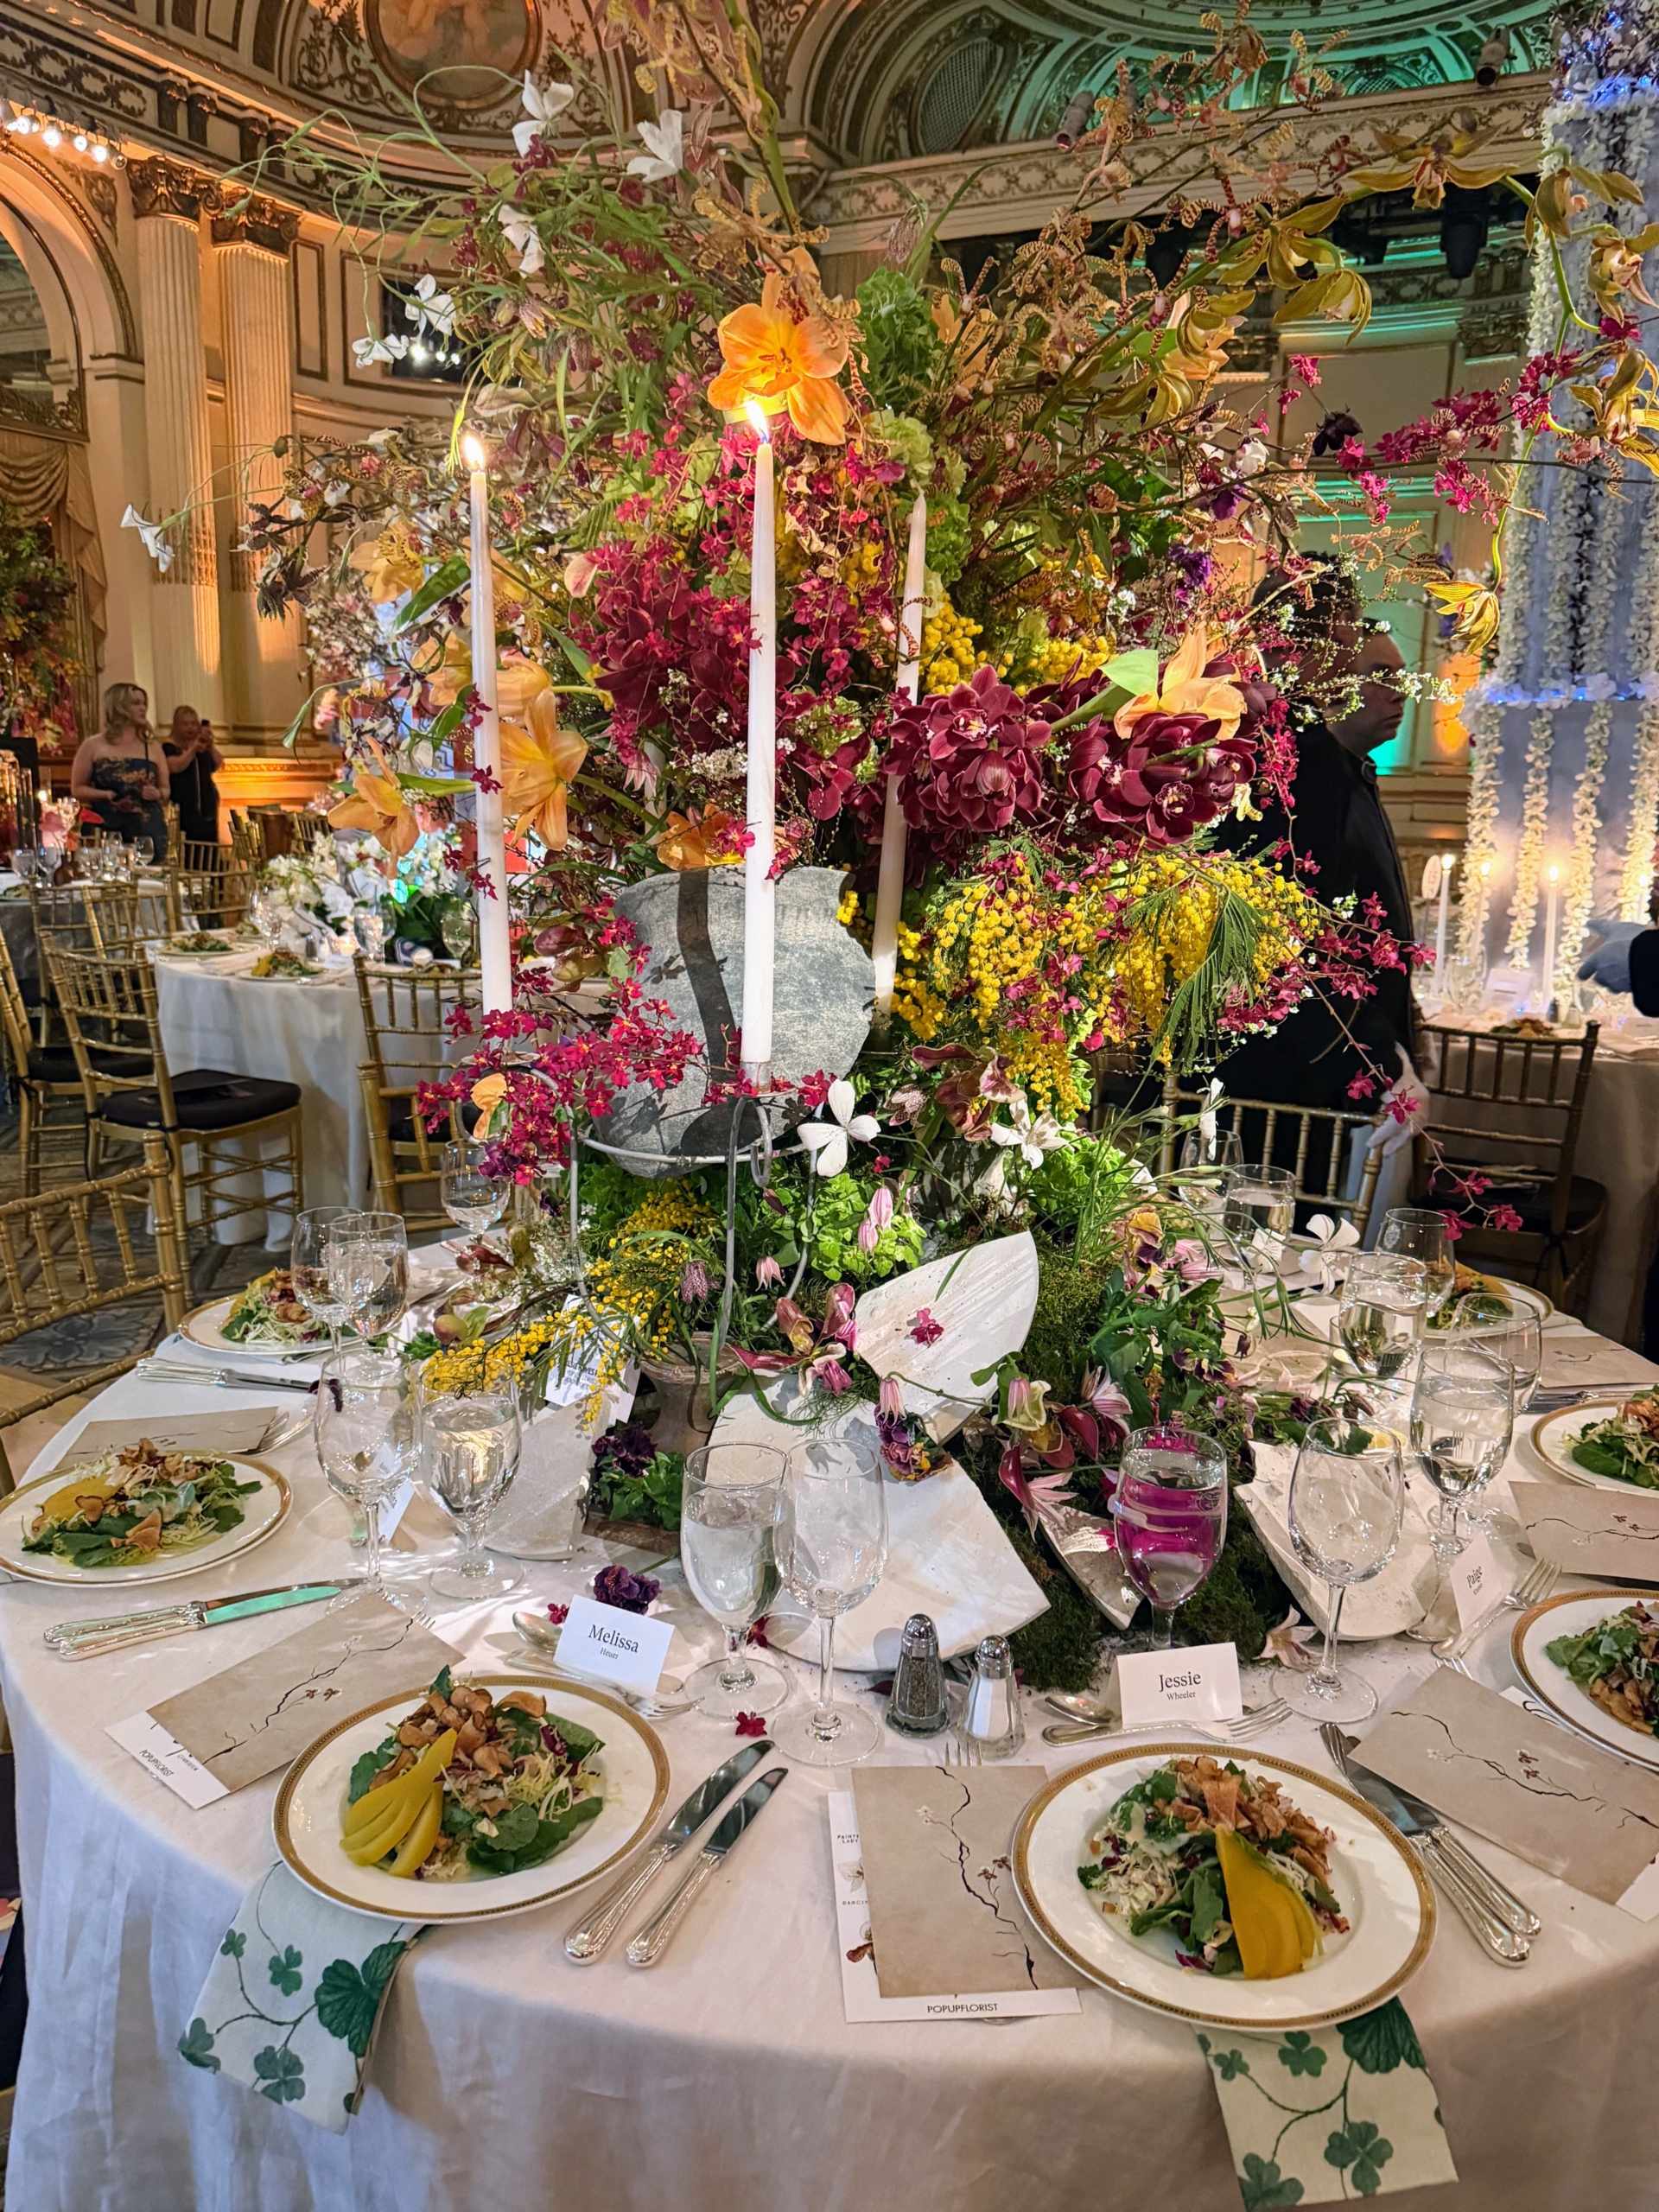
Here’s a beautiful floral arrangement done by Kelsie Hayes Fine, POPUPFLORIST & HOUSE OF THREE.
And here is one by Ace Berry, Ace in Full Bloom.
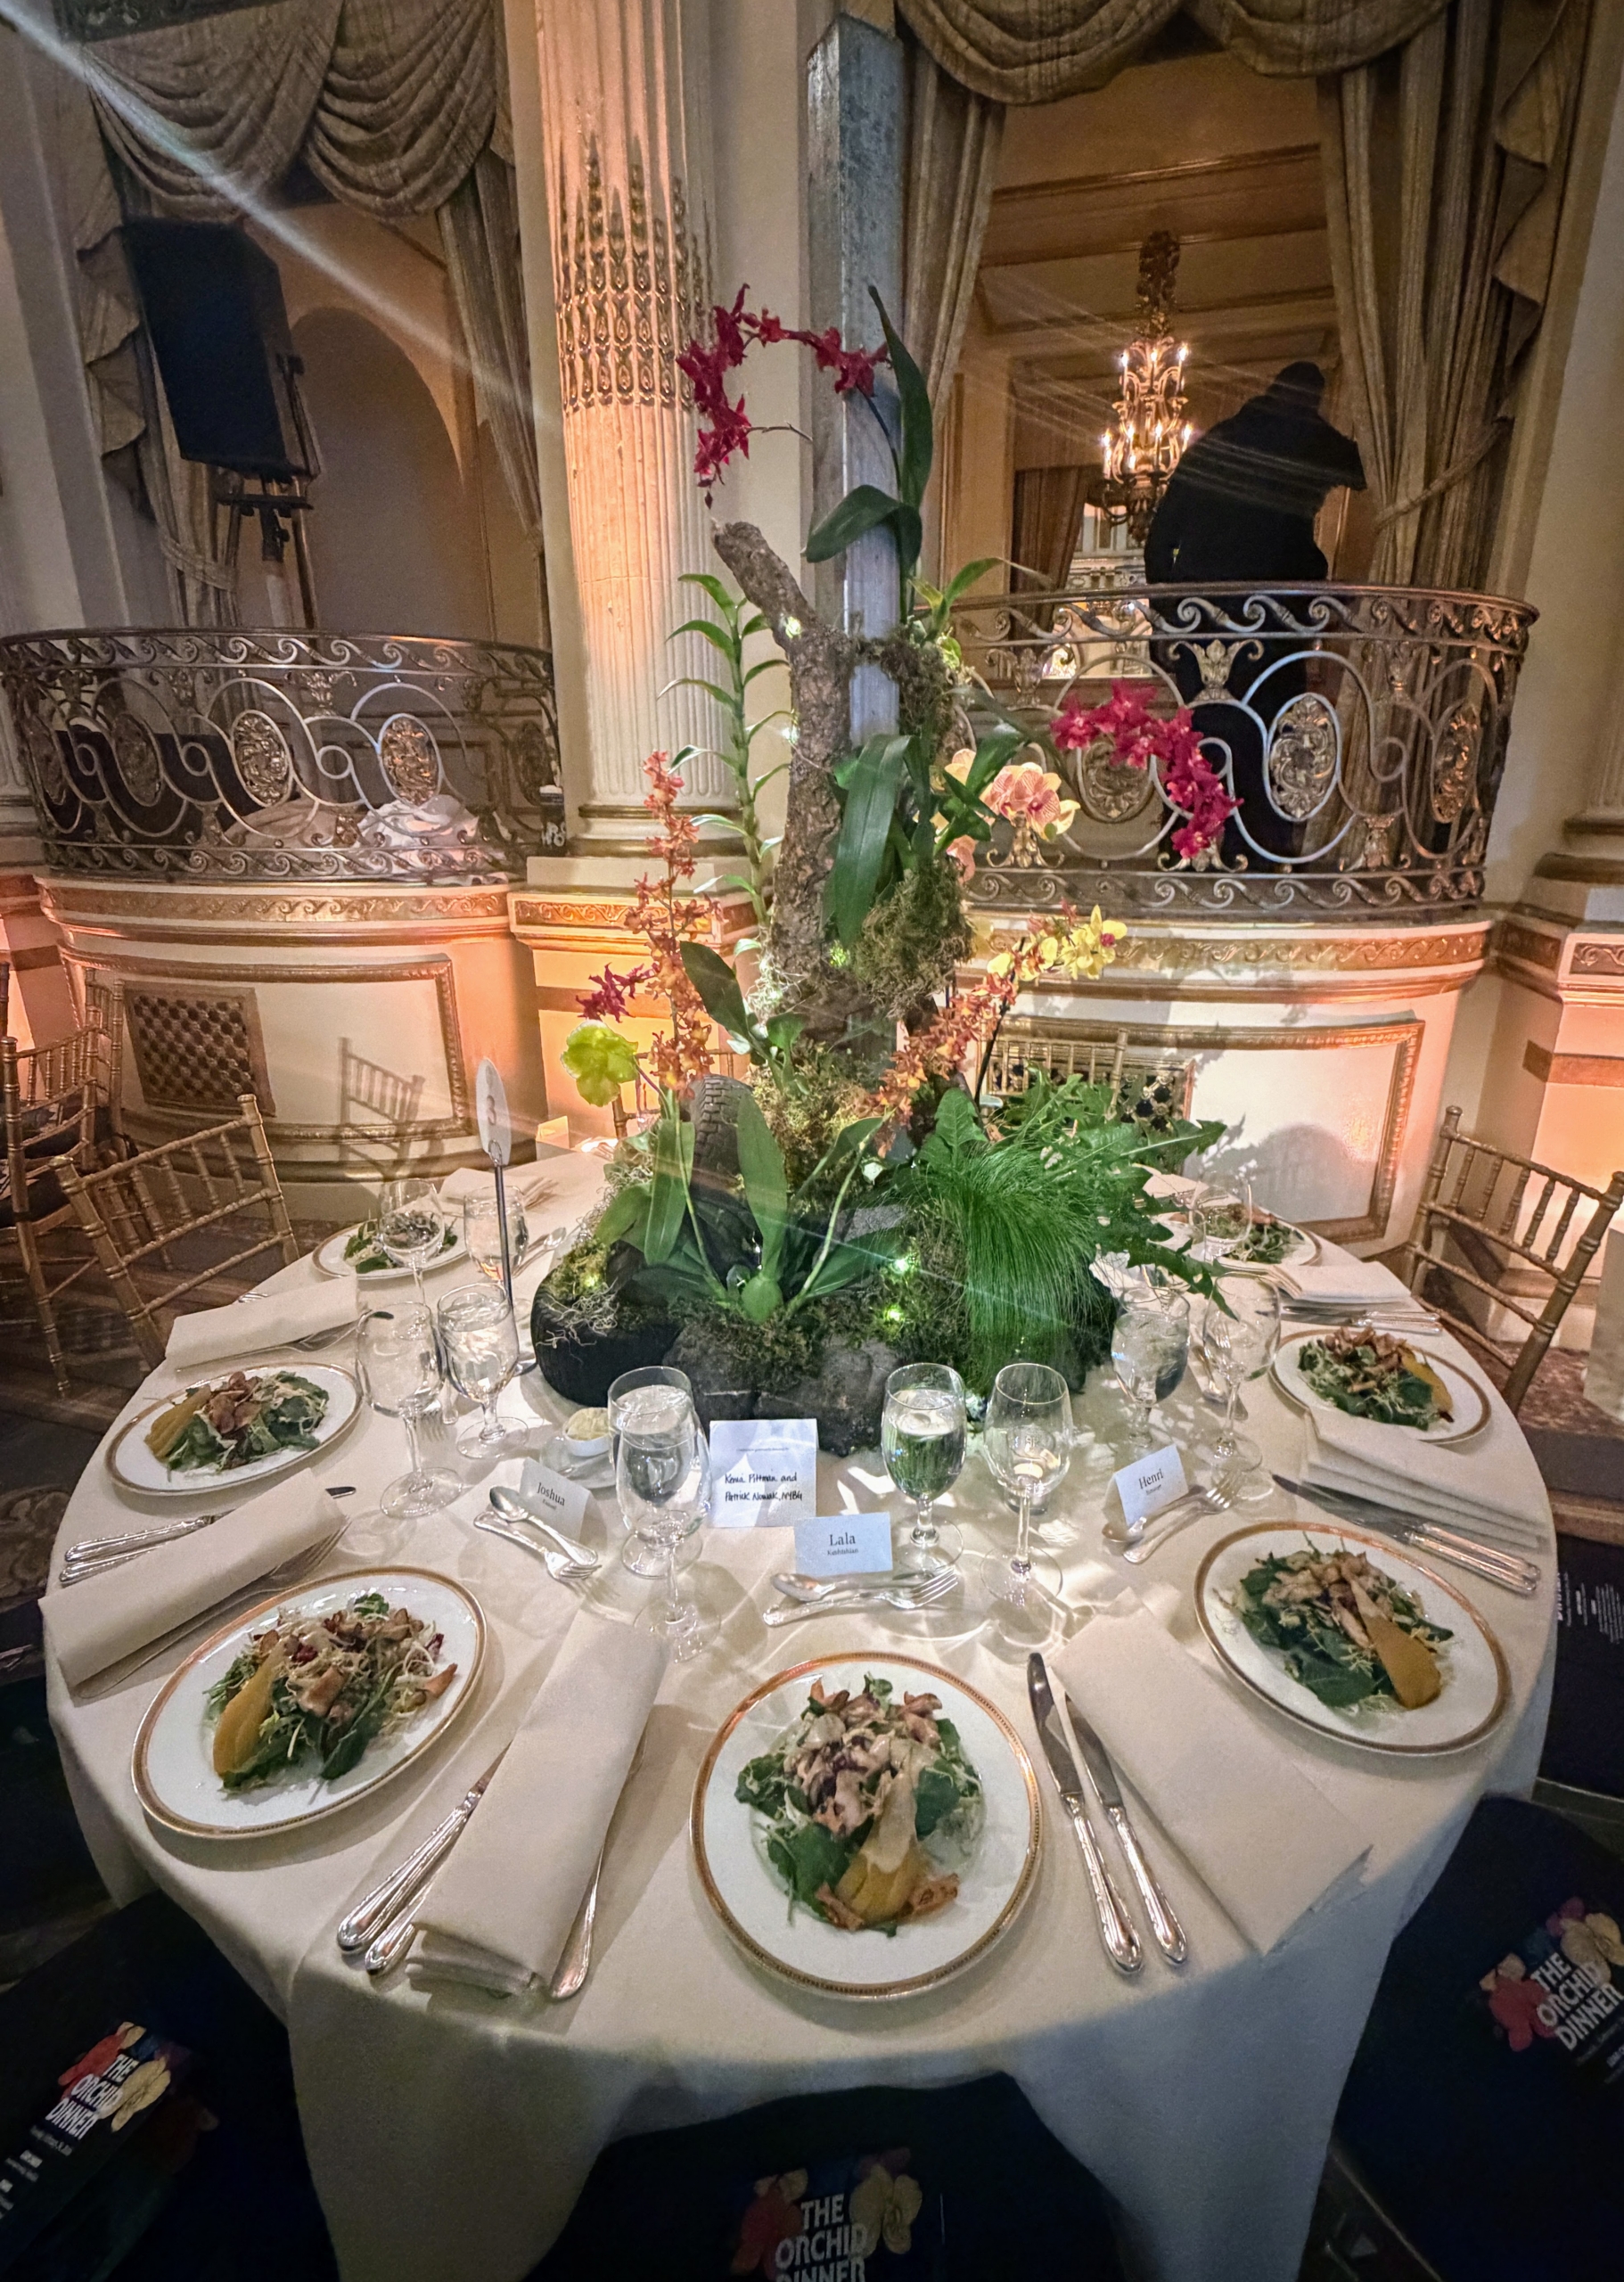
An orchid climbing up, perhaps, one of New York City’s many street light poles by Kenia Pittman and Patrick Nowak, NYBG.
And here is a simple, yet elegant display of orchids climbing up New York City’s Empire State Building by Jacqueline Elfe, Stellar Style Events, Floral & Event Design.
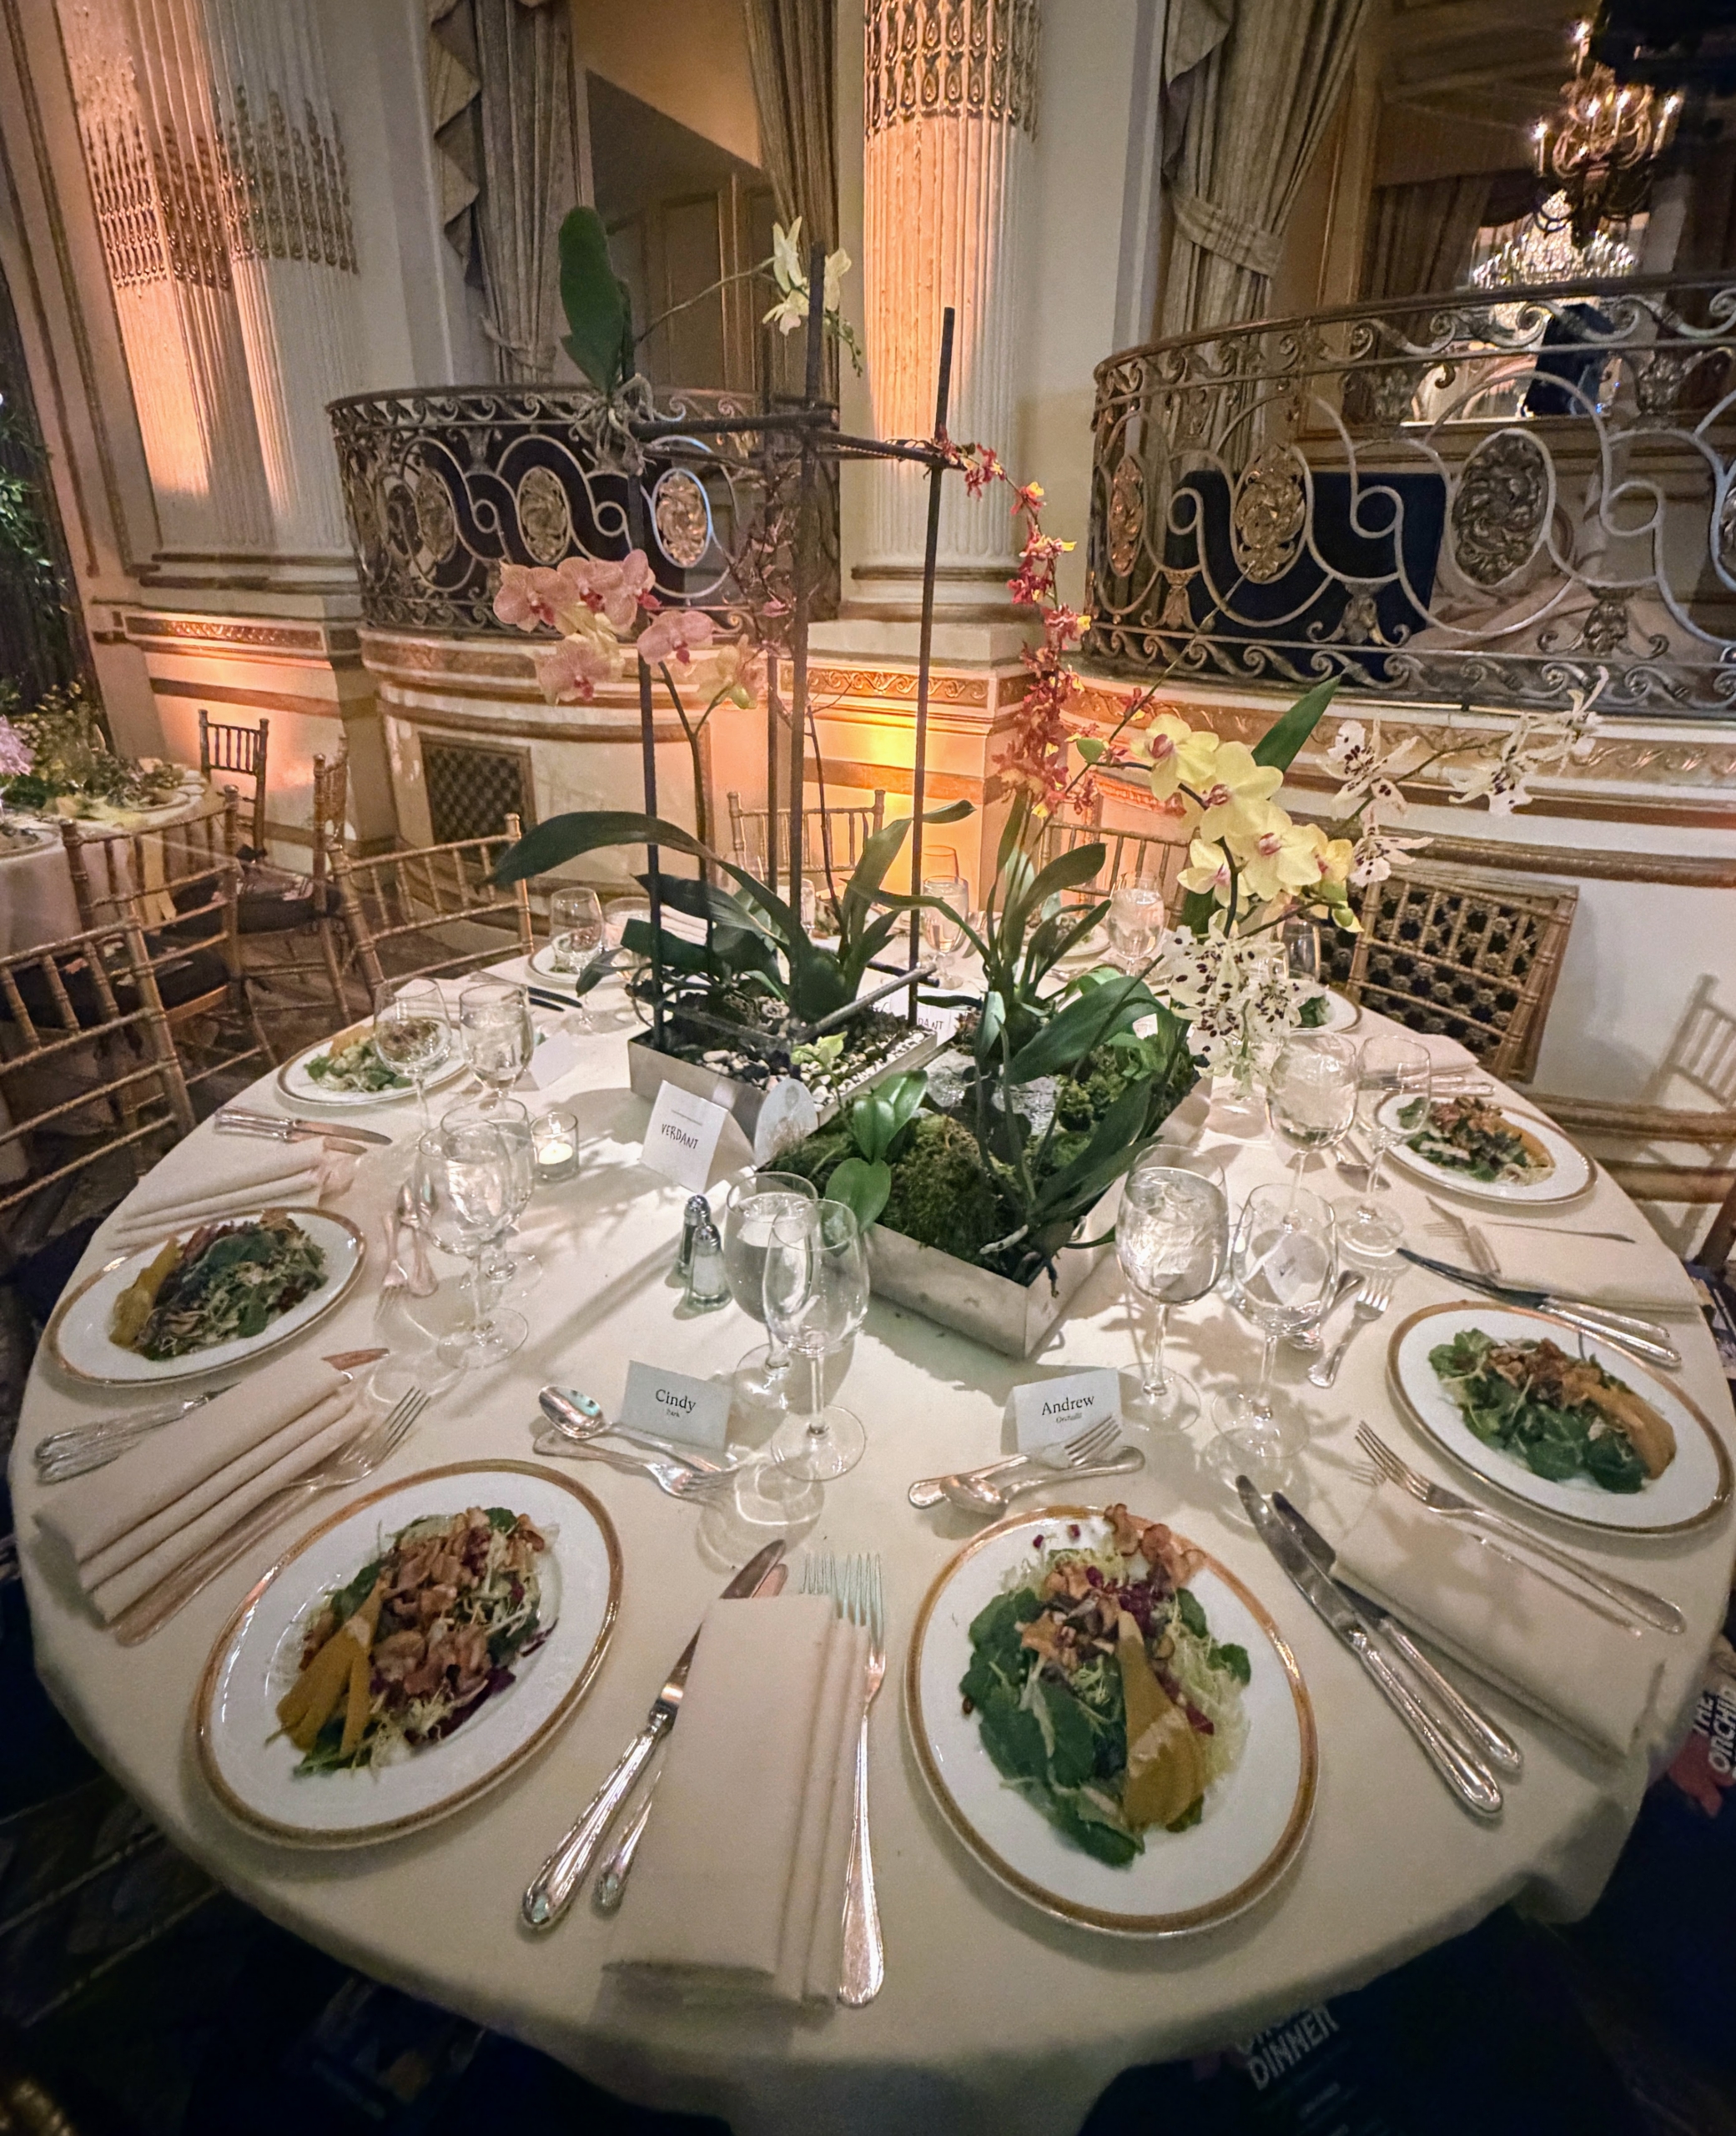
This centerpiece is by Verdant Garden Designs.
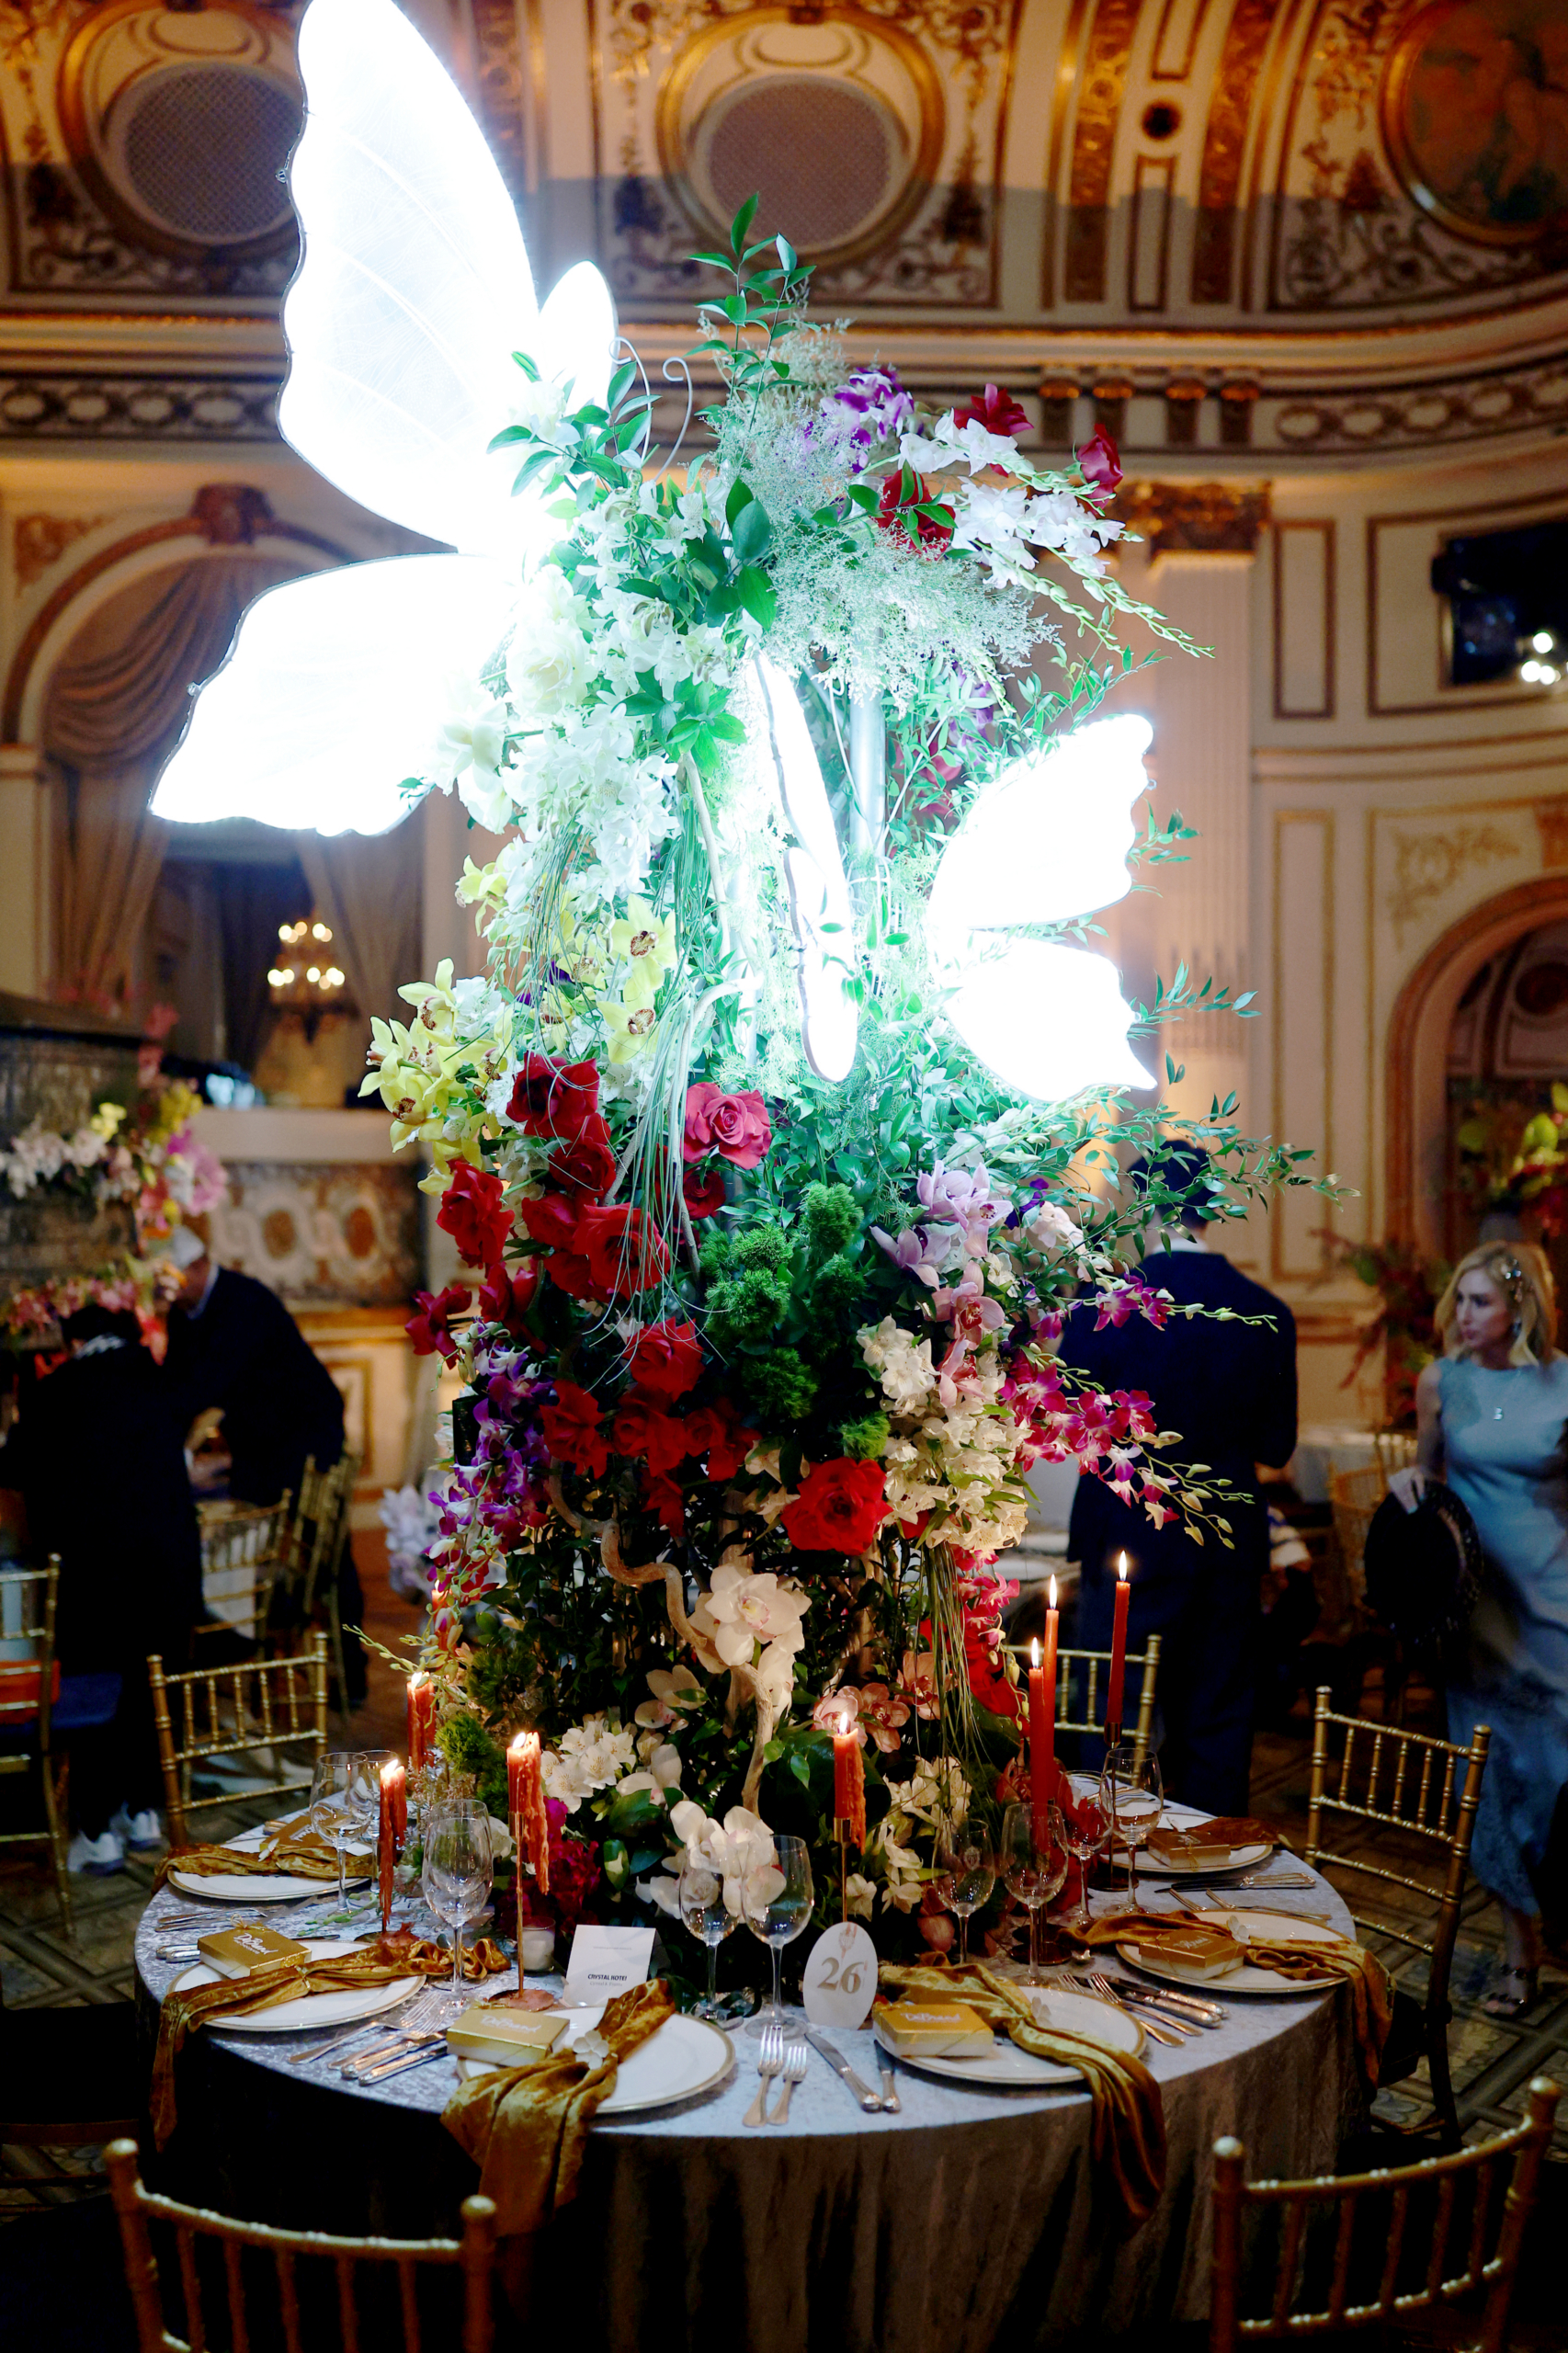
This centerpiece with butterfly lights was donated by Crystal Kotei, Crystal K Events. (Photo by Dimitrios Kambouris/Getty Images for The NYBG)
And this one, with its lovely color palette of pink and white surrounding the Chrysler Building is by Starbright Floral Design.
Gatherings Floral Design from right here in New York City donated this centerpiece.
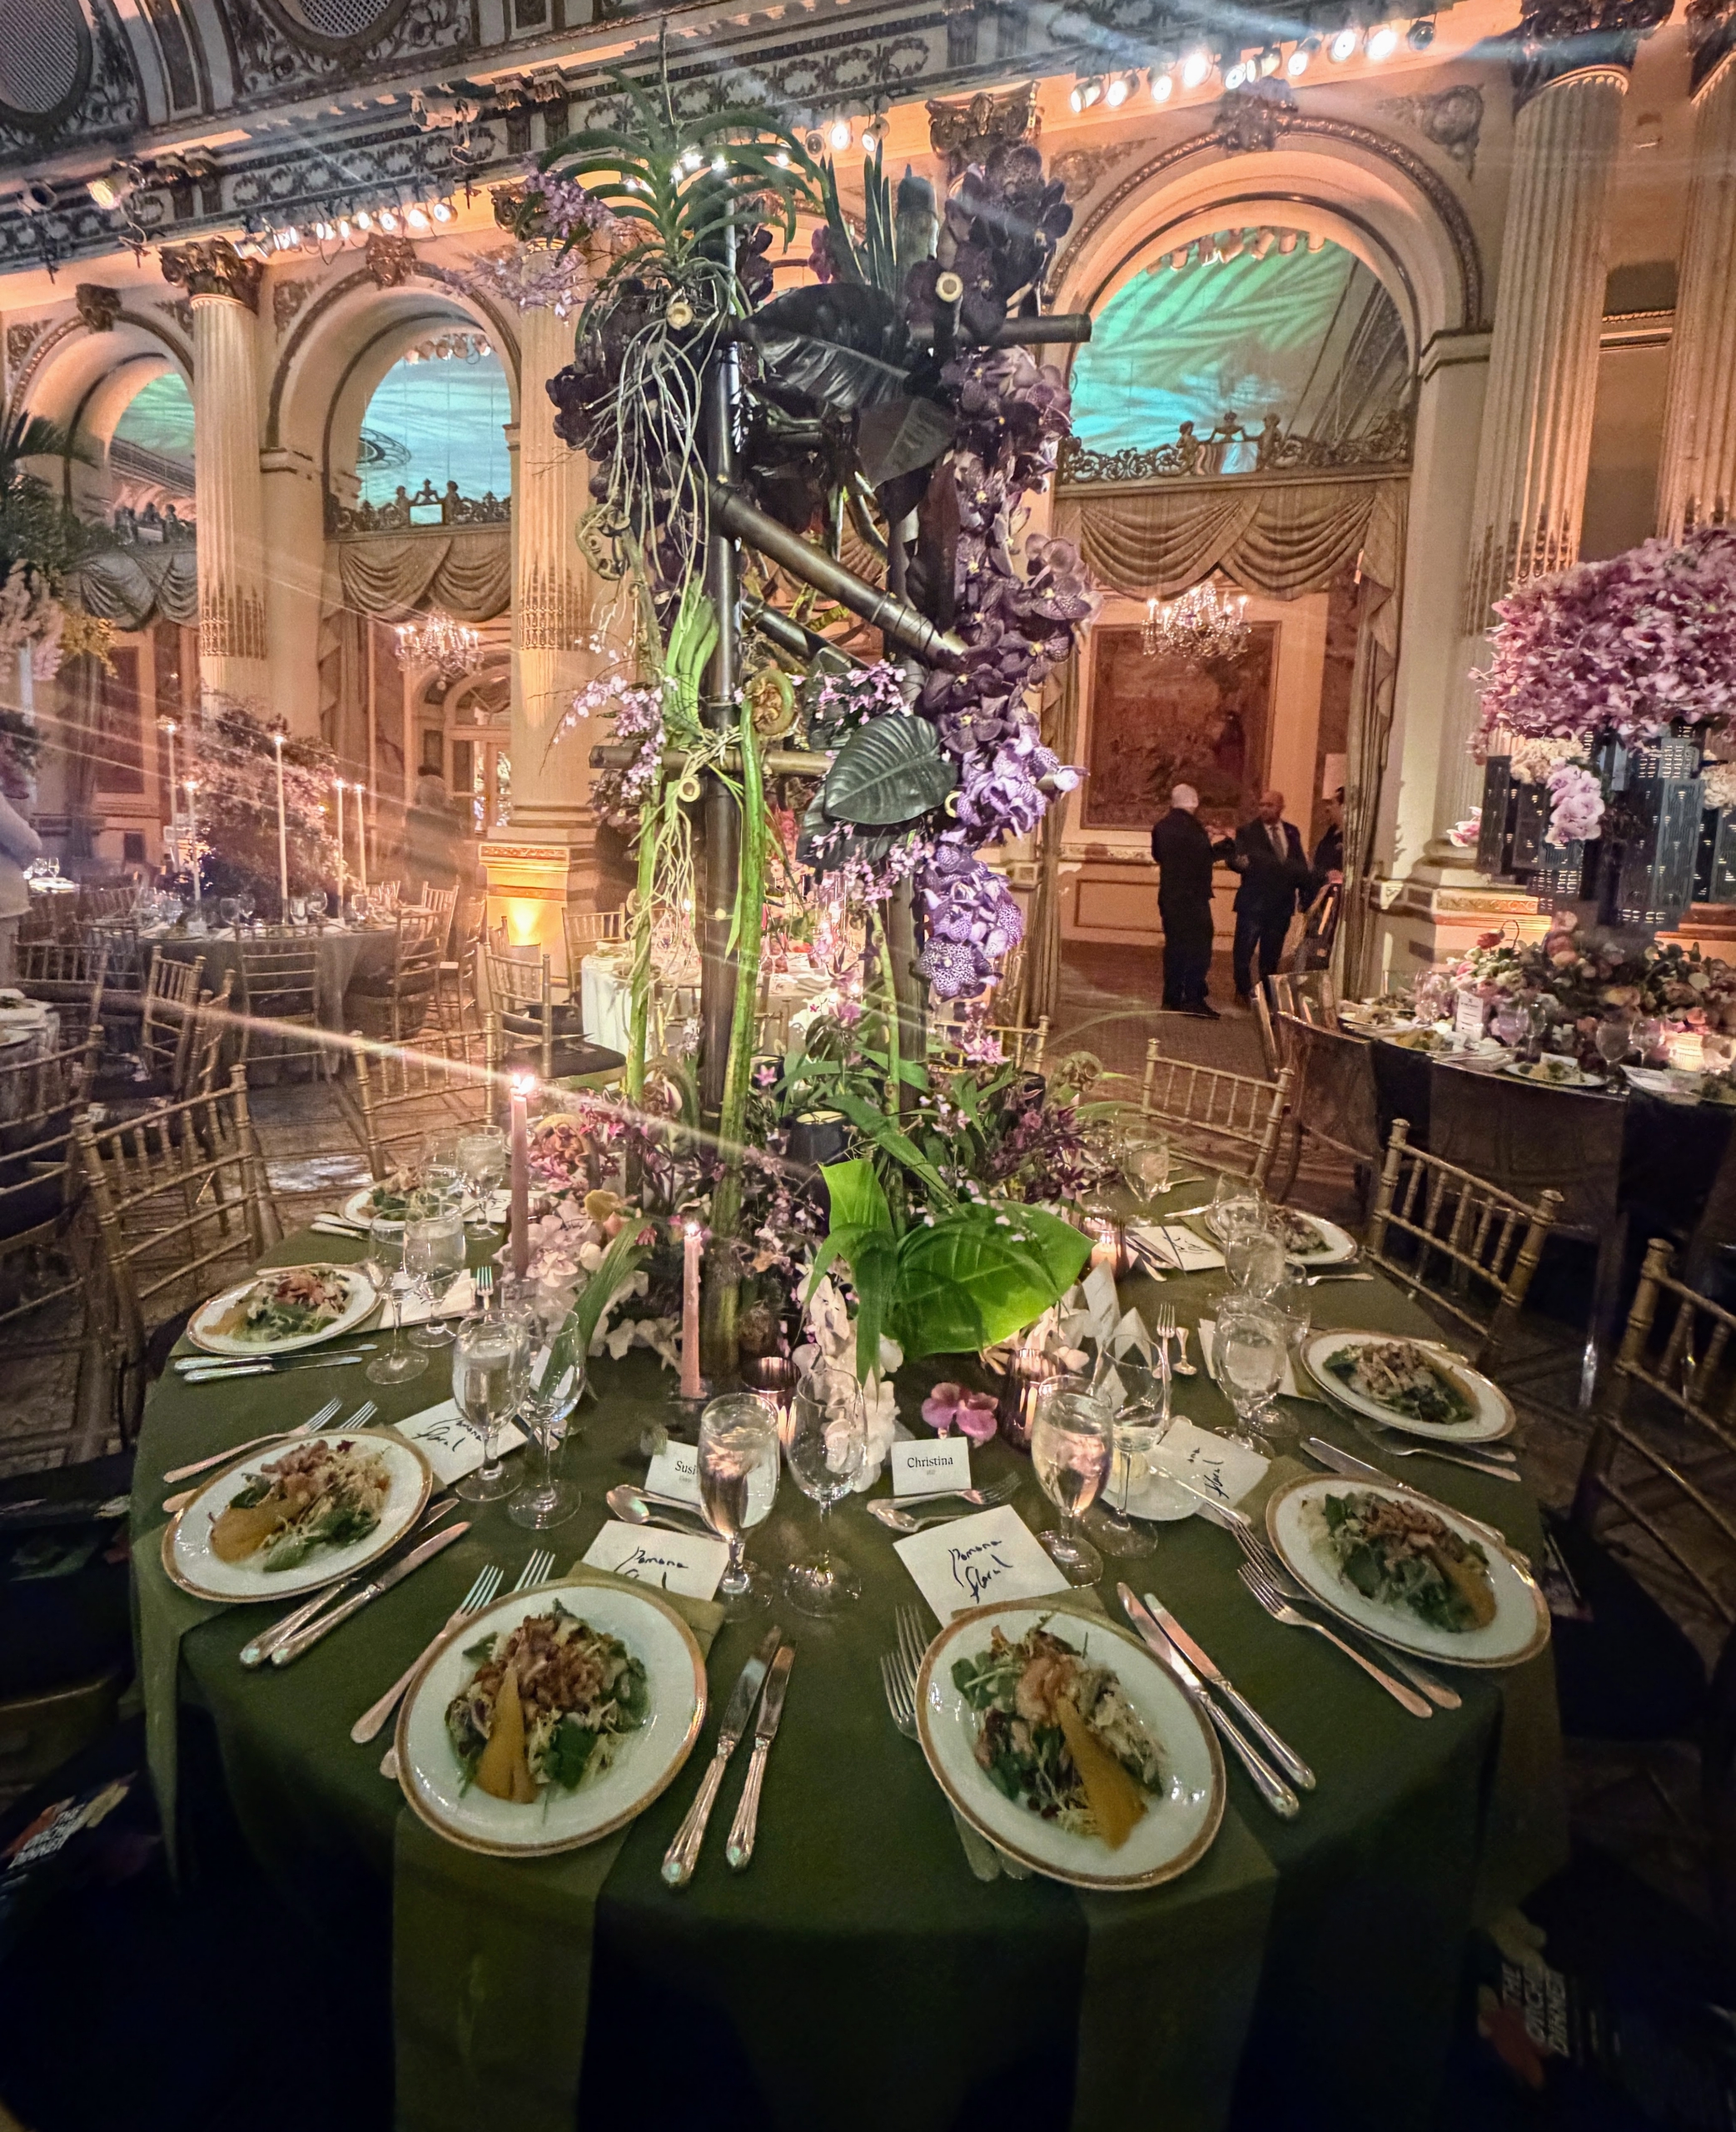
Every table’s display was interesting and different. This one is by Sarah Ruberto, Pomona Floral.
Autumn Pochiro, Autumn Dawn Design provided this floral display.
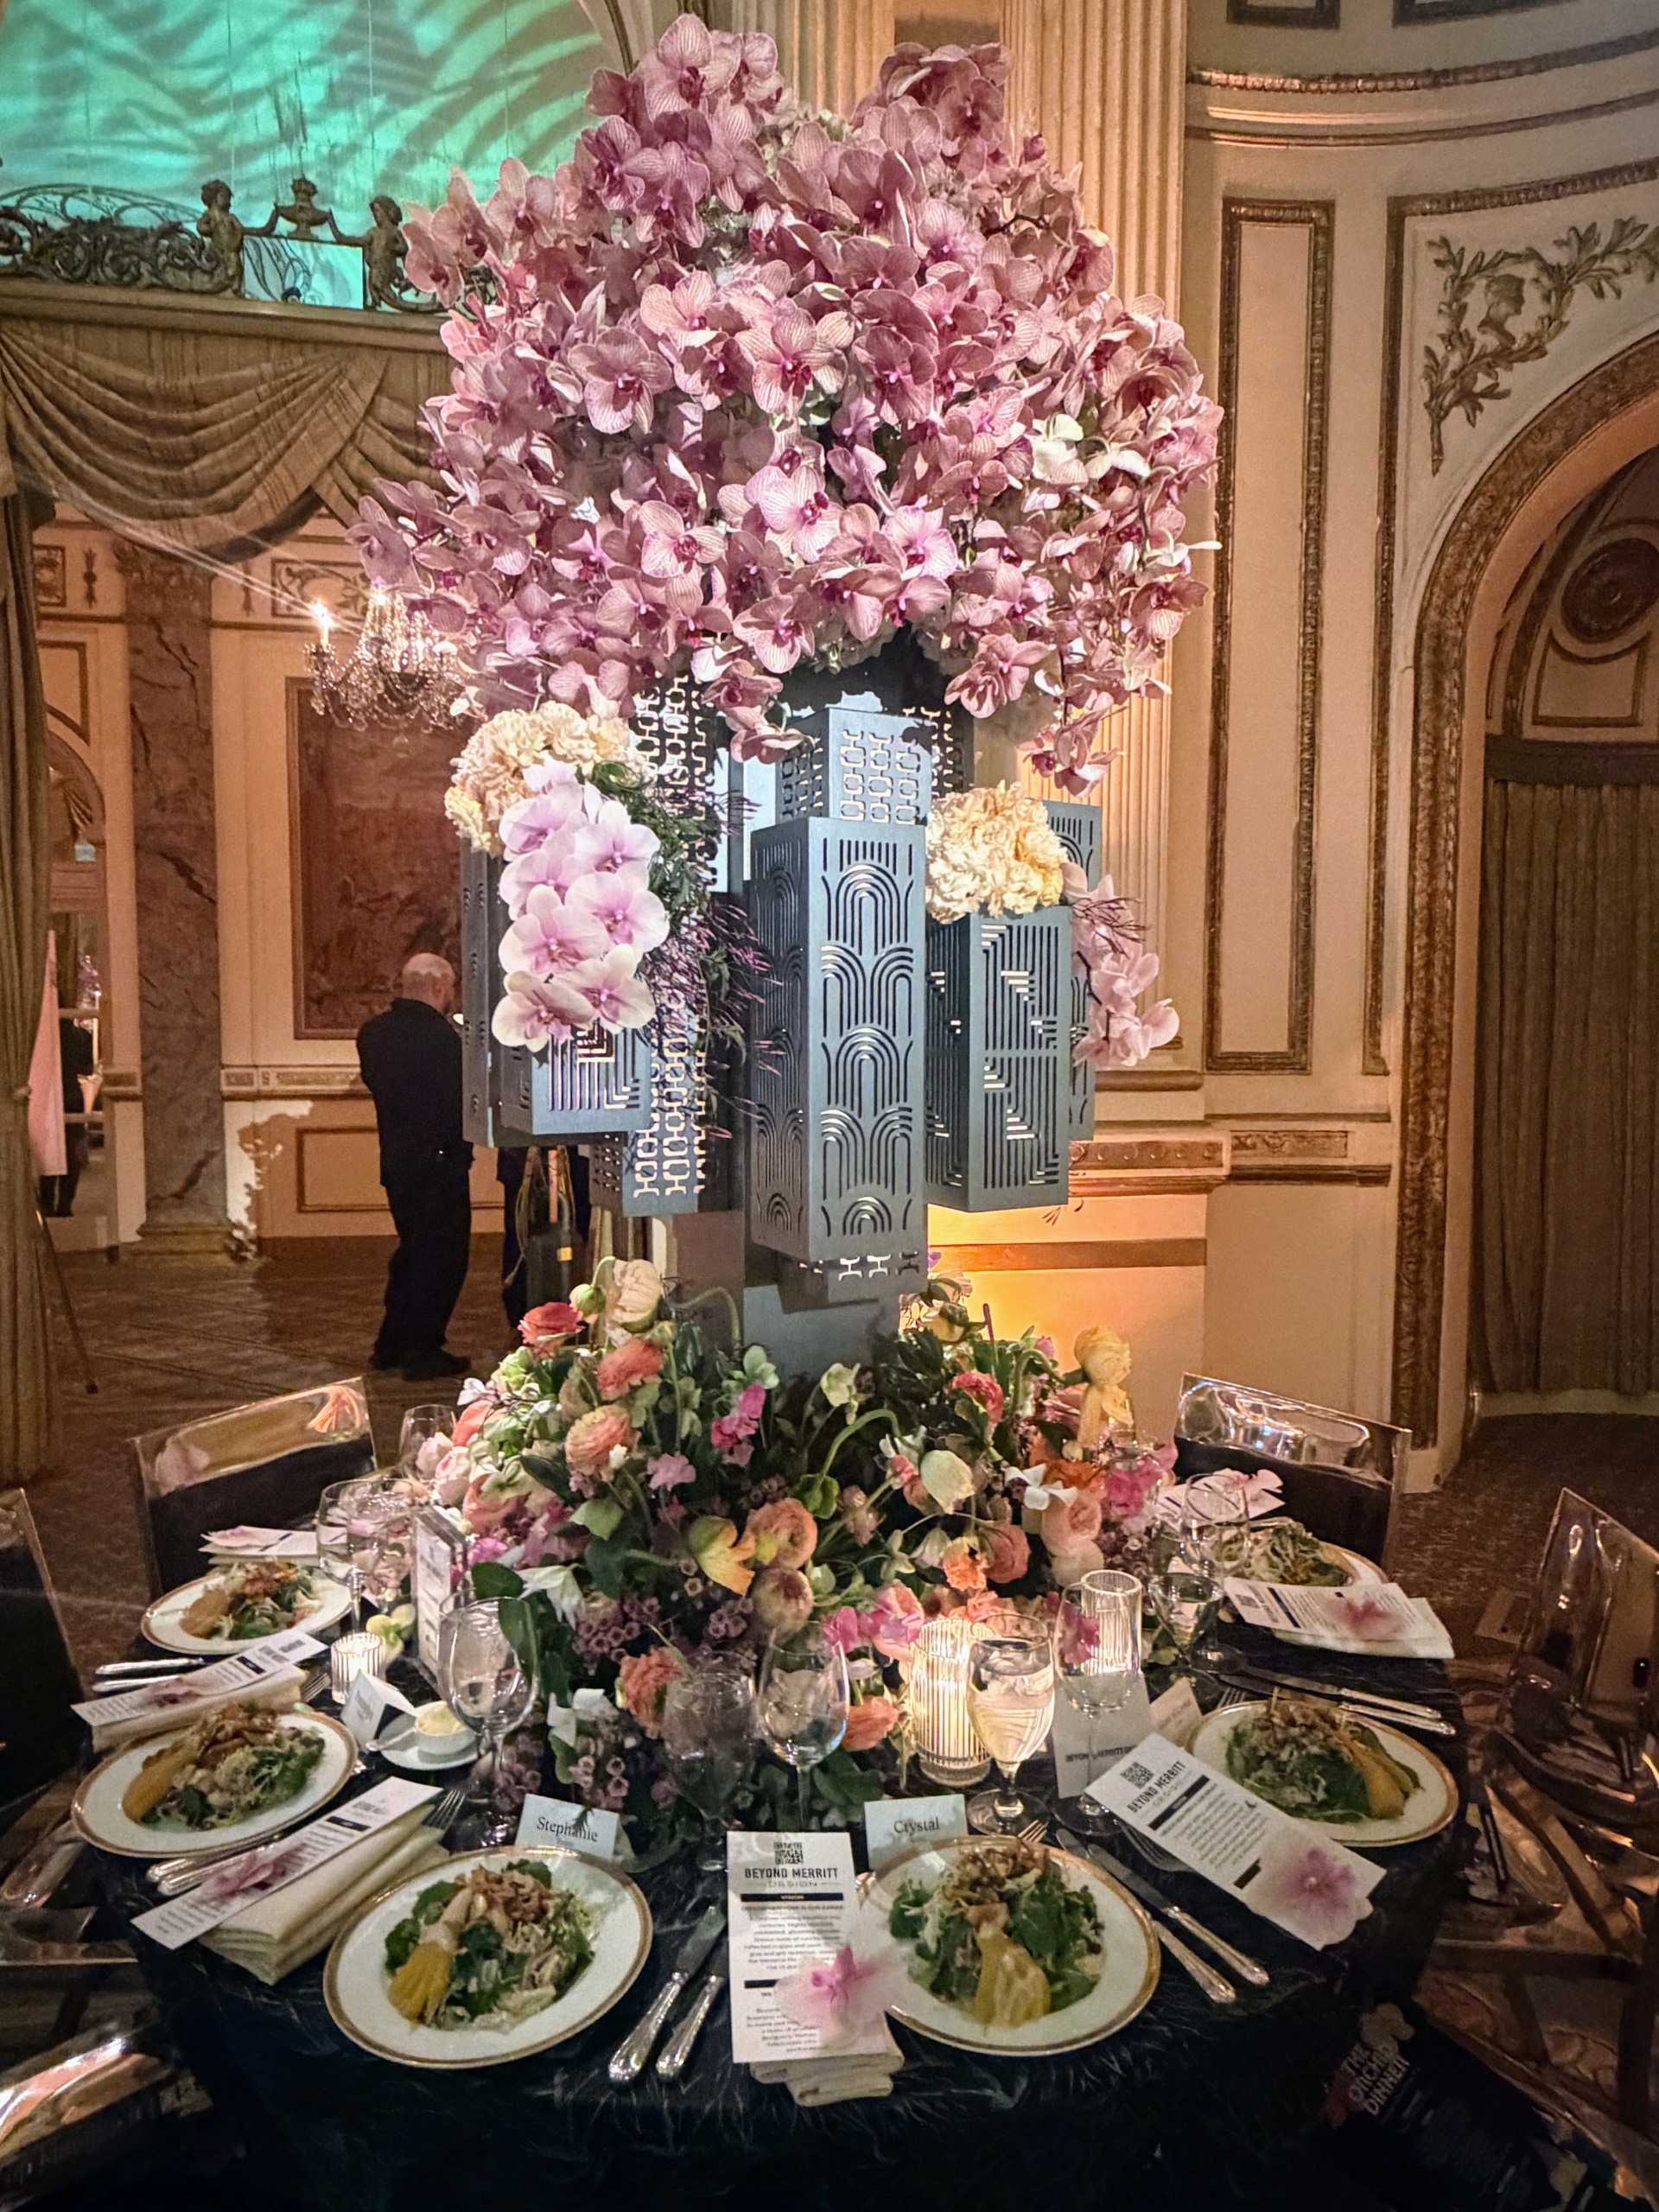
And this one was created by Beyond Merritt Design based in New York.
Hanging orchids are used for this presentation by Shannon Toal Designs.
And extra tall taper candles are used for this arrangement by Justin Reis, Justin Reis Designs.
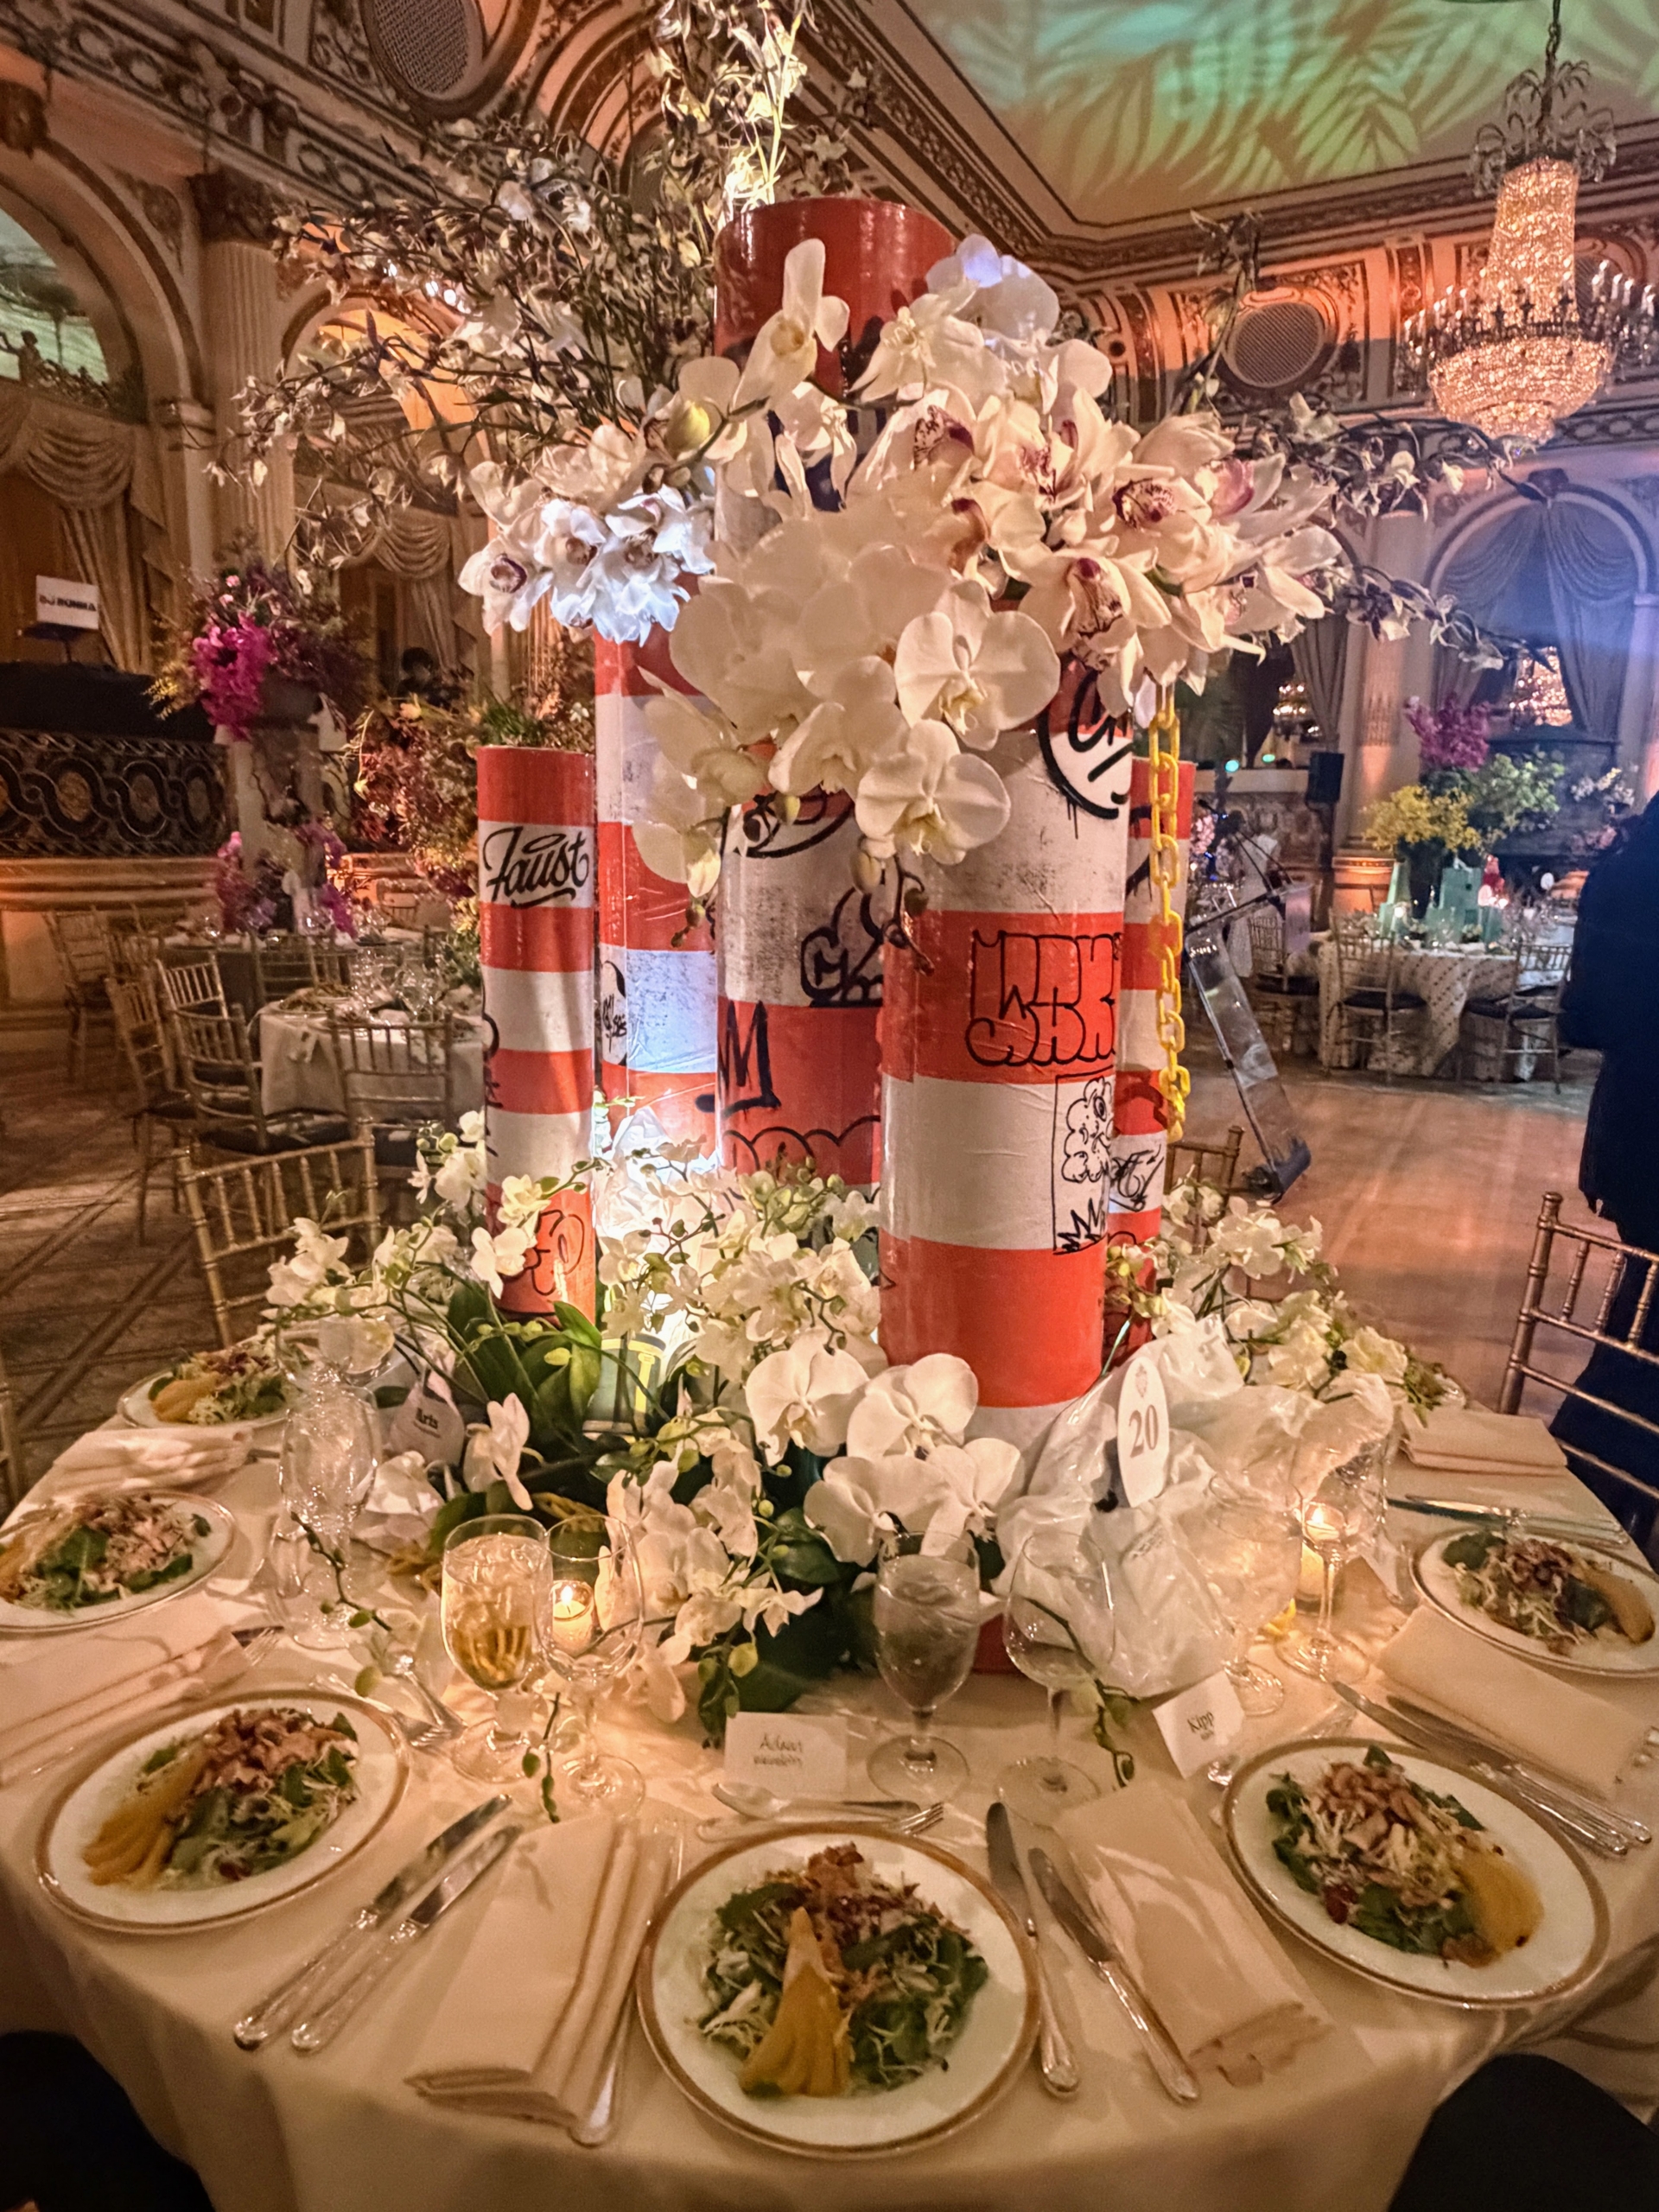
And Carlos Muiña, Petal Productions uses graffiti, or street art, on his New York City inspired centerpiece.
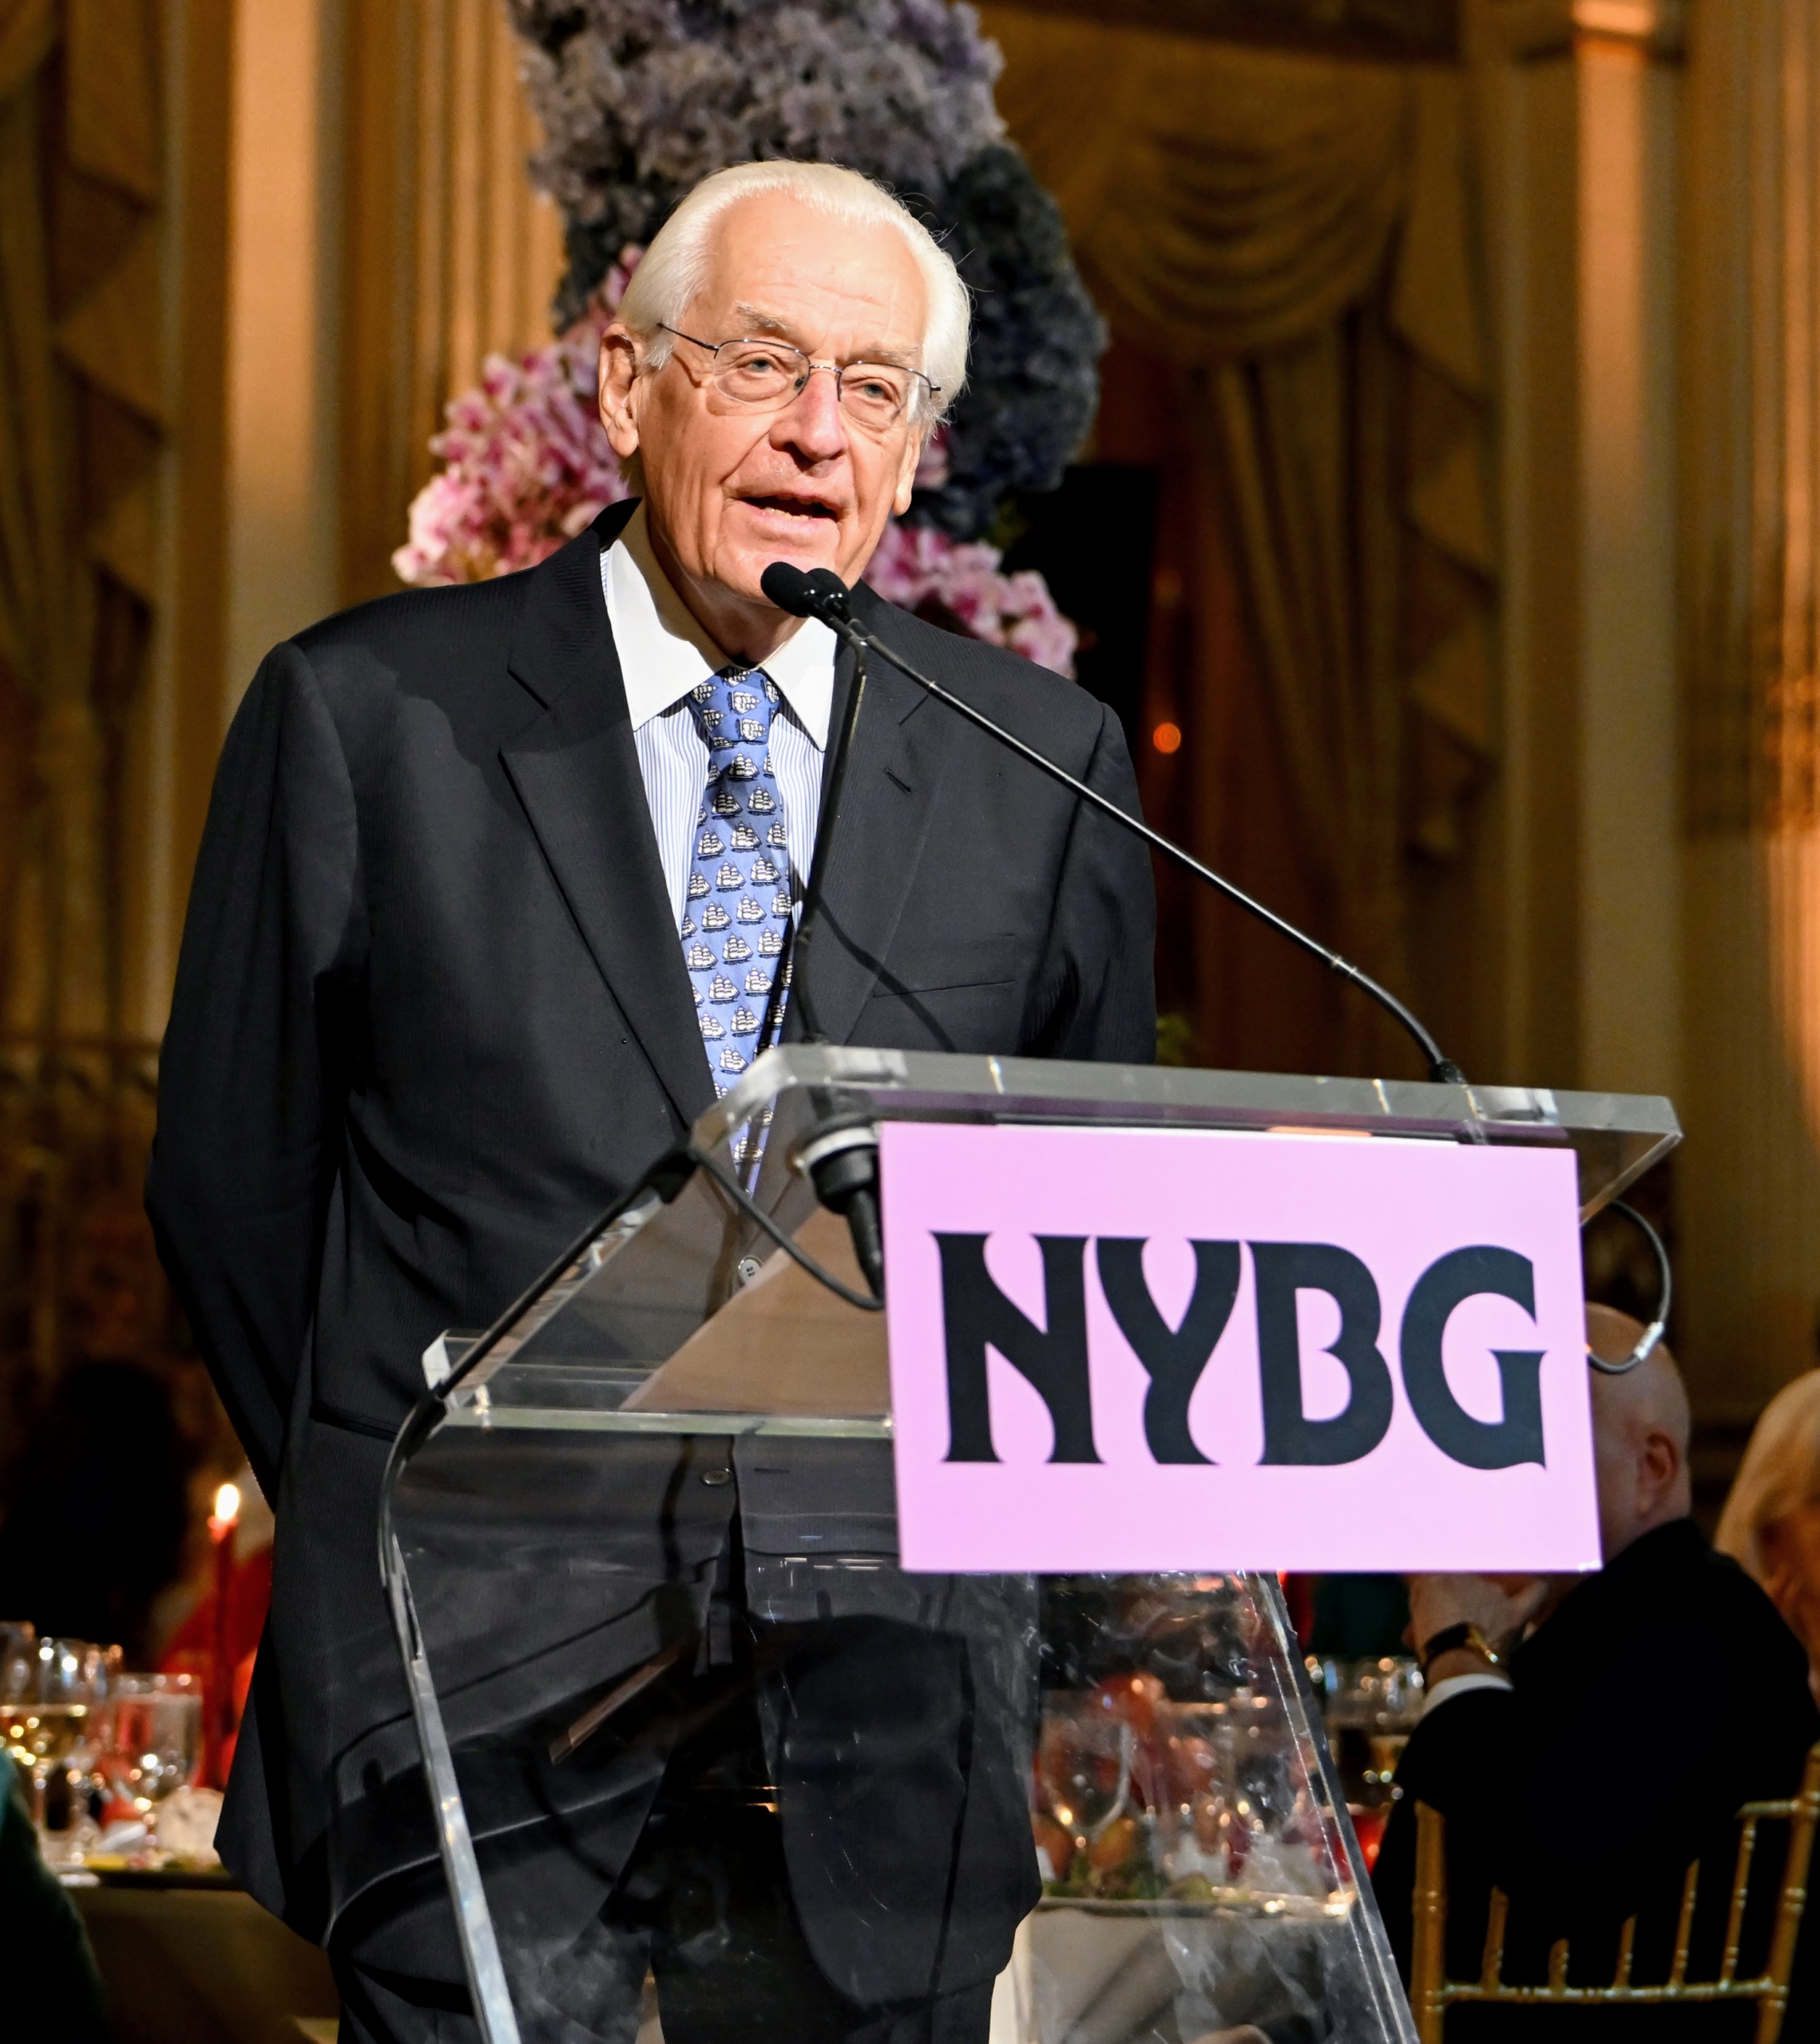
Here is NYBG Chairman of the Board, J. Barclay Collins II addressing the guests during dinner. (Photo by Bryan Bedder/Getty Images for The NYBG)
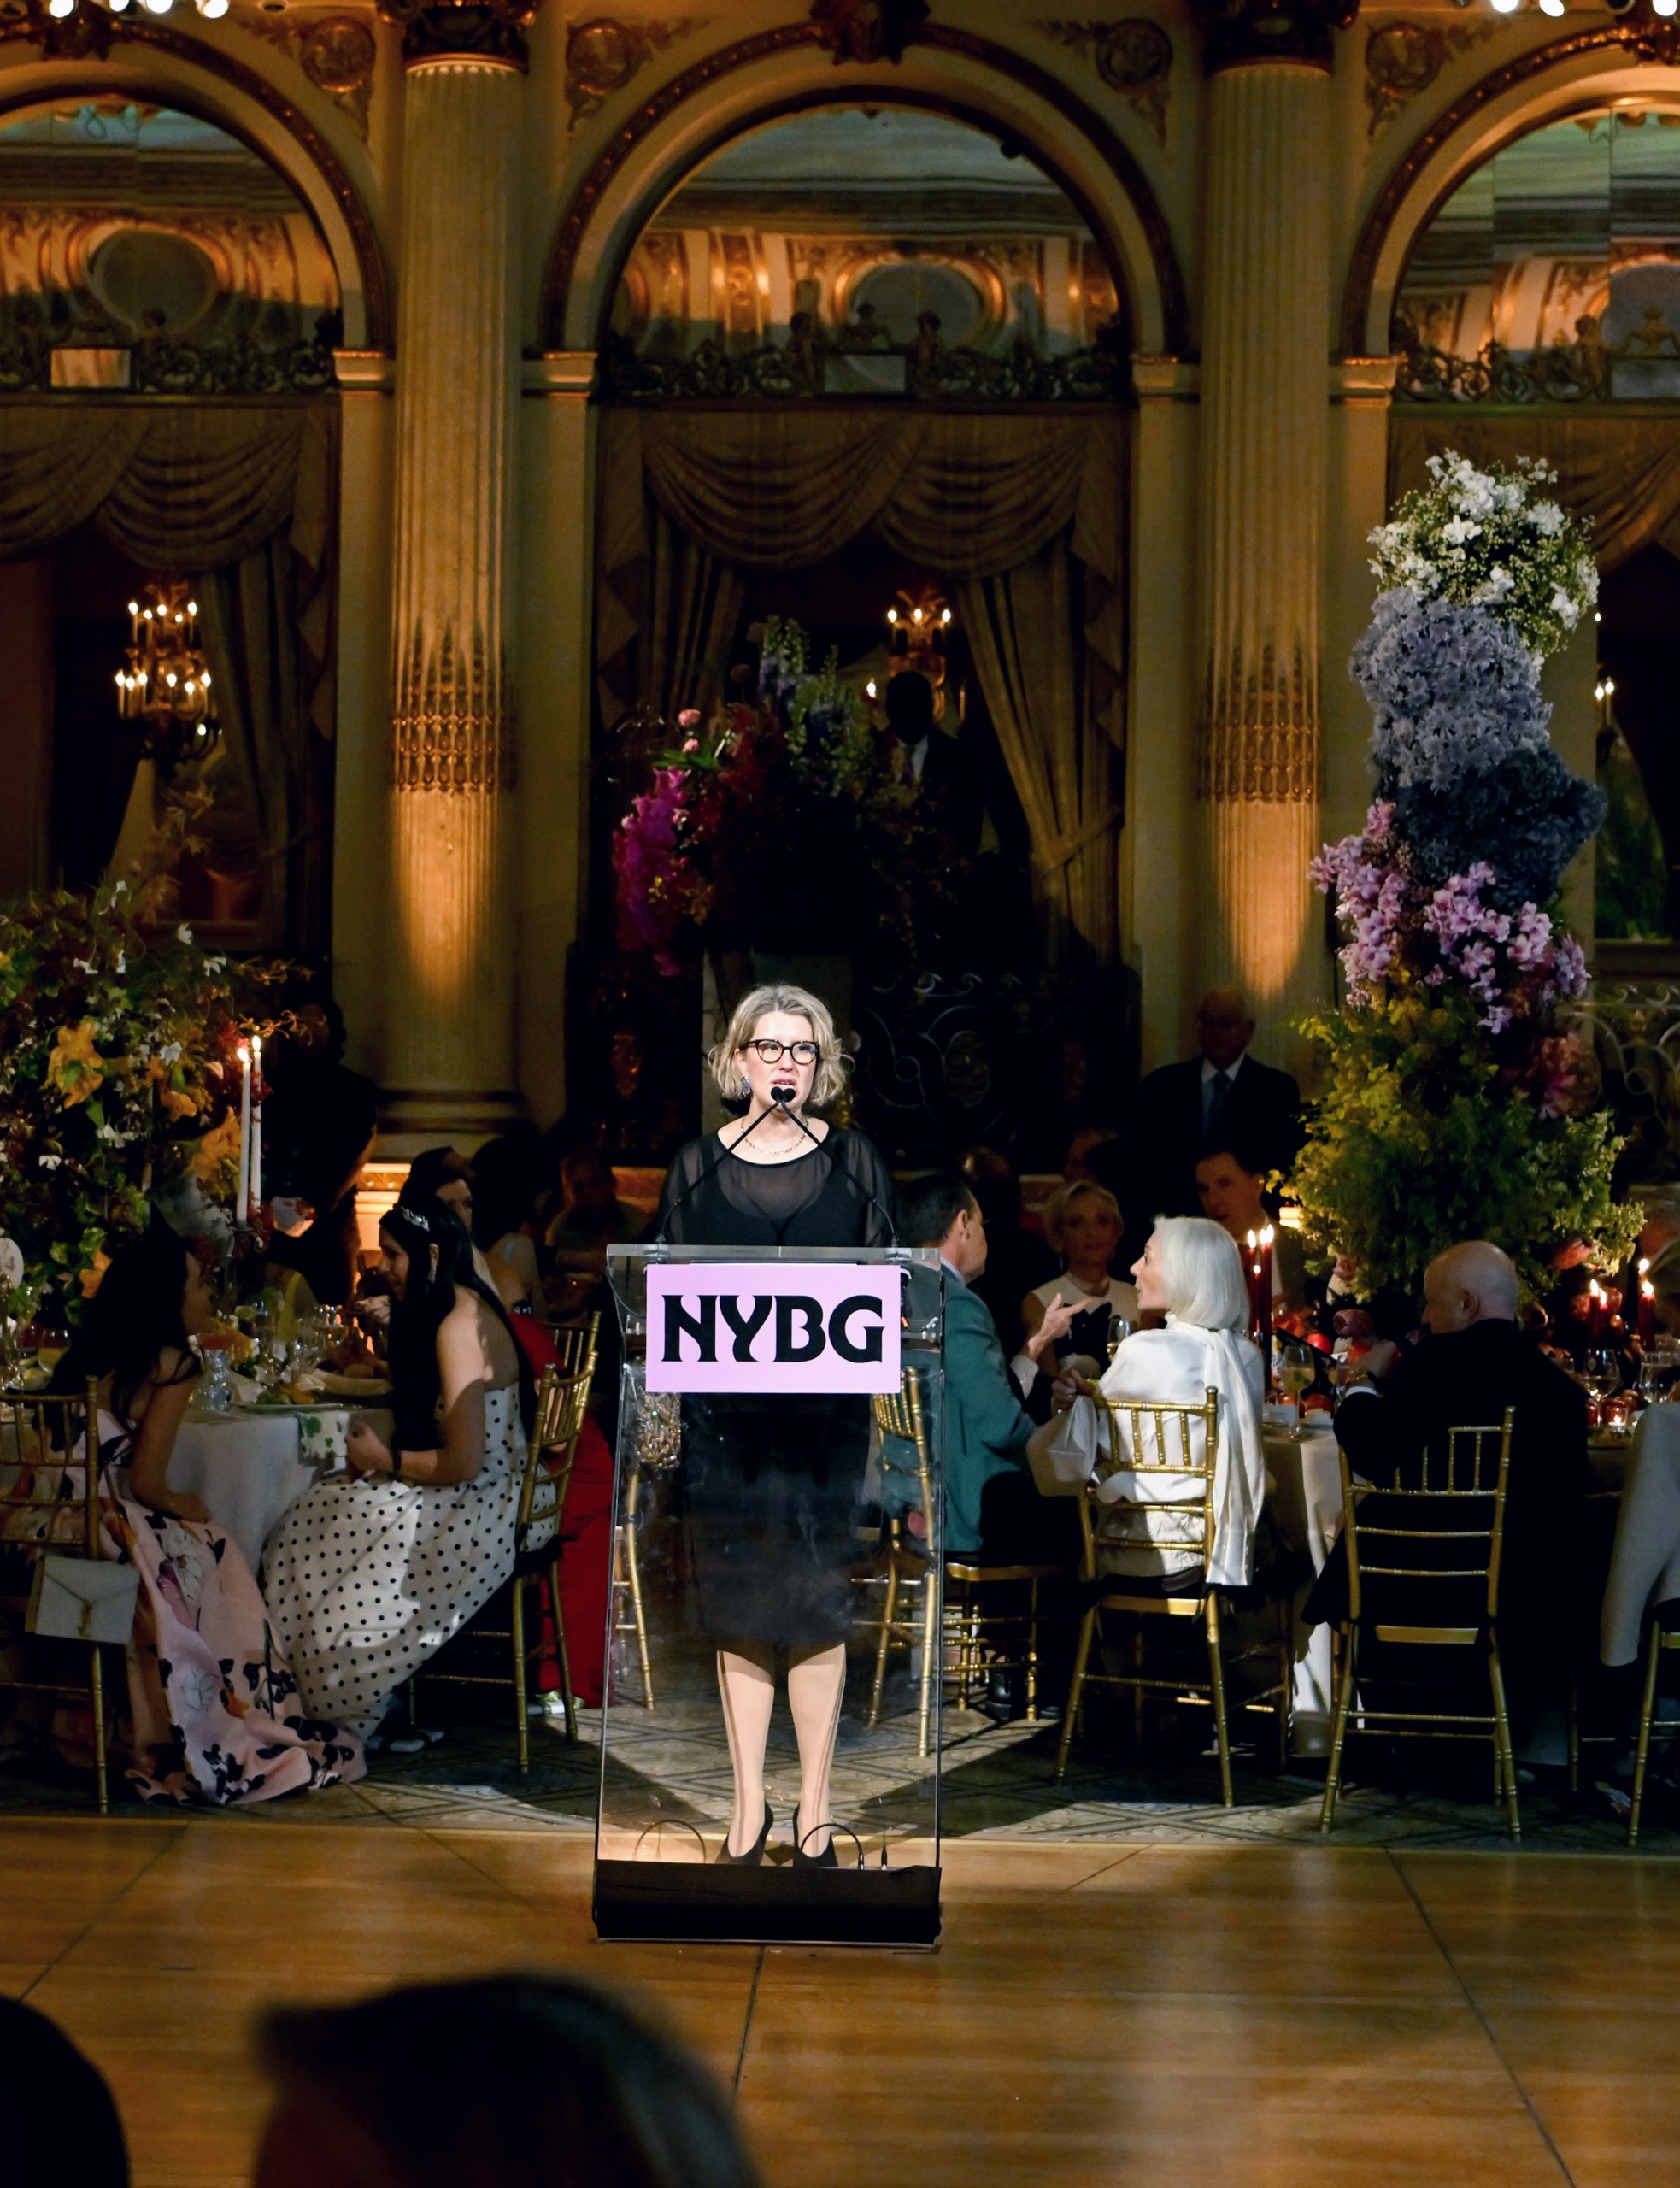
Jennifer Bernstein is the Chief Executive Officer and The William C. Steere Sr. President of The New York Botanical Garden. She also stepped up to the podium to greet guests. (Photo by Bryan Bedder/Getty Images for The NYBG)
The event was well attended with proceeds going to NYBG’s longtime educational and research missions. The NYBG Orchid Show runs through April 26th – go if you can. (Photo by Dimitrios Kambouris/Getty Images for The NYBG)