I love this time of year when everyone gathers together to celebrate the holidays.
Yesterday, I hosted a very special gathering for the entire staff at my farm. All my employees work so hard during the year - caring for the property and my many pets and gardens, and helping me prepare for all the meetings, shoots, parties, and other events that are scheduled through the year. I prepared a festive holiday buffet in my Winter House kitchen with help from Chef Molly Wenk. It included delicious shrimp cocktail, pigs in a blanket, Stilton cheese with my brown butter shortbread cookies, caviar and homemade melba toast, potato latkes with sour cream and applesauce, crudités, cider, a salami platter, lots of tasty holiday sweets, toasted homemade marshmallows and chestnuts, and of course, my famous eggnog. It was a busy morning of cooking and preparing, but we had a most enjoyable end of year celebration.
Here are some photos.
To show my appreciation for all of their hard work, I prepare a special holiday luncheon for my Bedford staff every year. My home is all decorated and the holiday lights are turned on for the occasion.
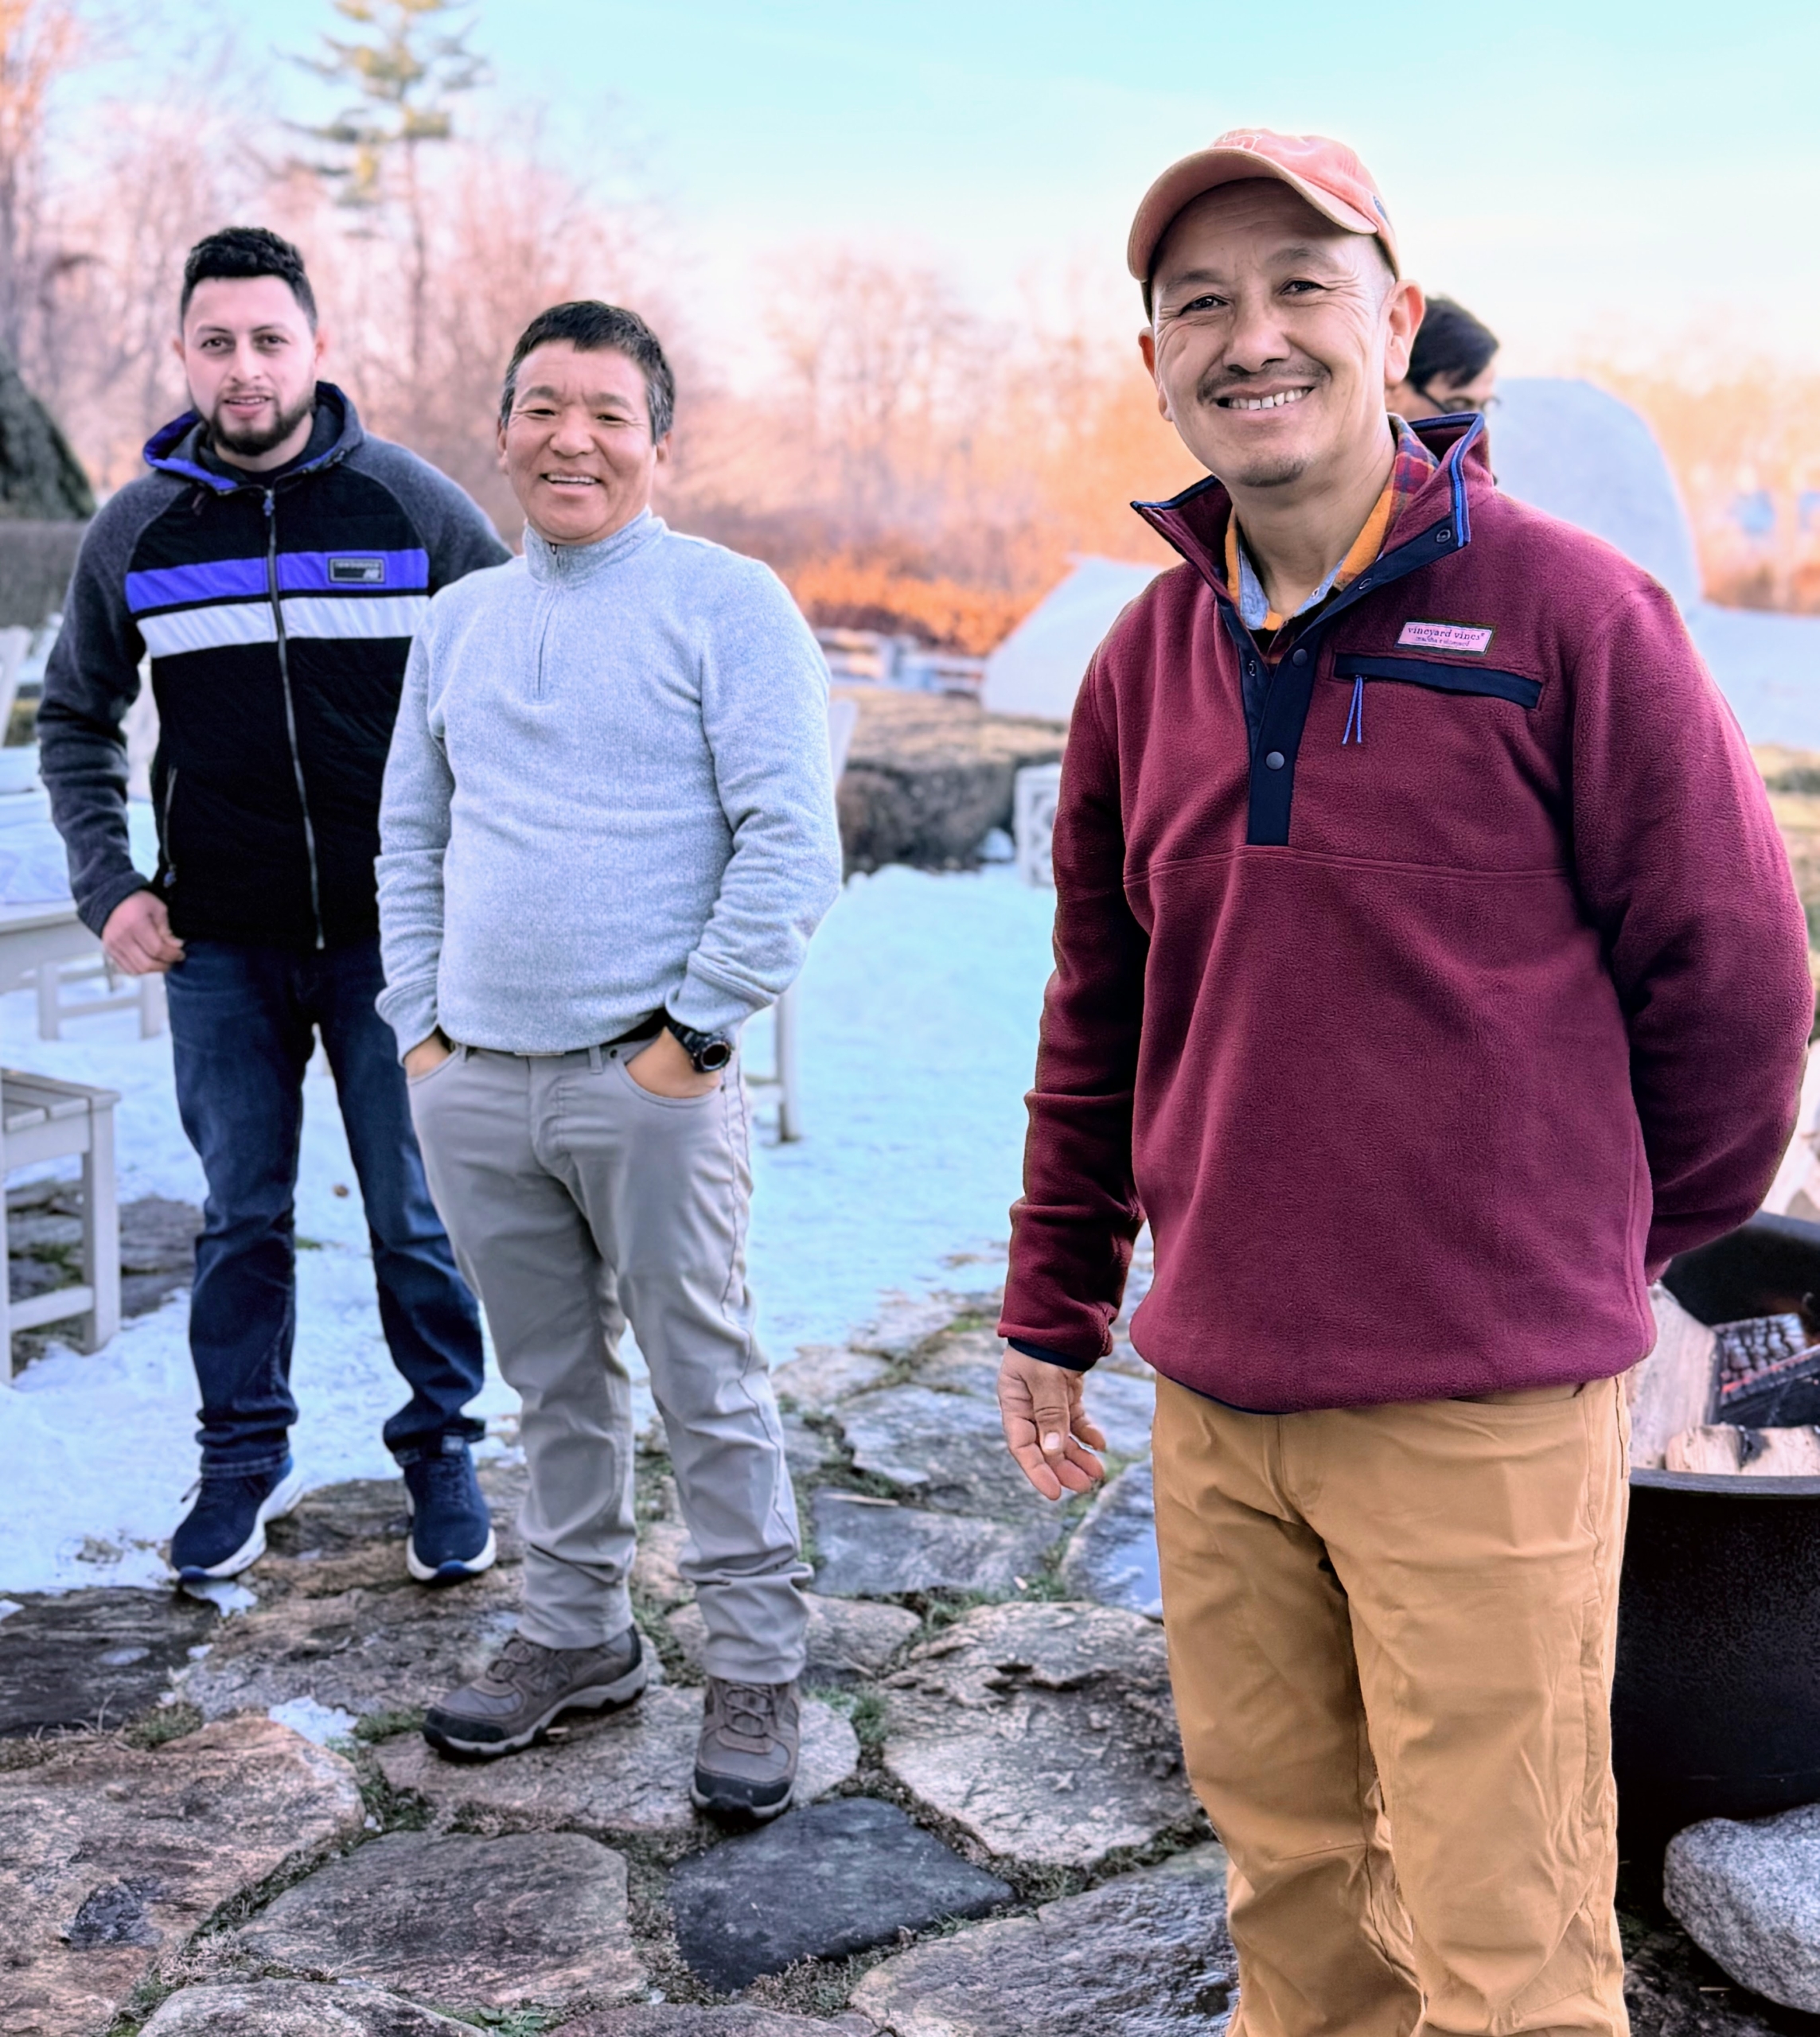
I planned the gathering for 3 o’clock in the afternoon. Everything was ready just in time. Here are Alex, Phurba, and Chhiring waiting on my terrace parterre – hungry and full of holiday cheer.
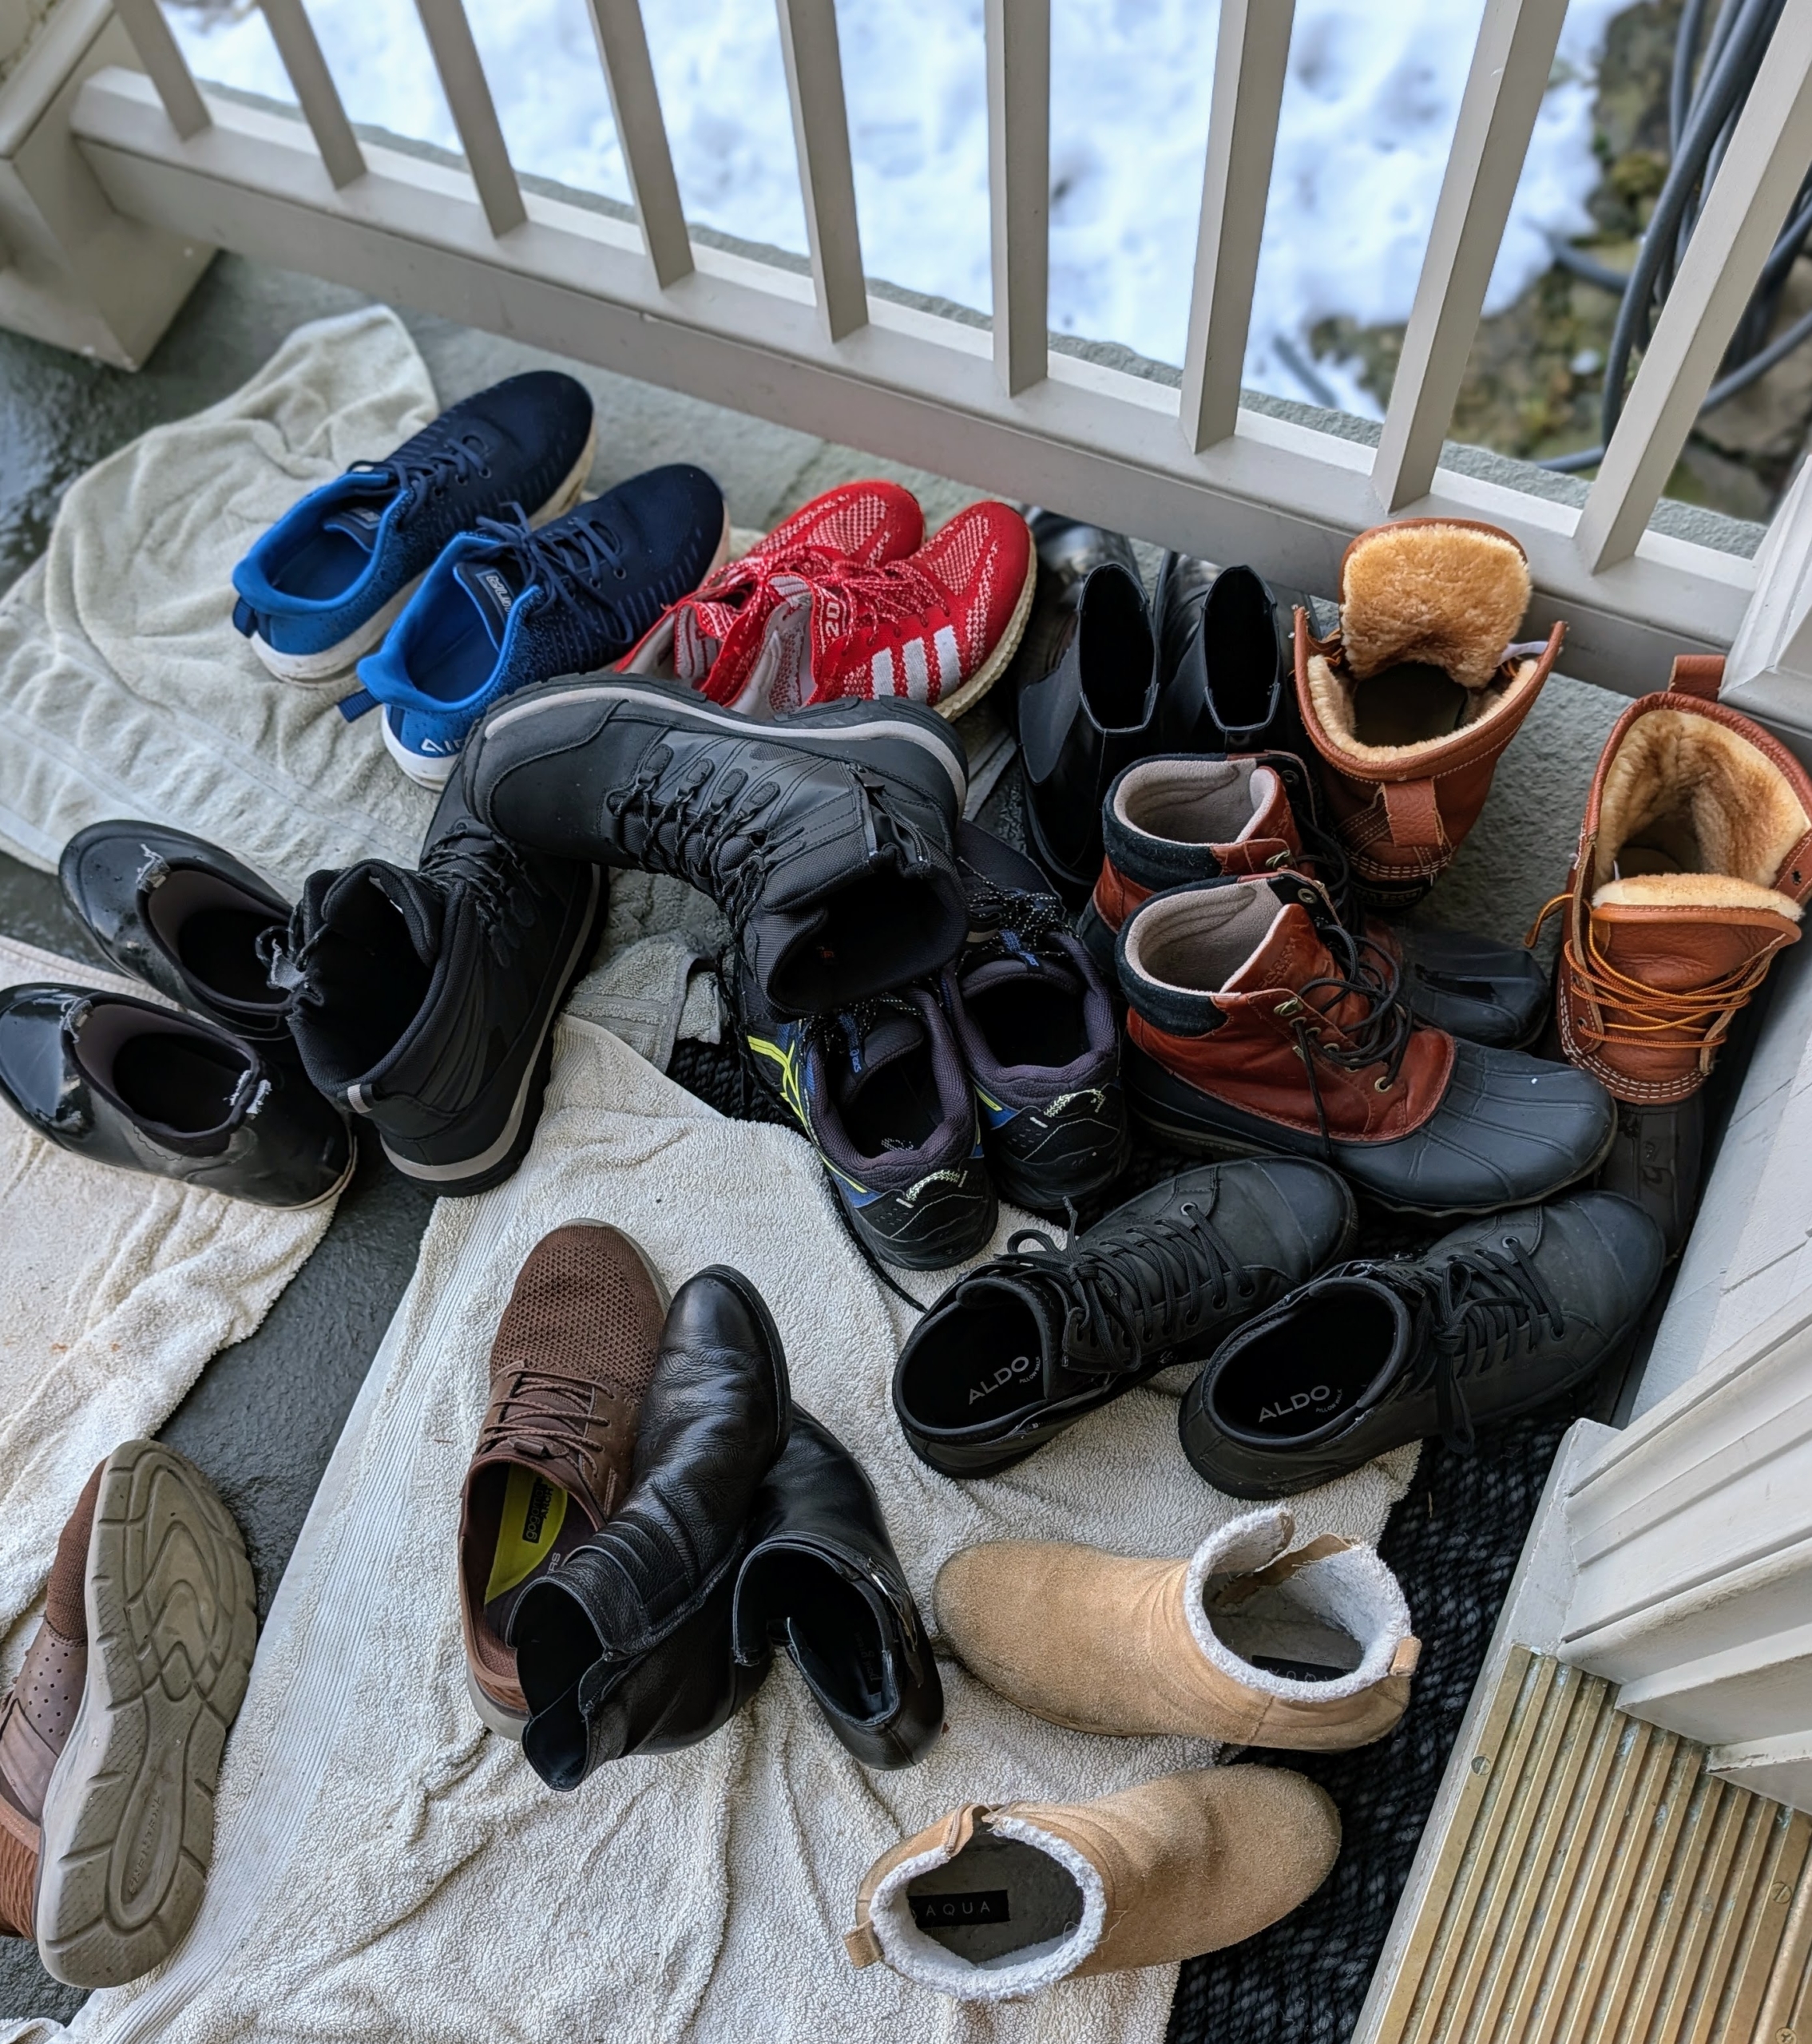
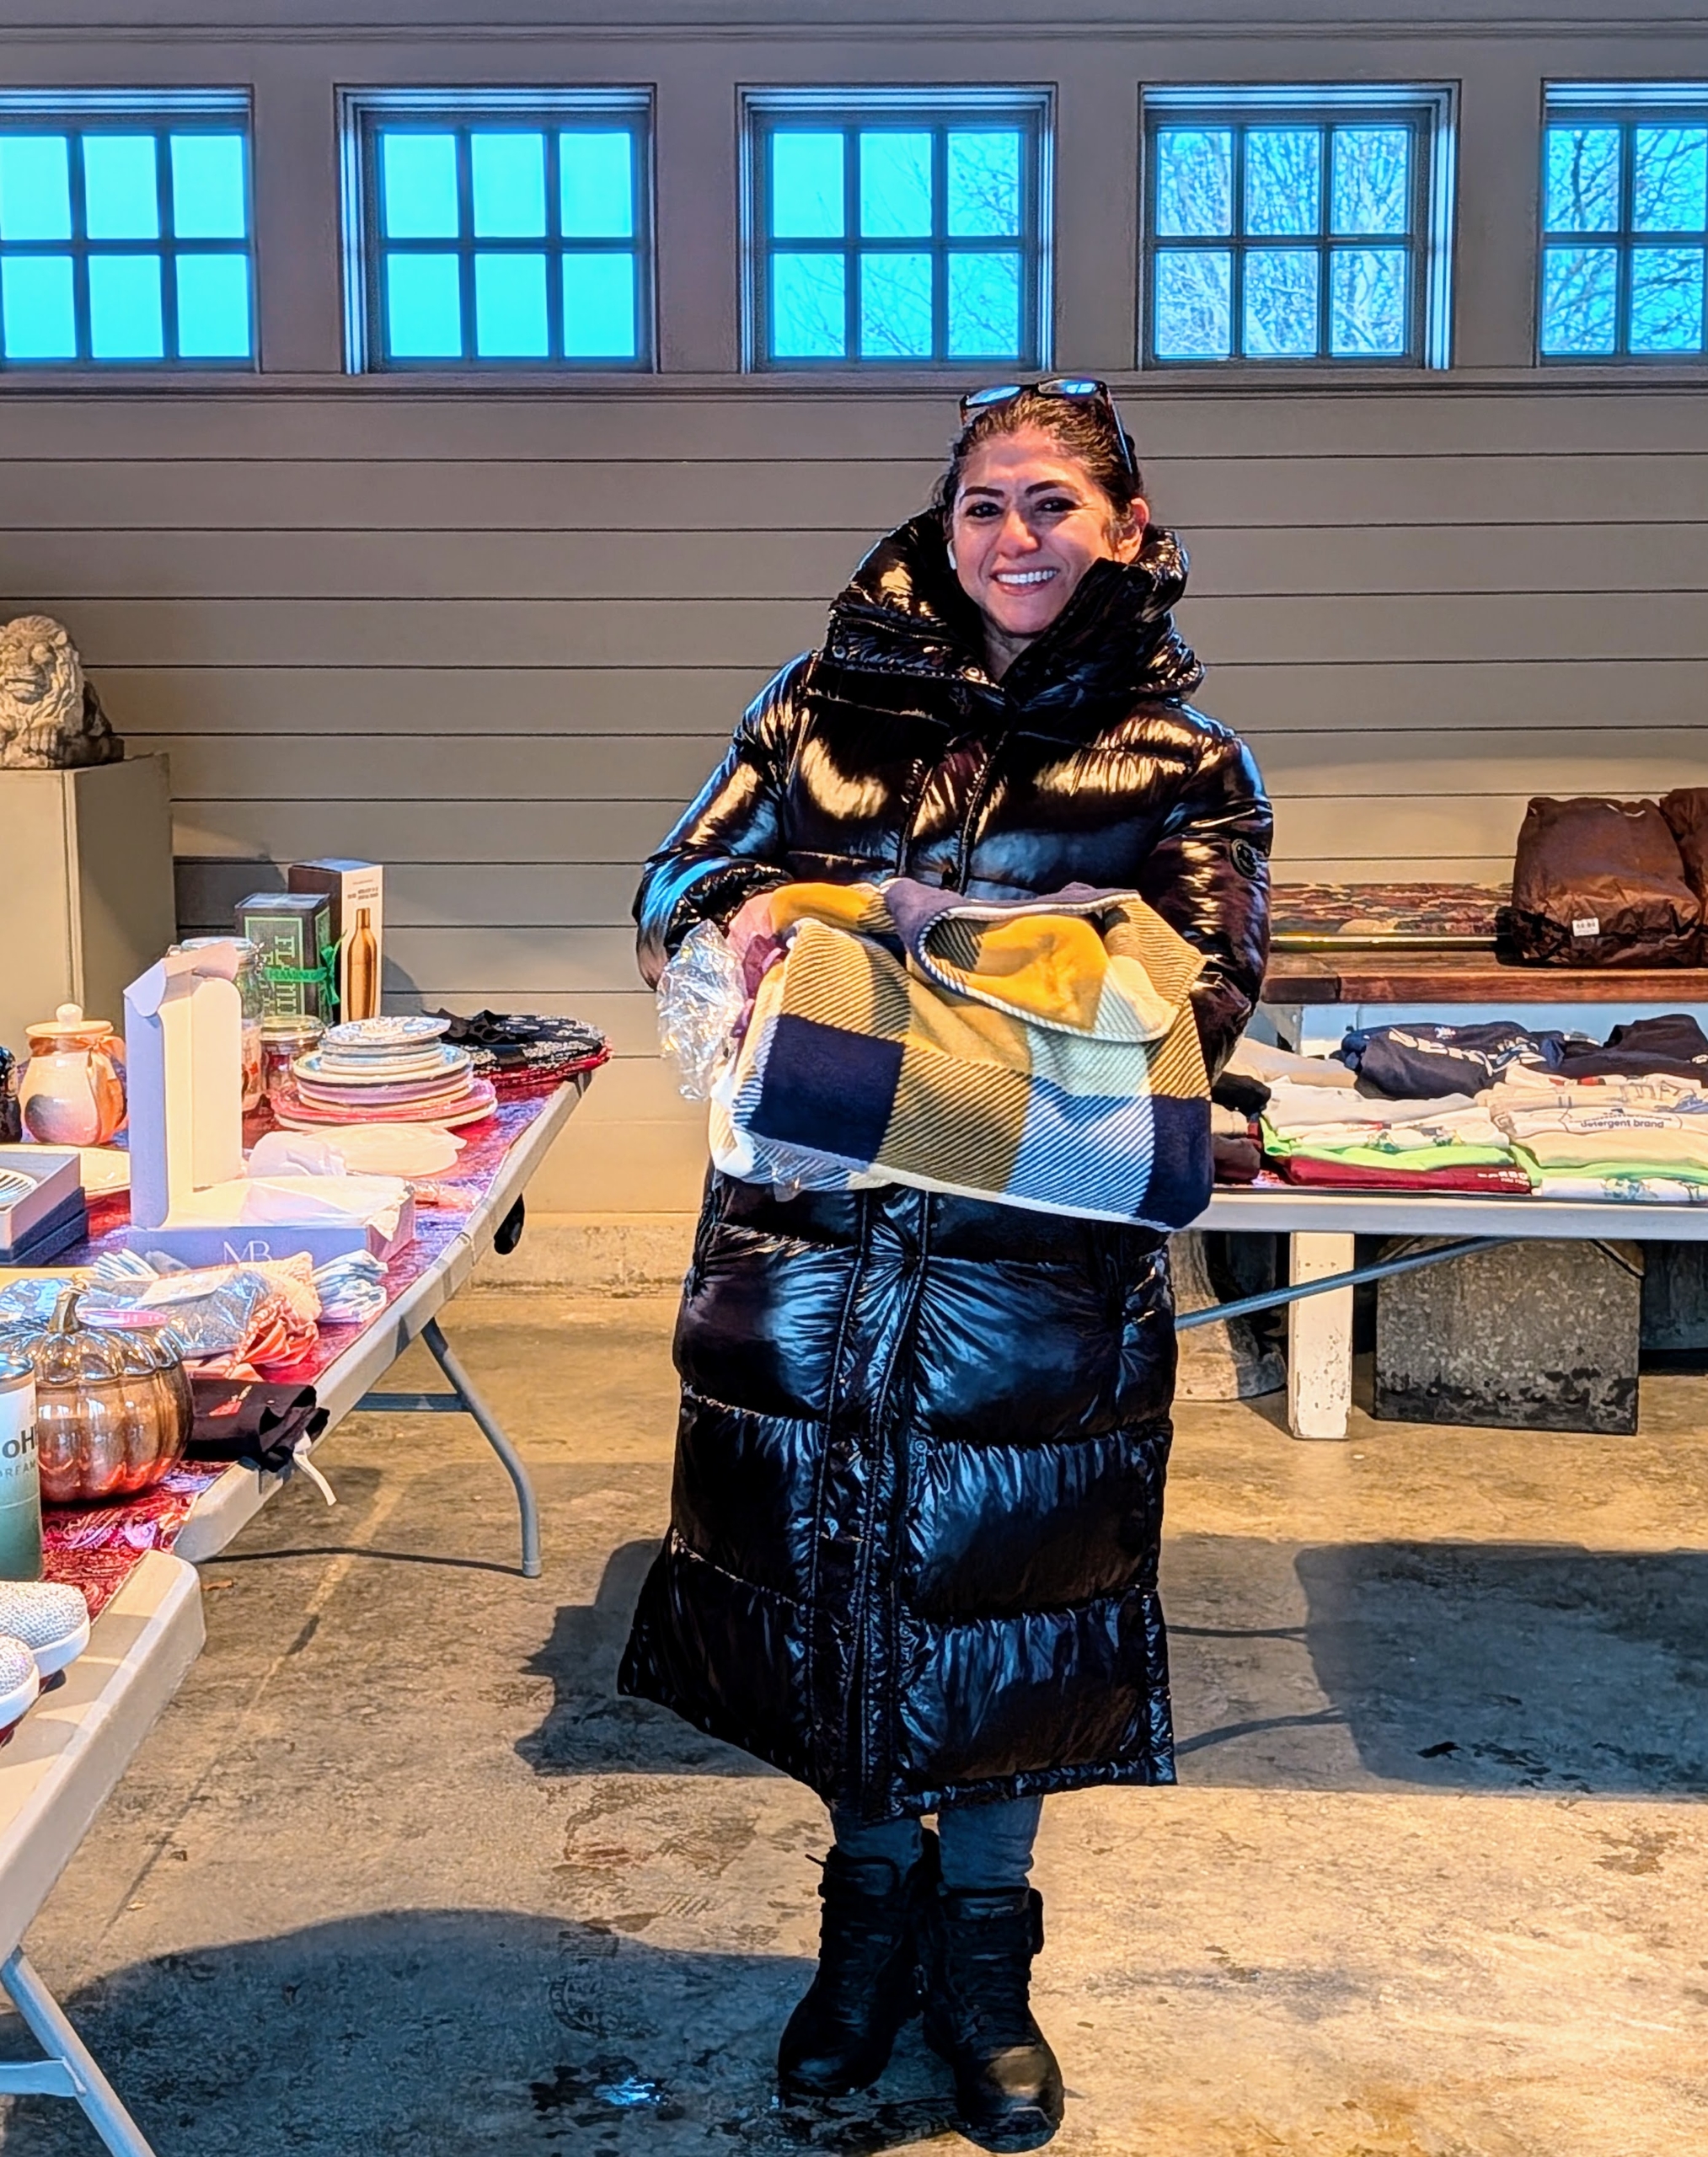
I have a “no shoes” policy in my home, do you?
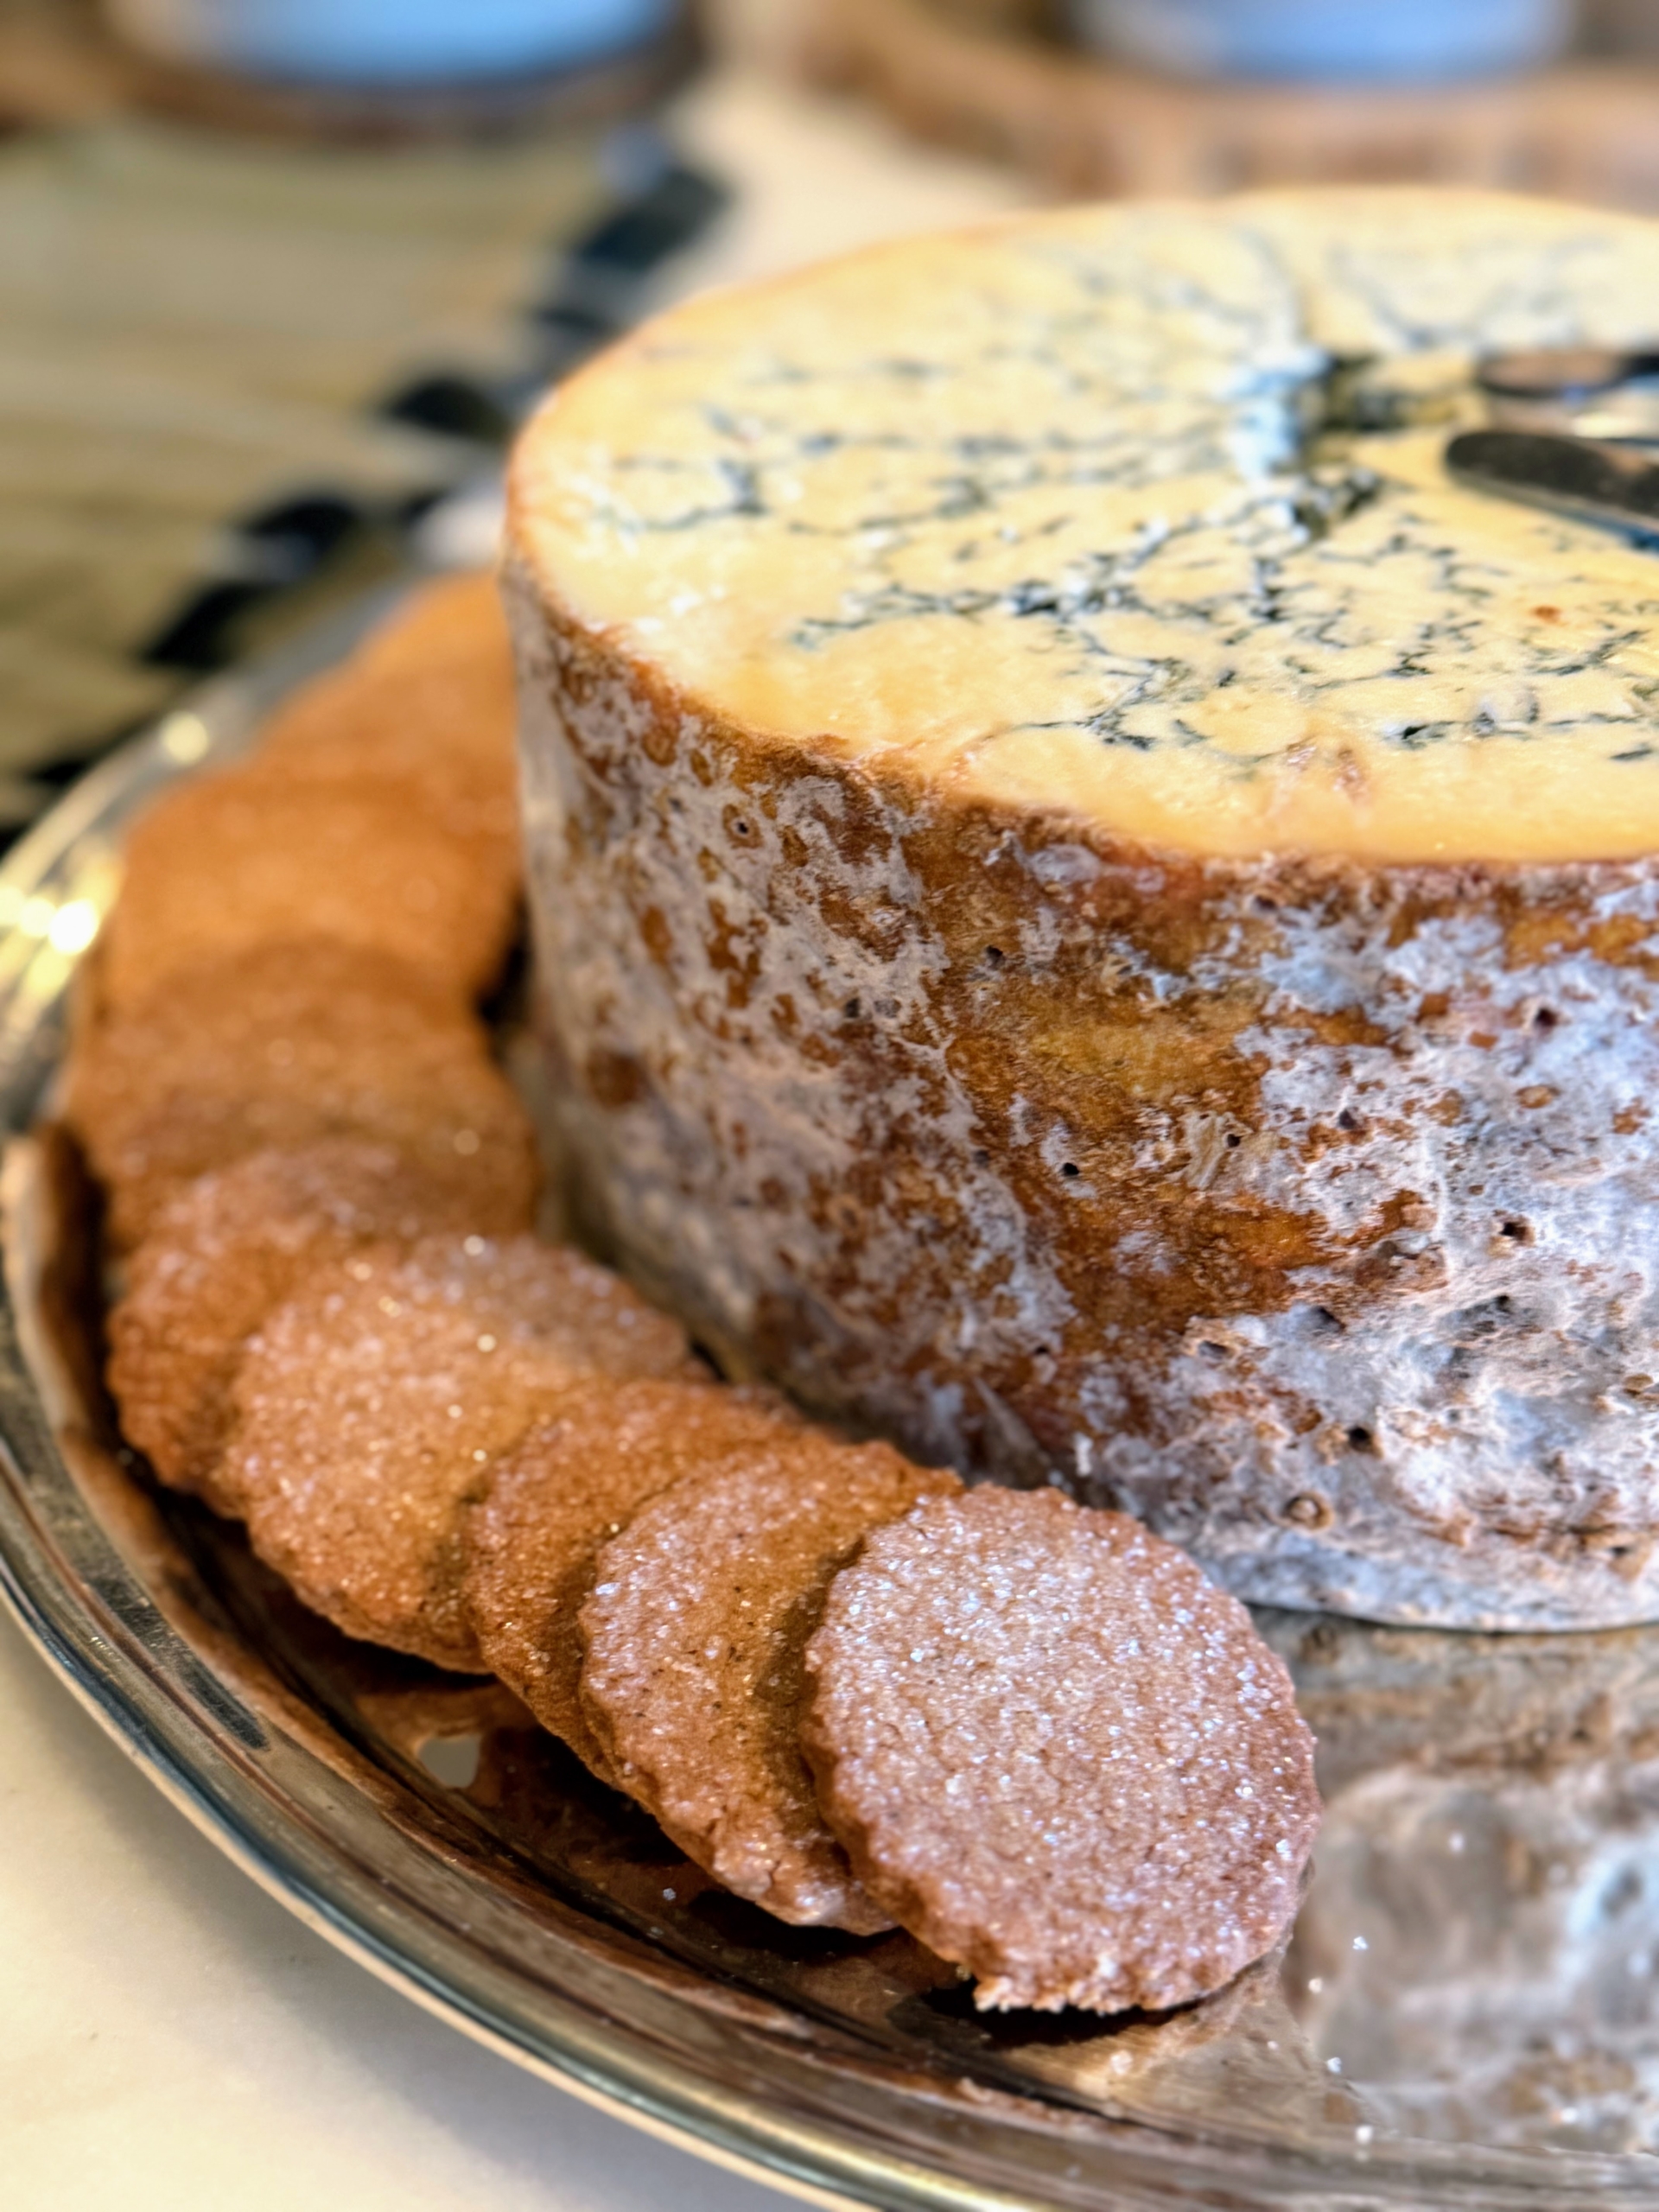
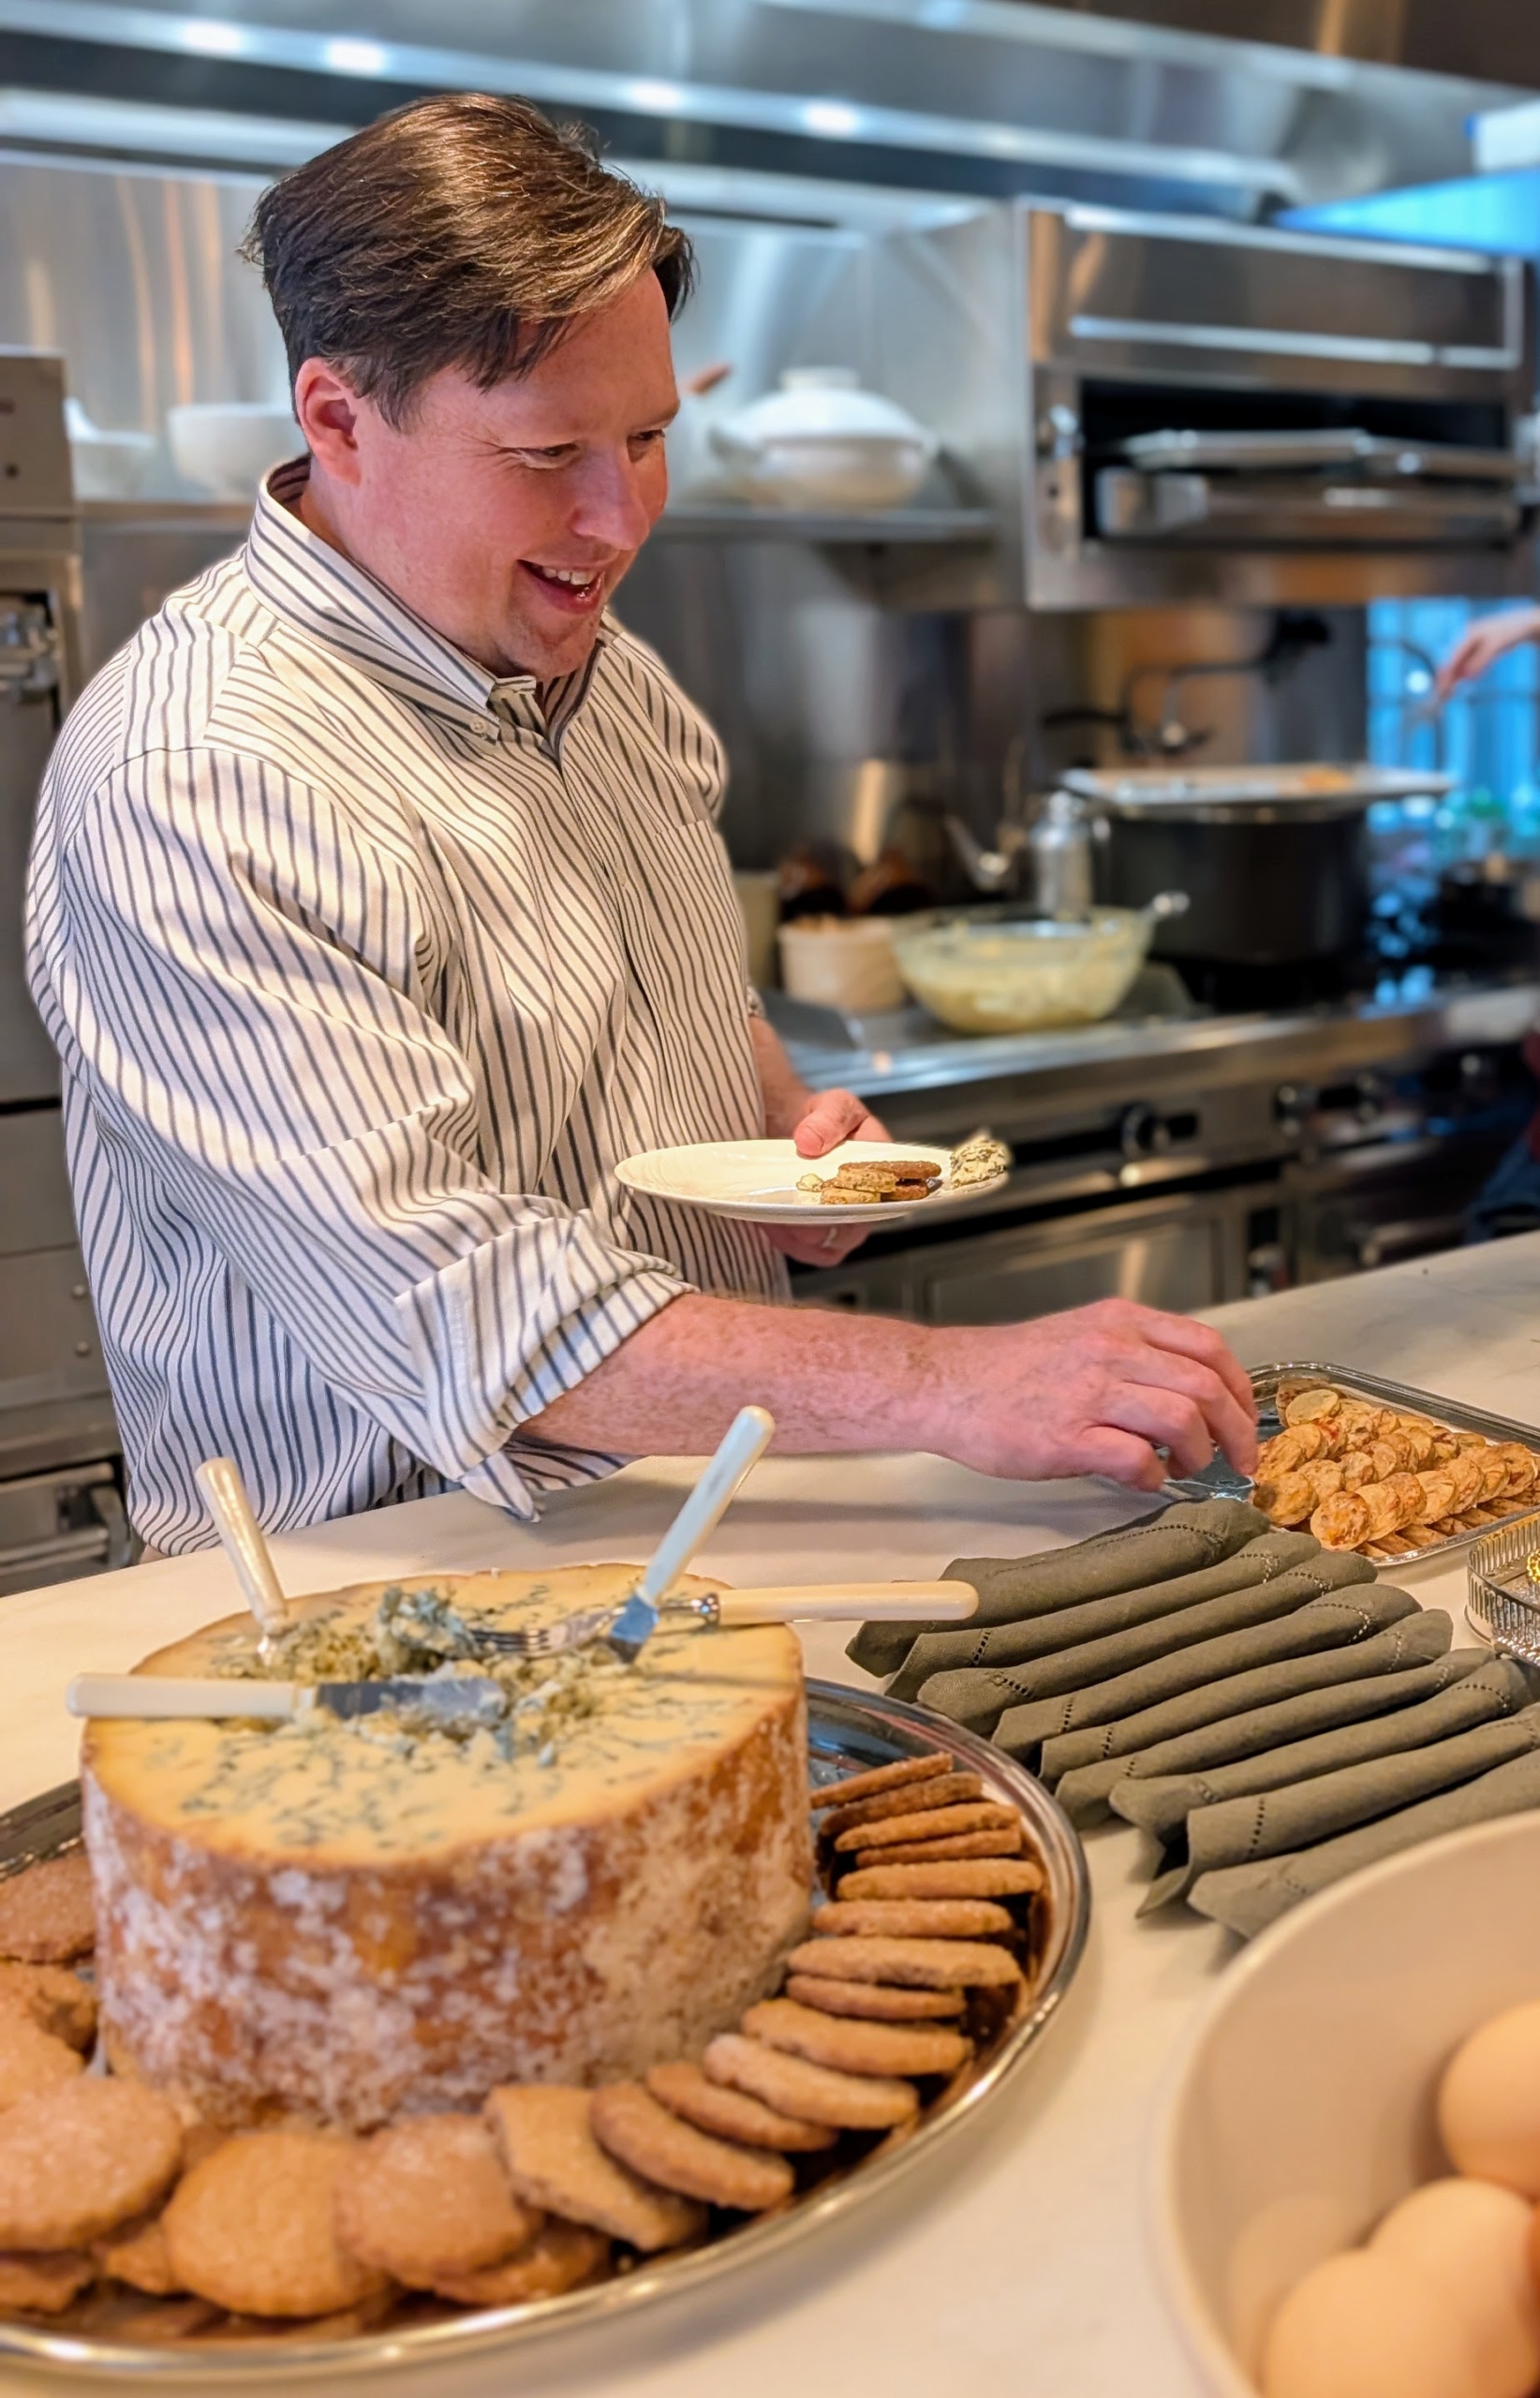
In my Winter House kitchen, I prepared a wonderful spread of food. This is Stilton cheese served with brown butter shortbread cookies – try it, you’ll love the combination, I promise.
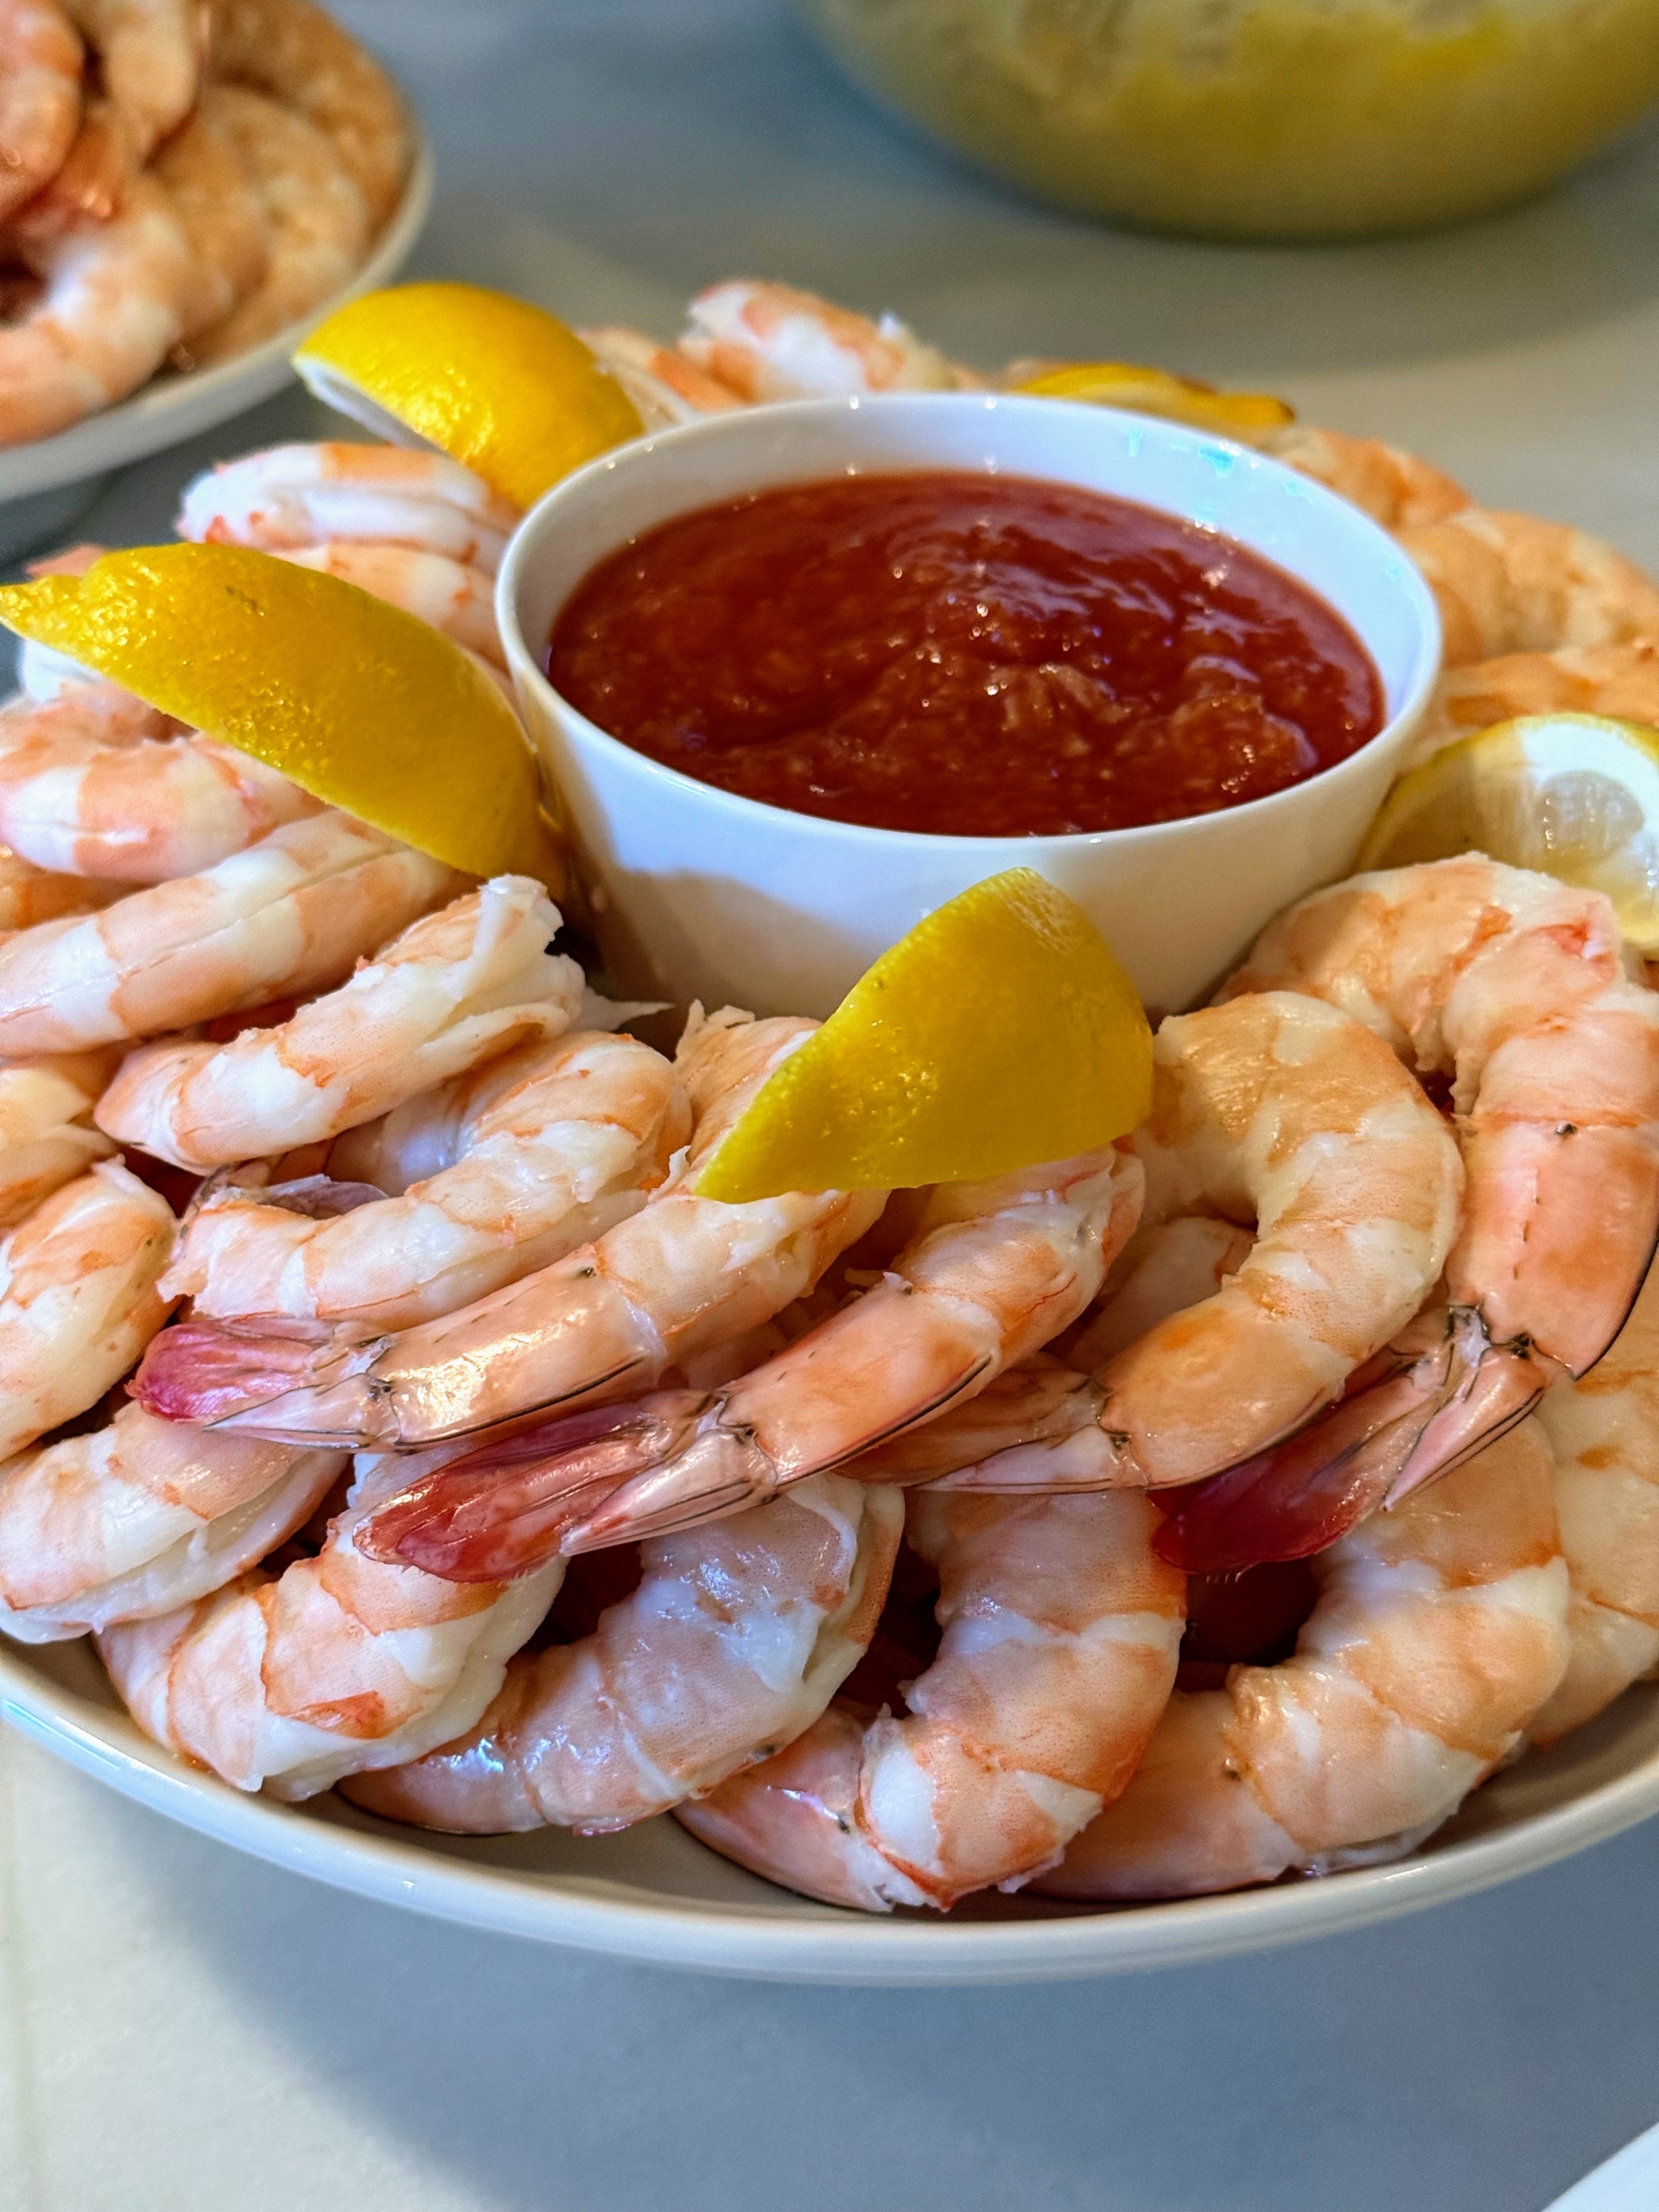
Here’s shrimp cocktail from Mt. Kisco Seafood. It went very quickly.
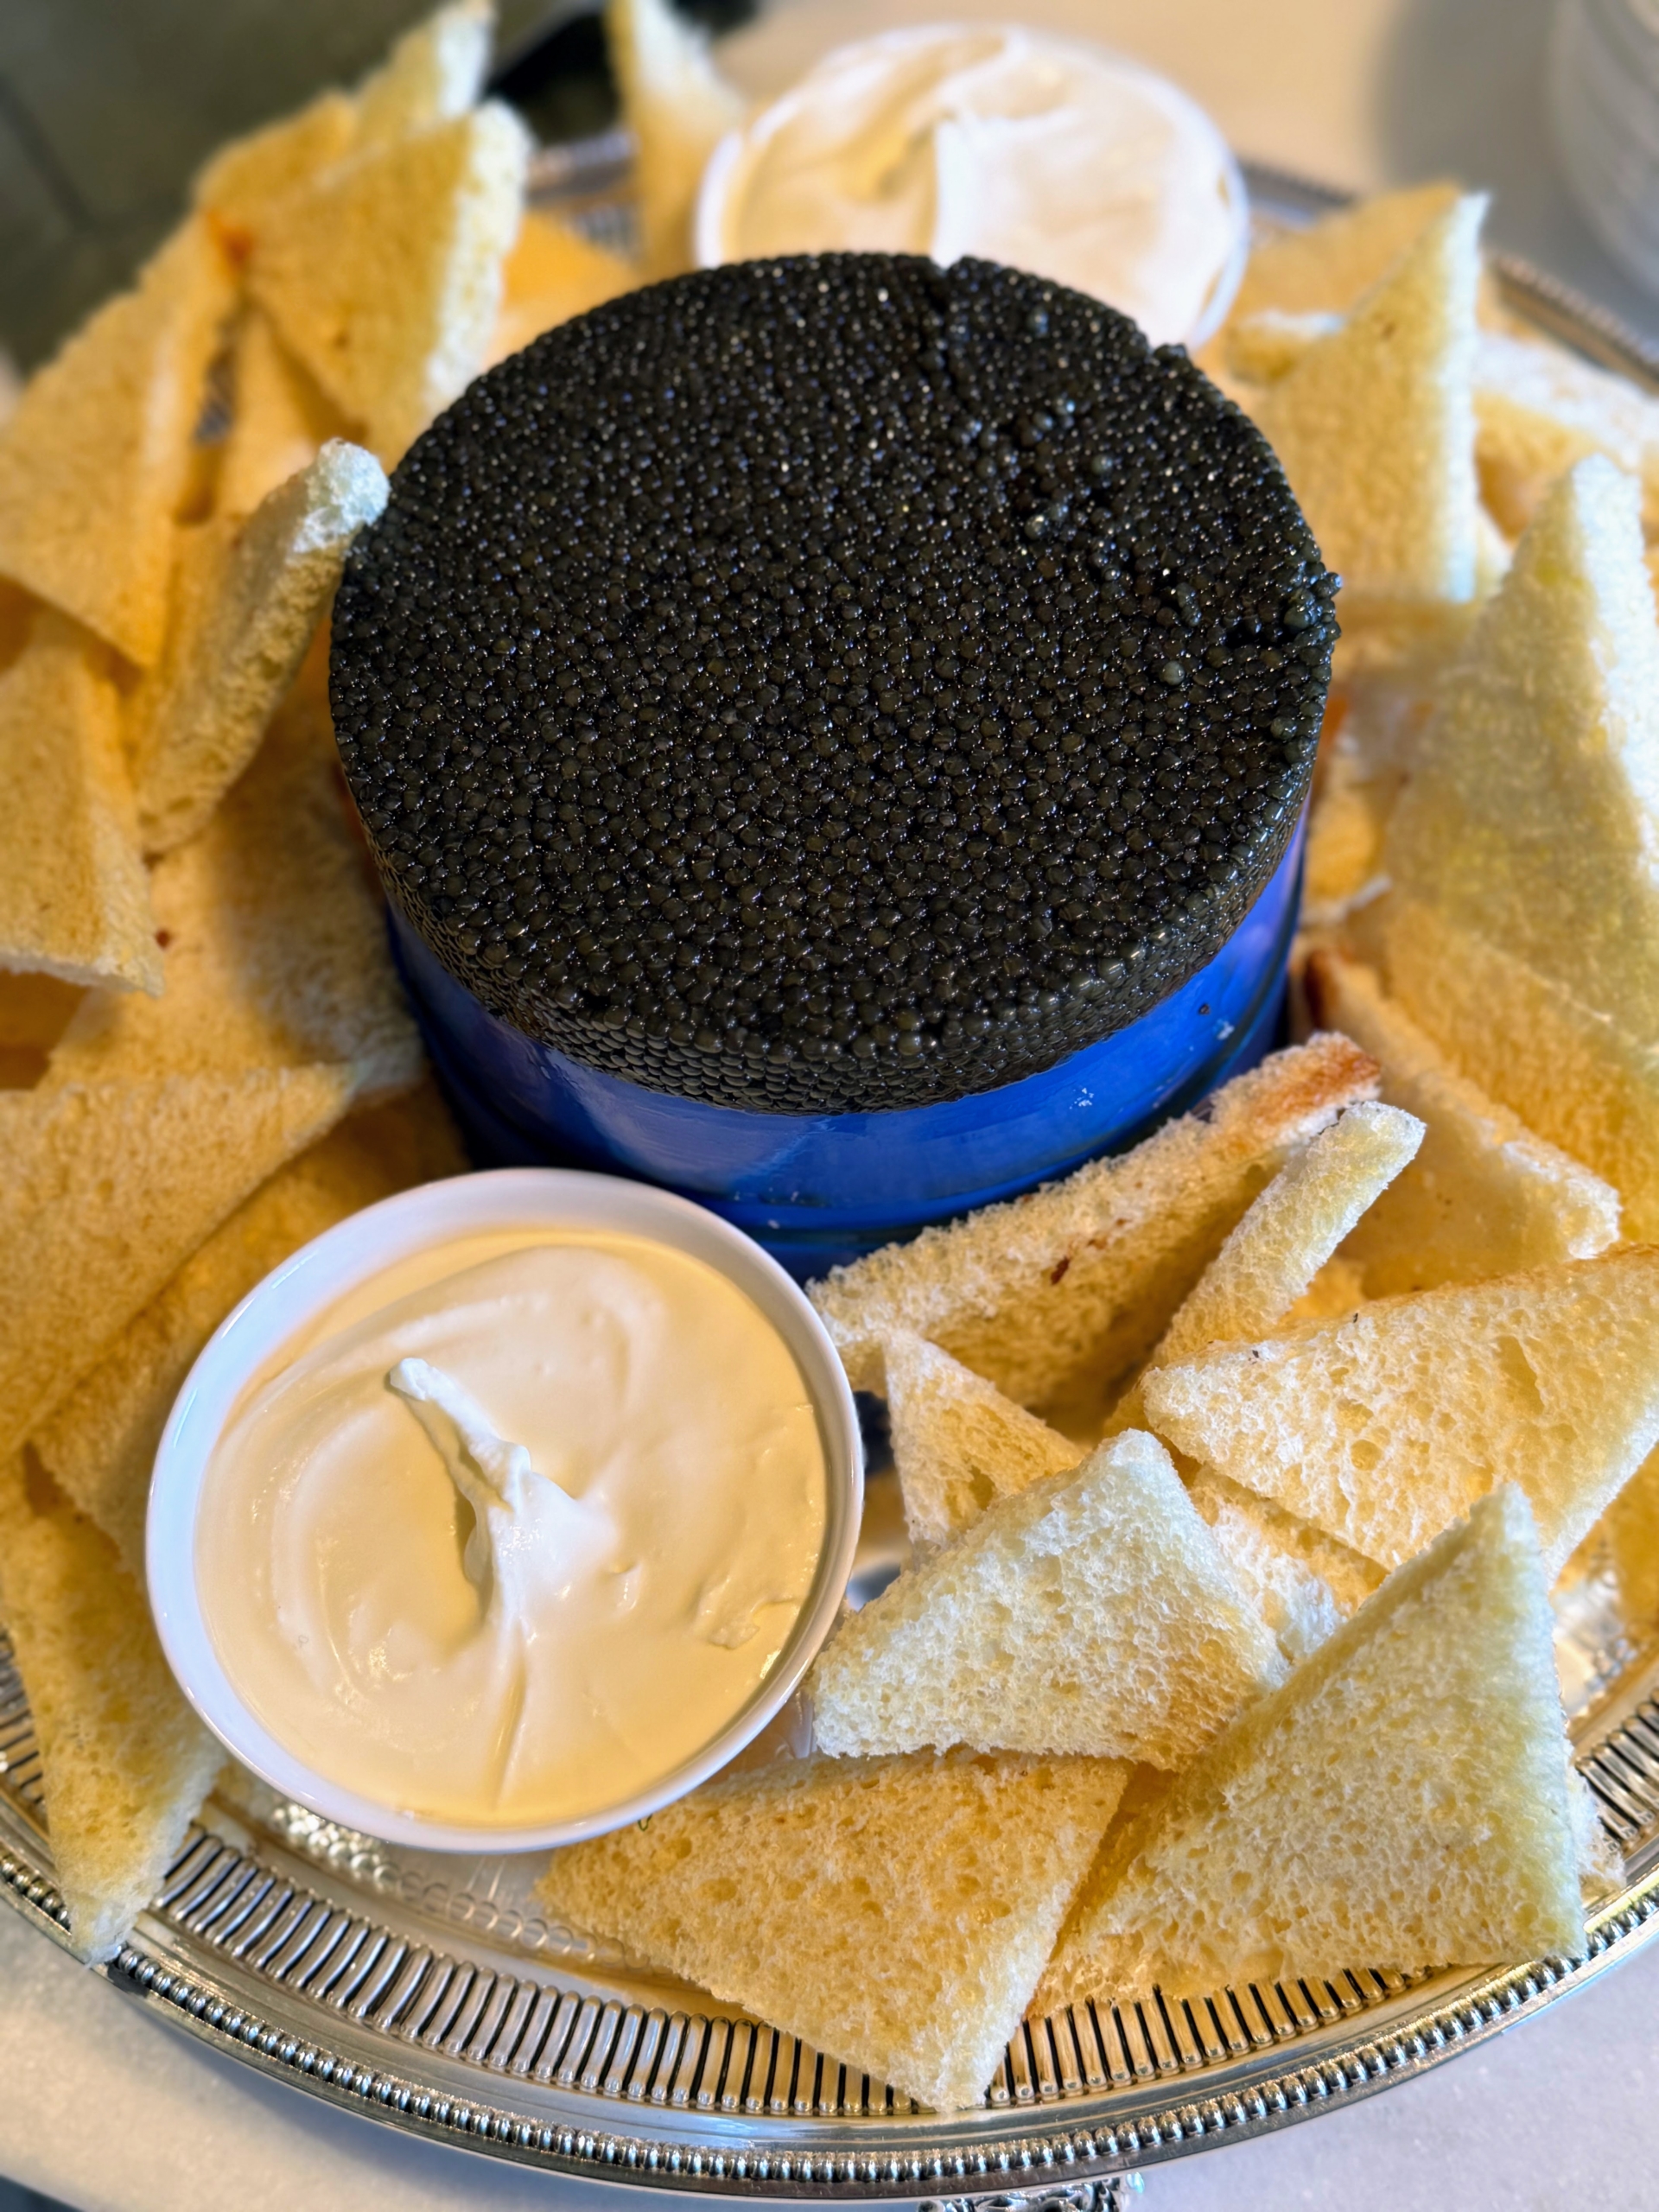
I also served delicious Black Diamond caviar. The caviar accompanied sour cream and mini melba toasts I made earlier in the day. It was also a very well-visited station at the buffet.
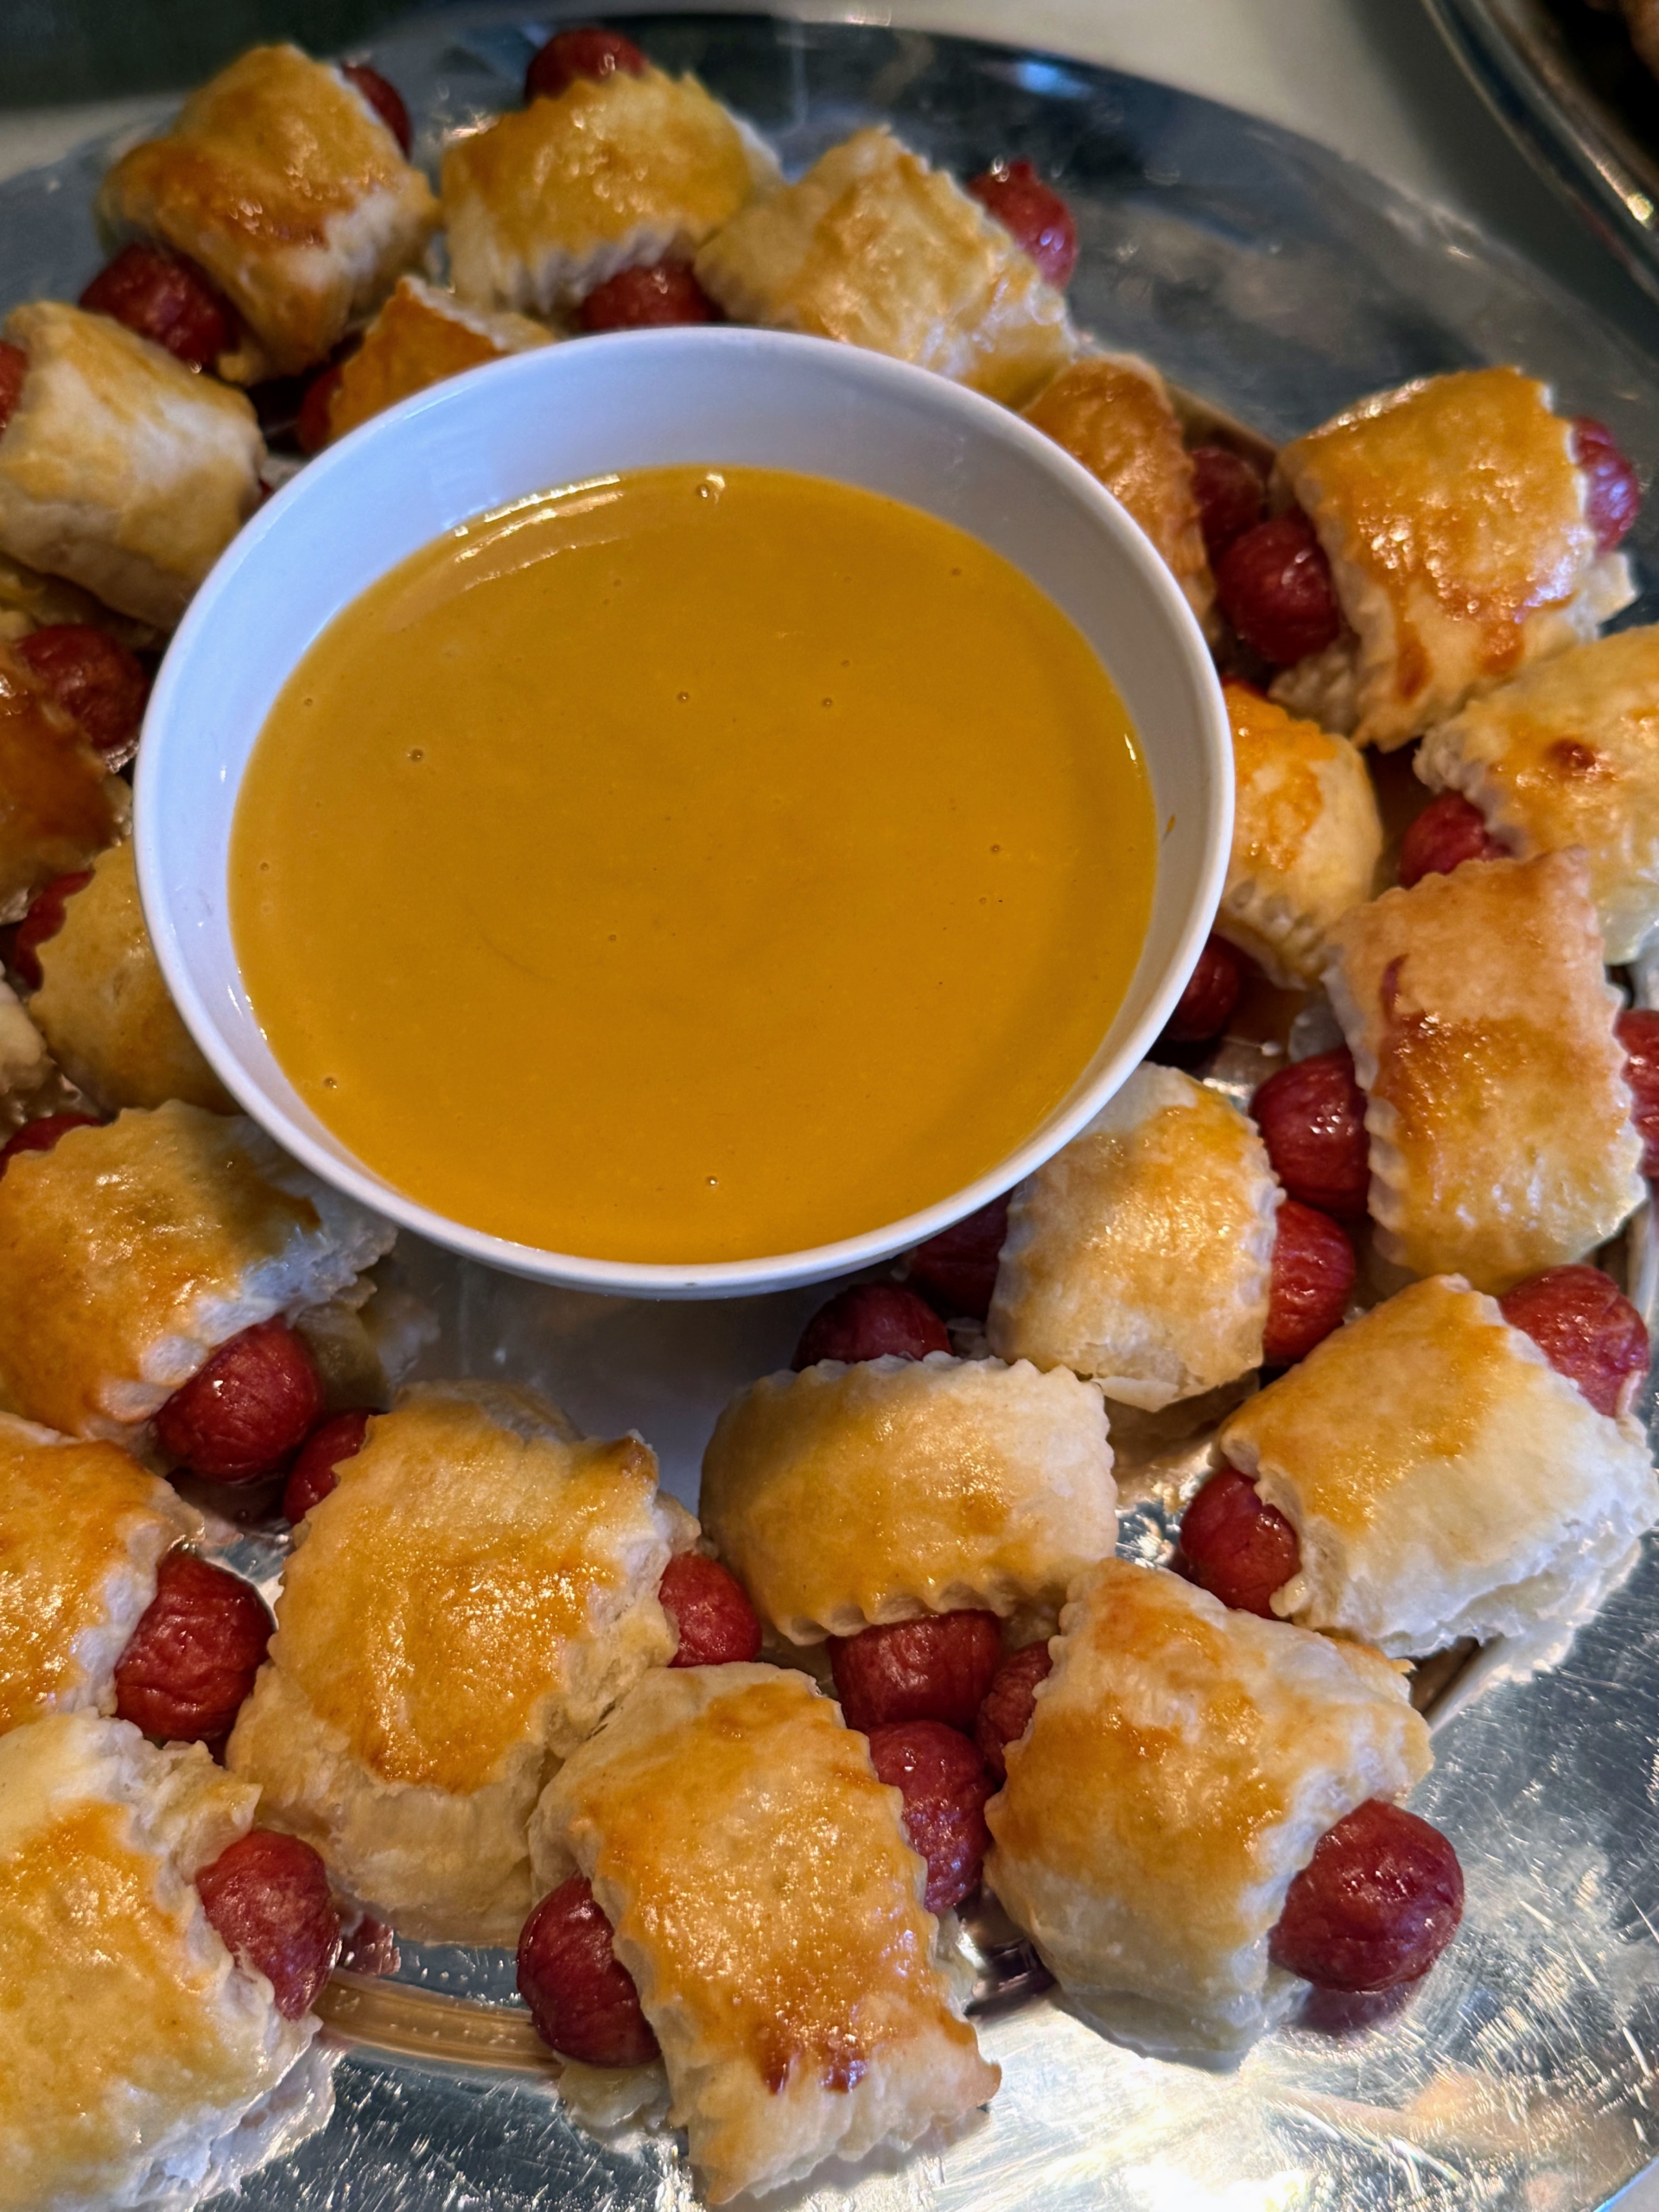
Molly made lots of pigs in a blanket – a favorite at all my parties.
And here is a large platter of crudités – bell peppers and fresh celery – delicious with green Goddess dip.
Kevin O’Leary, my archivist, was happy to try everything.
A platter of salami – this was also devoured quickly.
And crackers to go with anything.
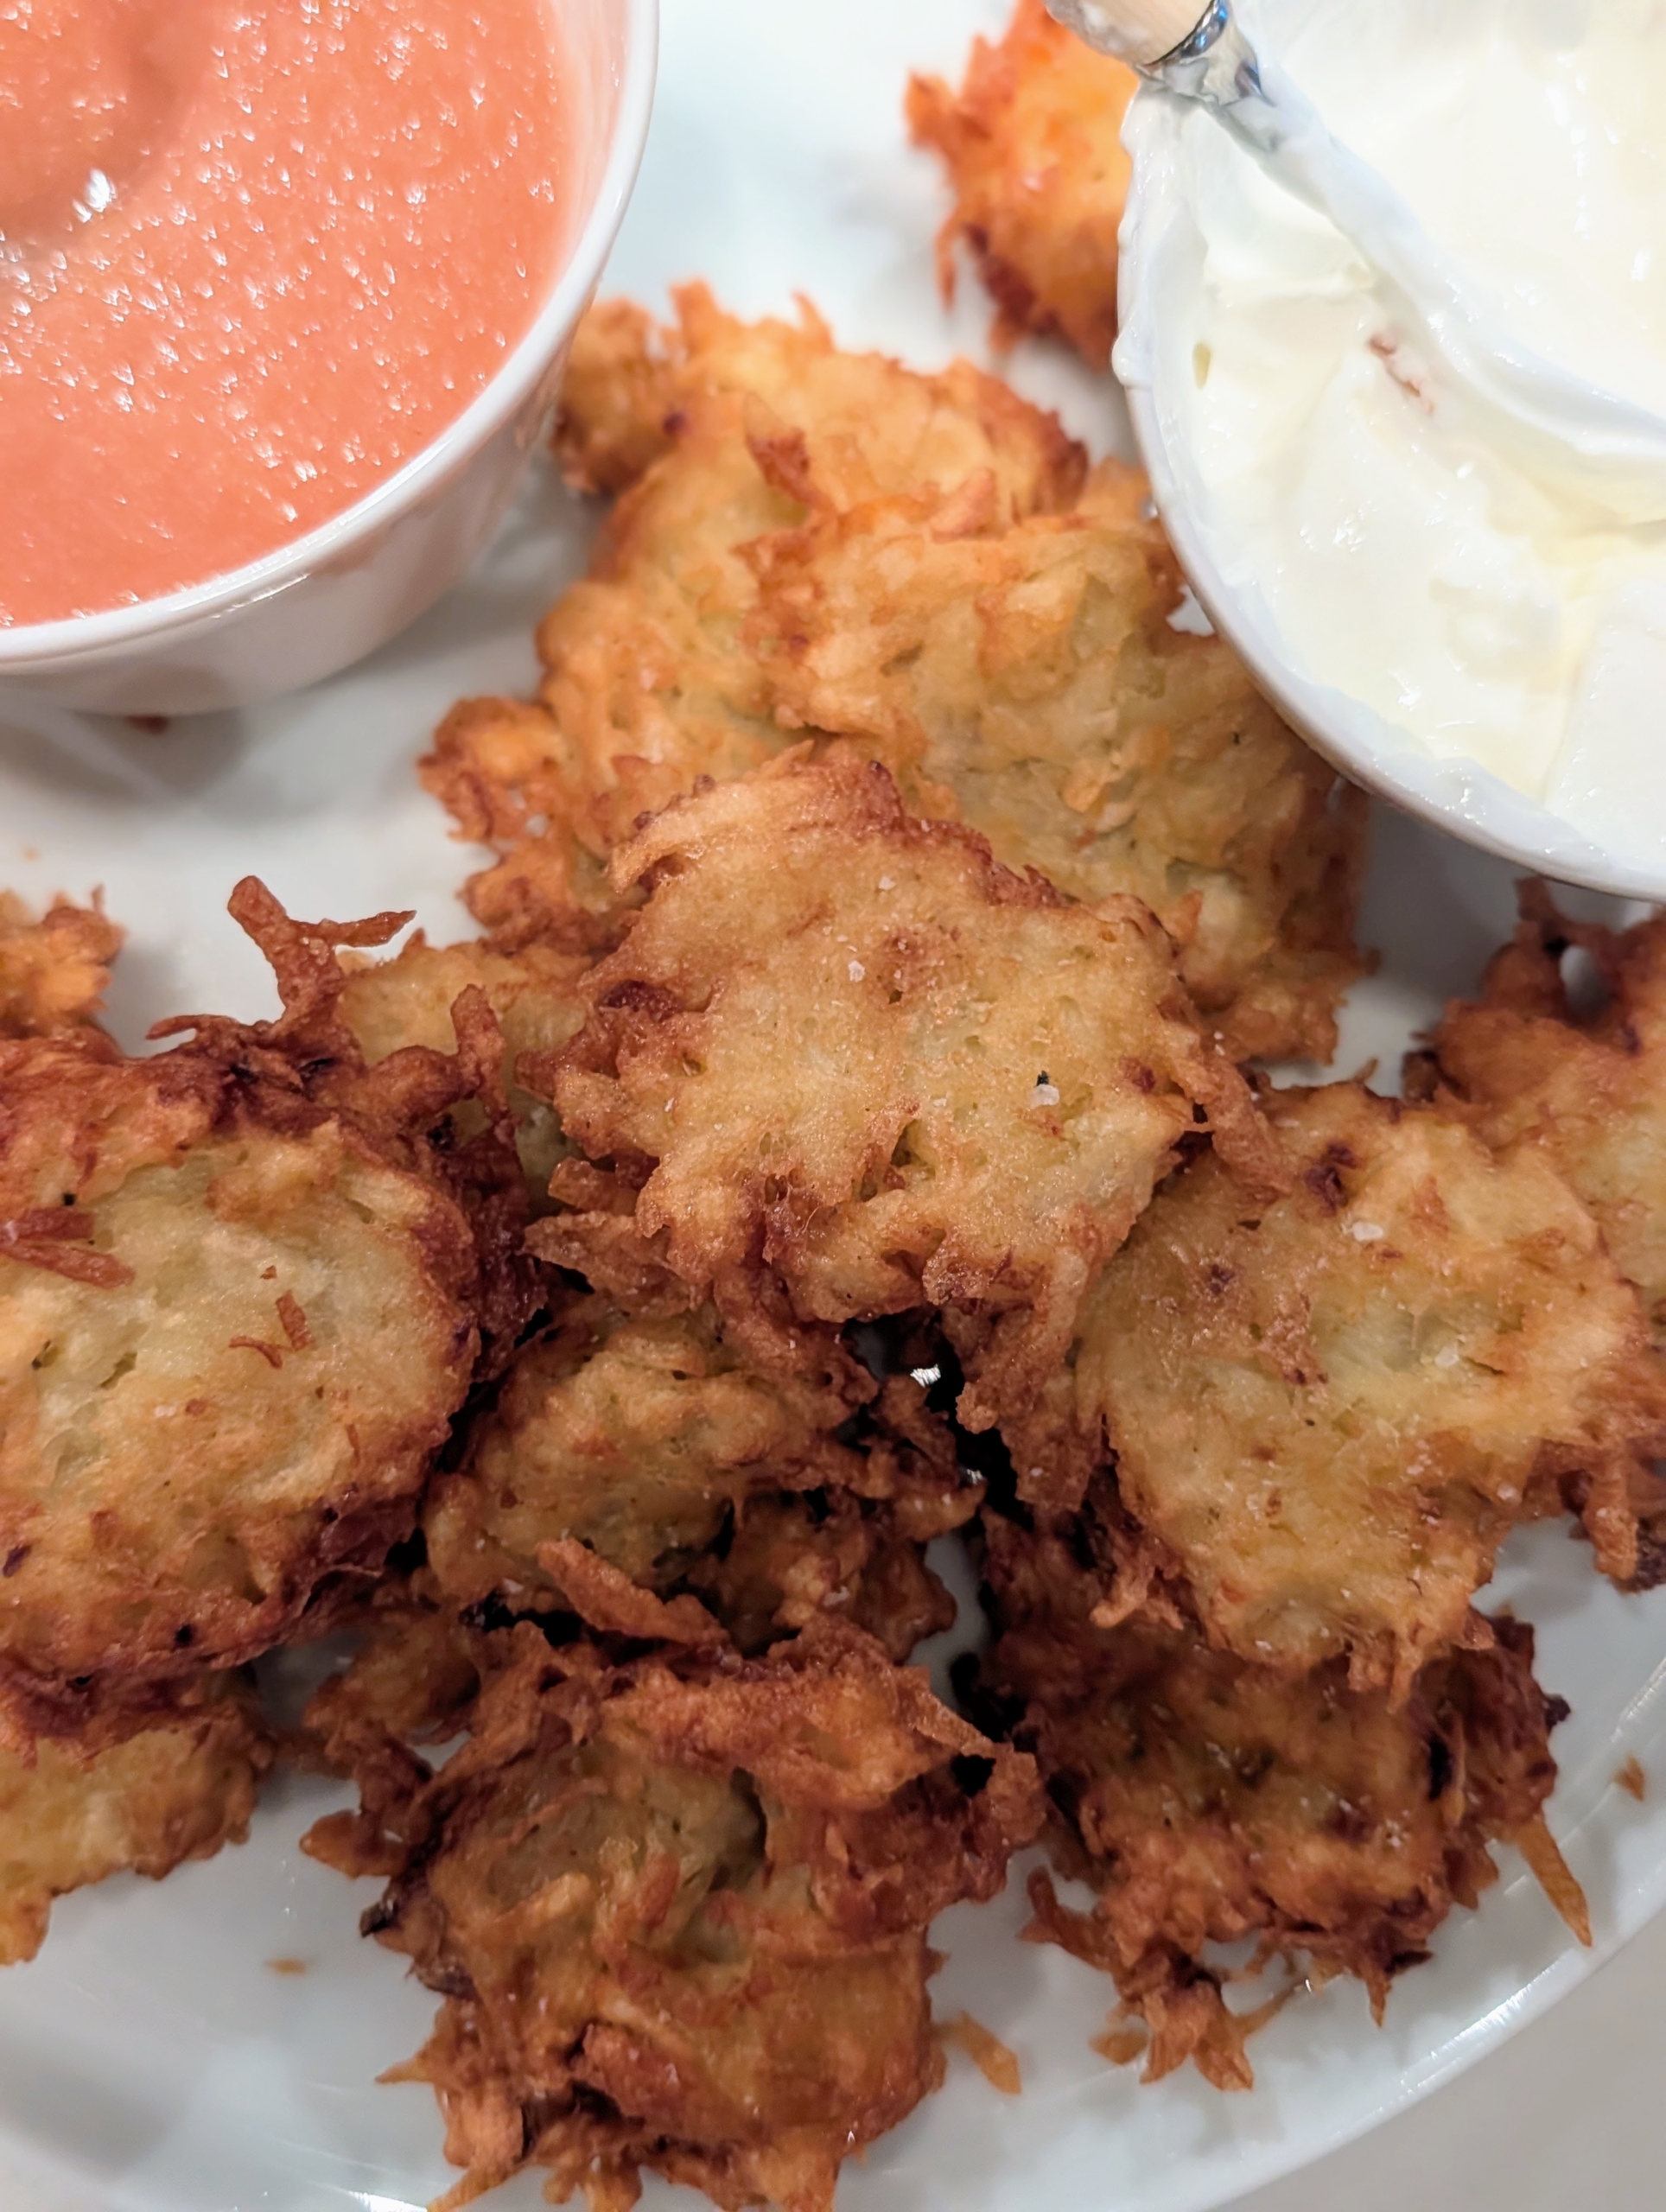
Chef Molly stood nearby making delicious potato latkes, also known as potato pancakes. These are always served hot and crispy.
… And always enjoyed with homemade applesauce and sour cream.
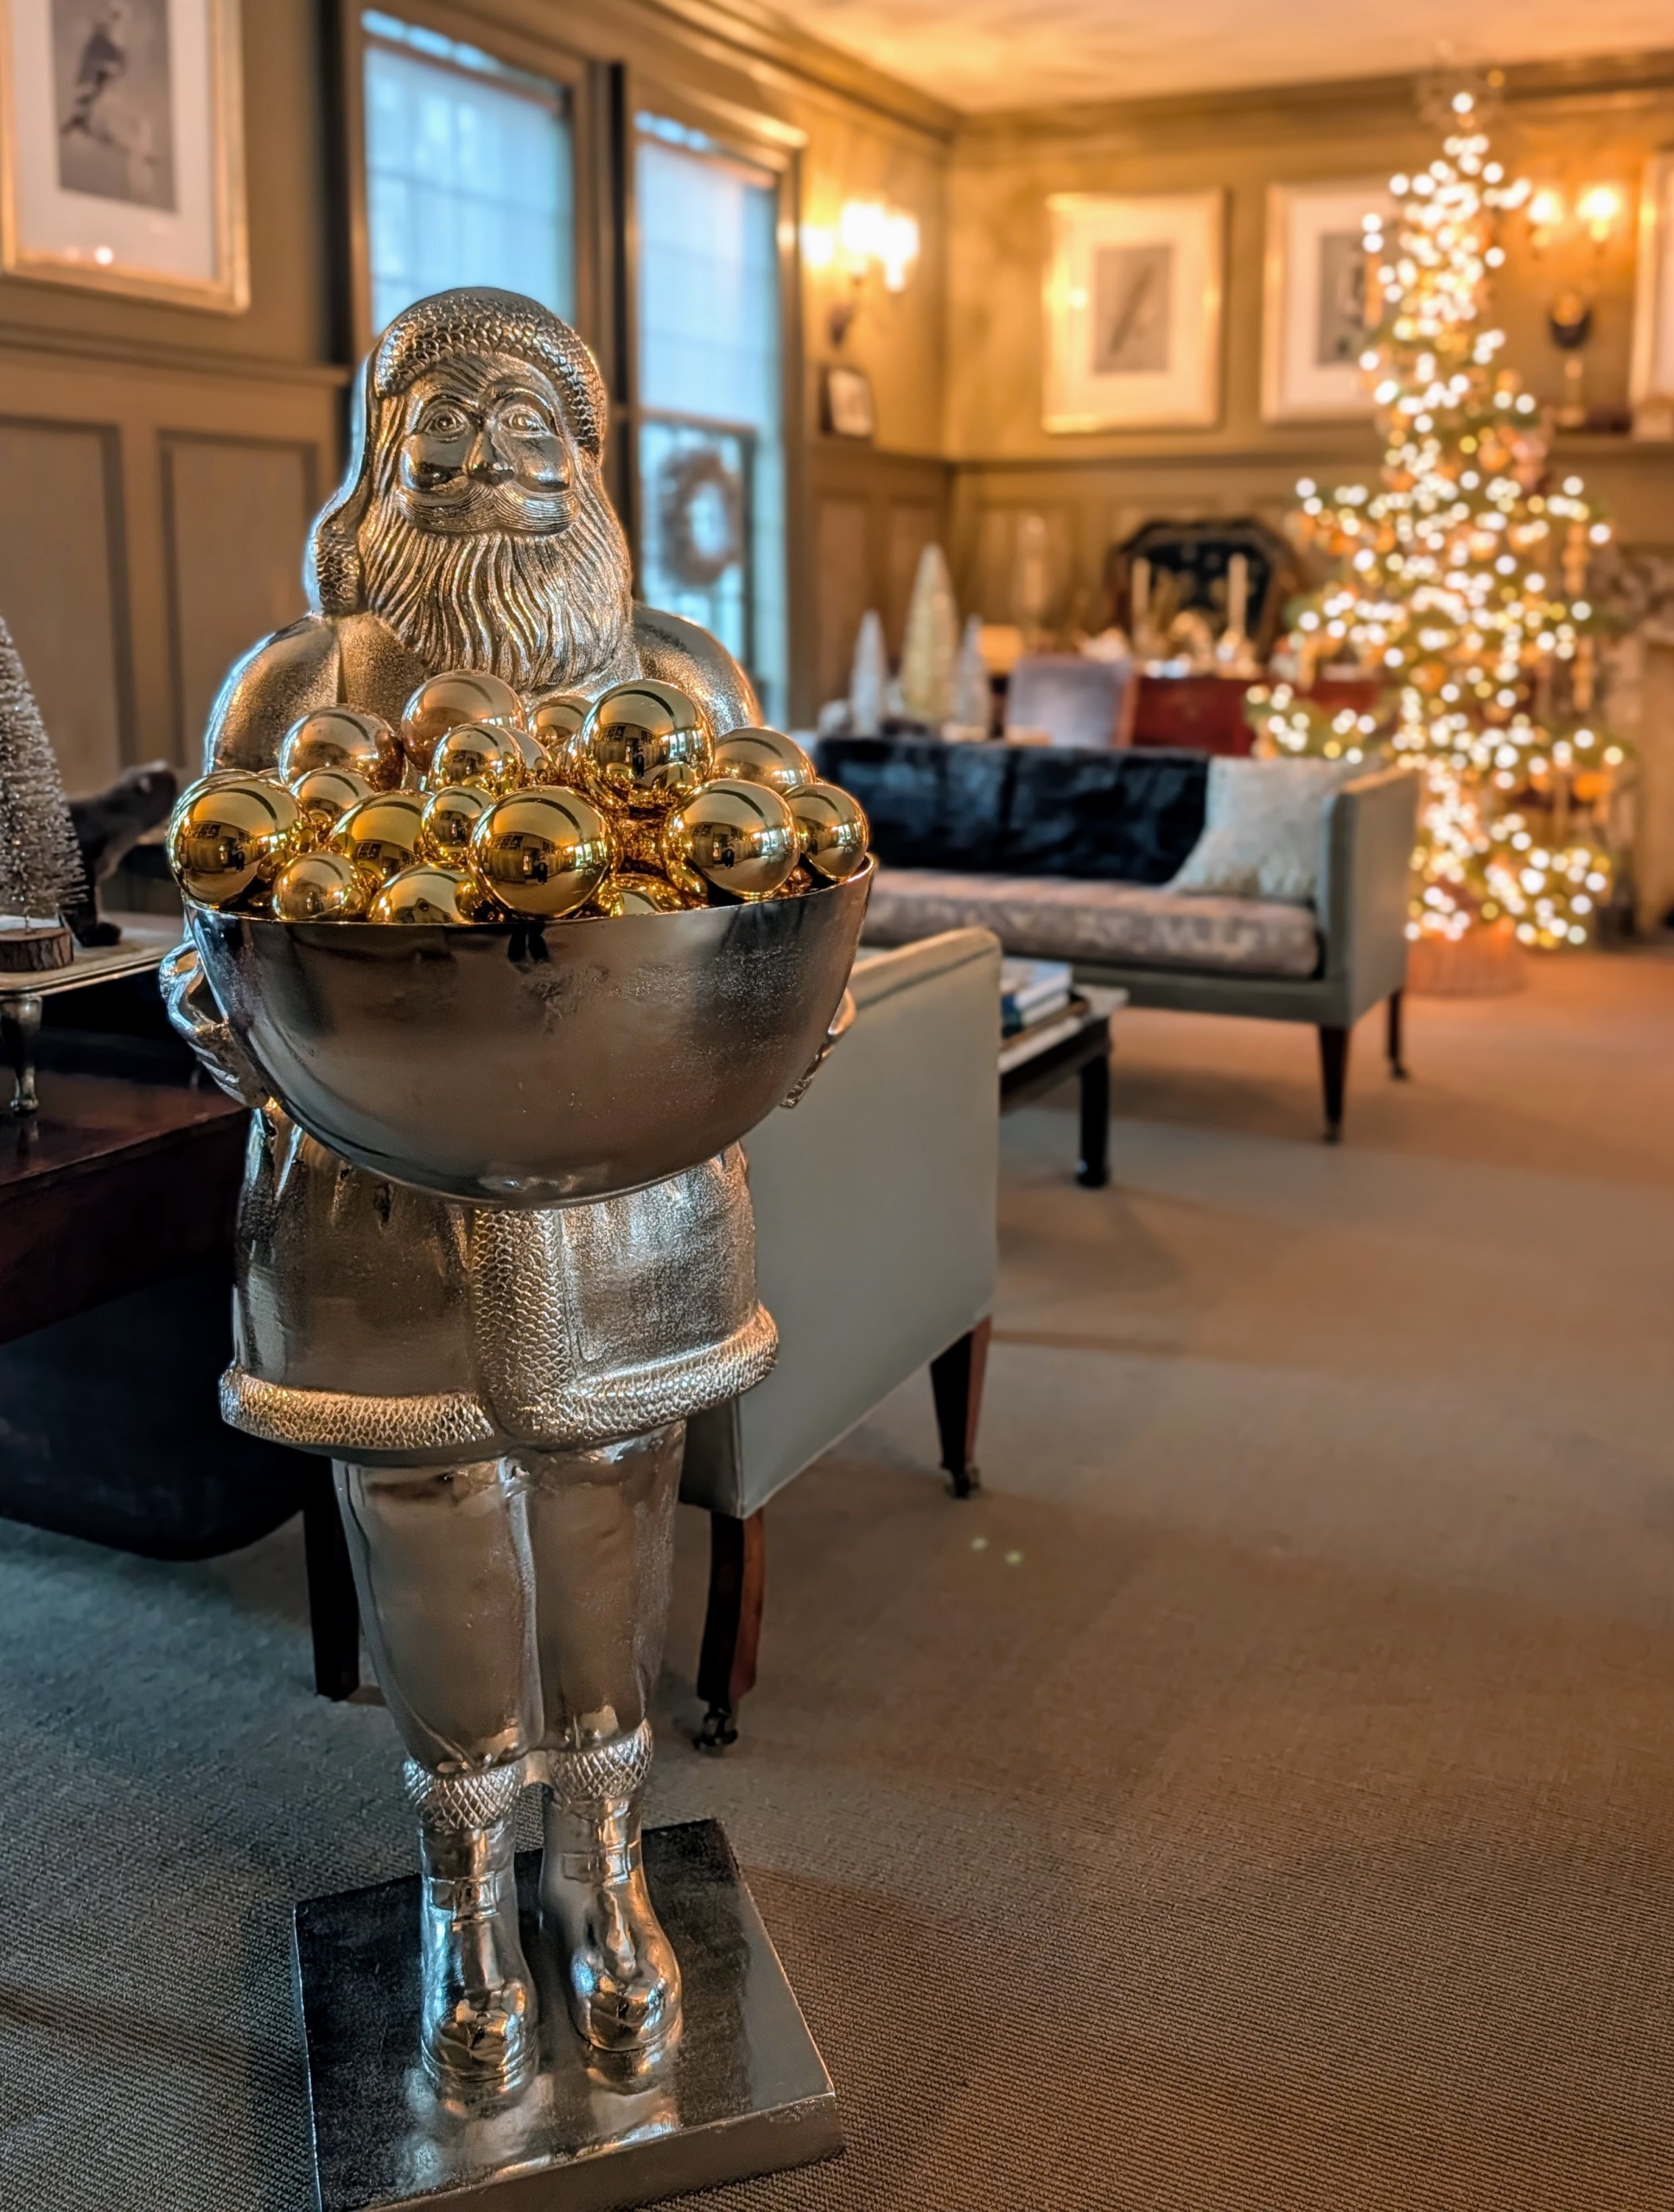
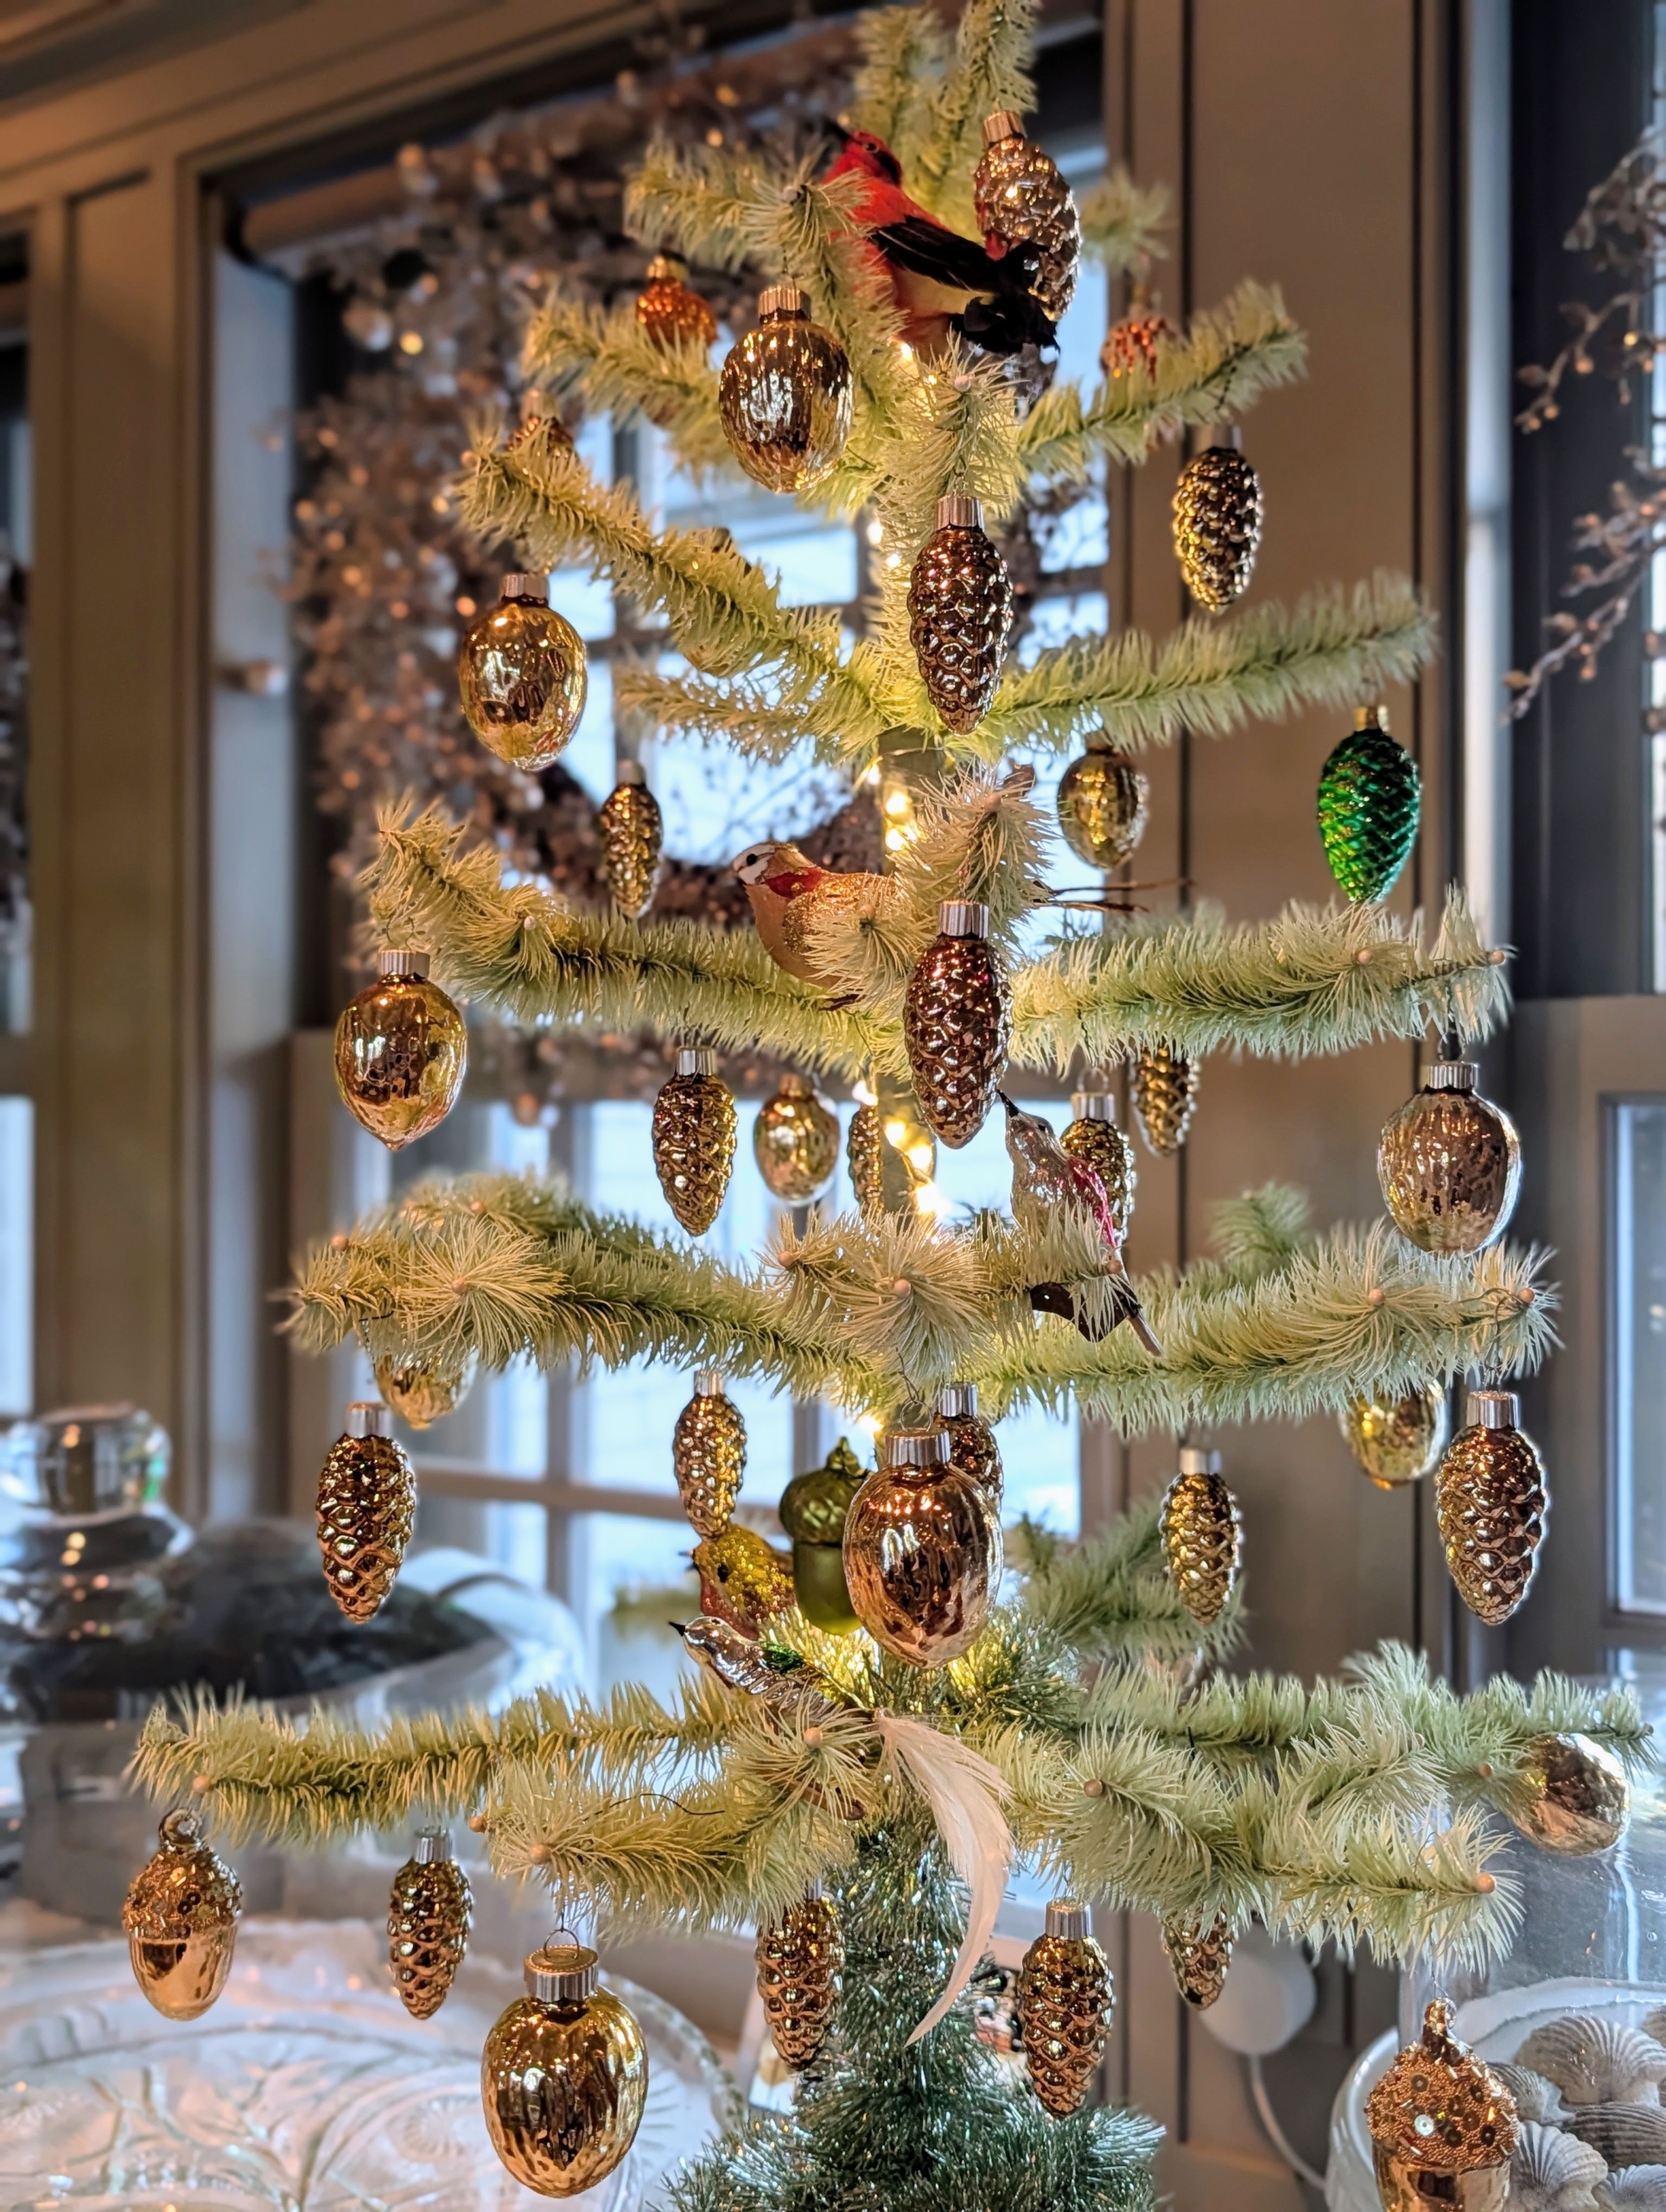
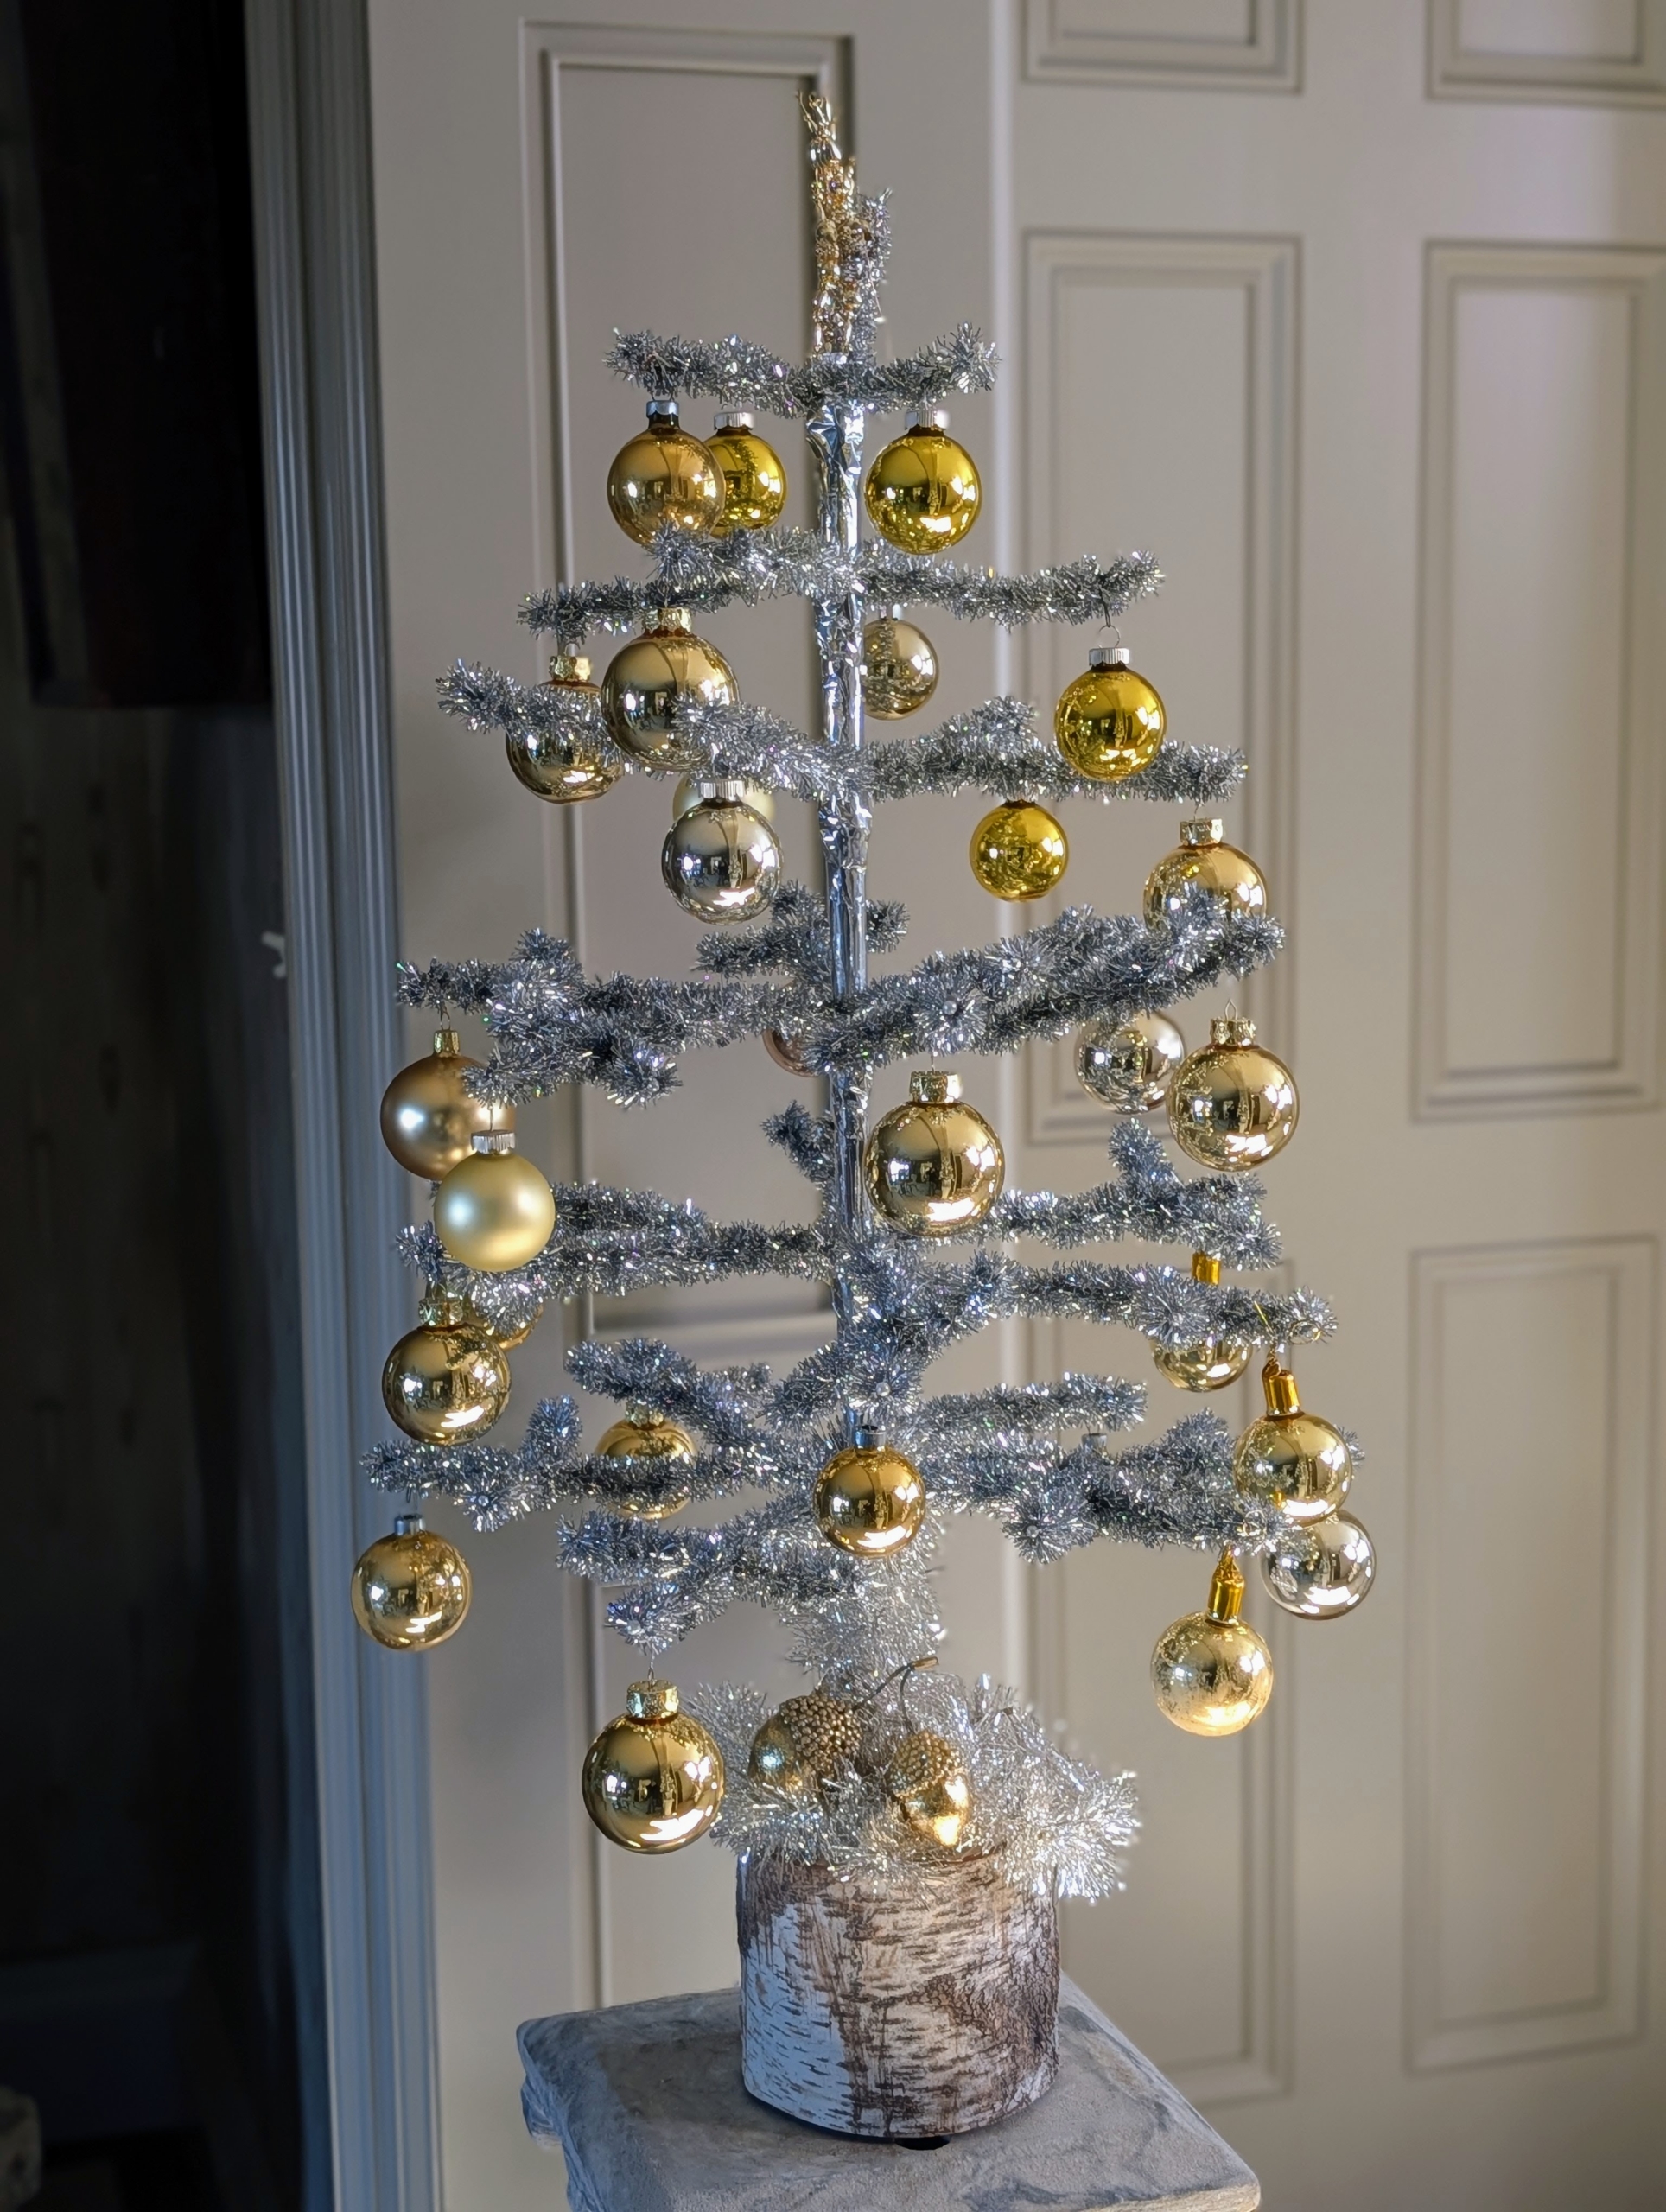
All the rooms in my Winter House are always decorated for the holidays. I try to do it a little differently every time, but it always includes lots of trees – big, small, green, gold, and silver.
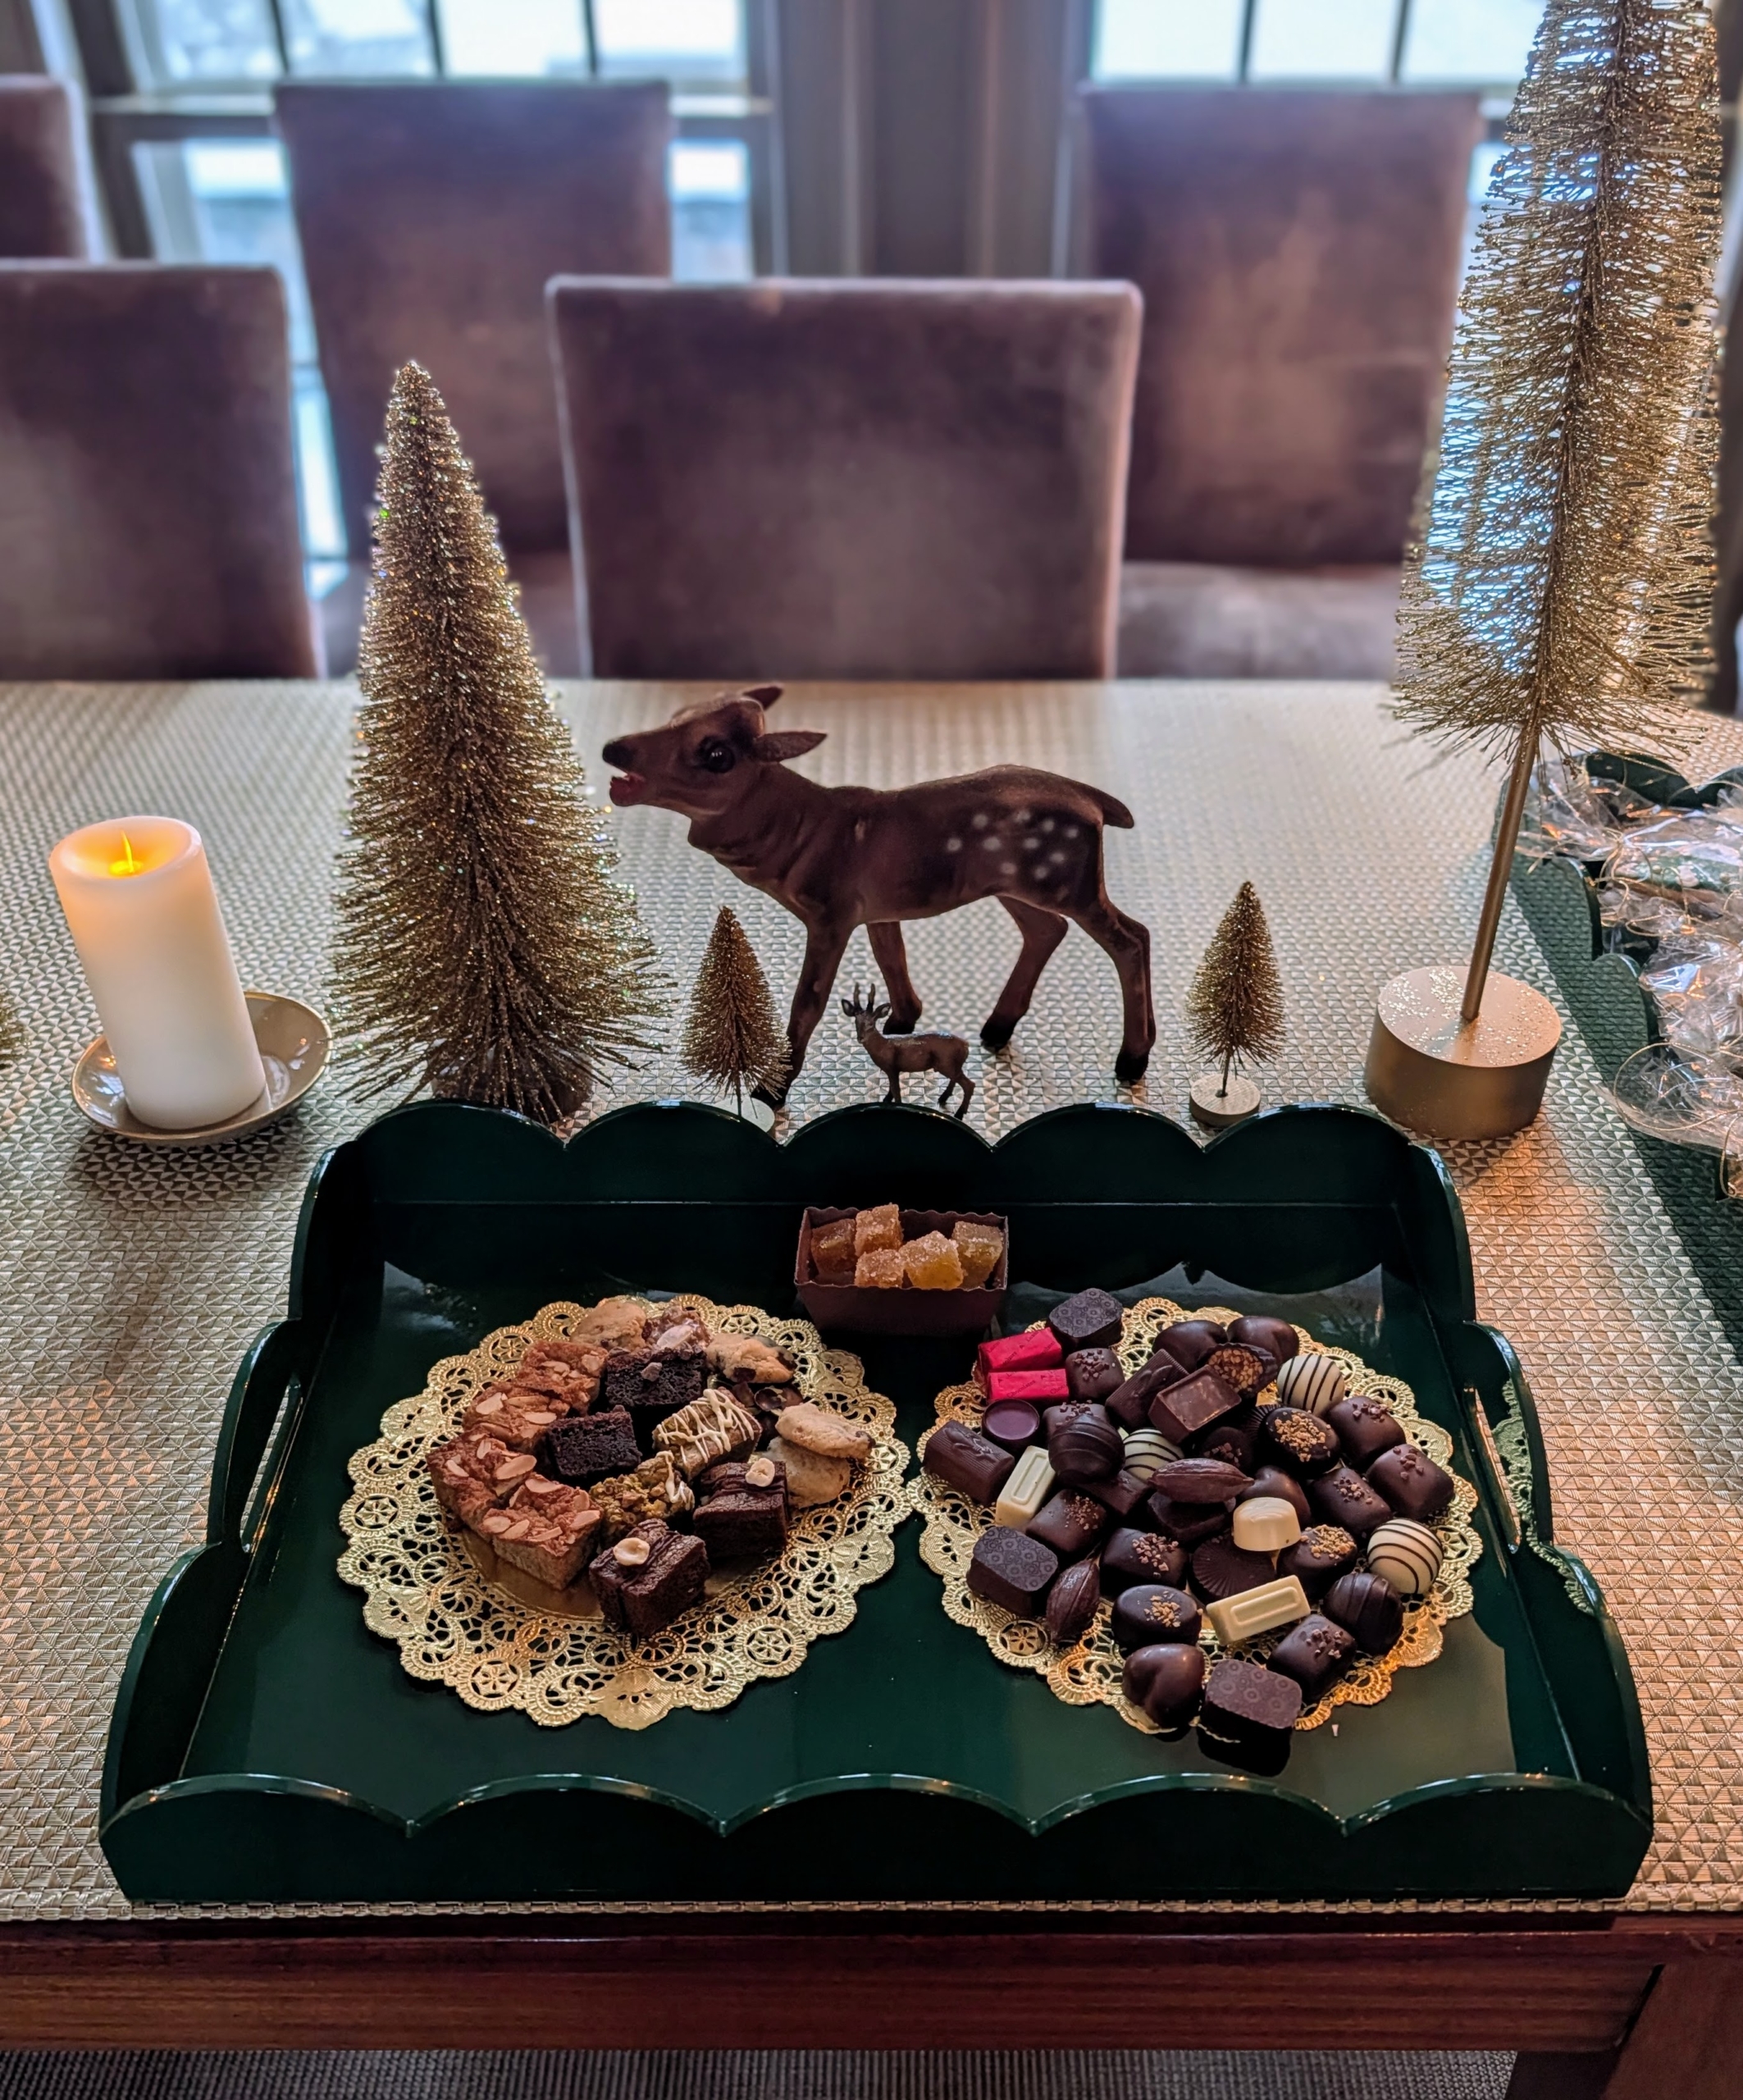
Earlier in the day, I went out to pick up this croquembouche from Bedford Village Pastry. A croquembouche or croque-en-bouche is a French dessert consisting of choux pastry puffs piled into a cone and bound with threads of caramel.
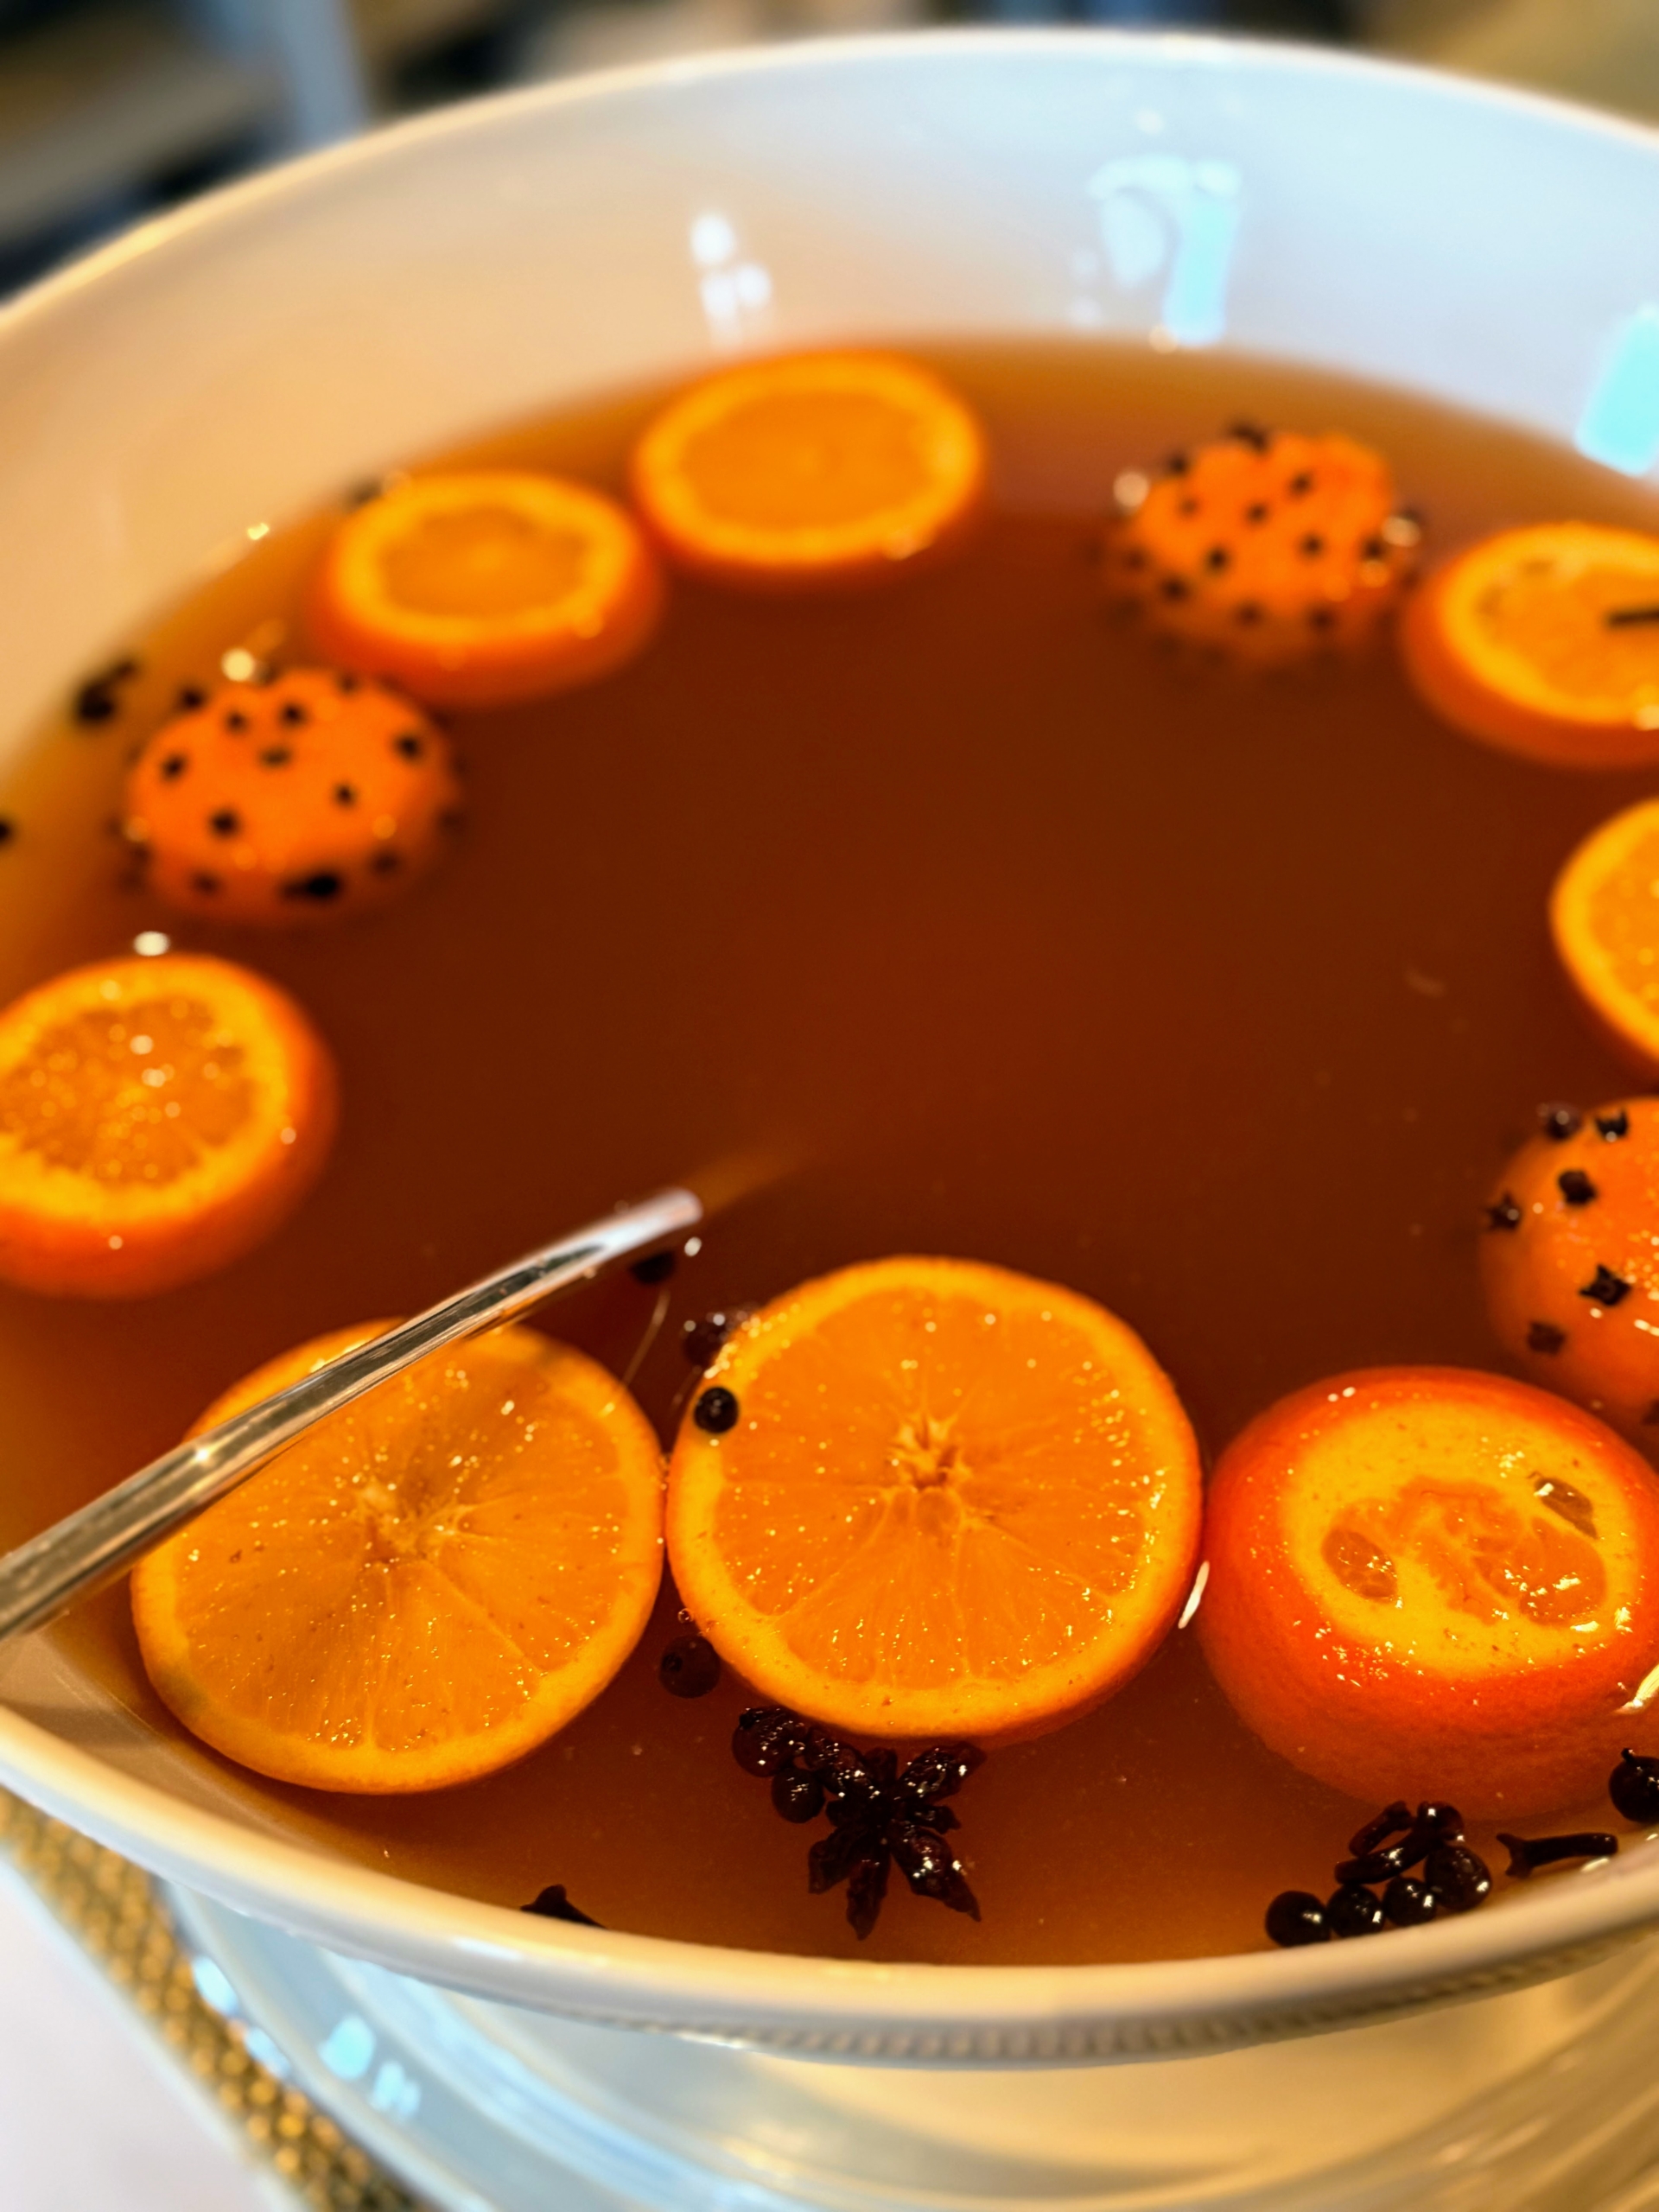
I served a lovely amber colored cider with citrus.
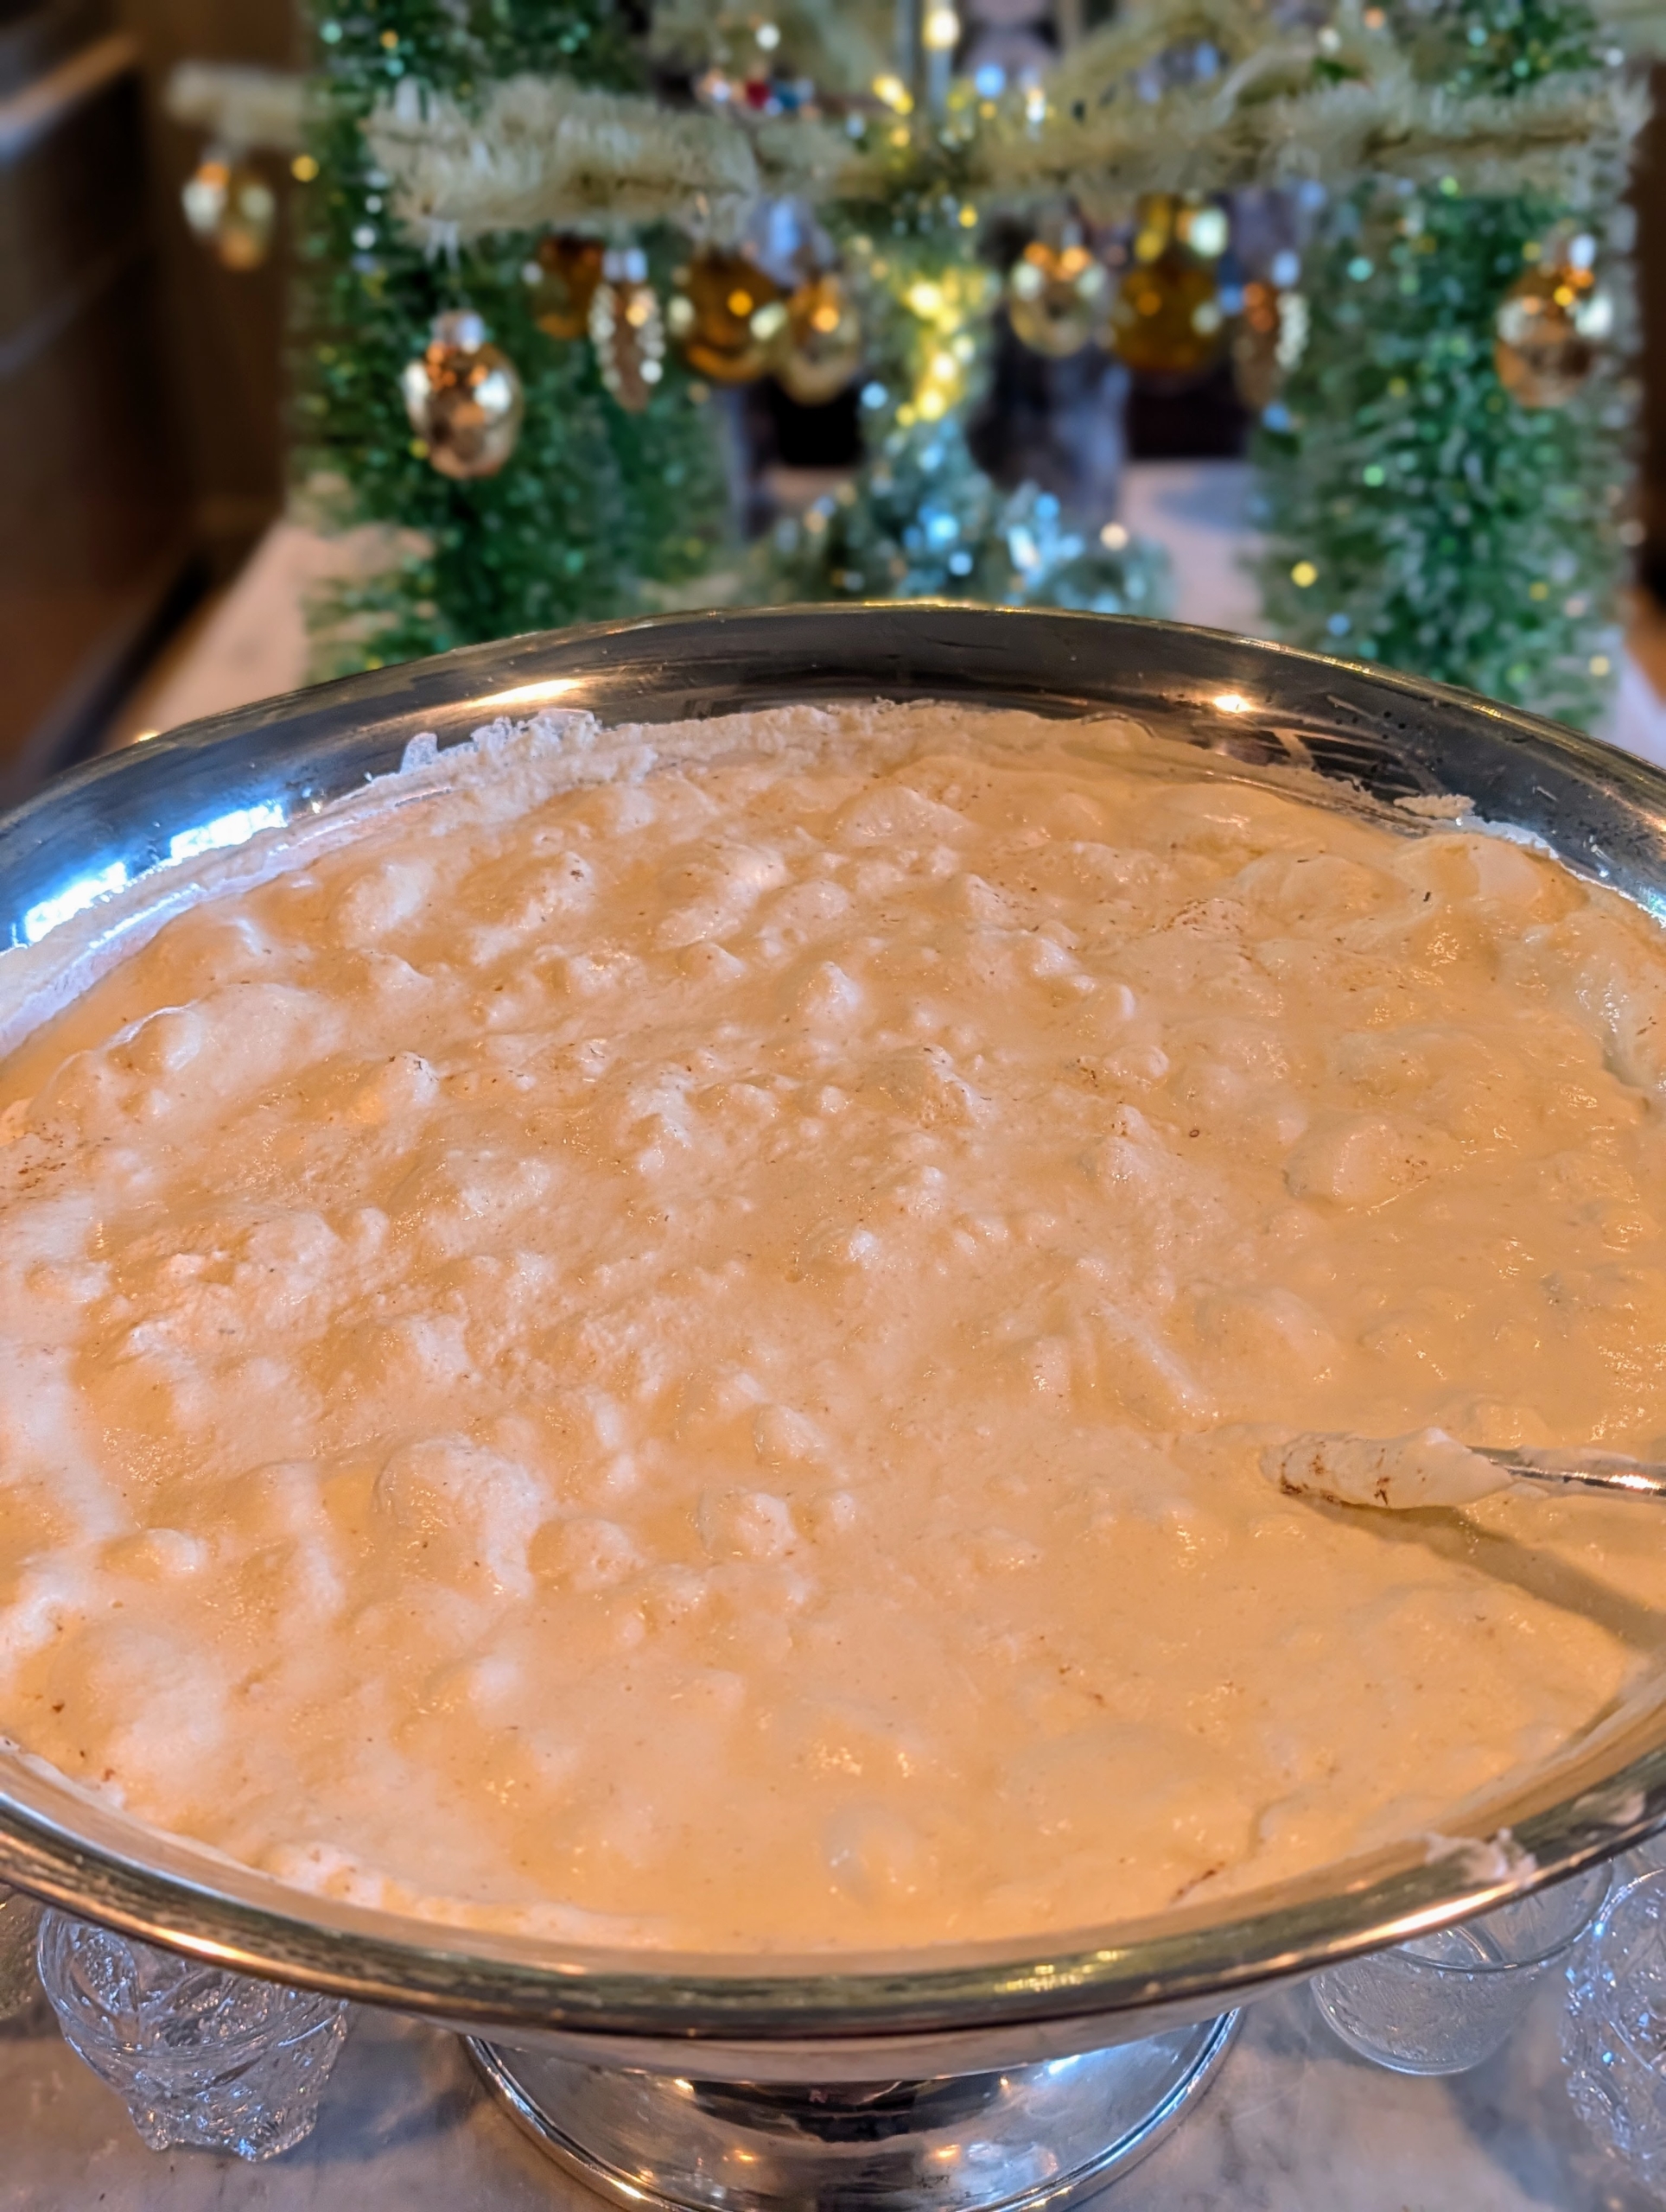
Here is my famous eggnog, freshly made and positioned right at the end of the counter in my servery for easy access. It is requested at every holiday party I host. The original recipe is in my very first book, Entertaining, Clarkson Potter 1982. And now in the new 2025 re-released version. There’s lots of everything – bourbon, cognac, rum, heavy cream, and eggs from my chickens.
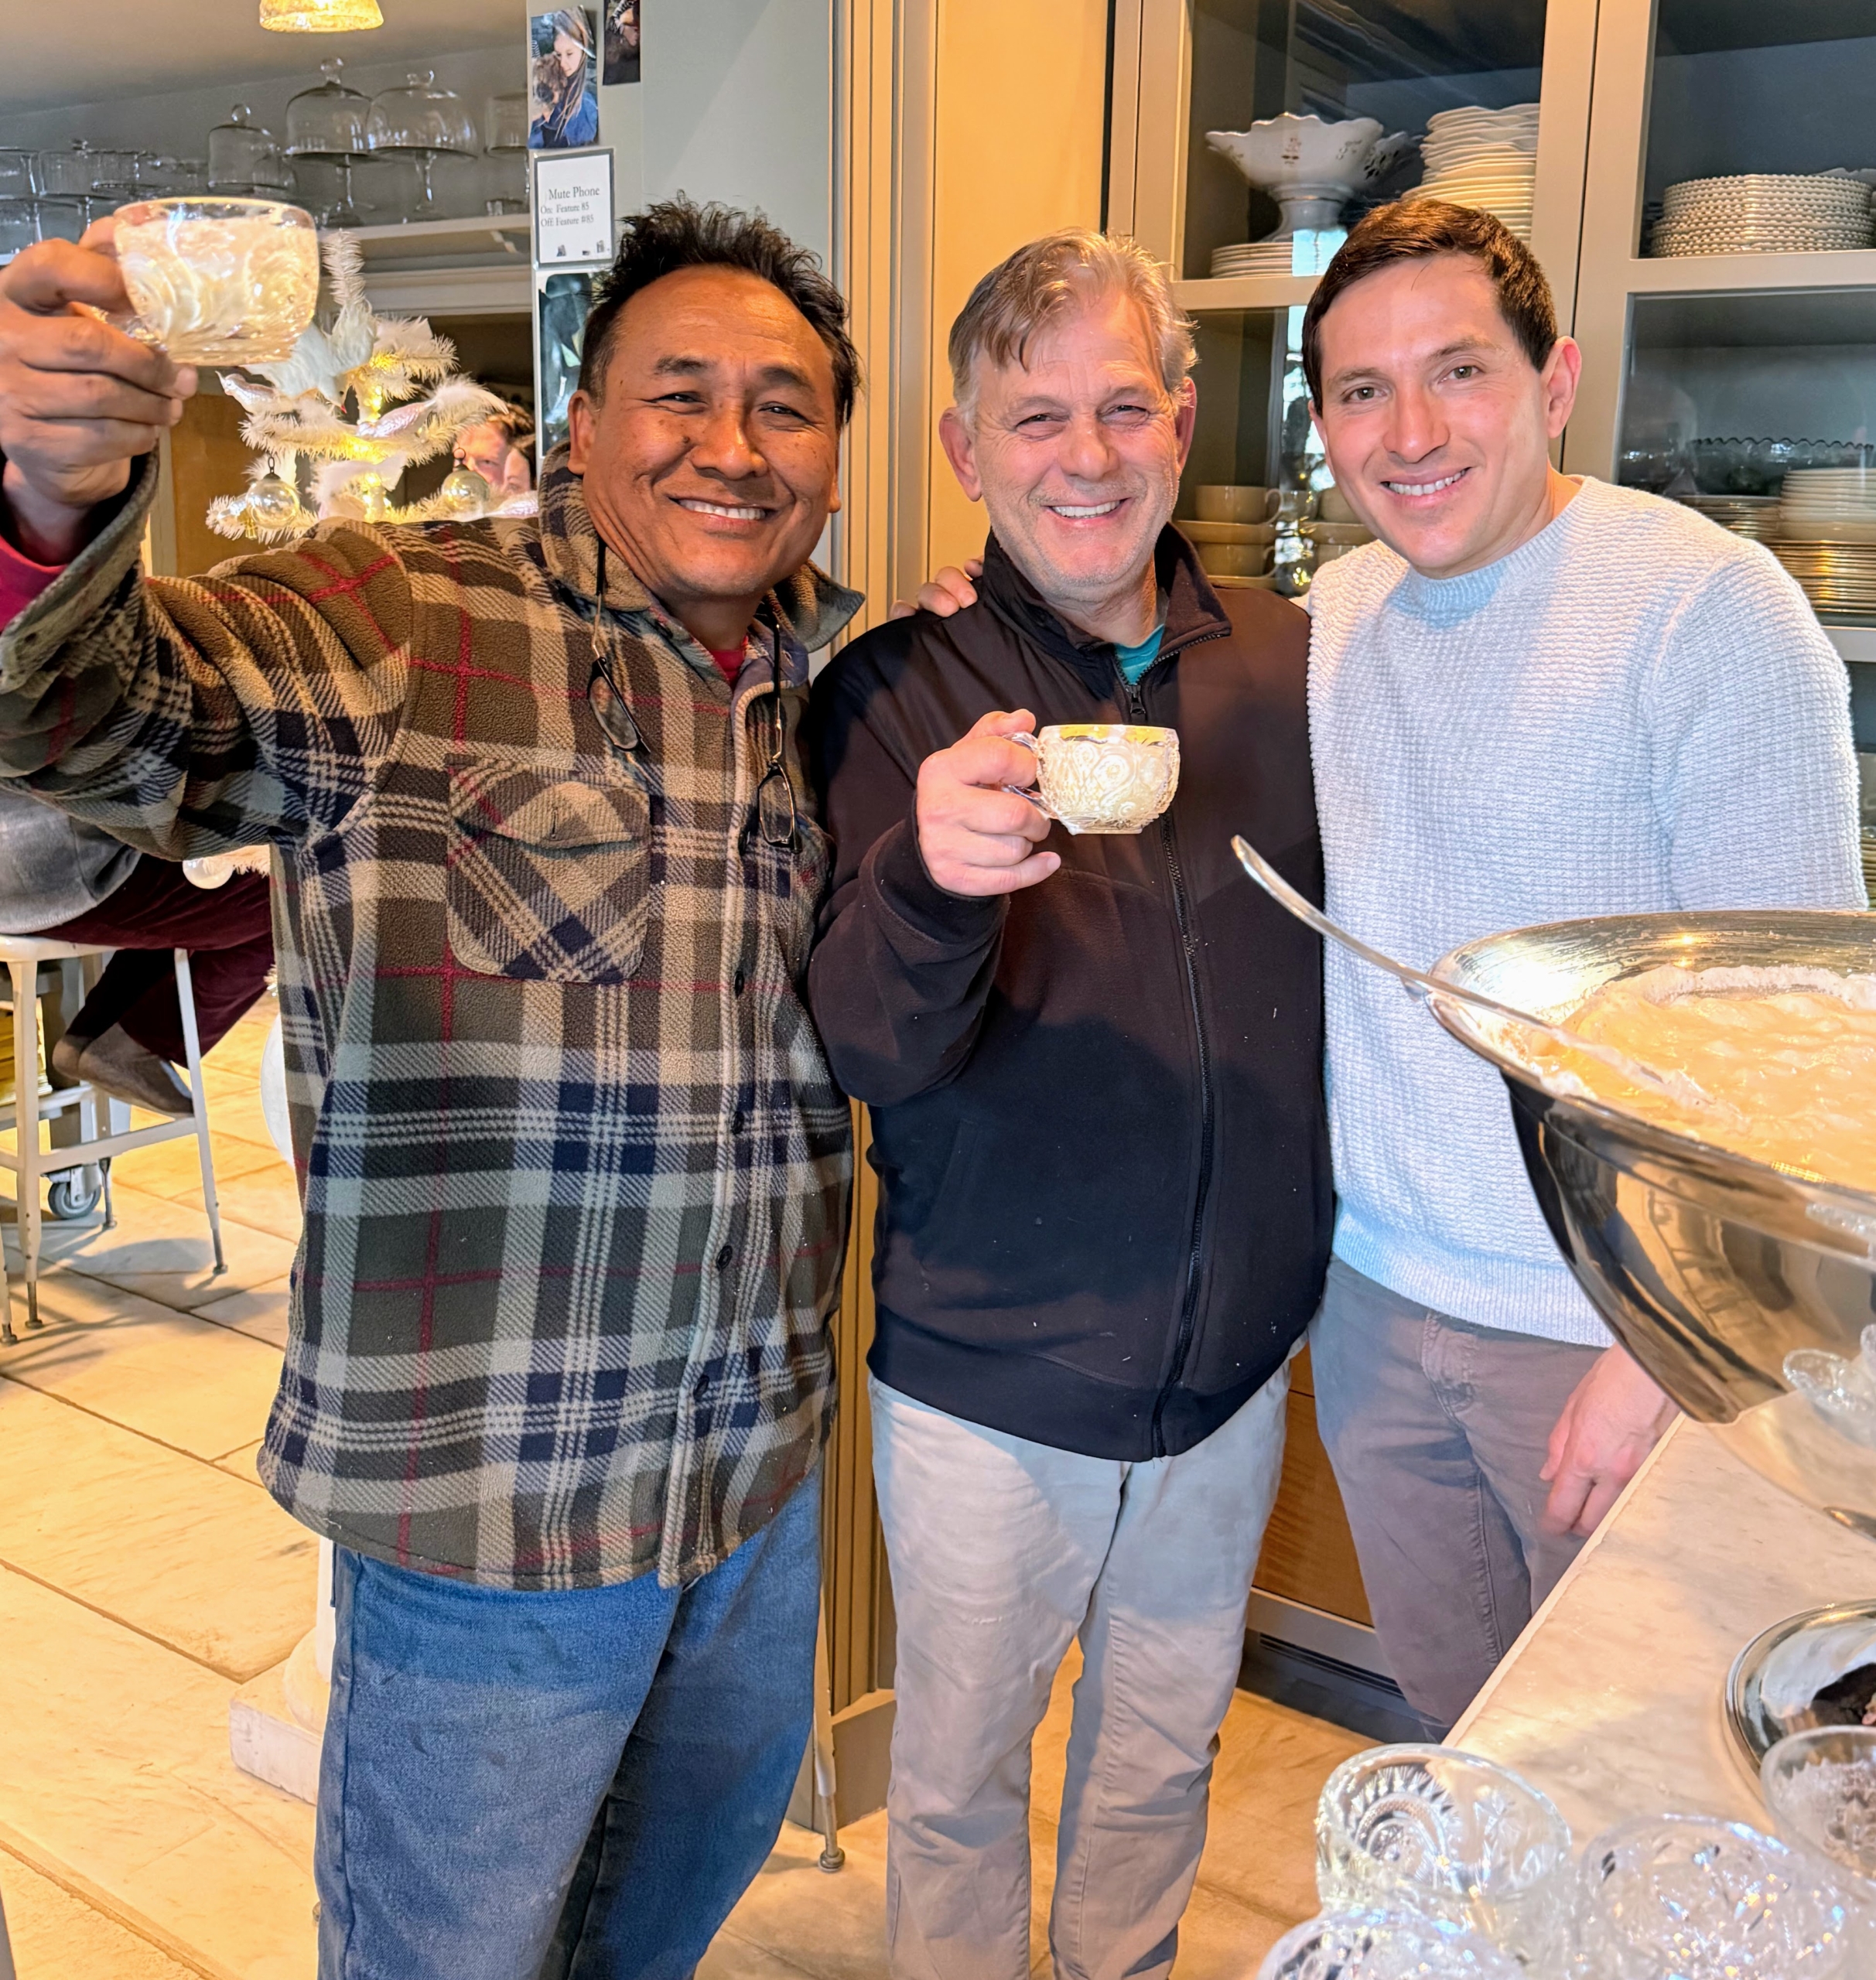
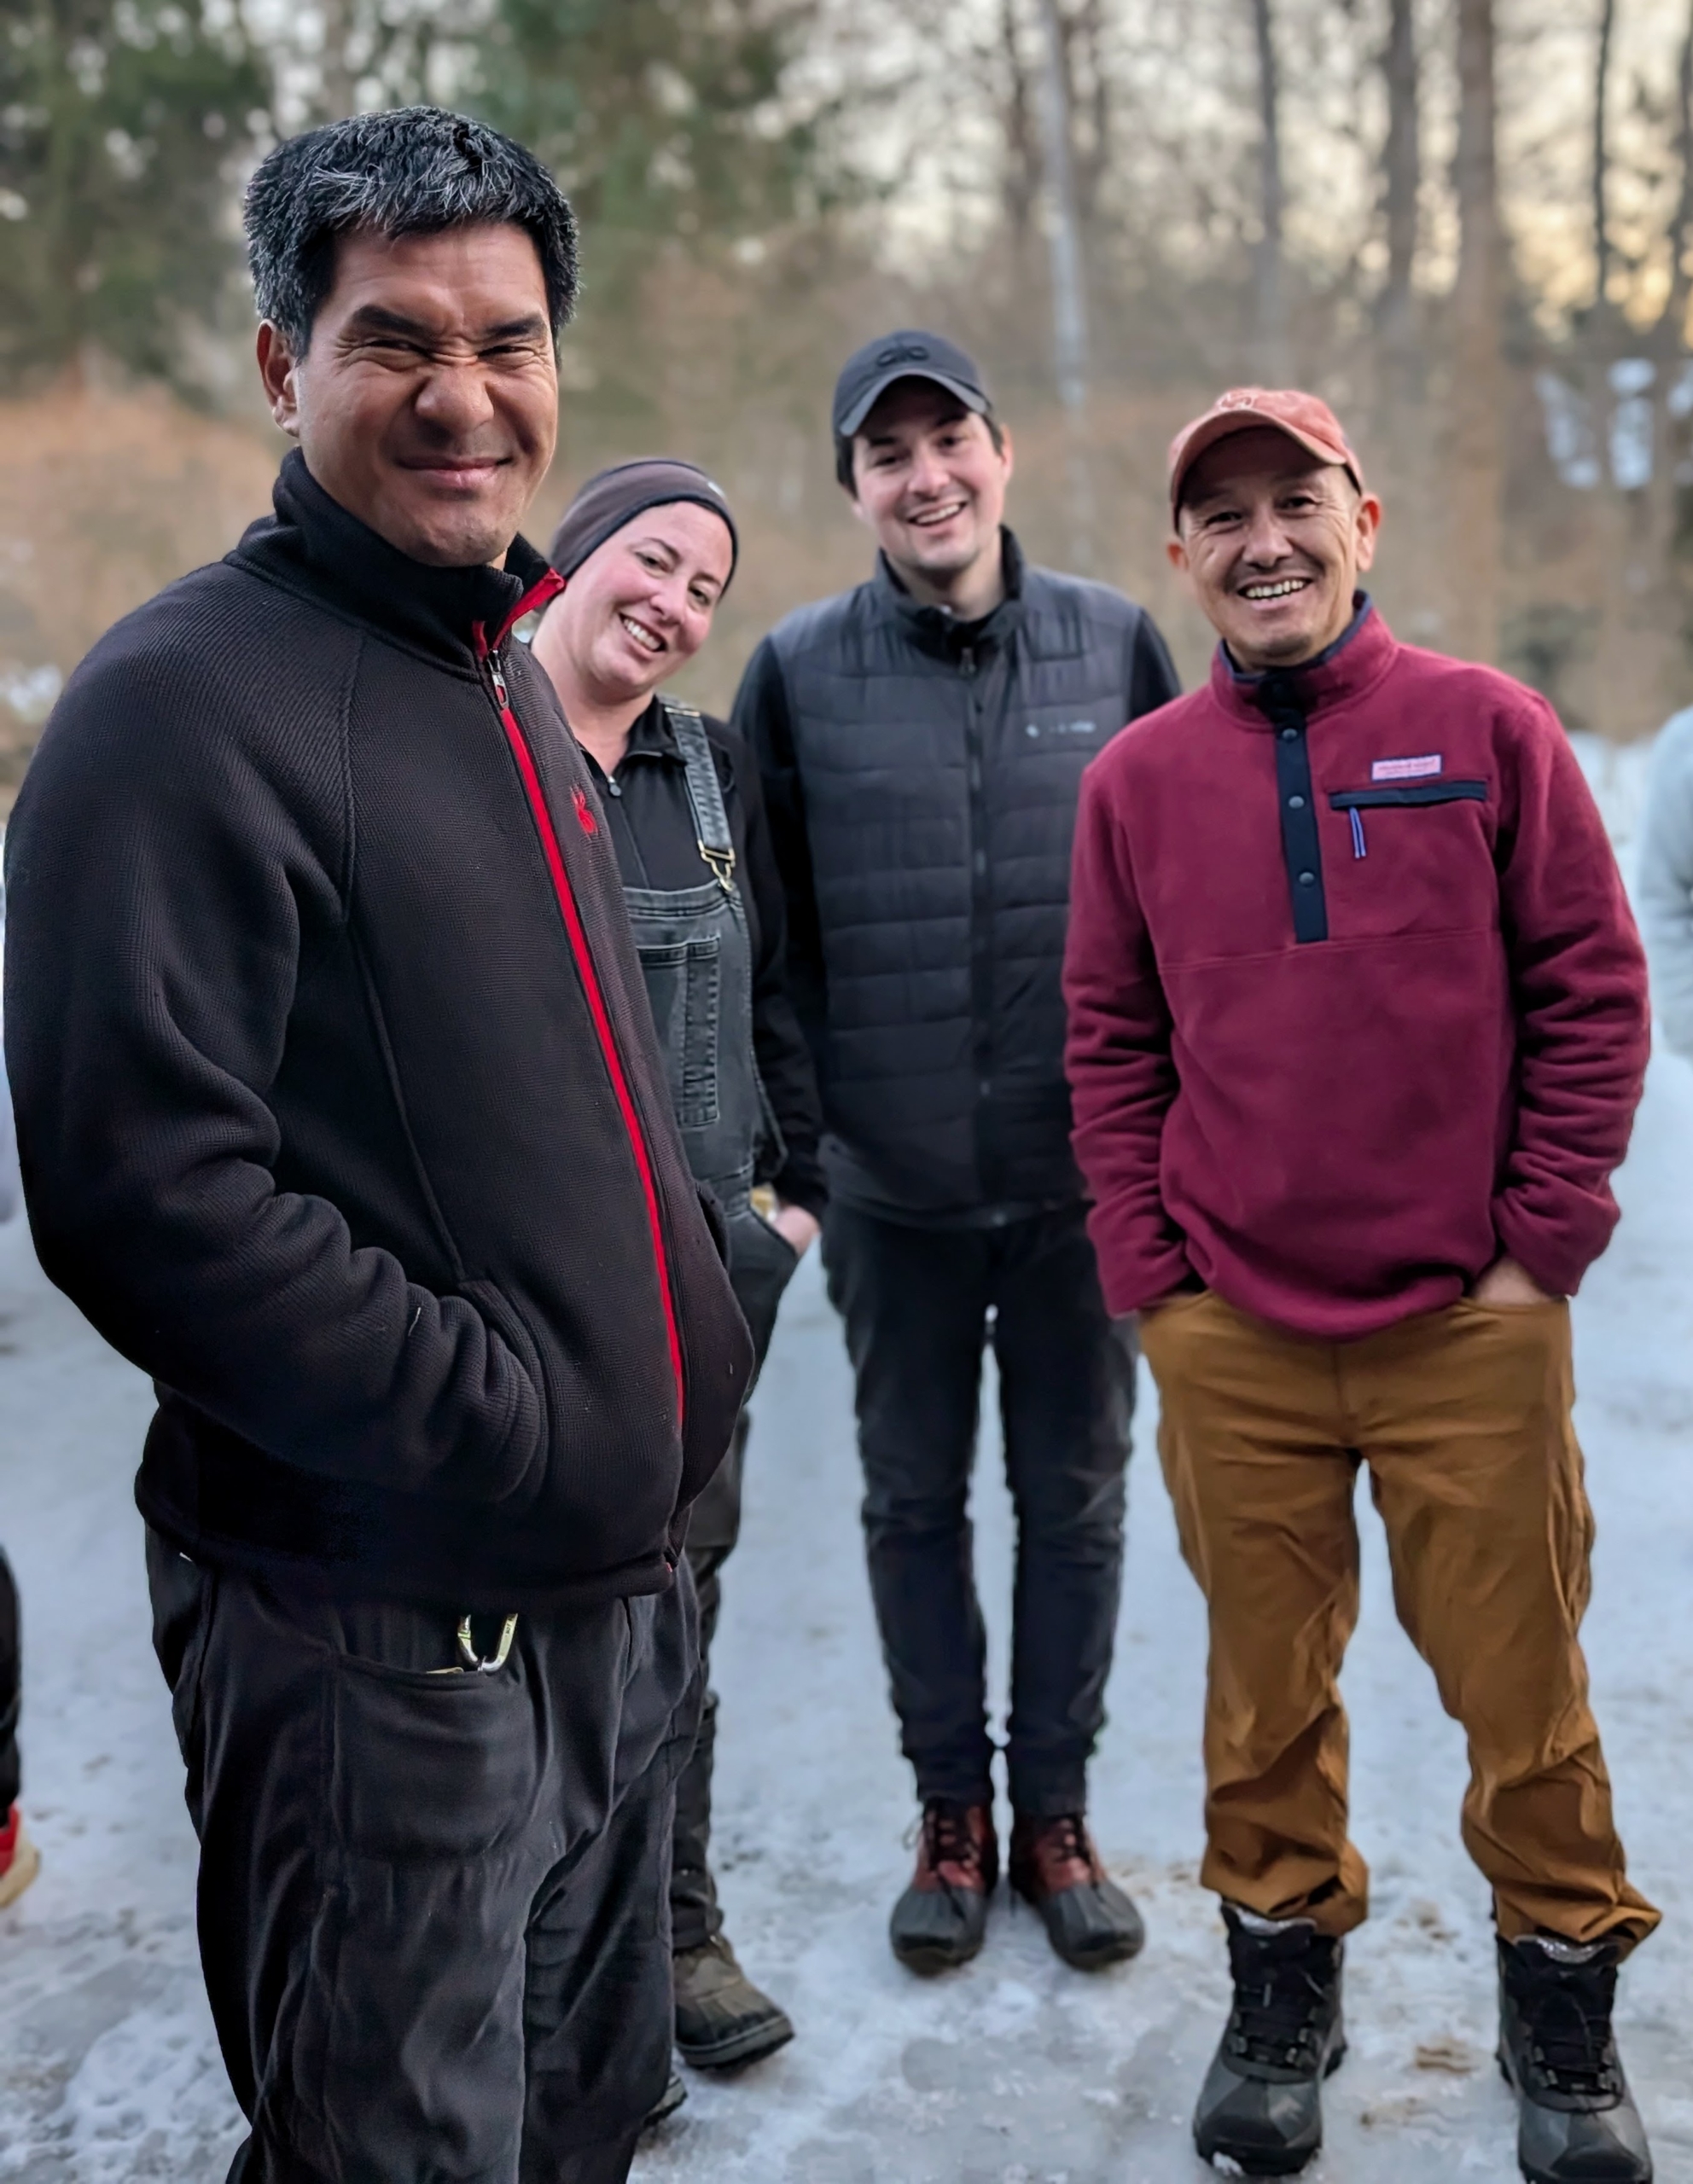
Holding their cups of eggnog – Pete Sherpa and Fernando Ferrari from my outdoor grounds crew, and my driver, Andres Velastegui – they’ve all been with me for many years.
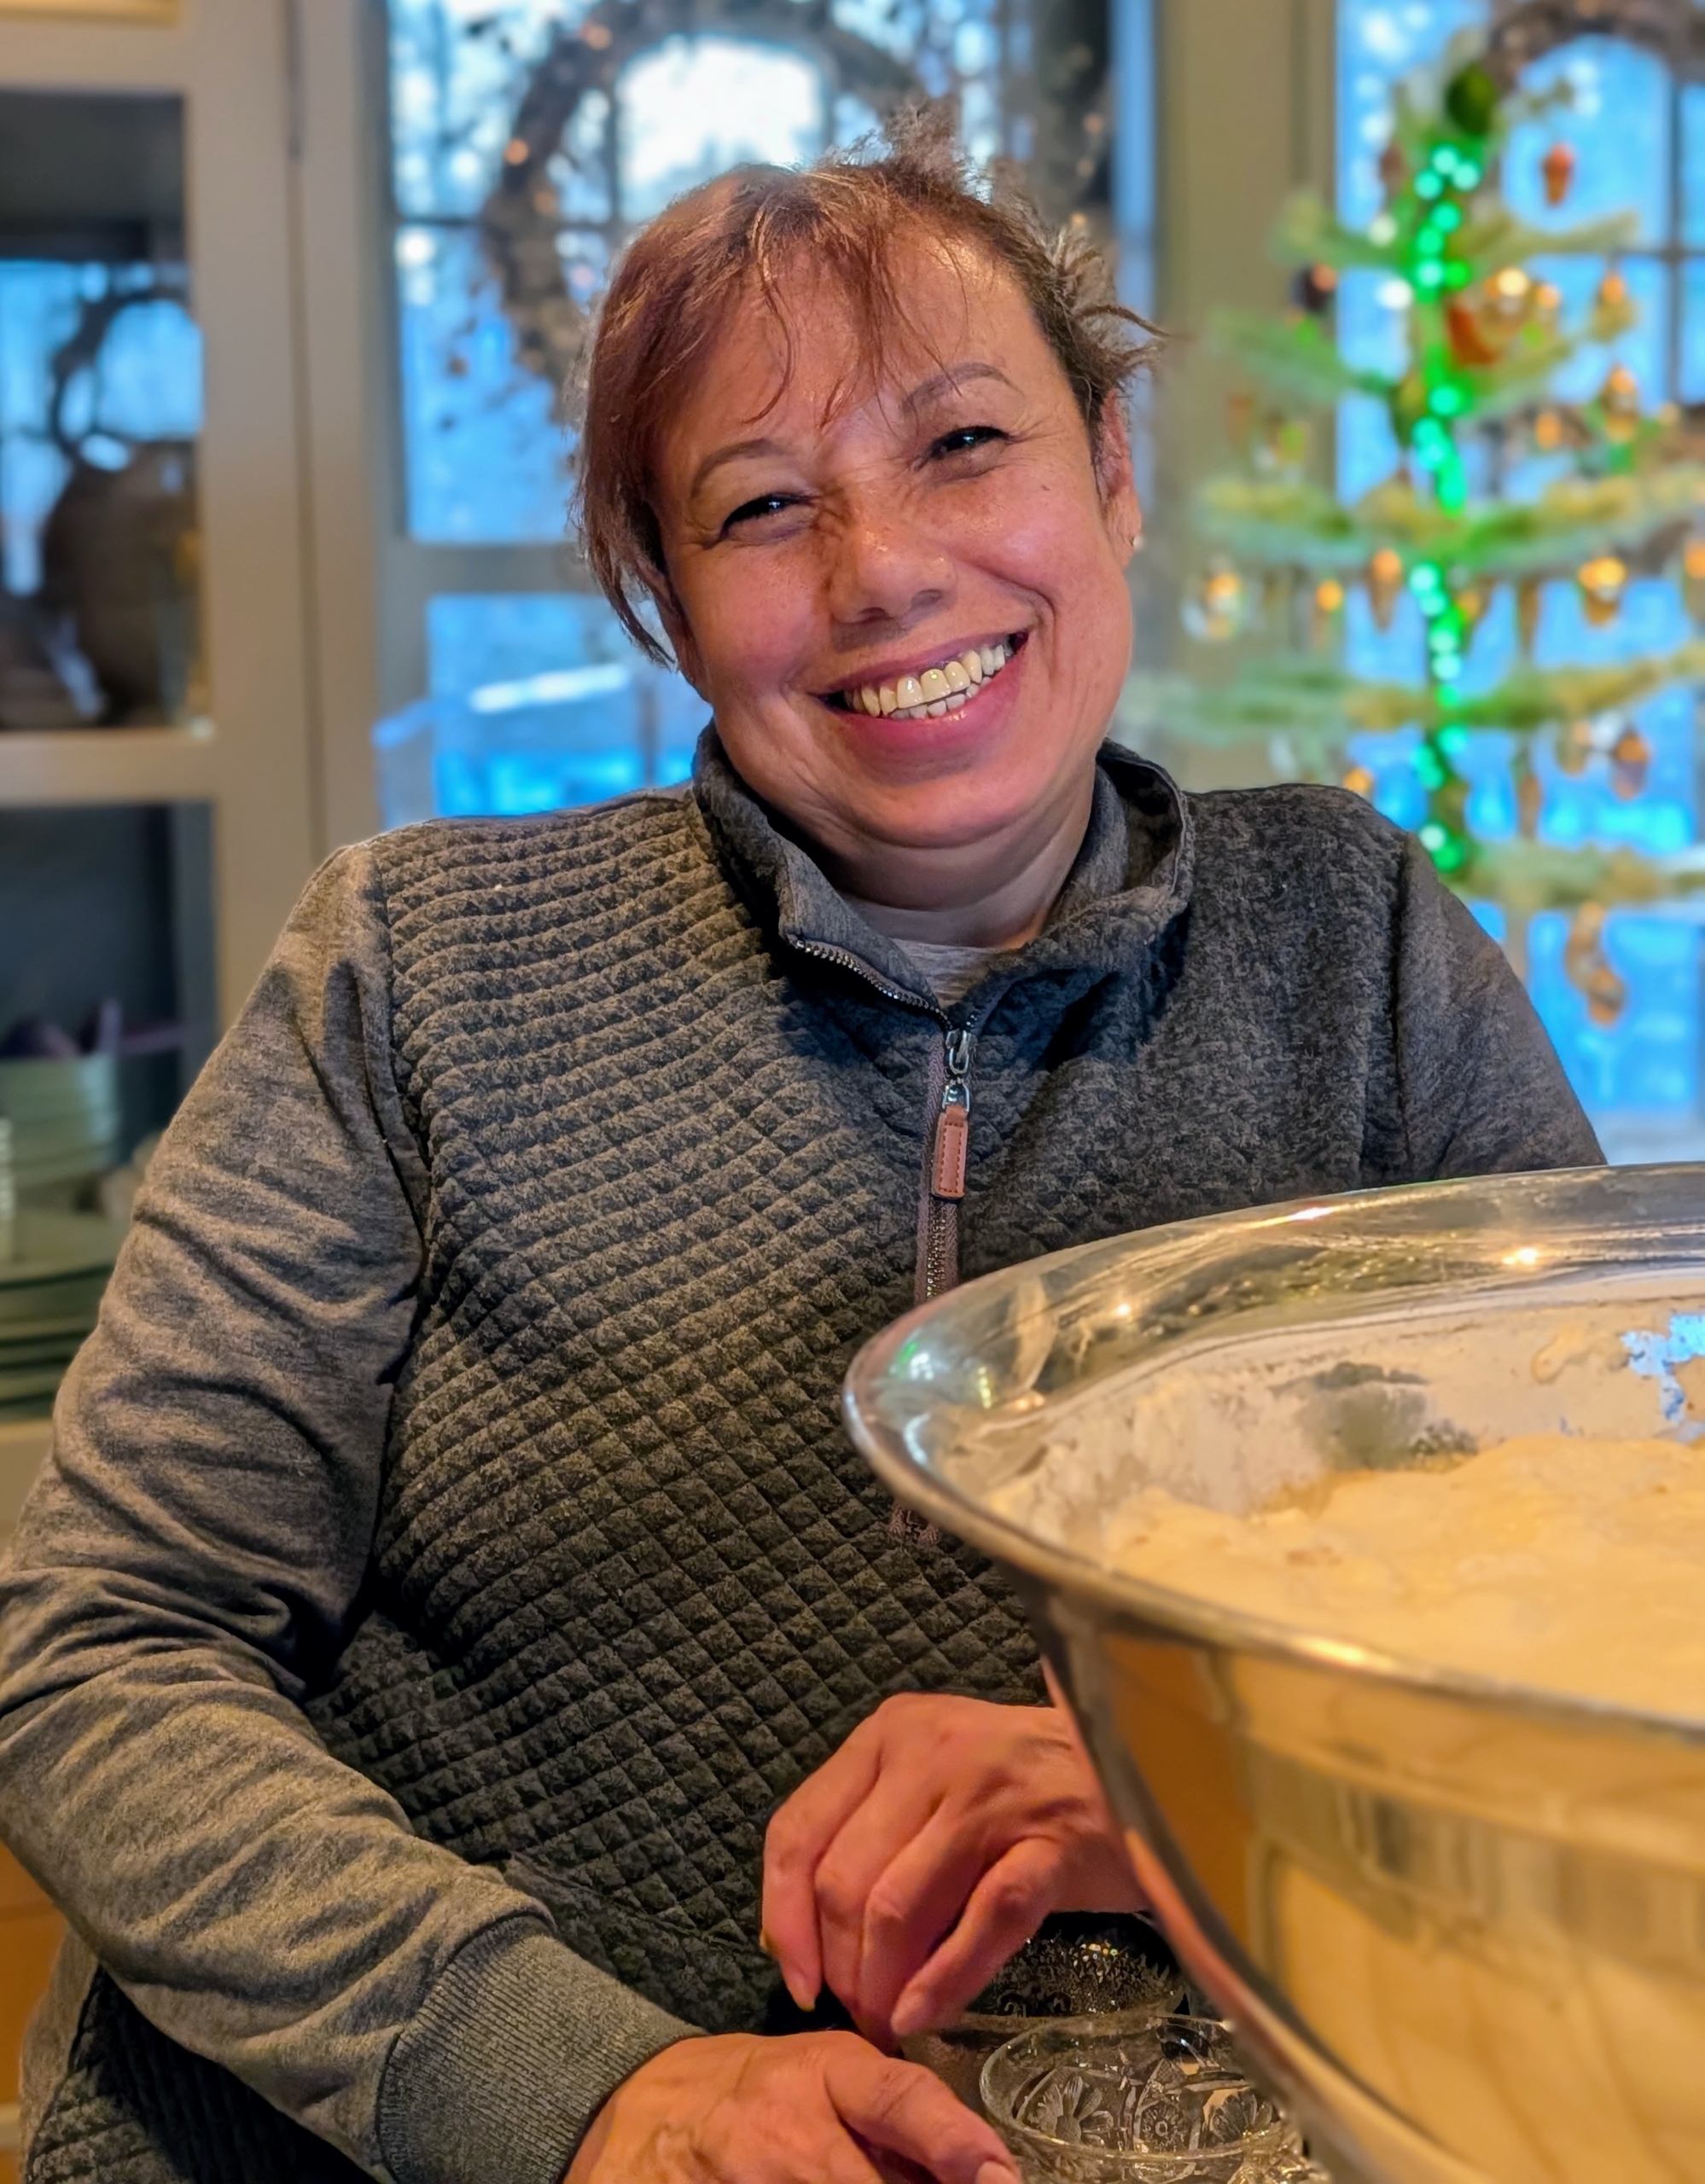
Here’s my housekeeper Elvira Rojas waiting her turn to fill a cup of eggnog.
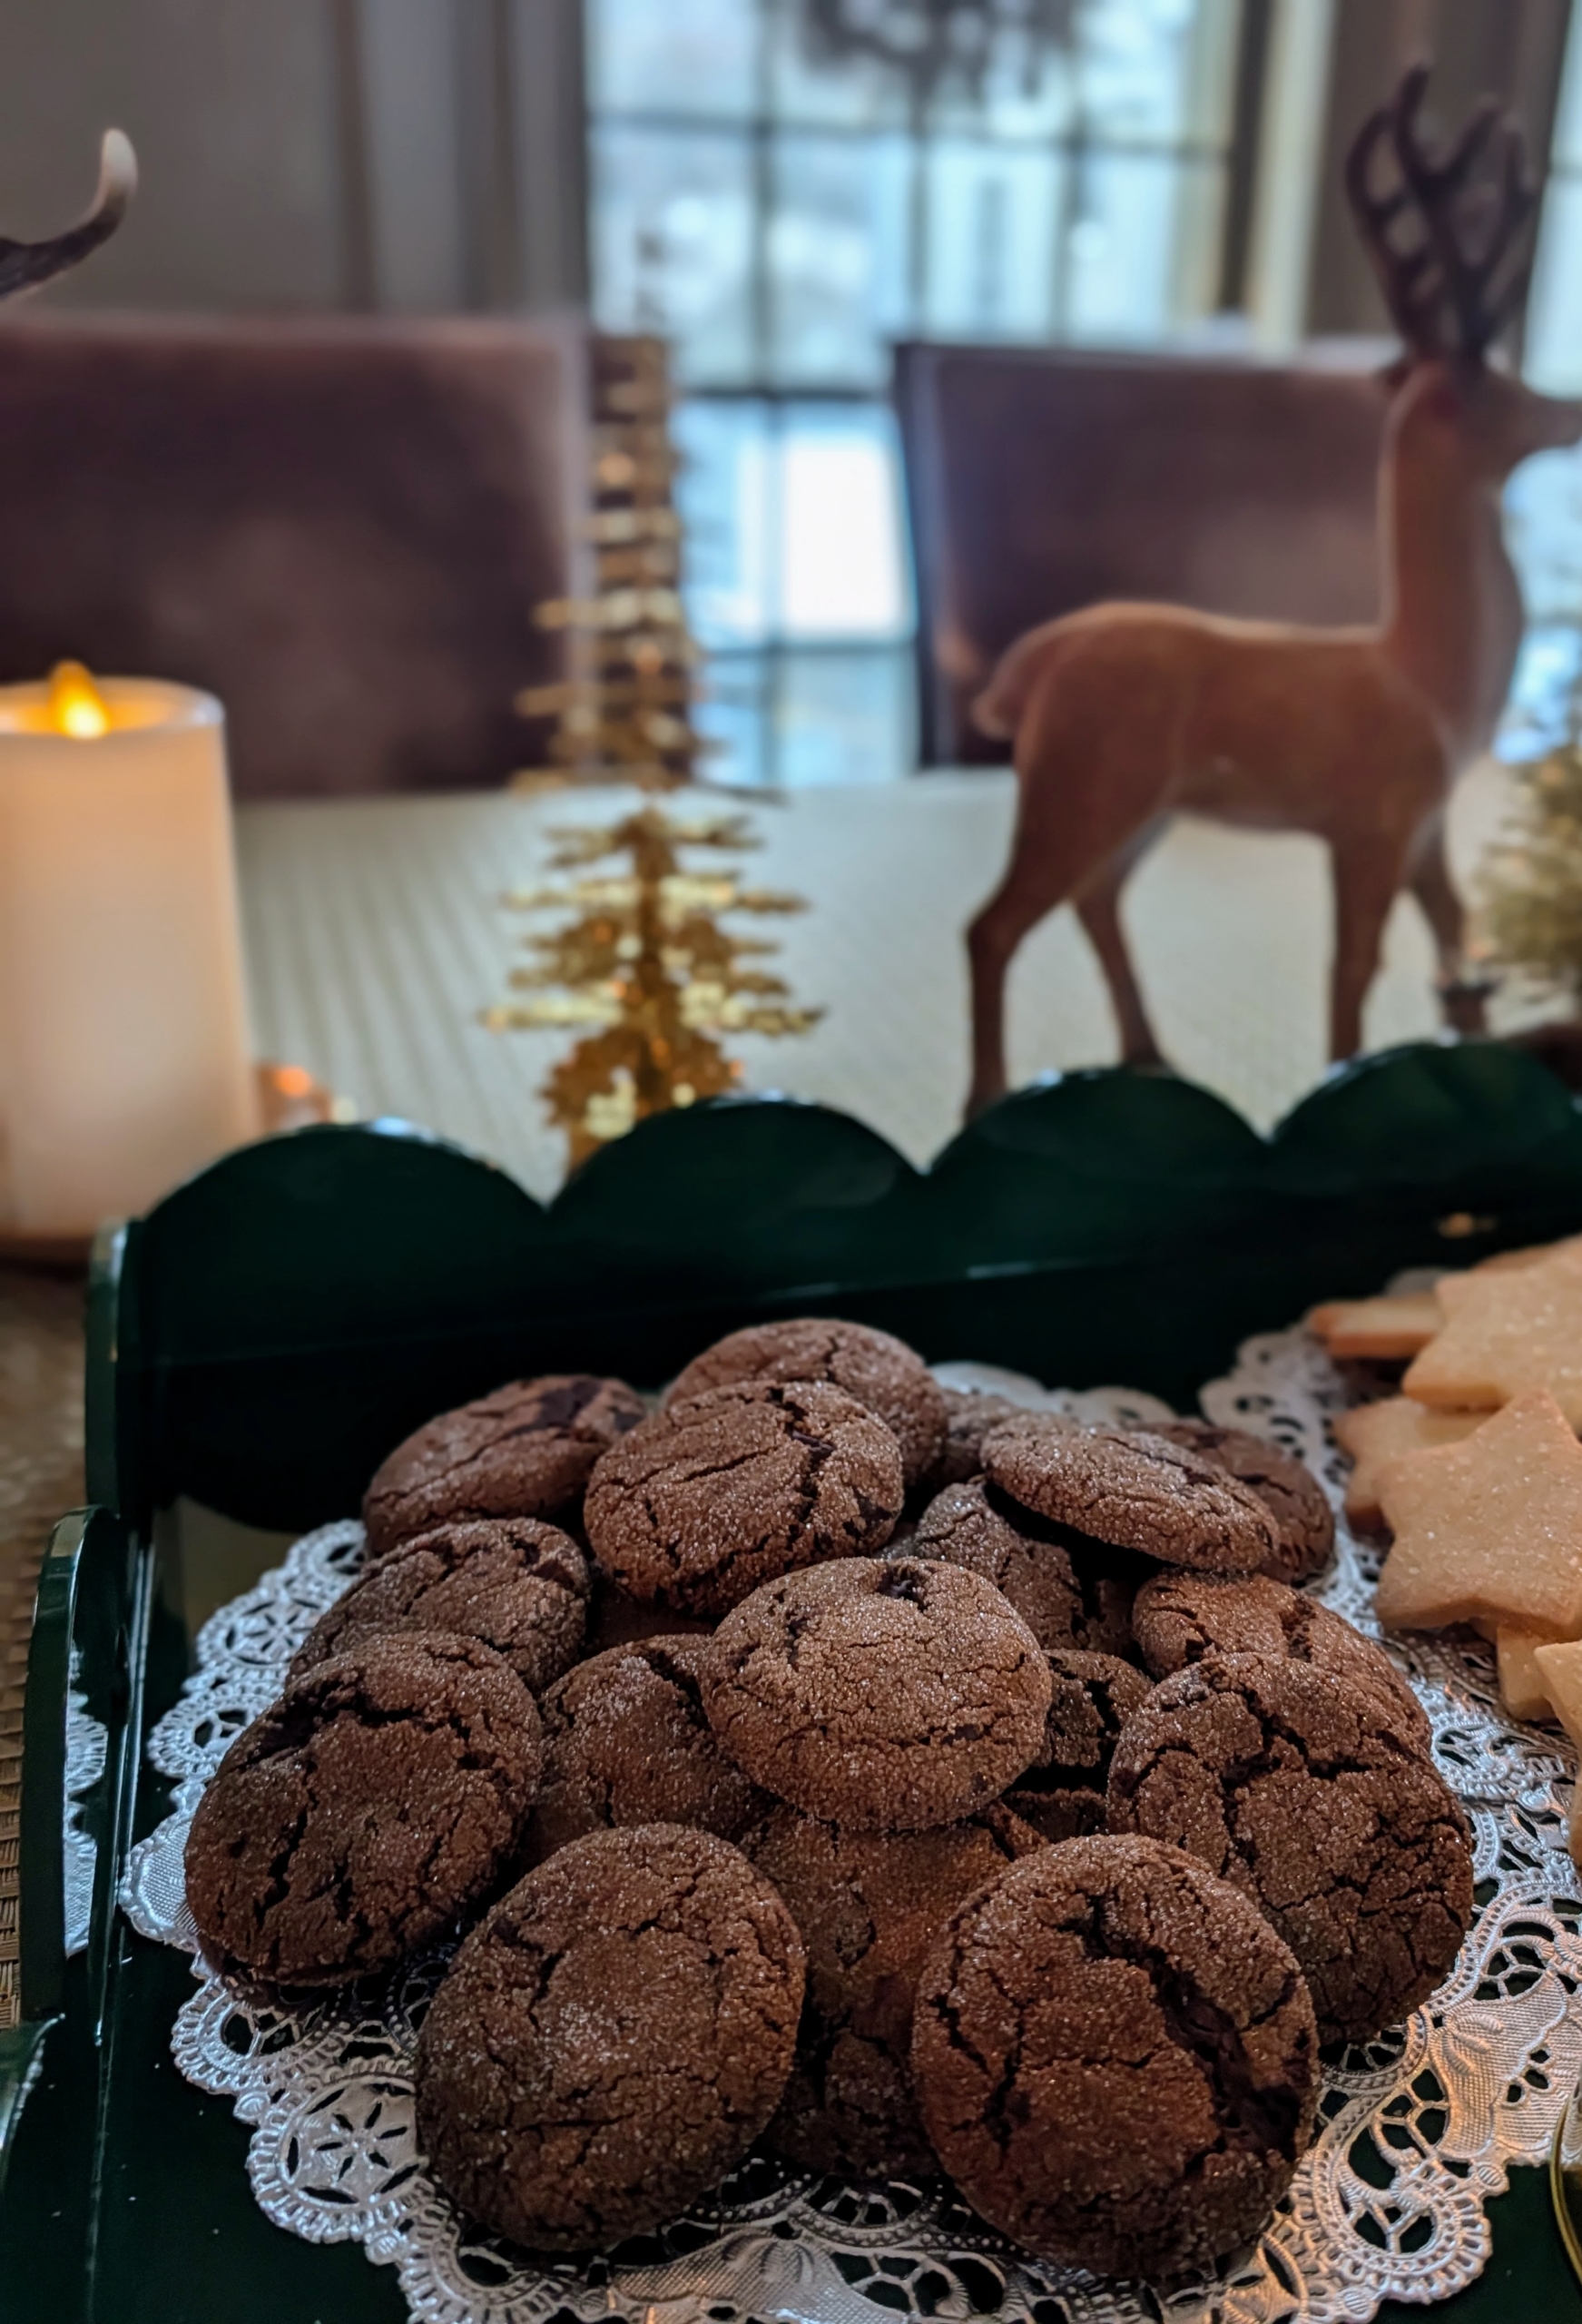
Molly also made cookies – chewy chocolate gingerbread…
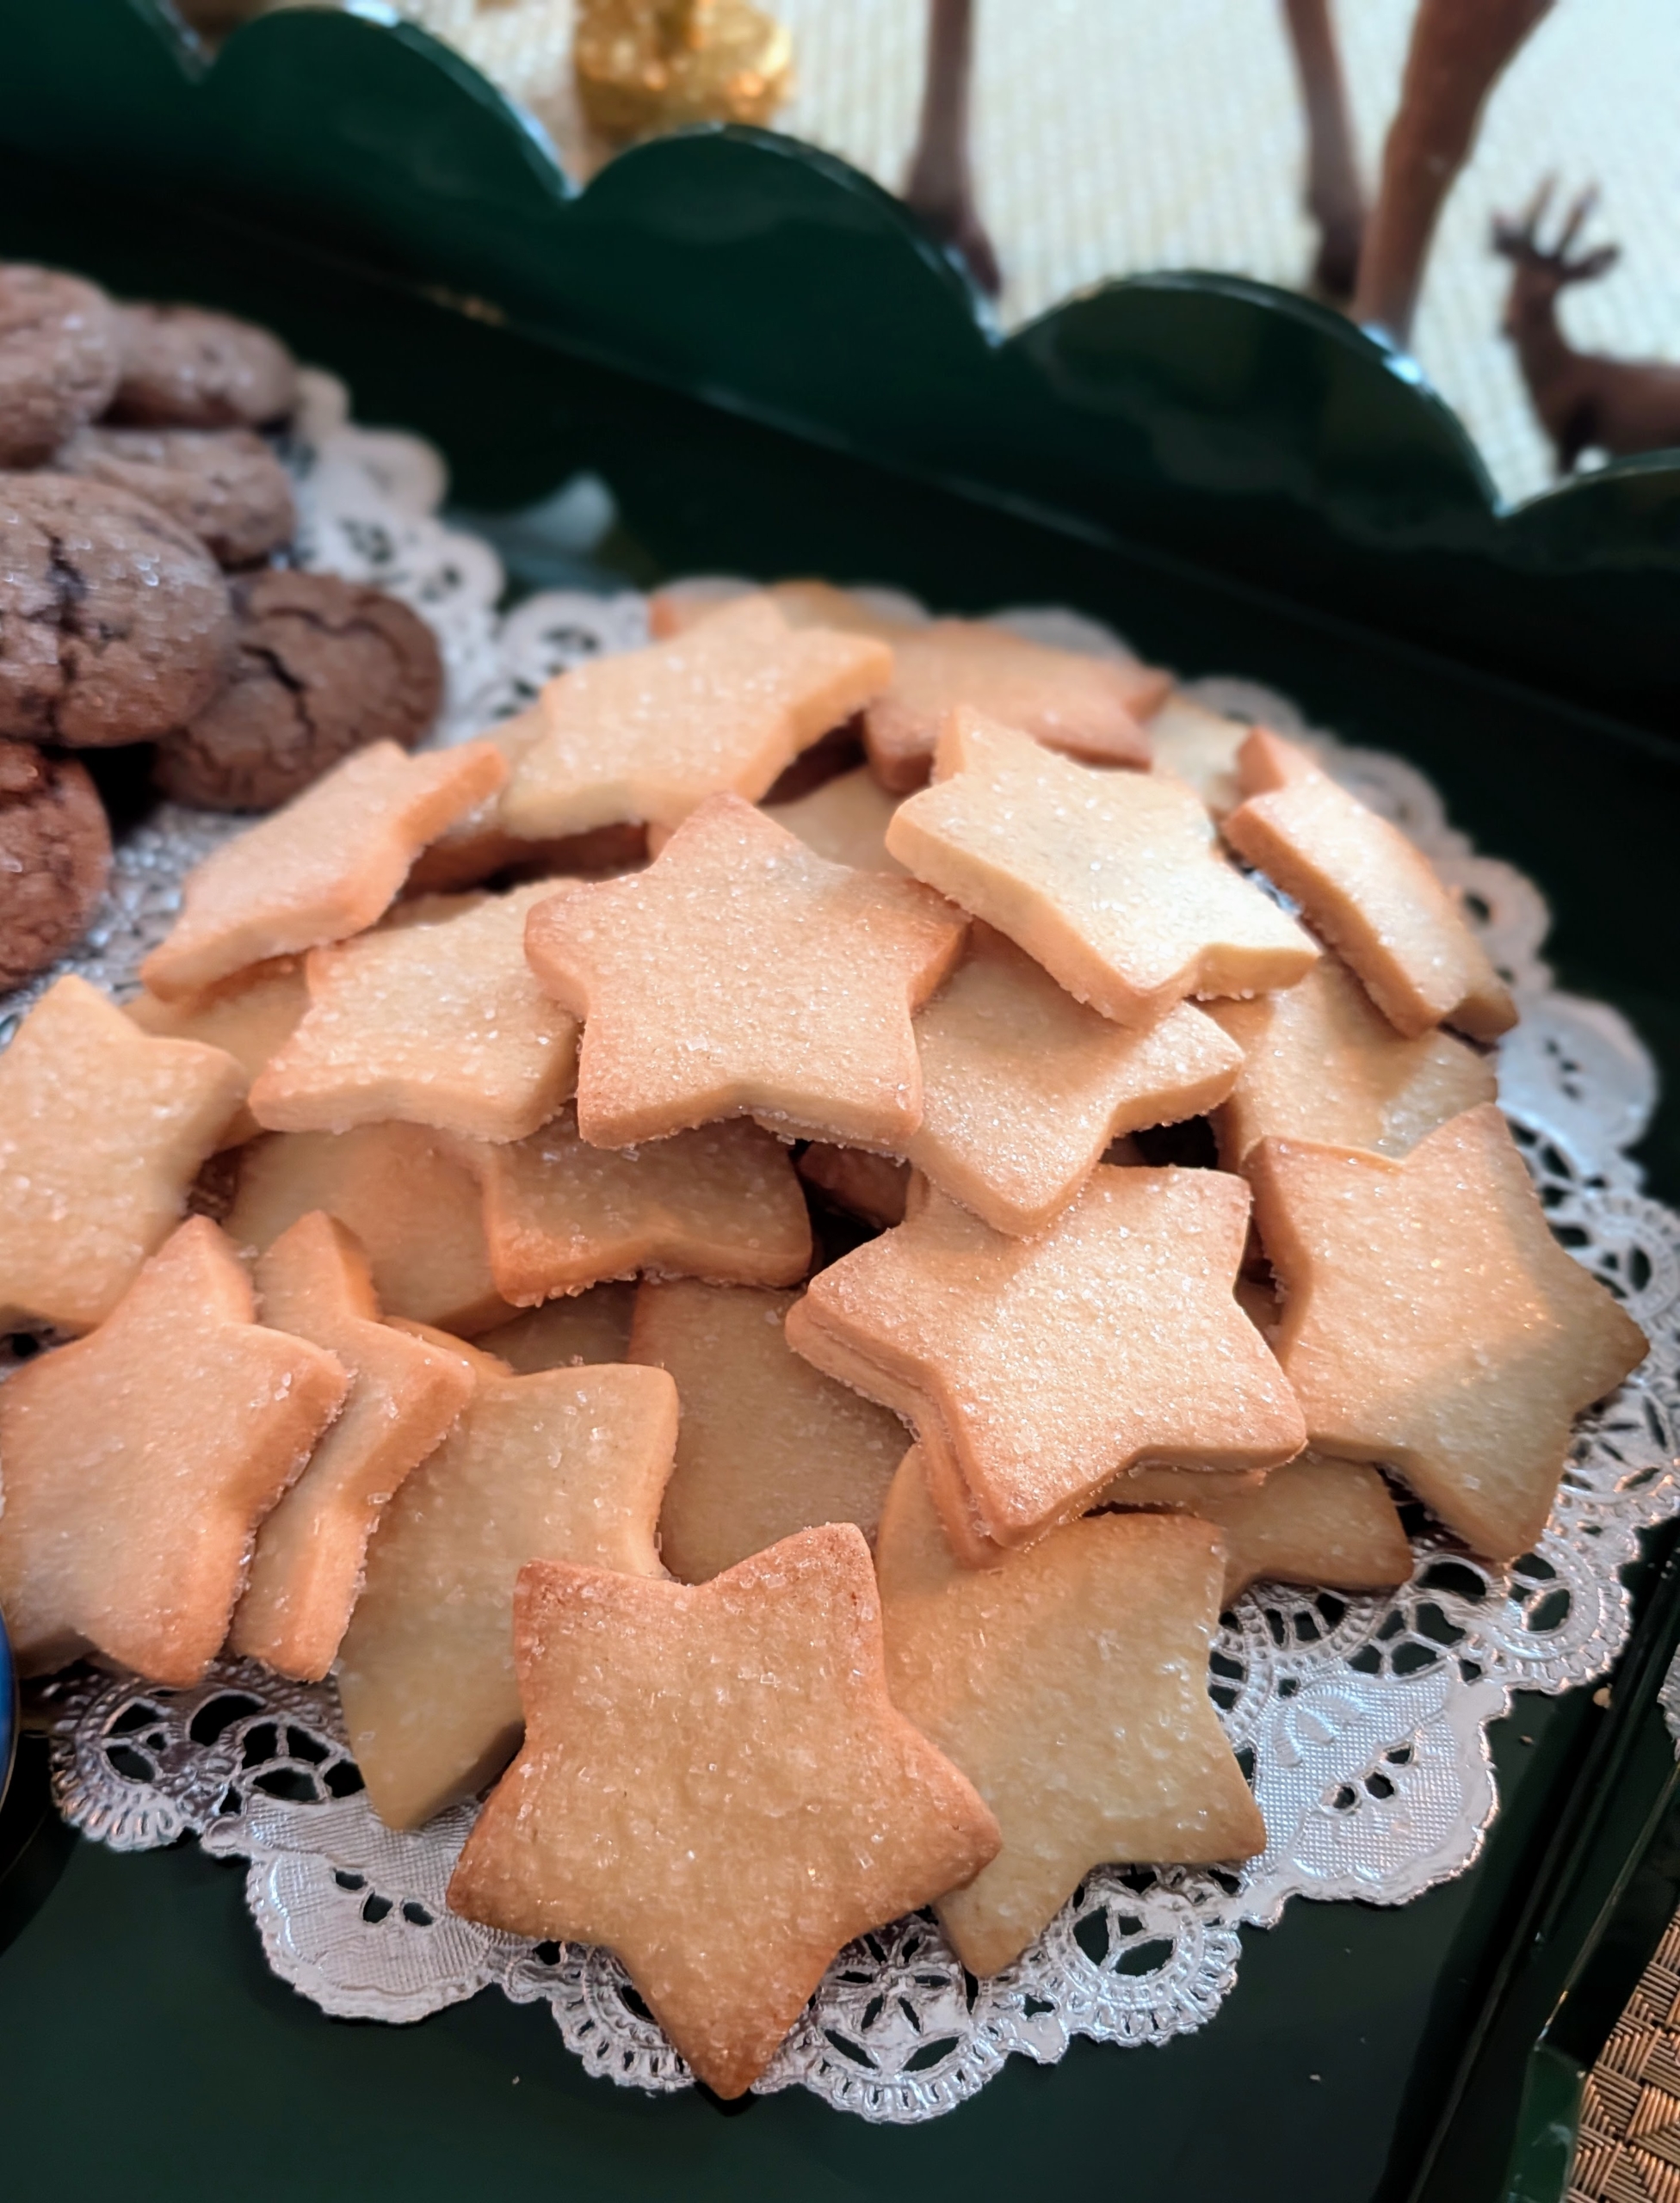
… And sparkling sugar cookies.
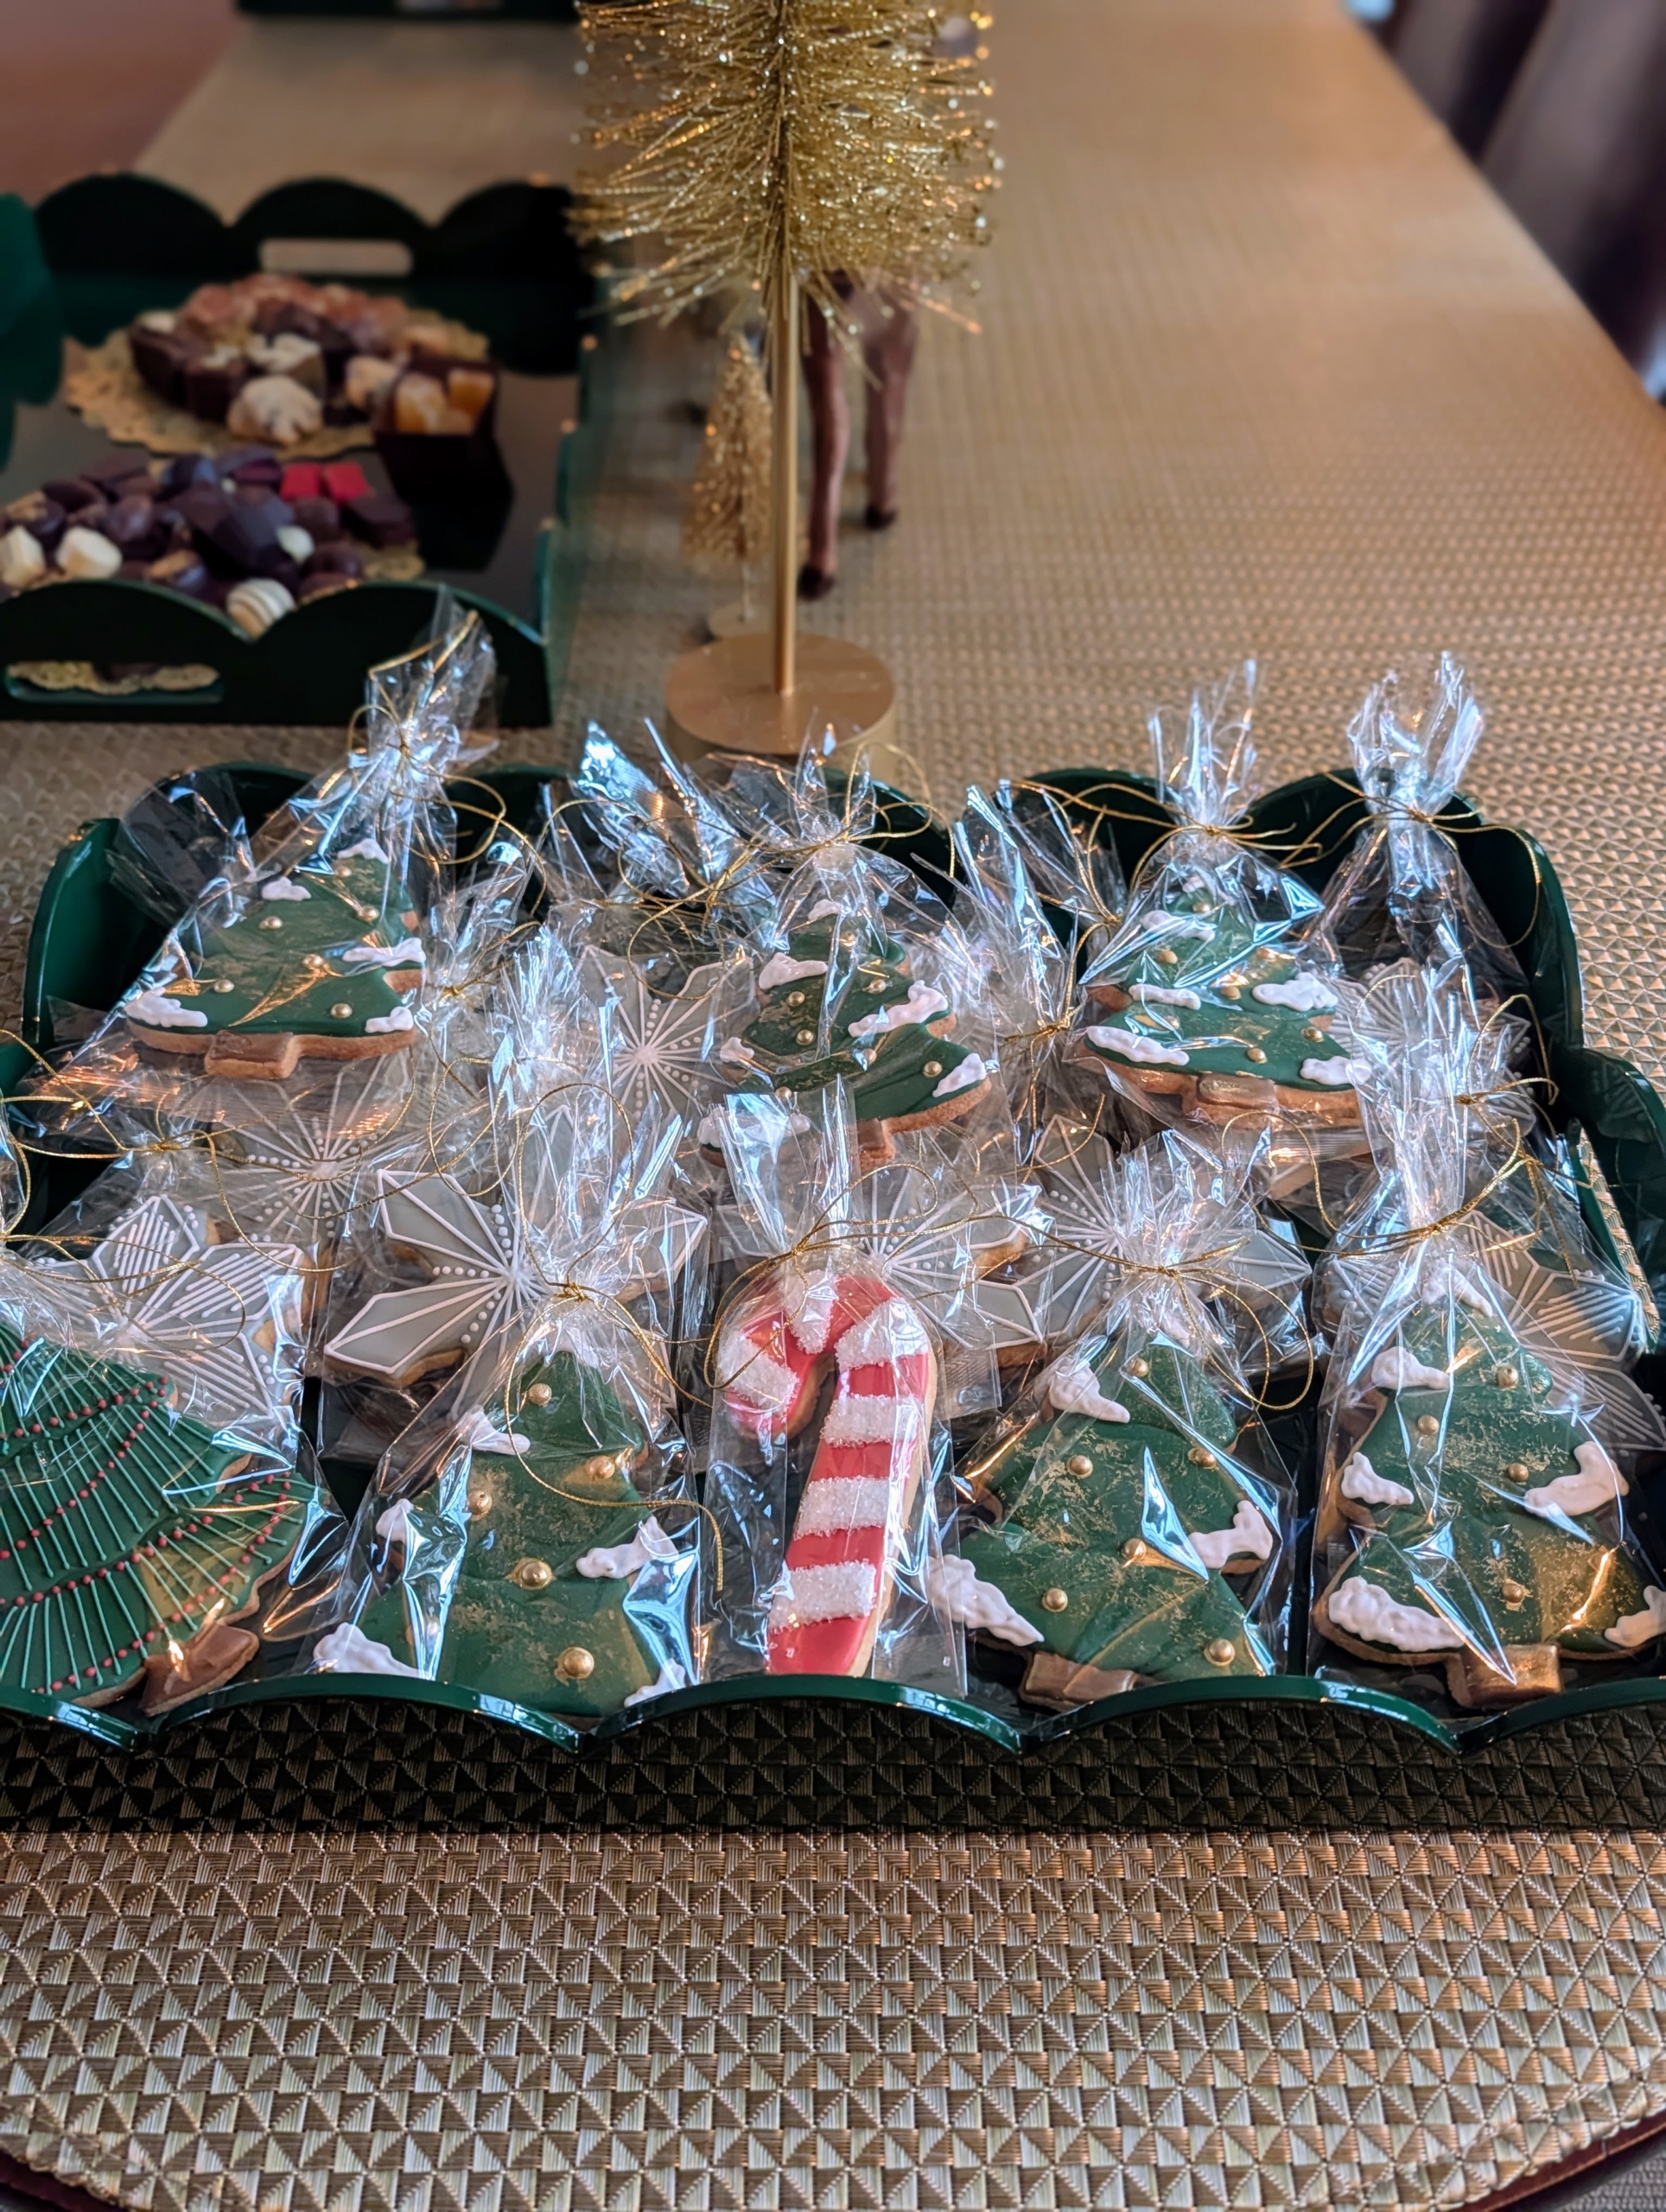
Here are some decorated sugar cookies wrapped and ready to take home.
And for chocolate fanciers, lots of chocolate candies to enjoy.
Here’s my head gardener Ryan McCallister and Jimmy Oliveros from my farm team. It was so nice to see everyone having such a good time.
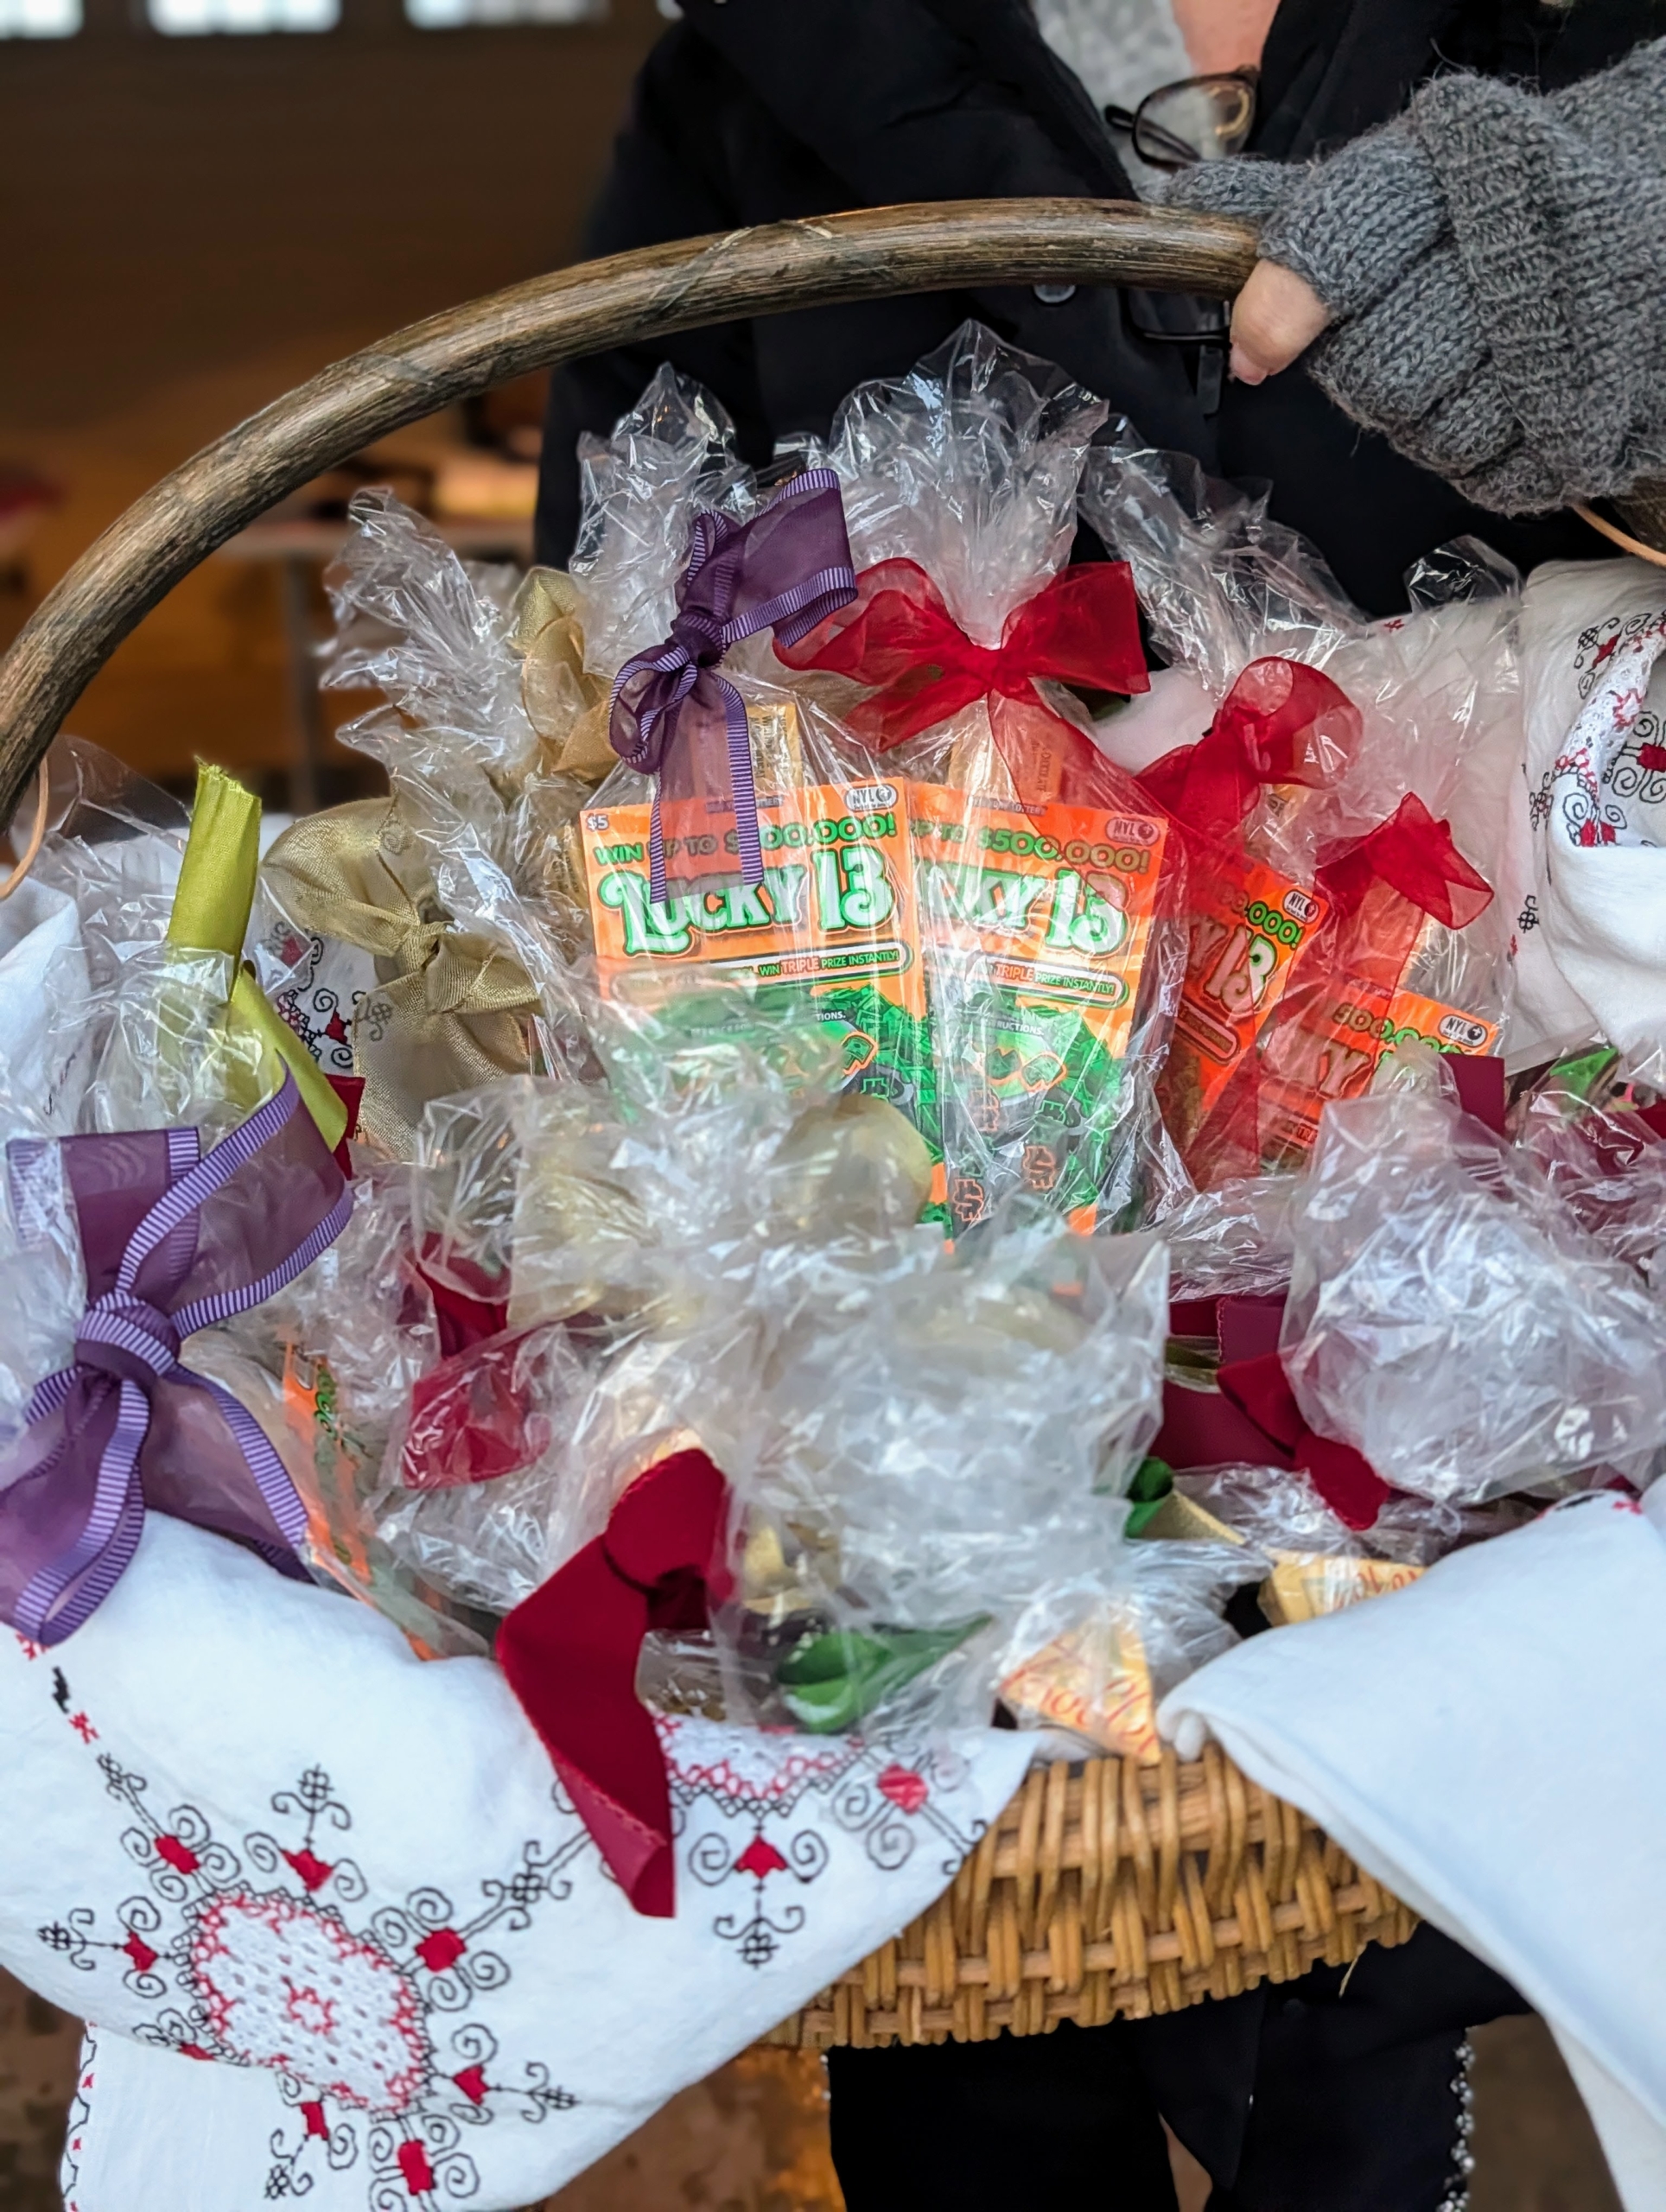
My dear friend, Muffin Dowdle, brought gifts for everyone too – candy bars and scratch off lottery tickets wrapped in cellophane bags and tied with festive ribbons.
After the buffet lunch, I planned a fun “grab bag” gift-giving activity – everyone picked numbers from a bowl and then lined up to make their selections. Here’s my housekeeper Enma Sandoval picking up her choices.
Next in line, my gardener Matt Orrego – what’s in there? Shoes?
Pasang Sherpa, Helen Peparo, Juan Londono, and Chhiring Sherpa wait their turns.
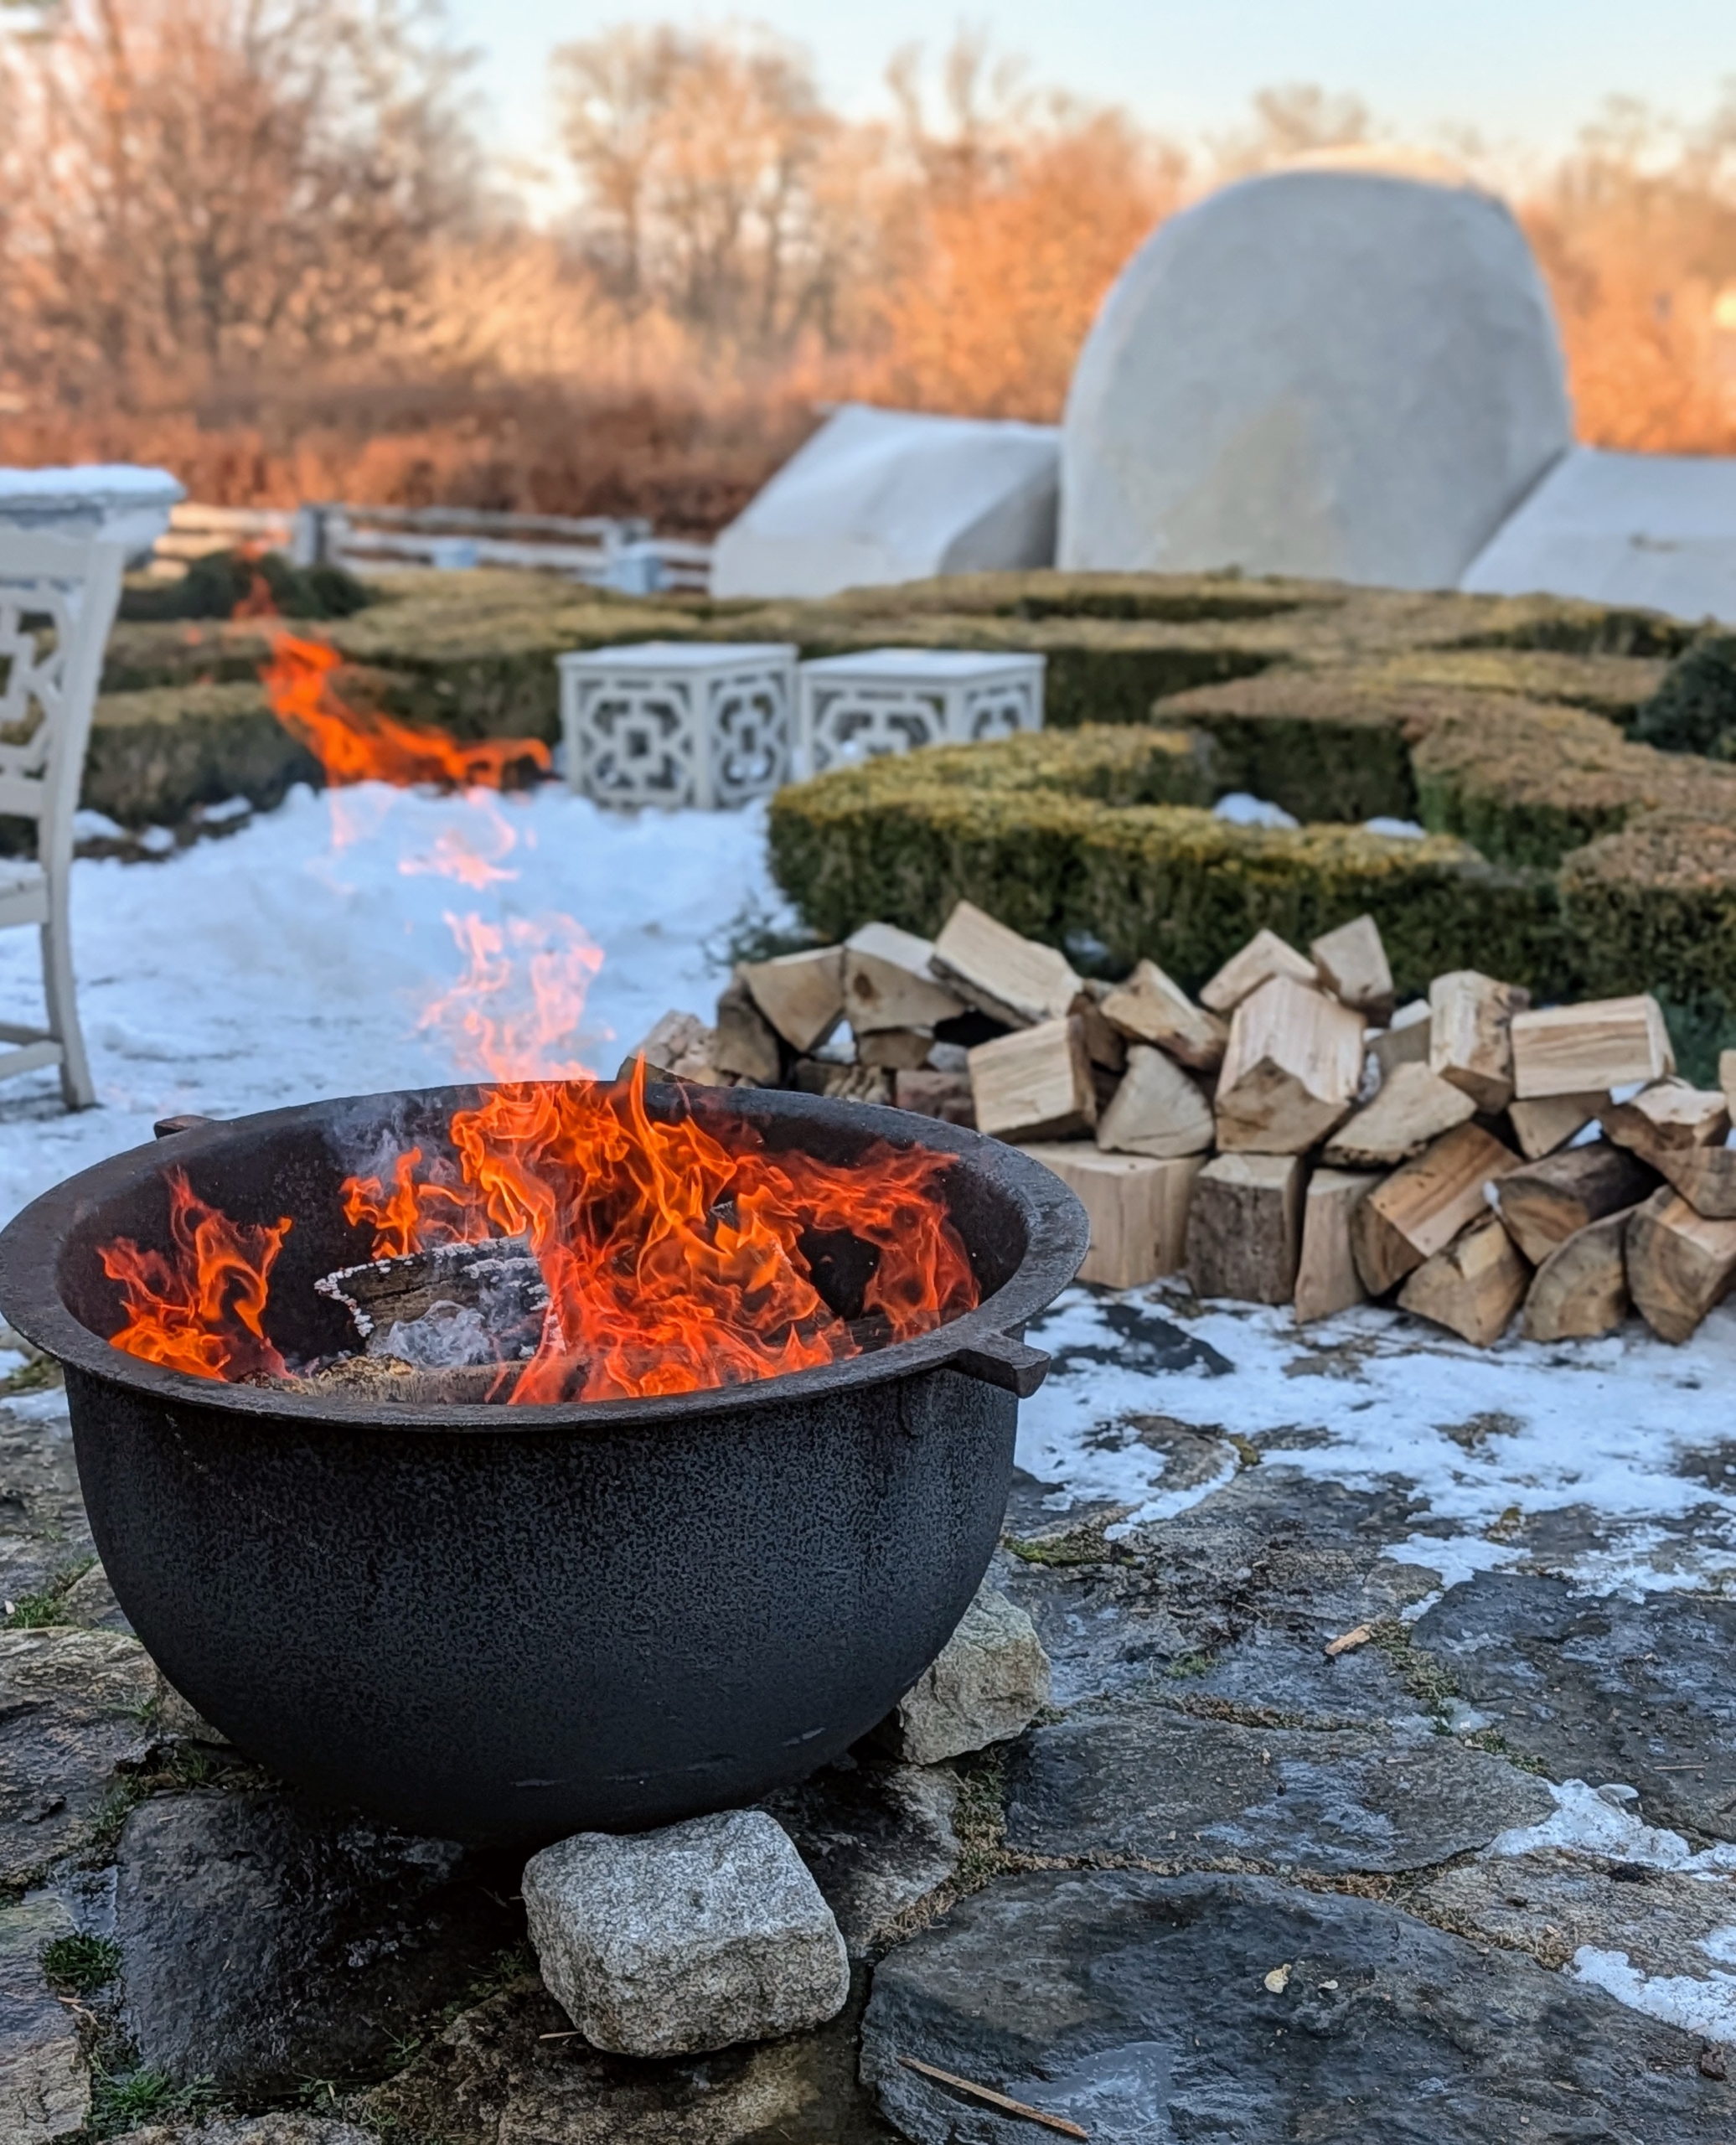
Outside, a nice fire in my sugar pot warmed cold hands. This is one of several huge cast iron sugar kettles I keep as fire pits. They add such a nice accent to the terraces and have always been fun conversation pieces during gatherings. It was a wonderful luncheon and afternoon together. I, along with my entire staff, wish you all a safe and joyous holiday!
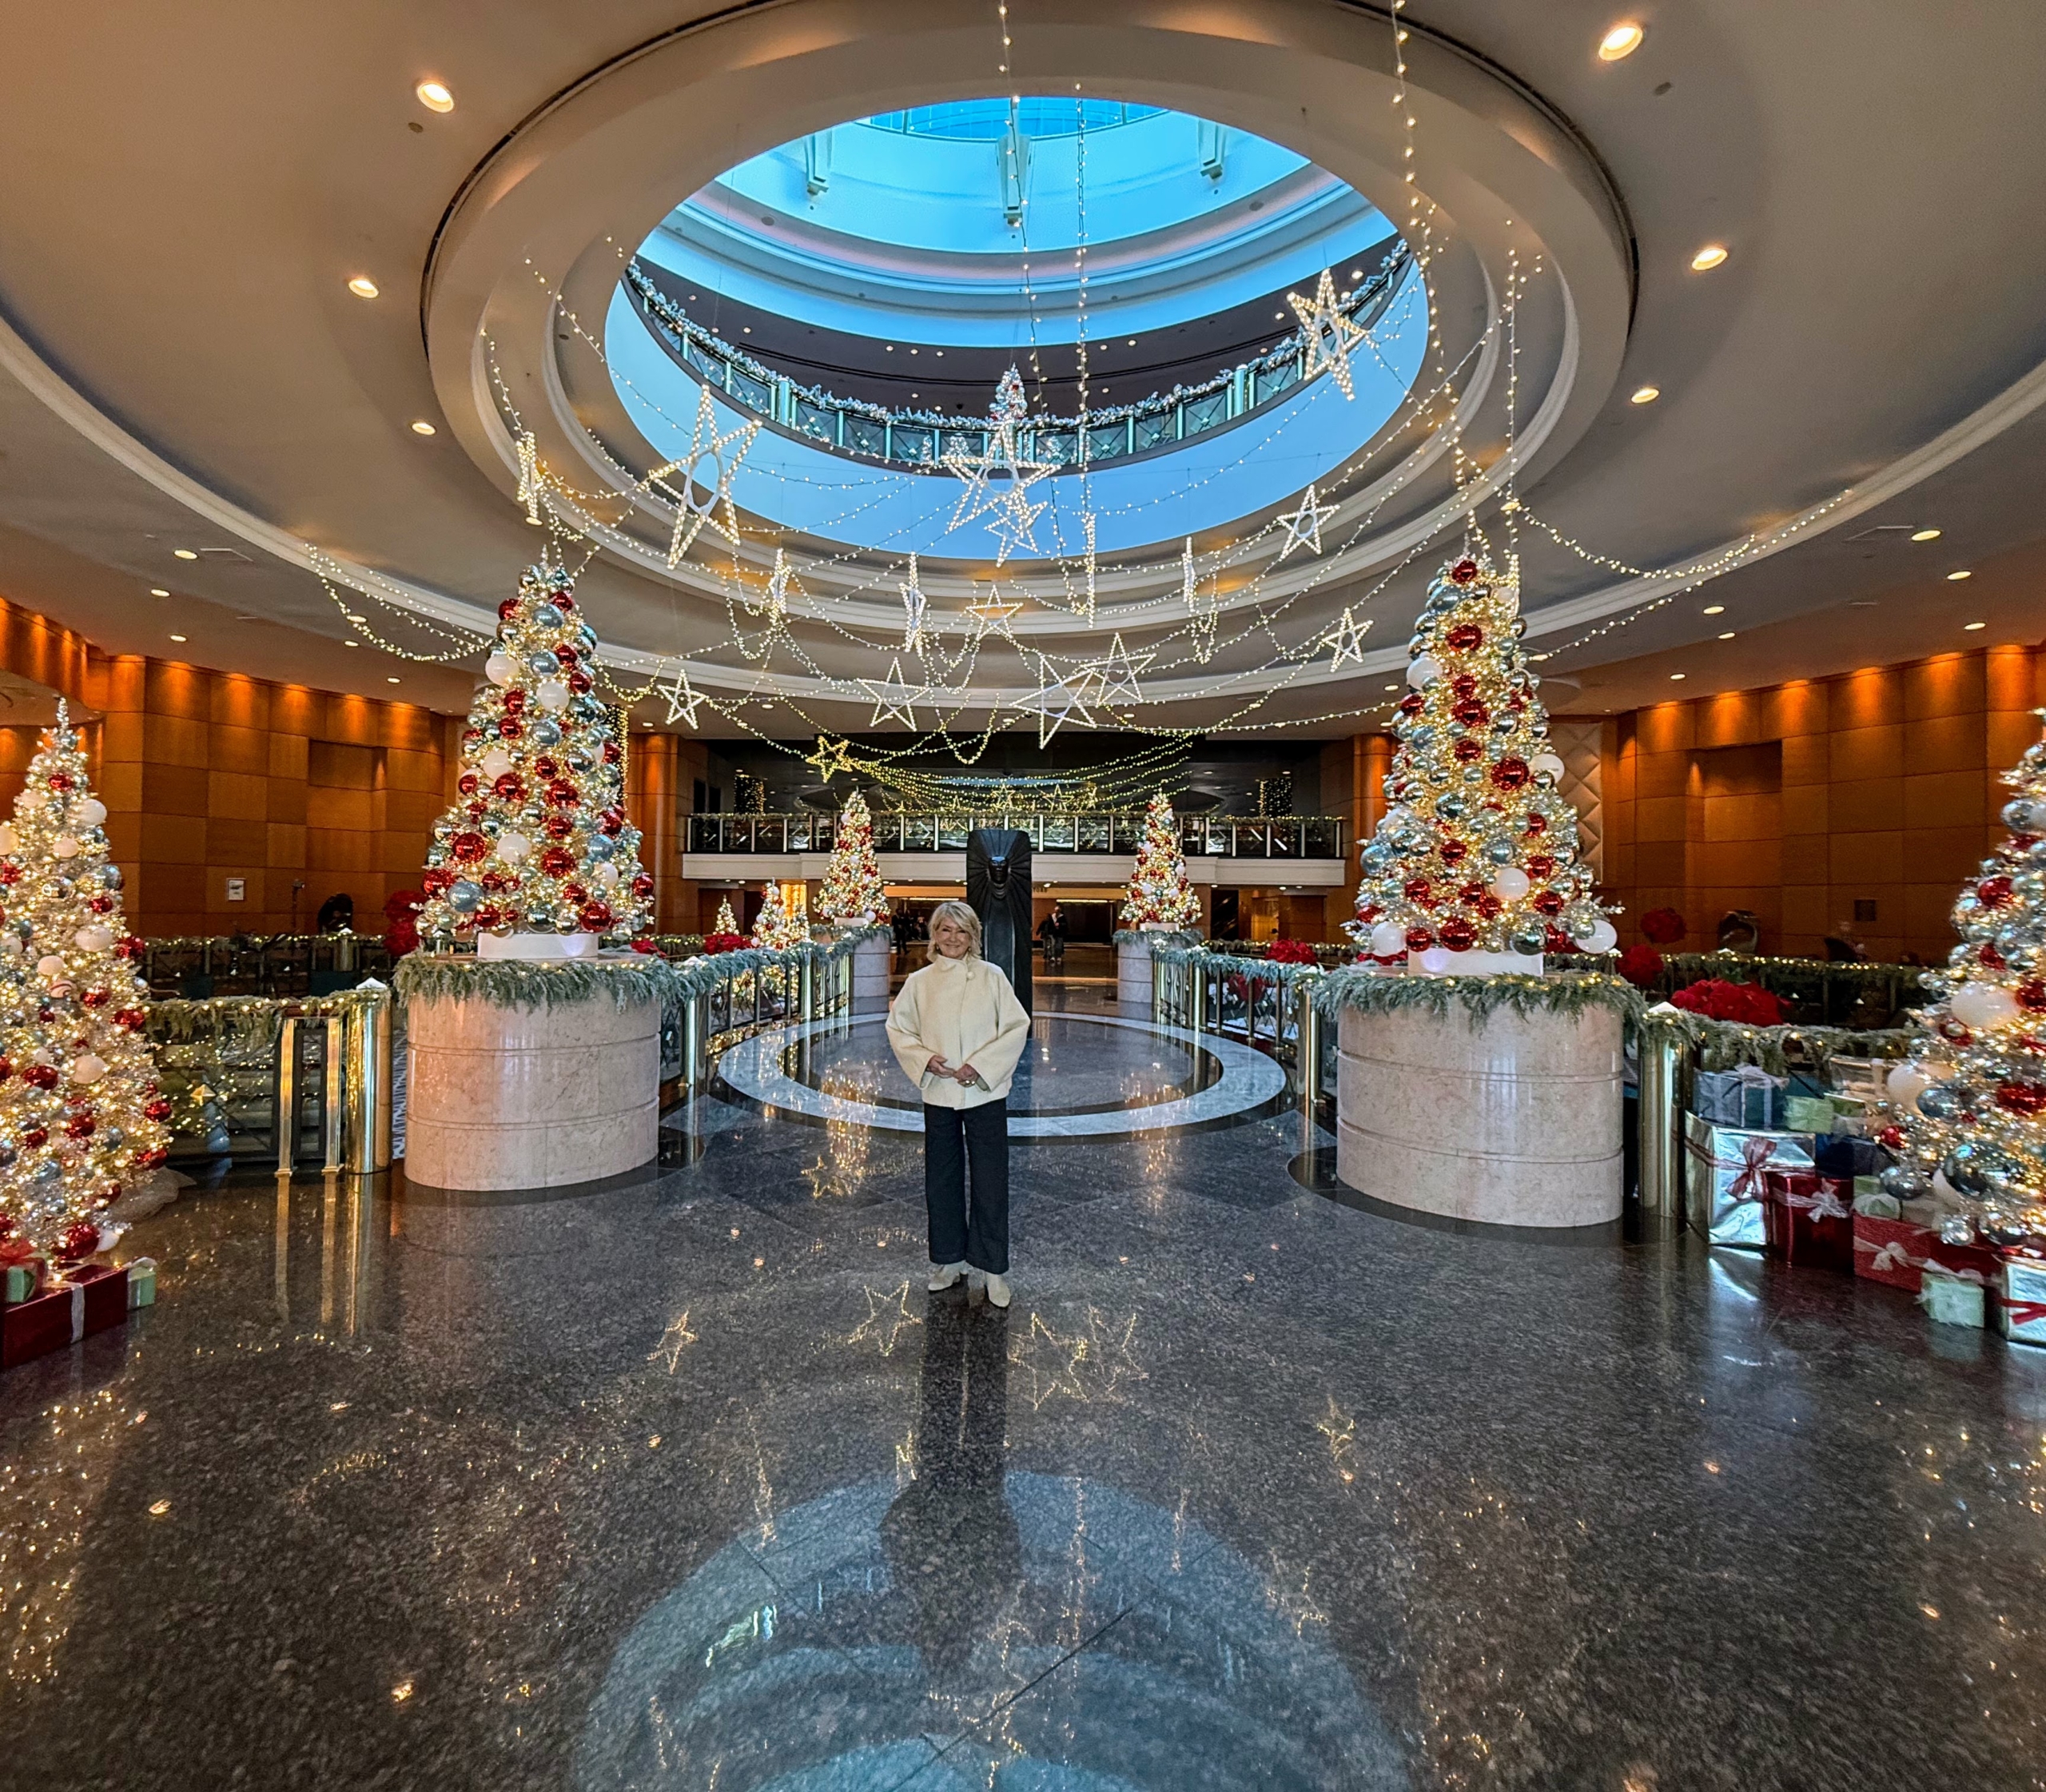
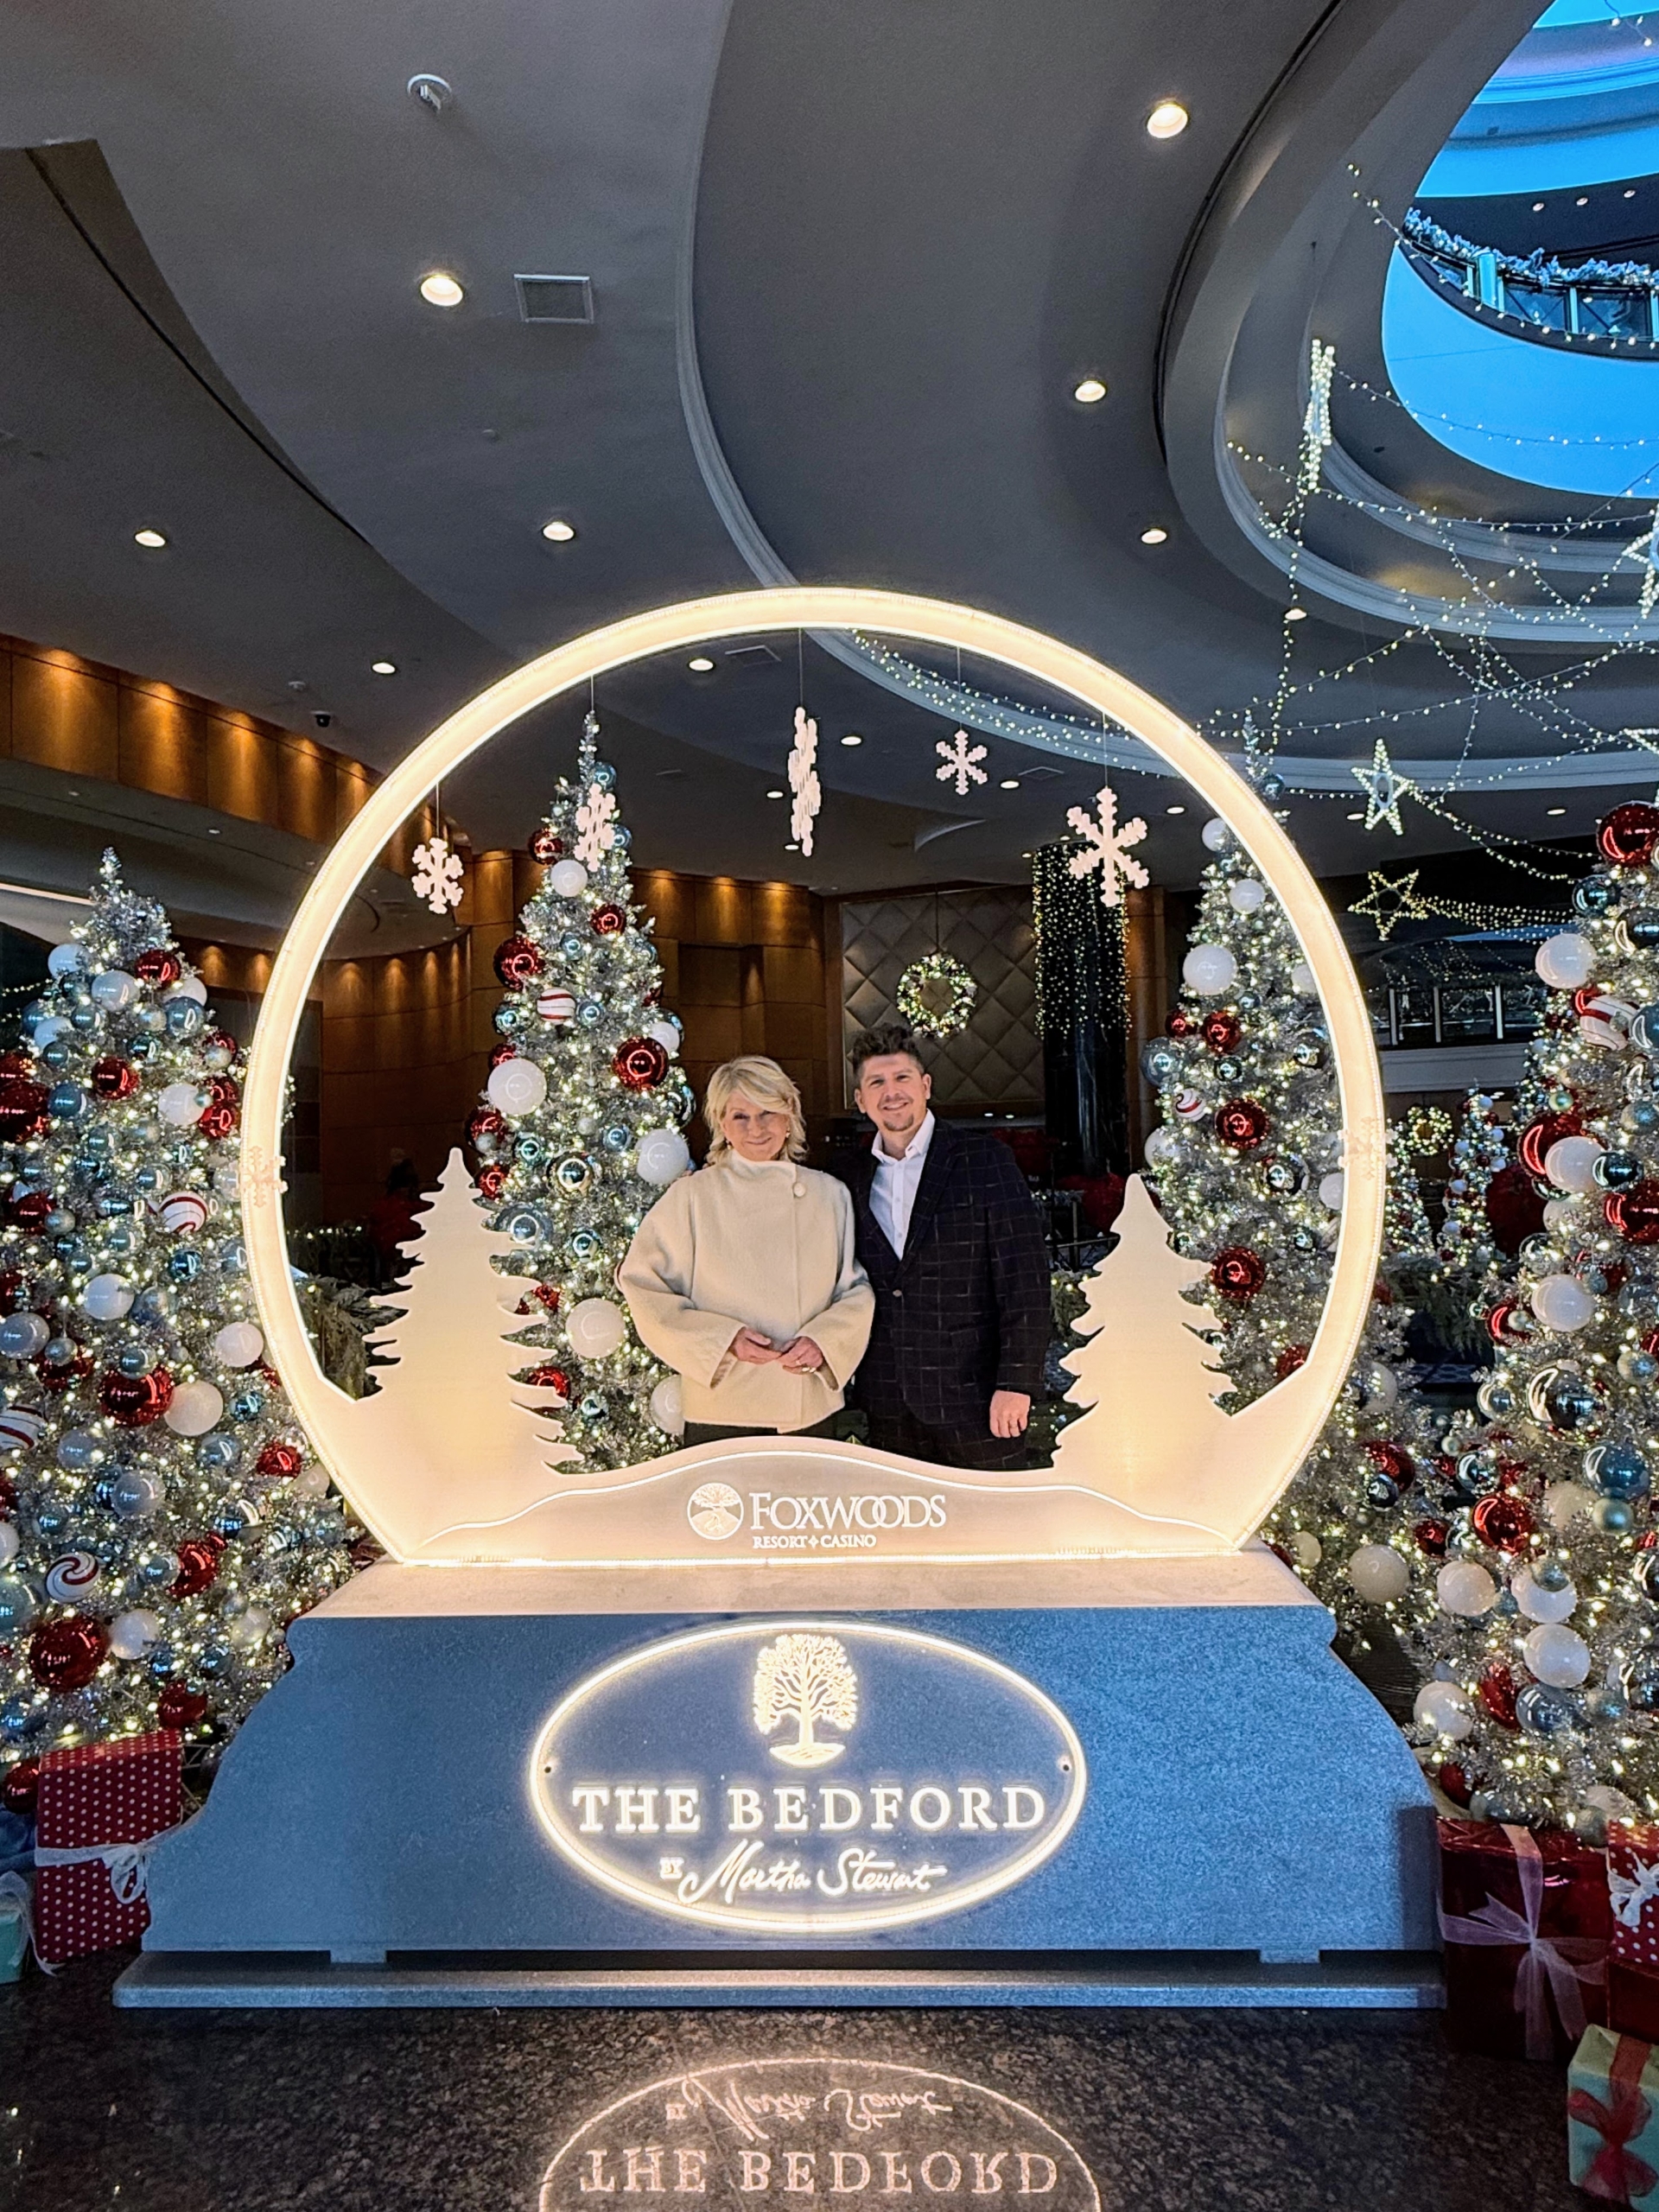
Here in the Northeast, we're celebrating the holidays like no other - this year with the debut of Christmas by Martha Stewart at Foxwoods, the largest resort casino in the region and the location for my second restaurant, The Bedford by Martha Stewart, opening in March!
Earlier this week, I traveled to Mashantucket, Connecticut to see the Grand Pequot Tower lobby at Foxwoods and the immersive holiday décor I curated for the space. It looks magical - holiday trees with bright, colorful ornaments under glistening shooting stars. And a giant snow globe where guests could take holiday photos surrounded by a cheerful winter scene. Before leaving, I also took a peek at my restaurant under construction. Everything looks great and in excellent shape for our scheduled spring opening!
Enjoy these photos.
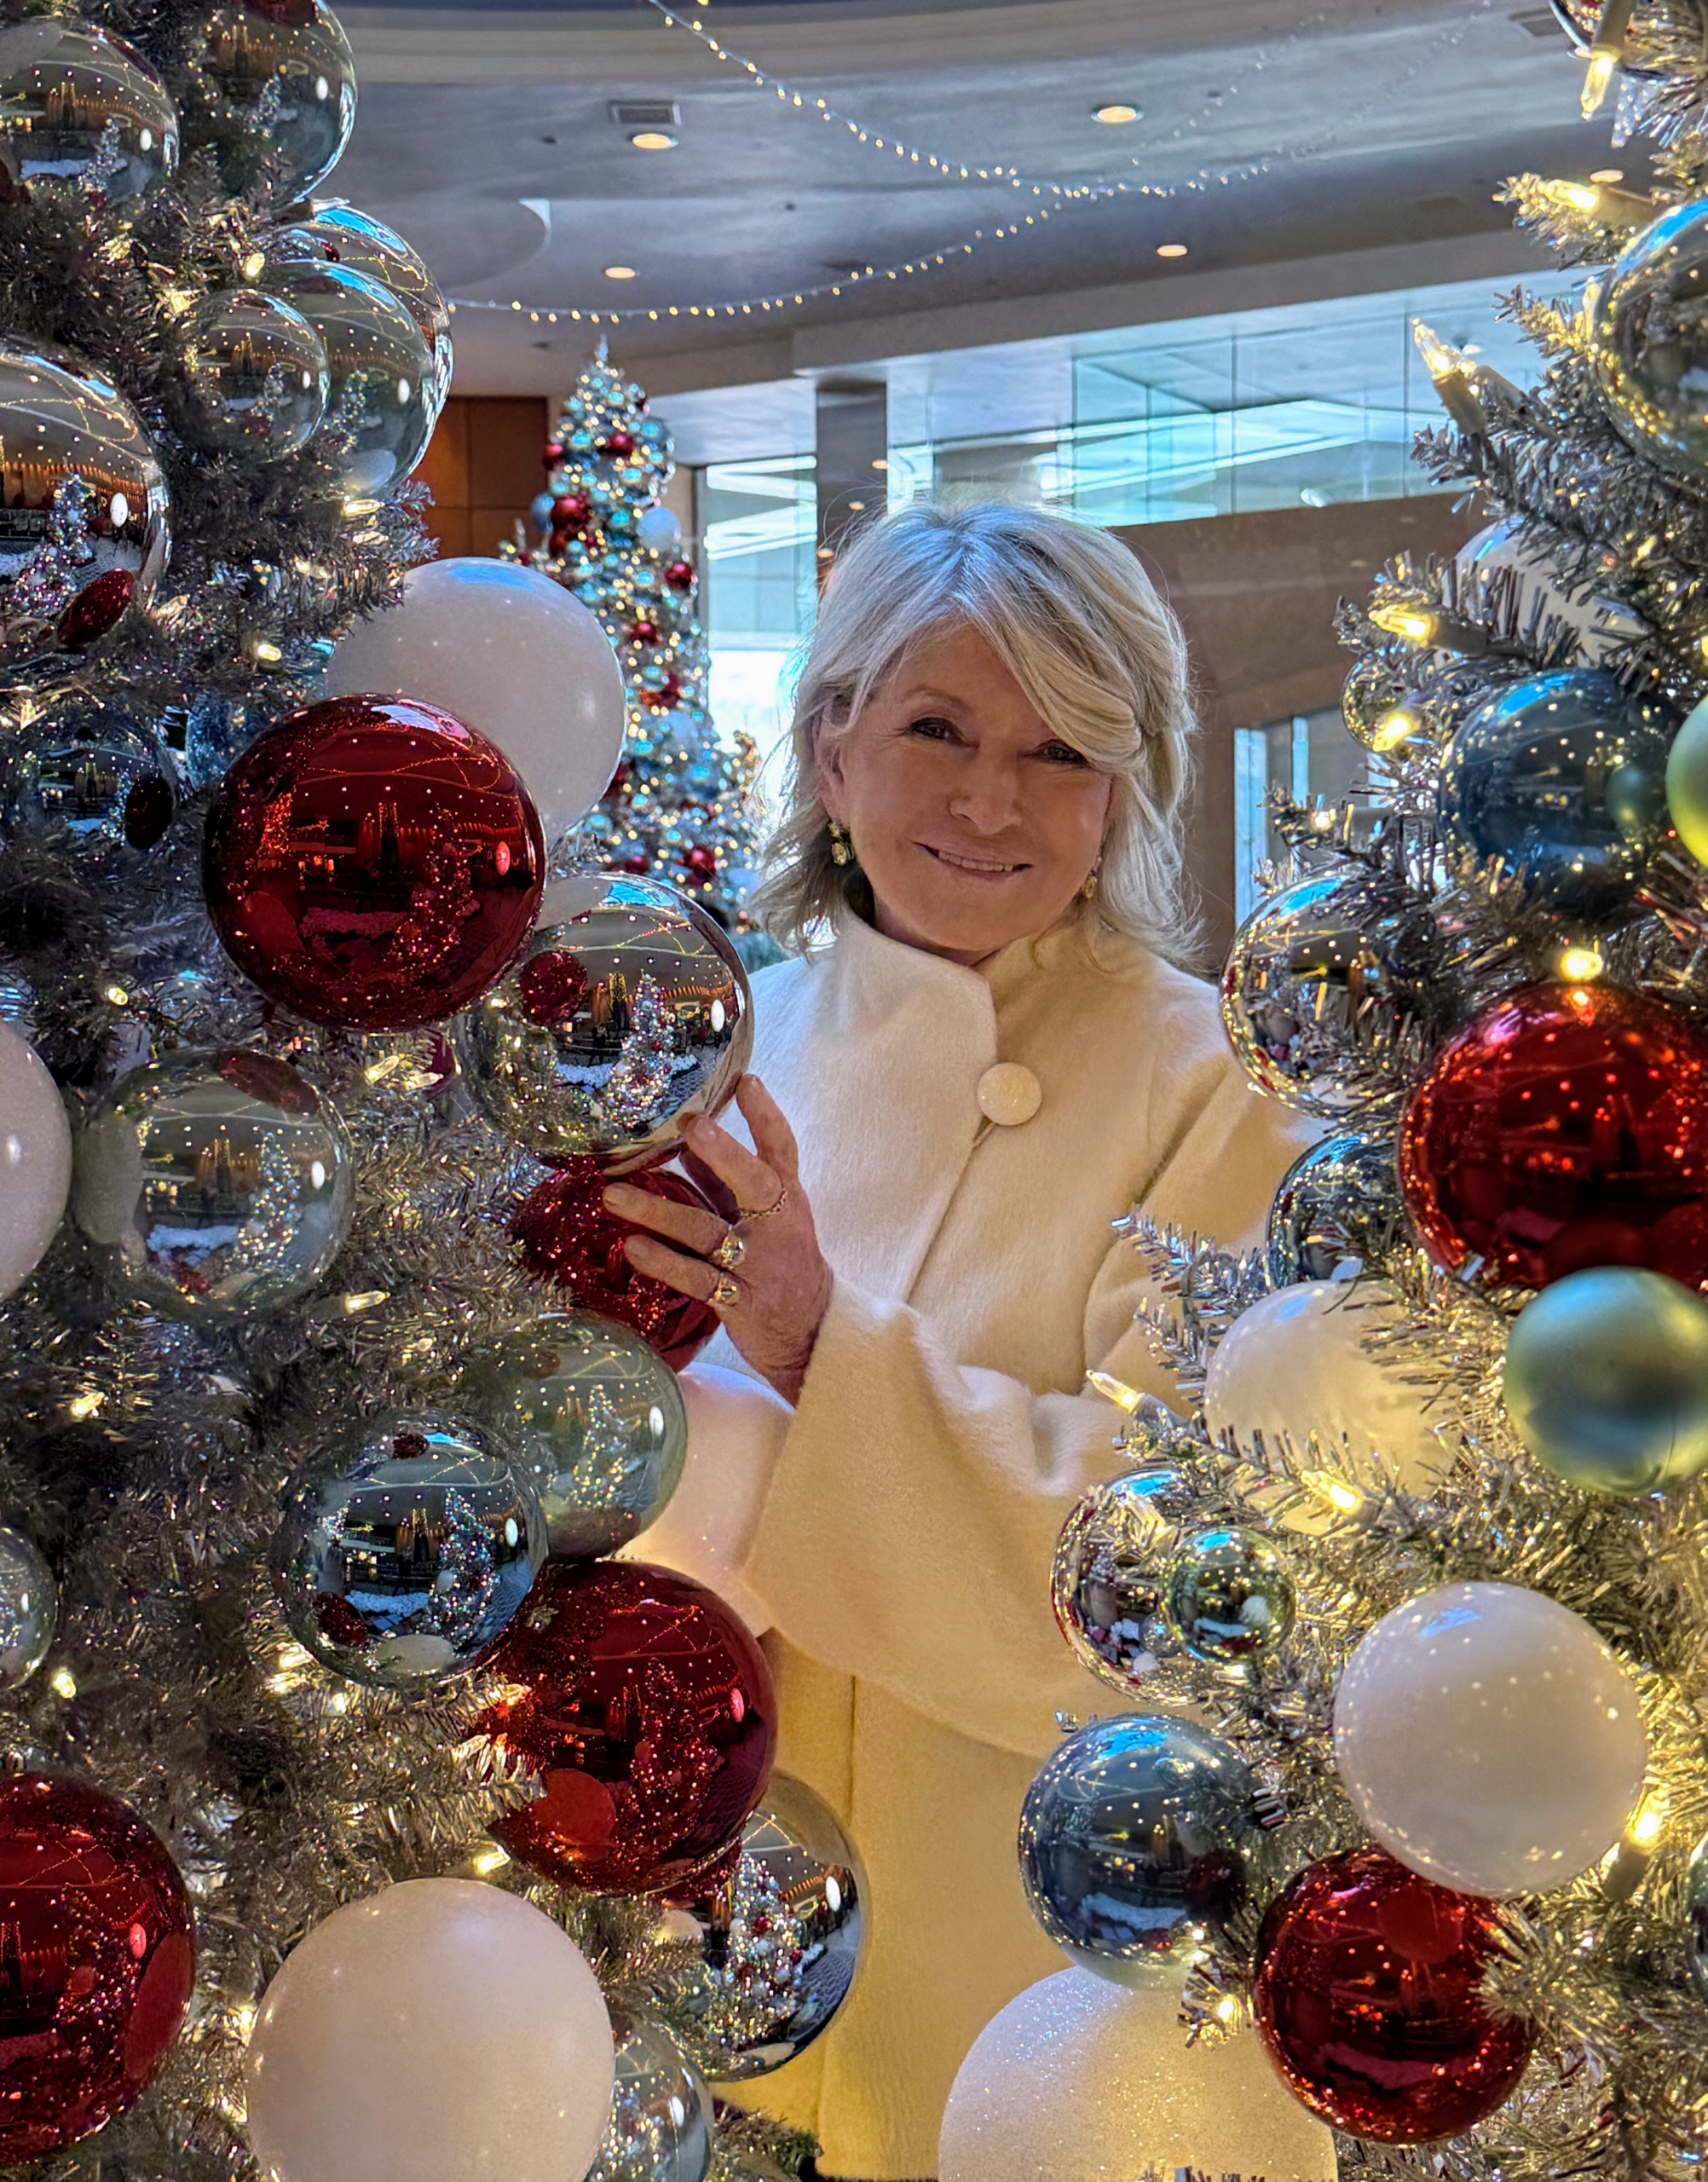
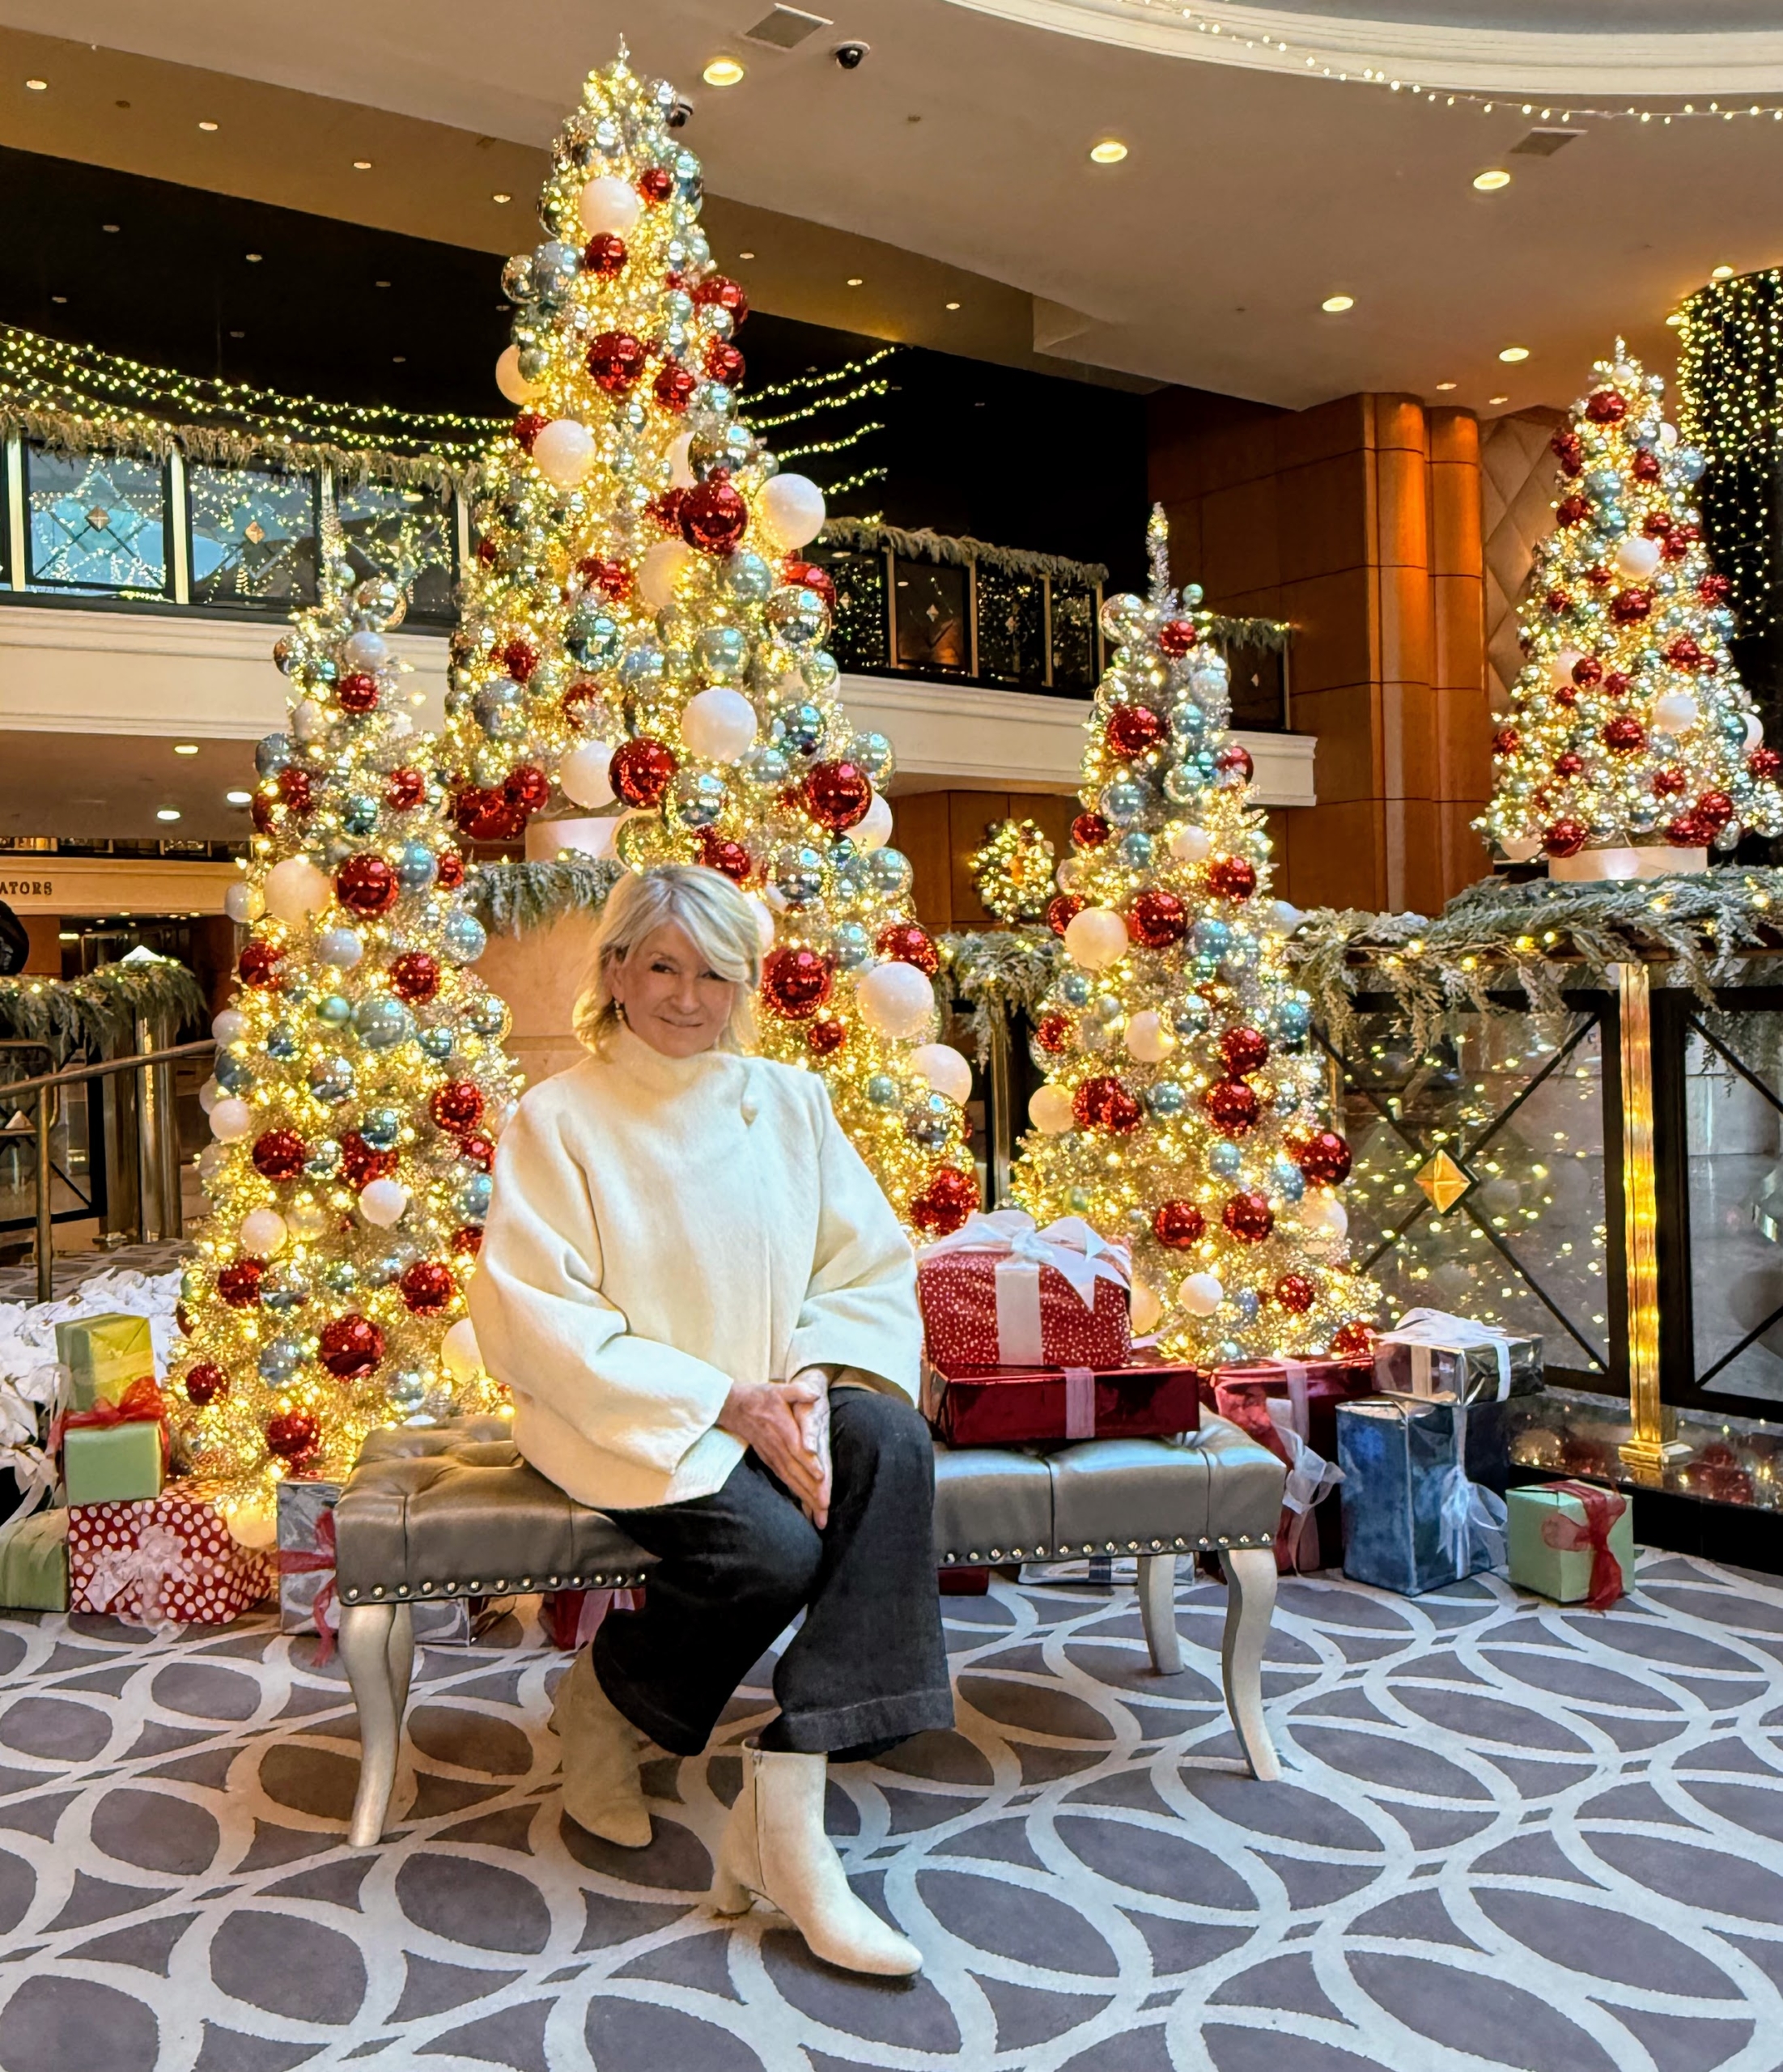
I hope you’re all enjoying this holiday season. Here I am at Foxwoods Resort Casino, owned by the Mashantucket Pequot Tribal Nation. It was such a pleasure to design the Foxwoods lobby for the holidays.
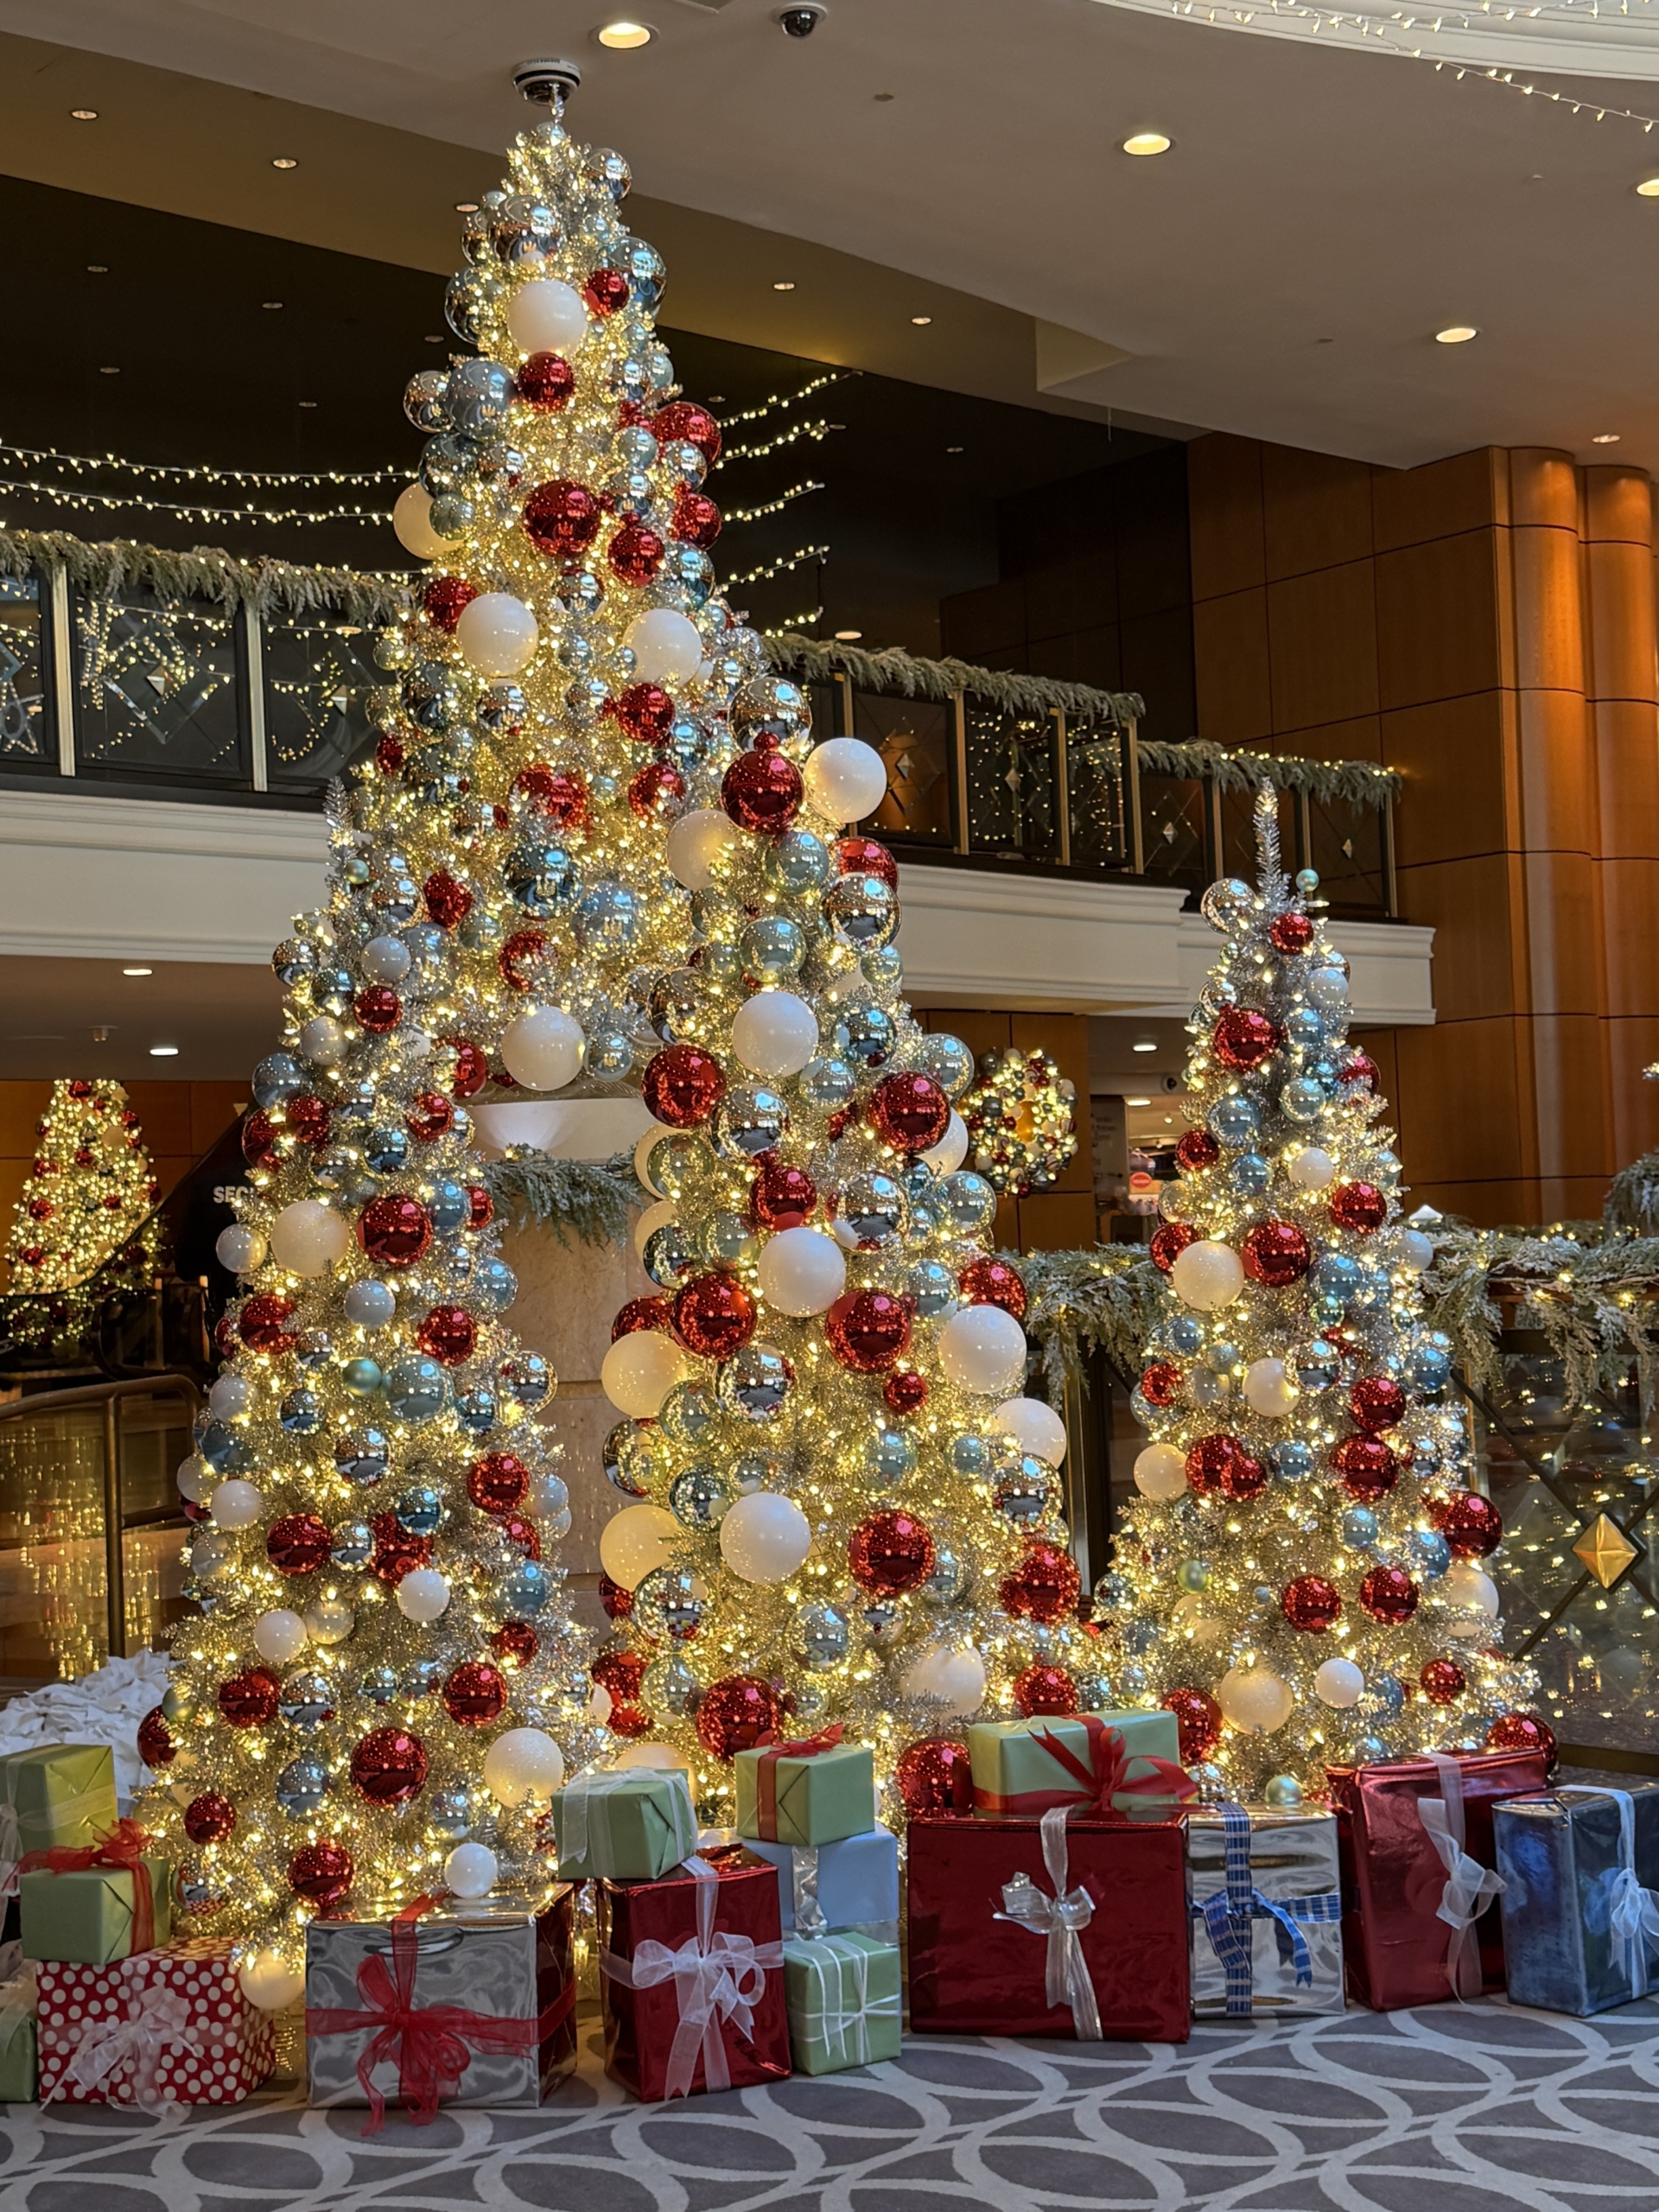
Look at the transformation. The area is decorated with trees, lights, and shimmering stars.
The more ornaments, the better. I always decorate every branch. Here at Foxwoods, the theme colors include silvery blue, silver, gold, red, and white.
There are trees of all sizes – and all beautifully adorned. My hope was make the space as immersive as possible, so guests could sit, explore, and enjoy all the details.
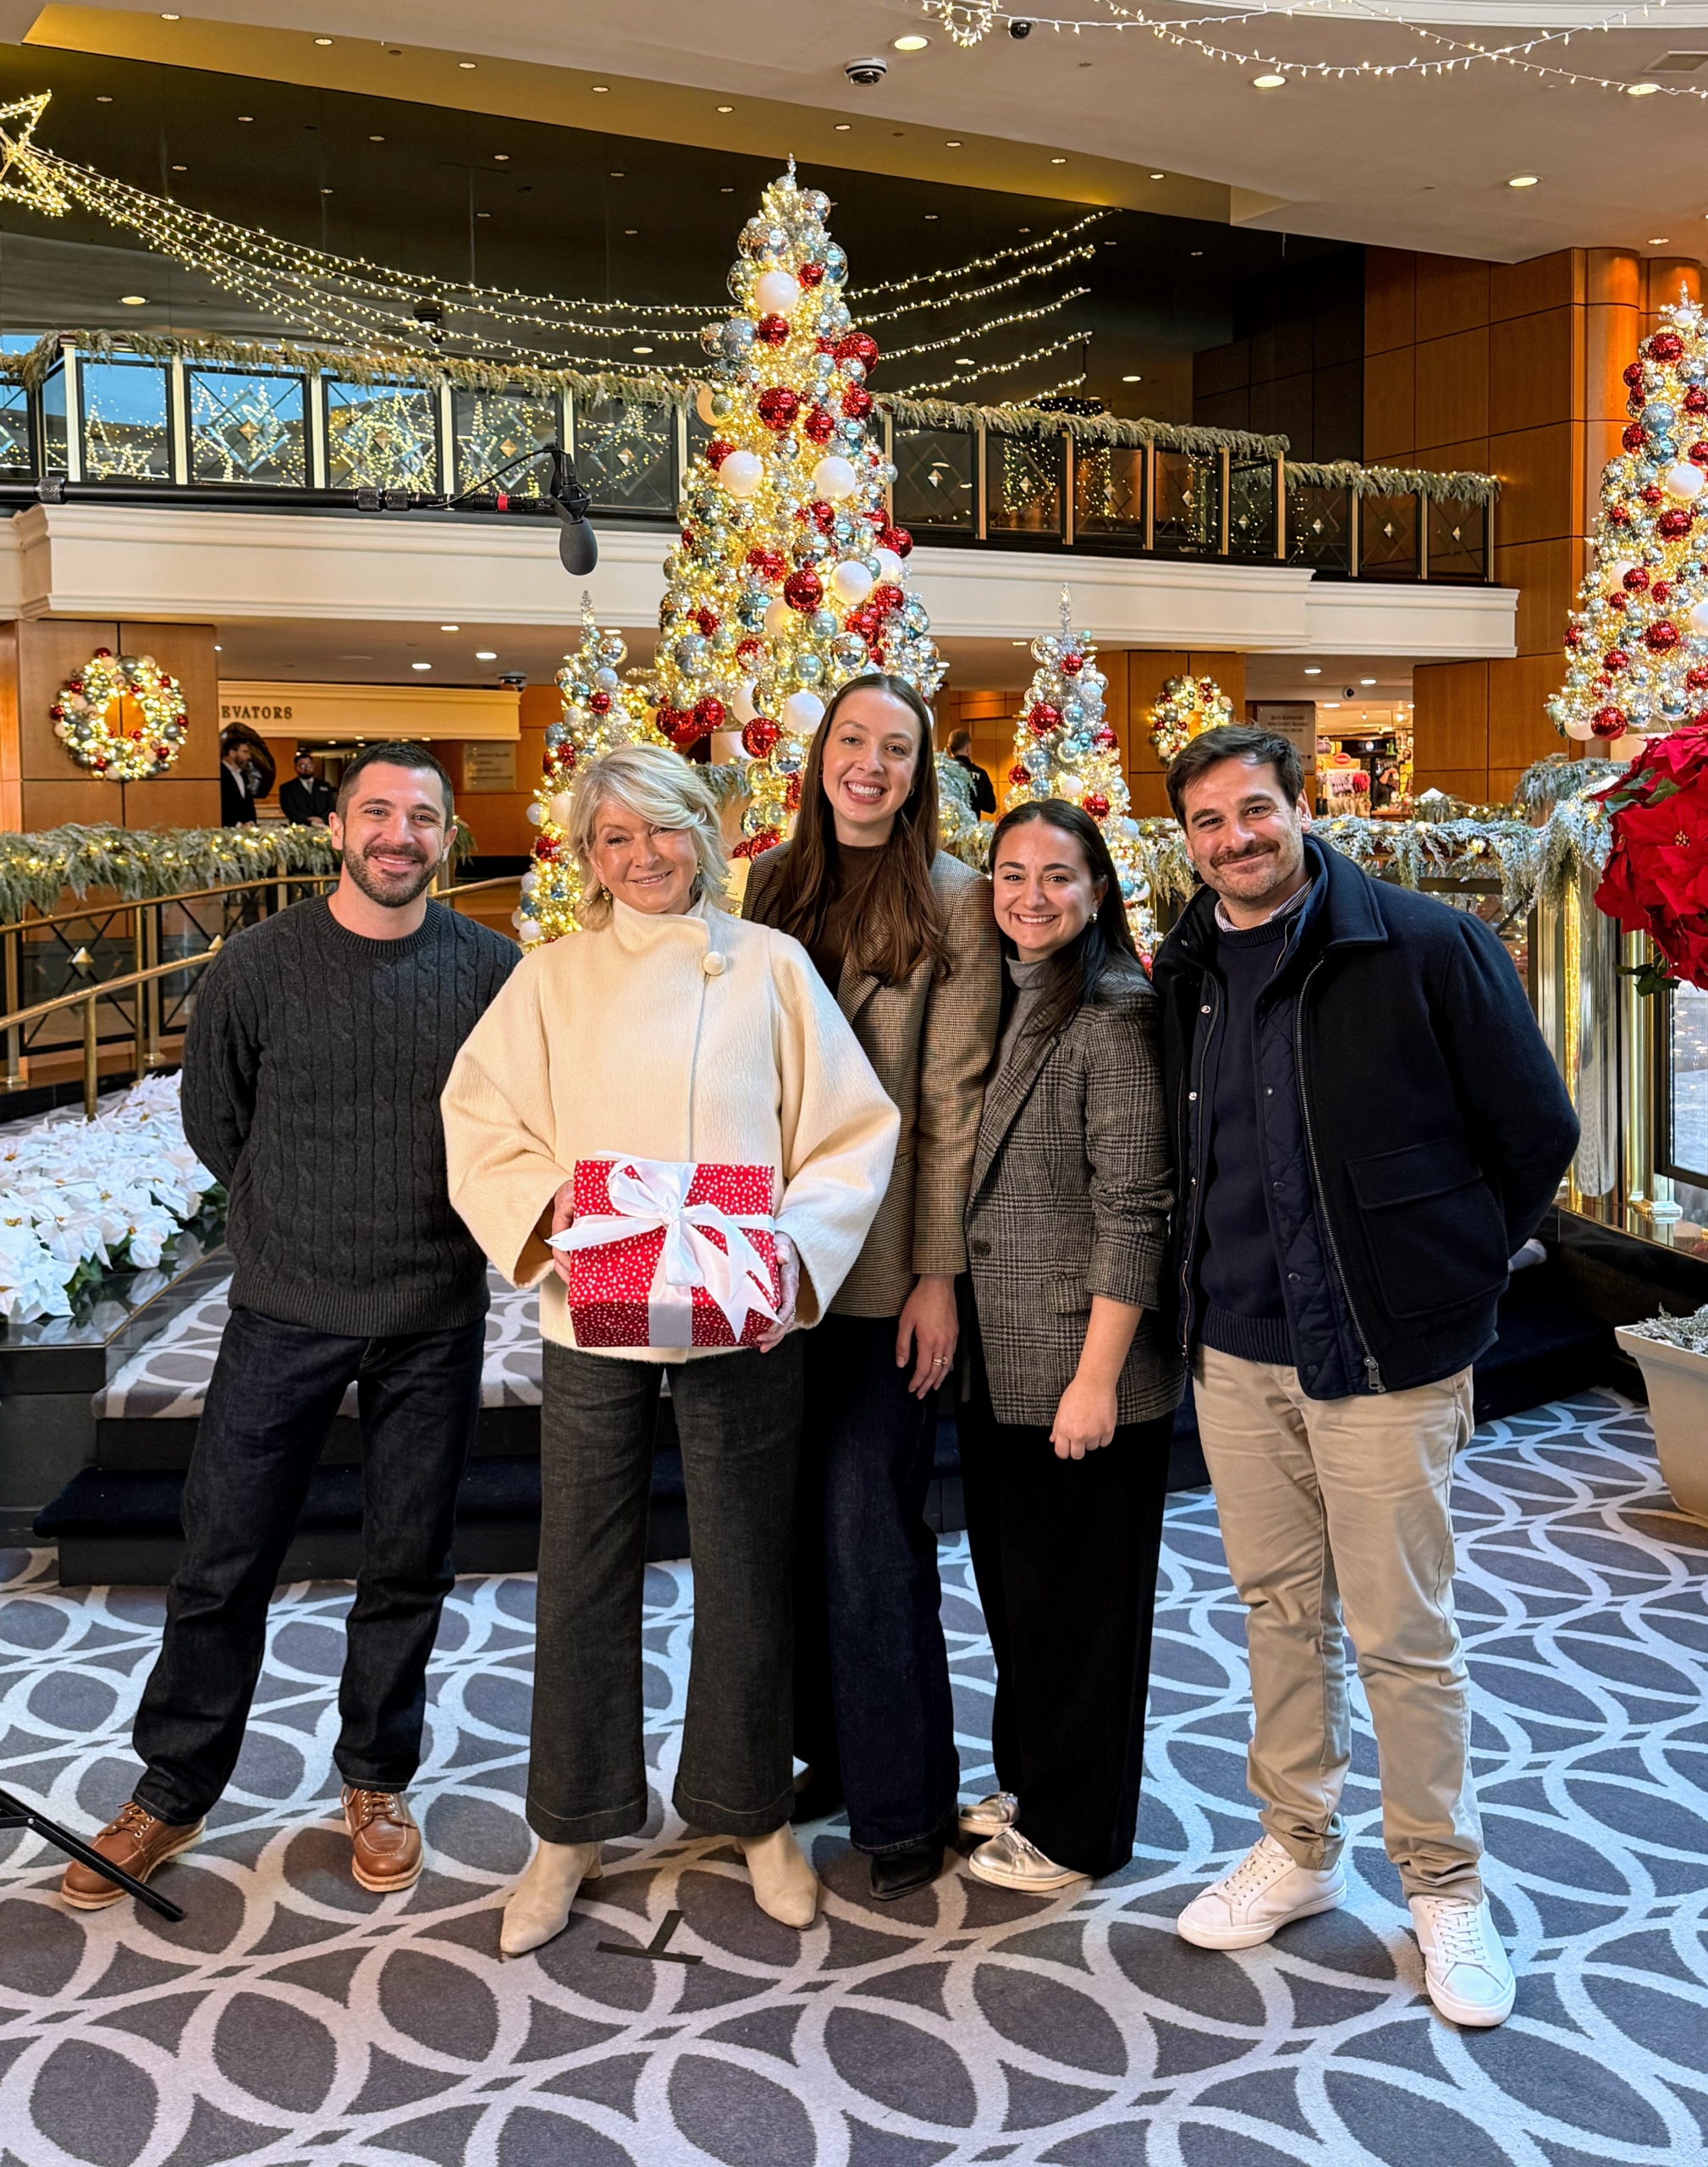
This photo is of me and Jason Guyot, President and CEO of Foxwoods. We’re behind a snow globe frame where guests can take memorable images surrounded by a charming winter wonderland.
Here’s a photo with my team – Ben Luckadoo, Sophie Roche, Isabella Falcione, and Thomas Joseph.
And here I am with some of the members of the Mashantucket Pequot Tribal Nation’s Tribal Council – Secretary Matthew Pearson, Vice Chairwoman Latoya Cluff, Councilor Crystal Whipple, Councilor-Elect Rahiem Eleazer, and Jason.
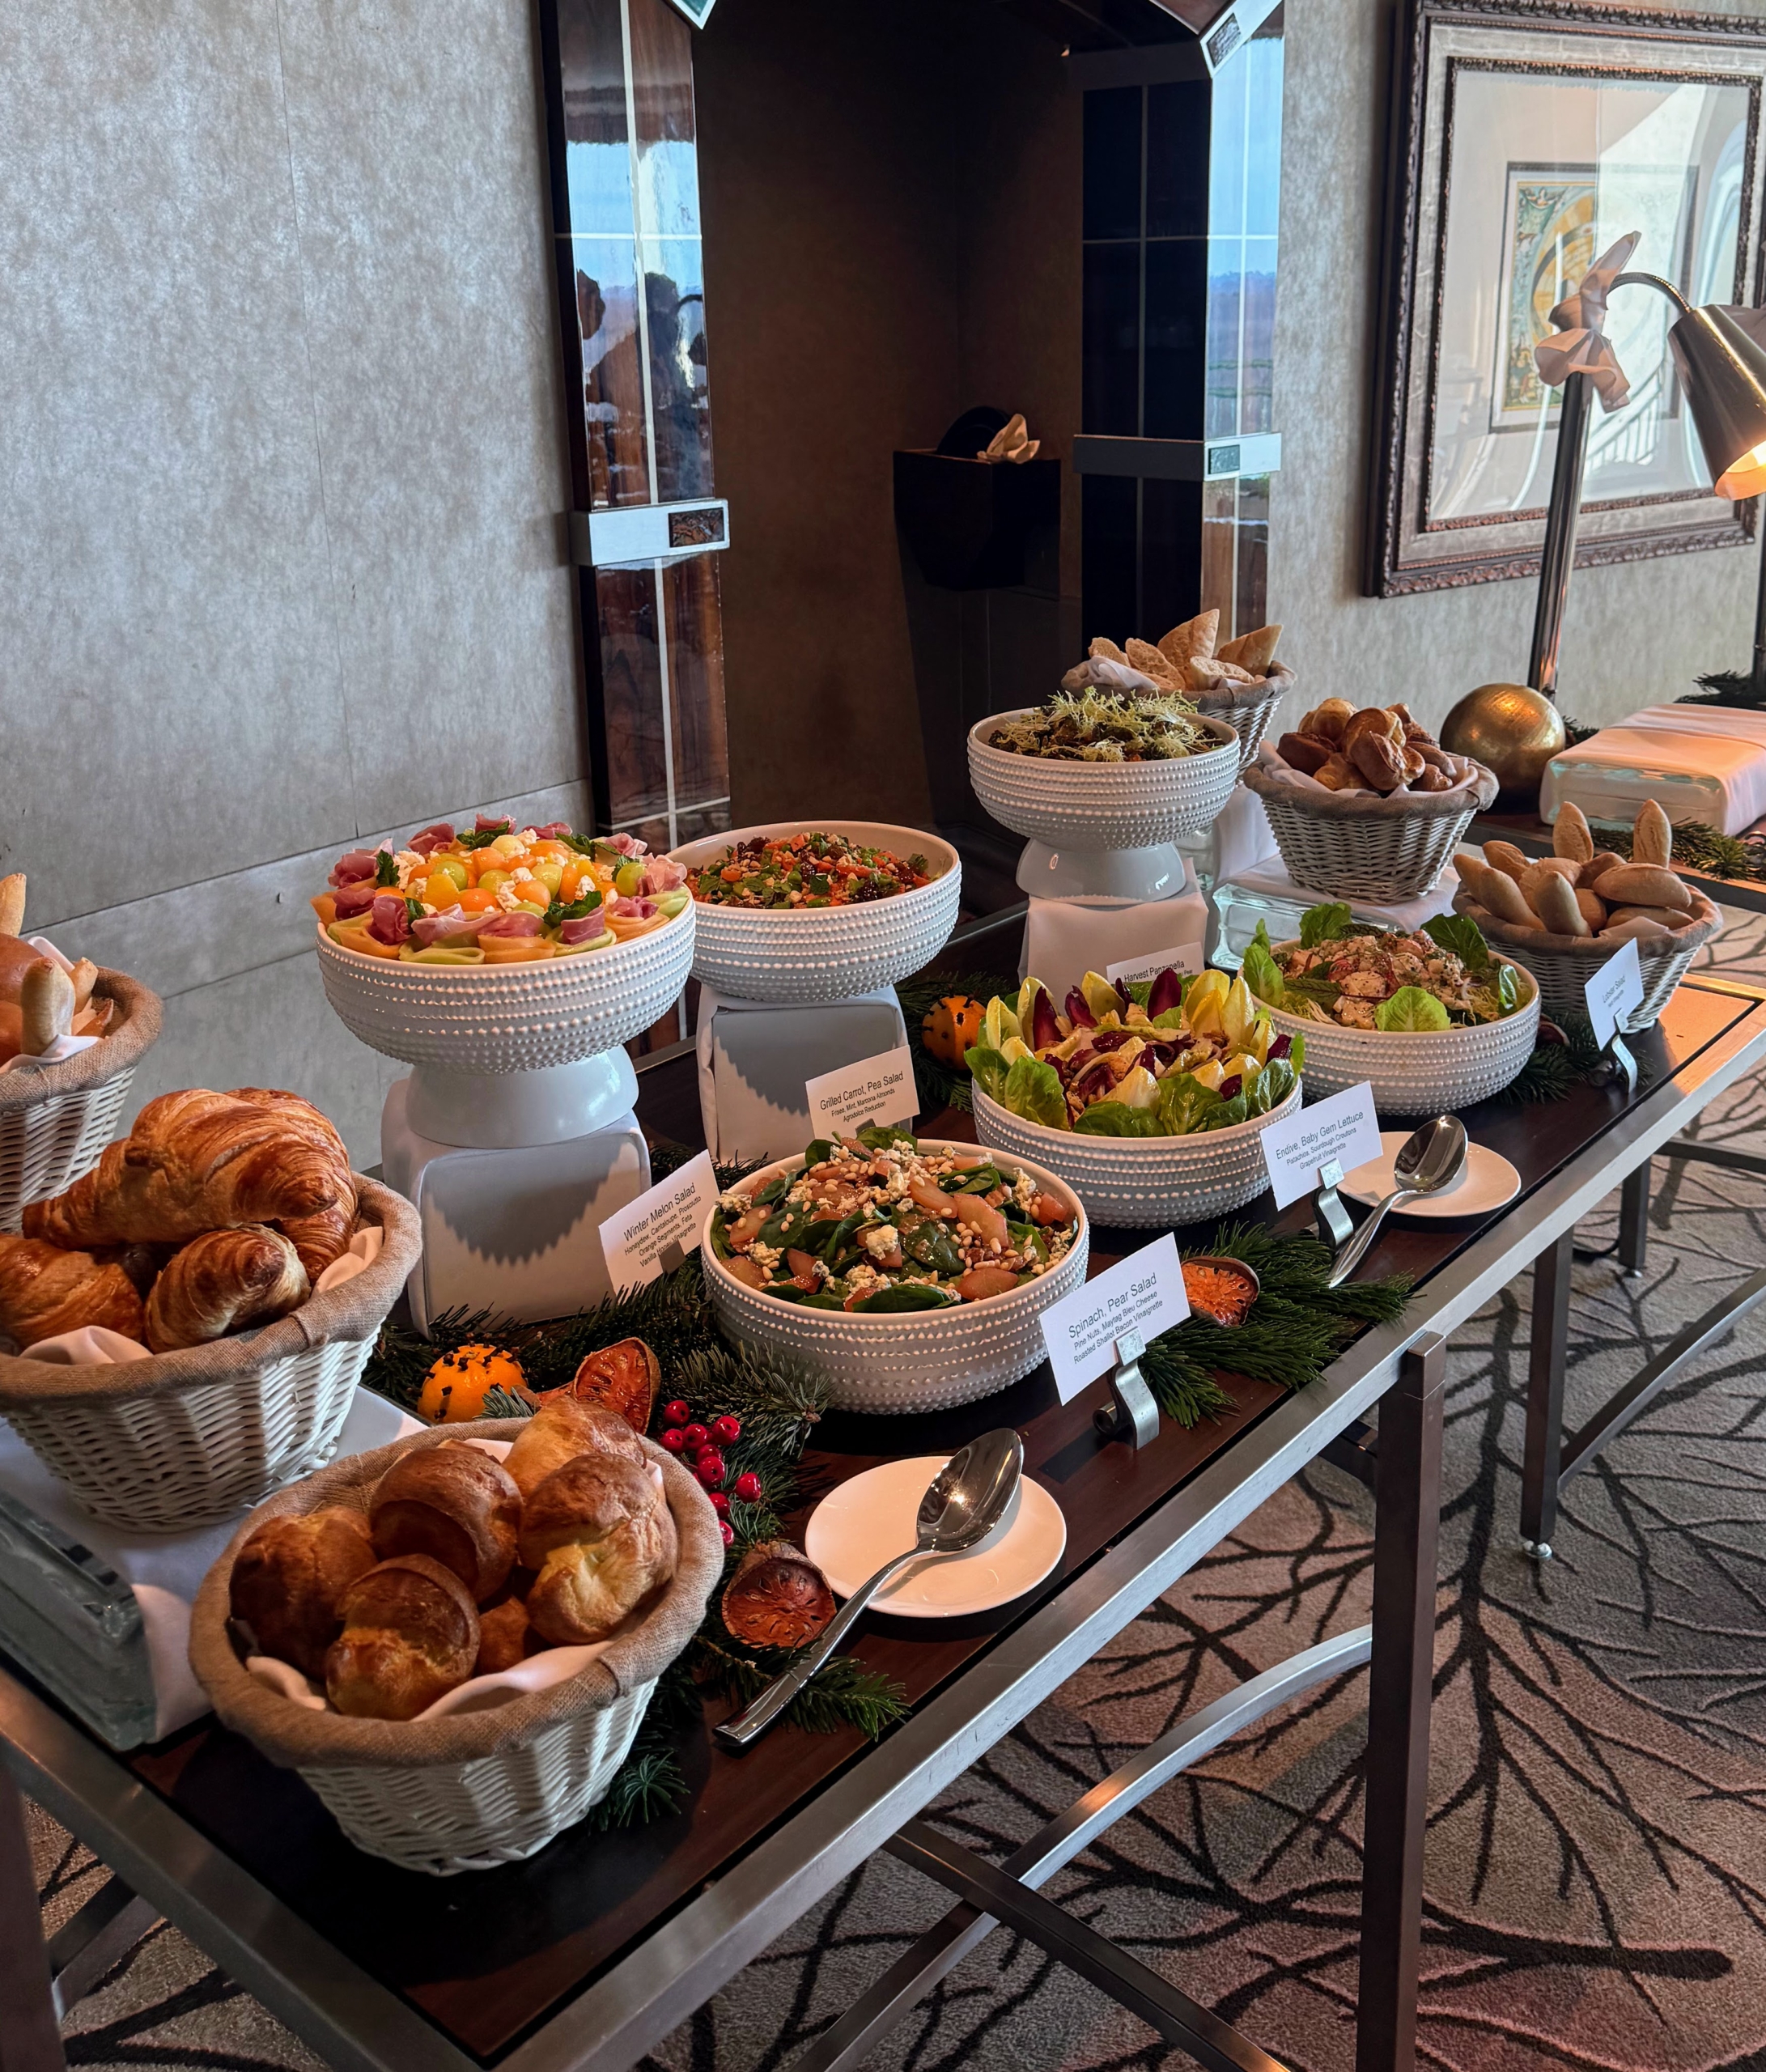
We all gathered for lunch at Foxwood’s brasserie, Vue 24. The menu included a variety of fresh salads, roasted chicken, beef tenderloin fry bread, seared tautog, shrimp scampi bucatini, and an array of holiday desserts.
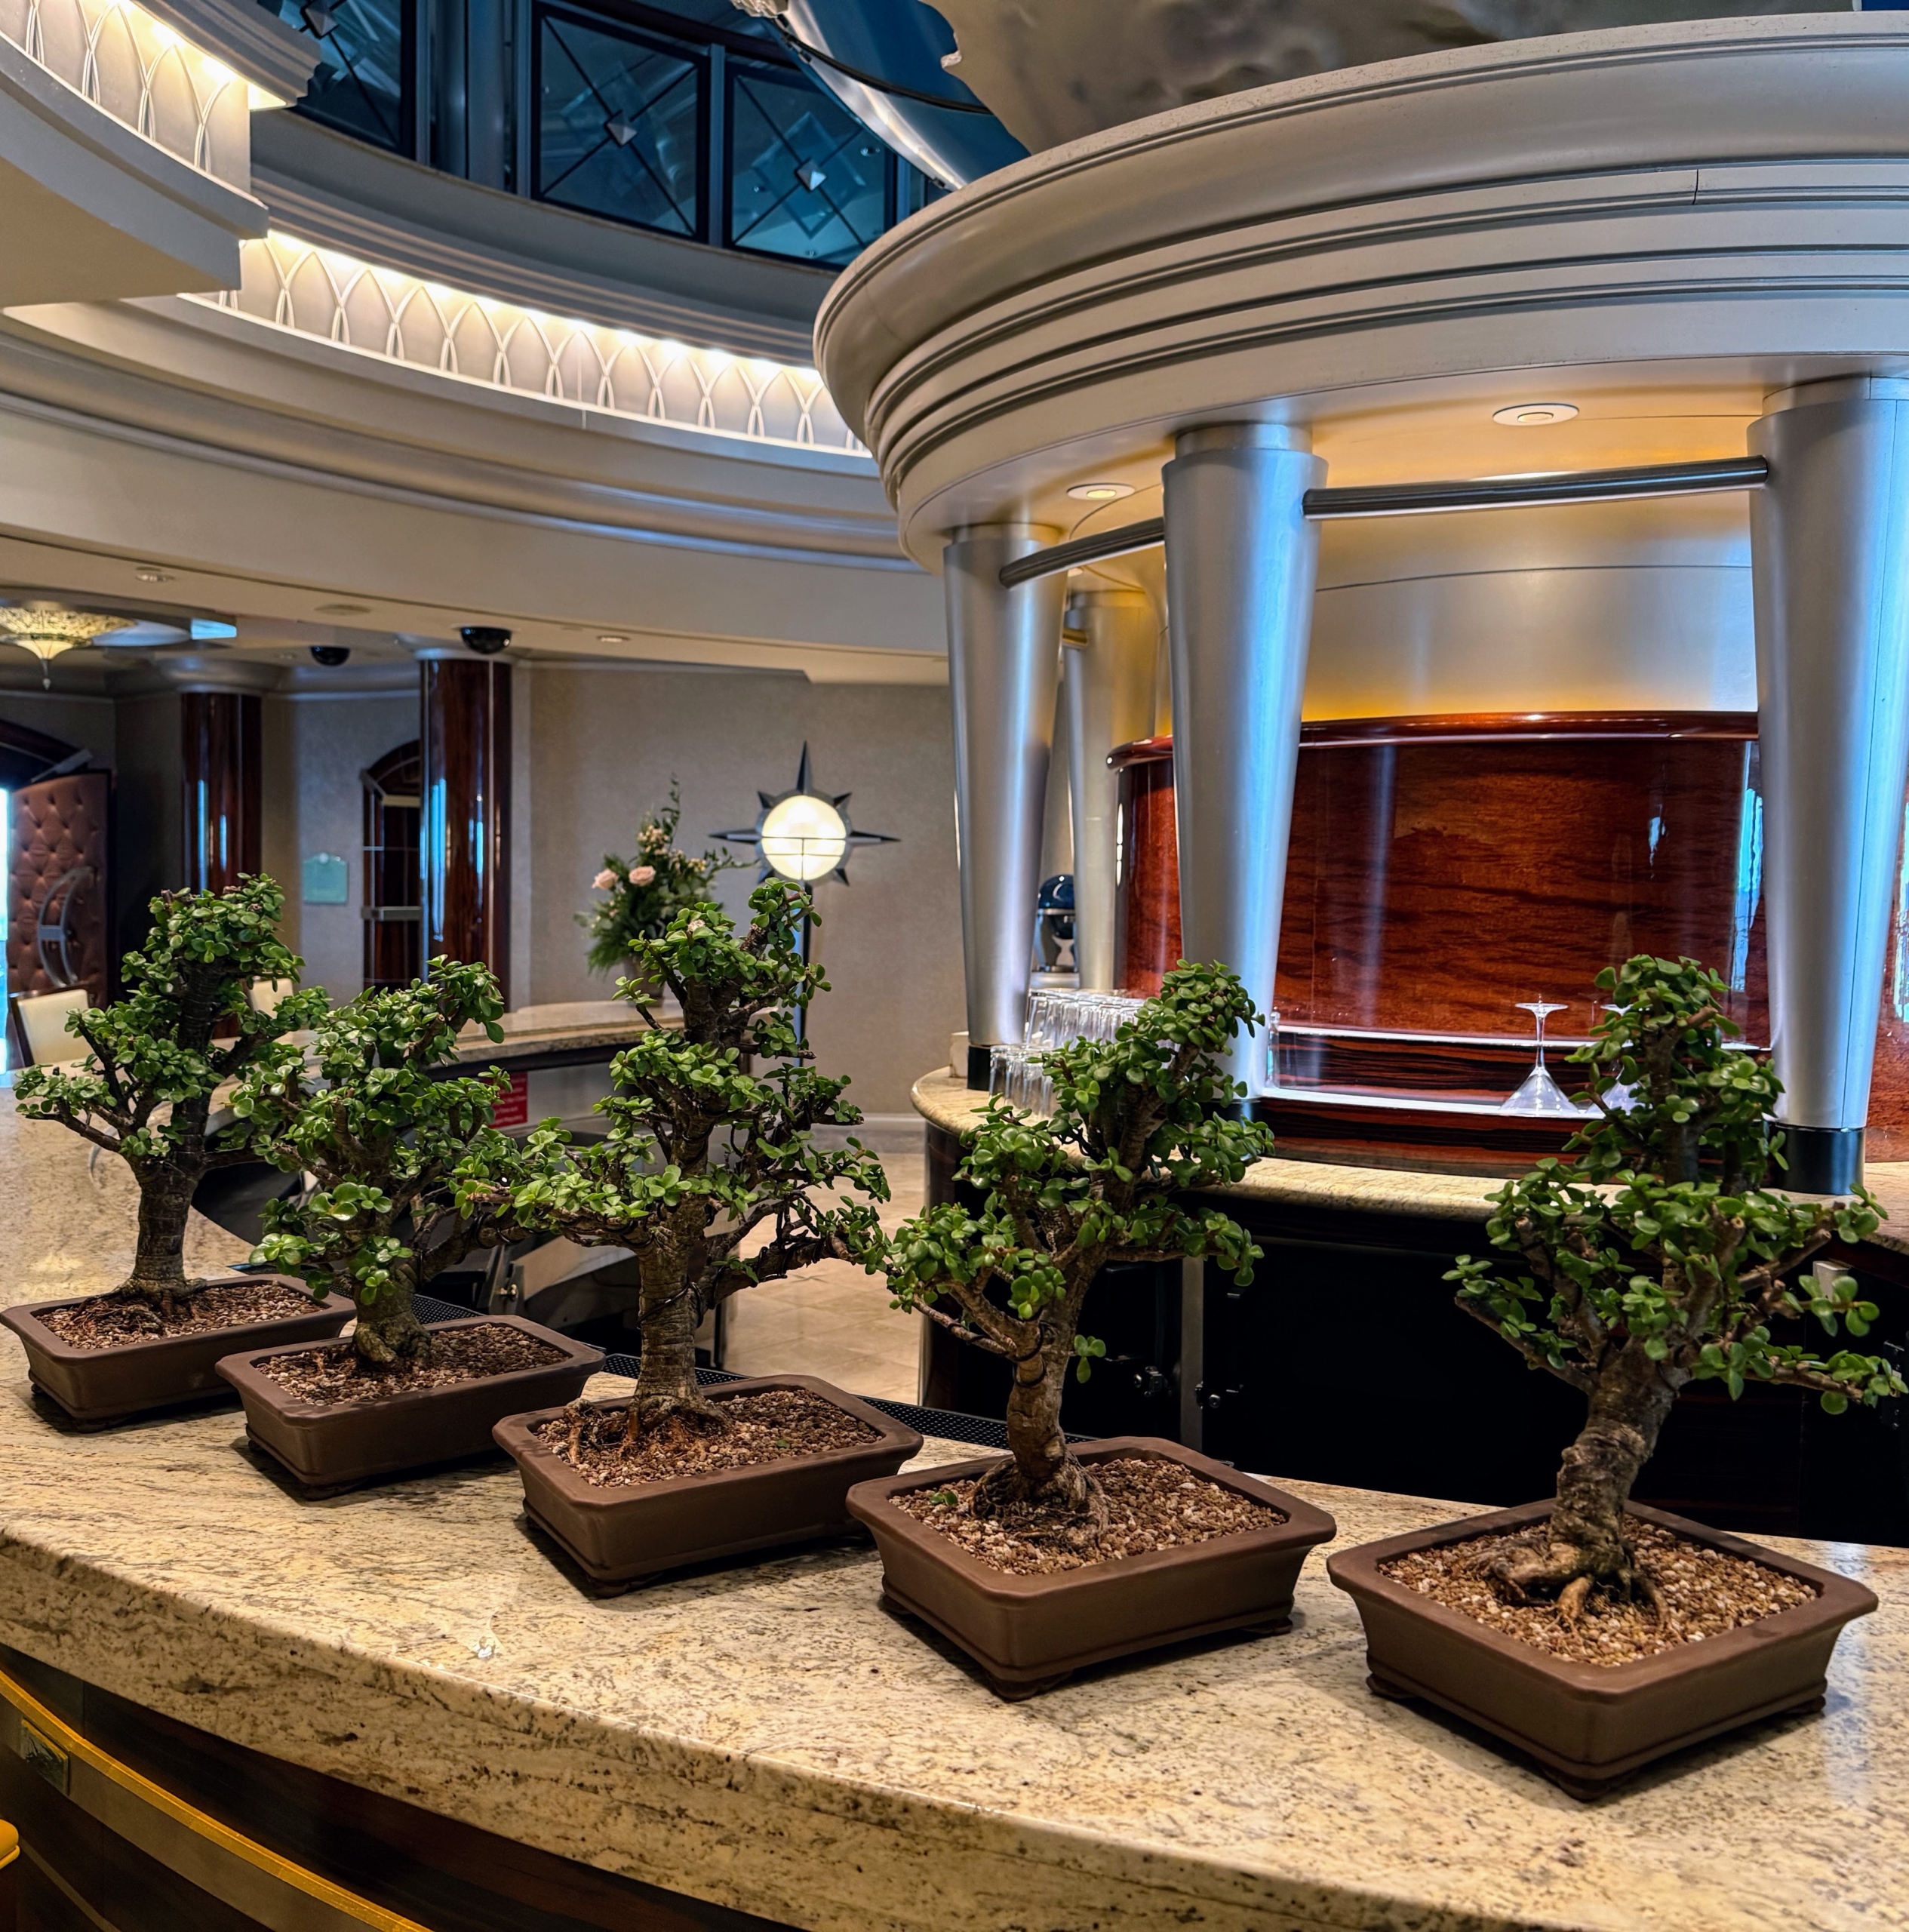
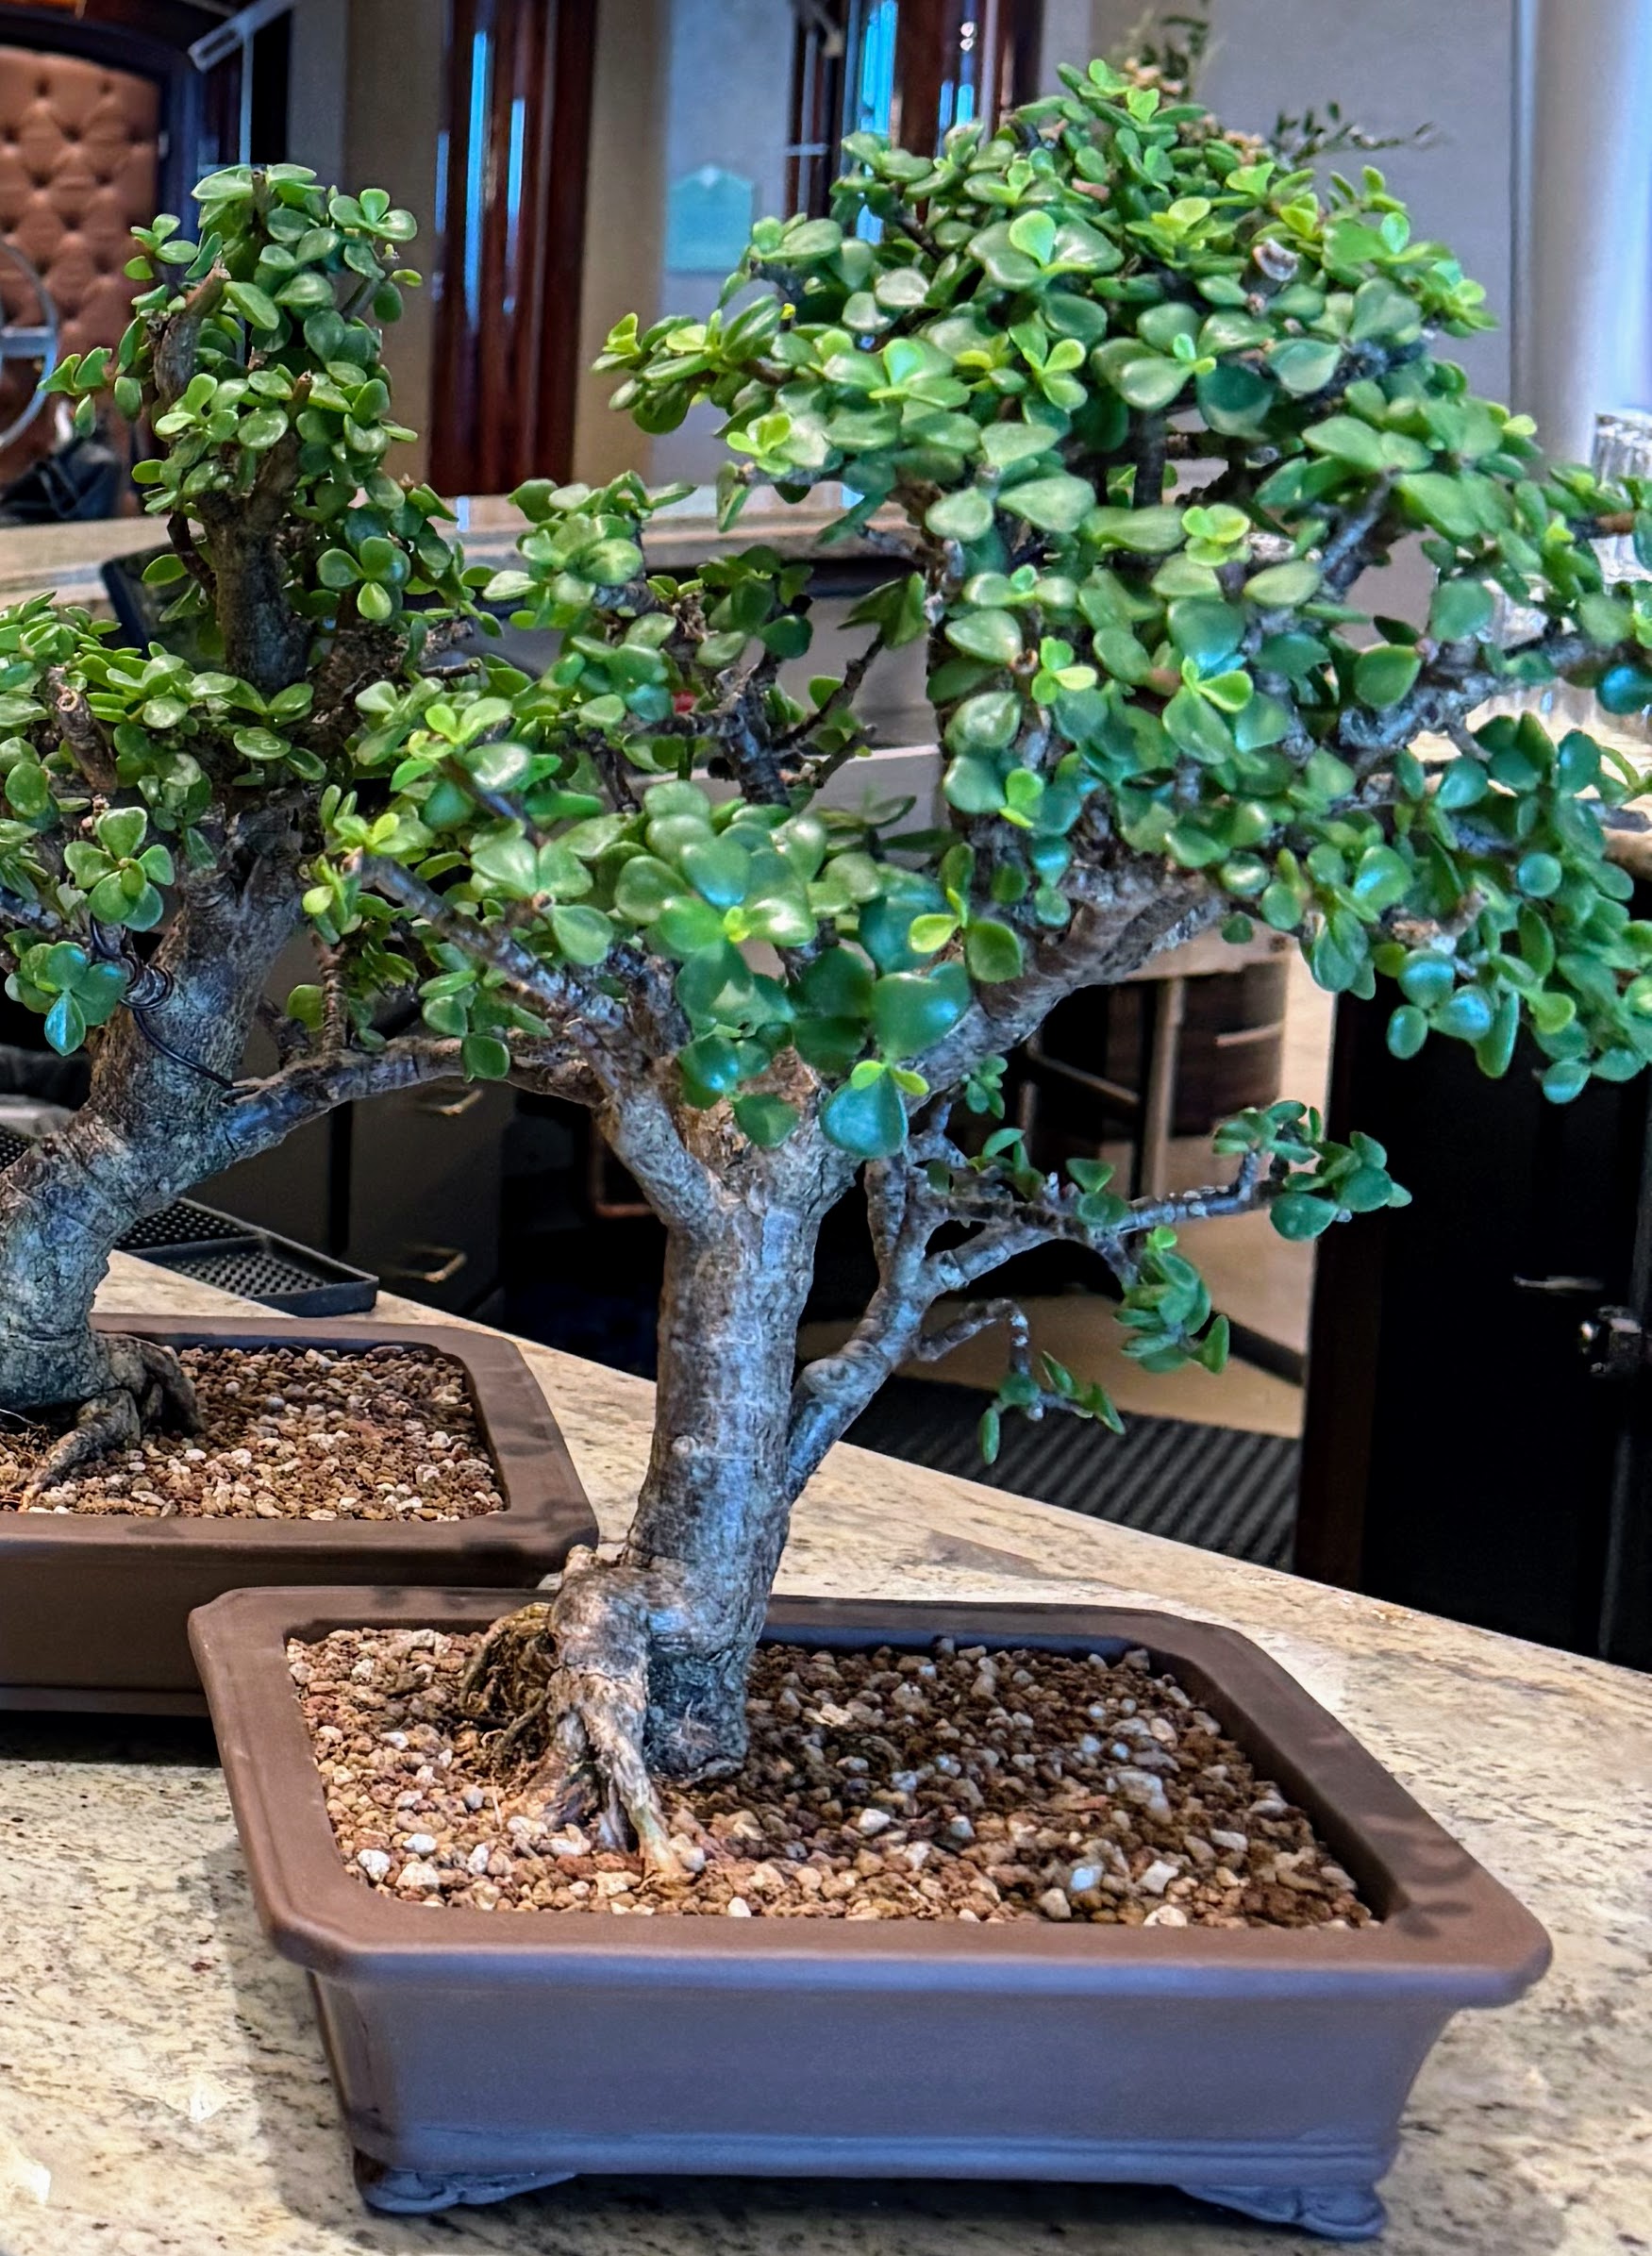
Following lunch, I gifted members of the Tribal Council with bonsai trees. I am very fond of bonsai trees and have nurtured many over the years.
Each of these is a jade bonsai – a dwarf version of the fleshy, soft, woody tree. These have such beautiful fine branch structures with thick green oval-shaped succulent leaves.
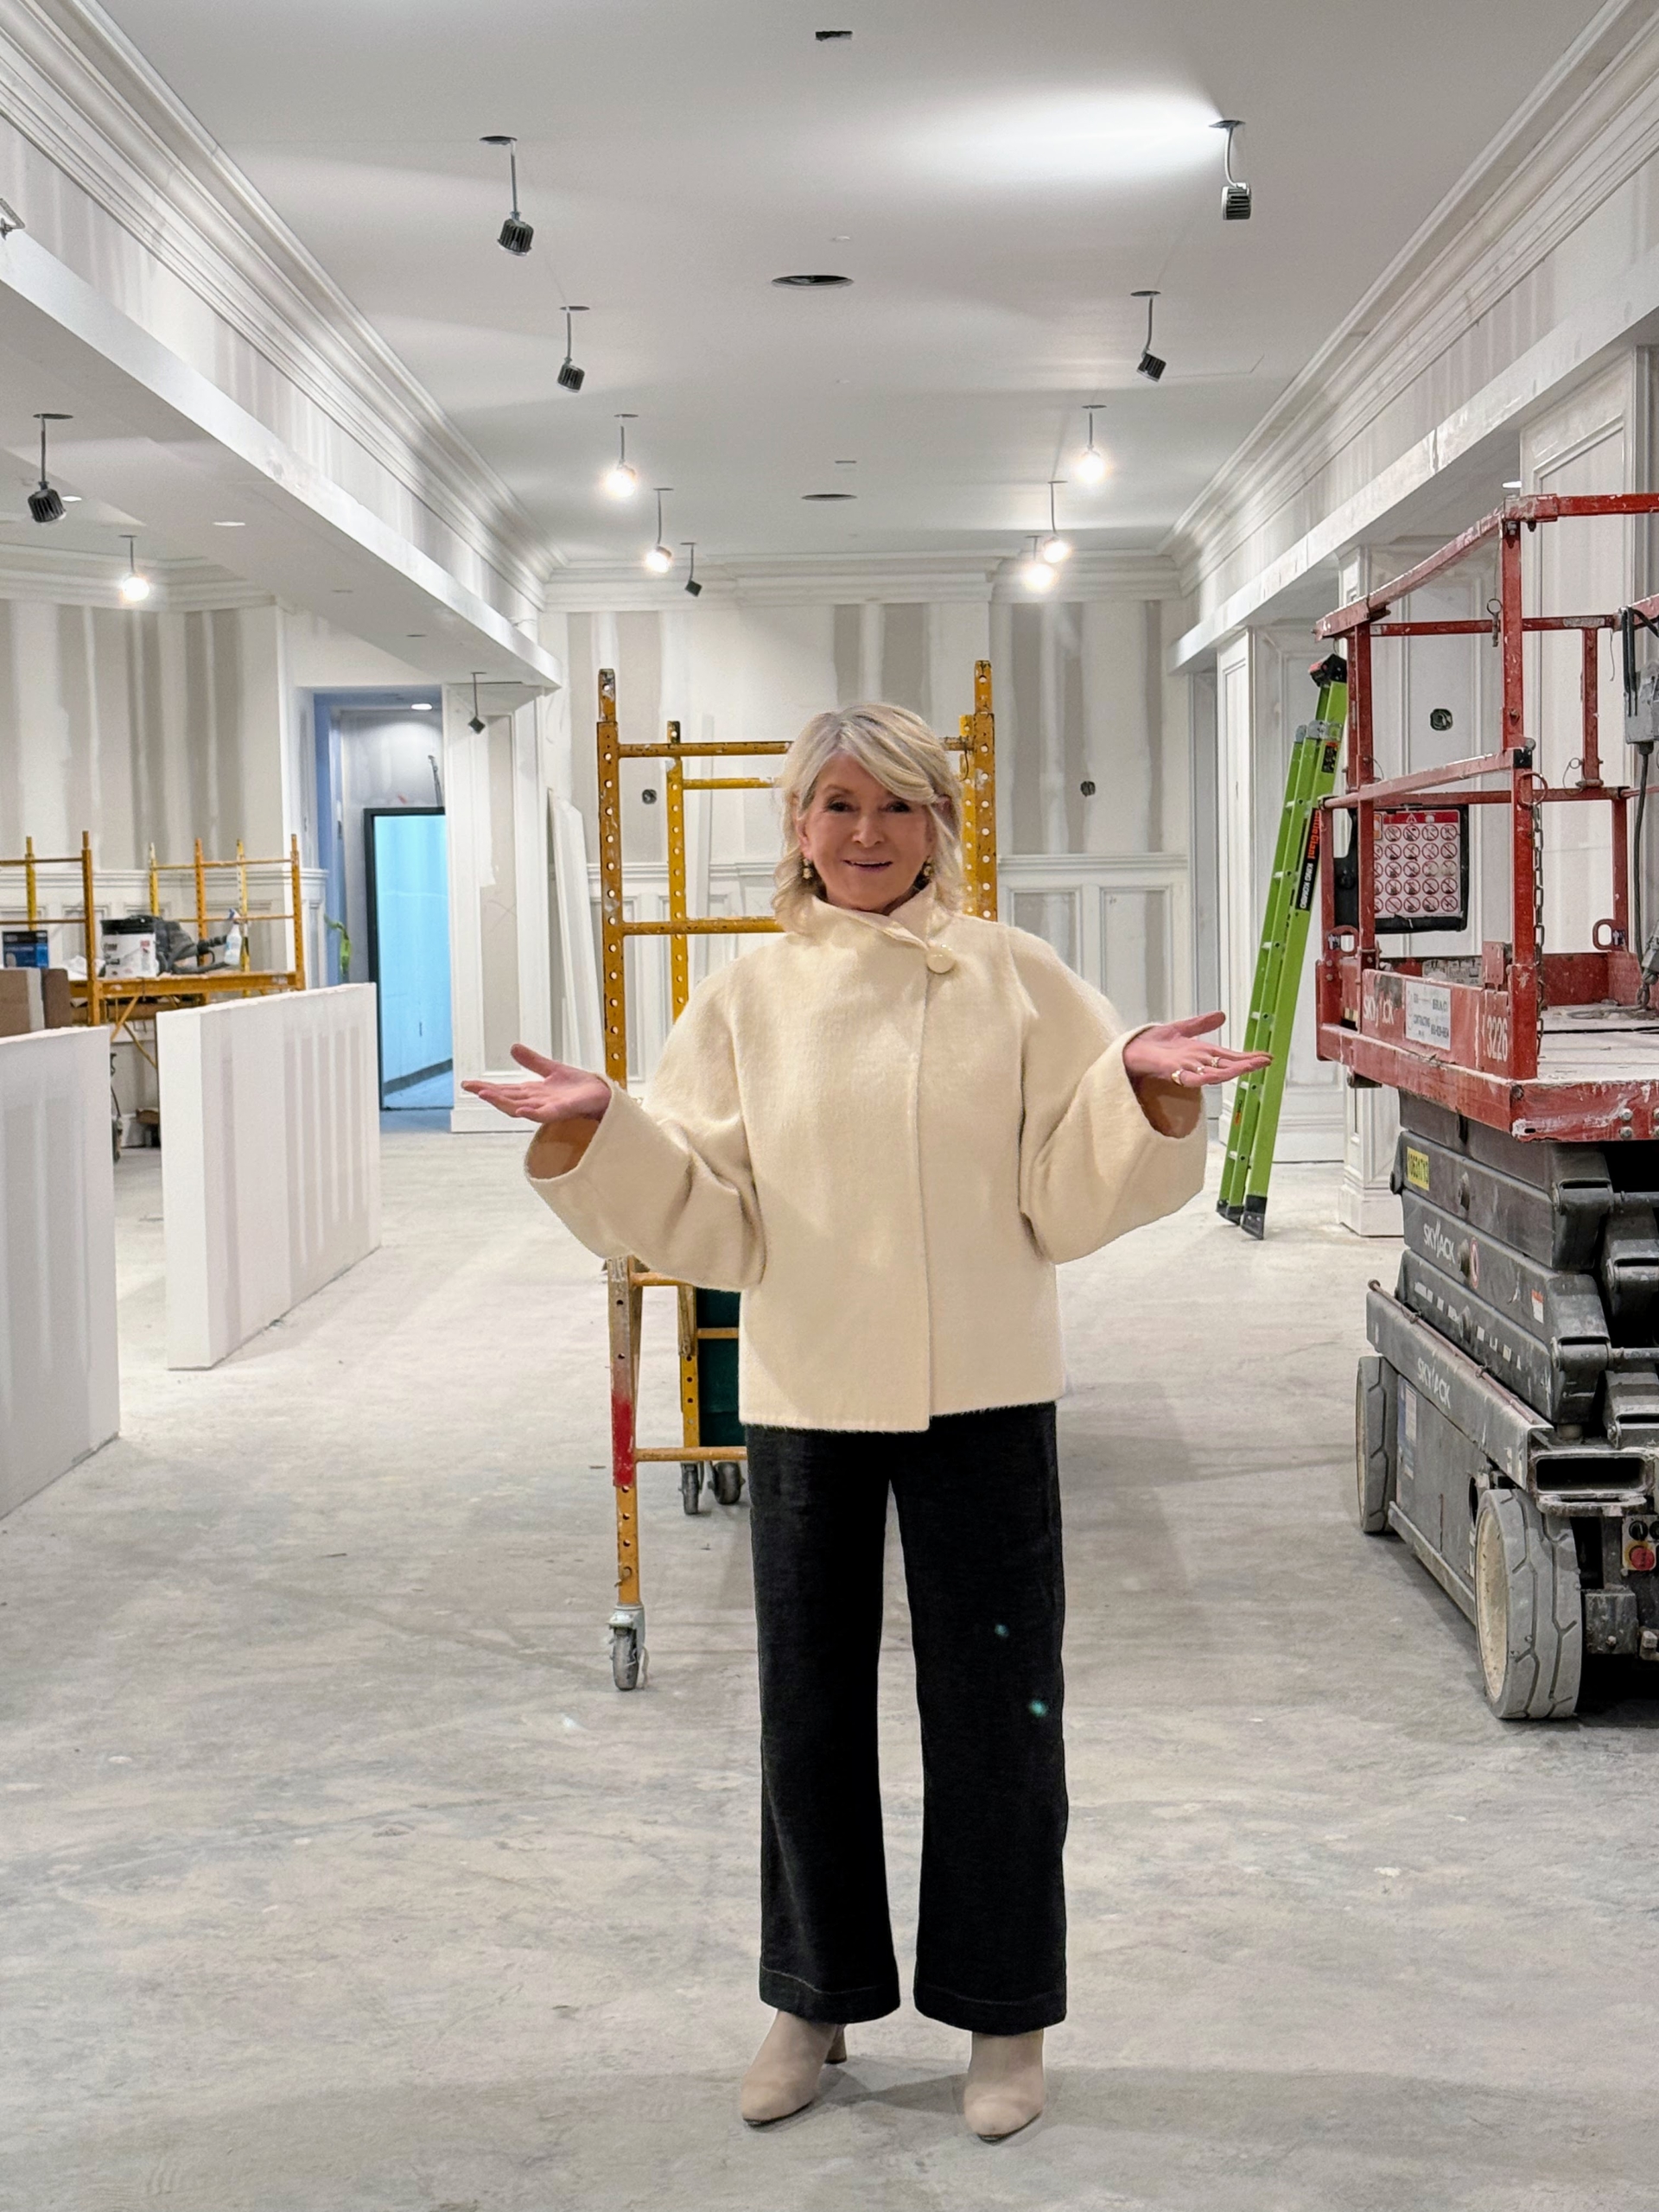
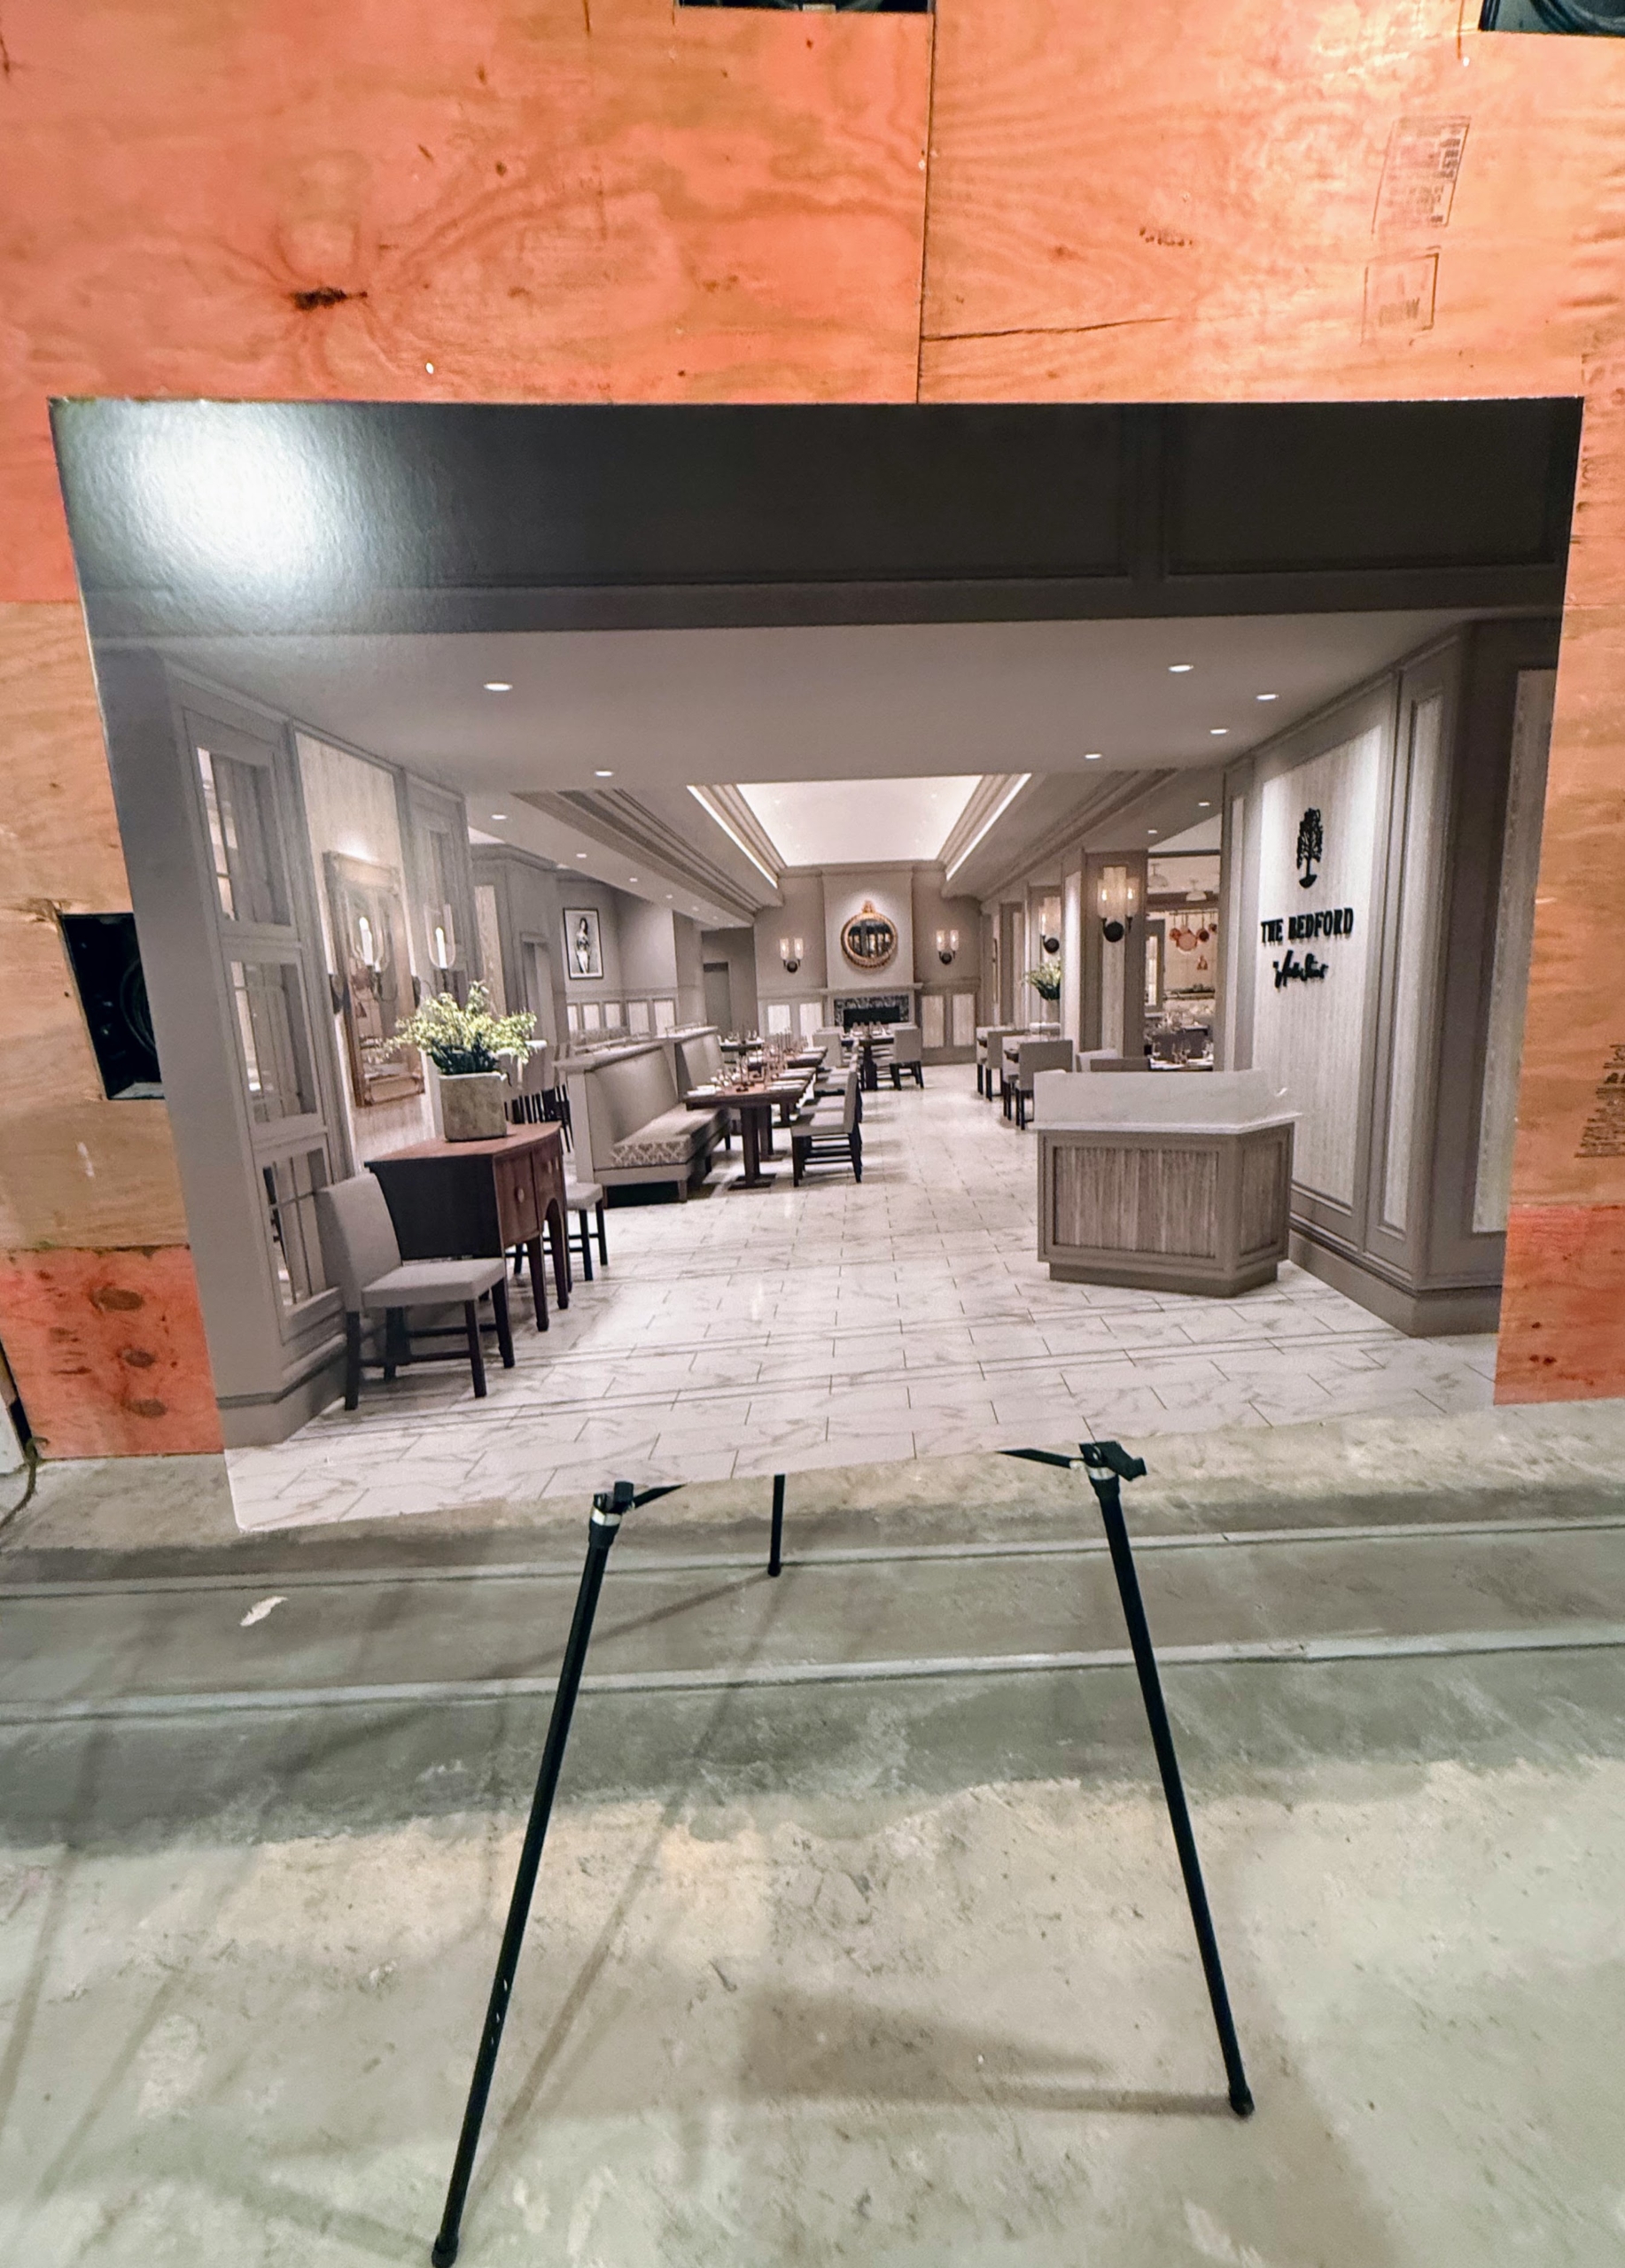
And here I am inside what will soon be The Bedford by Martha Stewart. I am so excited for the spring opening.
The walls are up in the dining spaces.
Floor to ceiling windows between rooms are already framed out.
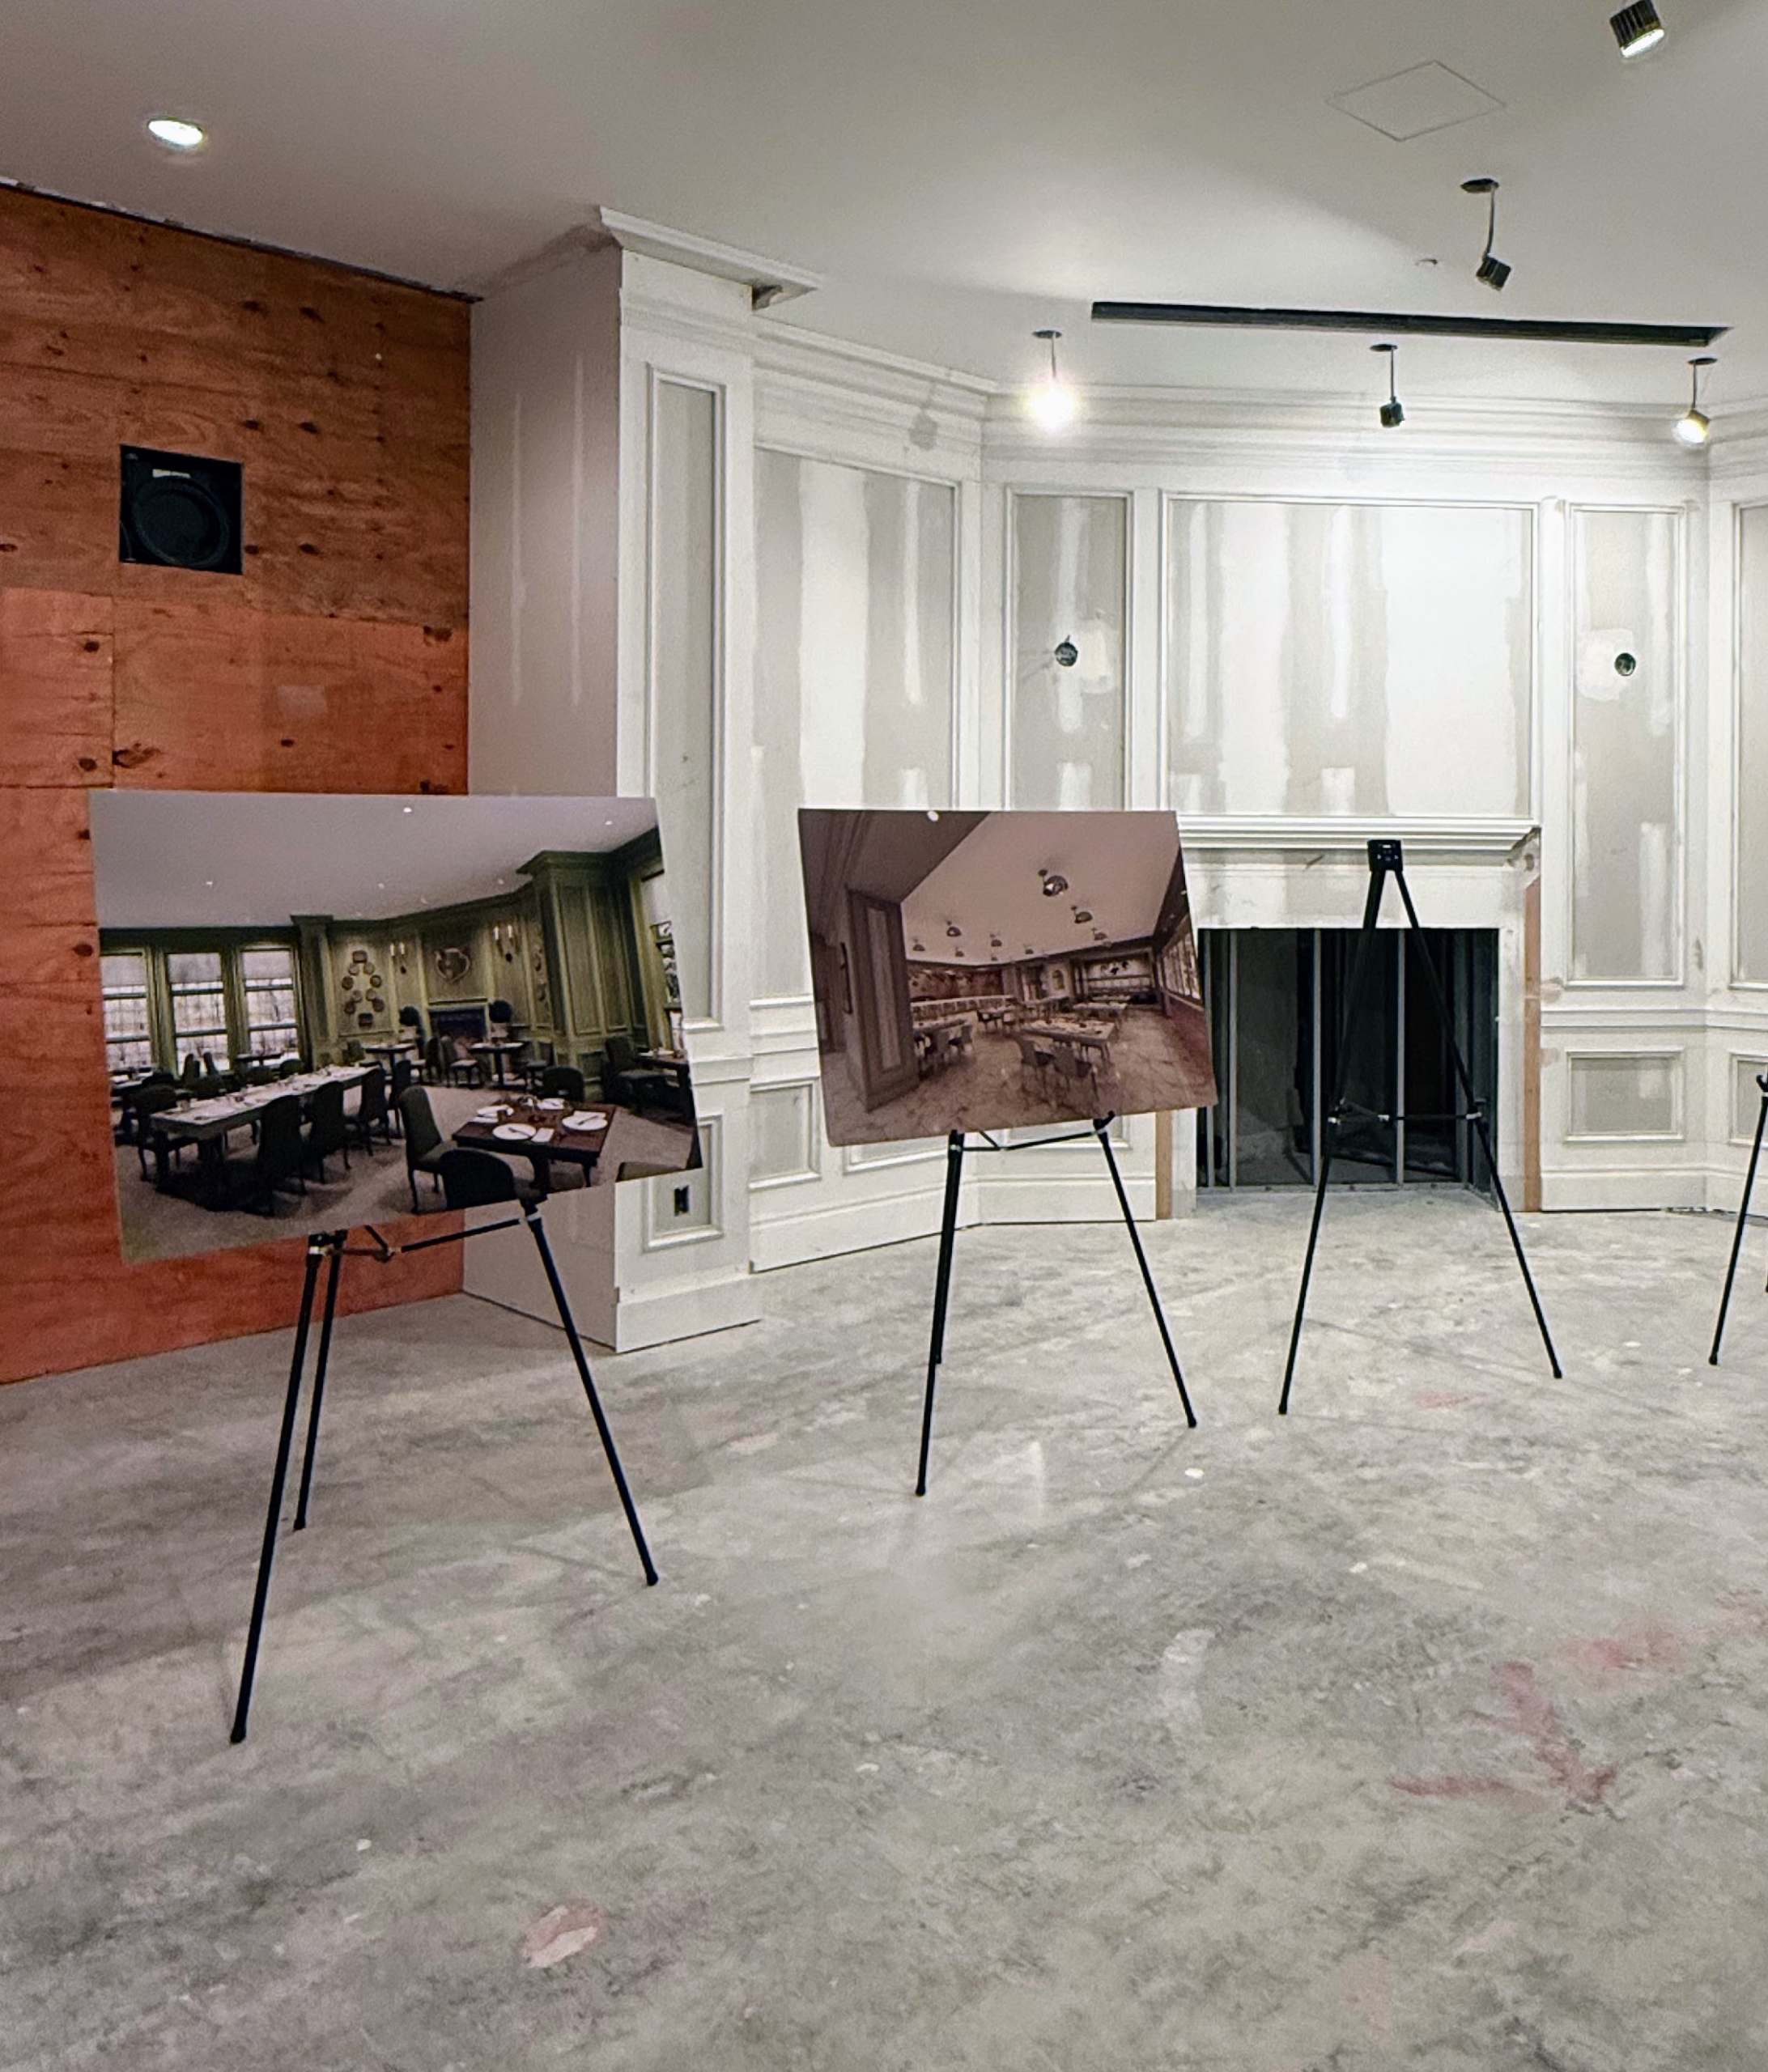
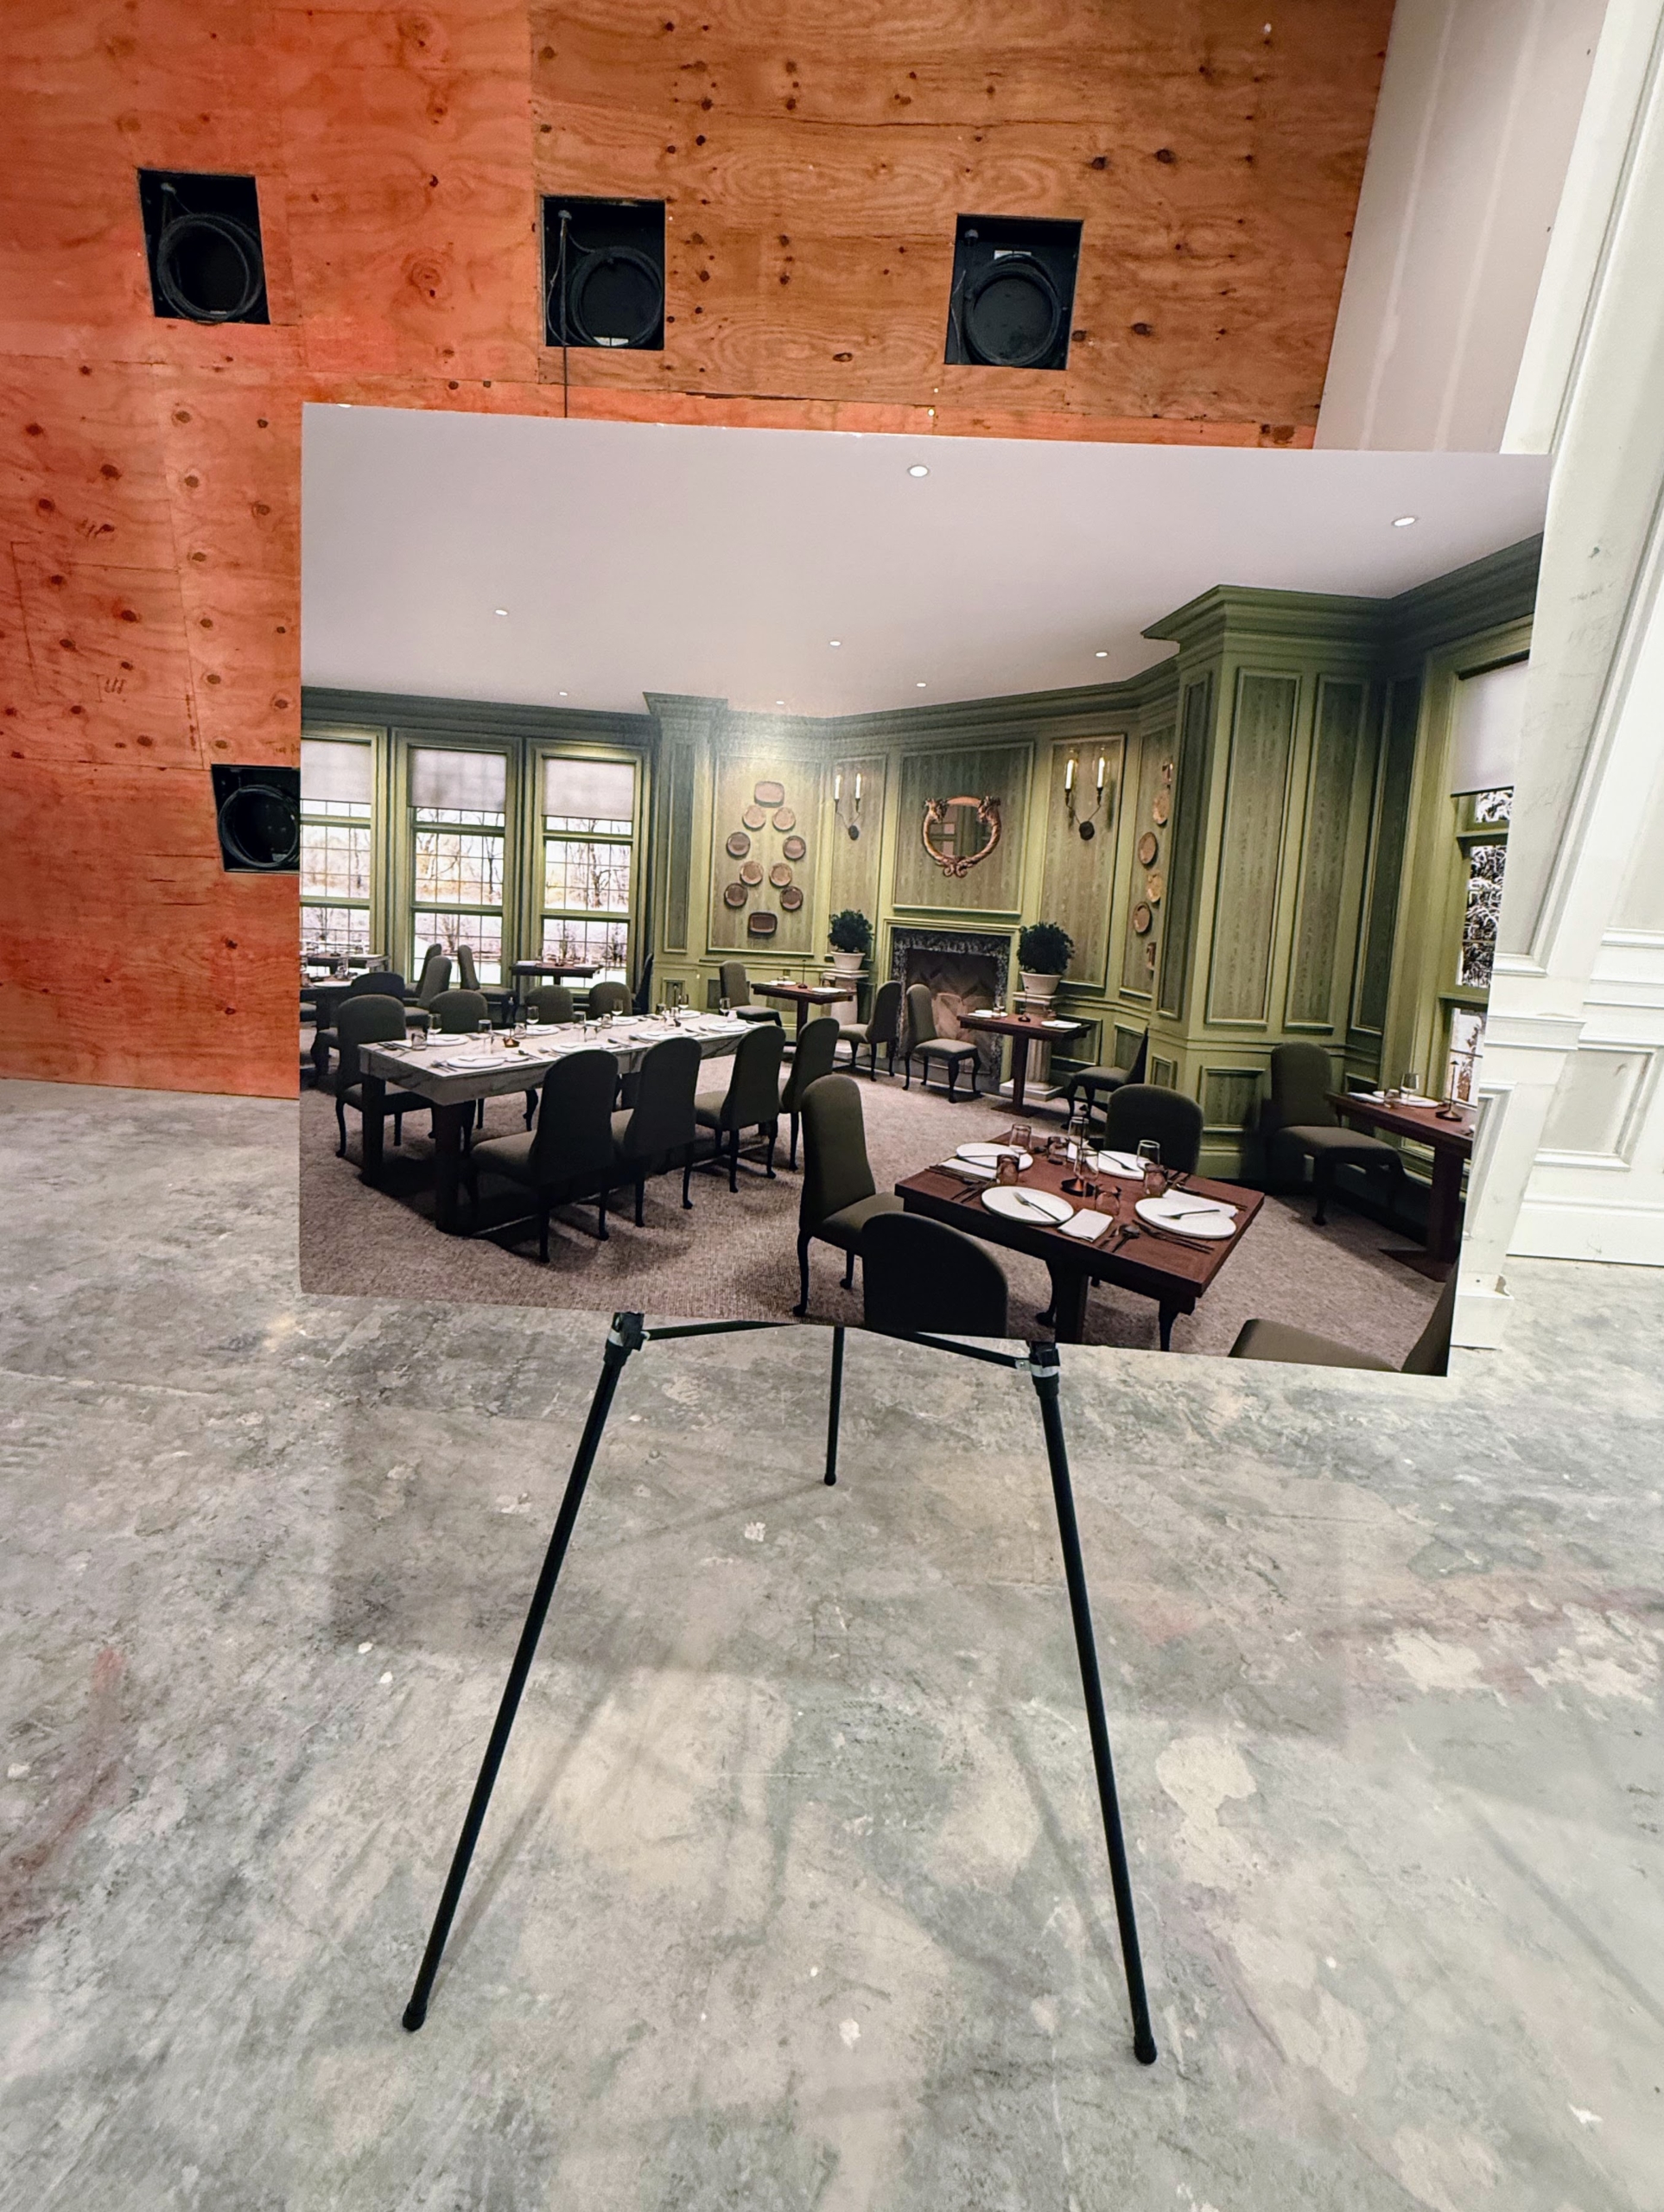
And photo renderings of the space to be are displayed.
While all the rooms are inspired by my home, one in particular will be decorated similarly to my green parlor with faux bois walls.
Here is how the entrance to the dining rooms will look like.
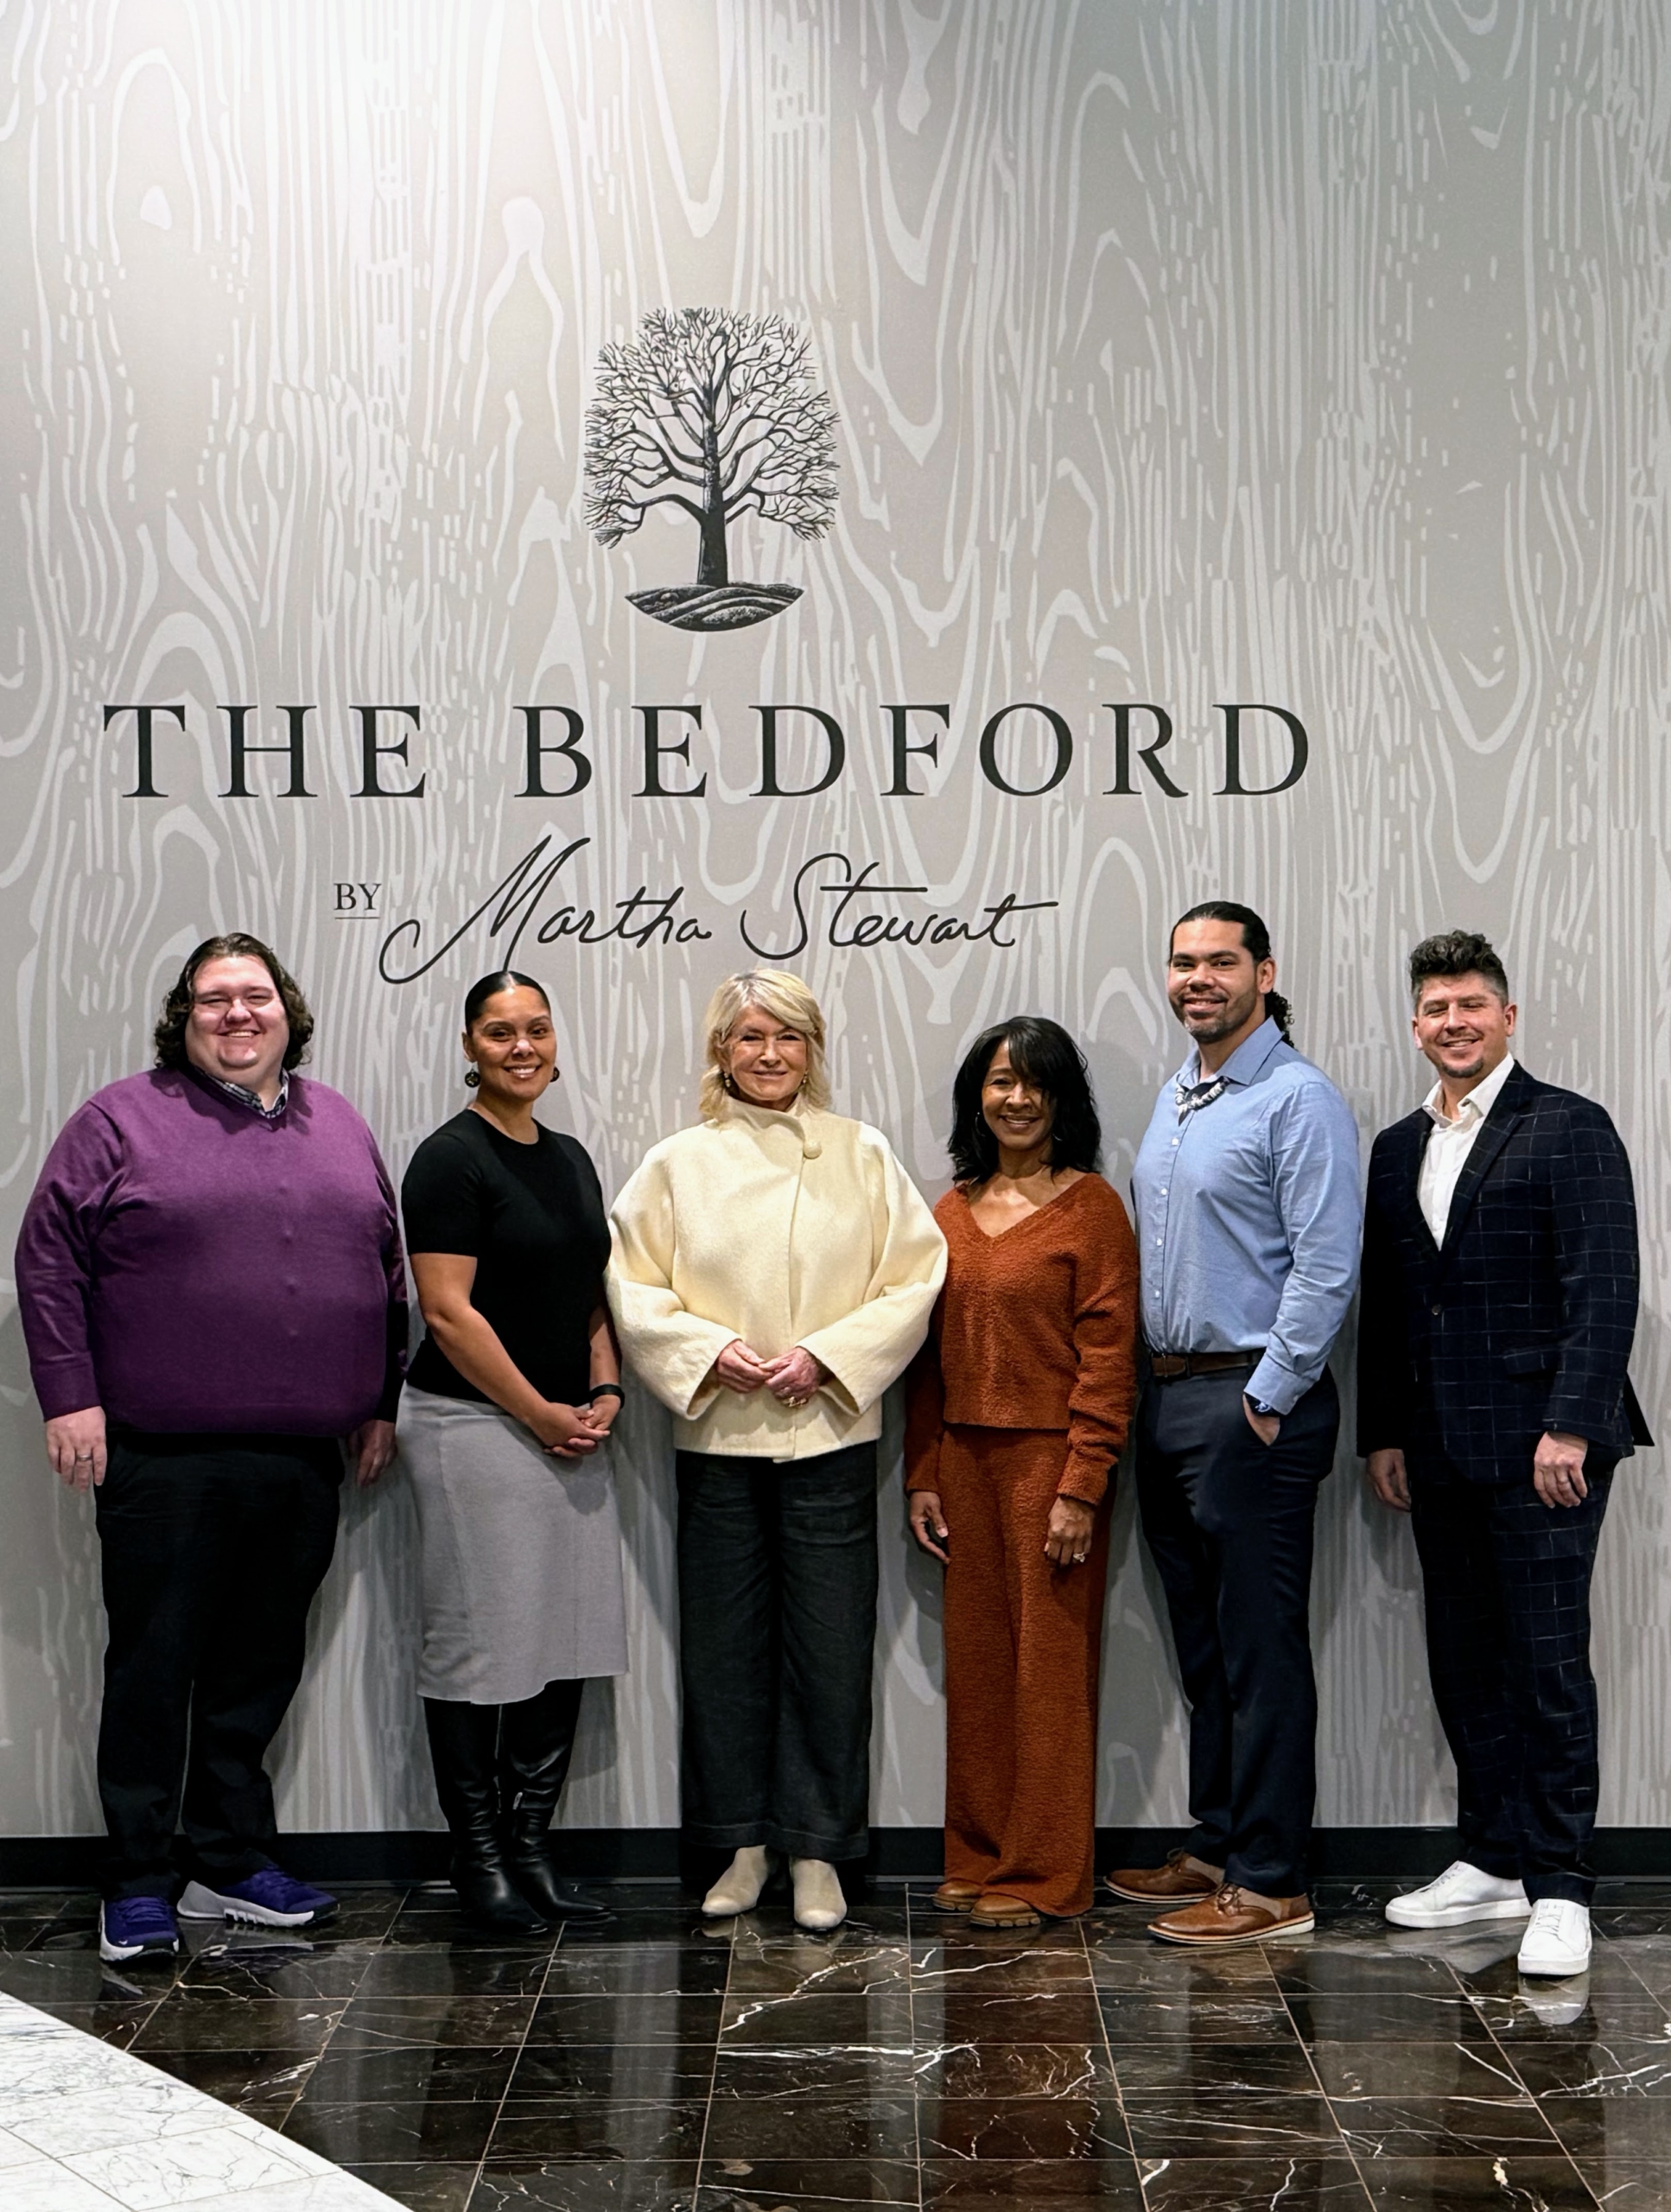
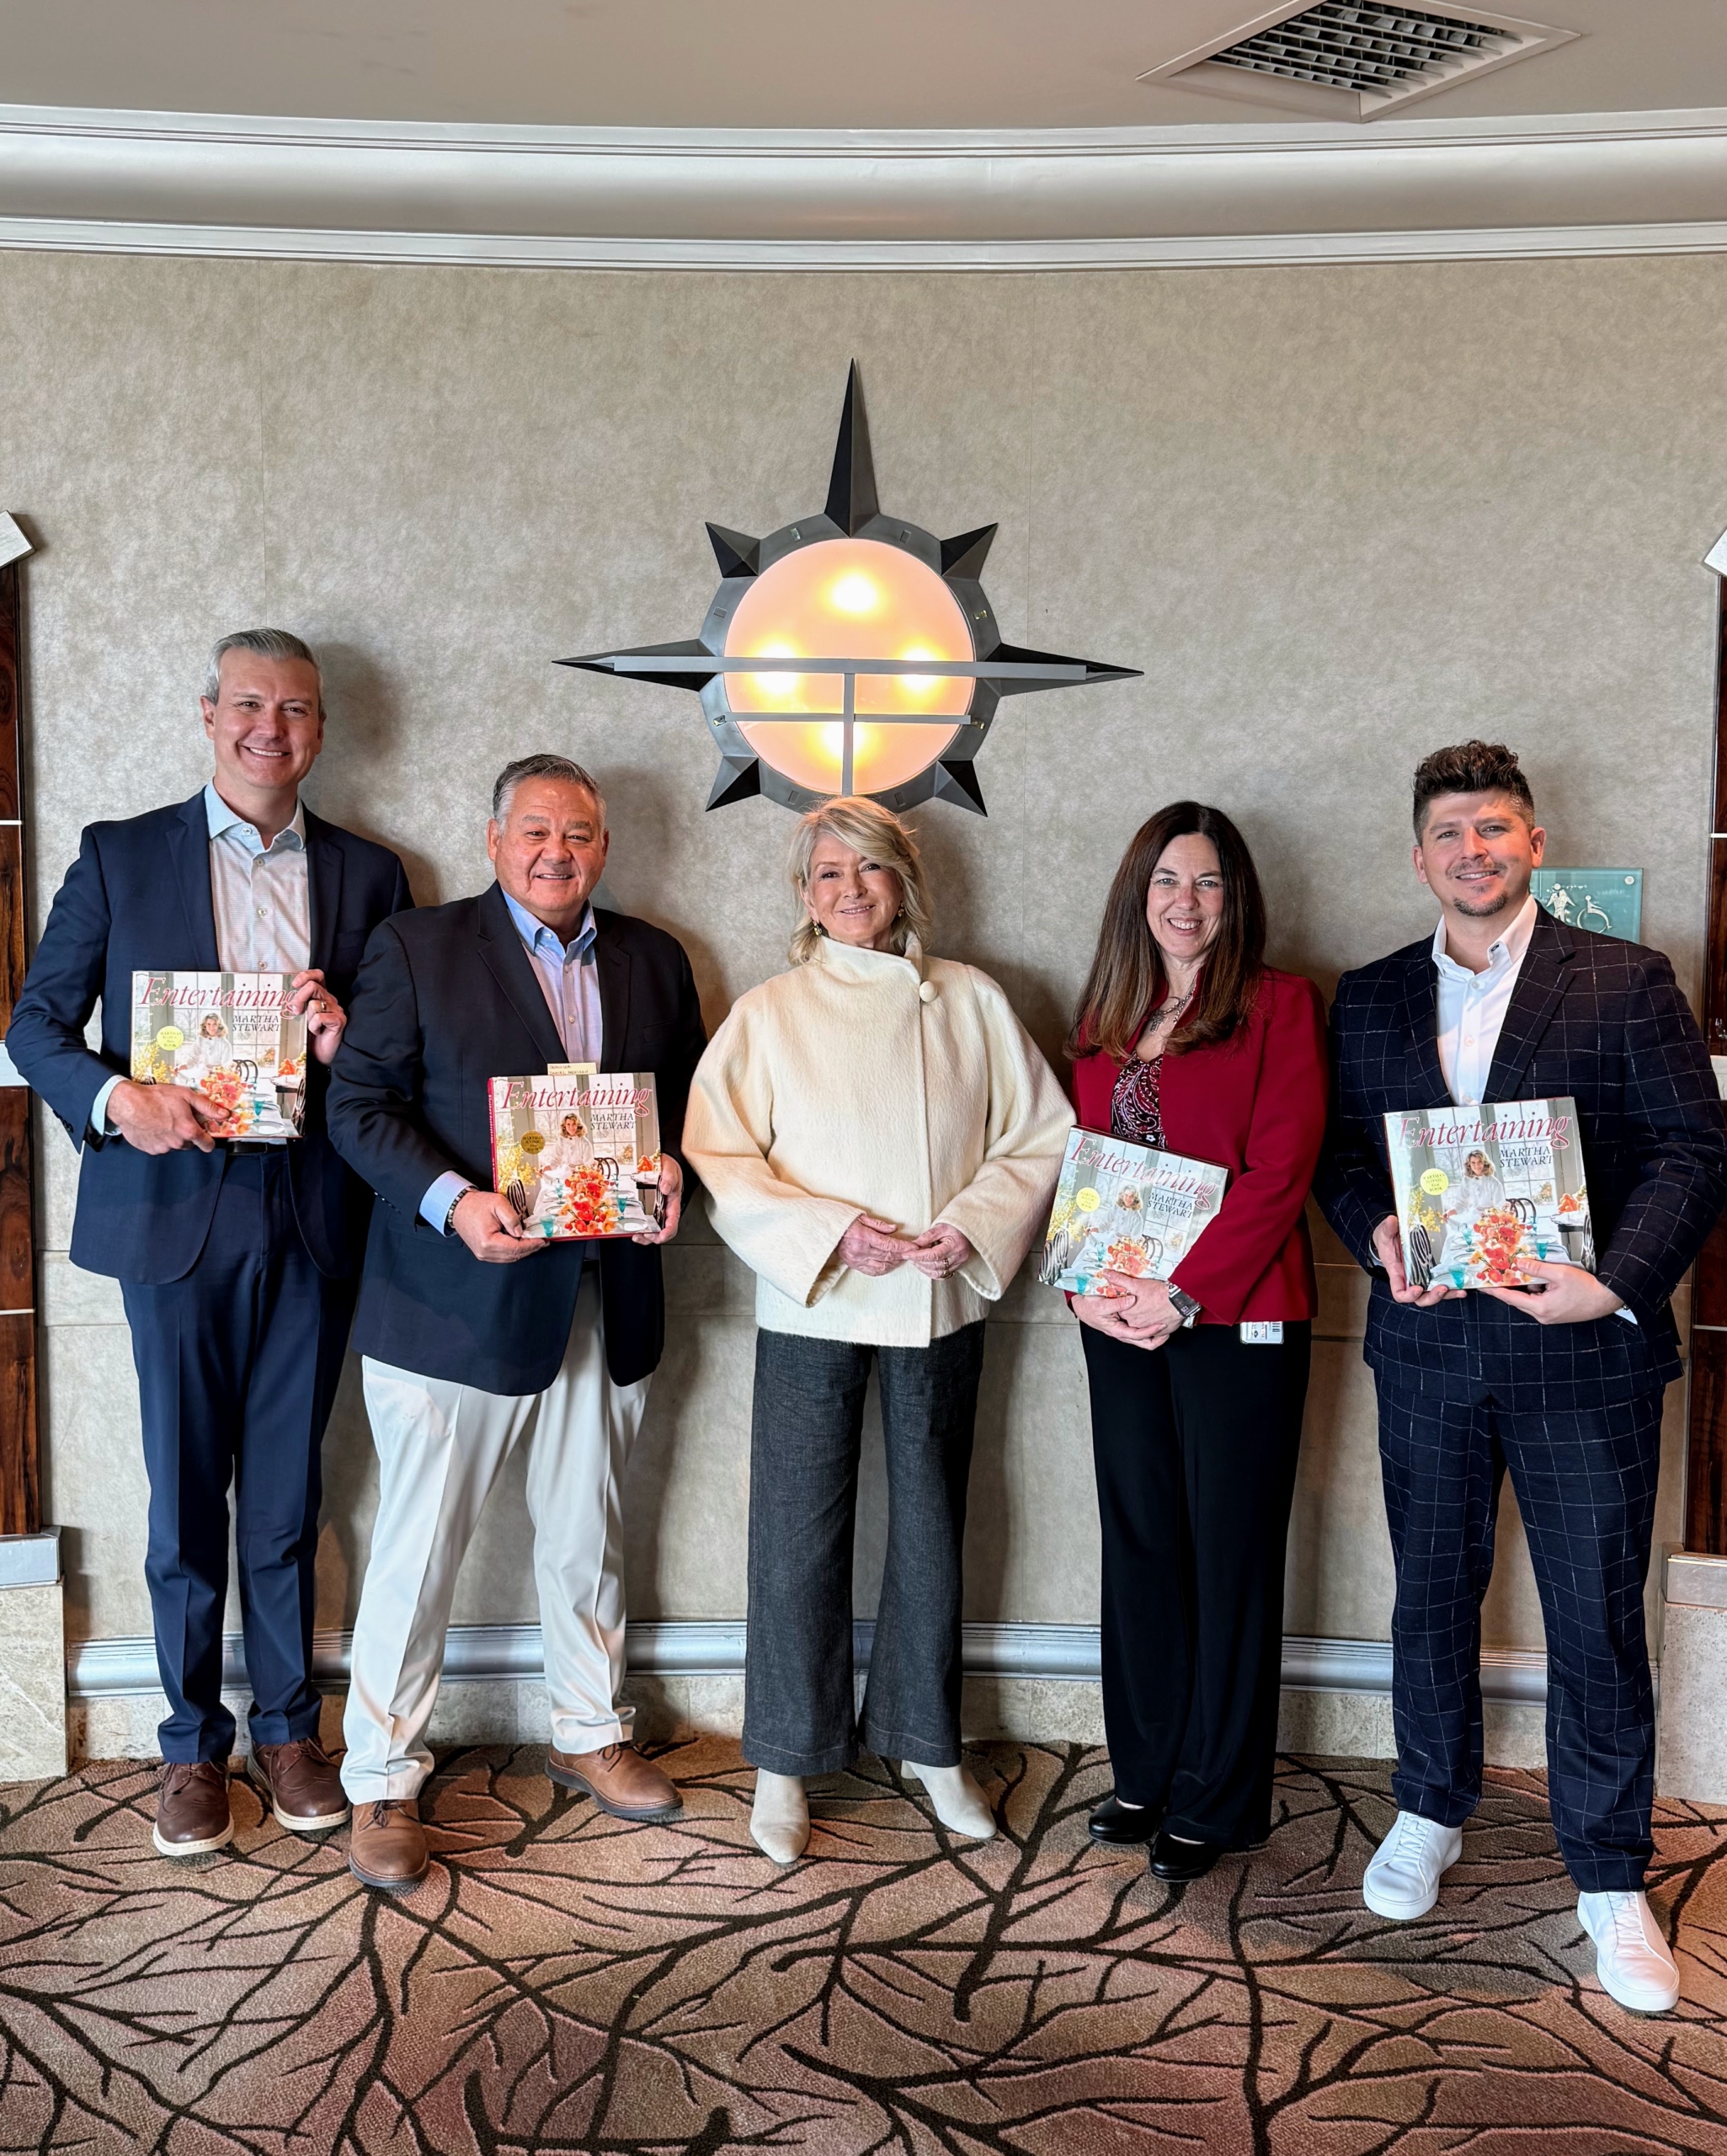
Before leaving, I gifted the Foxwoods team with copies of my newly re-launched book, Entertaining. Here I am with SVP Marketing Blair Bendel, VP Food and Beverage Eddie Allen, Michelle Shriver SVP Hospitality, and Jason. It was a productive and pleasant visit. I can’t wait to come back in March for the restaurant’s grand opening.
The holiday season is one of my favorite times to entertain.
Earlier this week, I hosted a small business dinner for seven. My Winter House was decorated with lots of beautiful trees glistening in green, silver, and gold. Chef Molly Wenk, who has worked with me on many television and video food productions, and I, collaborated on a wonderful menu that included endive and radicchio salad, celeriac soup that I made using vegetables from my garden, beef bourguignon and mashed potatoes, and for dessert, apple tarte tatin. It was a great evening and a most delicious late autumn feast.
Enjoy these photos.
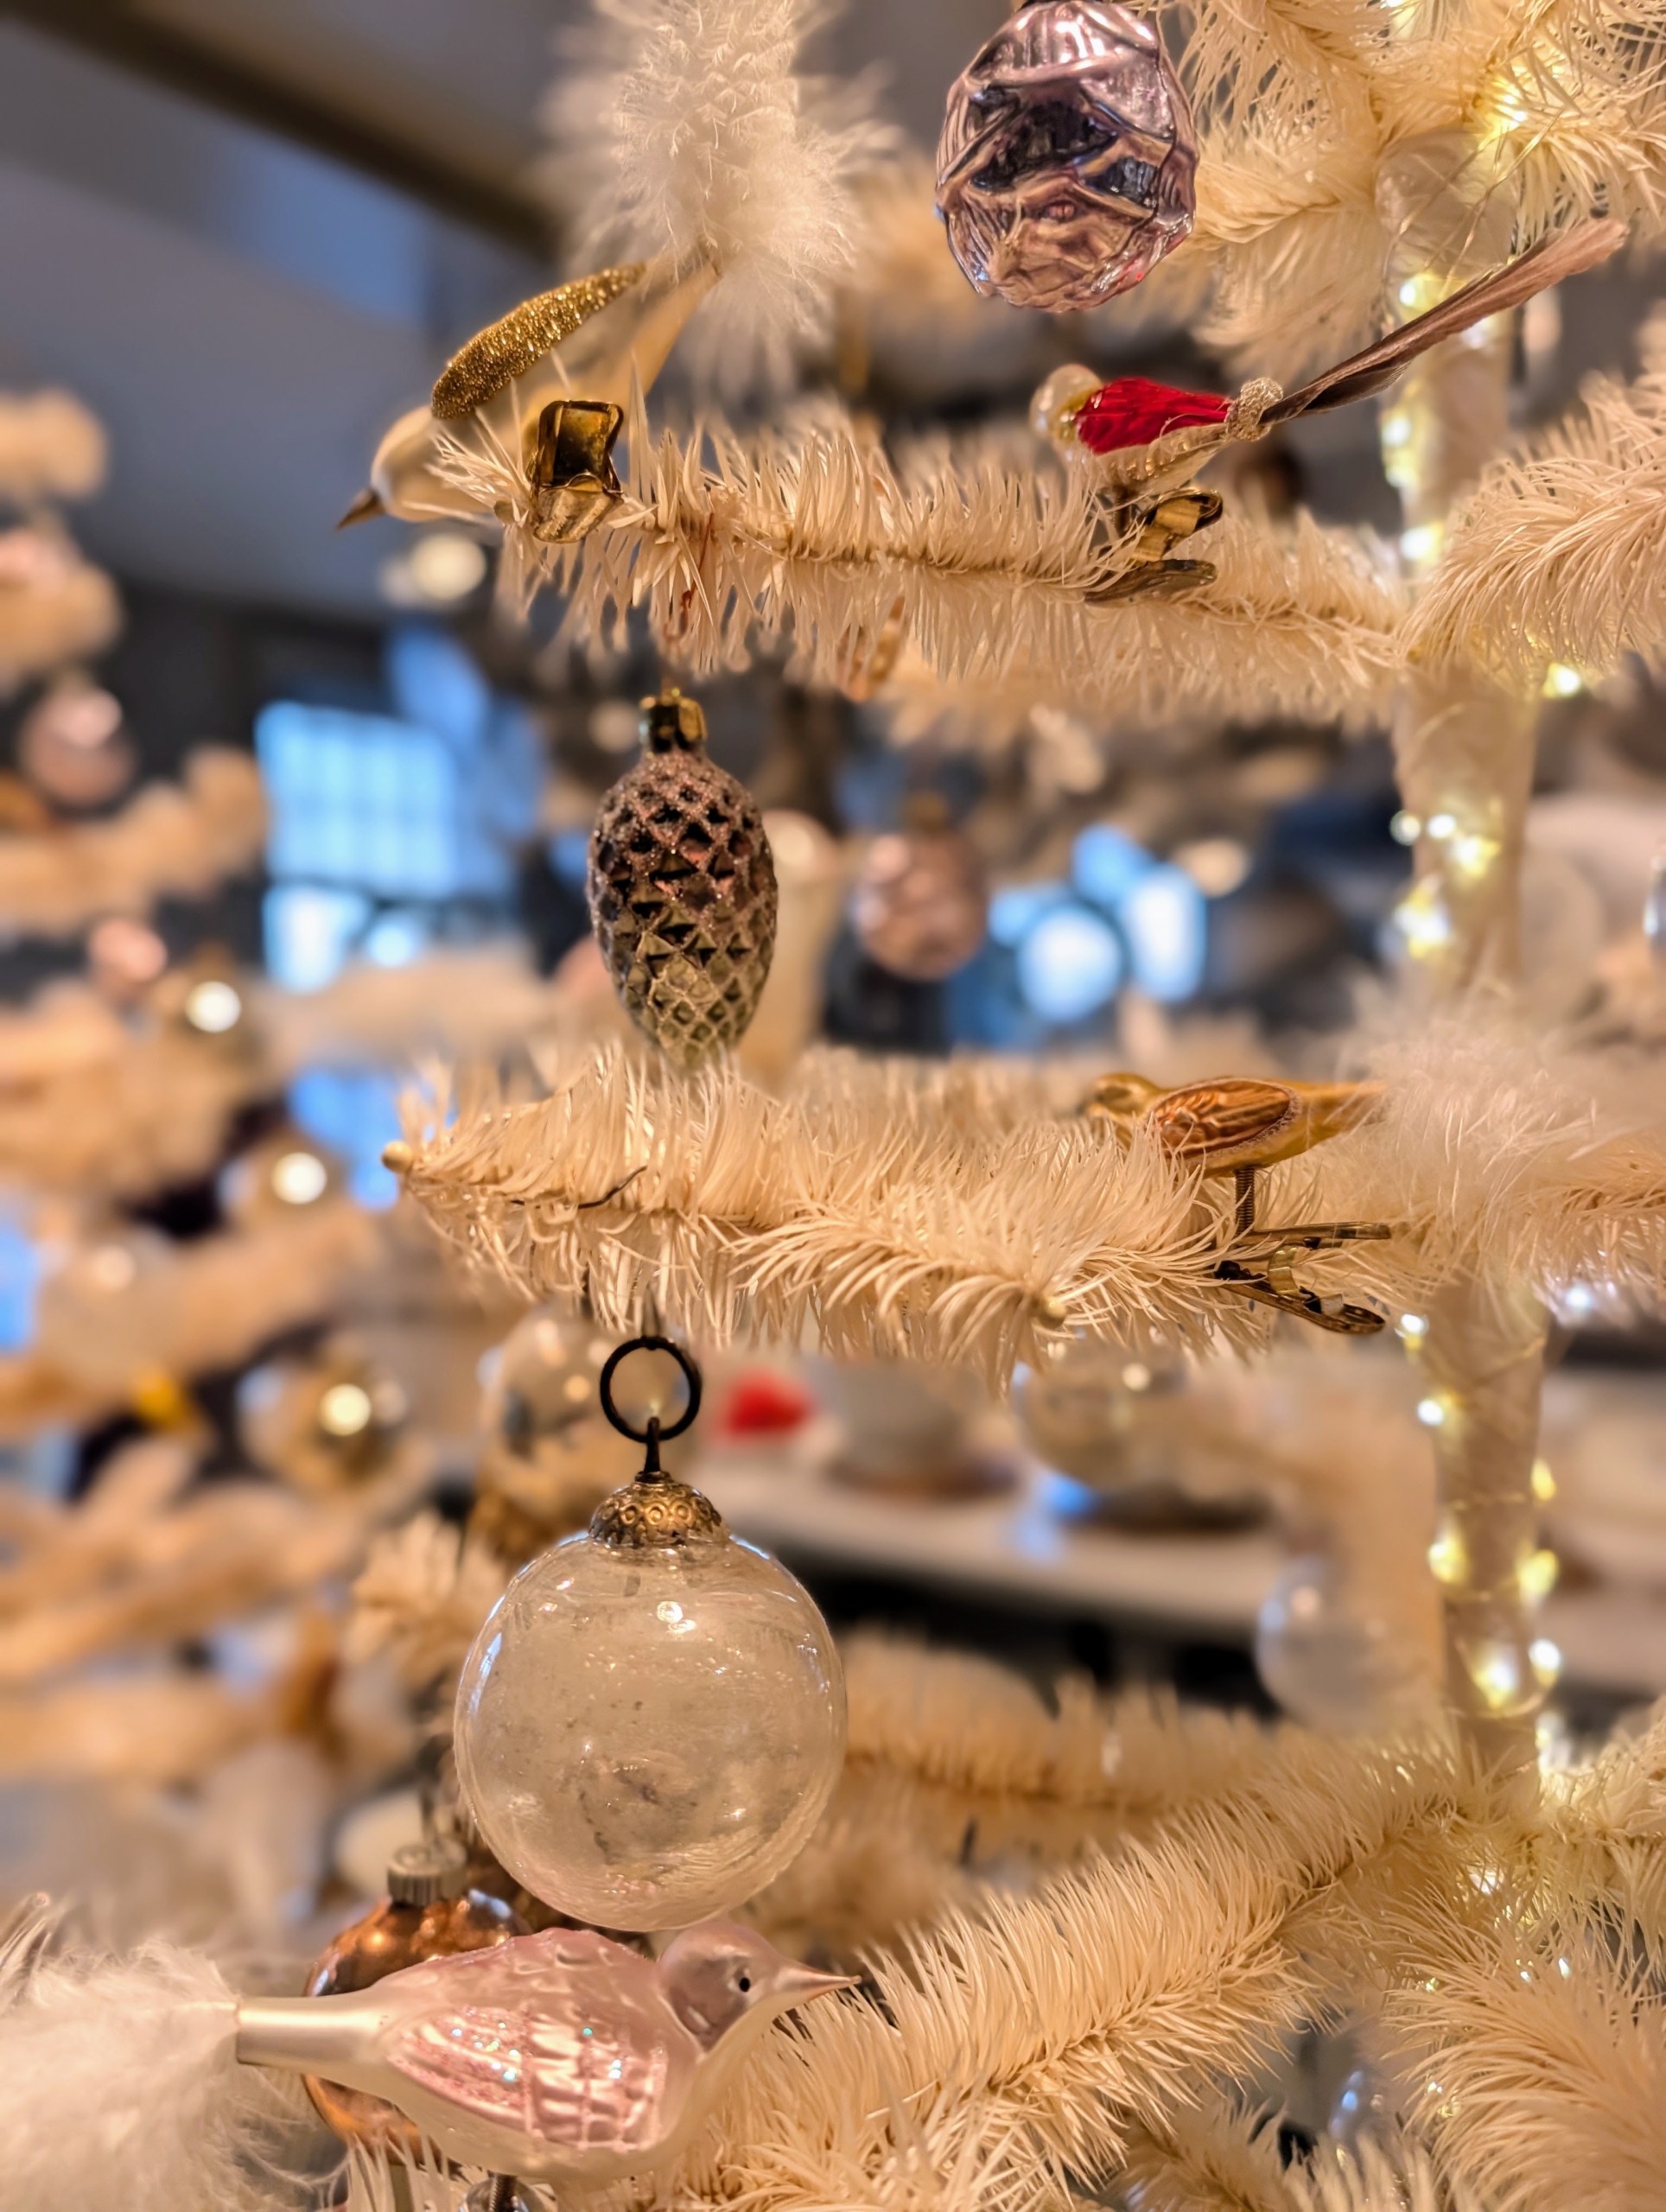
I always fill my Winter House rooms with many trees during the holidays – big, small, fresh, and charming feather trees like this one in my entrance hall, adorned with bright gold ornaments.
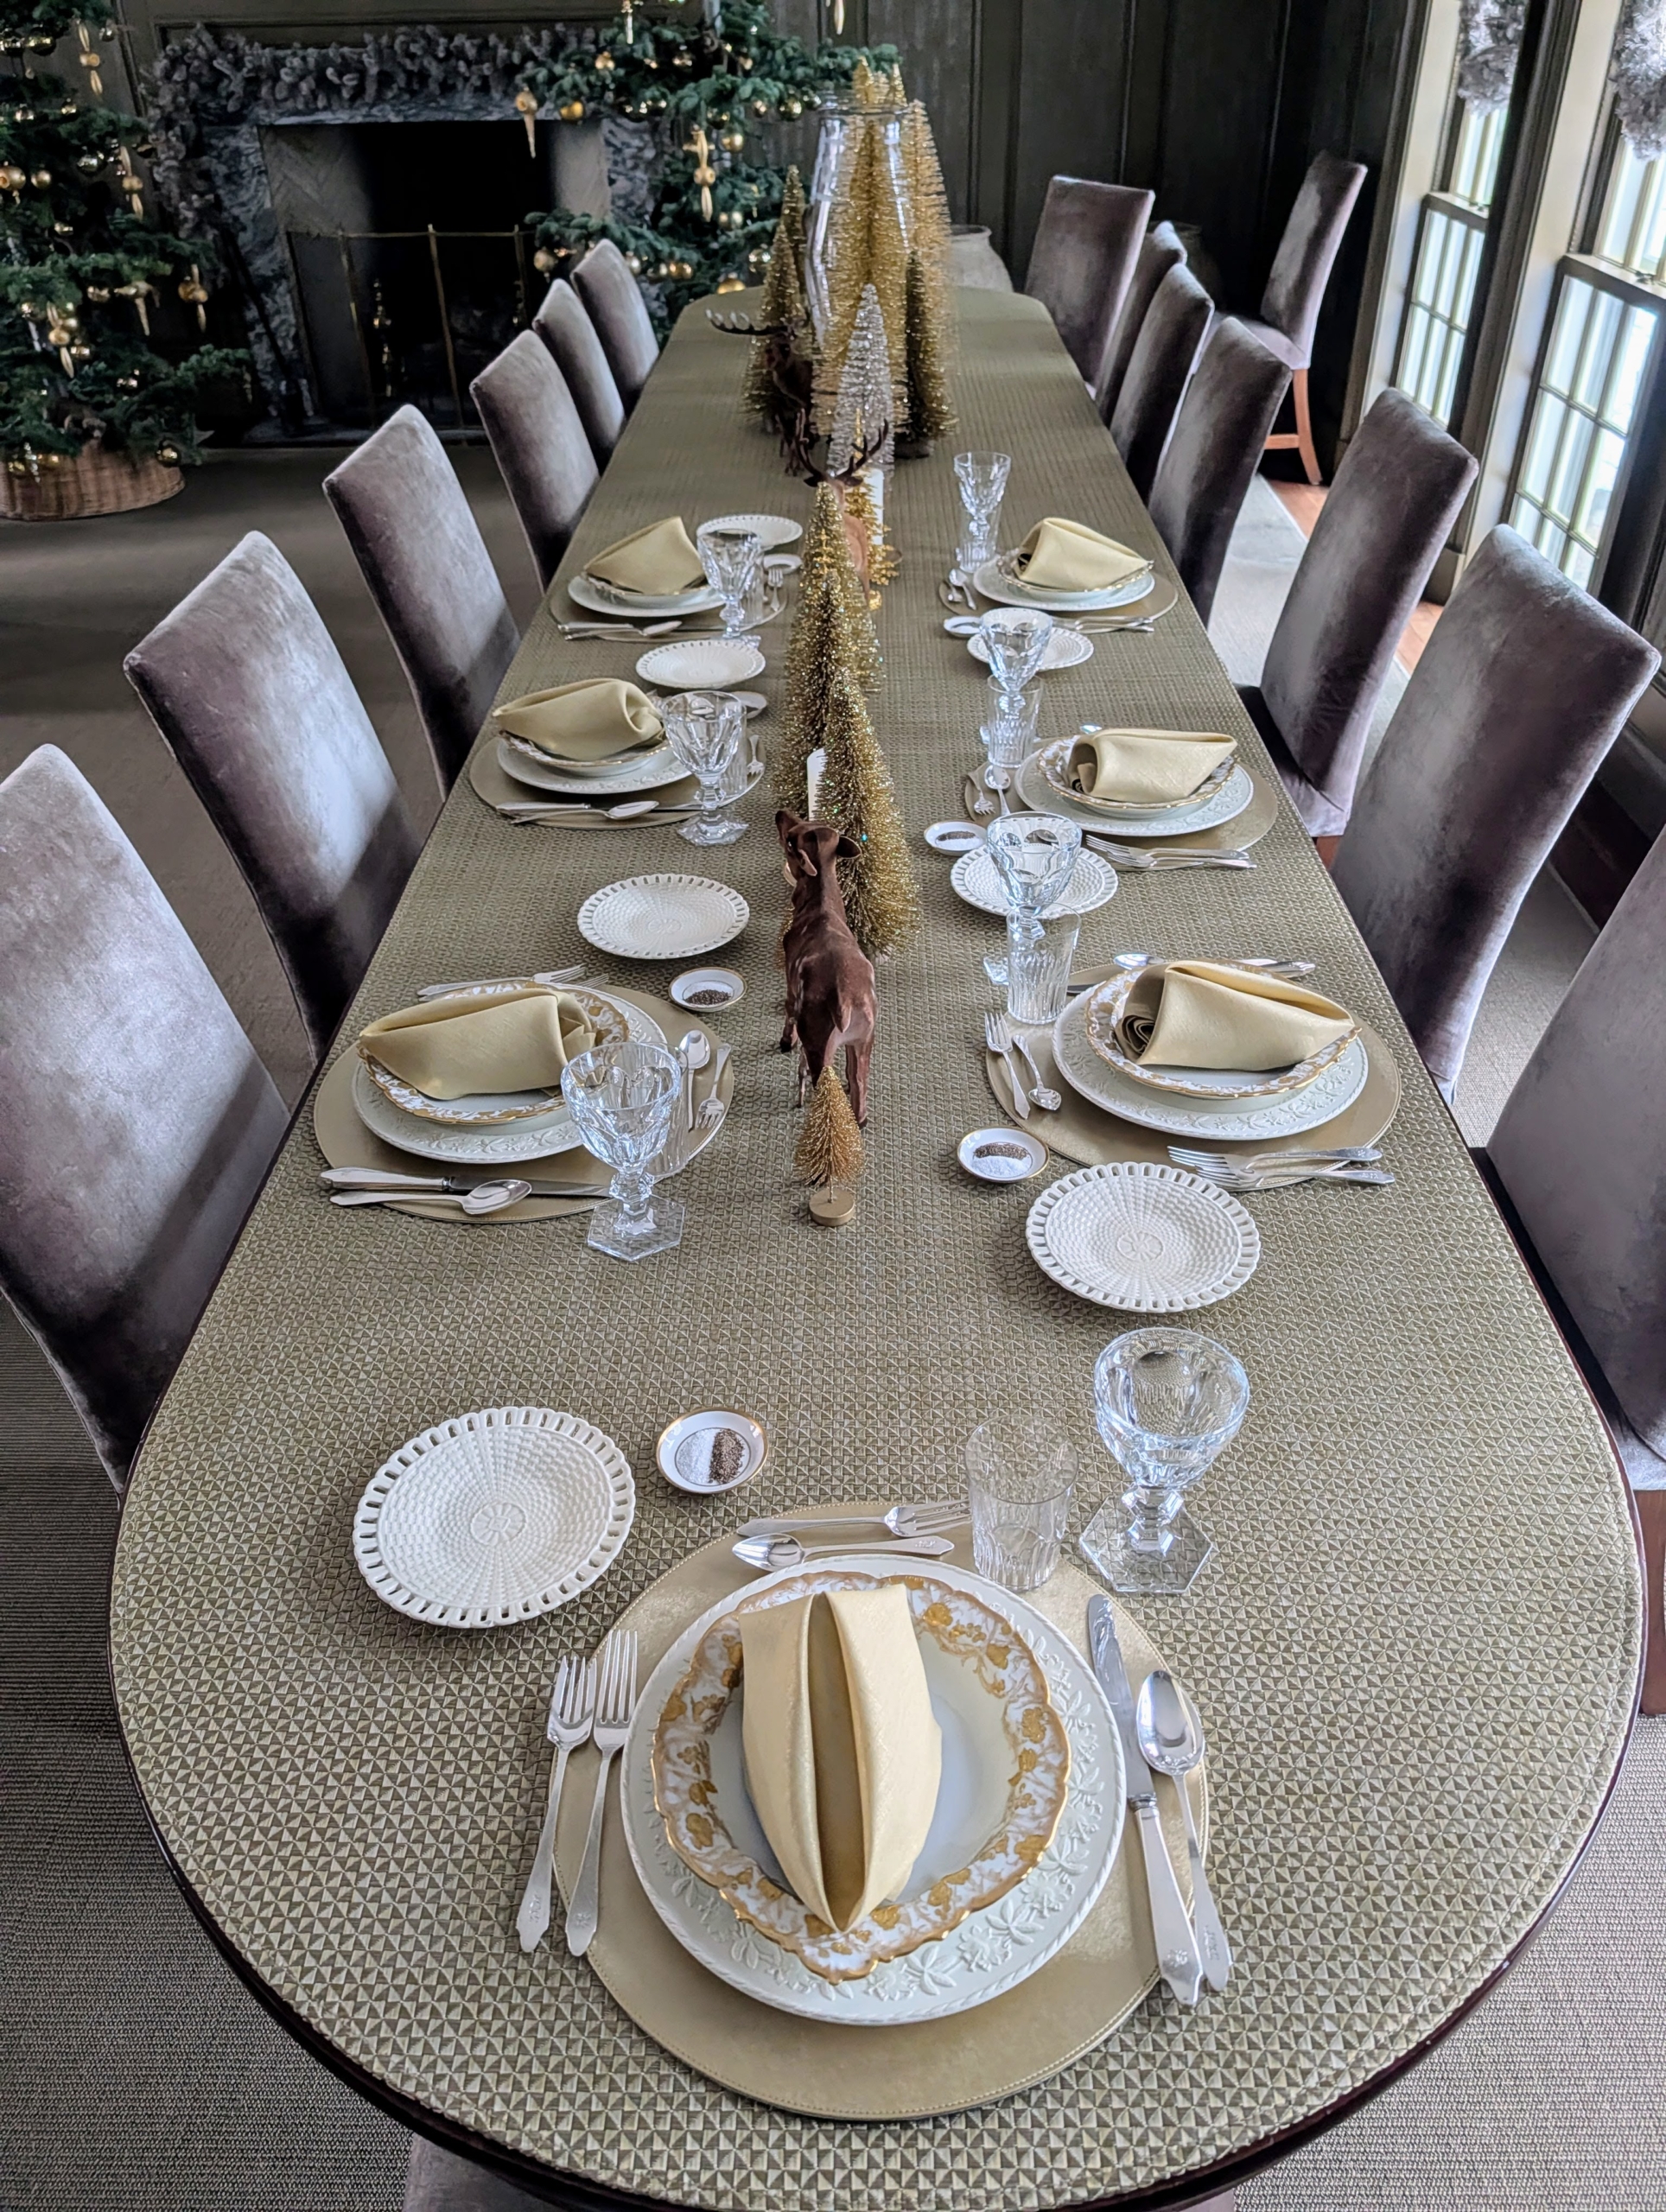
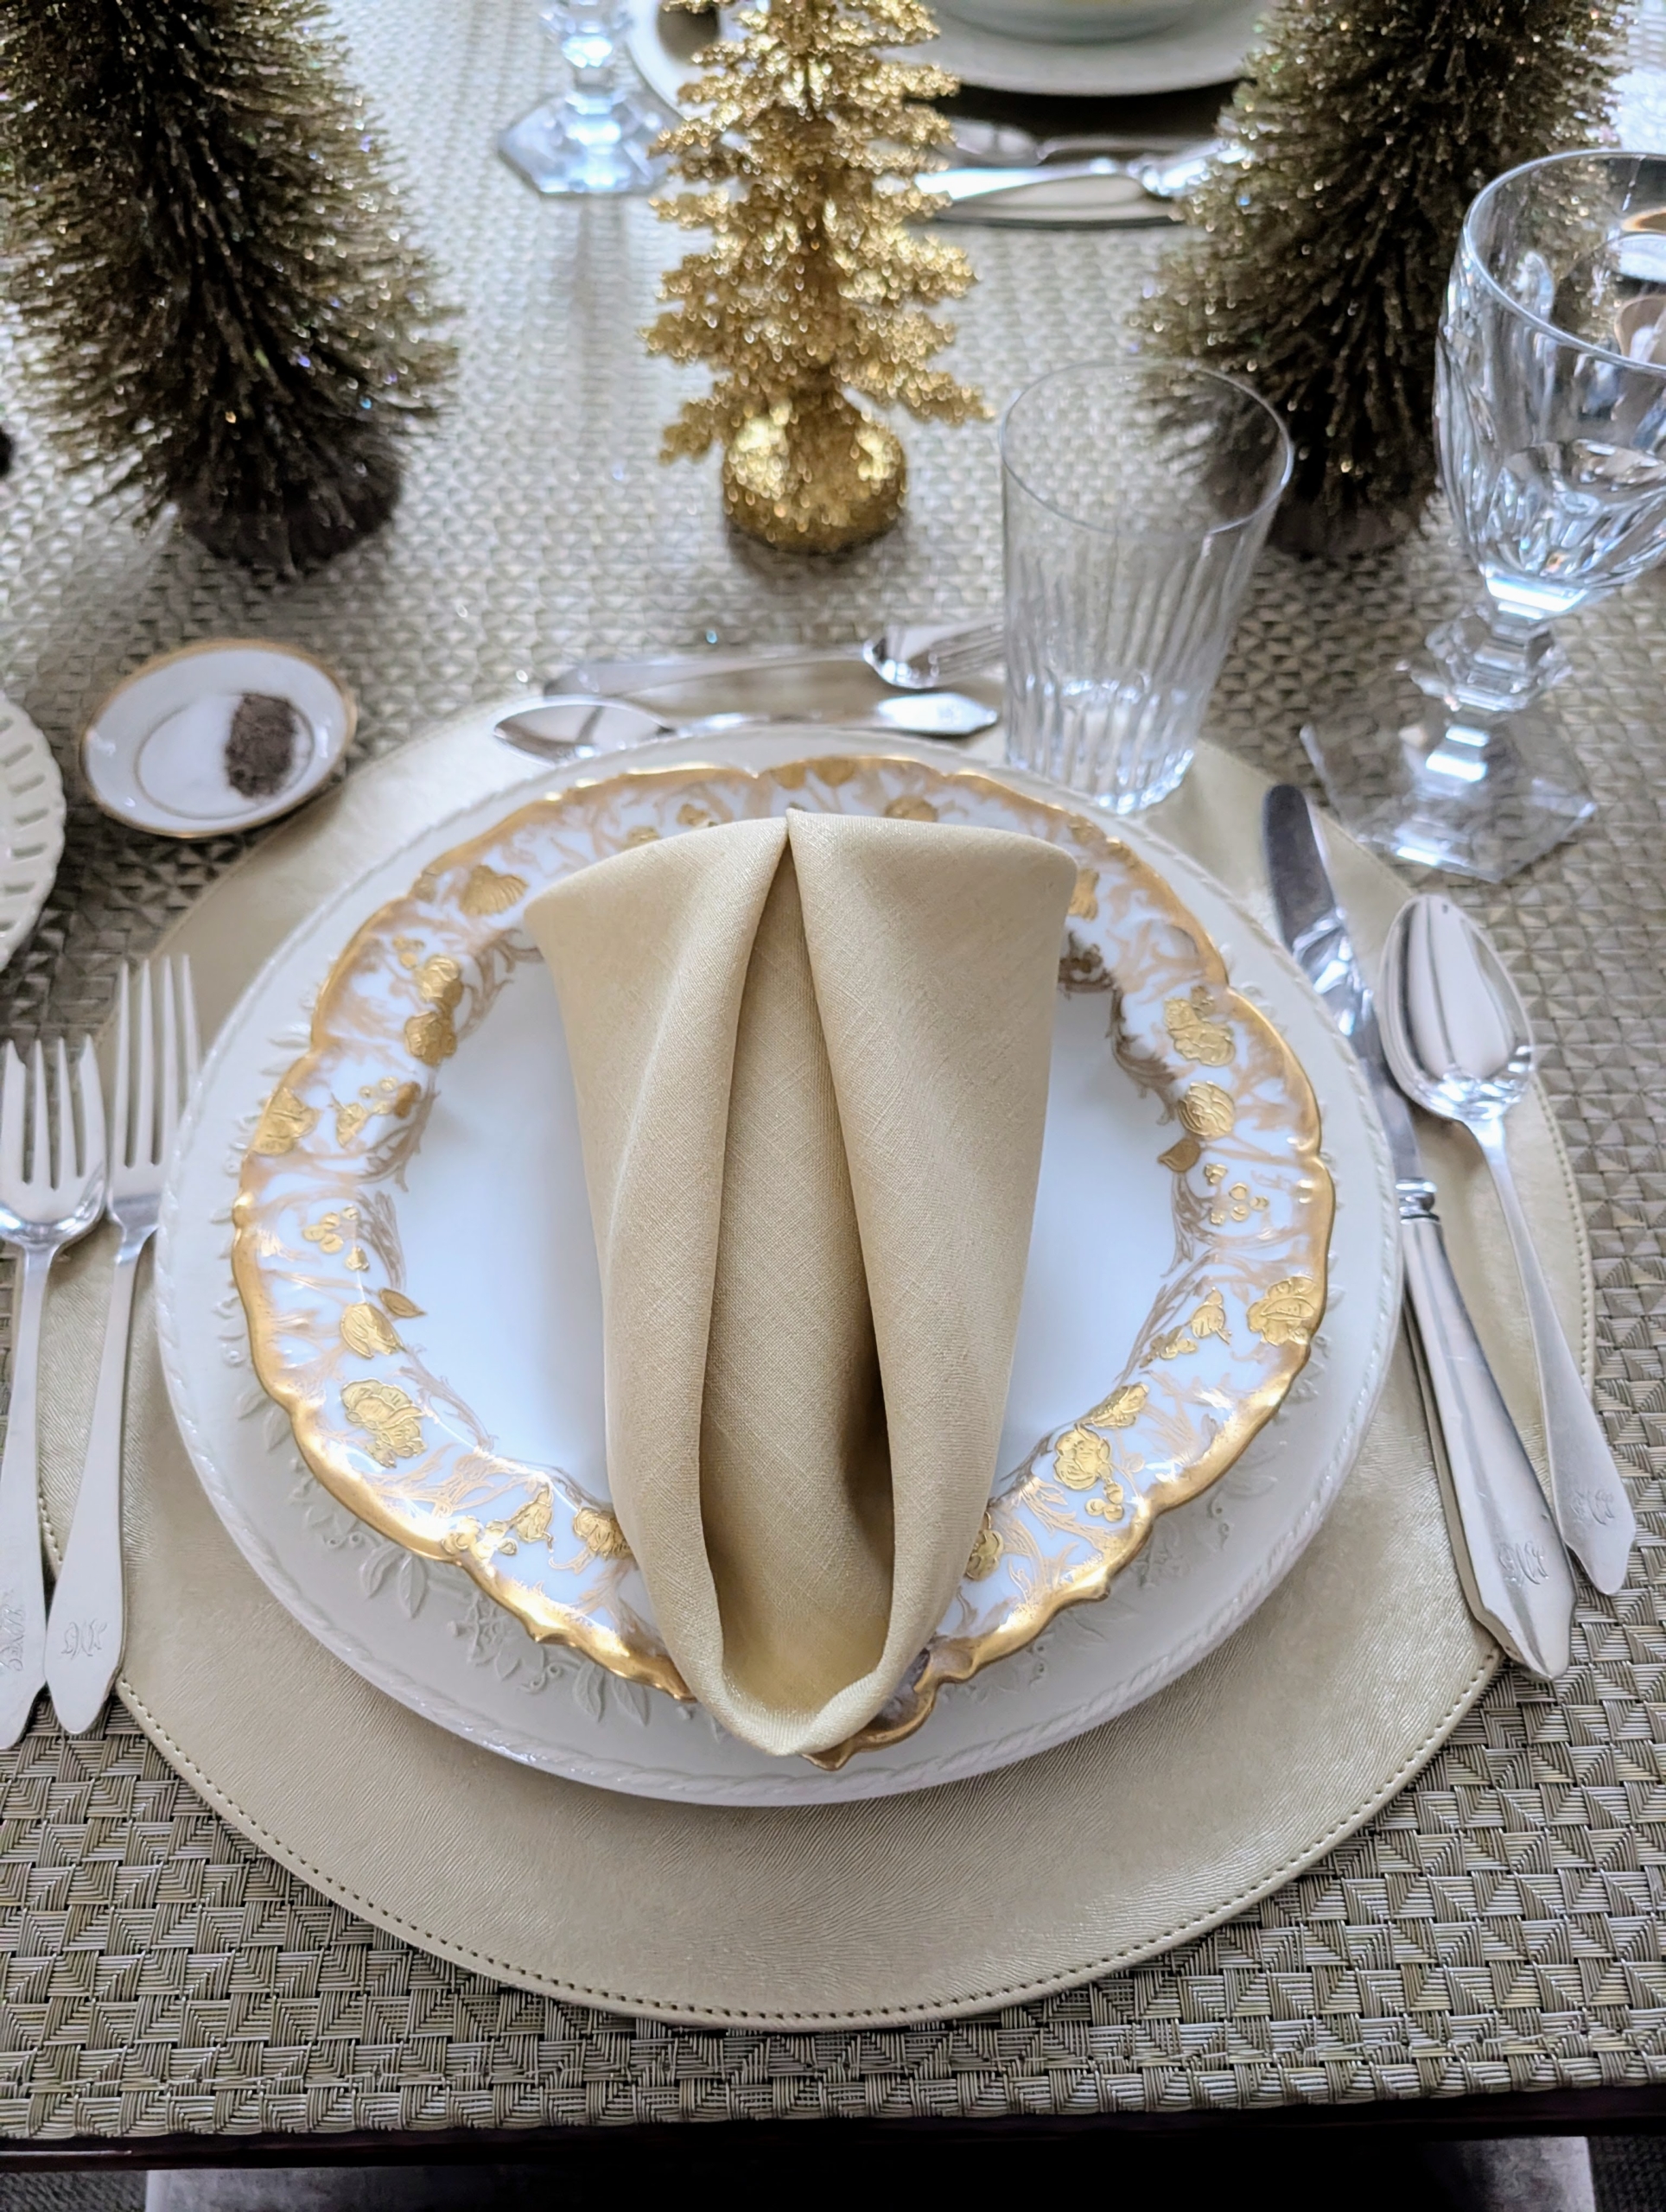
In my Brown Room, my long table is also decorated with gold and umber colored bottlebrush trees down the center with deer.
Each table setting has coordinating plates and napkins – all ready for a delicious meal.
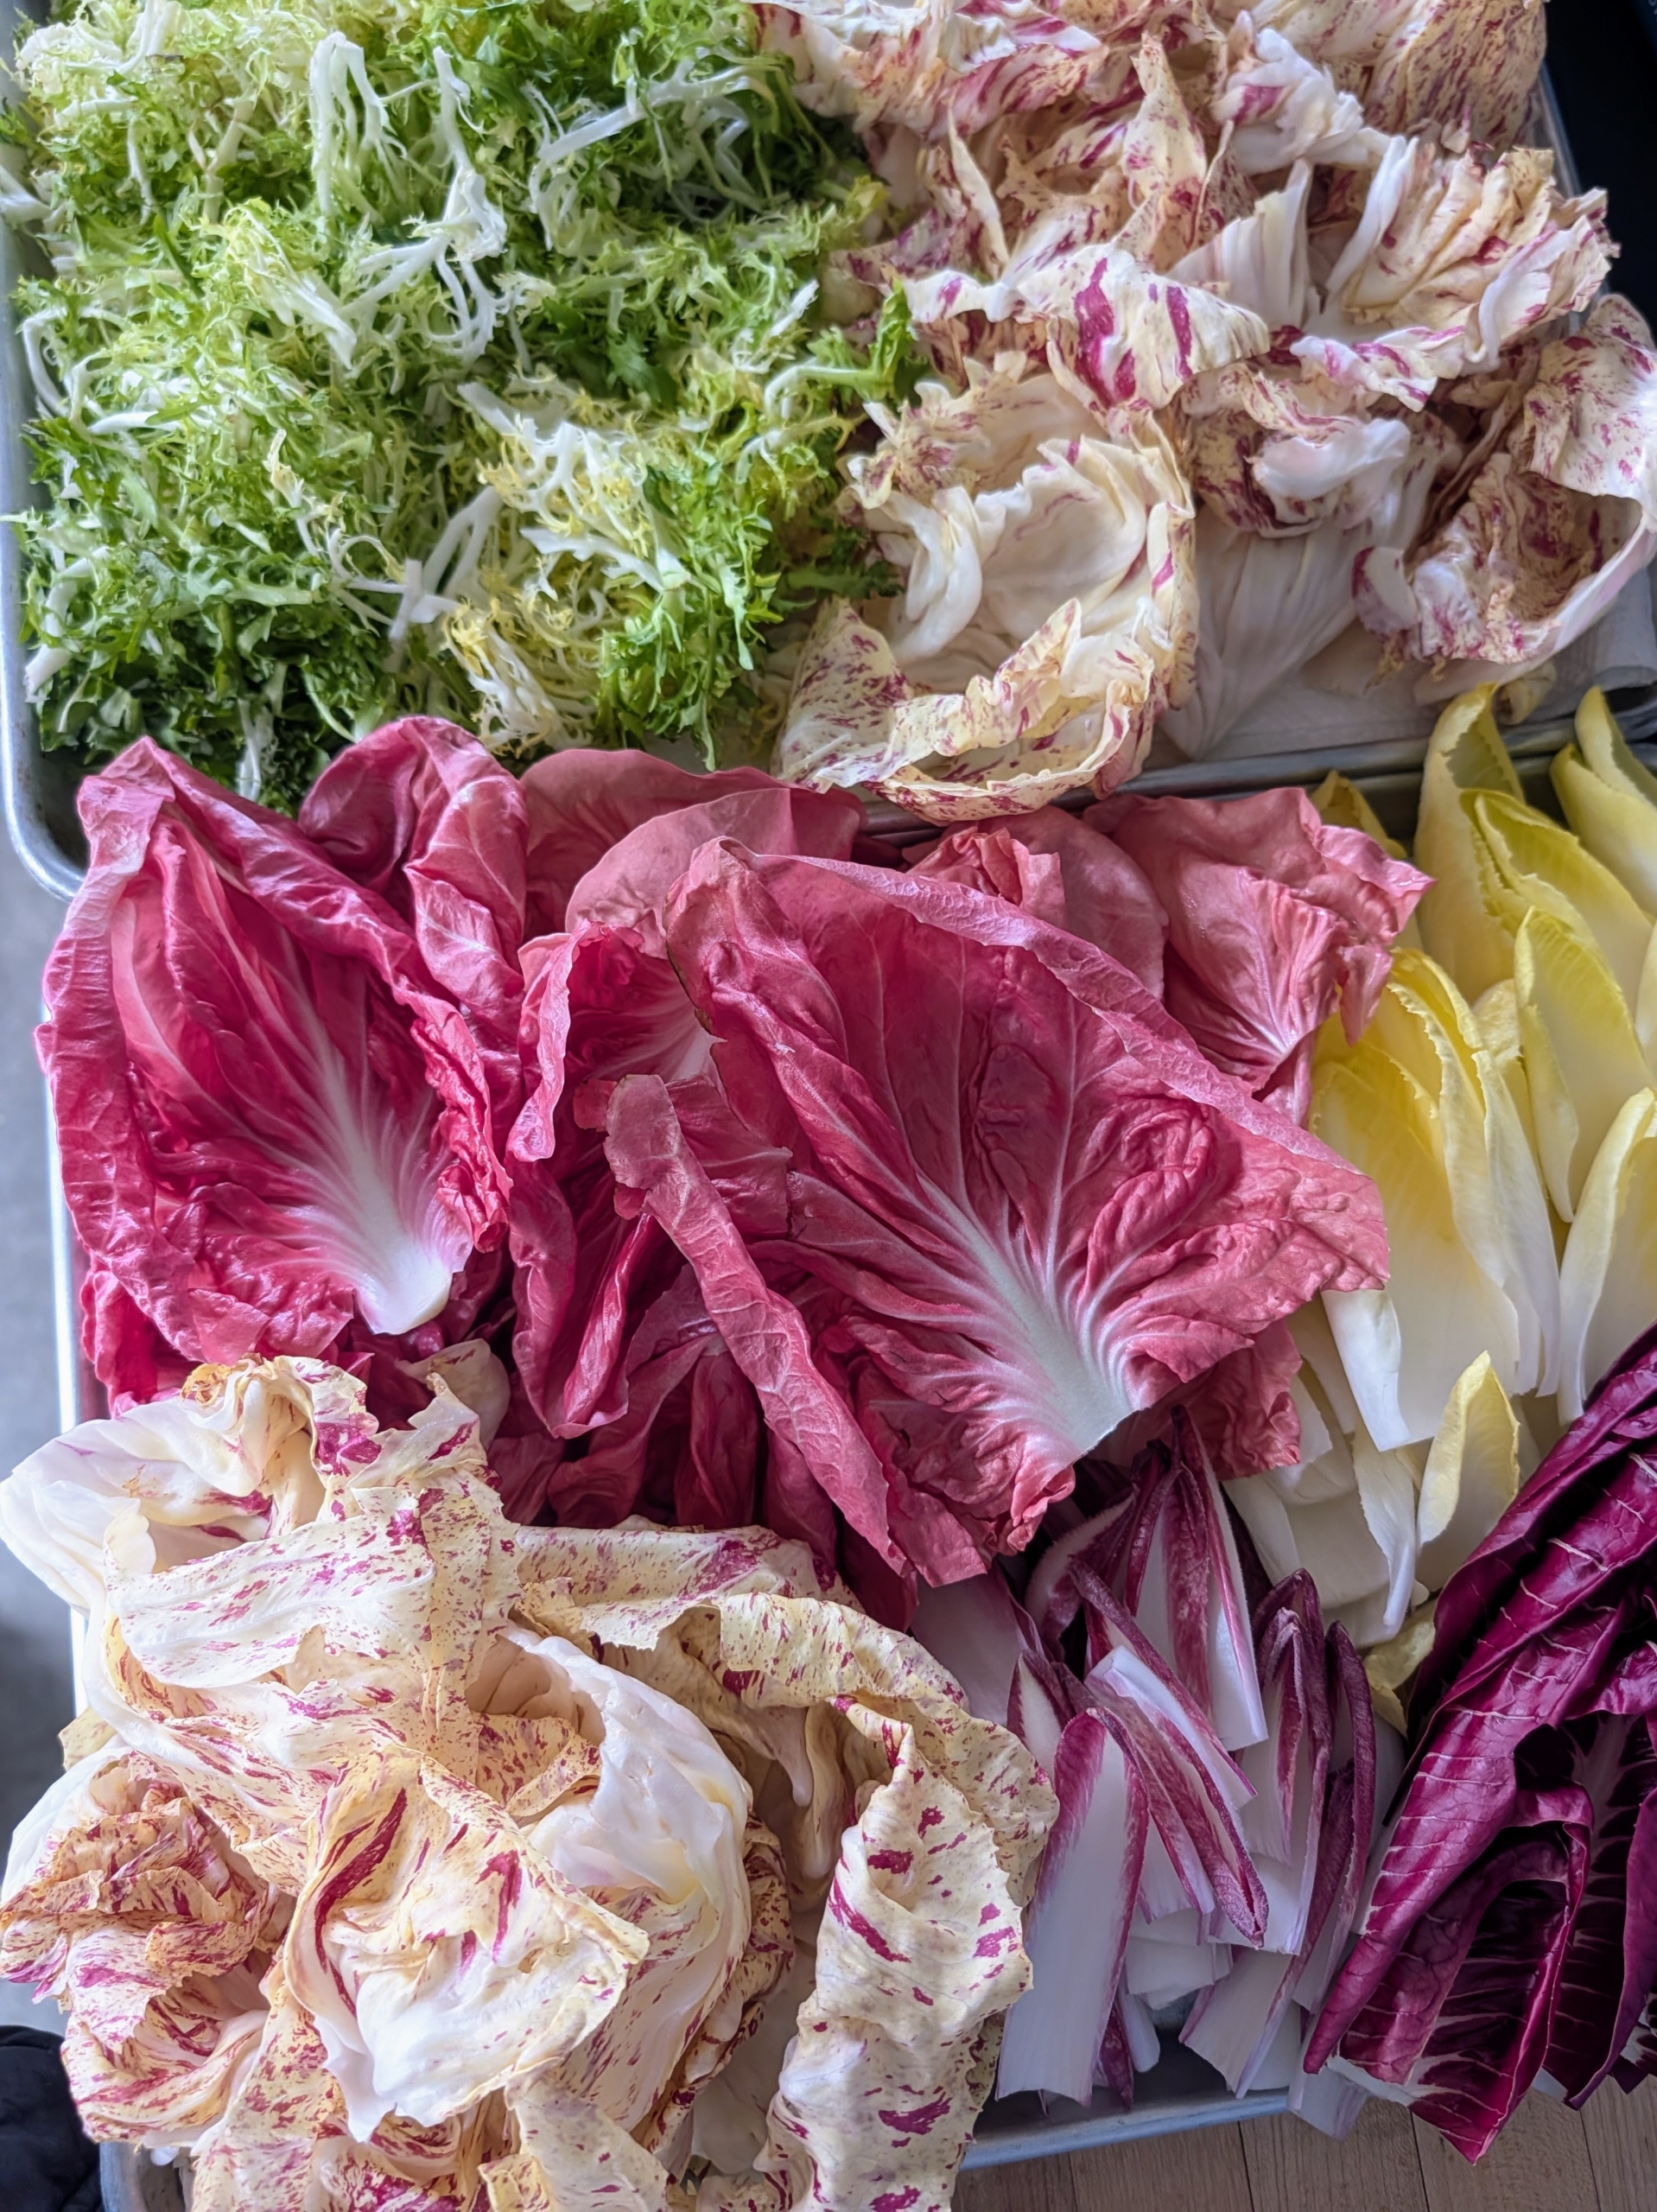
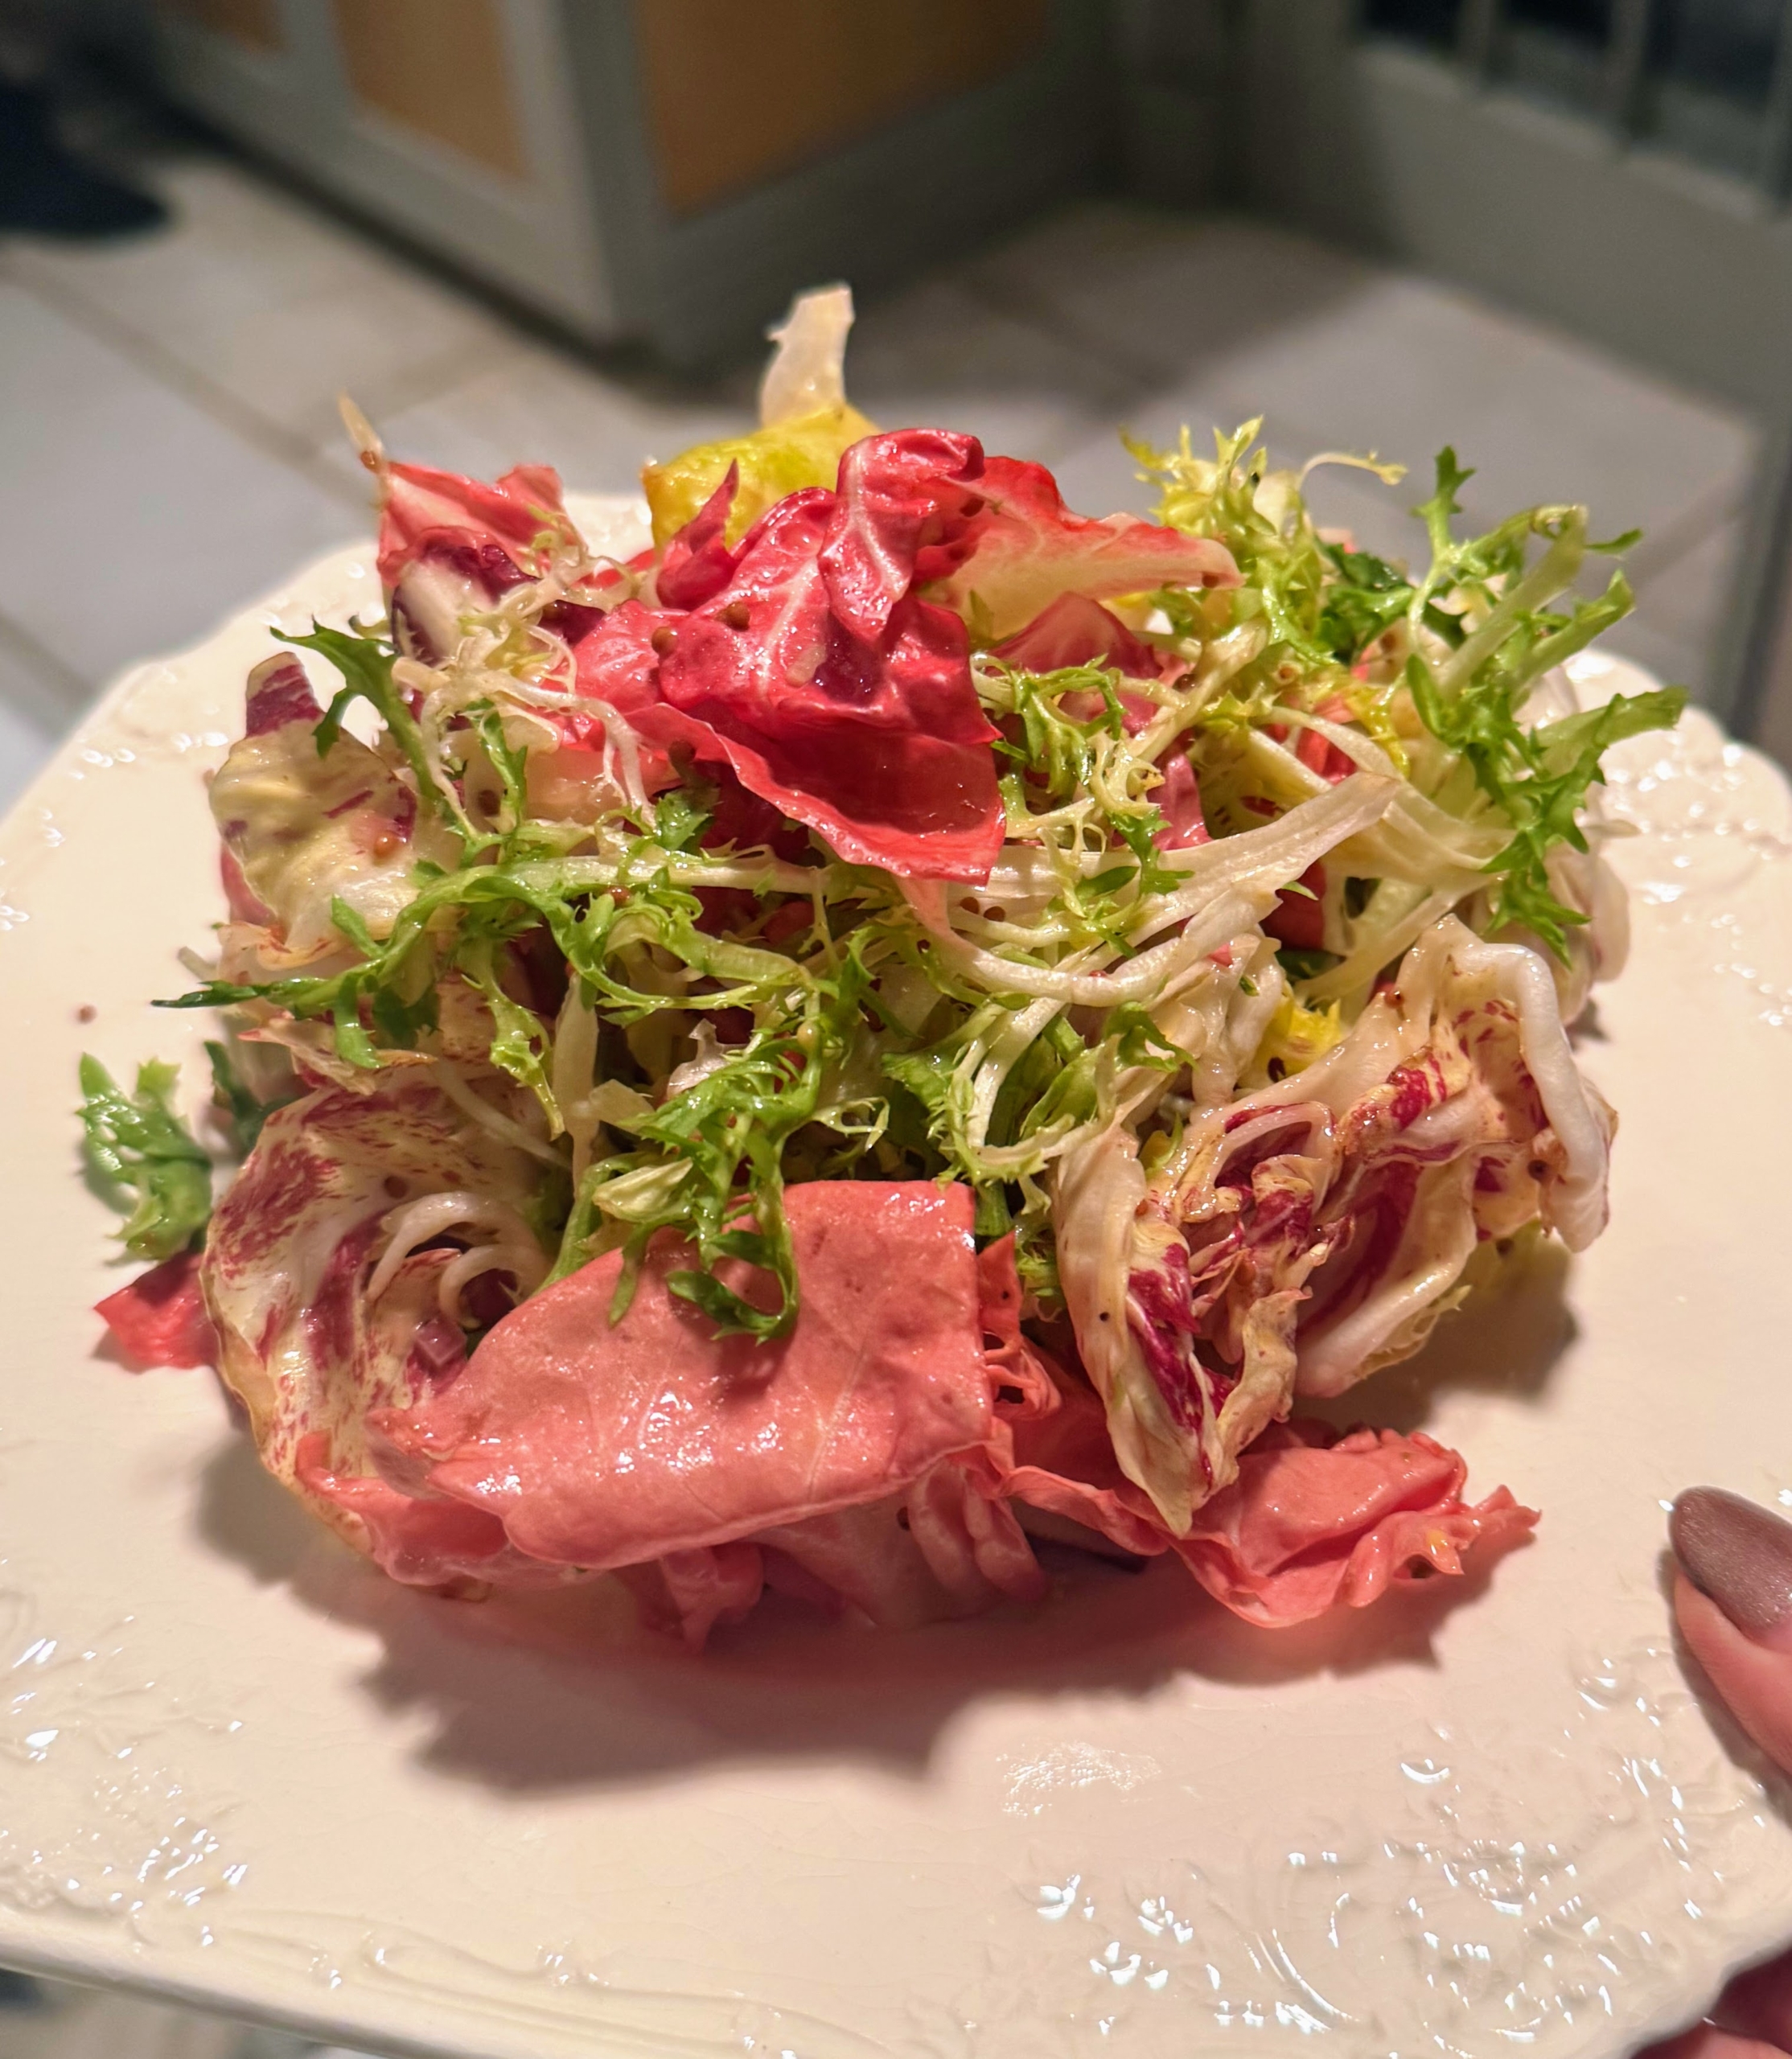
I served a wonderful endive and radicchio salad. Both endive and radicchio are part of the chicory family. Endive has a mild, slightly bitter flavor, while radicchio tastes more bold and peppery – they are great together. Frisée is also known as curly endive or chicory endive and adds a nice green color to this assortment.
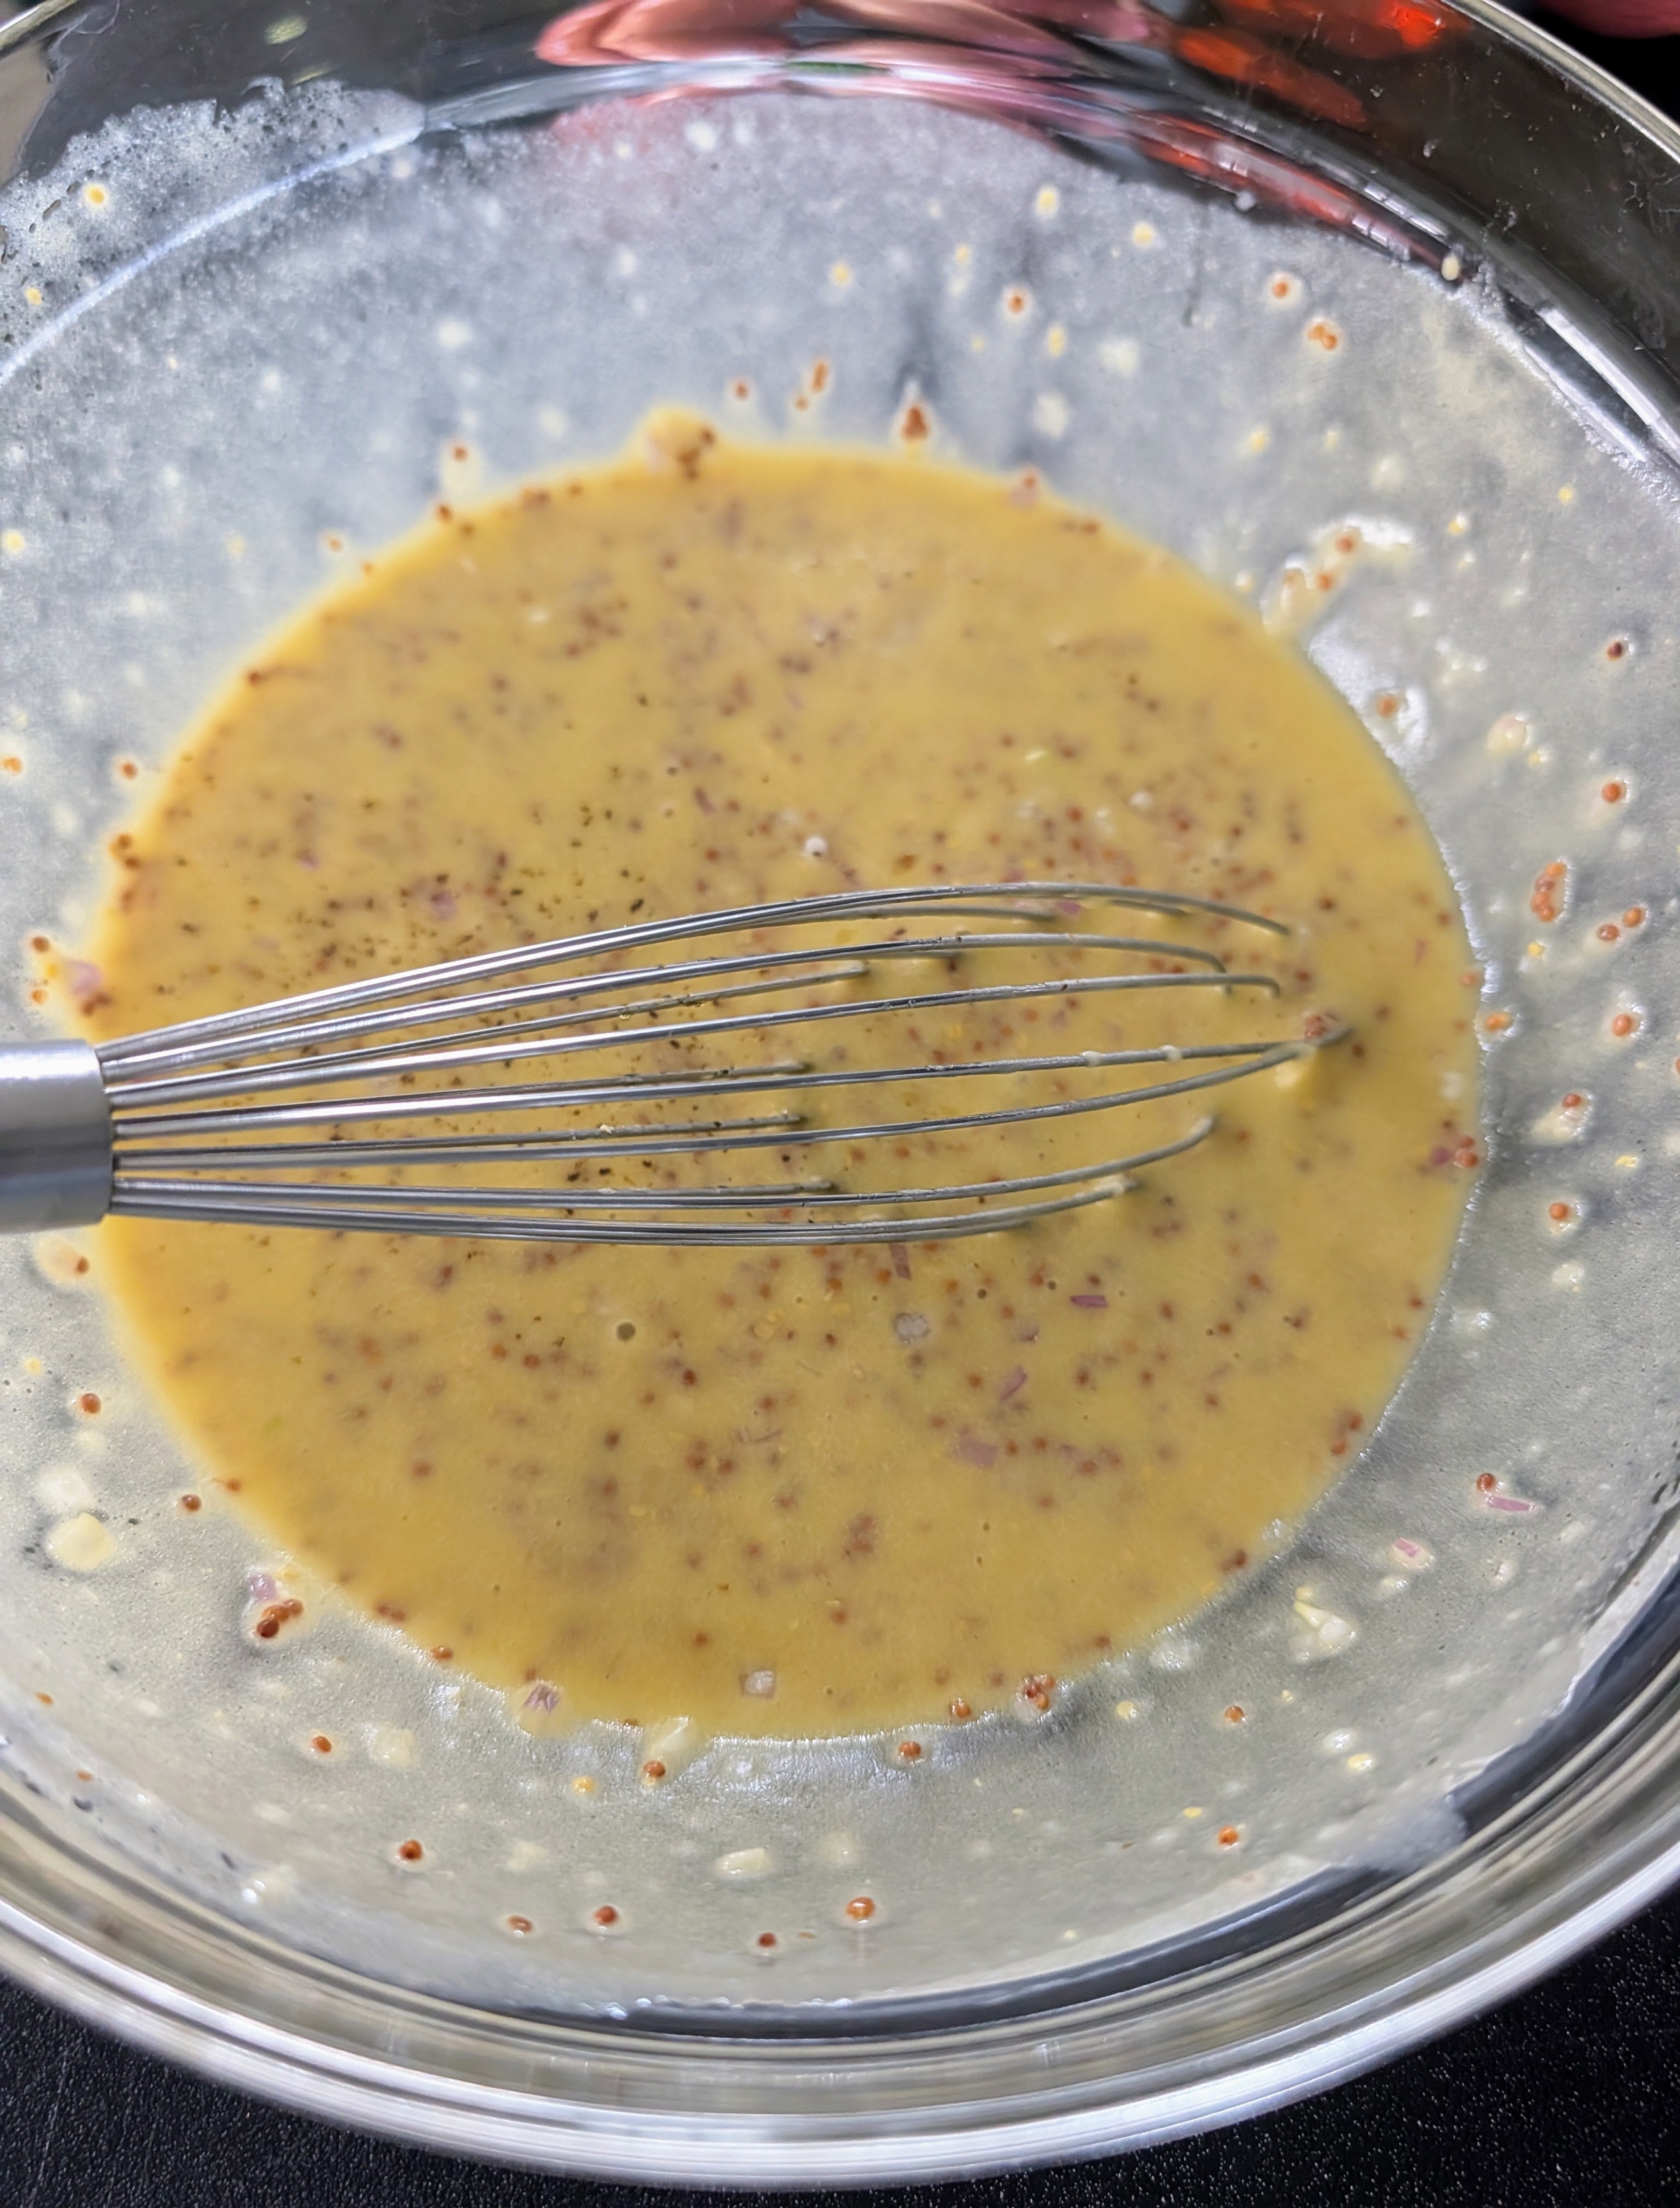
The dressing is a light and refreshing shallot vinaigrette.
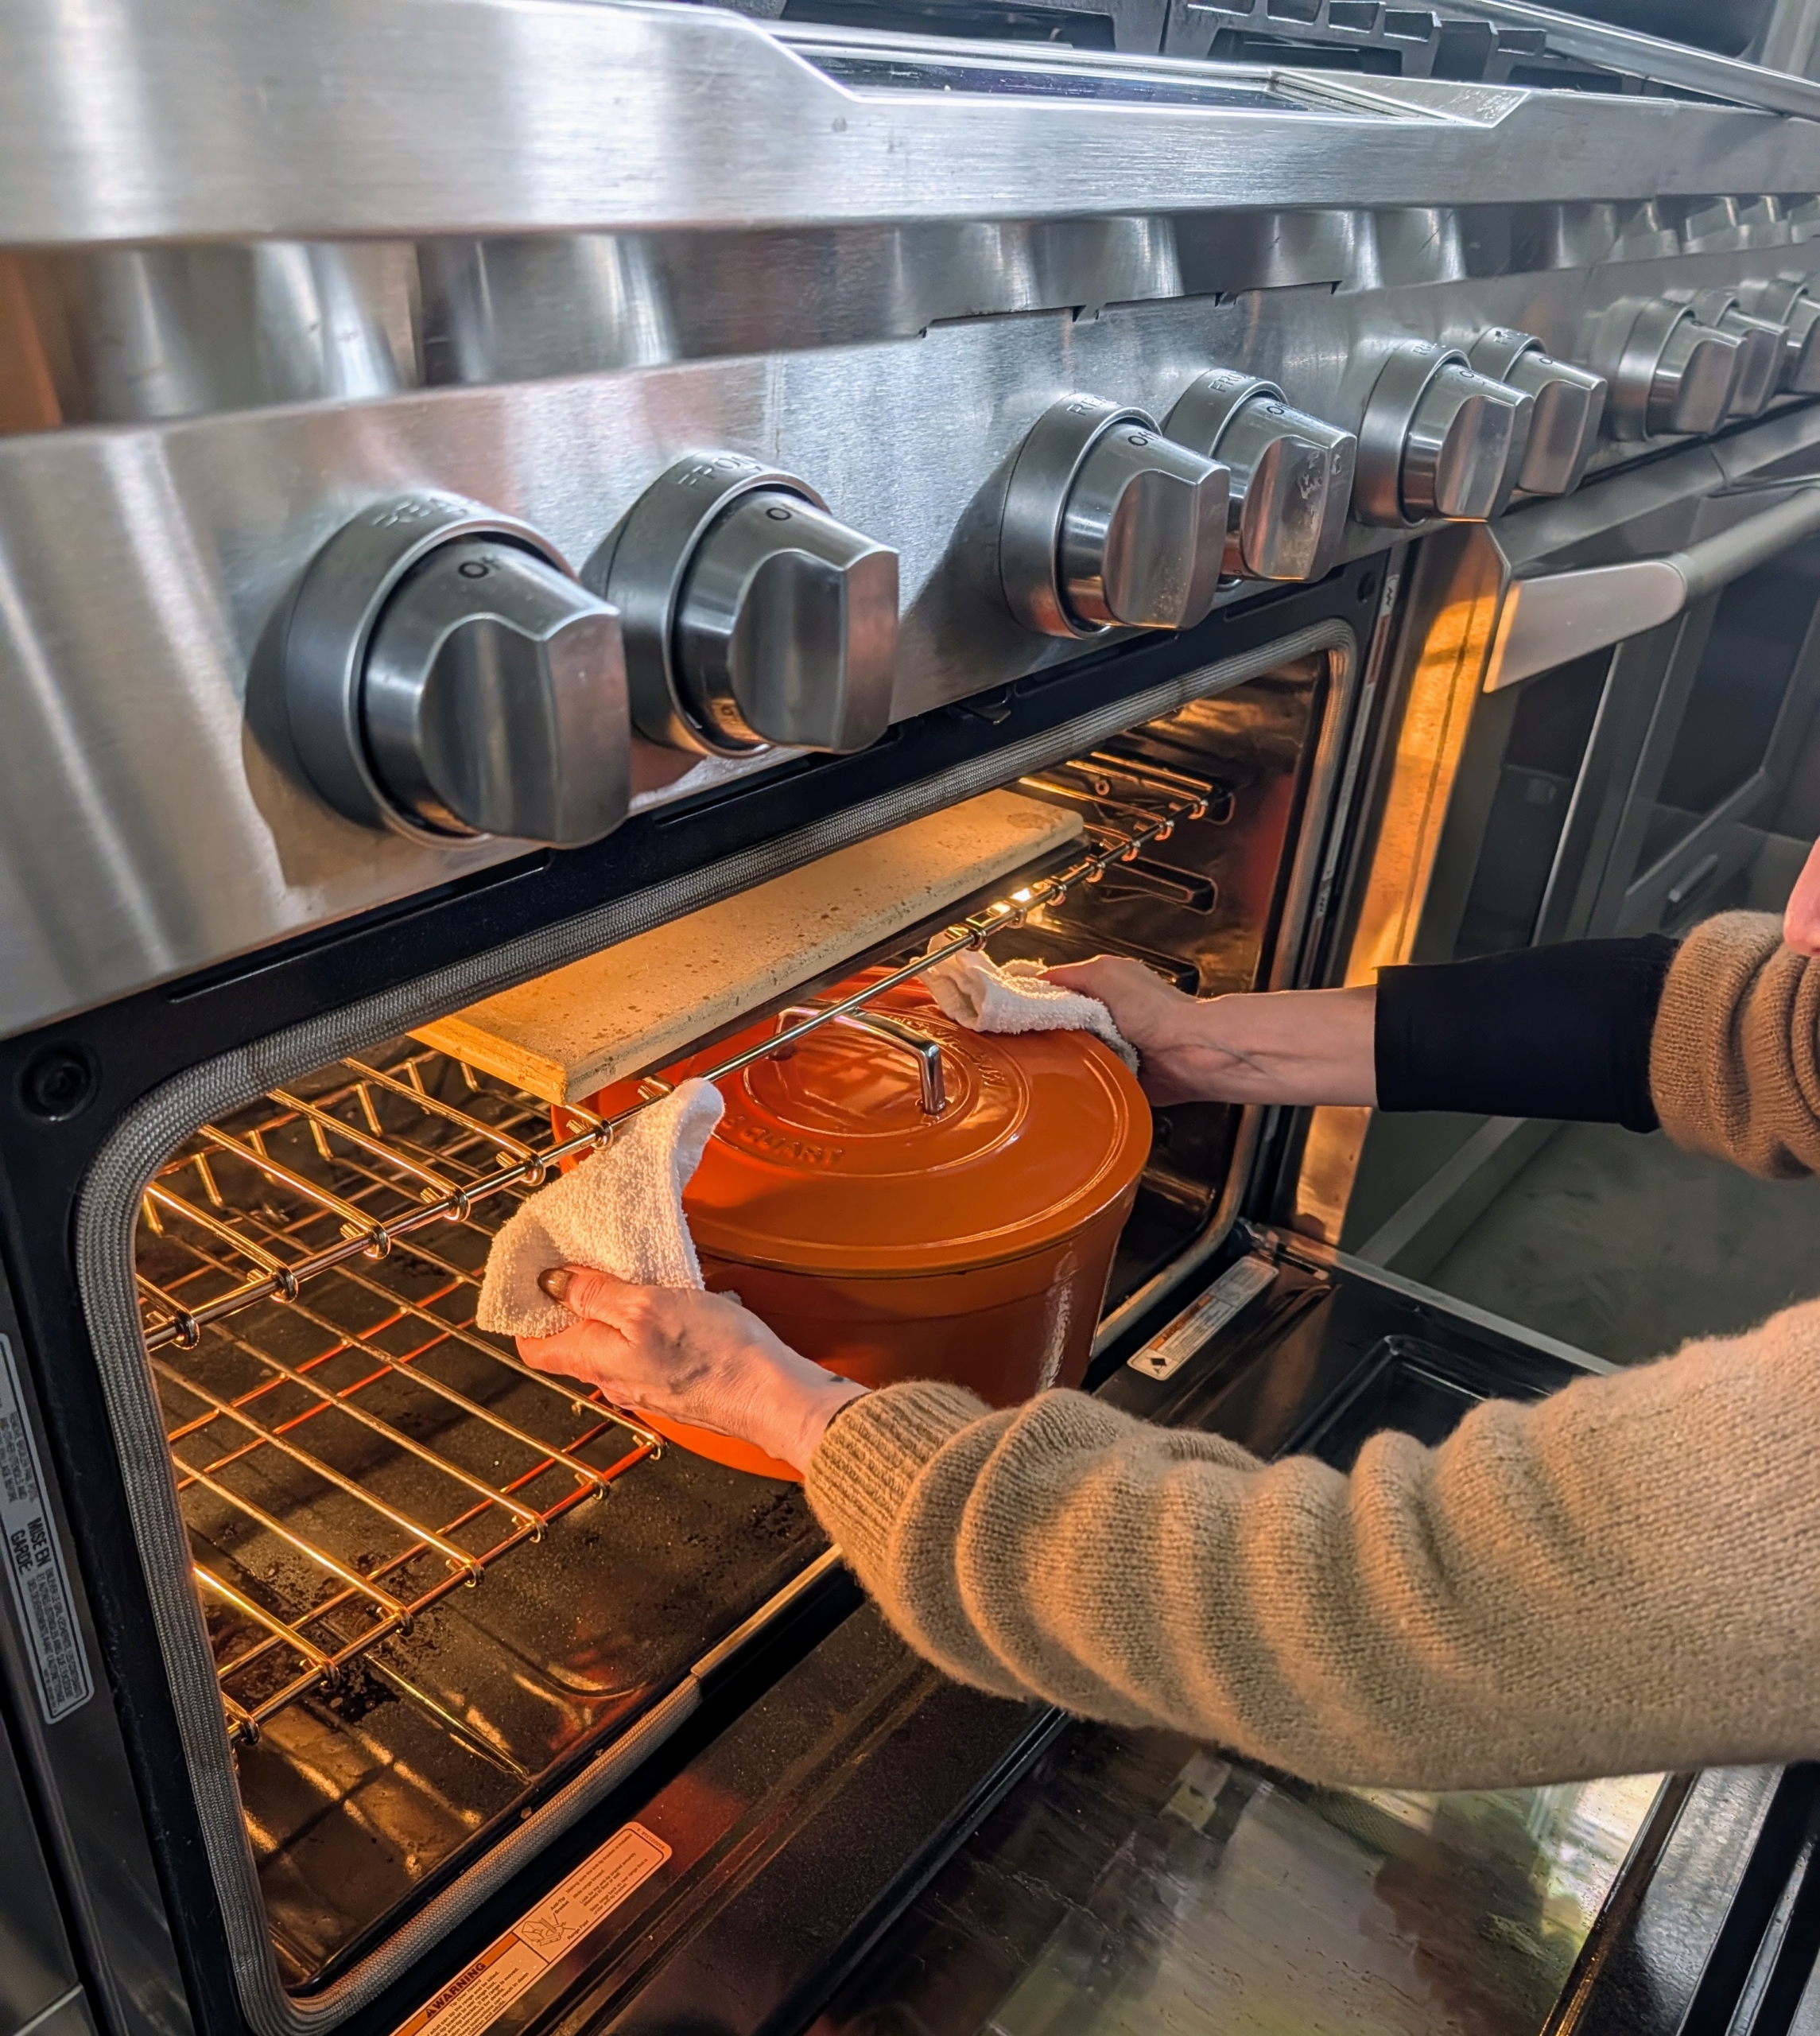
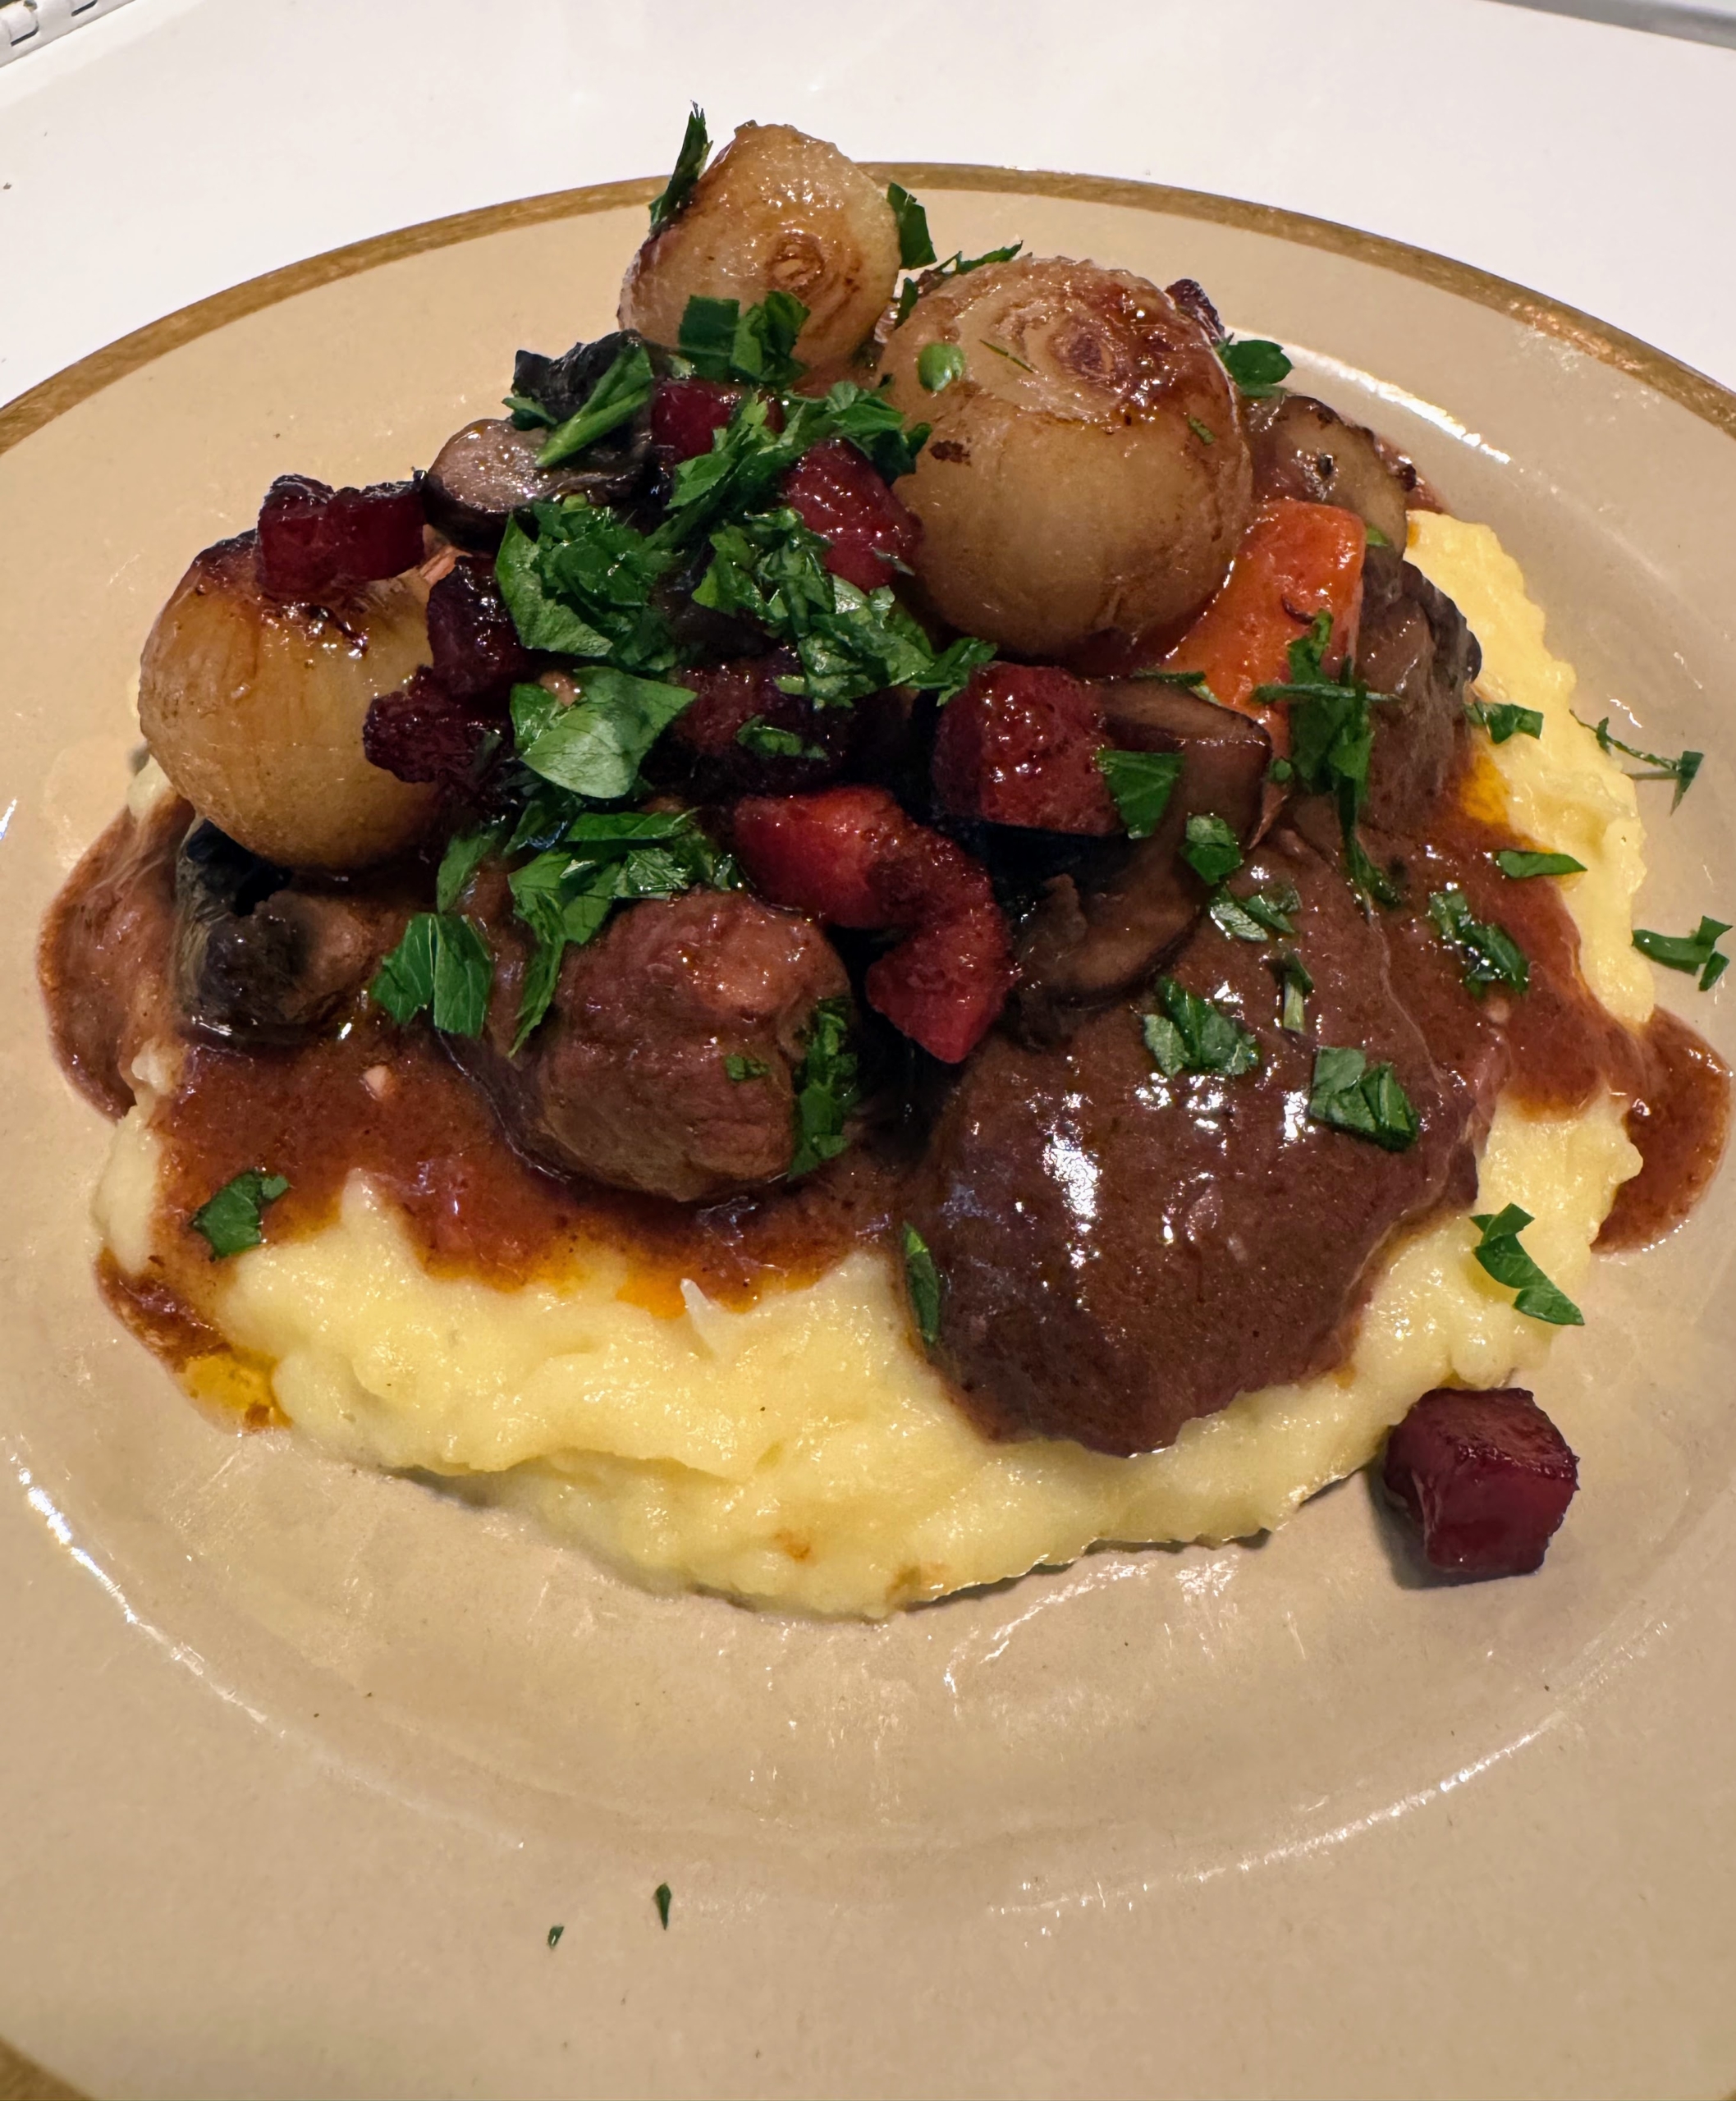
Beef bourguignon takes about three to four hours to complete. This duration includes preparation, searing of the meat, braising, and resting. After 90-minutes in the oven, Molly takes it out to check. She is using one of my Enamel Cast Iron Dutch Ovens – see my latest pieces at my shop on Amazon.
It’s looking so delicious. Beef bourguignon, or beef burgundy, is a classic and rich slow-cooked French stew with chunks of fork-tender beef braised in red wine and vegetables.
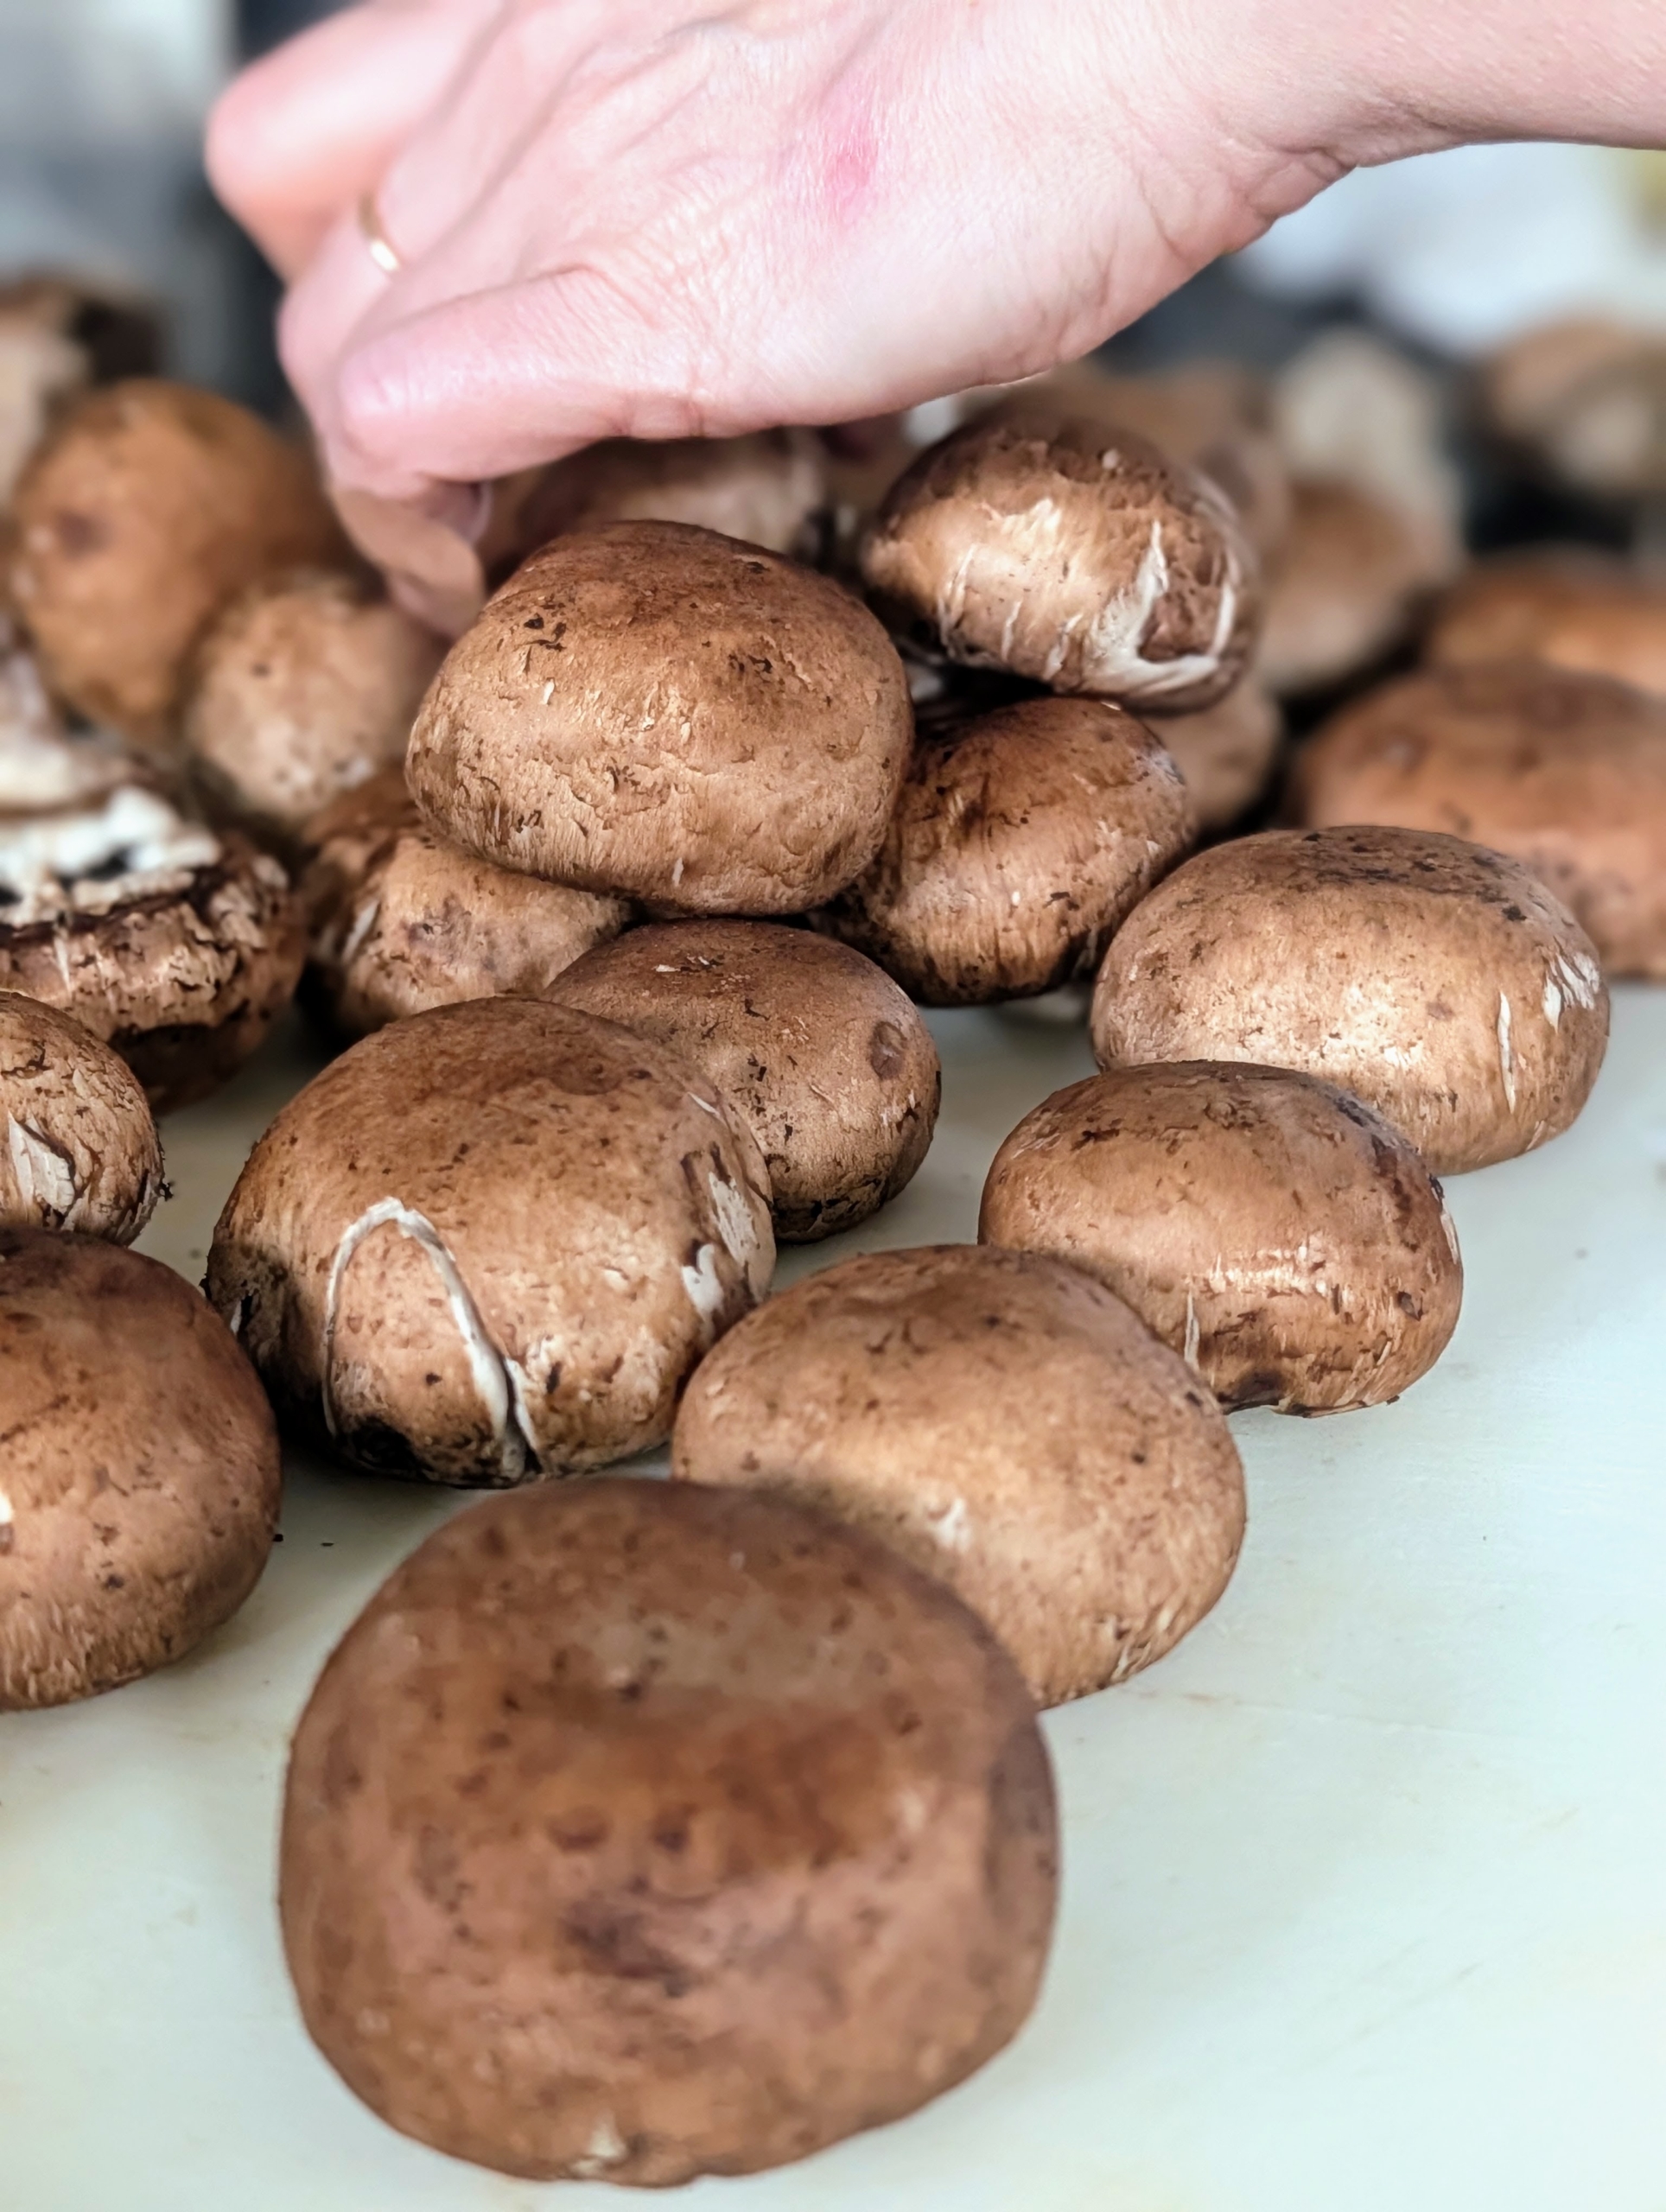
The dish will be topped with mushrooms, pearl onions, pancetta cubes and herbs when done. Here is Molly preparing the mushrooms.
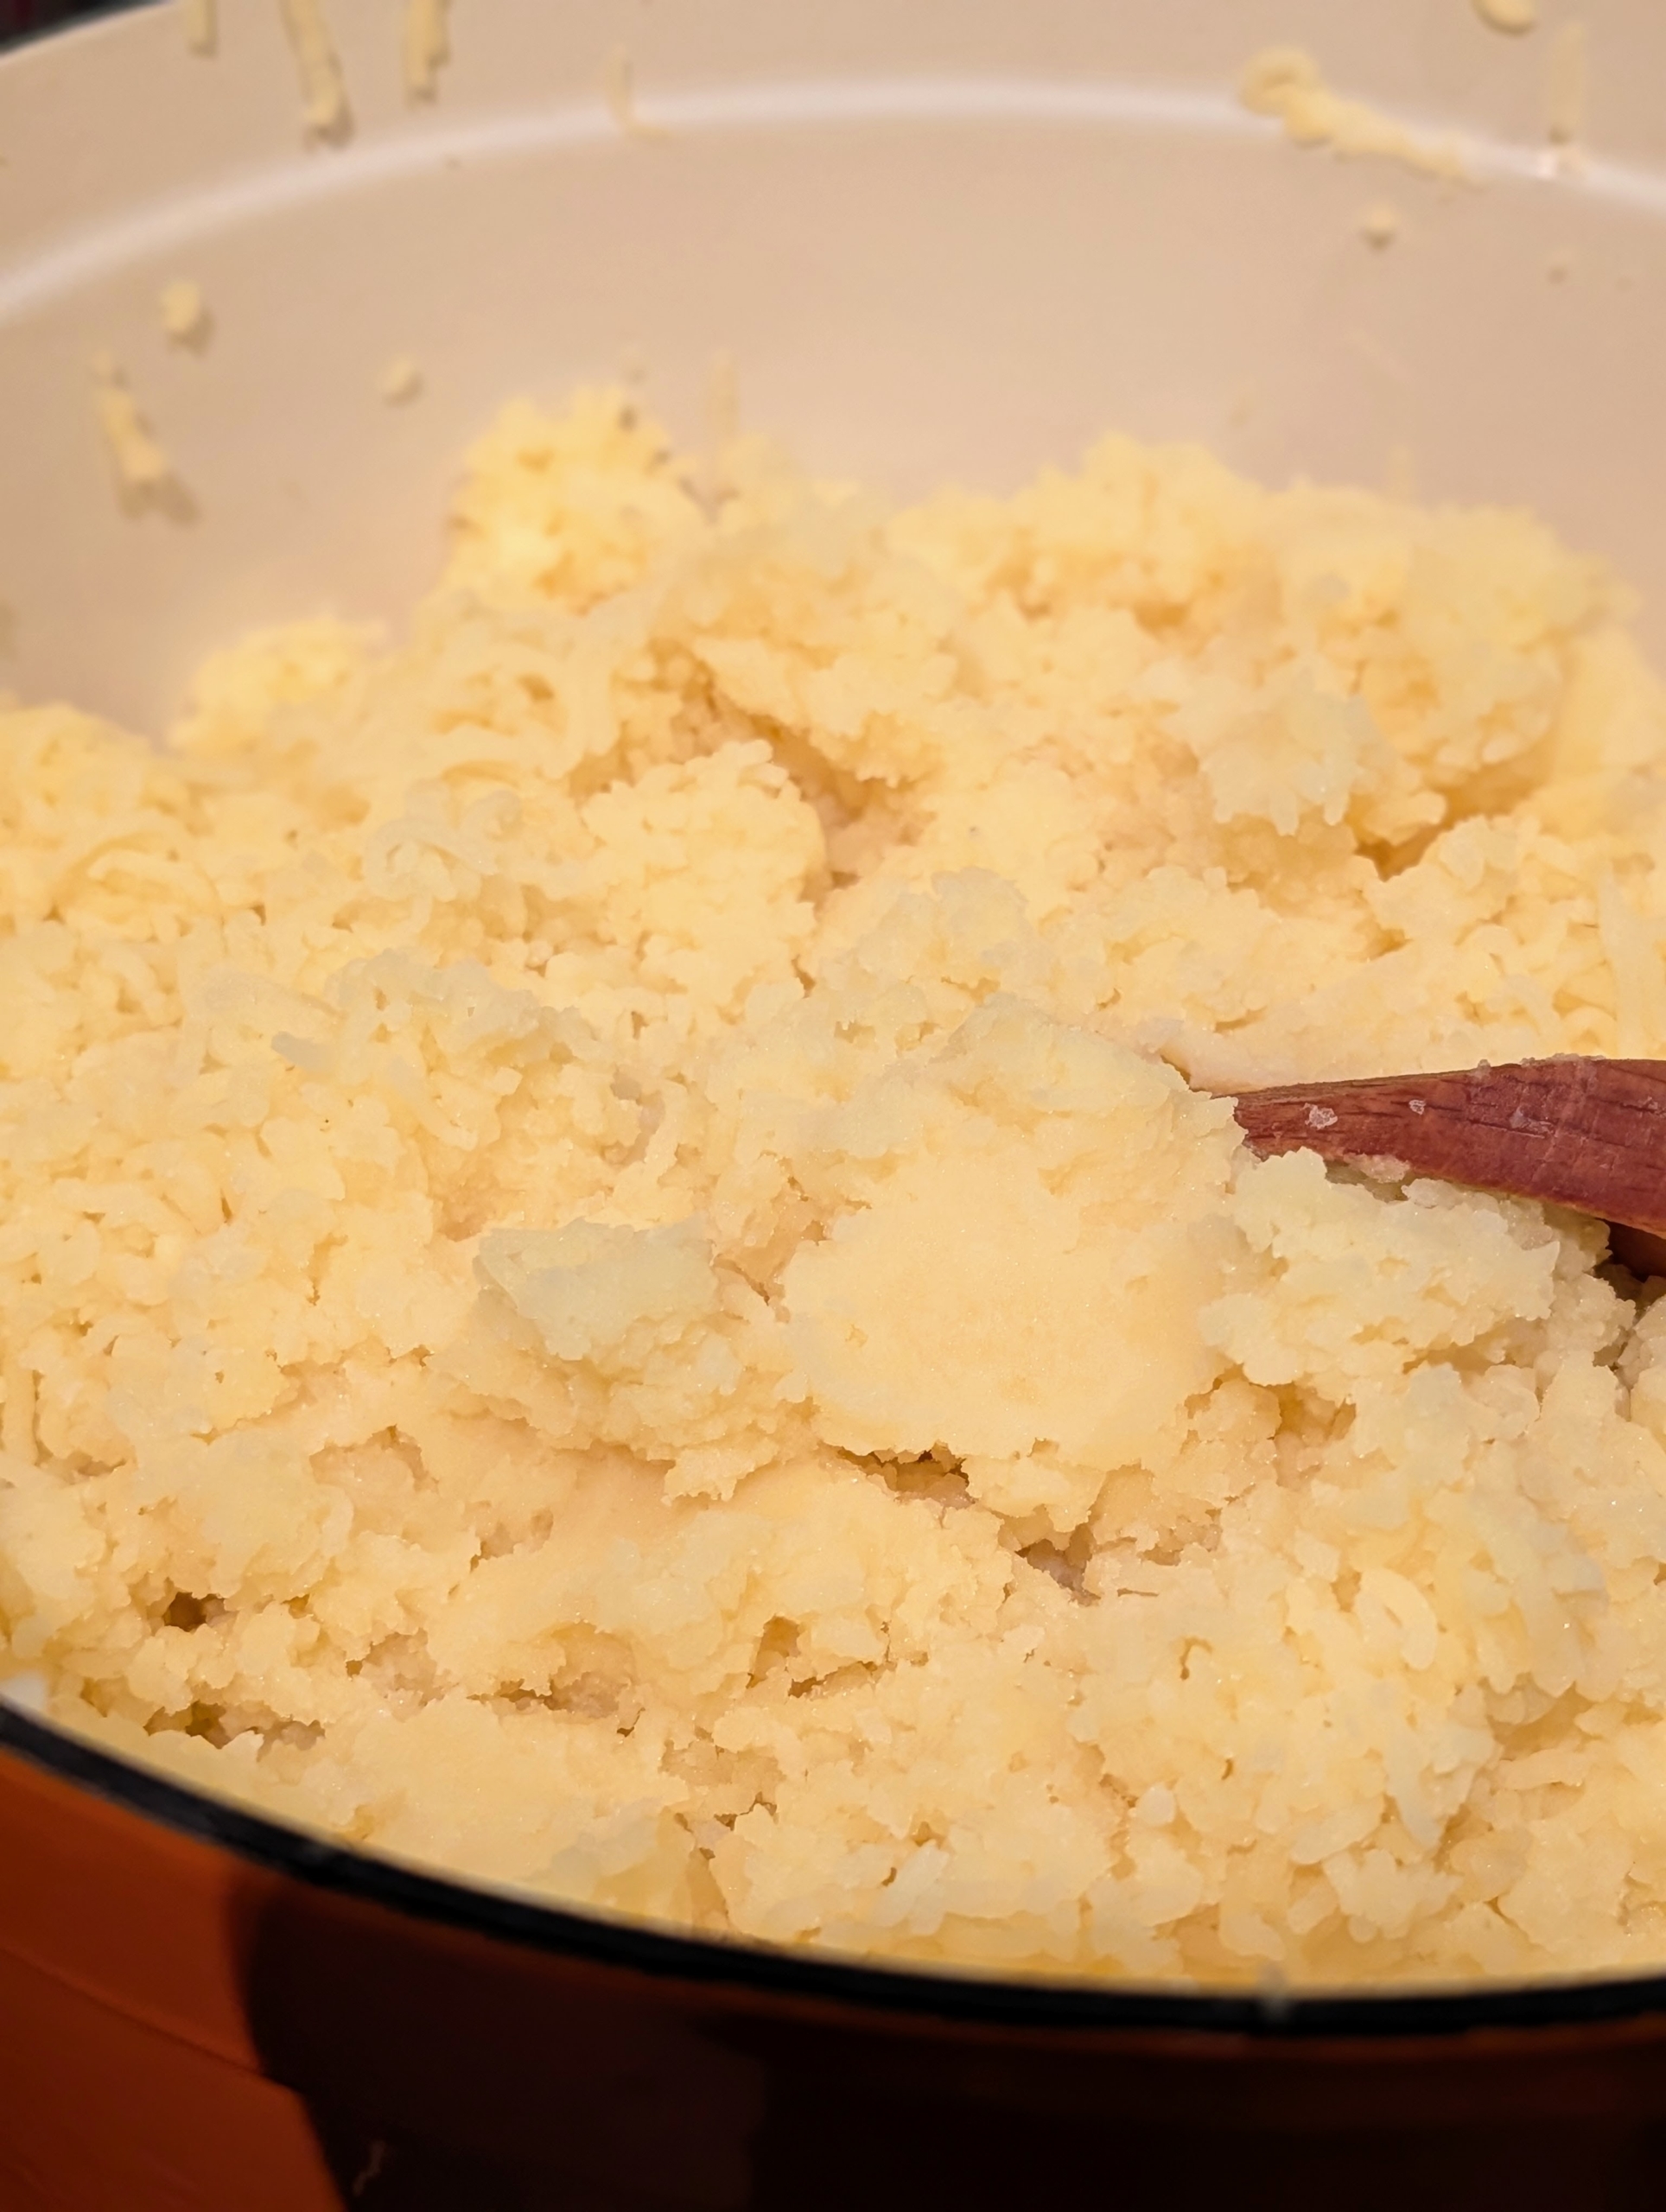
Molly also made mashed potatoes to serve with the beef bourguignon.
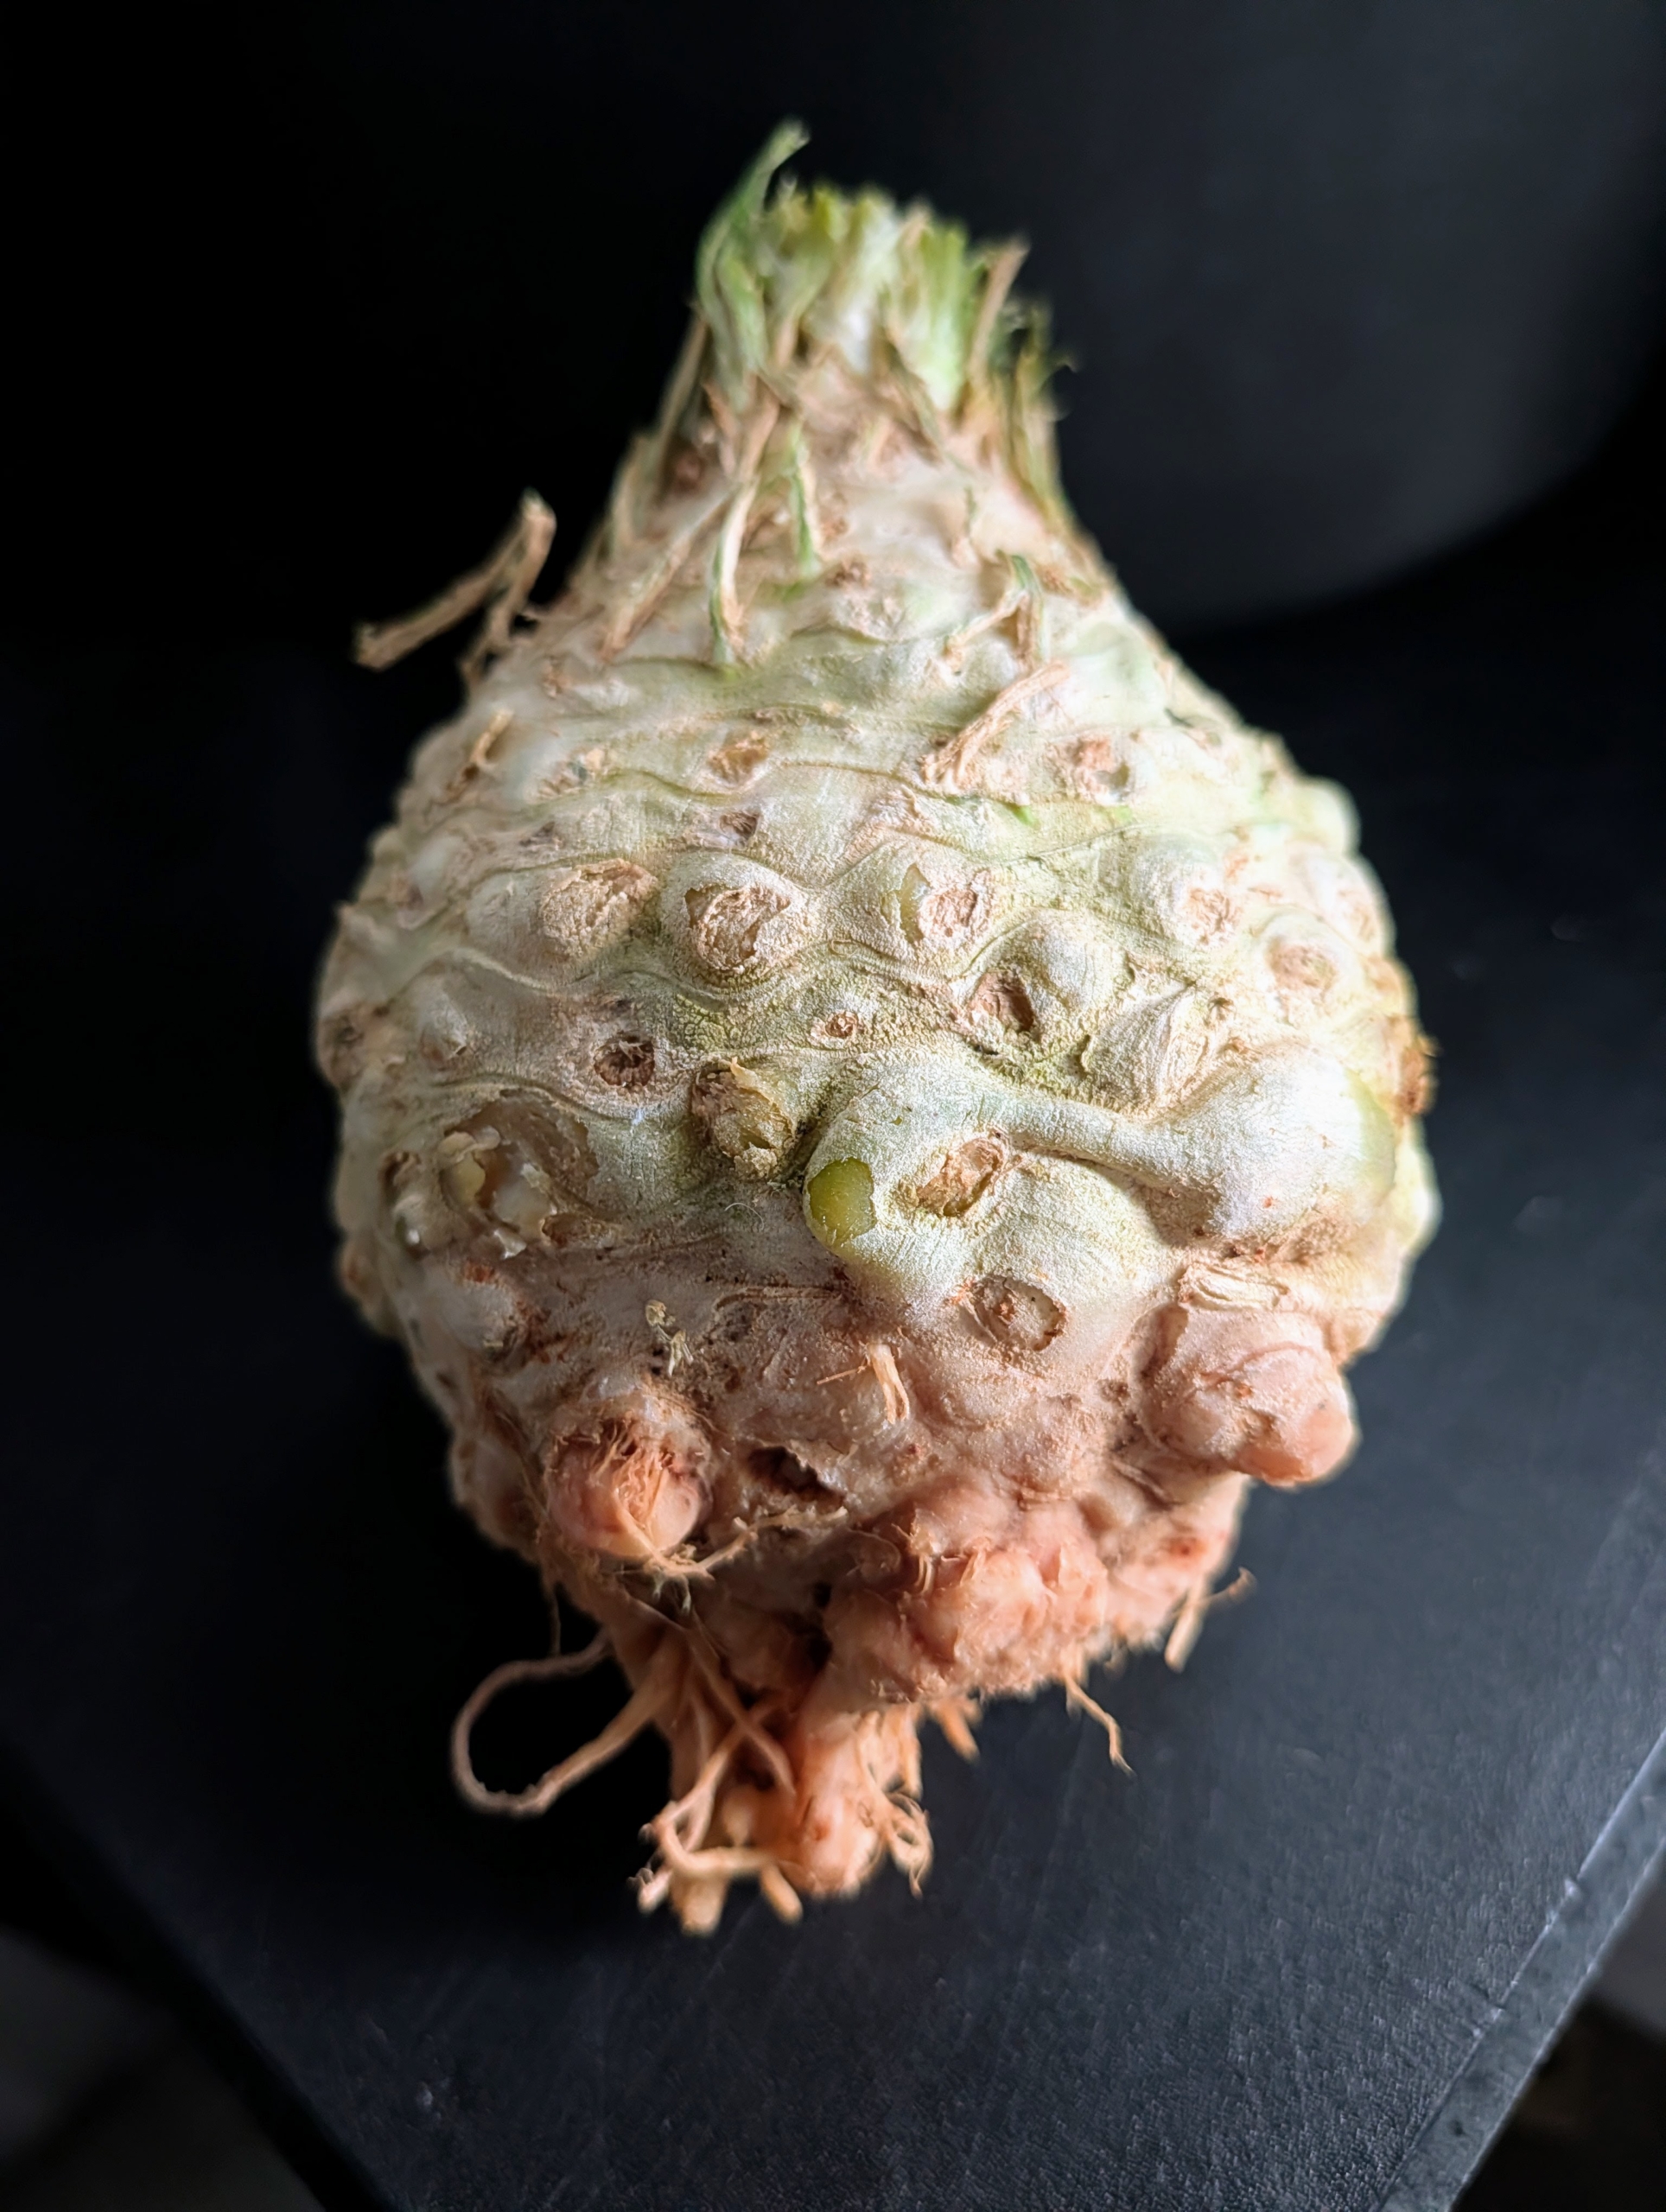
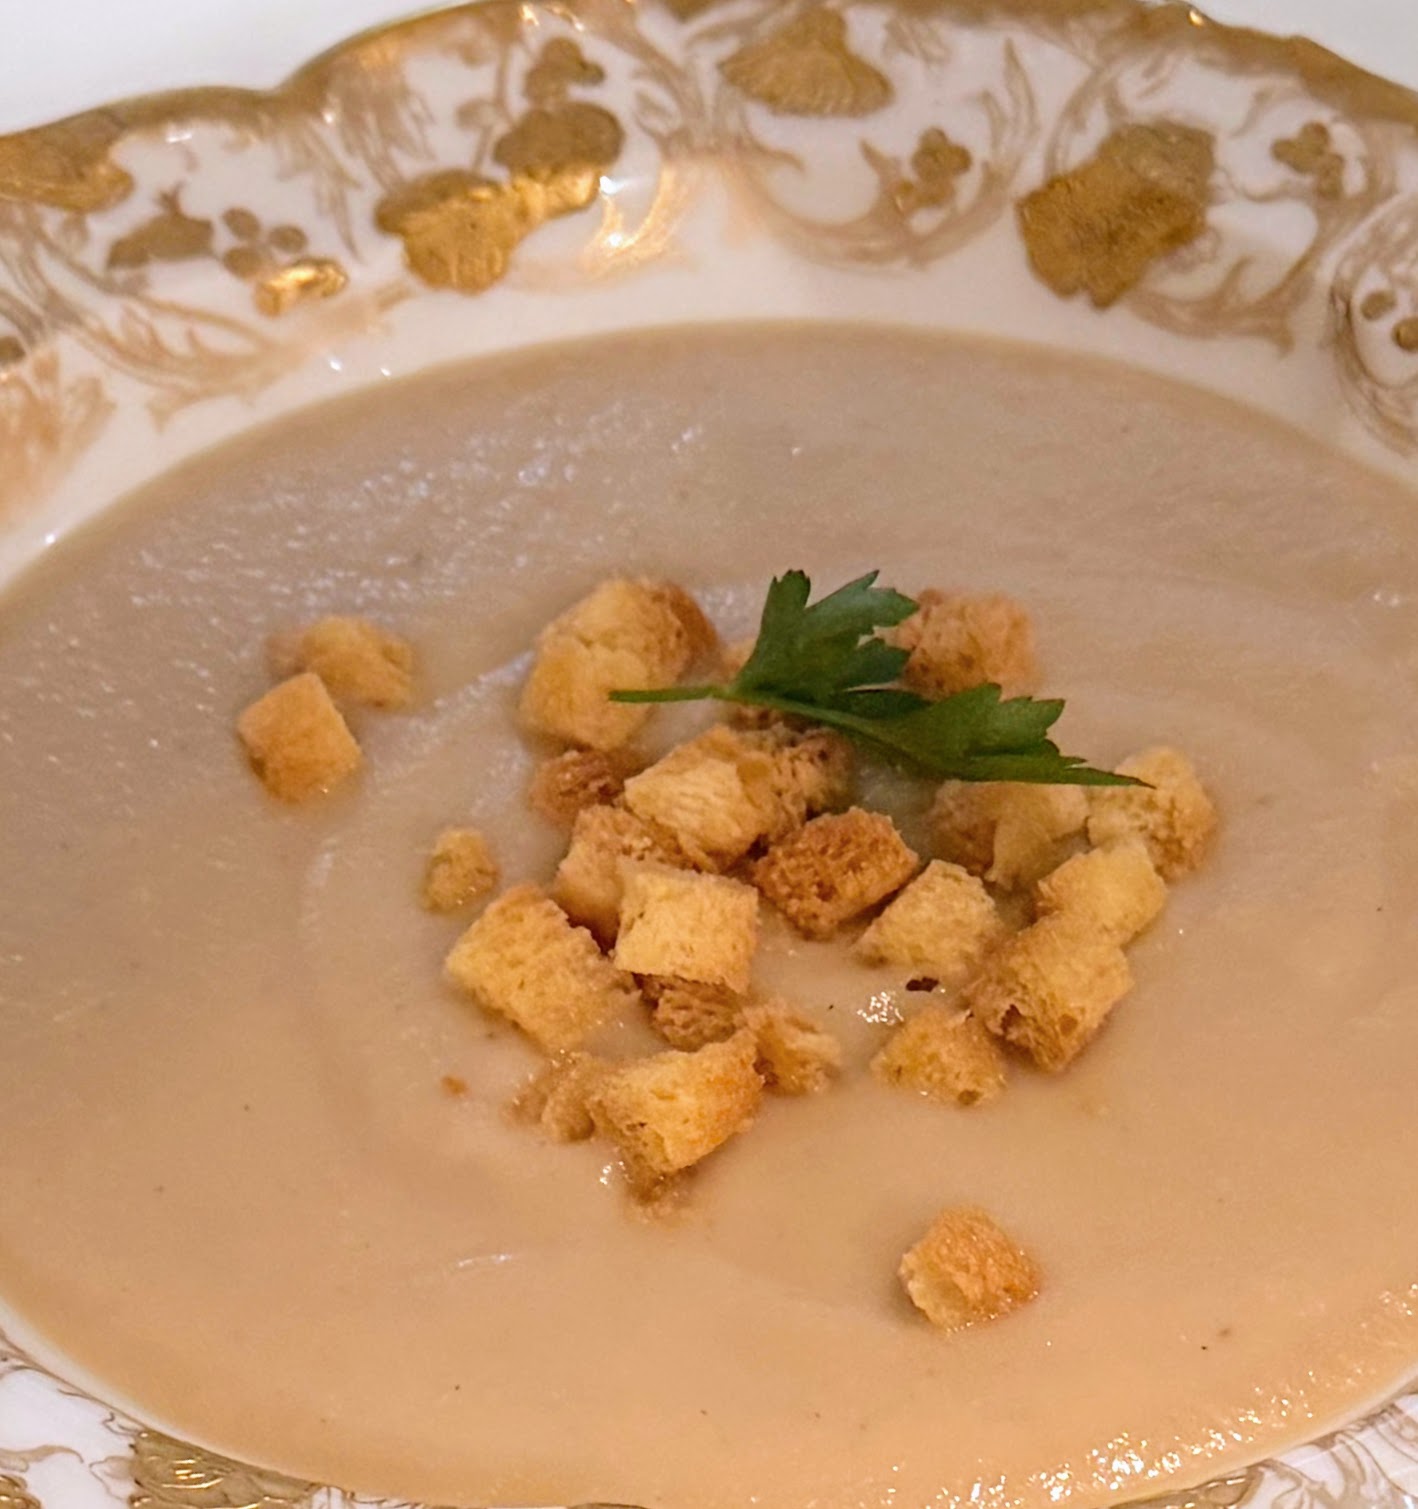
This is celeriac, also known as celery root. It is the root of the celery plant and has an earthy flavor with a hint of celery. I grow celeriac every year and love to use it for soup.
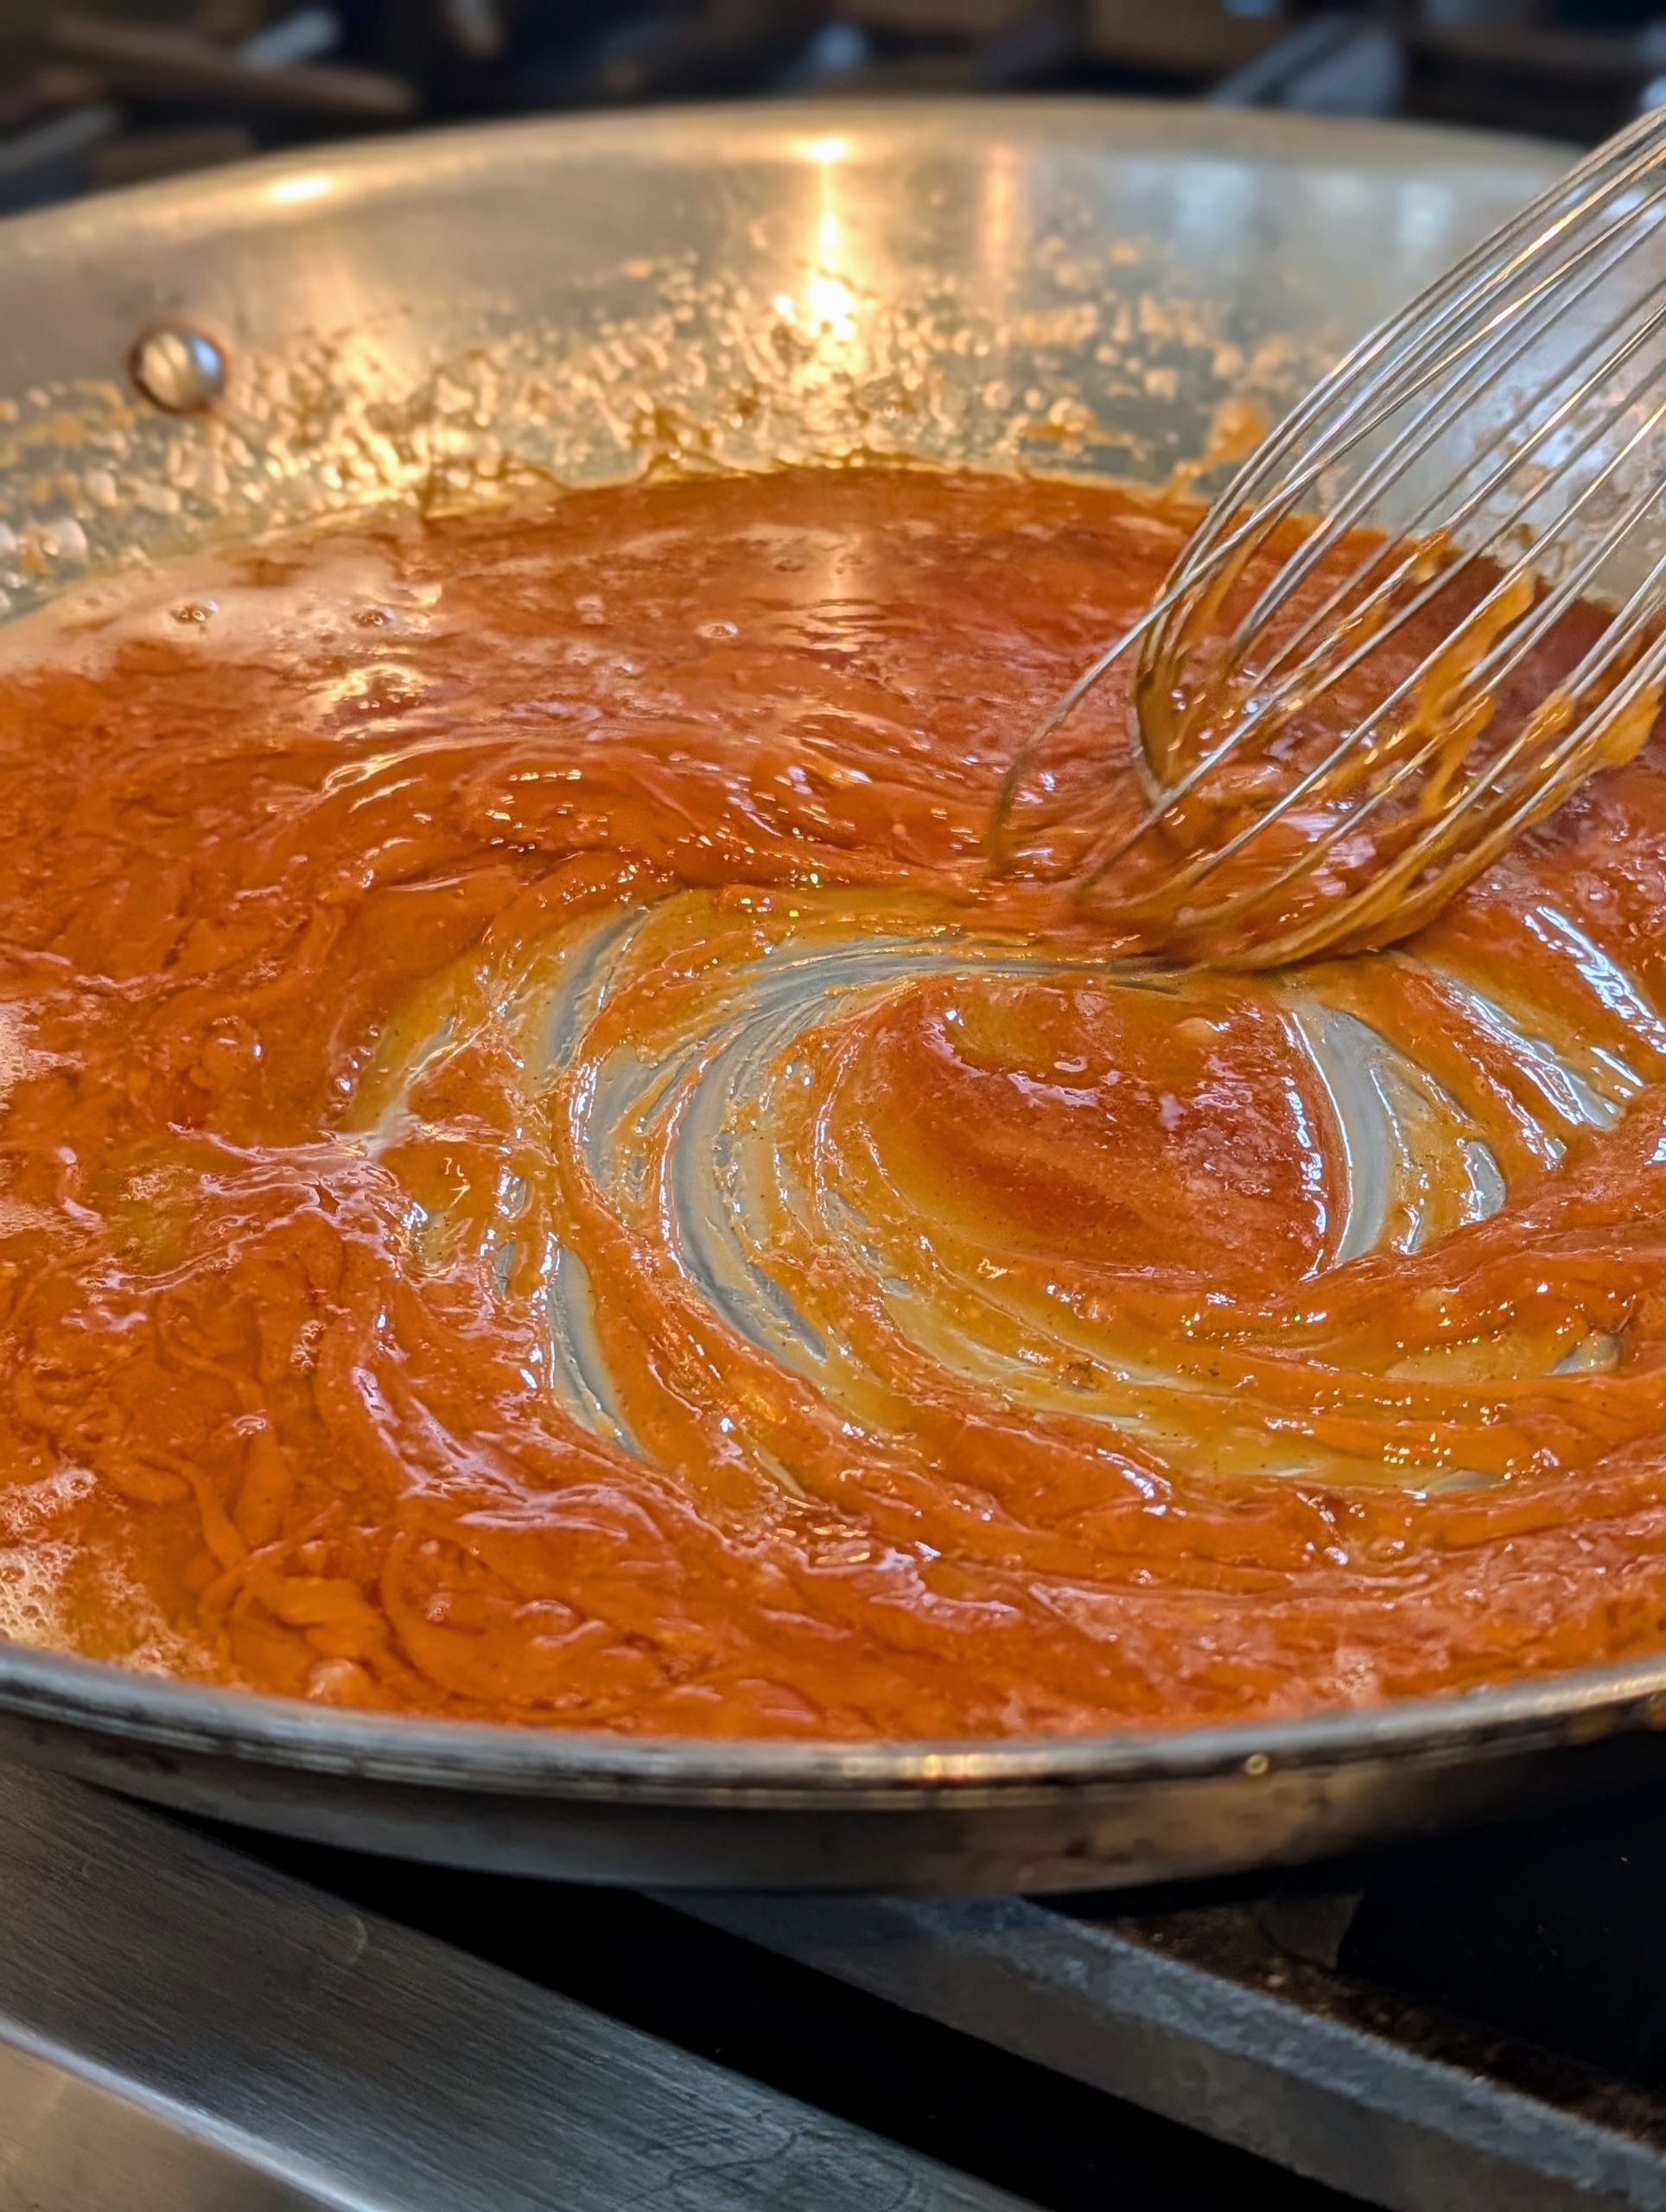
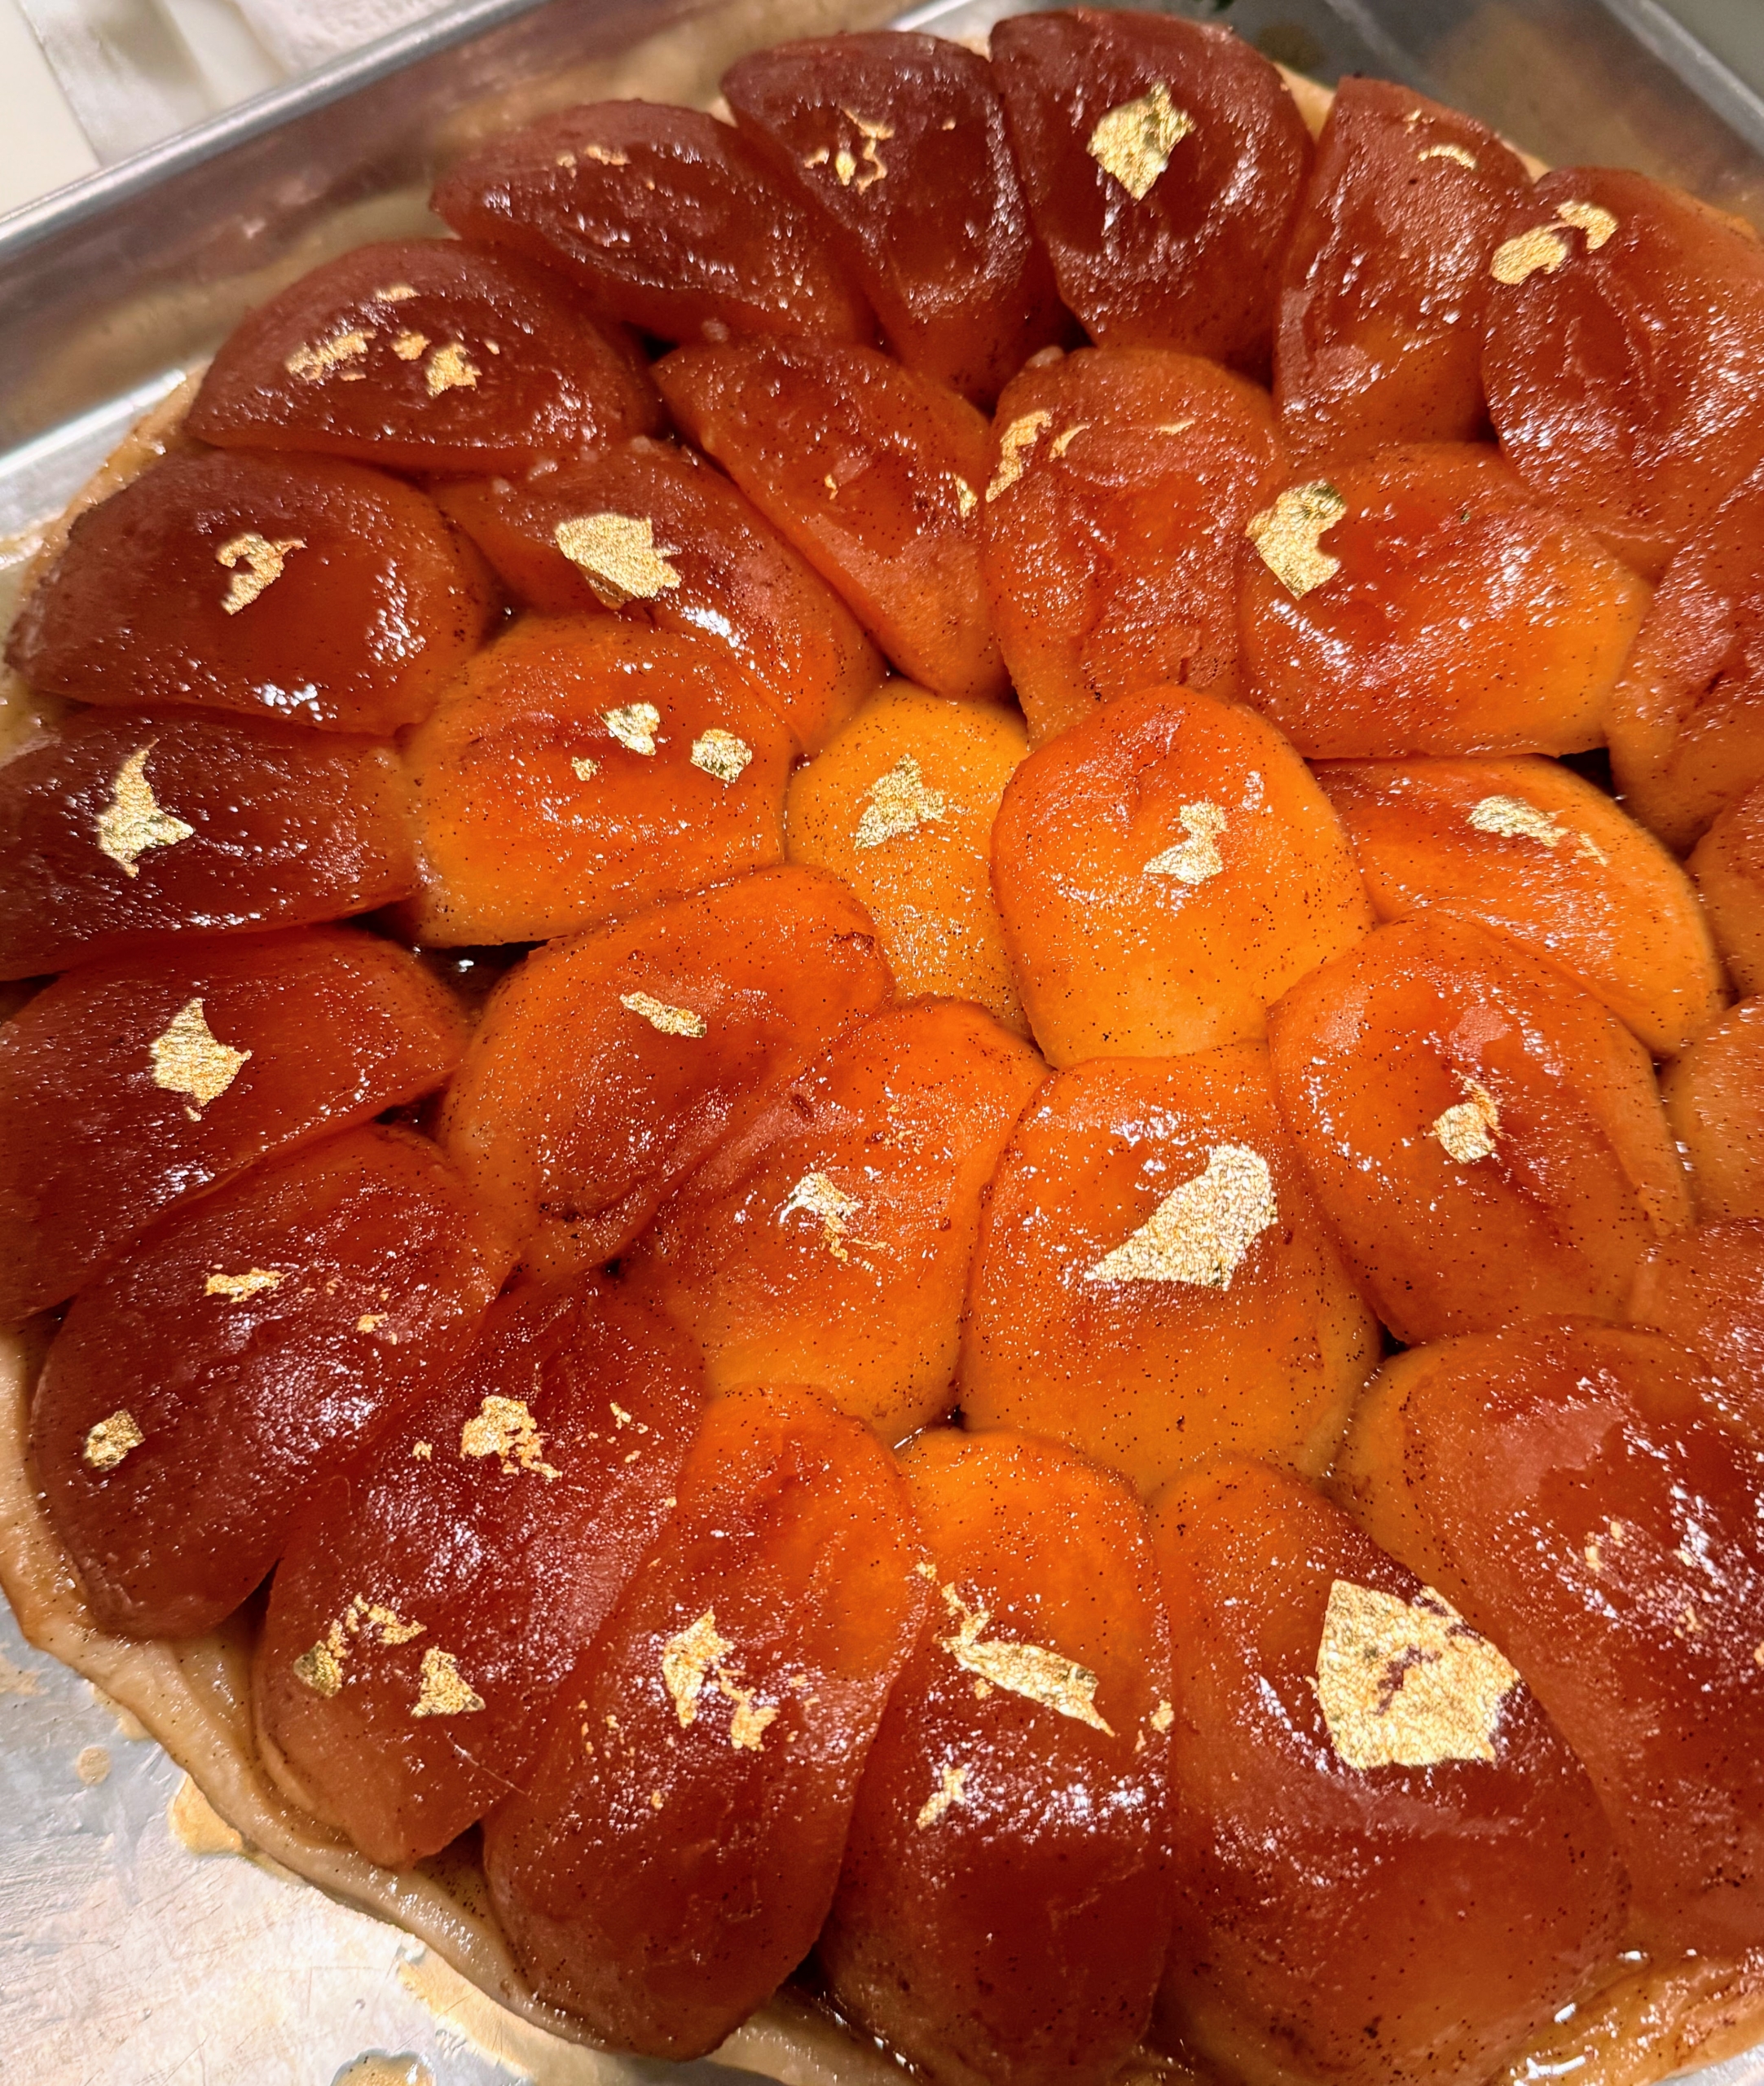
For dessert, I decided to serve apple tarte tatin. Tarte tatin is a classic French dessert with caramelized apples, baked under a flaky pastry crust and served upside down. Molly starts by melting down the butter and sugar in a skillet.
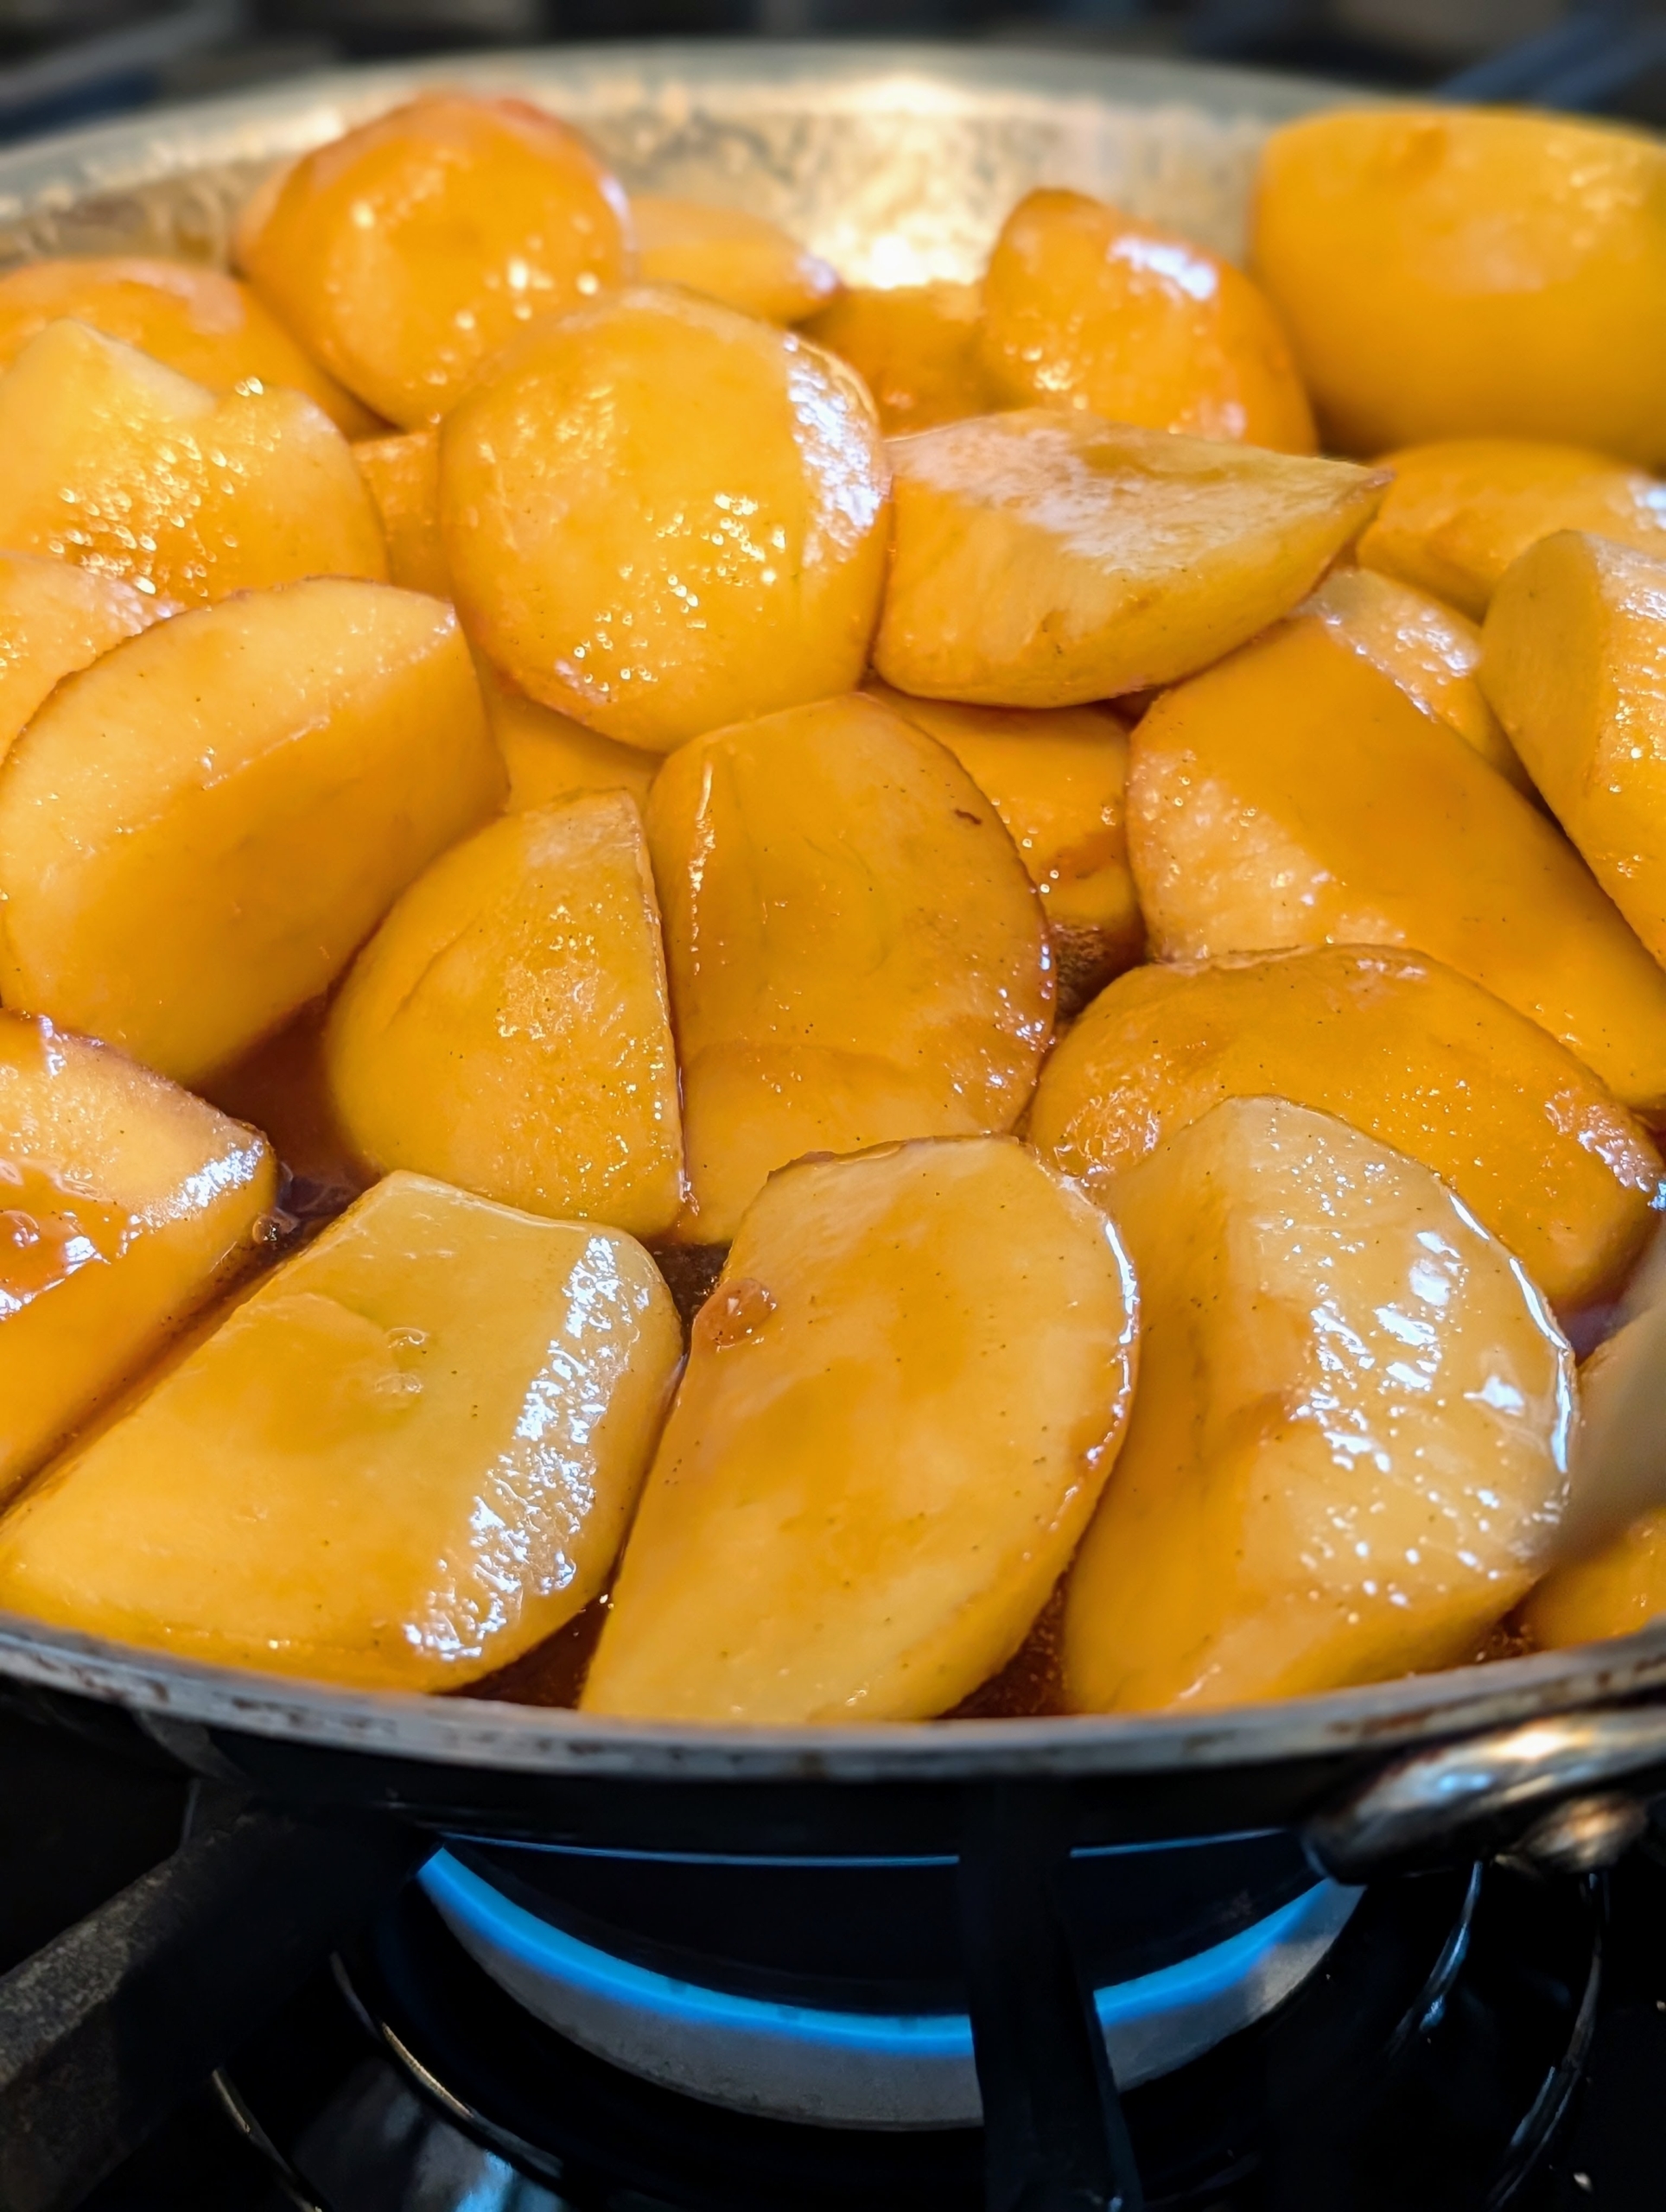
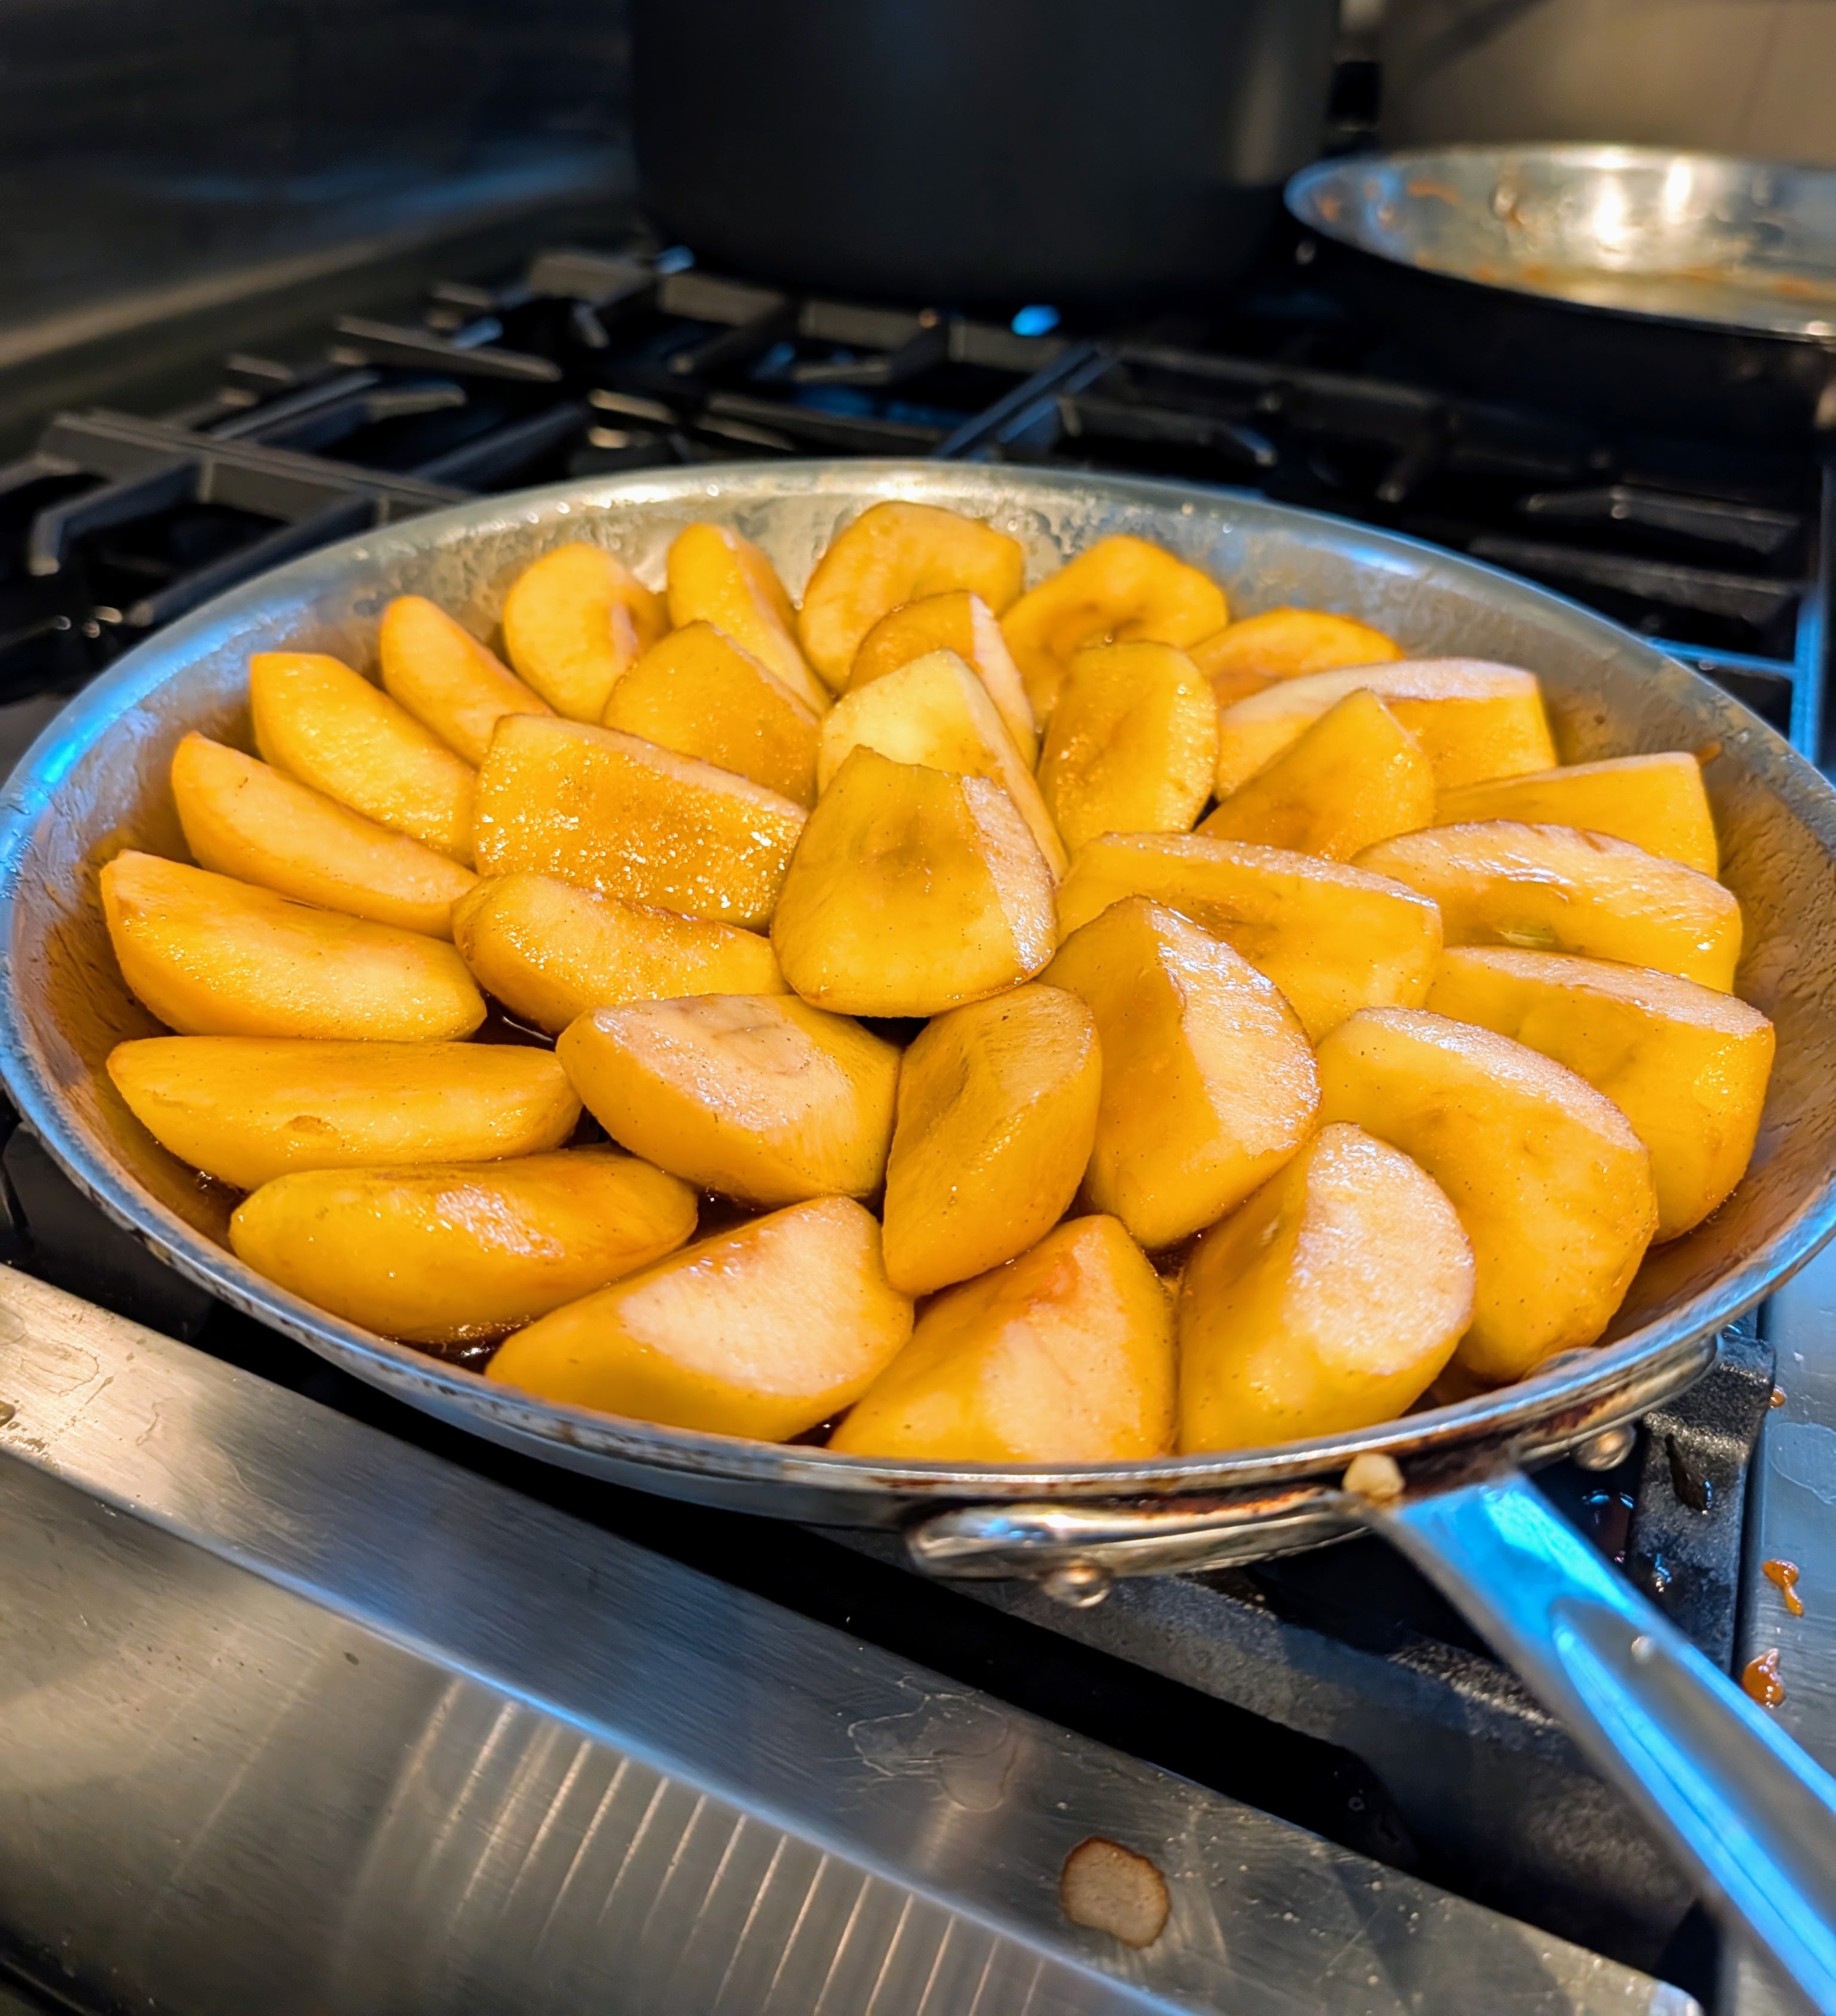
Once the caramel is the right consistency, it is used to coat the apple slices.
Molly arranges the apples in a circular pattern, overlapping them slightly to create a spiral.
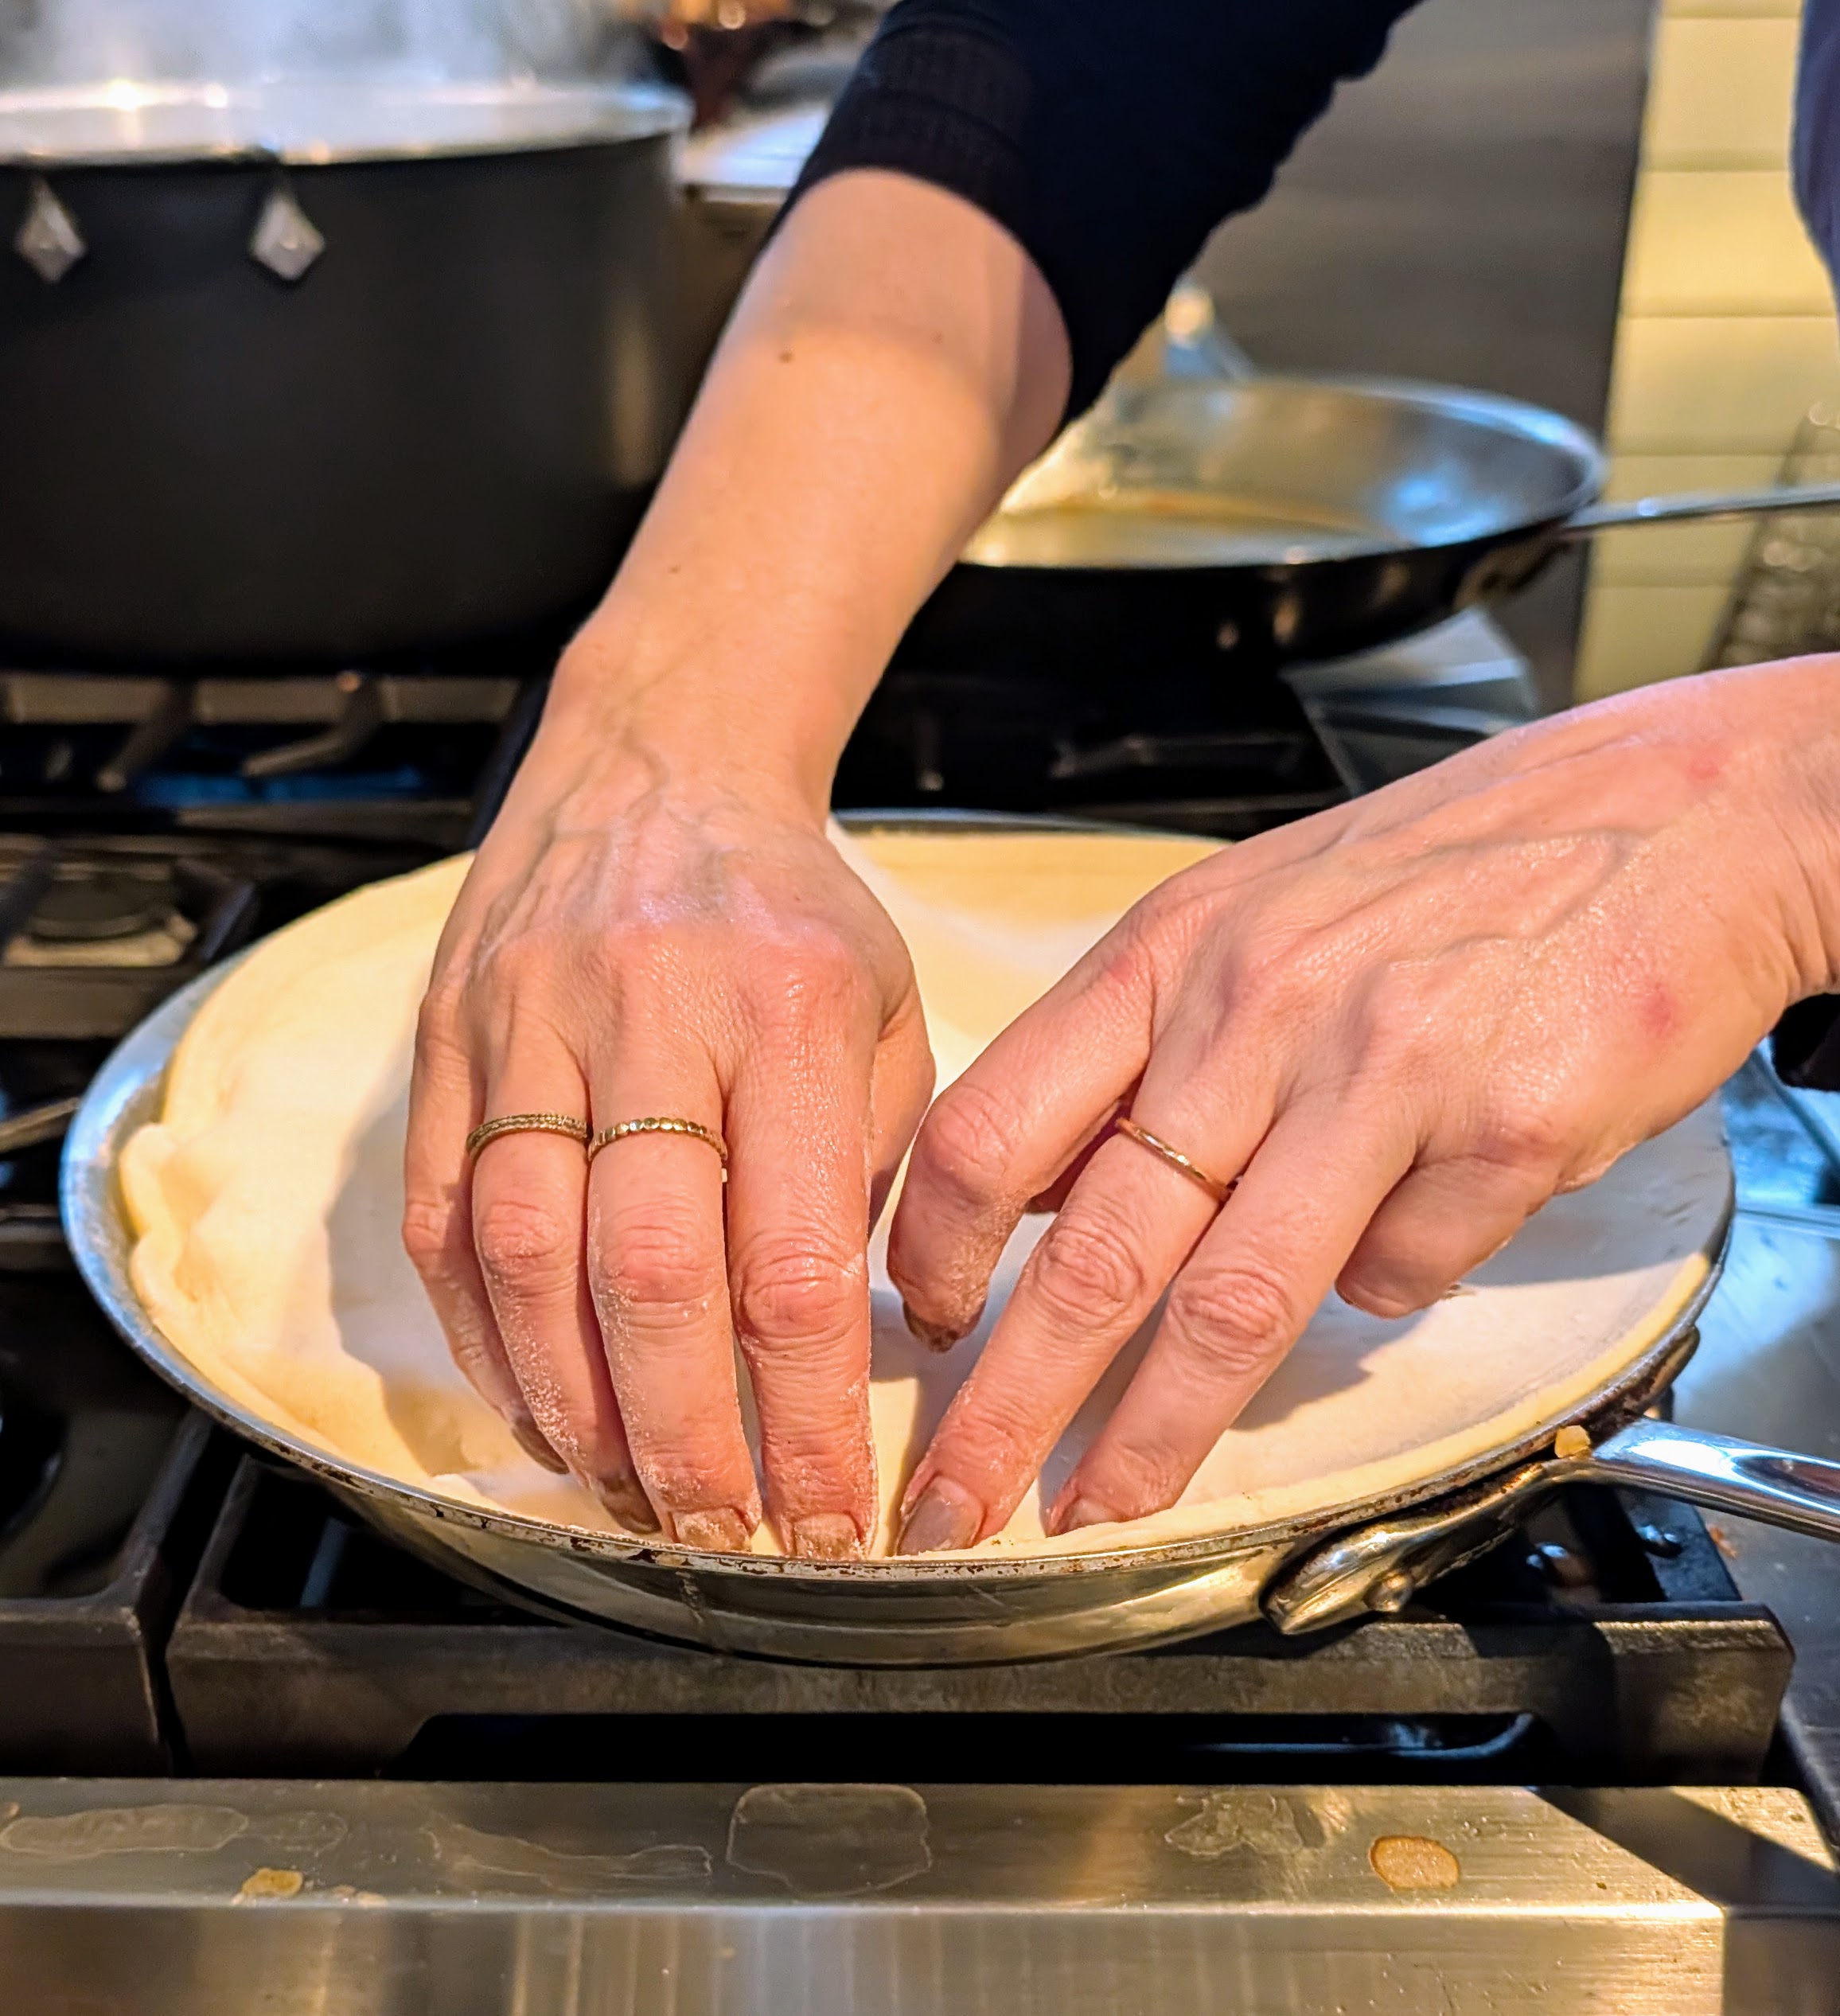
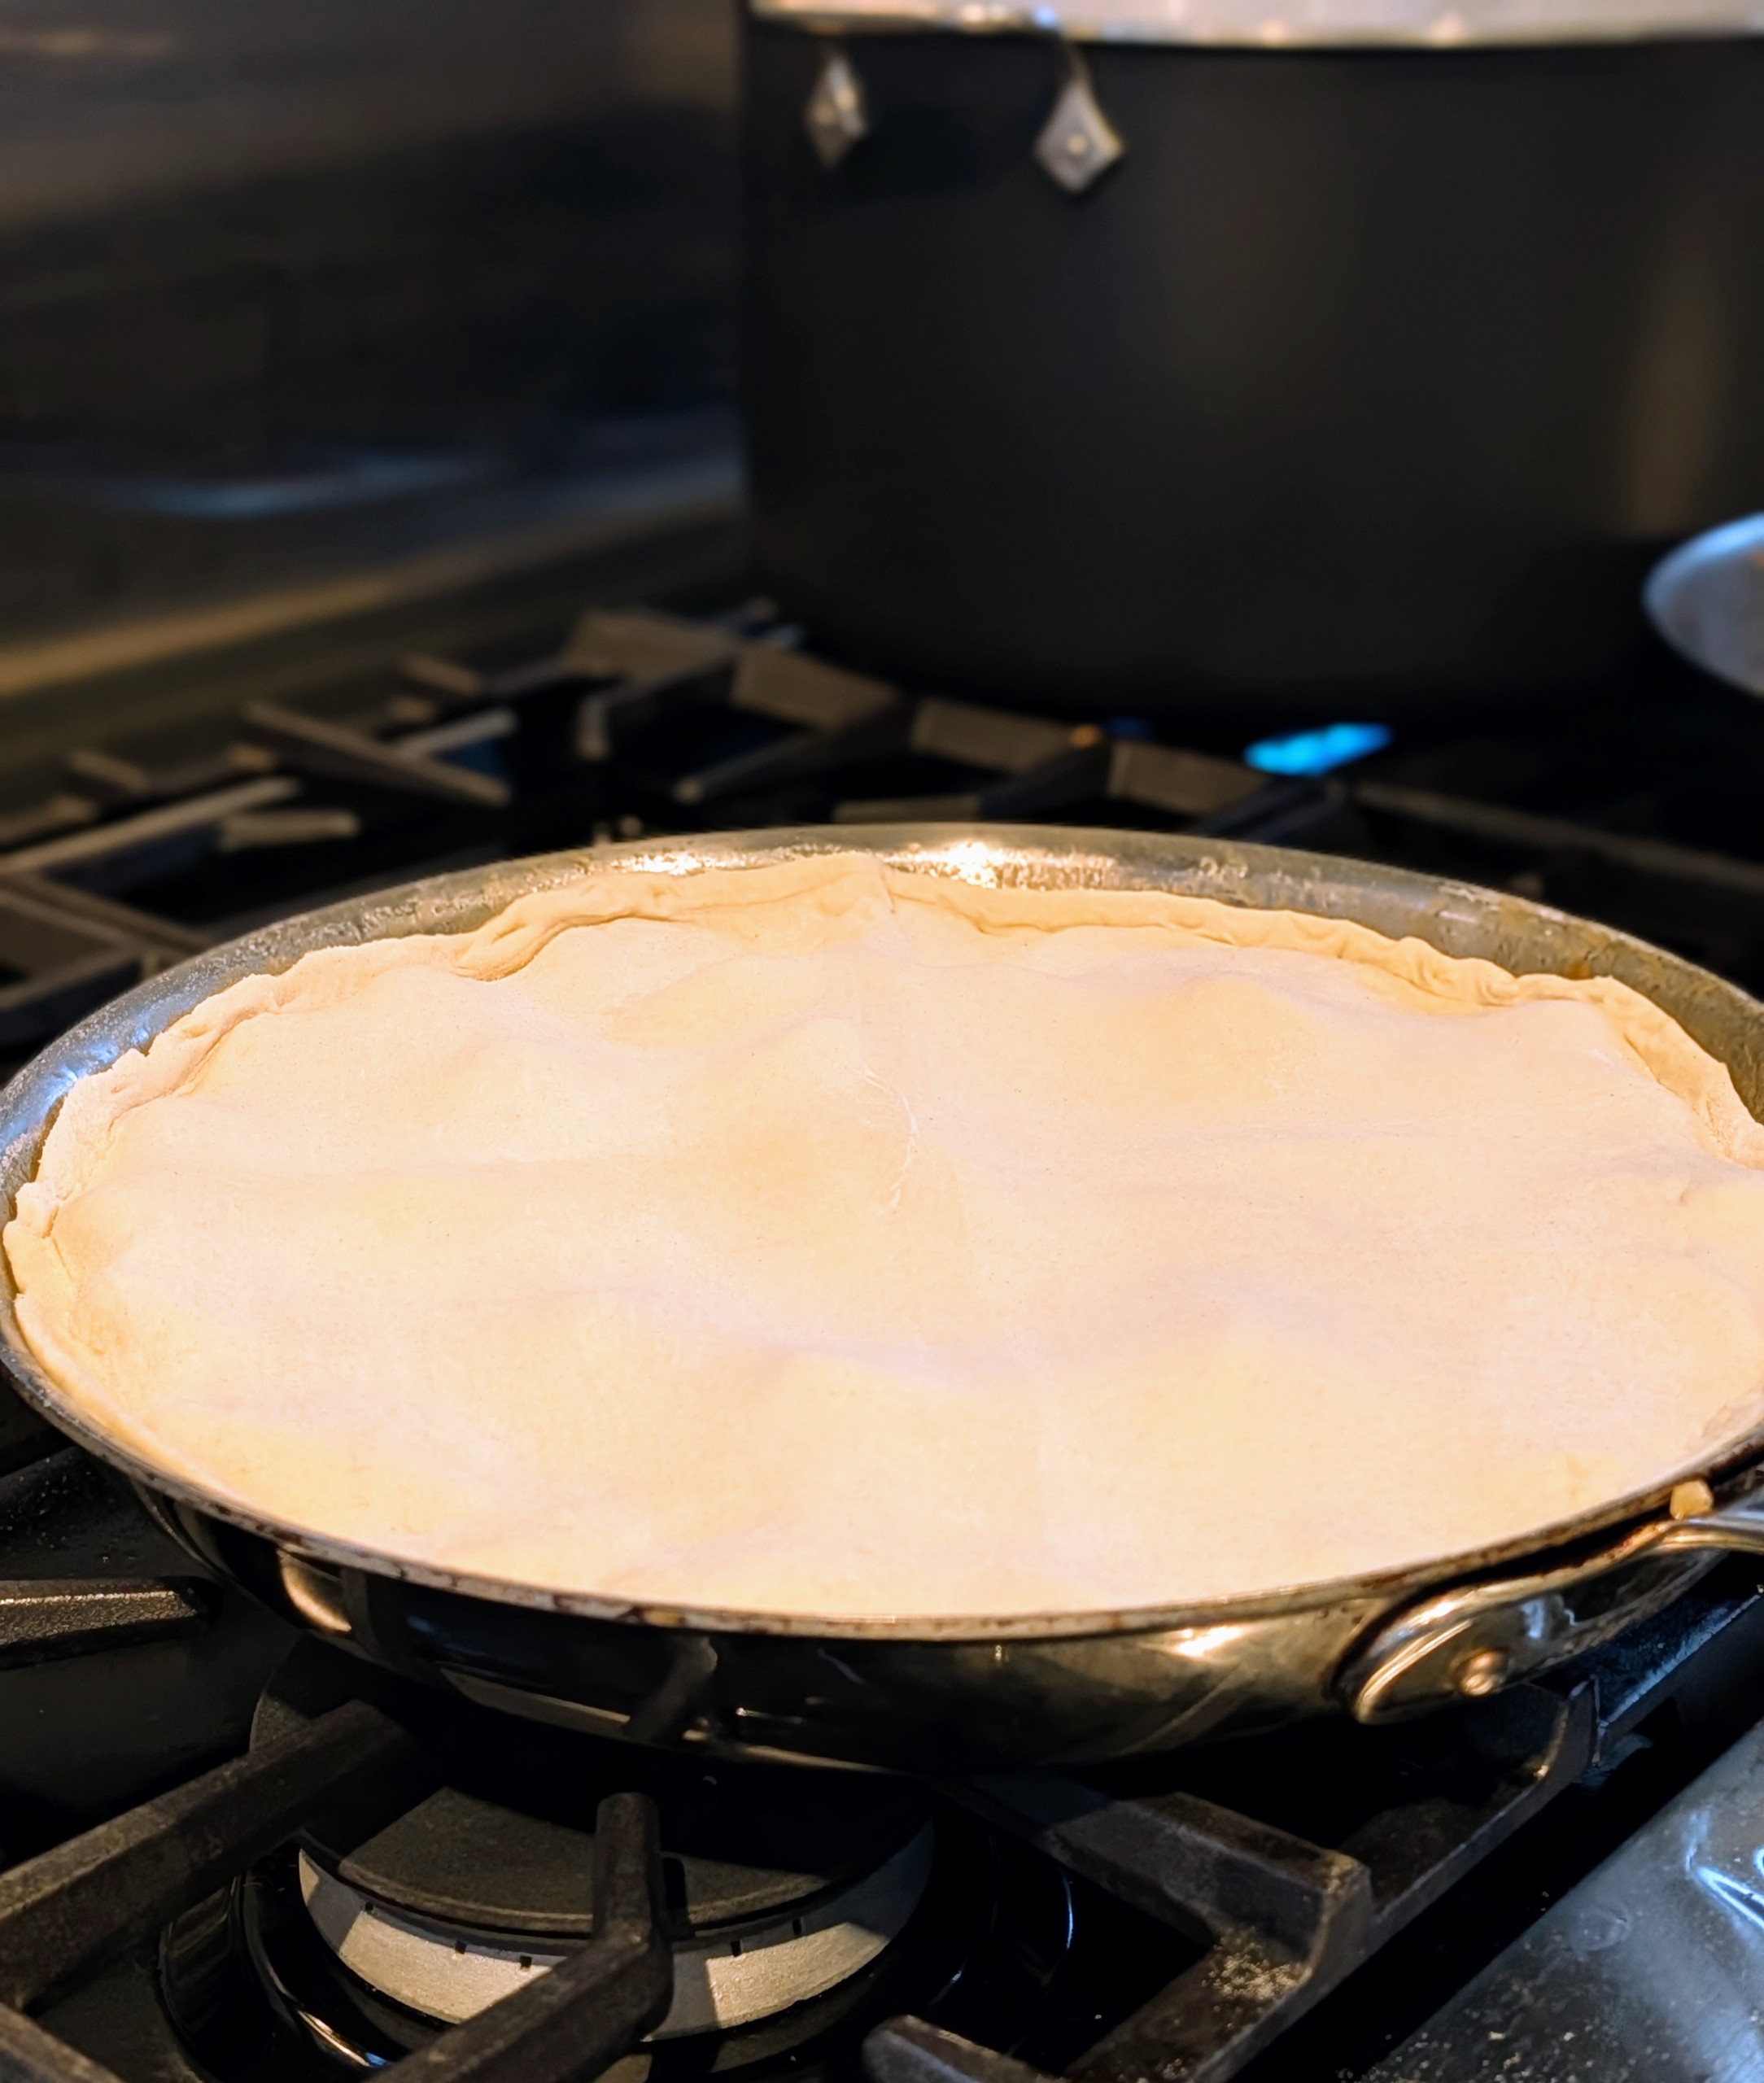
Then the entire skillet is covered with pastry dough cut to fit just over the apples.
It is placed into the oven and baked until the crust is golden brown.
Inside my Winter House kitchen, beautiful white feather trees are decorated and displayed on my counter.
Here is my celeriac soup topped with homemade brioche croutons.
The colorful endive and radicchio salad is served next.
Here’s our entrée – a generous serving of beef bourguignon on a bed of silky mashed potatoes.
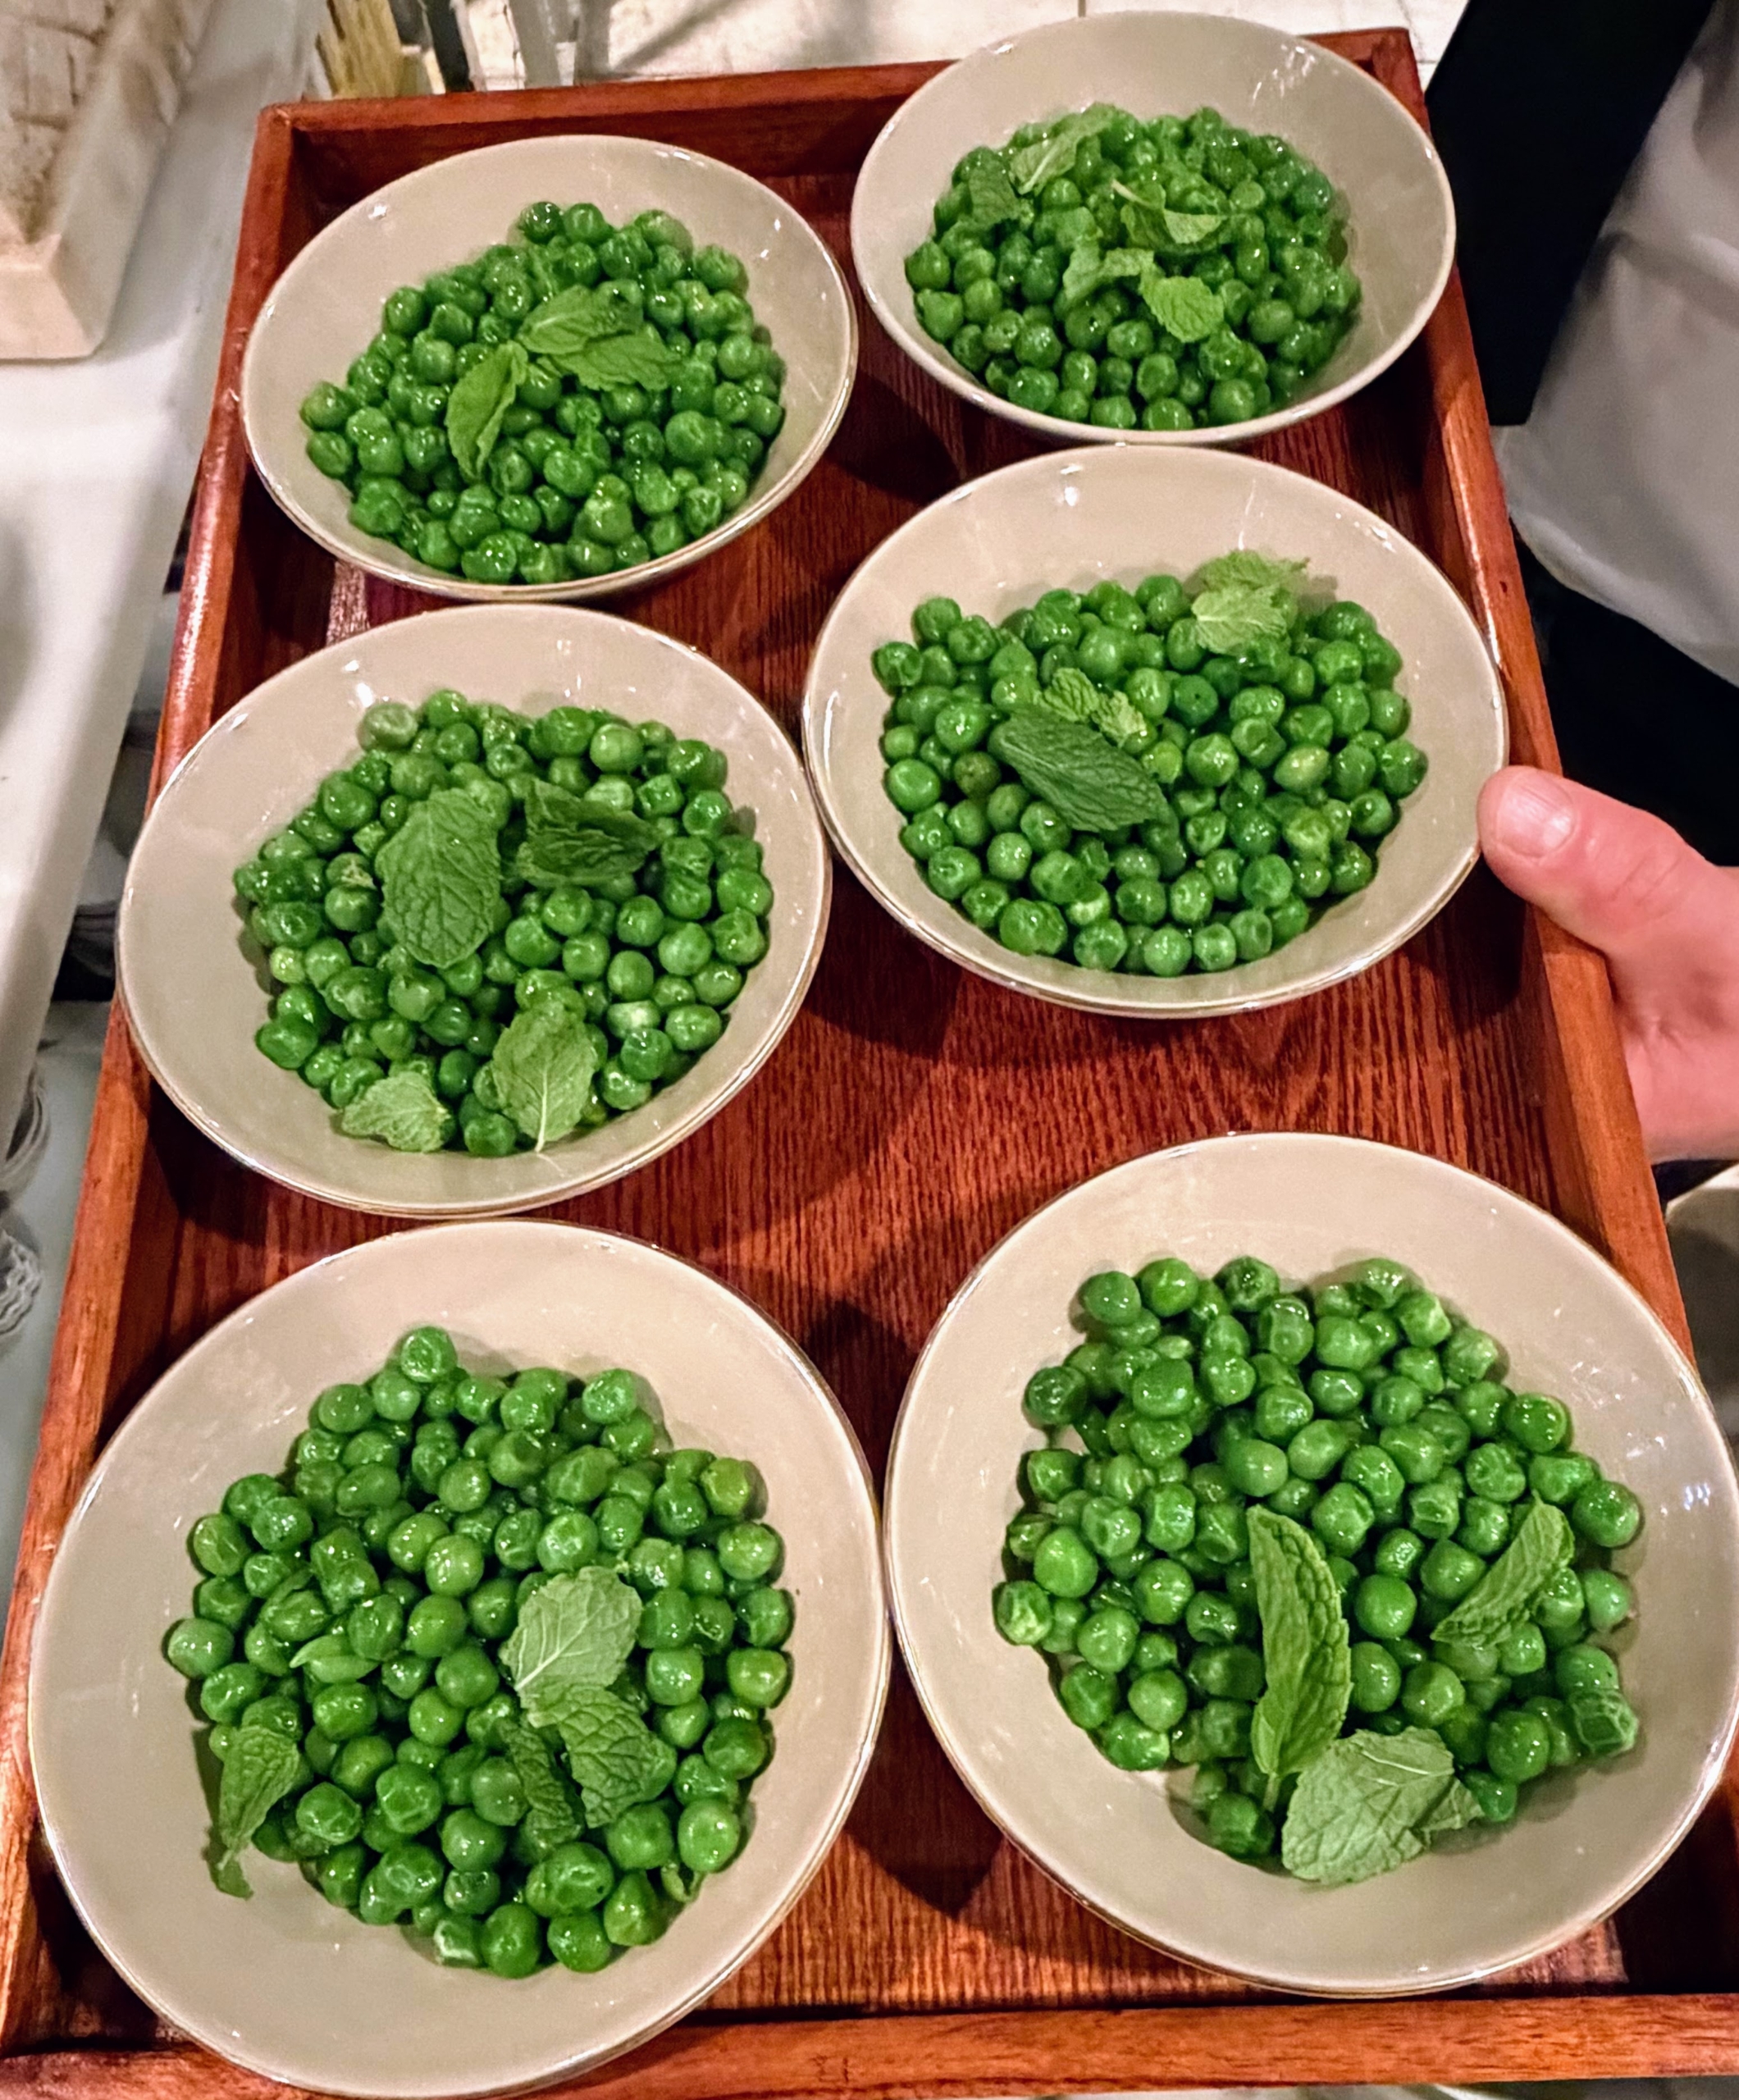
A side of pees is also served to my guests.
And here is the apple tarte tatin – baked perfectly and then decorated with gold leaf.
A lovely slice with a dollop of crème fraîche – not a morsel was left on anyone’s plate. It was a delicious meal for all.