Another outdoor chore is checked off my long list - so much is getting done this season.
My farm sits on 153 acres of gardens, pastures, and woodlands. Every year, I work hard to design new garden spaces and enhance existing ones. I take into consideration a plant's growing needs and mature size and plant accordingly. This week, I took down some old pussy willows in an area behind my main greenhouse to make room for a a collection of wonderful pink and white hydrangeas from Star Roses and Plants, a company of brands that focuses on breeding and introducing specimens offering longer-lasting, disease resistant blooms. This garden will look so stunning when these plants are mature.
Here are some photos, enjoy.
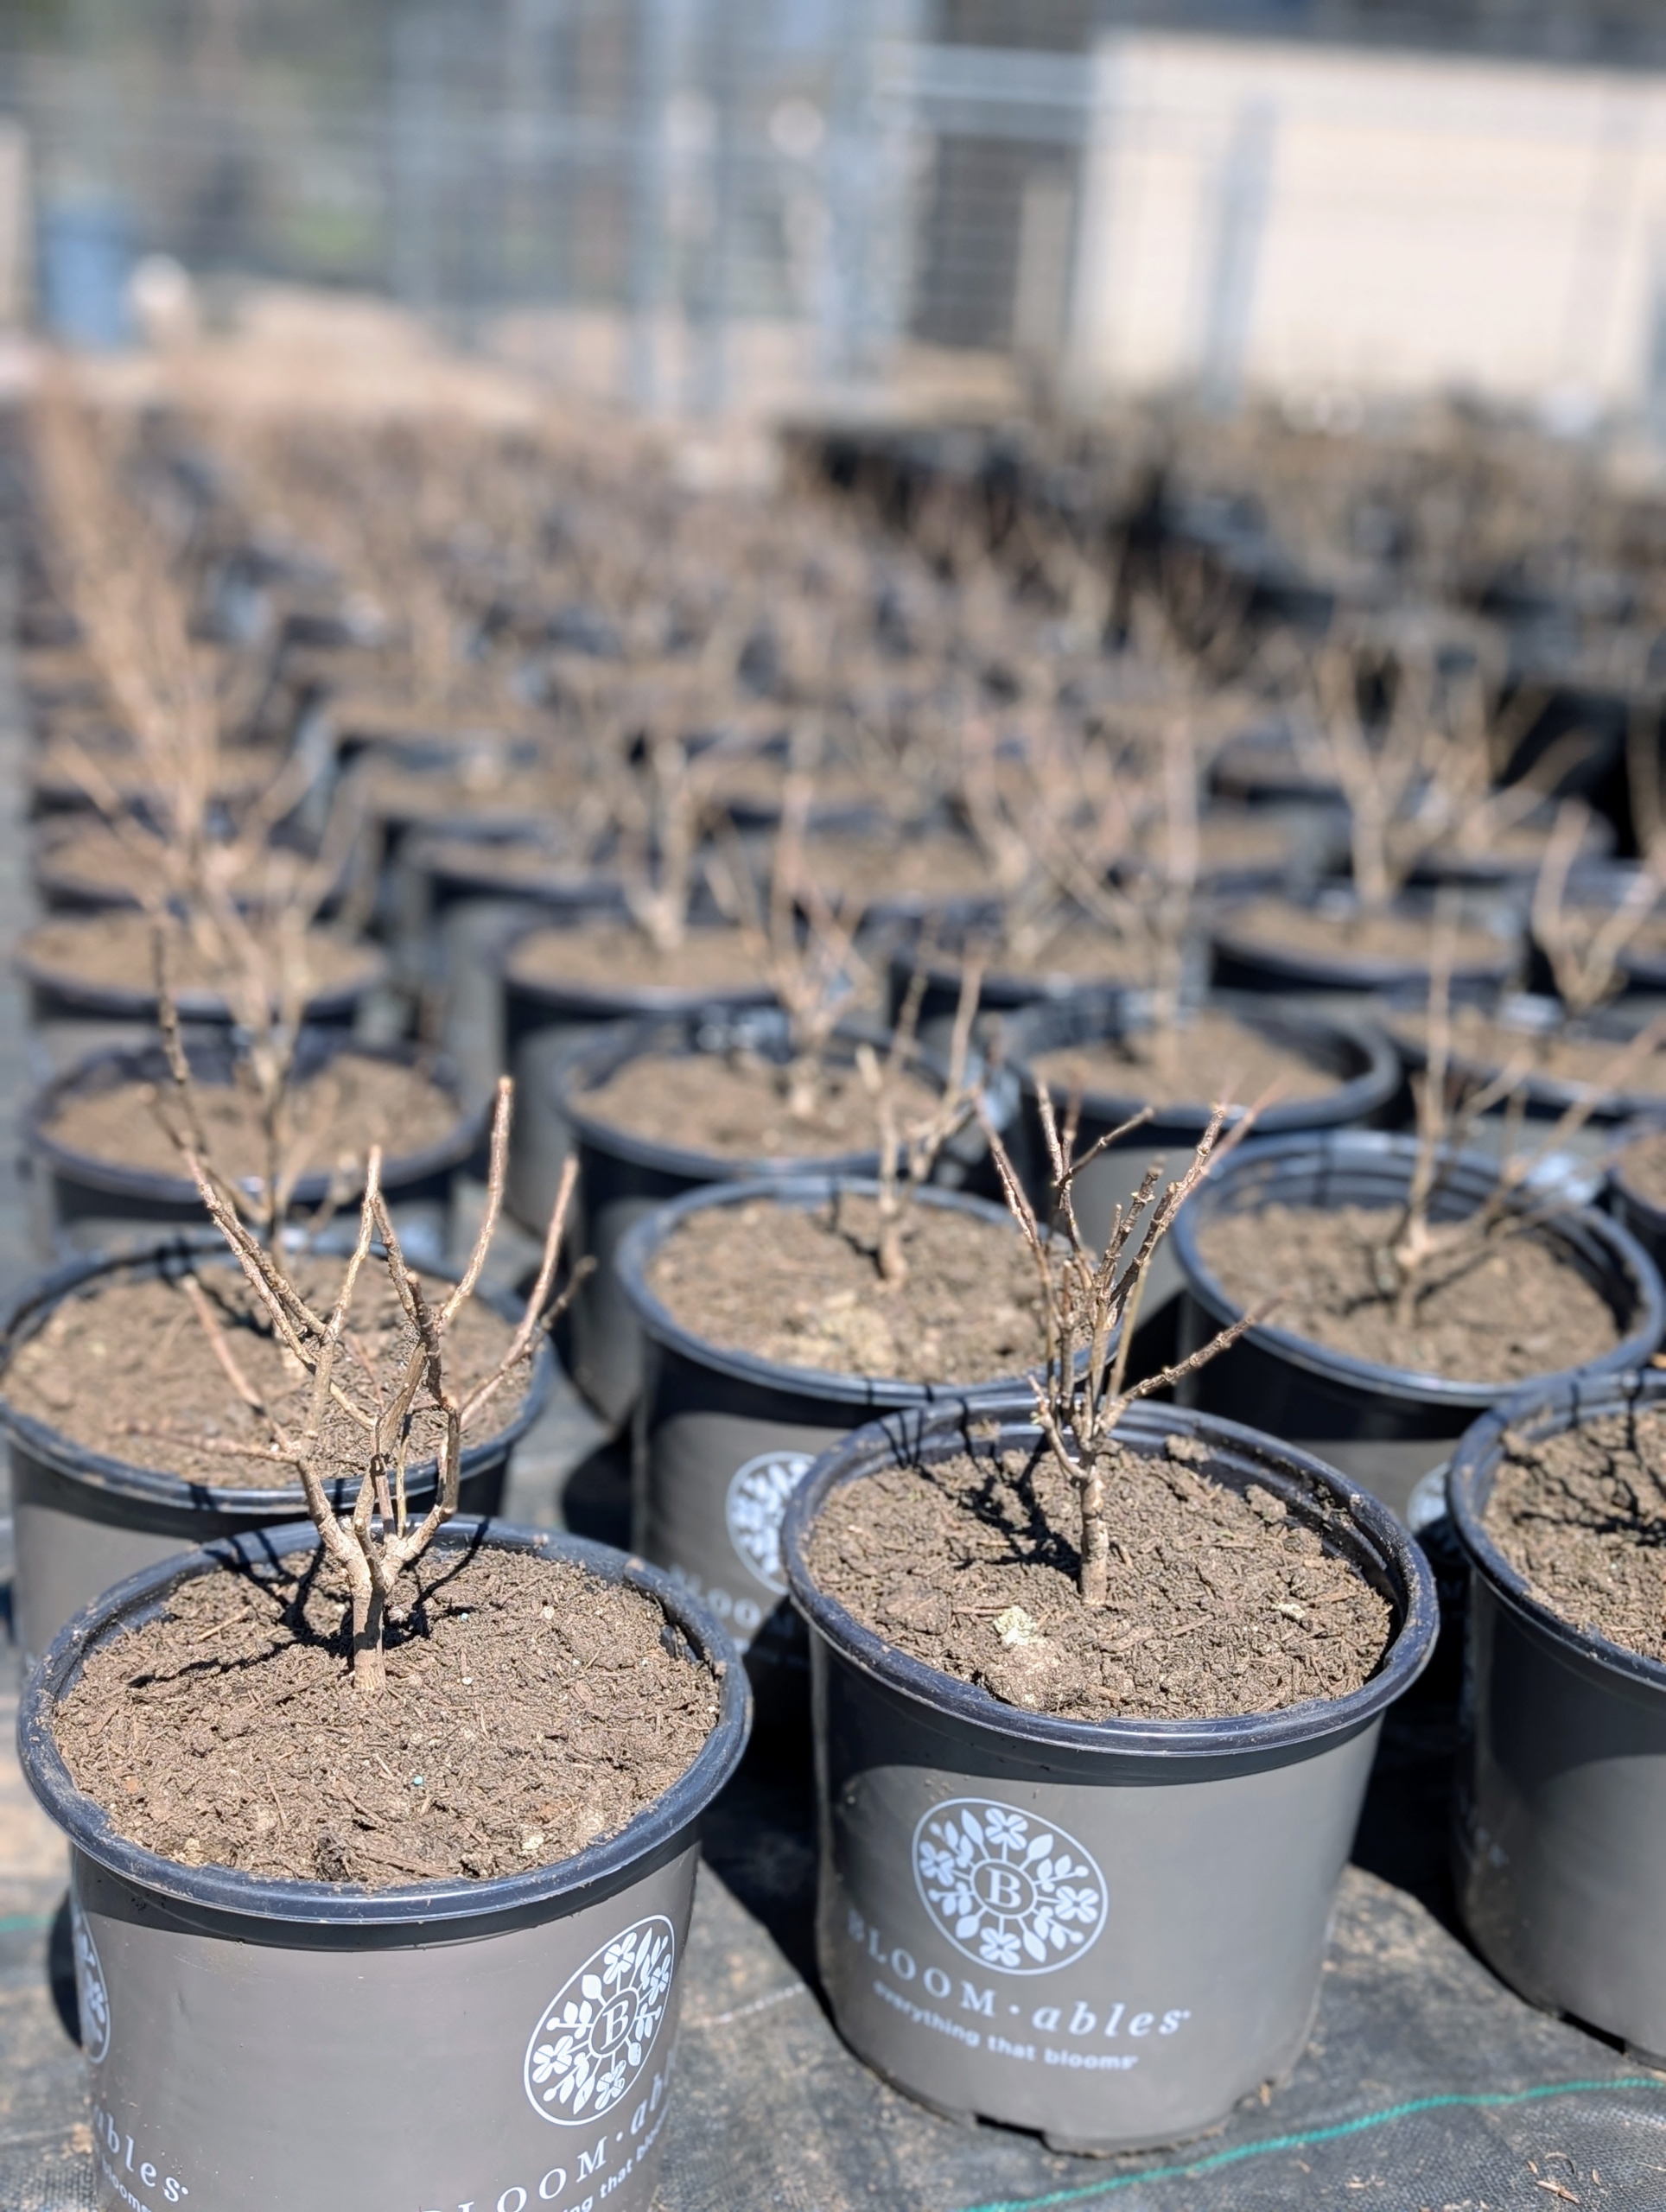
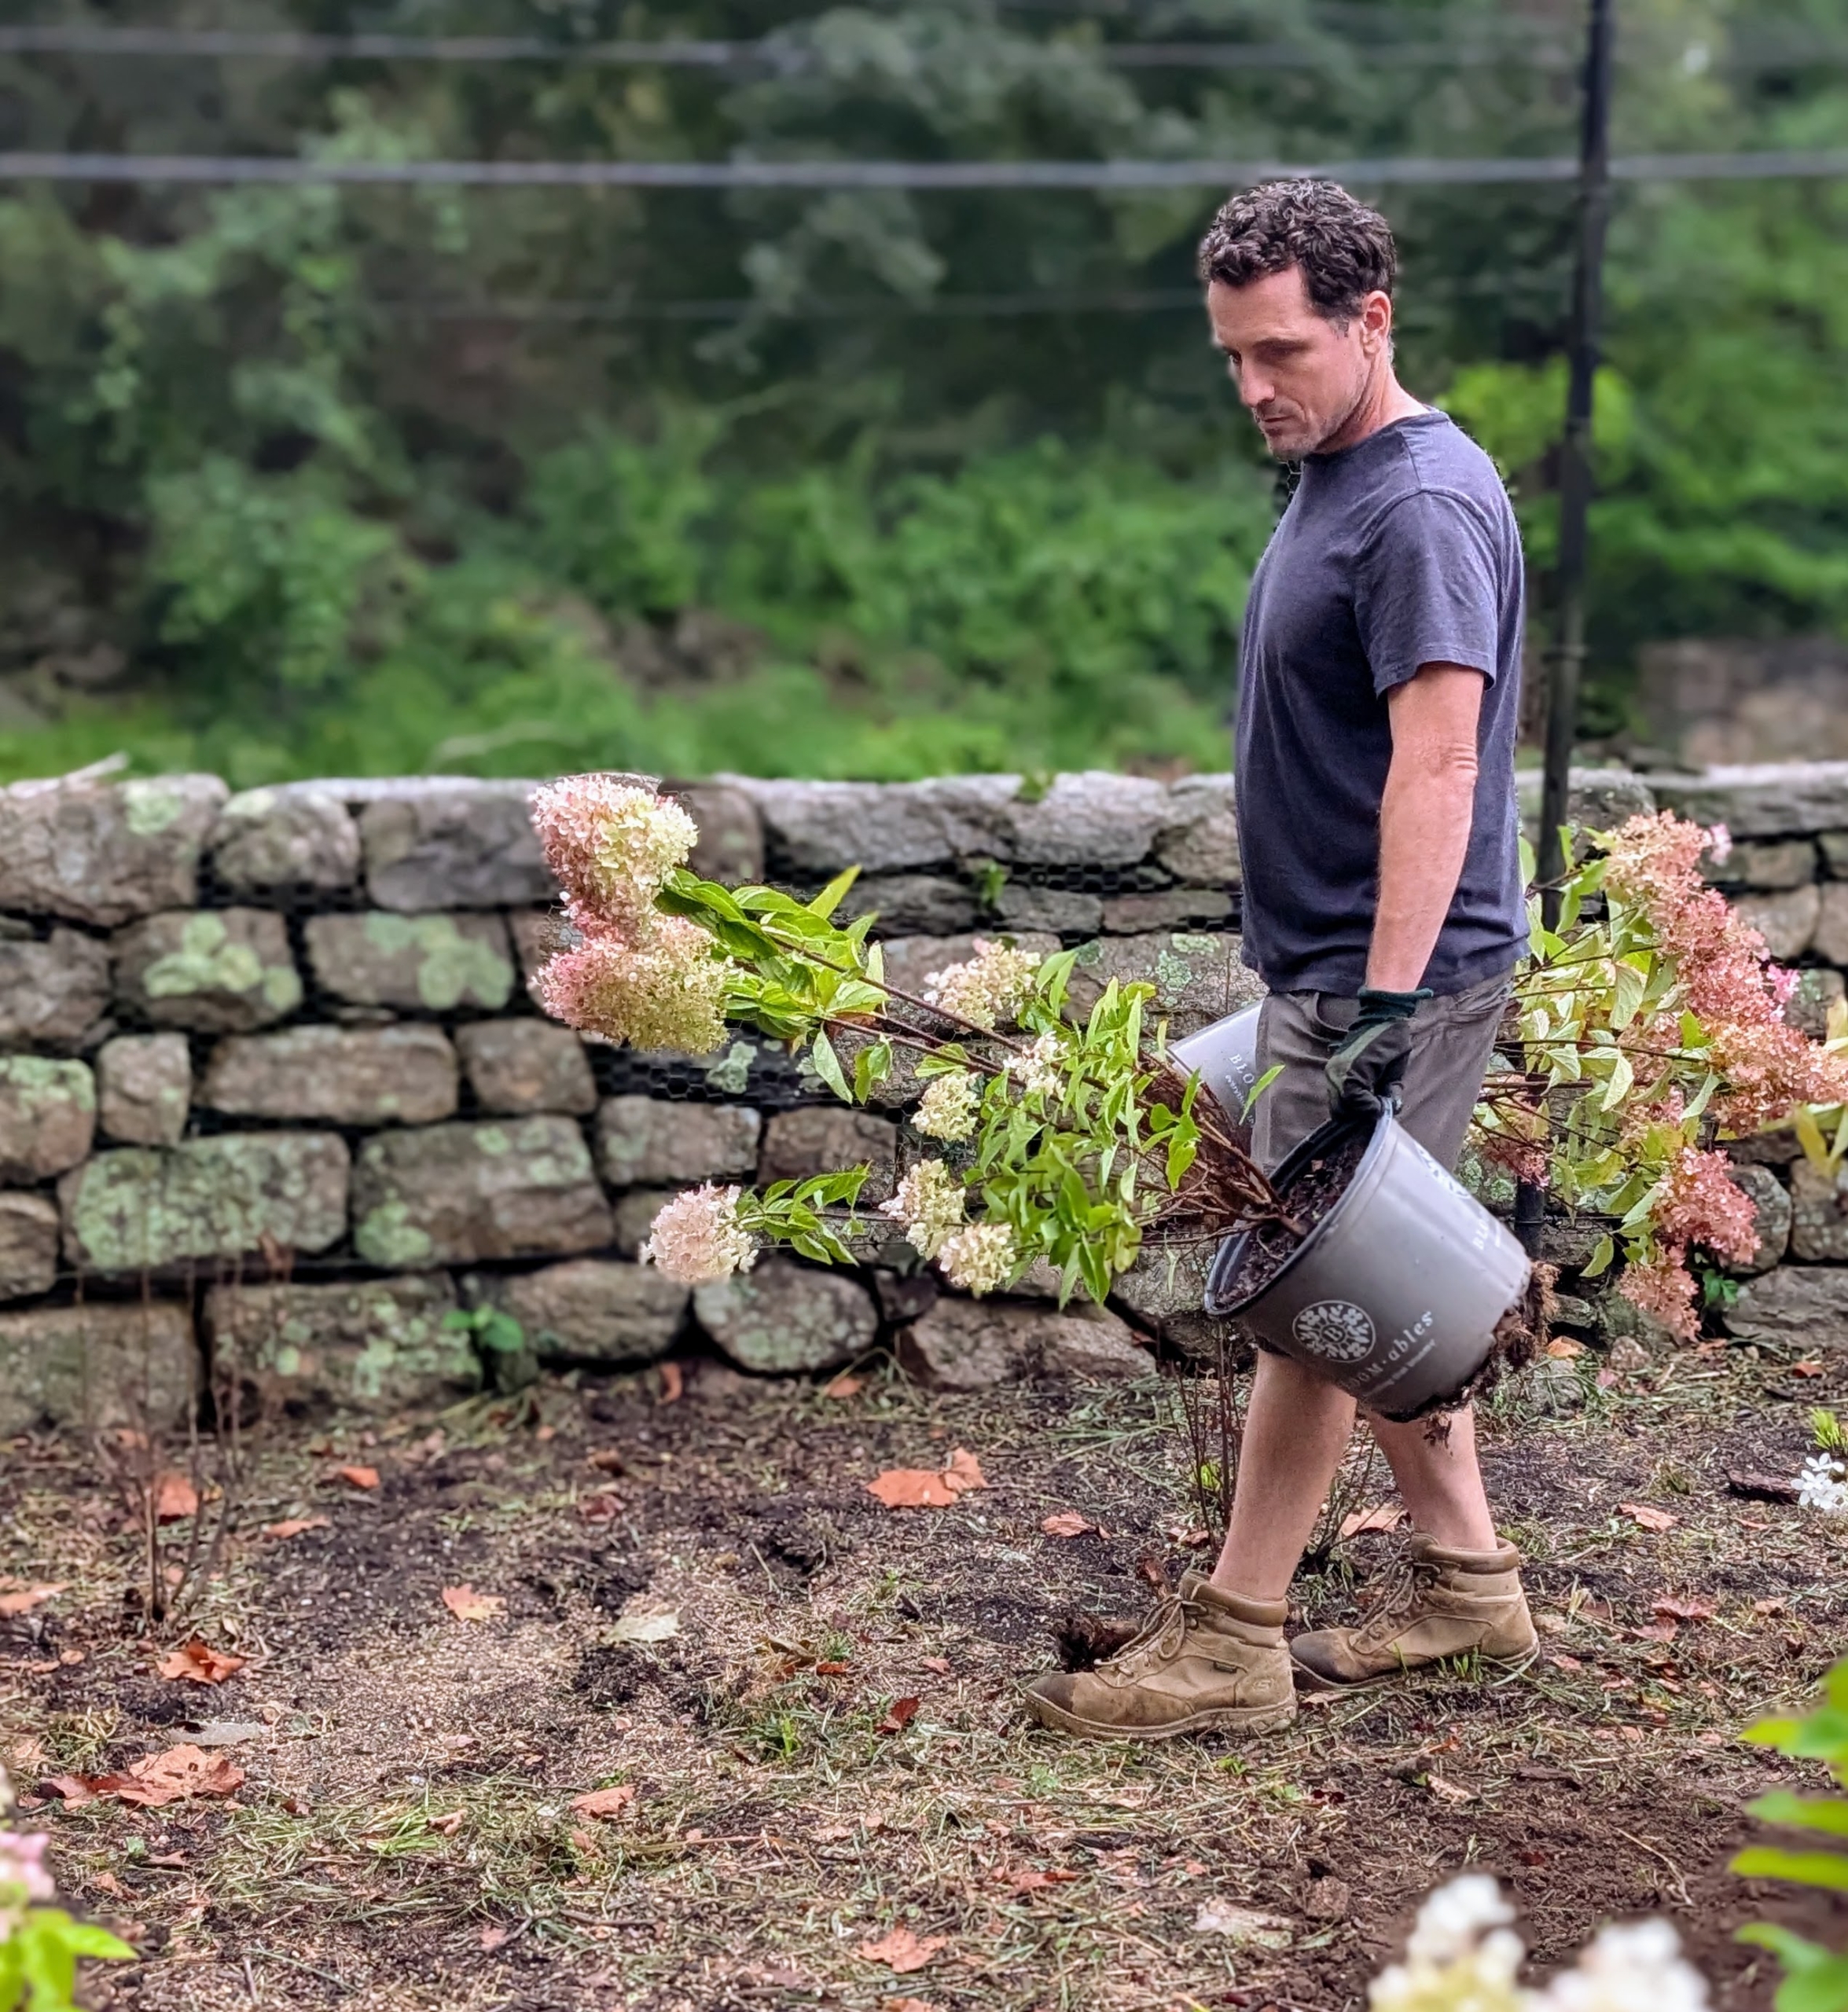
I’m so proud of all the many bare-root plants I am able to nurture here in pots before they are planted in more permanent locations. These bare-roots are Sweet Starlight Hydrangeas, Hydrangea paniculata. Its bright white blooms age from light to dark pink. These were potted up last April.
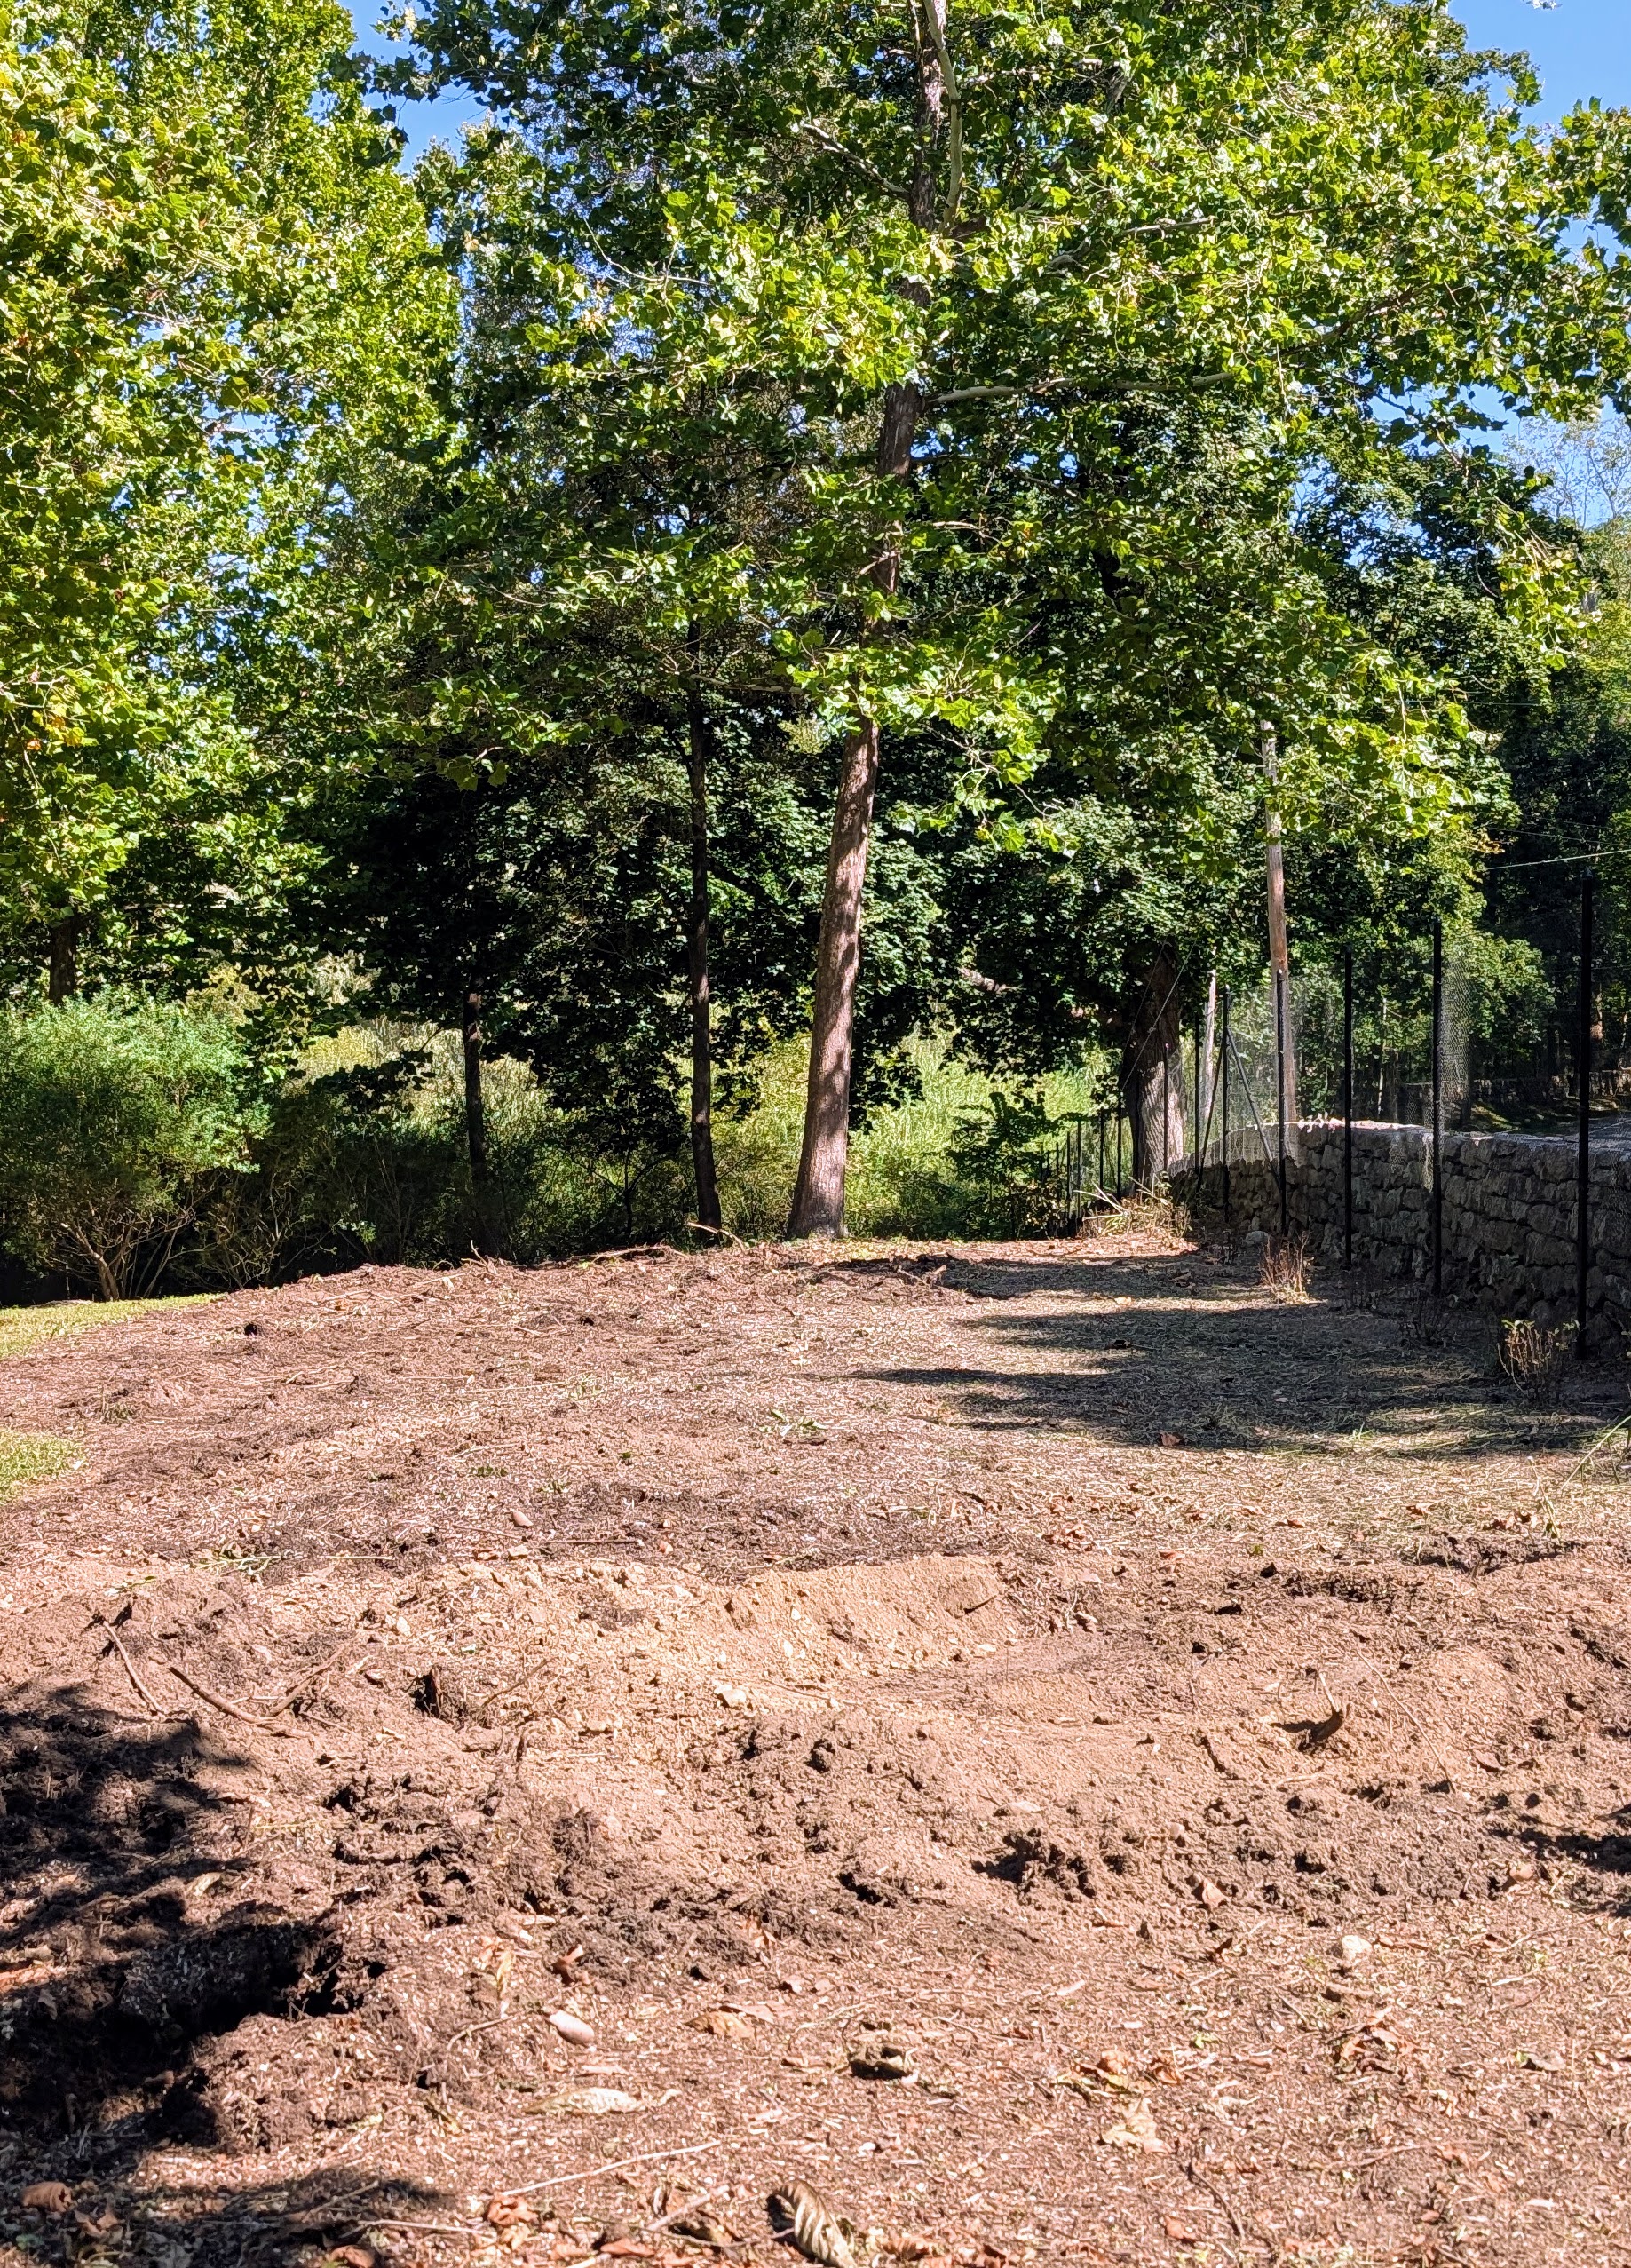
I decided this area behind my main greenhouse needed a change. There were some old willows here that needed replacing. Once the space was cleared, it was leveled and prepared for planting.
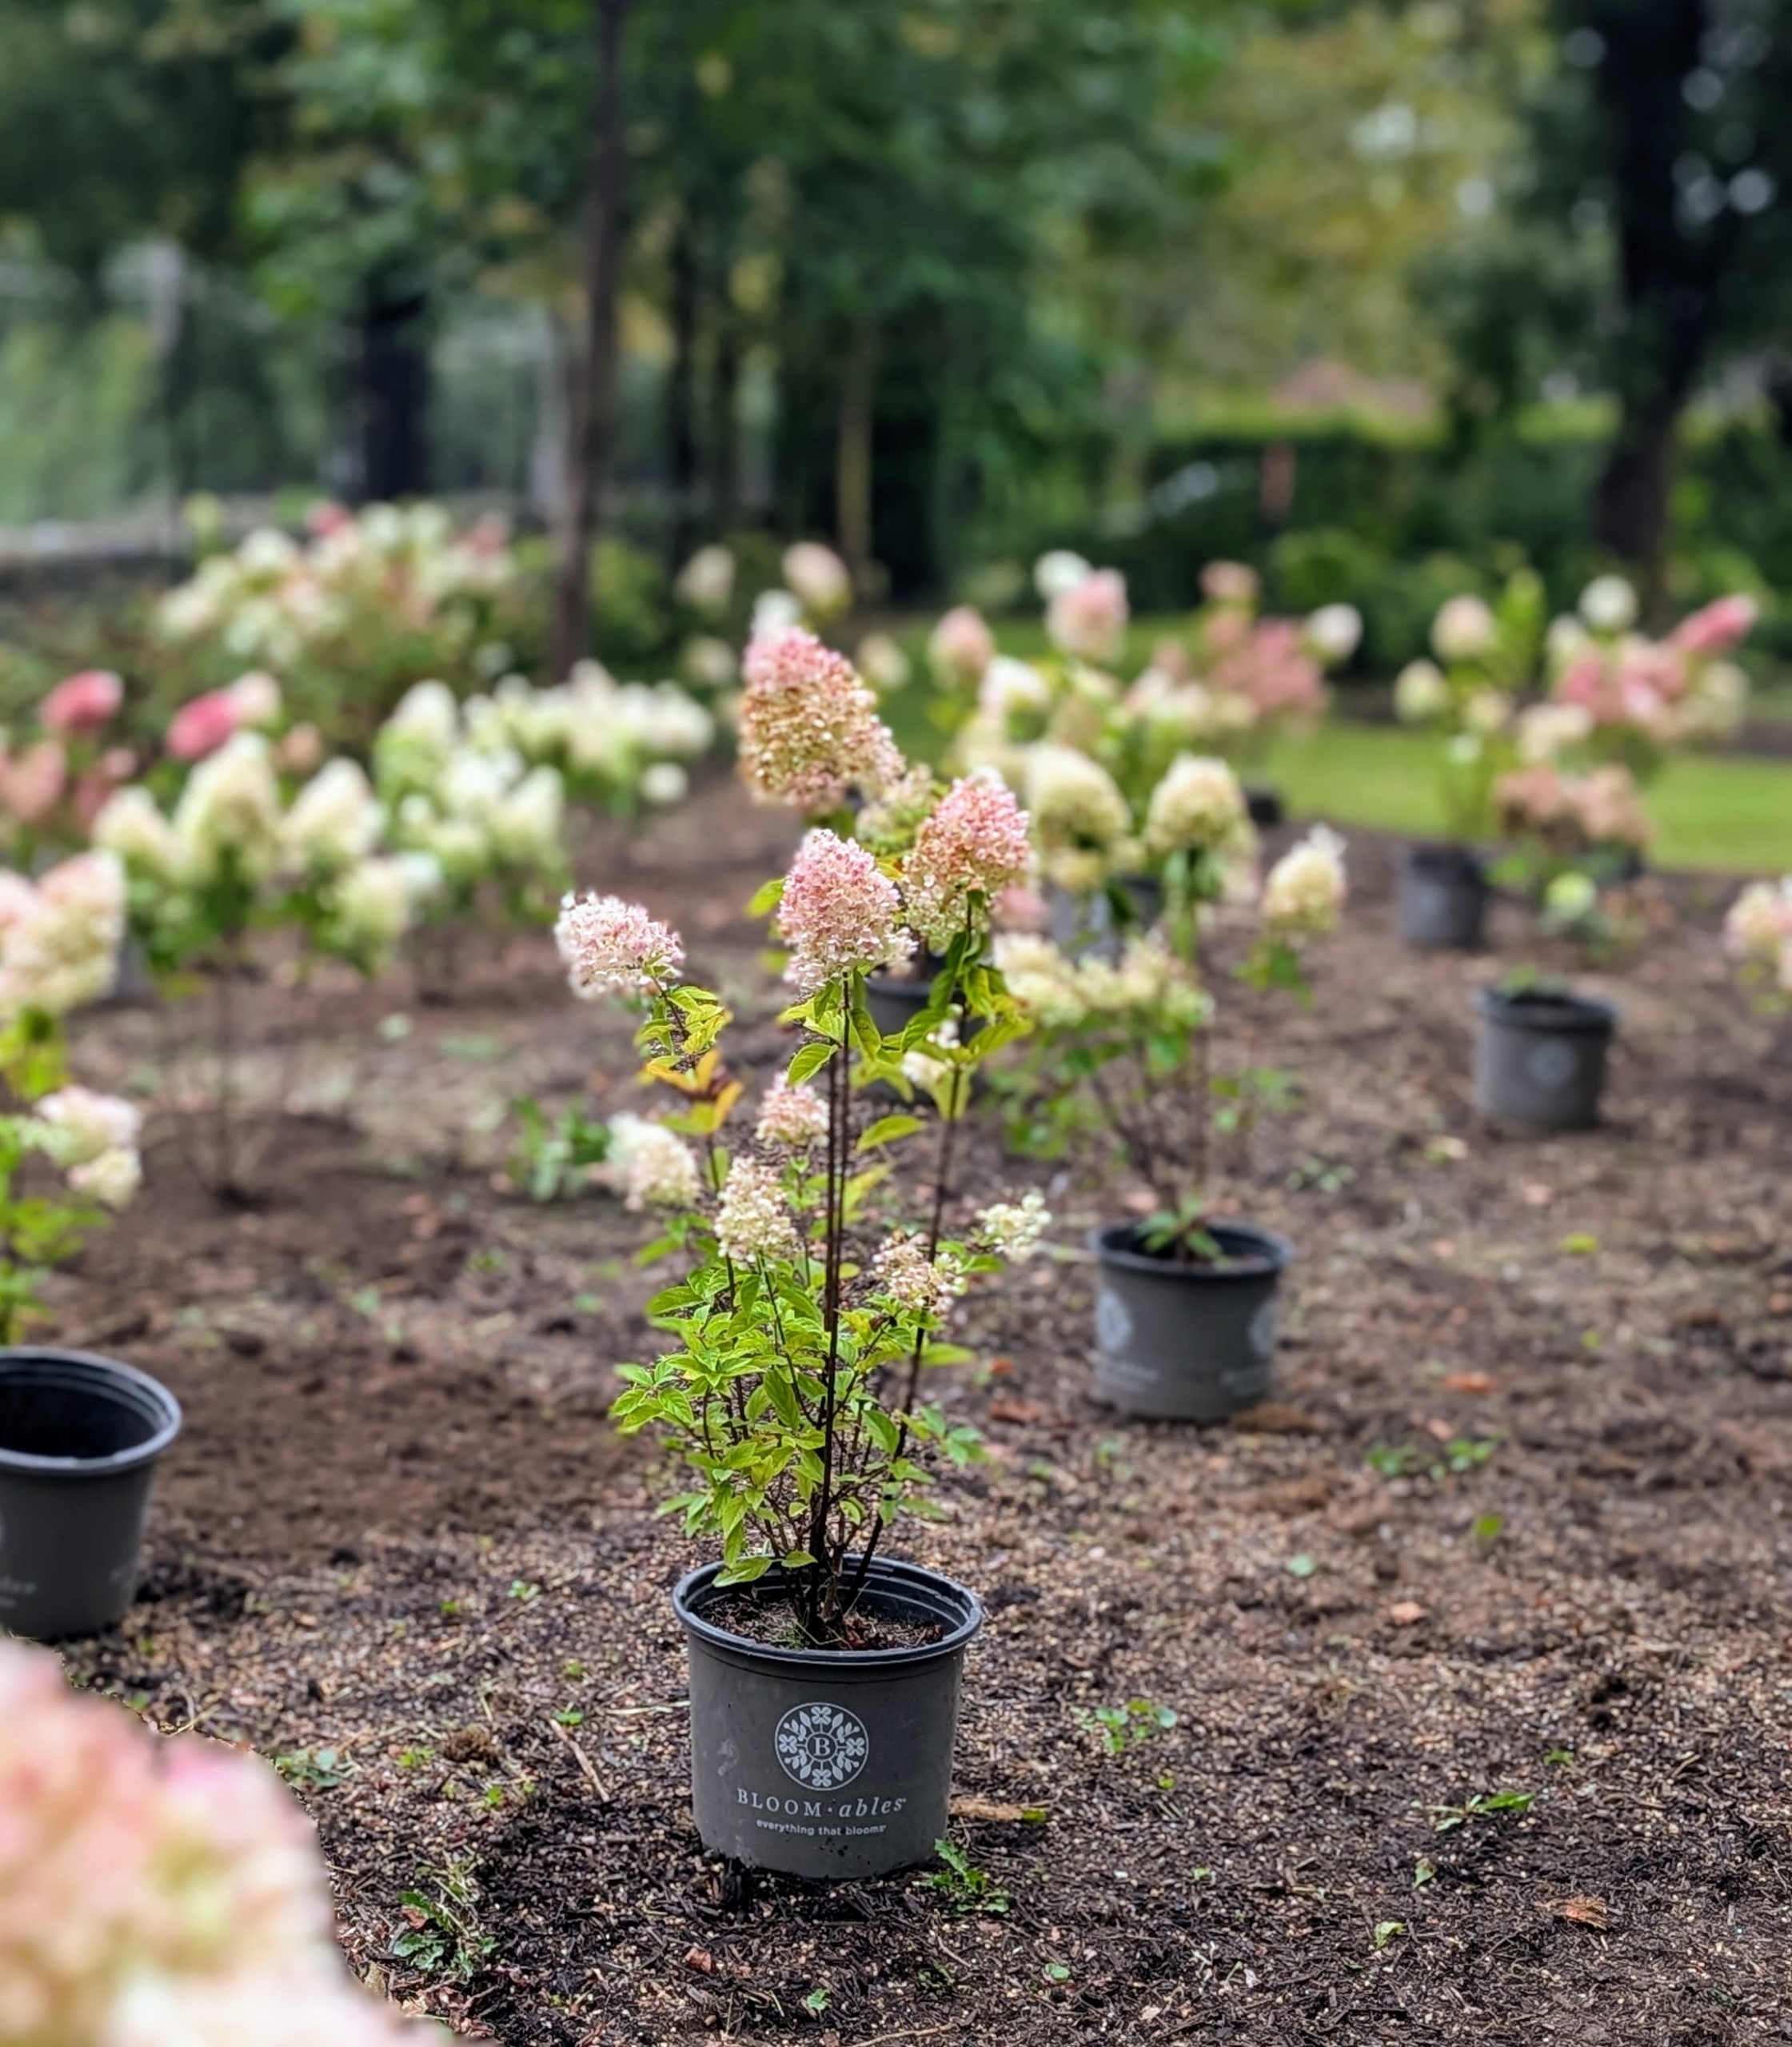
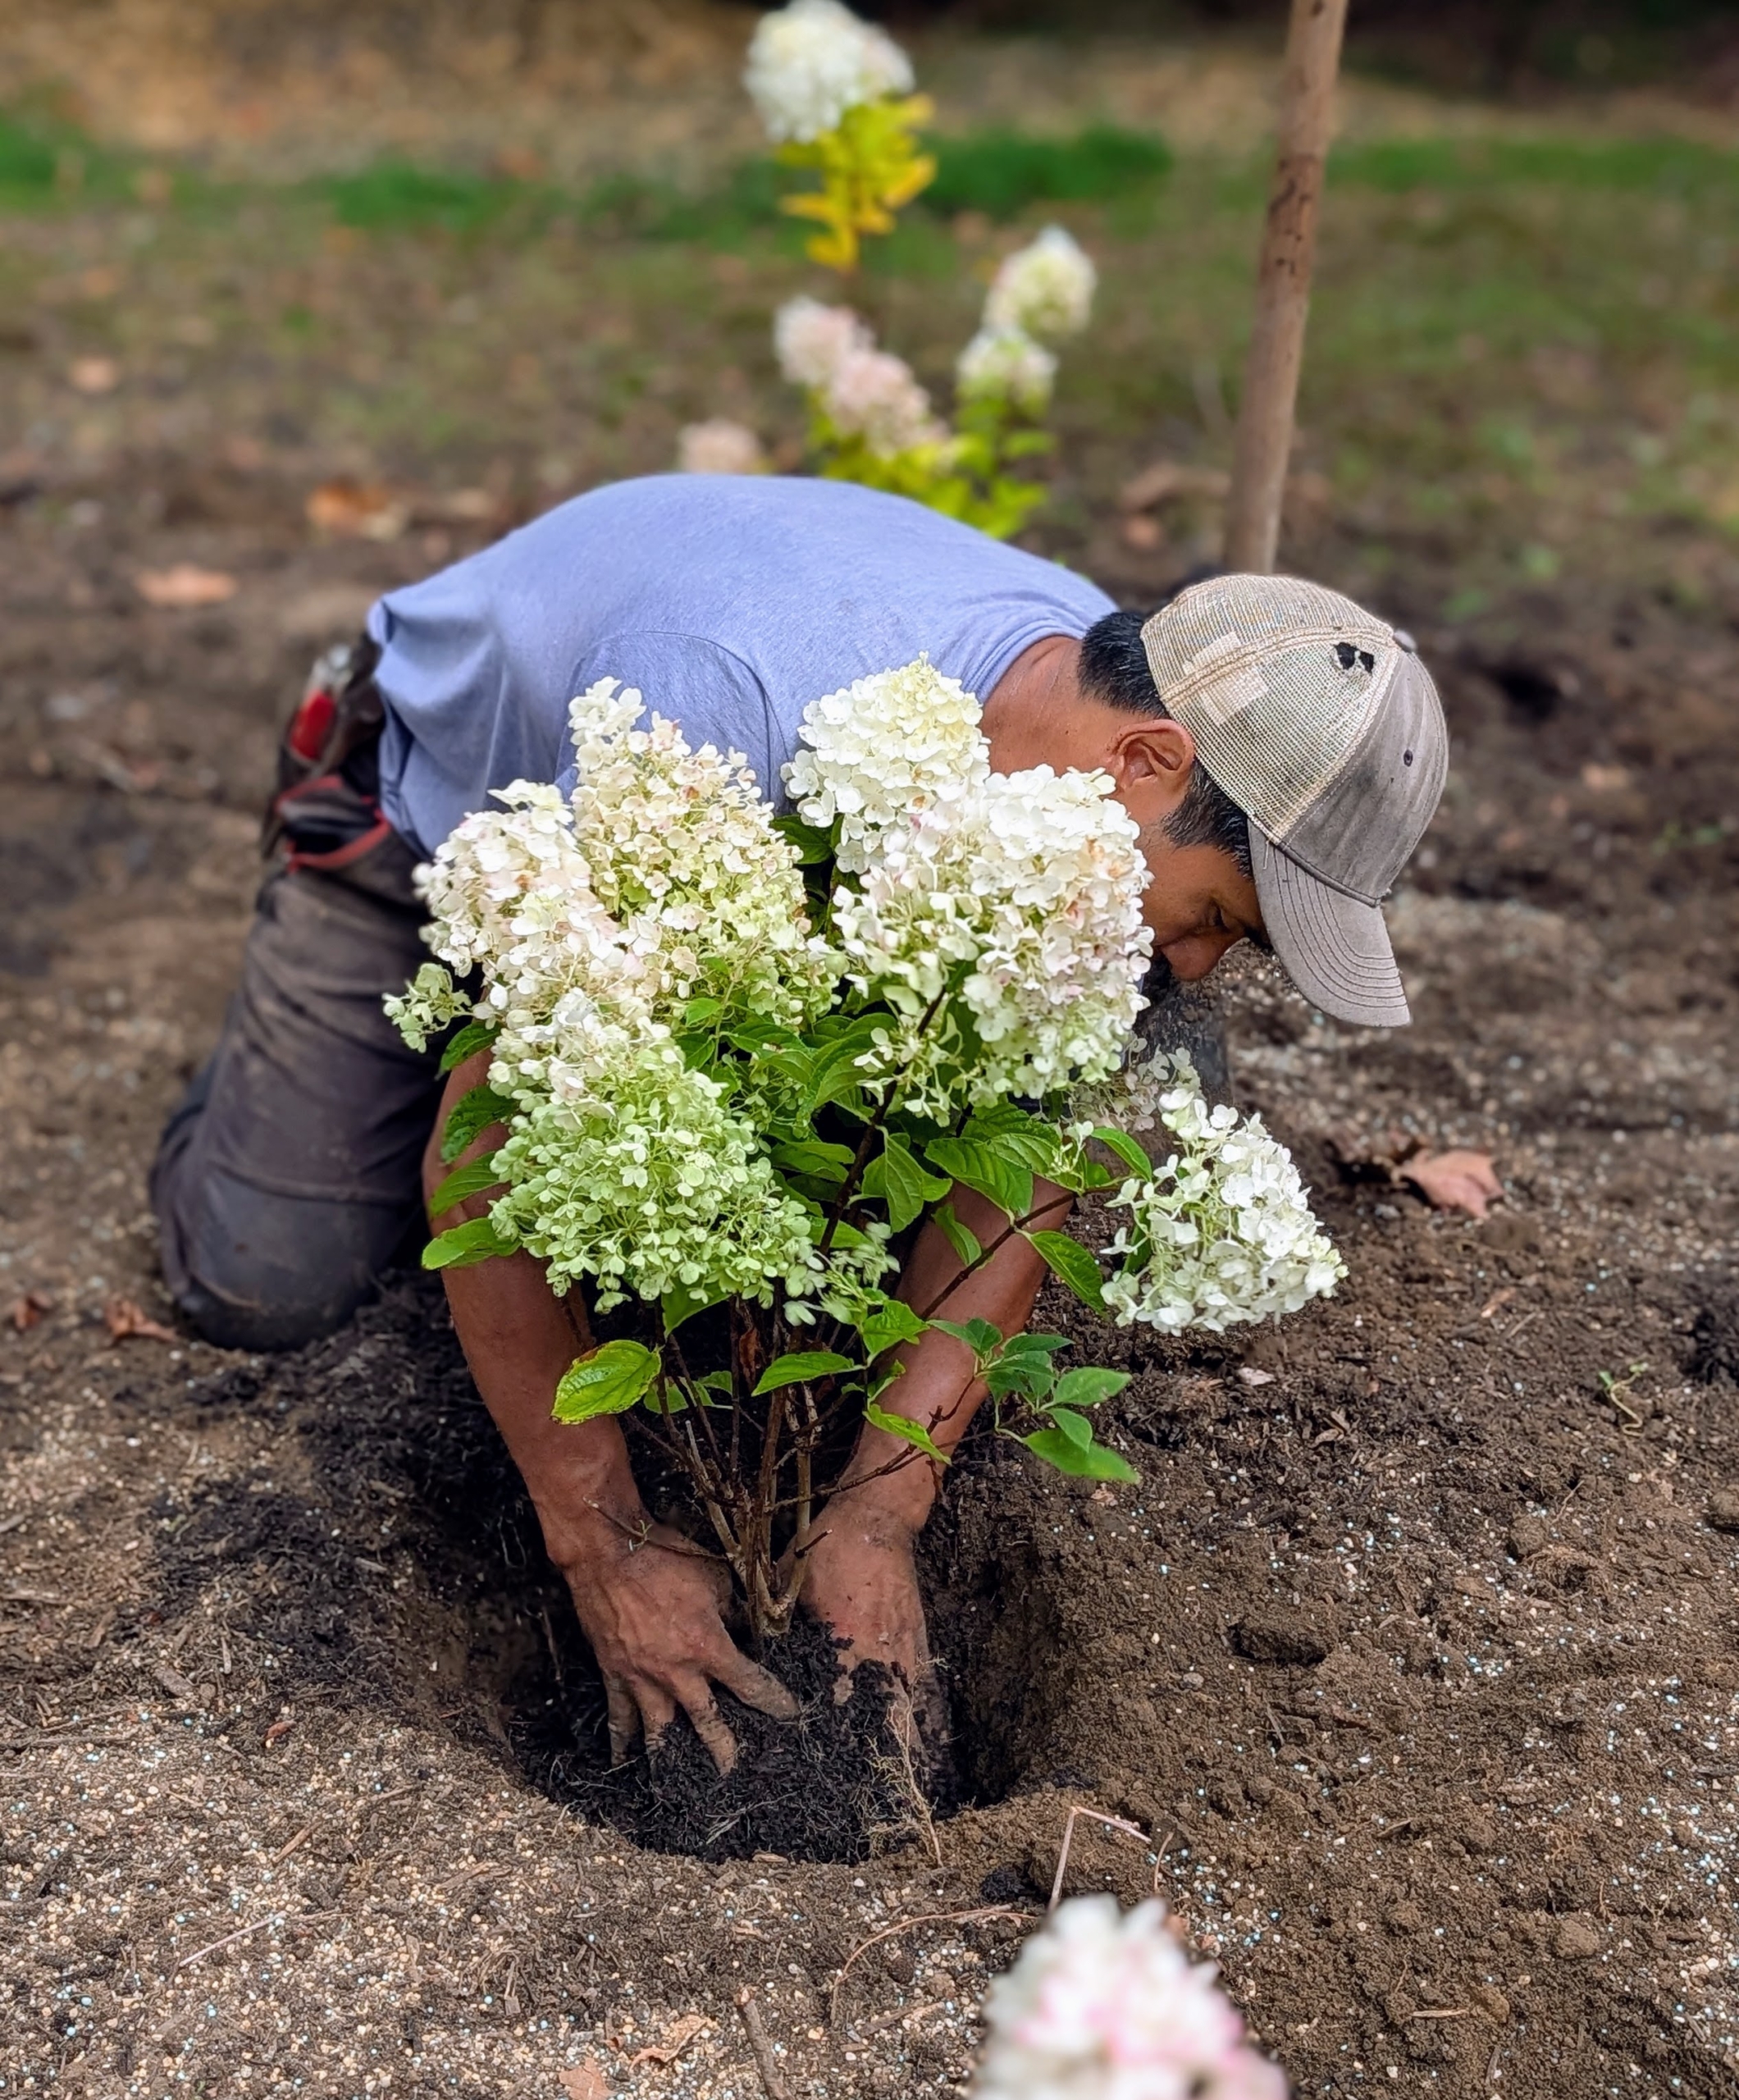
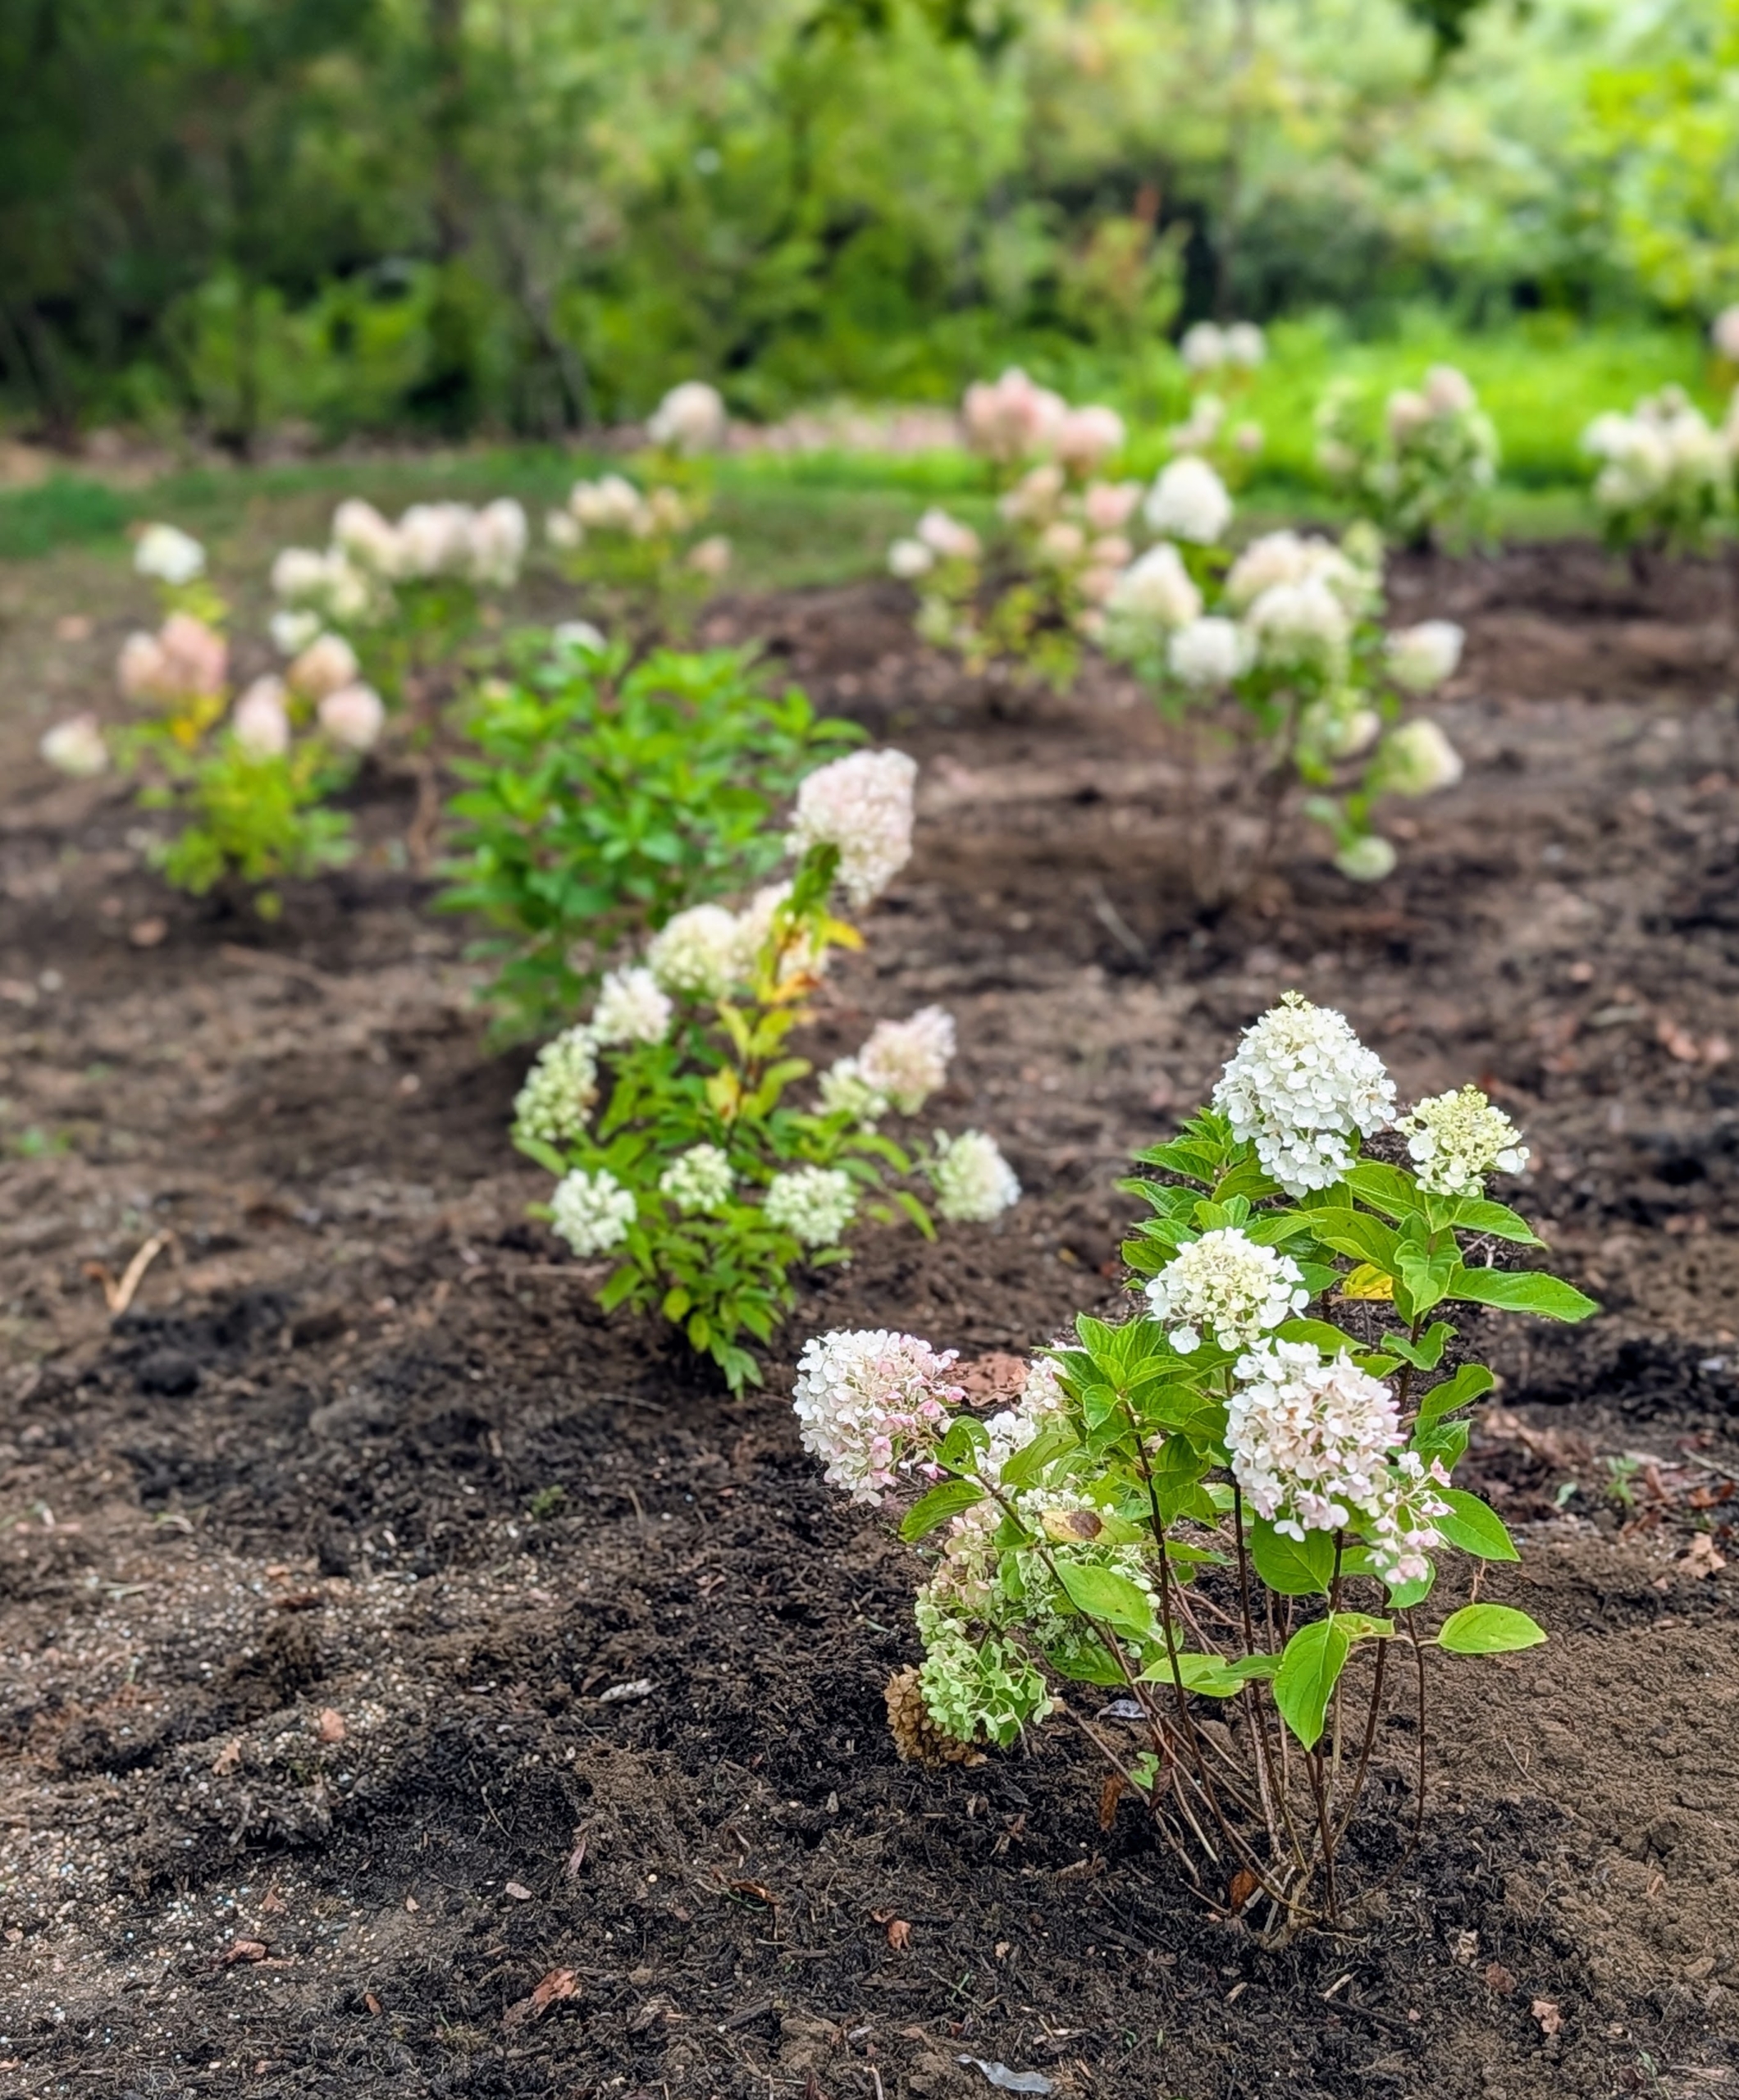
And here are the hydrangeas this week just before planting in this new garden bed.
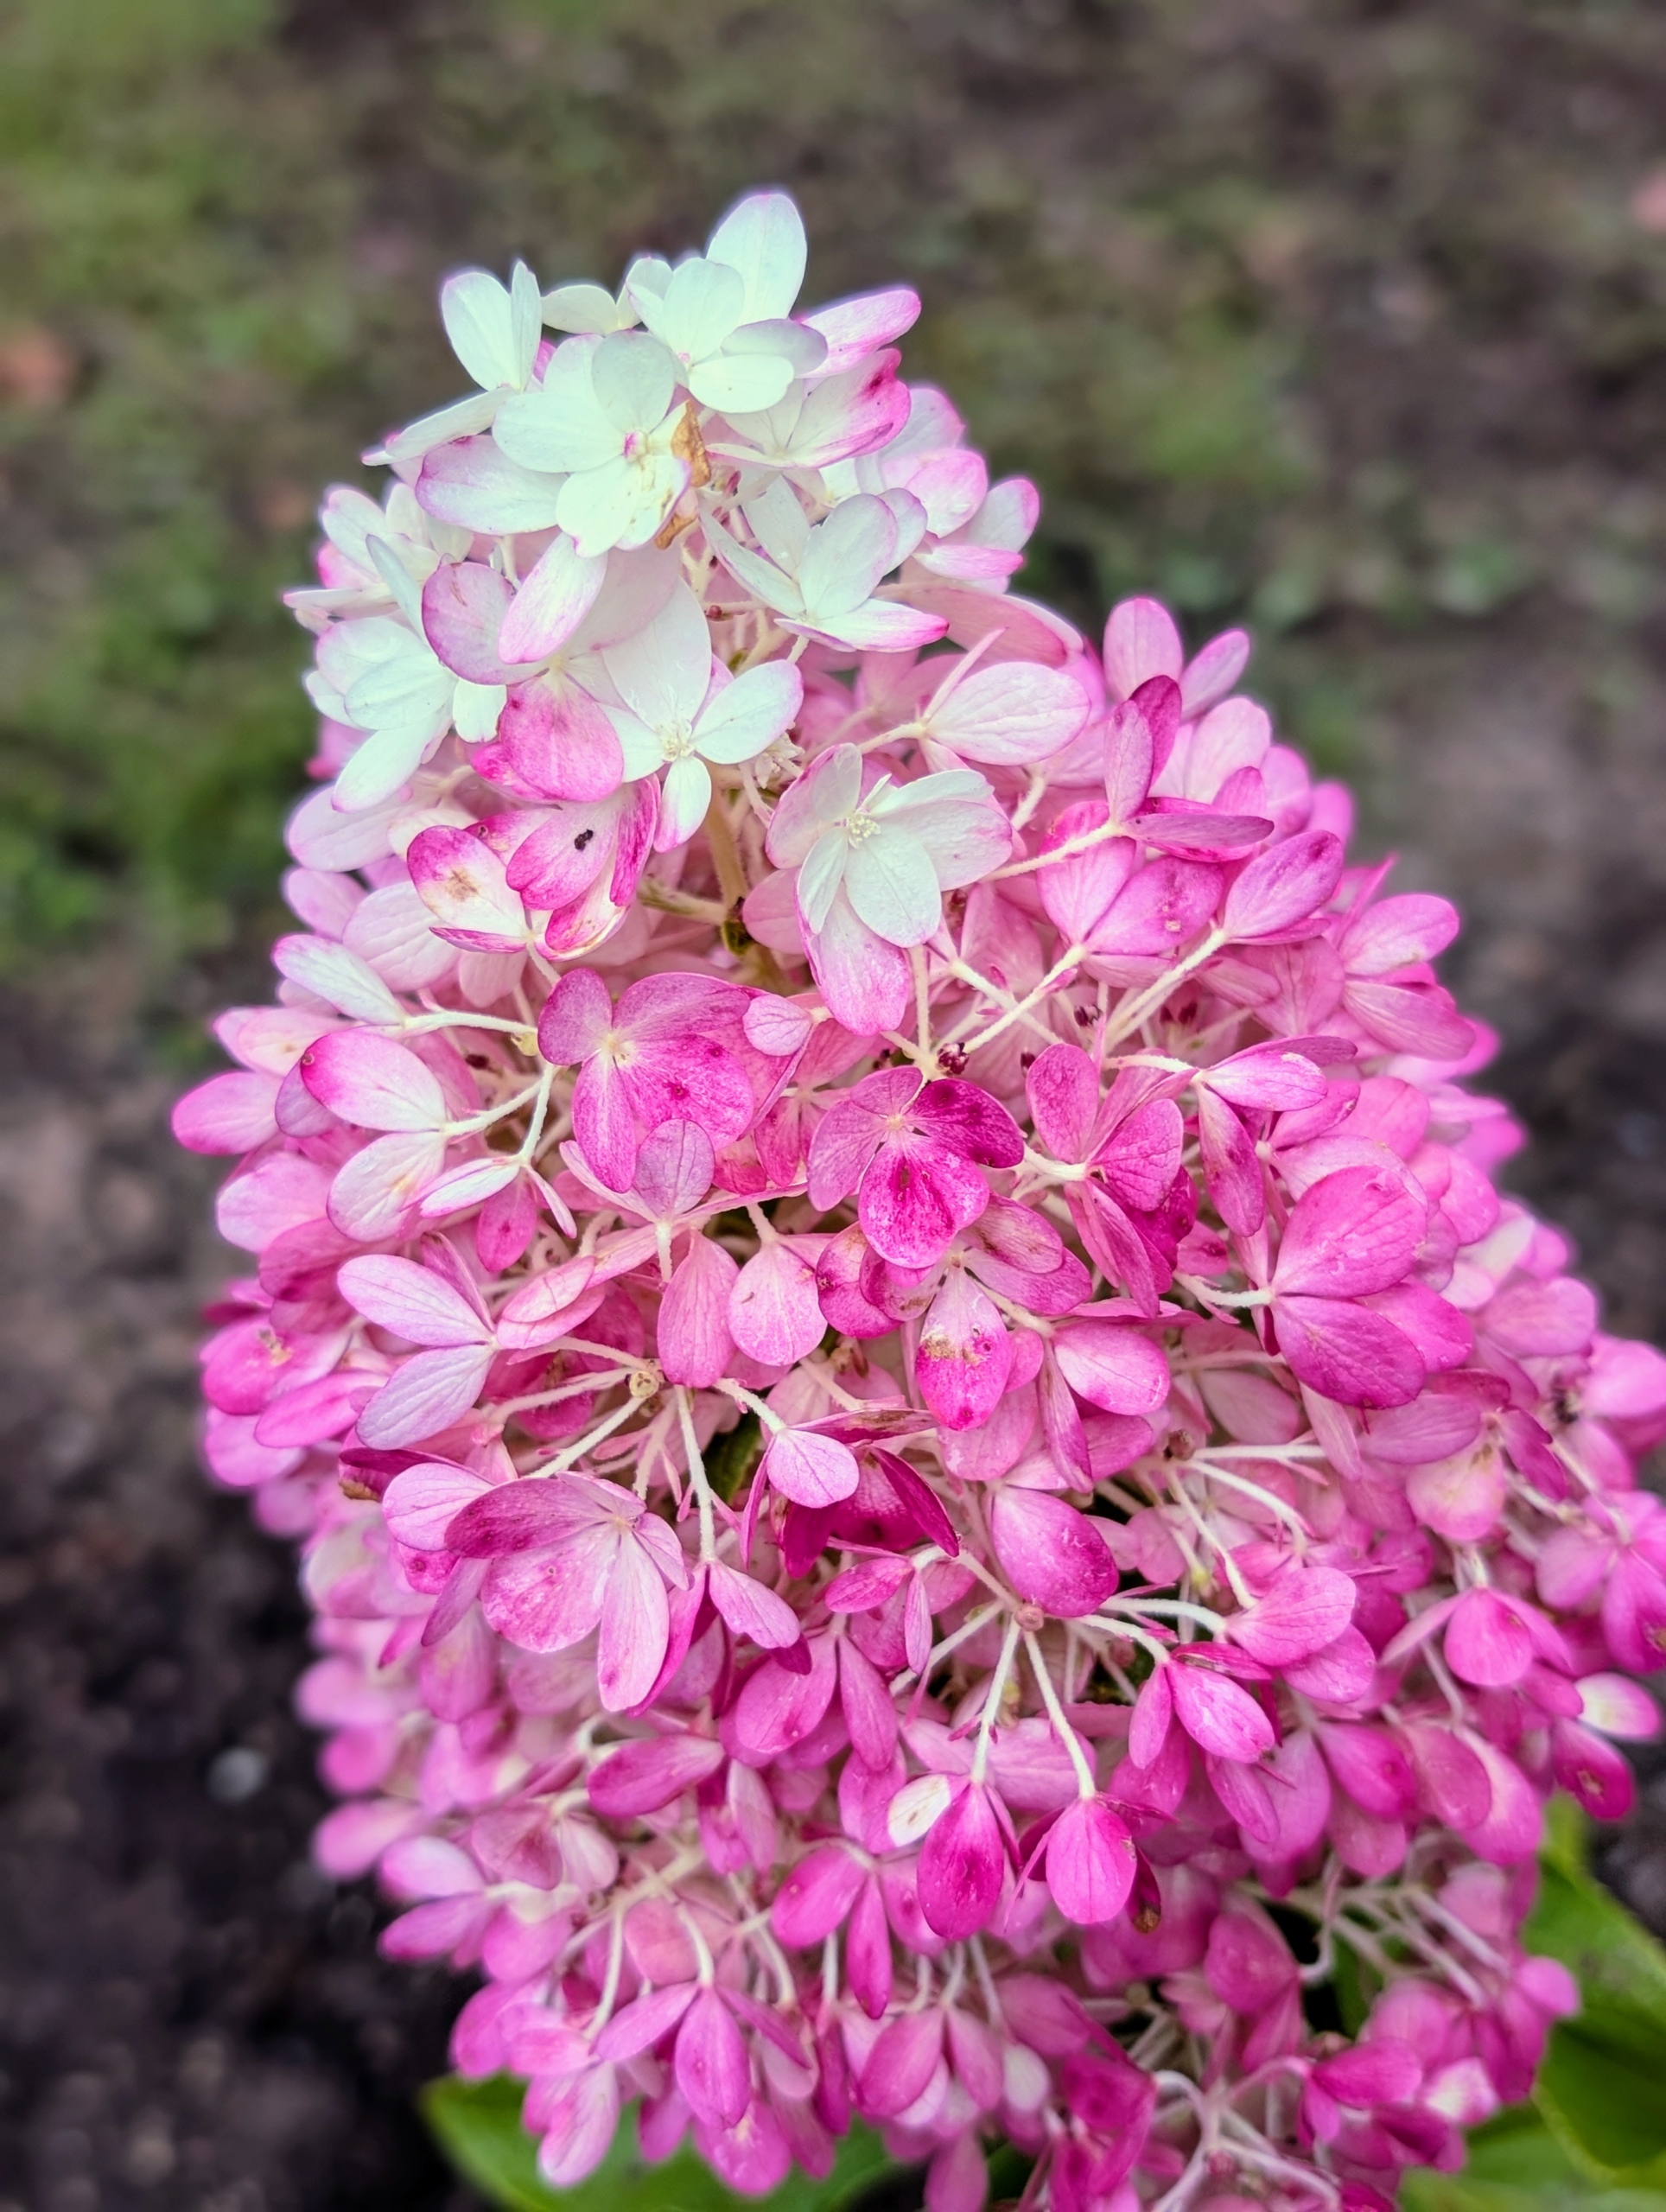
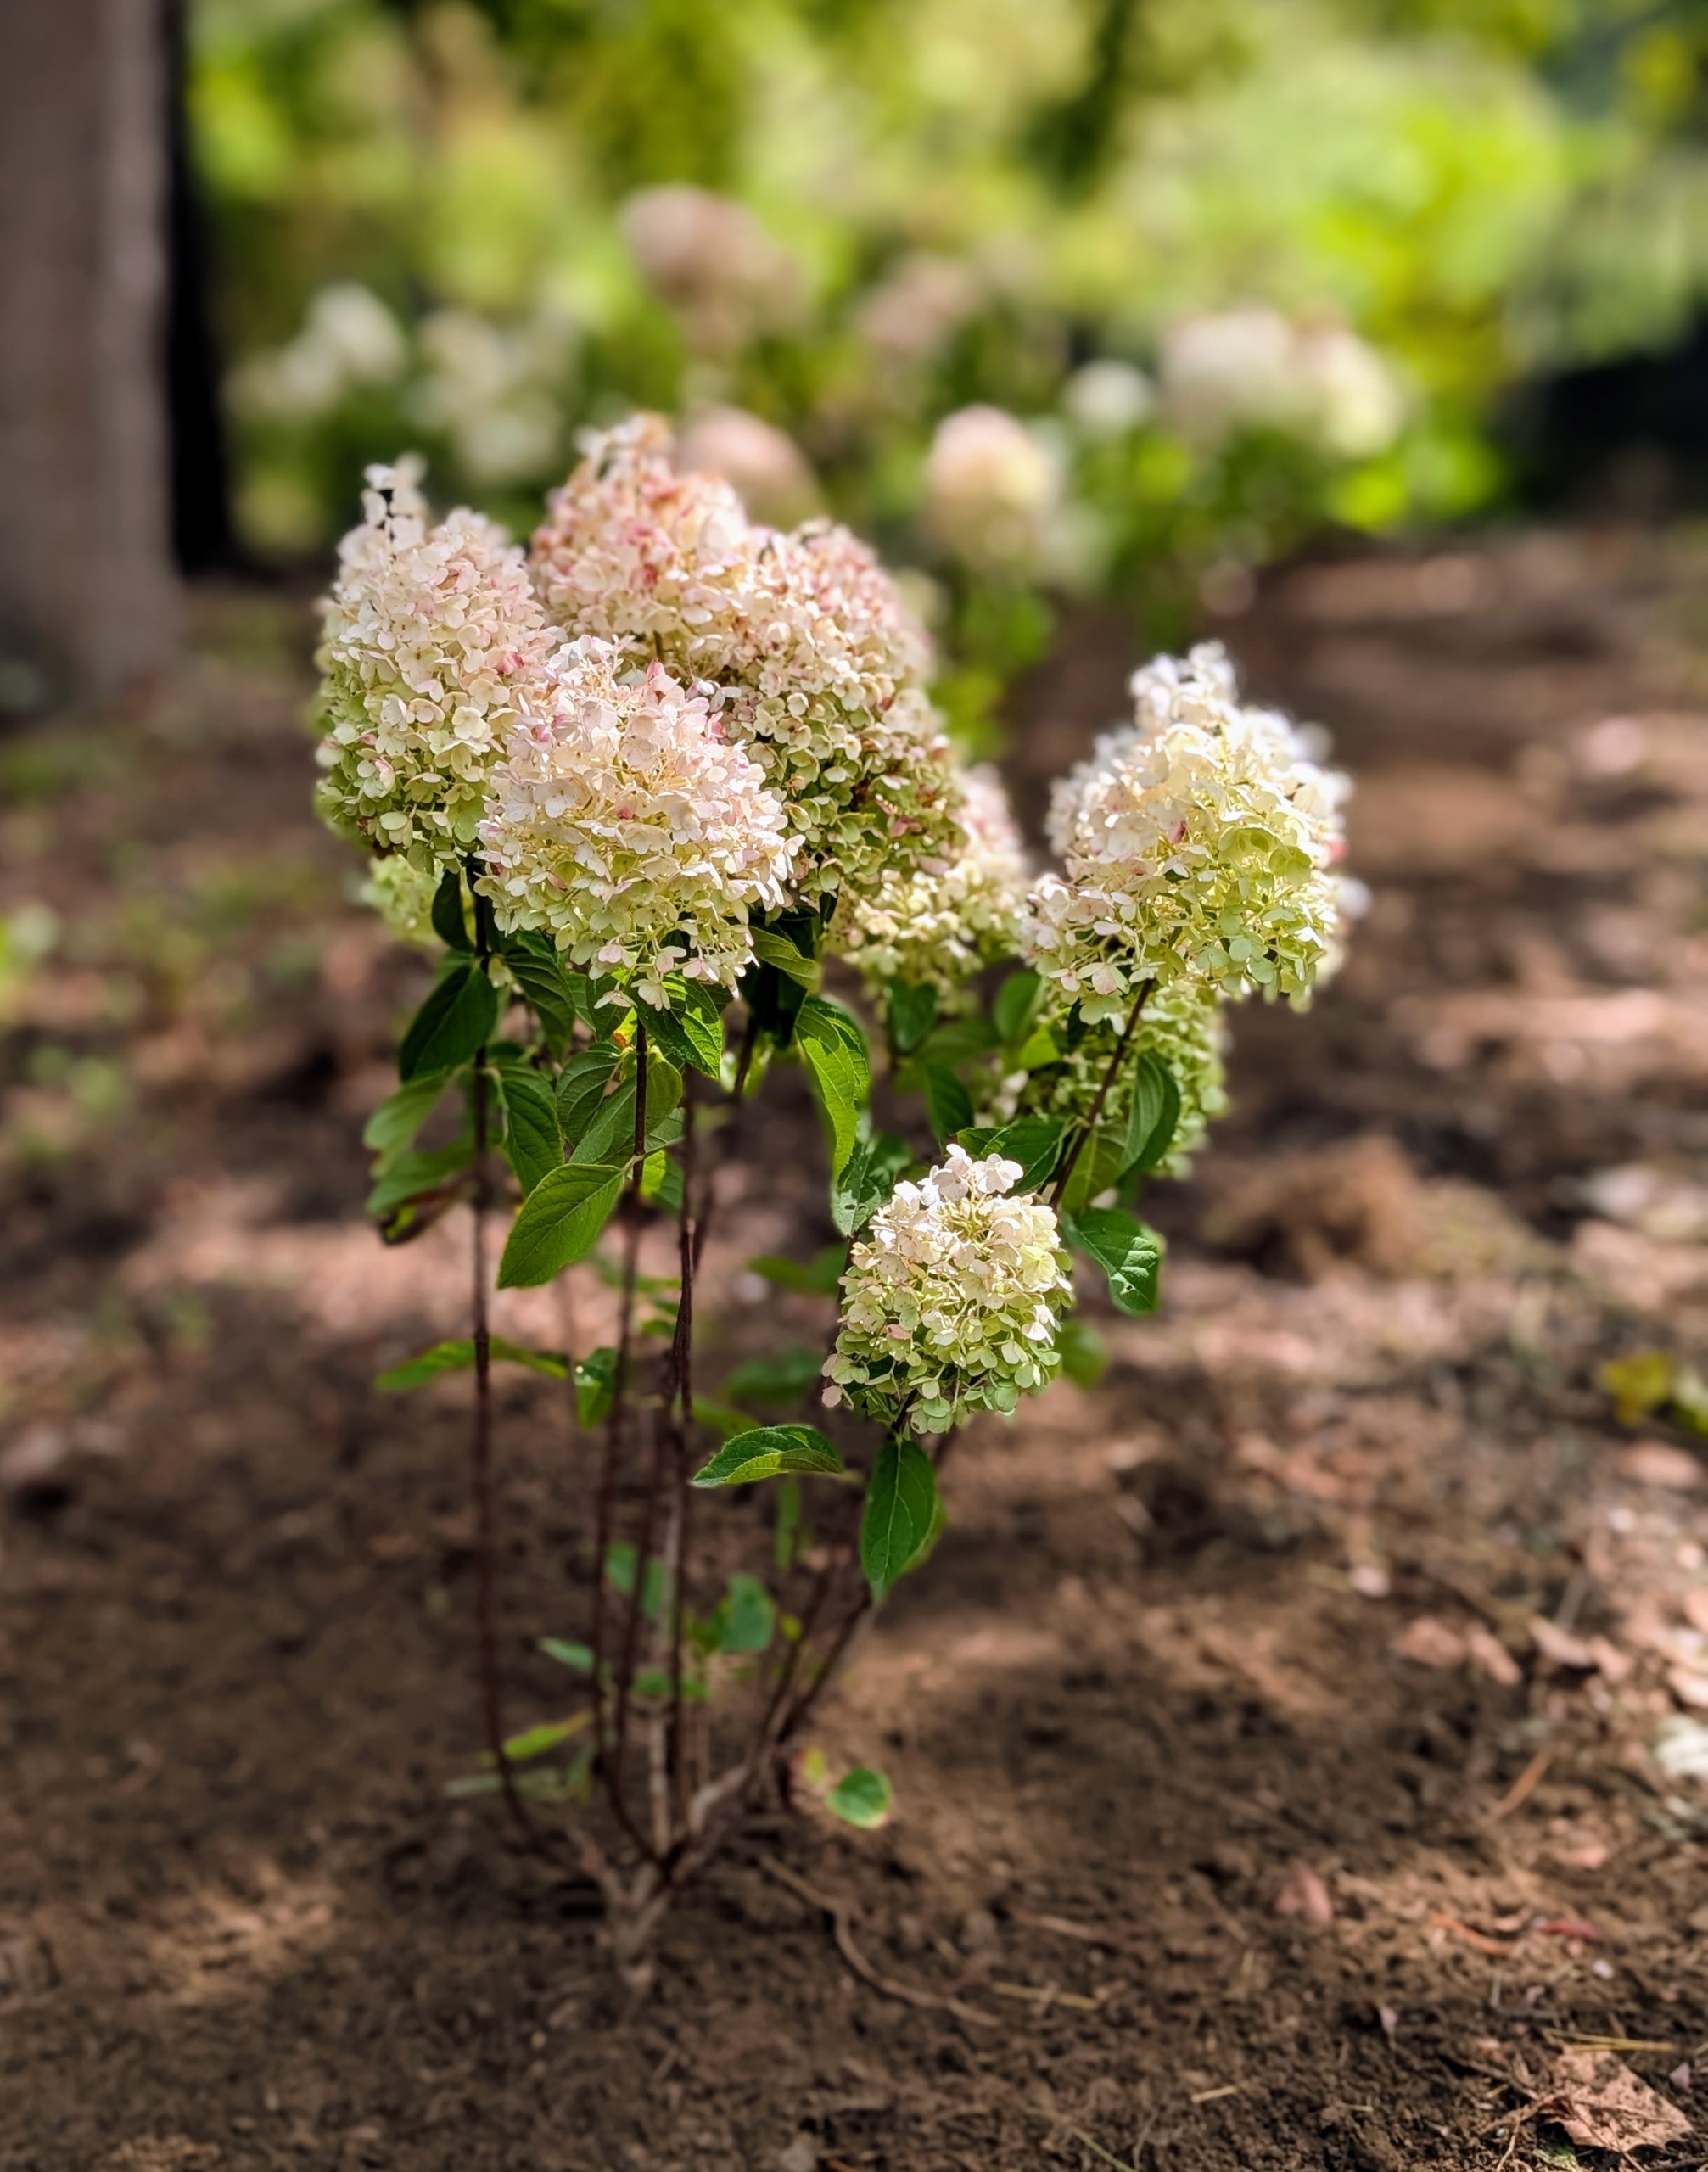
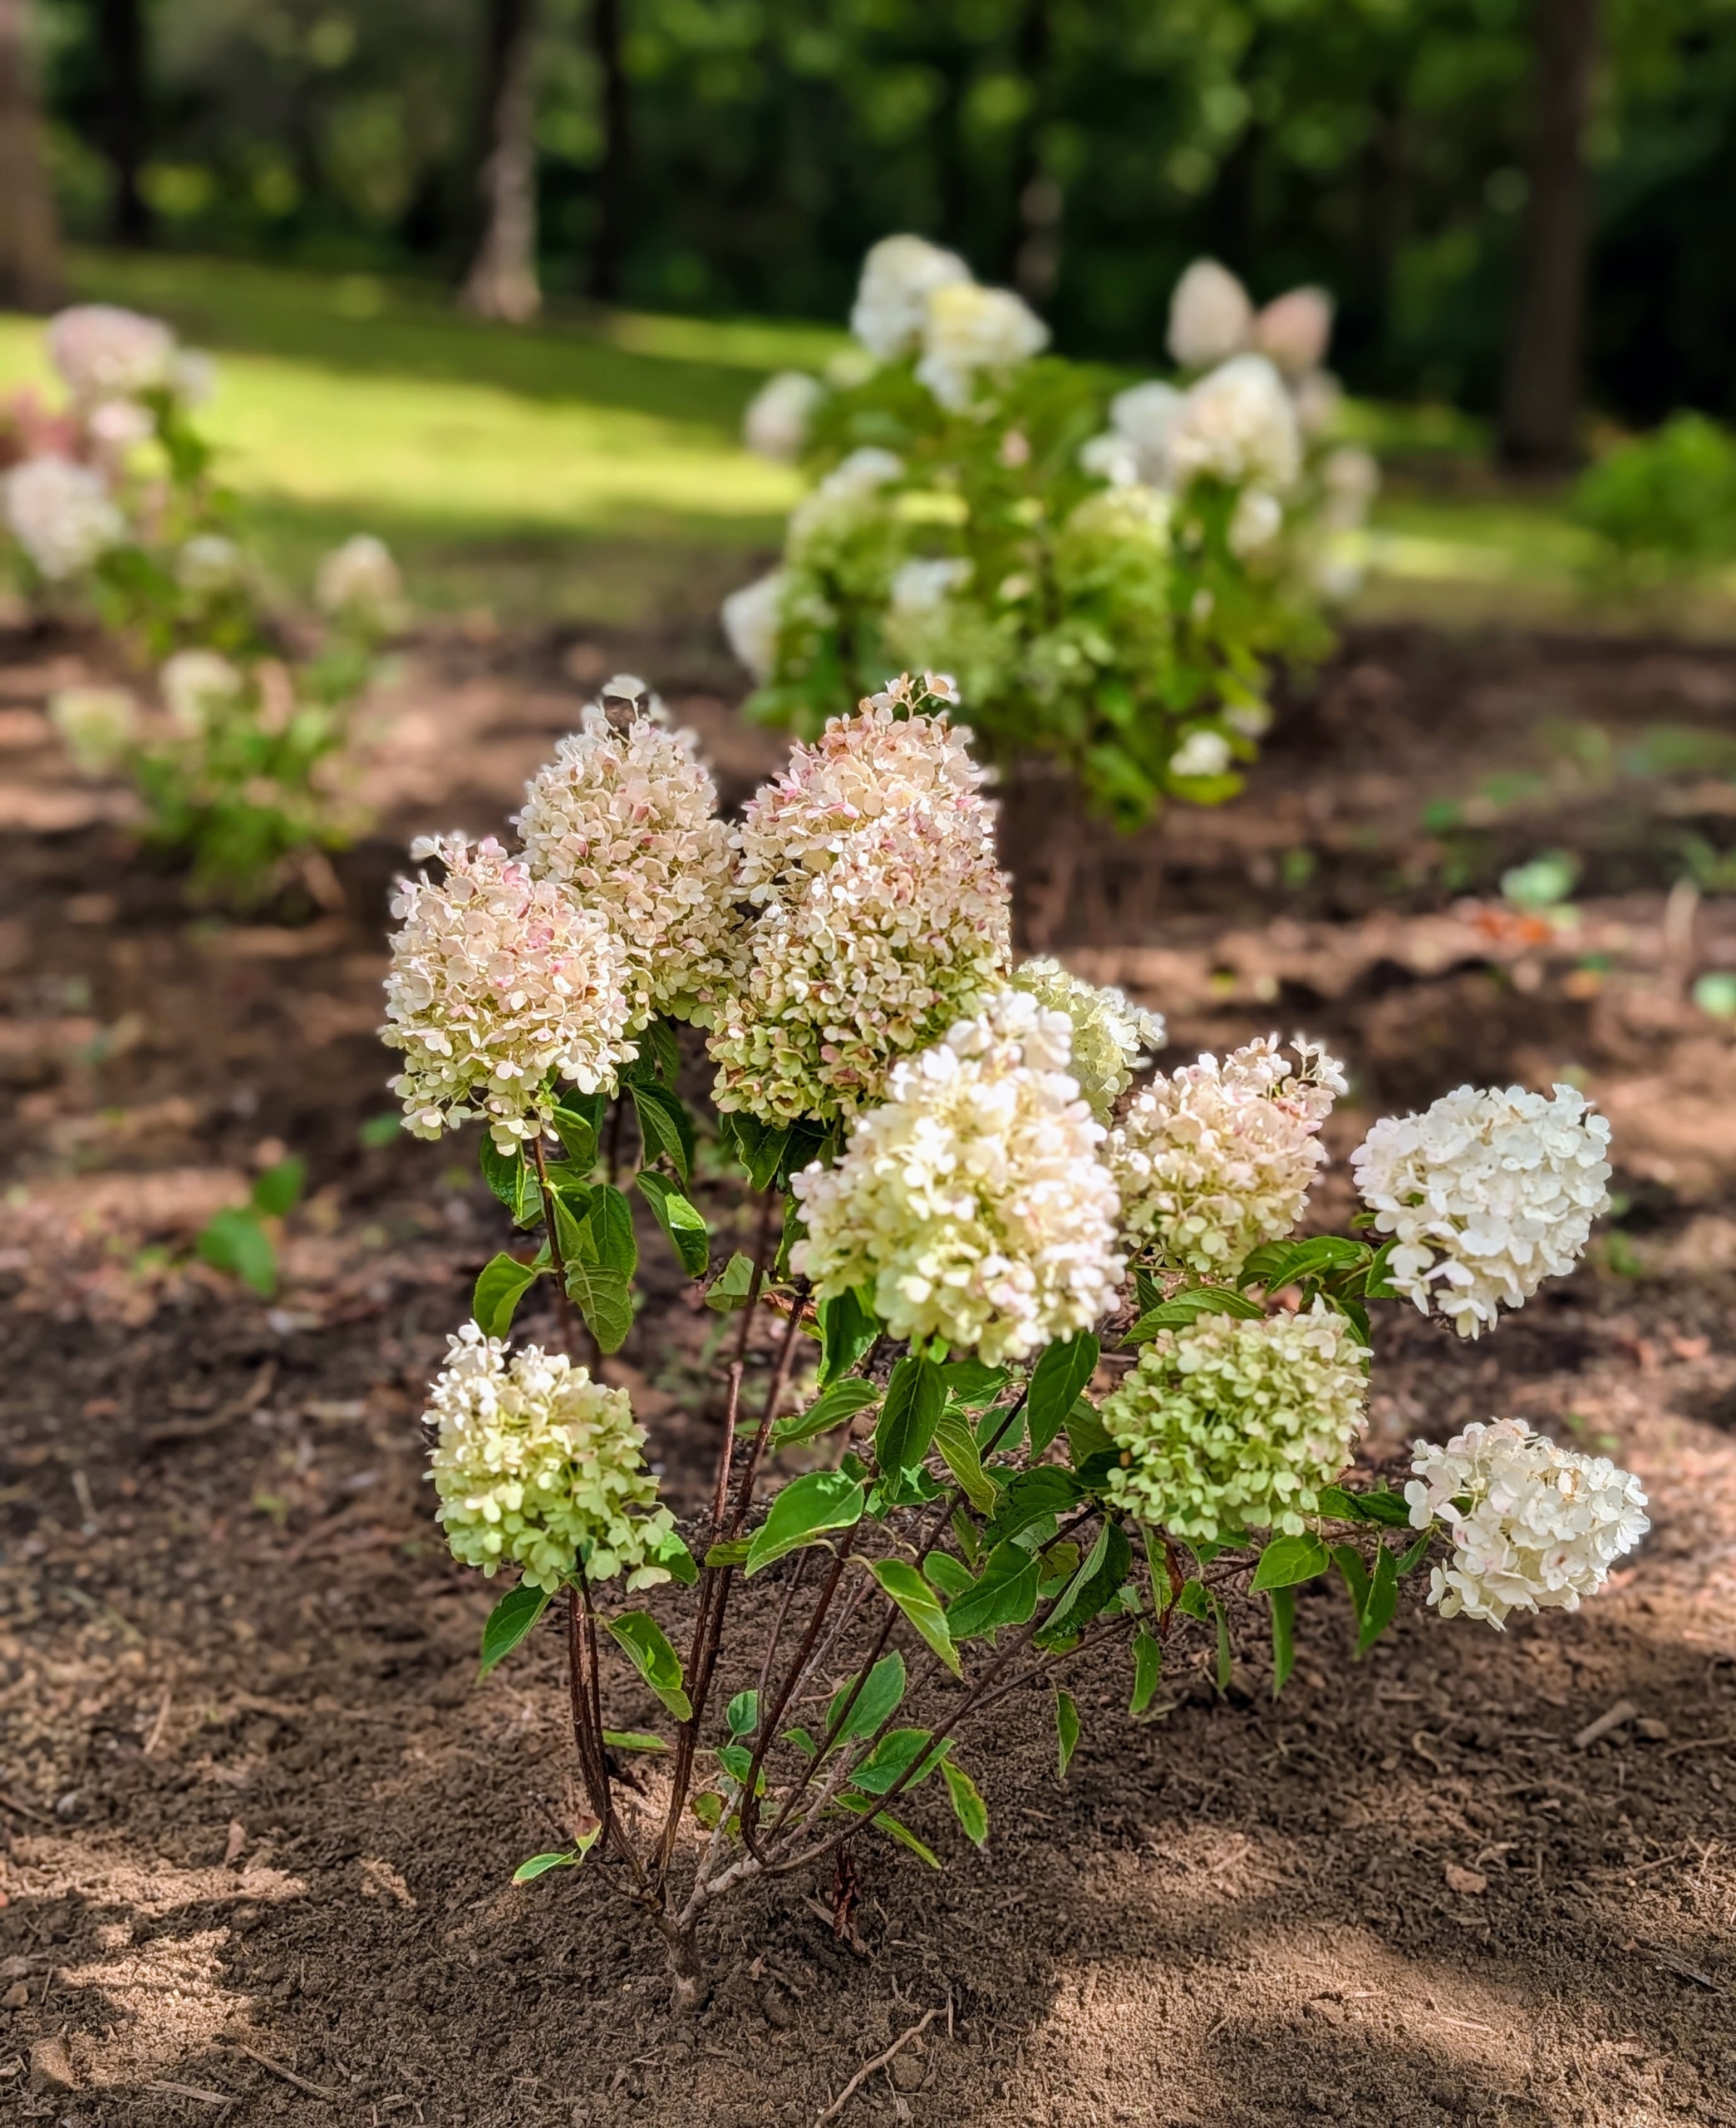
This variety features bright white flower panicles that bloom every year and age from light to dark antique pink. Strong stems keep the showy blooms from flopping over and the compact size fills in nicely when planted in numbers.
Here’s a closer look at a panicle bloom which contains both light and dark pink.
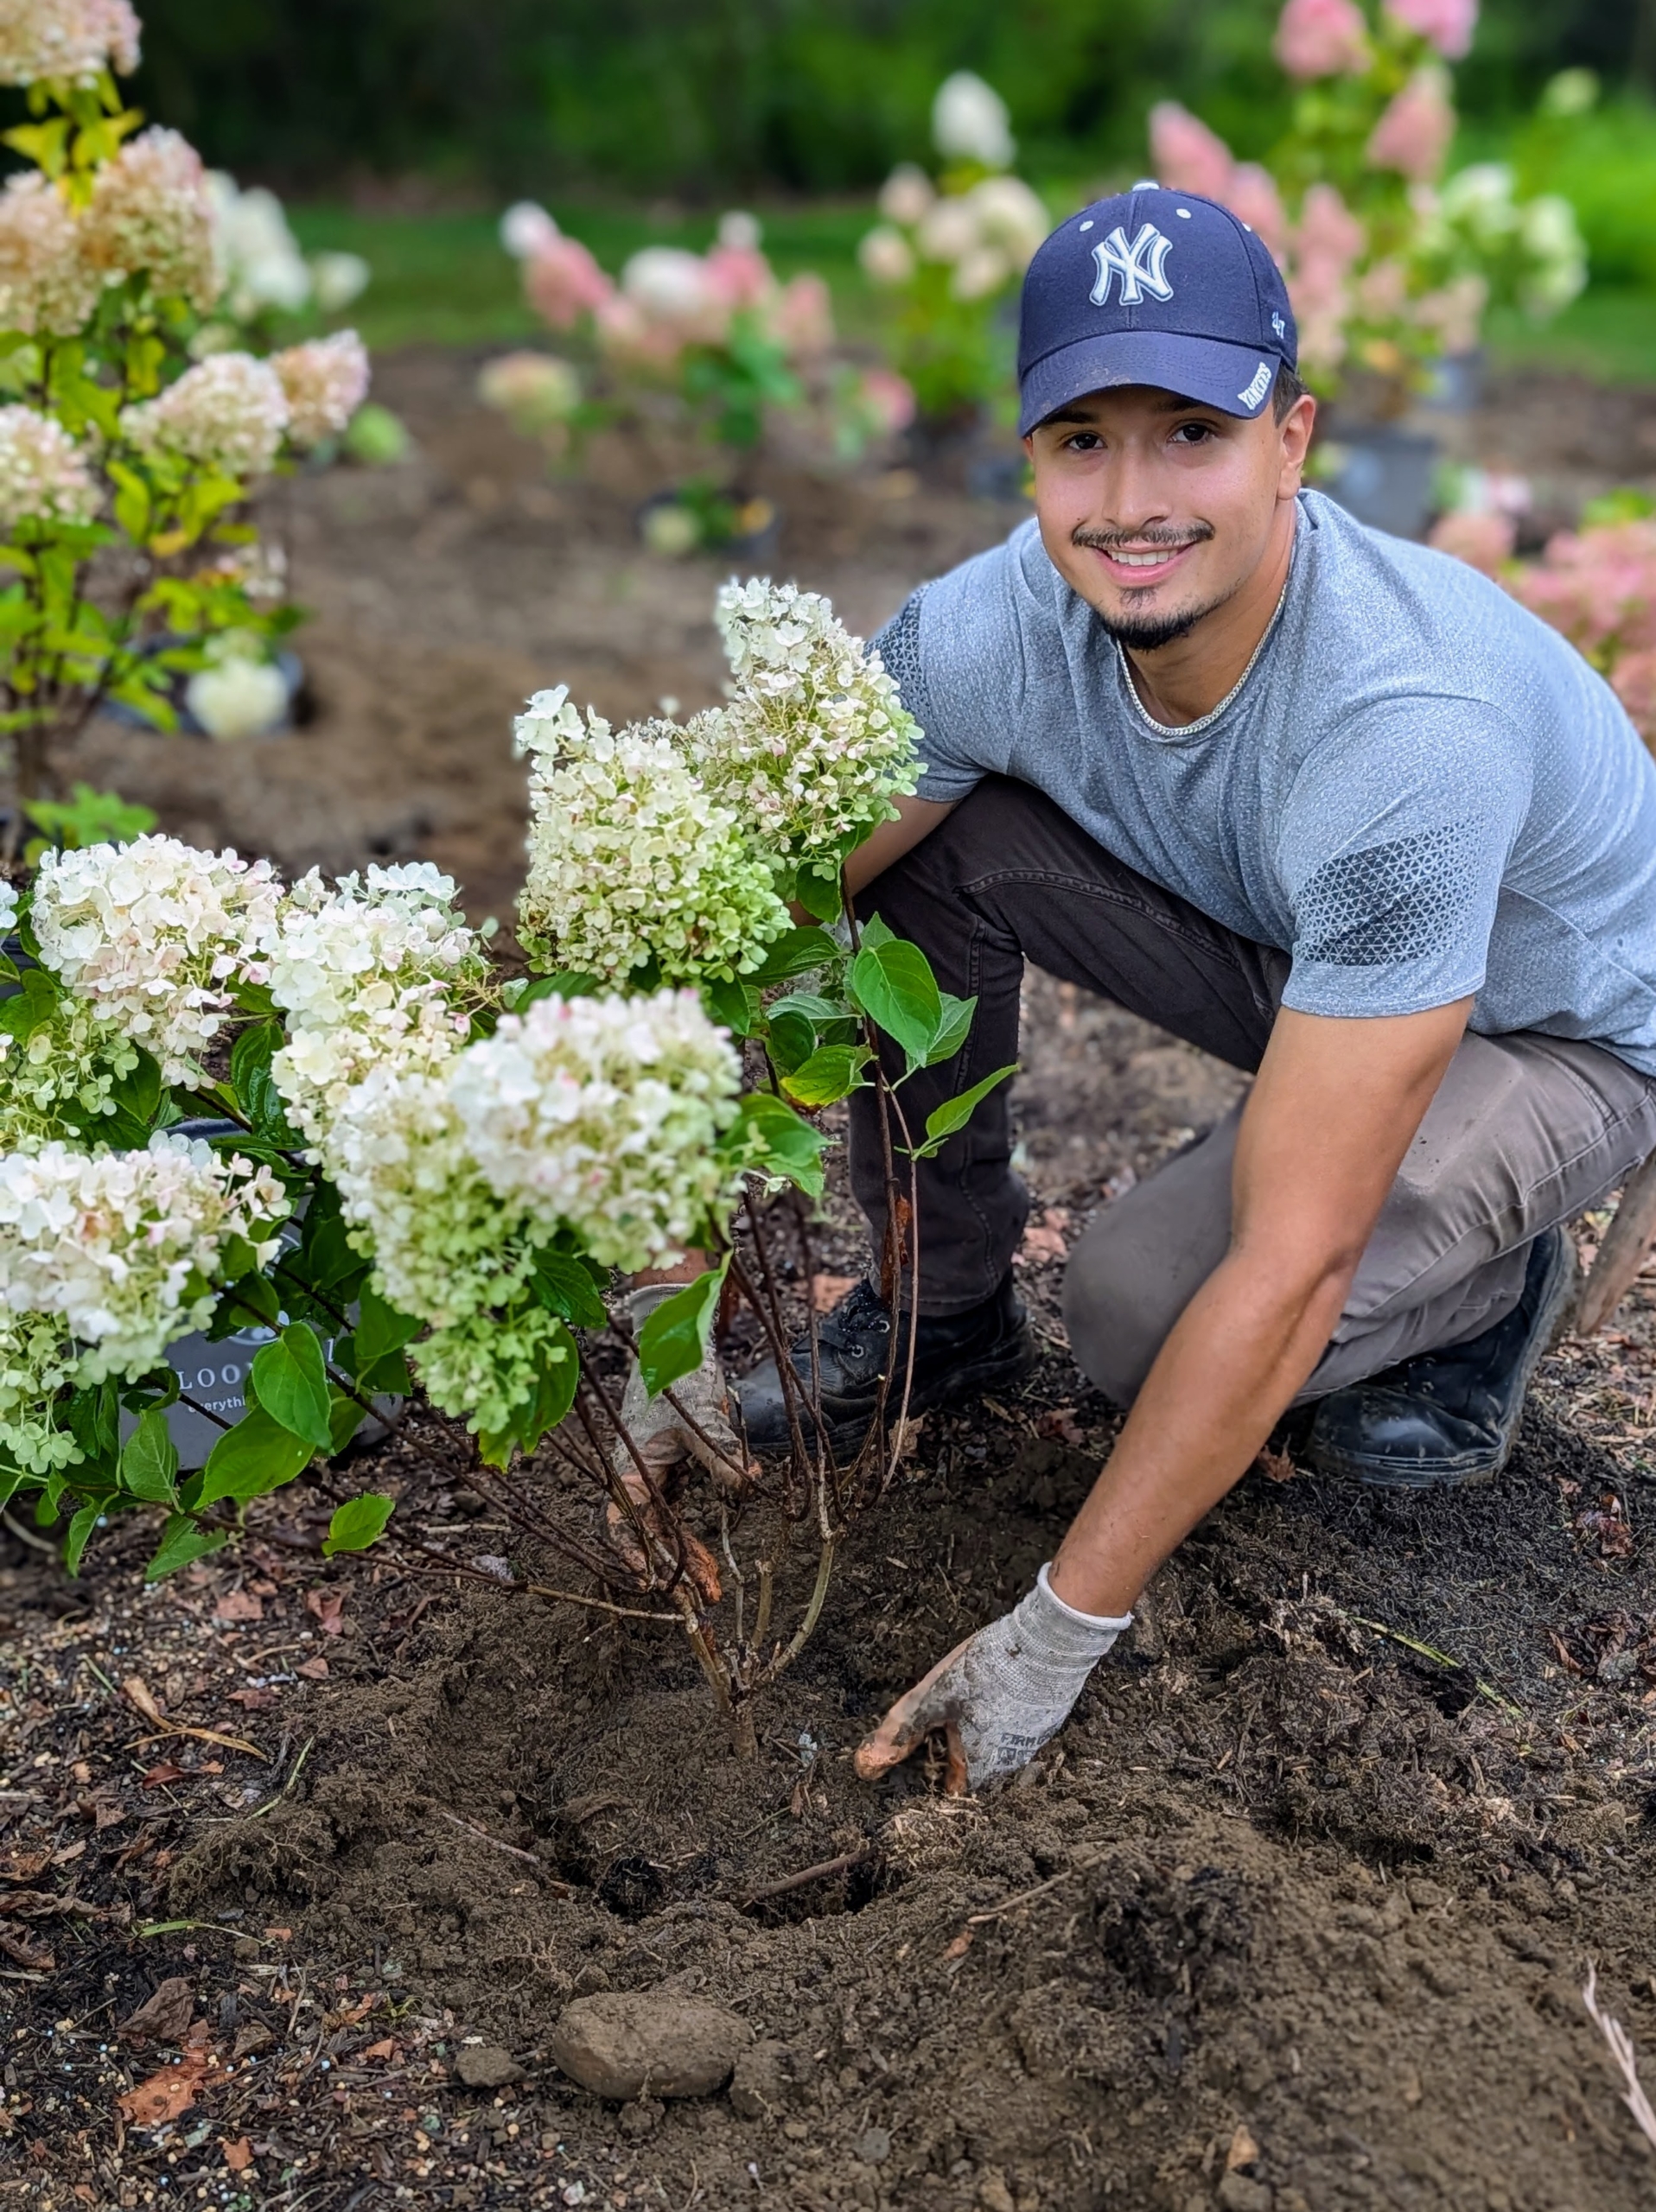
Ryan focuses on placing the plants in the bed. As with all new plants, the potted hydrangeas are carefully positioned where they will be planted to ensure good spacing and arrangement. Hydrangeas should be at least four feet apart when planted in groups.
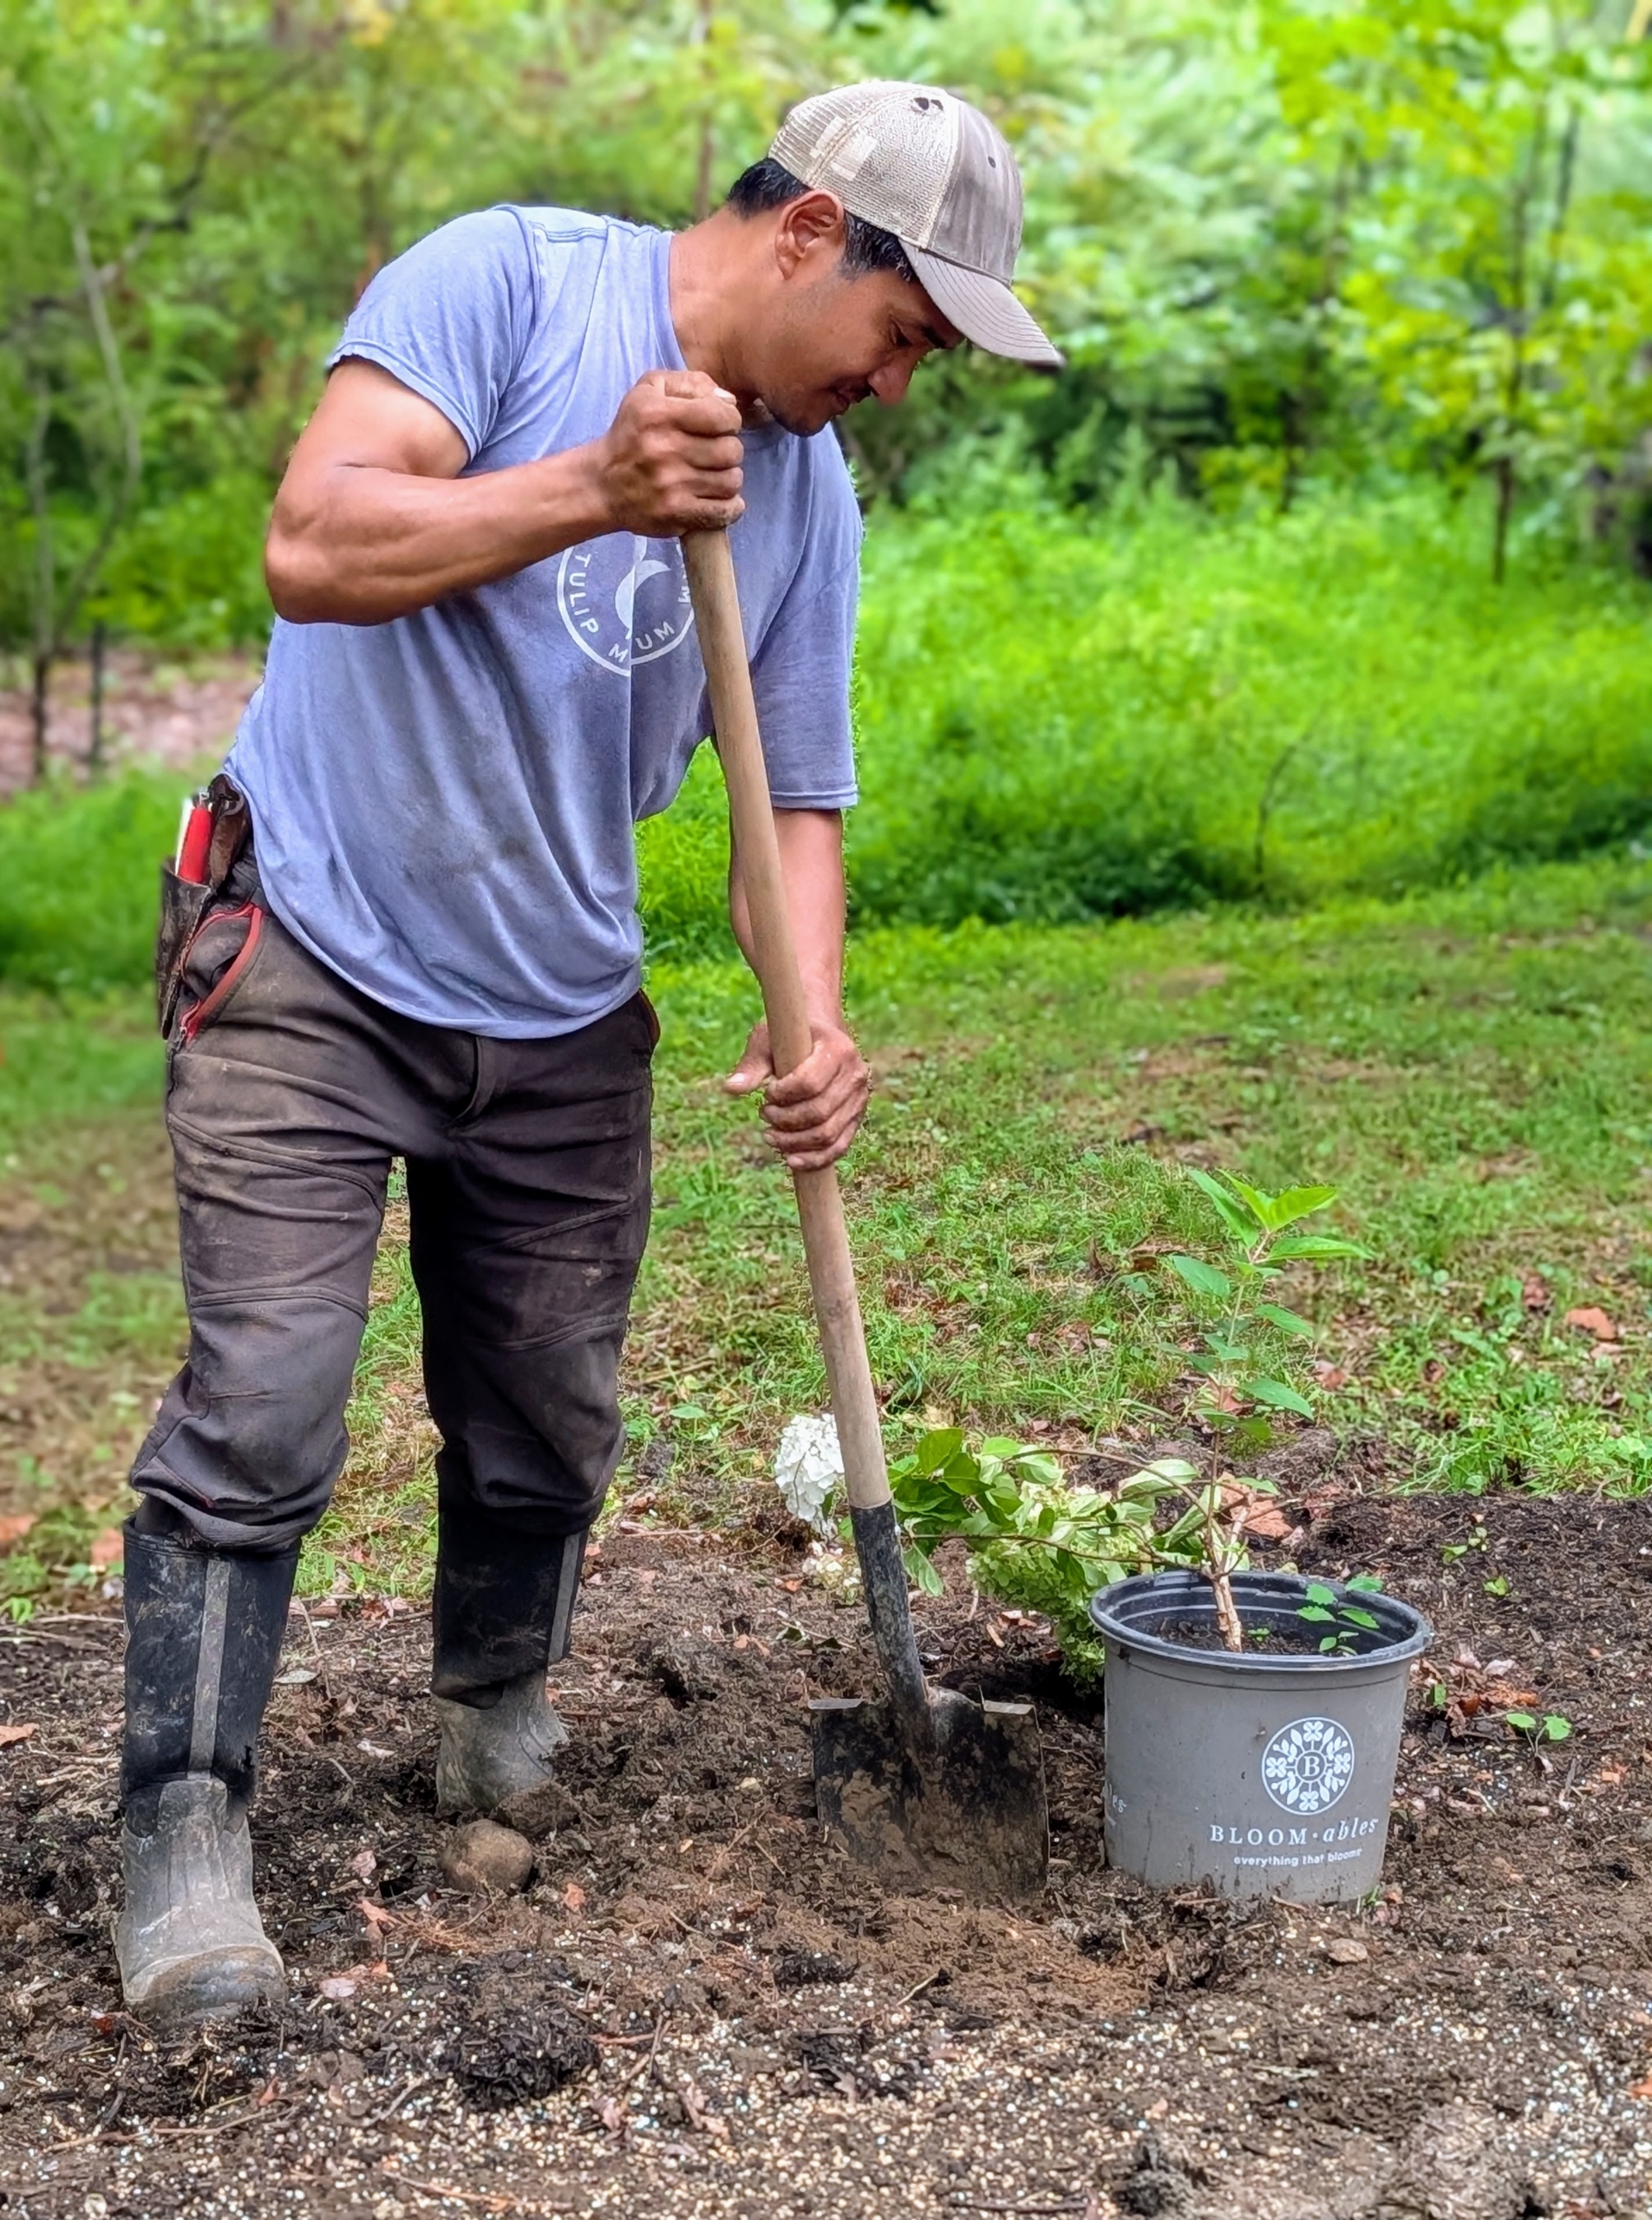
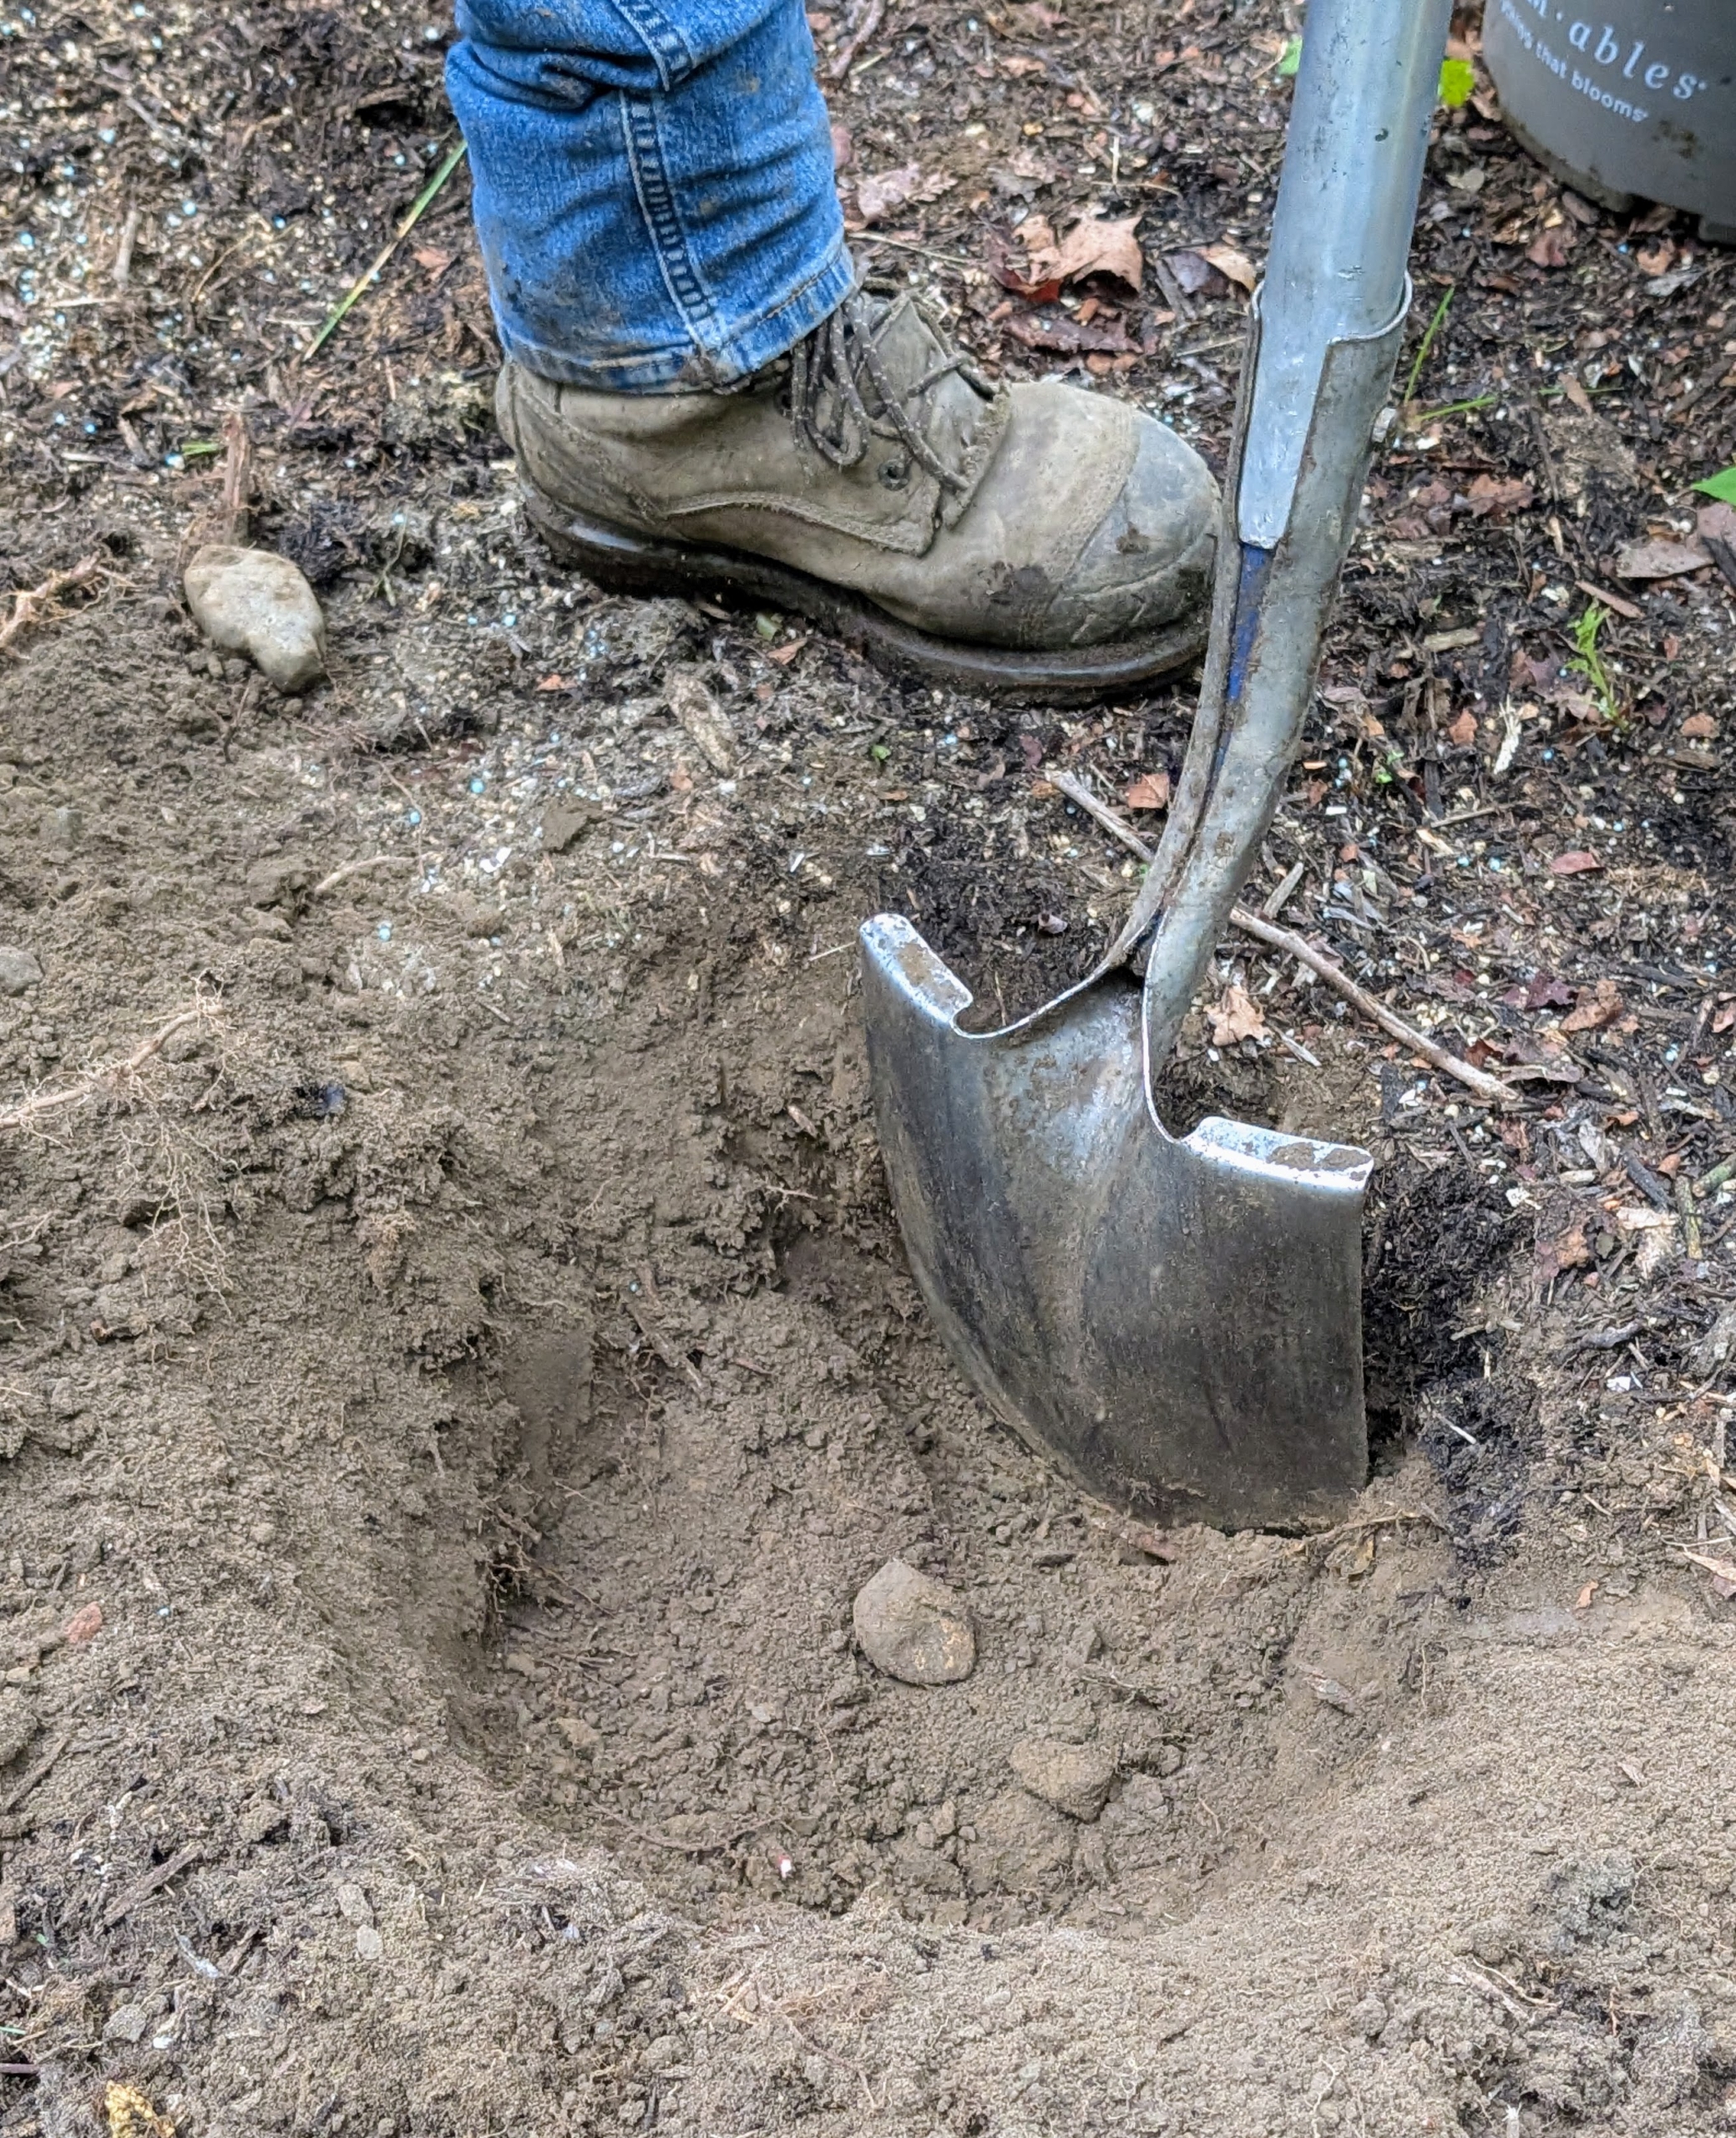
It was all hands on deck to get the 90 hydrangeas planted before lunch. Here’s Pasang digging one of the holes.
The crew works in a production line process. The holes are dug first before any planting begins. Placing the plants in their designated holes also helps to keep track of the holes dug.
Each hole should always be twice as wide as the plant’s root ball and several inches deeper than the original pot. This ensures that the roots have enough room to grow and spread properly.
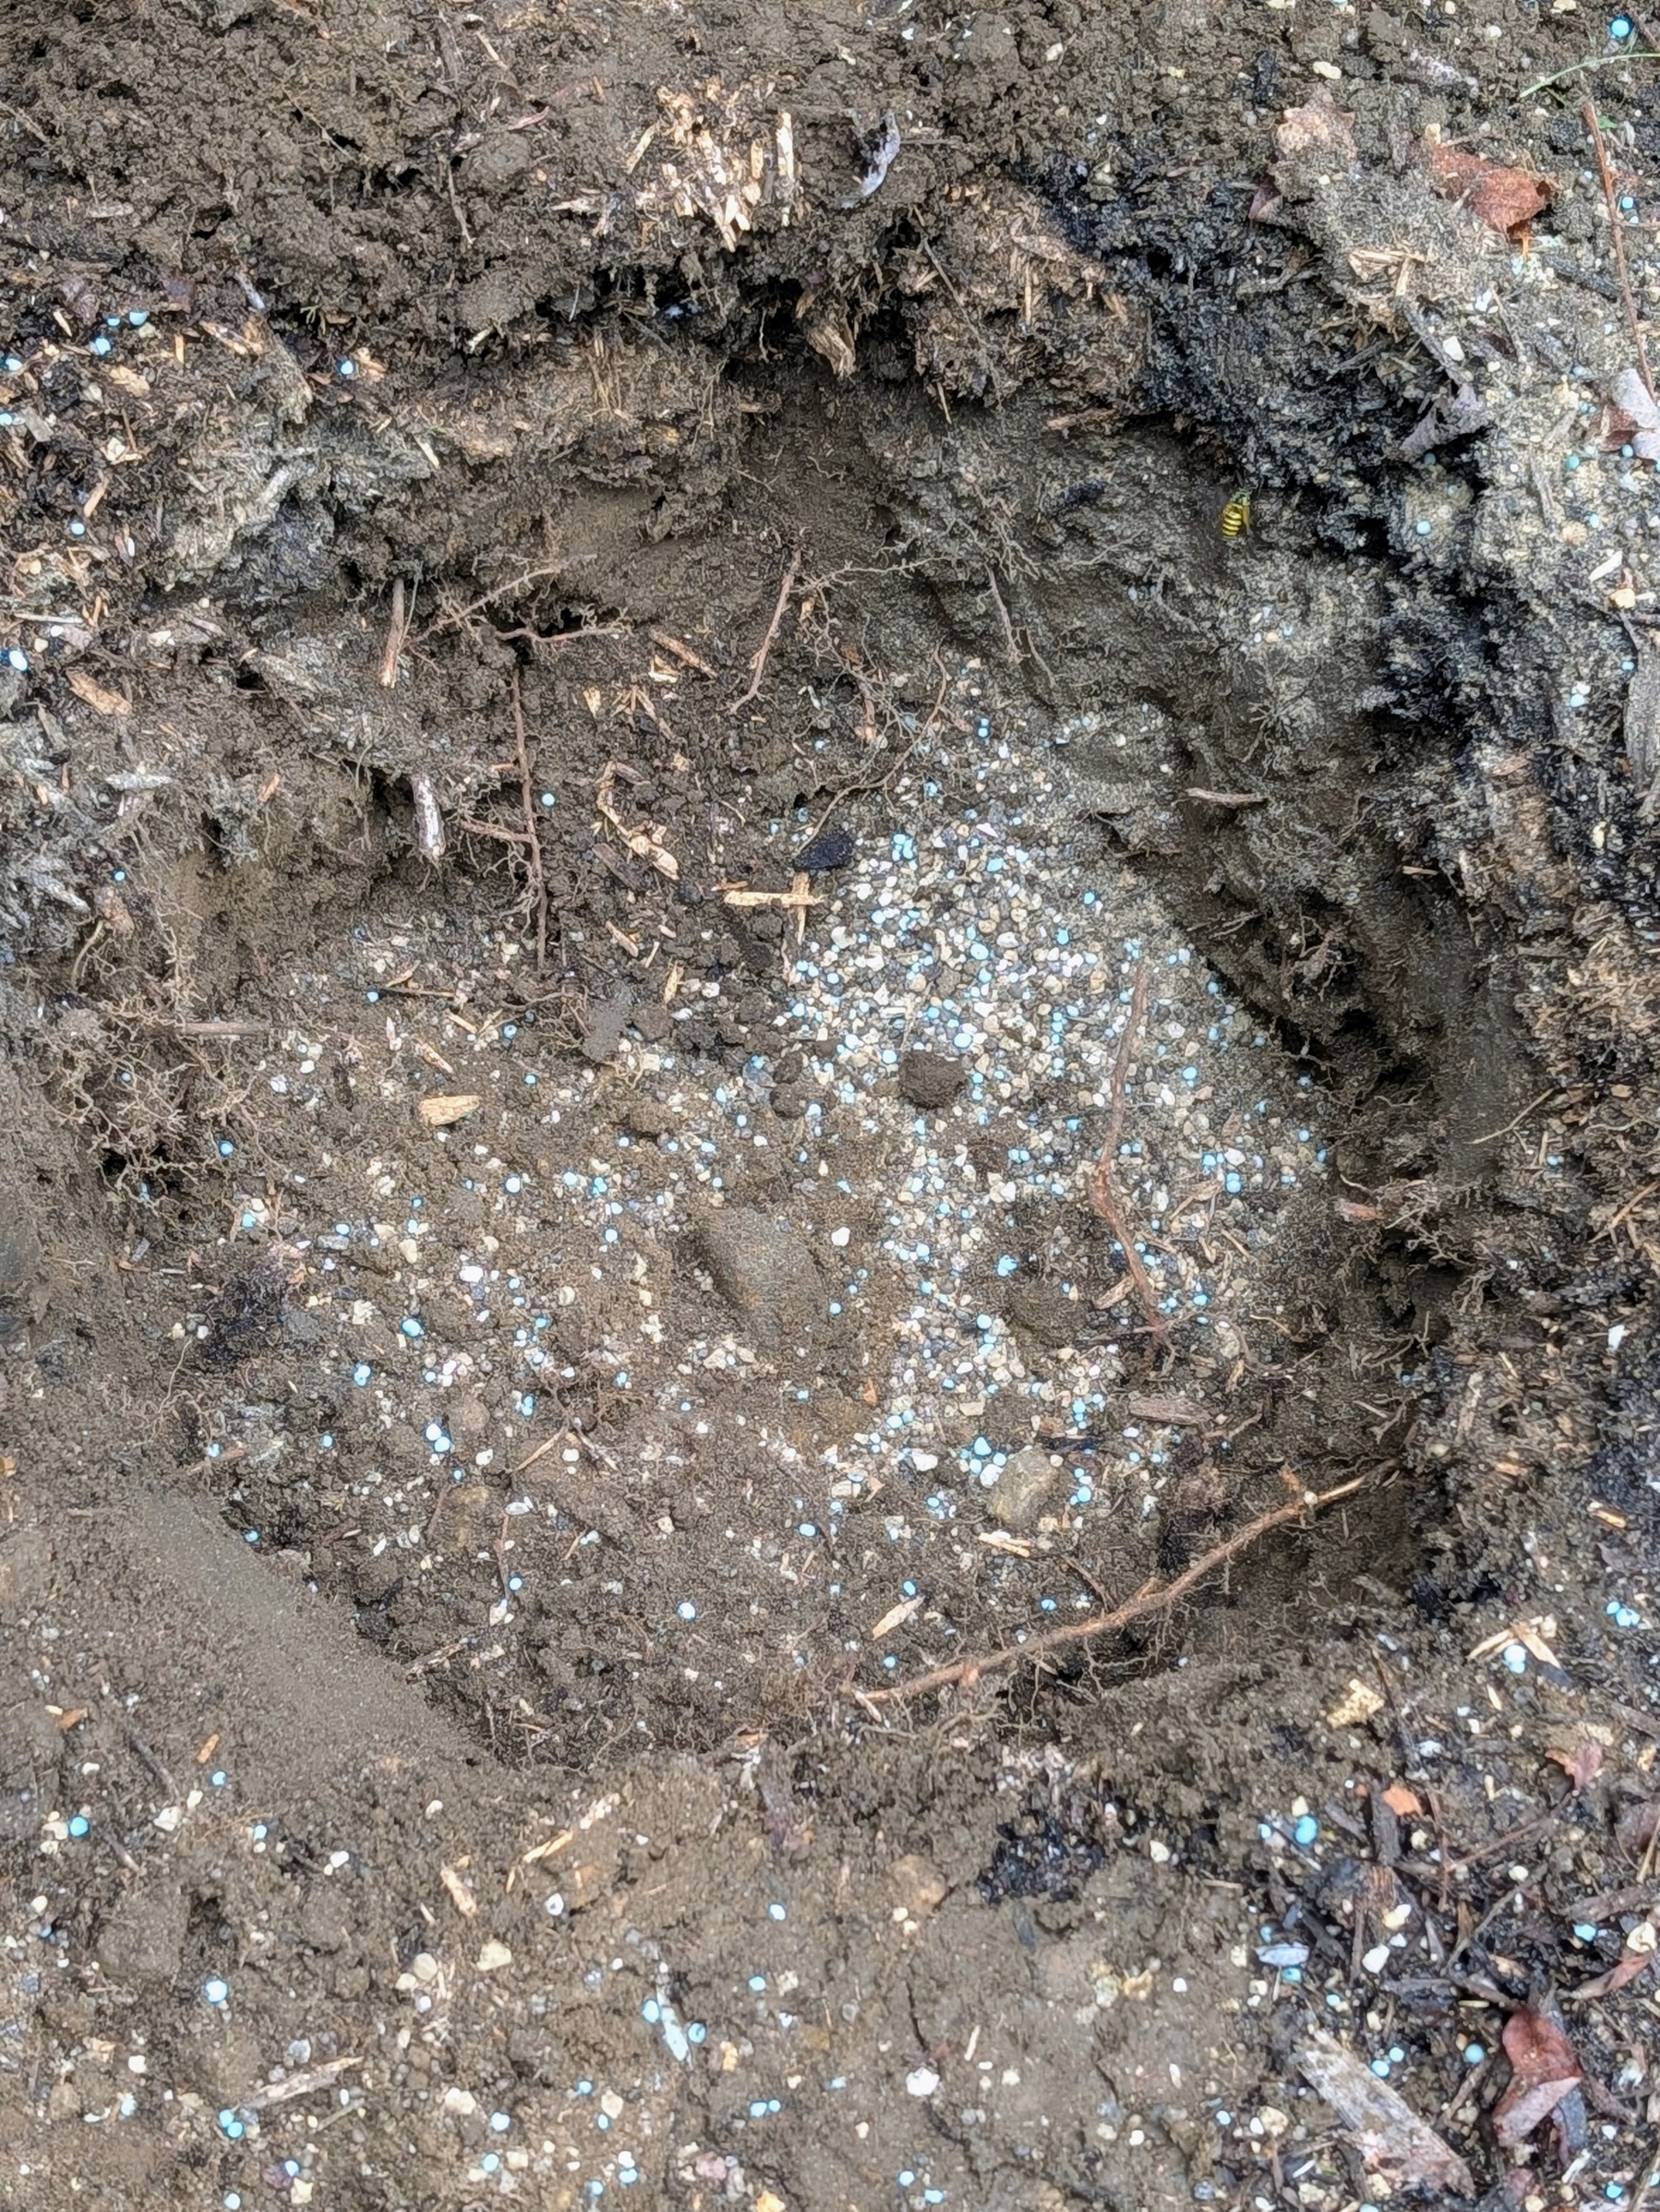
Fertilizer is sprinkled generously inside the hole and on the surrounding soil. I use Miracle-Gro fertilizers that help with transplant survival, increase water and nutrient absorption, and encourage vigorous root growth and lush foliage. Ryan also sprinkles fertilizer around the entire bed.
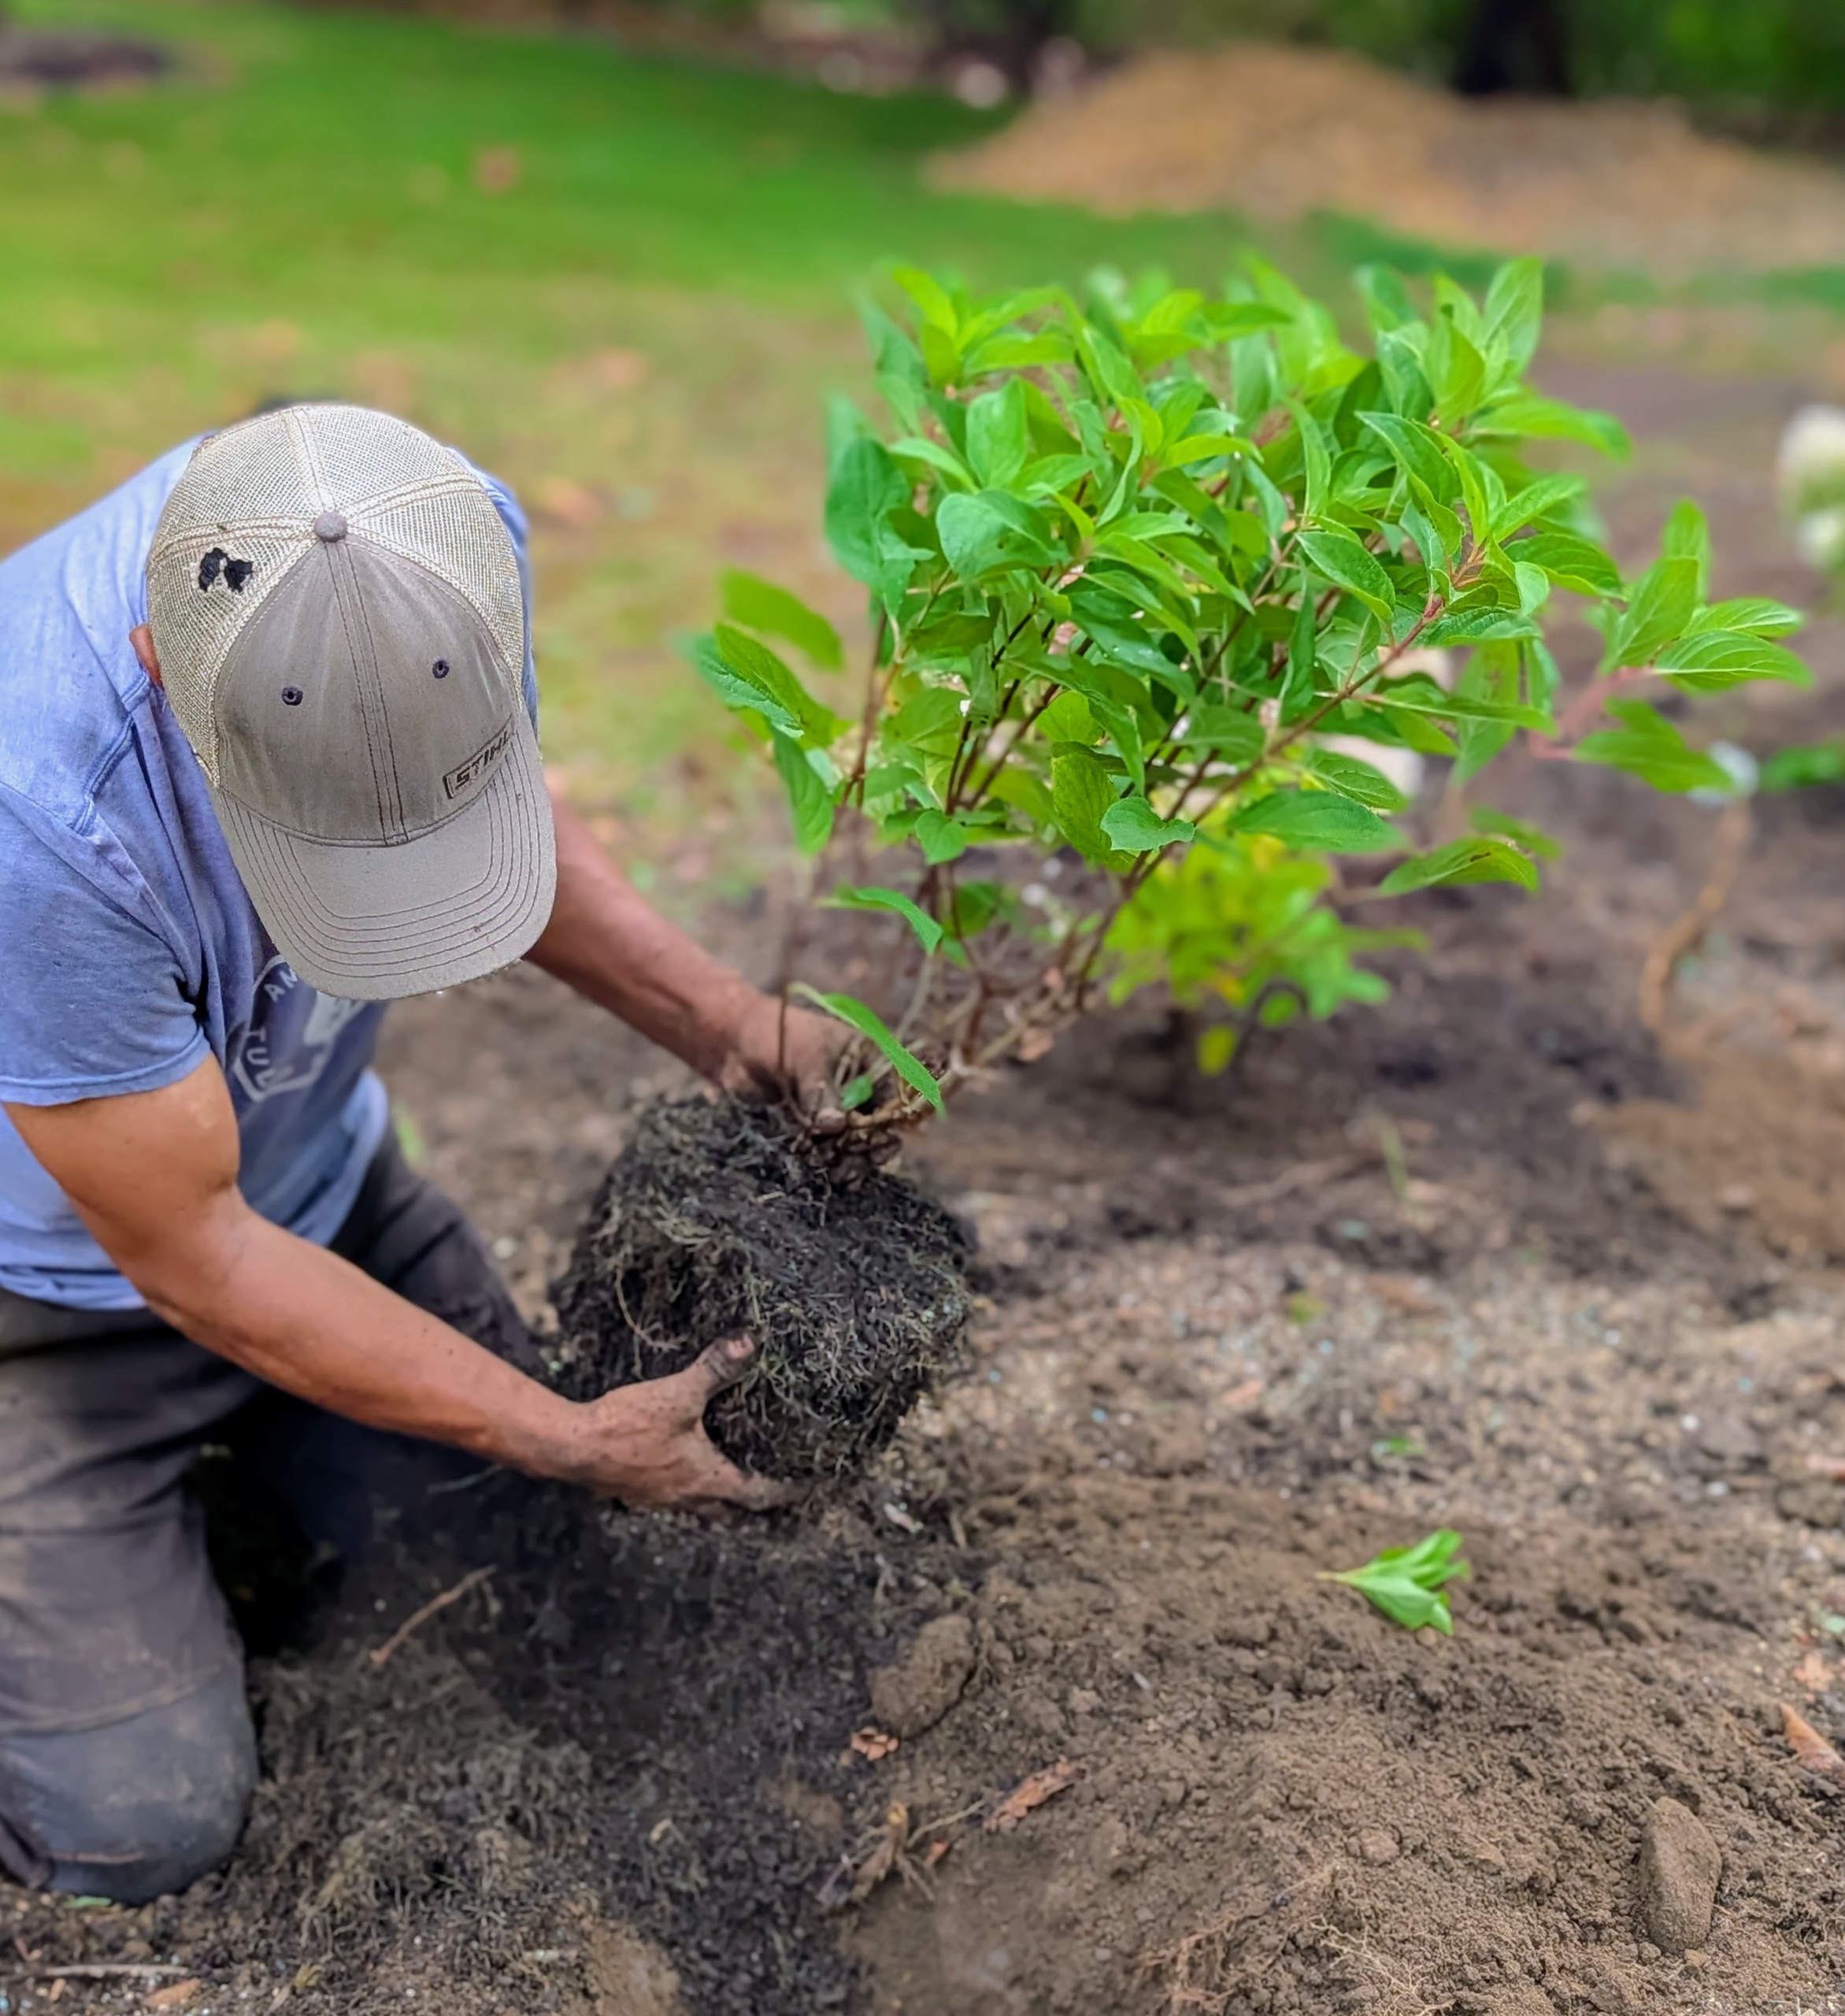
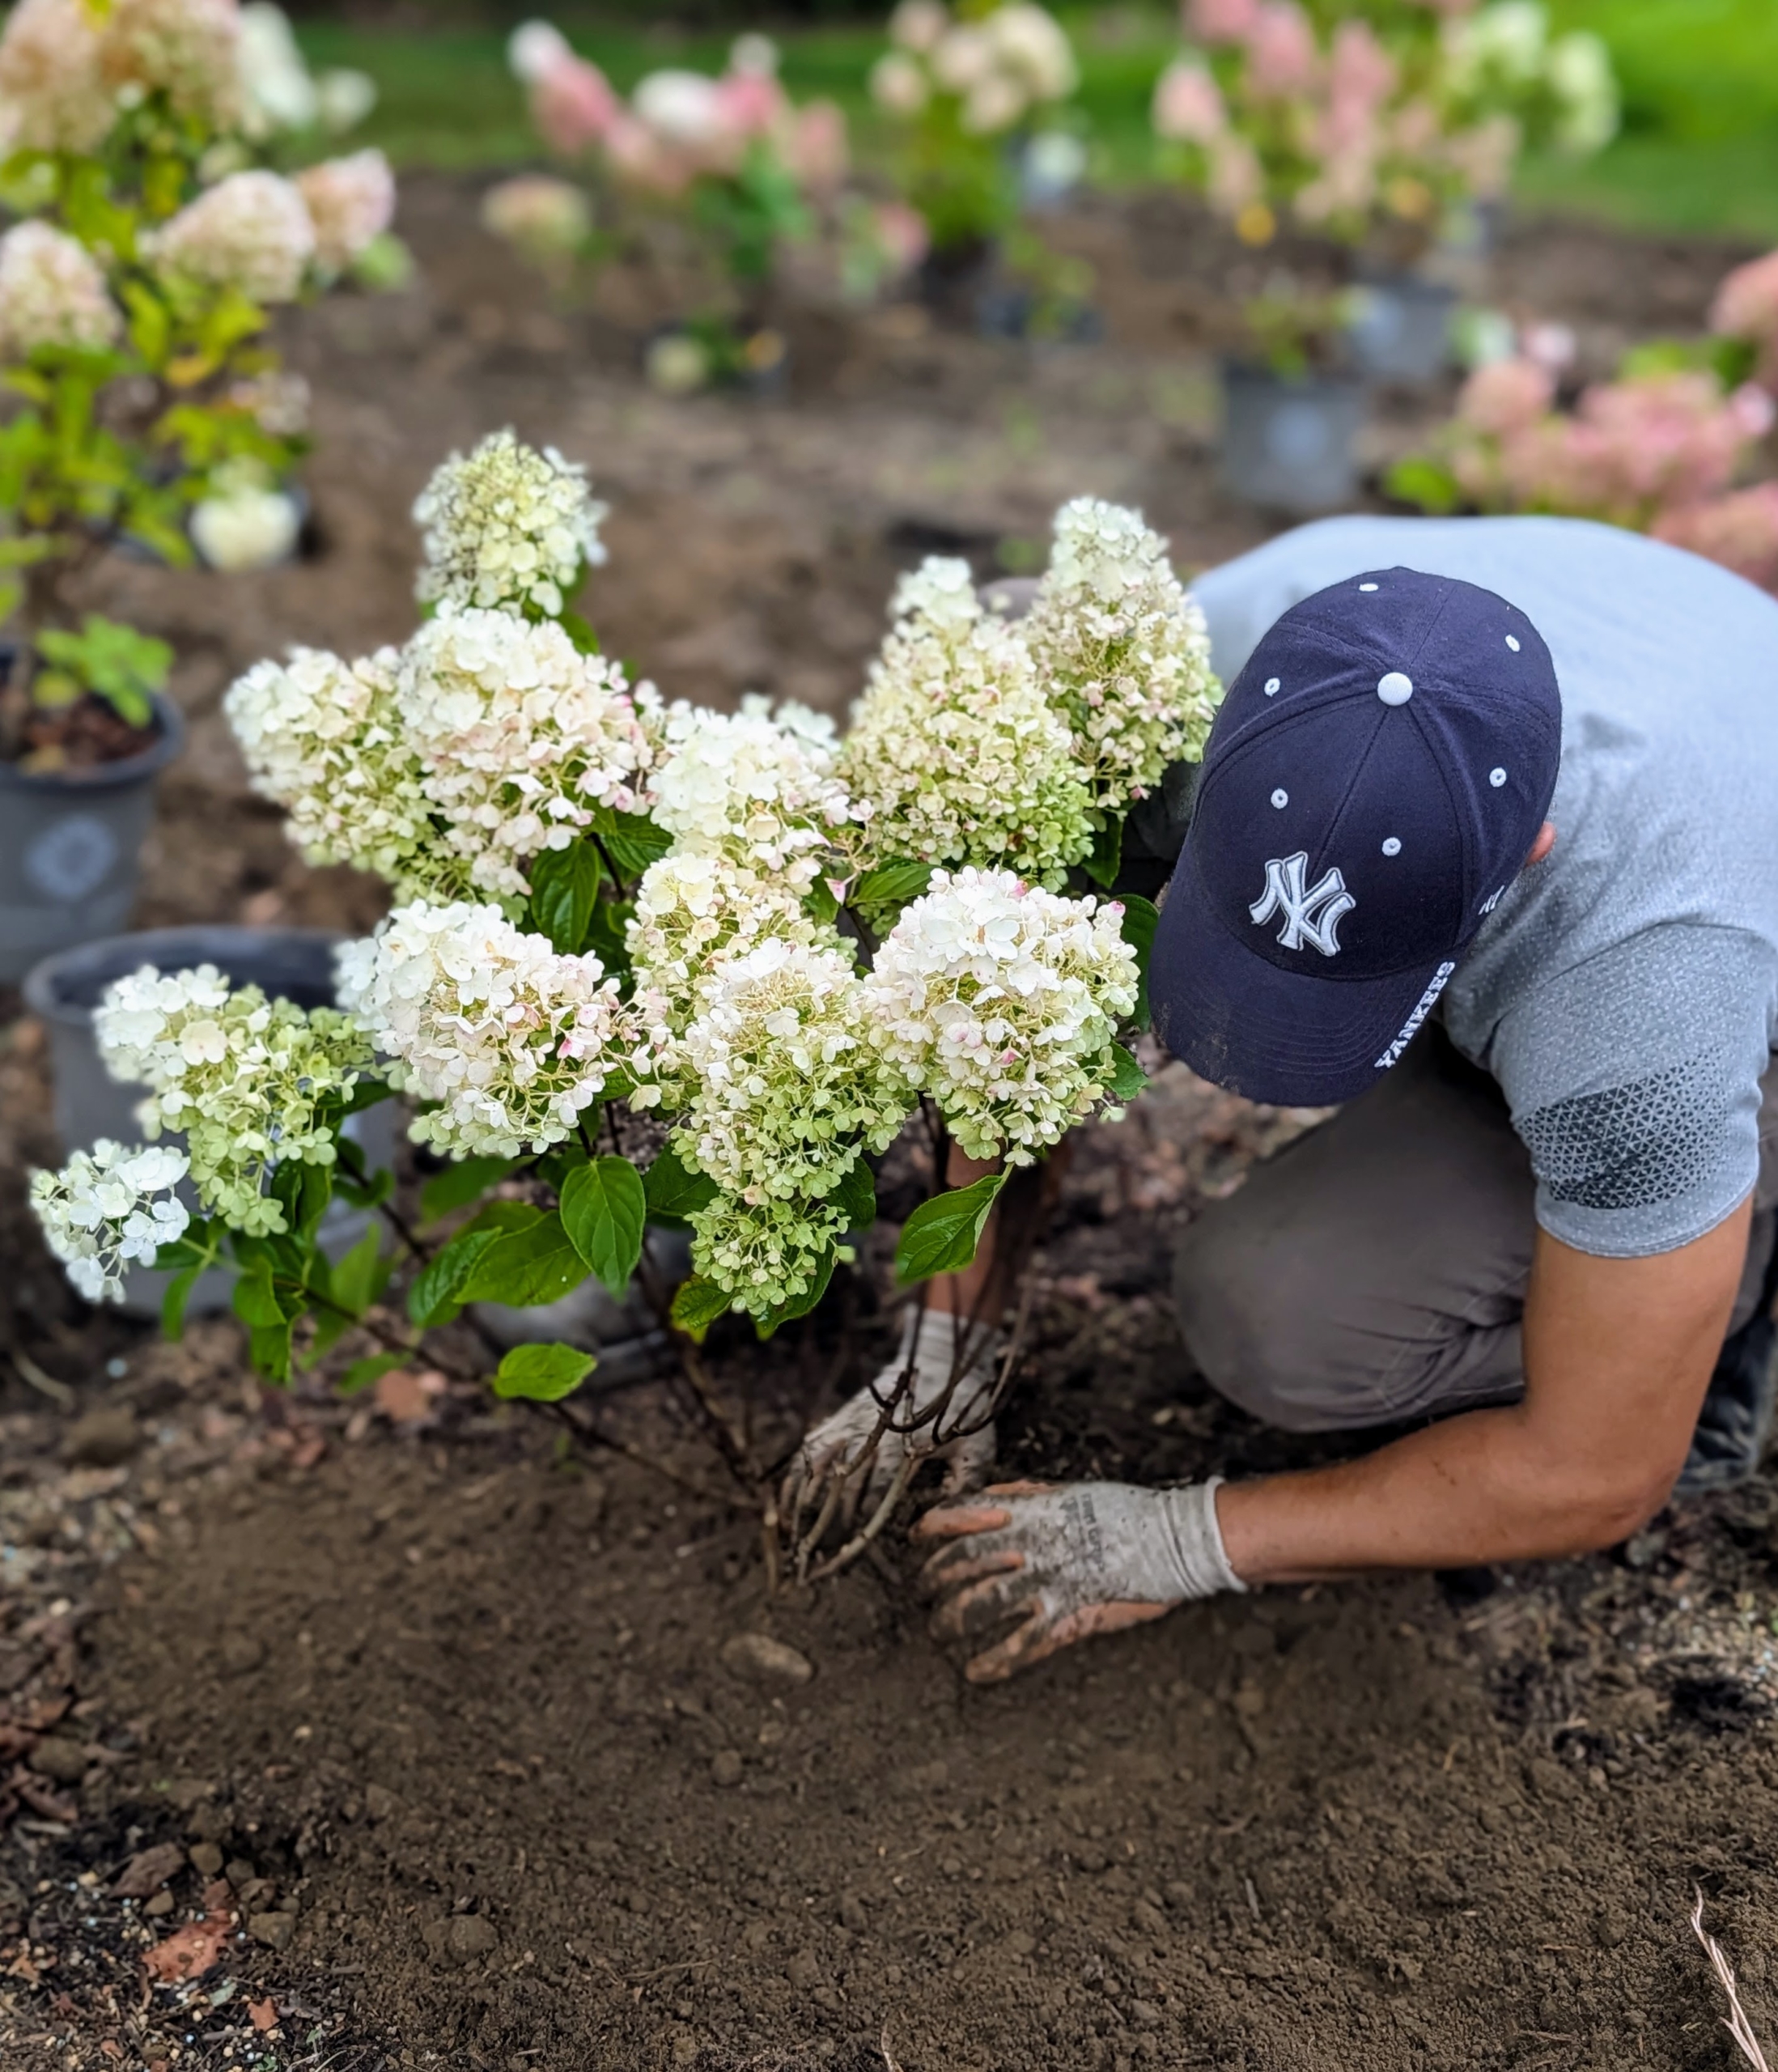
Pasang uses his hands to scarify the root ball and stimulate growth. Since these were just potted last spring, the root ball soil is still soft and easy to break up.
Hydrangeas have a fibrous root system, which means their roots are thin and branch out. The roots allow the plants to absorb water and nutrients from the top layers of soil.
Pasang plants the hydrangea similar to the way it was planted in the pot. Planting them too deep can bury the stems, which can promote root rot.
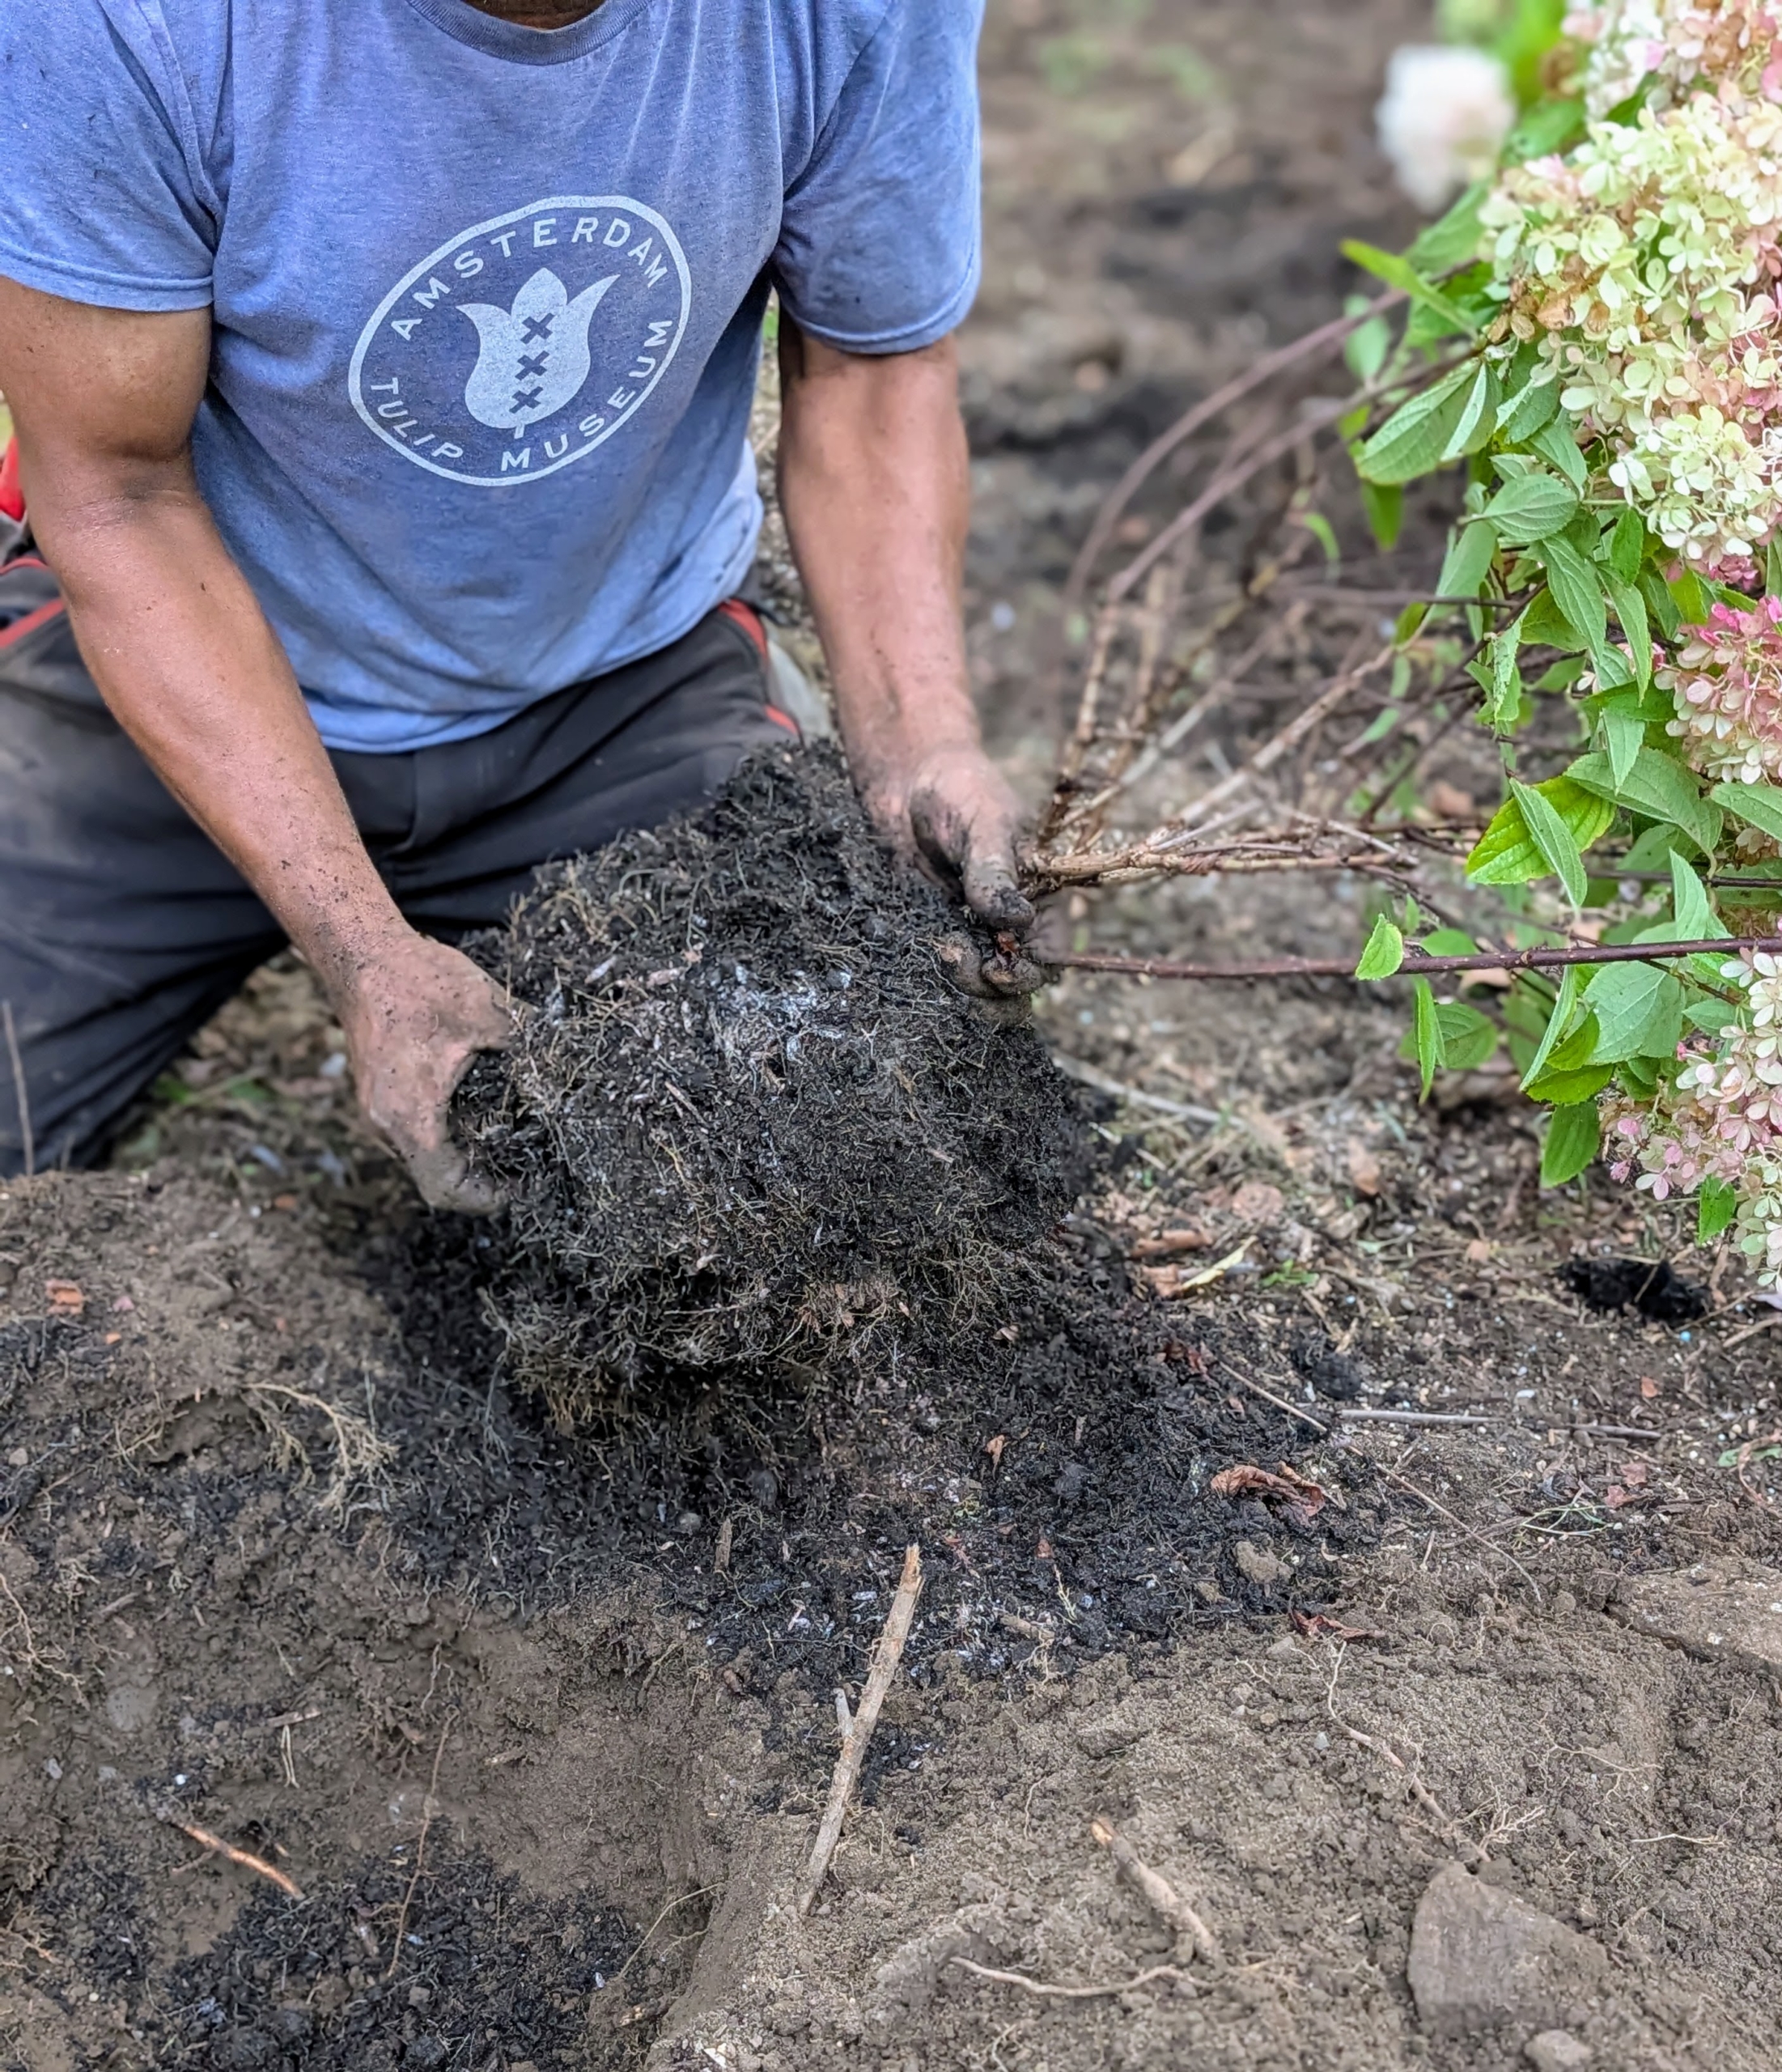
Nearby, Matthew plants another. The hole is backfilled with the existing soil as well as new composted soil made right here at my farm.
In the ground, the plant should sit at the same depth it was in the pot. Matthew spreads the soil evenly and tamps lightly at the end to ensure good contact.
Remember, perennials like hydrangeas generally grow slowly the first year, faster the second year, and then reach full size in the third year.
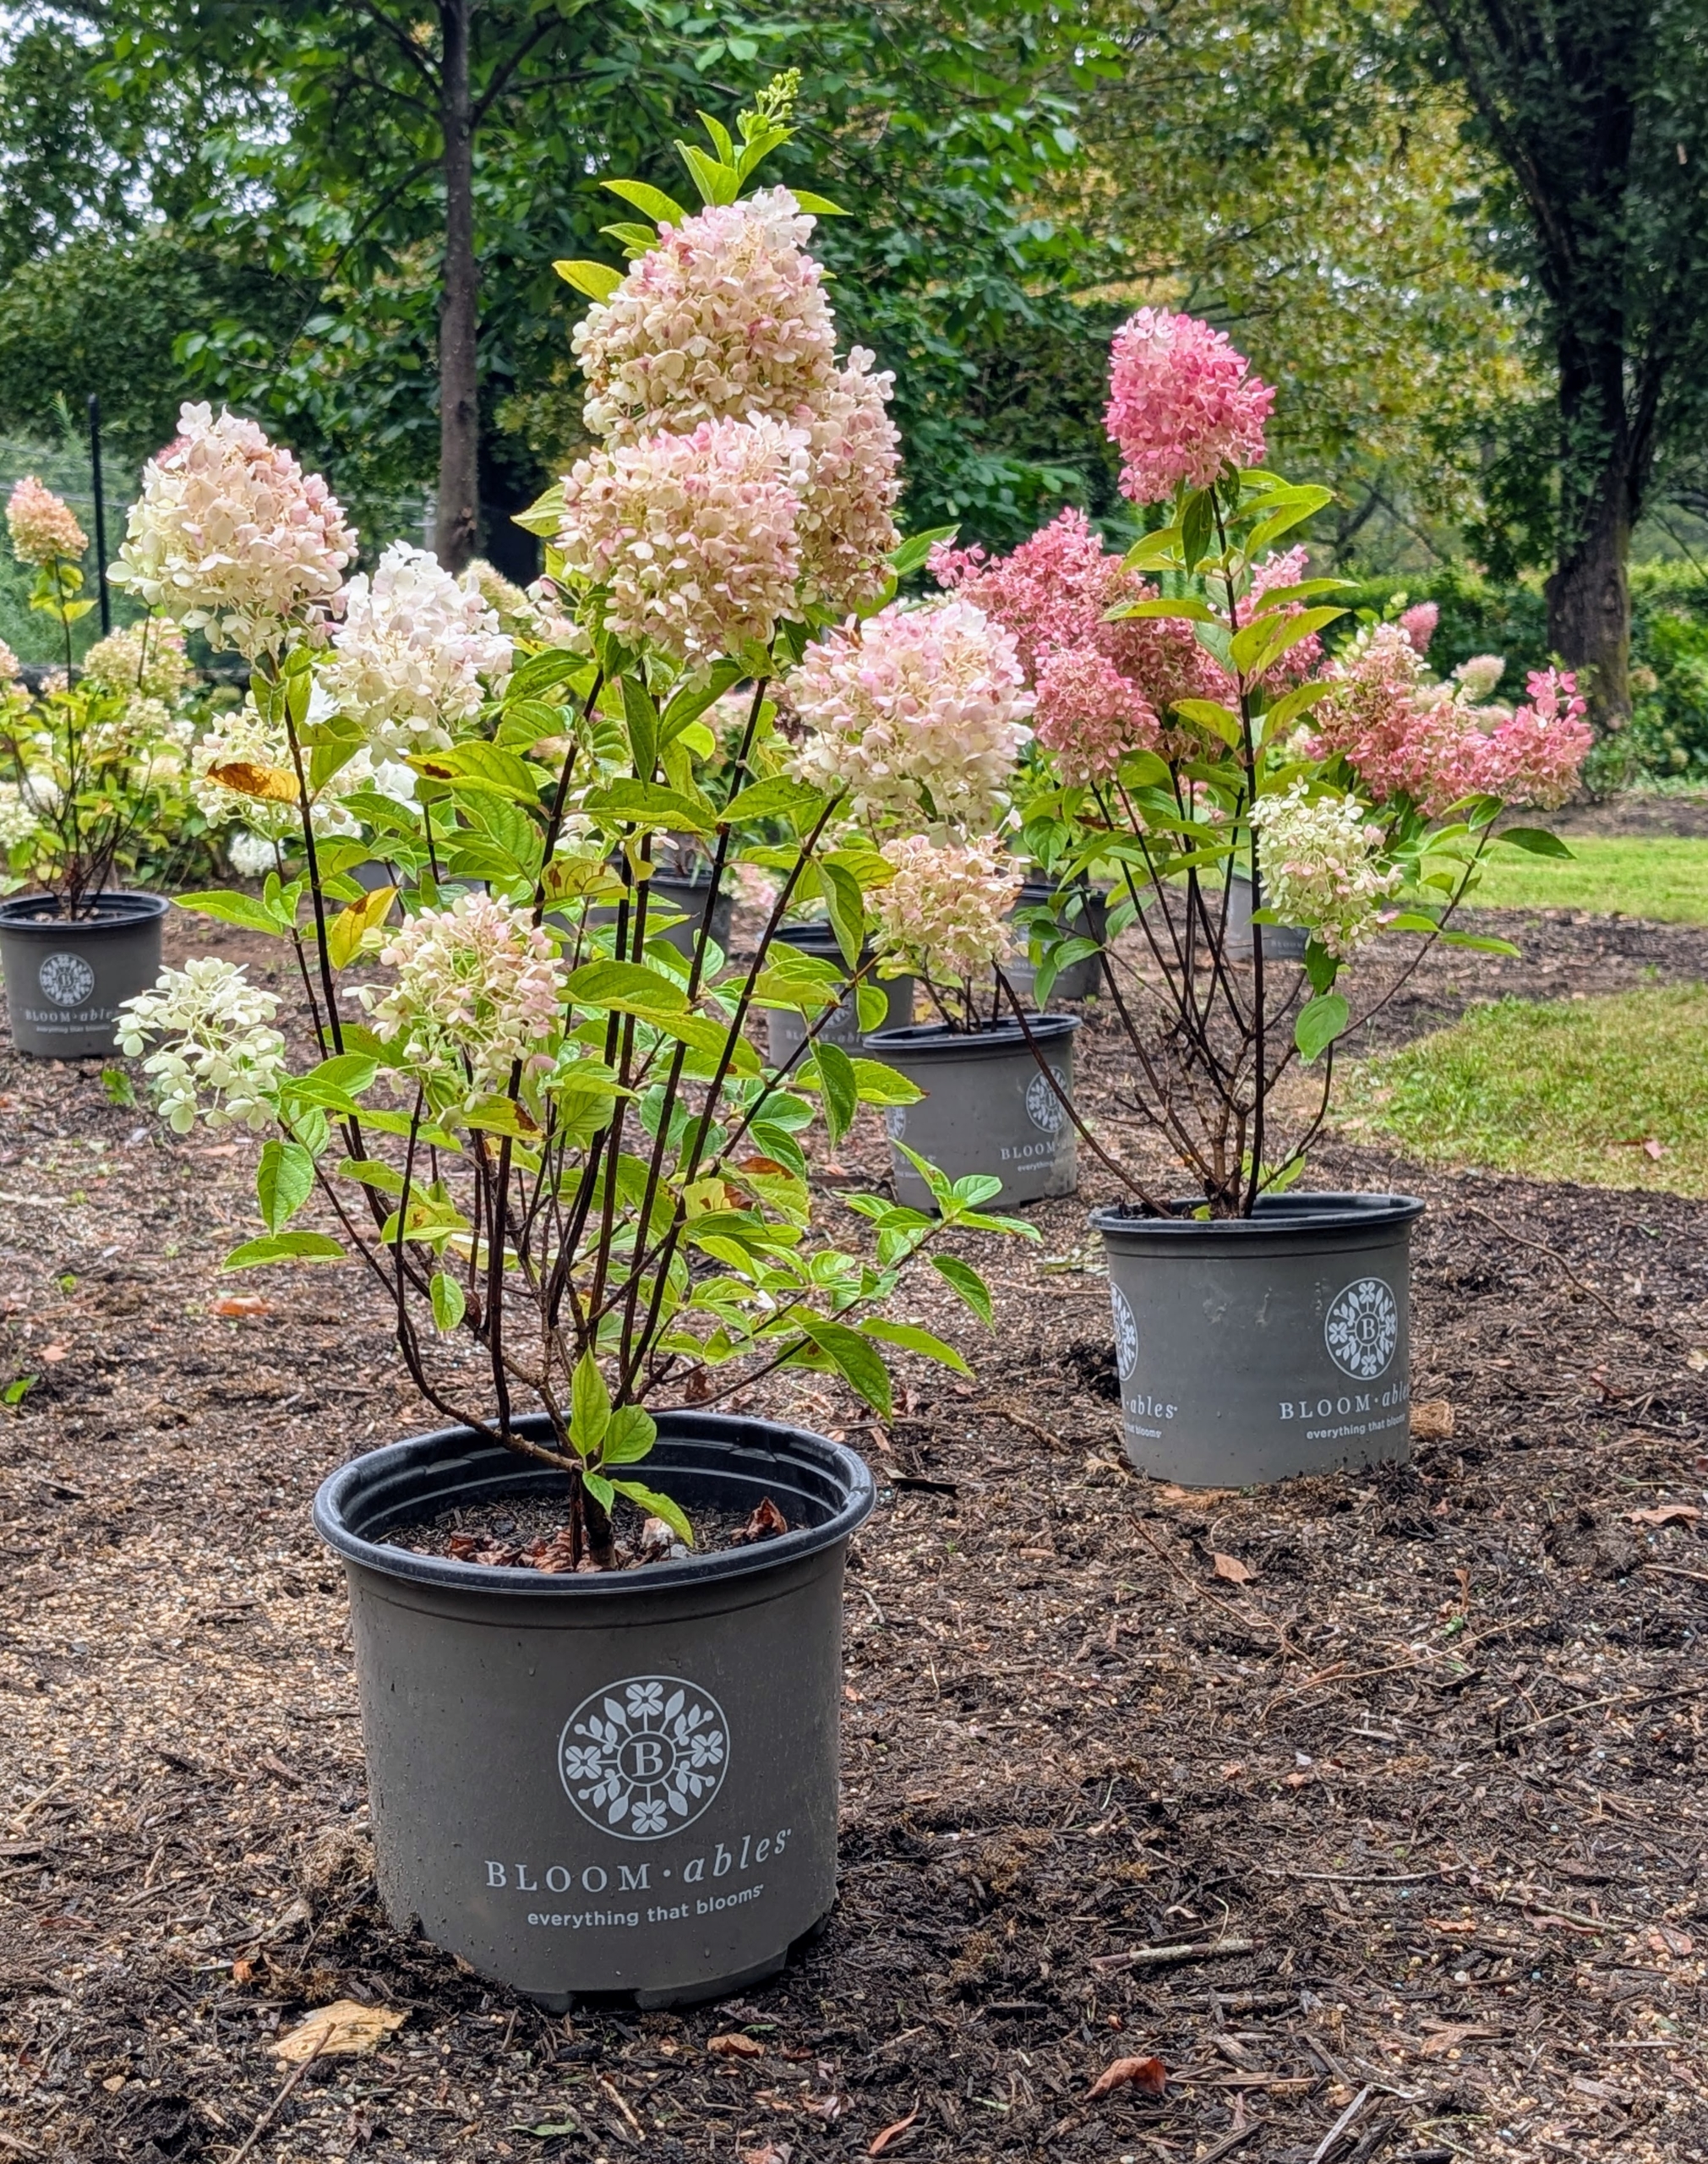
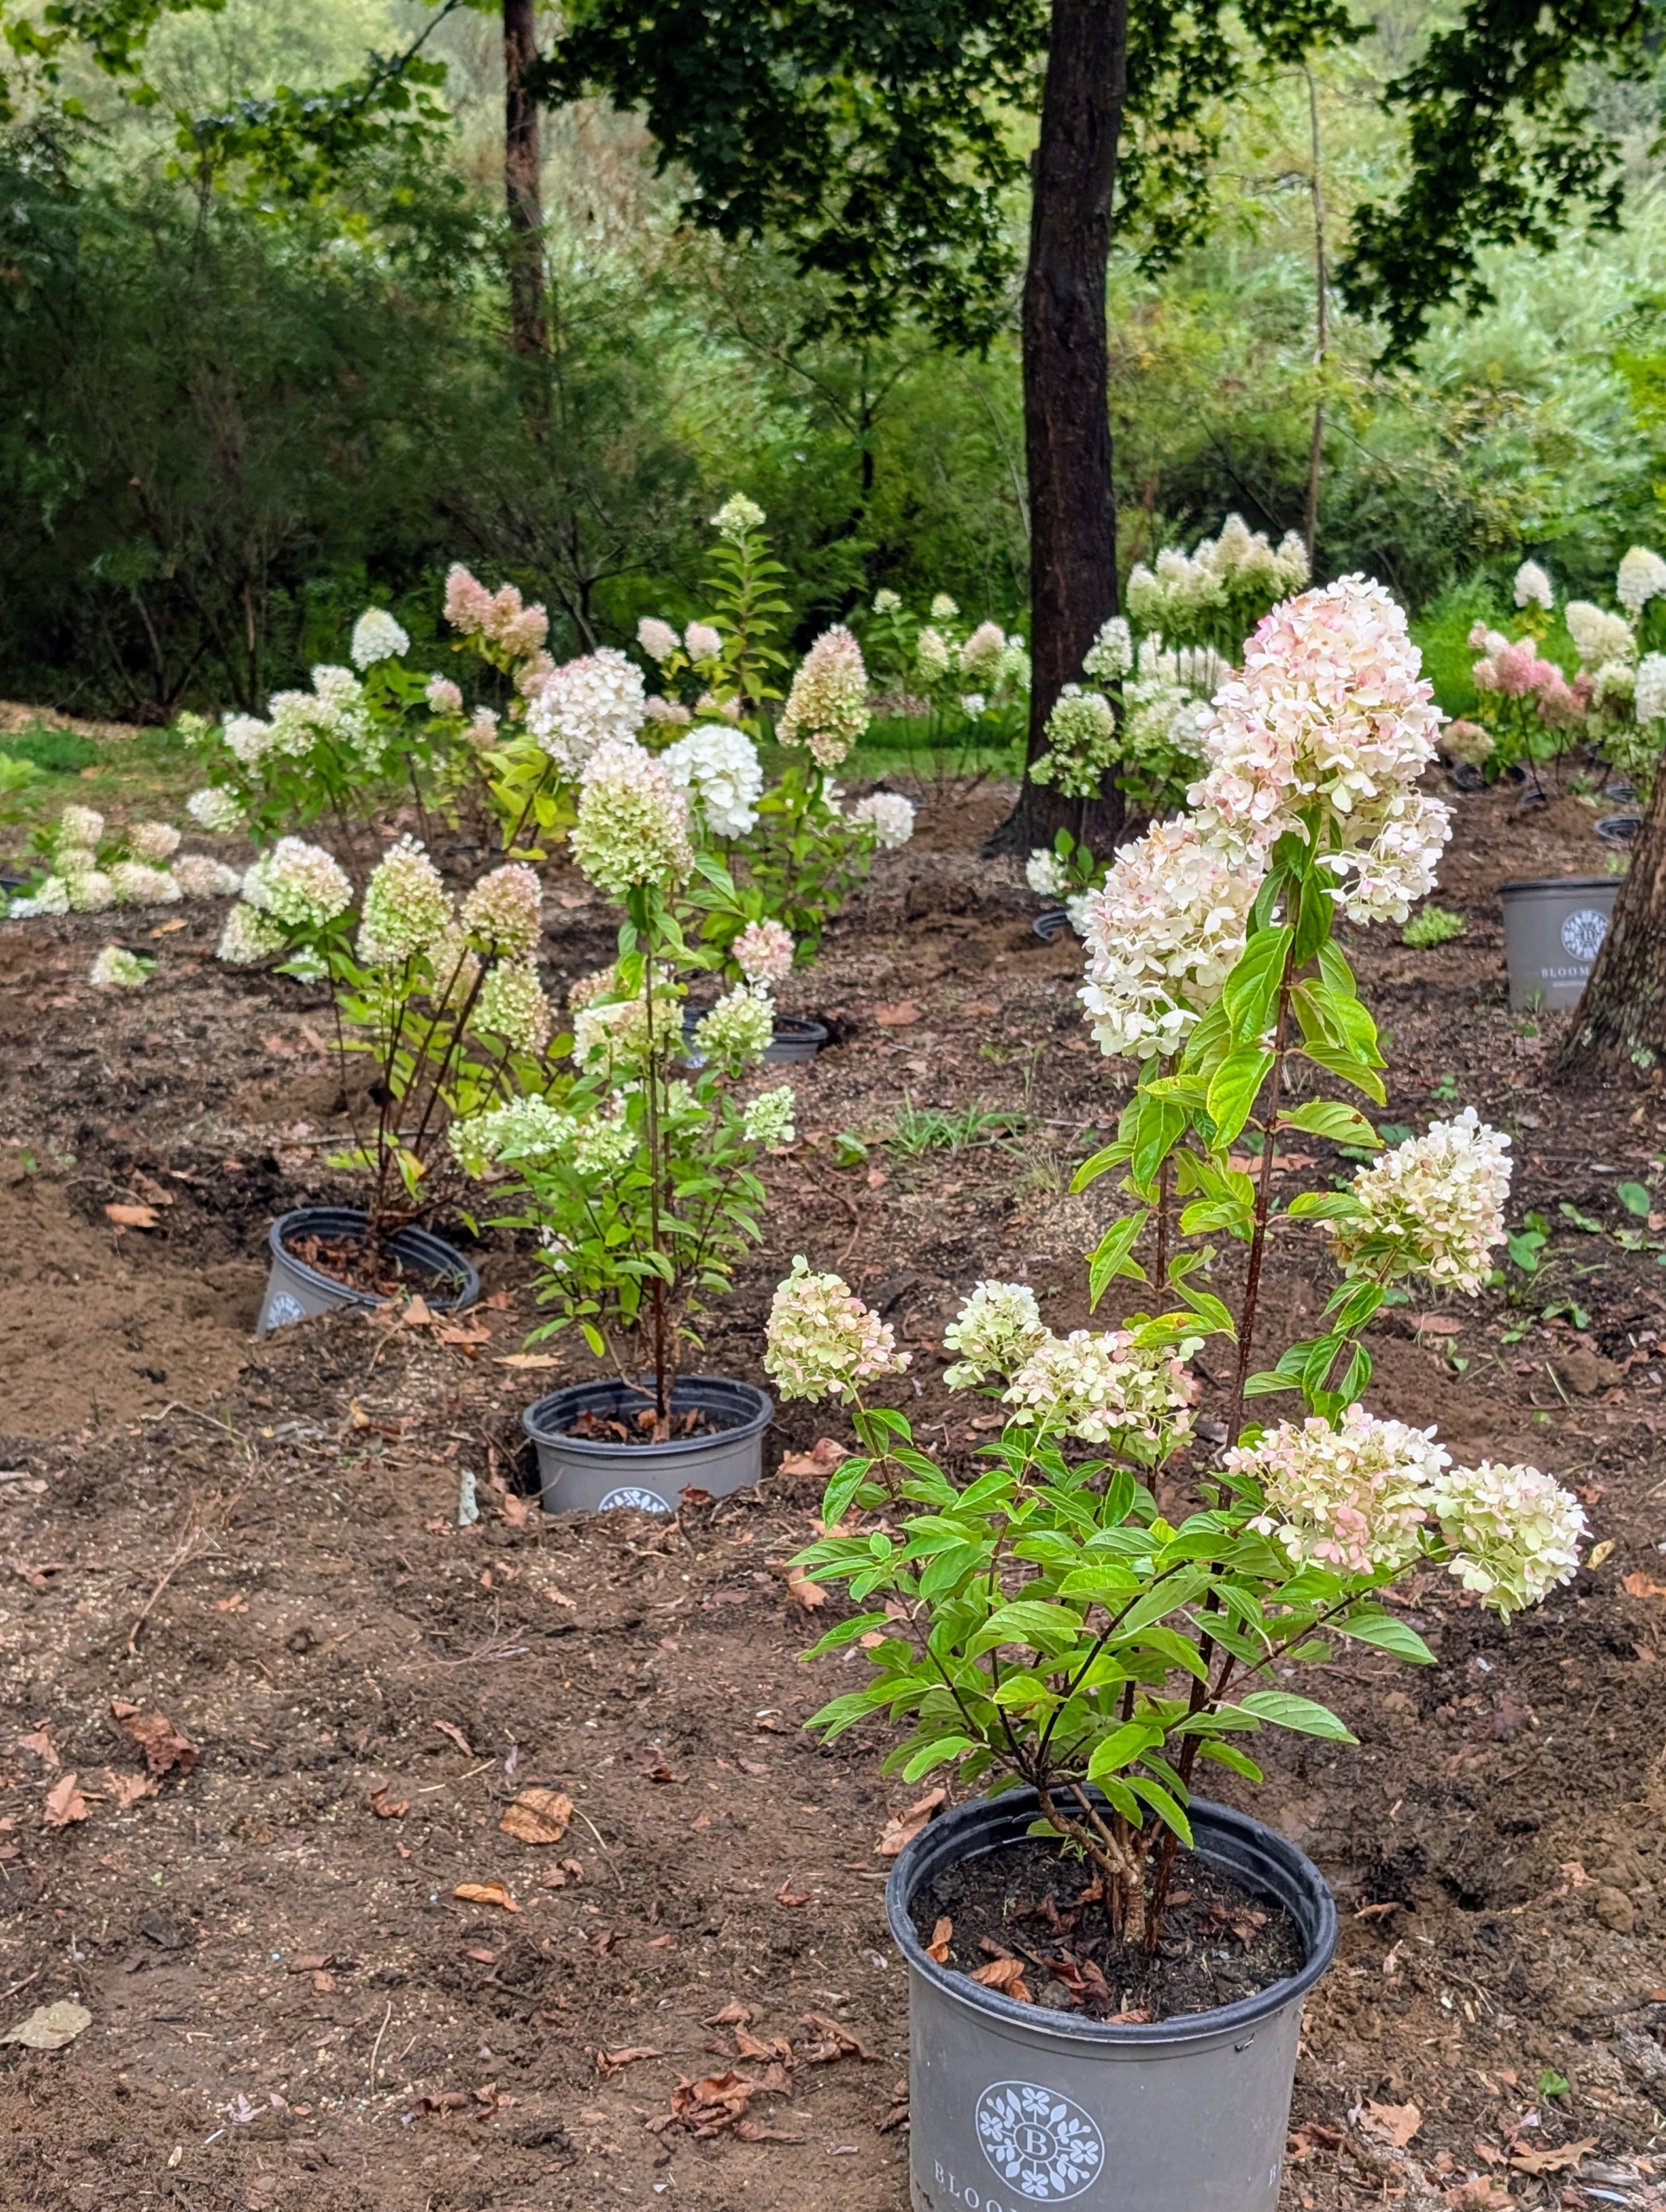
In just a couple of hours, all the hydrangeas are planted and looking great.
Cesar rakes the area, so it is neat and tidy.
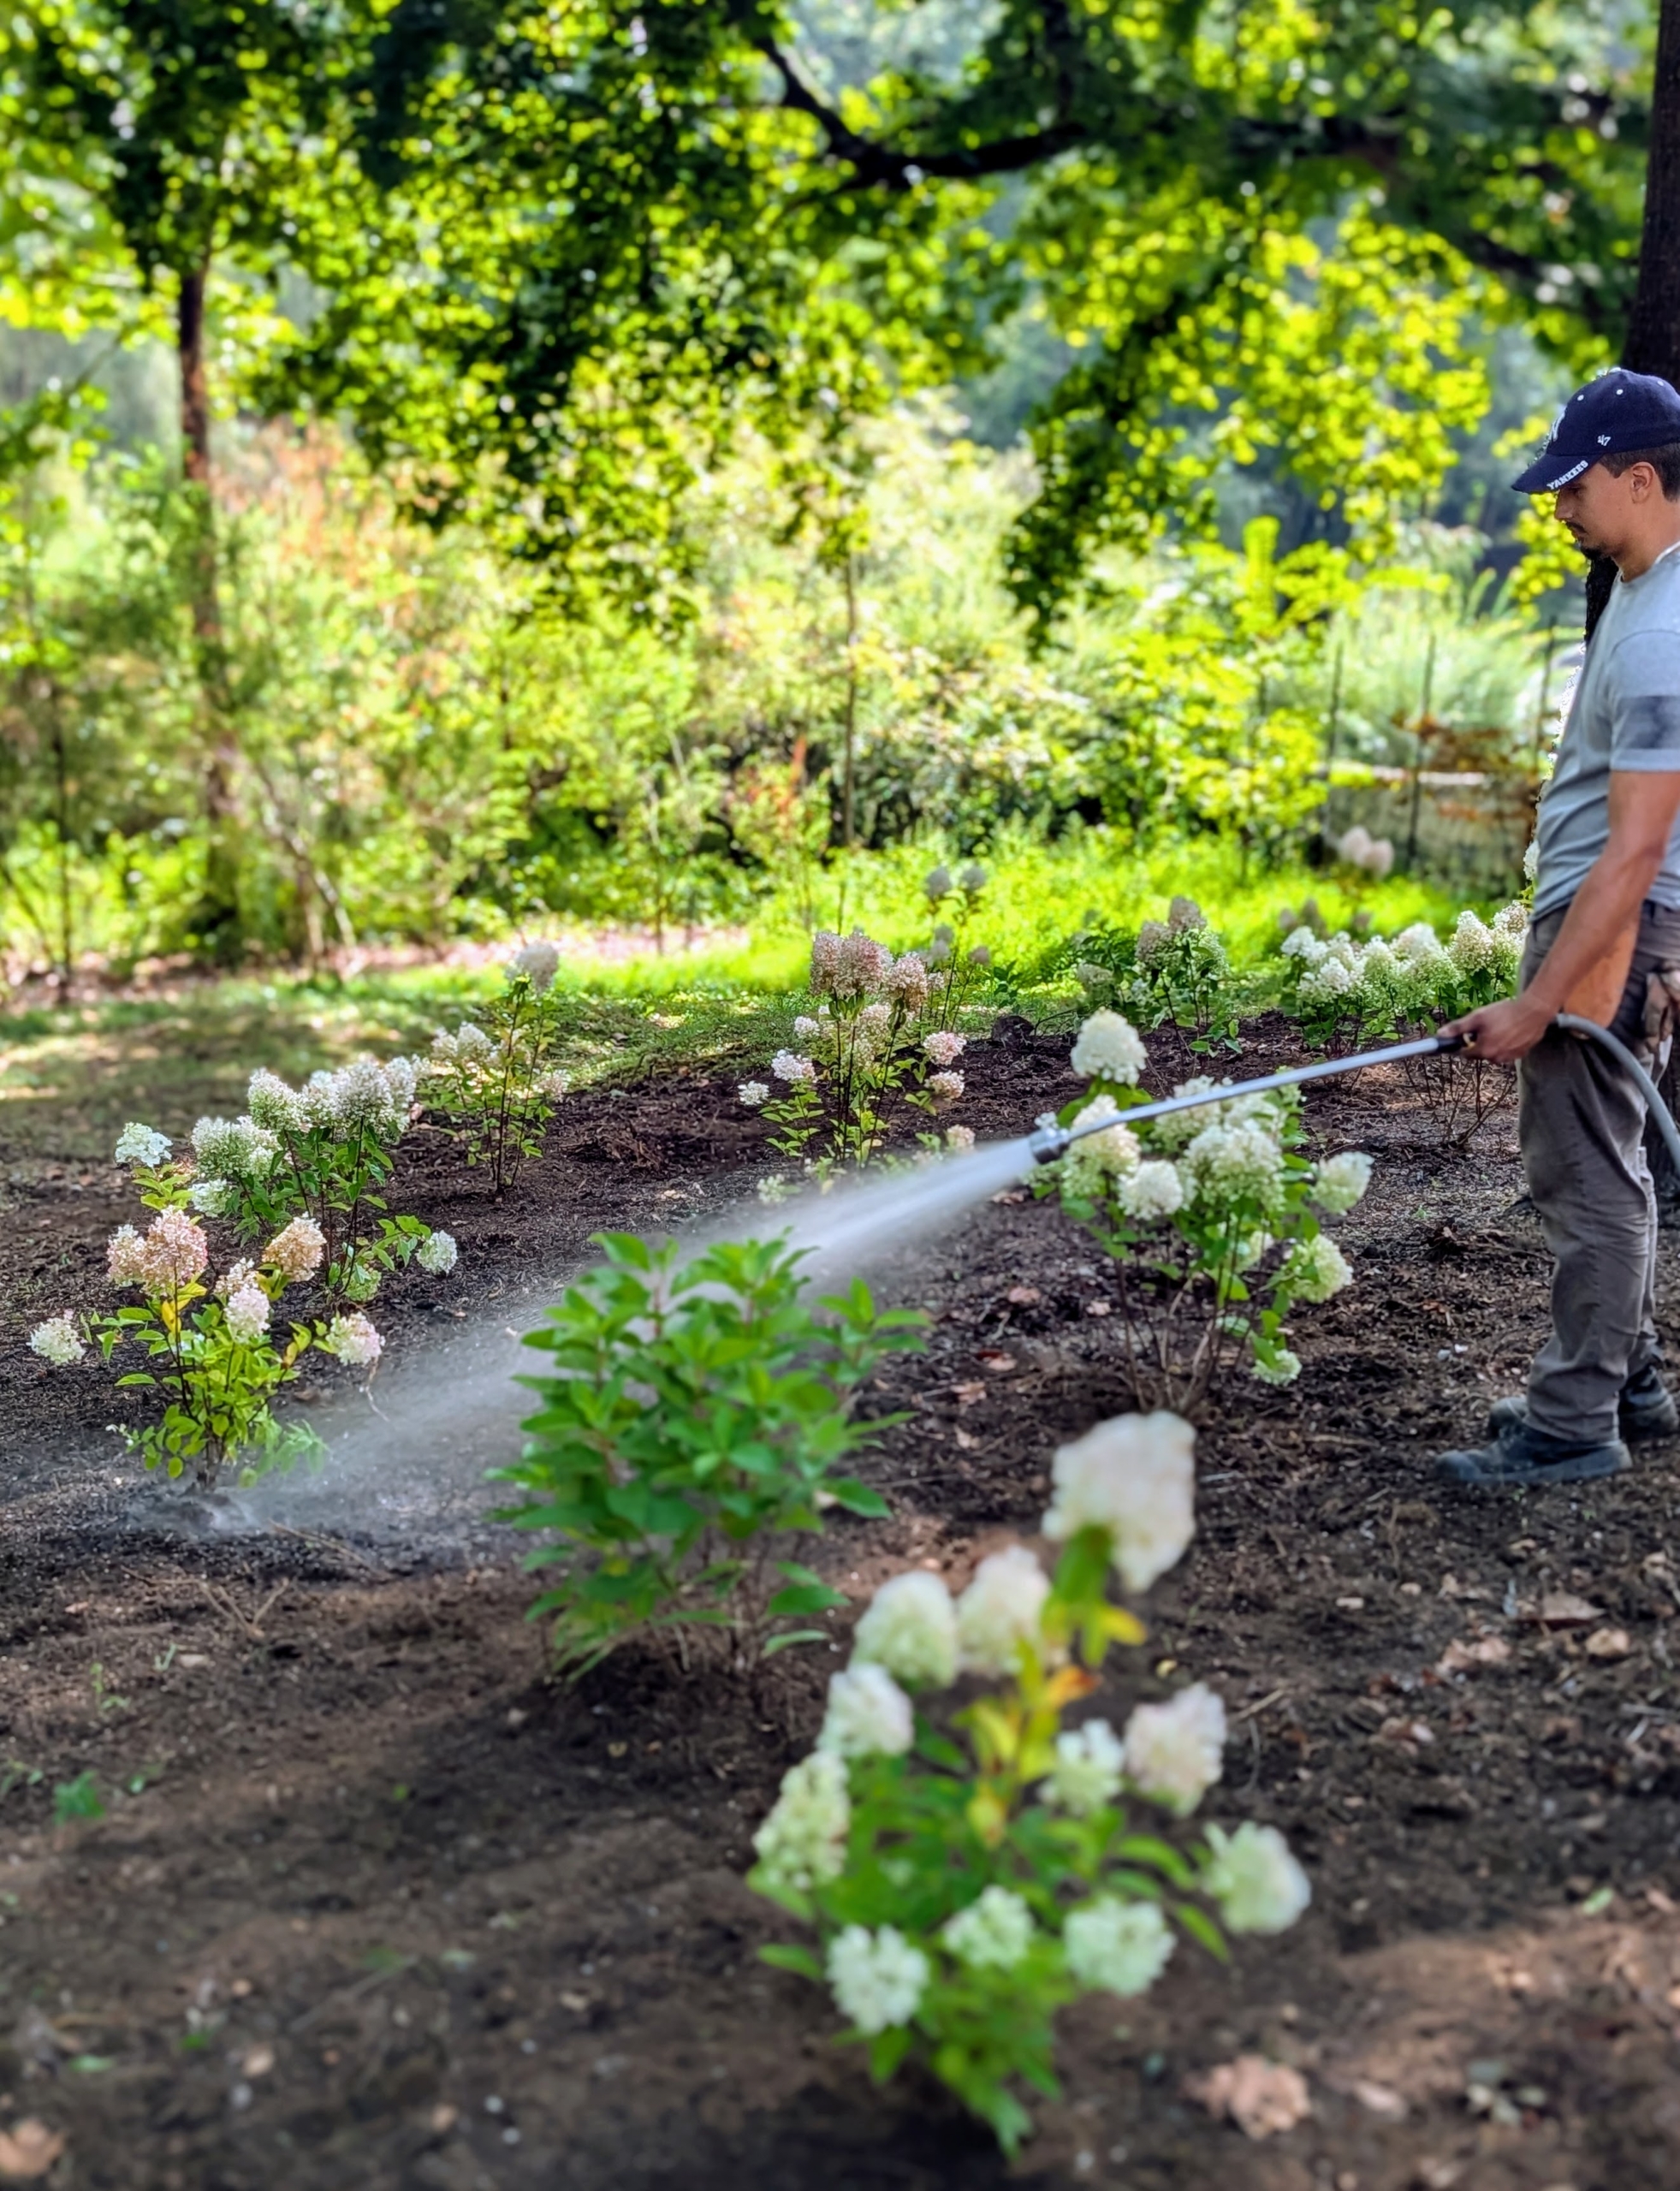
And then Matthew gives each plant a thorough drink.
Hydrangeas prefer full sun to partial shade and moist, well-drained soil. I know these will do so well in this location.
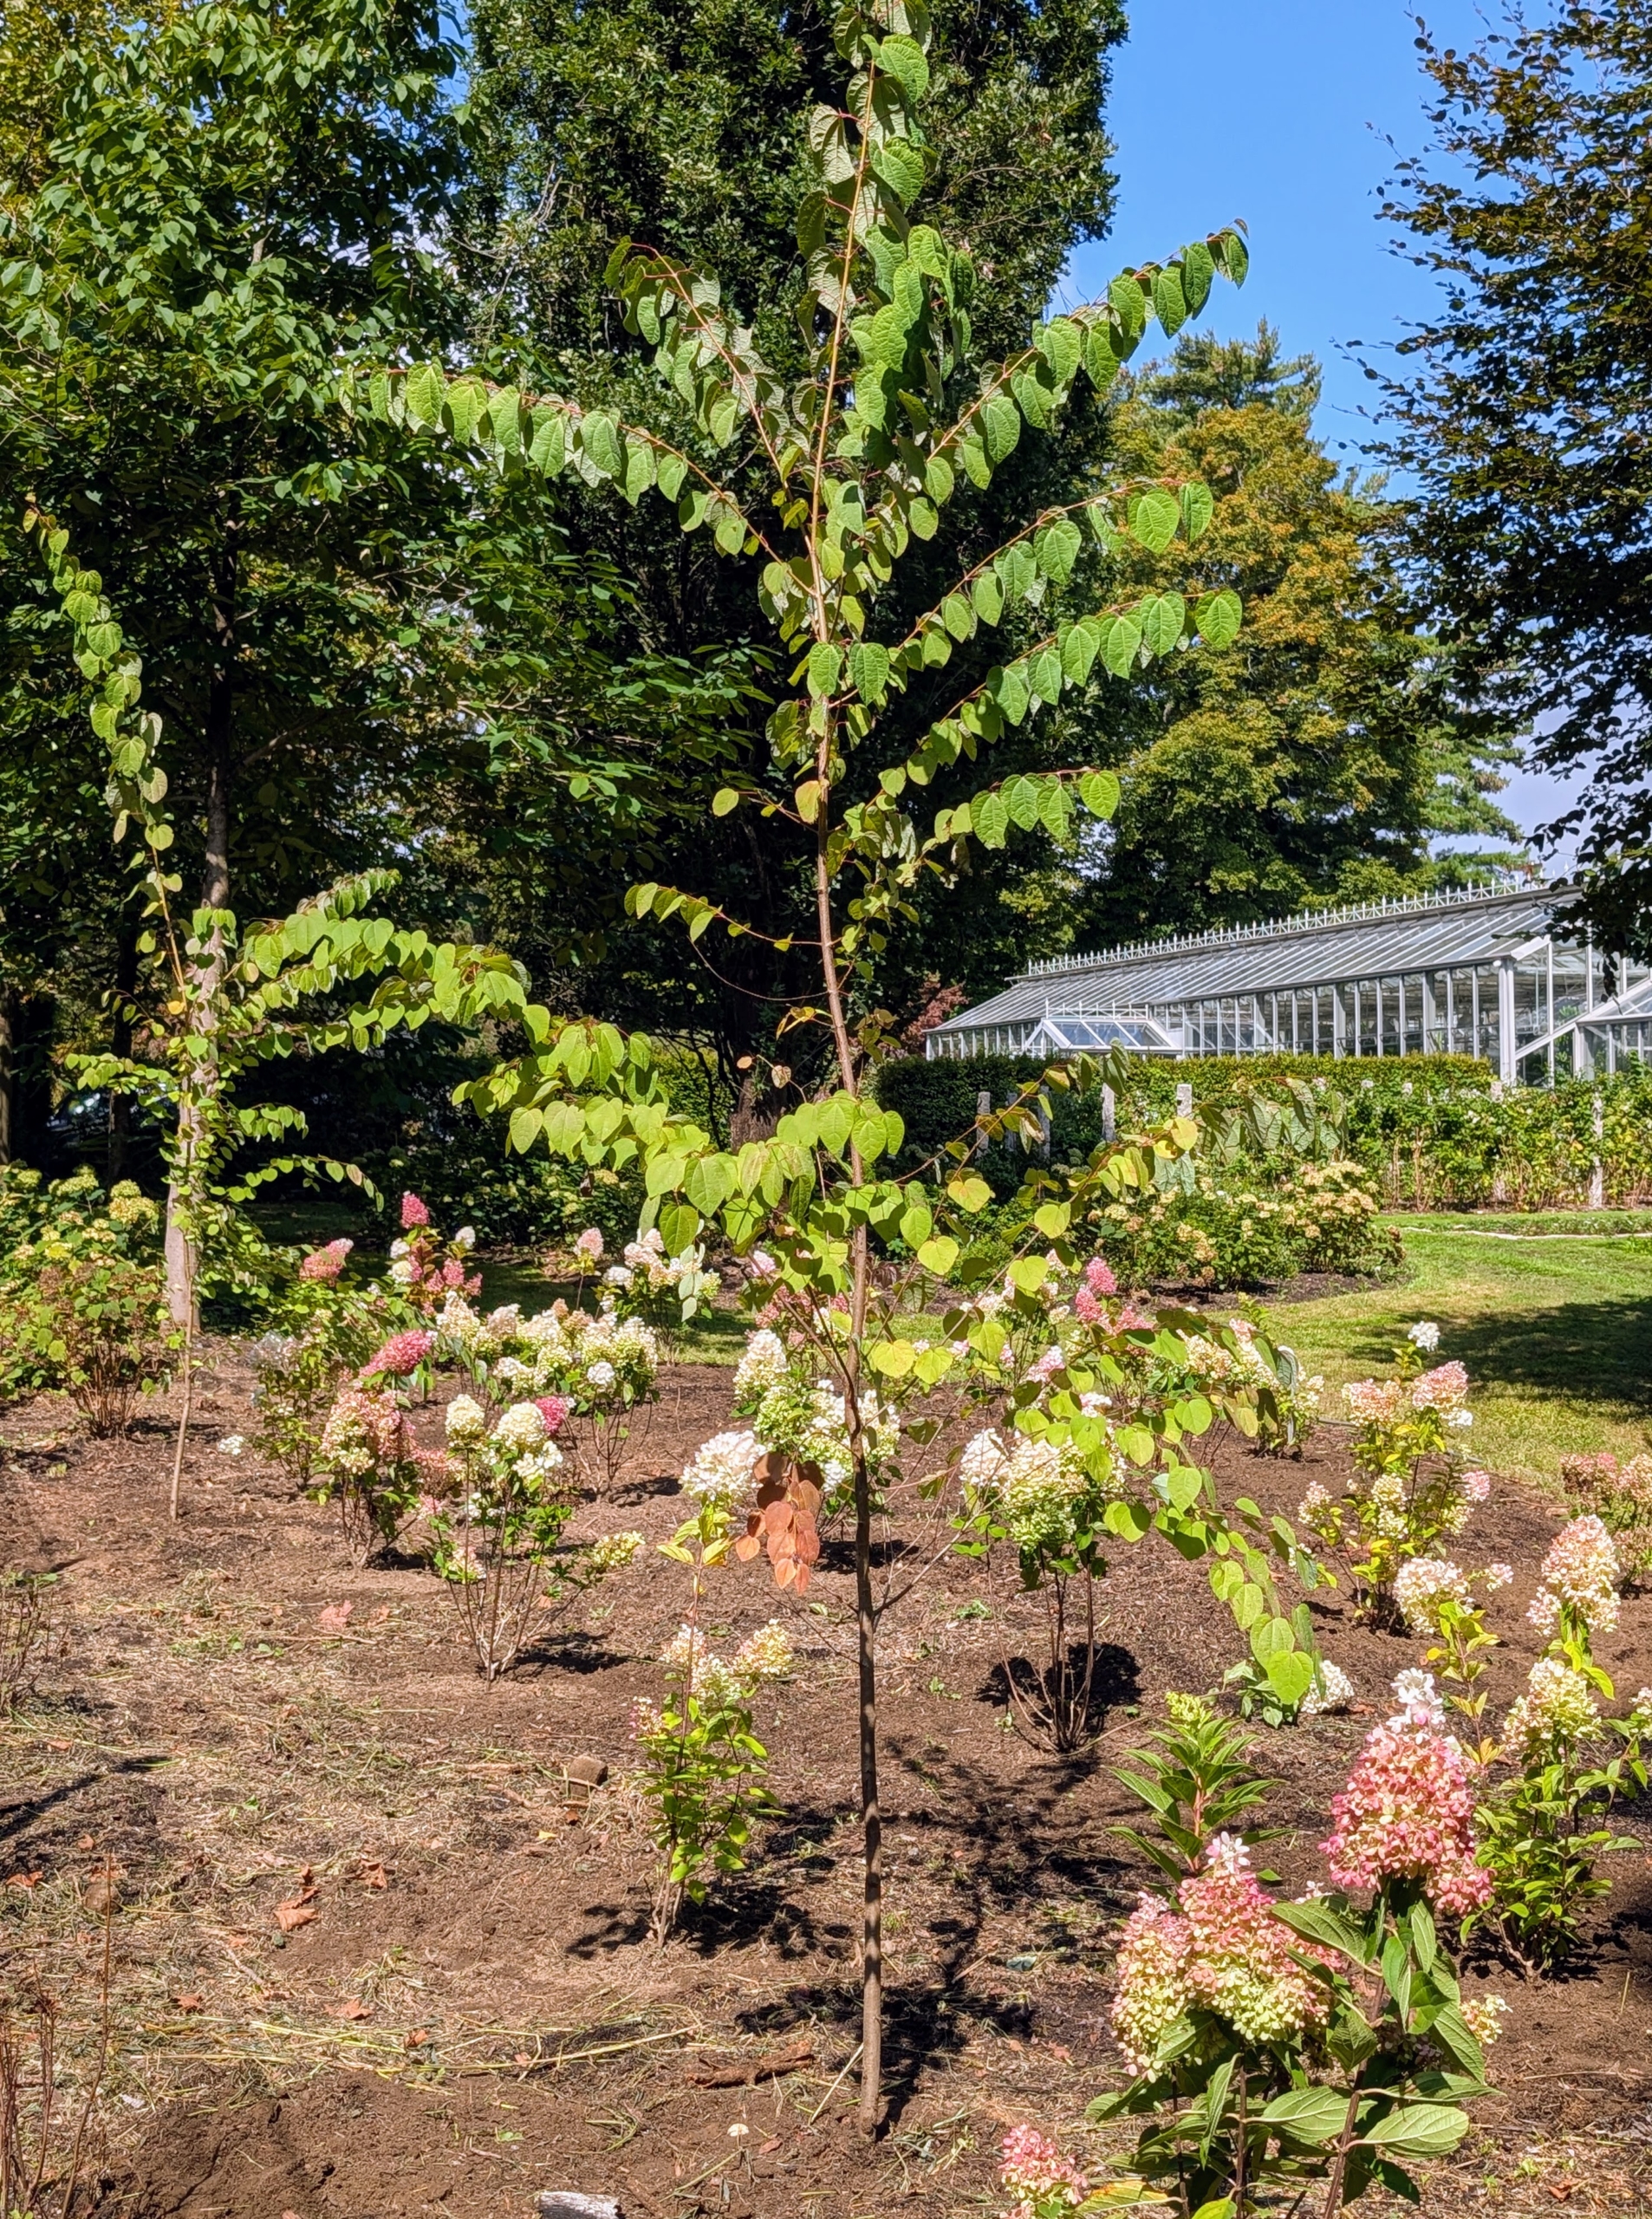
A row of trees was also planted to offer some dappled shade over the hydrangeas once mature. These are katsura trees. what do you think? Following is a short clip showing the bed at the end of the day.
Another annual summertime task is checked off the list.
Along one side of my home overlooking the farm, I have a large stone terrace constructed with formal hedged gardens. For the upper parterres, I selected contrasting evergreen shrubs – boxwood, and golden barberry. To provide interest, these shrubs are sheared to different heights, creating a step effect. In the lower parterres, carefully designed and manicured boxwood hedges surround two hand-casted antique fountains. On one side, a low hedge shaped with an inverted V pattern, or chevron. Maintaining all these plantings requires extra maintenance and regular grooming, but I think it’s well worth the effort.
Enjoy these photos.
I am so pleased with how well these formal gardens have developed over the years. I’ve worked hard to maintain the detailed shapes of the hedges and shrubs. This is the lower terrace that is located just outside my Winter House kitchen. It’s a lovely place to sit and conduct meetings or enjoy summer meals.
This is what the hedges looked like before pruning began. It’s important to groom the specimens every few months when they appear overgrown.
Golden barberry, Berberis thunbergii, is a deciduous shrub that is compact, adaptable, very hardy and shows off striking small, golden yellow oblong leaves. Golden barberry takes on its brightest coloring when it gets at least six hours of direct sun a day.
Buxus is a genus of about 70 species in the family Buxaceae. Common names include box or boxwood. The boxes are native to western and southern Europe, southwest, southern and eastern Asia, Africa, Madagascar, northernmost South America, Central America, Mexico, and the Caribbean. The leaves are arranged opposite from each other, making pairs. I use European boxwood all over my farm.
For trimming and grooming, I use a select group of tools for the terraces. These STIHL battery operated trimmers, shears, and blowers are durable, efficient, and gentle enough to use around this formal garden space.
These are Okatsune 30-inch long Hedge Shears. Okatsune shears are light and precise, and come in a range of sizes.
Phurba is my resident boxwood pruning expert. He’s been with me for many years. Here he is pruning and shaping the boxwood by hand using the Okatsune shears.
To get the top of the manicured hedges level and groomed, Phurba uses the STIHL HSA 140 T battery hedge trimmer. It’s excellent for trimming and sculpting.
Phurba is able to skim the top of the hedge removing the new growth with precision and ease.
Here, Phurba works on the upper terrace quadrants, again hand trimming the big boxwood shrubs.
Phurba makes sure to cover every side of the shrubs and hedges, sometimes carefully having to walk in tight spaces.
Phurba uses the STIHL hand-held HSA 26 garden shears to trim the golden barberry.
There are always a lot of clippings to clear, but that’s because these hedges are doing so well. Good, regular pruning stimulates new growth, controls unwanted growth, and removes dead or damaged branches.
Here is a finished section of a boxwood hedge. Boxwood is a popular choice for formal gardens because of its versatility, ability to be pruned, and year-round bold green foliage.
Phurba takes several days to do all the careful pruning and grooming. Here, one can see where he has trimmed, and where he still has work to do.
And have you seen my all-weather furniture by Polywood? These chairs and table are part of my Chinoiserie Collection. These pieces stay out all season long and are designed to withstand storms and strong winds. They are so durable and look perfect year after year.
My Chinoiserie Accent Tables by Polywood are great for displaying some of my potted plants. This outdoor furniture comes in a variety of colors including my signature Bedford gray.
It takes time to develop formal gardens. When planning, one must consider type of plants, their size at the time of planting and at maturity, the level of care, the environment, and local weather conditions. It can take up to 10-years for a formal garden to be fully established.
These gardens look so excellent after a good grooming.
This is my antique sugar pot in the center of the footpath of the upper terrace parterre. Sugar kettles were used on 19th century Louisiana plantations for the production of sugar. In the winter, I use it as a fire pit when entertaining.
All the hedges are now level around the boxwood. These plants have filled out the areas so nicely. Thanks Phurba! The terraces look wonderful.
My vegetable garden just keeps on giving - this week, some beautiful farm-grown onions.
The onion, Allium cepa, is the most widely cultivated species of the genus Allium. Onions are hardy, easy to grow, and can be grown in a variety of soils and climates. I plant a lot of onions every year. I use them in my cooking, and in sandwiches and salads. And I share many of them with family and friends.
Here are some photos, enjoy.
It’s so rewarding to be able to pick so many fresh vegetables from one’s own garden. This week, I harvested lots of onions.
I plant a good amount of onions every year. It is one of the most favorite crops here at the farm.
My onions are started from seed in the greenhouse and then planted outdoors in the garden bed in spring.
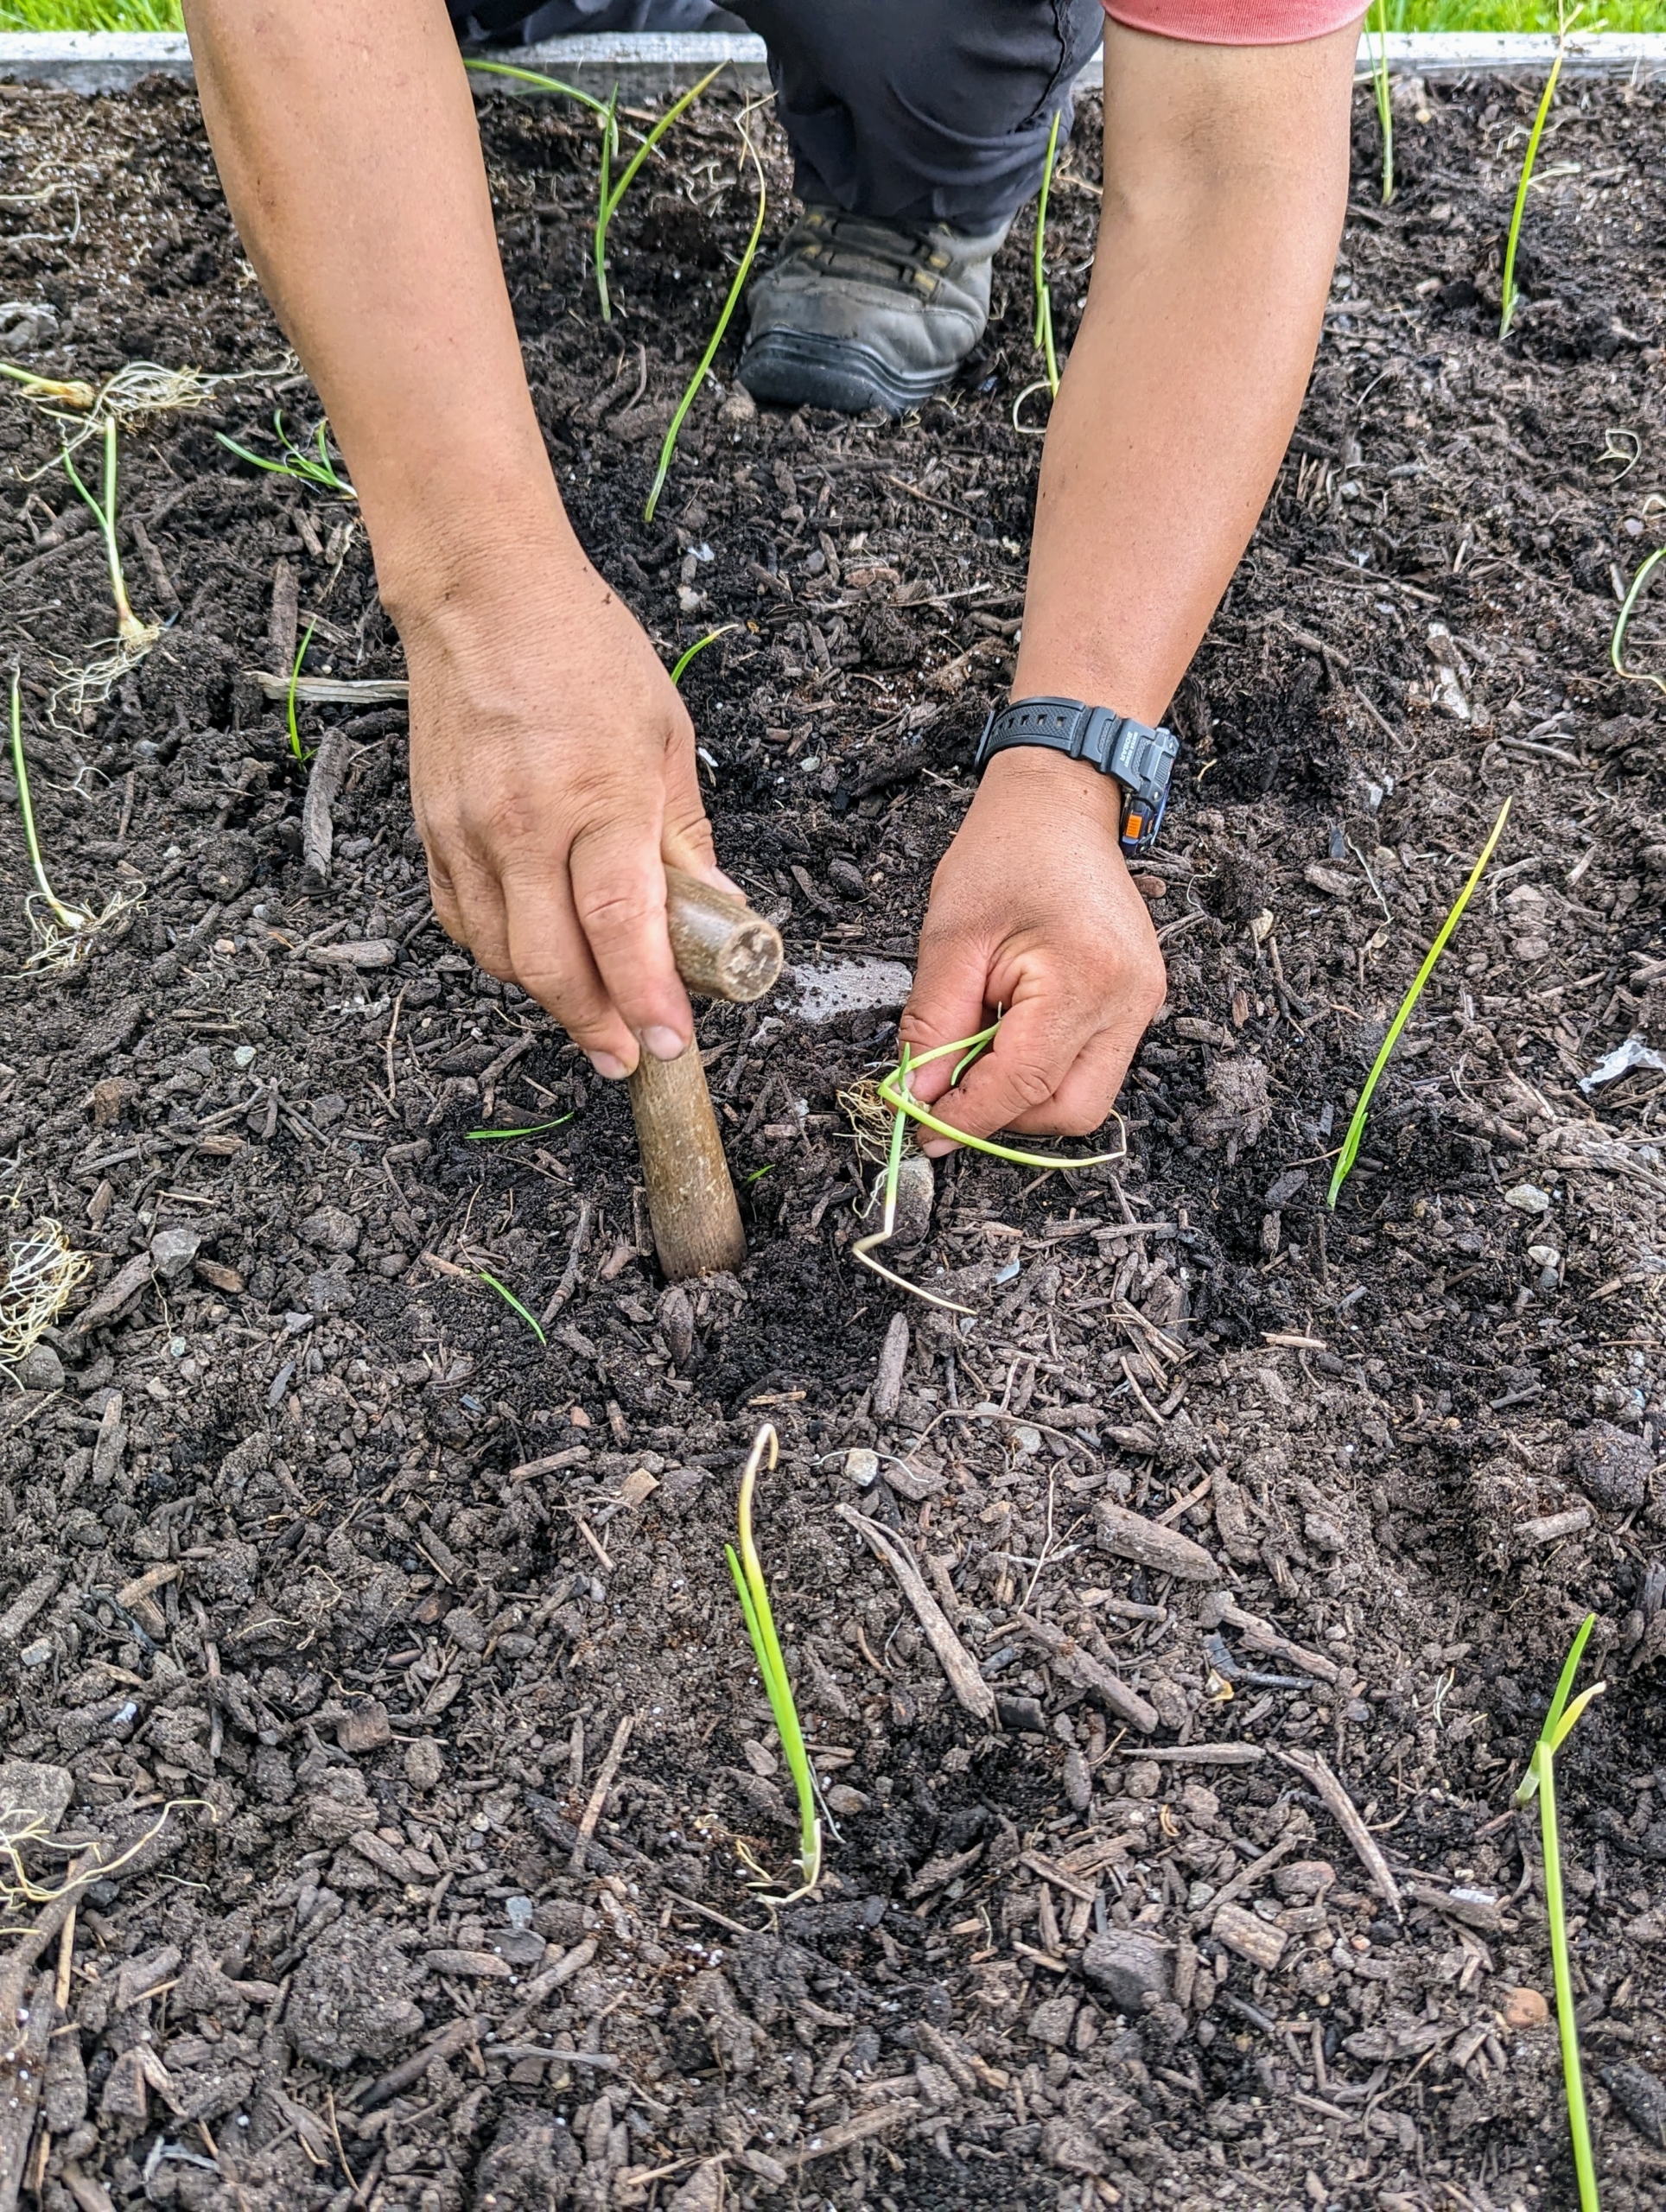
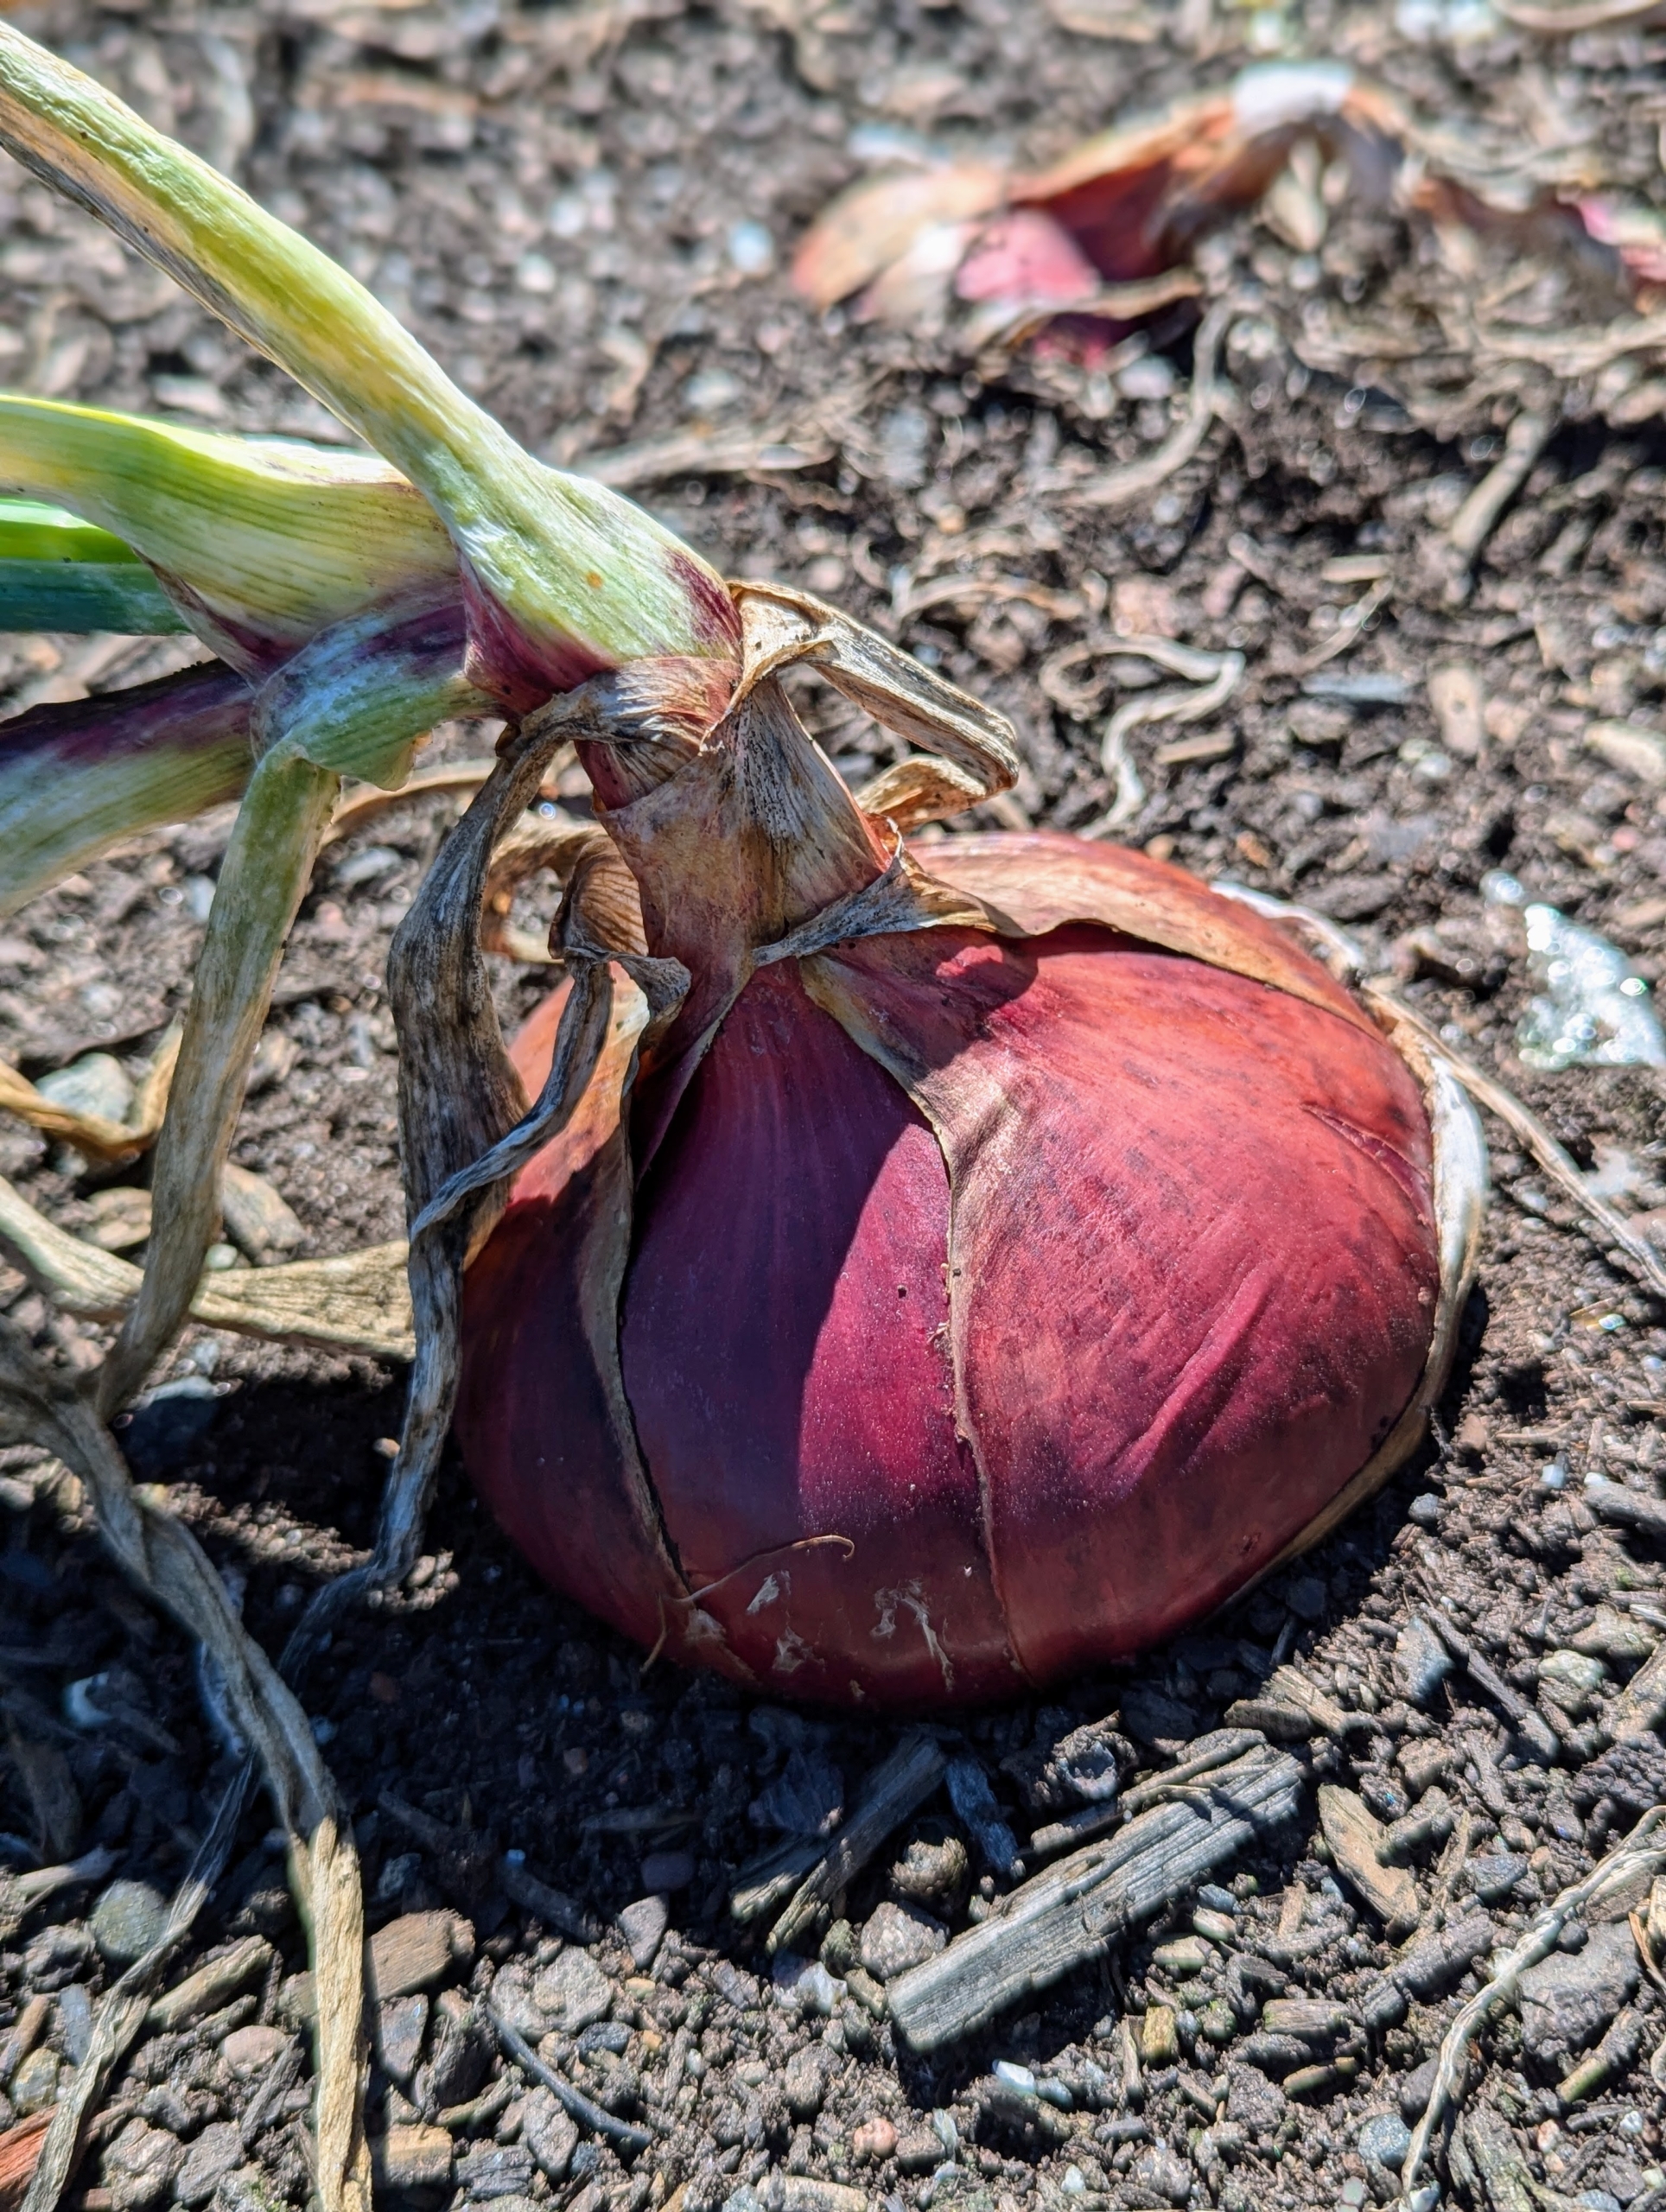
I plant red onions, white onions, and yellow onions. Here, Phurba carefully plants them using a dibber.
They are planted when temperatures are still a bit cool. Early planting gives the onions time to develop tops and store energy for the bulbs.
Here they are all planted in early June.
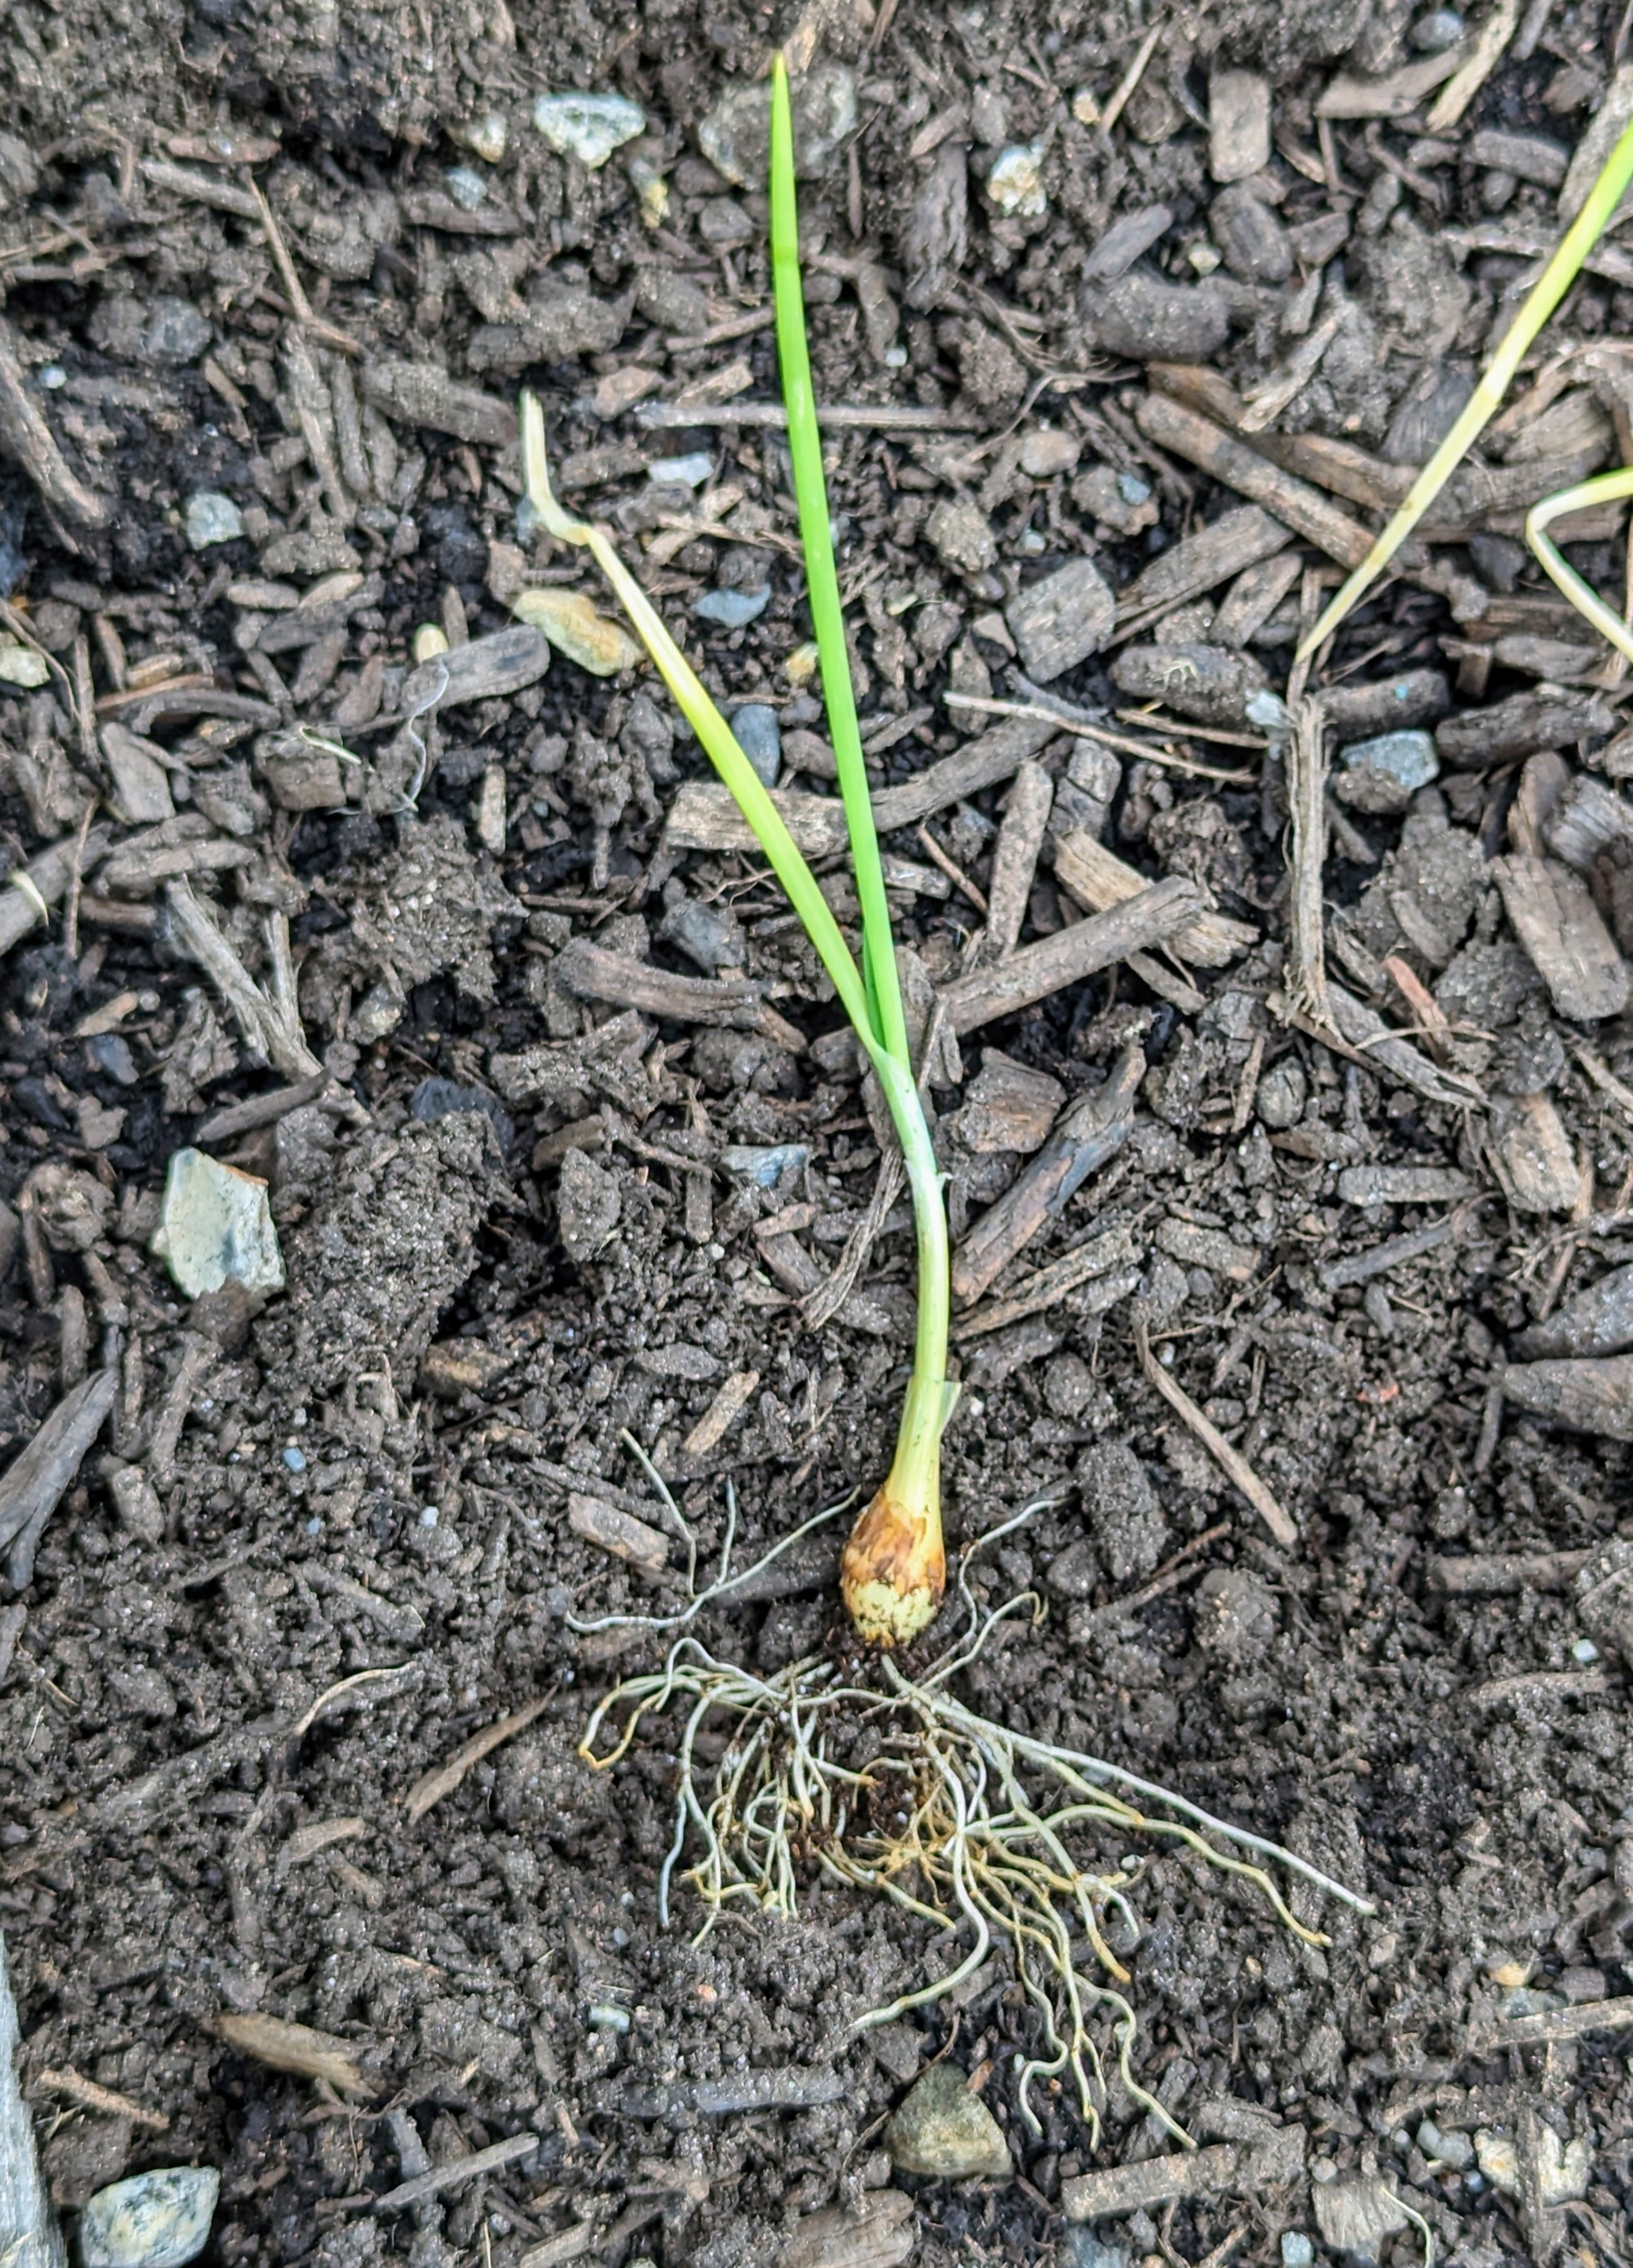
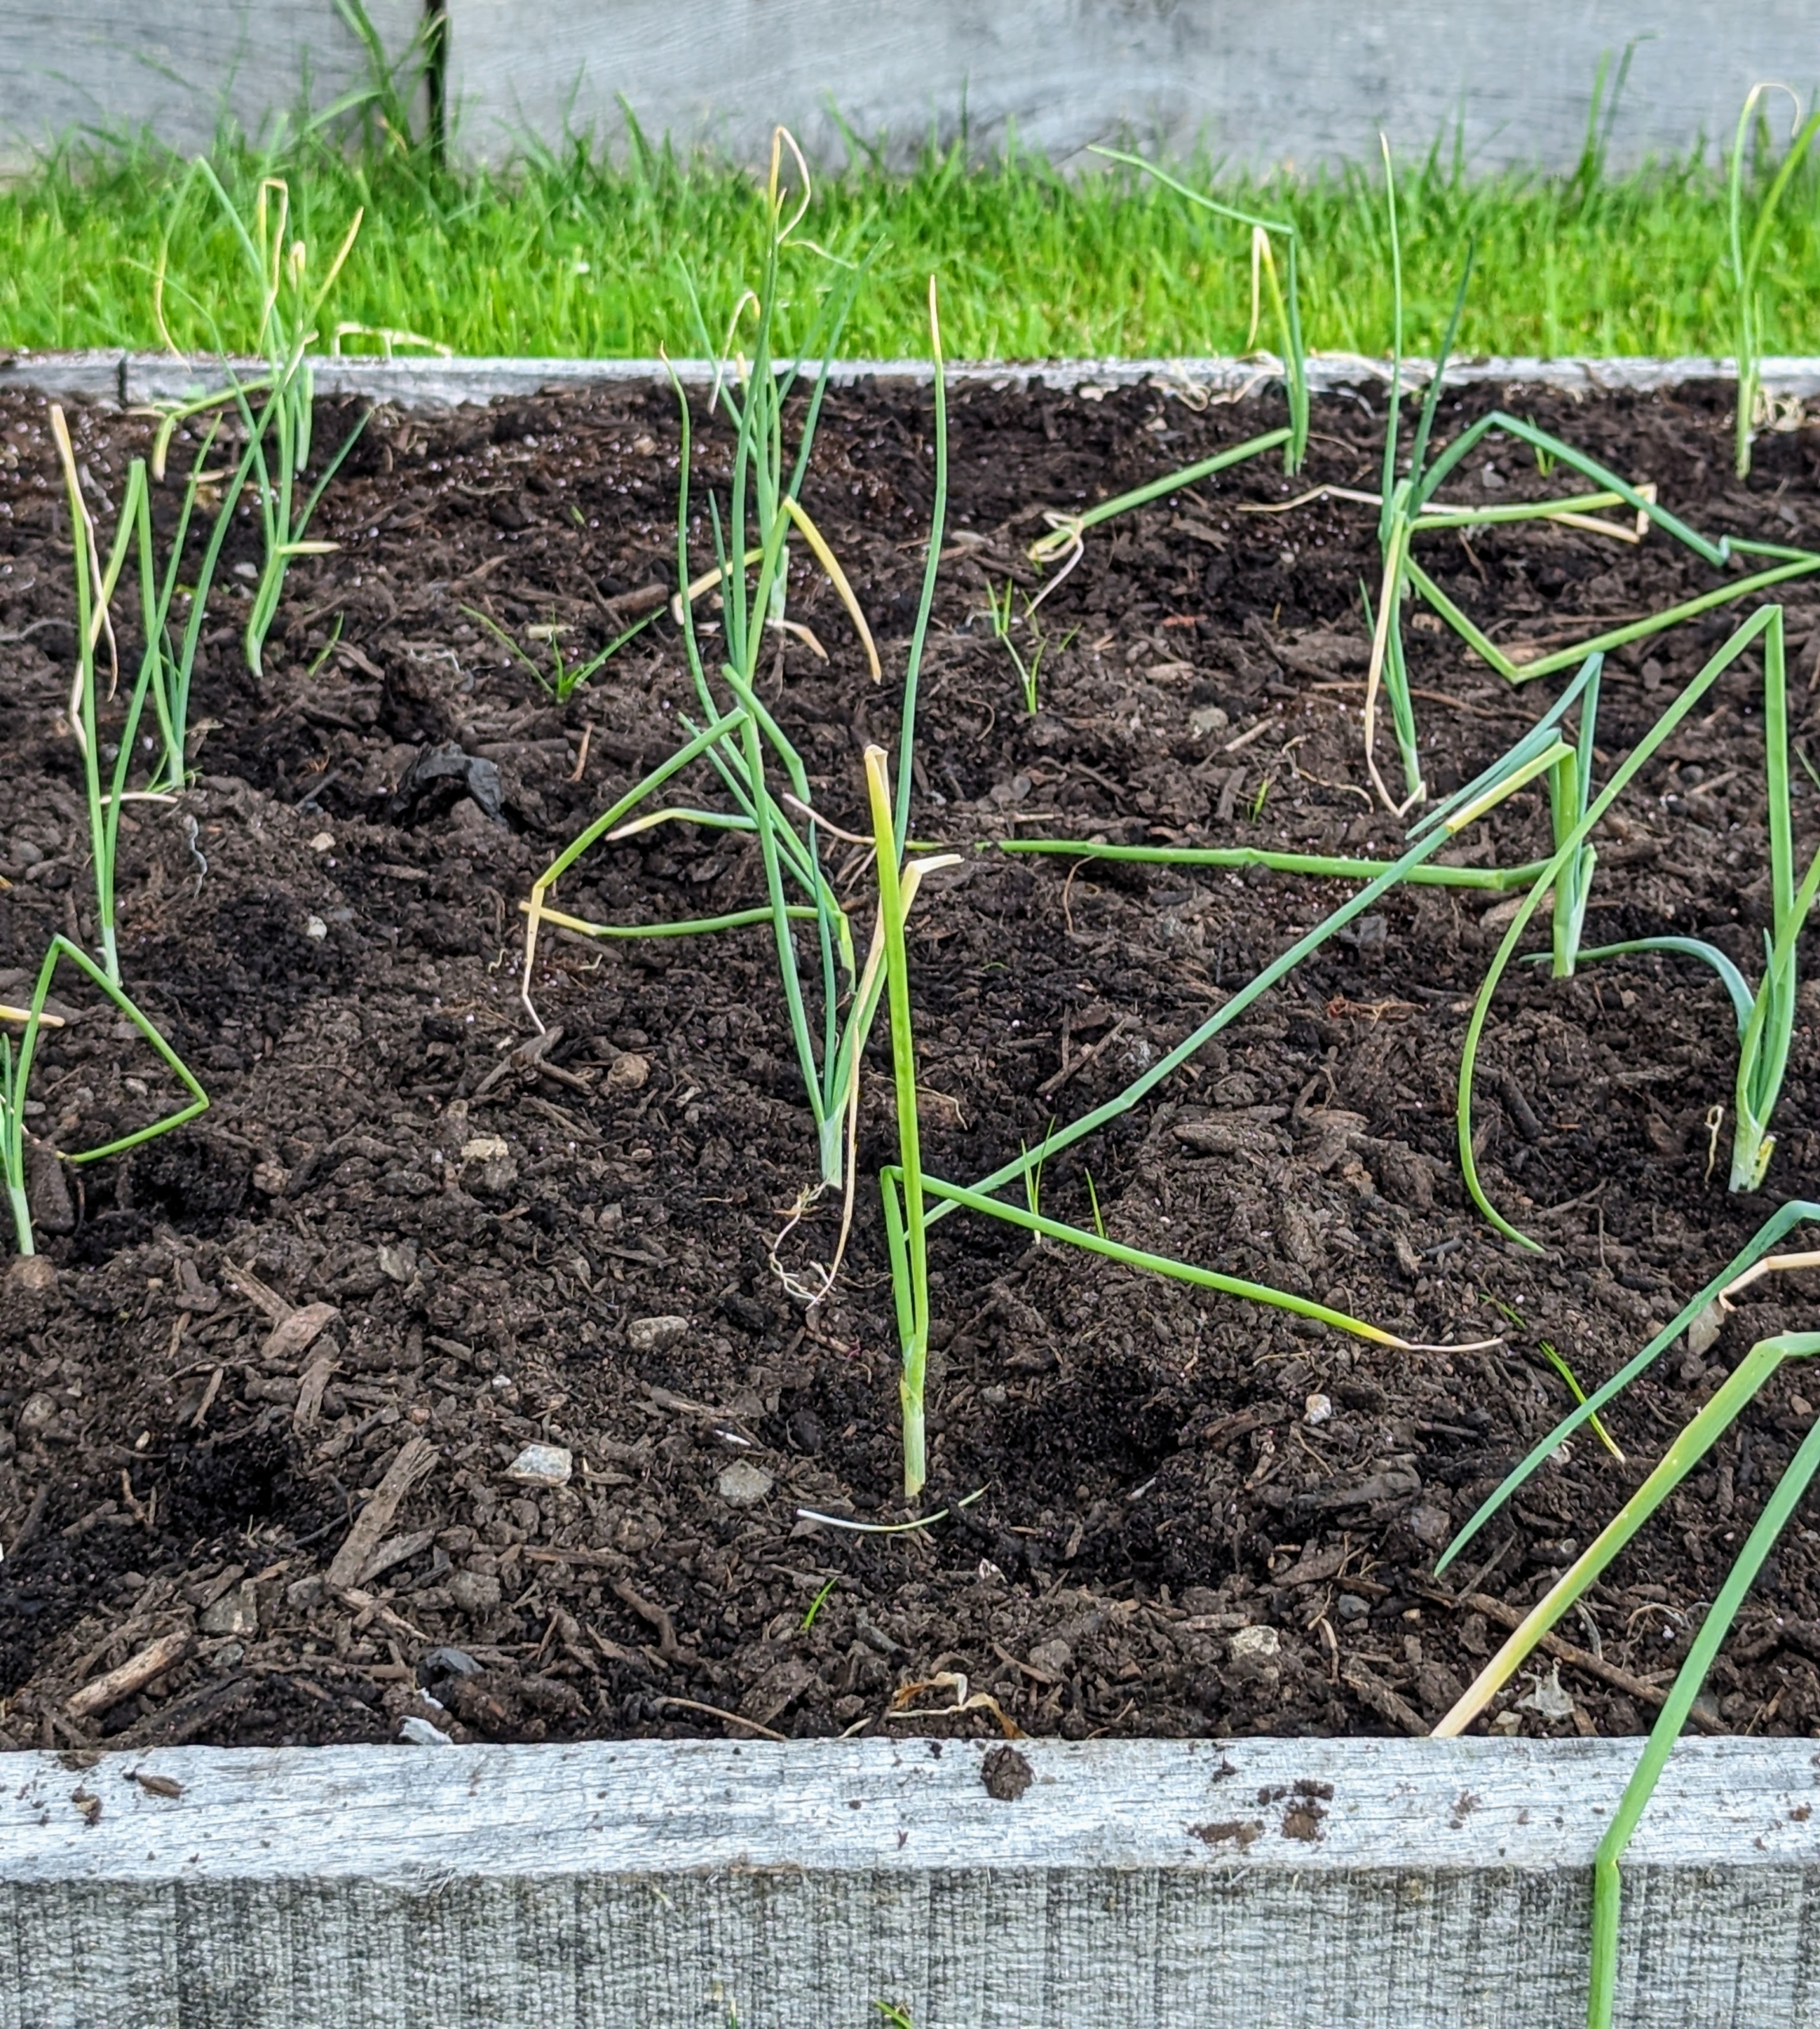
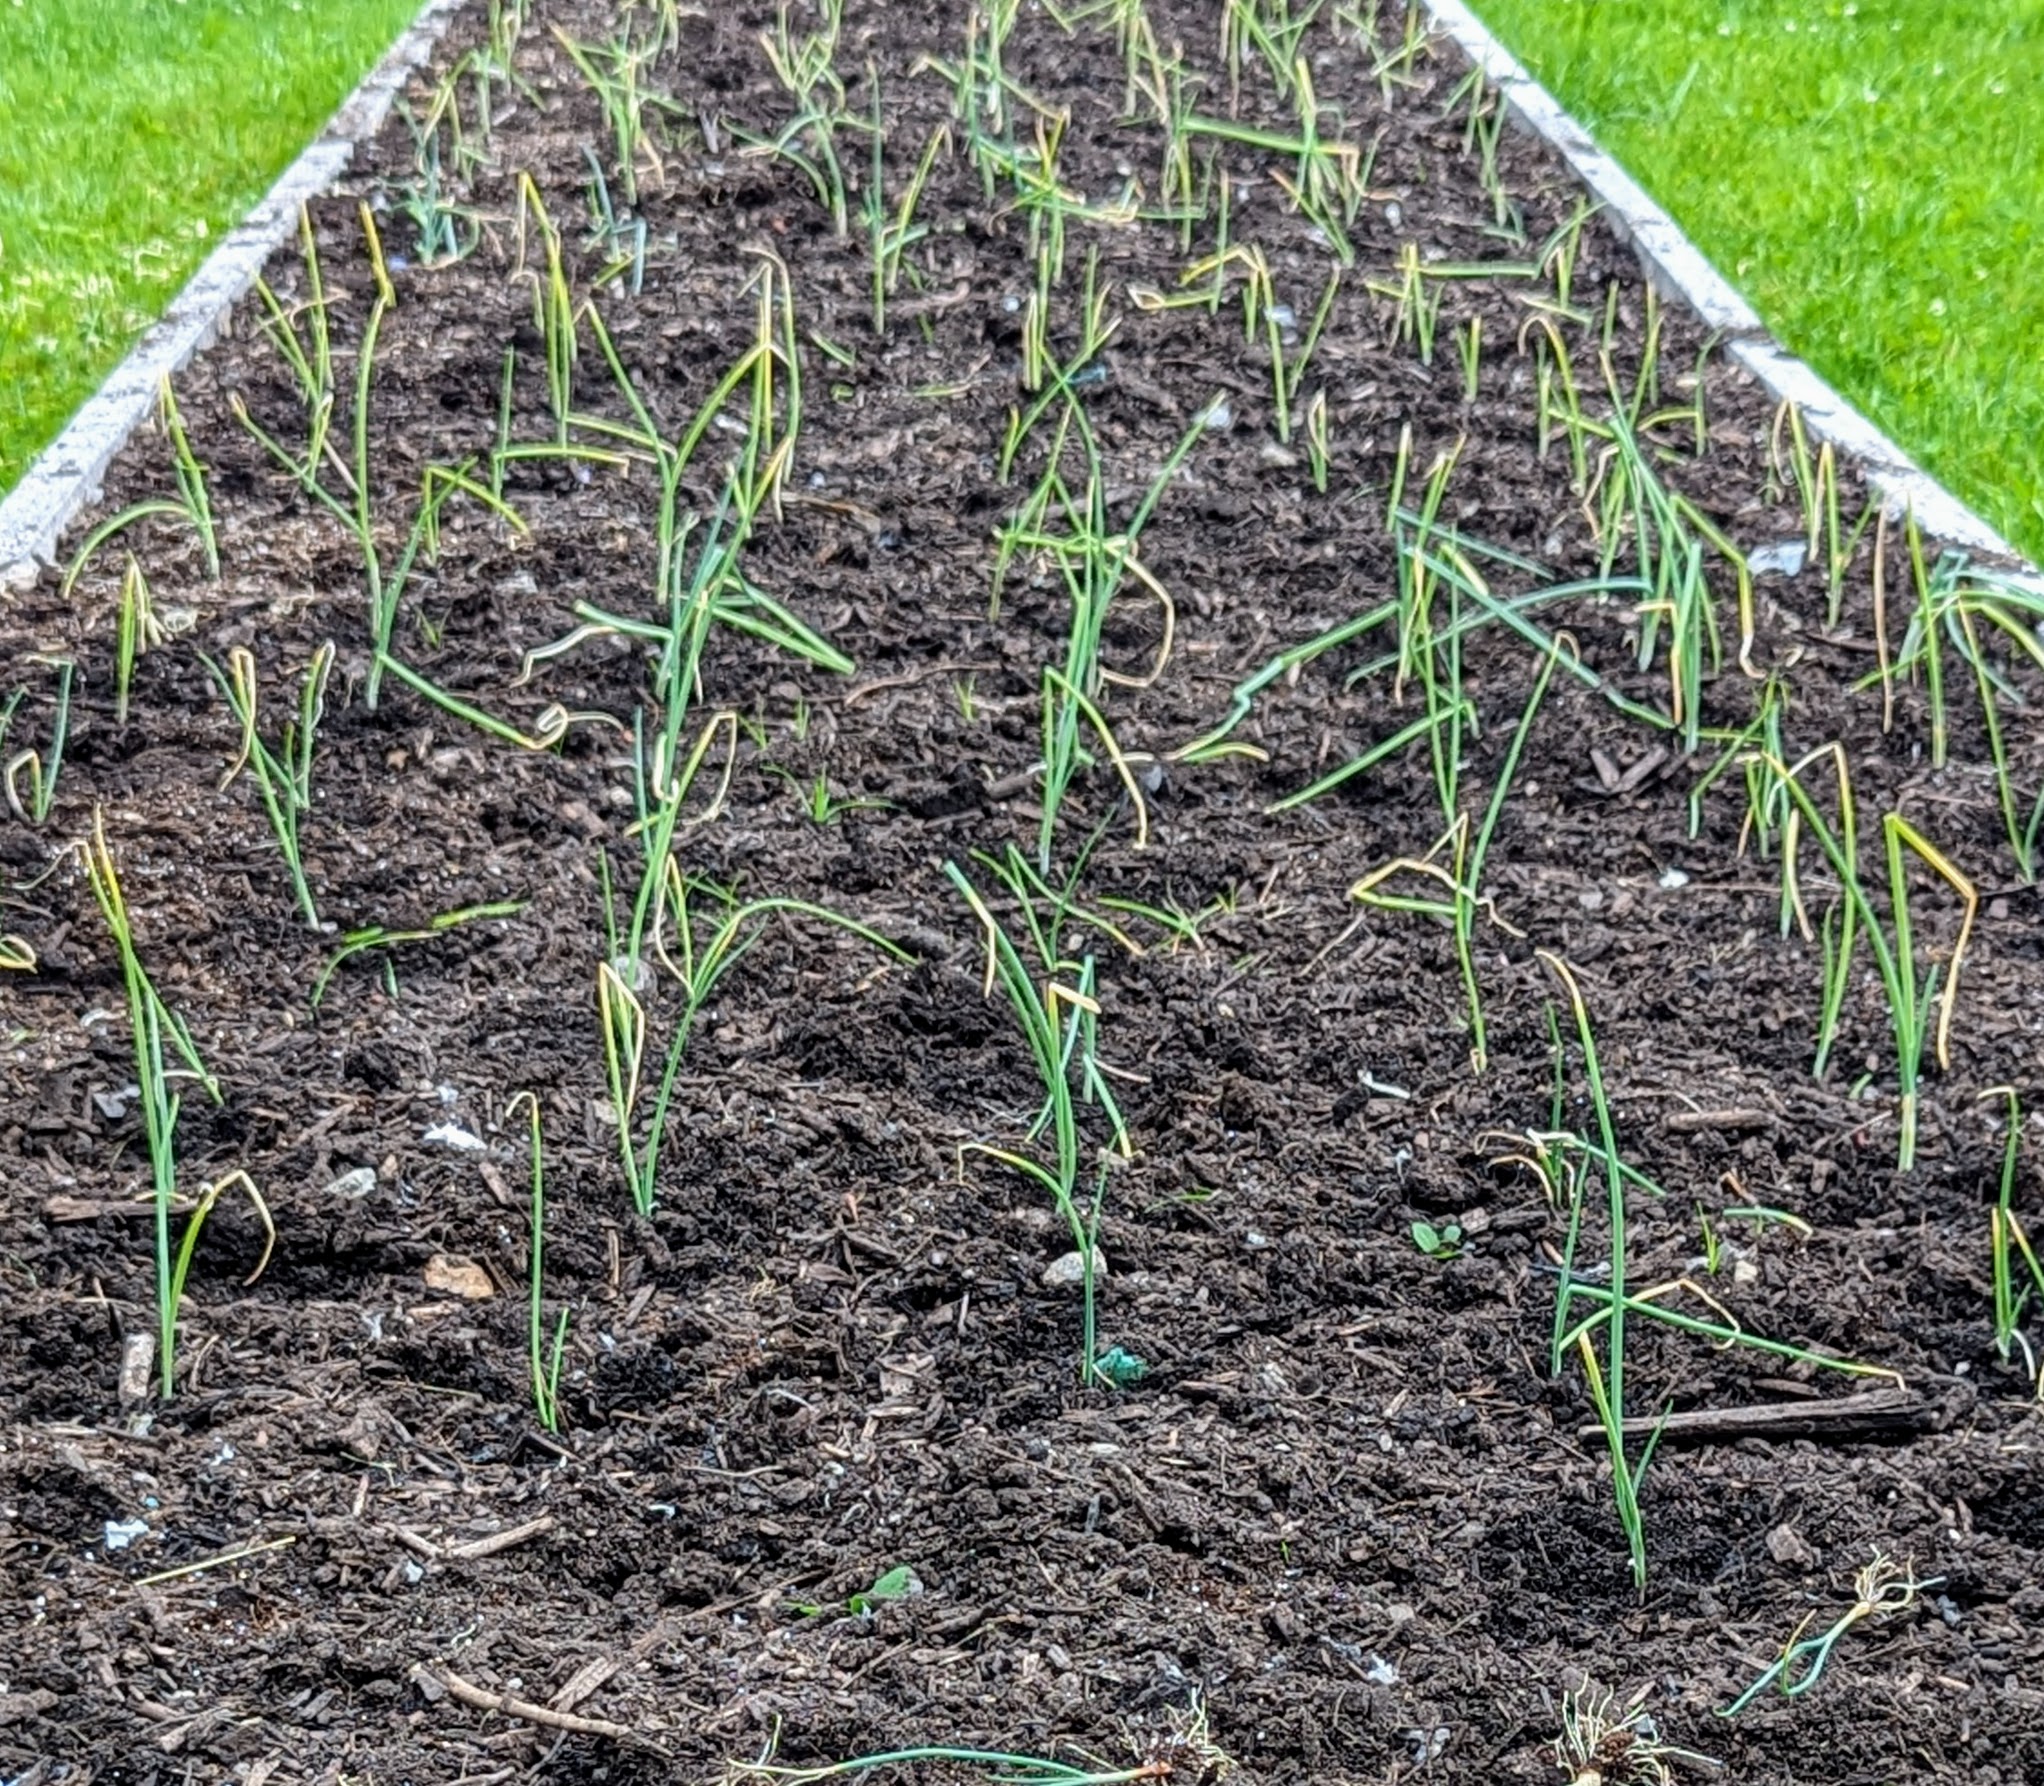
By late July the onions are starting to show through the soil, but they are still small and the top leaves are still very green.
Onions require 90 to 100 days to mature from seed, which is around four months. From sets, onions are ready to harvest after around 80 days, or just under three months.
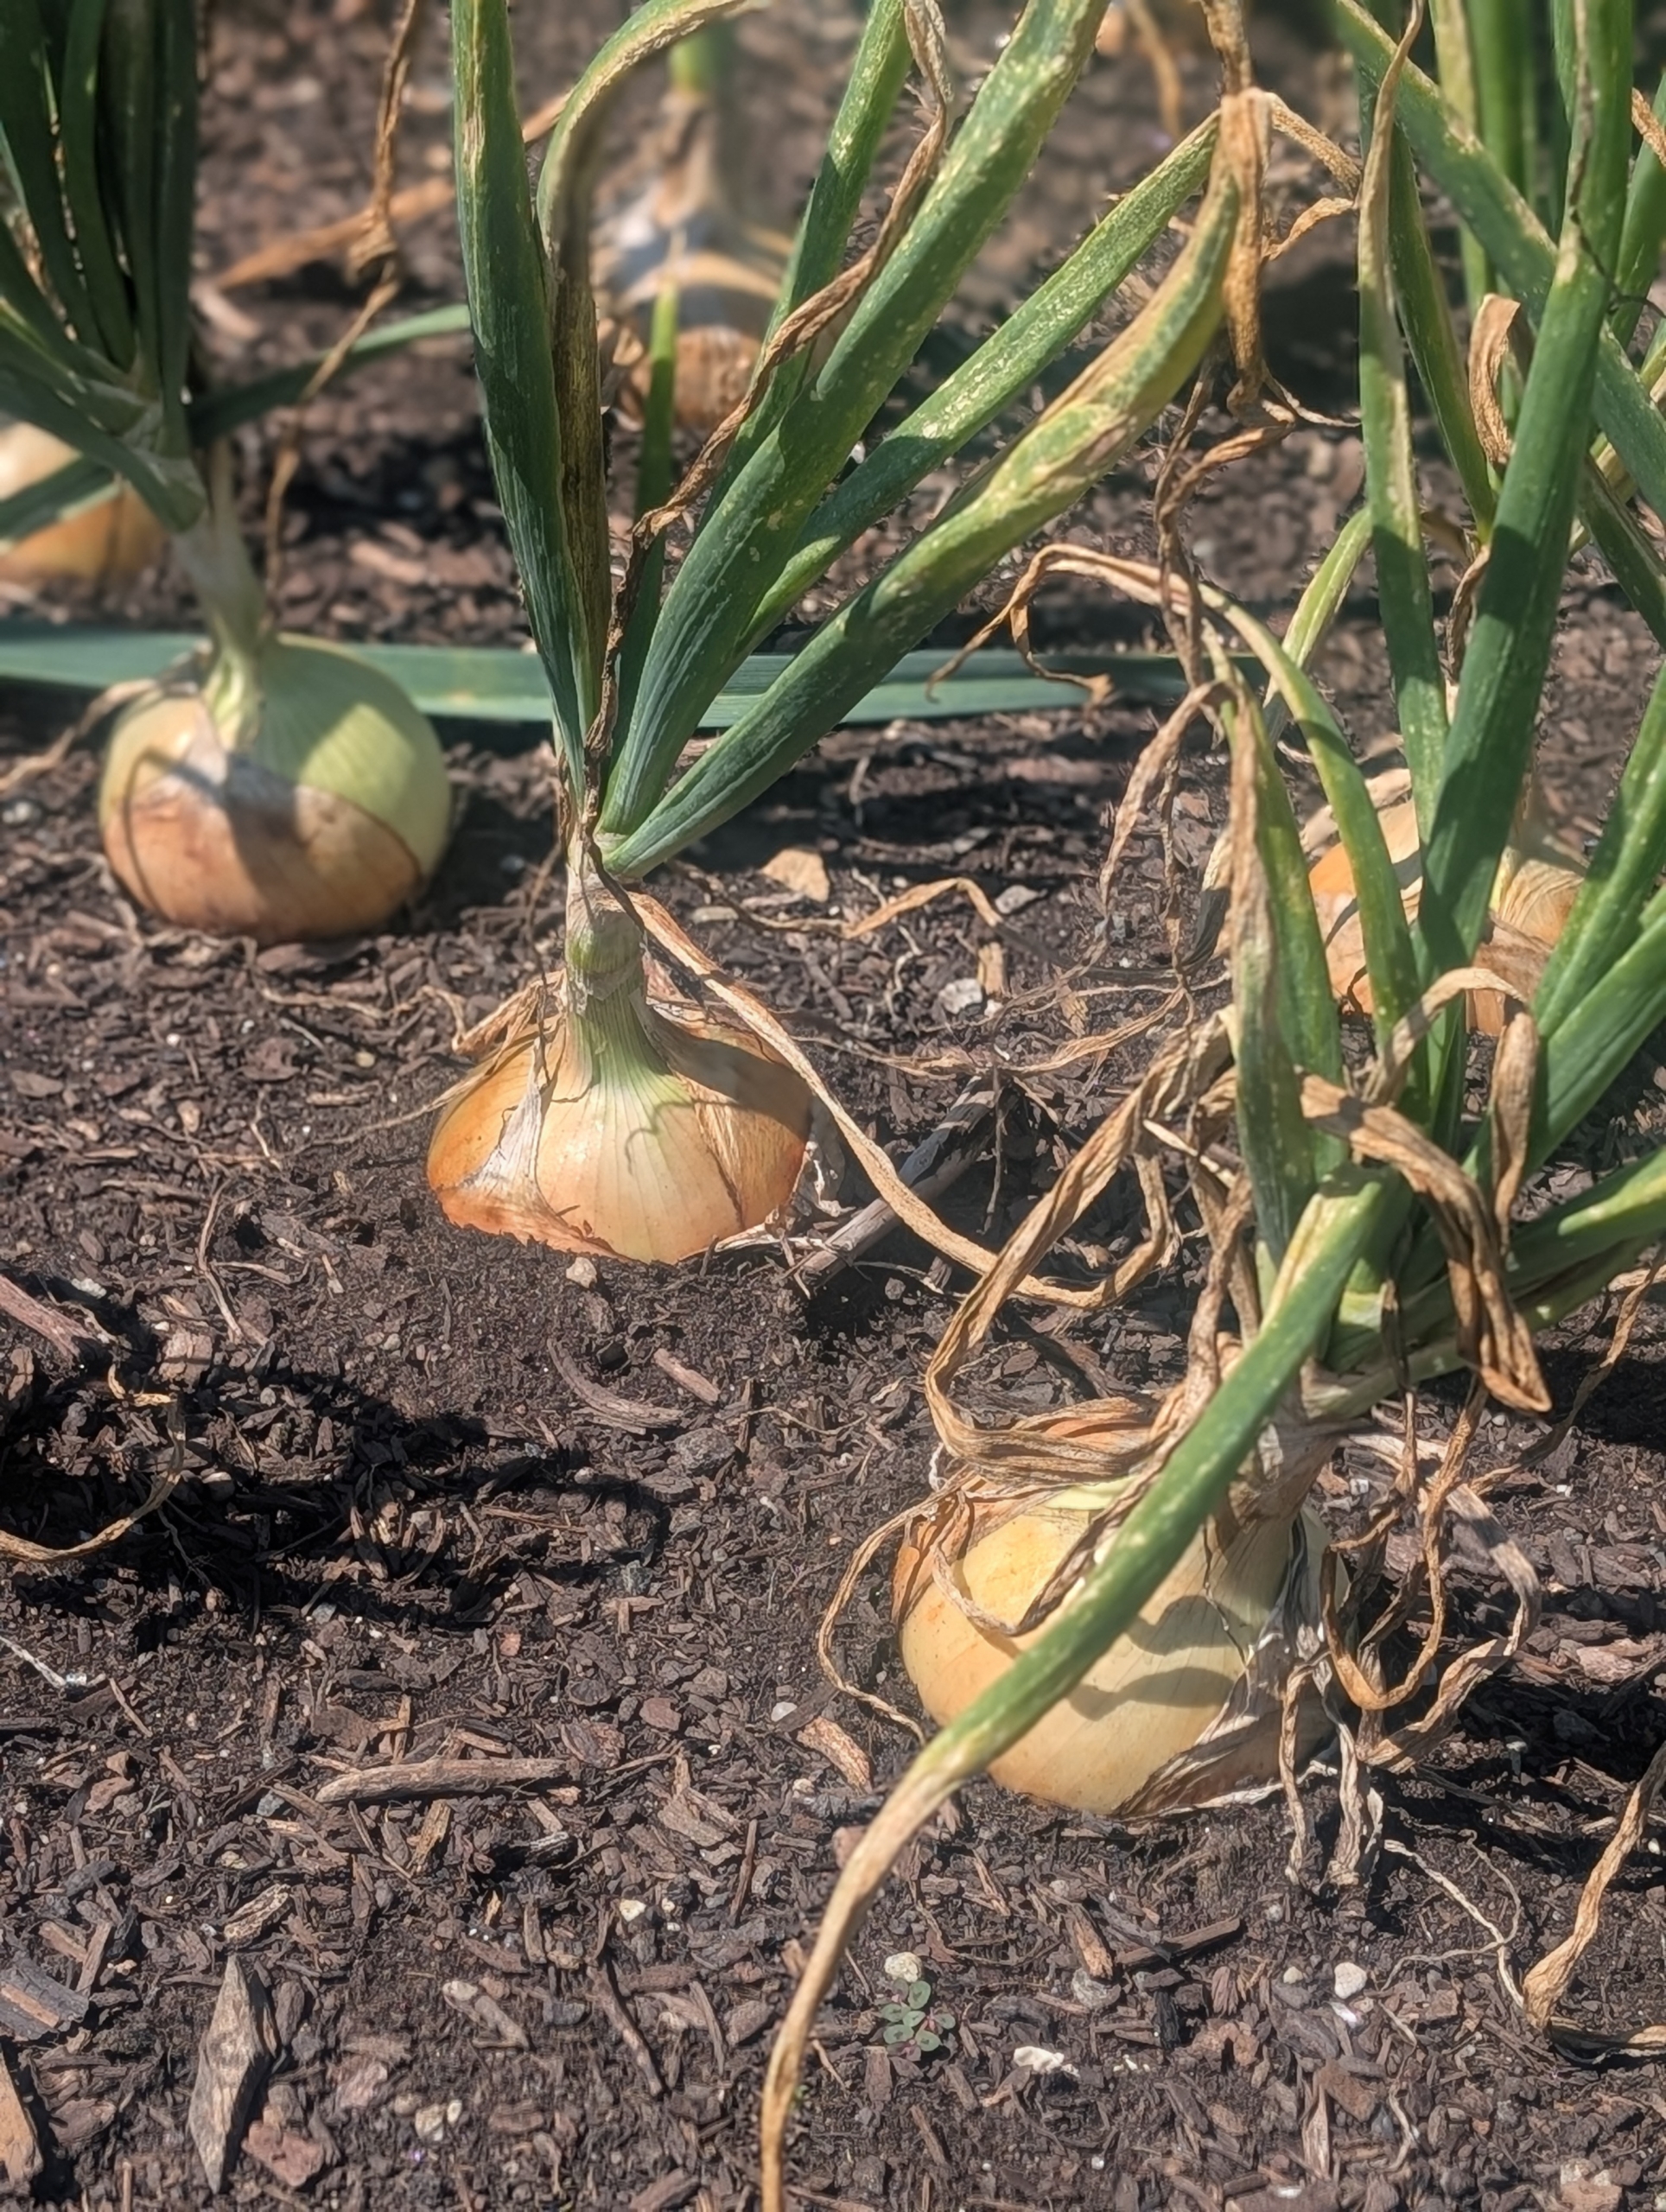
Onions are edible at any point, no matter how small they are. Here I harvested a few early season onions – they look very good.
A week later, the leaves are beginning to brown.
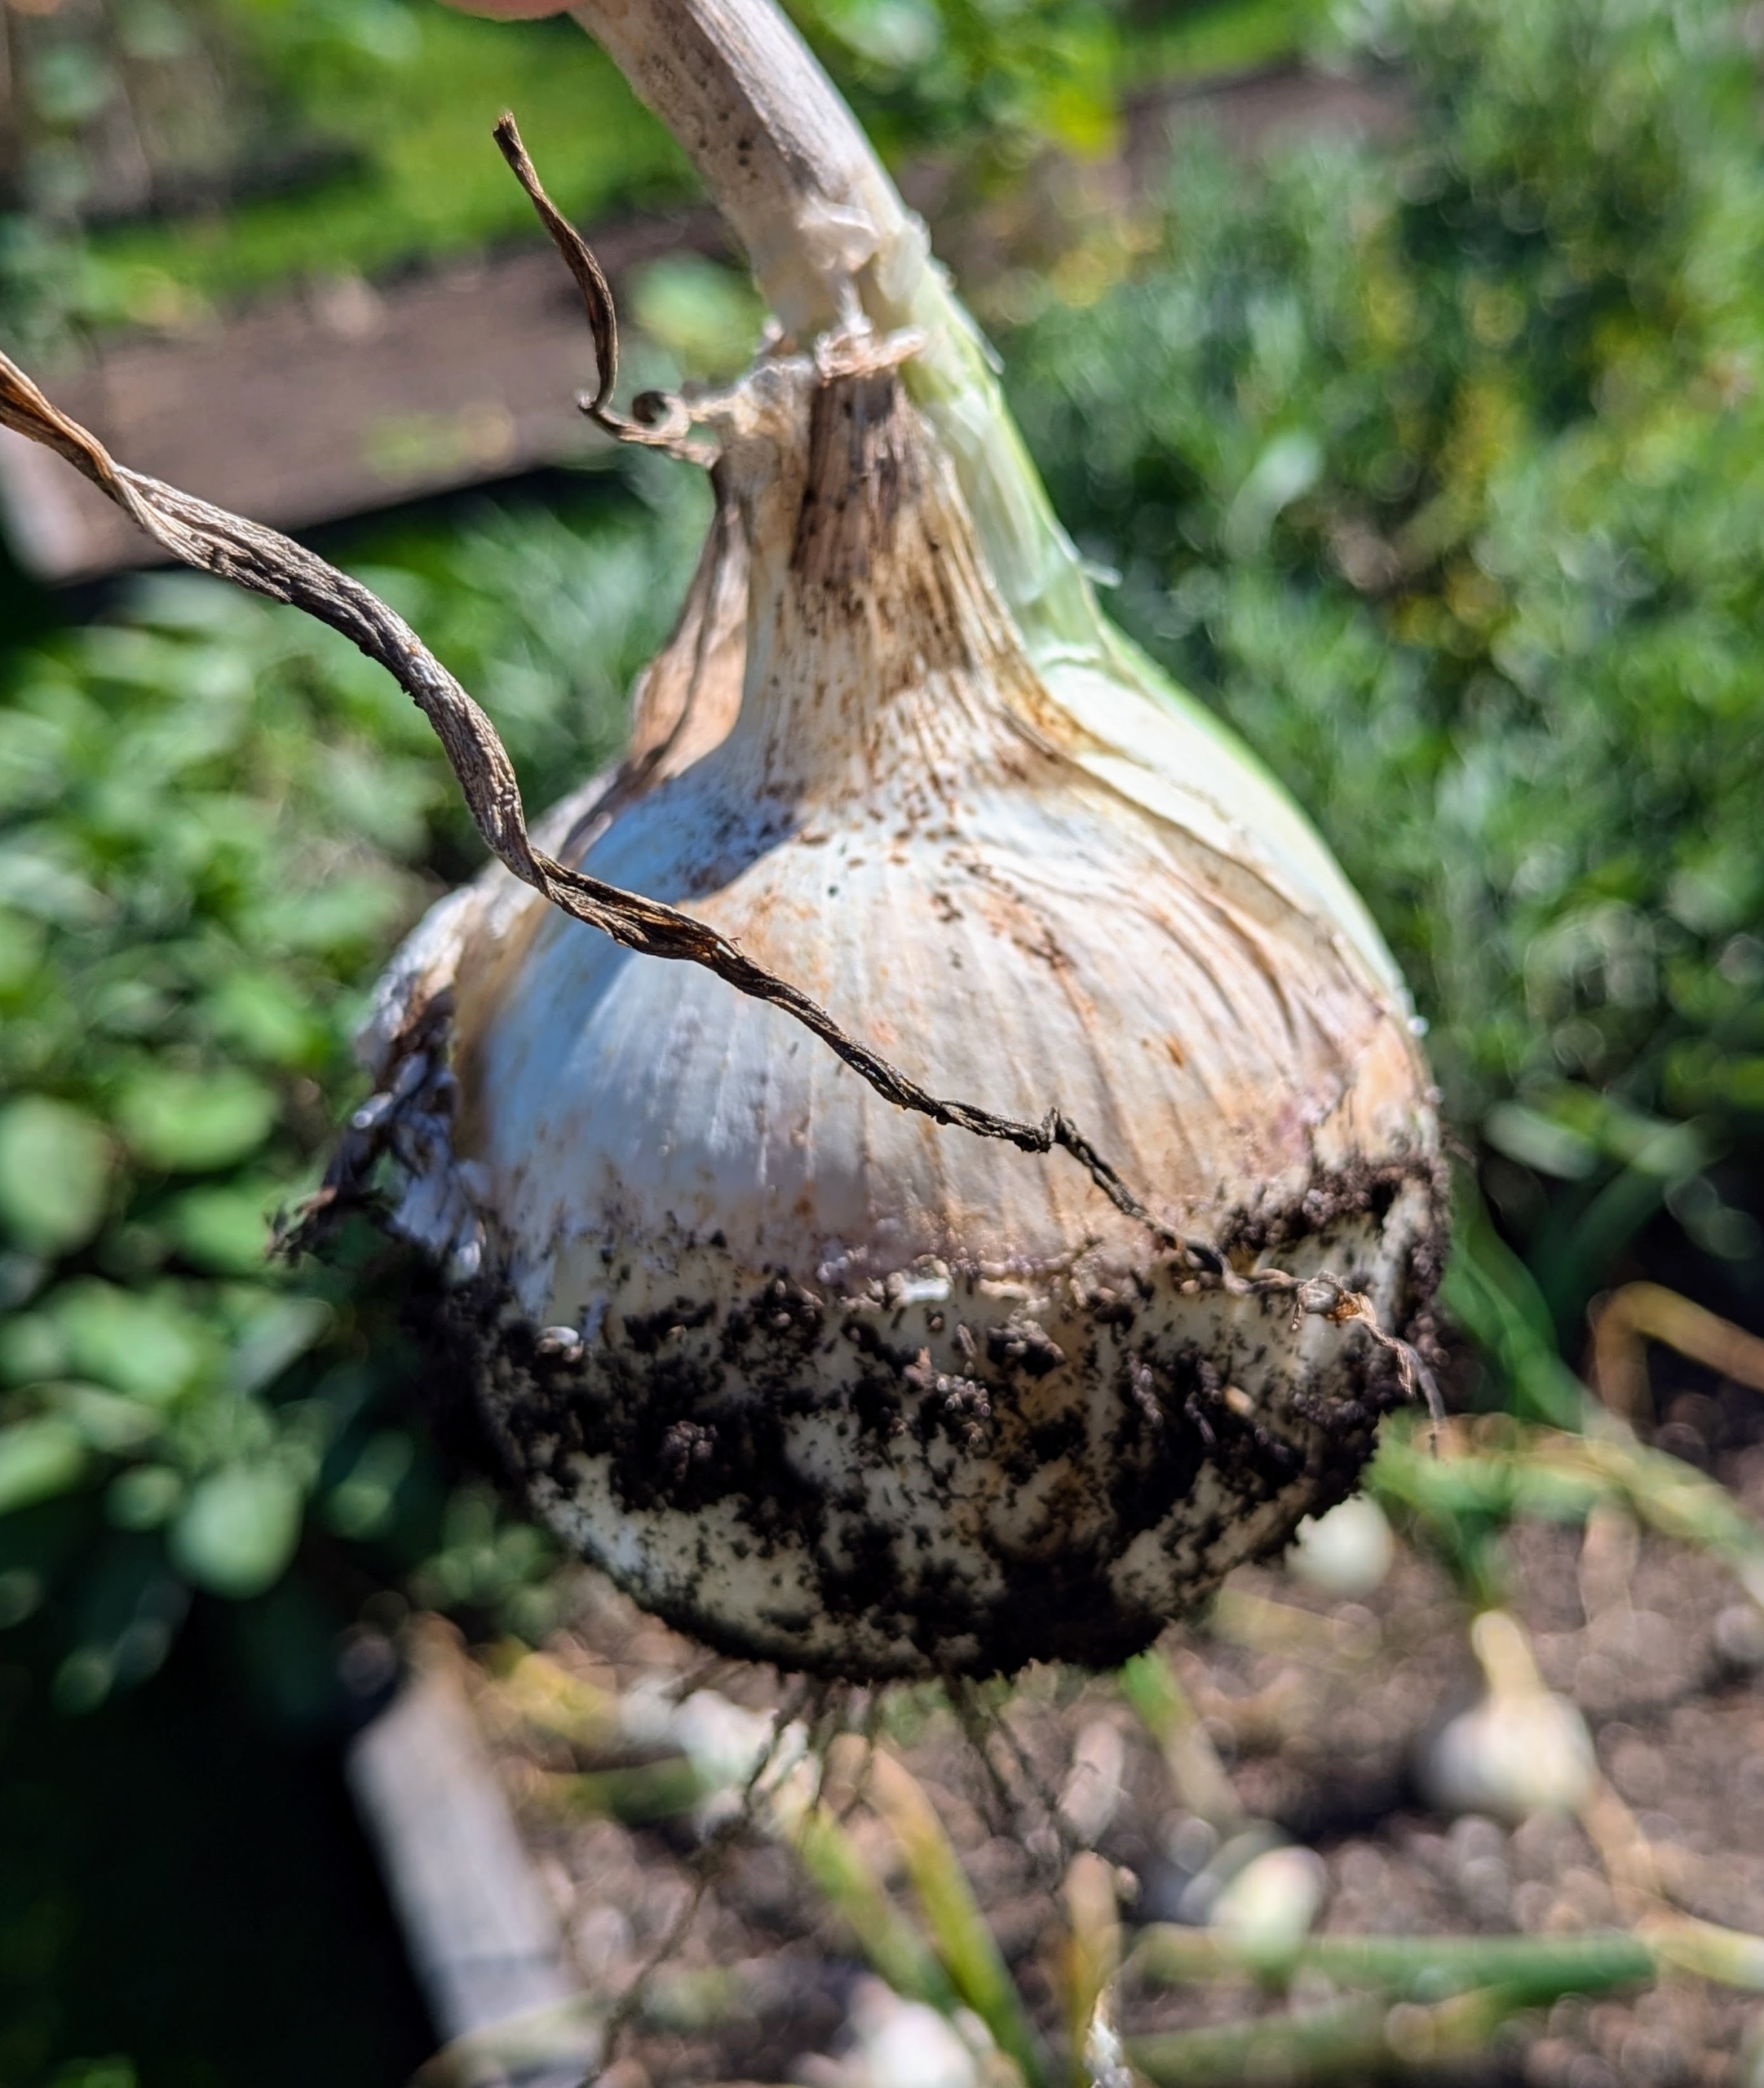
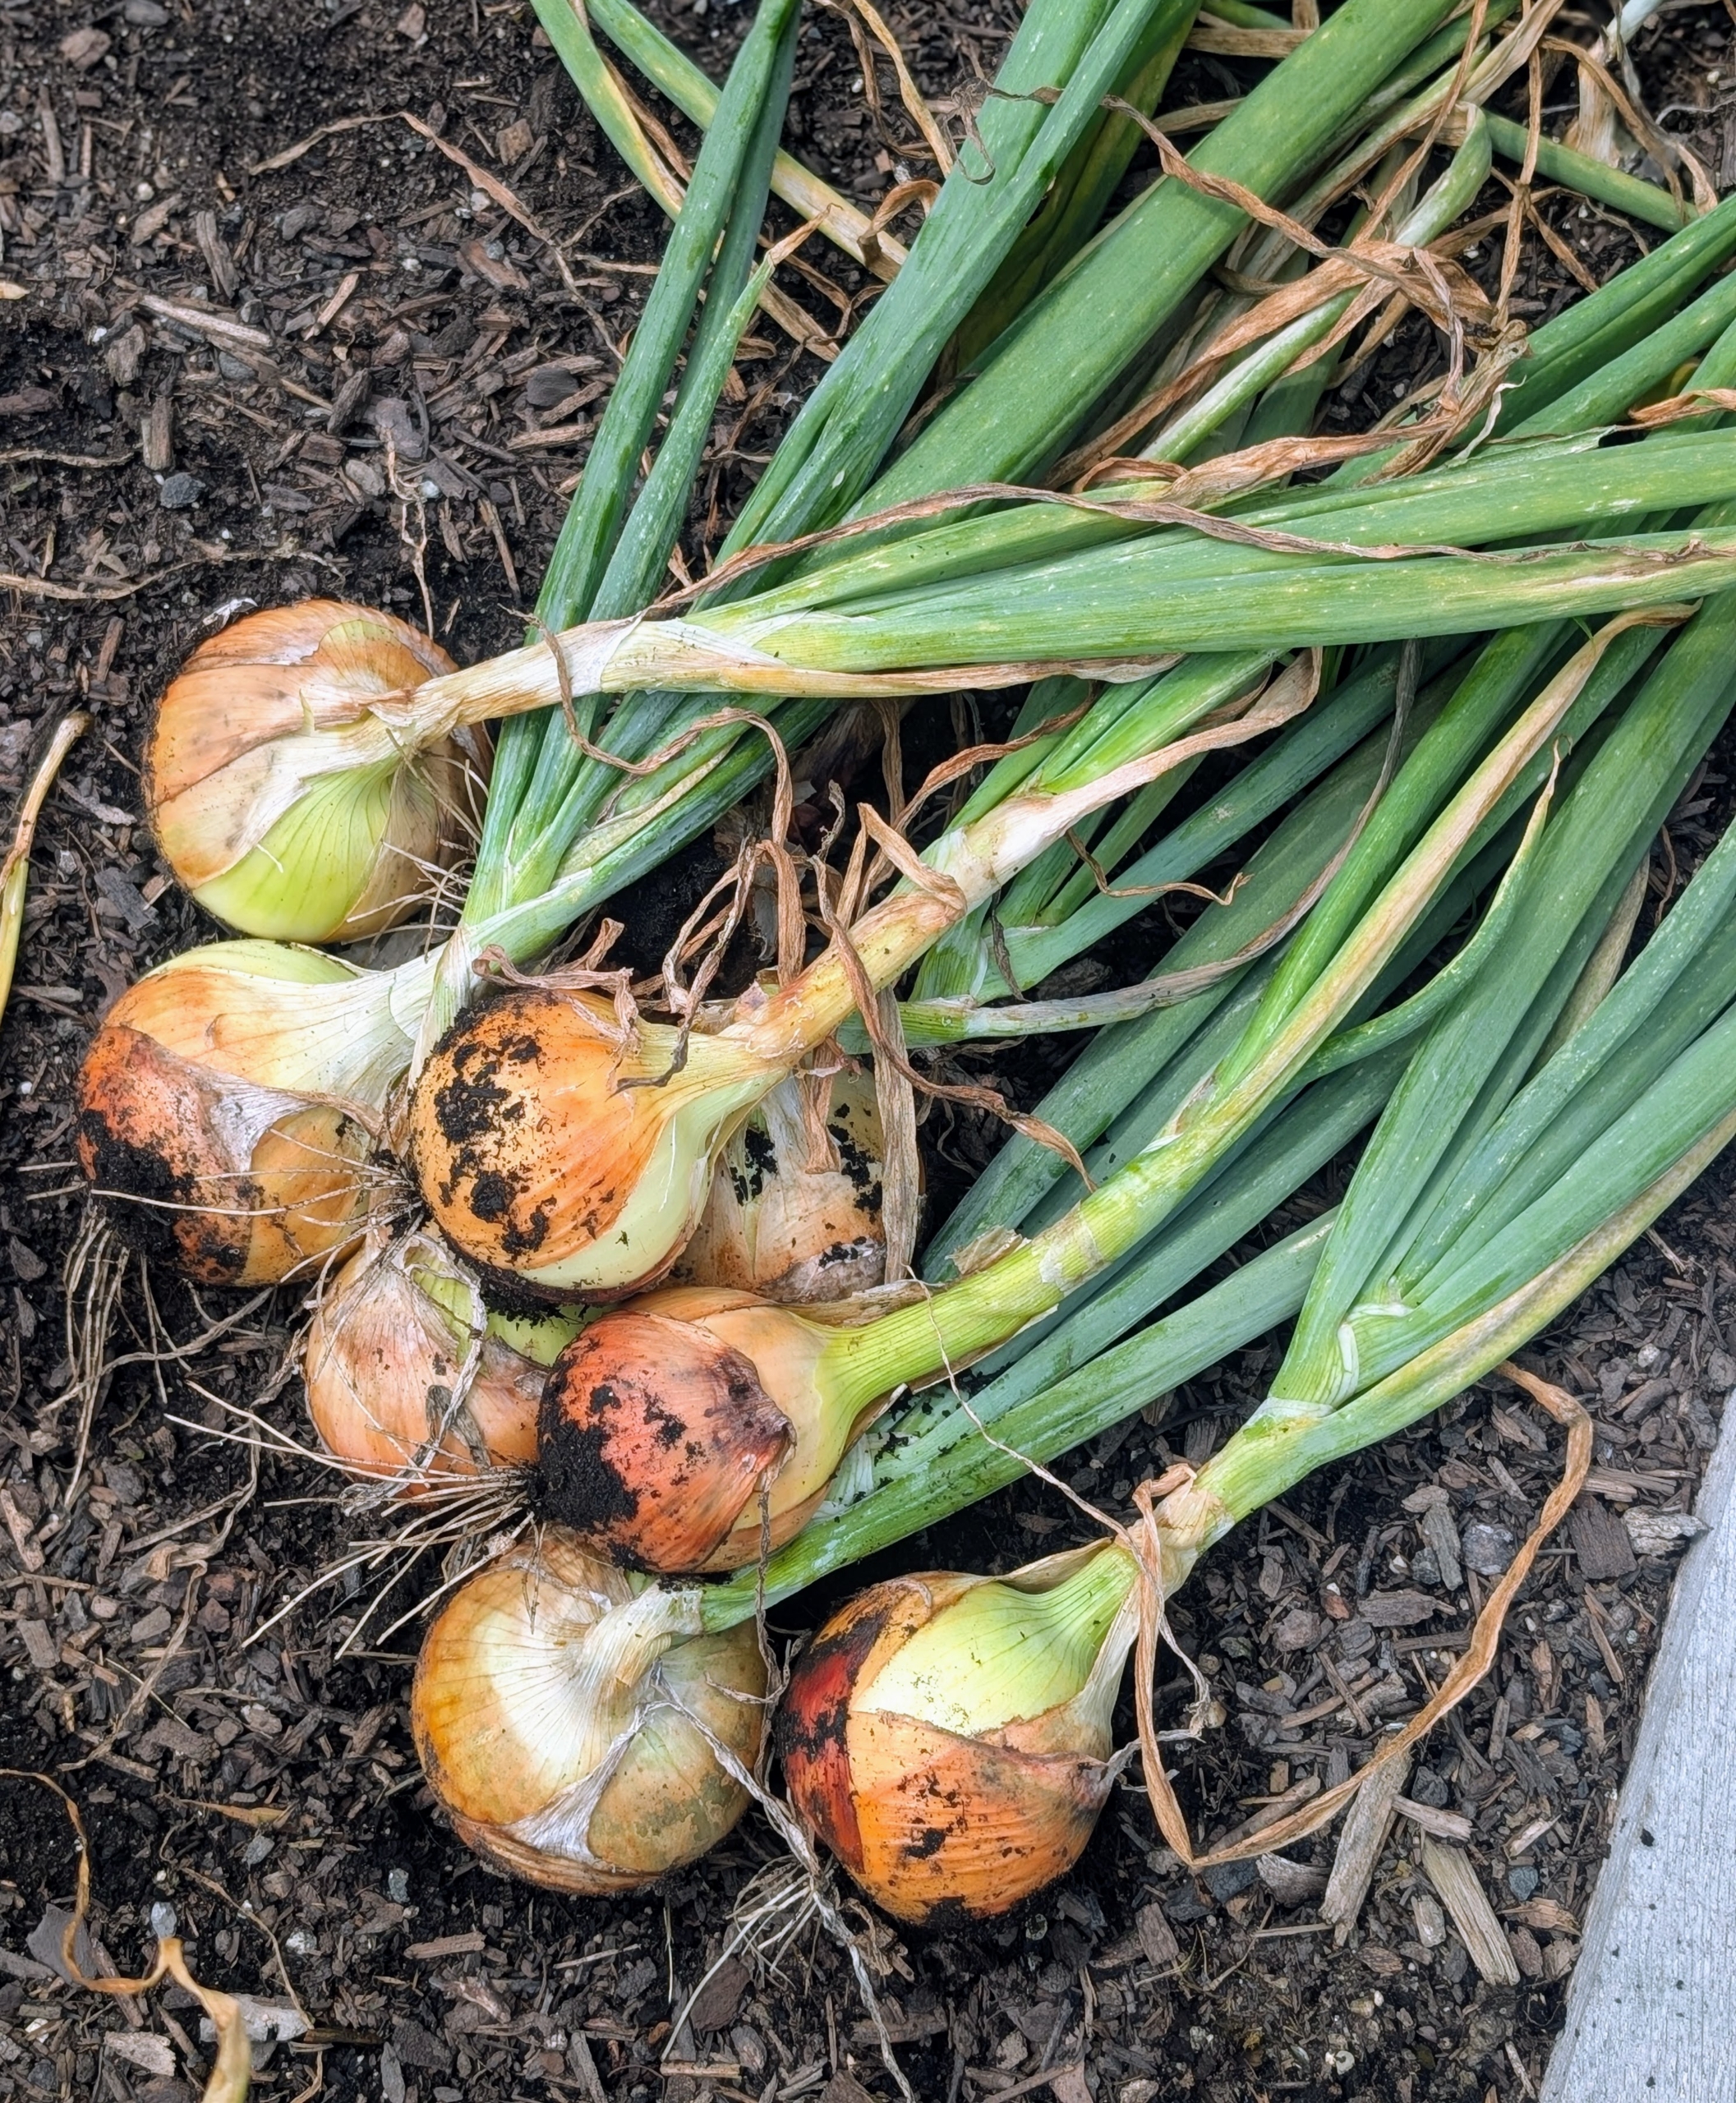
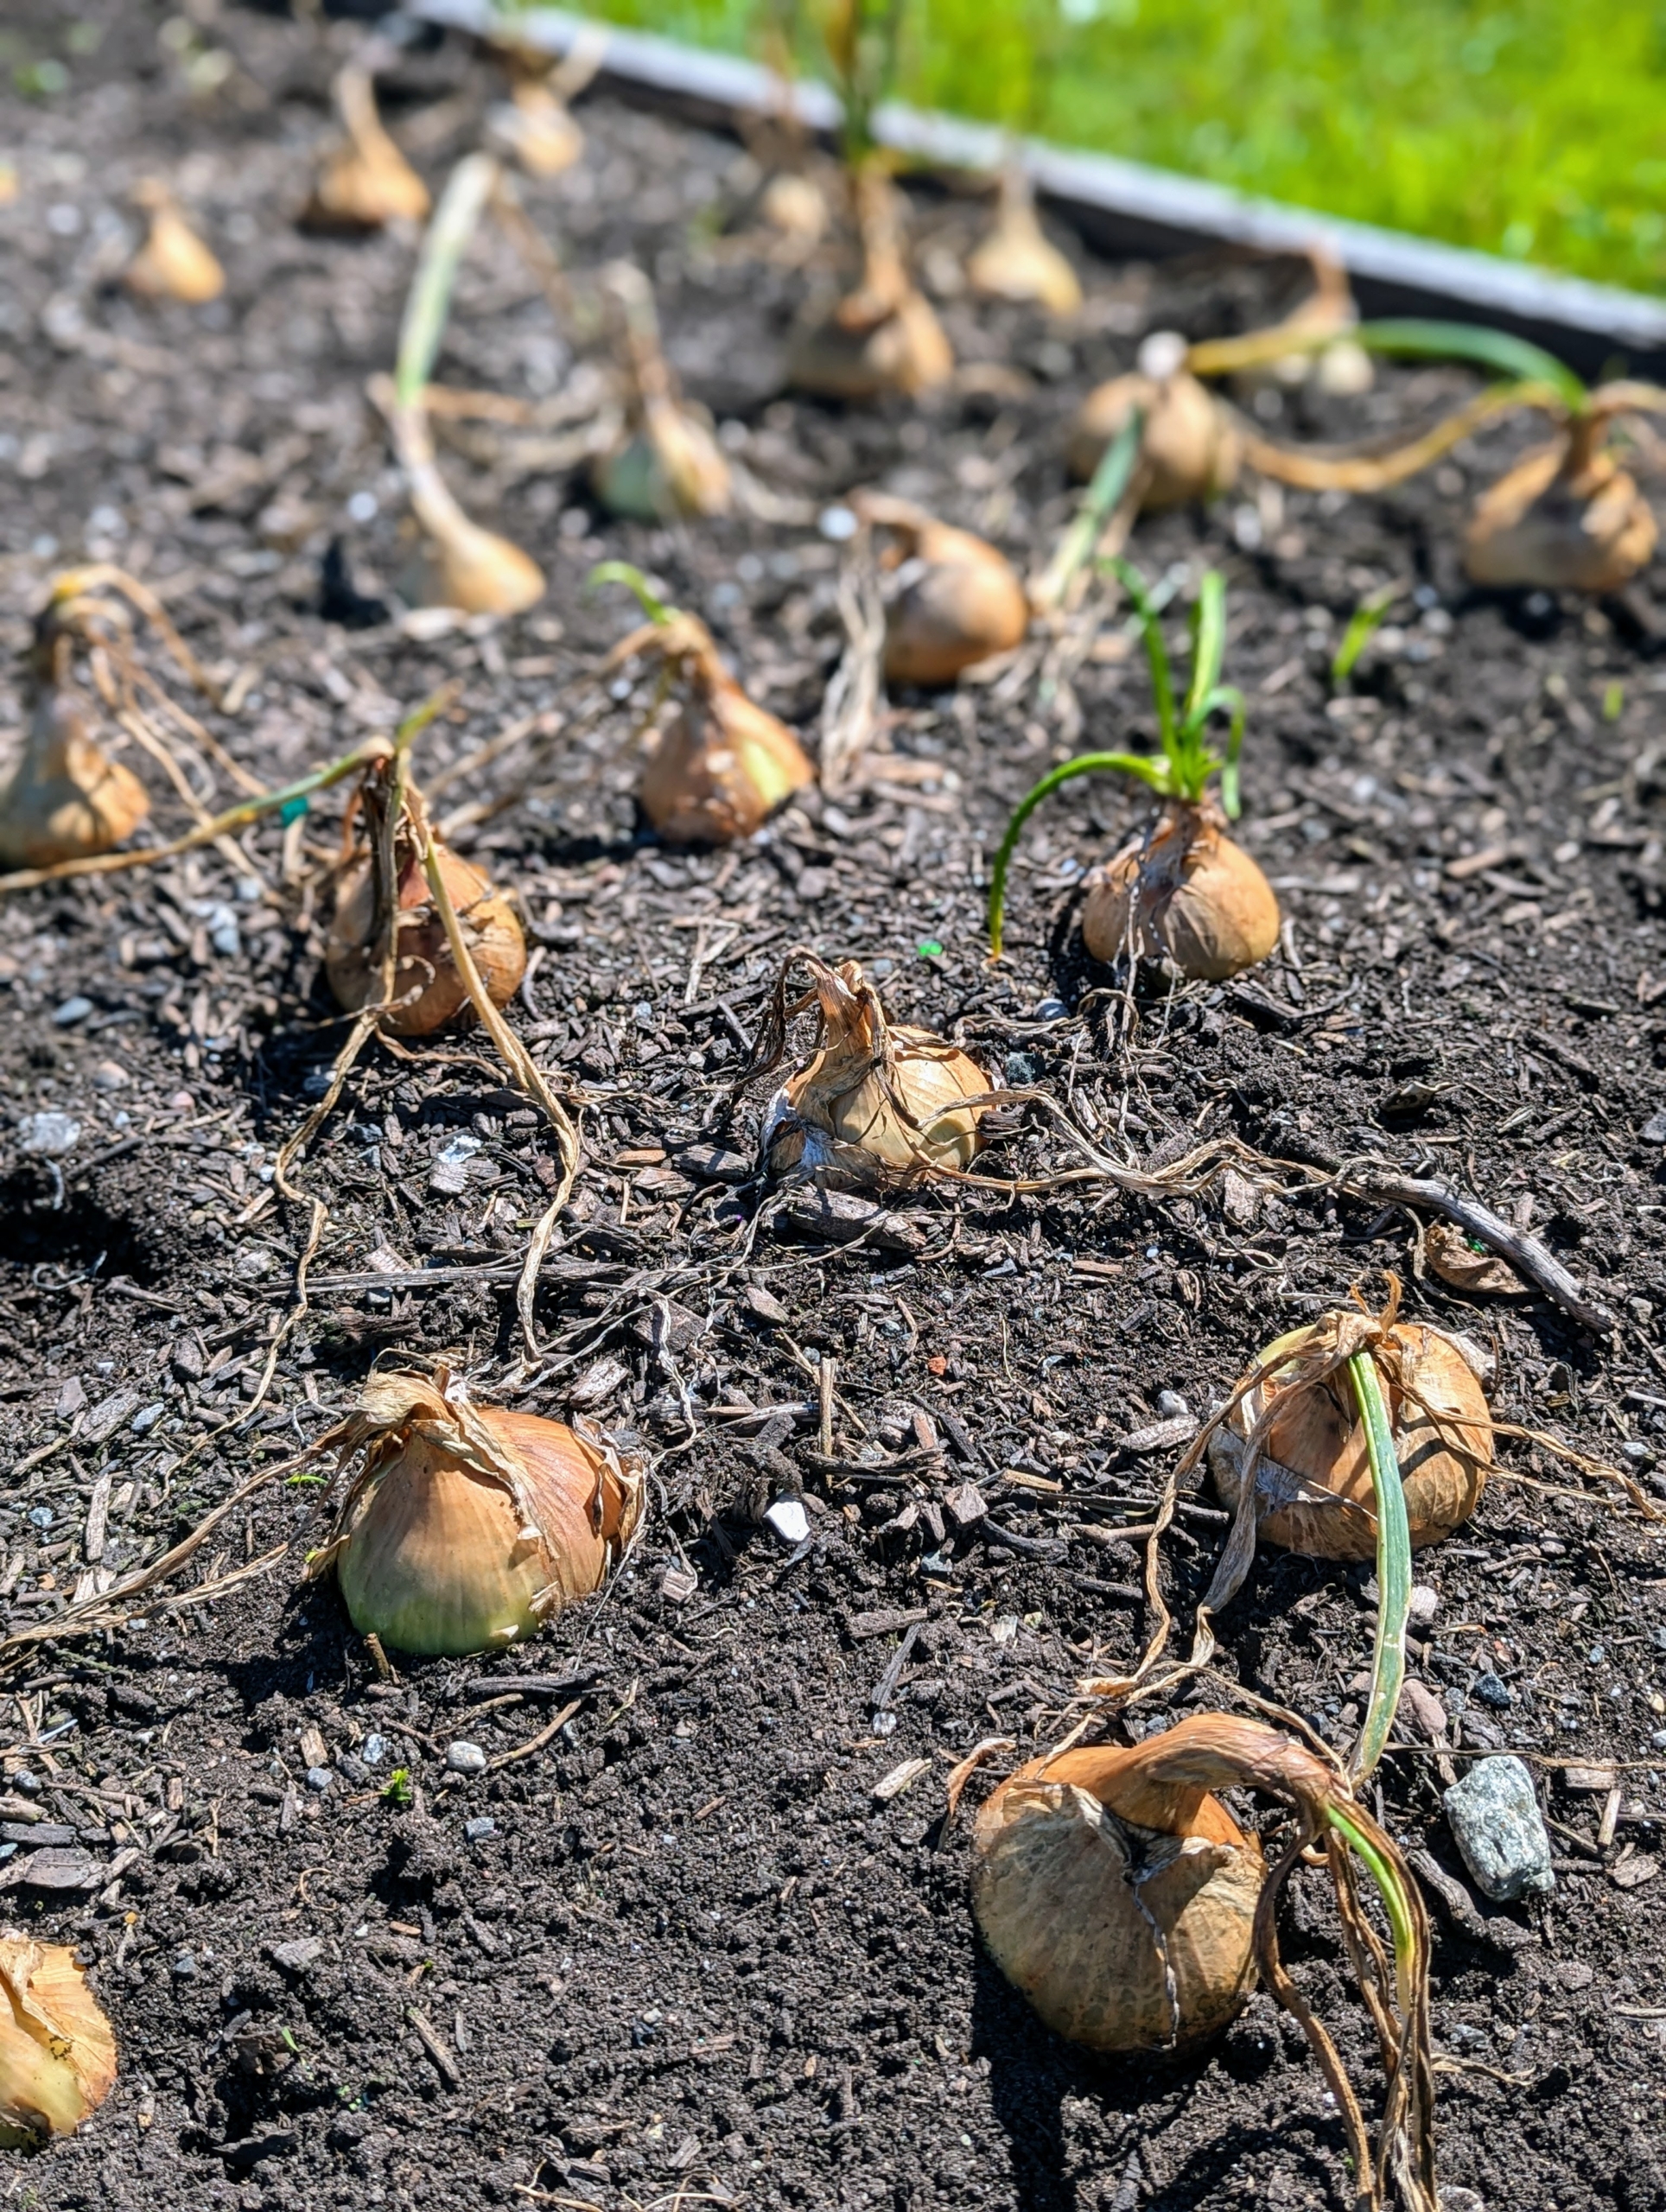
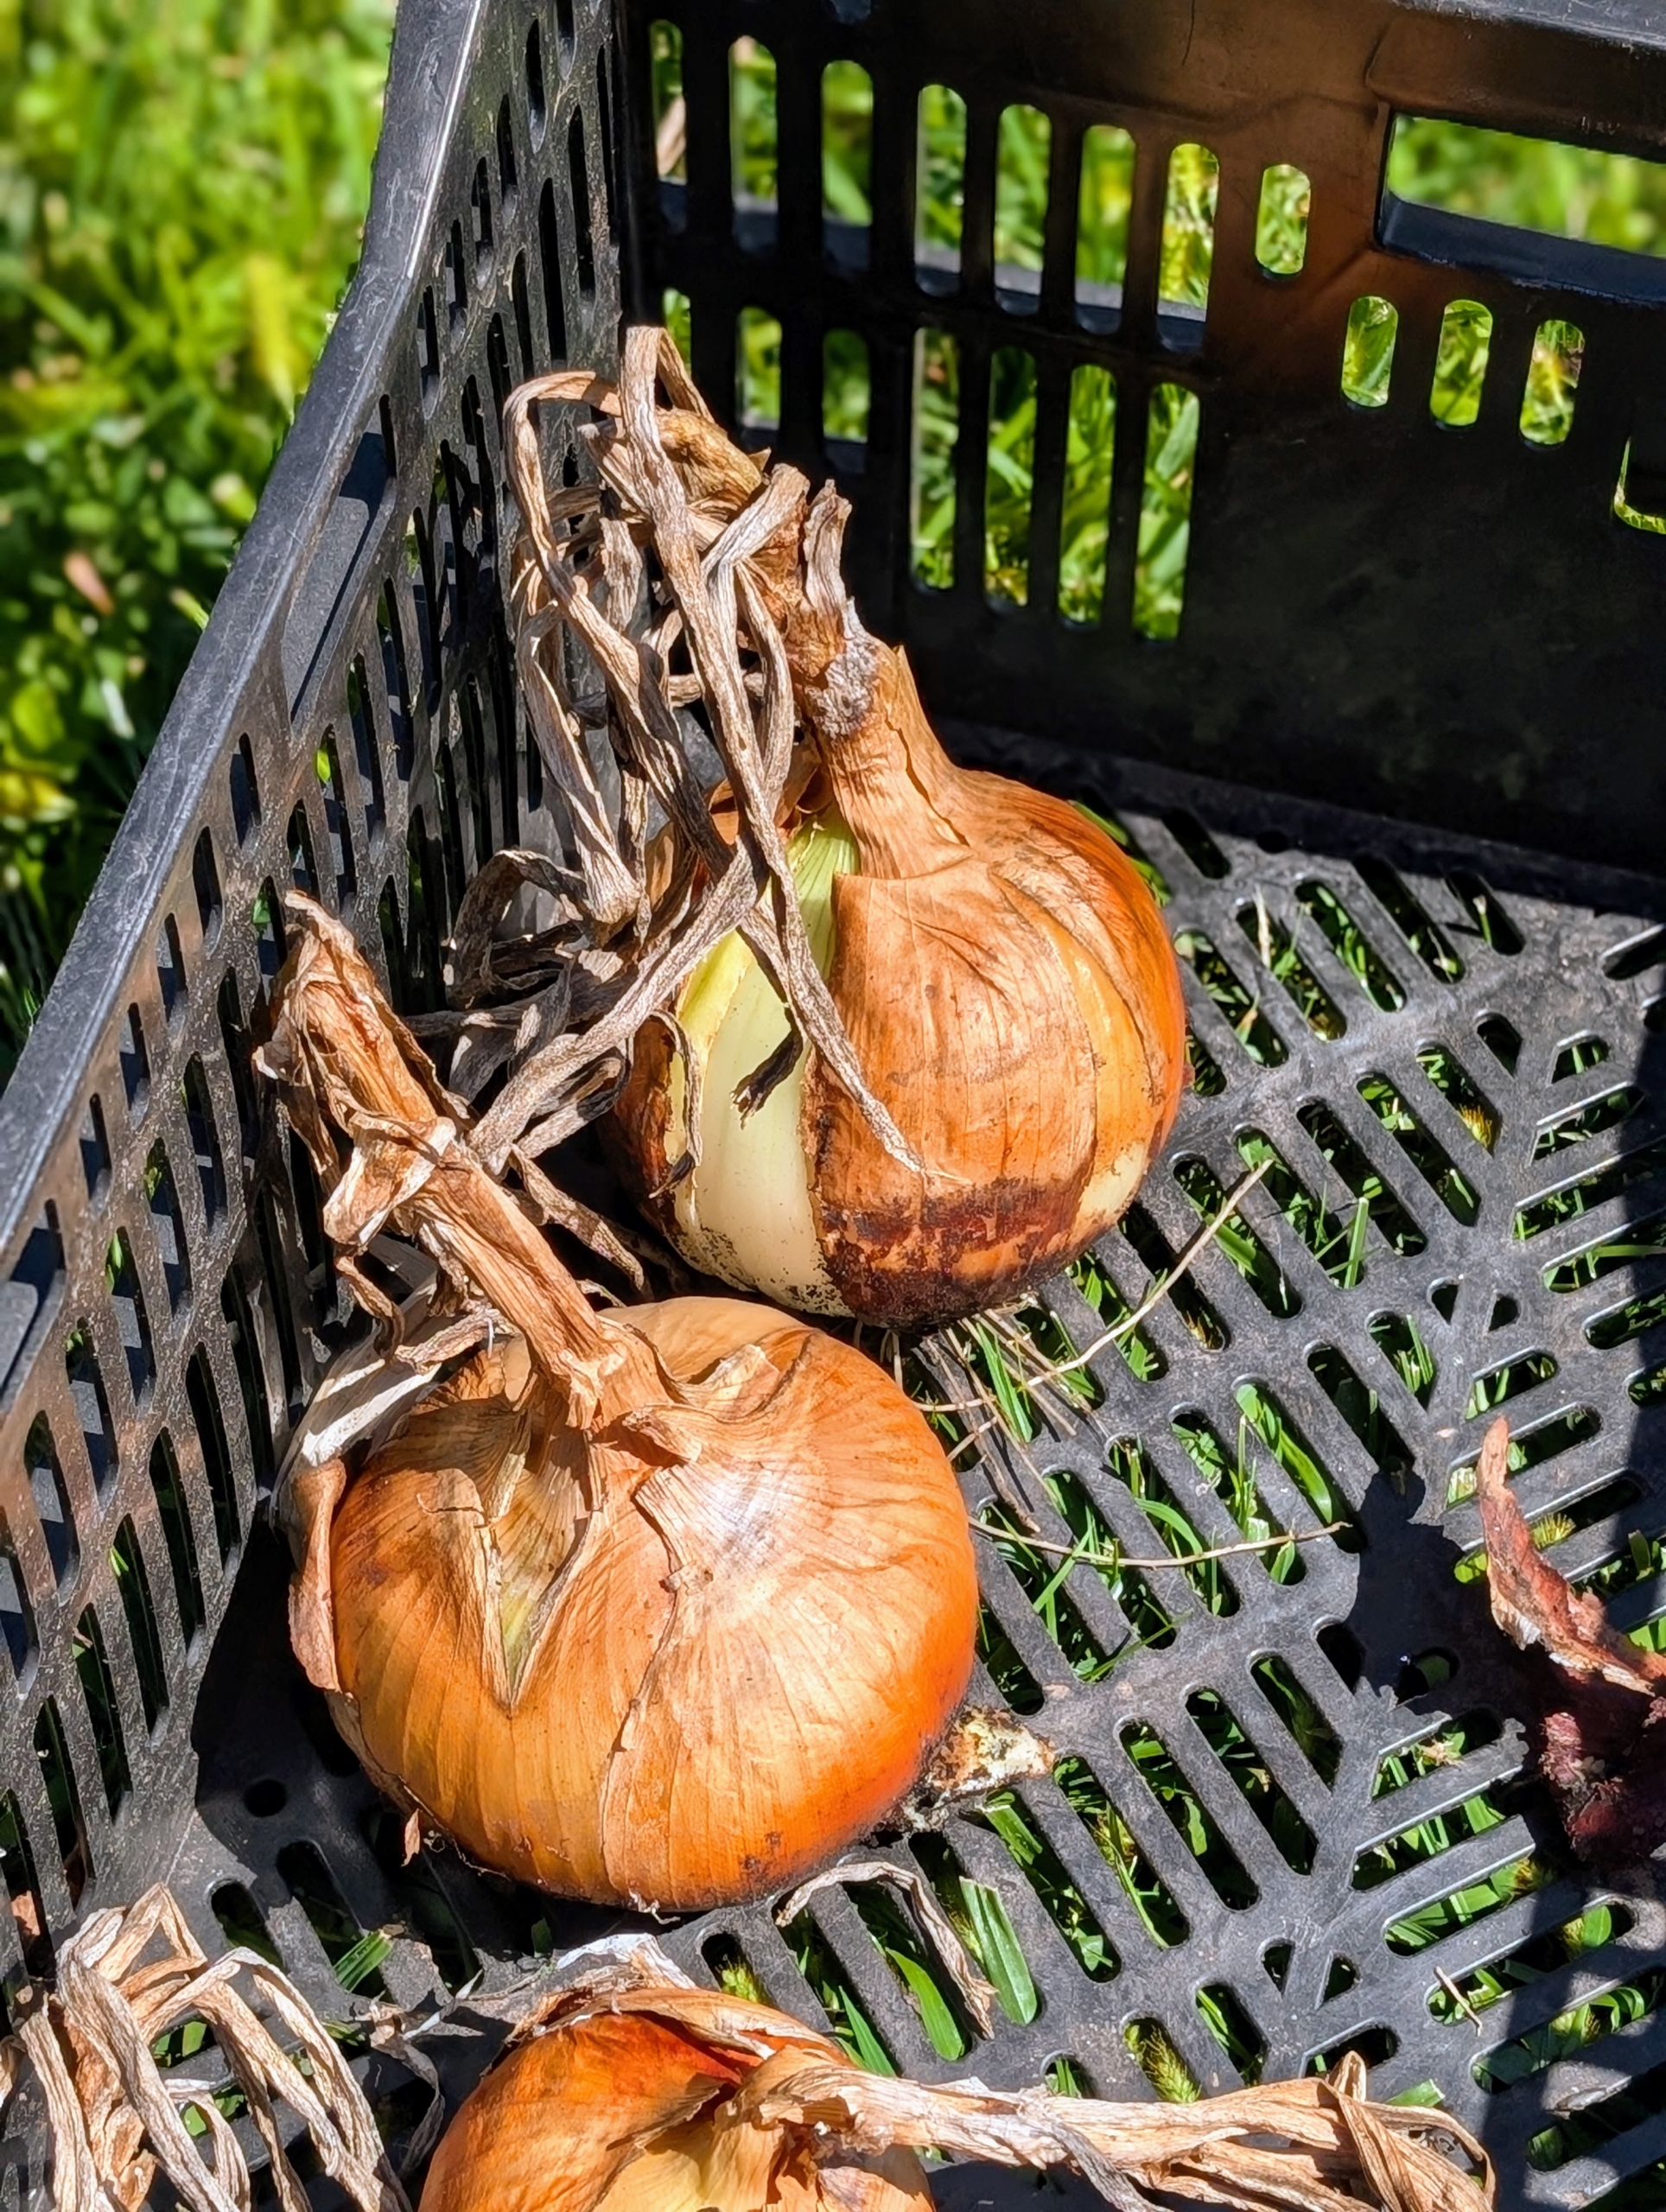
And this week, the tops of the onion plants have withered and turned brown naturally – a clear indication they are fully mature and ready to harvest.
The onion leaves are also quite dry. This happens at the “neck” of the onion, where the leaves meet the bulb, and signals that the plant has stopped growing.
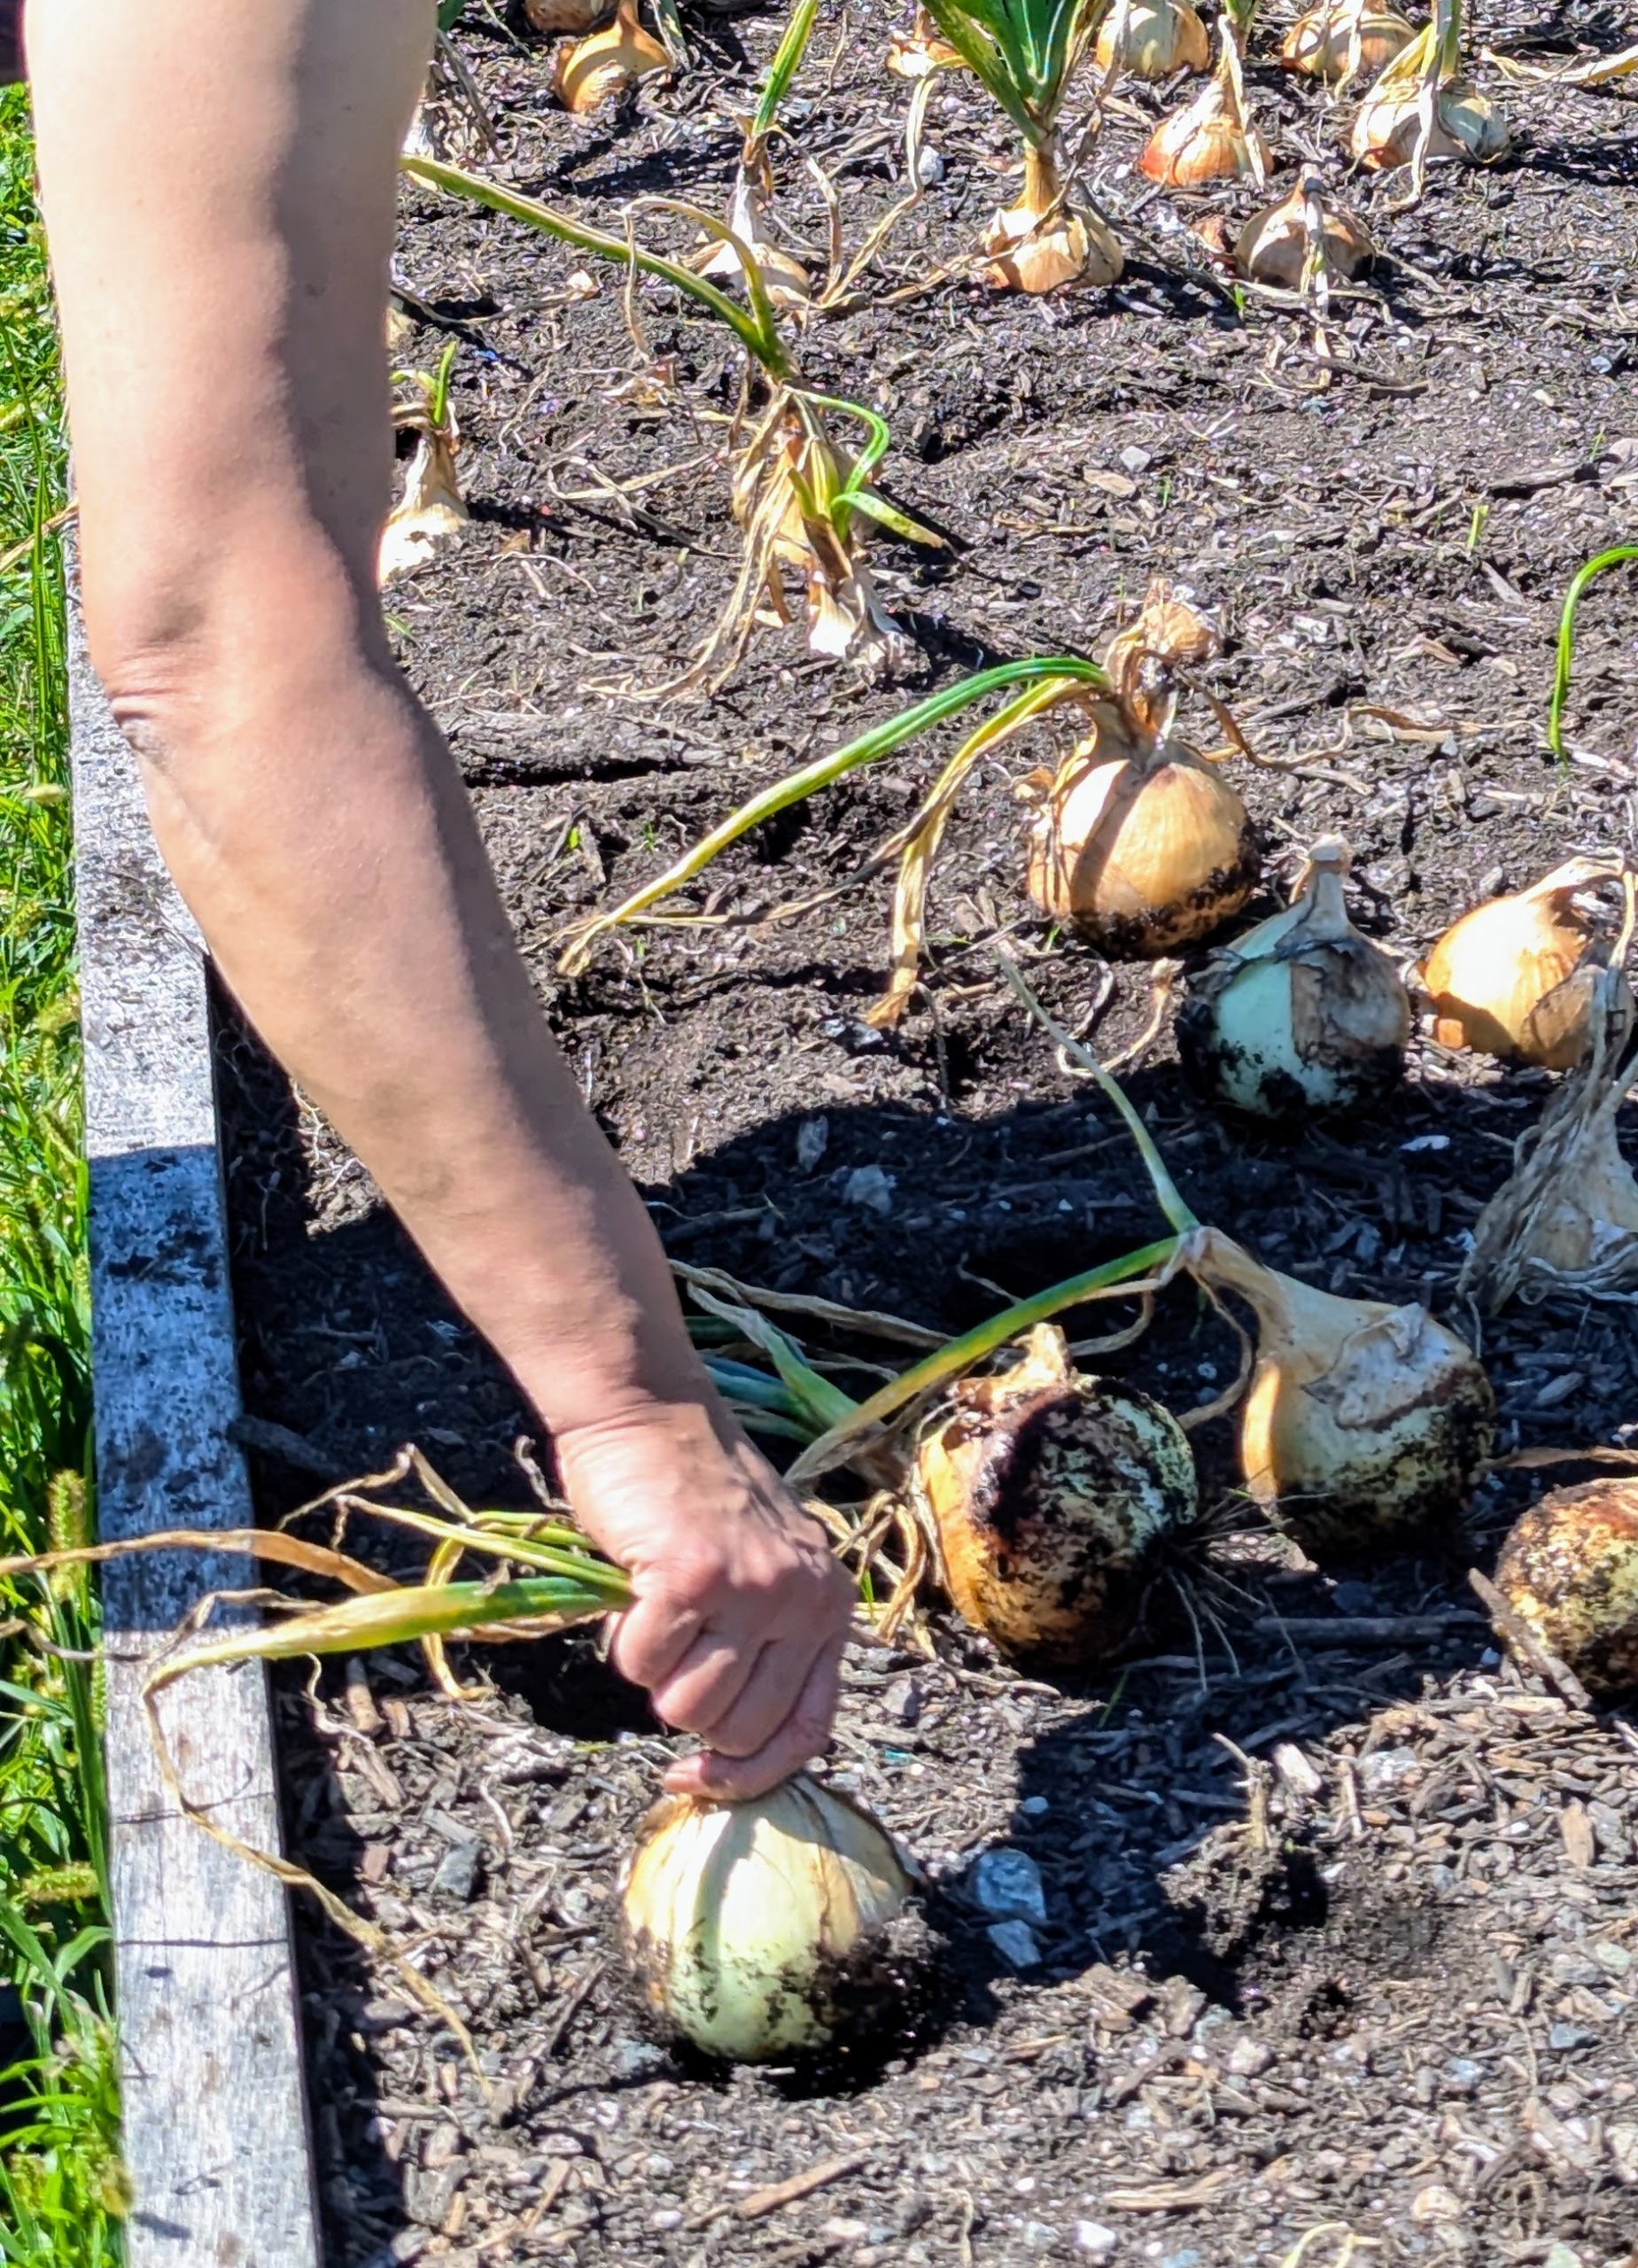
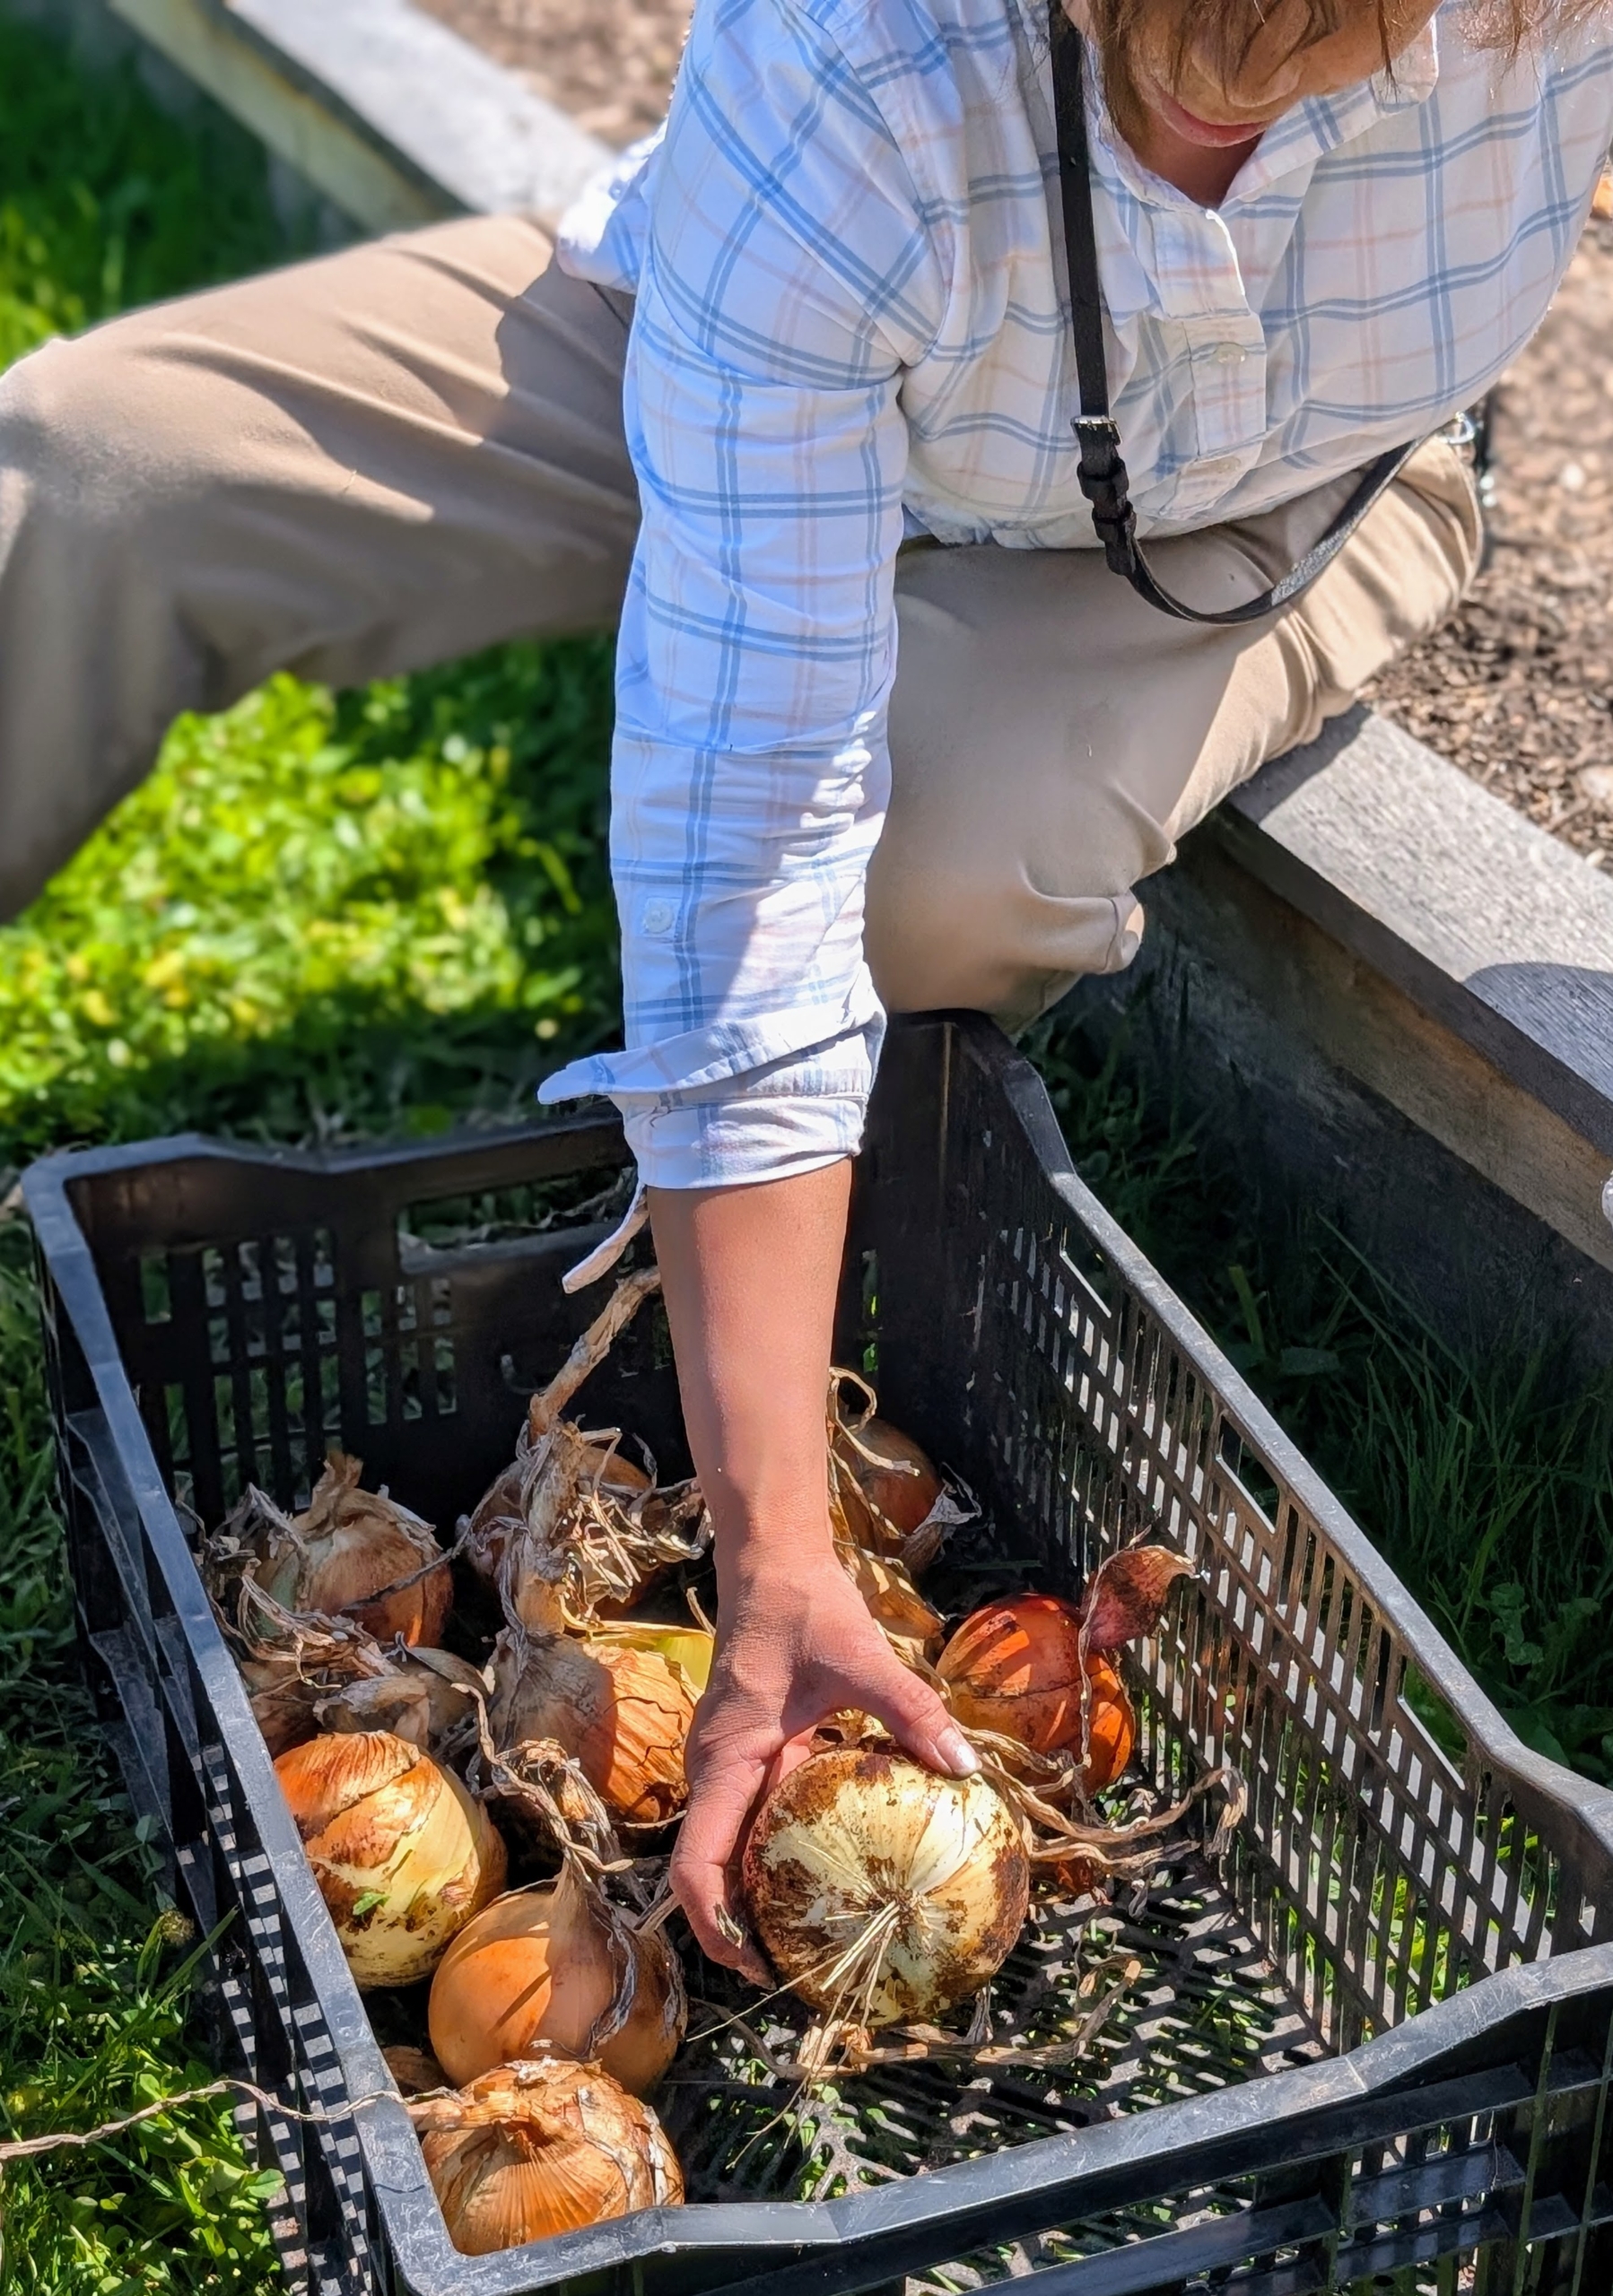
To pick, Elvira carefully and gently pulls the onion up by its top. It’s important to keep the stem intact to prevent the possibility of rot.
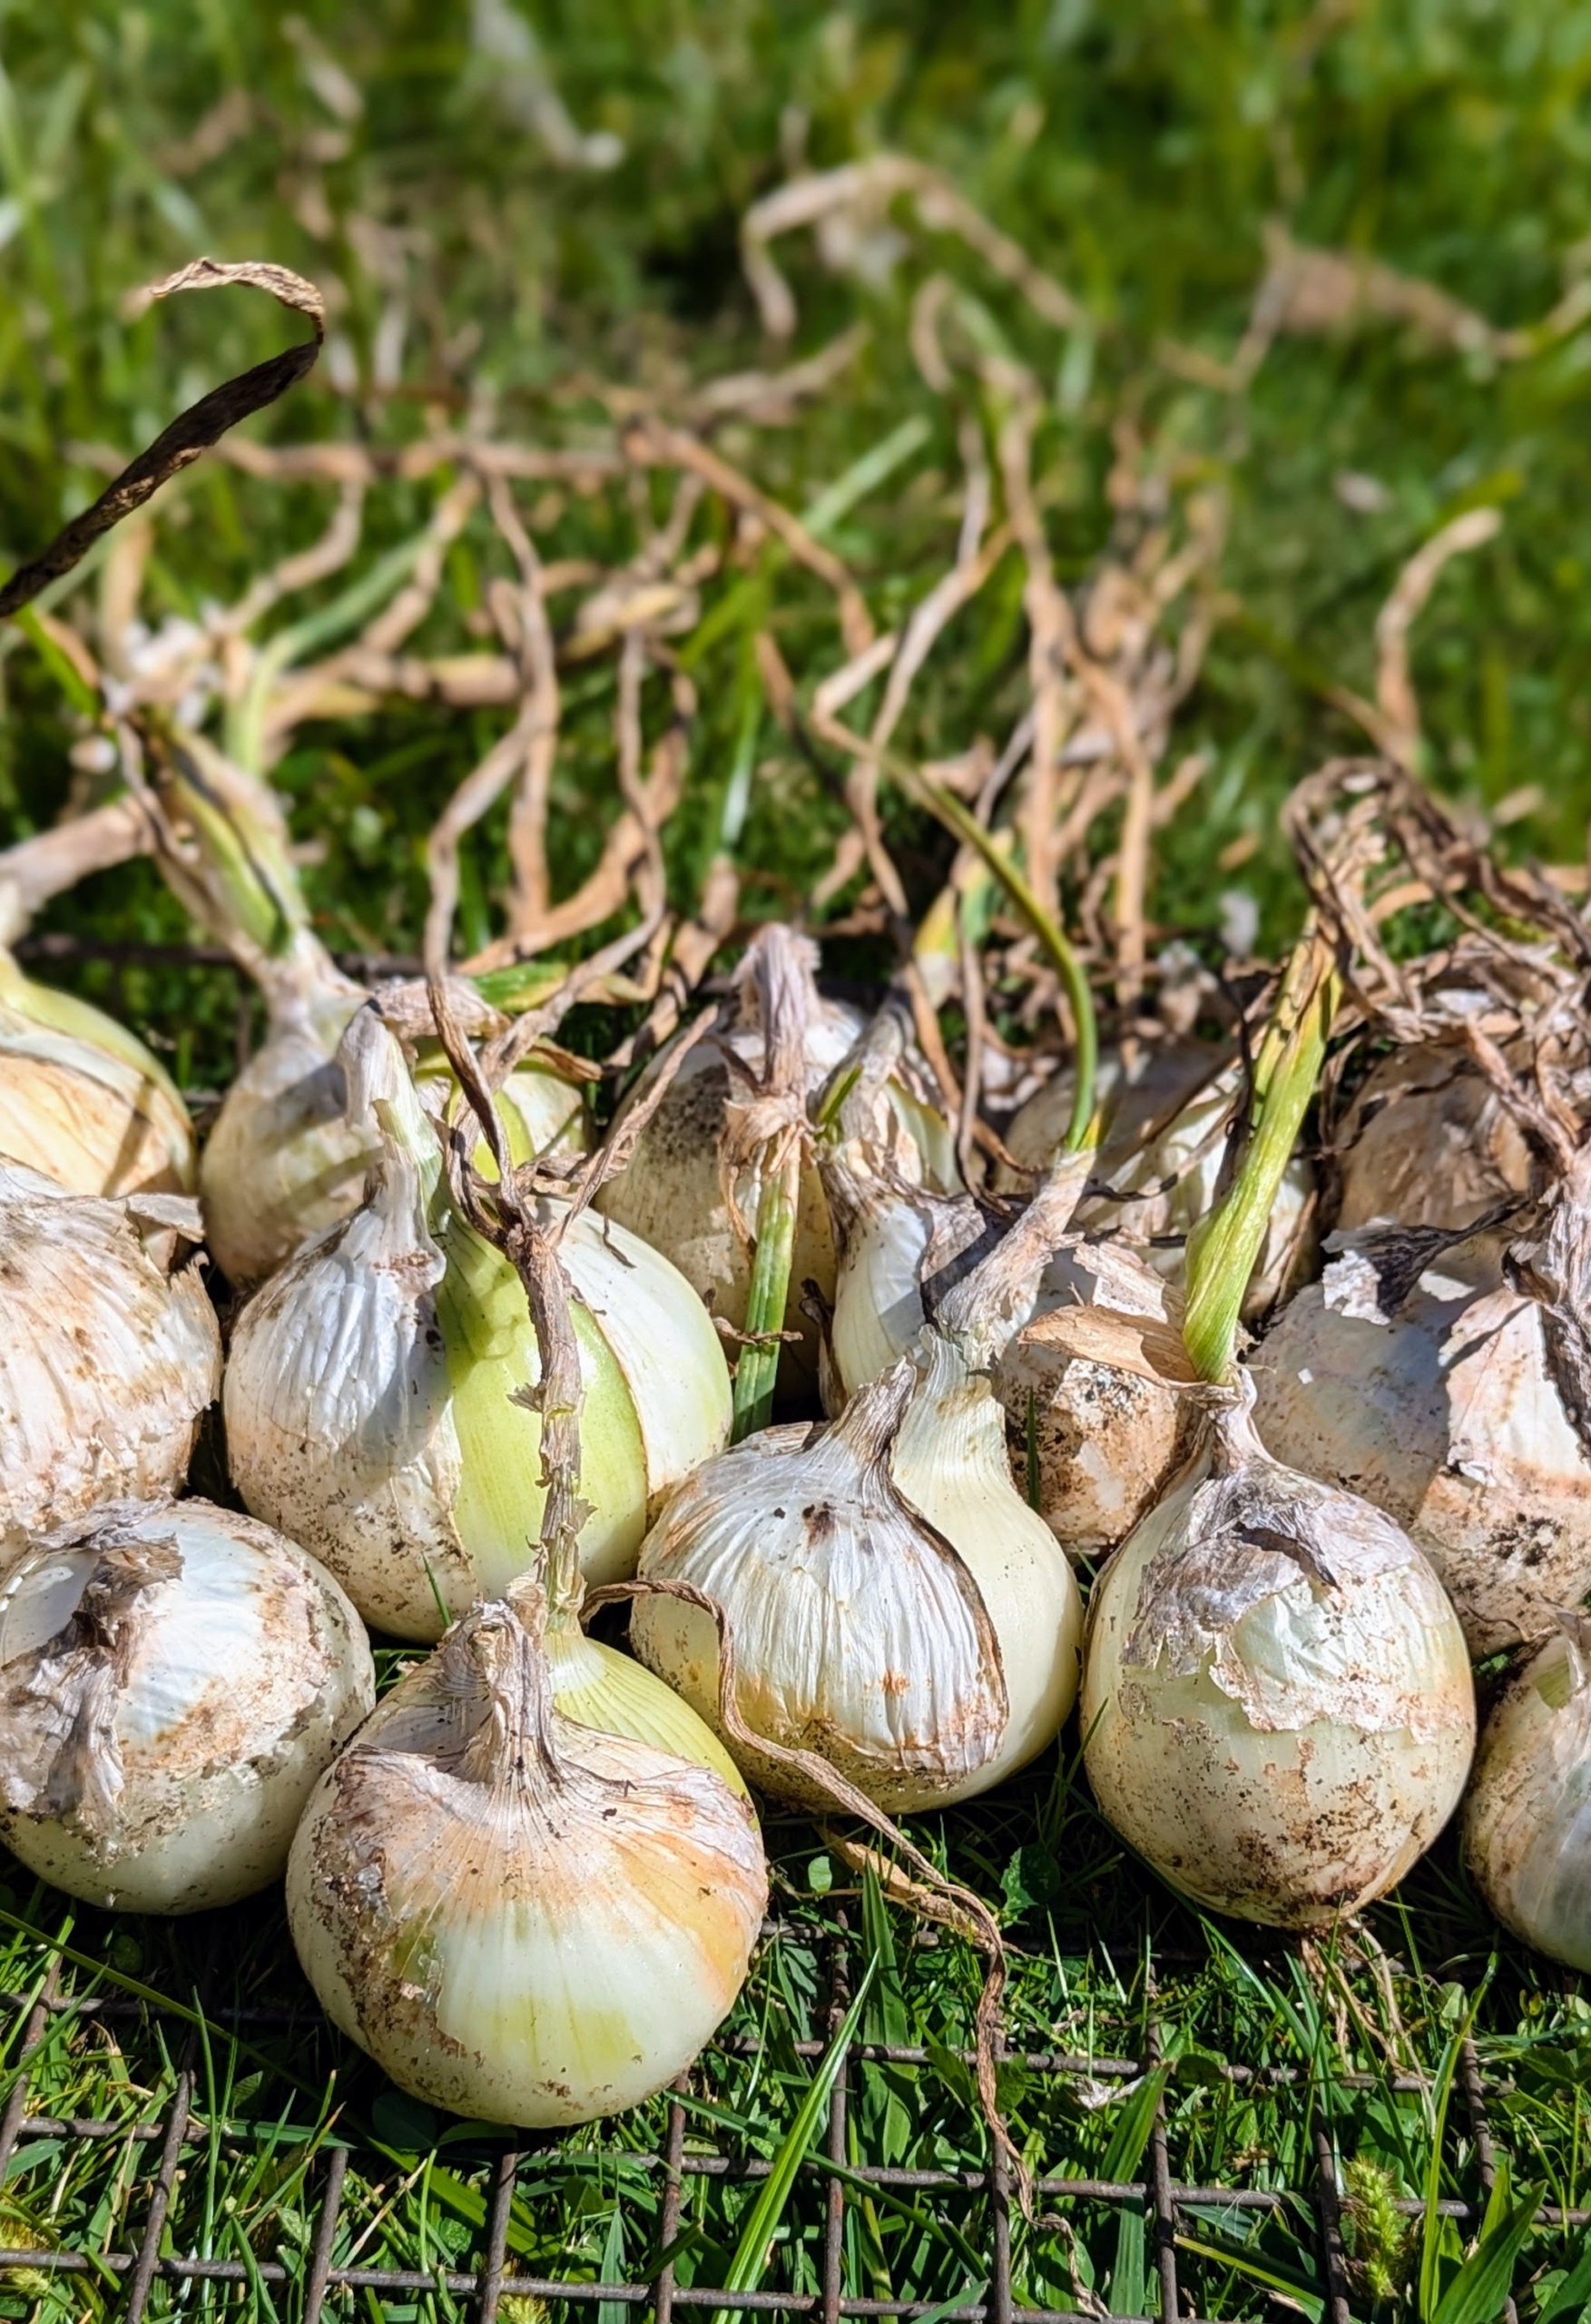
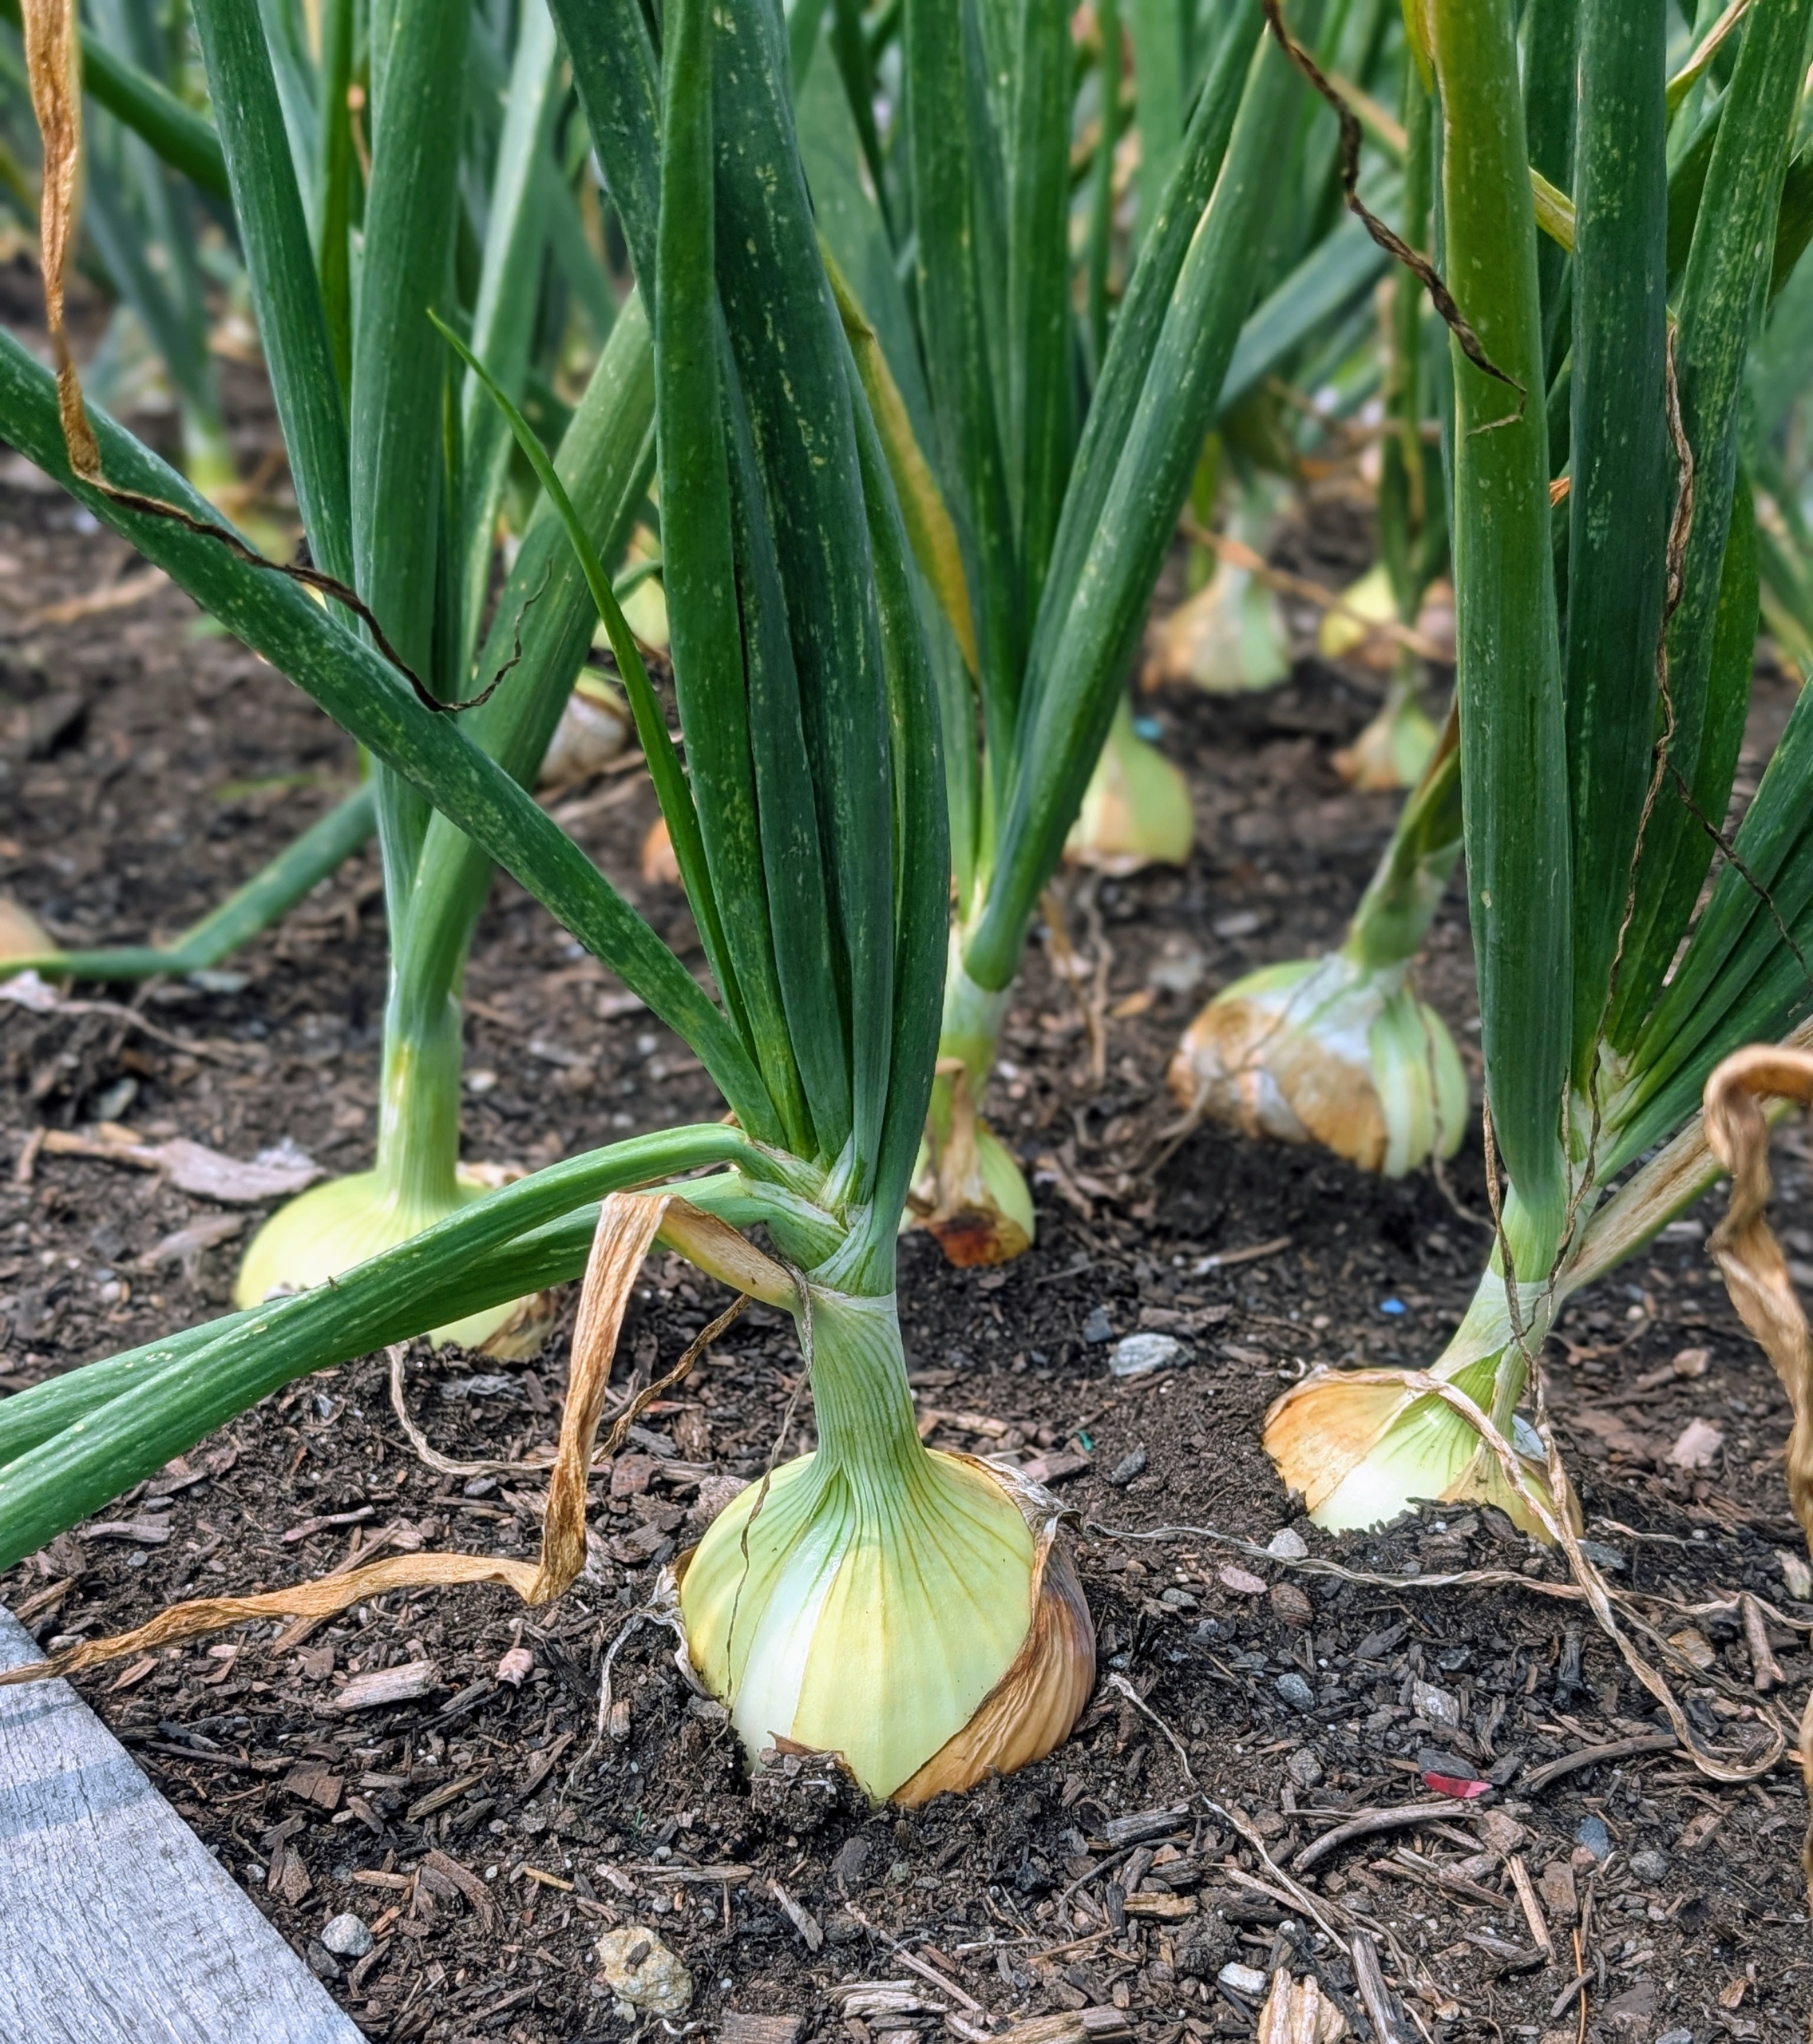
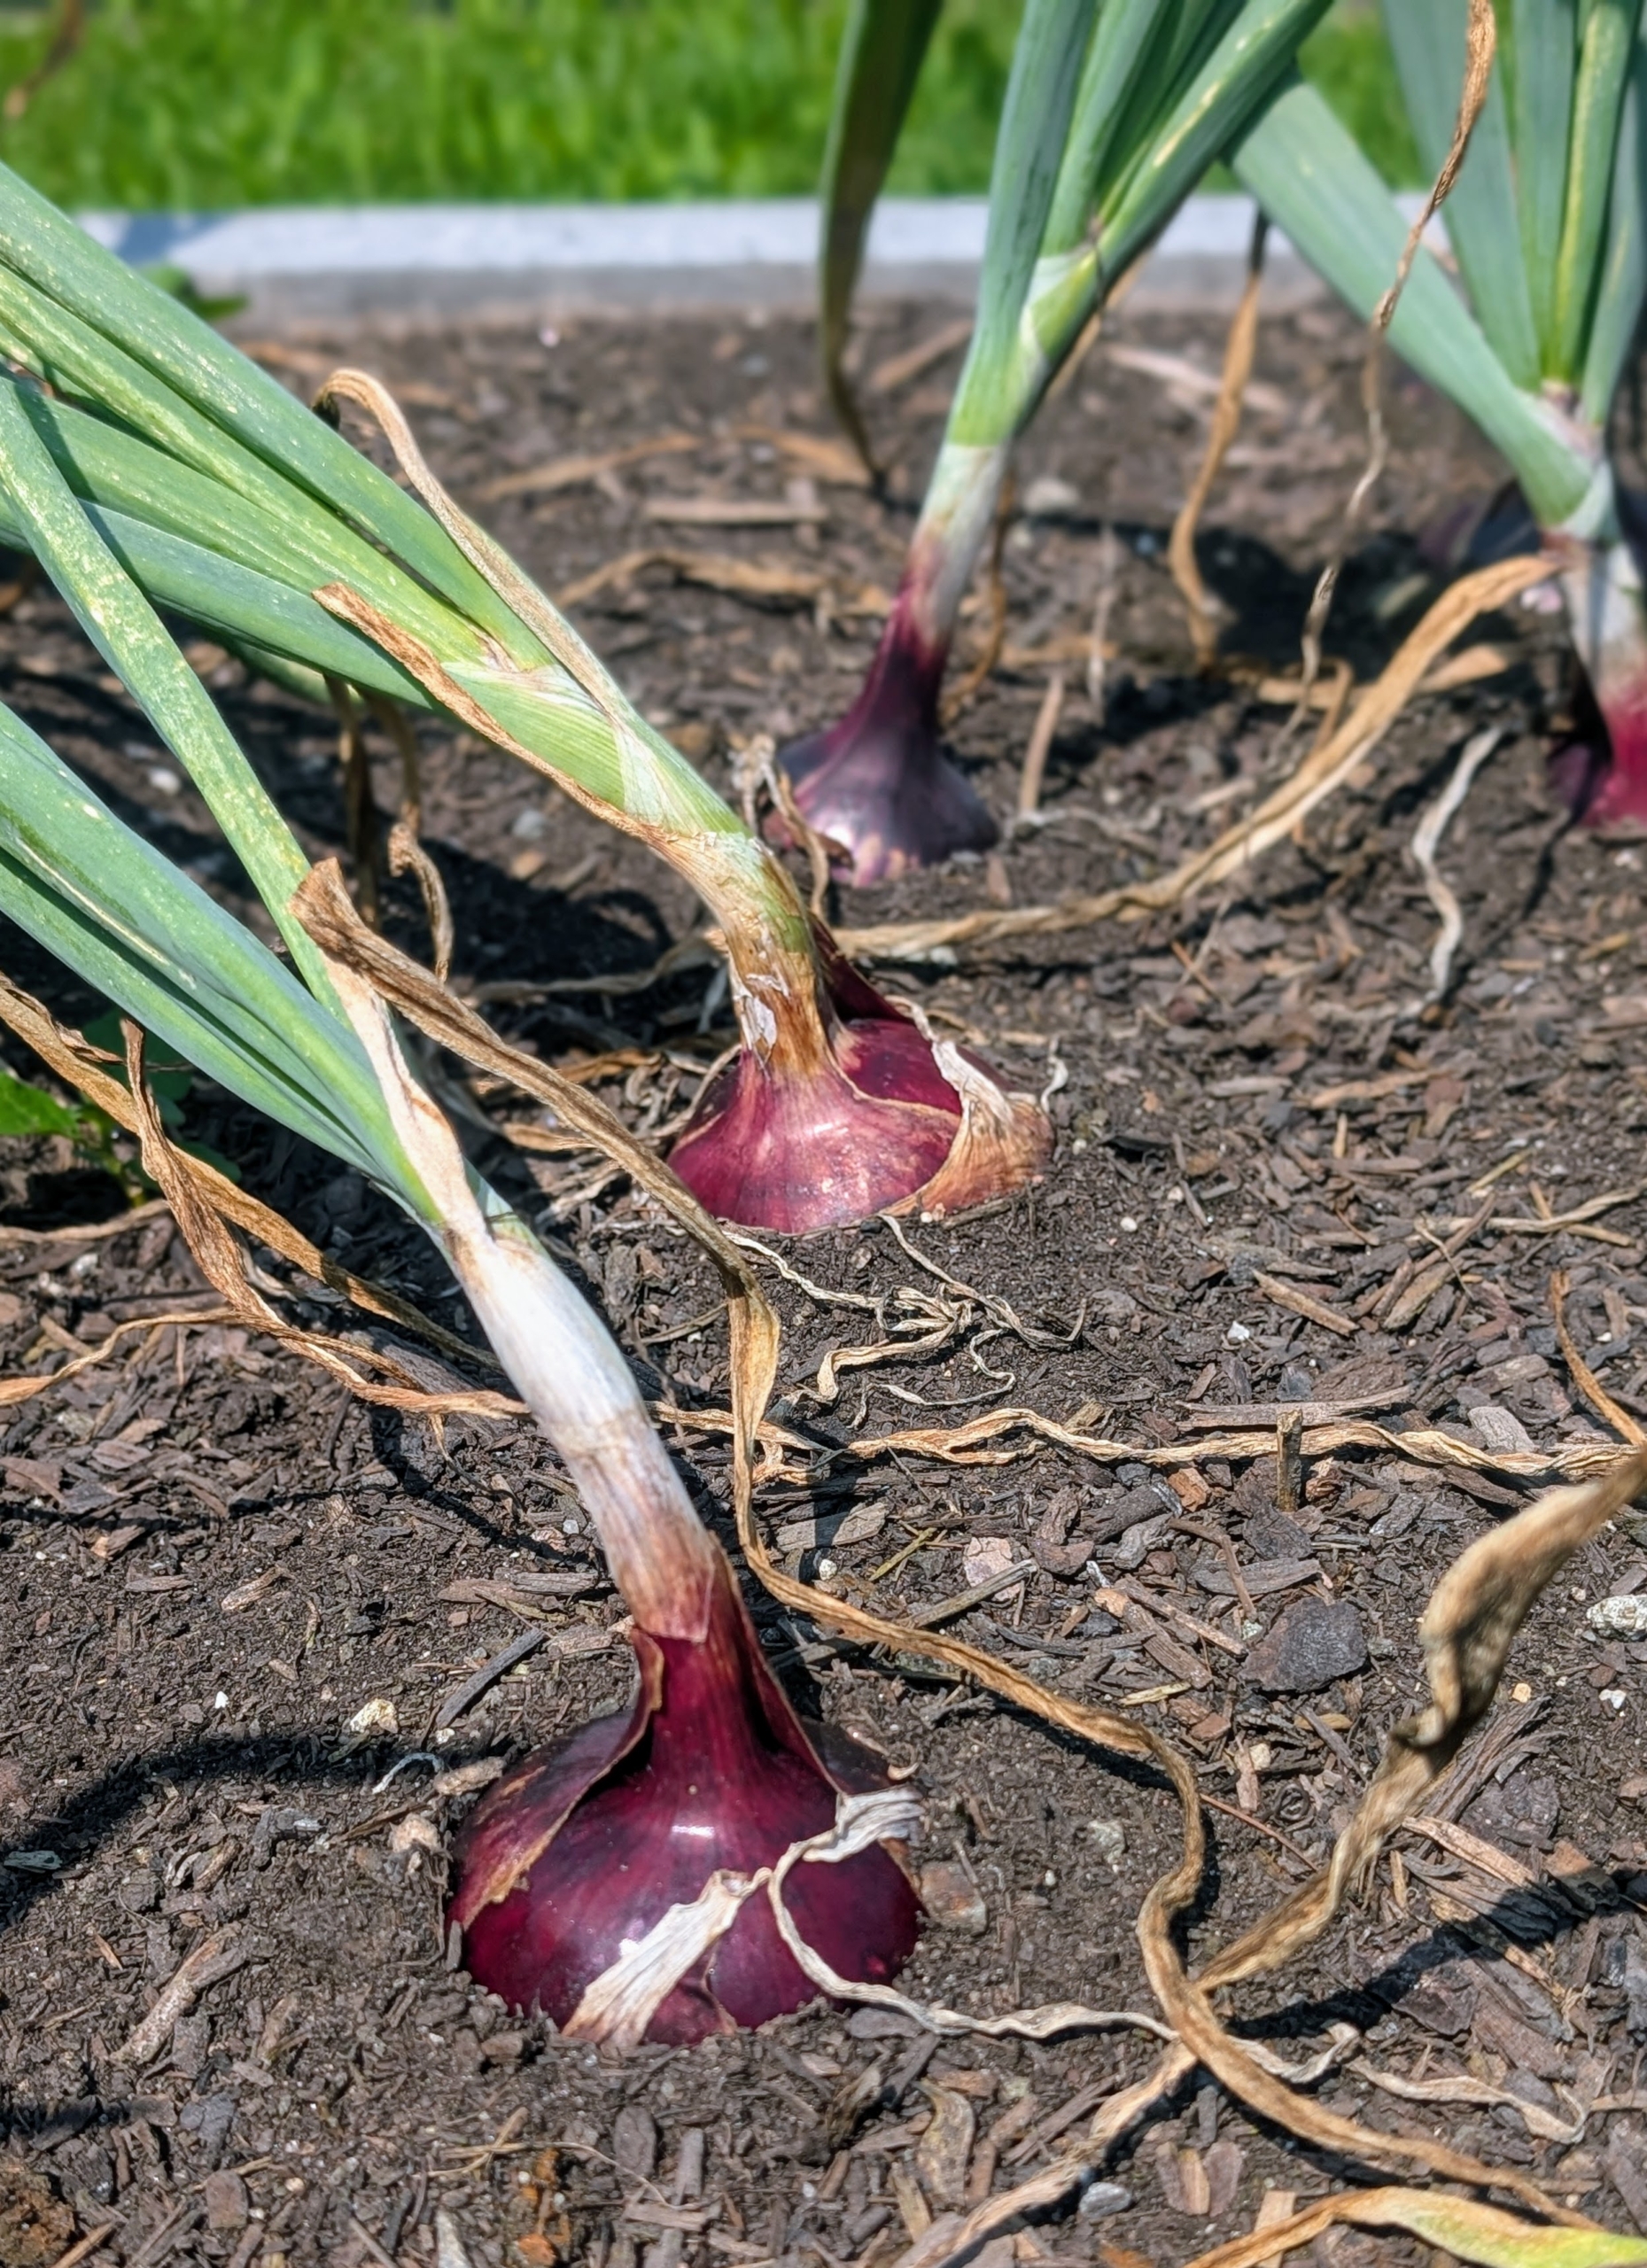
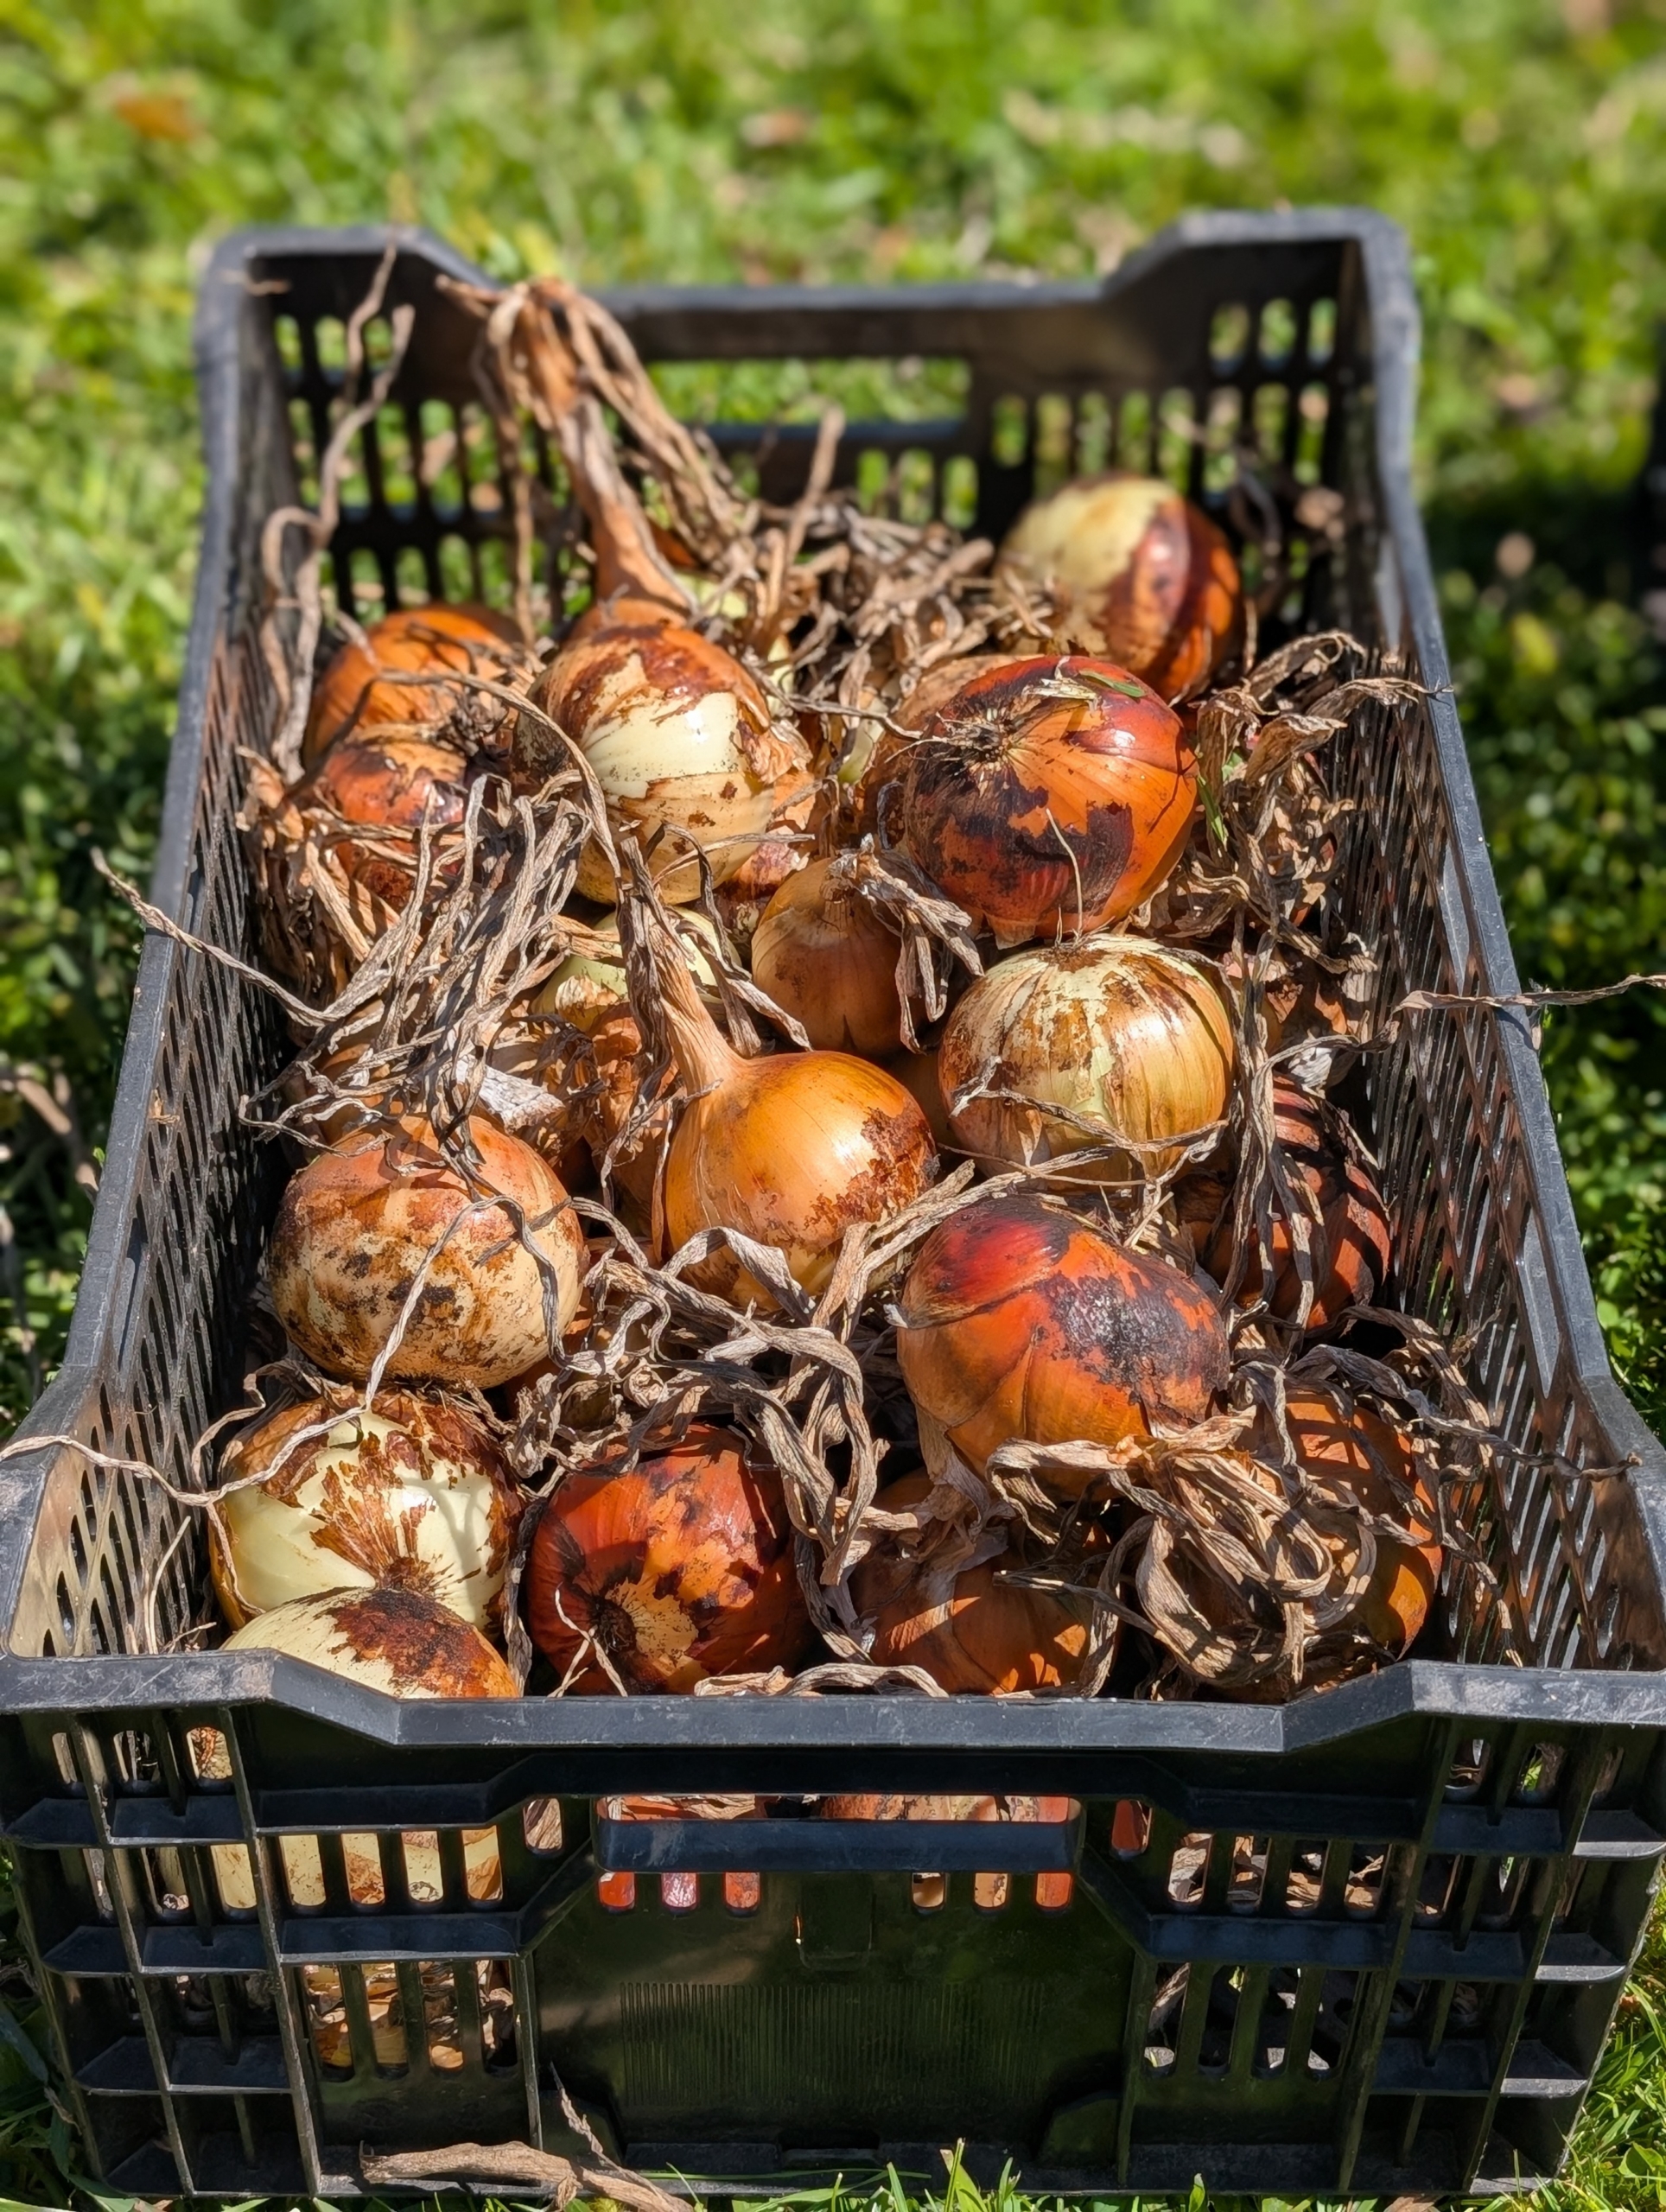
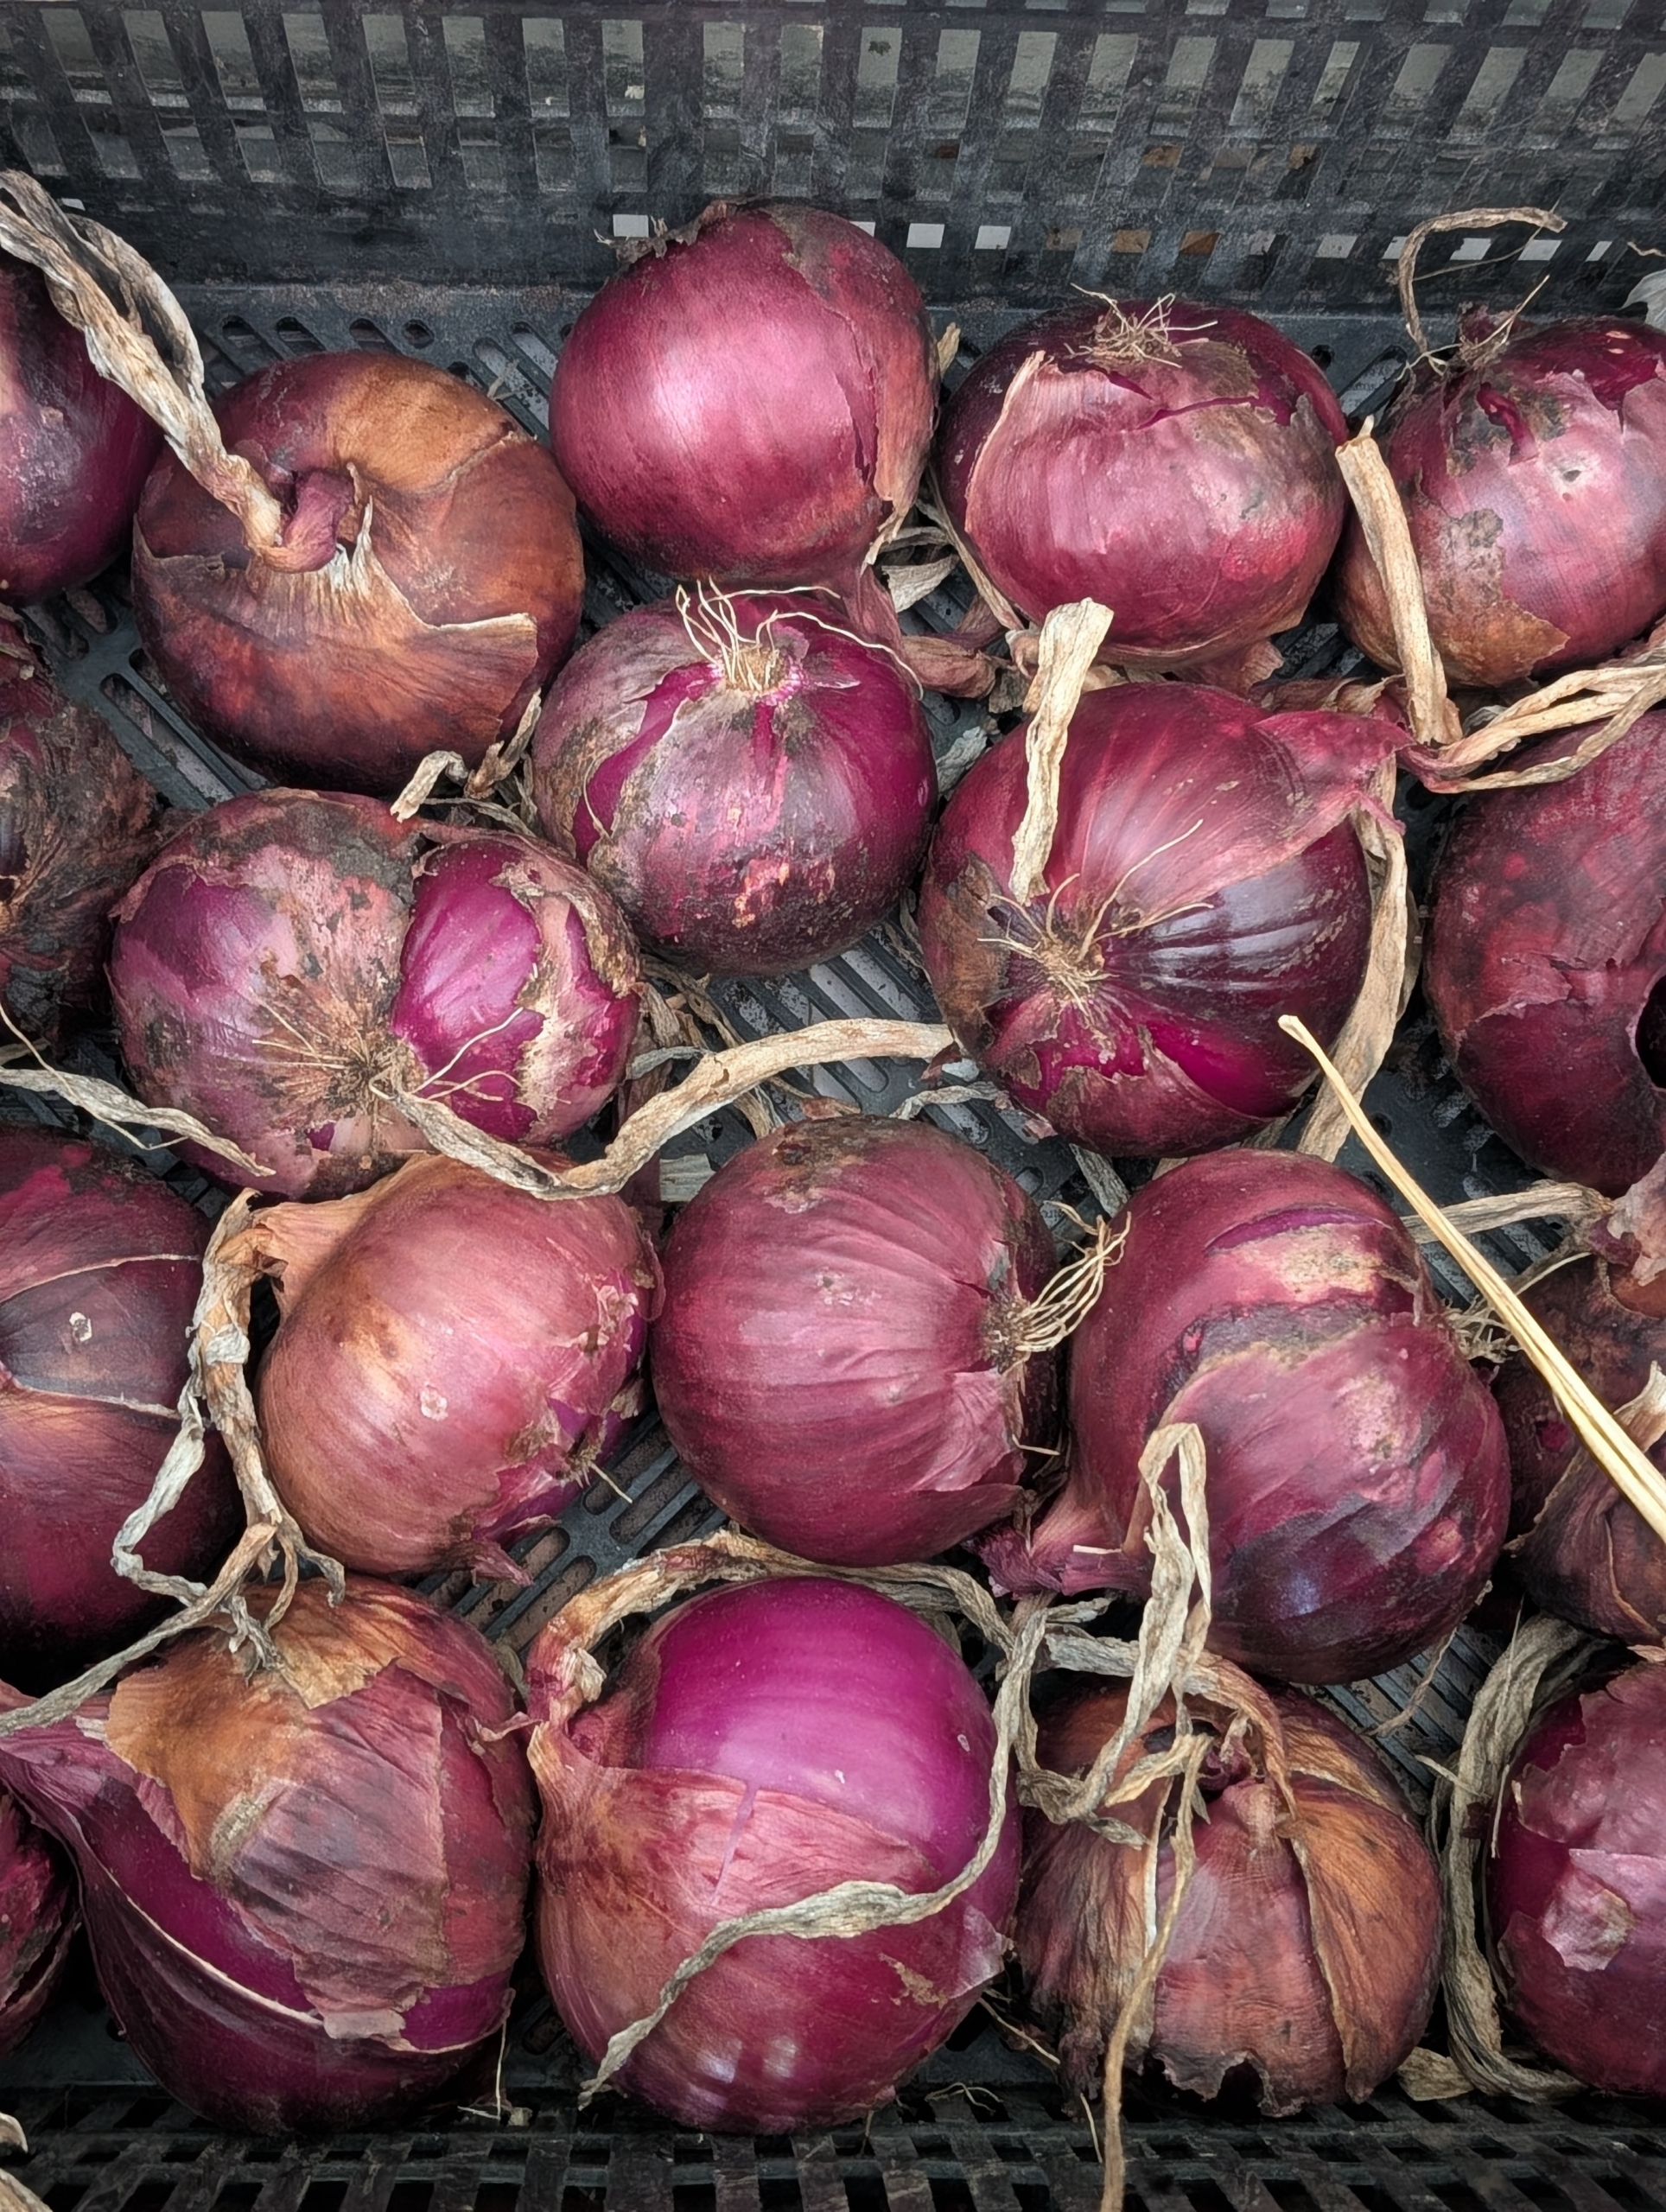
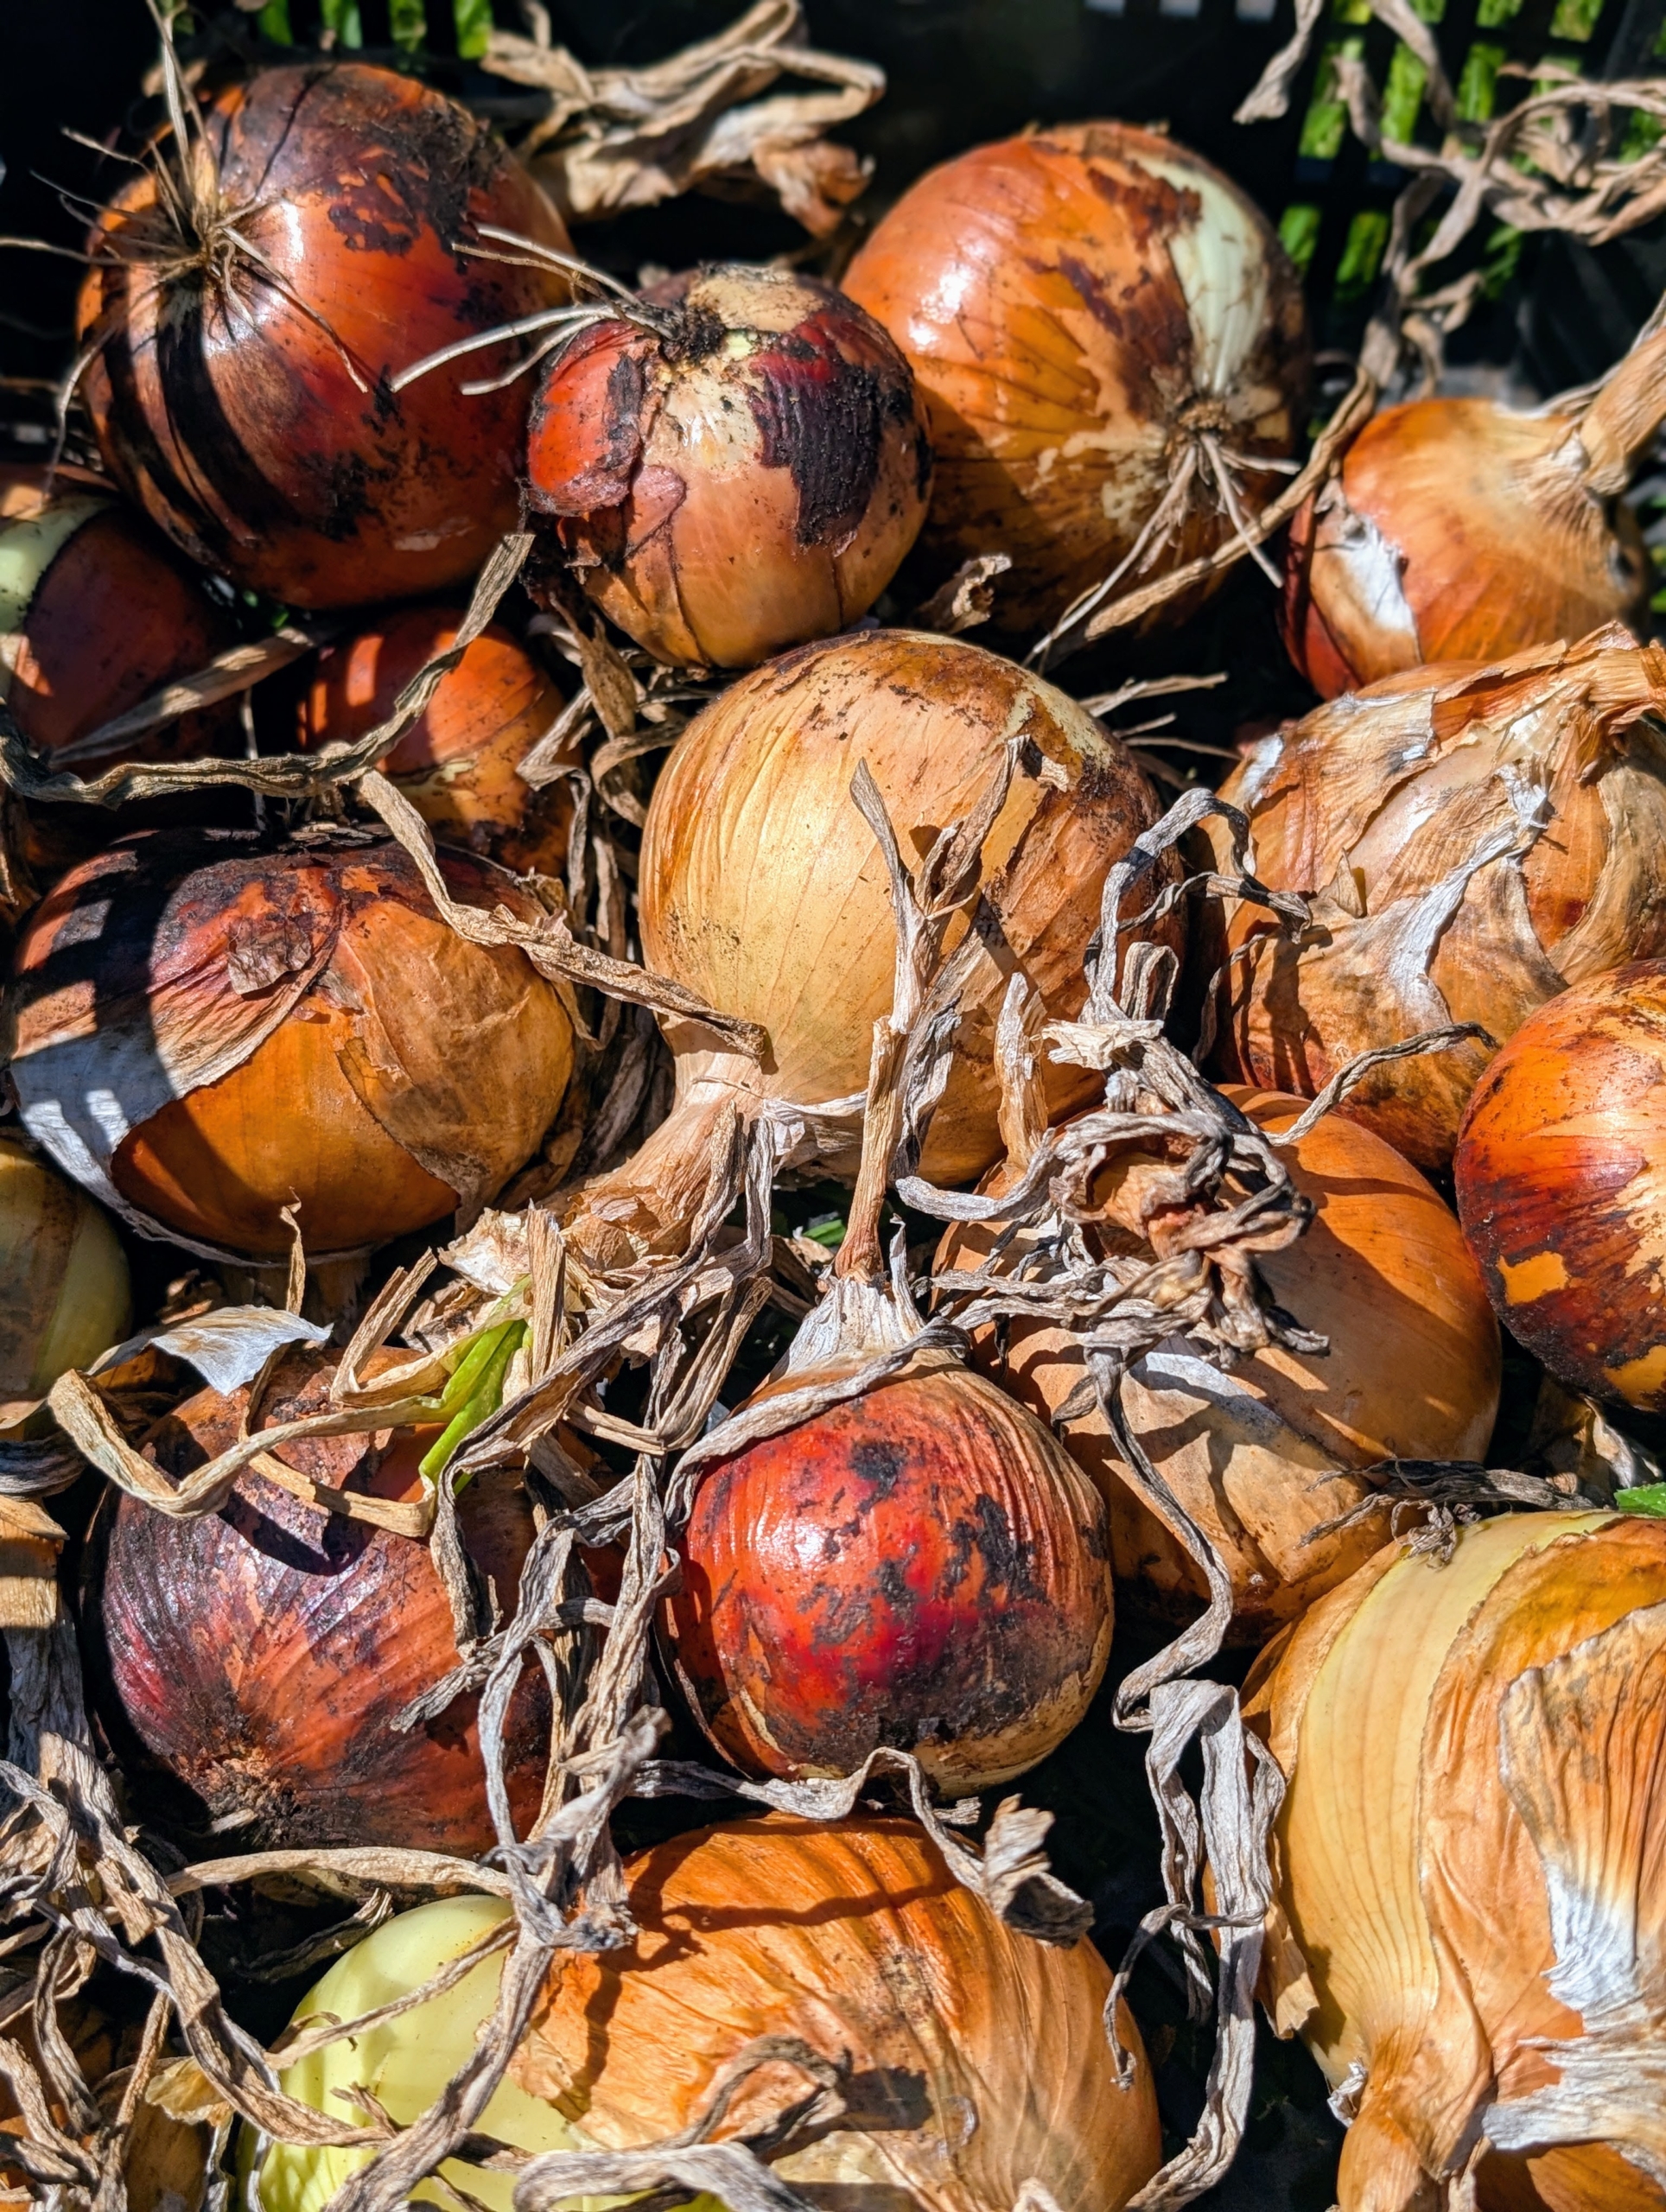
Most of these onions are medium to large in size.
Fortunately, very few animals eat garden onions.
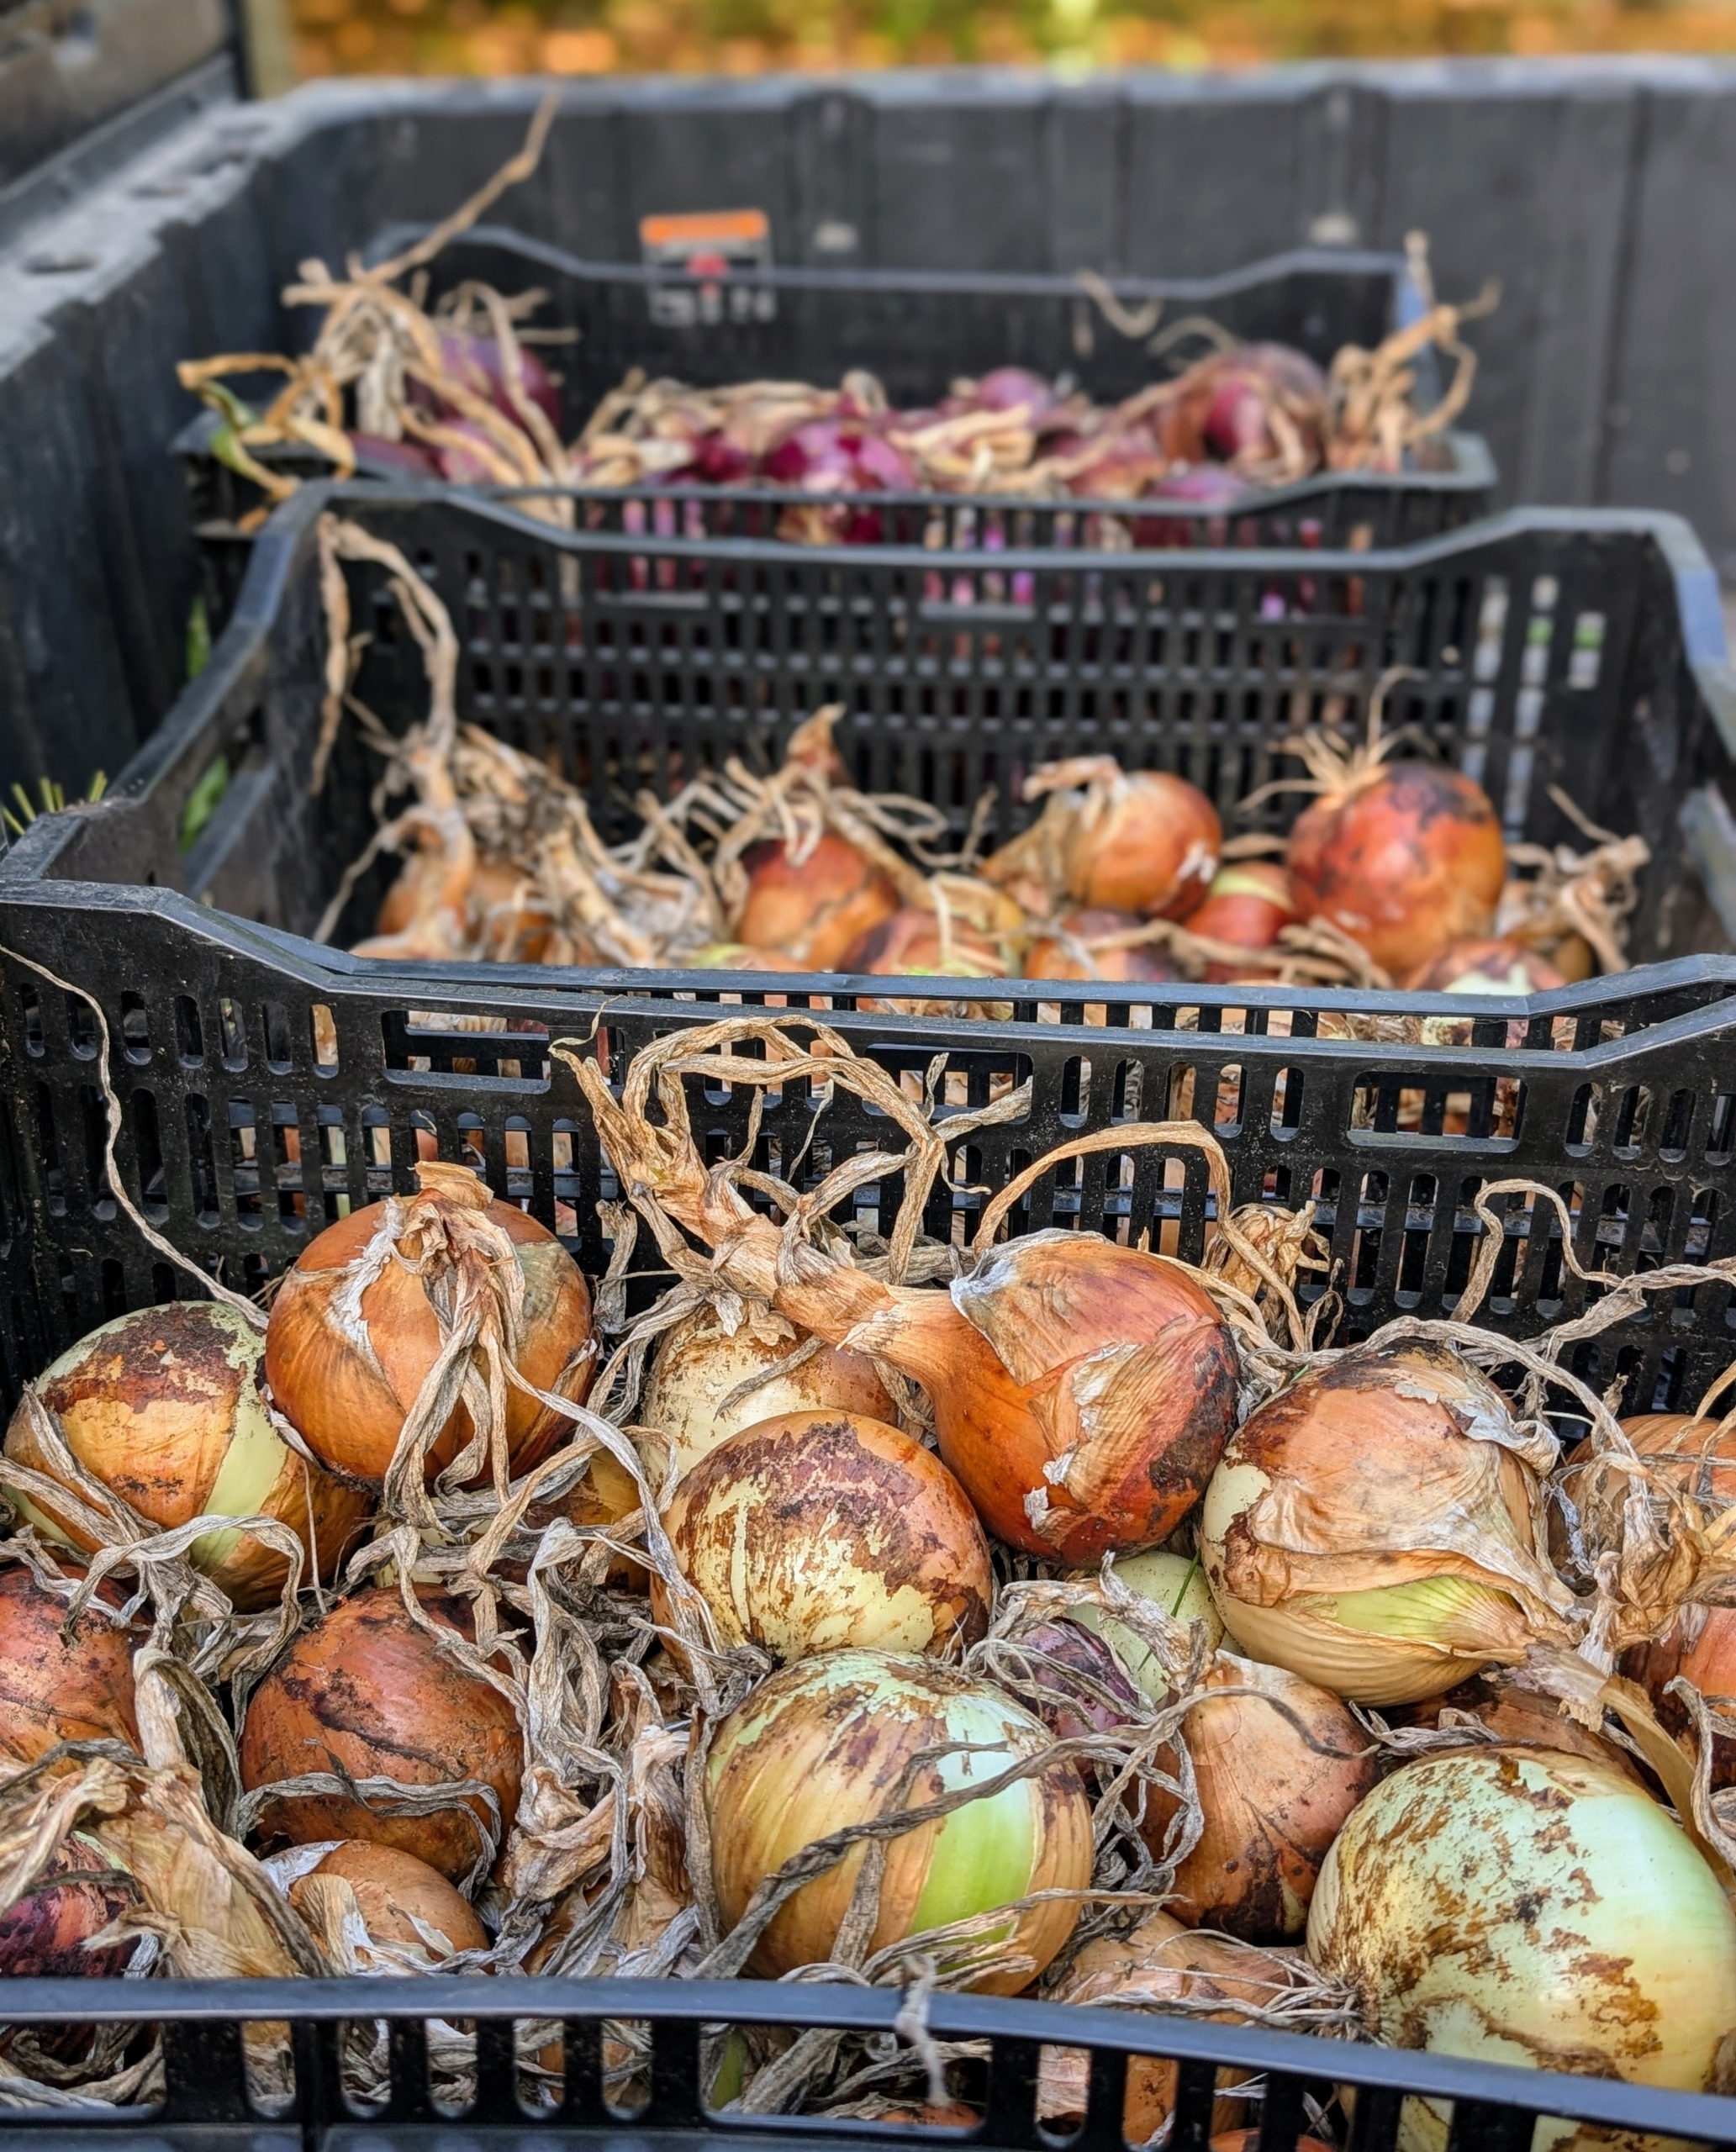
Enma fills the crates. When picking, use containers that provide good air circulation such as these milk crates.
Be sure to pick onions when they are dry, meaning never after a rain shower. Picking them whey they are dry prevents spoilage.
Elvira picked lots of red onions, which are most often used for their color and mild flavor in salads, salsas, and other raw preparations.
Yellow onions are full-flavored and are a reliable standby for cooking almost anything. White onions are often used in prepared salads, white sauces, and classic Mexican cuisine. They’re also loved in soups, stews, braises, and rice pilaf.
Once all the onions are picked, they are taken to my carport where they can cure. Curing is a process of preparing the onions for long-term storage. During the curing stage, the outer layers of the onions dry out, tightening around the bulb and creating a protective layer that keeps the onion firm and fresh for a longer time.