Cleaning Garlic for Storage
This year's garlic is ready to use!
I grow a lot of garlic here at my Bedford, New York farm and up at Skylands, my home in Maine. I plant it in the fall, harvest it the following summer, and then let it thoroughly cure in a dry, warm place. Yesterday, the garlic was cleaned and trimmed - a process that takes some time to complete, but is the last step before bringing the garlic in to use and enjoy.
Here are some photos.
-

- I always grow lots of garlic to use in my cooking and to share with my daughter, Alexis.
-
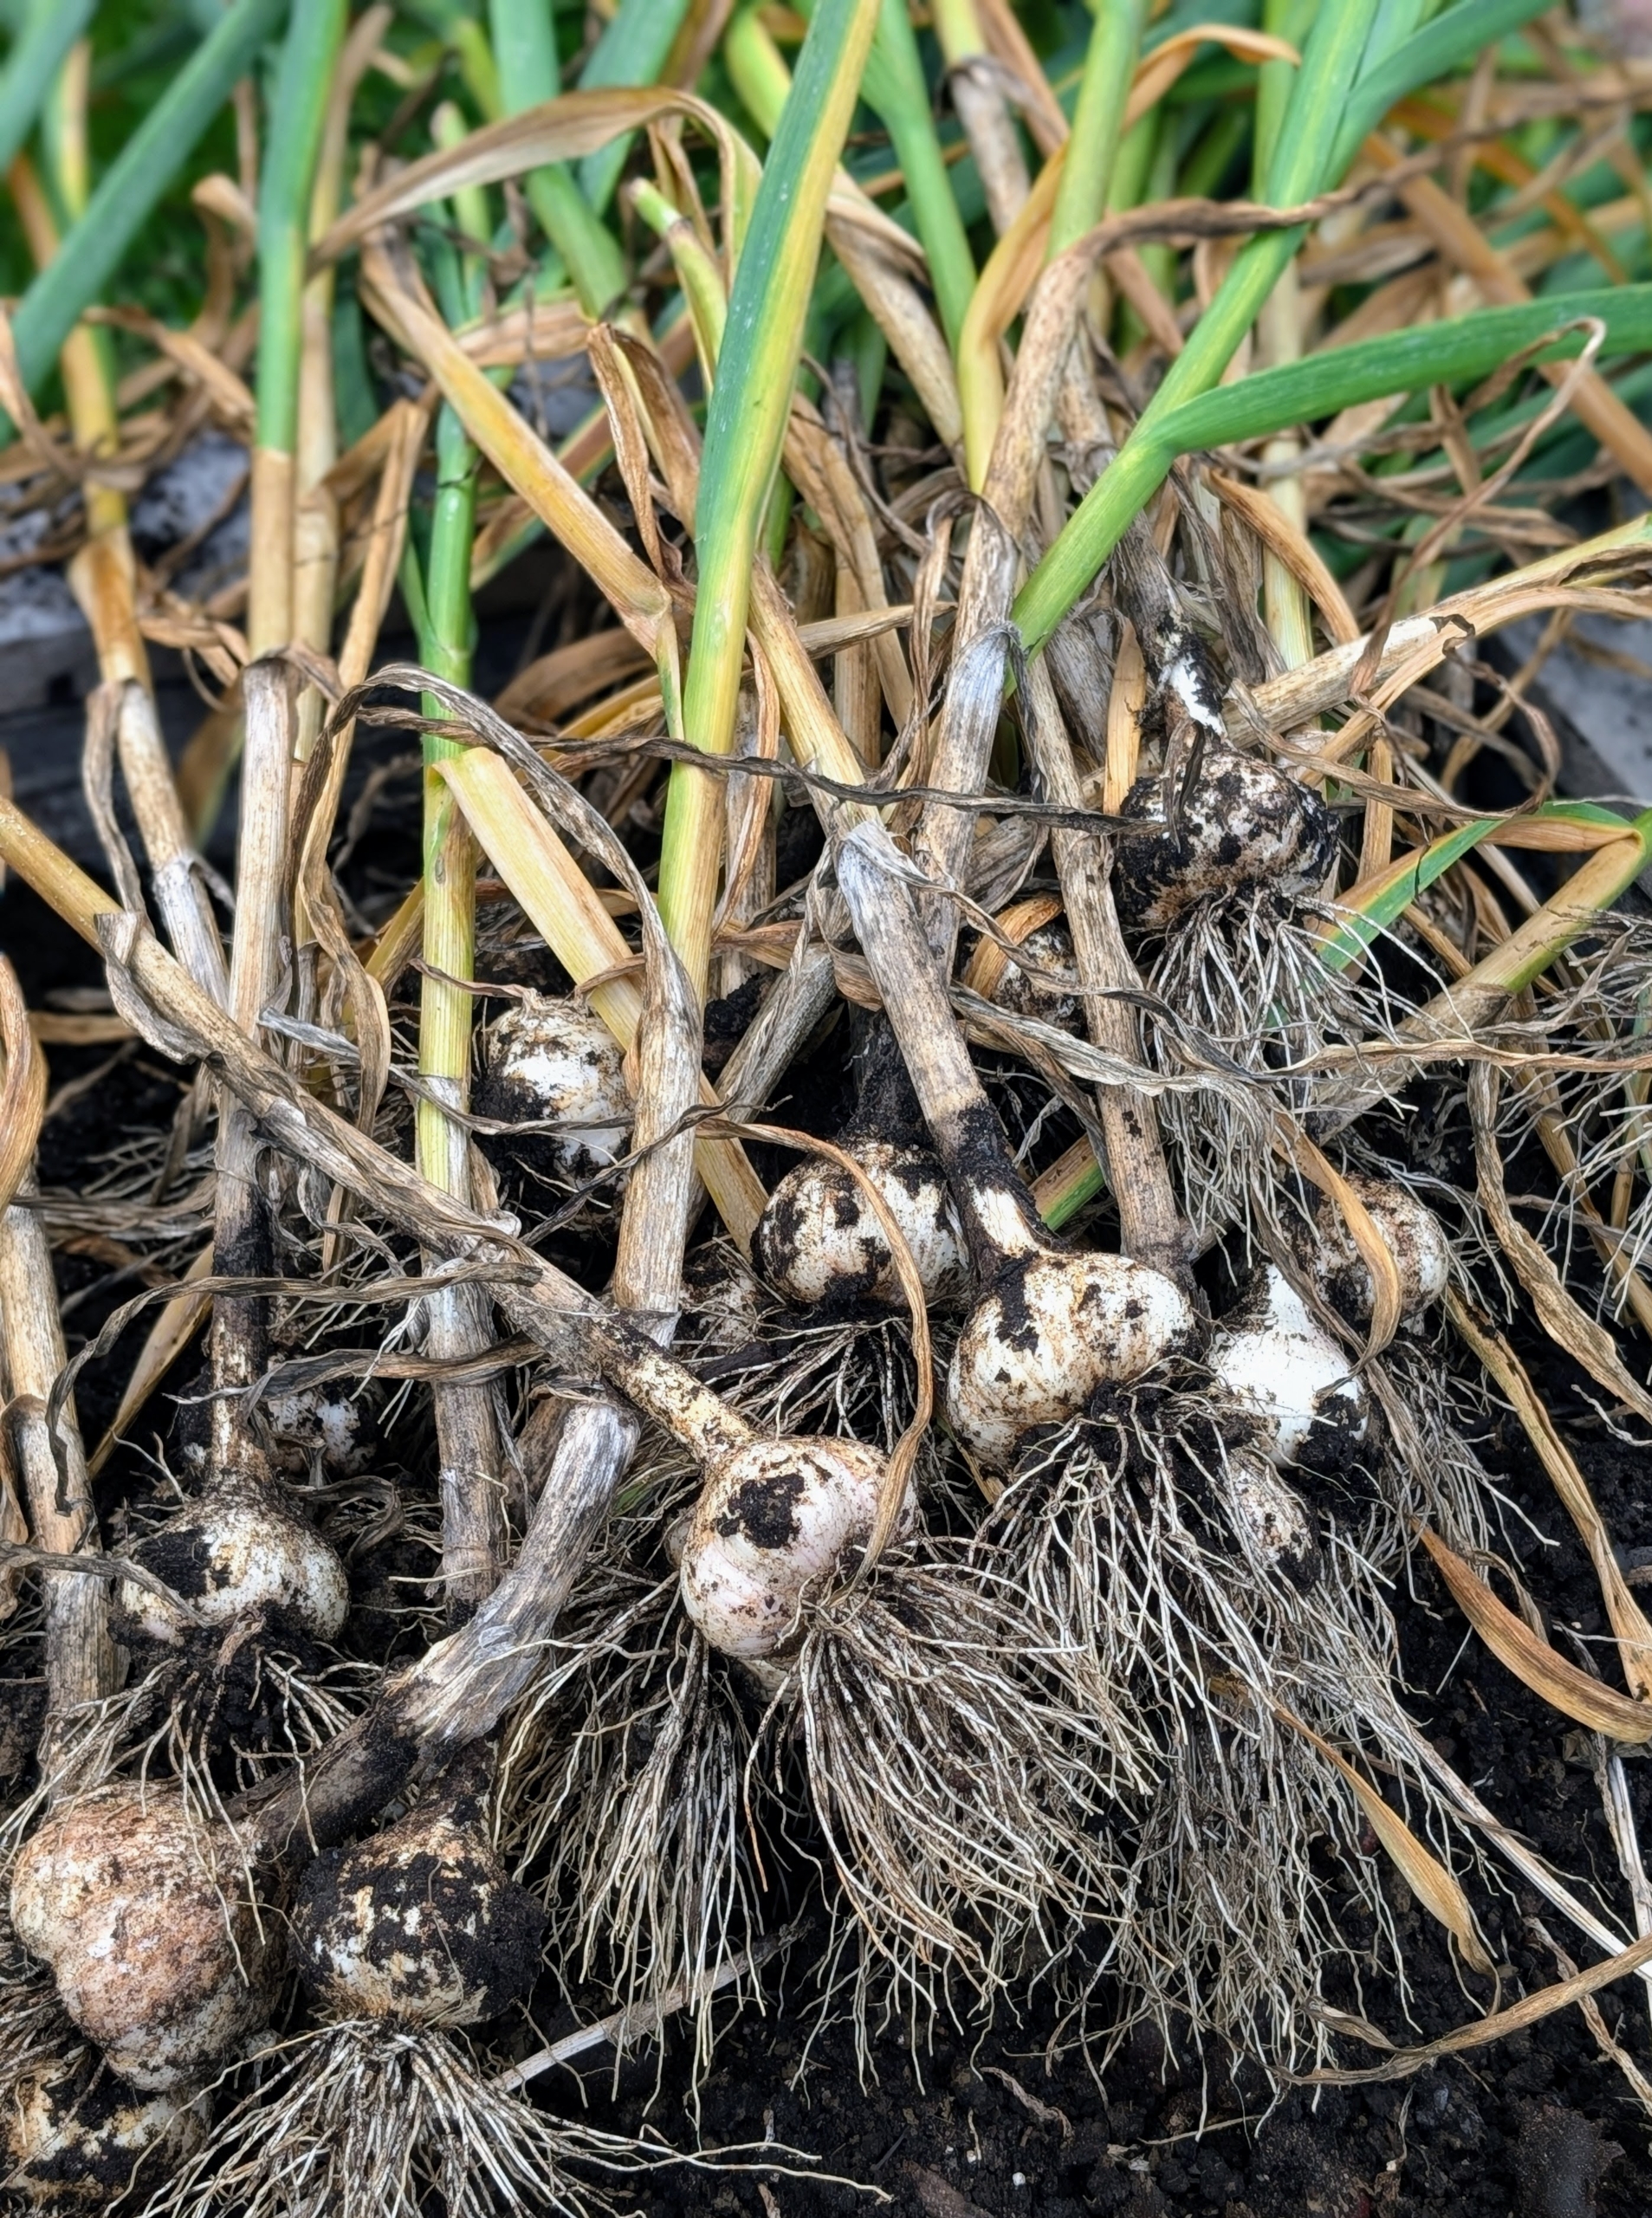
- I harvested this year’s garlic back in July. Determining when garlic is ready to harvest can be tricky. If it’s harvested too soon, the cloves are small and underdeveloped. If harvested too late, the clove heads begin to separate, making them more vulnerable to decay. The real indicator is the plant itself – when the bottom leaves have turned brown, and the top leaves are still green.

-
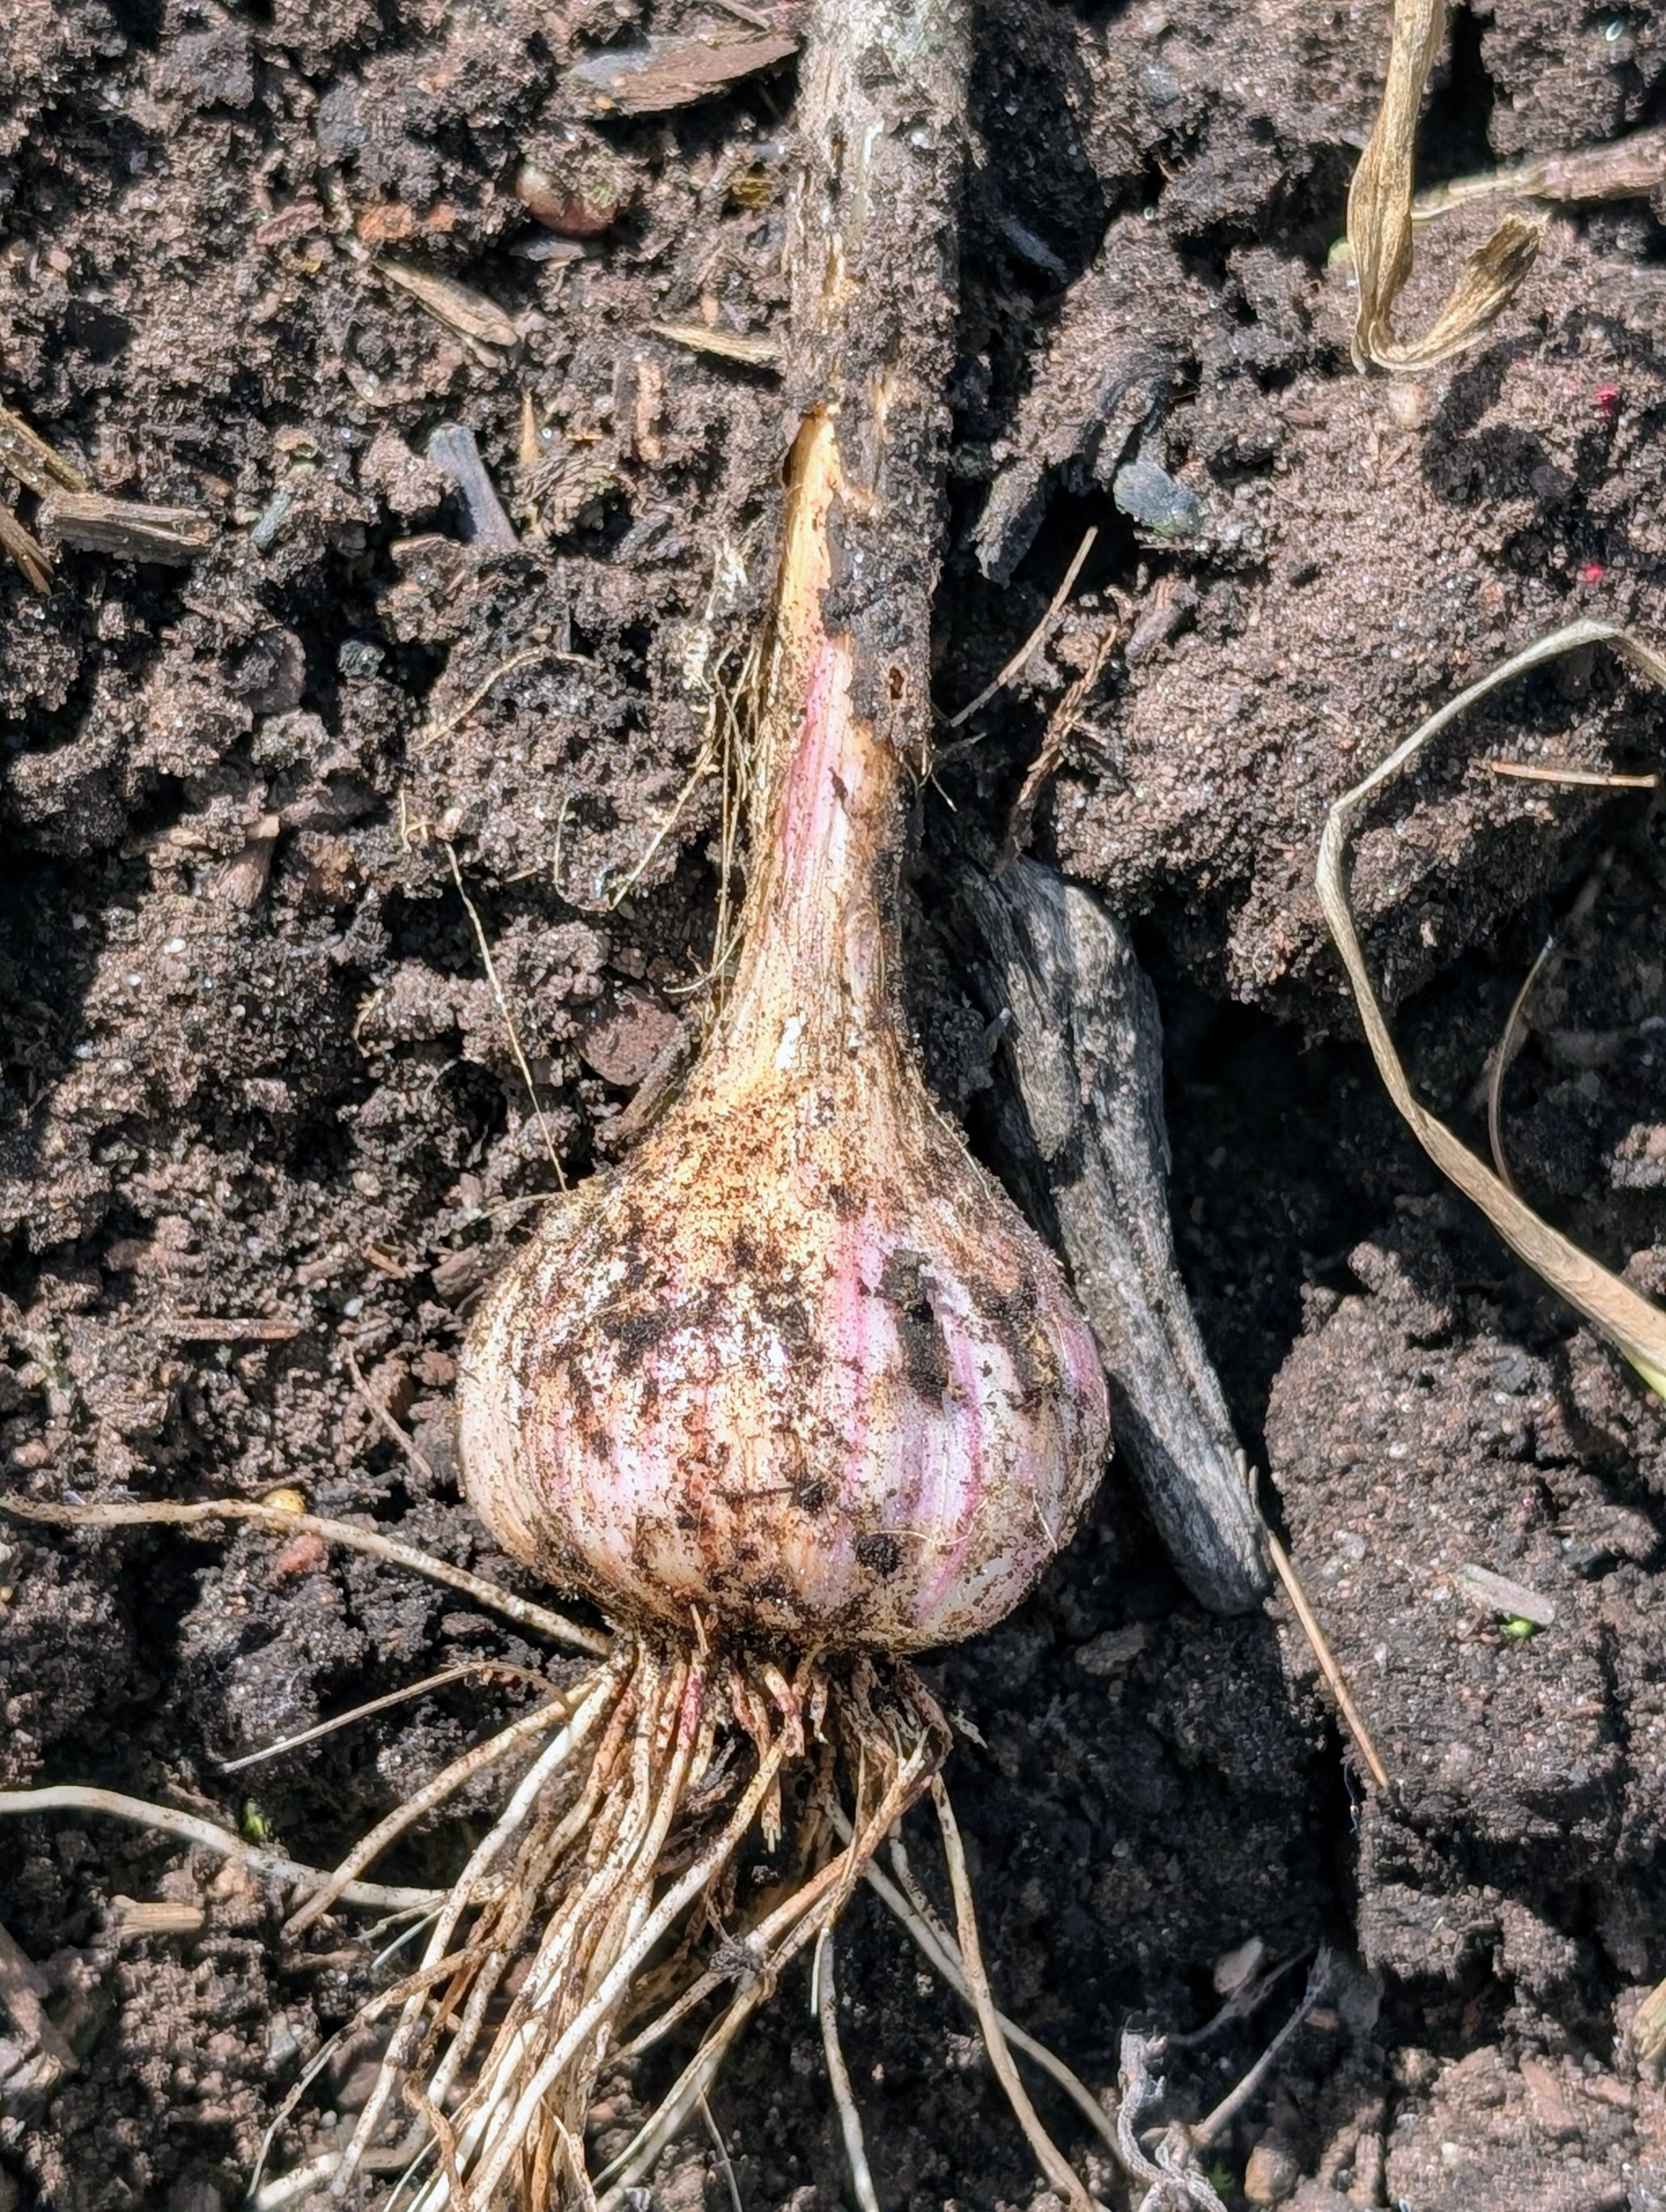
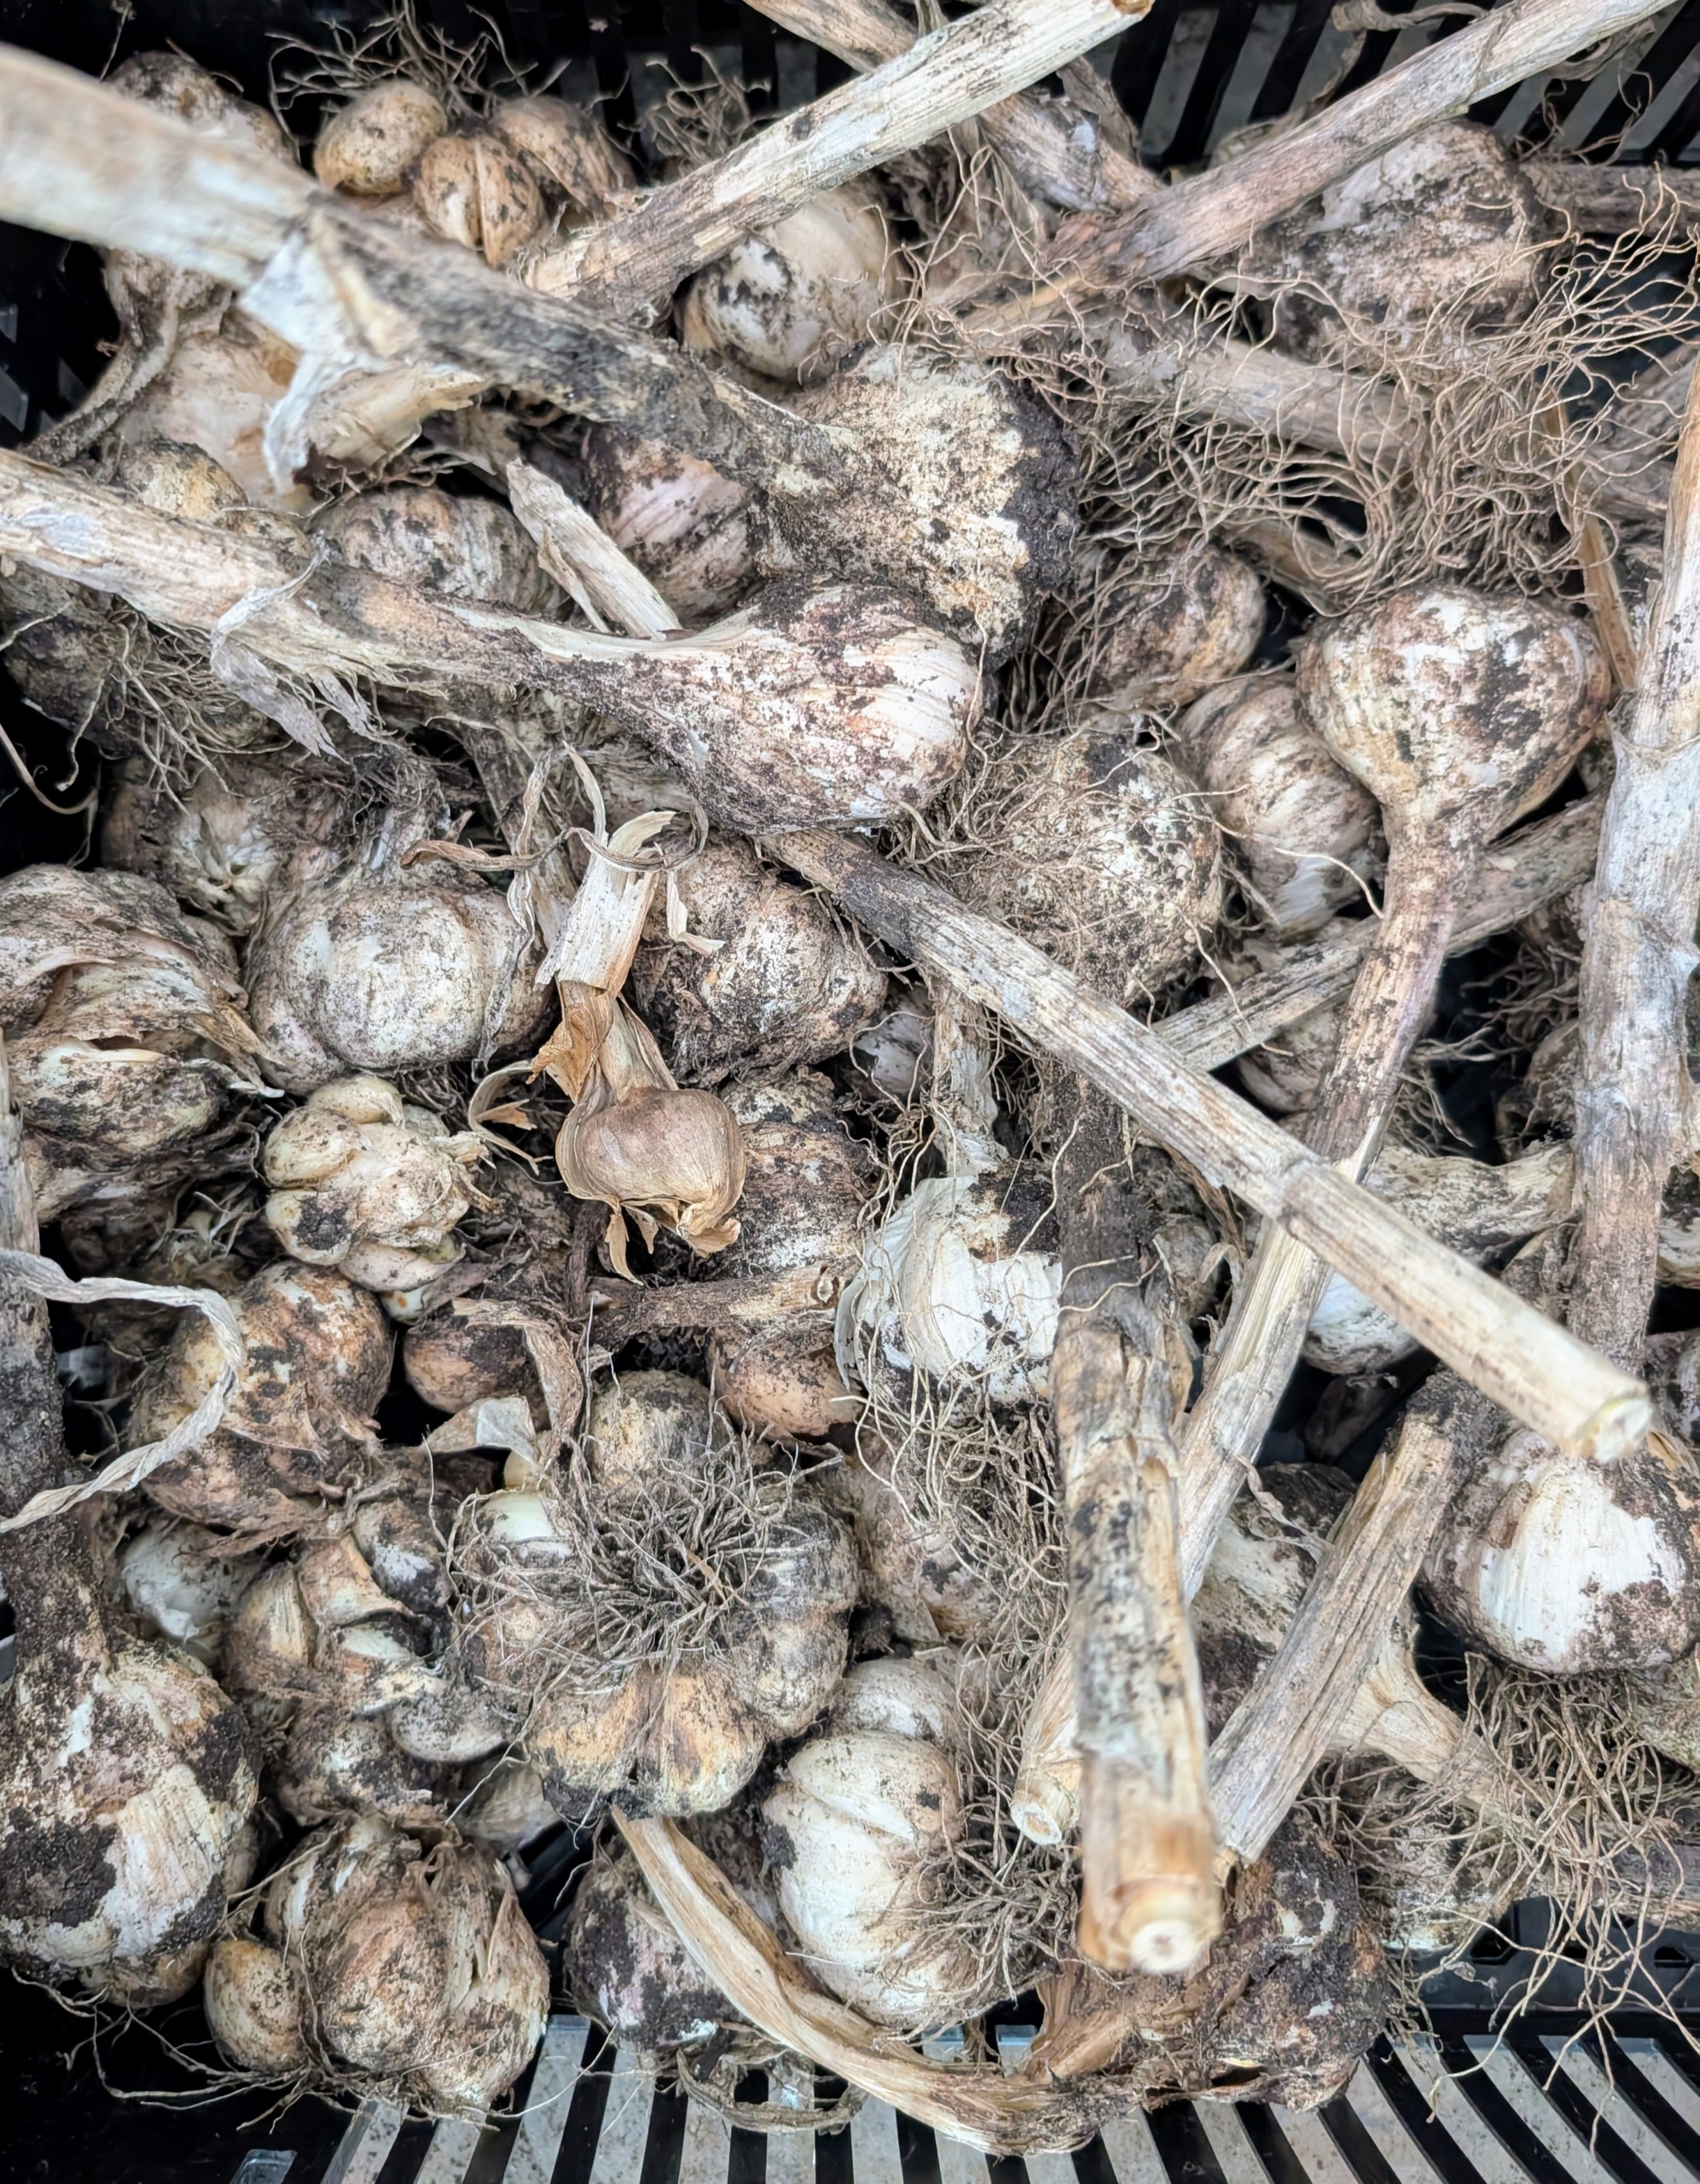
- When harvested, each one is pulled out carefully from the base, so that the head comes out completely.
-
- Here is a freshly picked garlic head.
-
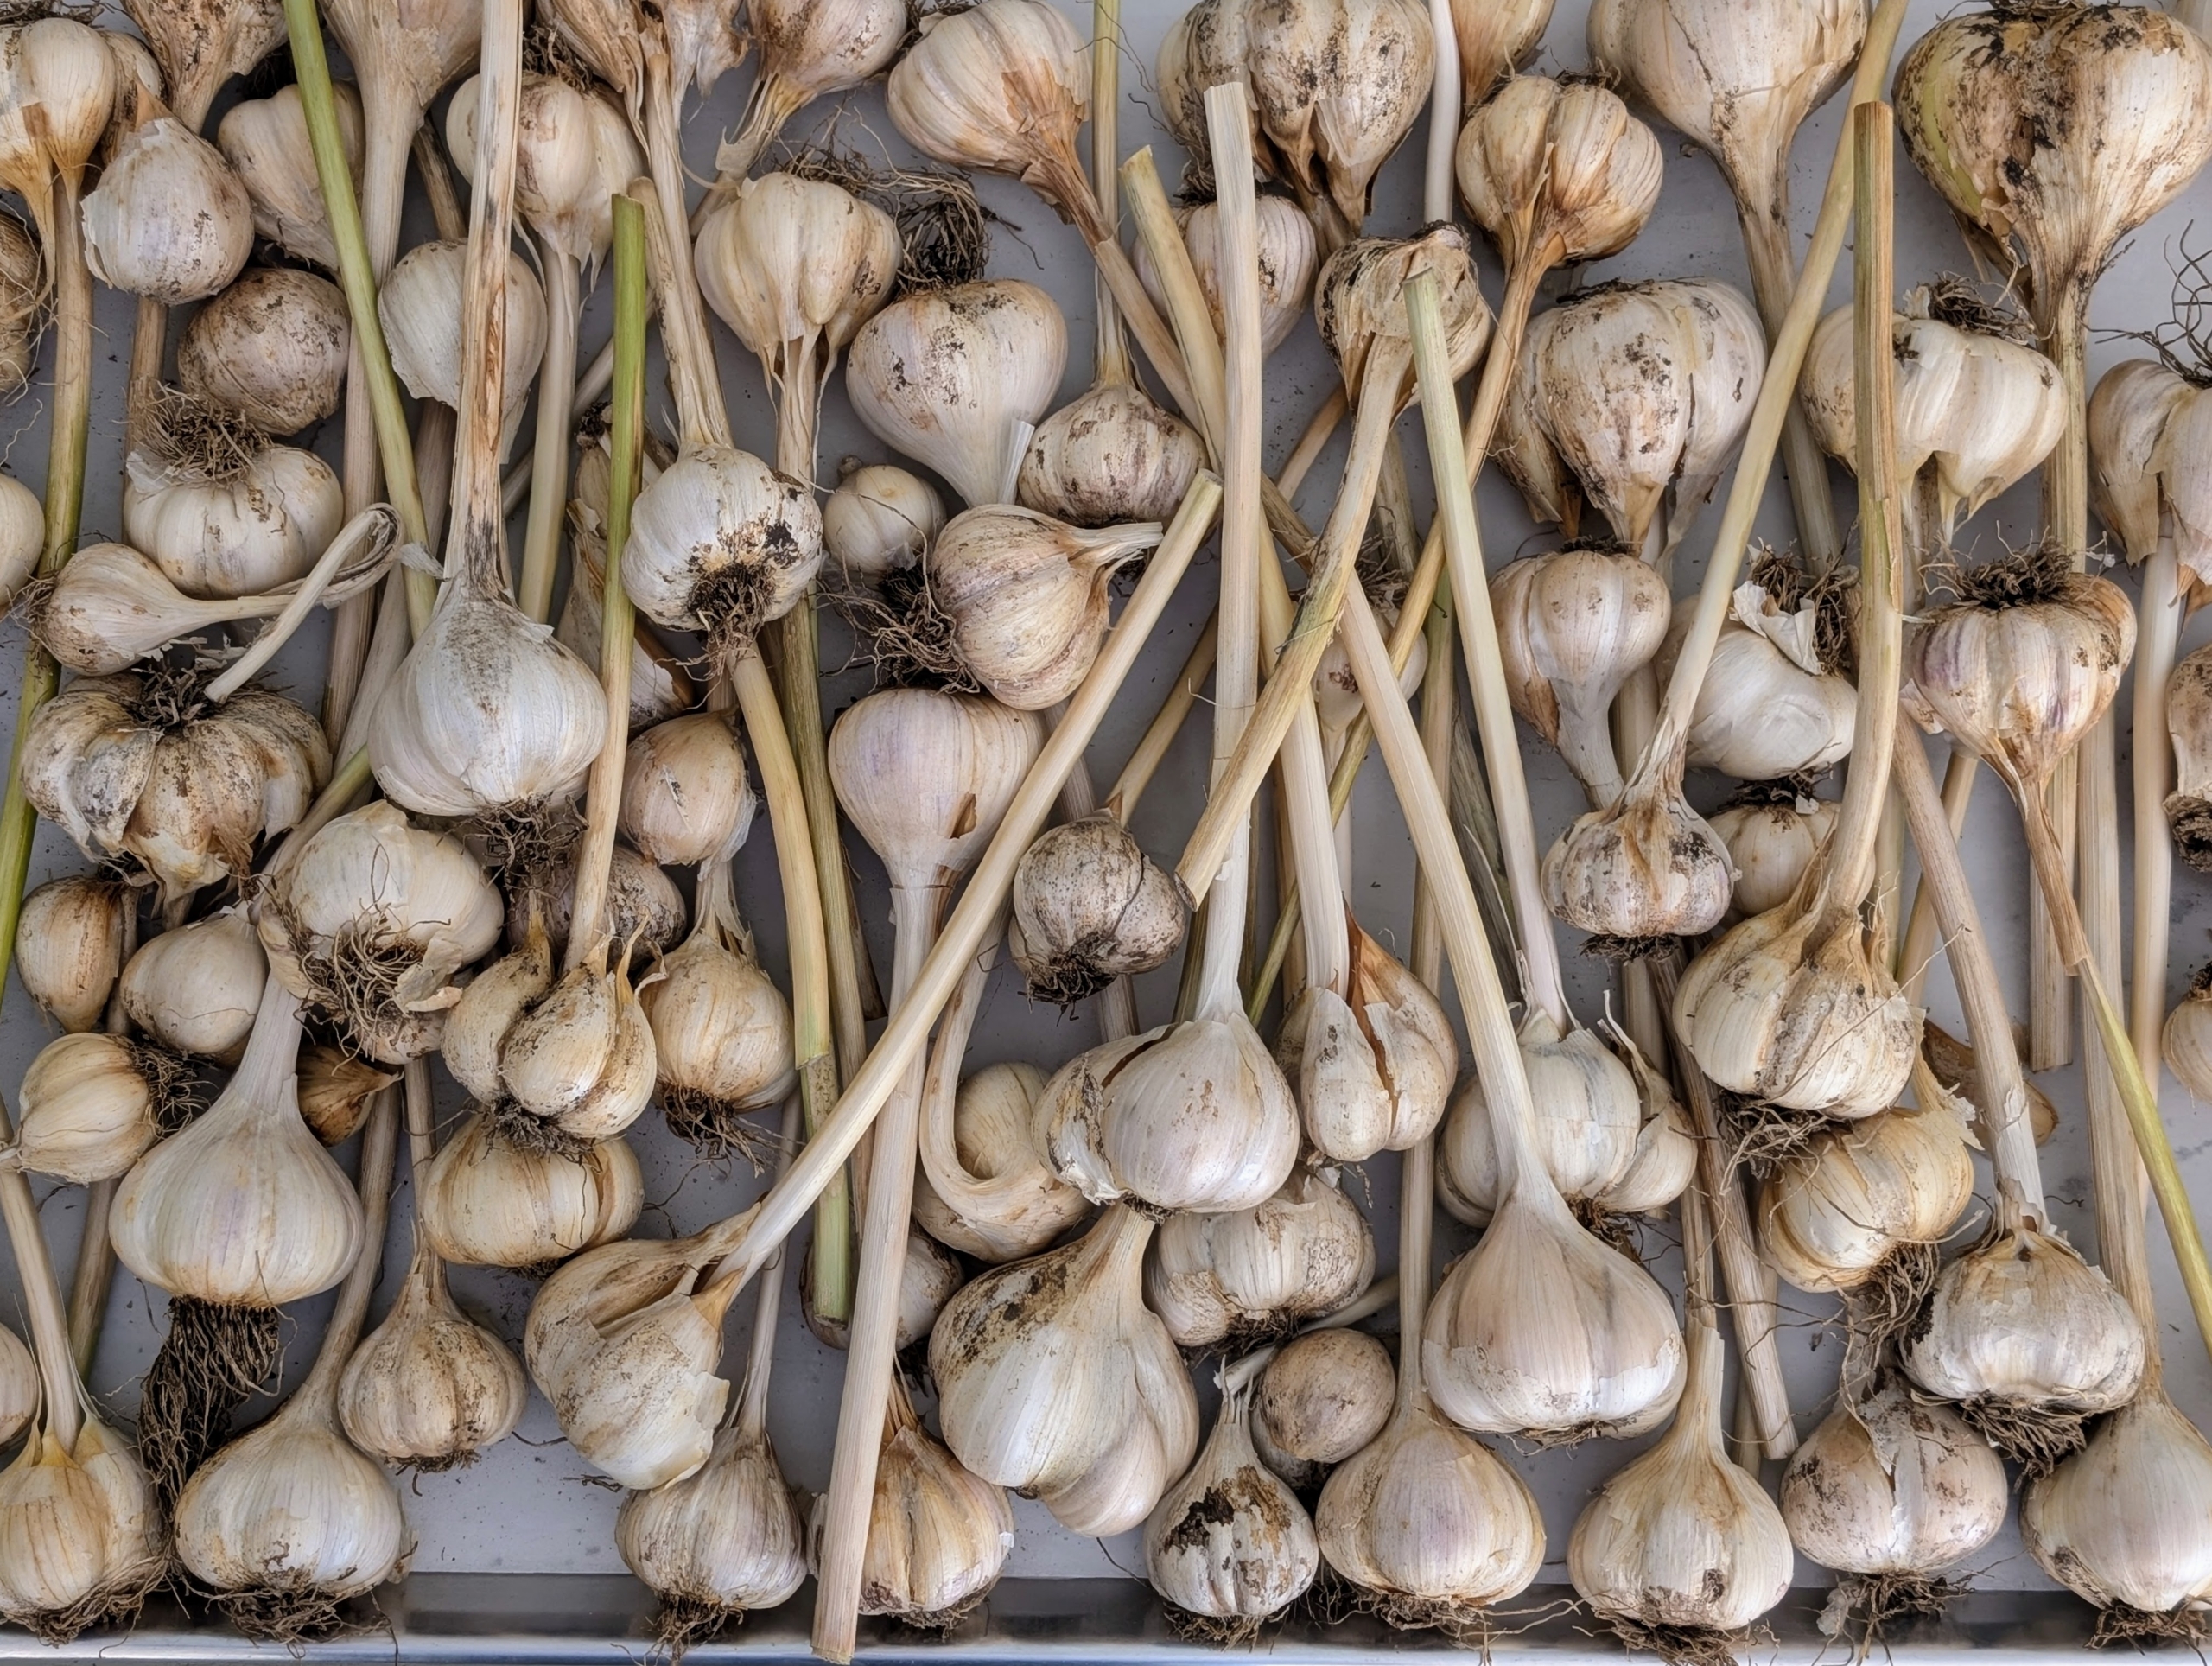
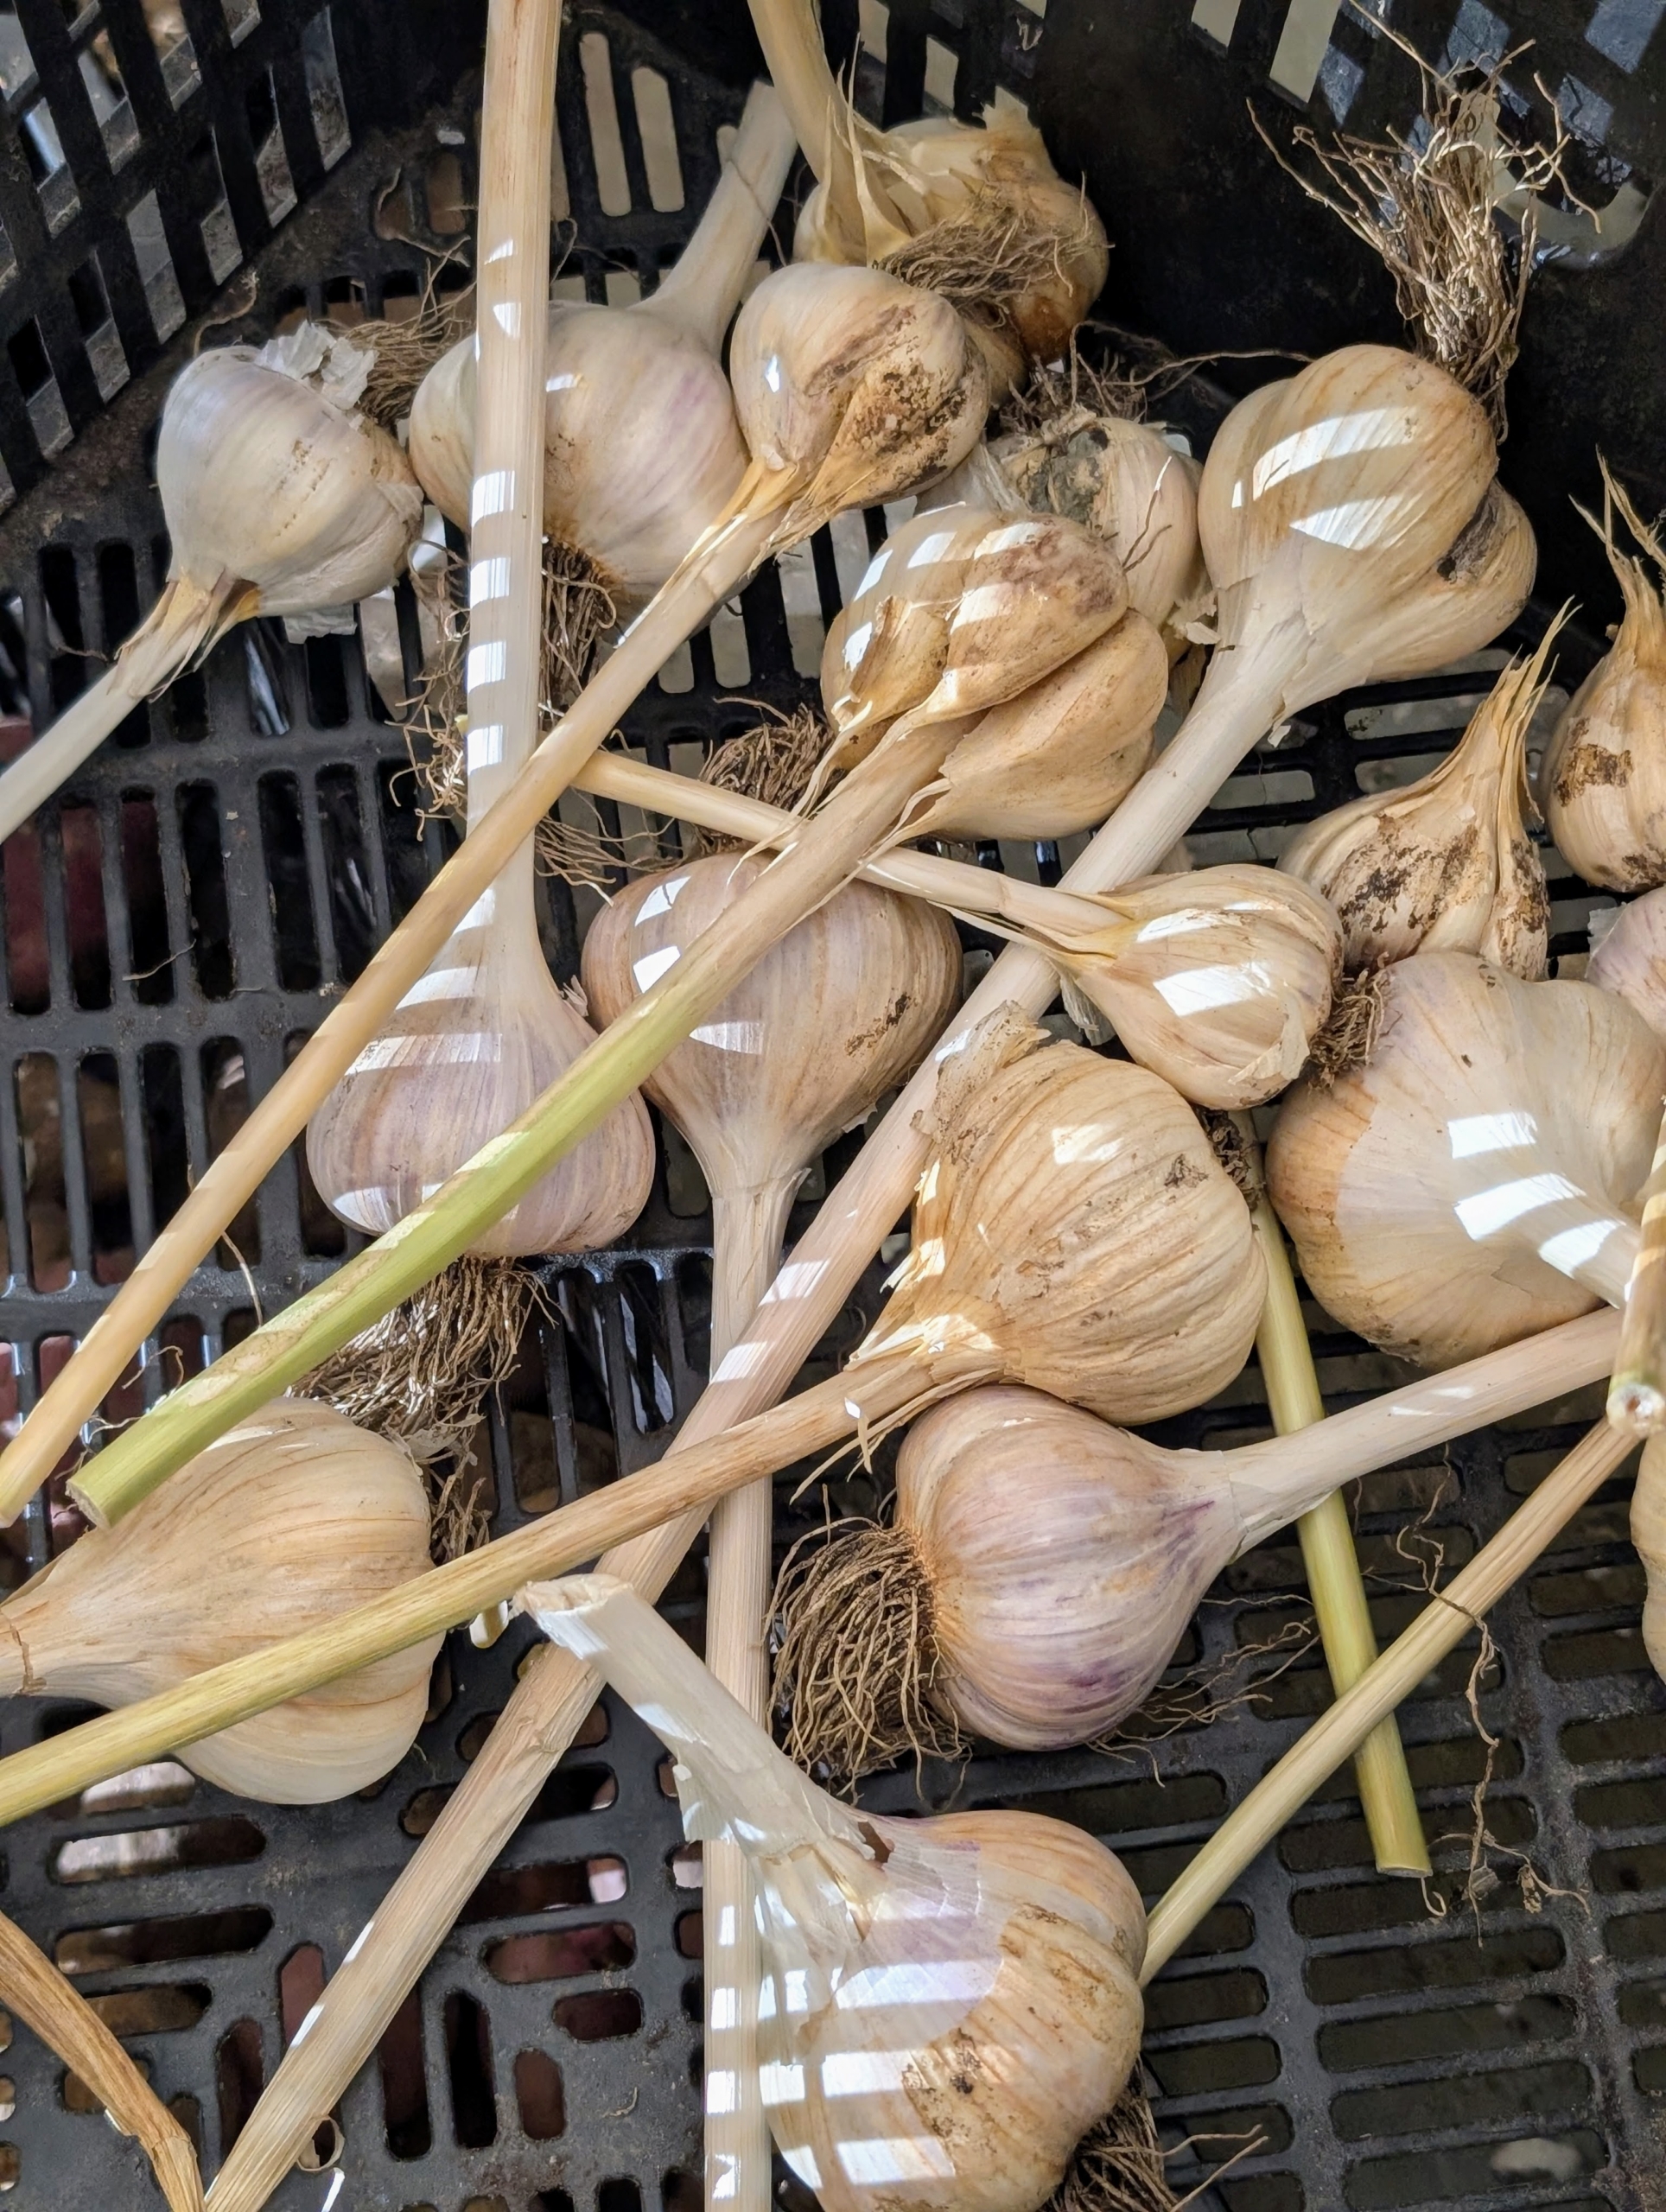
- All these garlic heads were picked at the right time.
-
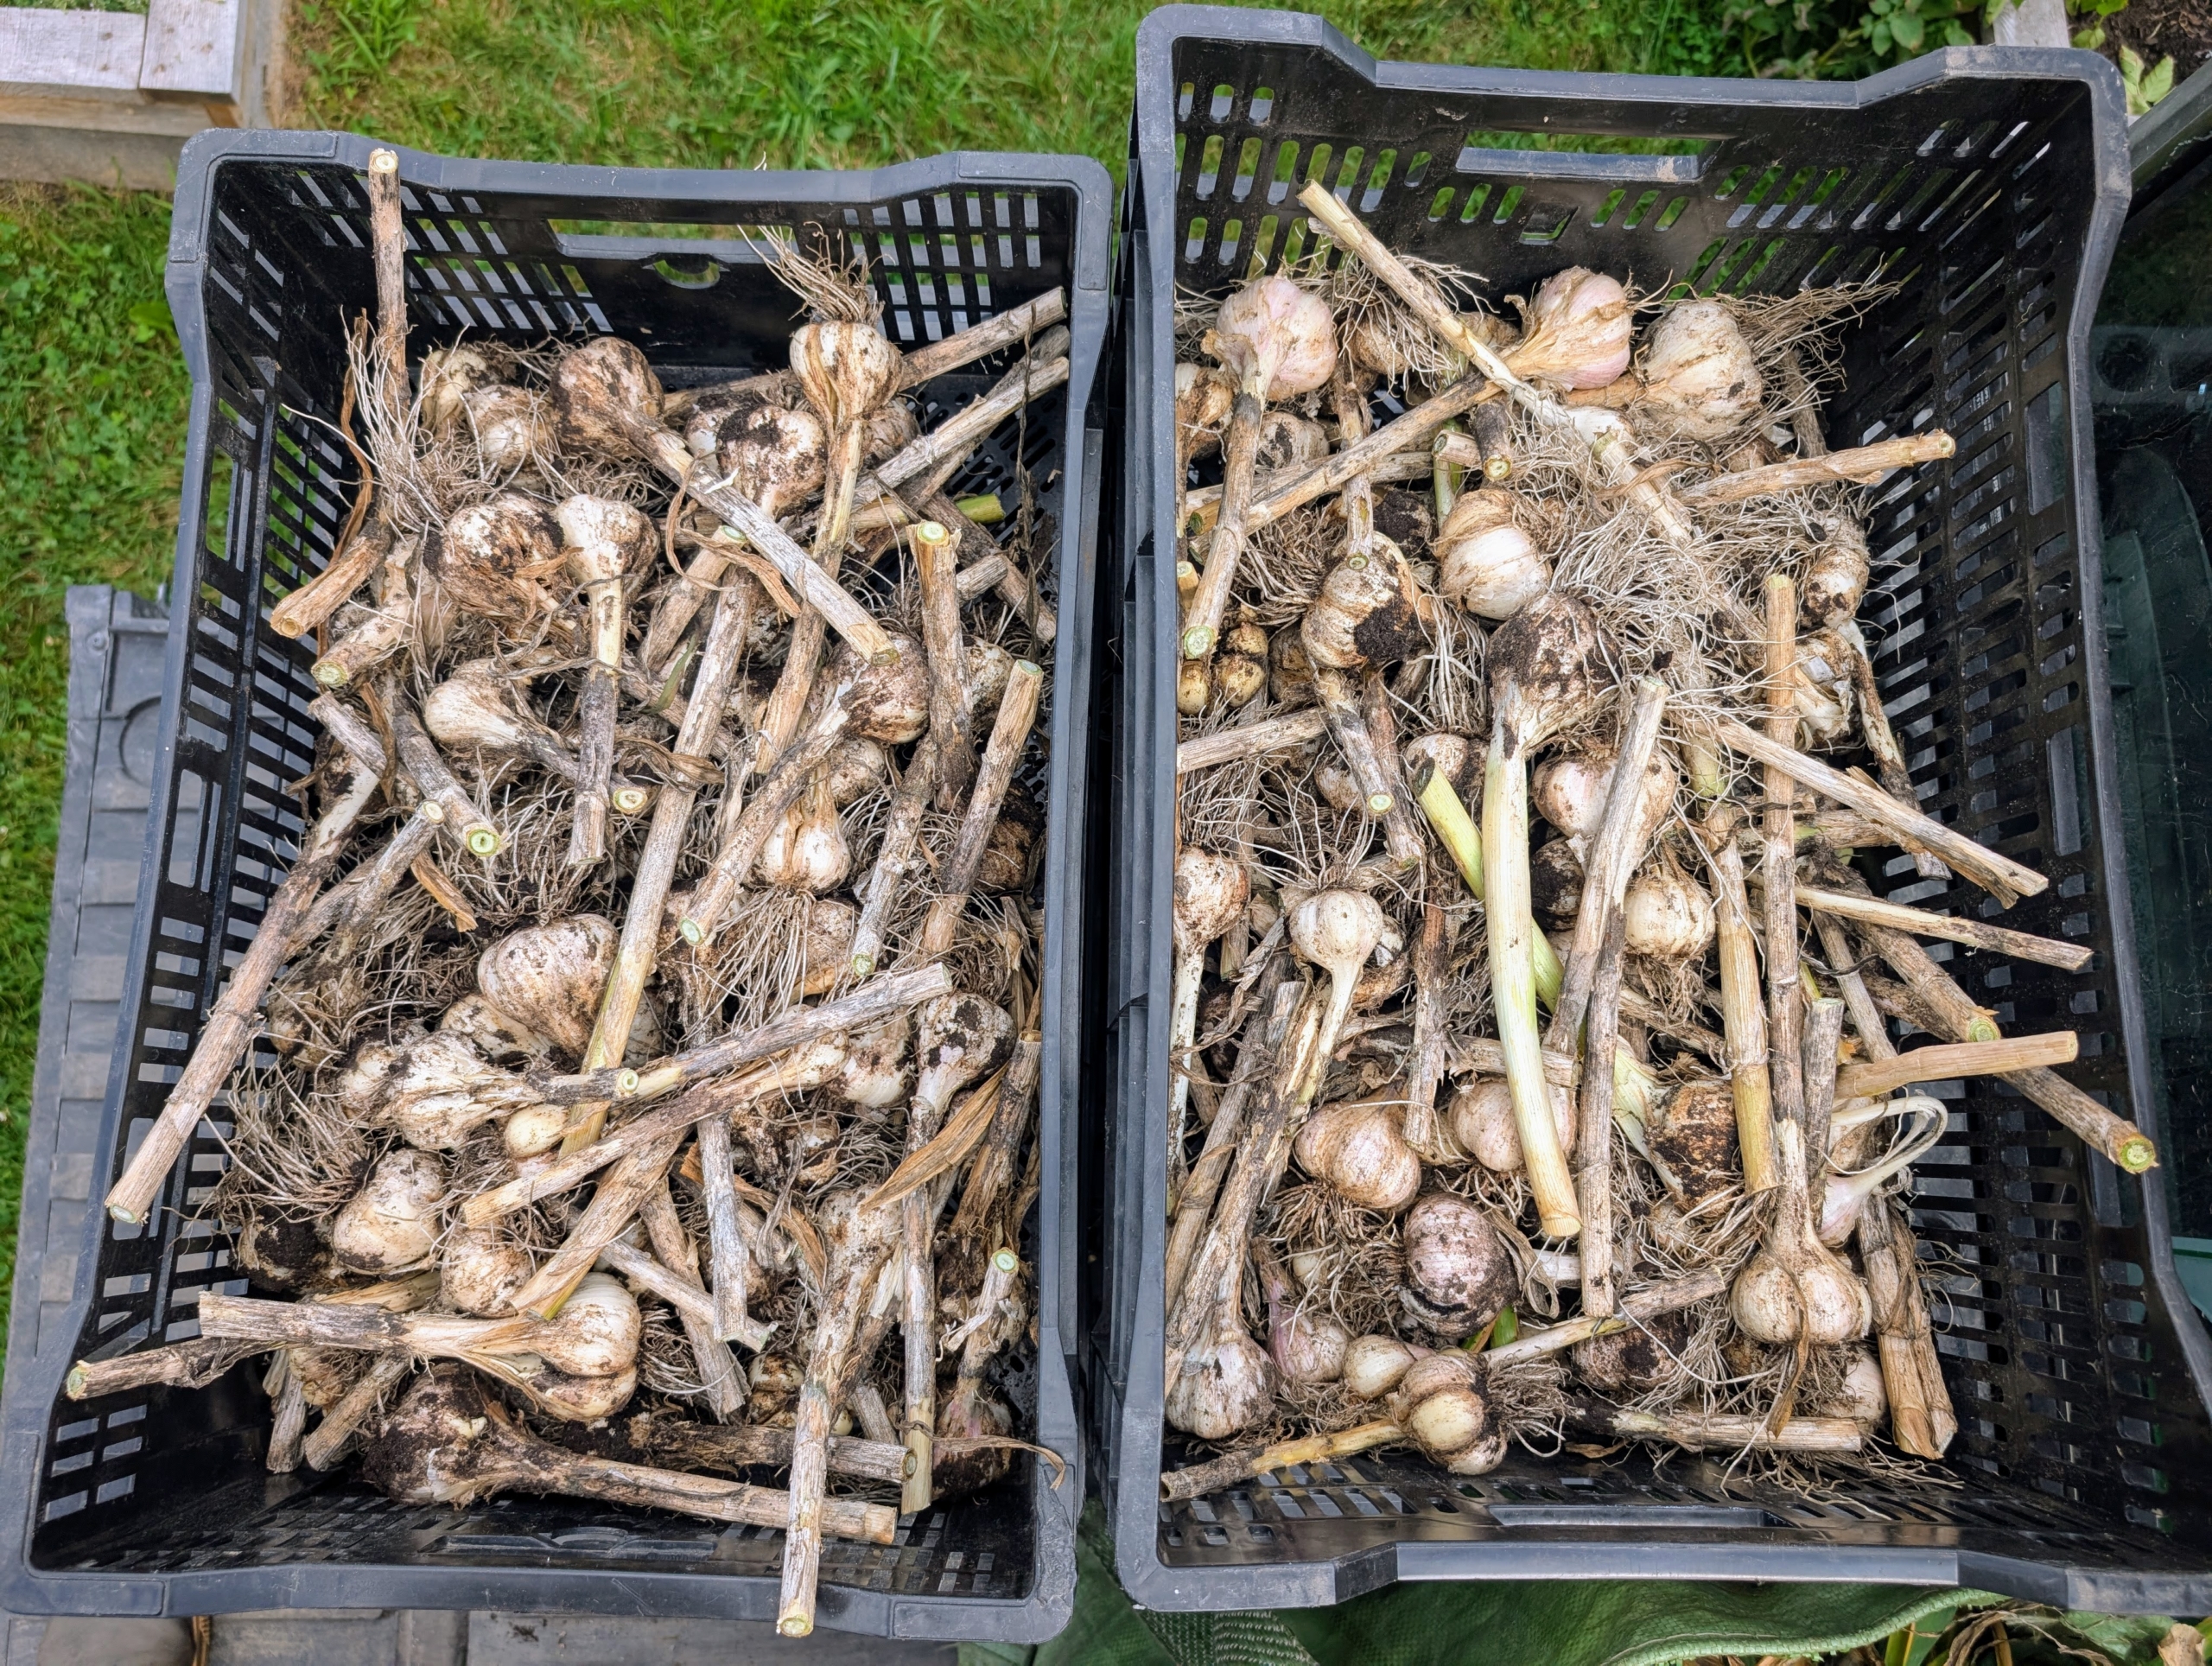
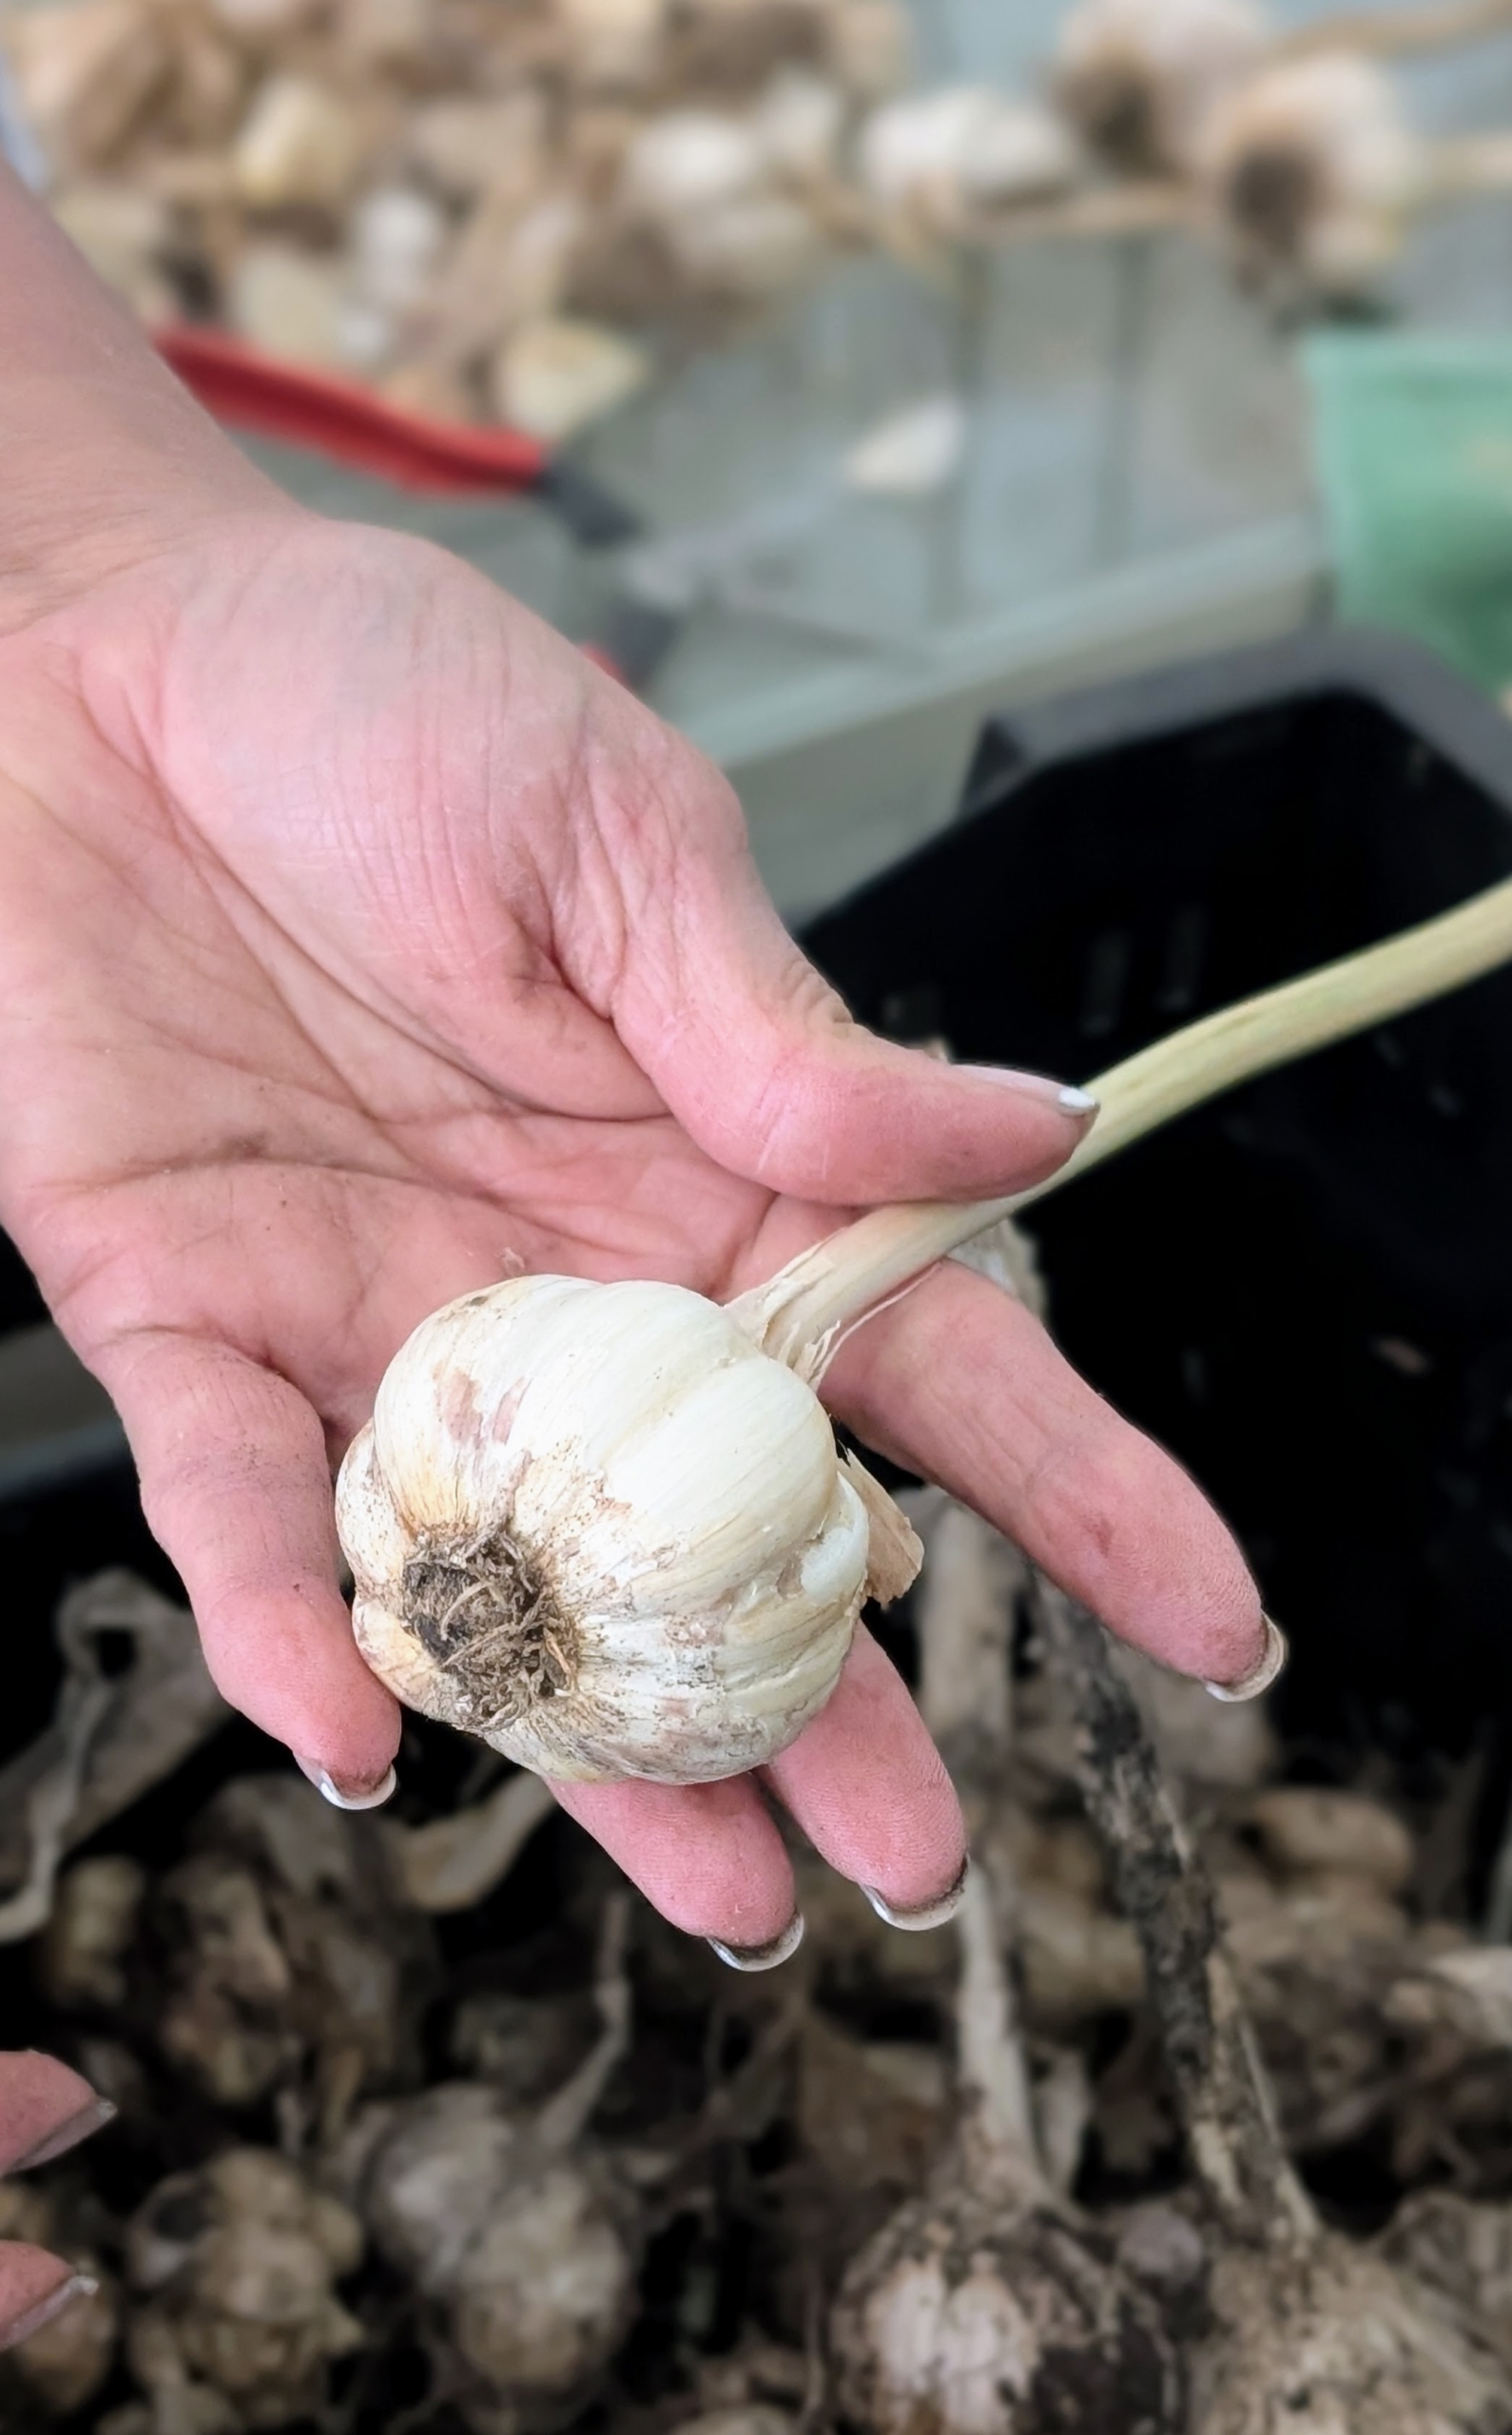
- As it is harvested, the garlic’s long stem is cut slightly and then the head is placed in a breathable crate, so it stays dry. And then all are taken to a well-ventilated warm location with good air circulation so they can start to cure. It’s wise to avoid full sun and direct sunlight, as it can alter the flavor.
-
- These were left in my carport, where they were protected from any elements.
-
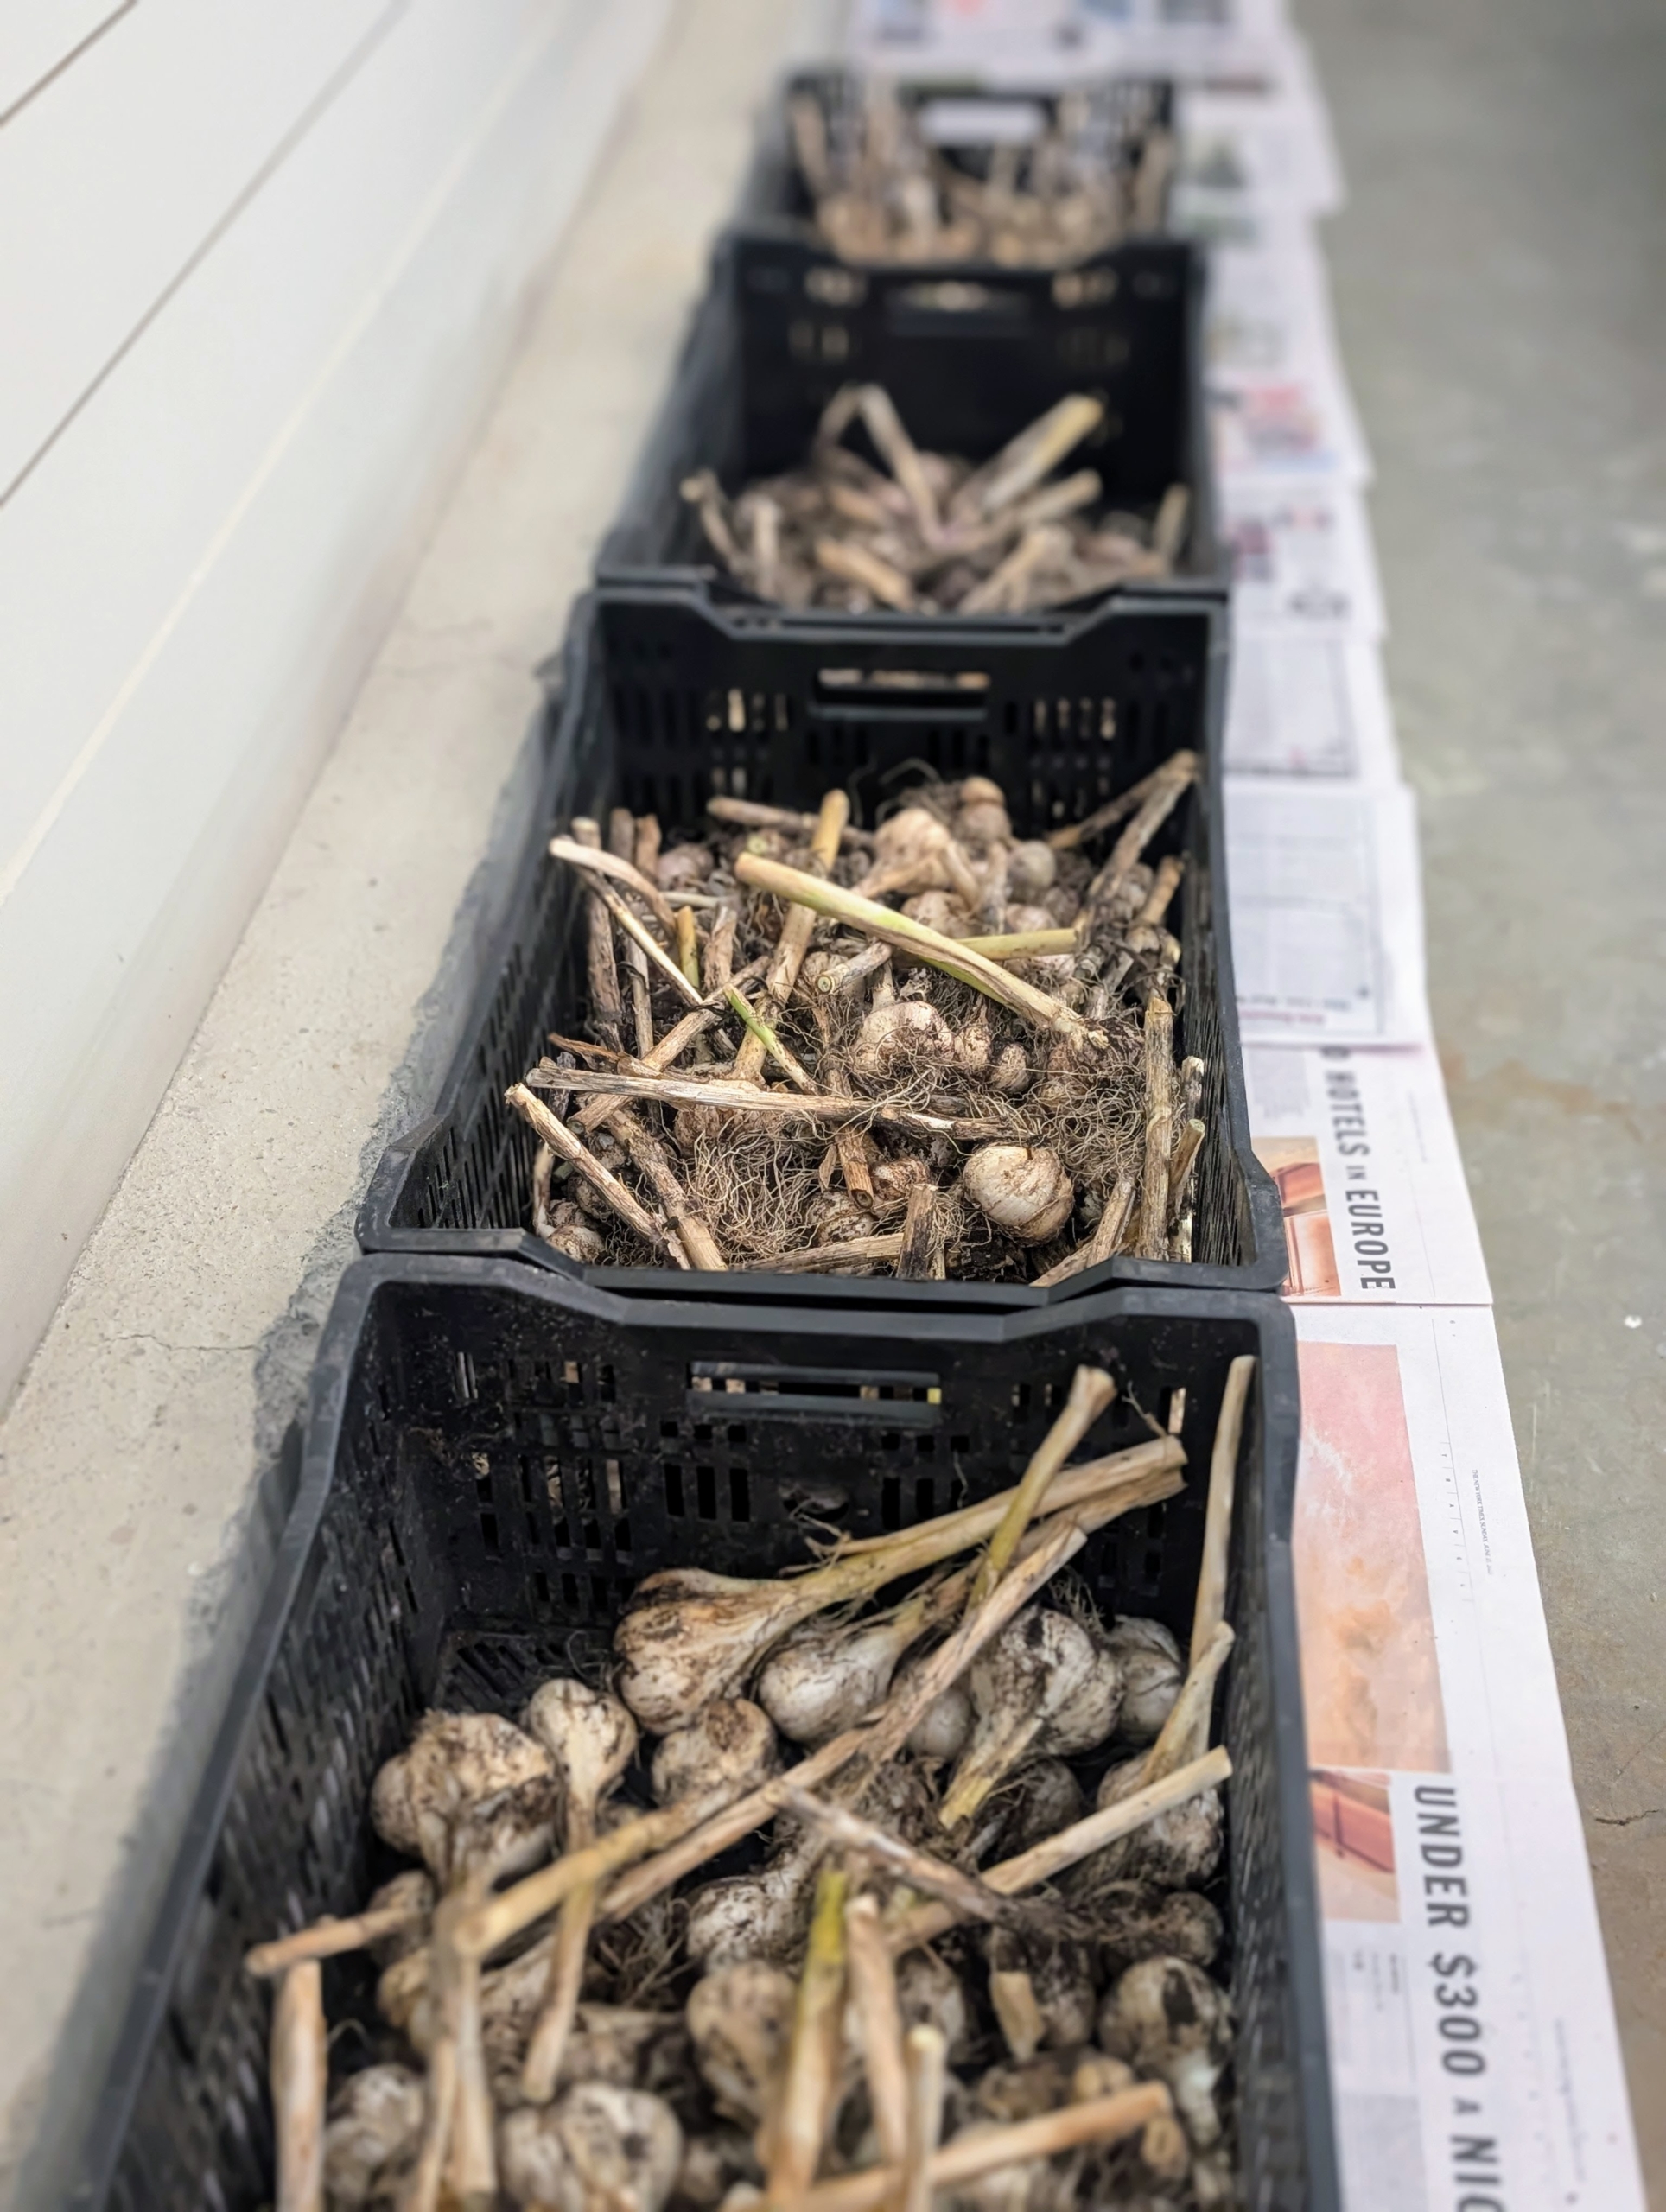
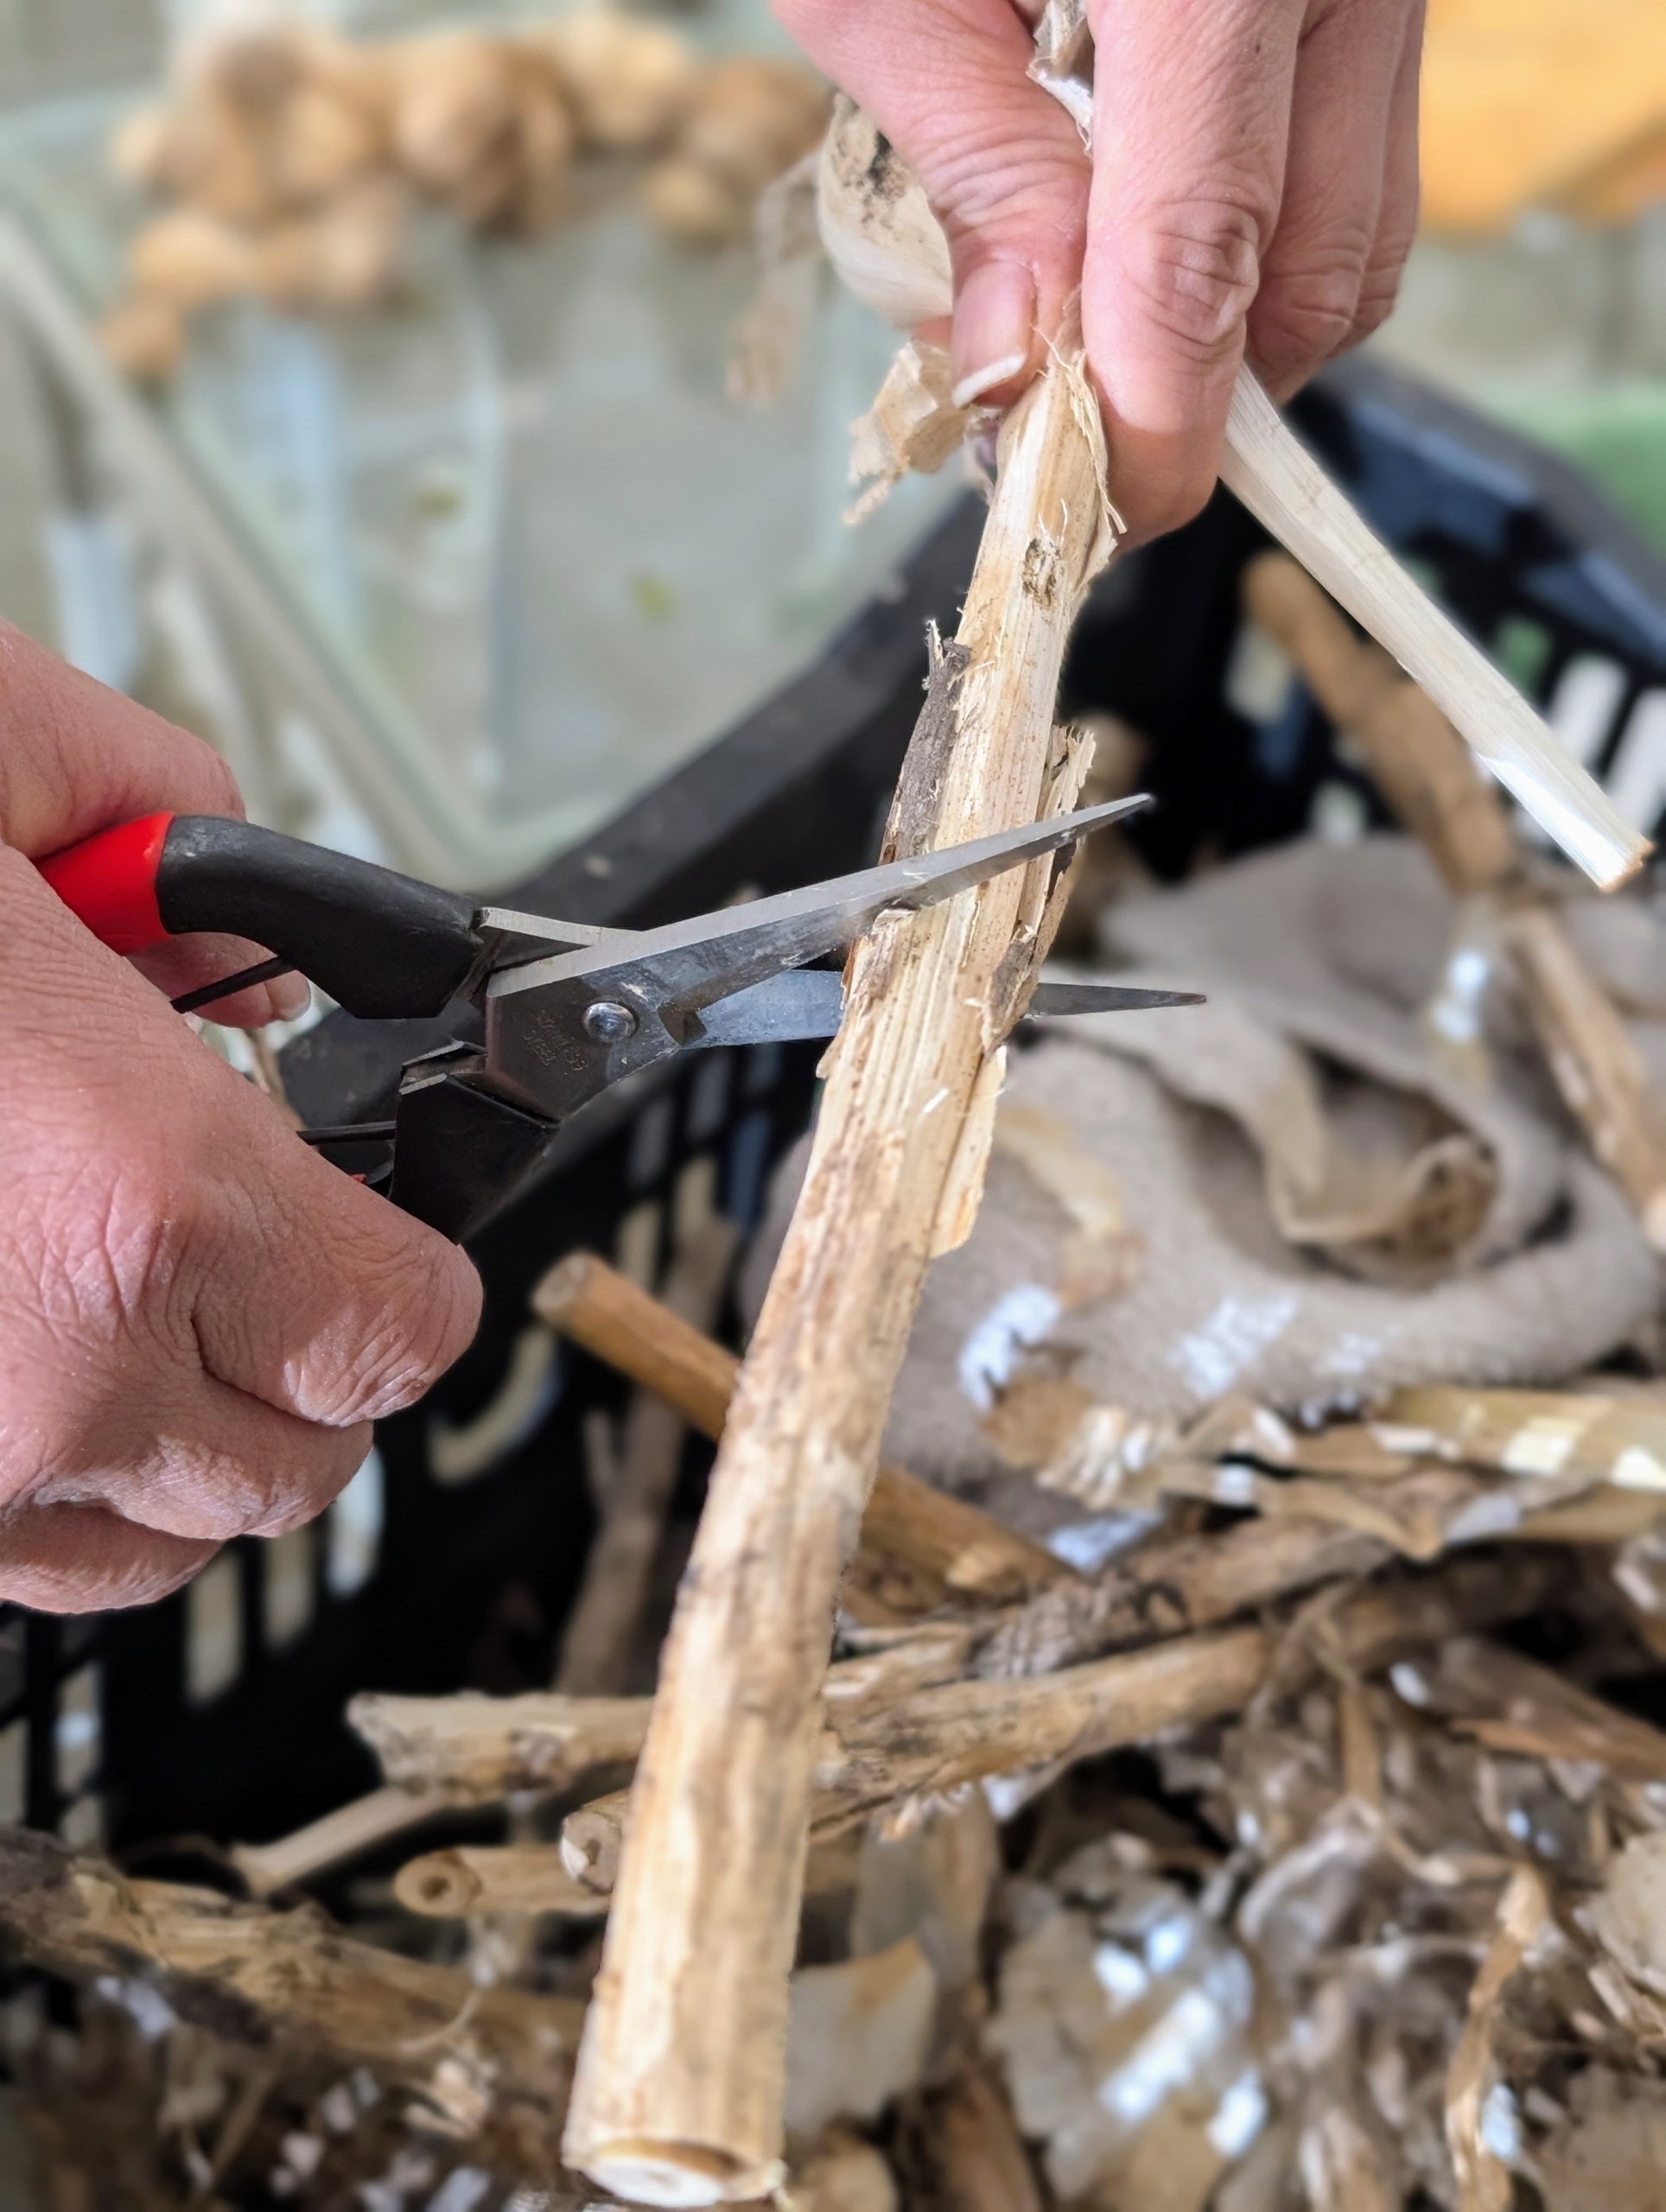
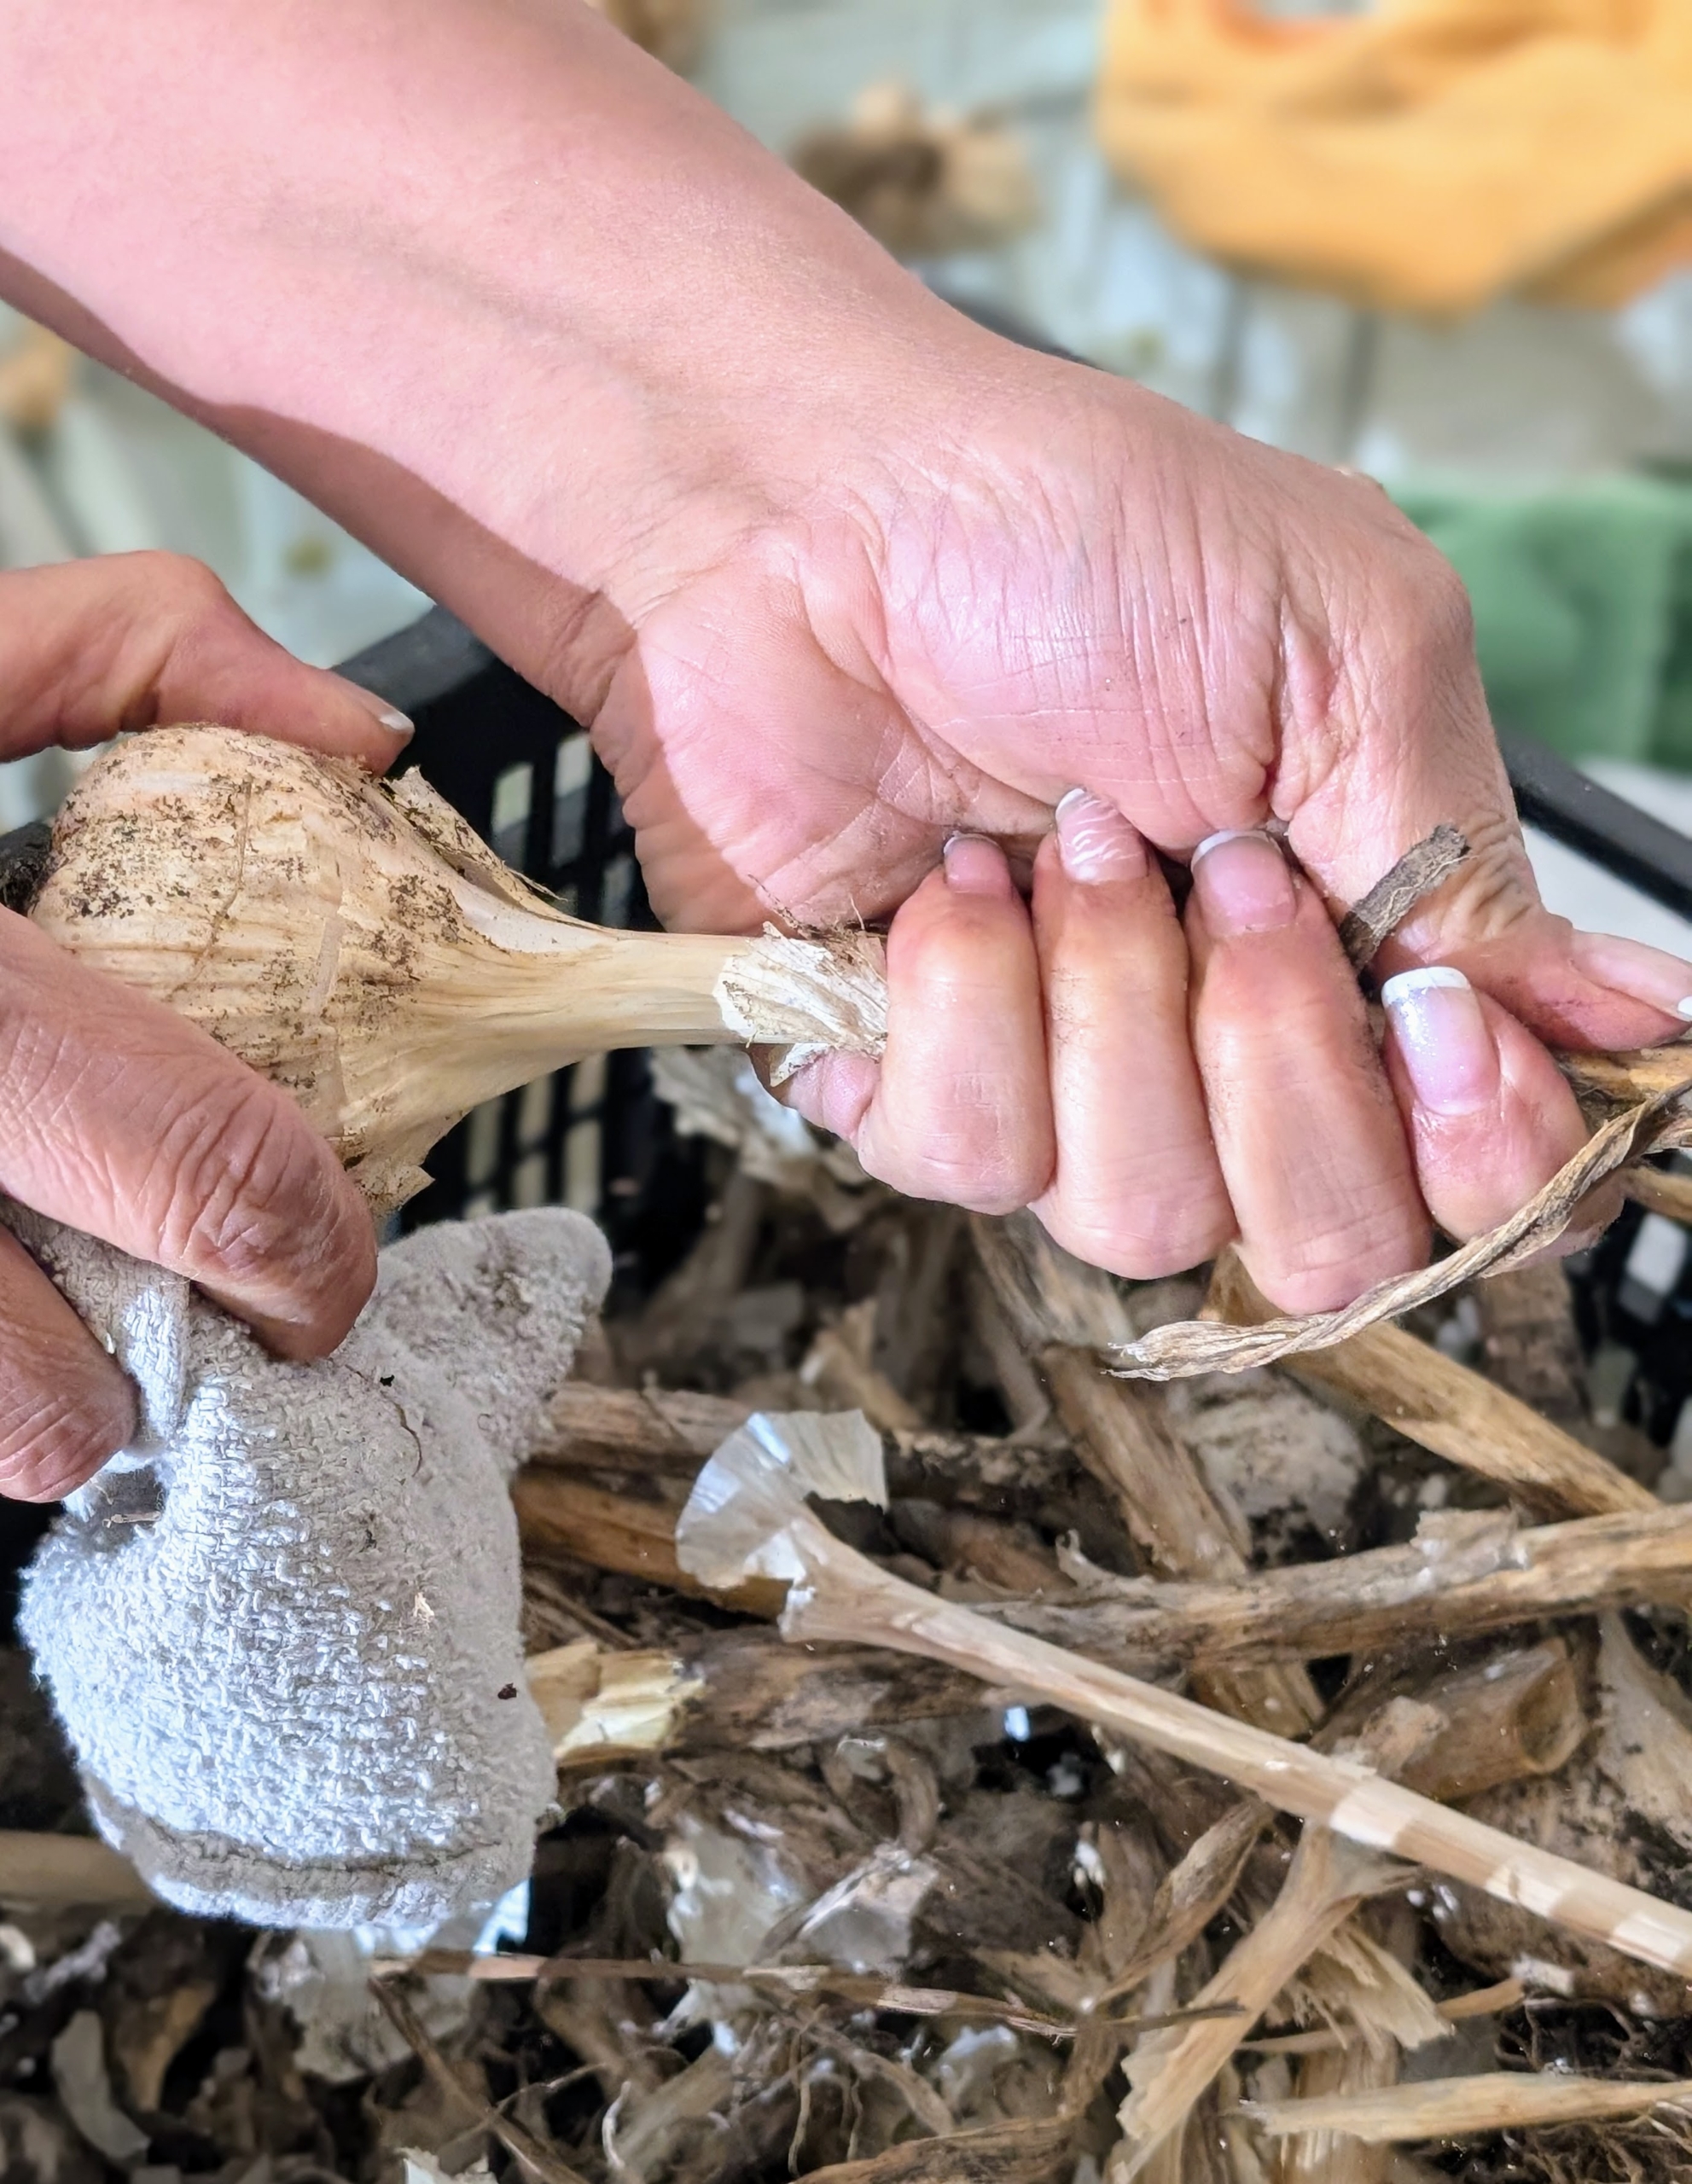
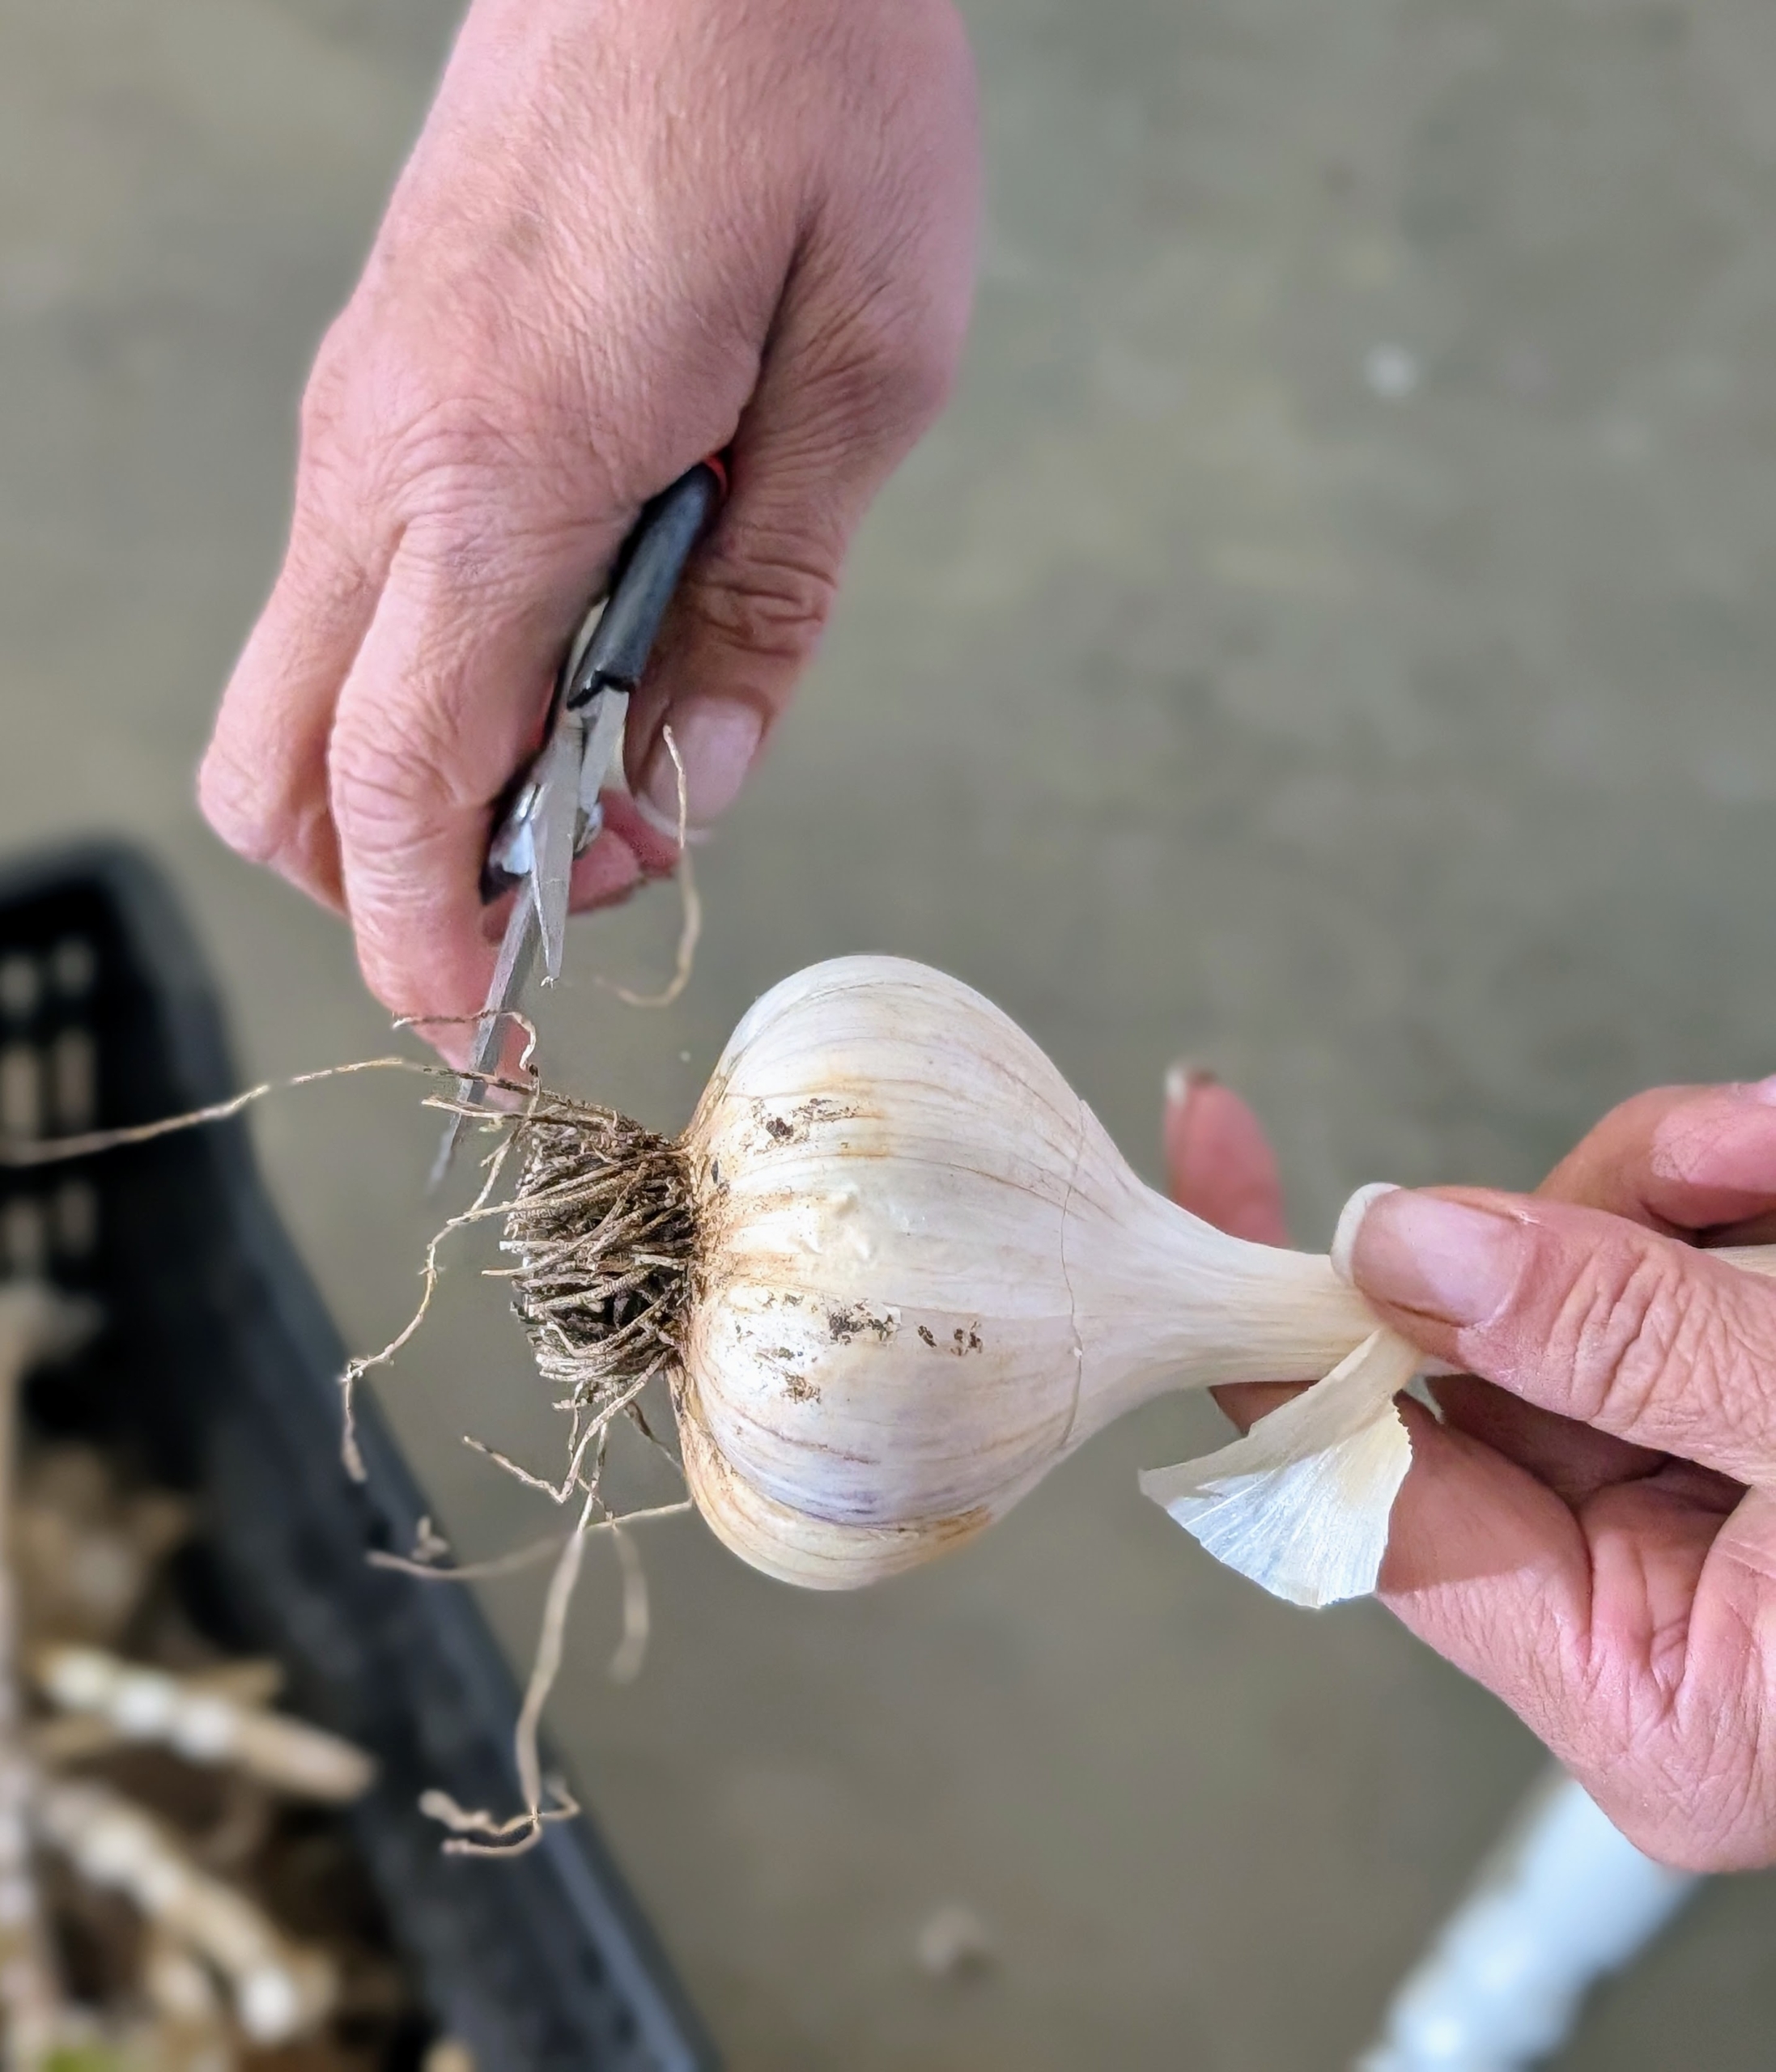
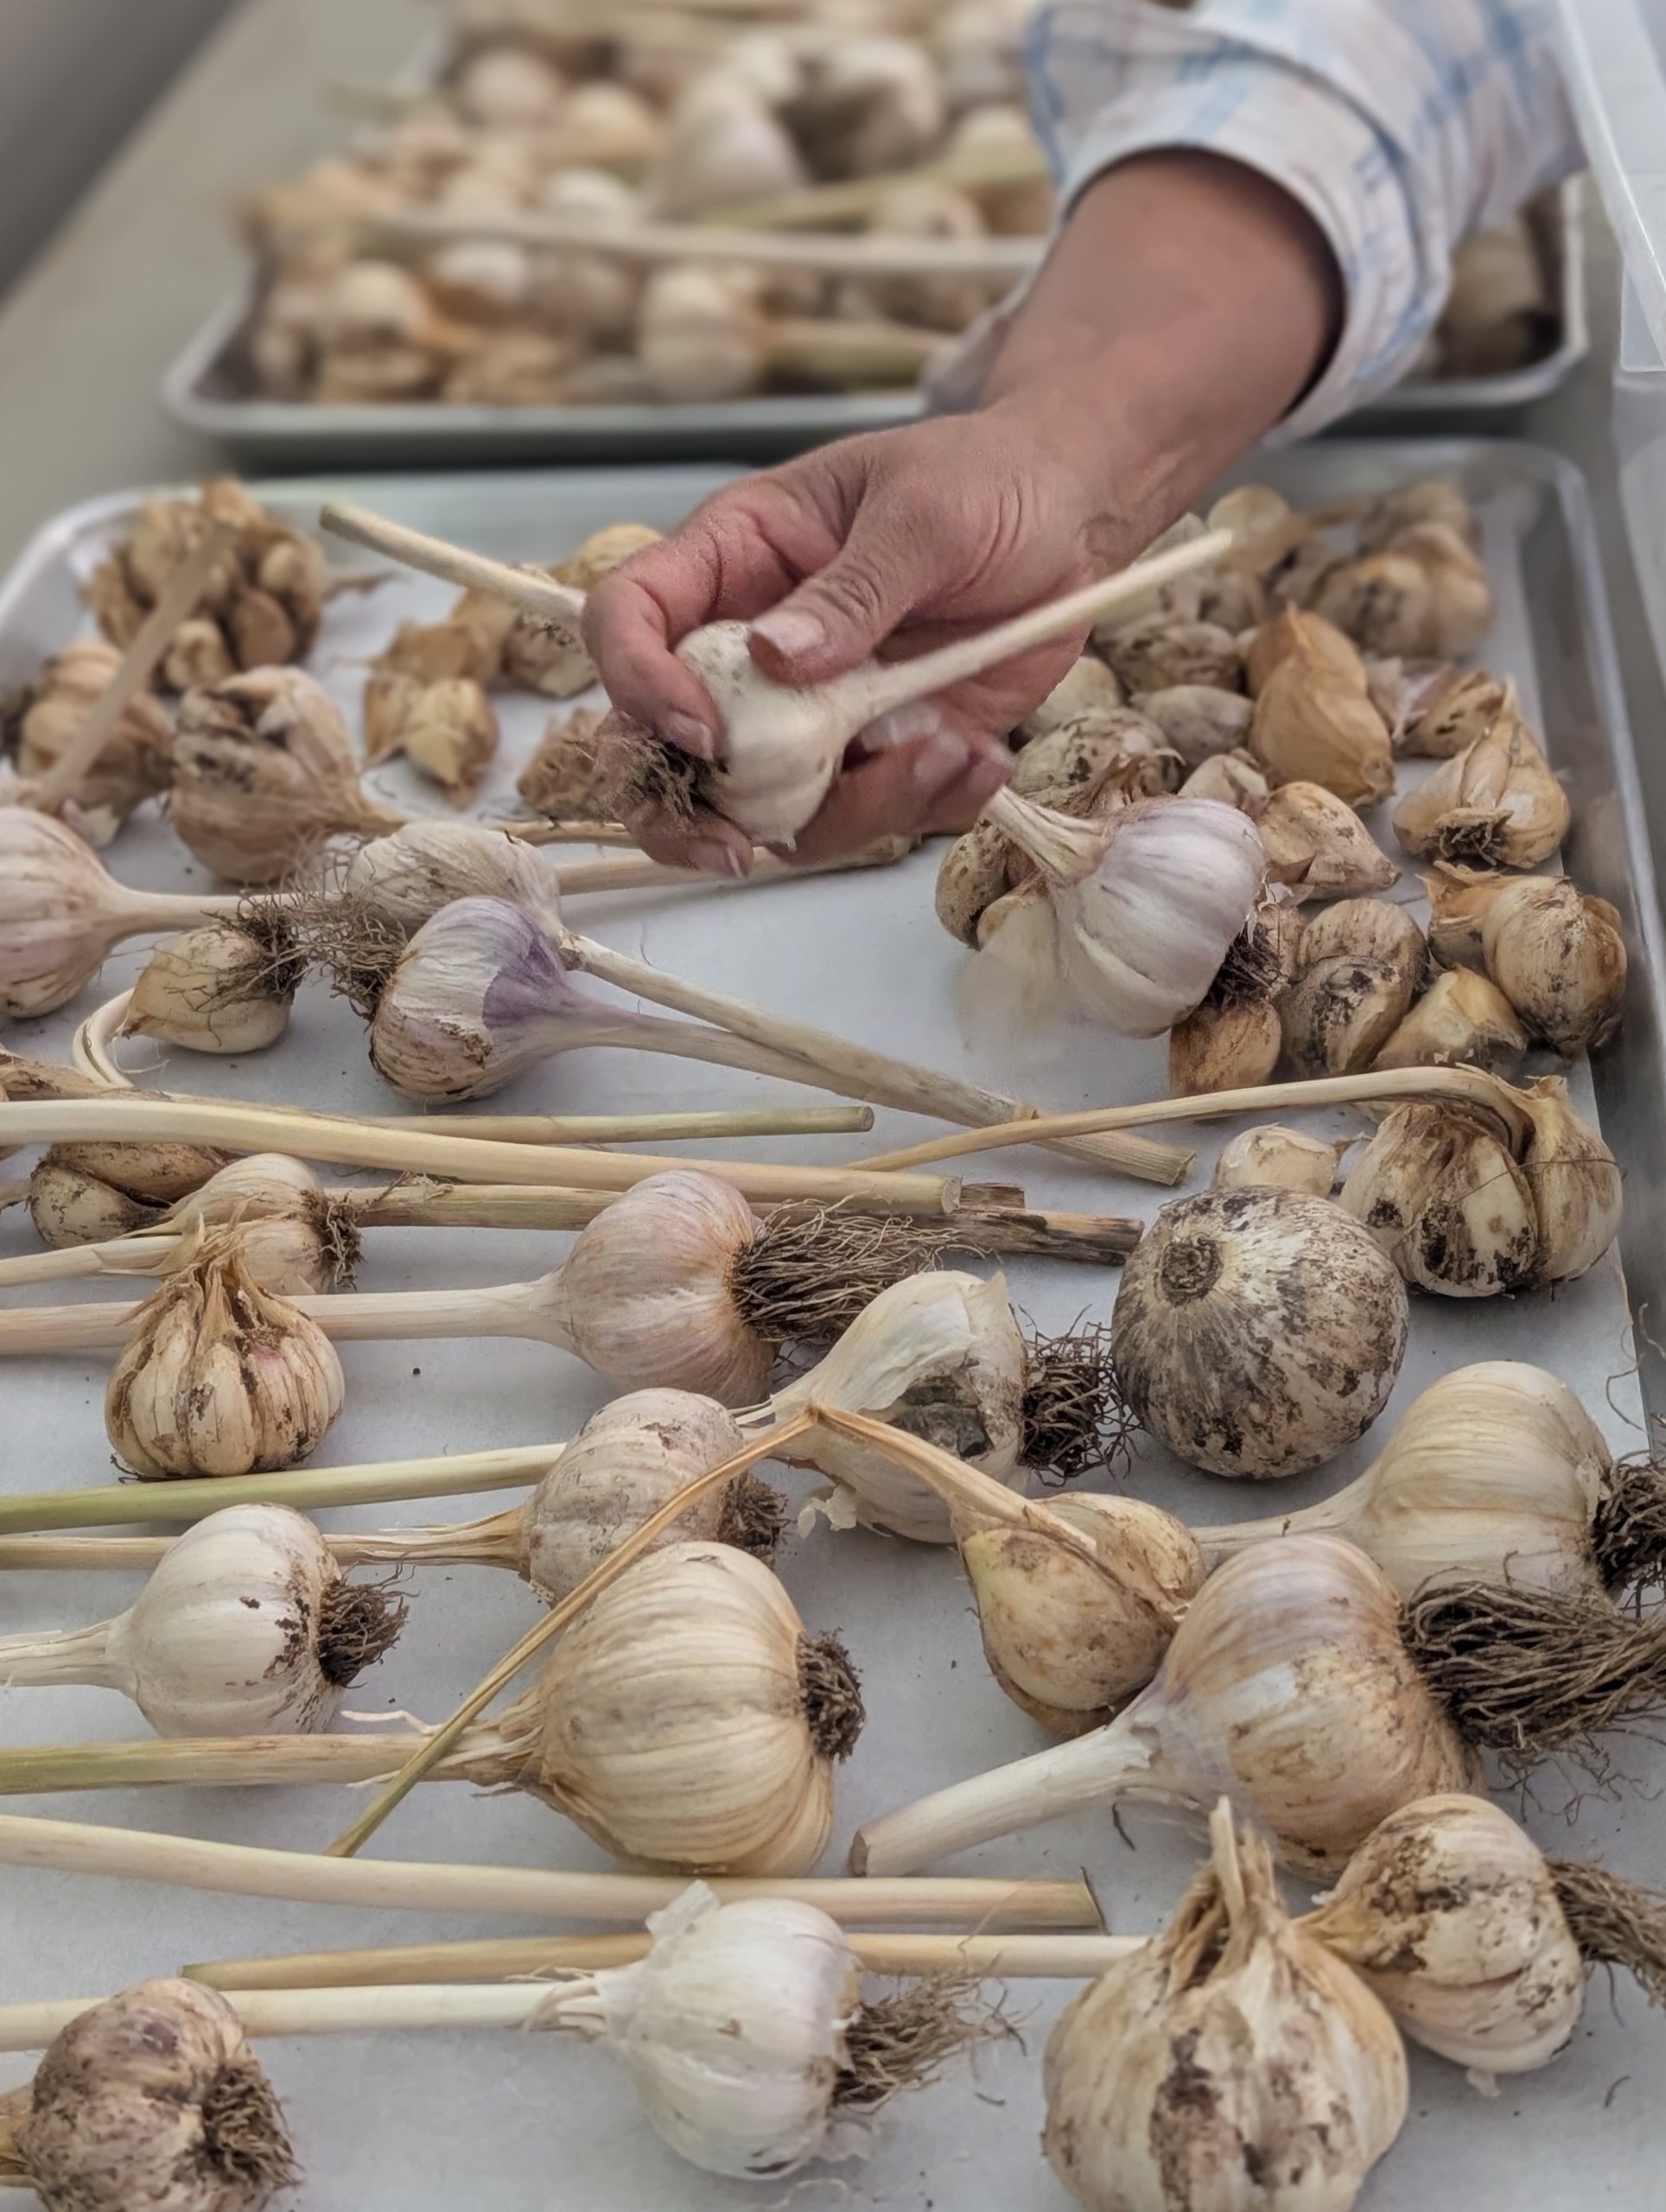
- Several weeks later is when the next part of the process is done. Yesterday, Elvira got them ready for storage by cleaning and trimming each garlic head. Elvira wipes each one with a dry rag removing any excess dirt.
-
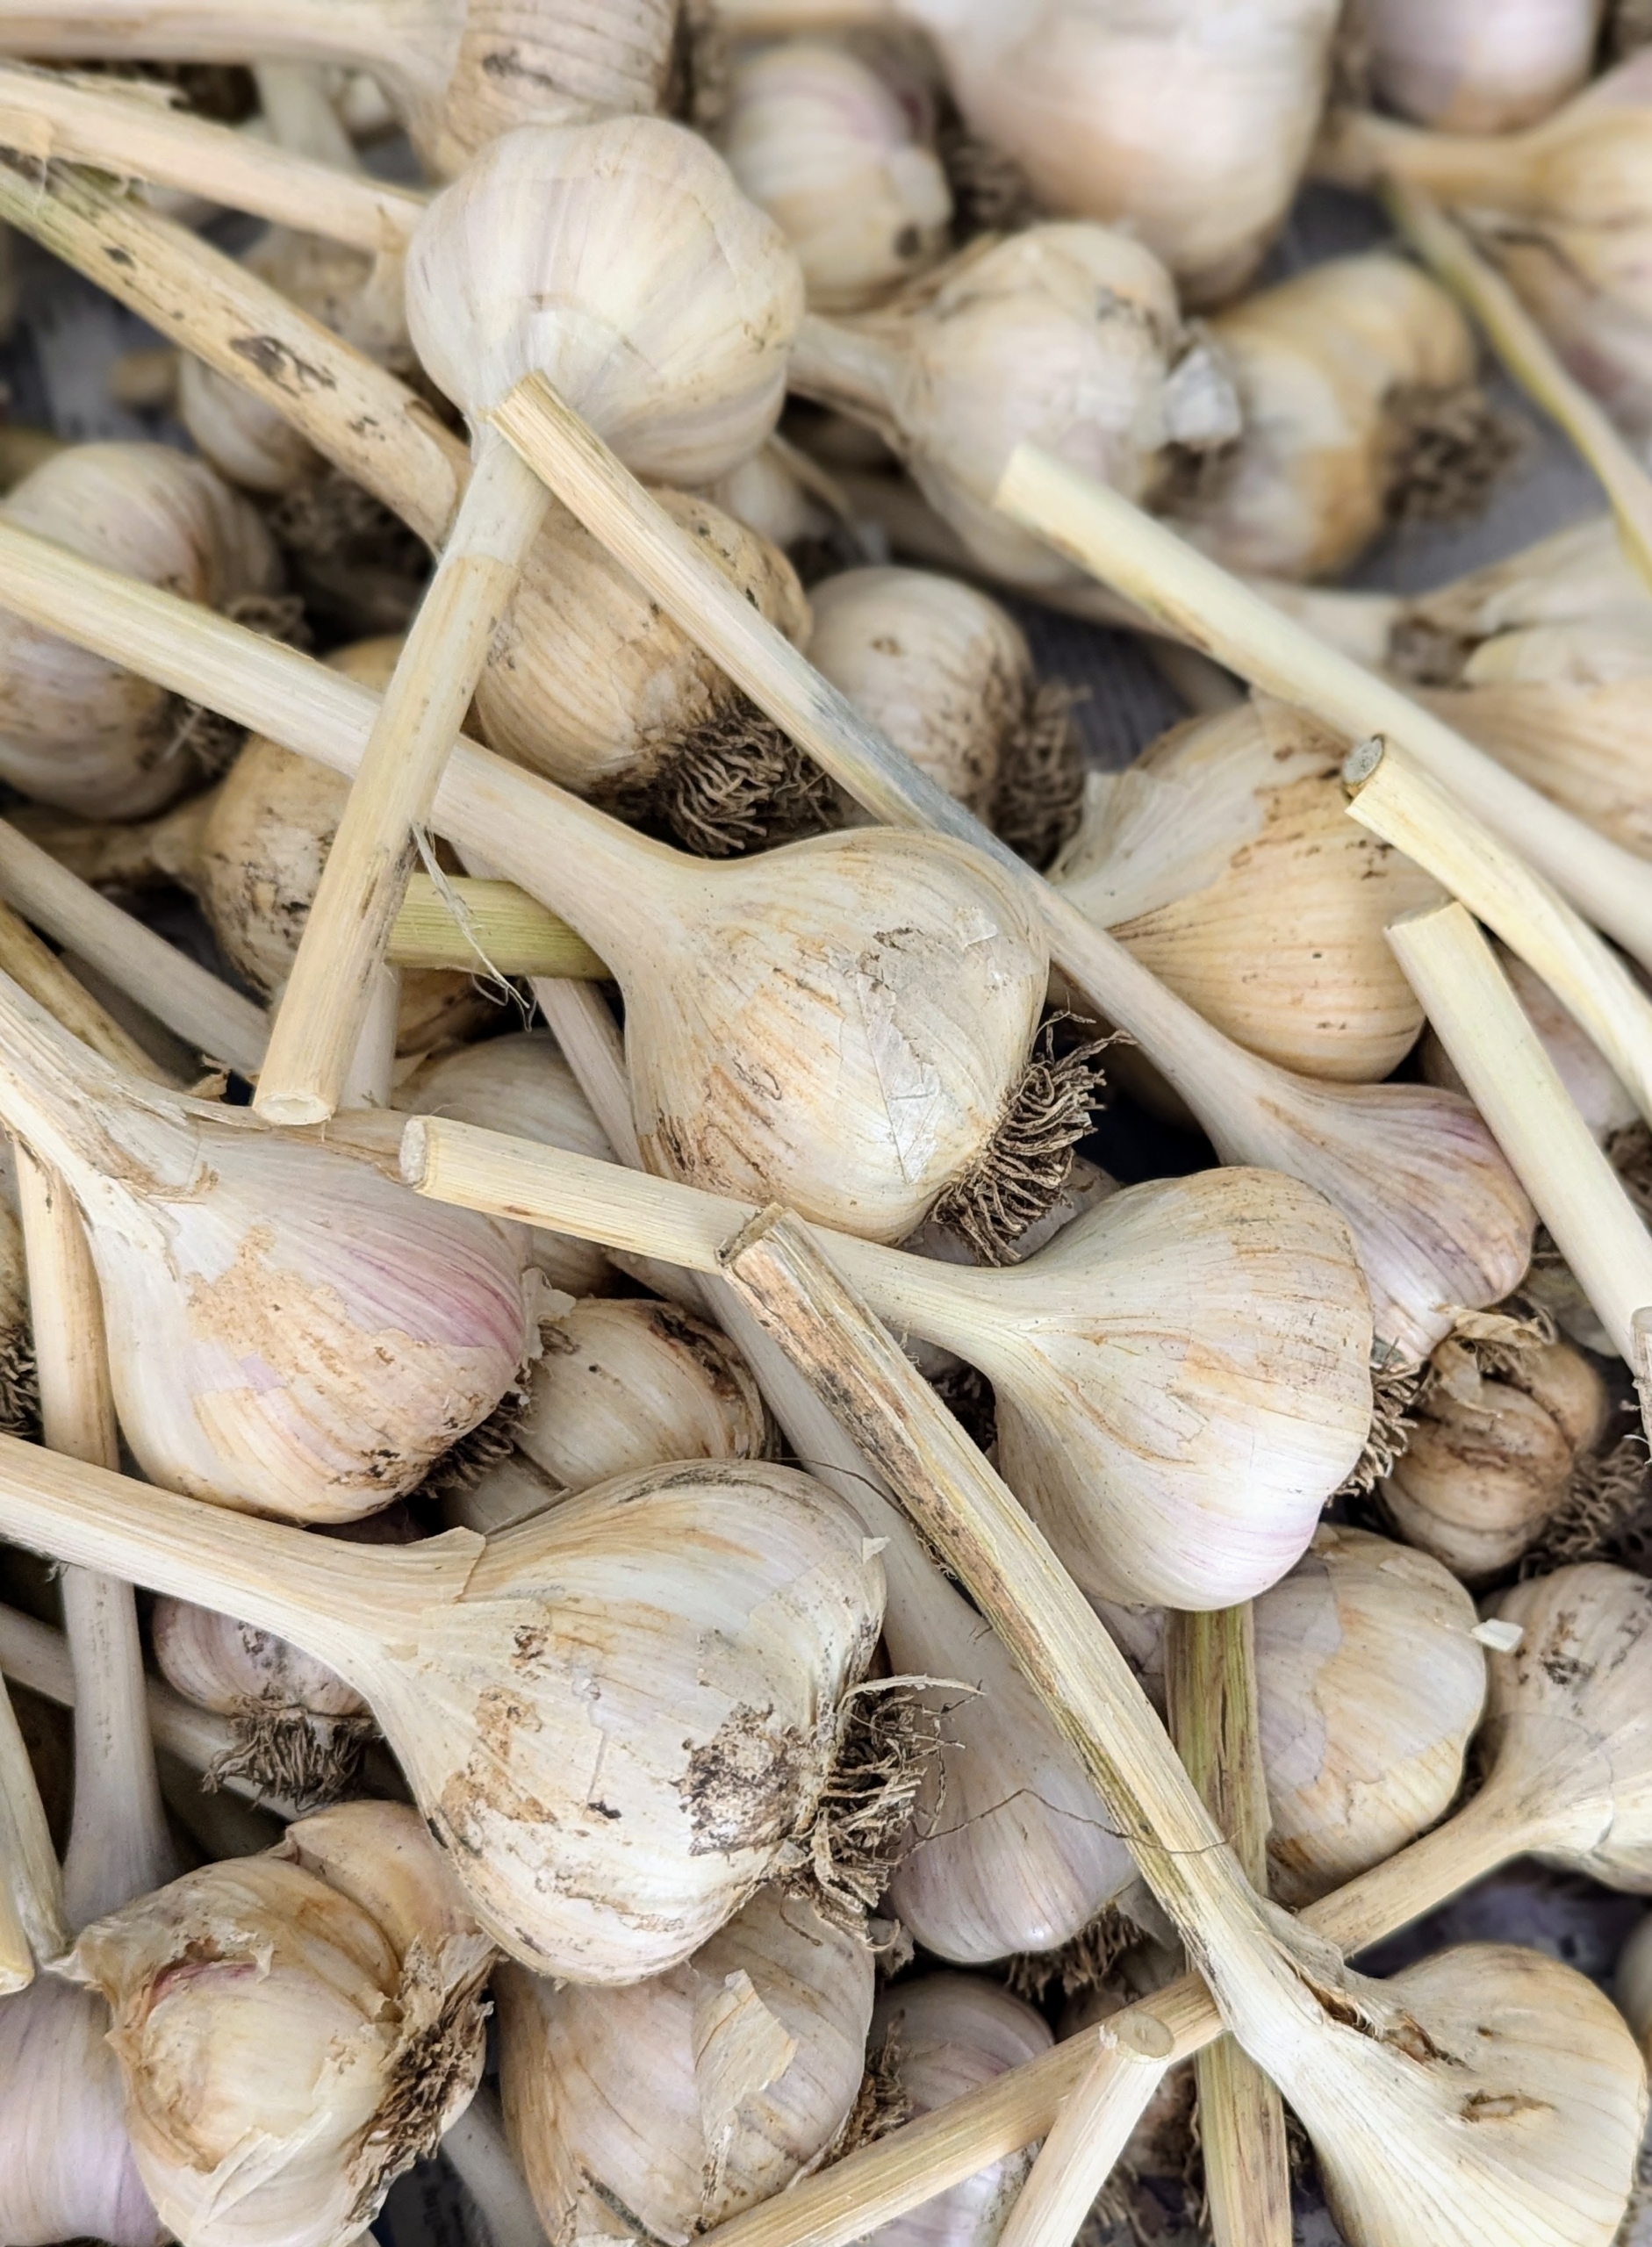
- Garlic is considered cured when the outer skin is dry and crispy, the stem neck is constricted, and the cut stem’s center is hard.
-
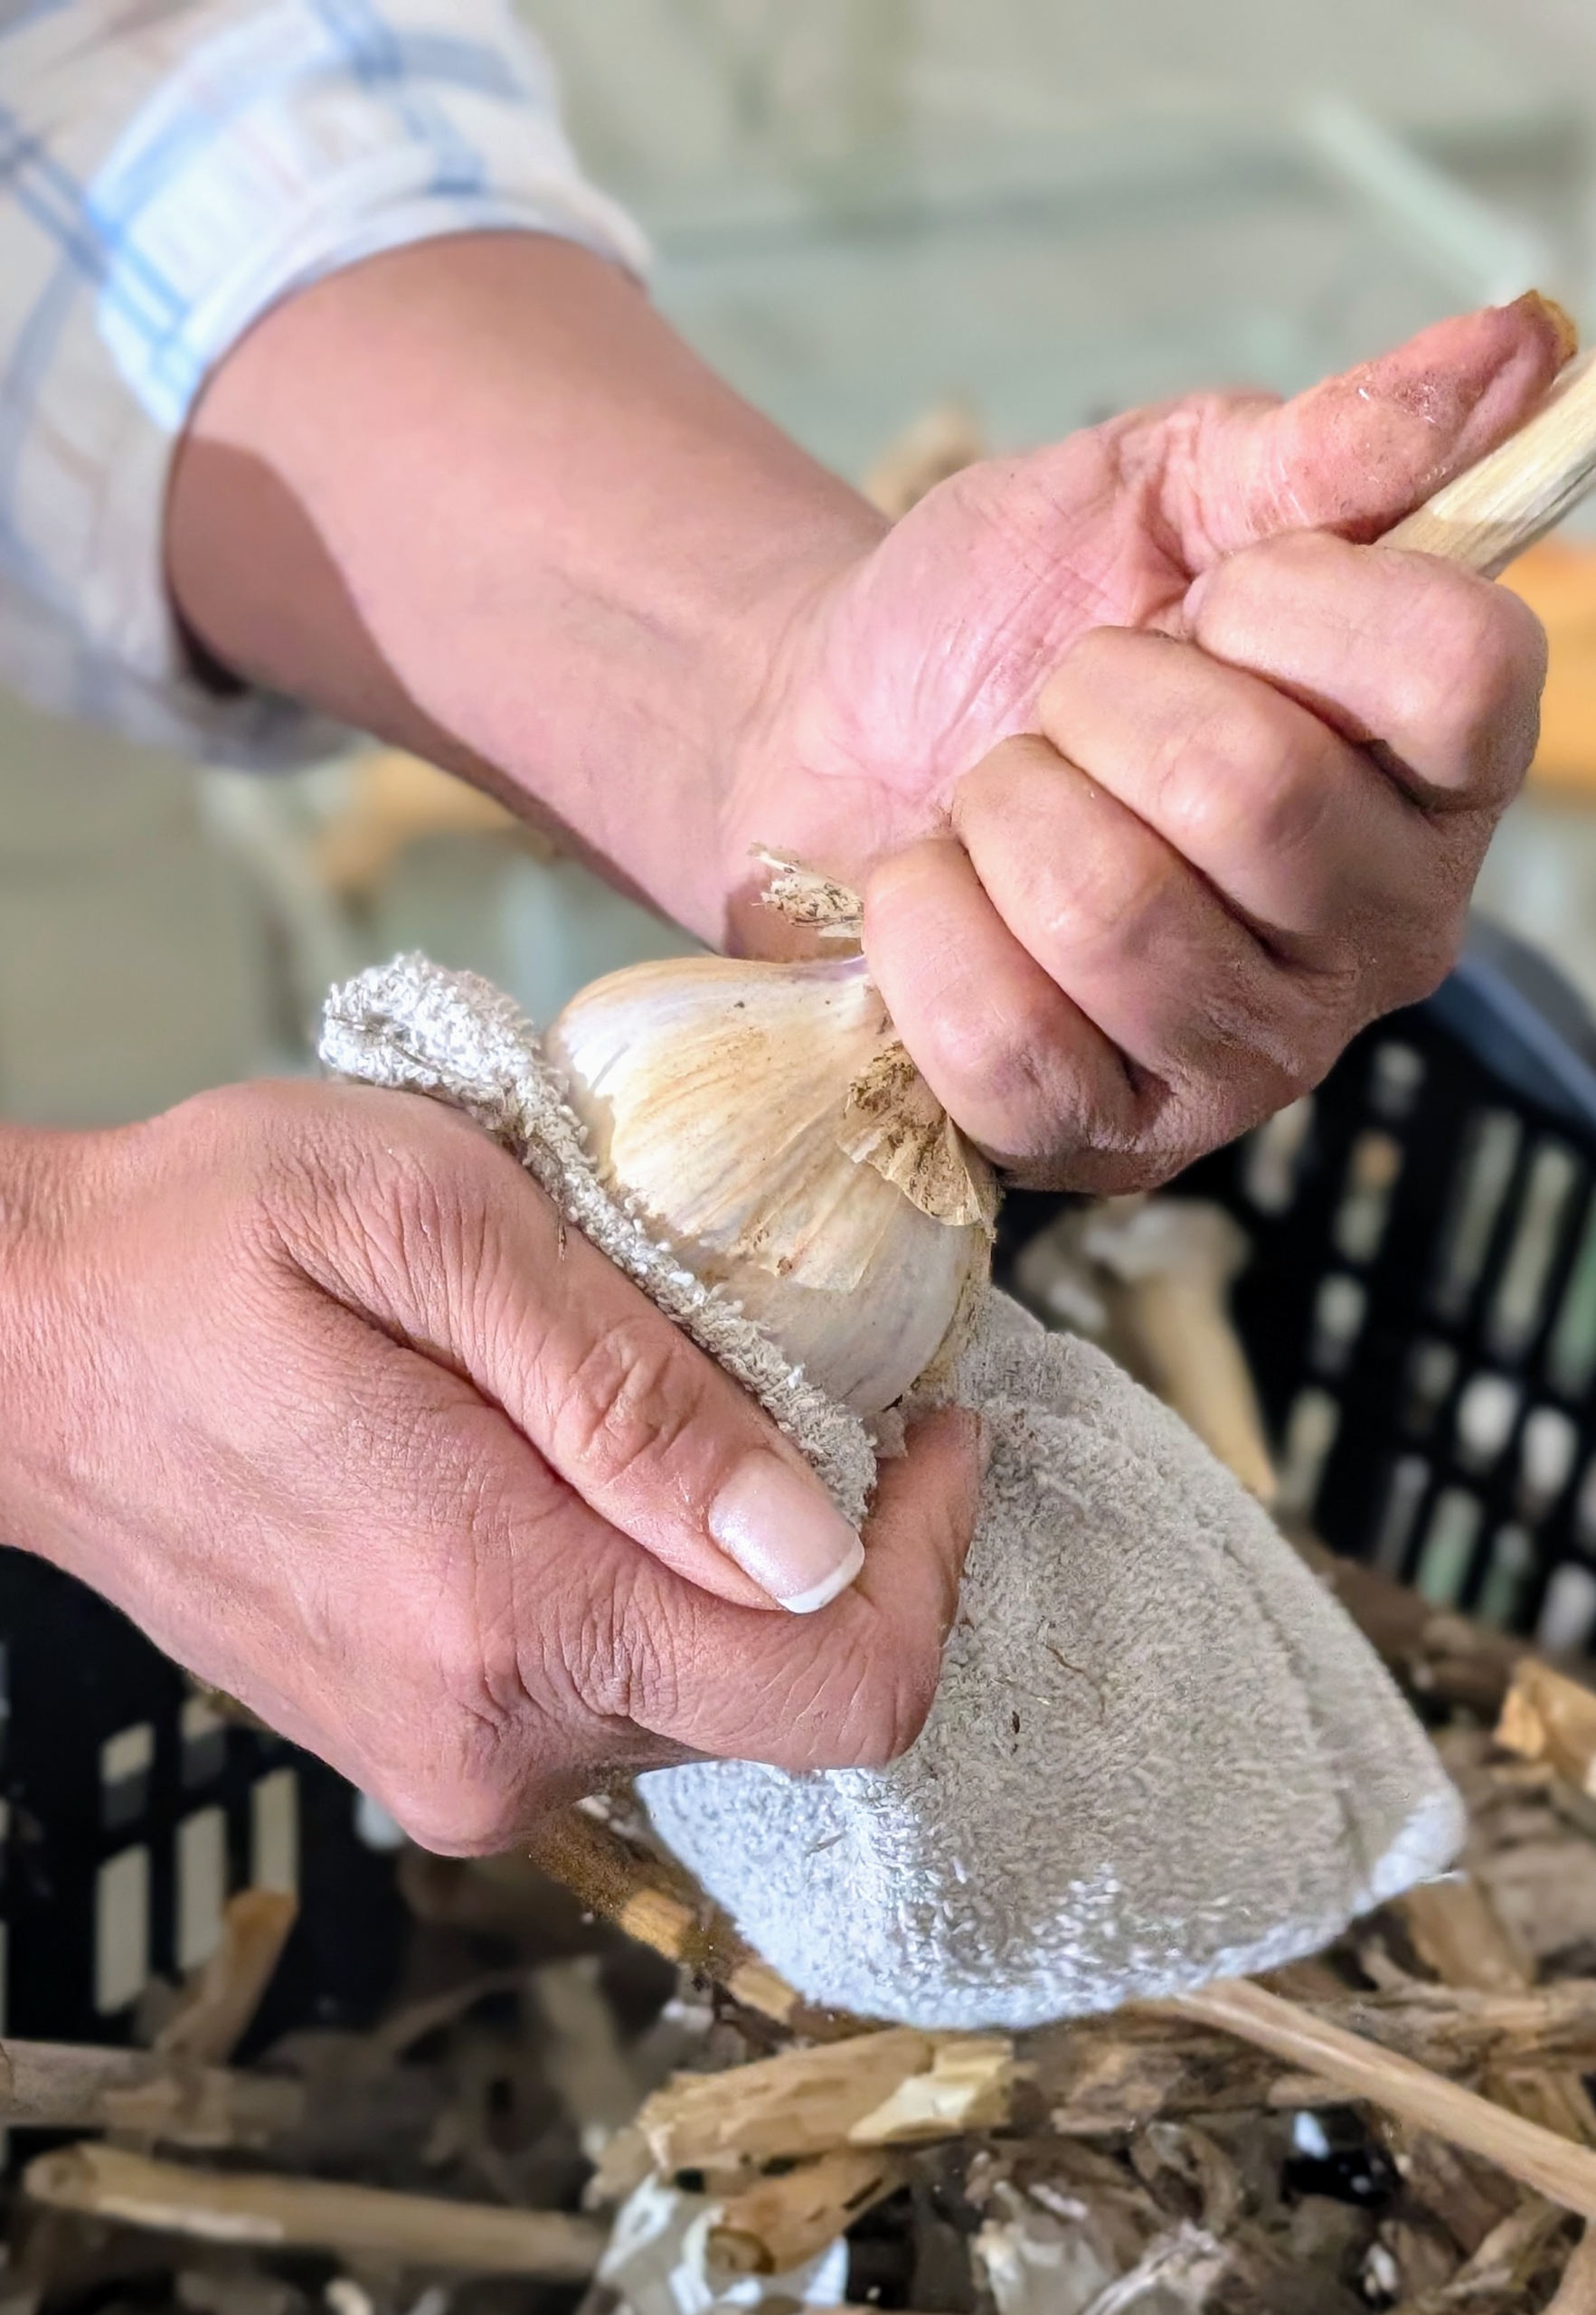
- She trims each stalk more leaving about two to four inches. Trimming the stalks makes it easier to store and keeps them neat and uniform.
-
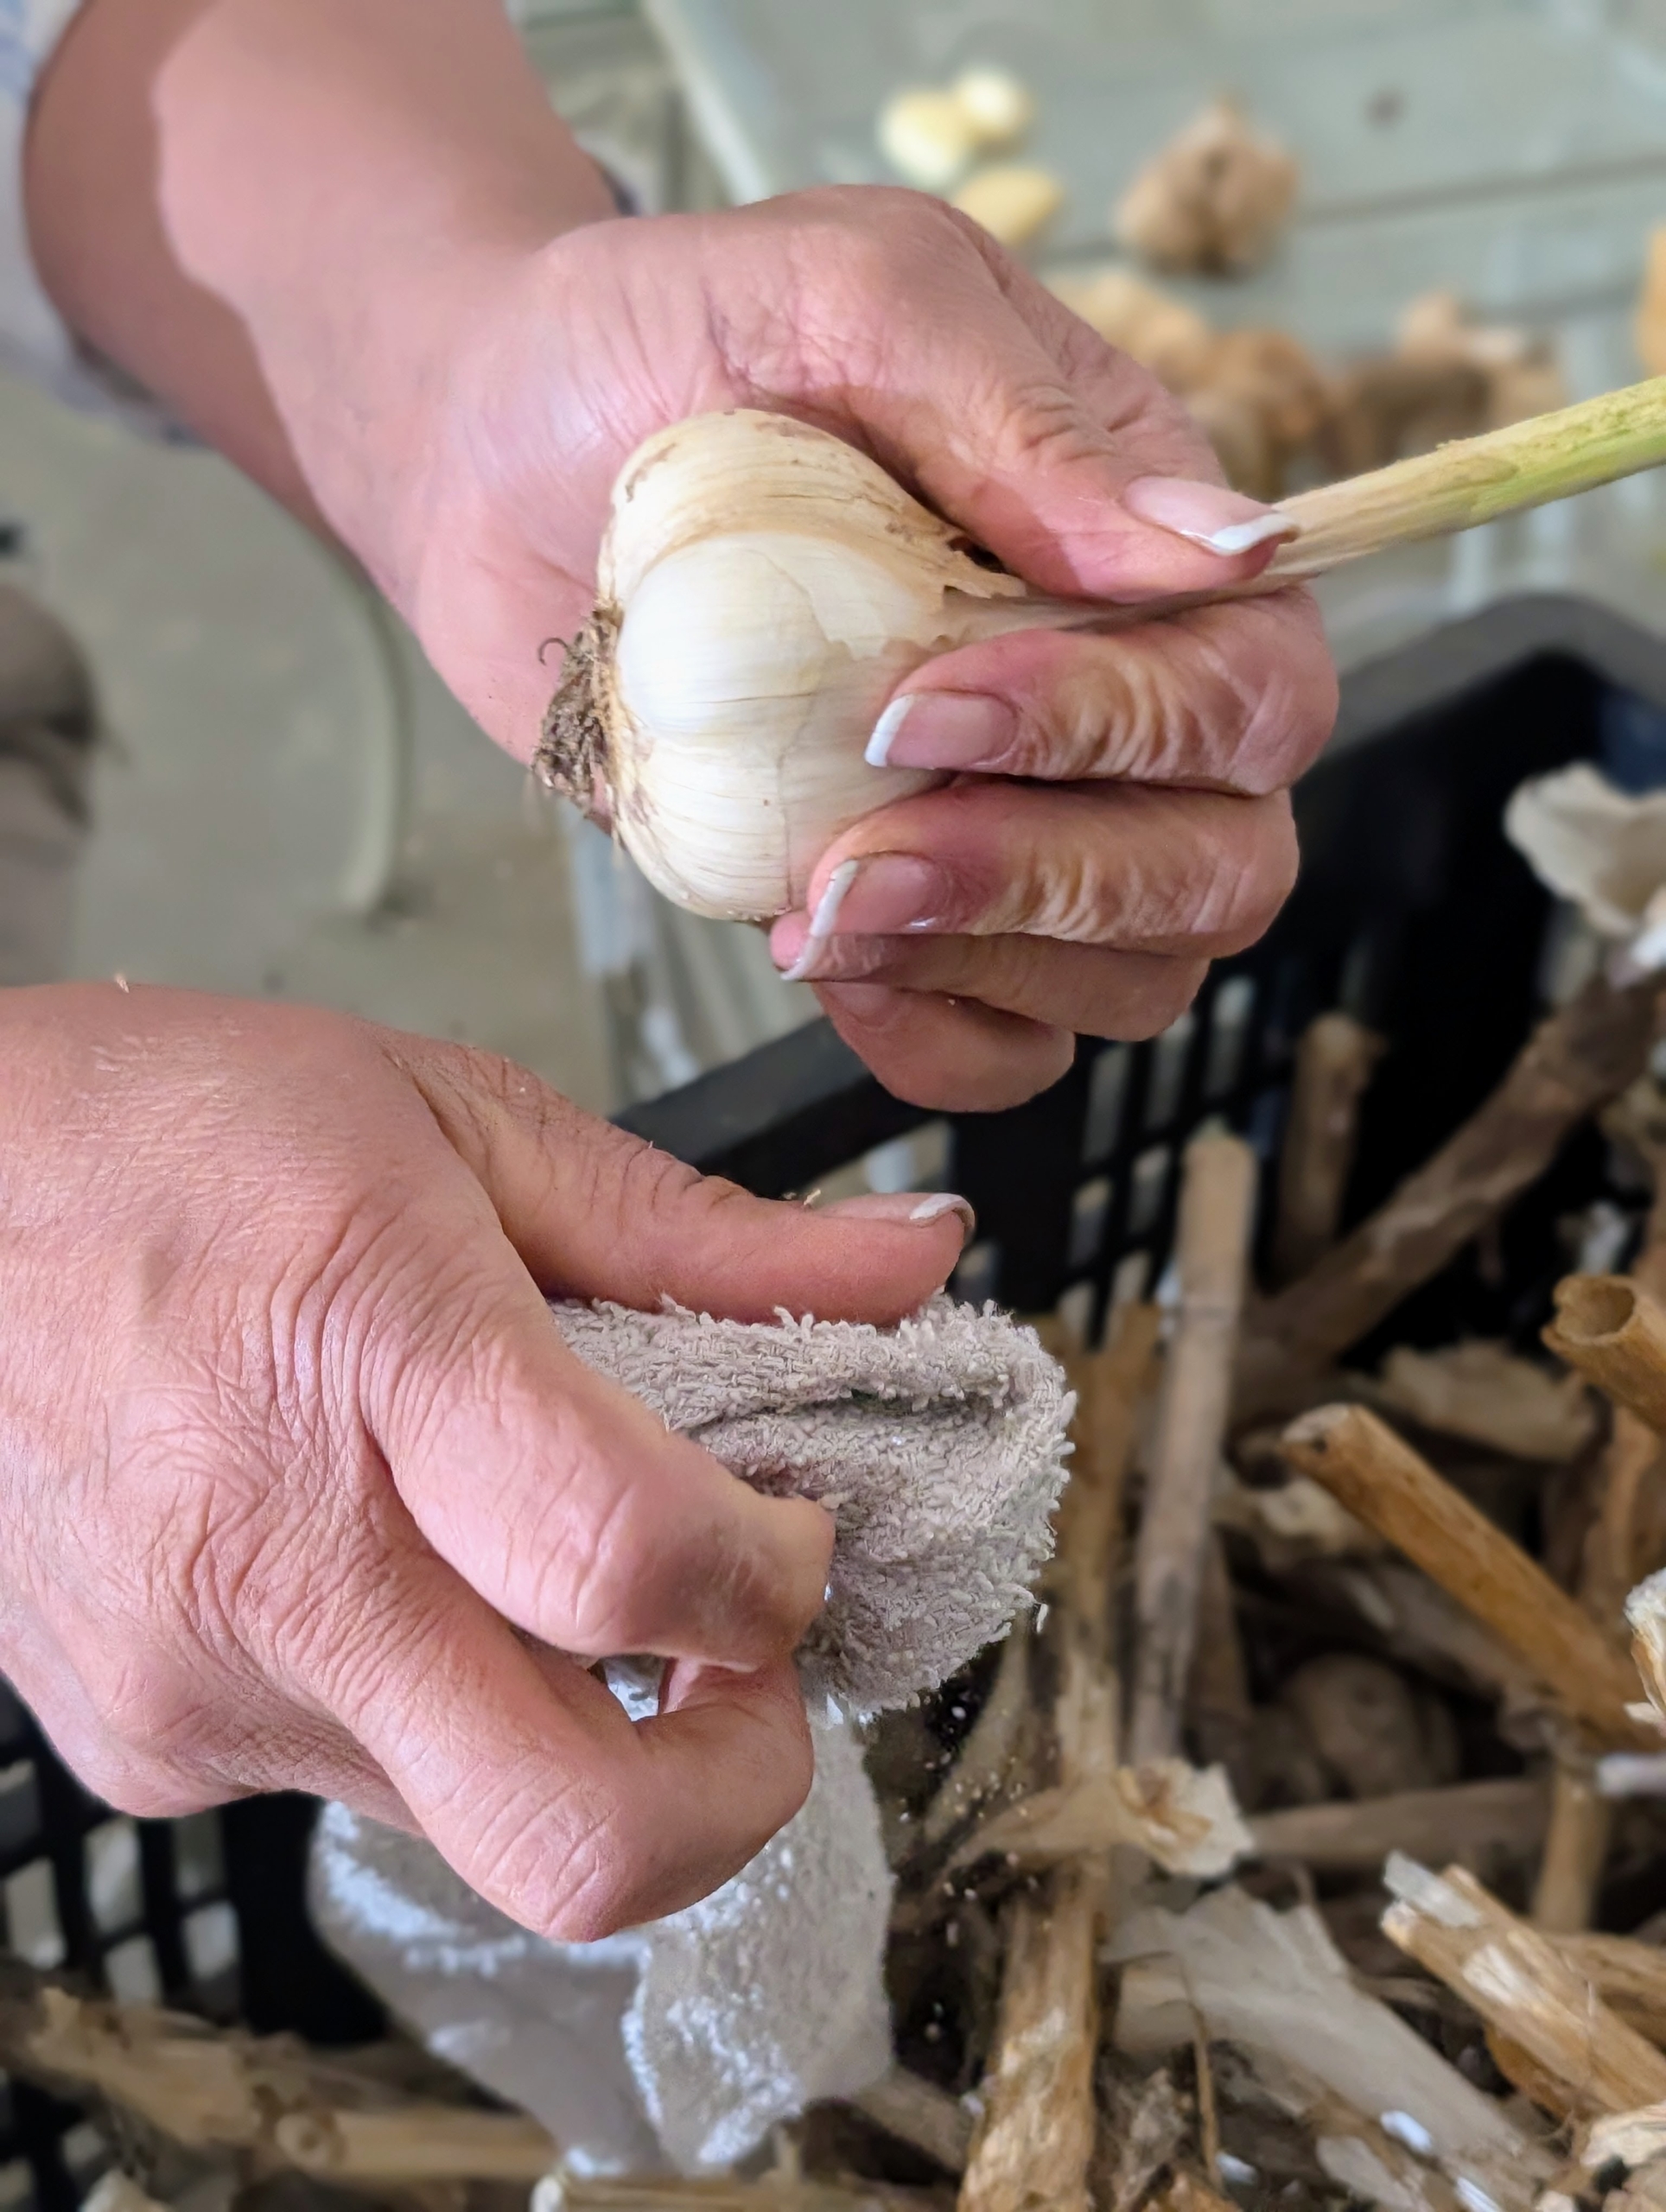
- Elvira removes any loose, dry, papery outer skin, leaving the thinner, more delicate skin underneath intact.
-
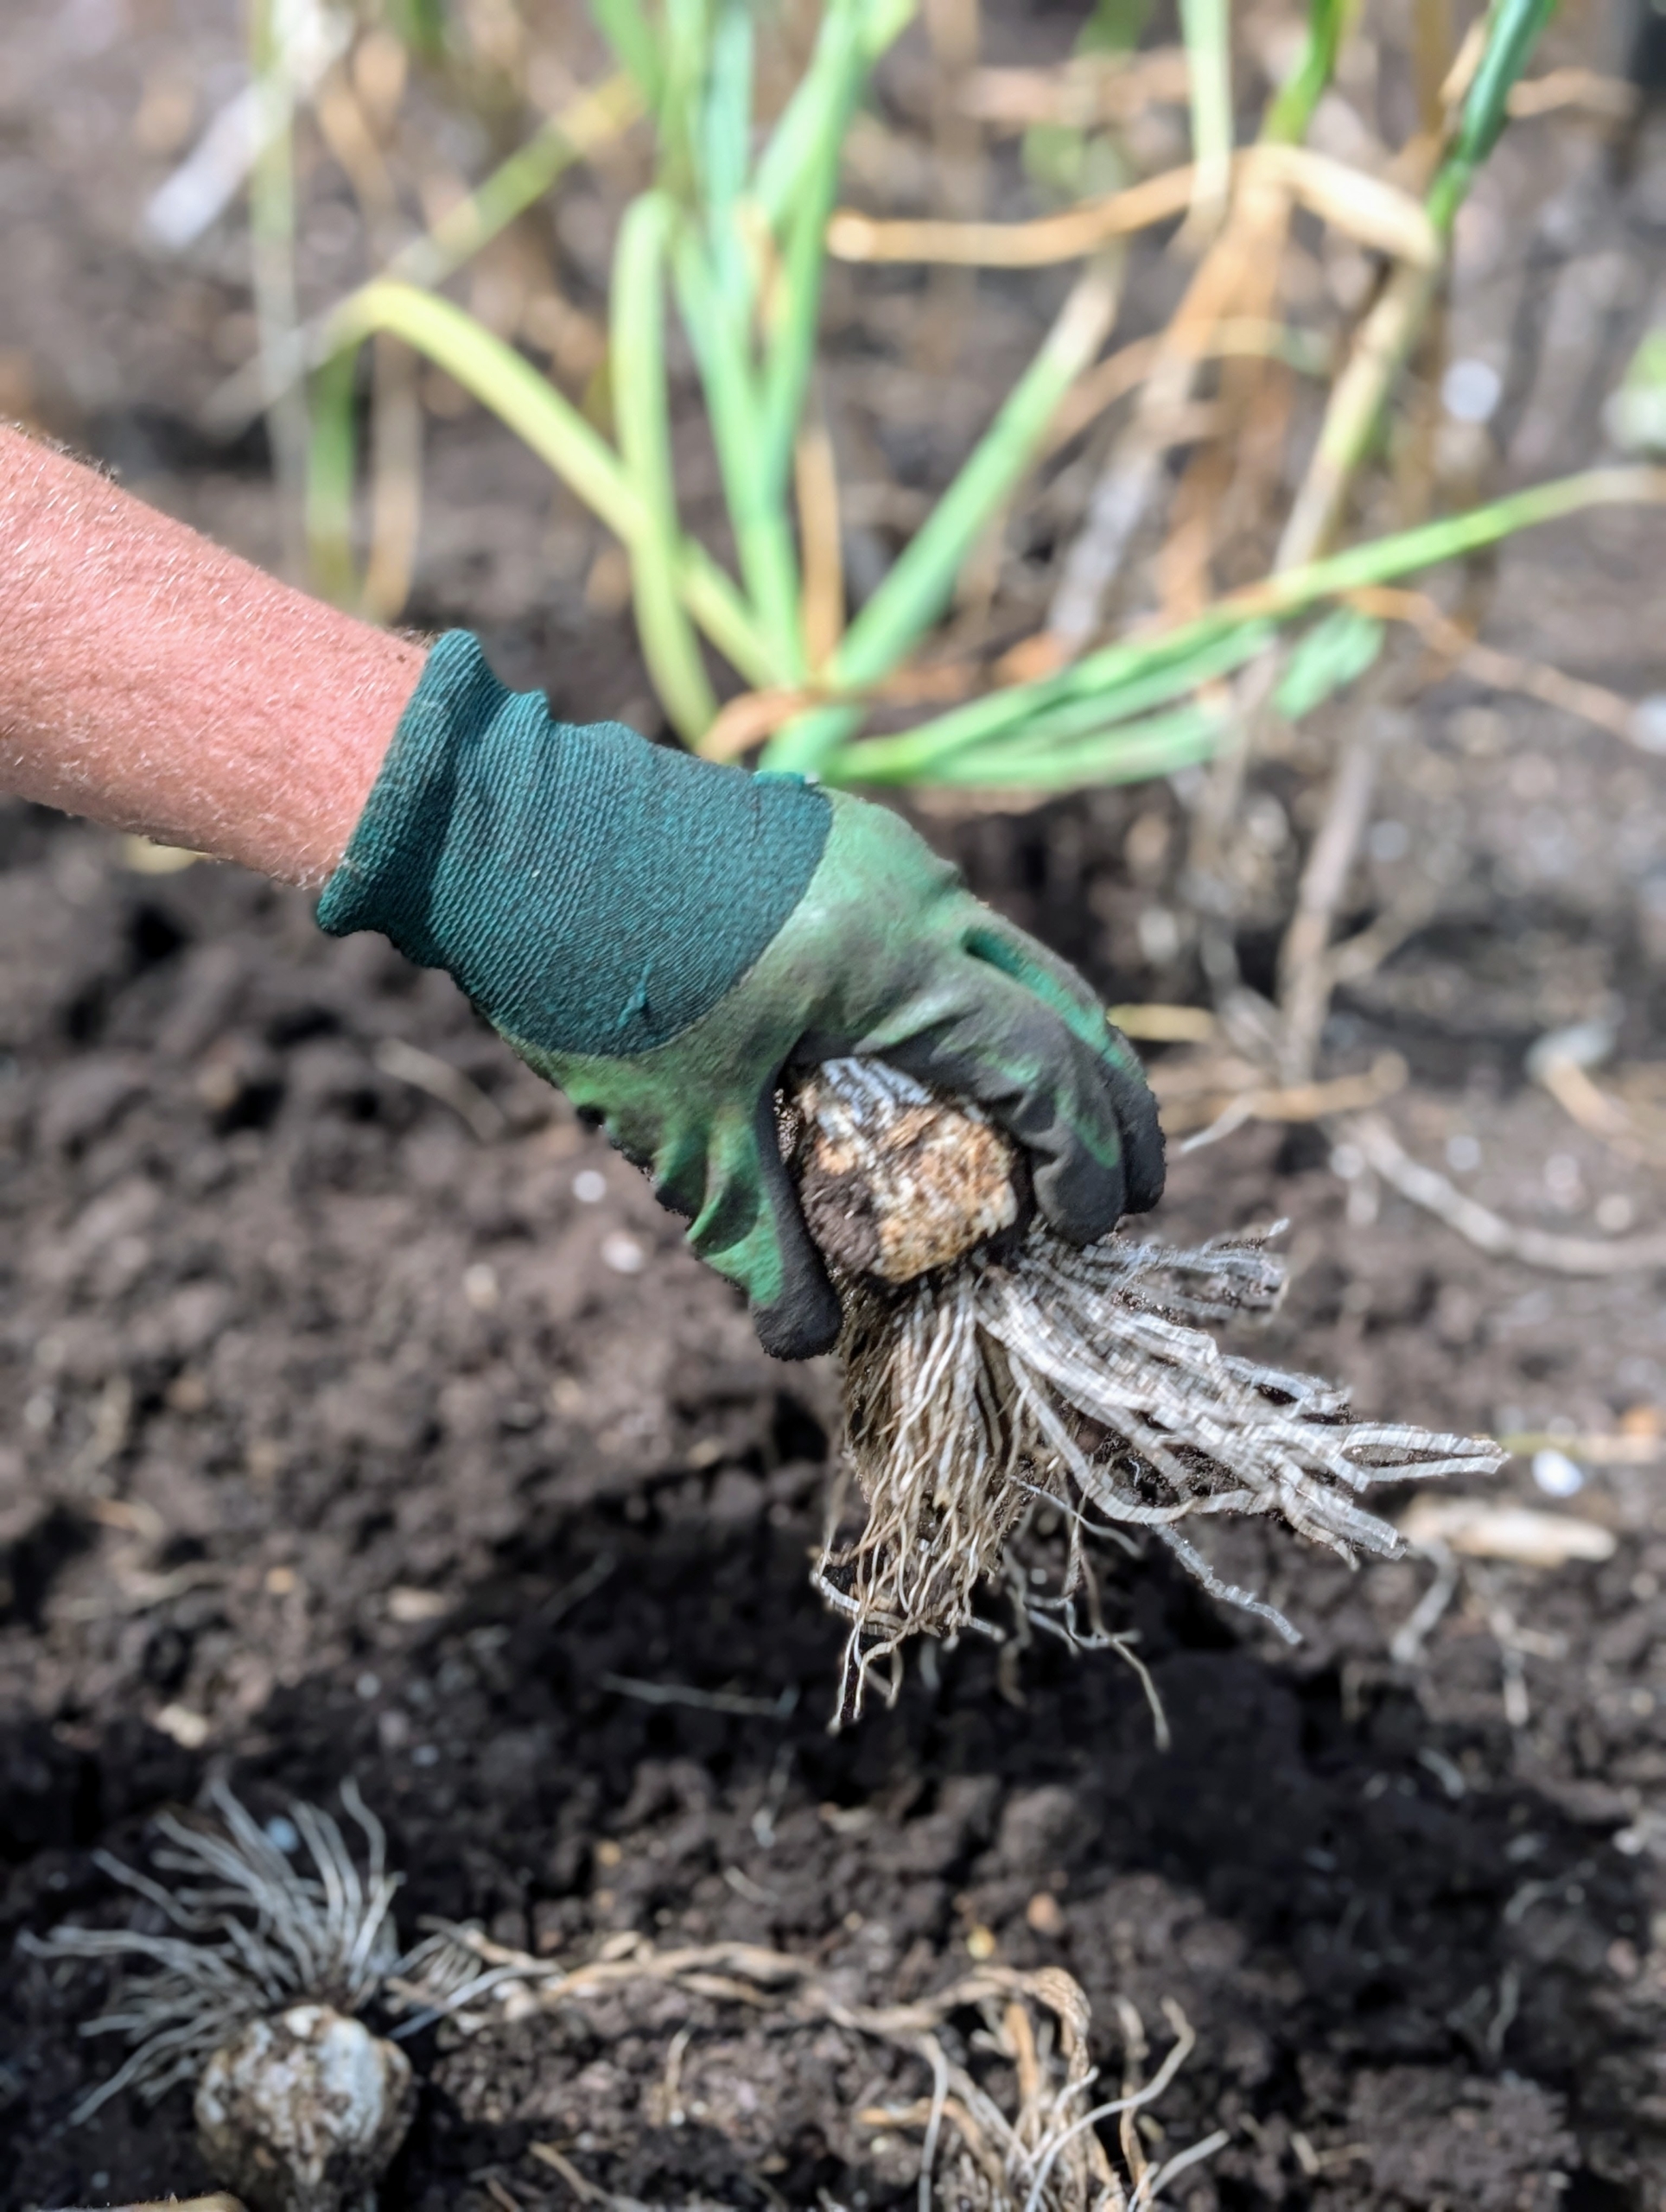
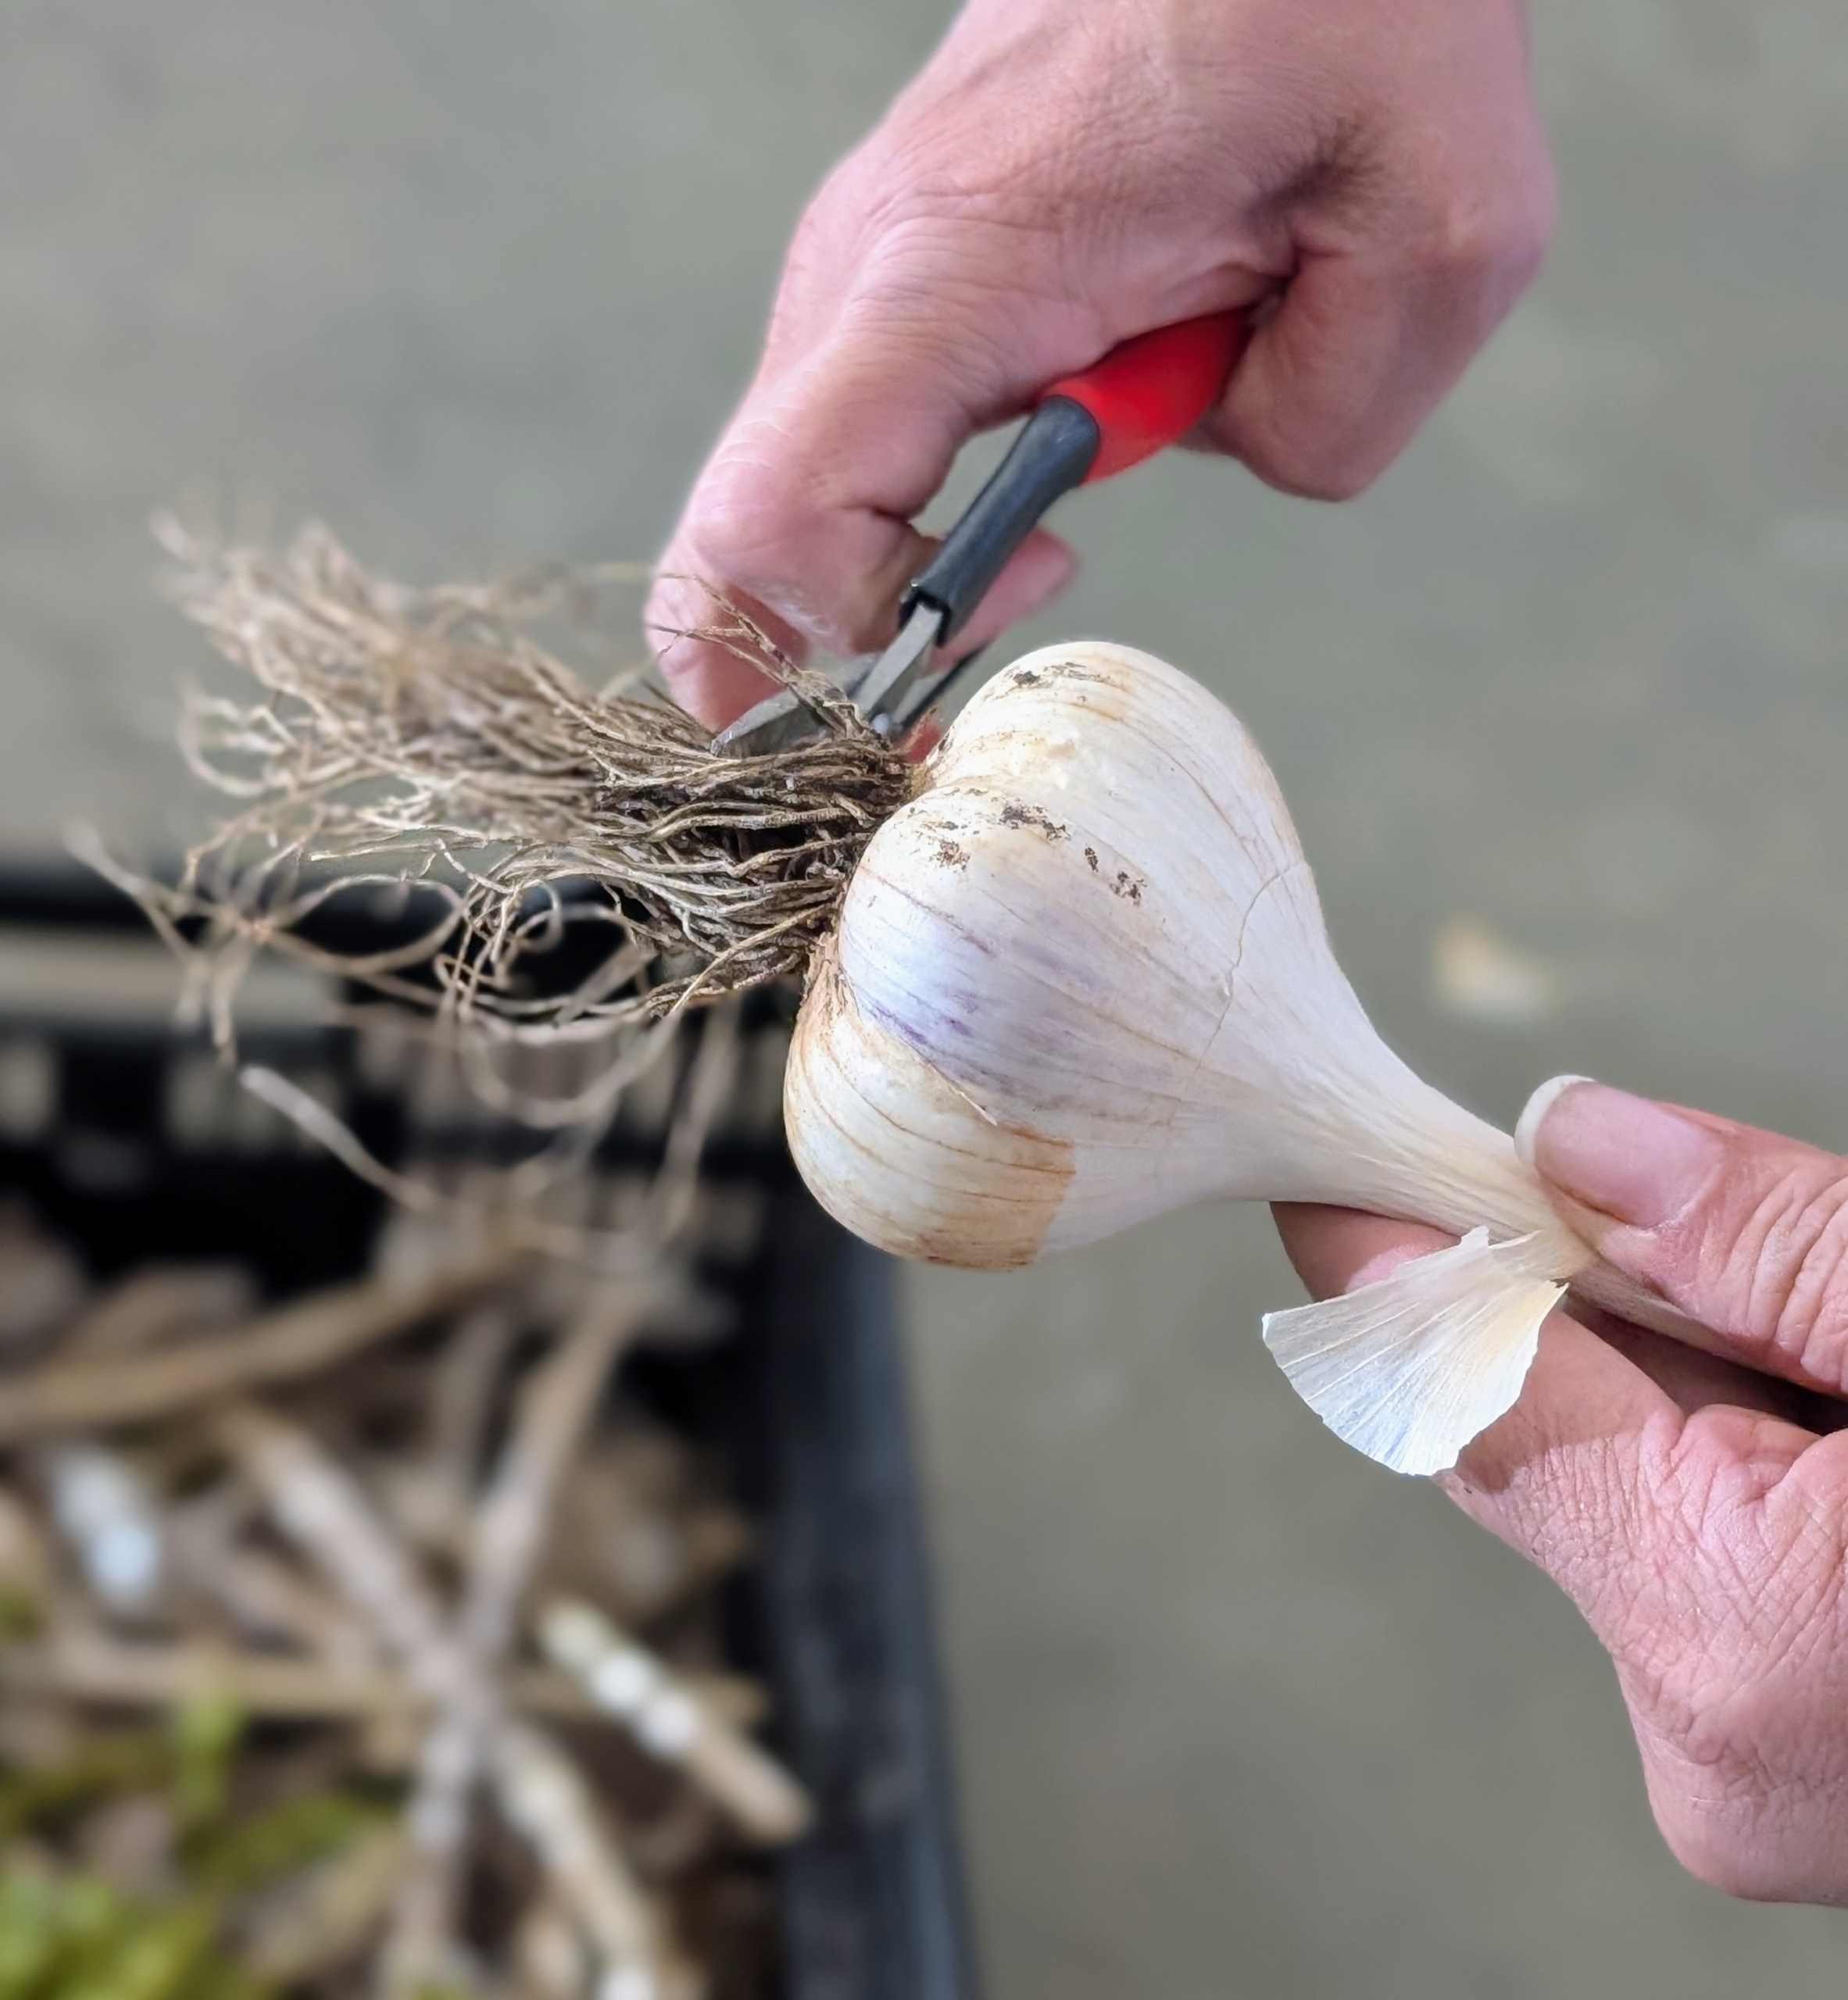
- Next she trims the roots being careful not to cut the skins that protect the cloves.
-
- Elvira leaves about a half inch of roots.
-
- Here is a garlic head after it is cleaned and trimmed.
-
- Elvira wipes the garlic head one more time to ensure all the dirt is removed.
-
- And then drops each one back in the crate, separated from the uncleaned batch.
-
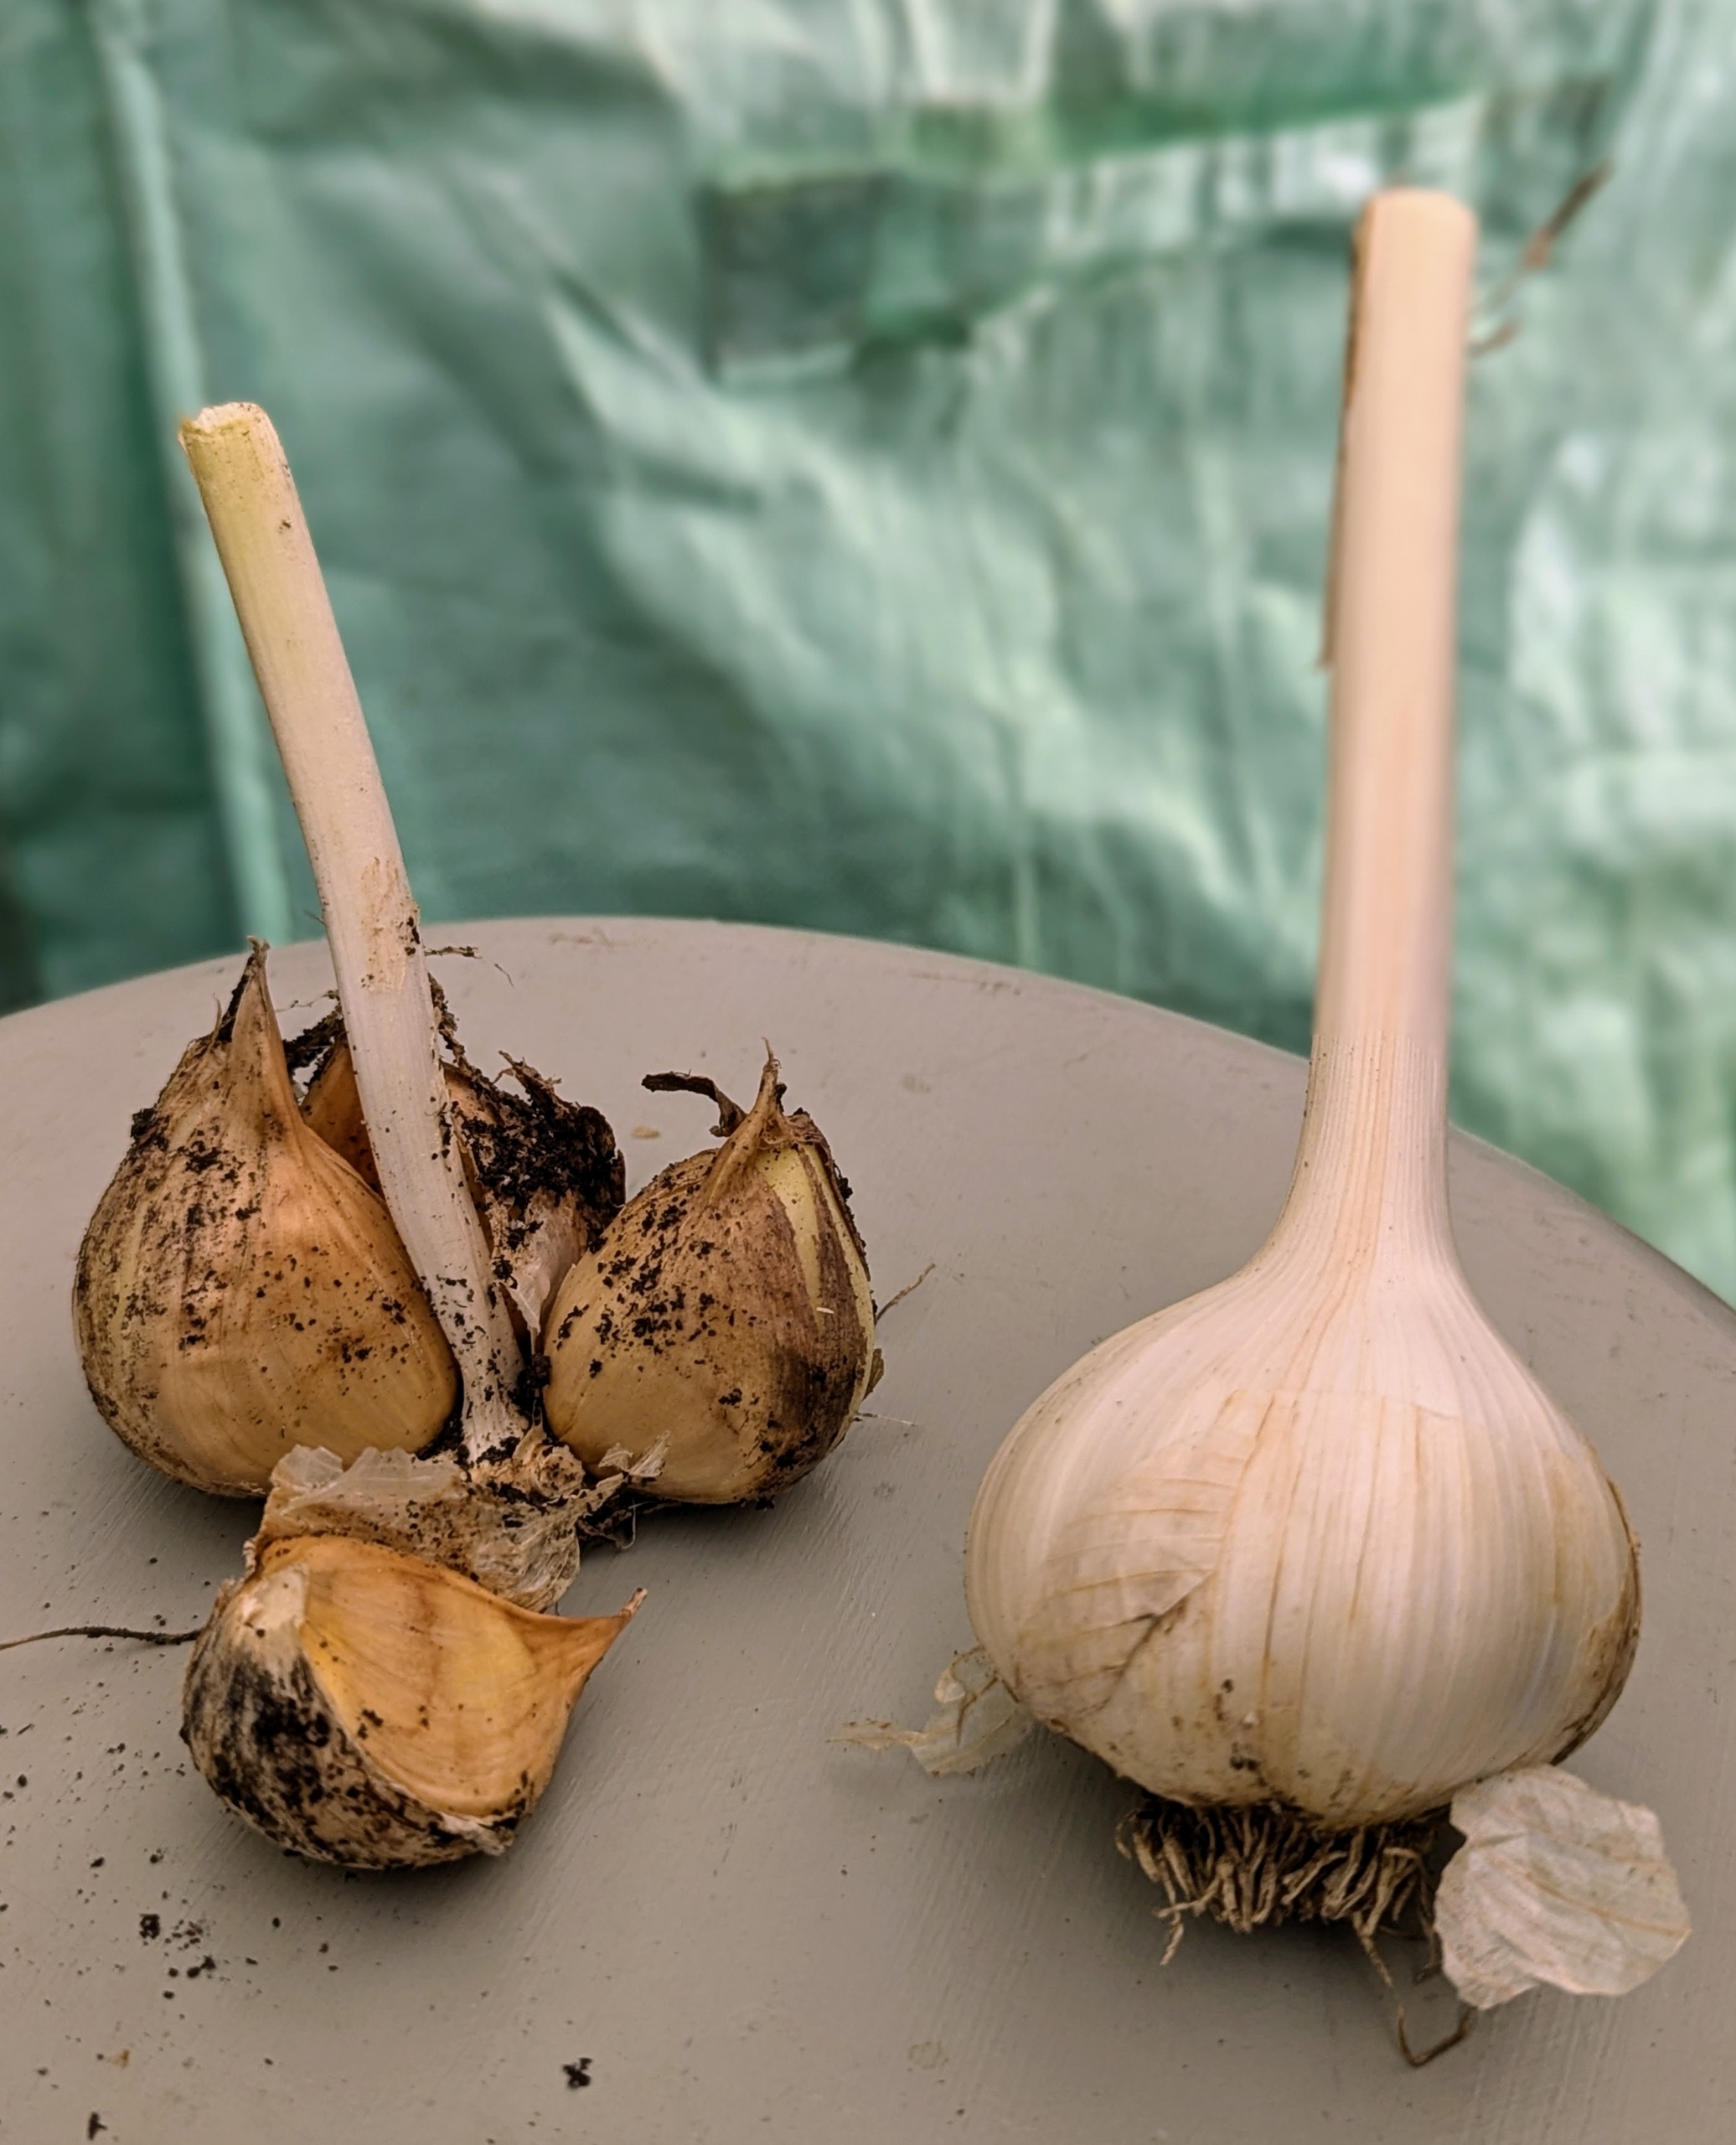
- And remember, a garlic head, also known as a garlic bulb, is the entire bulb of garlic as seen on the right. A garlic clove is one of the individual segments that make up the bulb as seen on the left.
-
- After they’re all done, Elvira places each cleaned head on a tray lined with parchment paper. One can also lay them out on newspaper. They will continue to cure here in my carport until I bring them into my kitchen to be used.
-
- They are placed in a single layer to continue drying. They can also be kept in breathable bags, boxes, or trays and placed in a cool, dark place with good airflow. This will help the garlic last longer and prevent it from sprouting or molding.

-
- It takes some time to get through all the garlic. Garlic can be kept in good condition for a few months at ambient temperatures of 68 to 86 degrees Fahrenheit under low relative humidity. And be sure to save the healthiest bulbs to plant next season.