Another annual summertime task is checked off the list.
Along one side of my home overlooking the farm, I have a large stone terrace constructed with formal hedged gardens. For the upper parterres, I selected contrasting evergreen shrubs – boxwood, and golden barberry. To provide interest, these shrubs are sheared to different heights, creating a step effect. In the lower parterres, carefully designed and manicured boxwood hedges surround two hand-casted antique fountains. On one side, a low hedge shaped with an inverted V pattern, or chevron. Maintaining all these plantings requires extra maintenance and regular grooming, but I think it’s well worth the effort.
Enjoy these photos.
I am so pleased with how well these formal gardens have developed over the years. I’ve worked hard to maintain the detailed shapes of the hedges and shrubs. This is the lower terrace that is located just outside my Winter House kitchen. It’s a lovely place to sit and conduct meetings or enjoy summer meals.
This is what the hedges looked like before pruning began. It’s important to groom the specimens every few months when they appear overgrown.
Golden barberry, Berberis thunbergii, is a deciduous shrub that is compact, adaptable, very hardy and shows off striking small, golden yellow oblong leaves. Golden barberry takes on its brightest coloring when it gets at least six hours of direct sun a day.
Buxus is a genus of about 70 species in the family Buxaceae. Common names include box or boxwood. The boxes are native to western and southern Europe, southwest, southern and eastern Asia, Africa, Madagascar, northernmost South America, Central America, Mexico, and the Caribbean. The leaves are arranged opposite from each other, making pairs. I use European boxwood all over my farm.
For trimming and grooming, I use a select group of tools for the terraces. These STIHL battery operated trimmers, shears, and blowers are durable, efficient, and gentle enough to use around this formal garden space.
These are Okatsune 30-inch long Hedge Shears. Okatsune shears are light and precise, and come in a range of sizes.
Phurba is my resident boxwood pruning expert. He’s been with me for many years. Here he is pruning and shaping the boxwood by hand using the Okatsune shears.
To get the top of the manicured hedges level and groomed, Phurba uses the STIHL HSA 140 T battery hedge trimmer. It’s excellent for trimming and sculpting.
Phurba is able to skim the top of the hedge removing the new growth with precision and ease.
Here, Phurba works on the upper terrace quadrants, again hand trimming the big boxwood shrubs.
Phurba makes sure to cover every side of the shrubs and hedges, sometimes carefully having to walk in tight spaces.
Phurba uses the STIHL hand-held HSA 26 garden shears to trim the golden barberry.
There are always a lot of clippings to clear, but that’s because these hedges are doing so well. Good, regular pruning stimulates new growth, controls unwanted growth, and removes dead or damaged branches.
Here is a finished section of a boxwood hedge. Boxwood is a popular choice for formal gardens because of its versatility, ability to be pruned, and year-round bold green foliage.
Phurba takes several days to do all the careful pruning and grooming. Here, one can see where he has trimmed, and where he still has work to do.
And have you seen my all-weather furniture by Polywood? These chairs and table are part of my Chinoiserie Collection. These pieces stay out all season long and are designed to withstand storms and strong winds. They are so durable and look perfect year after year.
My Chinoiserie Accent Tables by Polywood are great for displaying some of my potted plants. This outdoor furniture comes in a variety of colors including my signature Bedford gray.
It takes time to develop formal gardens. When planning, one must consider type of plants, their size at the time of planting and at maturity, the level of care, the environment, and local weather conditions. It can take up to 10-years for a formal garden to be fully established.
These gardens look so excellent after a good grooming.
This is my antique sugar pot in the center of the footpath of the upper terrace parterre. Sugar kettles were used on 19th century Louisiana plantations for the production of sugar. In the winter, I use it as a fire pit when entertaining.
All the hedges are now level around the boxwood. These plants have filled out the areas so nicely. Thanks Phurba! The terraces look wonderful.
My vegetable garden just keeps on giving - this week, some beautiful farm-grown onions.
The onion, Allium cepa, is the most widely cultivated species of the genus Allium. Onions are hardy, easy to grow, and can be grown in a variety of soils and climates. I plant a lot of onions every year. I use them in my cooking, and in sandwiches and salads. And I share many of them with family and friends.
Here are some photos, enjoy.
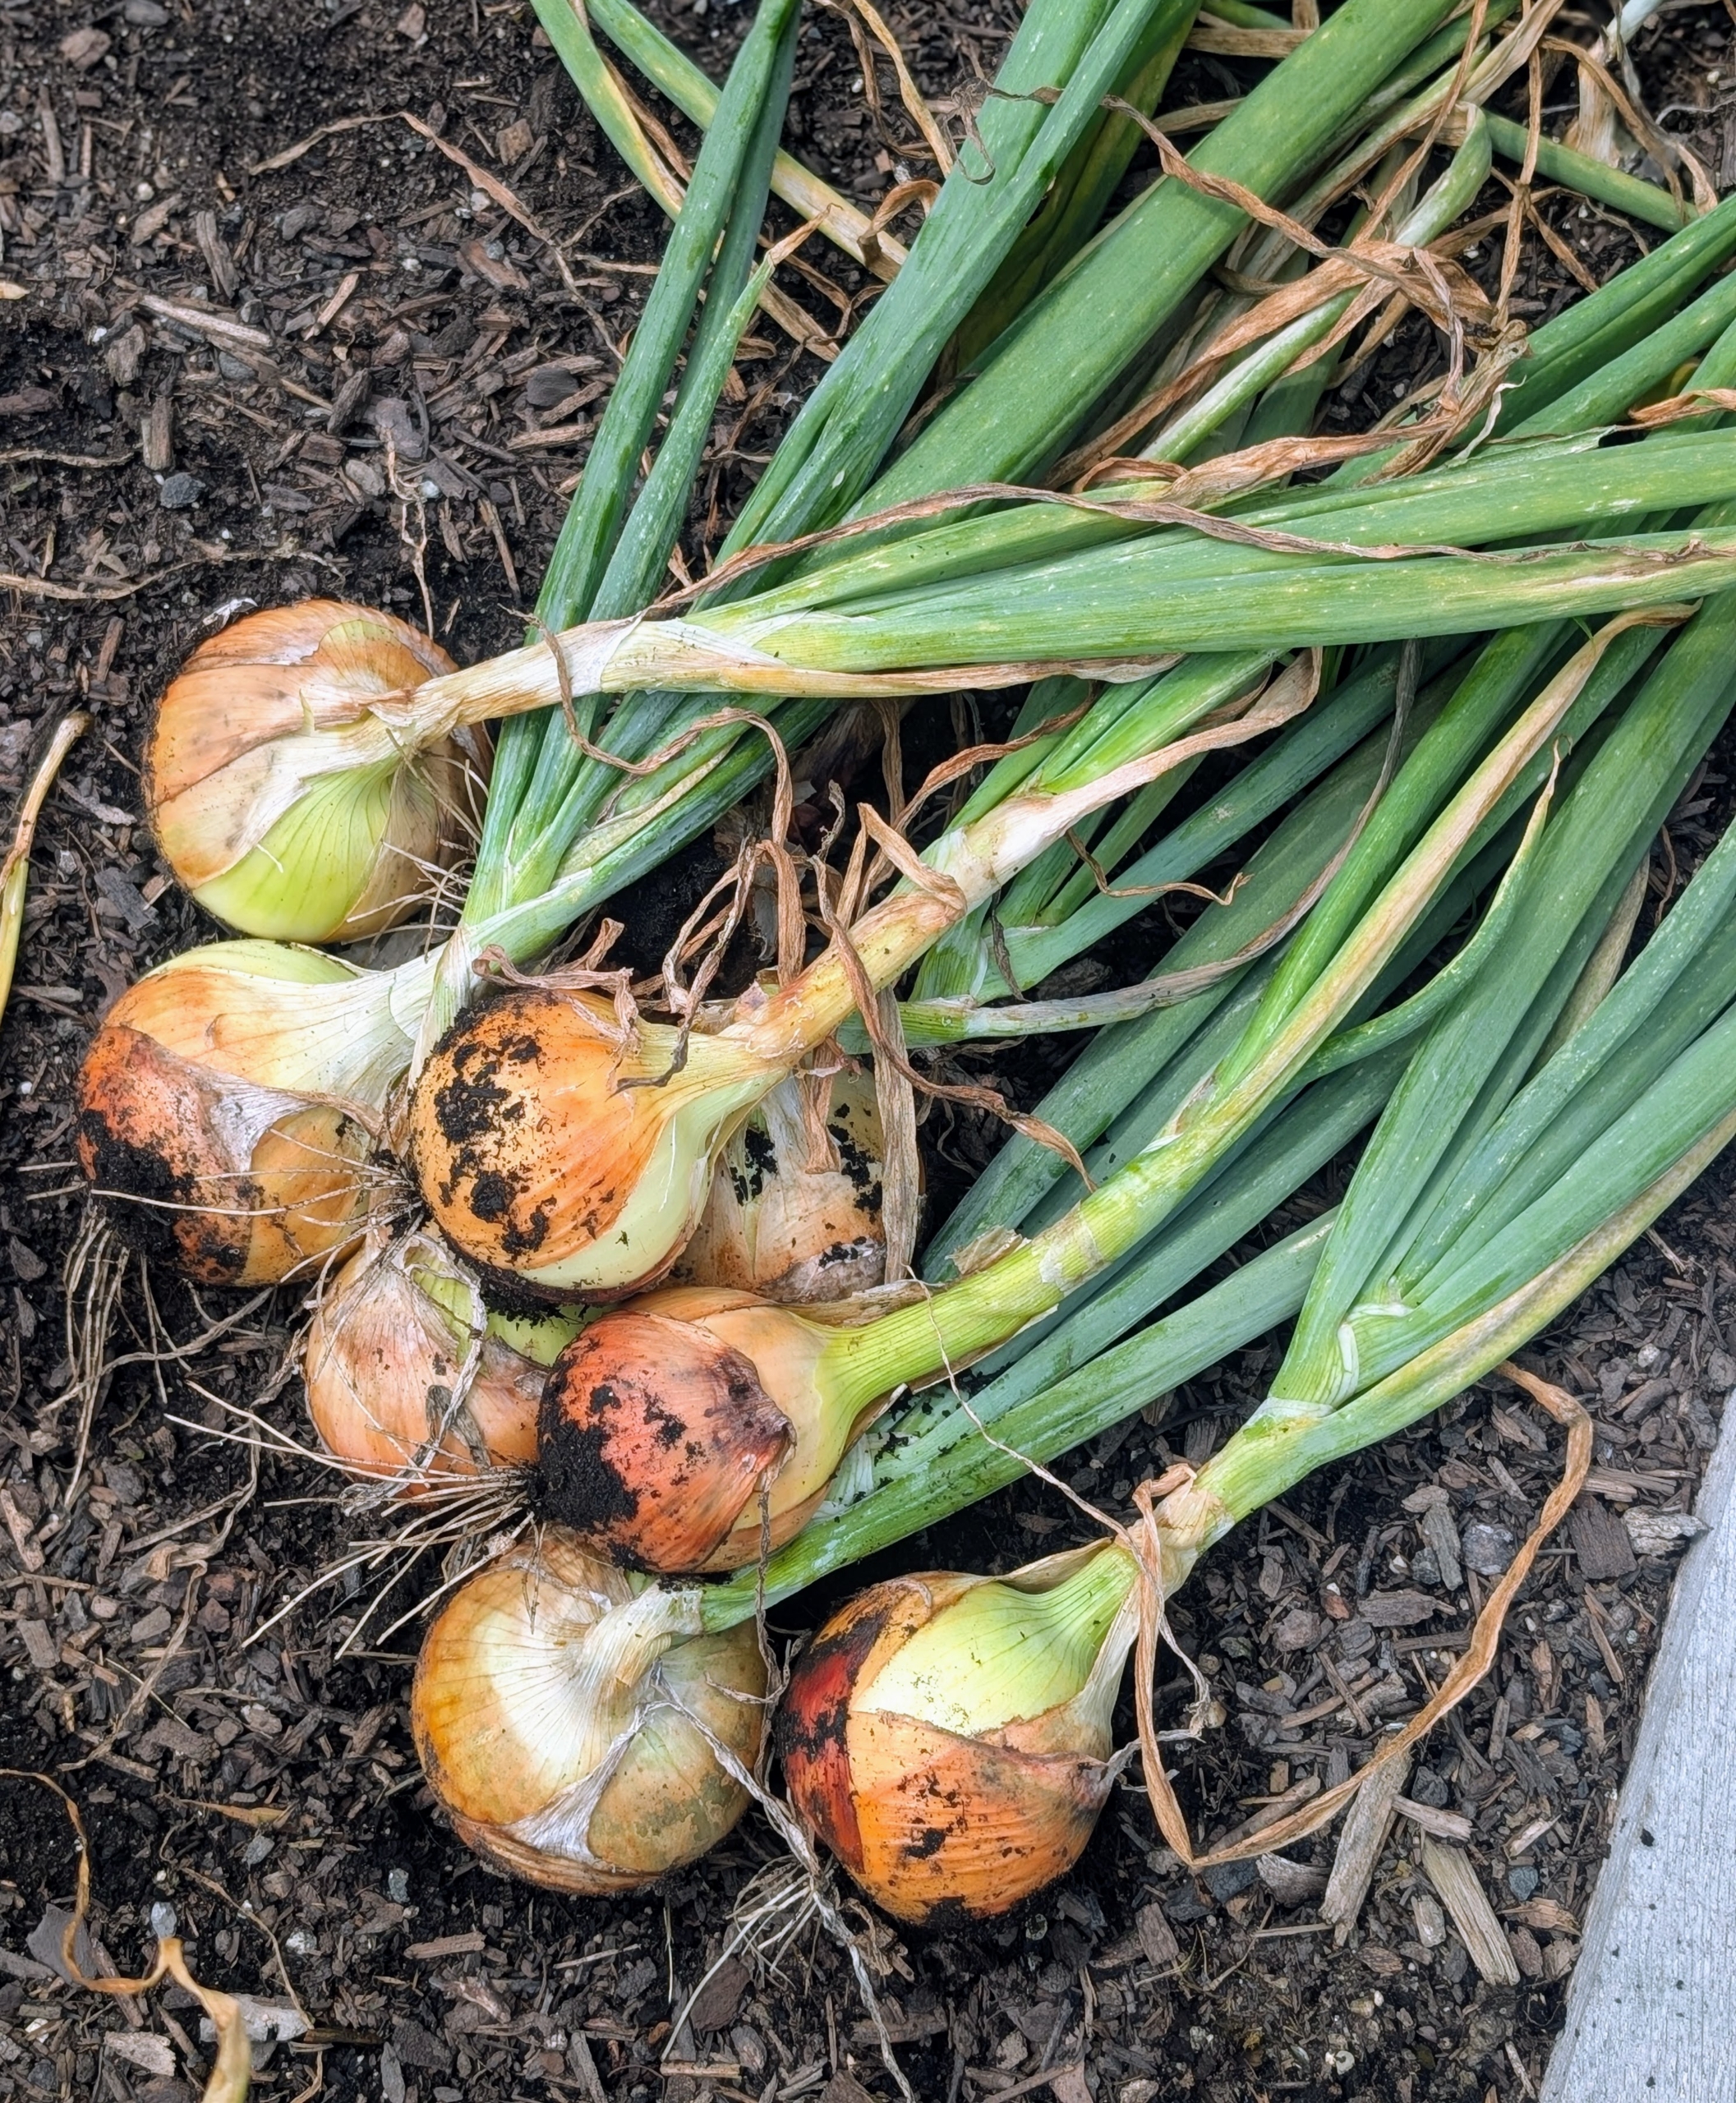
It’s so rewarding to be able to pick so many fresh vegetables from one’s own garden. This week, I harvested lots of onions.
I plant a good amount of onions every year. It is one of the most favorite crops here at the farm.
My onions are started from seed in the greenhouse and then planted outdoors in the garden bed in spring.
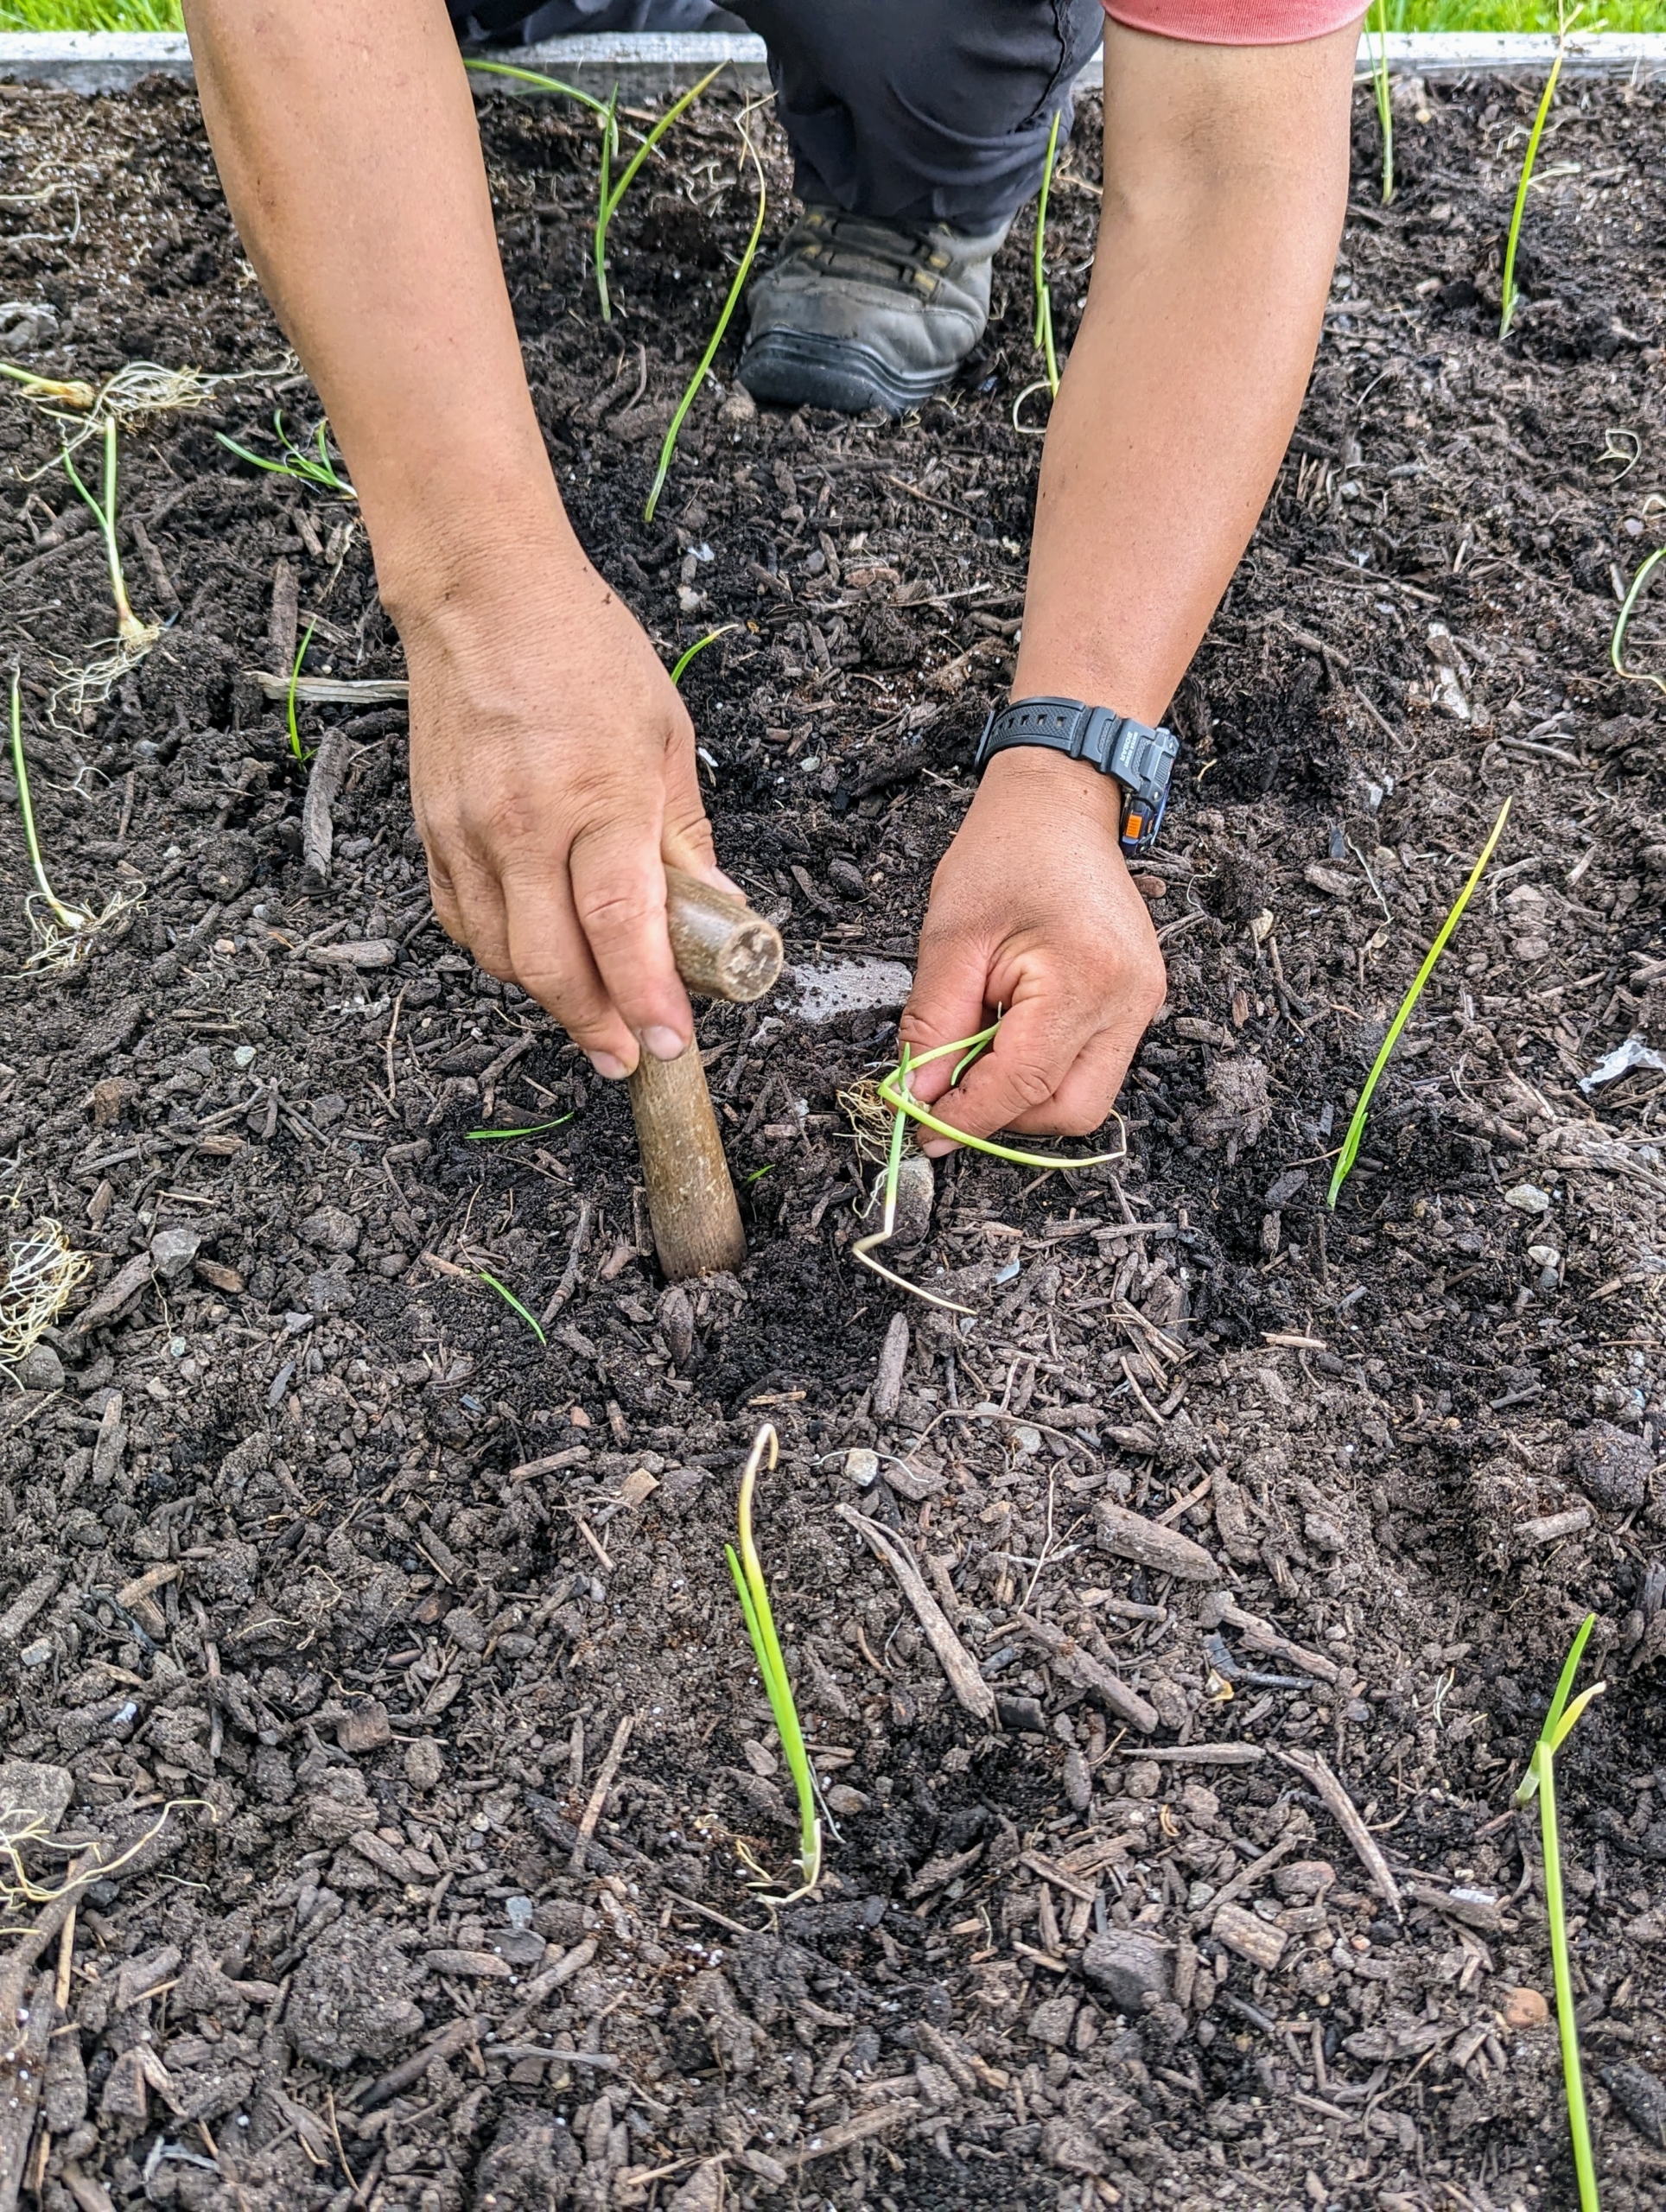
I plant red onions, white onions, and yellow onions. Here, Phurba carefully plants them using a dibber.
They are planted when temperatures are still a bit cool. Early planting gives the onions time to develop tops and store energy for the bulbs.
Here they are all planted in early June.
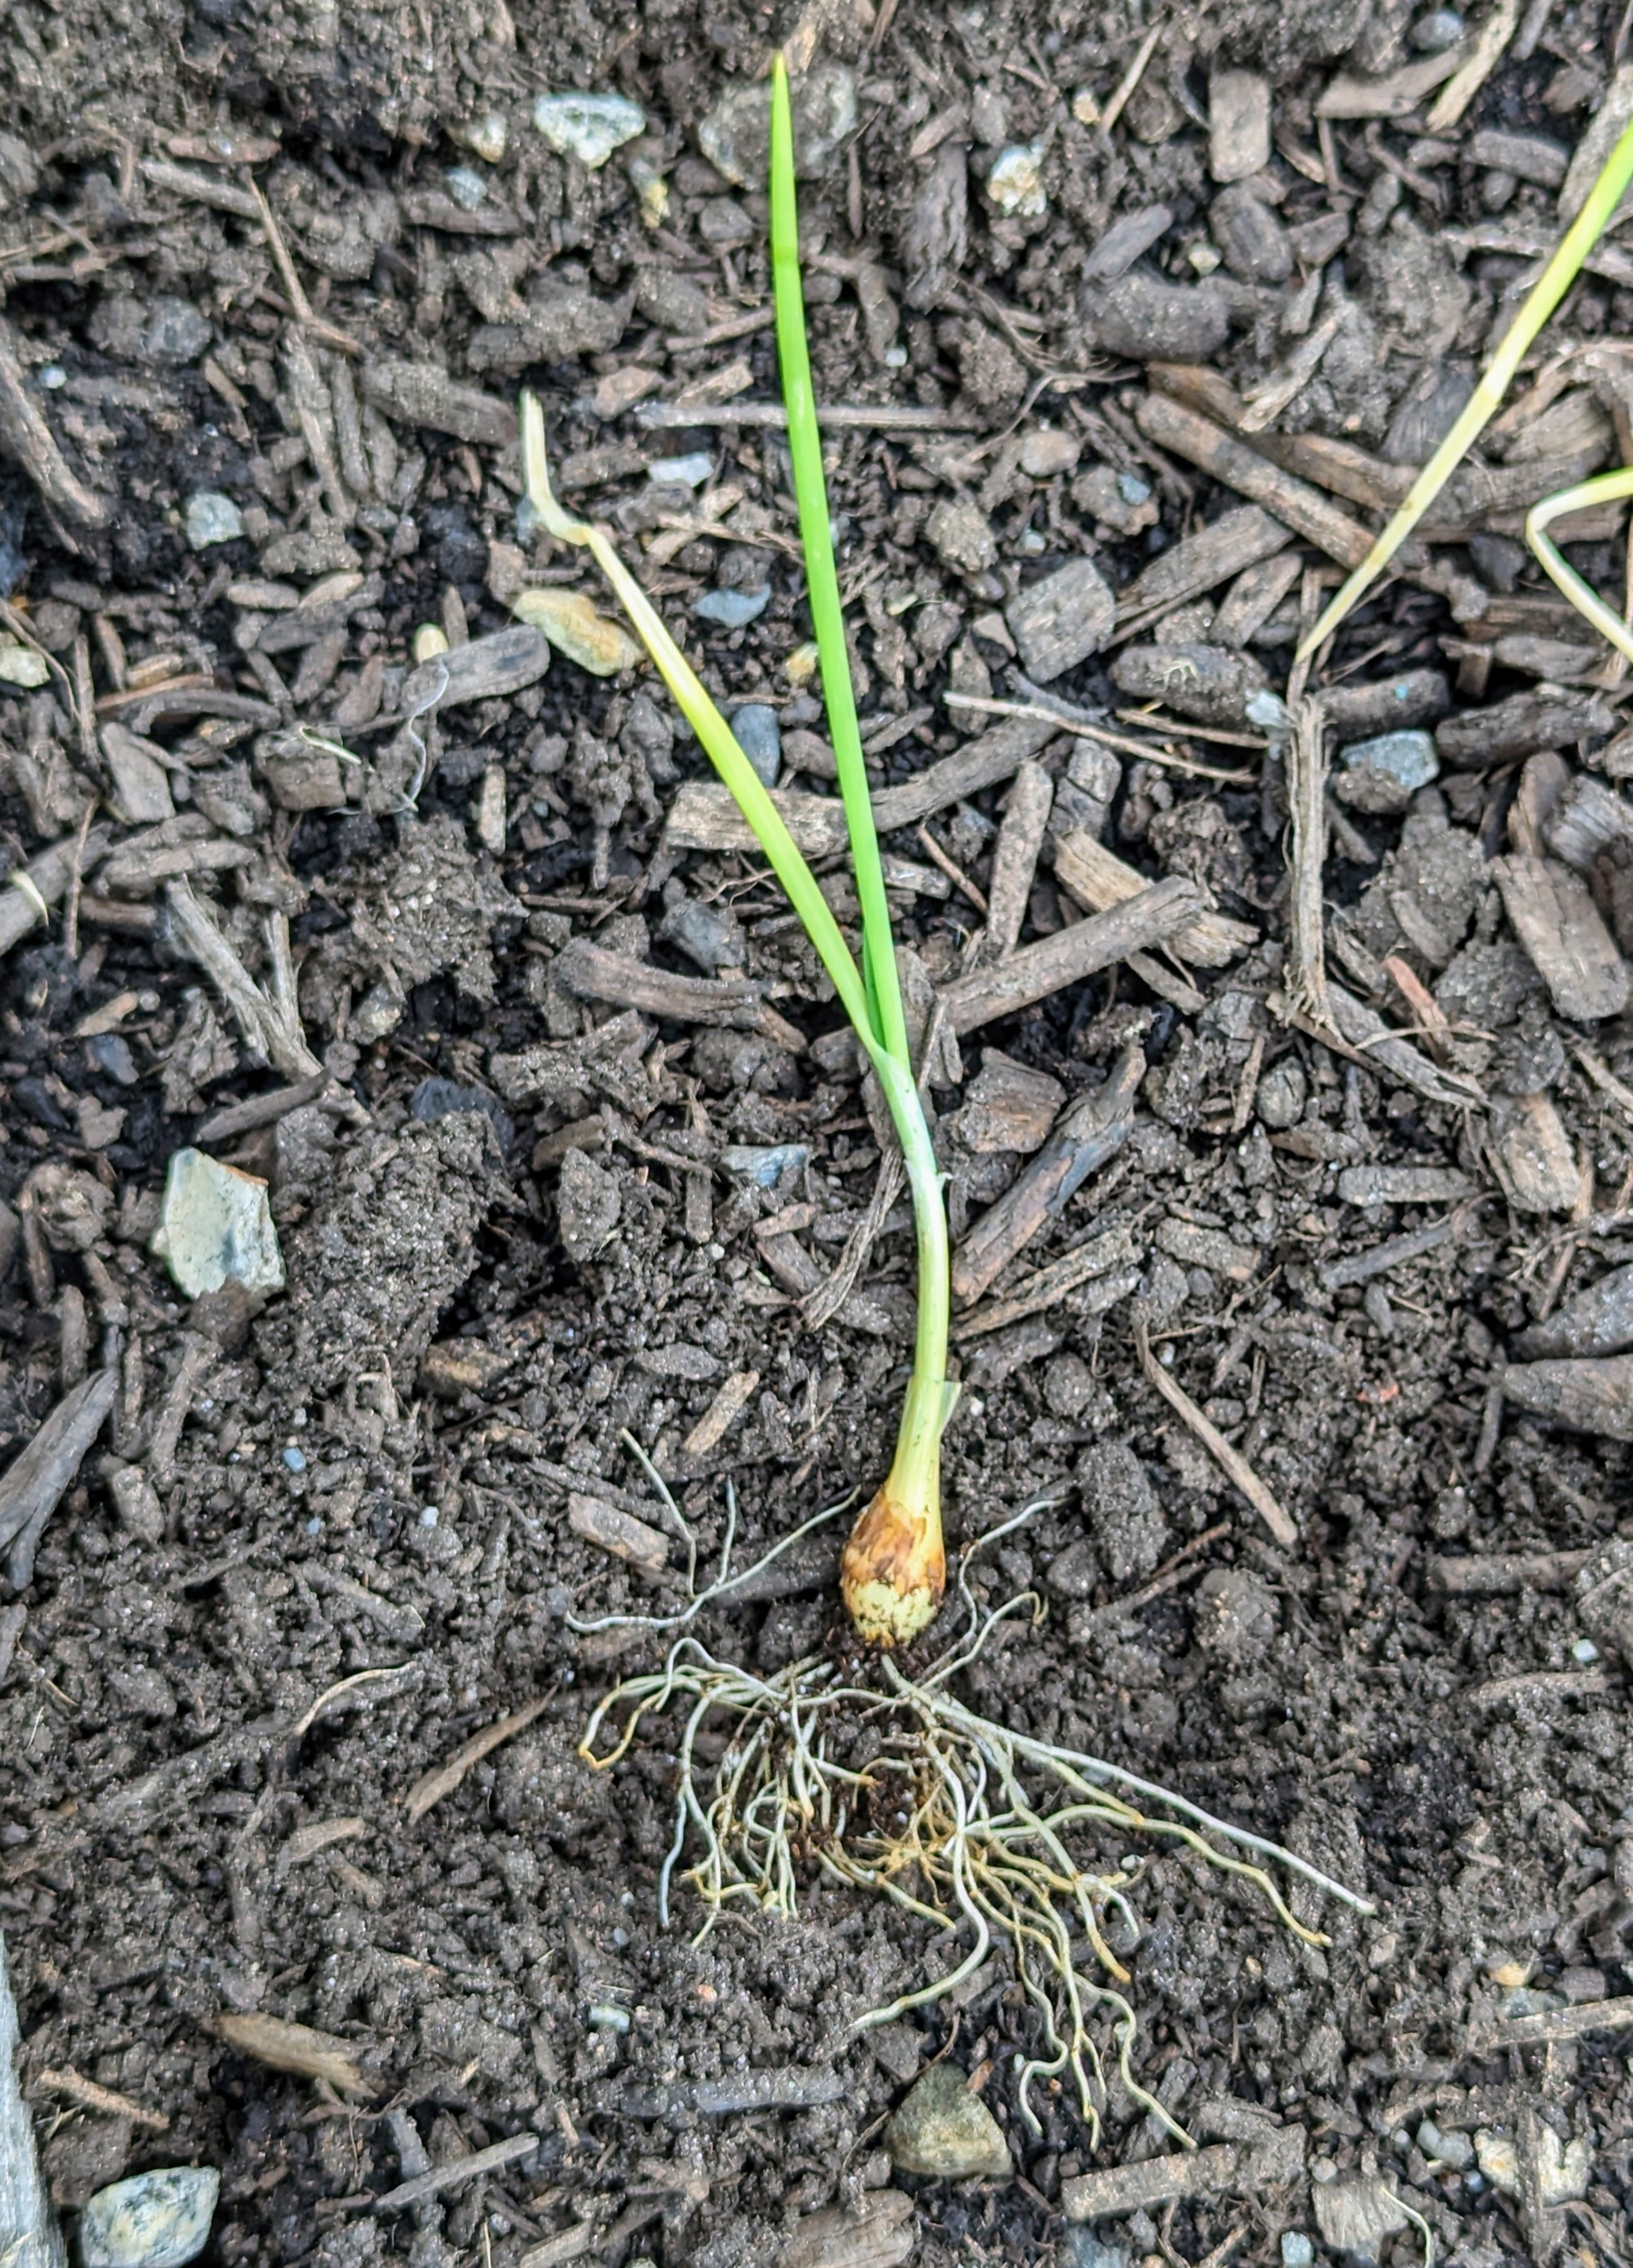
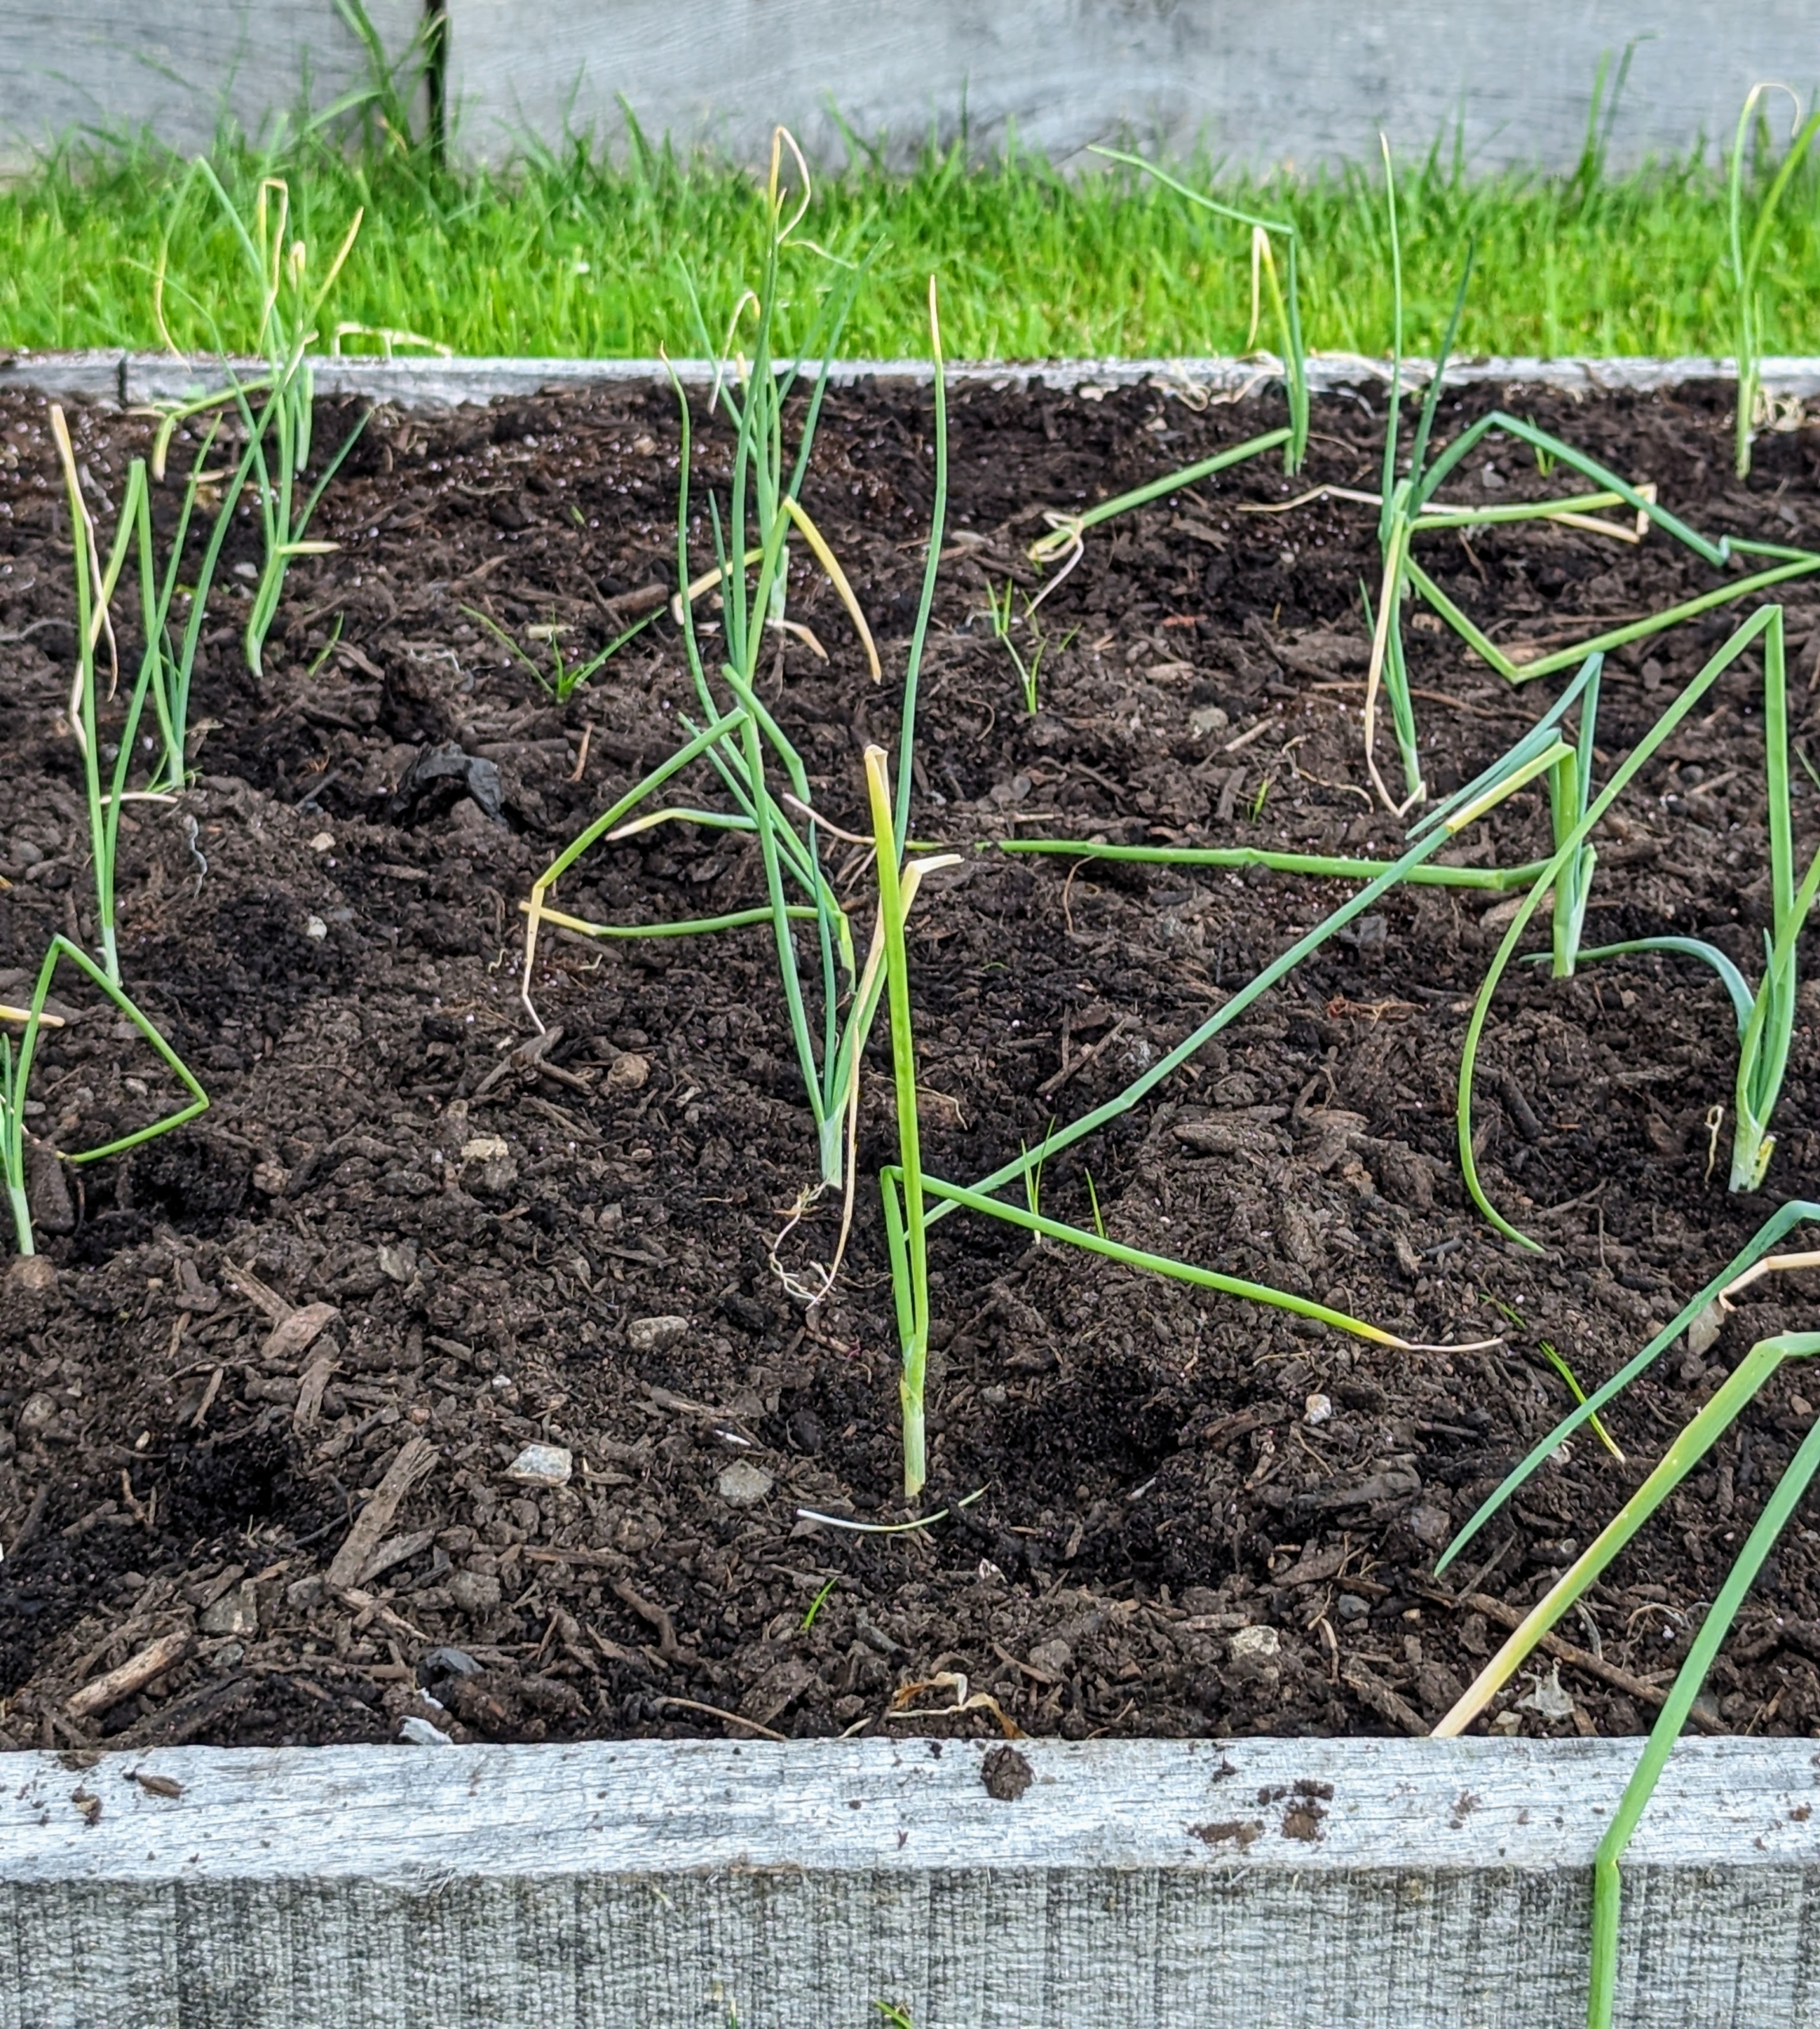
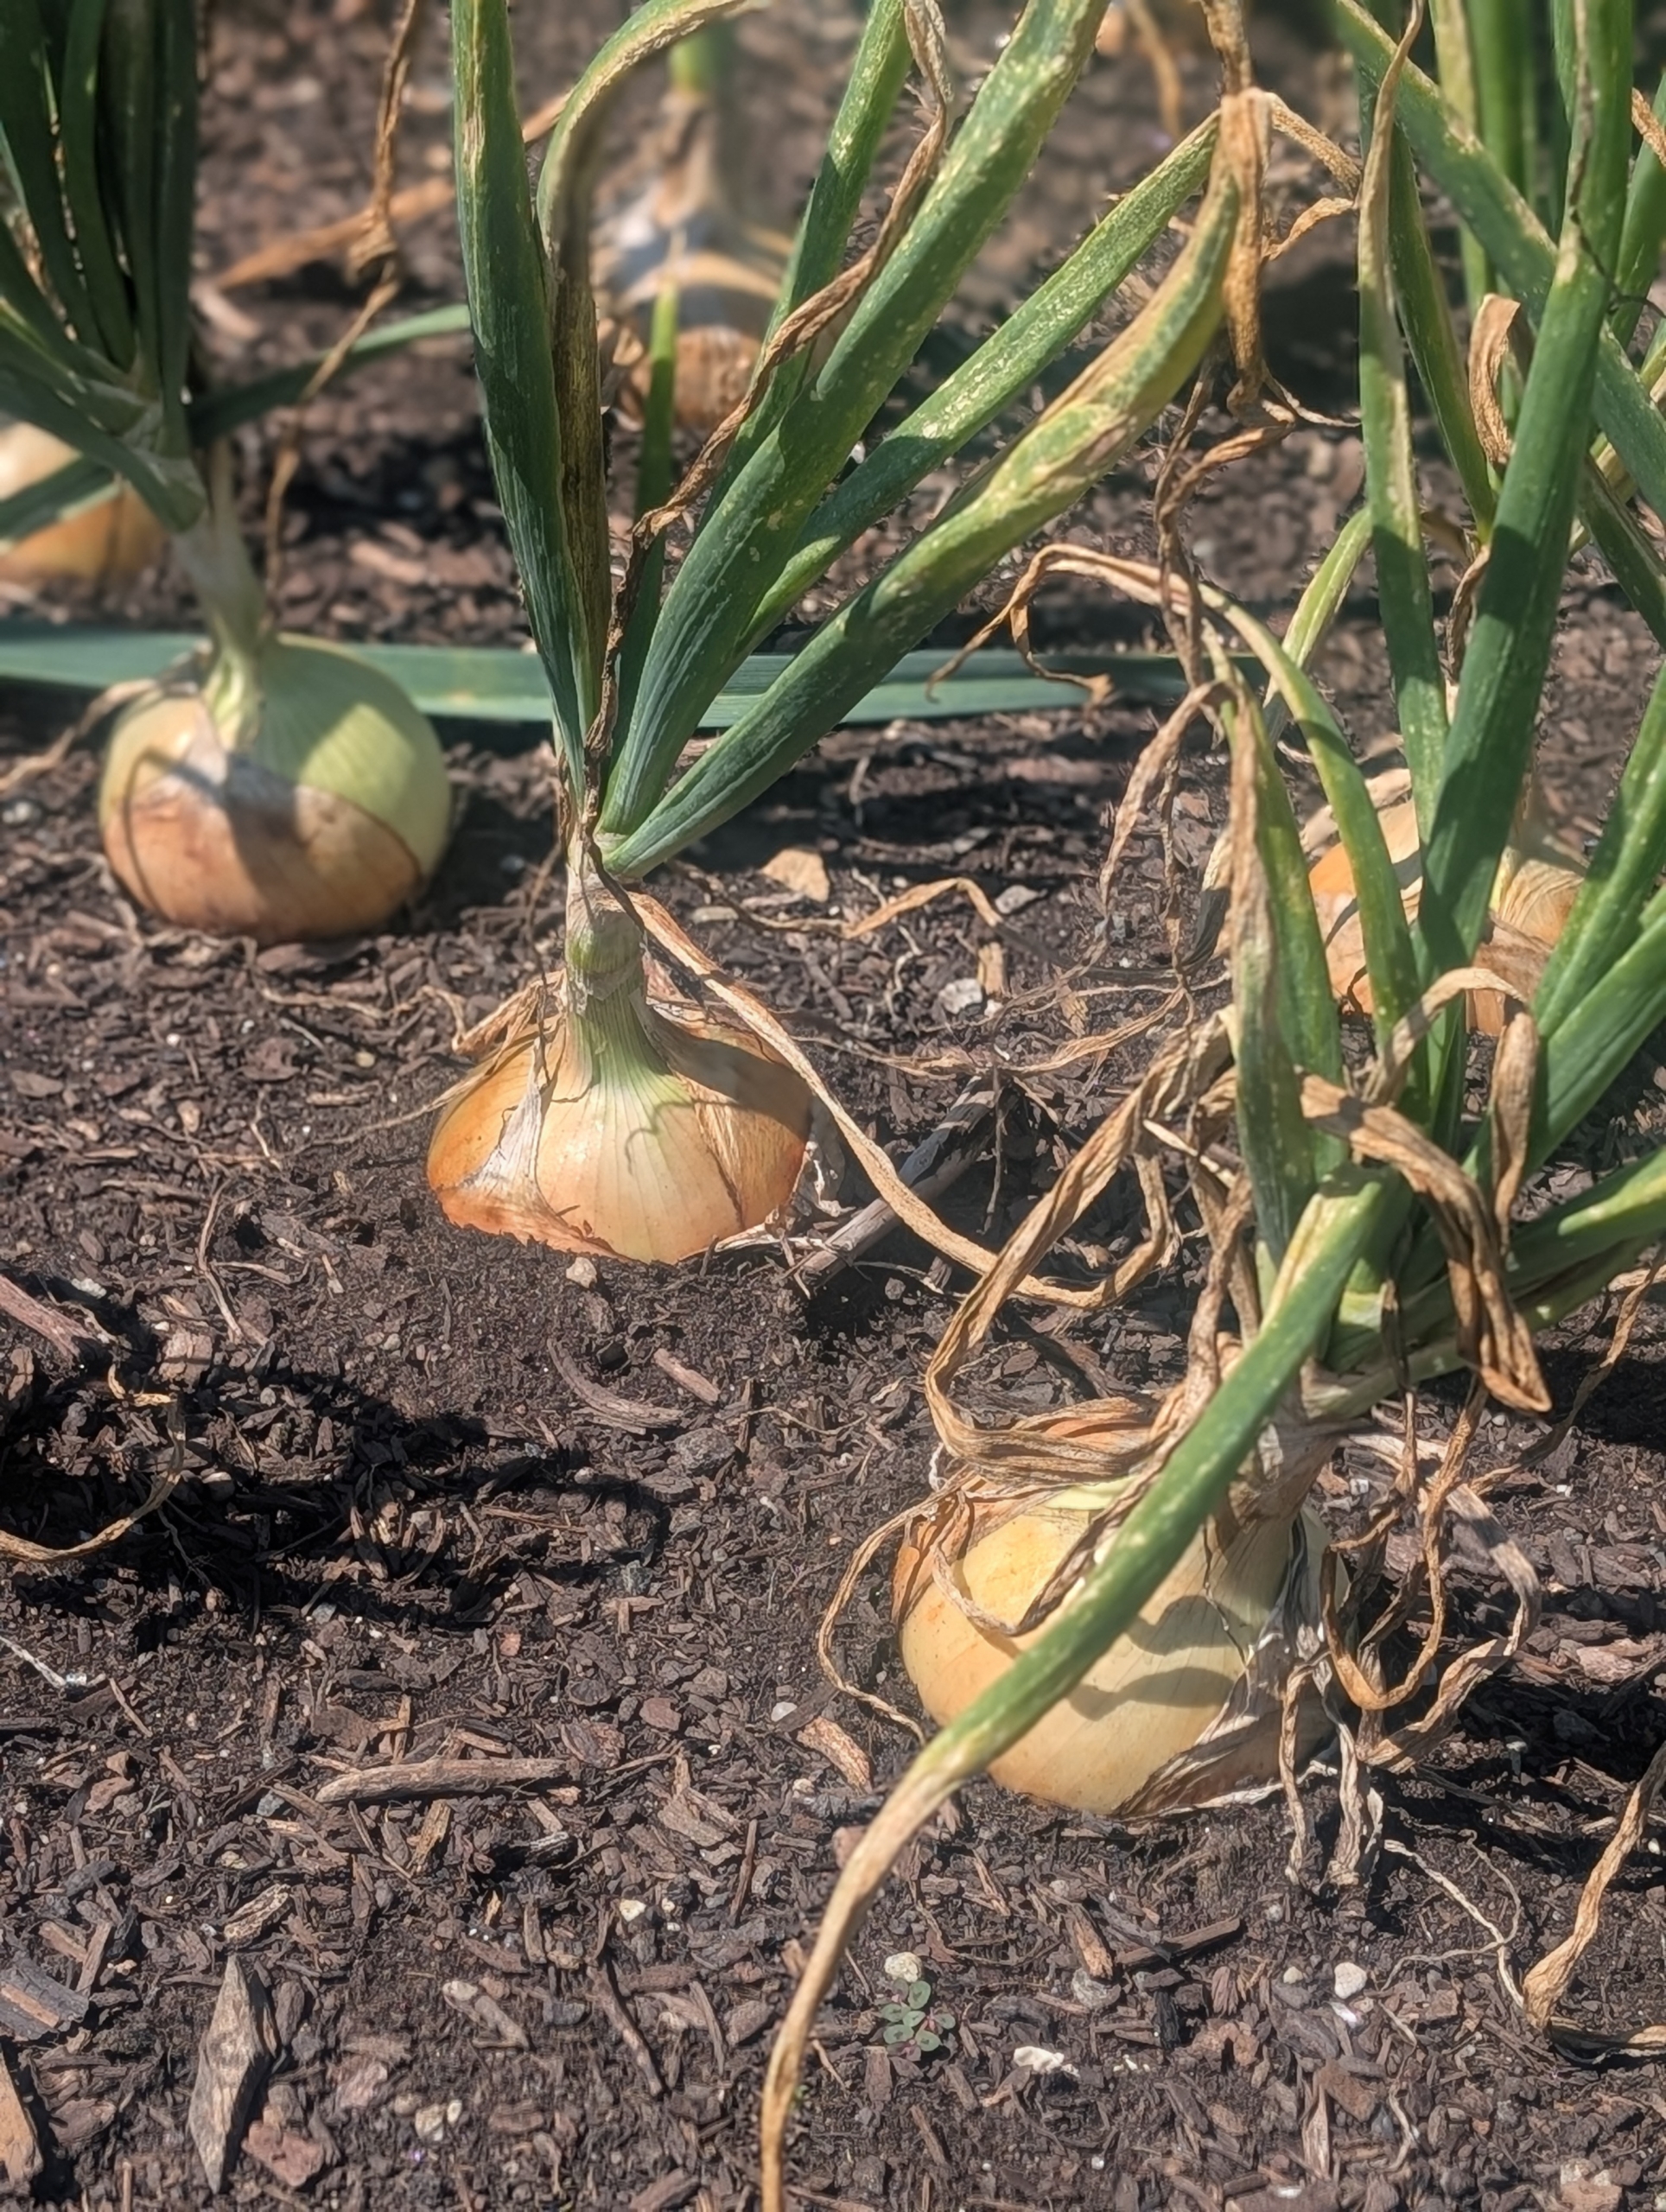
By late July the onions are starting to show through the soil, but they are still small and the top leaves are still very green.
Onions require 90 to 100 days to mature from seed, which is around four months. From sets, onions are ready to harvest after around 80 days, or just under three months.
Onions are edible at any point, no matter how small they are. Here I harvested a few early season onions – they look very good.
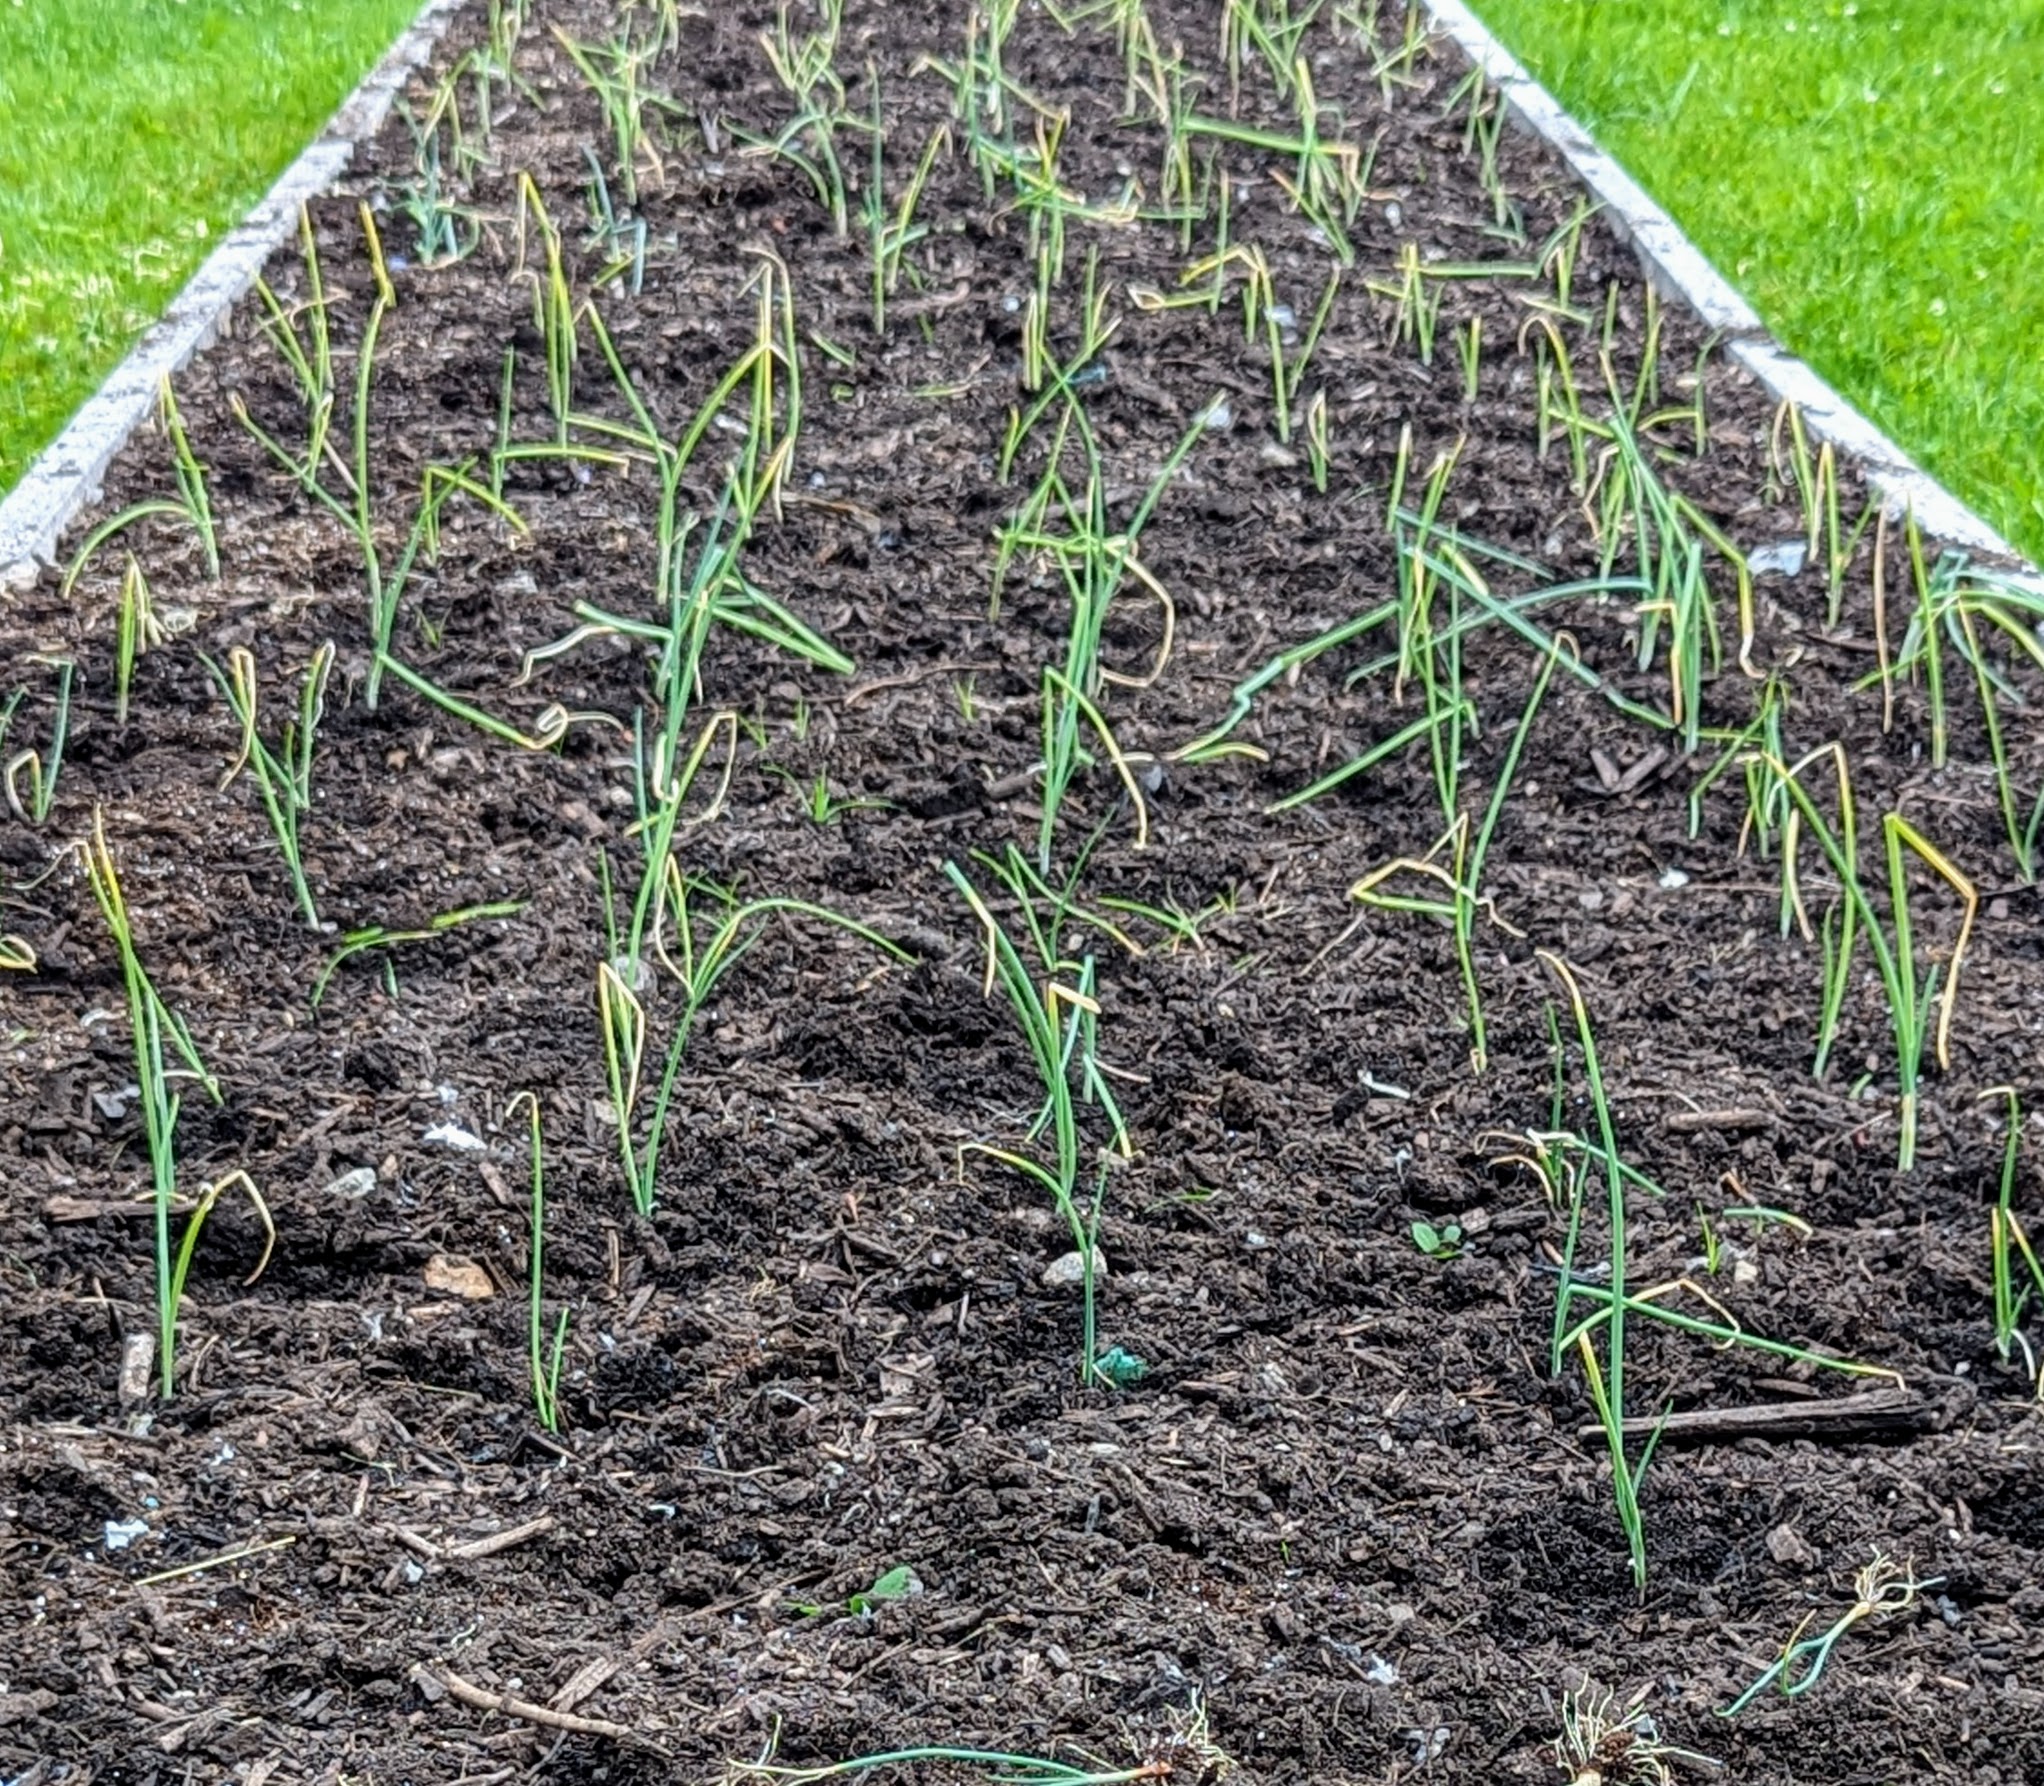
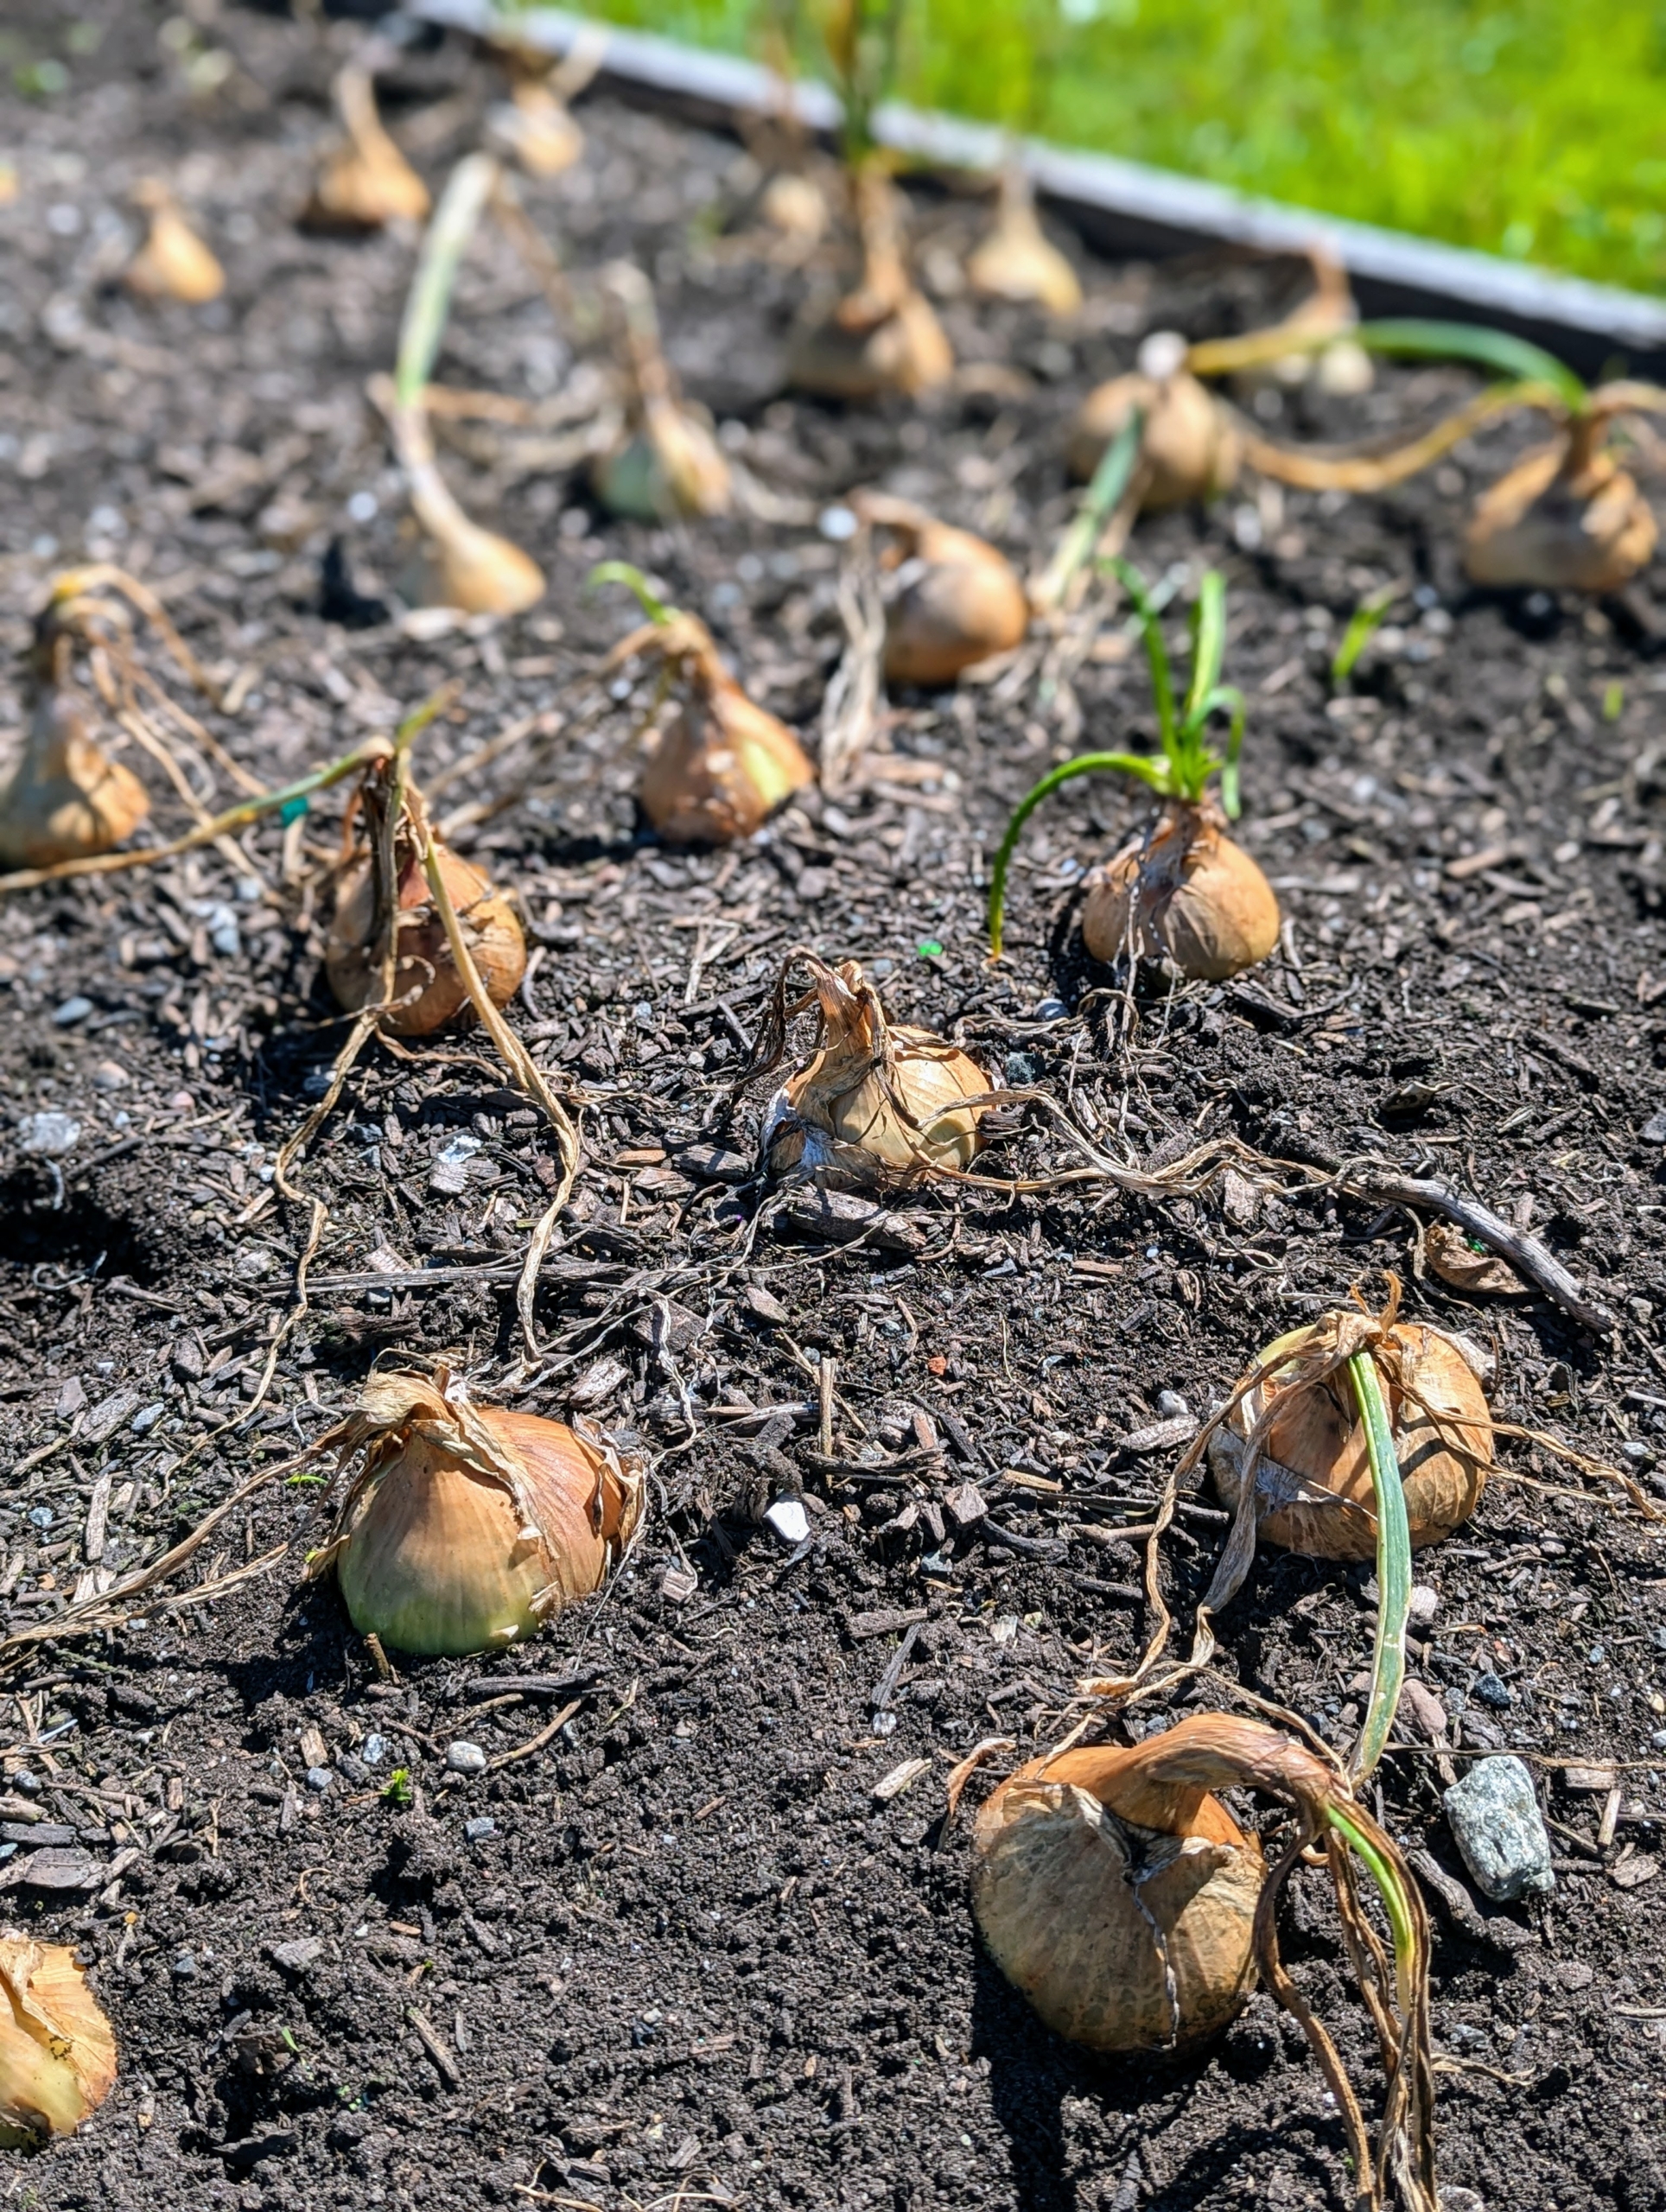
A week later, the leaves are beginning to brown.
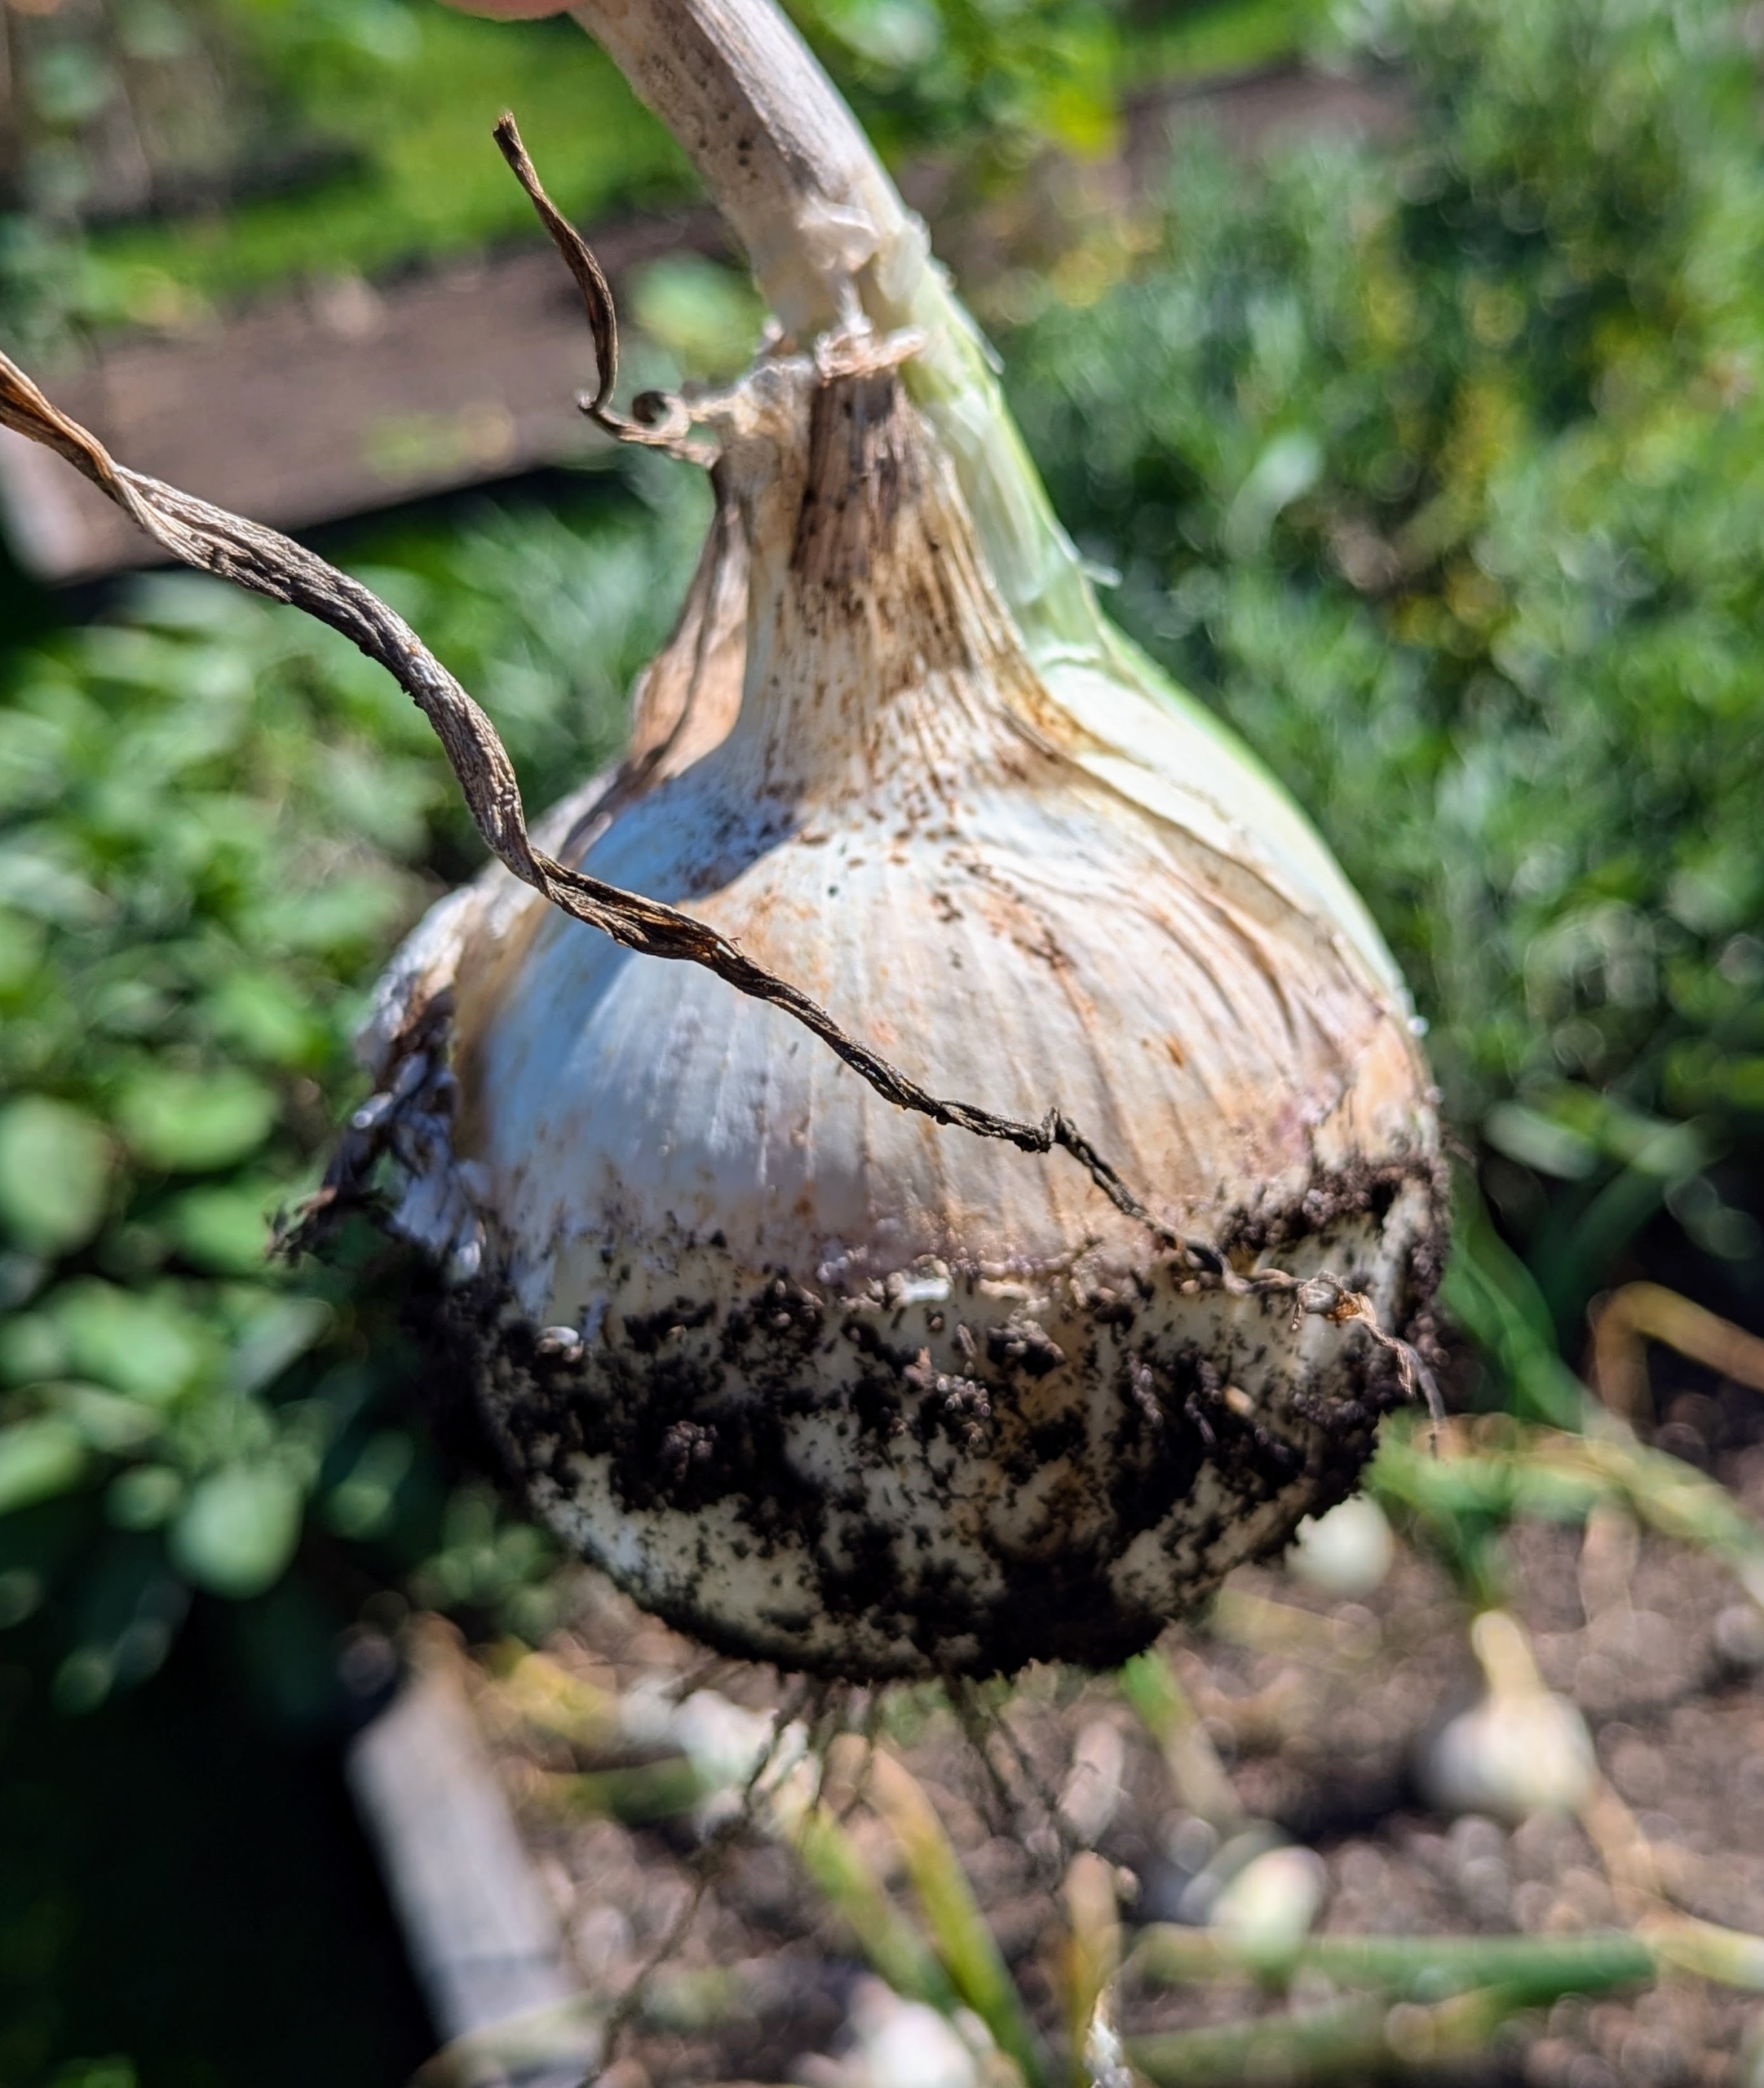
And this week, the tops of the onion plants have withered and turned brown naturally – a clear indication they are fully mature and ready to harvest.
The onion leaves are also quite dry. This happens at the “neck” of the onion, where the leaves meet the bulb, and signals that the plant has stopped growing.
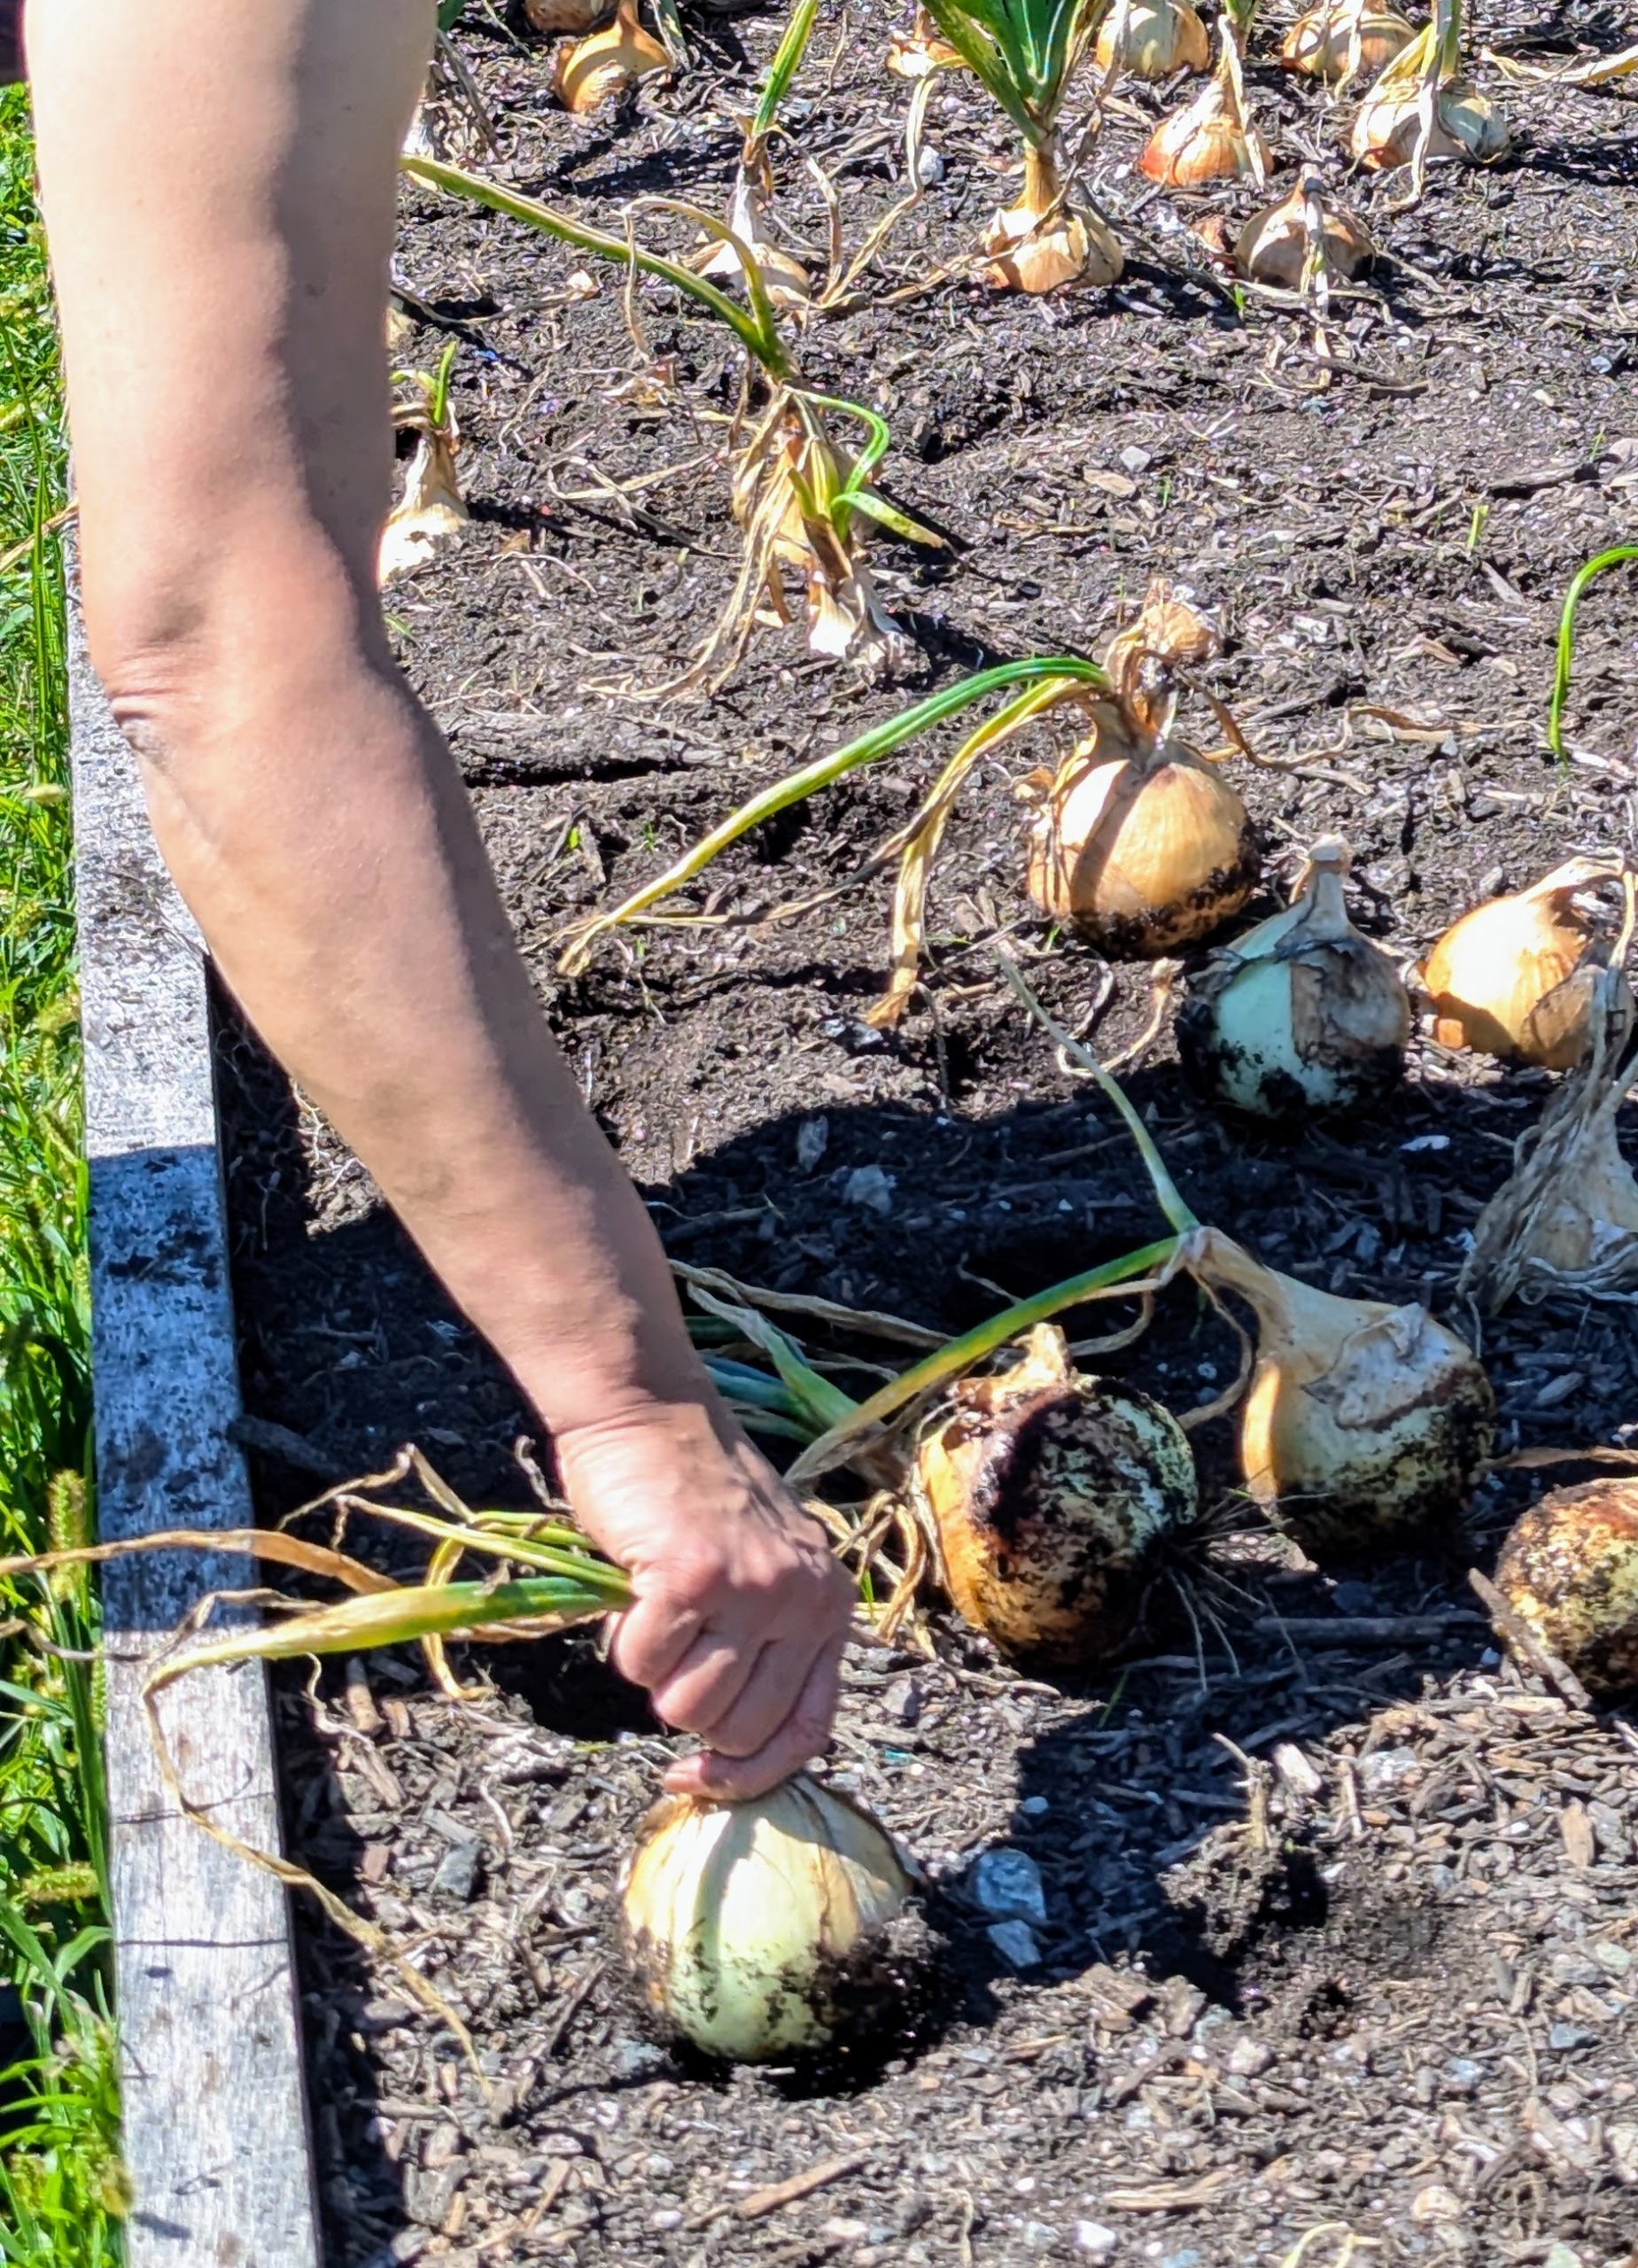
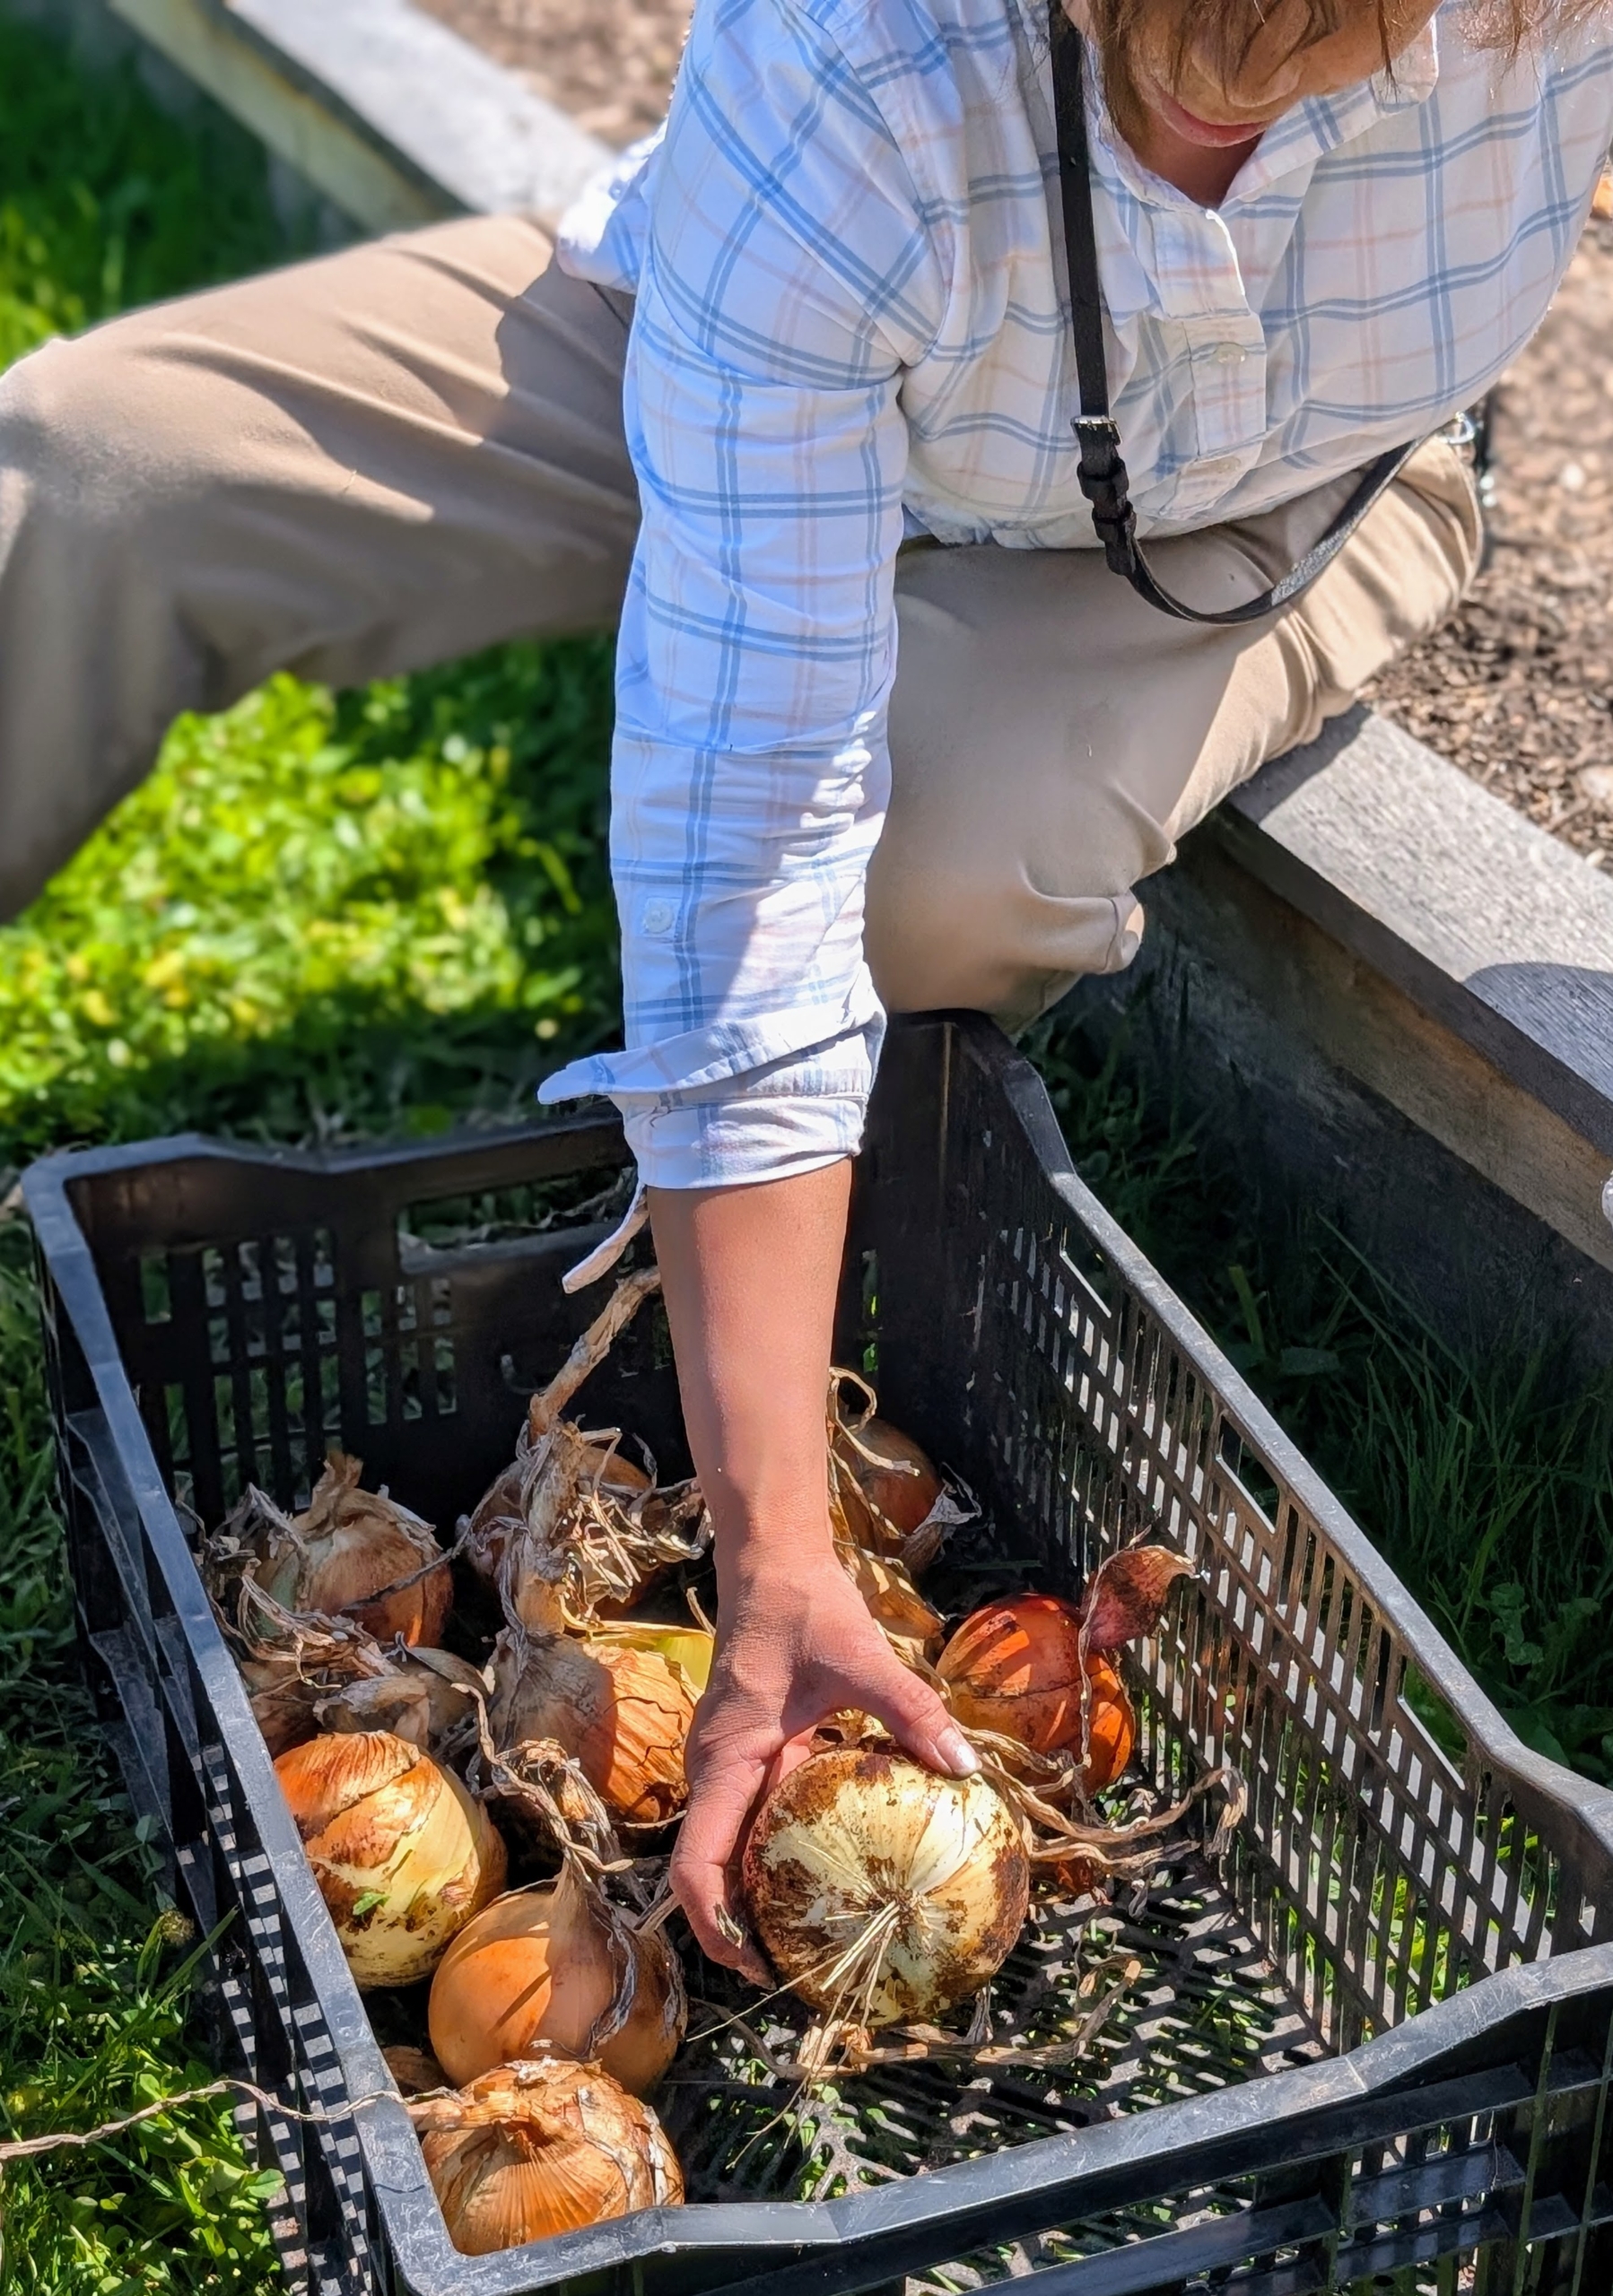
To pick, Elvira carefully and gently pulls the onion up by its top. It’s important to keep the stem intact to prevent the possibility of rot.
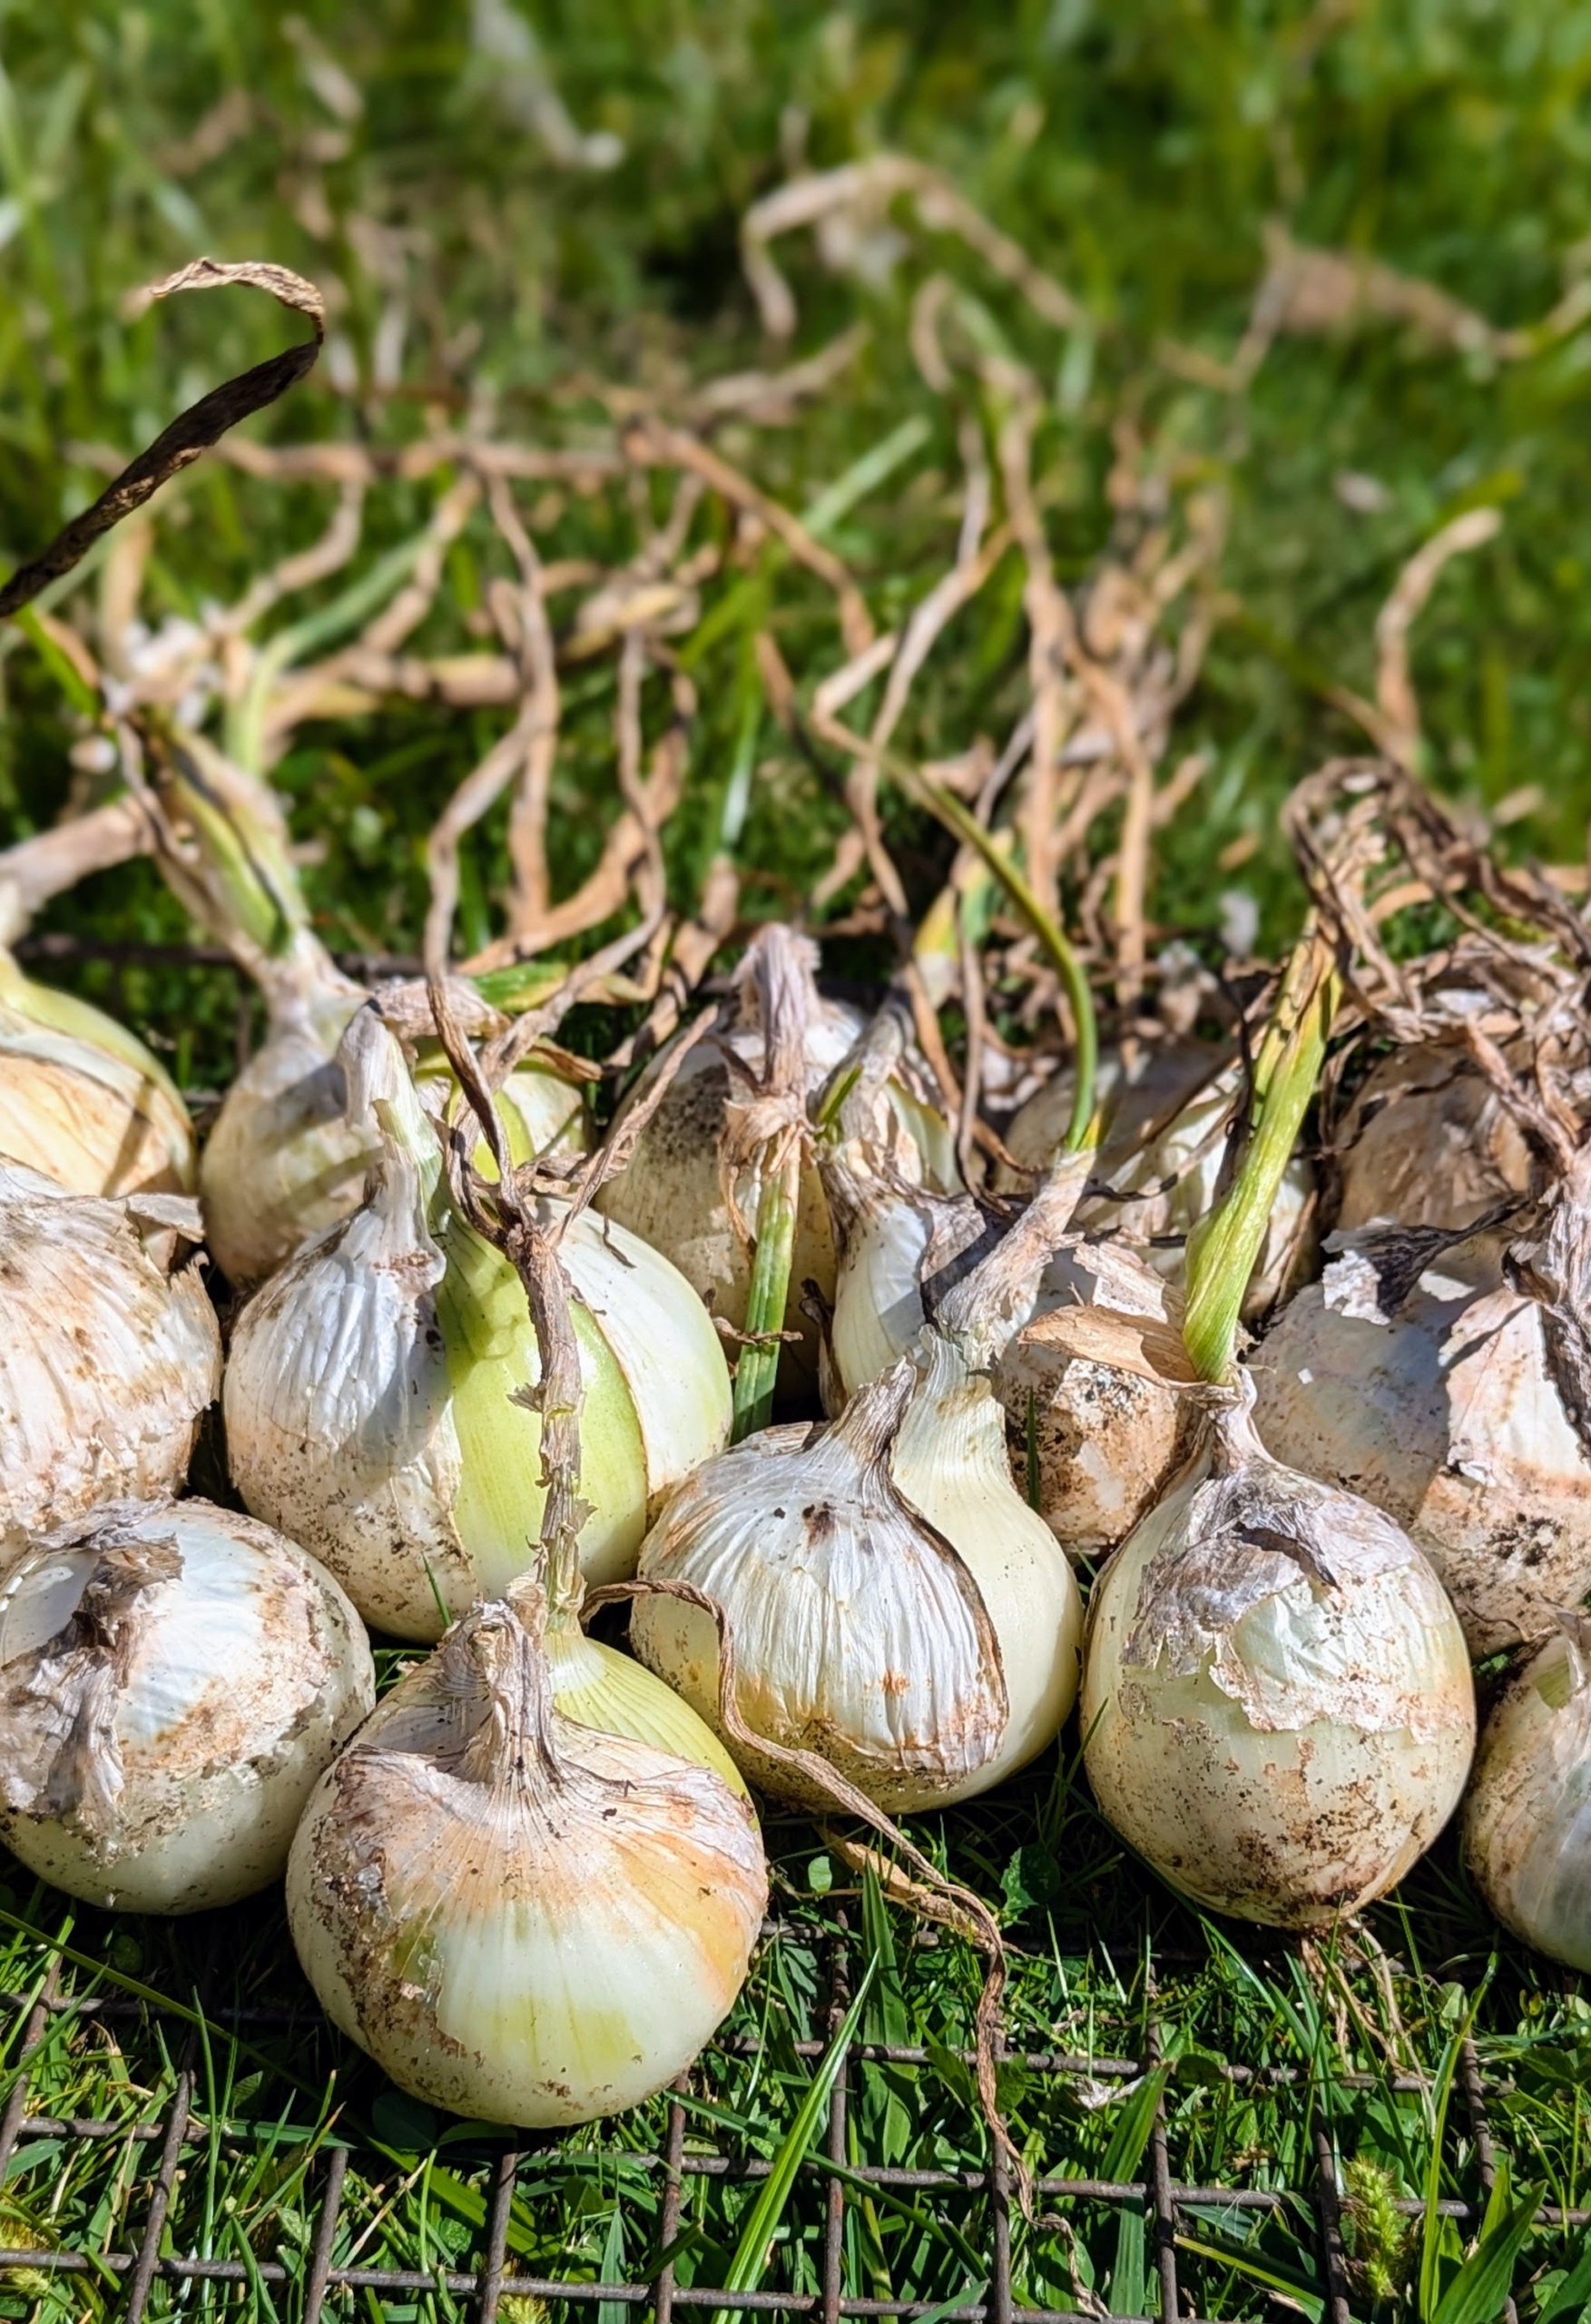
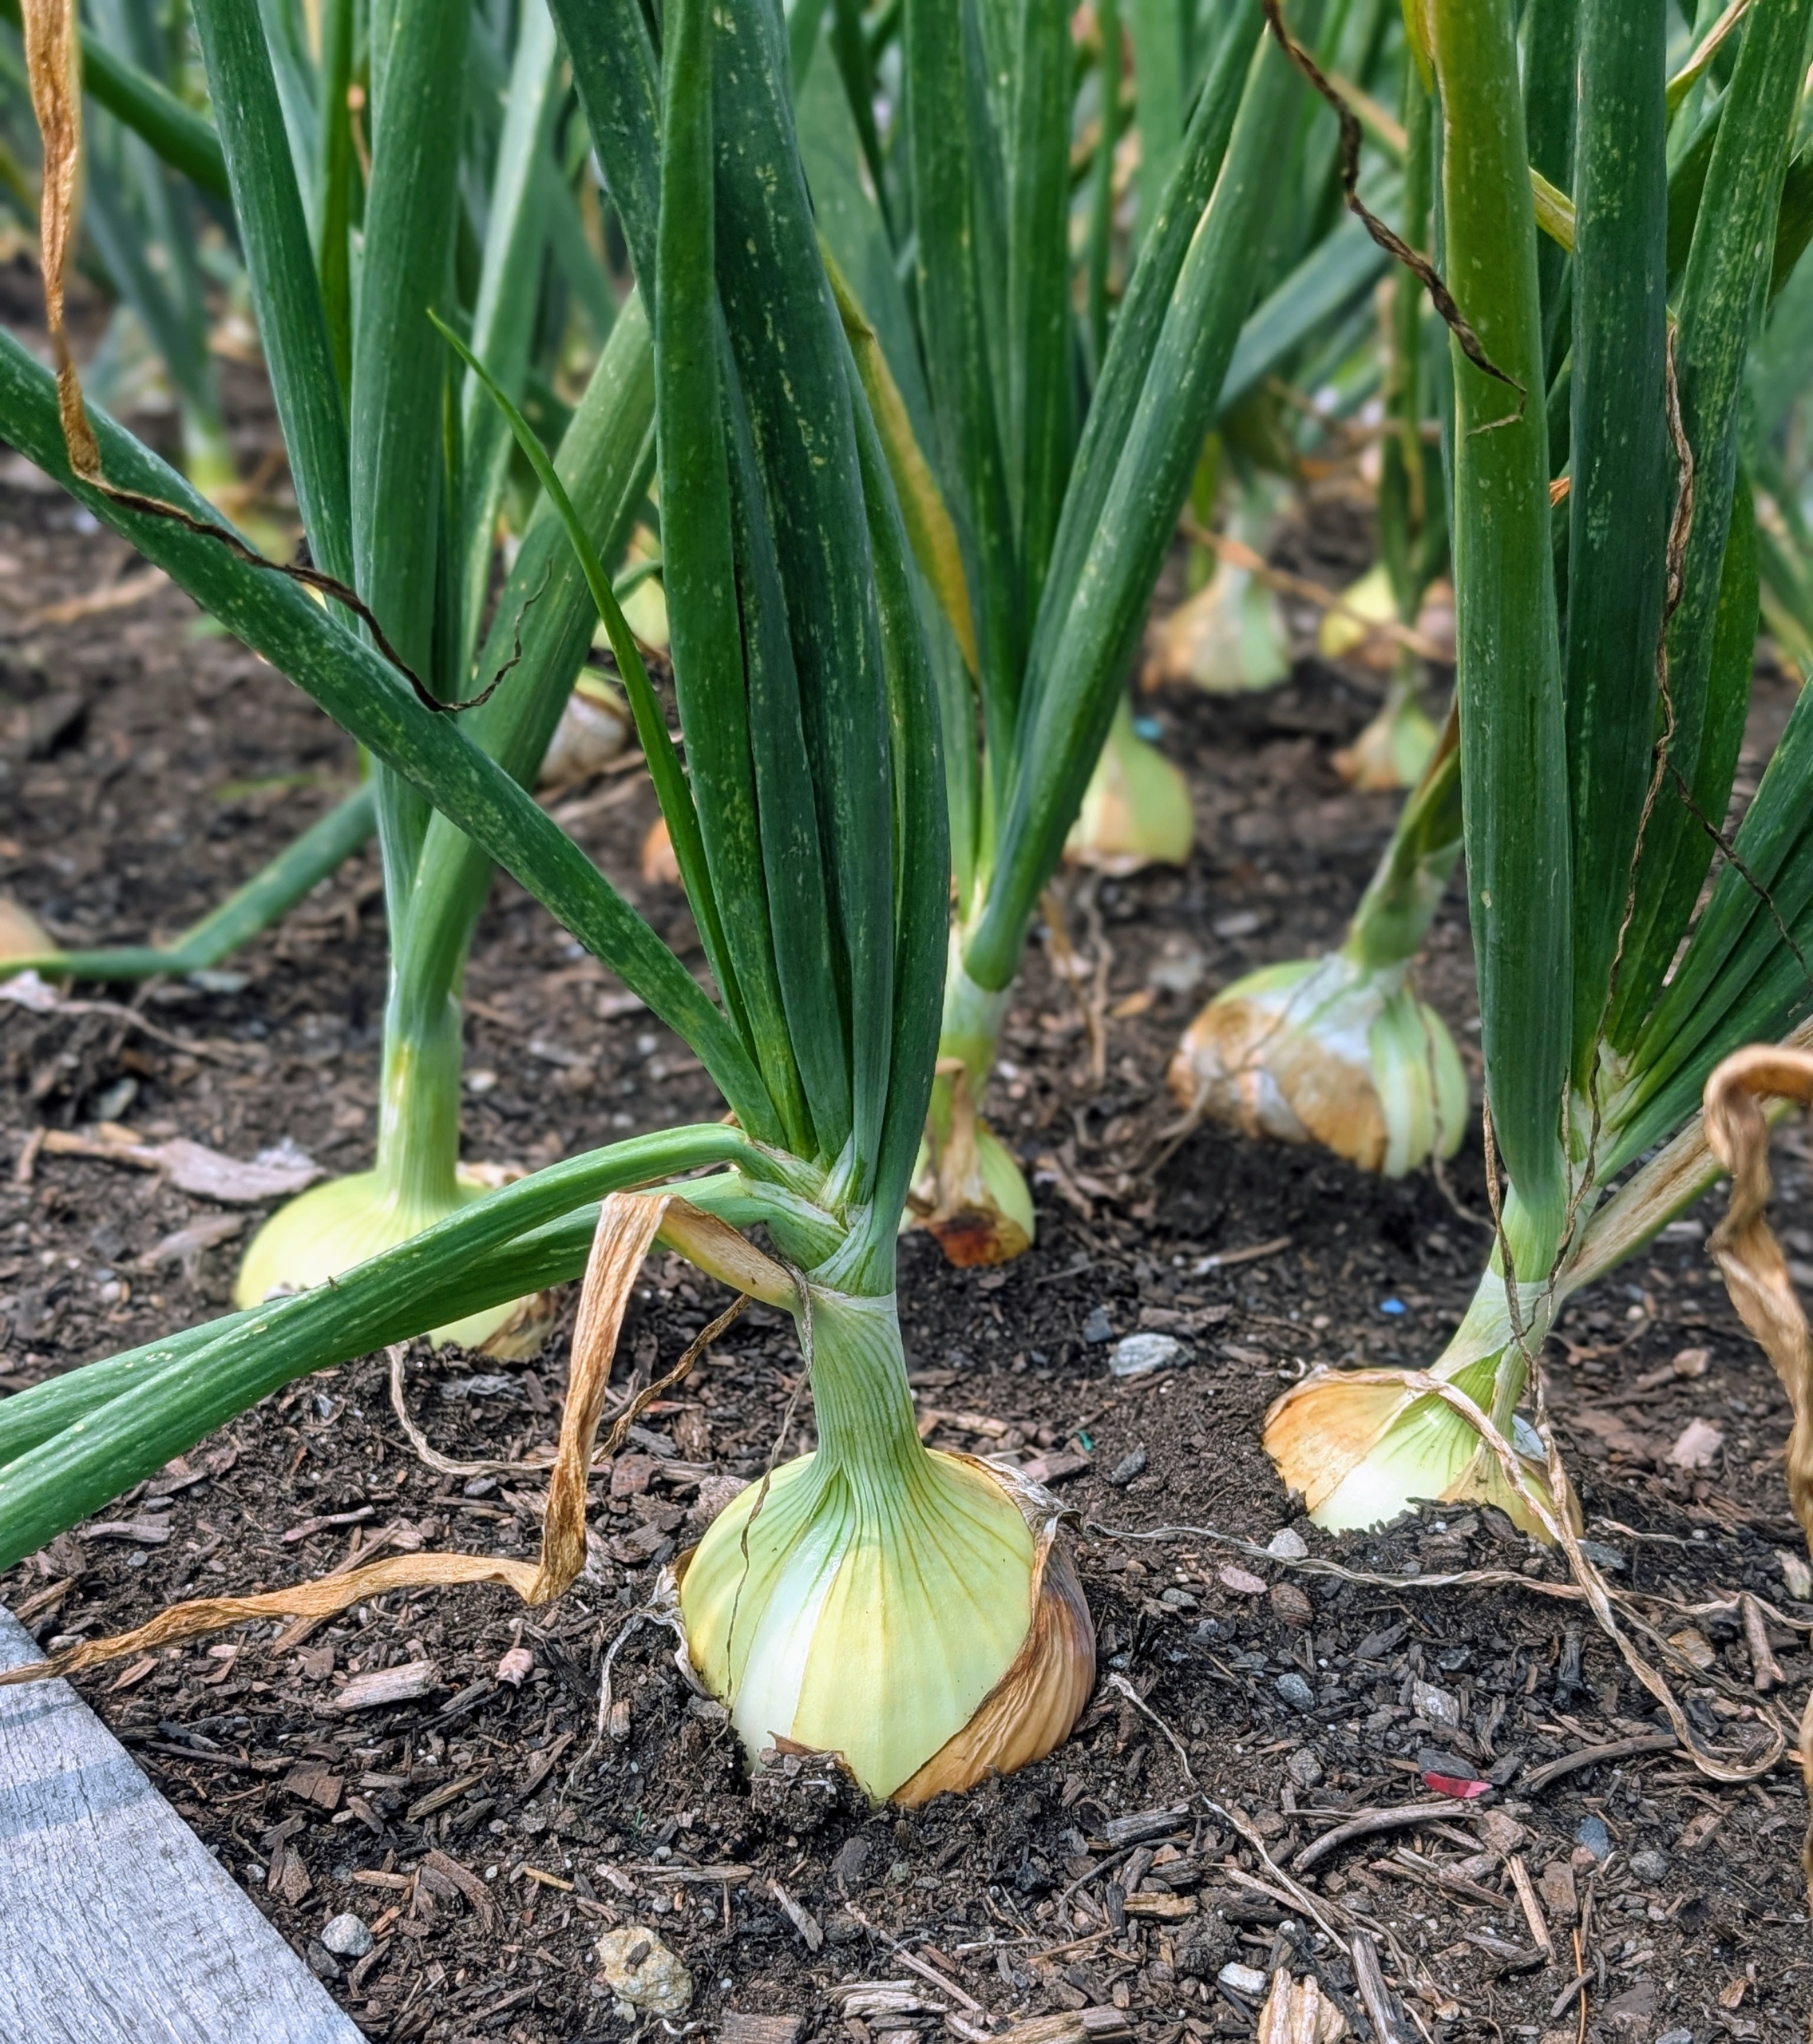
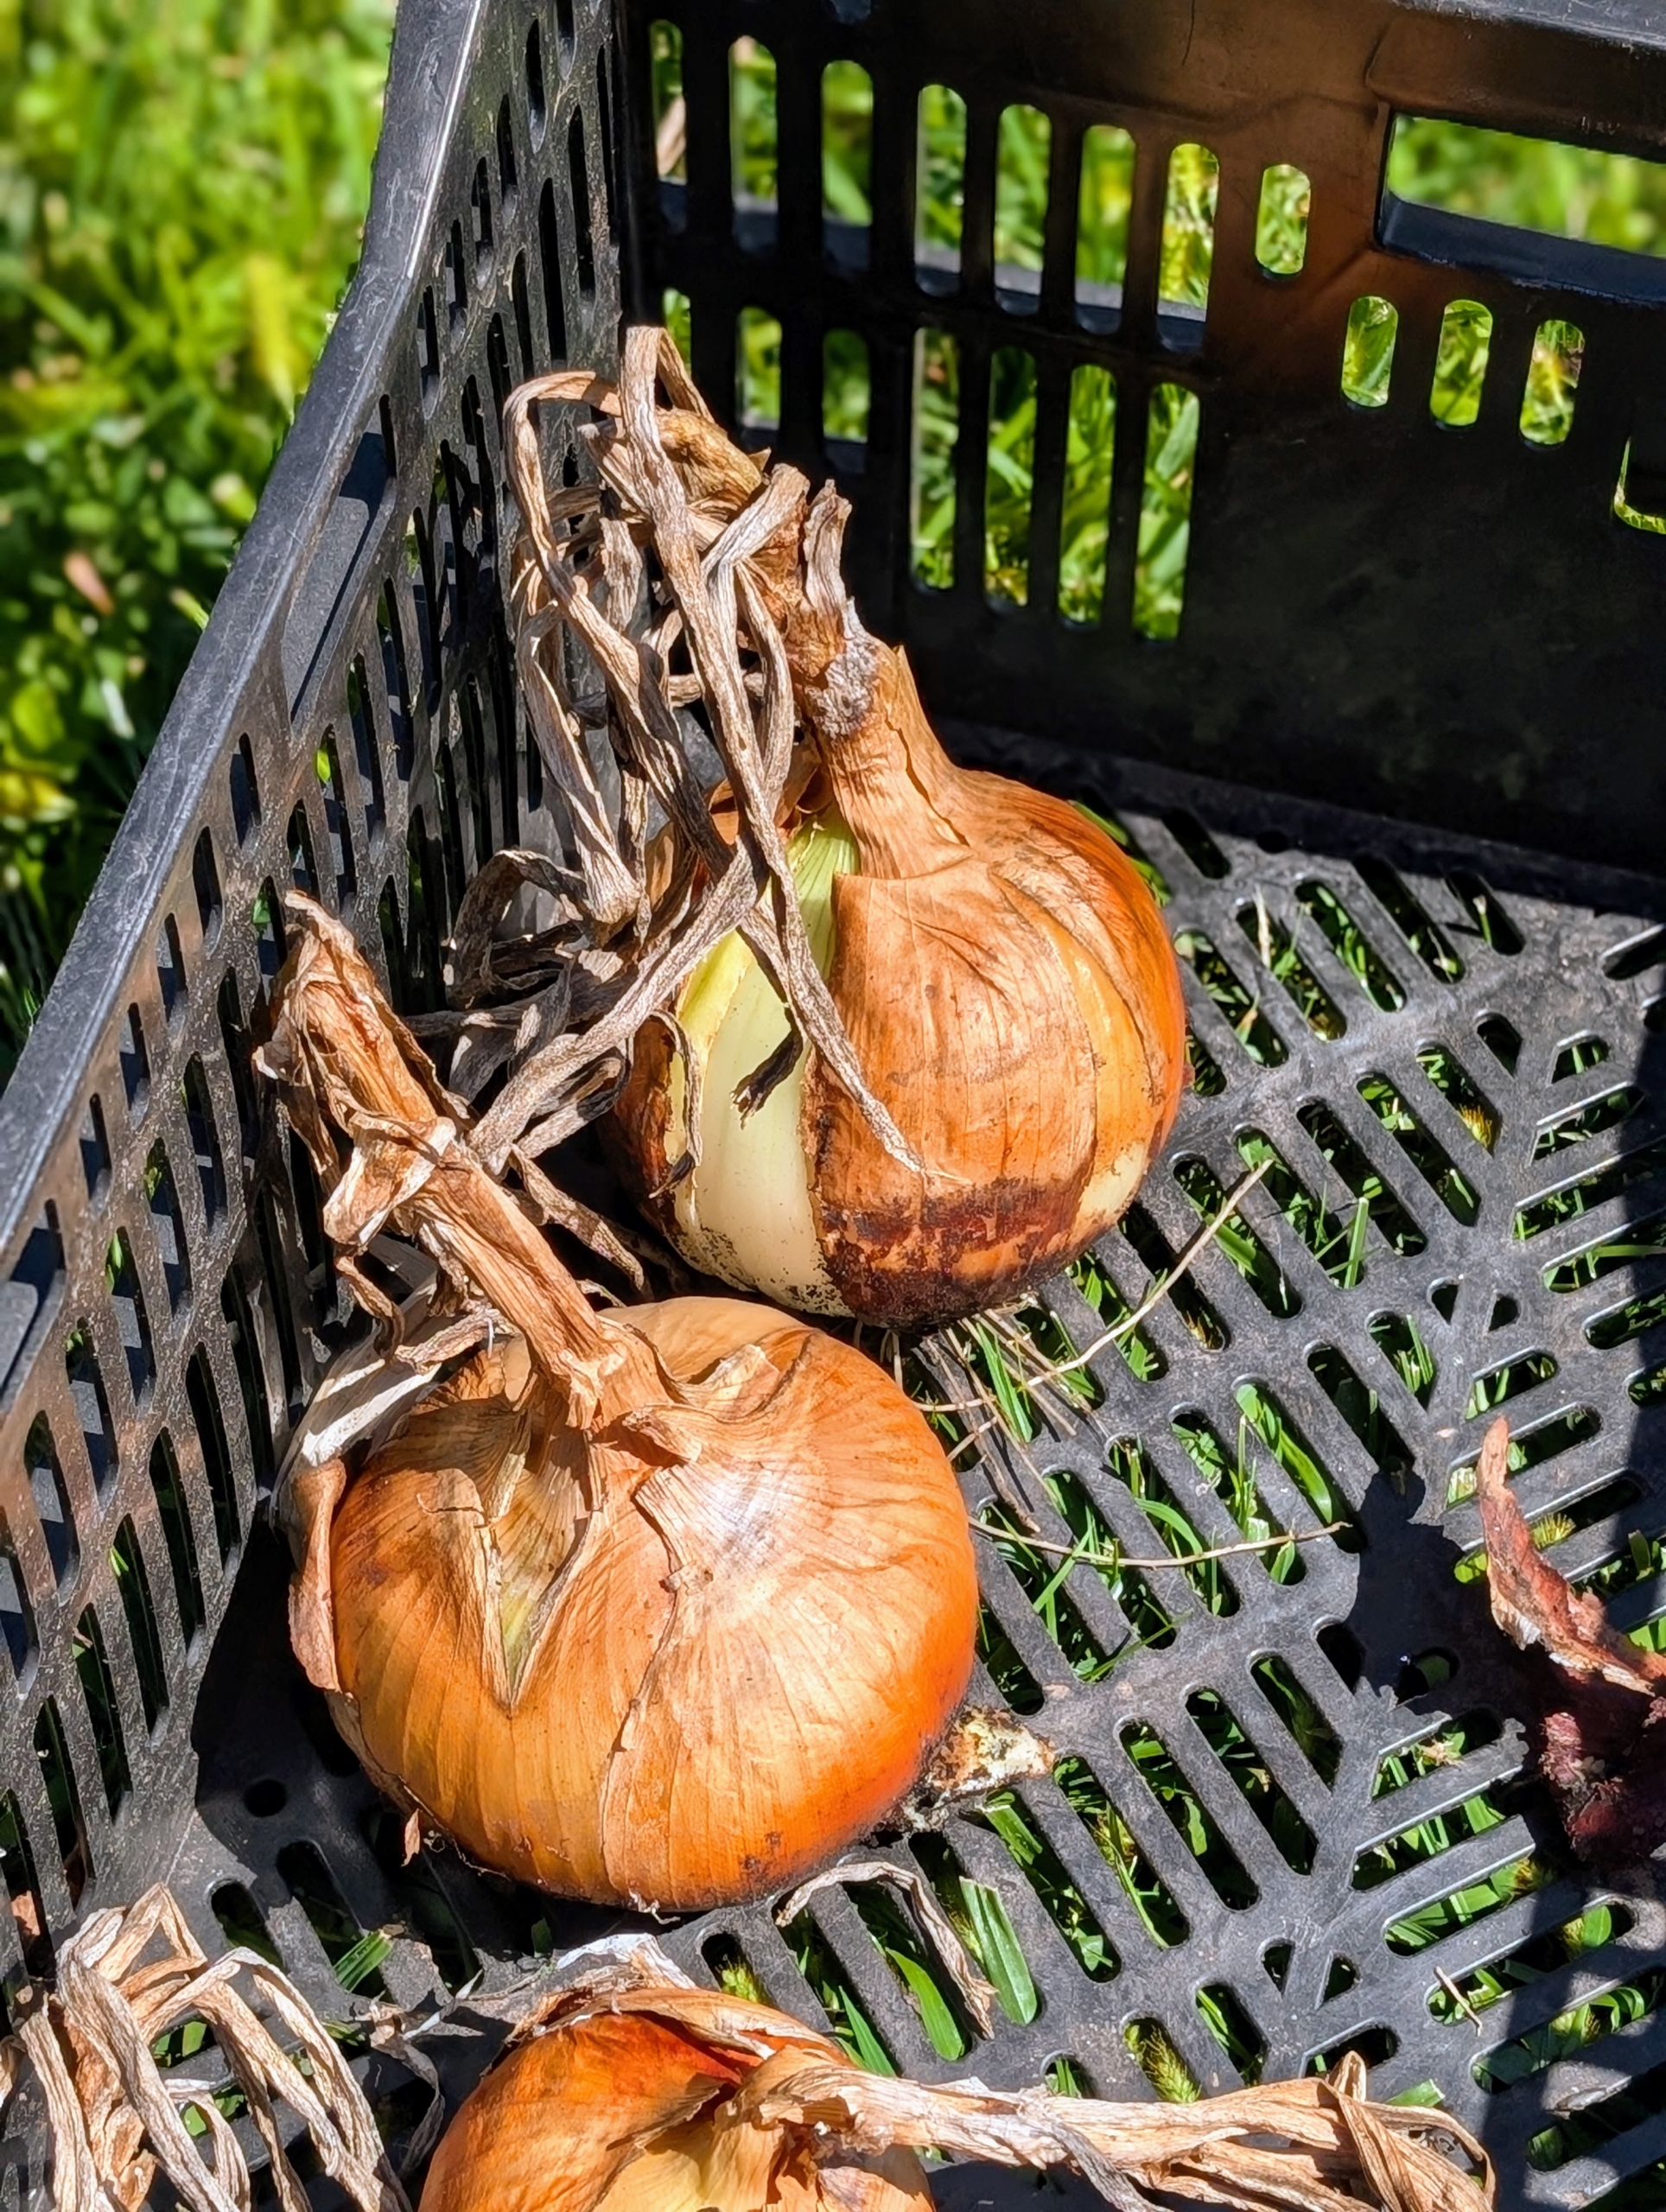
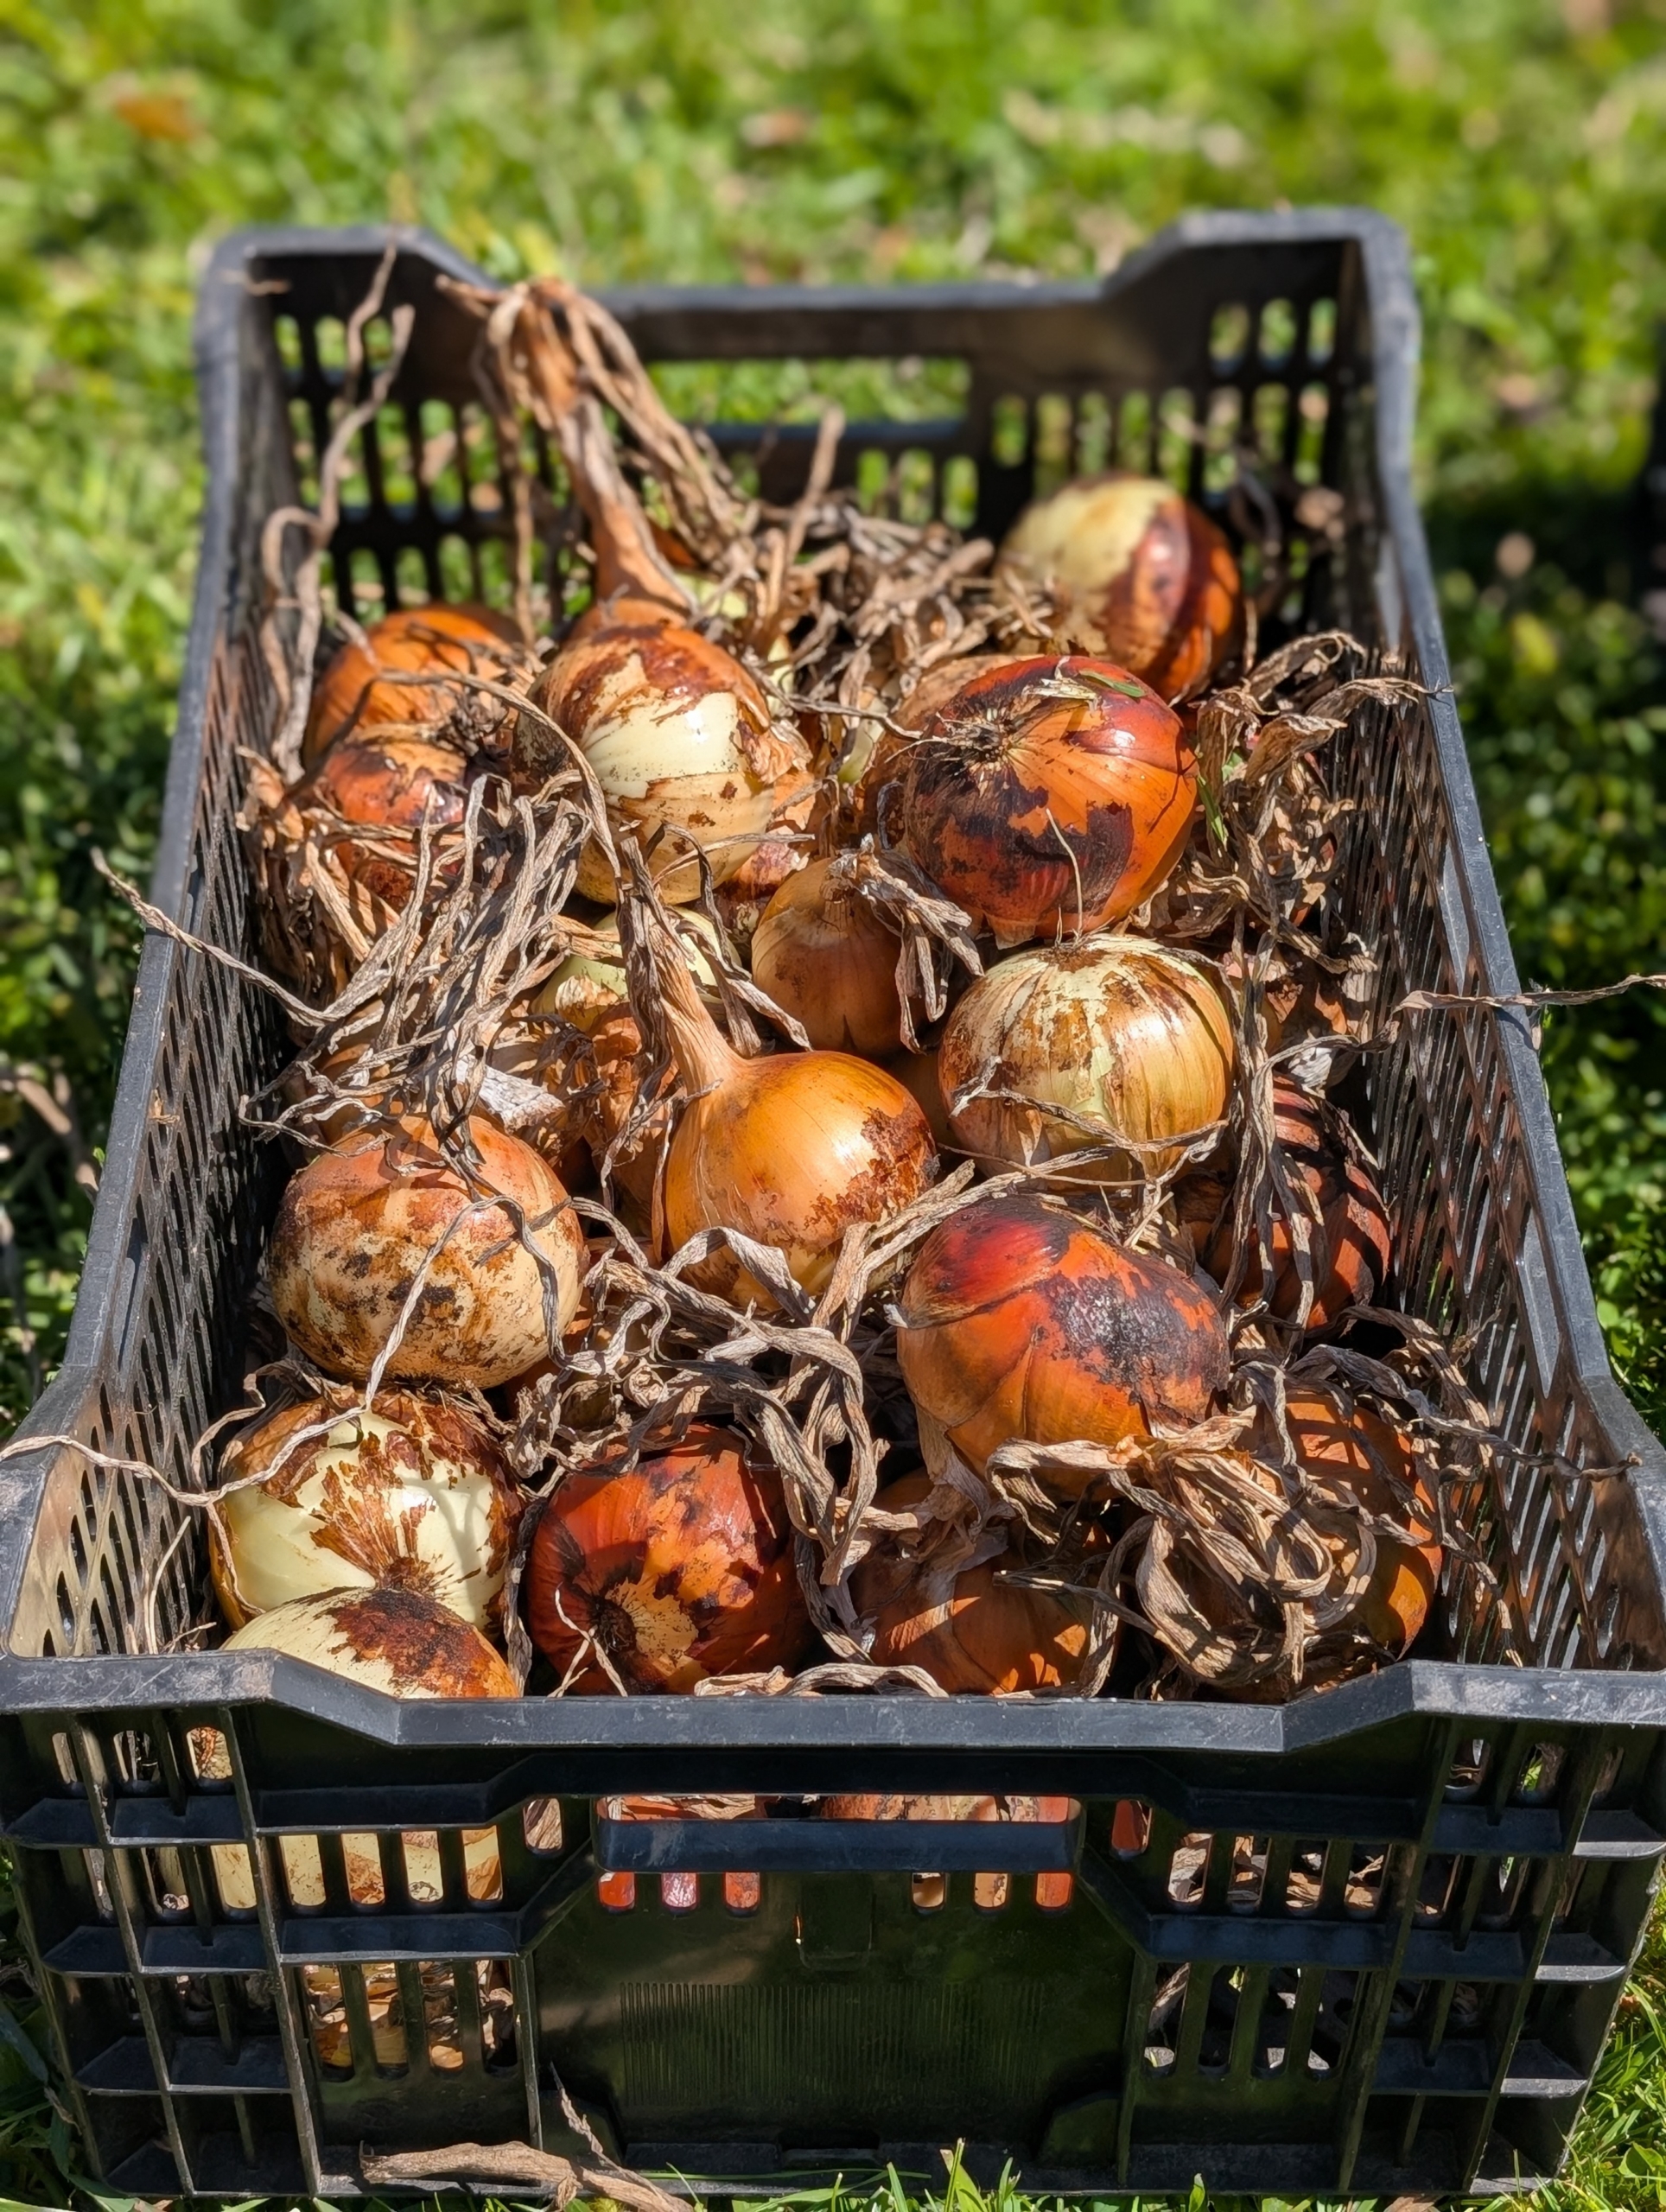
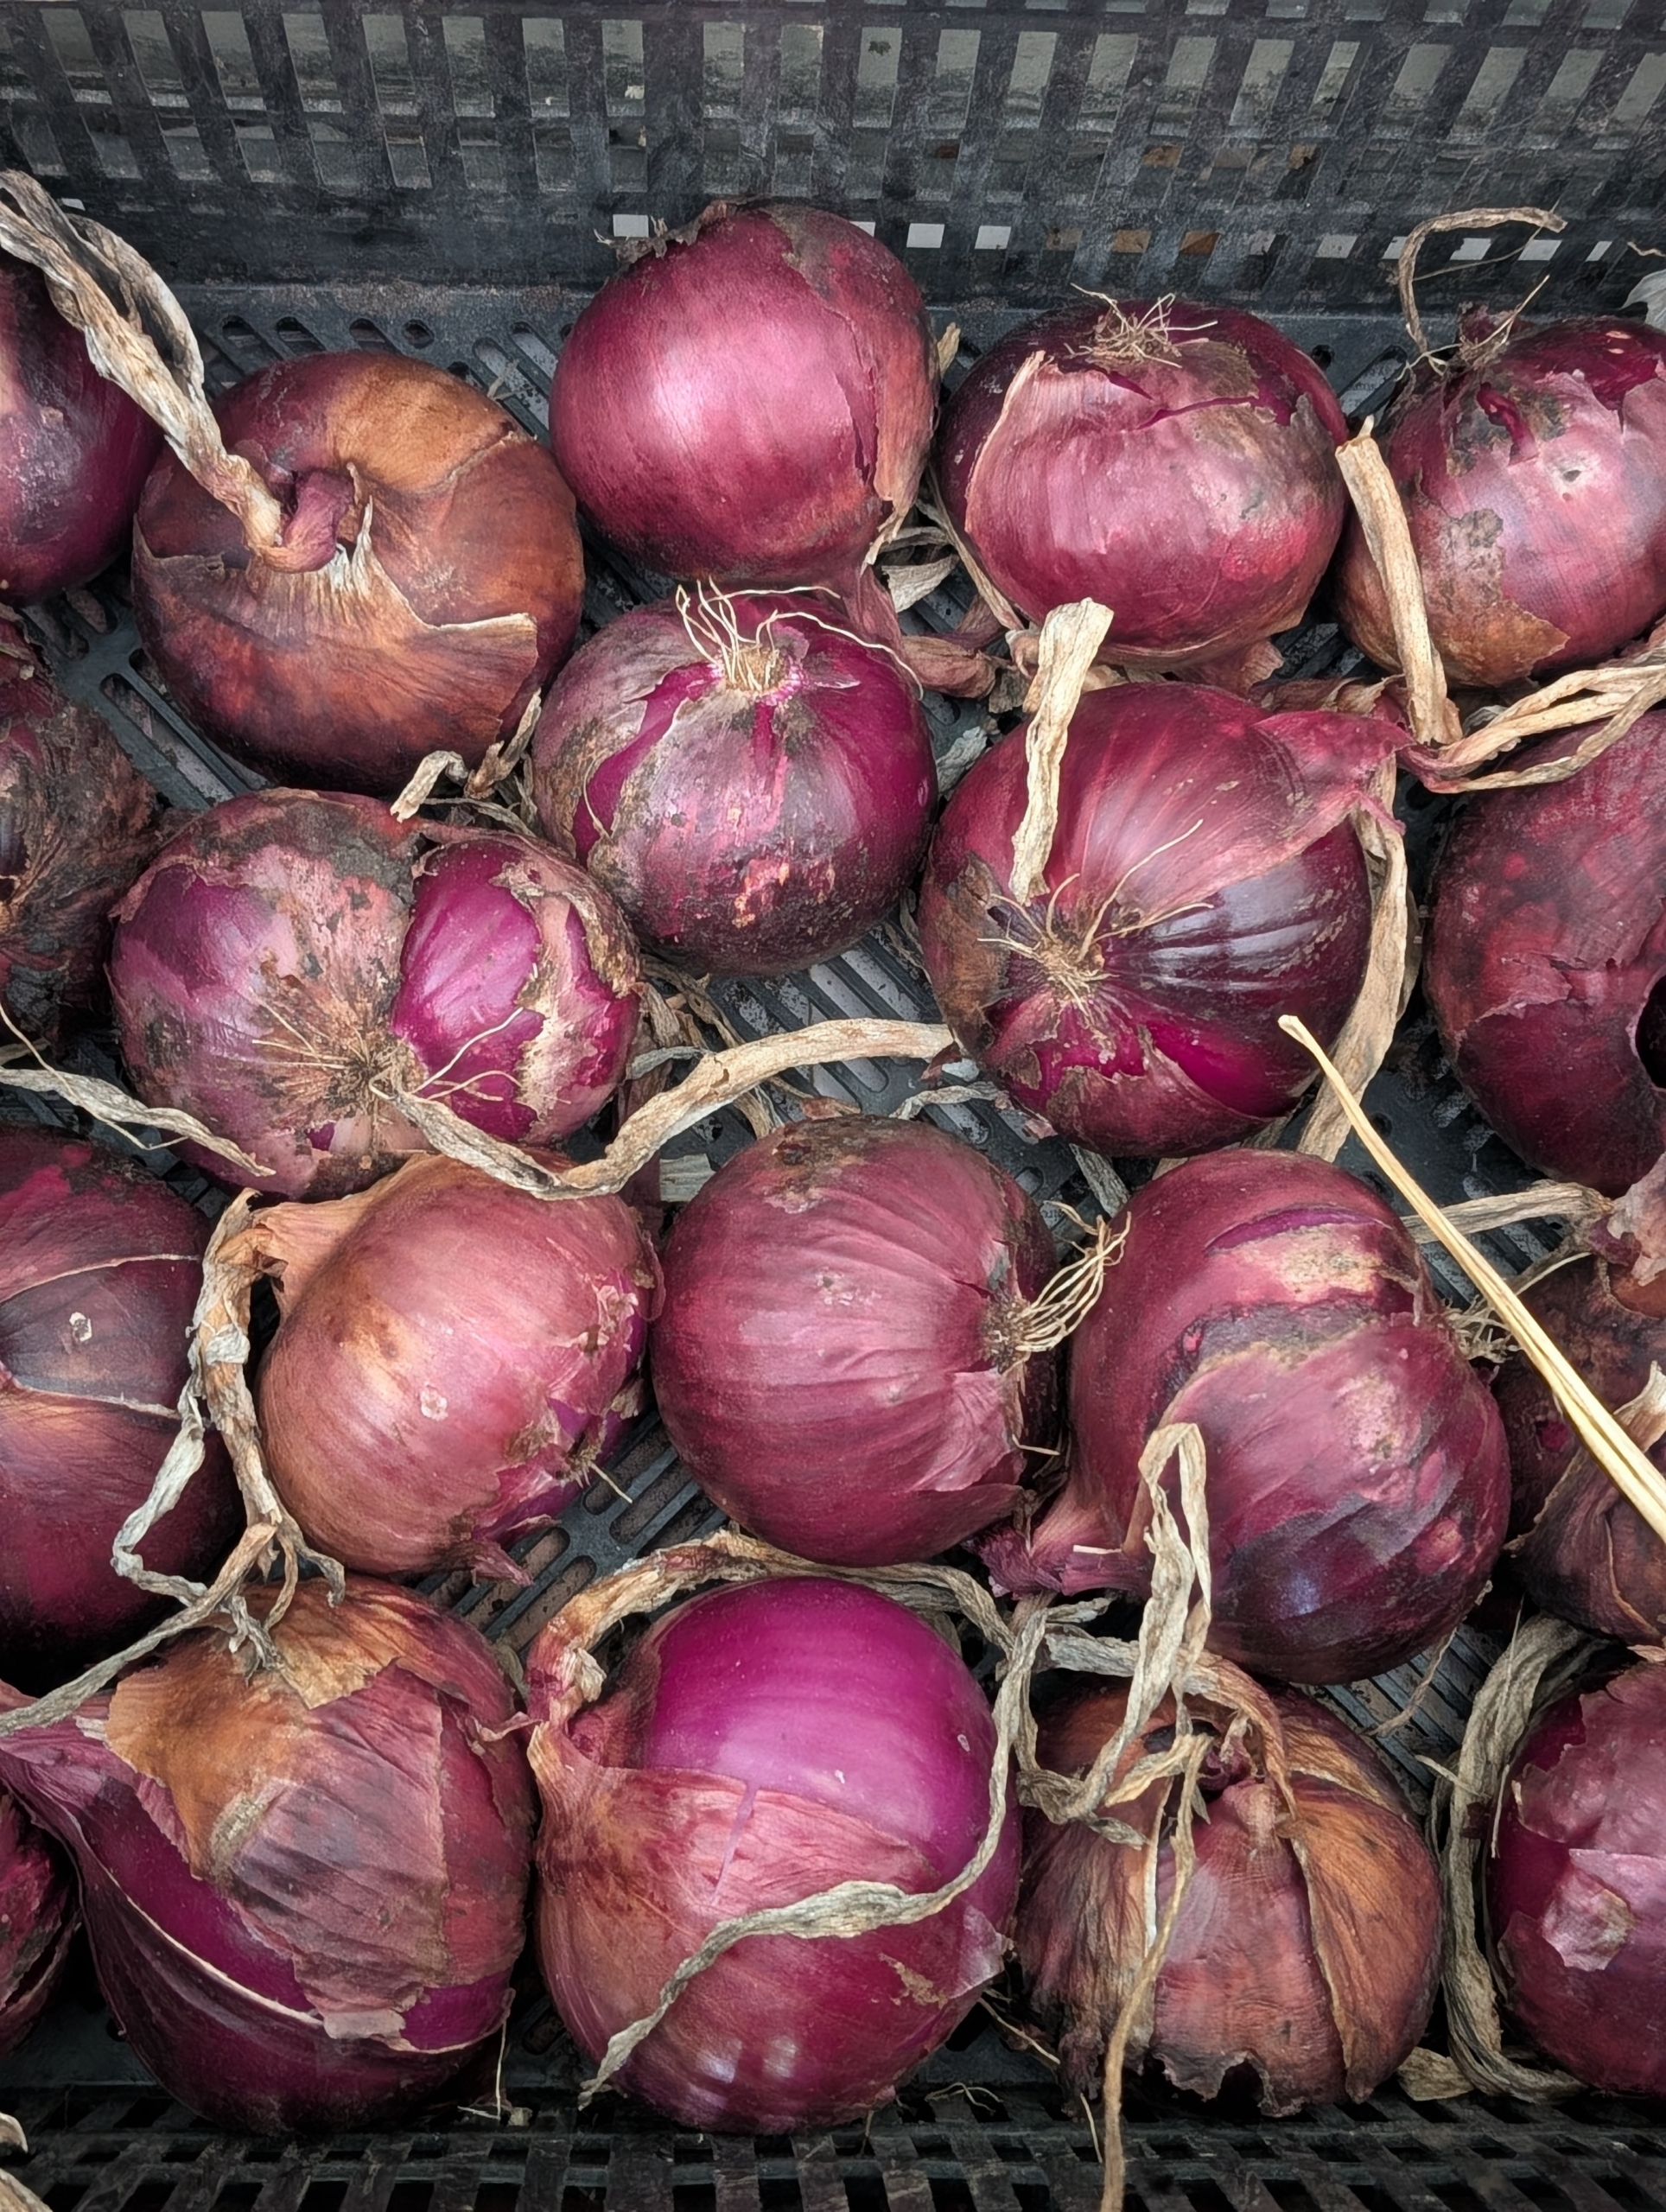
Most of these onions are medium to large in size.
Fortunately, very few animals eat garden onions.
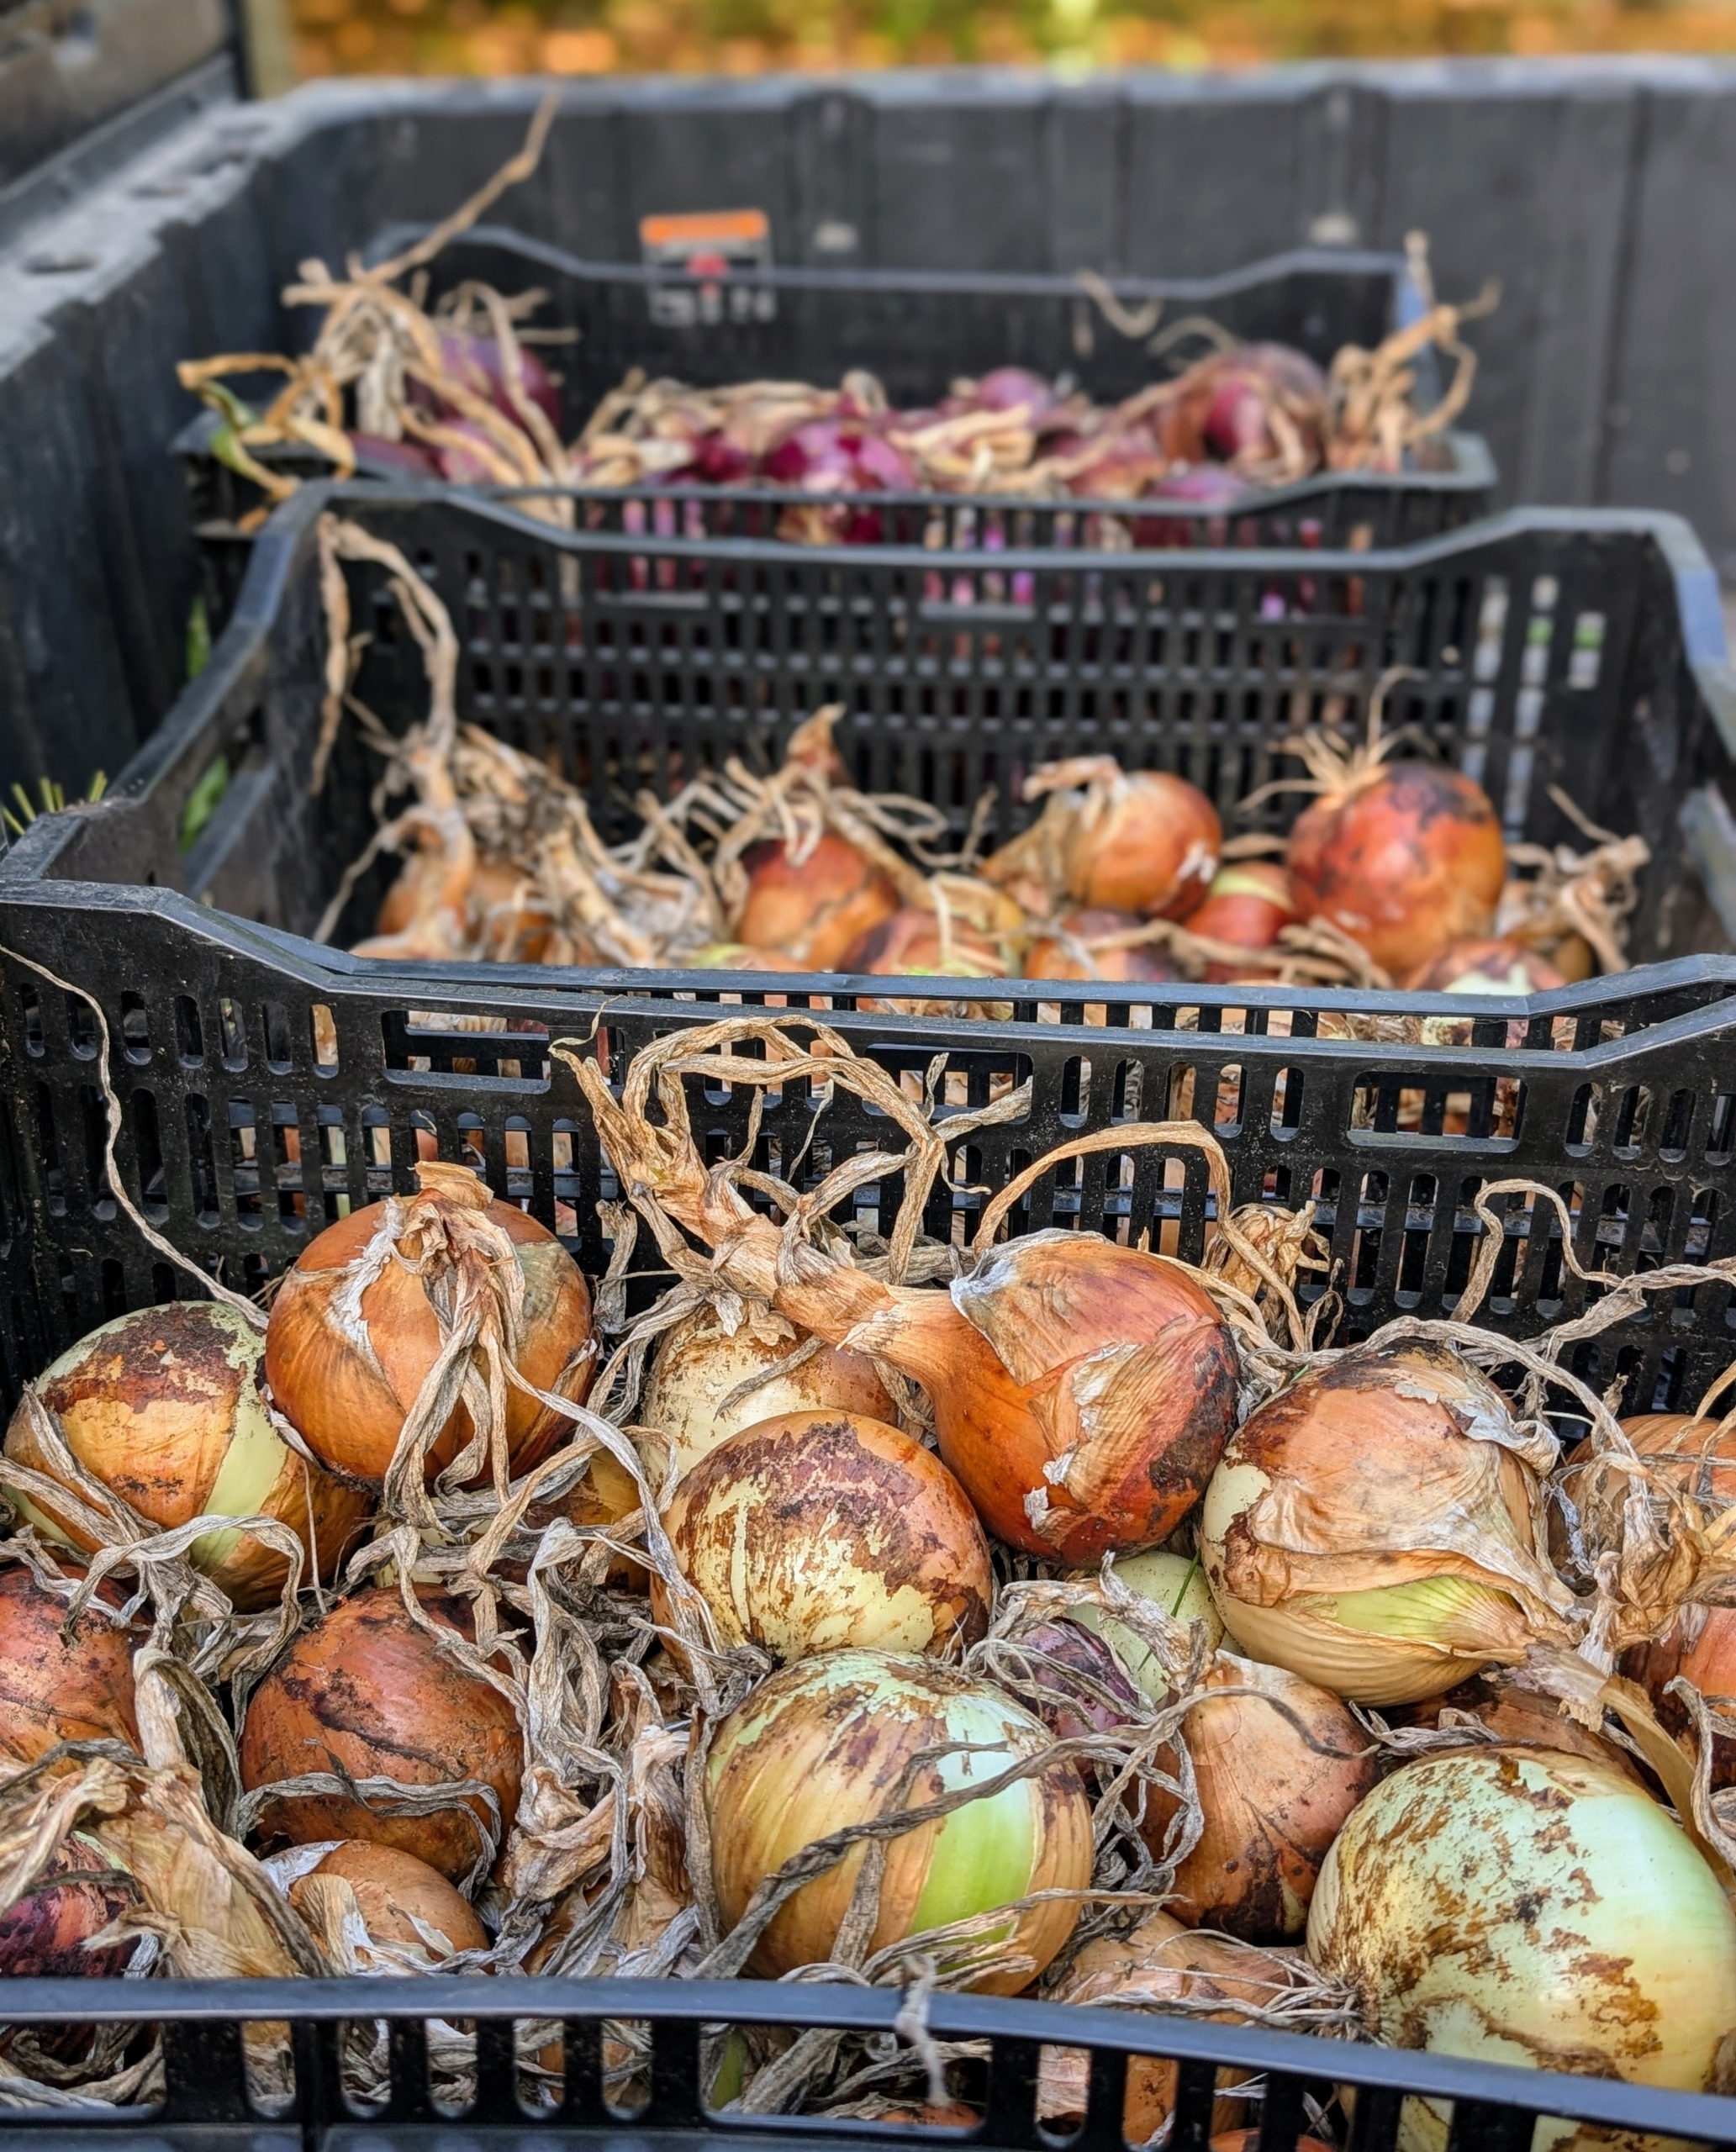
Enma fills the crates. When picking, use containers that provide good air circulation such as these milk crates.
Be sure to pick onions when they are dry, meaning never after a rain shower. Picking them whey they are dry prevents spoilage.
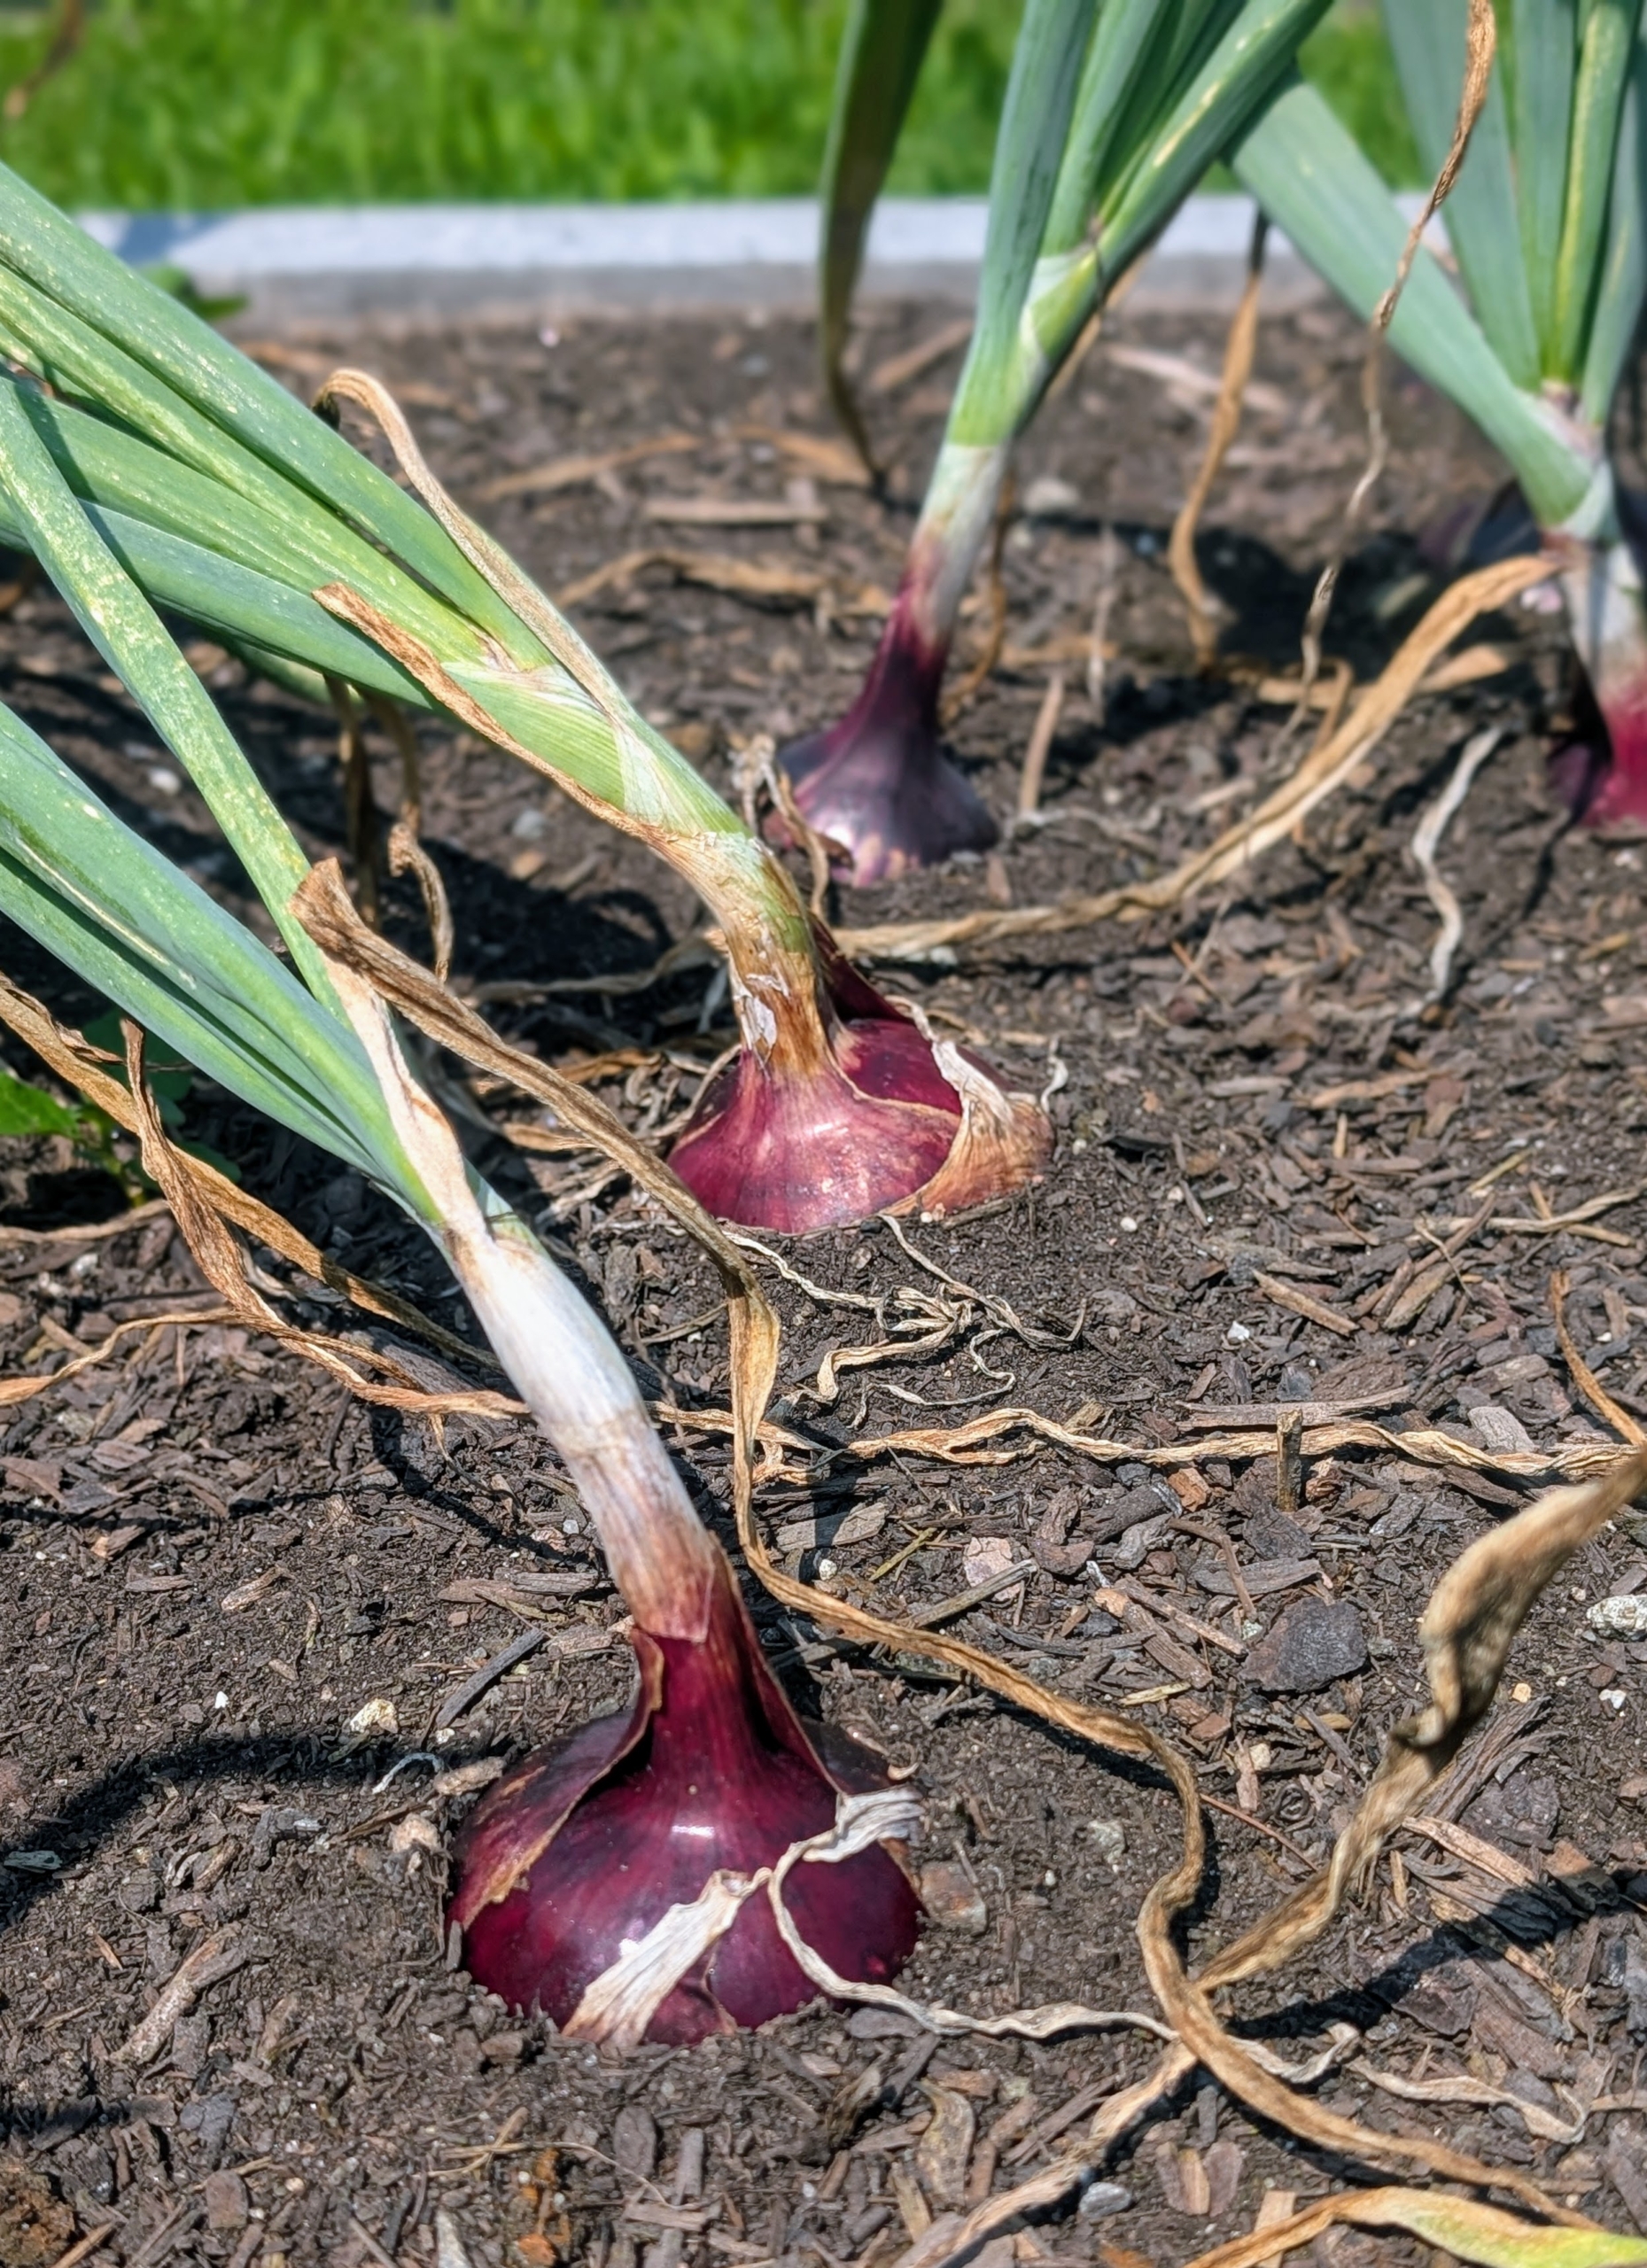
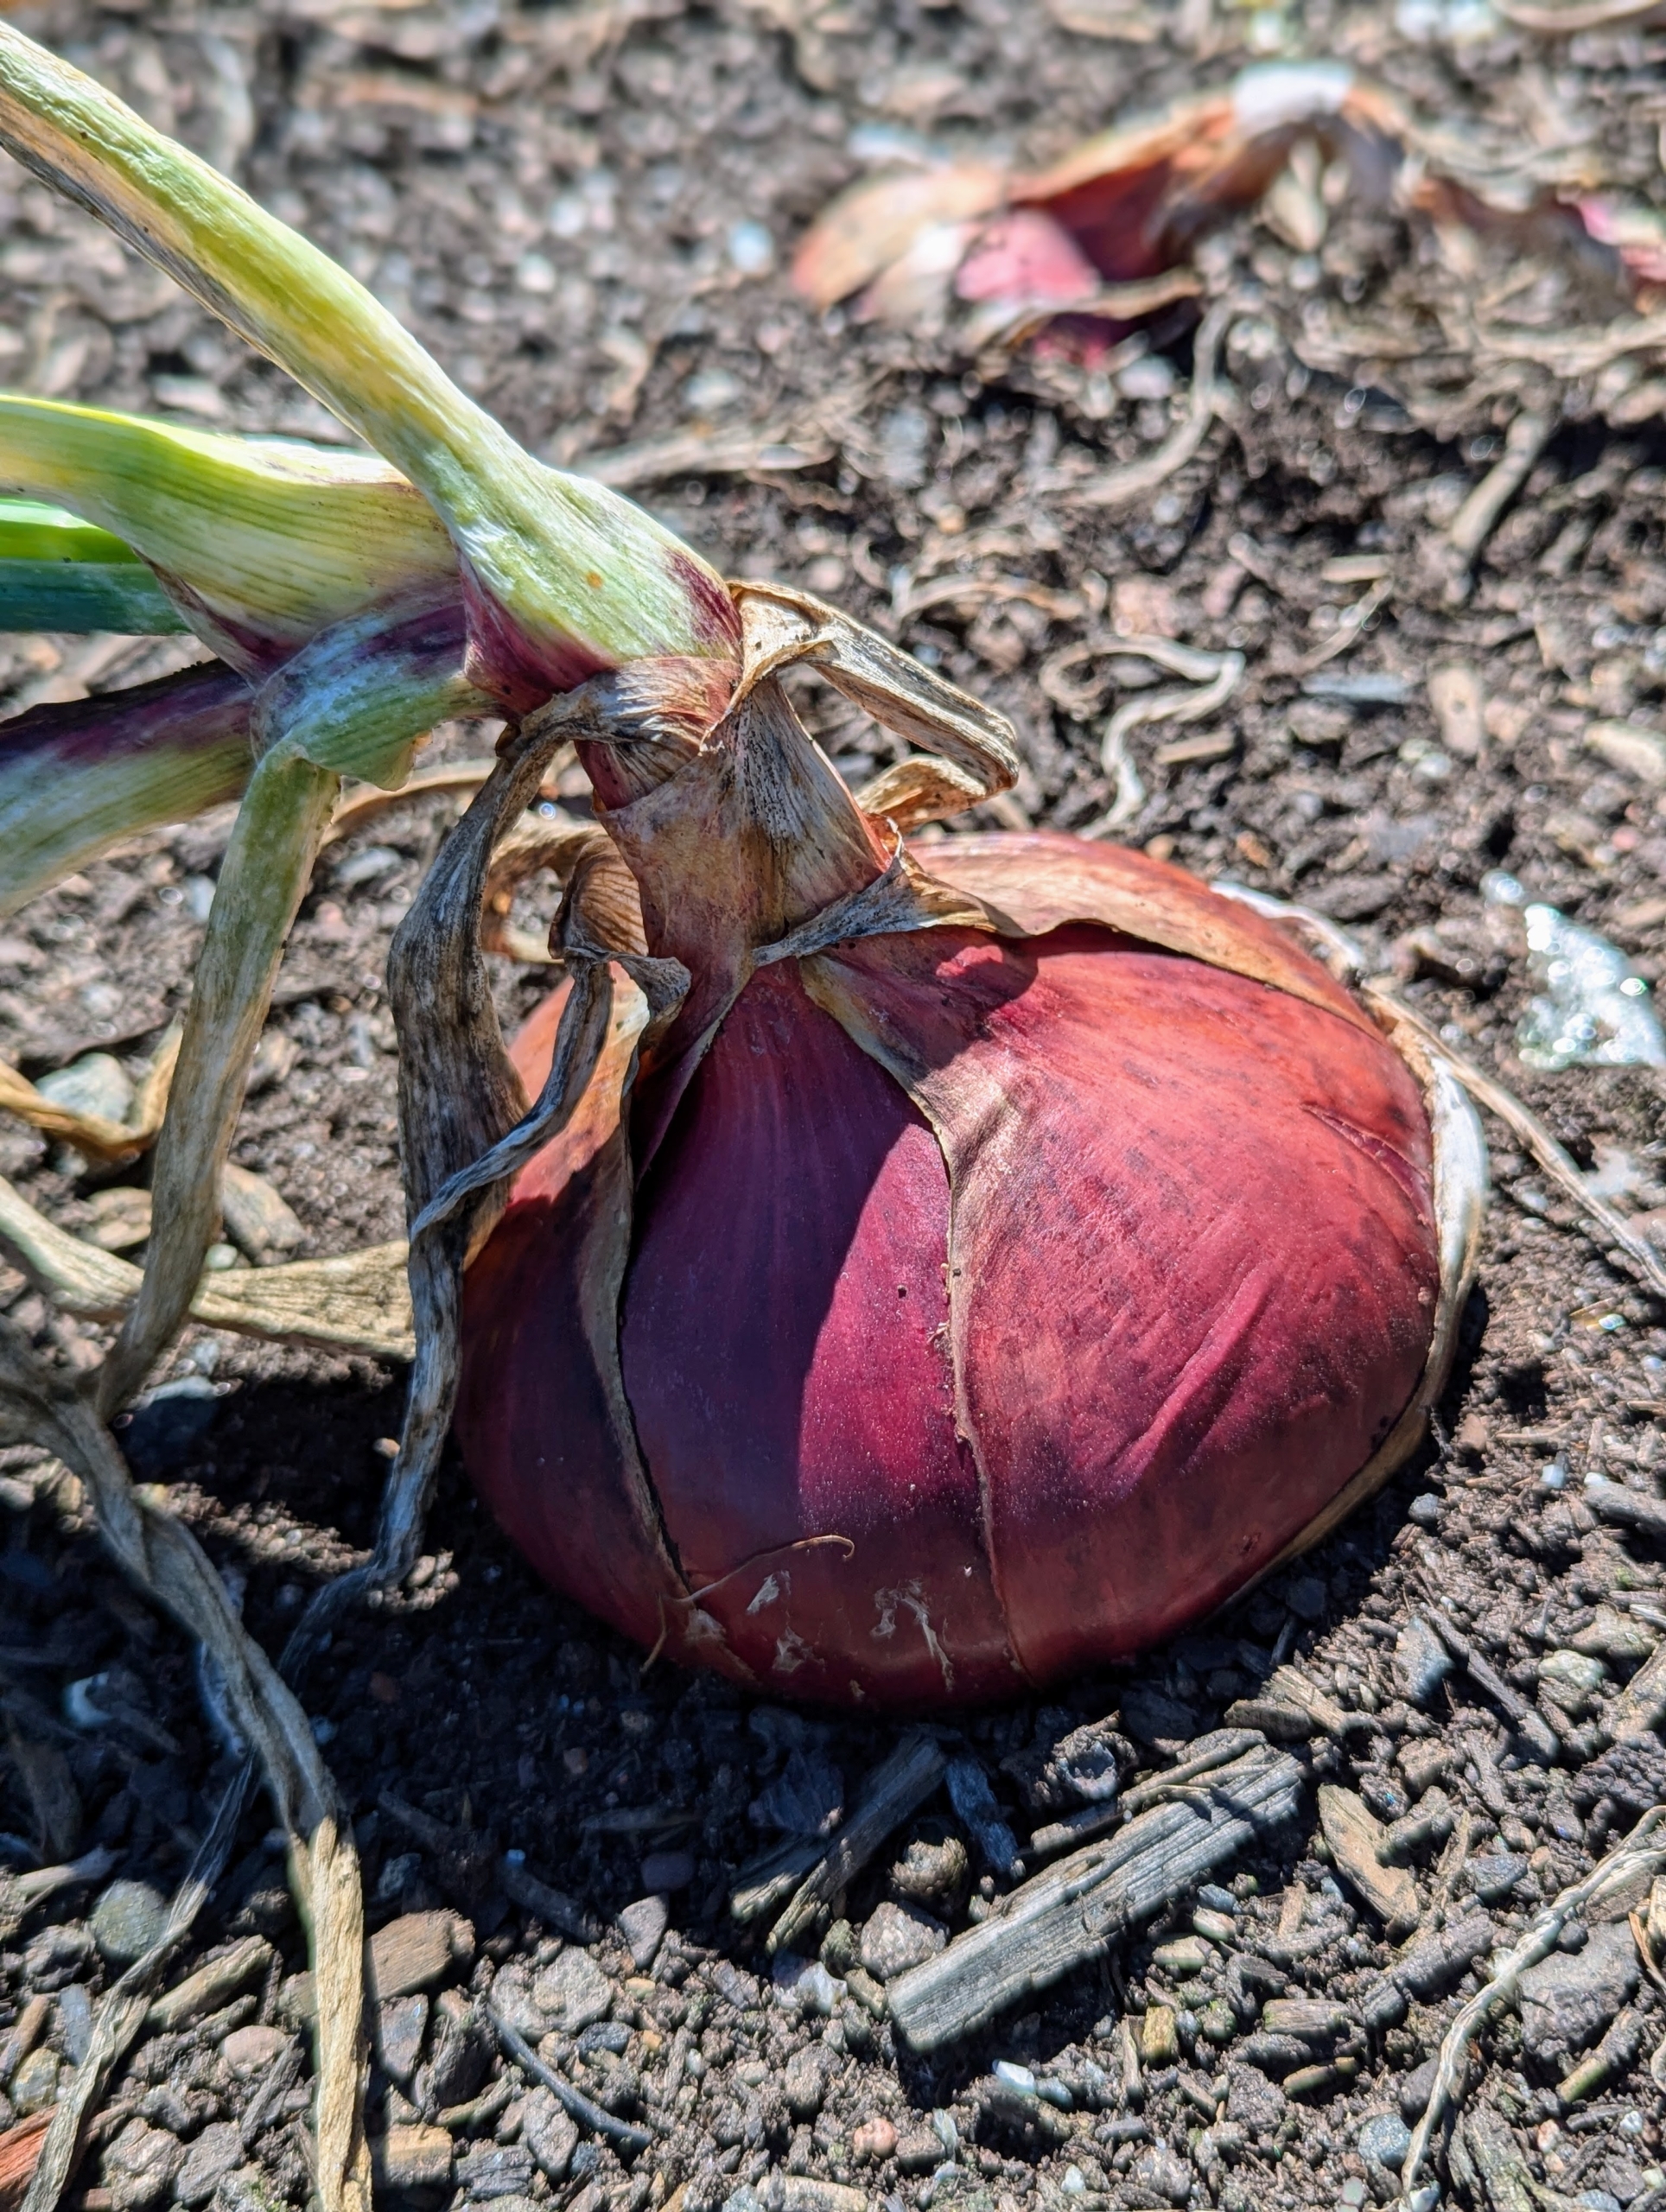
Elvira picked lots of red onions, which are most often used for their color and mild flavor in salads, salsas, and other raw preparations.
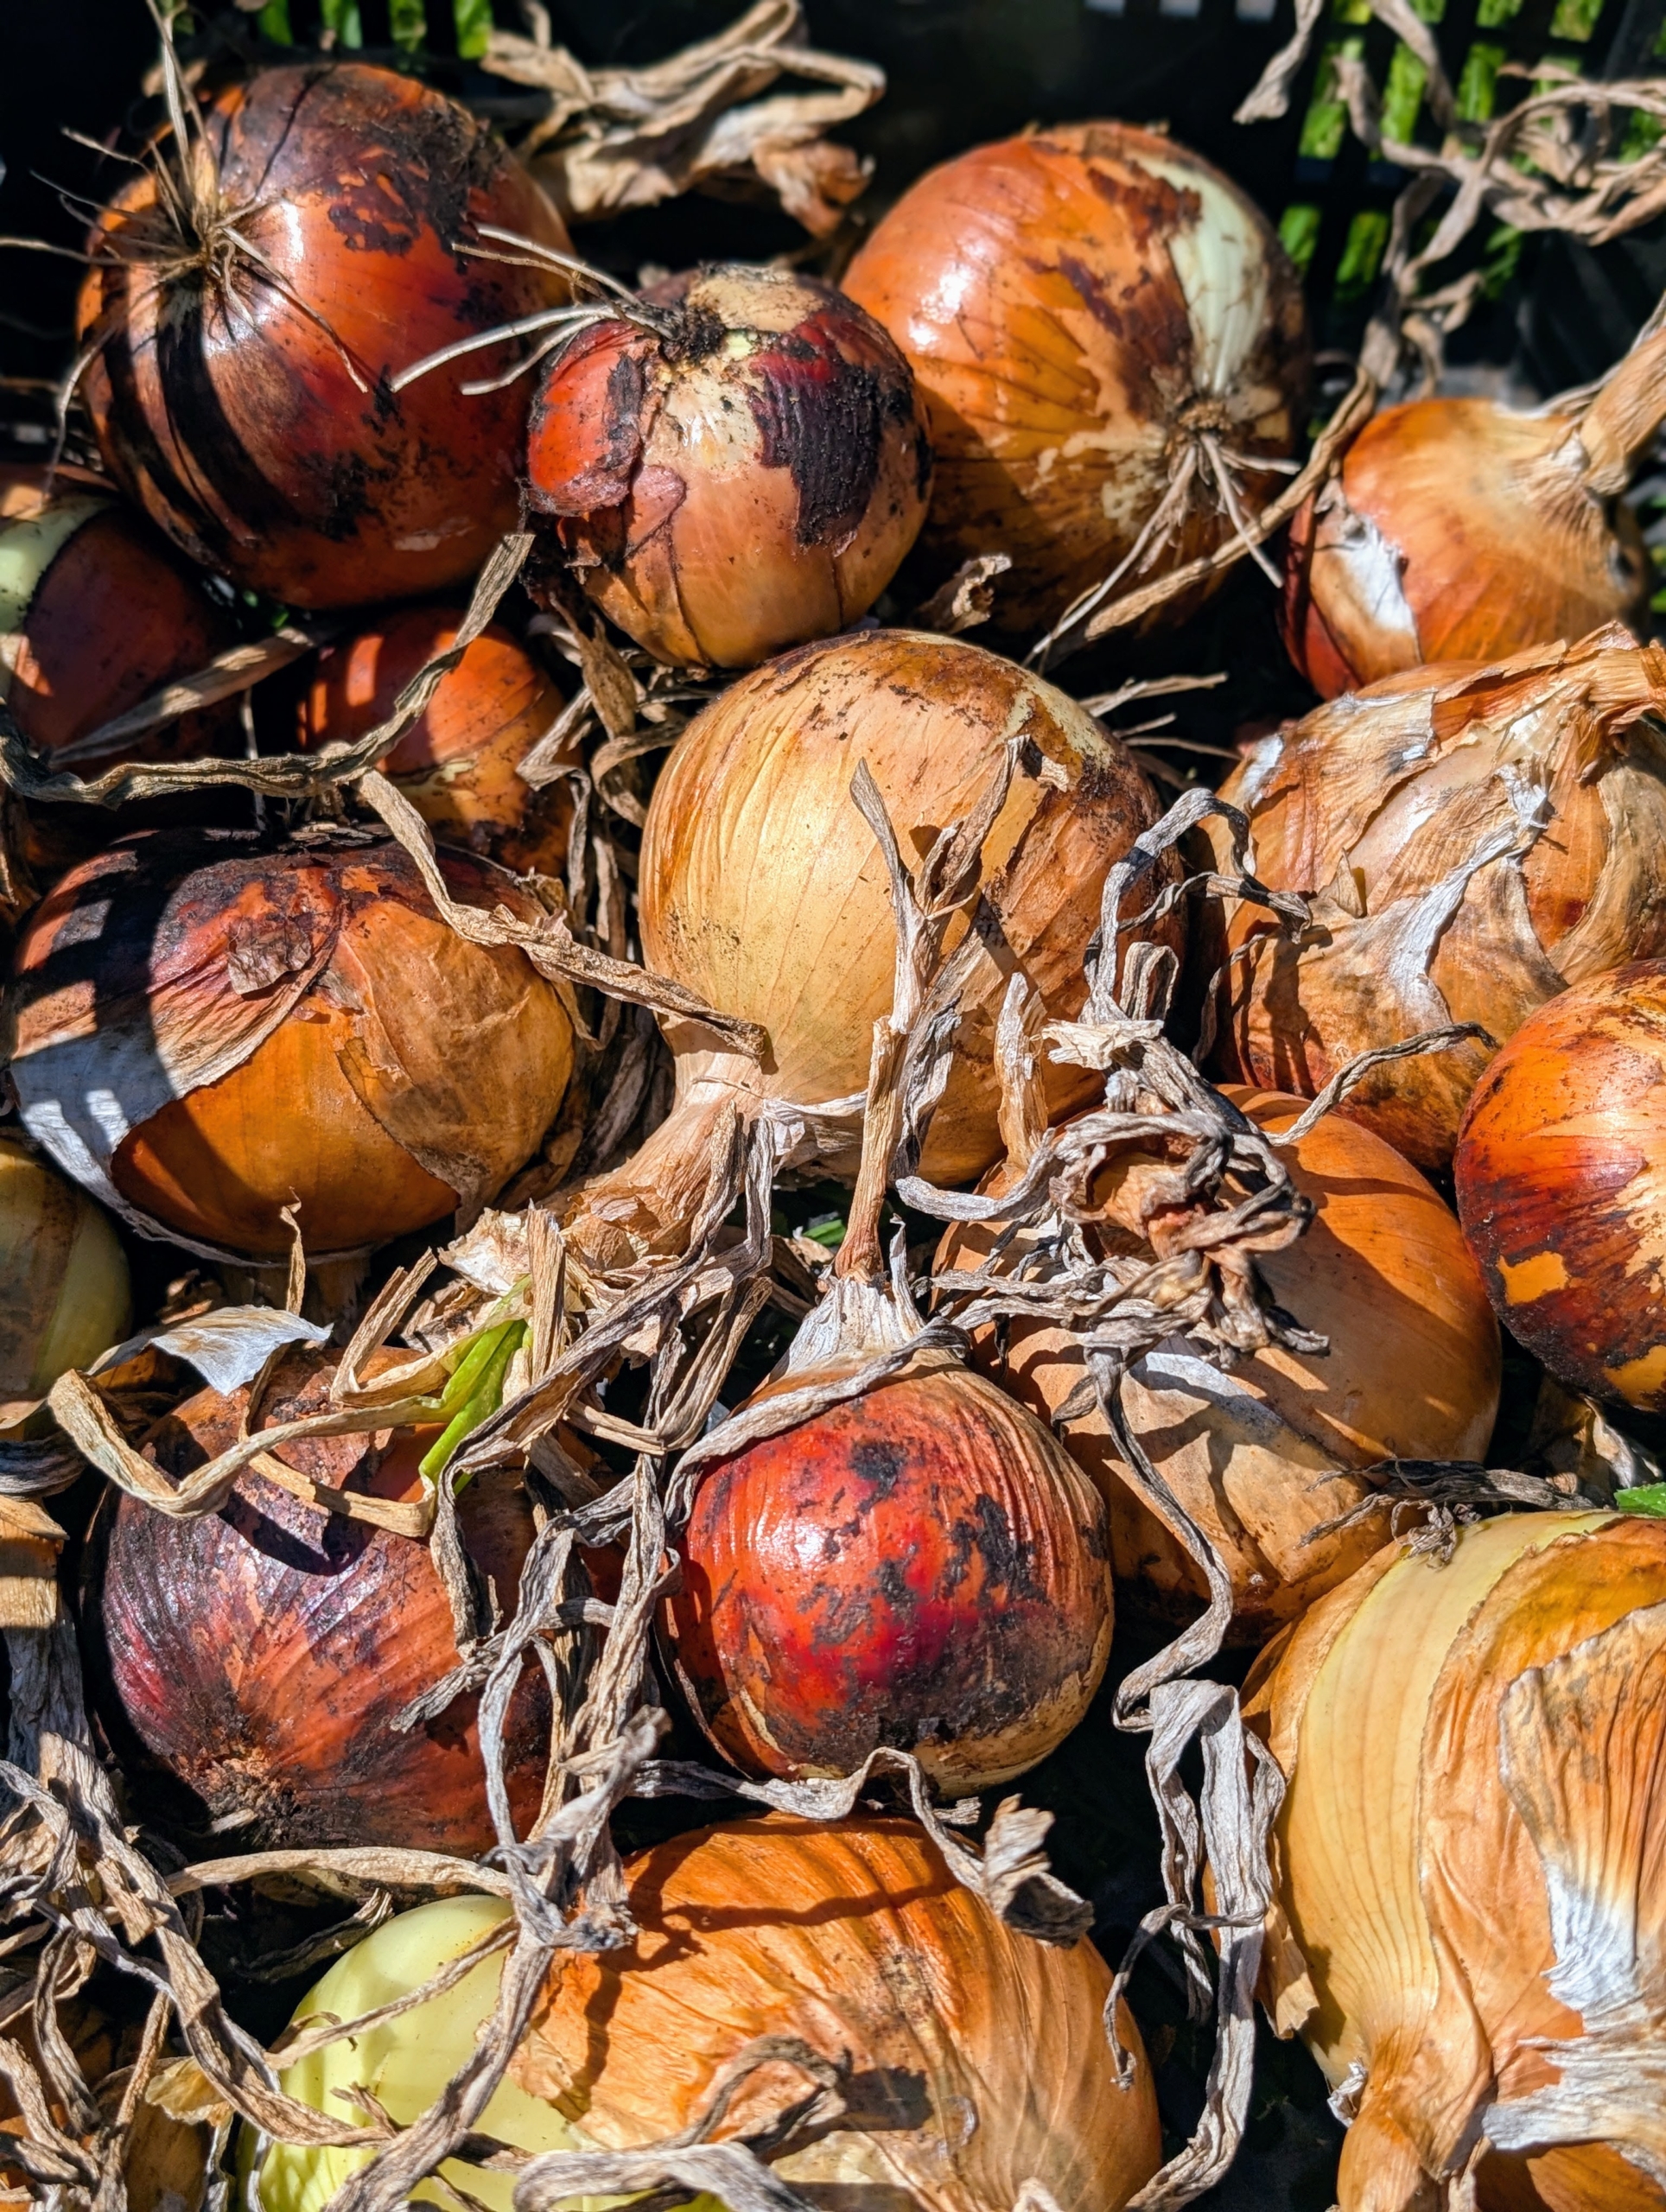
Yellow onions are full-flavored and are a reliable standby for cooking almost anything. White onions are often used in prepared salads, white sauces, and classic Mexican cuisine. They’re also loved in soups, stews, braises, and rice pilaf.
Once all the onions are picked, they are taken to my carport where they can cure. Curing is a process of preparing the onions for long-term storage. During the curing stage, the outer layers of the onions dry out, tightening around the bulb and creating a protective layer that keeps the onion firm and fresh for a longer time.
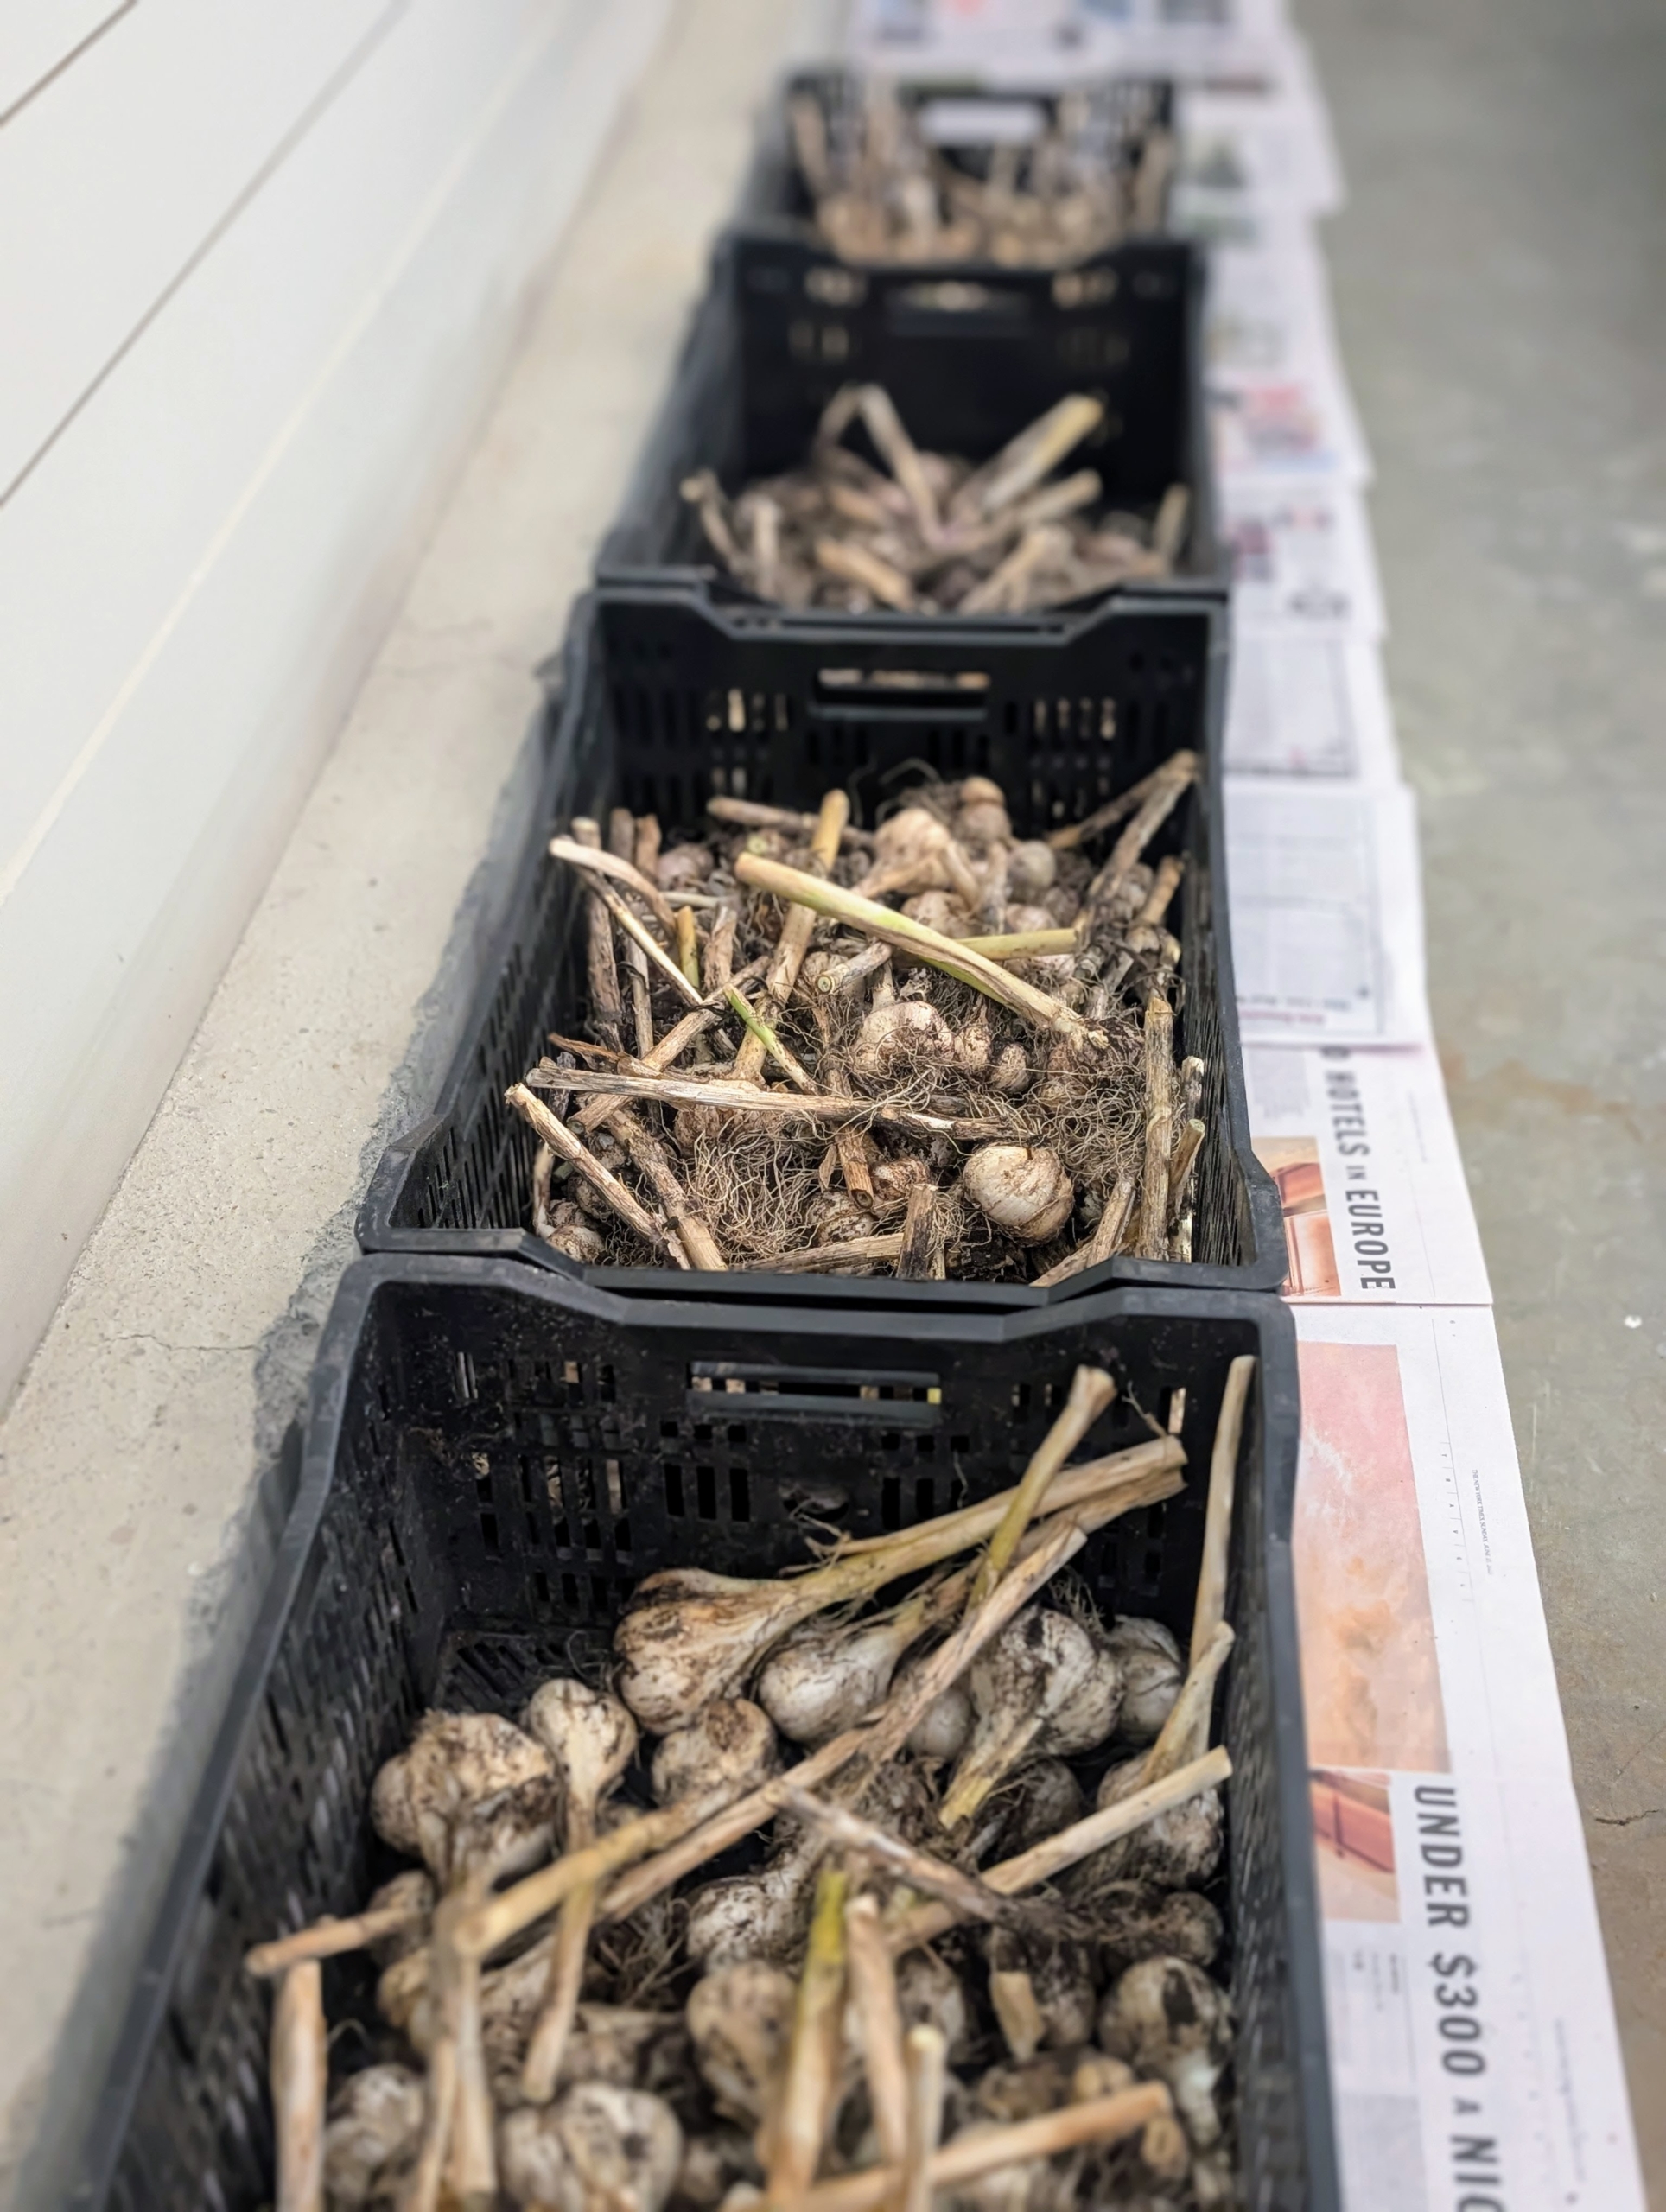
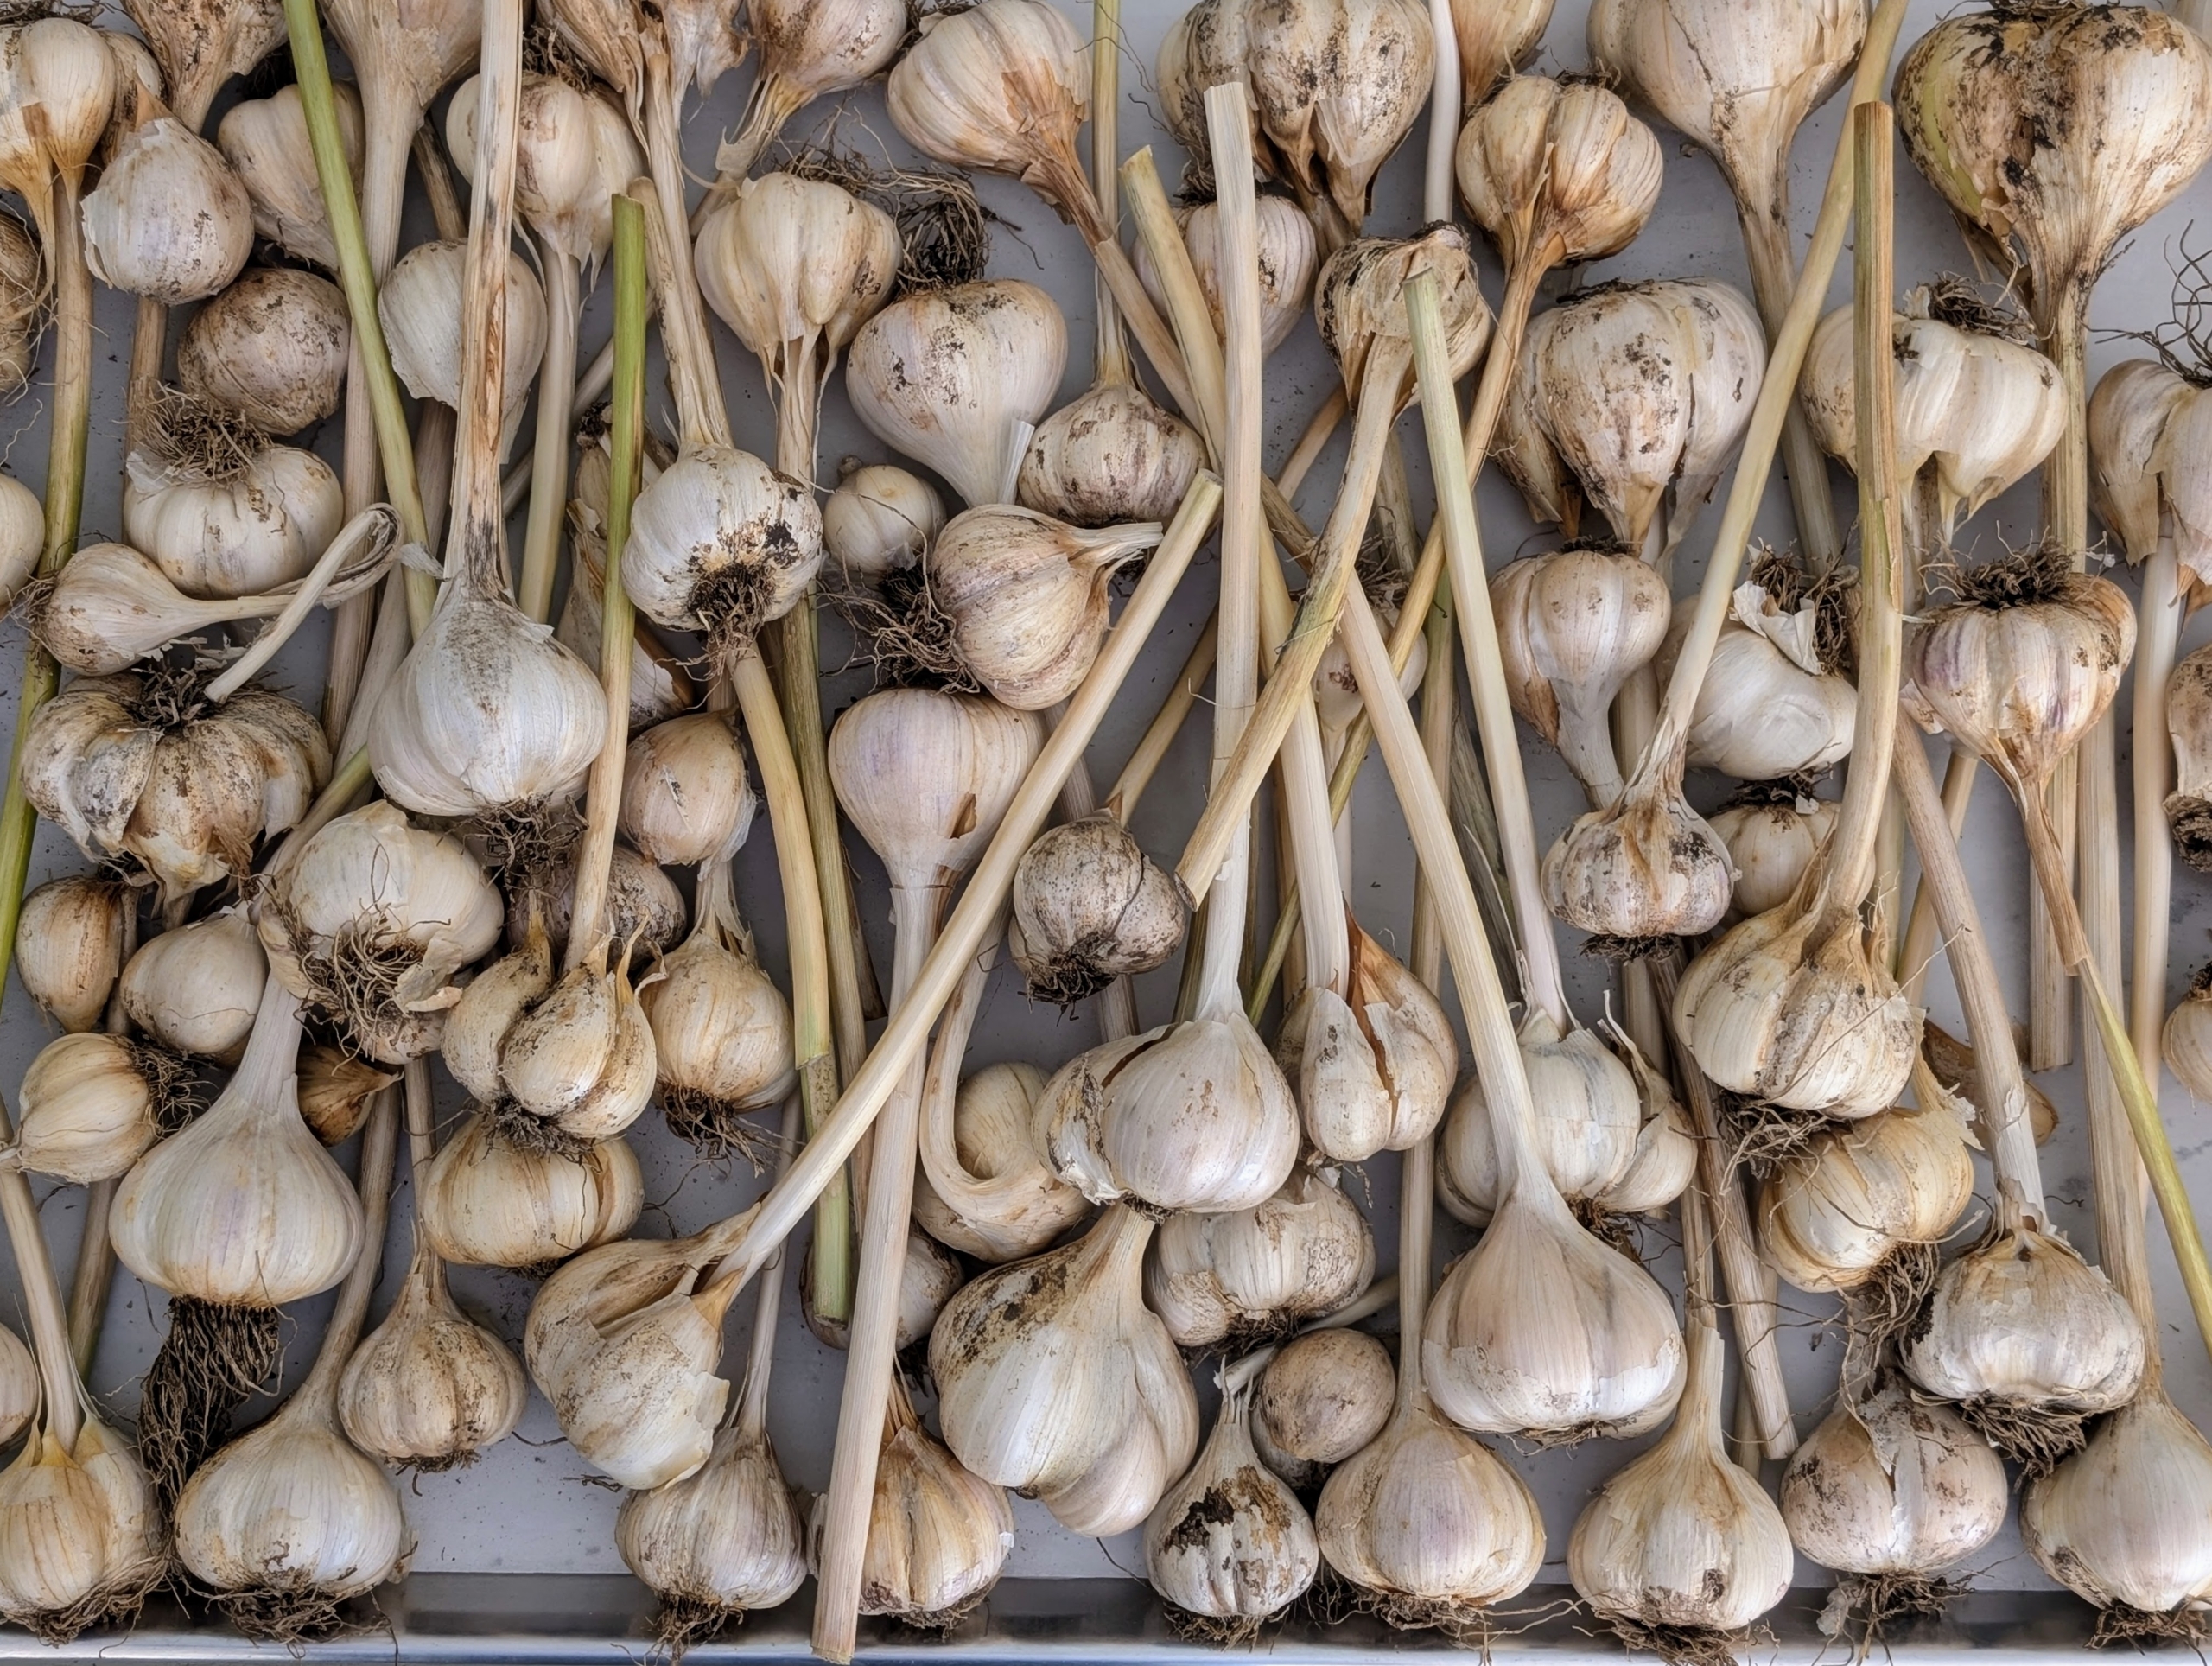
I grow a lot of garlic here at my Bedford, New York farm and up at Skylands, my home in Maine. I plant it in the fall, harvest it the following summer, and then let it thoroughly cure in a dry, warm place. Yesterday, the garlic was cleaned and trimmed - a process that takes some time to complete, but is the last step before bringing the garlic in to use and enjoy.
Here are some photos.
I always grow lots of garlic to use in my cooking and to share with my daughter, Alexis.
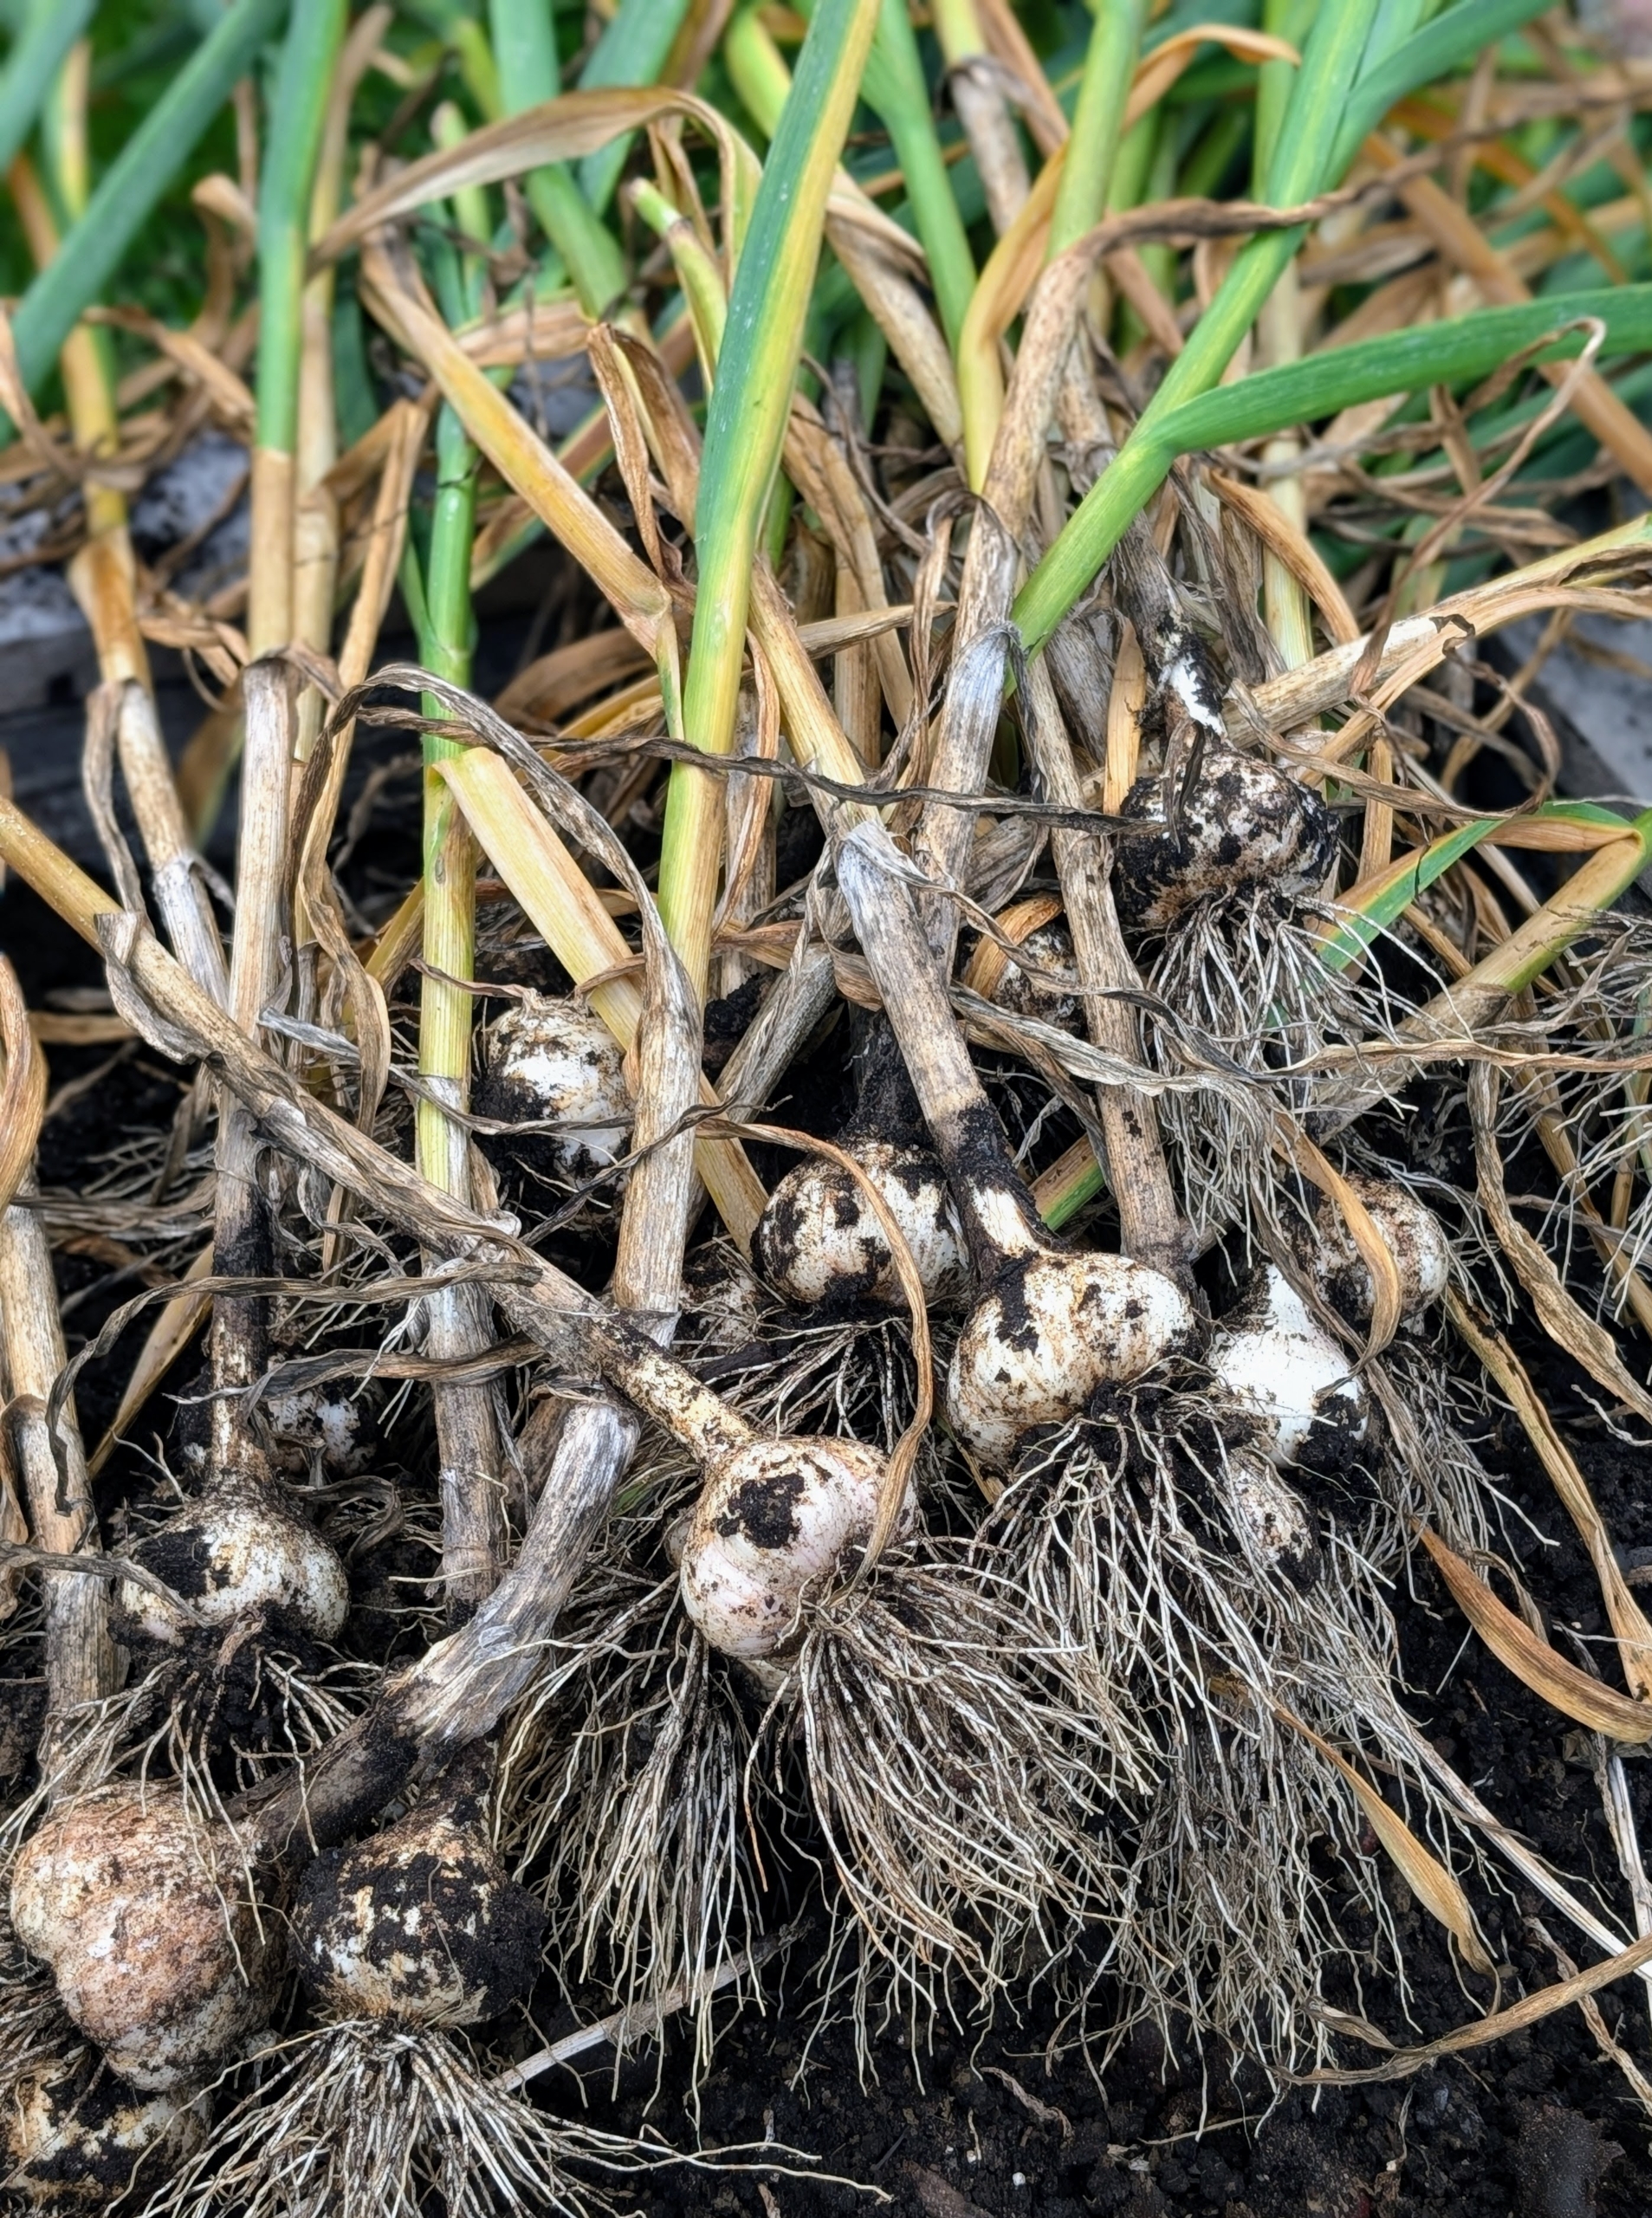
I harvested this year’s garlic back in July. Determining when garlic is ready to harvest can be tricky. If it’s harvested too soon, the cloves are small and underdeveloped. If harvested too late, the clove heads begin to separate, making them more vulnerable to decay. The real indicator is the plant itself – when the bottom leaves have turned brown, and the top leaves are still green.
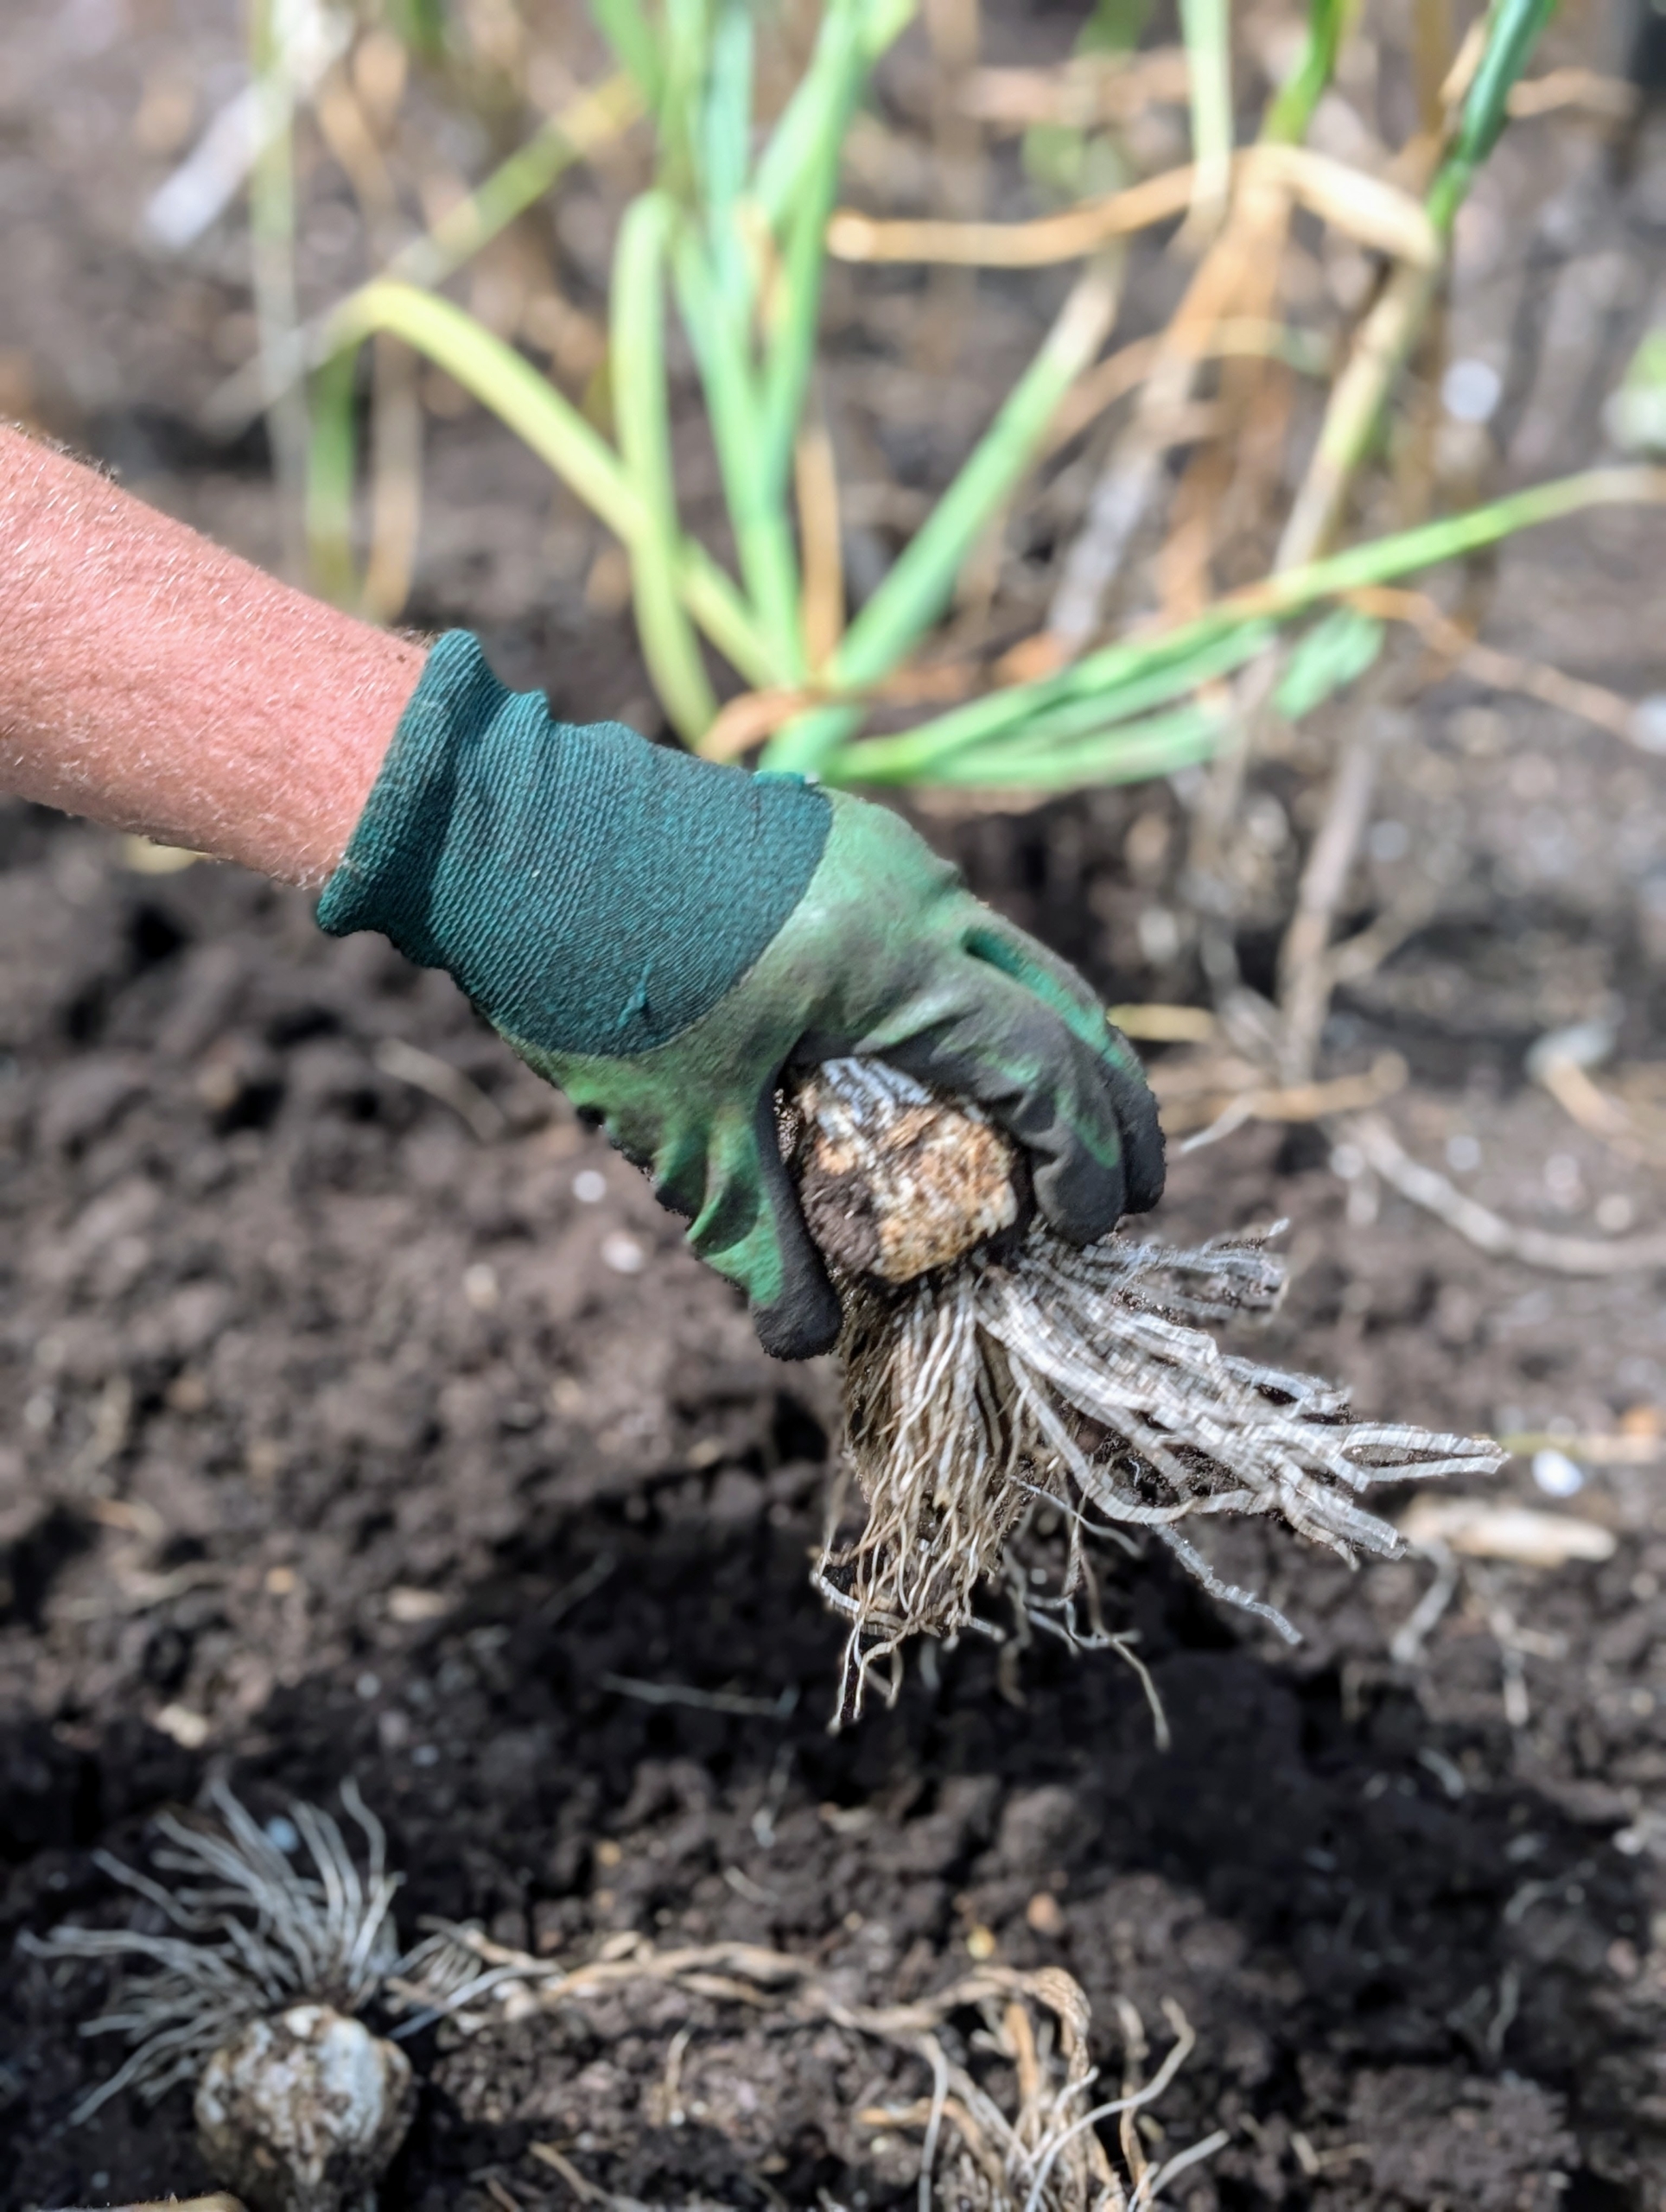
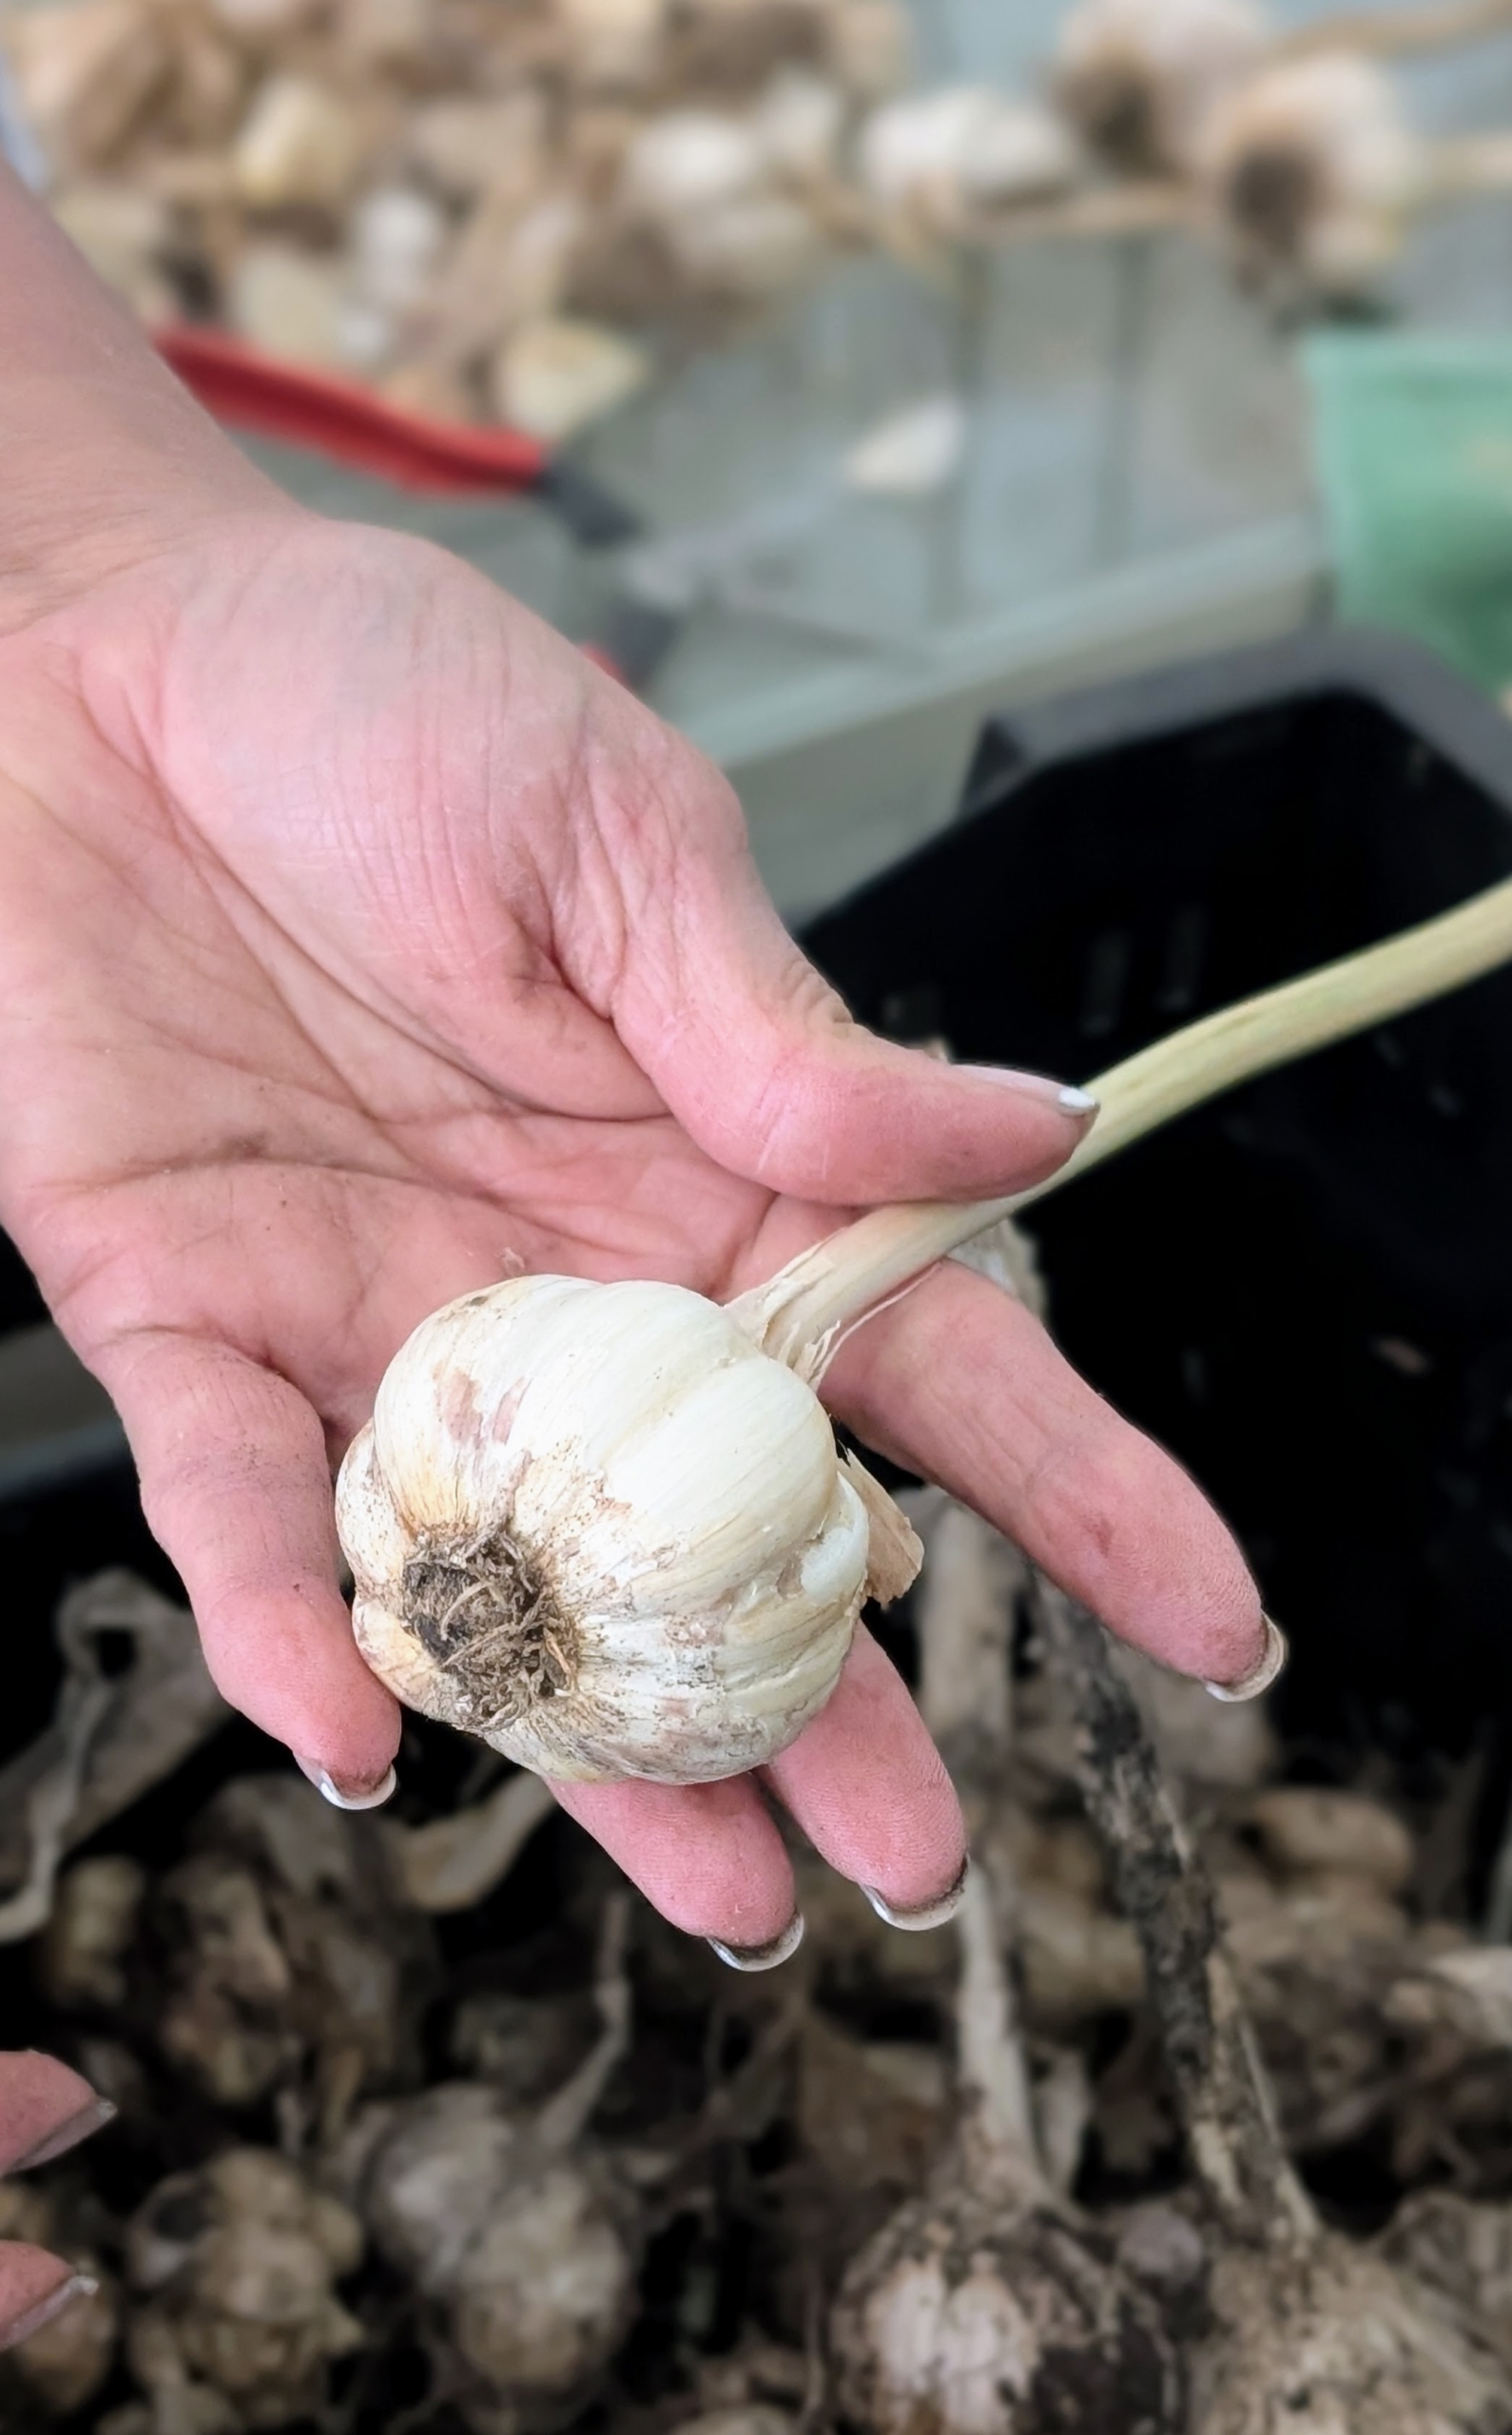
When harvested, each one is pulled out carefully from the base, so that the head comes out completely.
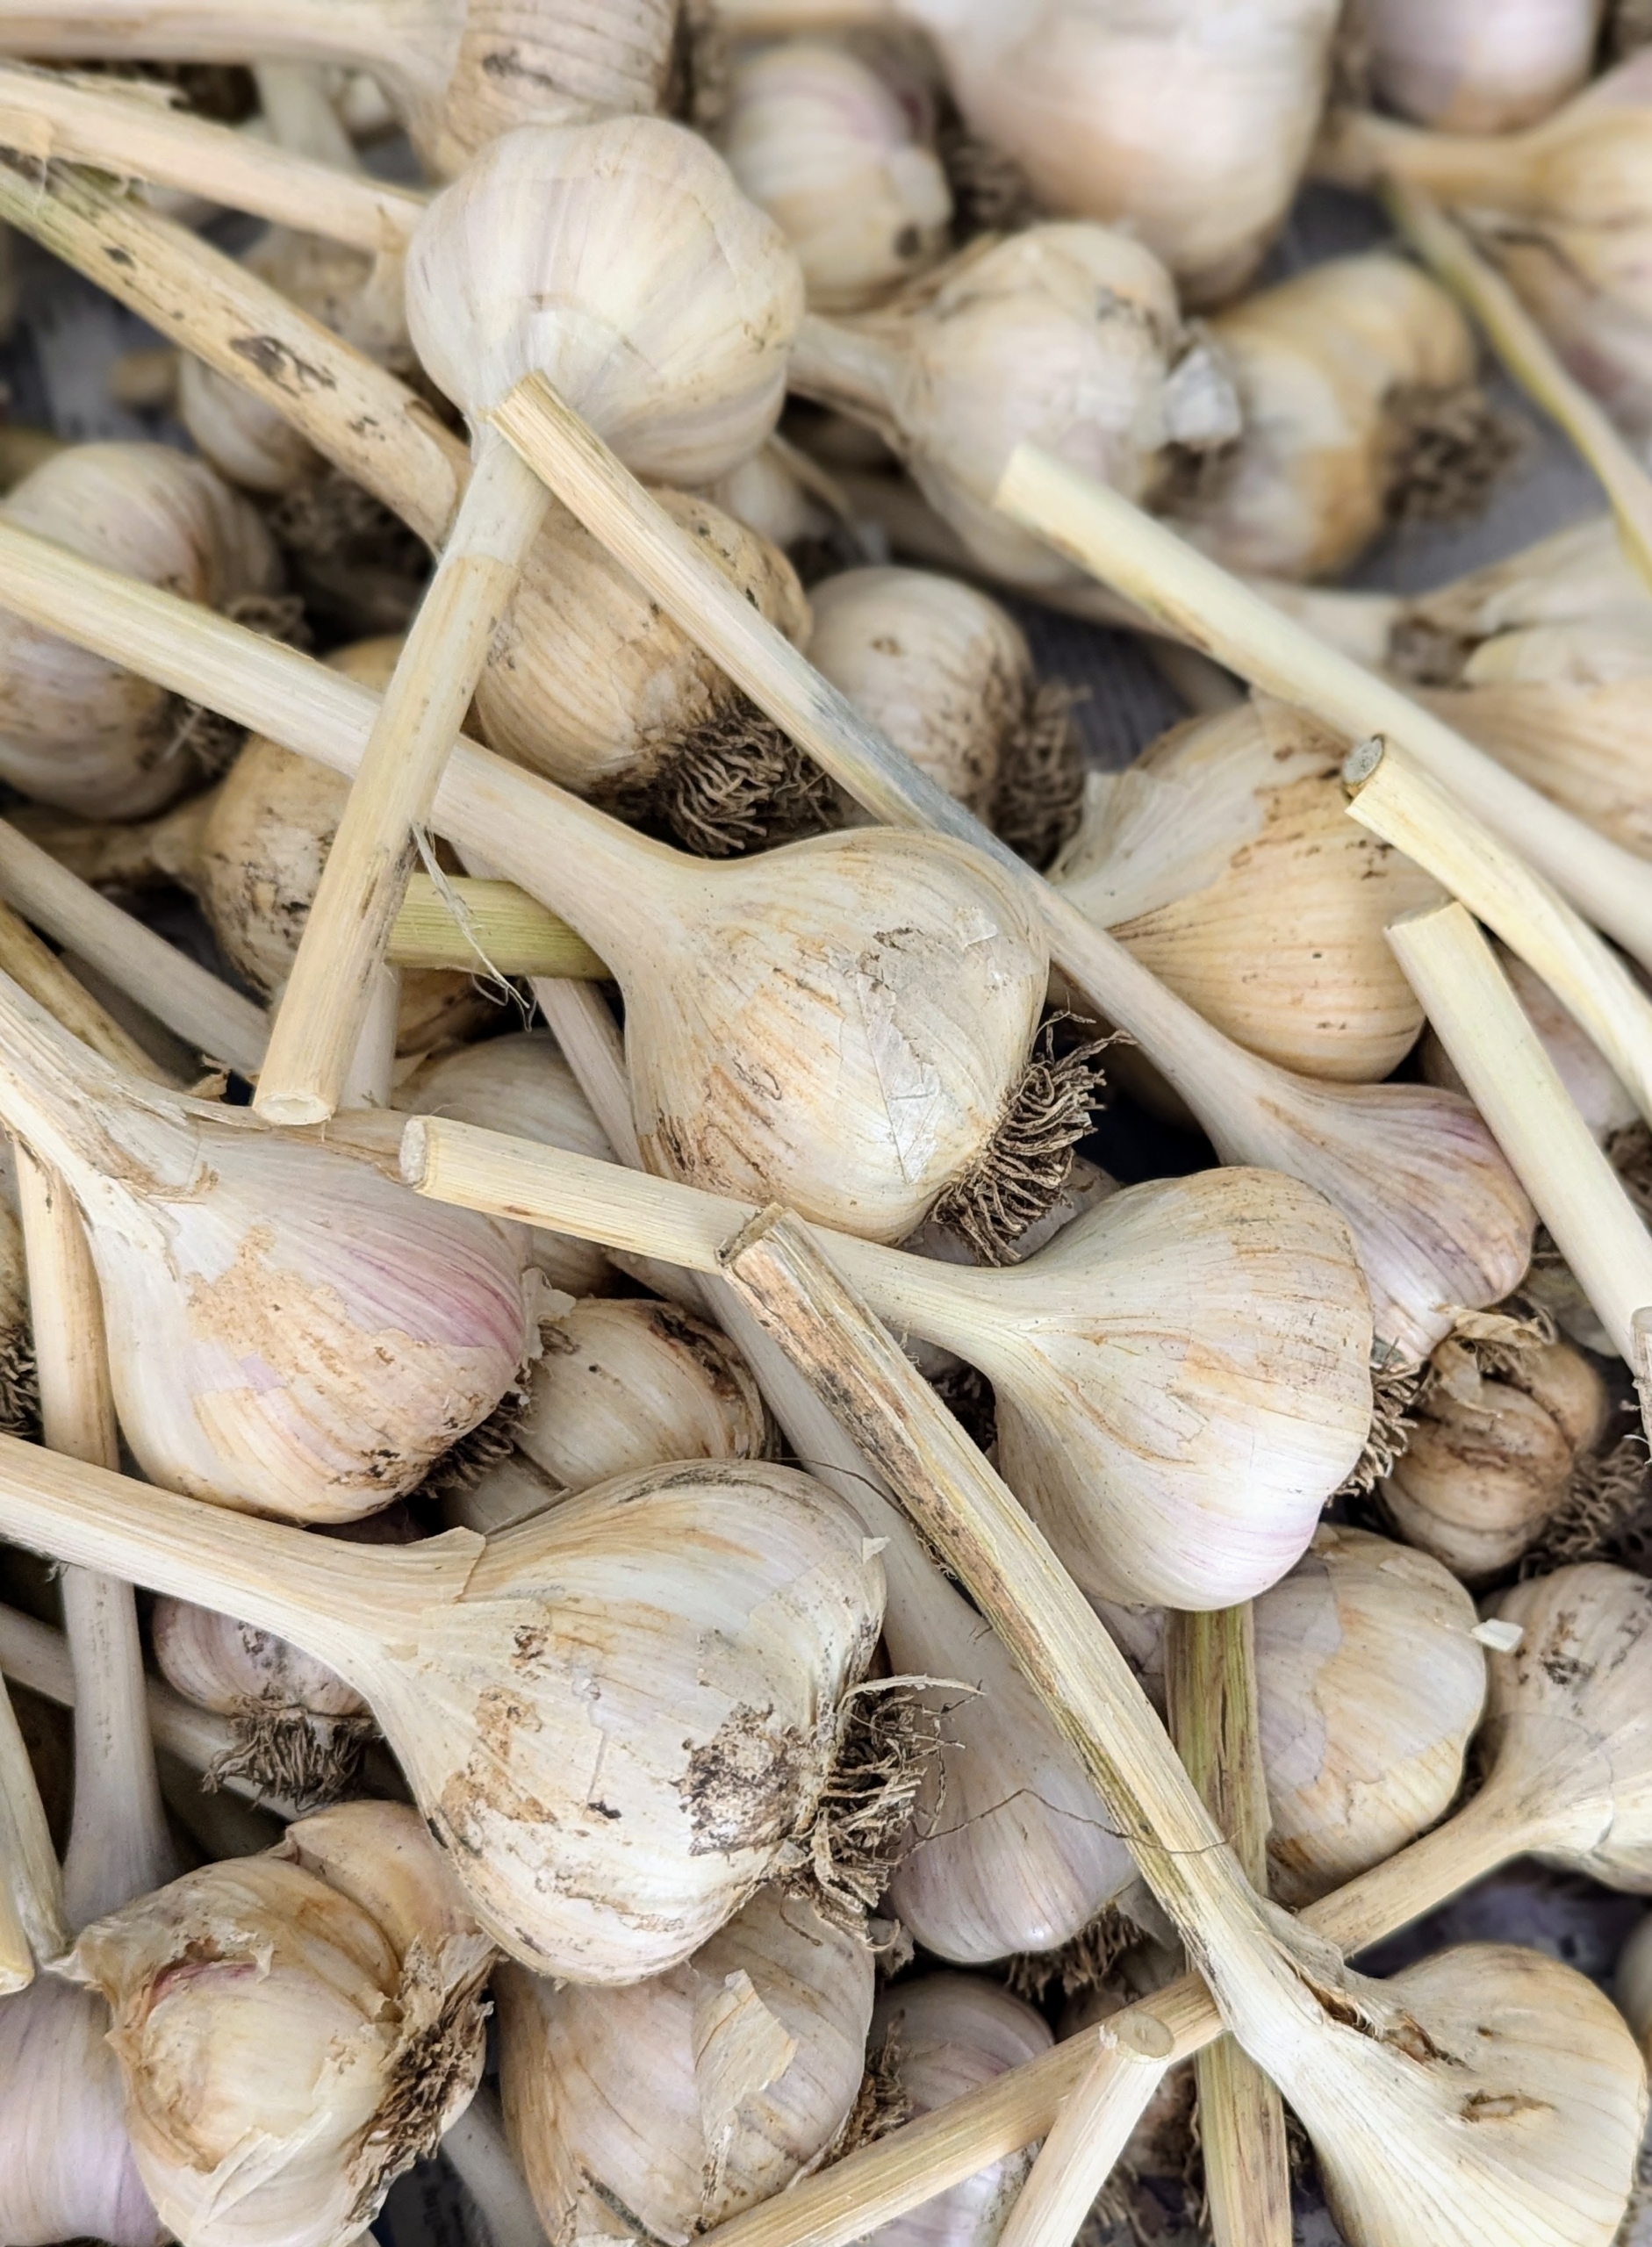
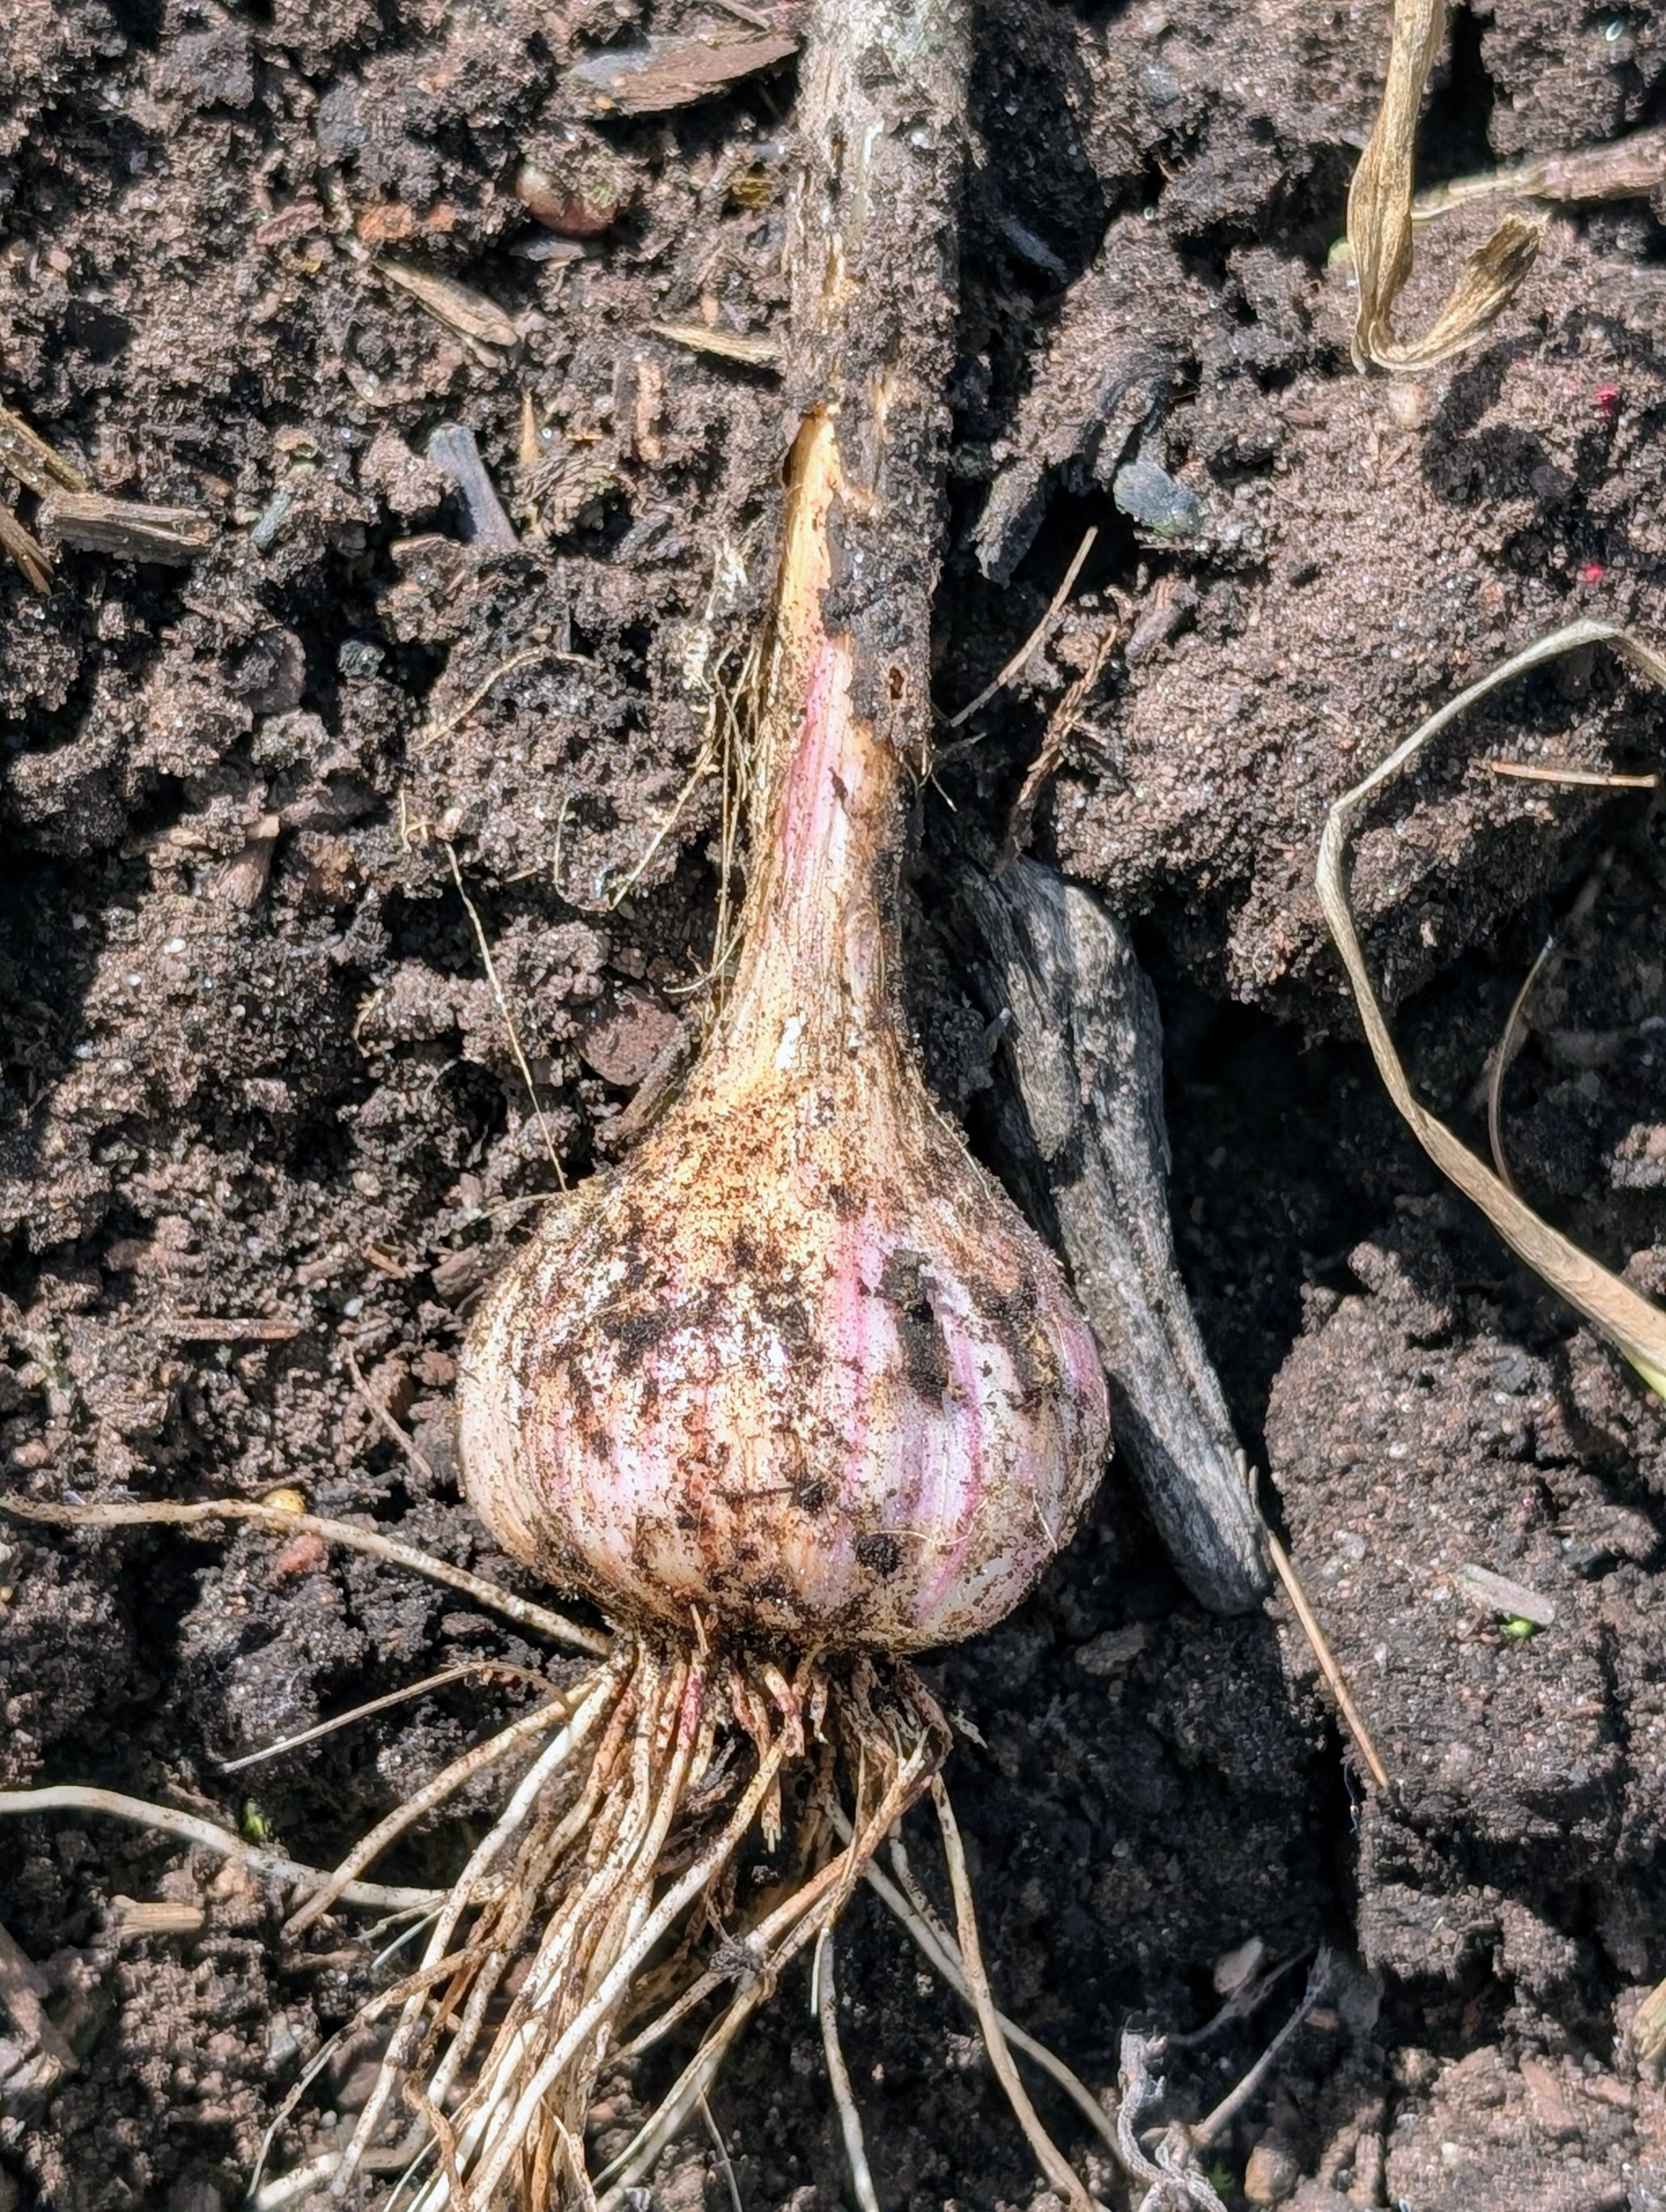
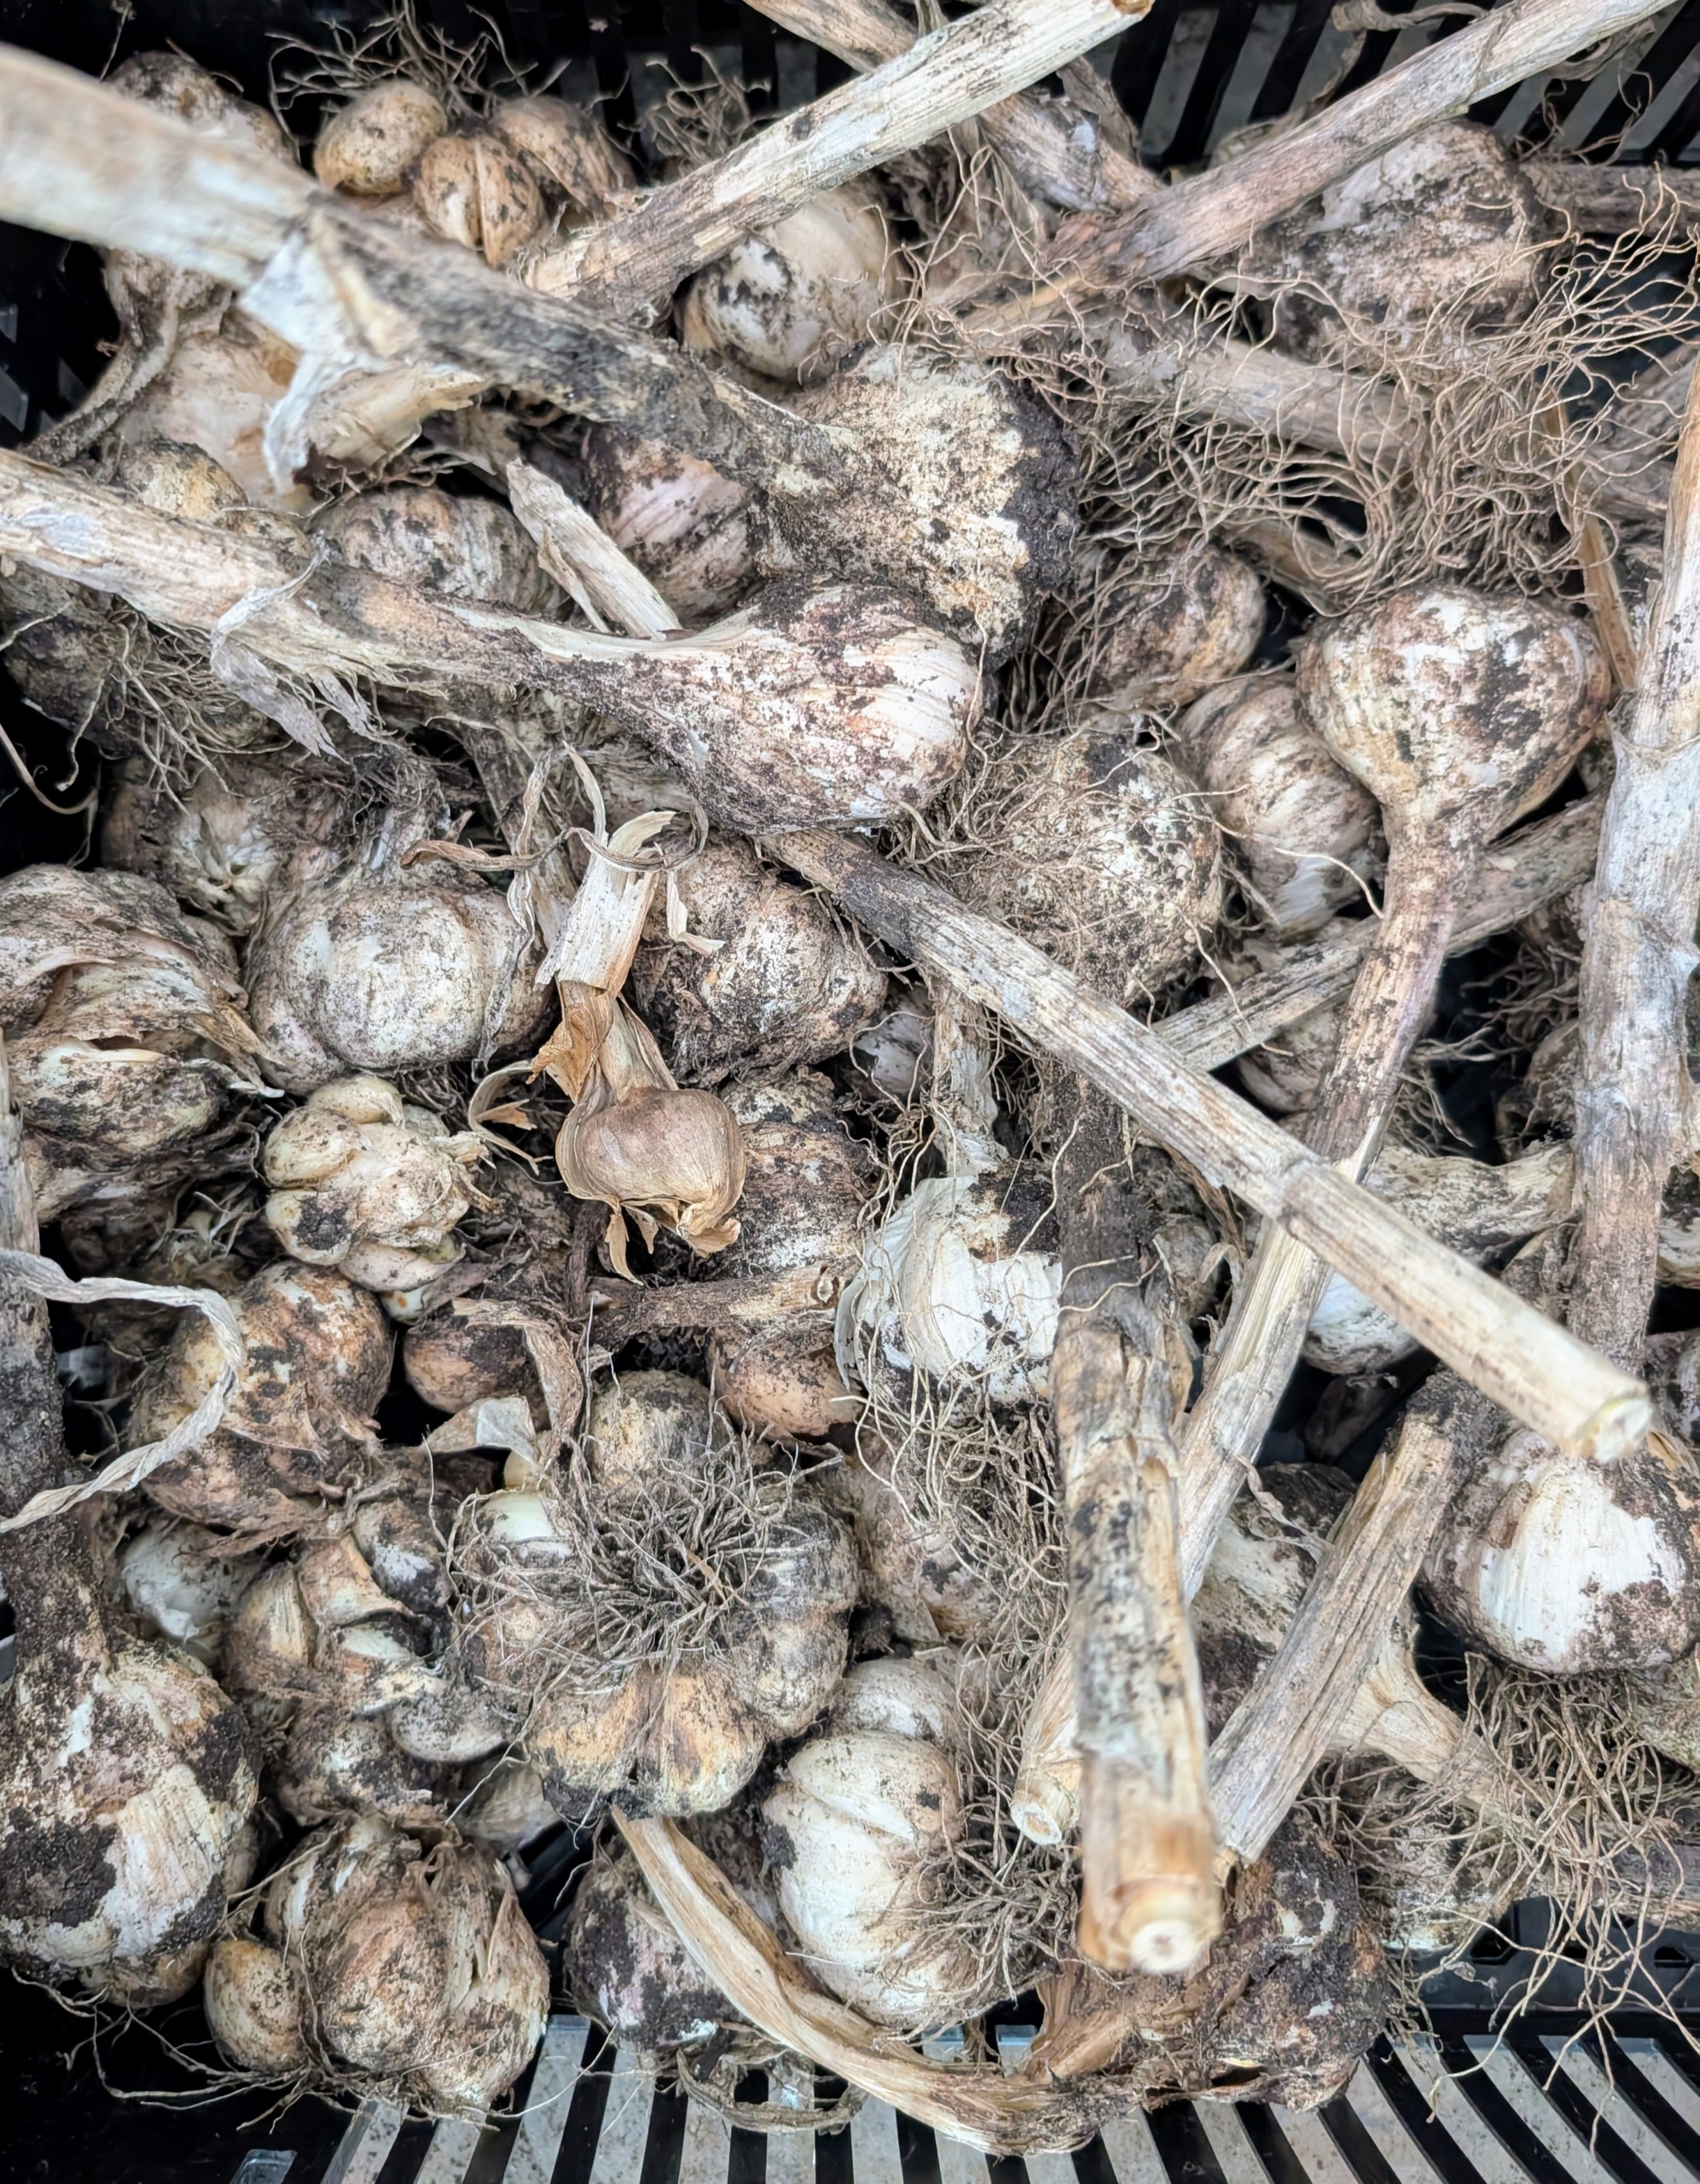
Here is a freshly picked garlic head.
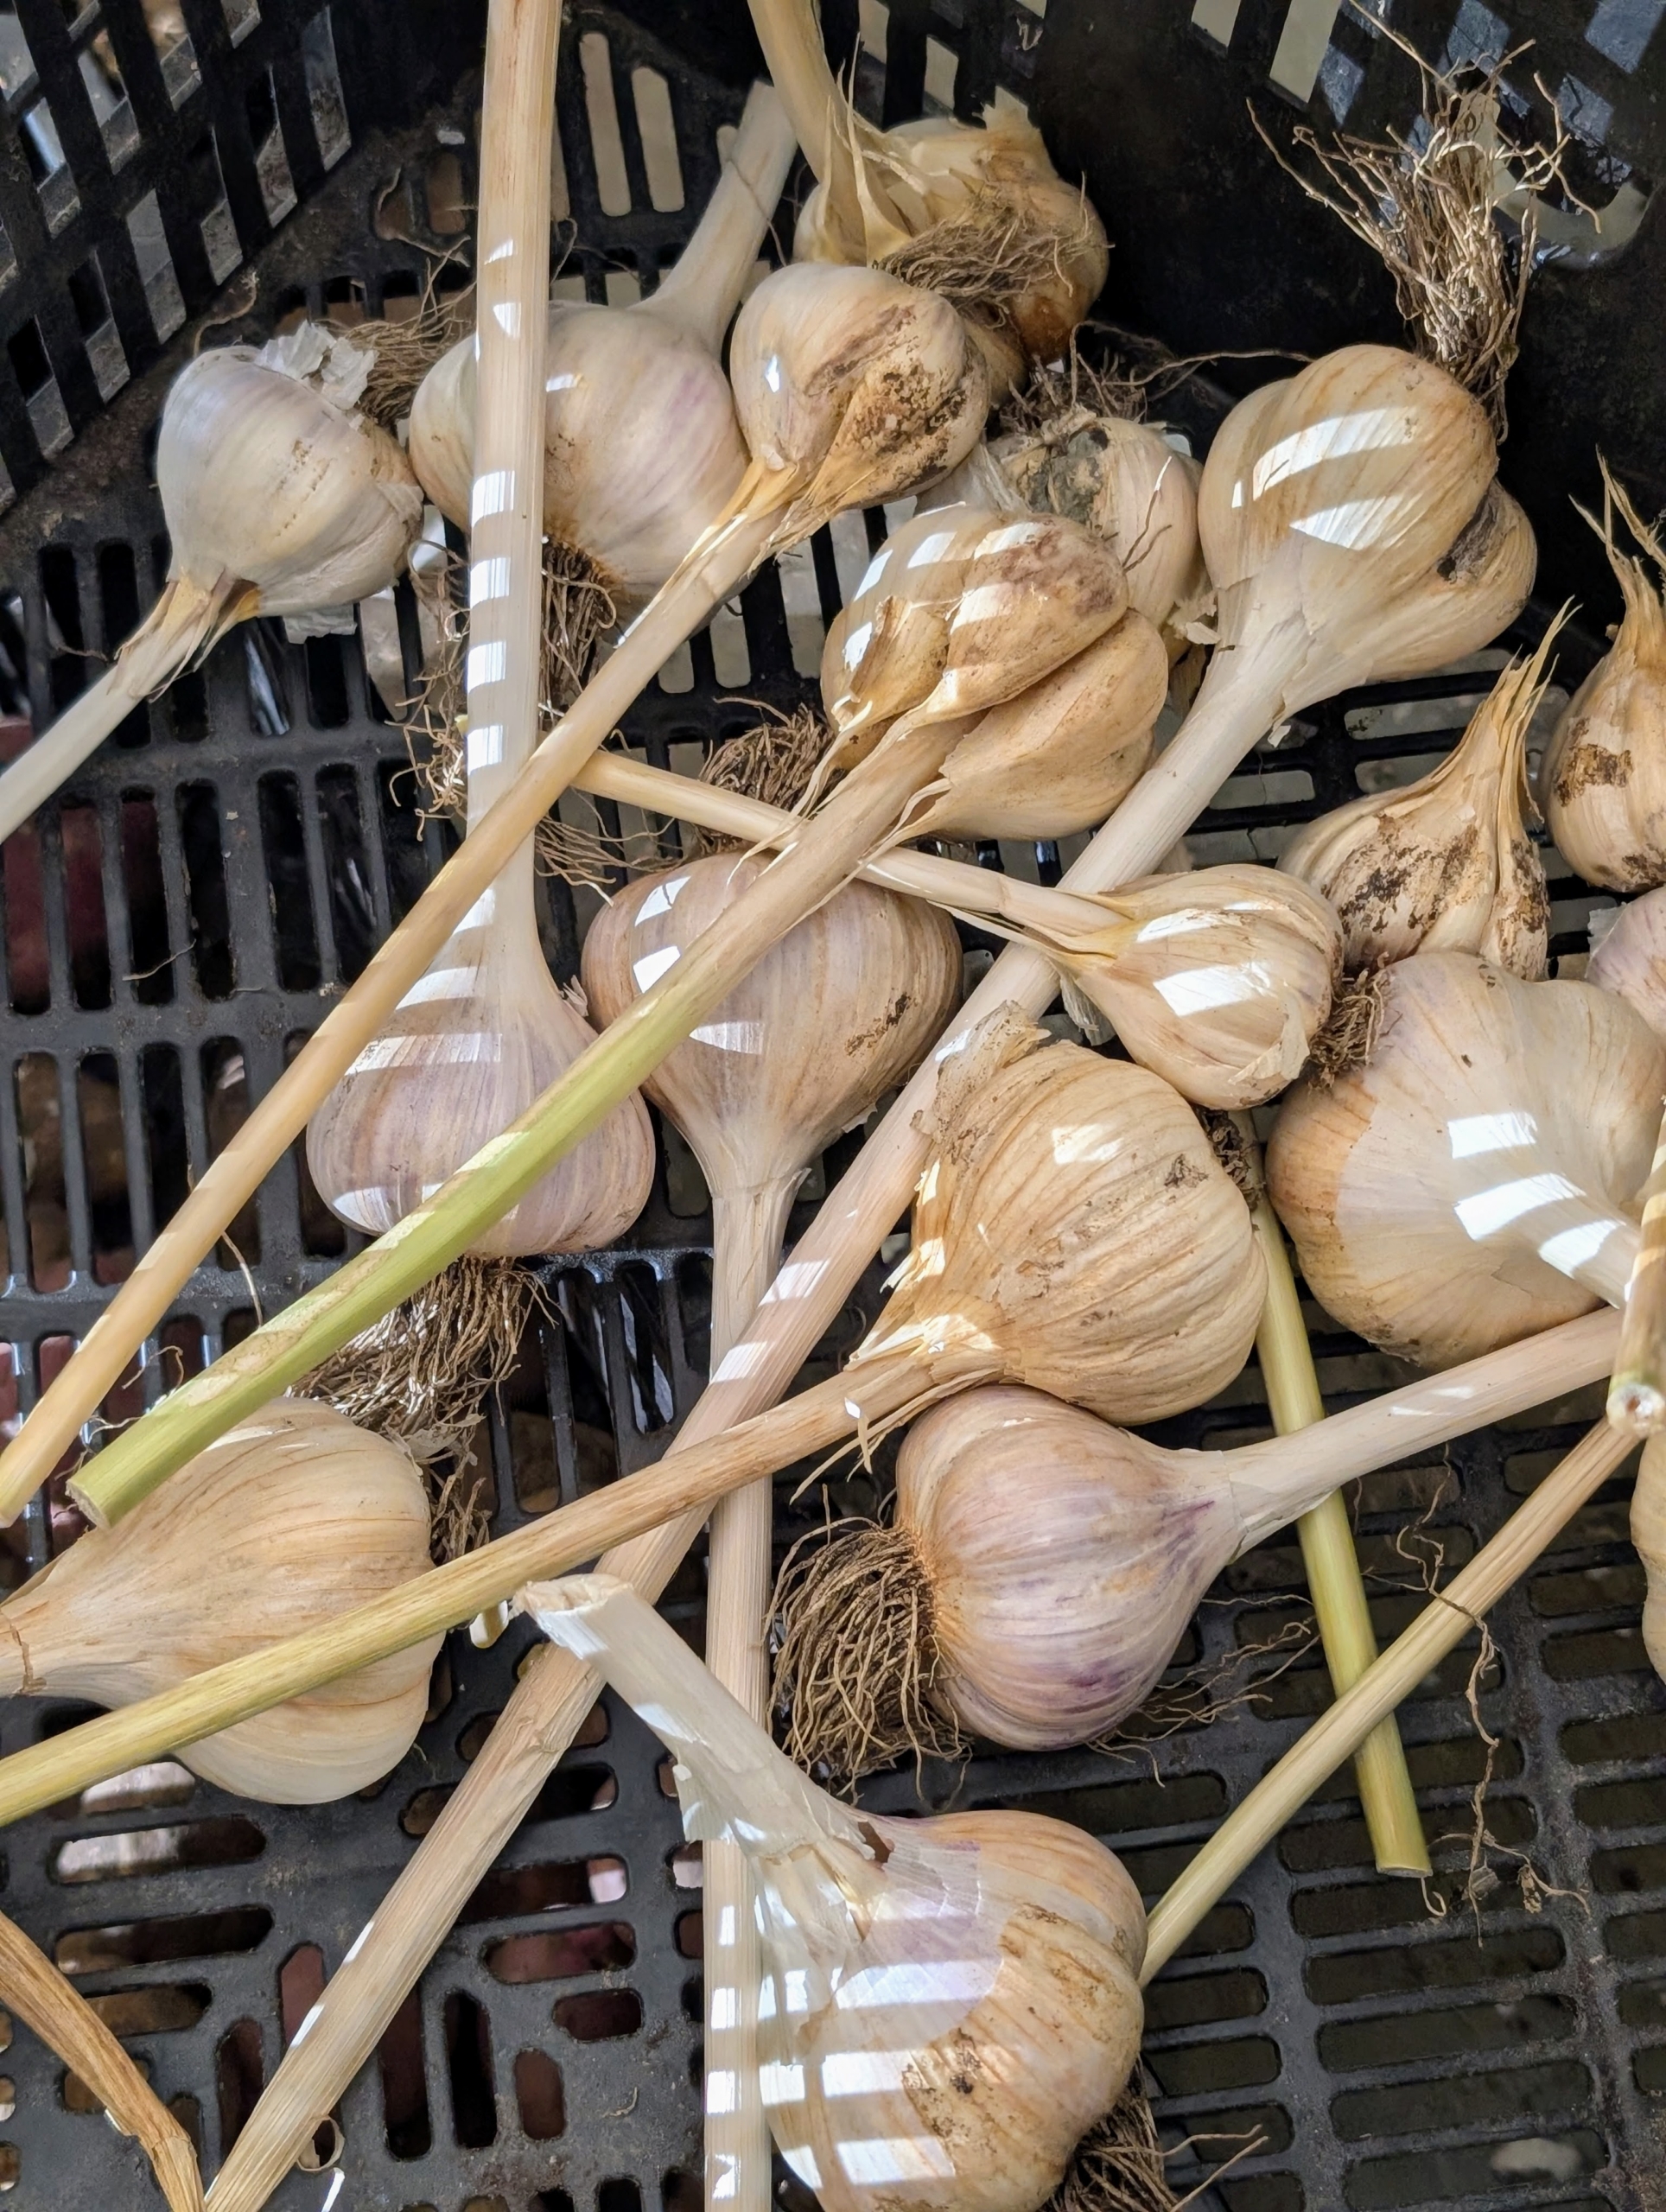
All these garlic heads were picked at the right time.
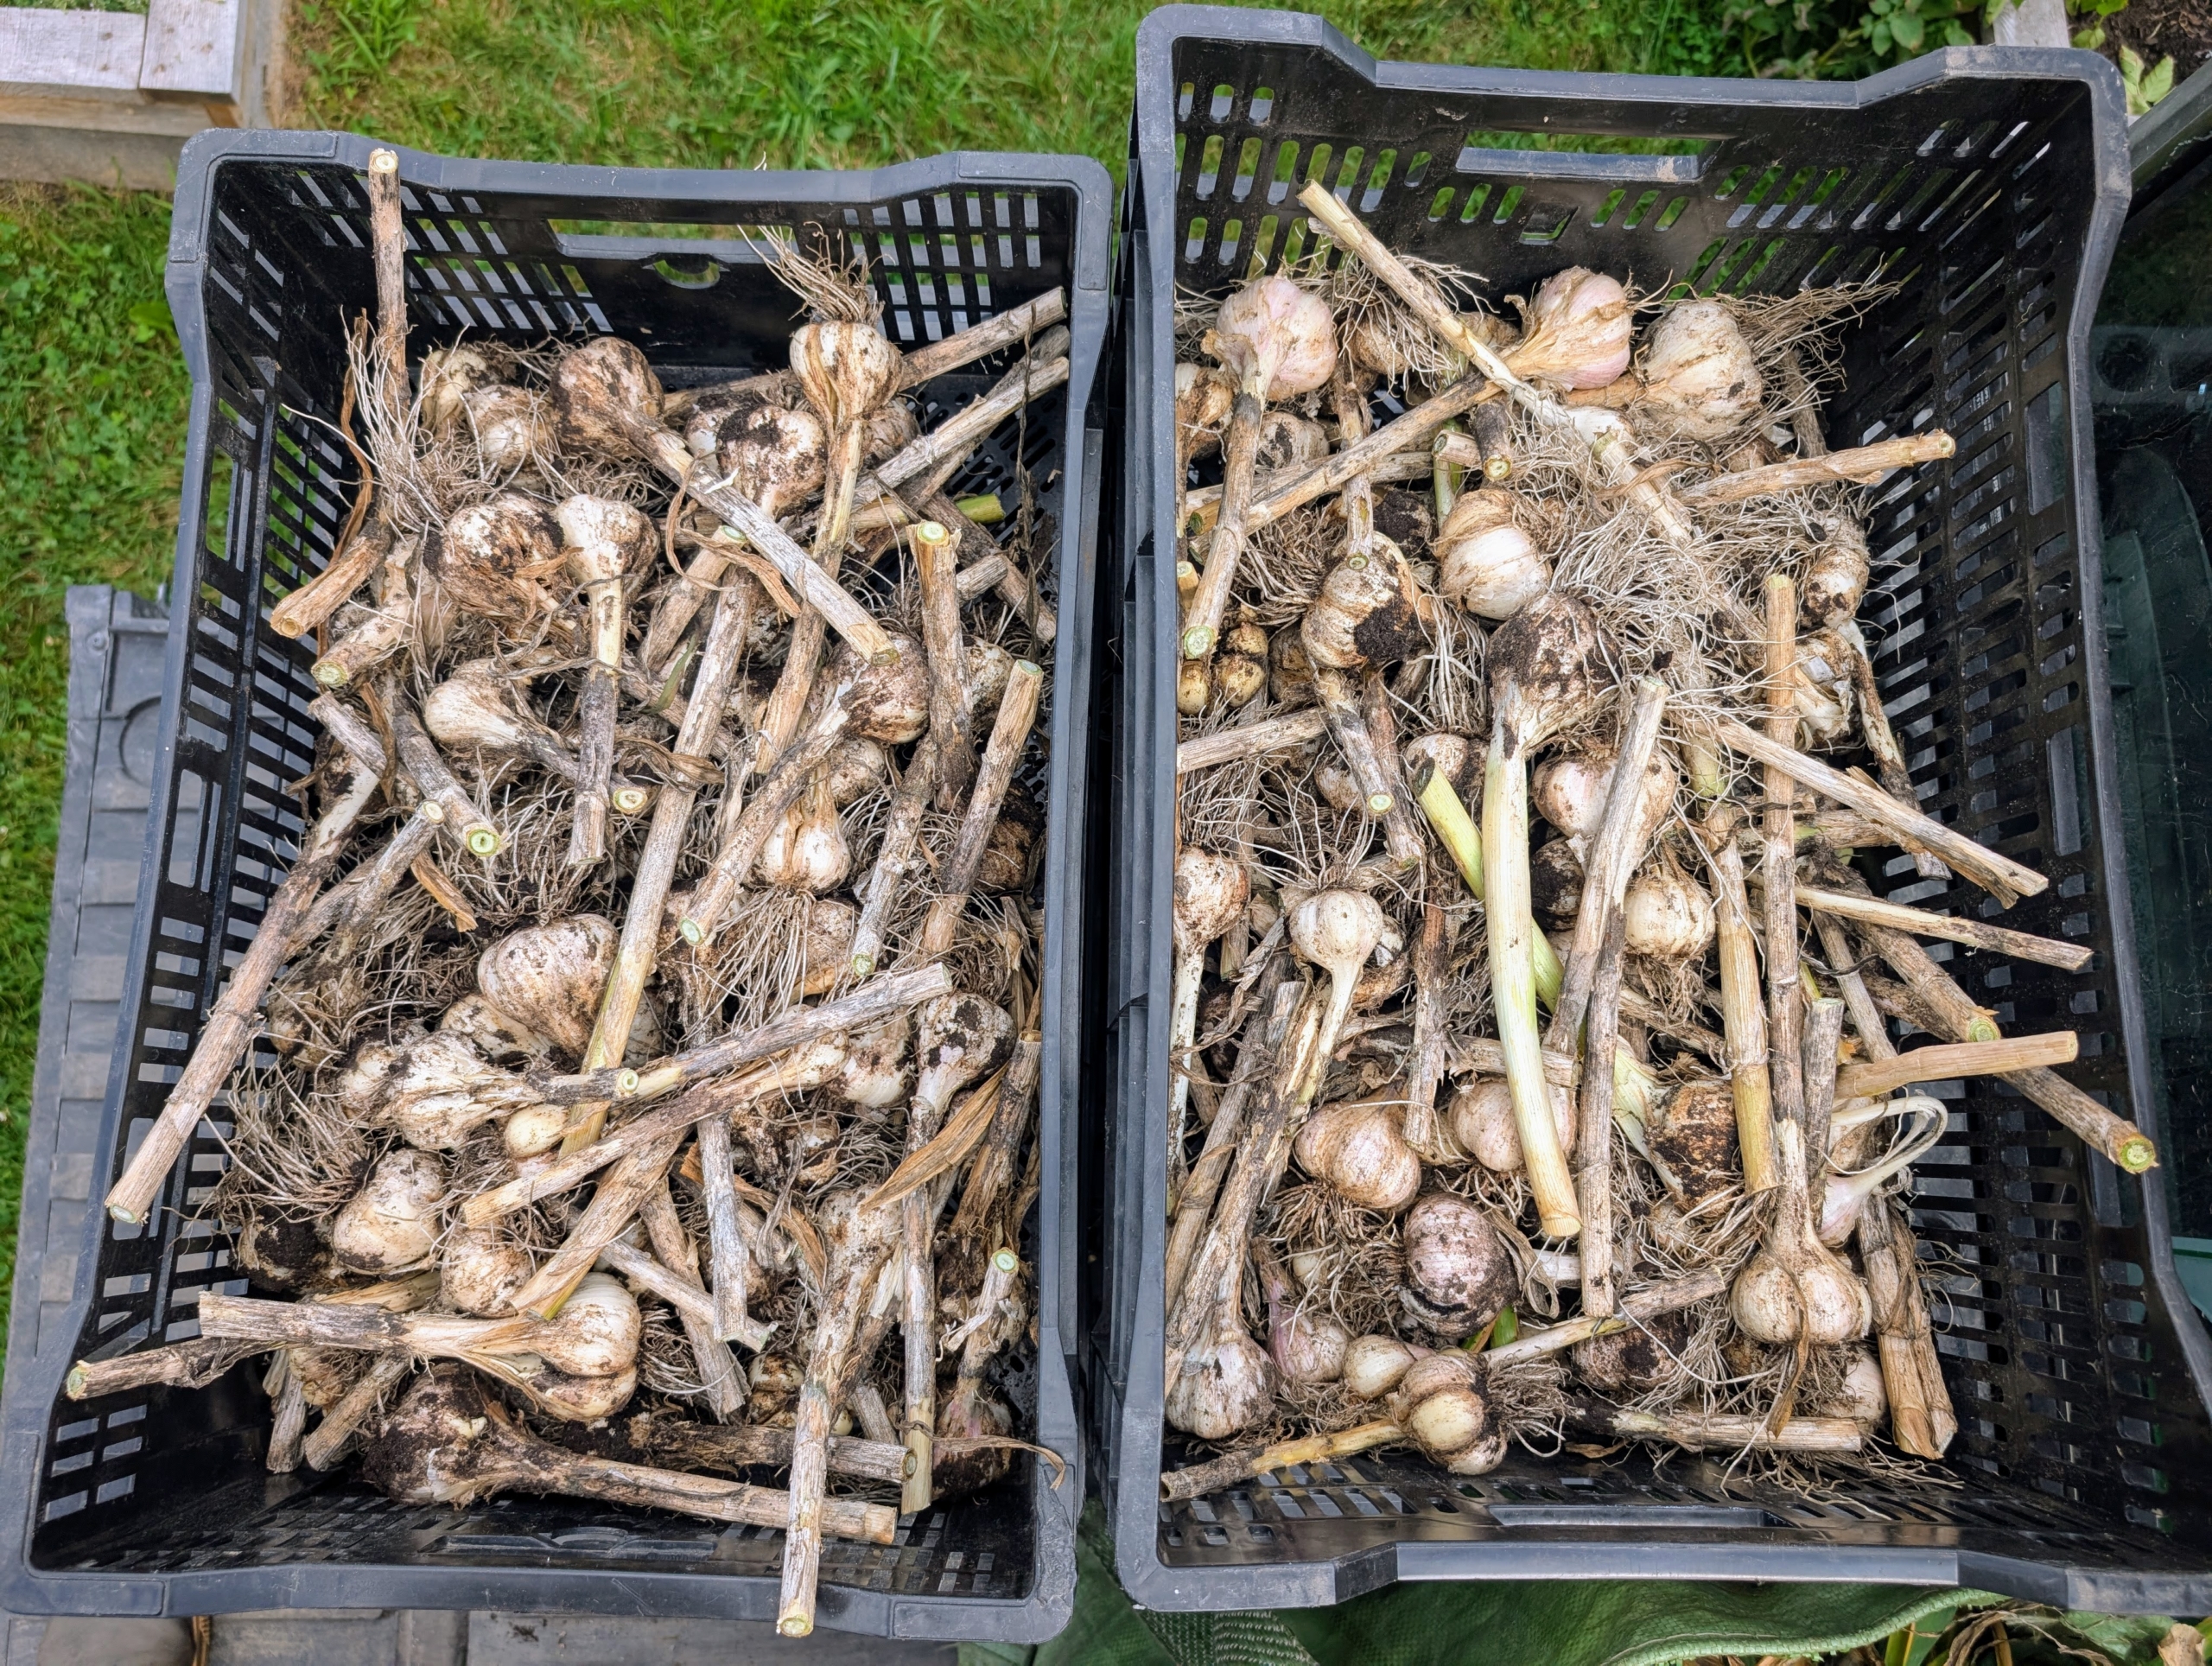
As it is harvested, the garlic’s long stem is cut slightly and then the head is placed in a breathable crate, so it stays dry. And then all are taken to a well-ventilated warm location with good air circulation so they can start to cure. It’s wise to avoid full sun and direct sunlight, as it can alter the flavor.
These were left in my carport, where they were protected from any elements.
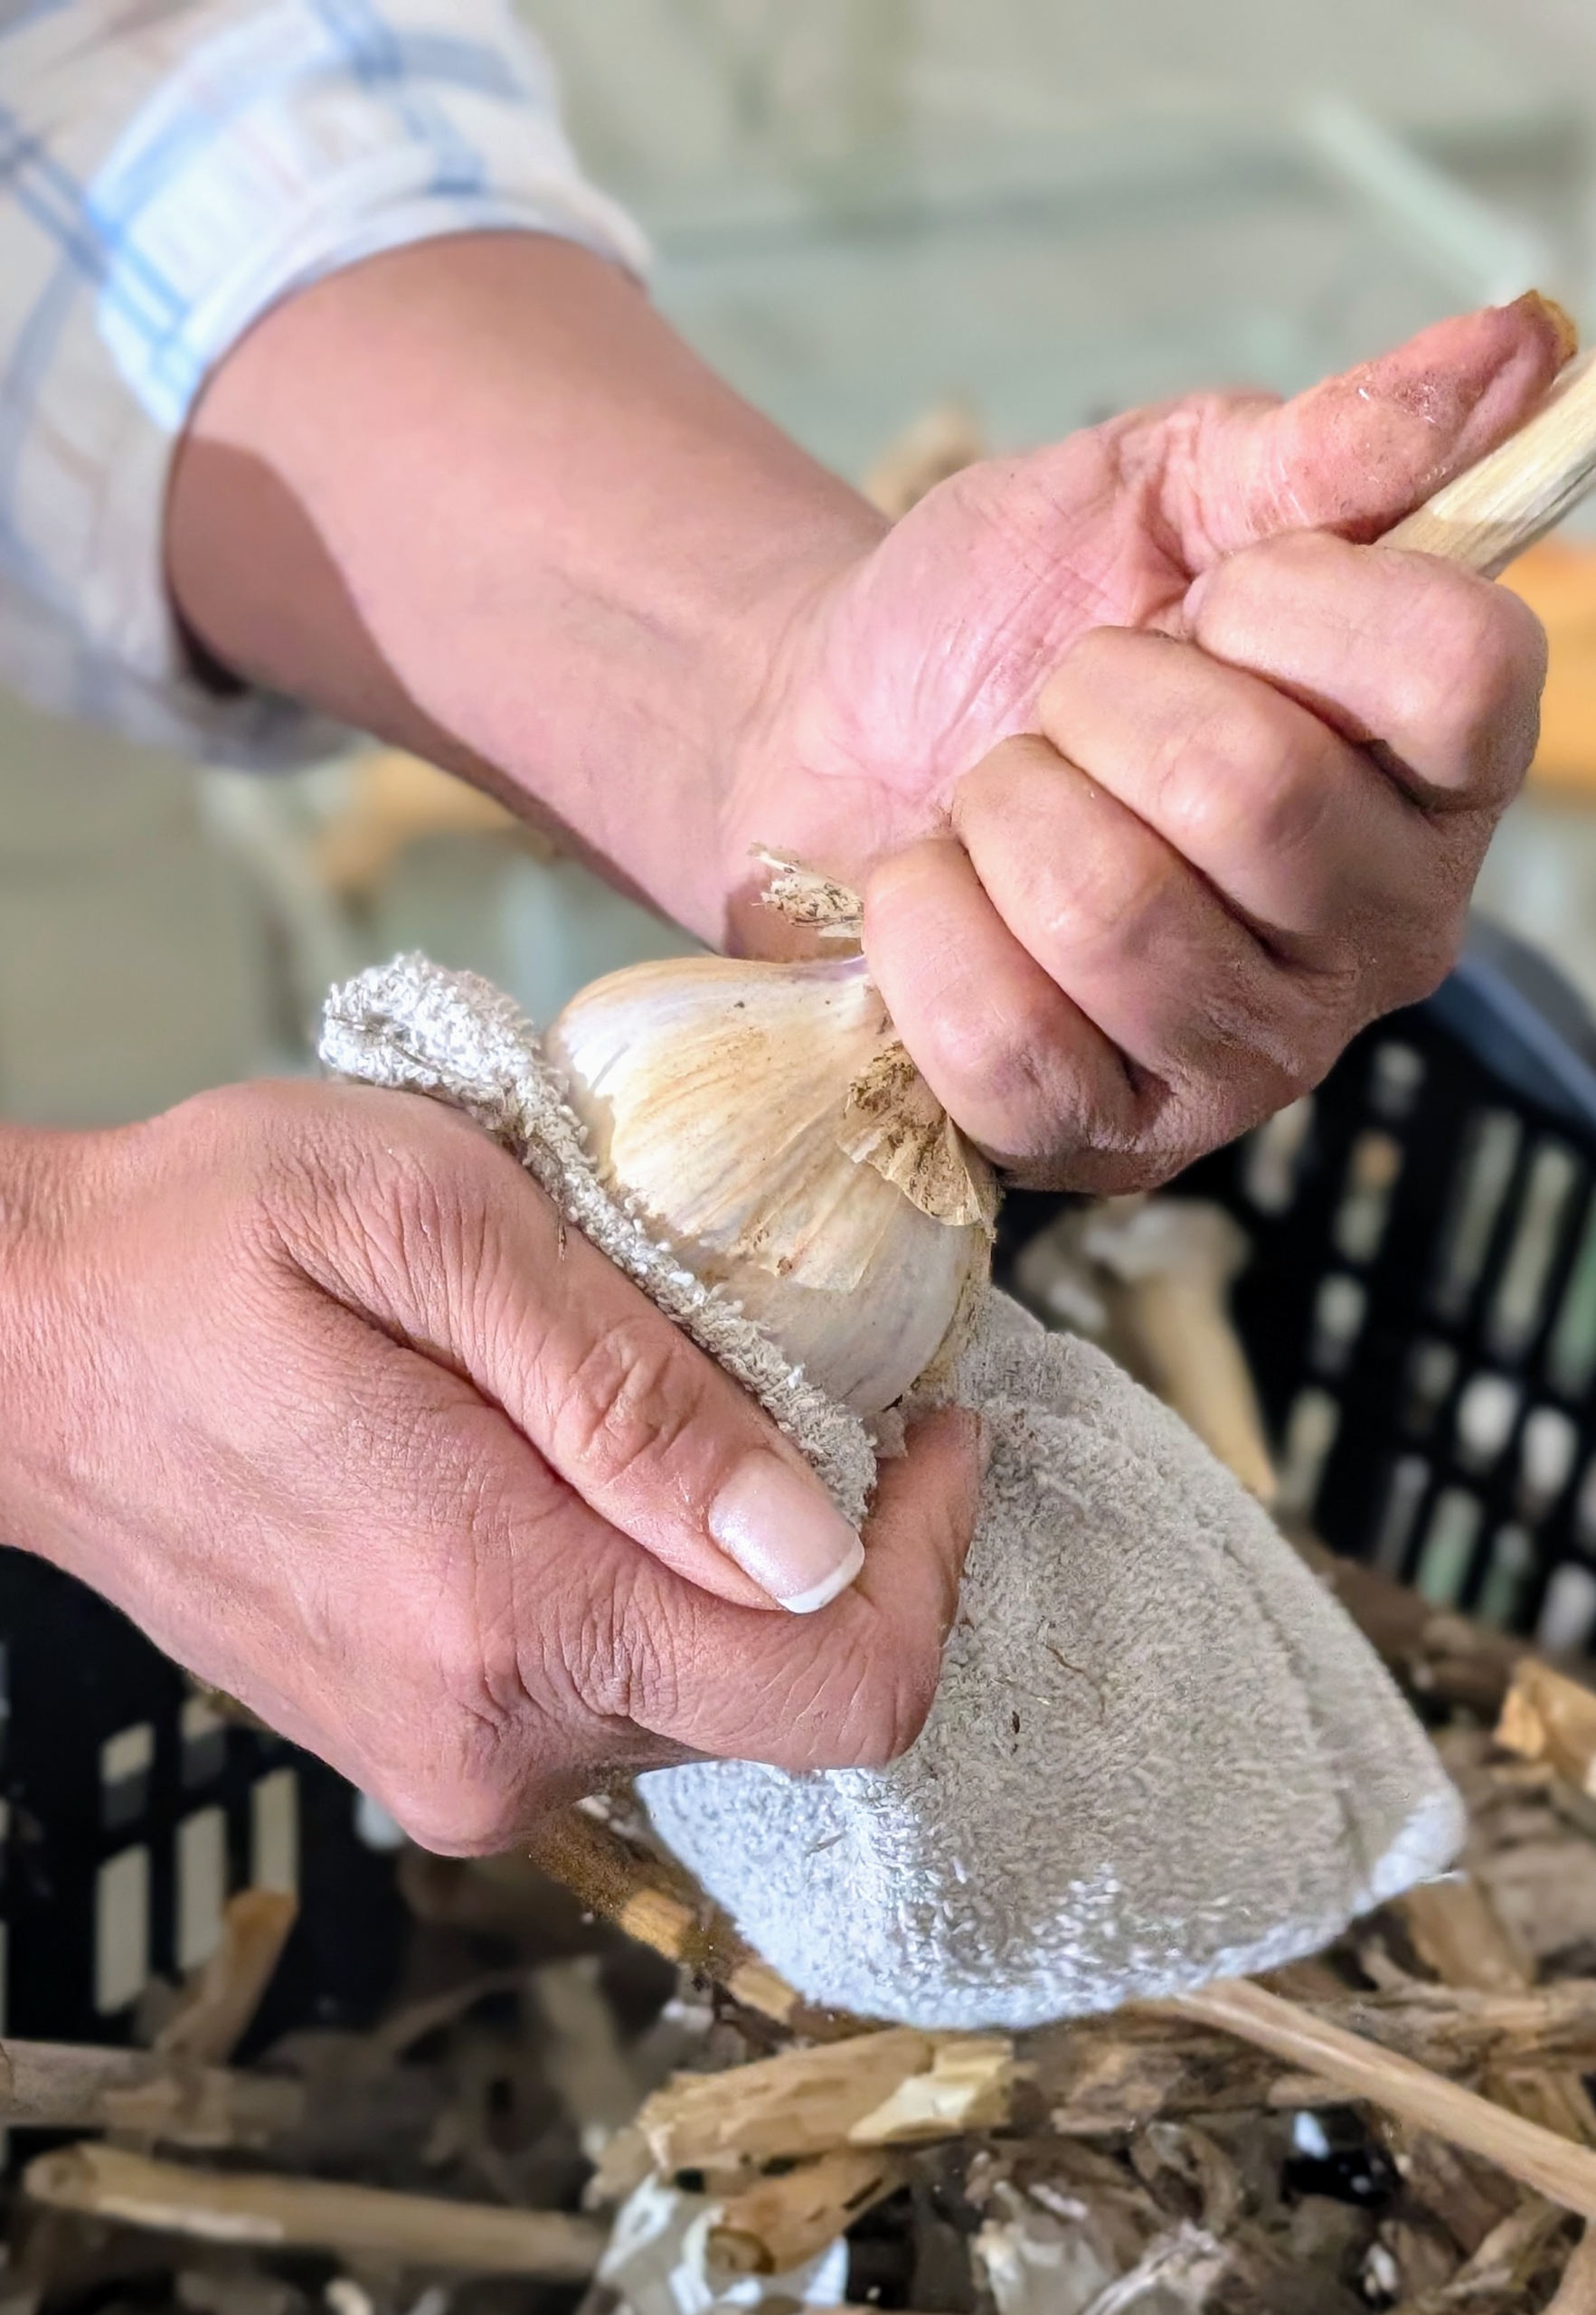
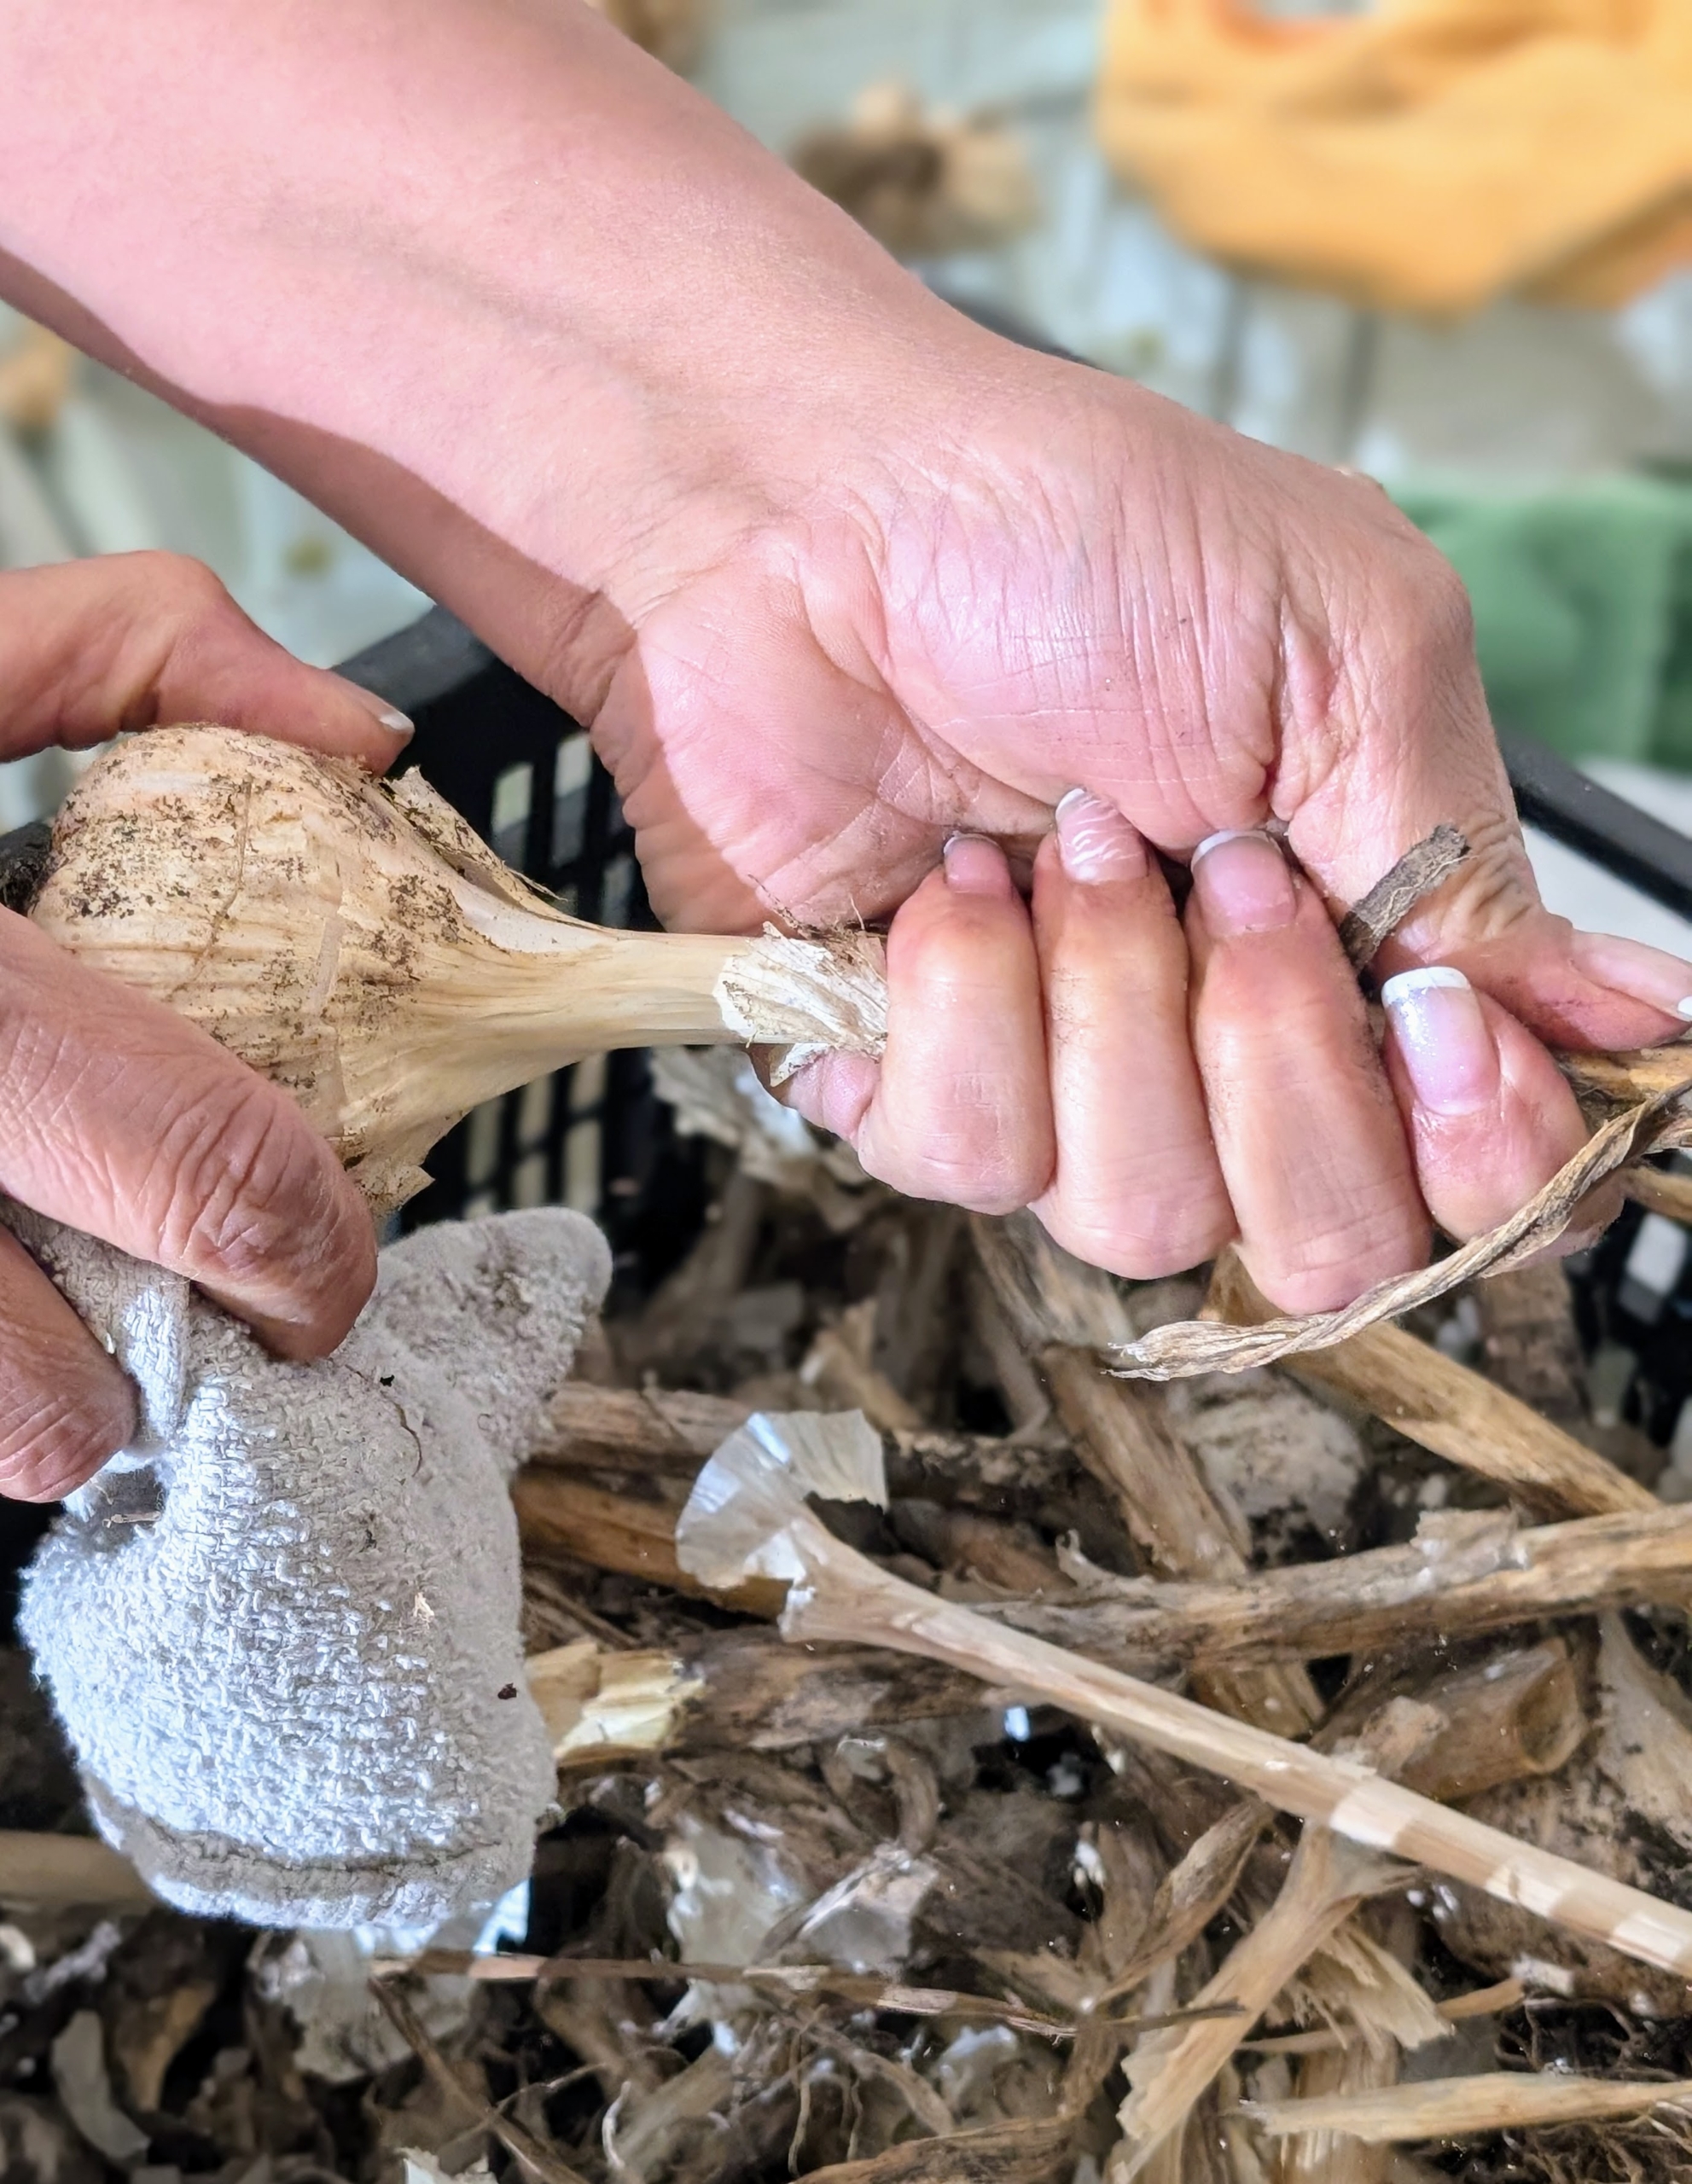
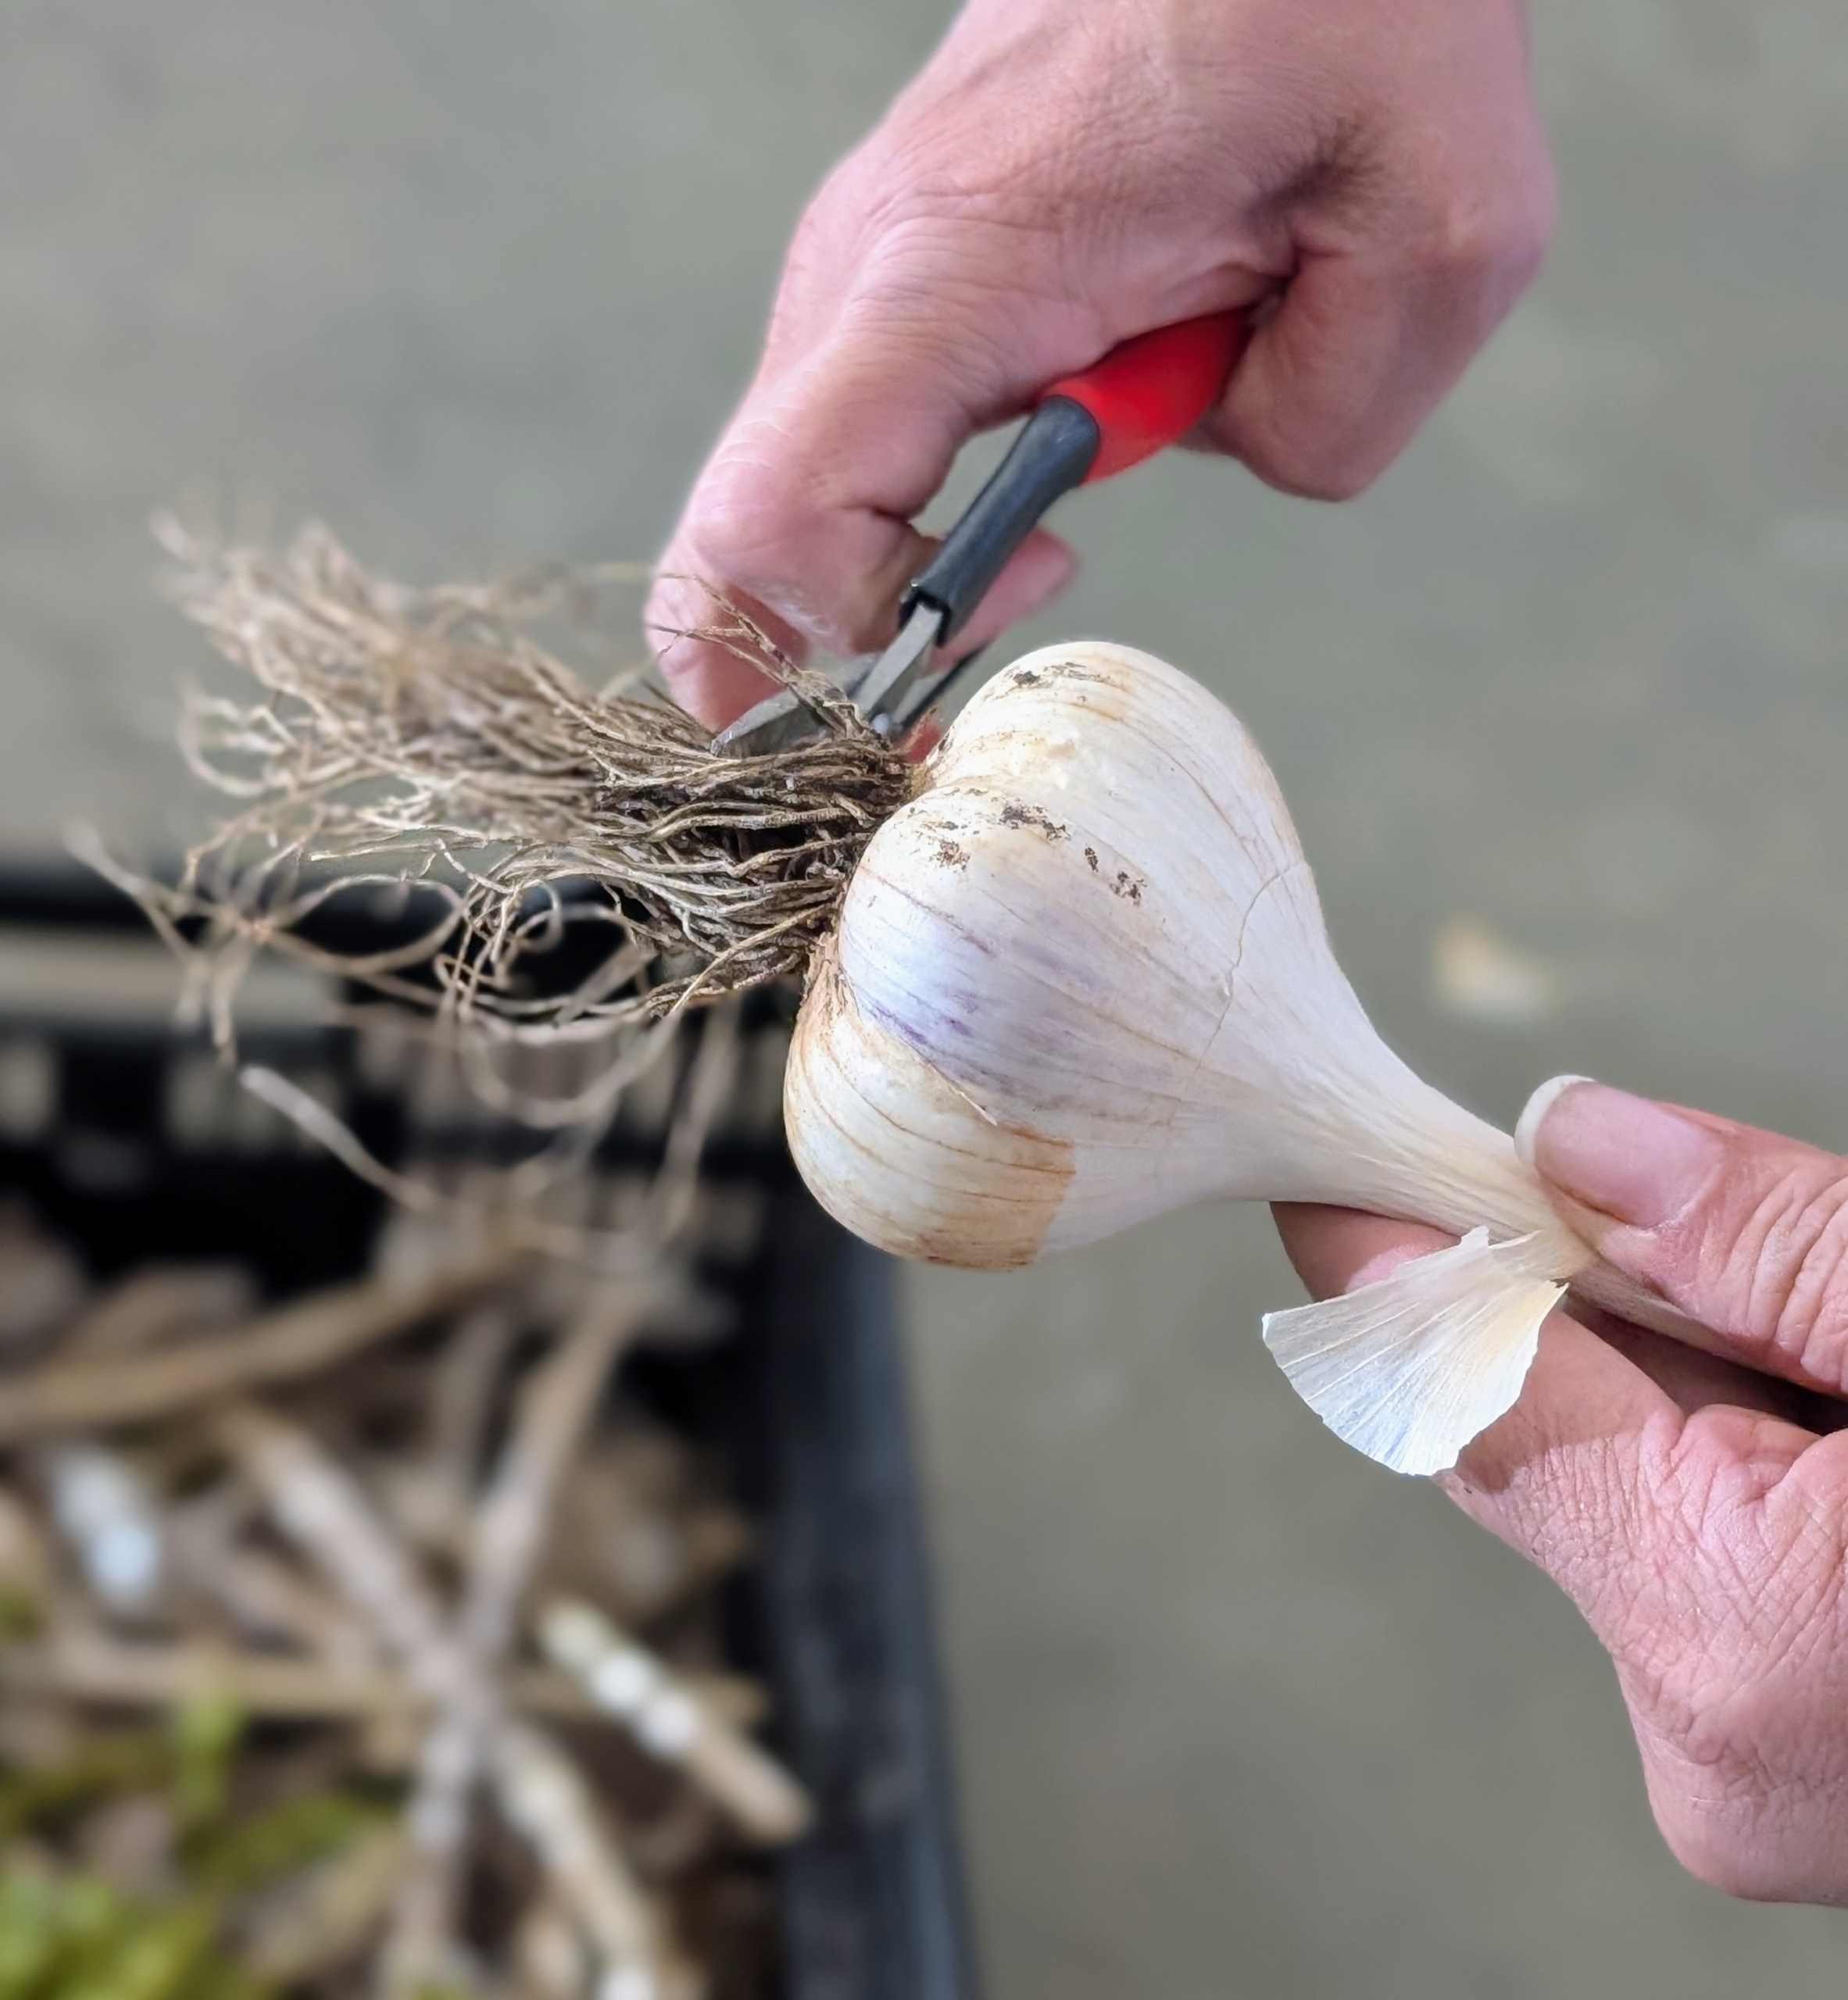
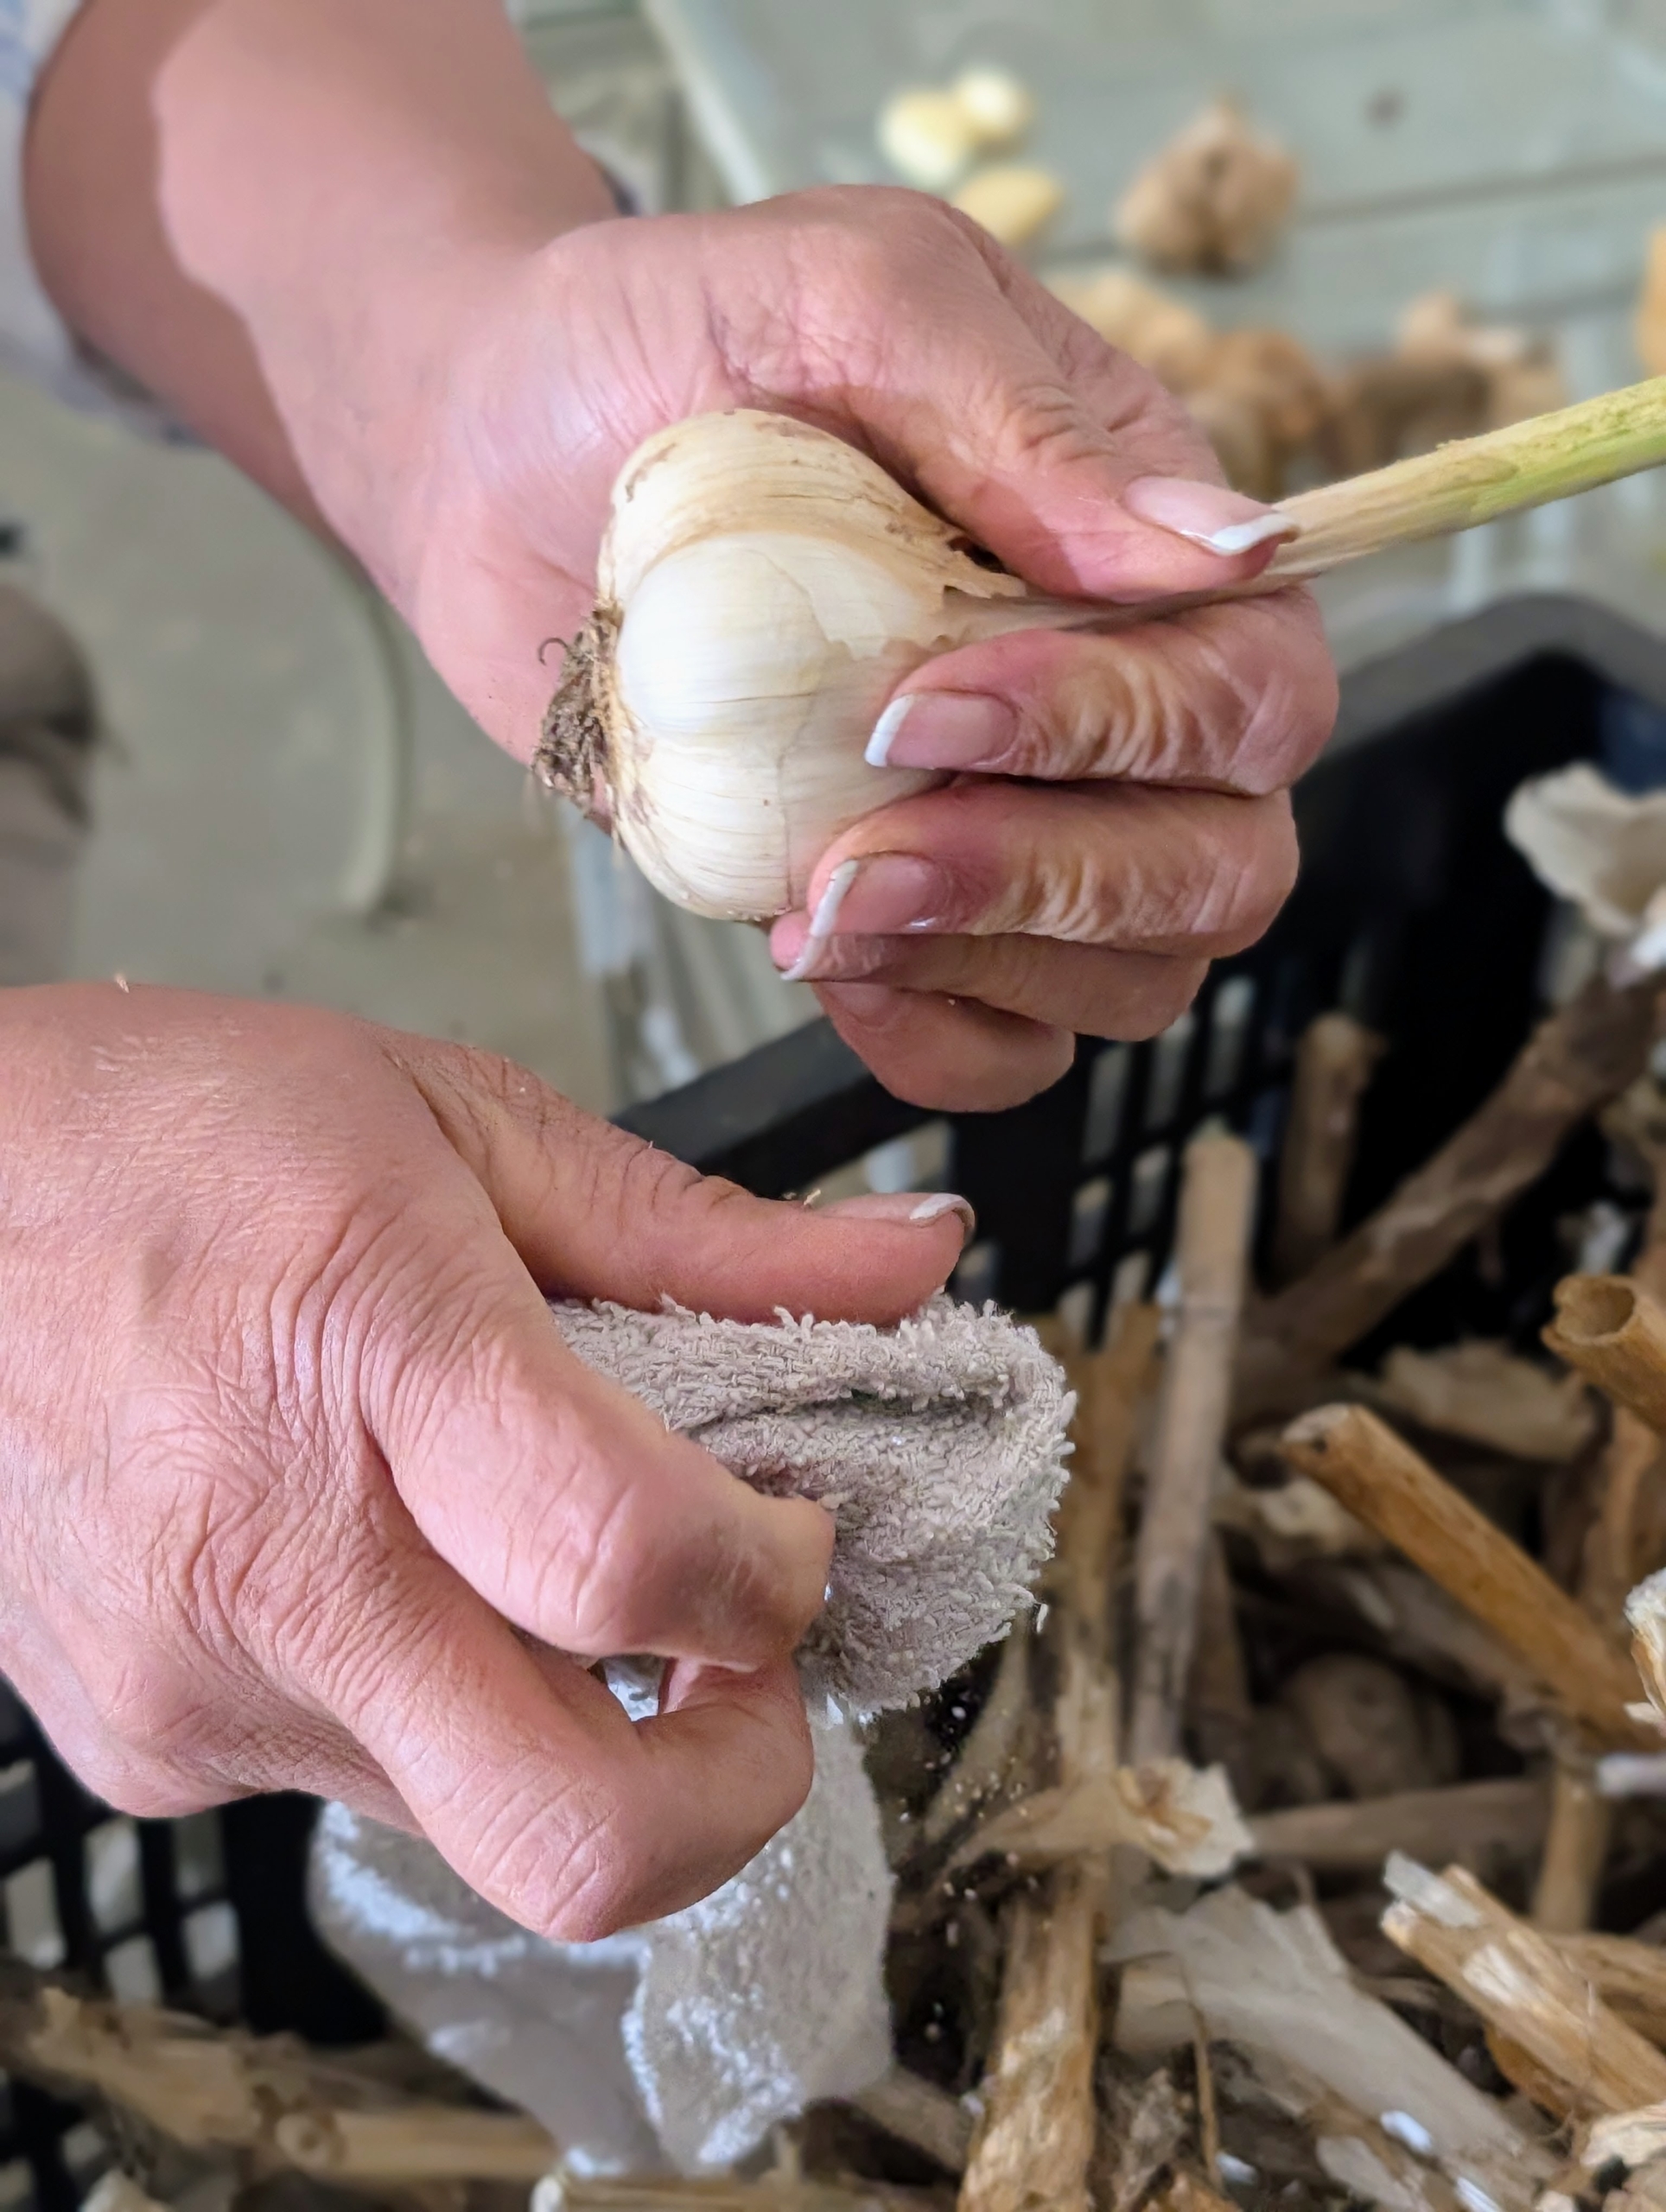
Several weeks later is when the next part of the process is done. Yesterday, Elvira got them ready for storage by cleaning and trimming each garlic head. Elvira wipes each one with a dry rag removing any excess dirt.
Garlic is considered cured when the outer skin is dry and crispy, the stem neck is constricted, and the cut stem’s center is hard.
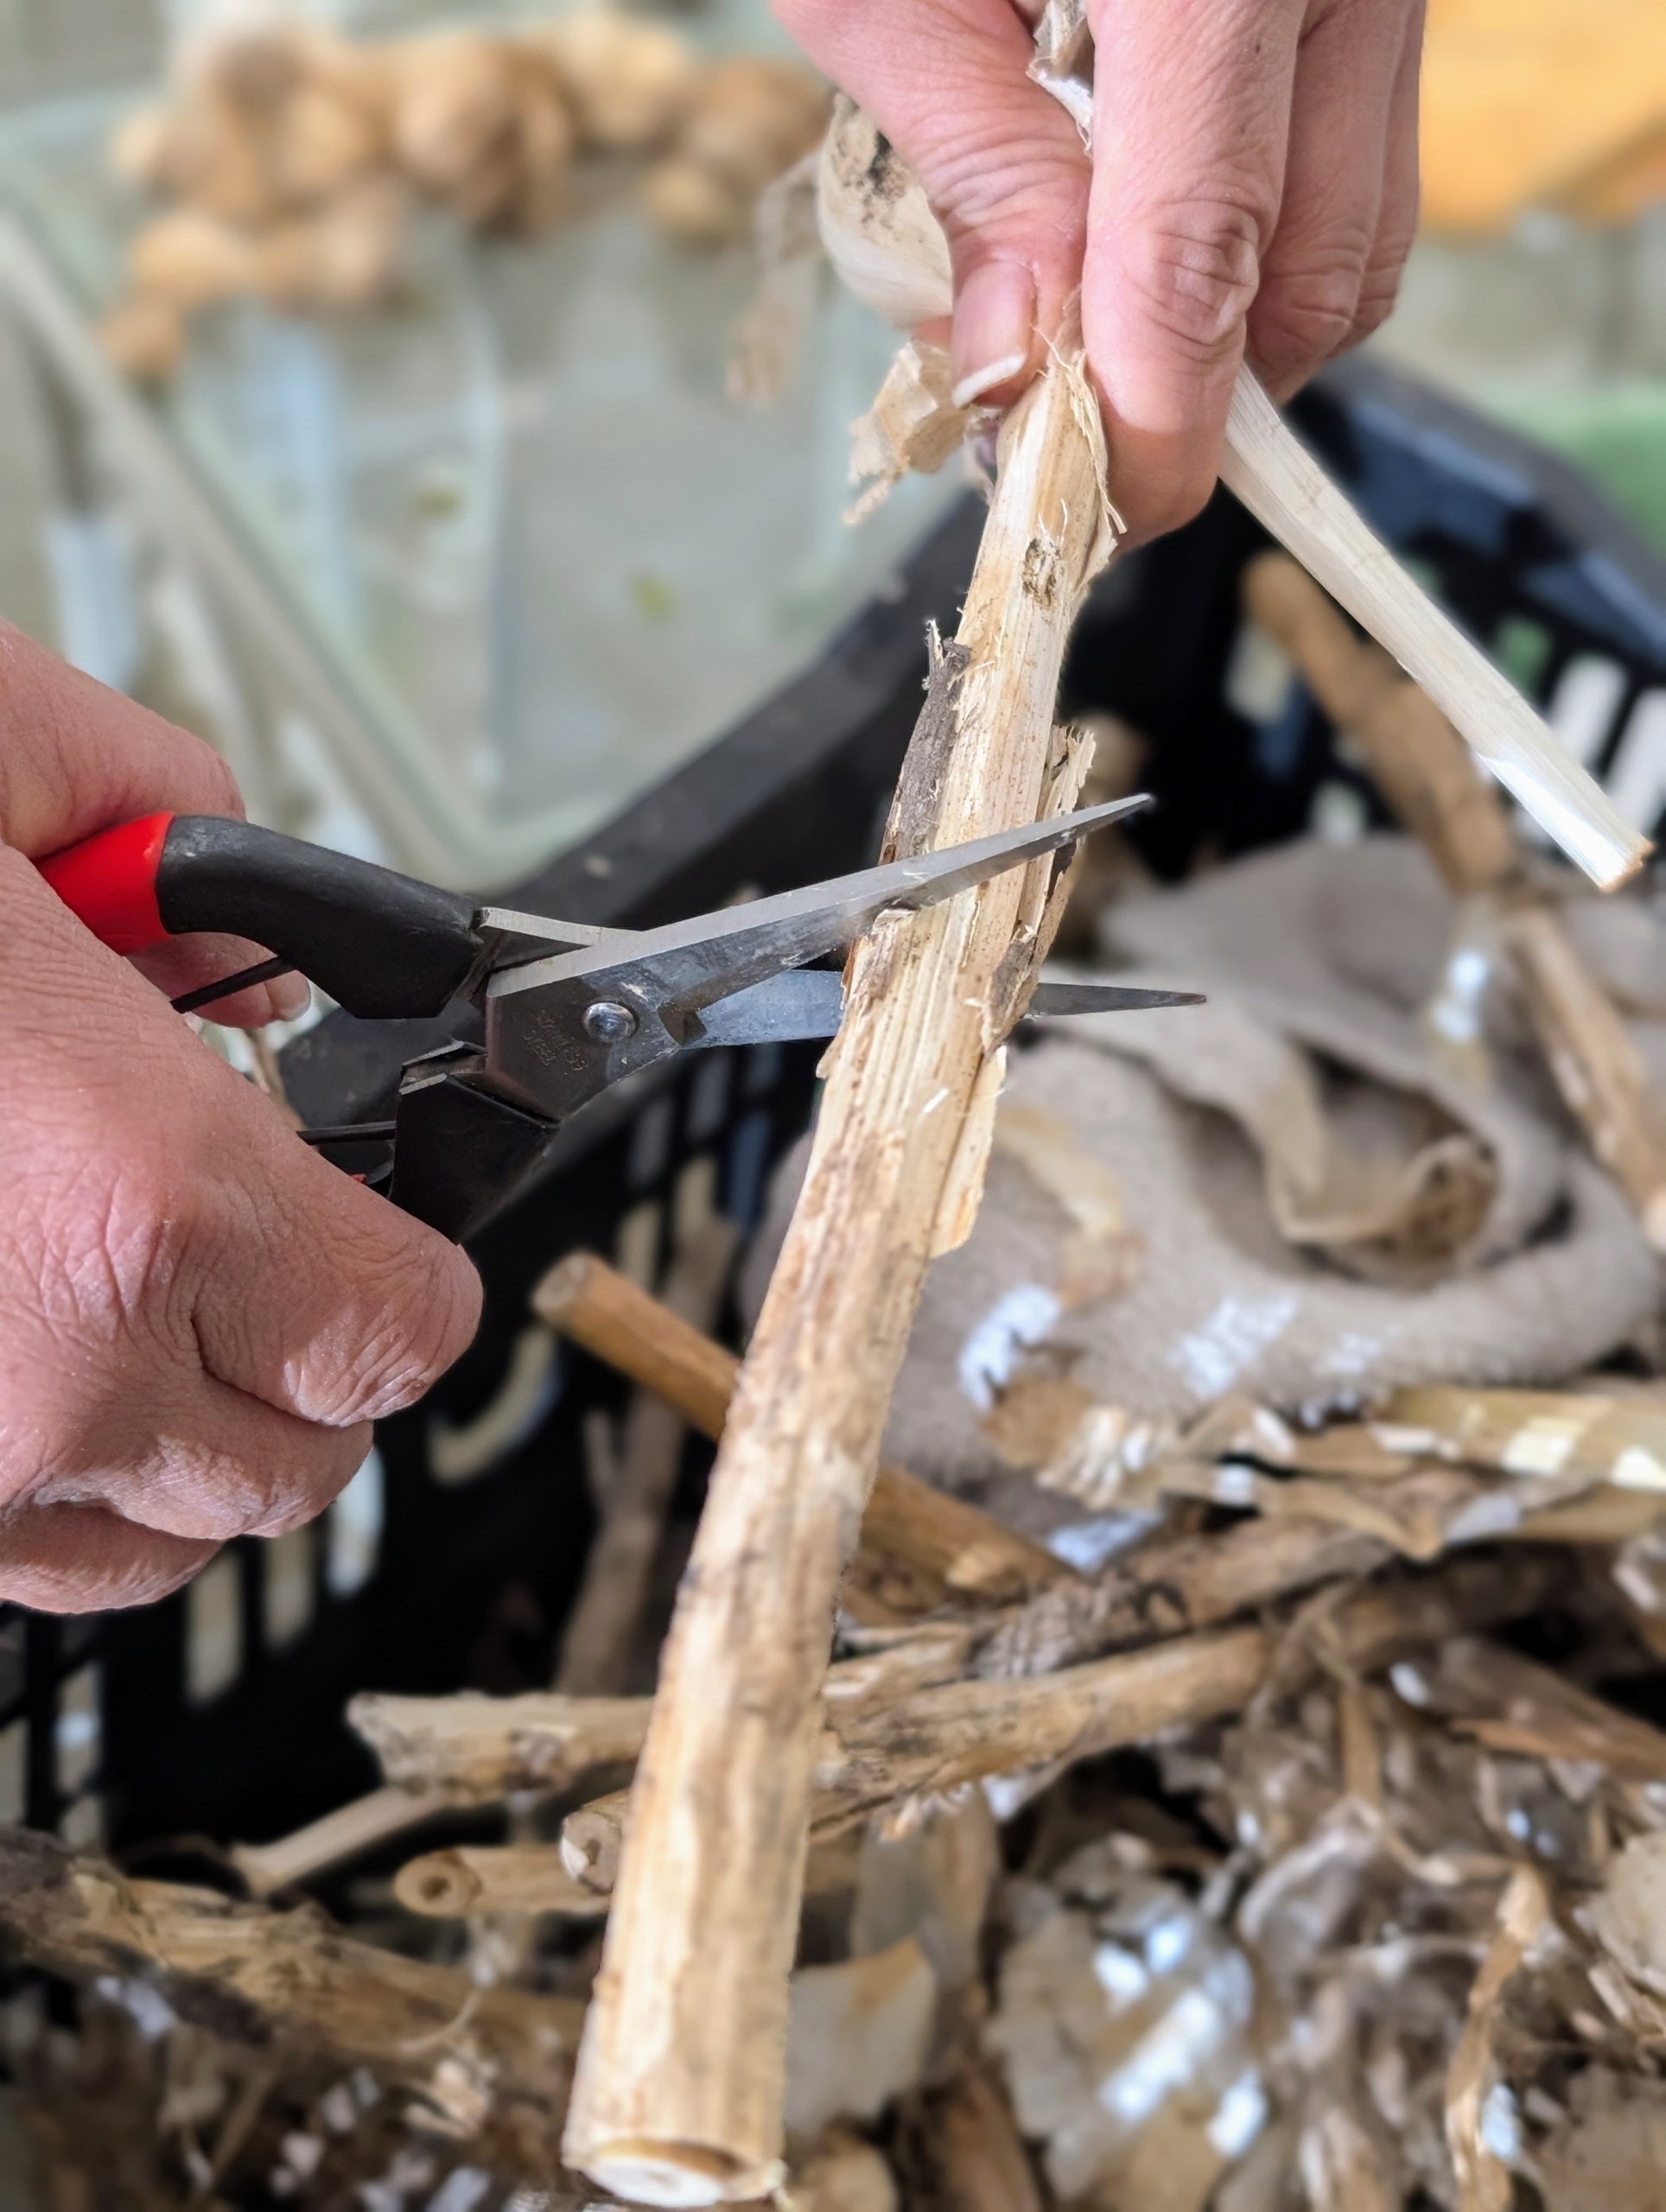
She trims each stalk more leaving about two to four inches. Trimming the stalks makes it easier to store and keeps them neat and uniform.
Elvira removes any loose, dry, papery outer skin, leaving the thinner, more delicate skin underneath intact.
Next she trims the roots being careful not to cut the skins that protect the cloves.
Elvira leaves about a half inch of roots.
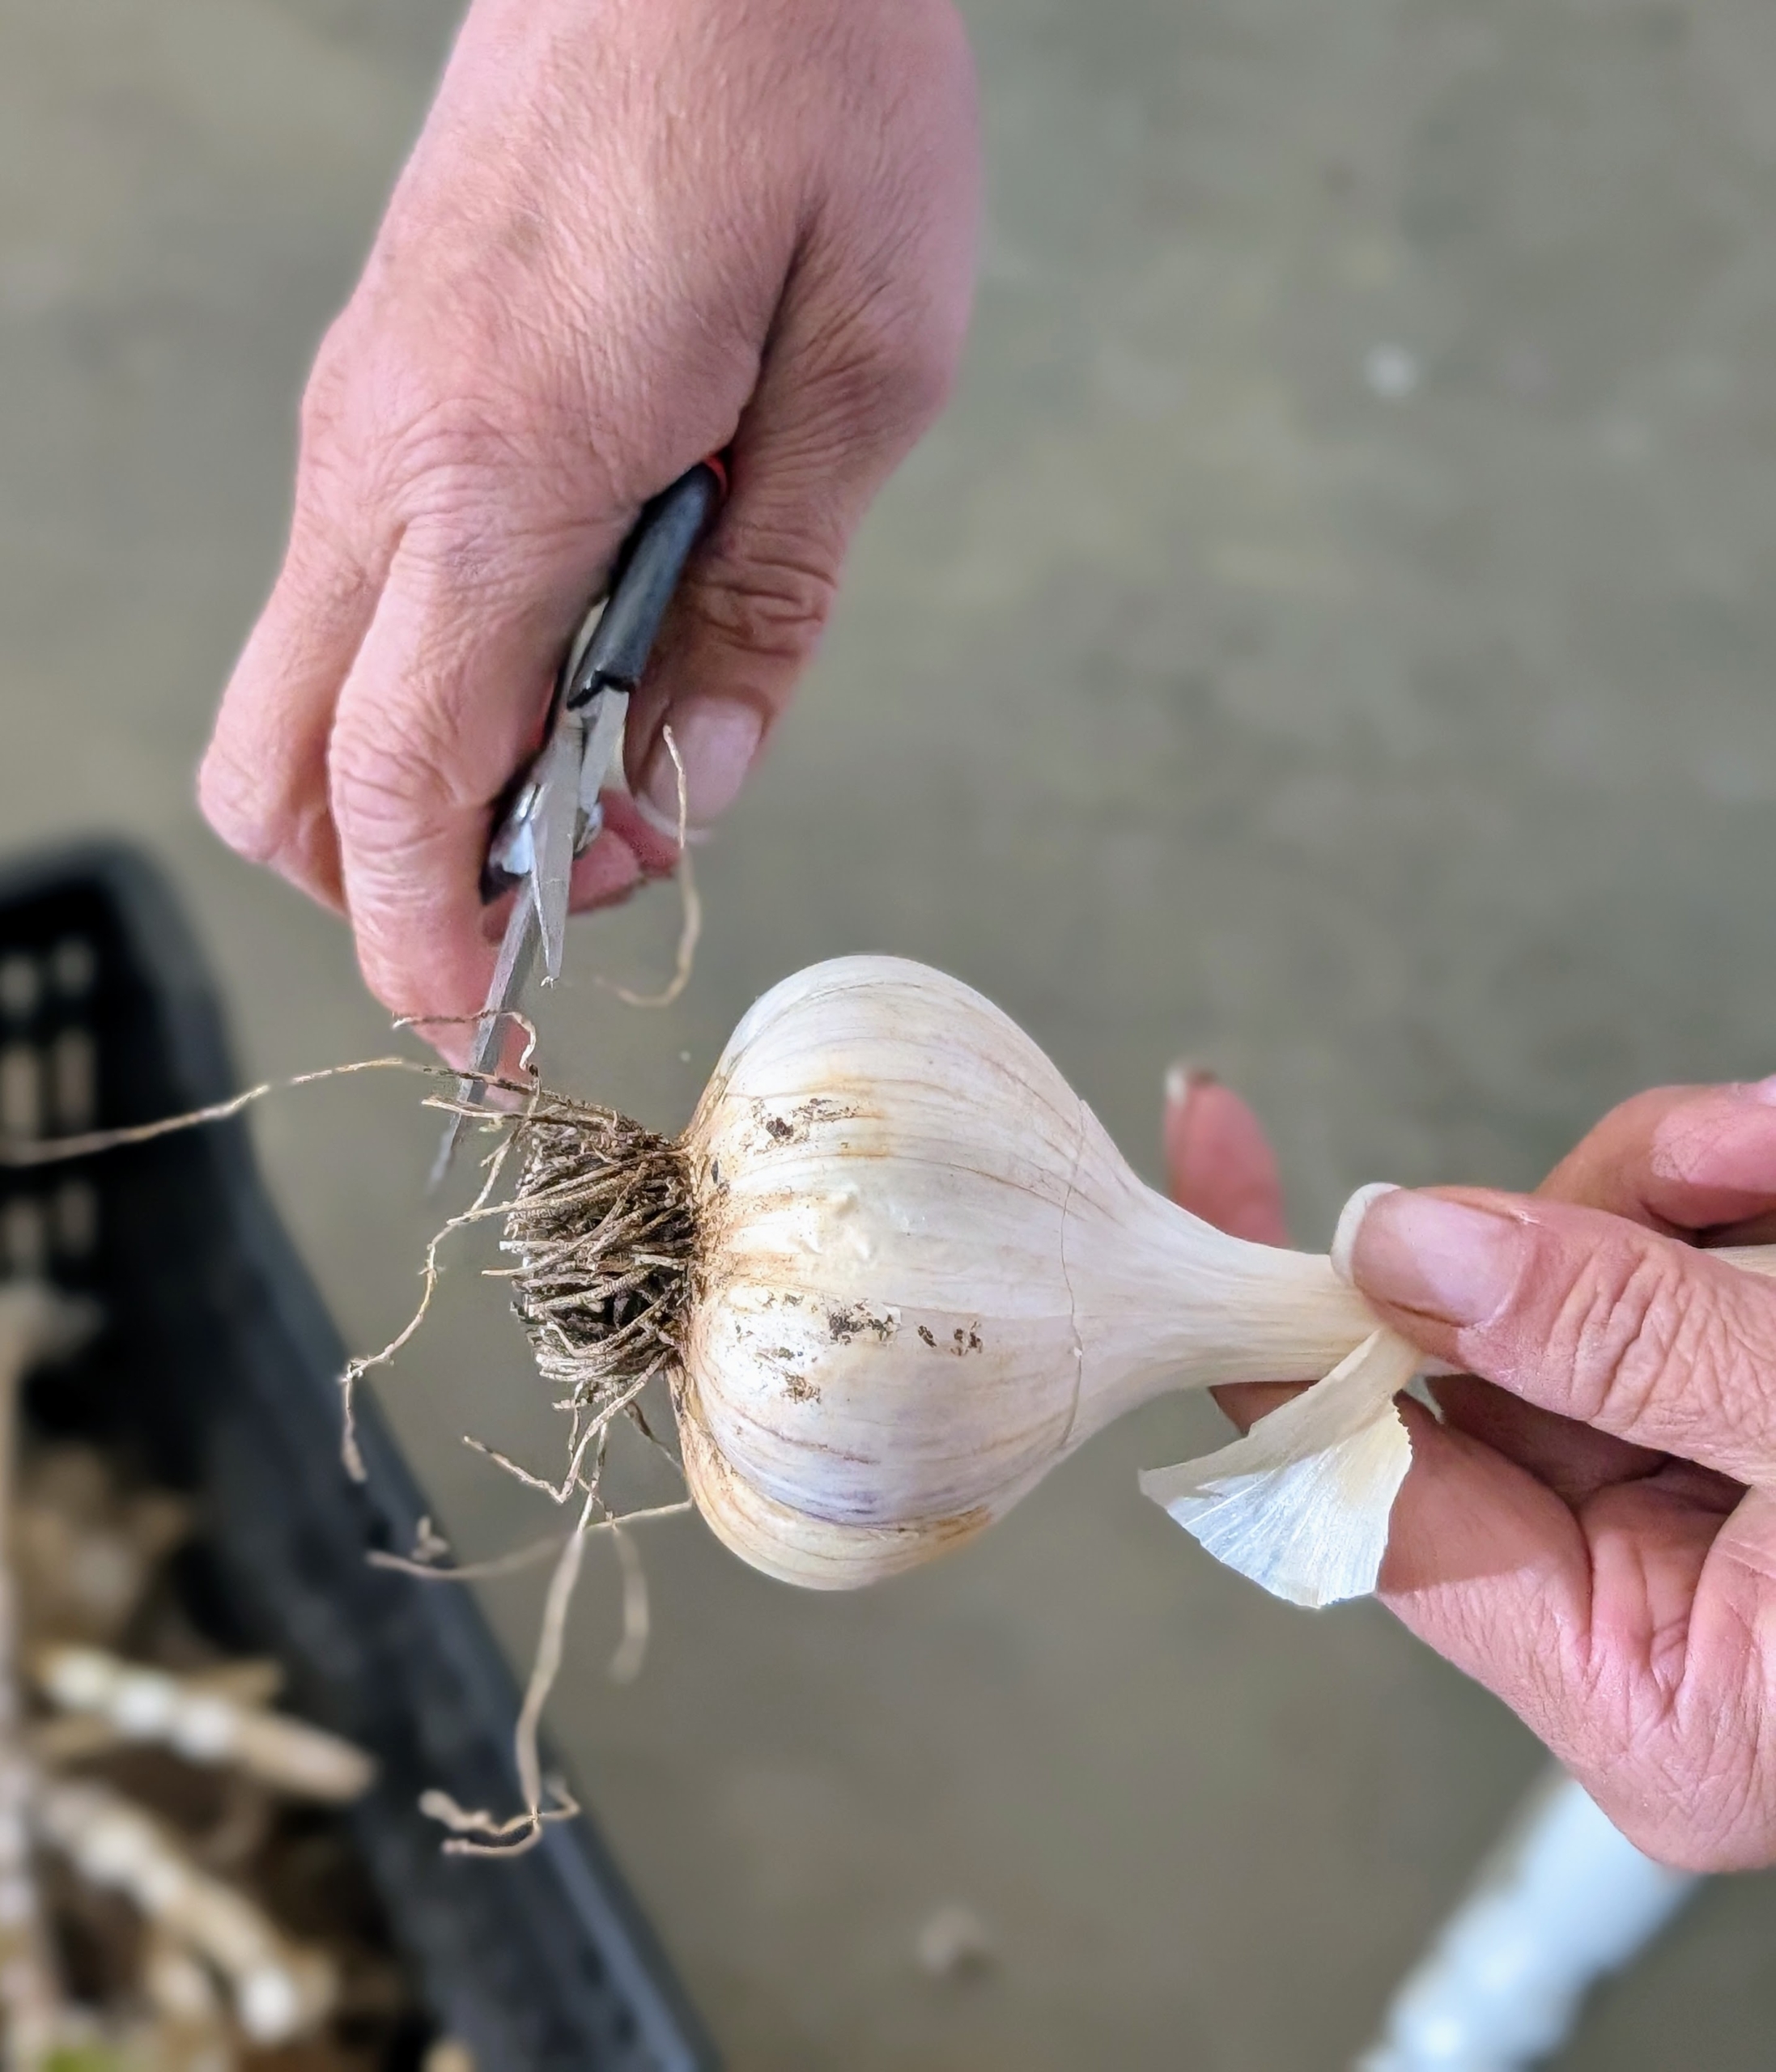
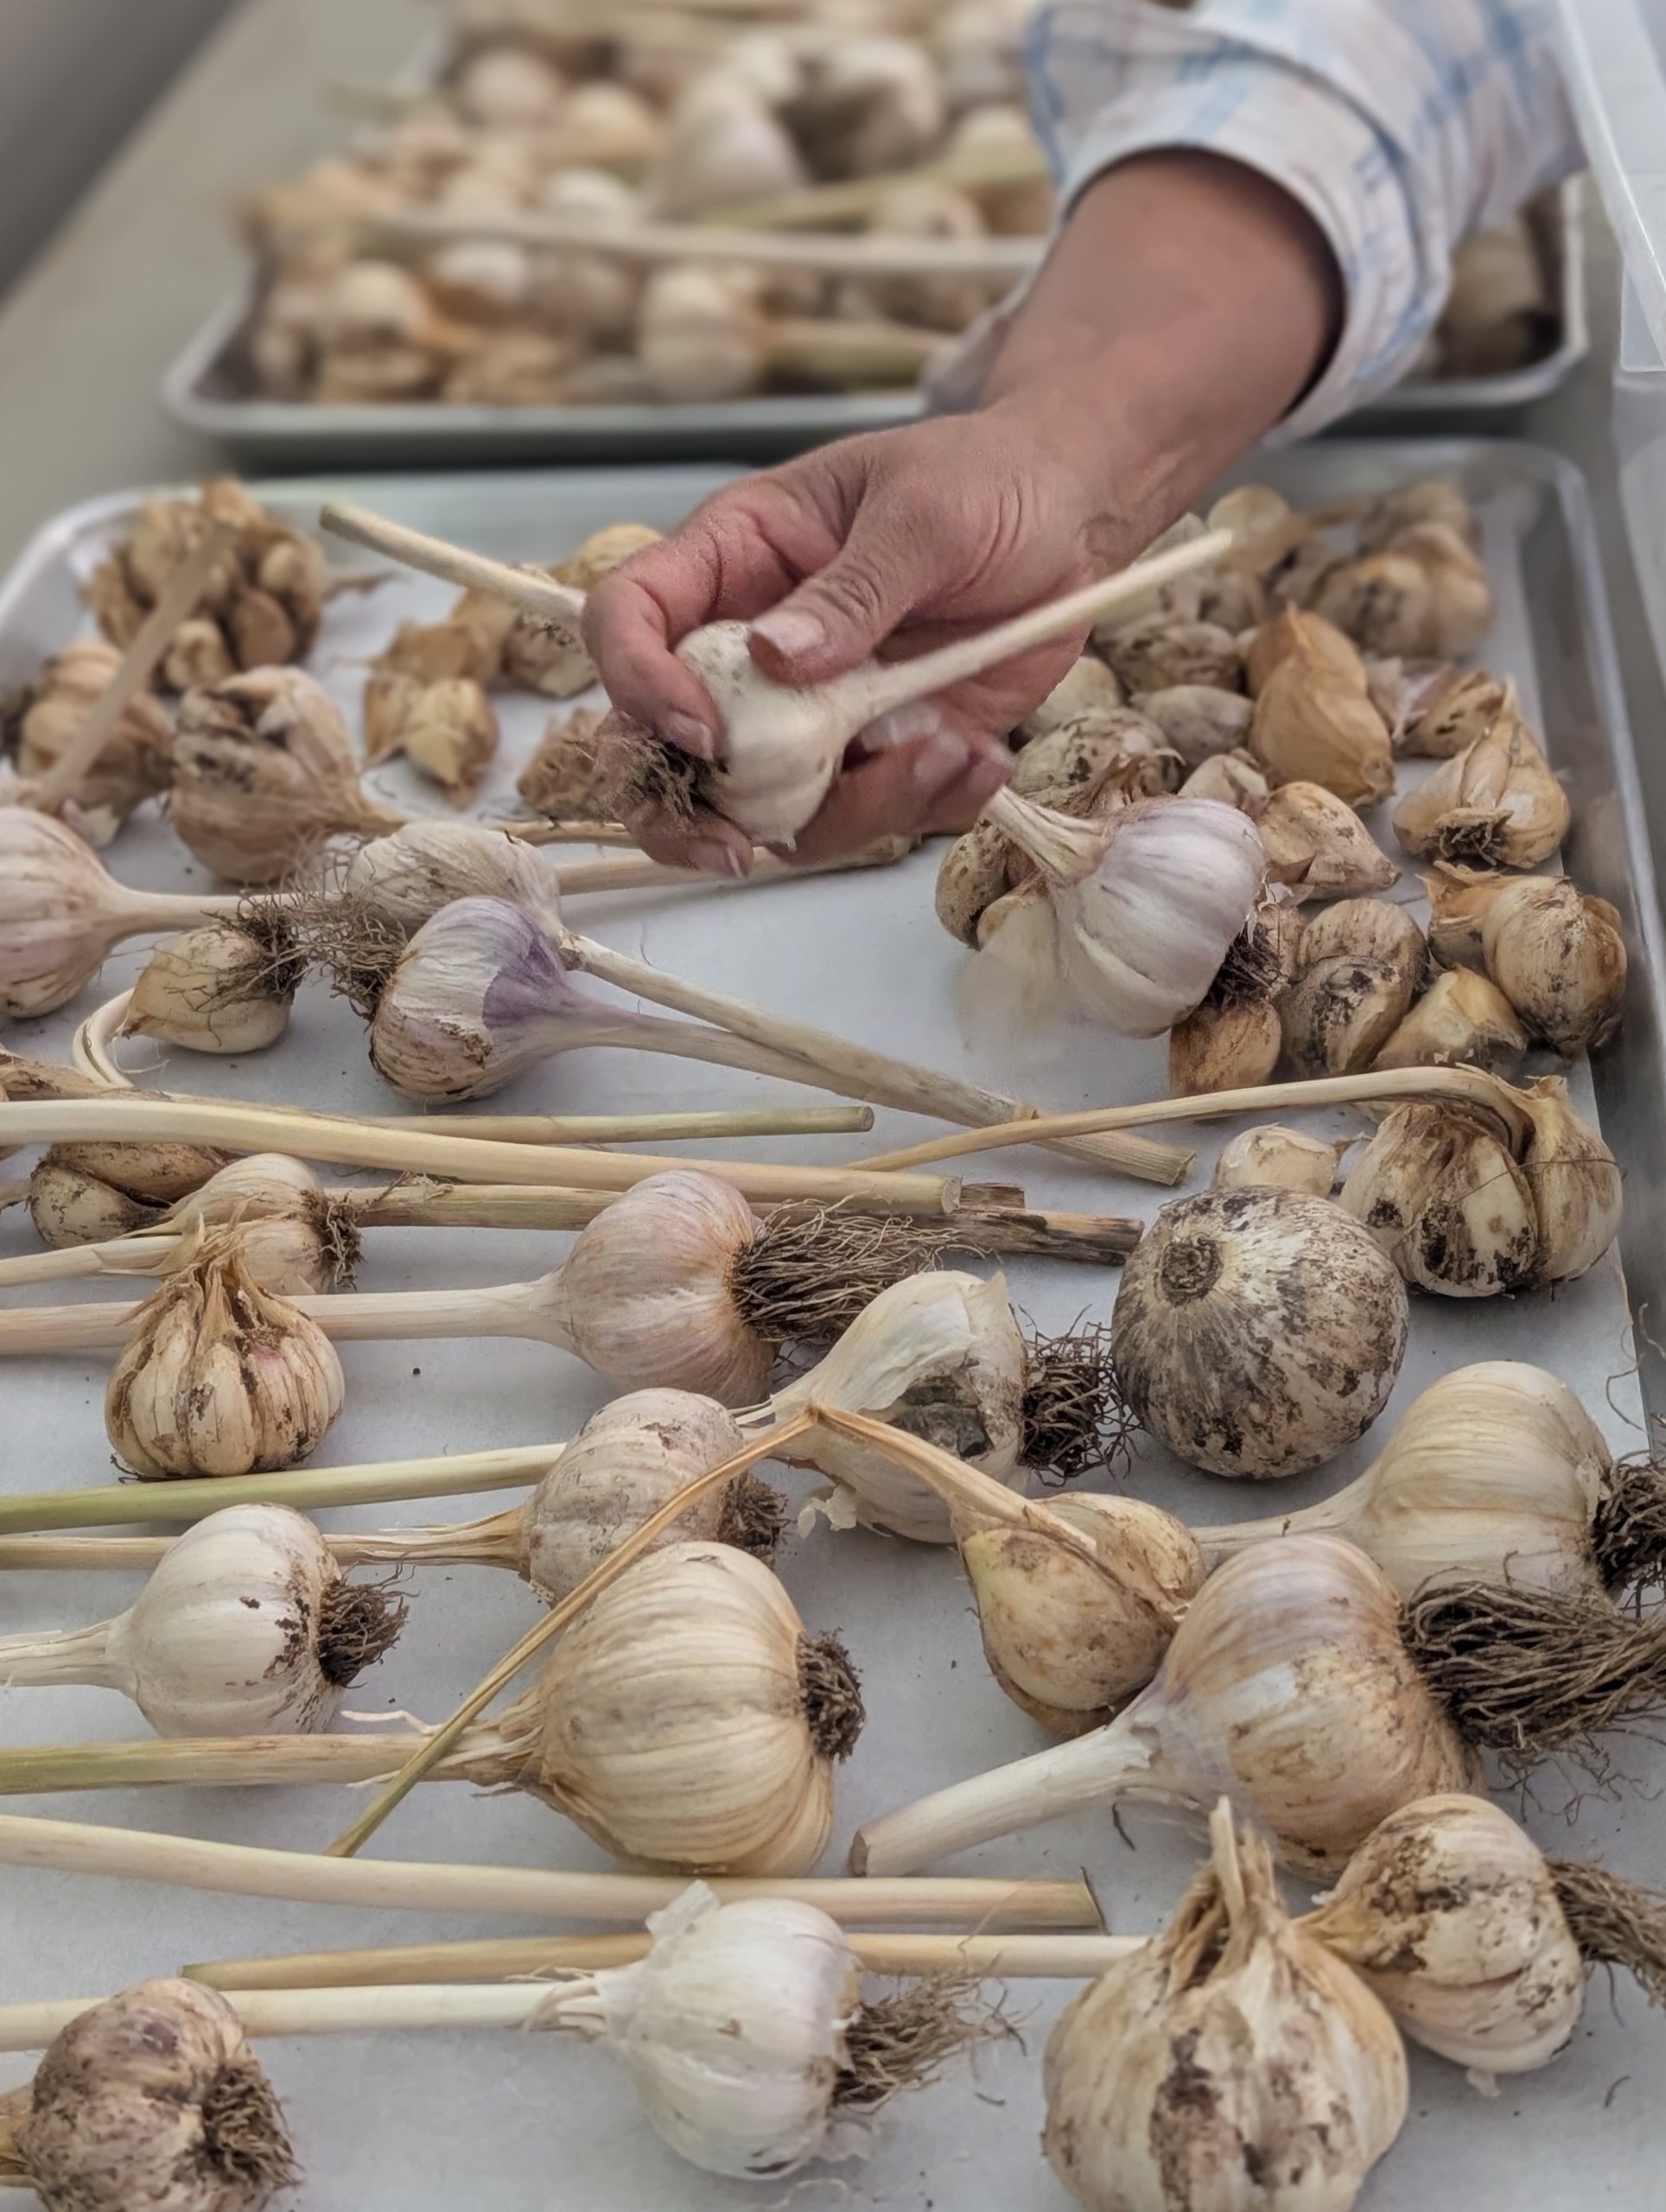
Here is a garlic head after it is cleaned and trimmed.
Elvira wipes the garlic head one more time to ensure all the dirt is removed.
And then drops each one back in the crate, separated from the uncleaned batch.
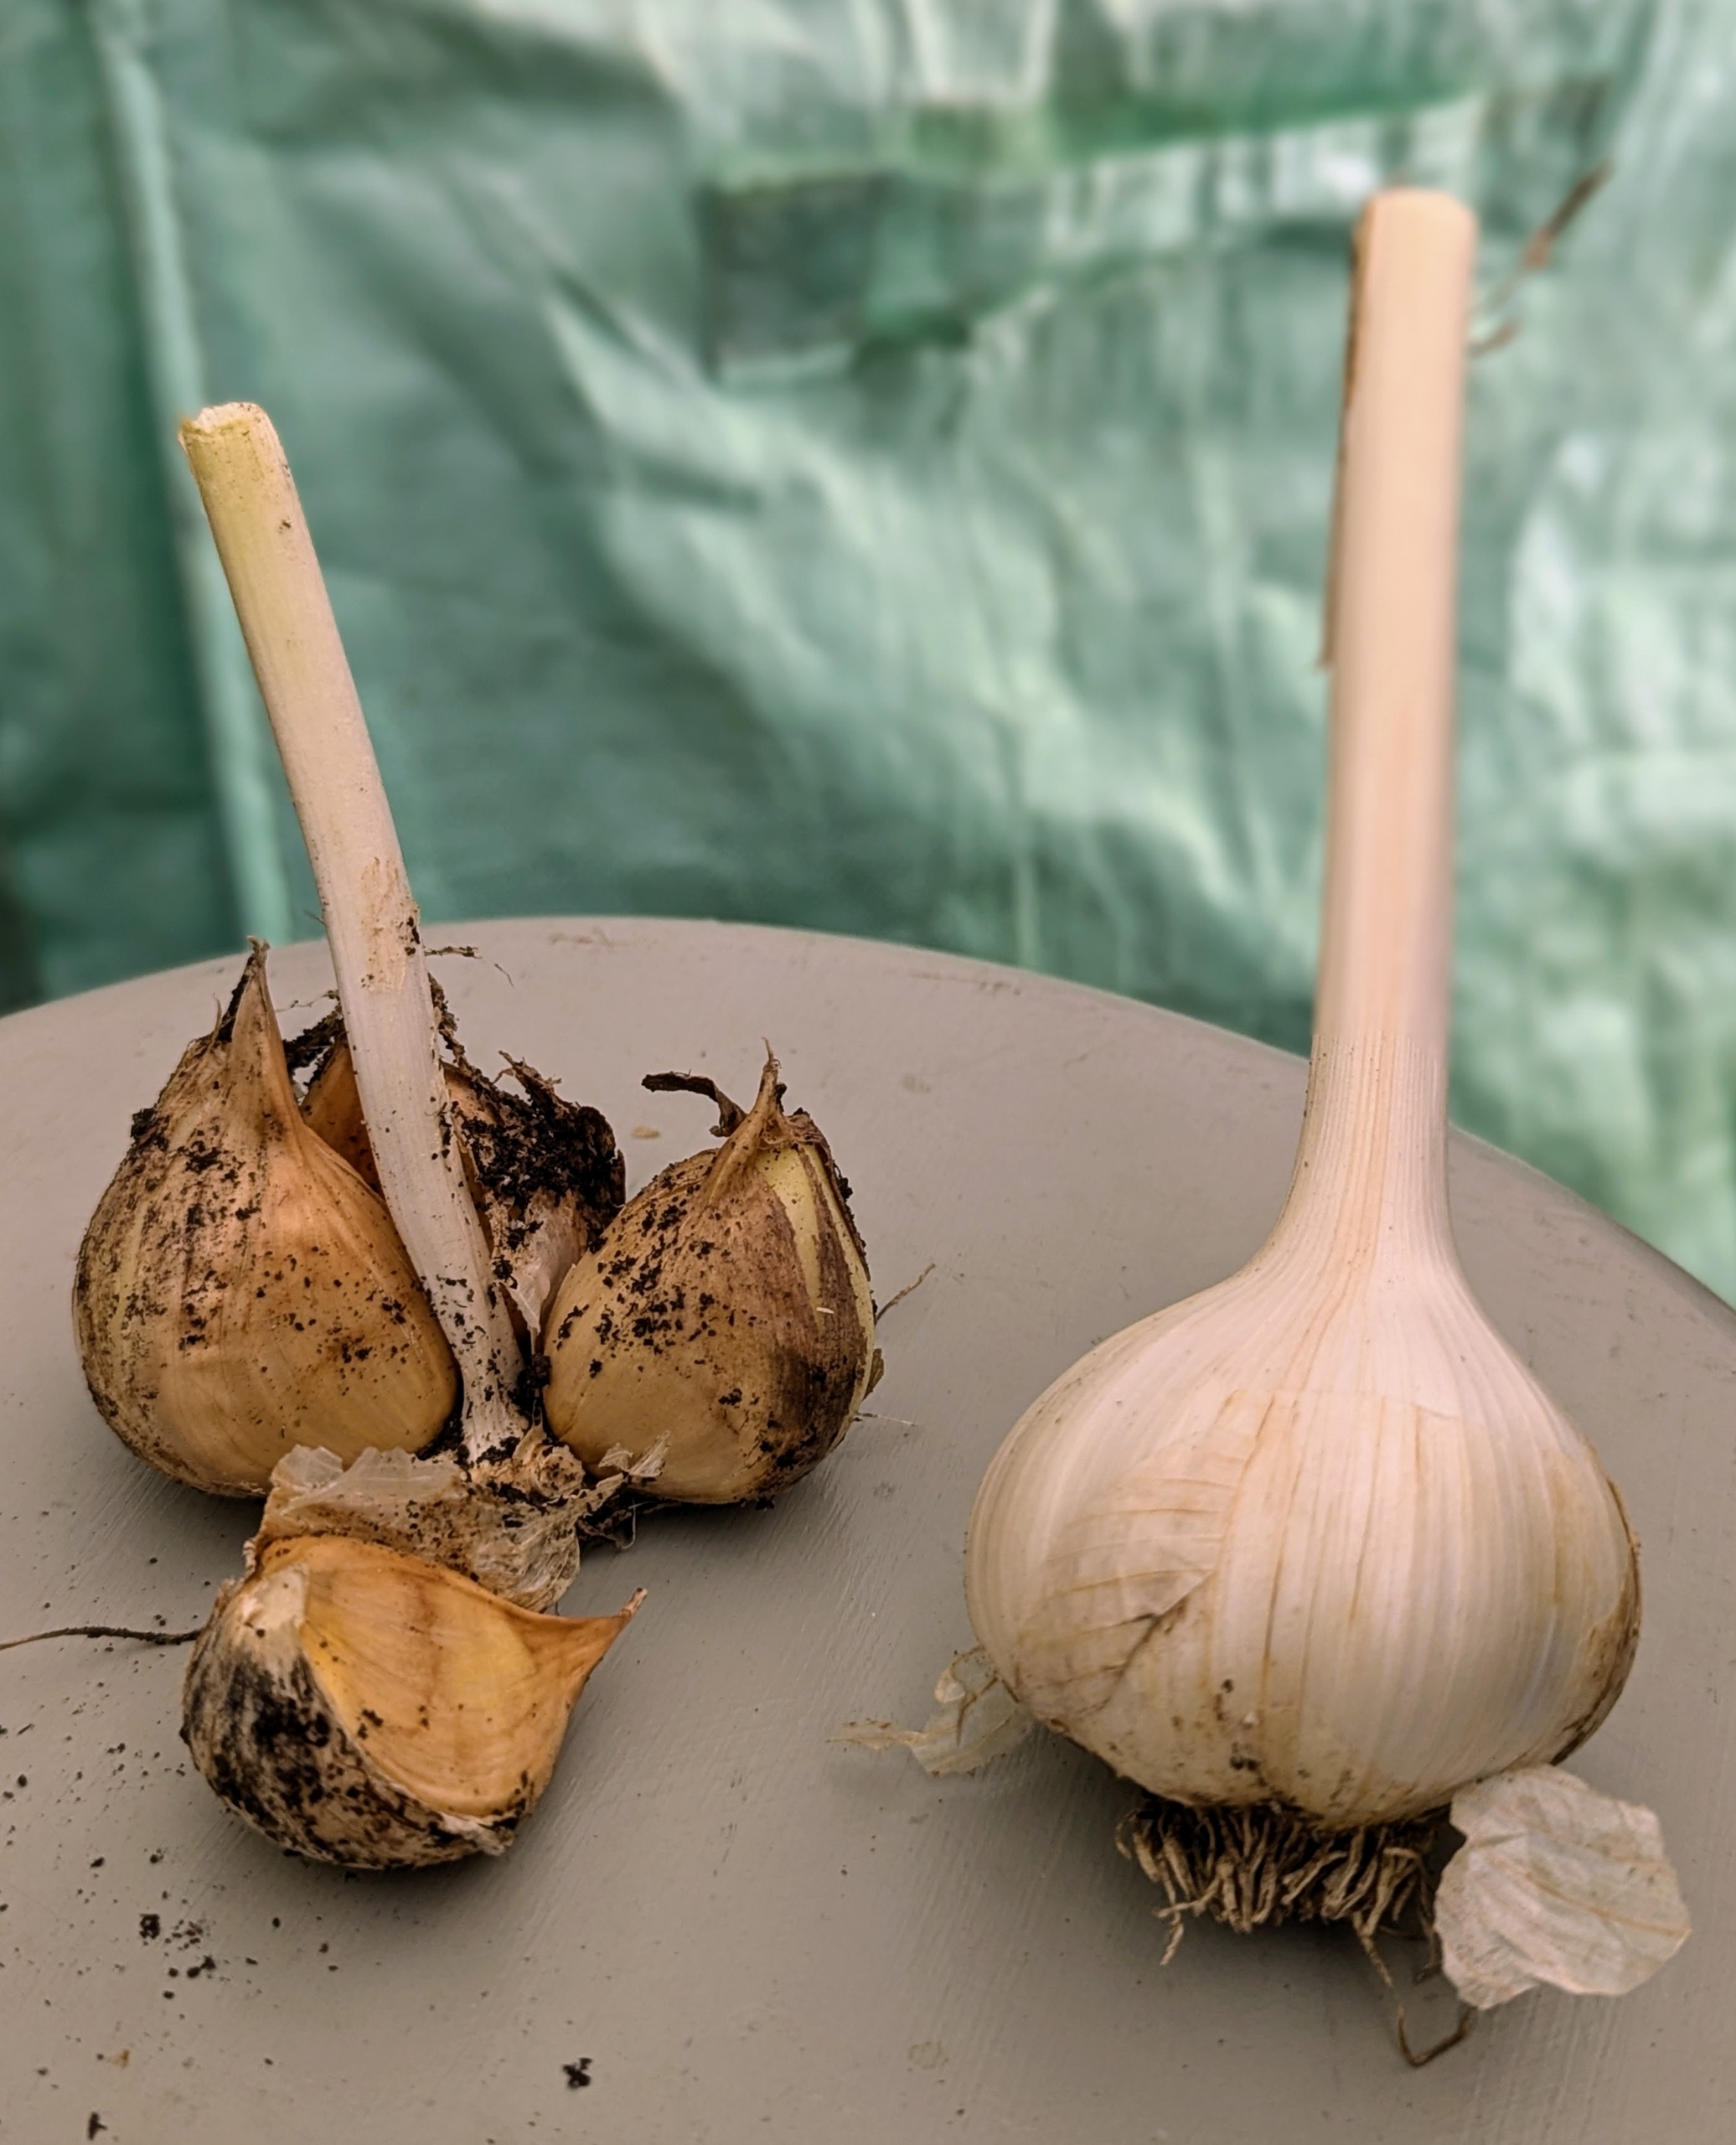
And remember, a garlic head, also known as a garlic bulb, is the entire bulb of garlic as seen on the right. A garlic clove is one of the individual segments that make up the bulb as seen on the left.
After they’re all done, Elvira places each cleaned head on a tray lined with parchment paper. One can also lay them out on newspaper. They will continue to cure here in my carport until I bring them into my kitchen to be used.
They are placed in a single layer to continue drying. They can also be kept in breathable bags, boxes, or trays and placed in a cool, dark place with good airflow. This will help the garlic last longer and prevent it from sprouting or molding.
It takes some time to get through all the garlic. Garlic can be kept in good condition for a few months at ambient temperatures of 68 to 86 degrees Fahrenheit under low relative humidity. And be sure to save the healthiest bulbs to plant next season.