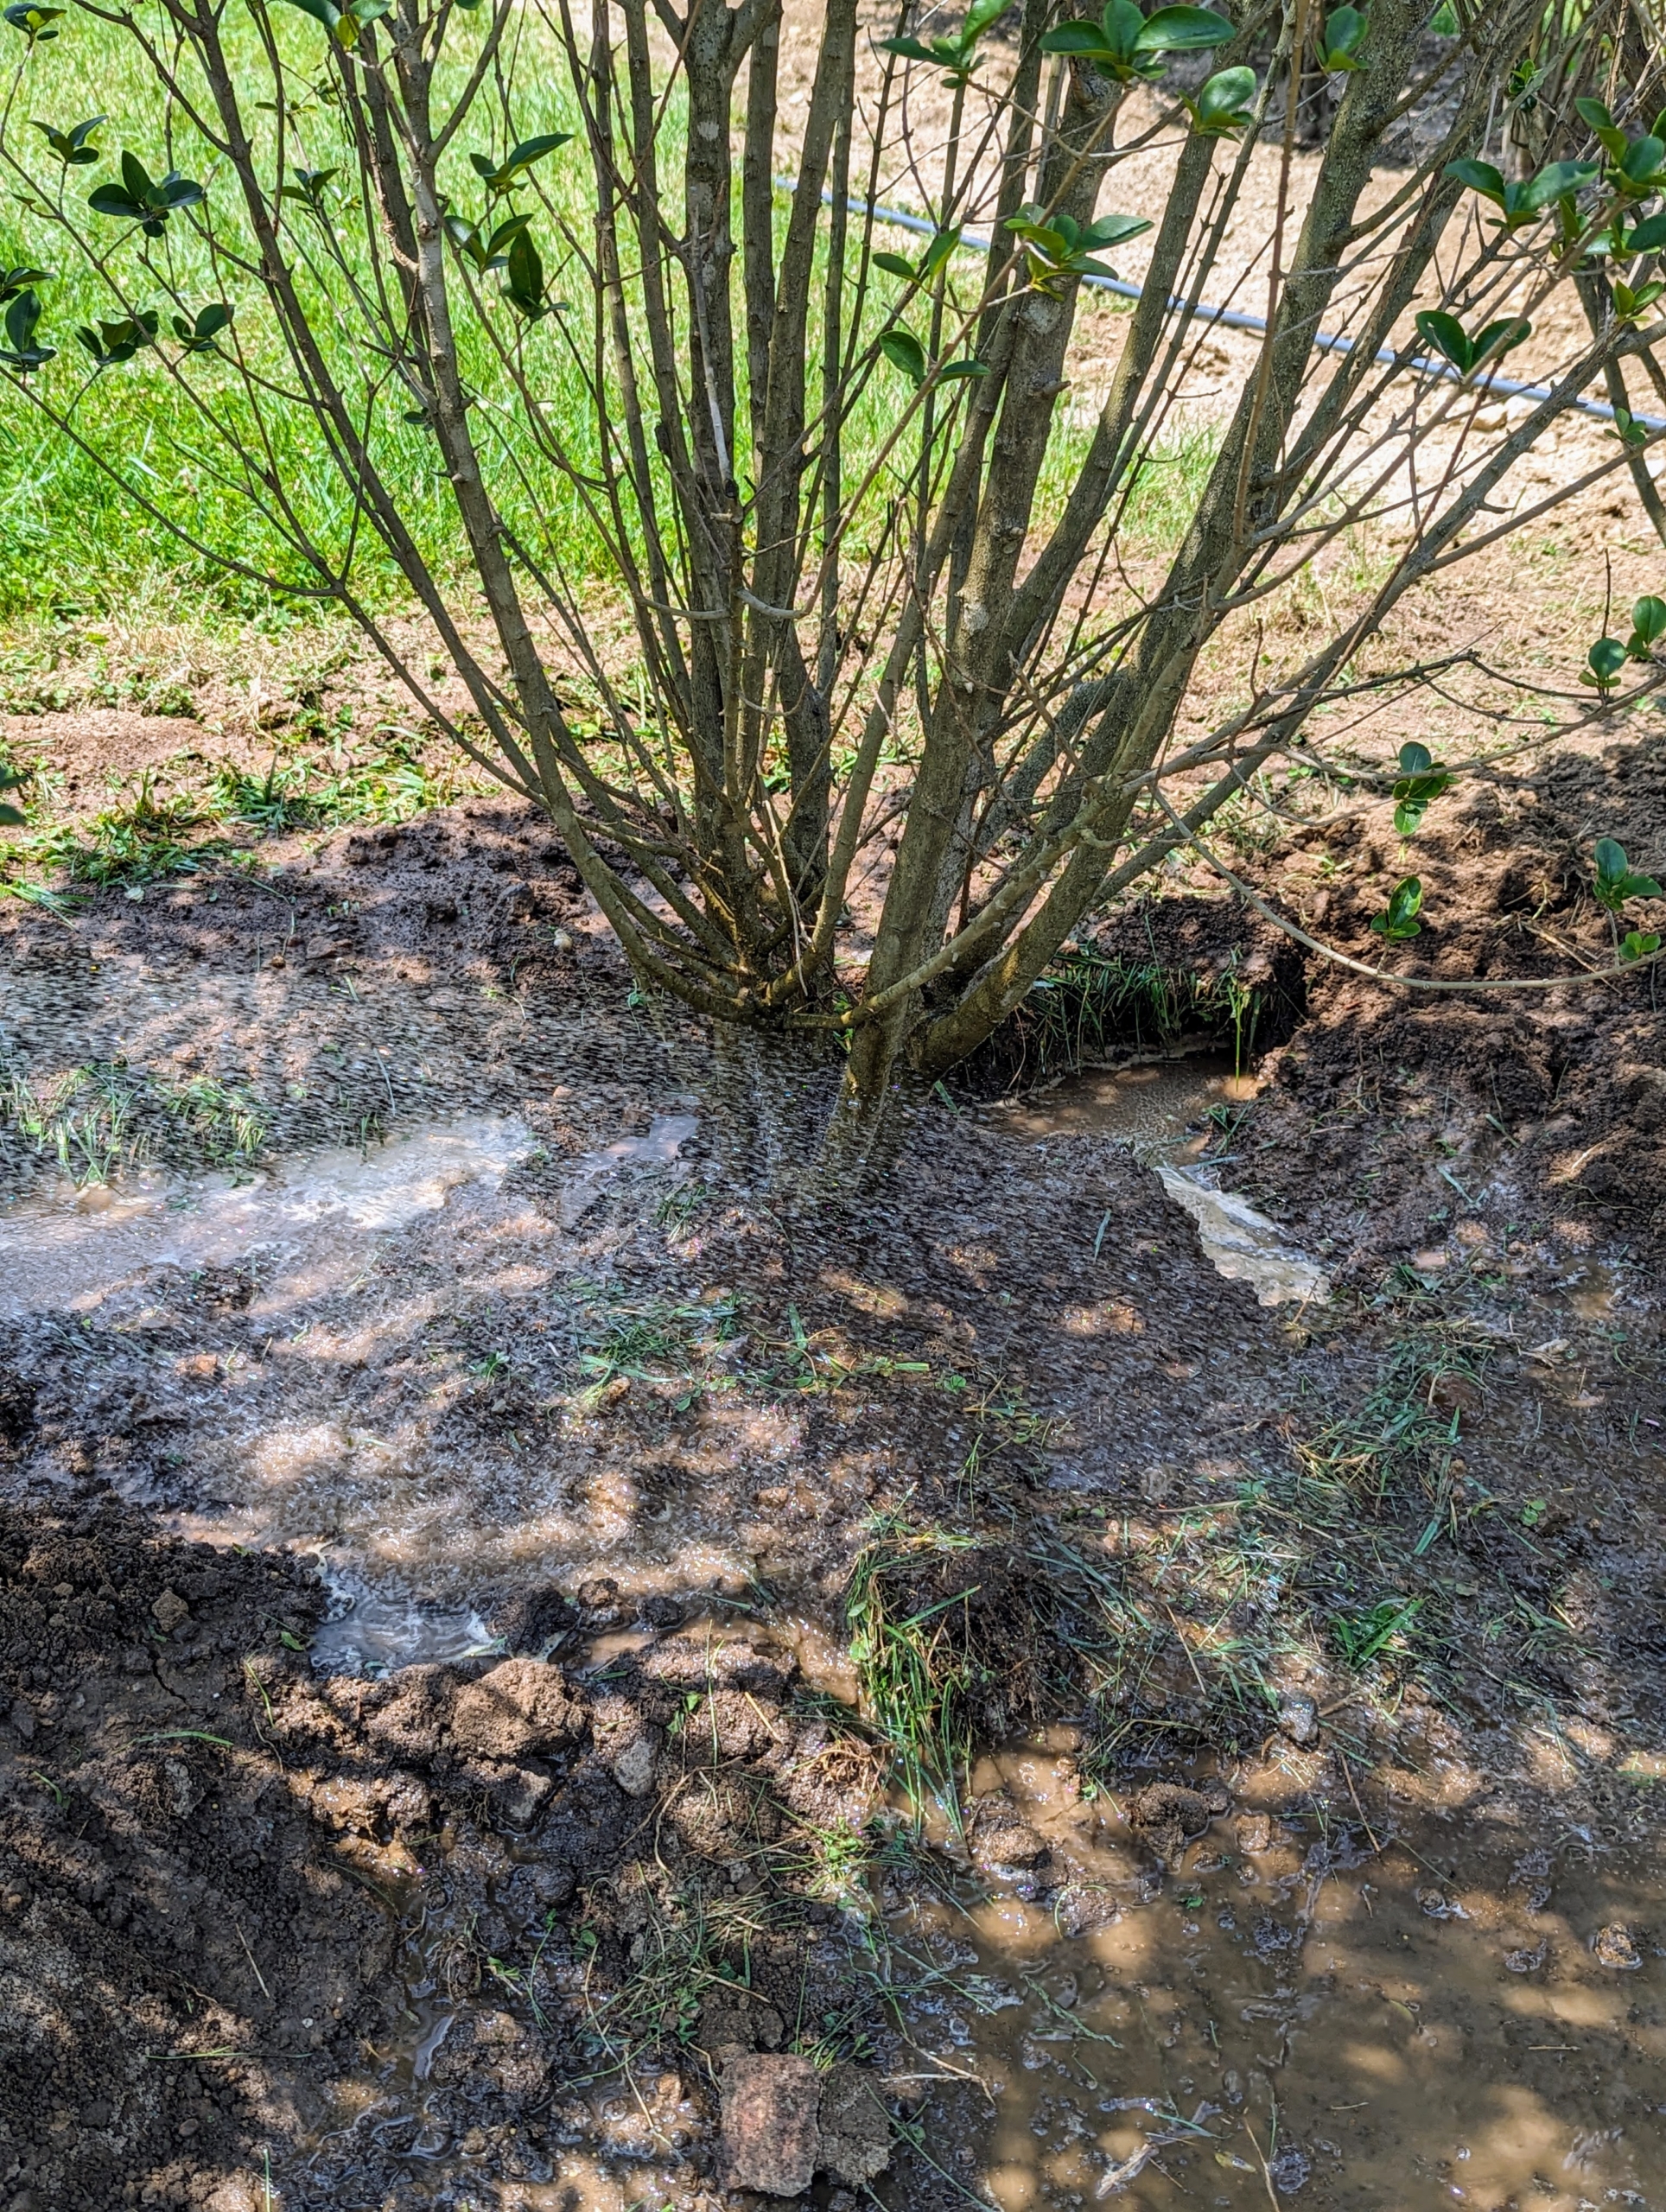
It's that time of year again, when the fast growing hornbeam hedges around my farm need to be pruned and groomed.
Over the last couple of weeks, my outdoor grounds crew trimmed the tall hornbeam hedge in front of my main greenhouse. They also tackled the long hornbeam hedge that runs from my Summer House and along the road behind my Winter House as well as the nearby hornbeam shrubs. Botanically known as Carpinus betulus, the hornbeam is a fast-growing deciduous tree. In fact, it can grow about four to five feet per year. I keep a close eye on all the hornbeams - it’s crucial to prune them regularly, so they never look too overgrown and unruly.
Enjoy these photos.
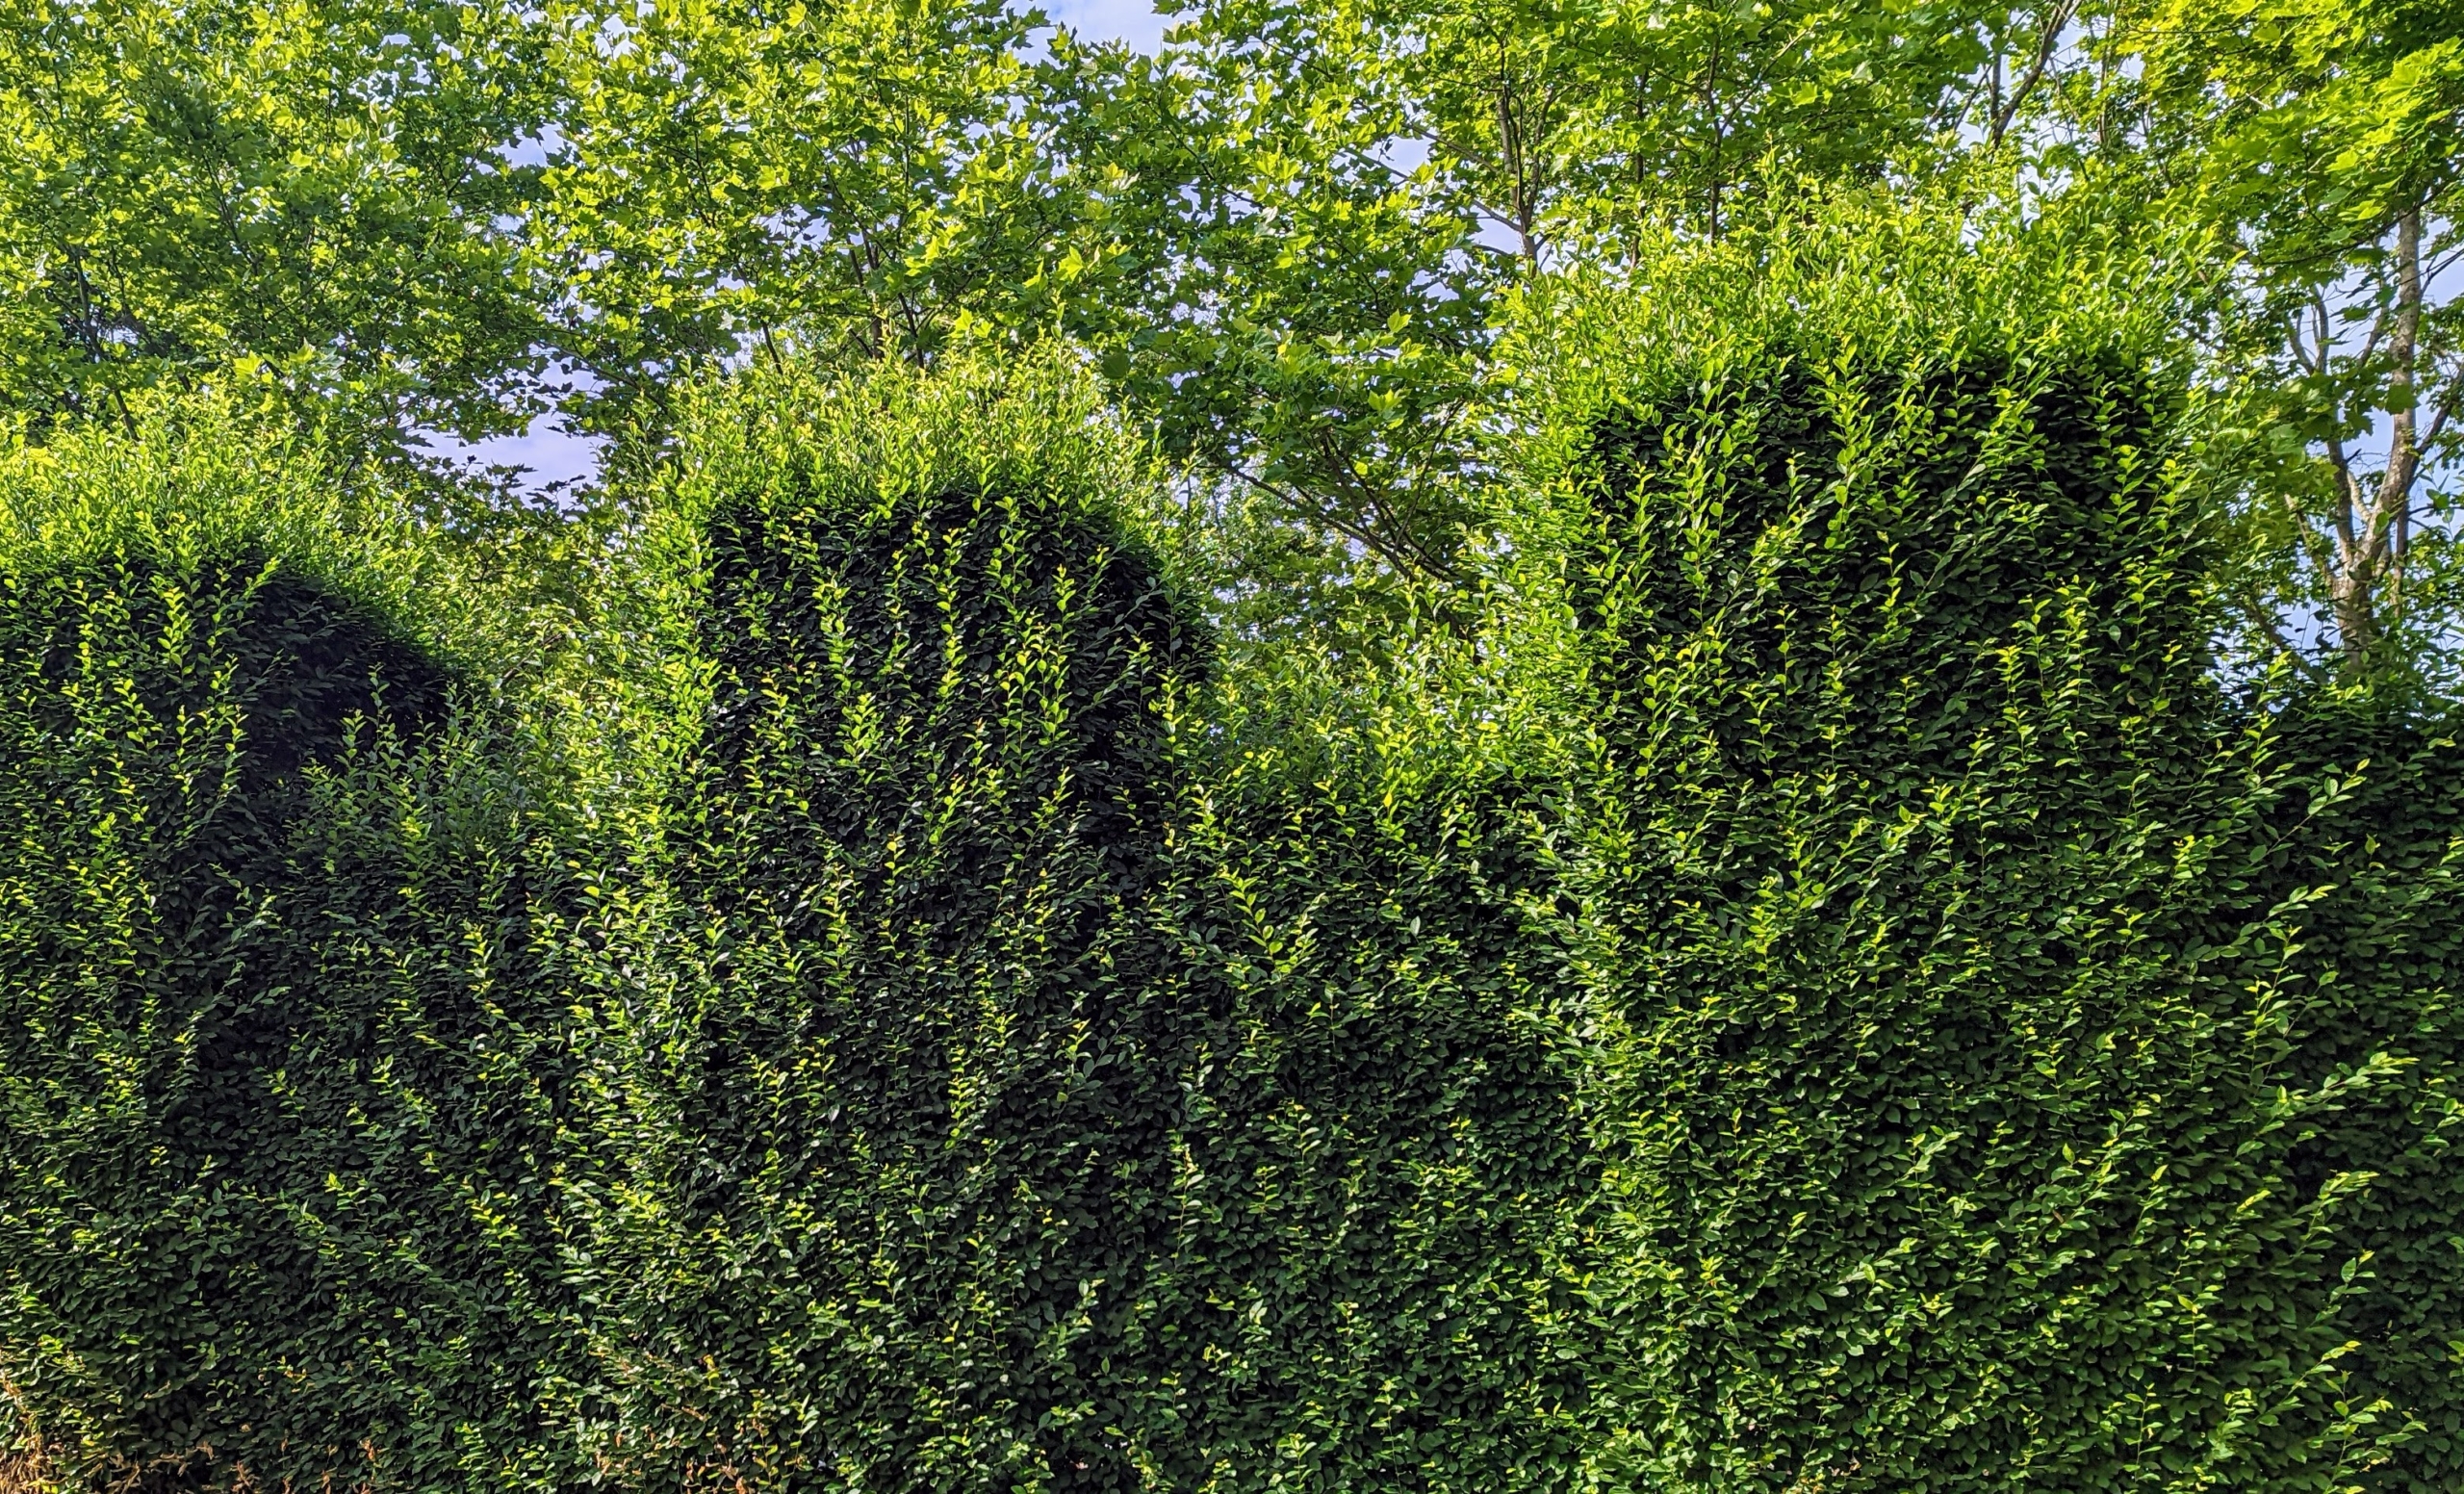
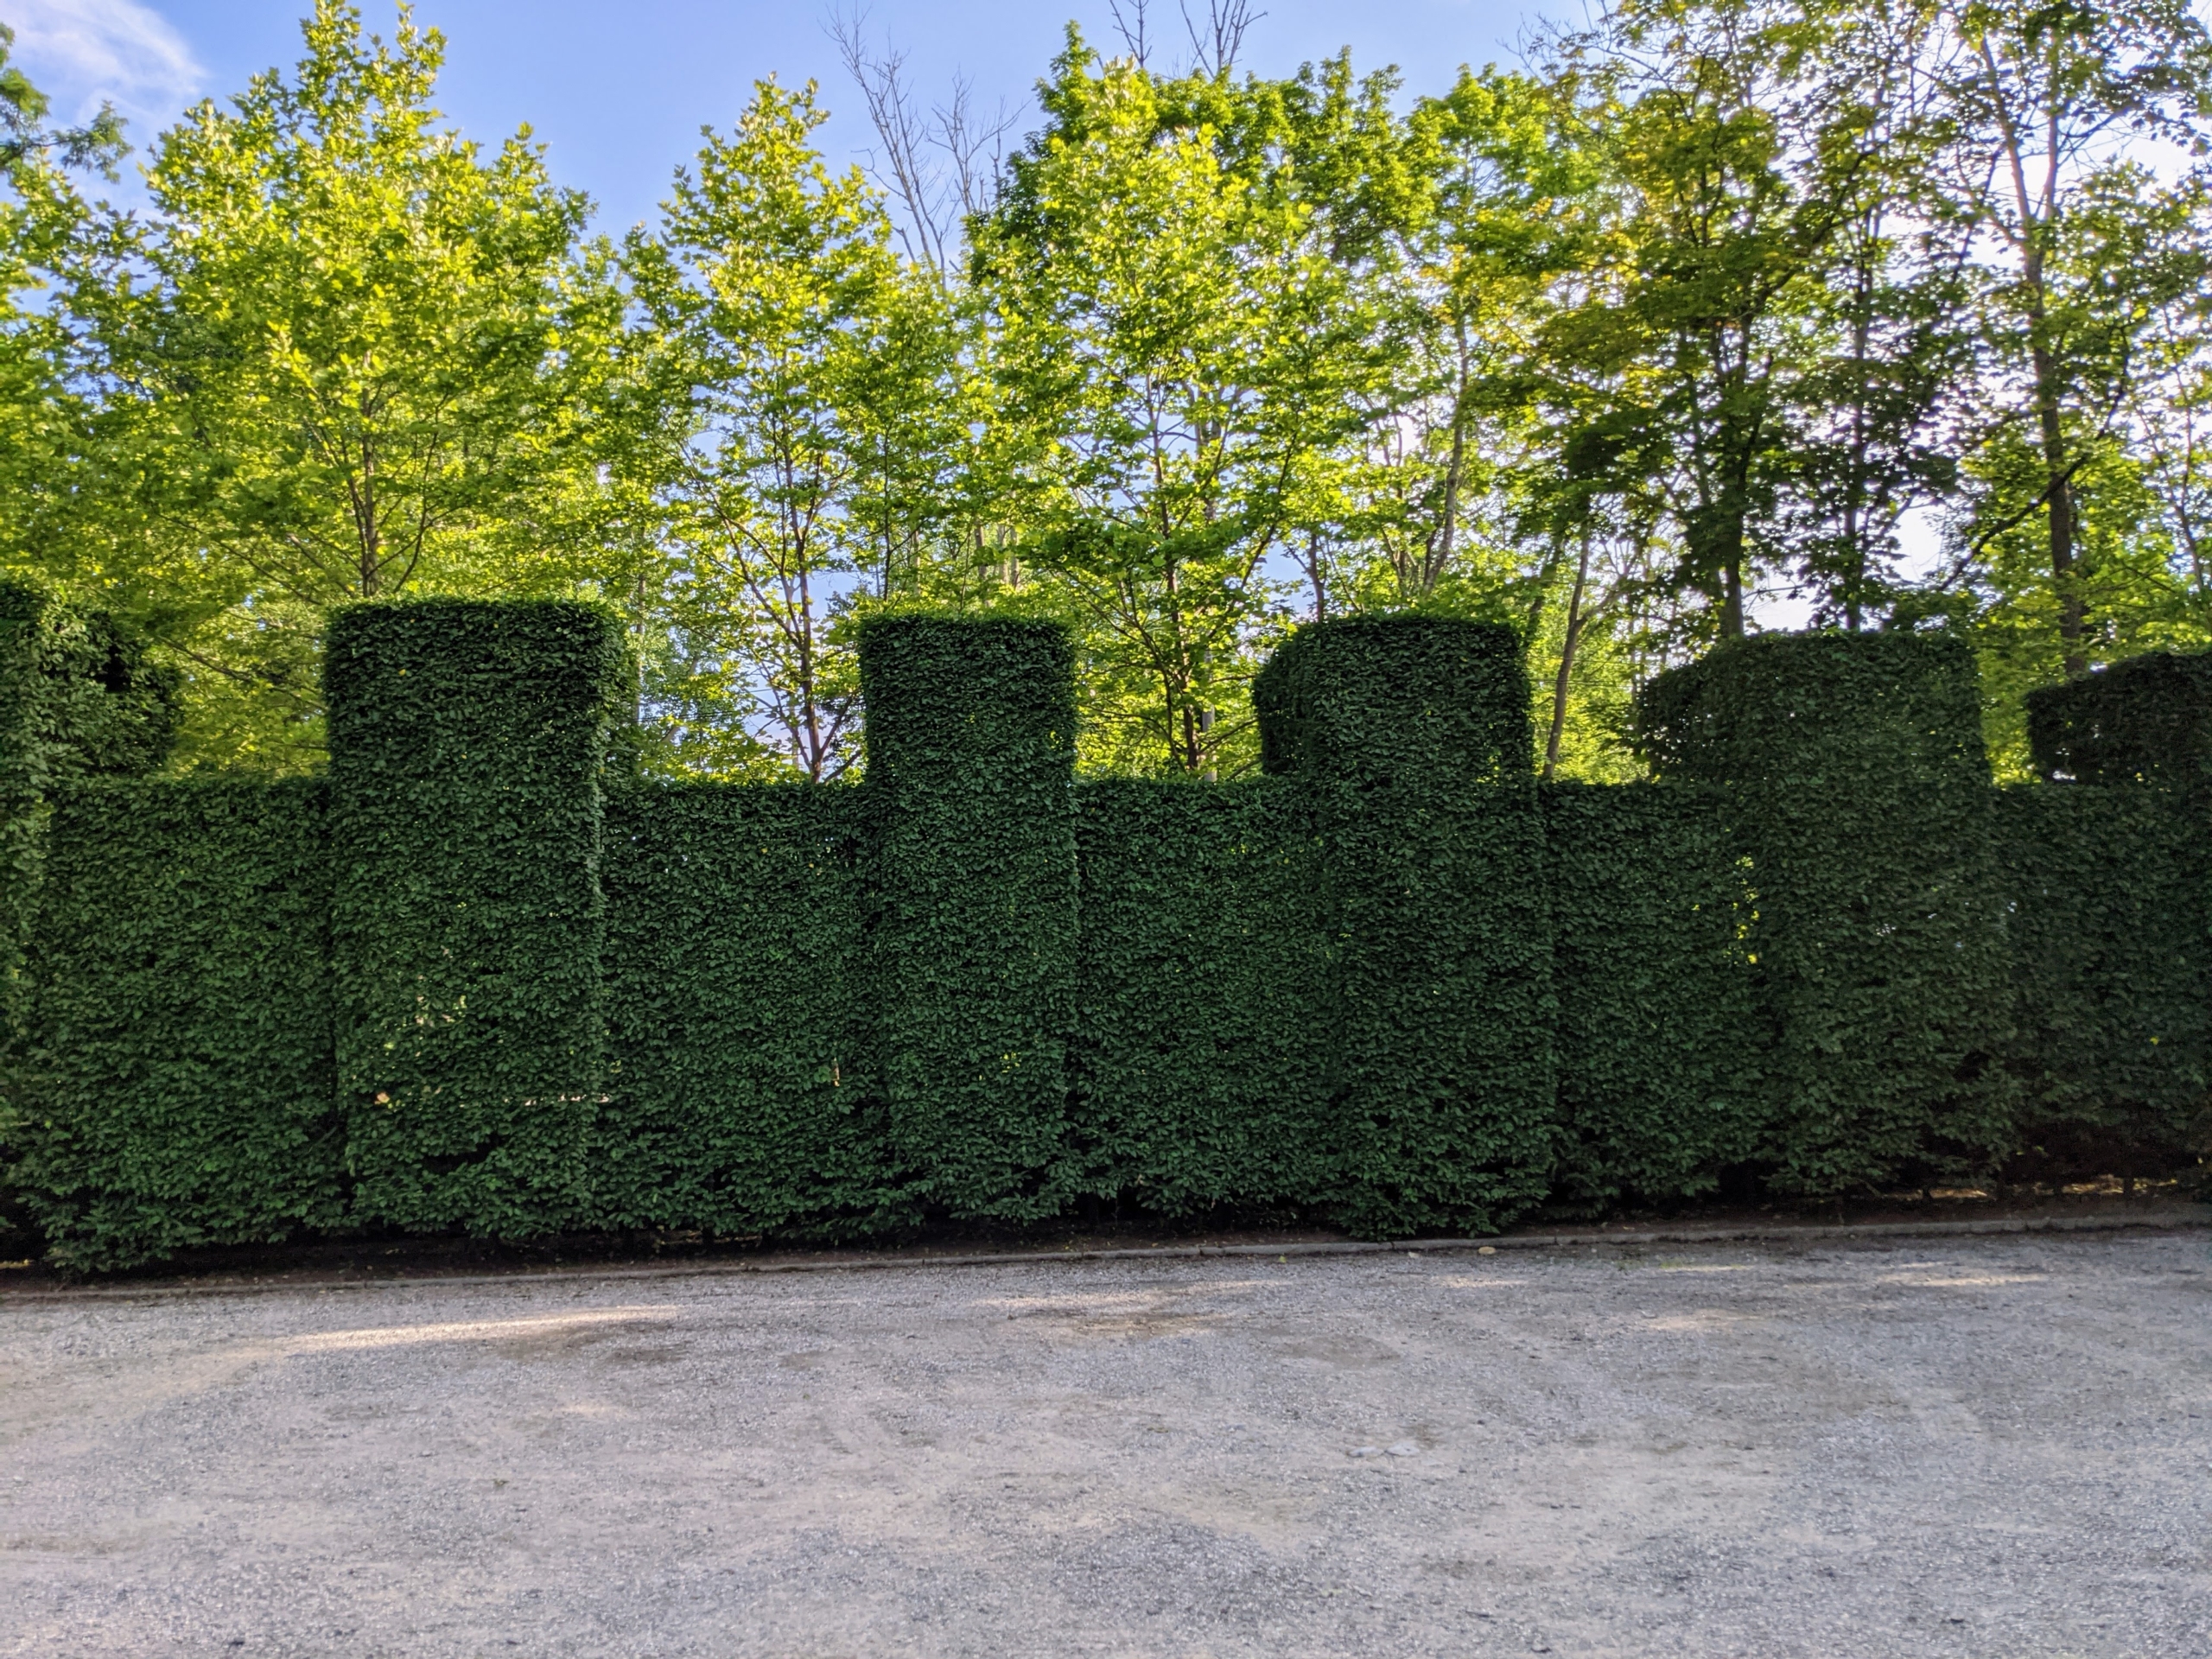
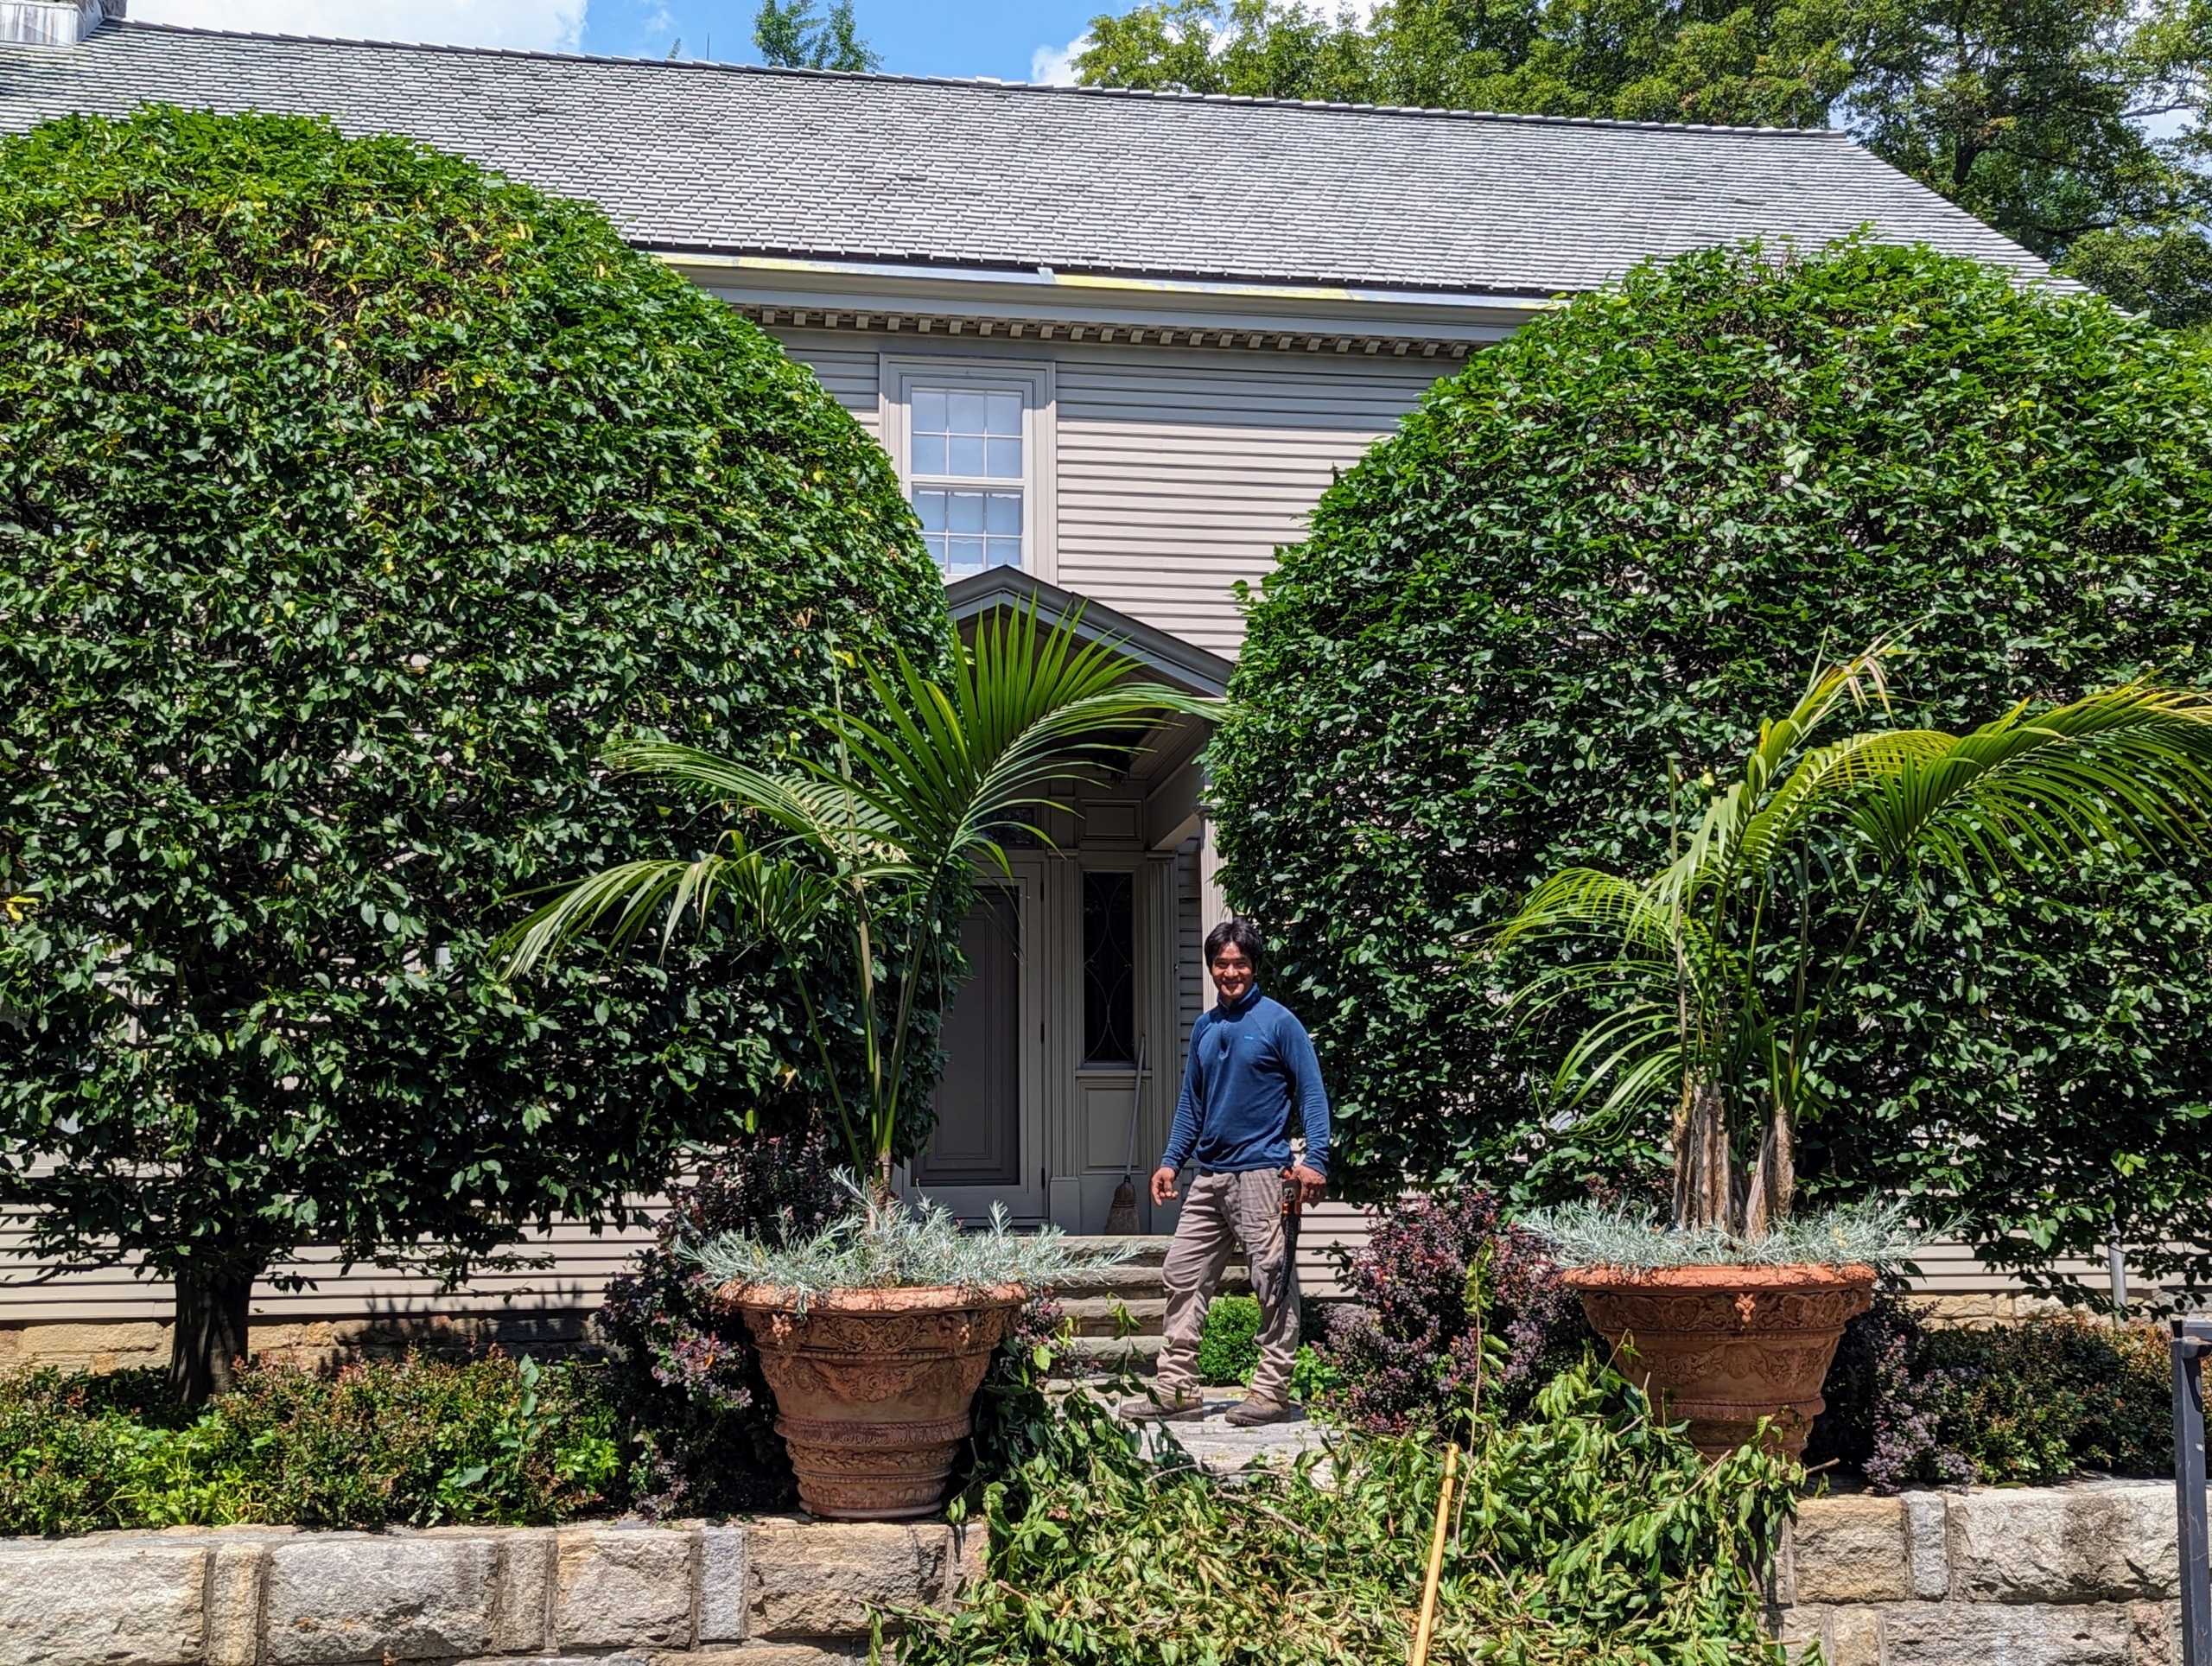
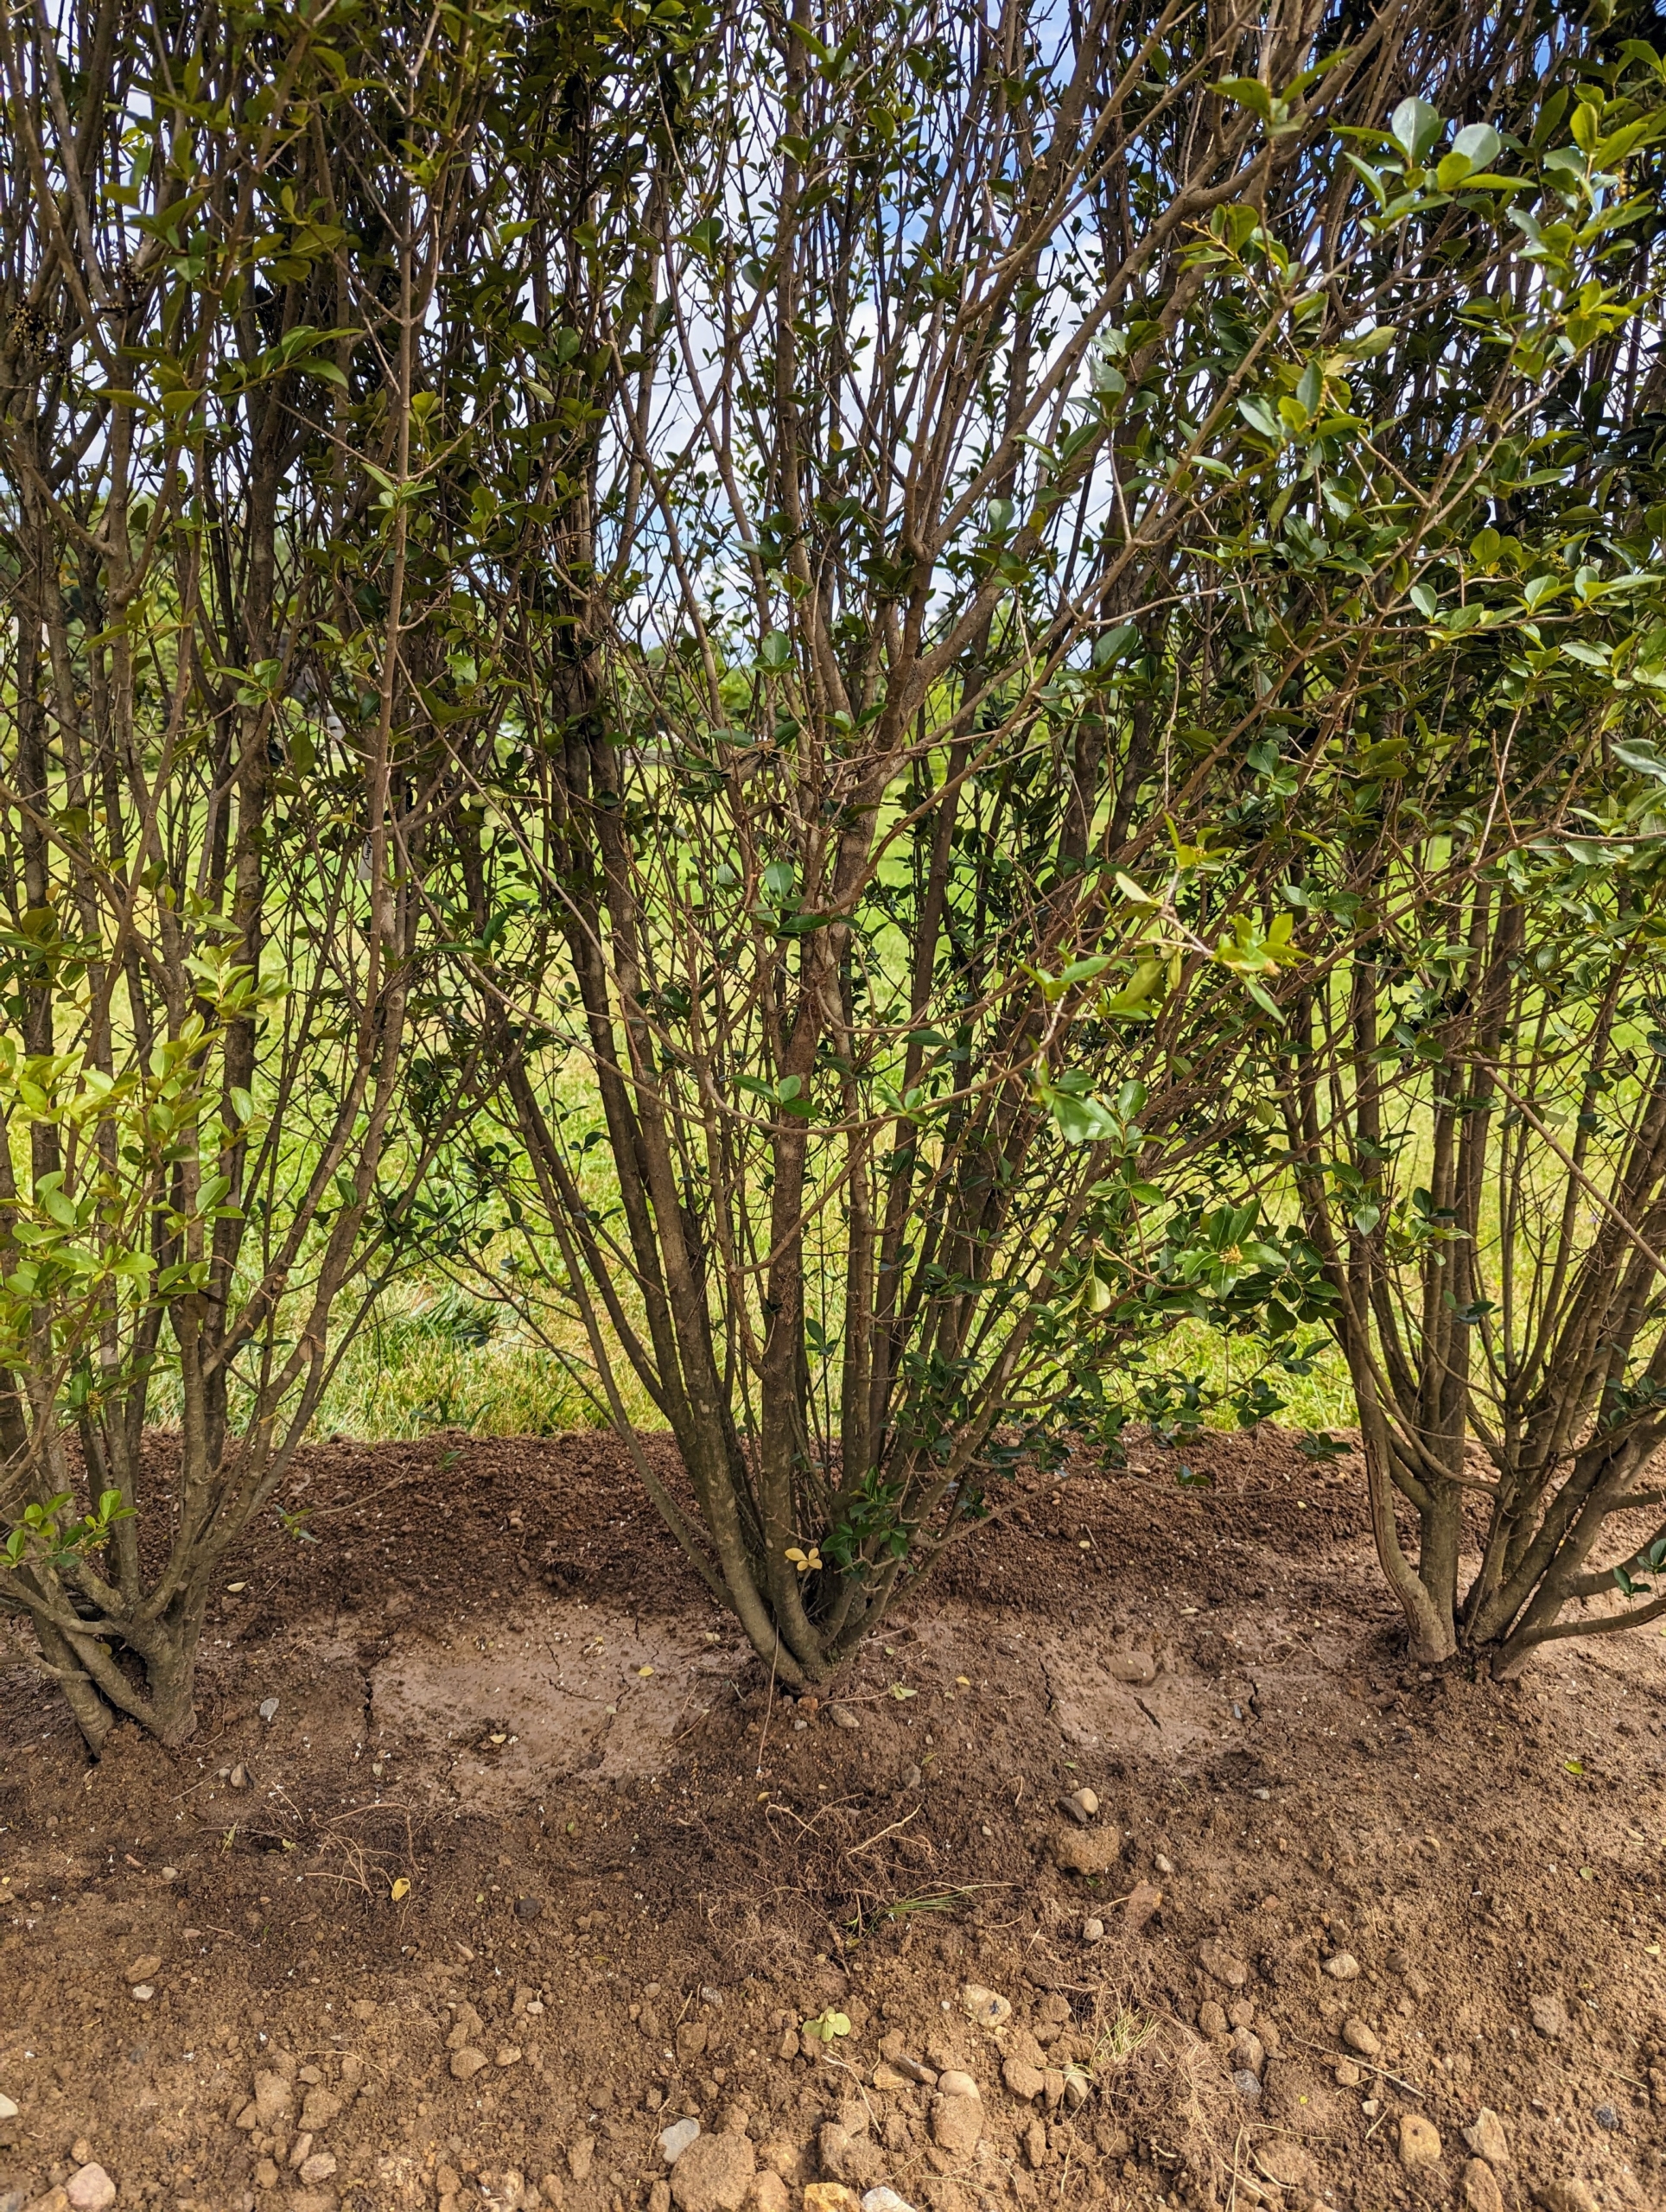
If you follow my blog, you may have seen this tall hornbeam hedge. It grows along one side of the parking lot directly in front of my main greenhouse. It is quite pretty here but serves primarily as a privacy and noise barrier from the road. Carpinus betulus is a hornbeam native to Western Asia and central, eastern and southern Europe, including southern England. Because of its dense foliage and tolerance to being cut back, this hornbeam is popularly used for hedges and topiaries.
Hornbeams grow quickly, so it is important to trim and sculpt them regularly. We do this task every year around this time. Hornbeam is also very hardy and frost resistant, which is good in this region.
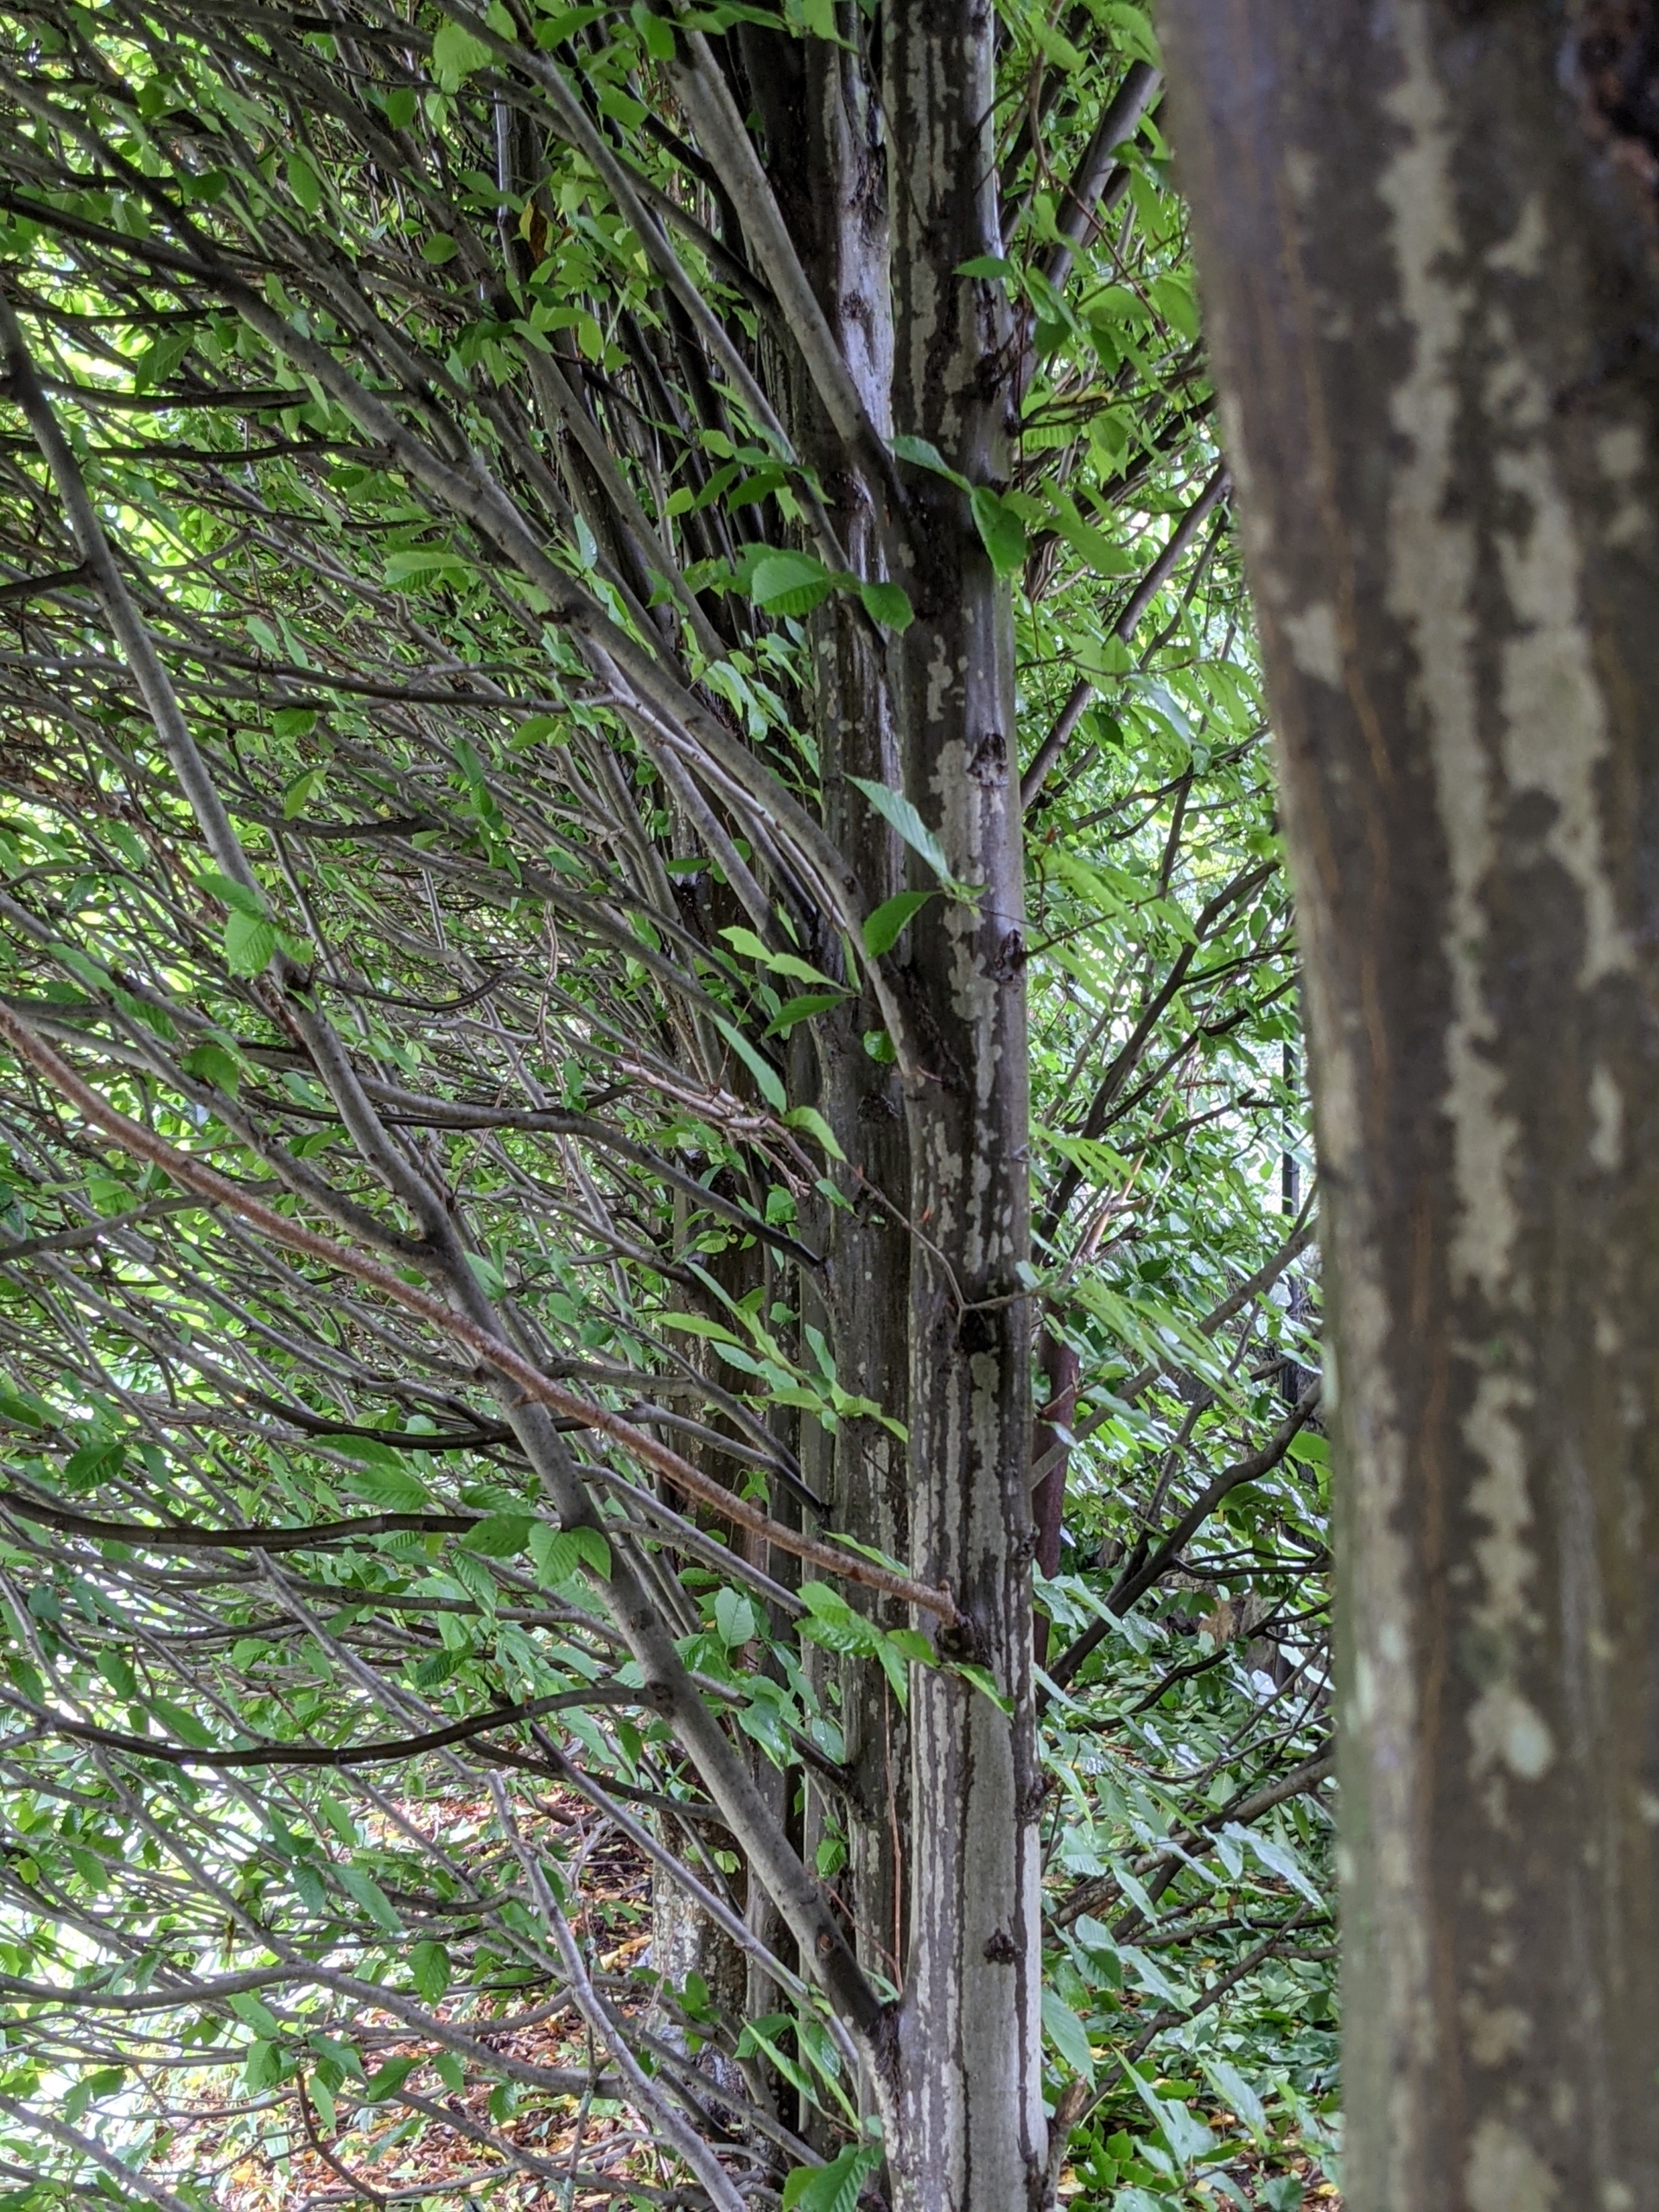
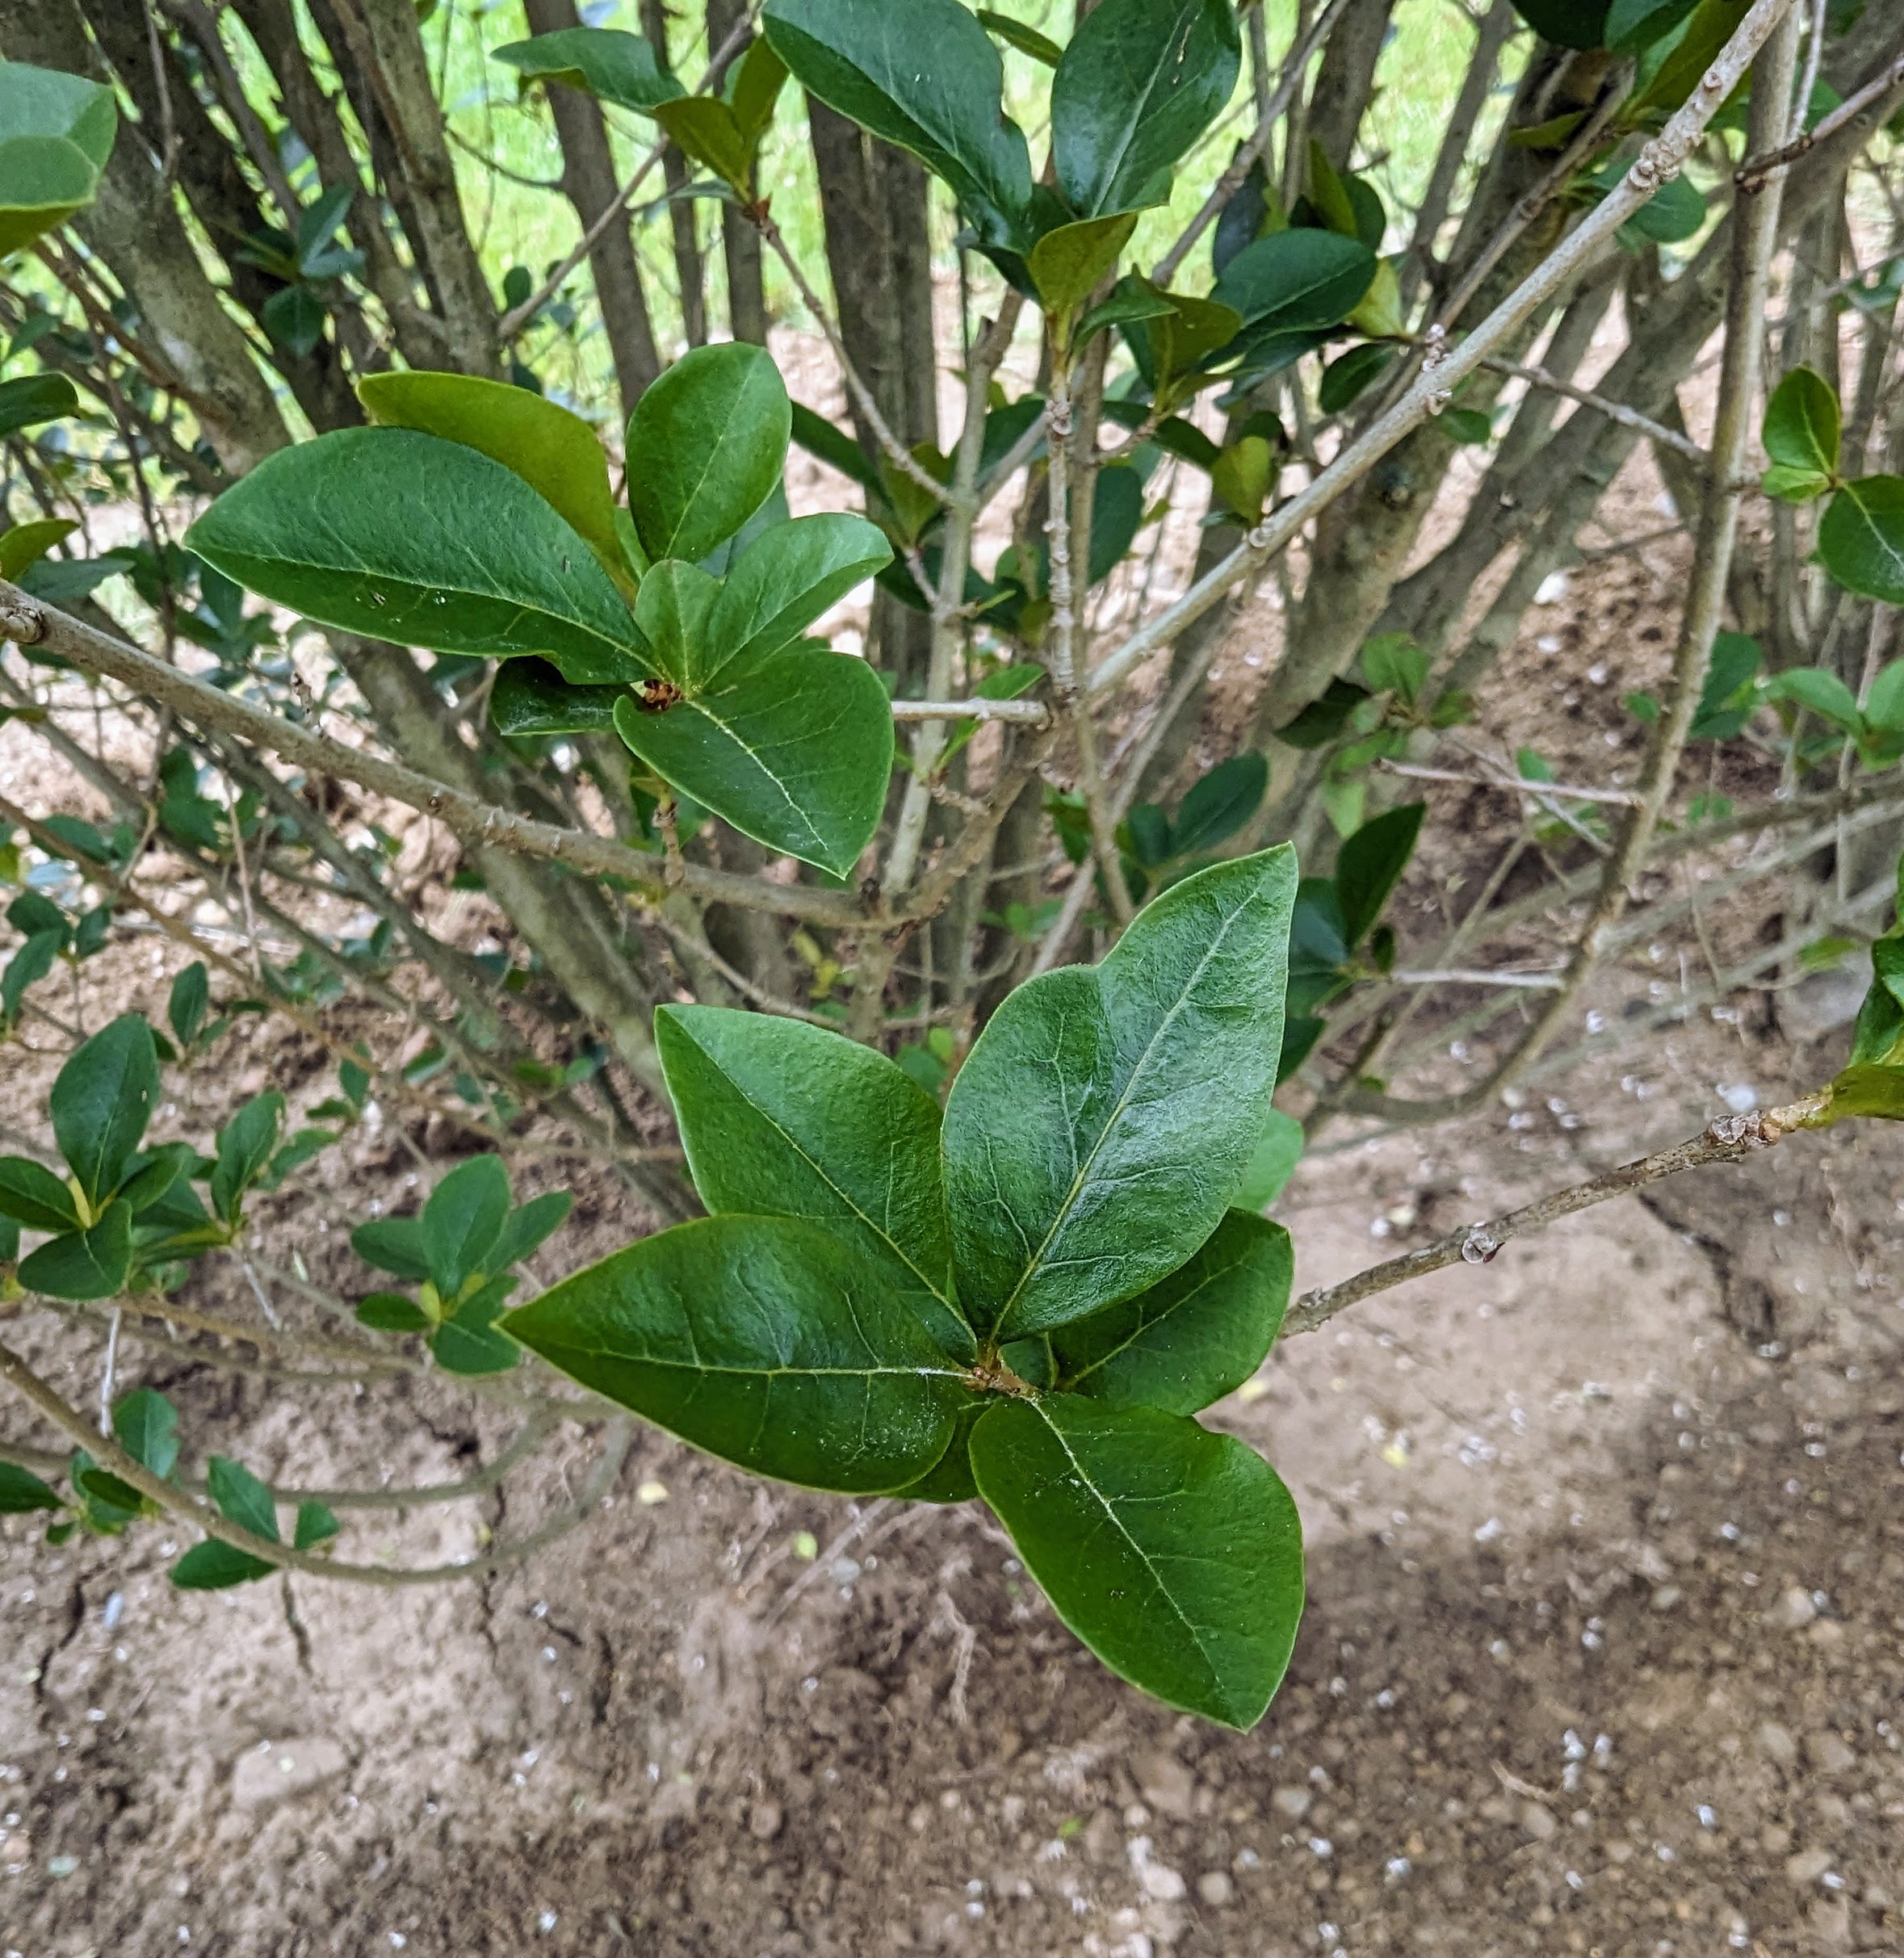
Looking inside the hedge, the hornbeam has pale grey bark with vertical markings. All of the hornbeams are planted in a very straight line just a couple feet apart. One can see the sturdy branches and how they grow outward and slightly upward.
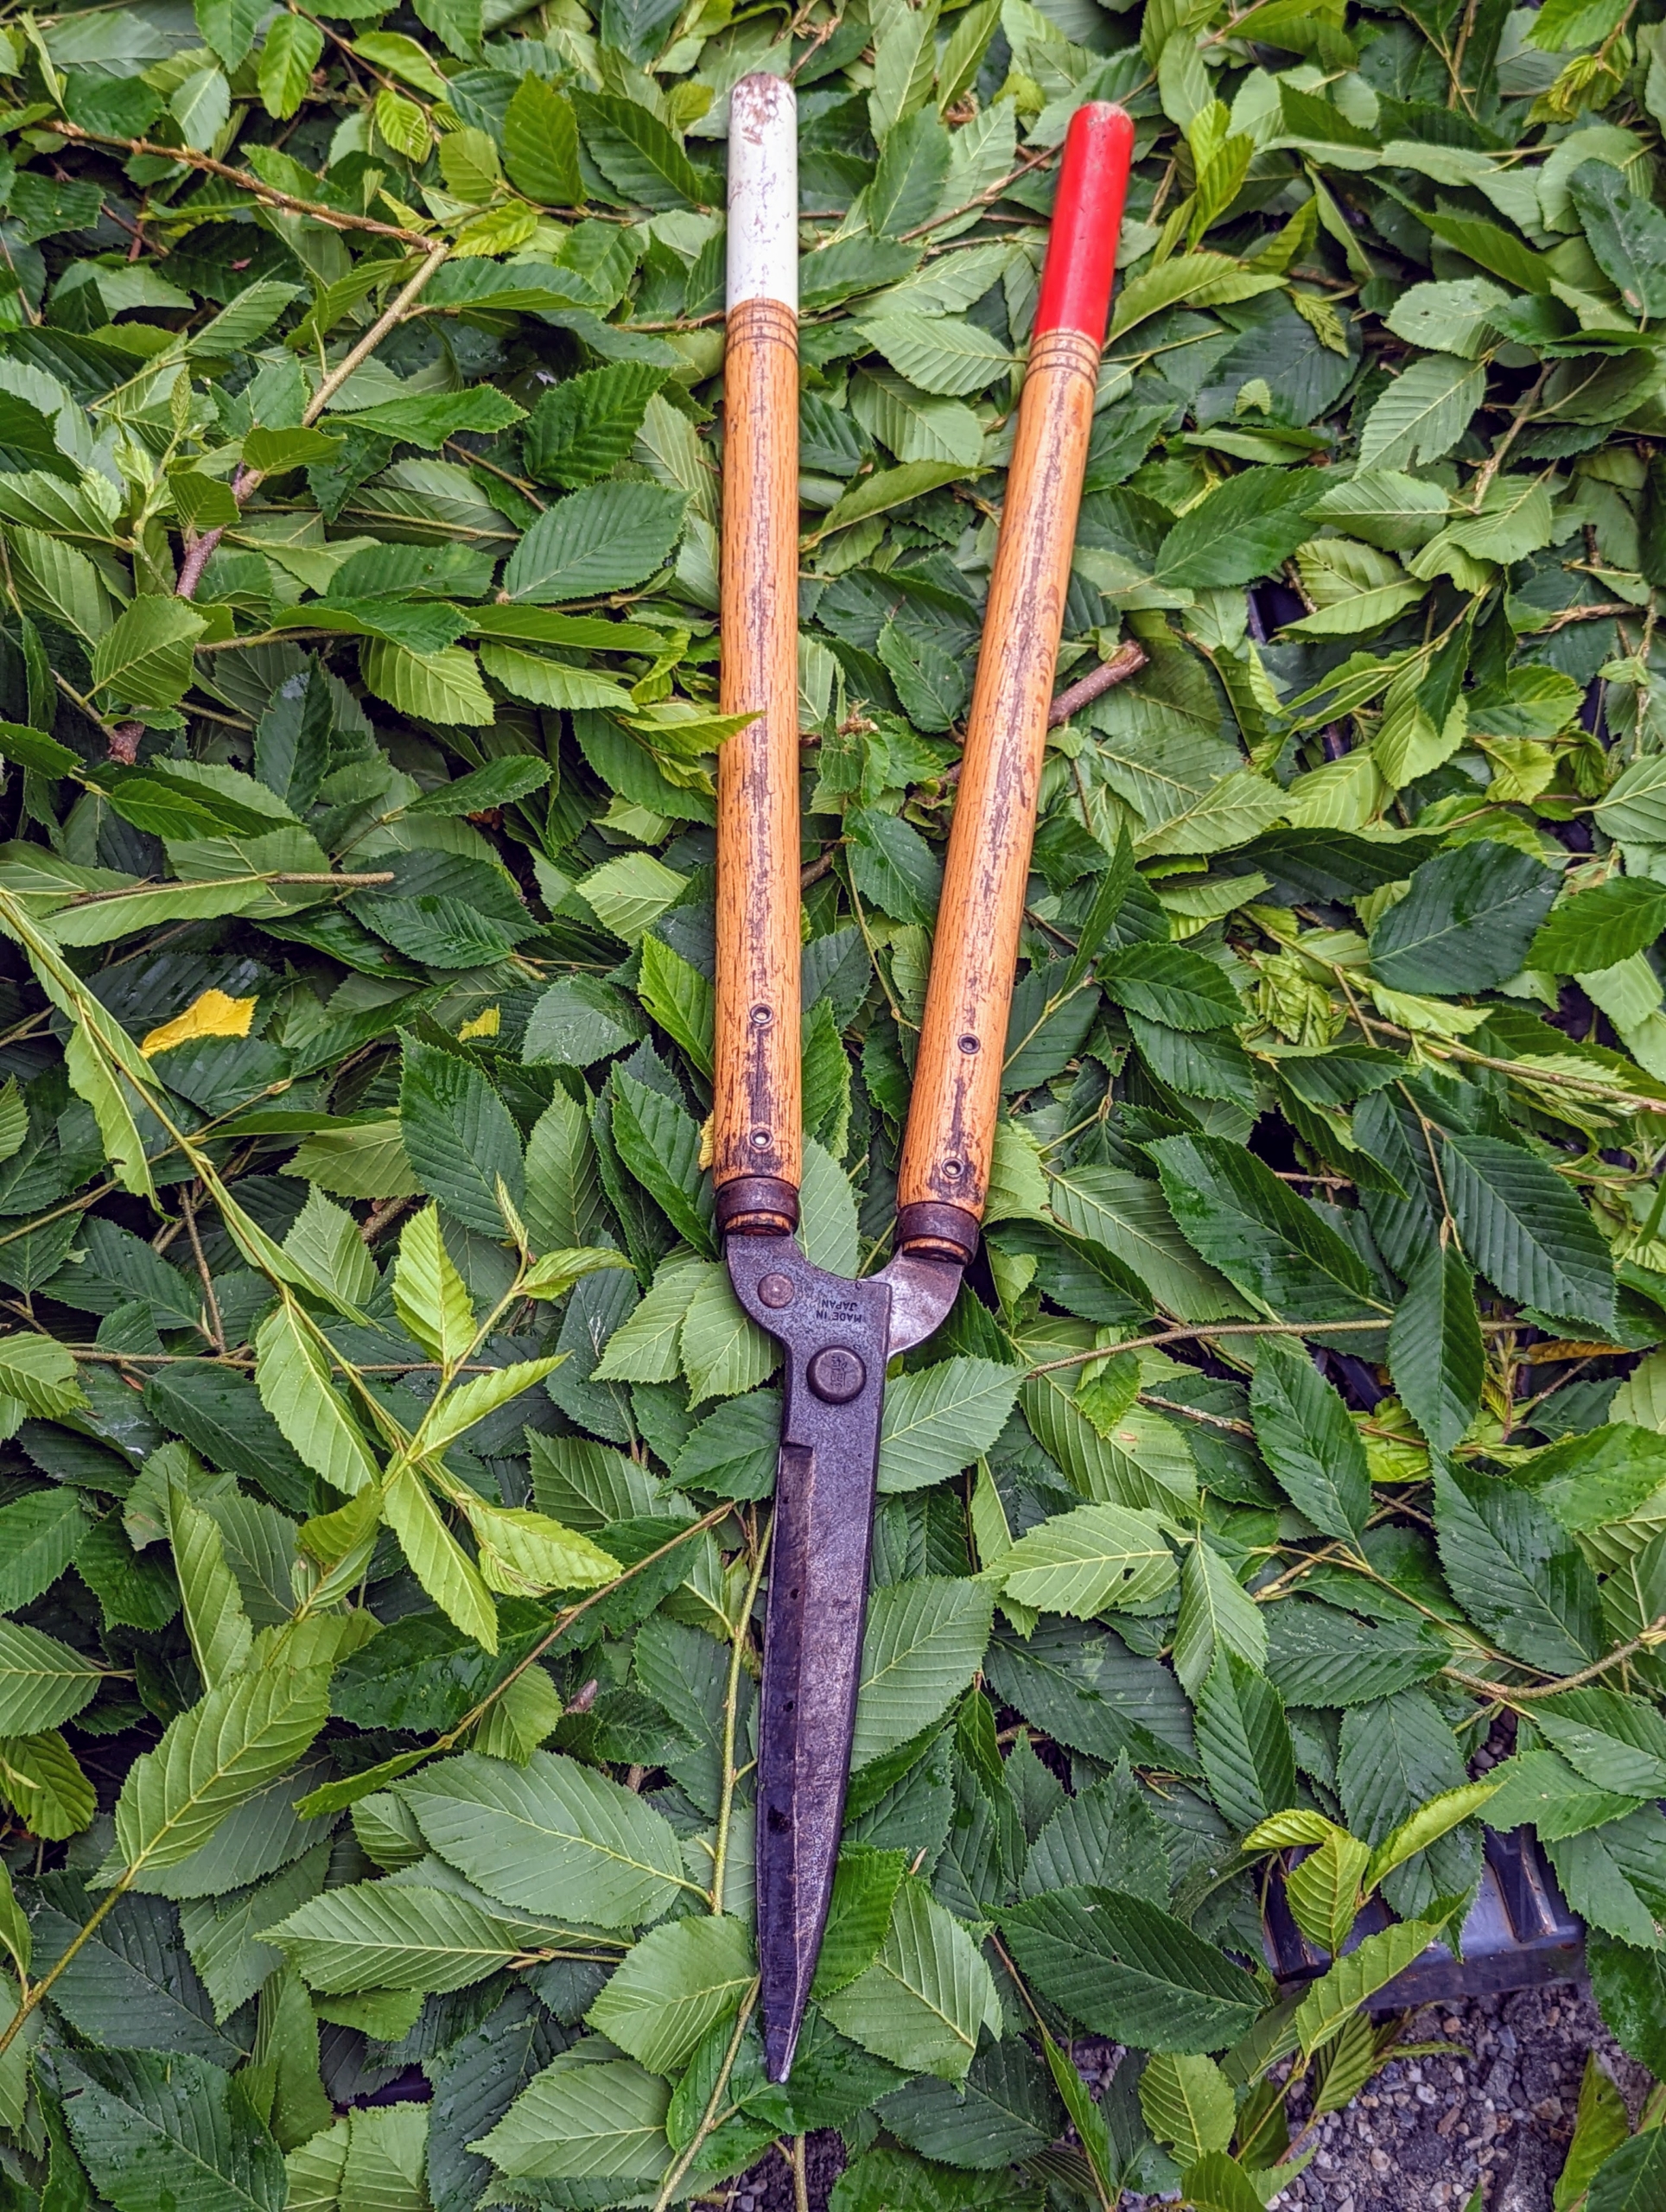
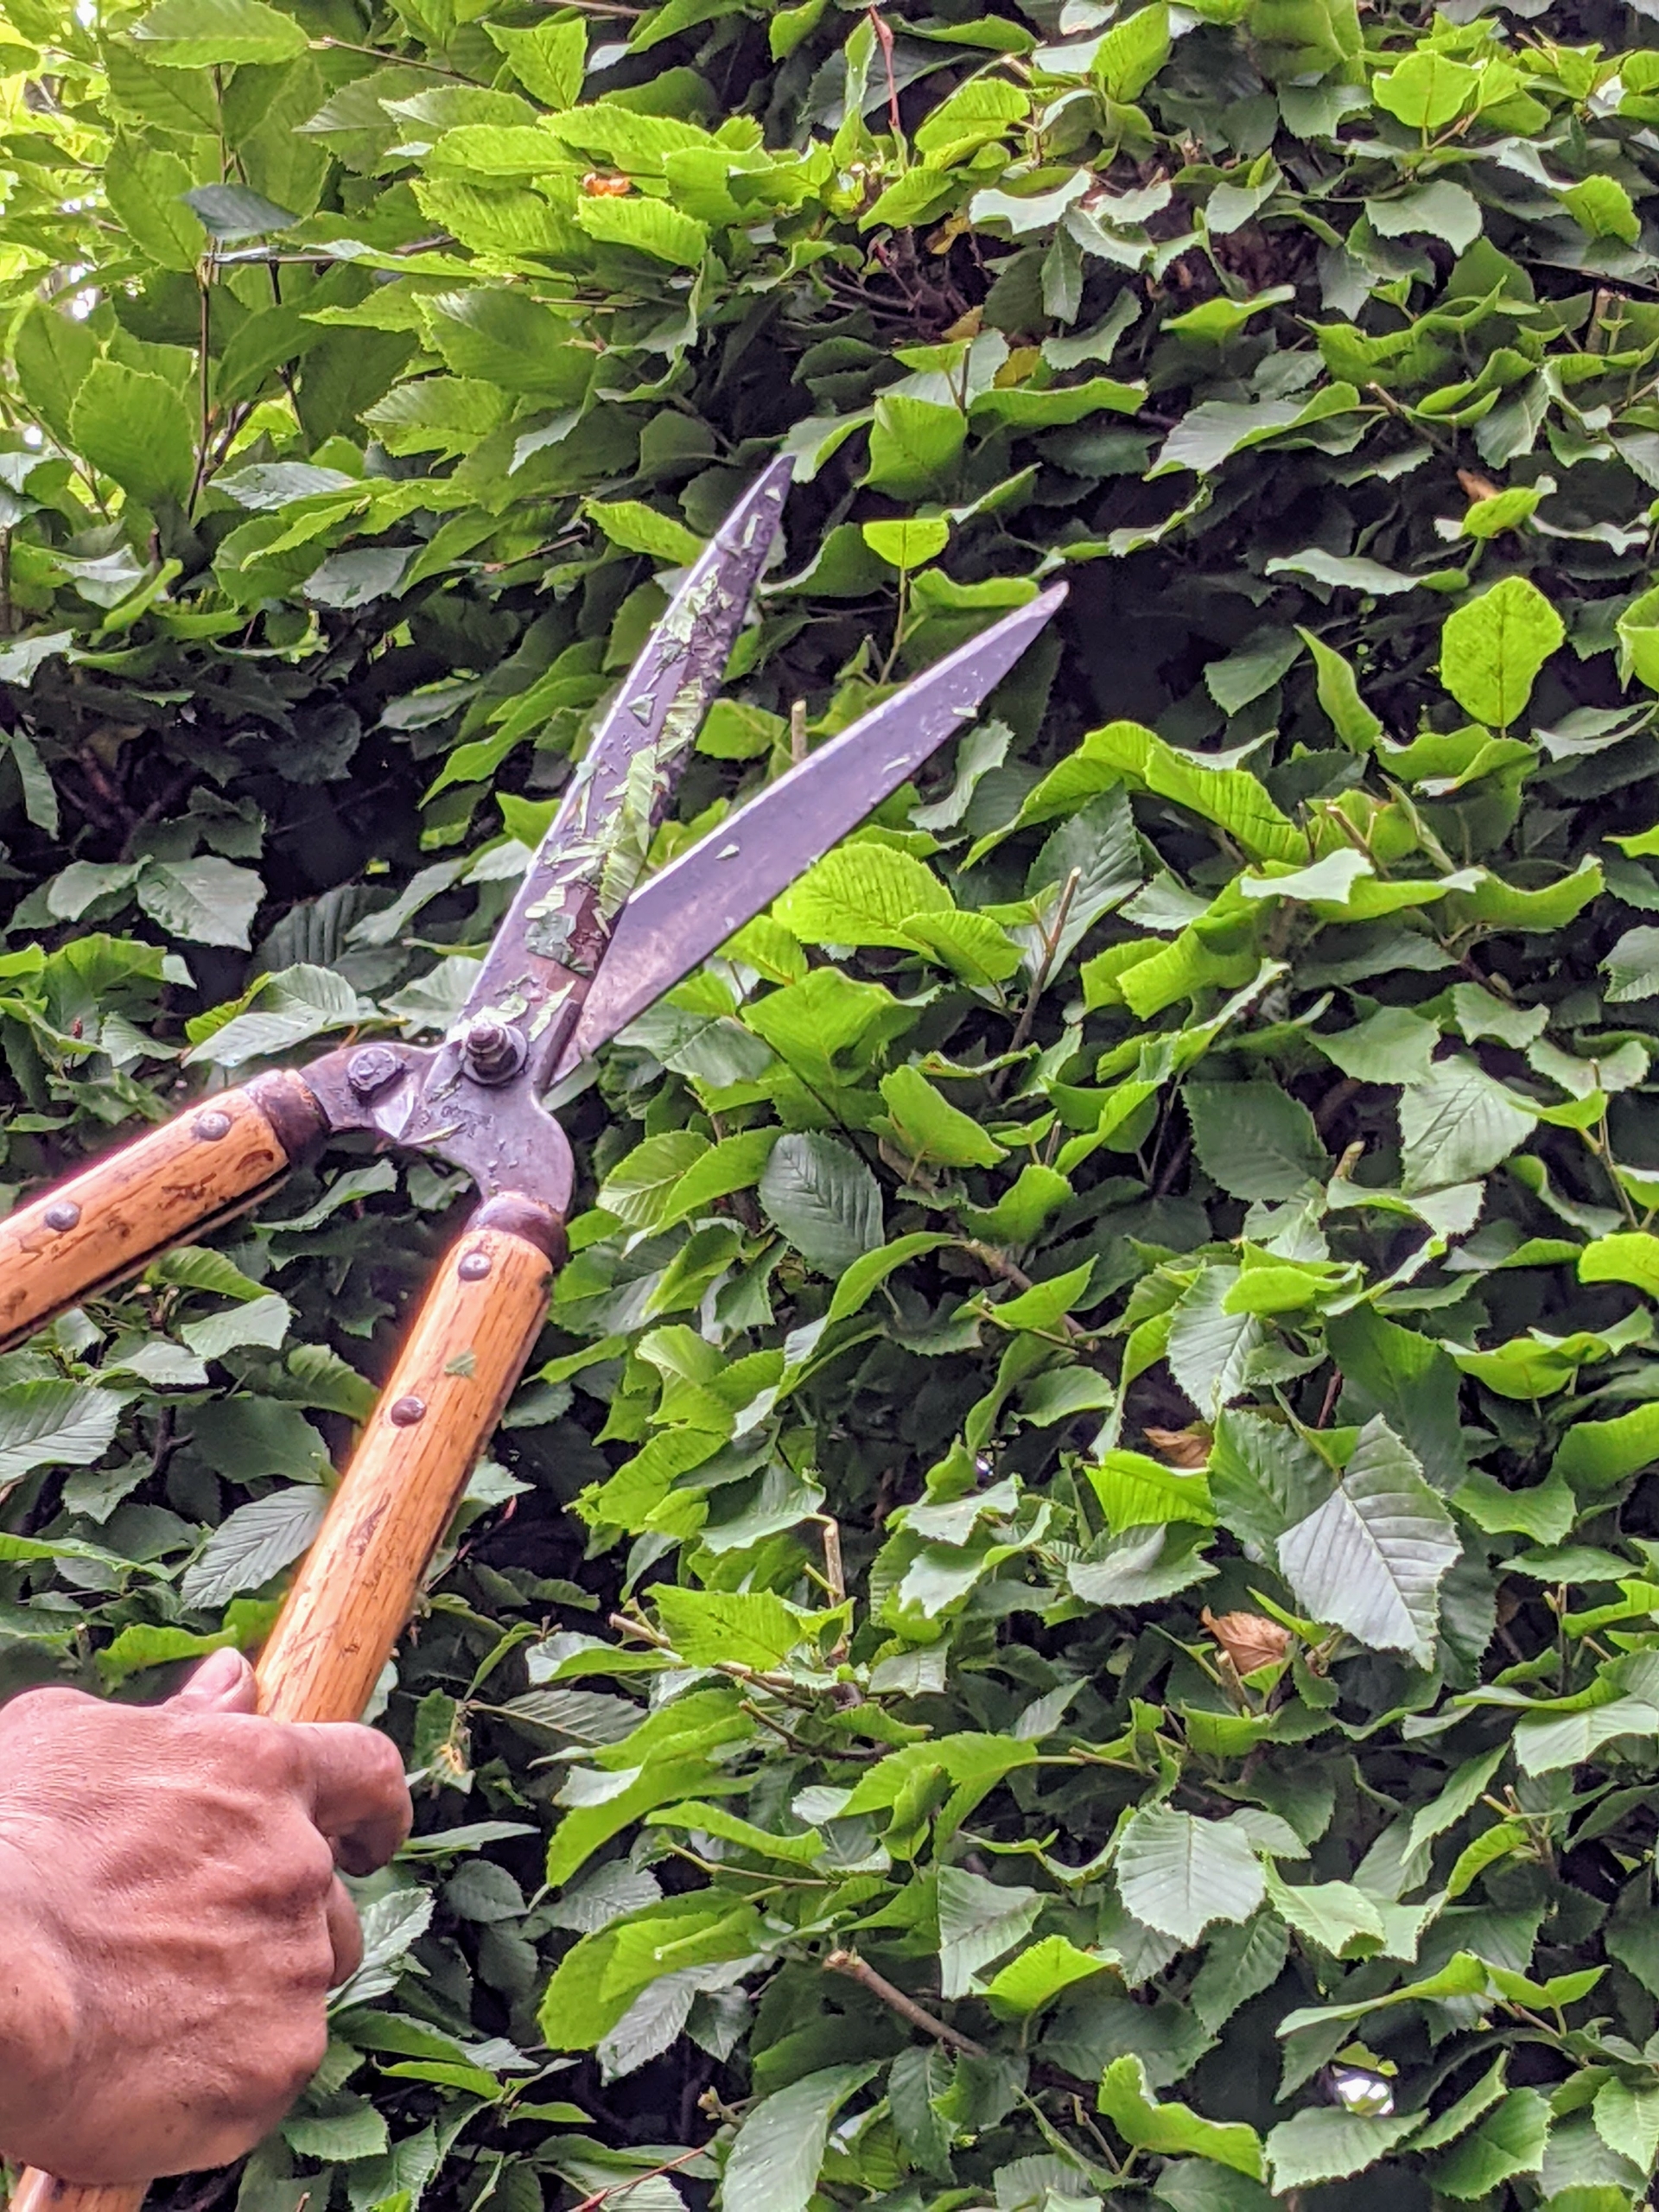
The crew does most of the hornbeam pruning by hand. Everyone uses Japanese Okatsune shears specially made for trimming hedges. These shears are user friendly, and come in a range of sizes.
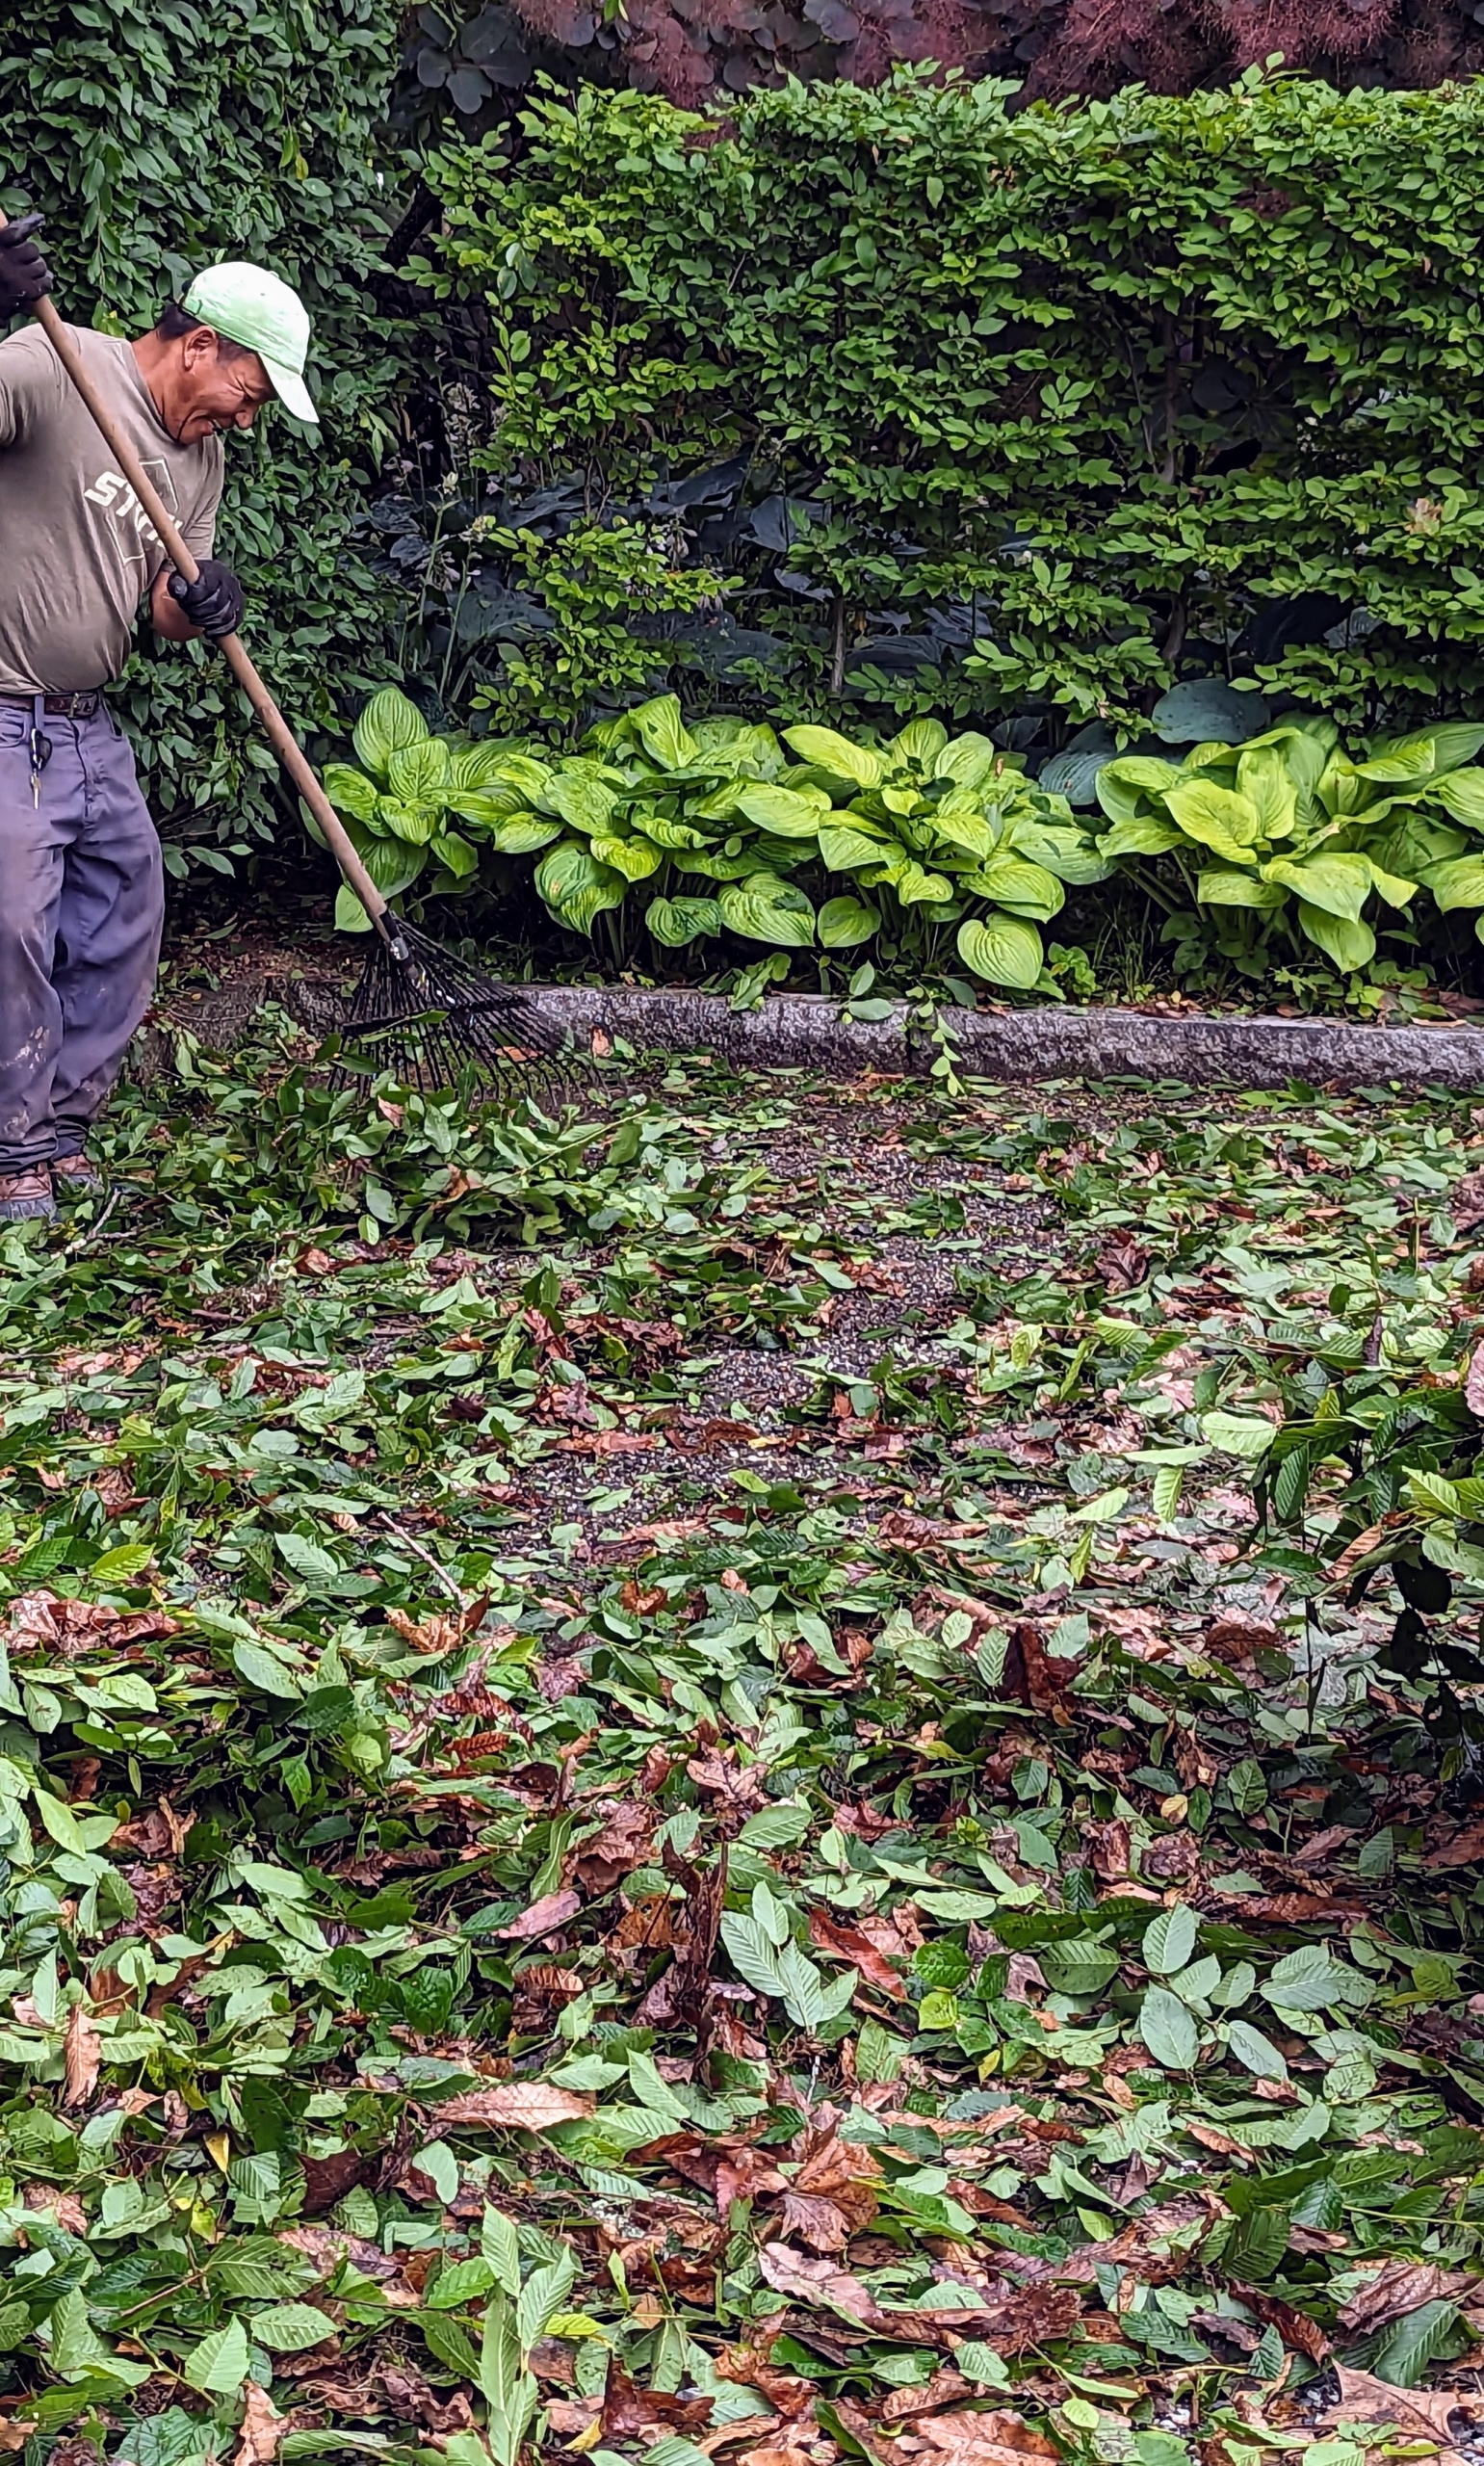
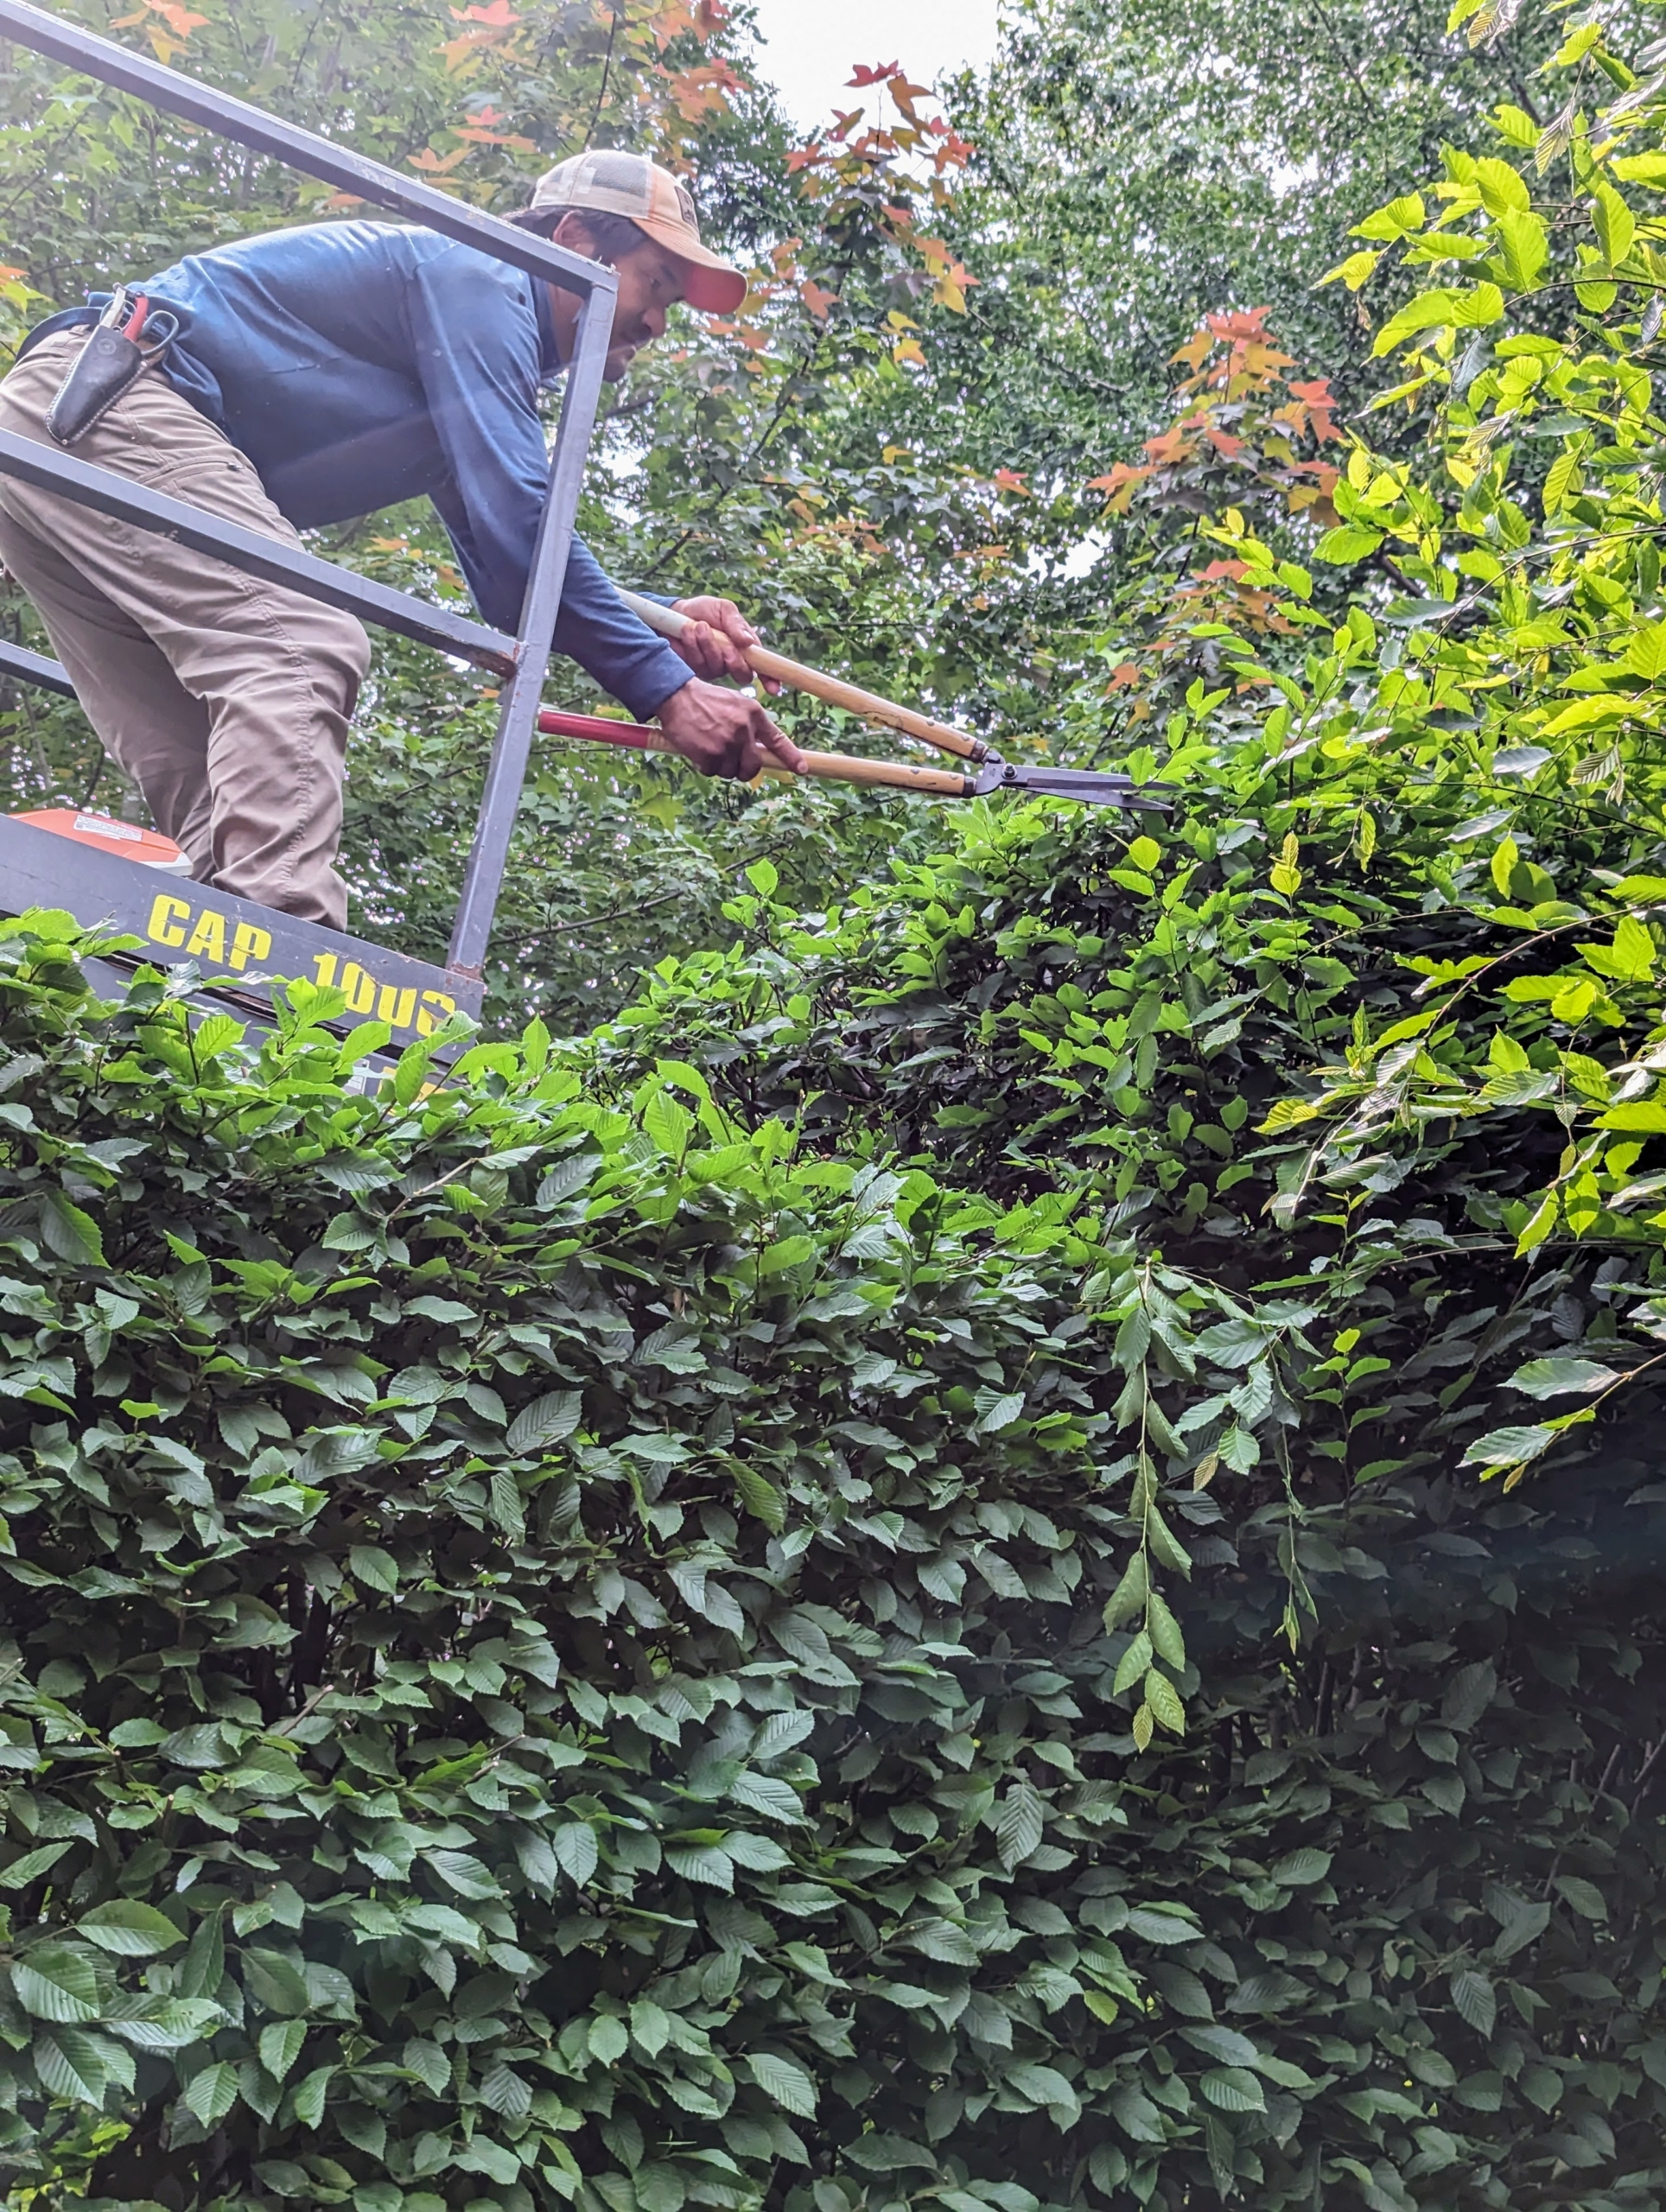
Here’s Pasang working on the front sections. We use a traditional English style of pruning, which includes a lot of straight, clean edges. A well-manicured hedge can be stunning in any garden but left unchecked, it could look unruly.
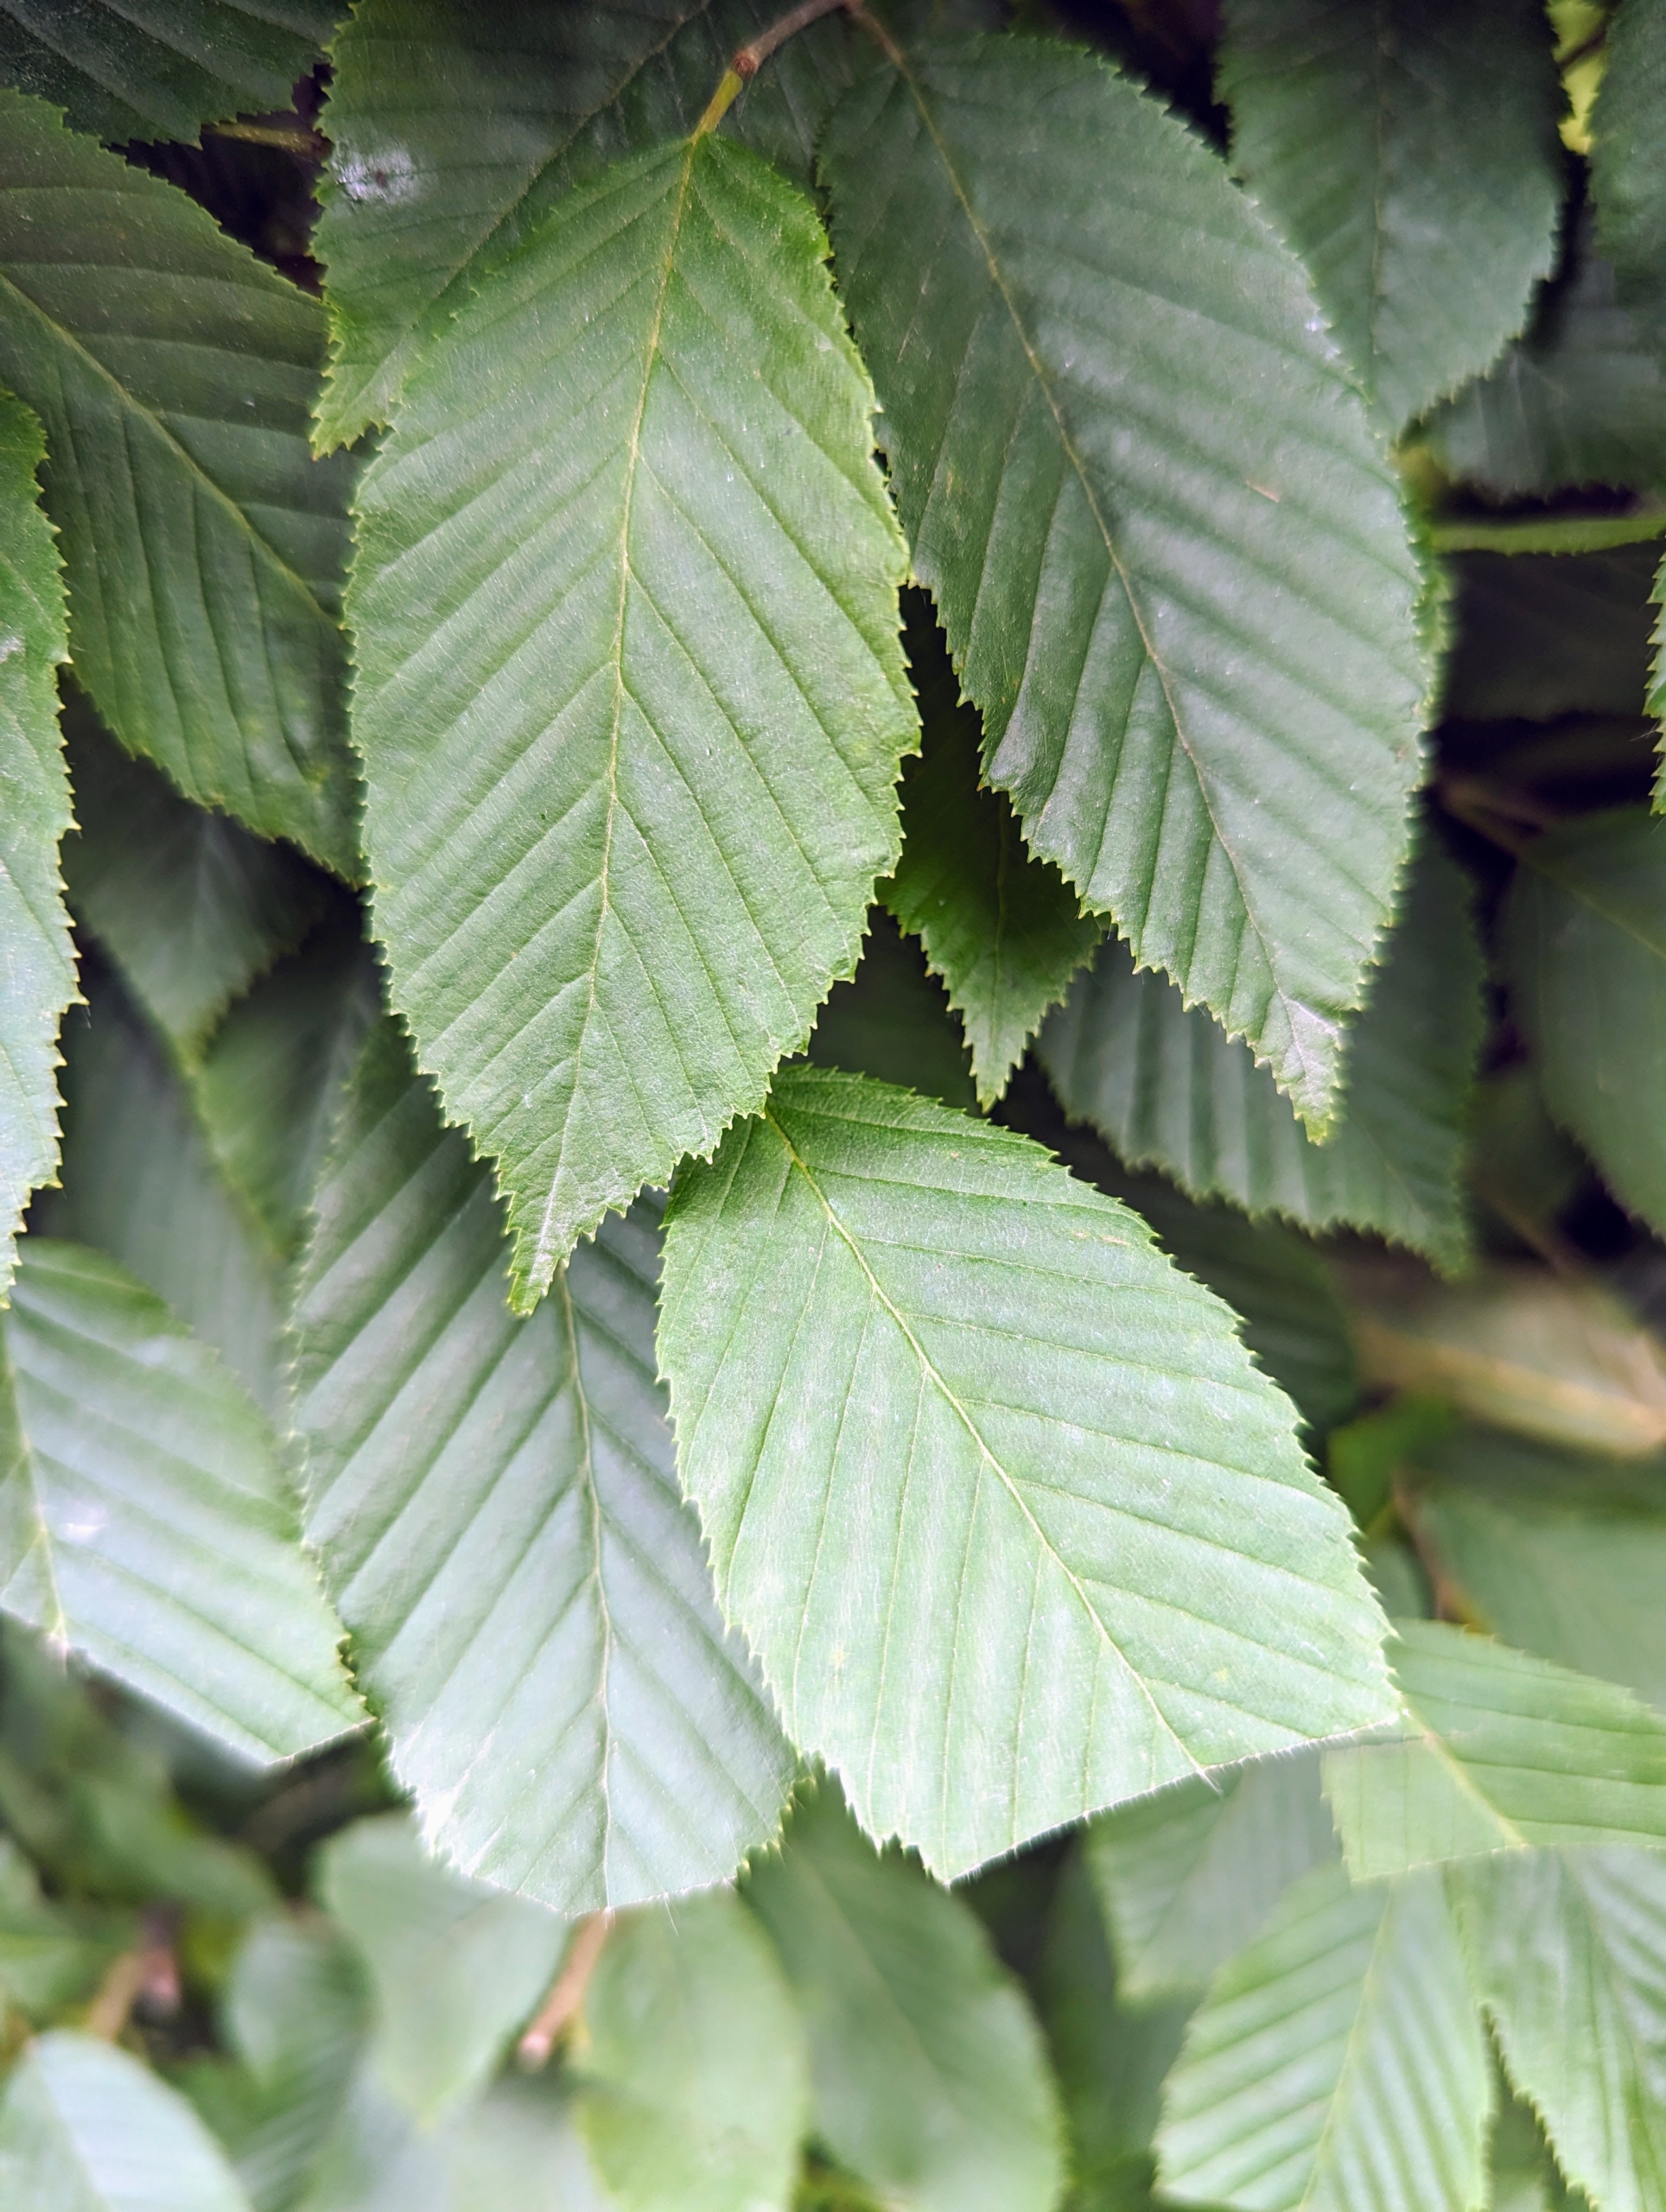
I prefer this method of trimming because the cuts are very clean and smooth when done by hand. The English hornbeam is related to the beech tree, with a similar leaf shape. On the hornbeam, the leaves are actually smaller and more deeply furrowed than beech leaves. They become golden yellow to orange before falling in autumn.
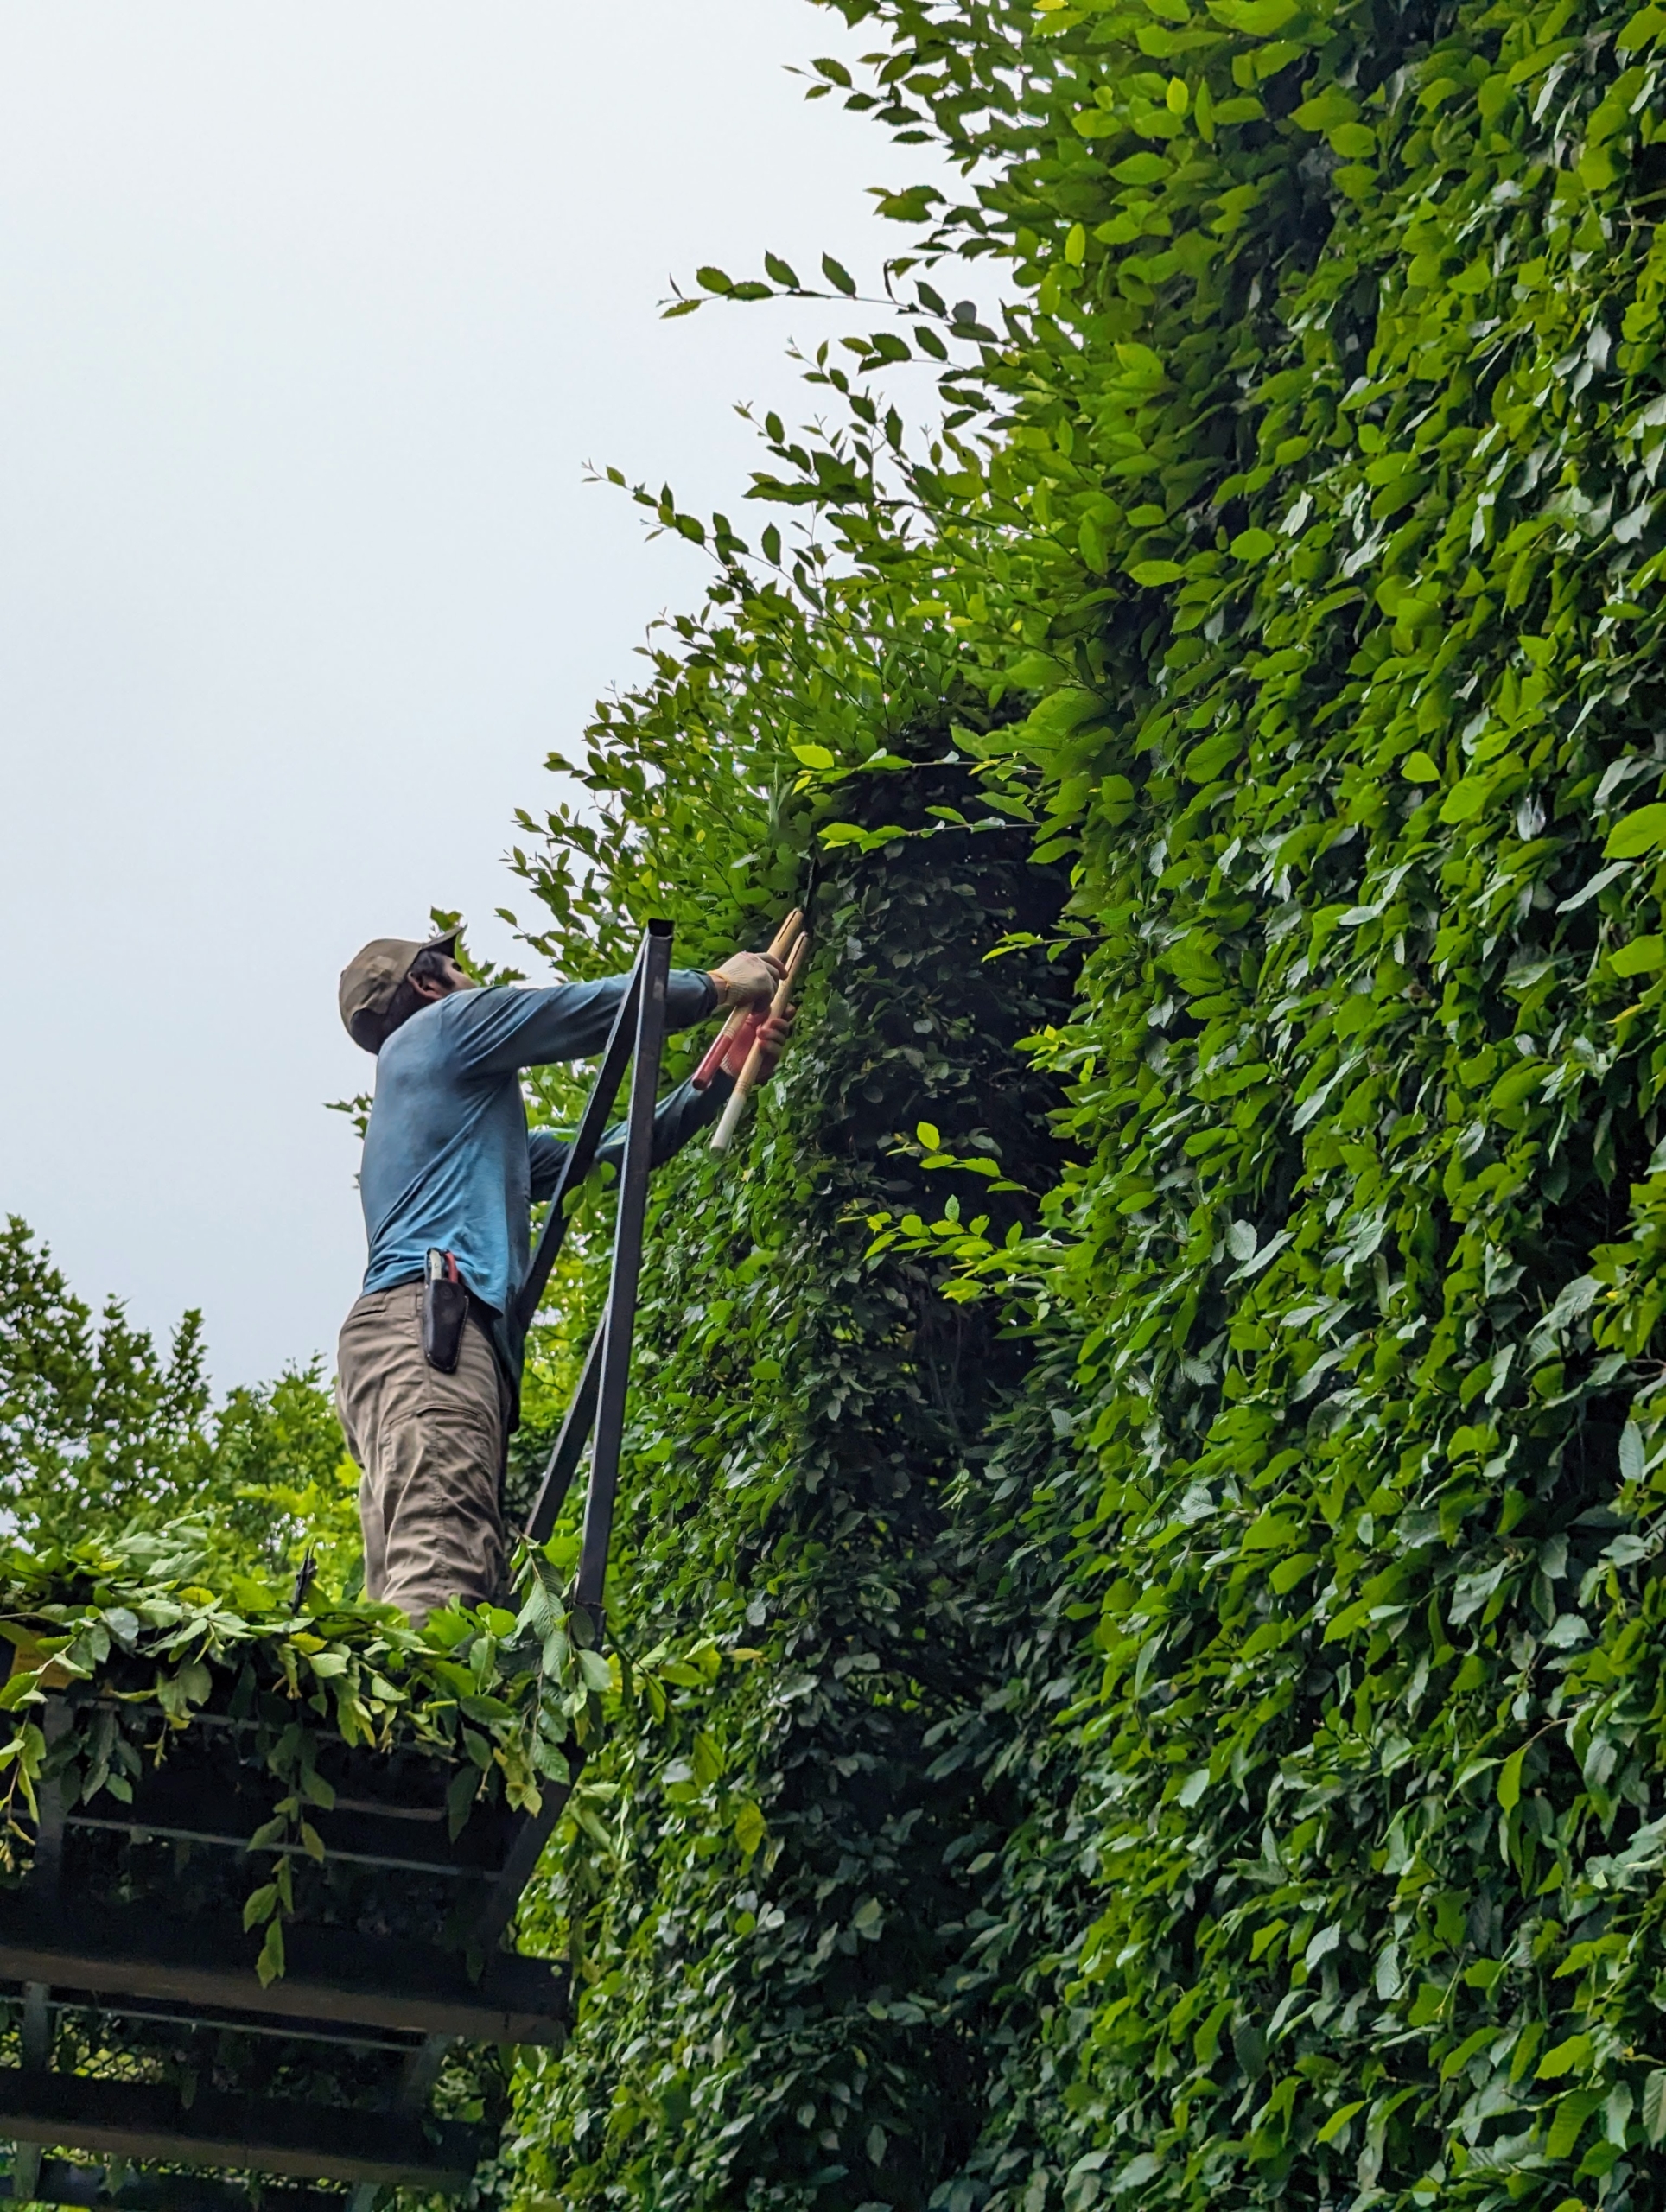
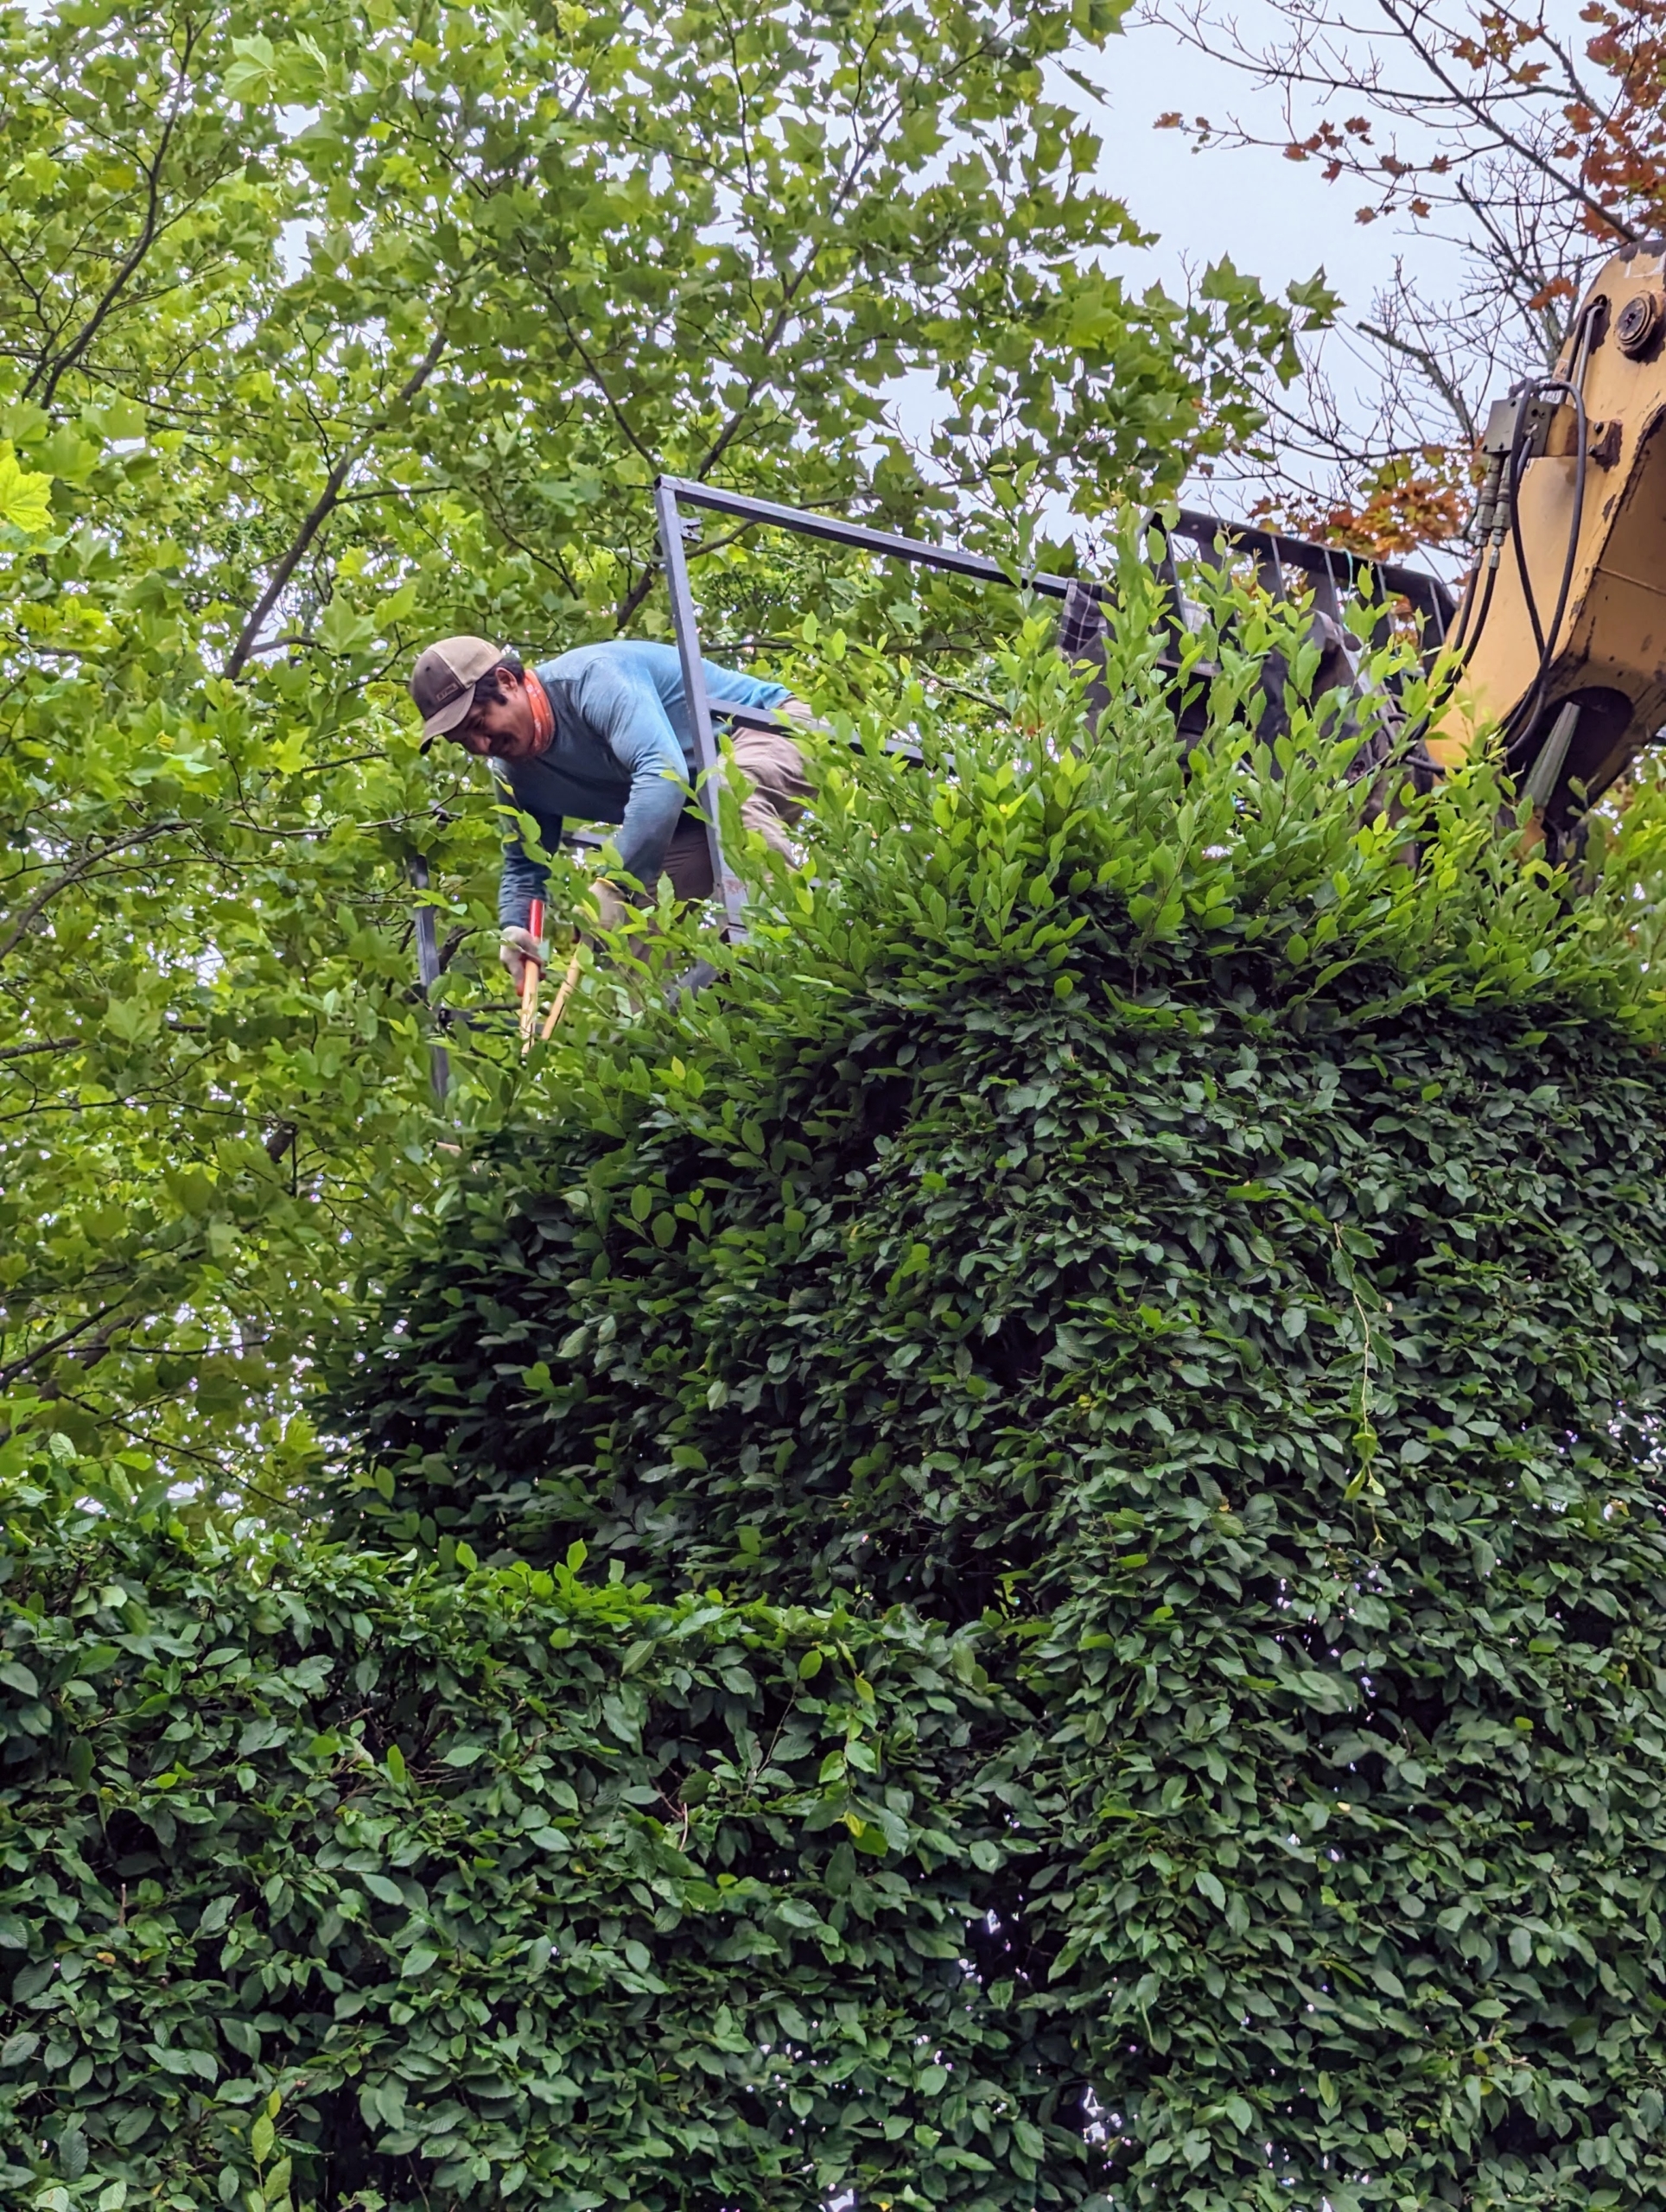
When pruning, Pasang keeps the shears close to shoulder level. This allows the best control. He also holds the shears closer to the base of the blades. Here he is working by hand on the upper sections from our trusted Hi-Lo. It is more time consuming to prune the hedge this way, but it is also more exact, and that’s important when sculpting formal hedges.
Pasang is carried from section to section very carefully. This is also a good time for him to assess his pruning from another angle, and to decide where adjustments are needed.
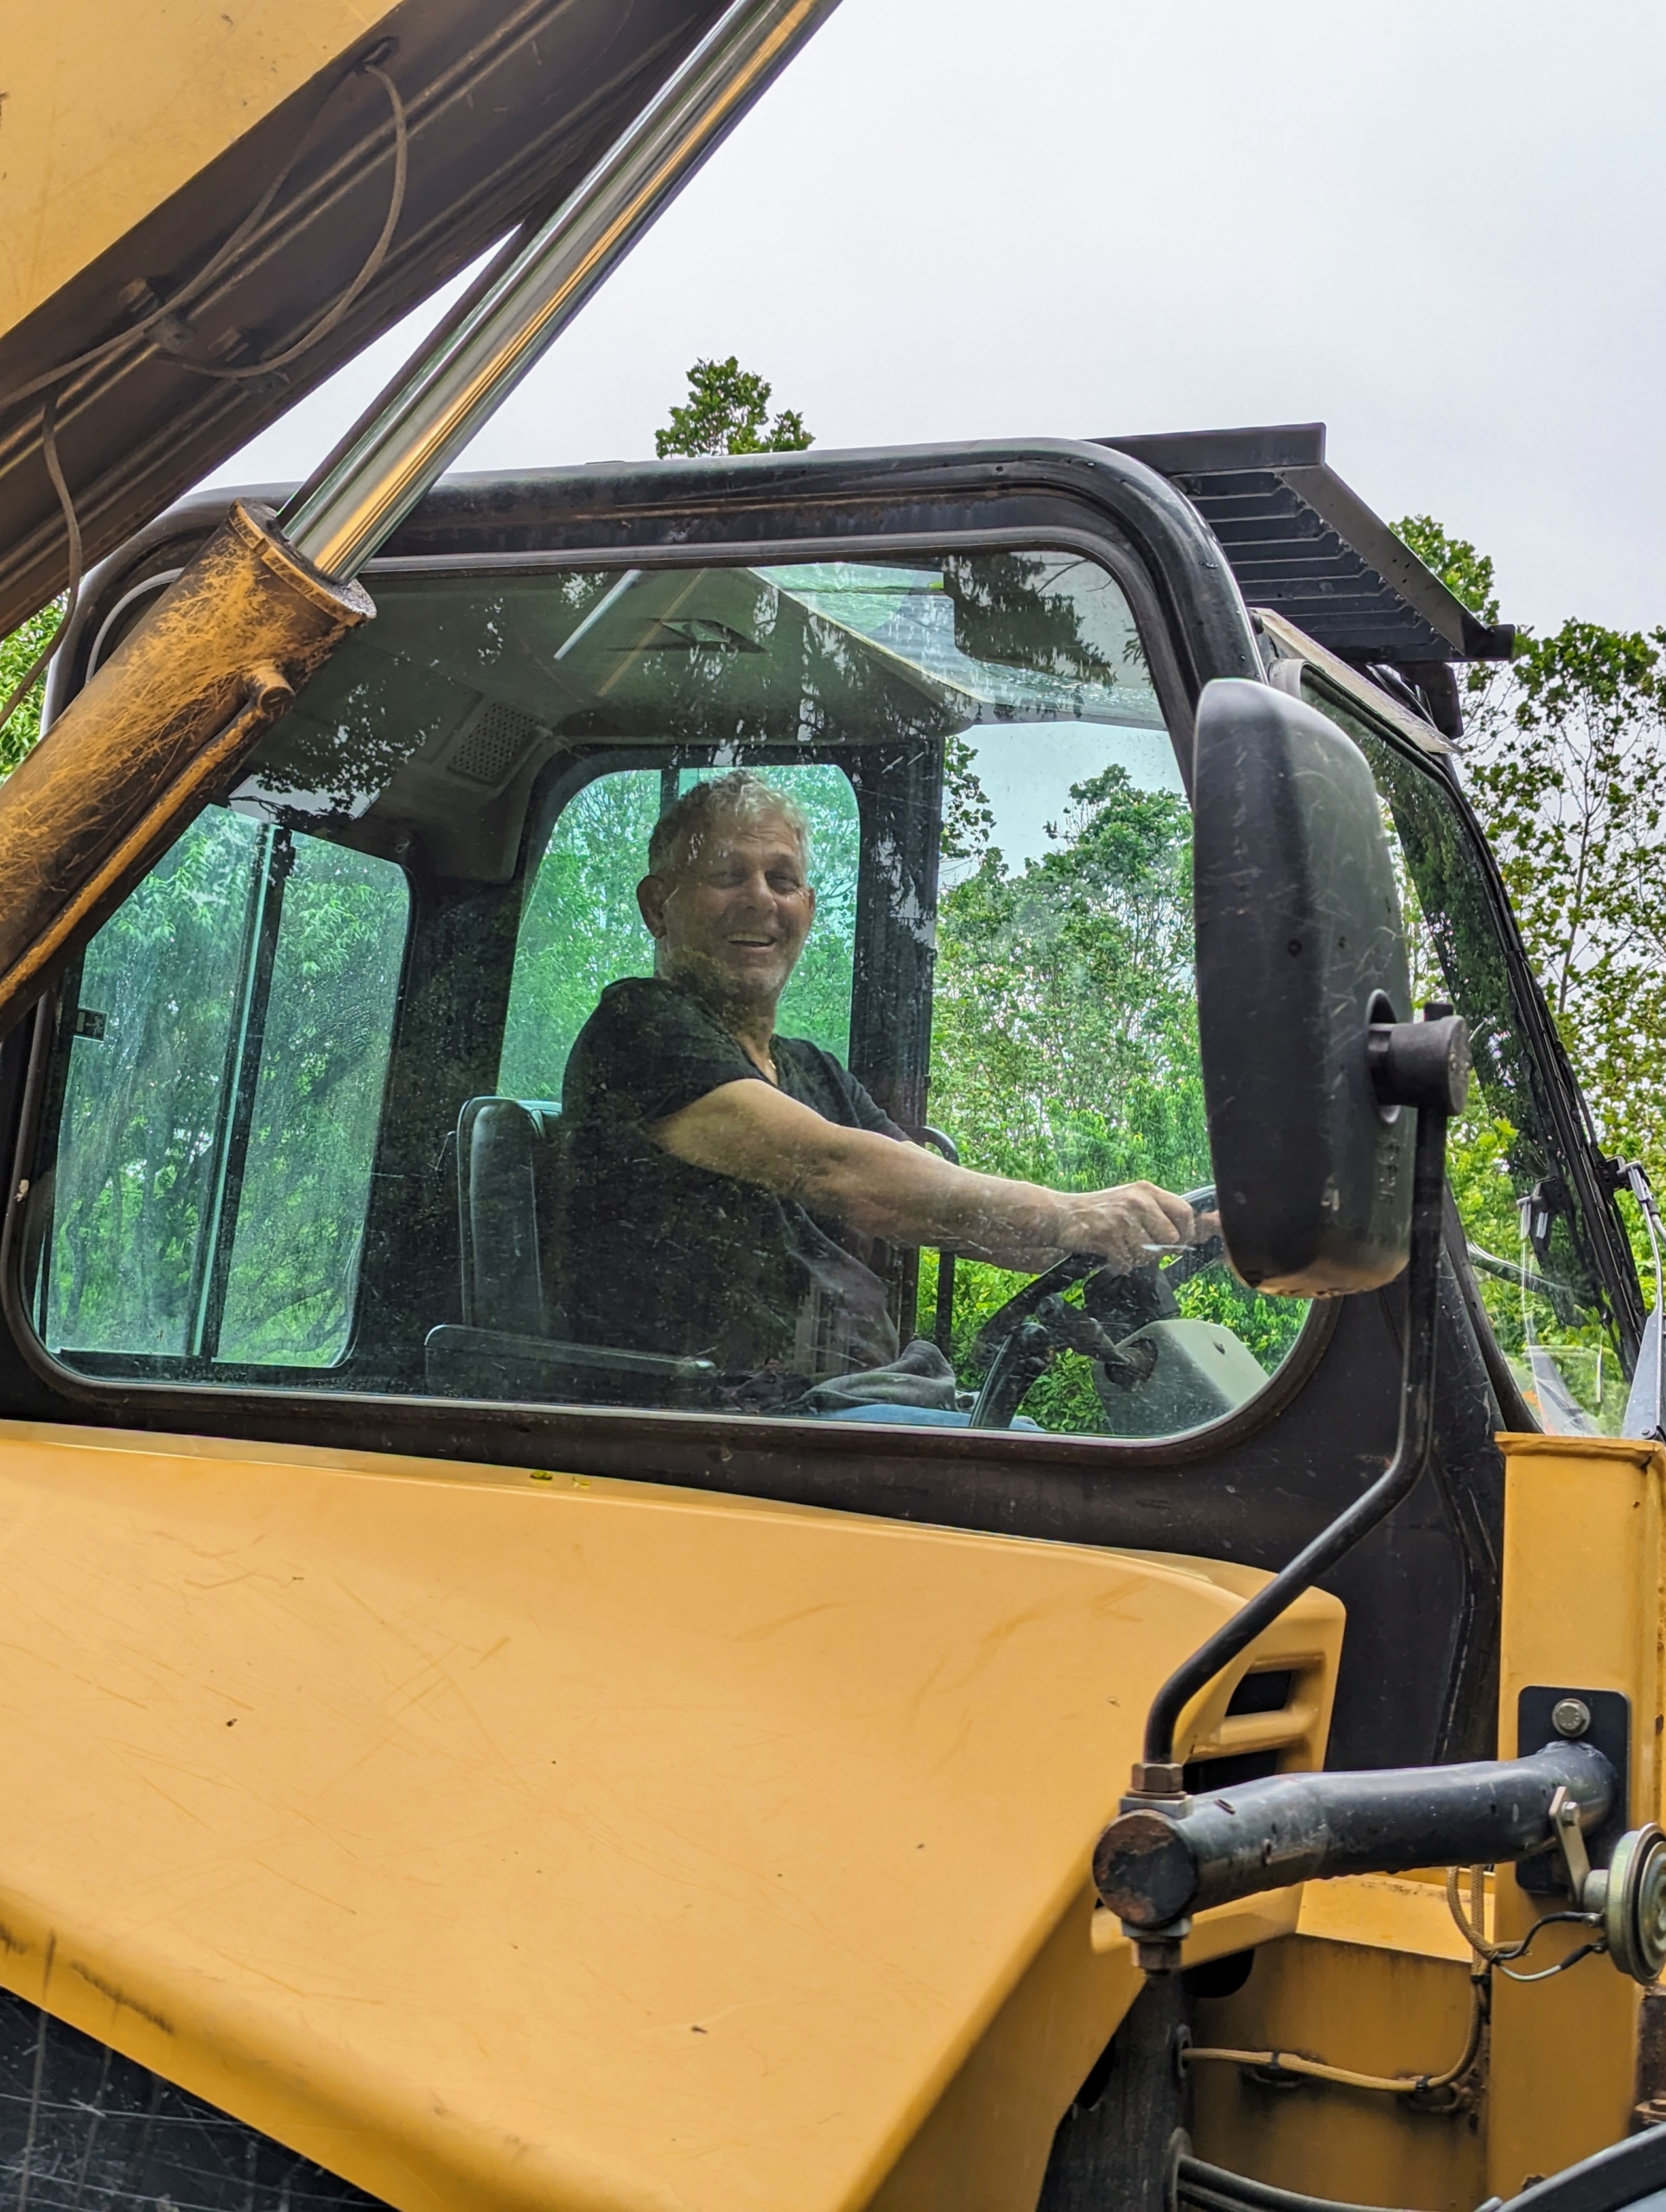
Down below, Fernando sits in the Hi-Lo ready to move Pasang safely from place to place. The Hi-Lo is very useful, and because the hedge is accessible from the parking lot, it always comes in handy for this task.
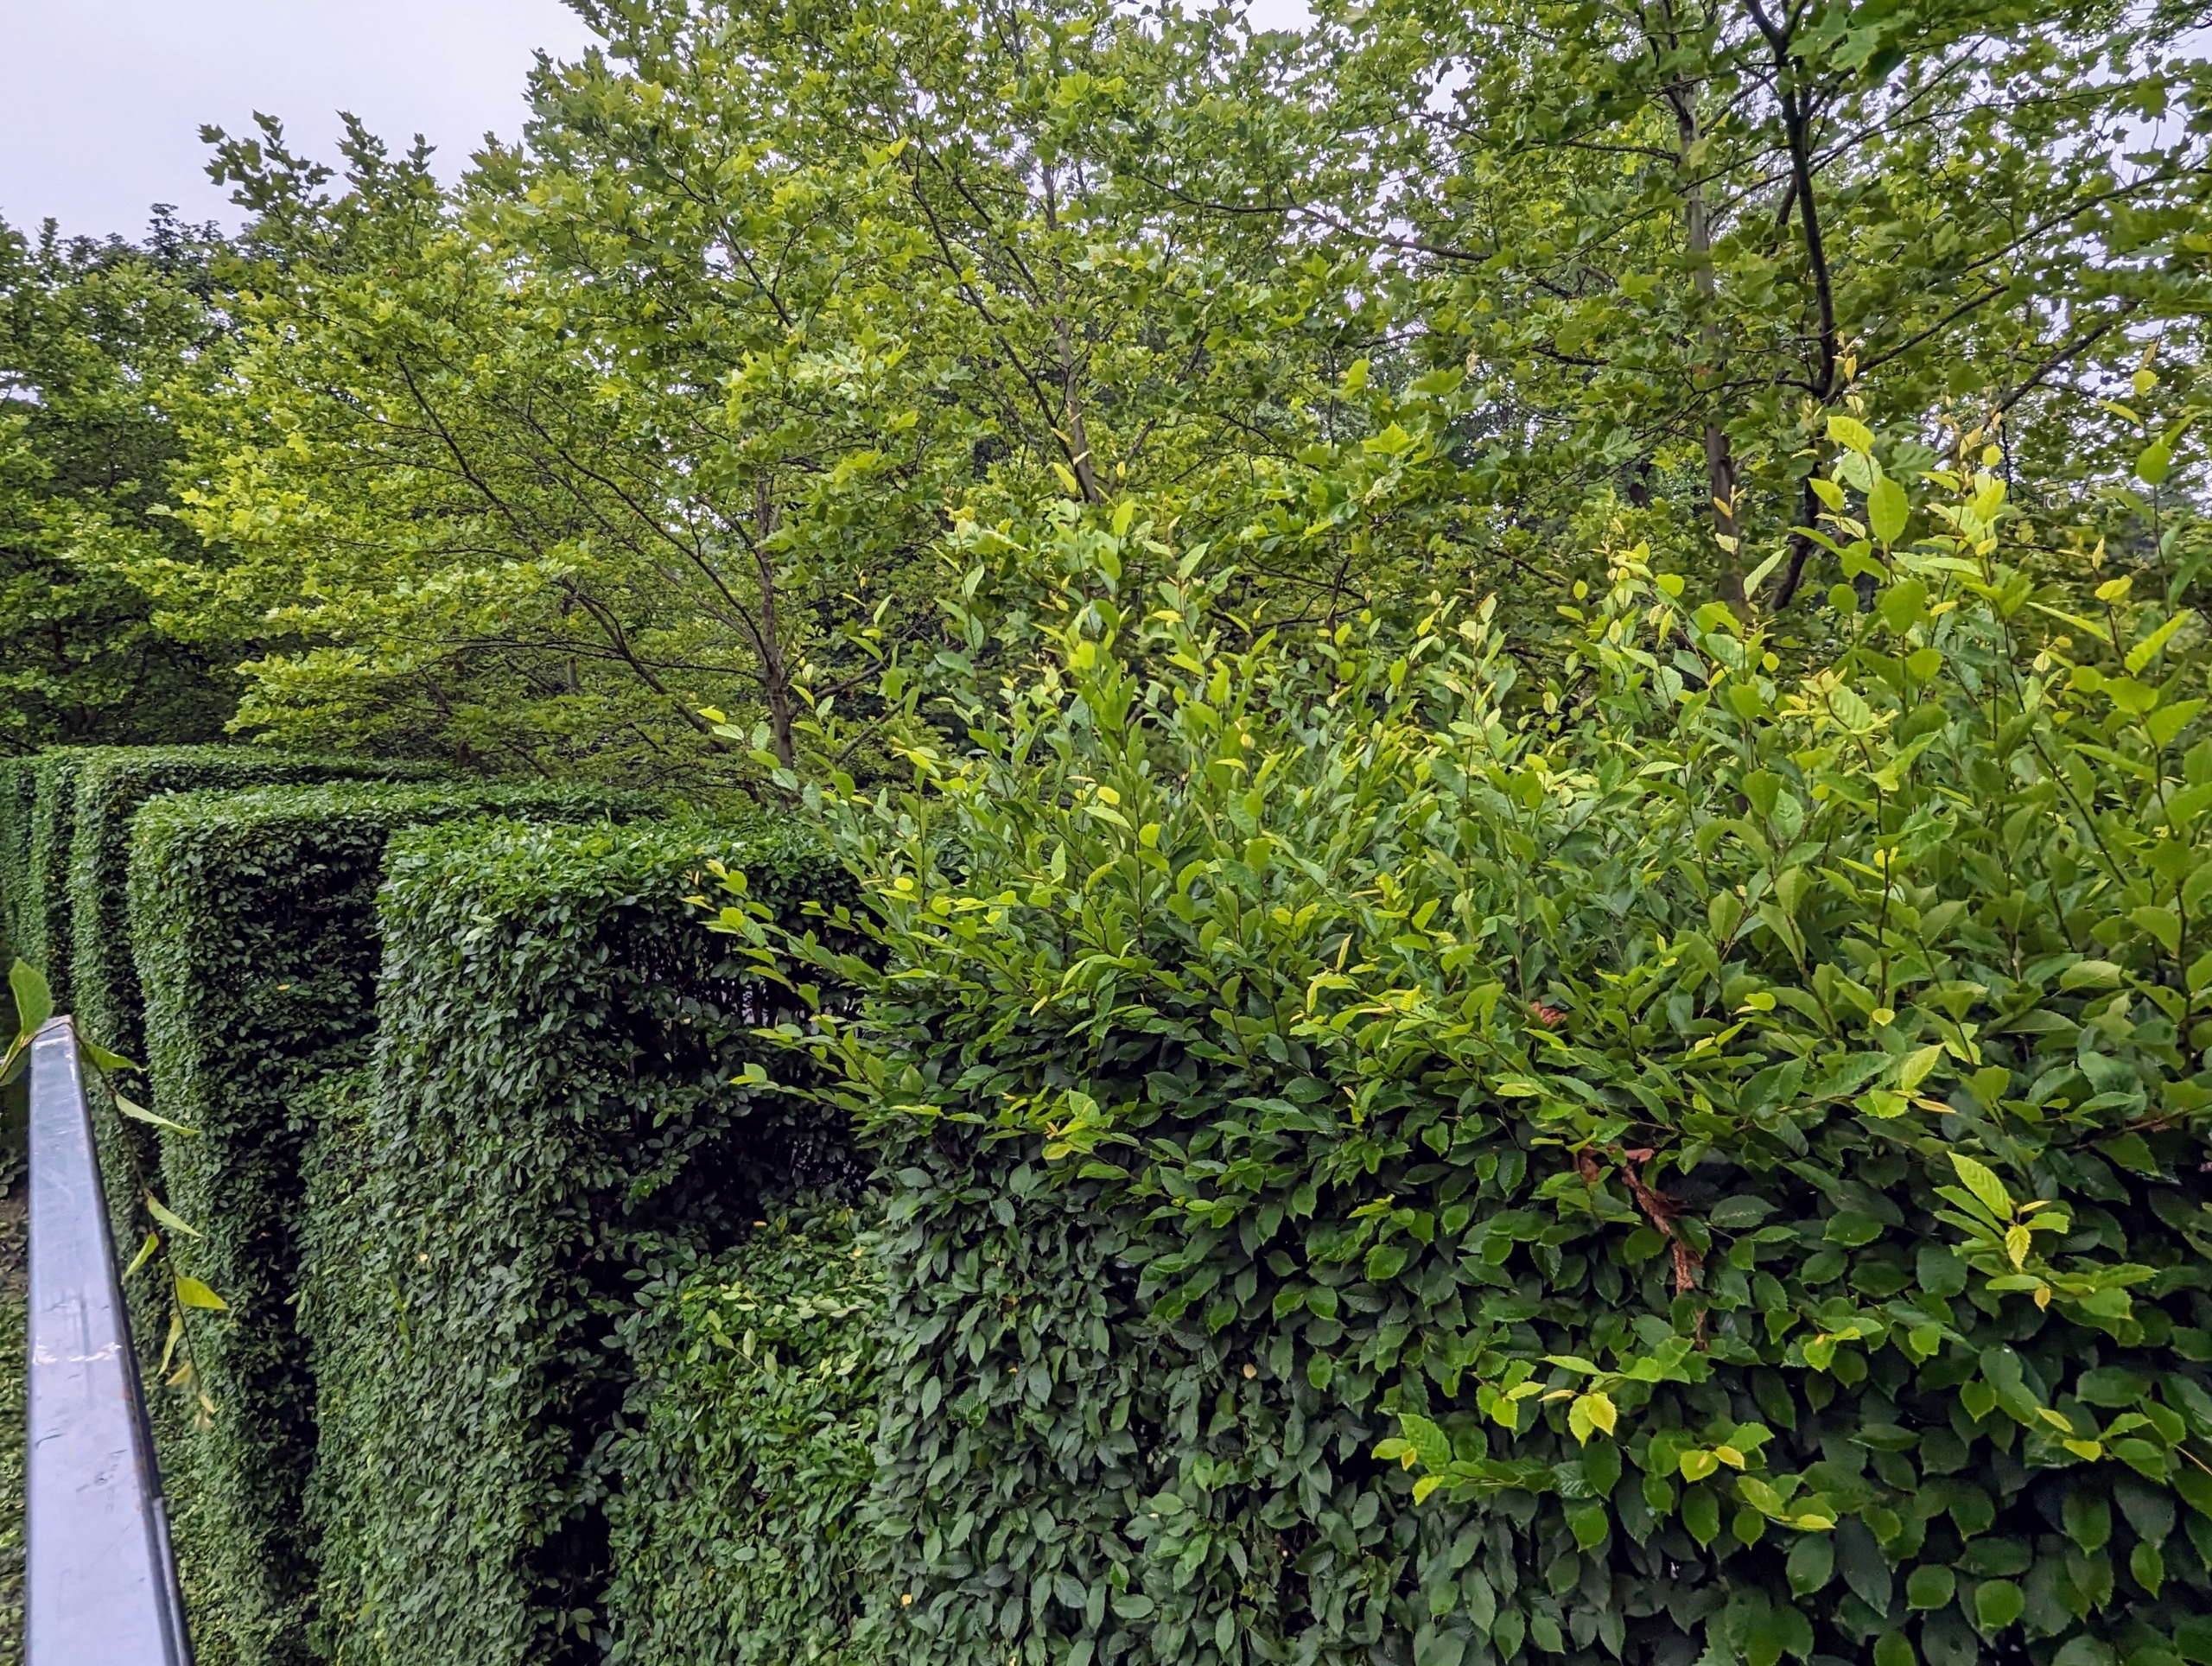
On the left is what Pasang has completed. On the right is what he still has left to do. It’s a big difference, but this shows the growth from the past year. These hornbeams are so healthy and lush.
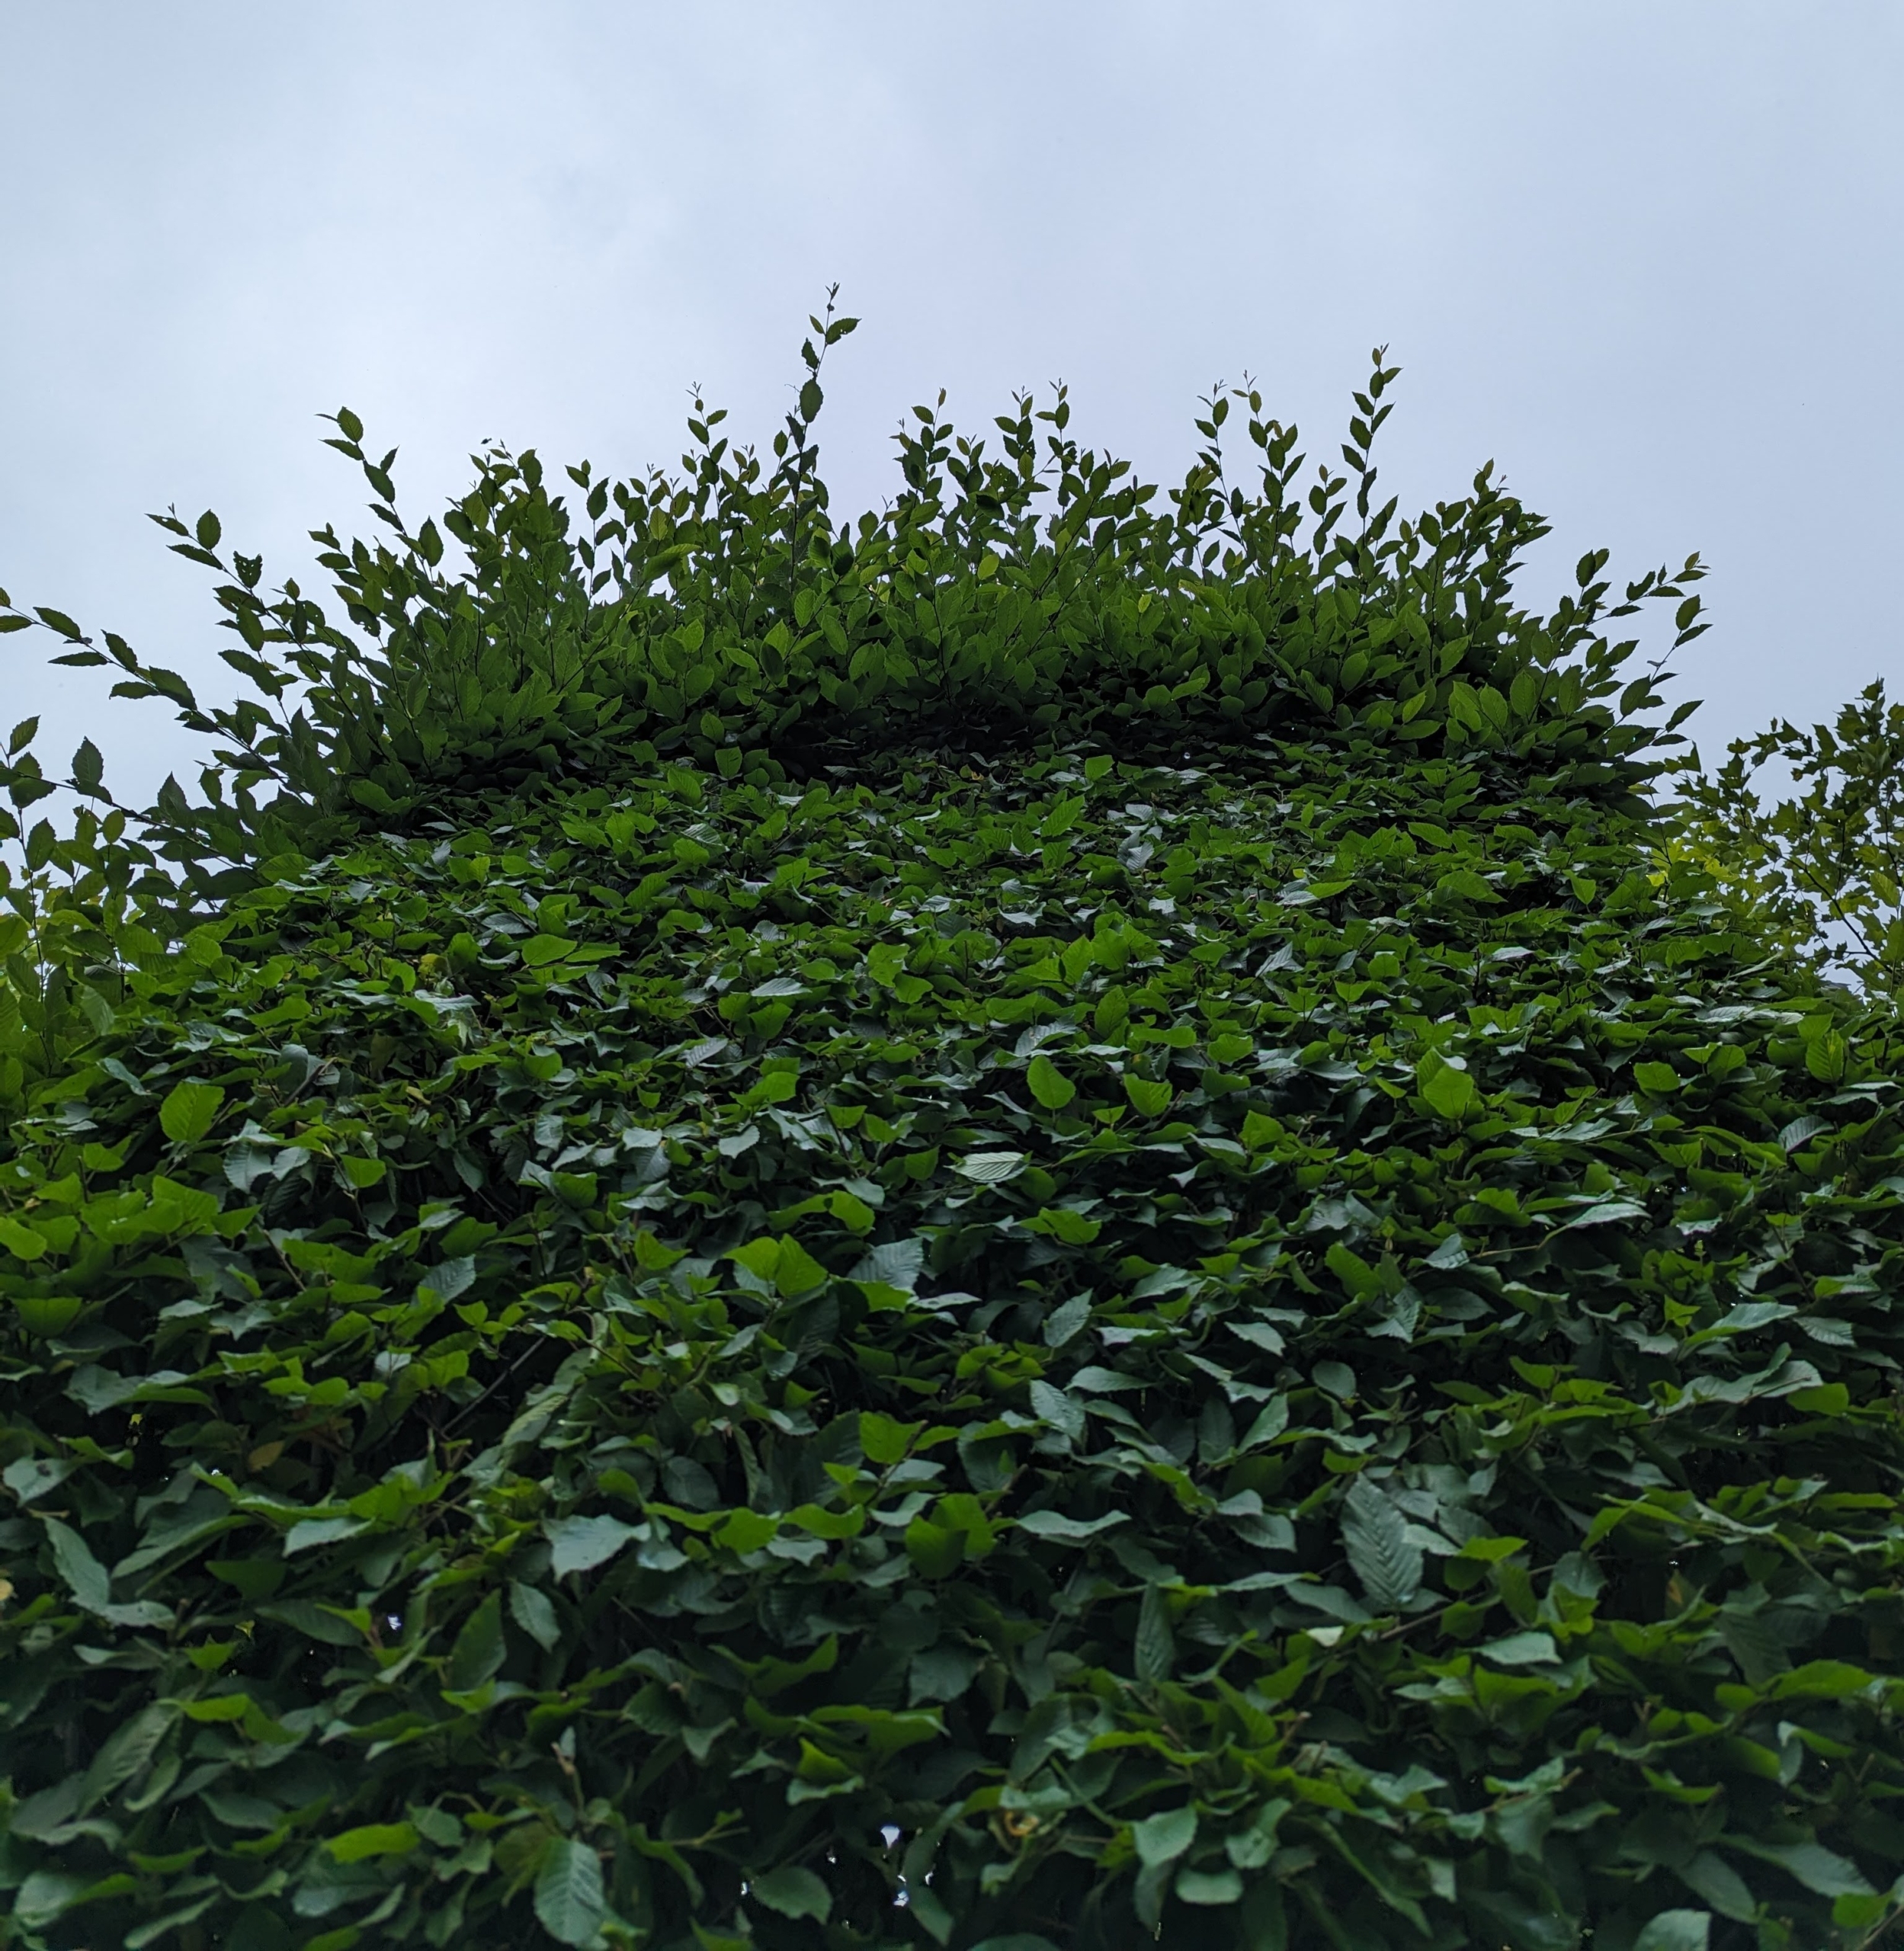
Looking up, the new growth can be seen growing wildly above the trimmed lower section.
Here he is trimming the sides from the safety of the Hi-Lo cage. He is also able to use the floor of the cage as a straight trimming guide.
And look at all the cut leaves – this is just from the front of the sections. Phurba rakes them up as they go, so it is an easier cleanup at the end.
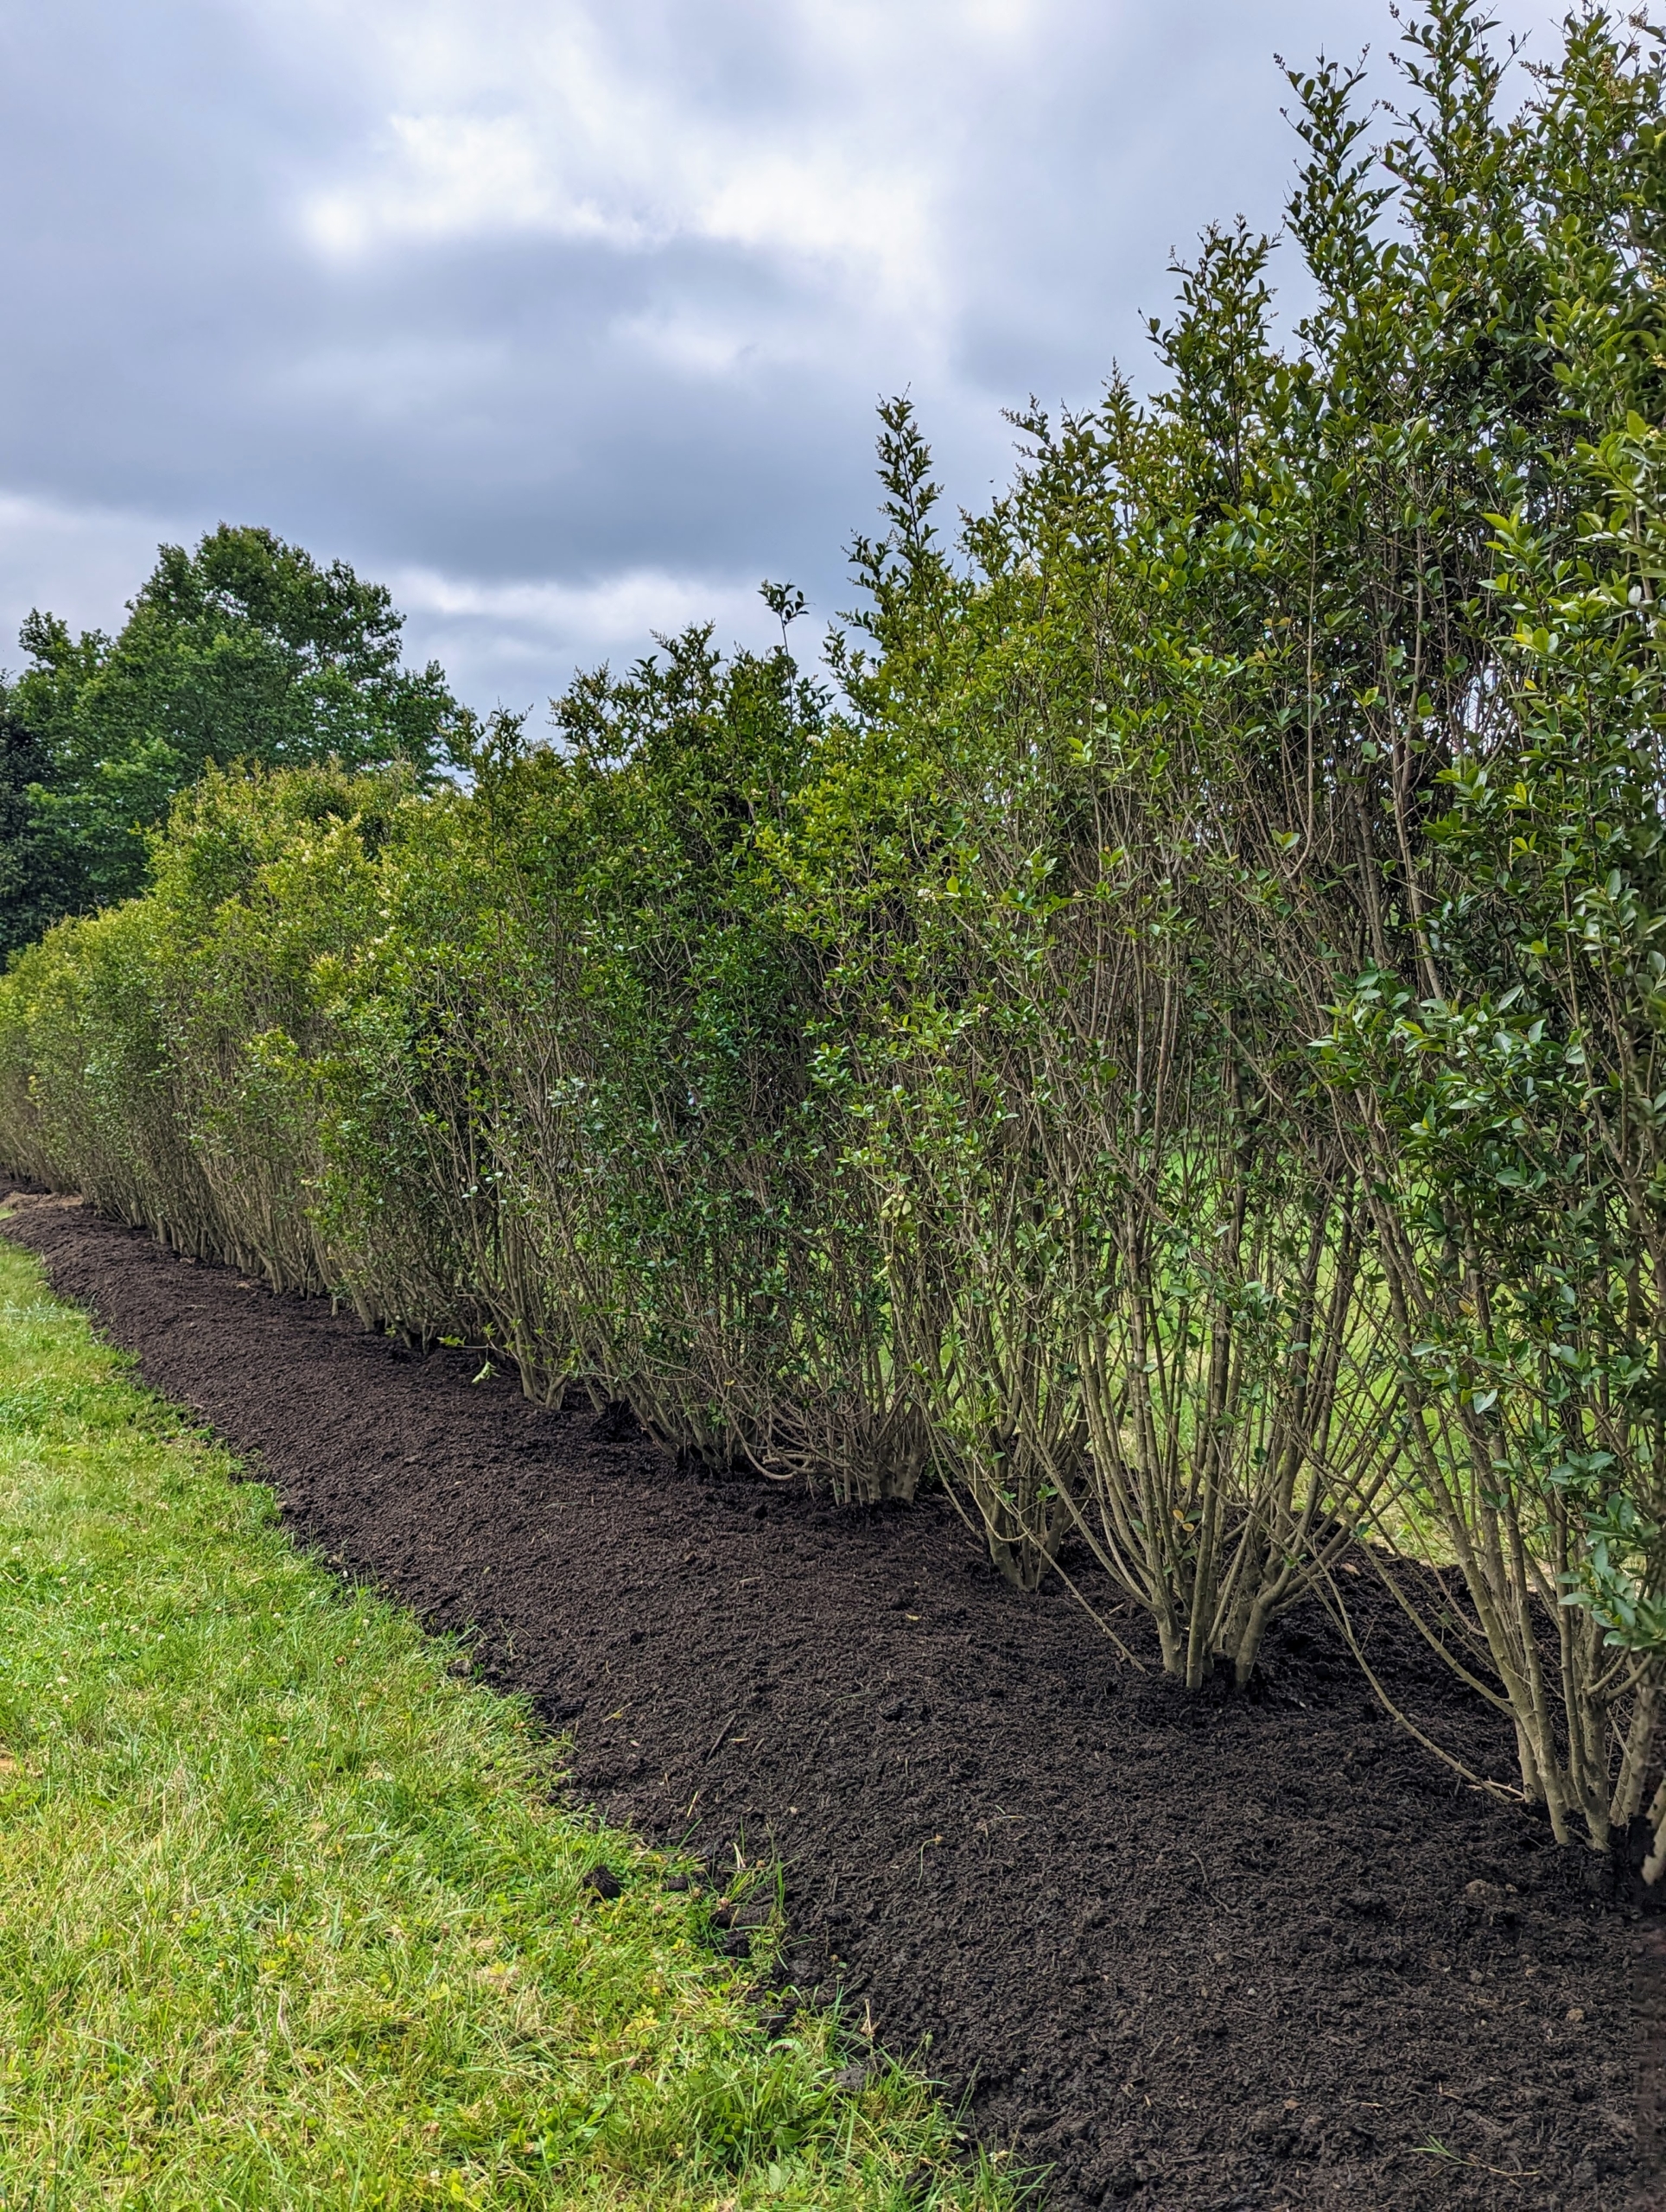
And here is the finished hedge – trimmed beautifully.
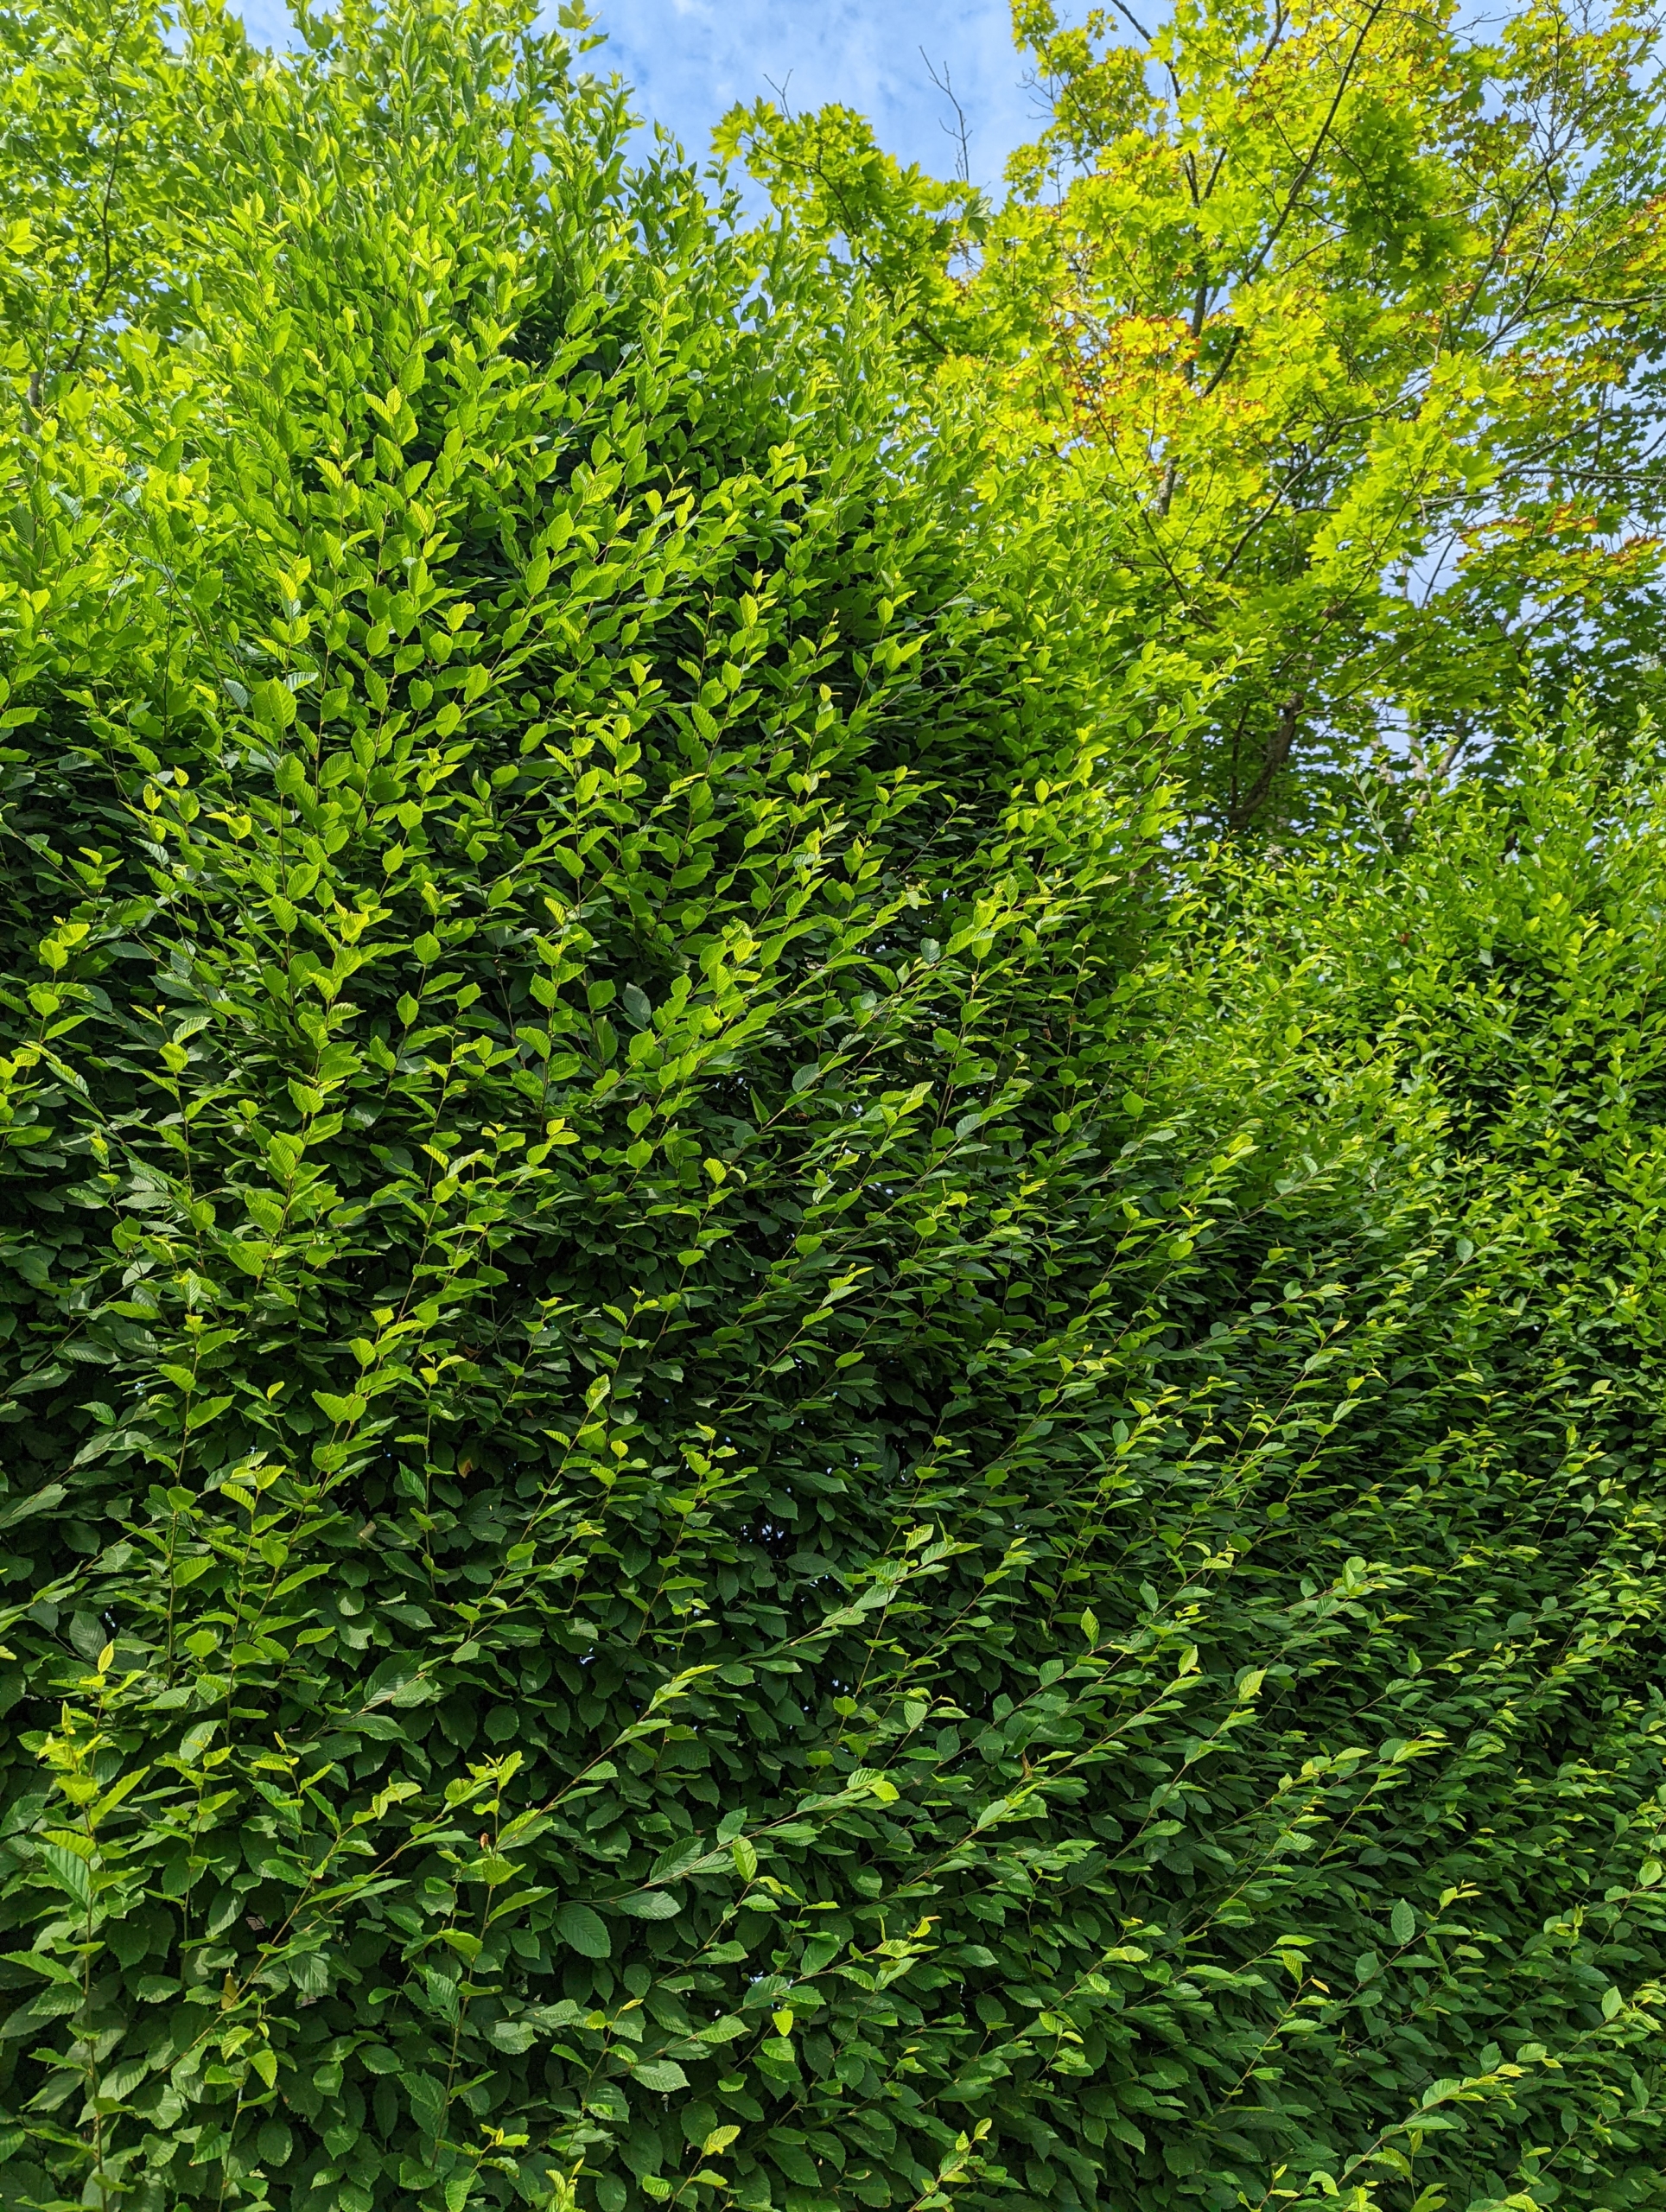
A younger hedge is also groomed across the parking lot right in front of my glass greenhouse. We planted this hedge in the spring of 2019 – it has grown quite a bit. An identical one is on the other side of the greenhouse entrance.
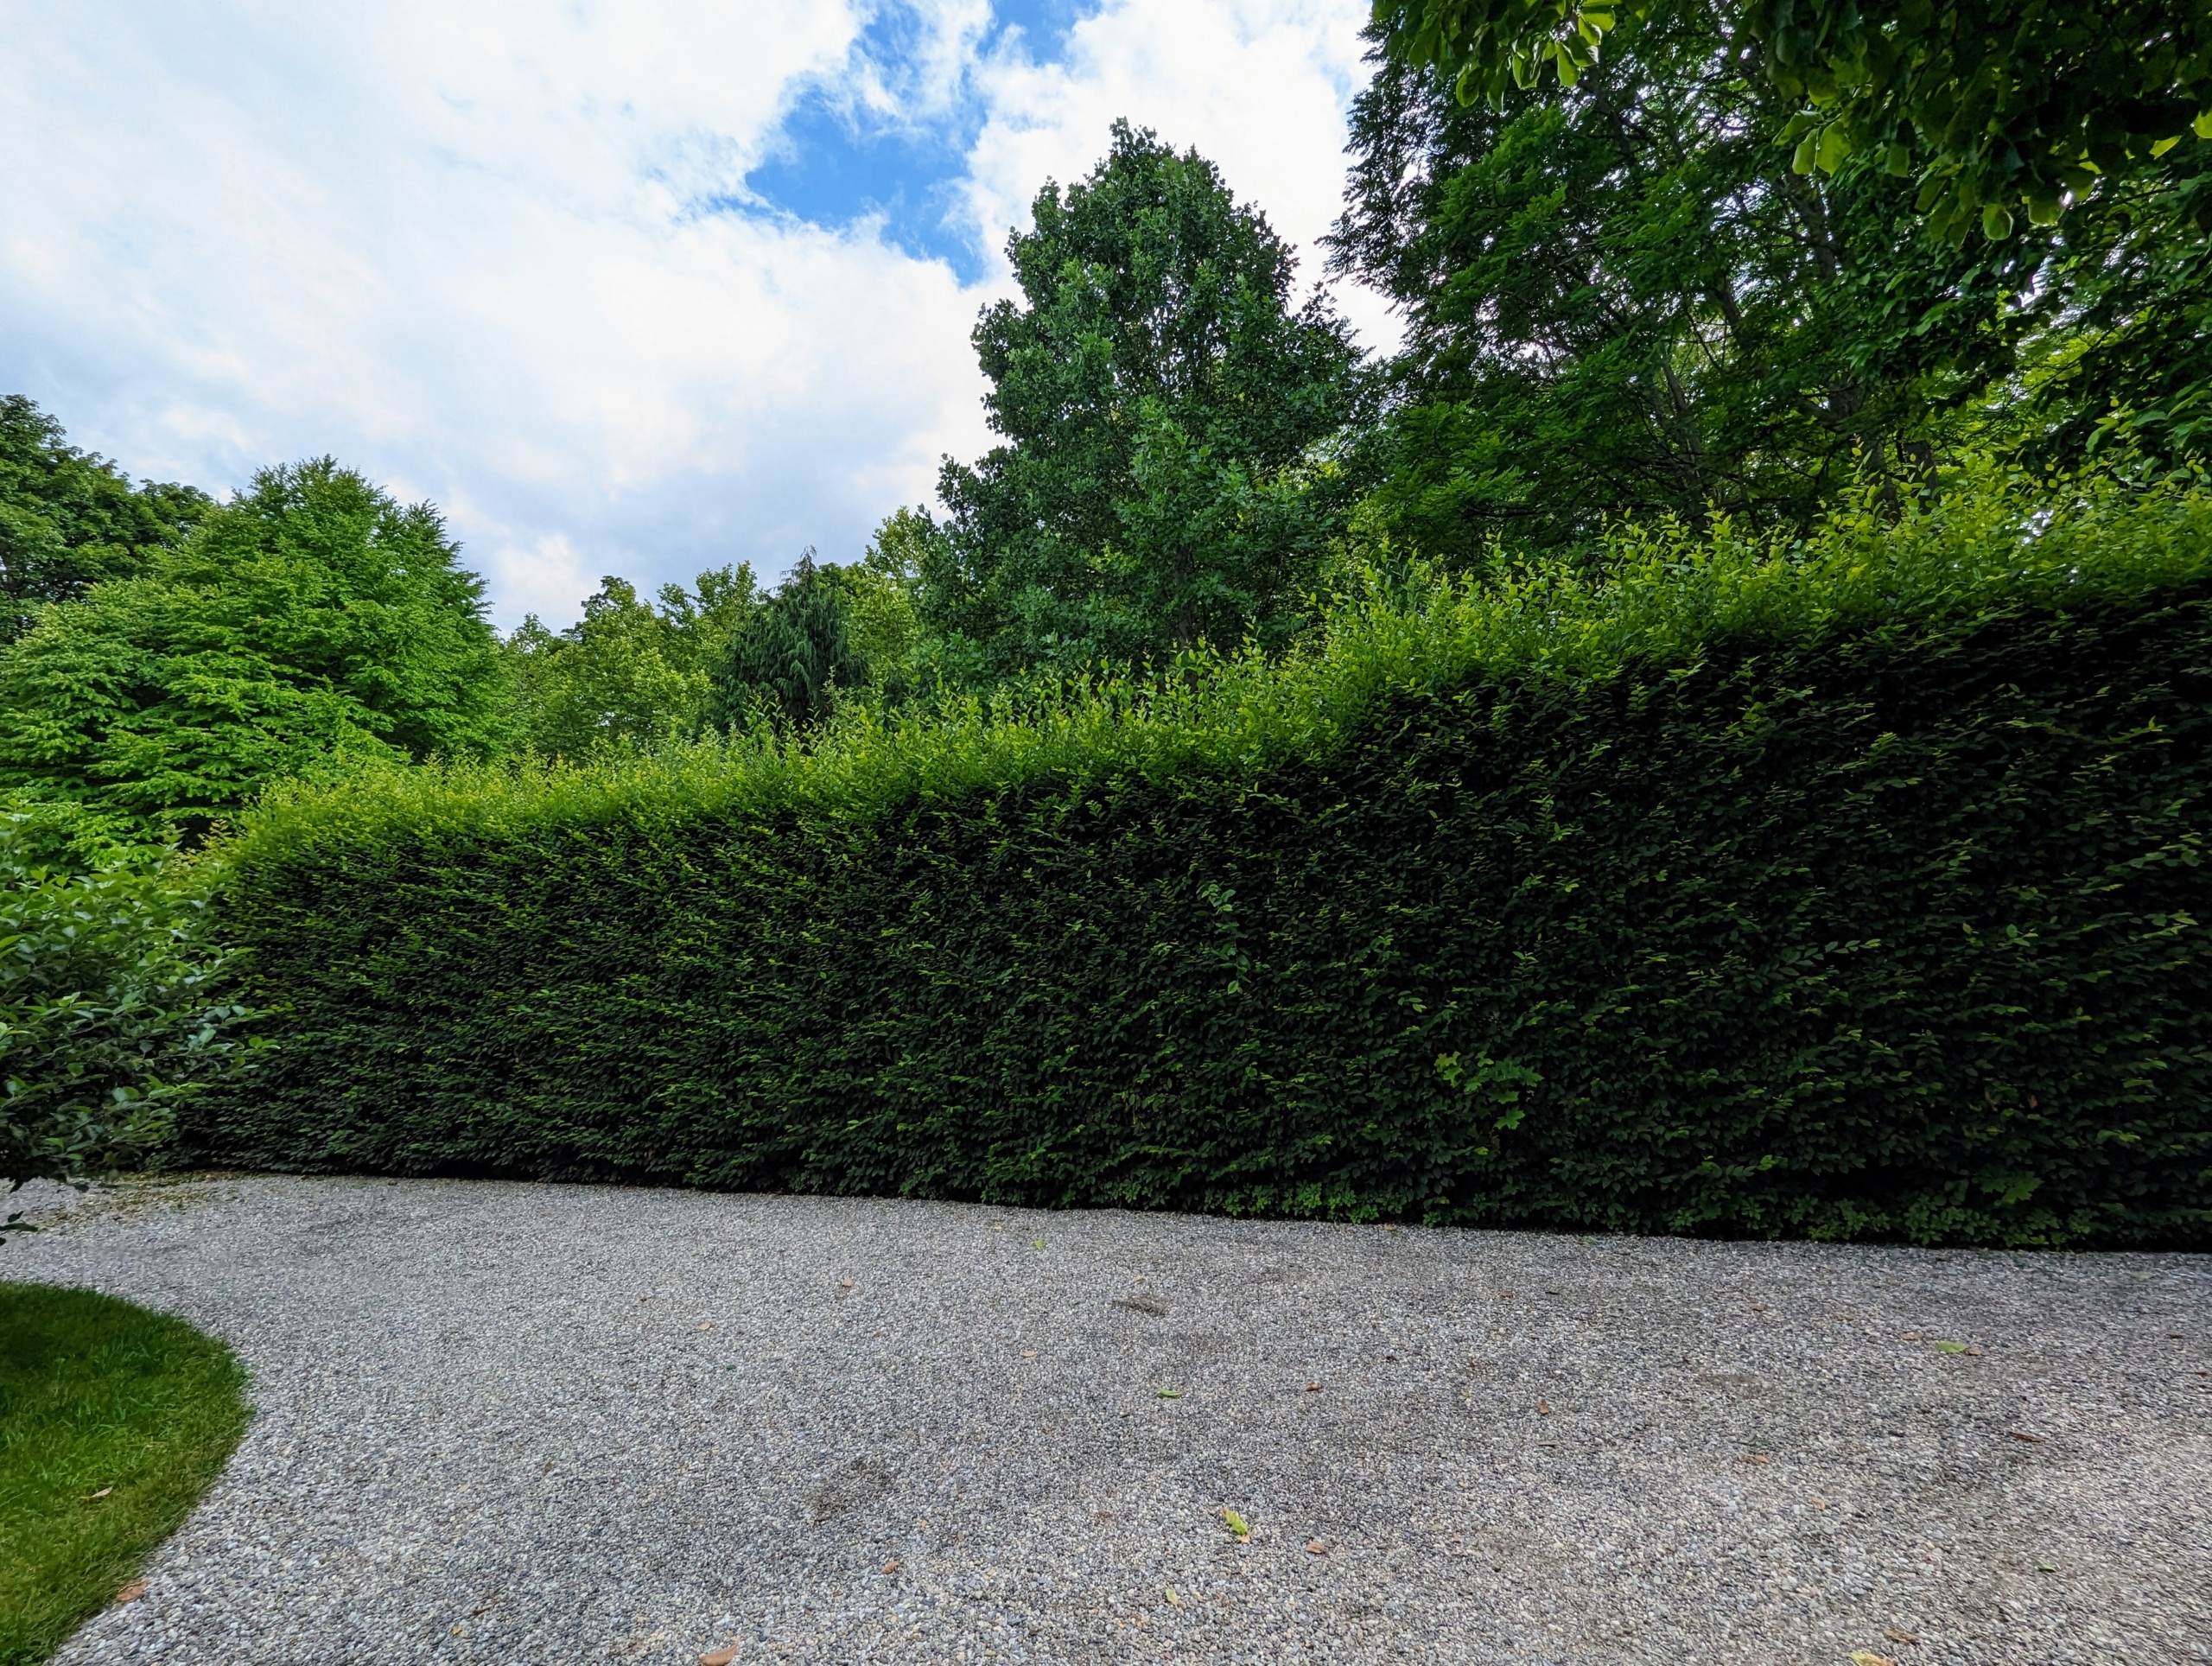
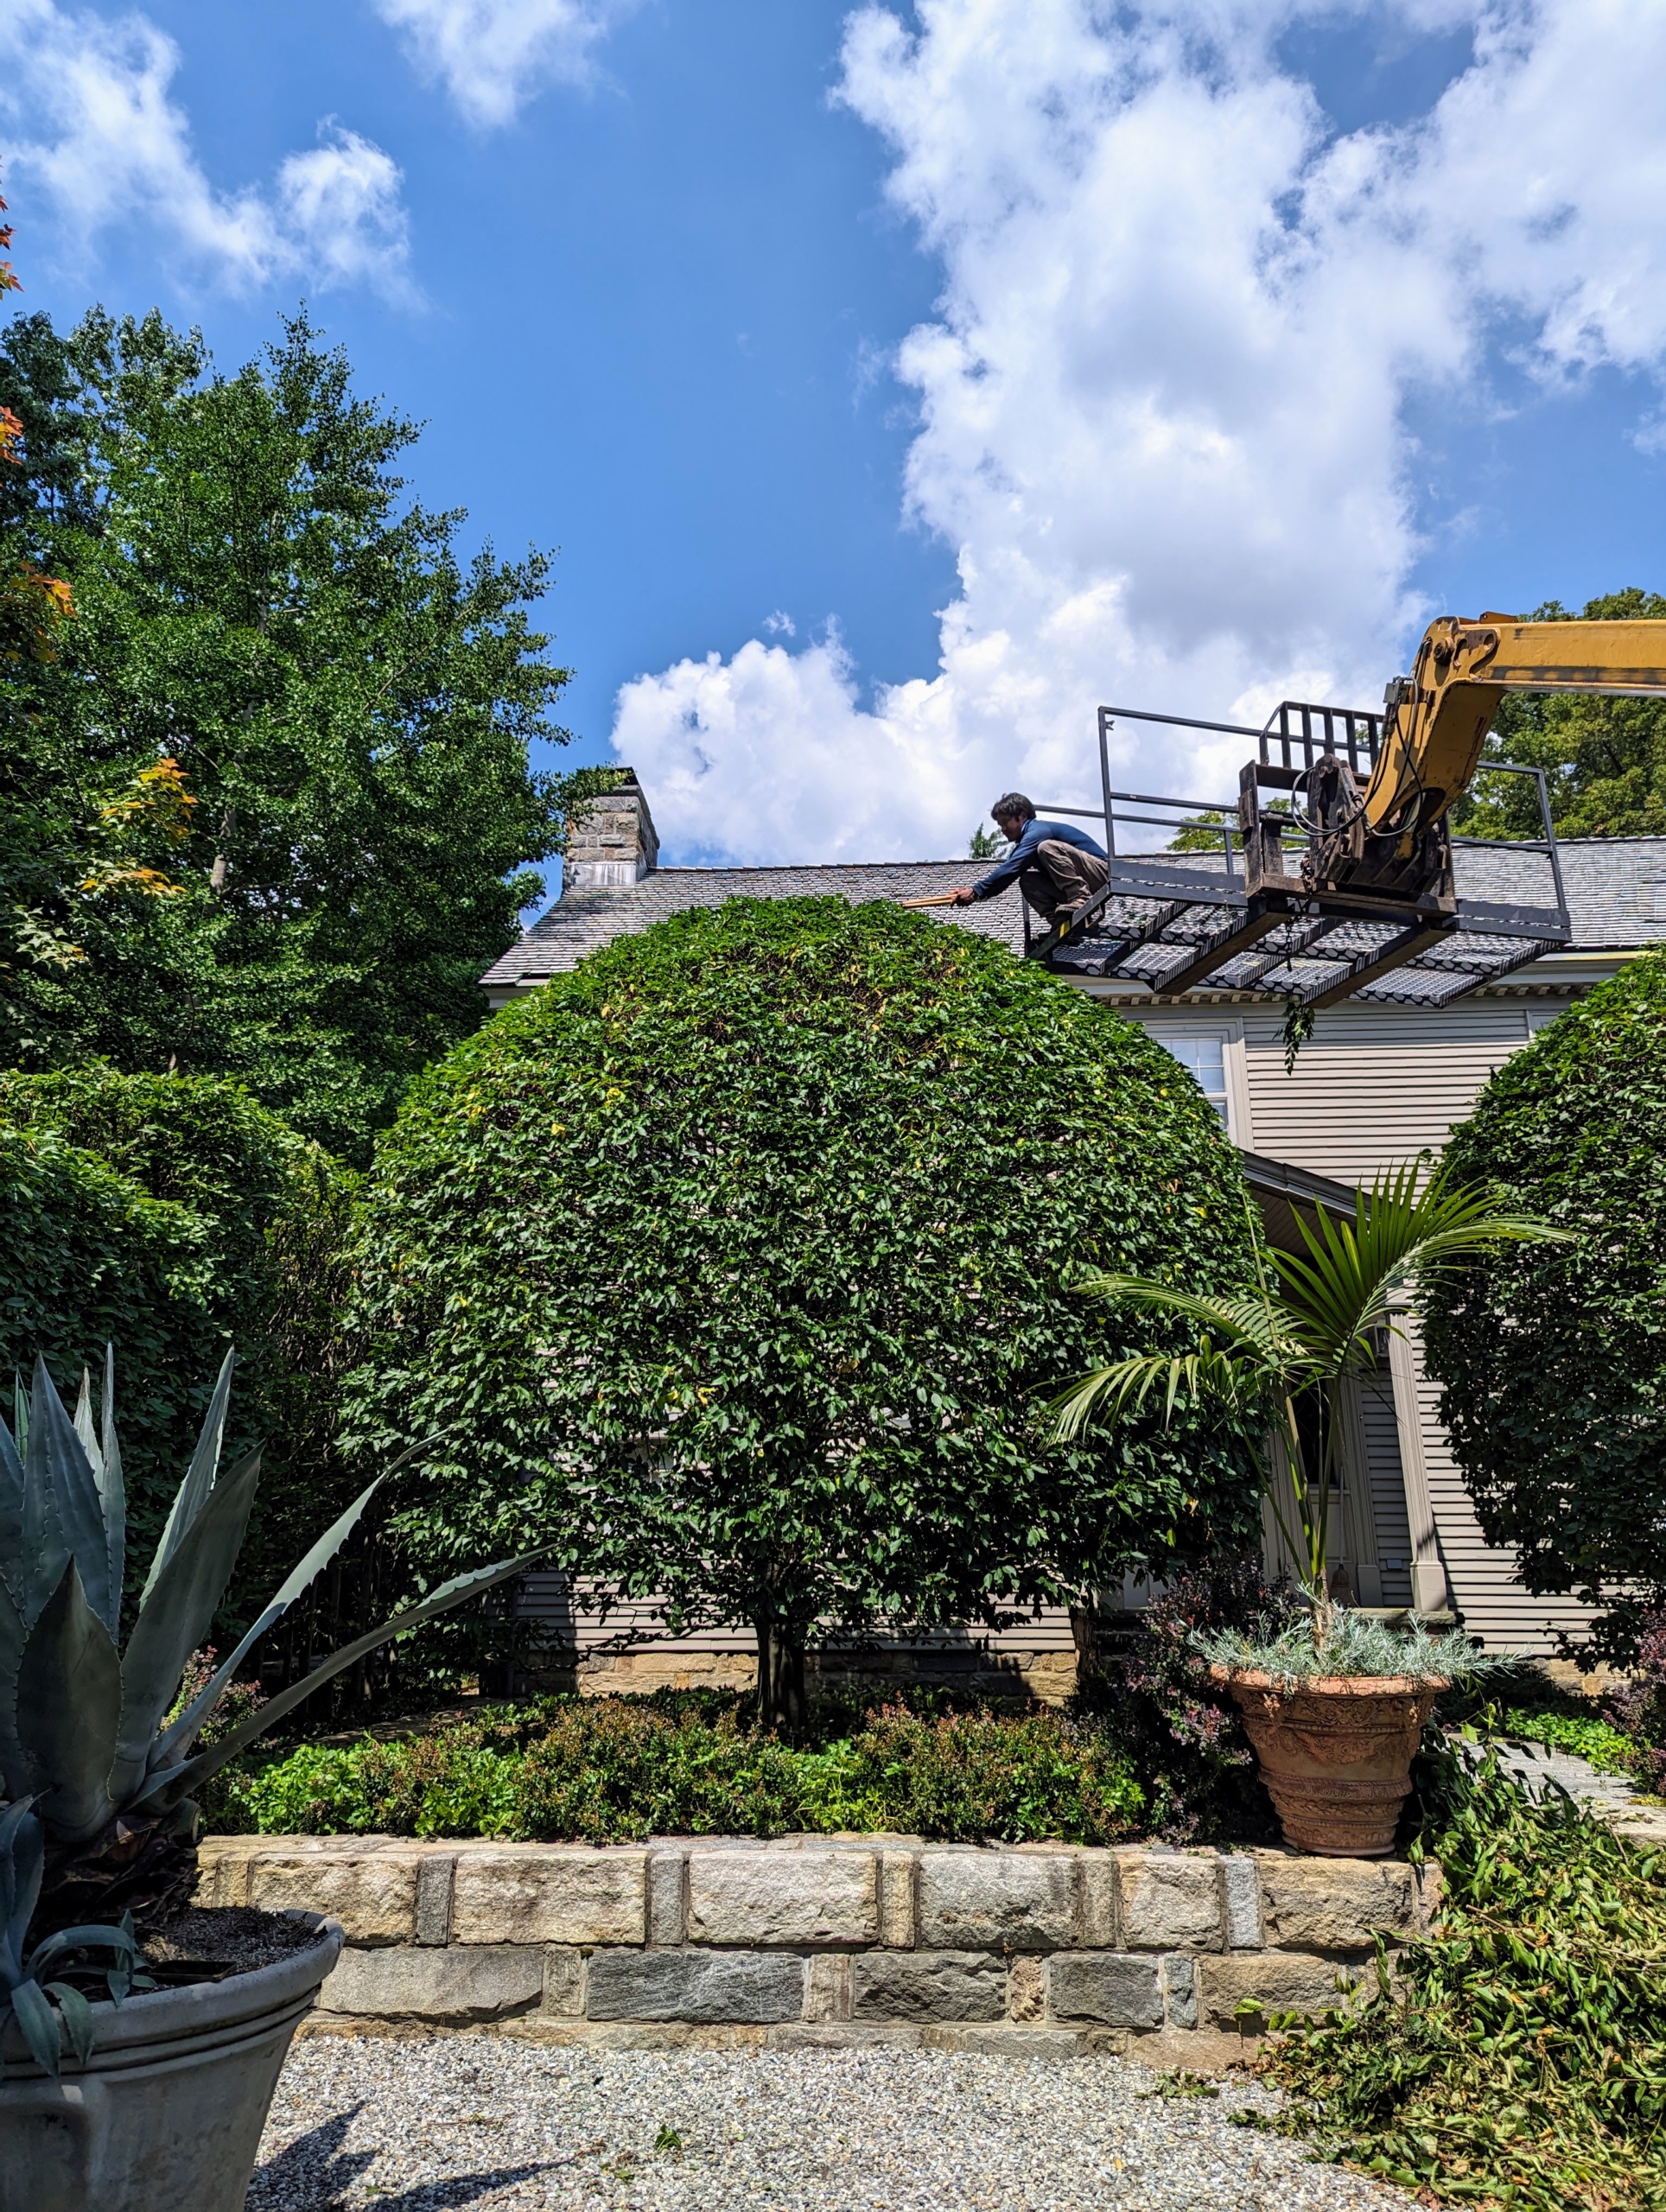
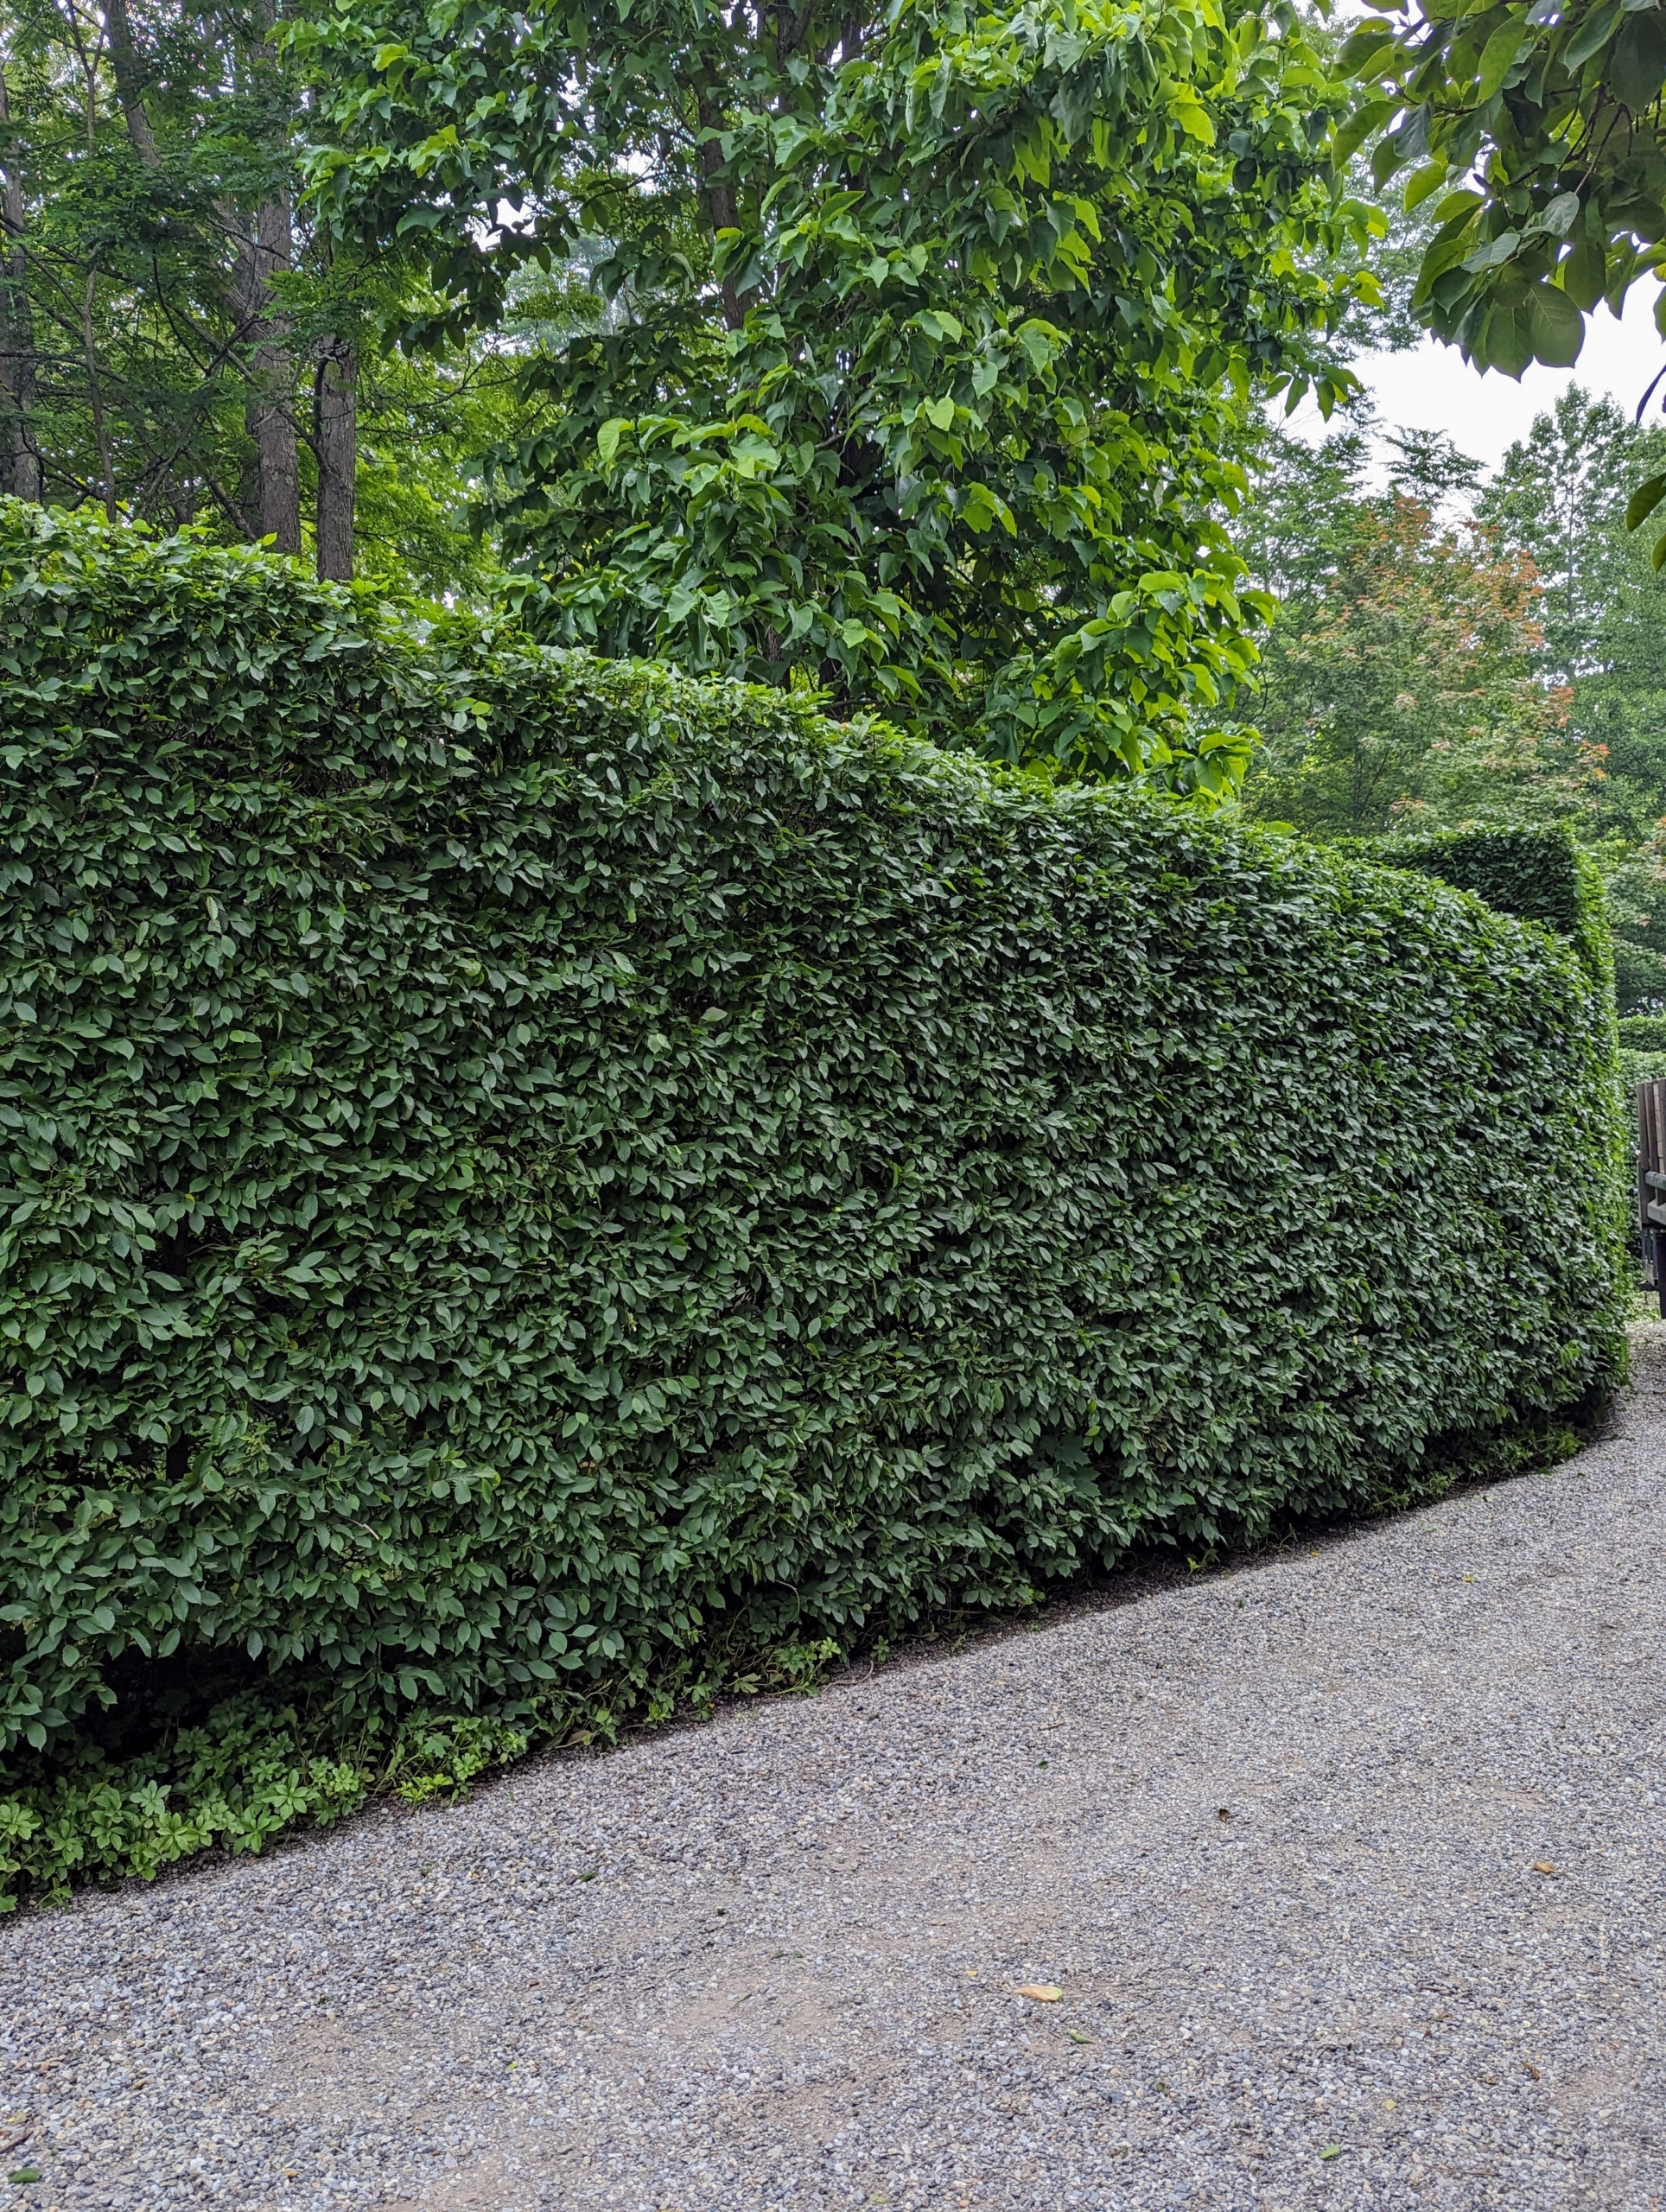
Next task – the European hornbeam hedge along the back of the Summer House and the Winter House. Because it is planted on a gradual slope, it needs to be pruned using a step method. The top and upper sides of a hedge are exposed to lots of light, so they grow more vigorously. Here is the hedge before it was done.
And here is one of two giant hornbeam shrubs opposite the long hedge which also needed pruning.
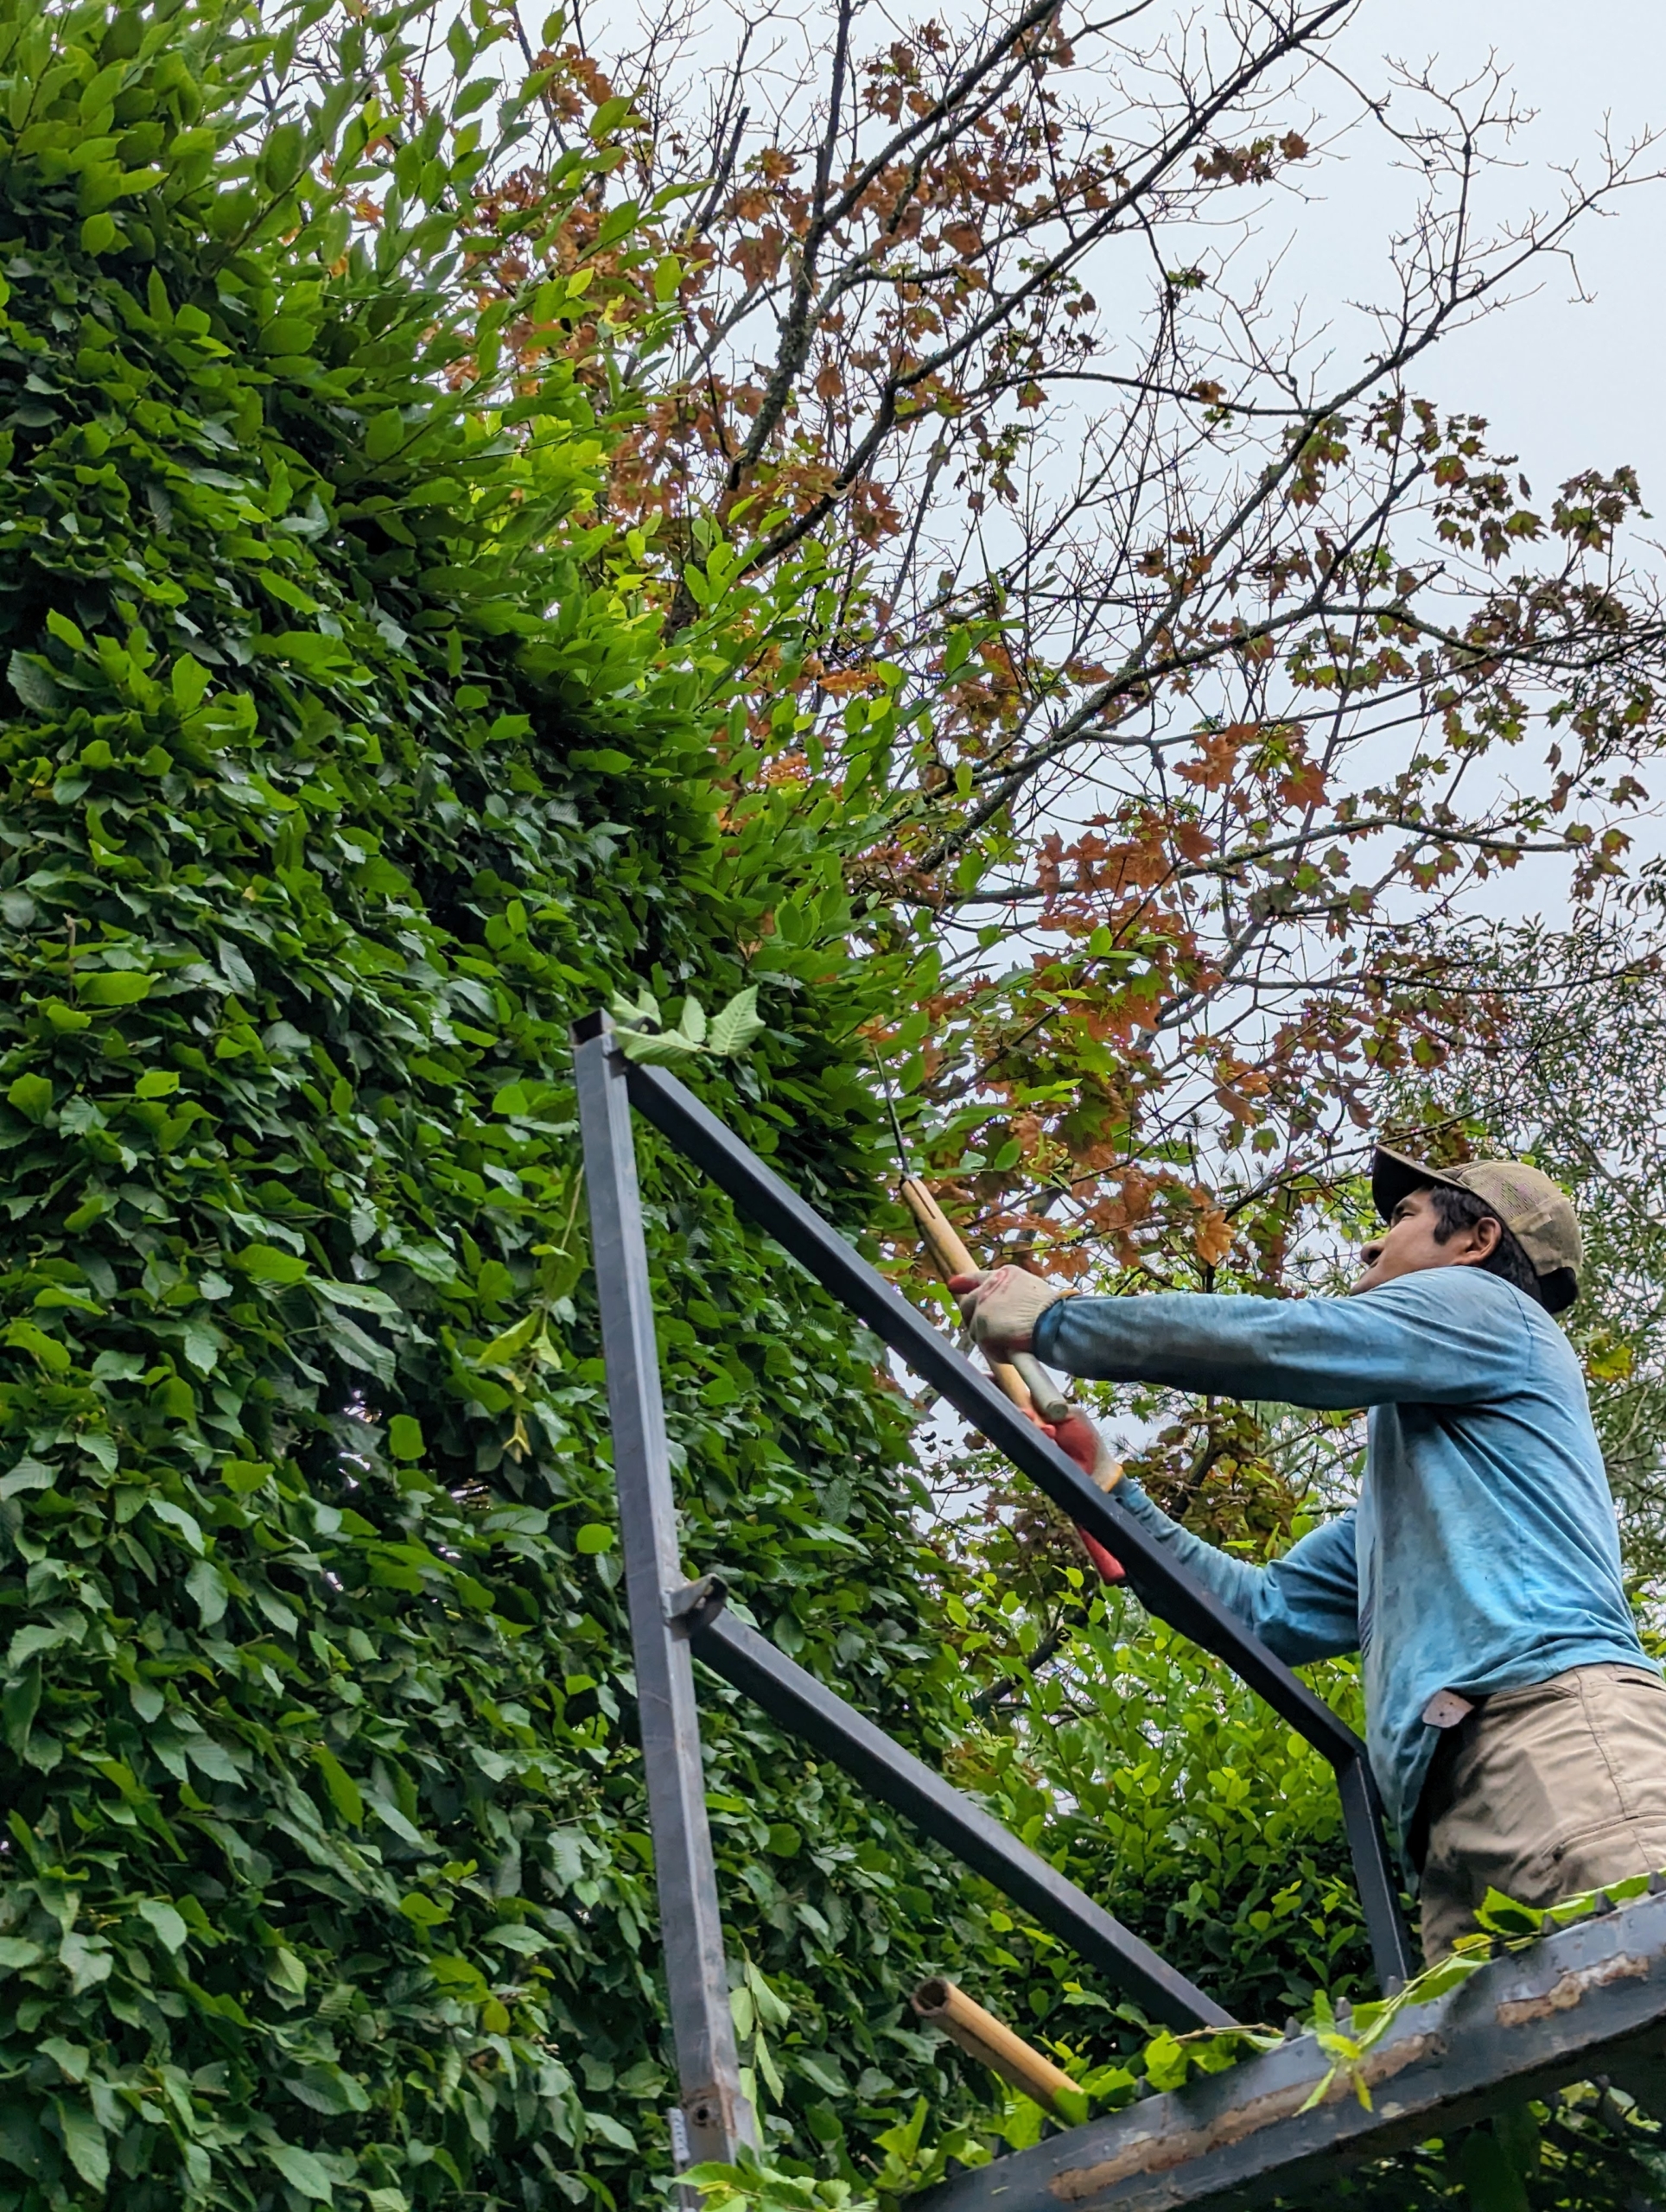
Pasang is back on our trusted Hi-Lo to reach the furthest parts of the hedge with his sheers.
Here he hs tackling the shrub. Pasang is very skilled at sculpting and shaping our trees.
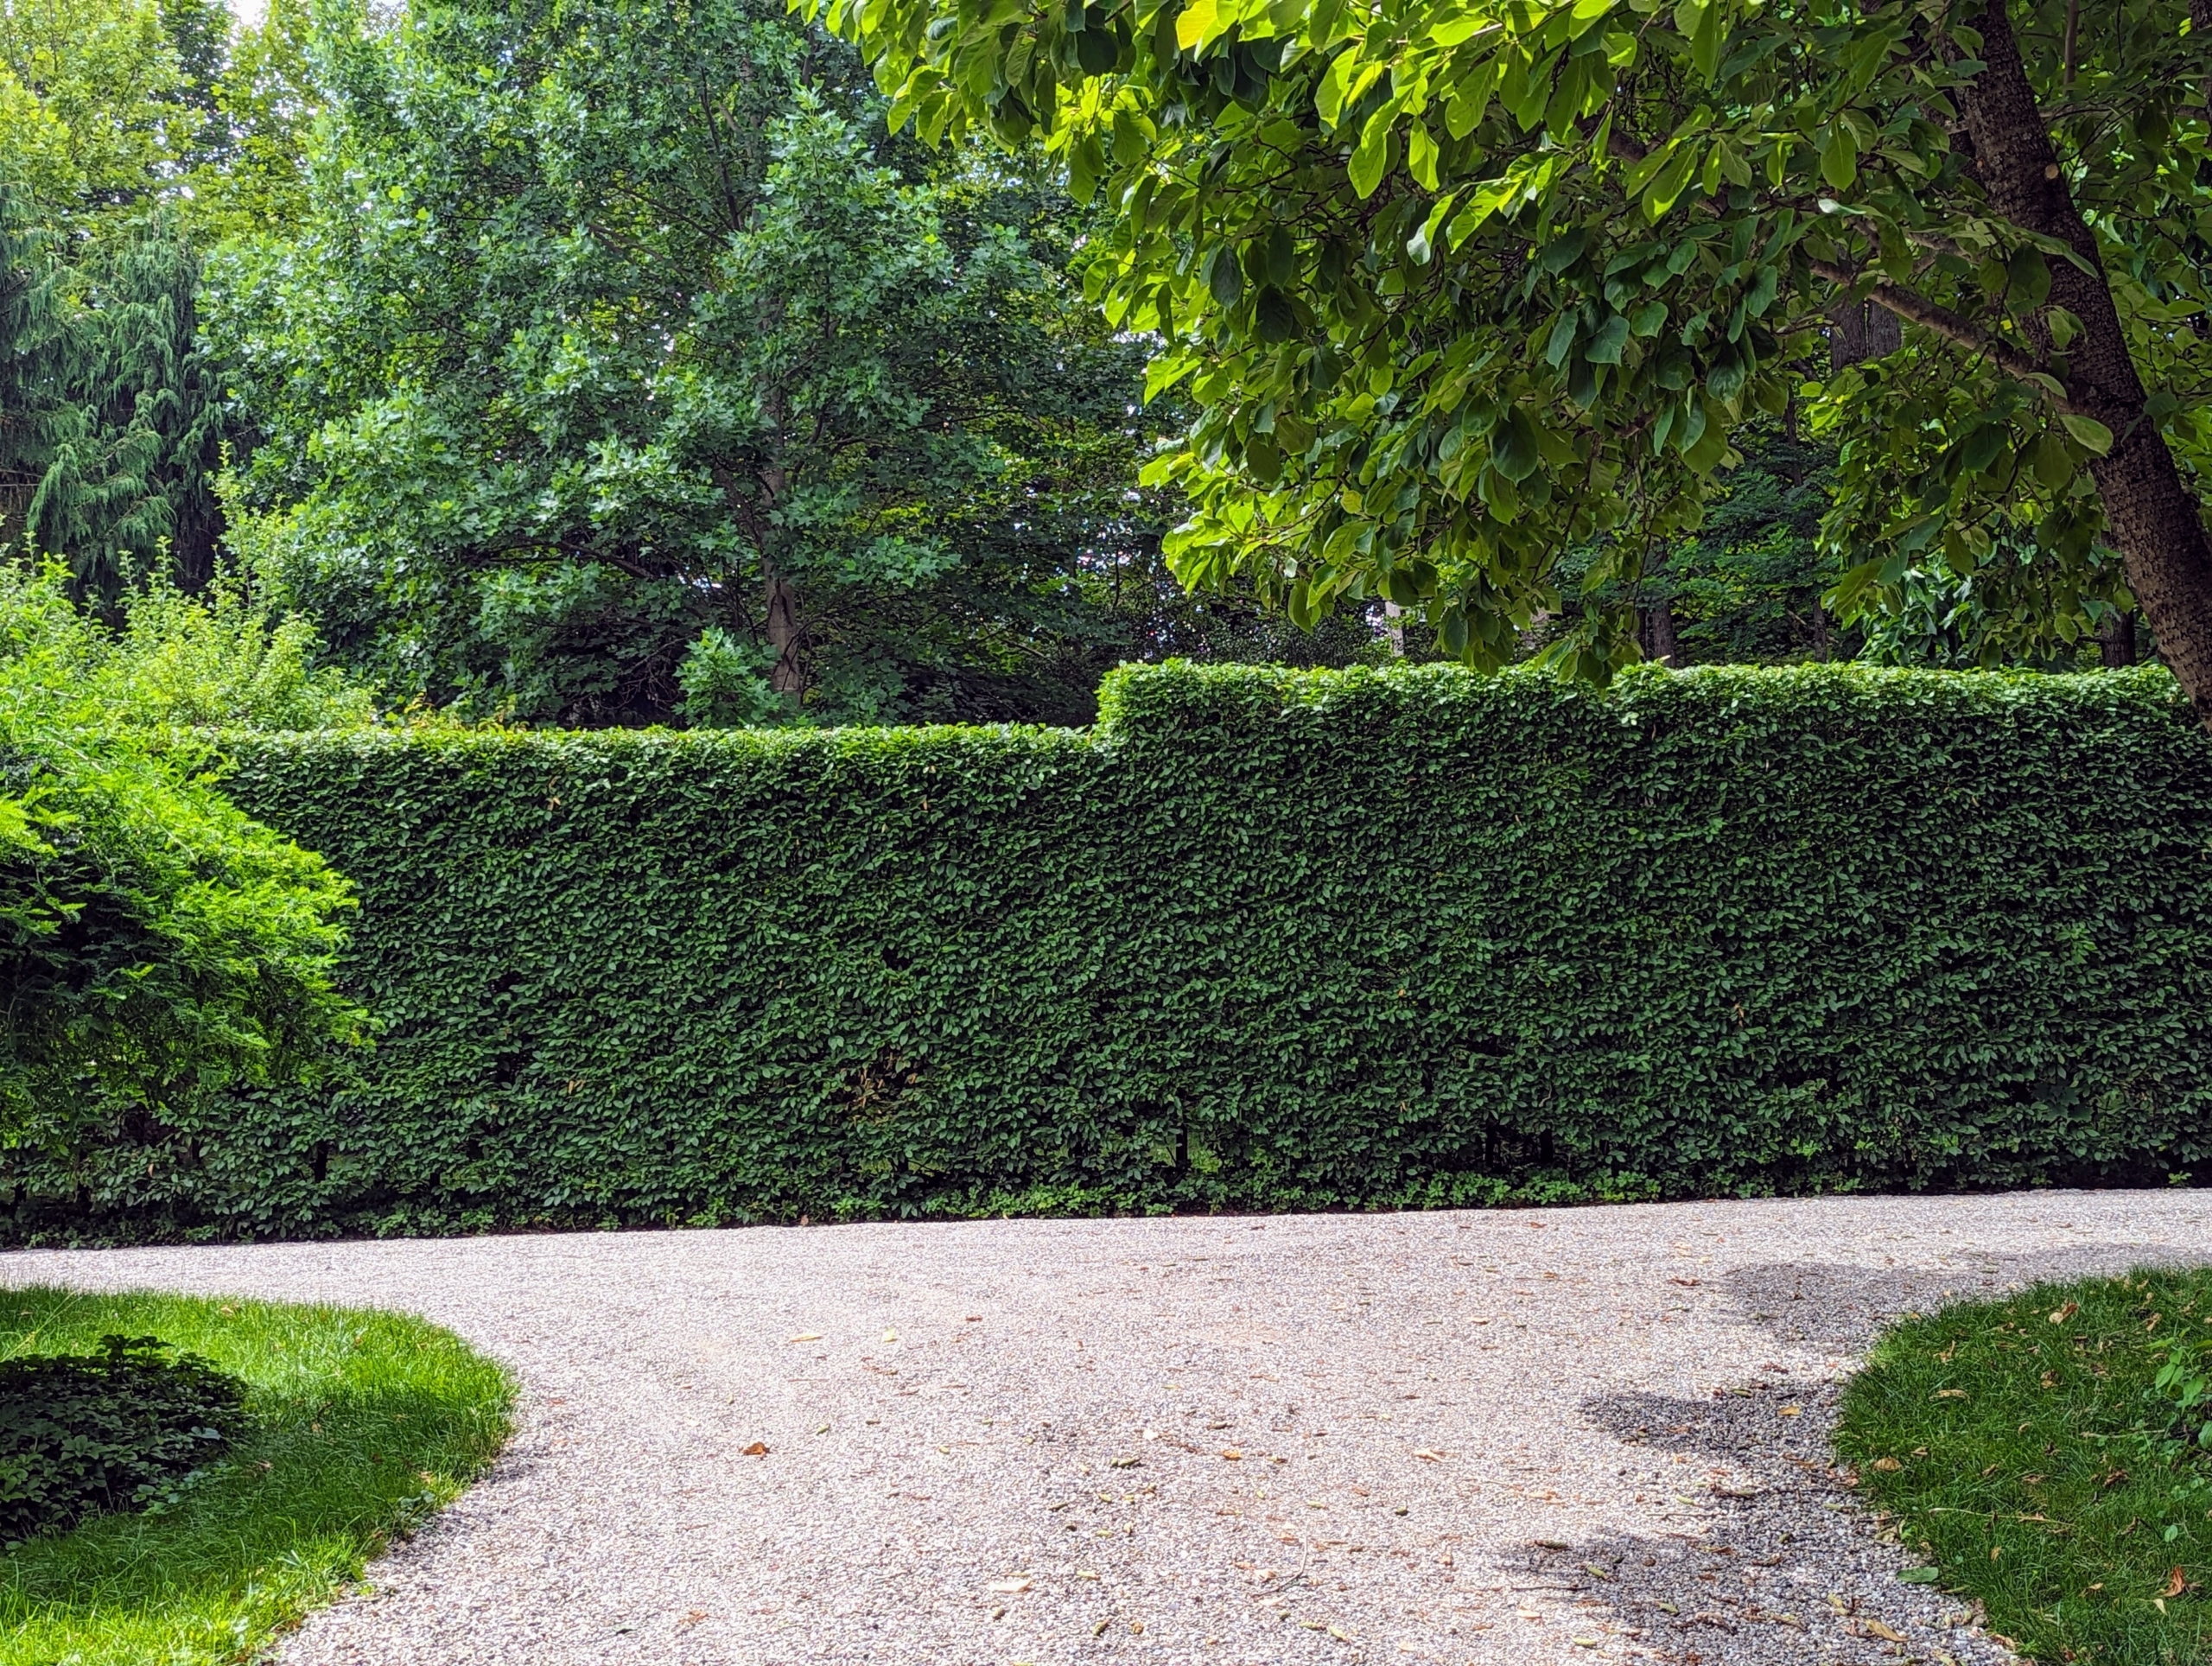
And here is the hedge all complete. Deer do eat hornbeams, but since the entire property is completely fenced, it isn’t a problem here at the farm.
Look at how beautiful it is from a distance when finished.
Here’s Pasang after finishing the front two shrubs – they’ve never looked better!
By day’s end, there are a lot of trimmings to rake up.
Here’s another photo after everything is cleaned and taken away to the compost pile. Pruning and grooming the hornbeams is a big task – it takes about two and a half weeks to get all of them done around the farm, but once they’re finished they look so terrific – and all done by hand! Thanks to the hardworking crew!
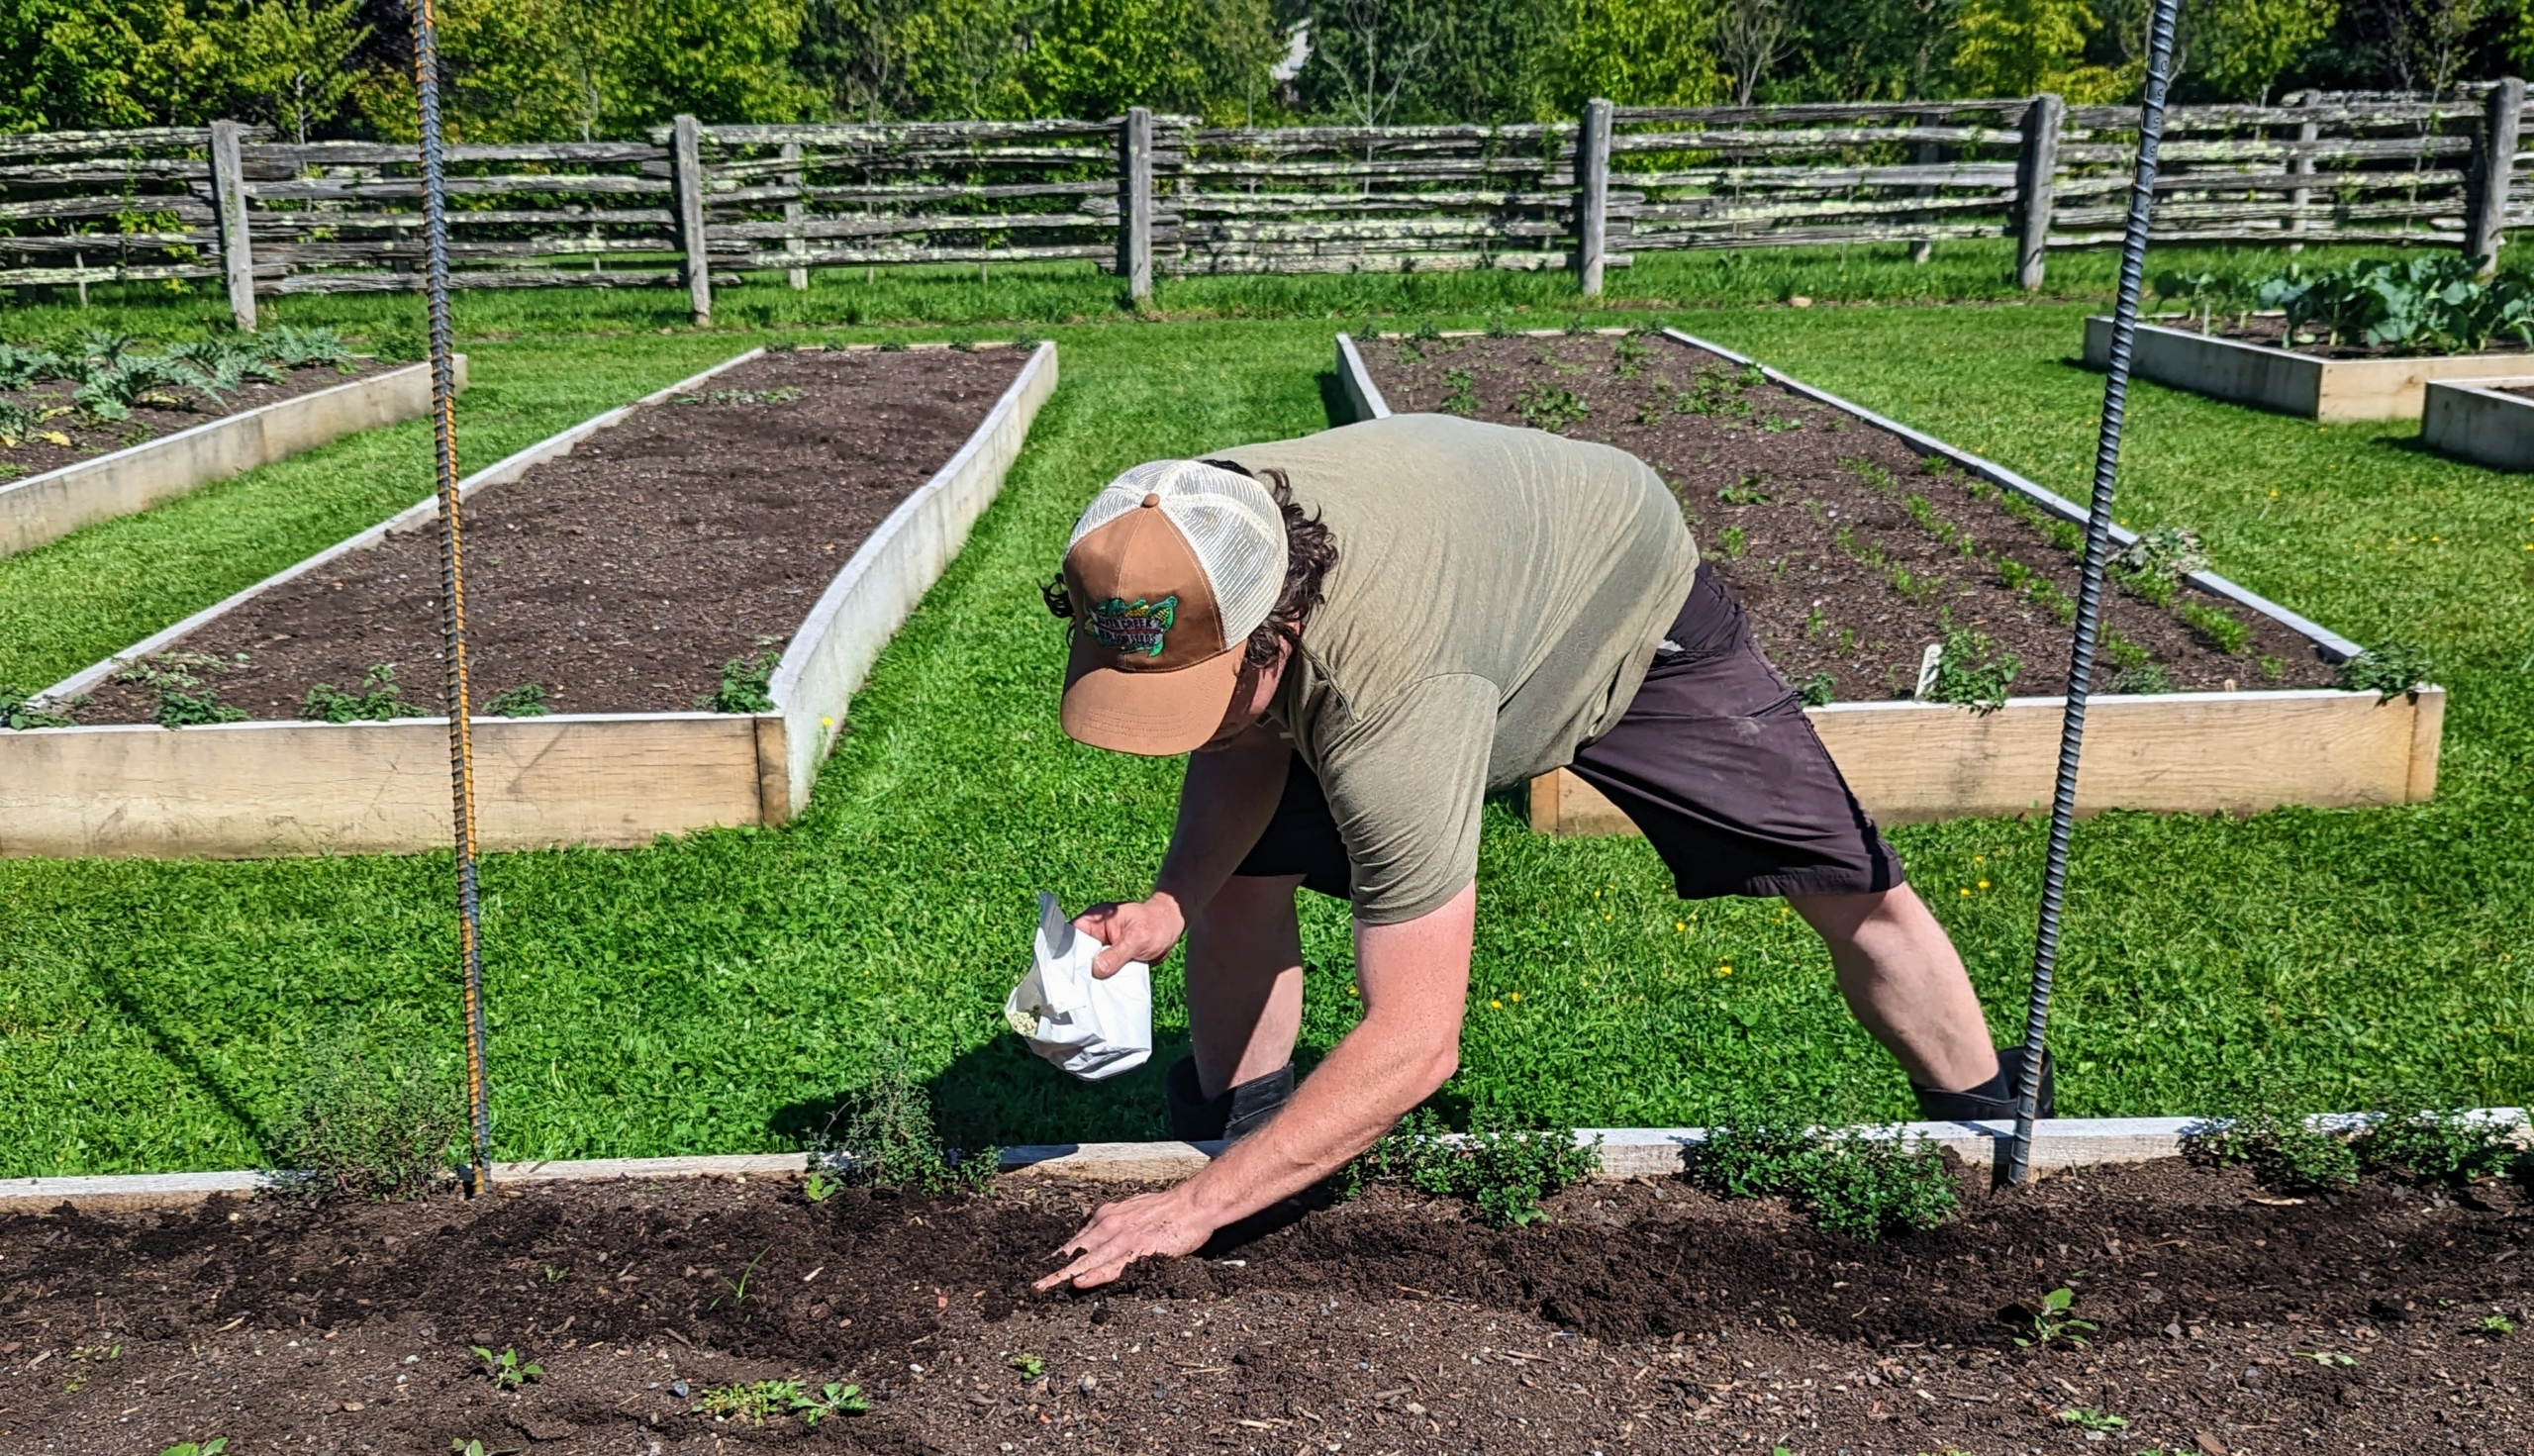
My garden maze here at my Bedford, New York farm now includes a section of evergreen privets, Ligustrum ovalifolium.
I started this three-acre maze in the spring of last year. I designed the maze with a variety of interesting trees, hedges, espaliers, and shrubs that would all grow tall enough to prevent walkers from seeing the paths ahead. Each row would branch off with pathway options and dead ends - with only one correct route to the center. So far, I've completed about a third of the entire course. I've planted European beech, European hornbeams, boxwood, parrotias, espaliered apple trees, American sweetgums, barberry, London planetrees, and now these privets.
Here are some photos, enjoy.
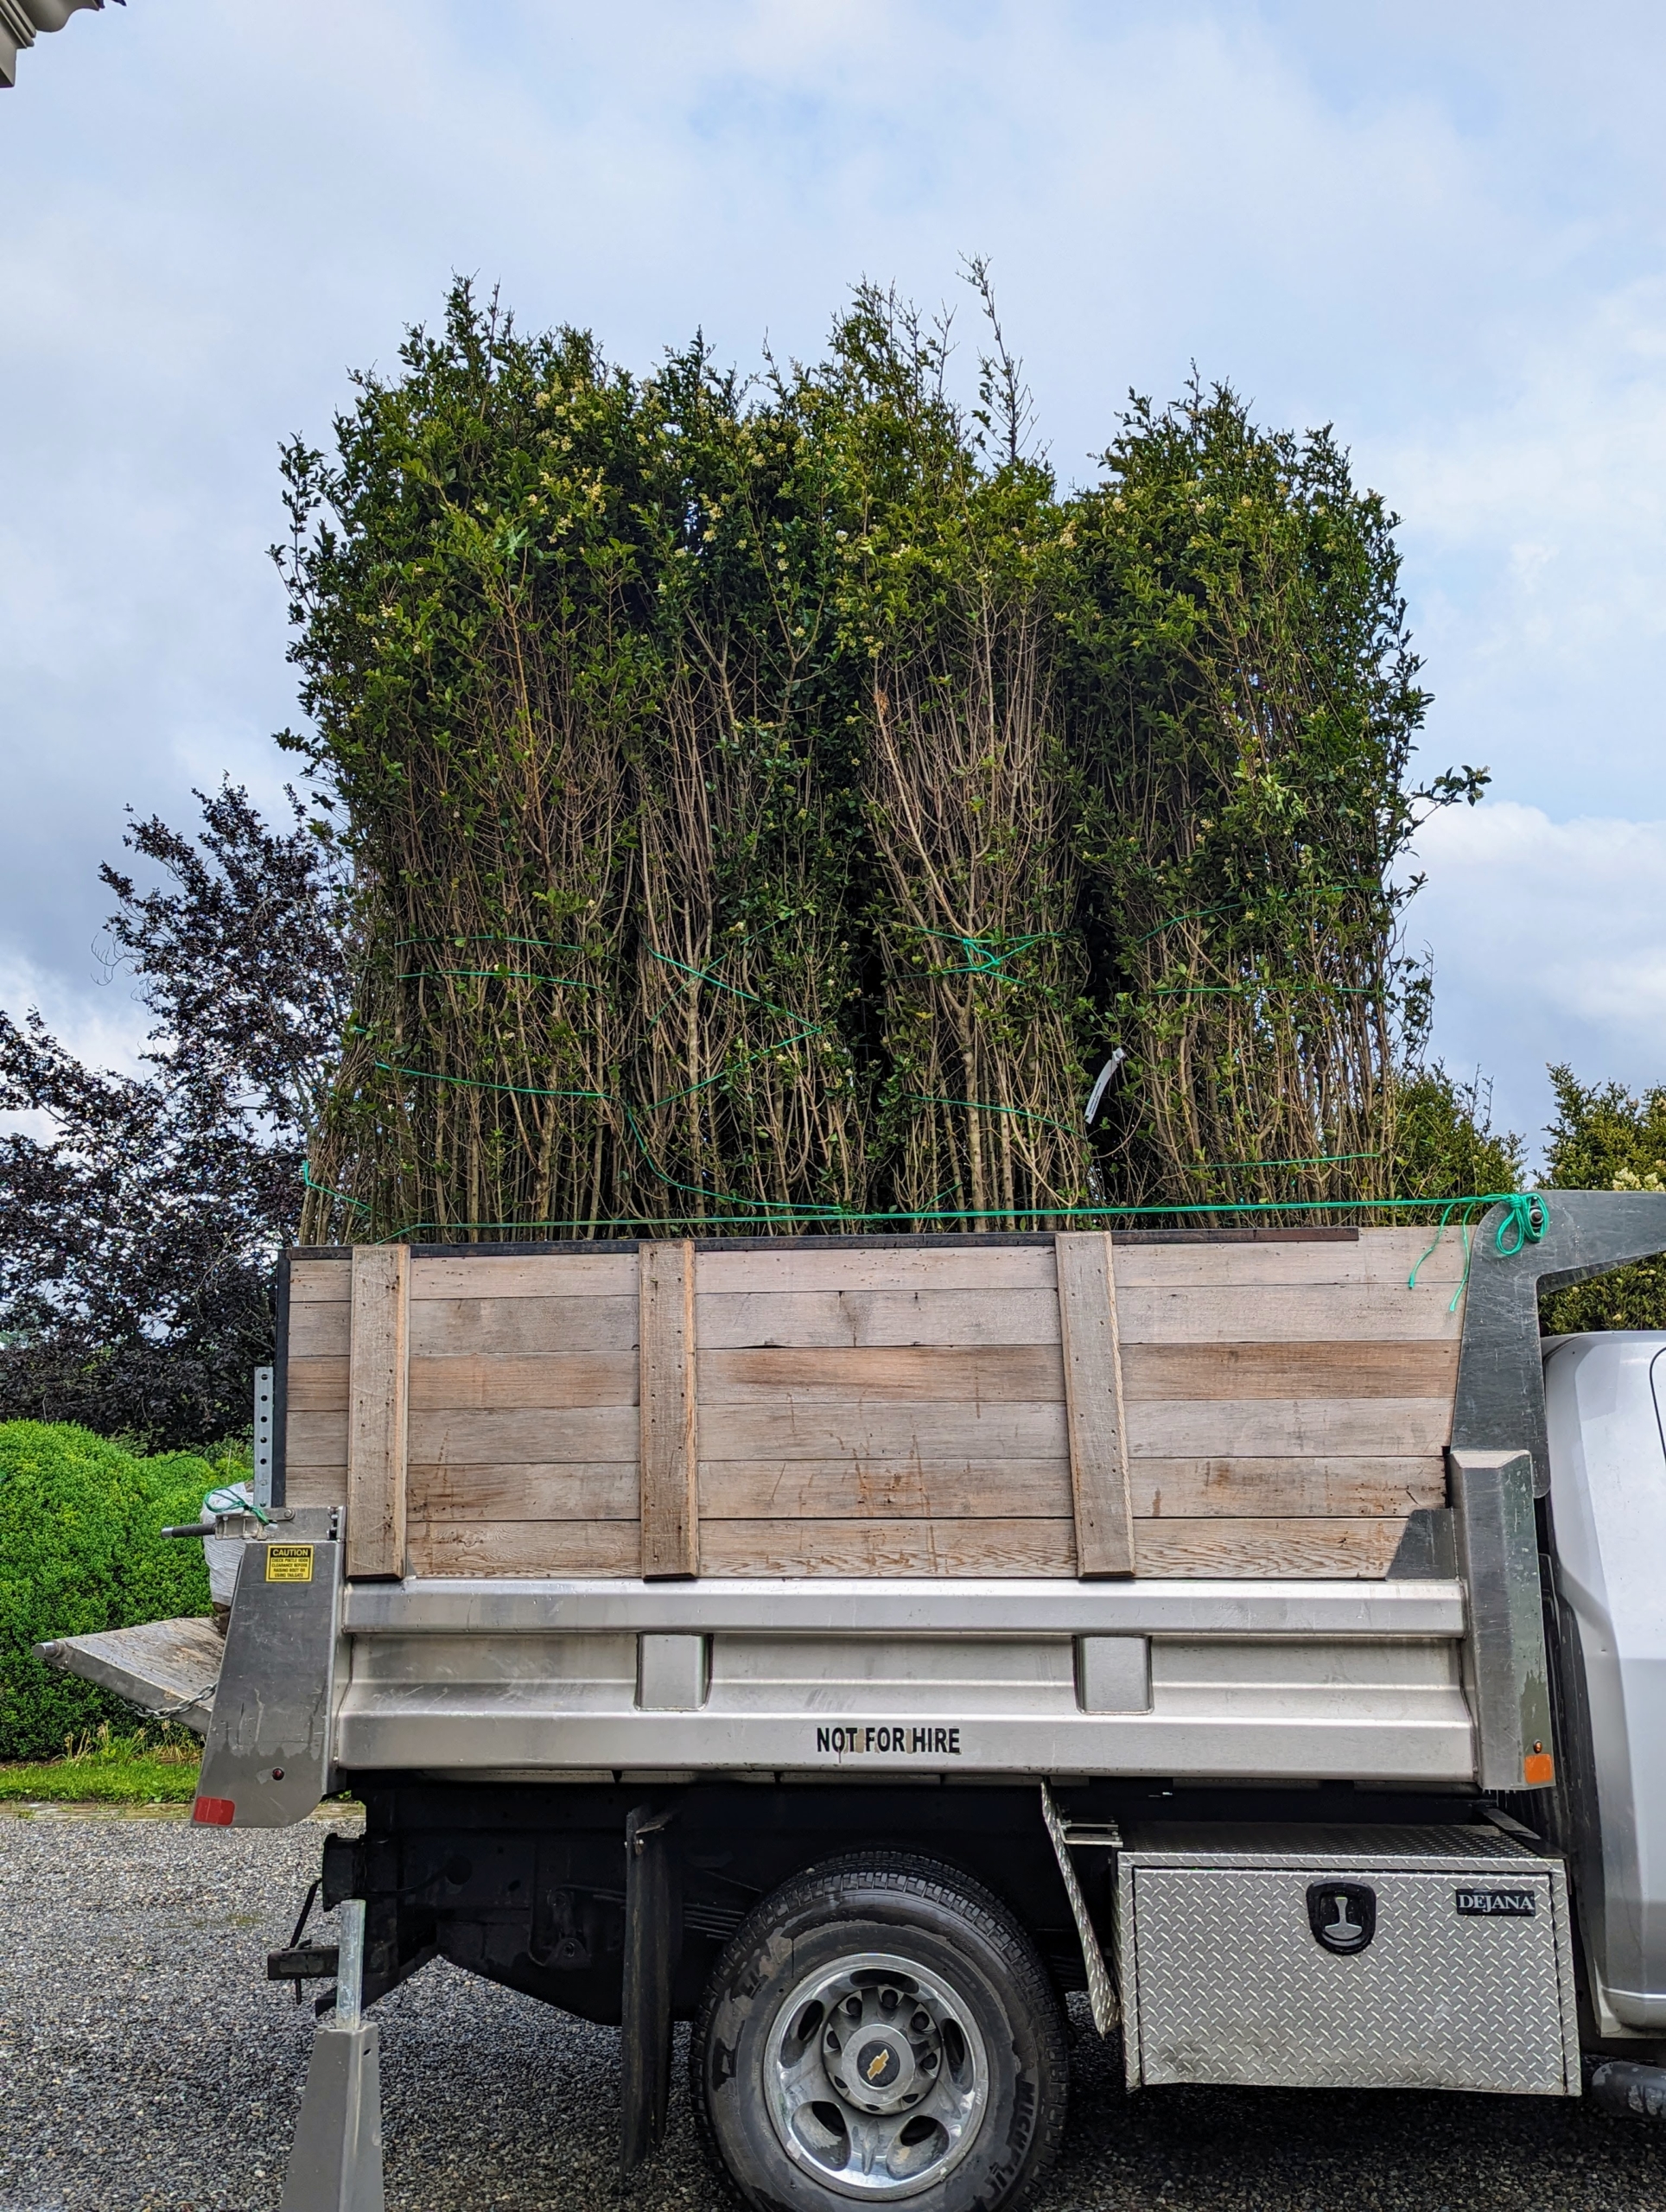
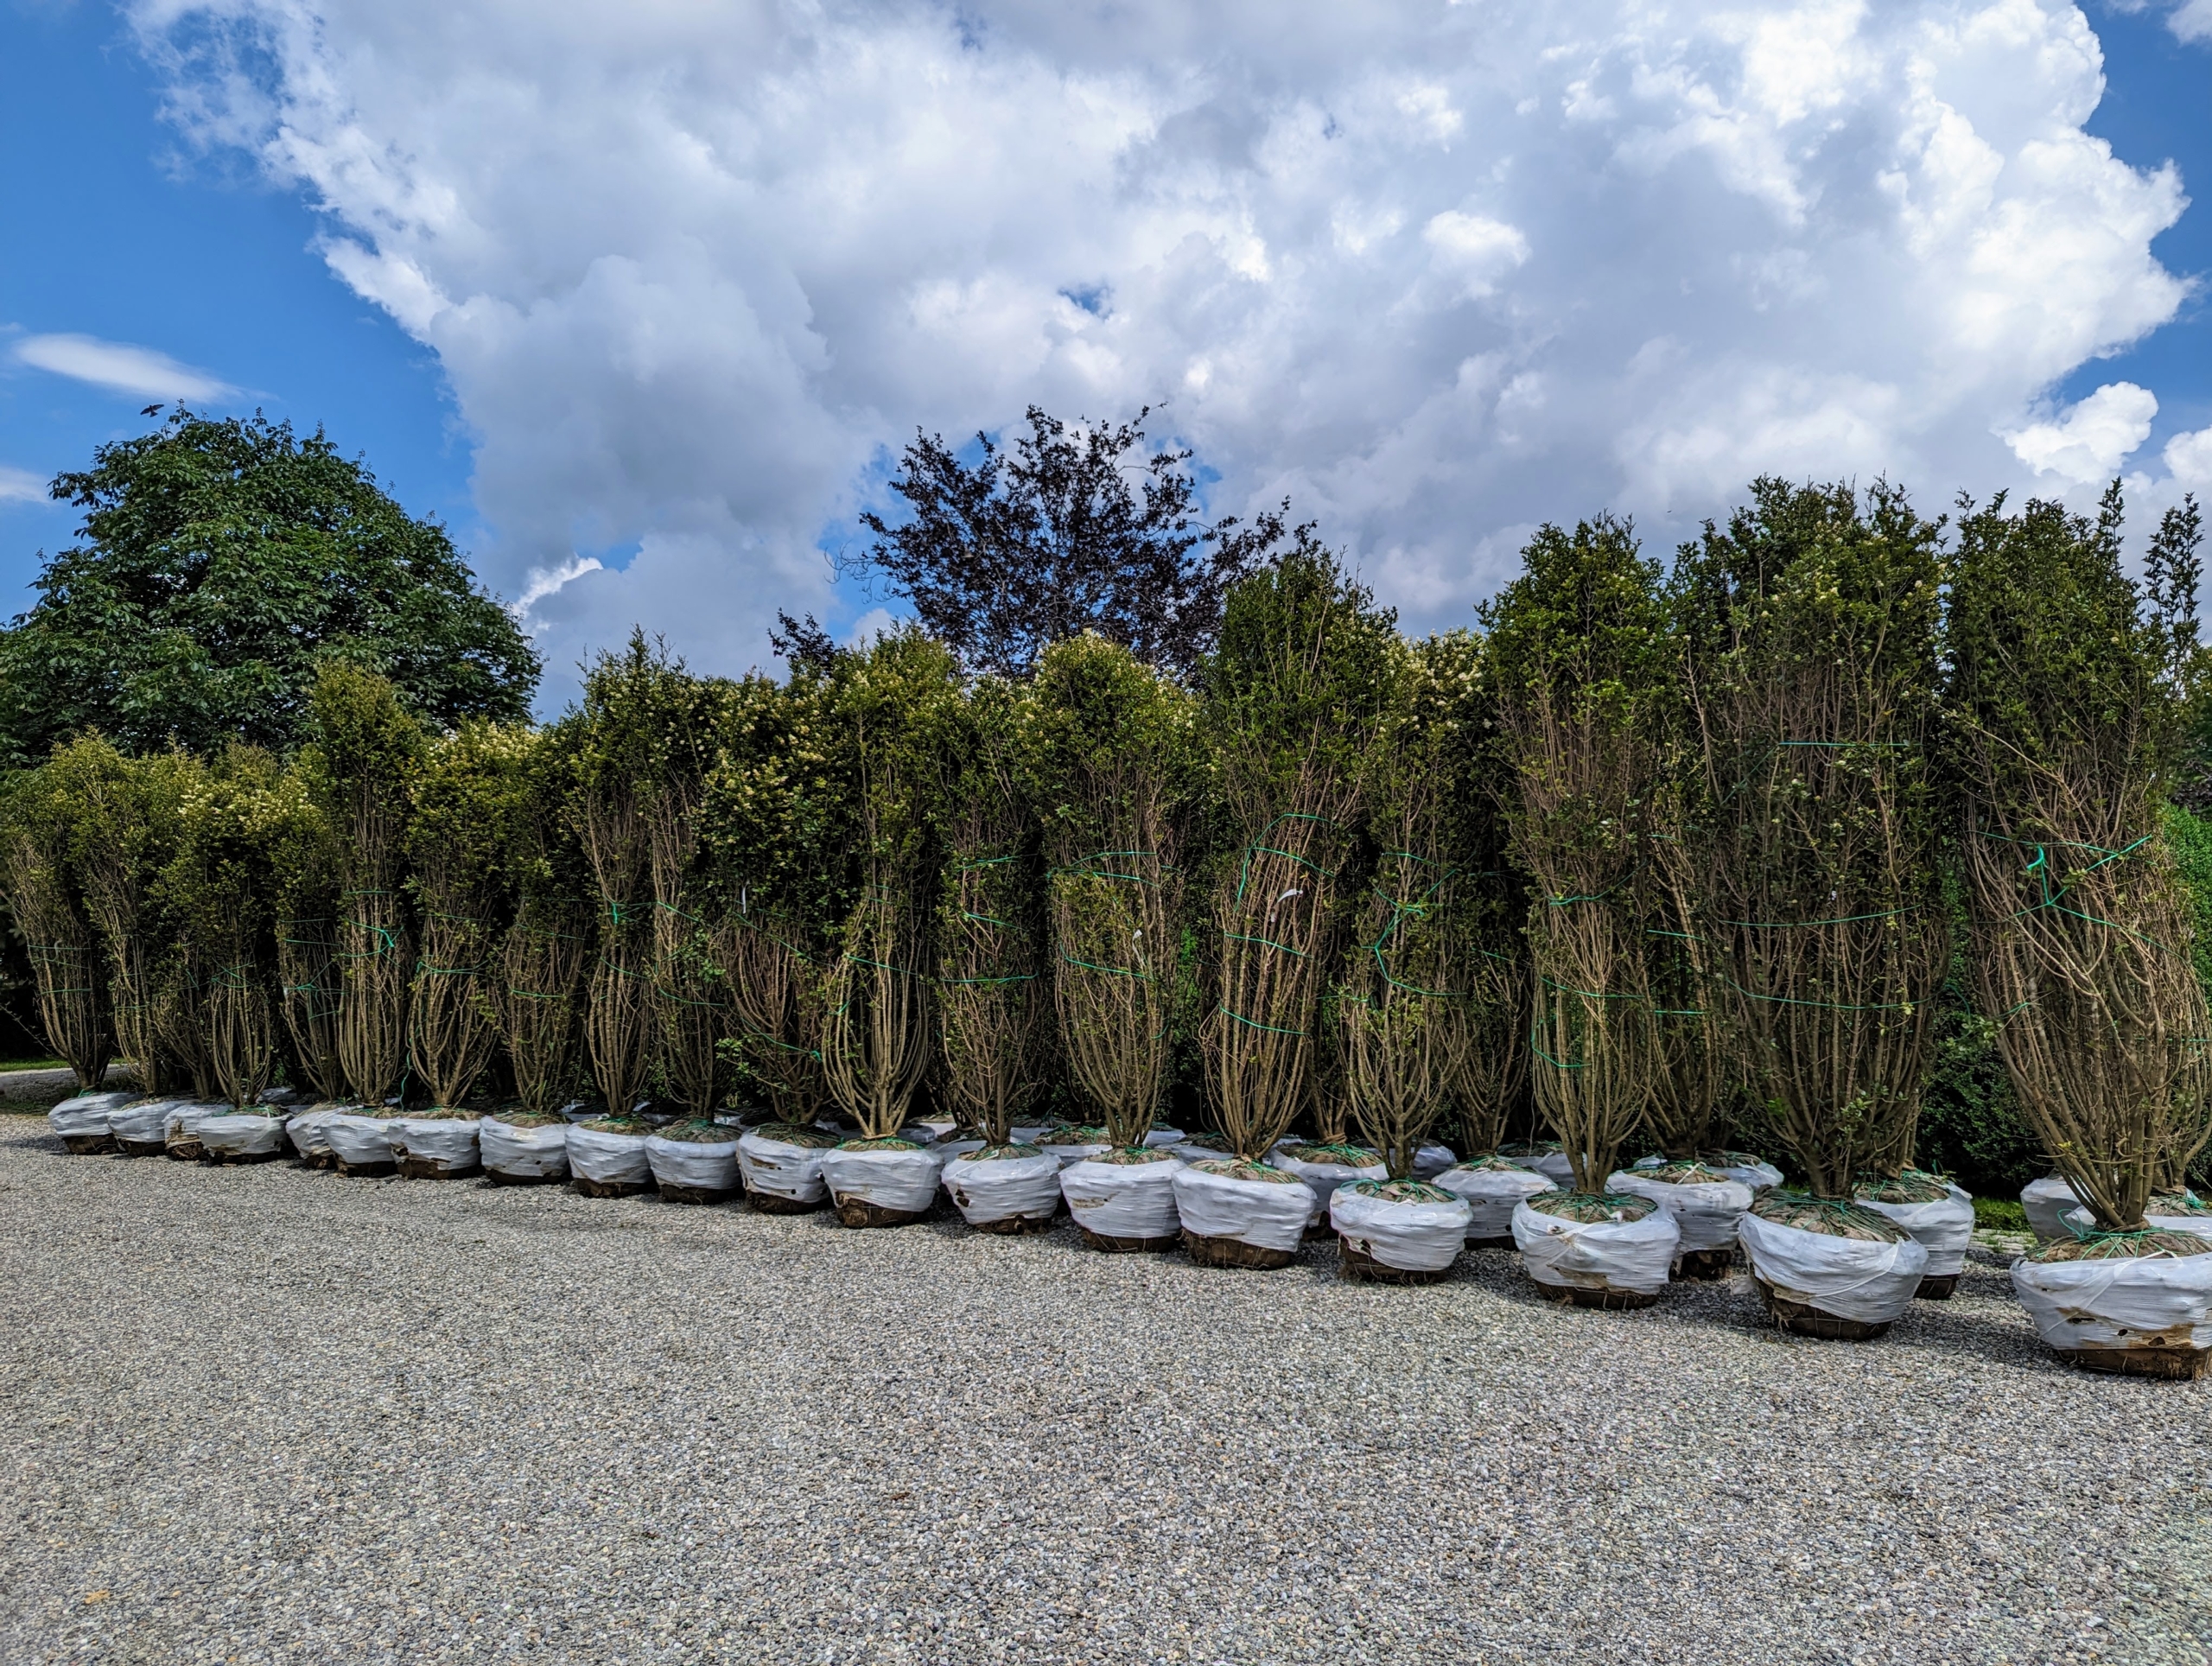
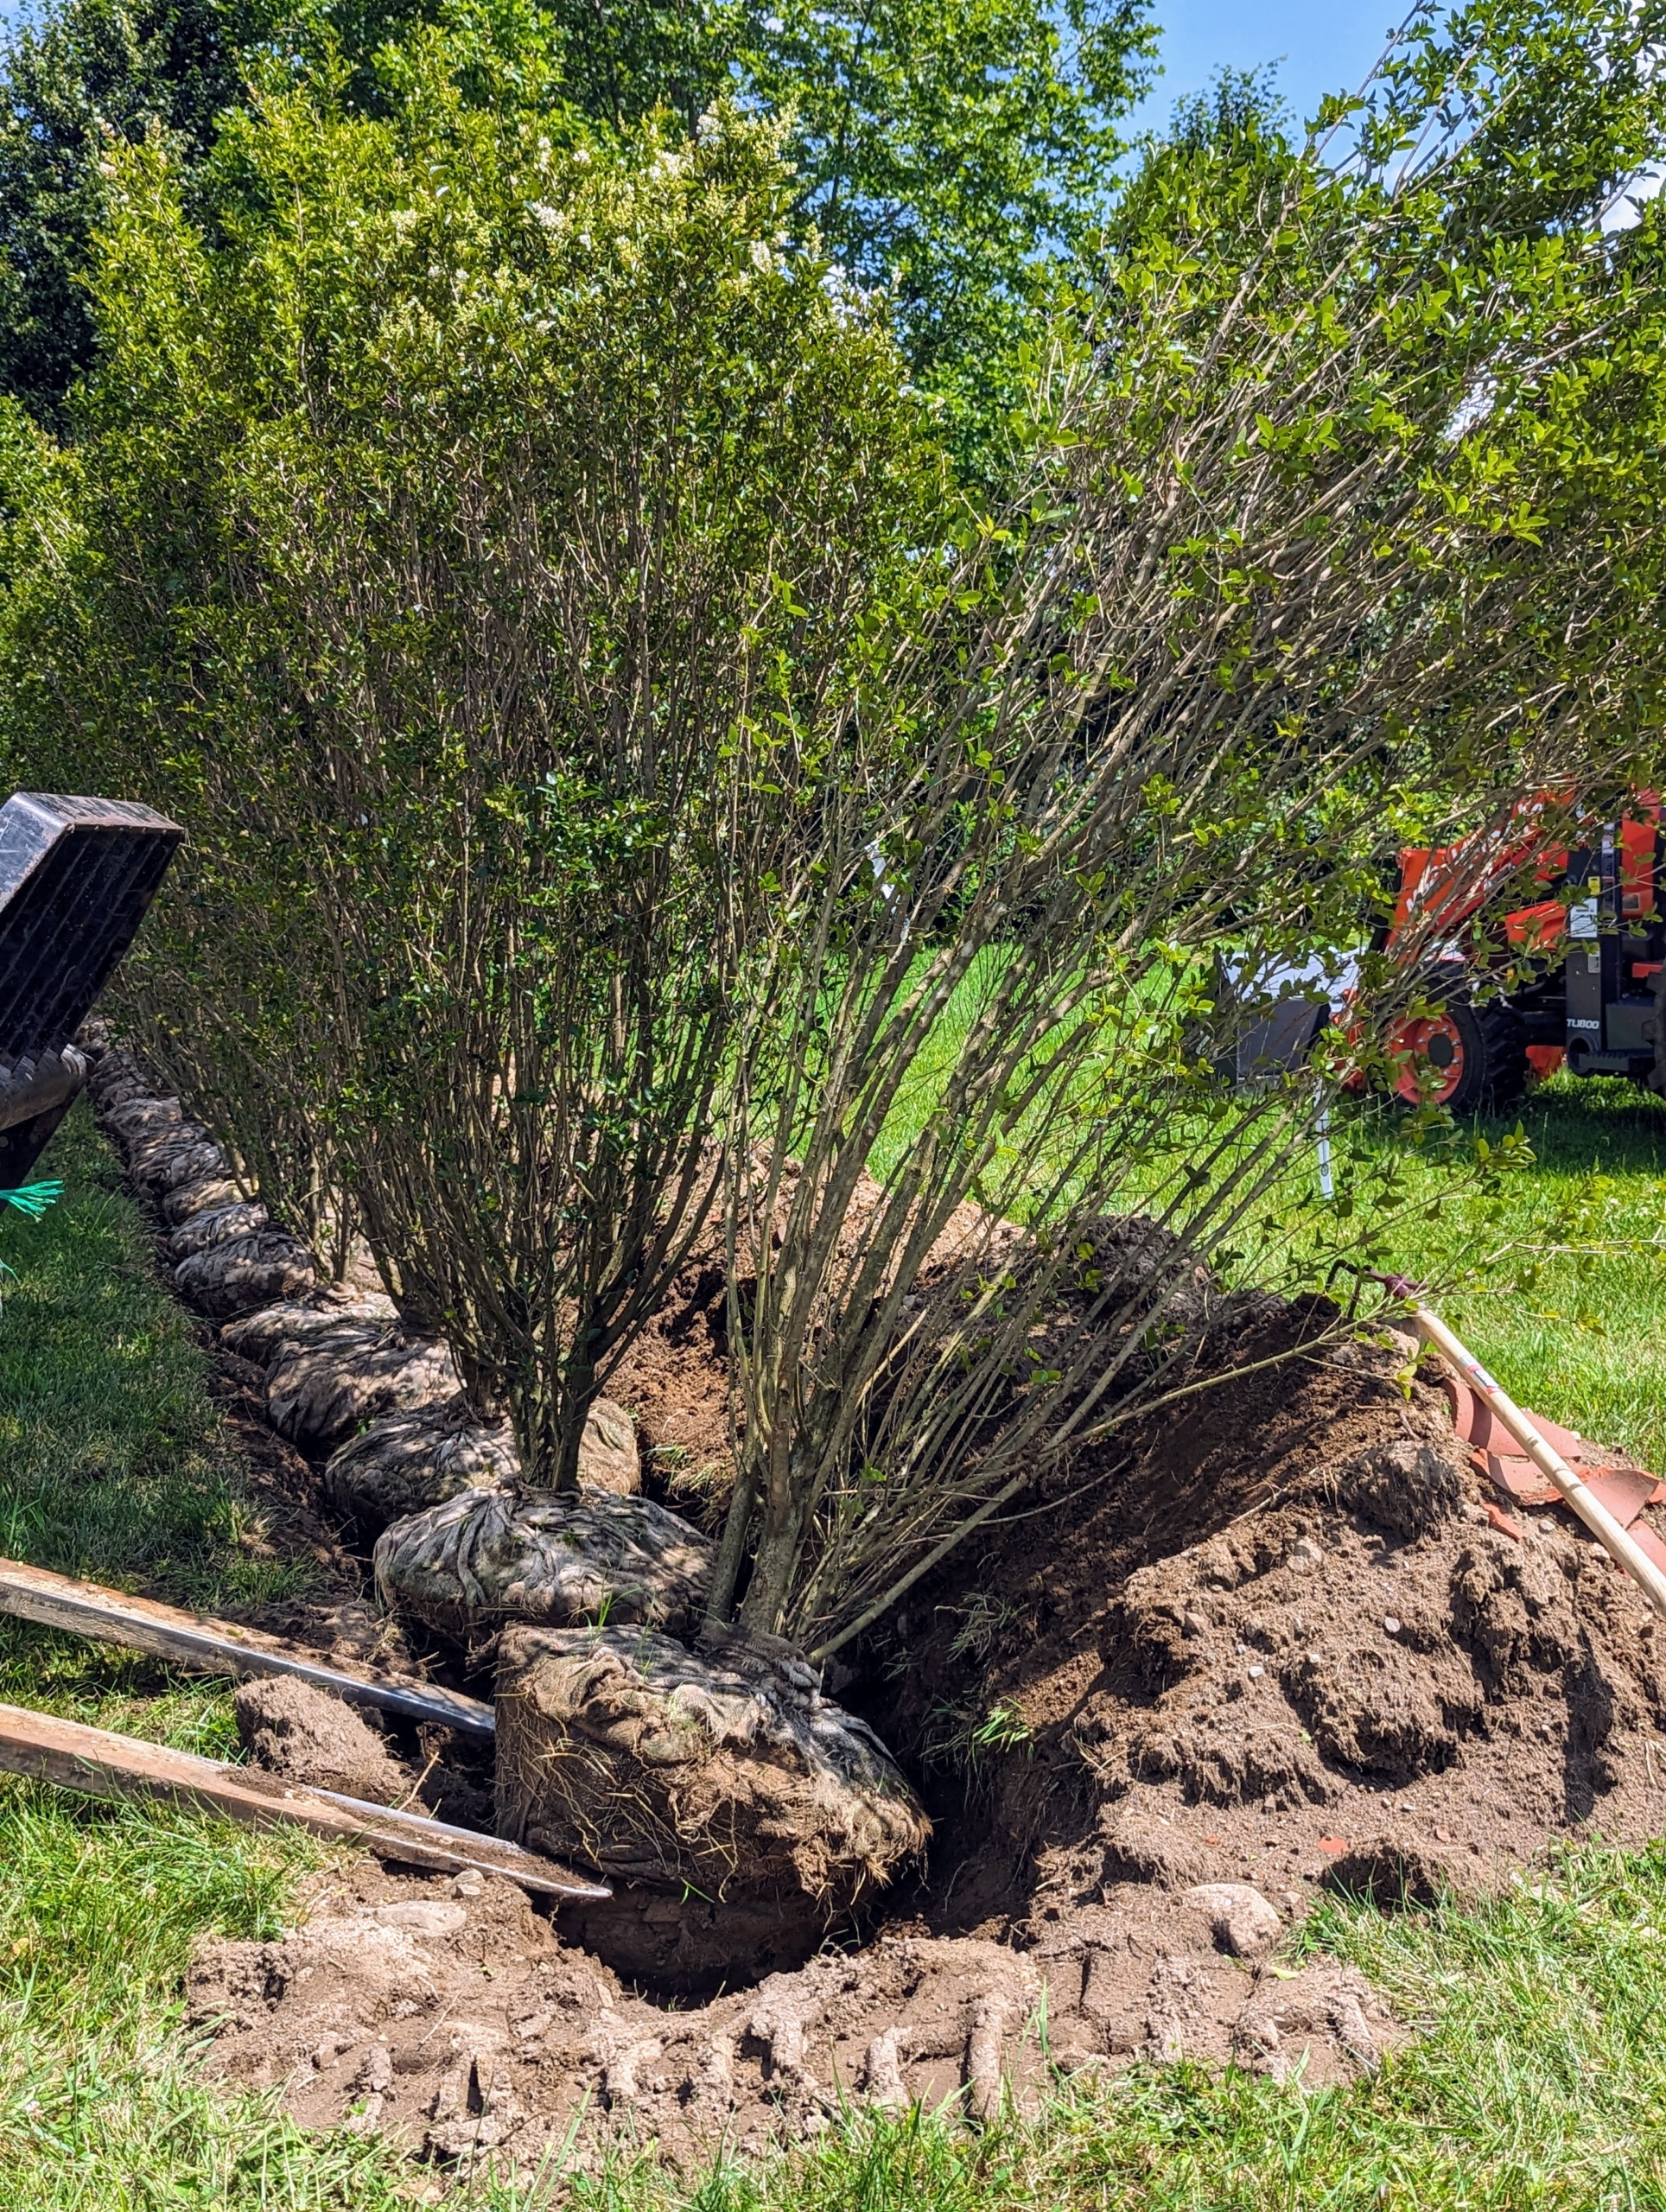
Recently, we picked up 58 privets from Select Horticulture in nearby Pound Ridge. I knew these shrubs would be great additions to my living maze.
Ligustrum ovalifolium, also known as Korean privet, California privet, garden privet, and oval-leaved privet, is a species of flowering plant in the olive family native to Japan and Korea. It is a dense, fast-growing, deciduous evergreen shrub or small tree.
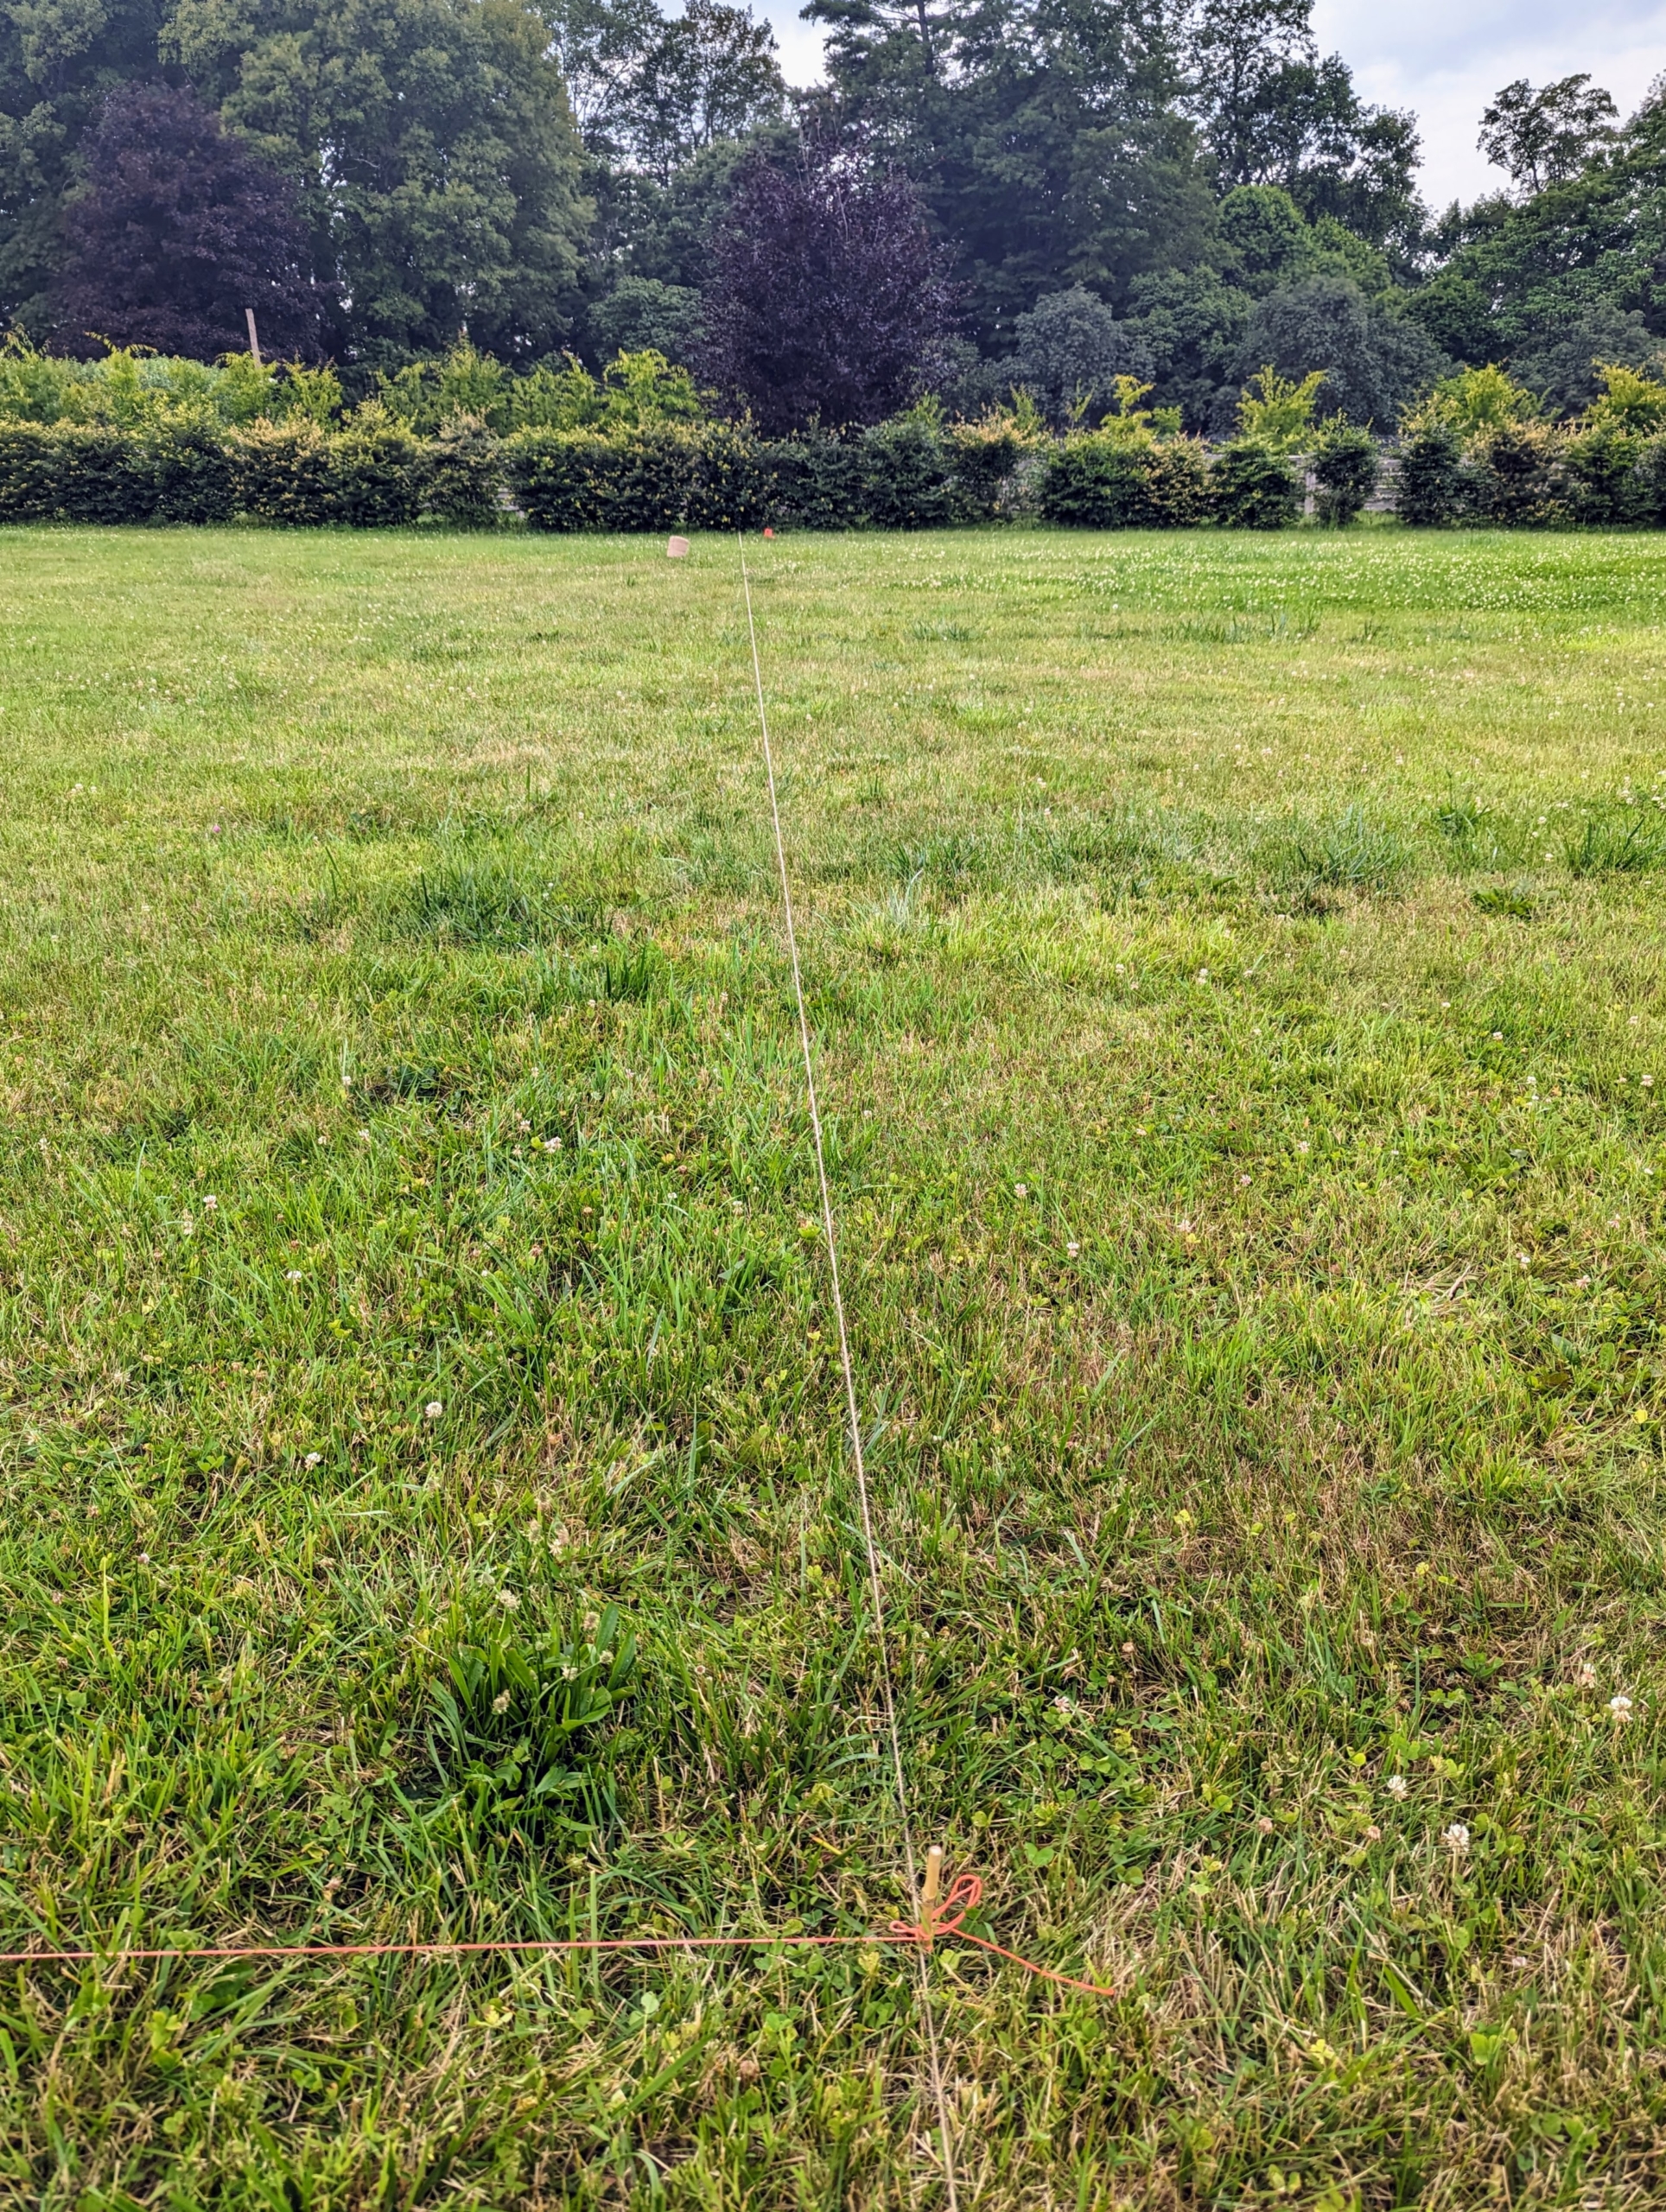
Here is one side designated for this newest grouping. Chhiring and Ryan secured landscape twine according to our maze map. These plantings must be placed very carefully and precisely in order for the maze design to work.
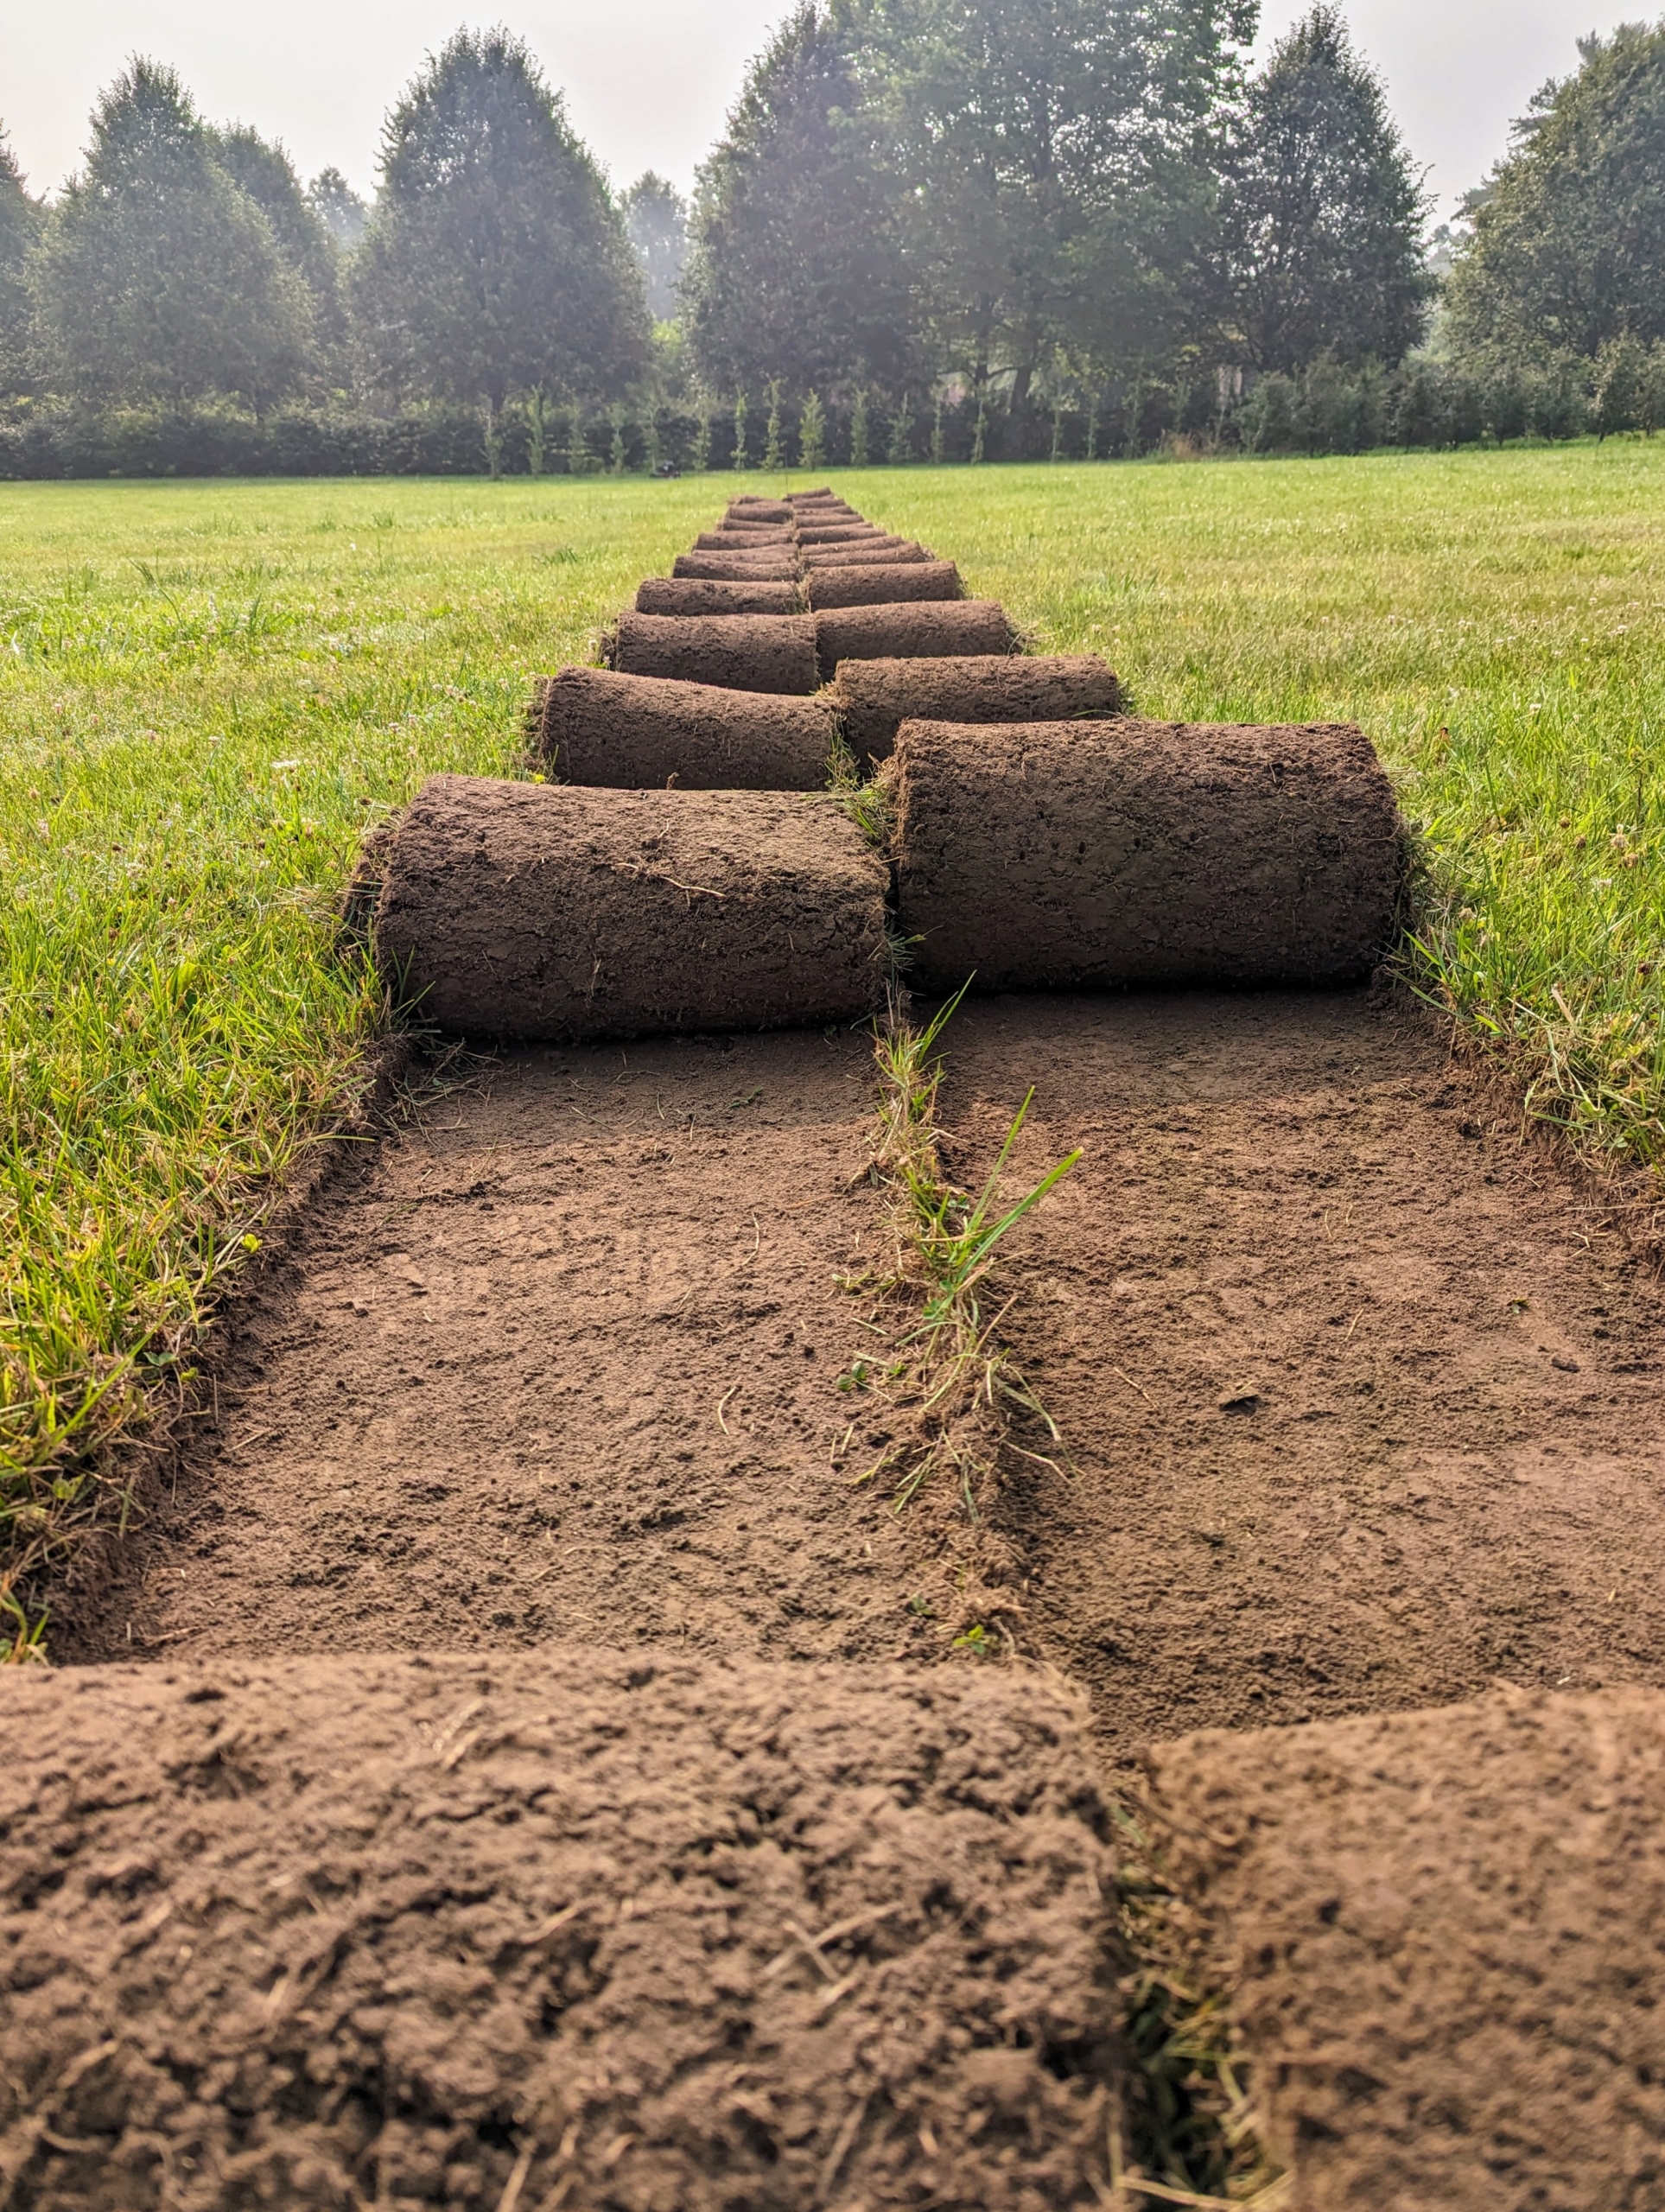
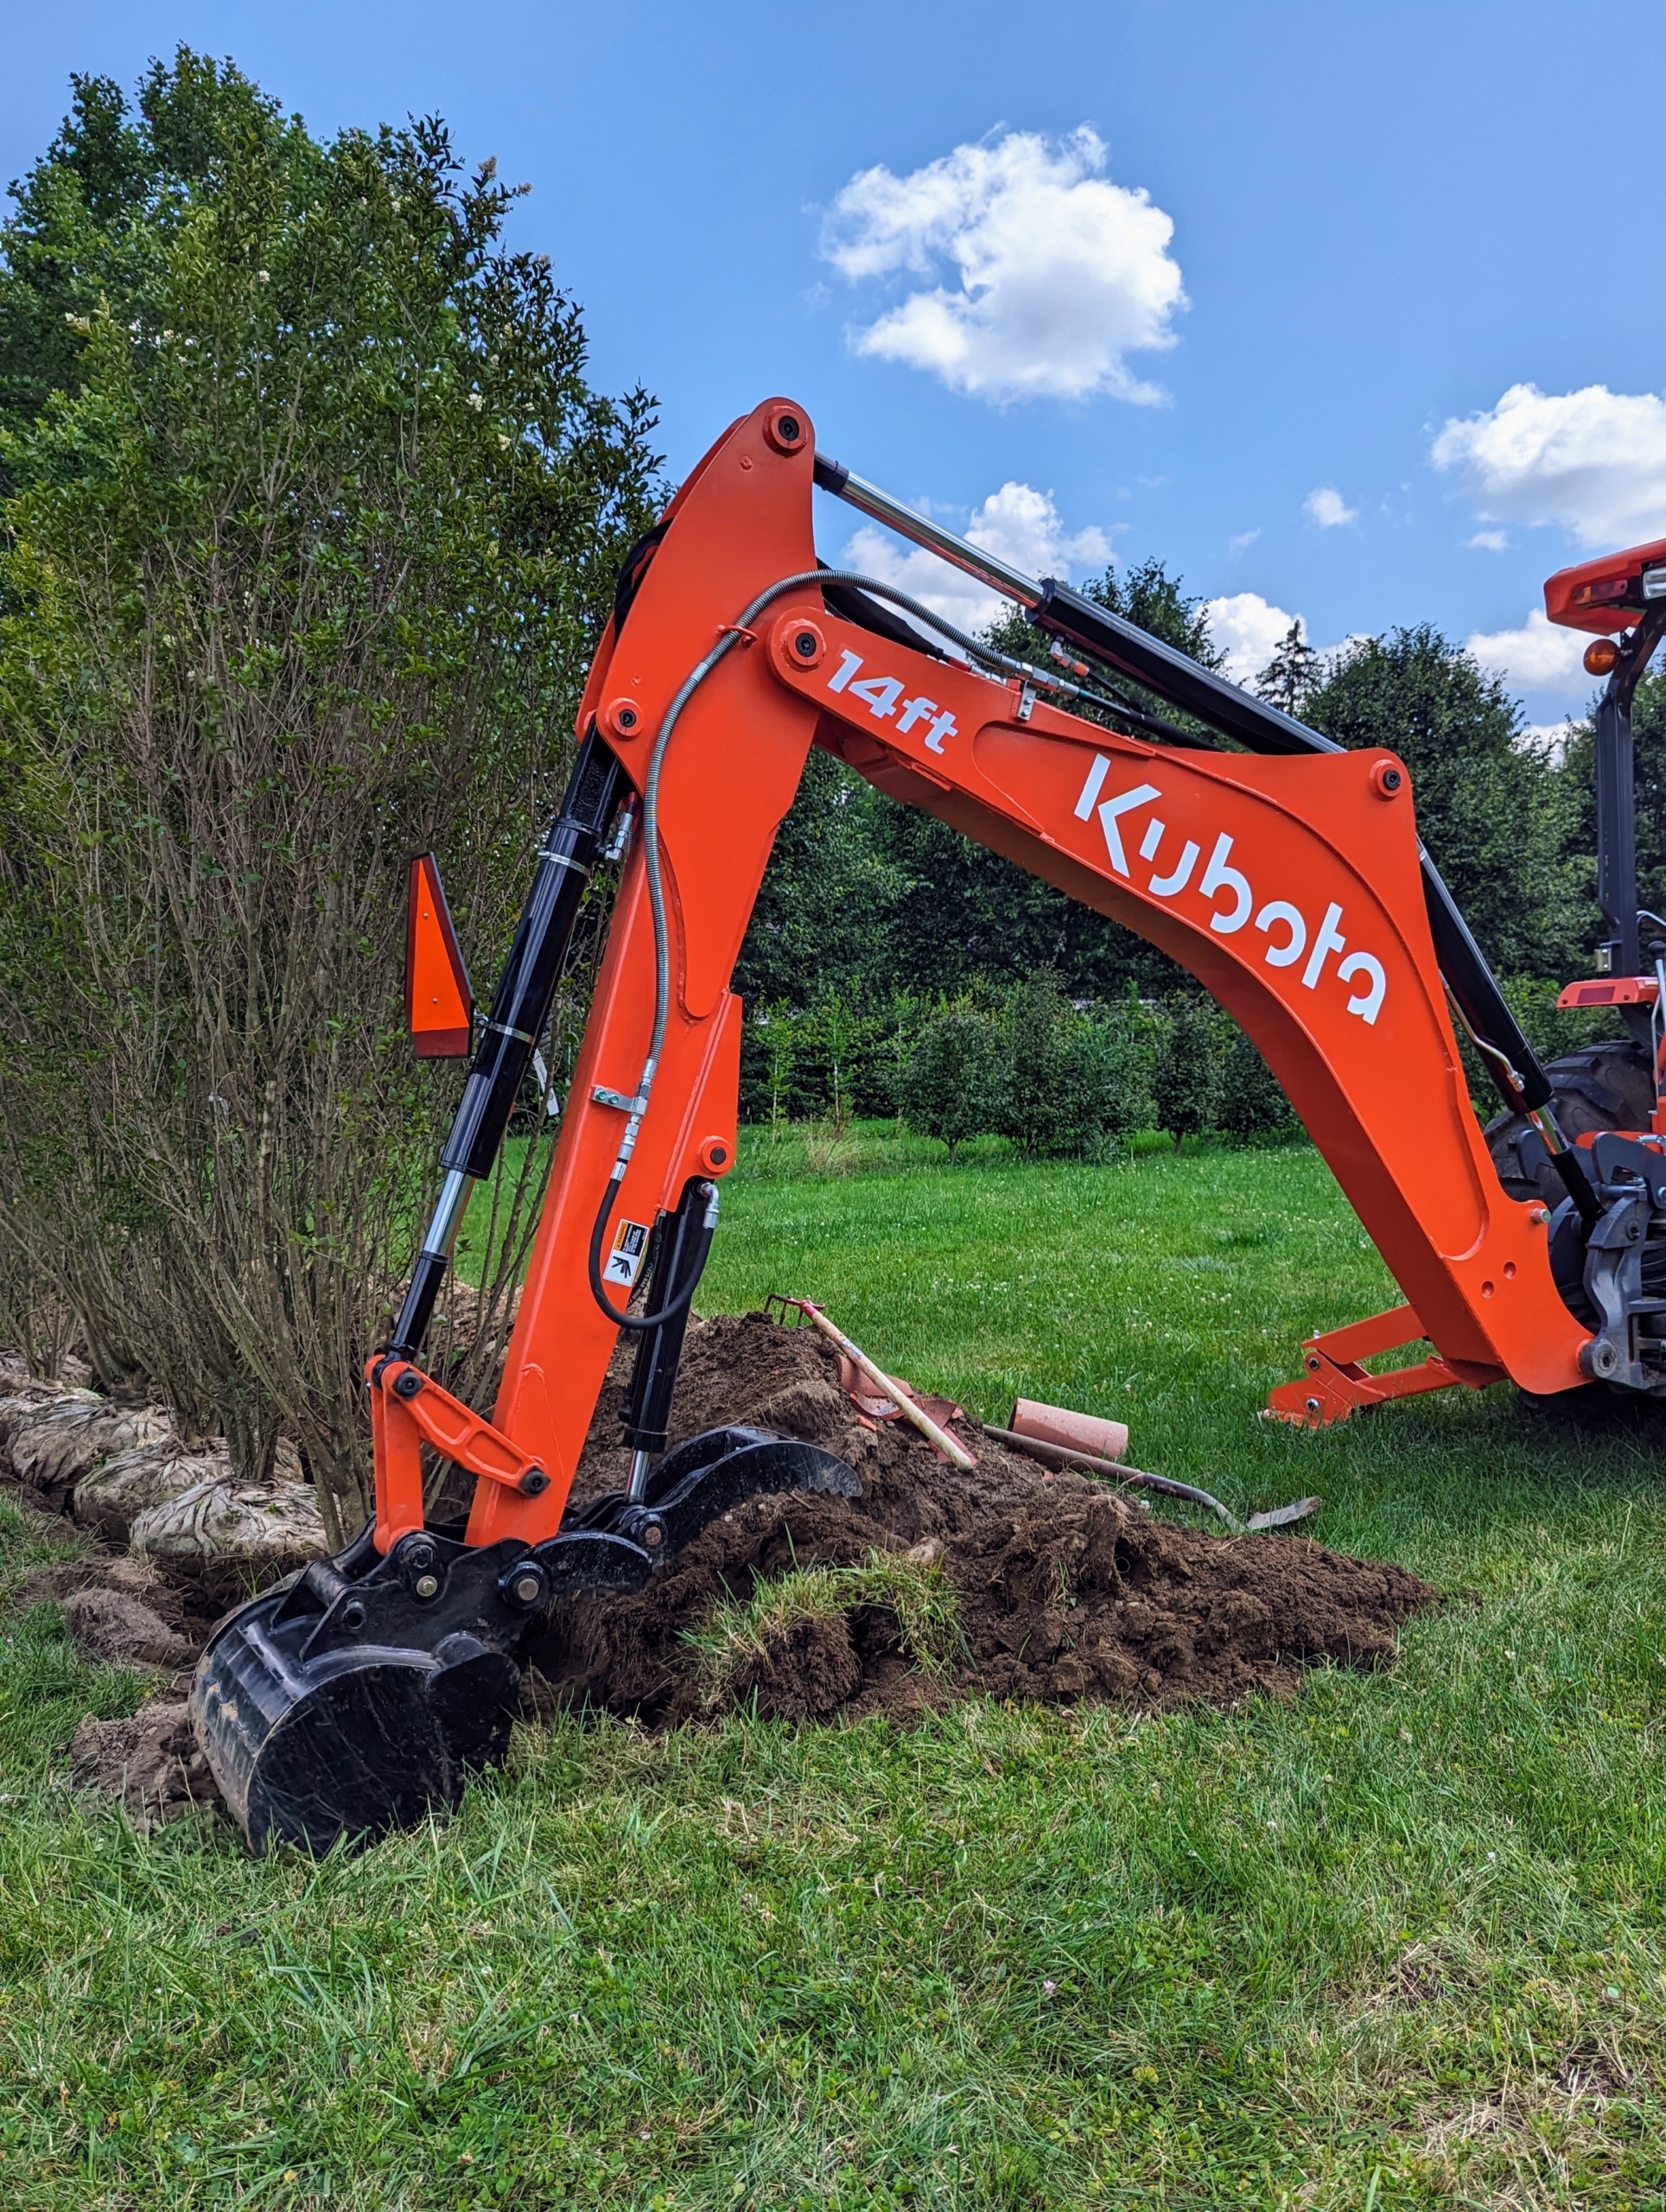
The next step is to remove the sod from the designated area. This was done with our new Classen Pro HSC18 sod cutter. It cuts the sod in two strips, which are then cut and rolled into sections, so they can be removed. Sod is quite heavy. The sod will be used in another section of the farm, so nothing is wasted.
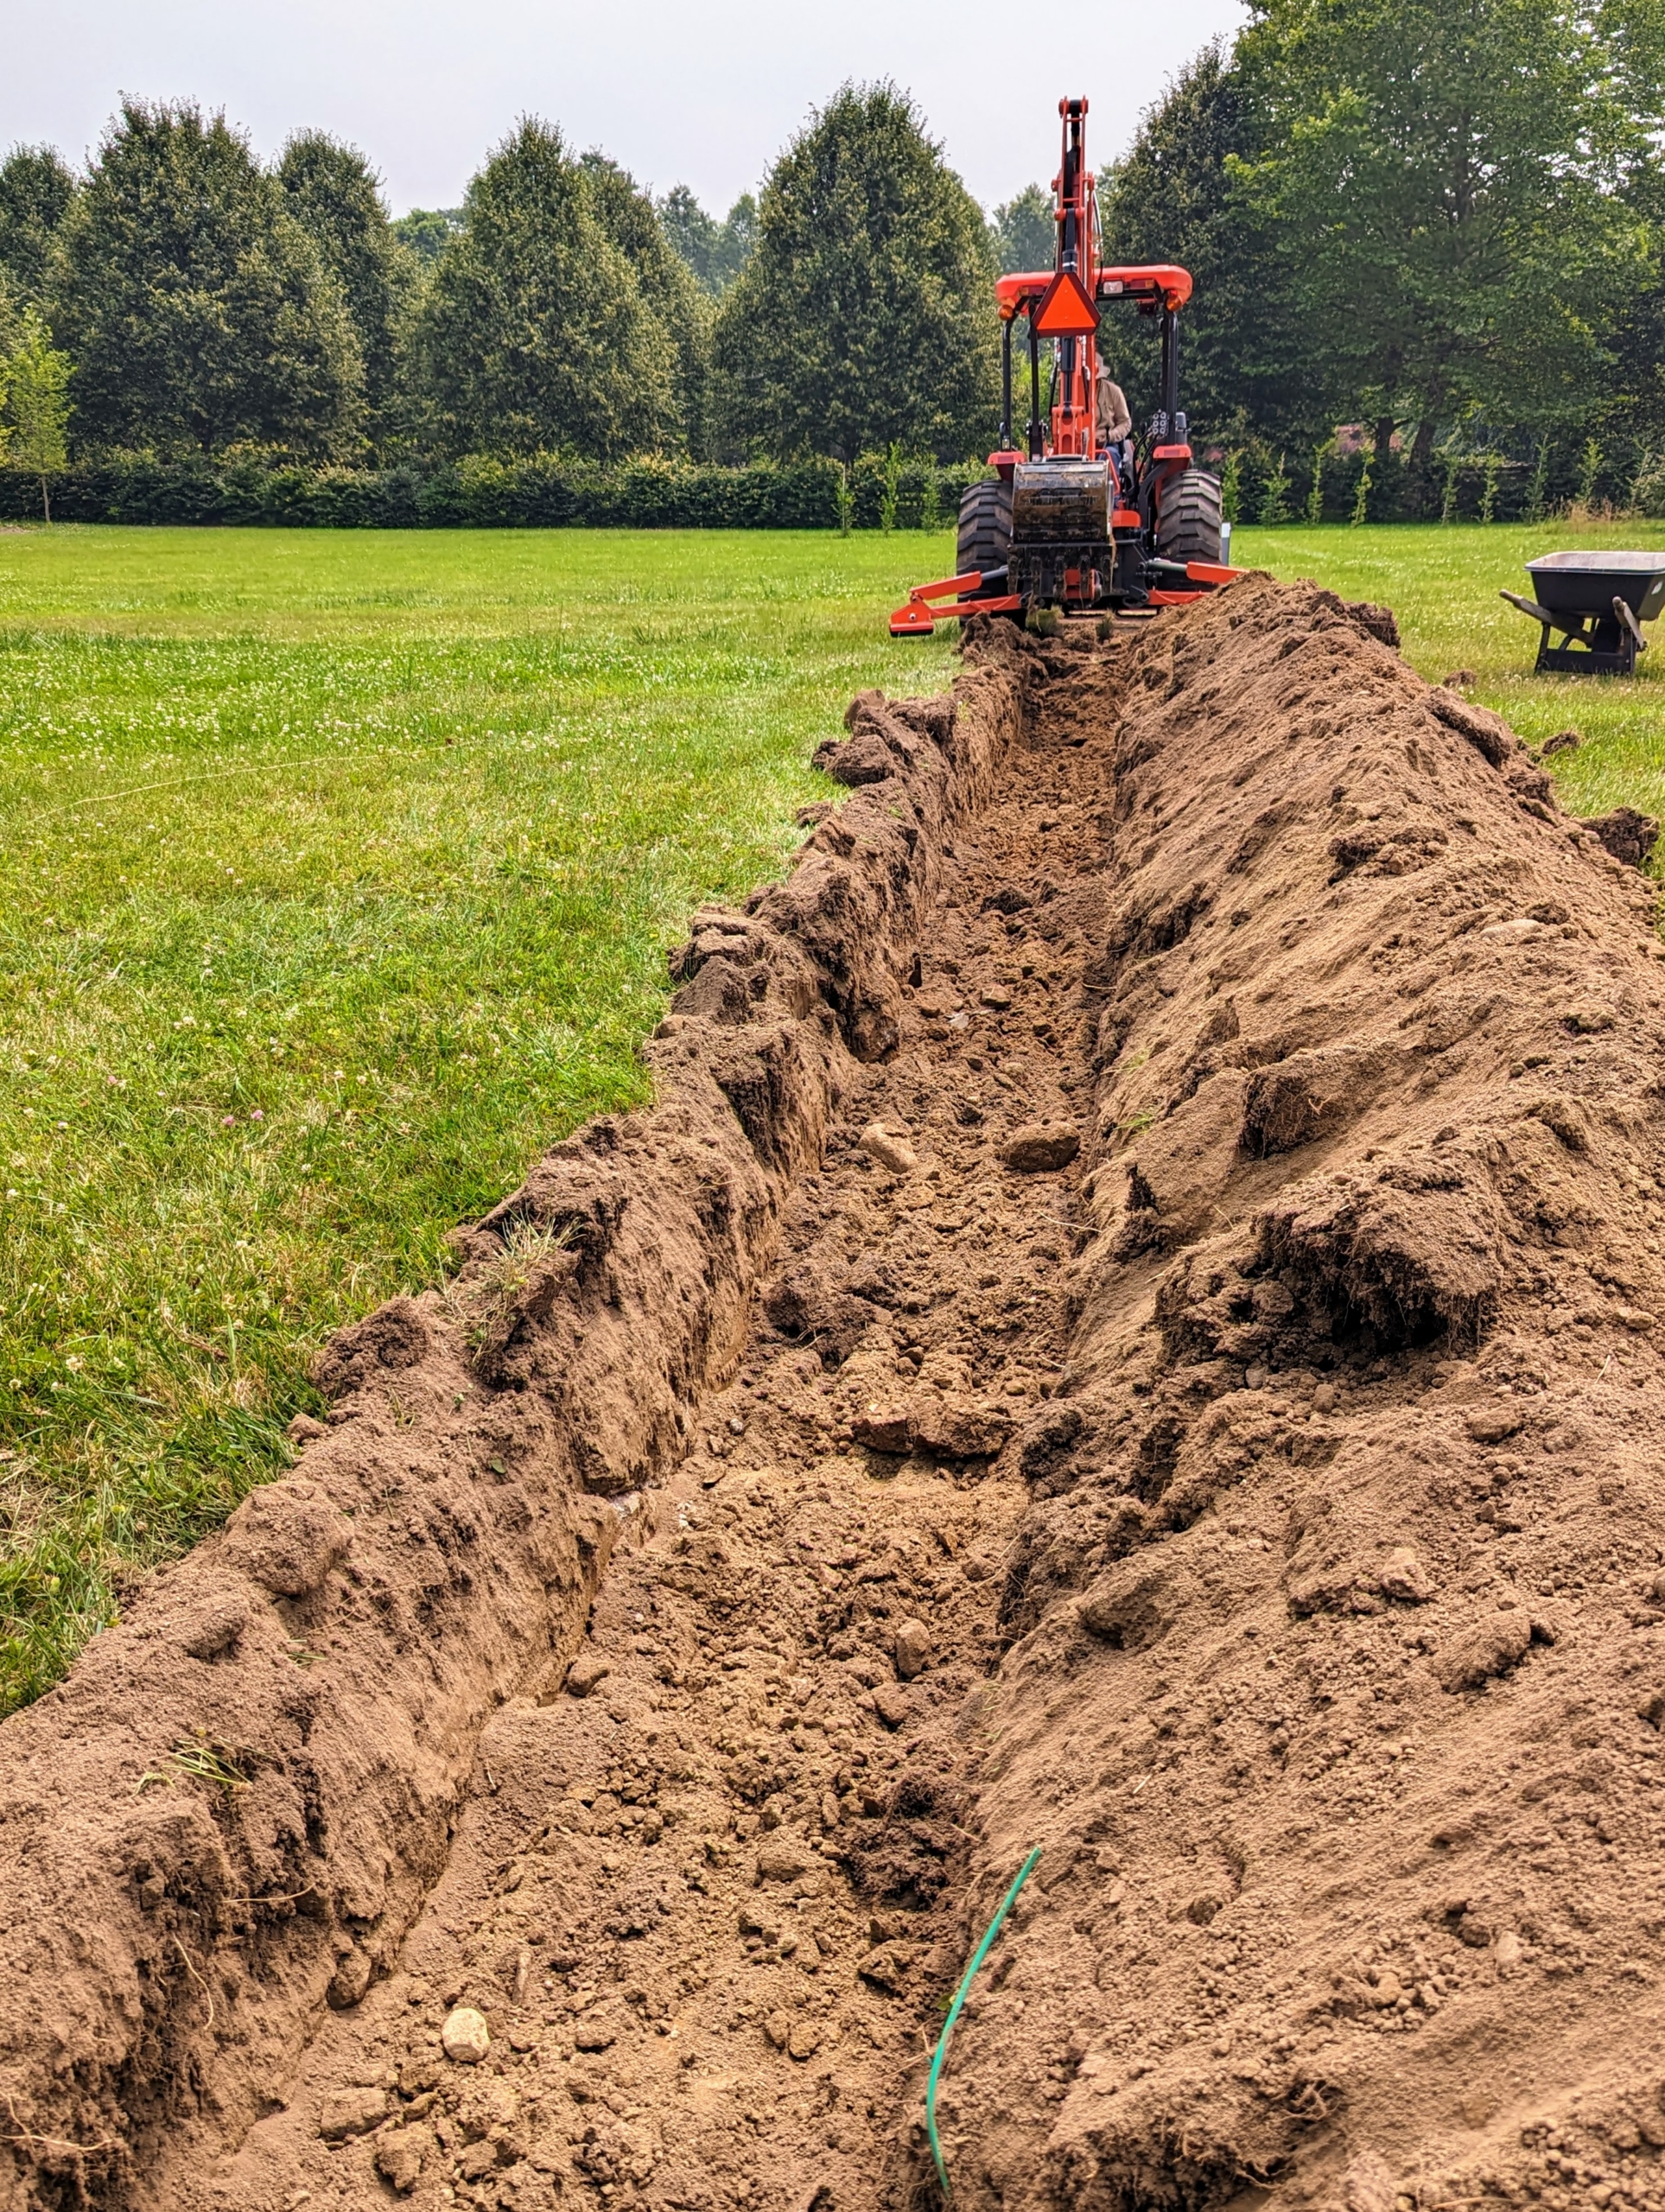
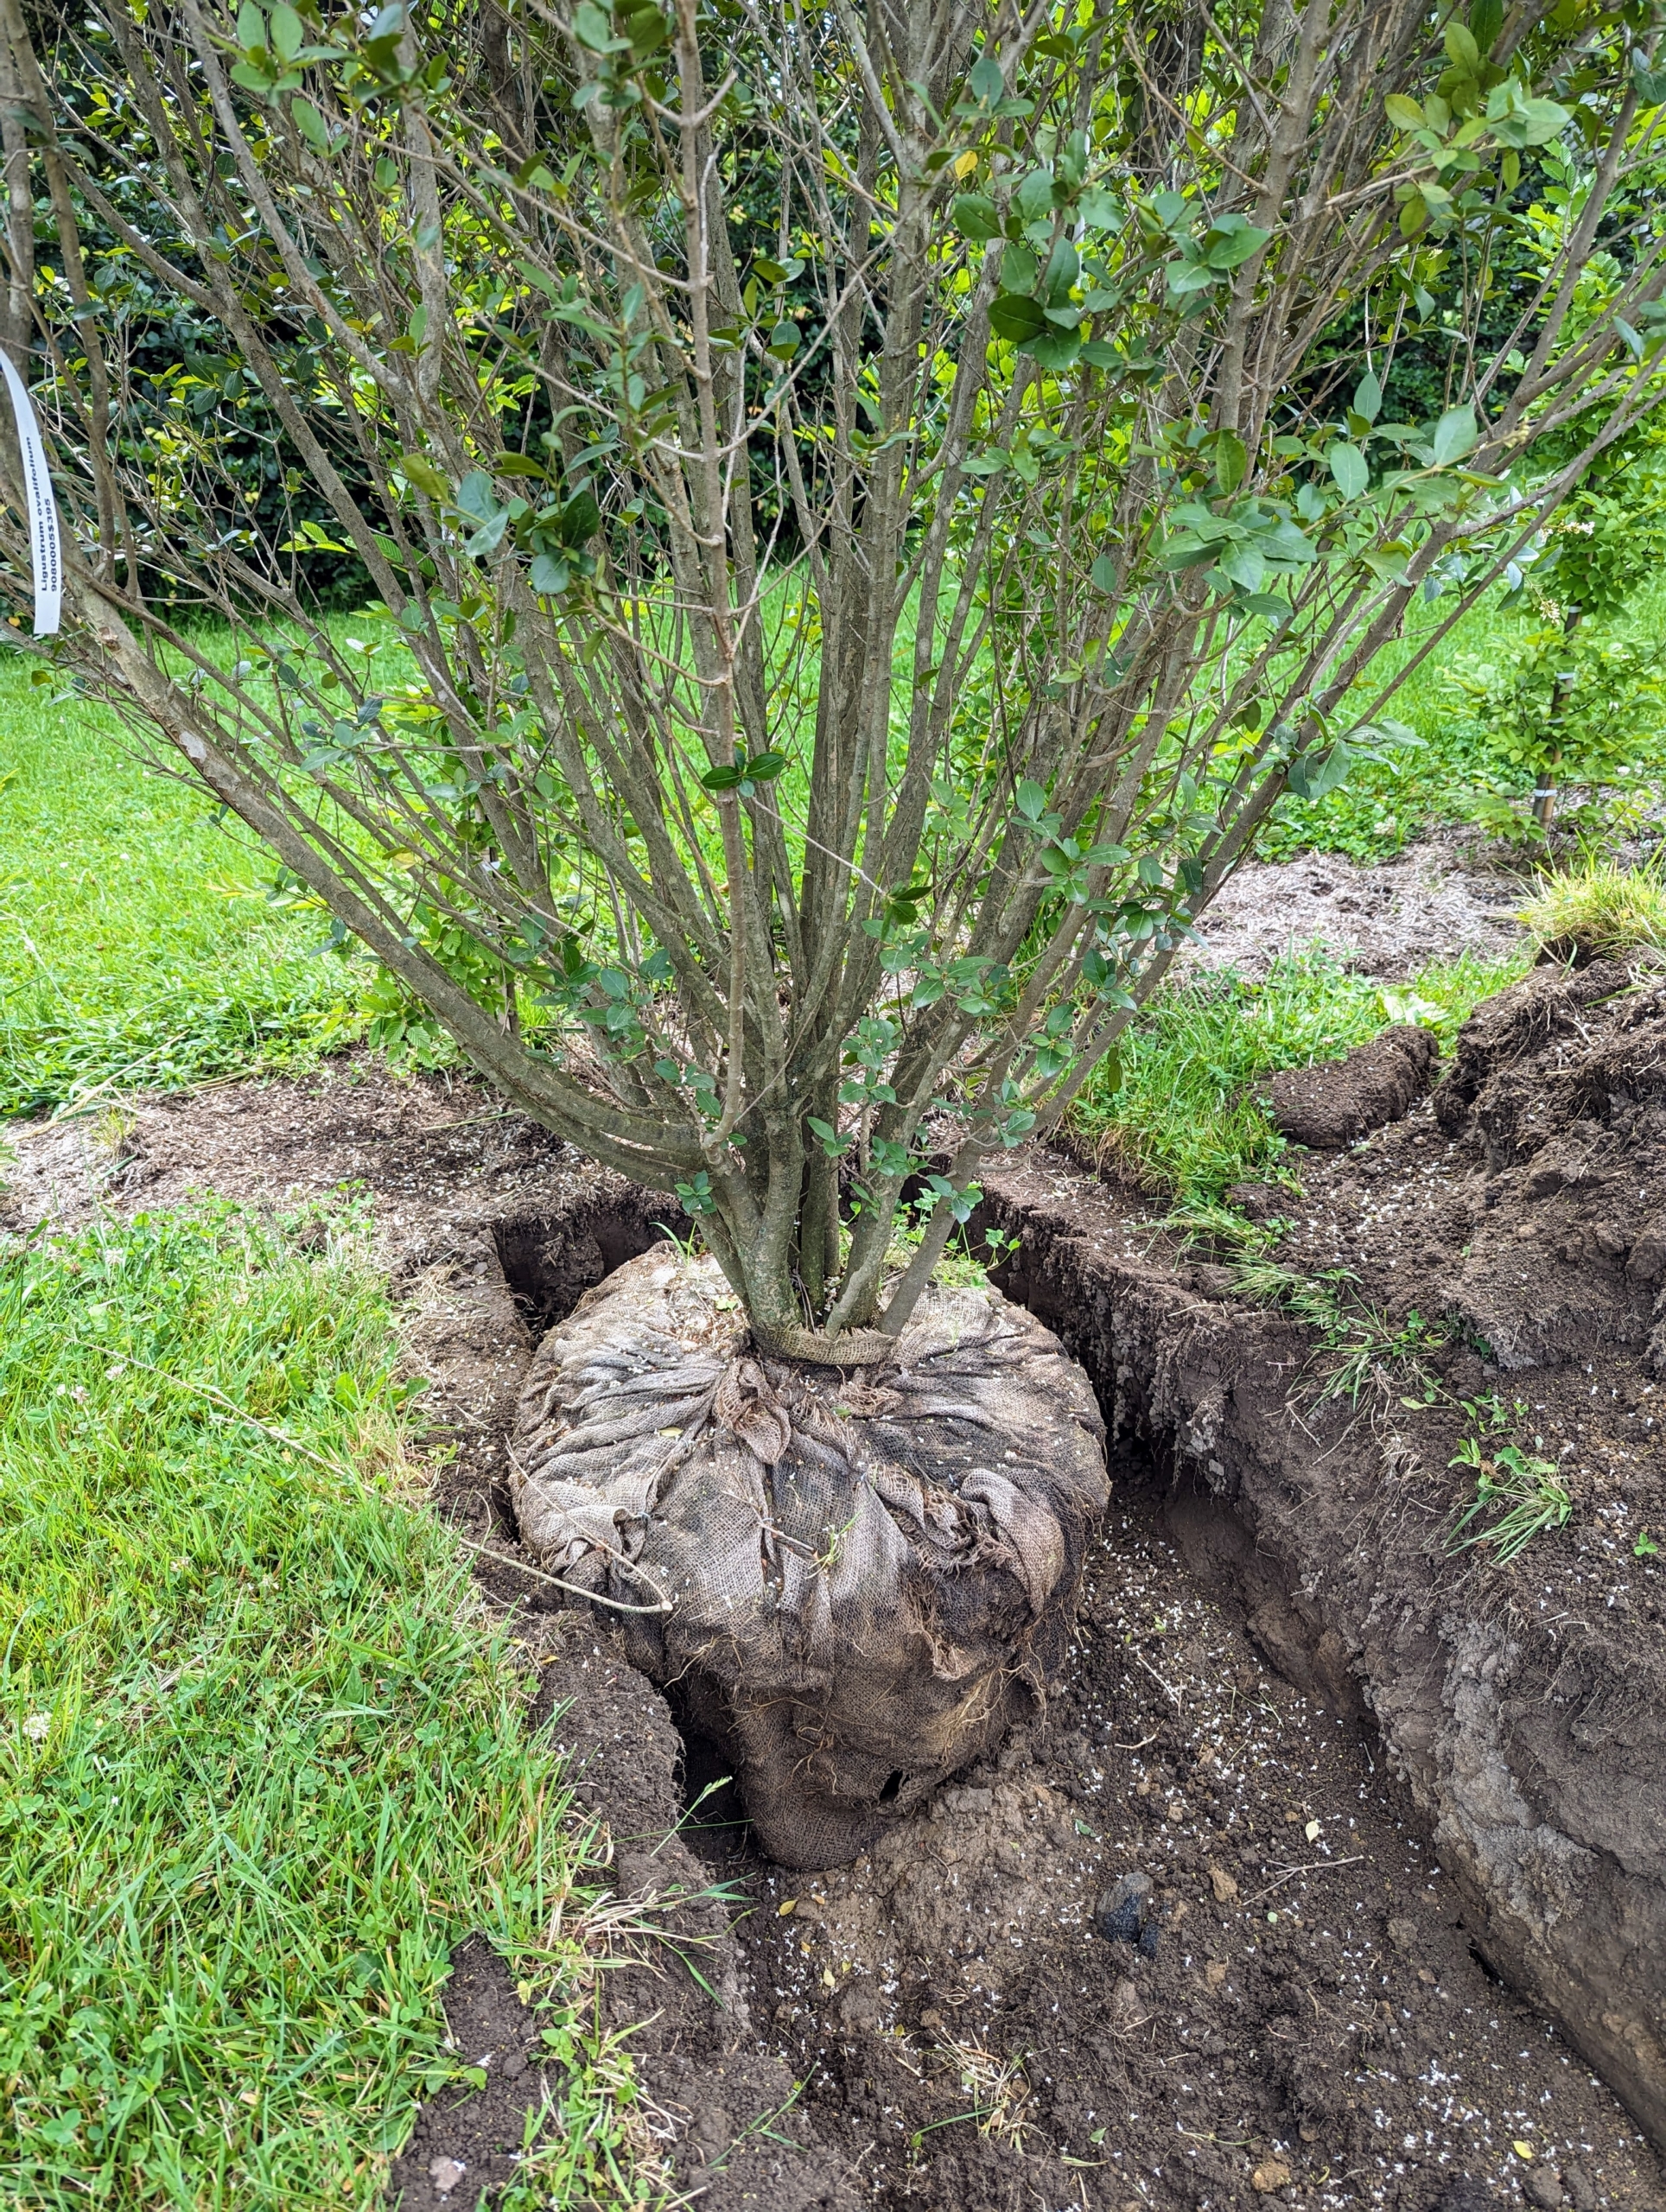
From one end to the other, Chhiring carefully removes about two feet of soil along the trench.
Here is the trench dug and ready for the privets. Digging a trench is not only faster when planting a number of trees in a row compared to individual holes, but it also allows more break up of the soil for new roots to grow and for better circulation of oxygen and water.
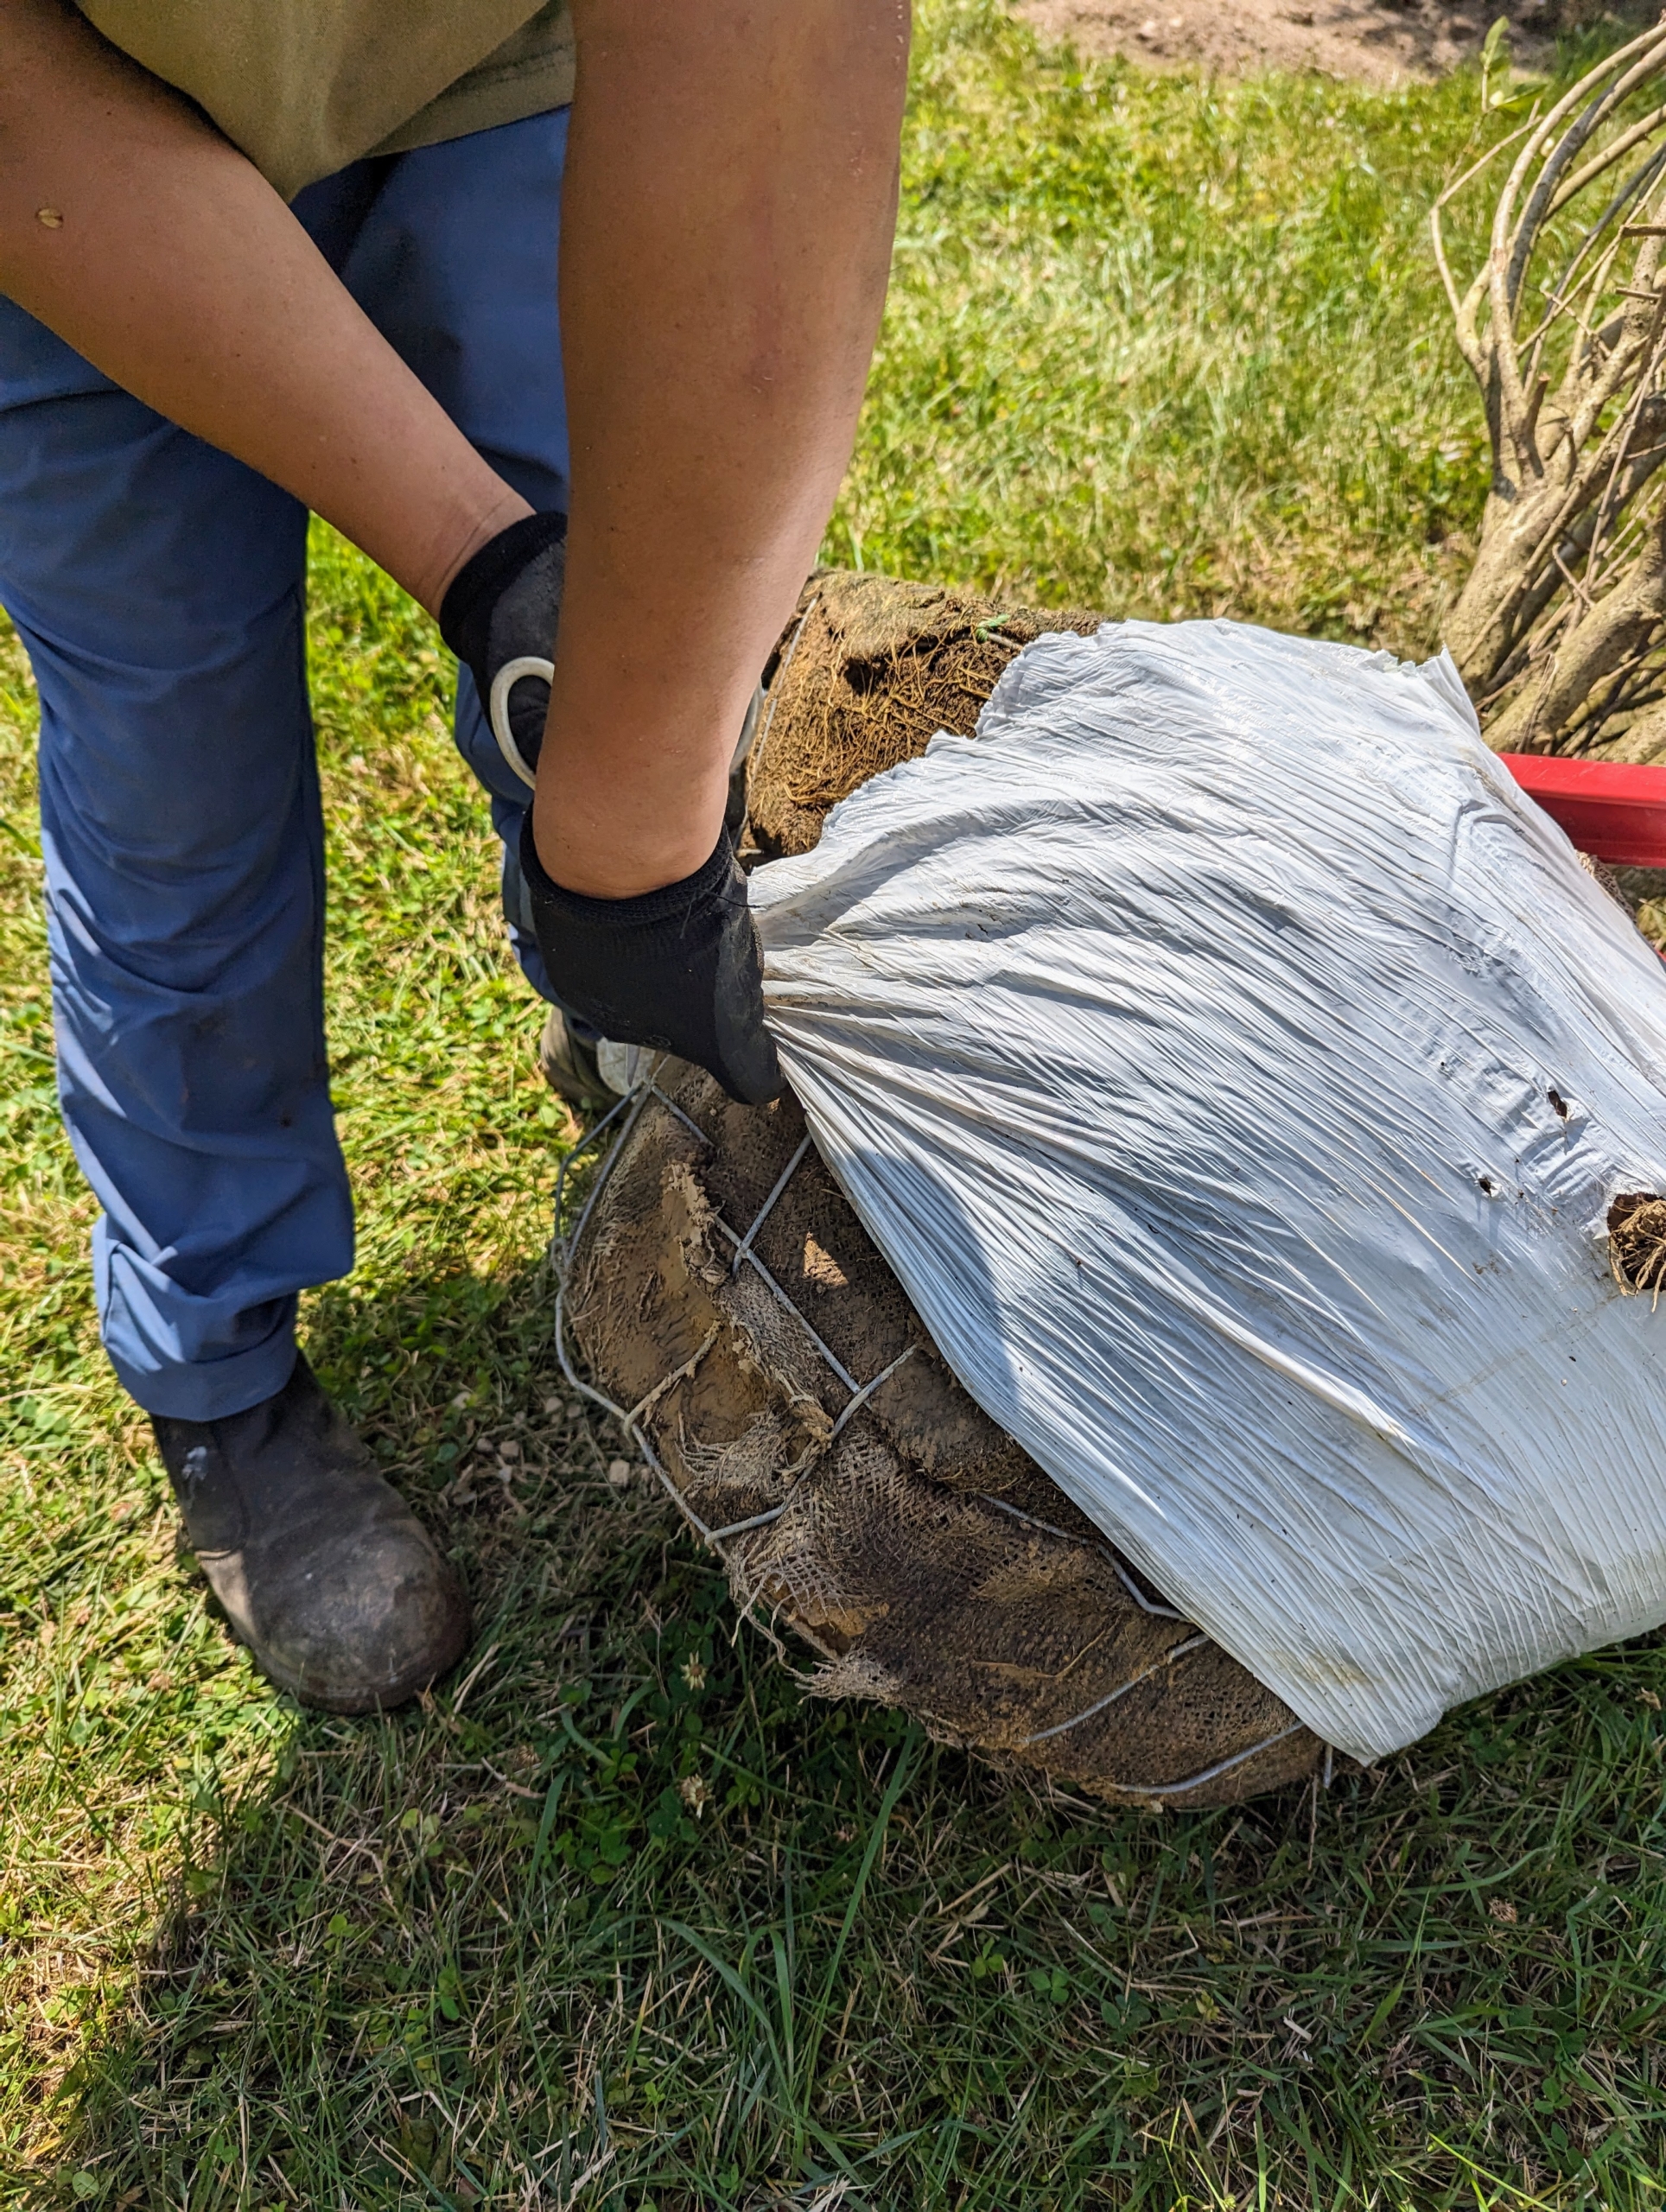
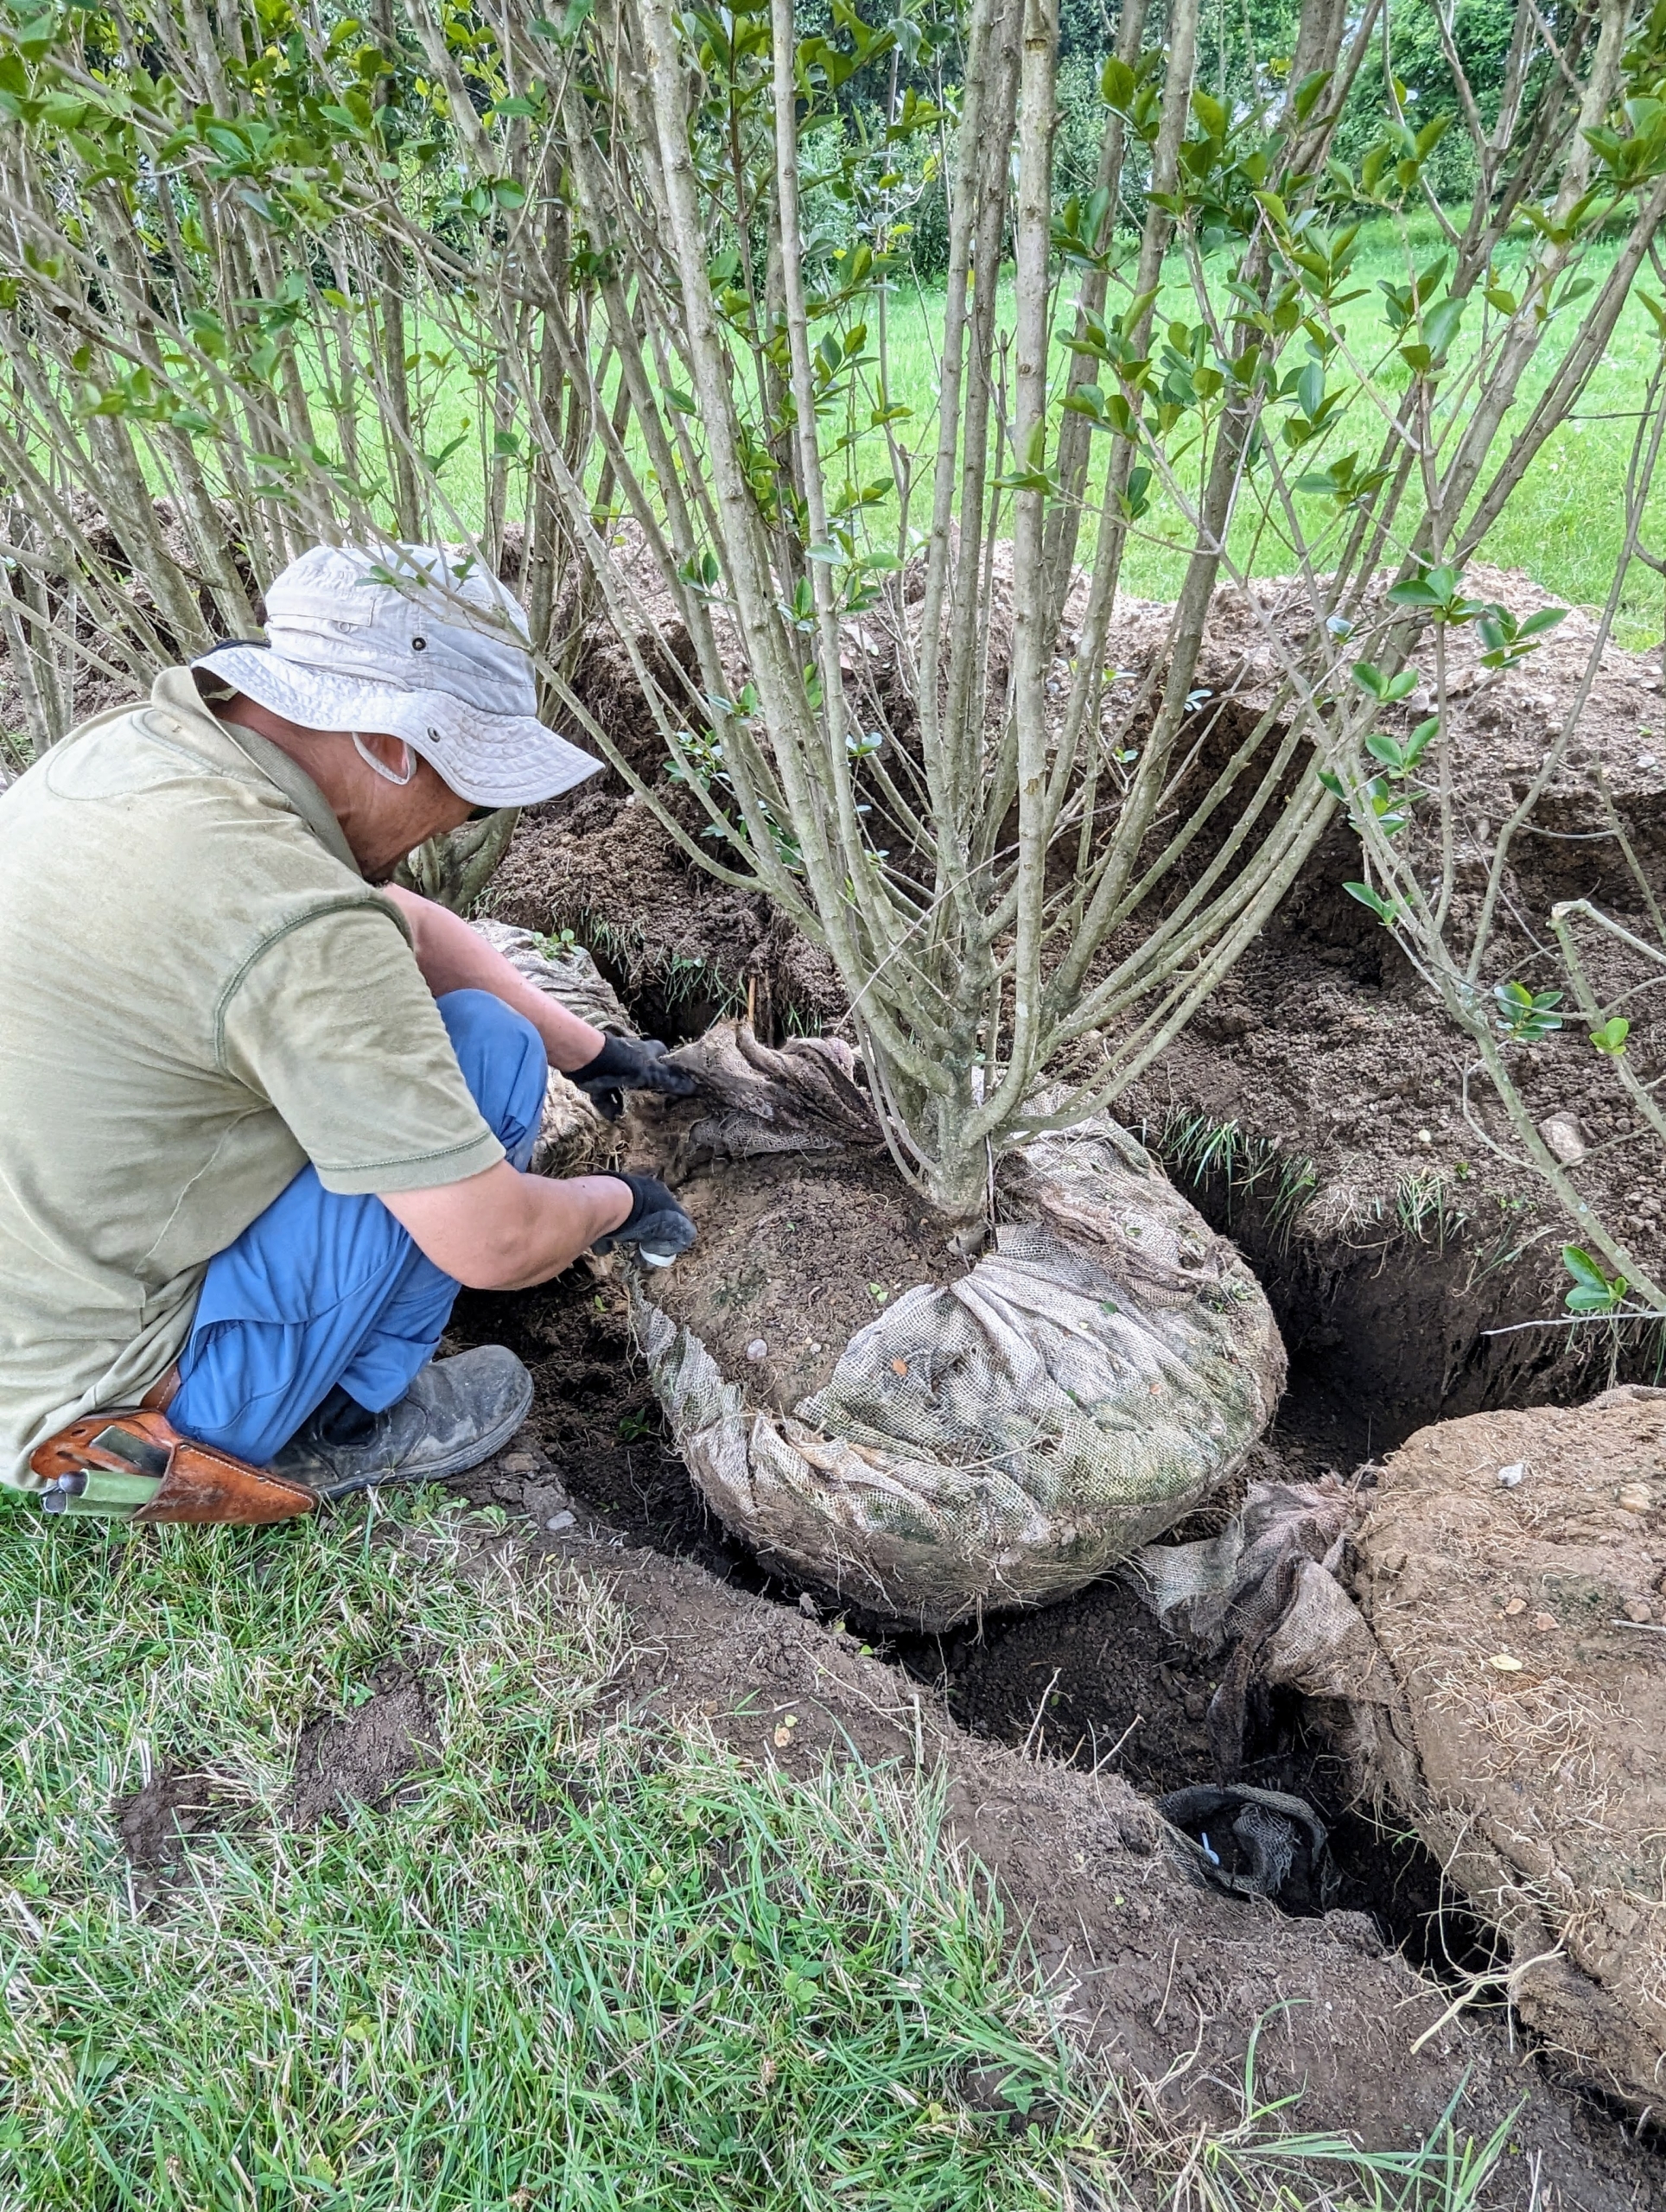
Chhiring removes the protective wrap from around each privet root ball.
And then he removes the cage around each root ball. Removing all the material is very important. Some gardeners will leave the wrapping in the ground, but I prefer to remove everything around any trees that are planted at the farm, so there is nothing blocking its root growth. Some burlap is also treated to prevent it from disintegrating.
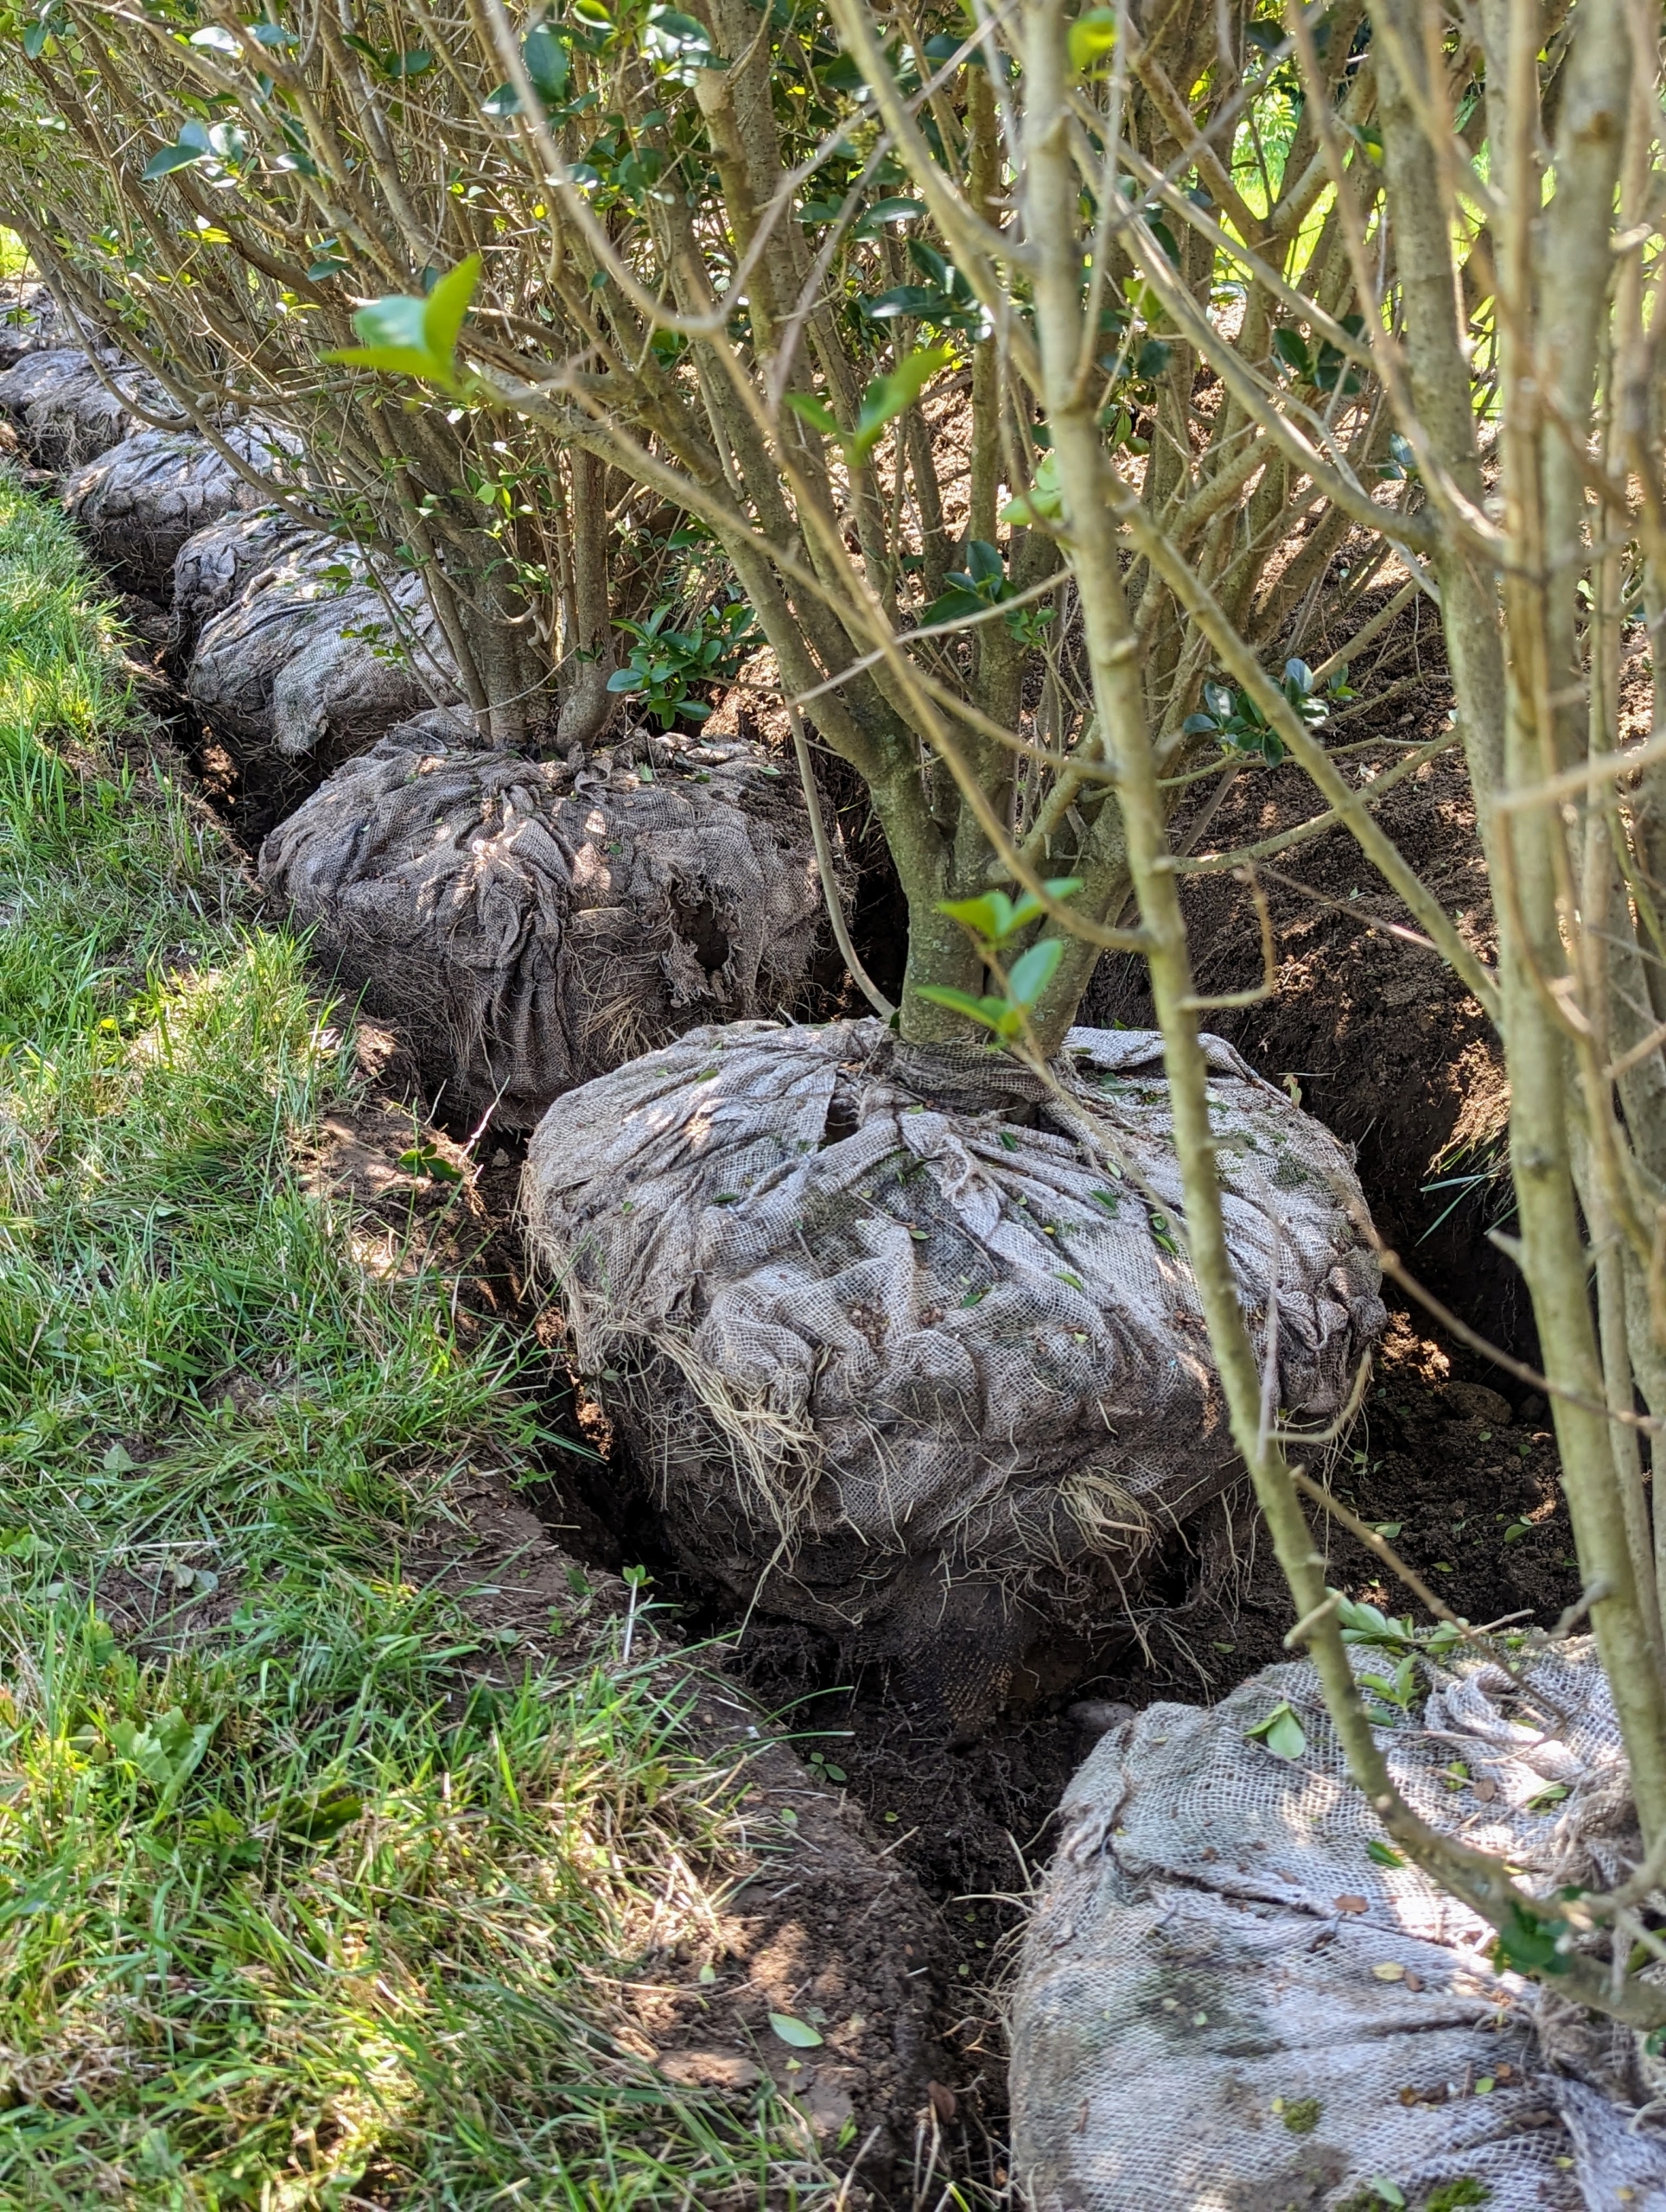
Now the first privet is in place – the natural burlap will also be removed once all the privets are lined up in the trench. The burlap helps keep the root ball intact for easy moving and positioning.
One by one, the privets are positioned – 30 on one side and 20 on the other.
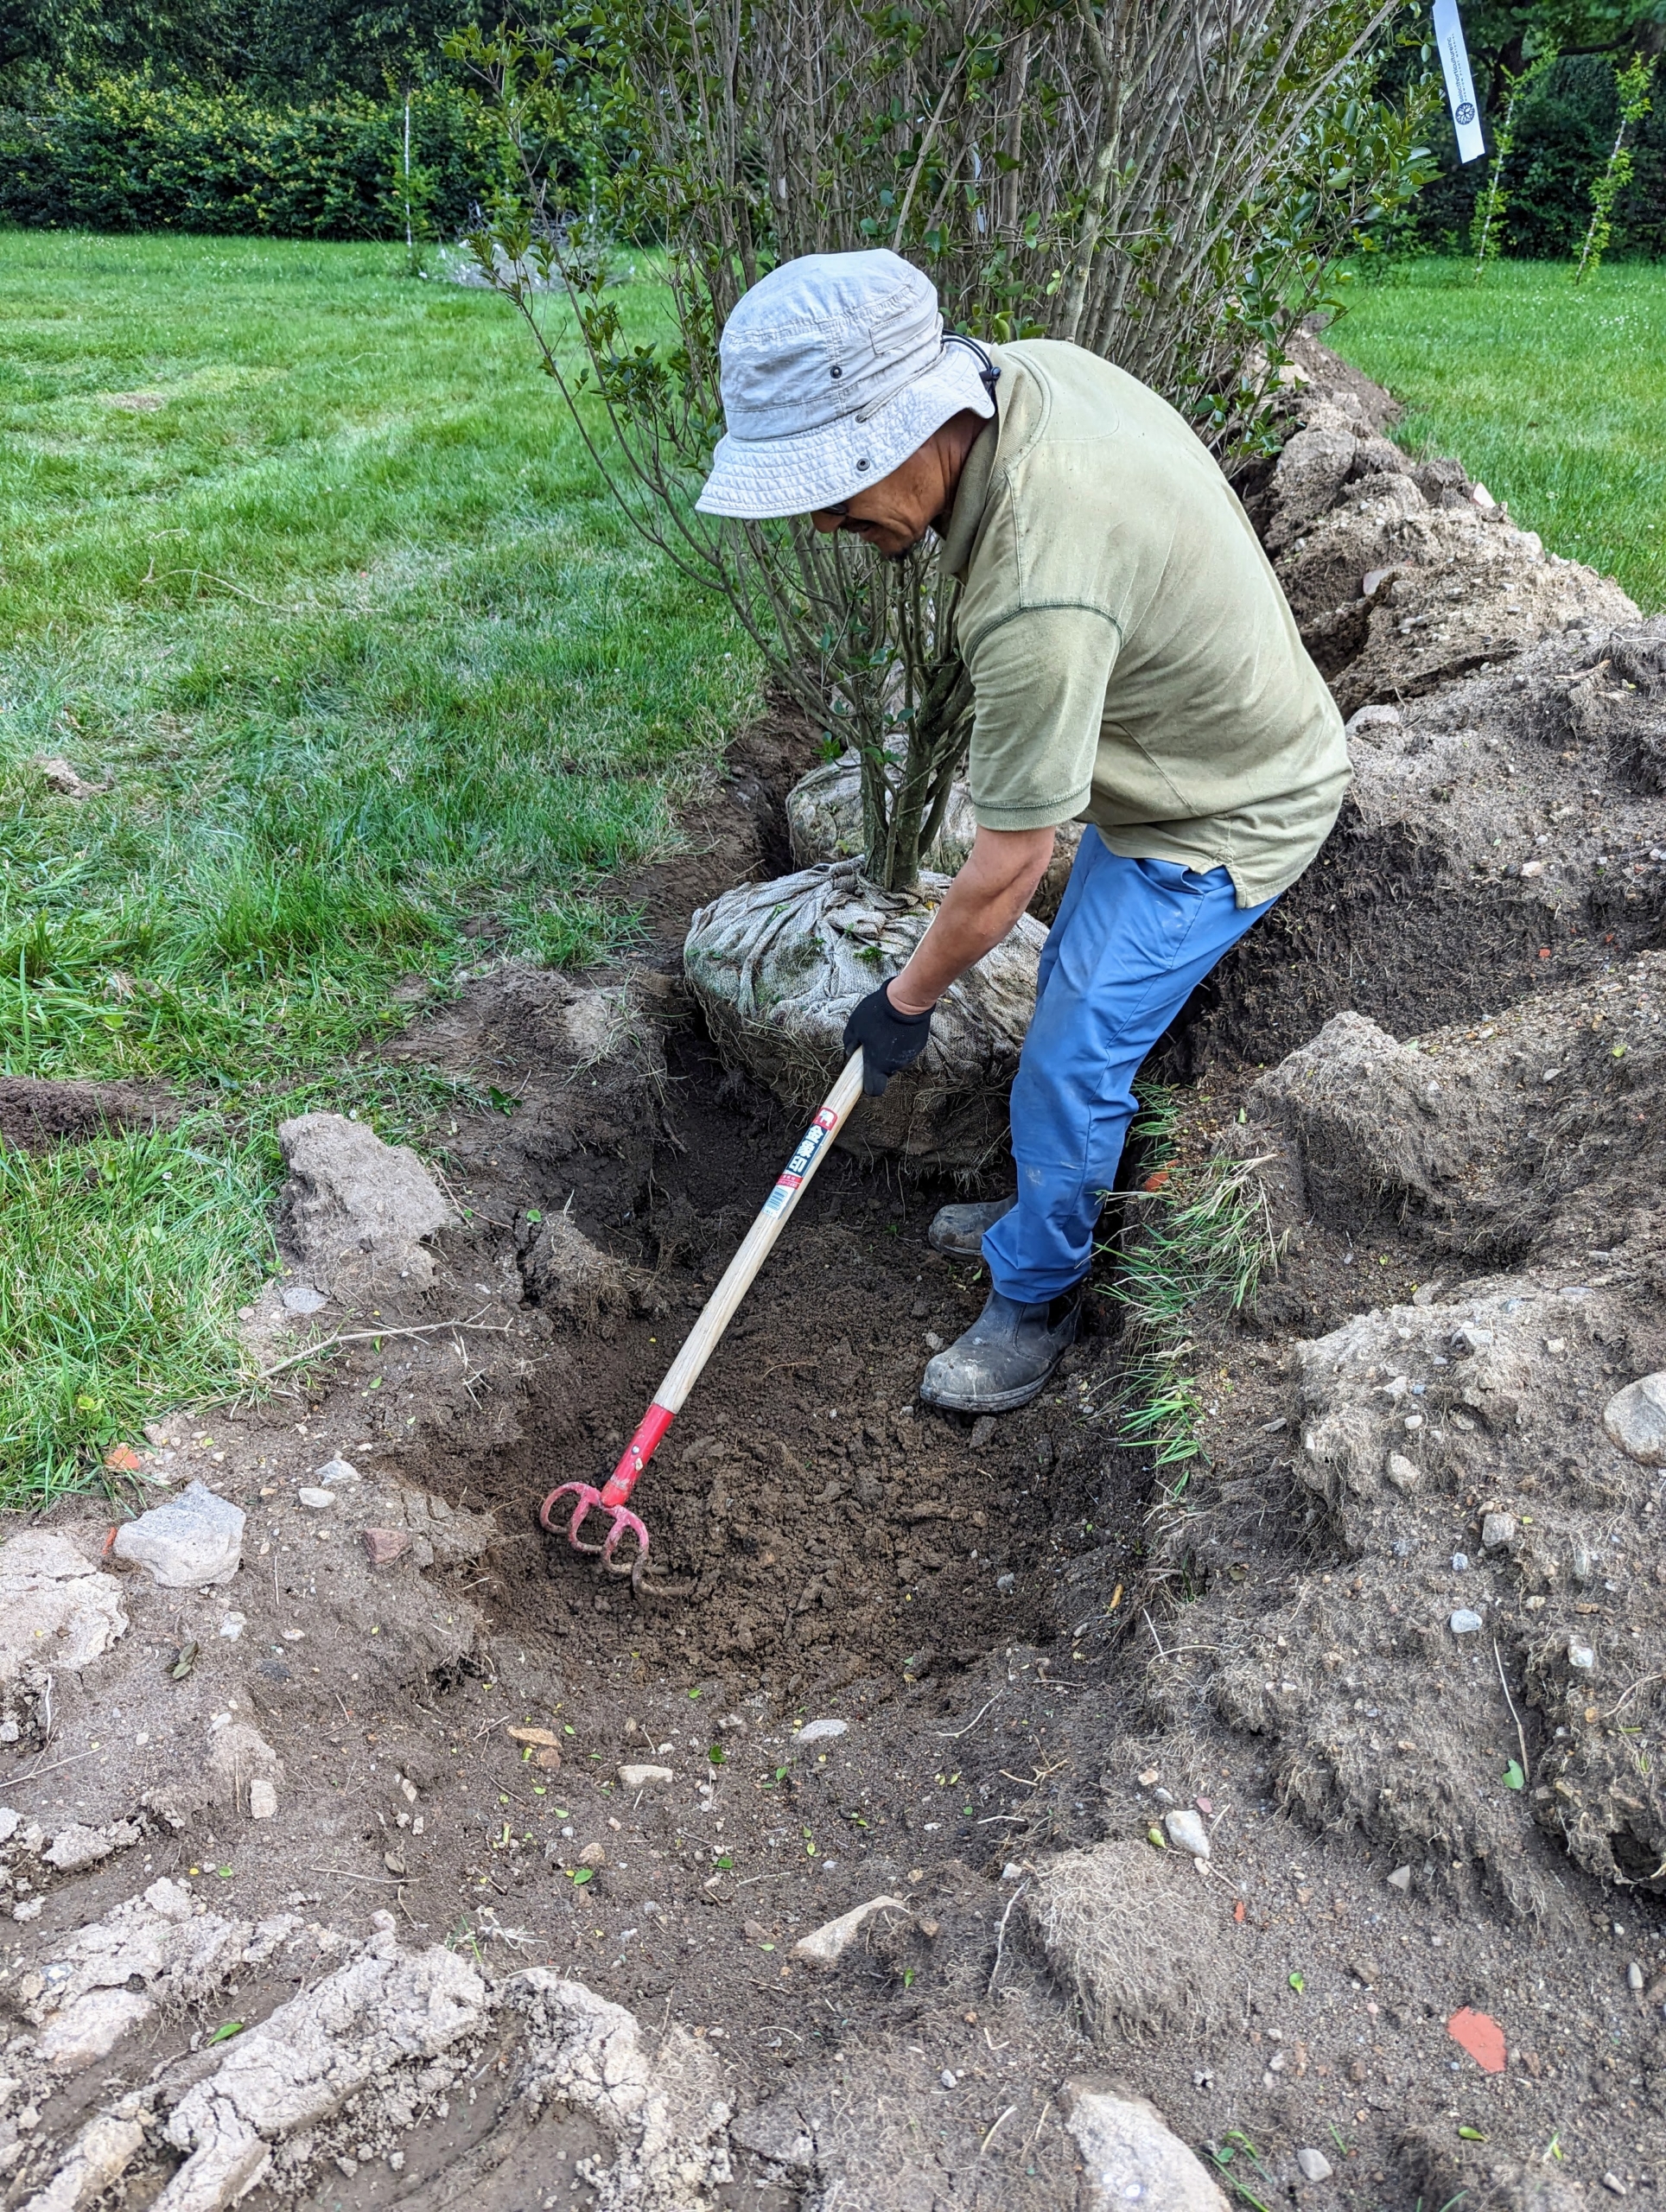
Chhiring manually smooths out the trench as needed. The entire process of planting these 58 privets takes several days.
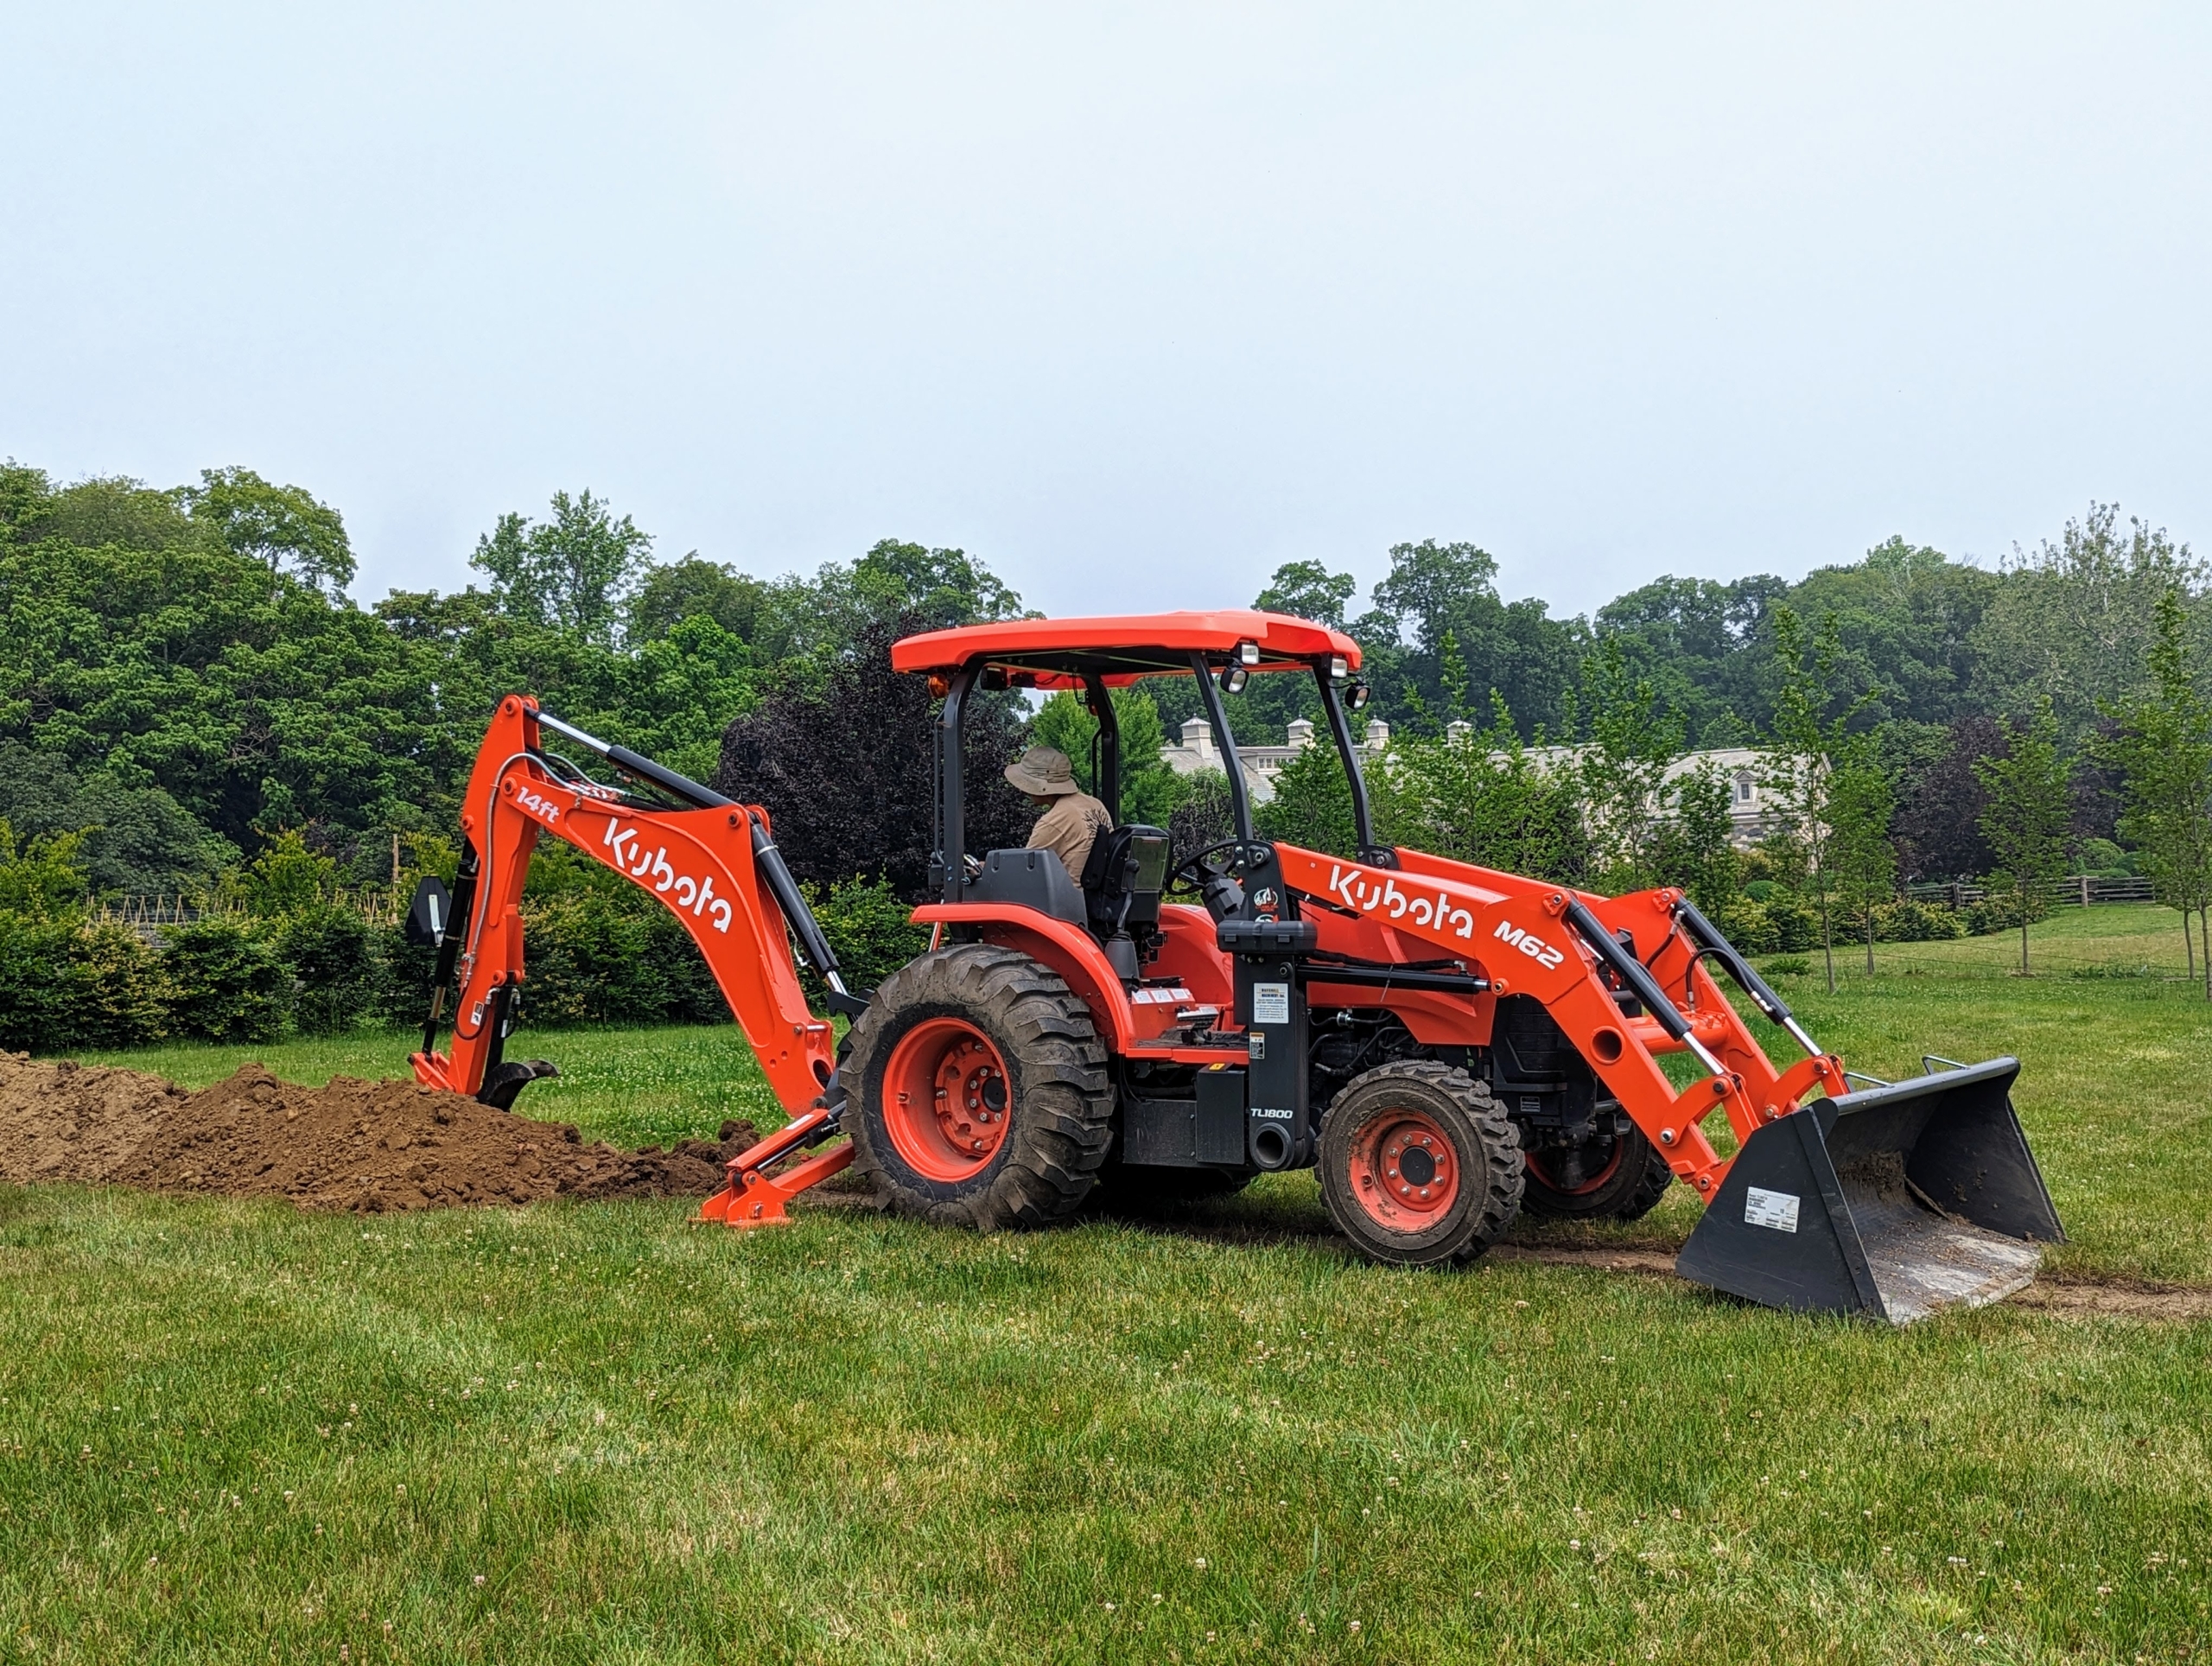
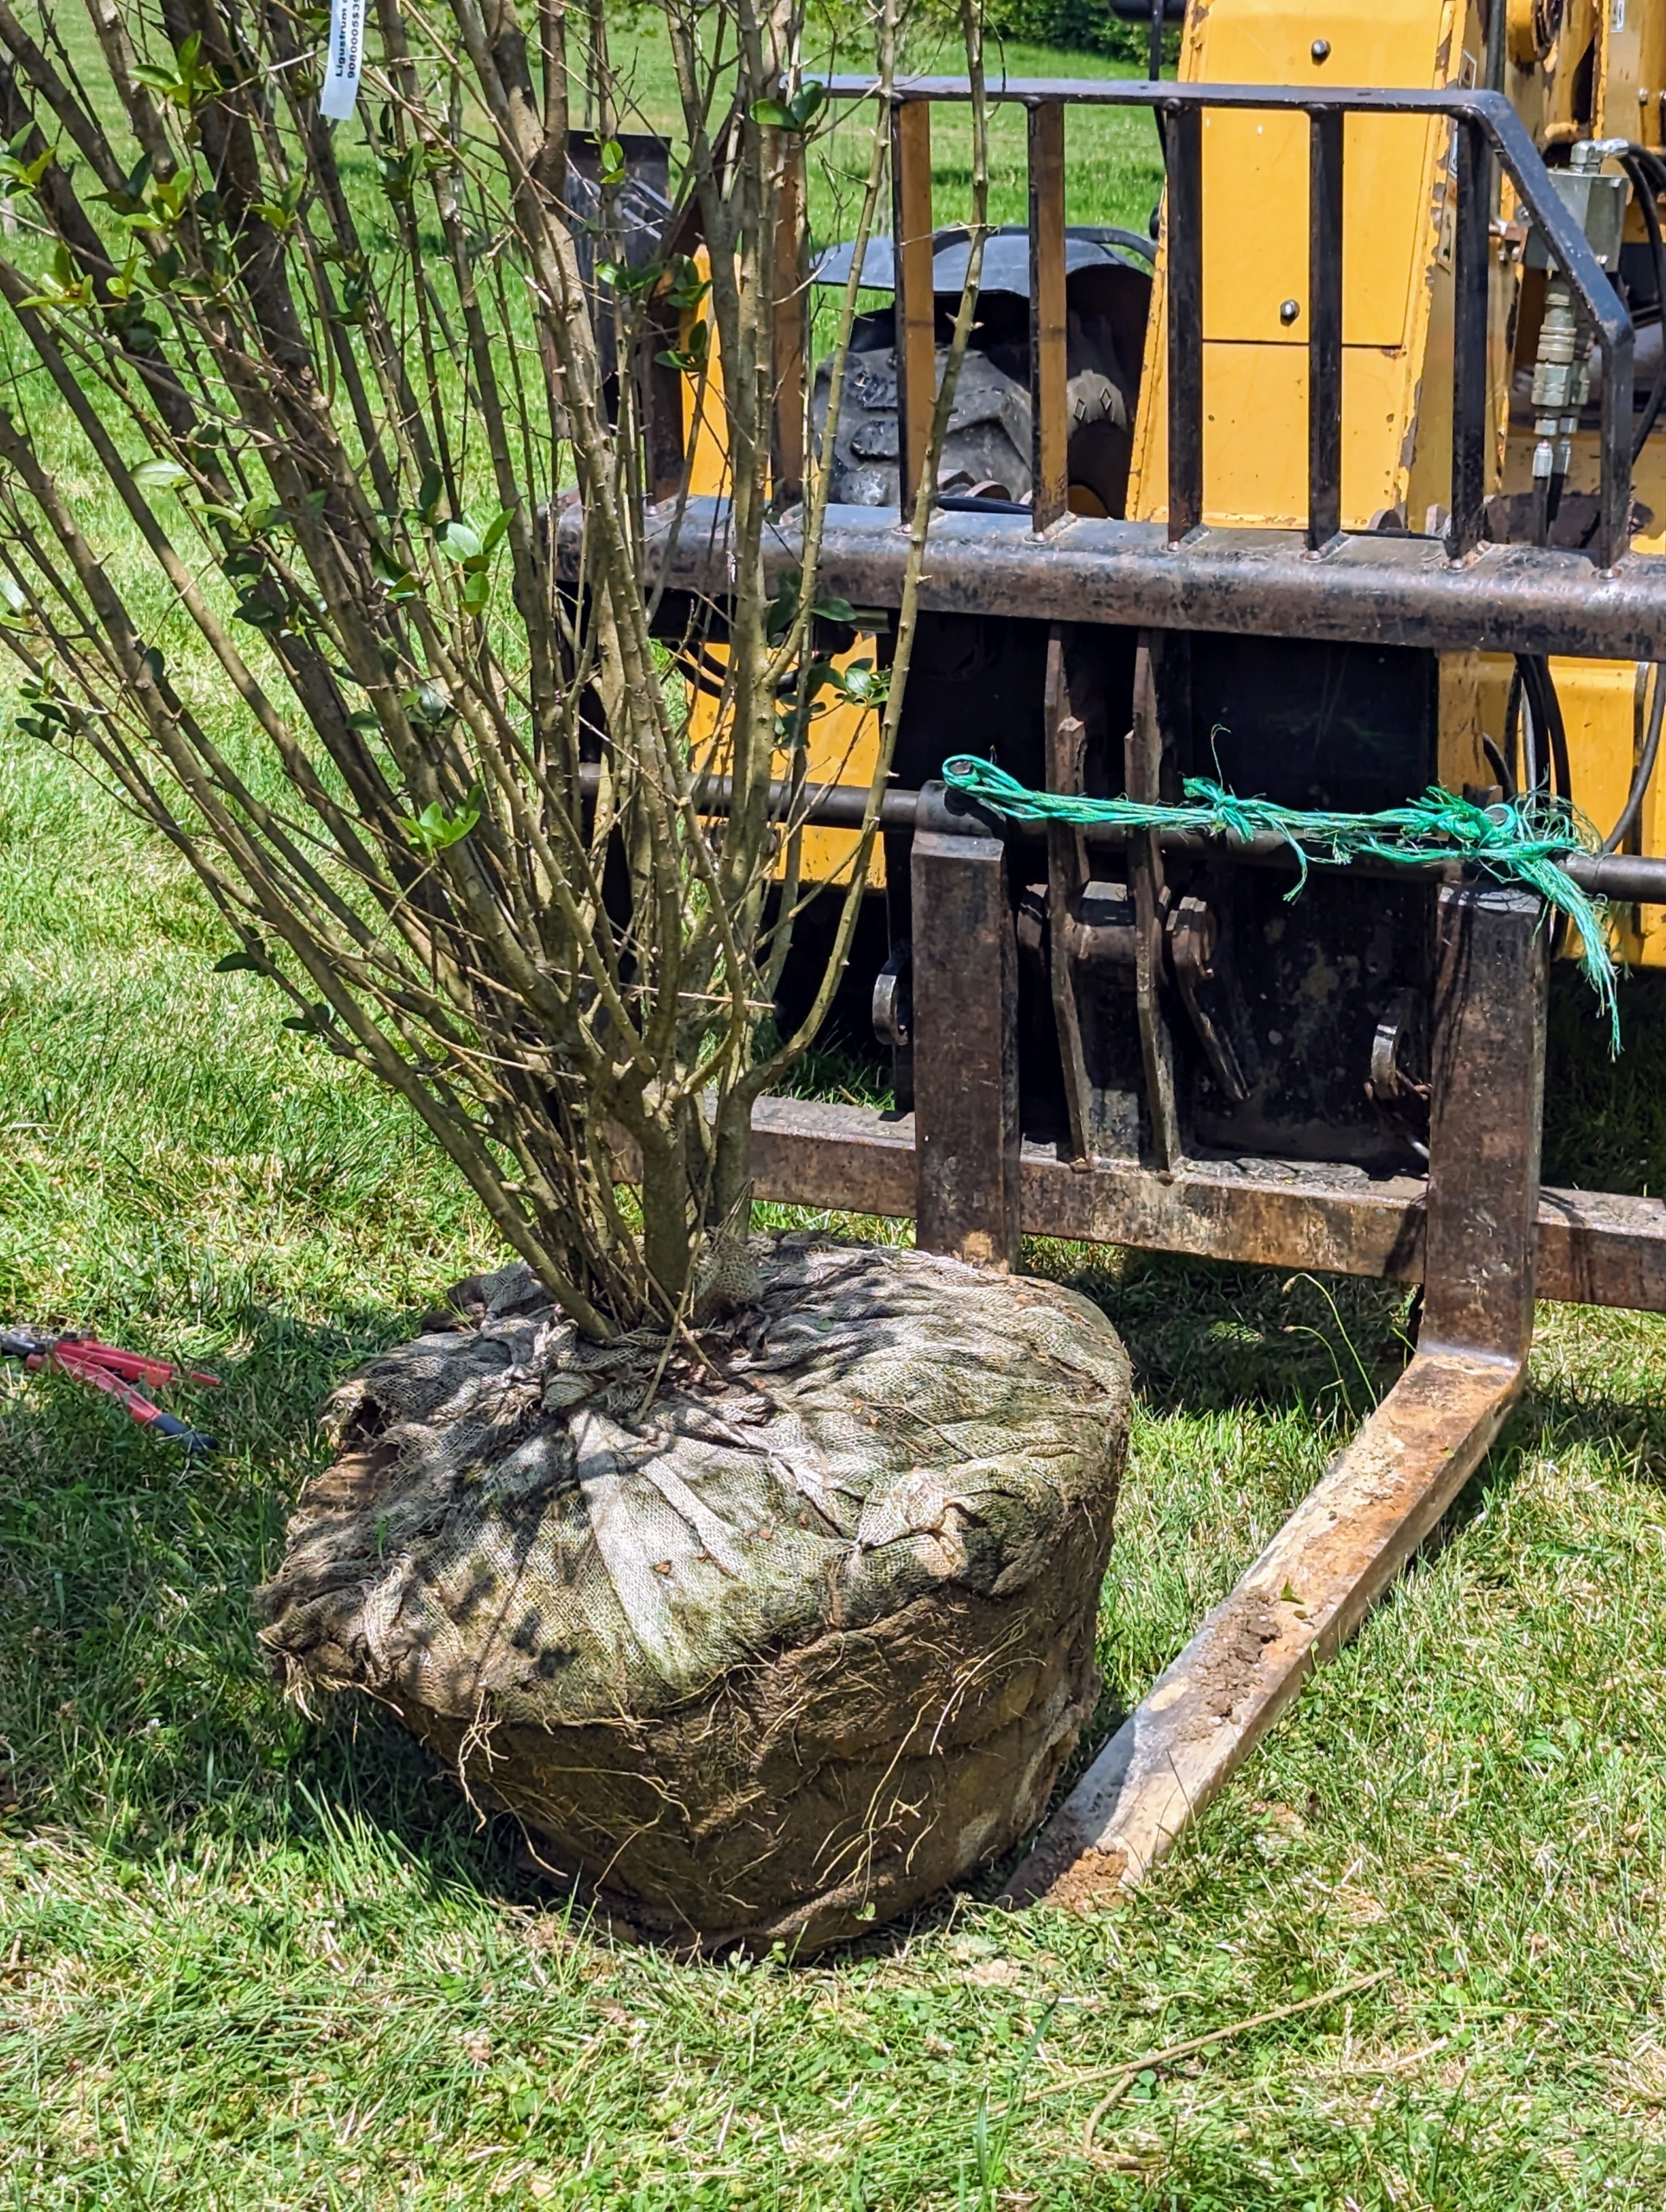
To place them in the trench, Chhiring uses our Hi-Lo fork lift. It i s able to lift the tree and get it right into its designated space.
All these shrubs are in good condition, but we always position plantings with the best side facing inward toward the walking path.
The map also includes some plantings going perpendicular to this row in the center, so Chhiring digs trenches just big enough to accommodate four privets on each side.
The last four privets are carried into place. If doing by hand, when moving trees, only hold it by the root ball and the base of the trunk – never by its branches, which could easily break.
Here, Chhiring removes all the protective burlap from the privets already in the trench.
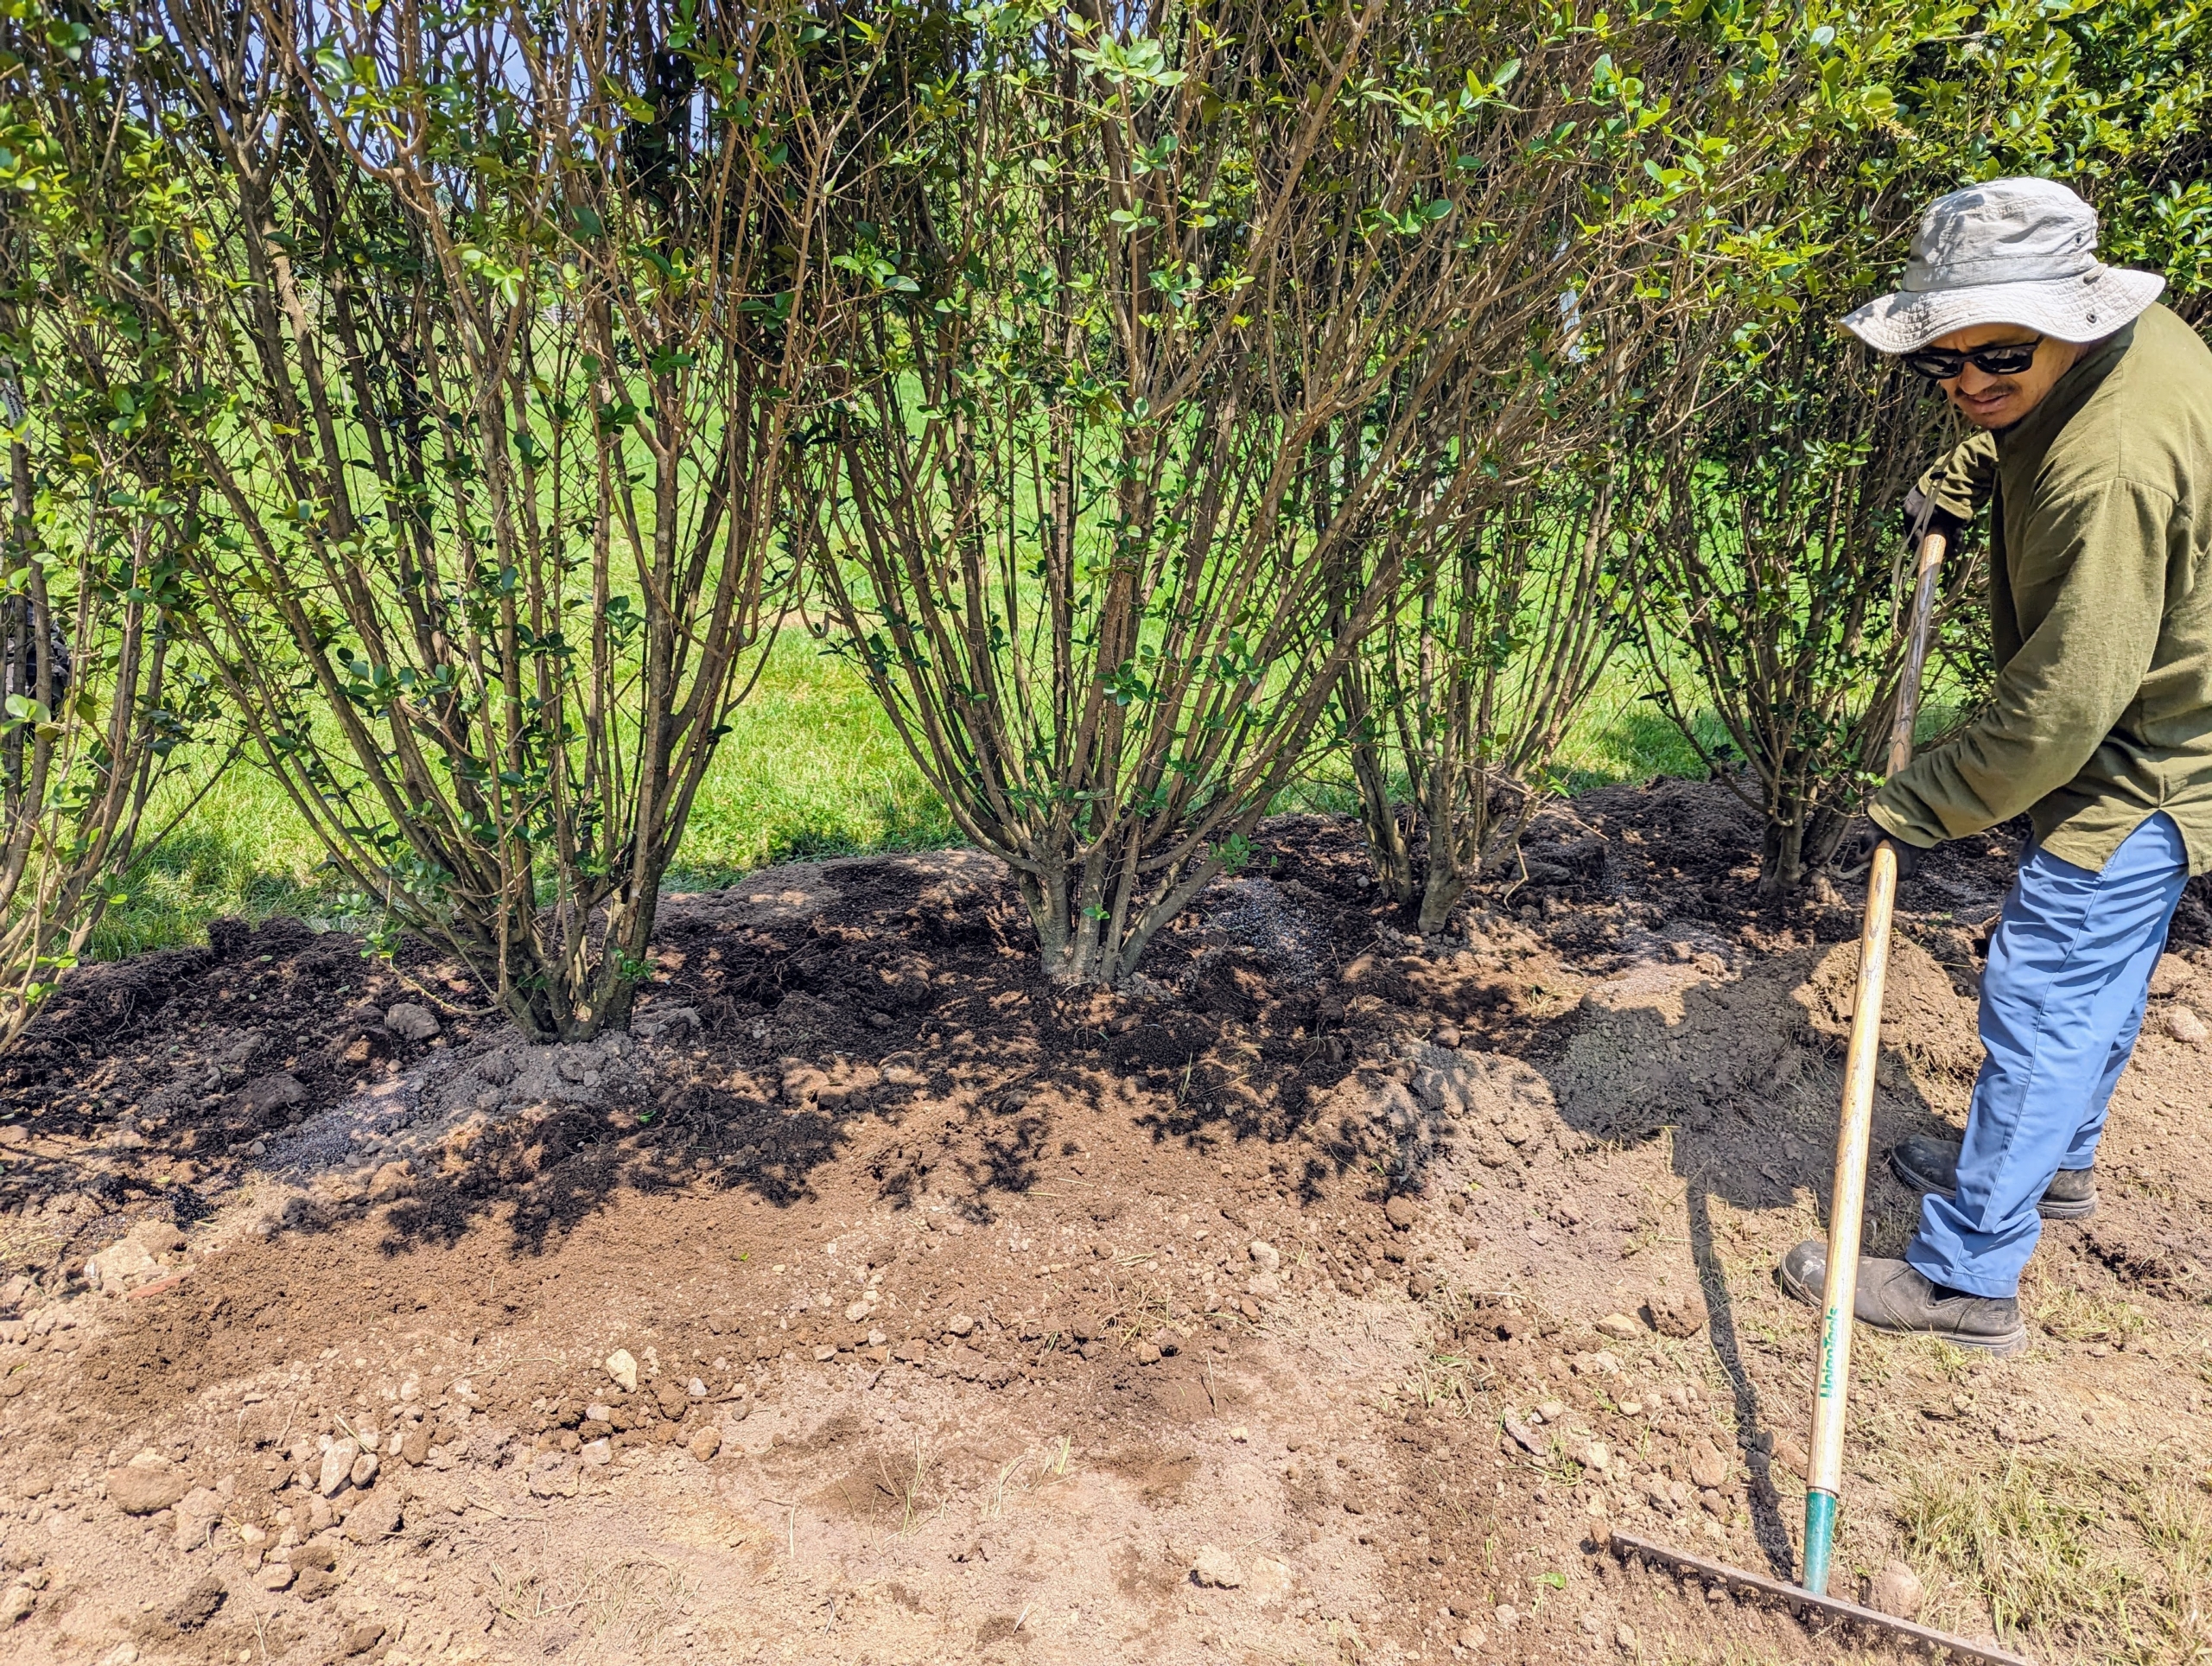
The shrubs are then backfilled. A good tip is to “plant bare to the flare,” meaning do not bury the tree above its flare, where the first main roots attach to the trunk. Tree roots need oxygen to grow. By placing the root flare at or slightly above ground level when planting gives the tree the best chance for survival, growth and development.
Chhiring also sprinkles fertilizer specially made for transplanting. Remember, “if you eat, so should your plants.”
Here is one side of the row planted and backfilled. When fully mature, these privets will grow 10 to 15 feet tall.
One can see that these privets are all equally spaced in the trench. They will eventually grow into a nice thick hedge.
The leaves of the privet are elliptic-ovate, glossy, dark green leaves and about two and a half inches long.
Small, tubular, dull white flowers in upright panicles up to four inches long bloom on the stem tips in June and July.
Once they’re all planted, the privets are given a very deep and thorough drink. It’s been very hot and humid here at the farm this week – we’ve been watering quite a bit.
And finally here they are all planted and mulched. The mulch is made right here at the farm.
Here it is from a distance. The maze will take some time before it is complete, but I am so pleased with how well it is turning out. It gets more interesting – and more confusing – with each row of plantings.
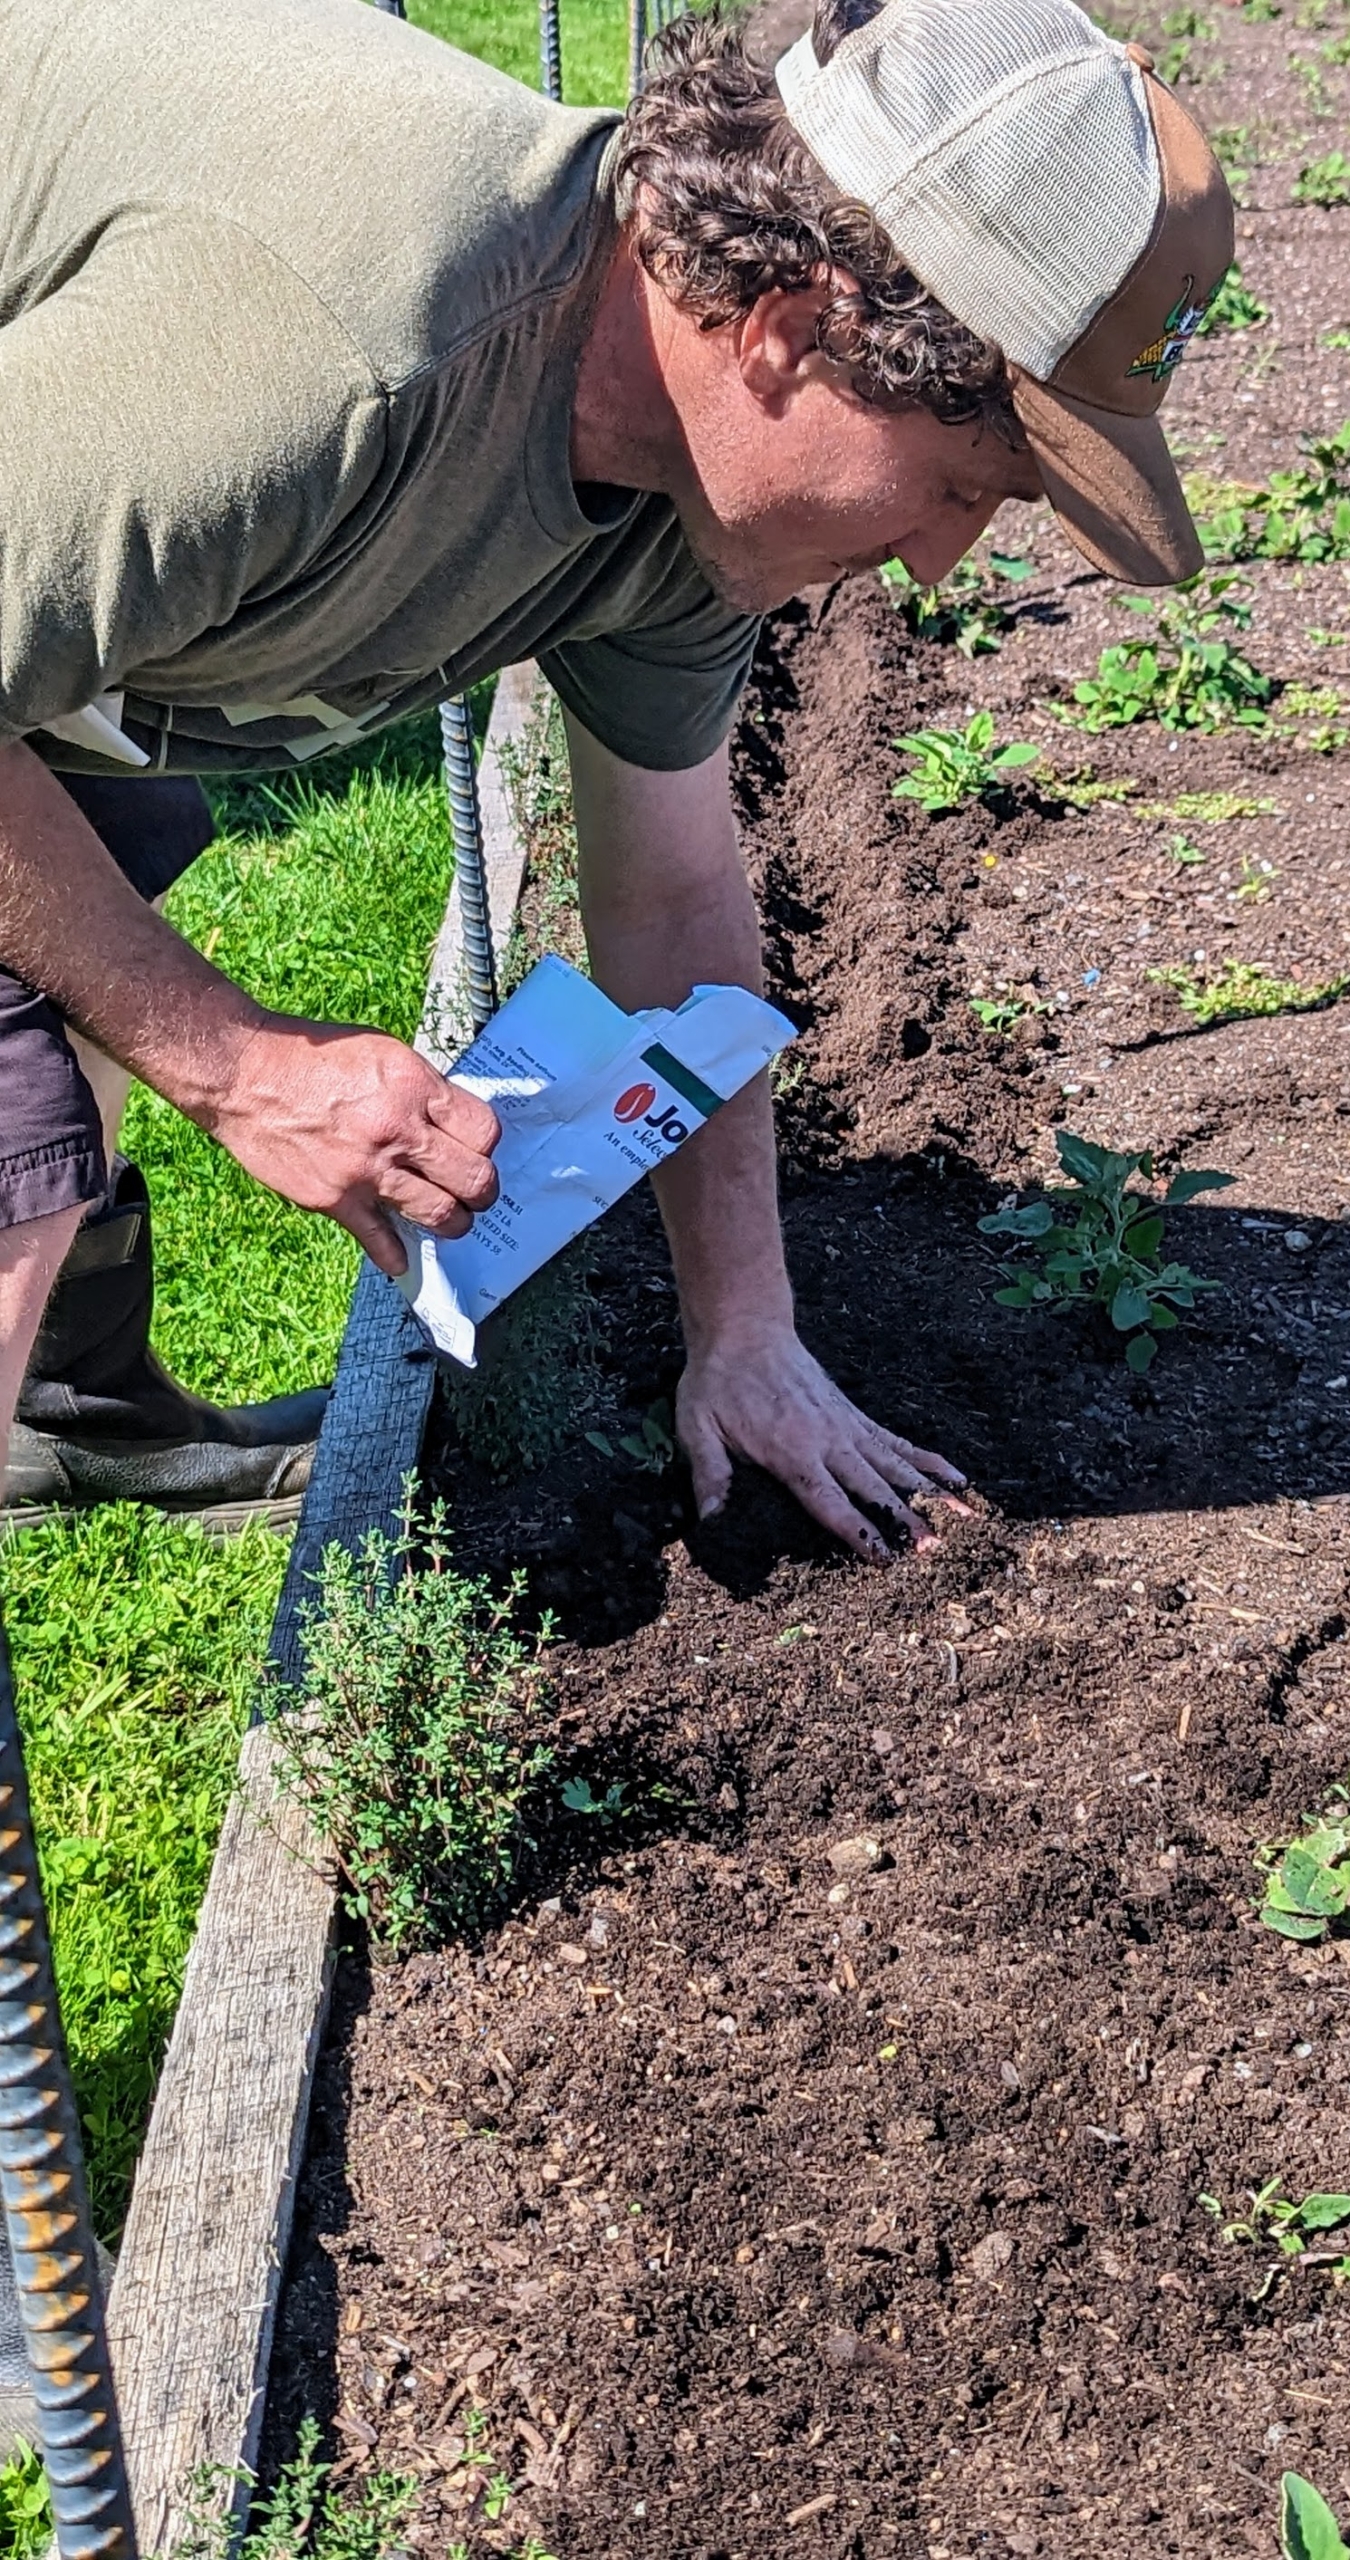
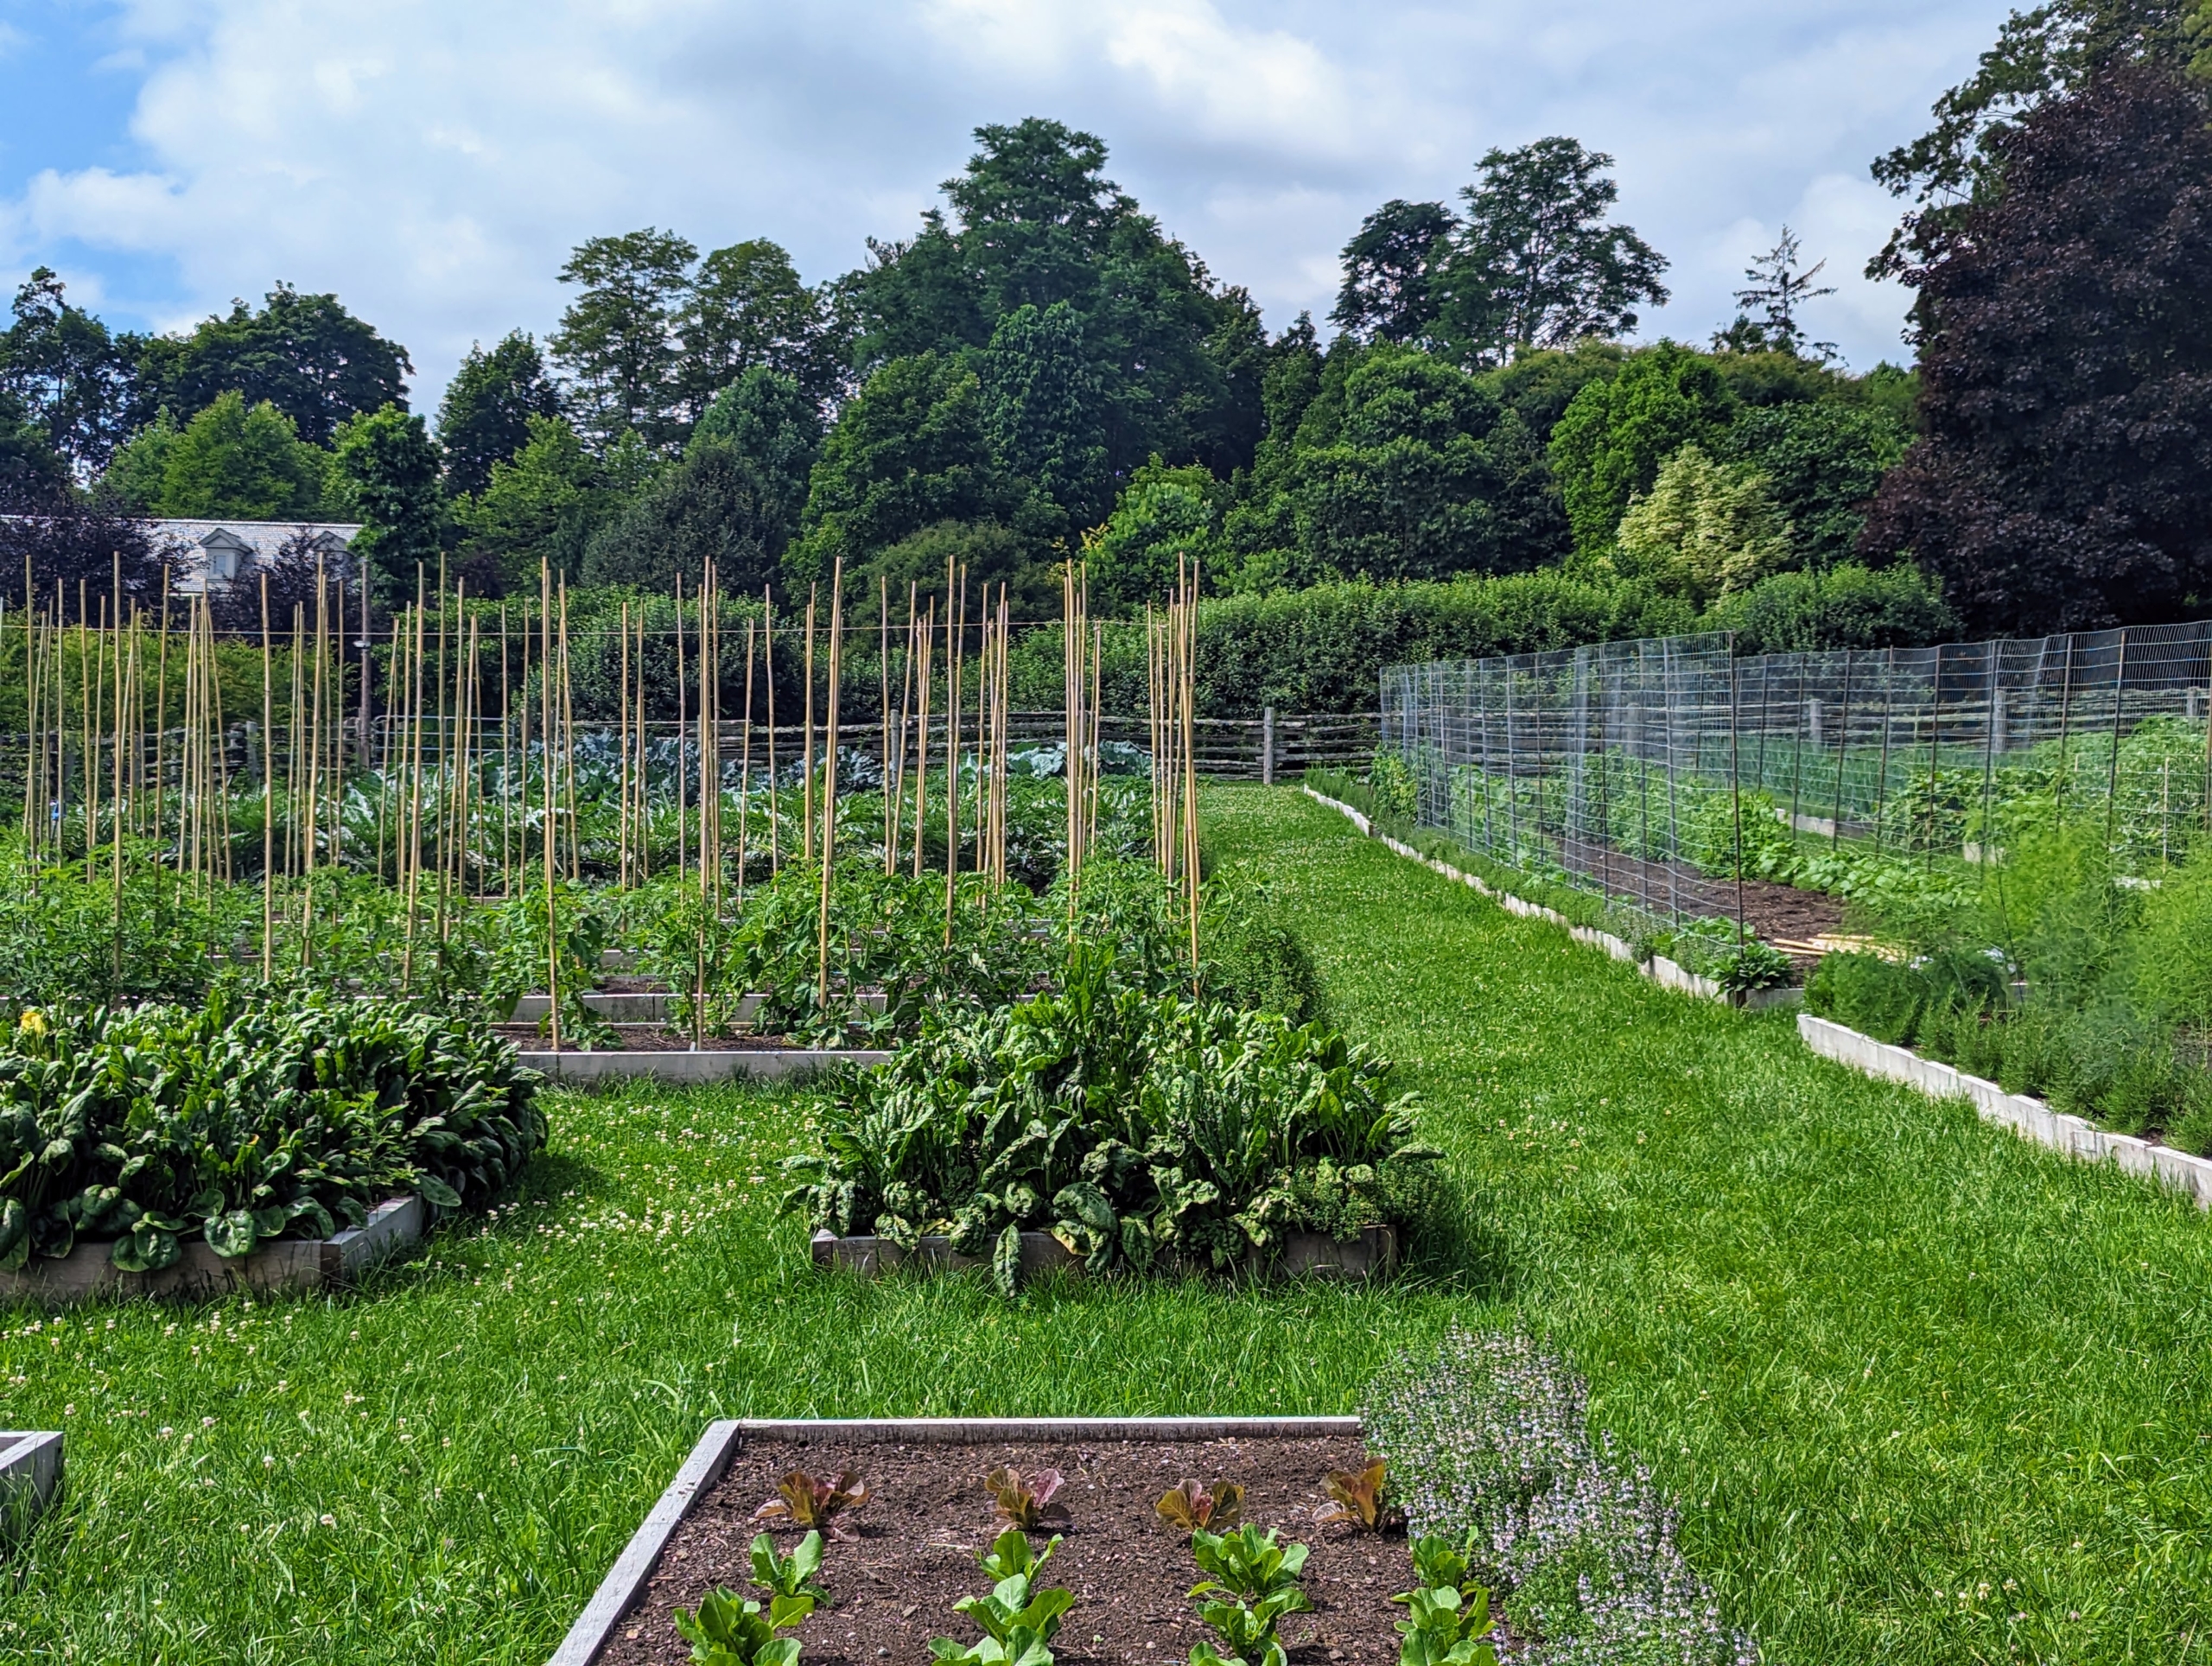
There’s so much to harvest in my new vegetable garden. We're all having so much fun watching these crops develop.
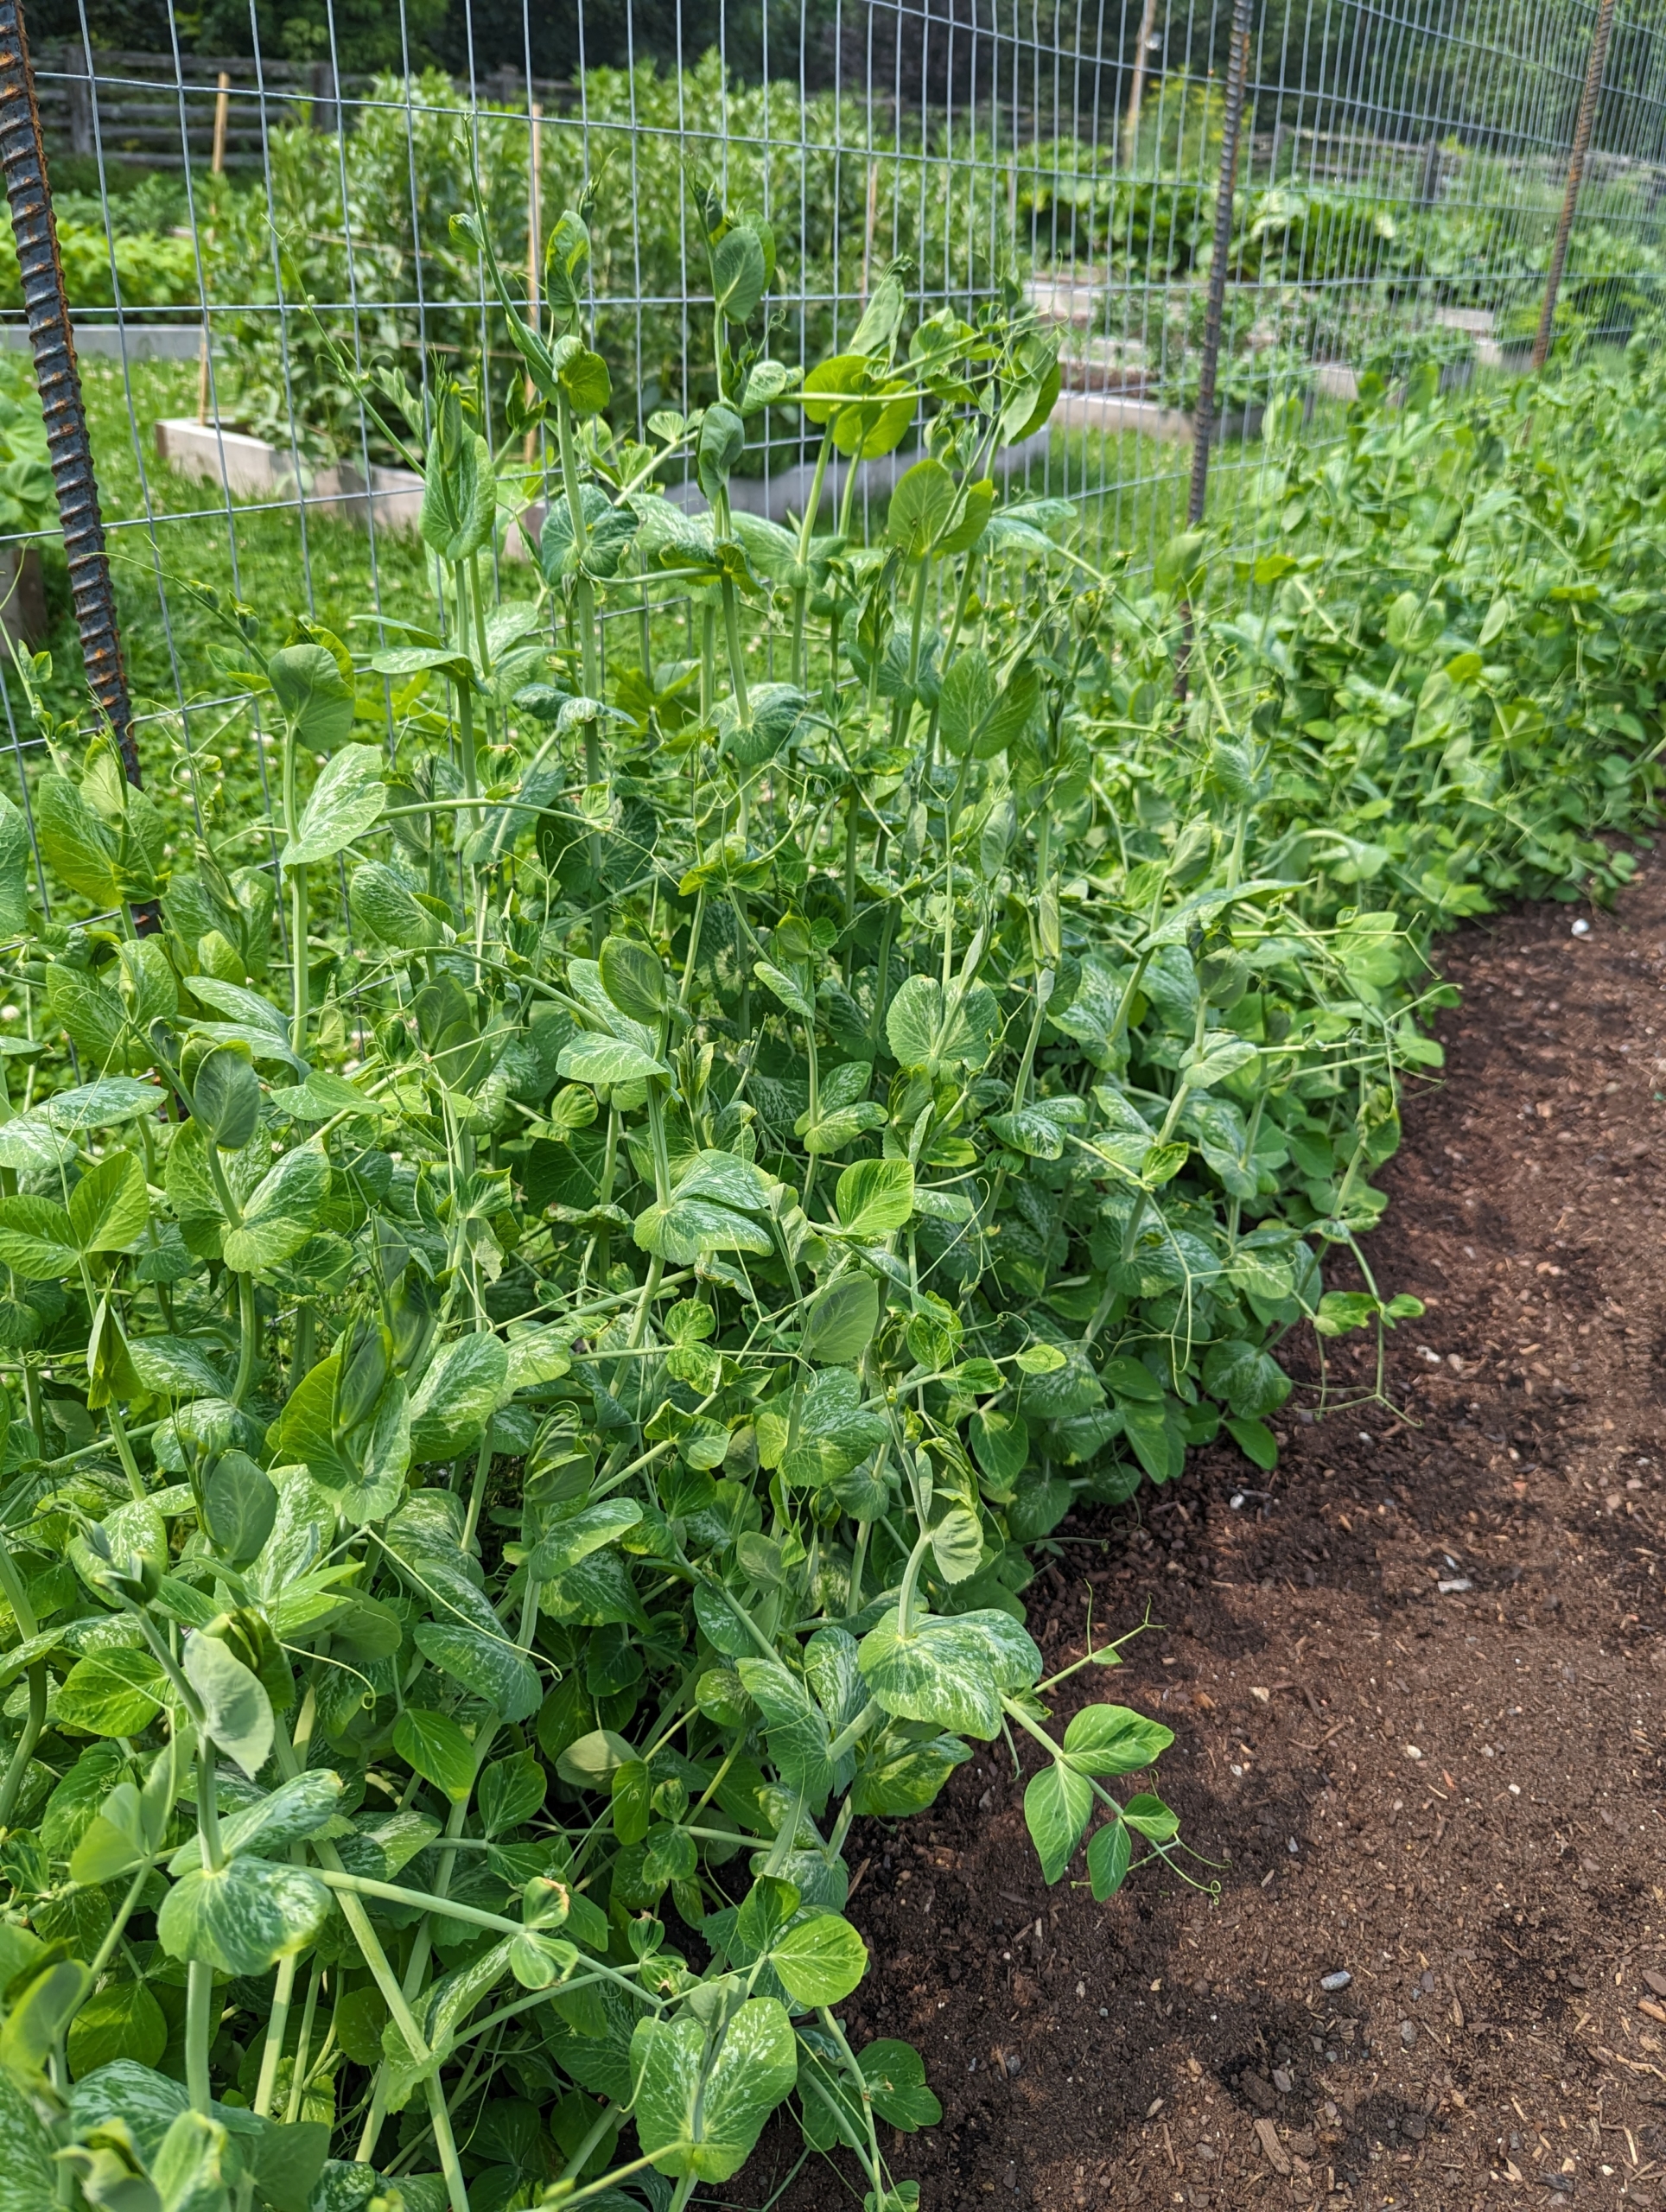
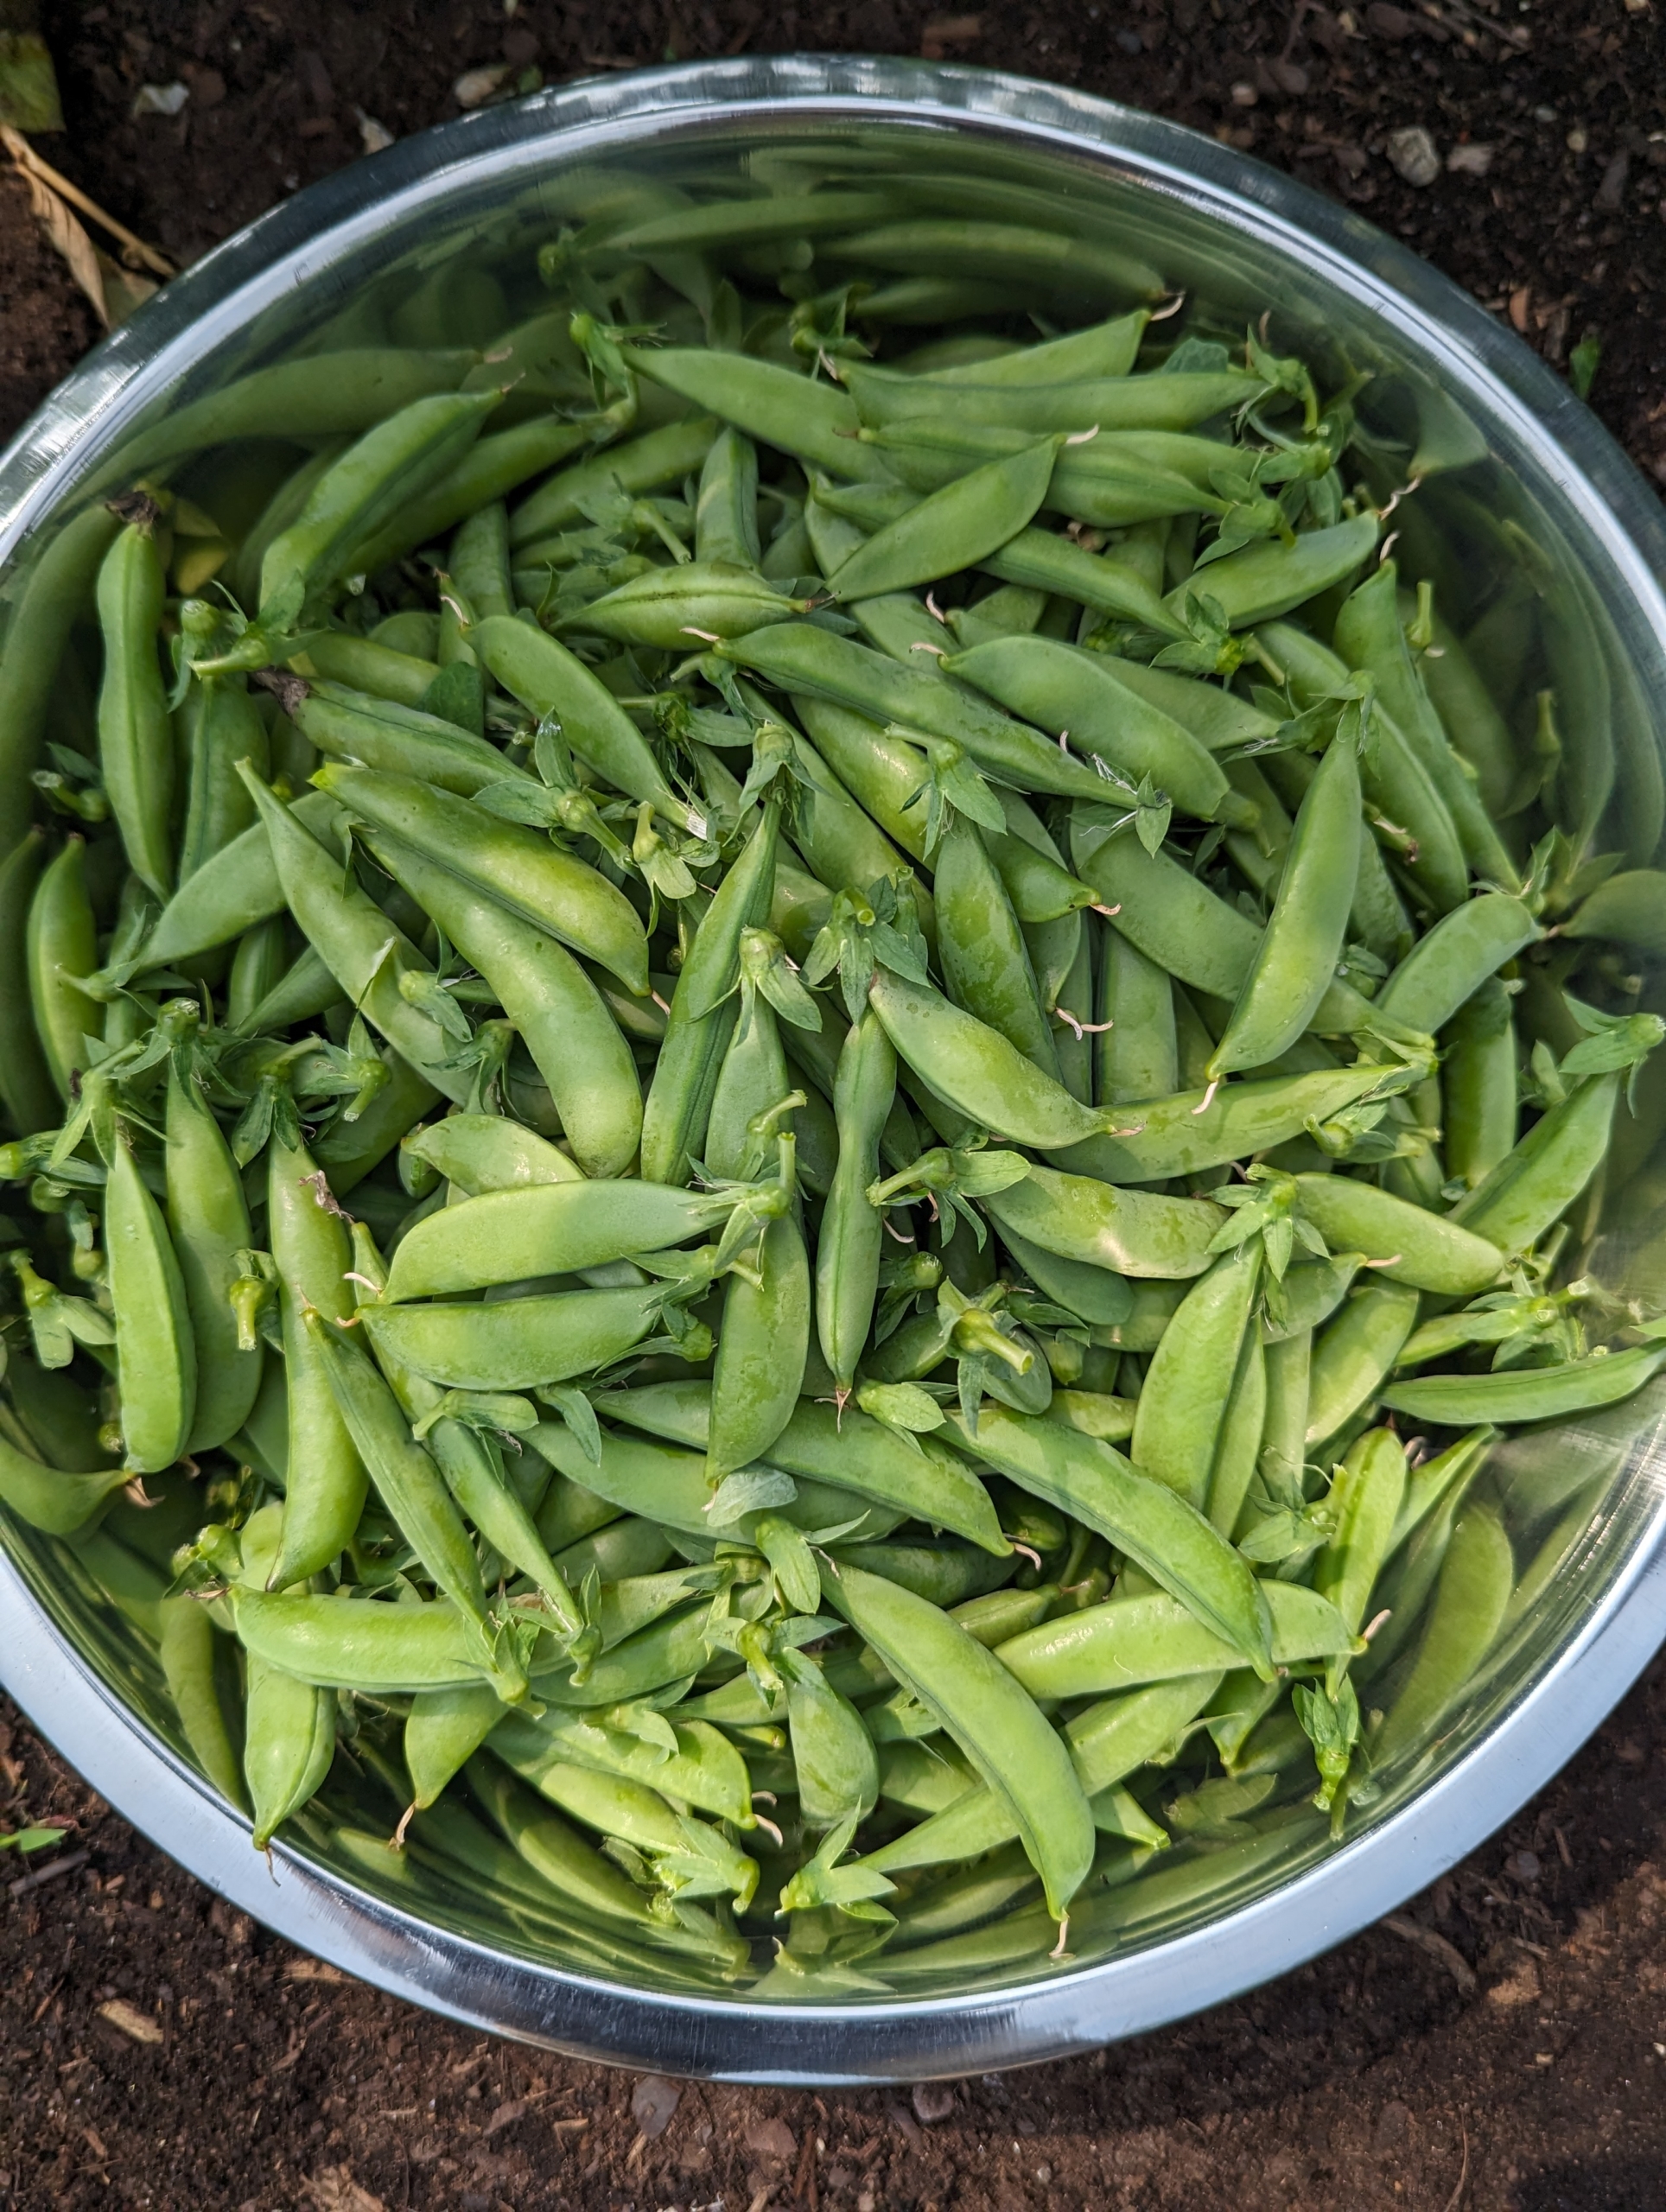
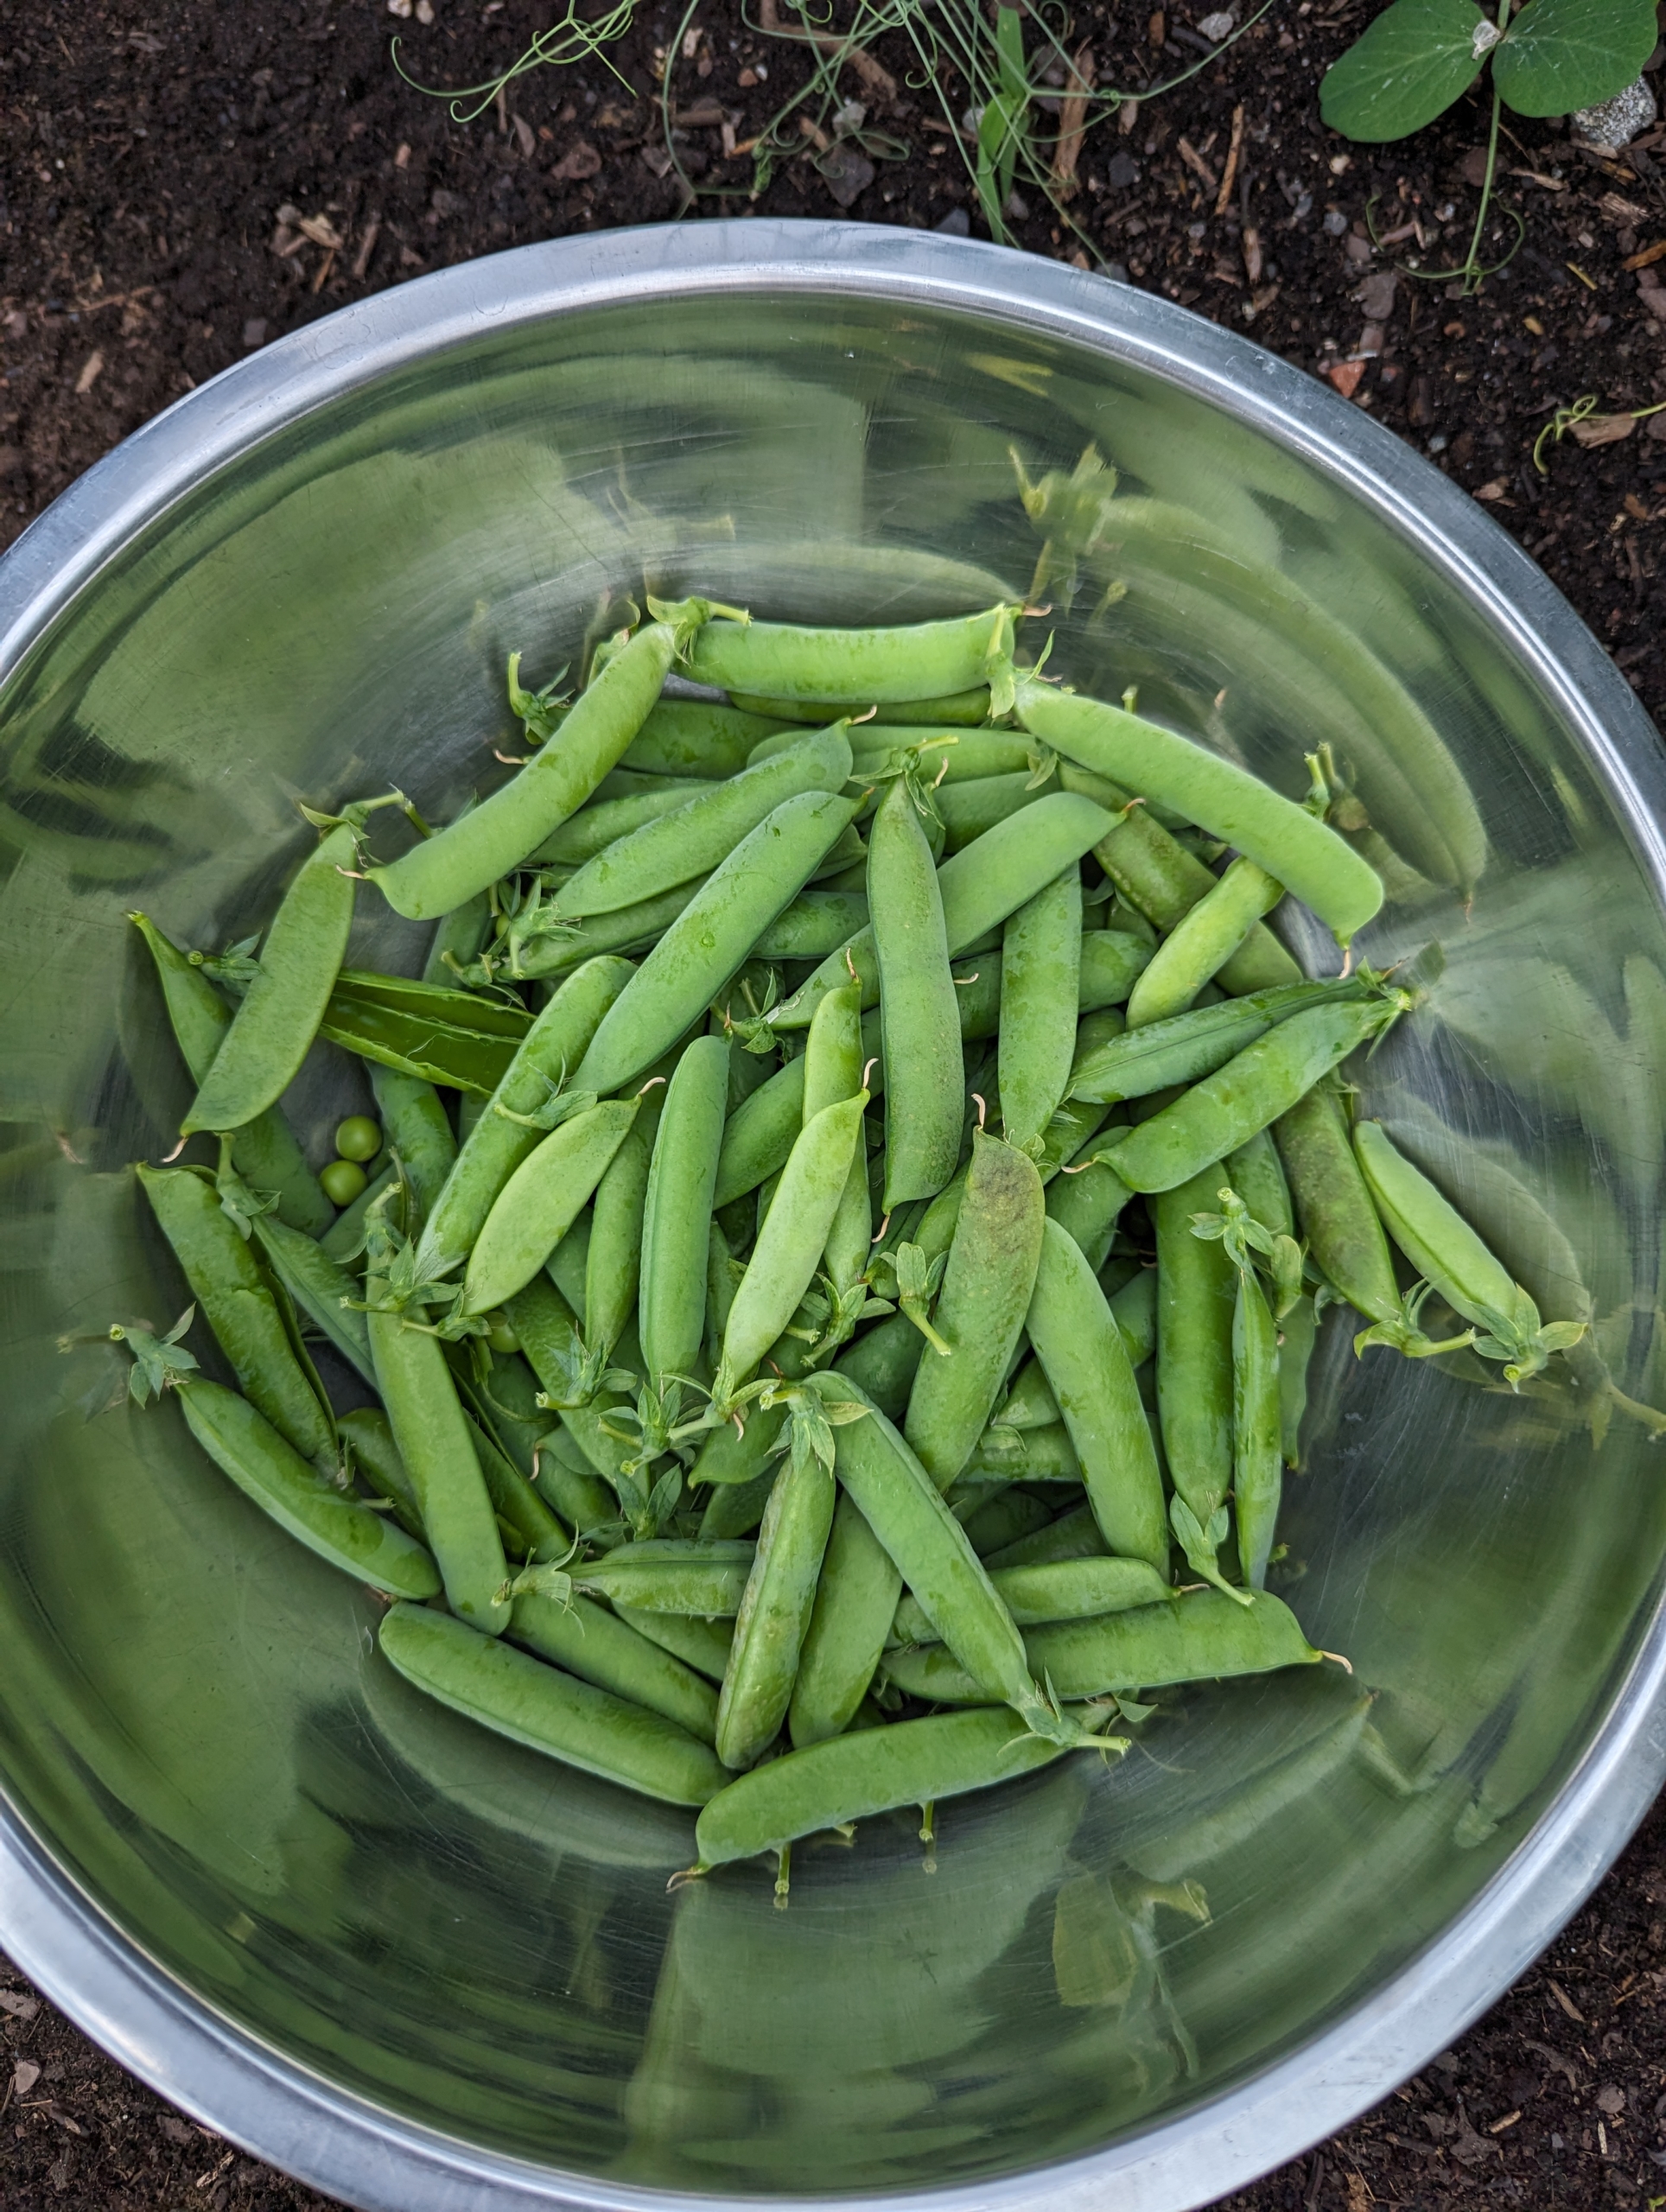
Most recently, we picked big bowls of peas - both shelling peas, which need to be removed from their pods before eating, and edible pods, which can be eaten whole. It’s important to plant peas as soon as possible in spring in order to get a bountiful harvest come summer. All our pea plants have been extremely prolific this season.
Here are some photos, enjoy.
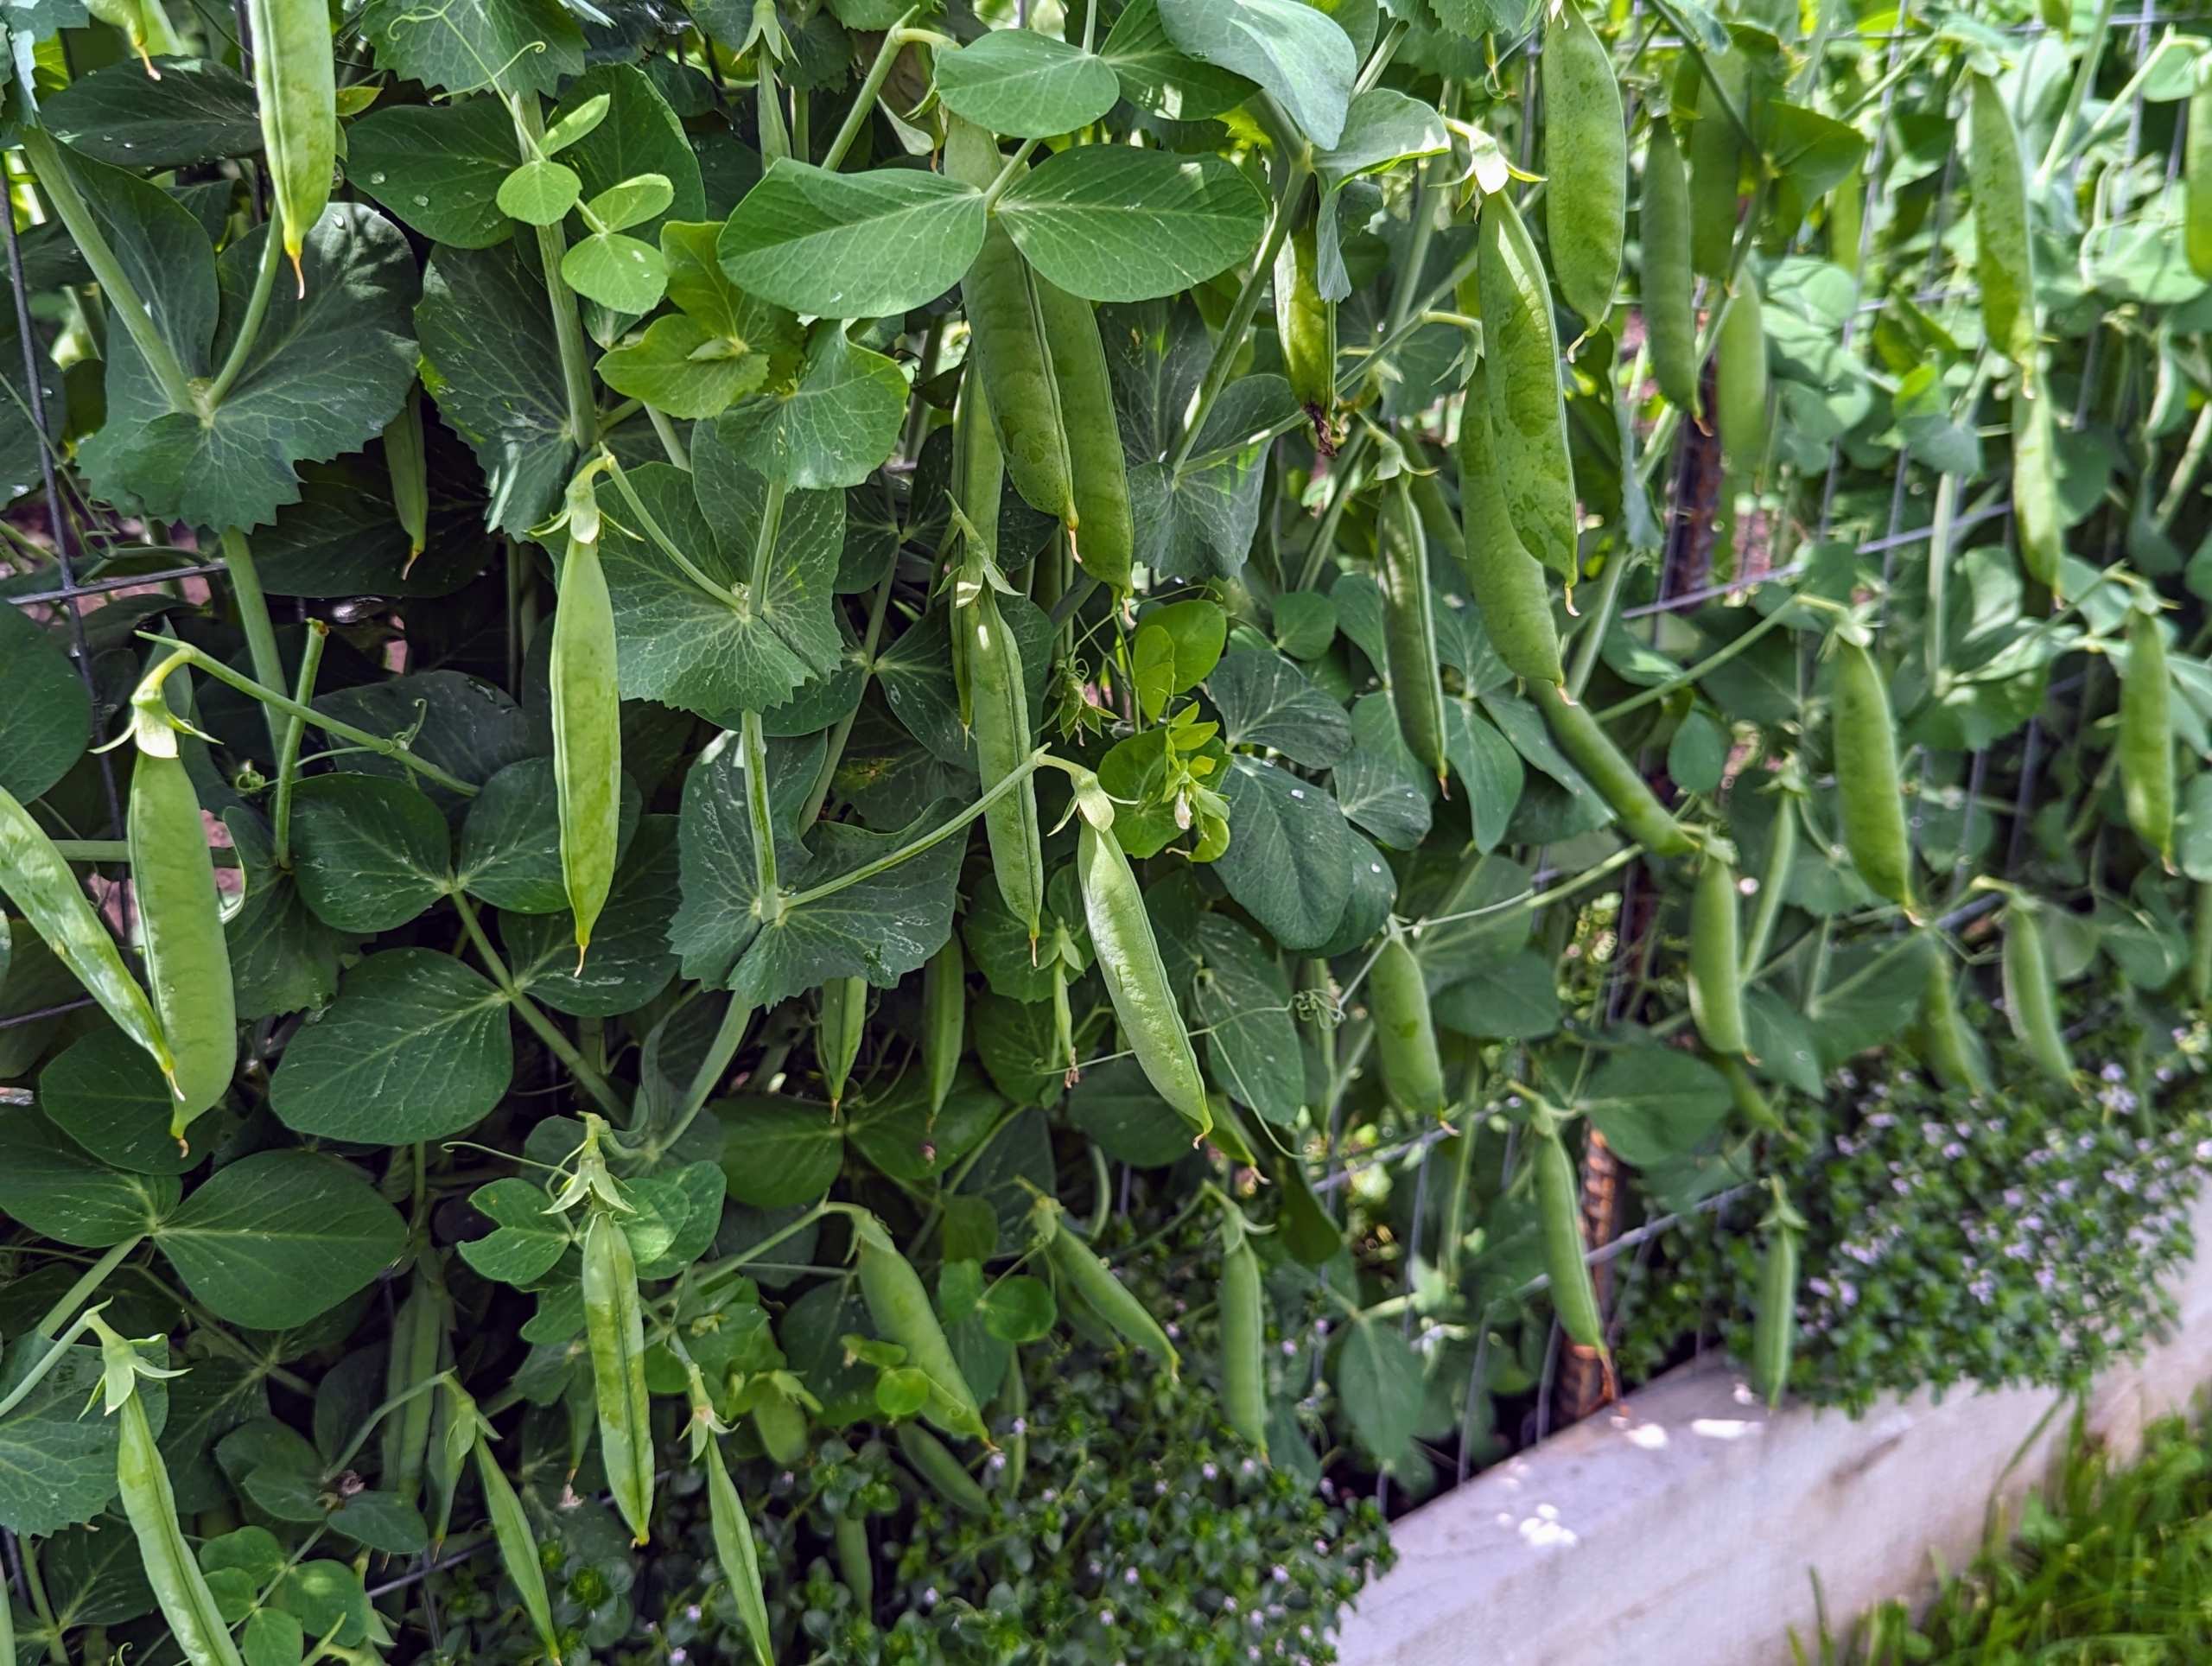
We planted many peas along both sides of our long trellis in the center of my garden. On this side, our edible pods…
… And on this side, the shelling peas. All of them have been so prolific this summer, as with all our vegetables in this new space.
This photo was taken in May when all our pea seeds were planted. Pea seeds may be planted as soon as the soil temperature reaches 50-degrees Fahrenheit. Peas grow best at temperatures of 55 to 64-degrees Fahrenheit.
Peas can take as little as 54-days to mature, but they average about 60 to 70 days before they can be harvested.
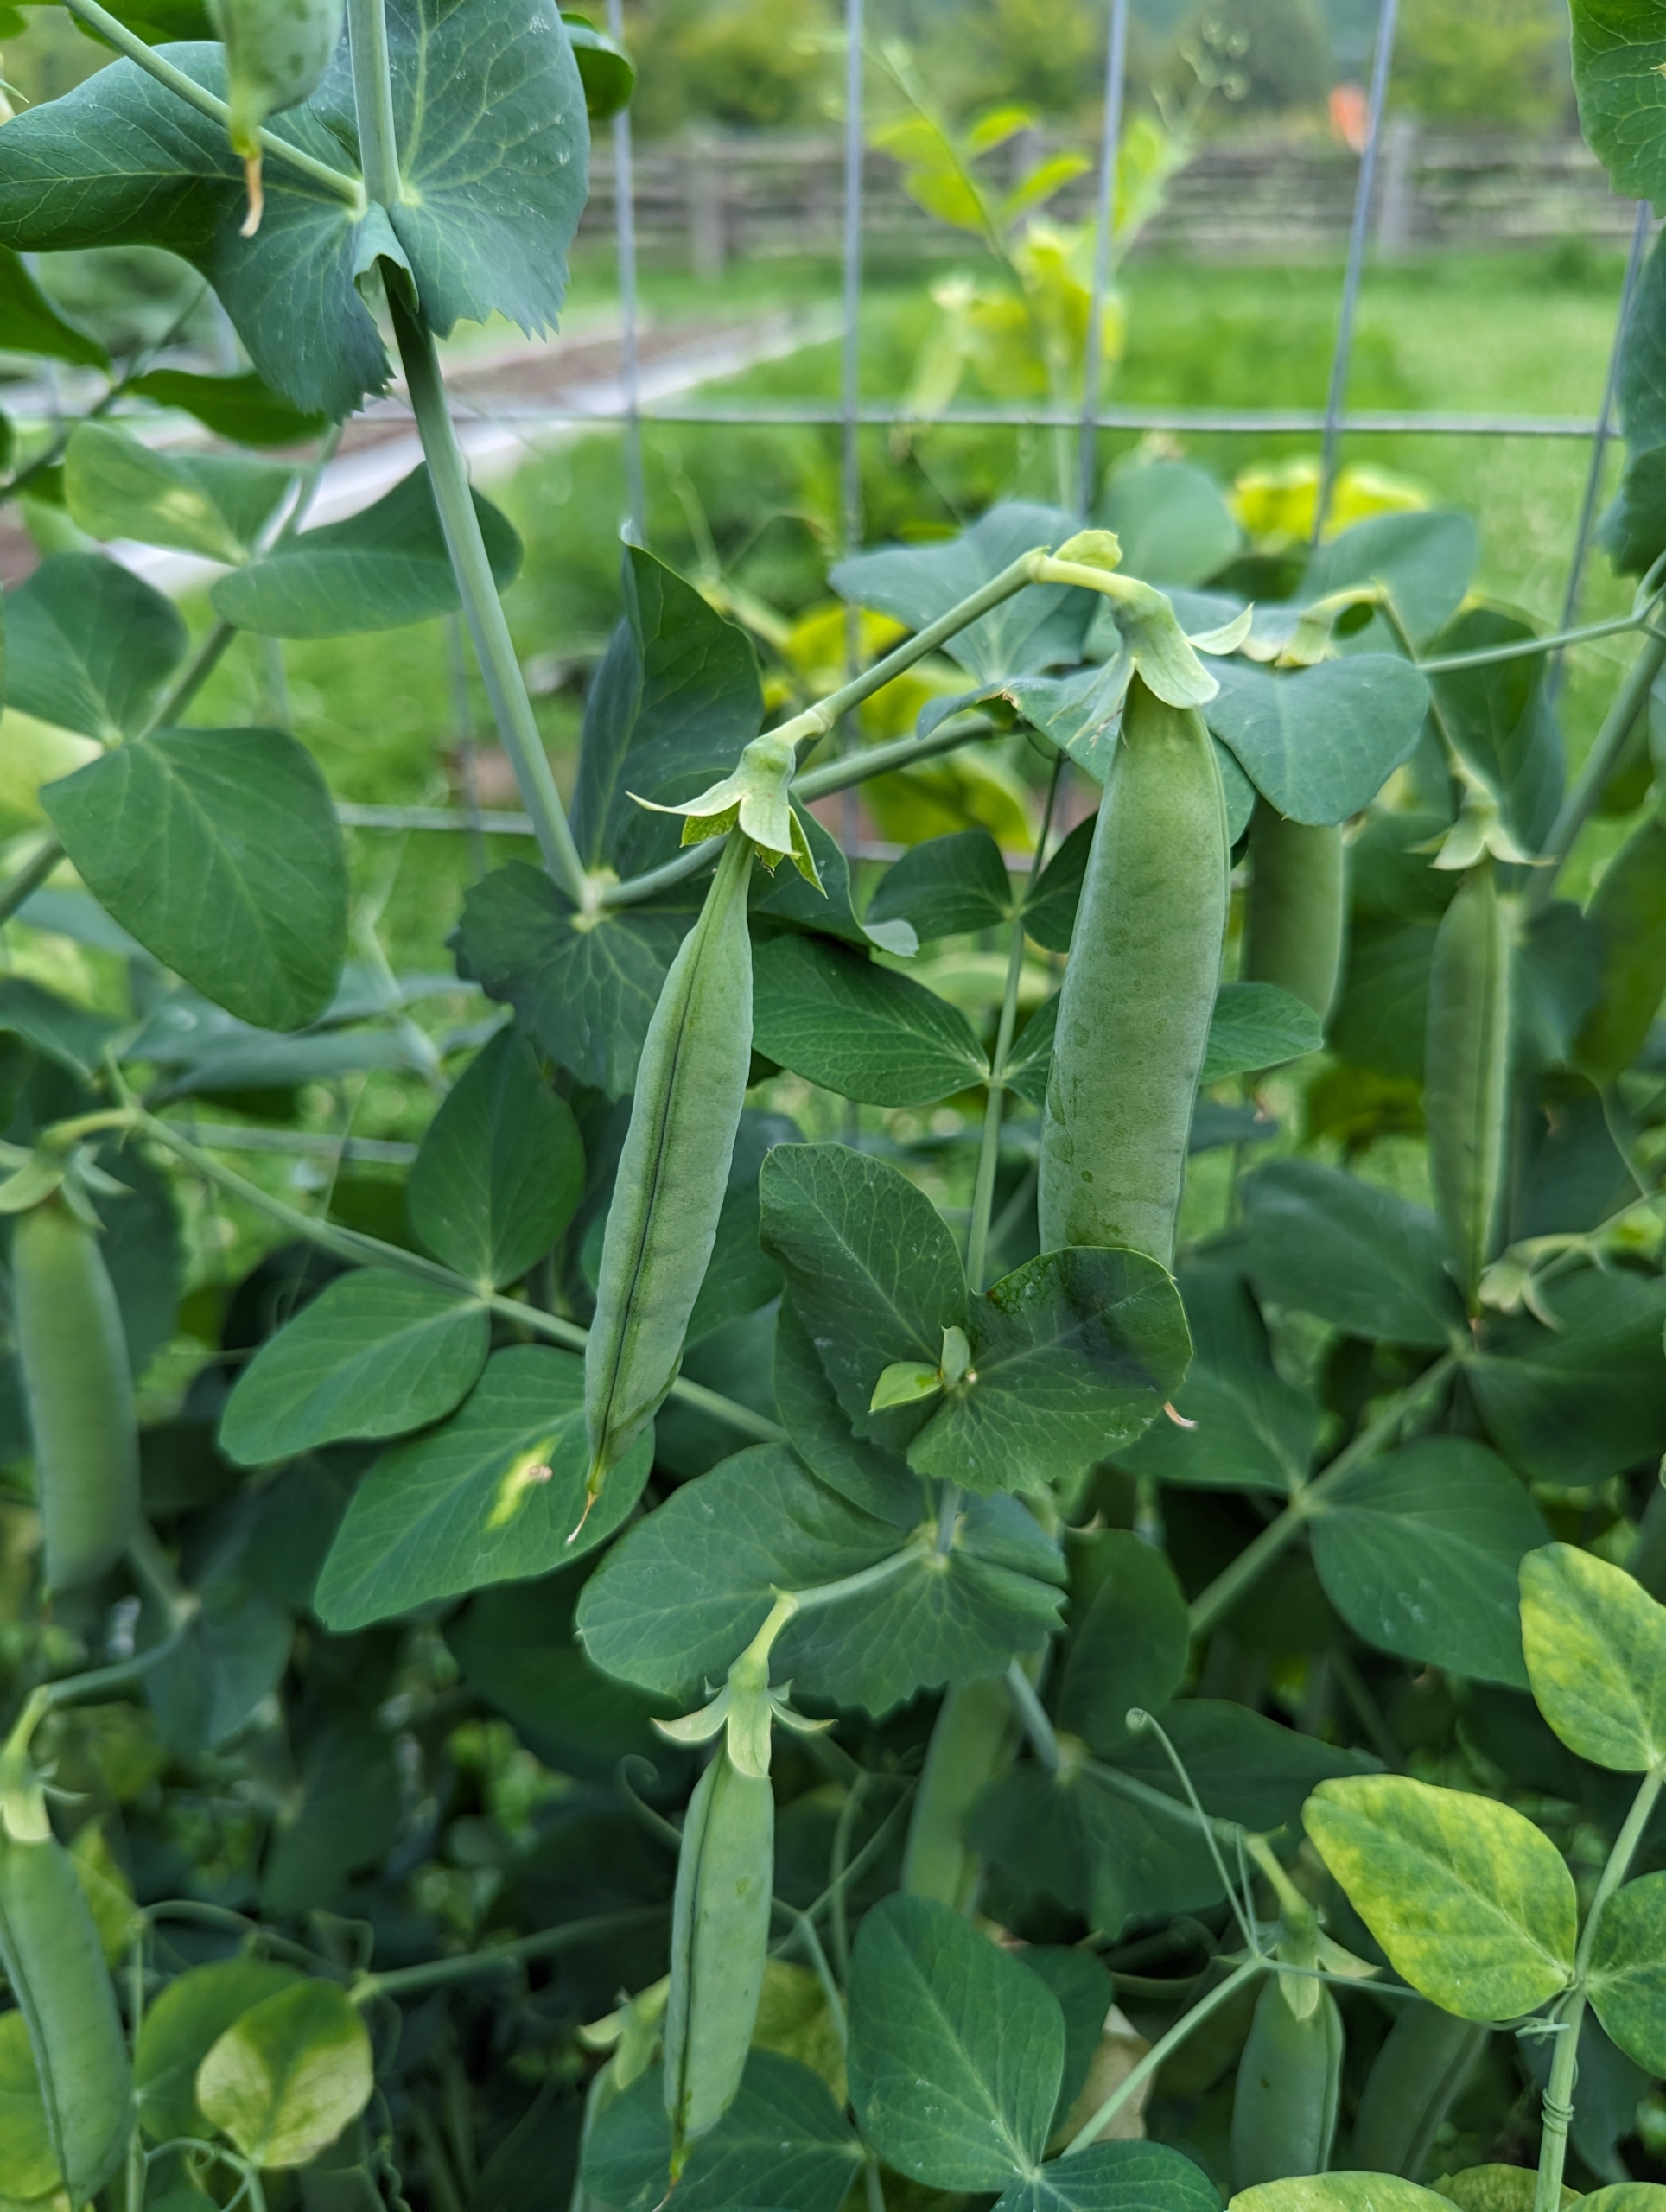
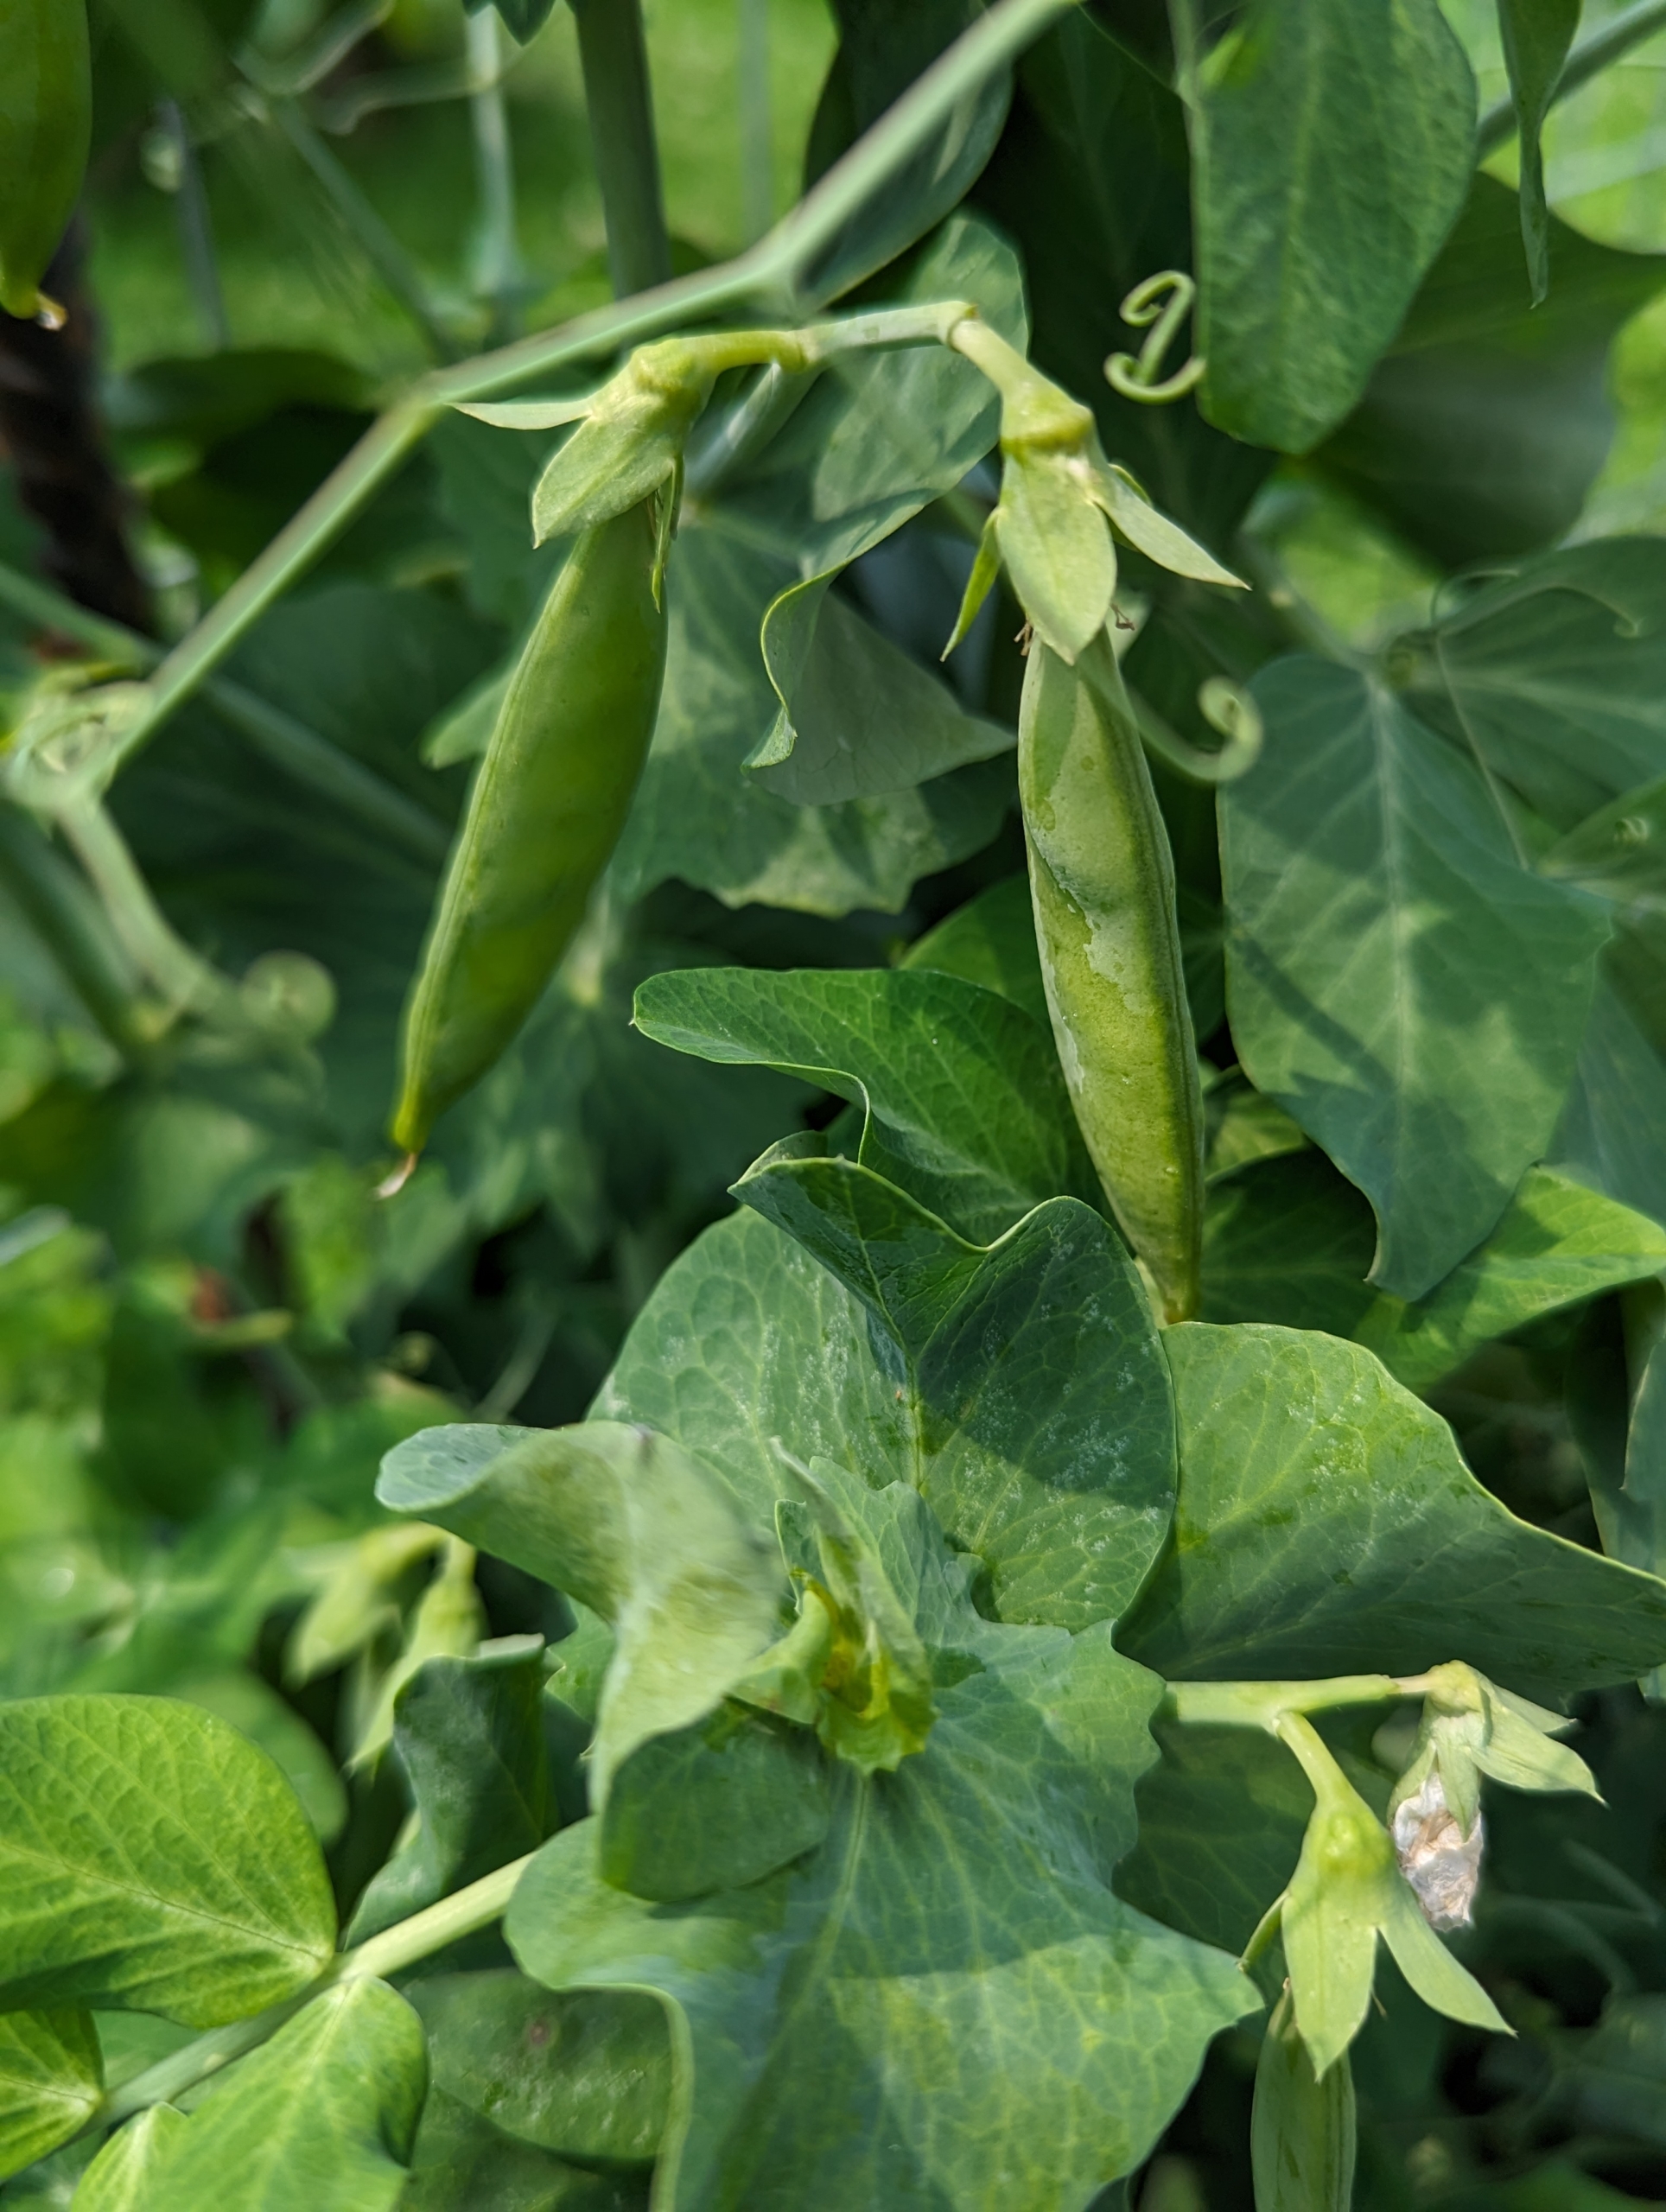
Because of the weather and our very good soil, these peas developed quickly. And last week, these peas were plump, and ready to be picked.
The pea, Pisum sativum, is an annual herbaceous legume in the family Fabaceae.
Our peas are so fresh and green. The oldest known pea was found in Thailand – it was 3000-years old.
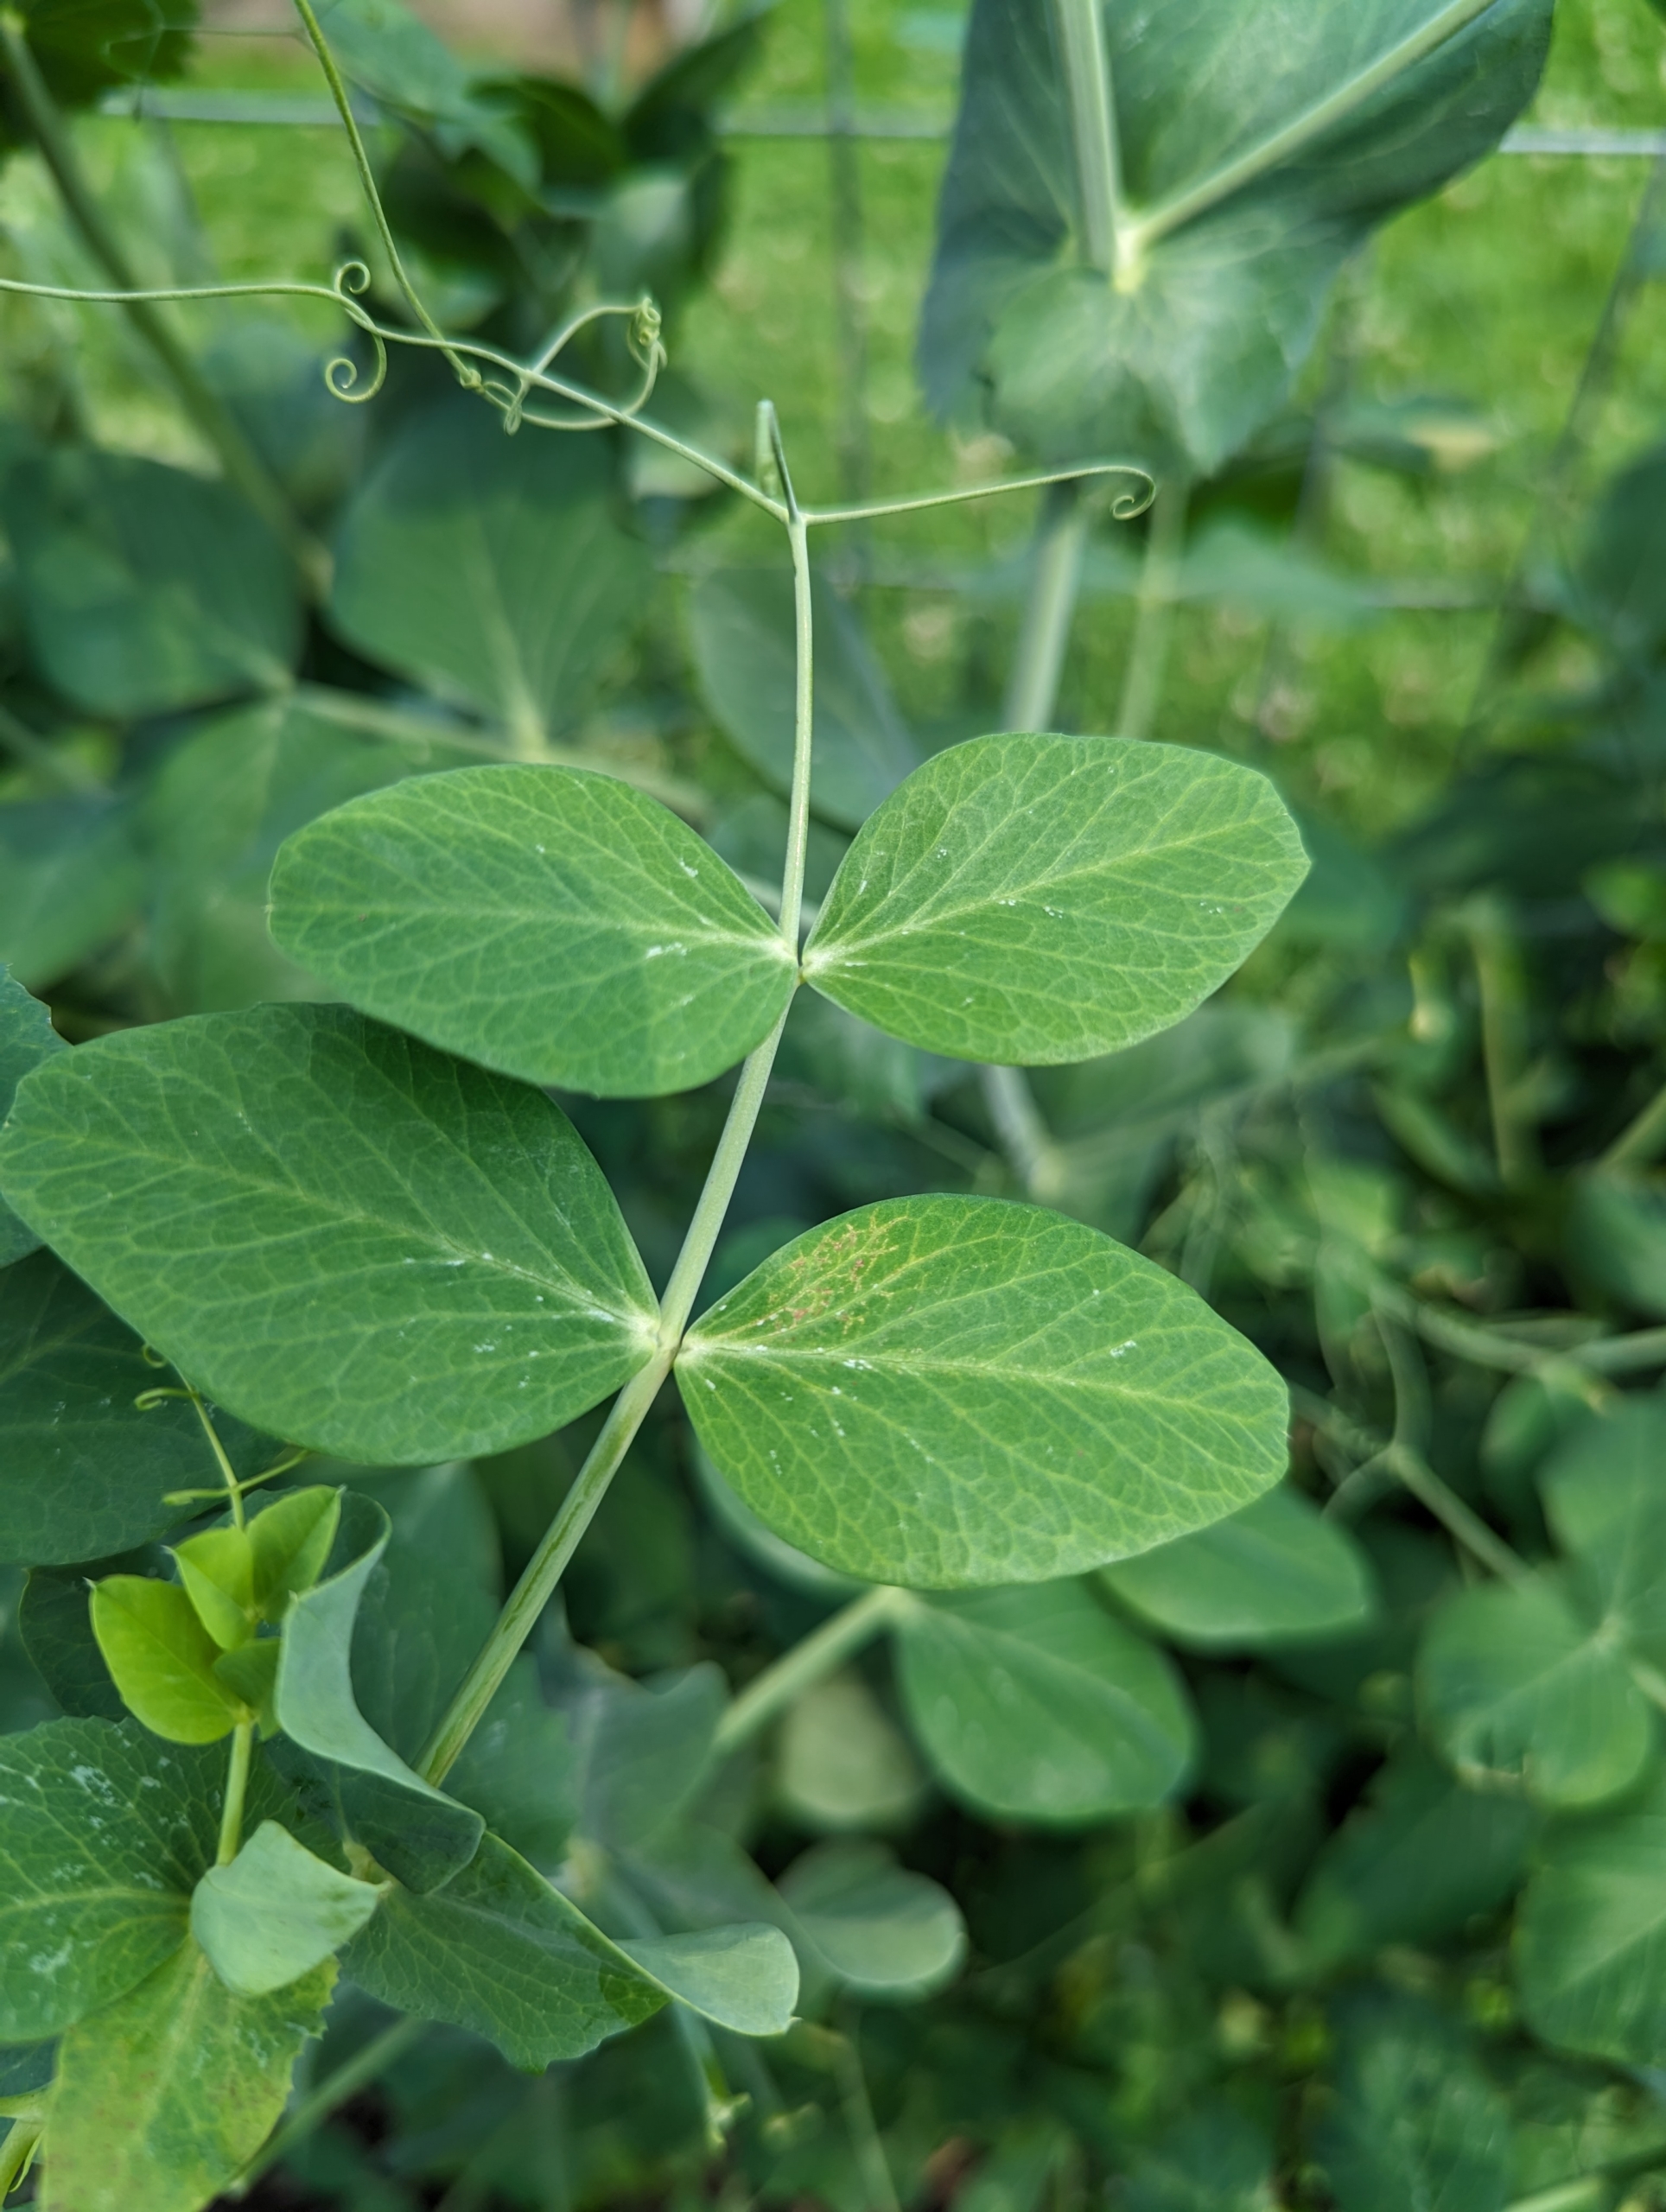
The pea plant can be bushy or climbing, with slender stems. The leaves are green, grow in pairs, and are generally oval shaped, sometimes with a point at the end.
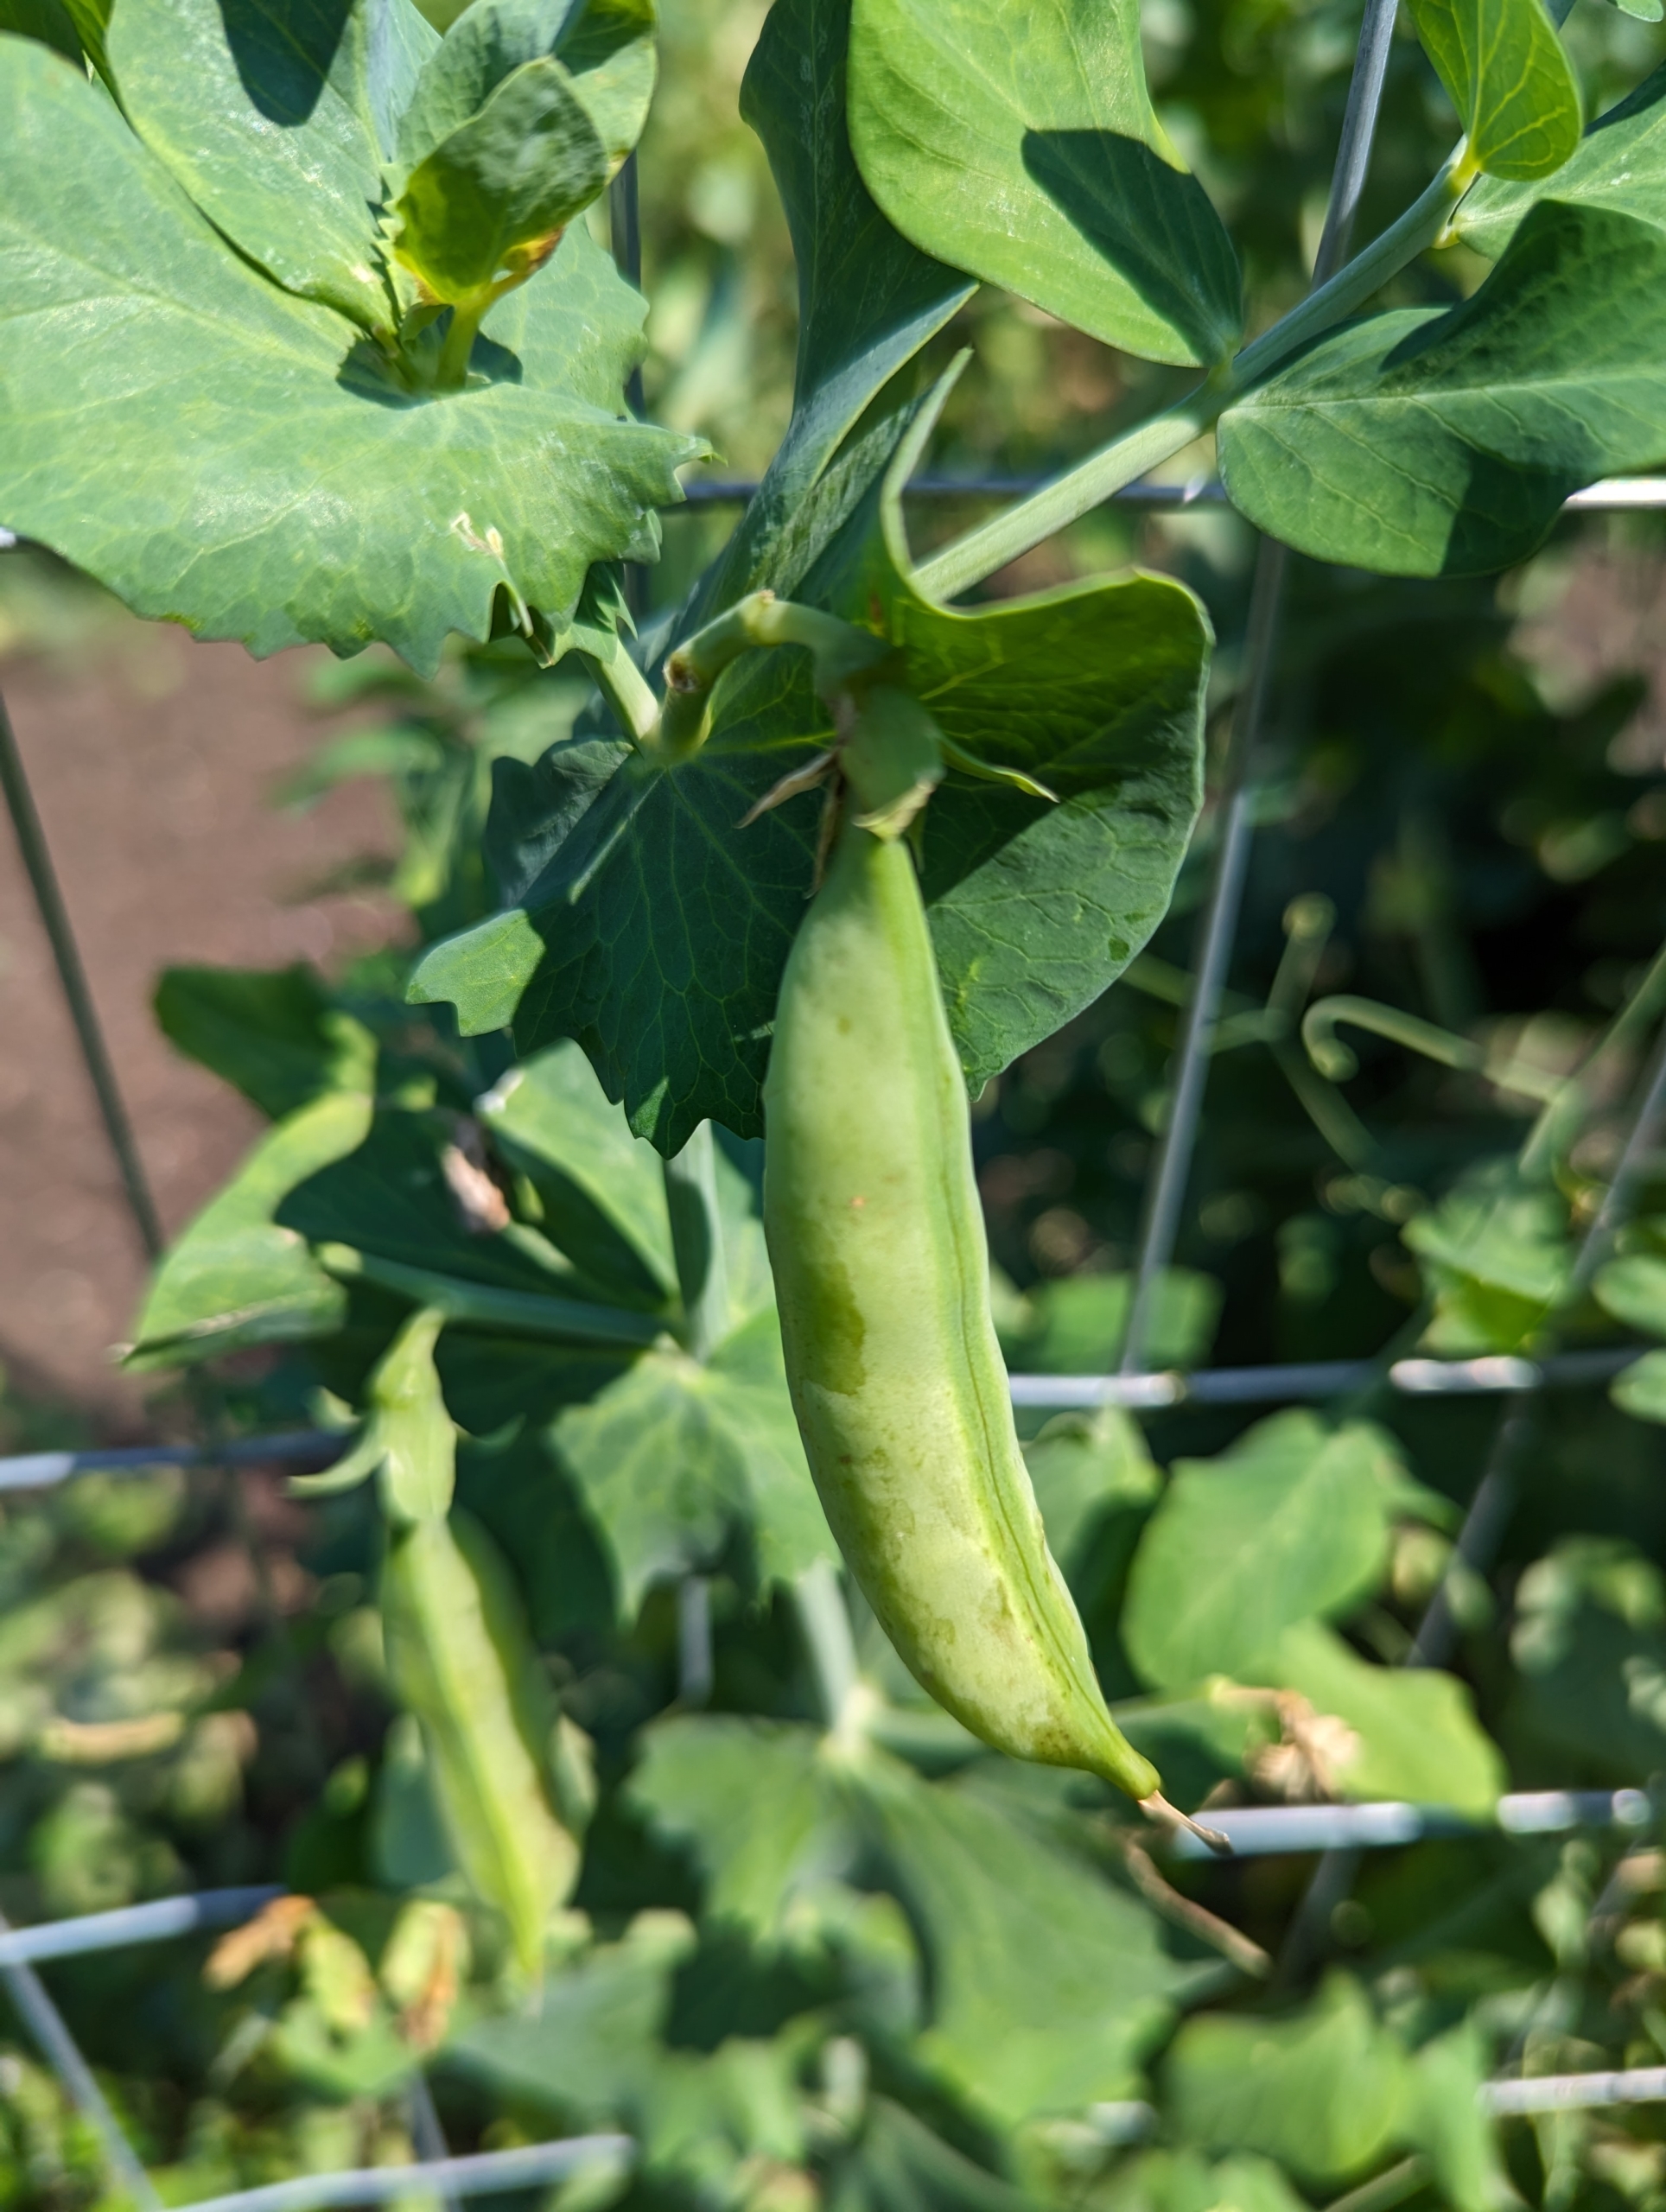
Here, one can see the pea tendrils. Pea tendrils, also known as pea shoots, are the young leaves, flowers, stems, and vines of a pea plant – all parts are edible and taste like a cross between peas and spinach.
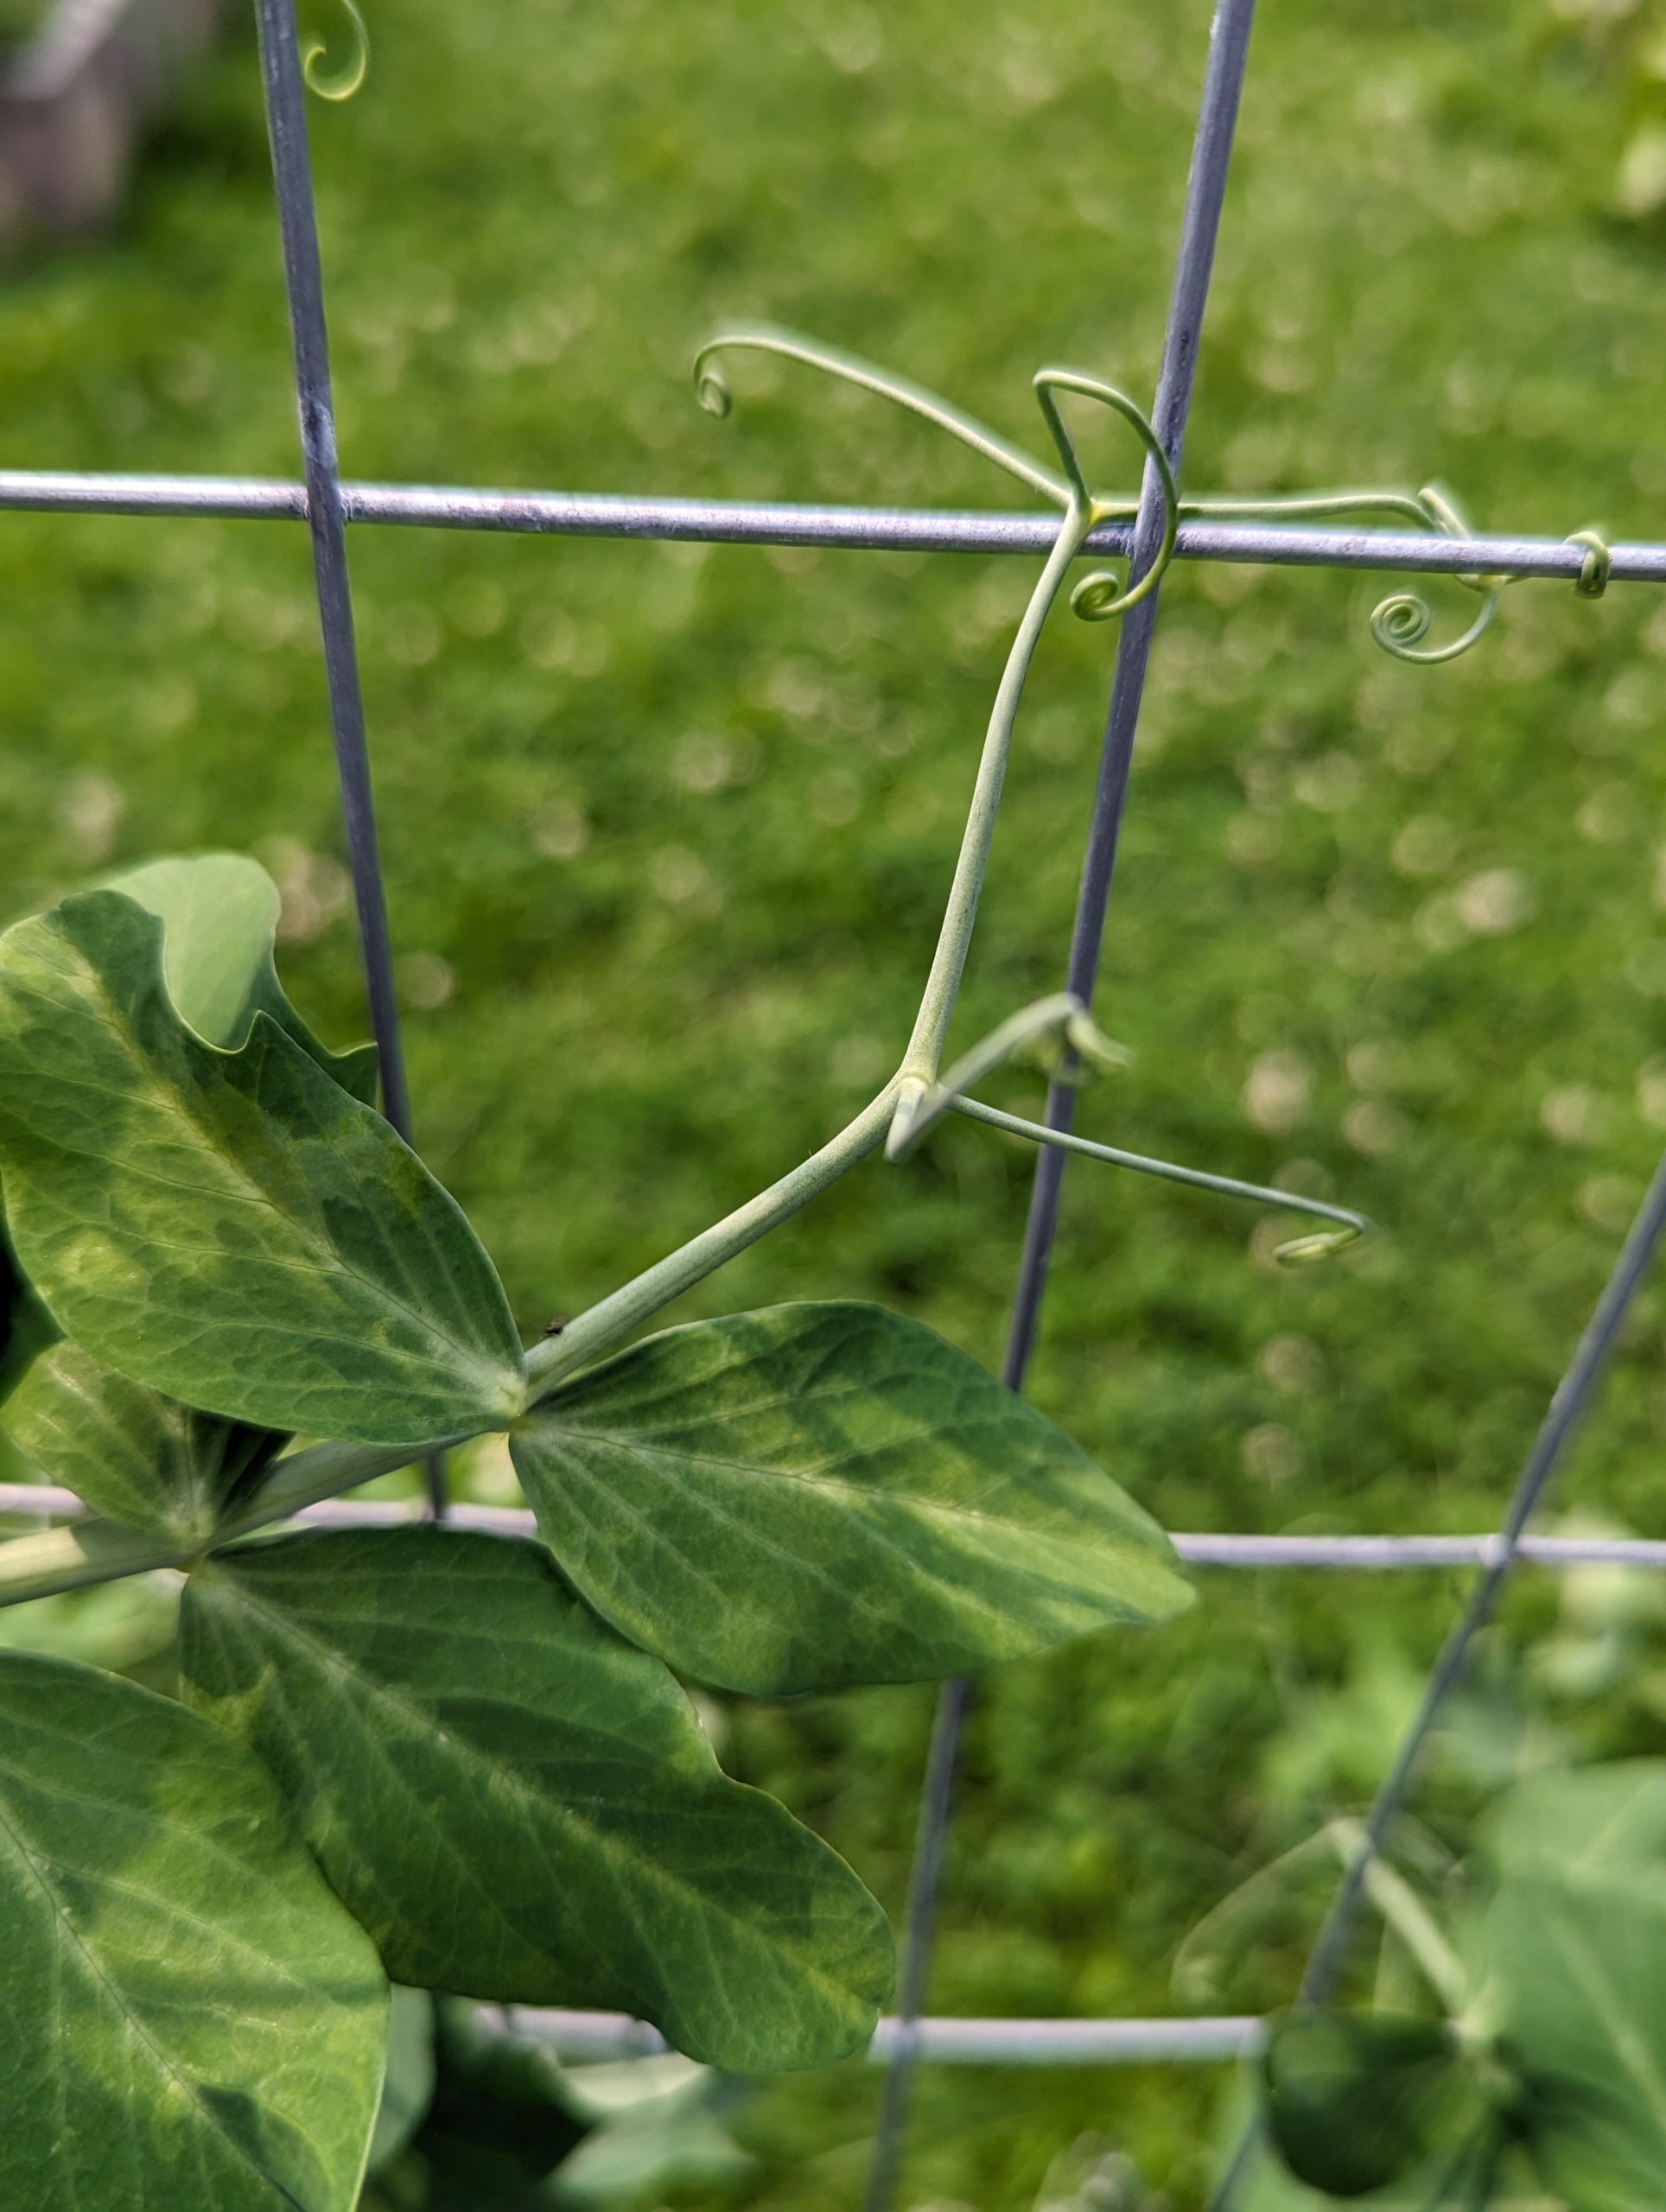
Because the pea plant is a climbing vine, the young tendrils have round hollow stems that allow it to climb easily up the trellis.
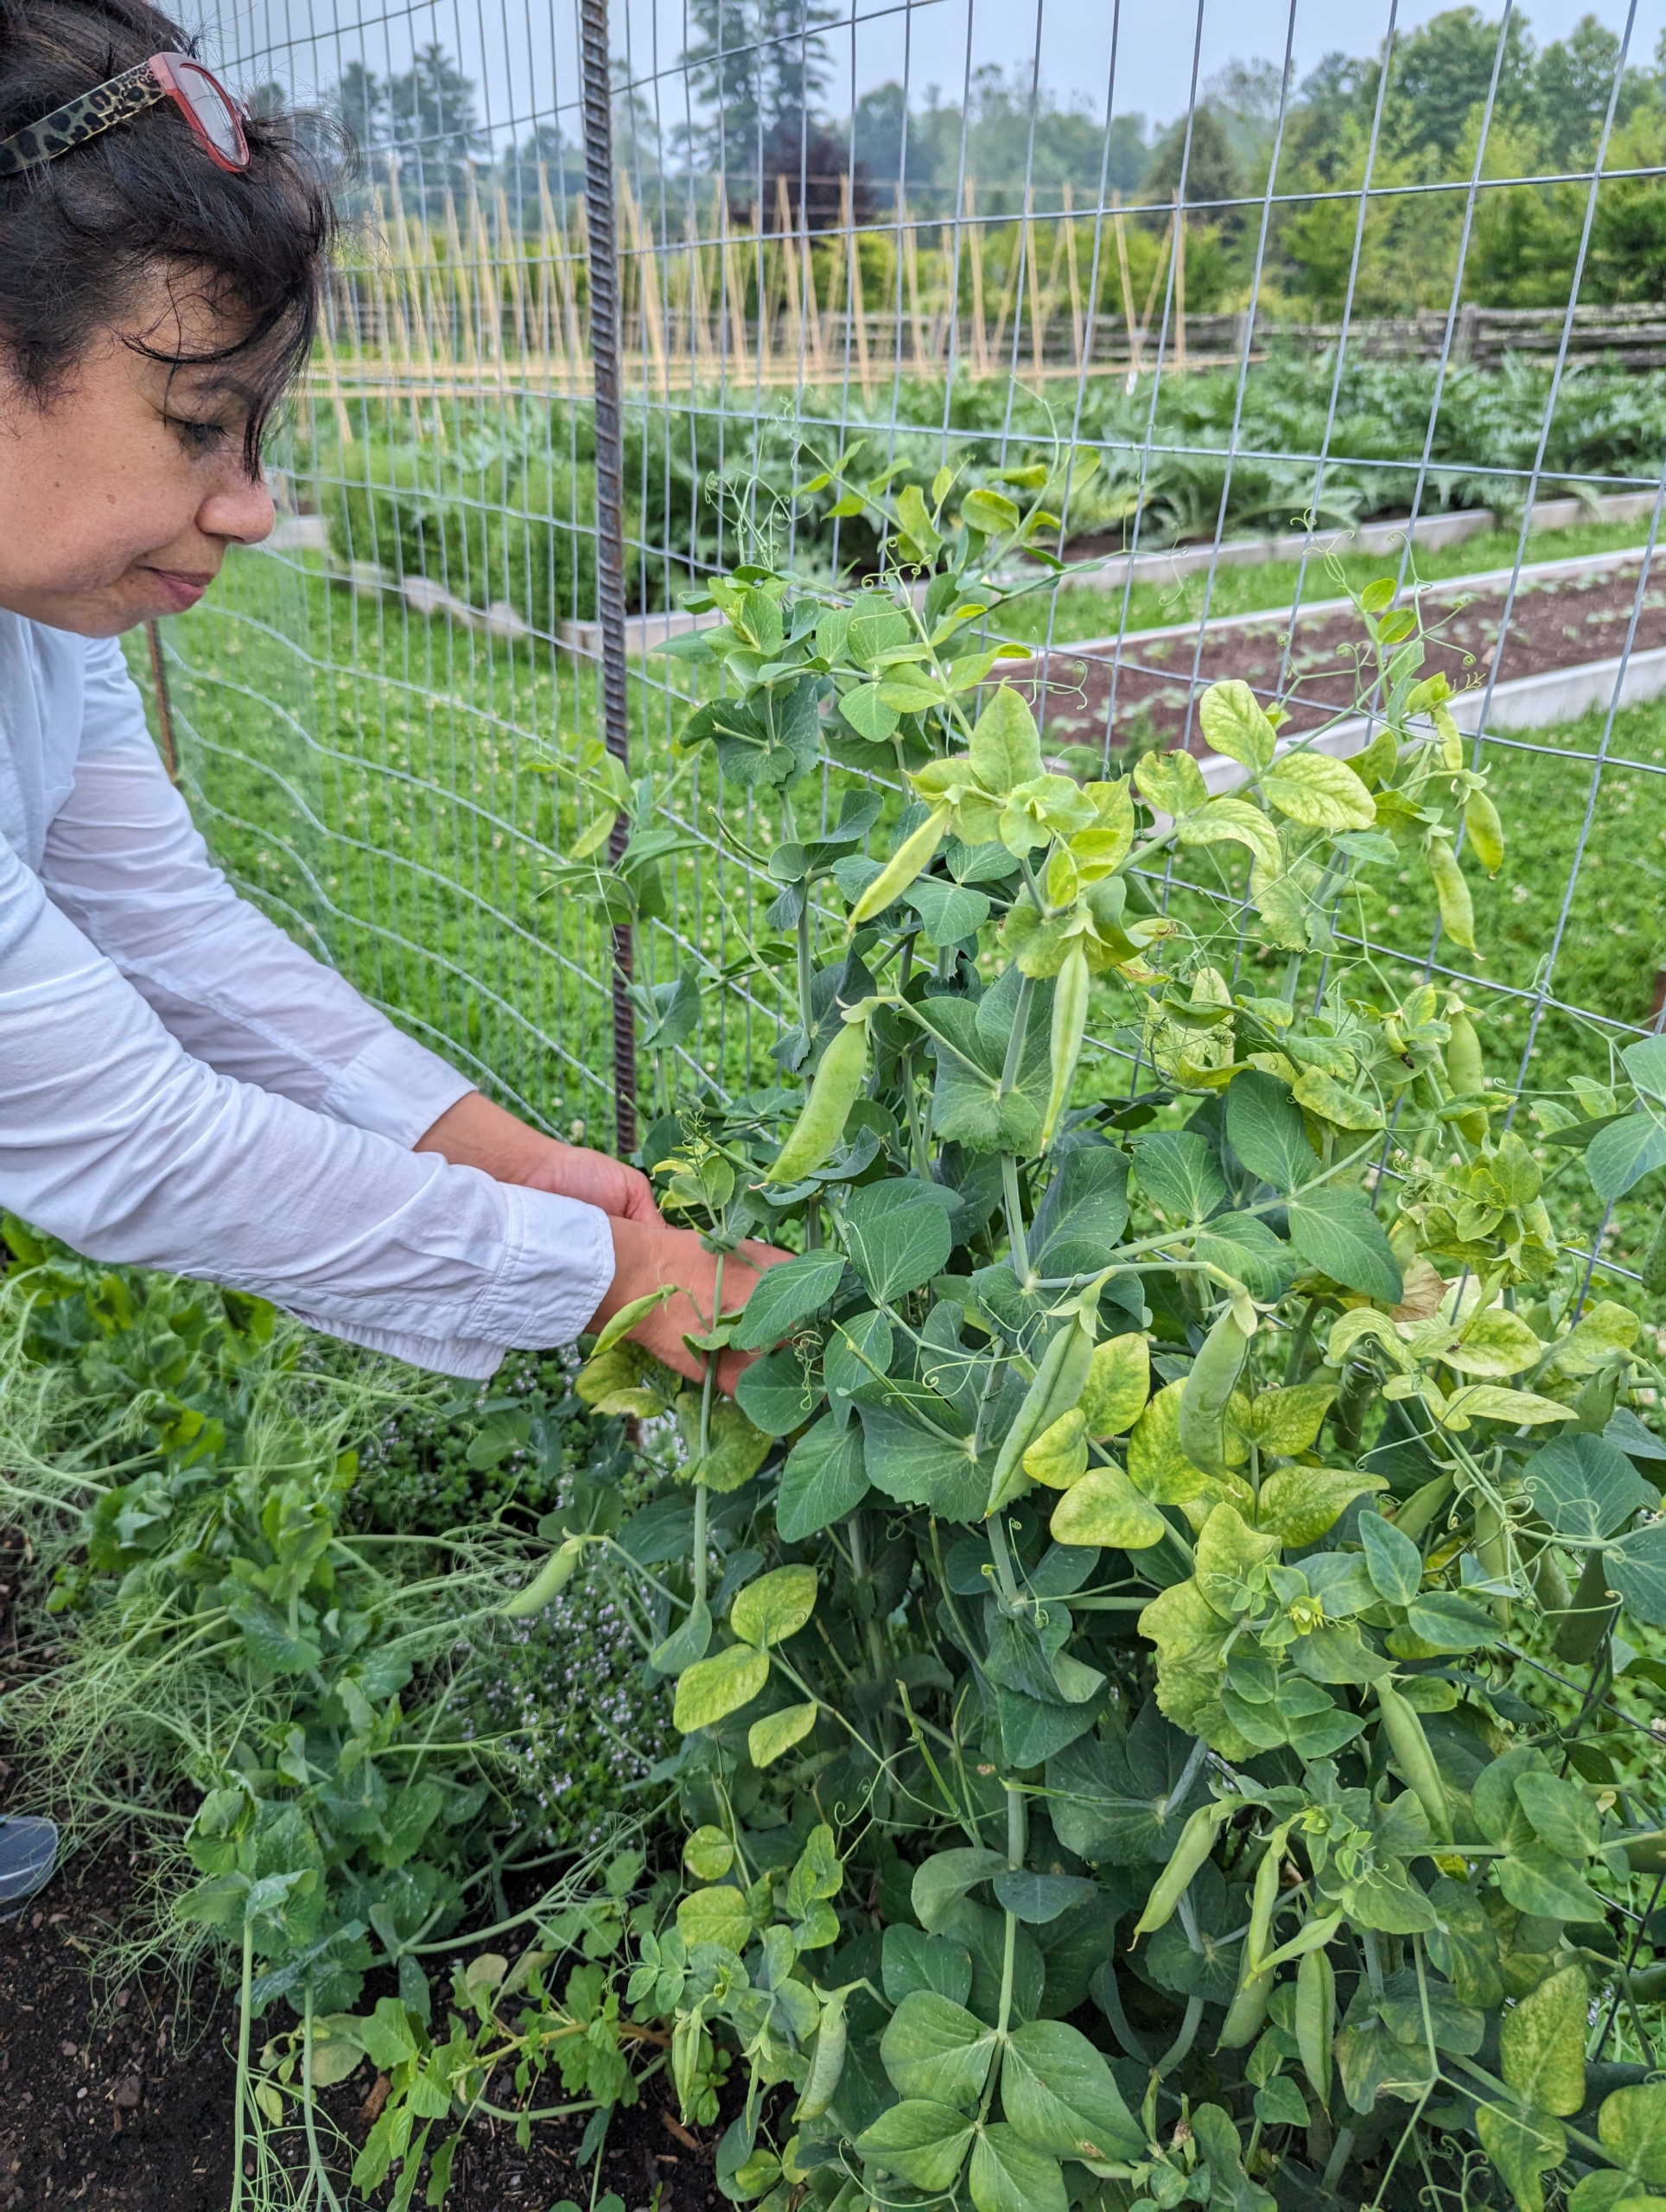
Here, one can see how the vines cling and climb. They are best grown on supports to keep them off the ground and away from many pests and diseases. We built the trellises using rebar and light metal fencing. They support our peas, as well as our cucumber crops. Elvira is able to pick the peas right off the trellising vines.
Picking is best done in the early hours of the day before it gets too warm.
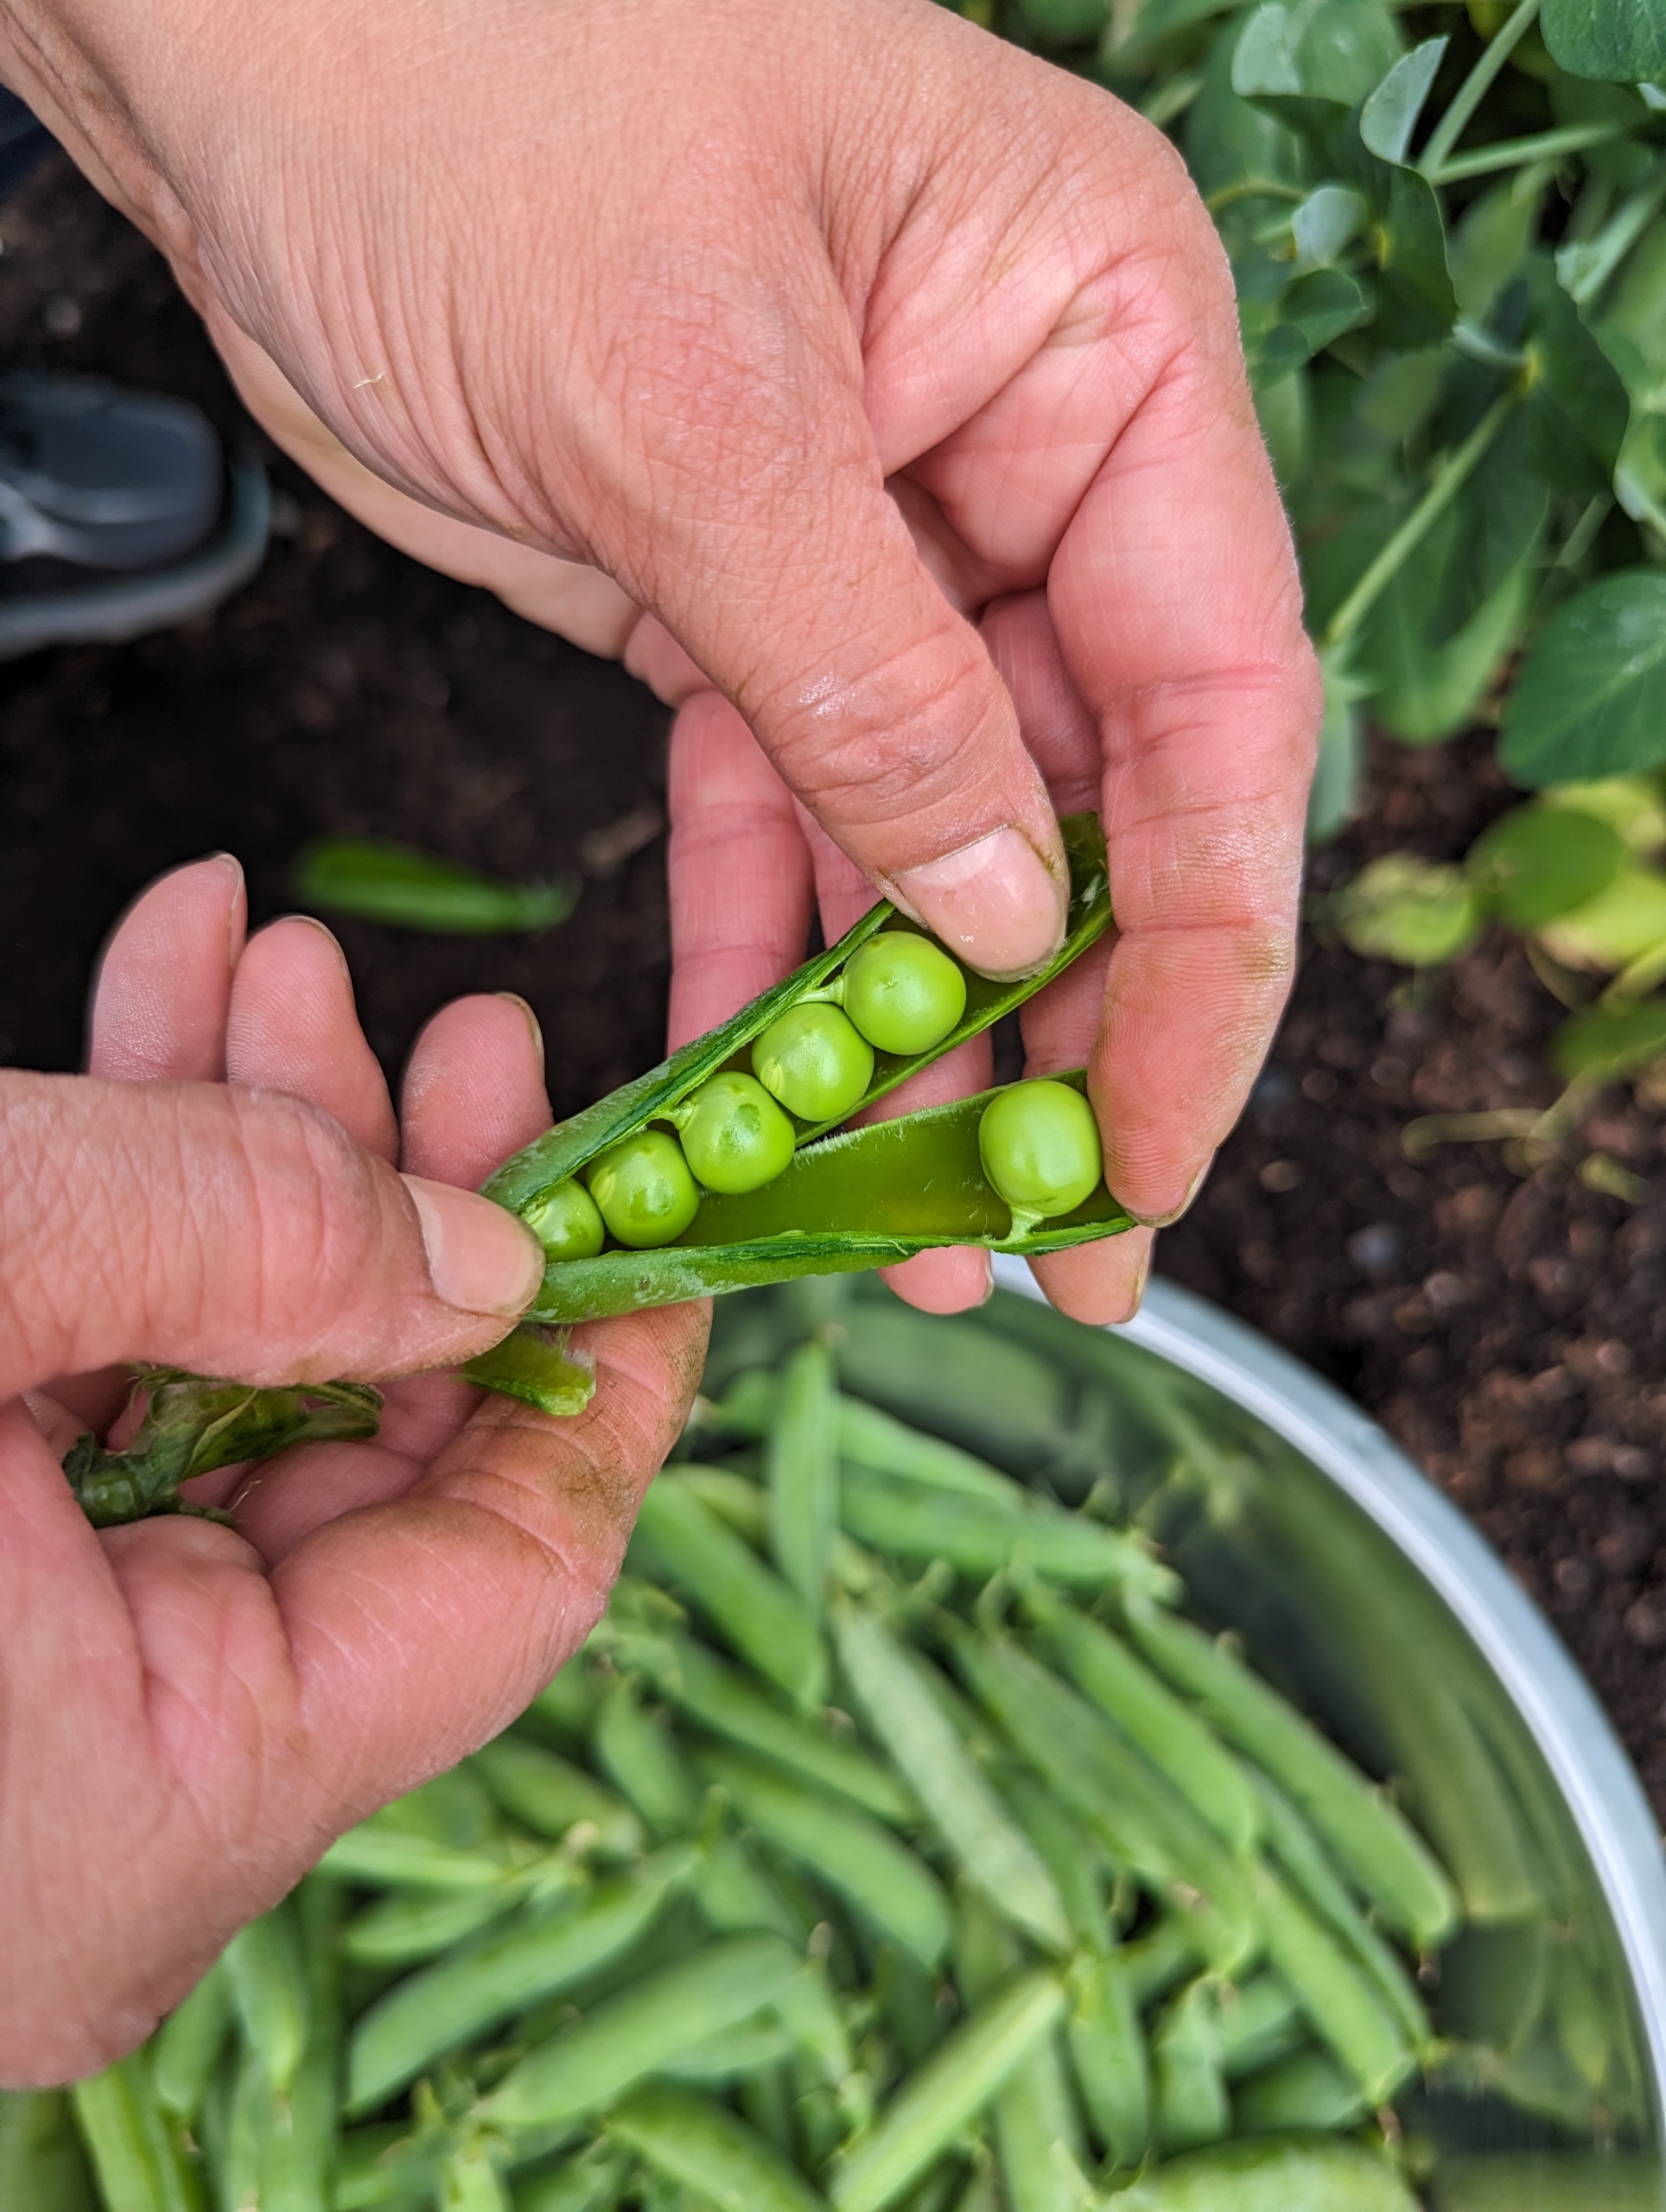
Harvest green peas when pods start to fatten, but before peas get too large. Be careful to pinch peas gently from the vine without tugging because the vines are fragile and easy to break.
Shelling peas are also sometimes called garden peas, sweet peas or English peas. The pods are firm and rounded, and the peas inside are sweet and may be eaten raw or cooked.
The pods can range in size from four to 15-centimeters long and about one-and-a-half to two-and-a-half centimeters wide. Each pod contains between two and 10-peas.
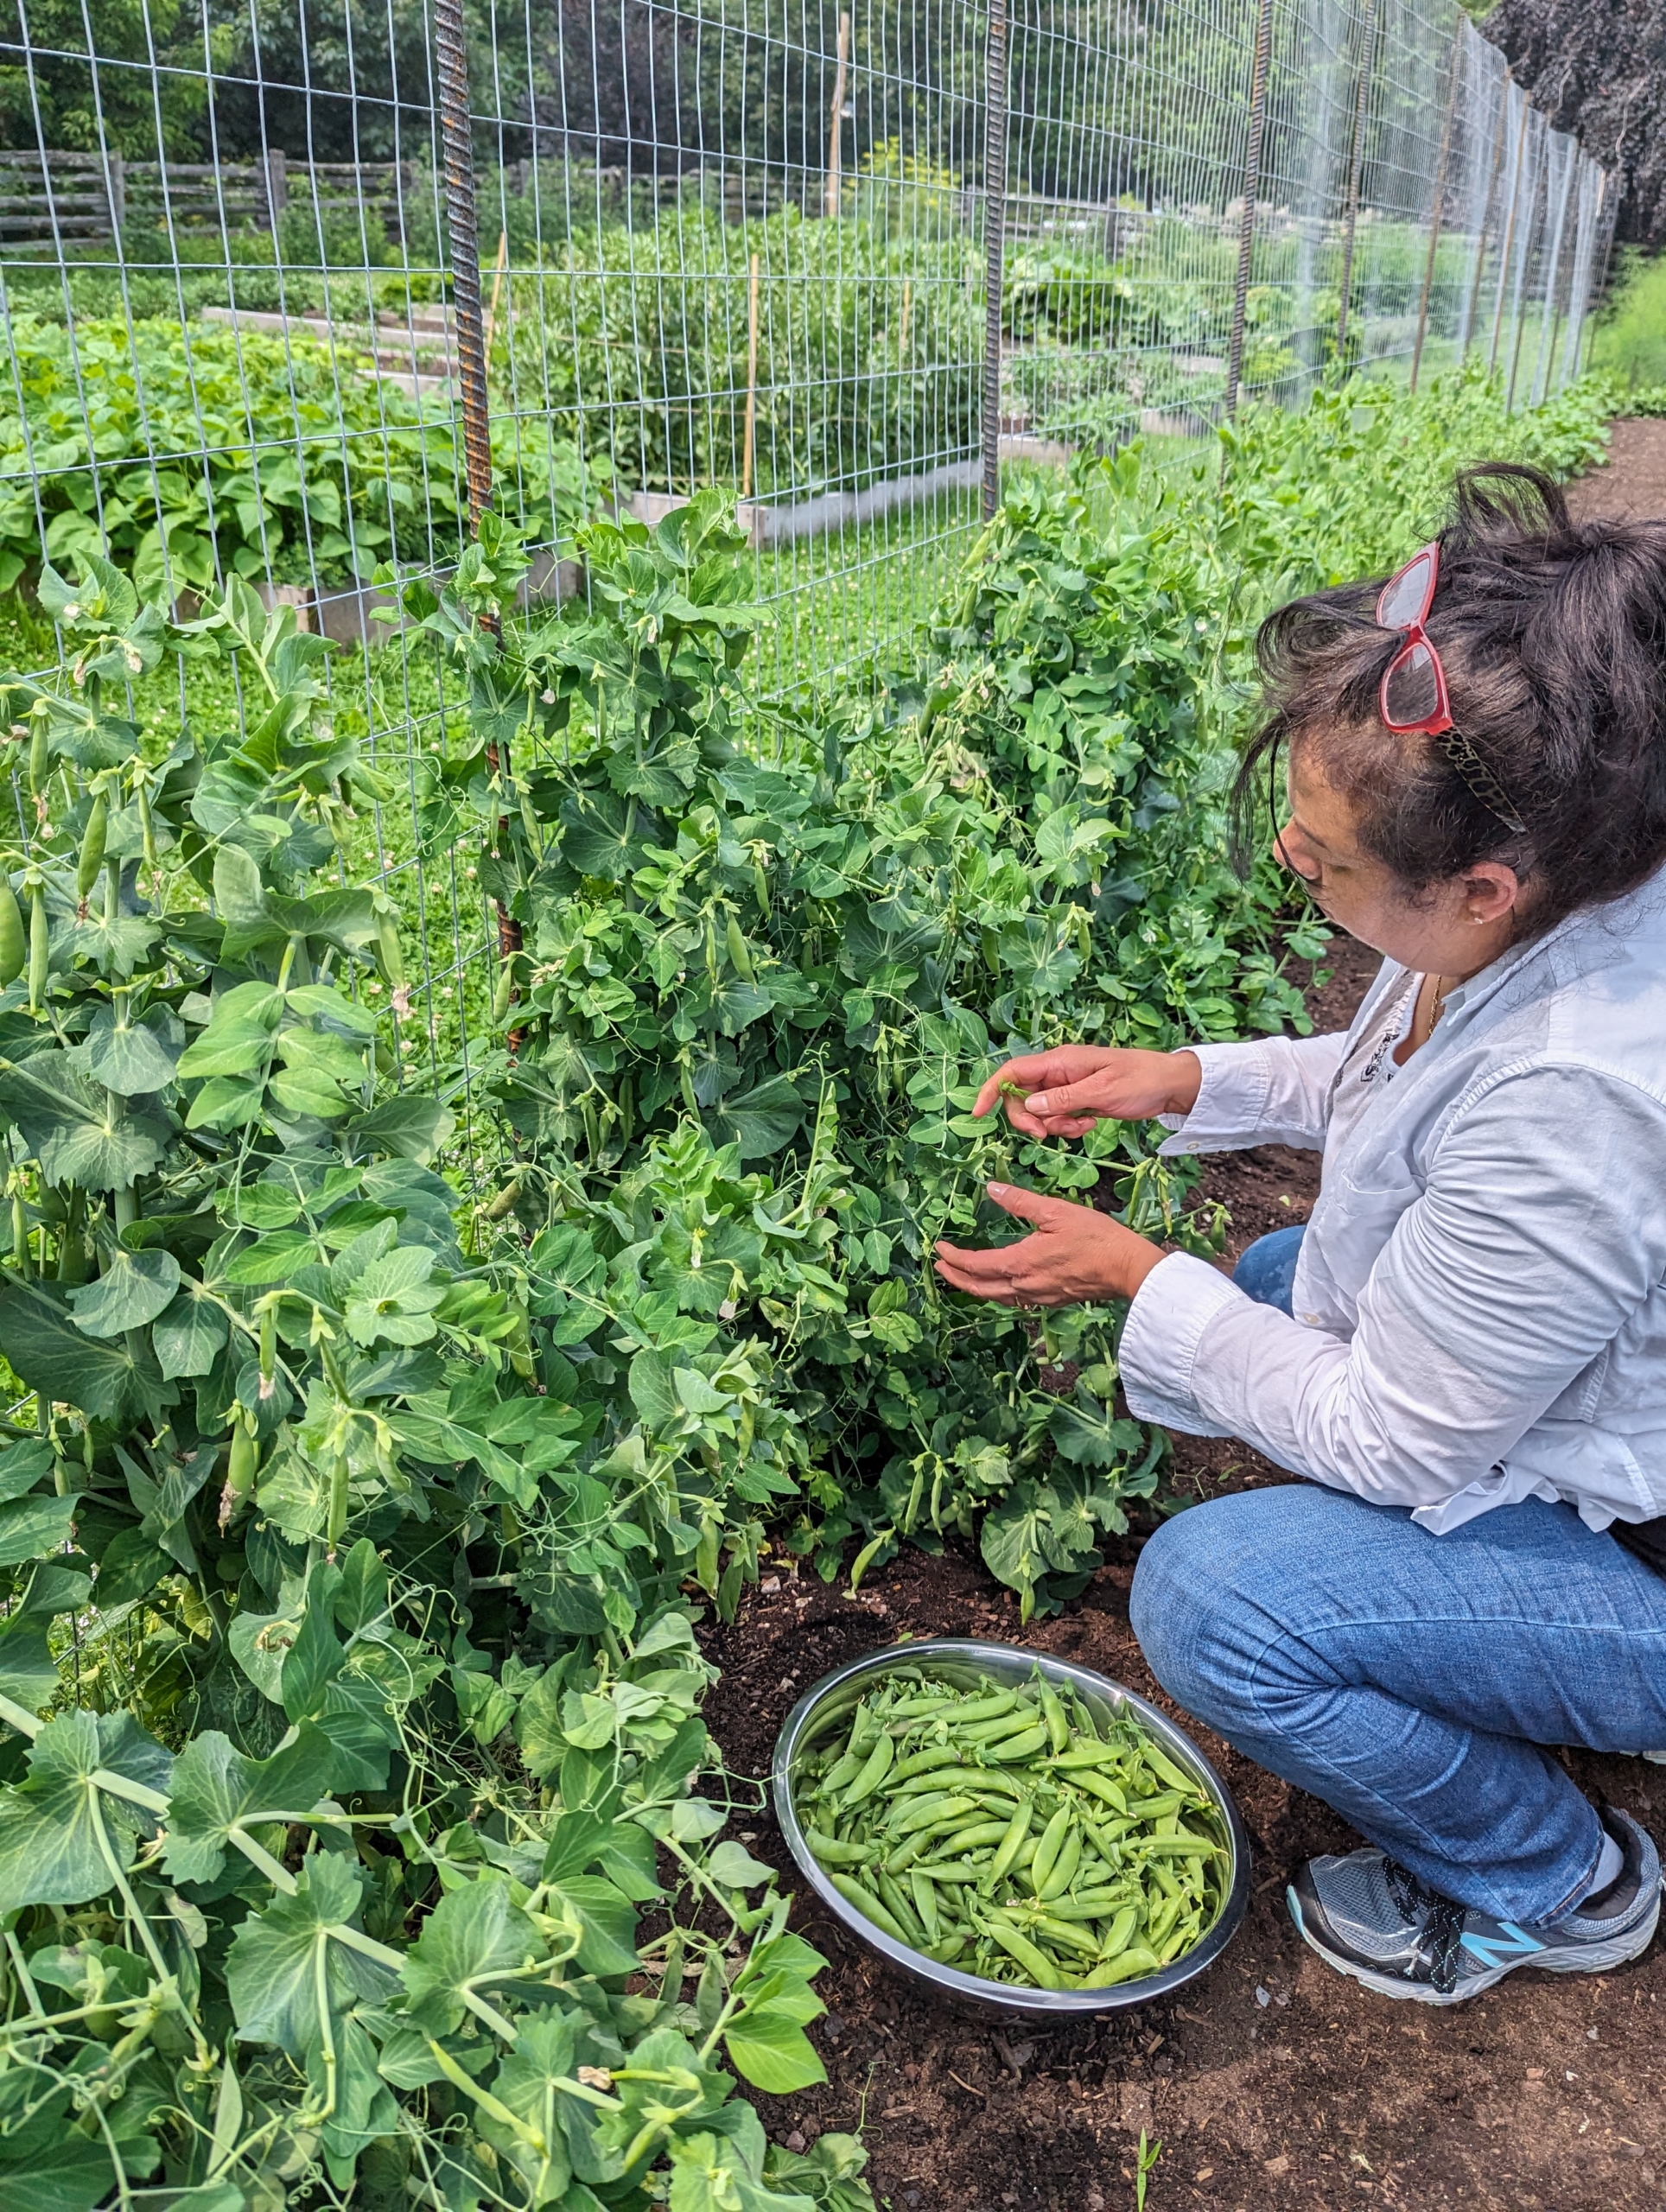
Elvira also picked a bowl of edible pods. An entire pea harvest usually lasts one to two weeks. I hope your pea crops have done as well as mine.
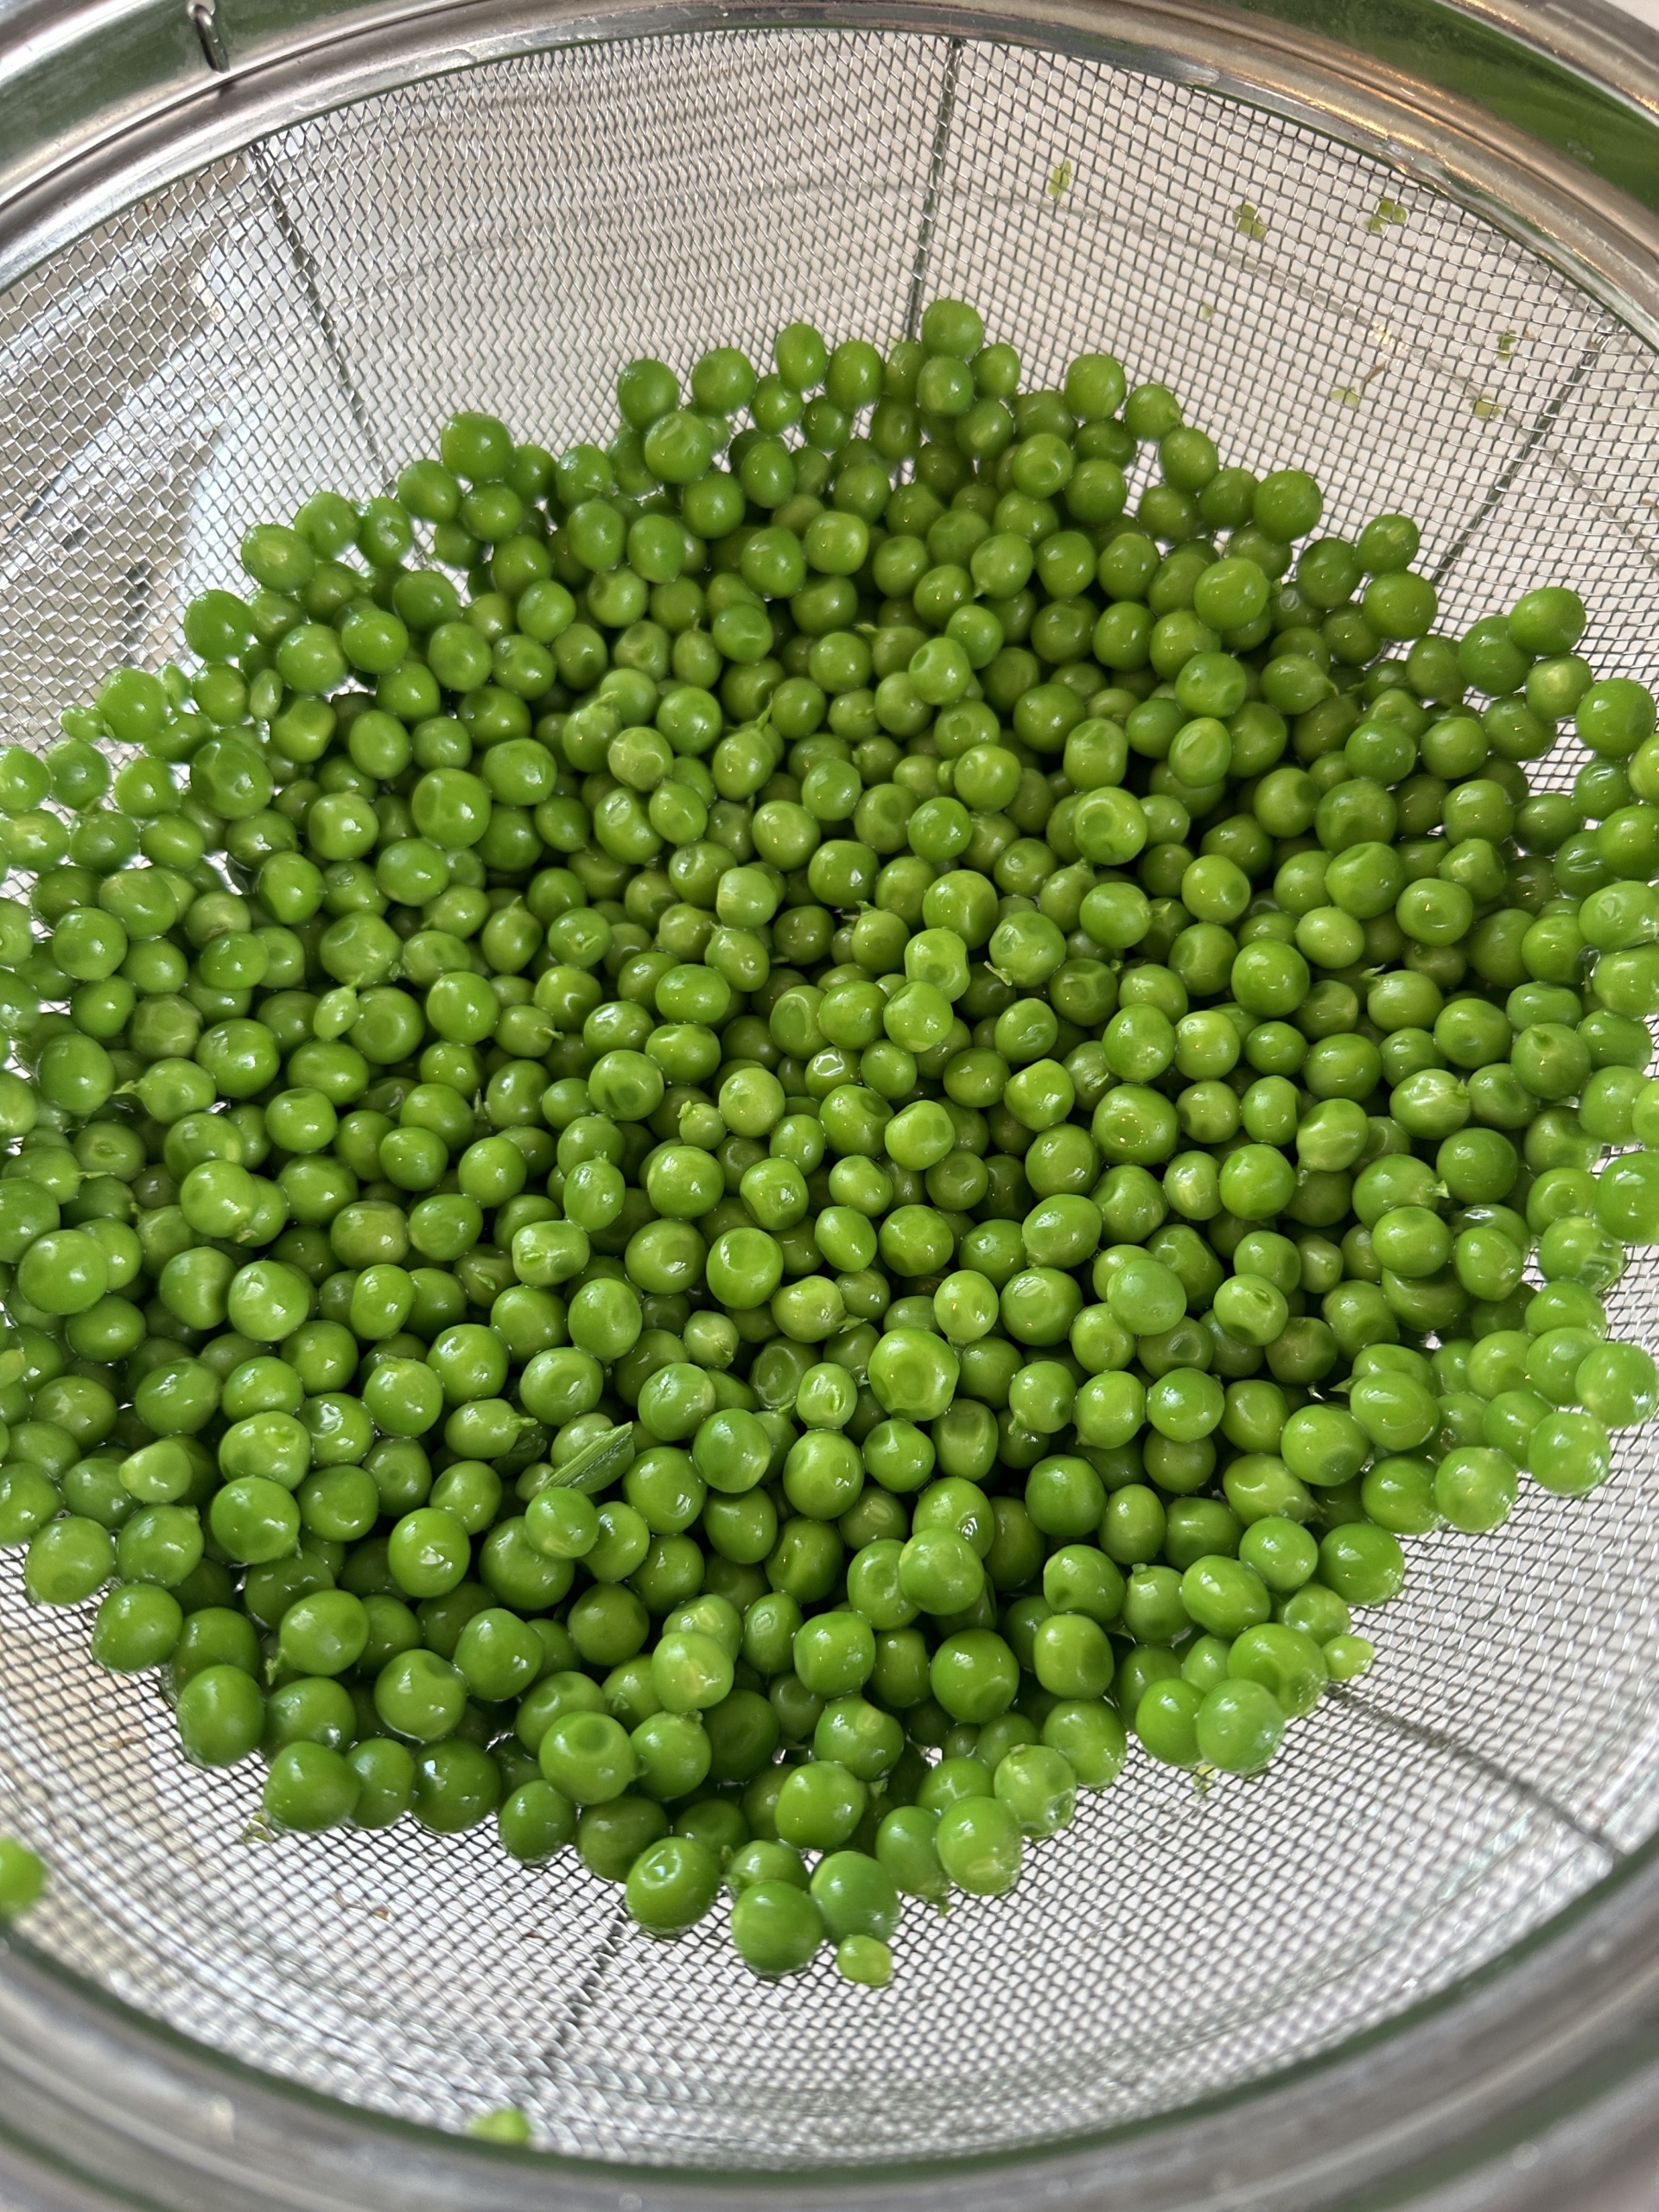
Here is a bowl of the shelling peas in my kitchen after I blanched them in boiling water and then quickly moved them into an ice bath before draining.
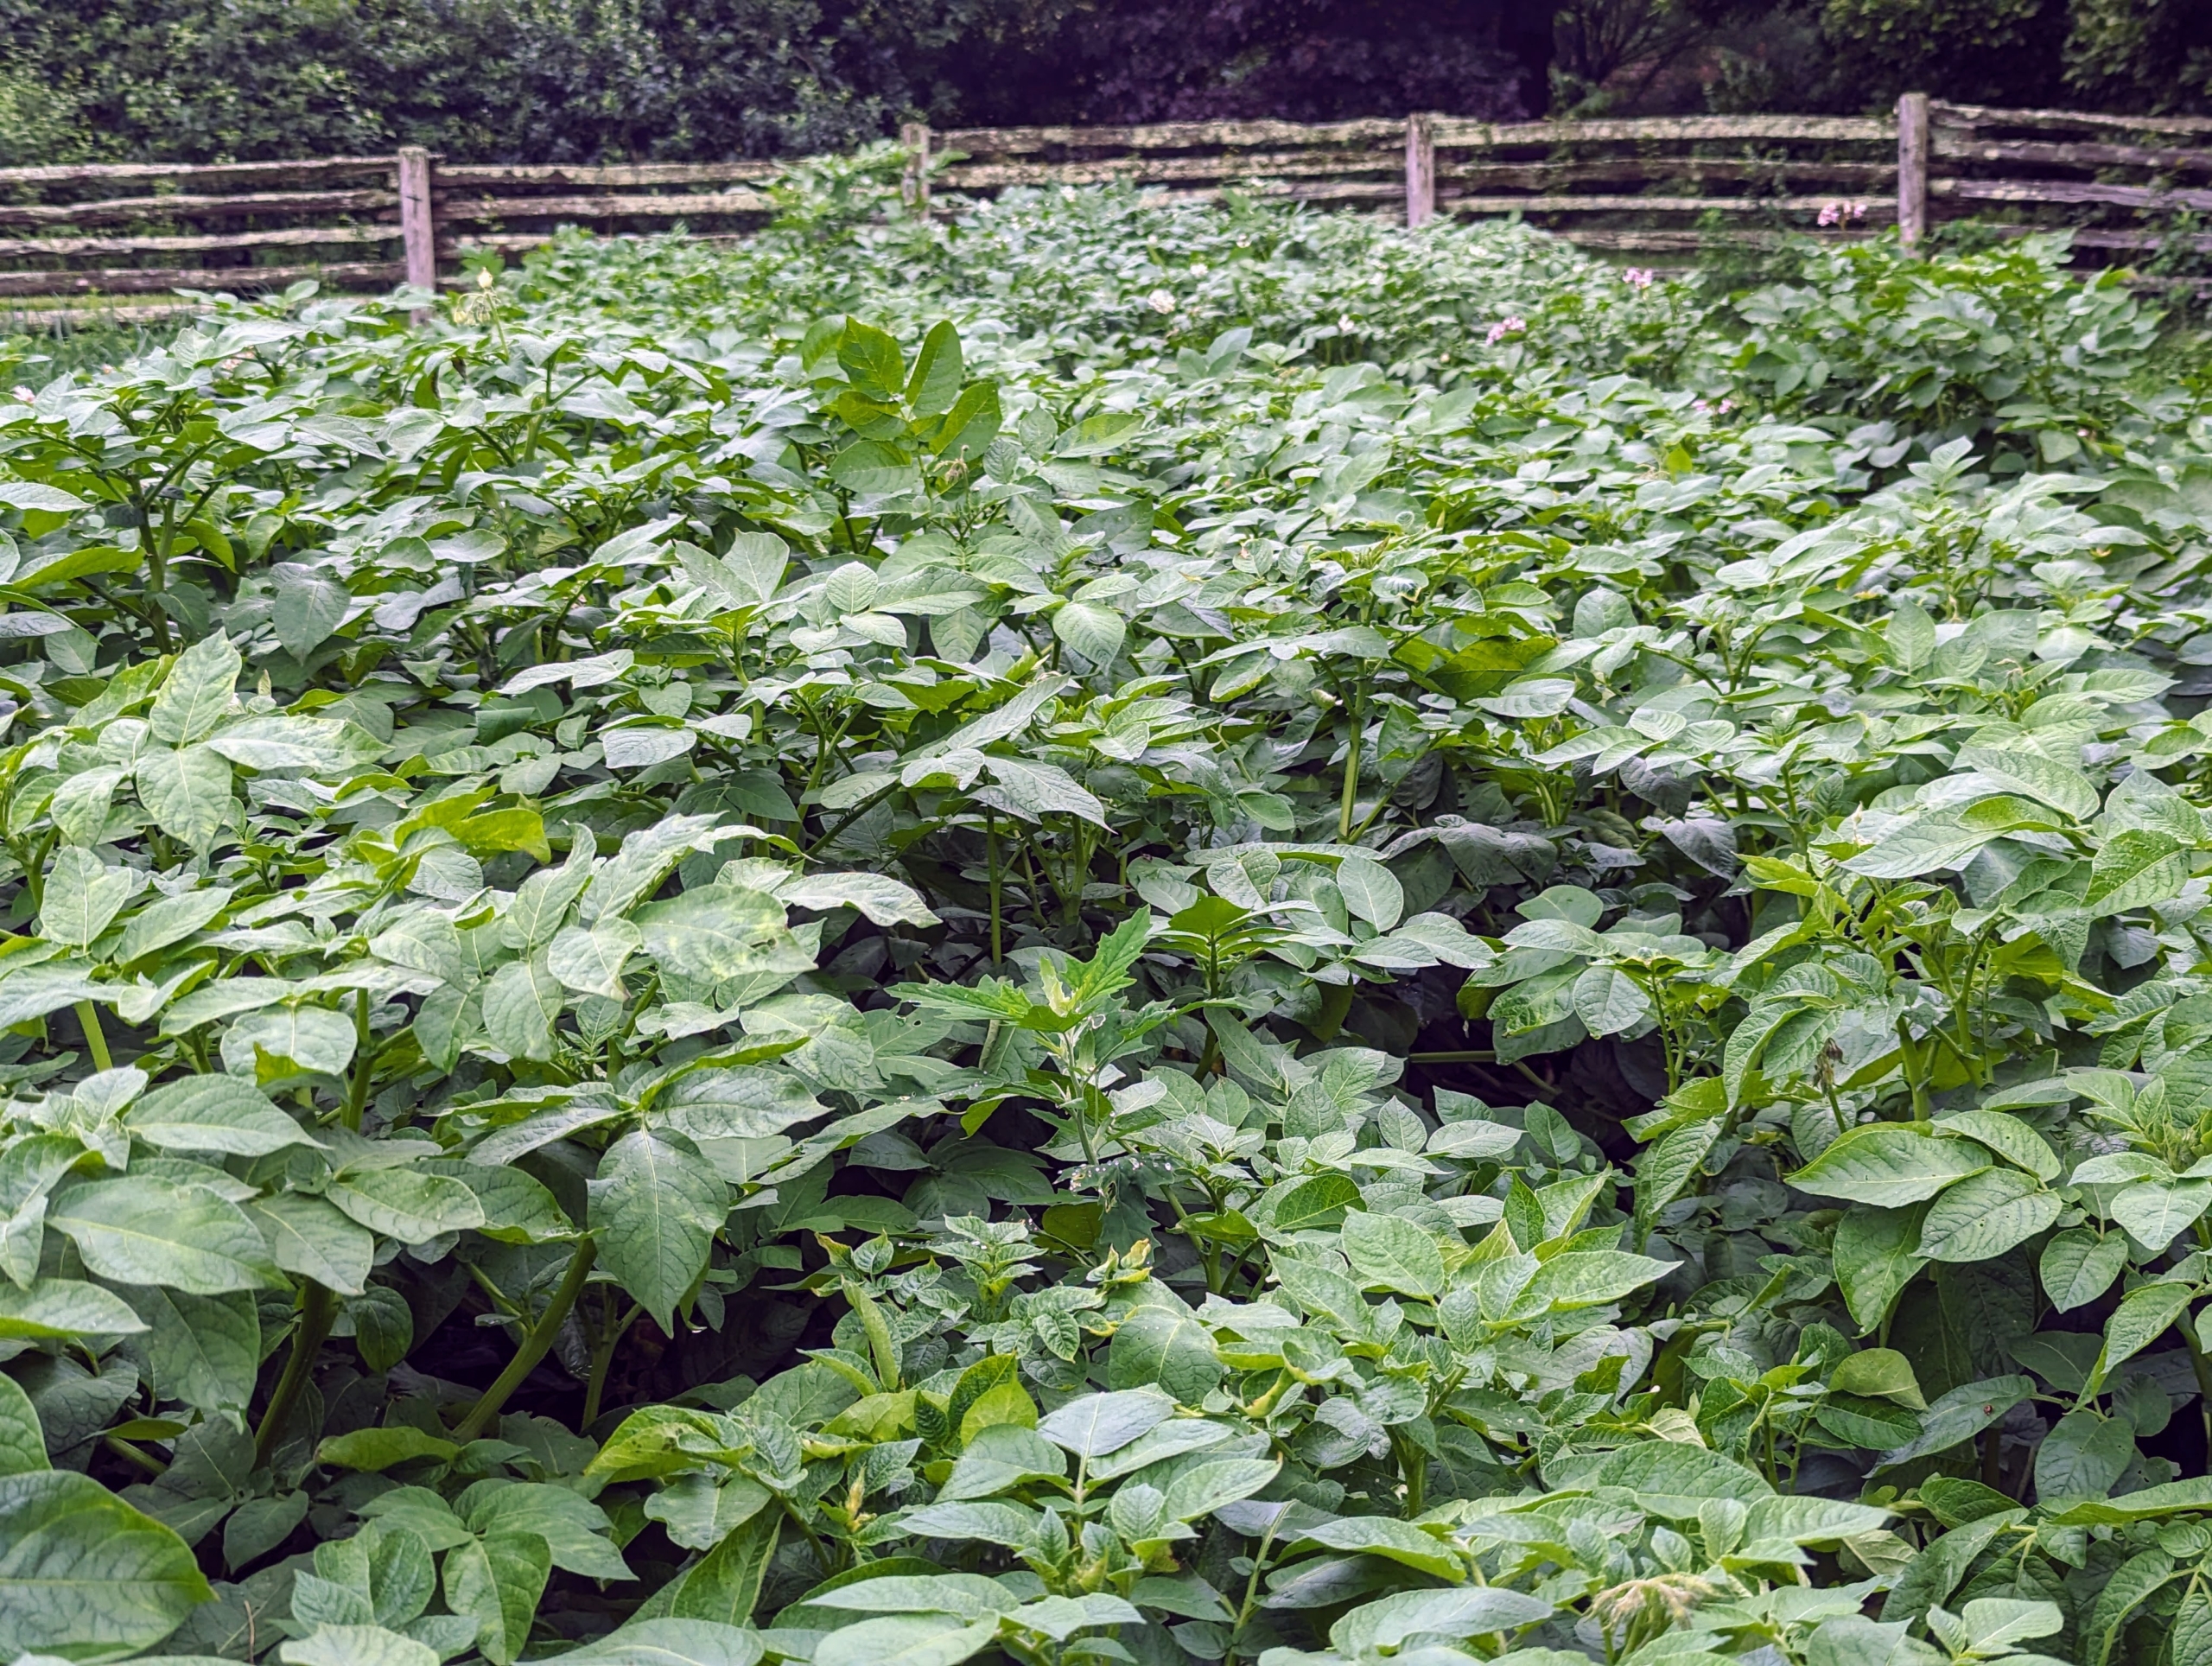
Also in the garden – look at our potatoes. The potatoes aren’t ready yet, but our crop is growing beautifully. Potatoes are tubers, which grow underground. Without these tops, potato plants cannot perform photosynthesis, and the tubers will not grow.
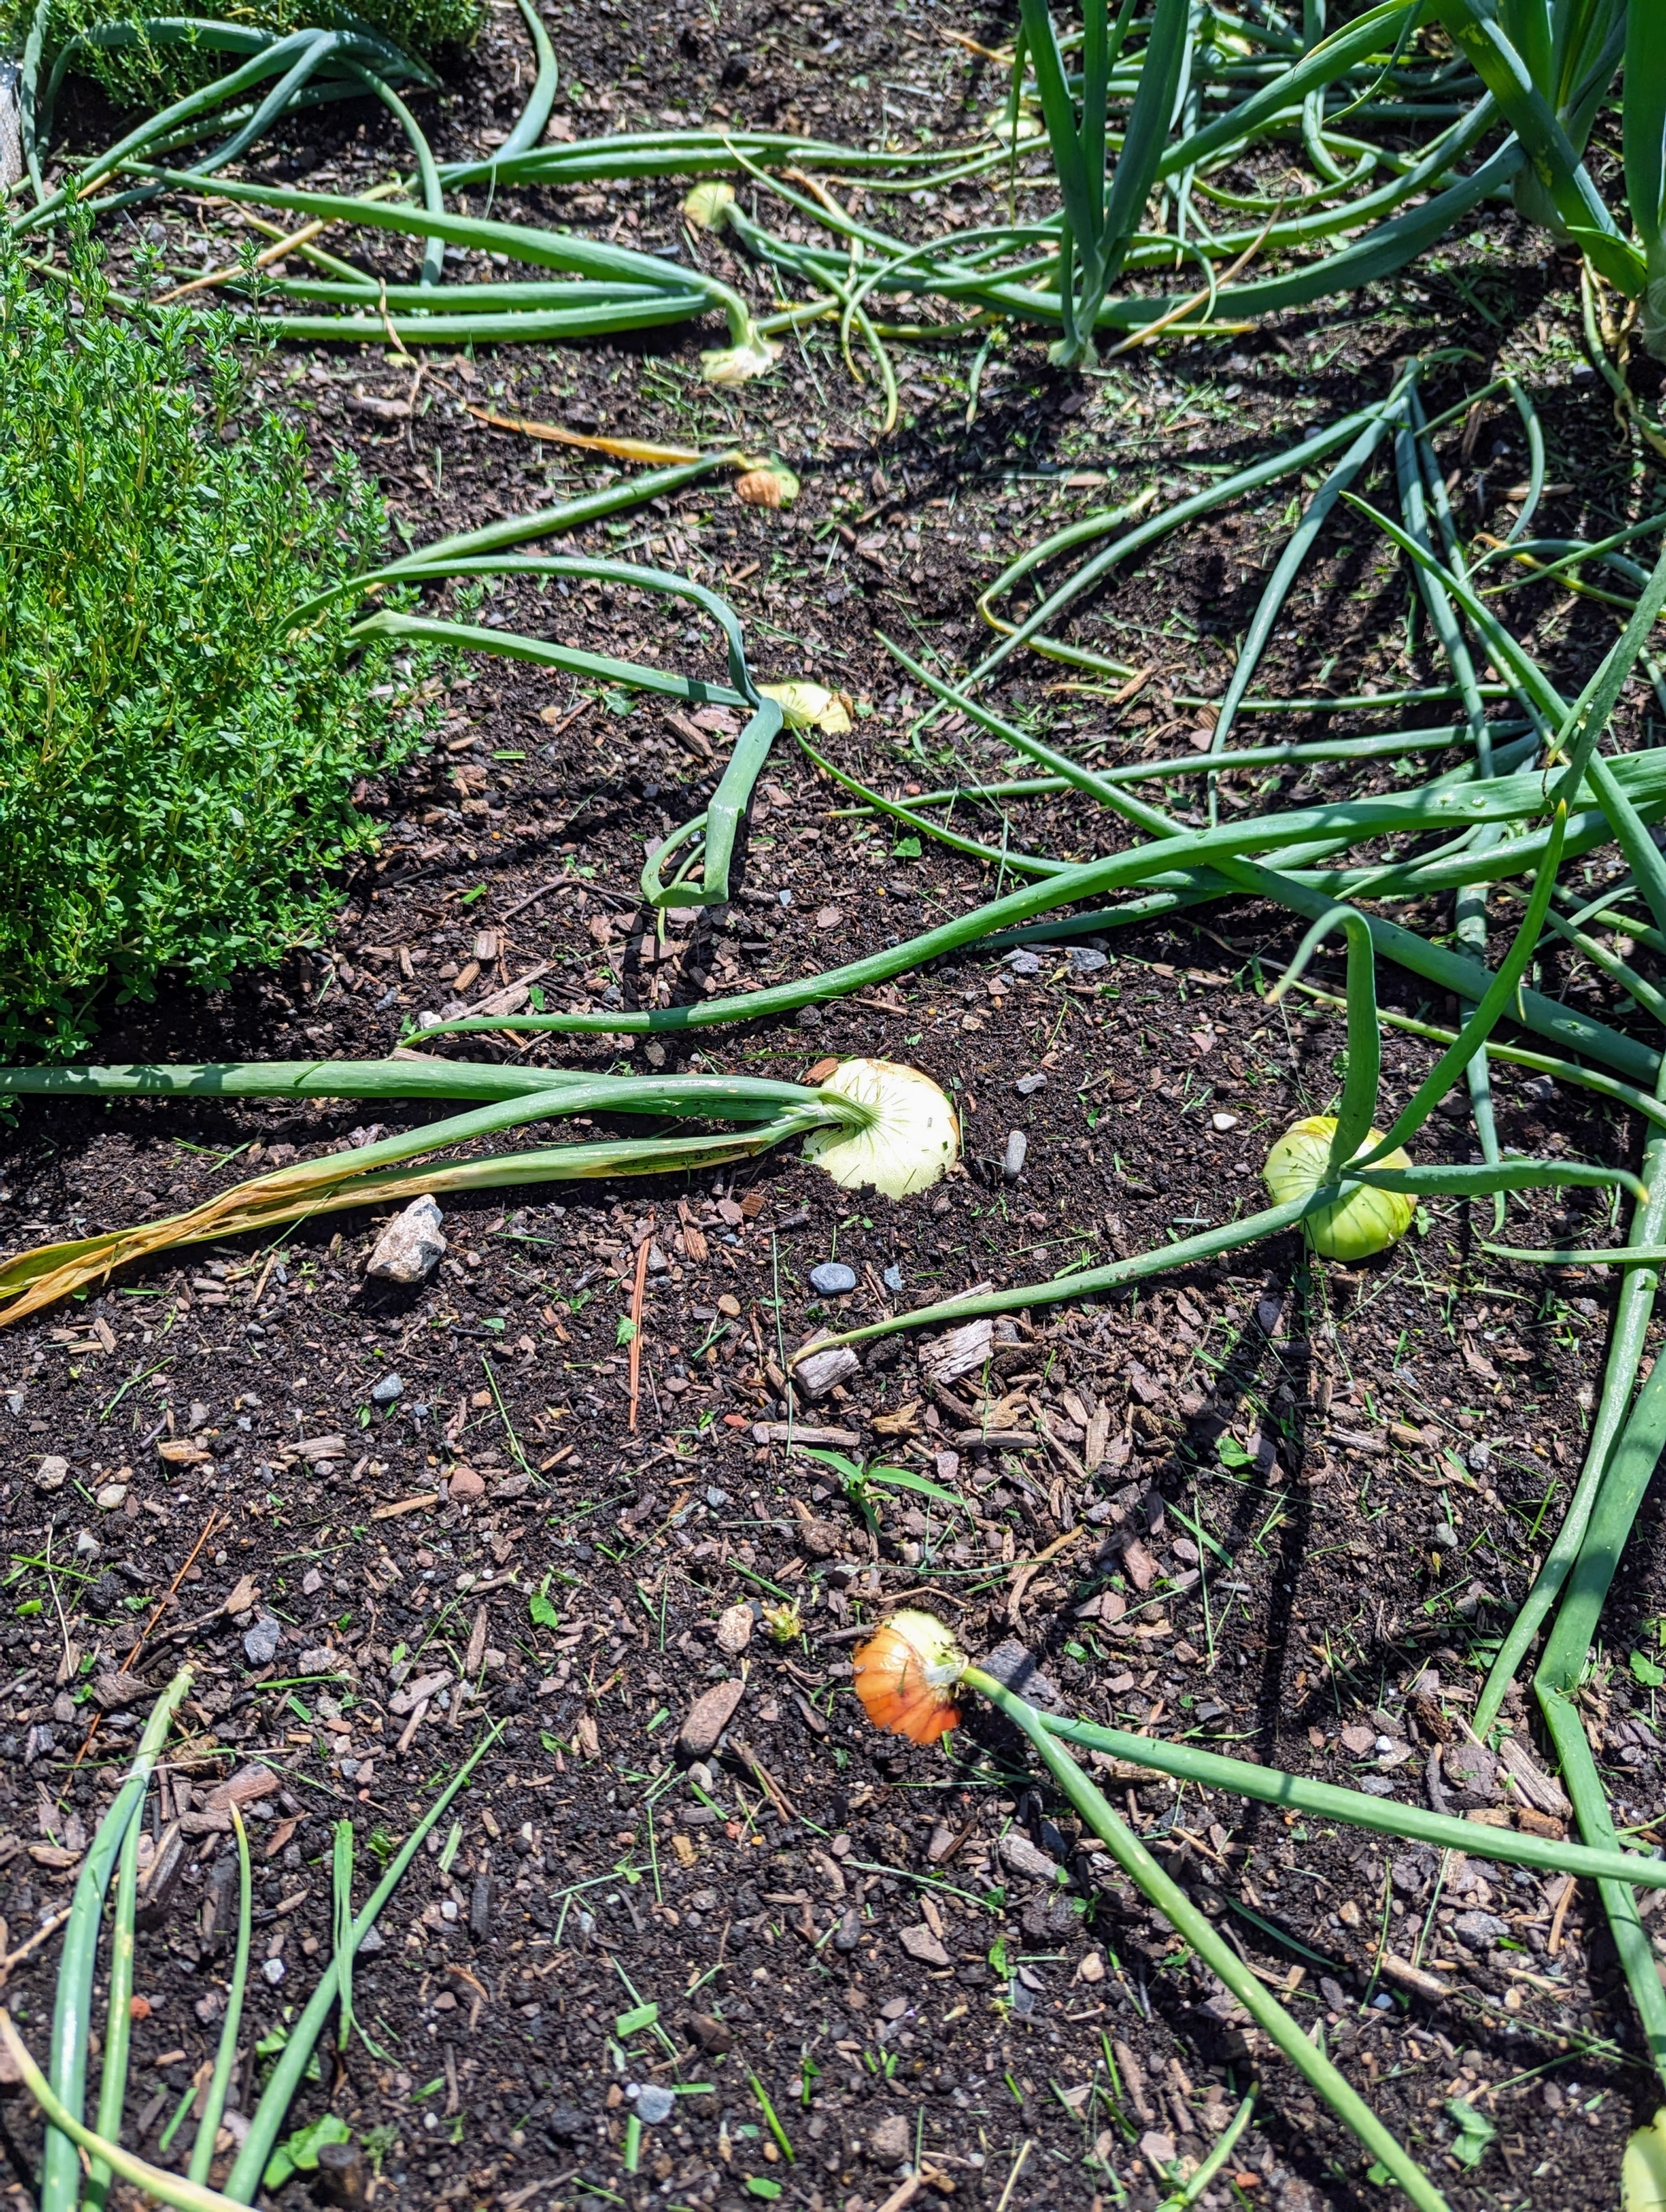
Here’s a peek at our onions – we are growing yellow, red, and white varieties.
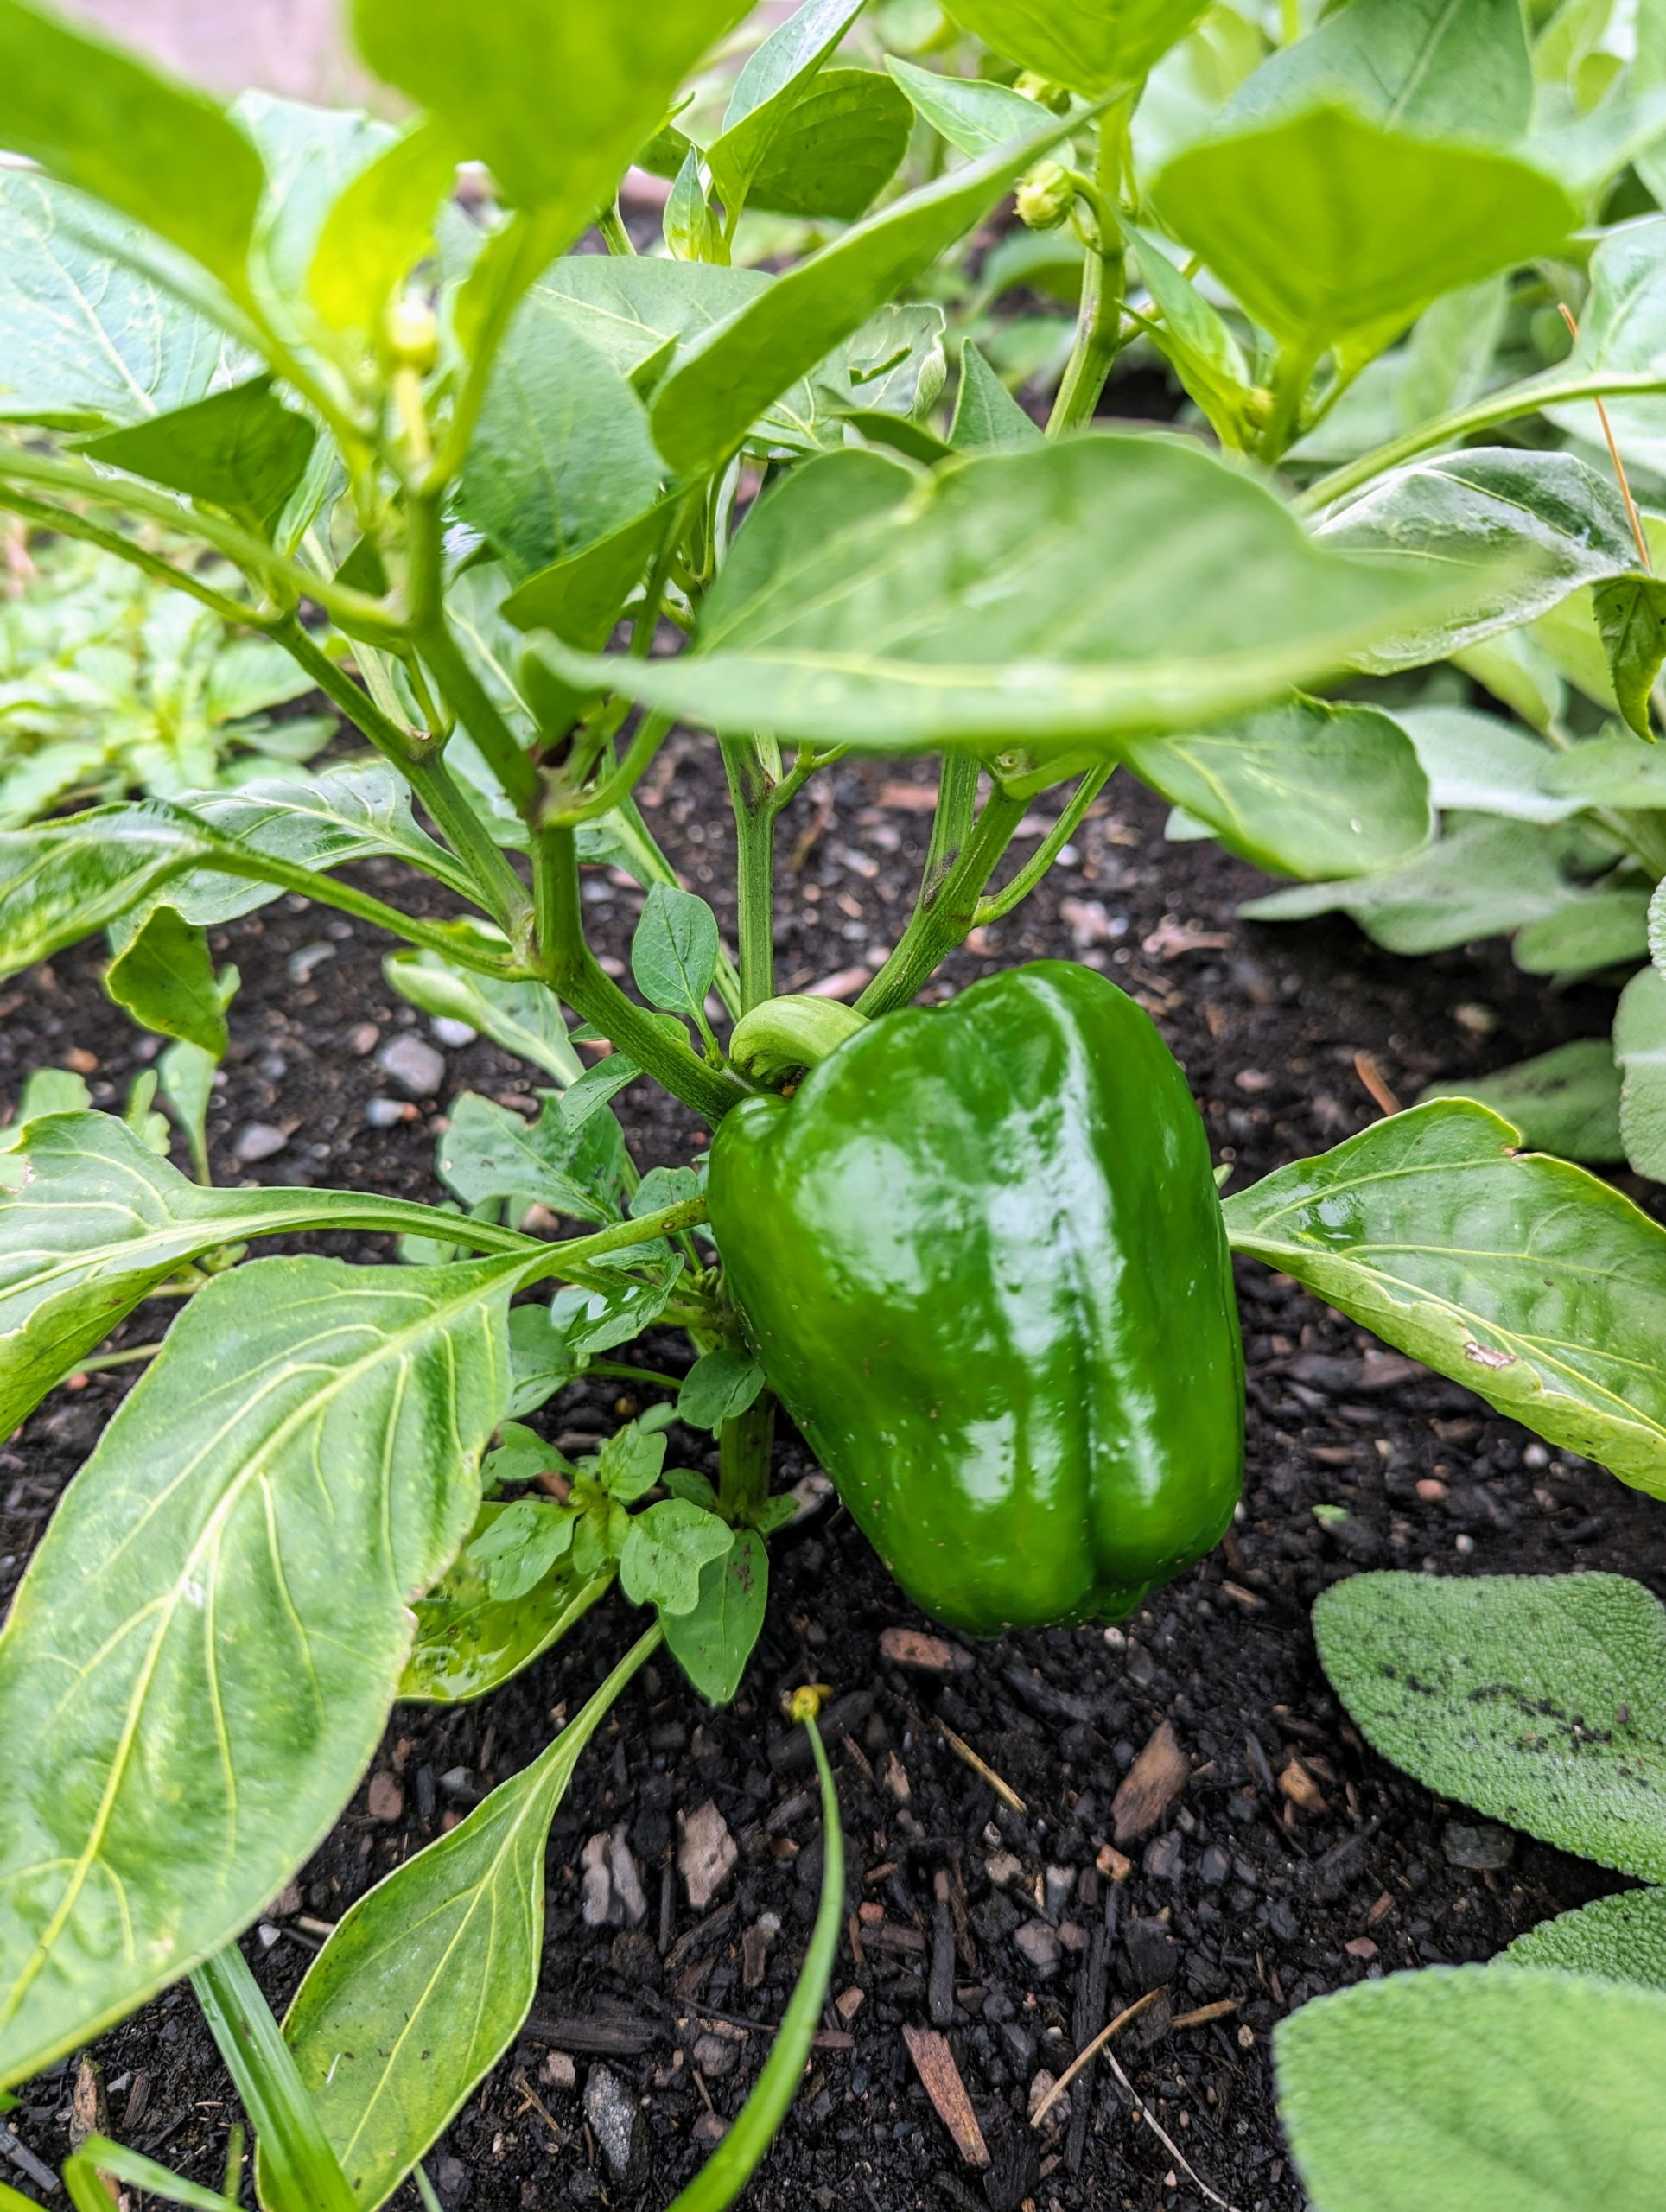
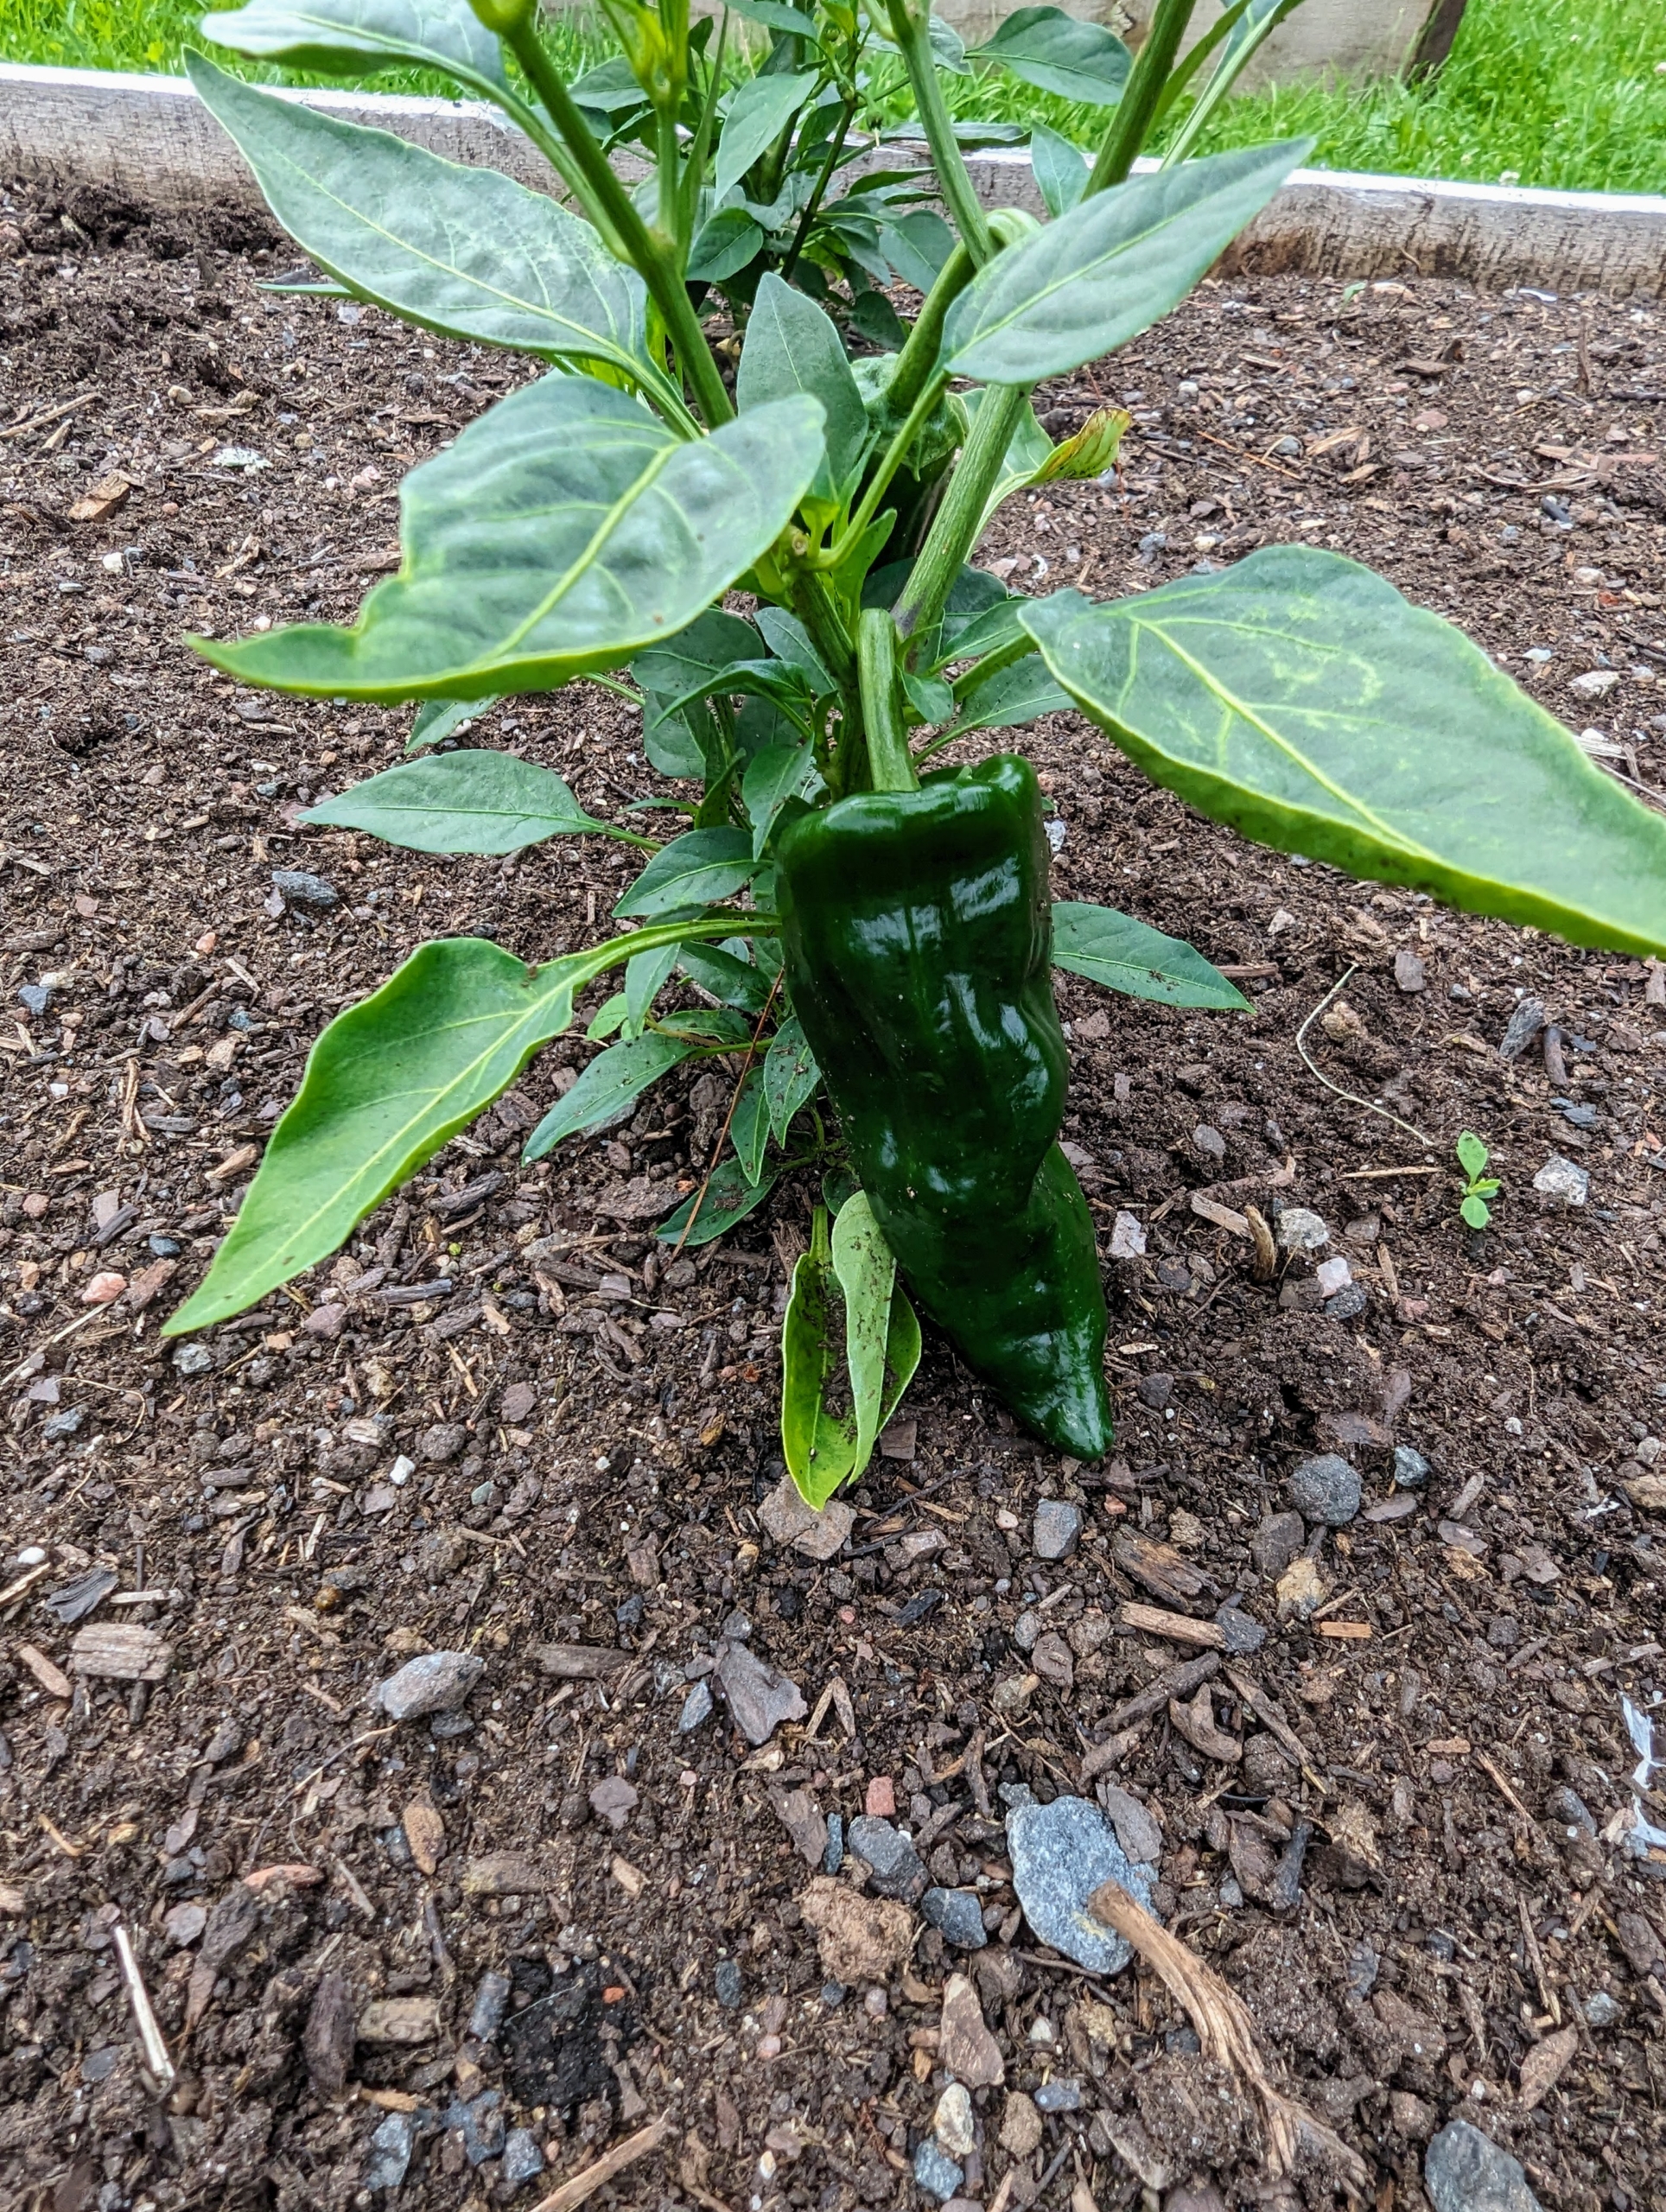
And the peppers are looking perfect. Sweet bell peppers are popular in the garden – all grassy in flavor and super-crunchy in texture. I love making stuffed peppers – so easy and so delicious.
We also grow hot peppers. Always be careful when picking peppers – keep the hot ones separated from the sweet ones, so there is no surprise in the kitchen.
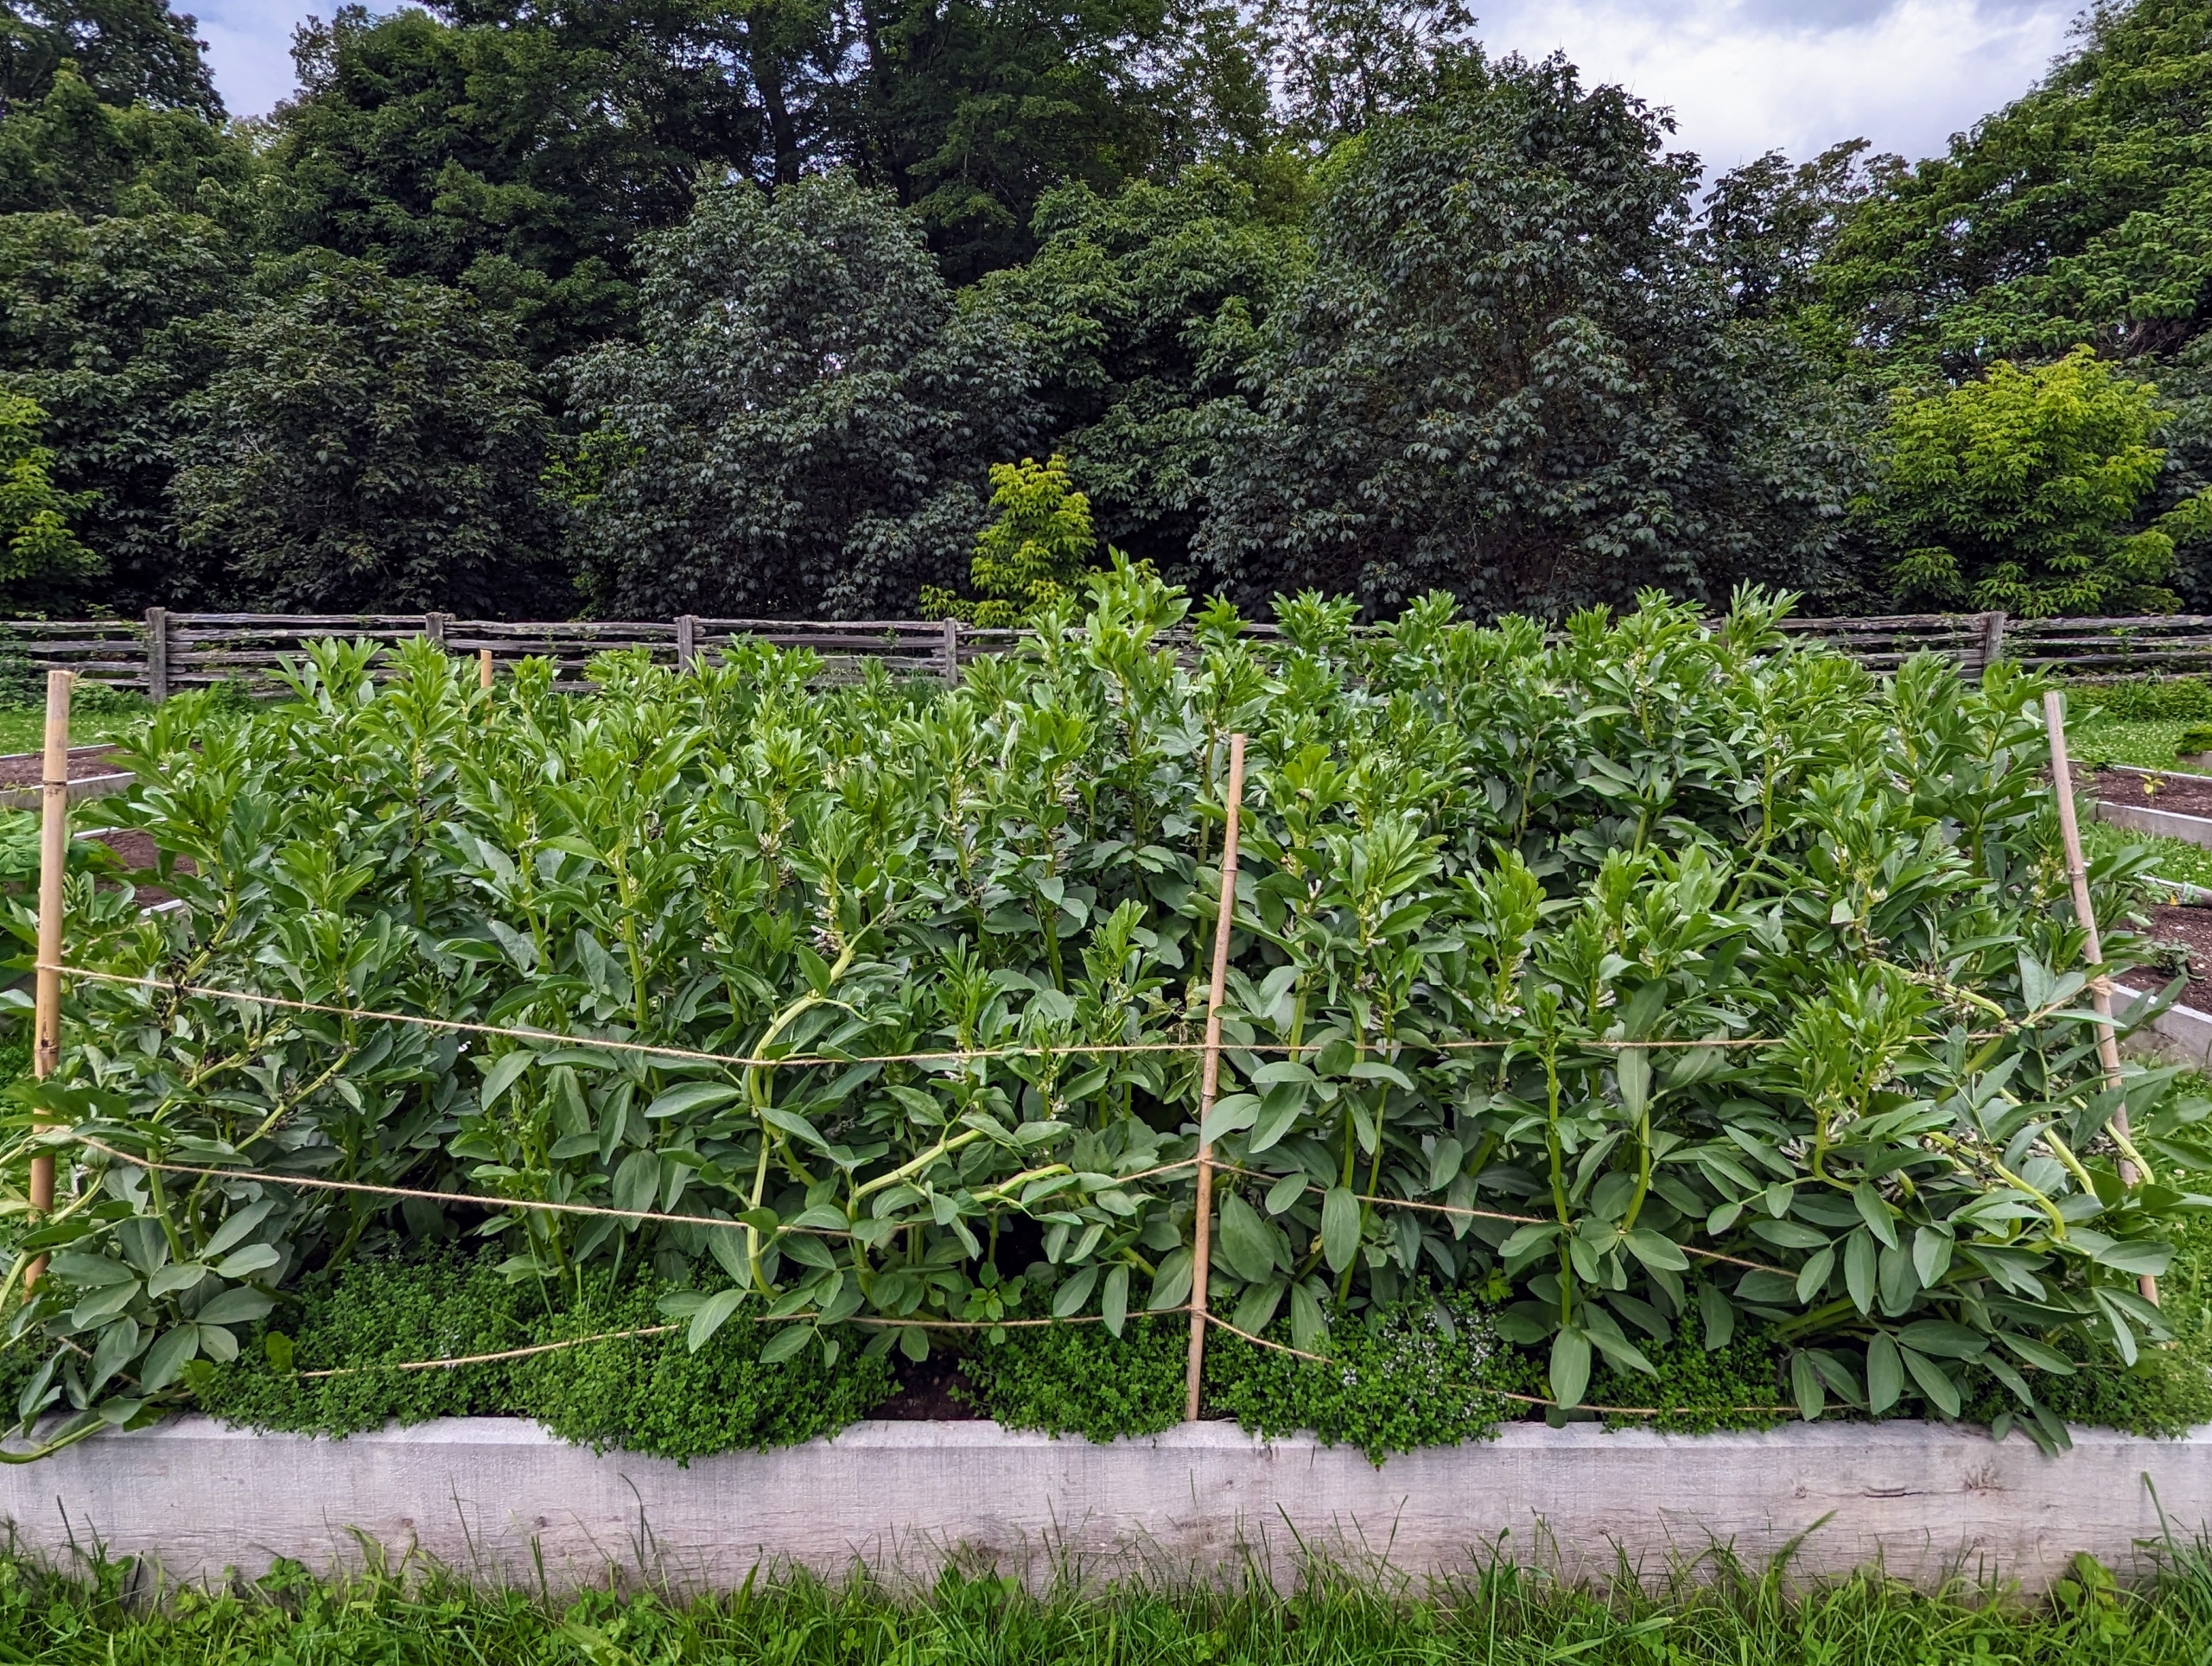
This is our bed of fava beans. Vicia faba, also known as the broad bean or fava bean is an ancient member of the pea family. They have a nutty taste and buttery texture. I always grow lots of fava beans.
And of course, our growing eggplant. While I love to pick eggplants when they are still small, ours need a little more time.
There has been so much growth in this vegetable garden these last couple of weeks – there’s always something delicious to pick. Many of you often ask what I do with all these vegetables. I share them with my family and friends, and my staff at the farm. They are also used for photo and video shoots for television shows. And whatever is left over goes to my precious chickens, peafowl, and geese. Happy harvesting!