While visiting Paris, France one must try to see the magnificent palace and gardens of Versailles. I've been to Versailles several times and every visit was more breathtaking than the last. My gardener, Ryan McCallister, picked a lovely day of his recent European vacation to tour the historic landmark and grounds.
When the château was built, Versailles was just a small 11th century village. Today, it is a wealthy suburb about 12-miles southwest of Paris. Known simply as Versailles, it was the seat of political power in the Kingdom of France from 1682, when Louis XIV moved the royal court from Paris, until the royal family was forced to return to the capital in 1789 after the beginning of the French Revolution. The expansive royal gardens were designed by renowned landscape architect André Le Nôtre. They cover more than 1970 acres and include gorgeous manicured hedges, gardens and groves, reflecting pools, artfully carved statues, and perfectly edged pathways.
Here are a few more photos from Ryan's trip, enjoy.
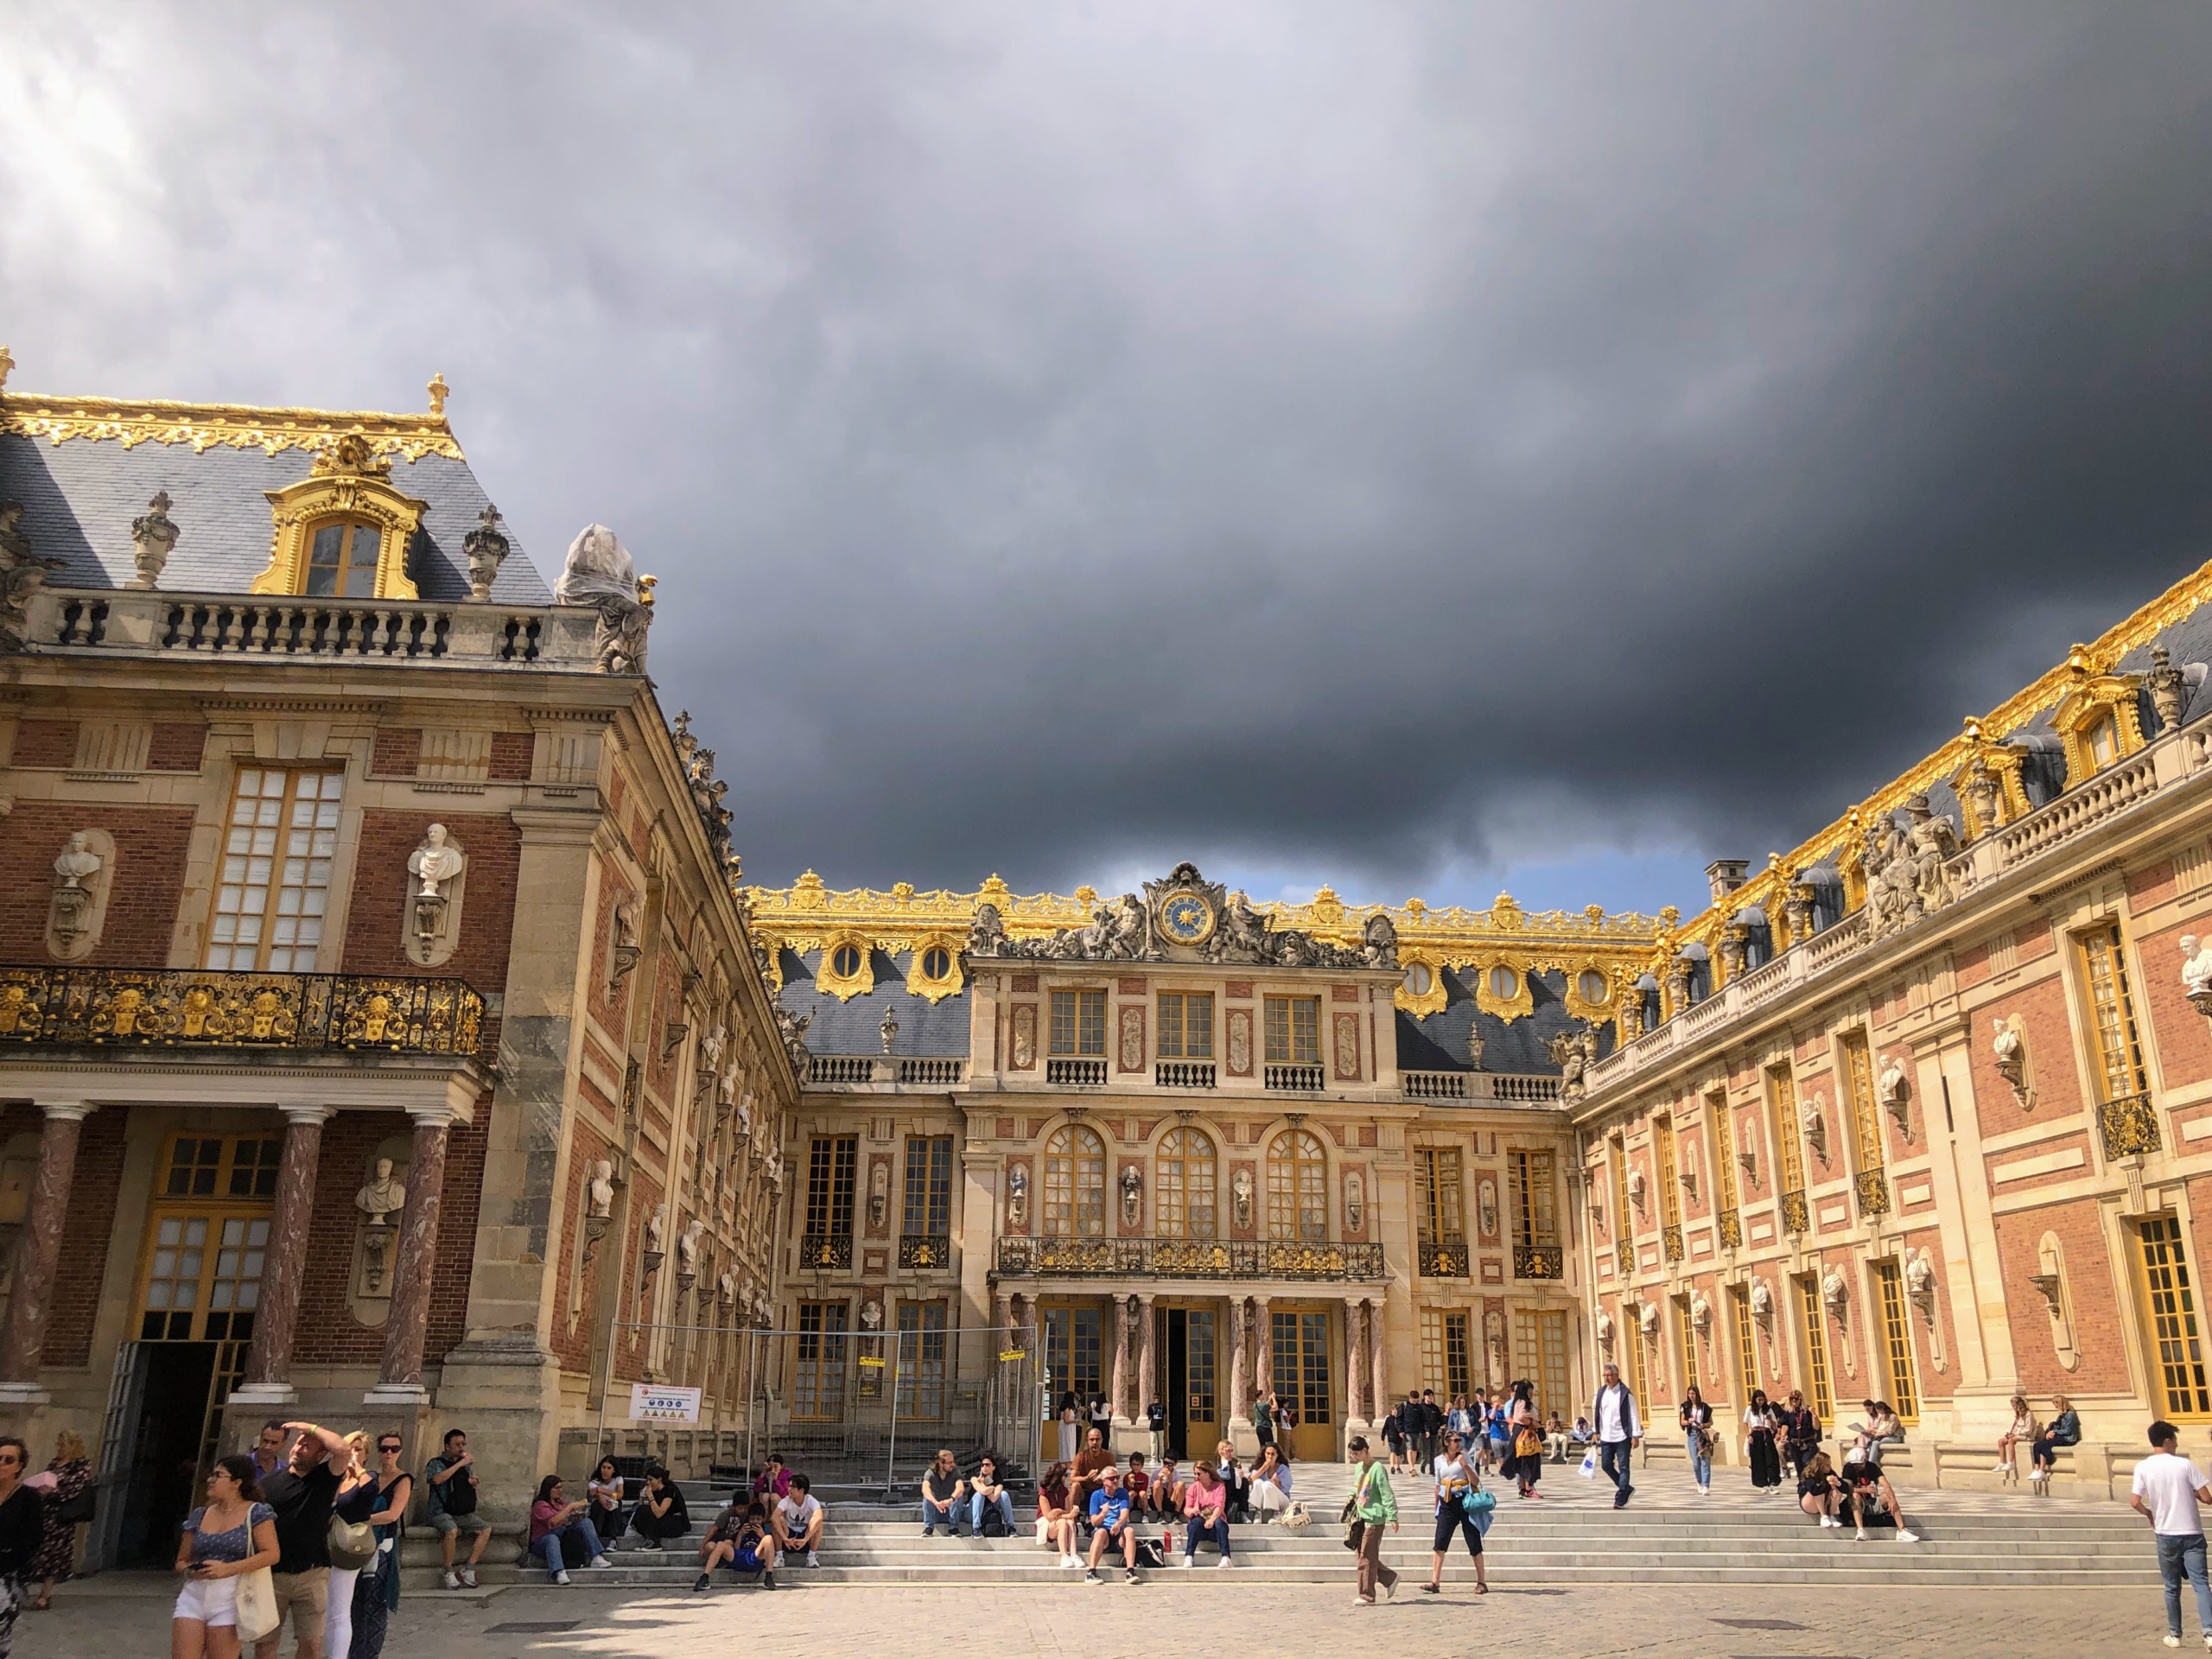
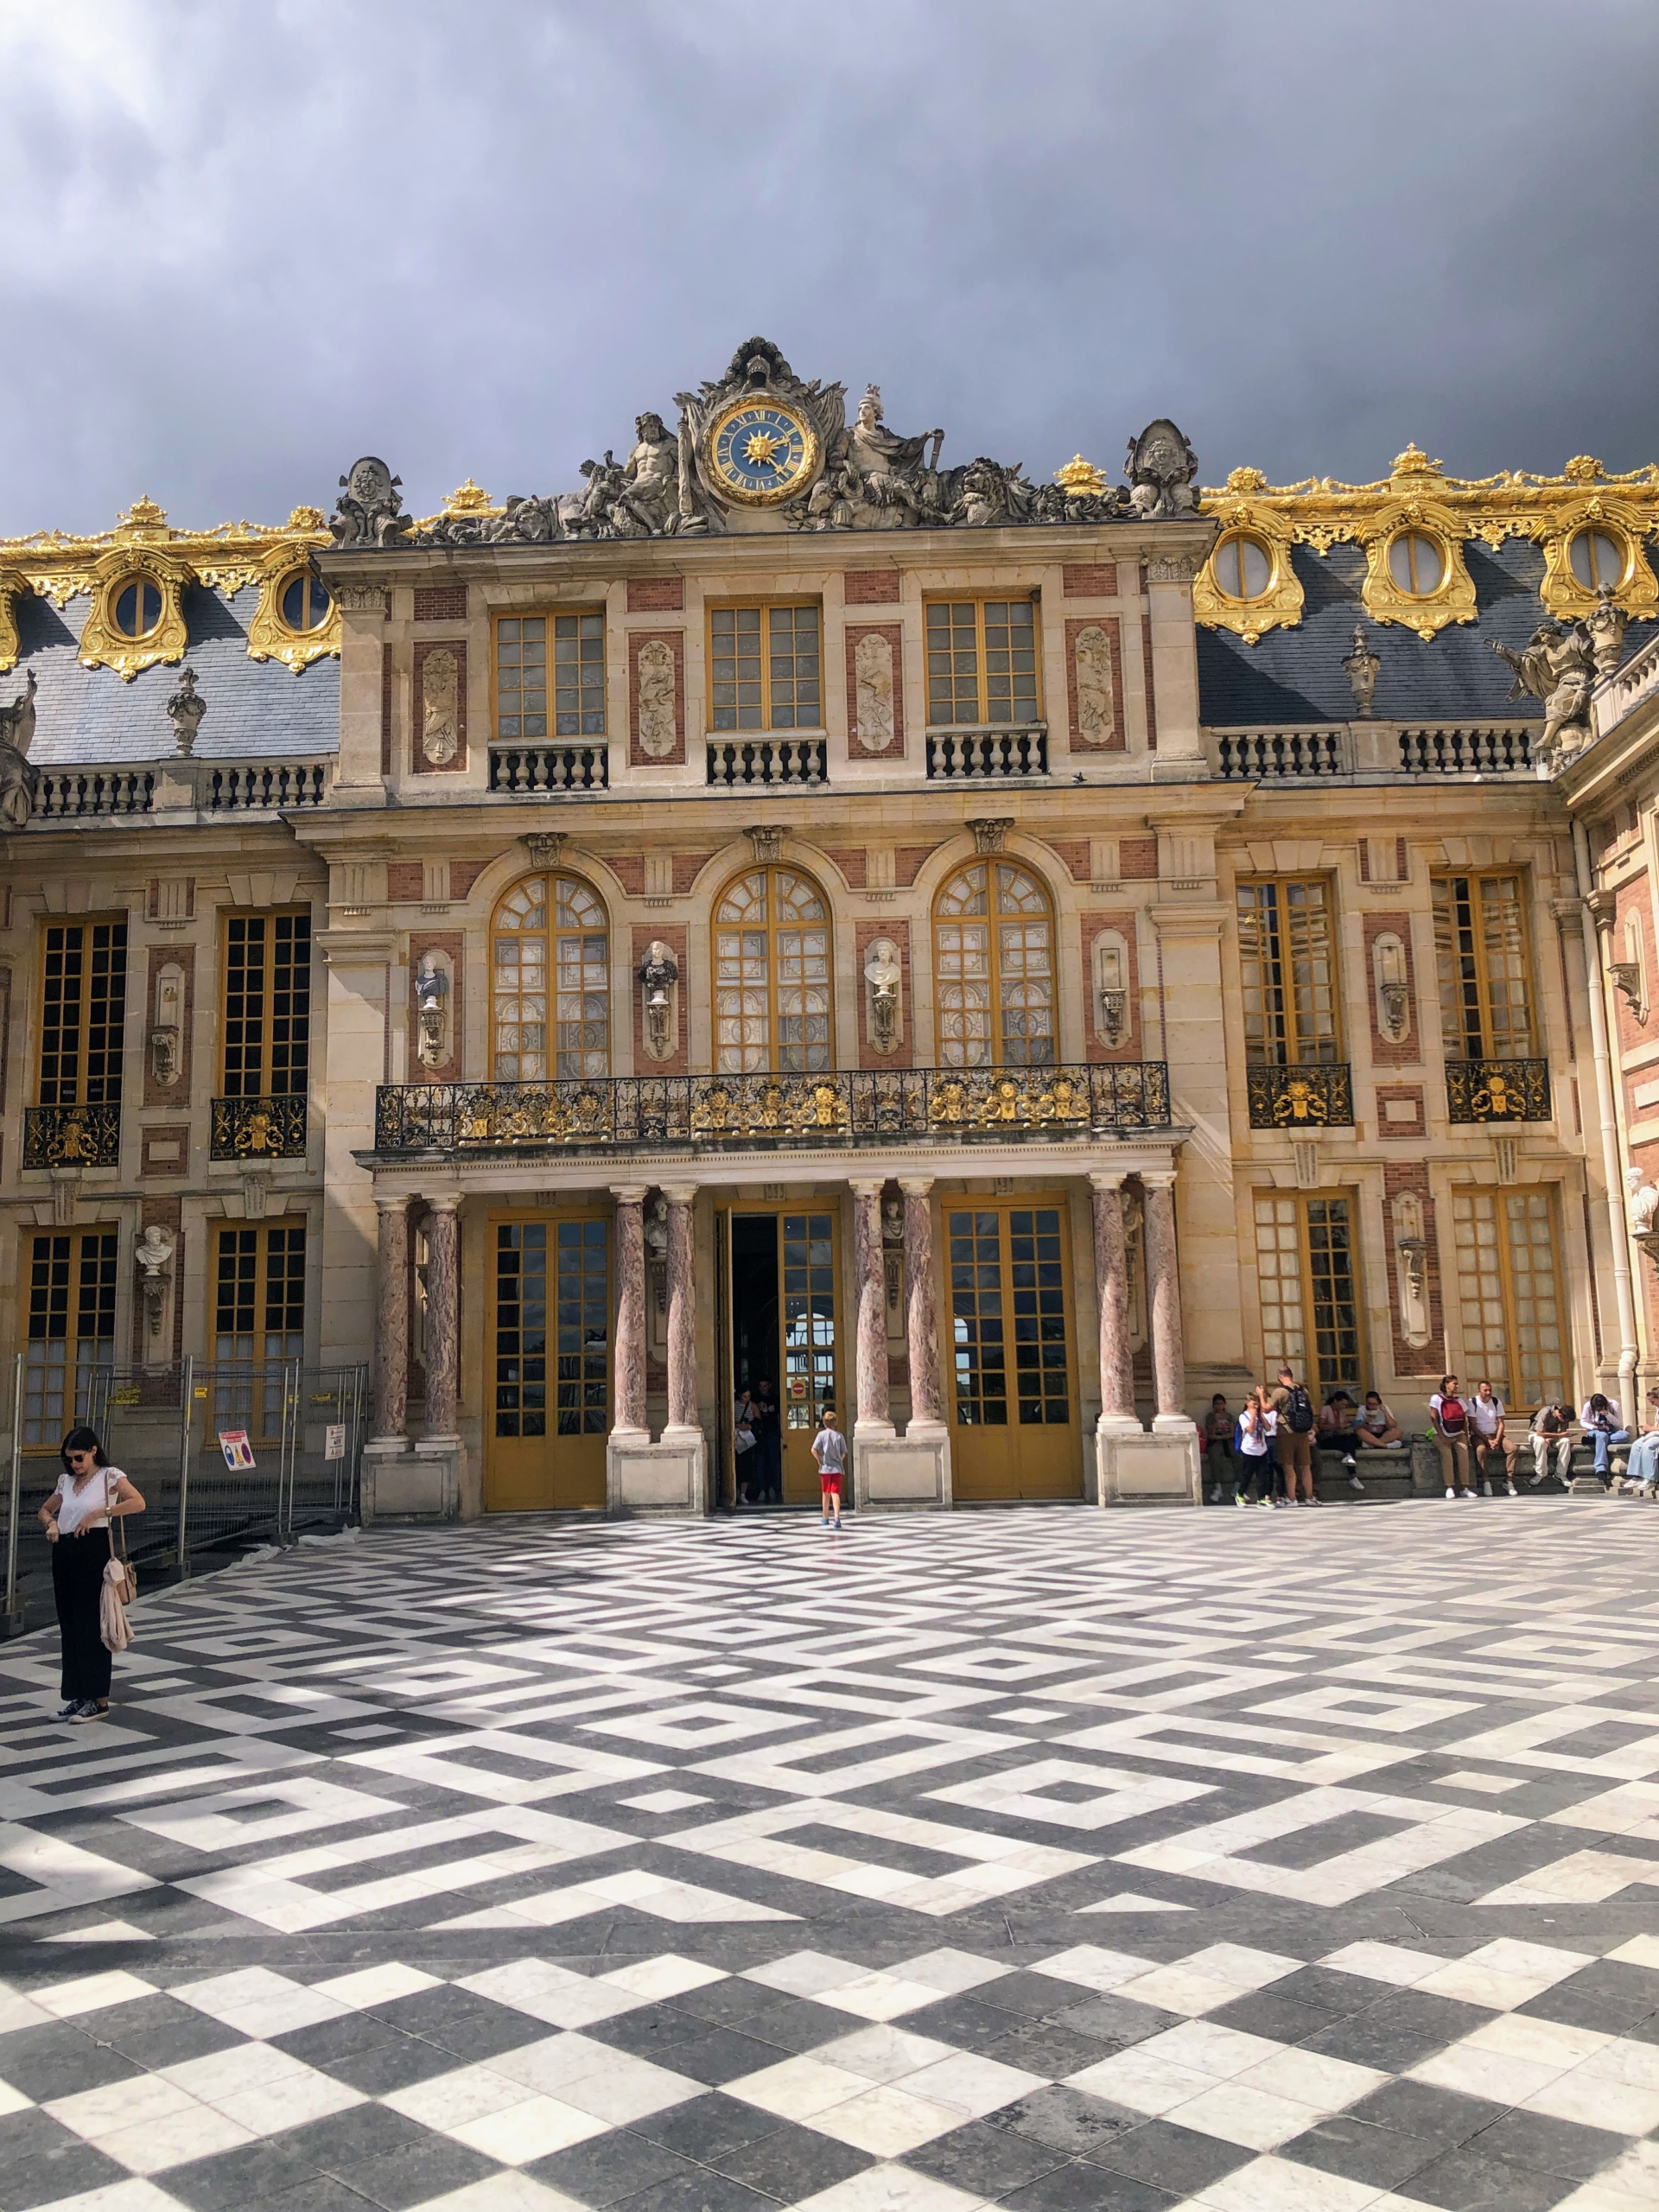
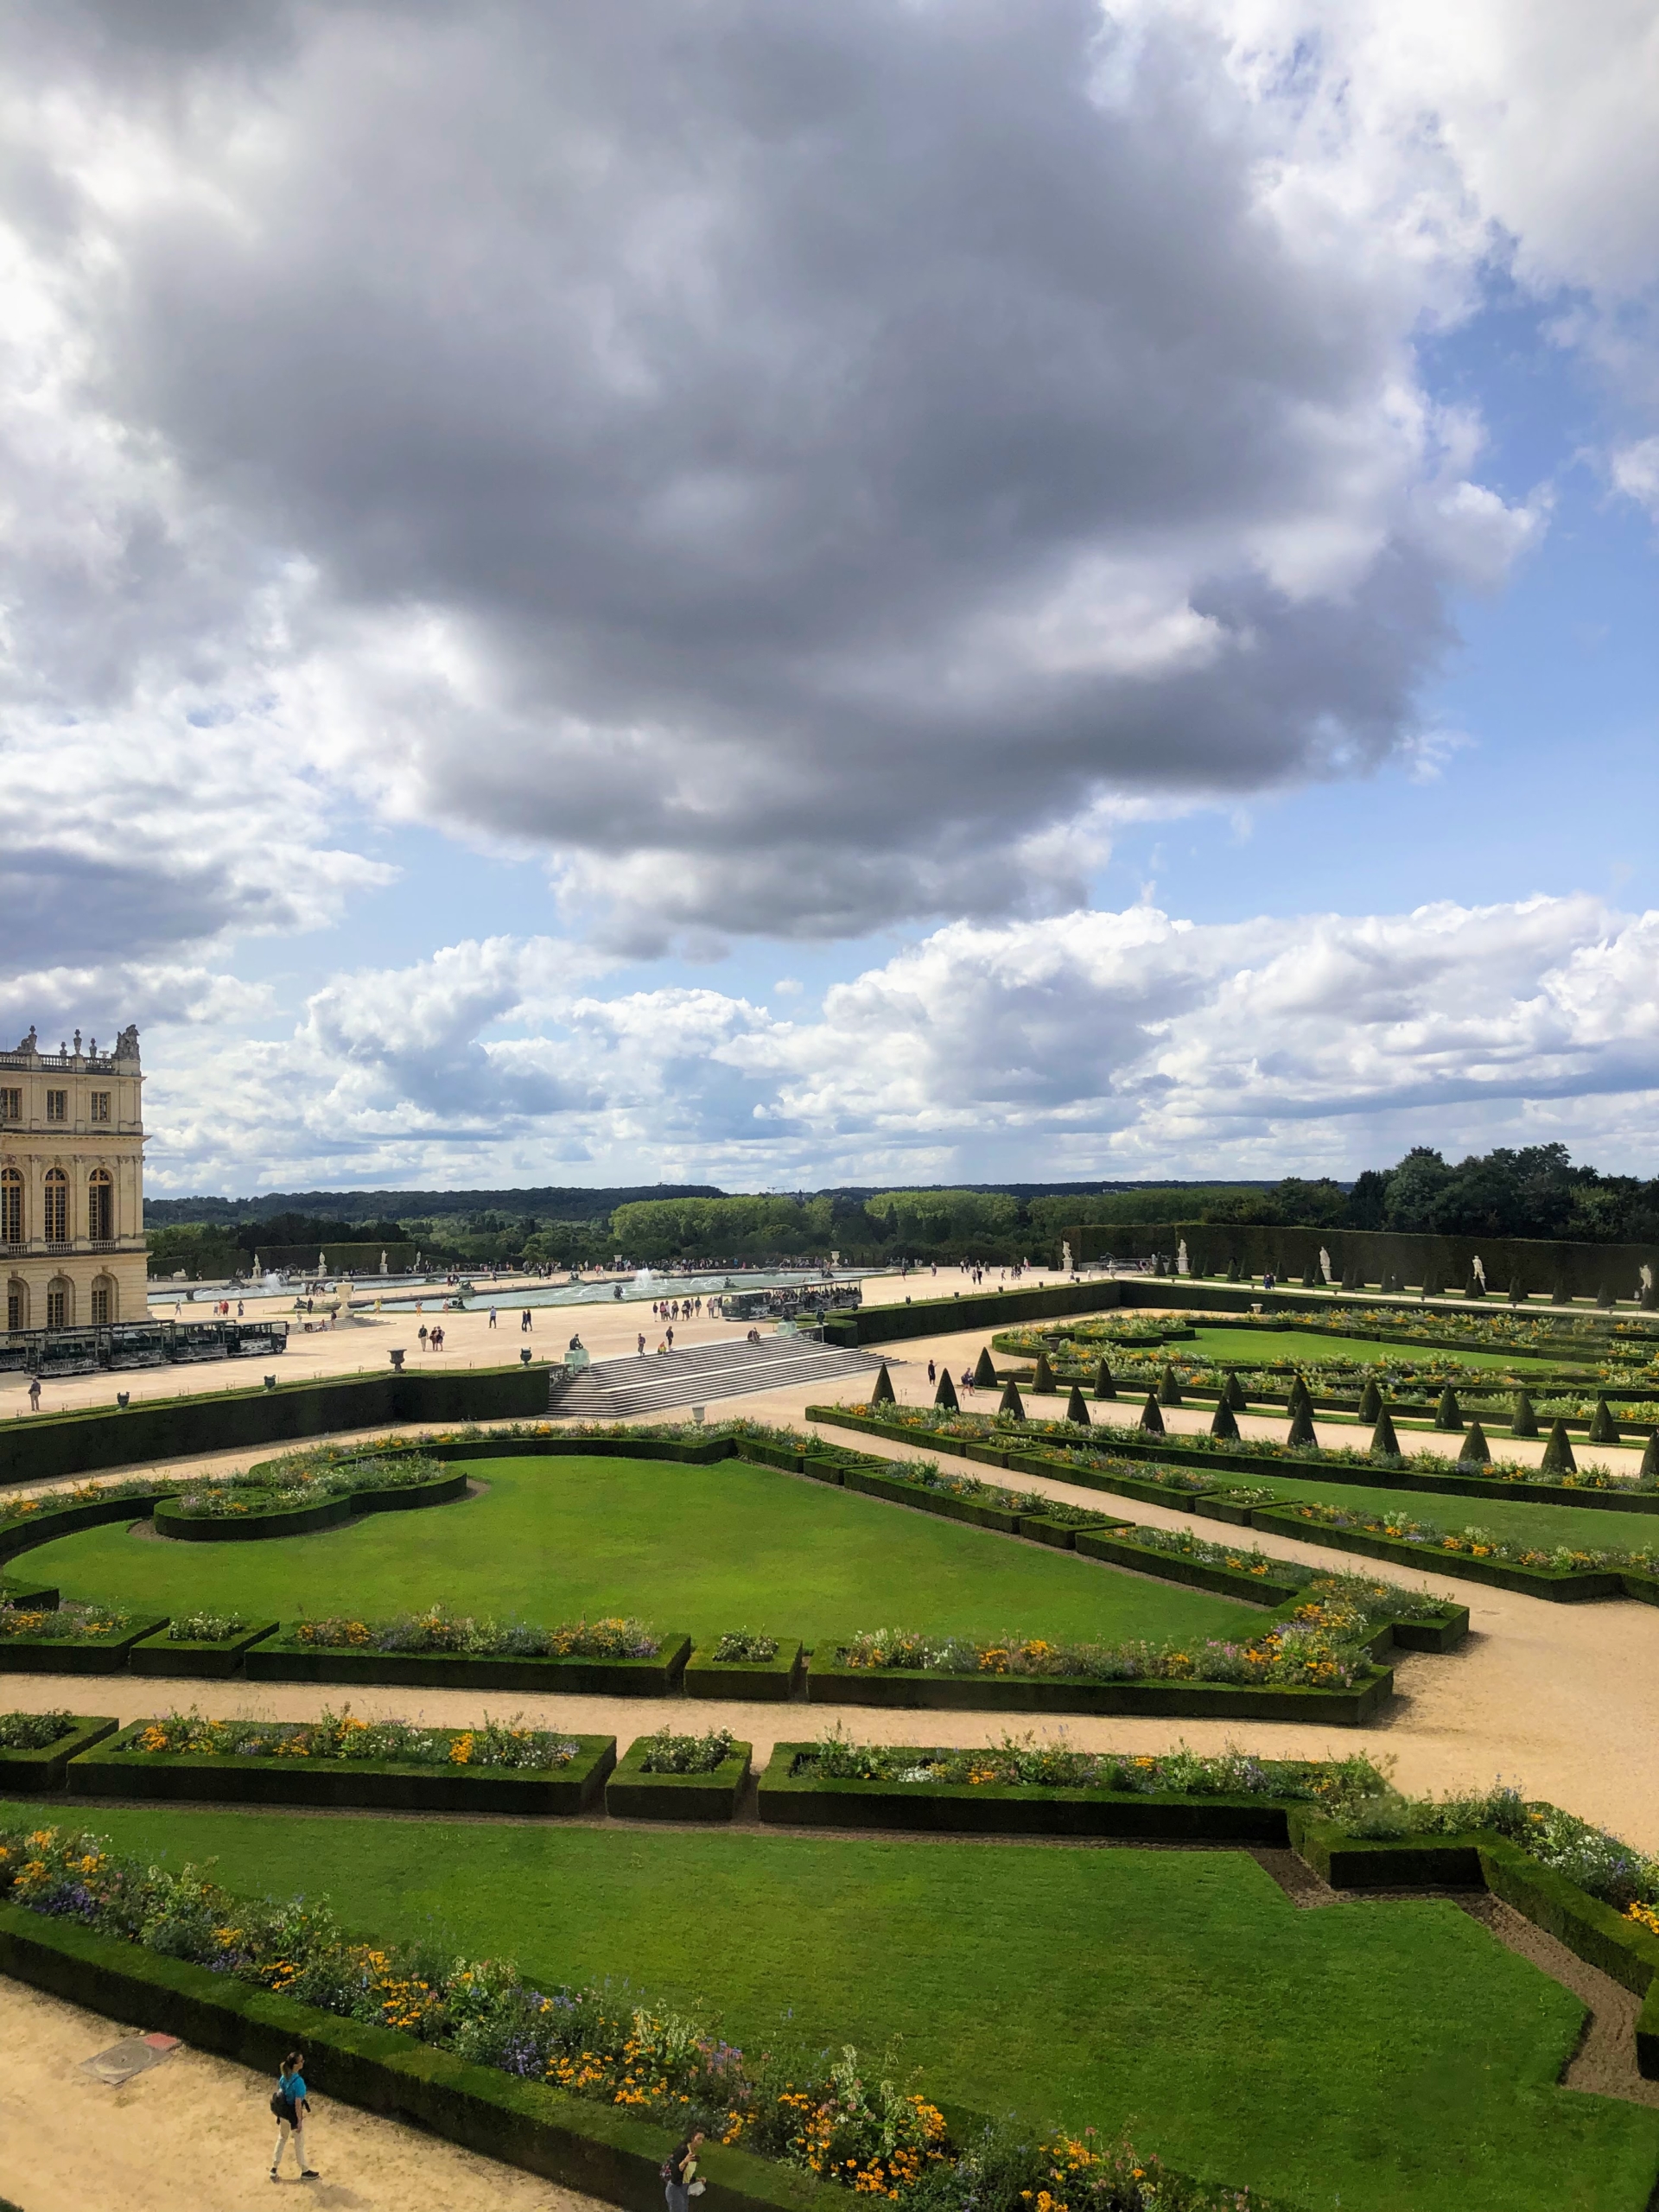
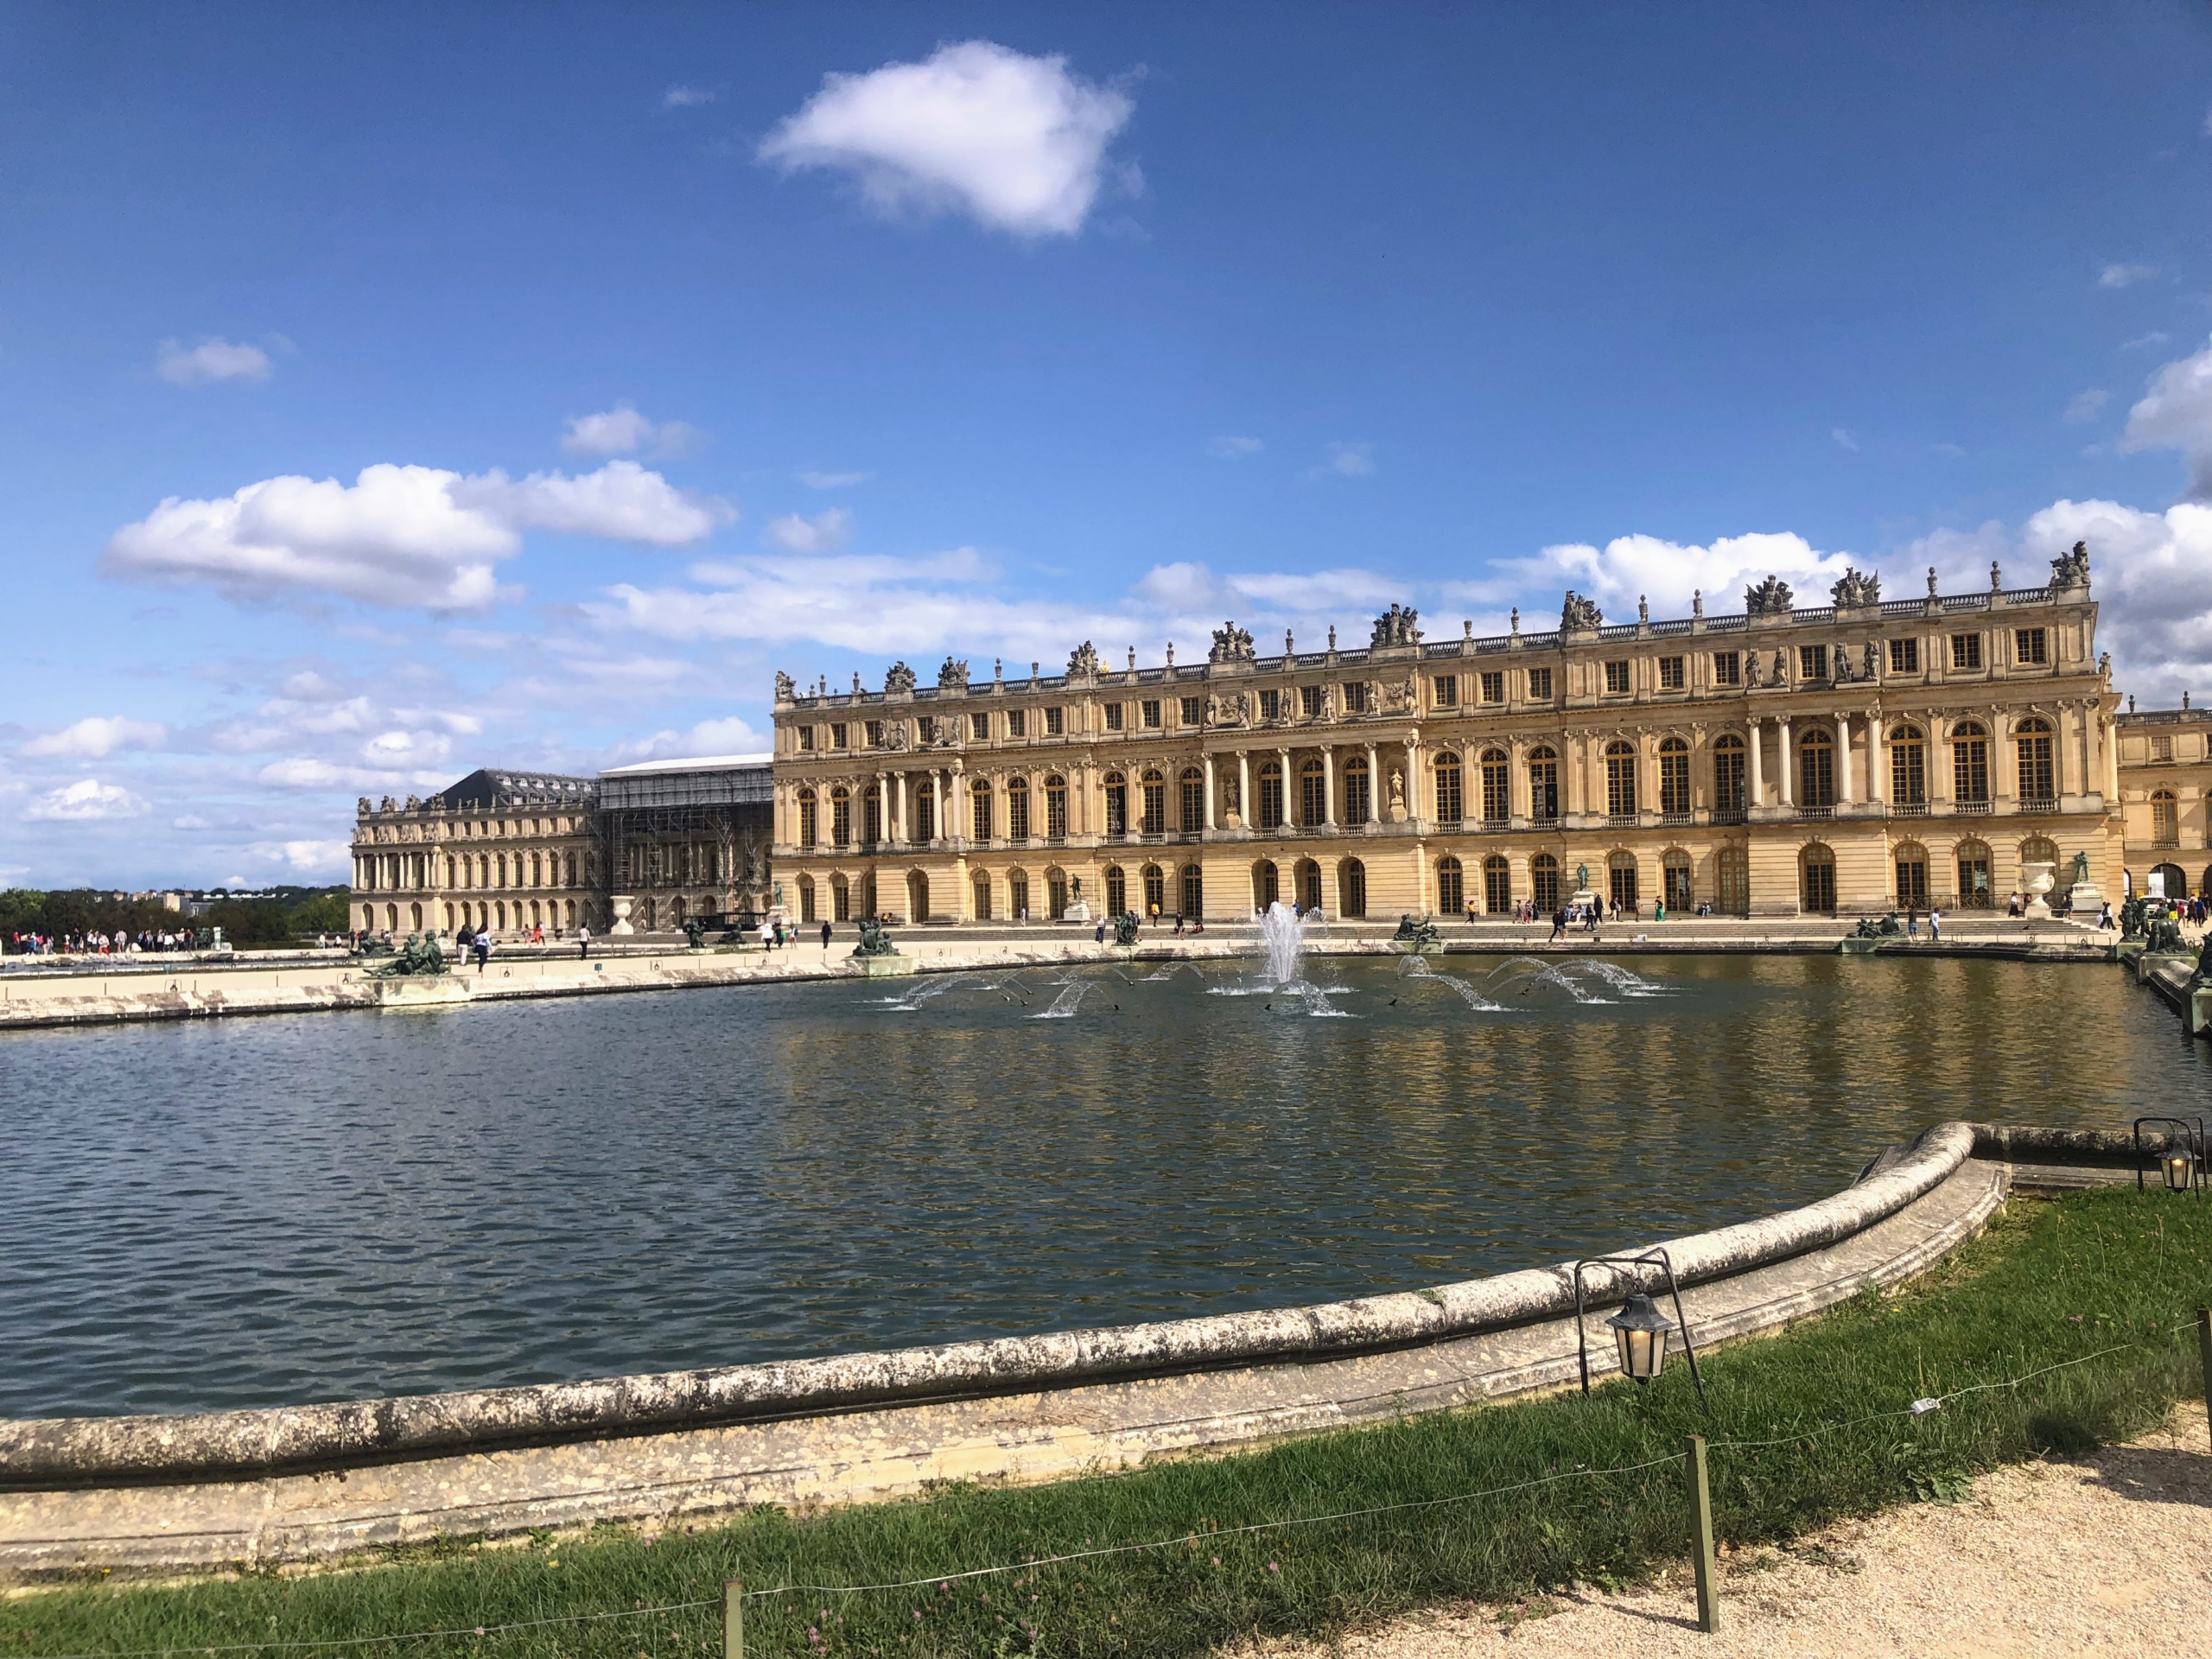
Here is the grand courtyard and front of the Royal Palace of Versailles in the Île-de-France region of France. It was a bit overcast to start, but the sun came out during Ryan’s tour of the gardens.
The Royal courtyard is all paved in marble with its contrasting colors of black and white stone.
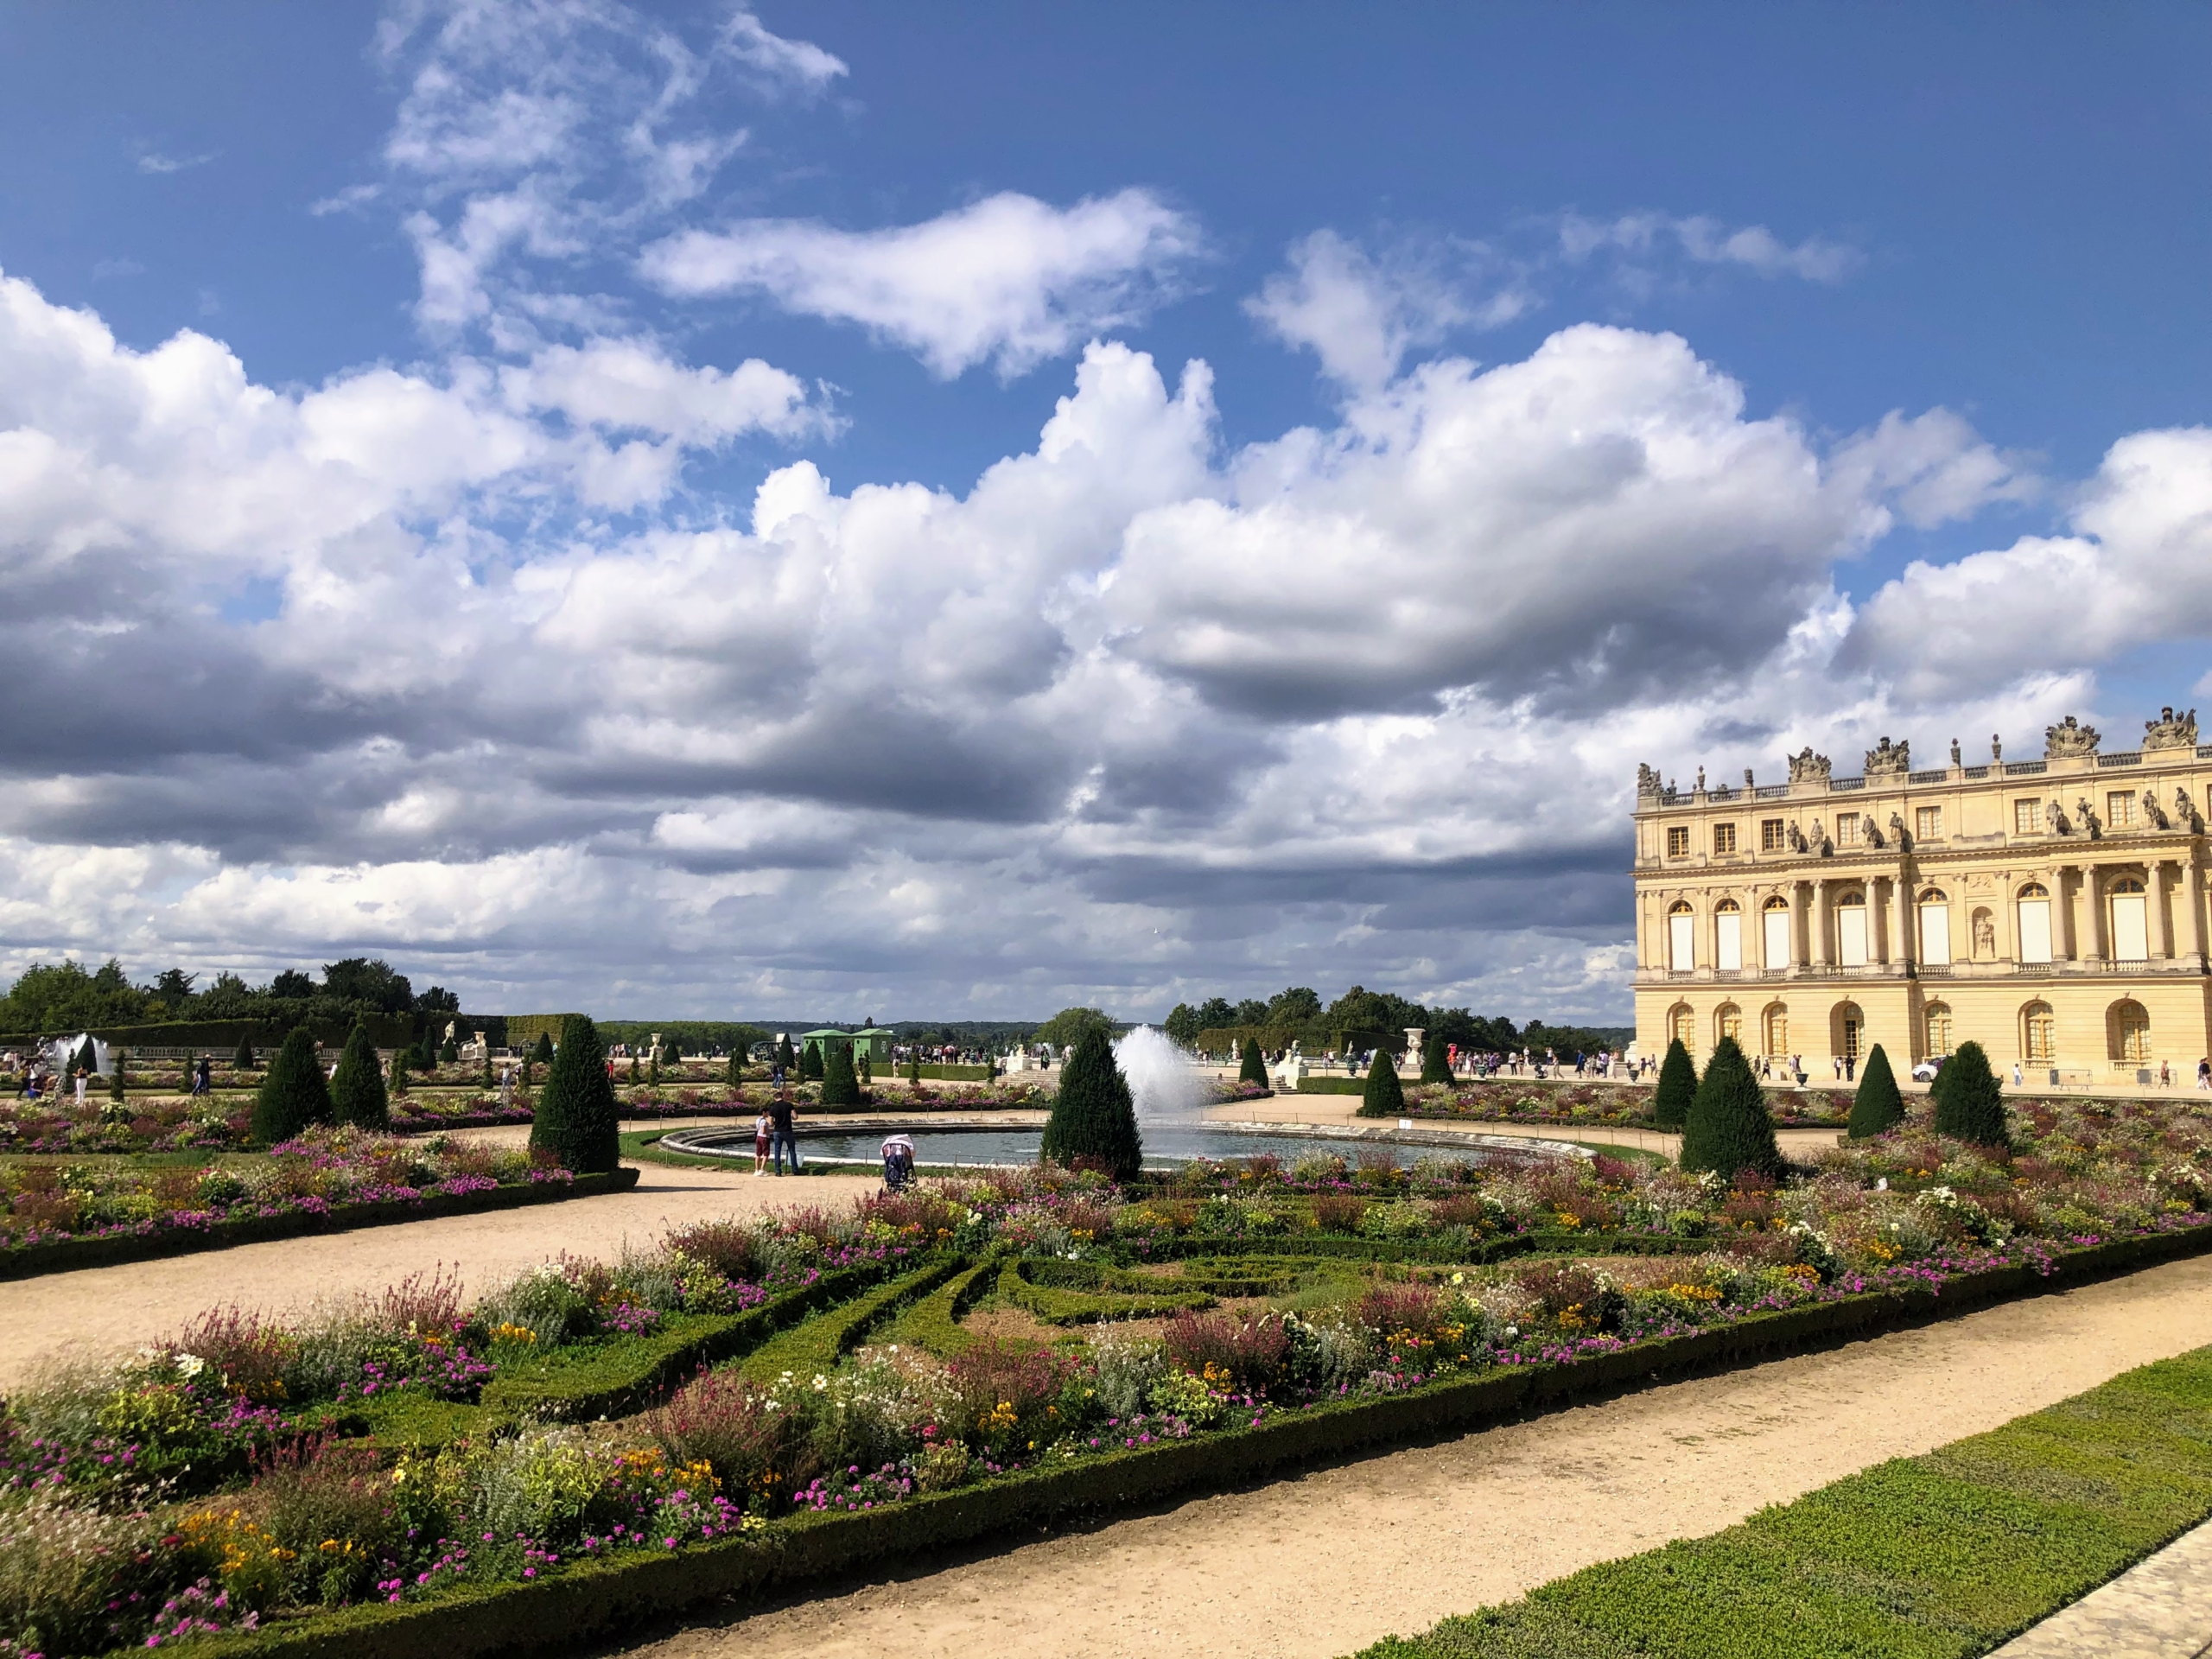
Versailles is an excellent example of the Baroque style of architecture, which developed in the 17th century.
In 1661 Louis XIV called on André Le Nôtre with the creation and renovation of the gardens of Versailles, which Louis considered just as important as the Palace itself. Work on the gardens was started at the same time as the work on the palace and lasted for about 40 years.
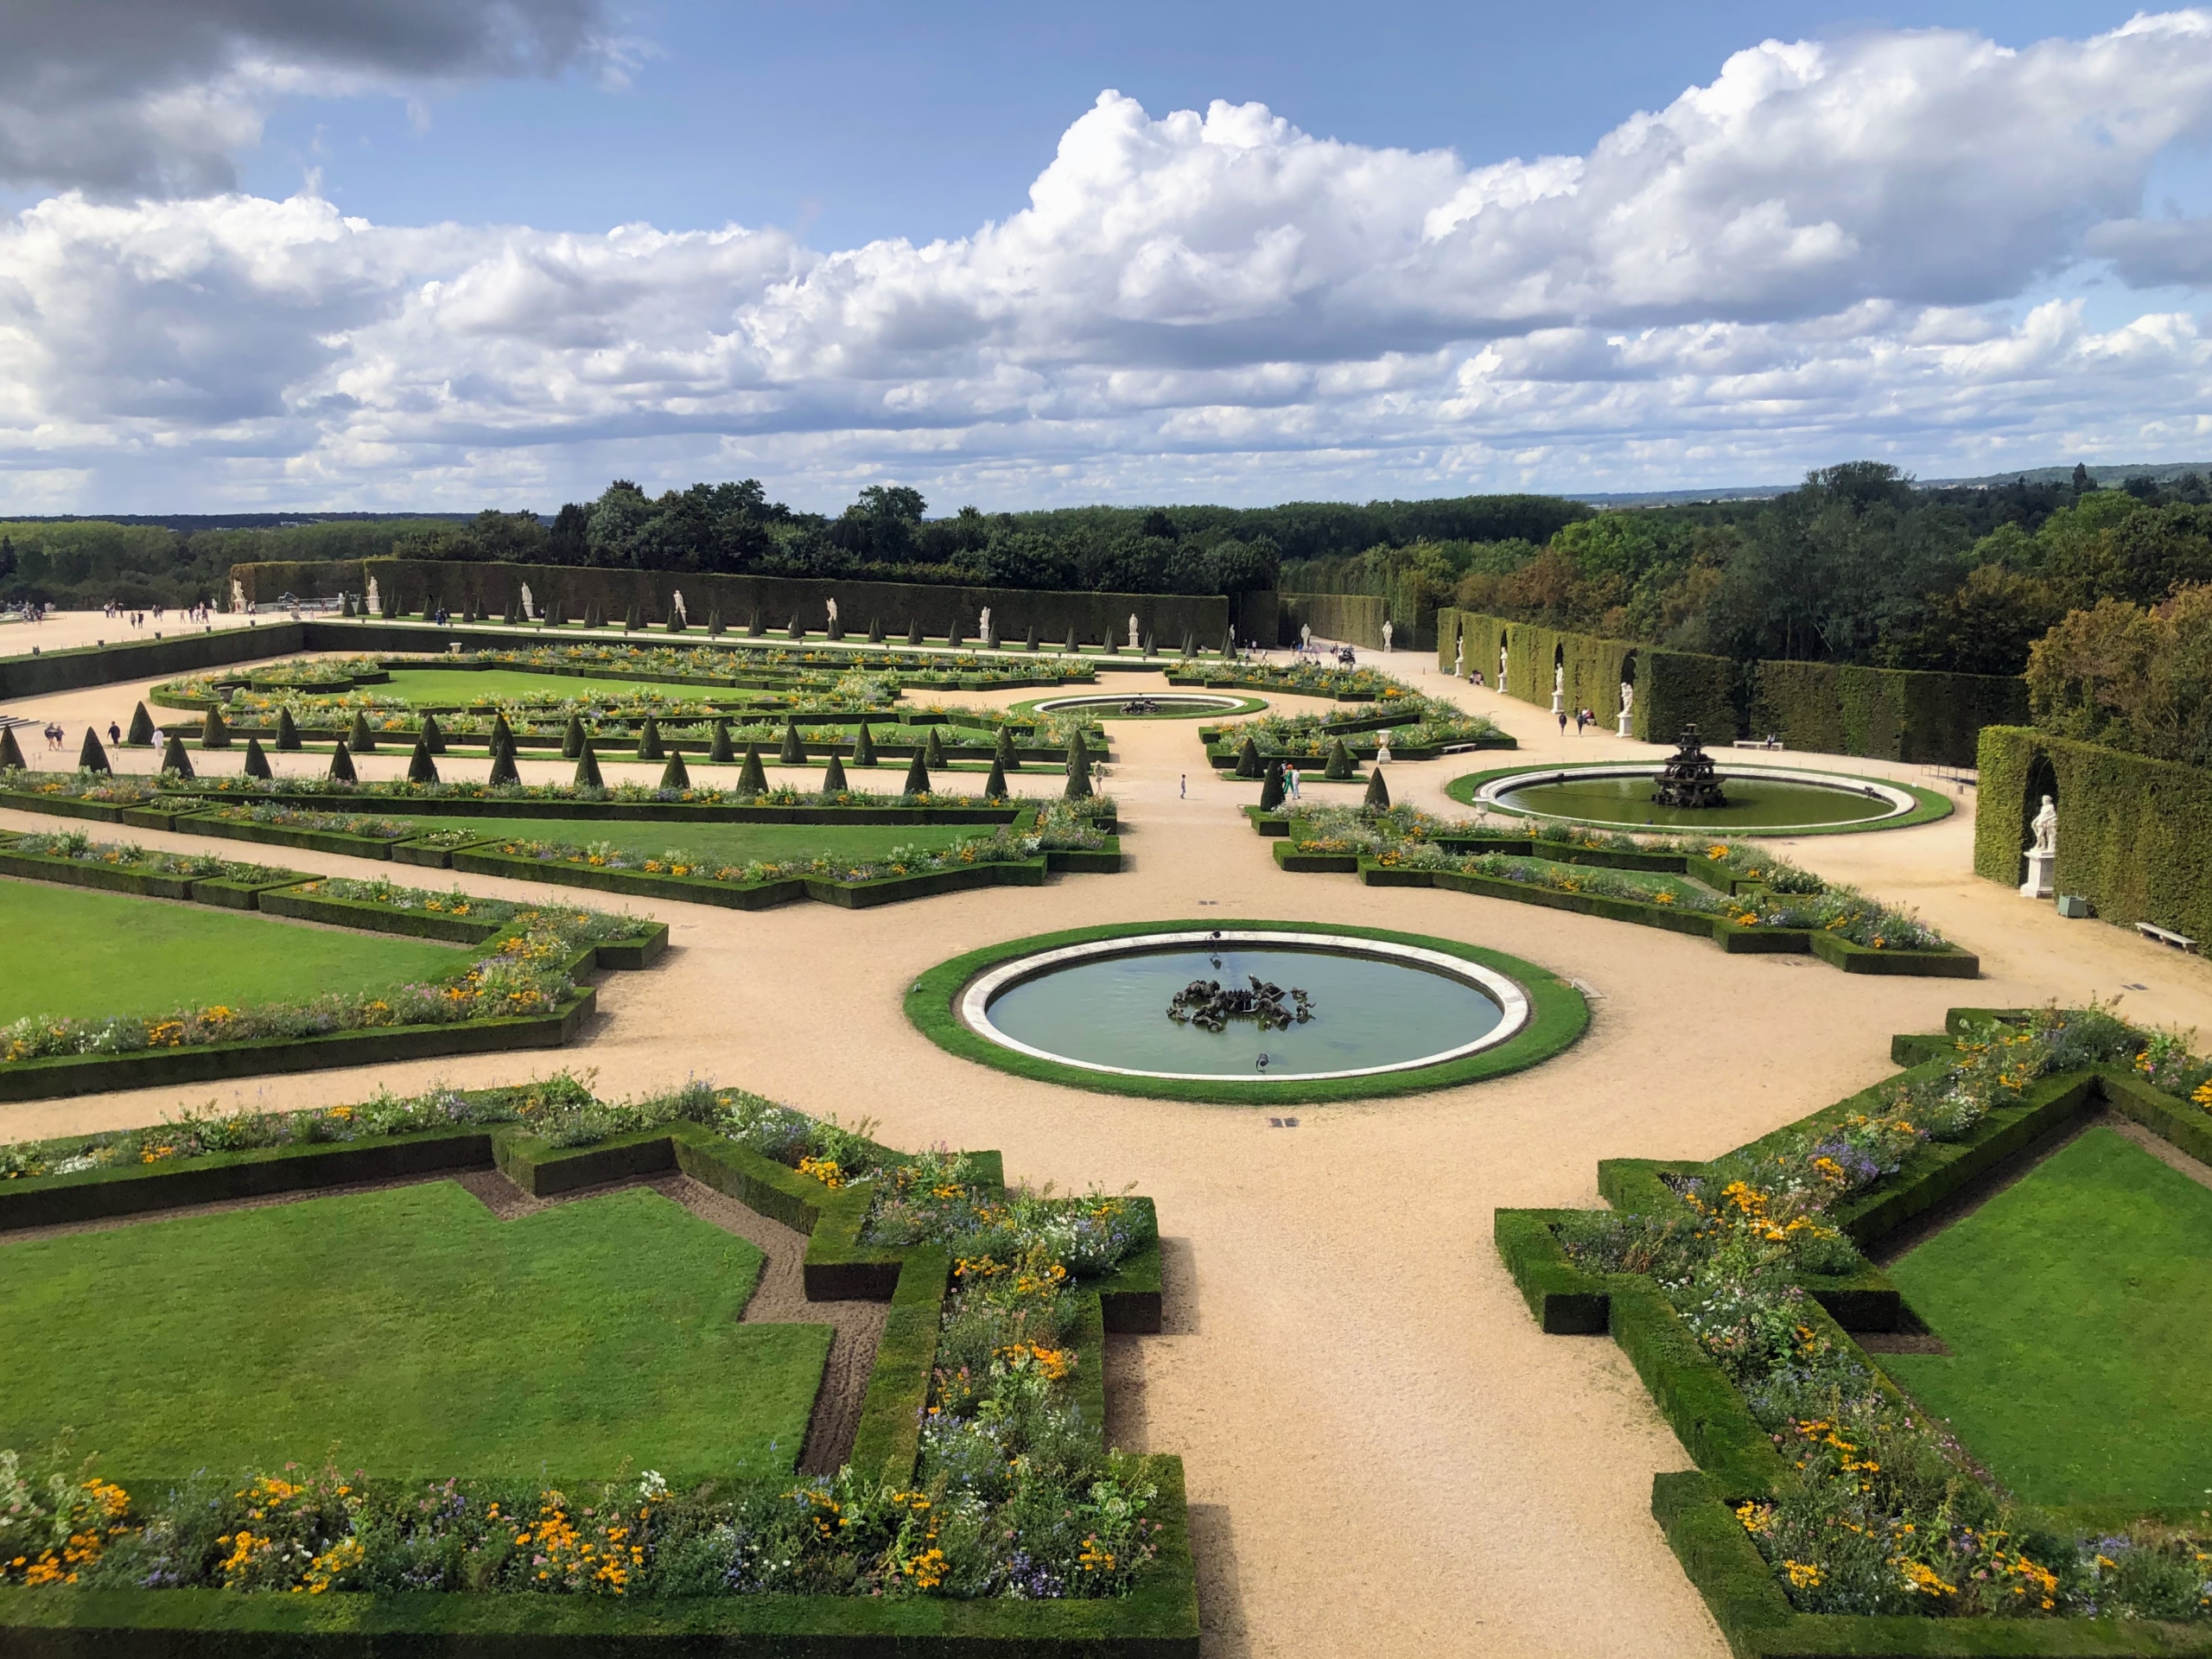
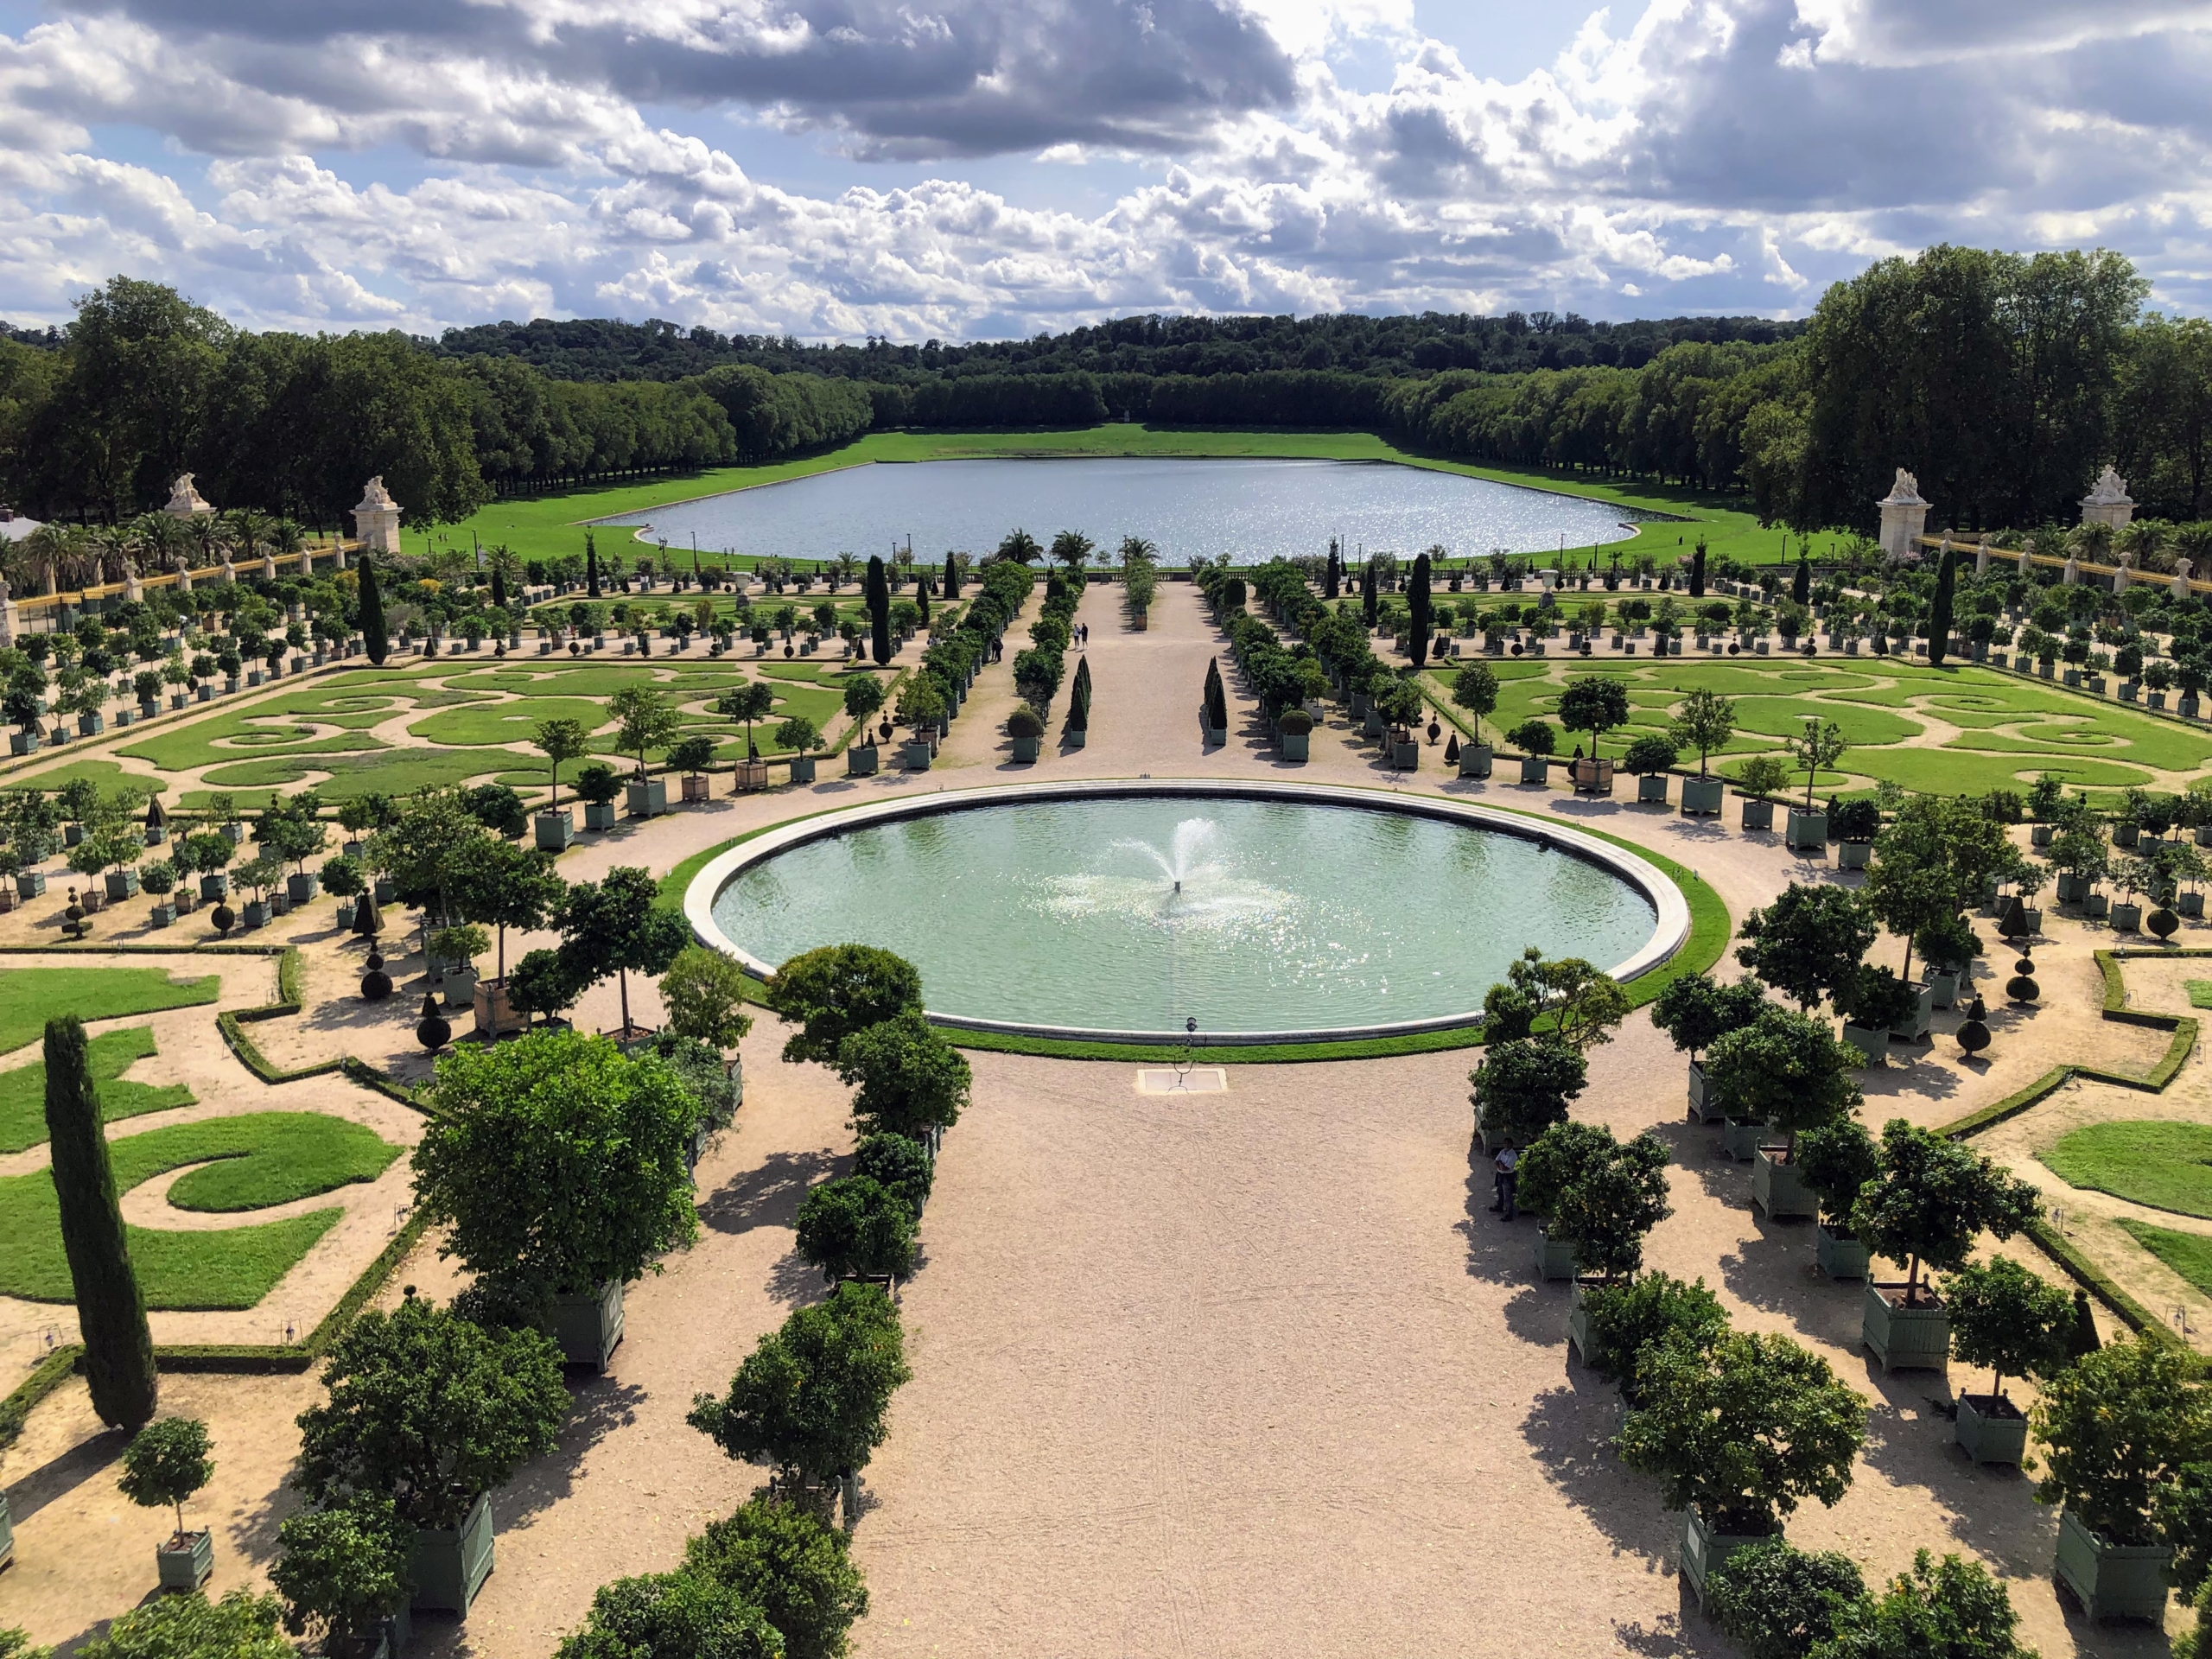
Creating the gardens of Versailles was a monumental task. Large amounts of soil had to be moved to level the ground and make room for various fountains, pools and statues and to create the parterres. This is the North Parterre.
It took thousands of workers, sometimes even entire regiments, to help create this immense project of the king.
To maintain its incredible design, the garden needed to be replanted approximately once every 100 years. King Louis XVI oversaw one of these replanting projects and so did Napoleon III during his reign.
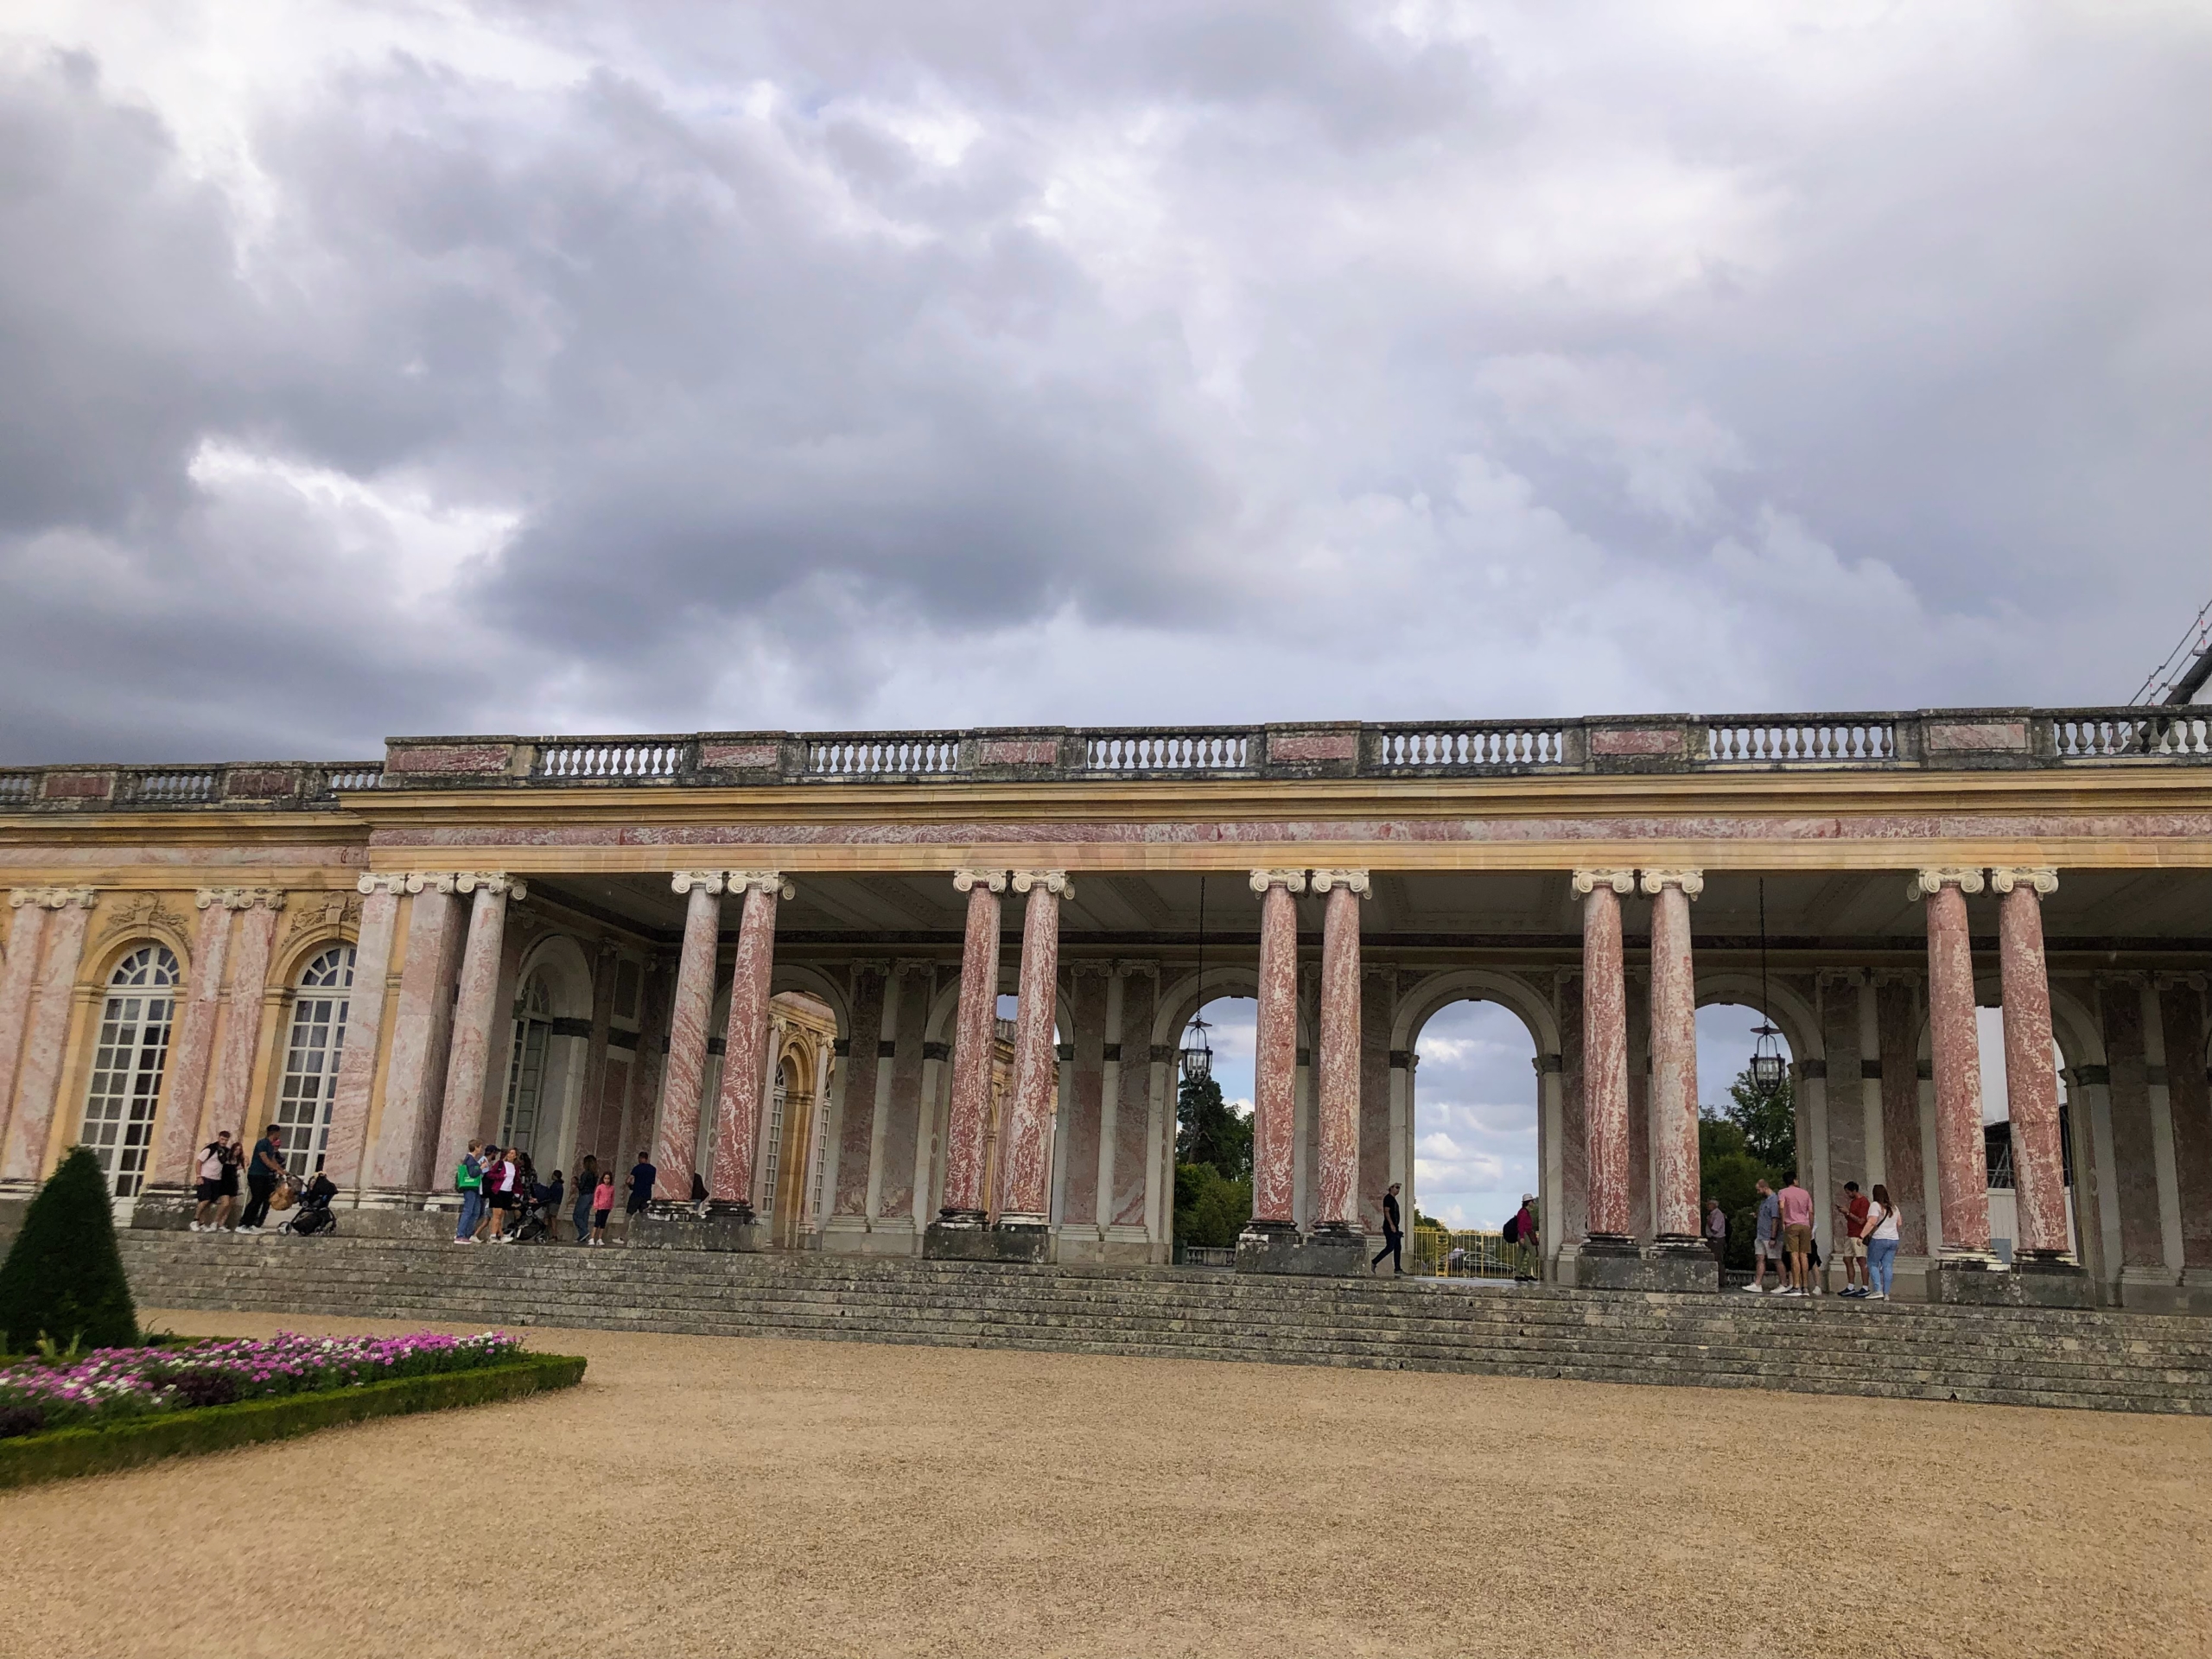
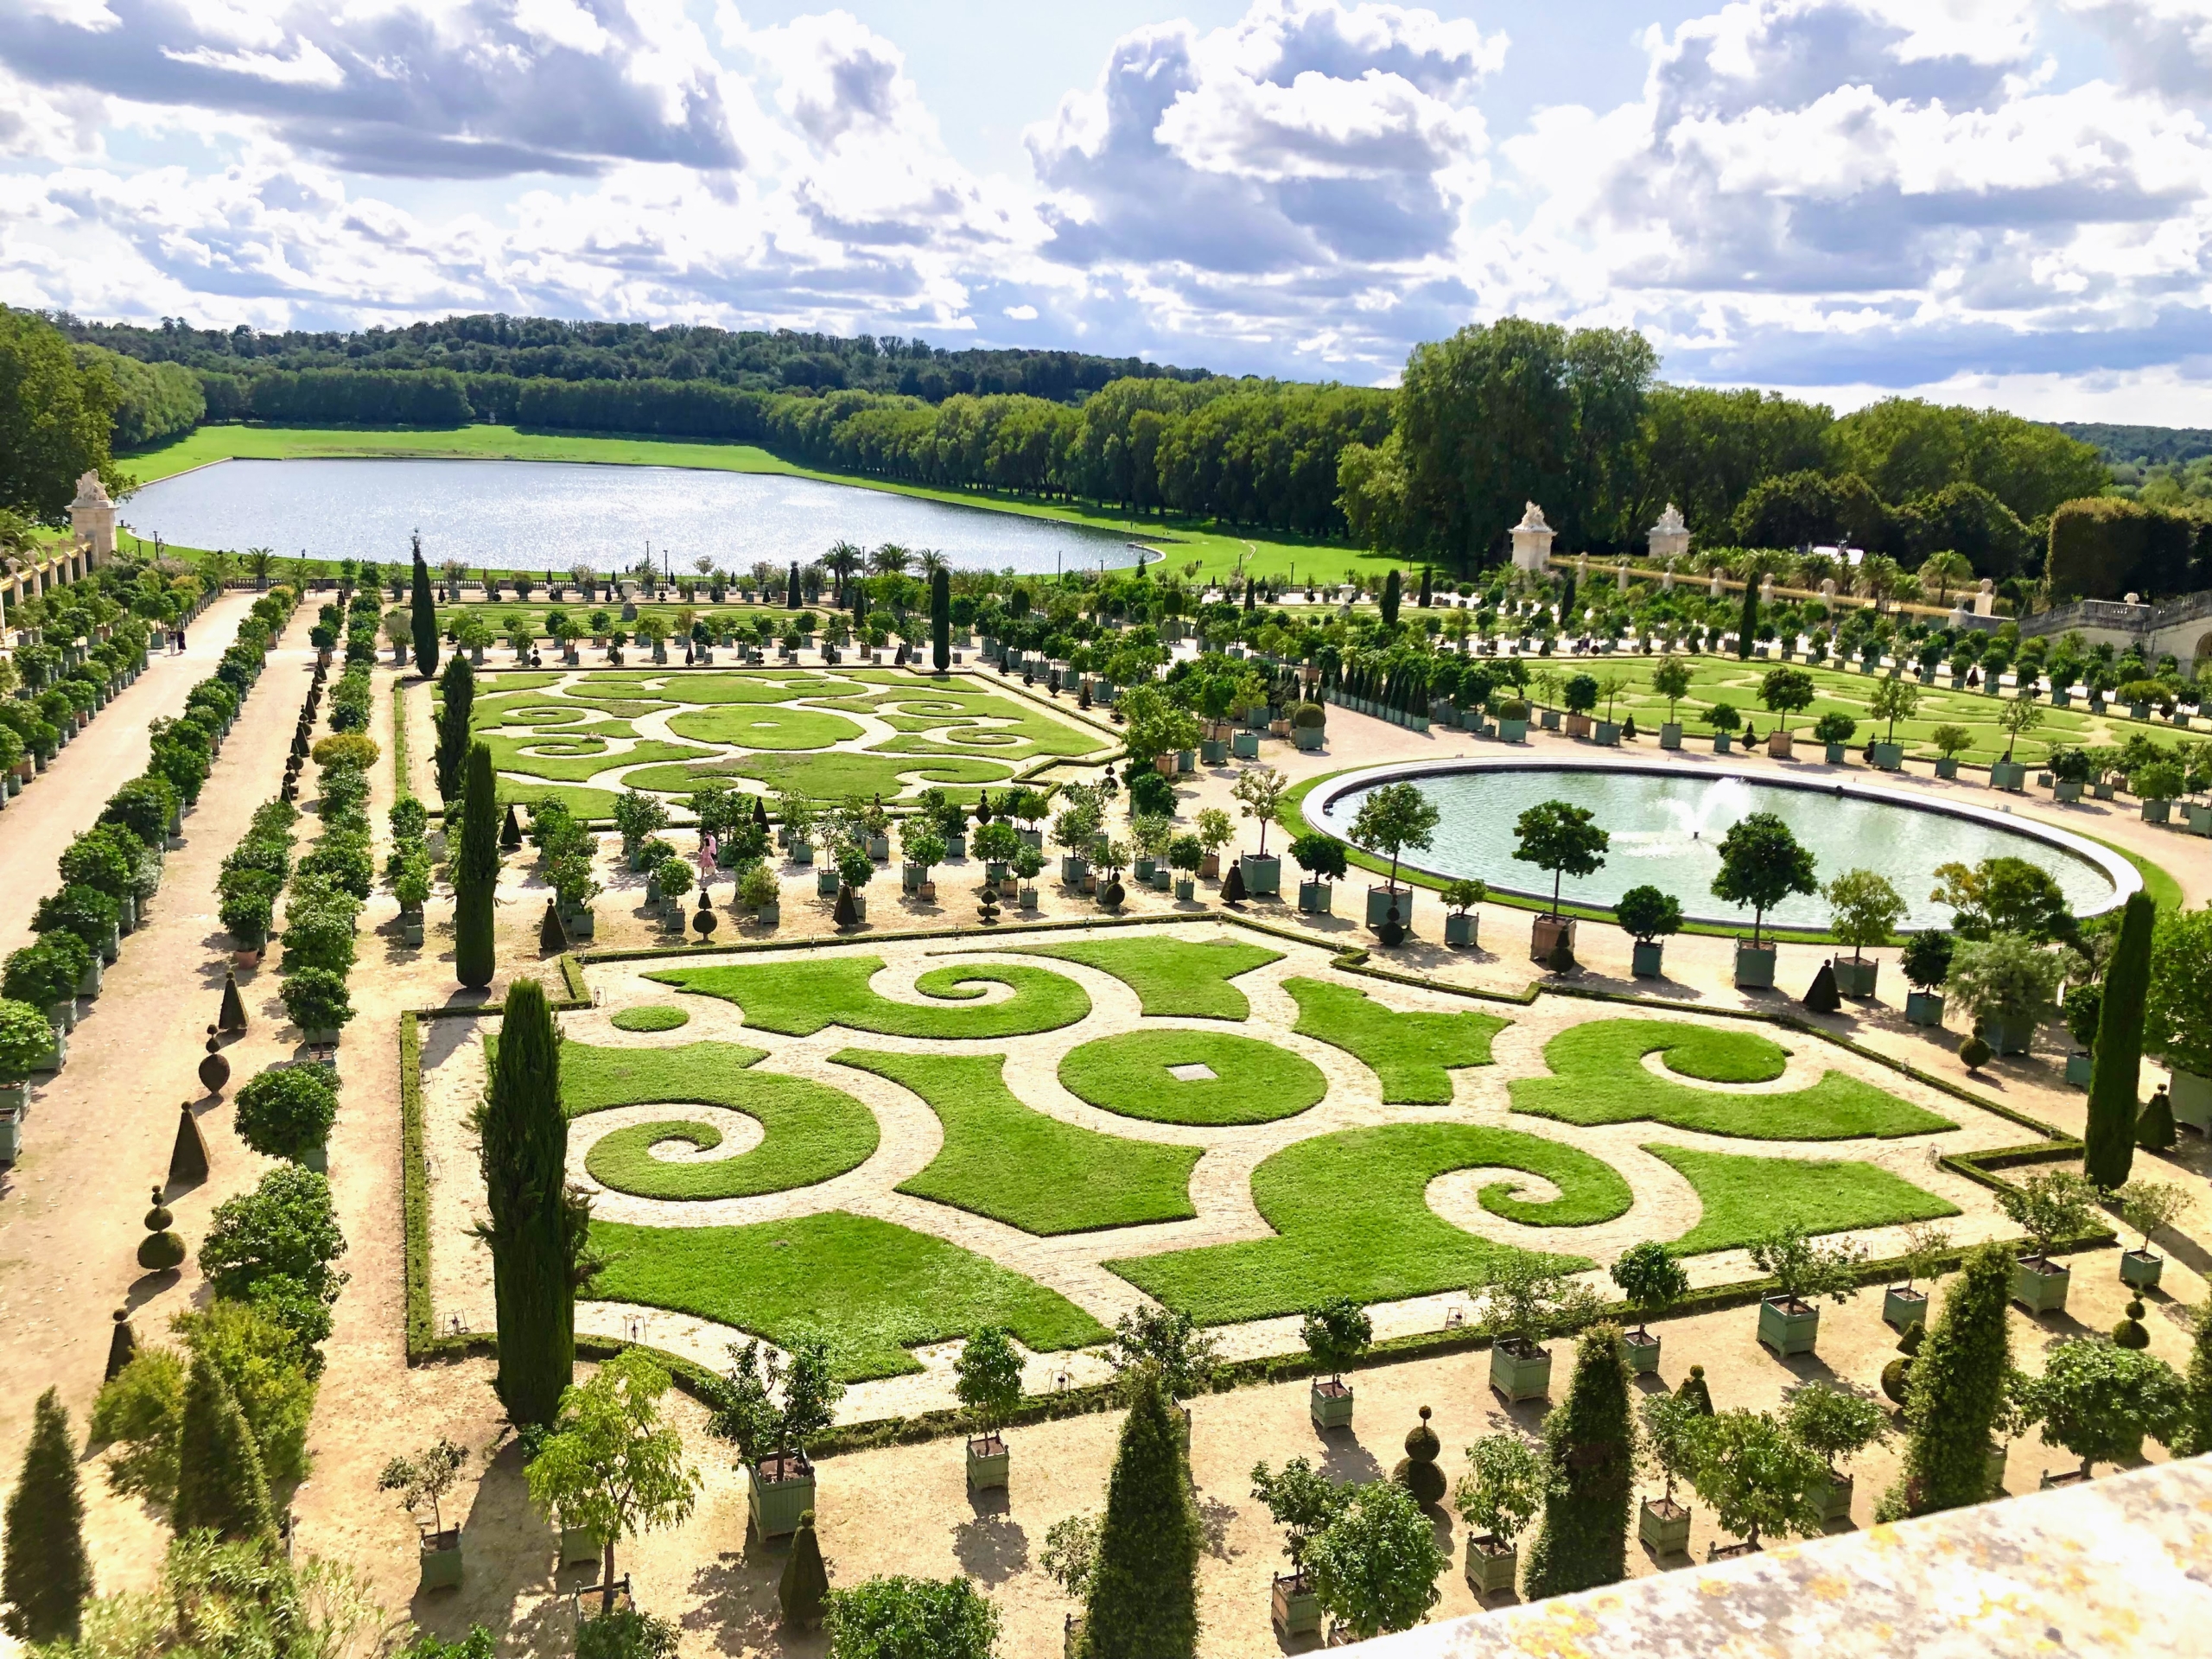
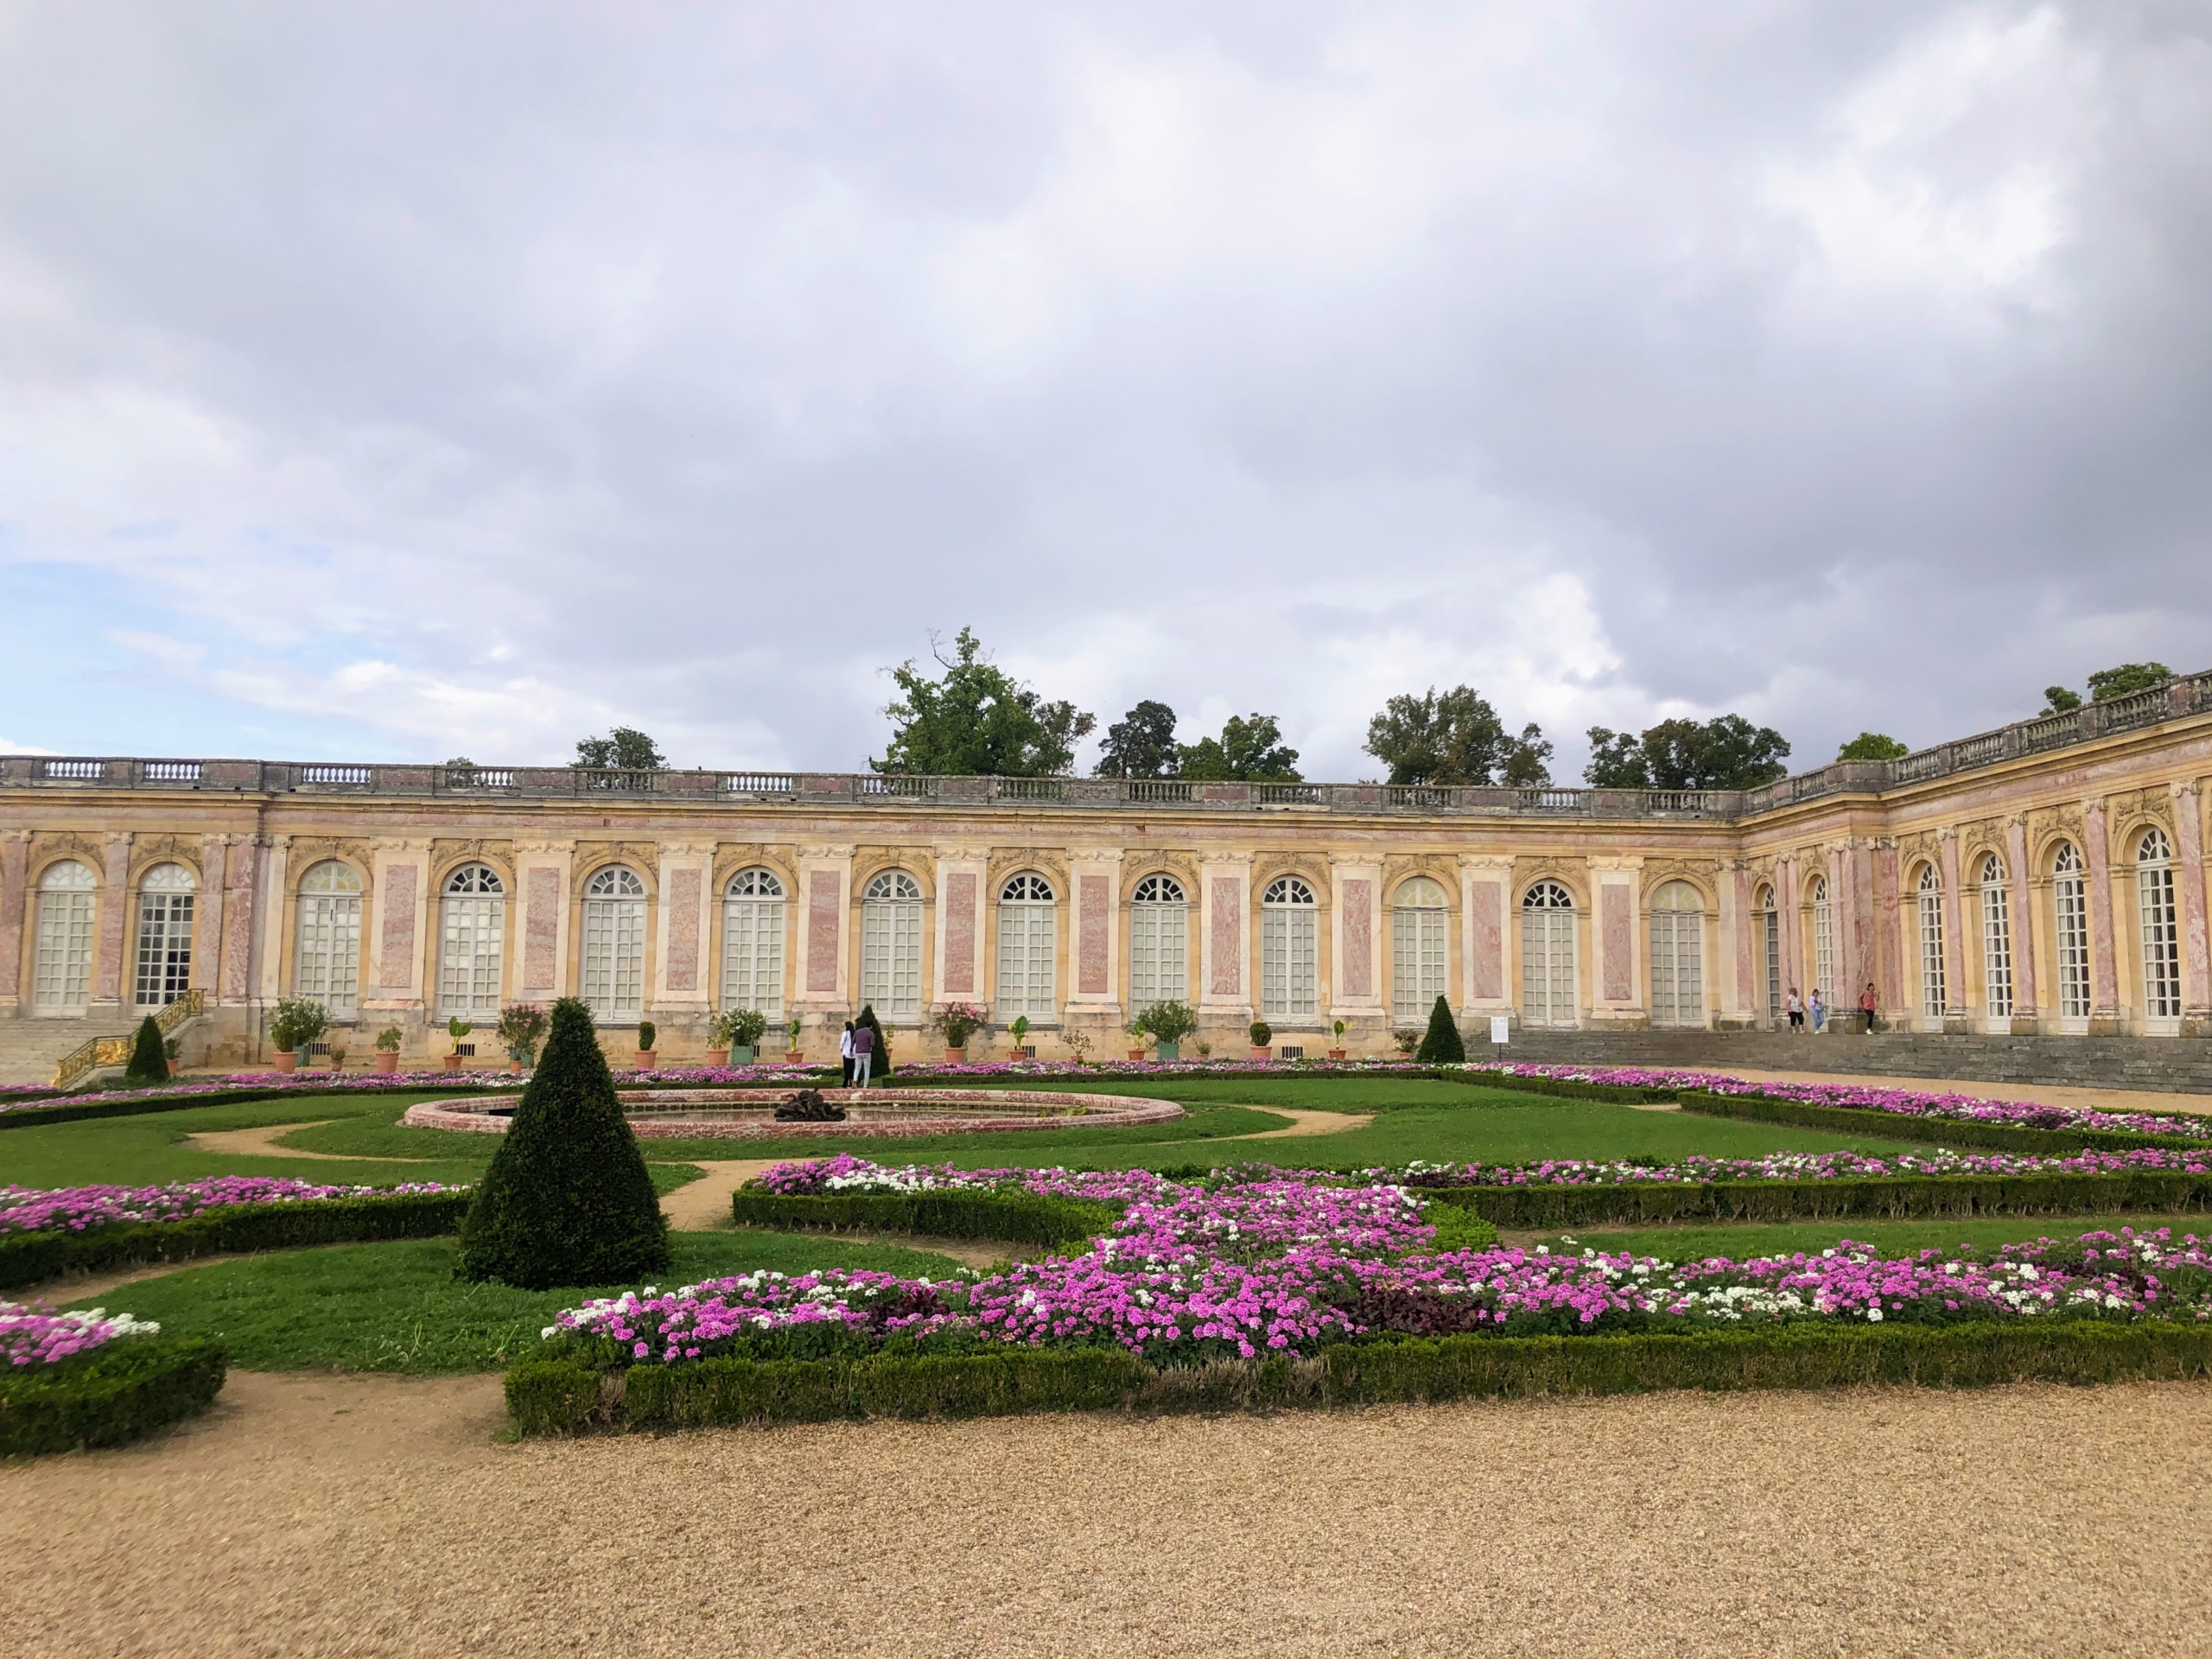
The Garden of Versailles is considered the essence of French formal garden design. This “jardin à la Français” uses order on nature by creating lots of symmetry and incorporating water features and plant life. This is the Orangerie.
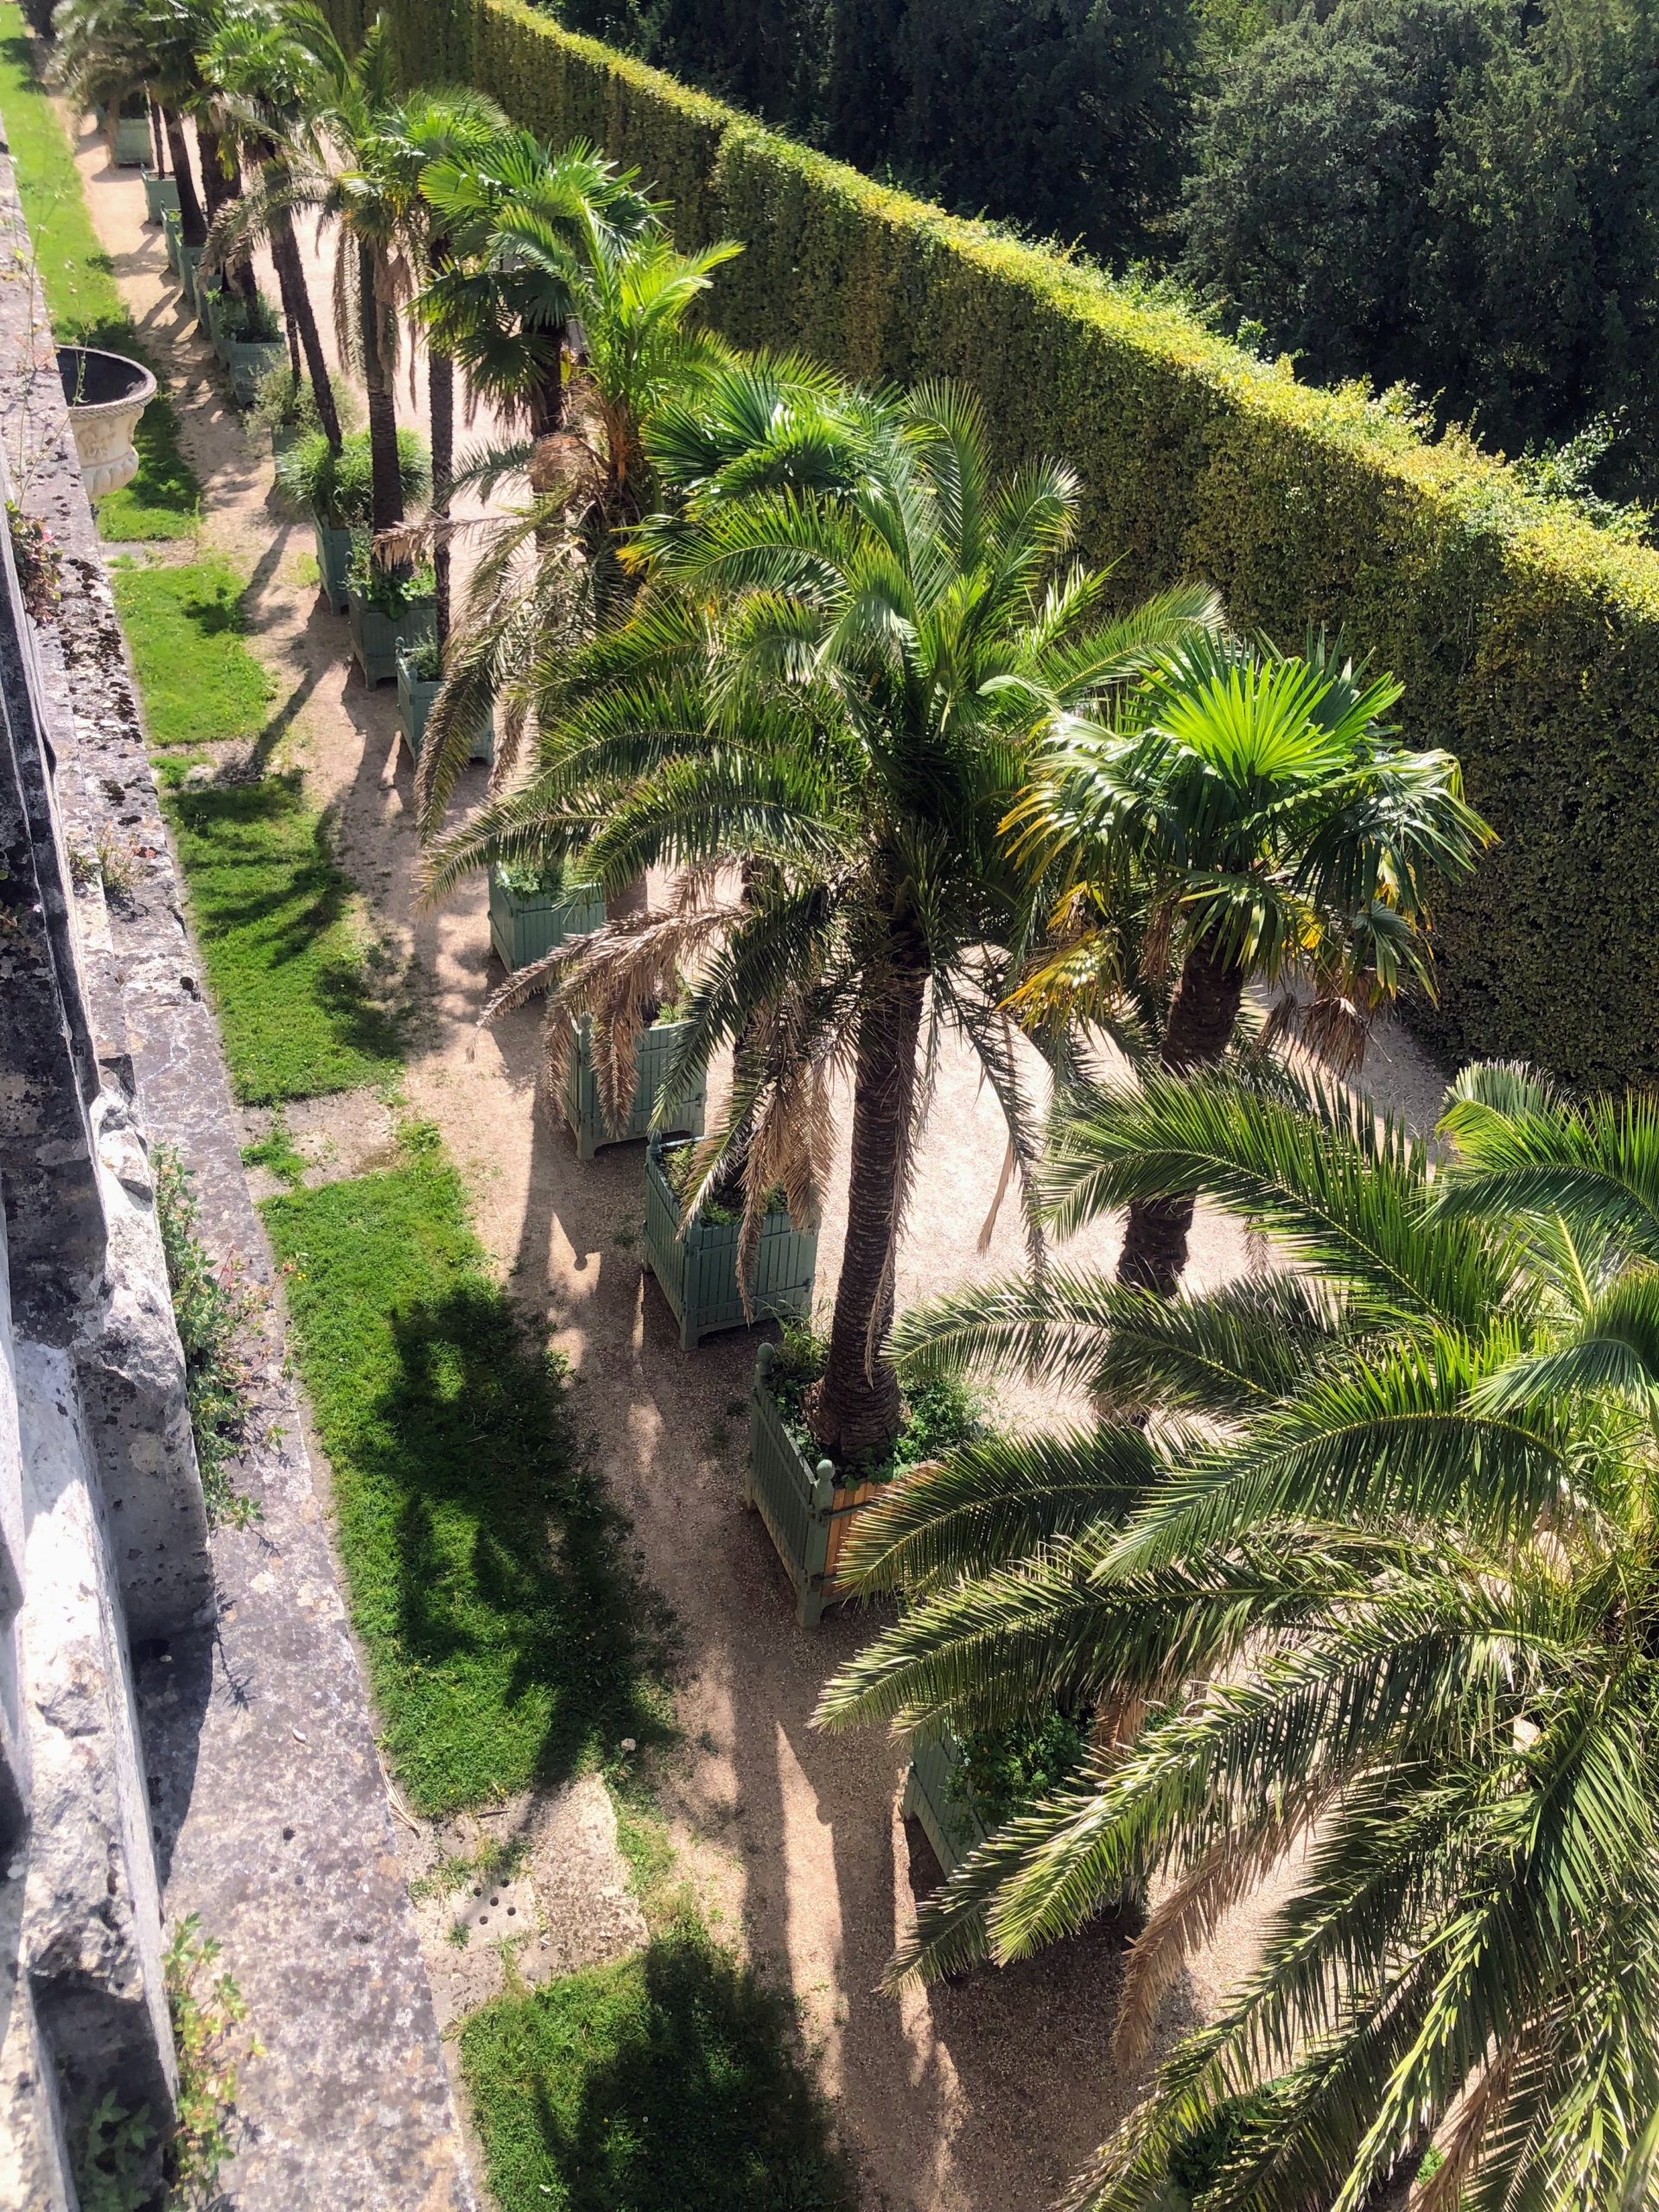
Originally completed in 1663, the Orangerie was intended to supply the much smaller hunting lodge of Versailles and the small retinue, or group of assistants and advisors, which Louis XIV would bring with him in the summer. In 1678, an enlargement of the Orangerie was created by Jules Hardouin-Mansart, which doubled the size of the original. in the distance is the Lake of the Swiss Guards.
Potted palm trees, orange trees from Portugal, Spain and Italy, lemon trees, oleander, and pomegranate trees, some more than 200 years old, are all housed in the Orangerie.
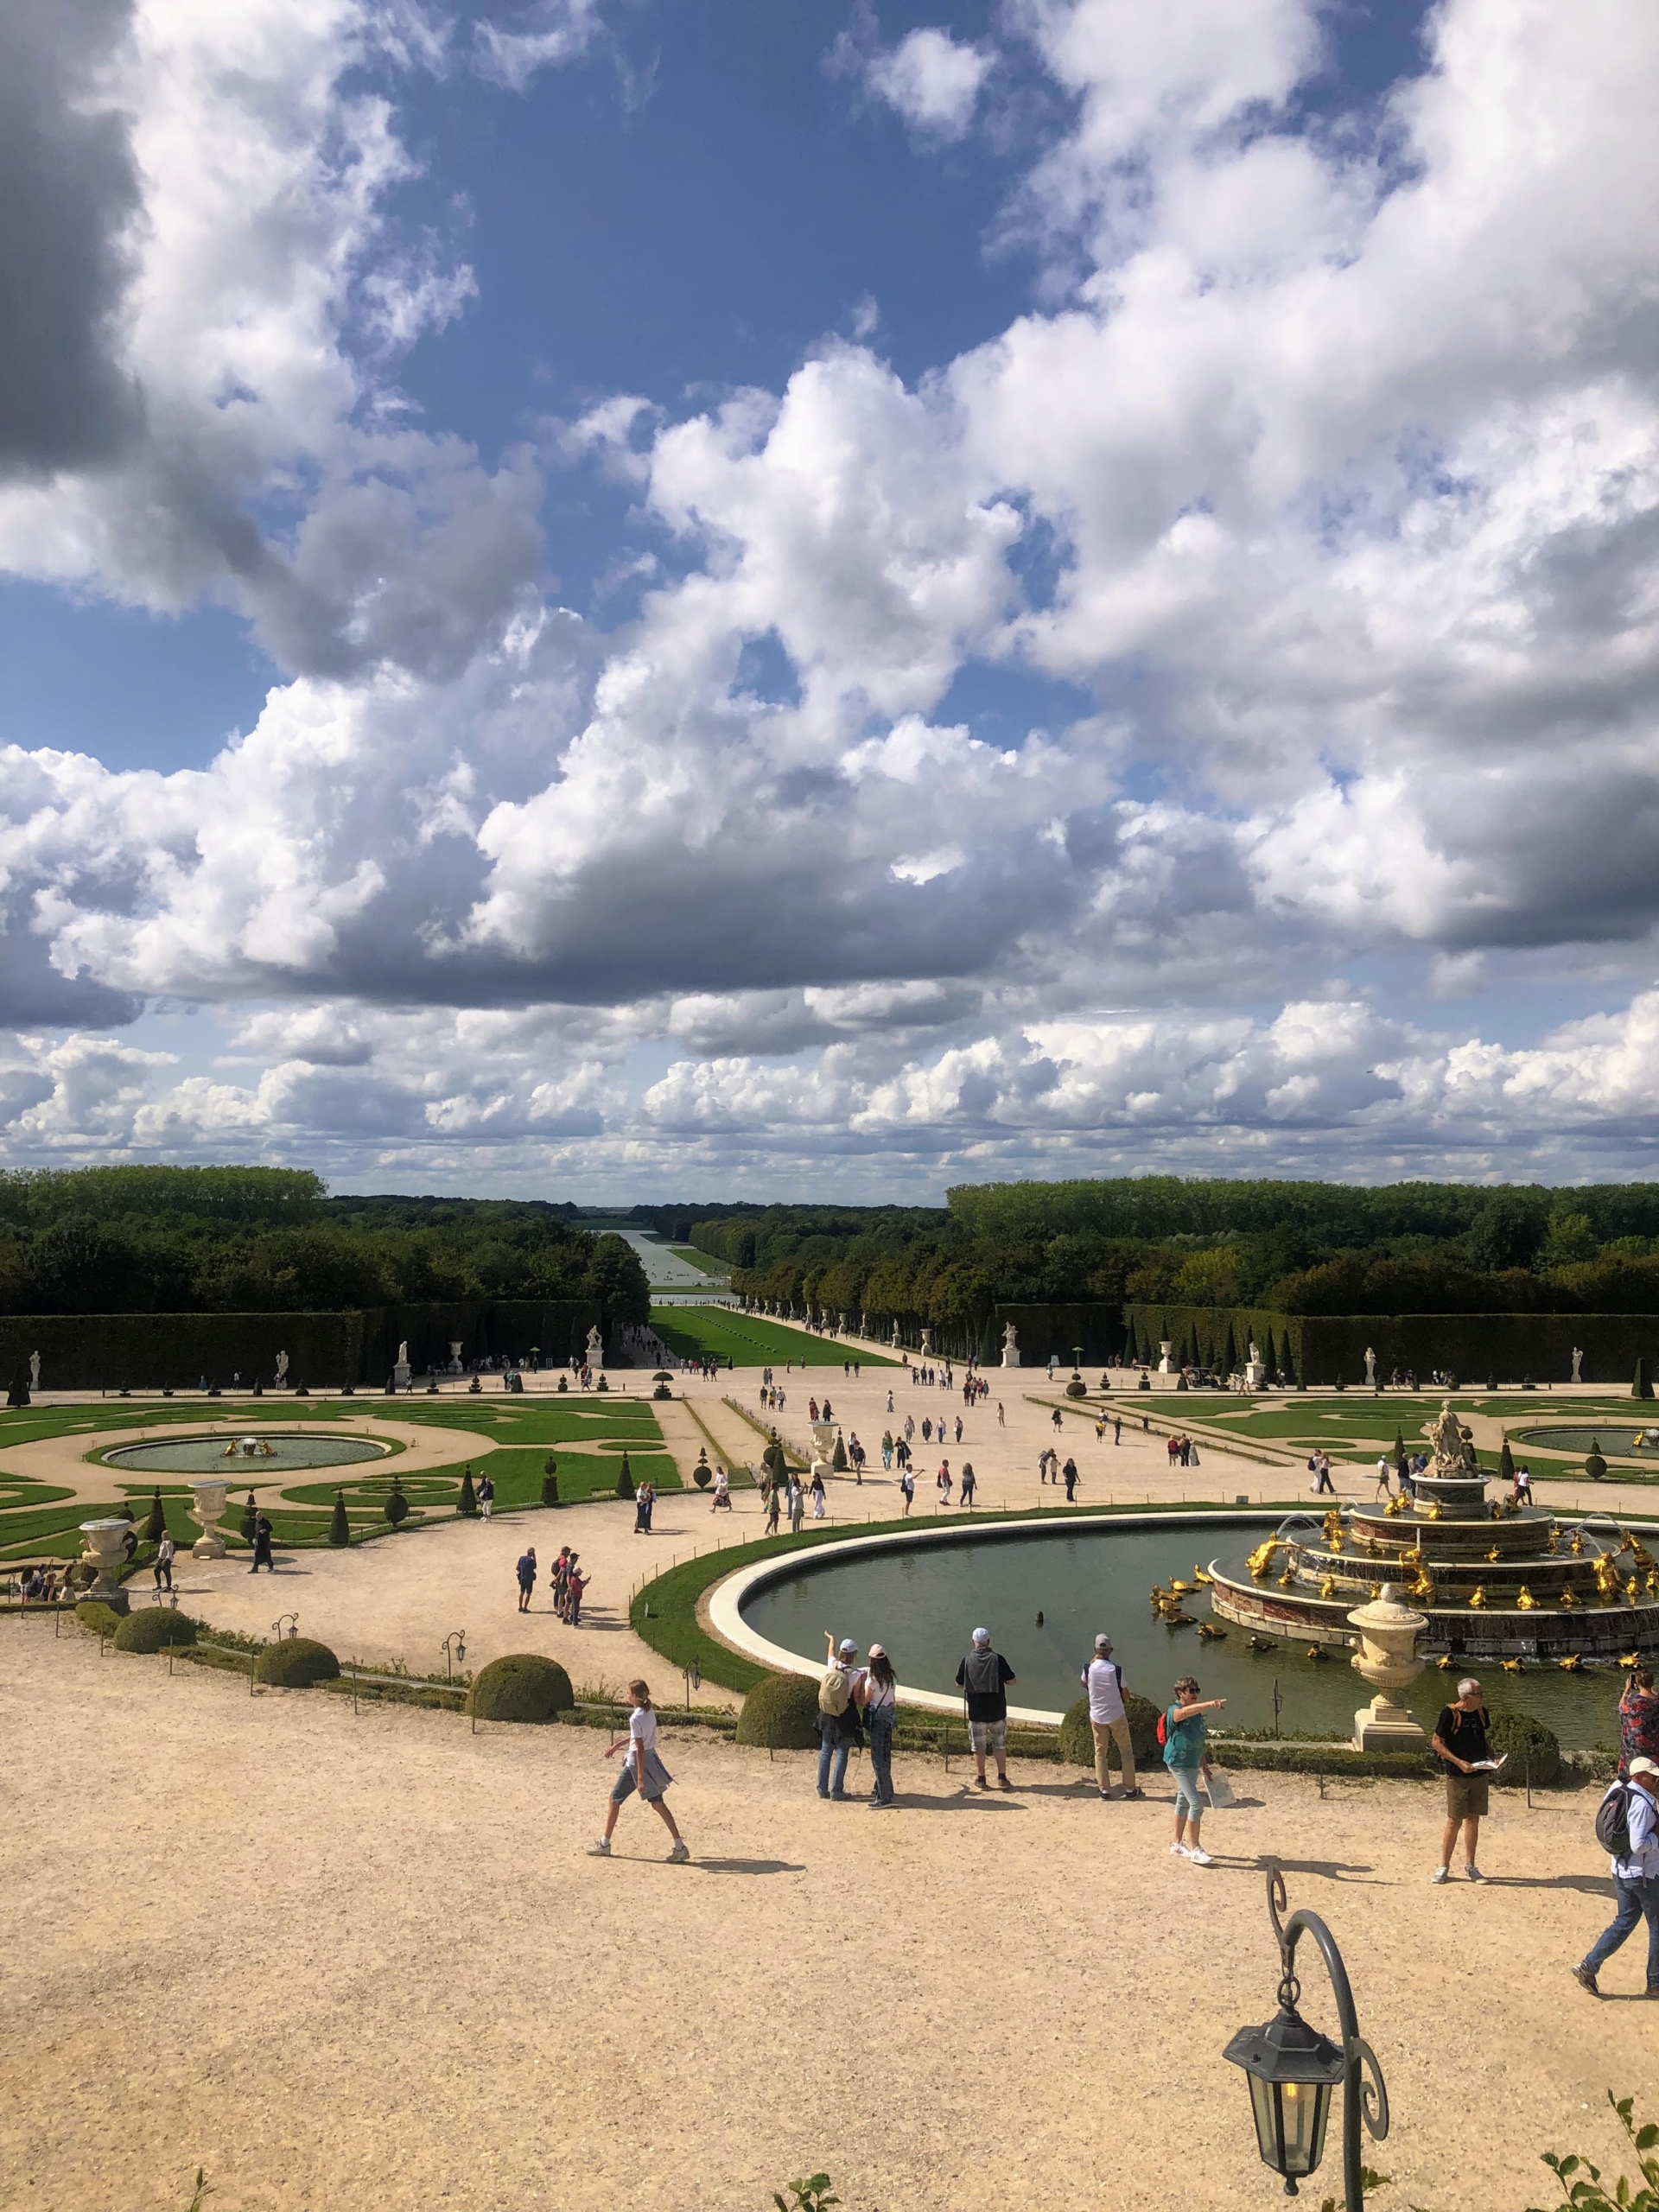
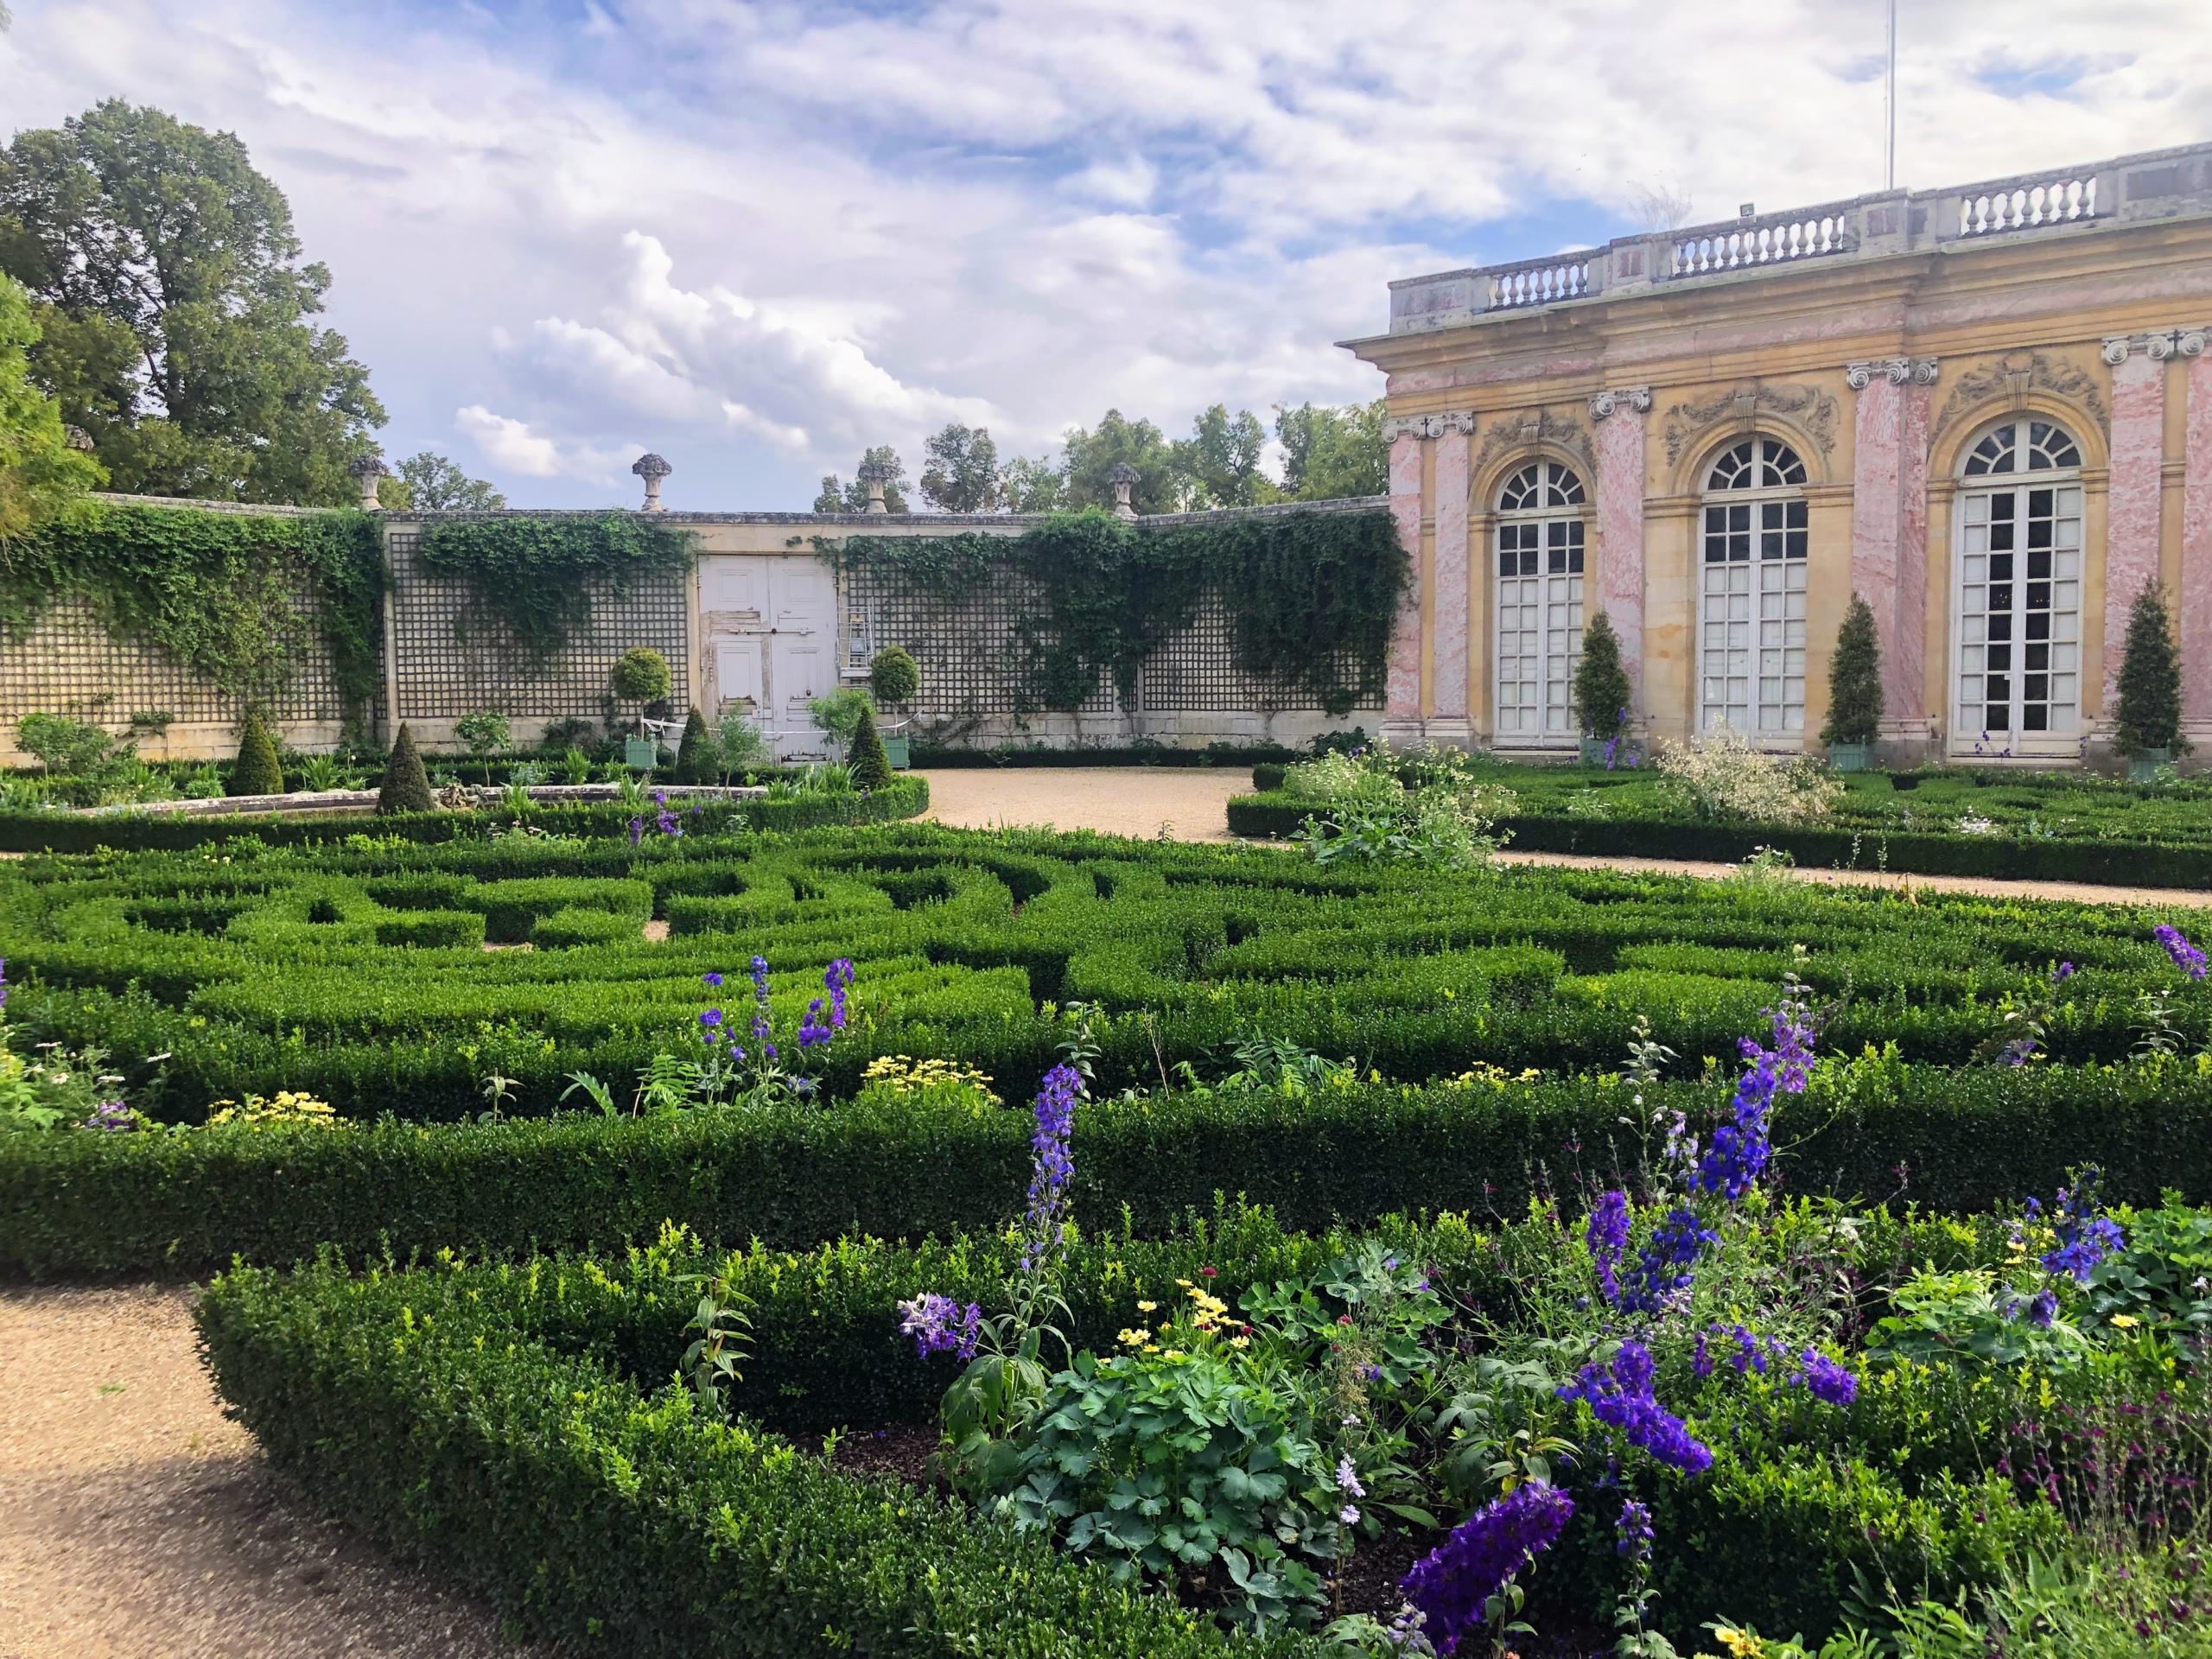
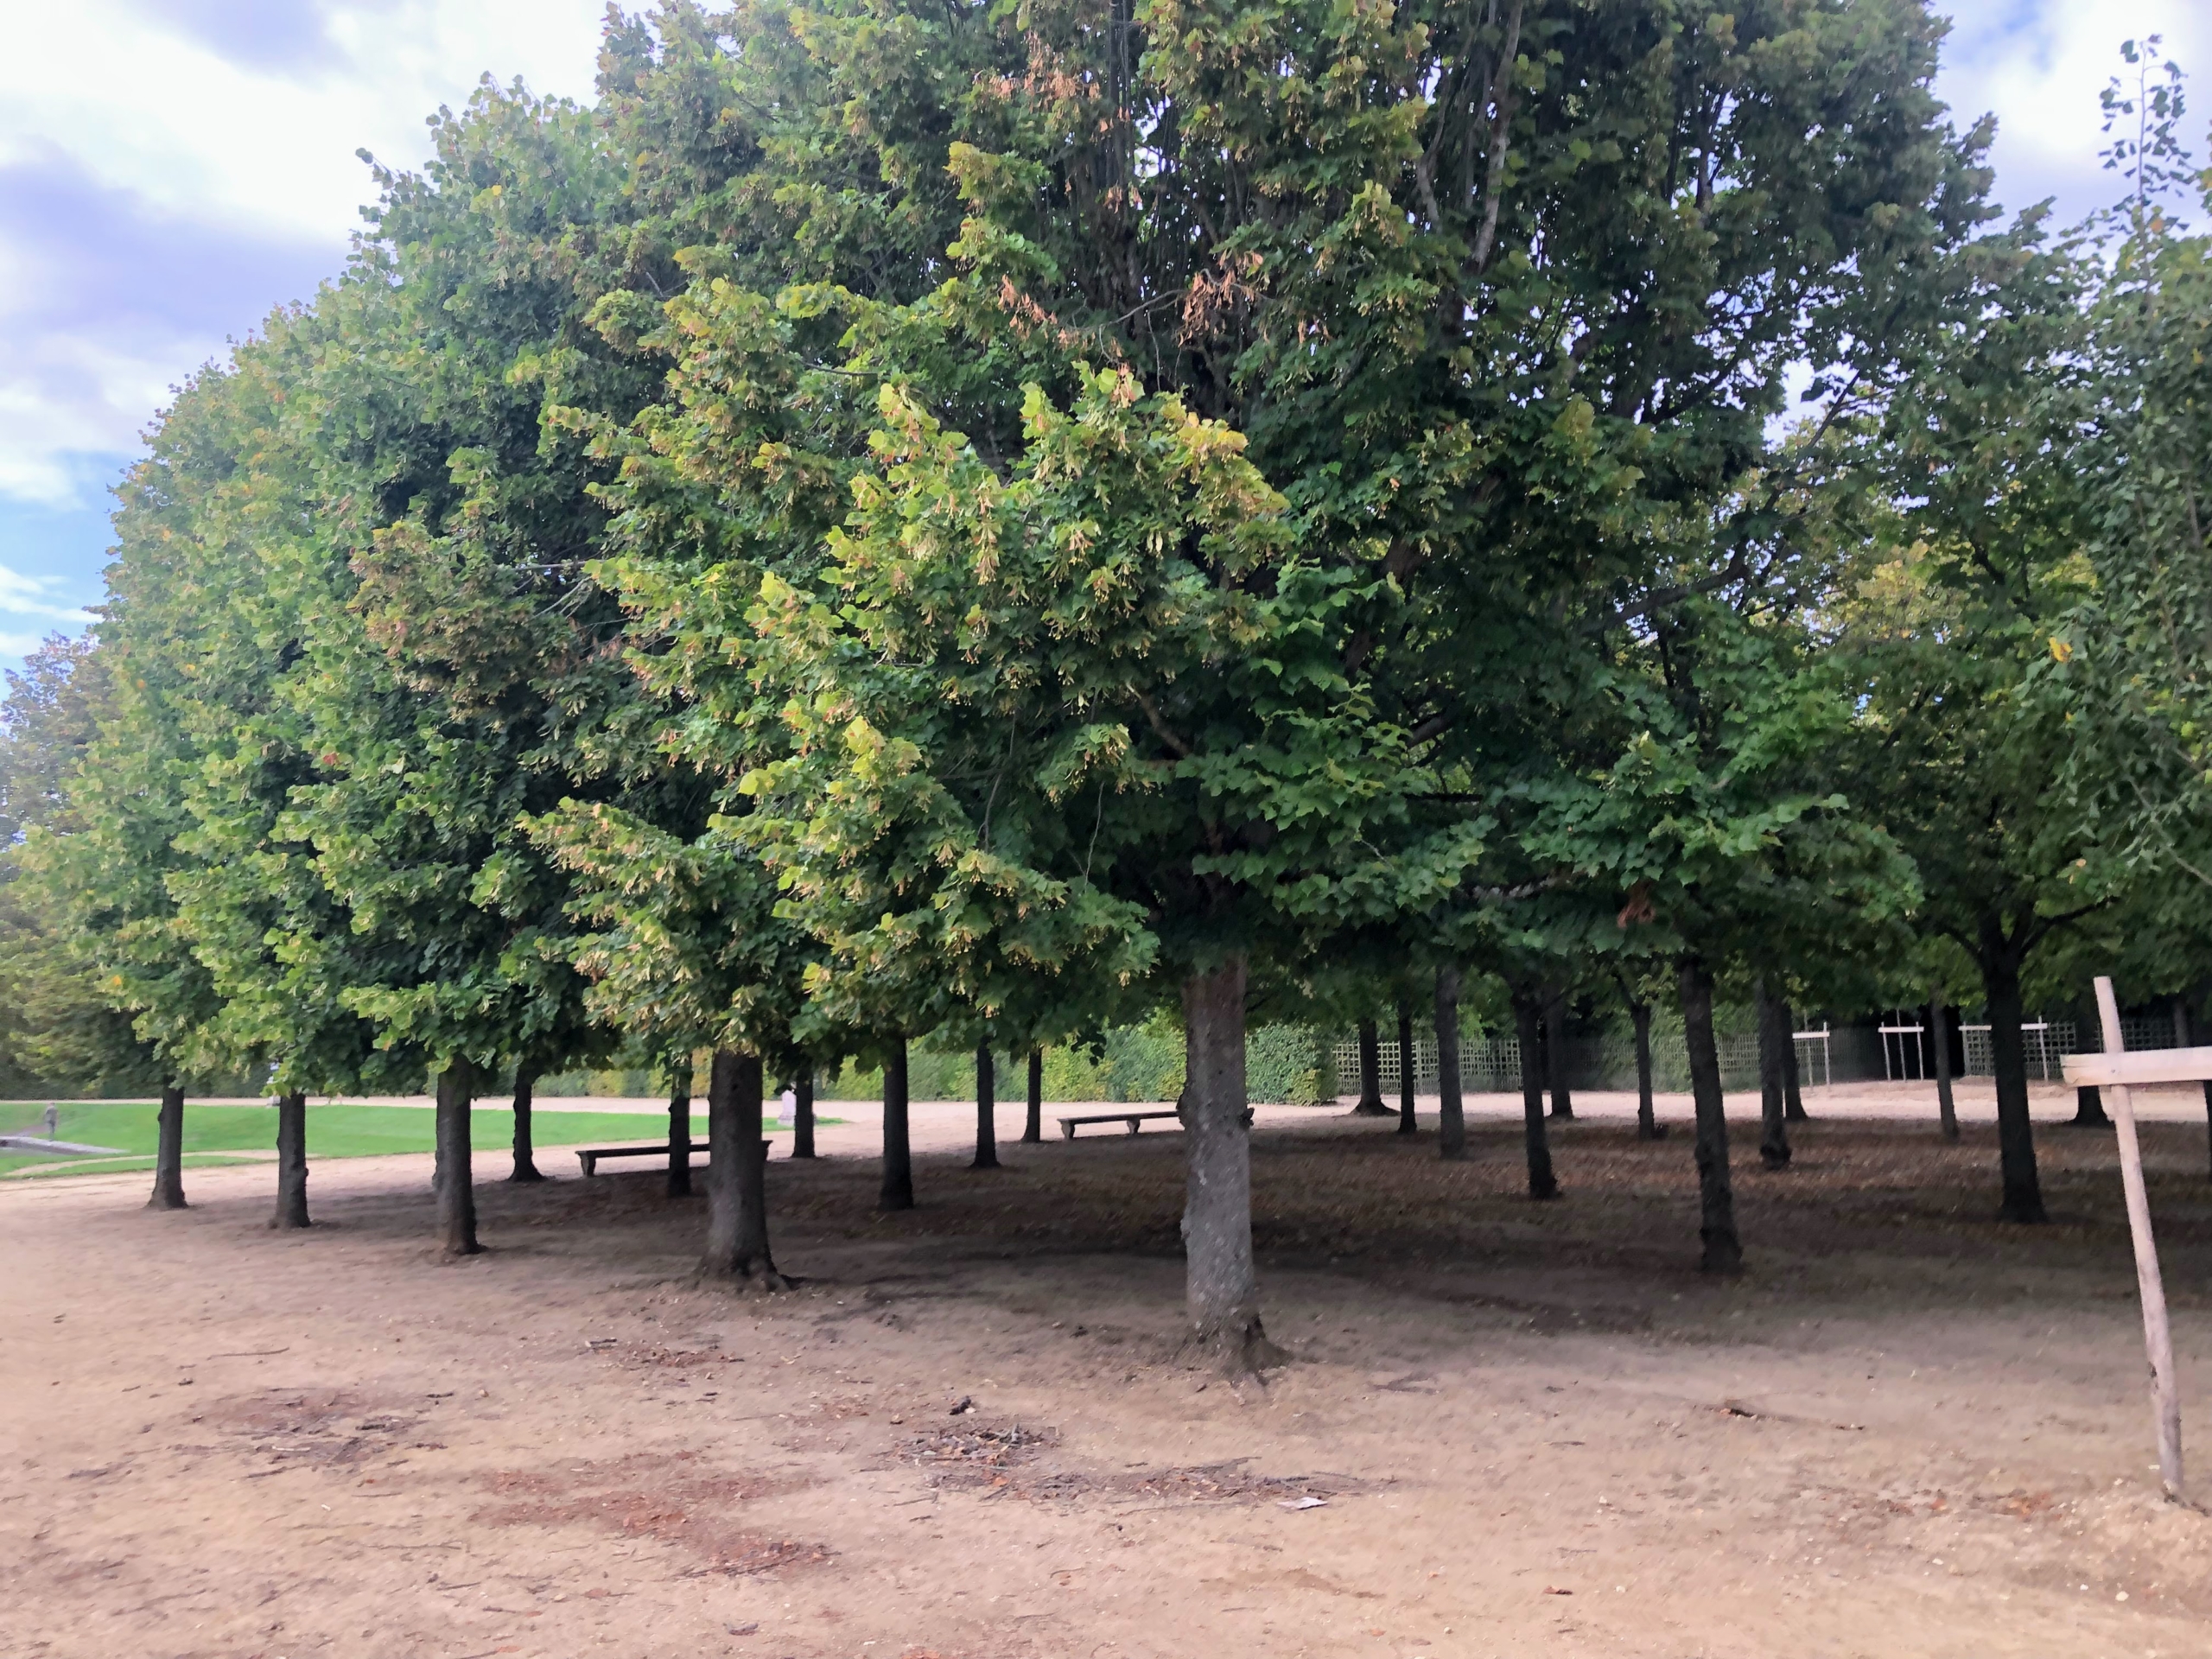
Today, to keep up with the planting of hundreds of thousands of specimens each year, including the regular maintenance tasks of grooming, pruning, edging, and cleaning, Versailles employs 48-full time gardeners. This is one of the many “walks” – a hedge allée from one area to another. André Le Nôtre organised the Gardens of Versailles around two axes, north-south and east-west.
The Neptune Fountain or the Fountain of Neptune was built between 1679 and 1681.
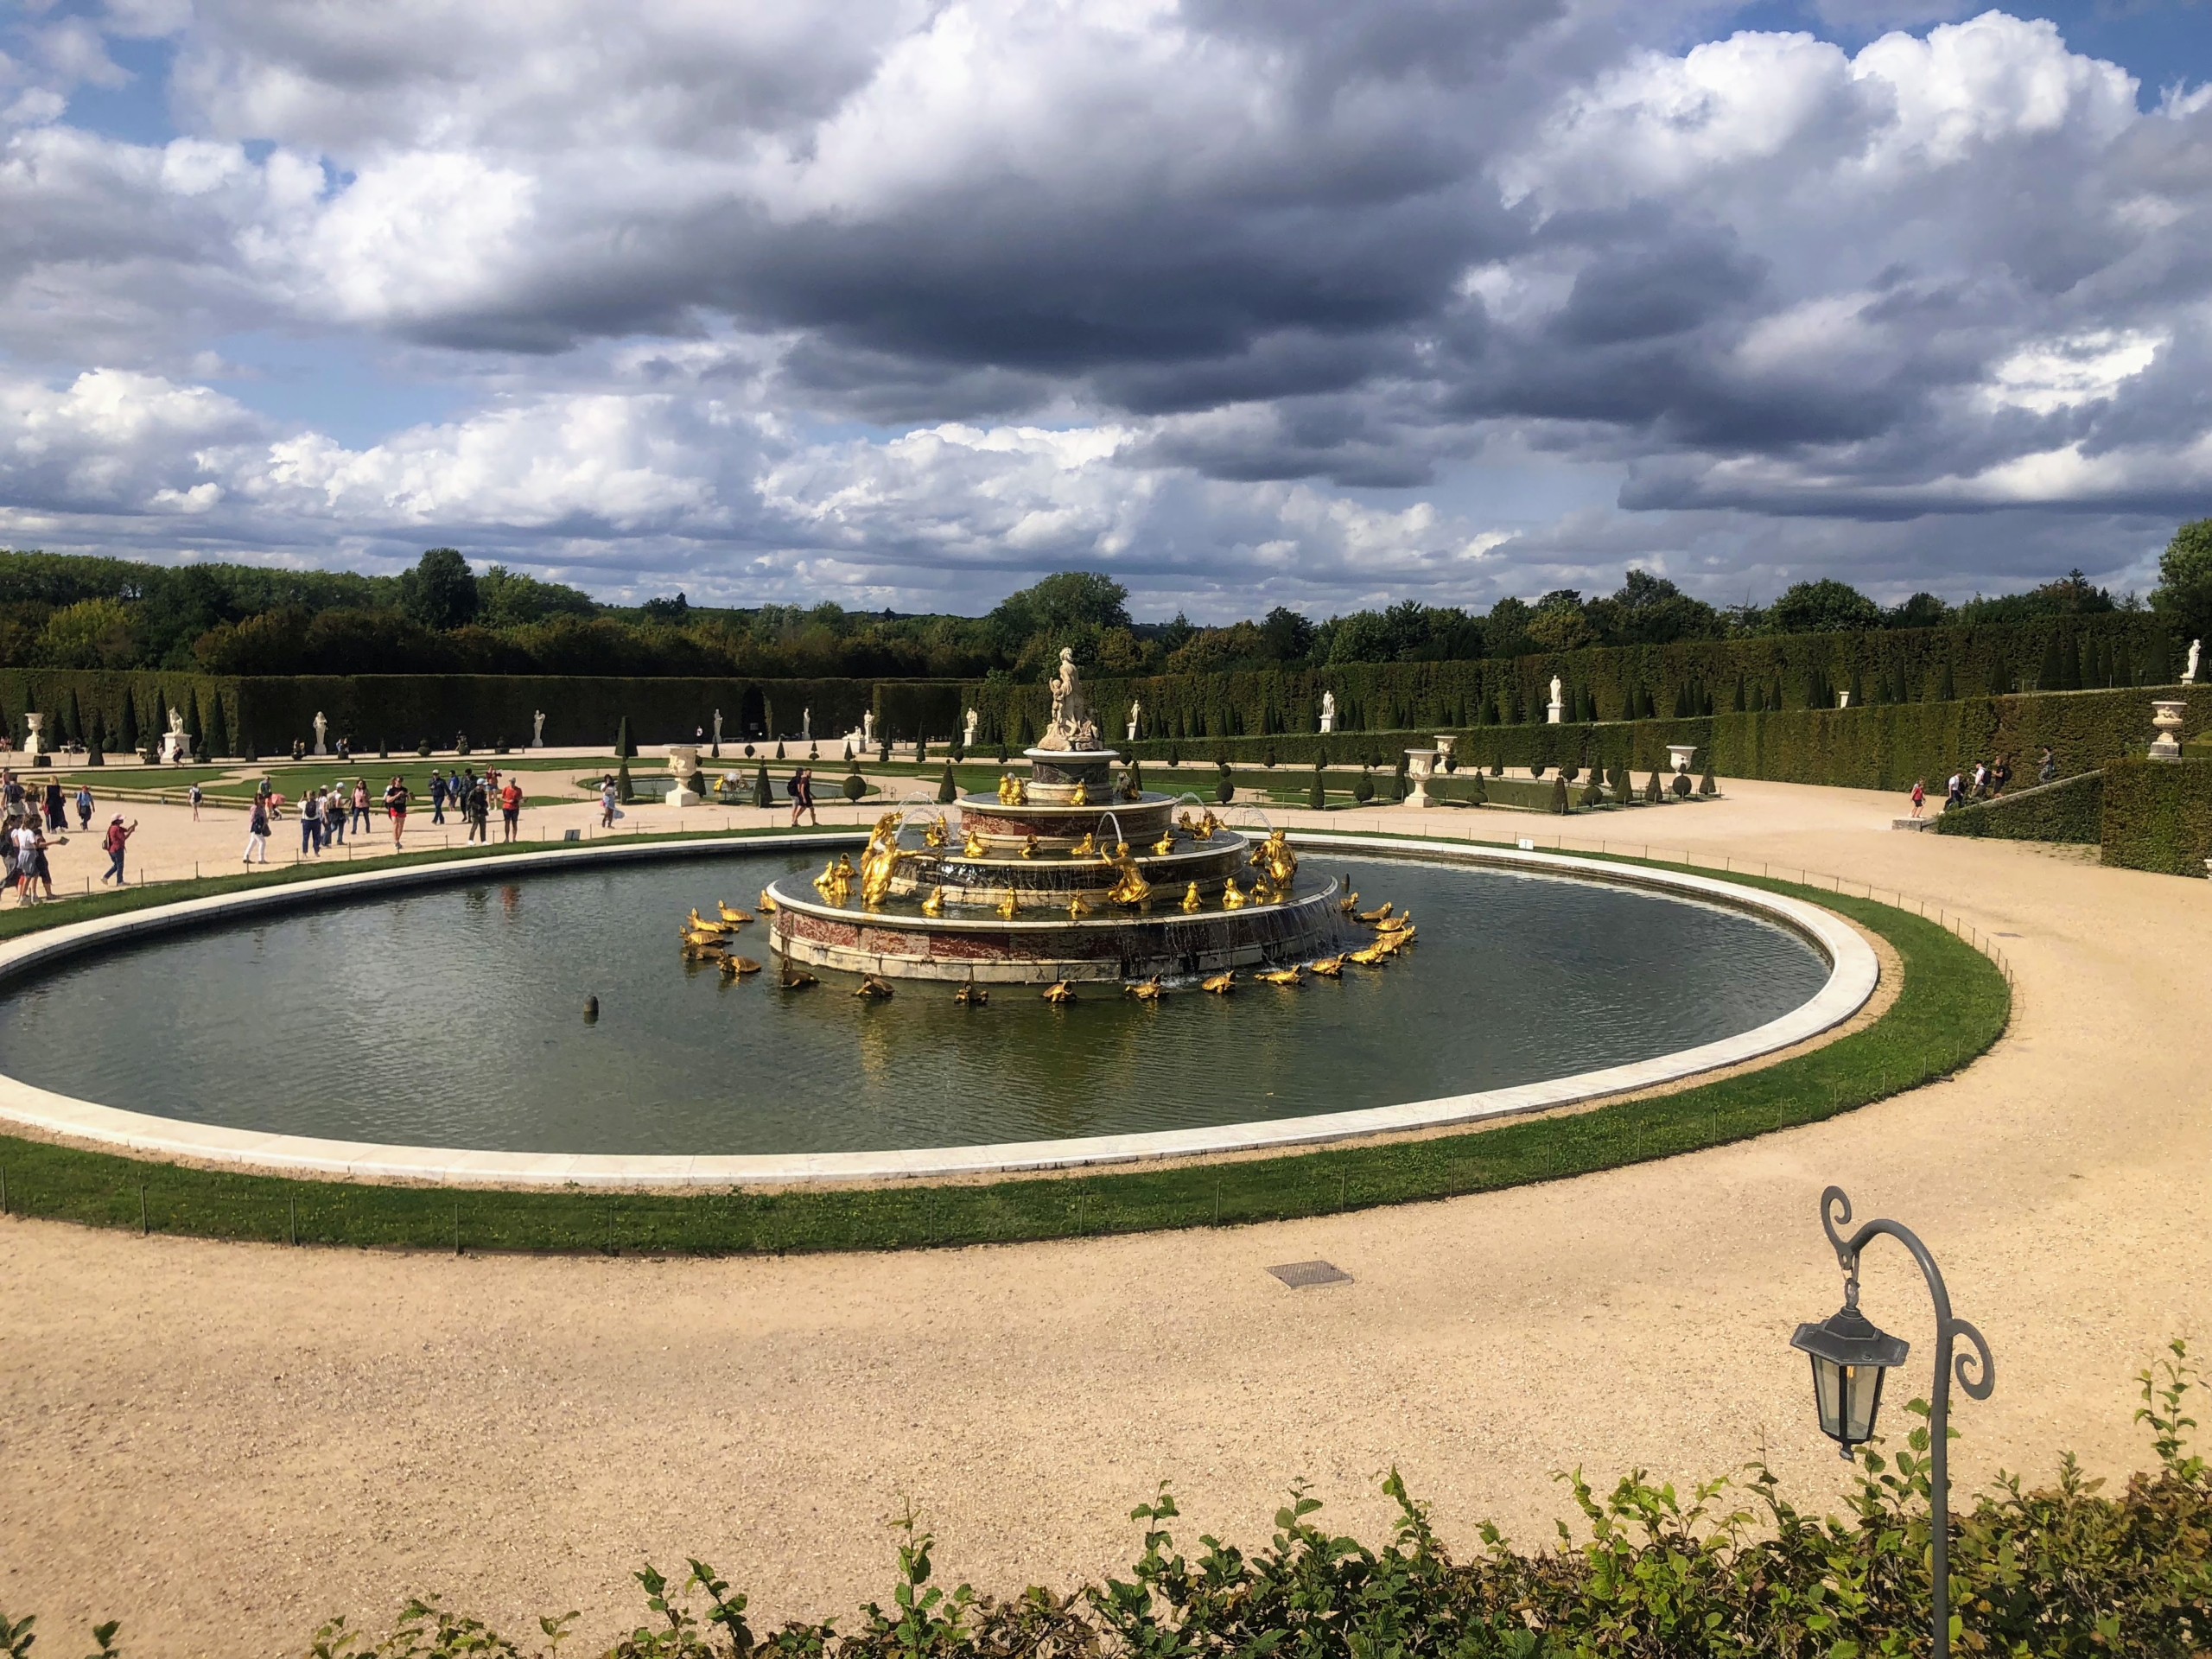
This is called Latona’s Fountain and Parterre. The Latona fountain was built for Louis XIV. He wanted a fountain telling the story of the childhood of Apollo, the sun god he selected for his emblem. It went through several stages before it acquired its present form.
Here is a closer look at the fountain. From 1687 to 1689, Jules Hardouin-Mansart created the present fountain by turning Latona around and placing her on the top of a marble pyramid. At the base are 20 frogs cast in lead which run water towards the center of the basin.
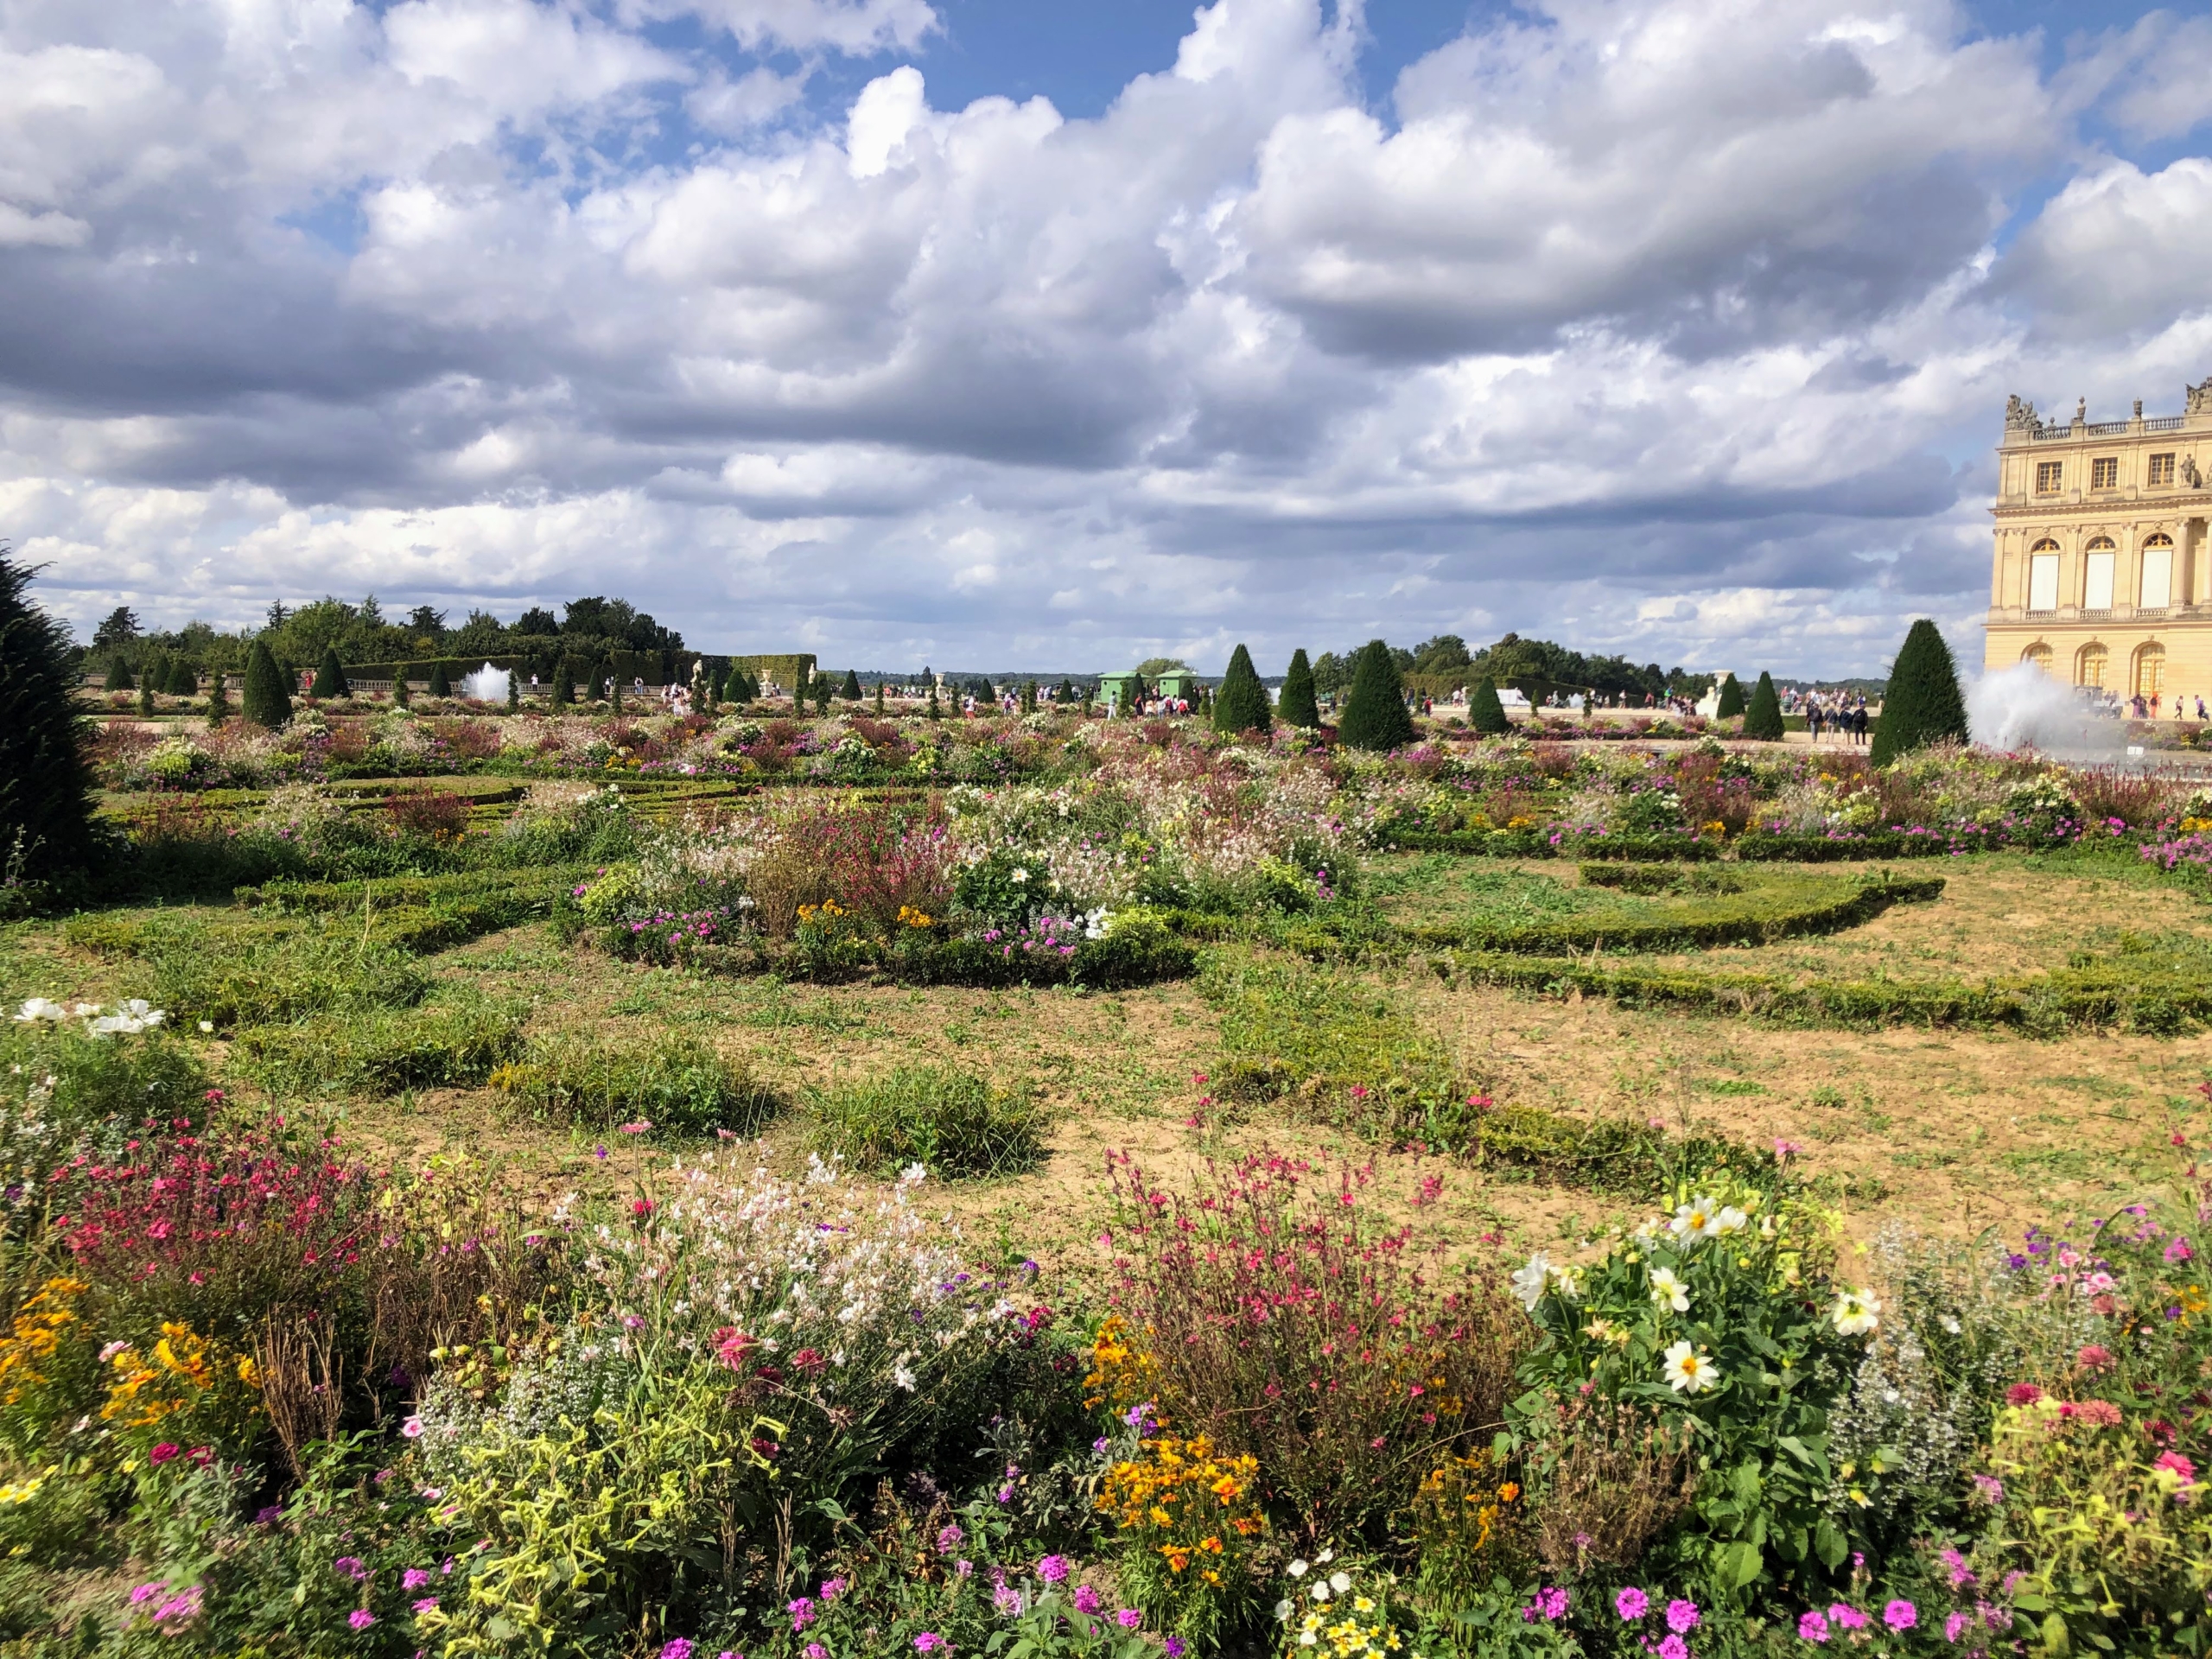
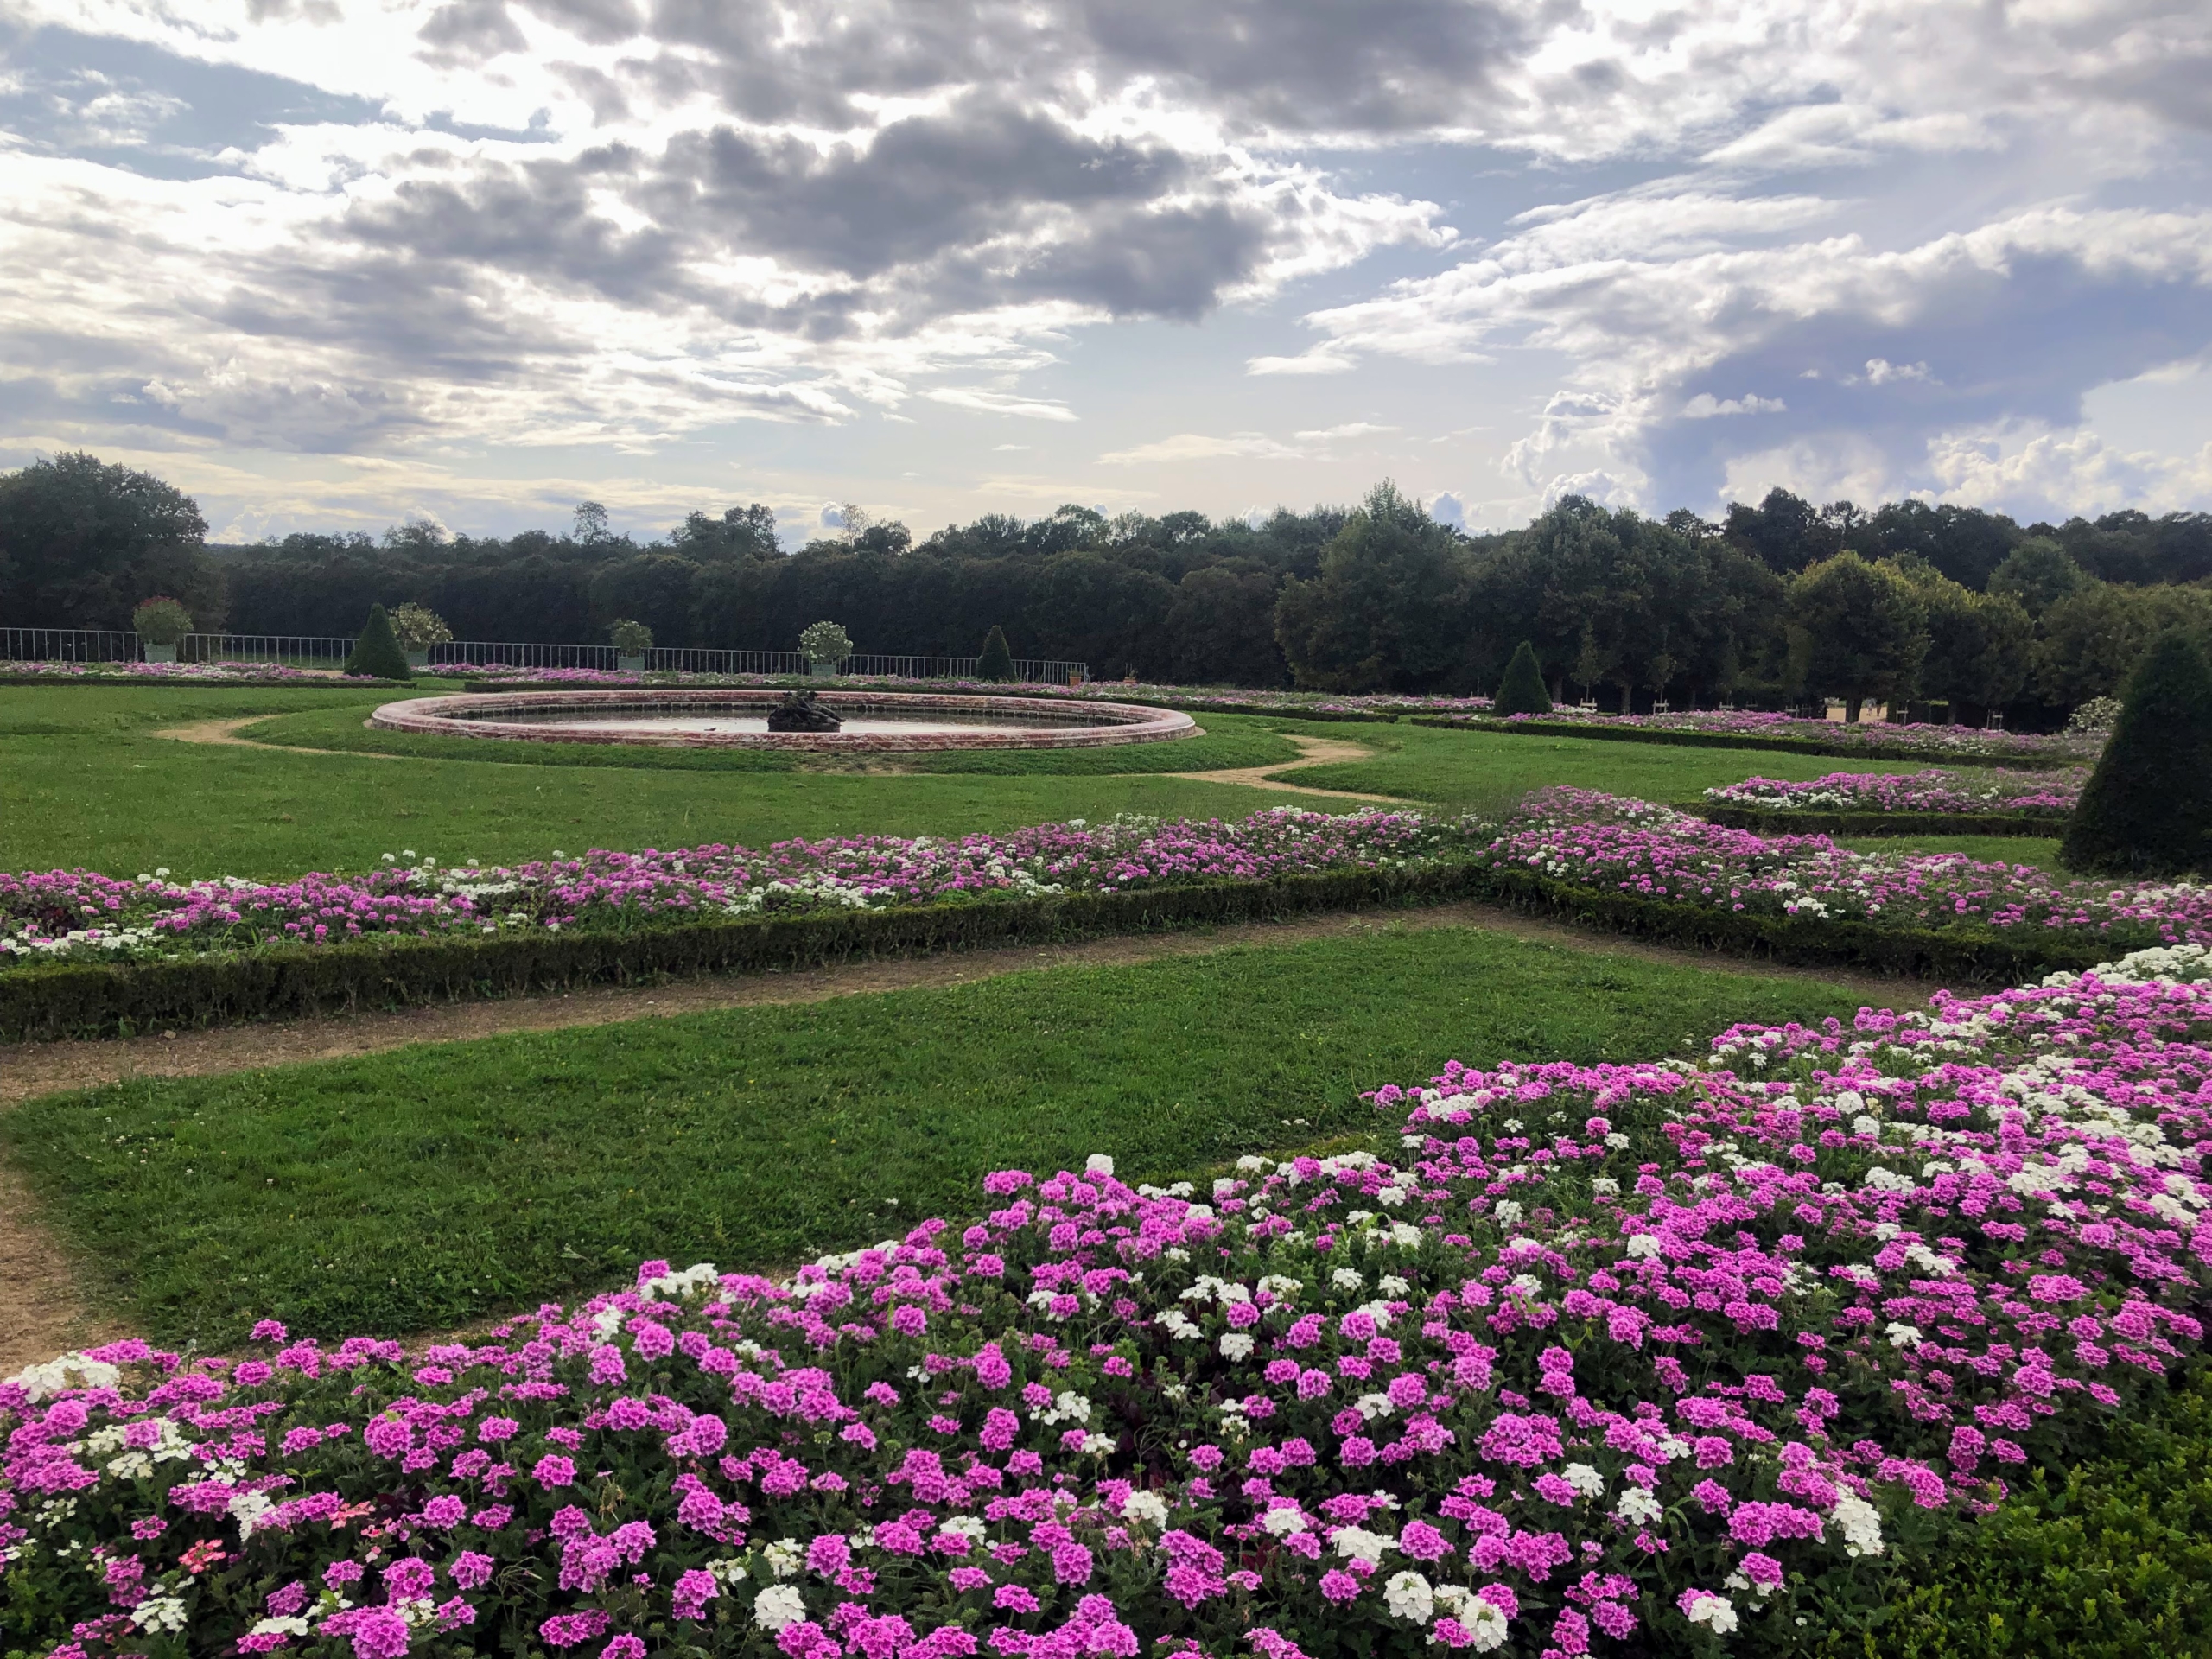
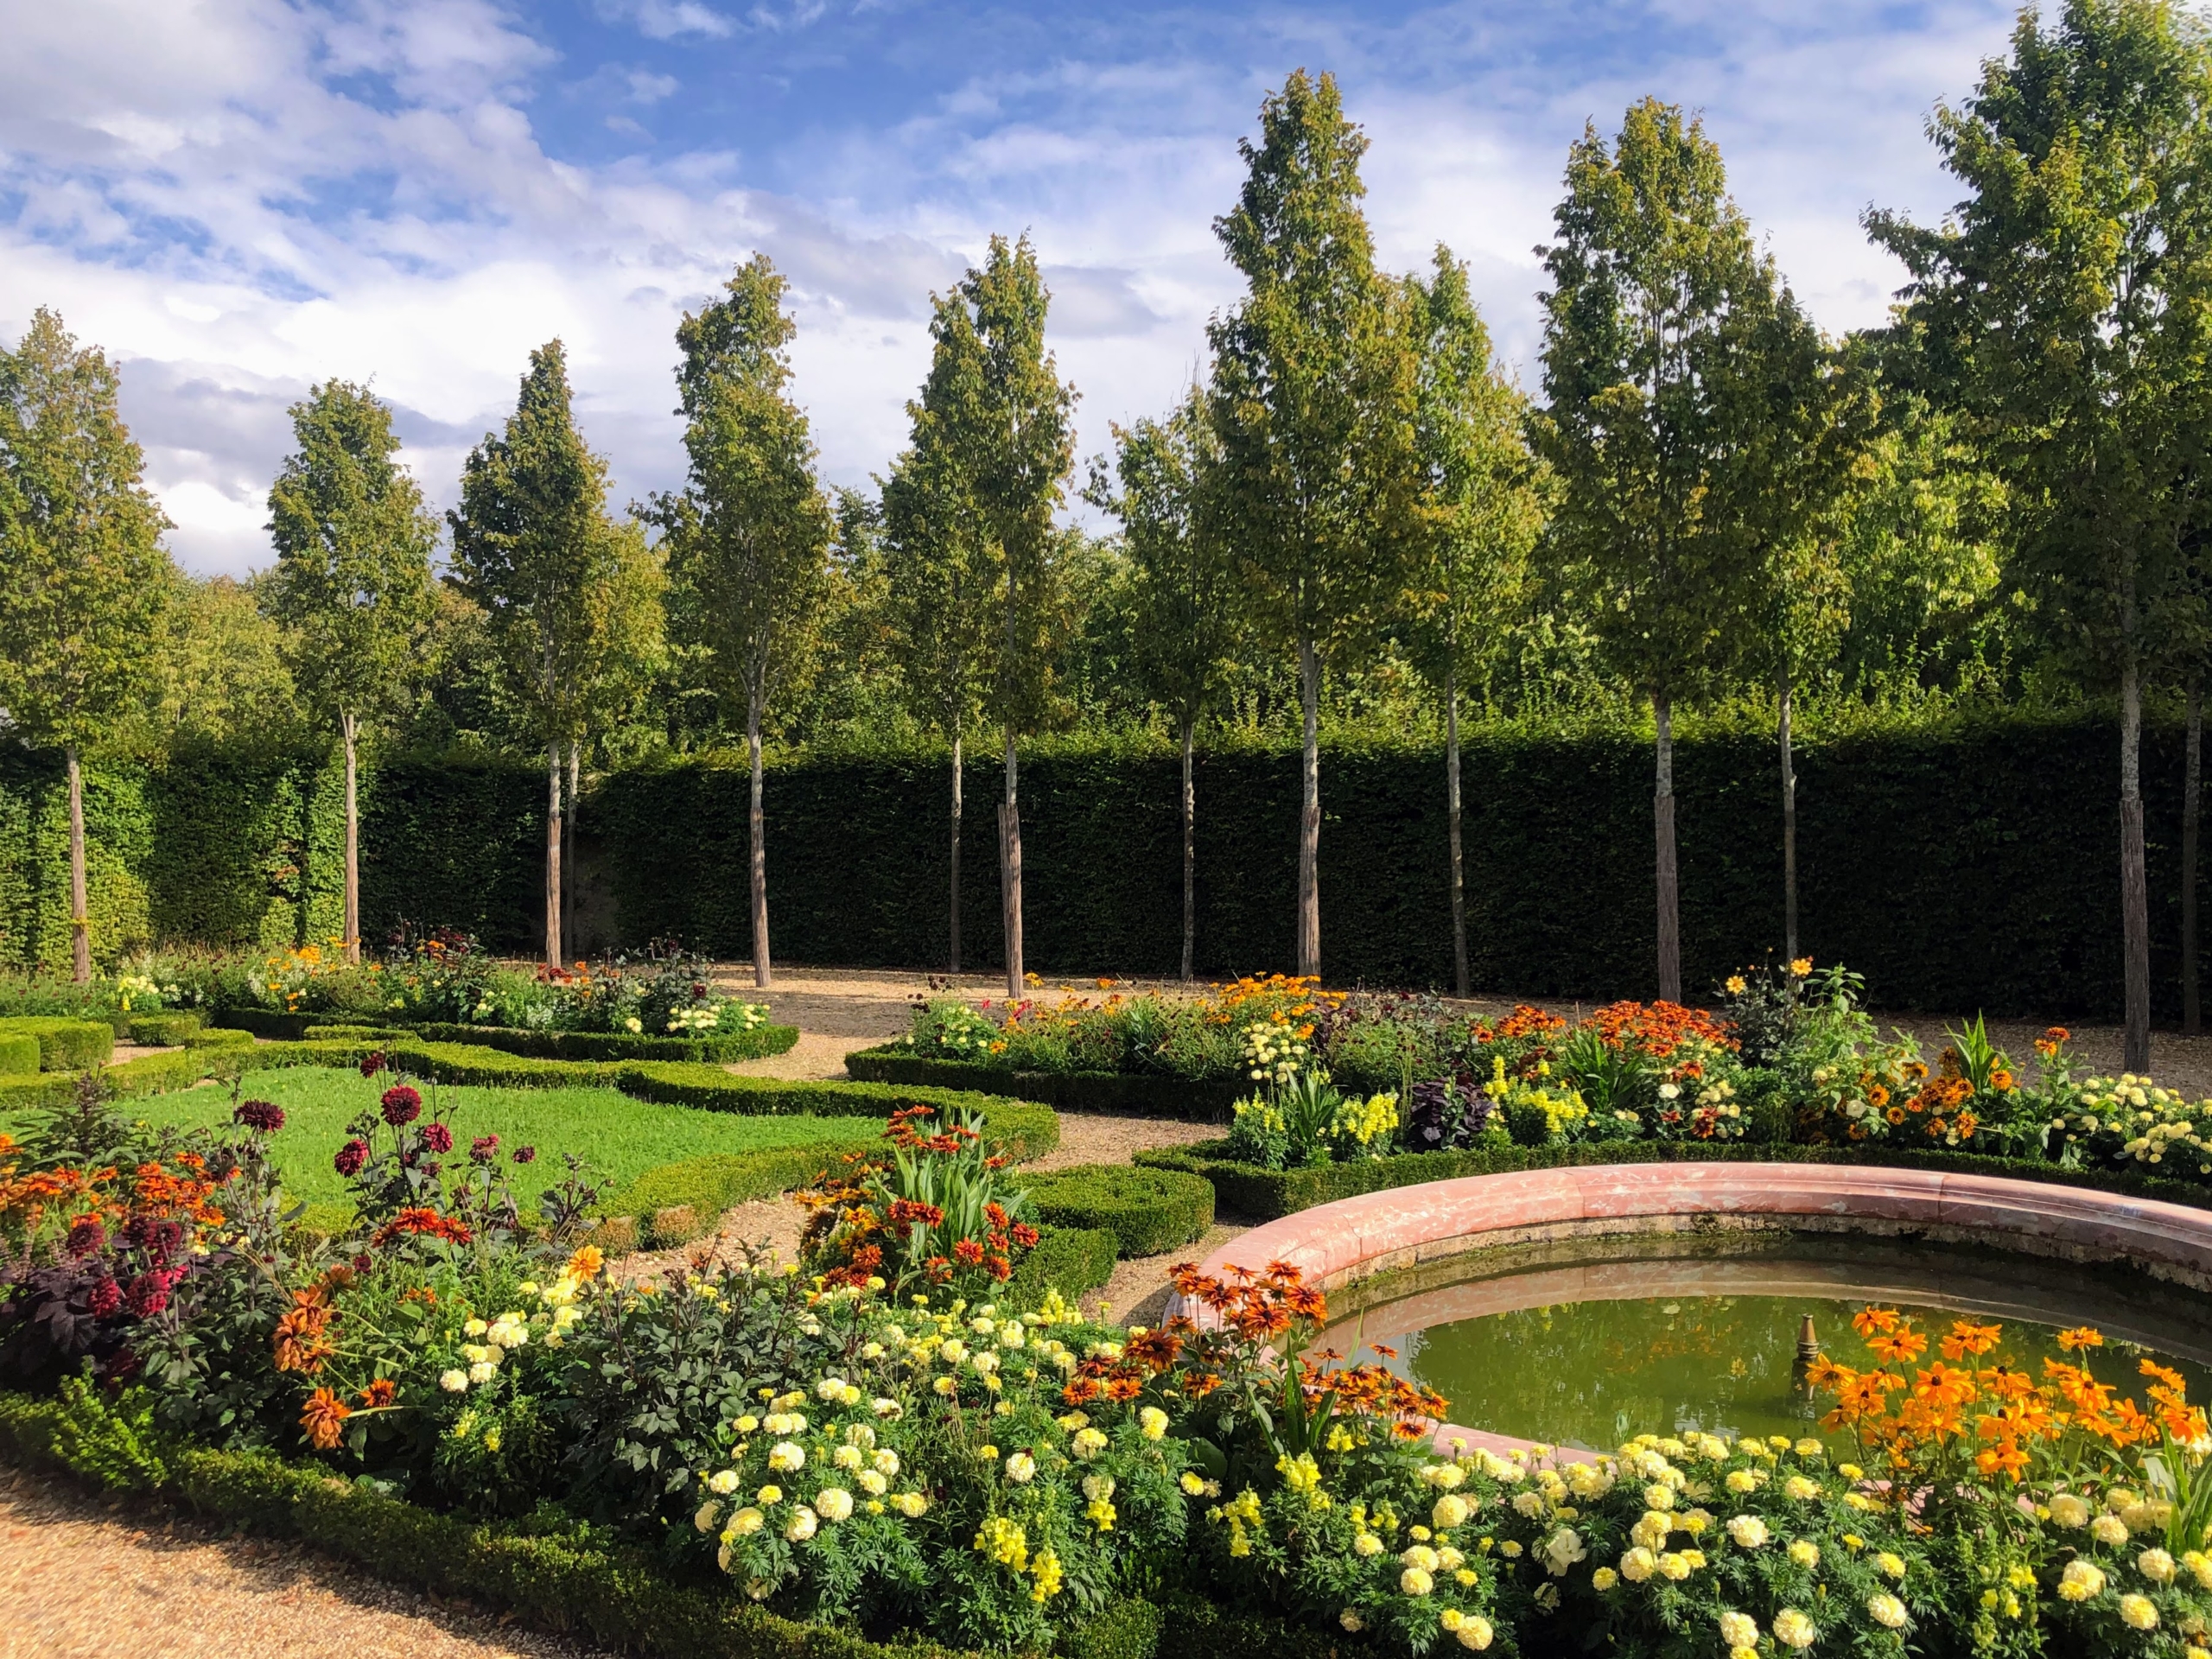
Brightly colored flowers have been planted since the reign of Louis XIV.
Each parterre is so perfectly groomed. At the foot of the Palace on the garden side there are three large parterres – the North Parterre, South Parterre and Water Parterre.
Every parterre is meticulously designed and beautifully maintained.
Scores of trees were planted at Versailles. Originally comprising mainly linden and chestnut trees from nearby forests, it has expanded over the centuries to include more rare trees such as the American tulip tree and Virginian juniper, the Japanese Pagoda tree, the Chinese catalpa, and the giant sequoia.
Many of the tall hedges are hornbeams – just like the European hornbeams I have at my farm.
Ryan thoroughly enjoyed his trip to France and especially Versailles. I am sure it is on his list to return there, again and again, just like I have. Thanks for sharing your photos, Ryan.
Here at my Bedford, New York farm, whenever a member of my team returns from vacation, I always encourage them to share some of their photos.
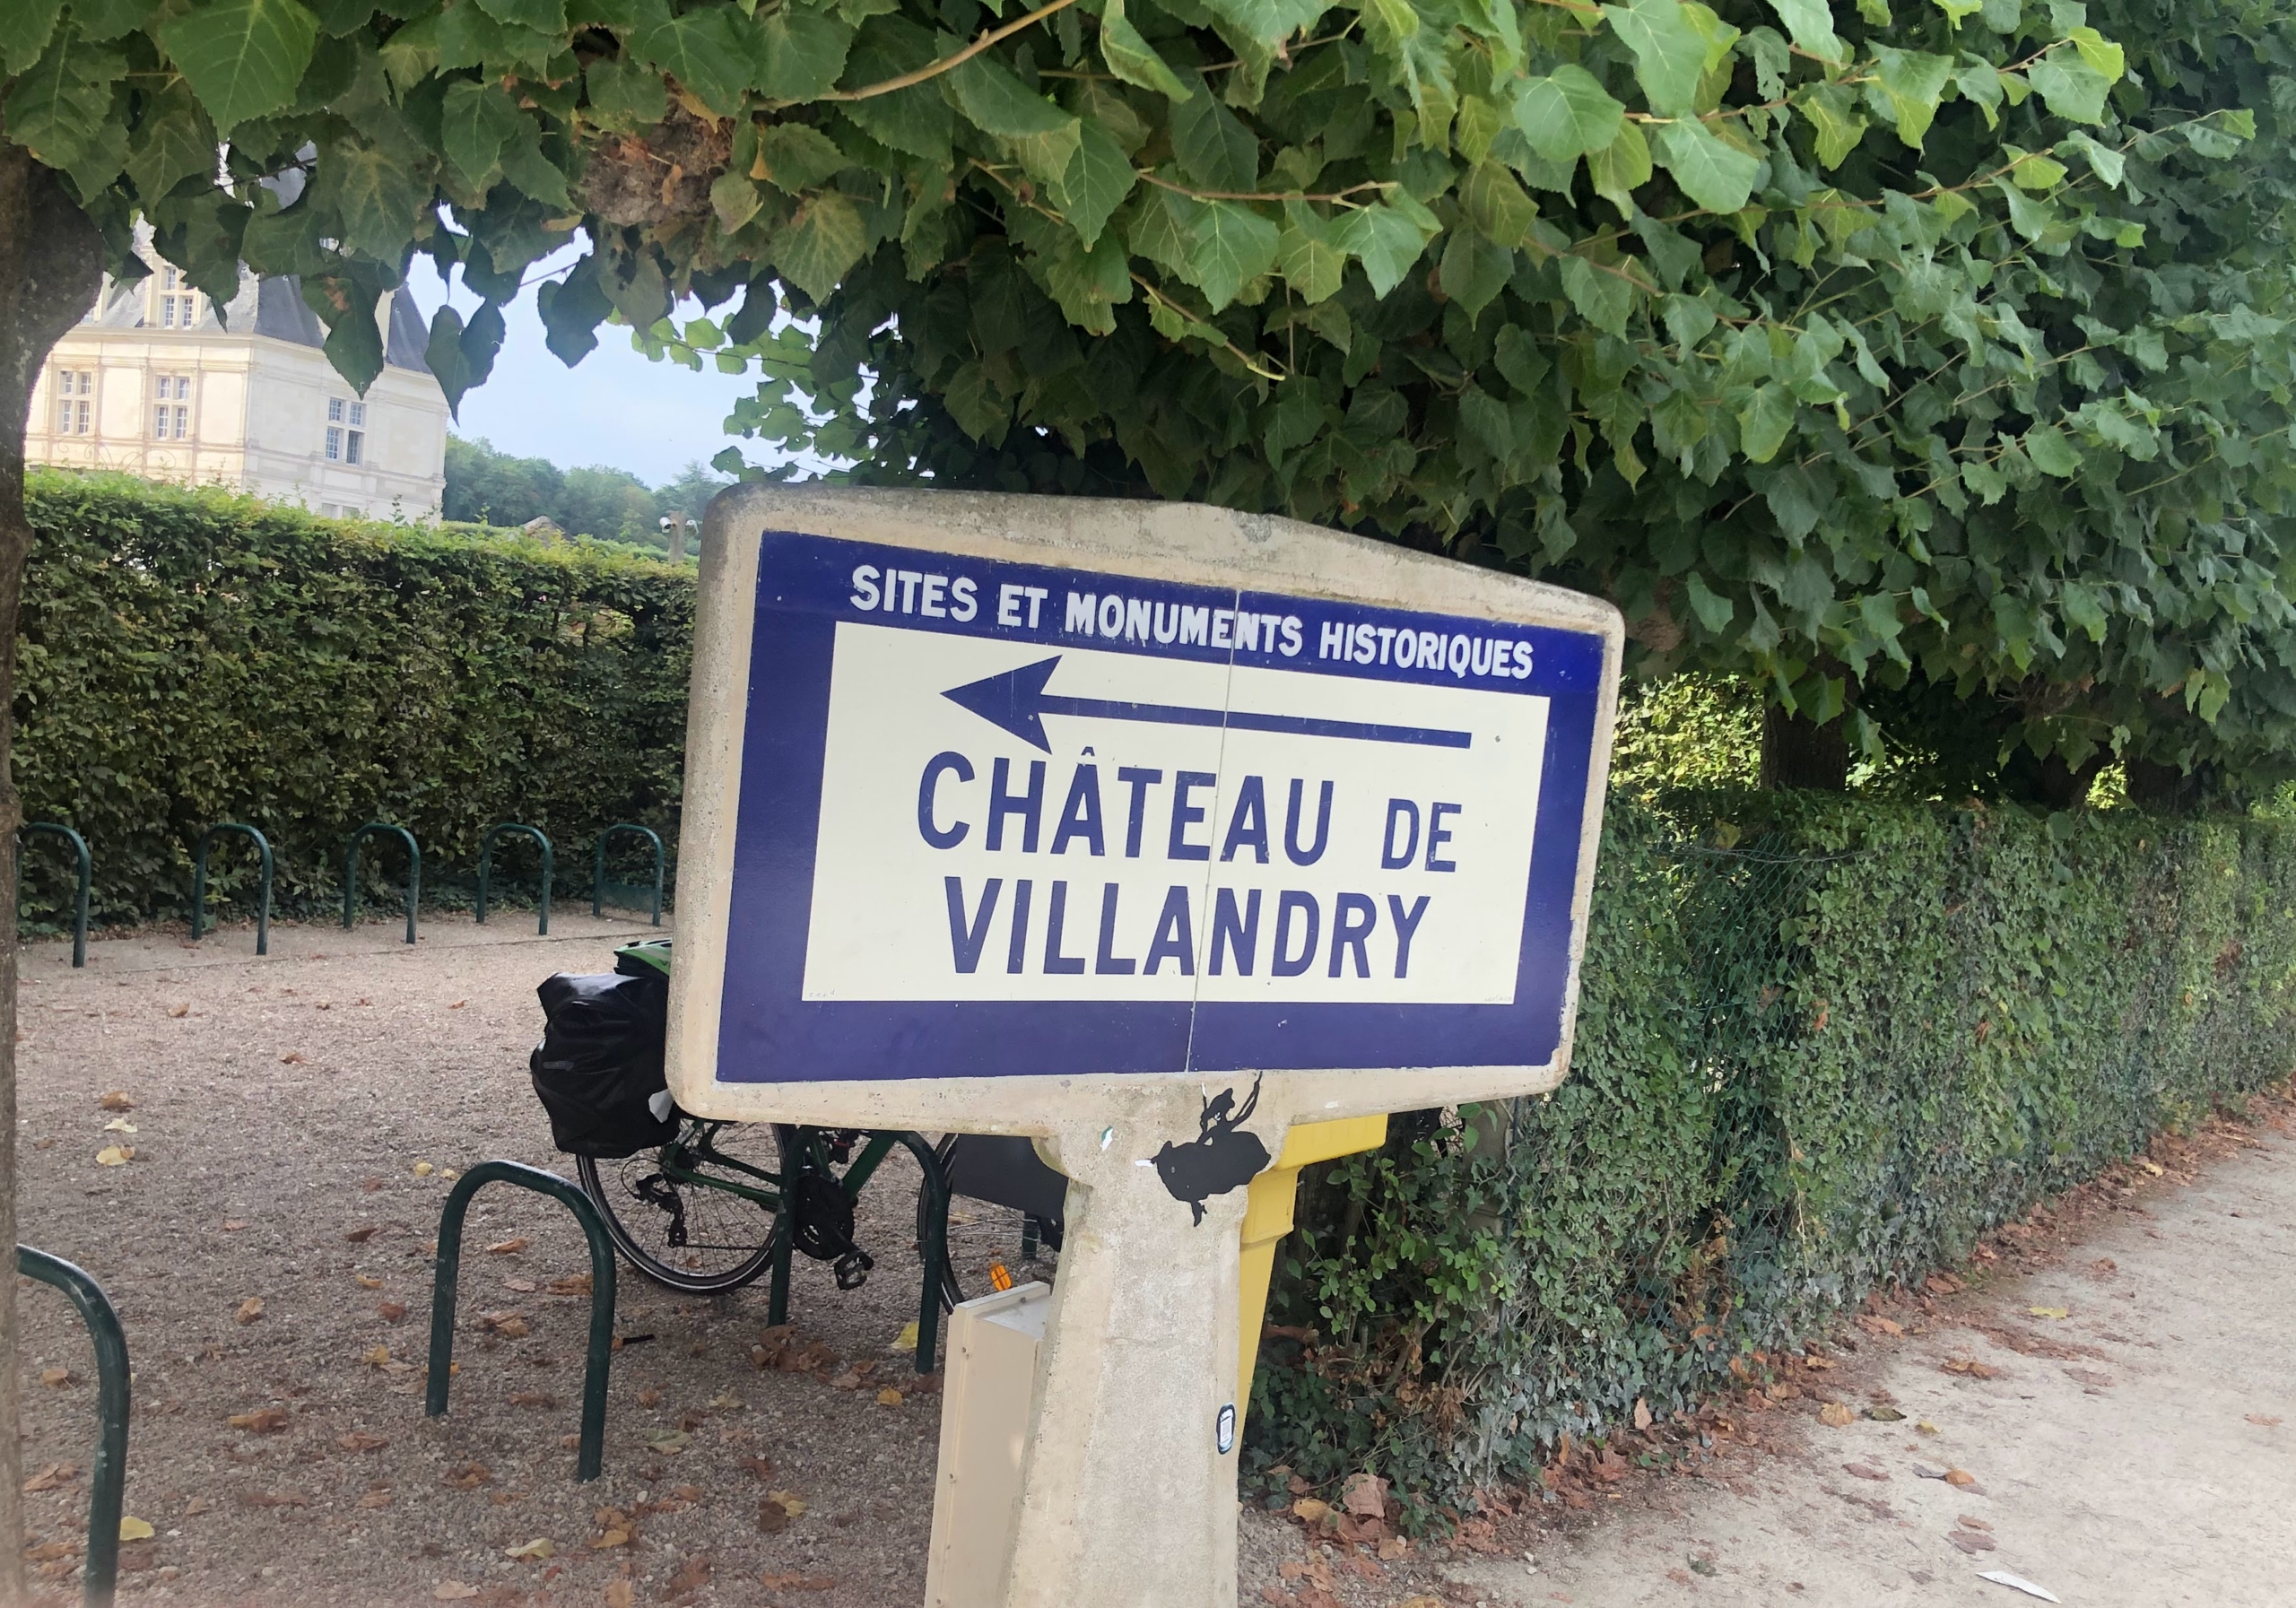
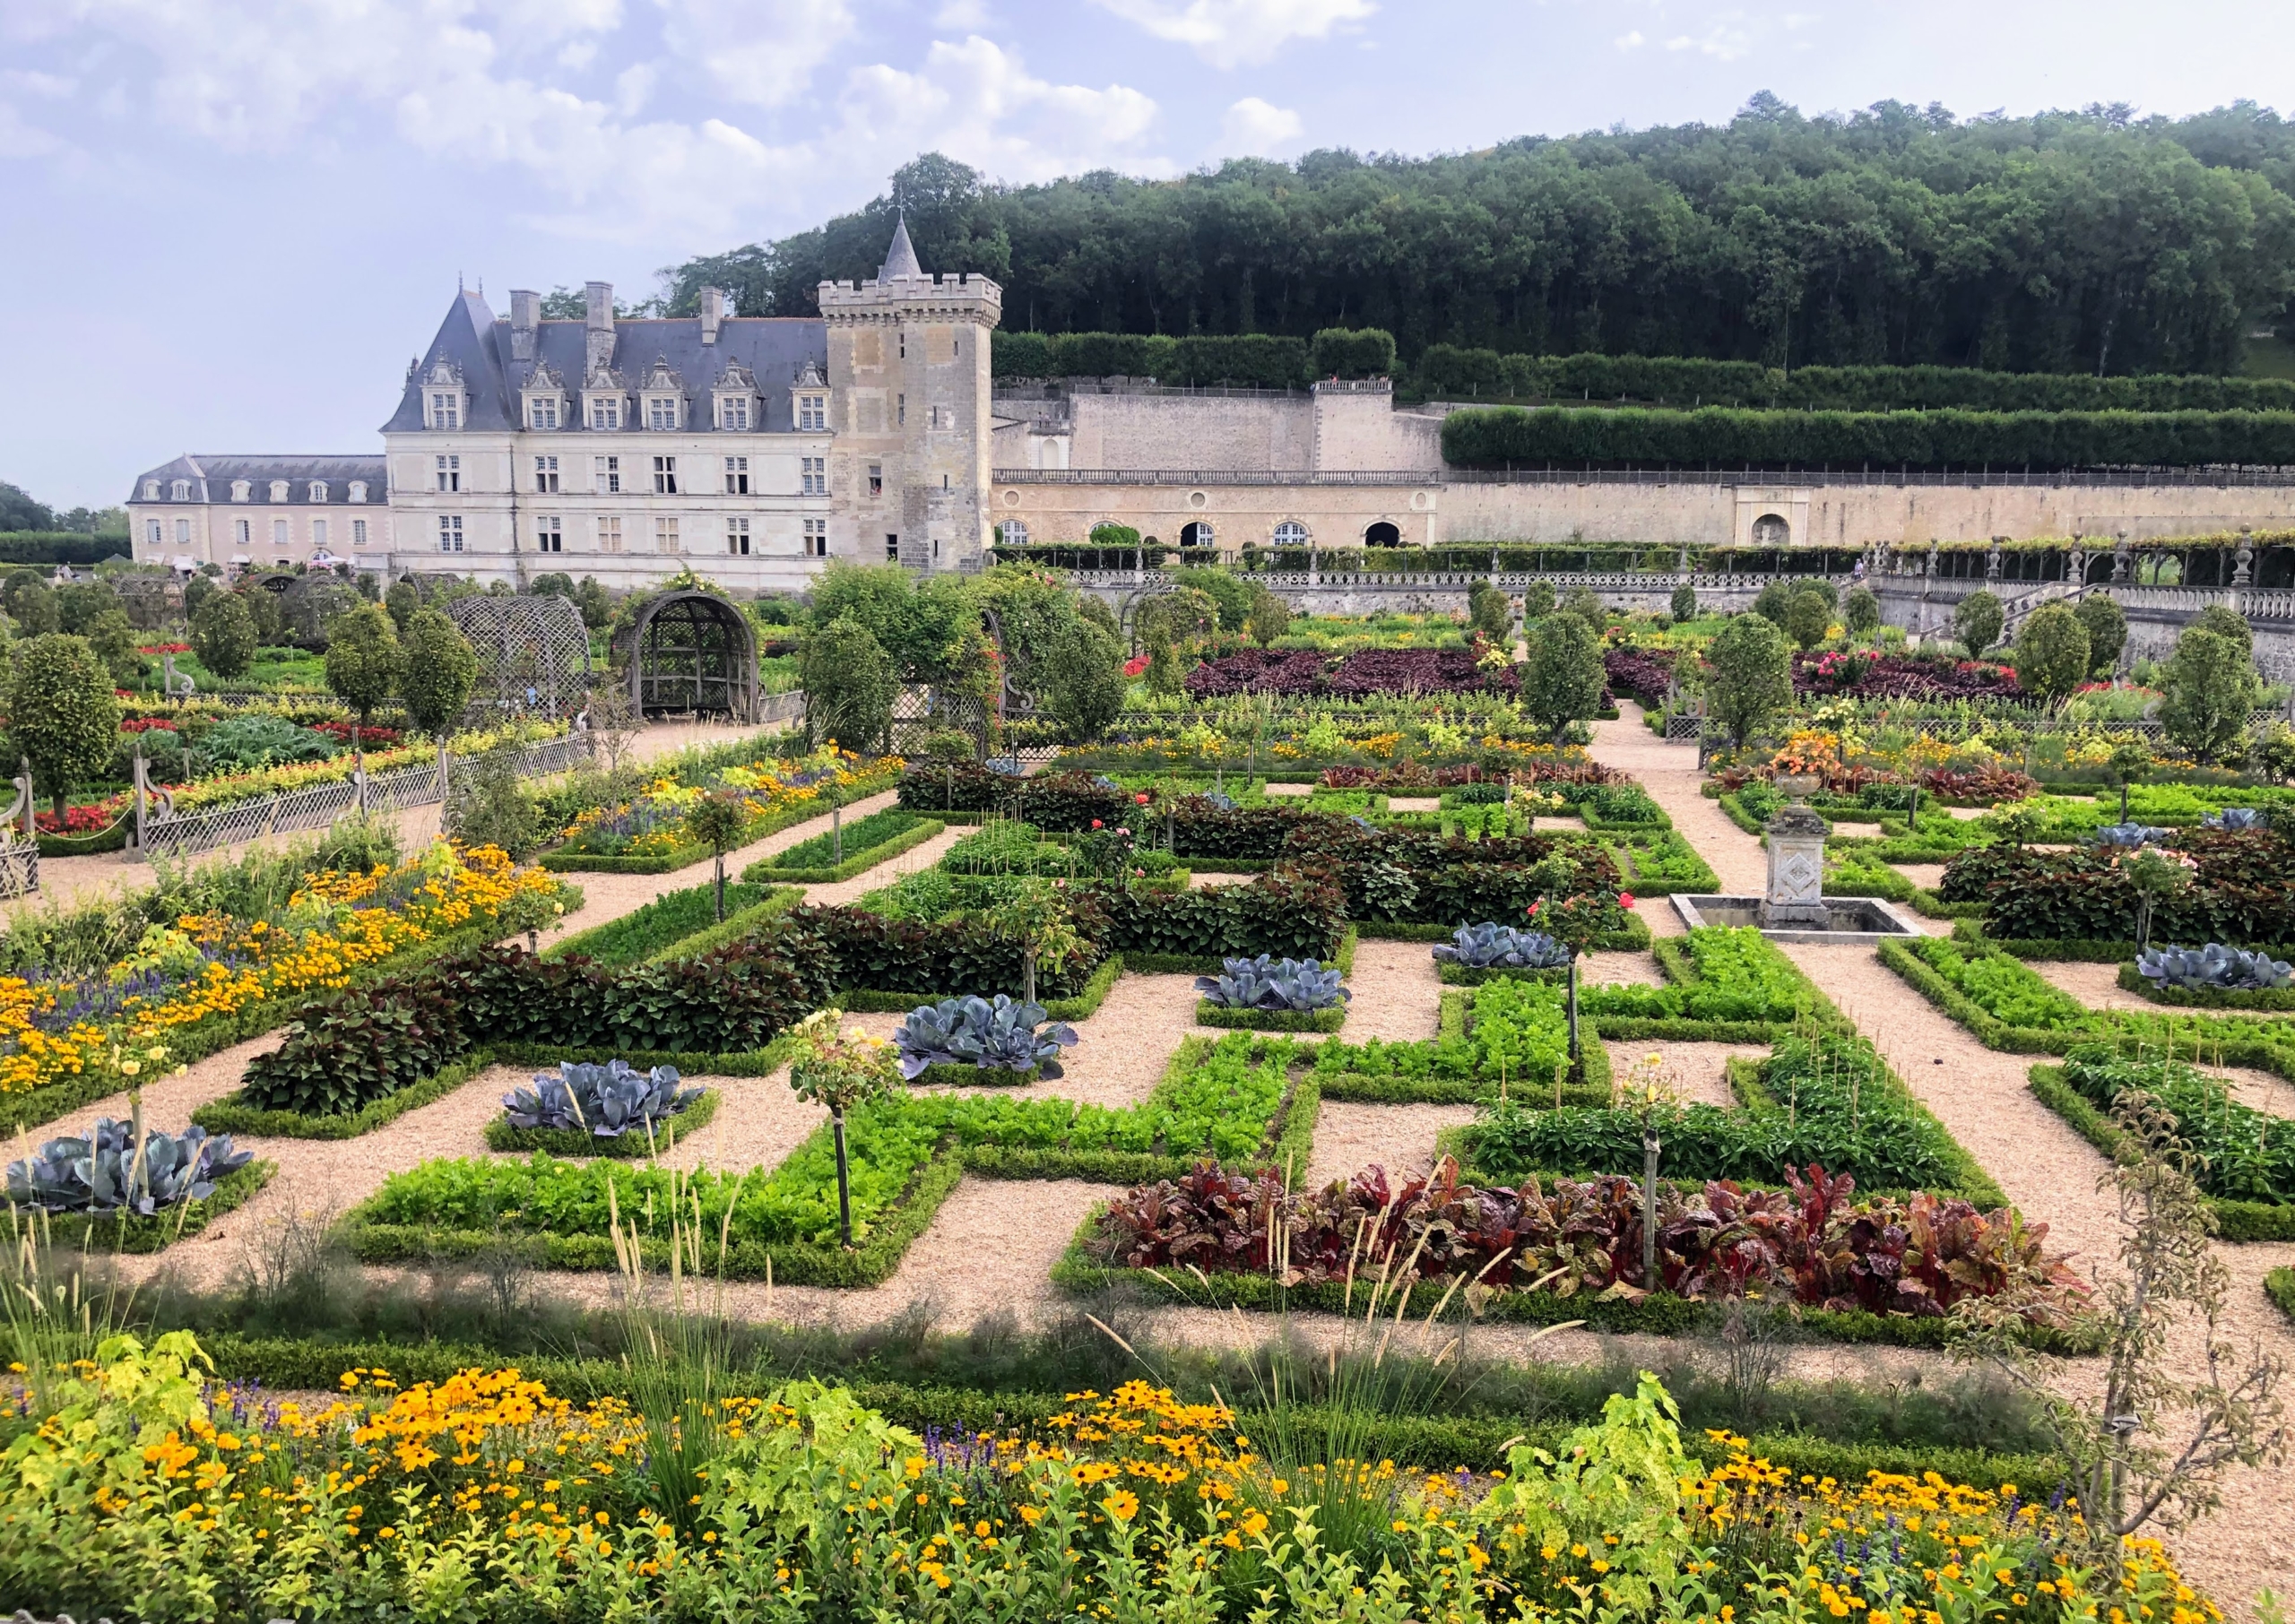
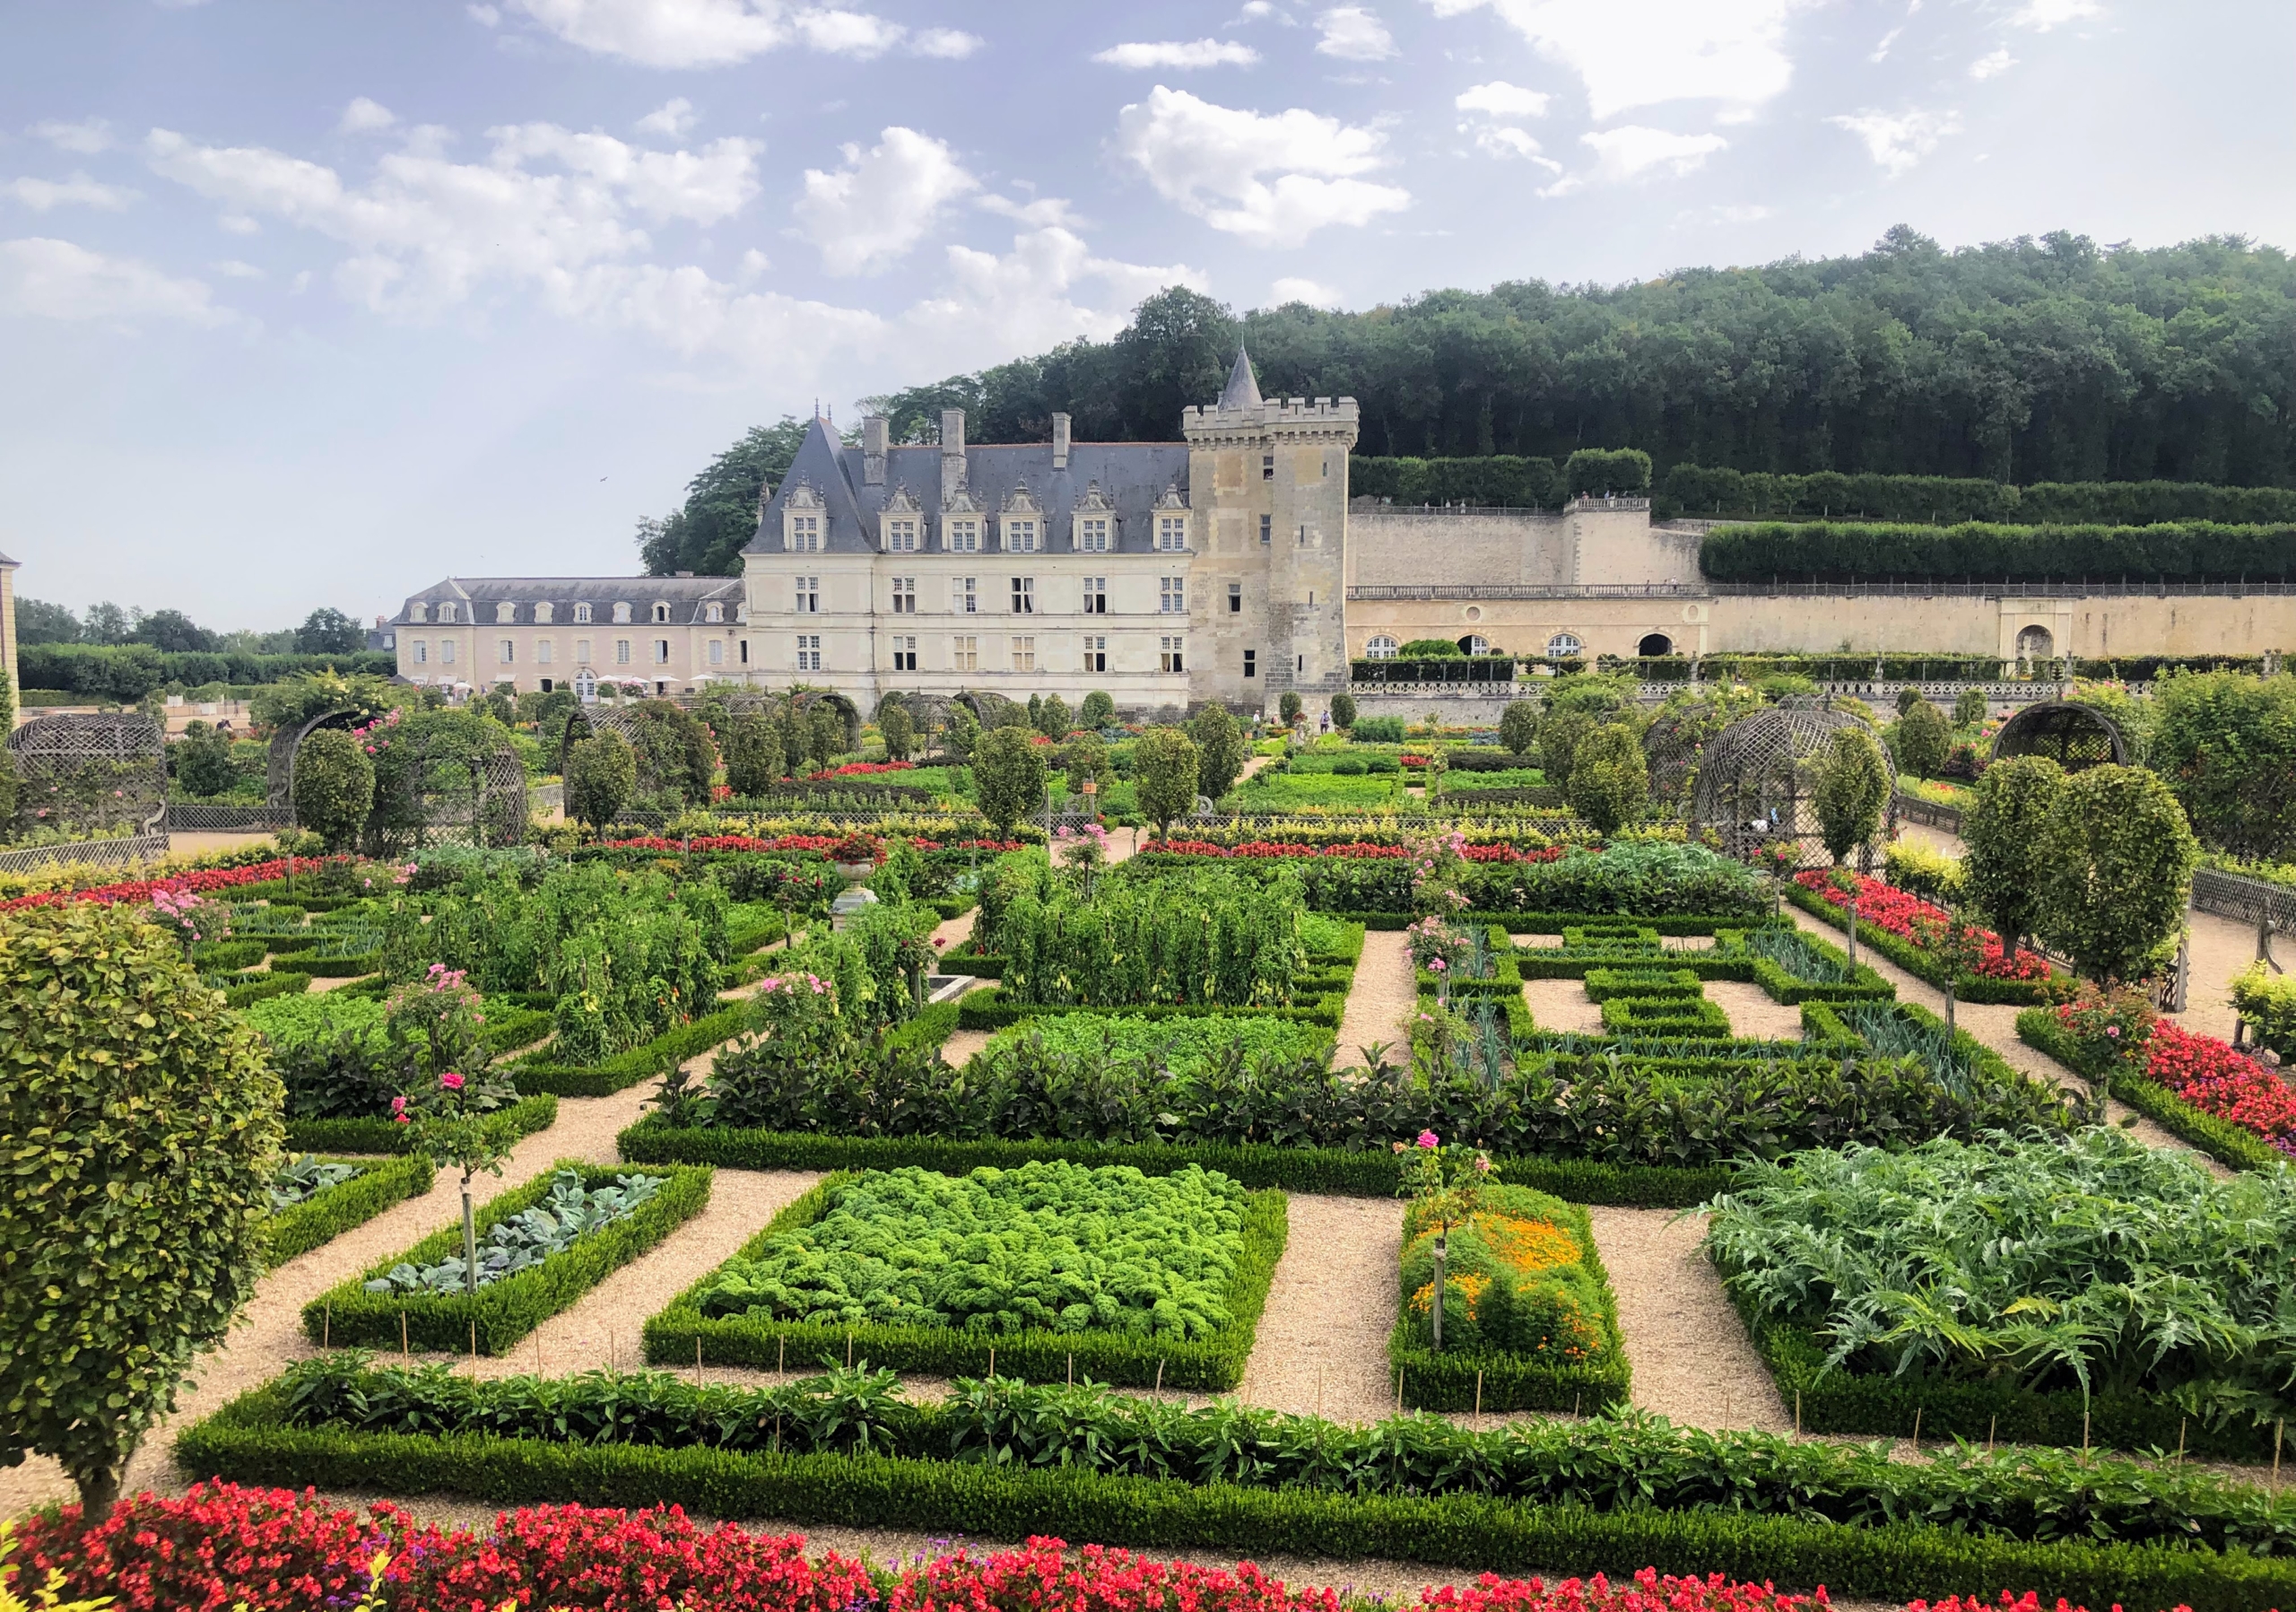
This summer, my head gardener, Ryan McCallister, traveled to France for the first time. Among his many day tours, he visited the famous château and gardens of Villandry, located in the département of Indre-et-Loire. Once part of a medieval fortress and known as Colombiers, the land passed through several owners - Jean Breton, treasury secretary to de Francois I; the Comte Michel-Ange de Castellane, ambassador of Louis XV; Jérôme Bonaparte, the younger brother of Napoleon; financier Pierre Laurent Hainguerlot, and then in 1906, Joachim Carvallo and his wife, Ann Coleman, heiress to the Coleman fortune. Joachim and Ann spent extensive time and money to redesign the extraordinary property - all of which sit on 15-acres, with the seven-acre garden forming a 360-degree backdrop for the château. In 1934, Château de Villandry was designated a Historic Monument.
Here are just some of Ryan's photos, enjoy.
The château and gardens of Villandry are located in a small valley overlooking the Cher River in central France, a left tributary of the famous Loire.
The land is bordered by a wooded hillside and a village. It is also completely walled.
Now a Historic Monument, the gardens symbolize the way in which gardens were built during the Renaissance. The design and maintenance are incredible. Now, a team of 10 gardeners works full-time to maintain and preserve the gardens.
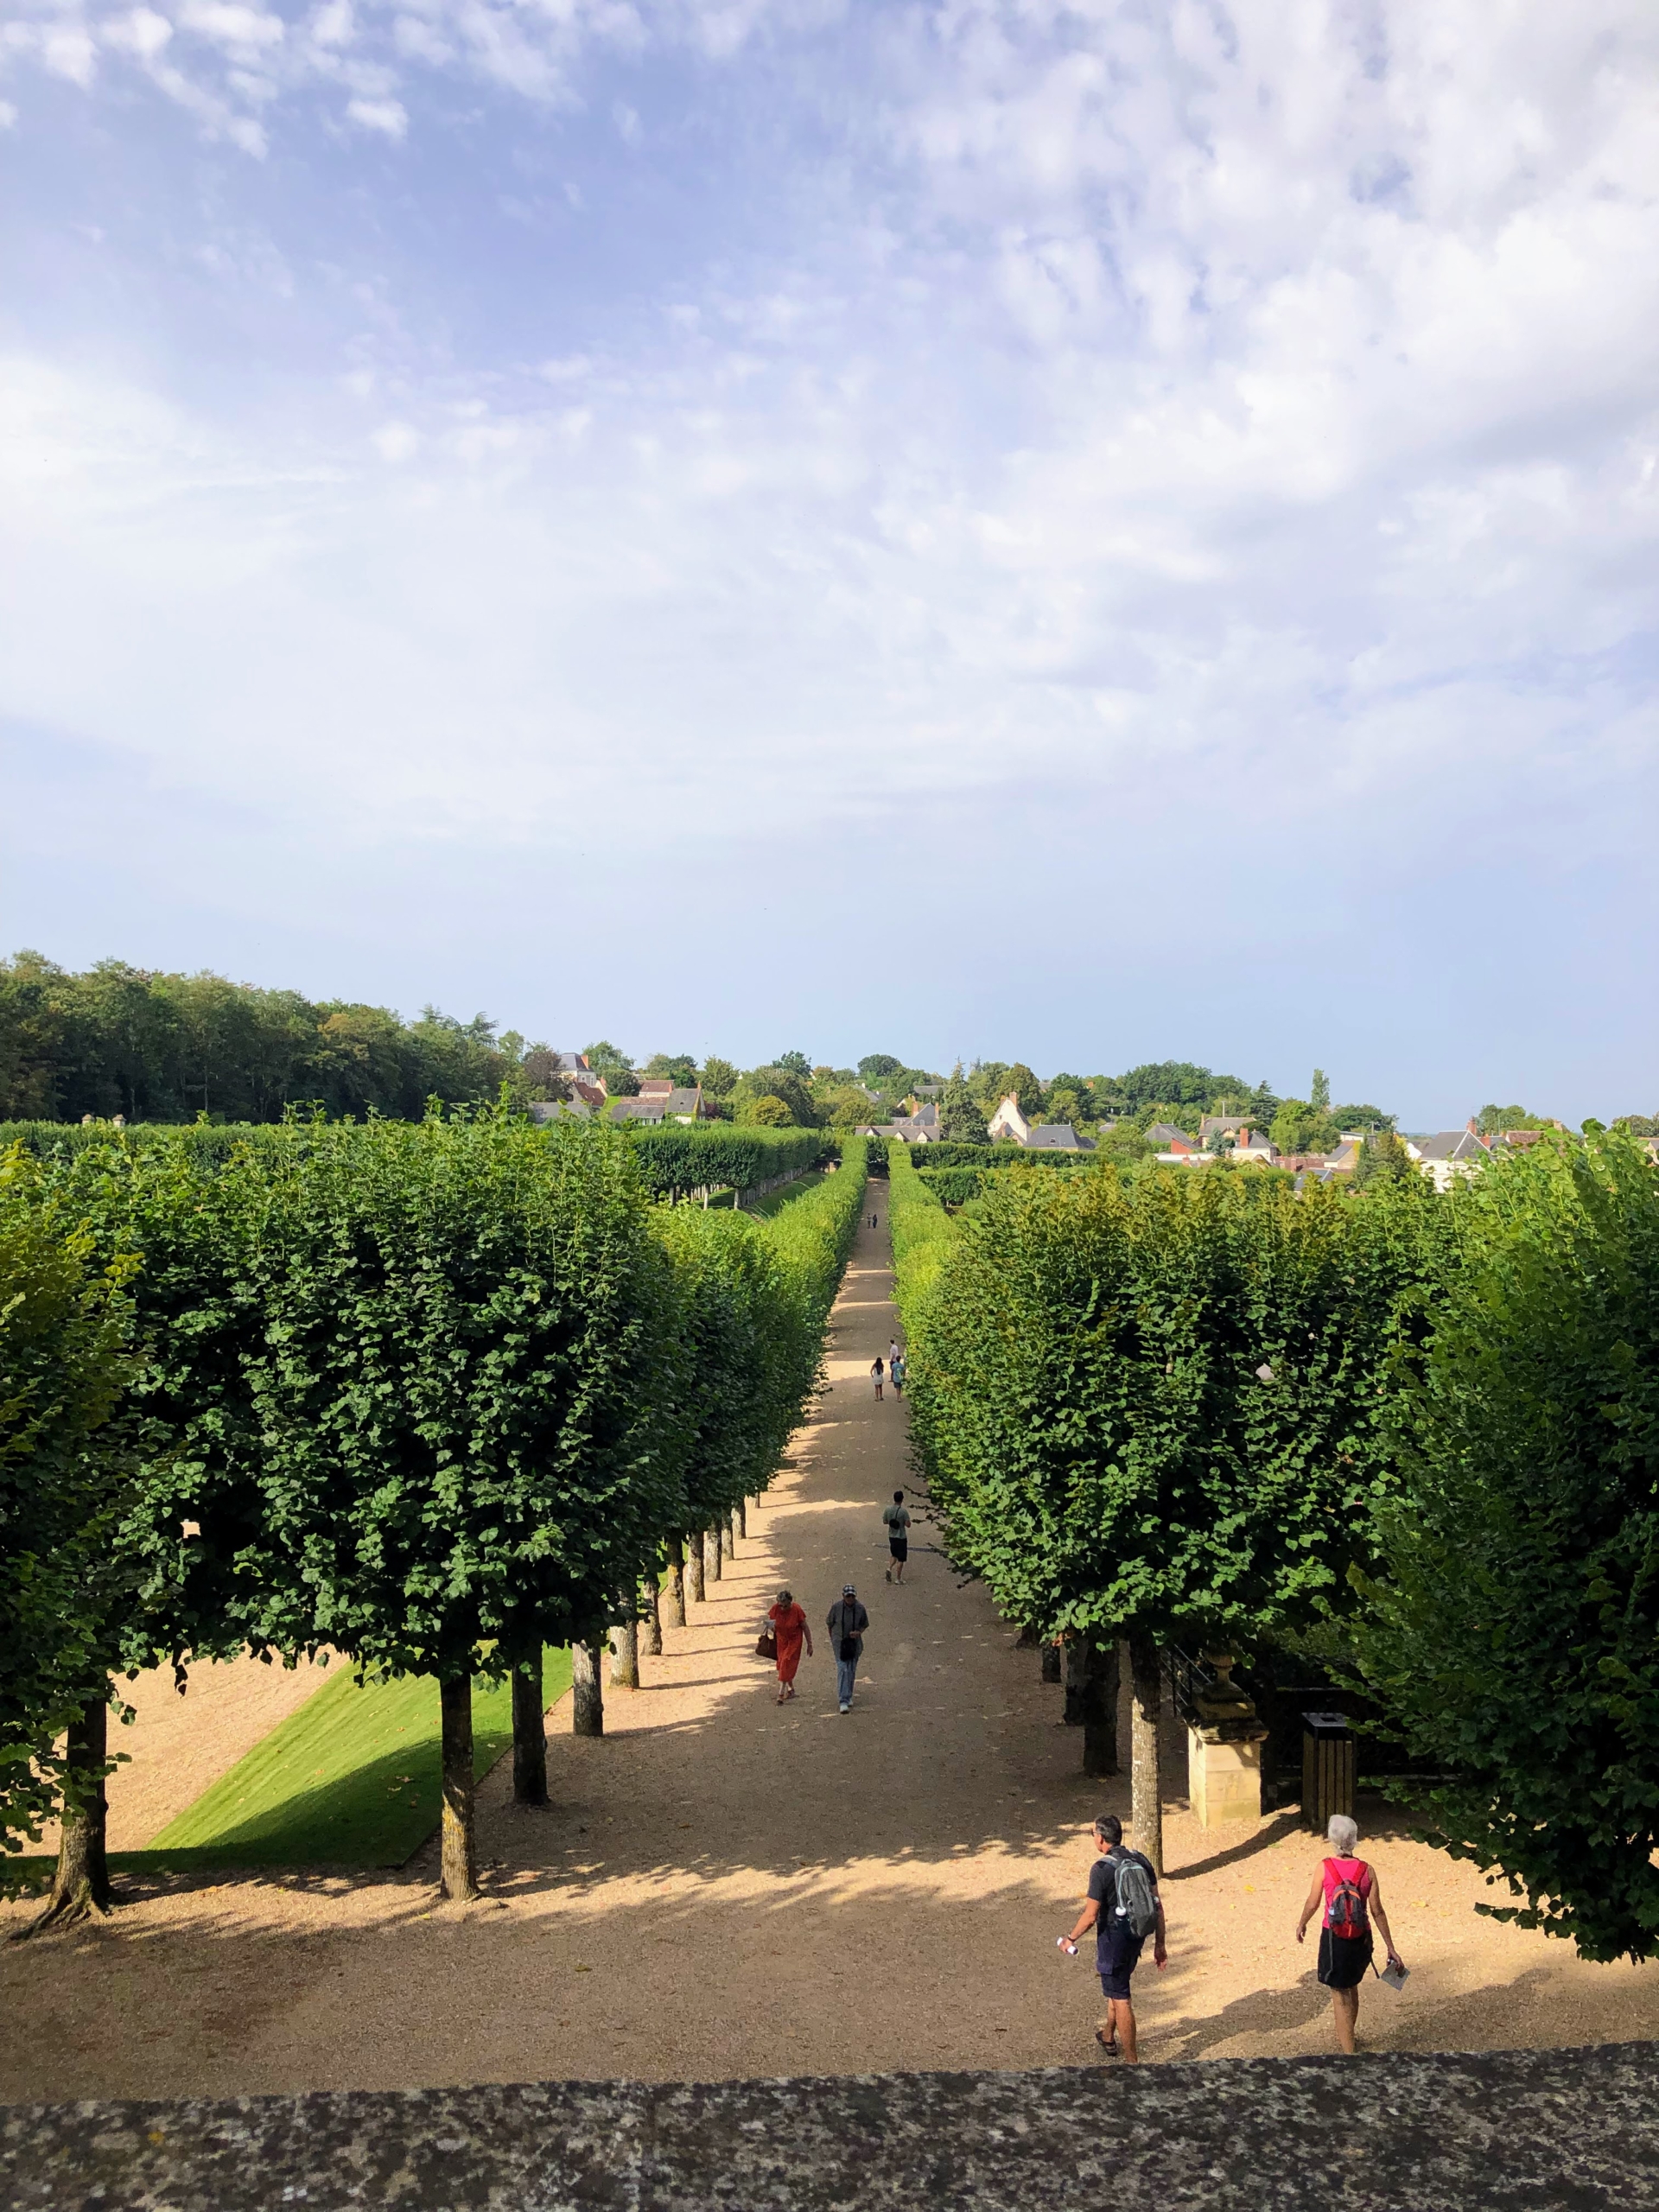
Everything is pruned and carefully groomed according to a very strict schedule. The trees planted throughout the estate require more than three months of pruning by a team of four.
More than 115,000 flowering and vegetable plants are planted every year.
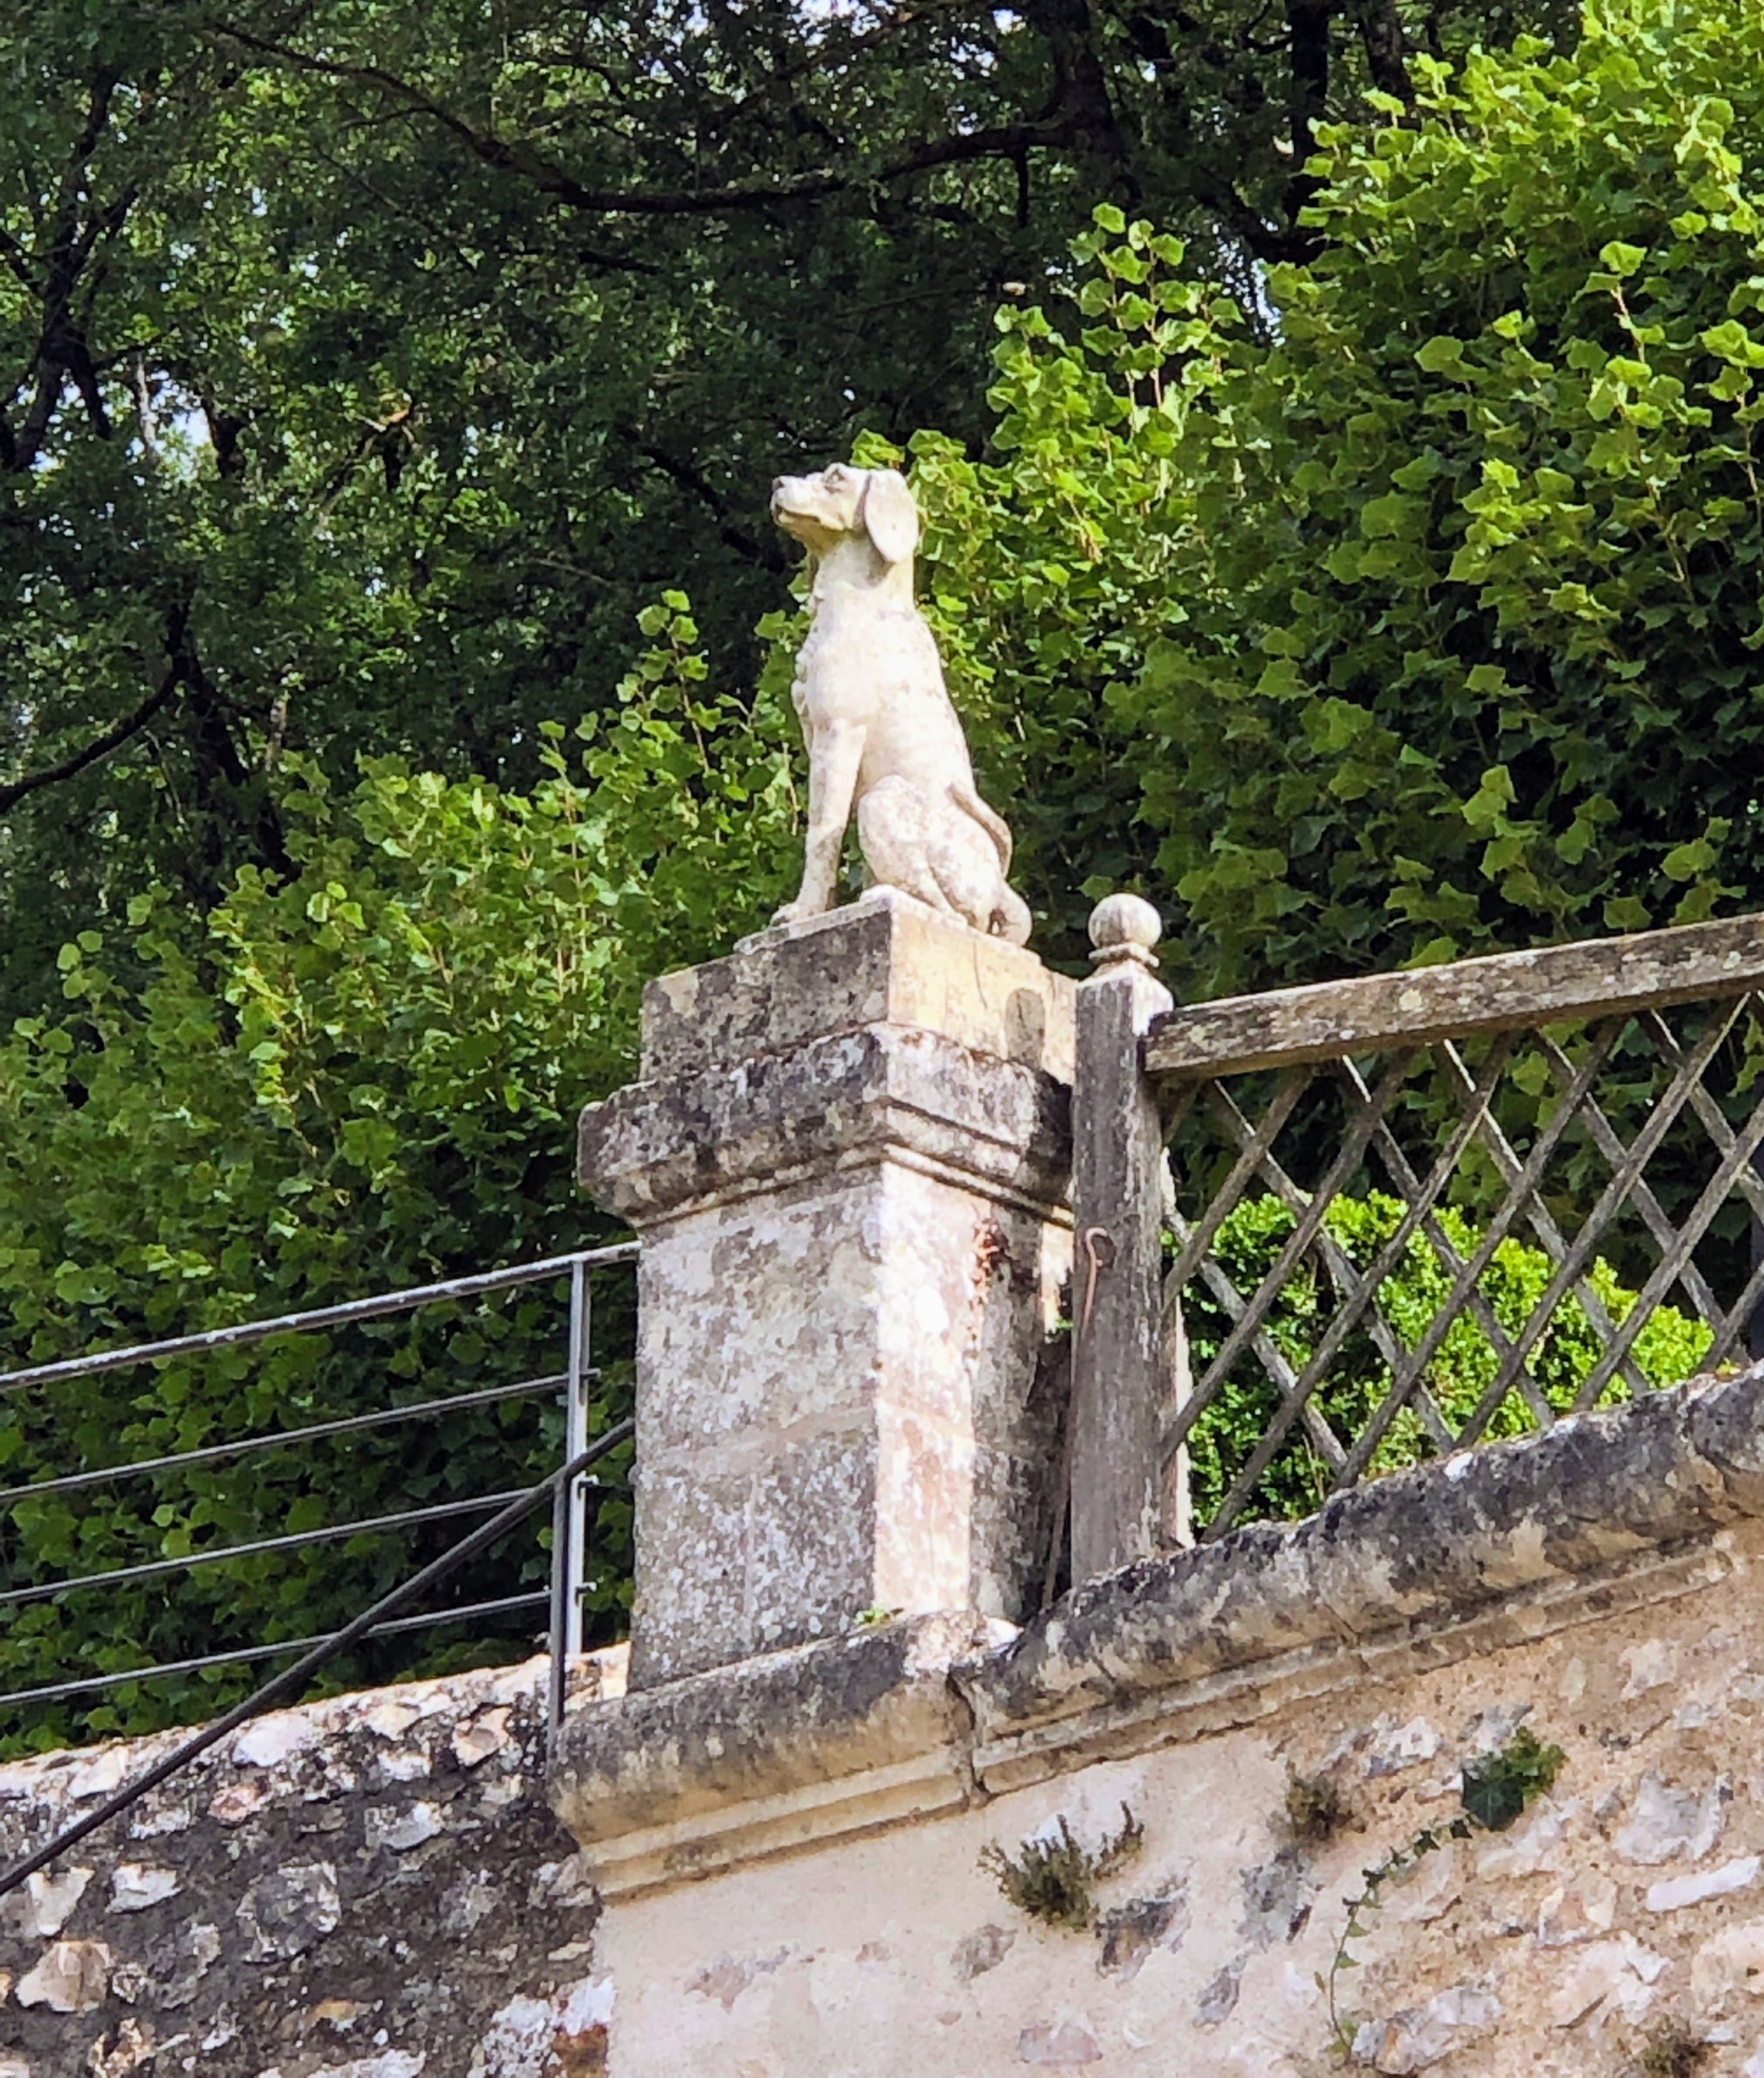
Here, a sculpture of a dog looks over the gardens from one of the terraces.
This is Water Garden surrounded by lawns and lime trees. It was meant to offer visitors a place for perfect rest and meditation. Originally created in the 18th century, it was restored in the early 20th century by Joachim Carvallo.
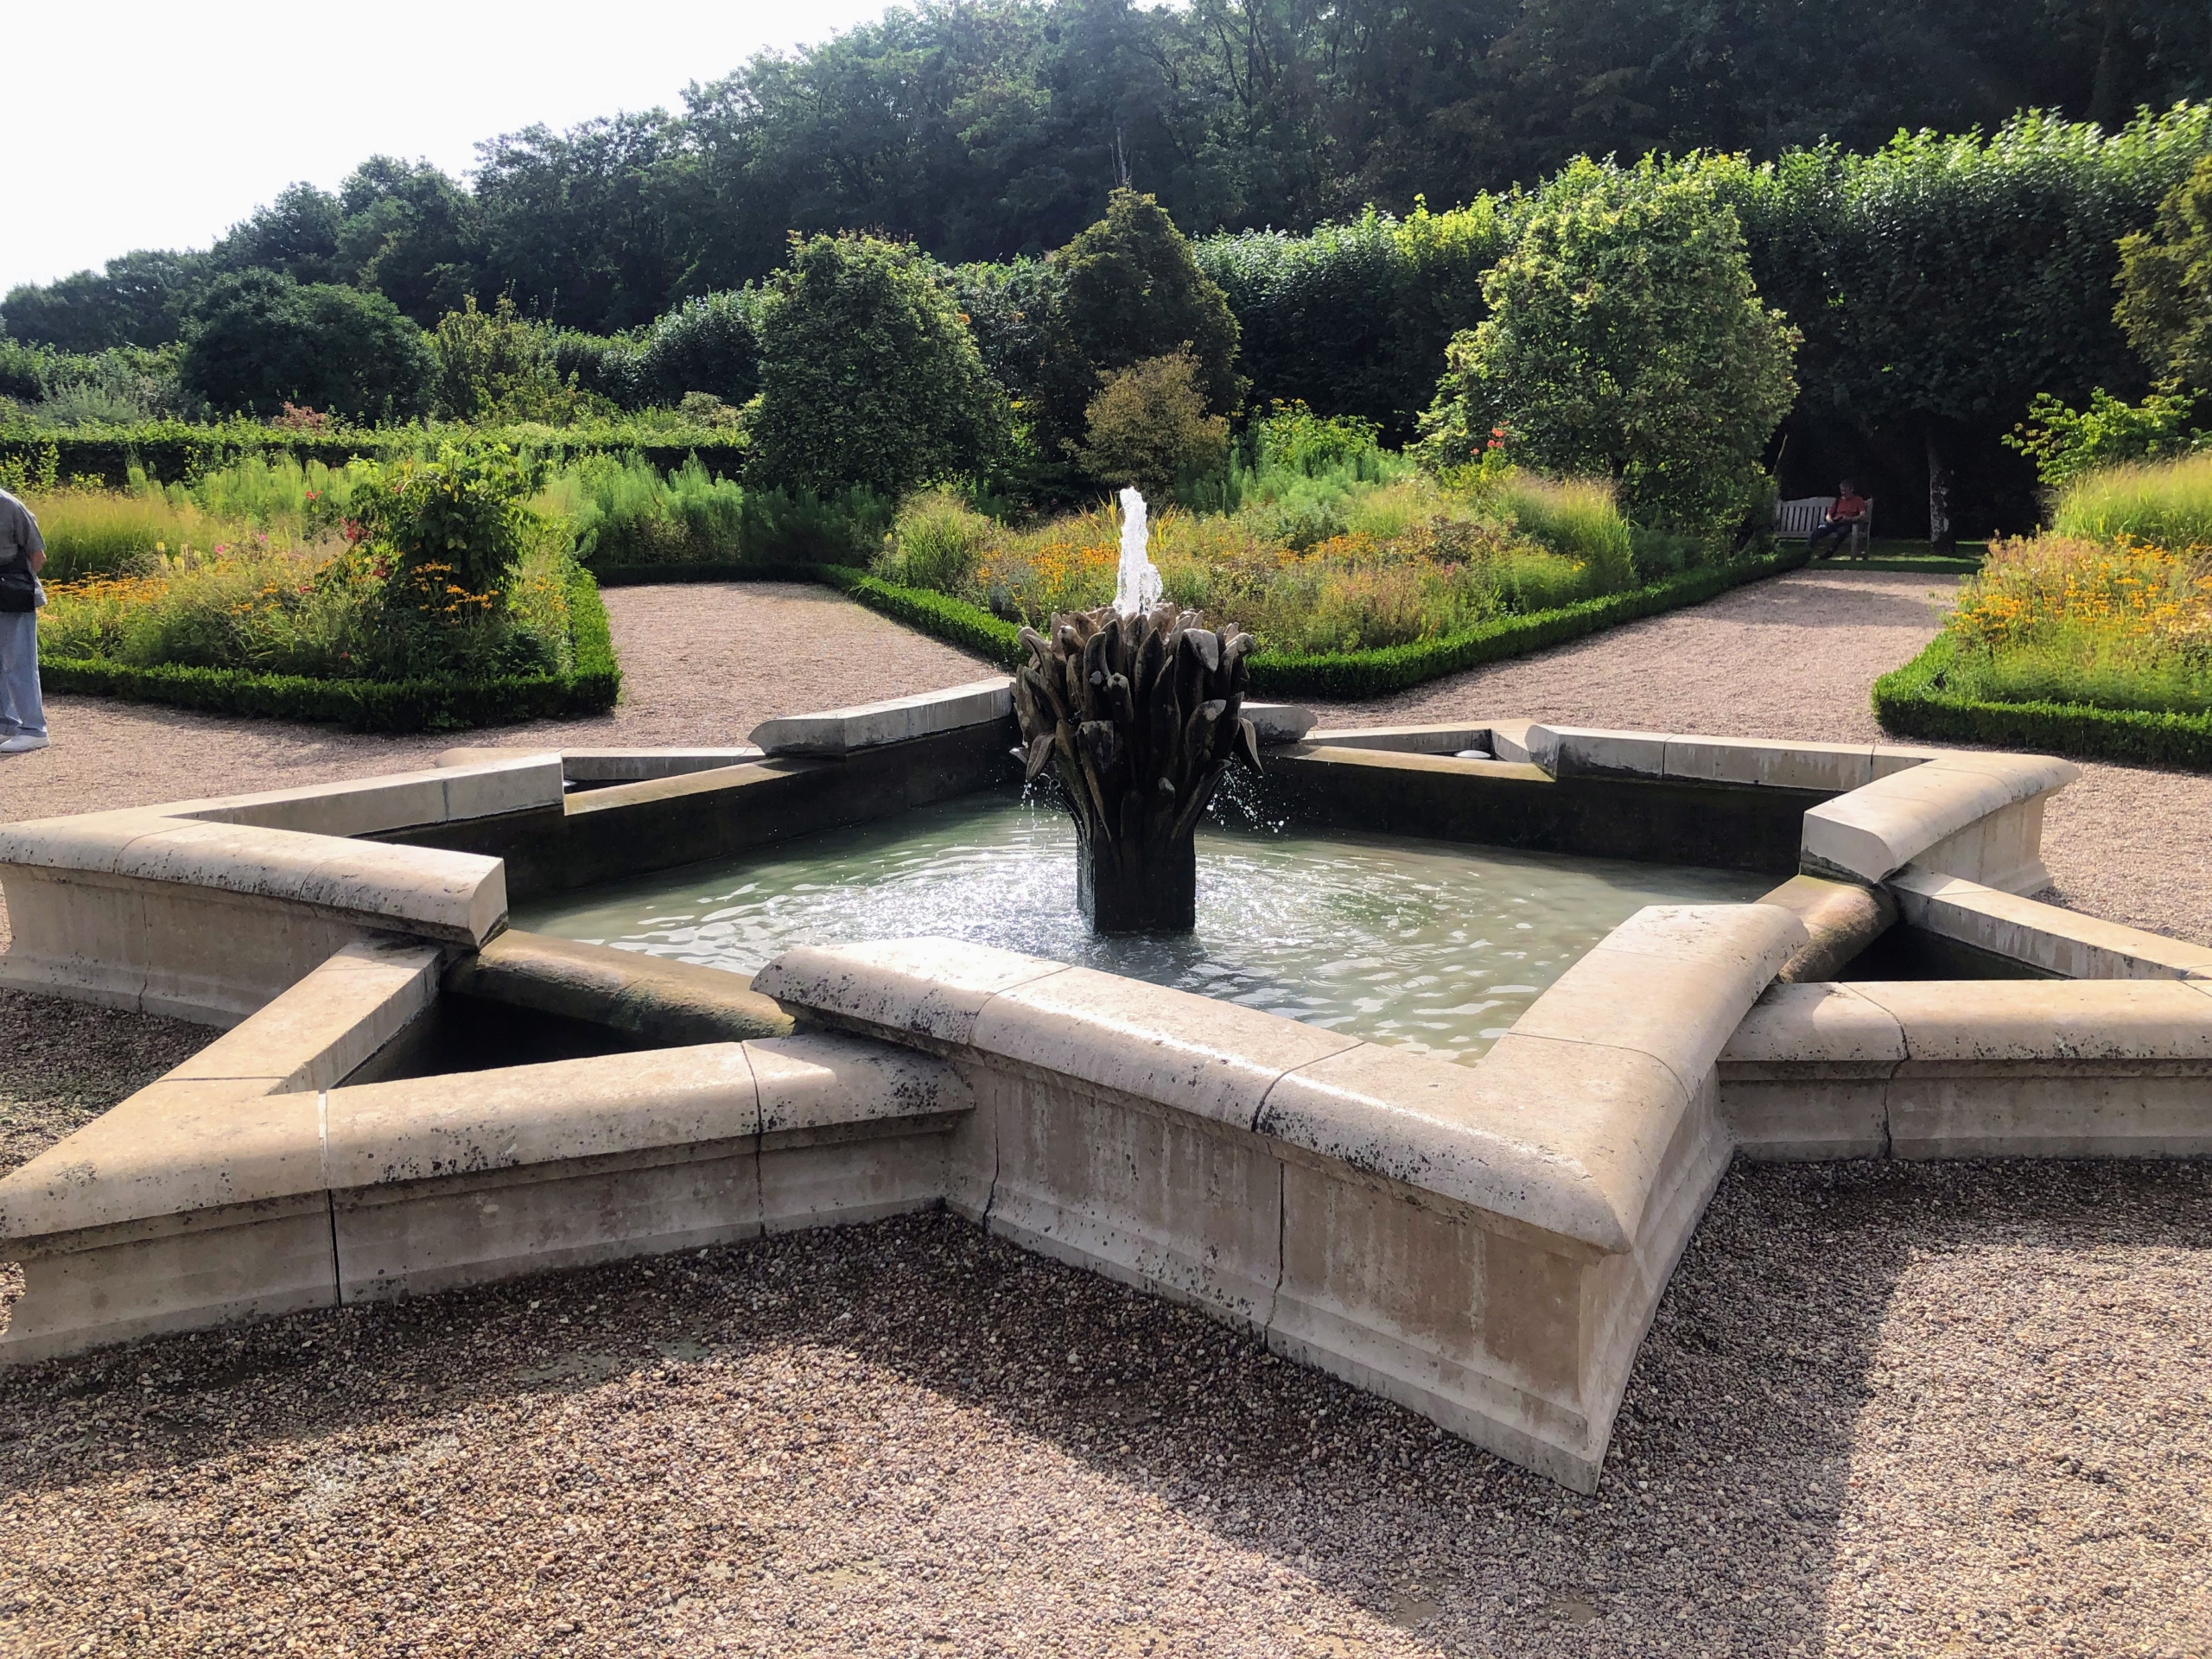
The Sun Garden is a contemporary space inspired by another one of Joachim’s projects. It is formed in three spaces – a cloud chamber with grassy paths, planted with shrubs and perennials, a children’s chamber and this sun chamber centered around a star shaped pool.
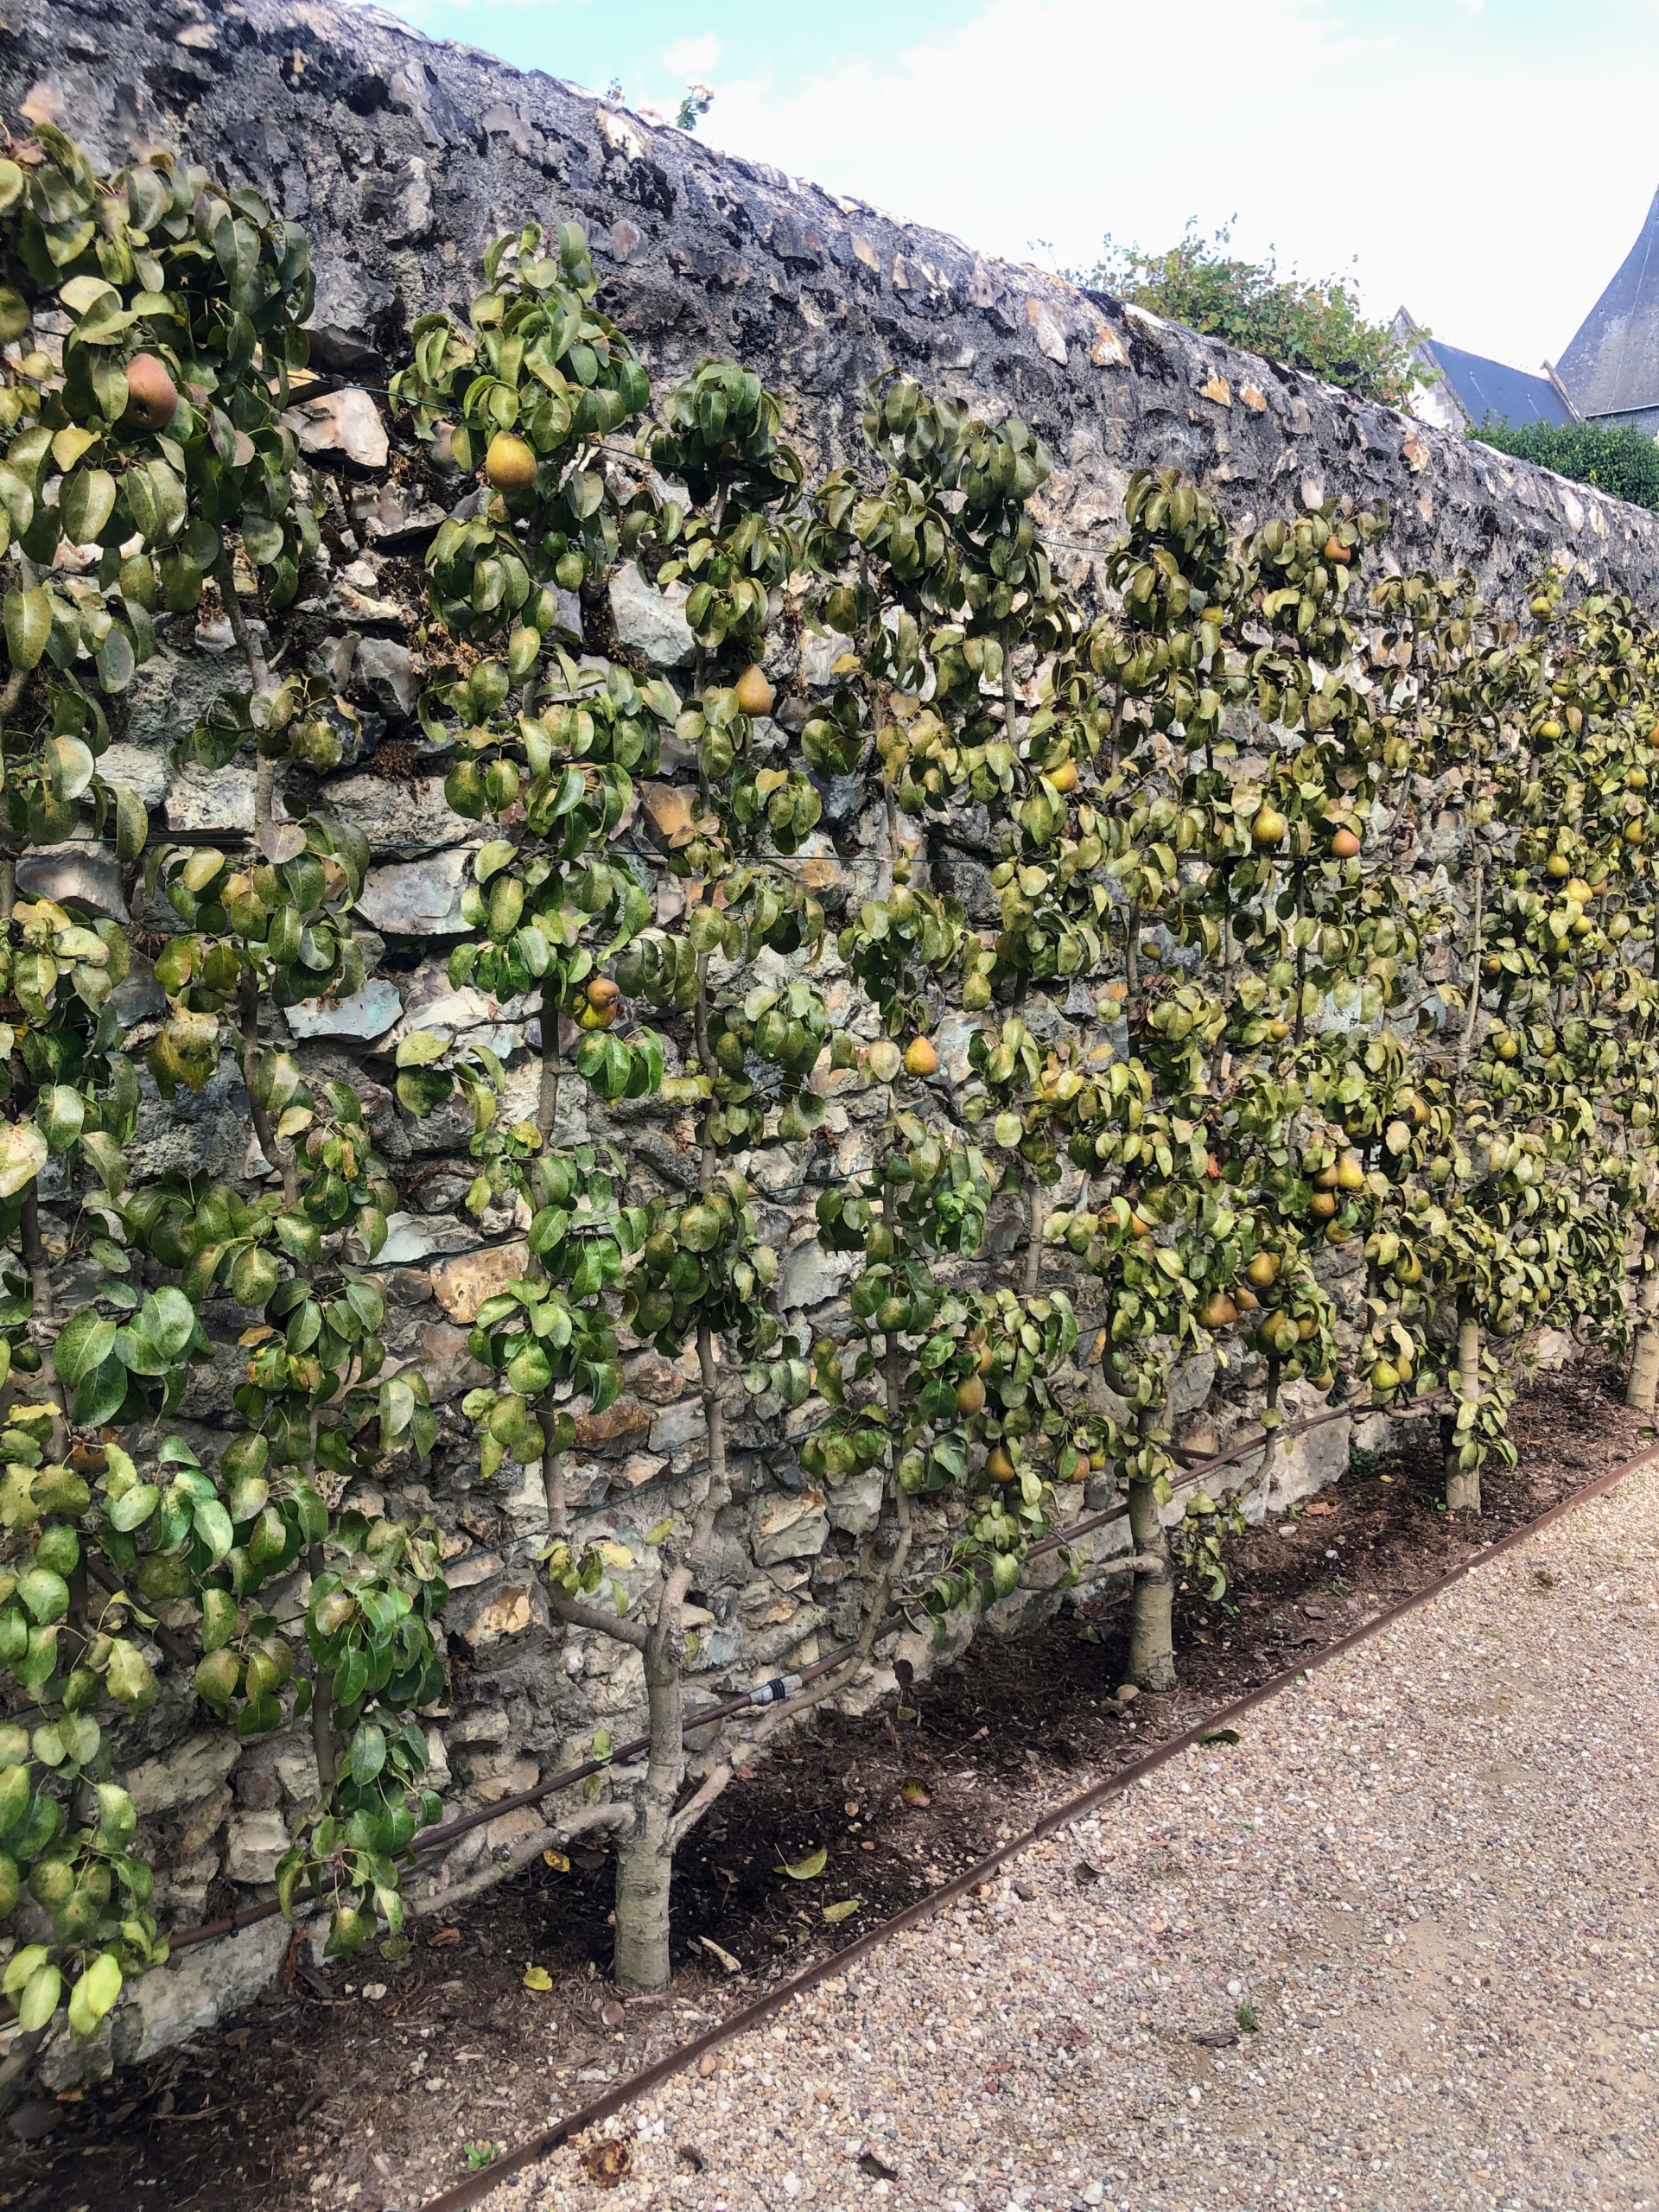
The gardens also include espaliers – fruit trees or ornamental shrubs whose branches are trained to grow flat against a wall, supported on a lattice or a framework of stakes. These are espaliered pear trees. I also have espaliered fruit trees at the farm. The horizontal branches grow lower to allow pickers easier reach.
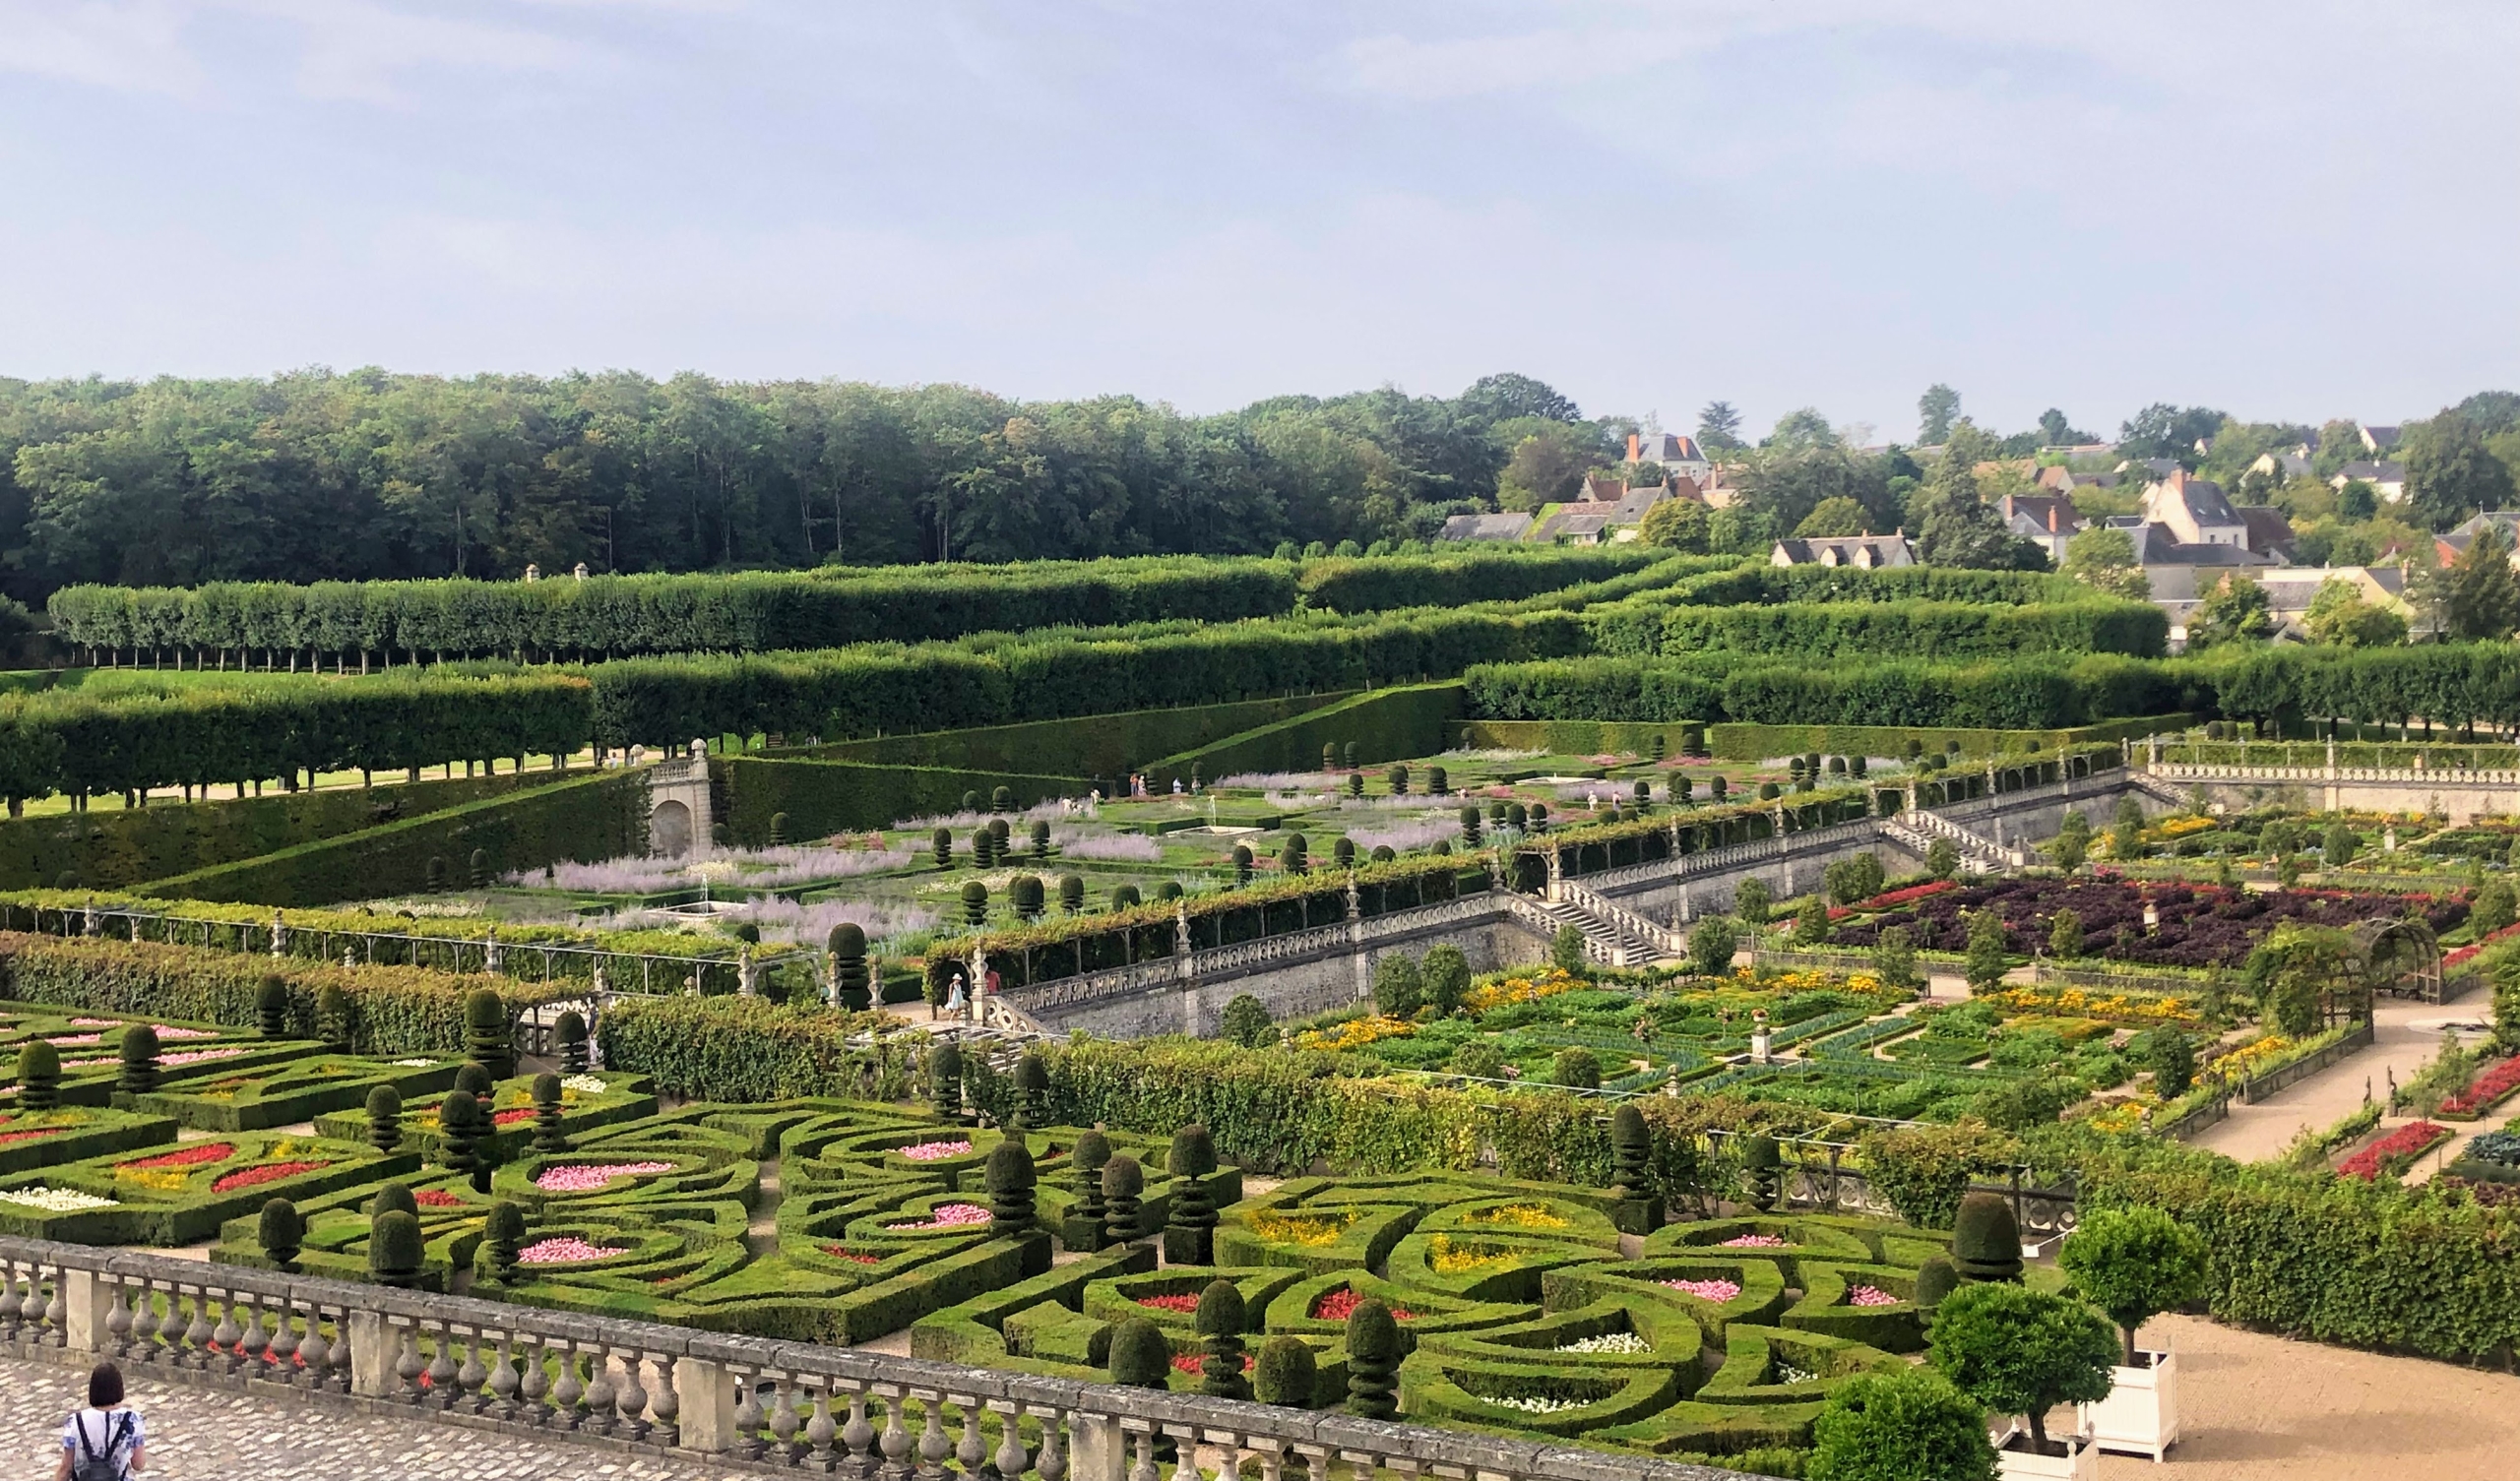
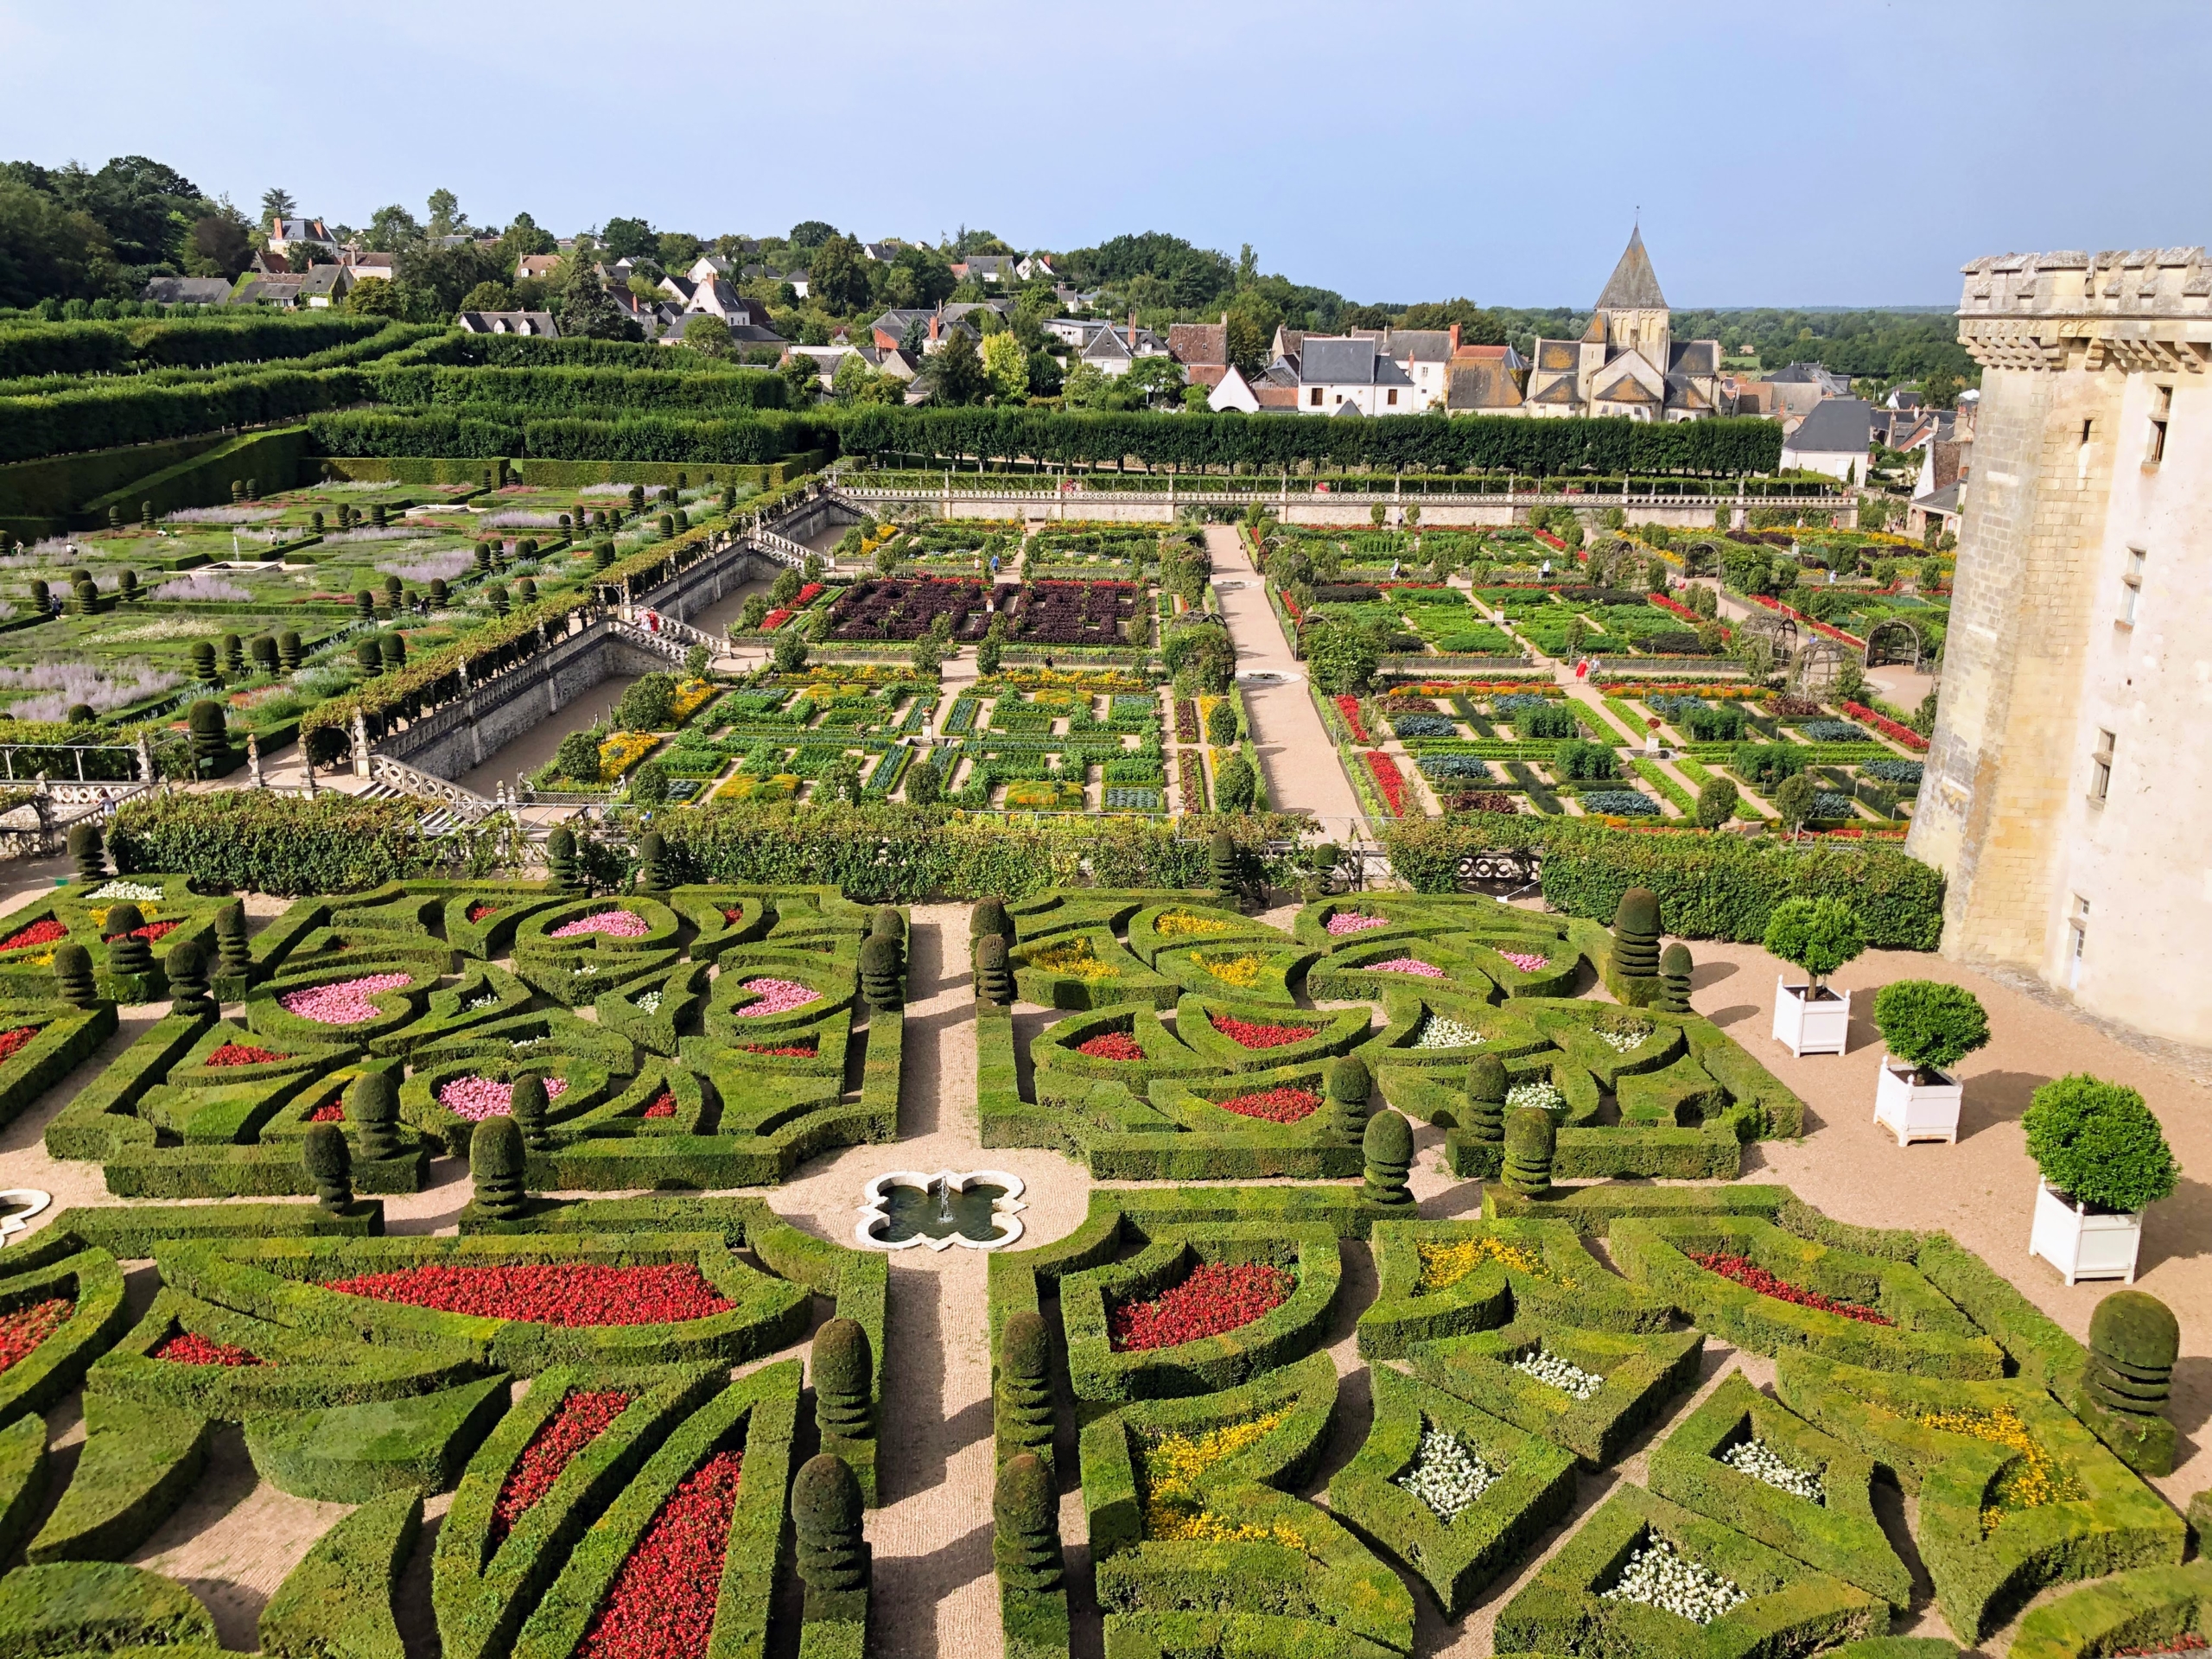
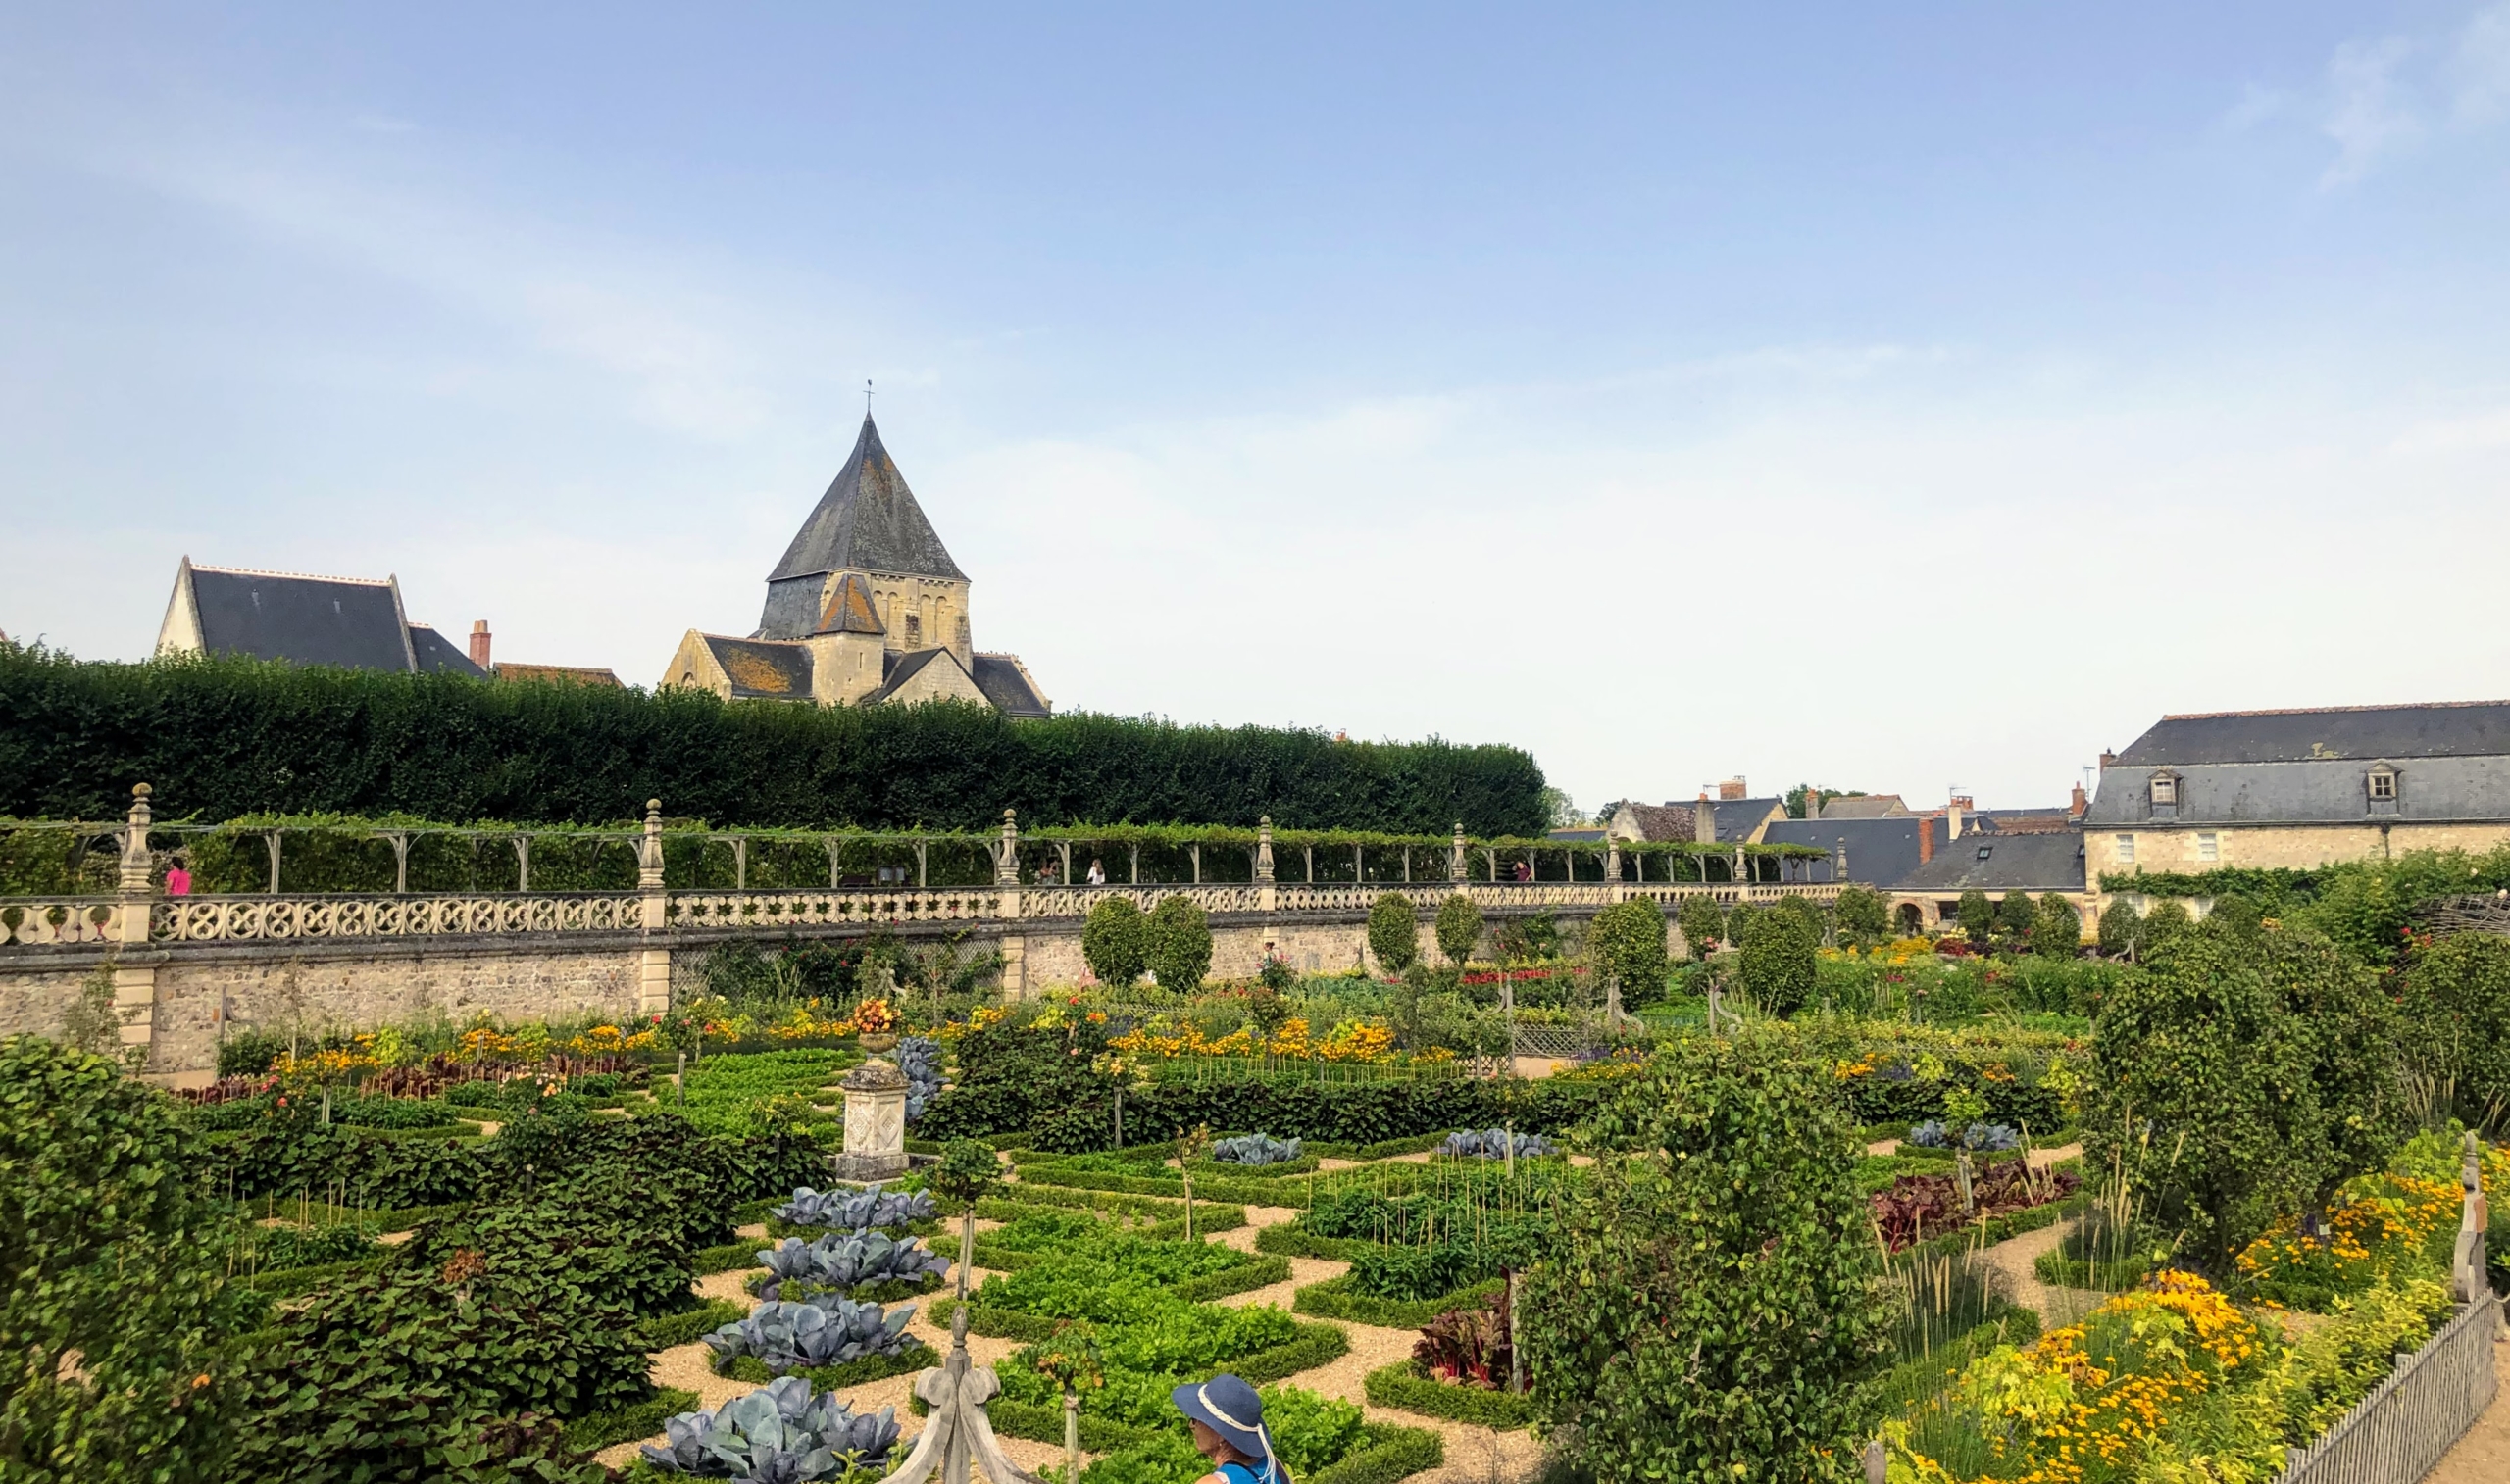
This is the Ornamental Kitchen Garden is located between the château and the village and is made up of nine raised beds featuring different geometrical designs.
Here’s another section of the Ornamental Kitchen Garden. It is also planted with different colors to offer the illusion of a multicolored checkerboard. It includes blue leeks, jade-green carrot tops, red cabbage, and others.
And in this section, perfectly planted red cabbages . This Ornamental Kitchen Garden was first planted during the Renaissance, was replaced for a while by an English style park in the 19th century and then transformed back into the Kitchen Garden in the early 1900s by Joachim.
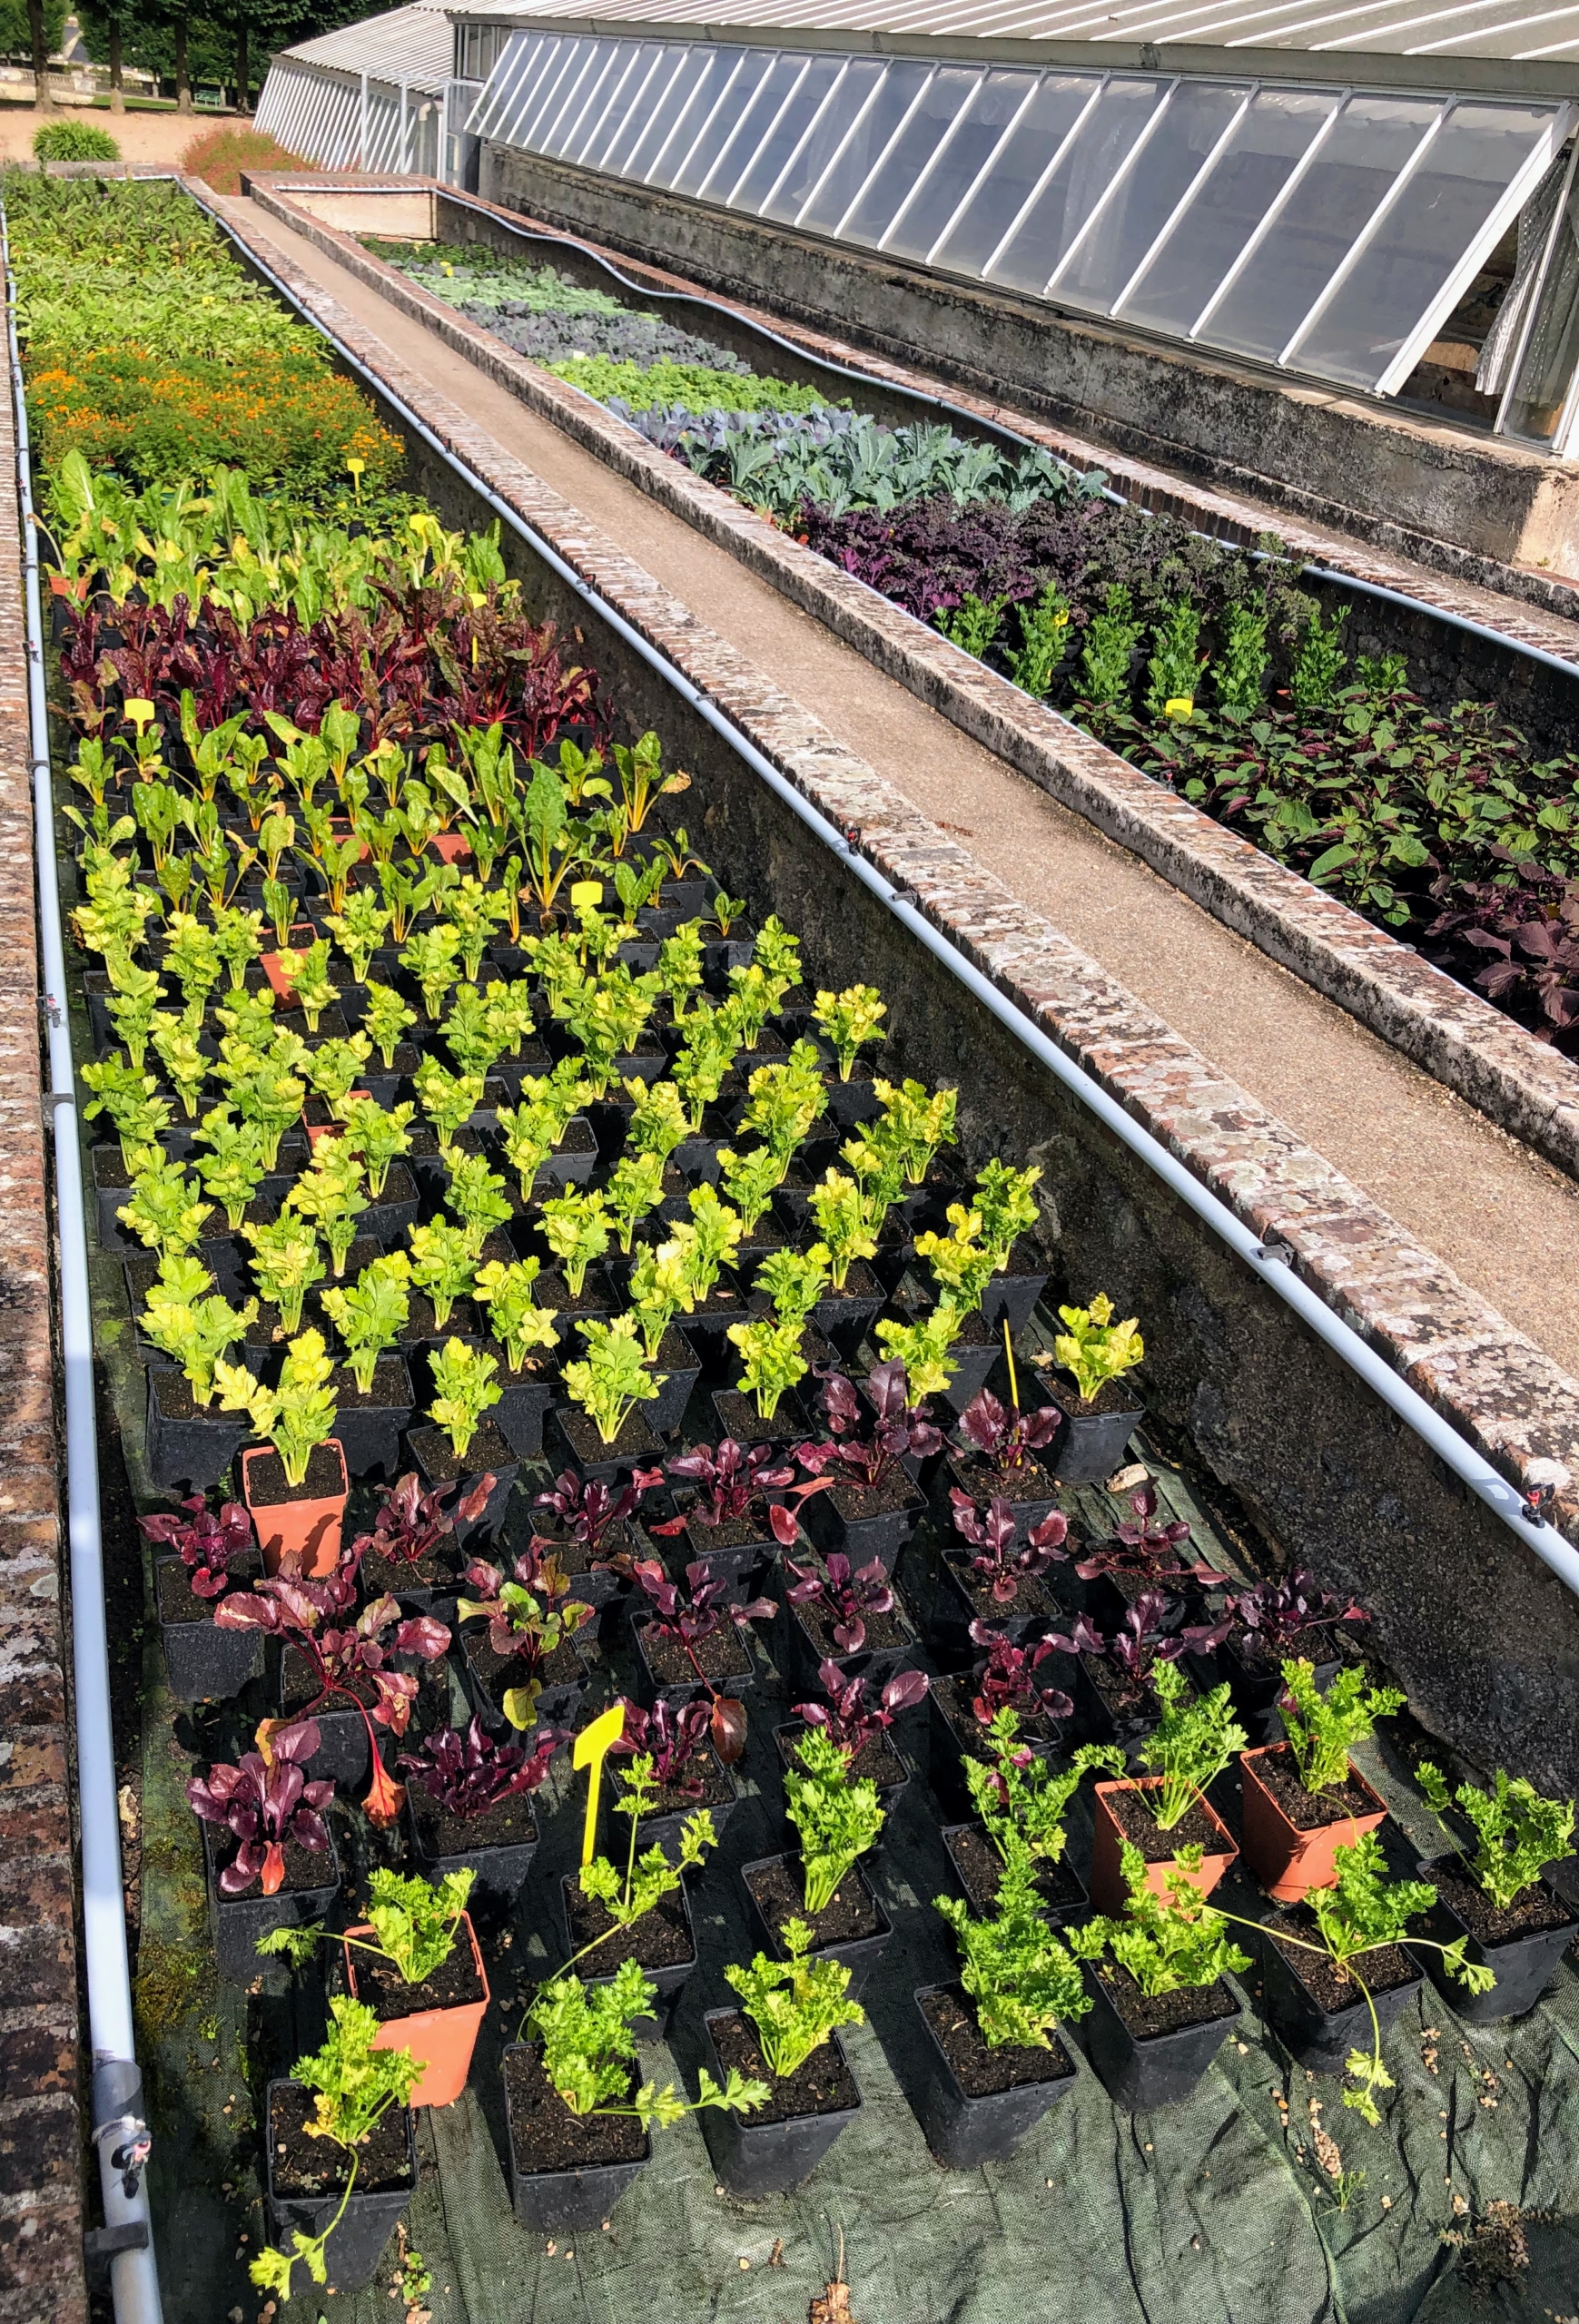
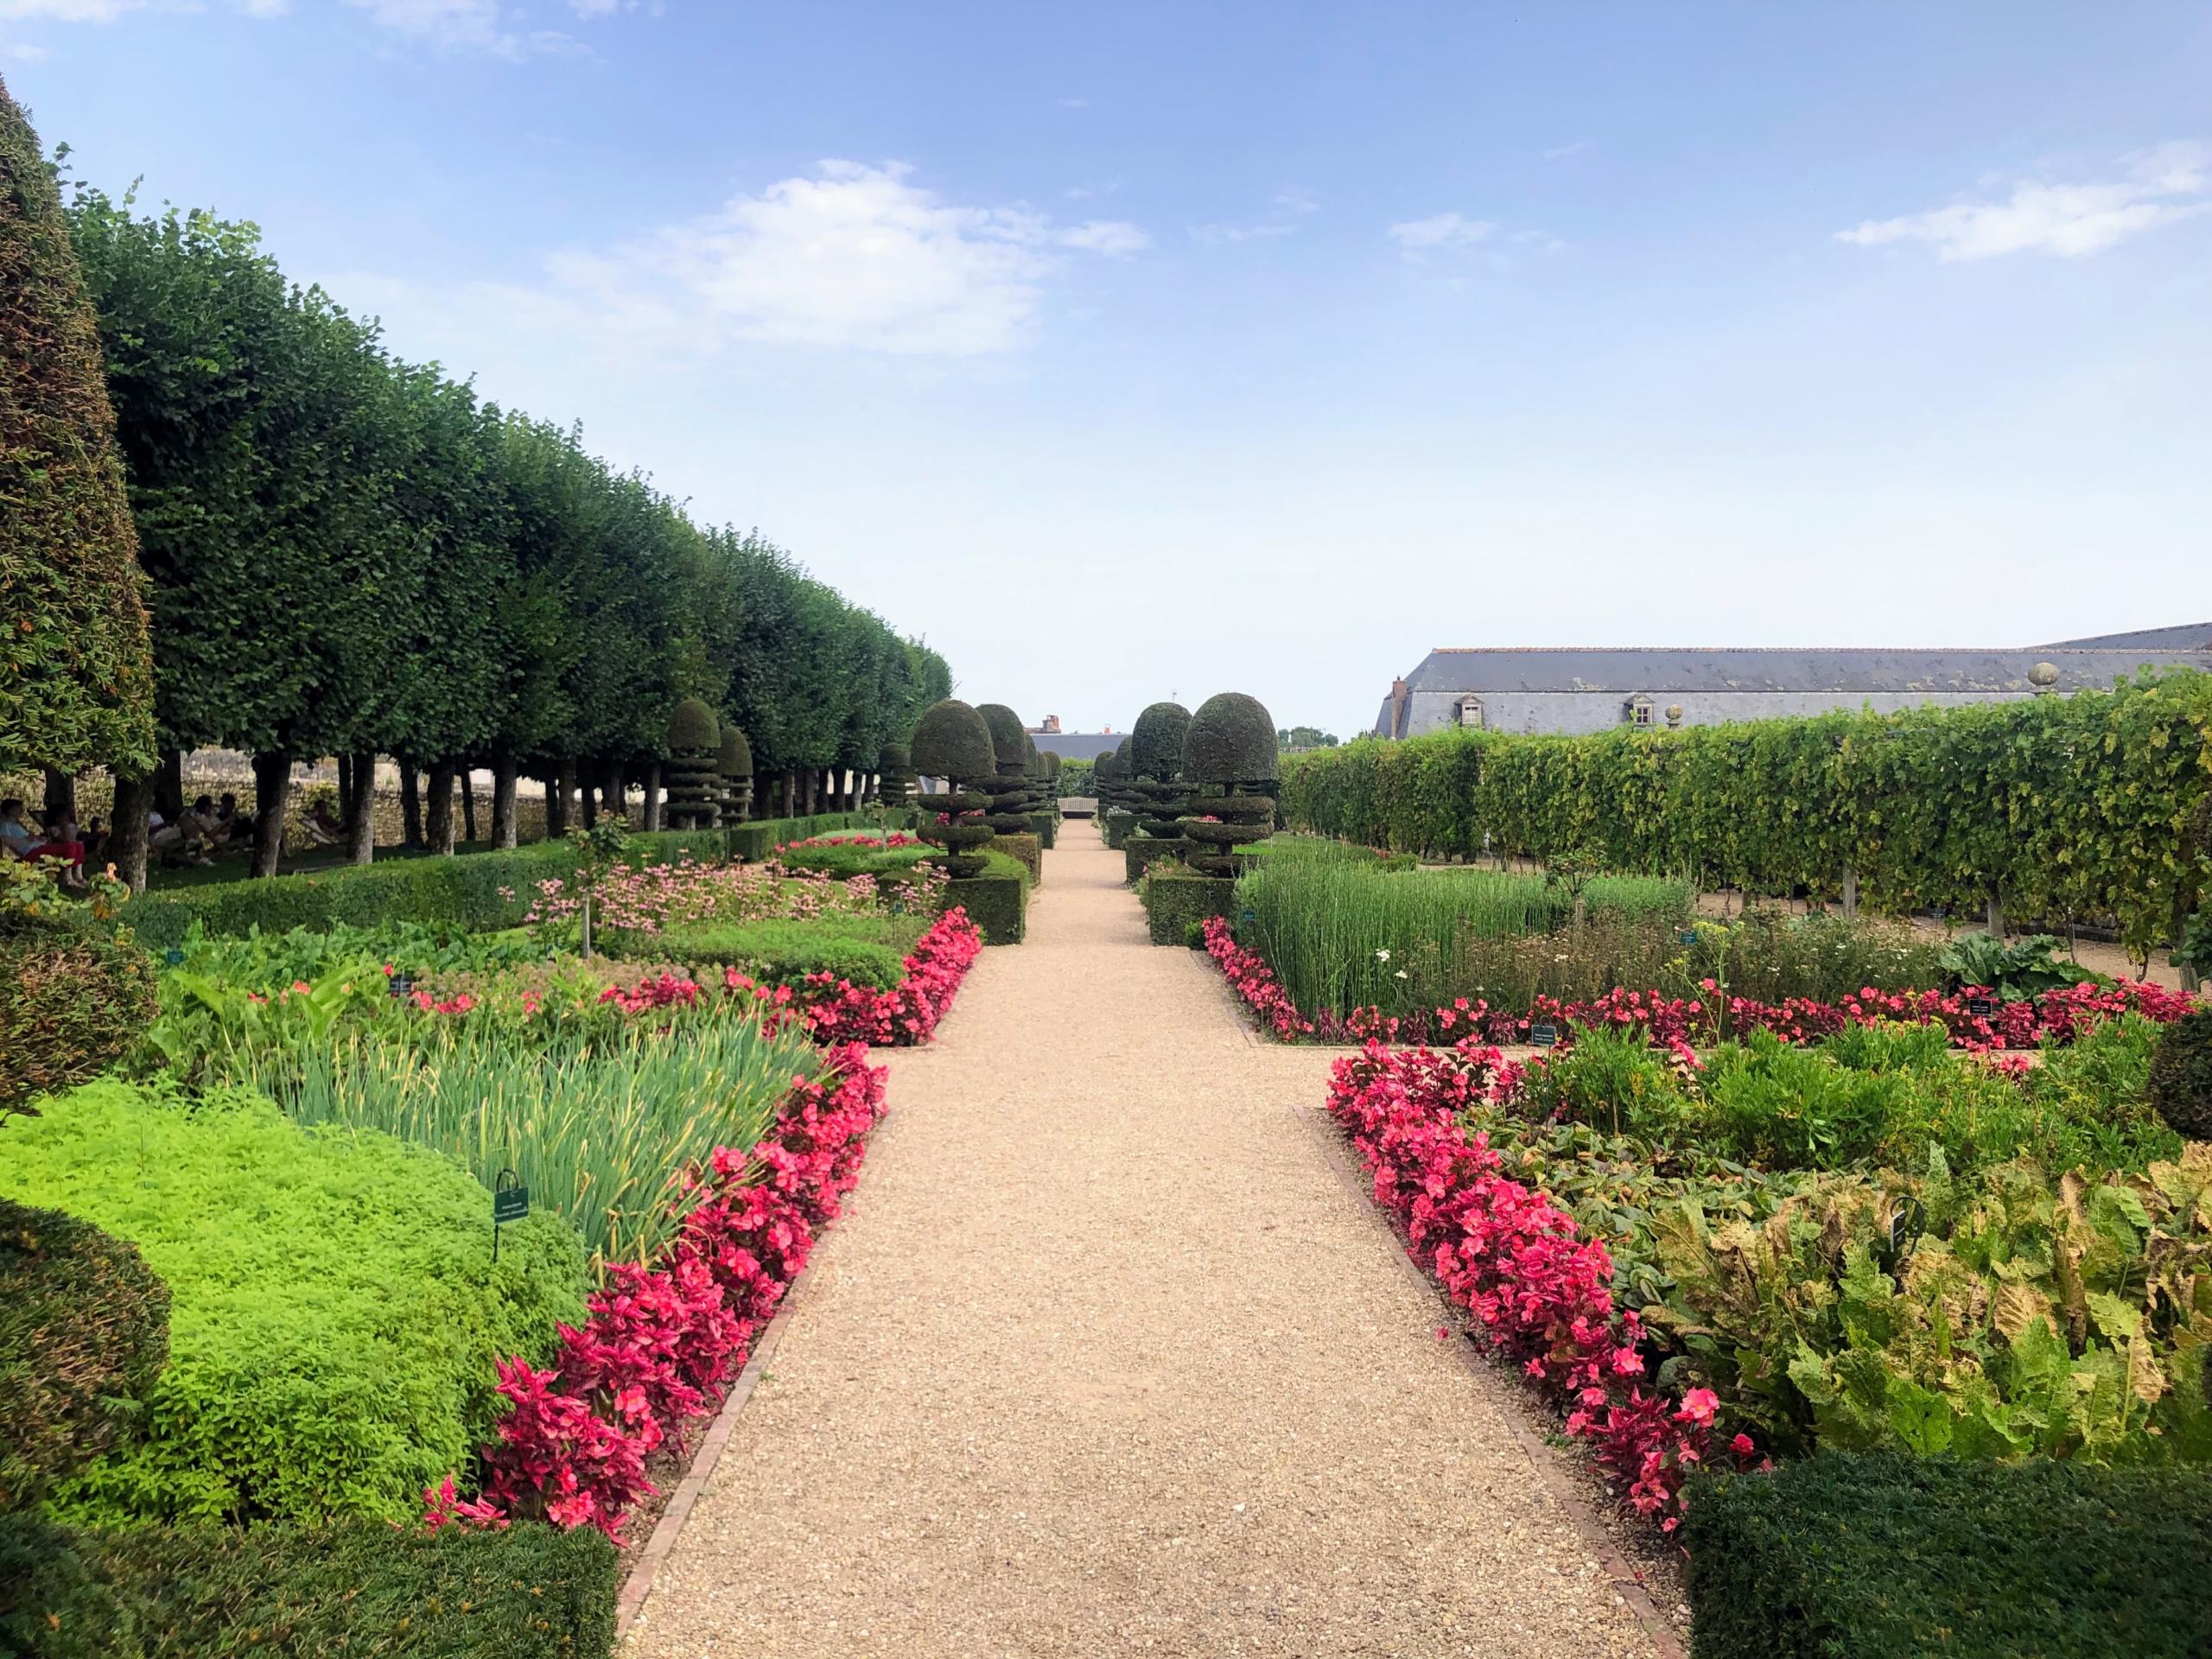
Footpaths throughout are lined with perfectly growing plants and shrubs. More than 60,000 of the specimens planted every year are first nurtured and prepared in the greenhouses.
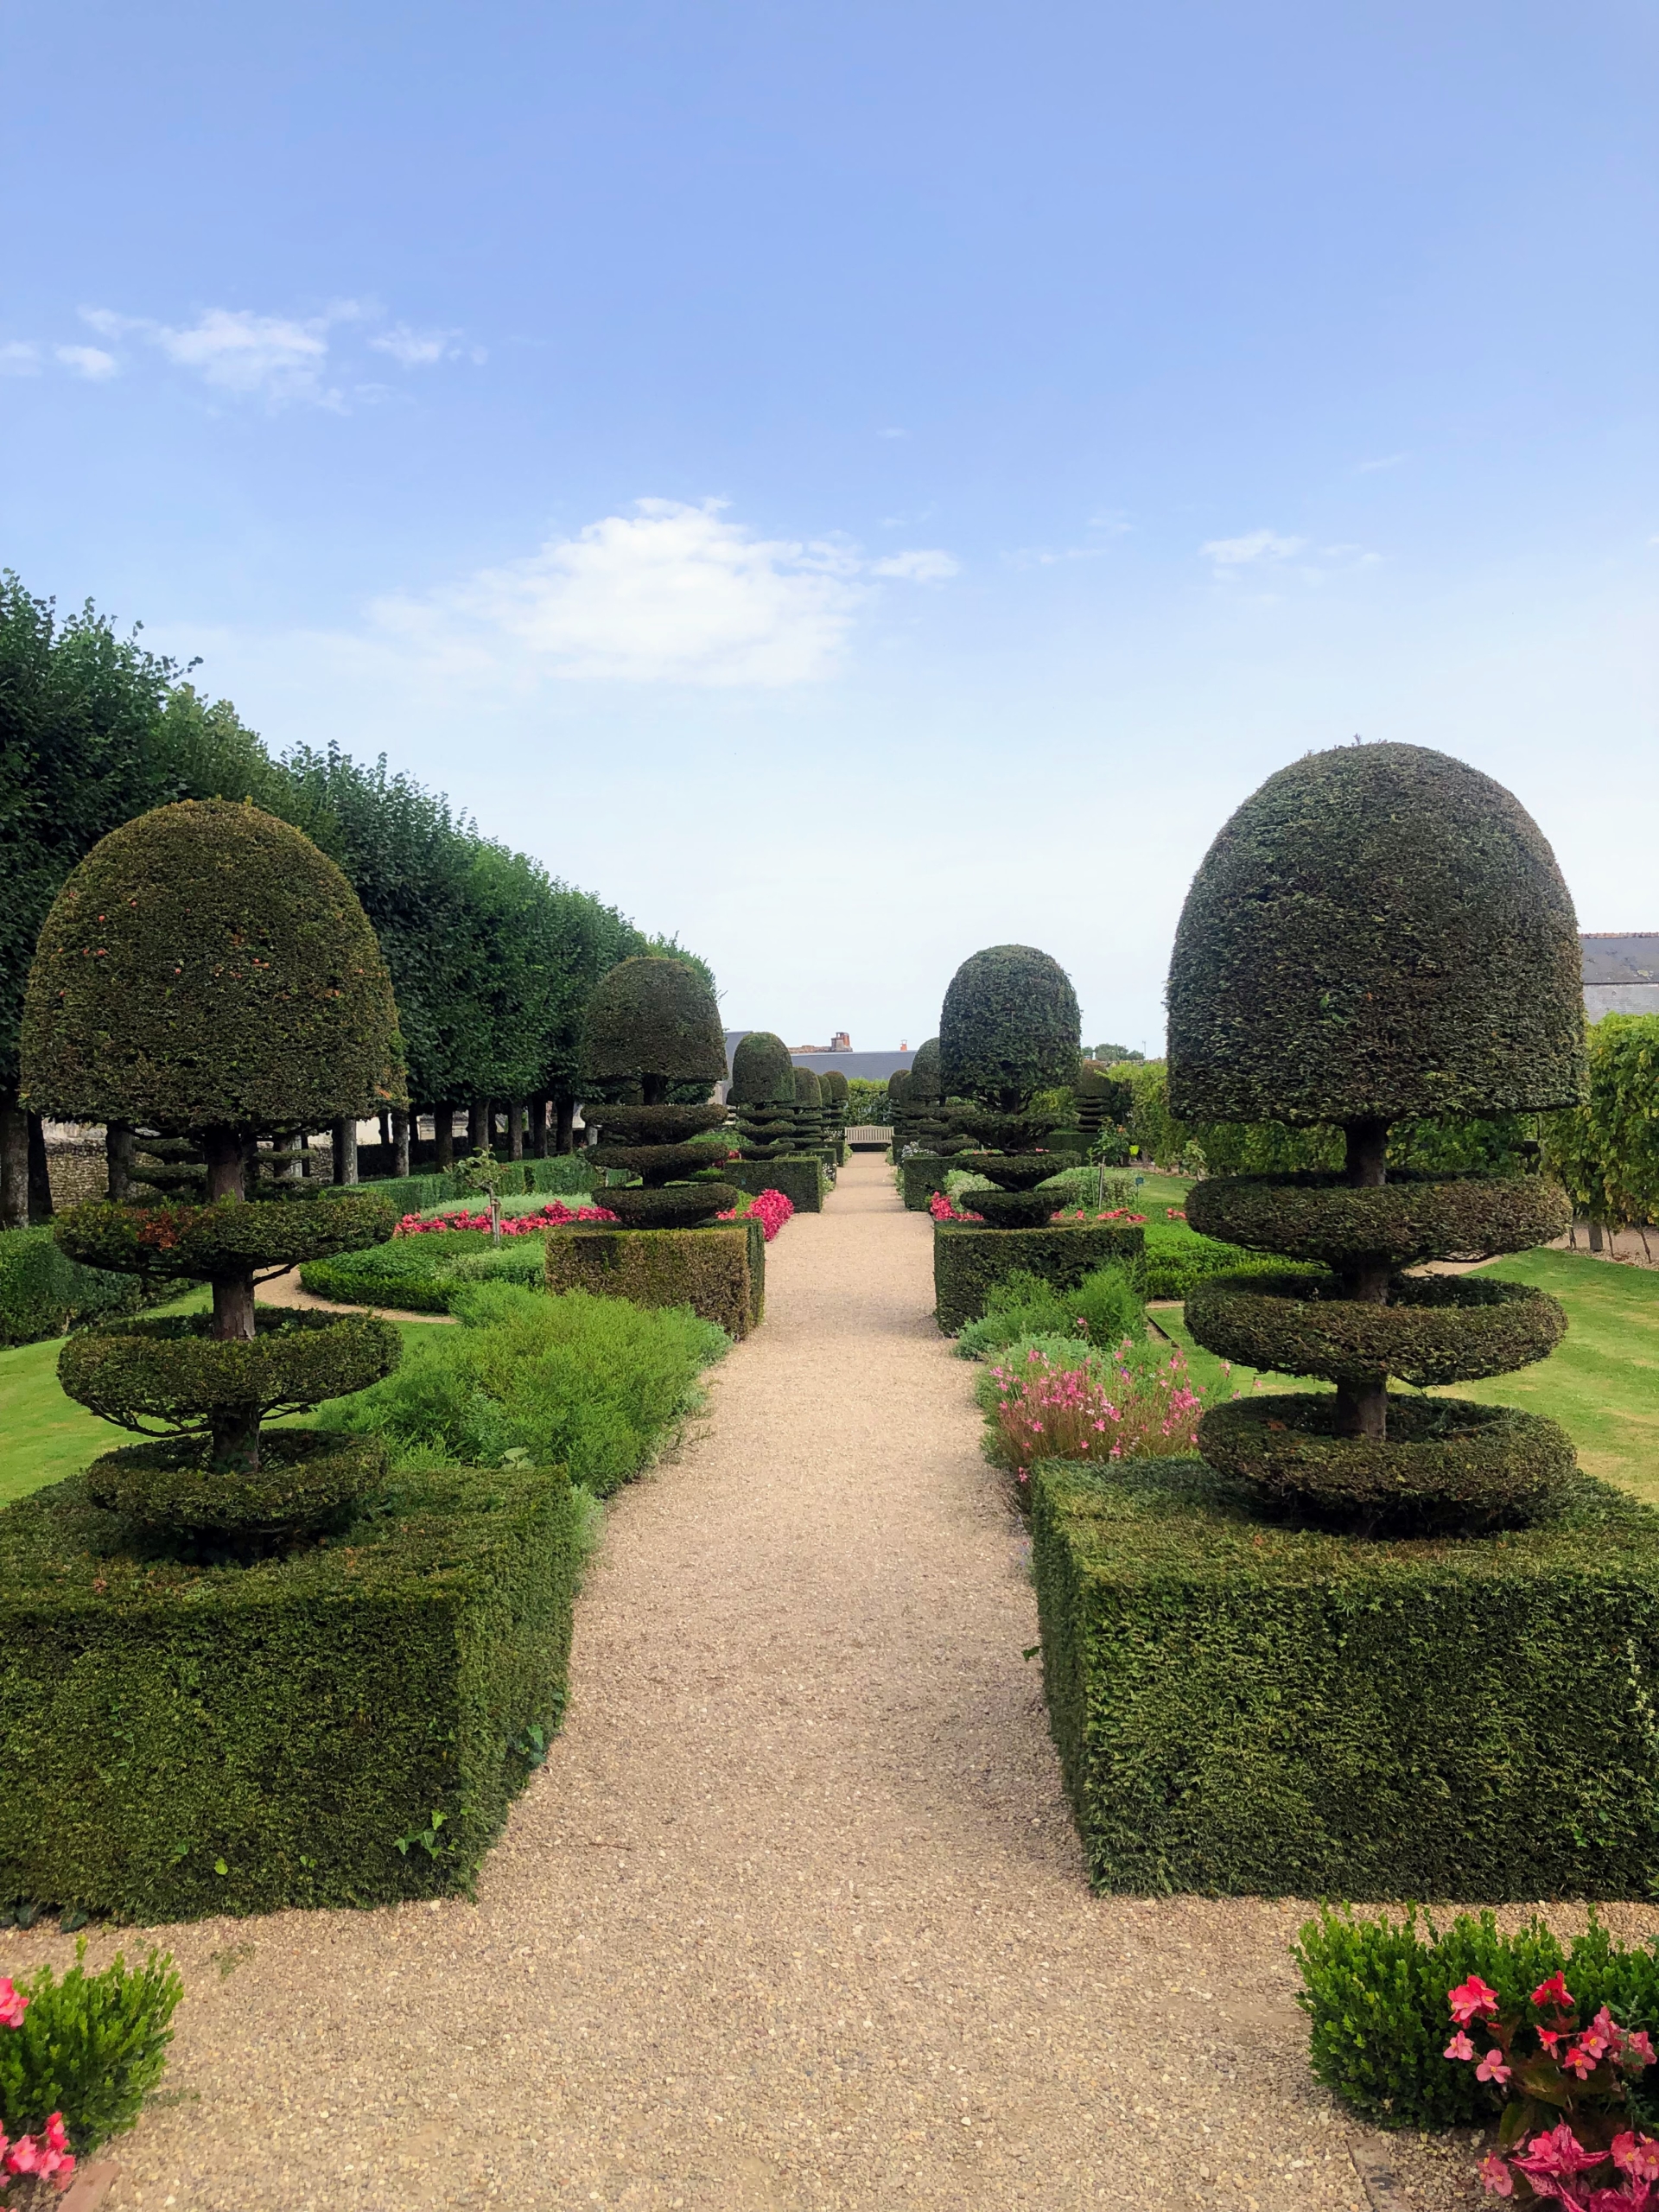
Hard not to admire the topiaries – also groomed flawlessly.
Today, the gardens are all well marked, giving all visitors a way to gain their bearings at Villandry.
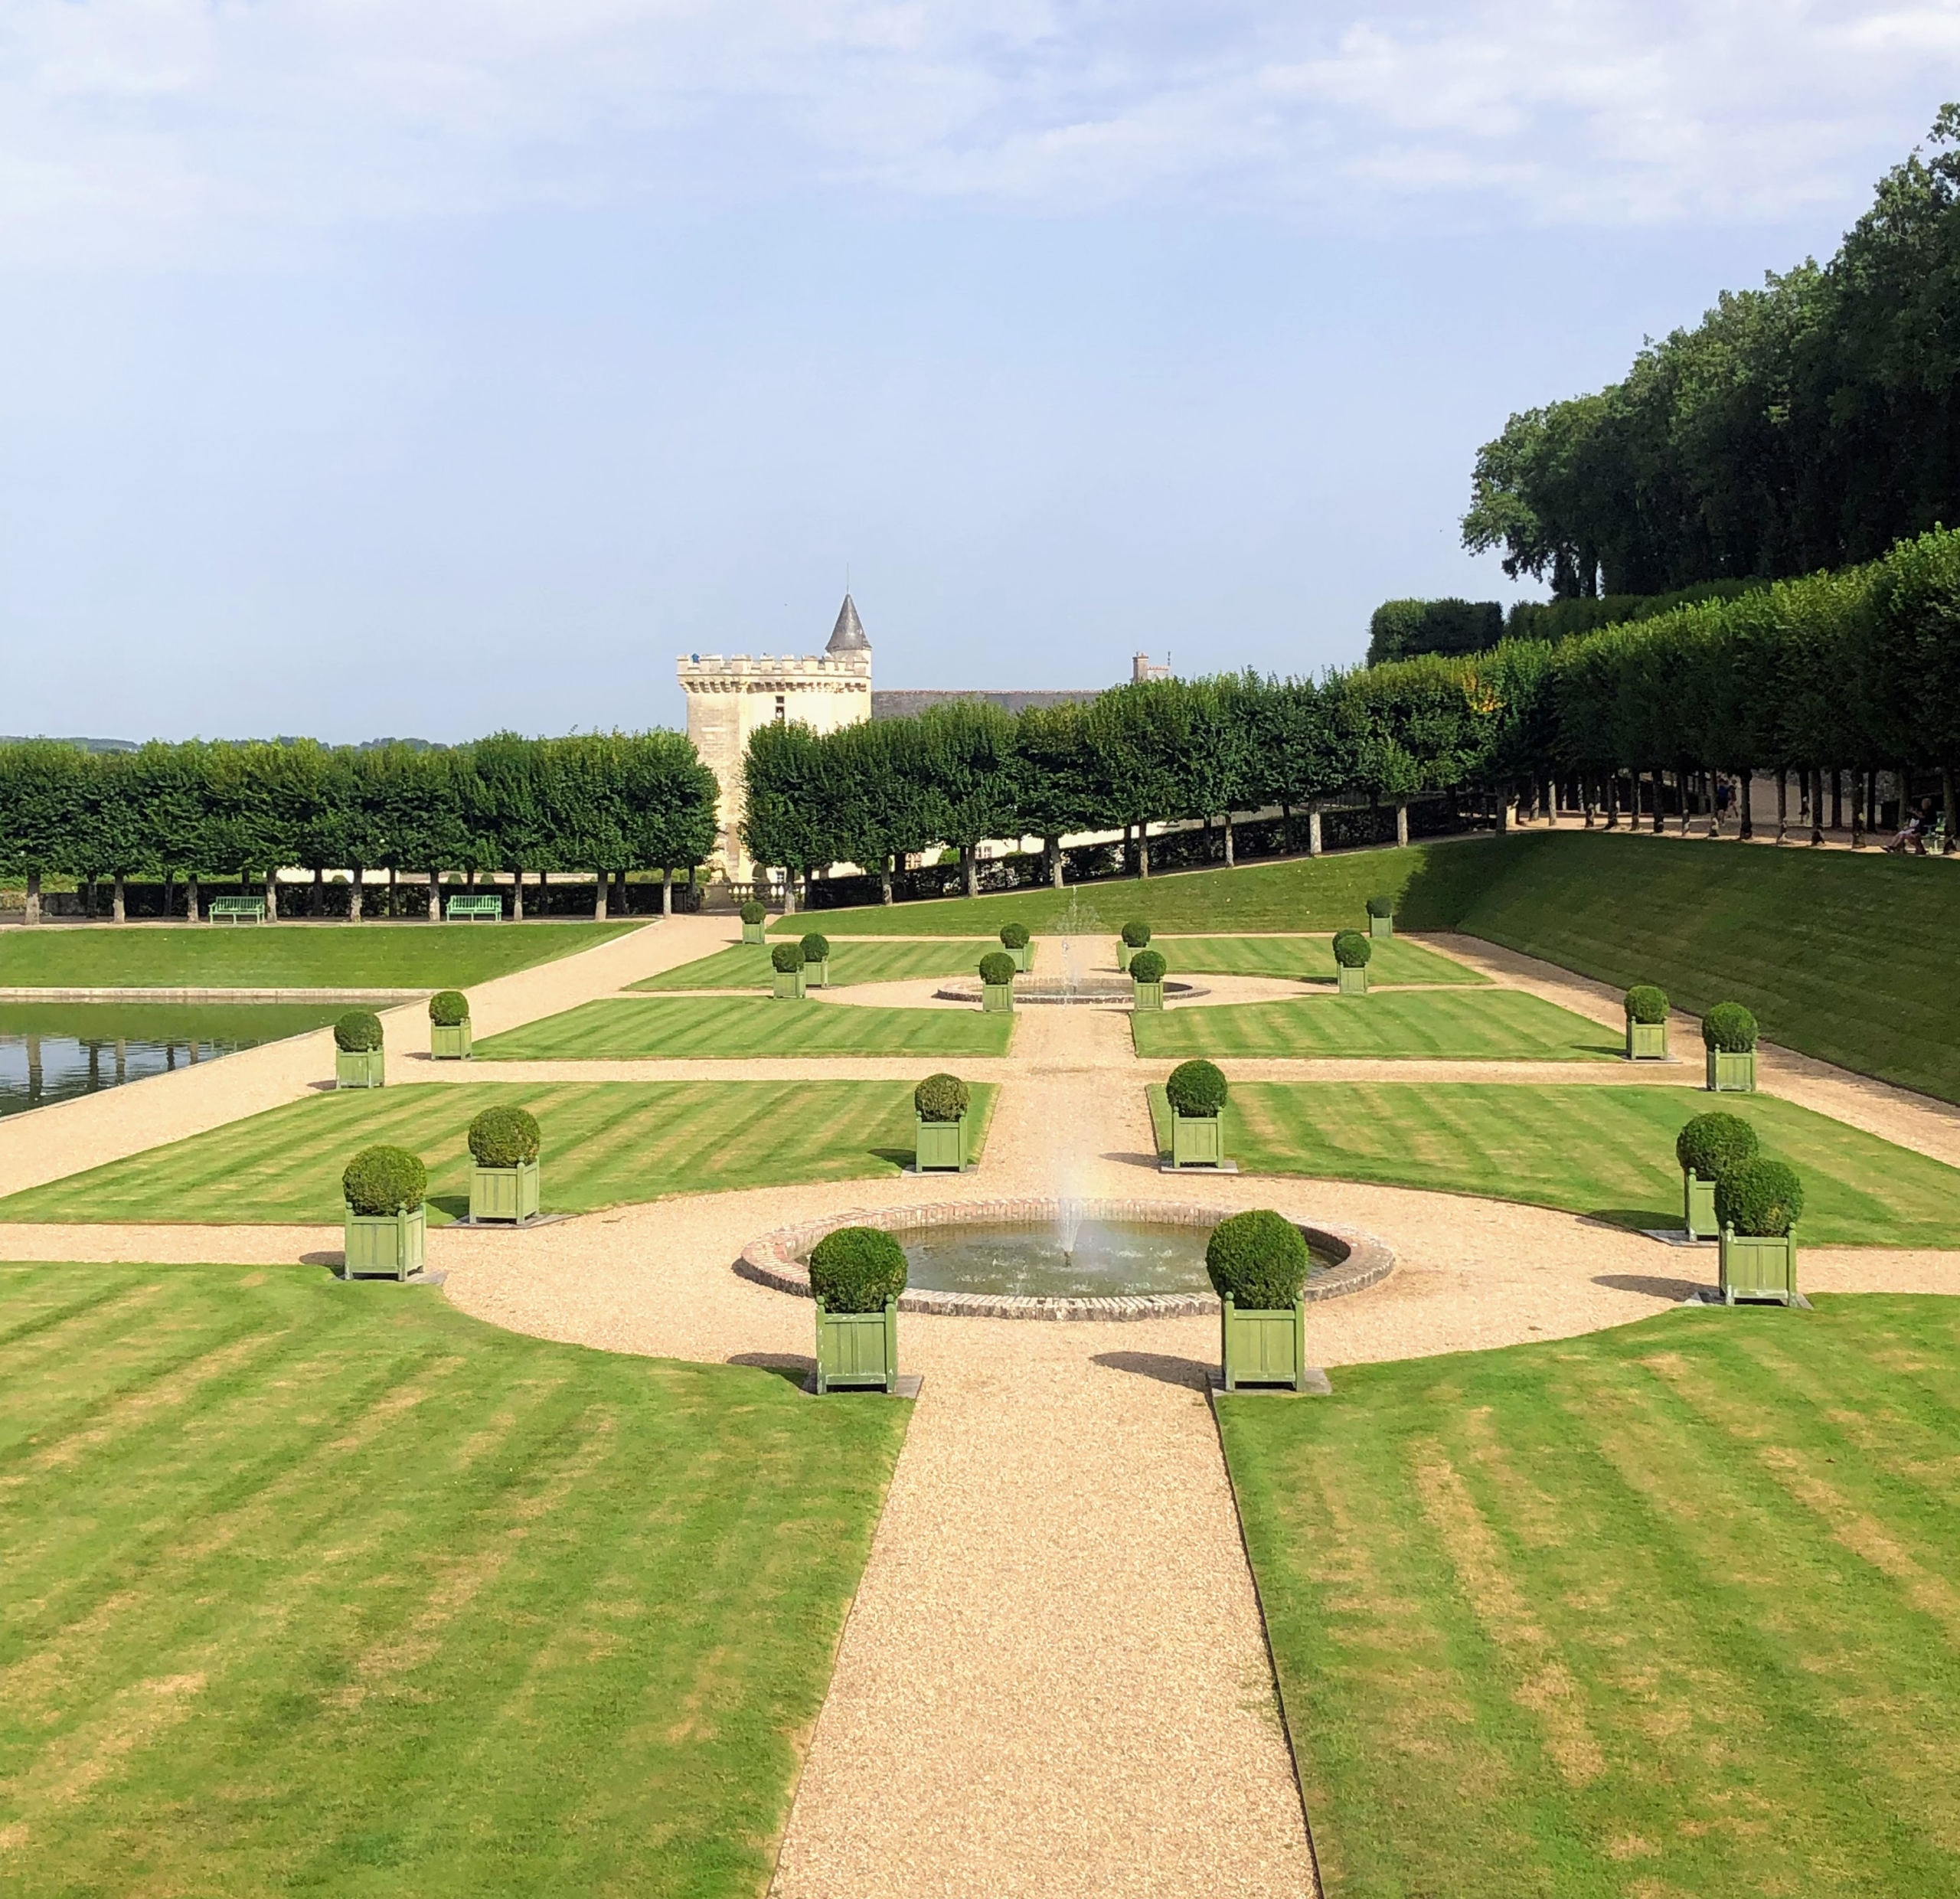
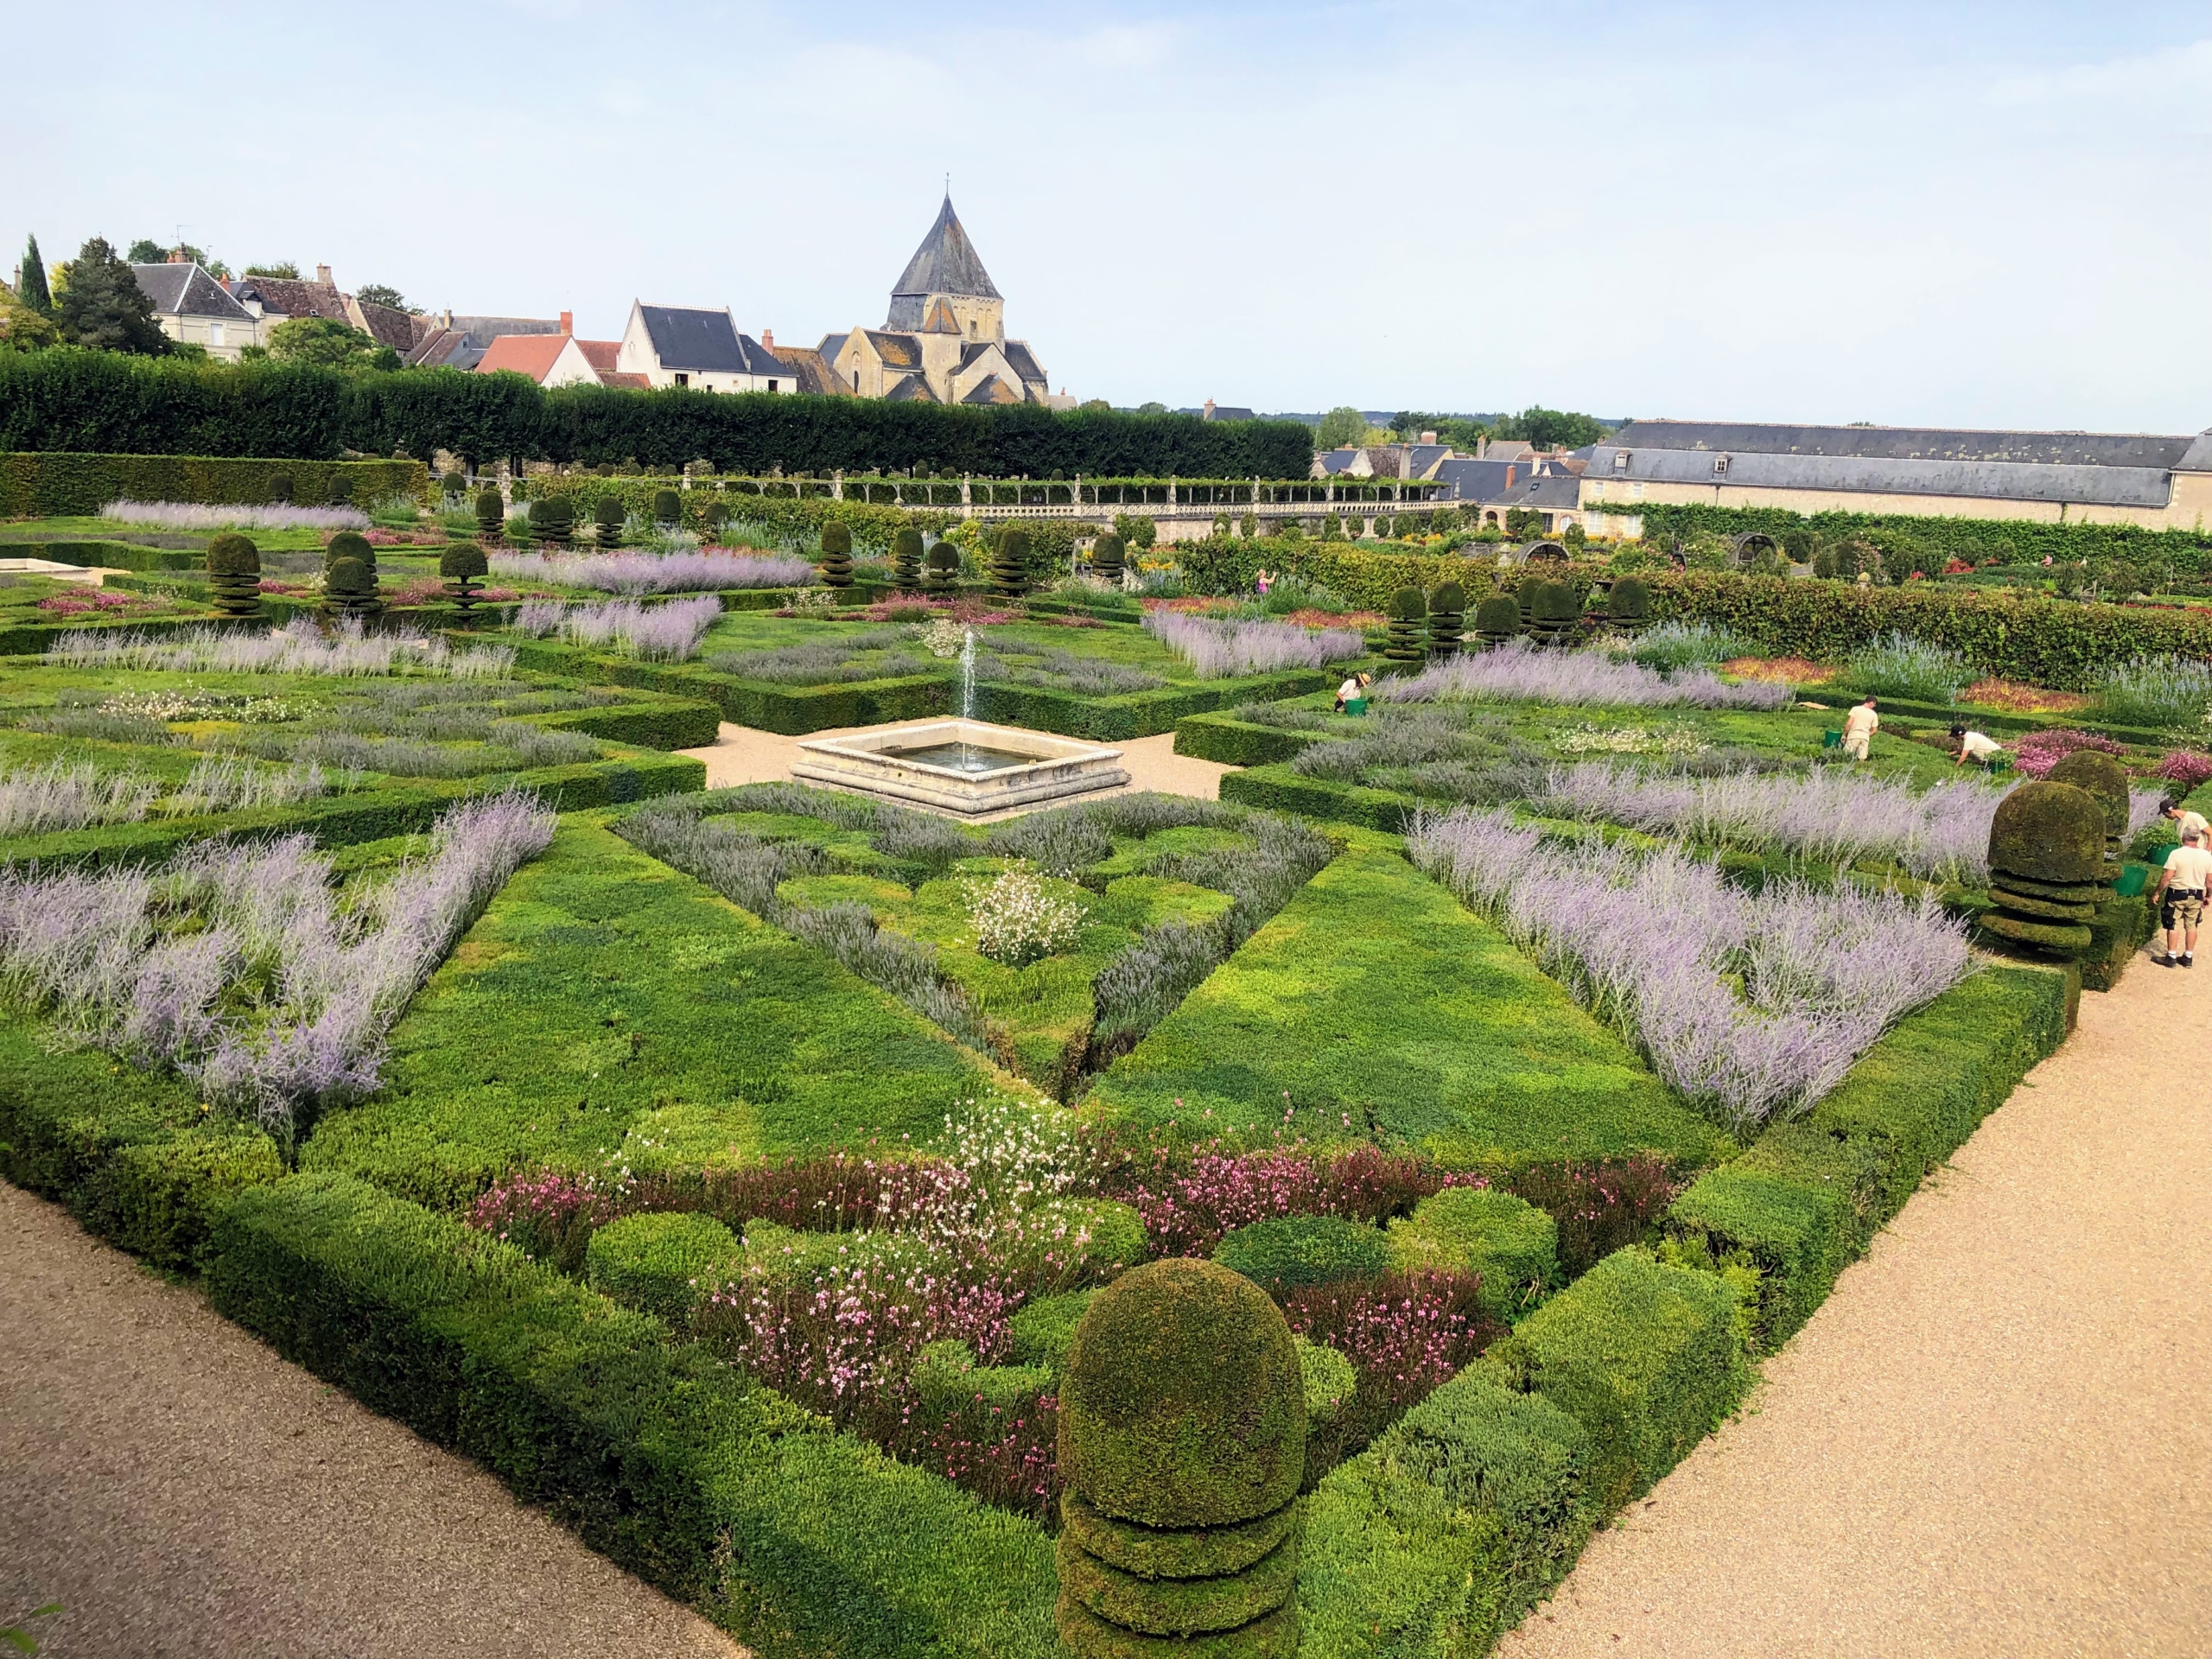
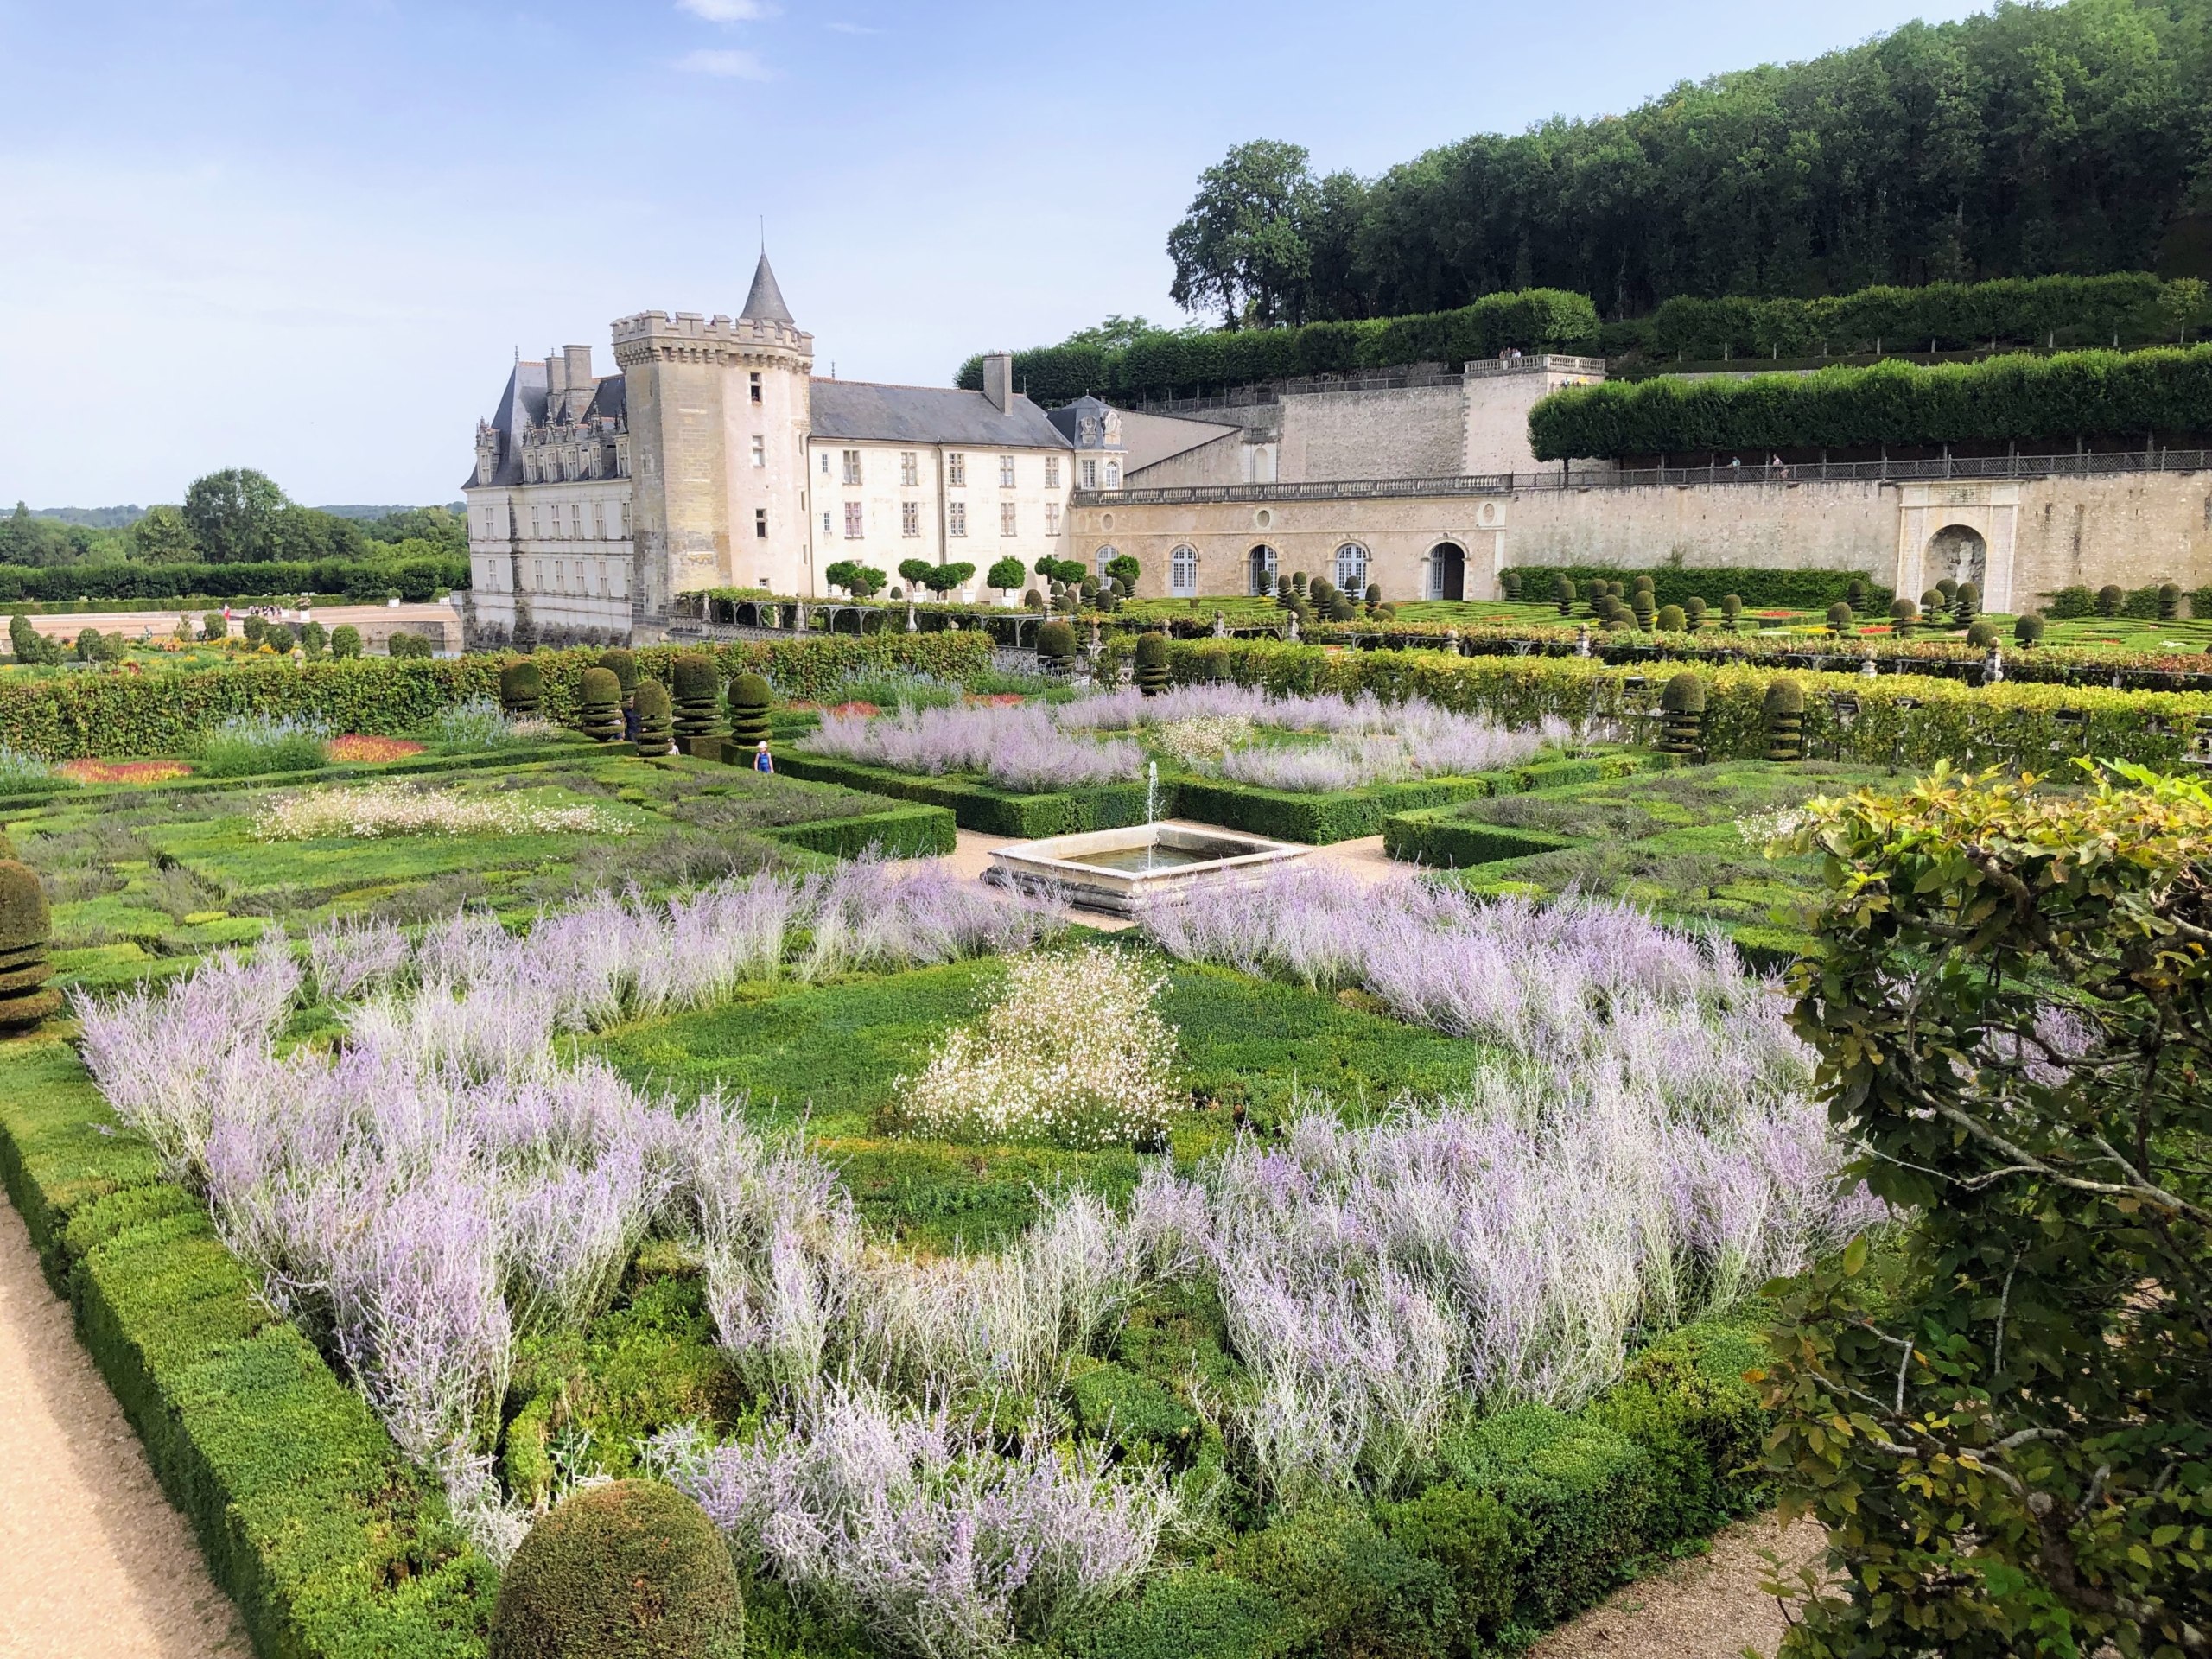
The gardens have two main planting sessions – one in spring and one in summer to fall. In all, there are six picturesque and mystical gardens that focus on the true heritage of the French Renaissance era – the Ornamental Gardens, the Water Garden, the Sun Garden, the Maze, the Herb Garden, and the Kitchen Garden.
Here is wider view from the nearby Ornamental Gardens. One can see the variety of knot gardens, square gardens bordered by box hedging, and all filled with different plants or vegetables to create beautiful, very symmetrical spaces.
Since 2009, the gardens have also been maintained without the use of chemicals and instead uses beneficial insects and other environmentally-conscious methods. Most of the watering is carried out by an automatic, underground system.
From every vantage point, one can see the meticulous work done by the talented team here at Villandry.
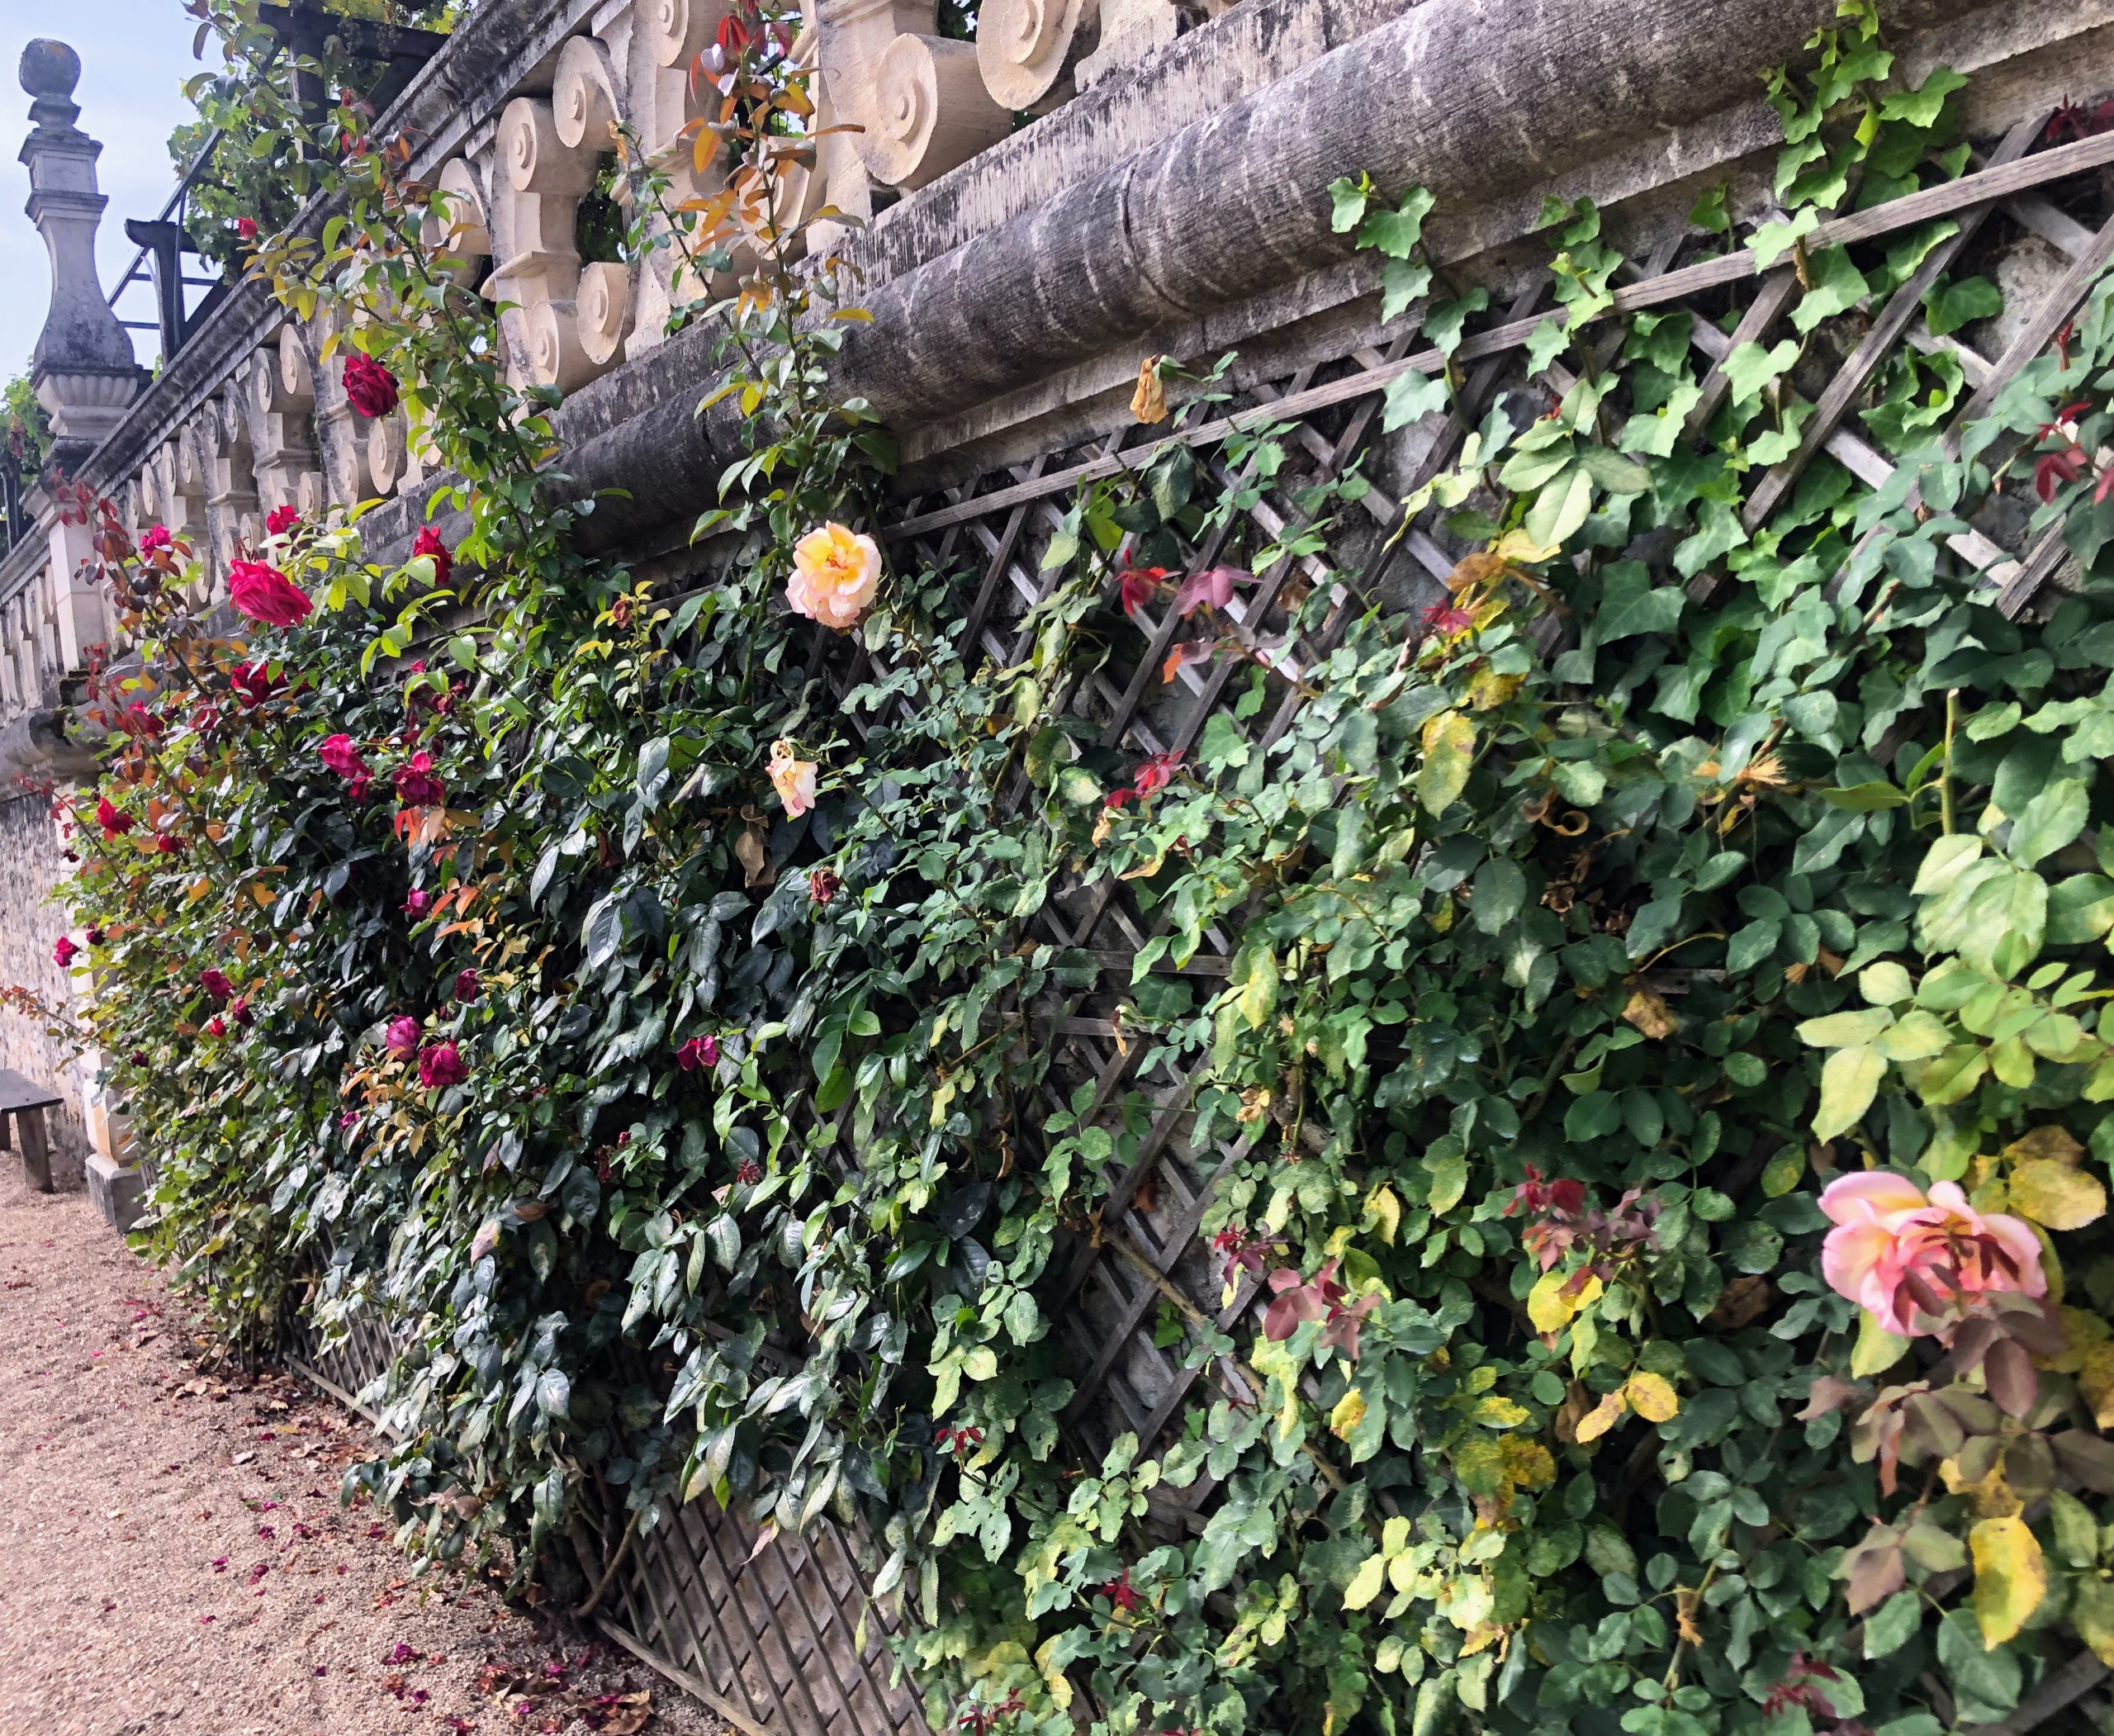
Climbing roses clinging to an ancient rock wall are grown near the exit. If France is on your list of places to visit, do make time to see Villandry – the grounds will astound and inspire you.
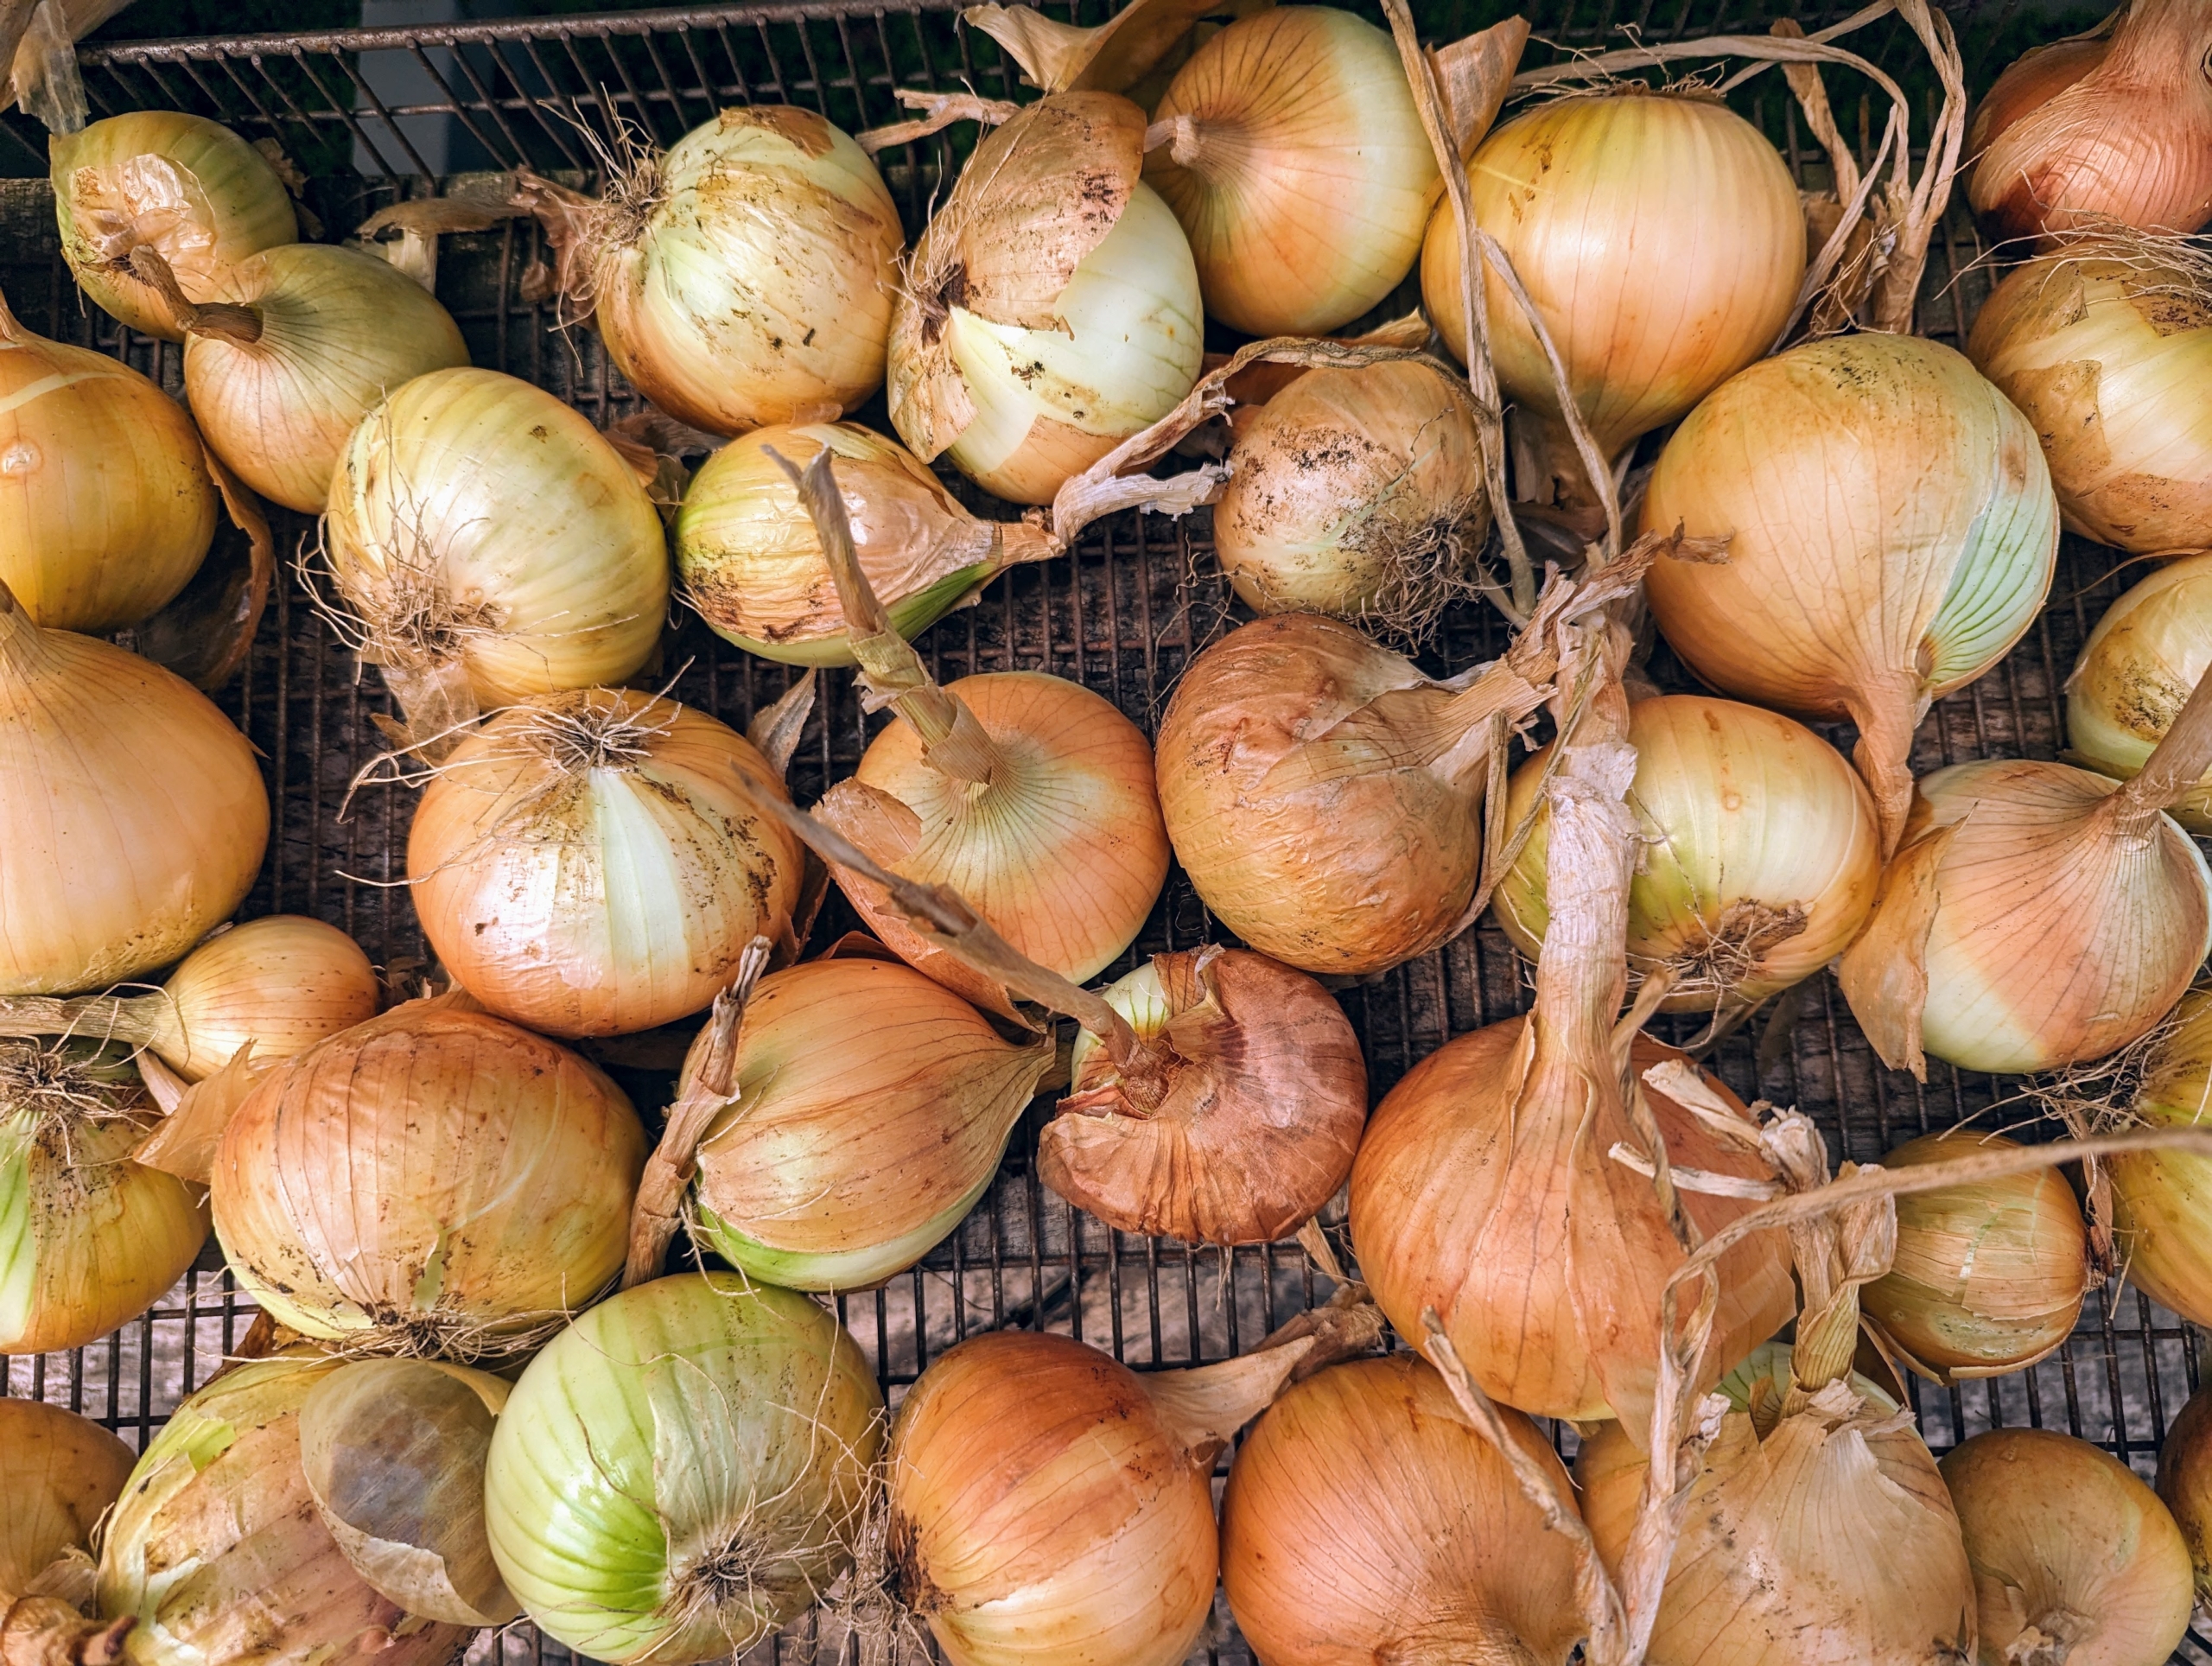
One of the best things about this time of year is harvesting so many great crops in the garden - this week we have lots of beautiful farm-grown onions and shallots.
The onion, Allium cepa, is the most widely cultivated species of the genus Allium. Onions are hardy, easy to grow, and can be grown in a variety of soils and climates. We plant a lot of onions every year. I use them in my cooking, and in sandwiches and salads. I also share many of them with my daughter, Alexis, and my grandchildren, Jude and Truman. Earlier this week, my gardener, Ryan McCallister, picked the onions from my new garden here at the farm and they are truly some of the best we've ever grown.
Enjoy these photos.
Such a bounty of gorgeous fresh onions – it’s one of our favorite crops to pick.
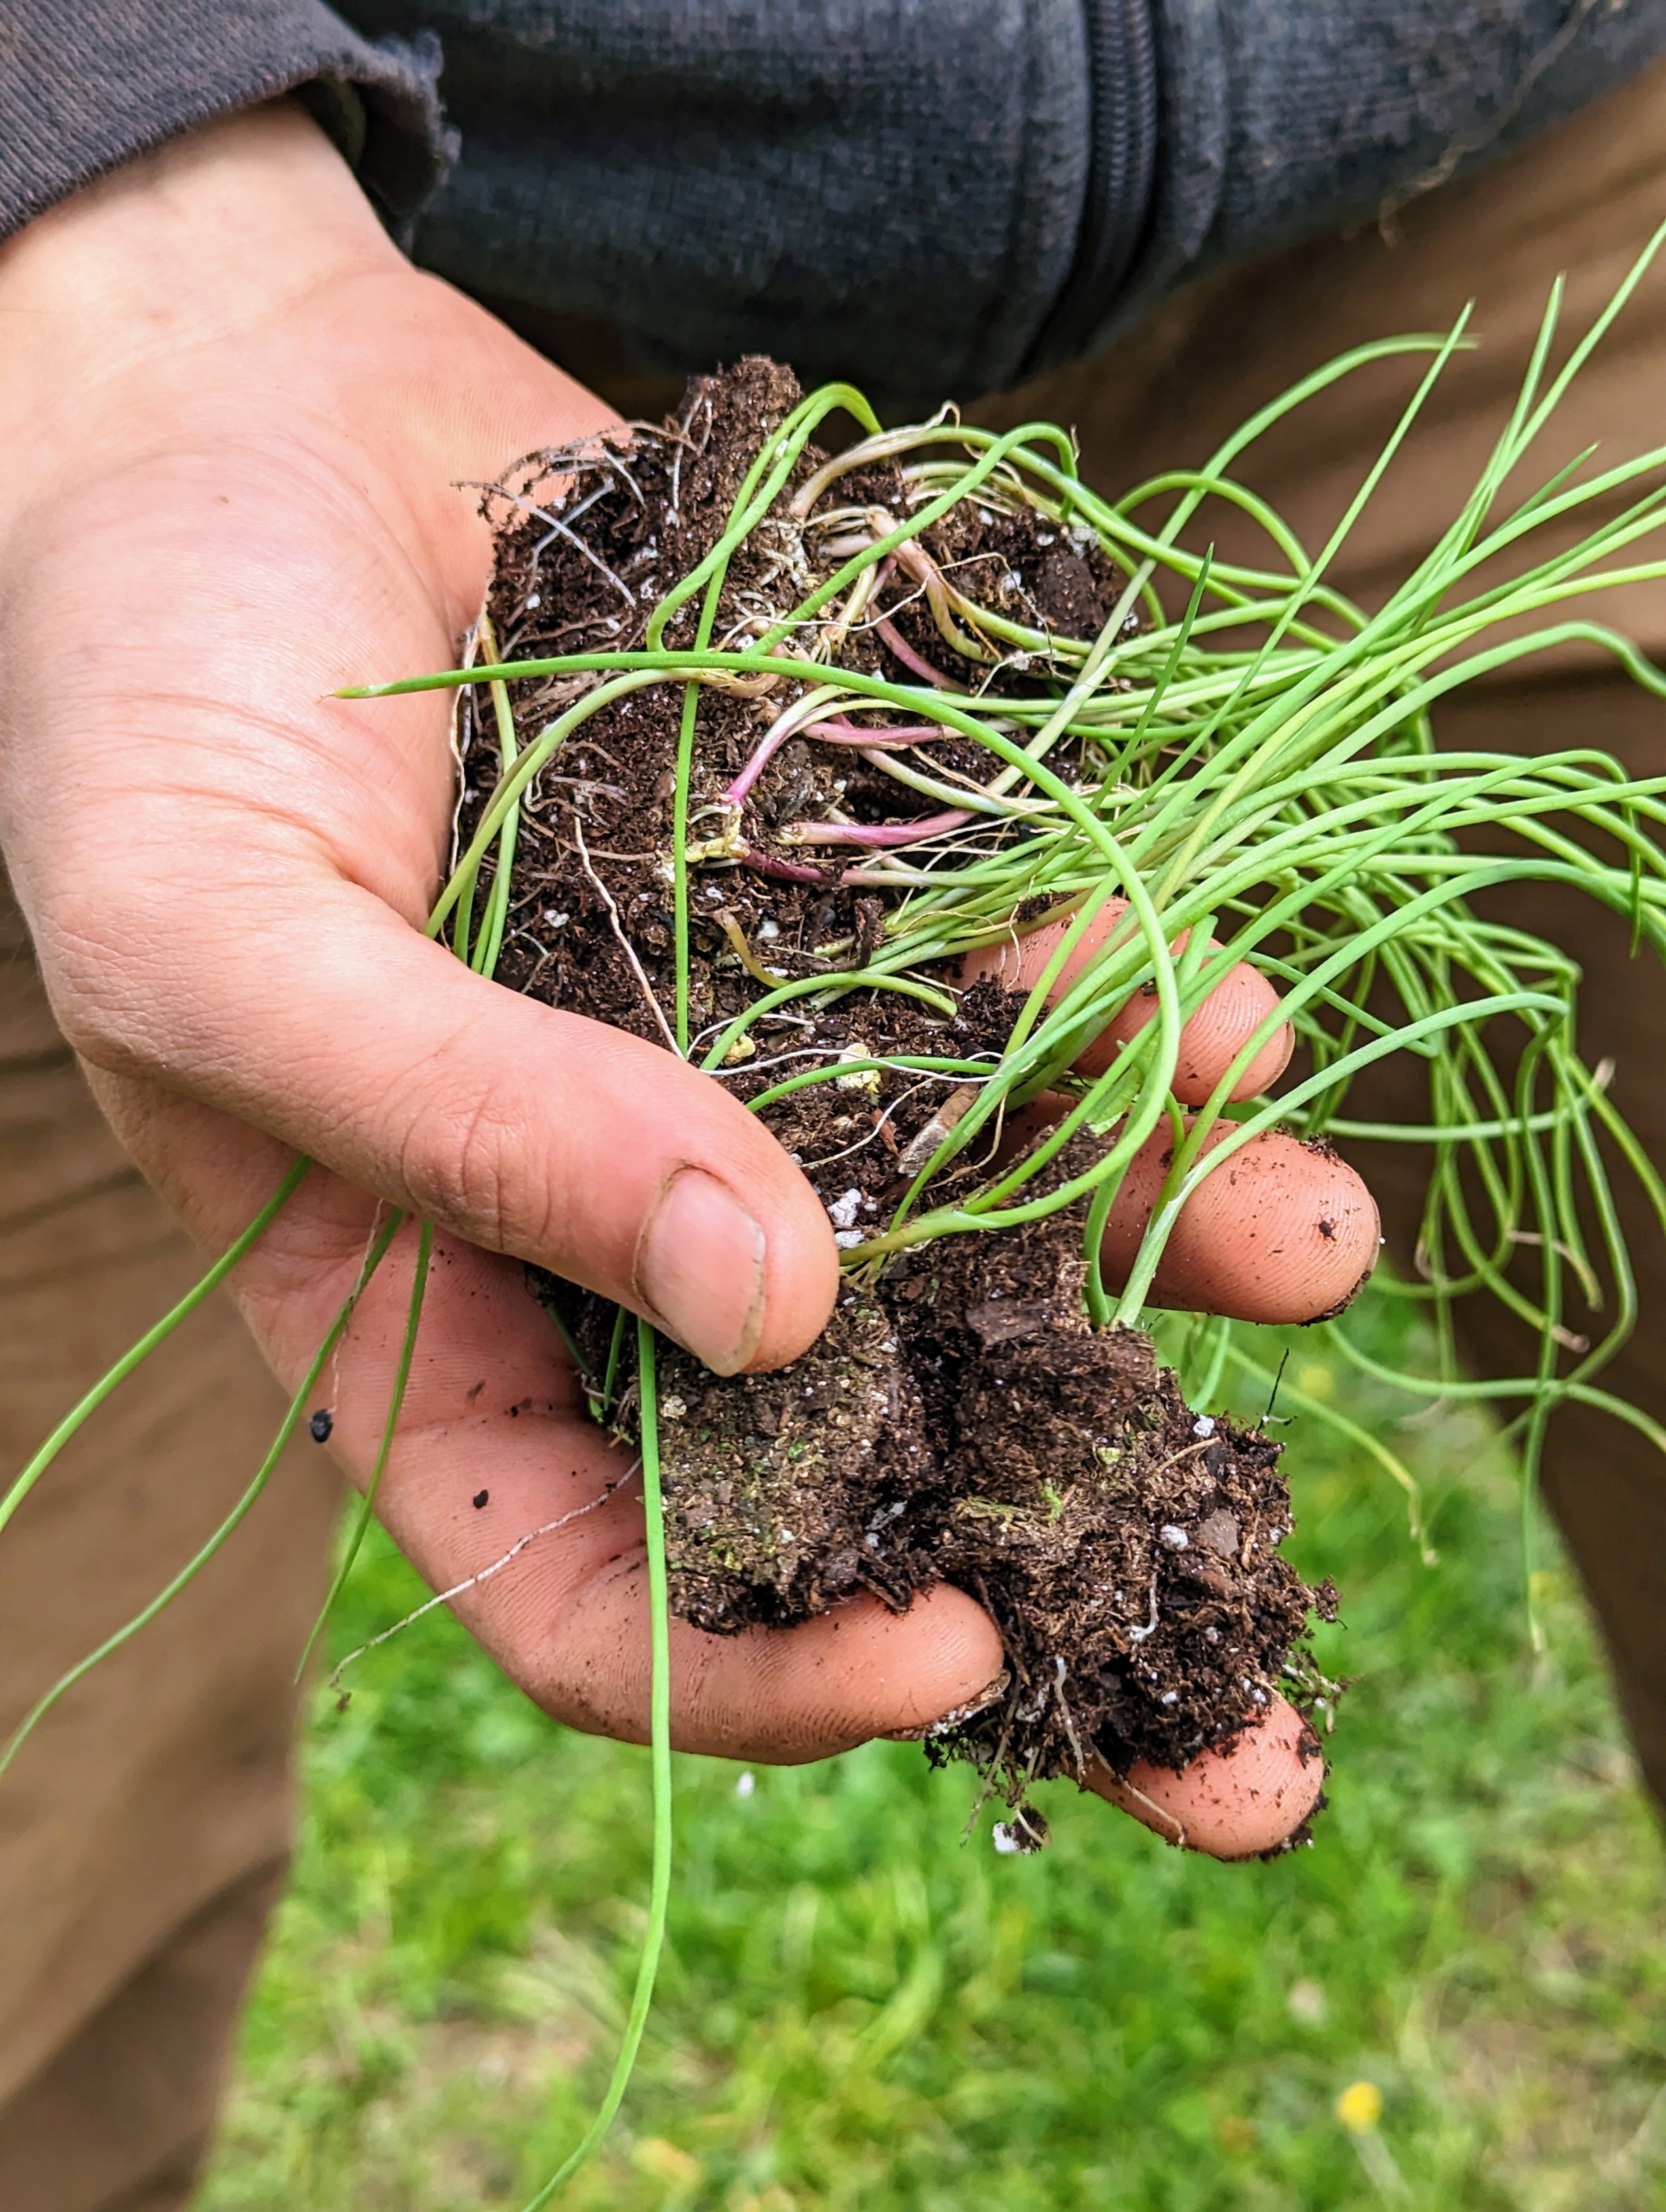
Here at the farm, our onions are started from seed in the greenhouse and then planted outdoors in the garden bed.
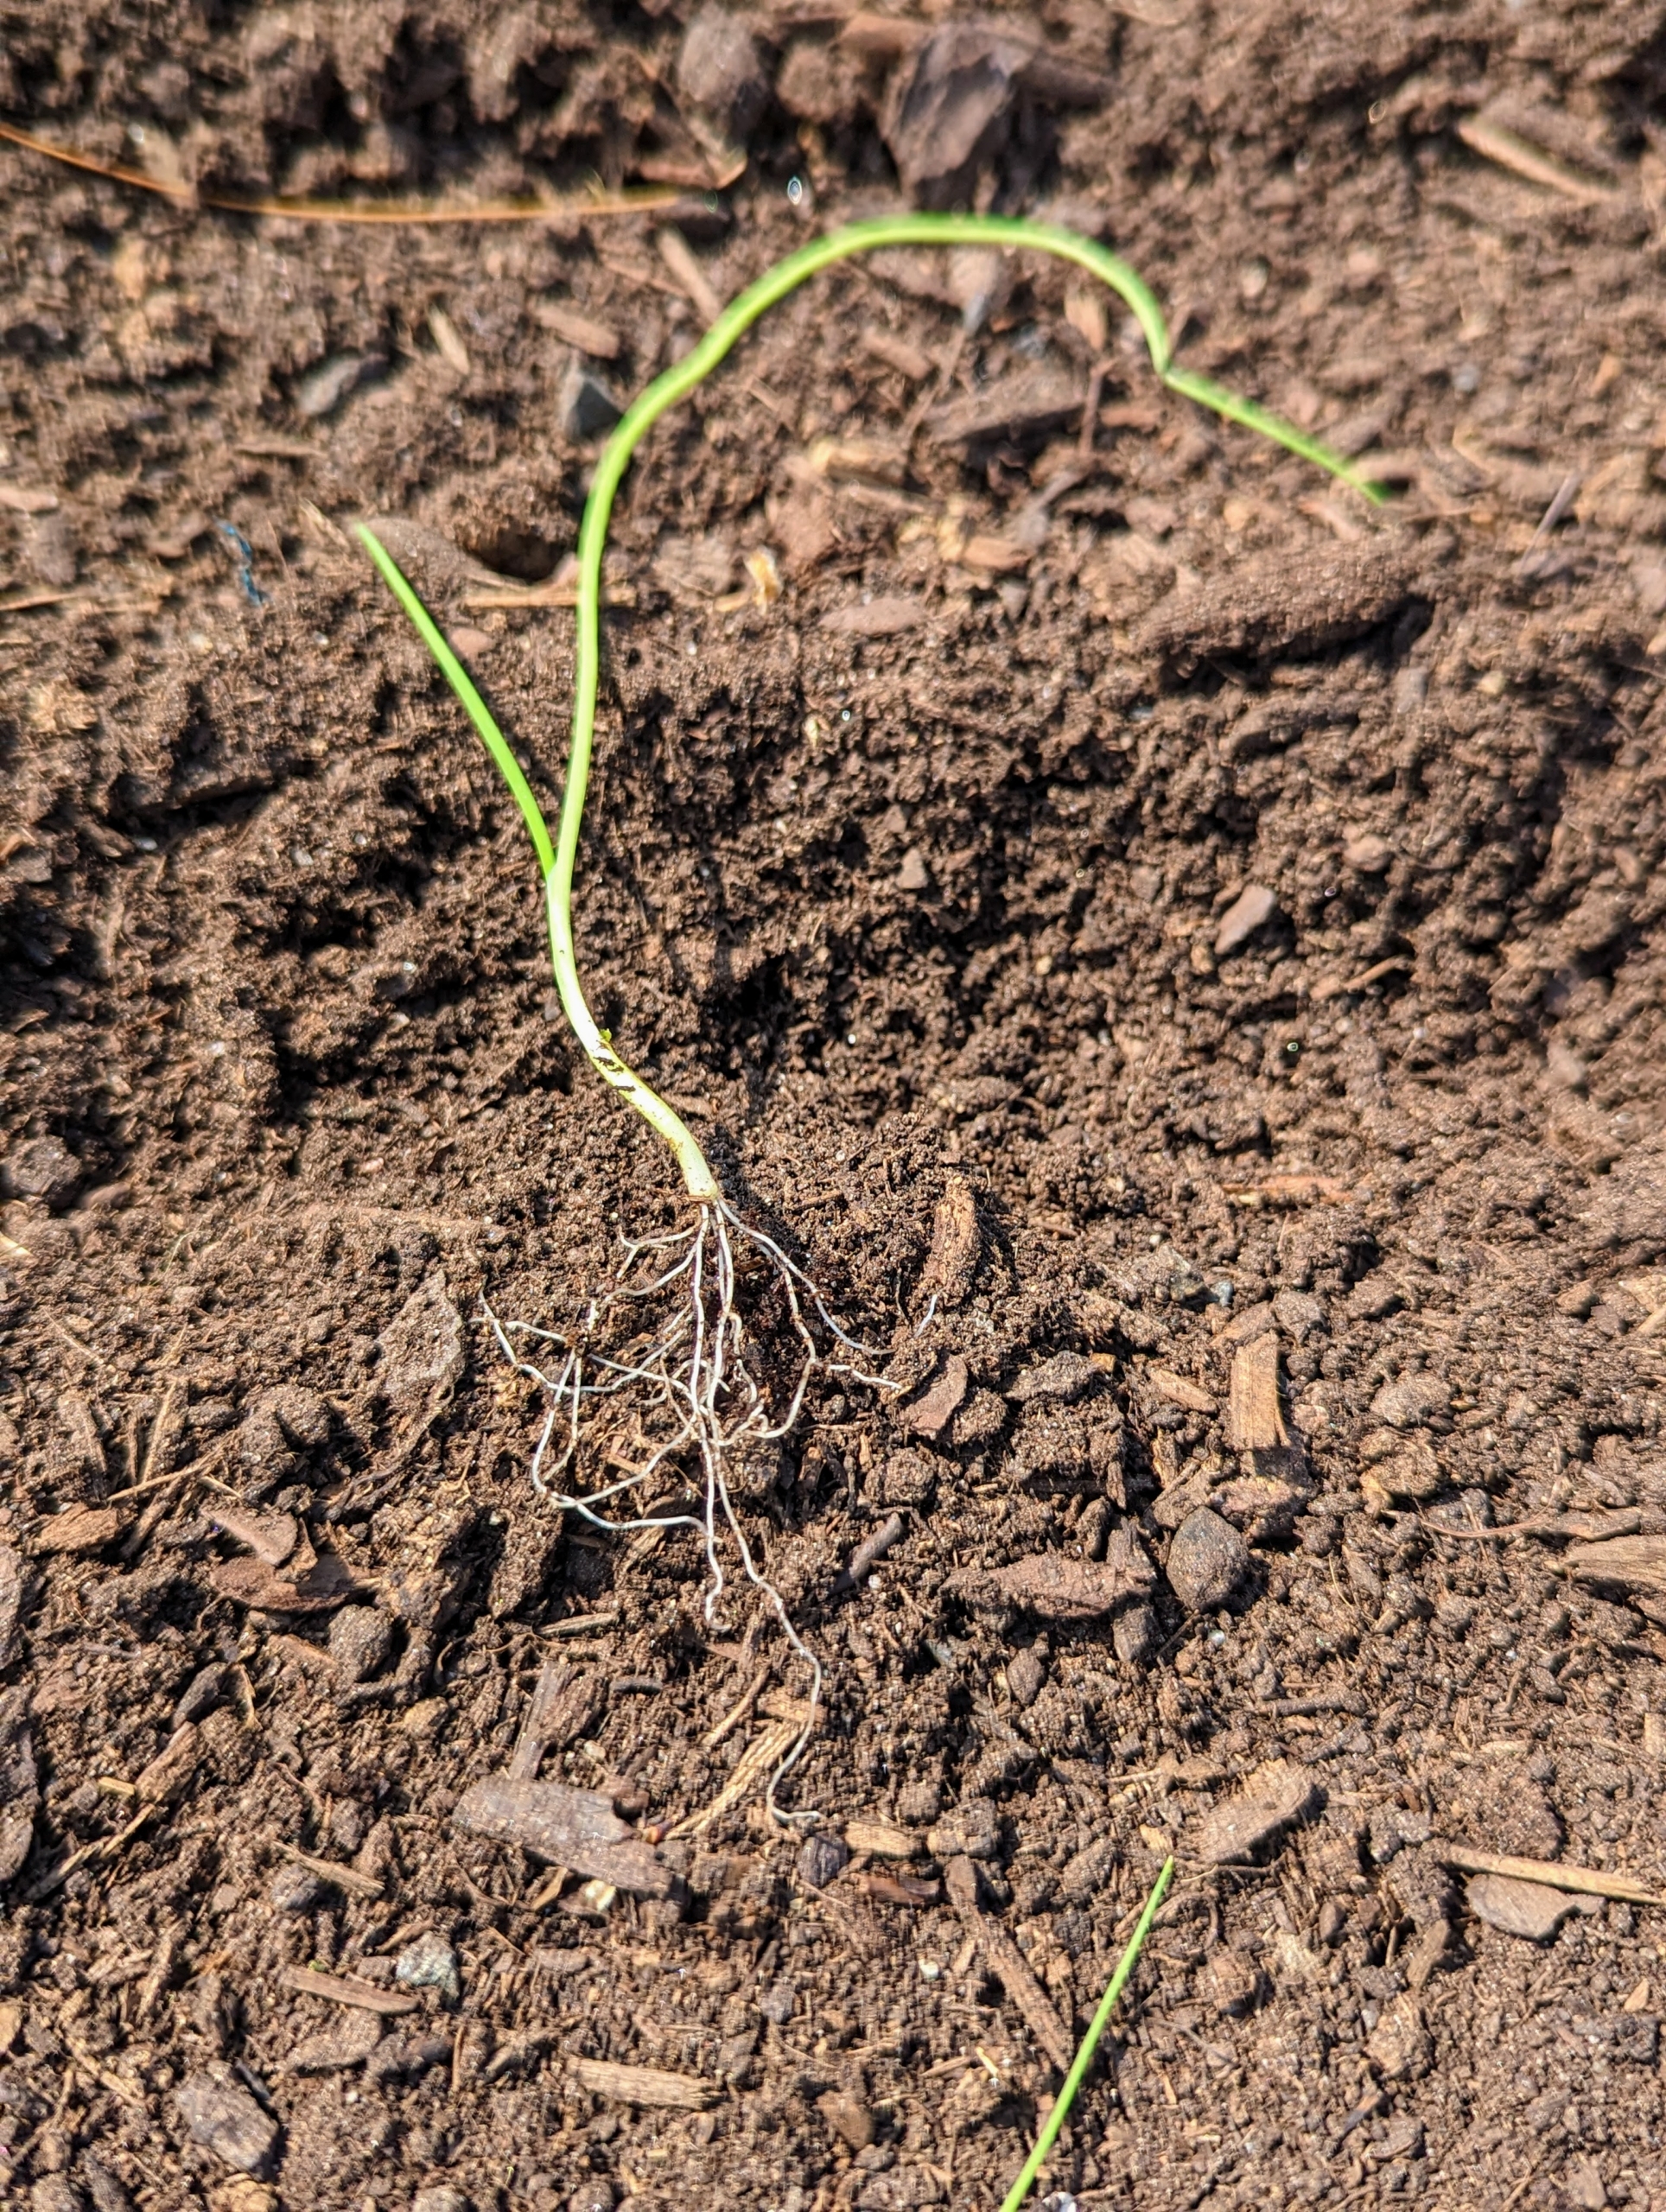
Here is what one of our onion plants looked like in late April just before planting it in the ground.
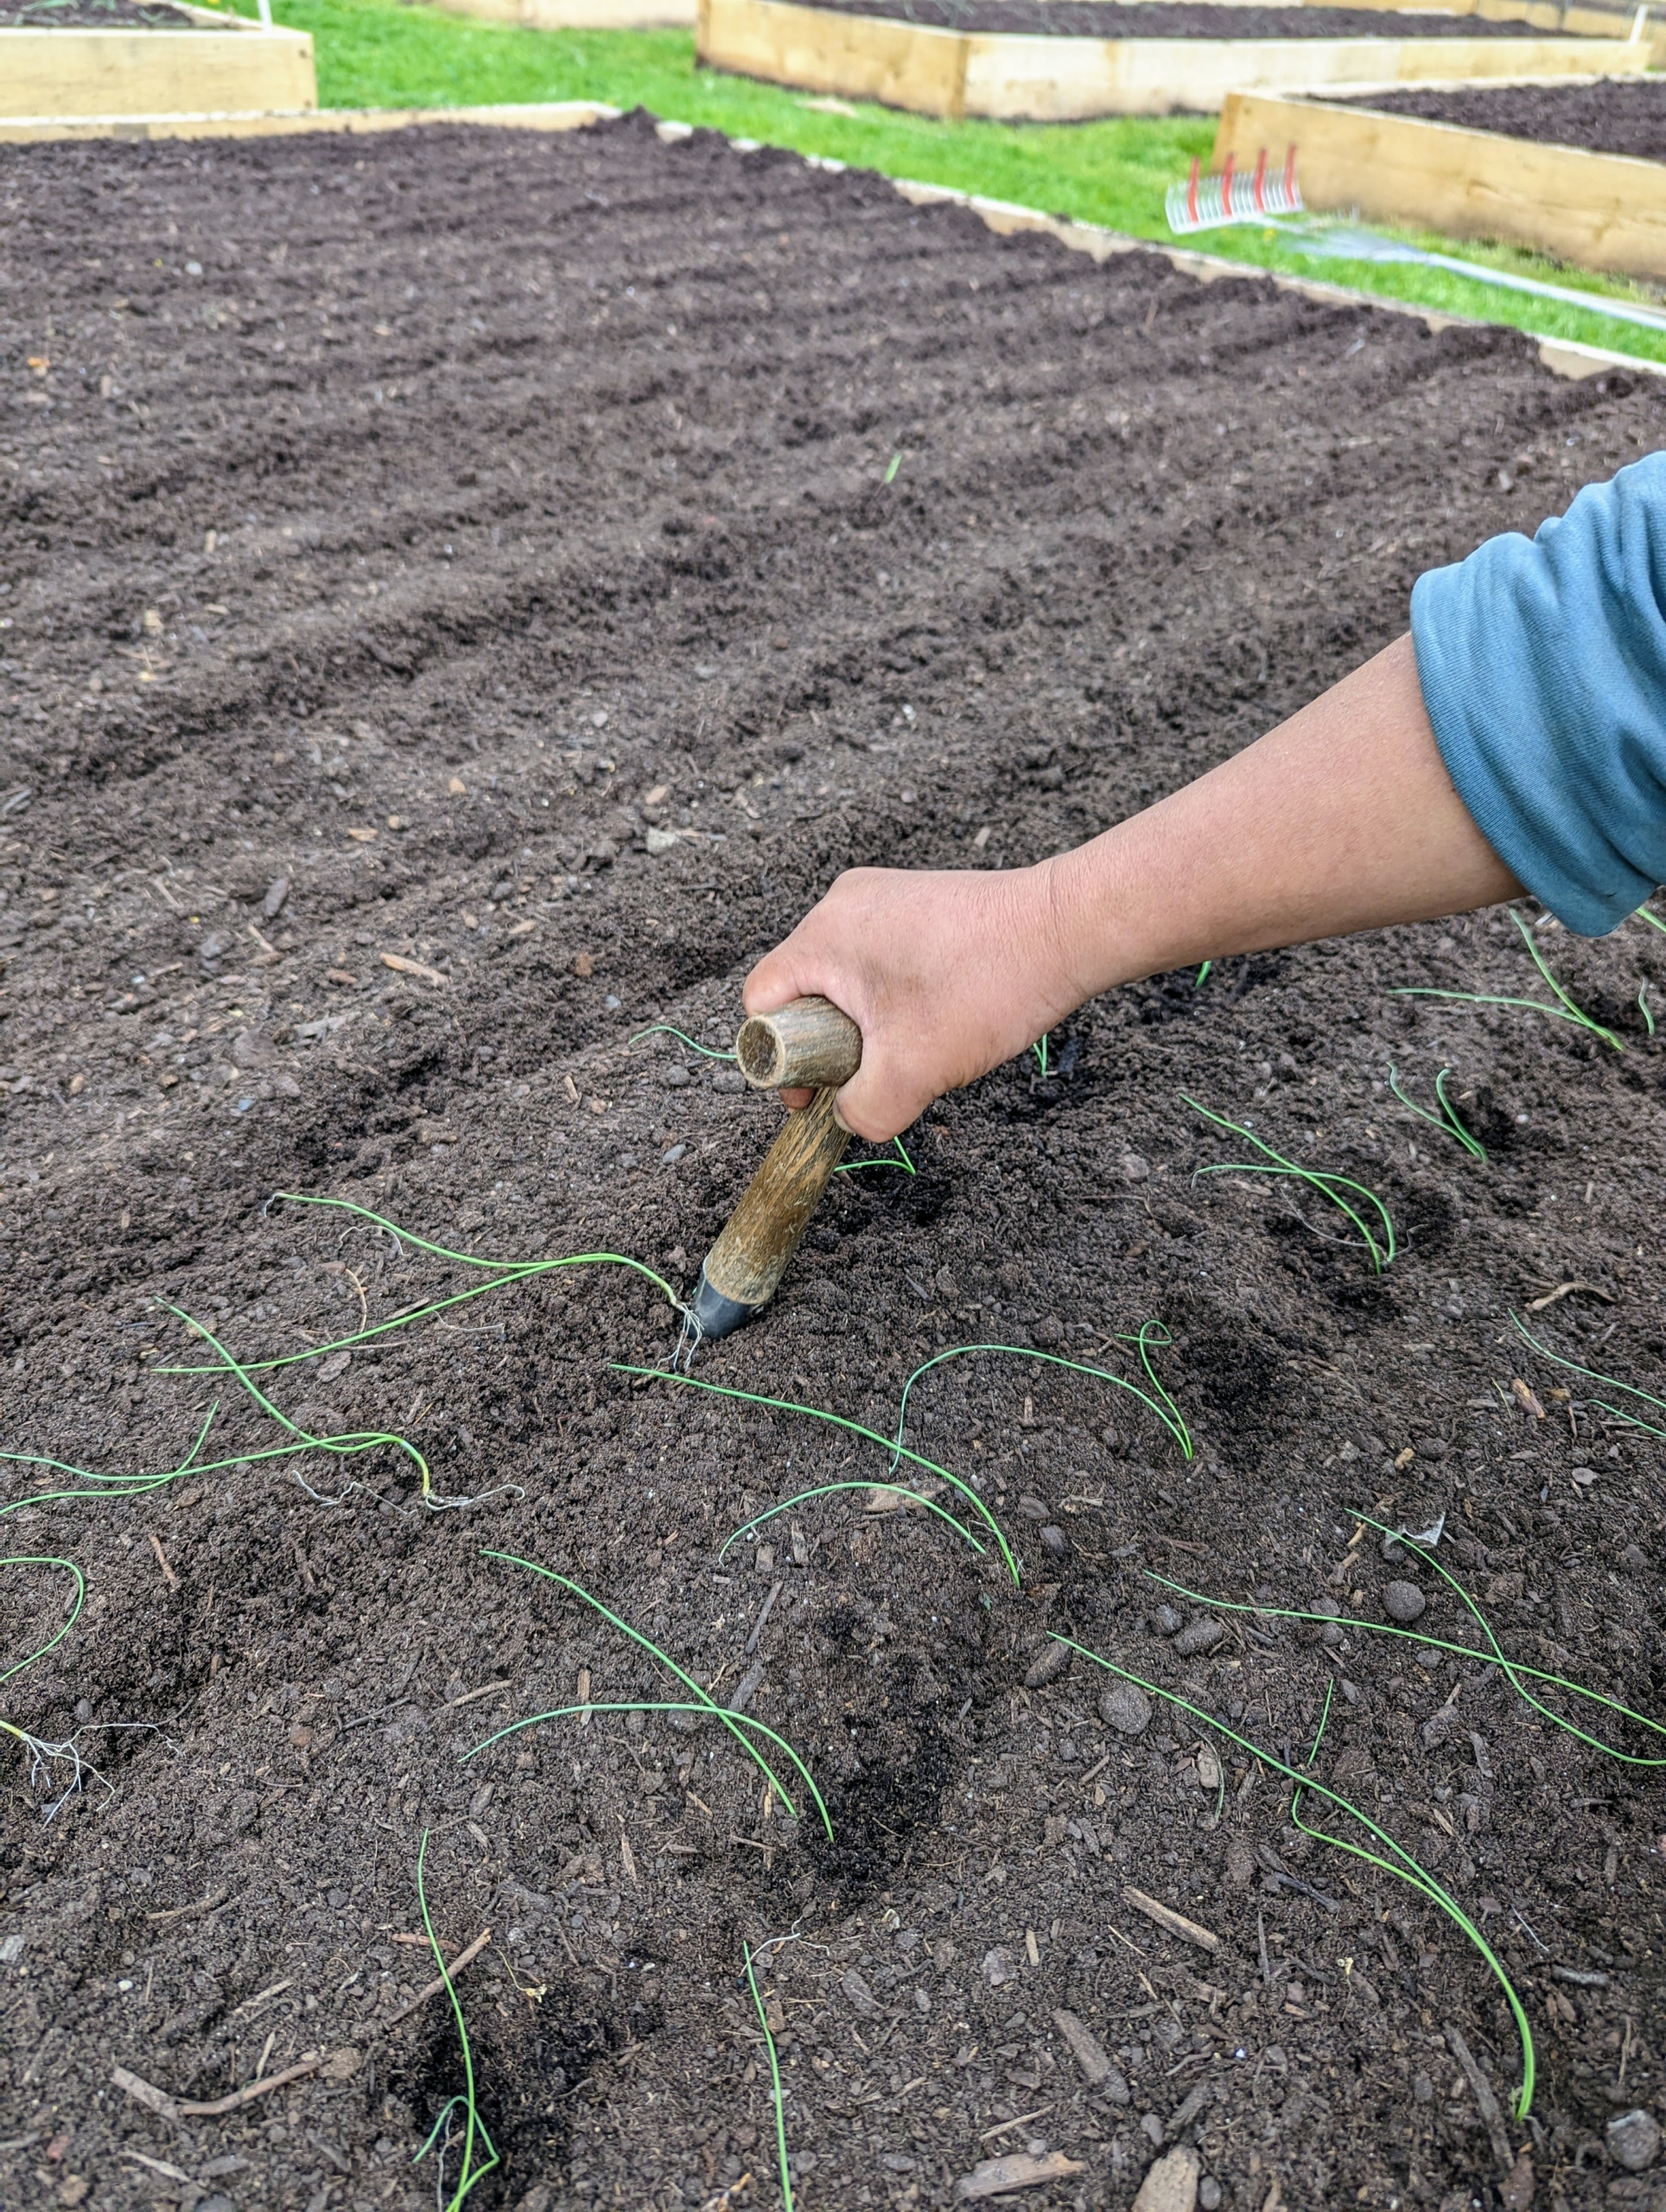
This year, we planted two large beds for red onions, white onions, yellow and brown onions.
And here they are in May – just one month after planting. The onion, Allium cepa, is the most widely cultivated species of the genus Allium. They are planted in spring when temperatures are still a bit cool. Early planting gives the onions time to develop tops and store energy for the bulbs.
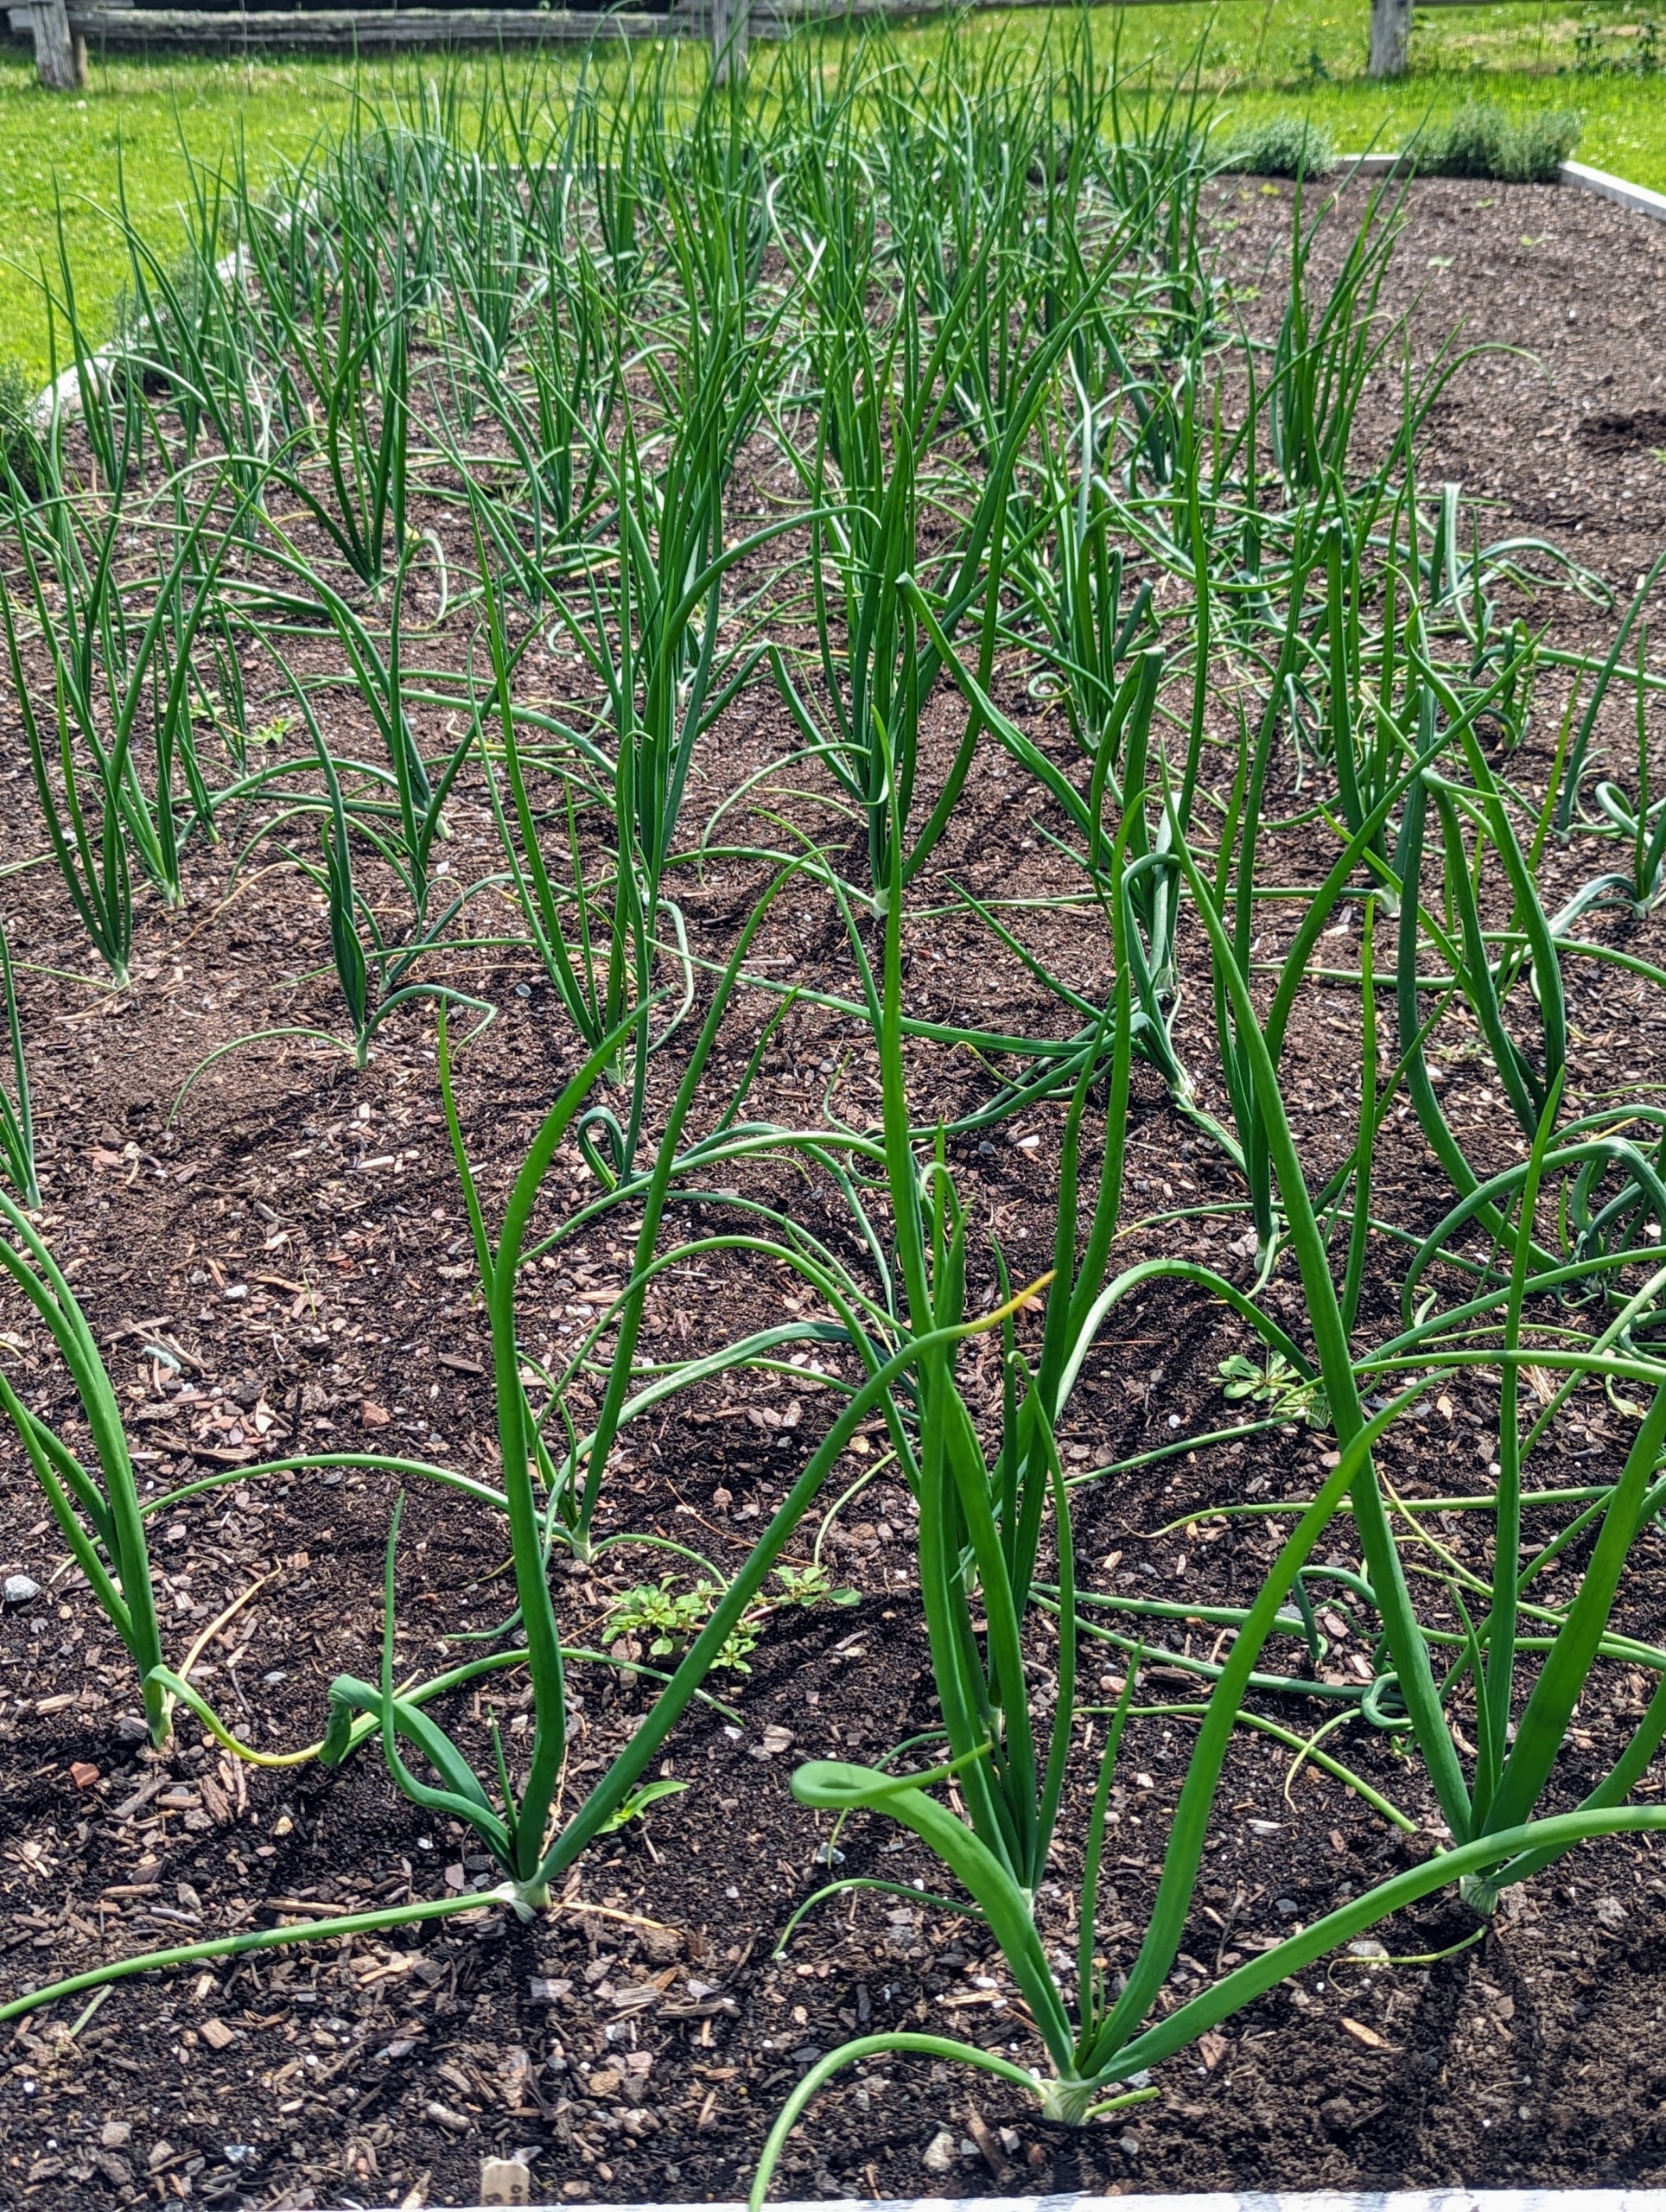
In June, the plants are much more developed and the leaves are quite tall, bright green, and sturdy.
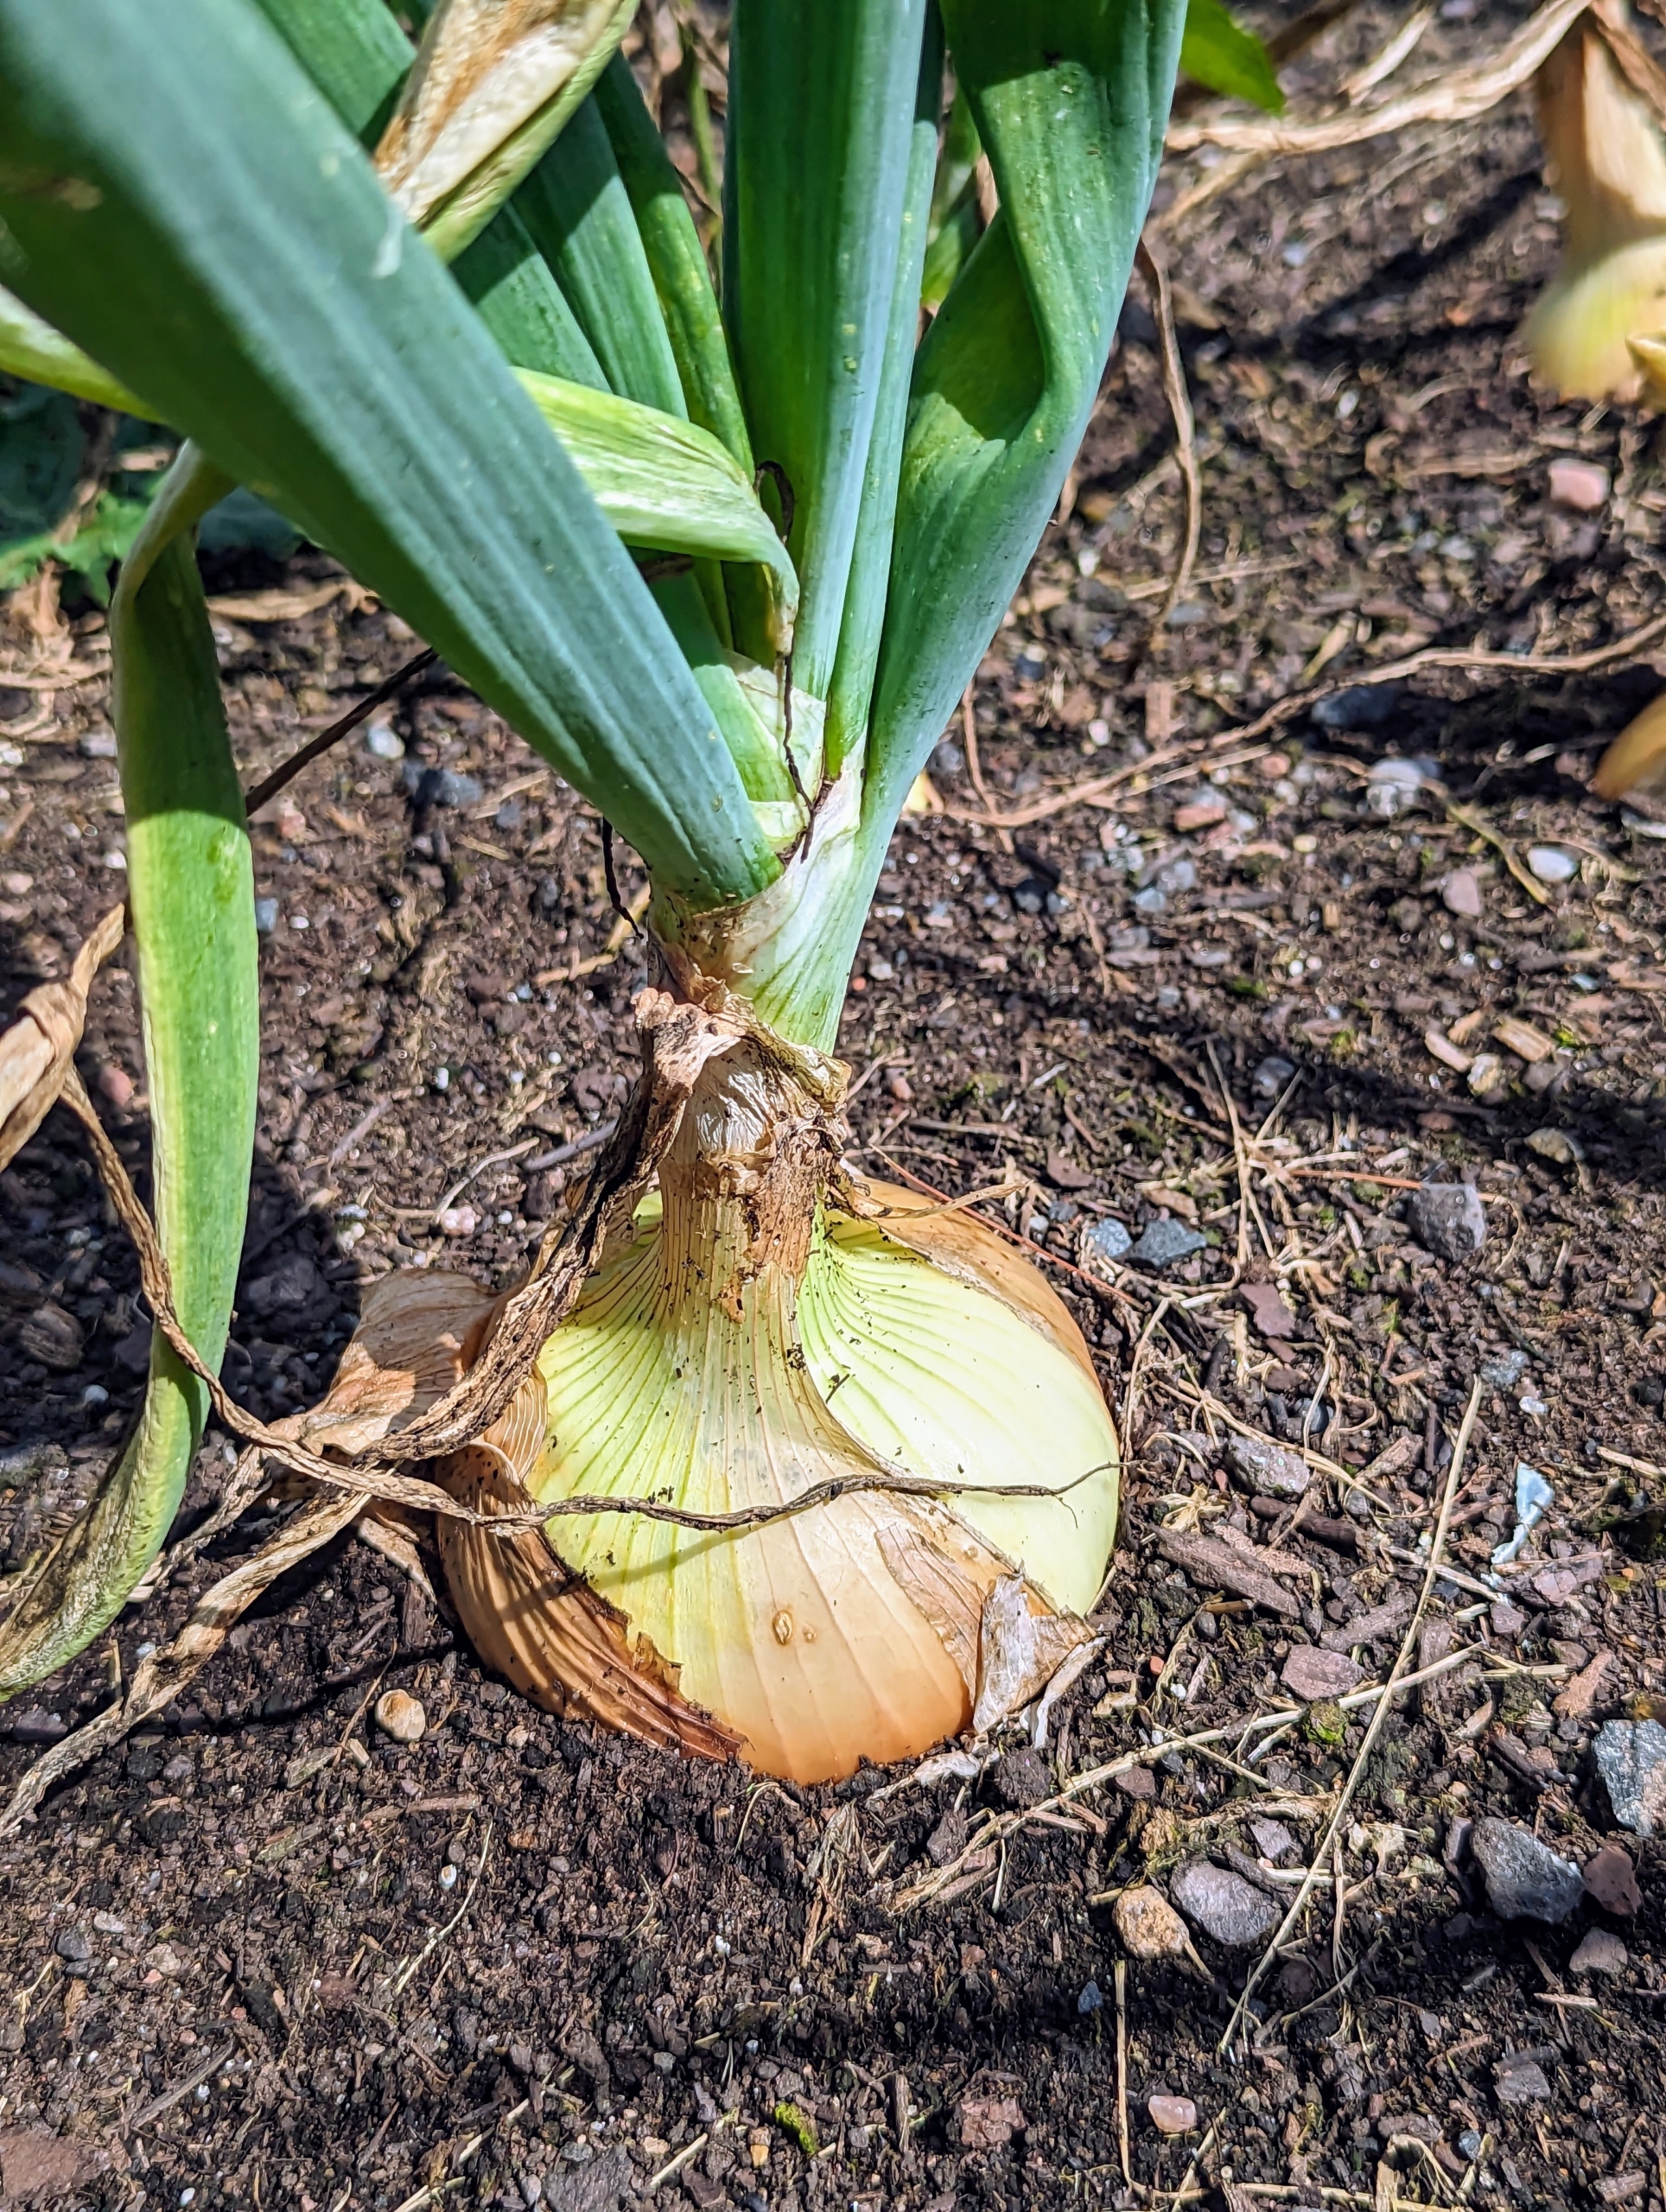
By July, the onions are starting to show through the soil, but they are still small and the top leaves are still very green.
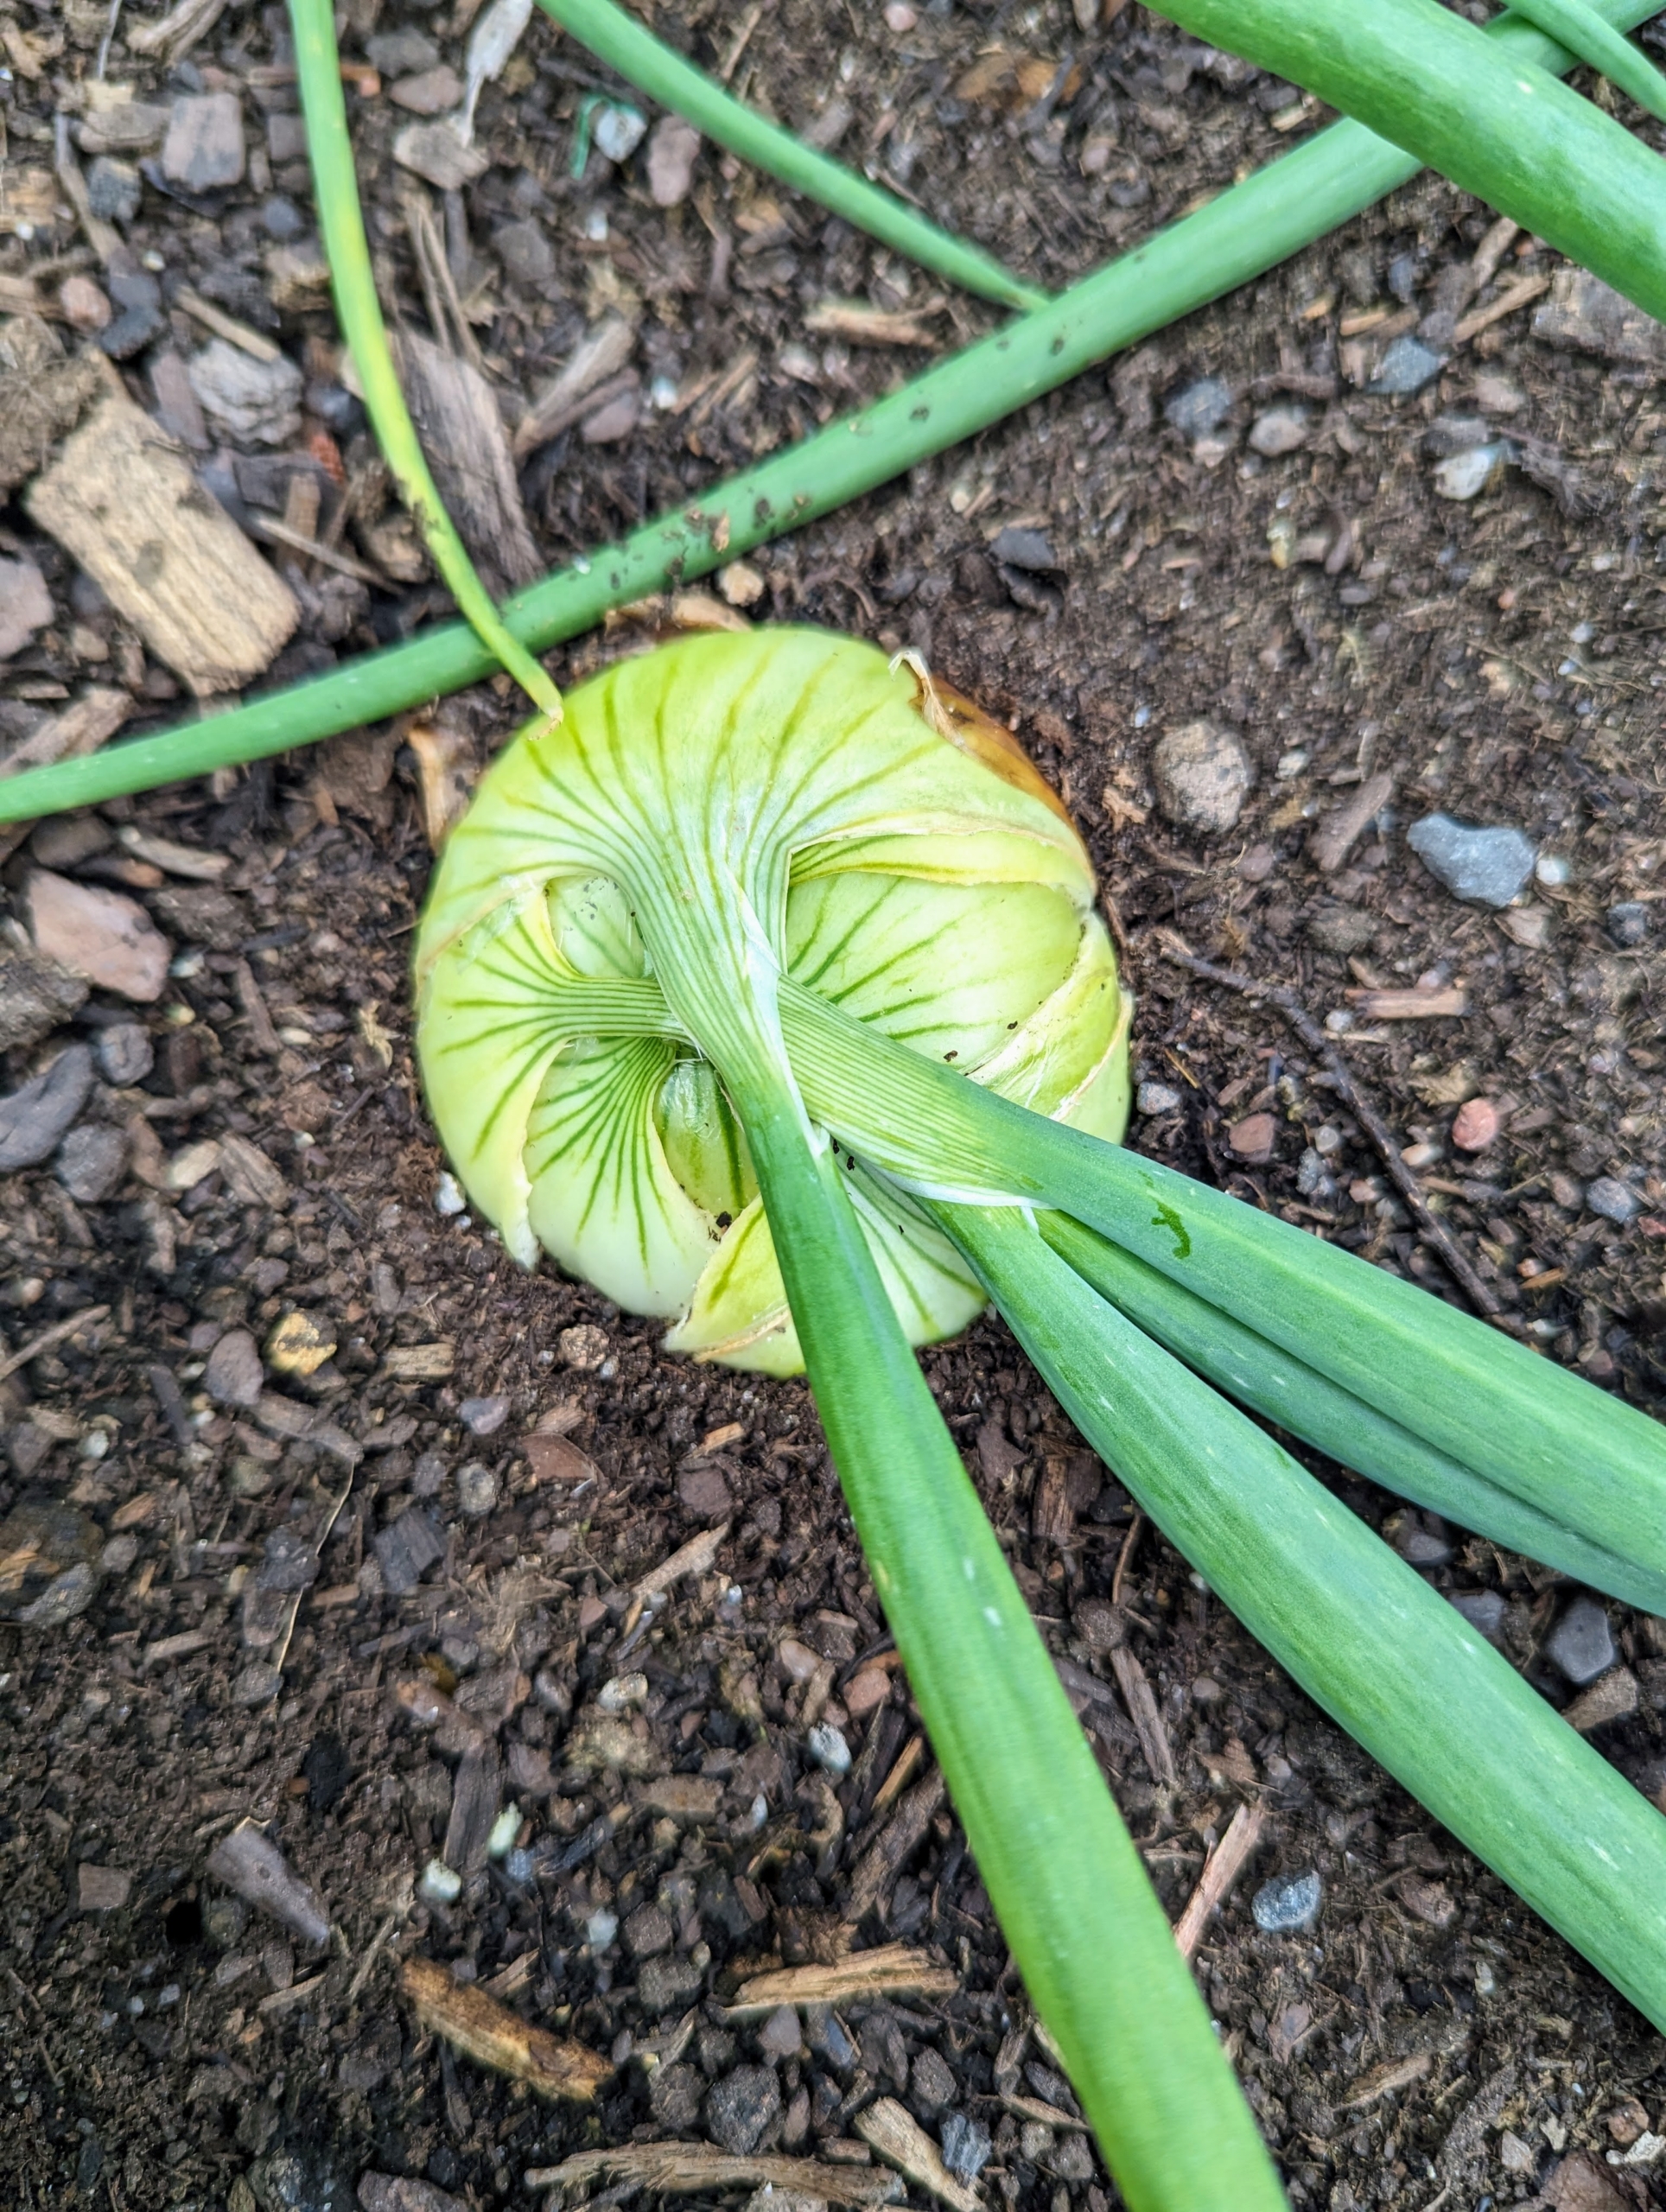
Looking down, this is one of the growing onions.
Onions require 90 to 100 days to mature from seed, which is around four months. From sets, onions are ready to harvest after around 80 days, or just under three months. We picked a few onions for my summer vacation in Maine.
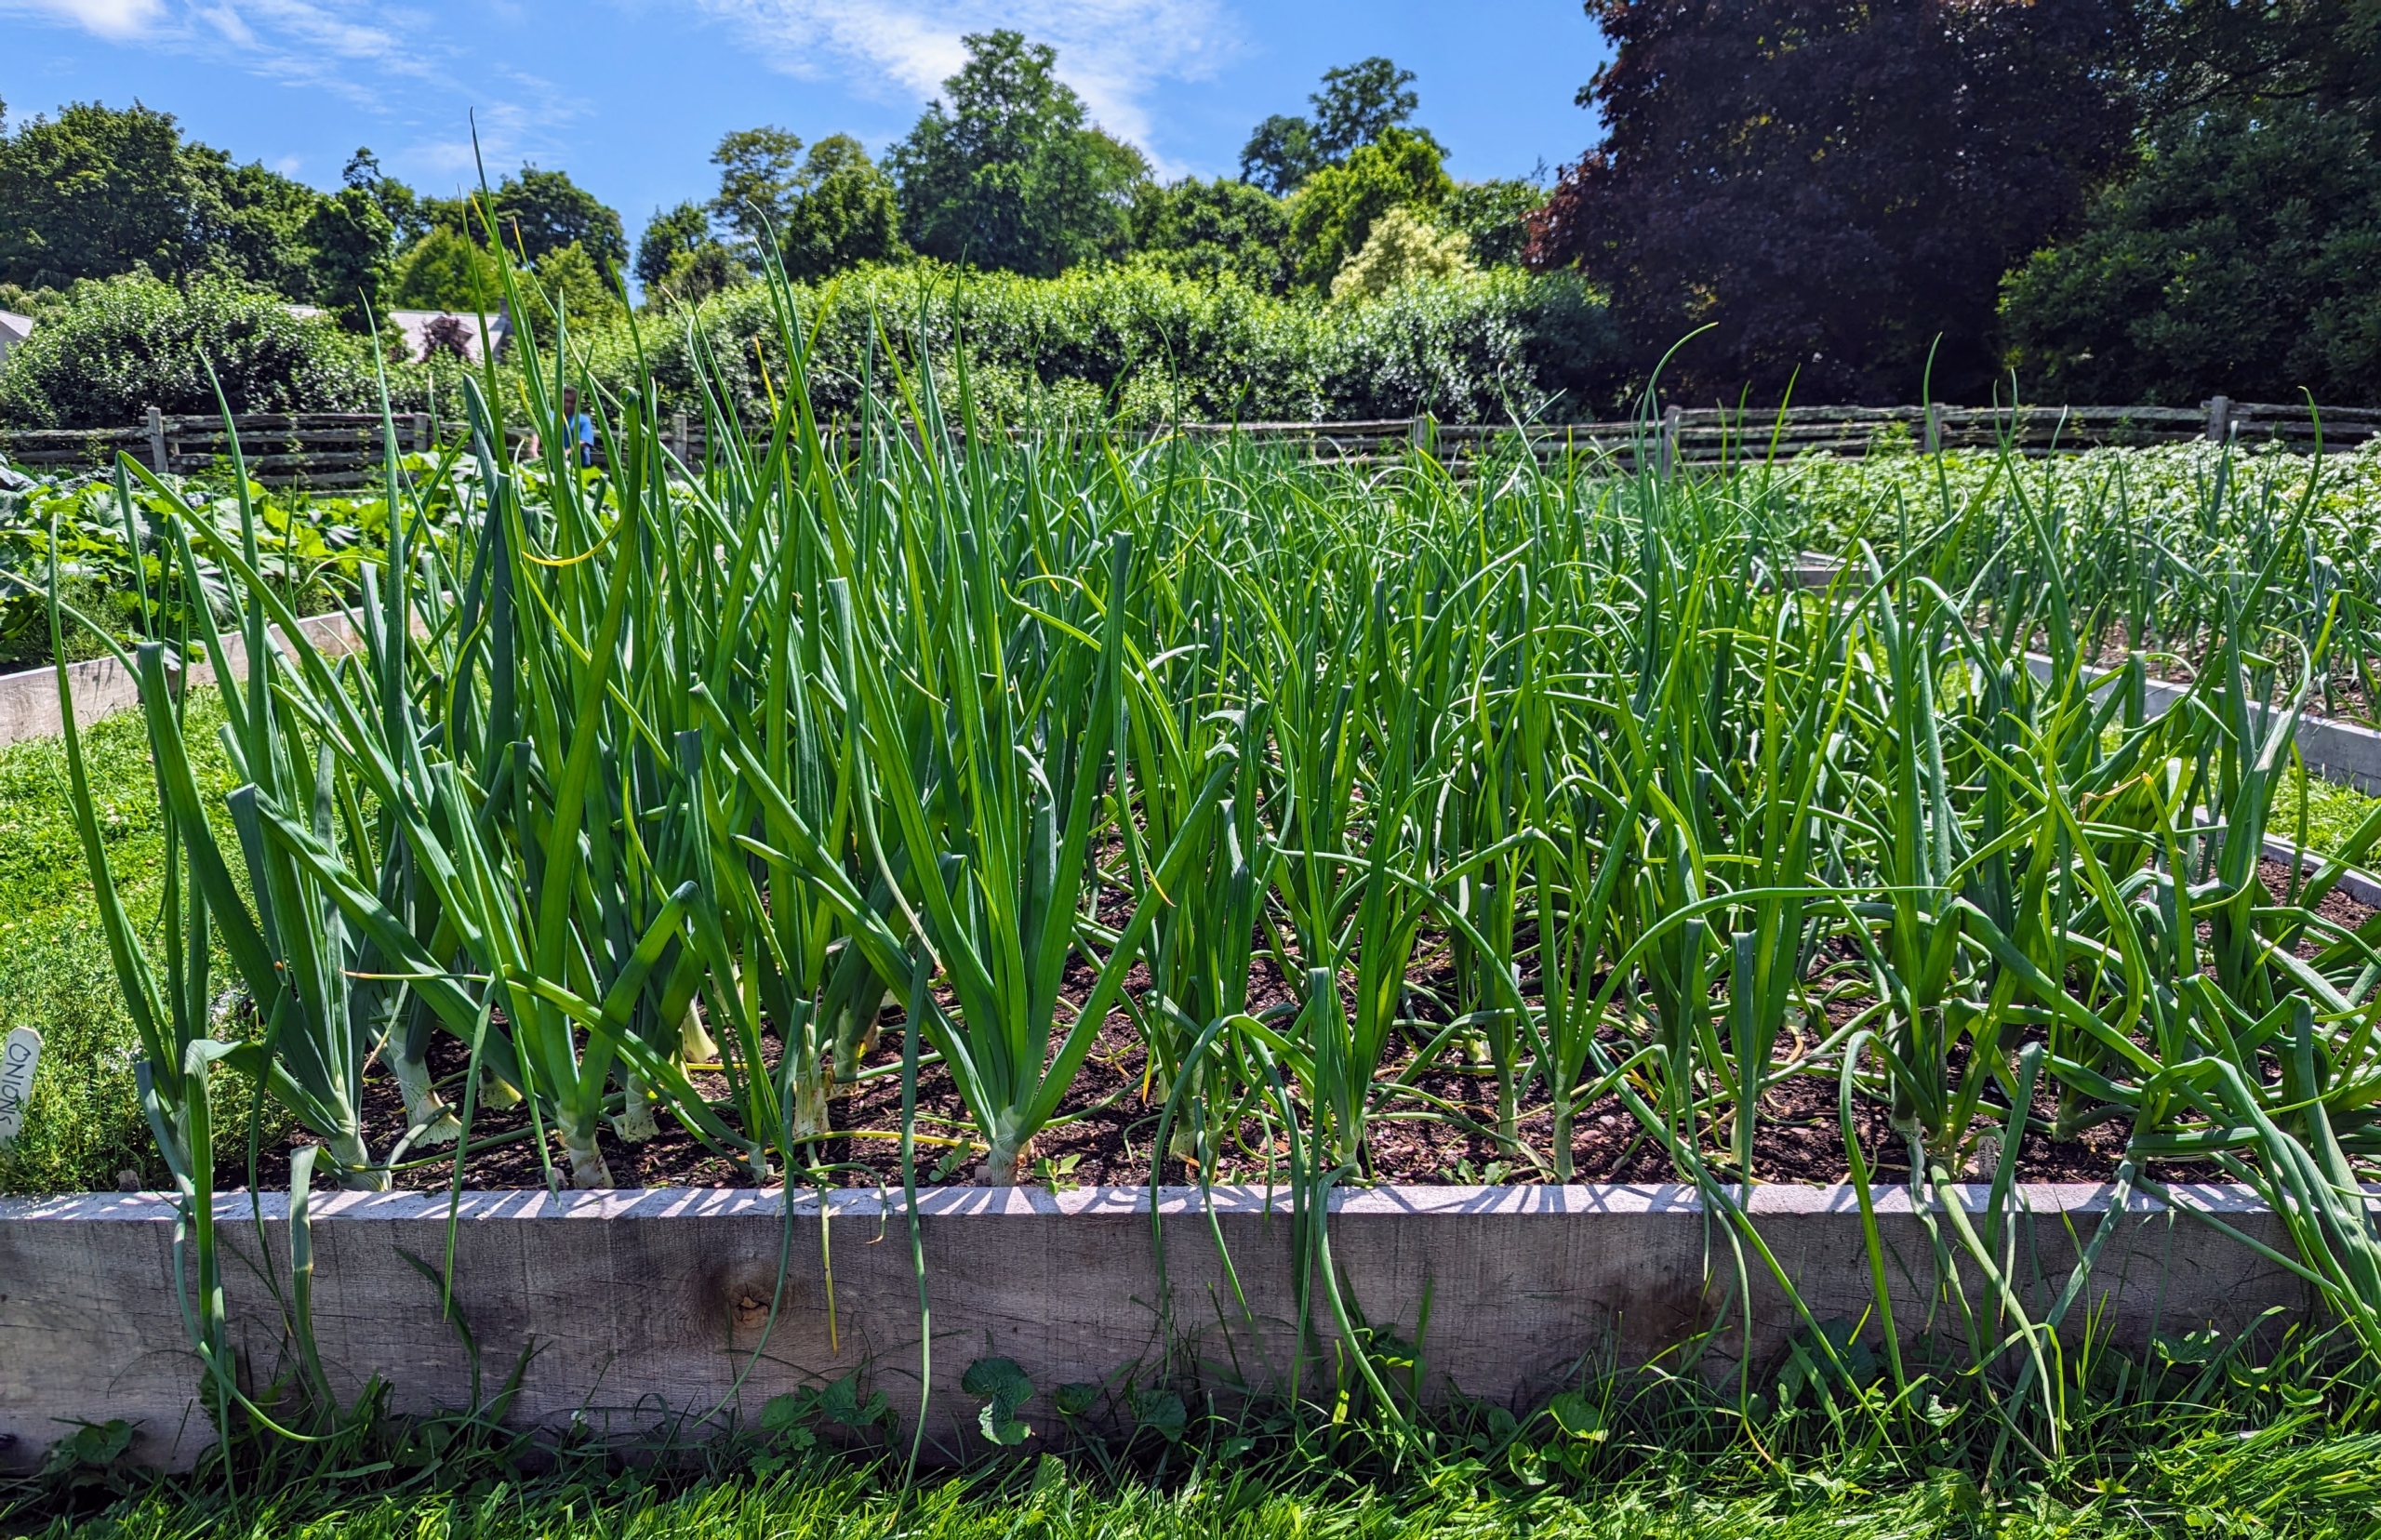
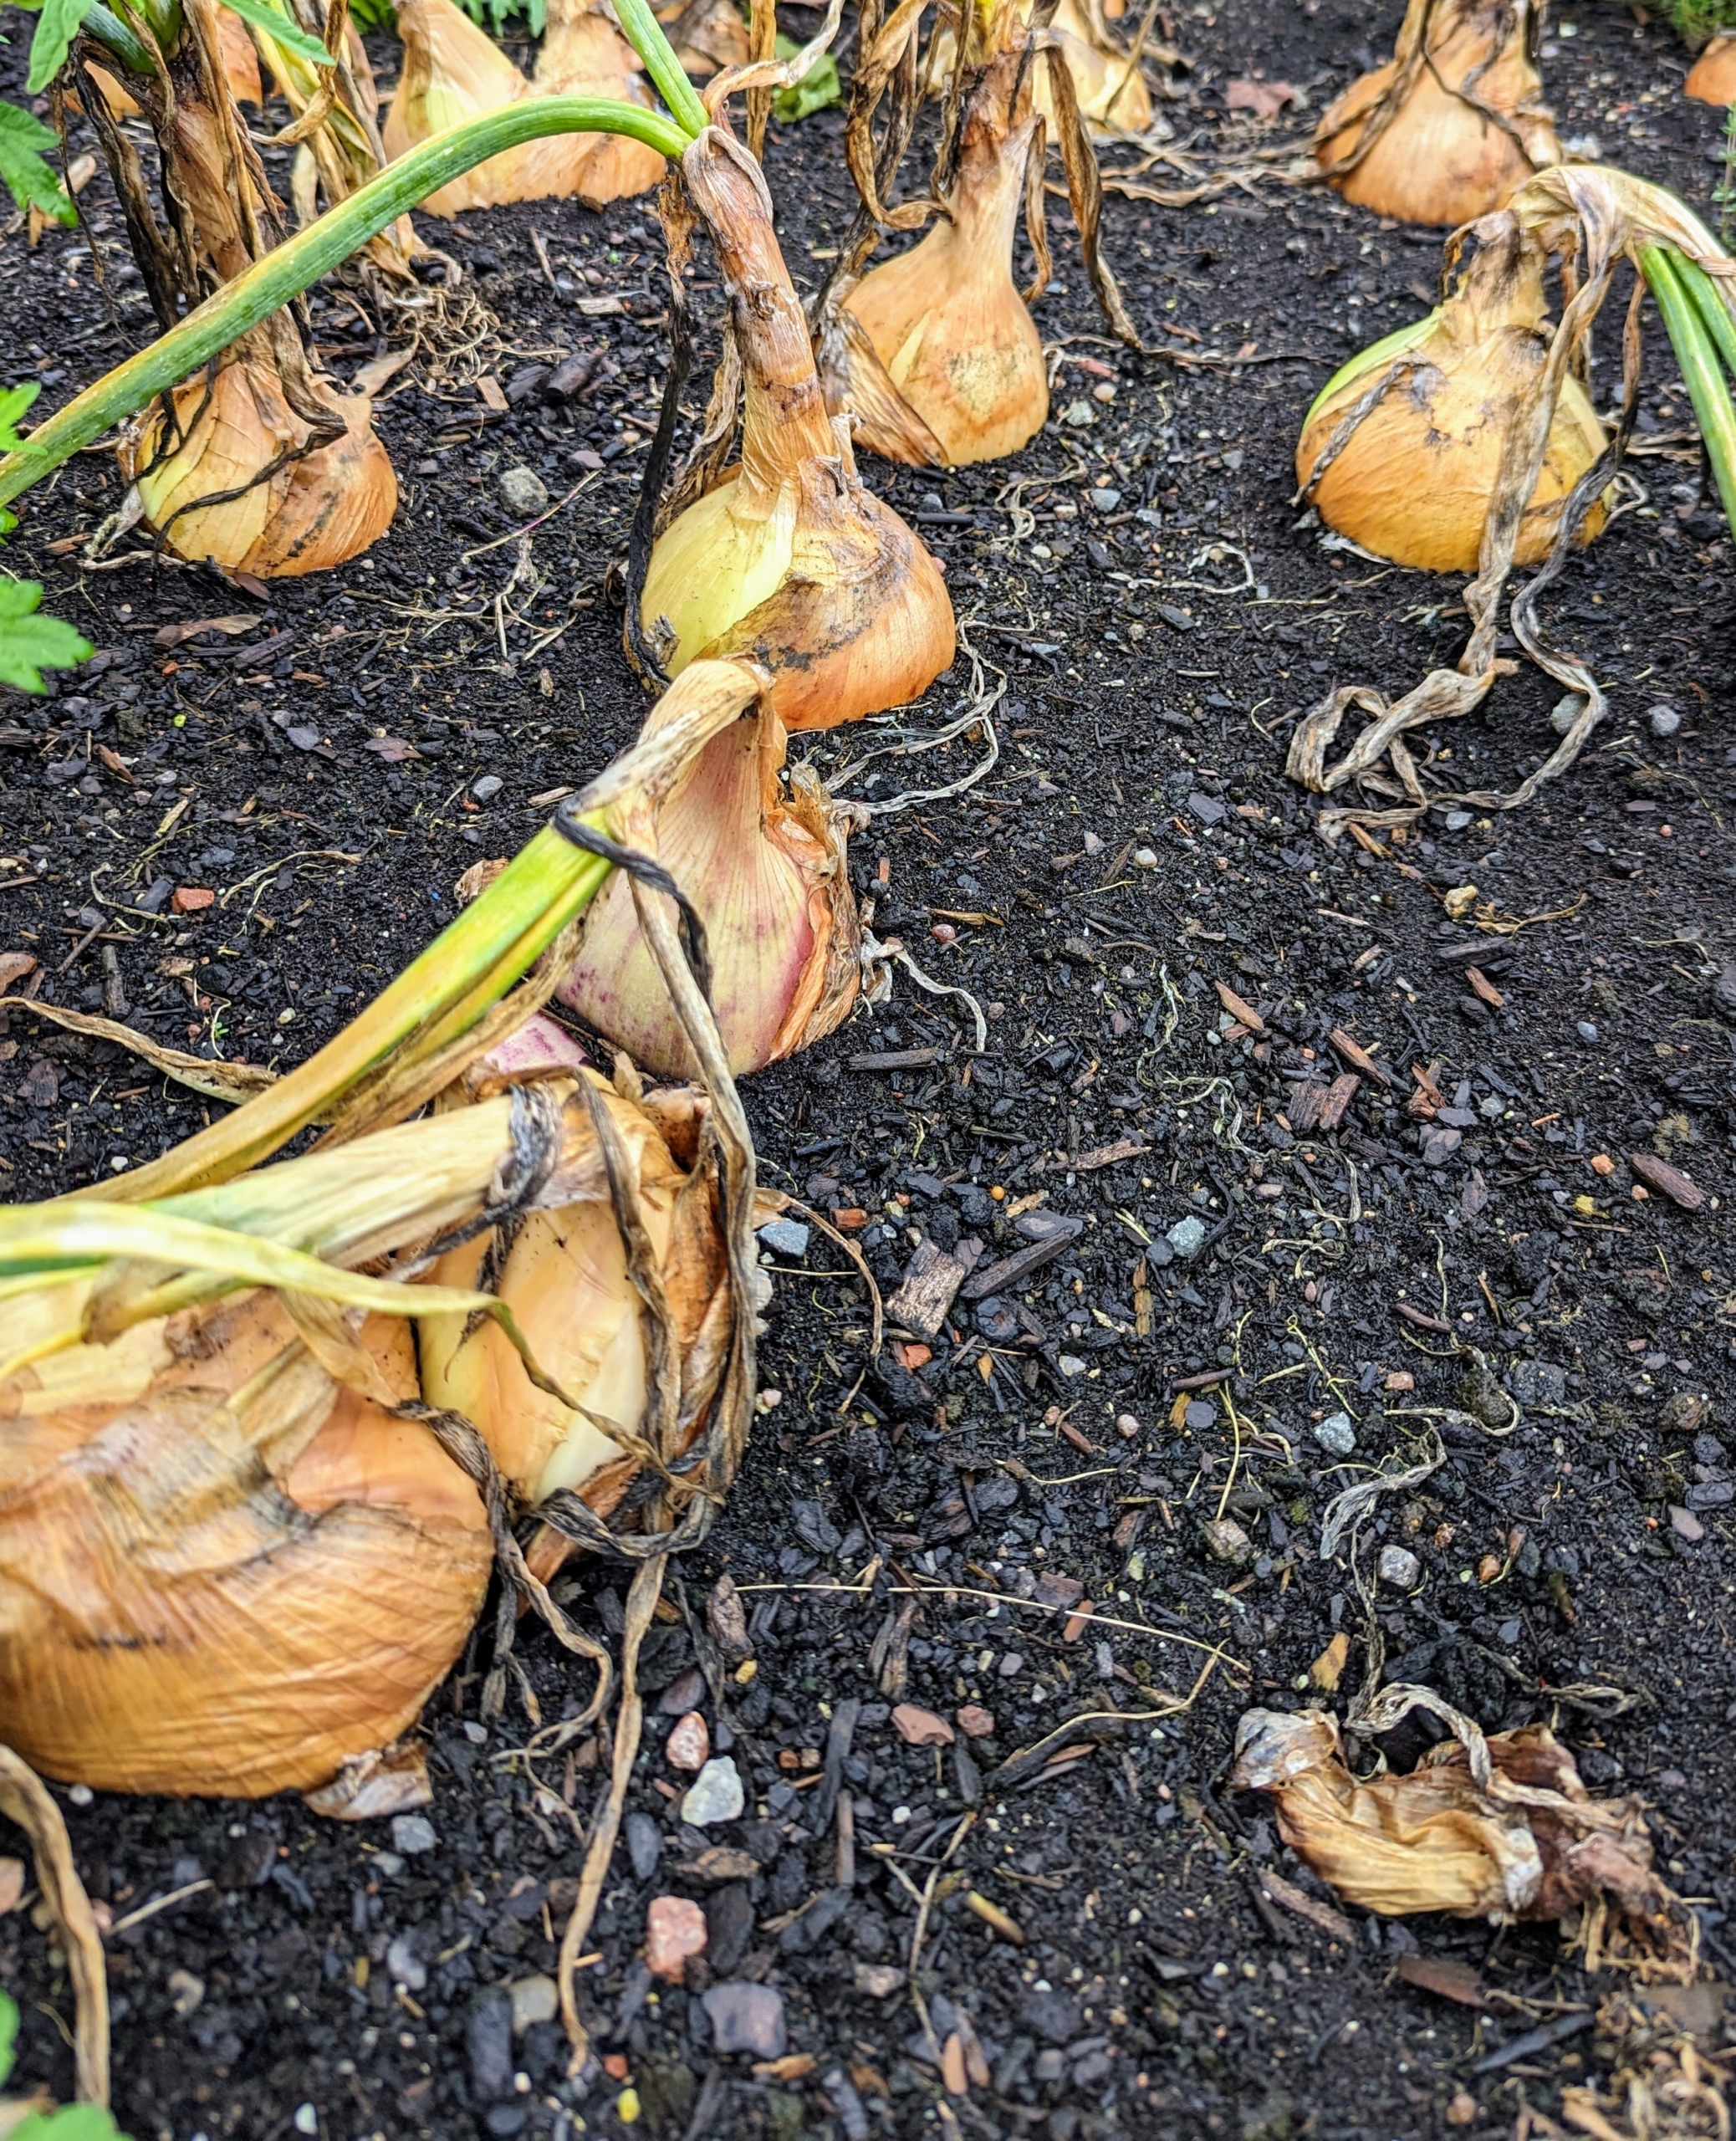
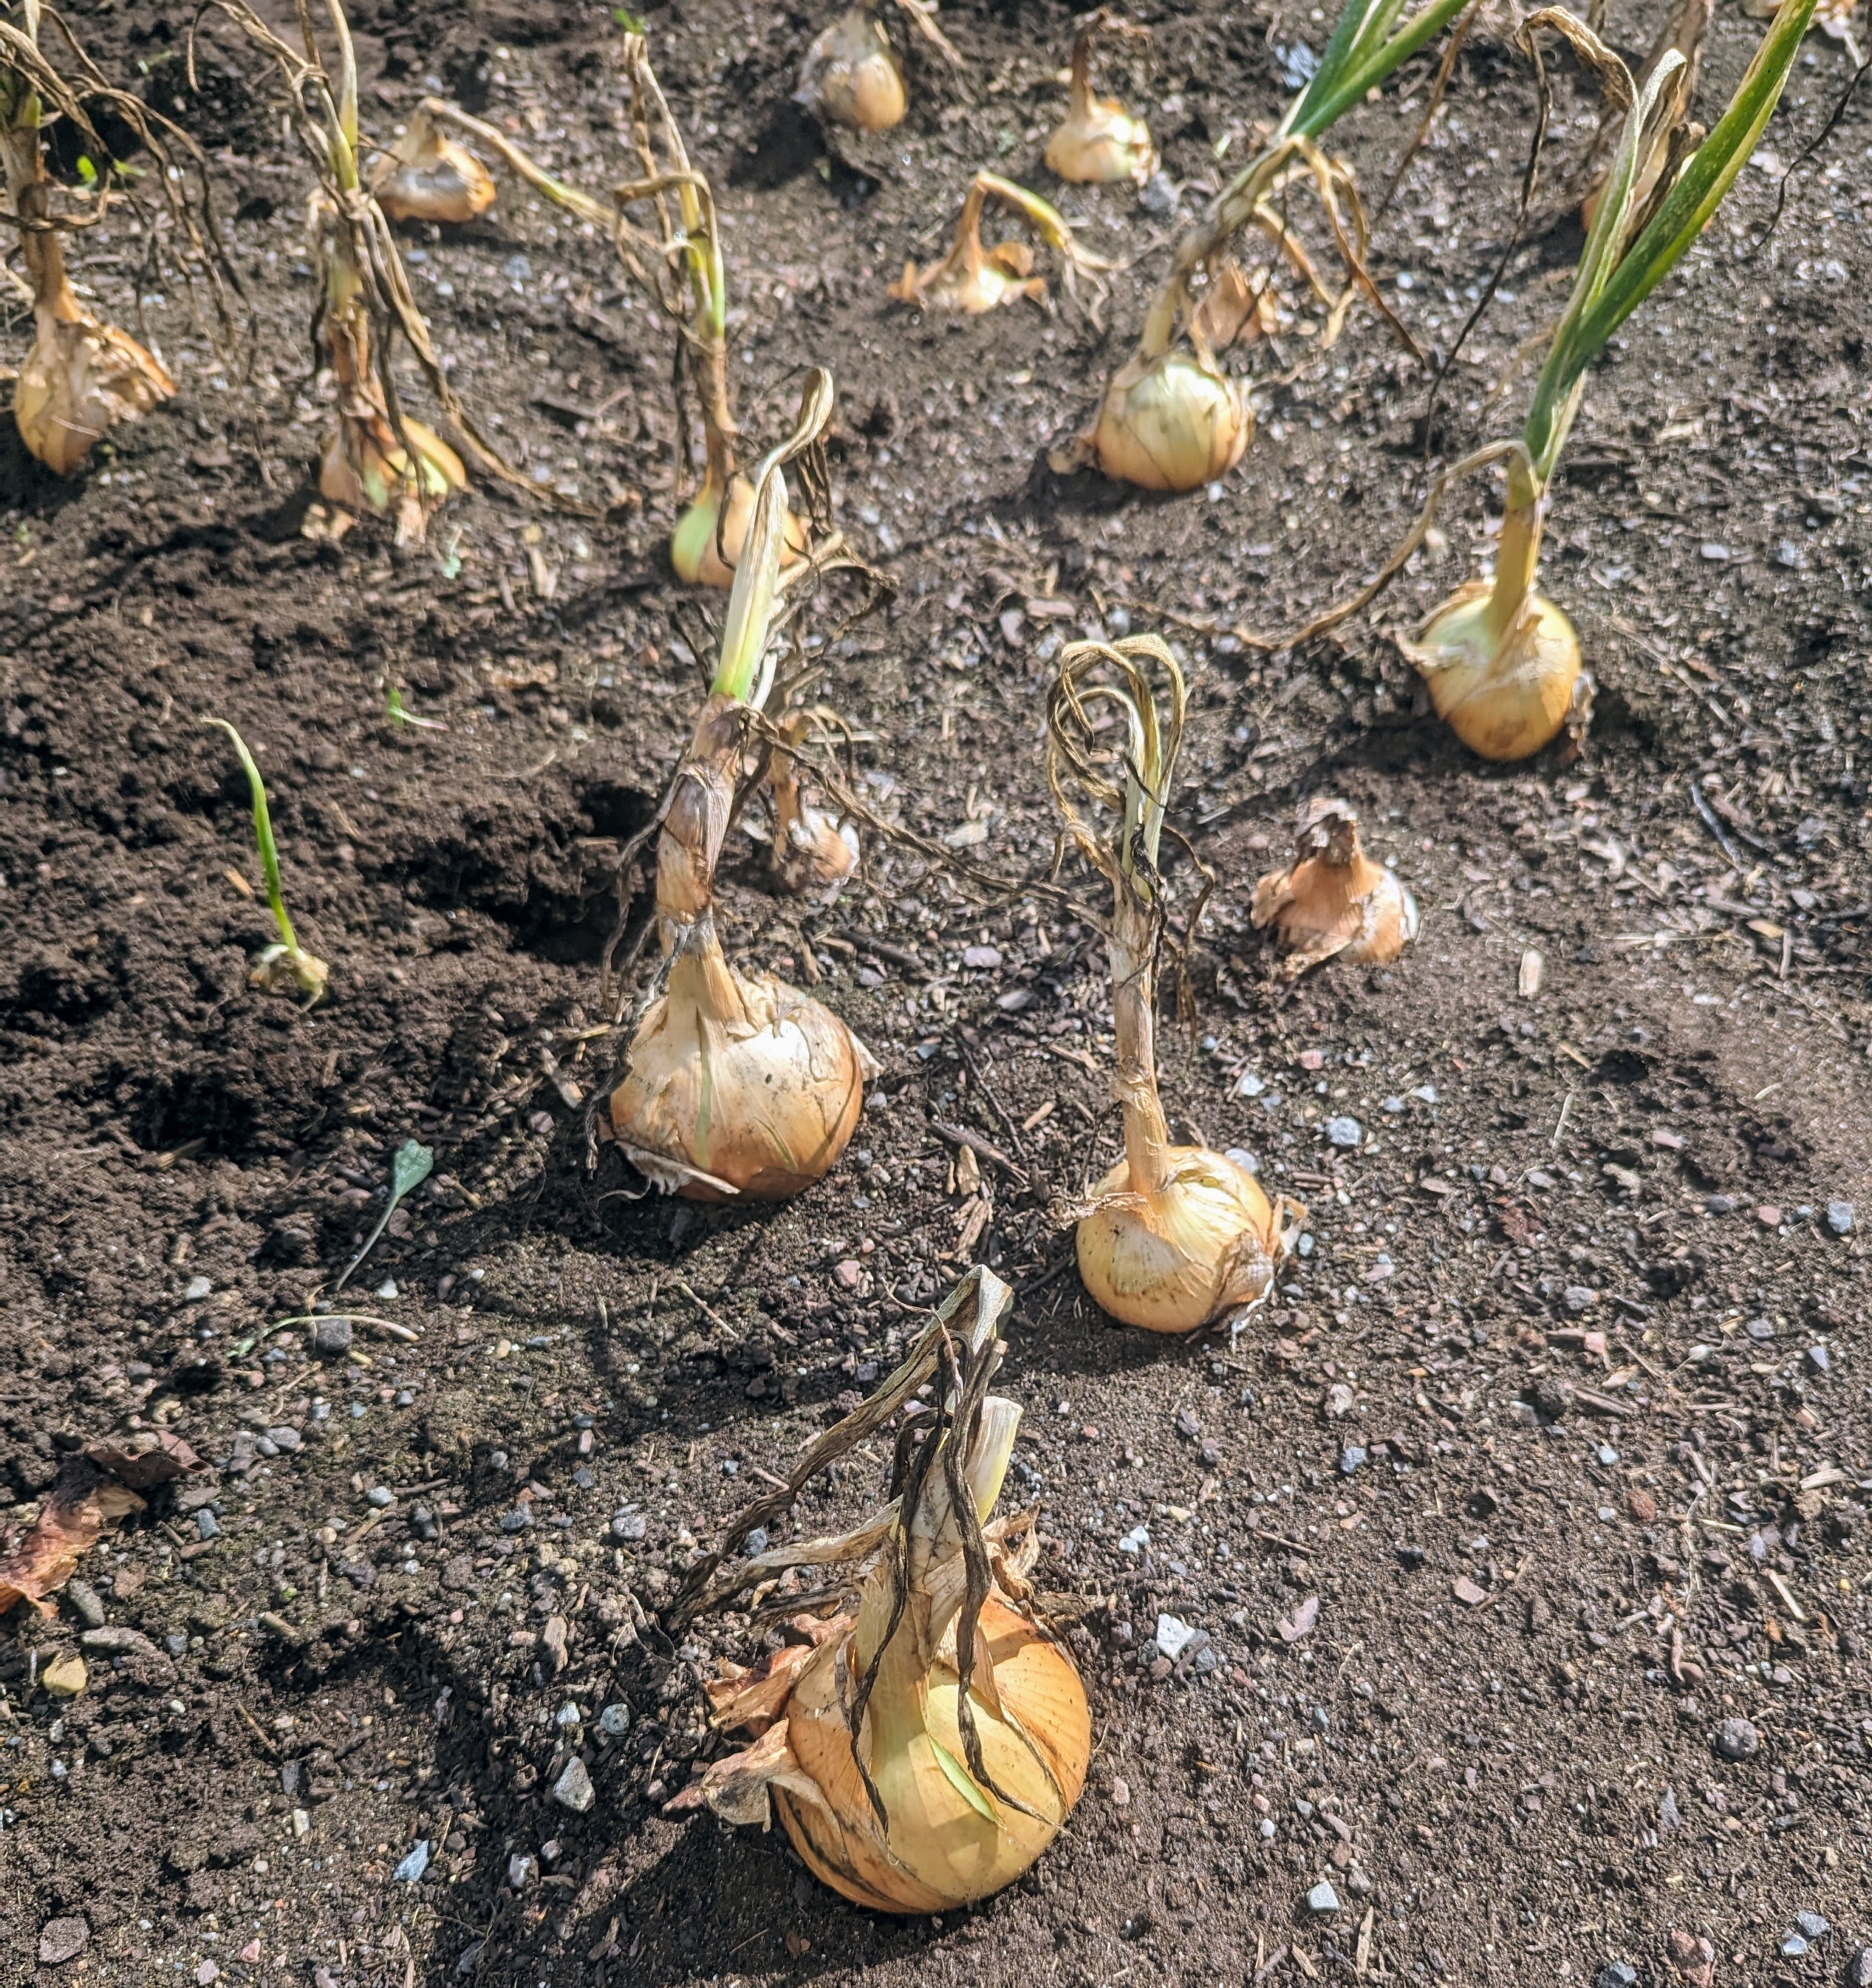
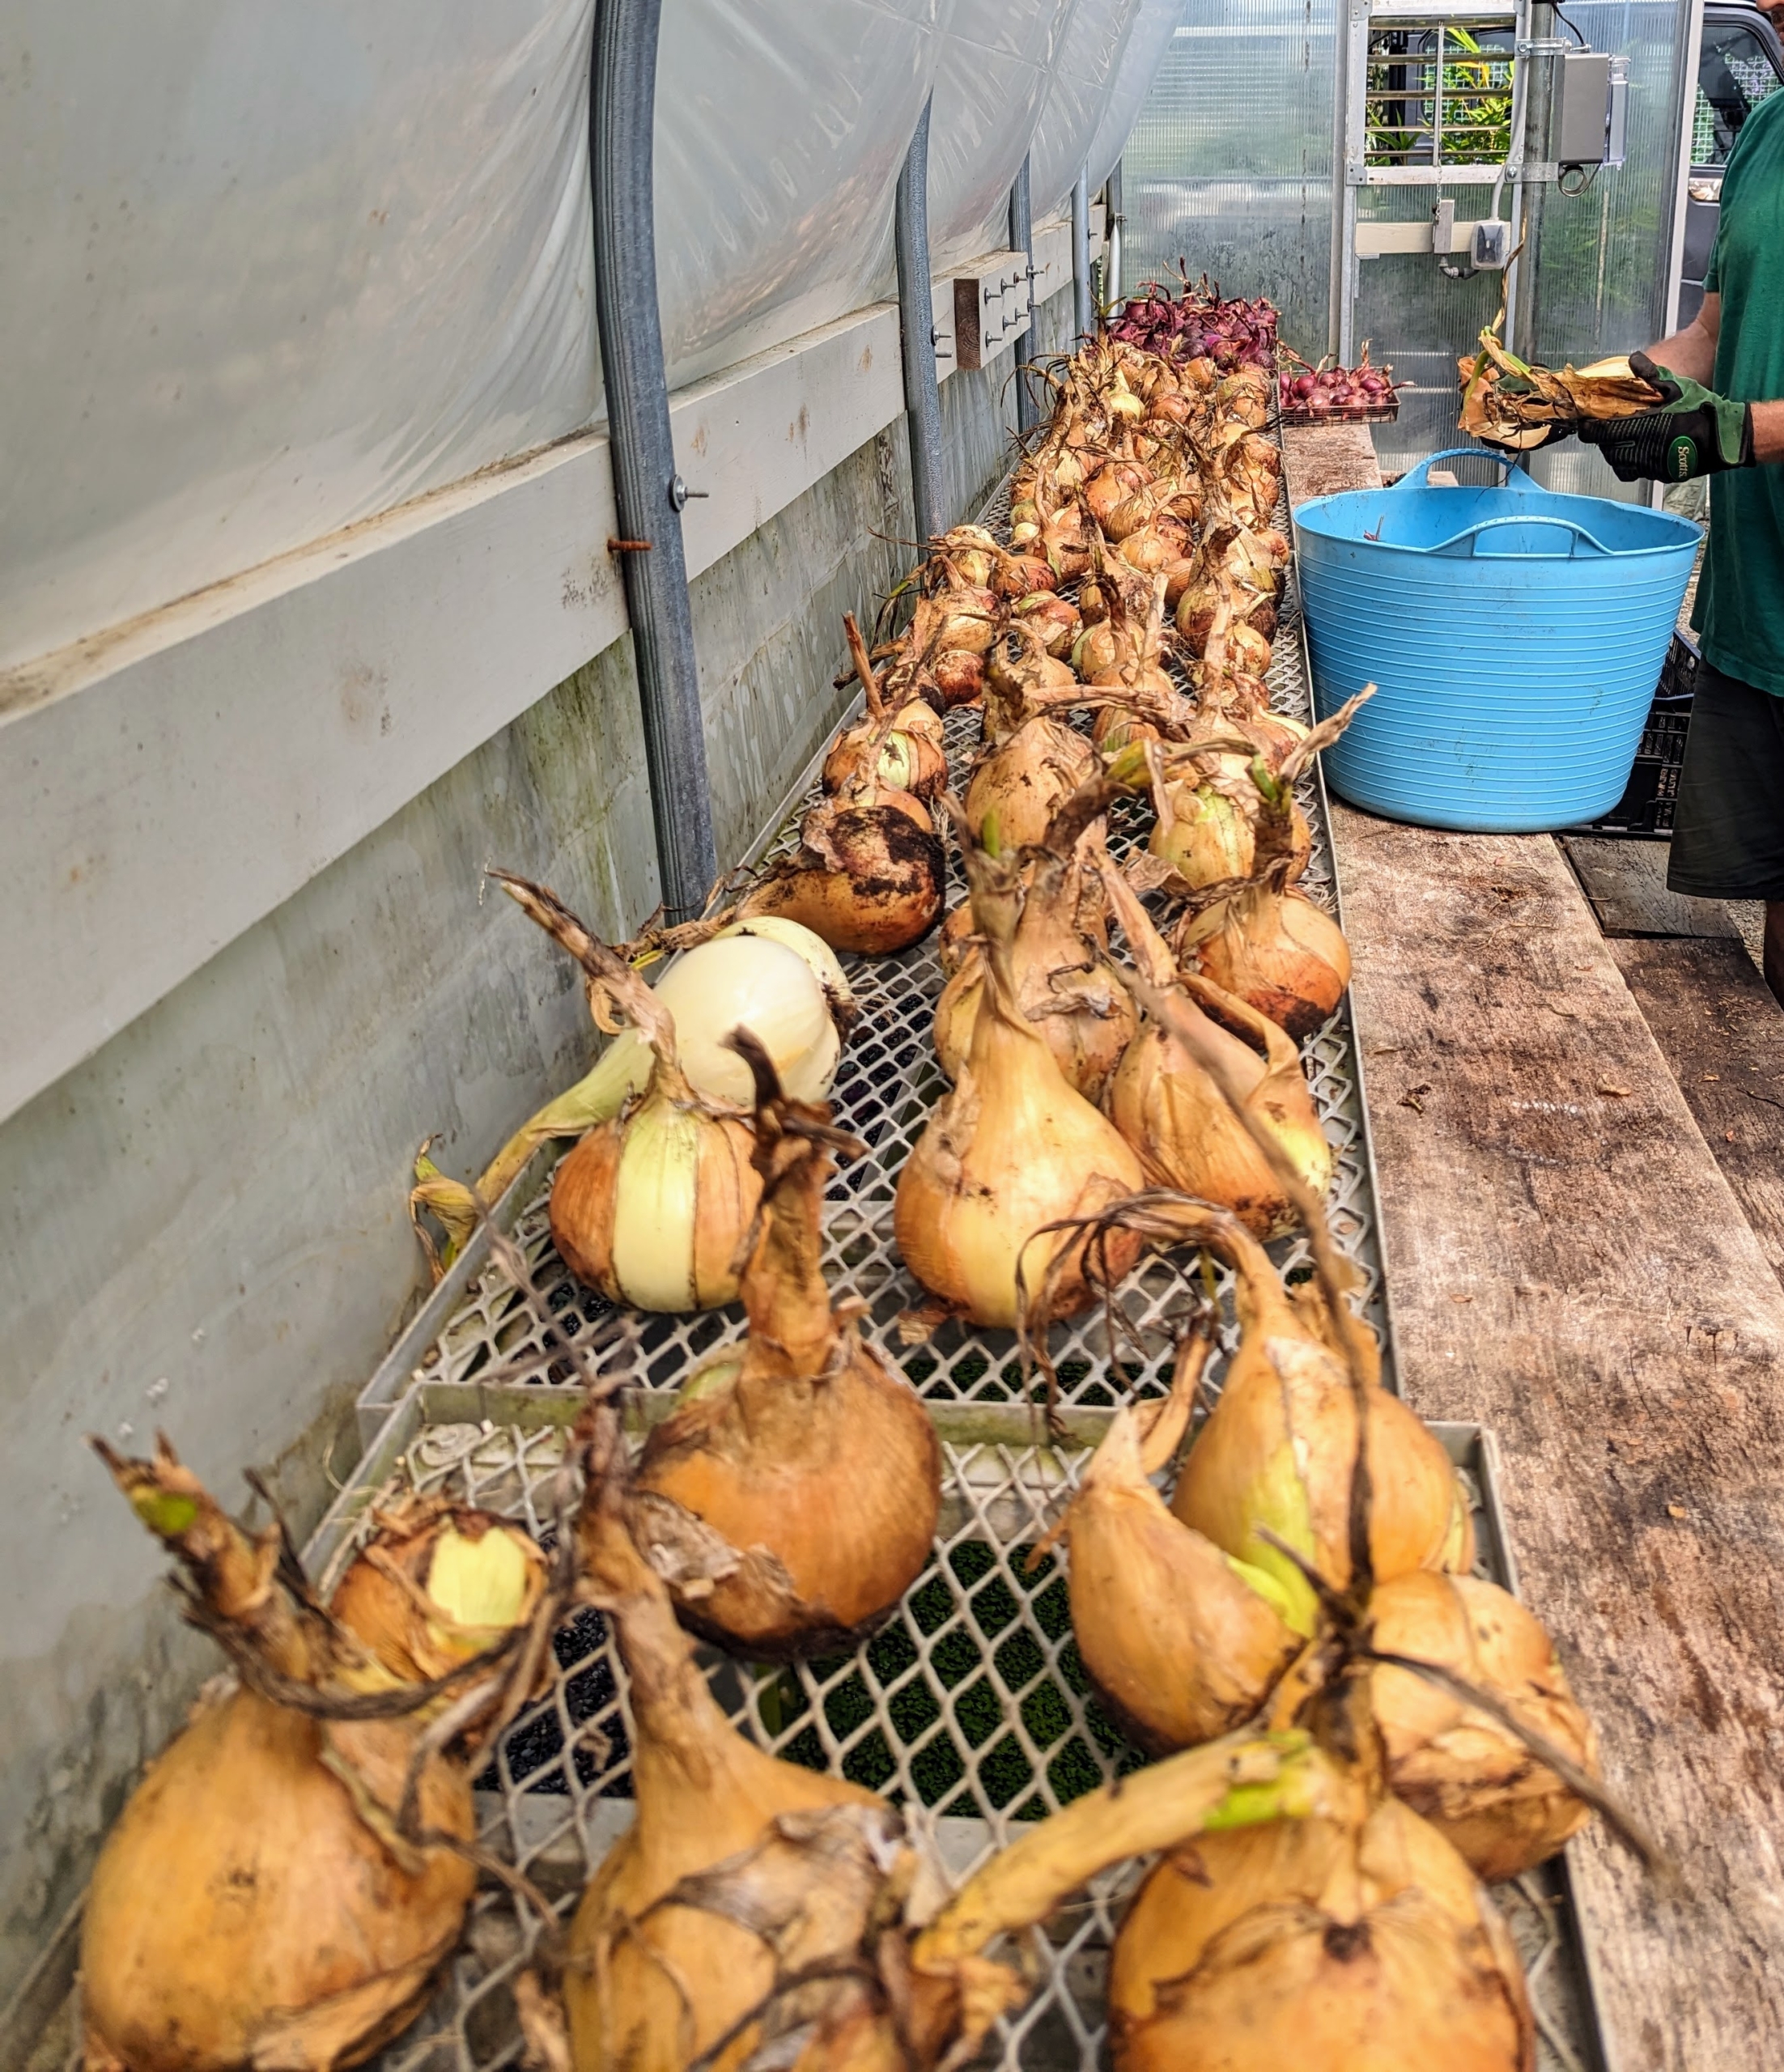
This week, the tops of the onion plants have fallen over naturally – an indication they are fully mature and ready to harvest.
Here, the onion leaves are also quite brown and dry. This happens at the “neck” of the onion, where the leaves meet the bulb, and signals that the plant has stopped growing.
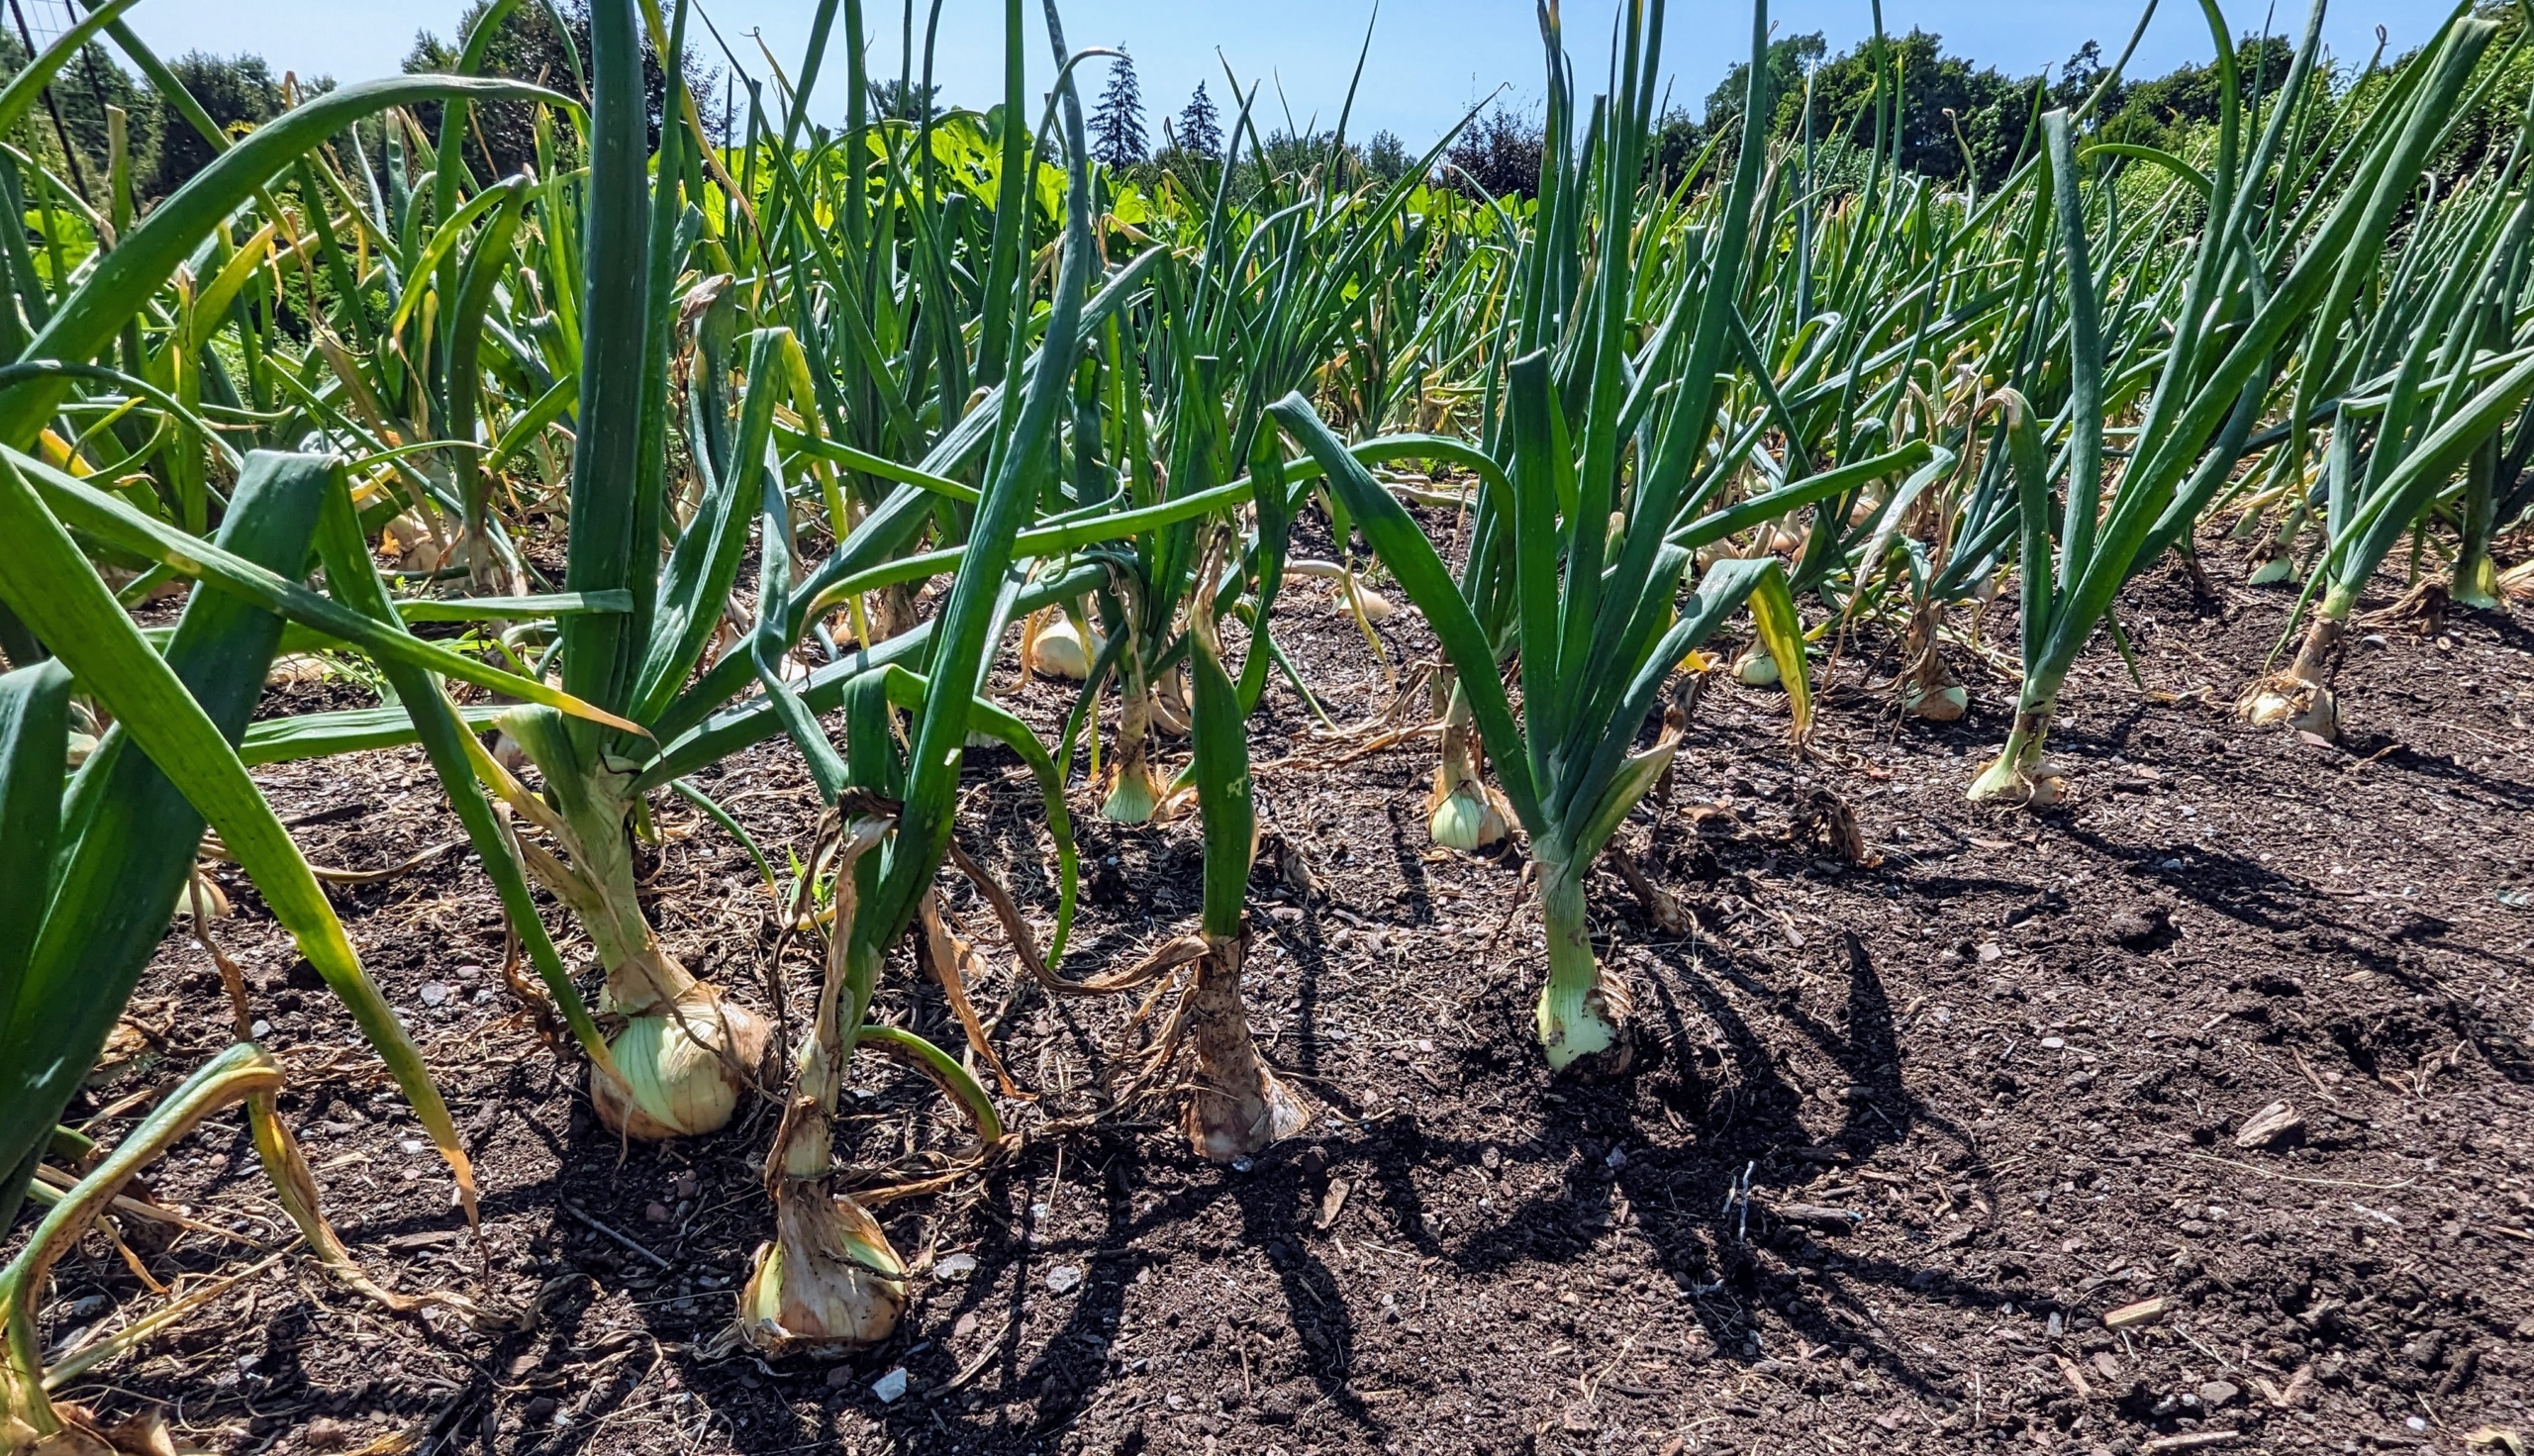
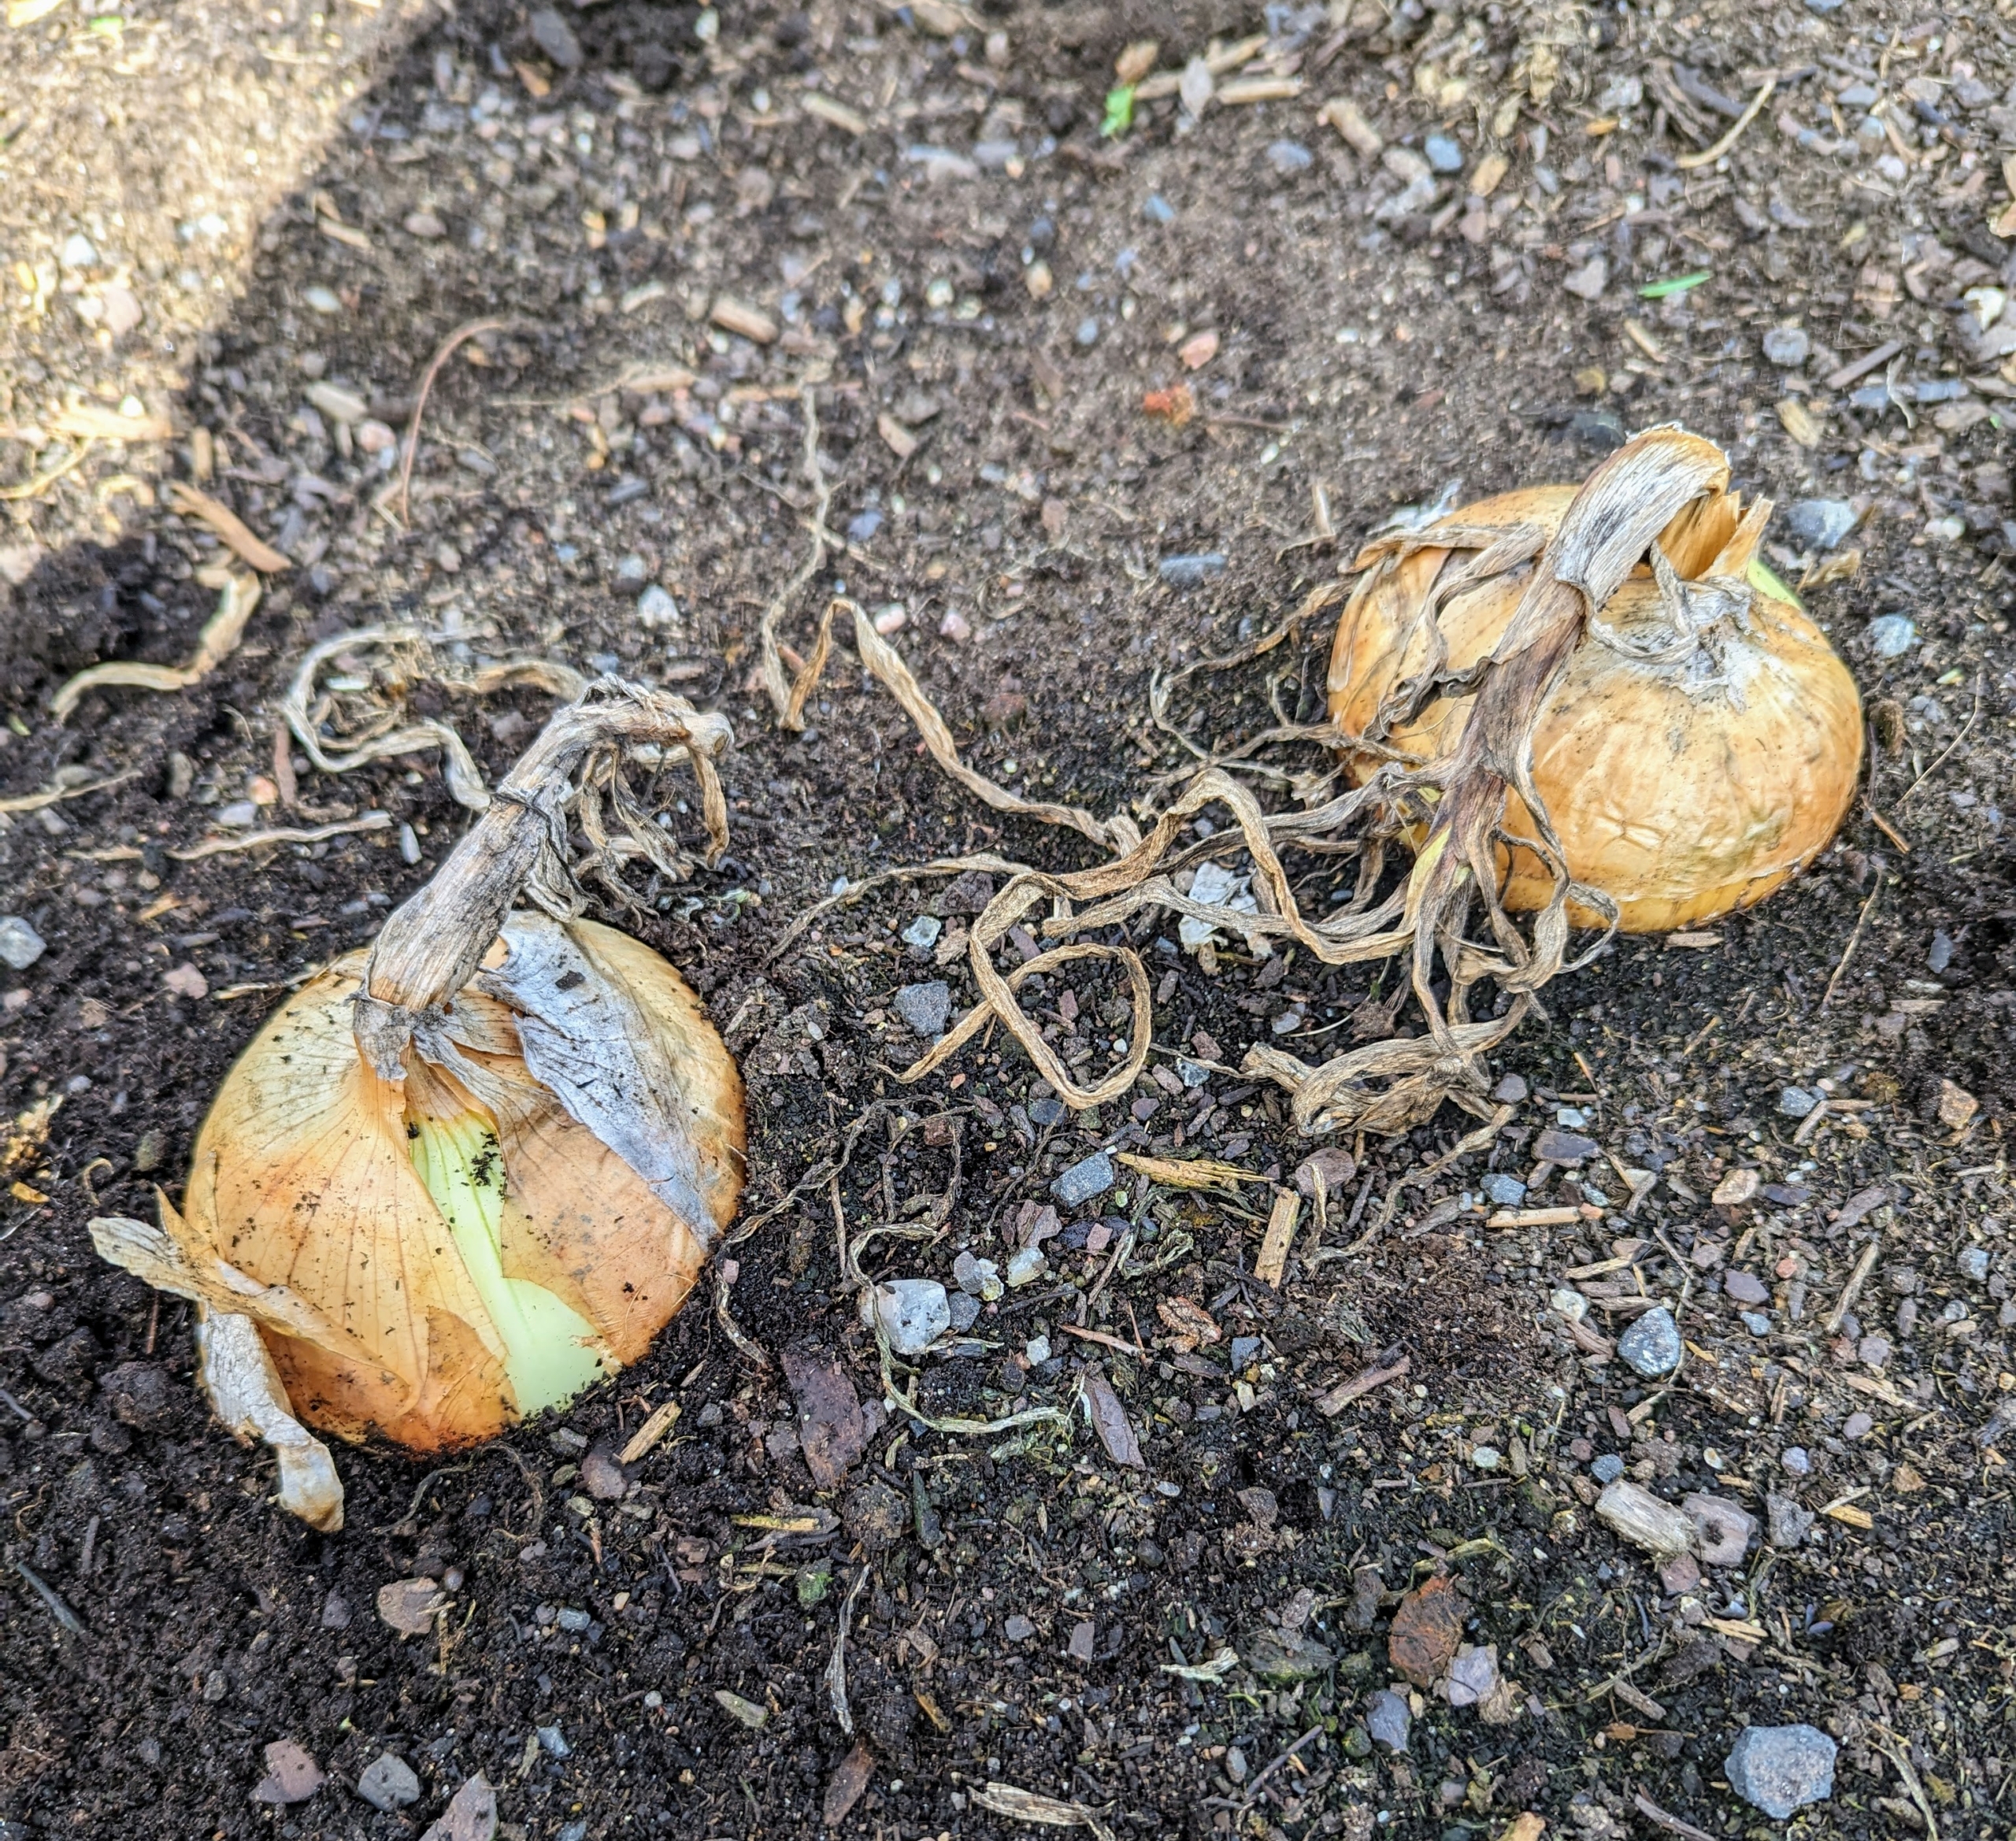
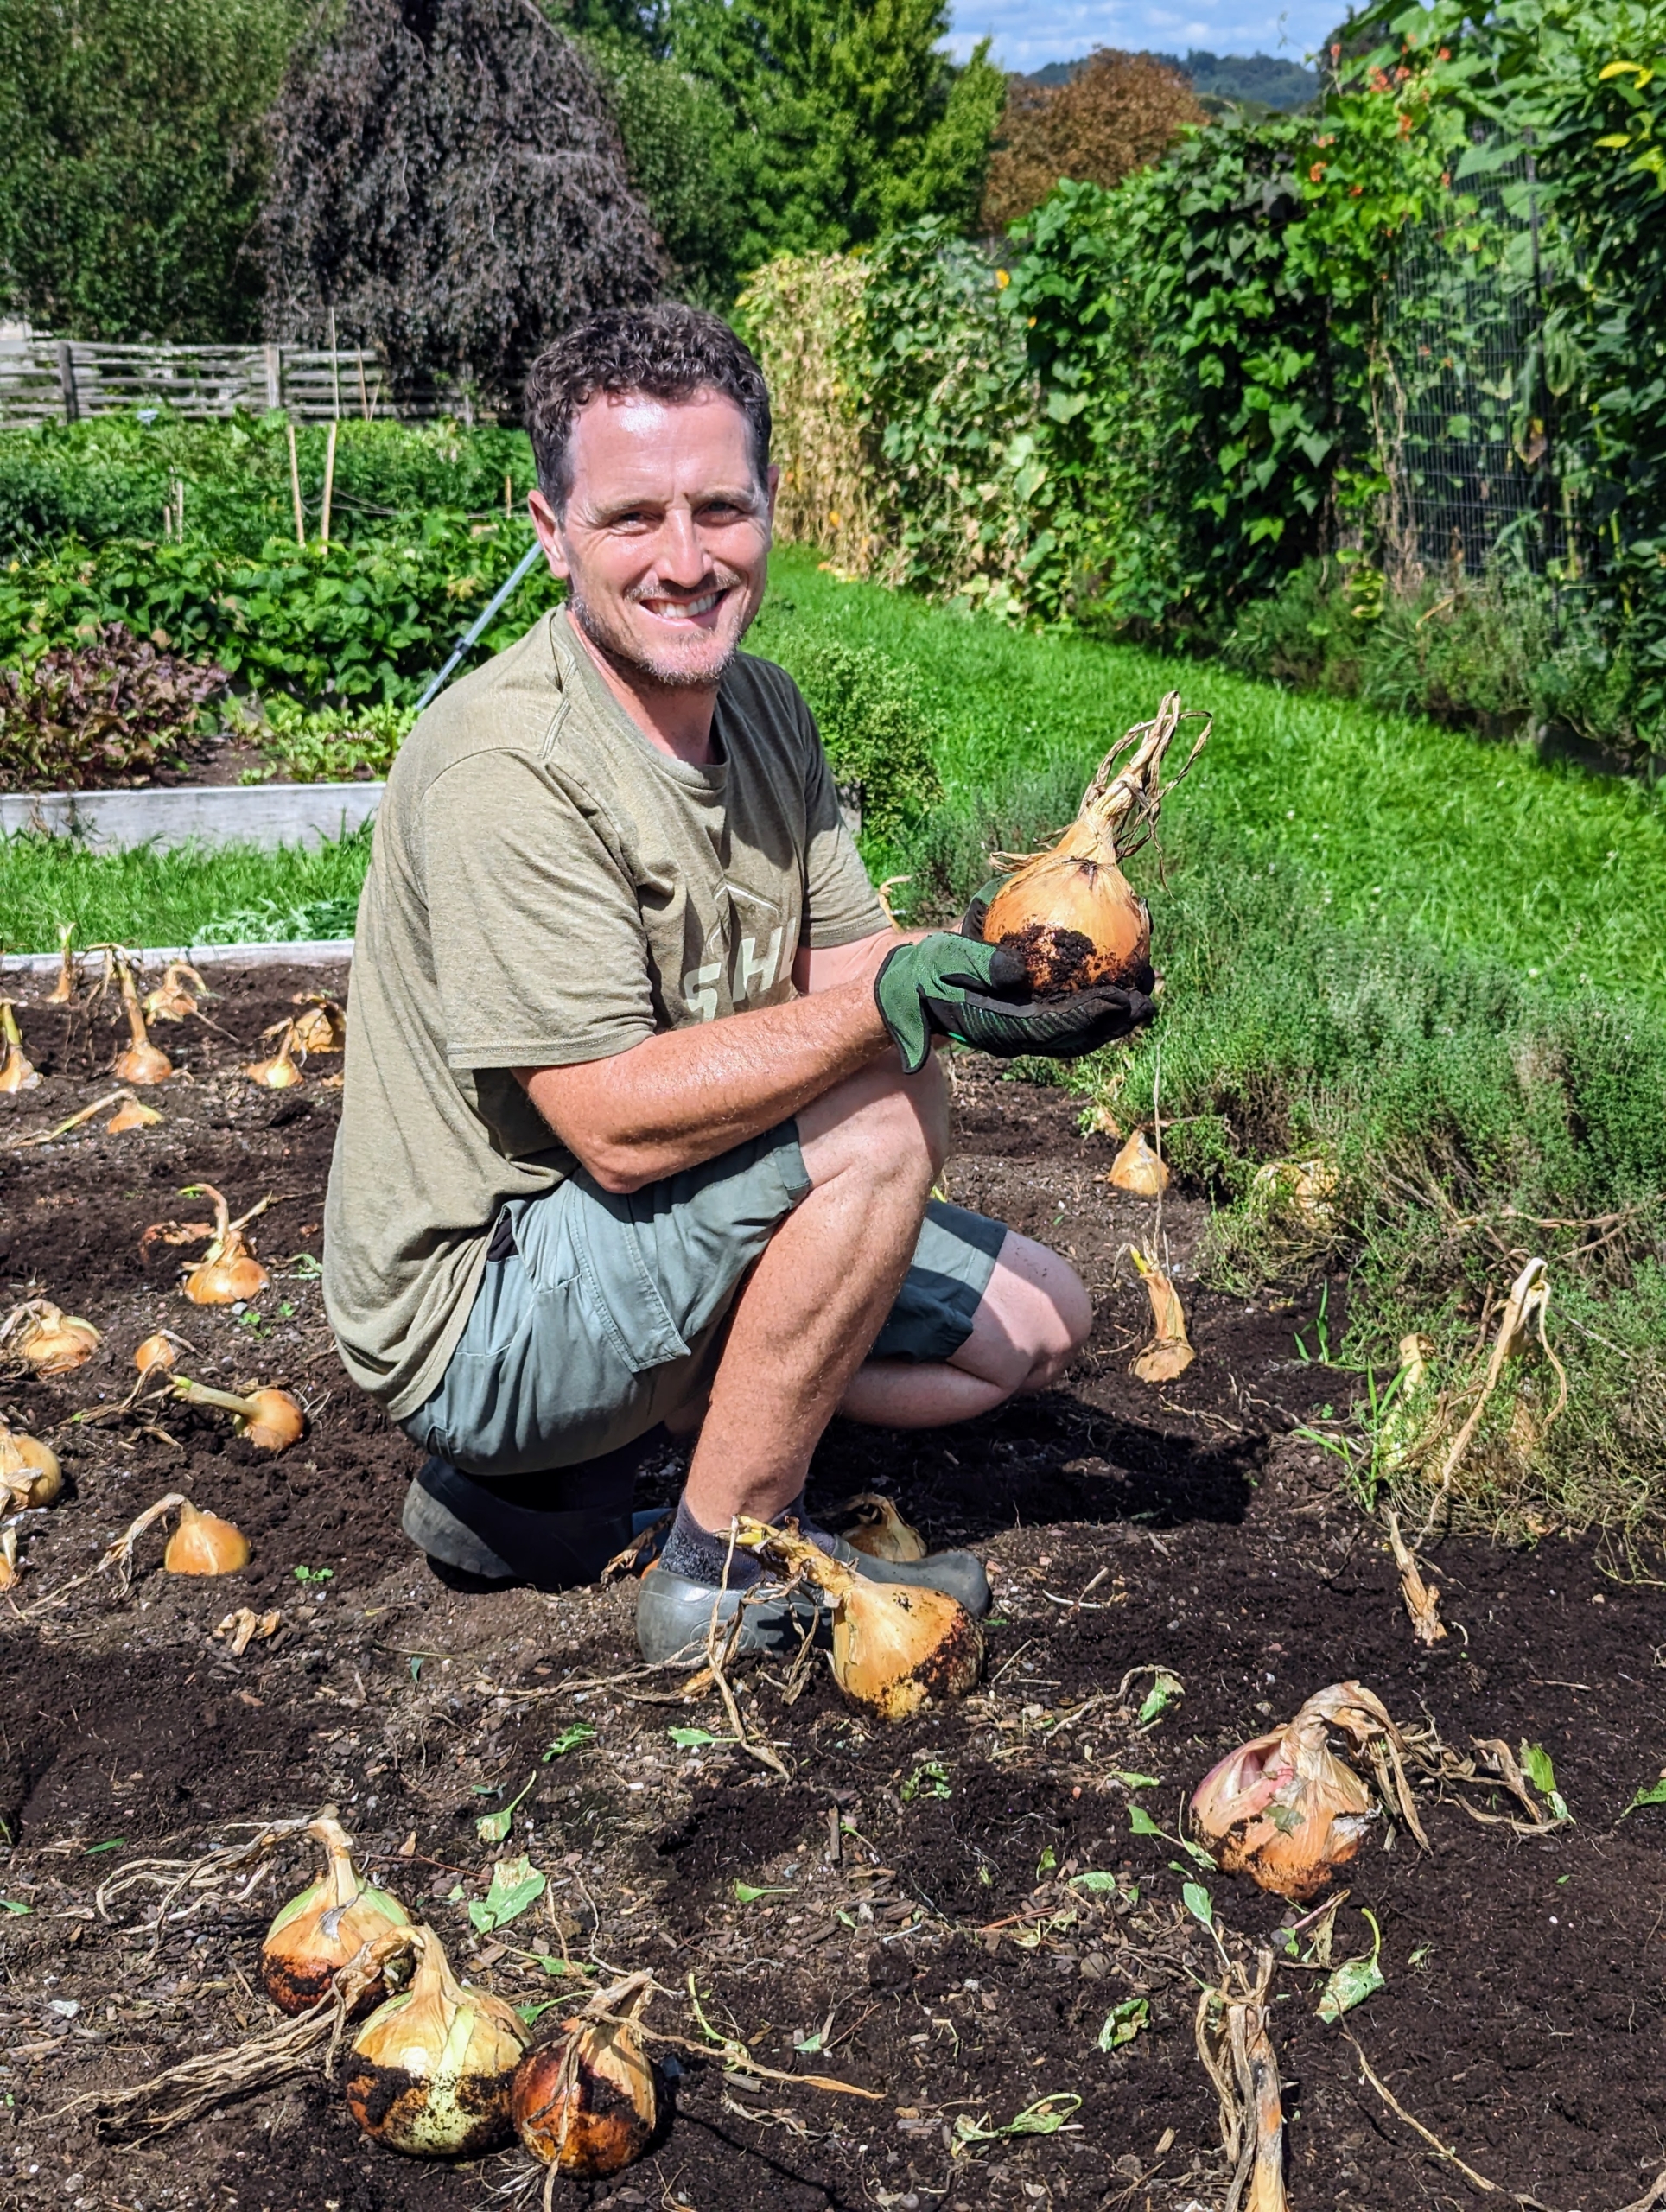
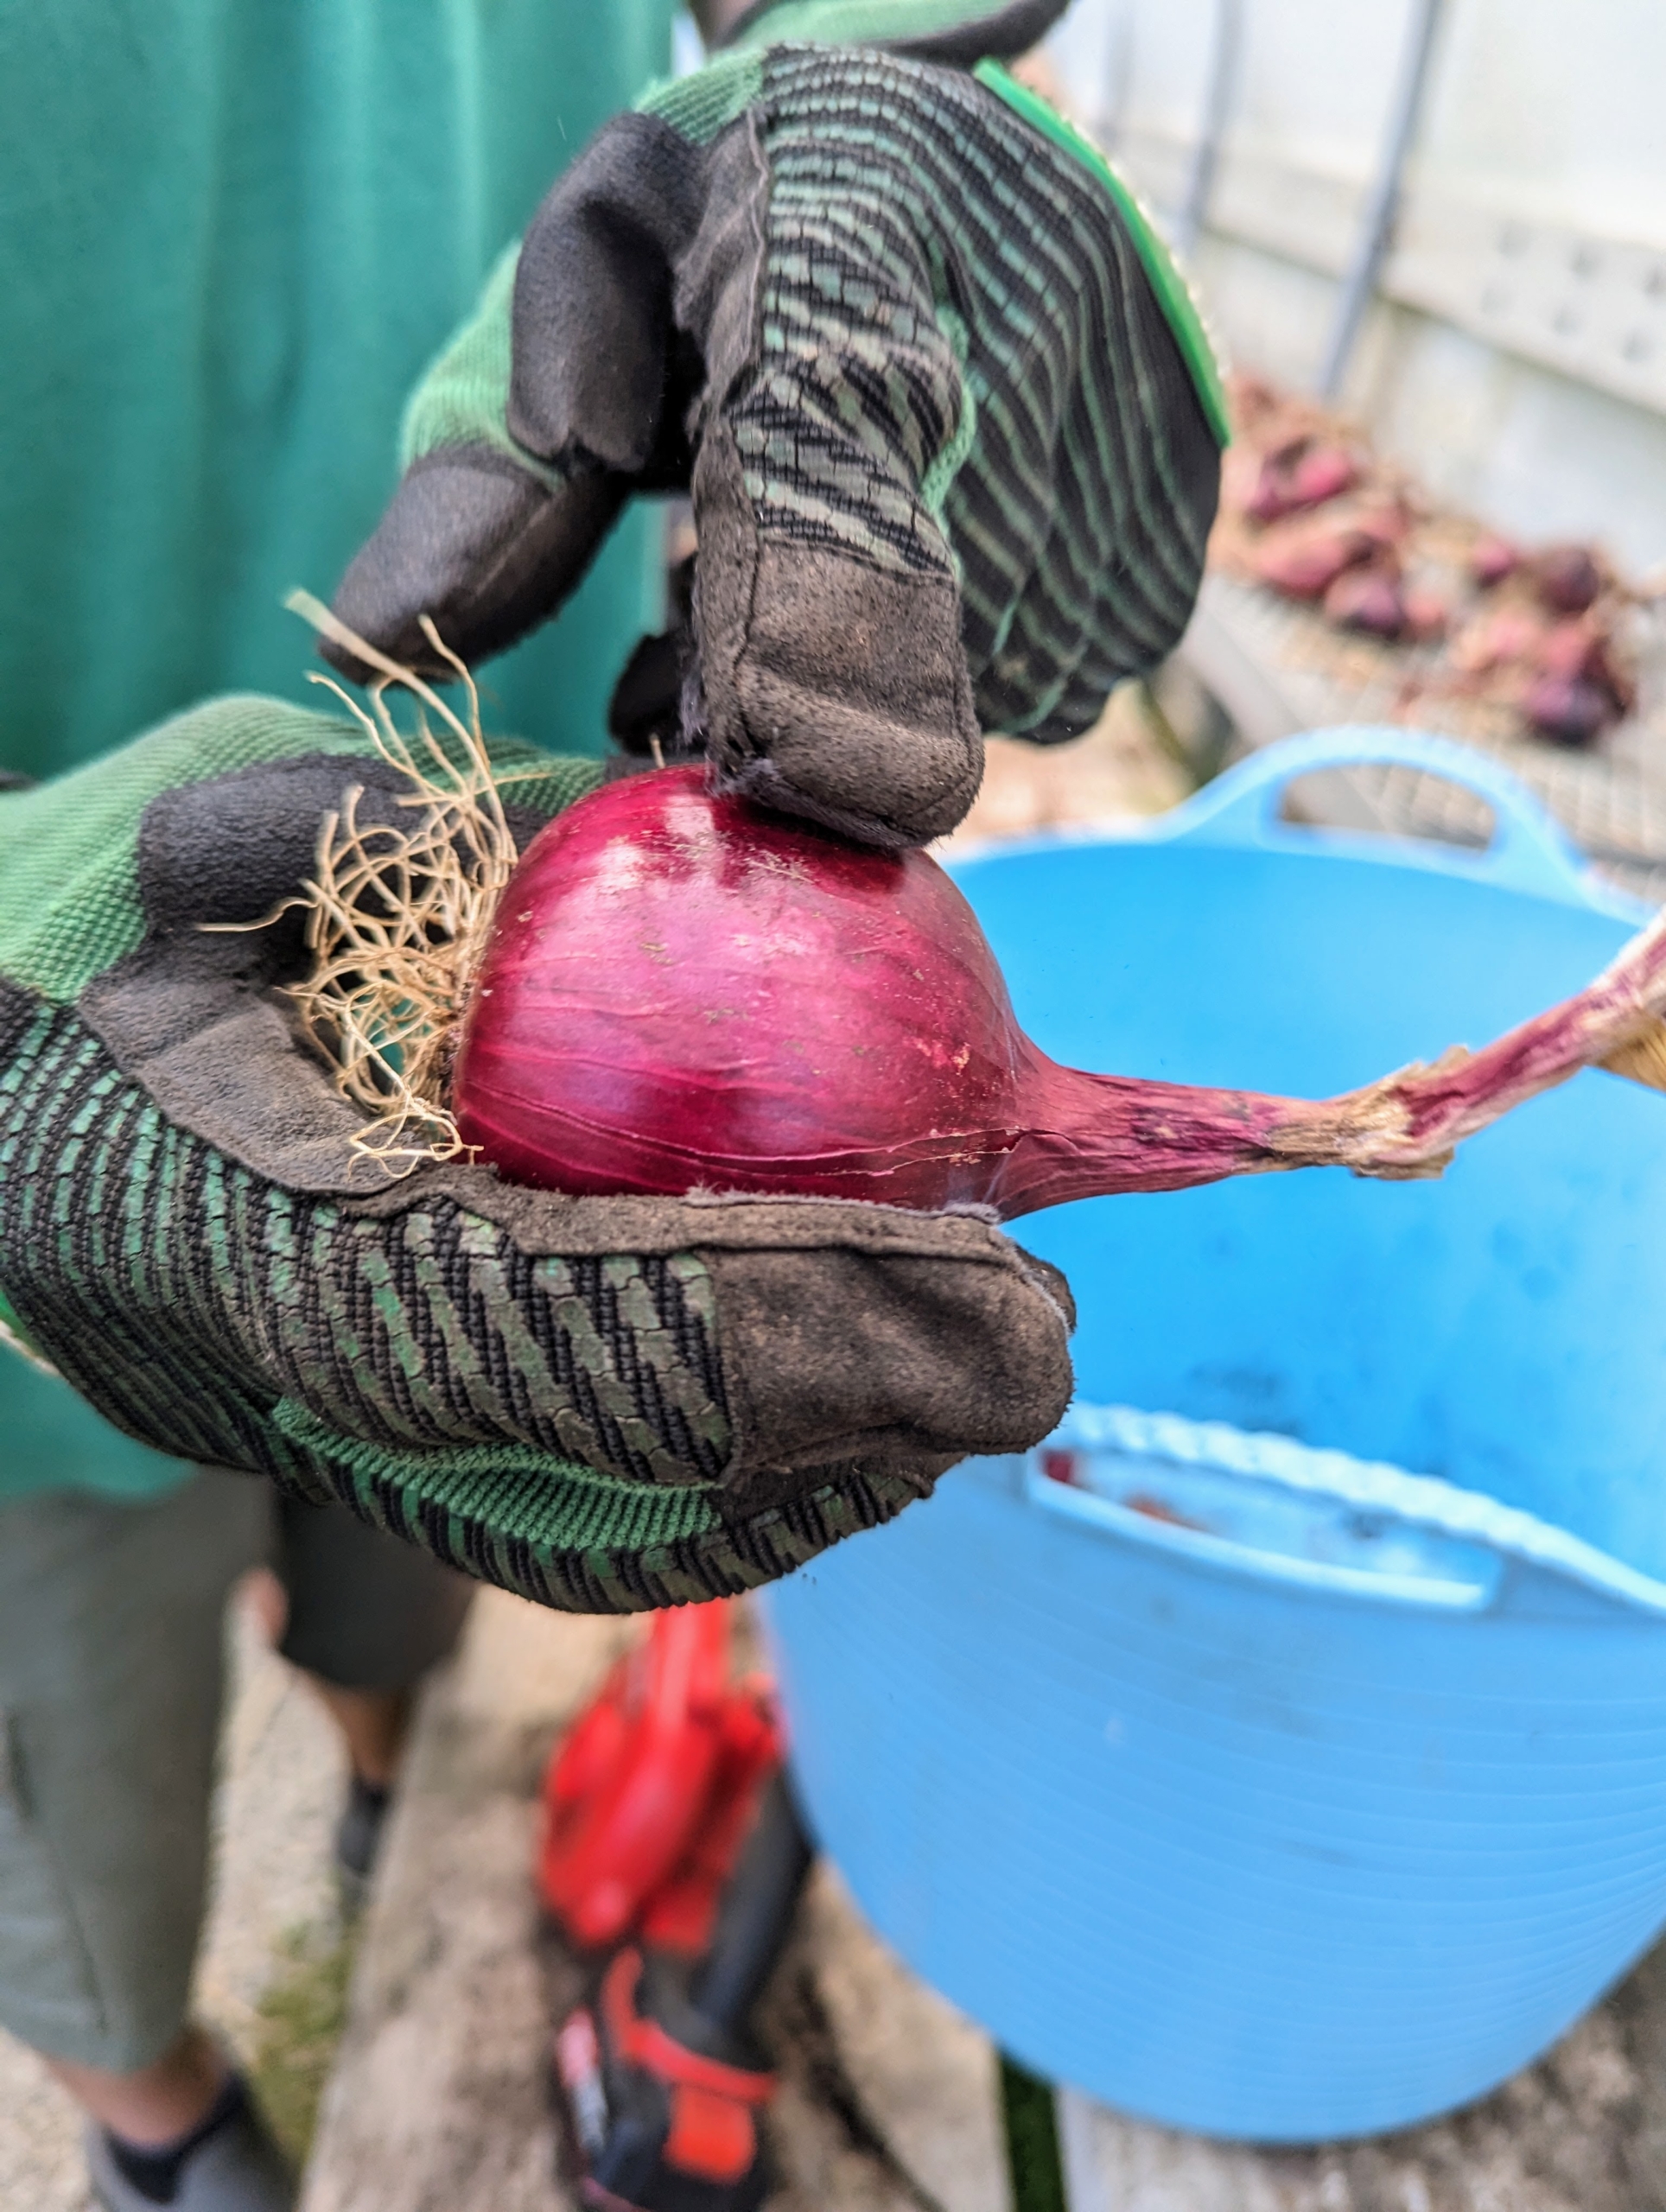
Here’s Ryan after picking one of our largest onions. To pick, he carefully loosens the surrounding soil and then gently pulls the onion up by its top. It’s important to keep the stem intact to prevent the possibility of rot.
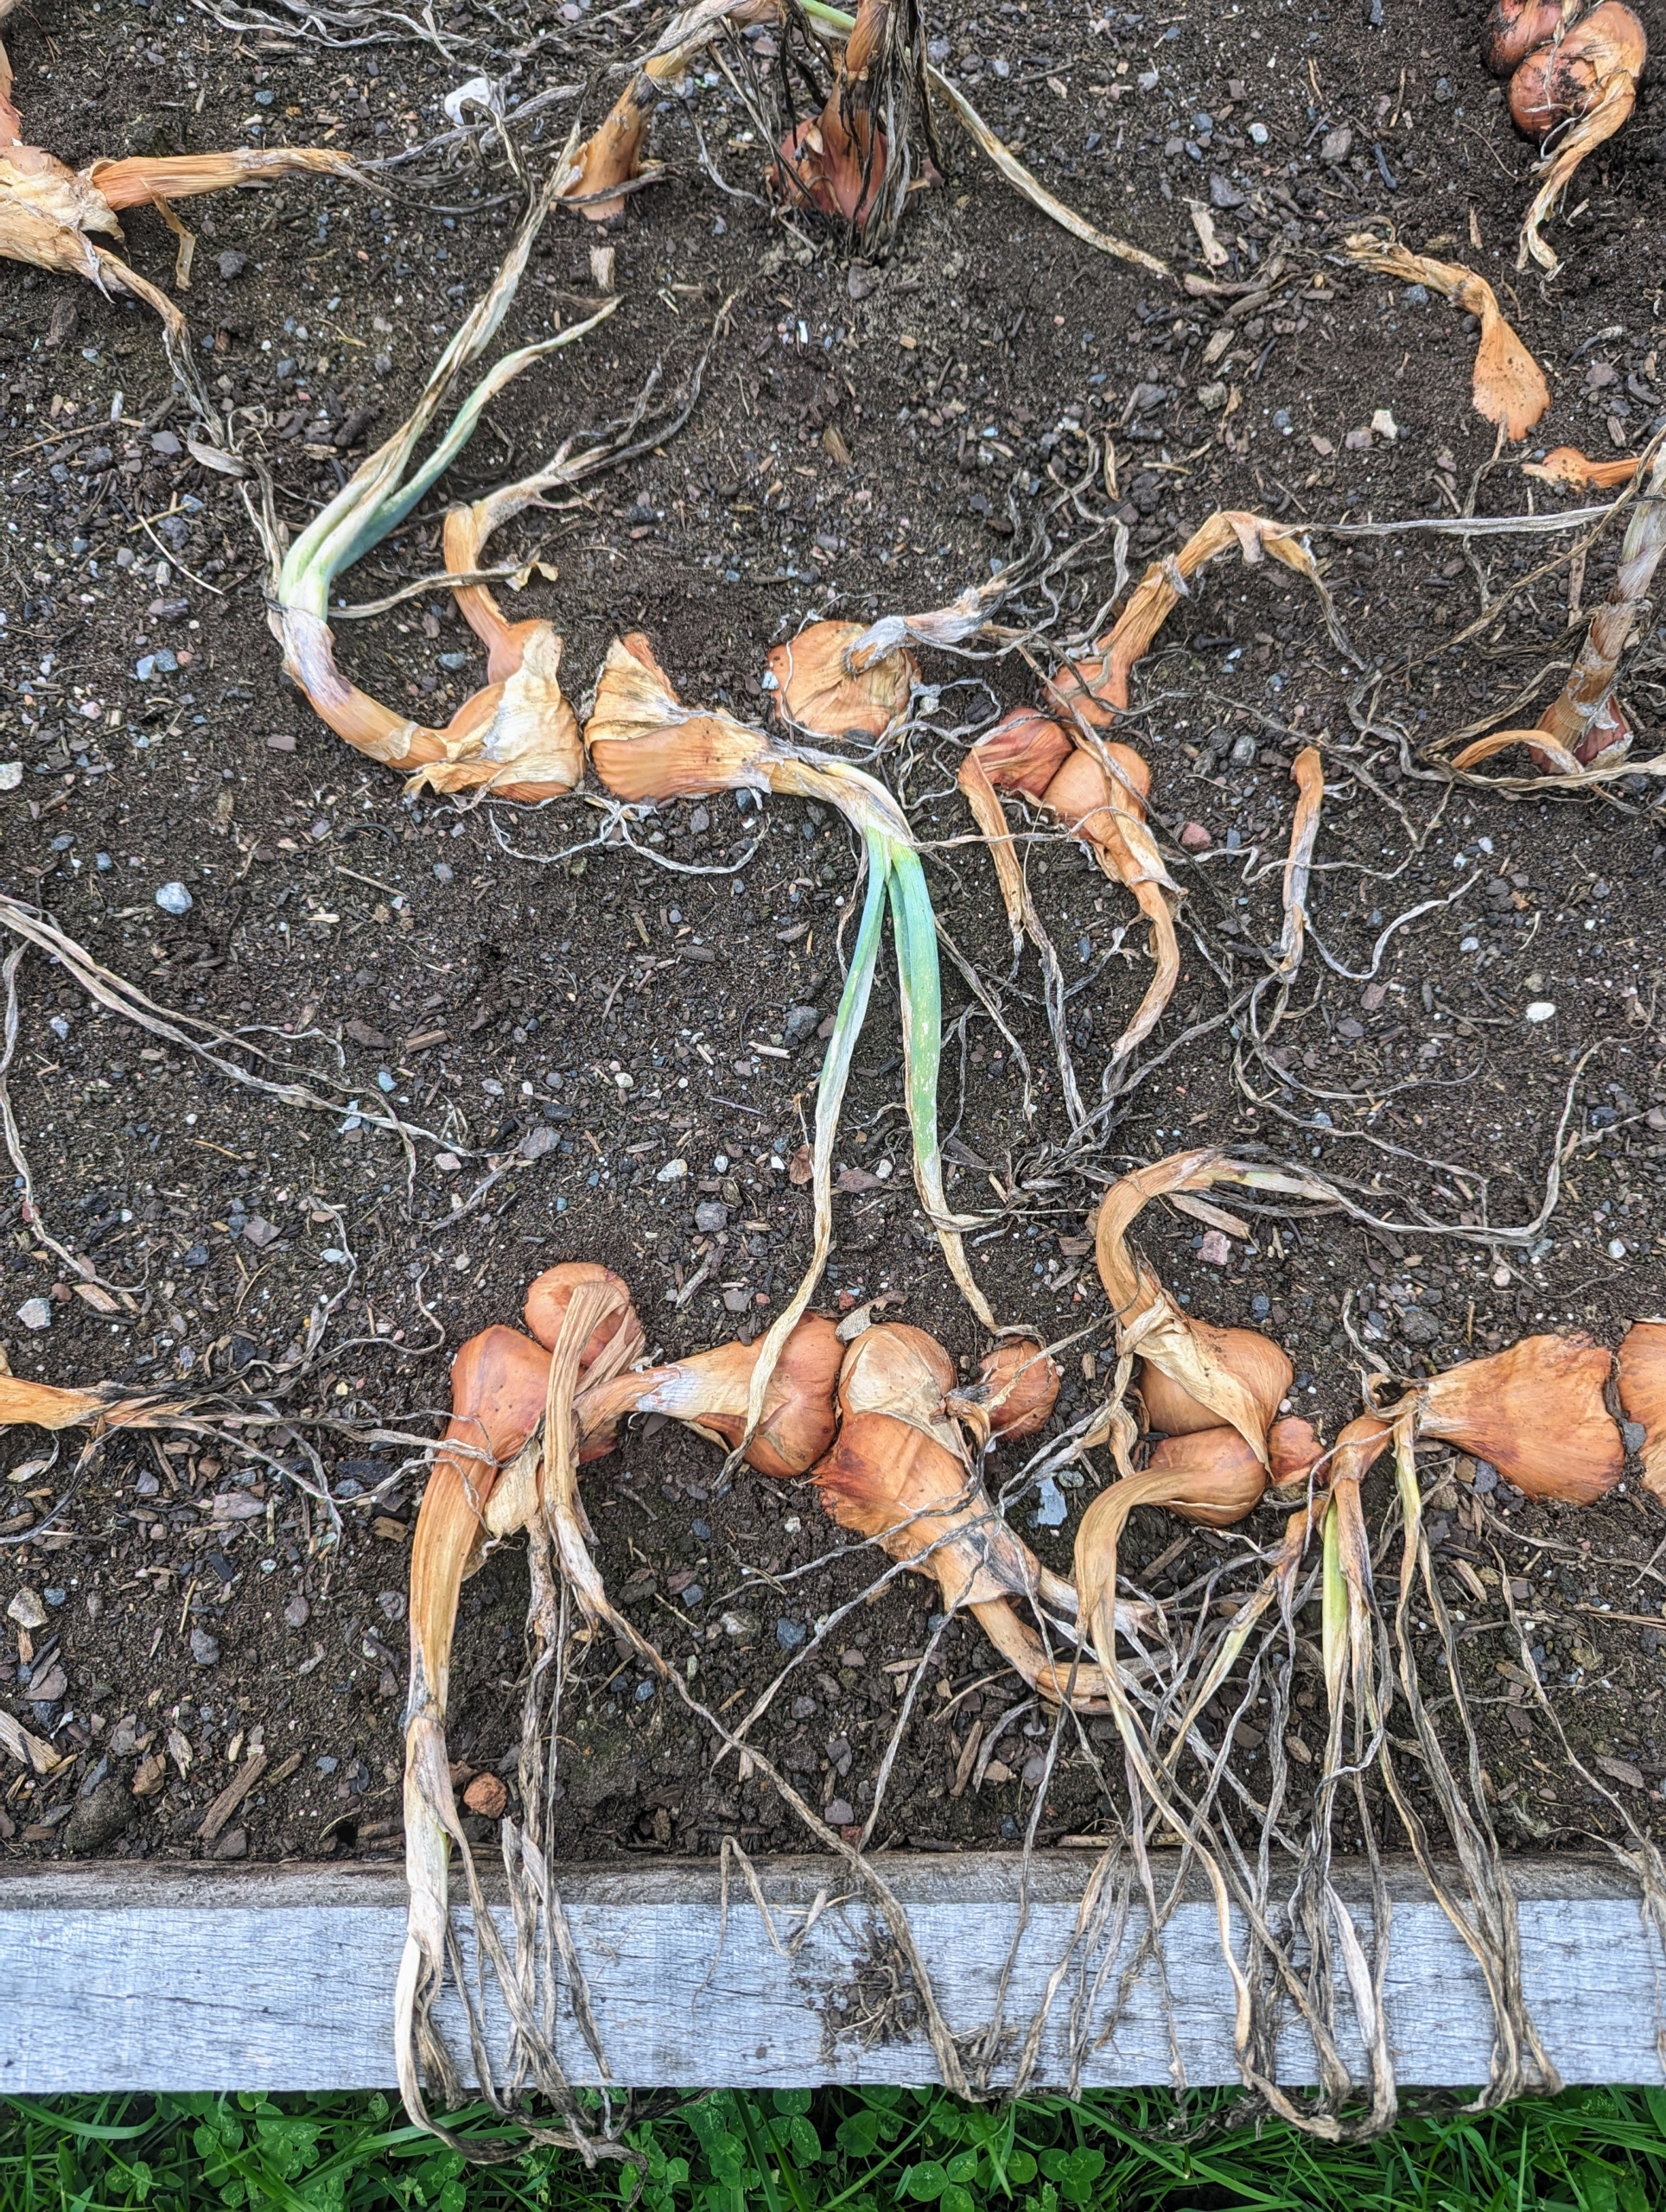
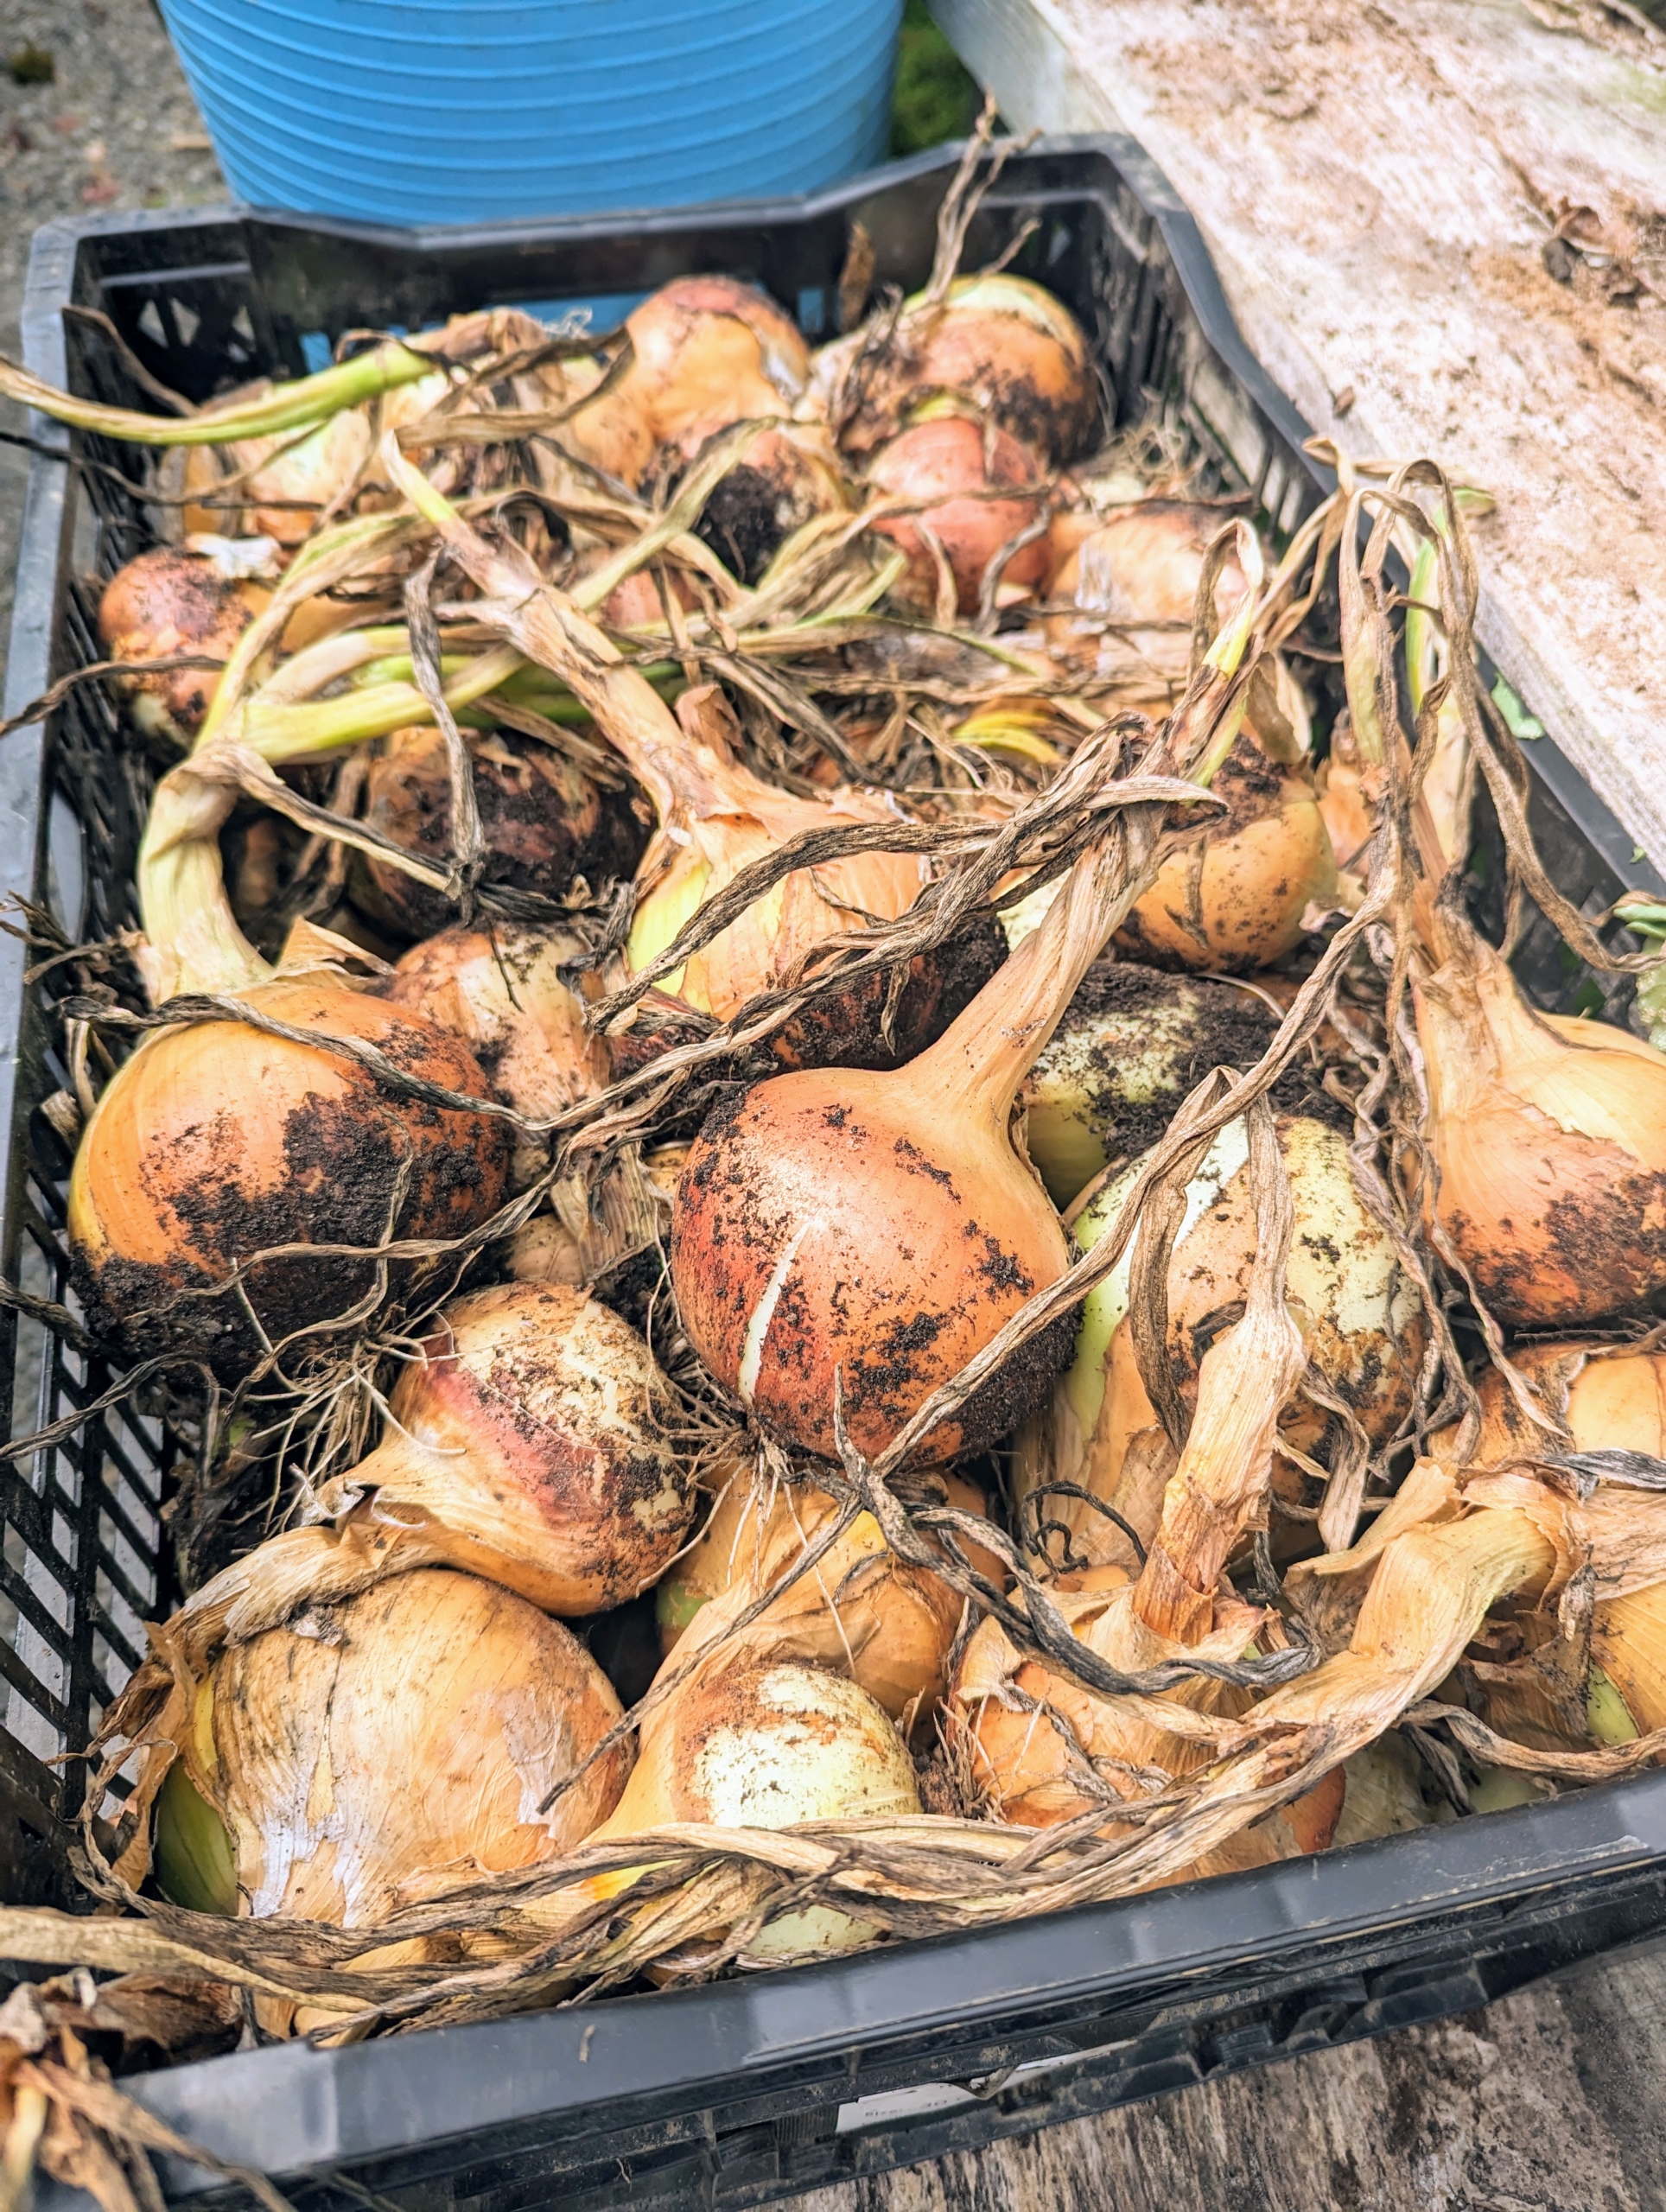
All these onions are in great condition. Ryan also keeps track of the varieties that grew well, so we know what kinds to grow again next season.
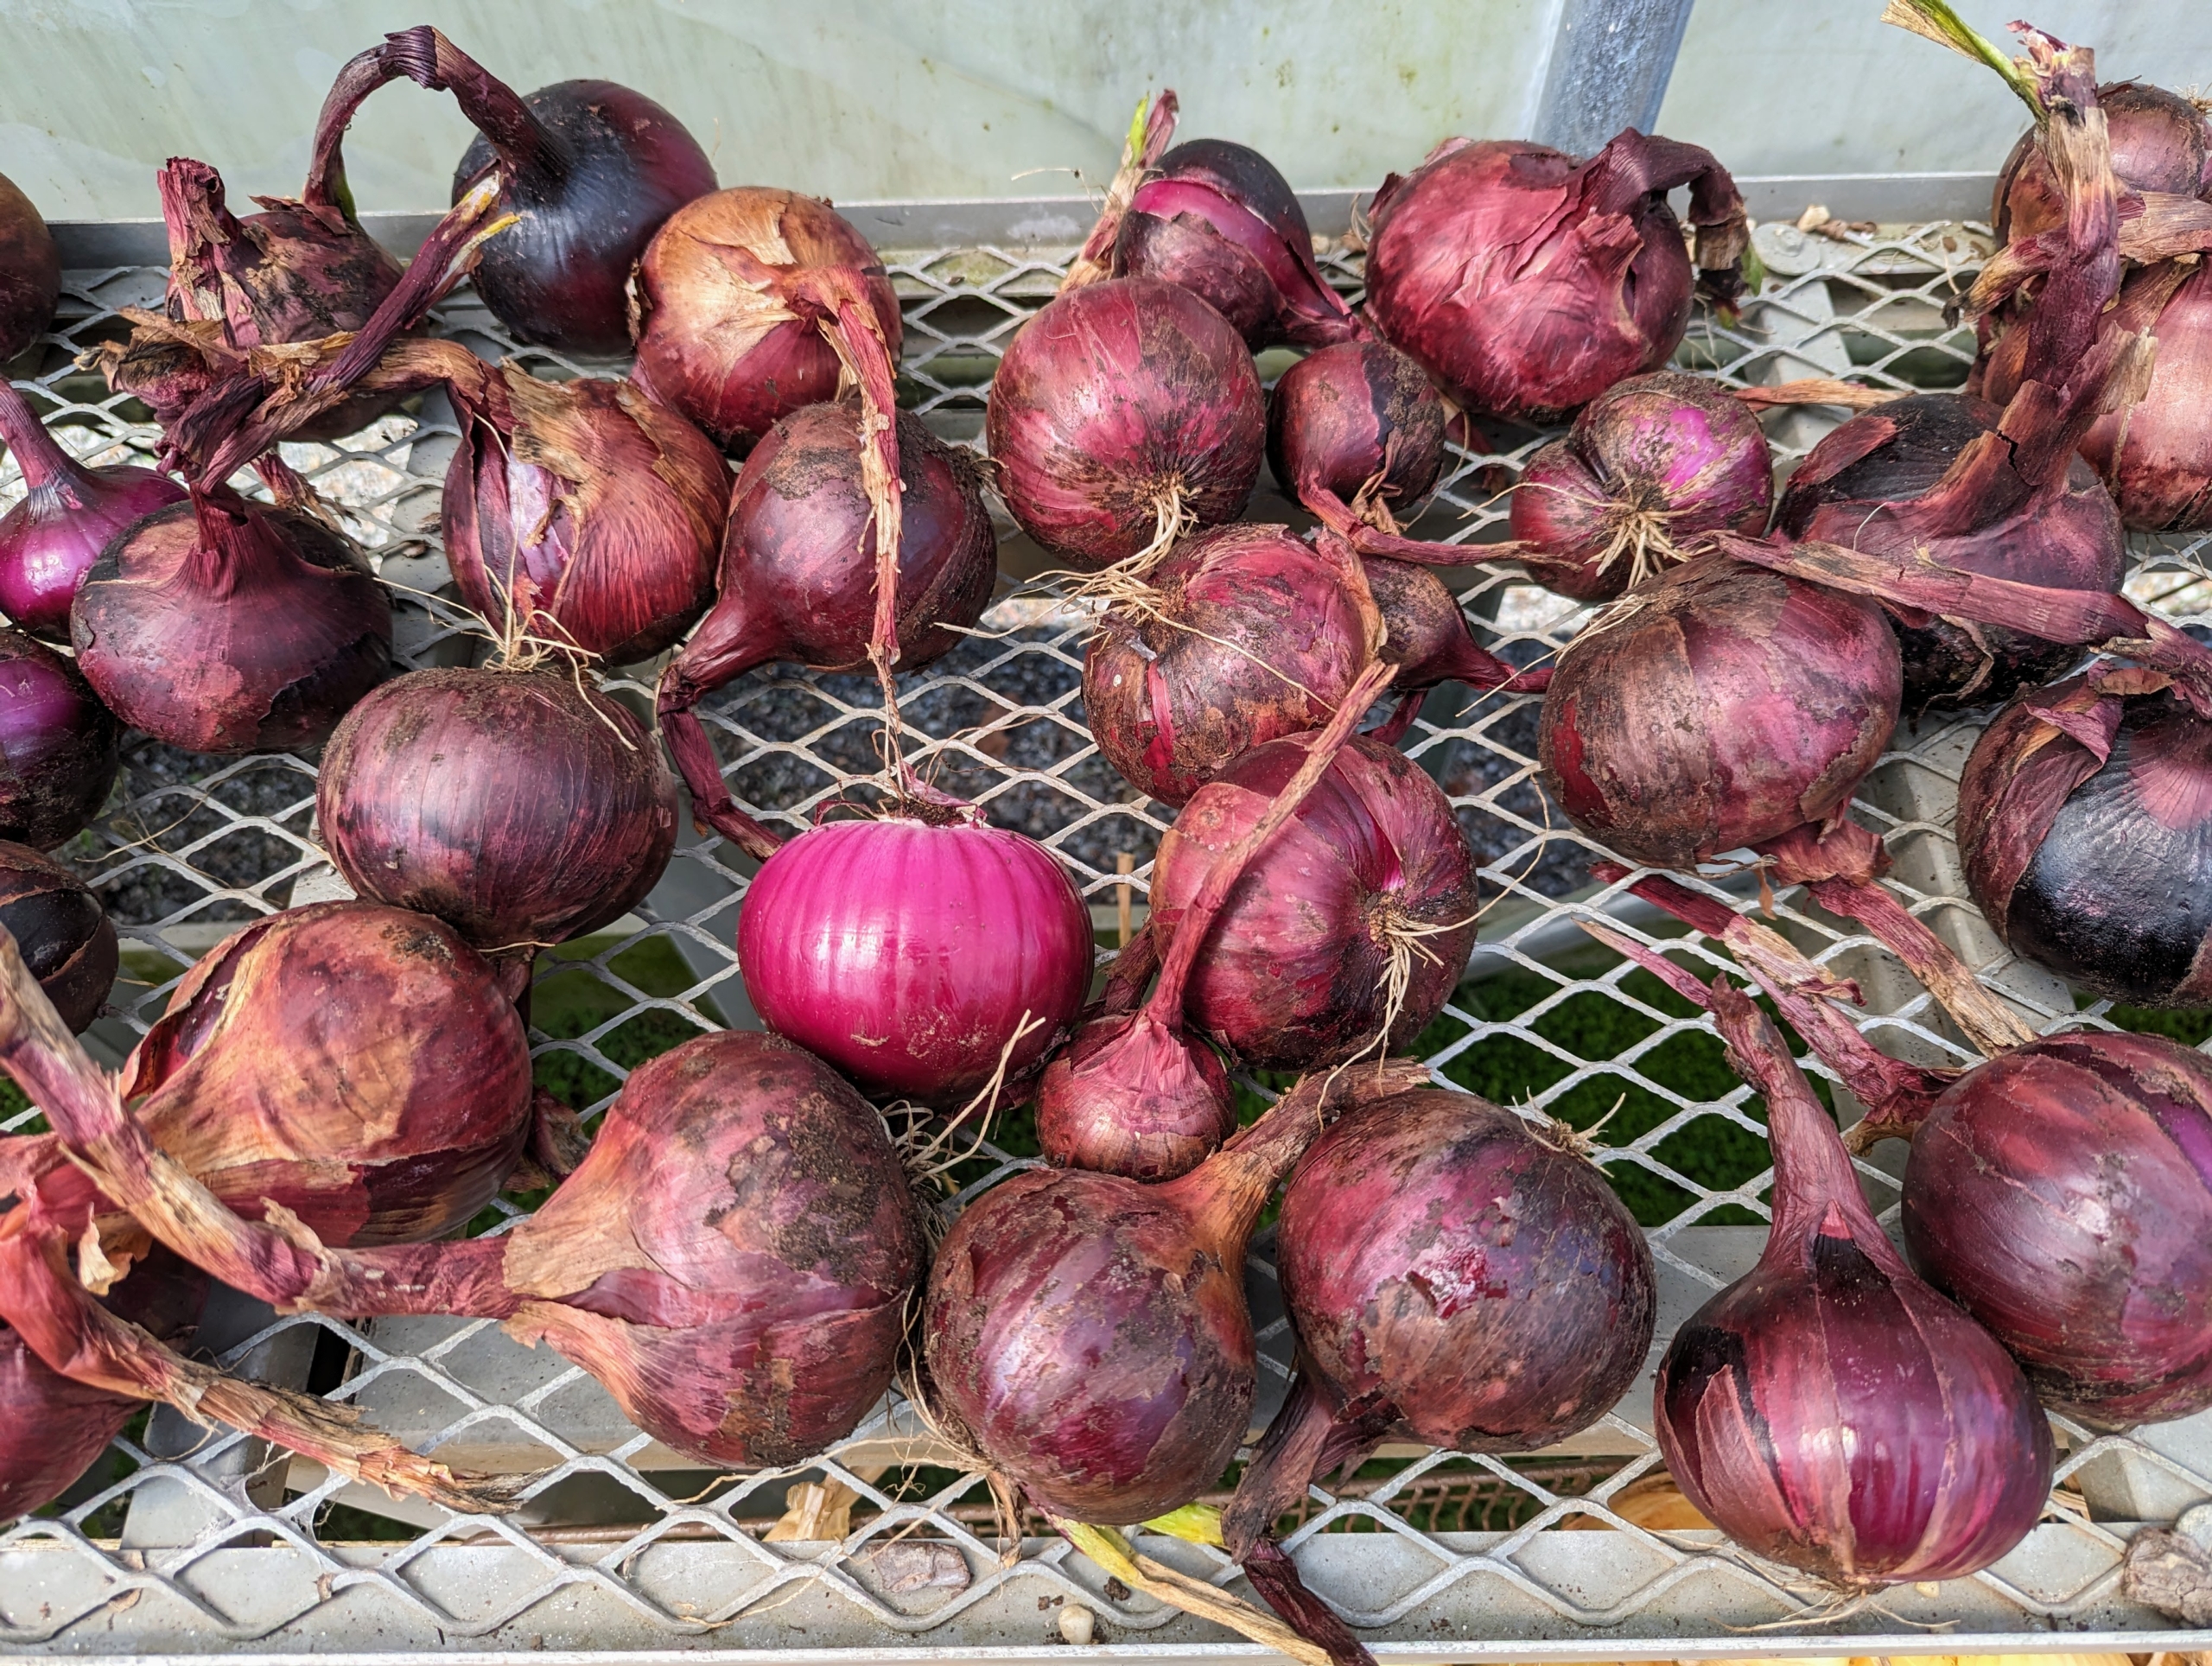
The red onions were also picked.
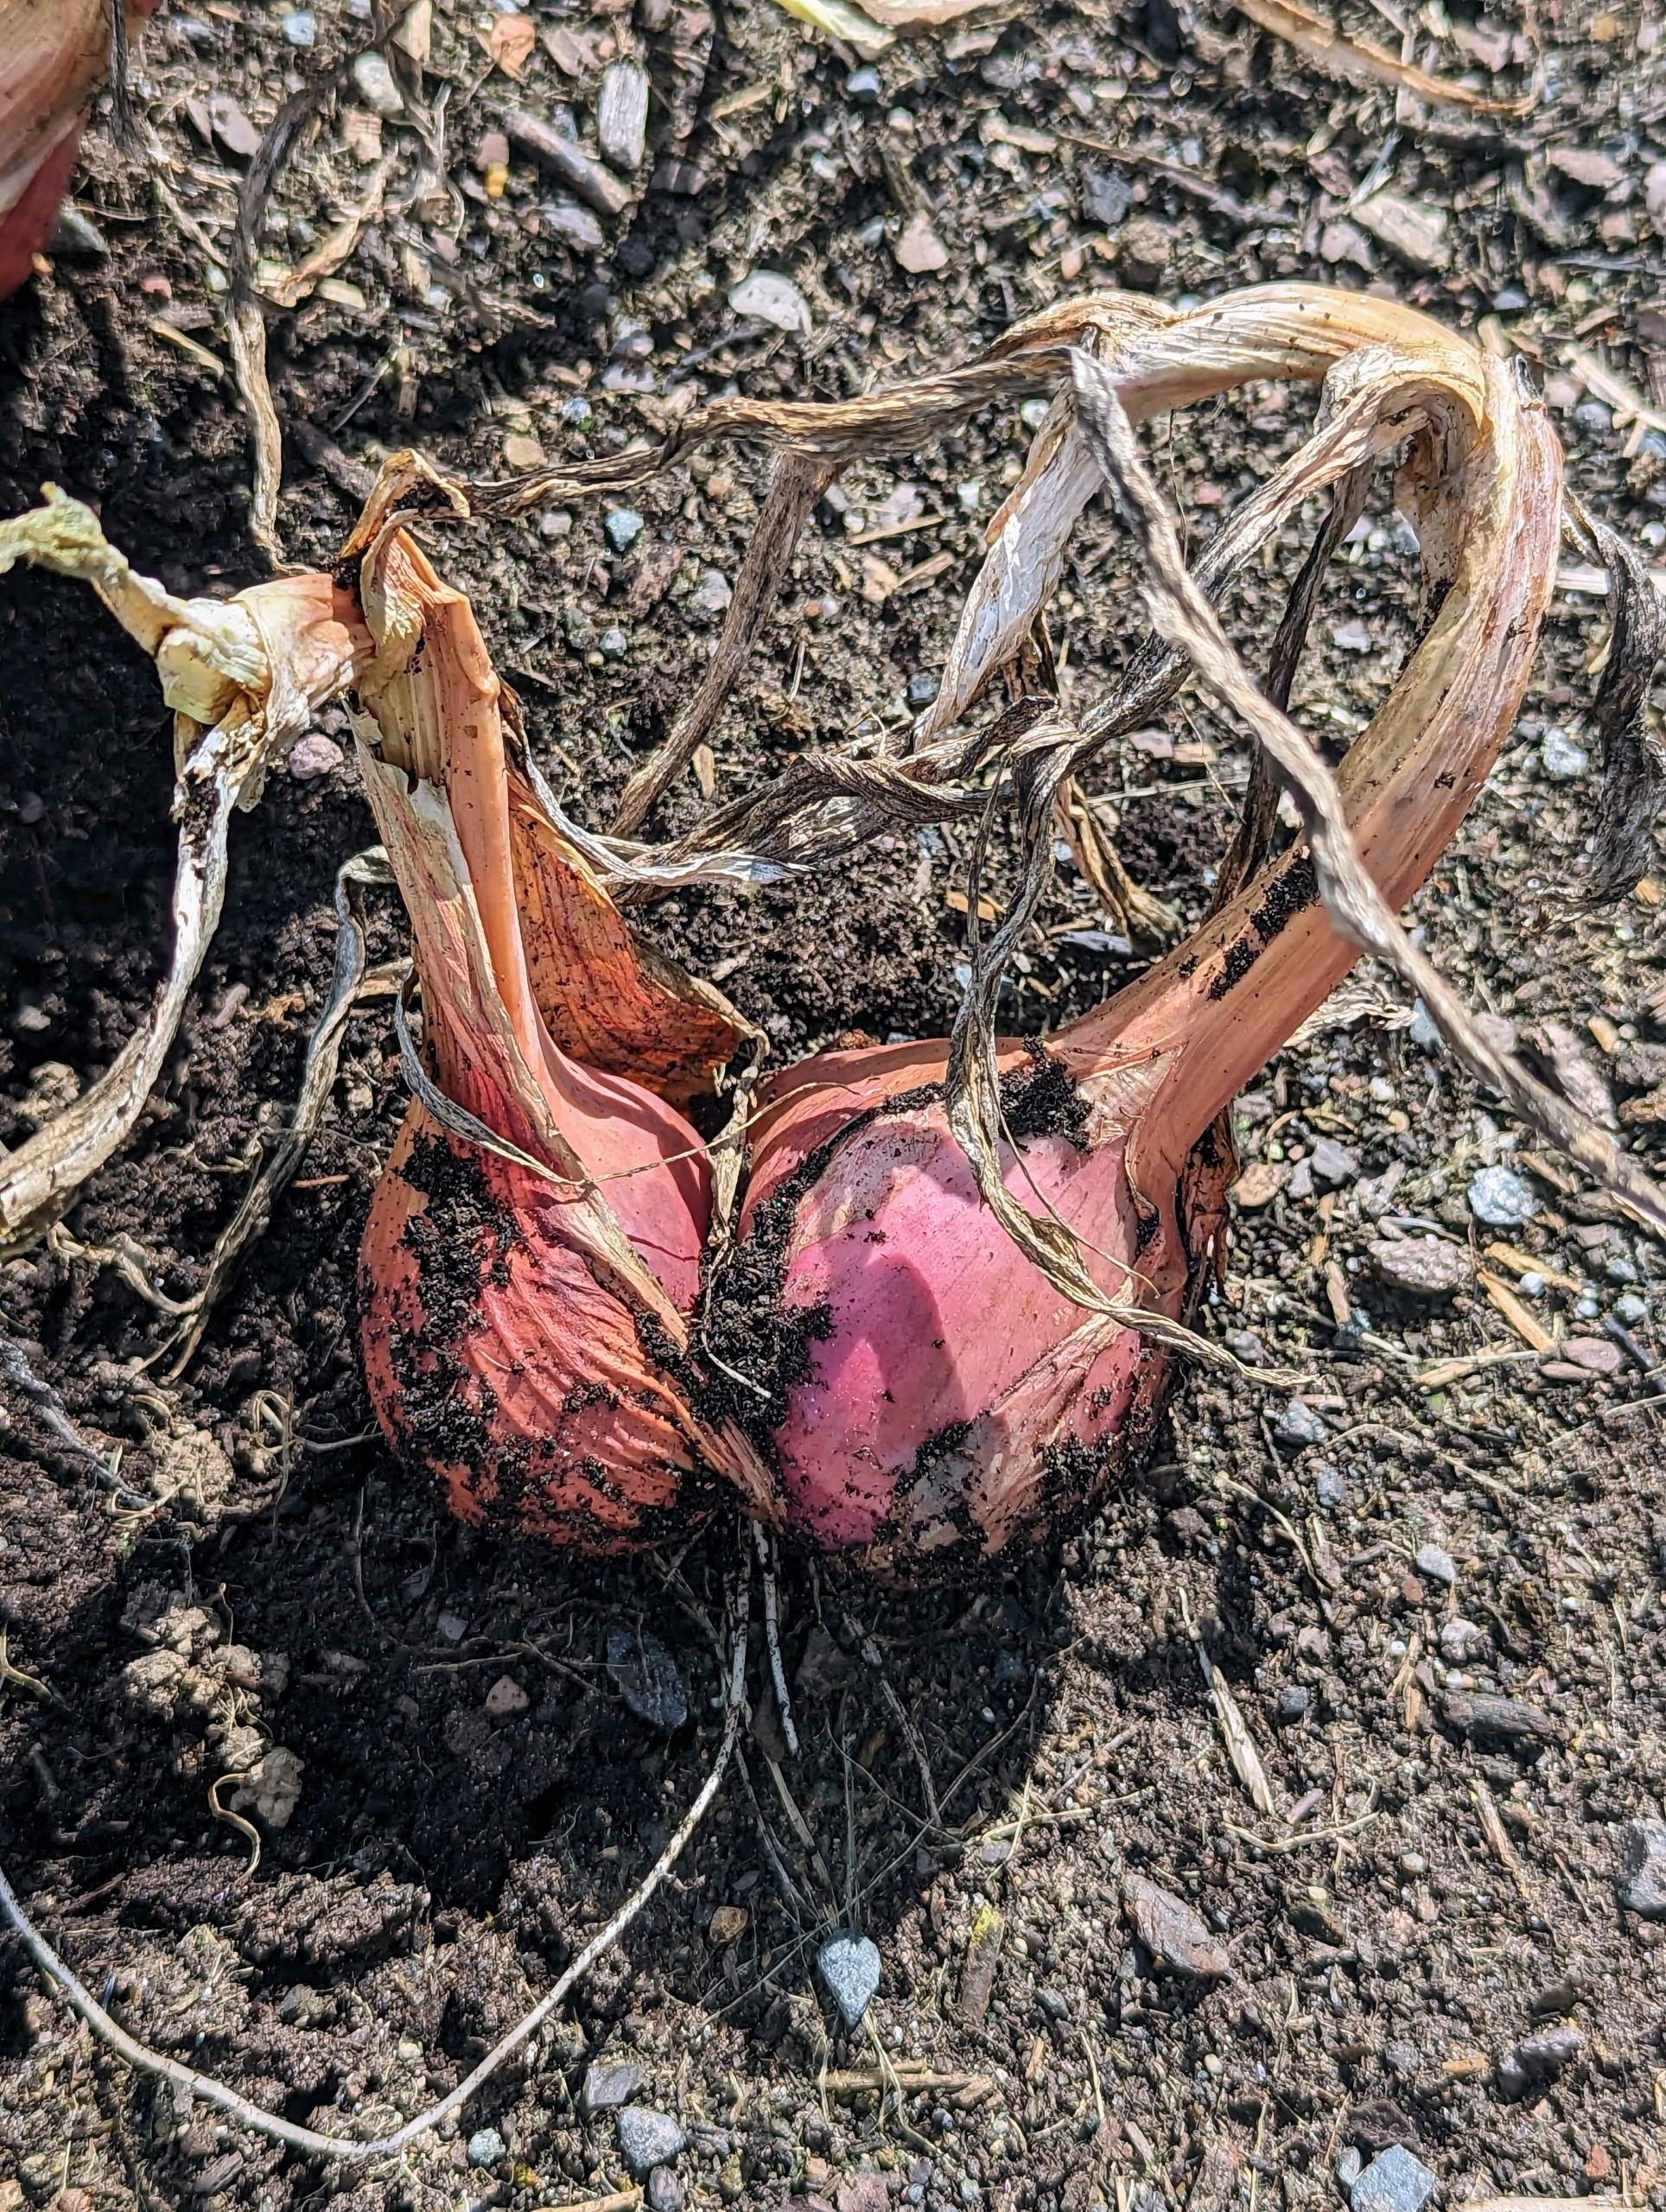
As well as the shallots. Shallots, Allium ascalonicum, are a member of the allium family, closely related to onions, garlic, and chives.
Shallots are smaller than onions, their skin is papery and coppery-pink, the flesh is pale purple and white, and the bulbs grow in clusters, similar to cloves of garlic.
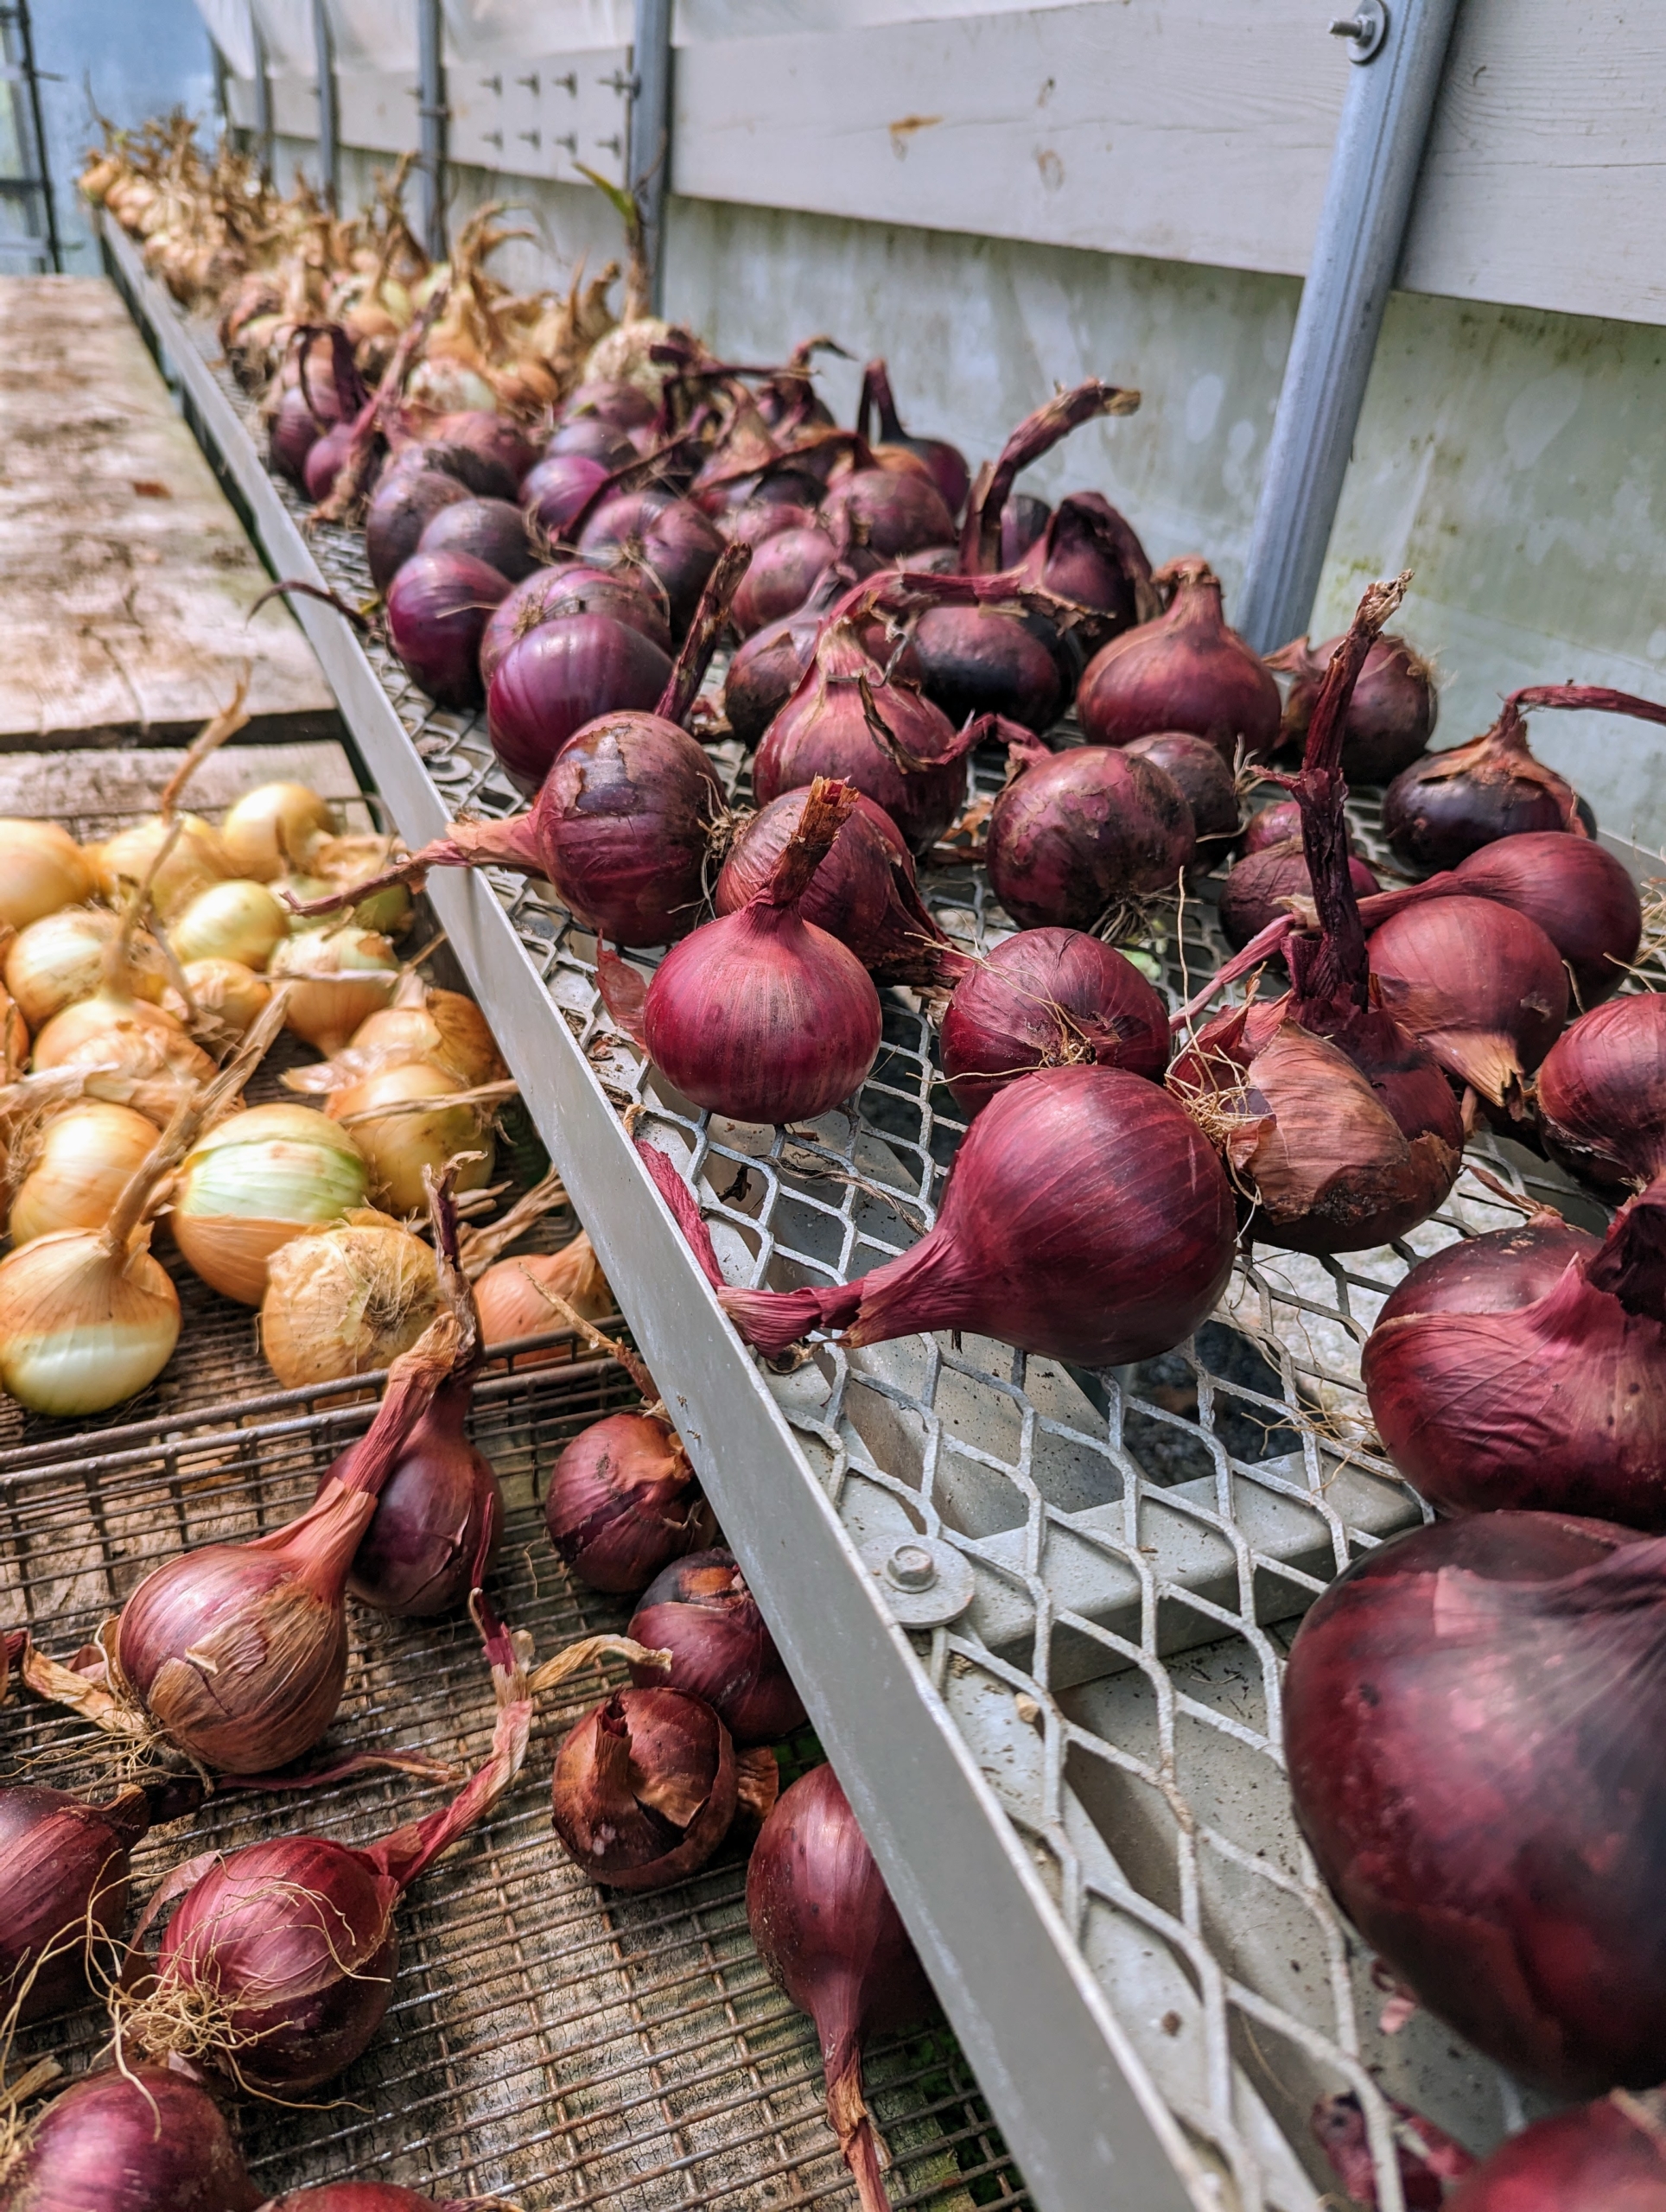
Once all the onions and shallots are picked, Ryan brings them into the hoop house closest to my main greenhouse where they can cure. Curing is a process of preparing the onions for long-term storage. During the curing stage, the outer layers of the onions dry out, tightening around the bulb and creating a protective layer that keeps the onion firm and fresh for a longer time.
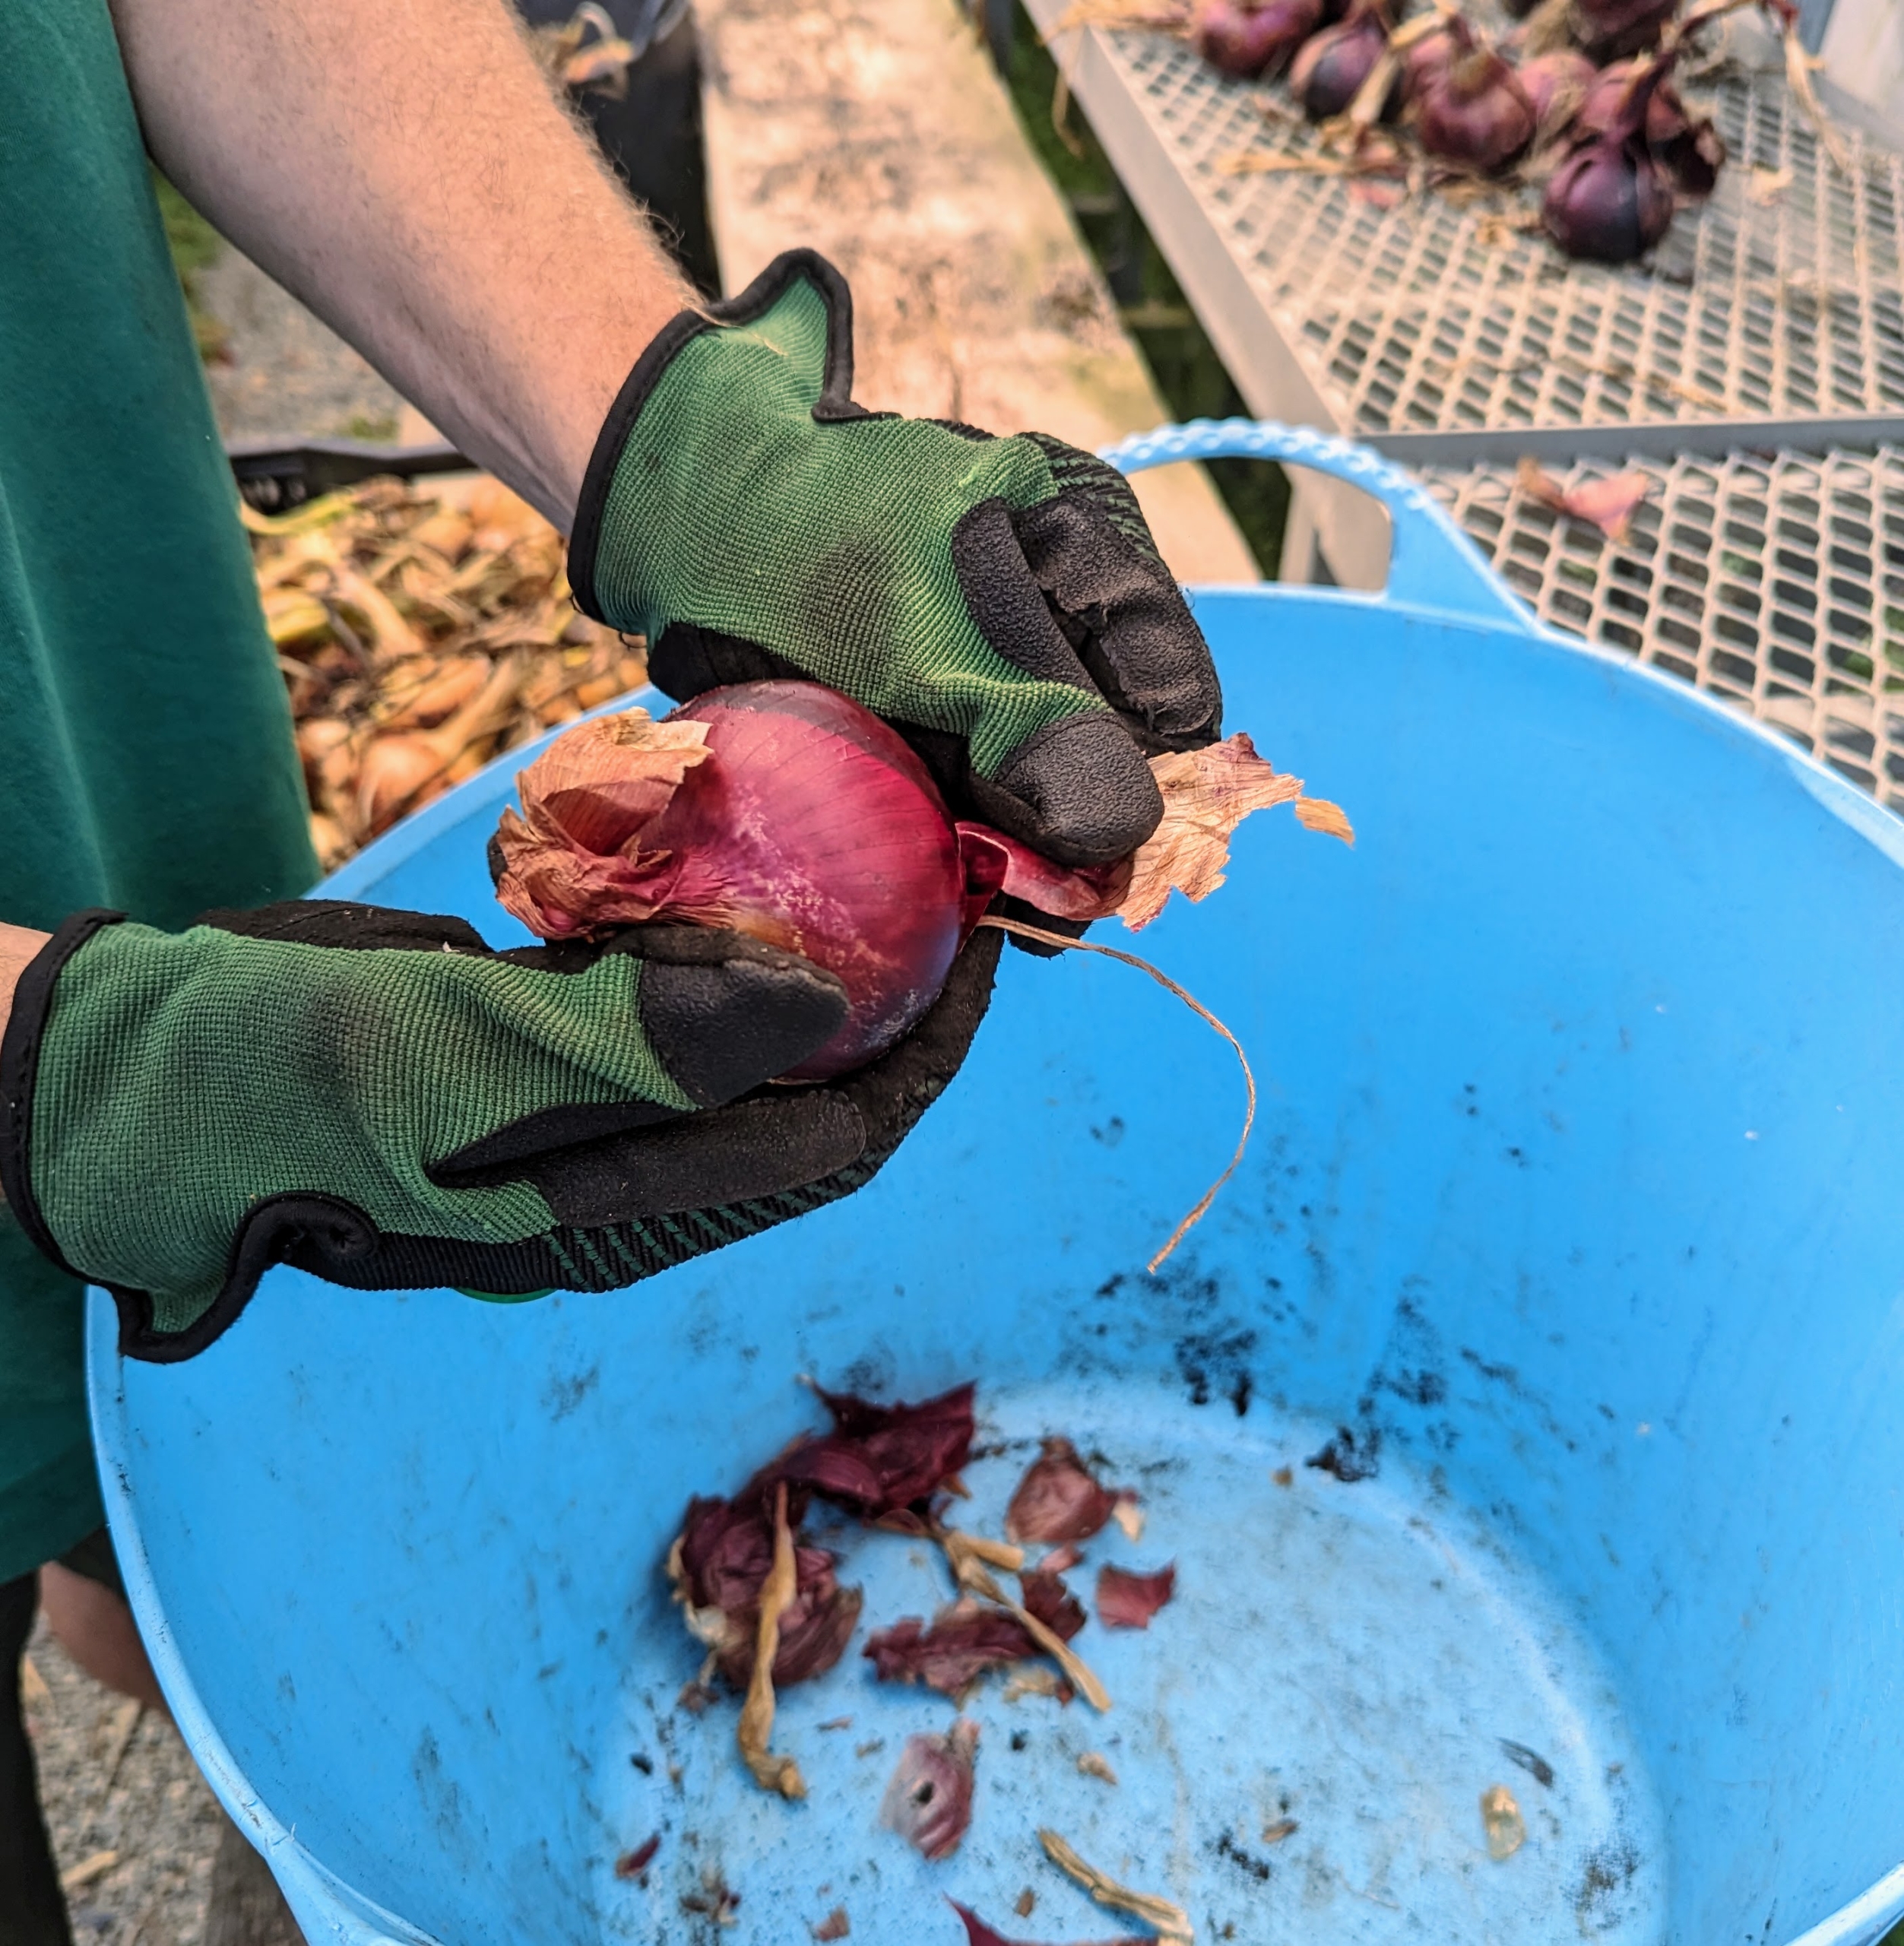
Some of the red onions had already been curing for a couple of weeks. Ryan removes the top layer of skin from the onion and clips the tops and roots.
The shiny skin should remain. He also lightly brushes off any loose soil before placing in a single layer on the shelf where they can continue to cure.
The onions need plenty of space for air to circulate, and can even be turned occasionally to make sure they dry evenly. Our greenhouse shelves are metal and have air circulating through, so this environment is Ideal. It is also warm in this hoop house – 75 to 80 degrees Fahrenheit, dry, and out of the sun.
Ryan is careful when handling the onions, so they don’t bruise.
When cured and stored properly, a good storage onion will retain its eating quality for 10 to 12 months. I can’t wait to try them. How did your onions do this year?