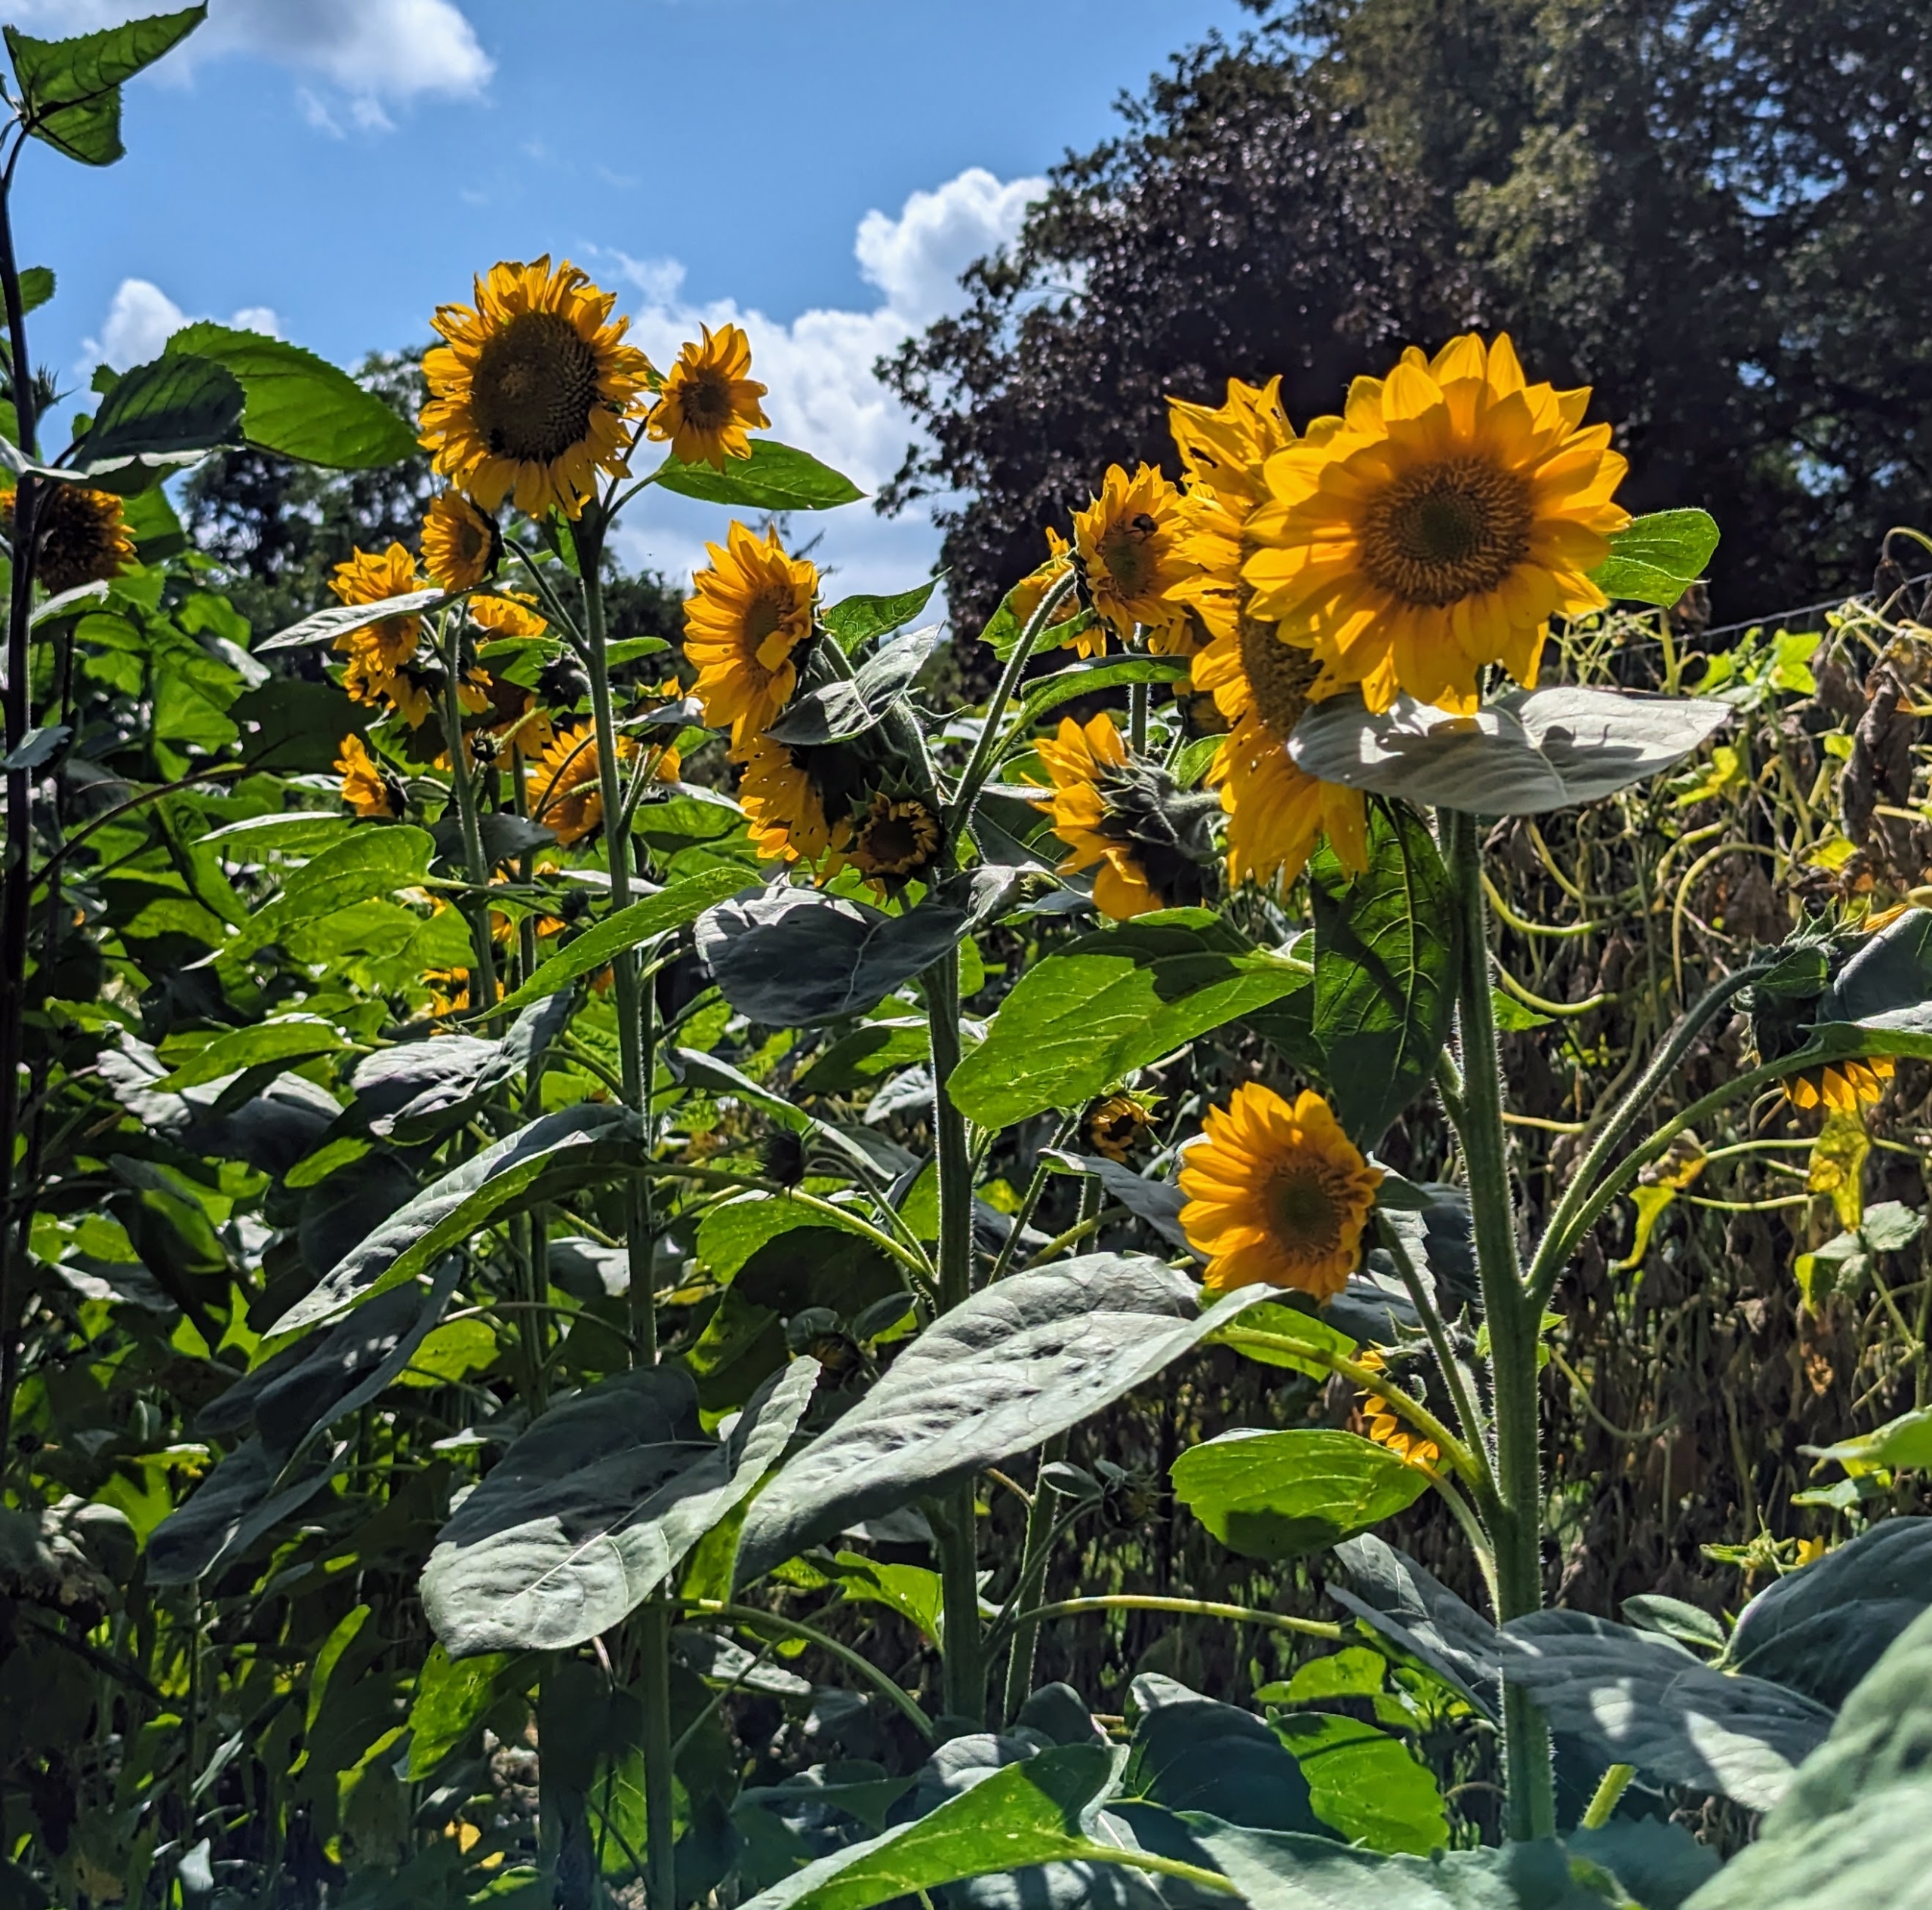
Here at the farm, the sunflowers are in bloom with their big daisy-like faces and brightly colored petals - it's always a very welcomed sight.
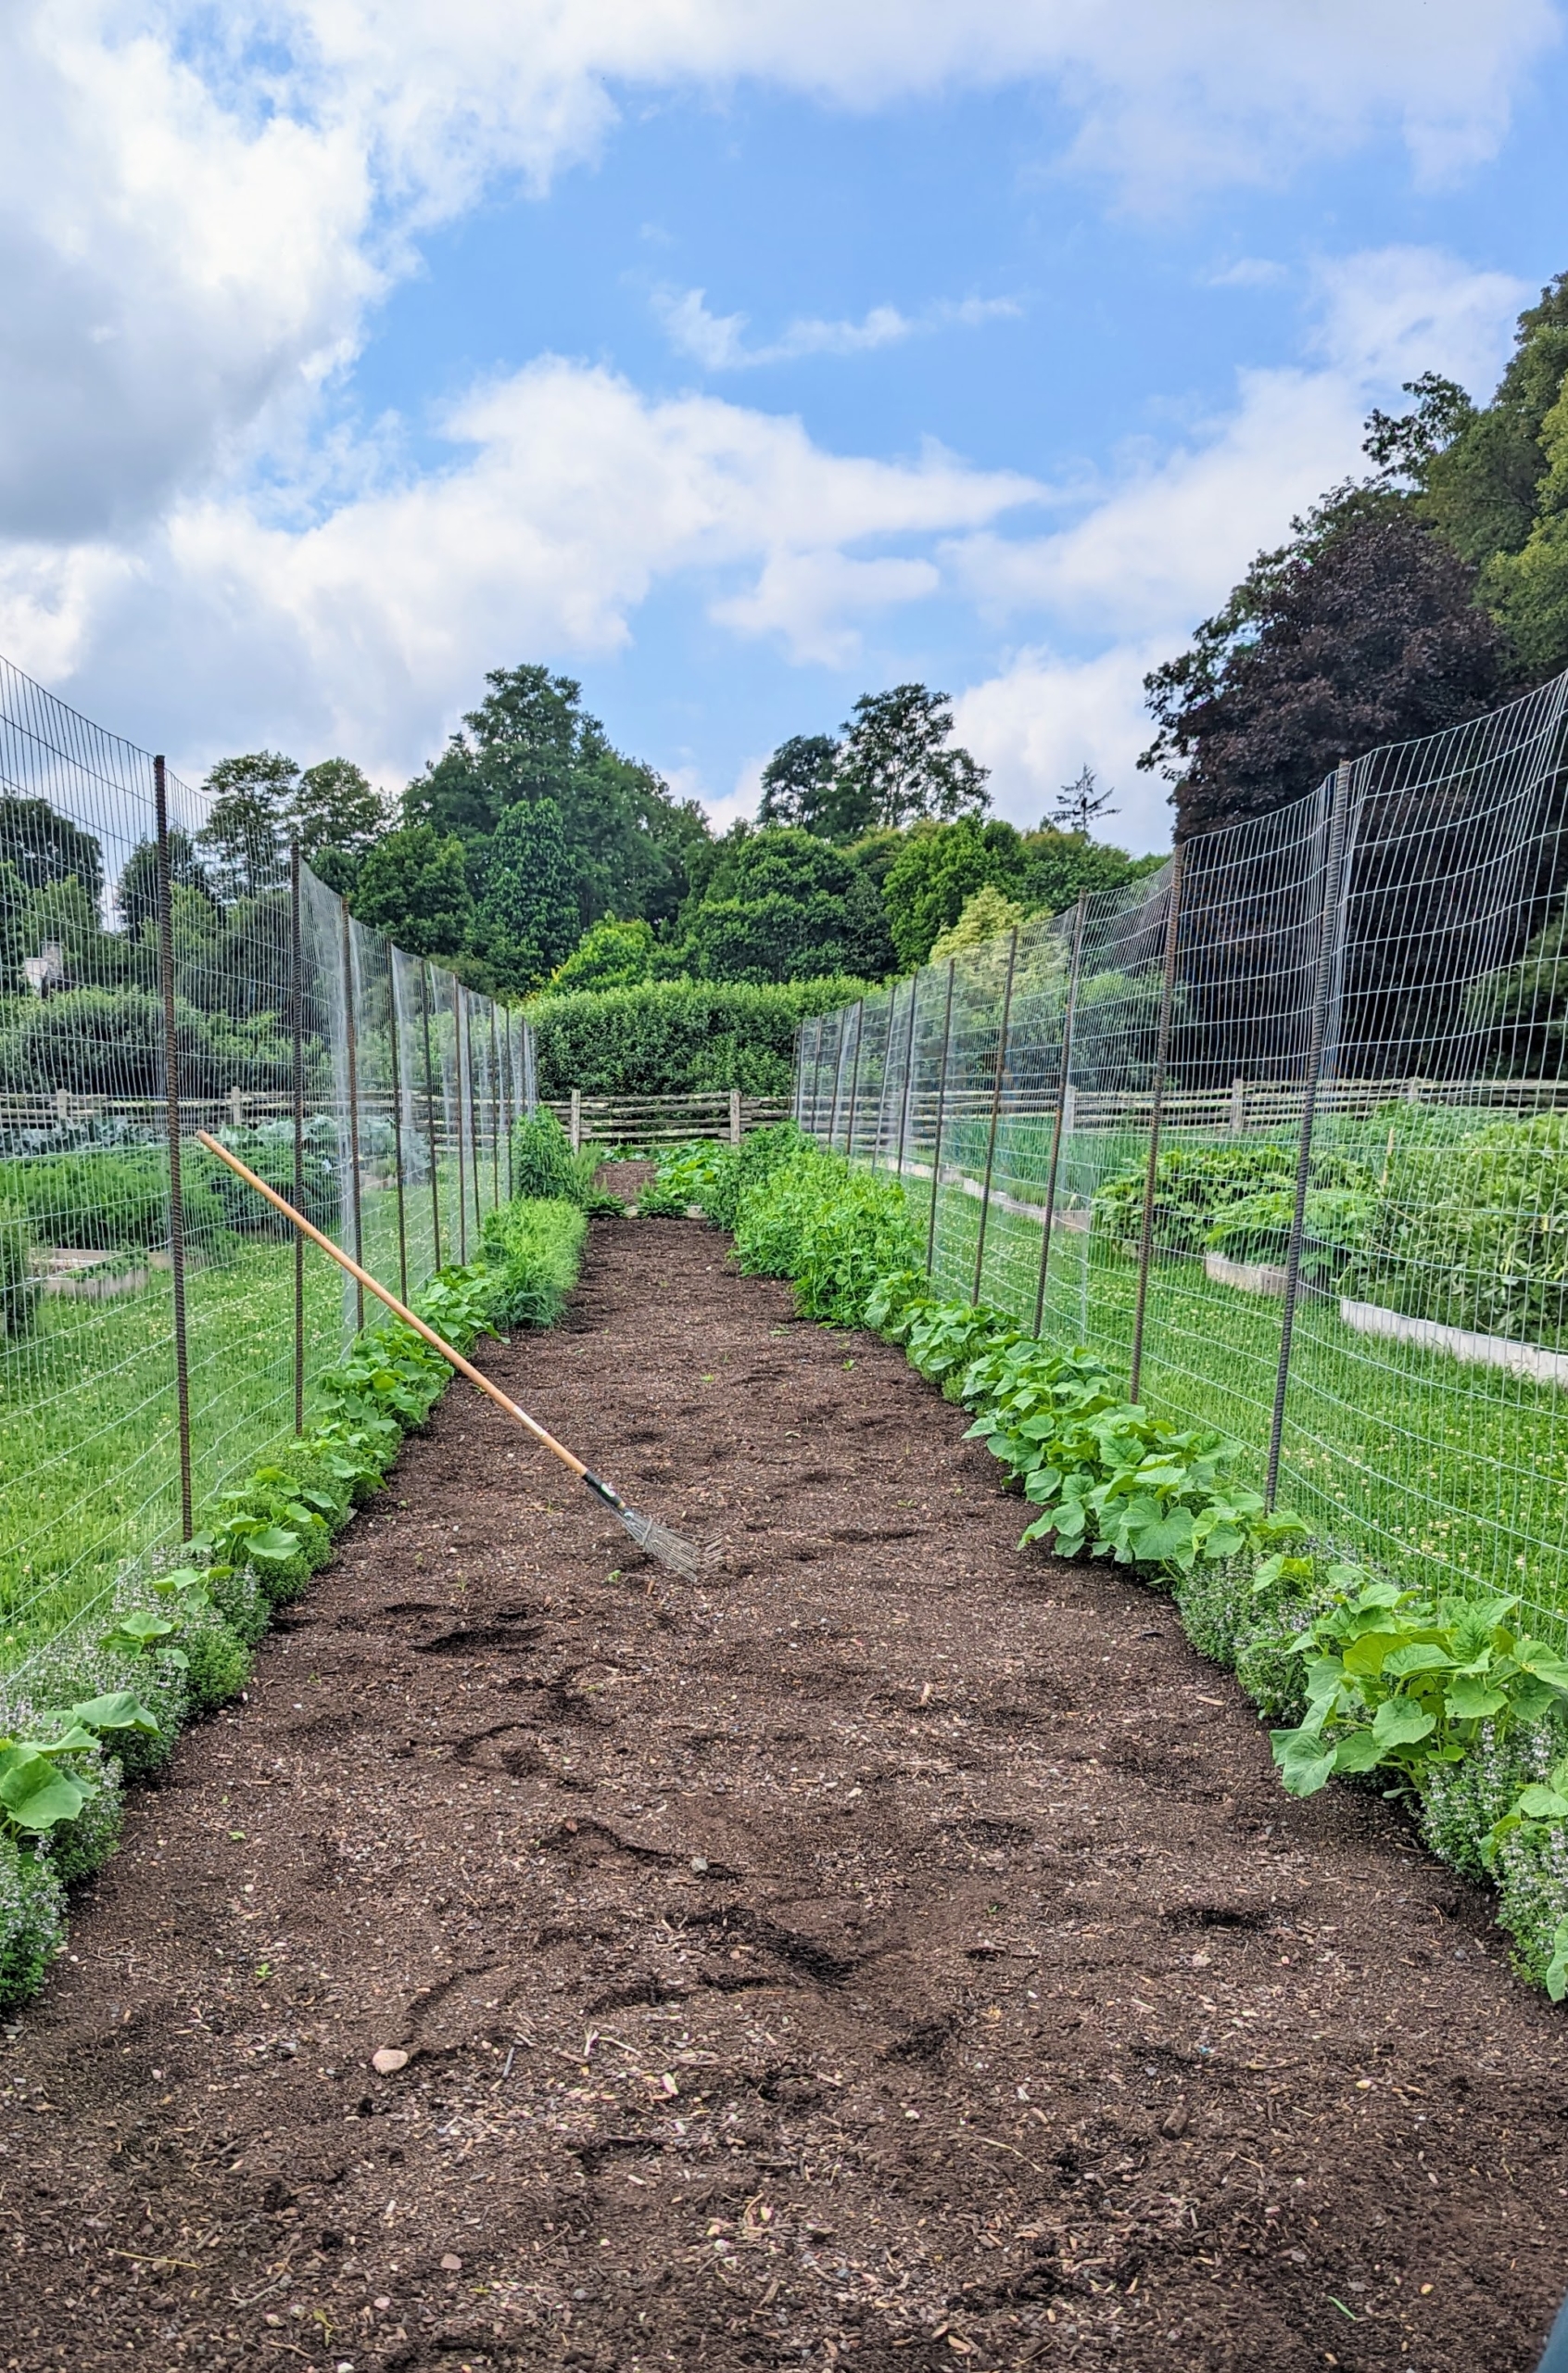
If you recall, my head gardener, Ryan McCallister, planted our sunflowers, Helianthus, in late June. They were planted in the center bed of my new vegetable garden. Sunflowers are the popular and cheerful annuals whose giant, round flower heads look like the sun. They come in vibrant yellow, but they're also seen in various shades of orange, red, bronze, and even white.
Enjoy these photos.
In late June, when we were still planting our first crops in the new vegetable garden, Ryan and I decided it would be nice to plant the sunflowers in this long center bed. We knew they would grow excellently here, but also provide a lovely selection of giant flowers for all to see.
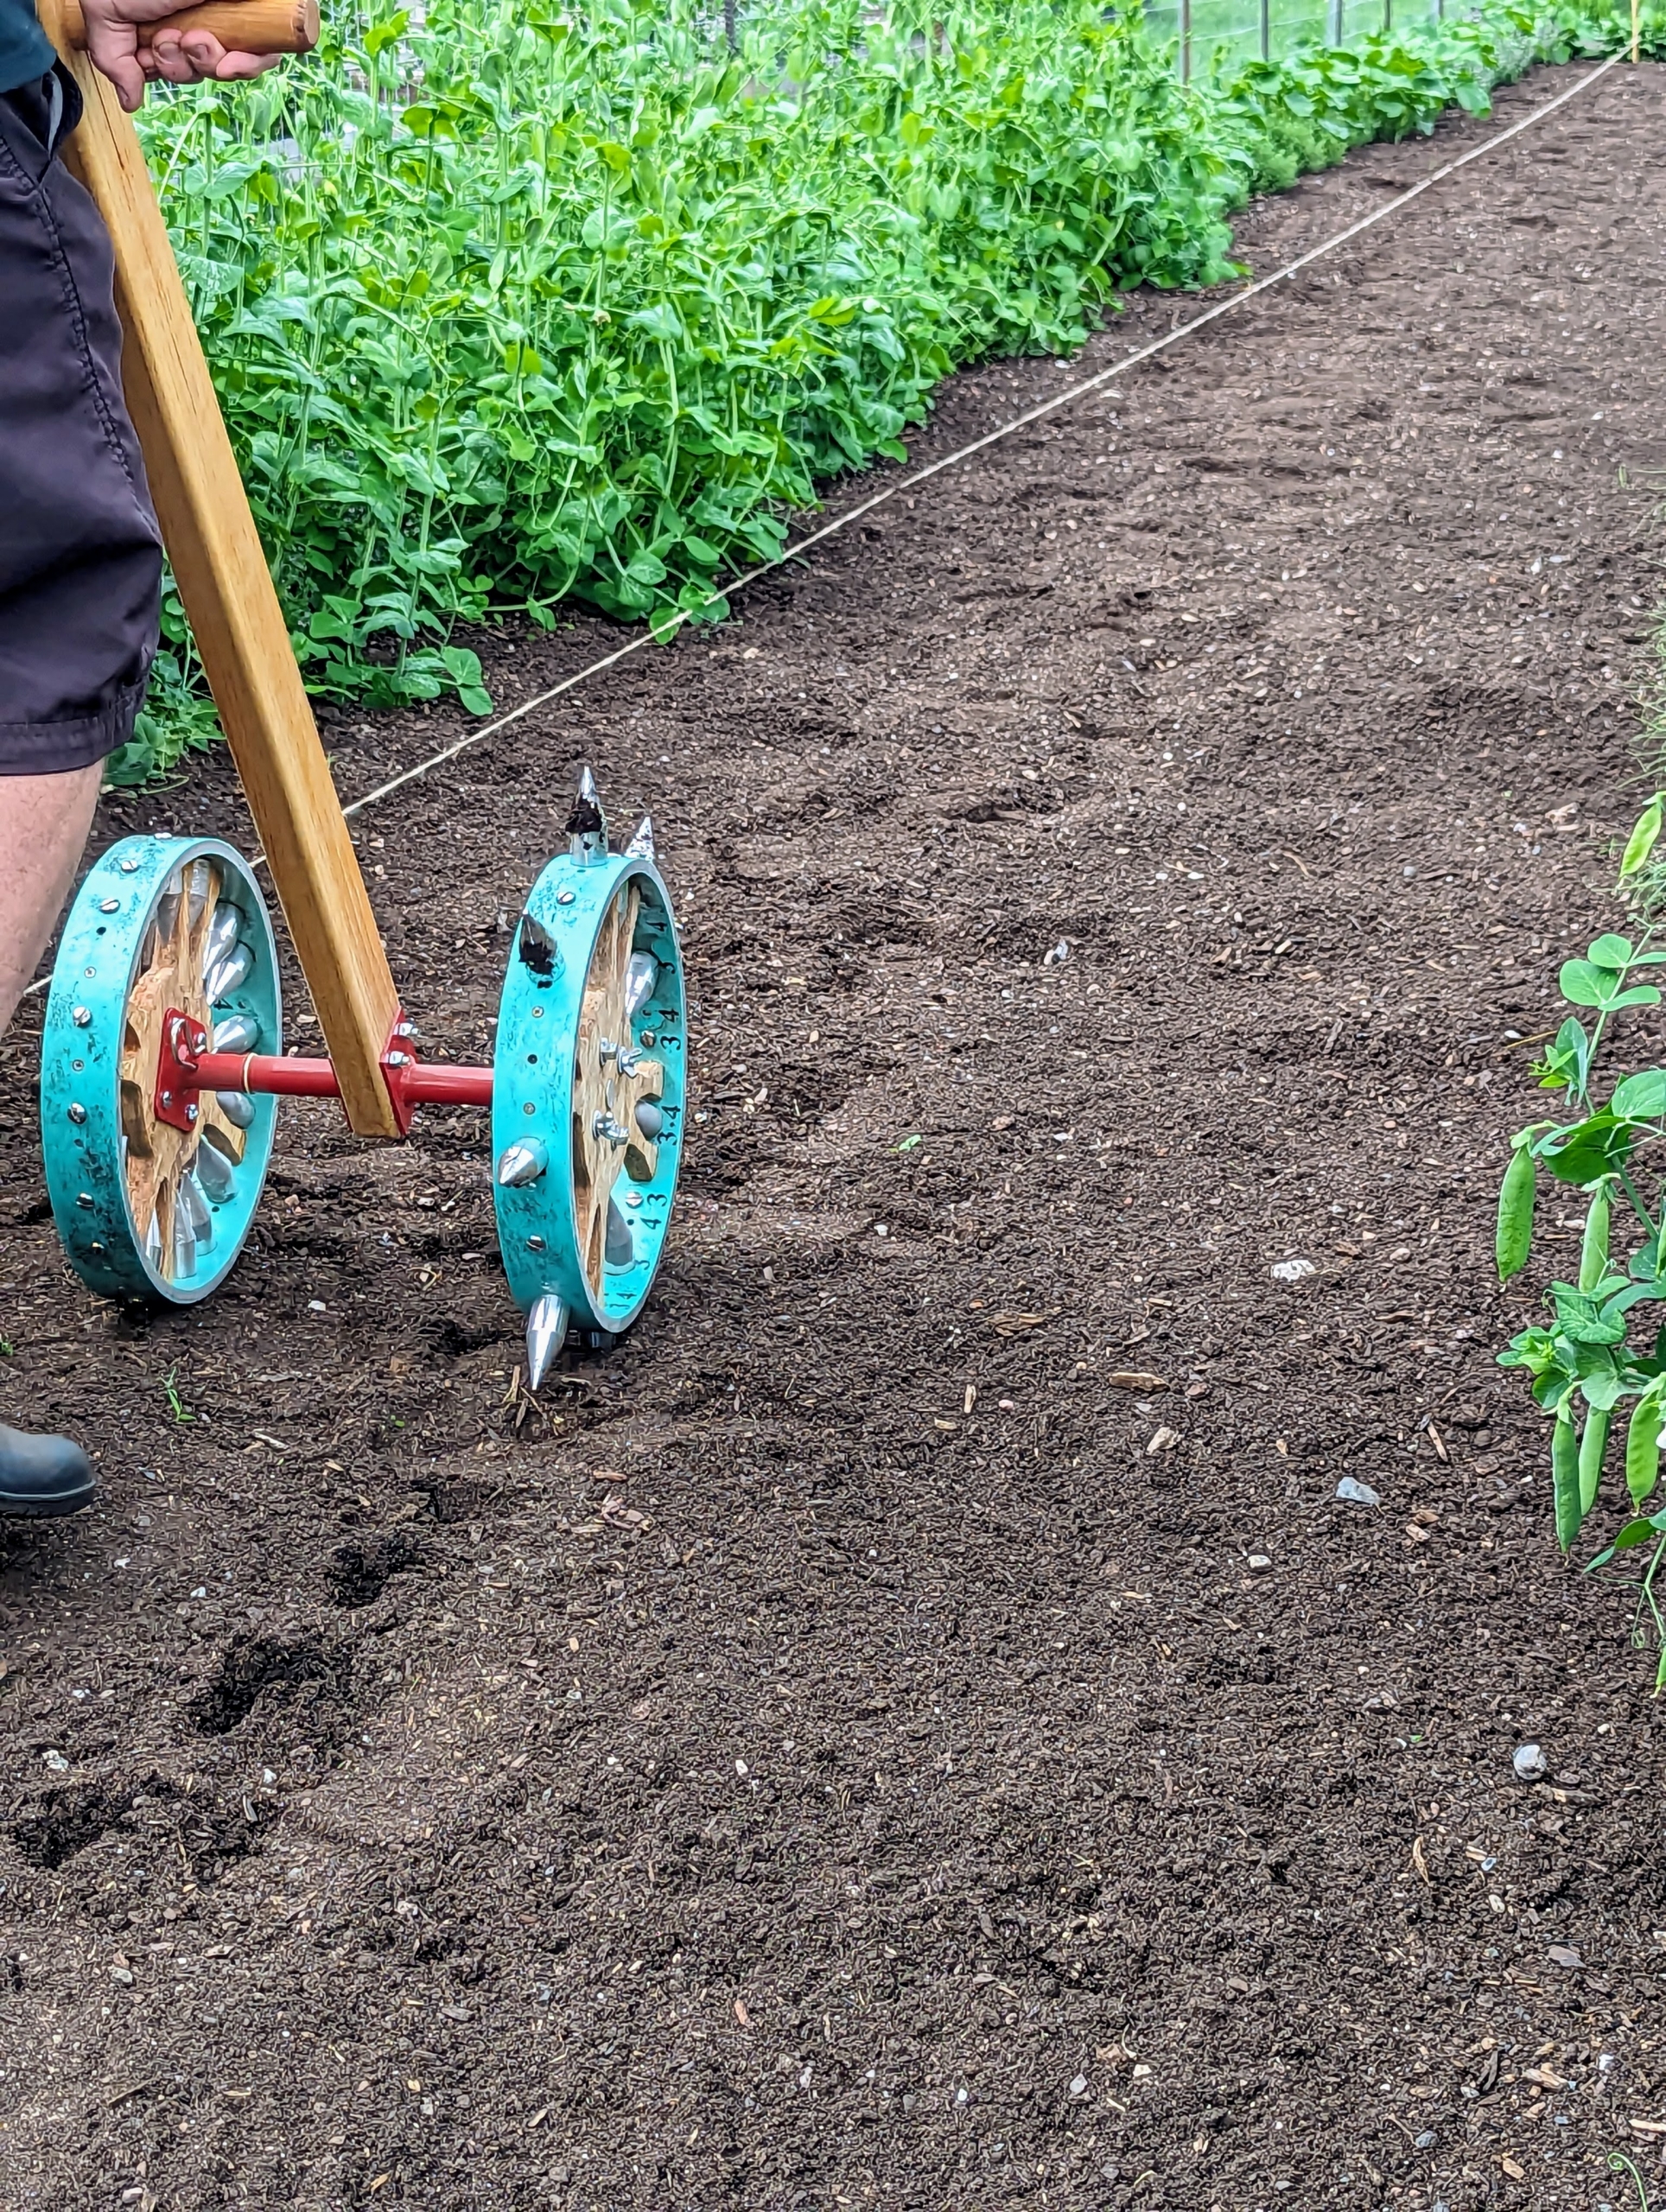
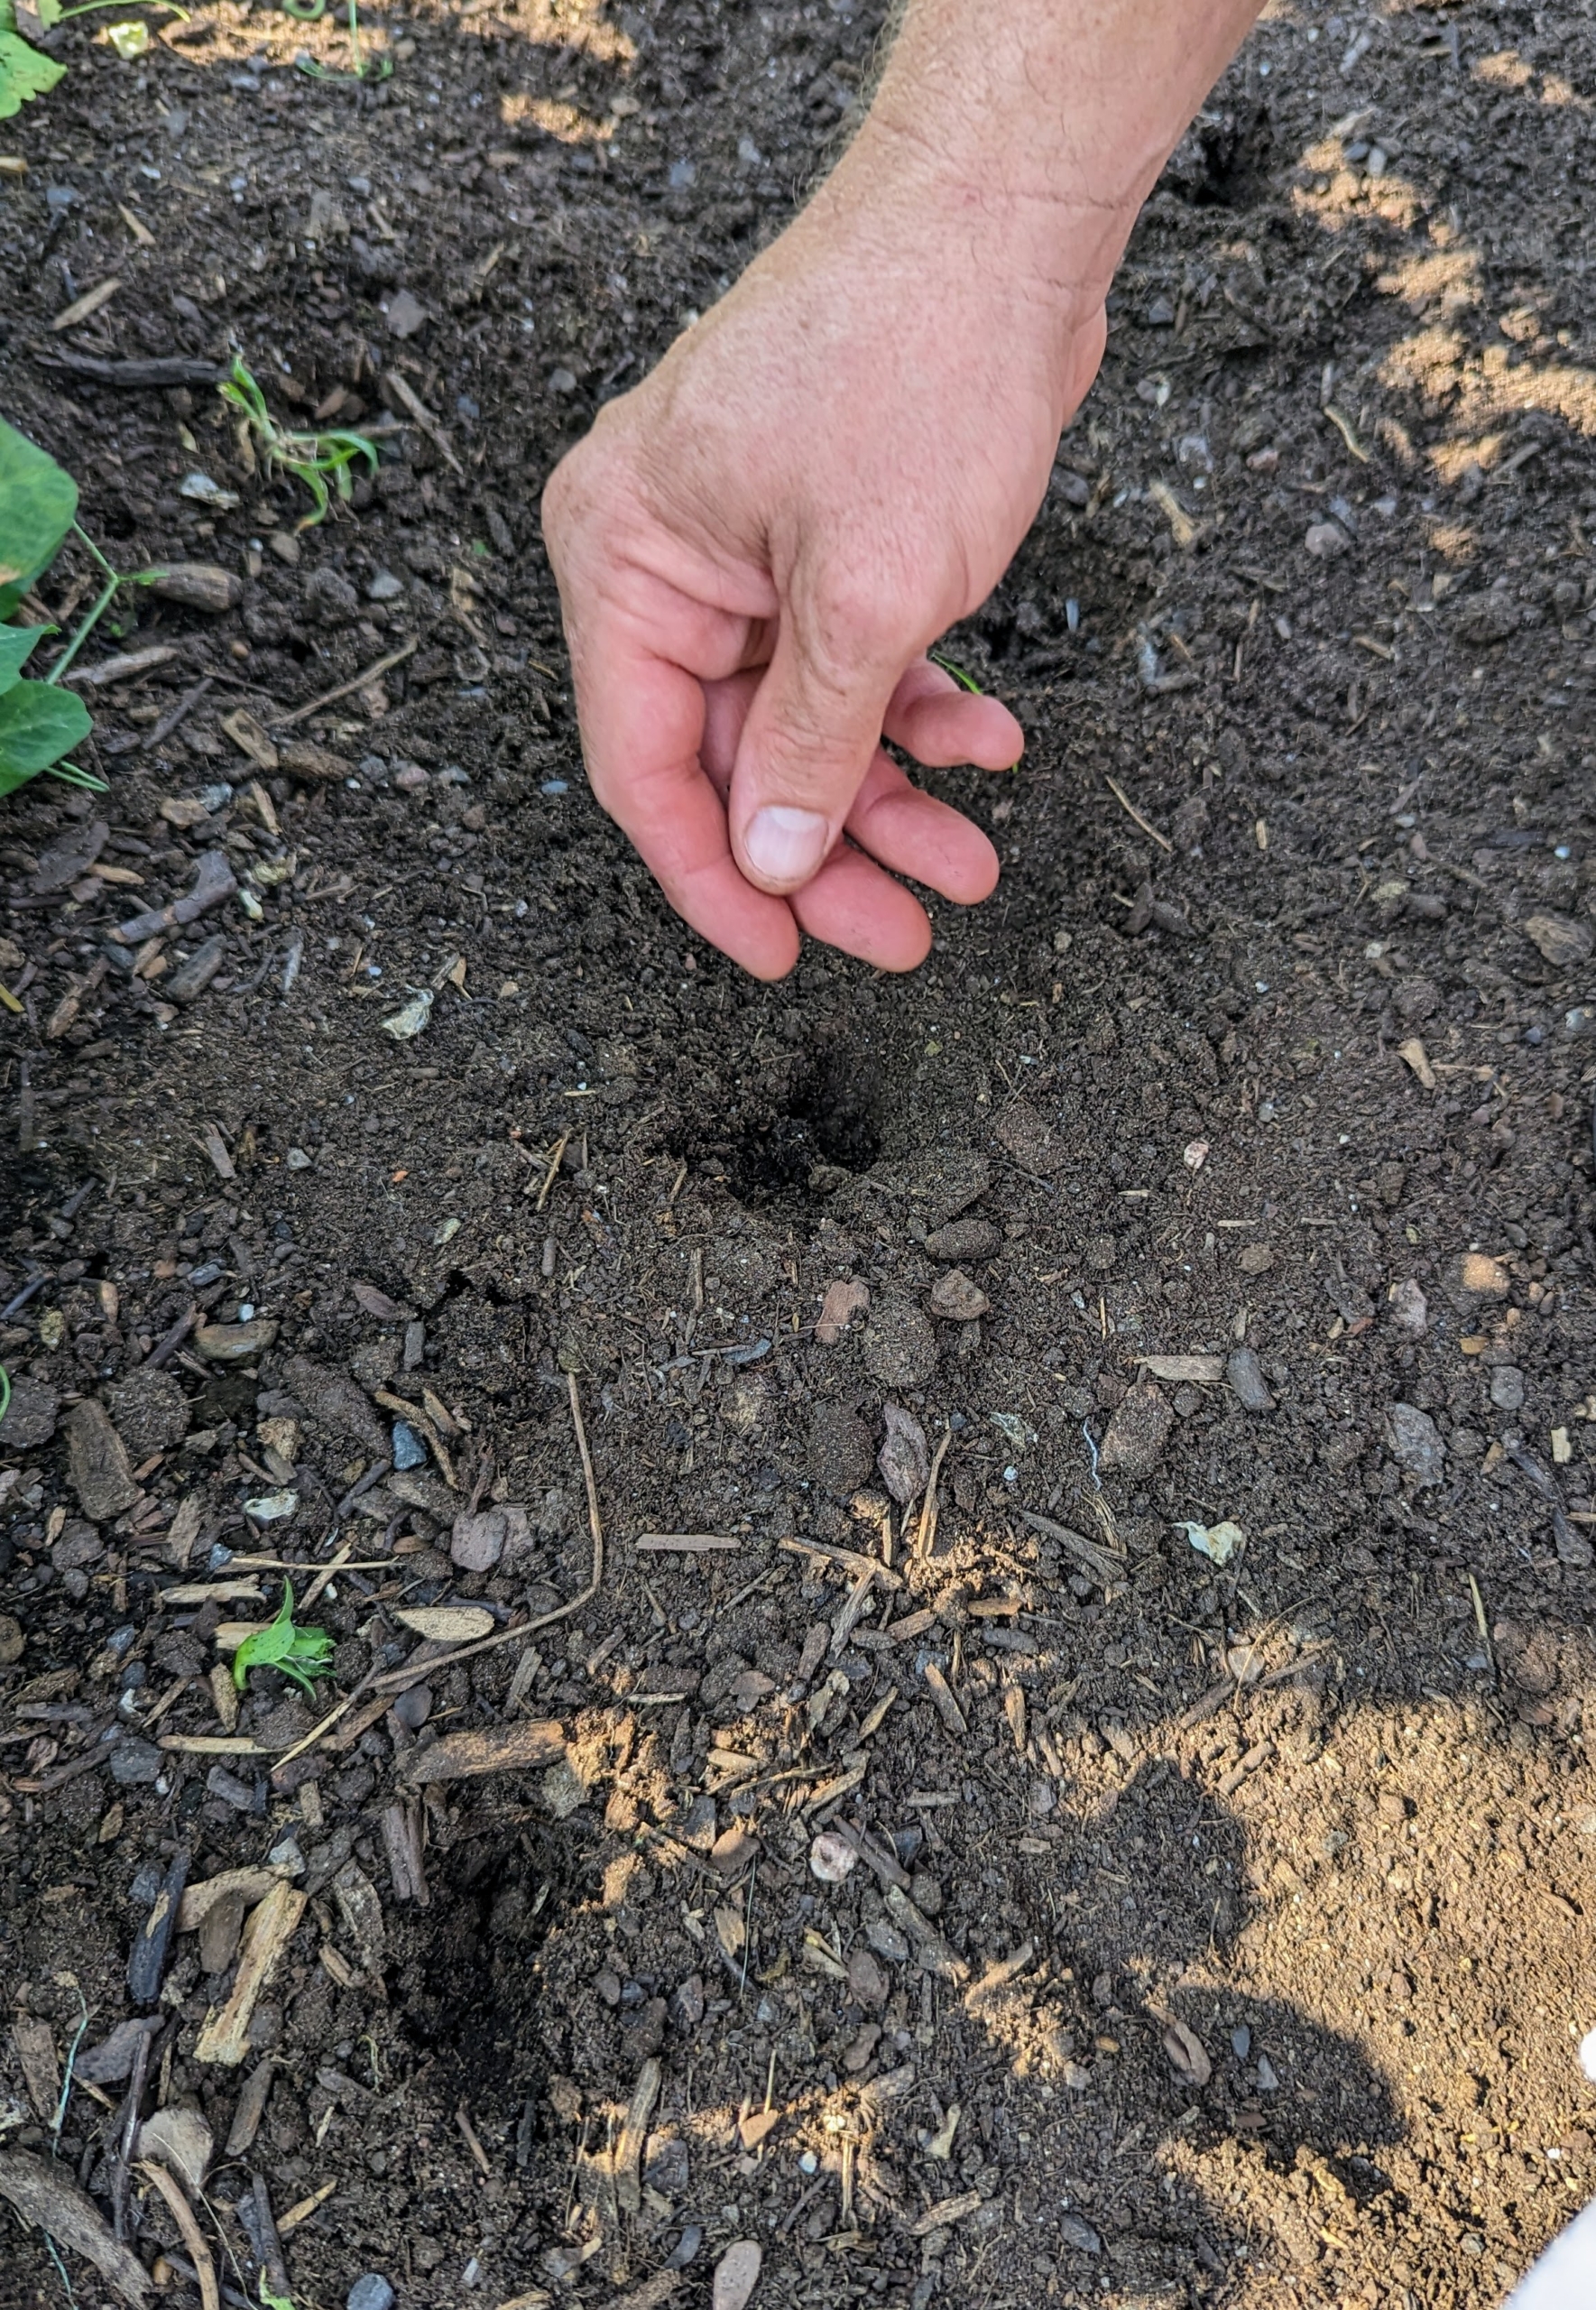
For planting the large sunflower seeds, Ryan used this rolling dibbler available at Johnny’s Selected Seeds. It comes in single form like this one or with multiple wheels. It allows one to create evenly spaced impressions in the soil for accurate transplanting.
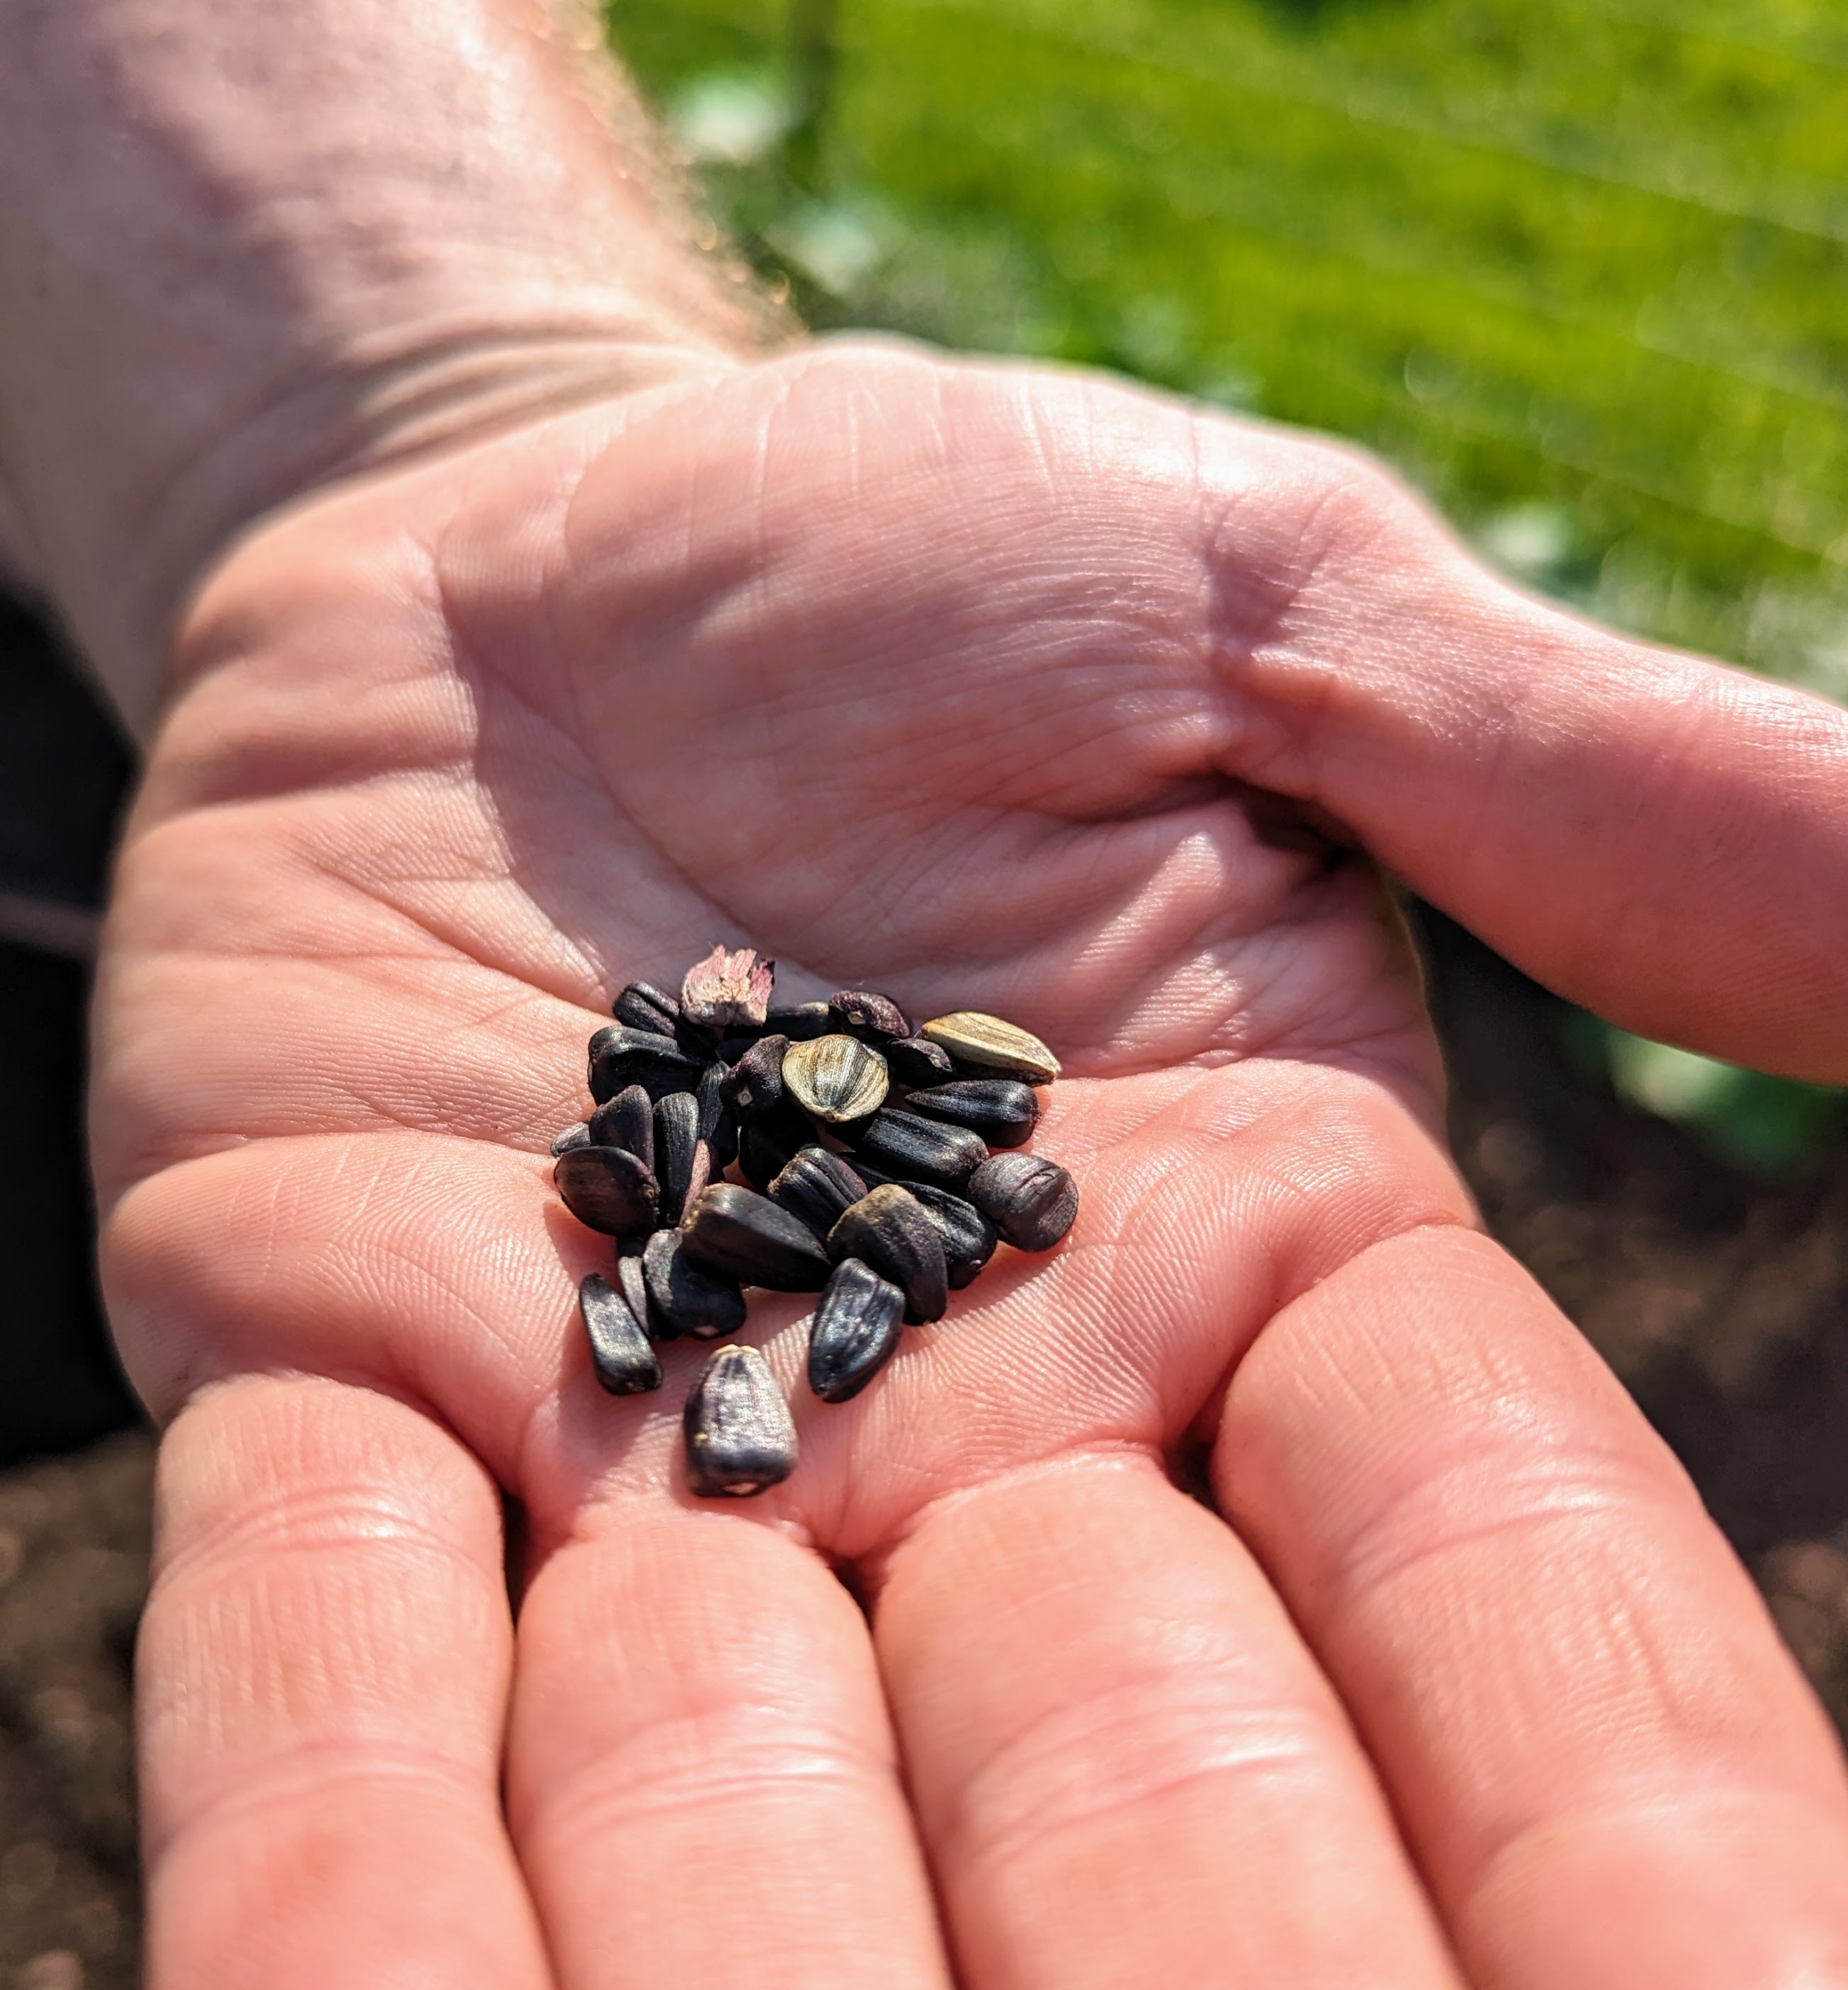
Sunflower seeds are normally black with white stripes and approximately five eighths of an inch long. The heavy hull accounts for approximately half the weight of the seed and is loosely fixed around the kernel inside.
Ryan planted one seed into each hole. Sunflowers grow quickly. Many can grow 12 feet in only three months. With the proper growing conditions, sunflowers should reach maturity in 70 to 100 days after planting.
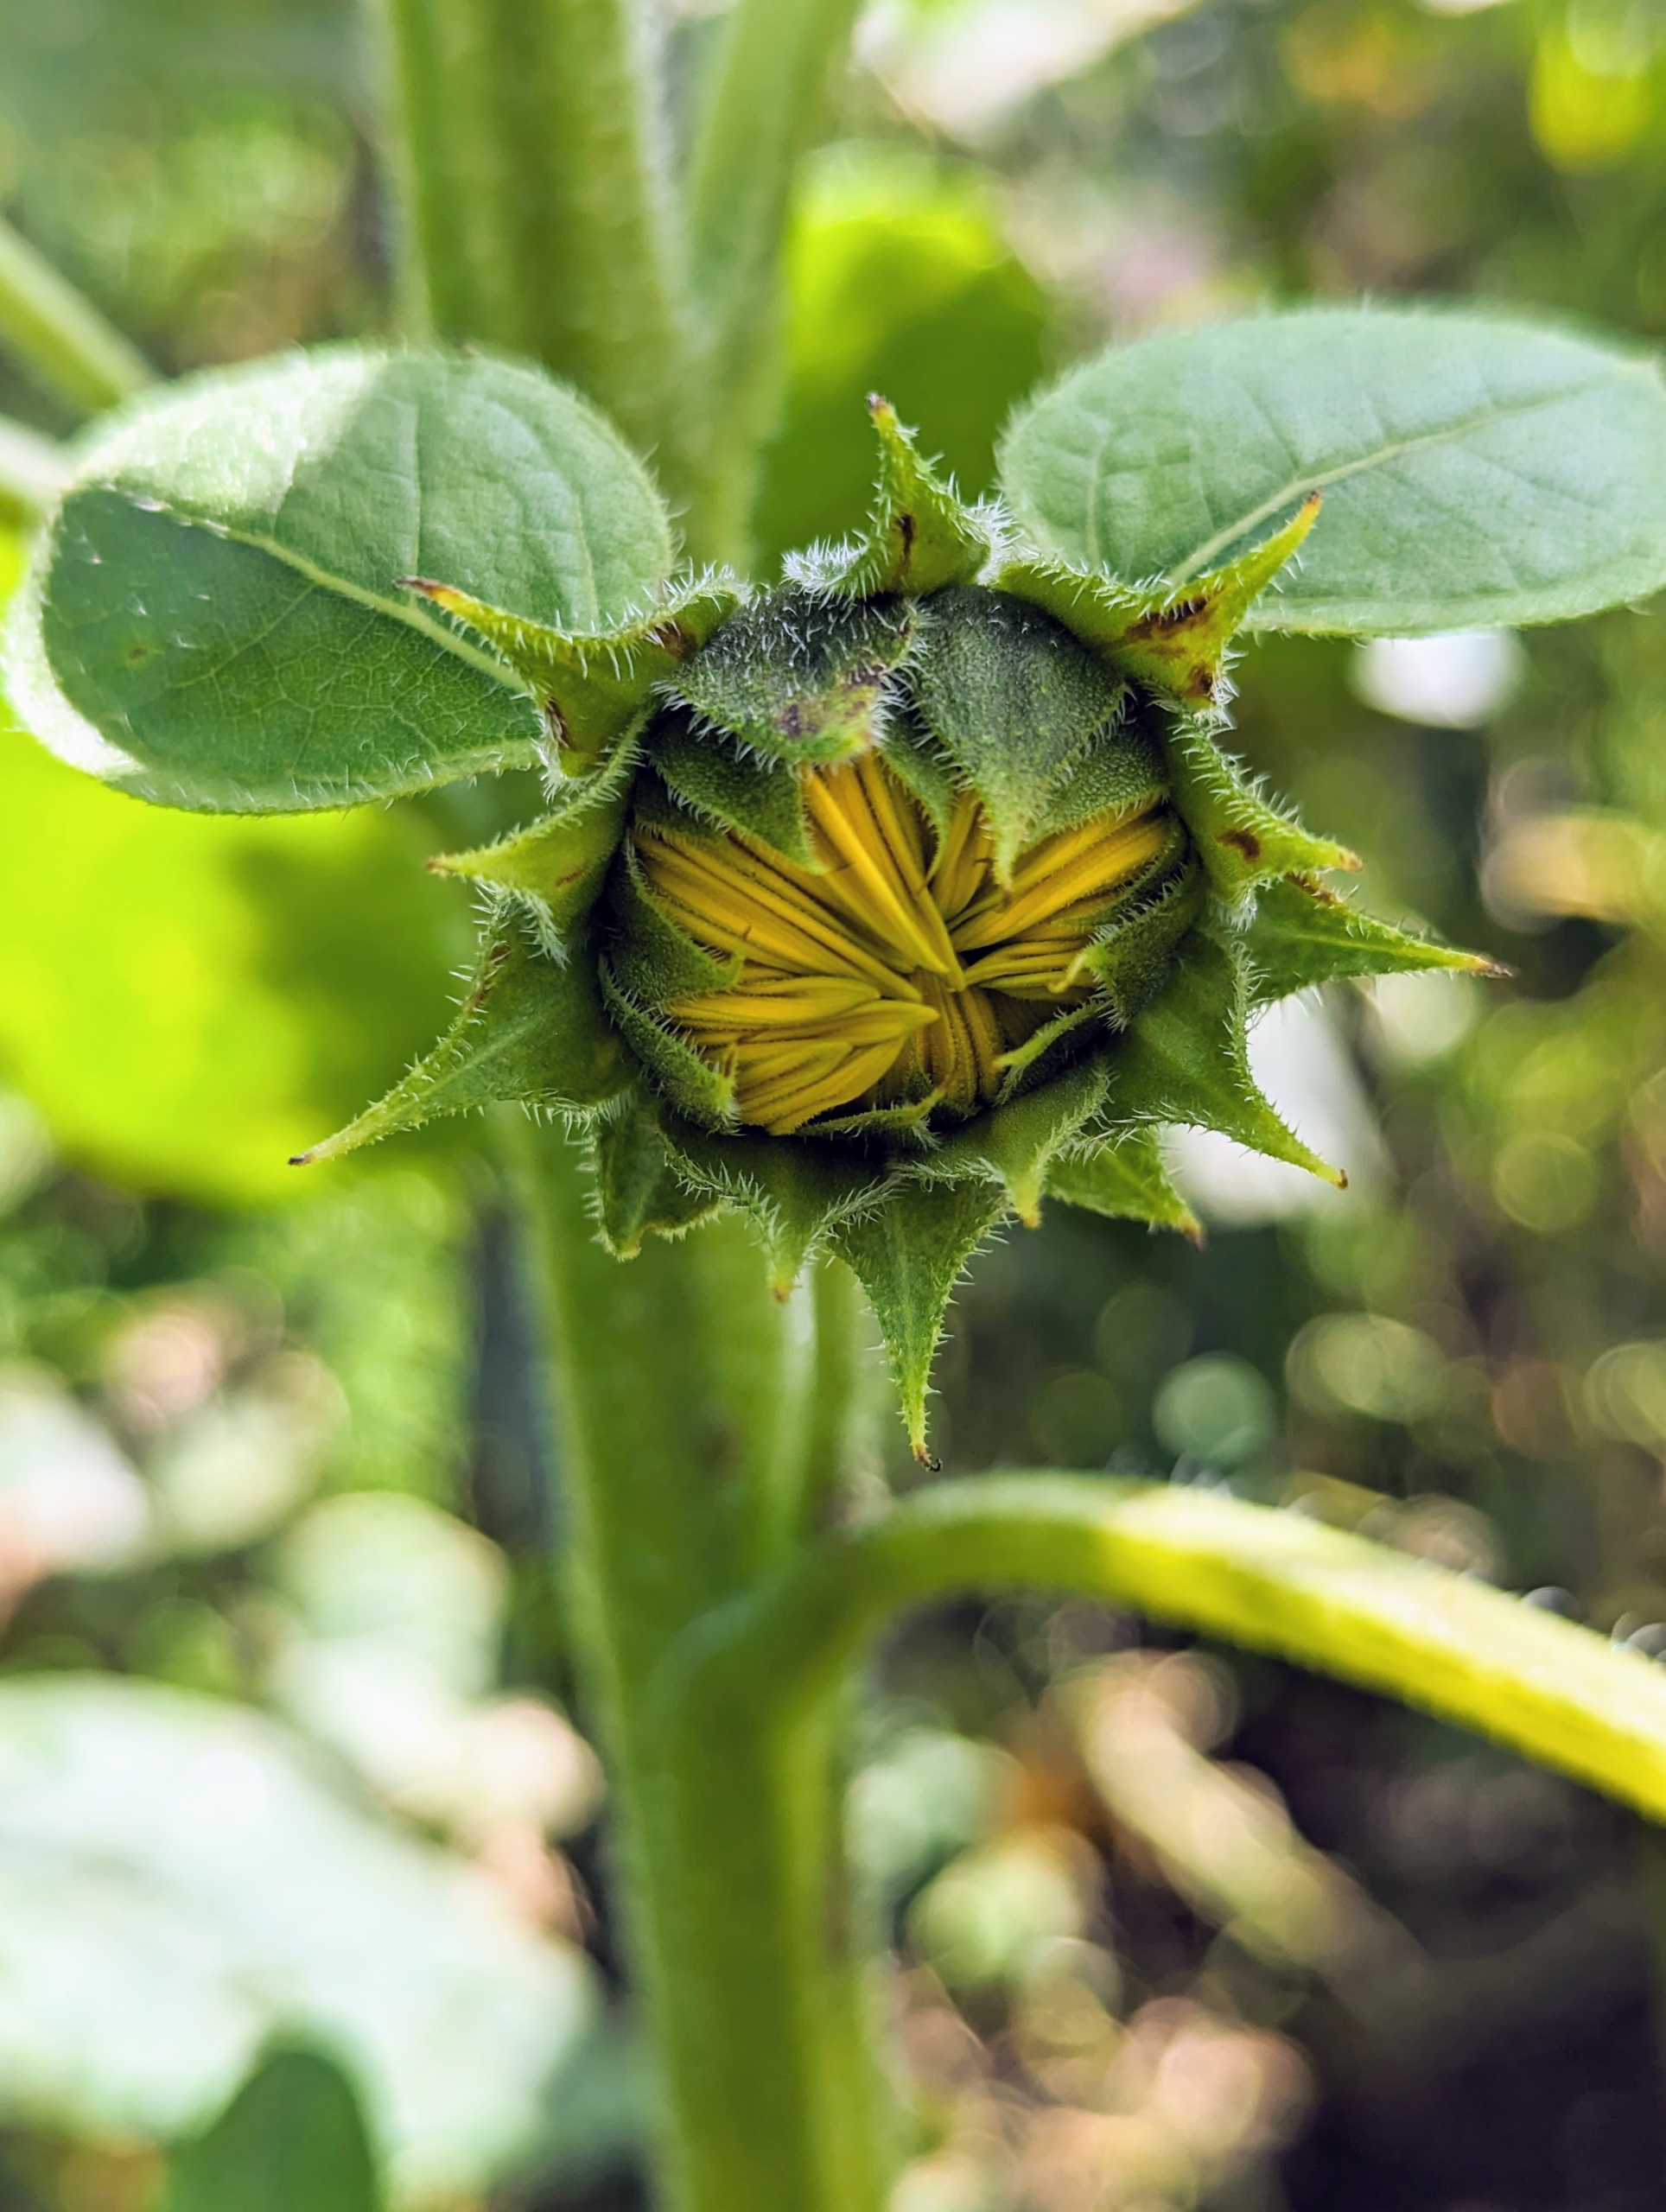
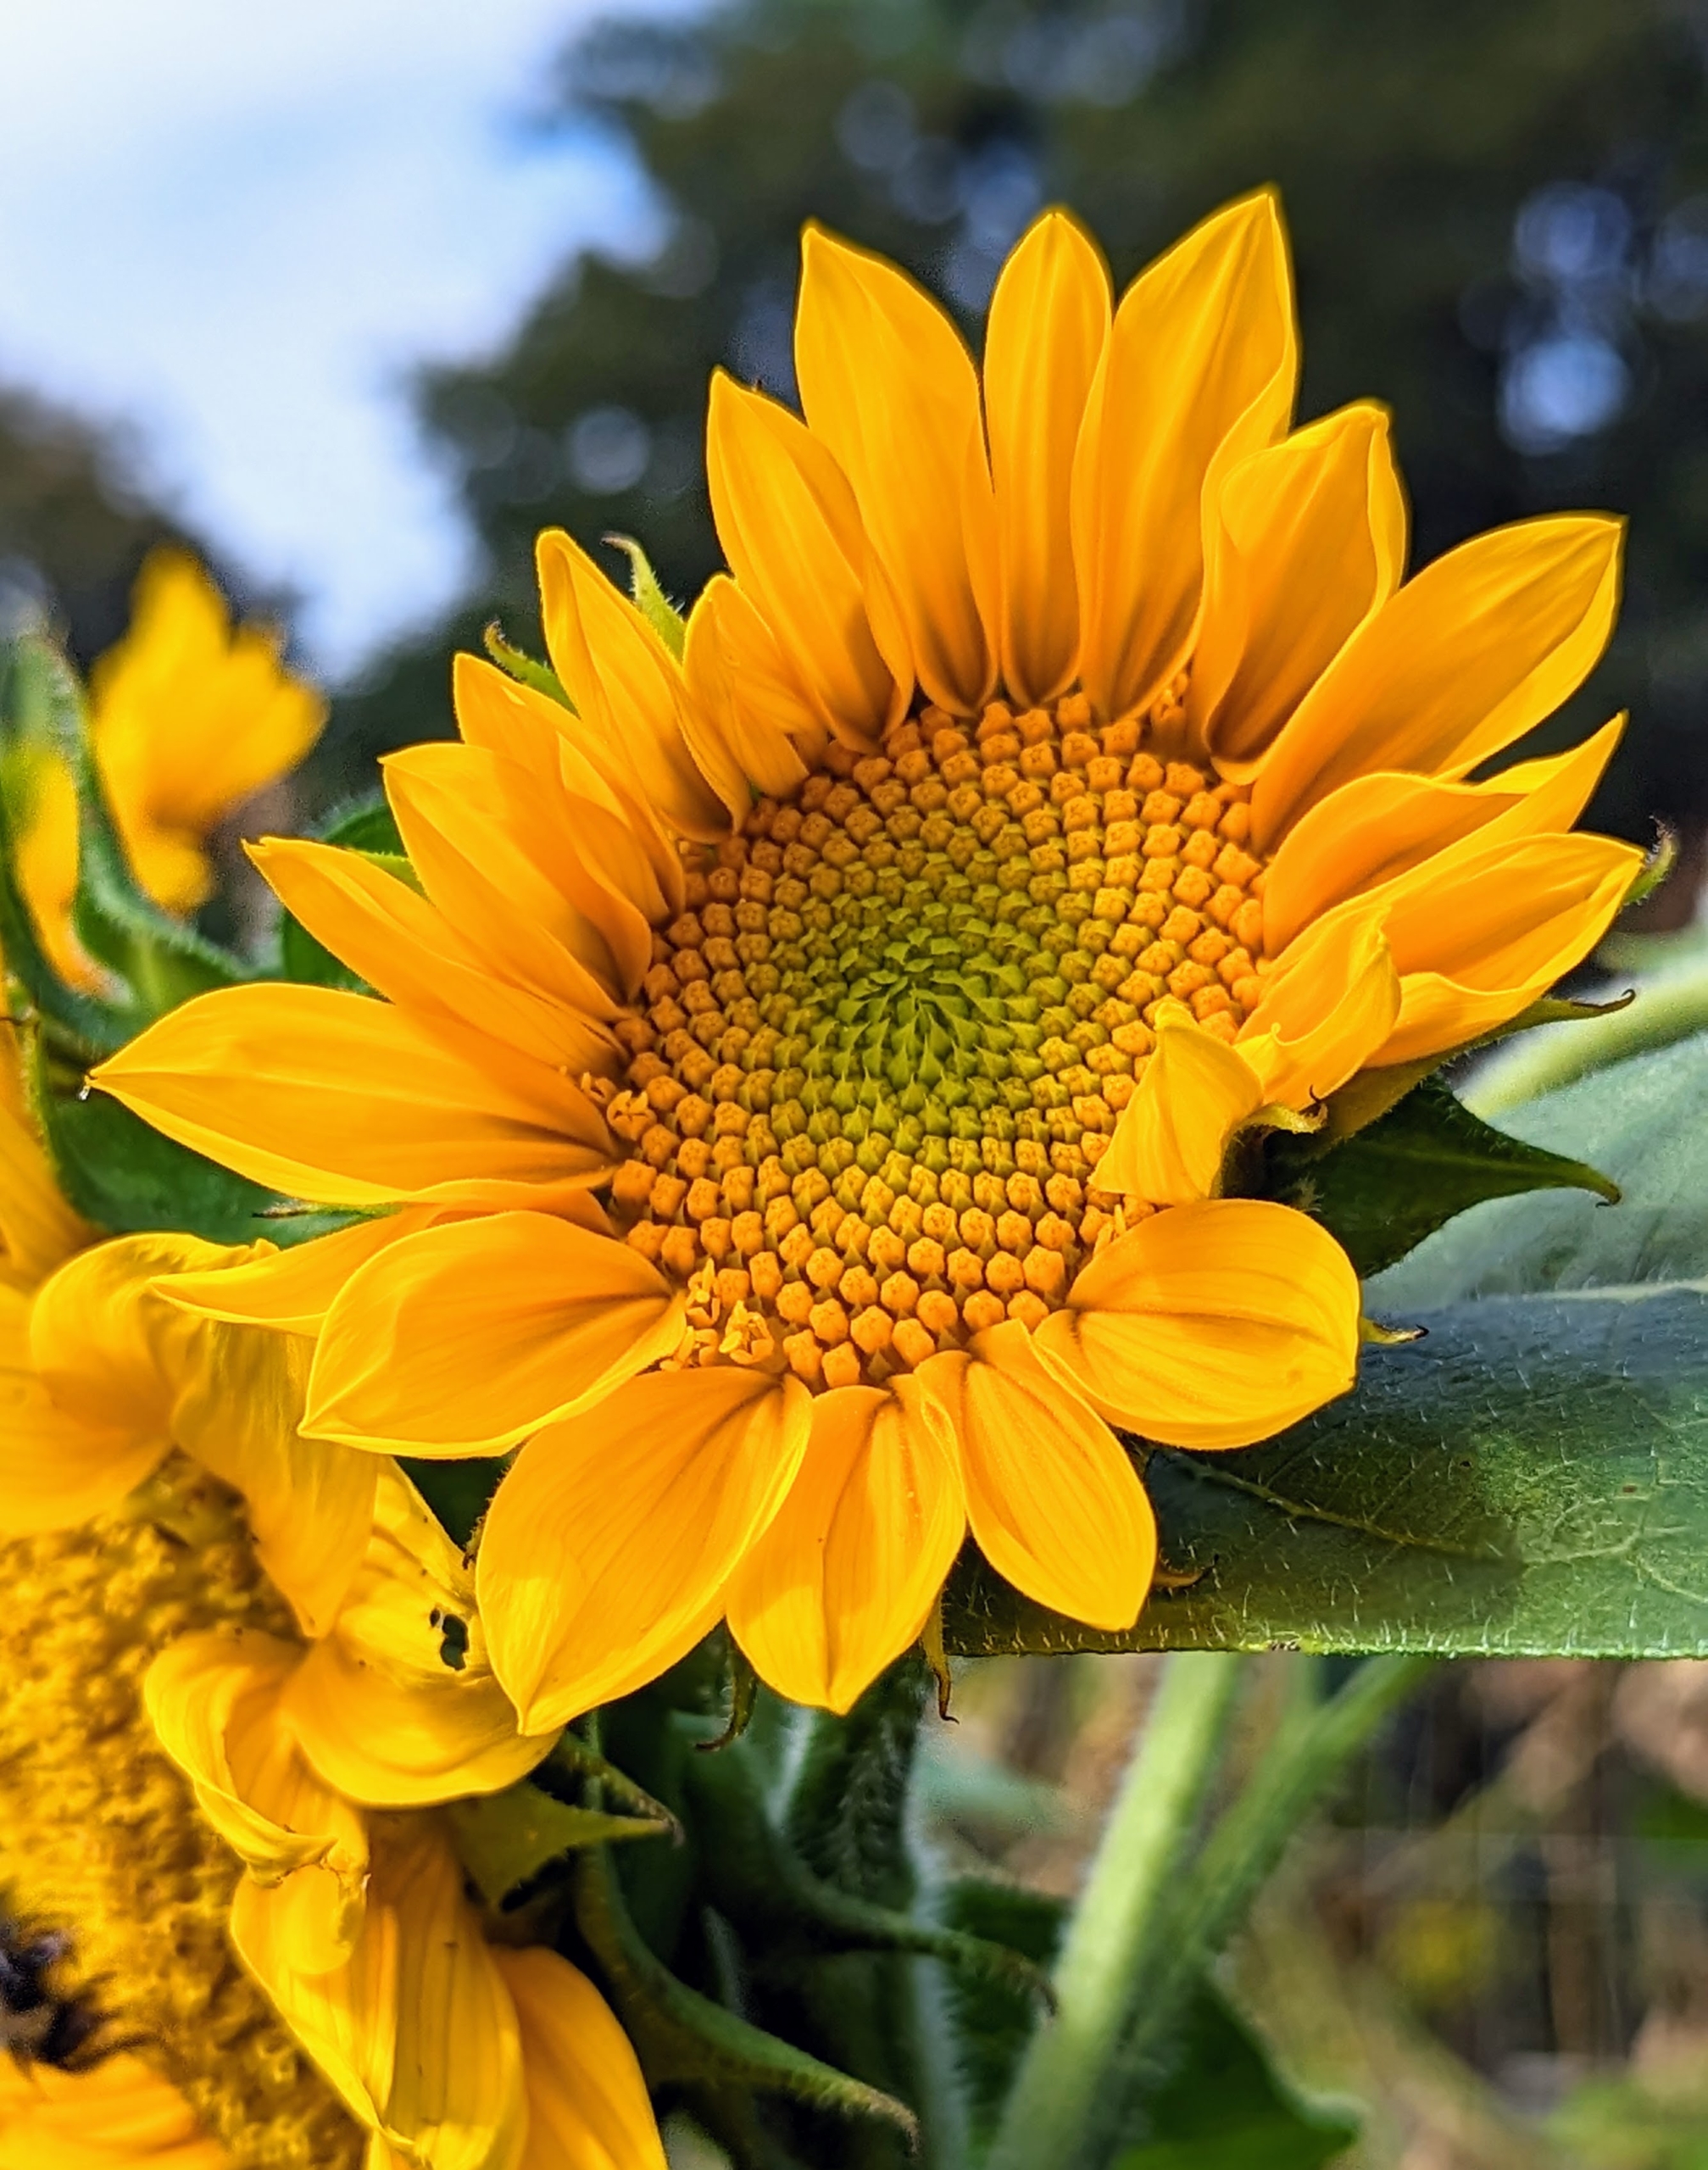
Here is one just beginning to open.
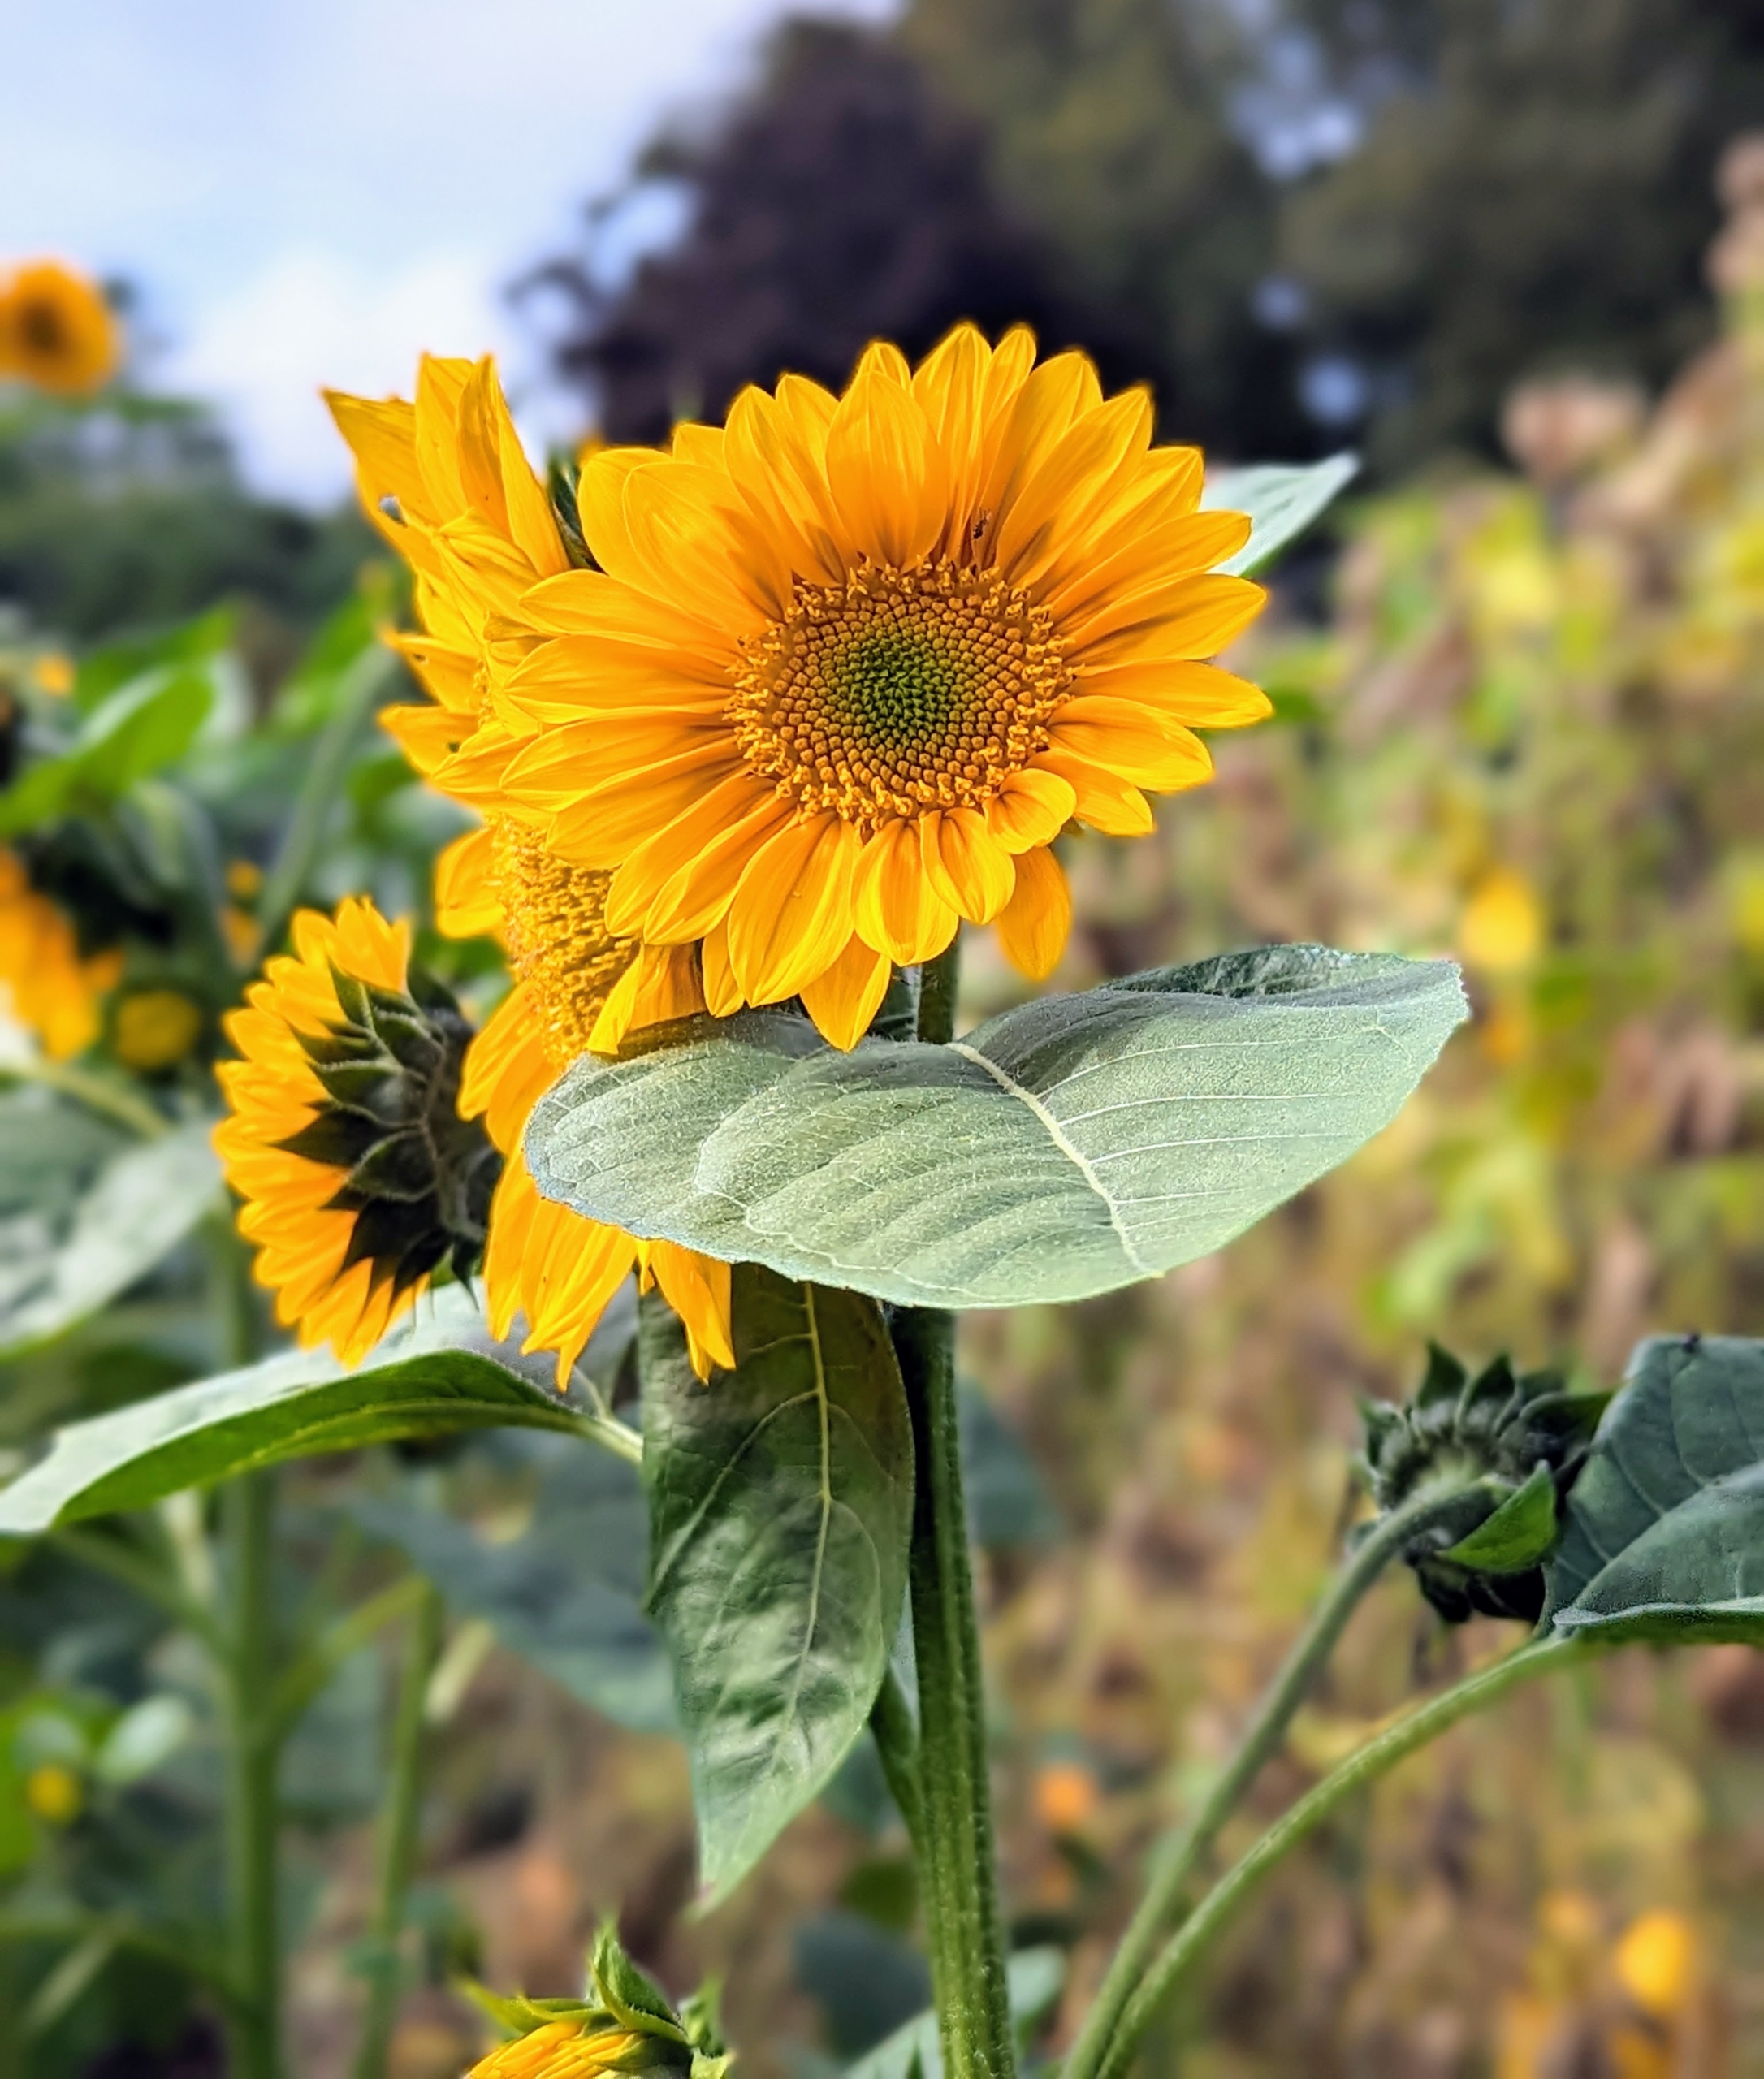
And now, many of the flowers are in full bloom. Sunflowers commonly bloom during summer and a portion of fall.
Young sunflowers turn to face the sun as it moves across the sky. They face east at dawn and then slowly turn west as the sun moves. During the night, they slowly turn back east to begin the cycle again. This is known as heliotropism and is due to the presence of auxin, a growth hormone in the stem. This process continues until the sunflower is mature.
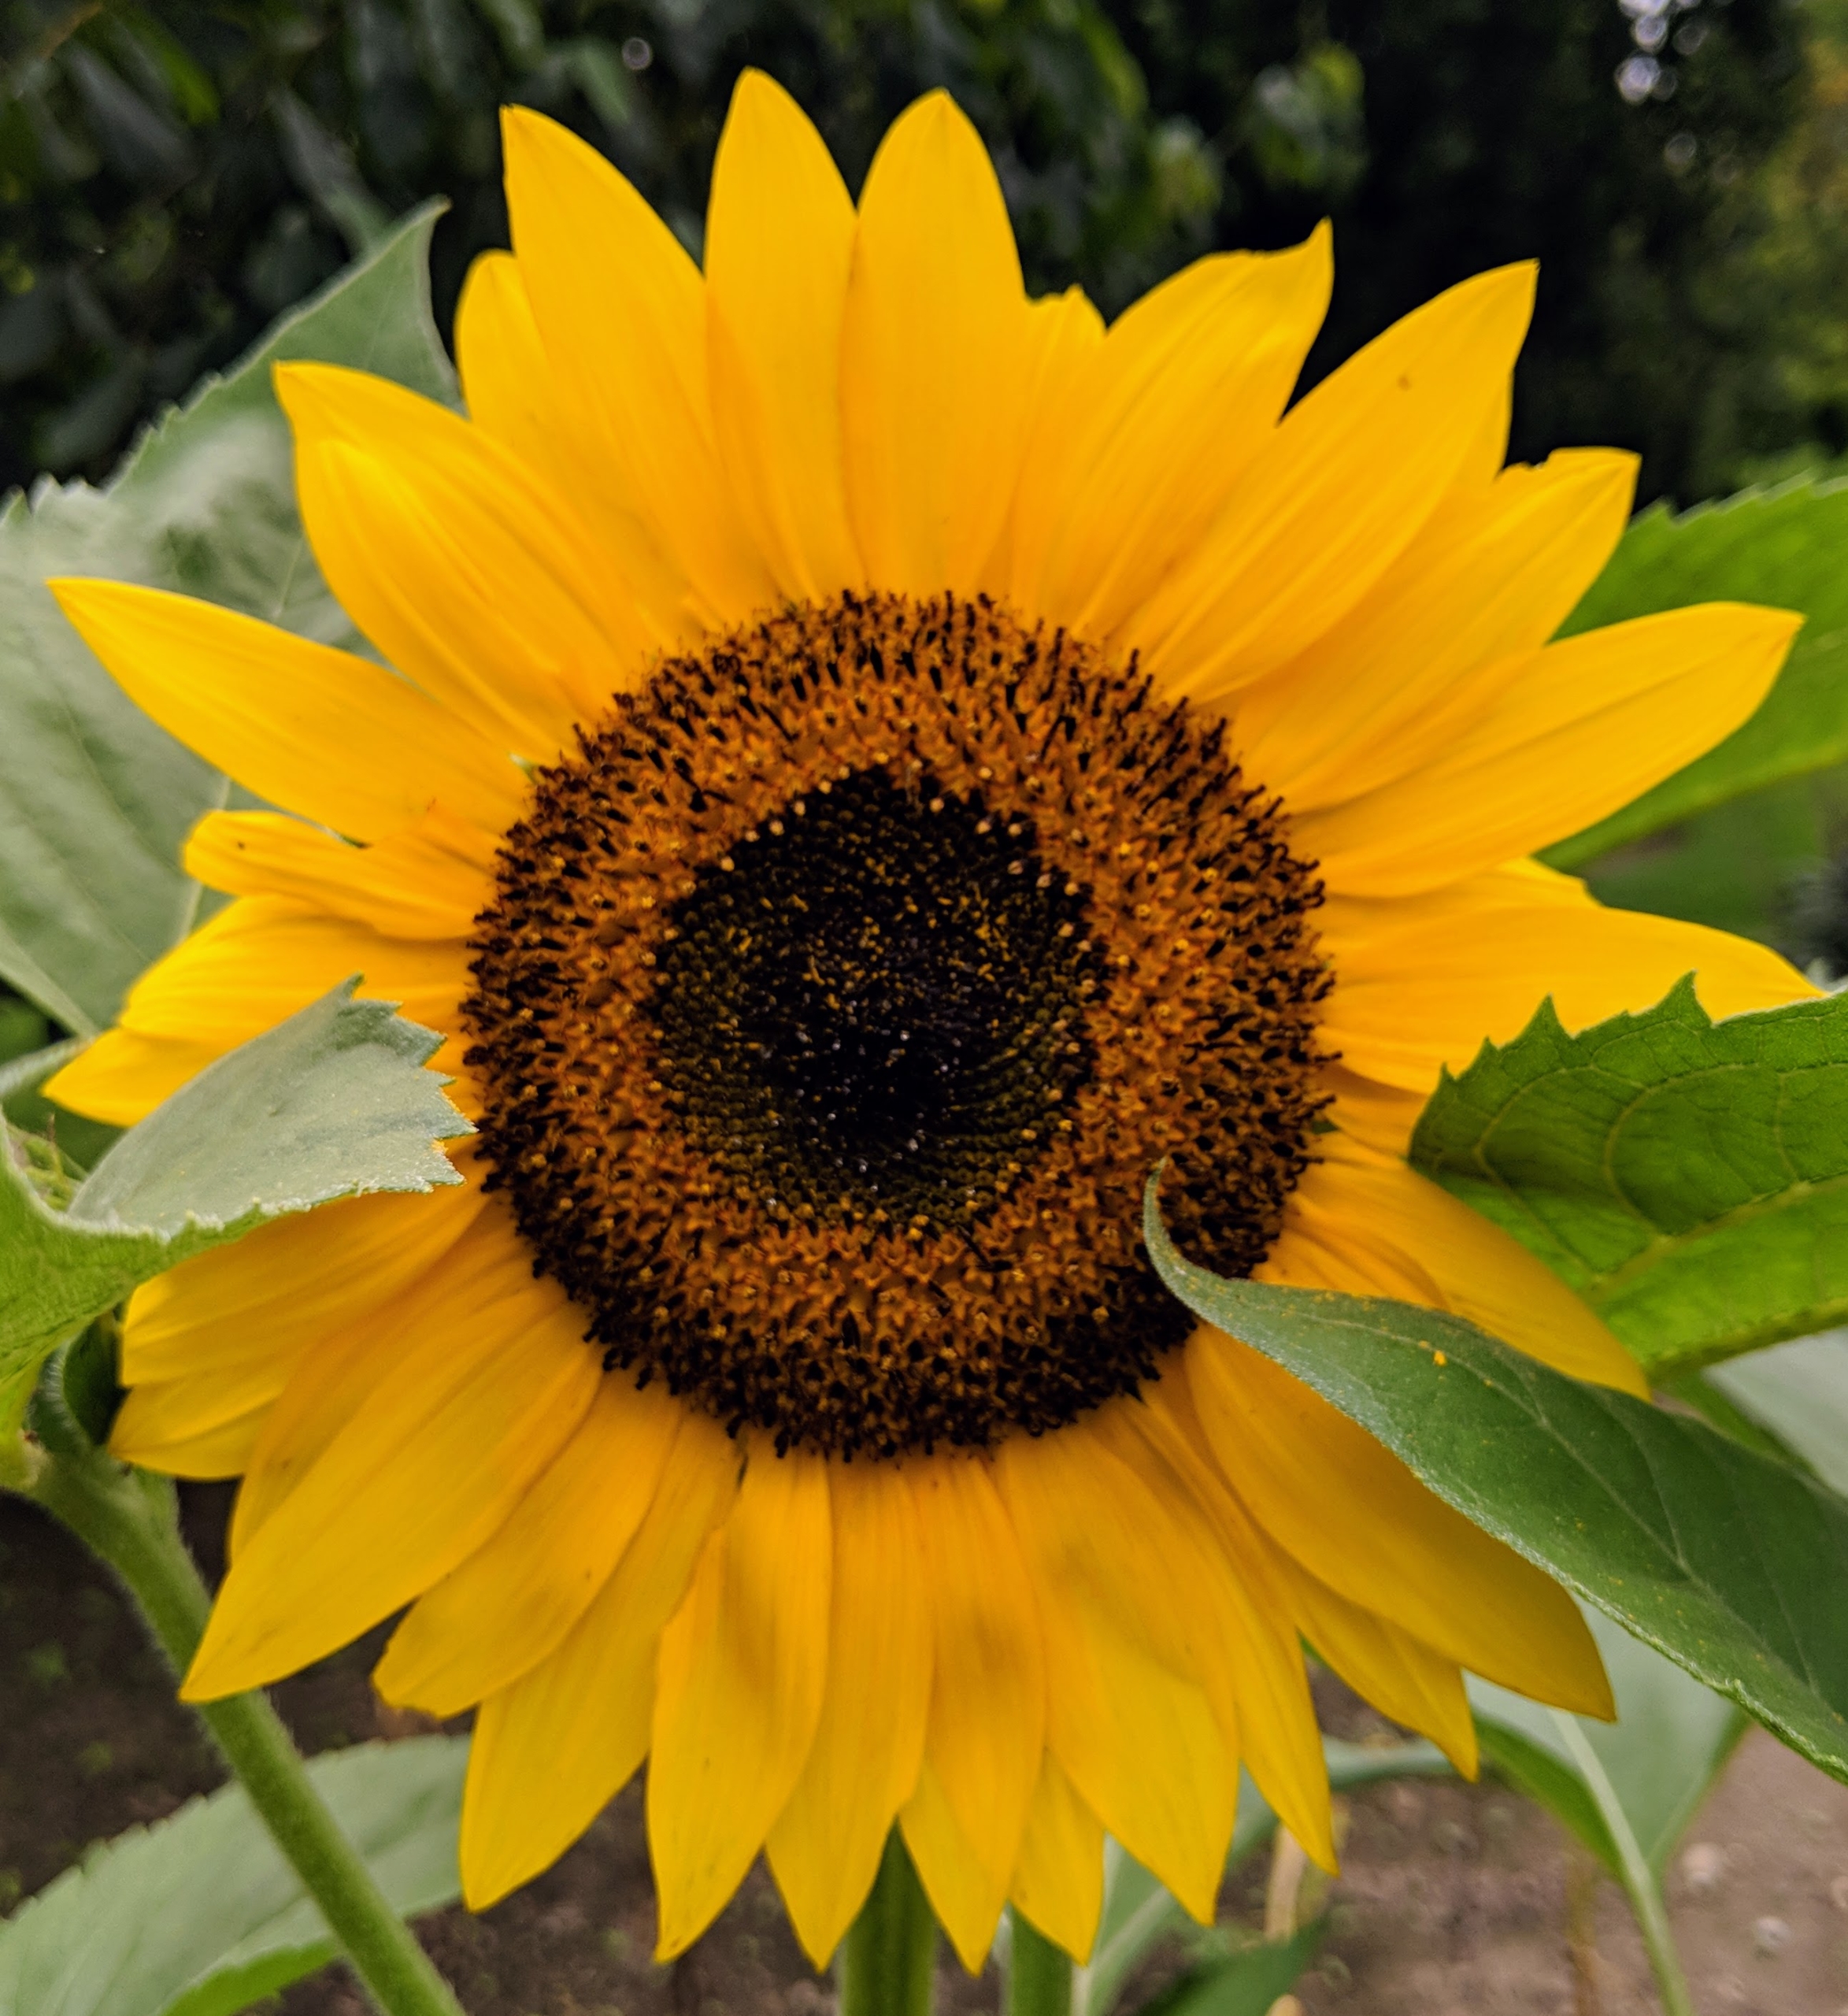
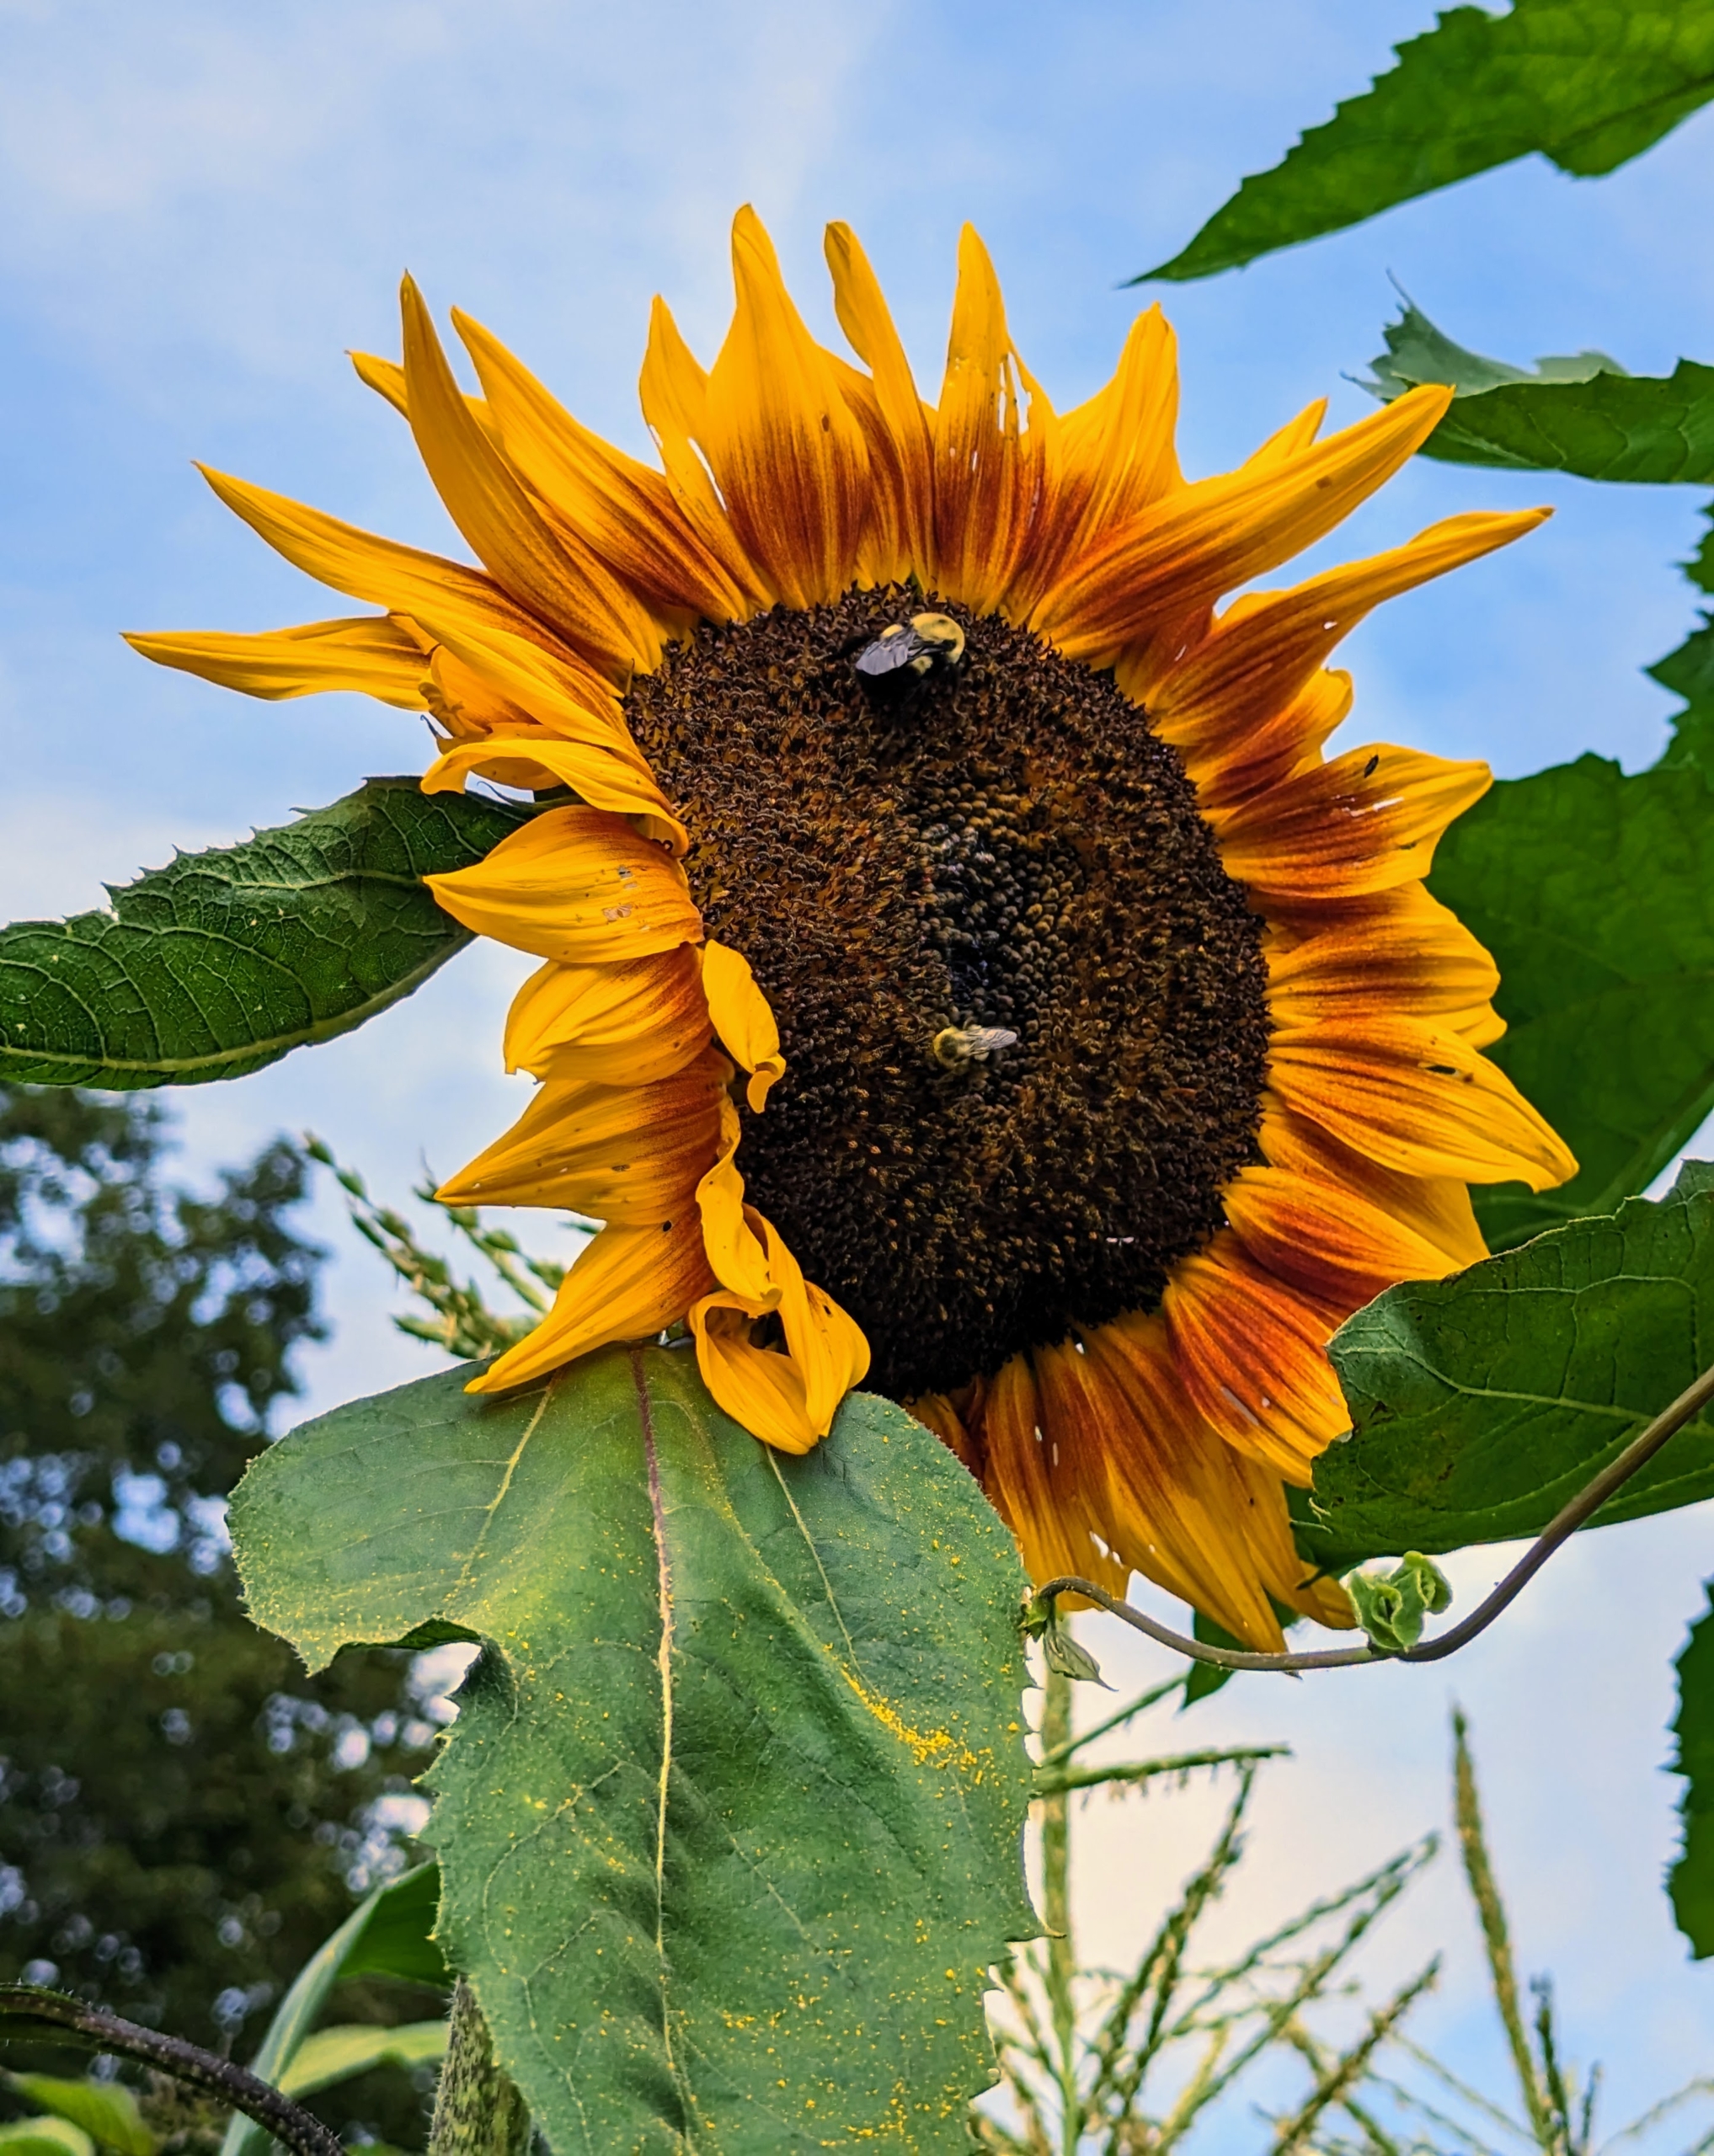
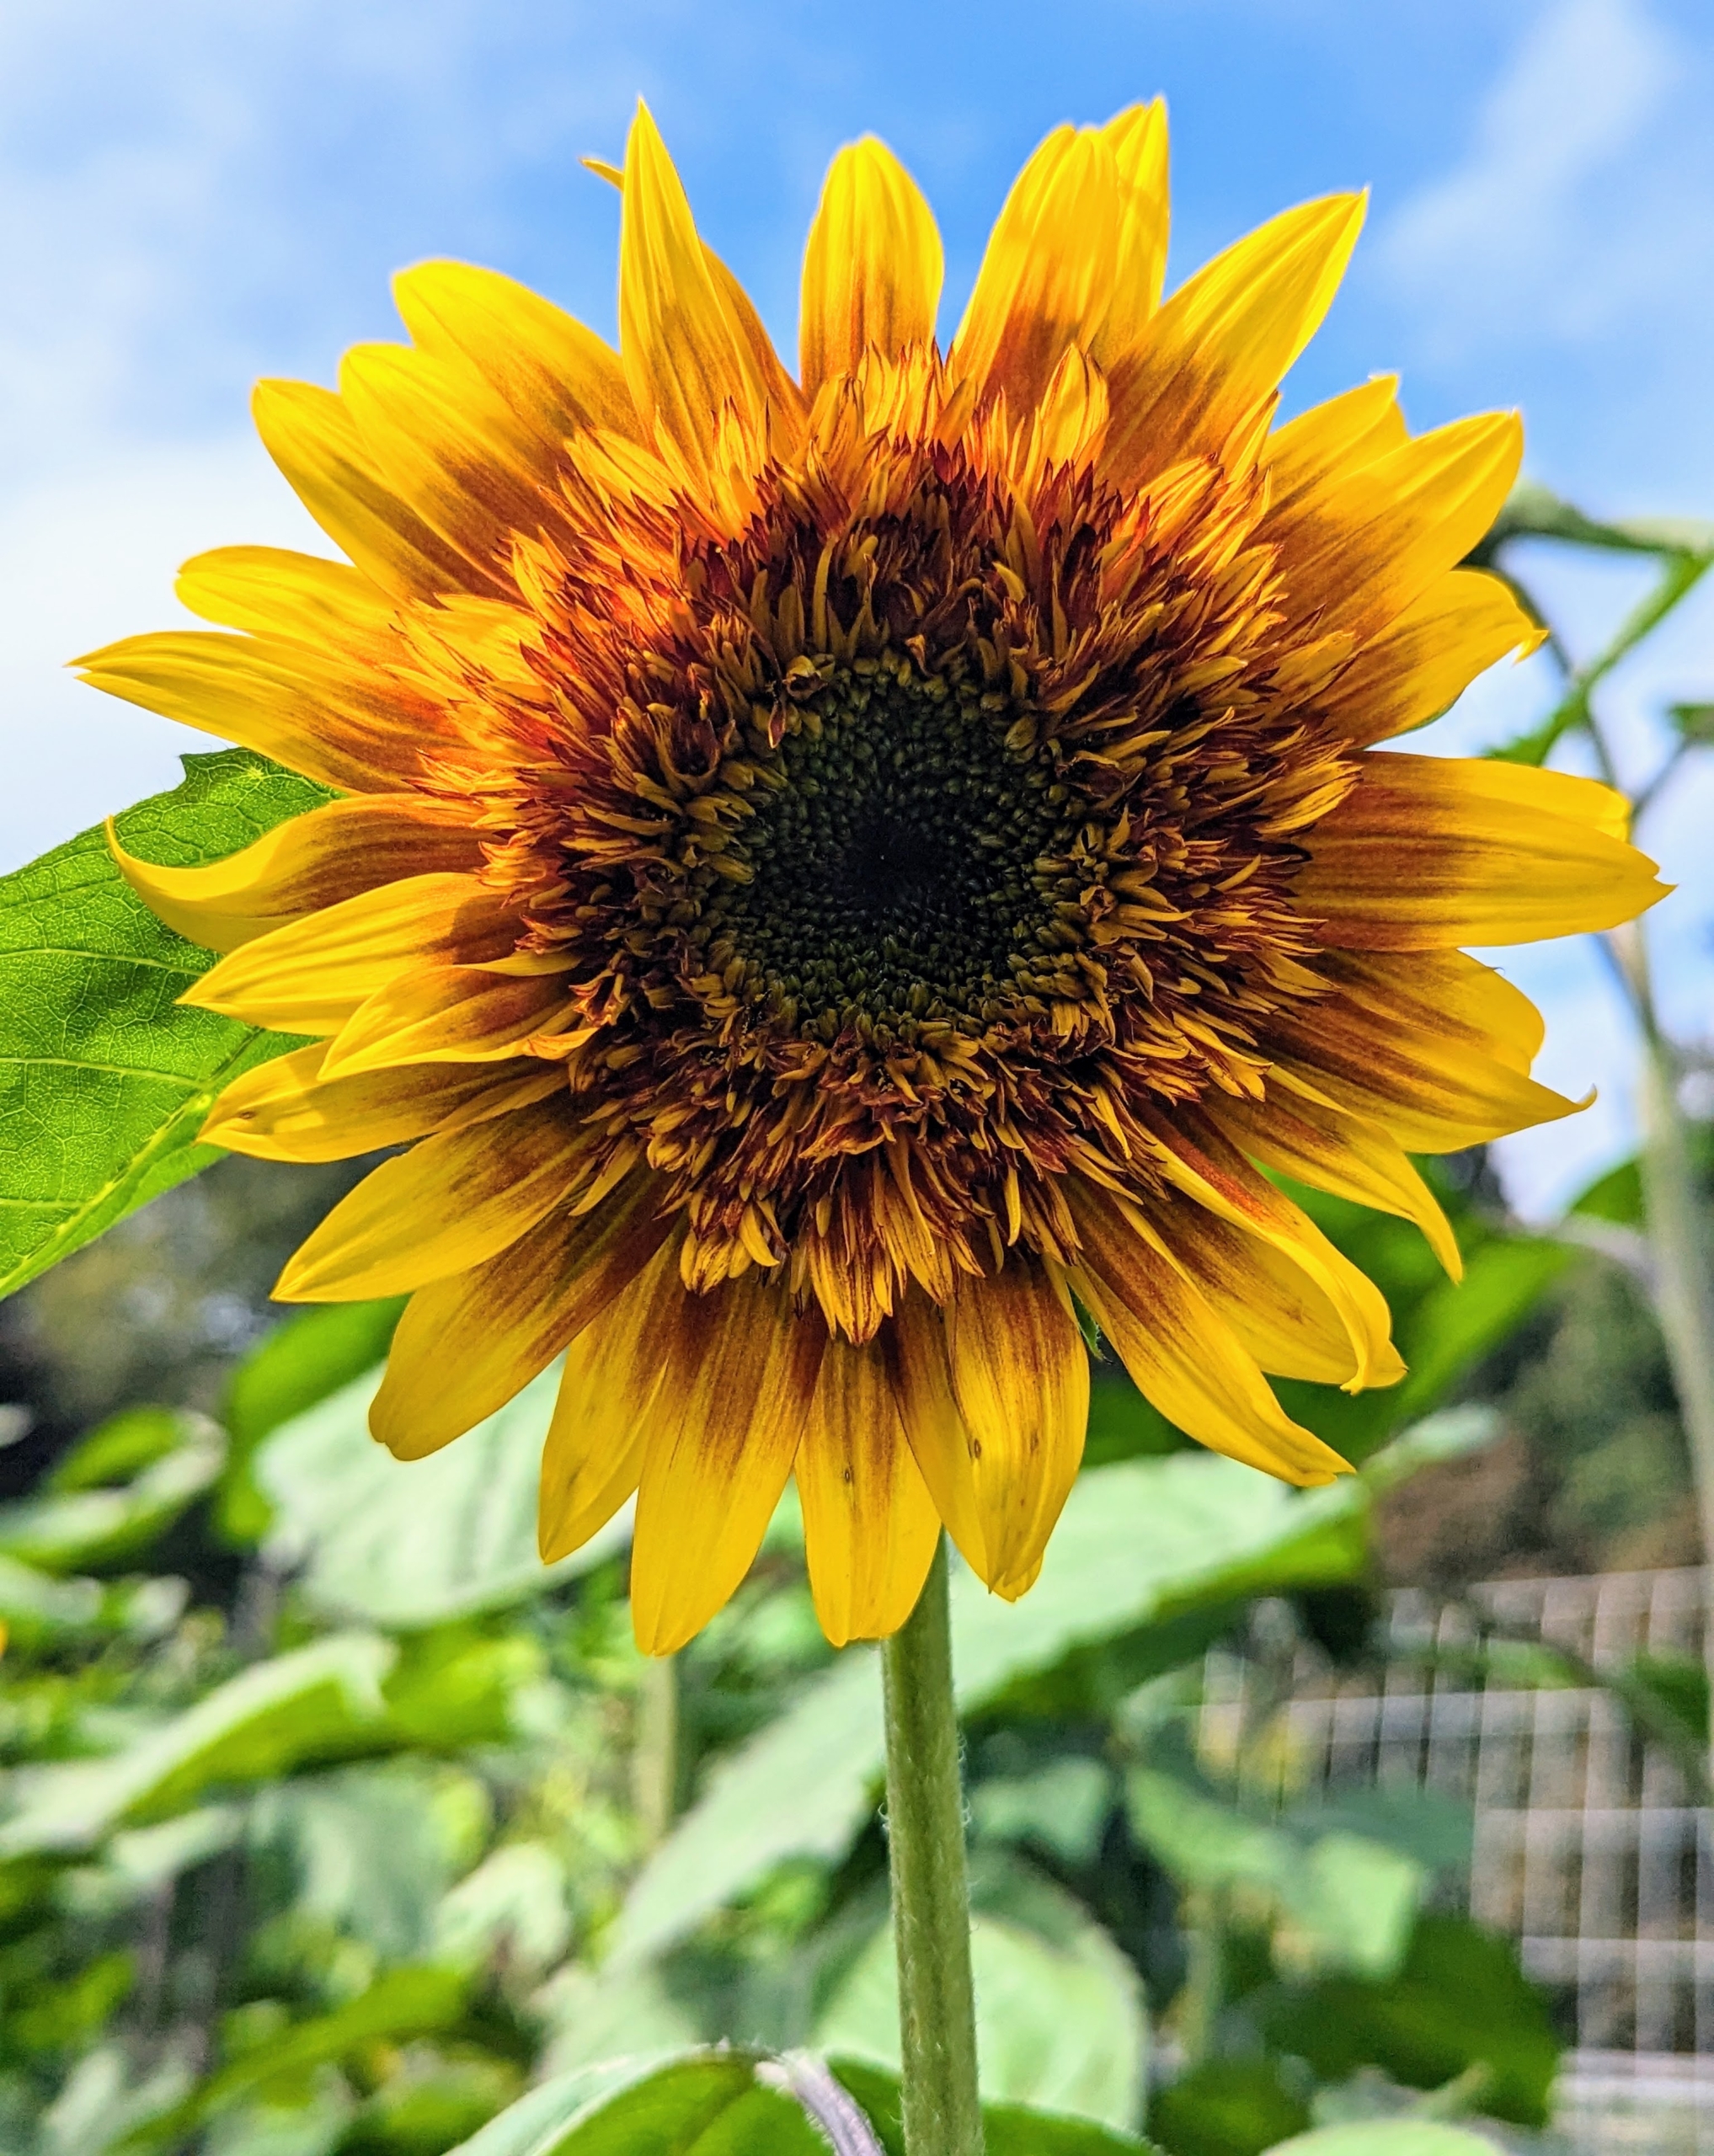
Sunflower is the only flower with flower in its name. “Helia” for sun and “anthus” for flower. Sunflowers are also the symbol of faith, loyalty and adoration. Sunflowers have different colored petals, but their centers also vary in different shades. The center of this sunflower is a light colored yellow and green.
Sunflowers are among the most popular of annuals. They have grown even more popular in the last couple of years because of the support for Ukraine. The sunflower is Ukraine’s national flower. It is also the state flower of Kansas here in the US.
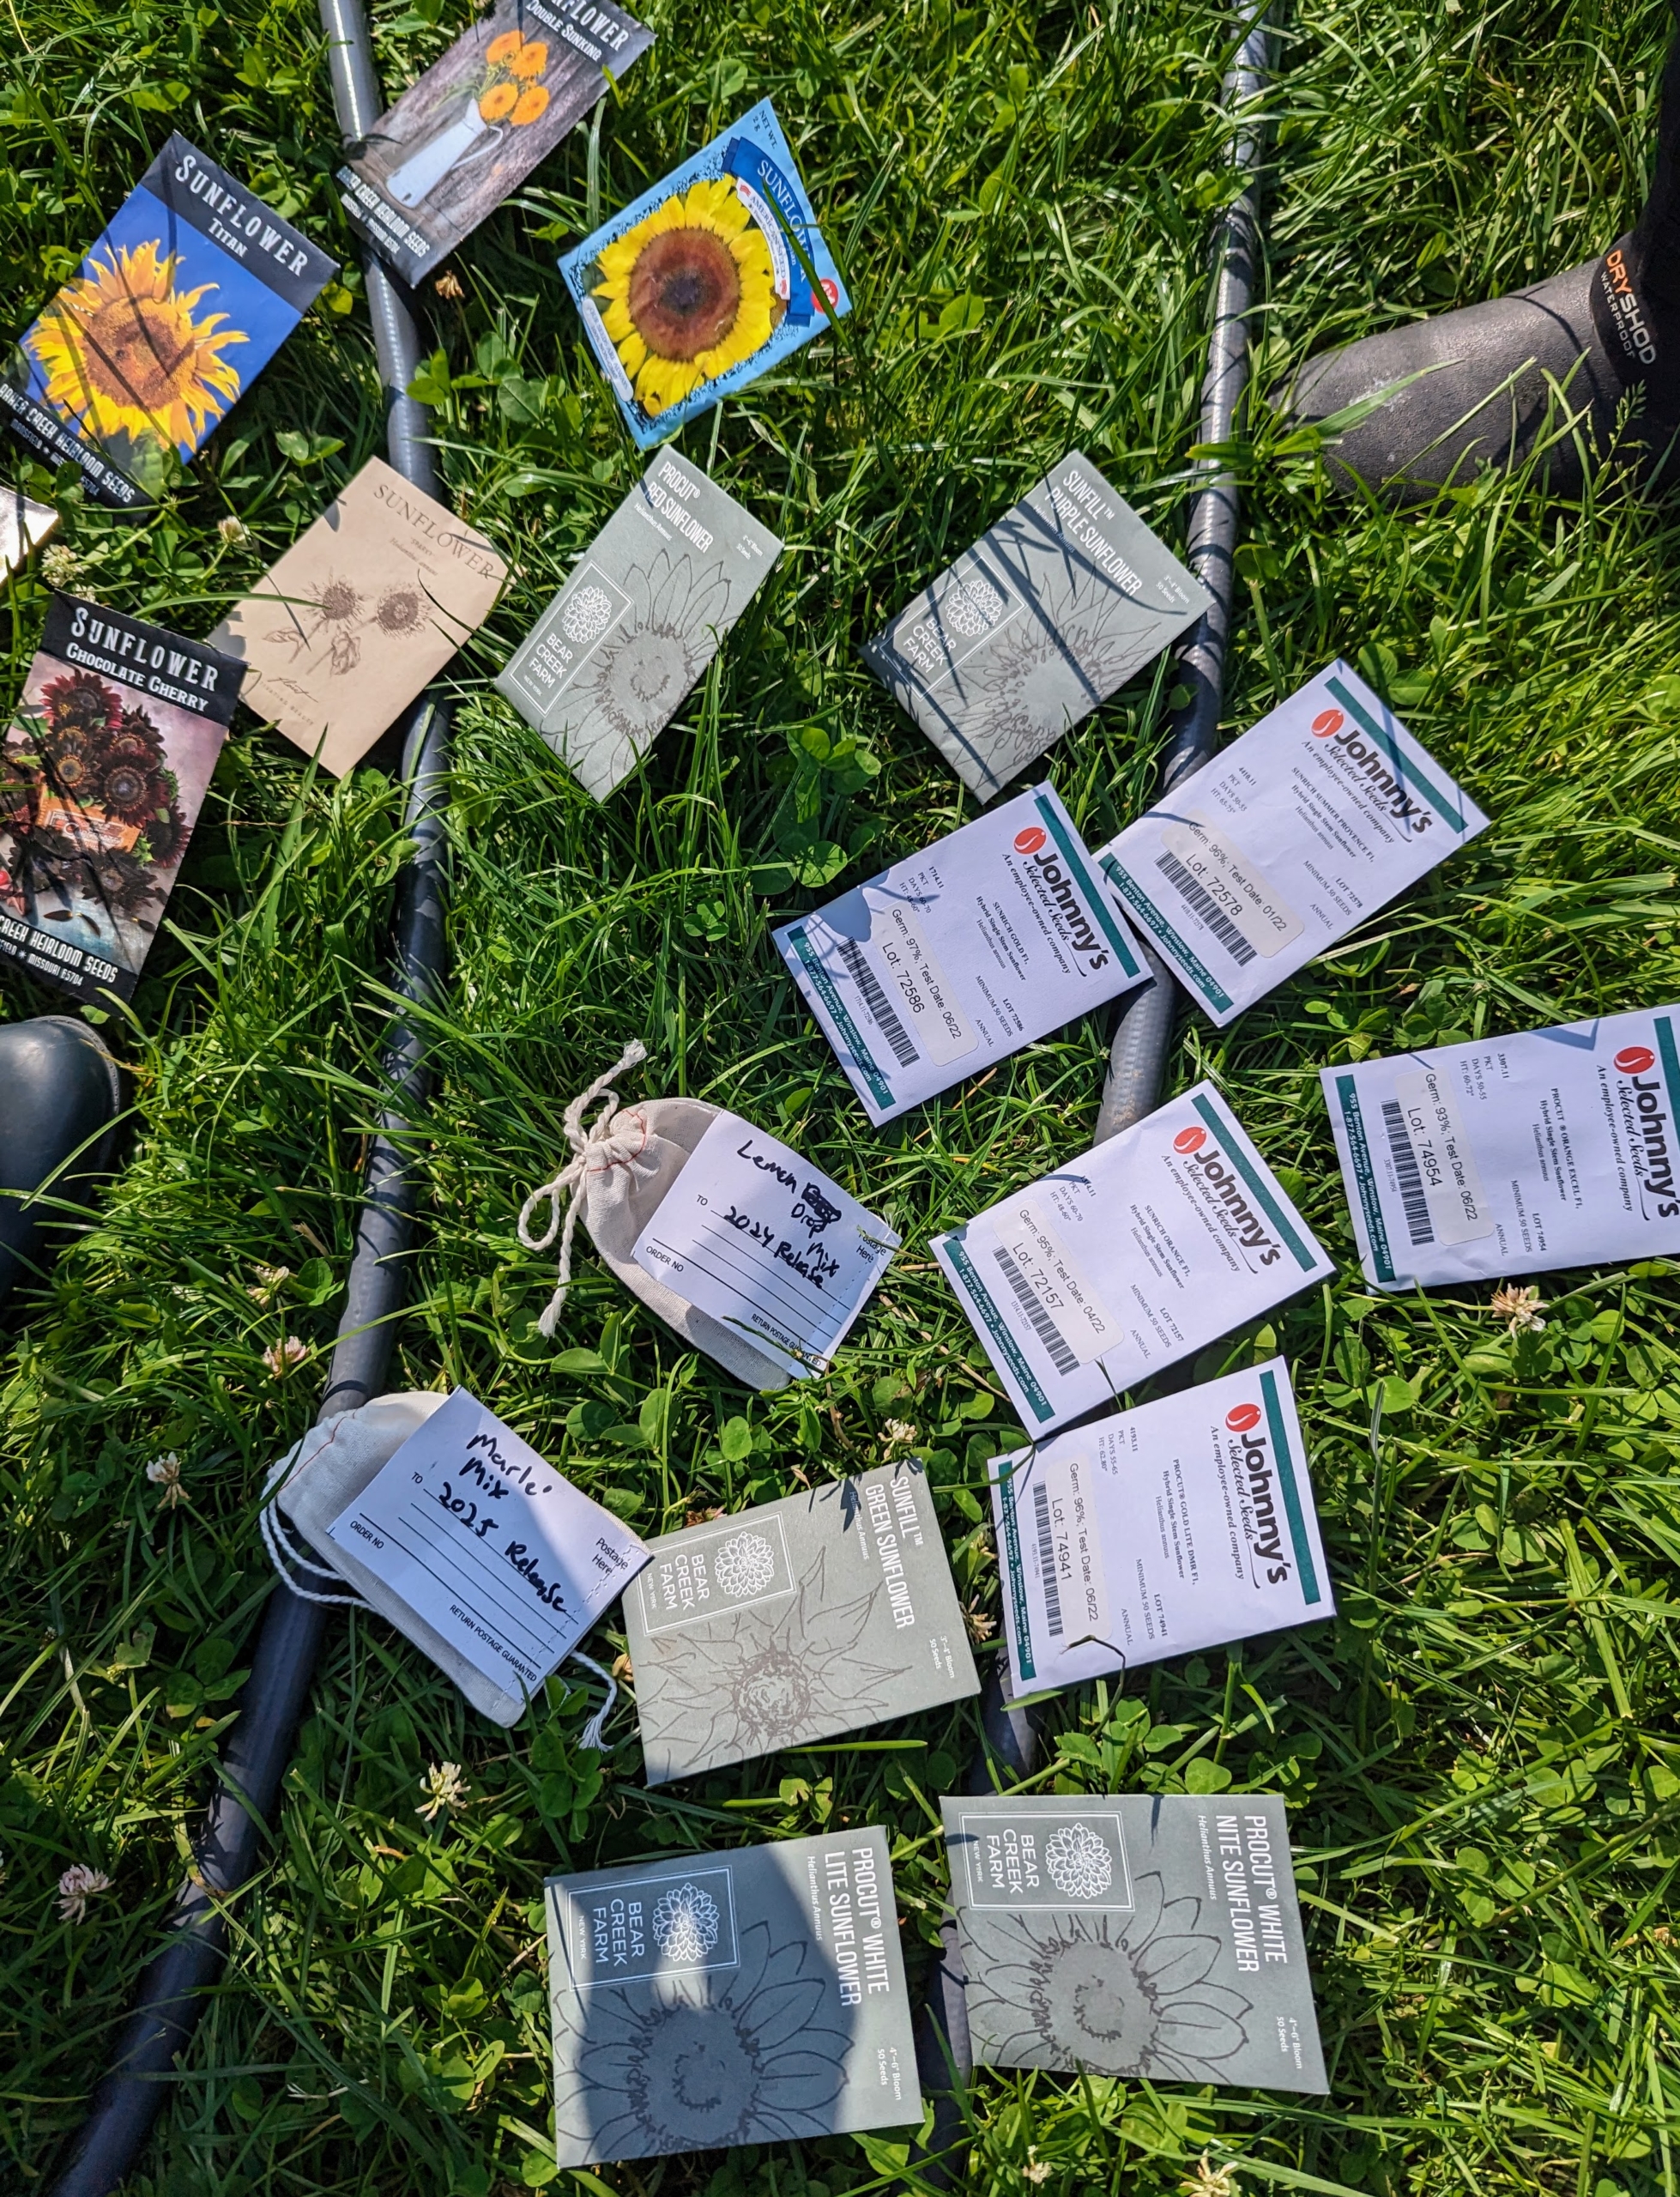
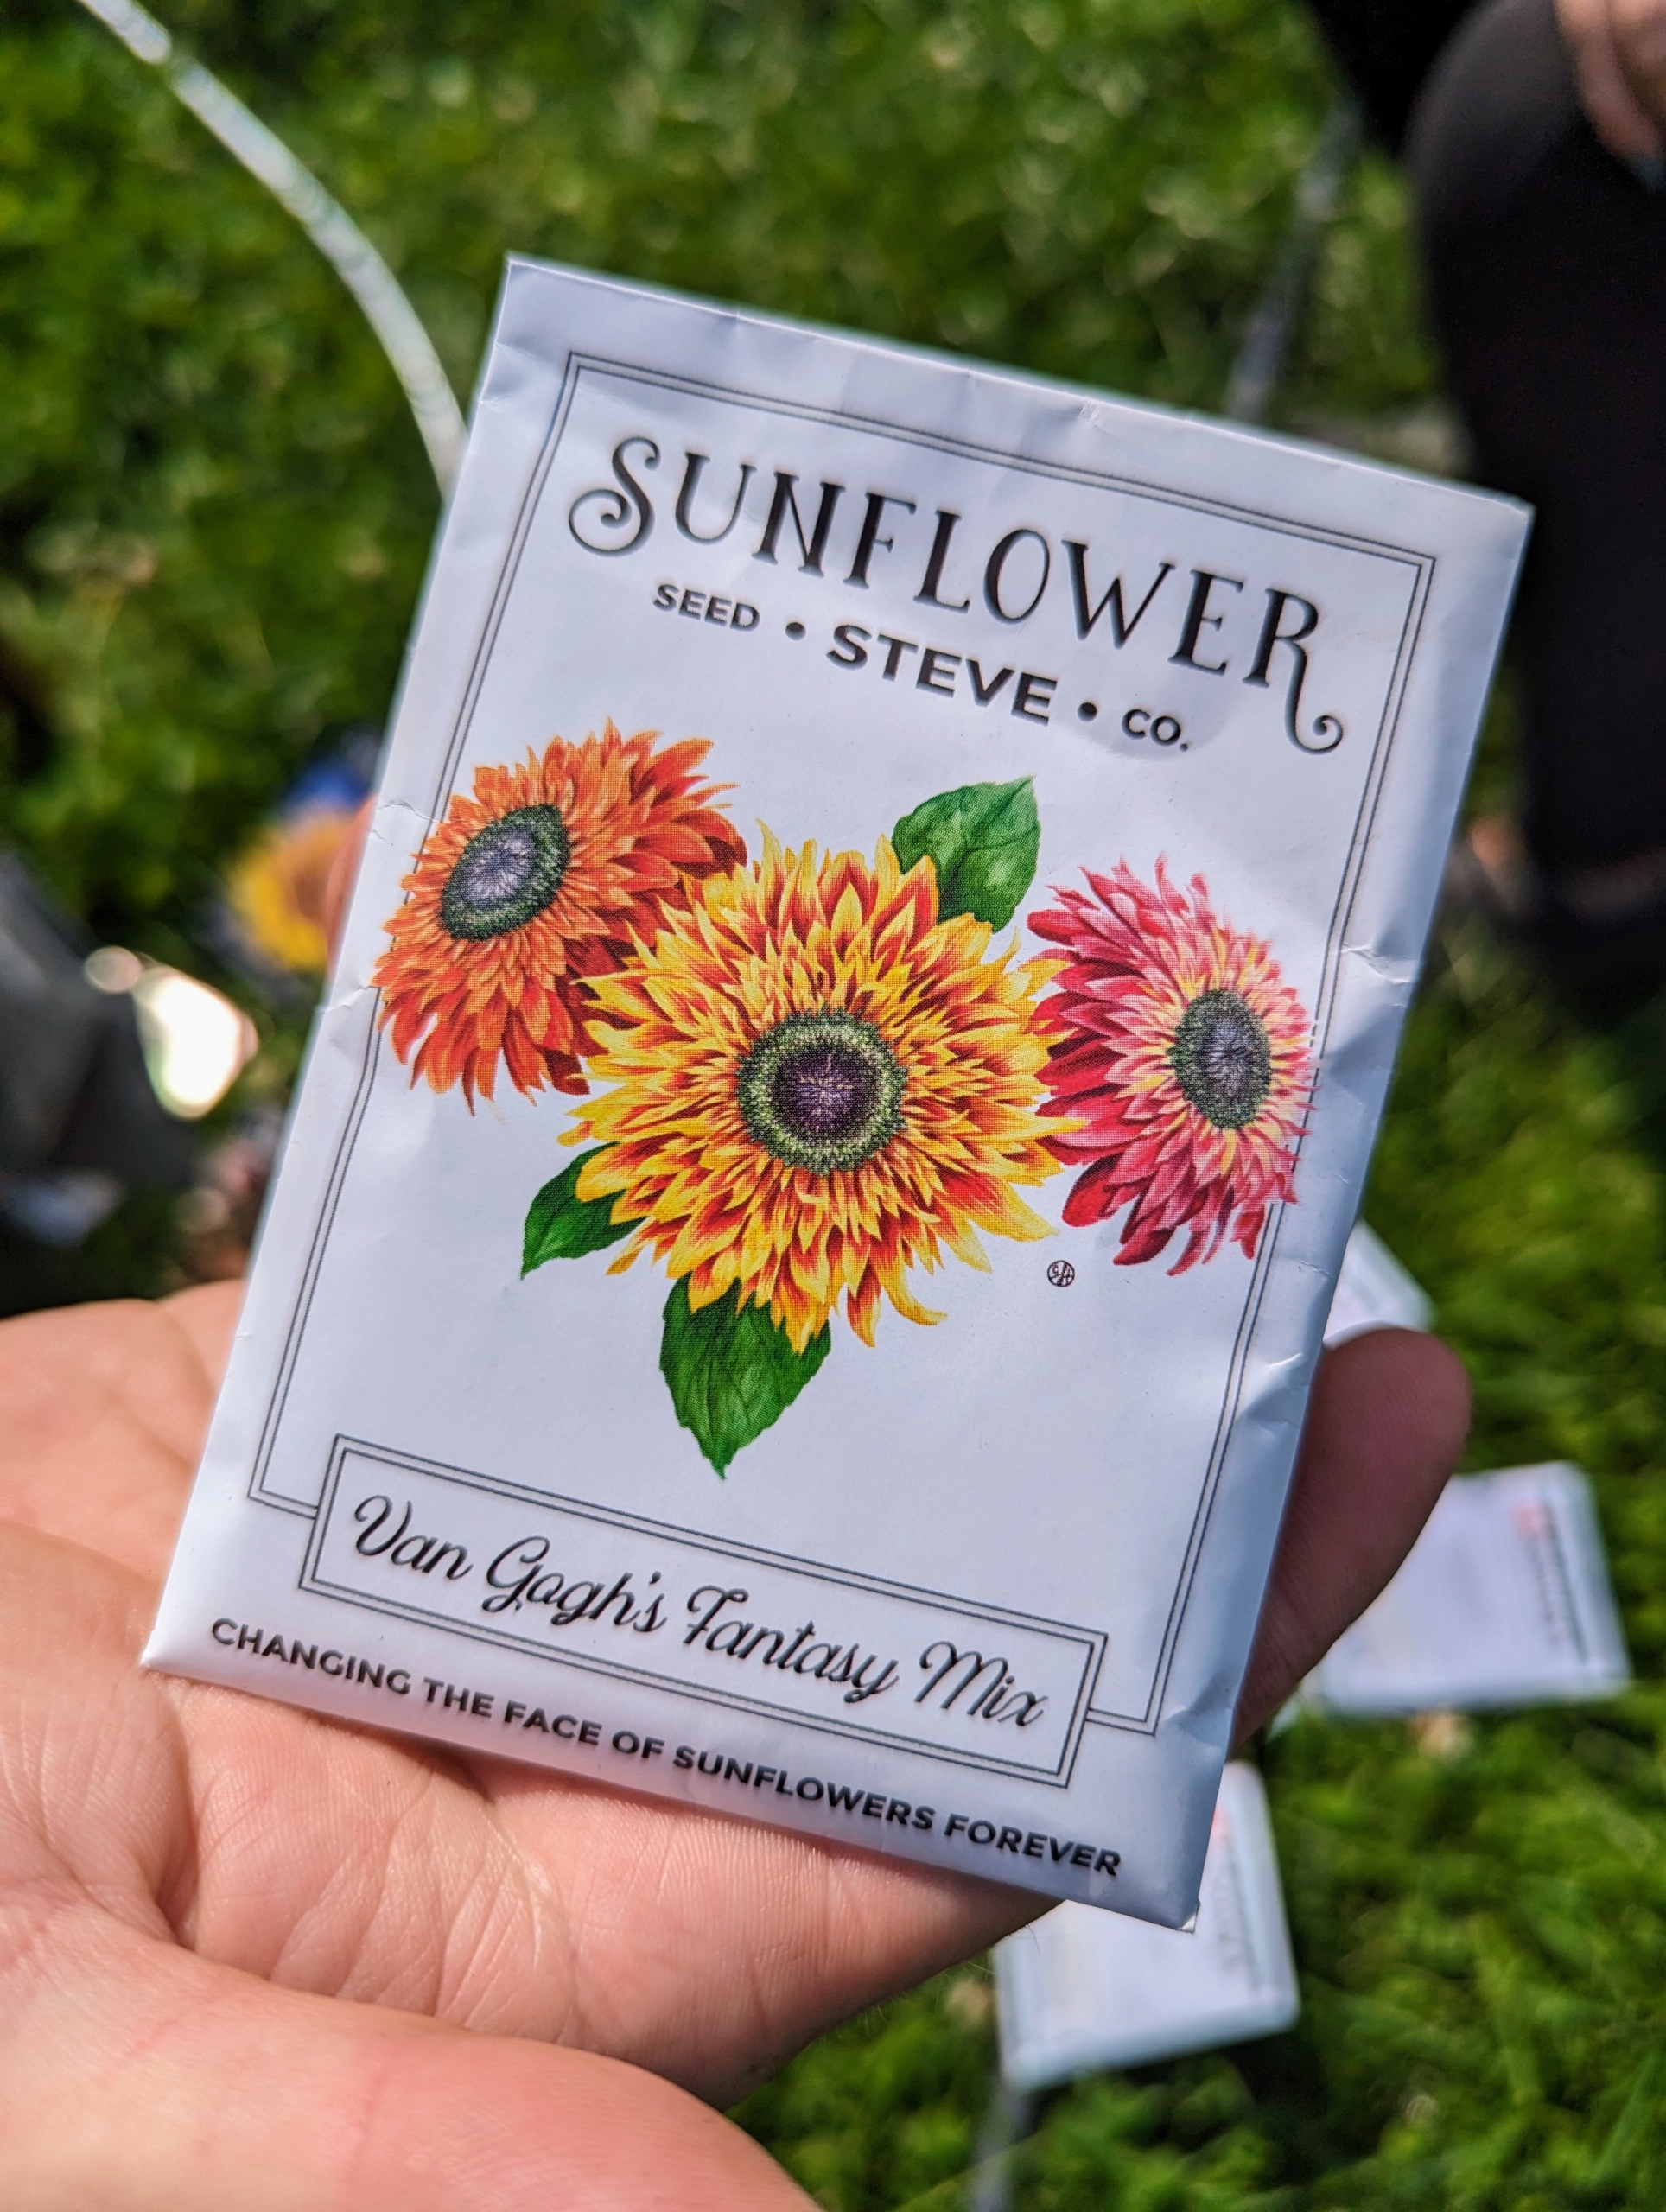
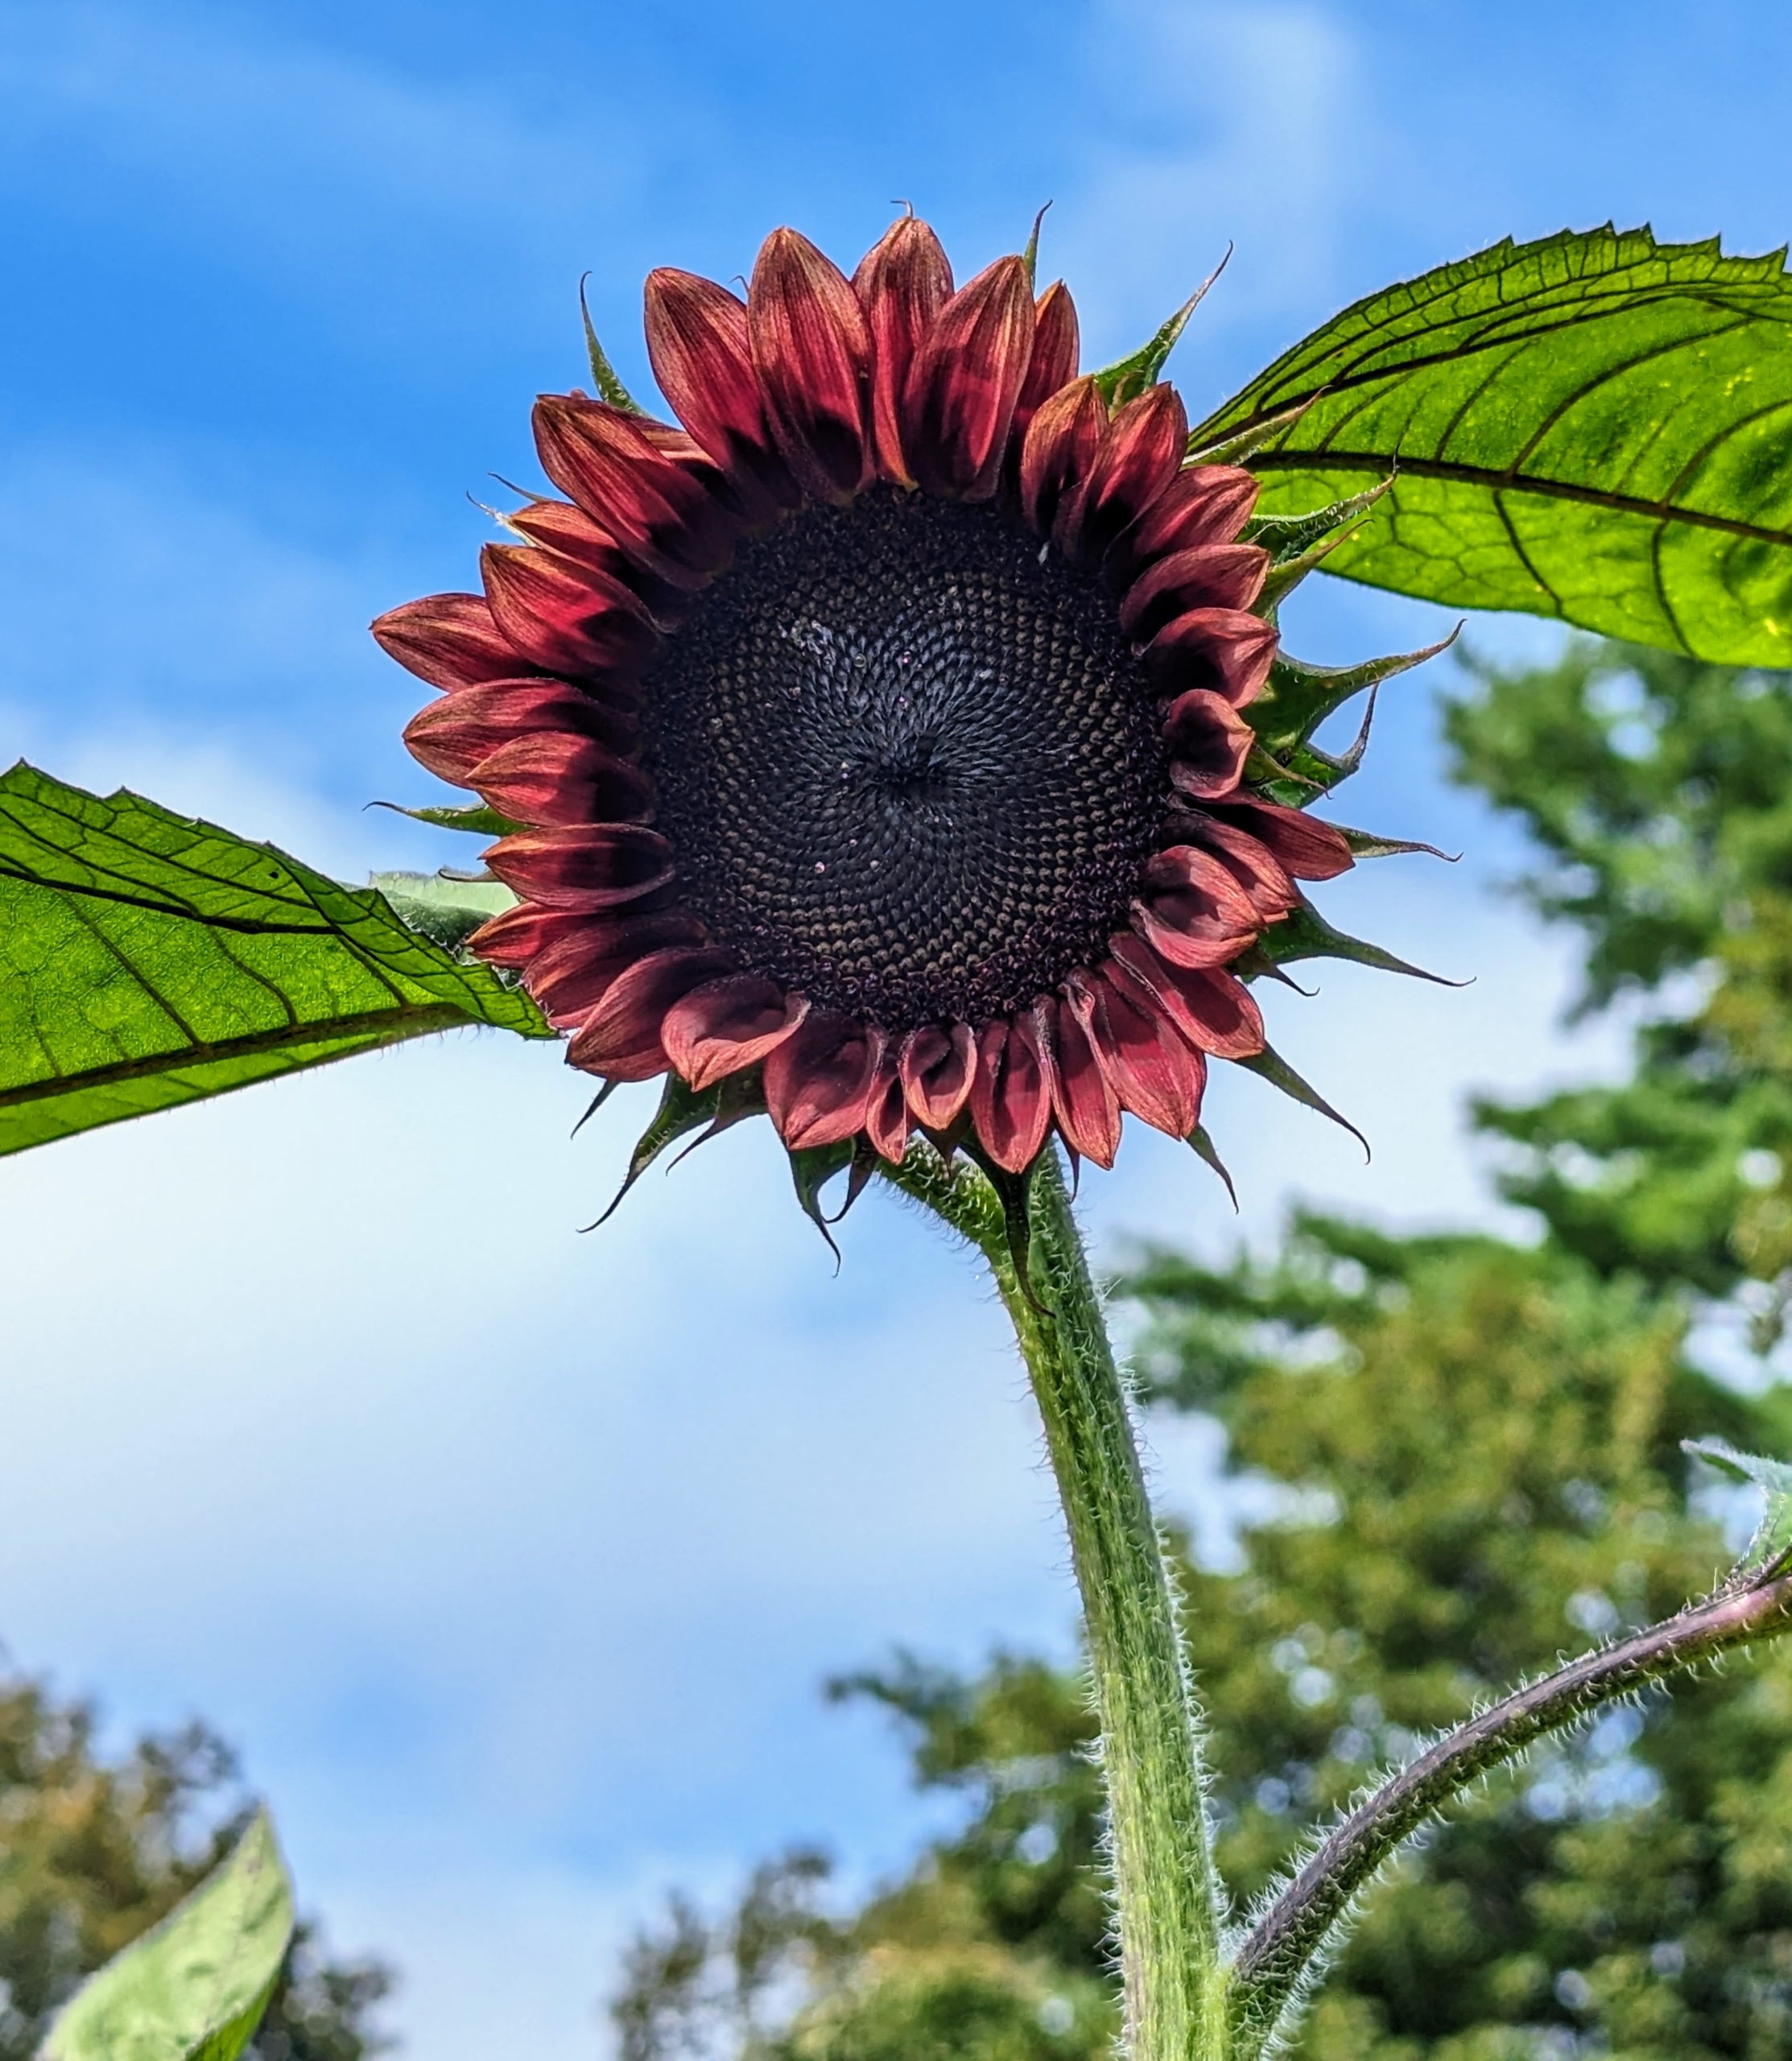
We planted many classic yellow sunflowers as well as the more unusual bronze to red colored sunflowers. All of them look so pretty in the garden.
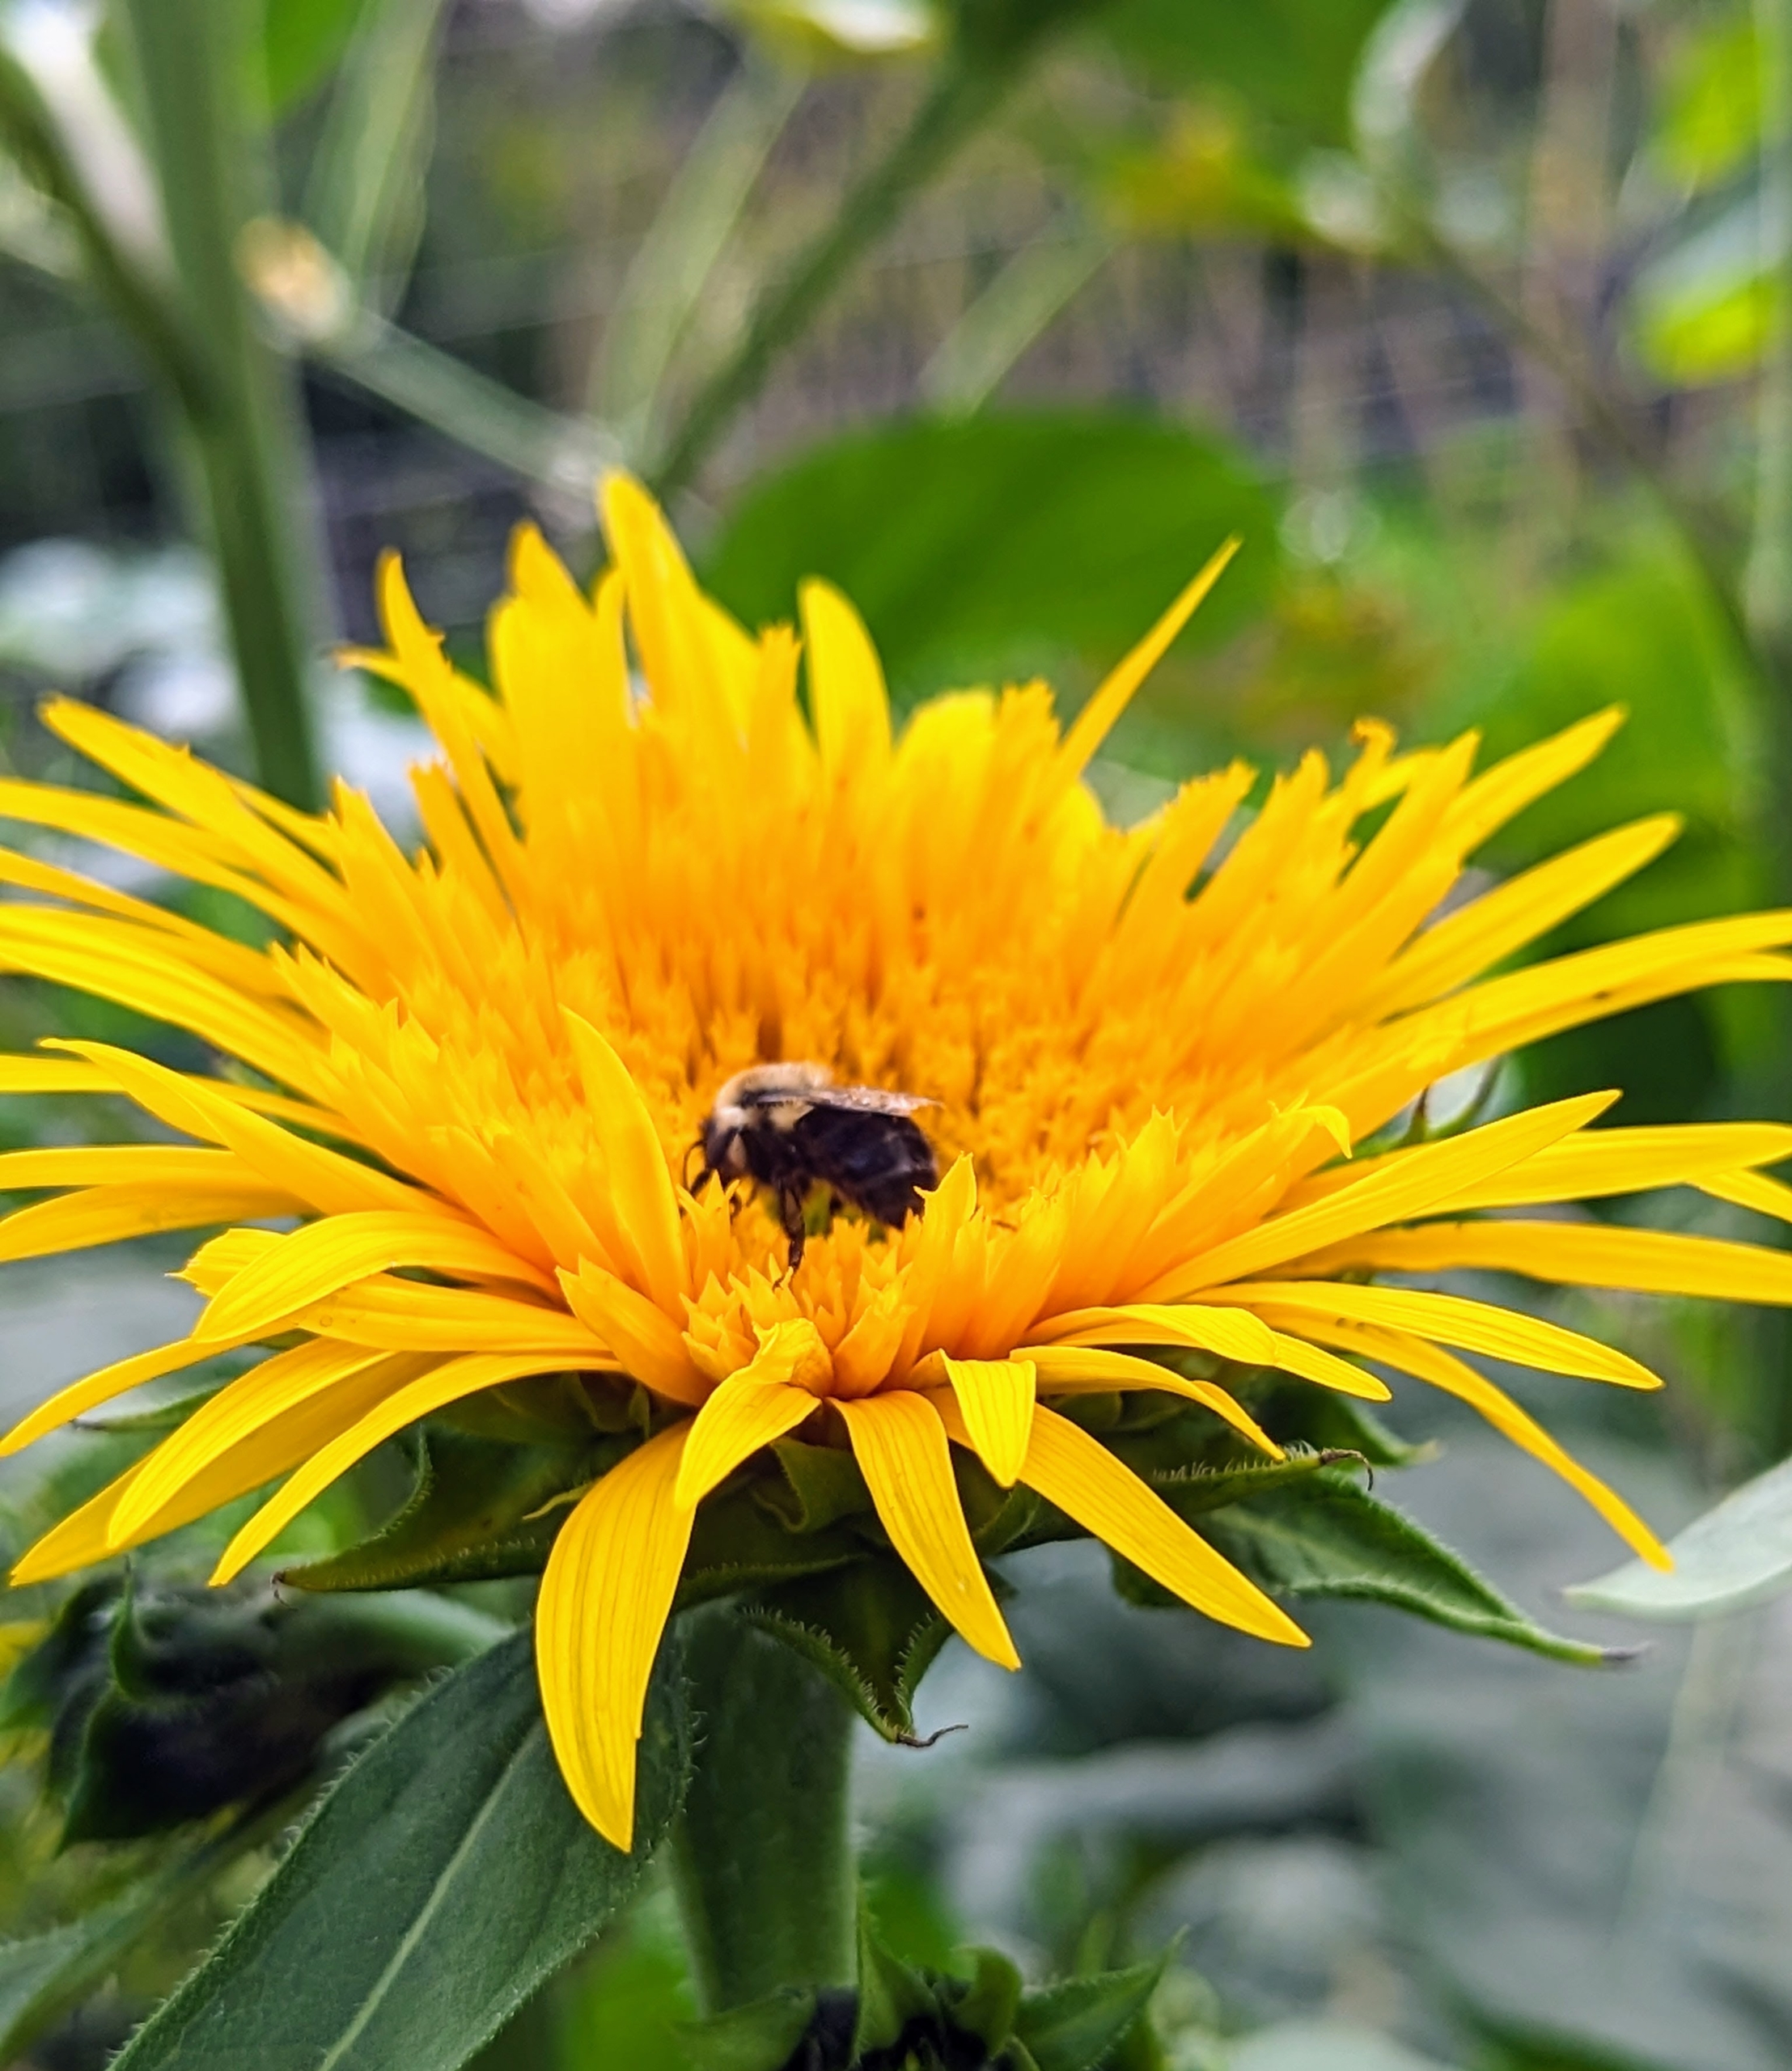
This bright yellow sunflower has long thin petals and a smaller center than other varieties.
Sunflowers produce a huge amount of pollen and nectar making so many pollinators very happy. Pollen from sunflowers has been found to boost the immune systems of both bumbles bees and honey bees.
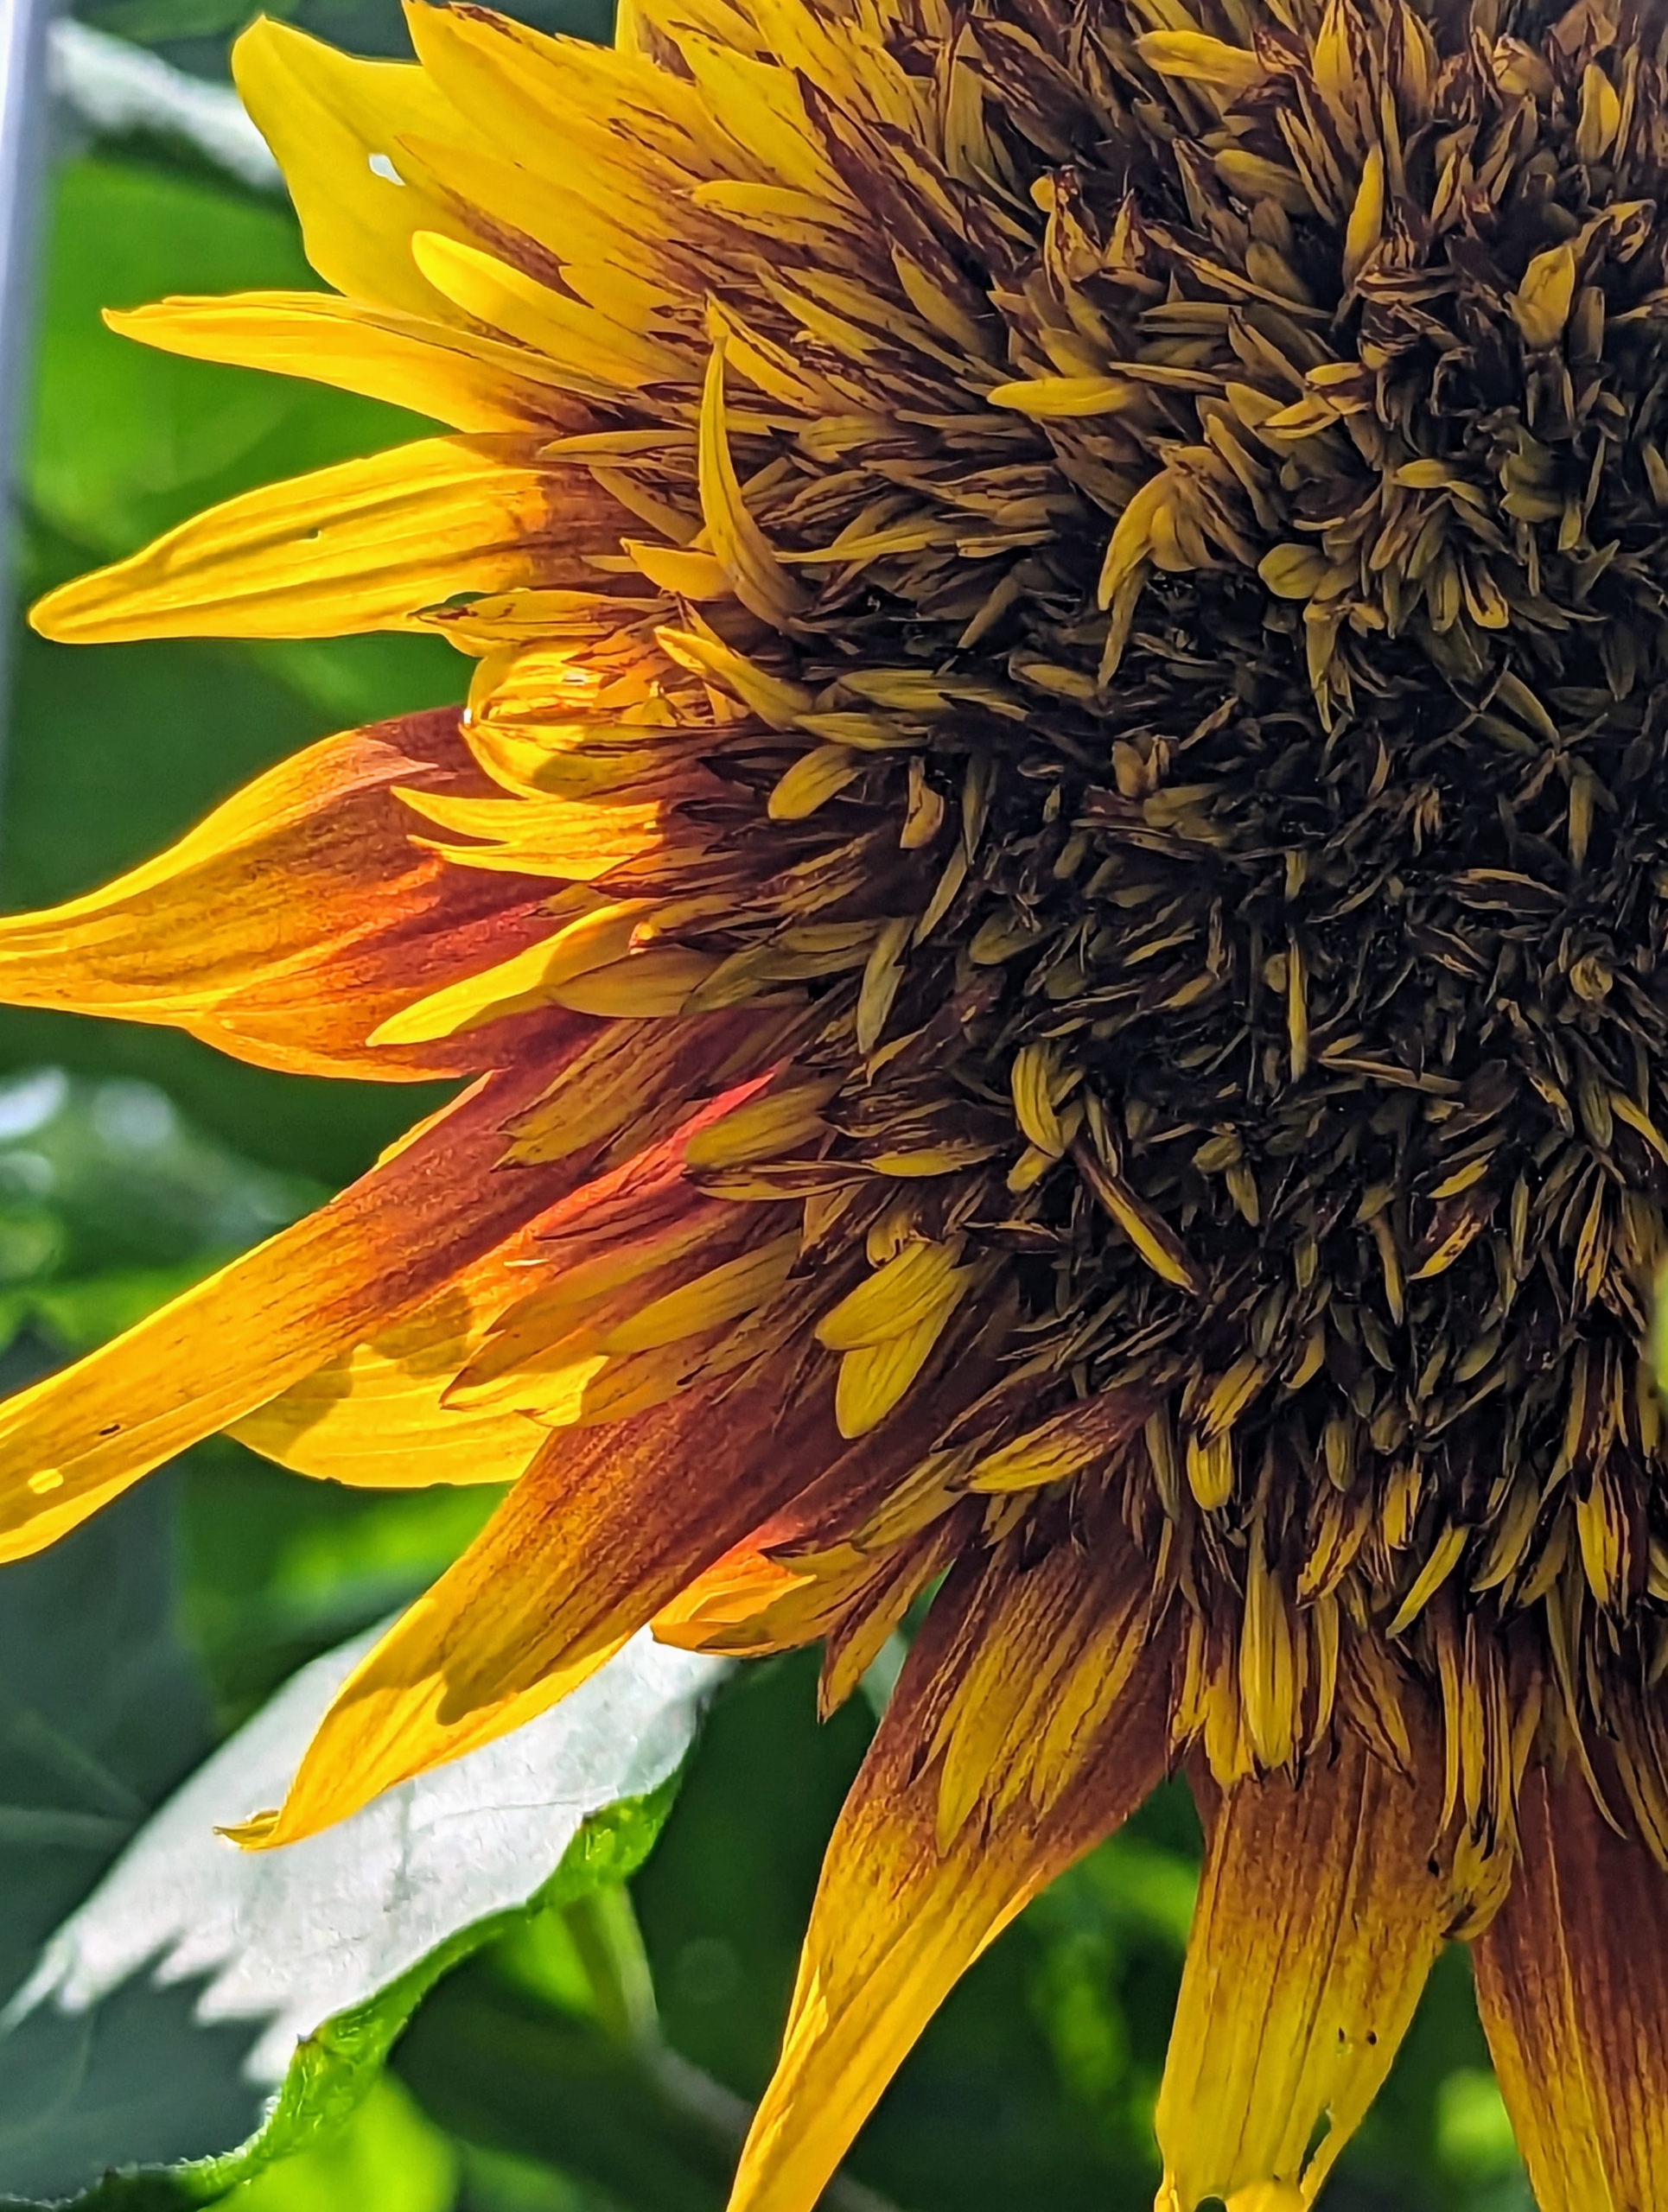
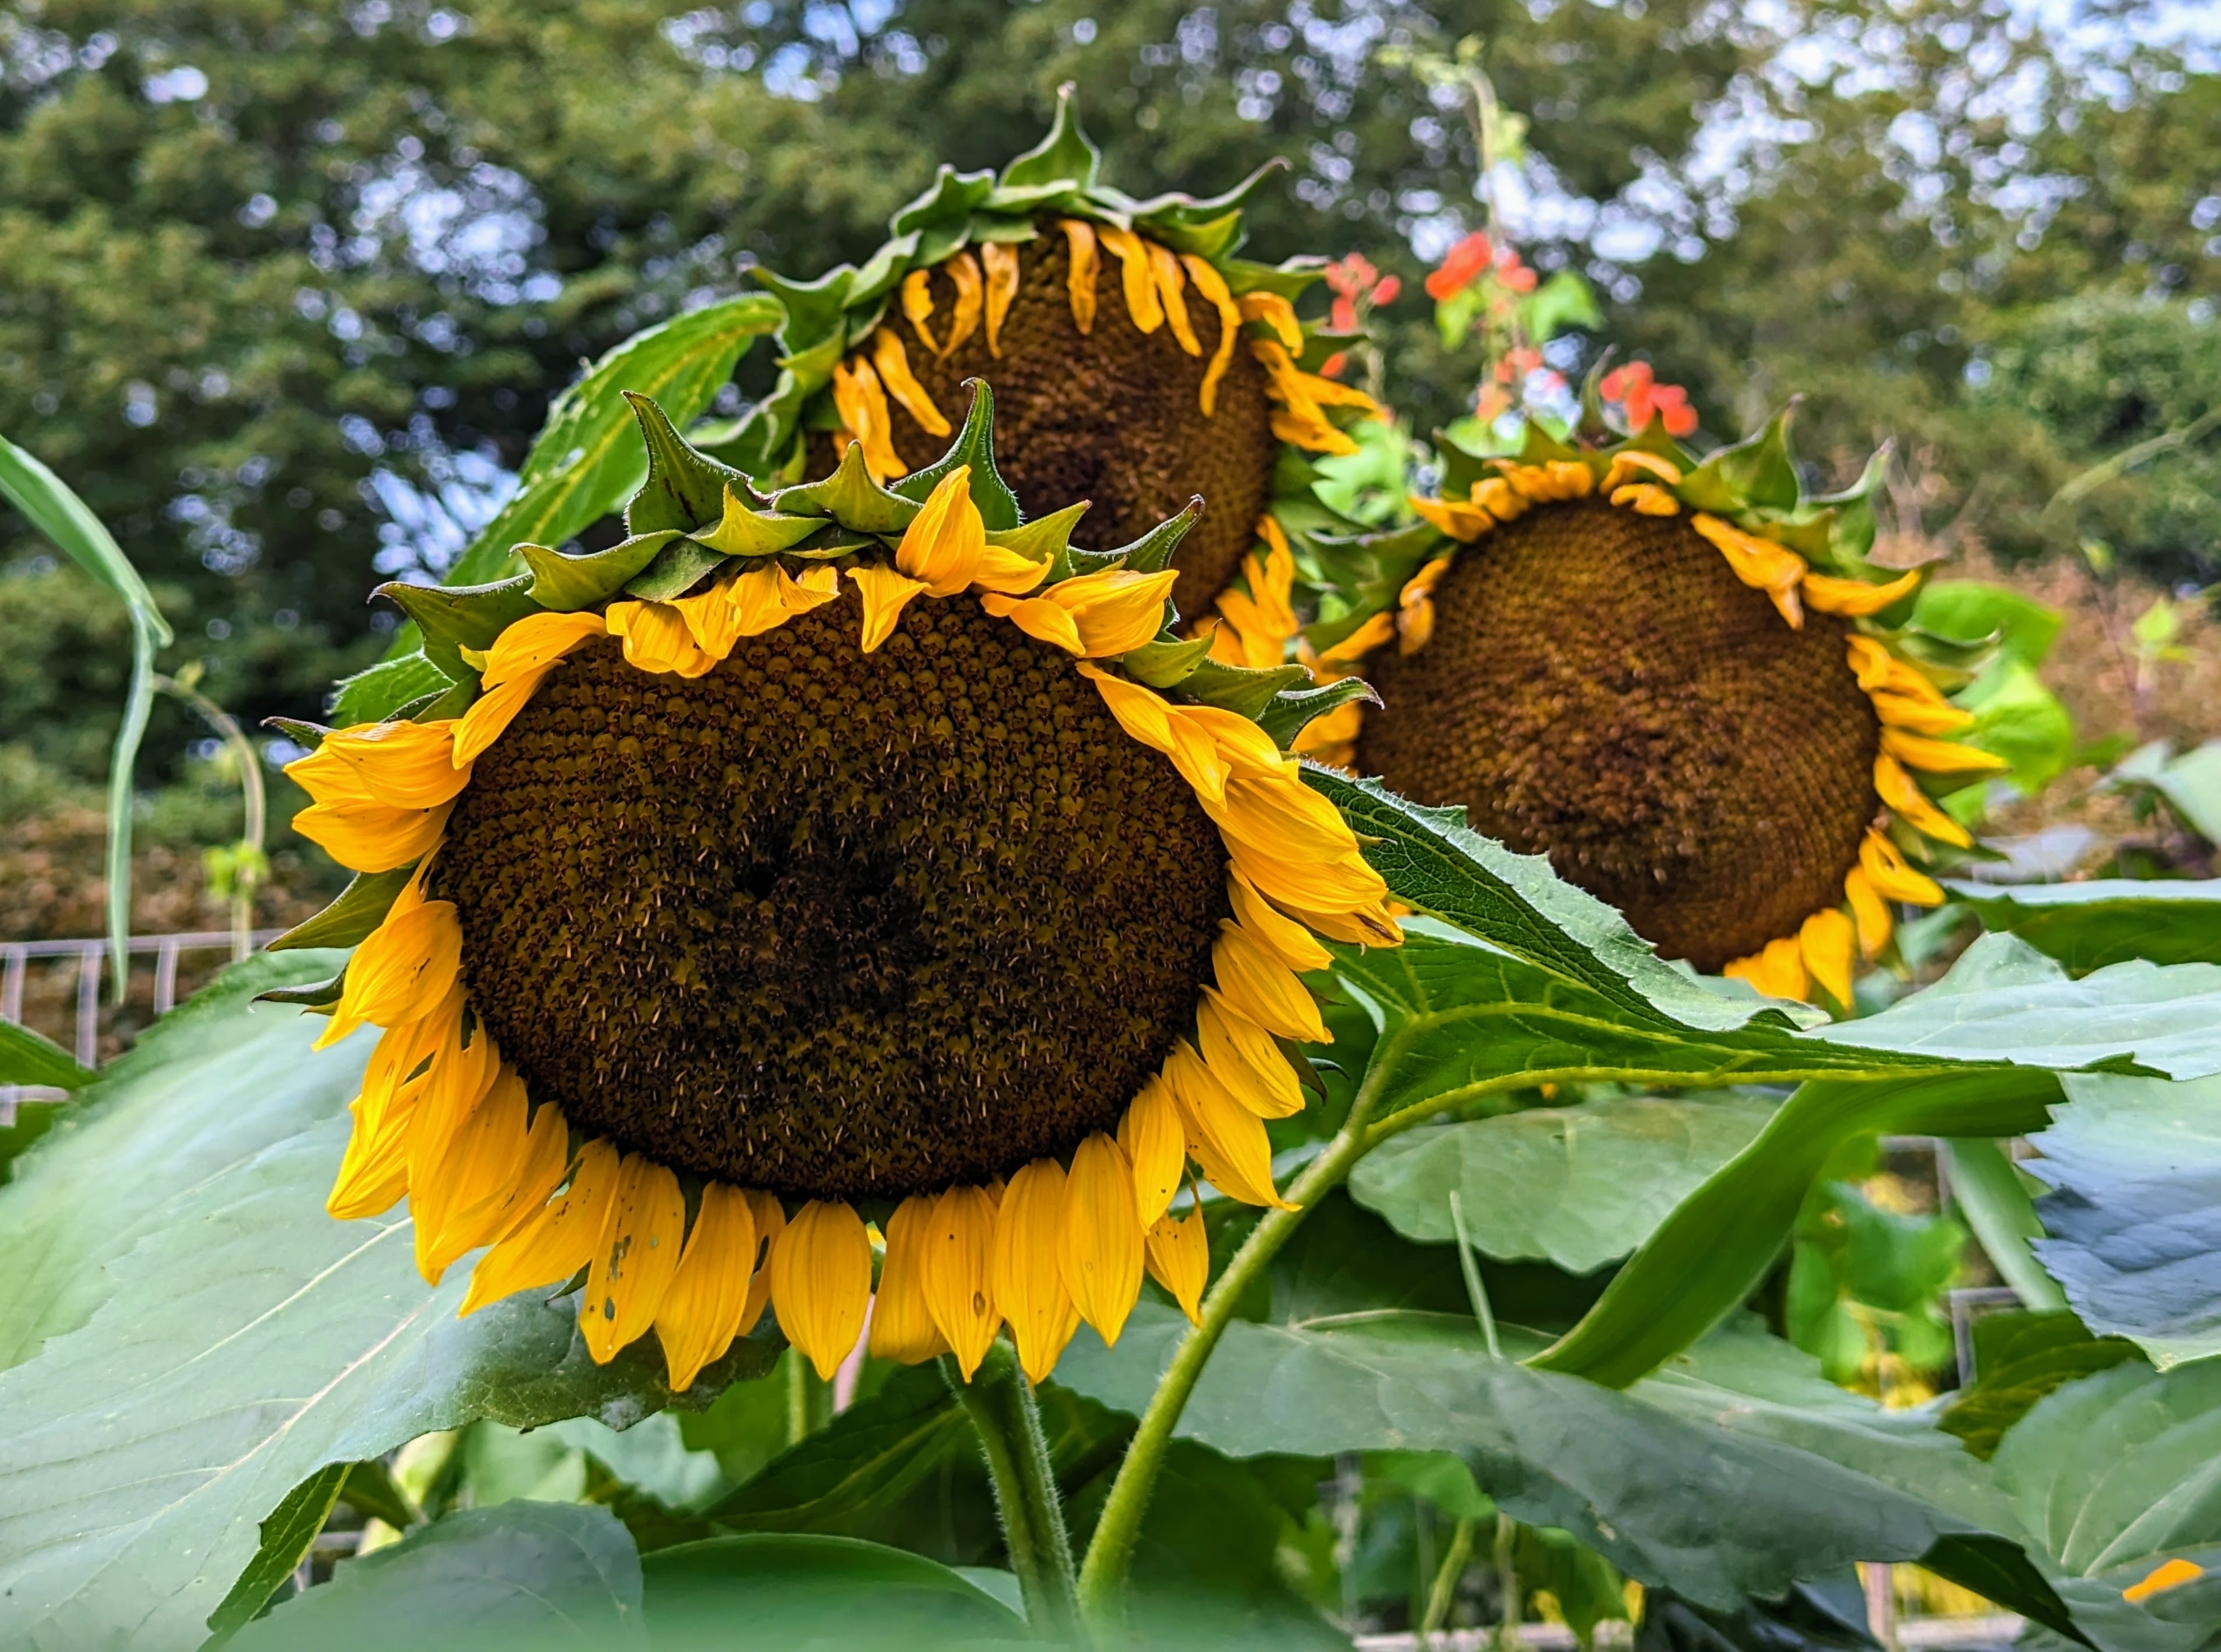
Each sunflower is actually thousands of tiny flowers. The center of the sunflower is filled with disc florets, the flowers in the middle that contain male and female reproductive organs and mature into fruit and seed.
Around the disc florets are the ray florets or the sterile florets on the outside. Each sunflower can contain as many as 1,000 to 2,000 seeds.
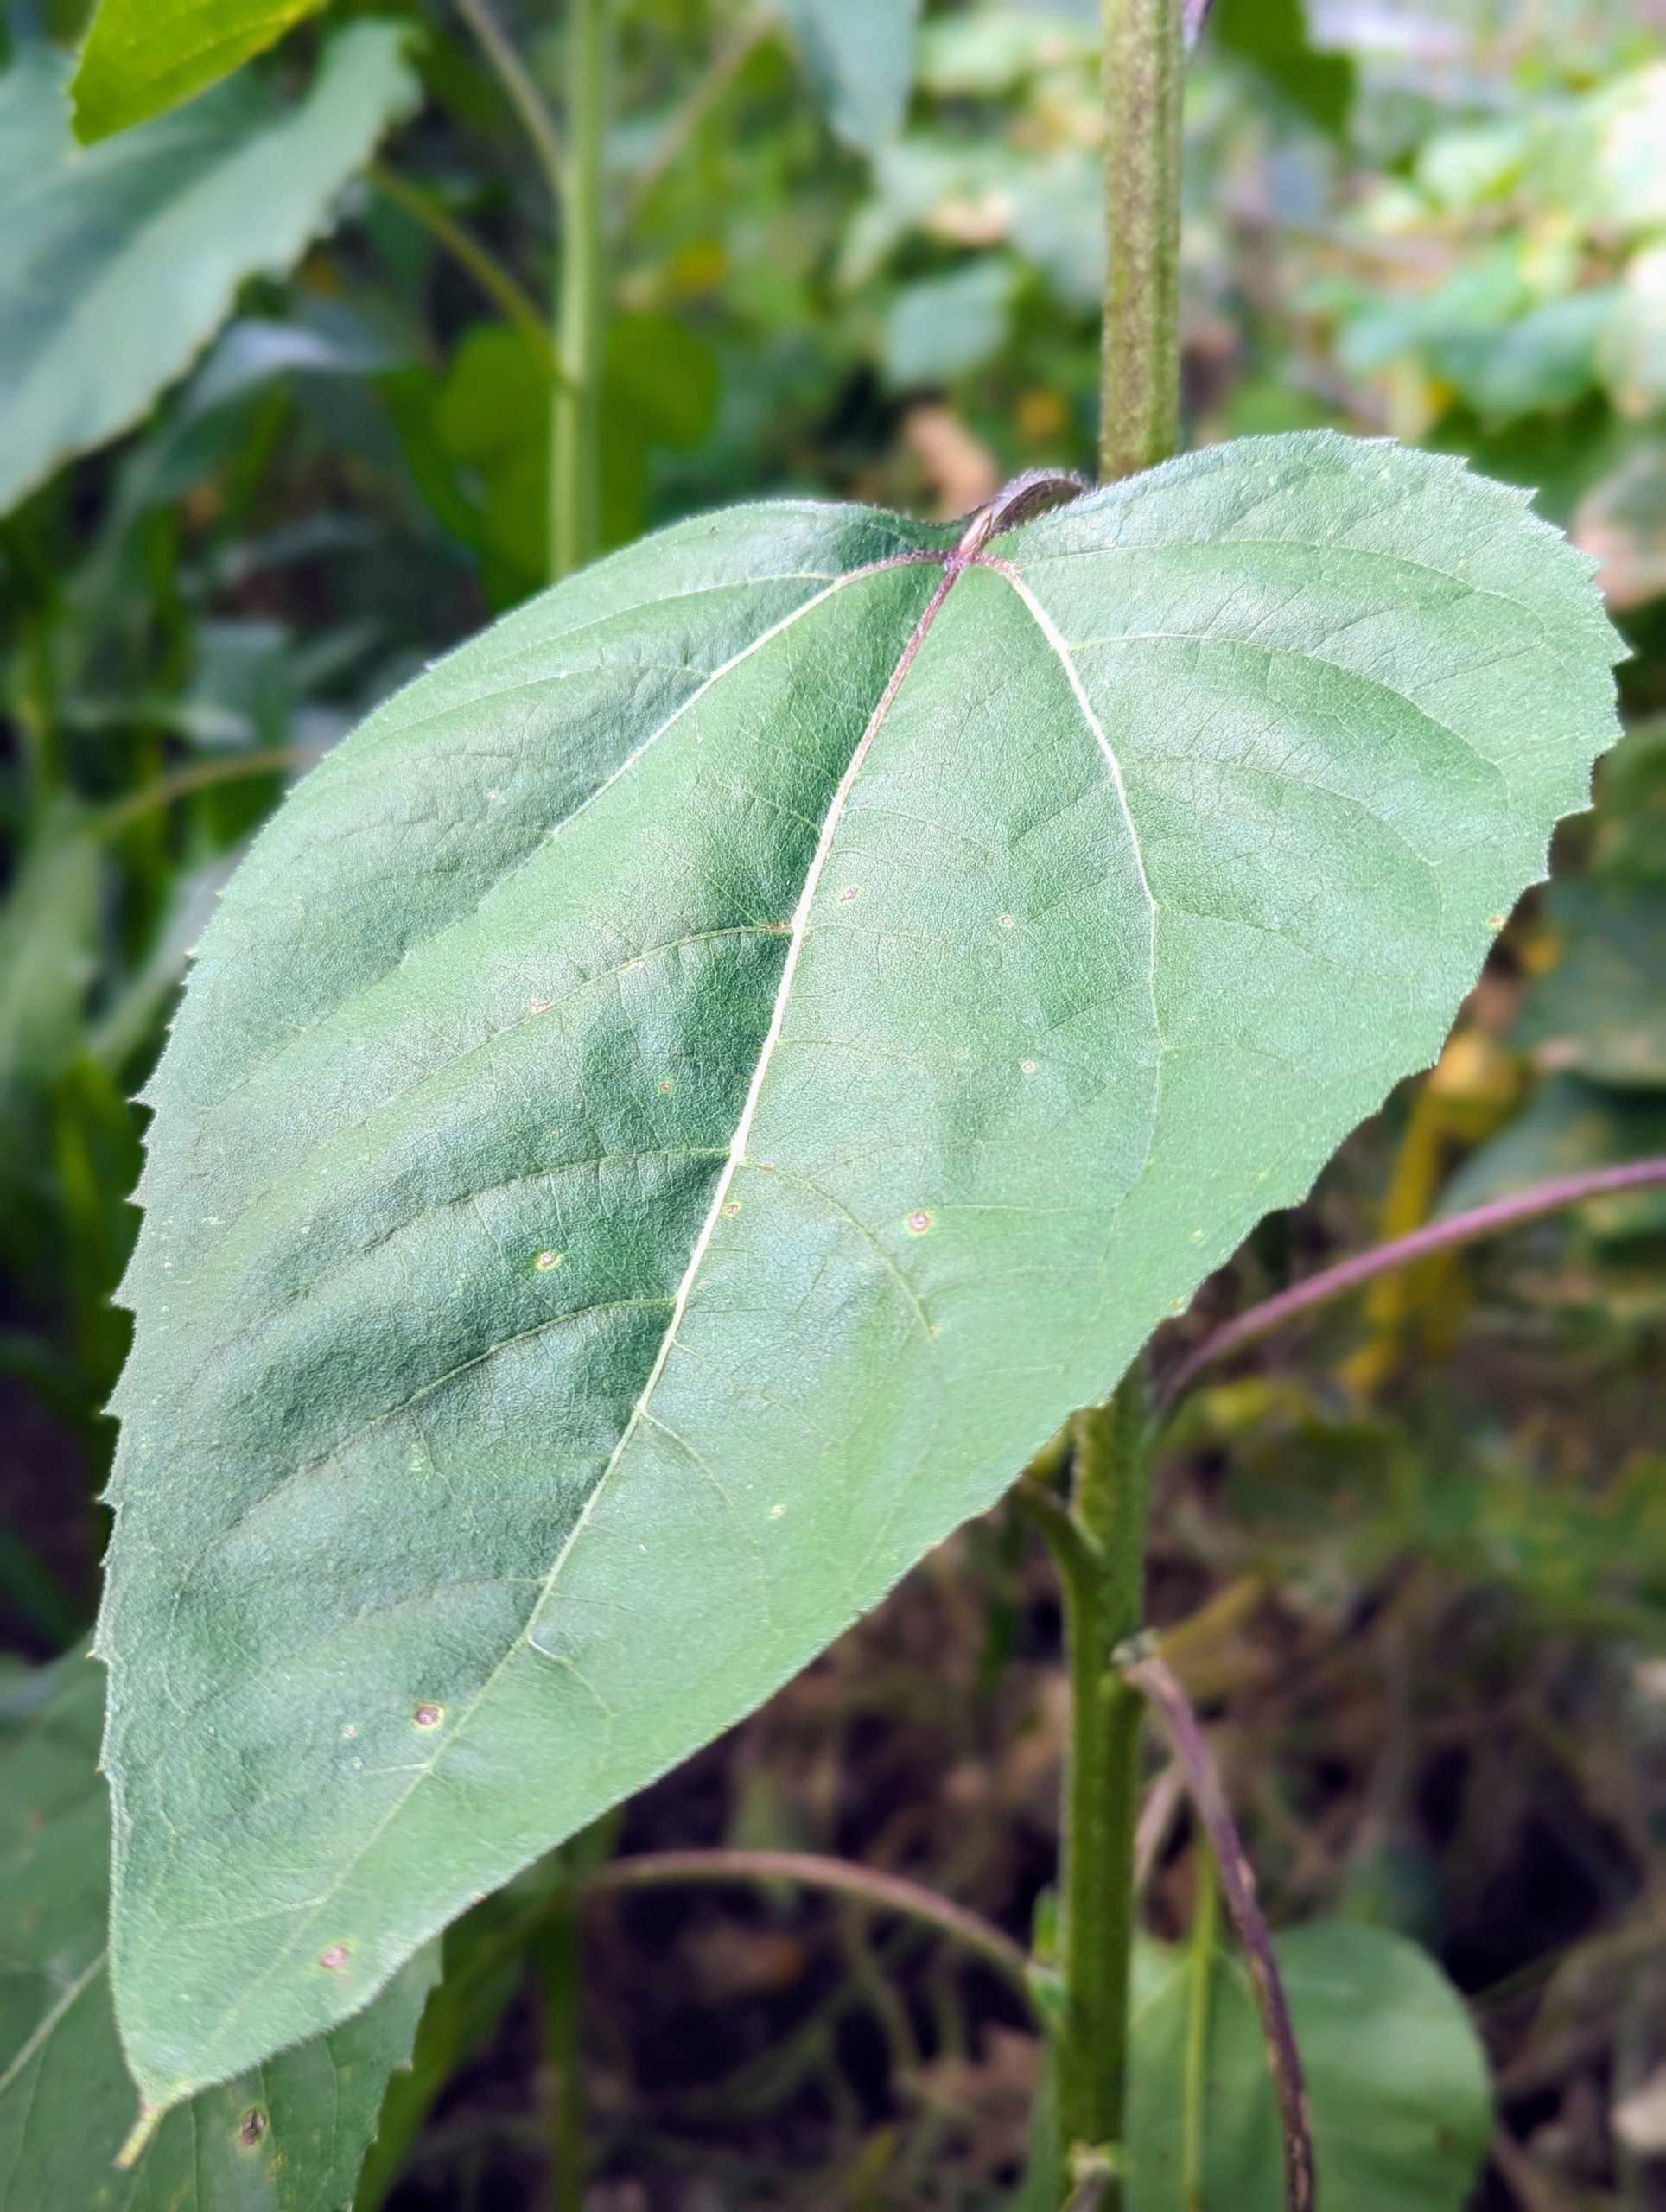
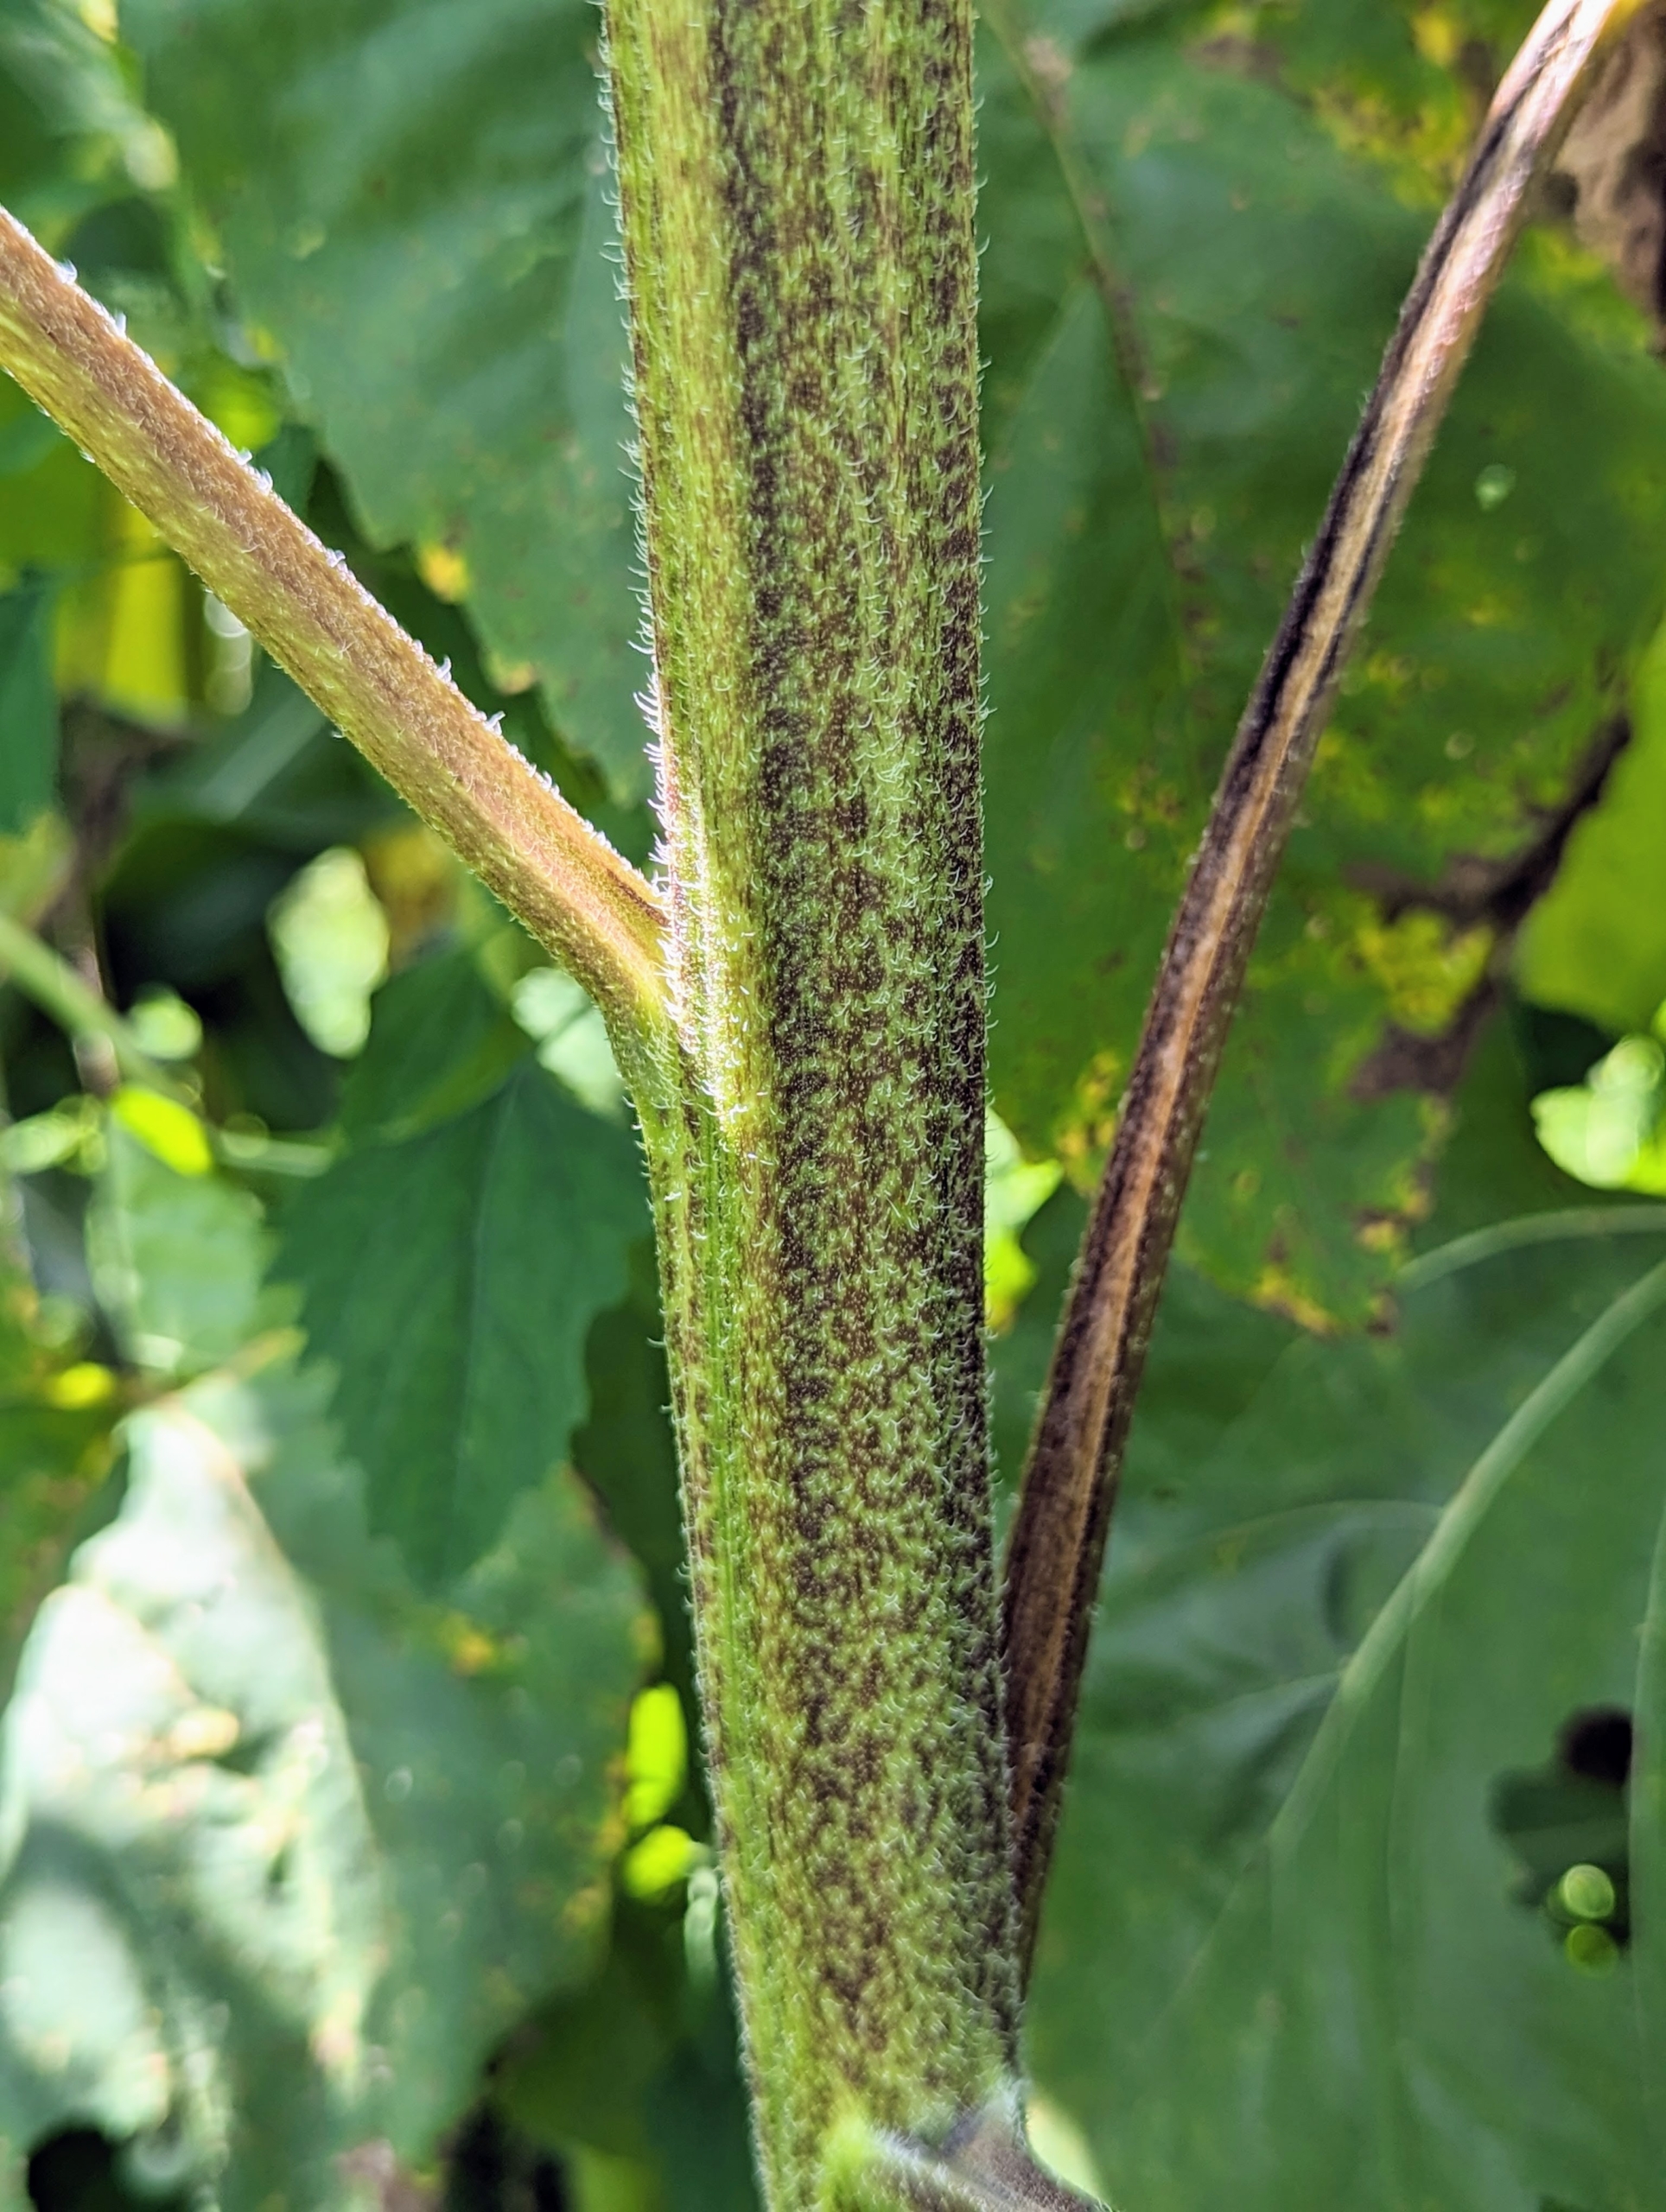
The sunflower’s leaves are large, arranged alternately along the stem when mature. They have serrated margins, and are triangular to heart-shaped and can grow up to 12 inches in length.
A common sunflower stem is sturdy and covered in coarse hairs. Sunflowers also have long tap roots that need to stretch out, so the plants prefer well-dug, loose, well-draining soil.
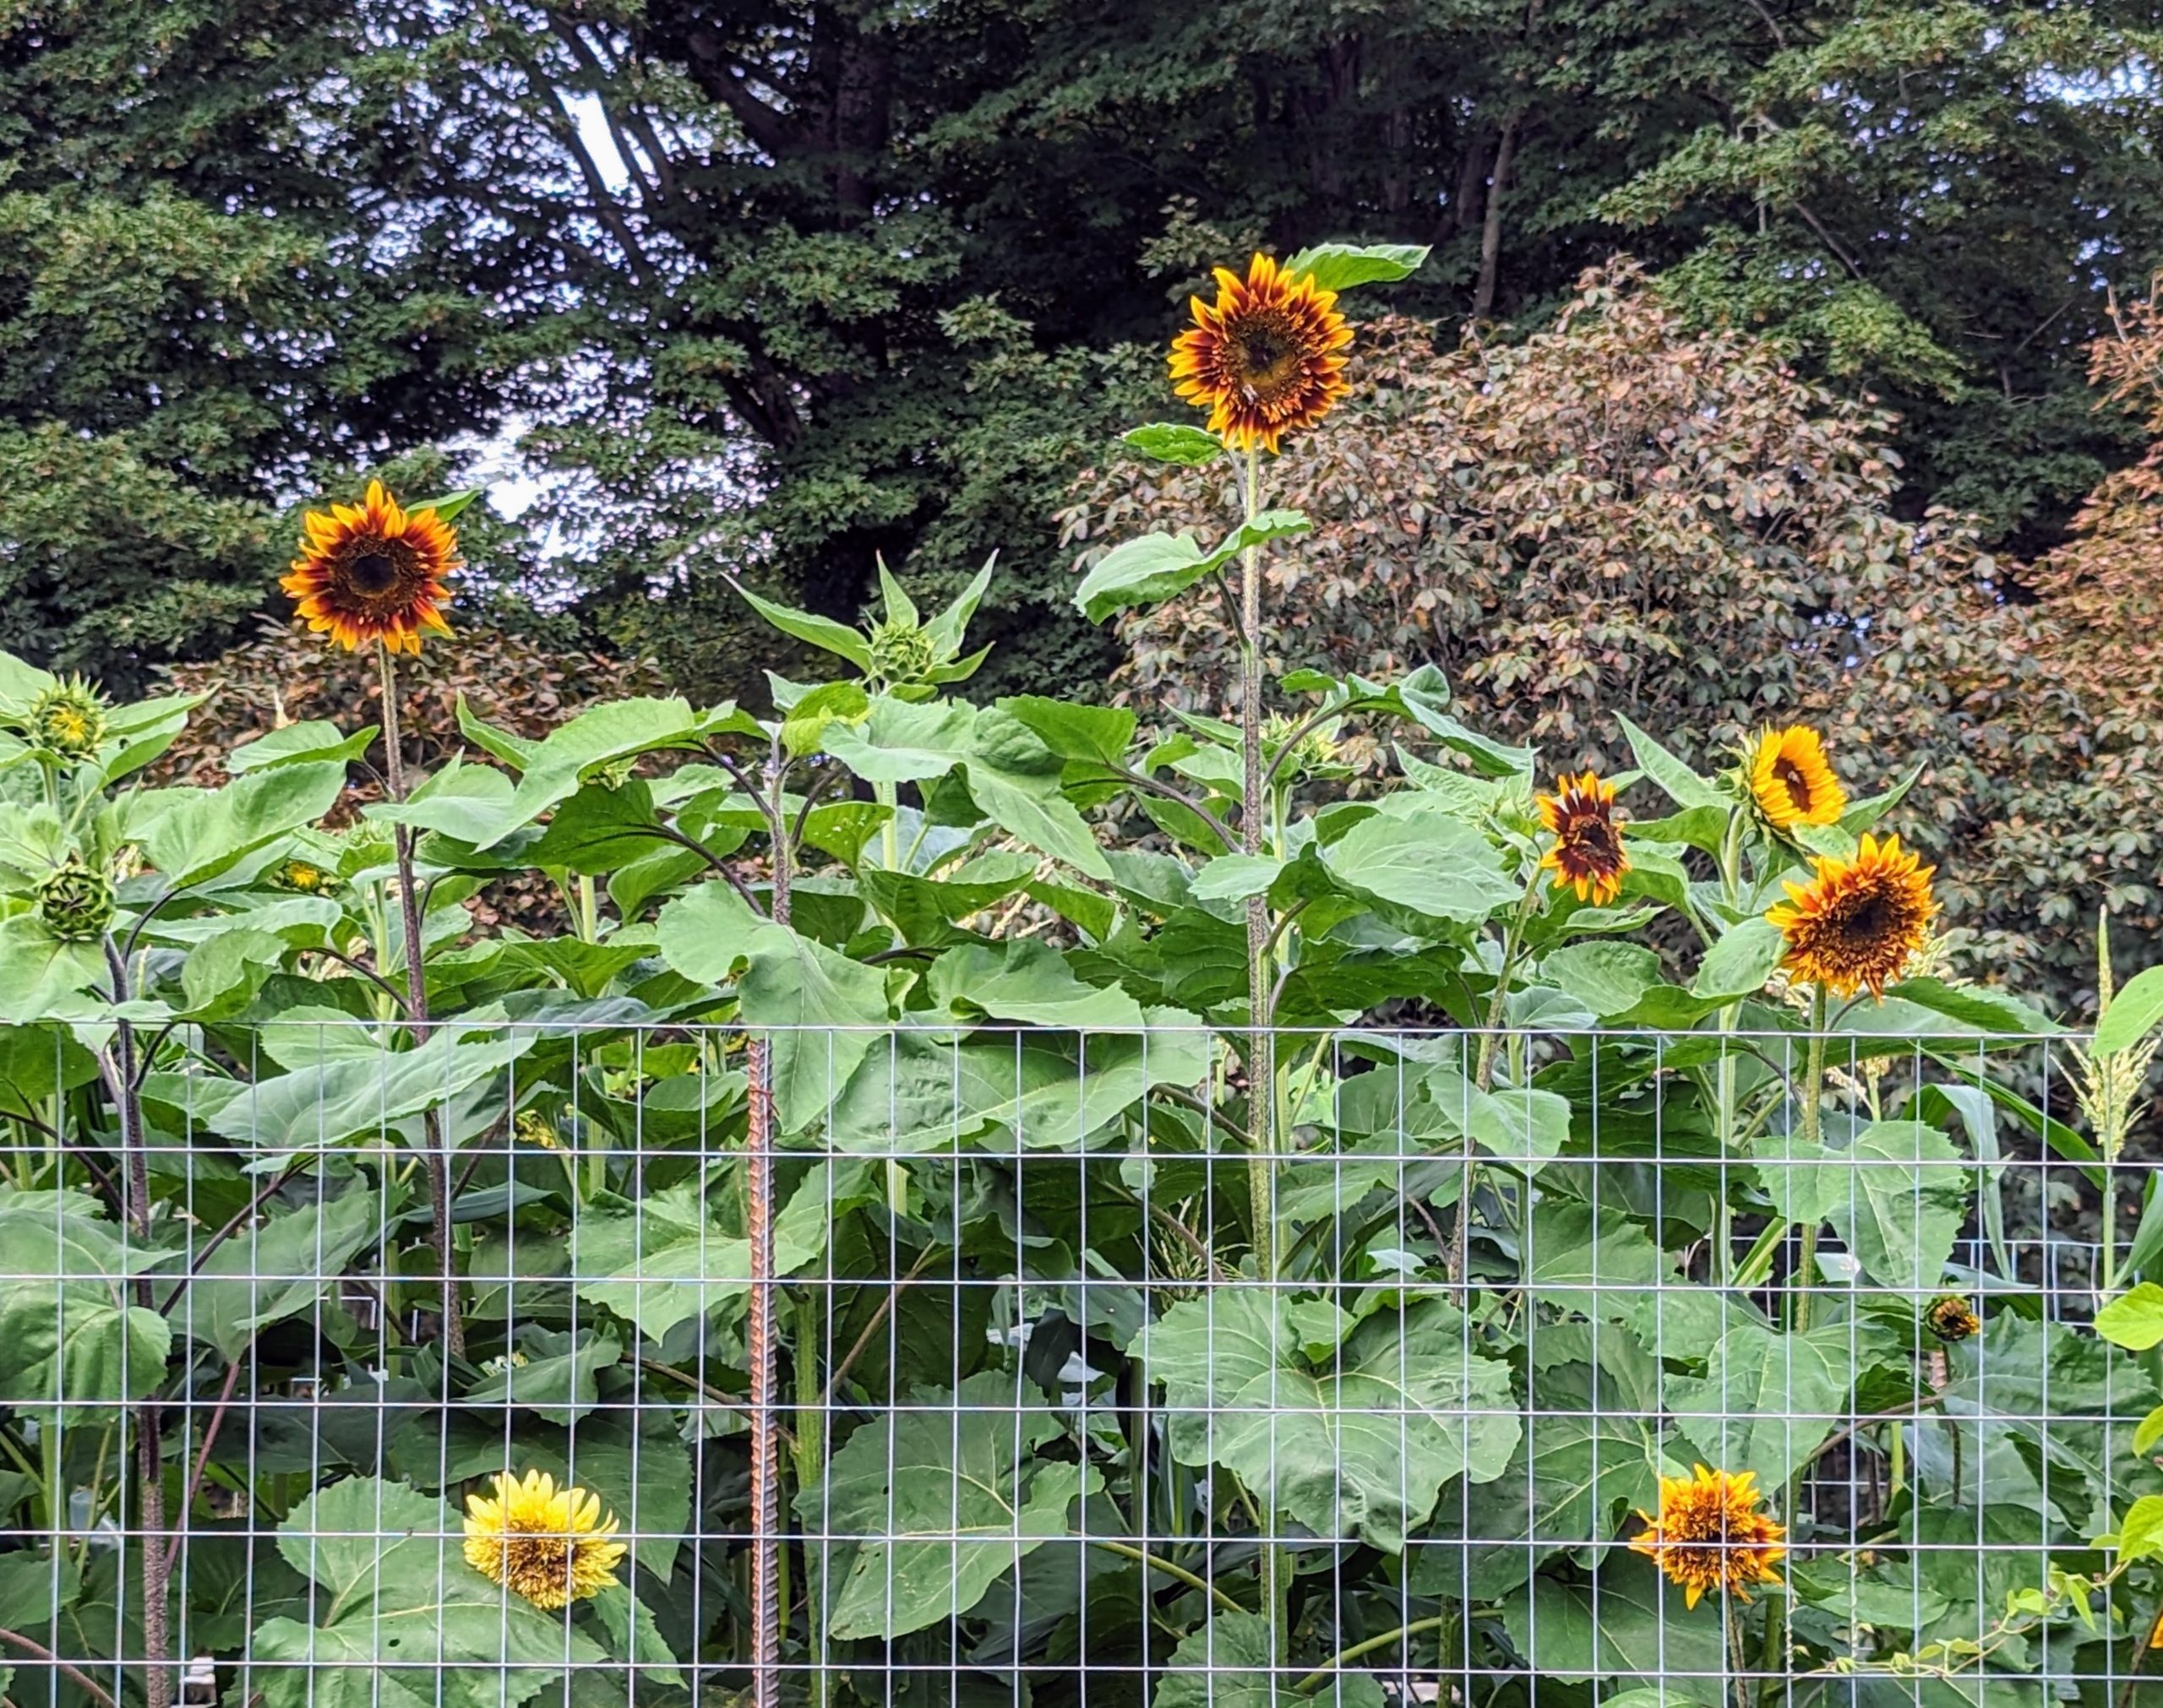
Here are three mature sunflowers all facing east. They often face the rising sun because increased morning warmth attracts more bees and helps the plants reproduce more efficiently.
Tall sunflower varieties can usually grow up to 15 feet tall. The height of a sunflowers depends on its variety. Some dwarf sunflowers only grow to be about three feet tall and the tallest recorded sunflower was more than 30 feet.
One can plant annual sunflowers in almost every plant hardiness zone as long as it is in full sun. Sunflowers usually stay in bloom for about three weeks, sometimes even four. In this garden, with its nutrient-rich soil, I’m hoping these pretty flowers last even longer… we’ll see.
My garden maze here at my Bedford, New York farm now includes three weeping camperdown elm trees, Ulmus glabra 'Camperdownii.'
As many of you know, I am in the process of building a living maze, a botanical puzzle of interesting trees, hedges, espaliers, and shrubs. I started this three-acre maze project in the spring of last year, and it's already beginning to stump some of those who stroll through its pathways. Some of the other specimens include European beech, European hornbeams, boxwood, parrotias, espaliered apple trees, American sweetgums, barberry, London planetrees, privets, yews, and now these camperdown elms.
Enjoy these photos.
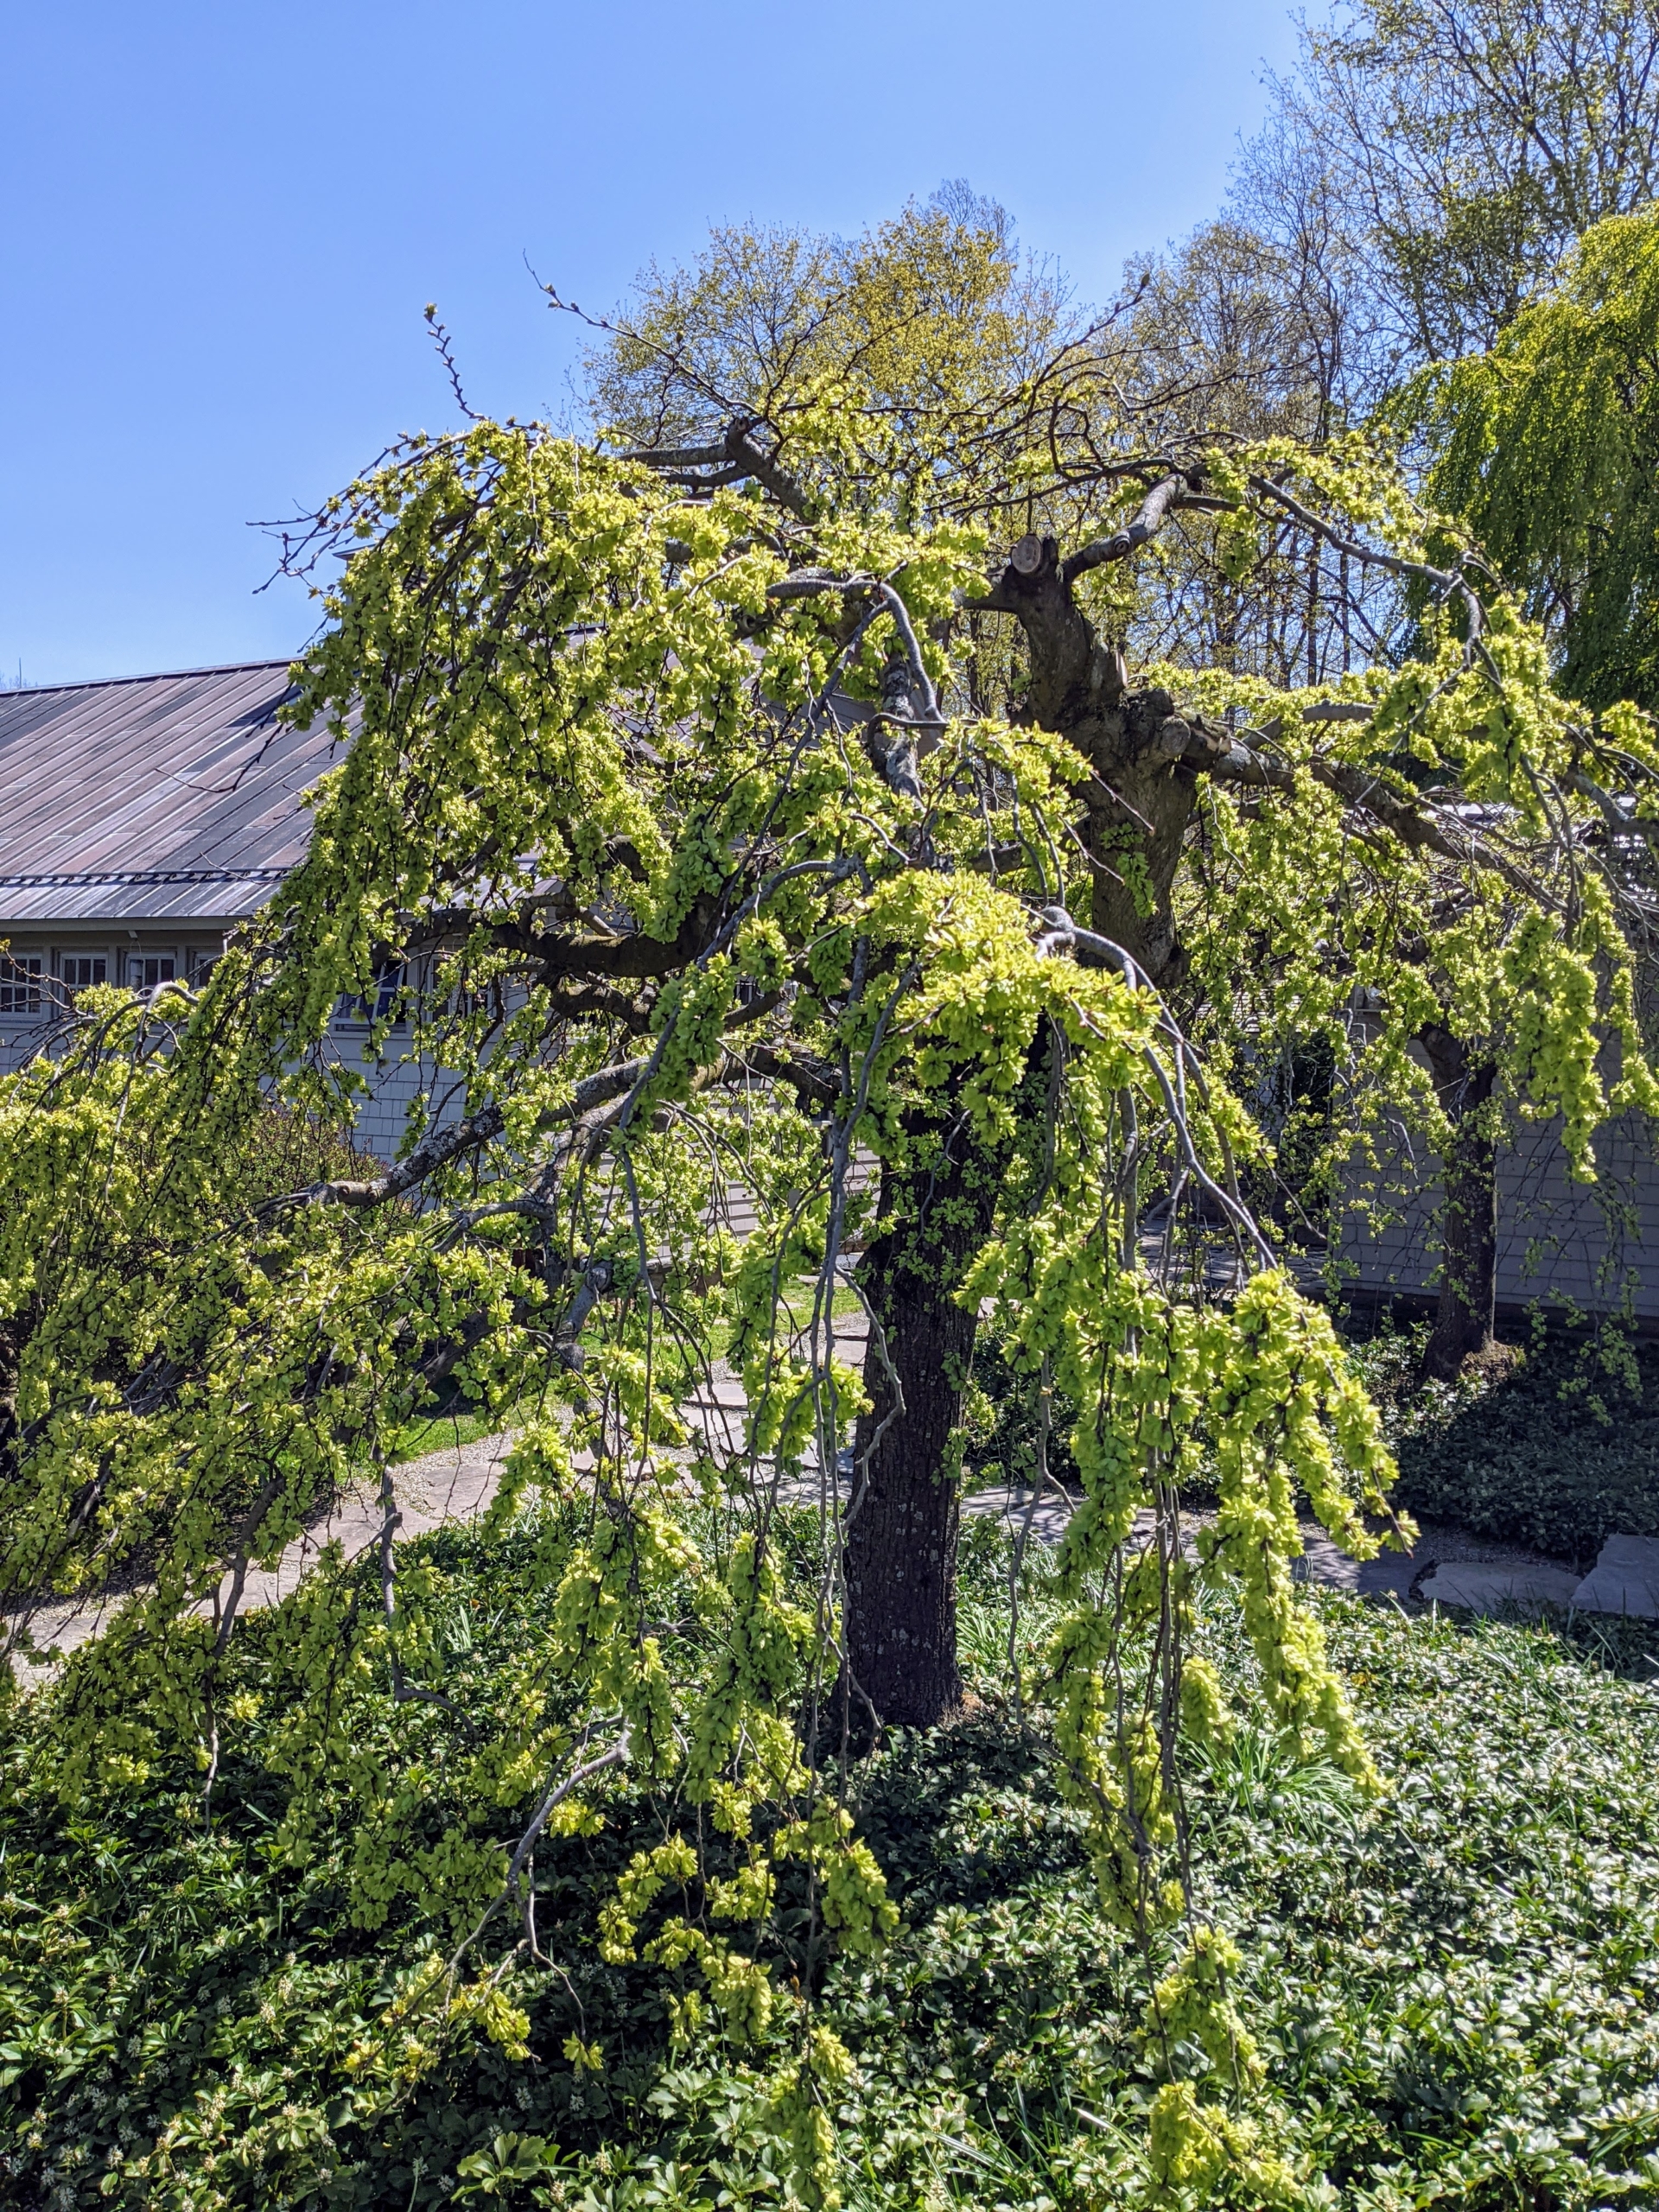
Just outside the kitchen to my Winter House, I have two of these weeping camperdown Elms. Camperdown elms slowly develop broad, flat heads and wide crowns with weeping branch habits that grow down towards the ground. This is how it looks in spring.
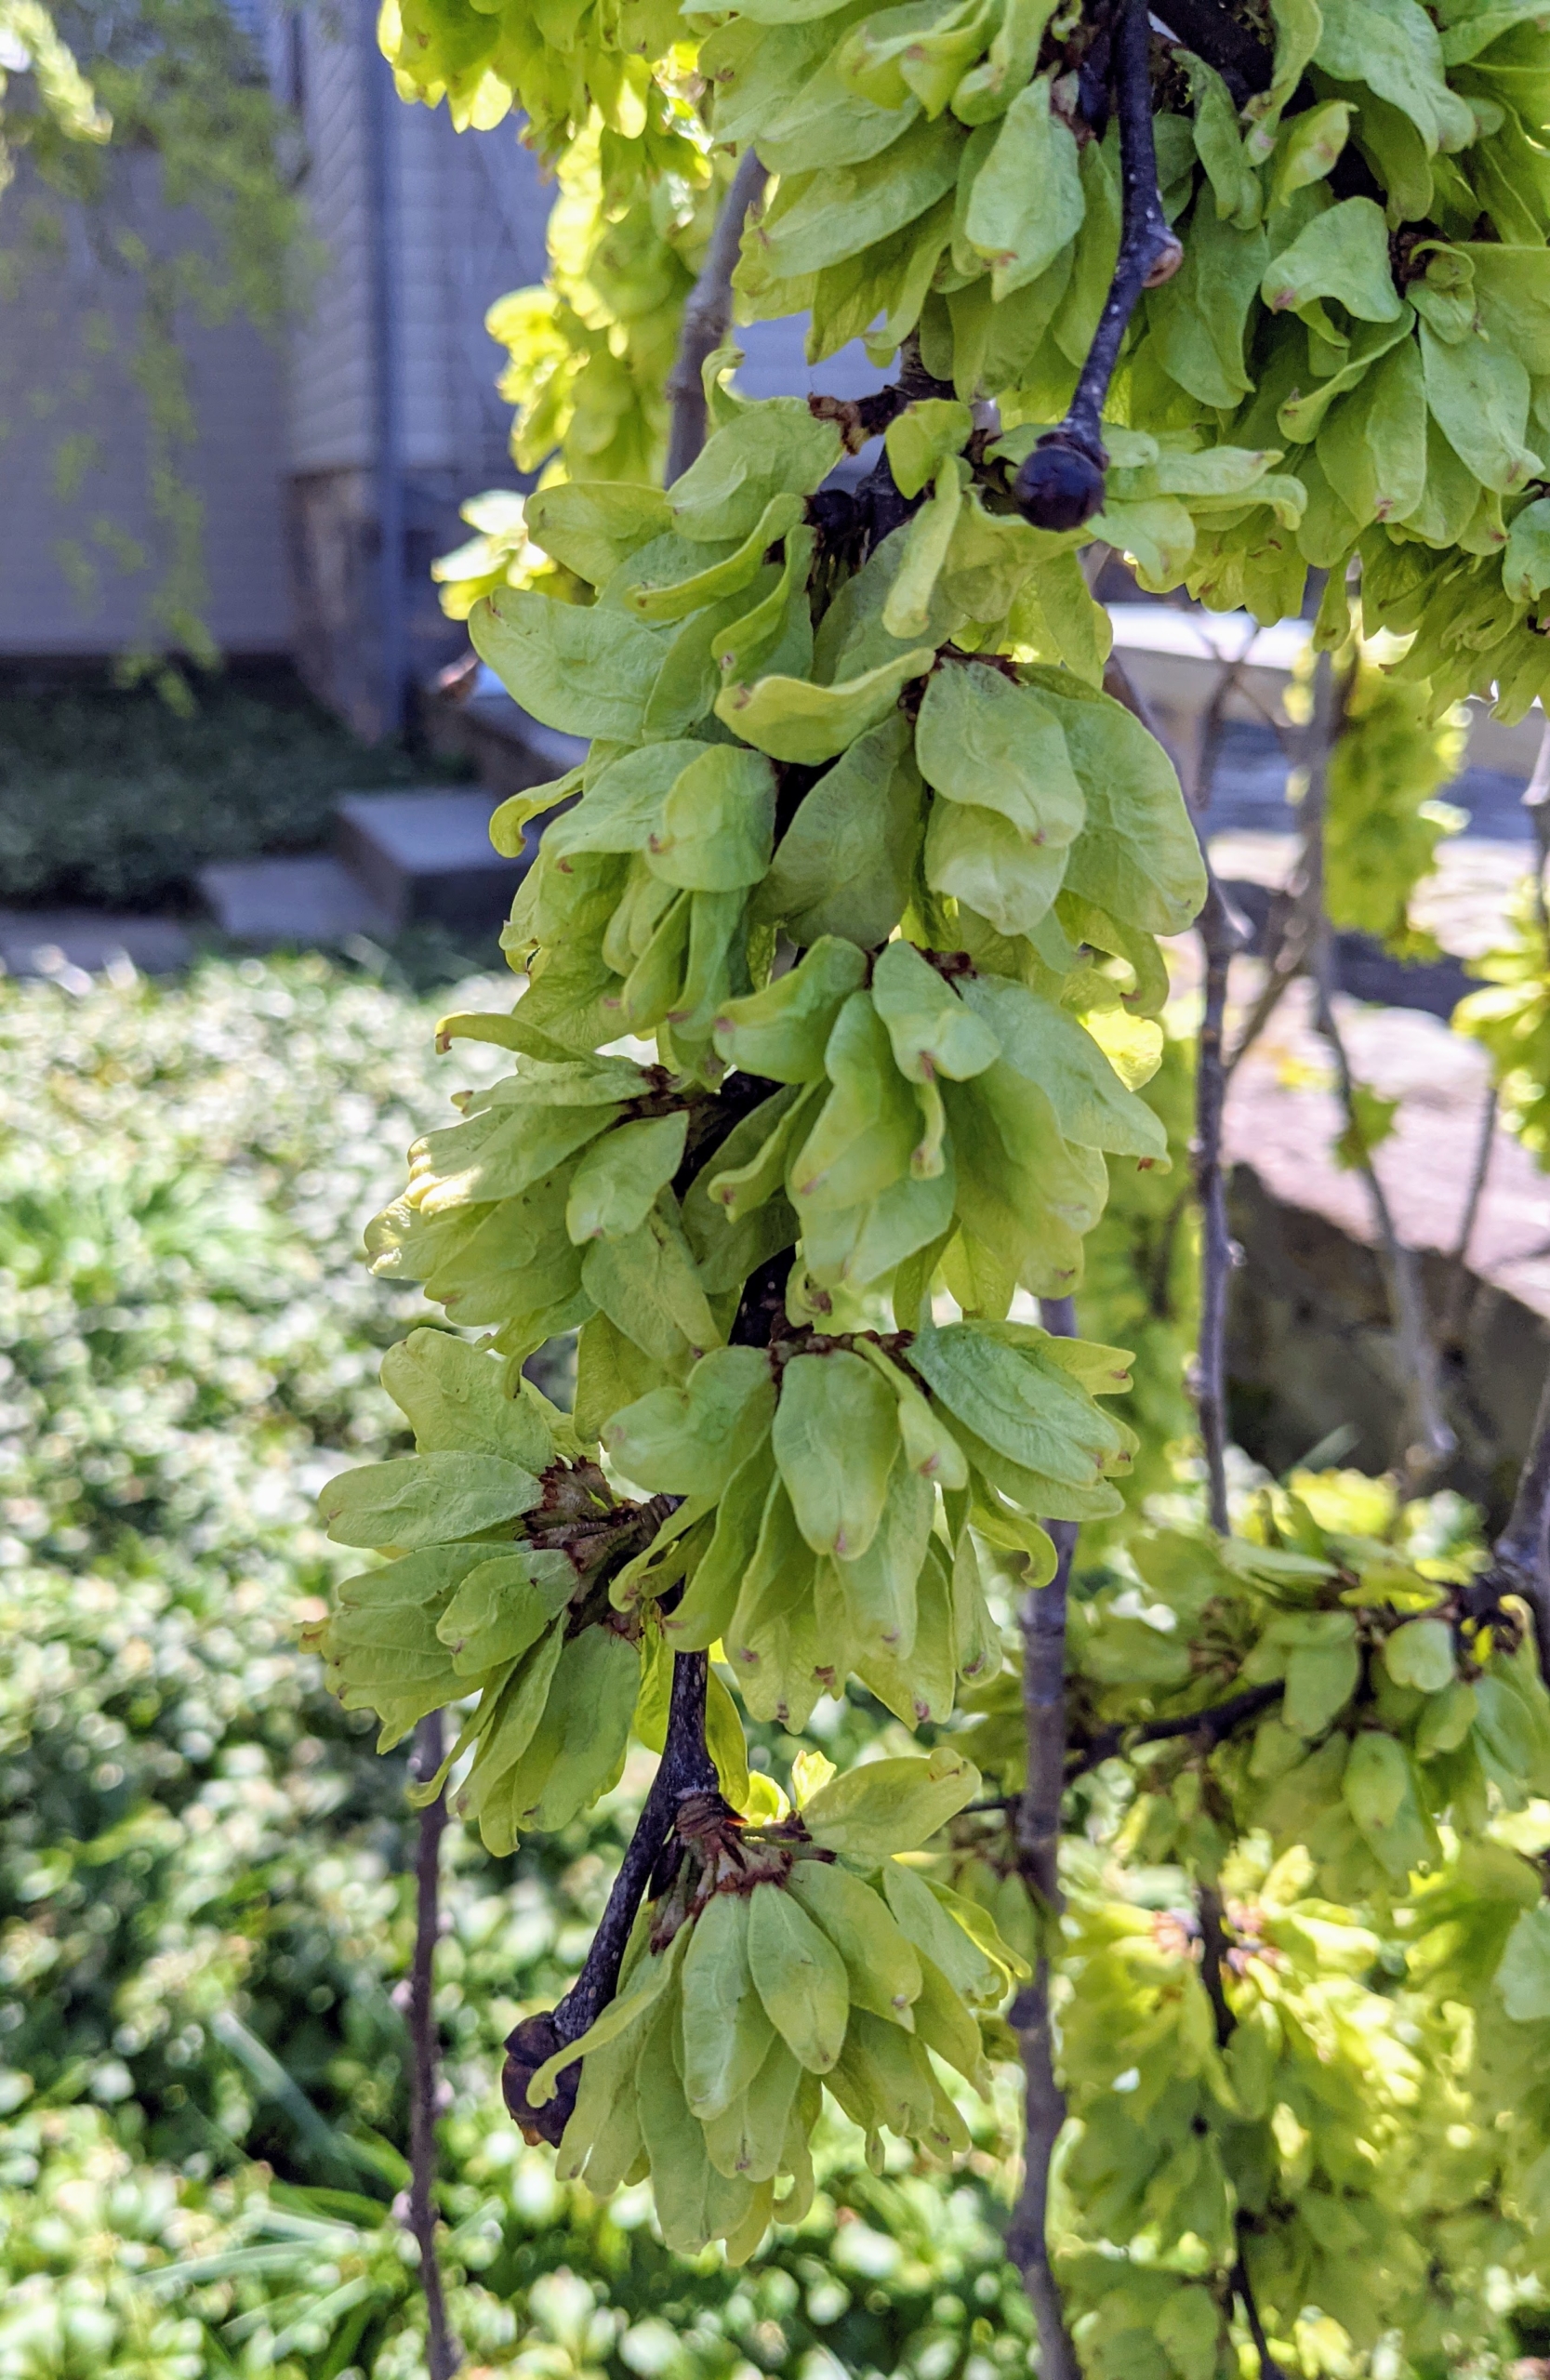
The tree’s seed pods are a light, silver green. This photo was taken in late April.
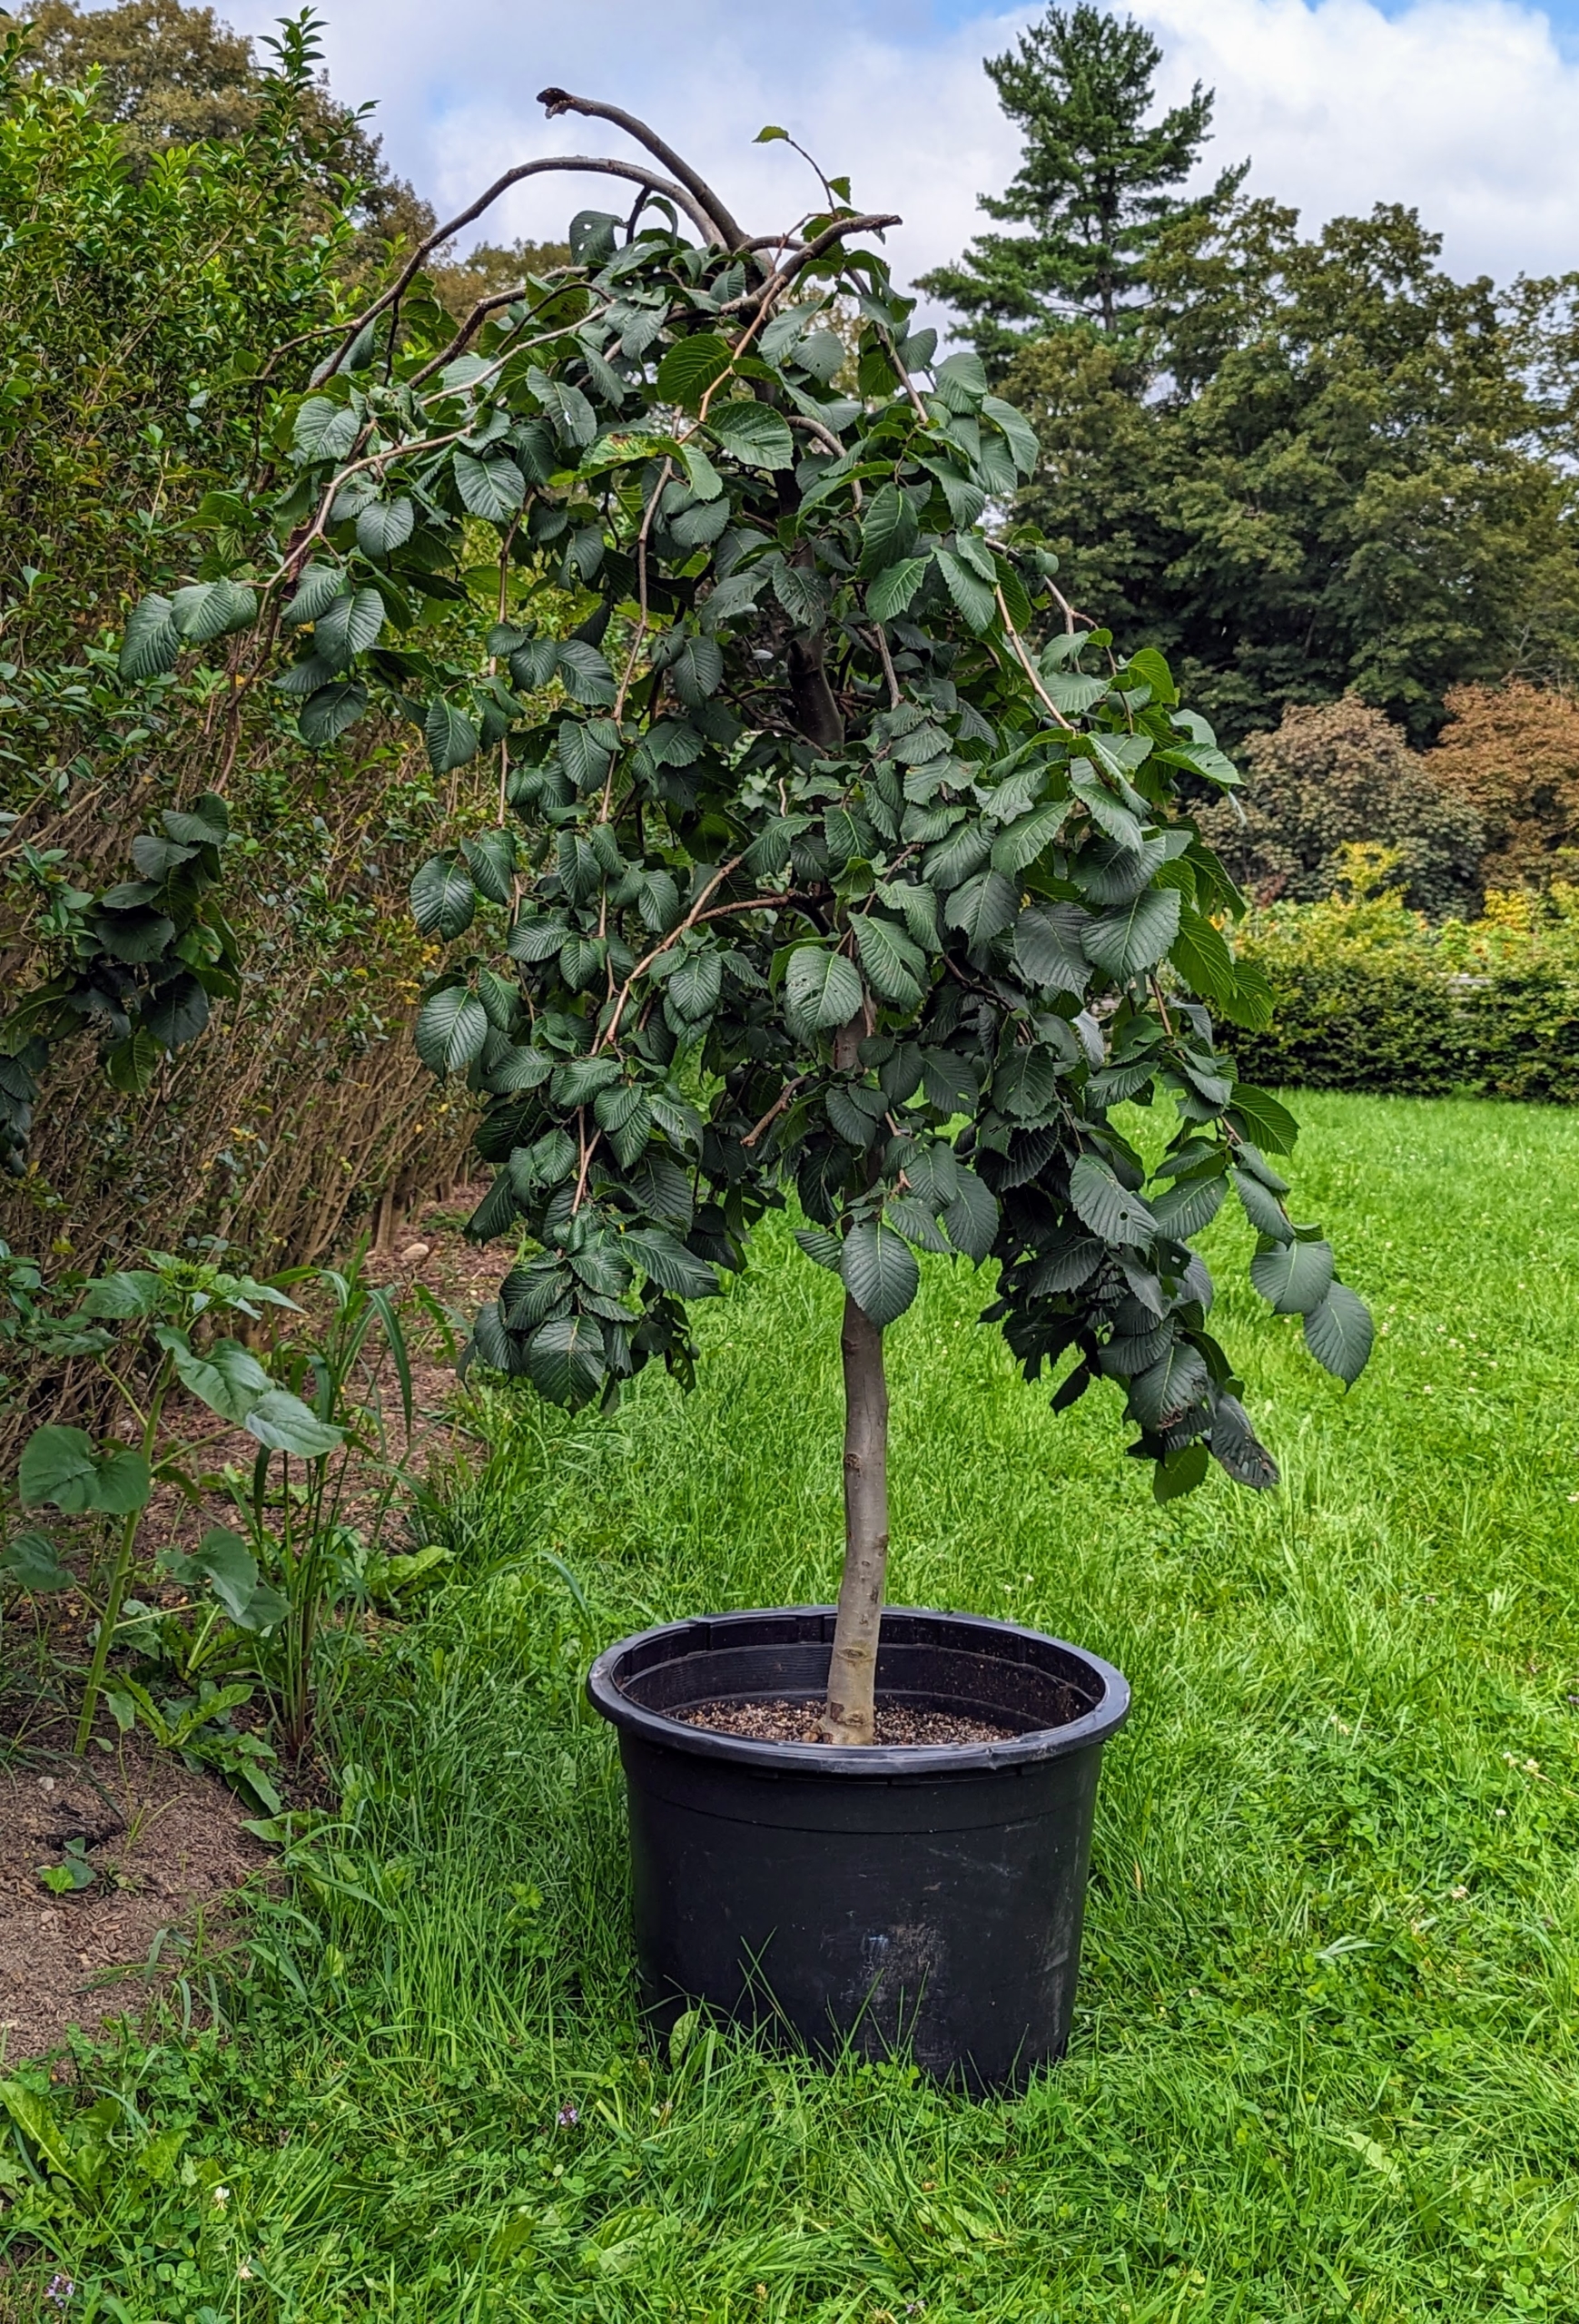
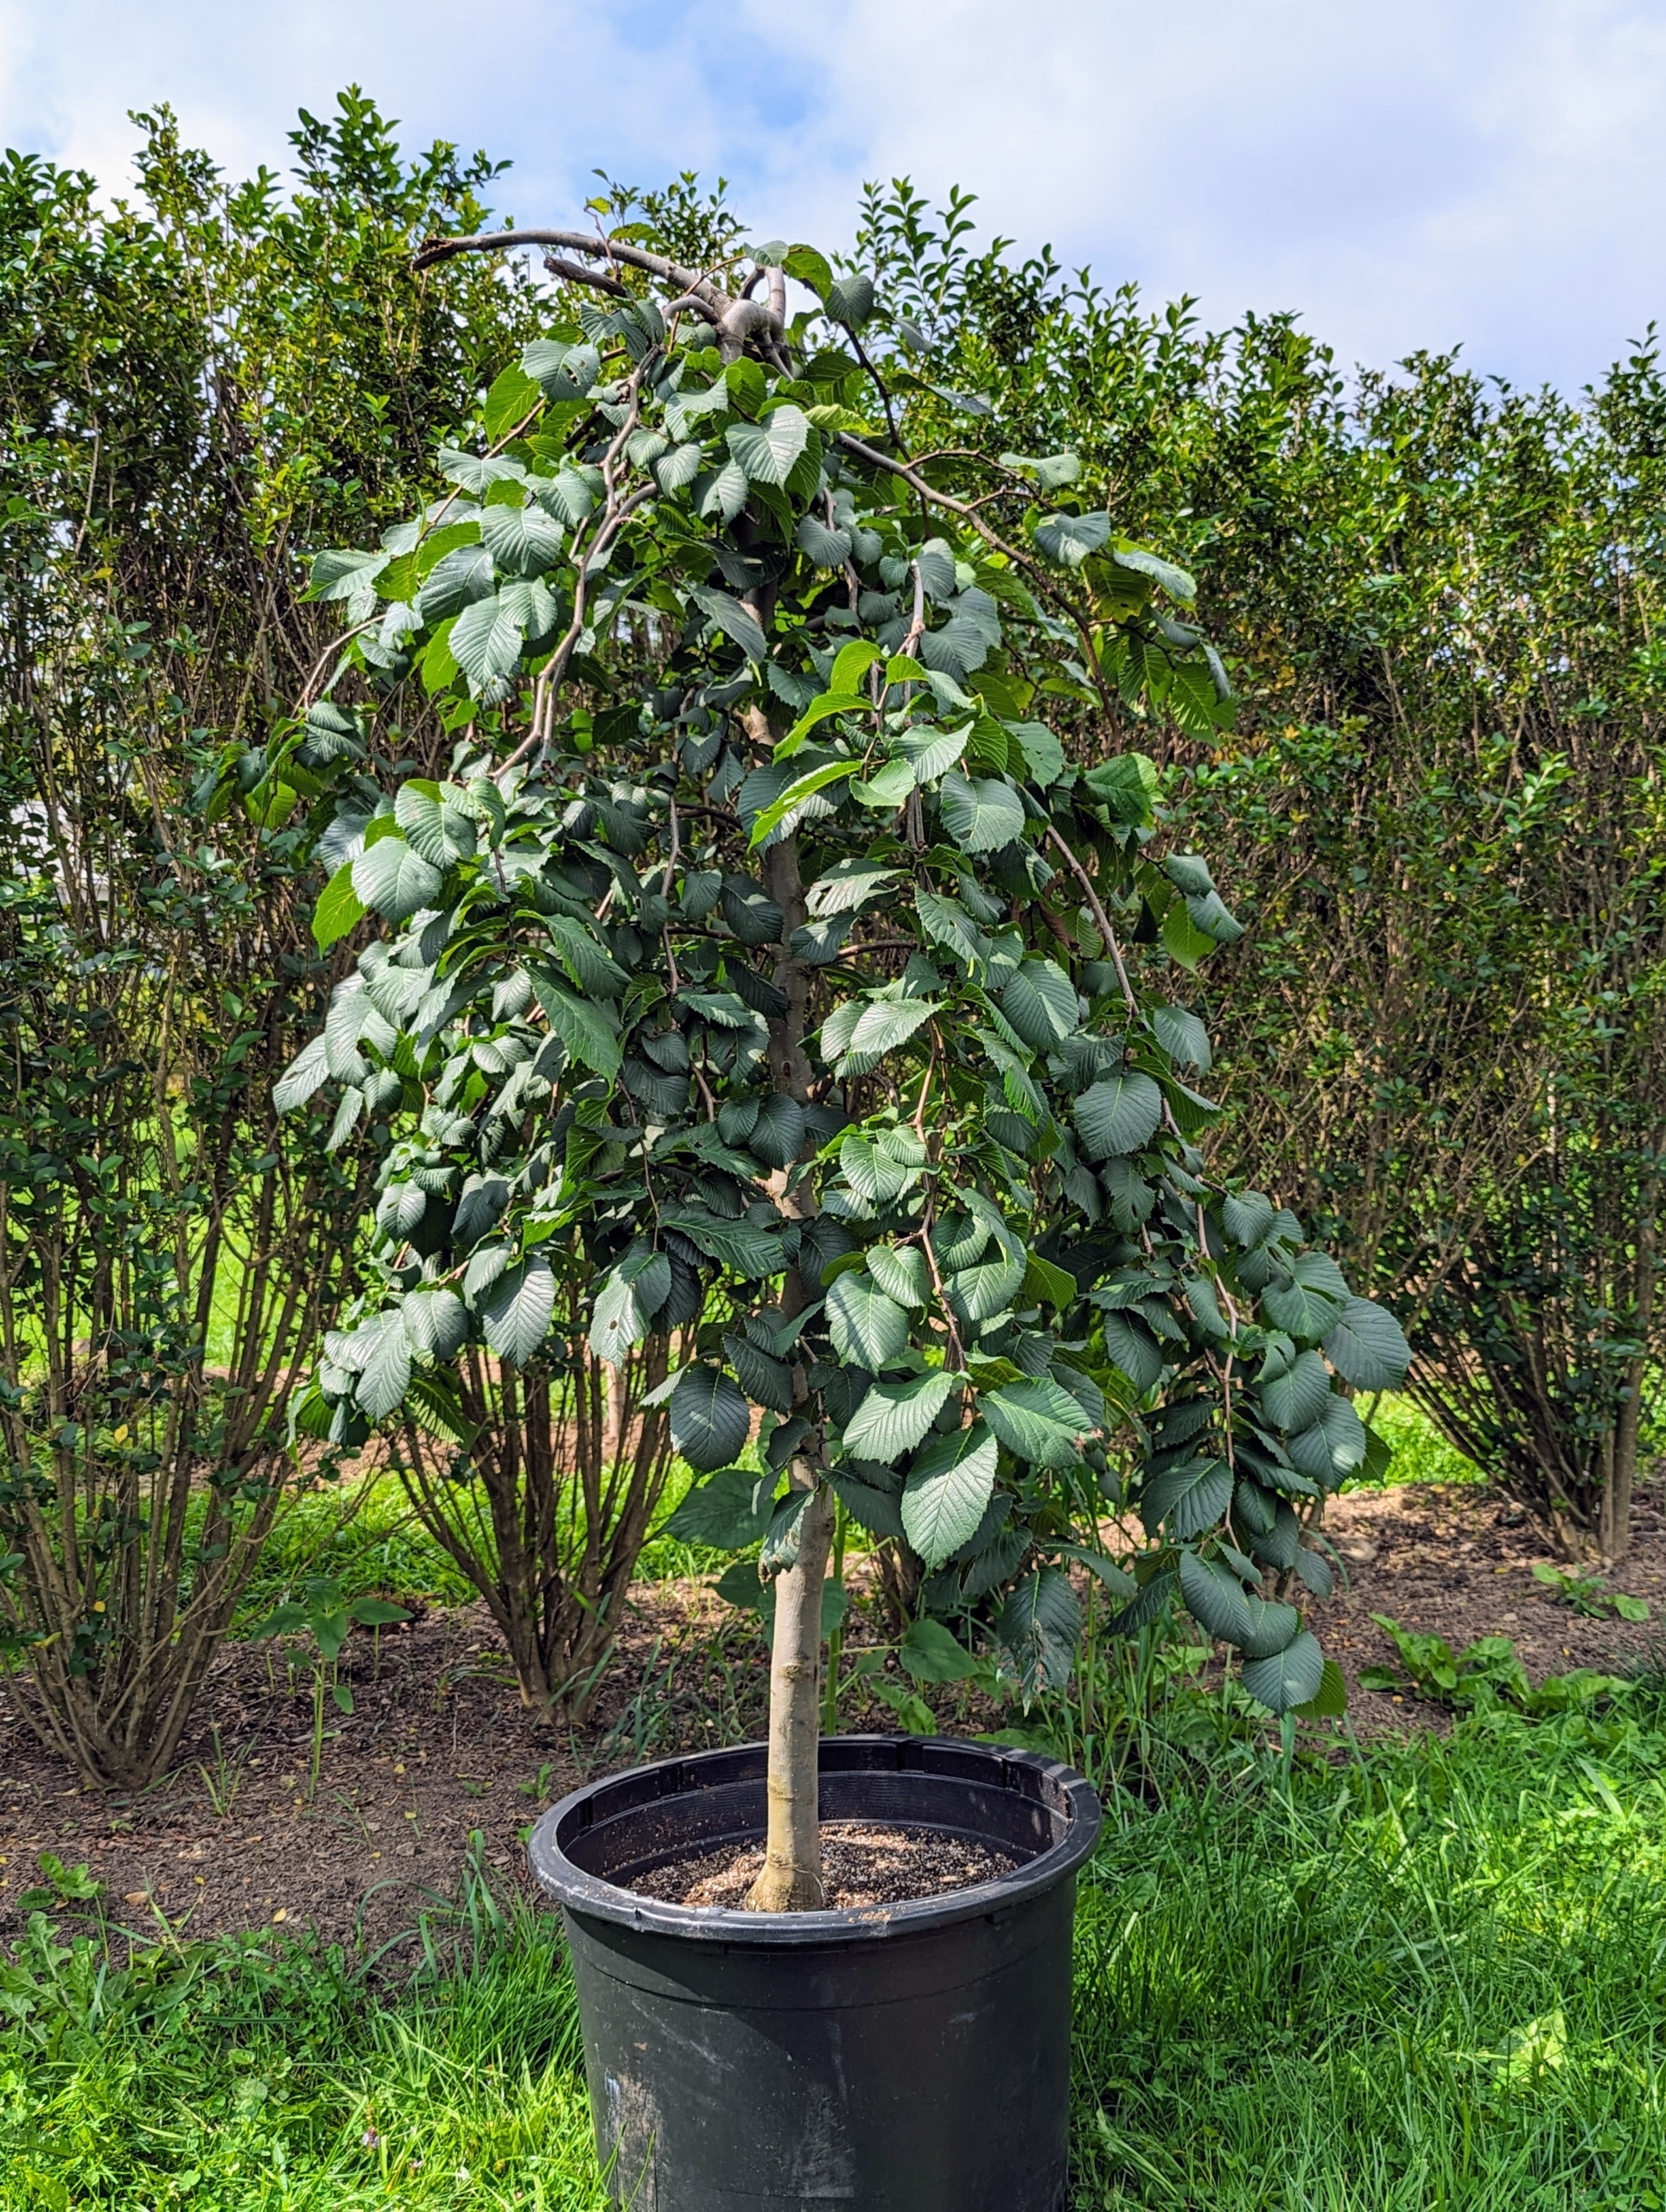
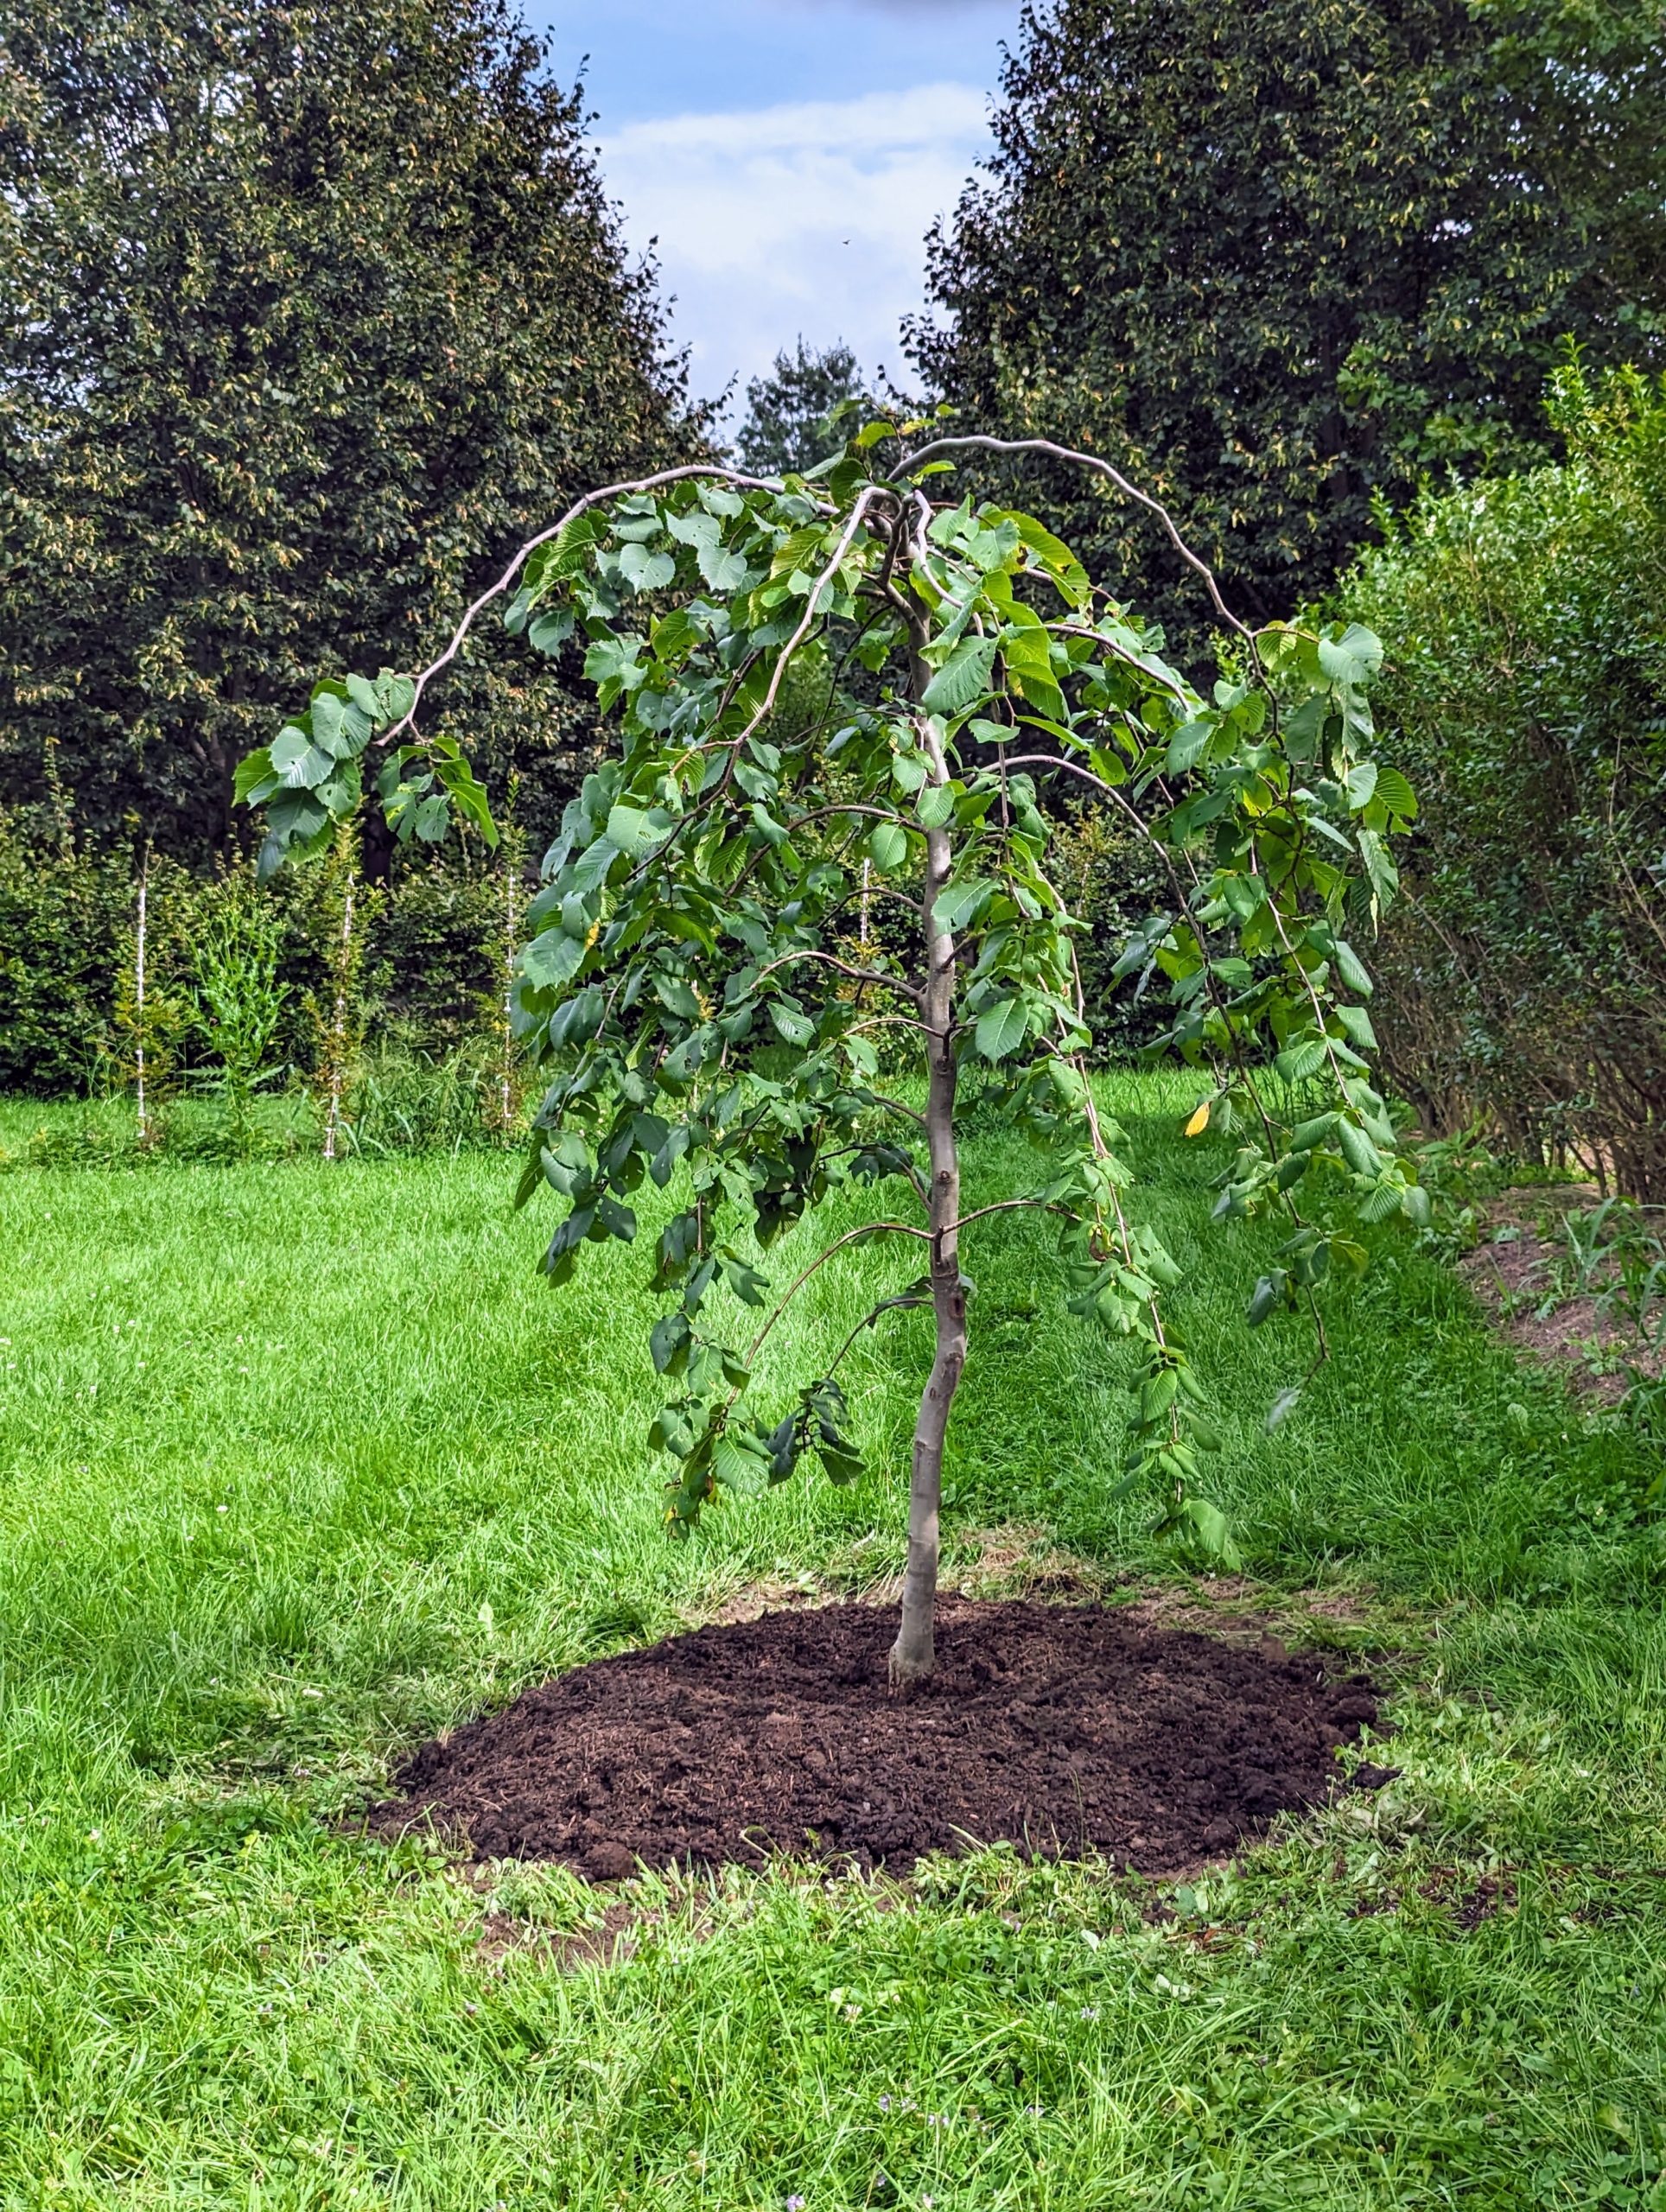
This is what it looks like now in summer. This is one of three young weeping camperdown elms to plant in this area of the maze.
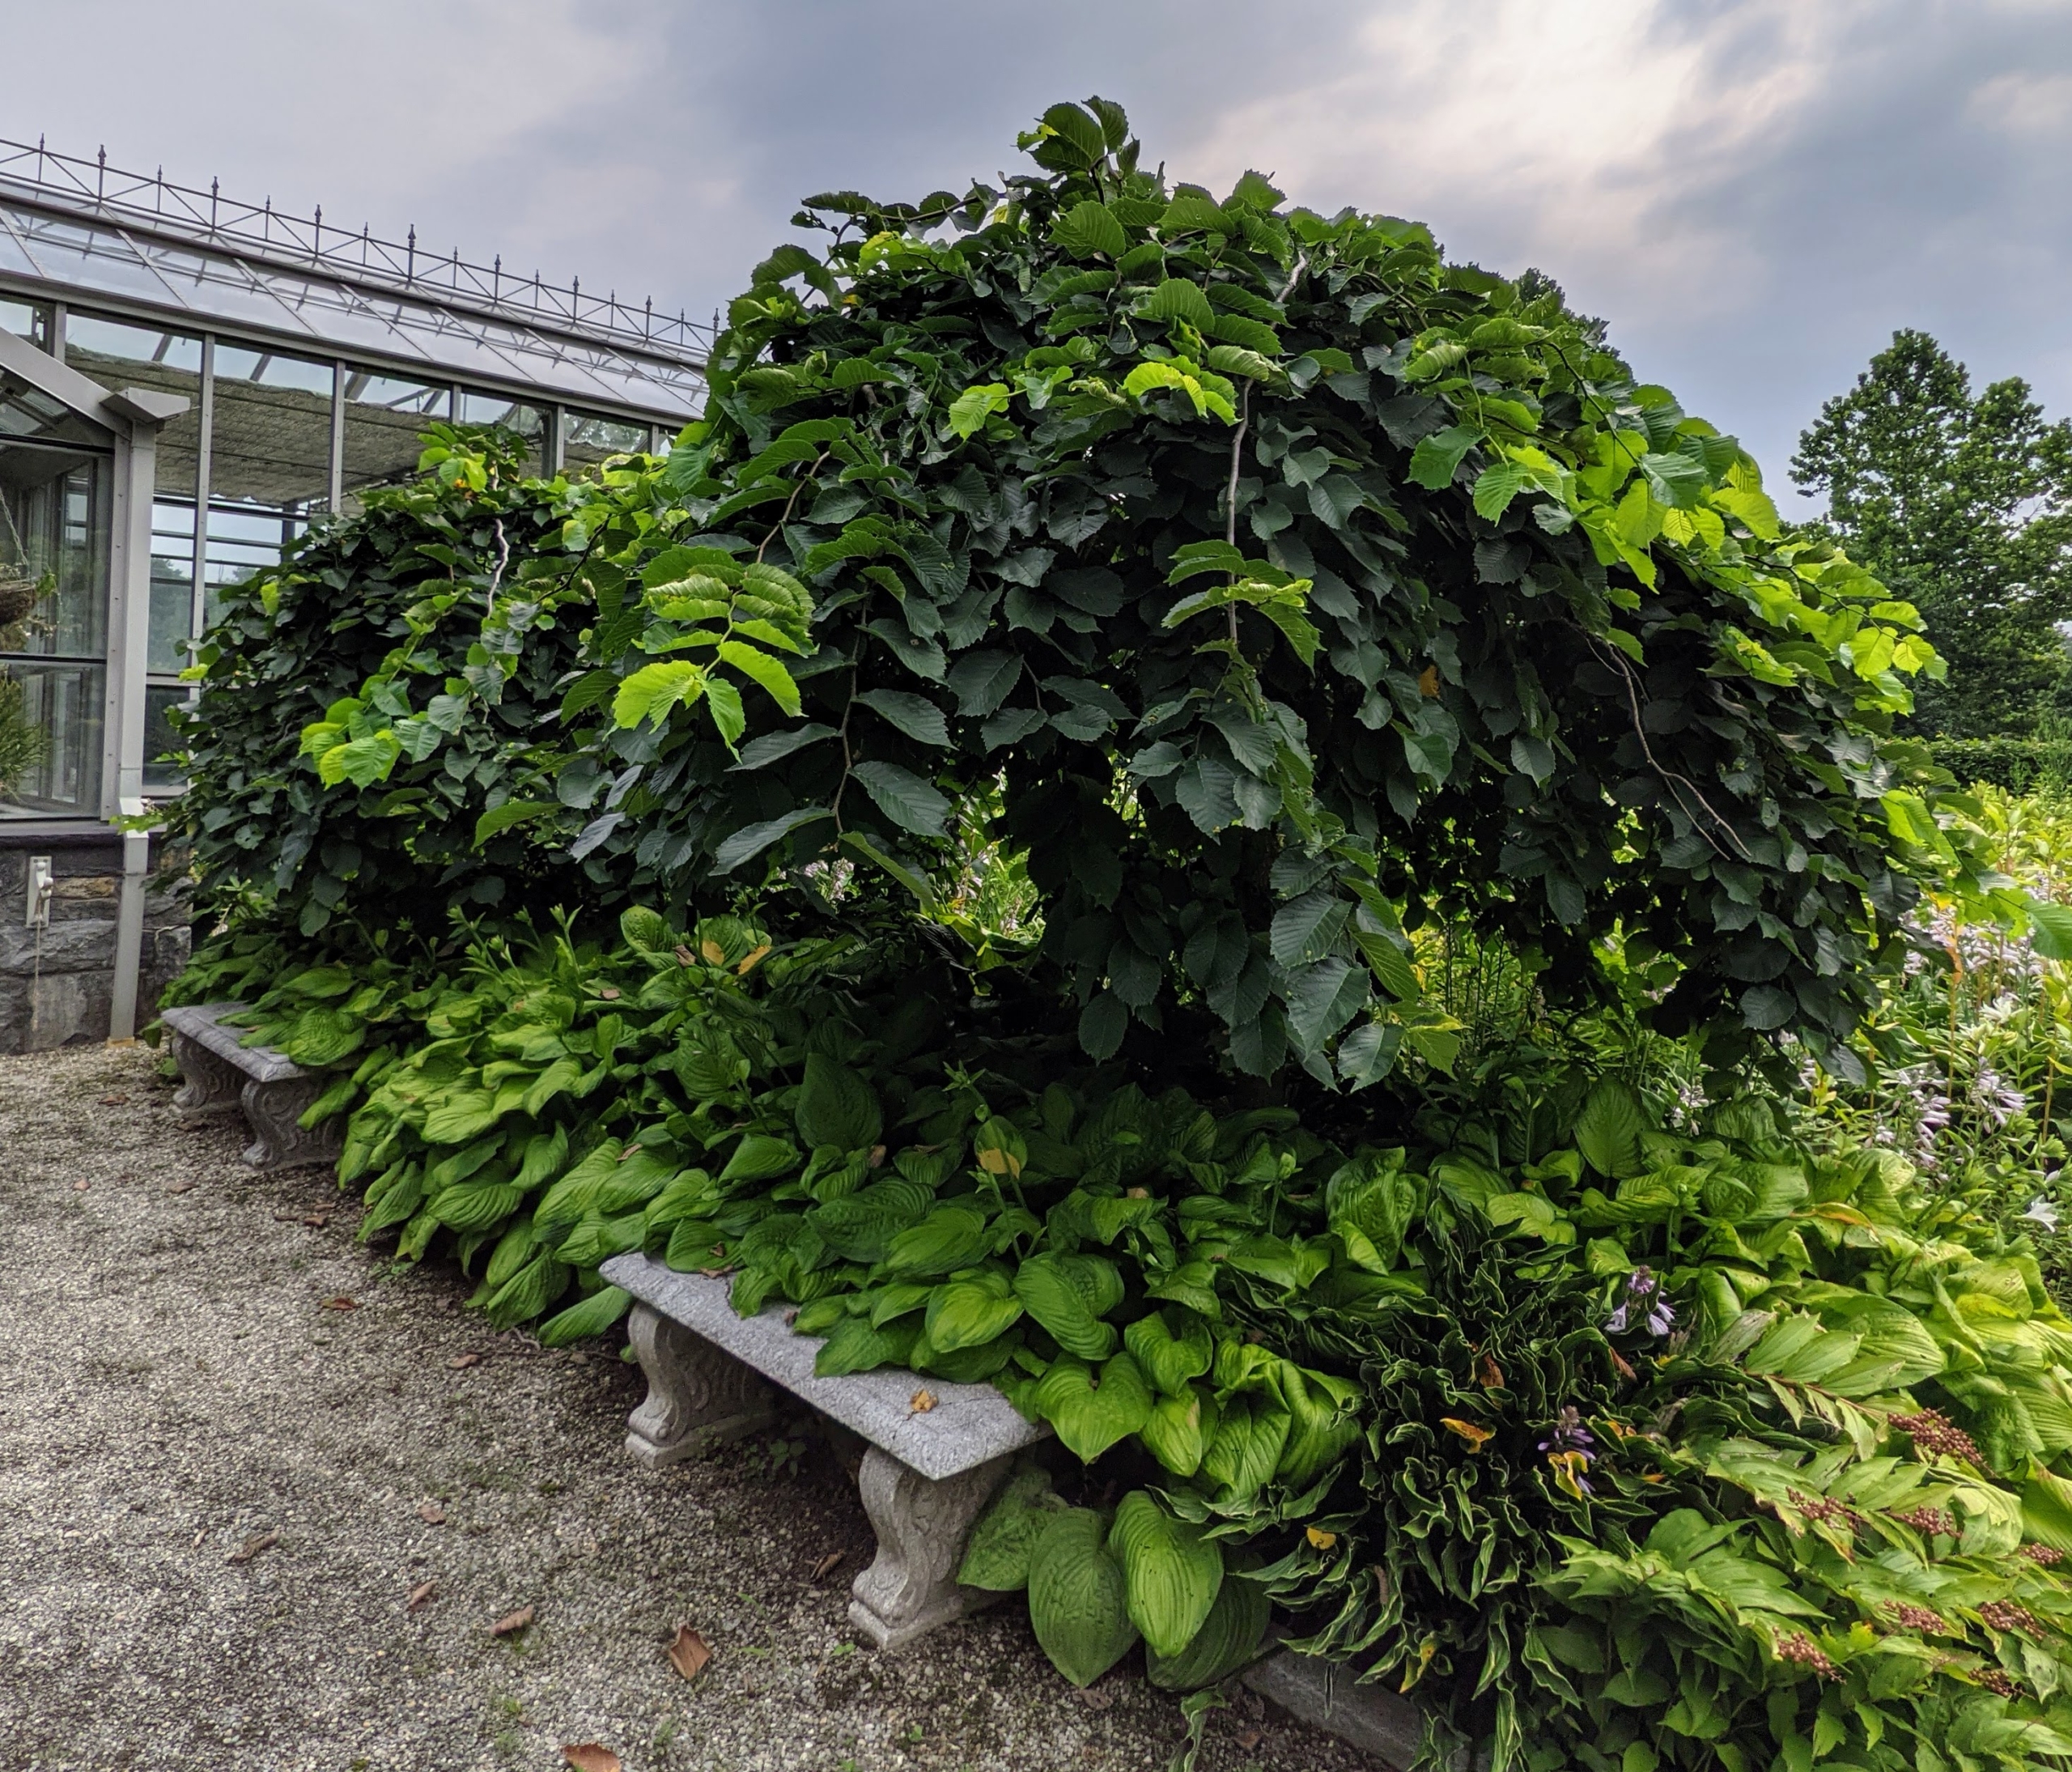
I also have weeping camperdown elms in front of my maine greenhouse. Here is a more mature specimen in summer.
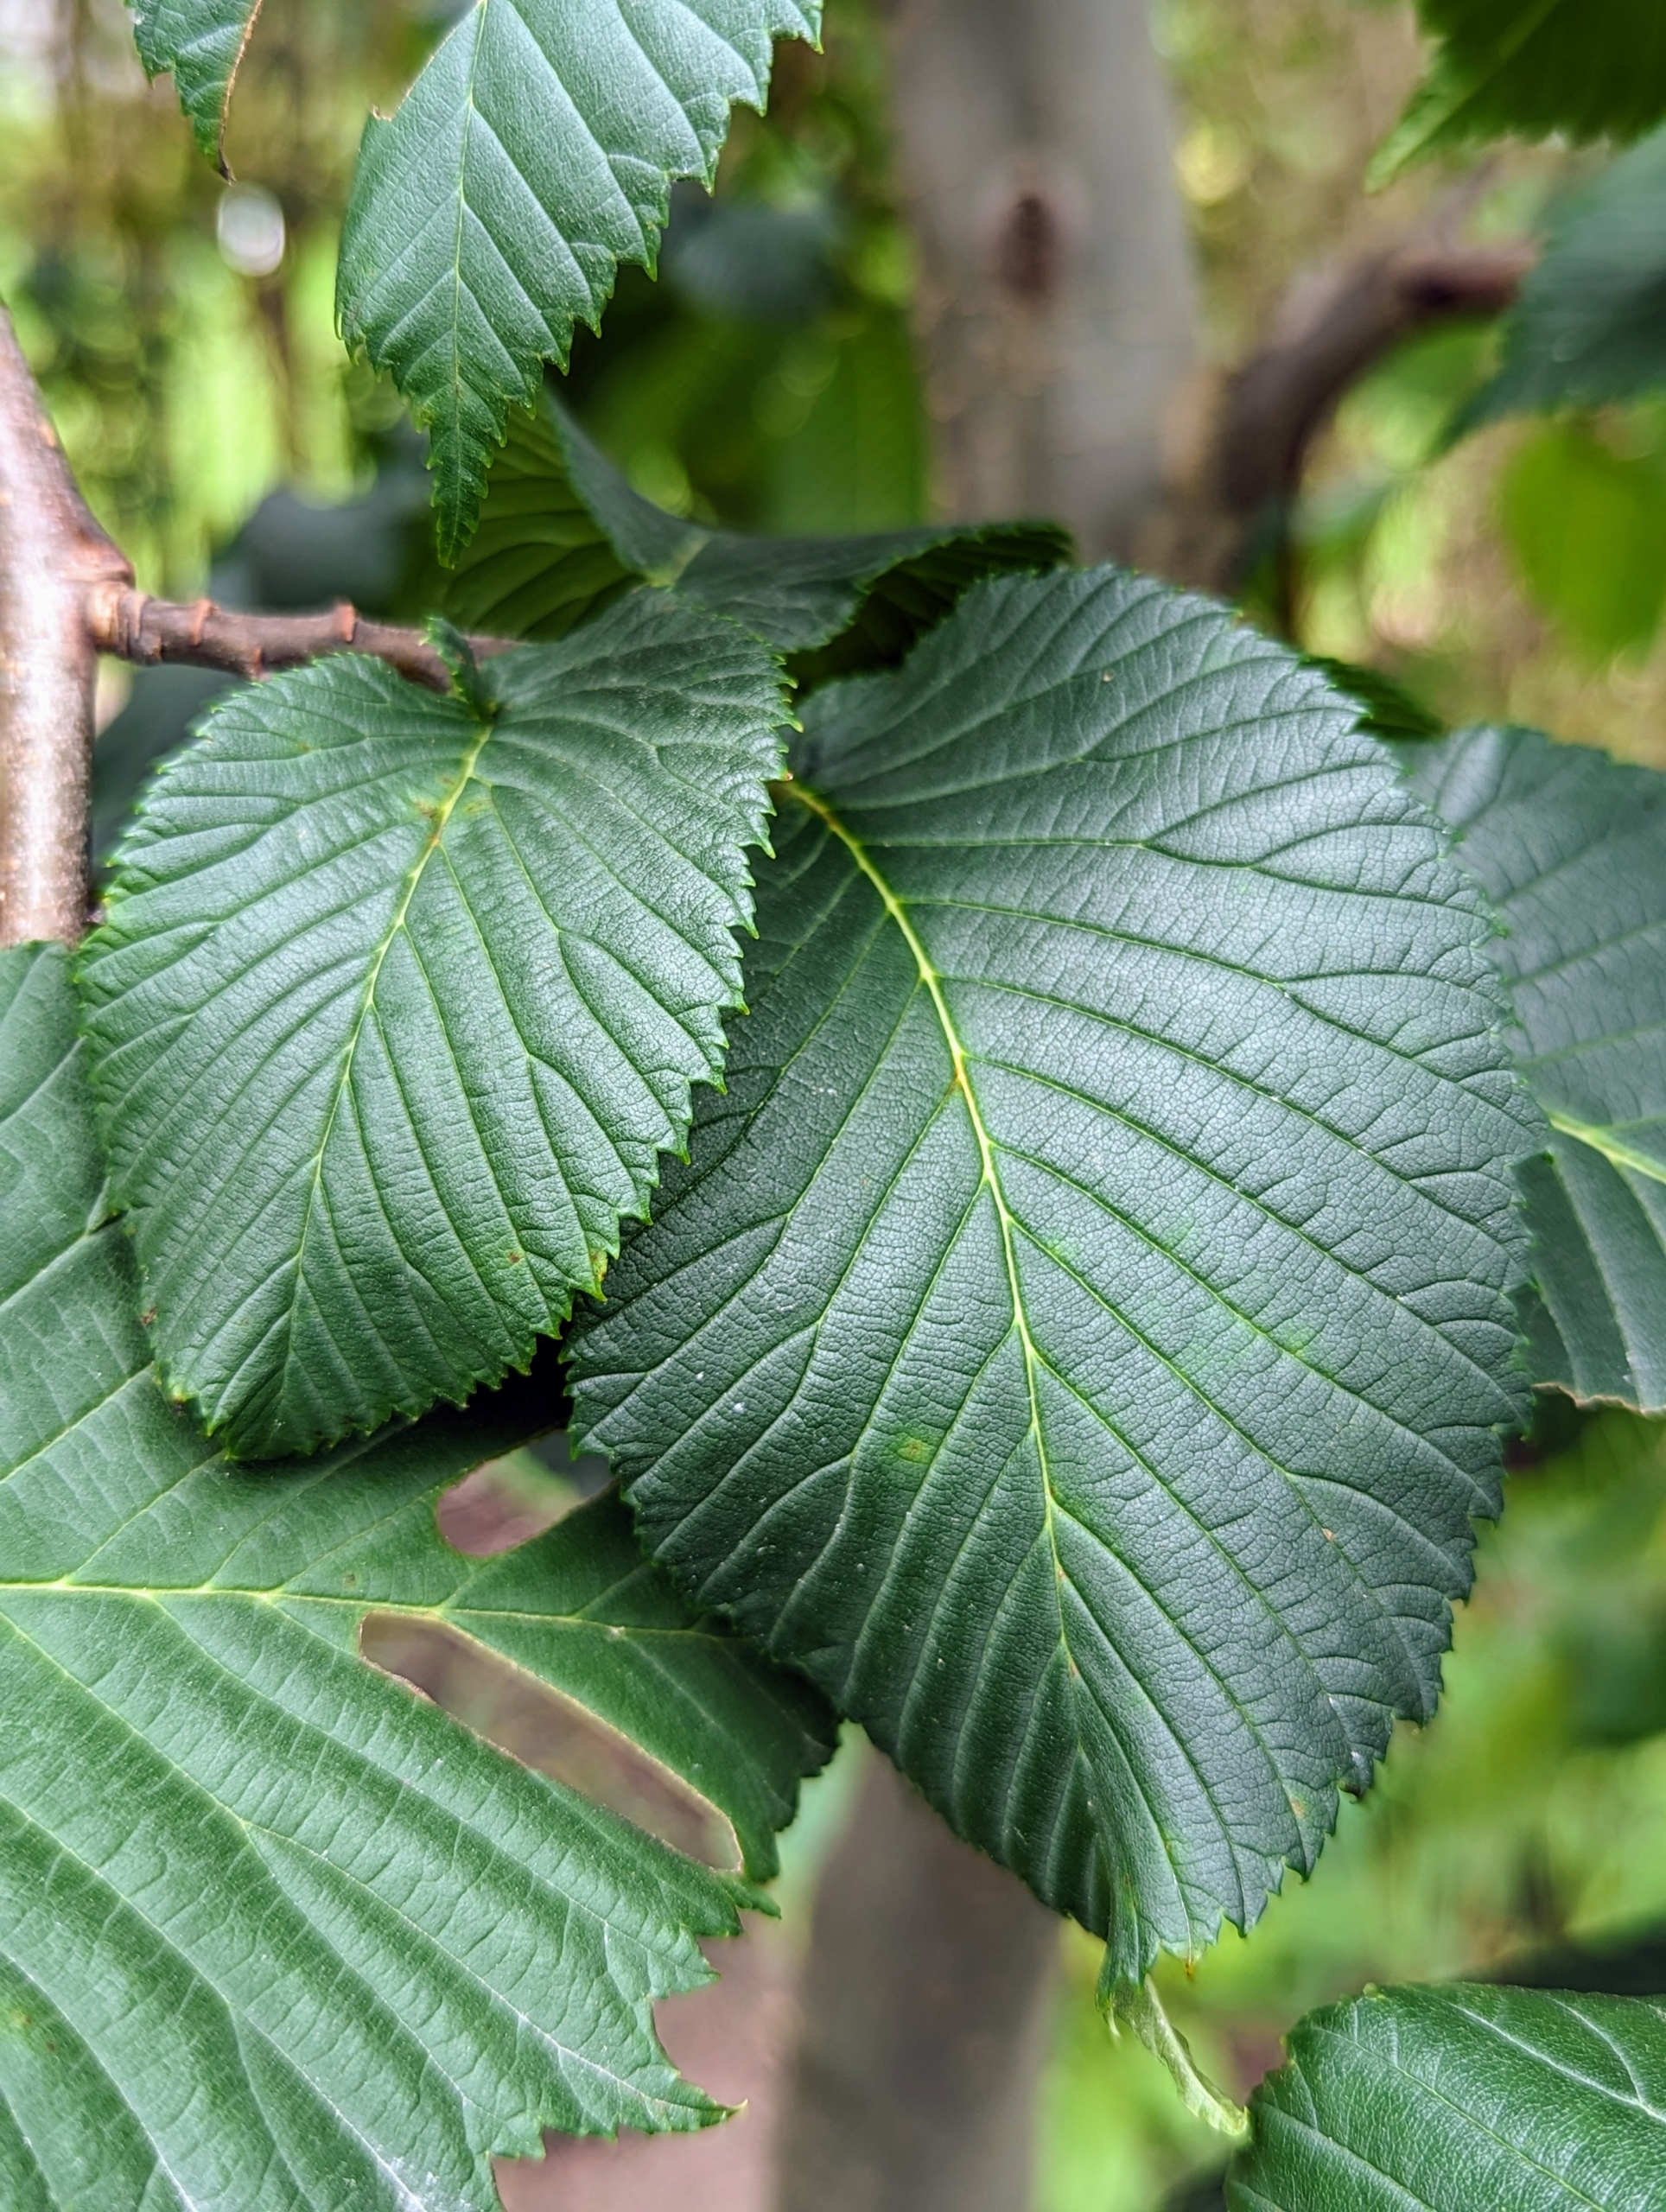
Its leaves are dark green, oval or egg-shaped with a pointed tip. The leaf has double-serrated leaf margins. Since it is deciduous, it will shed all its leaves in winter.
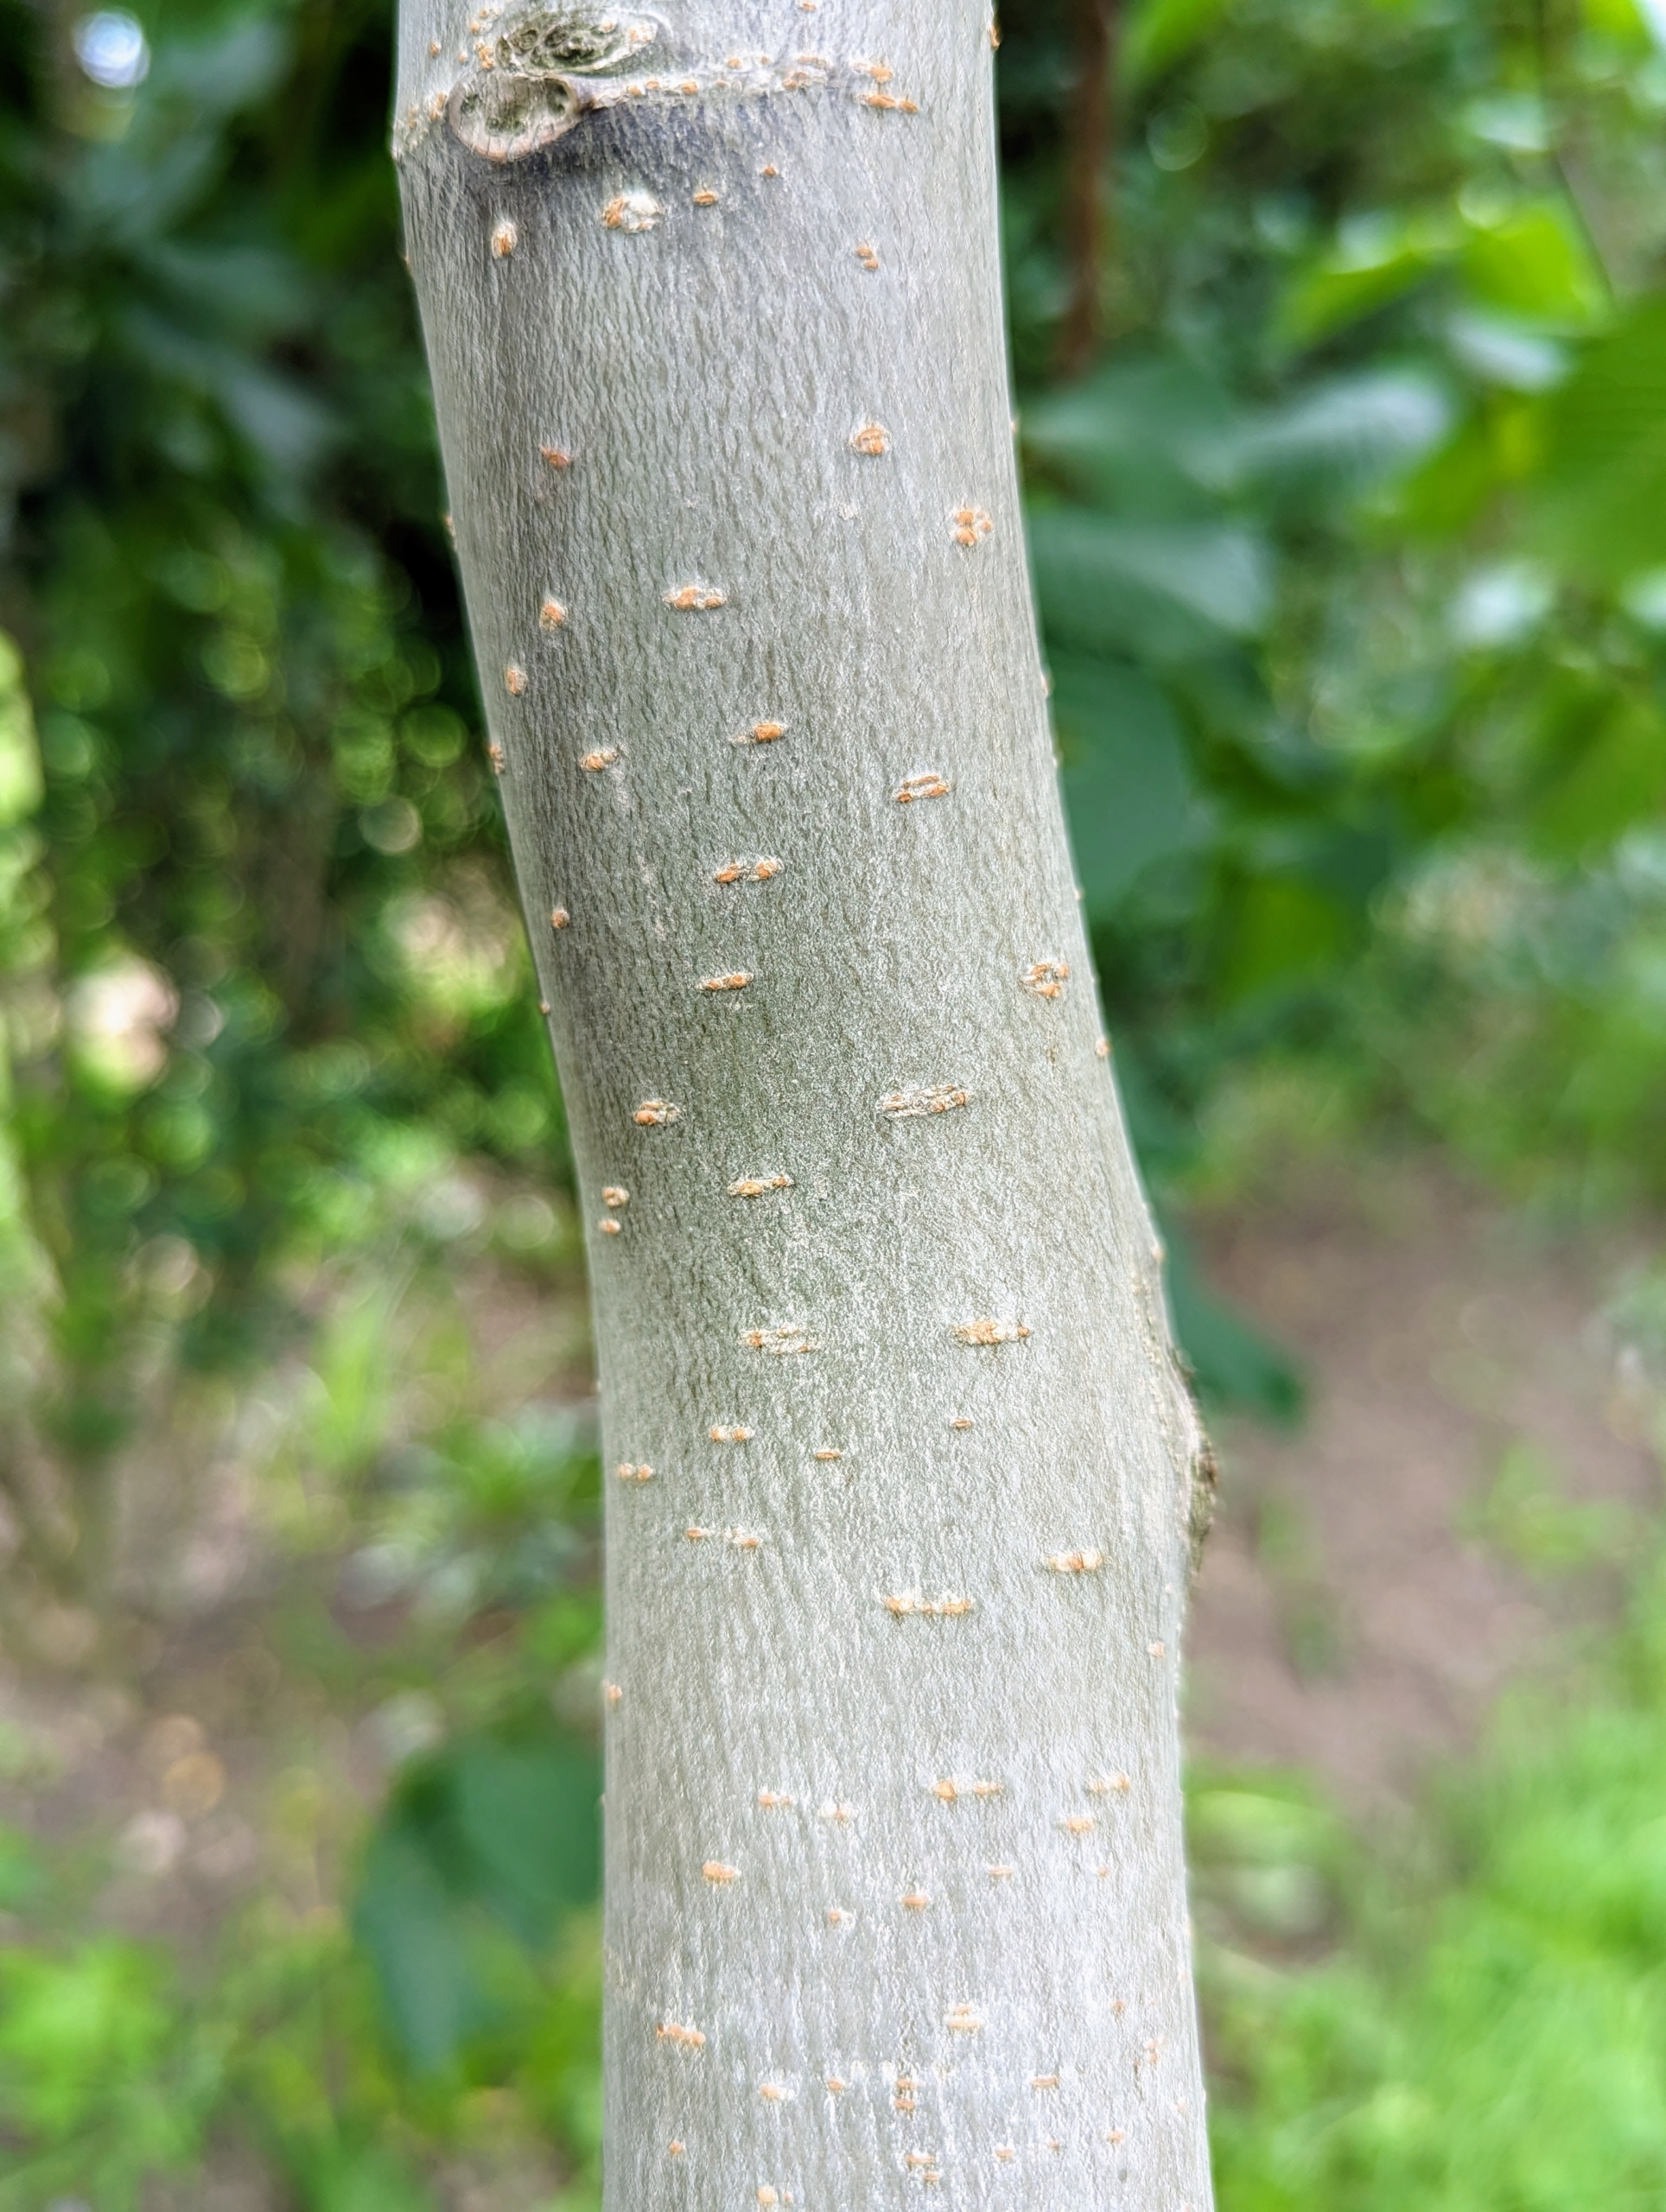
The bark of the camperdown elm is grayish. When it matures, it will have a darker colored bark and a more twisted form.
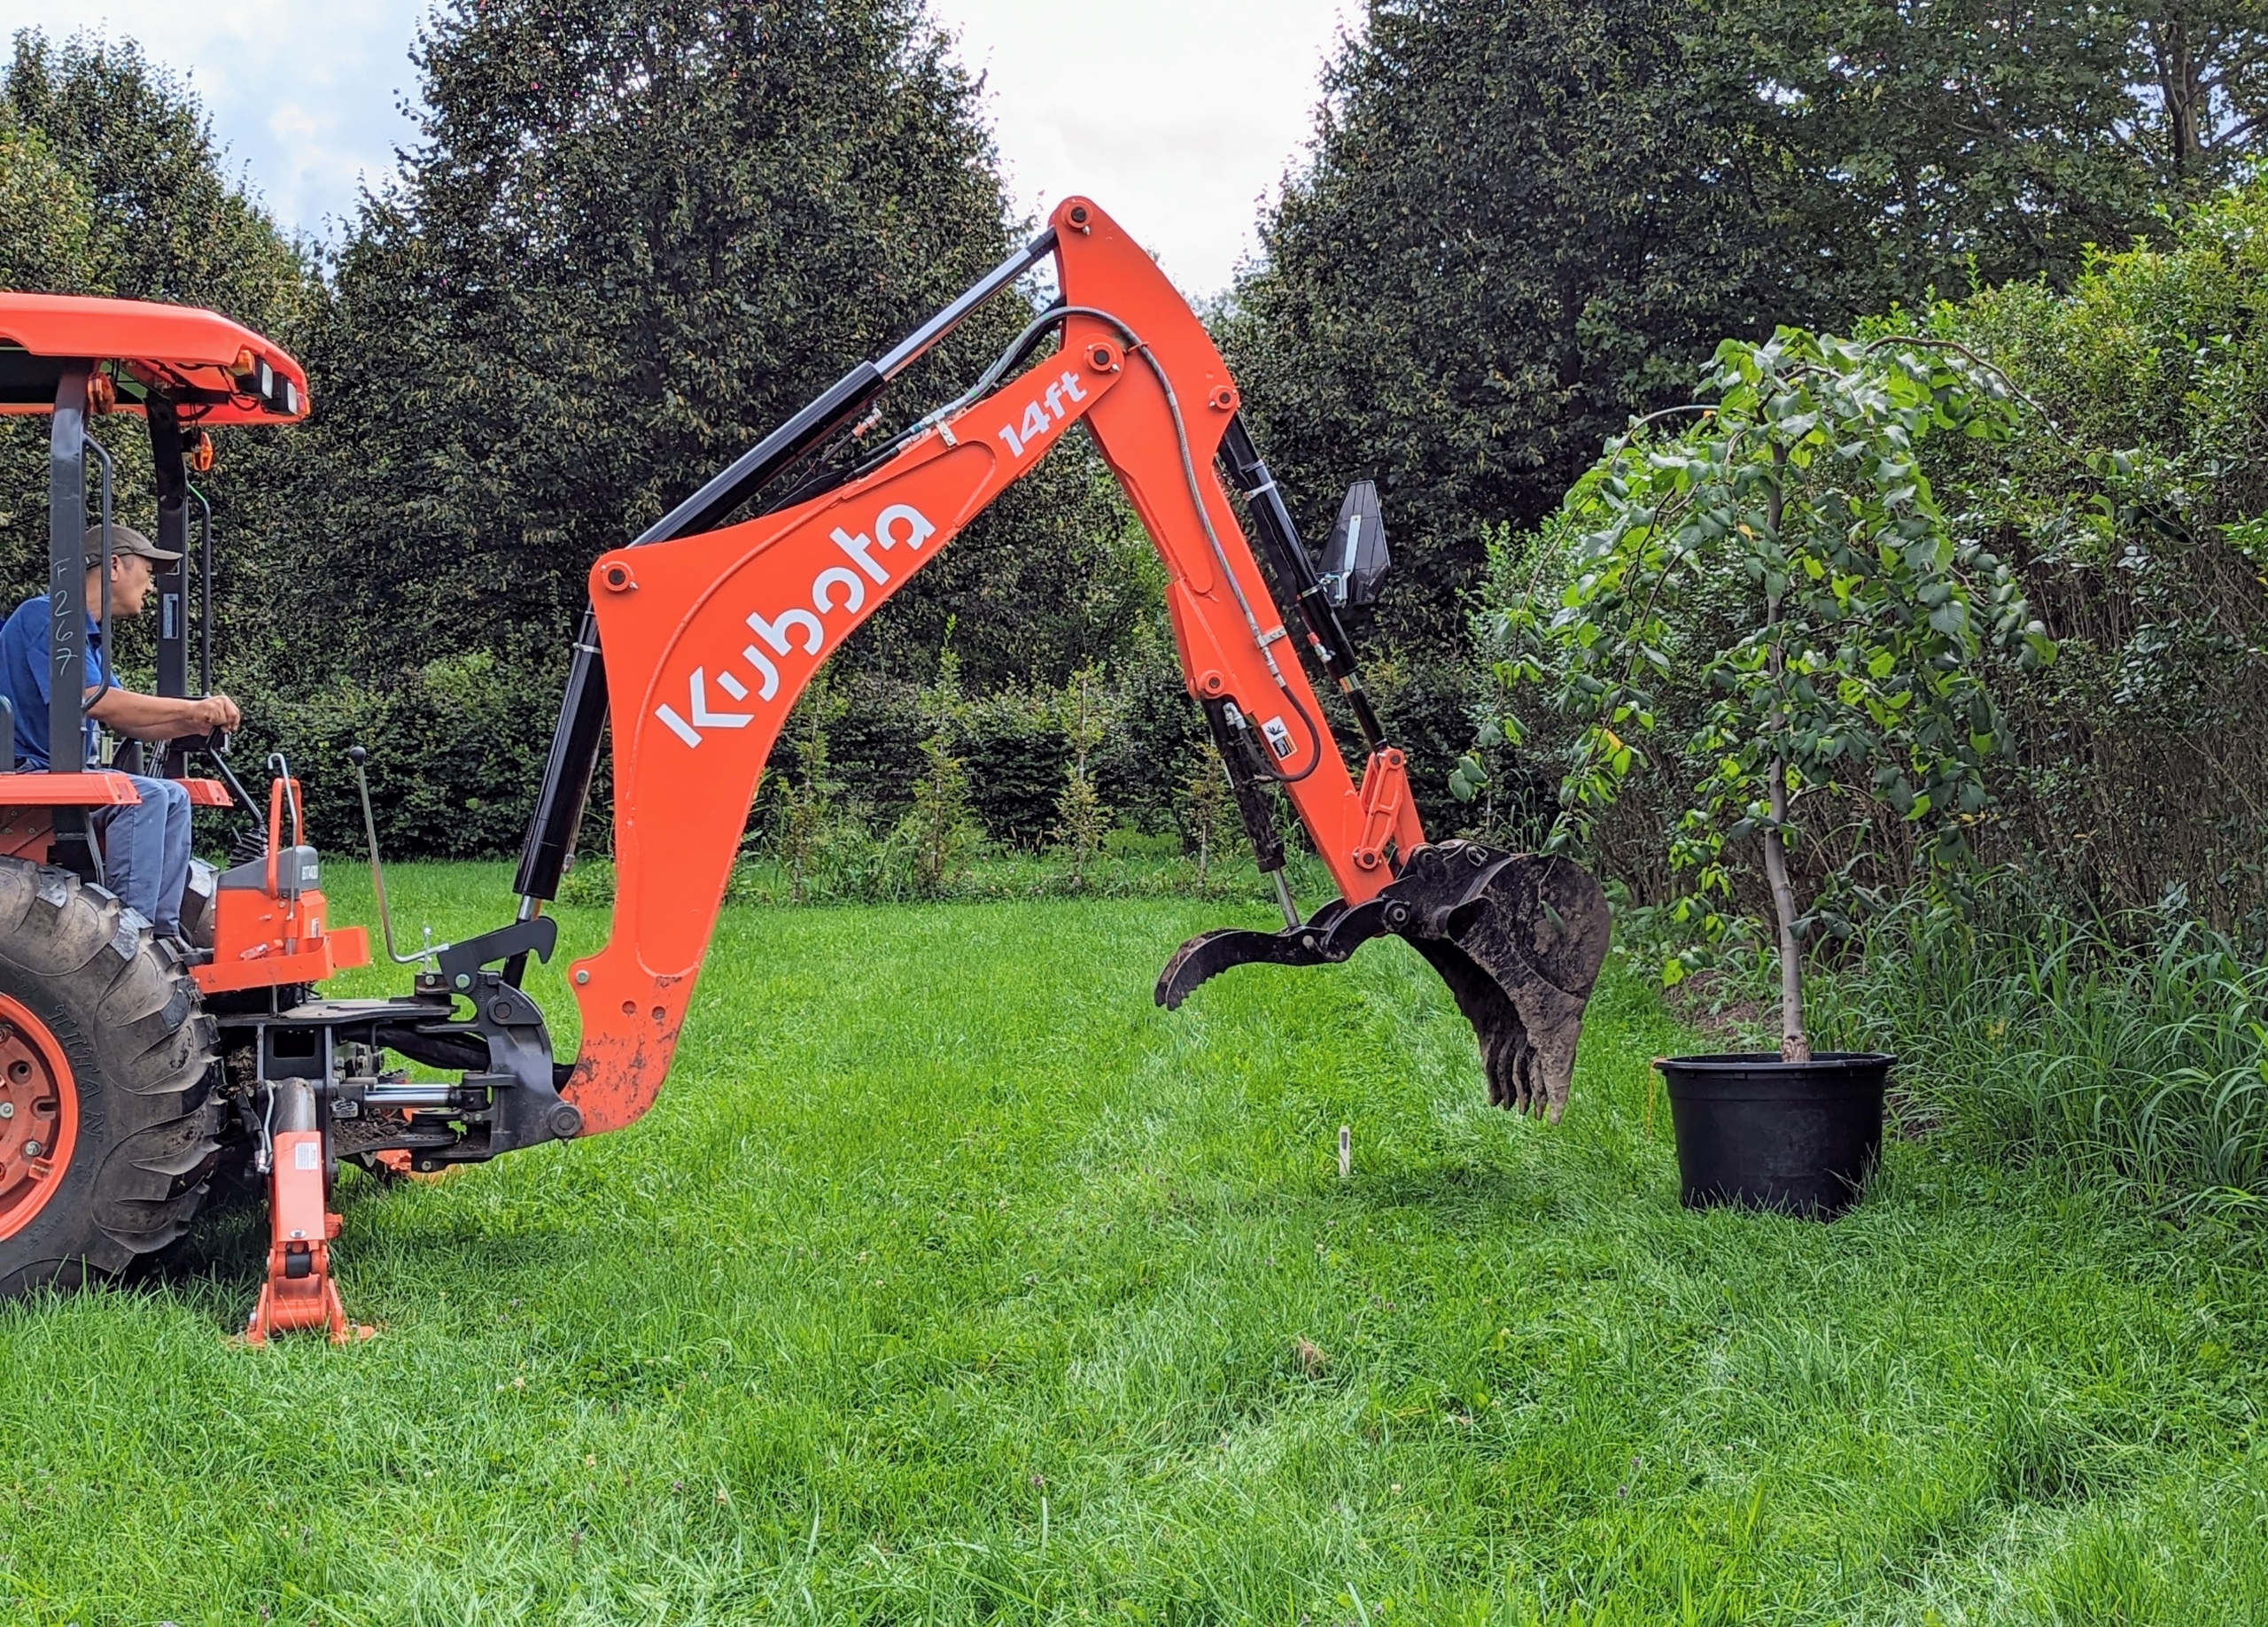
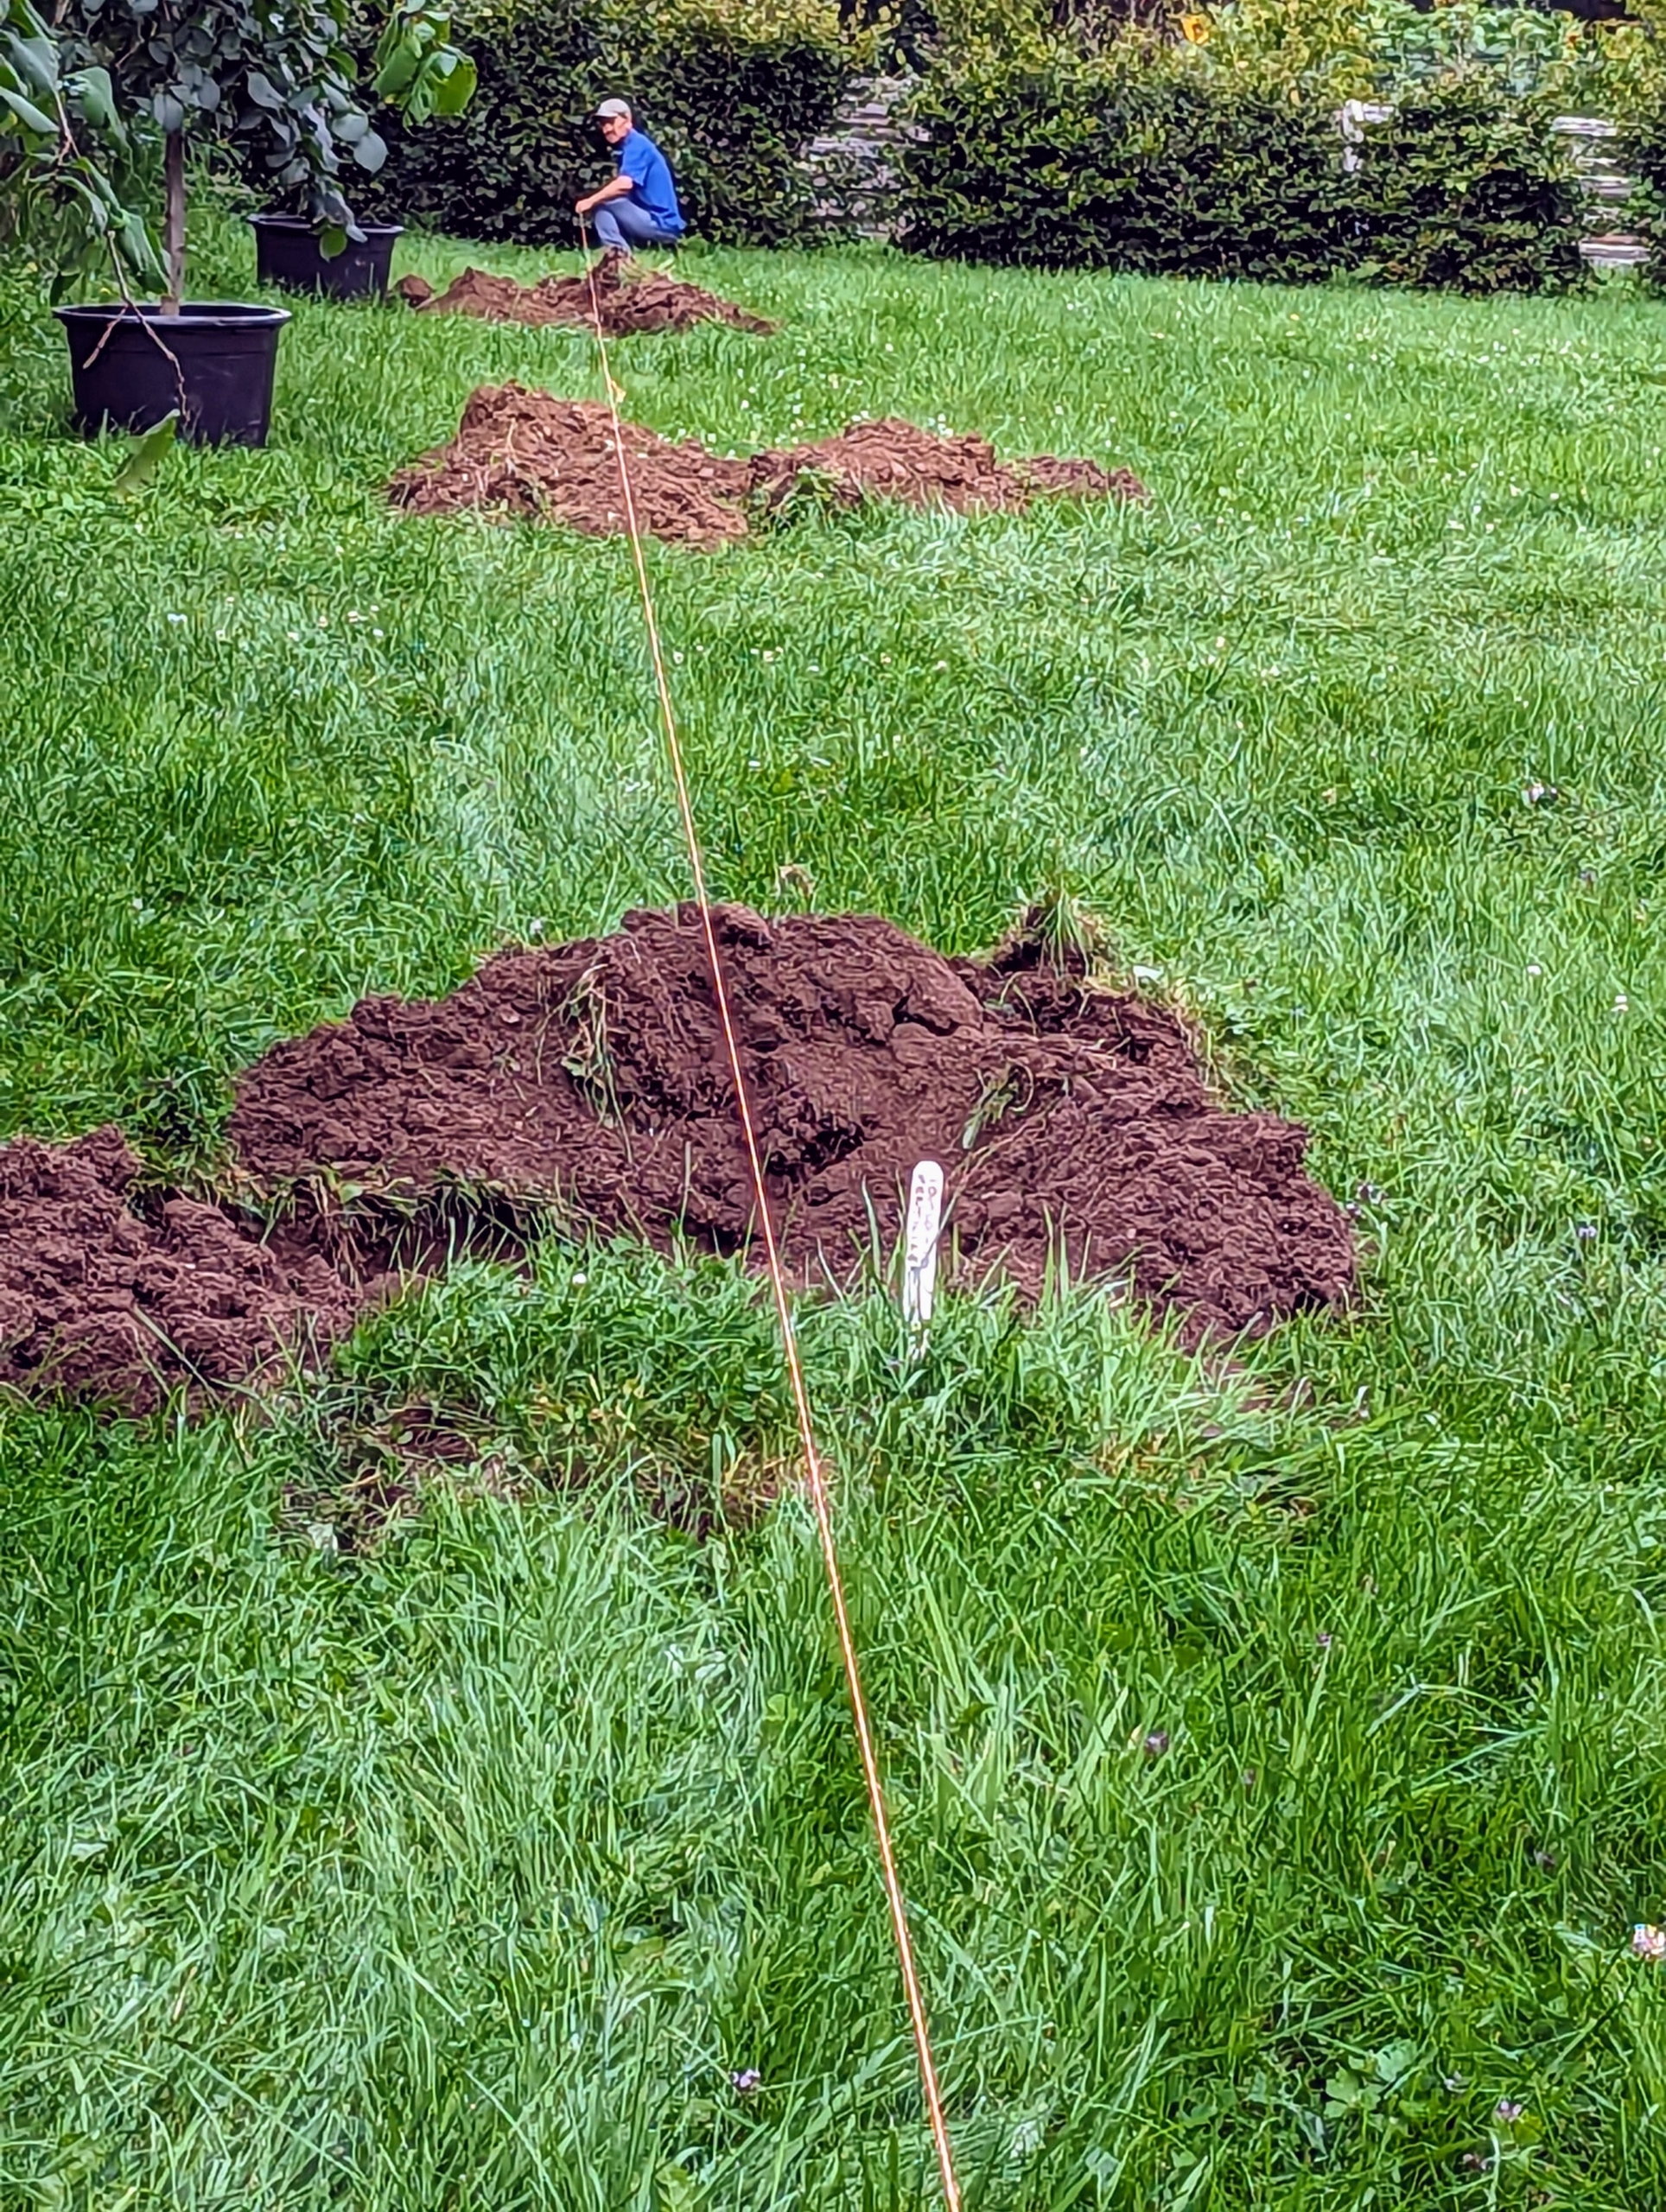
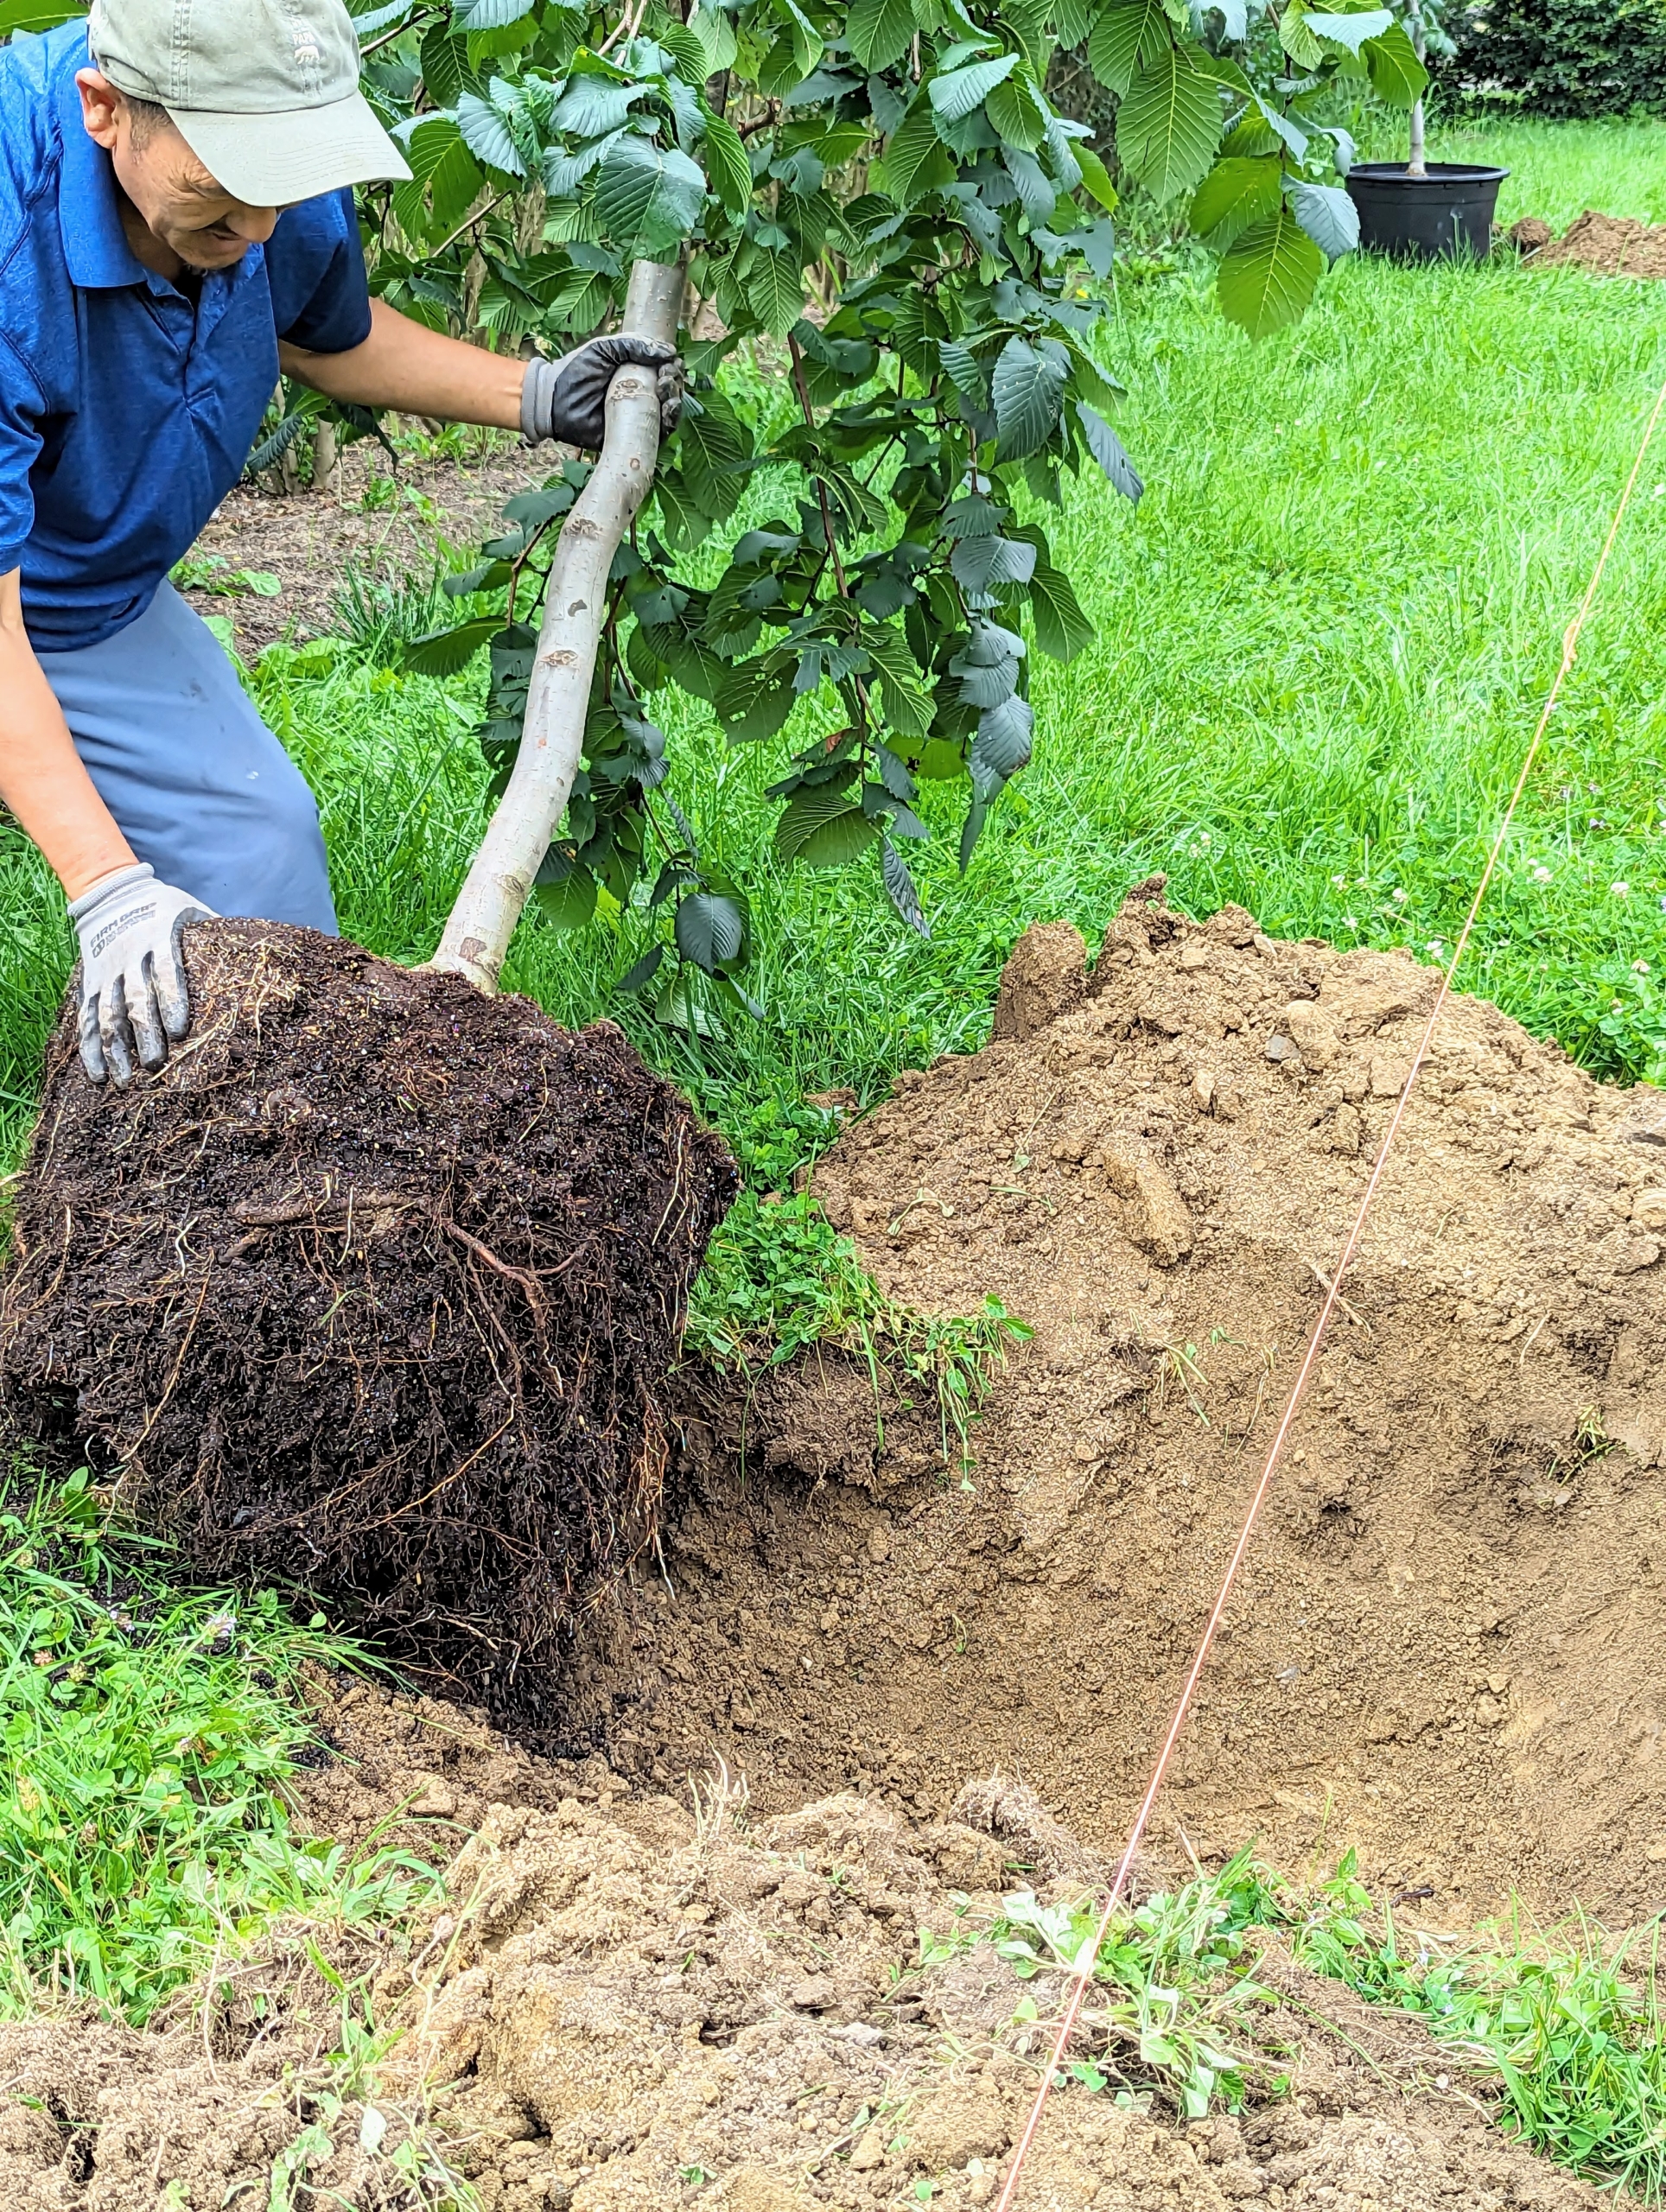
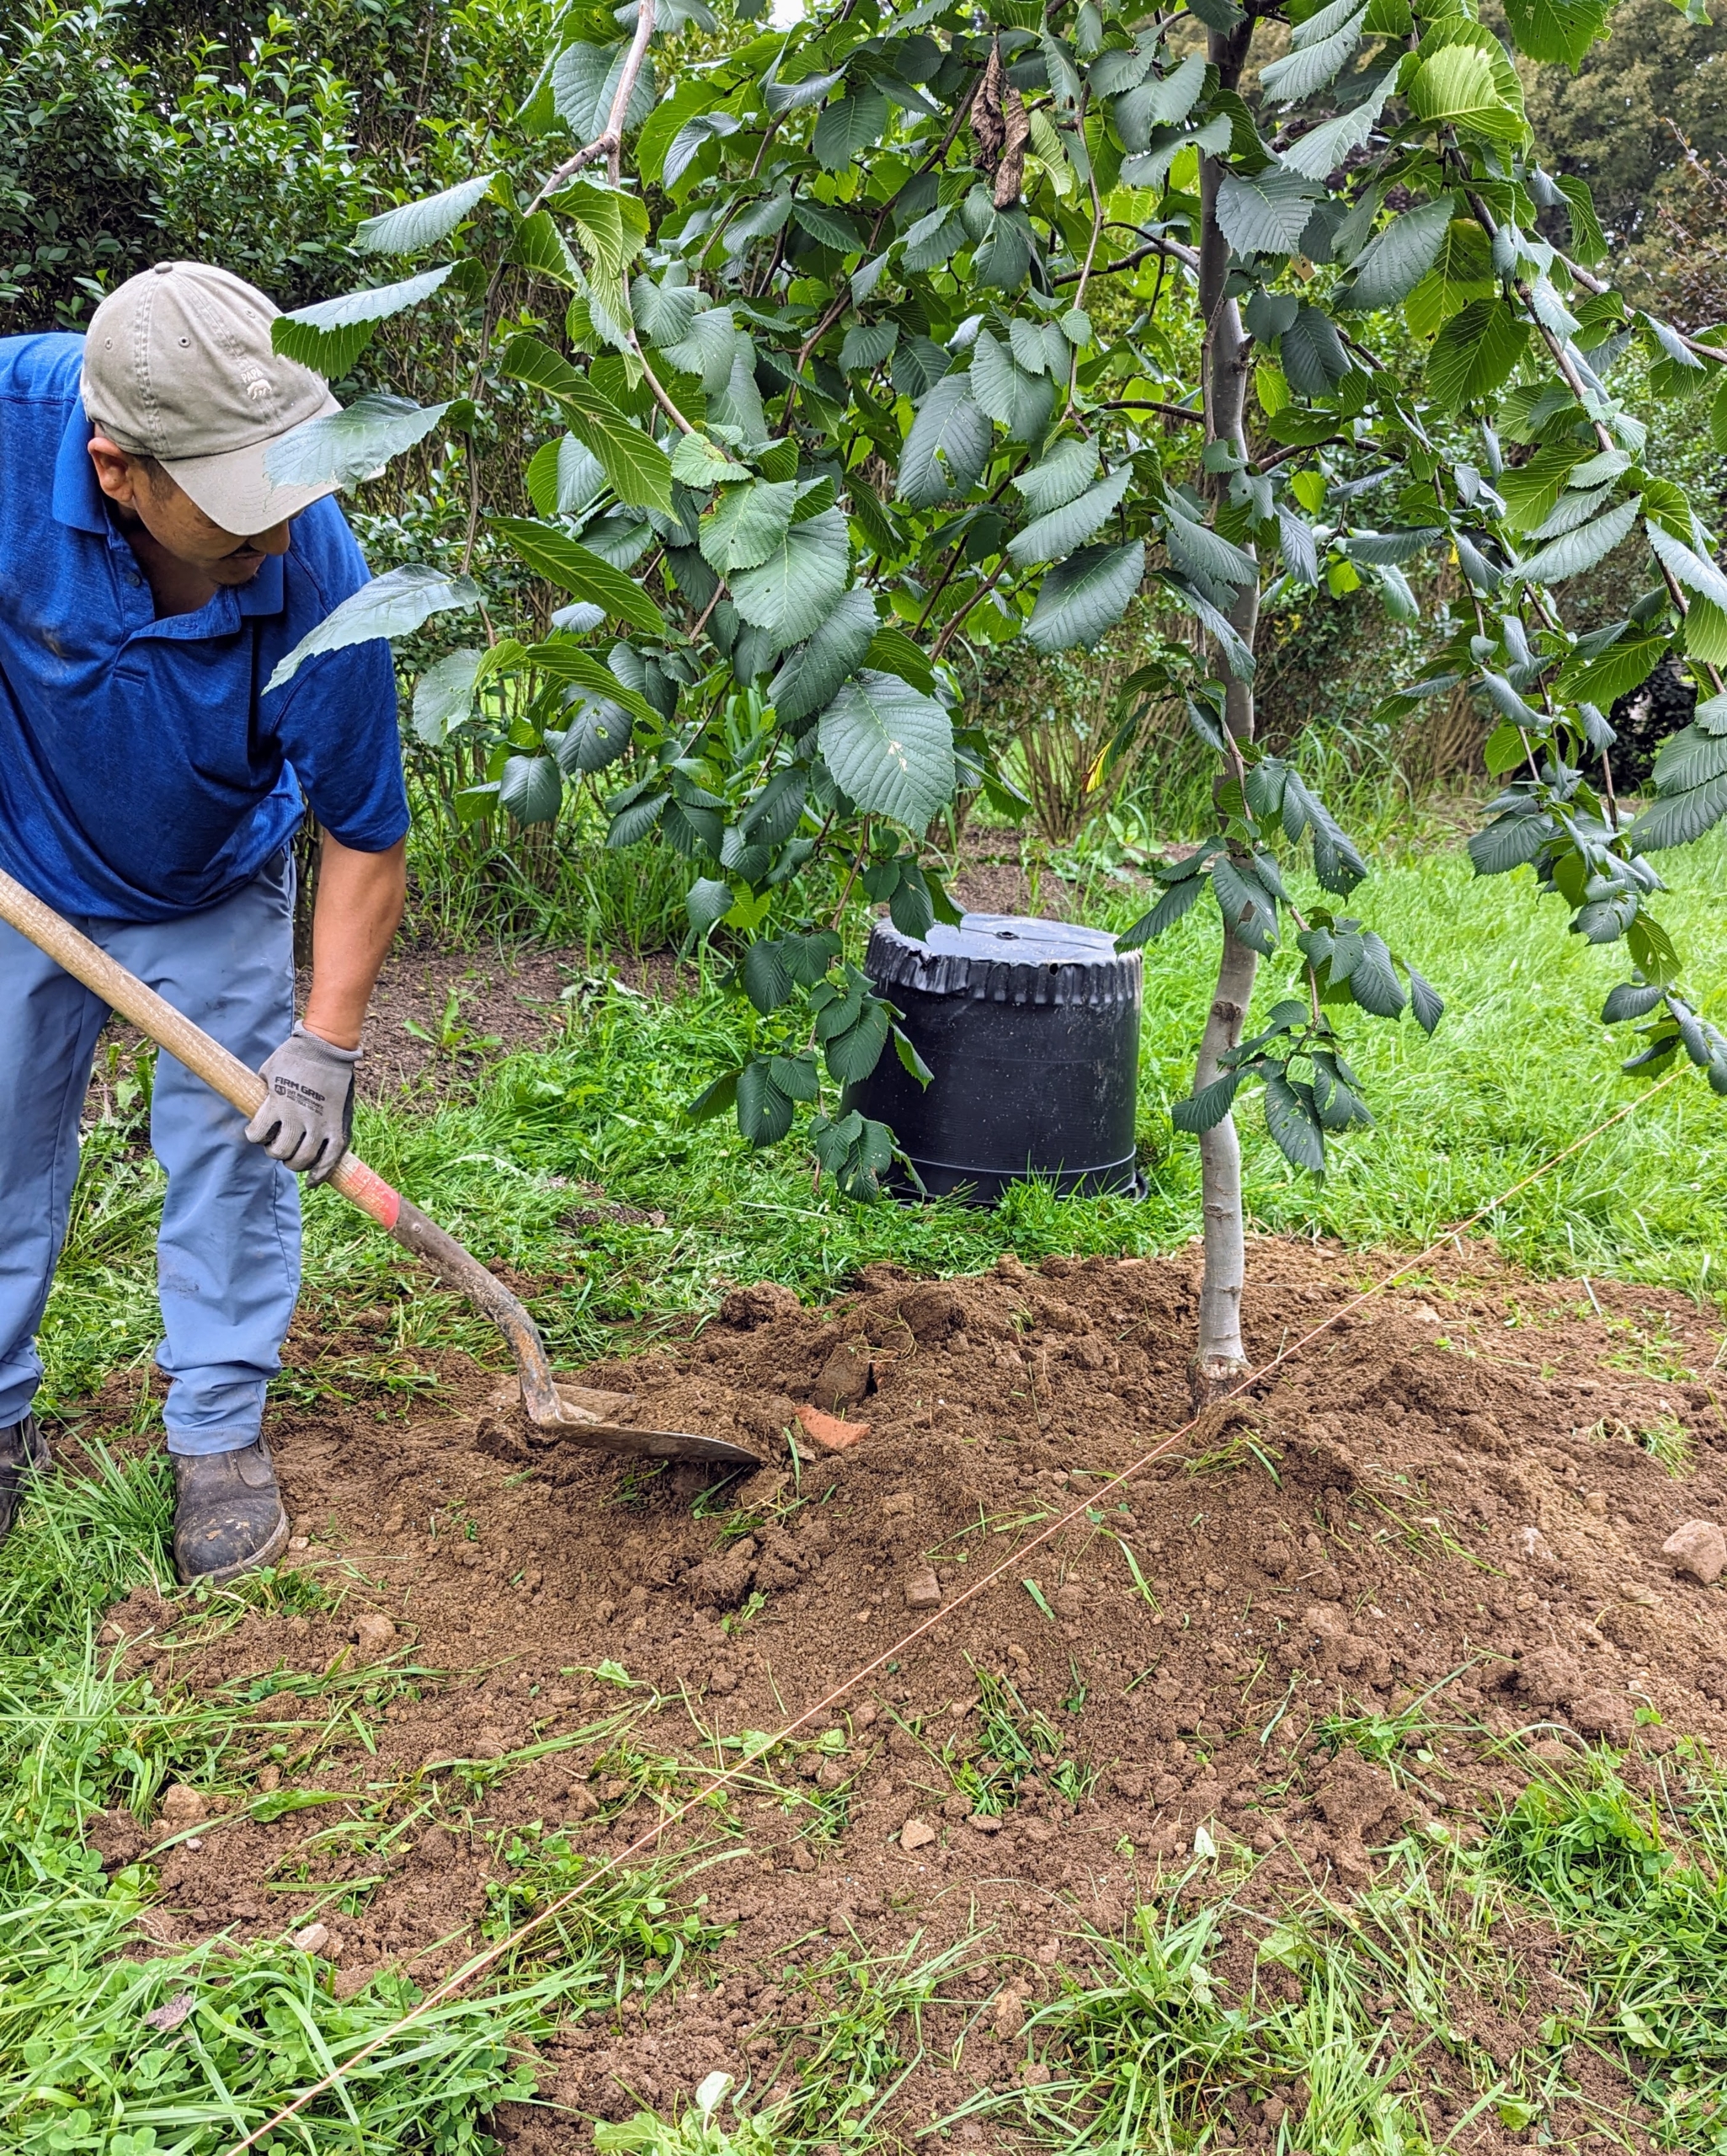
Once Chhiring marks the exact locations for the trees, the digging begins. Chhiring maneuvers our Kubota M62 tractor loader and backhoe to dig a hole for each camperdown elm.
Backhoes are extremely versatile. I am fortunate to have this attachment for our tractor. Backhoes come with a bucket and digging arm that can perform many different tasks, such as digging, moving materials. We use it very often here at the farm.
Camperdown elms prefer partial to full sun, but will also grow in light shade. The maze is a perfect environment for these trees.
After all the holes are dug, Chhiring uses landscaping twine to make sure the trees will be aligned properly. When choosing trees or plants, be sure to consider the size of the specimens when they are mature.
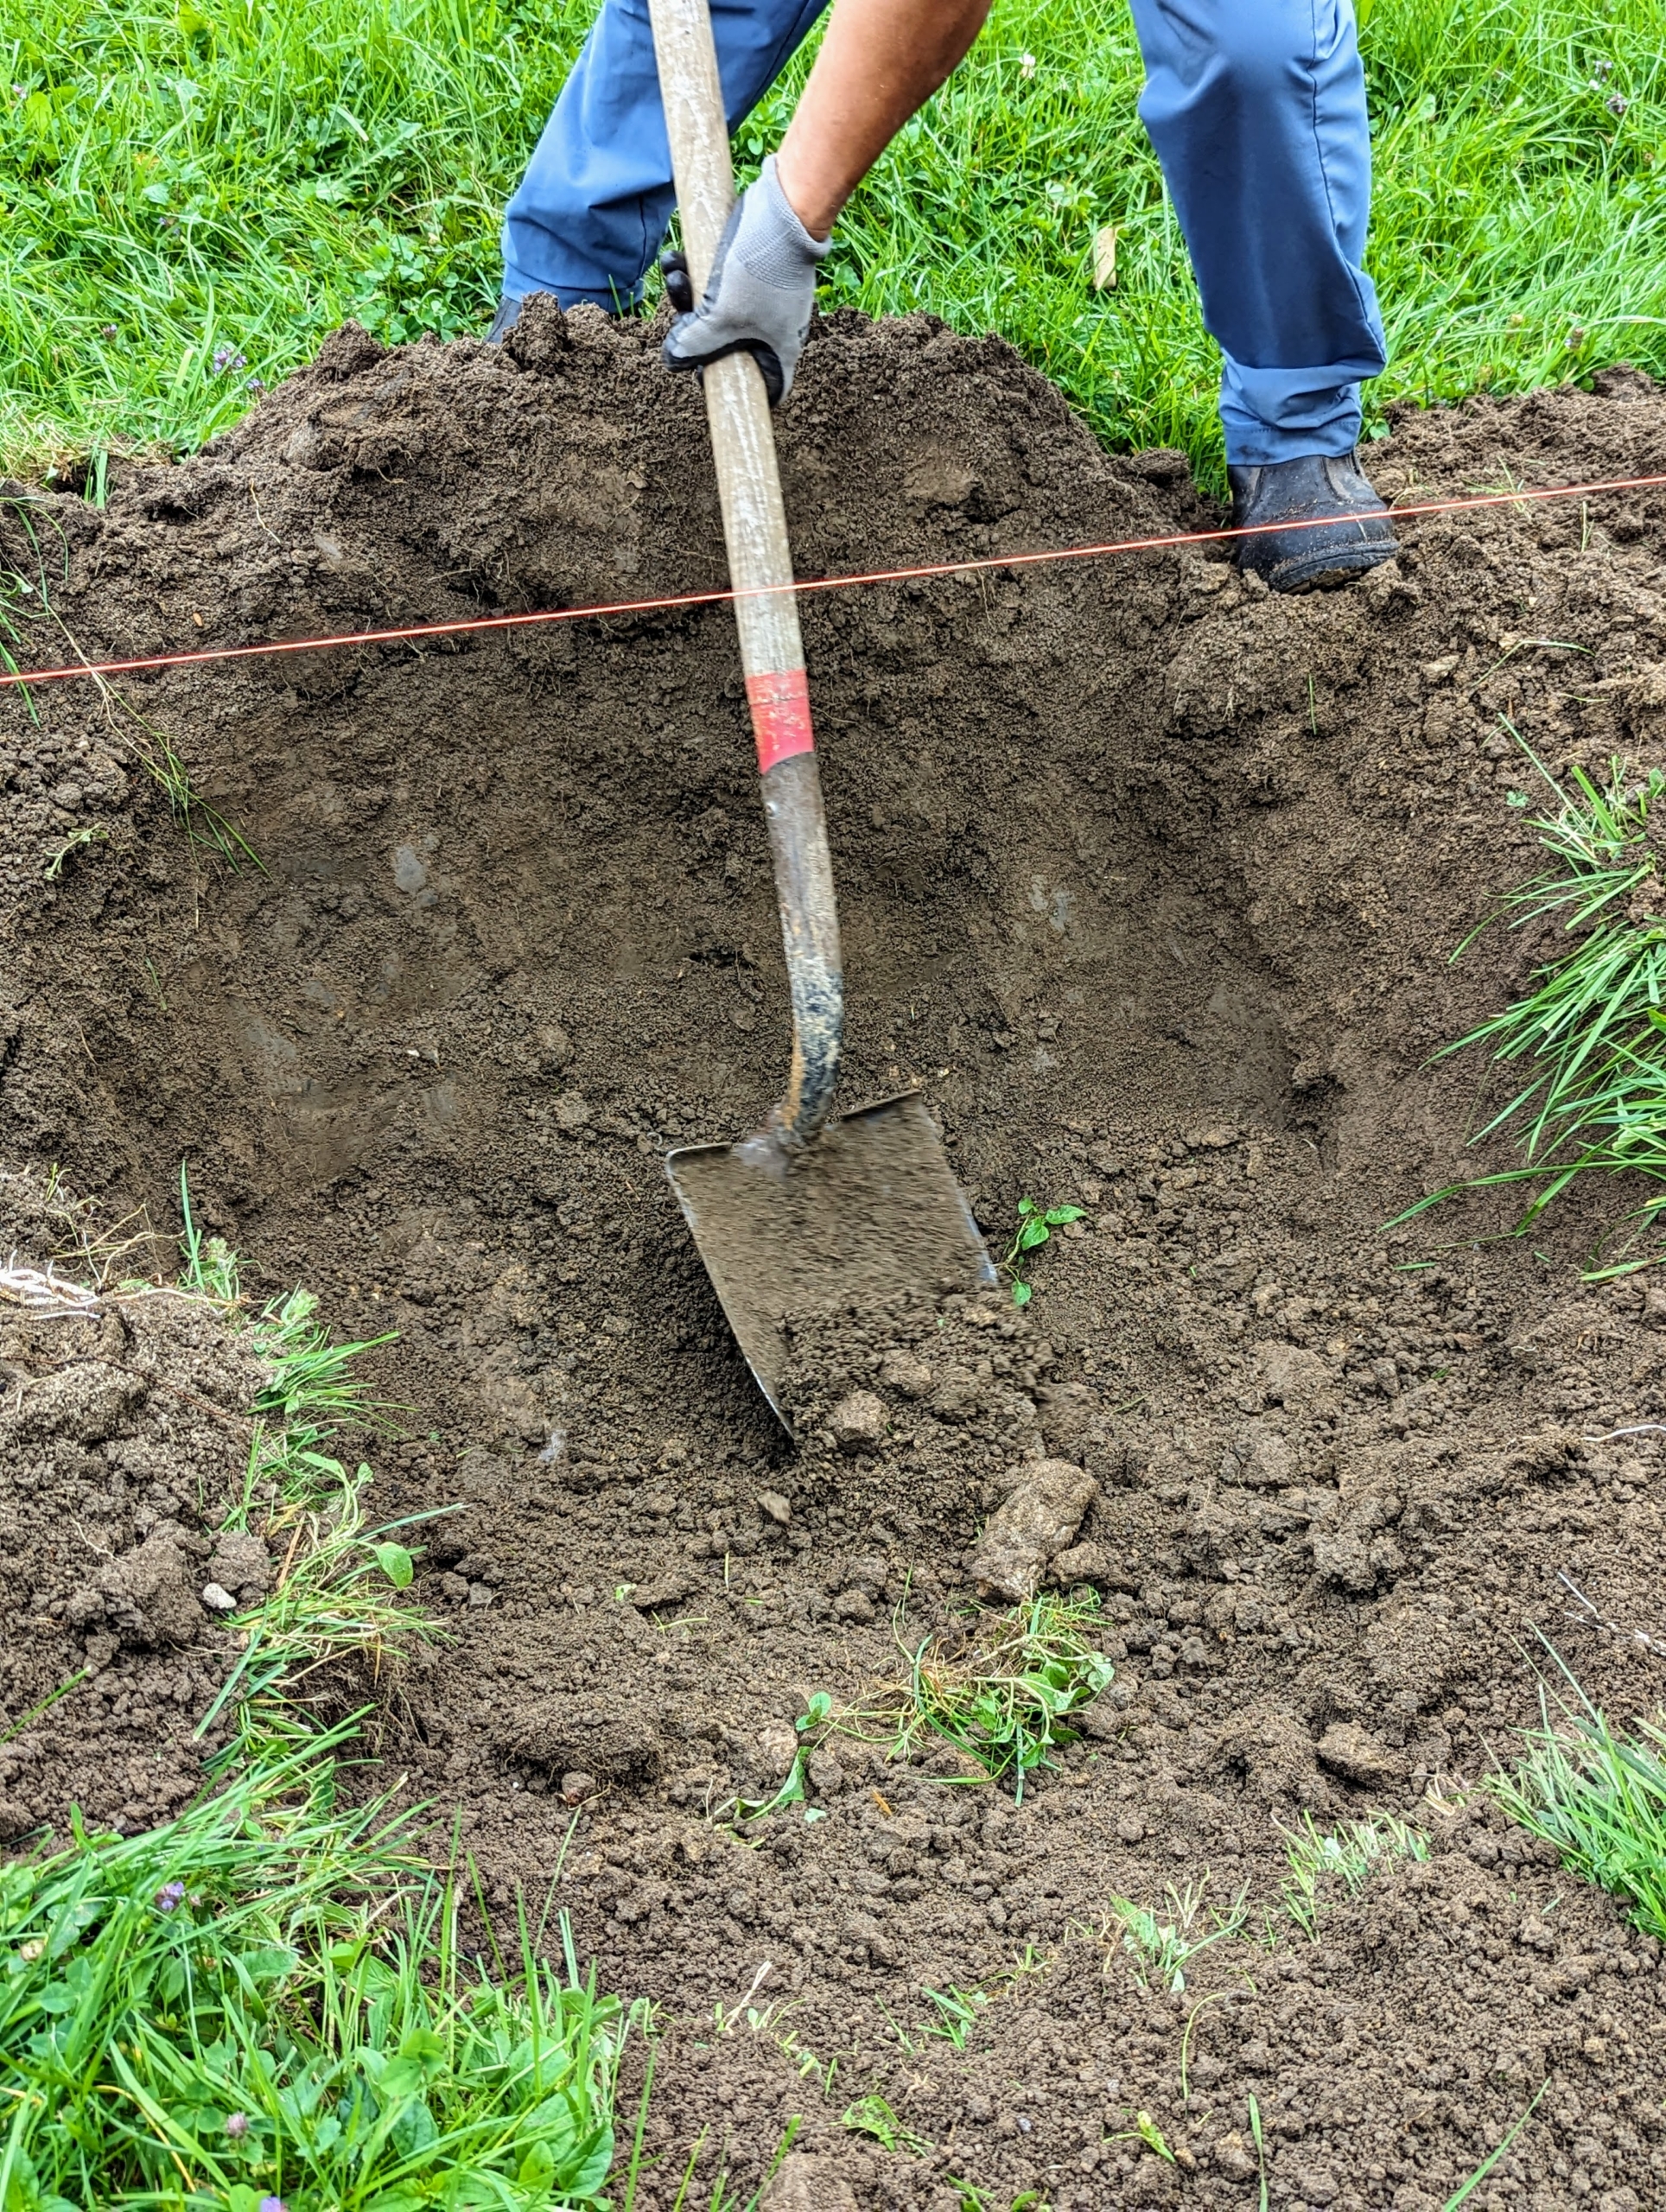
Here, Chhiring manually digs a bit more soil out of the hole. The rule of thumb when planting a tree is to dig the hole two or three times as wide as and no deeper than the bottom of the rootball to the trunk flare. The flare of the tree should be at or slightly above the soil grade. Remember, planting a tree too deep can kill it.
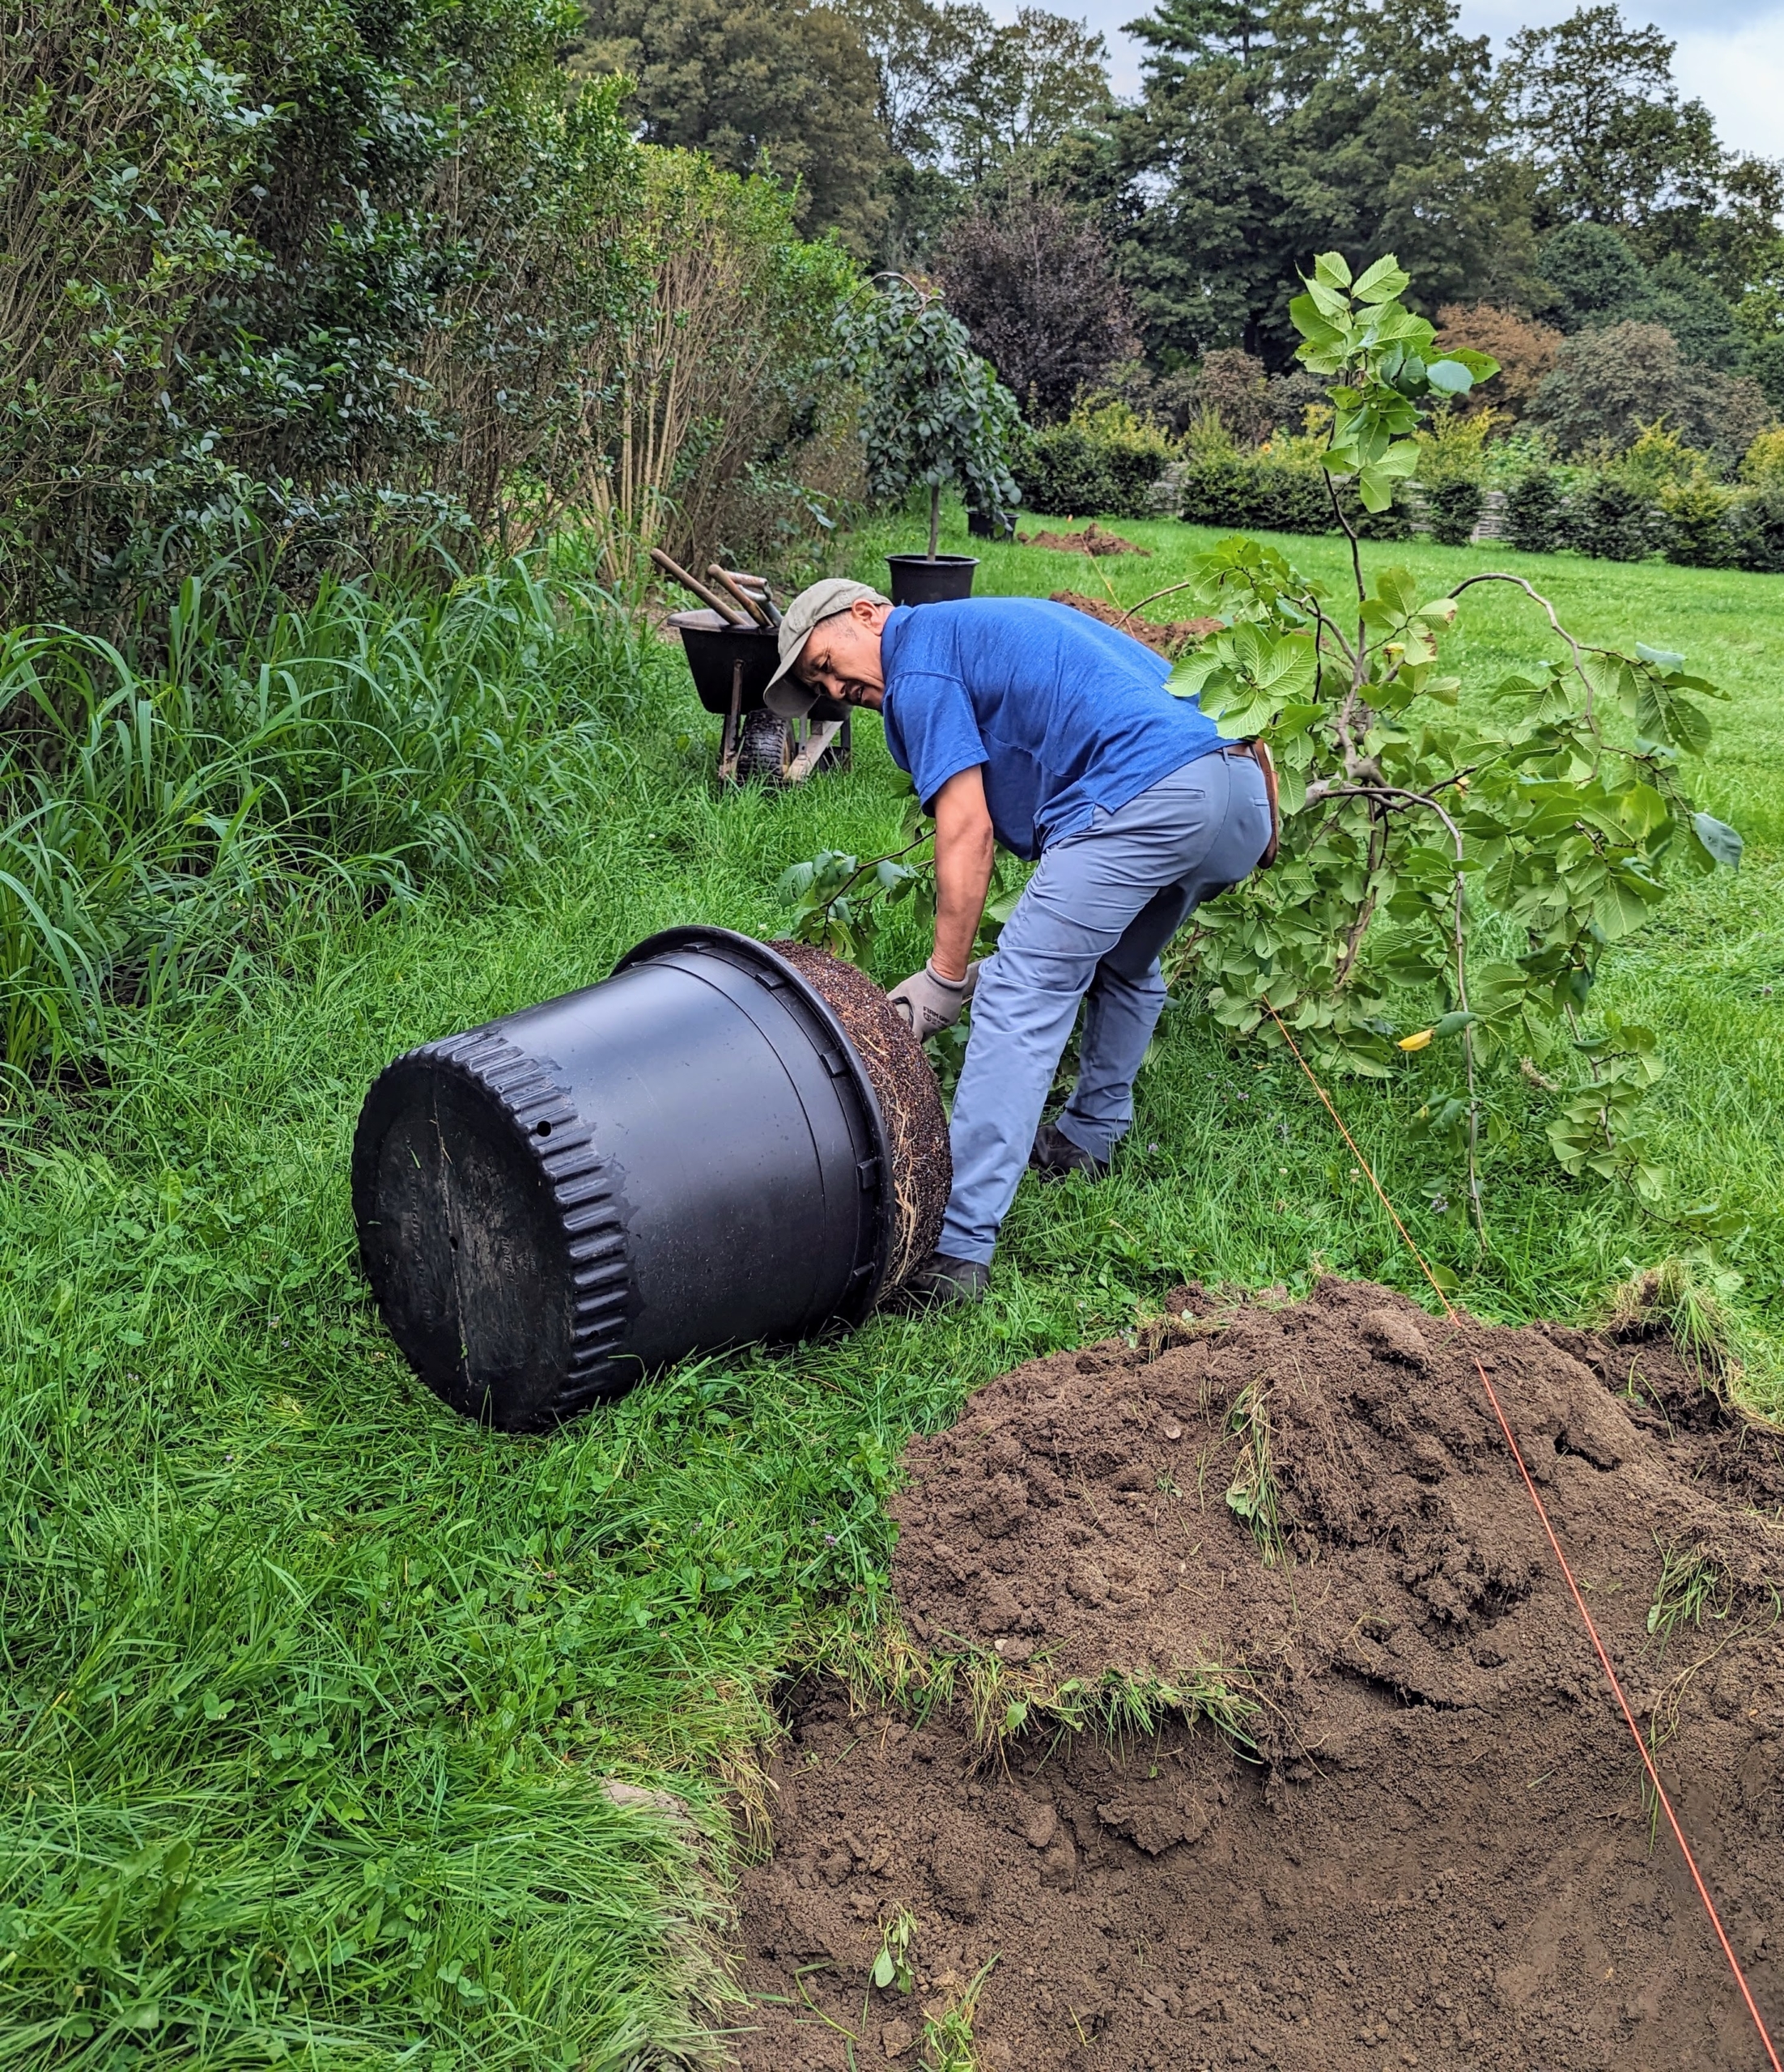
These camperdown elms were stored and nurtured at Skylands, my home in Maine. They were planted in pots, so there is no wrapping to remove or wire cages. Here, Chhiring pulls out the tree and exposes the rootball.
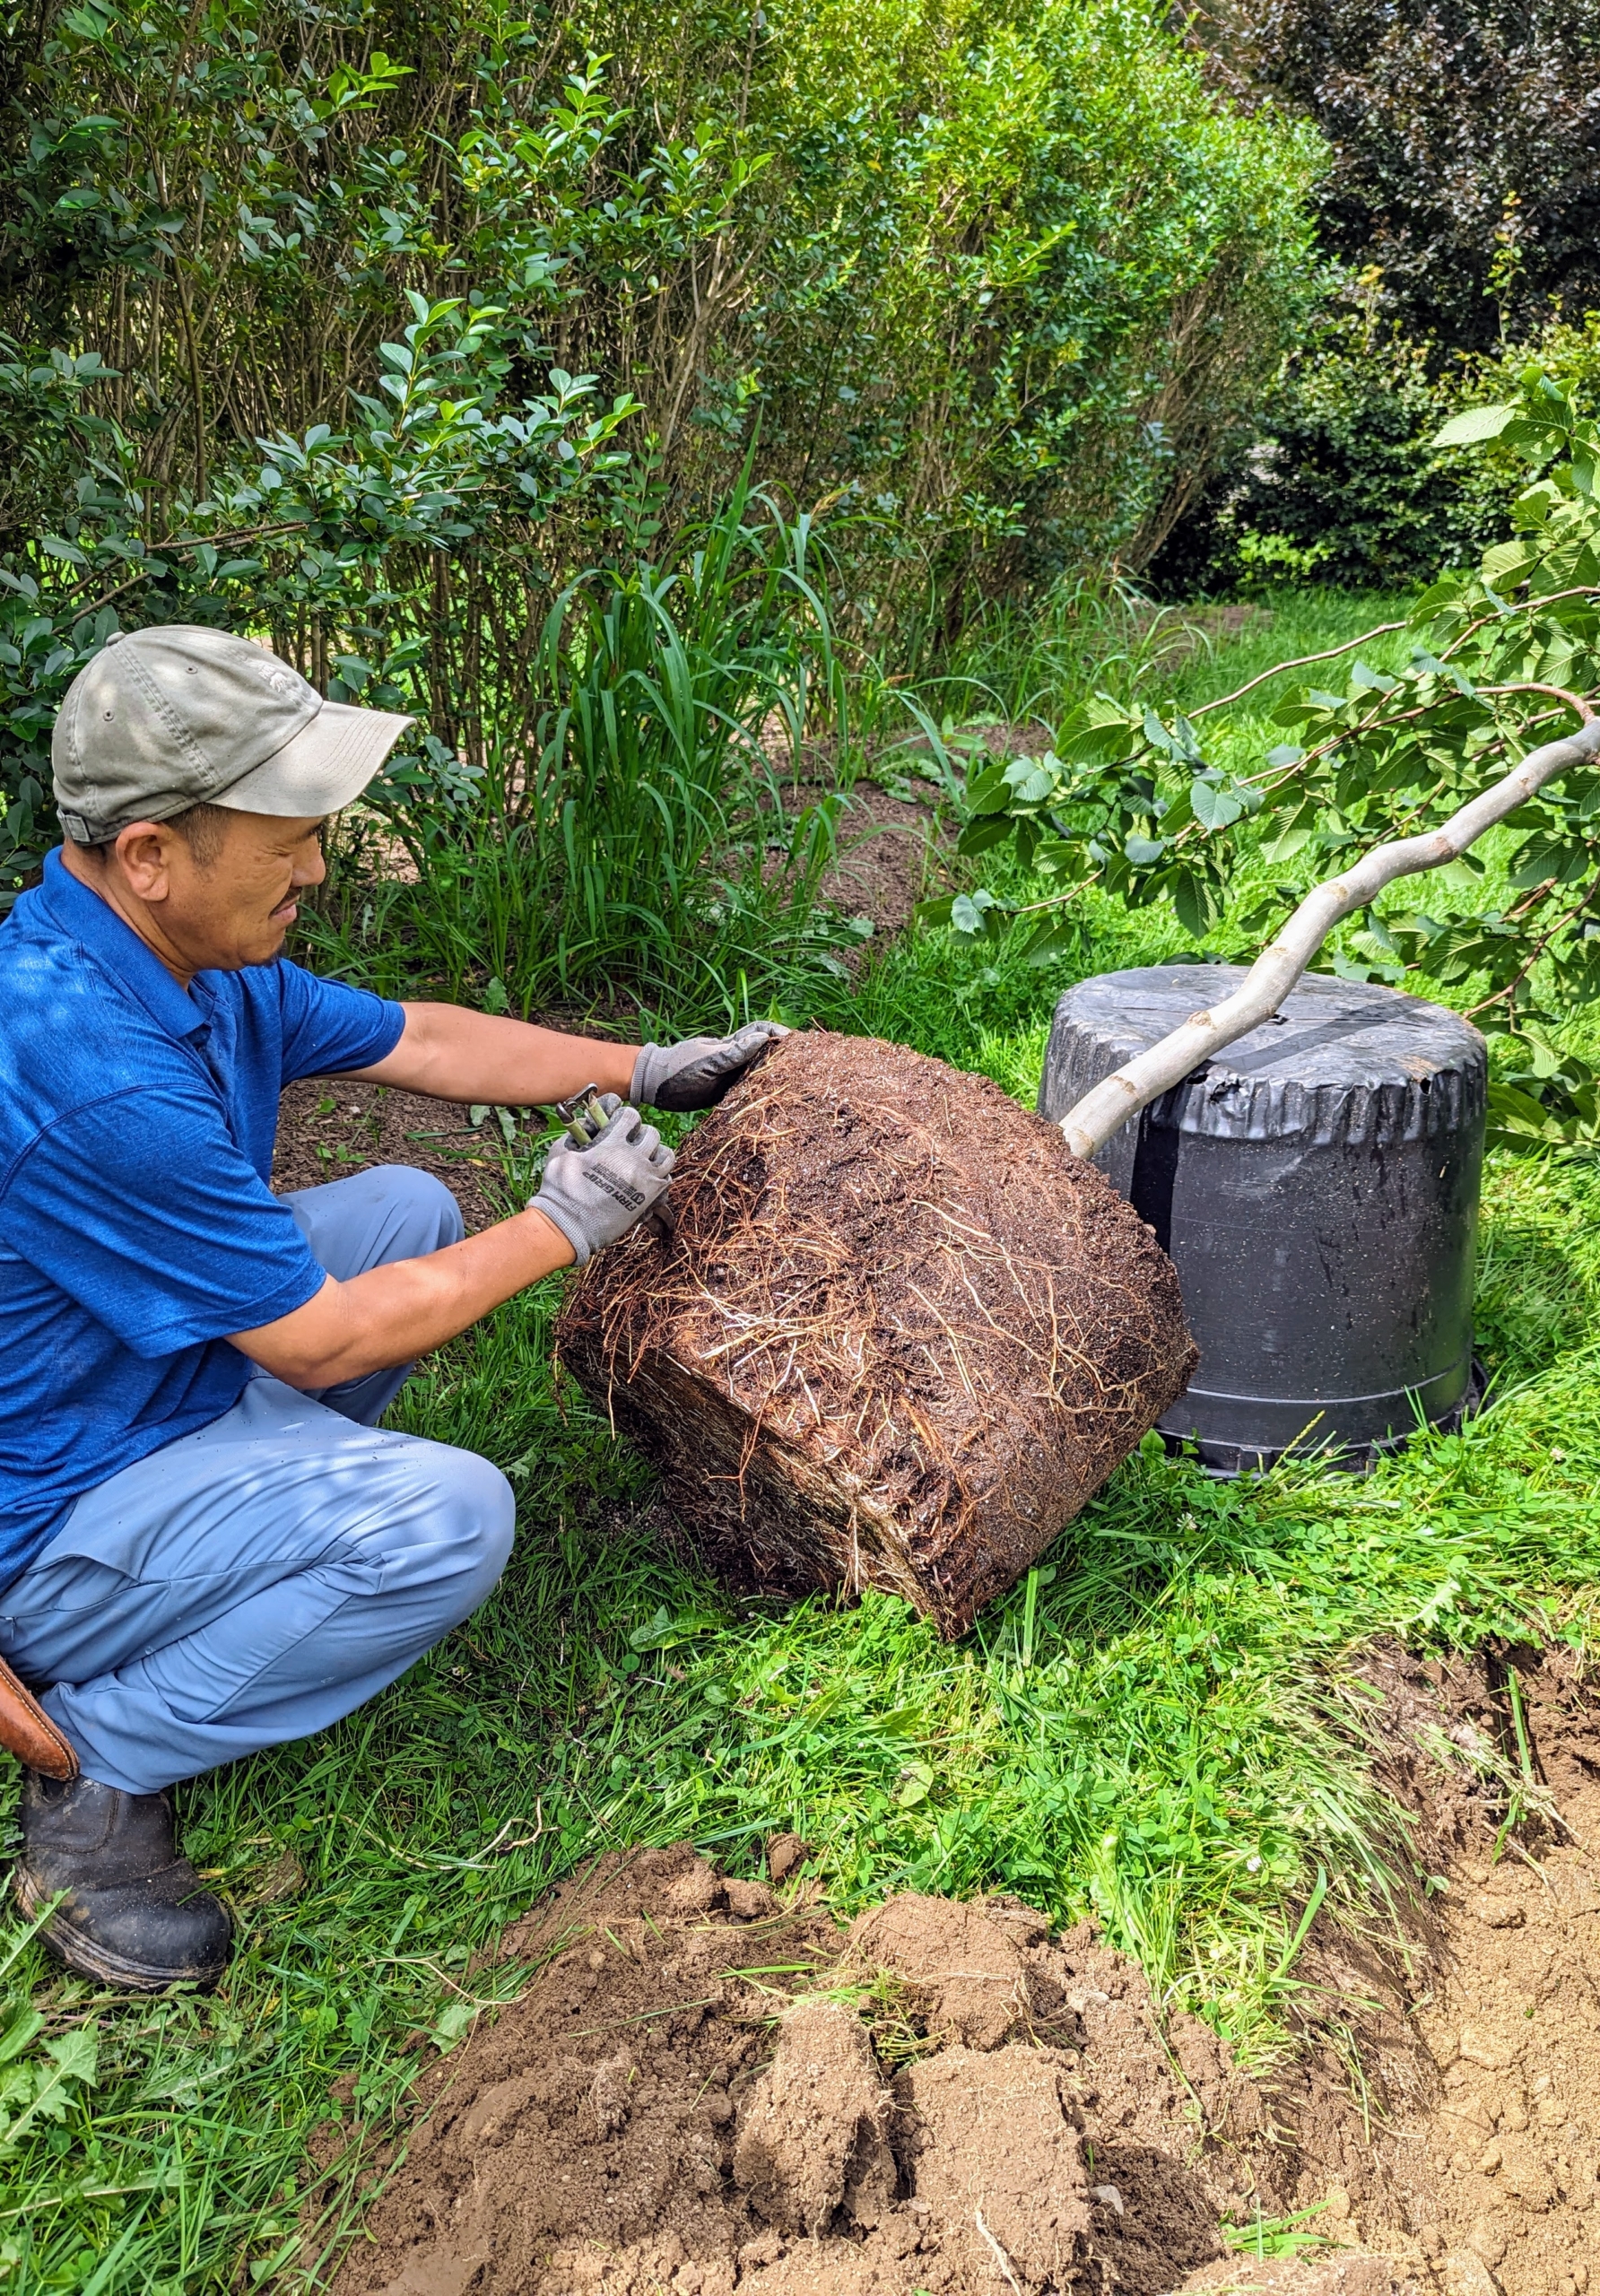
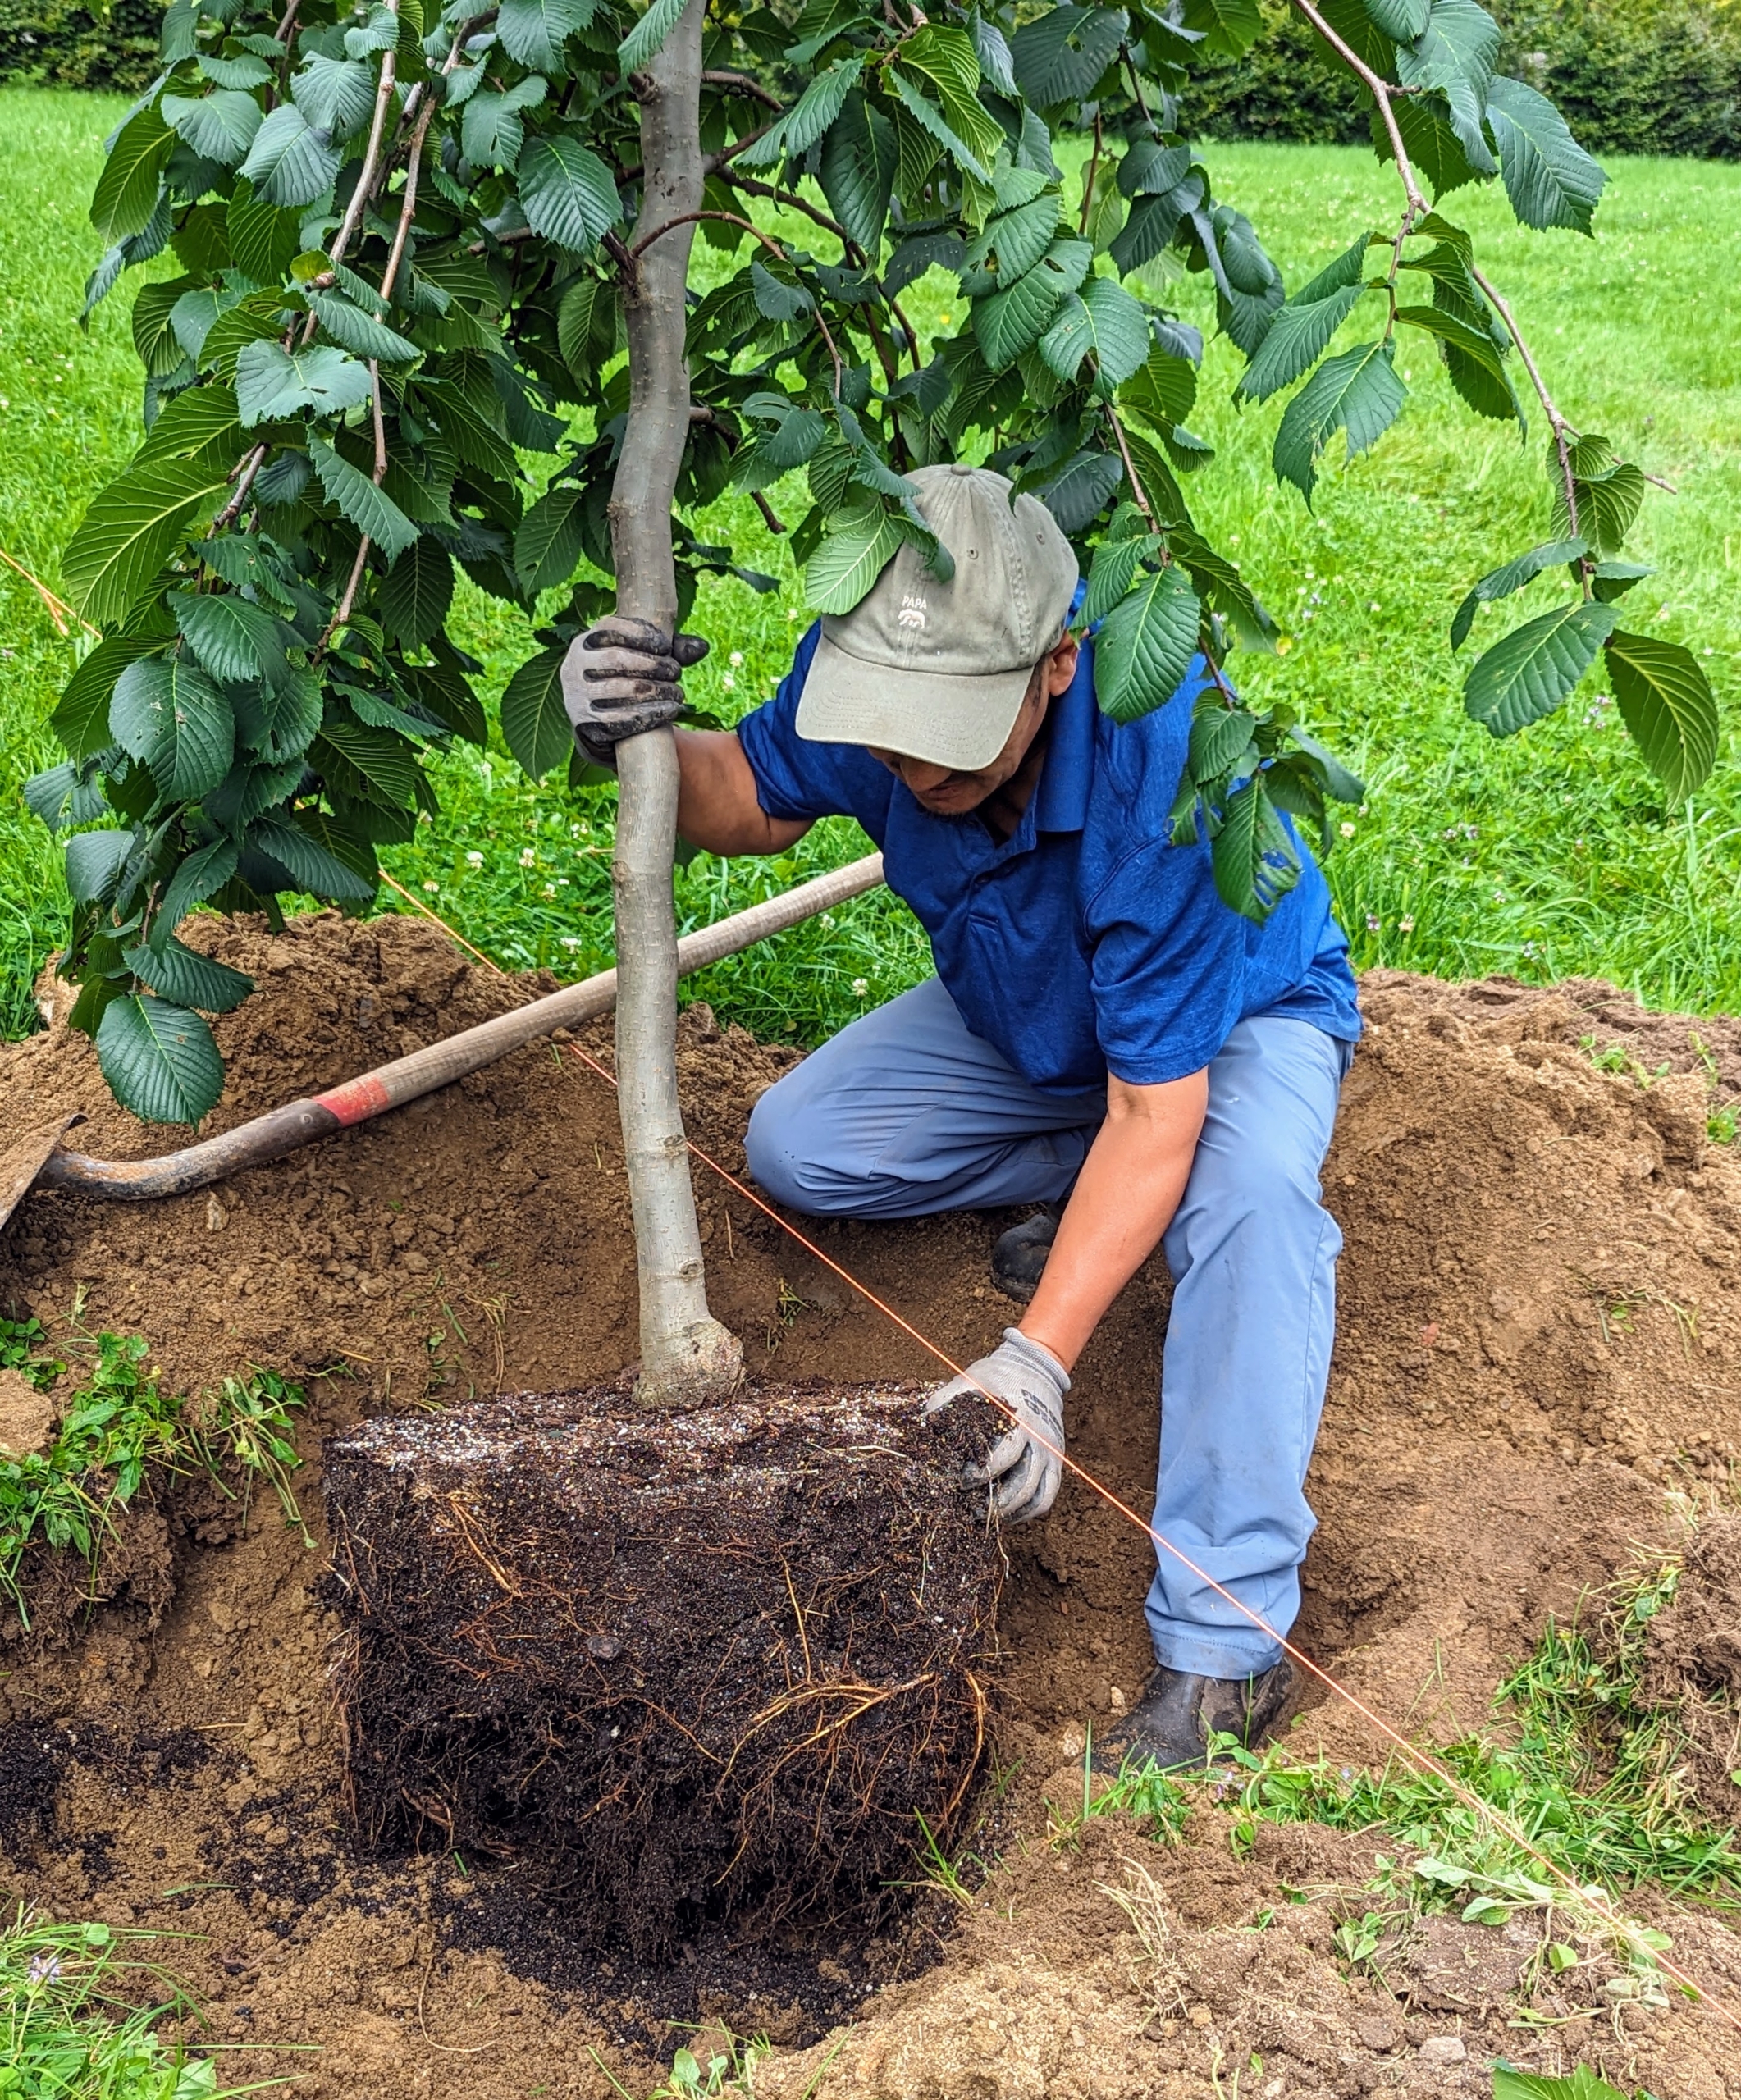
Next, he scarifies the rootball. When a tree has been growing in a container and the roots have reached the sides of the container, it’s important to scarify or tease the roots to stimulate growth.
Chhiring uses the end of his pruners to rough up the surface of the rootball on all sides and on the bottom.
Then he slowly and carefully rolls the tree into the hole. The twine is where the trunk of the tree should be.
This task takes a few minutes to get into the perfect position. Once it is placed, Chhiring checks that the trunk is straight and that the best side of the tree is facing the path.
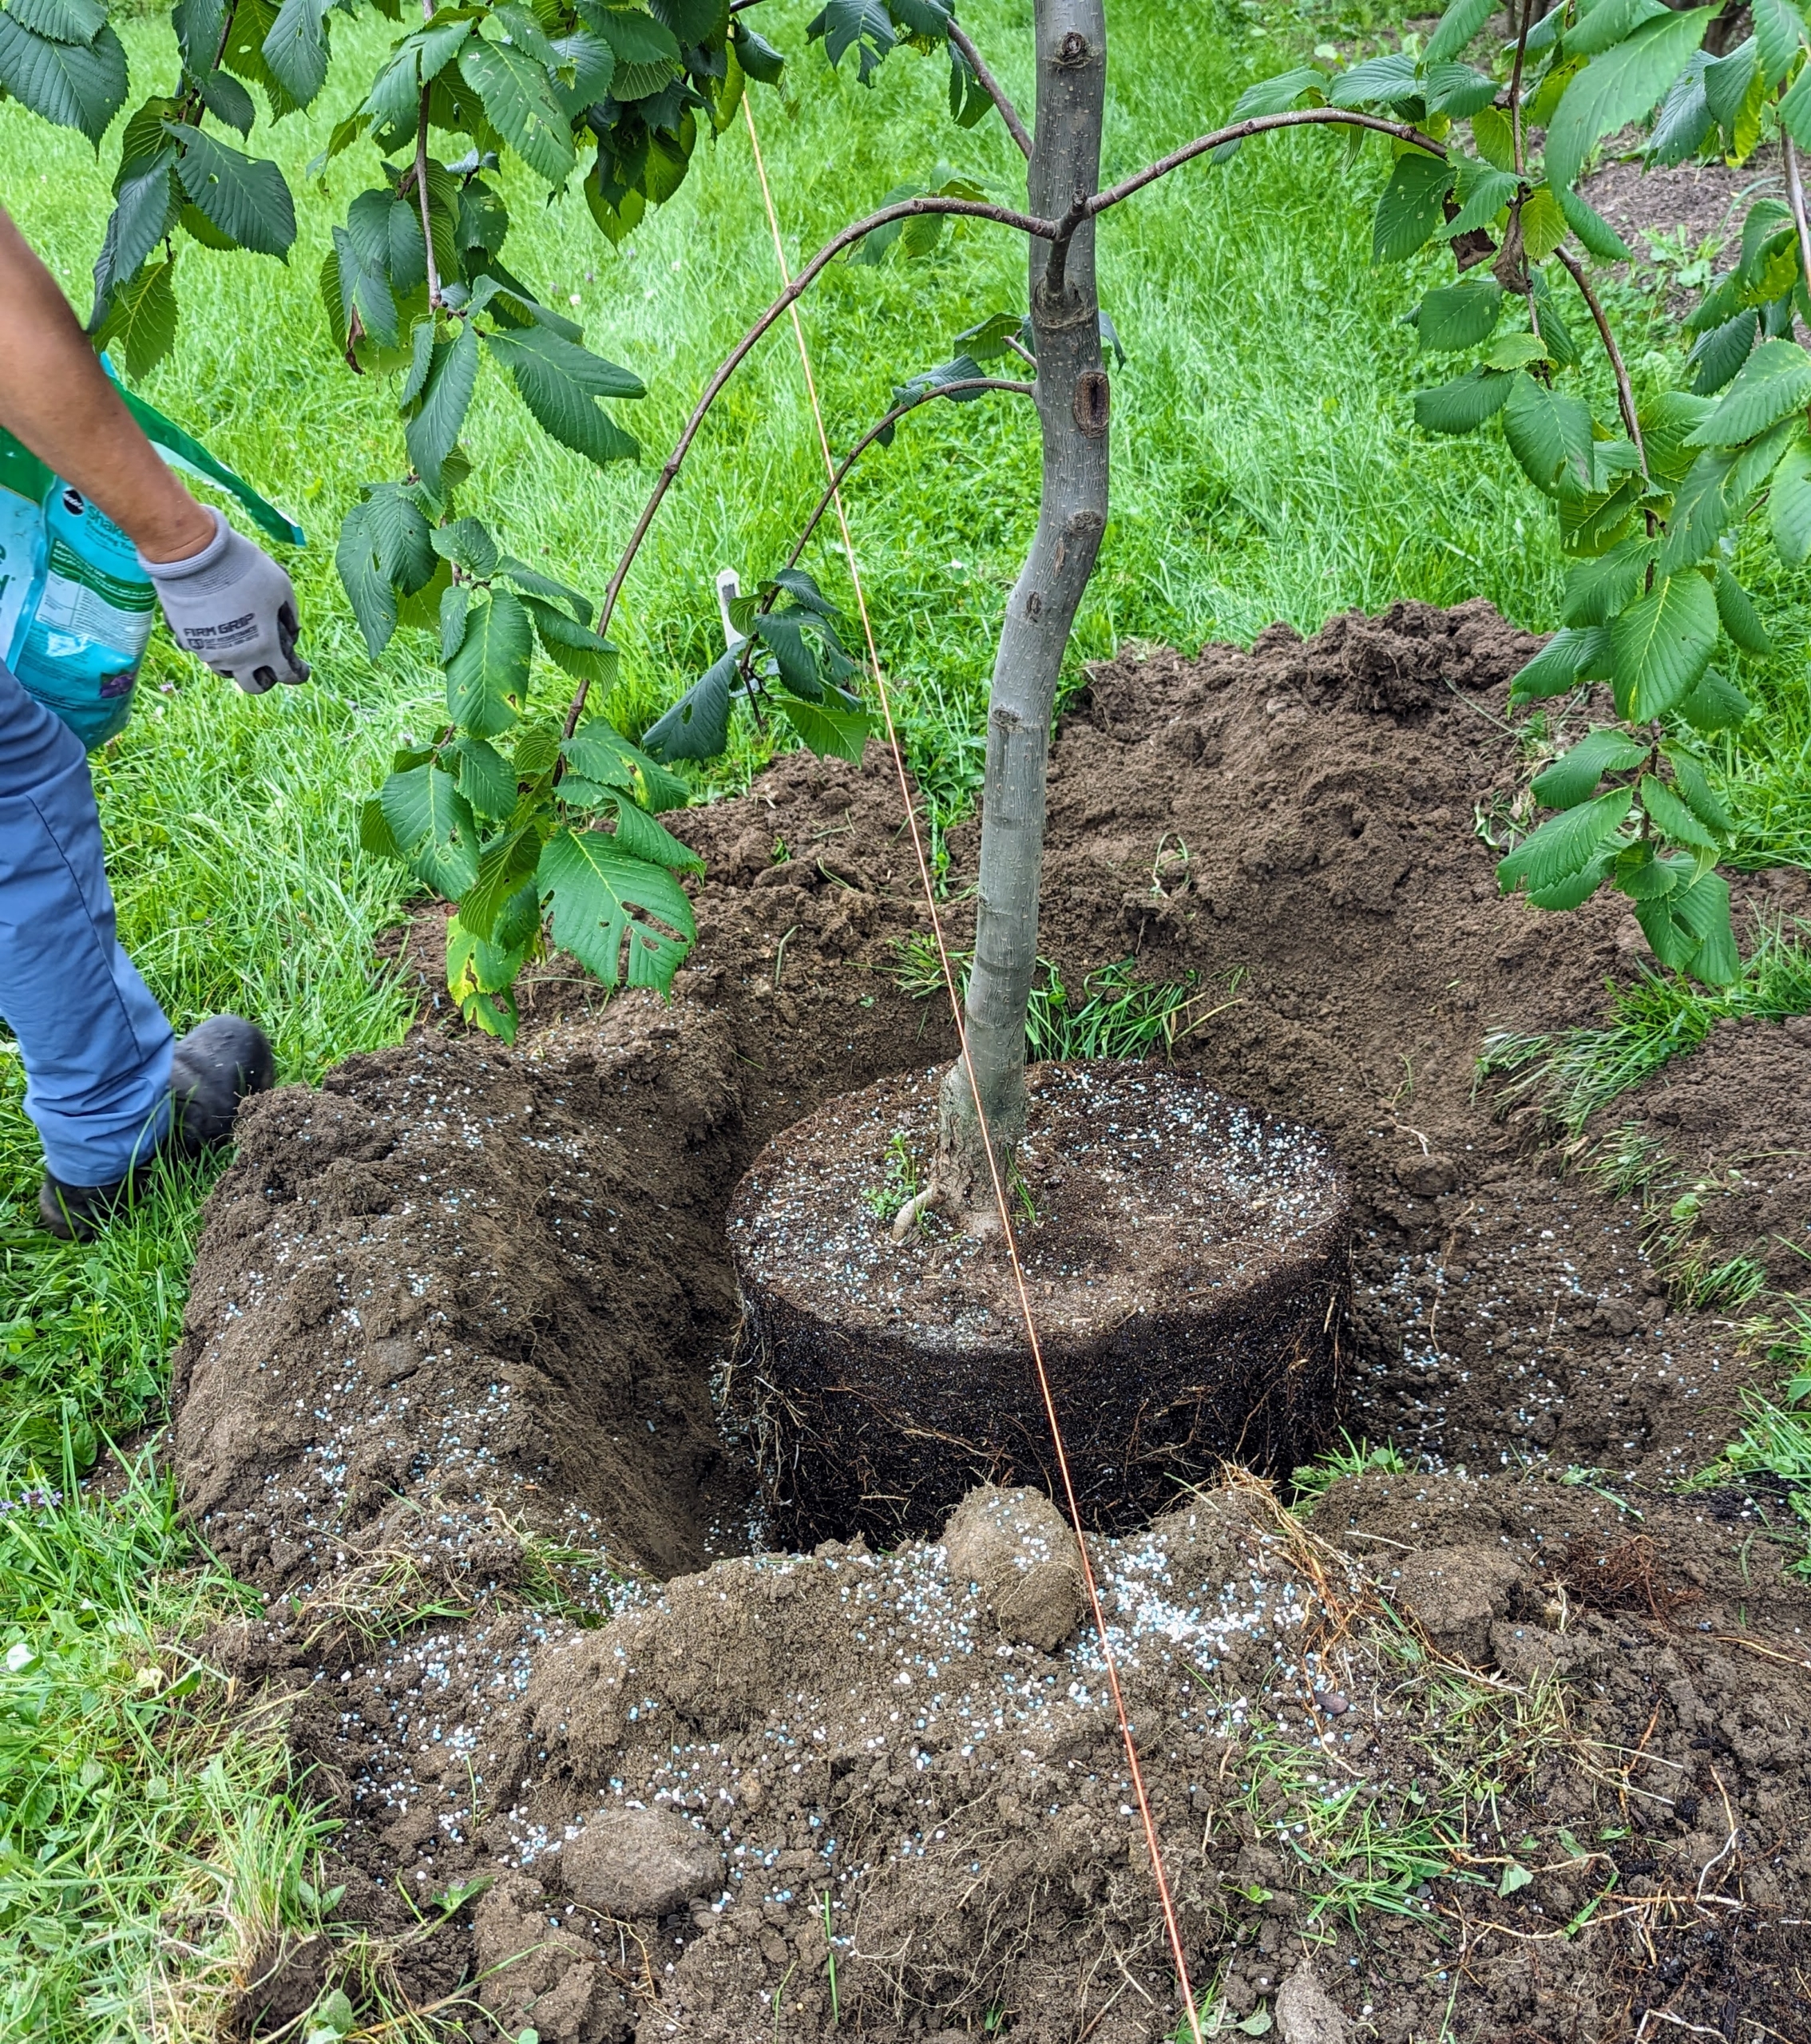
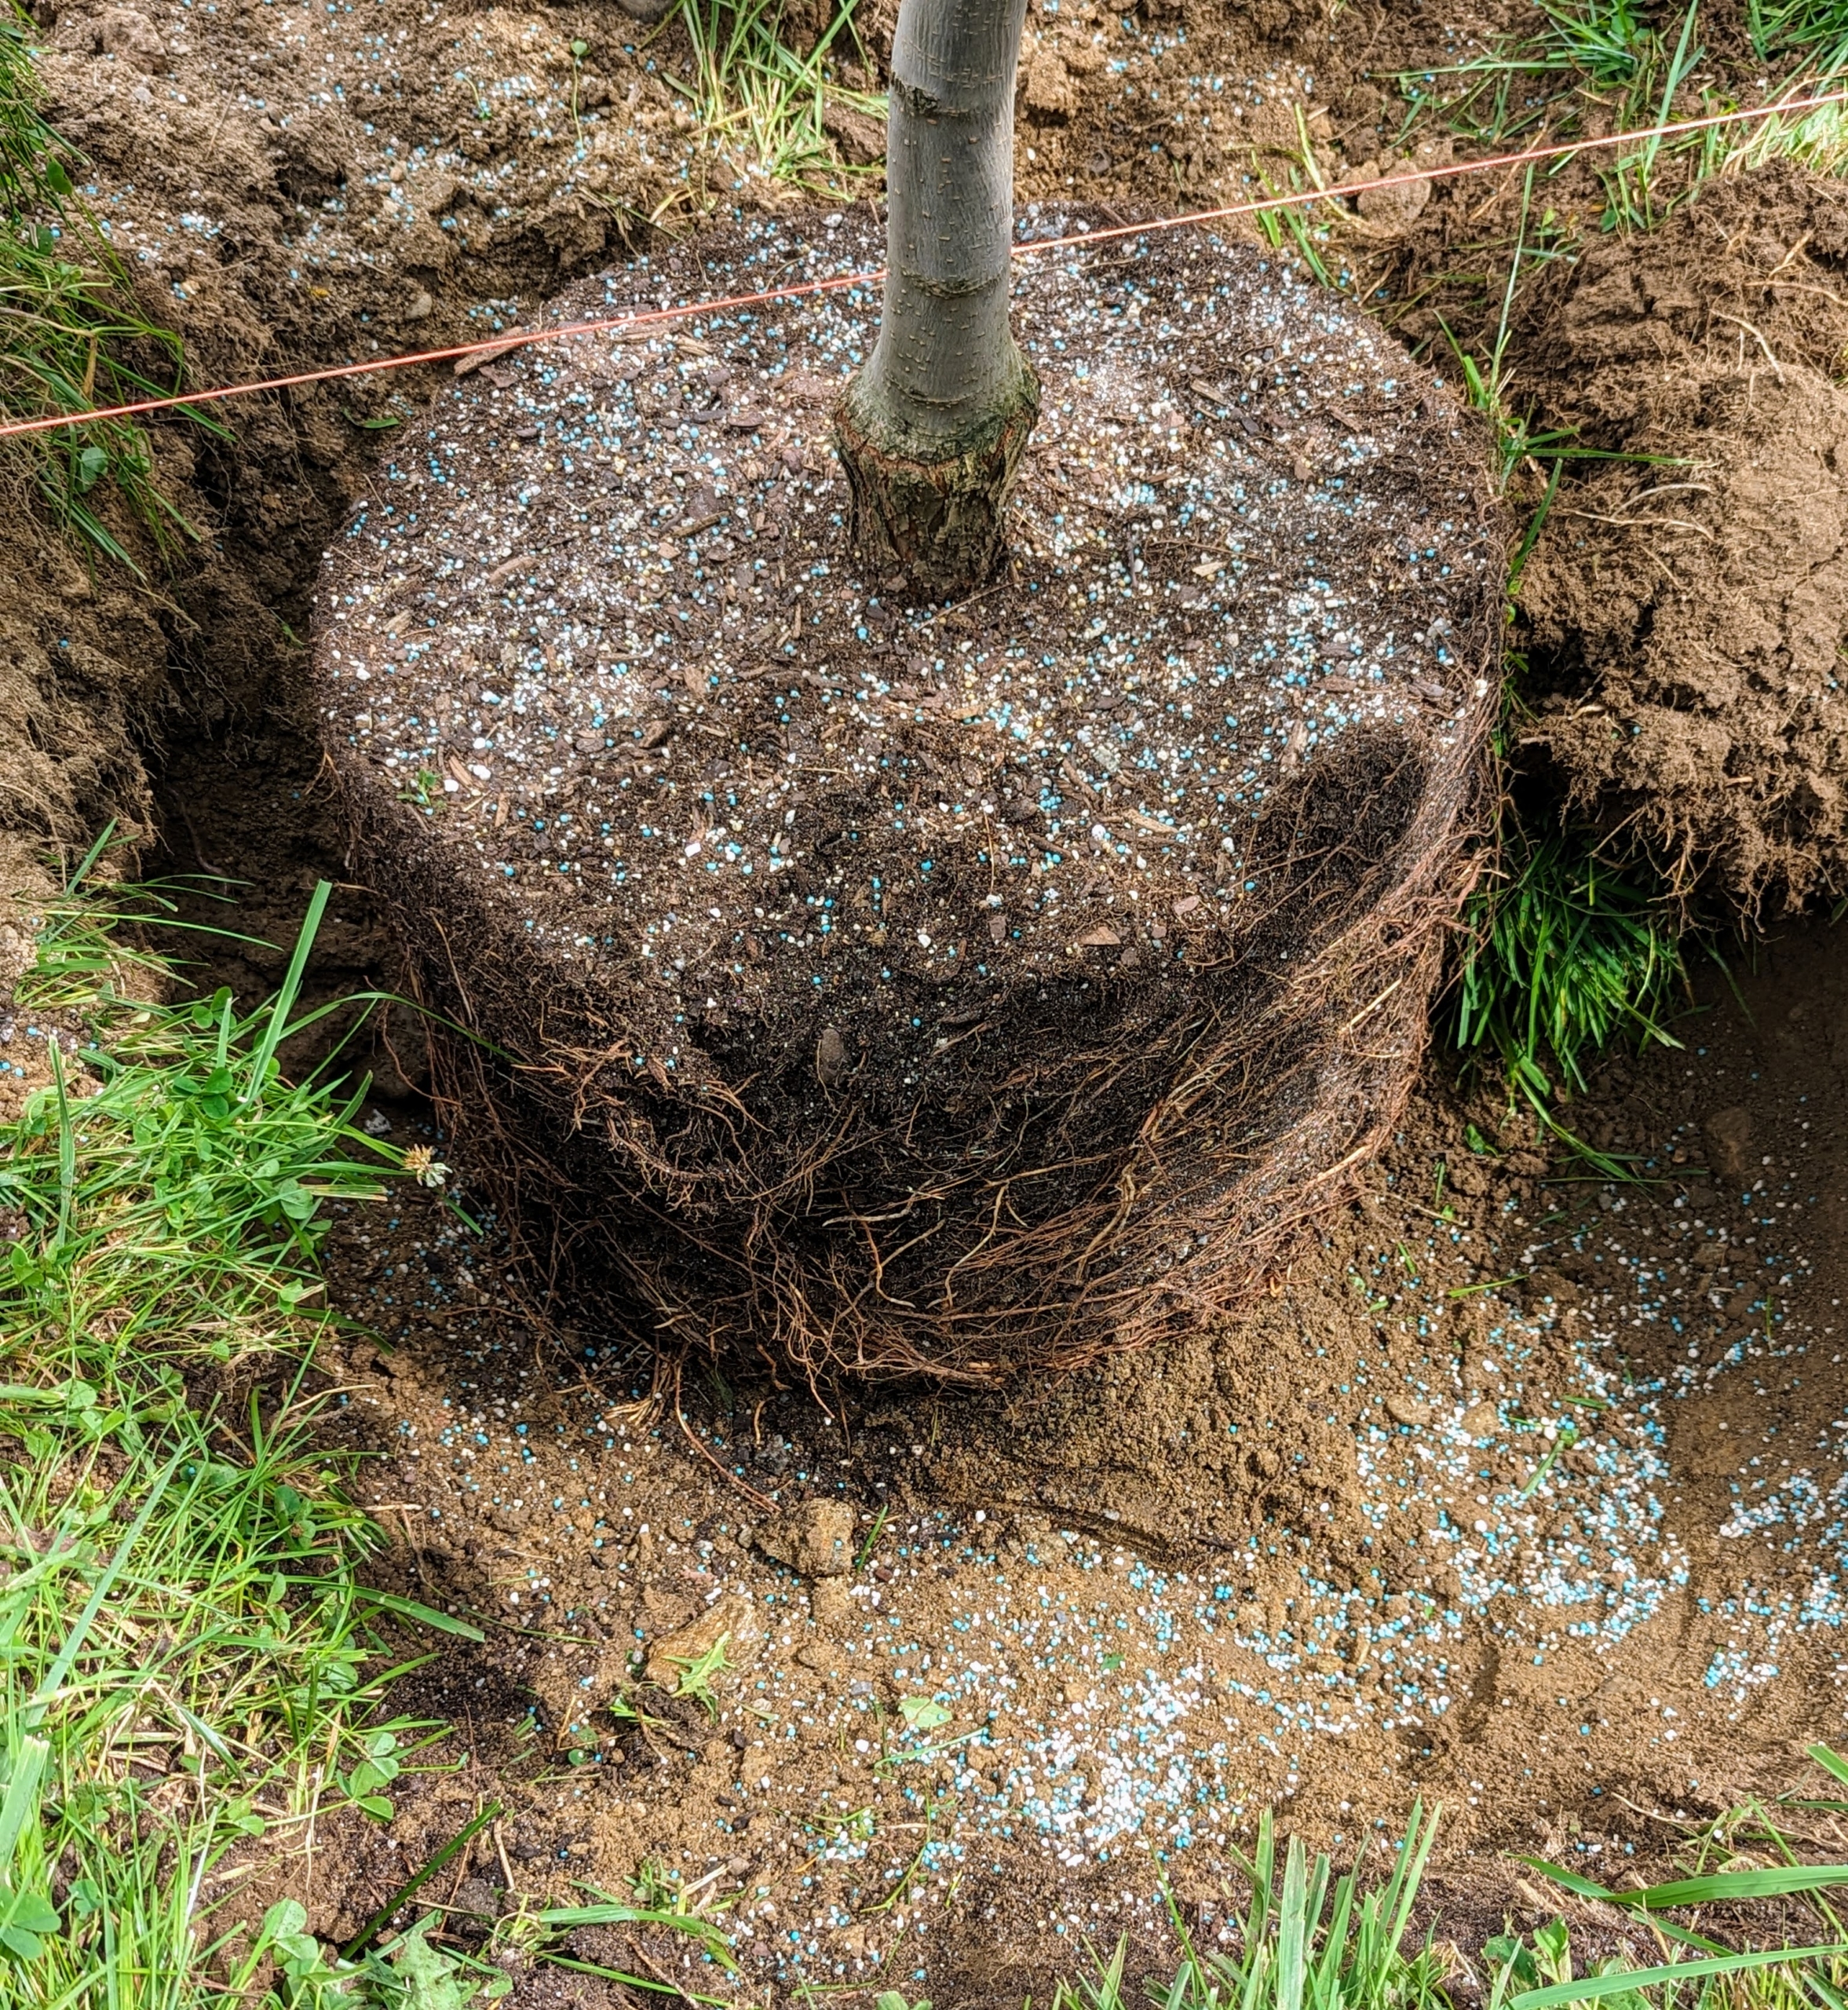
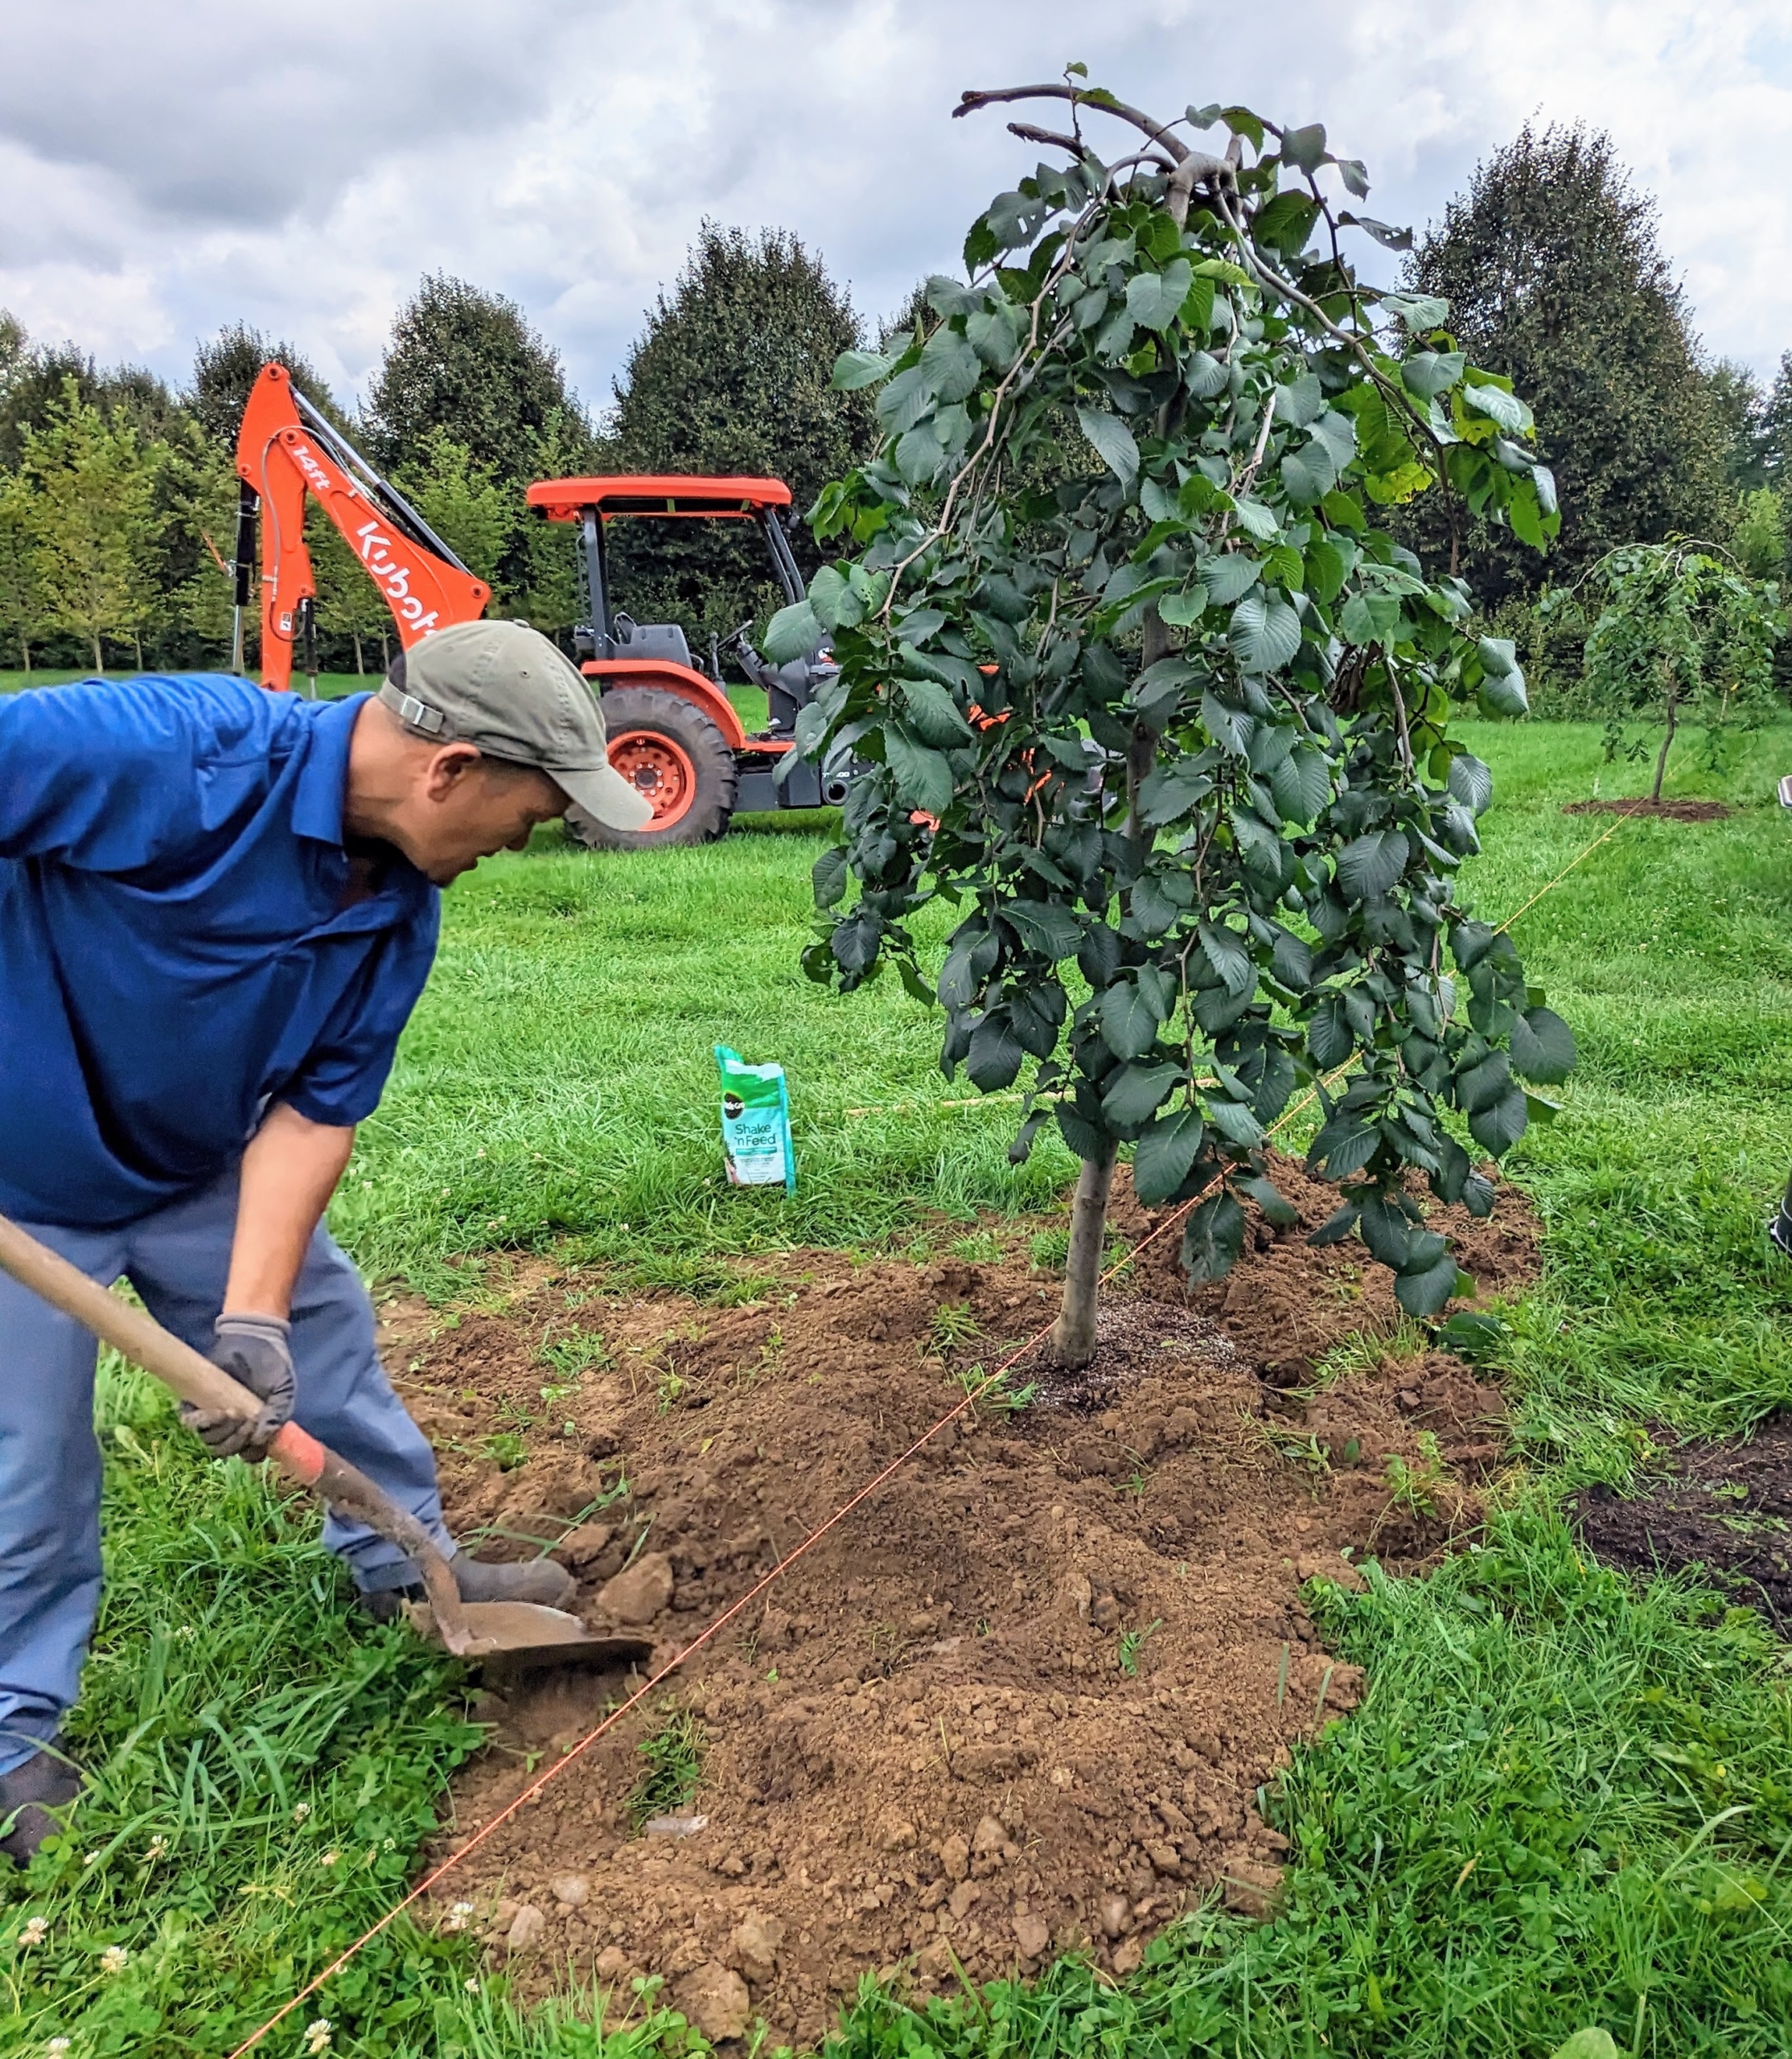
Then he gives it a generous sprinkling of fertilizer specially made for transplanting.
He sprinkles fertilizer on the rootball and on the surrounding soil.
The camperdown elm is now ready to be backfilled. He does this manually to ensure it is done to the right depth. Once he is finished, he steps on the soil, so it has good contact with the rootball.
Chhiring does the same for all the camperdowns. Later, I may decide to plant some bulbs underneath the canopies.
Lastly, the tree pits are top-dressed with a two inch layer of composted mulch and given a thorough drink. These deciduous top-grafted weeping ornamental trees will ultimately reach a mature height of 15 to 20 feet with a spread of 20 to 30 feet – they all have ample room to grow and flourish here in my maze.
Every year, I try to spend two or three weeks - give or take - at my beautiful refuge in Seal Harbor, Maine. This year, the weather was fantastic and I enjoyed many local day trips with friends, walks along the beaches, and a special birthday celebration at Skylands with my family.
Here are more photos from my time in Maine - enjoy. And see more photos on my Instagram page @marthastewart48.
August 3rd is my birthday. I always spend it in Maine with close friends and family. This is an old daily calendar, which is updated first thing every morning by Cheryl DuLong, who helps me care for my beautiful home, Skylands.
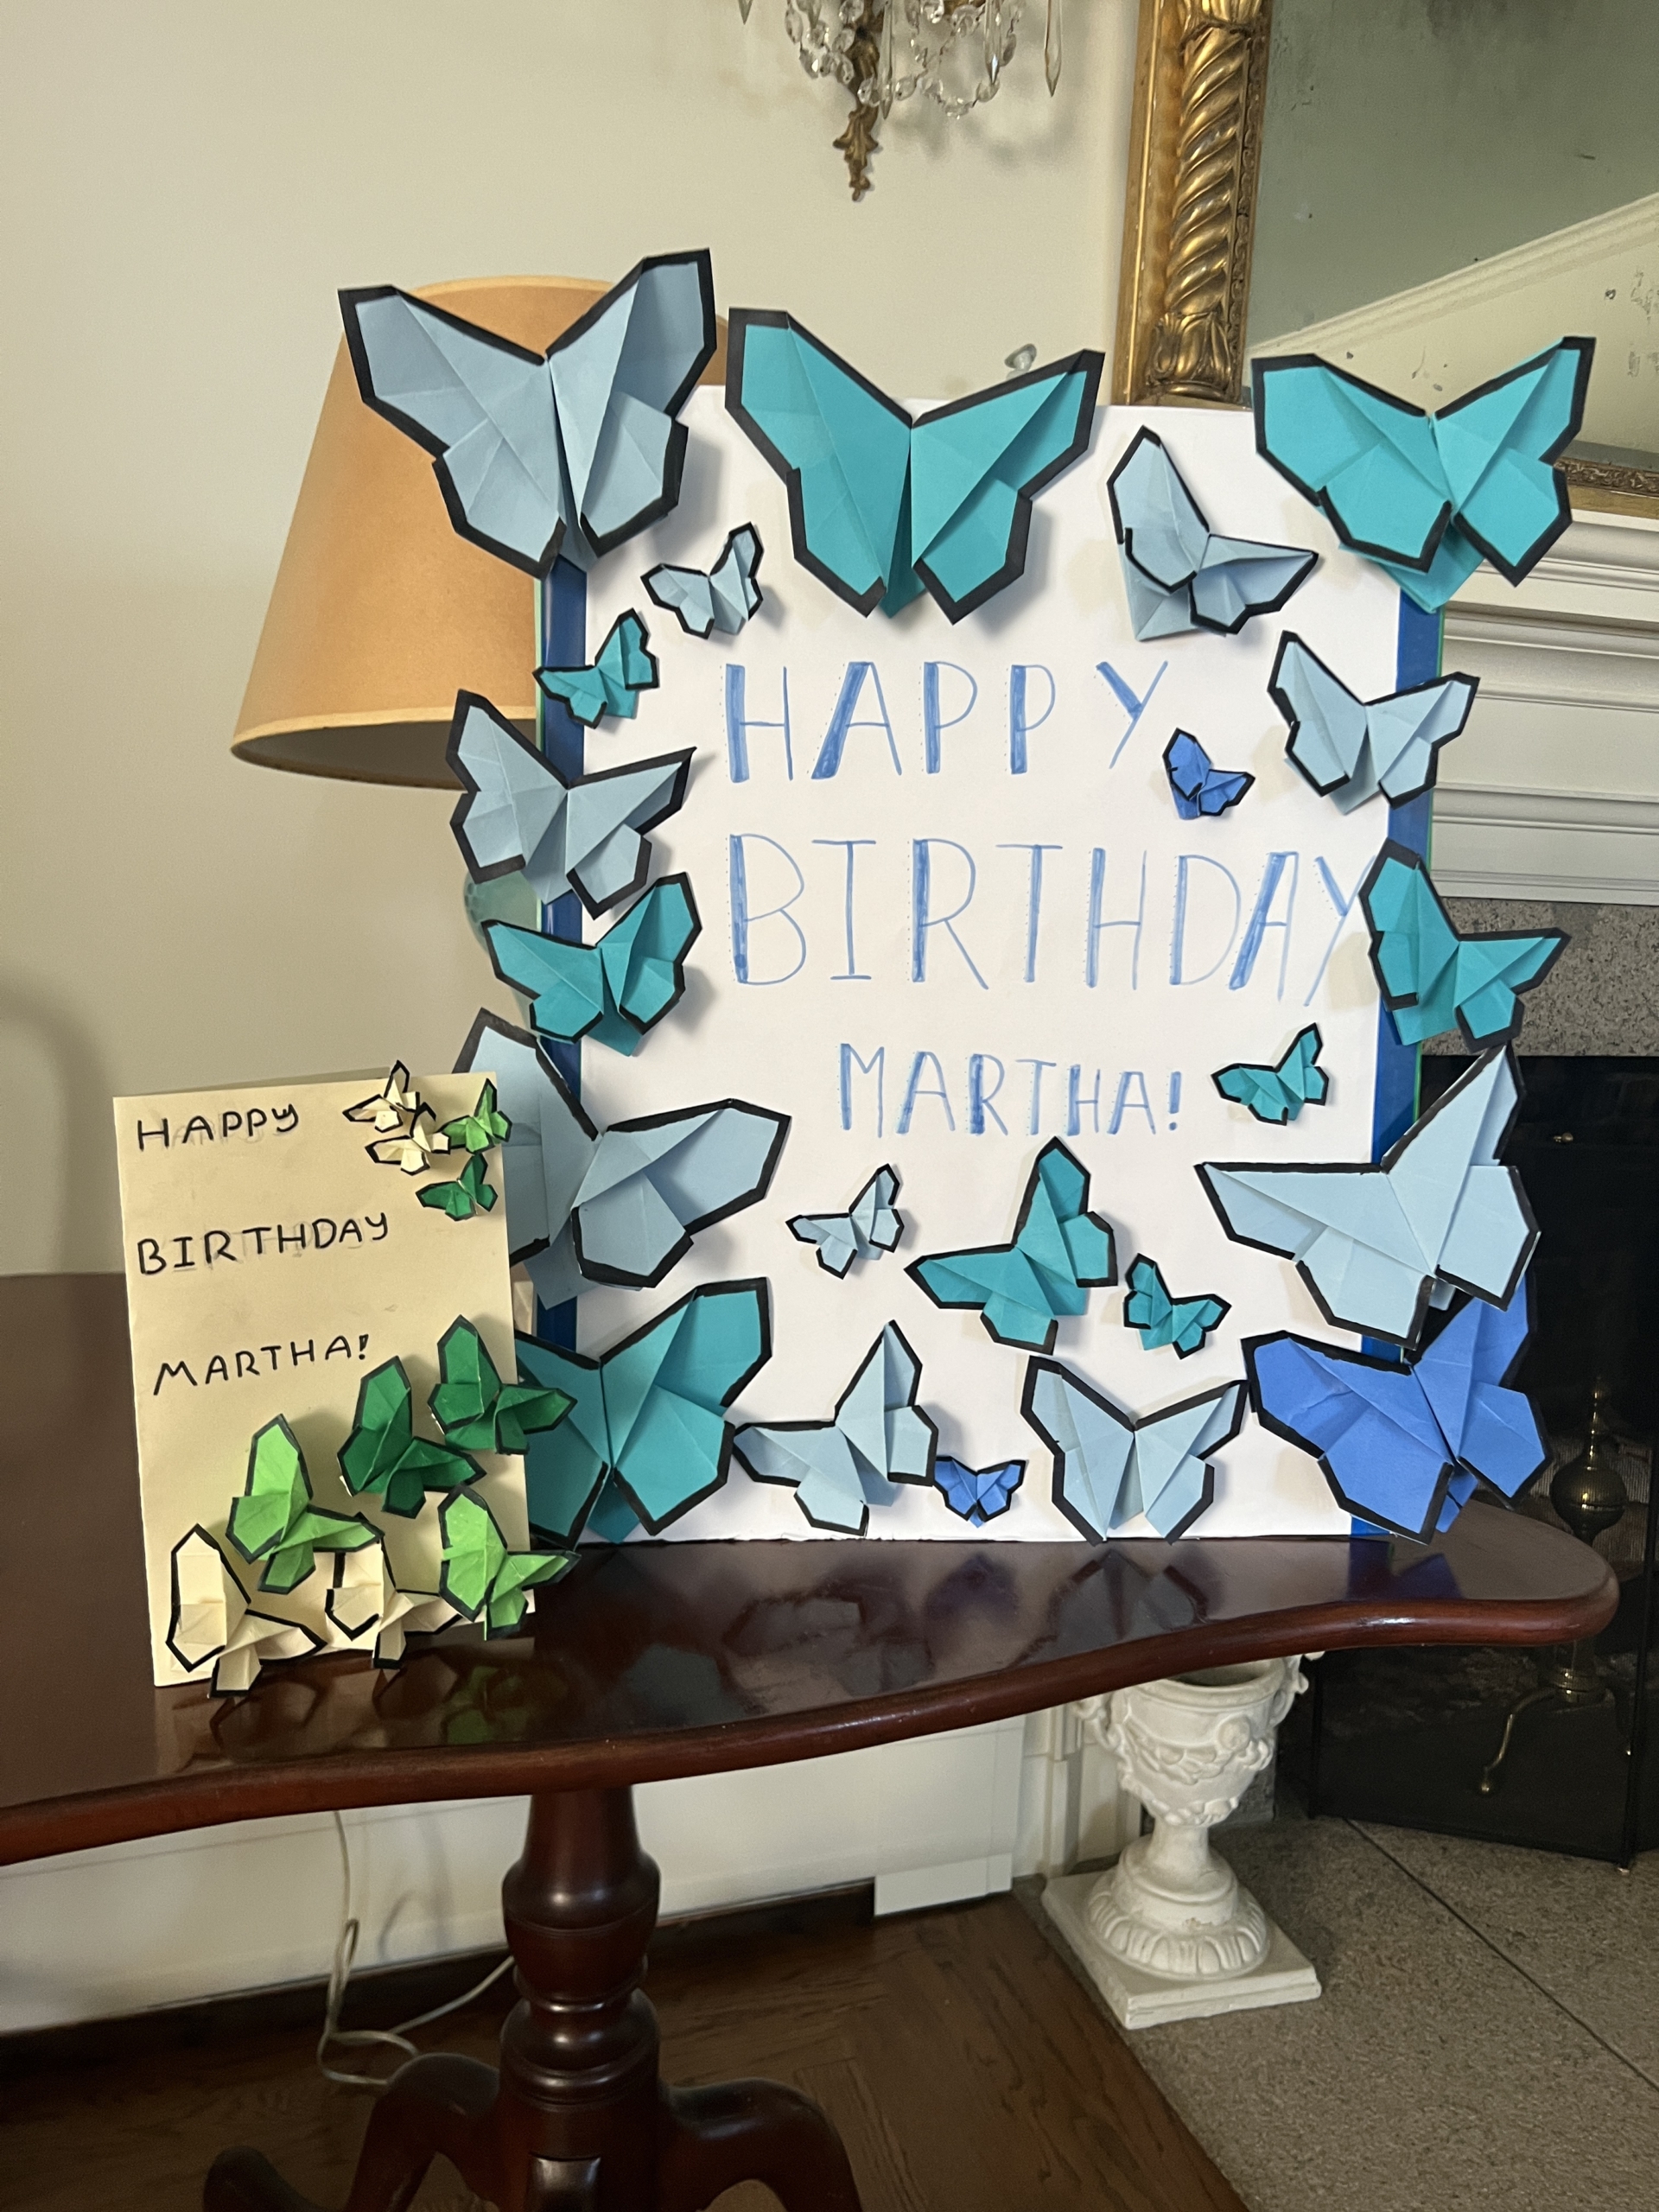
A yearly tradition – a birthday card made by my granddaughter – this year, Jude made it with her friend, Jade. It is the best one ever. And everyone at Skylands signed it. I love the handmade origami butterflies!
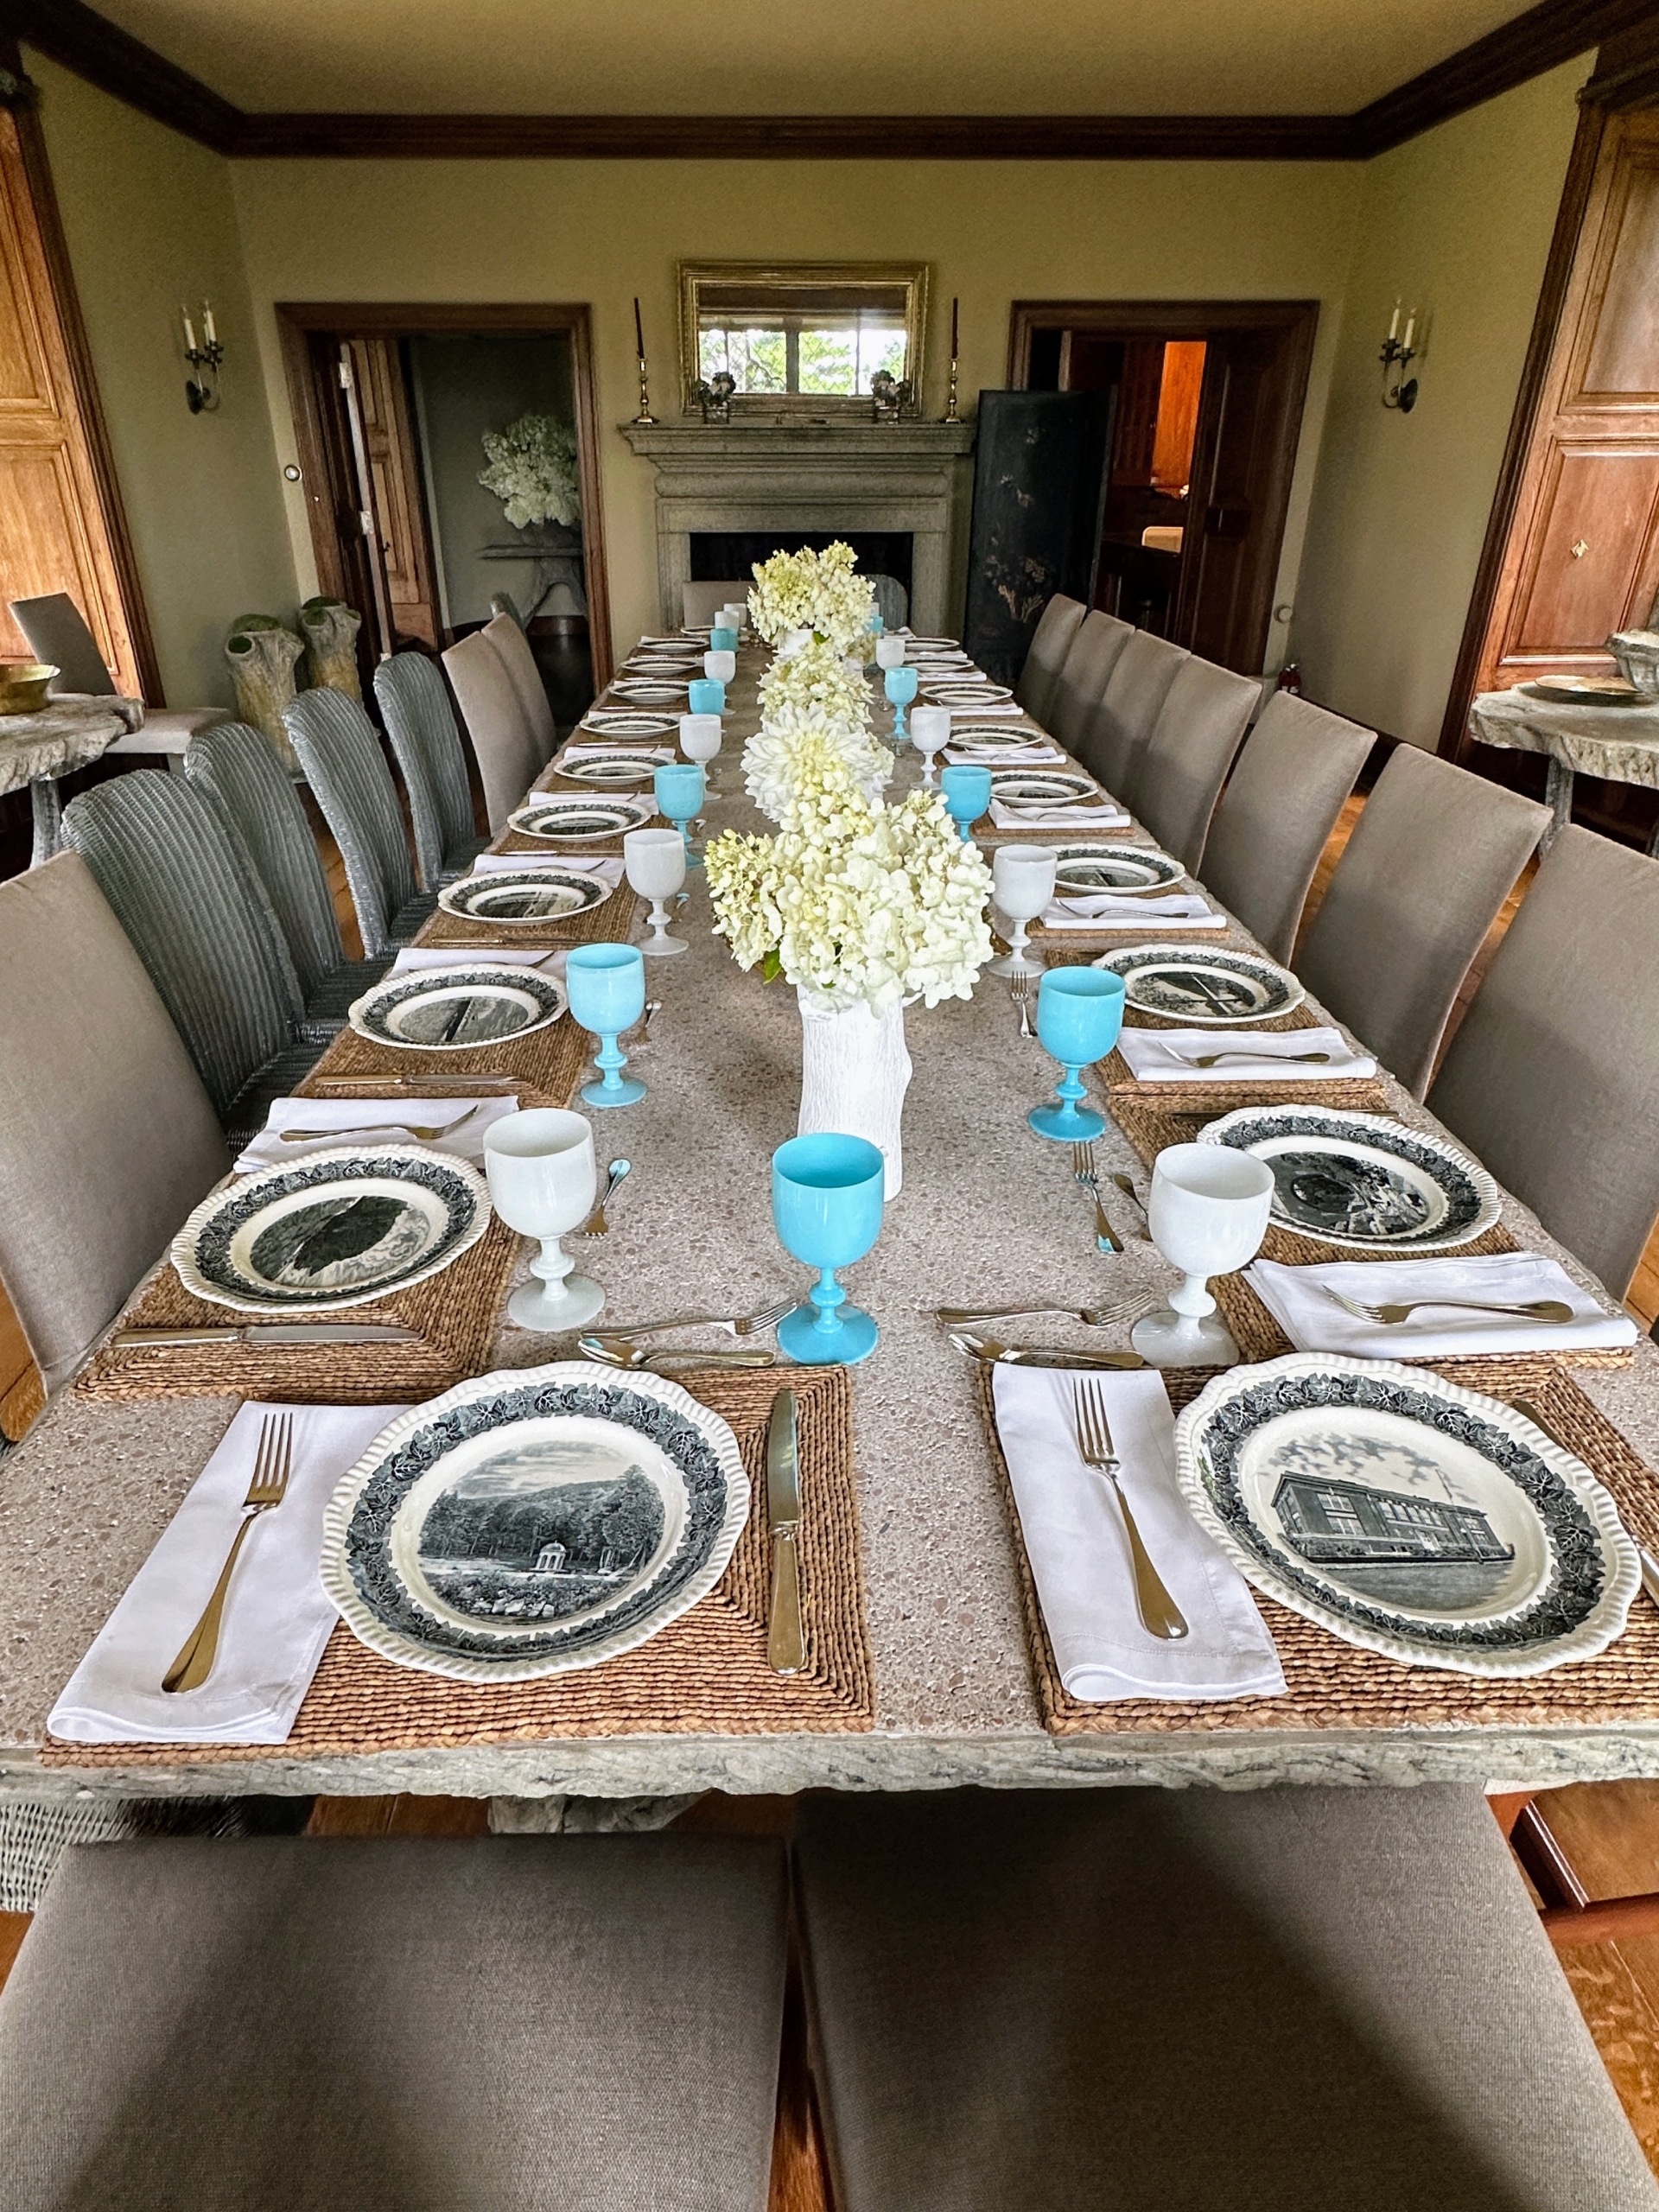
On this day, I hosted a special luncheon for the Beatrix Farrand Society, a non-profit organization
dedicated to preserving the memory and legacy of the landscape architect Beatrix Farrand. For this meal in my dining room, I used my Copeland Spode Sherman Bar Harbor plates – each one is different, showing a scene from around Seal Harbor and Acadia National Park.
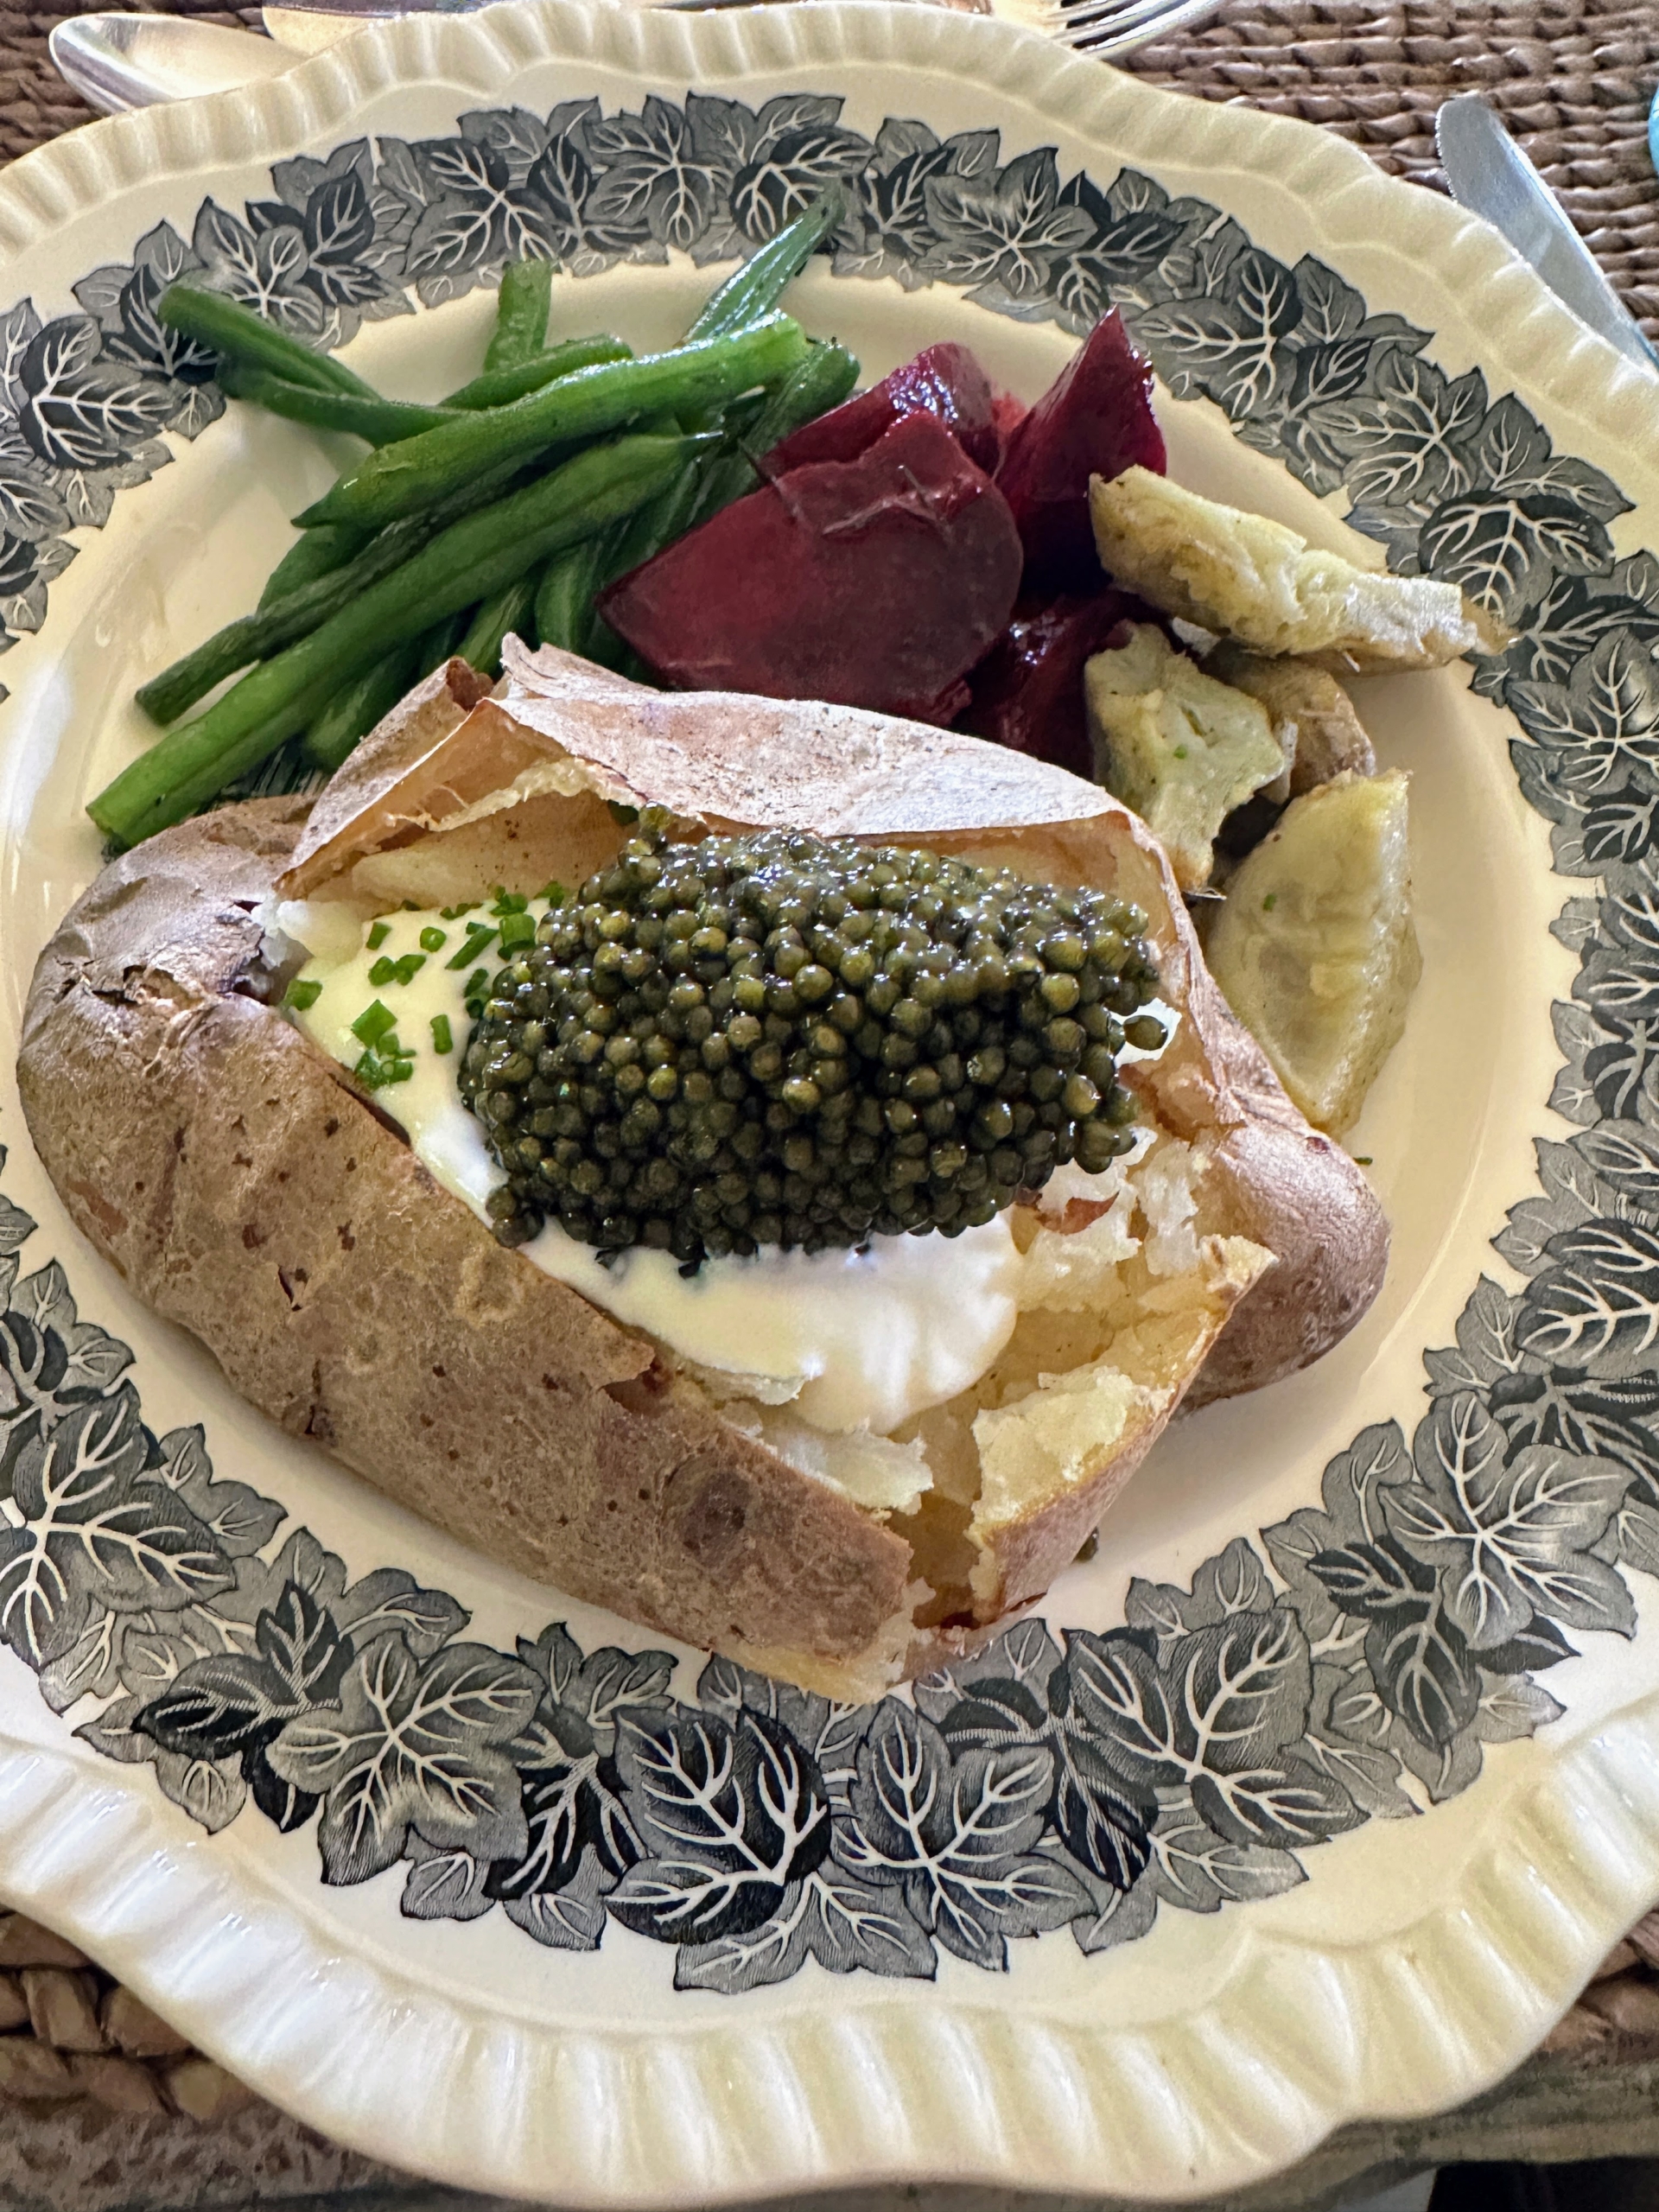
Our main course included russet potato baked, smashed, and served with creme fraiche, chives and caviar, roasted beet salad, green string beans, and braised artichoke hearts. All the vegetables were picked fresh from my gardens.
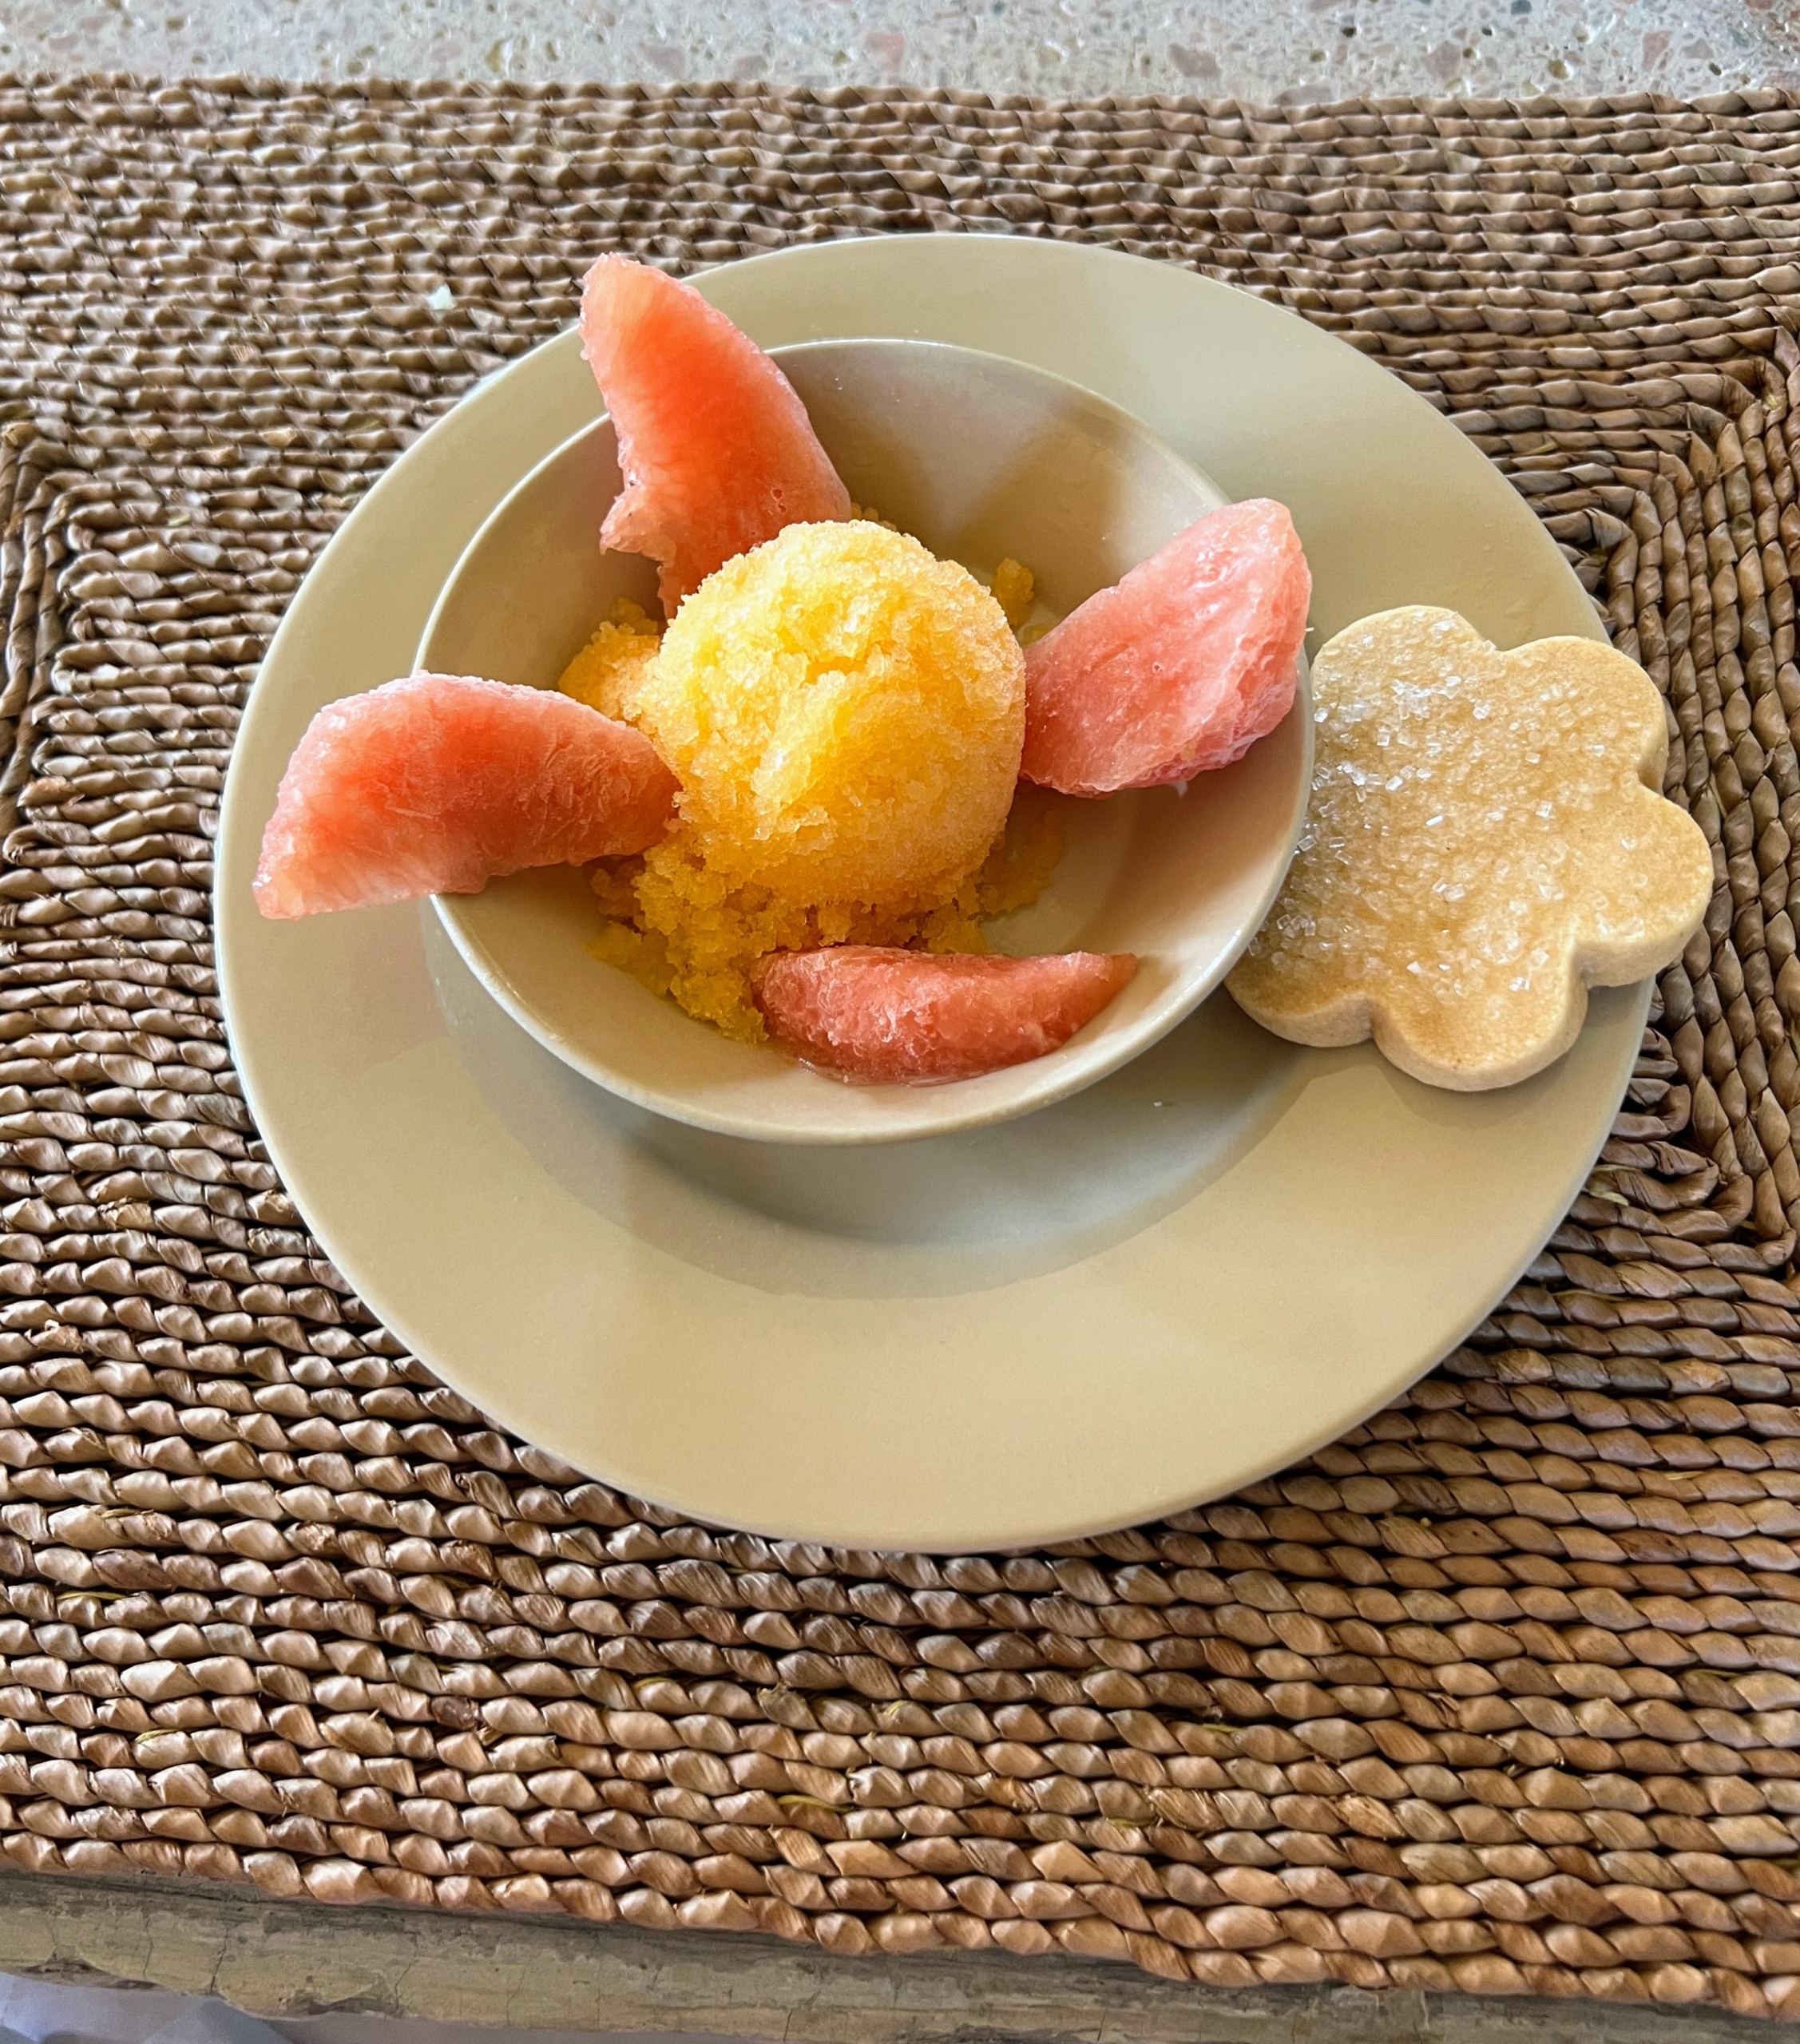
For dessert, citrus granita and homemade shortbread. It was a most refreshing and delicious meal.
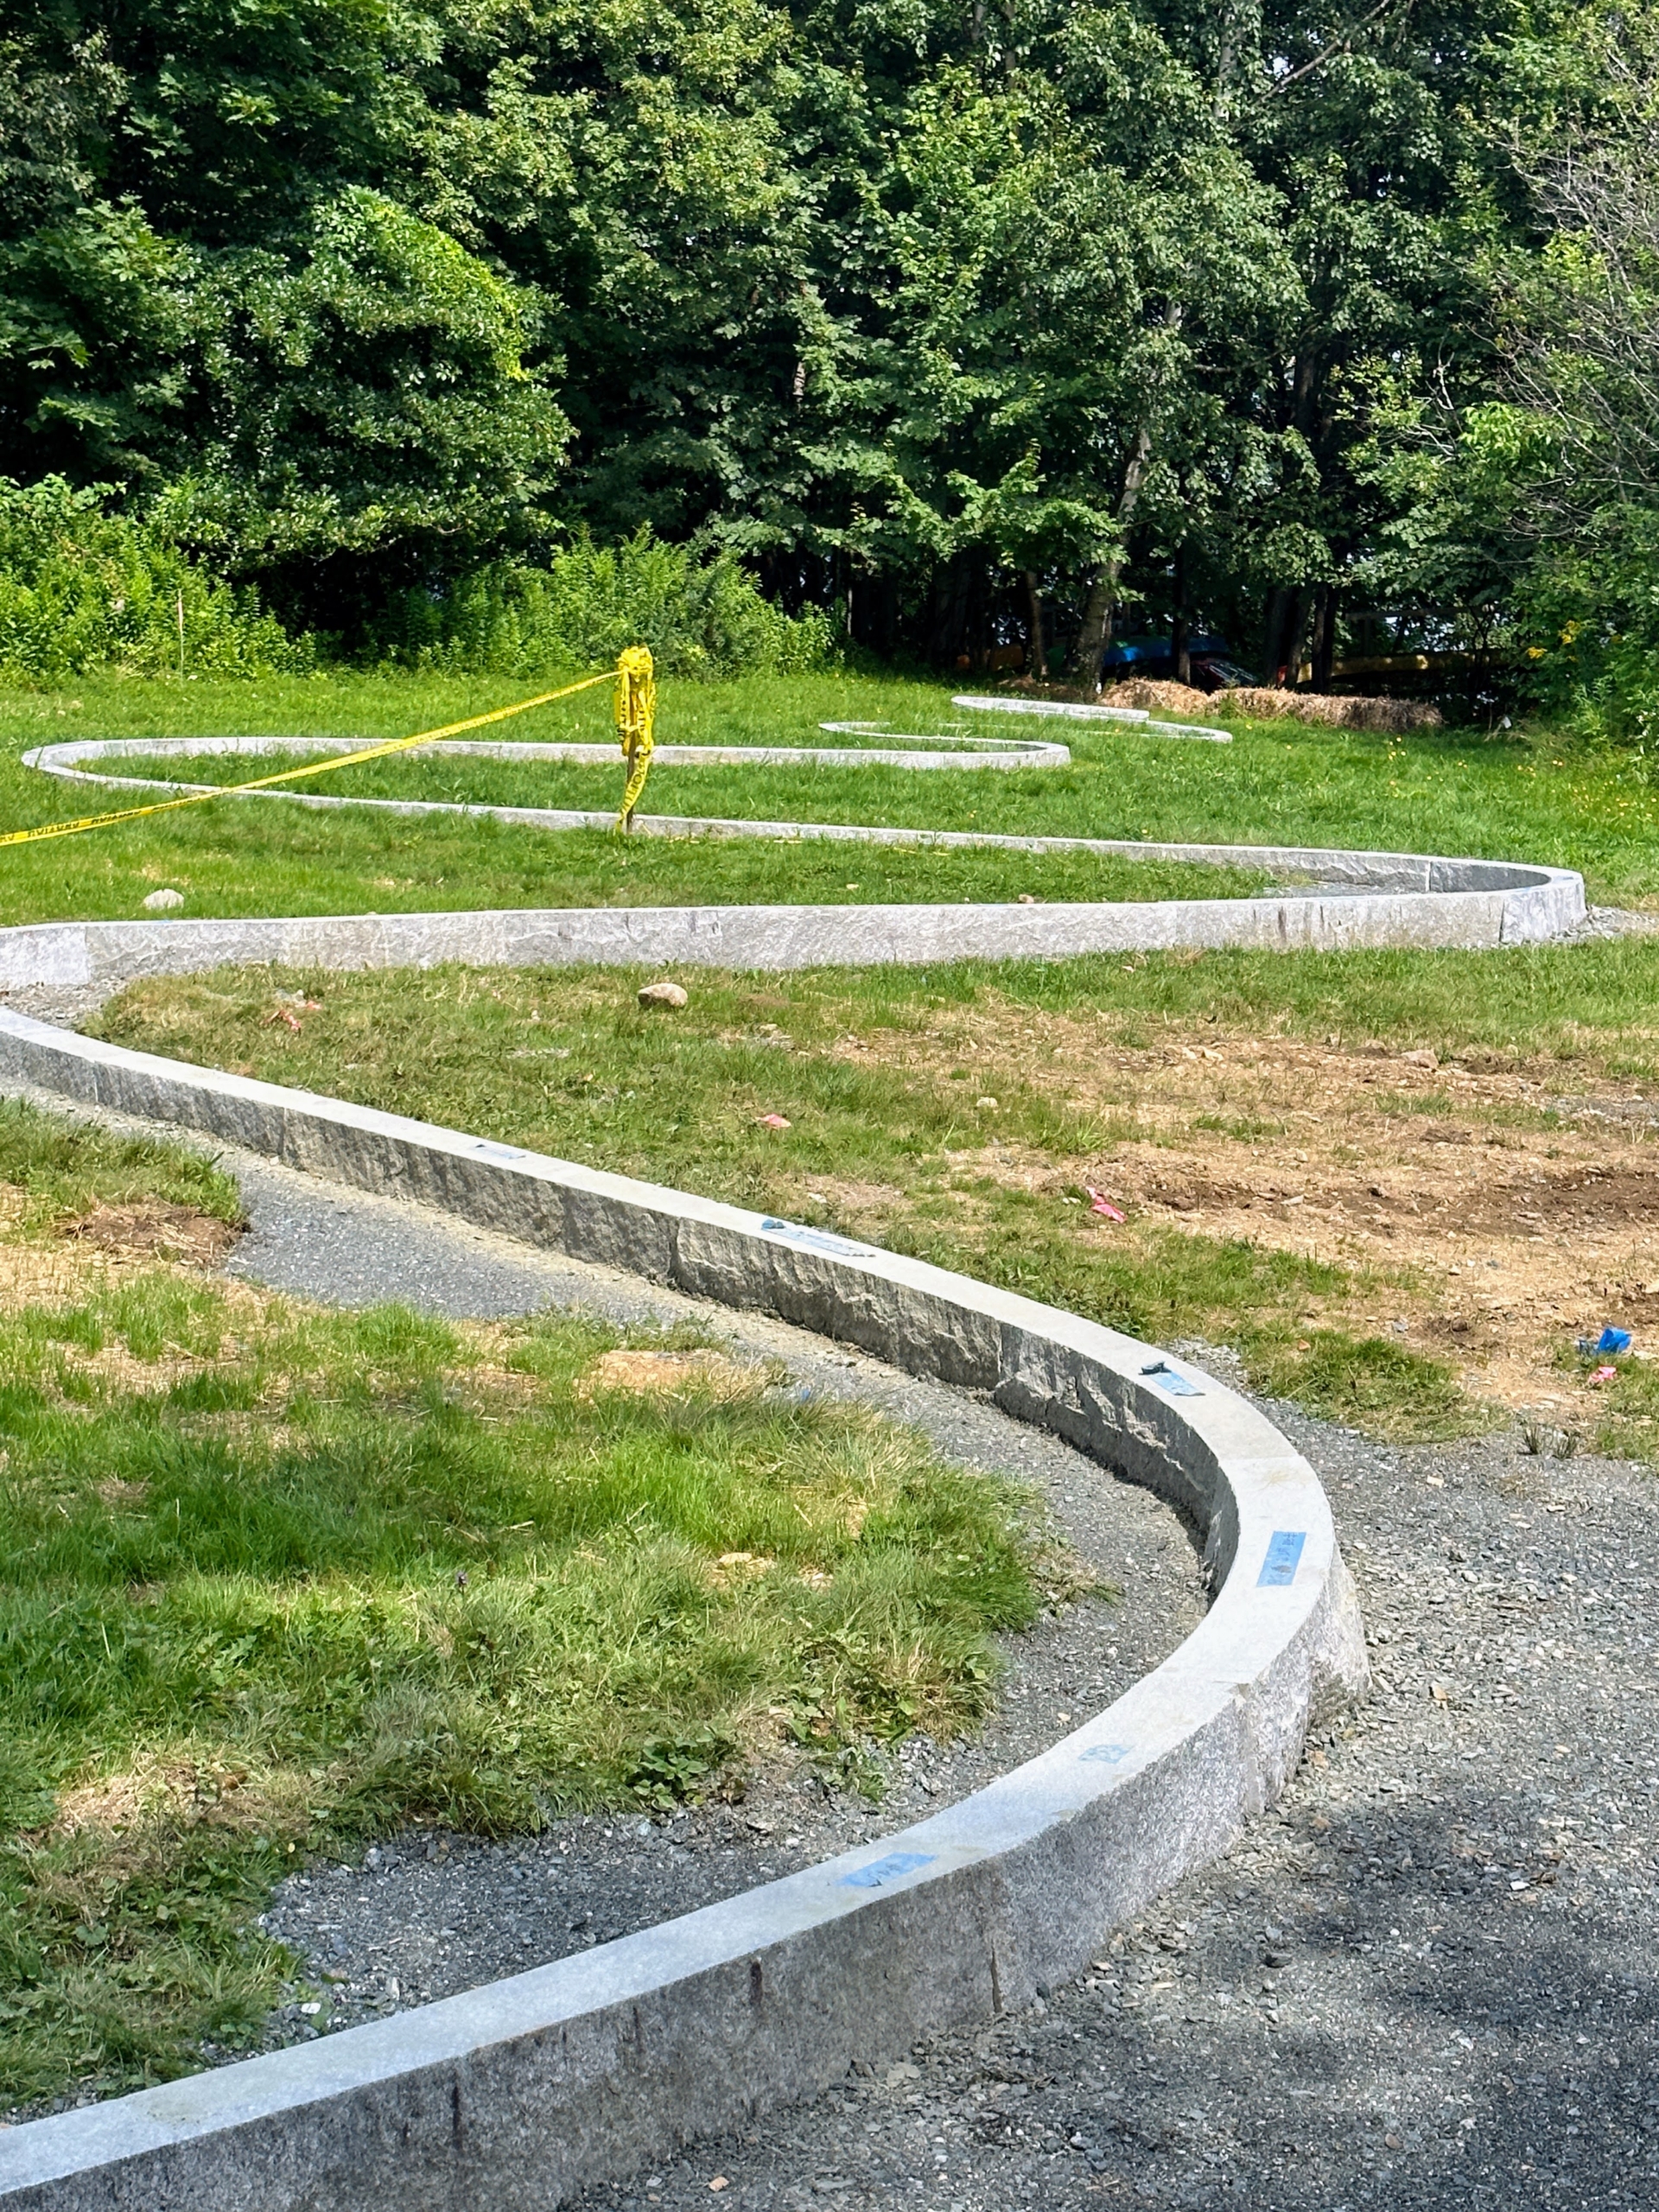
This is Andy Goldsworthy, acclaimed sculptor and artist, who is working on a very big project at the College of the Atlantic. It is called Road Line and it is his first permanent artwork in the state of Maine.
Road Line is made of a single continuous line of granite curbstones. It begins its route through the COA campus and will run its path to the coast of Frenchman Bay.
It is a very extensive project Andy hopes “will resonate with the students who will also pass through the college on their own journeys and that, wherever life takes them afterwards, they will always be reminded of their time in Maine.”
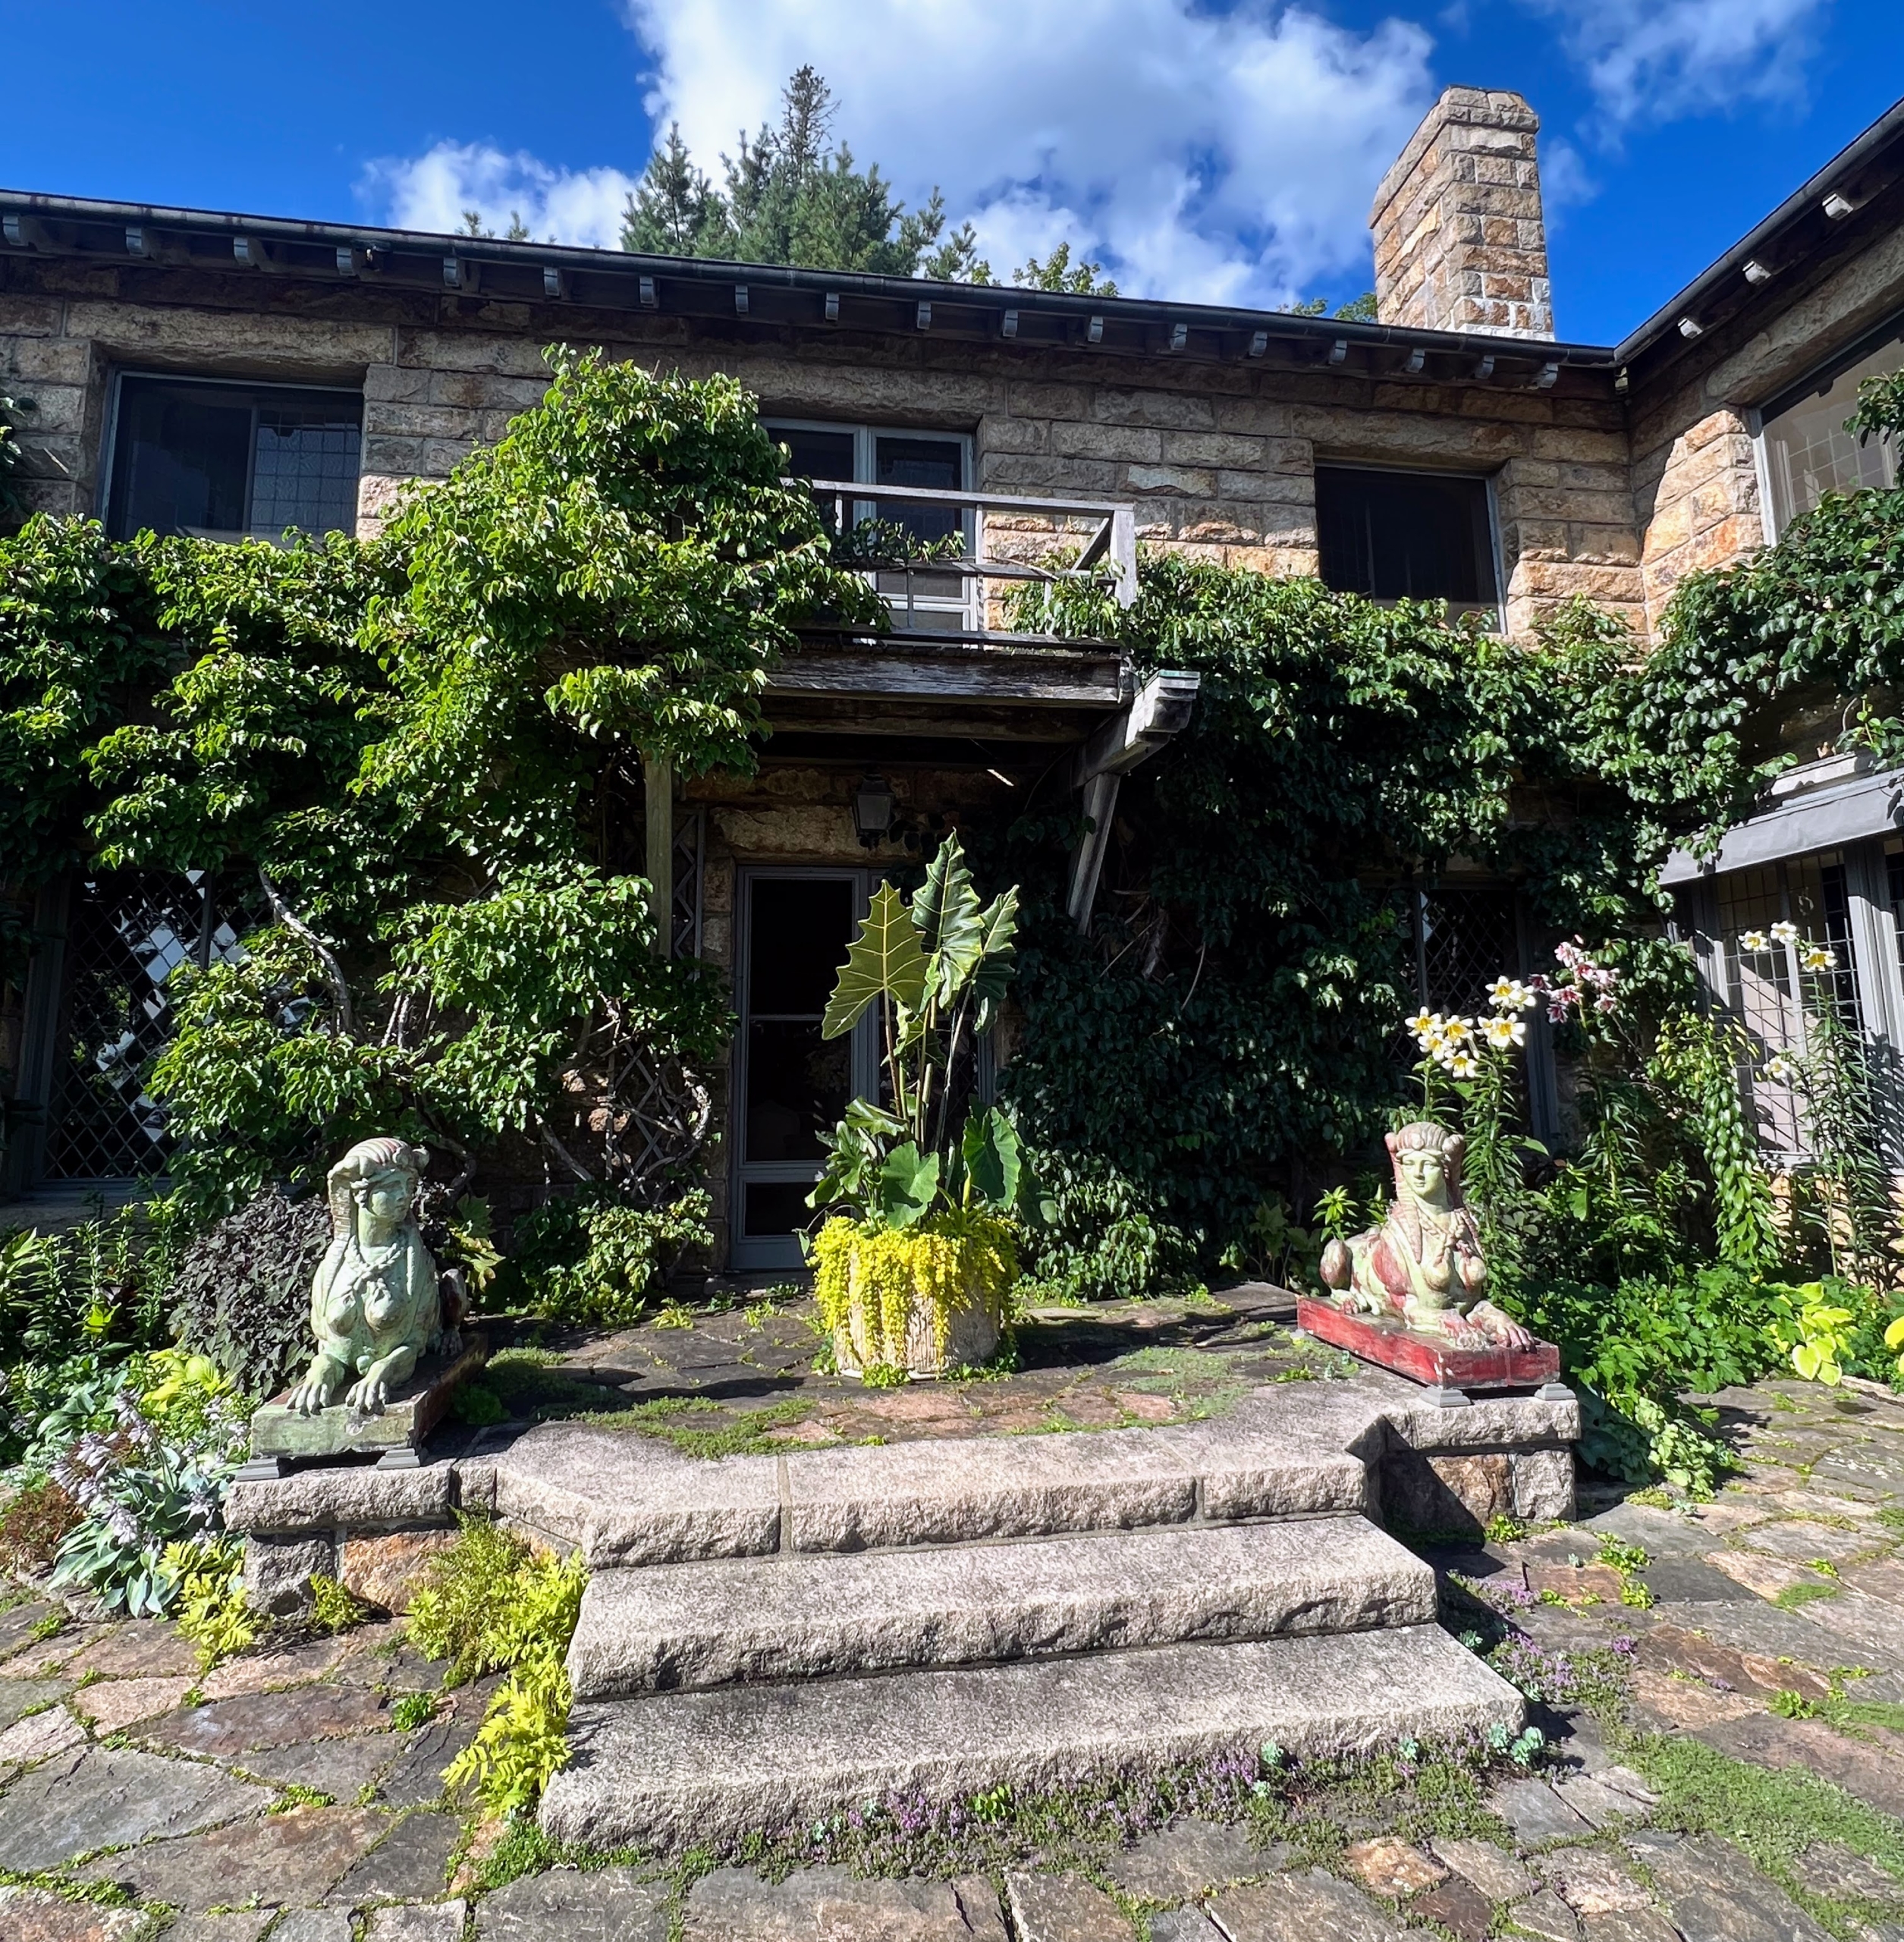
Back at Skylands, look at the kiwi vine – it is thriving. The vines are “ancient” actinidia, which are small kiwi. They are original to the home and have done exceptionally well all these years. This great, fast-growing, sturdy vine is fruit producing.
Beneath the vine and brought out every summer are the two glazed terra-cotta sphinxes. They are designed by Emile Muller and guard this entrance to the house.
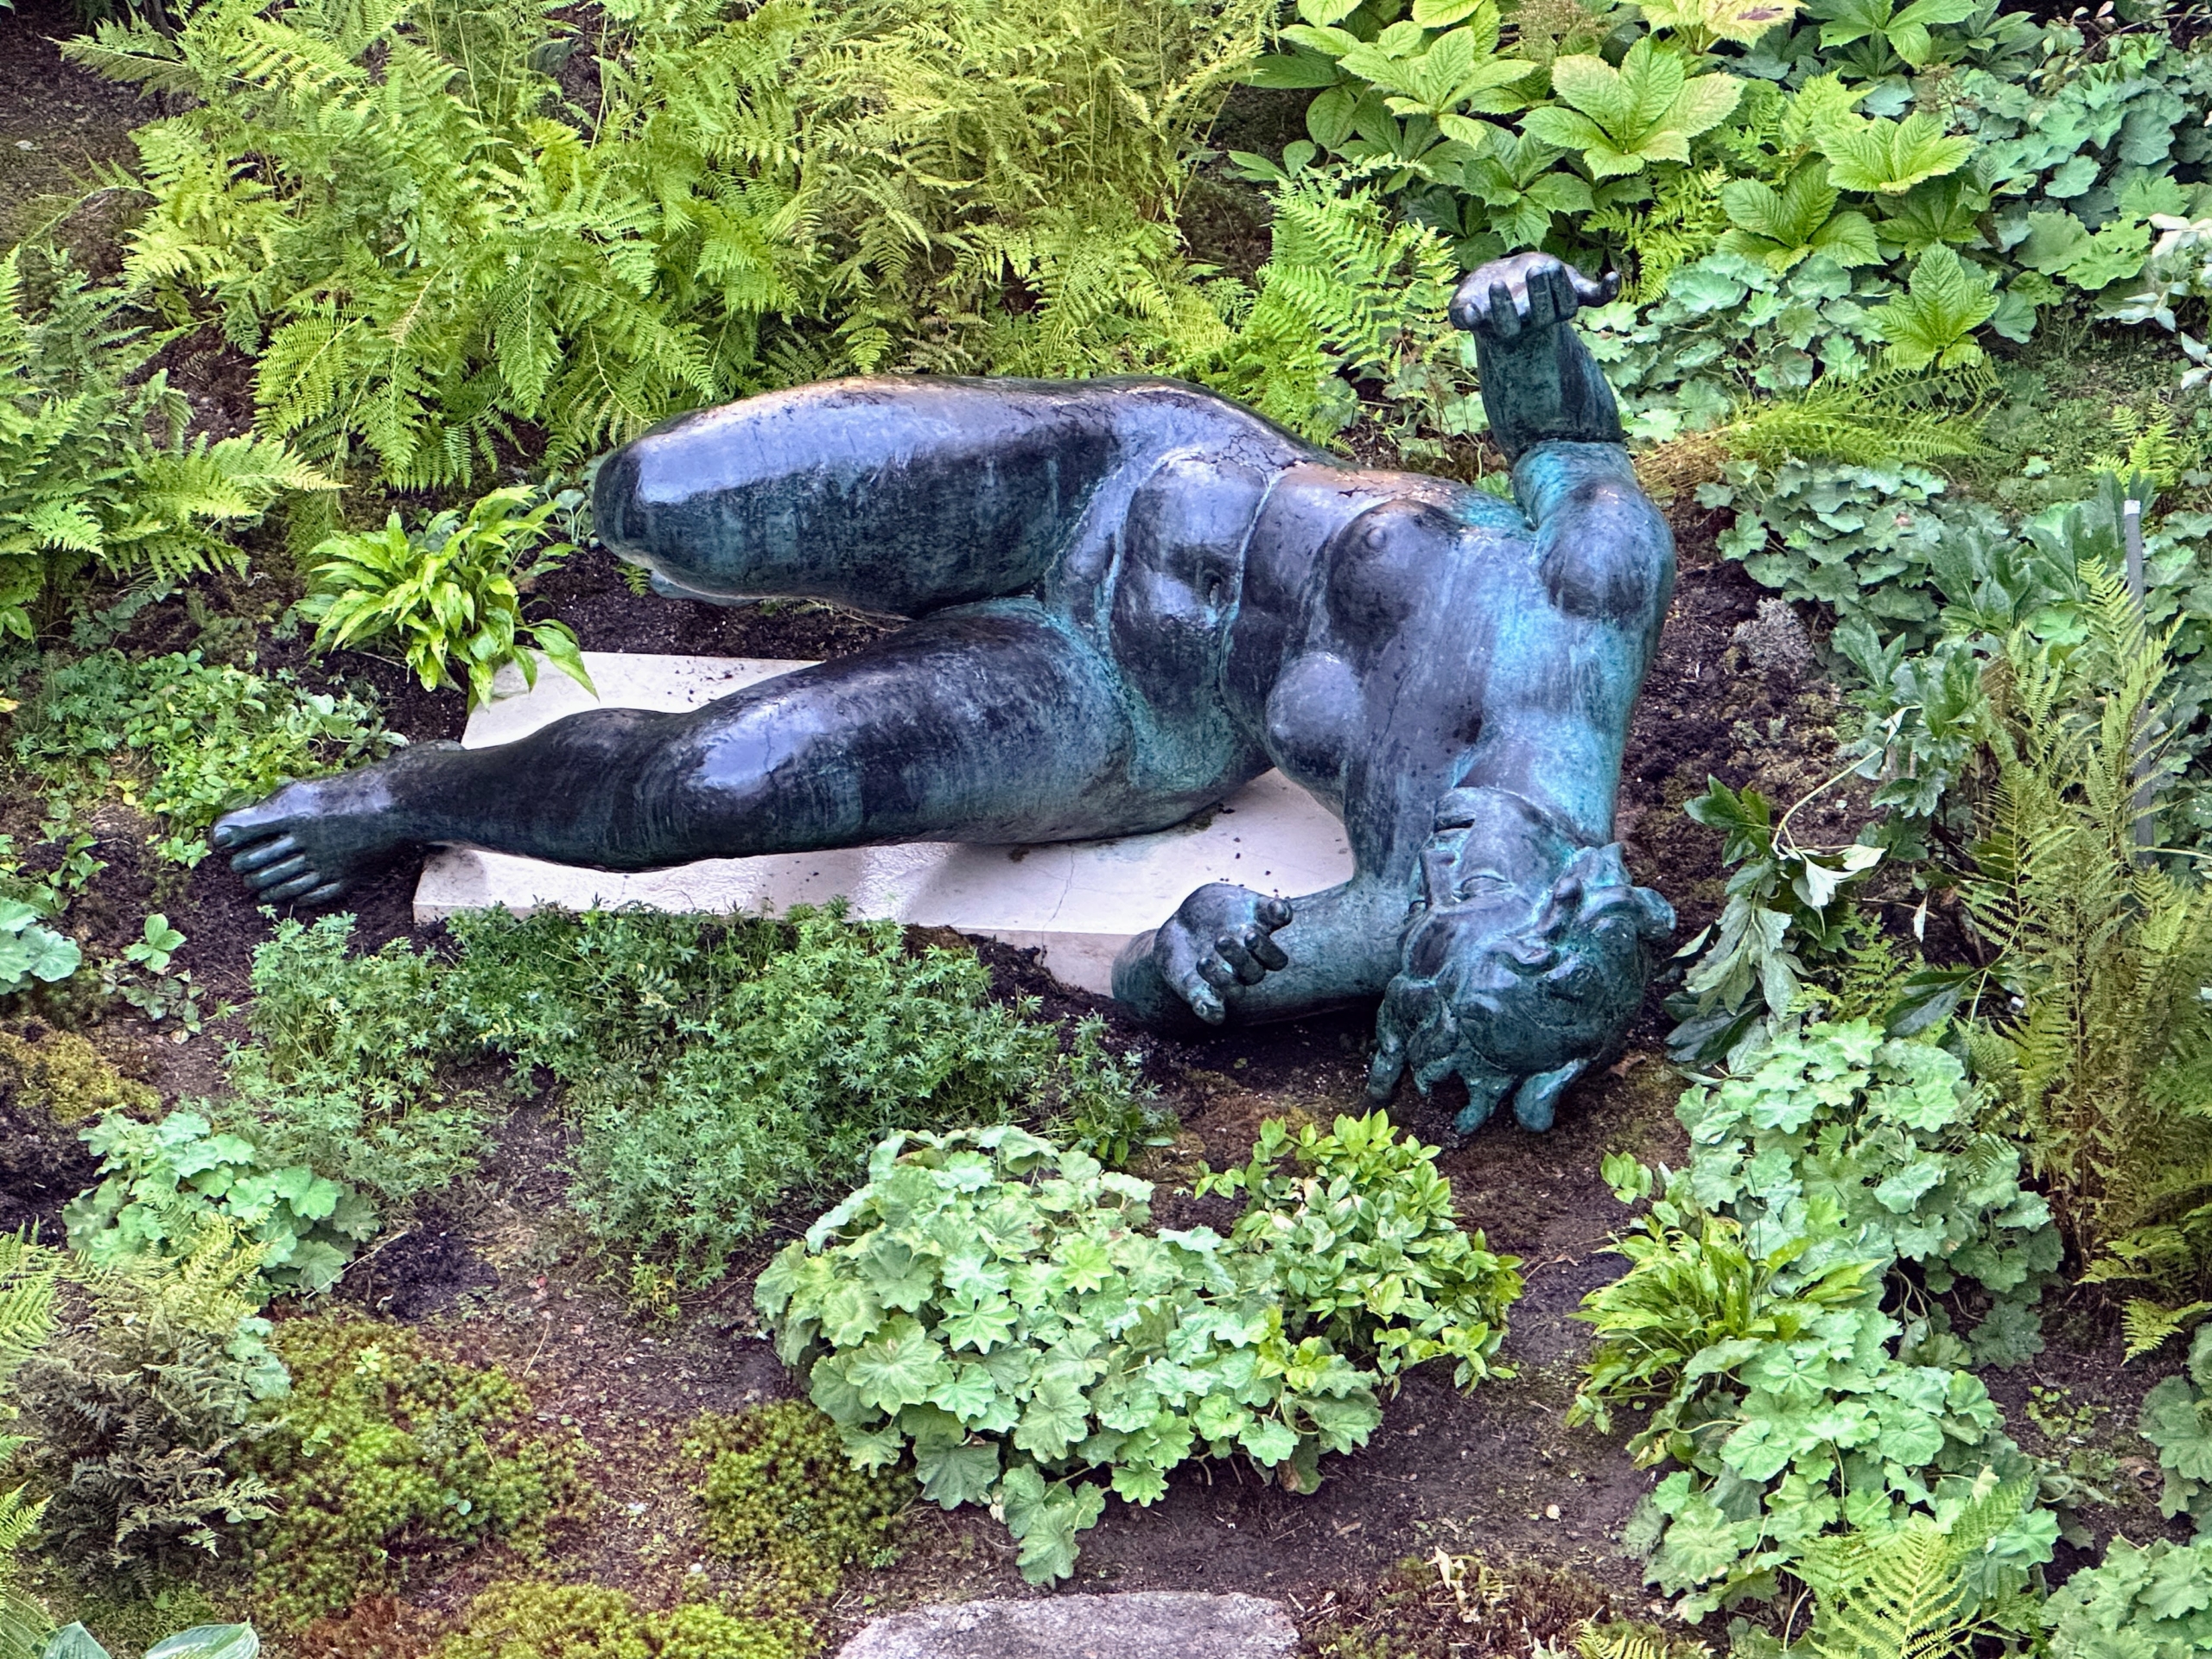
Below the ledge and lying beneath the West Terrace is the lady – La Riviere by Aristide Maillol. The original terms of the commission were intended to honor Henri Barbusse, noted author and pacifist. Maillol initially conceived the figure as a woman who had been stabbed in the back, falling at the viewer’s feet. However, when funds proved to be insufficient to complete the memorial, Maillol re-conceived the figure as a more timeless theme, the personification of a river. Here, she is surrounded by ferns, tree peonies, Japanese maples, blueberry bushes, and Lady’s Mantle. I had just cleaned the garden around her when I took this photo.
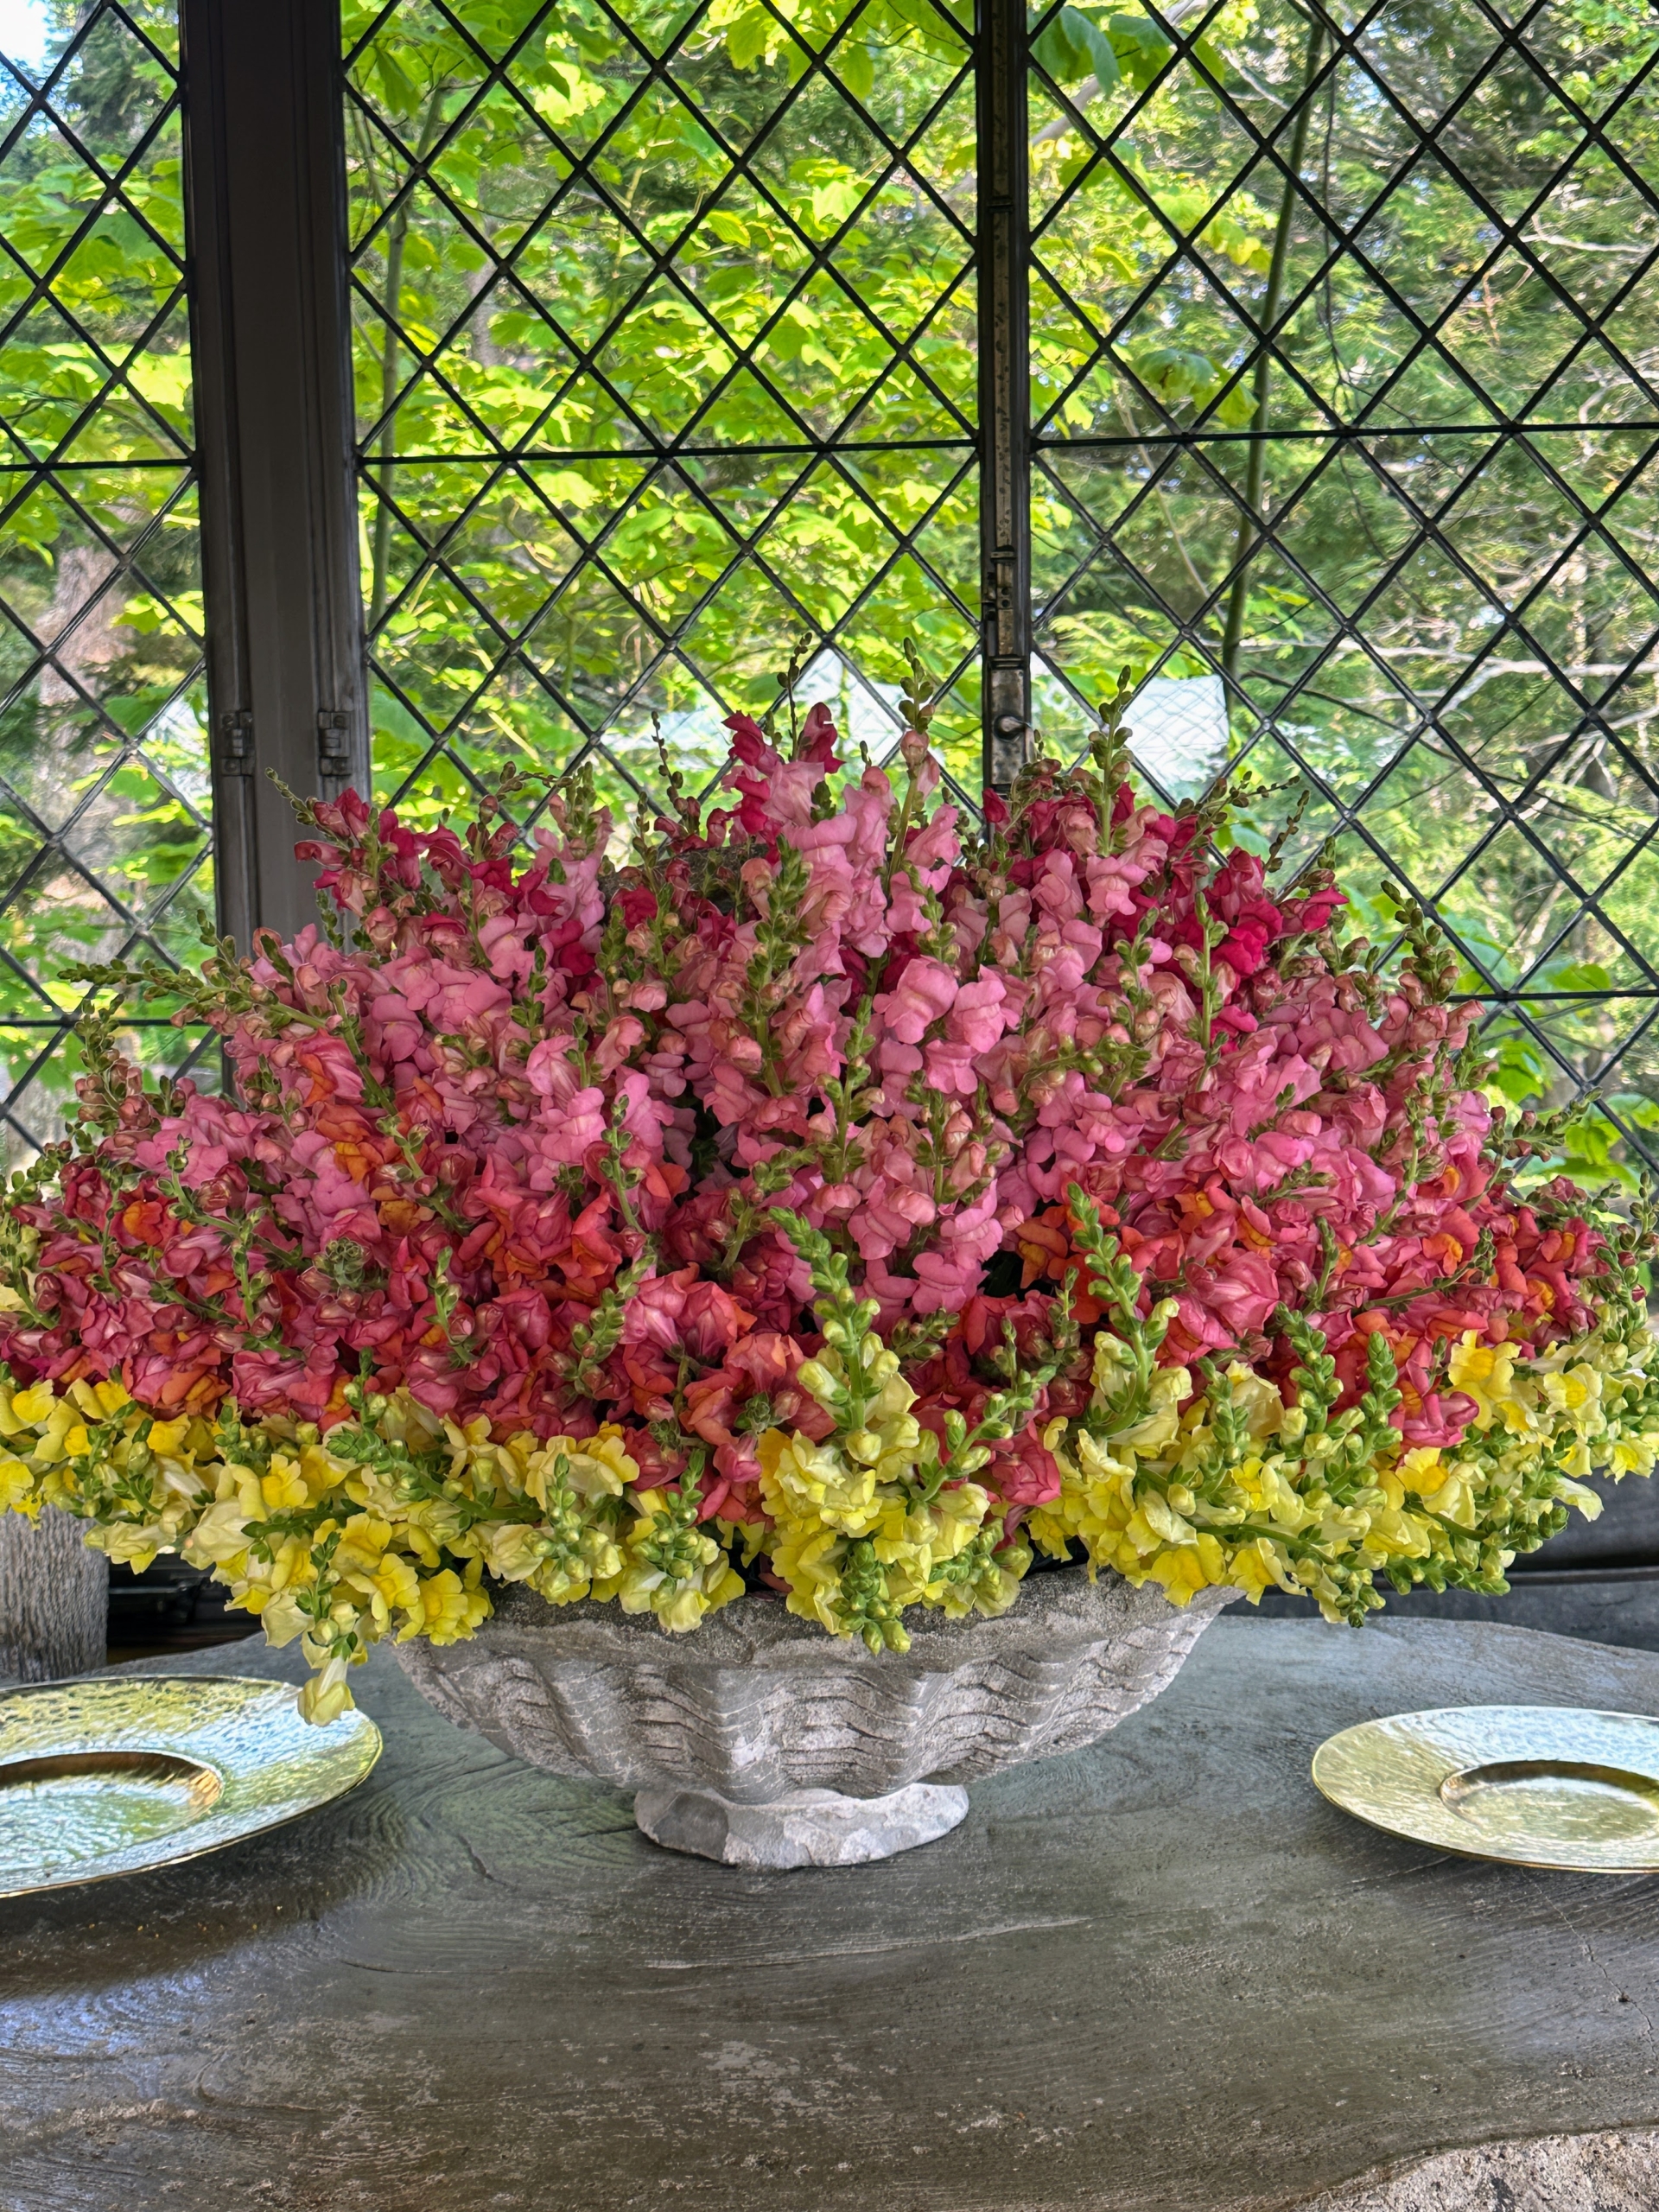
Wendy Norling, my gardener at Skylands, made all the floral arrangements this season. Every one of them was beautiful. This one includes colorful snapdragons grown by Wendy and picked the same day right from my garden.
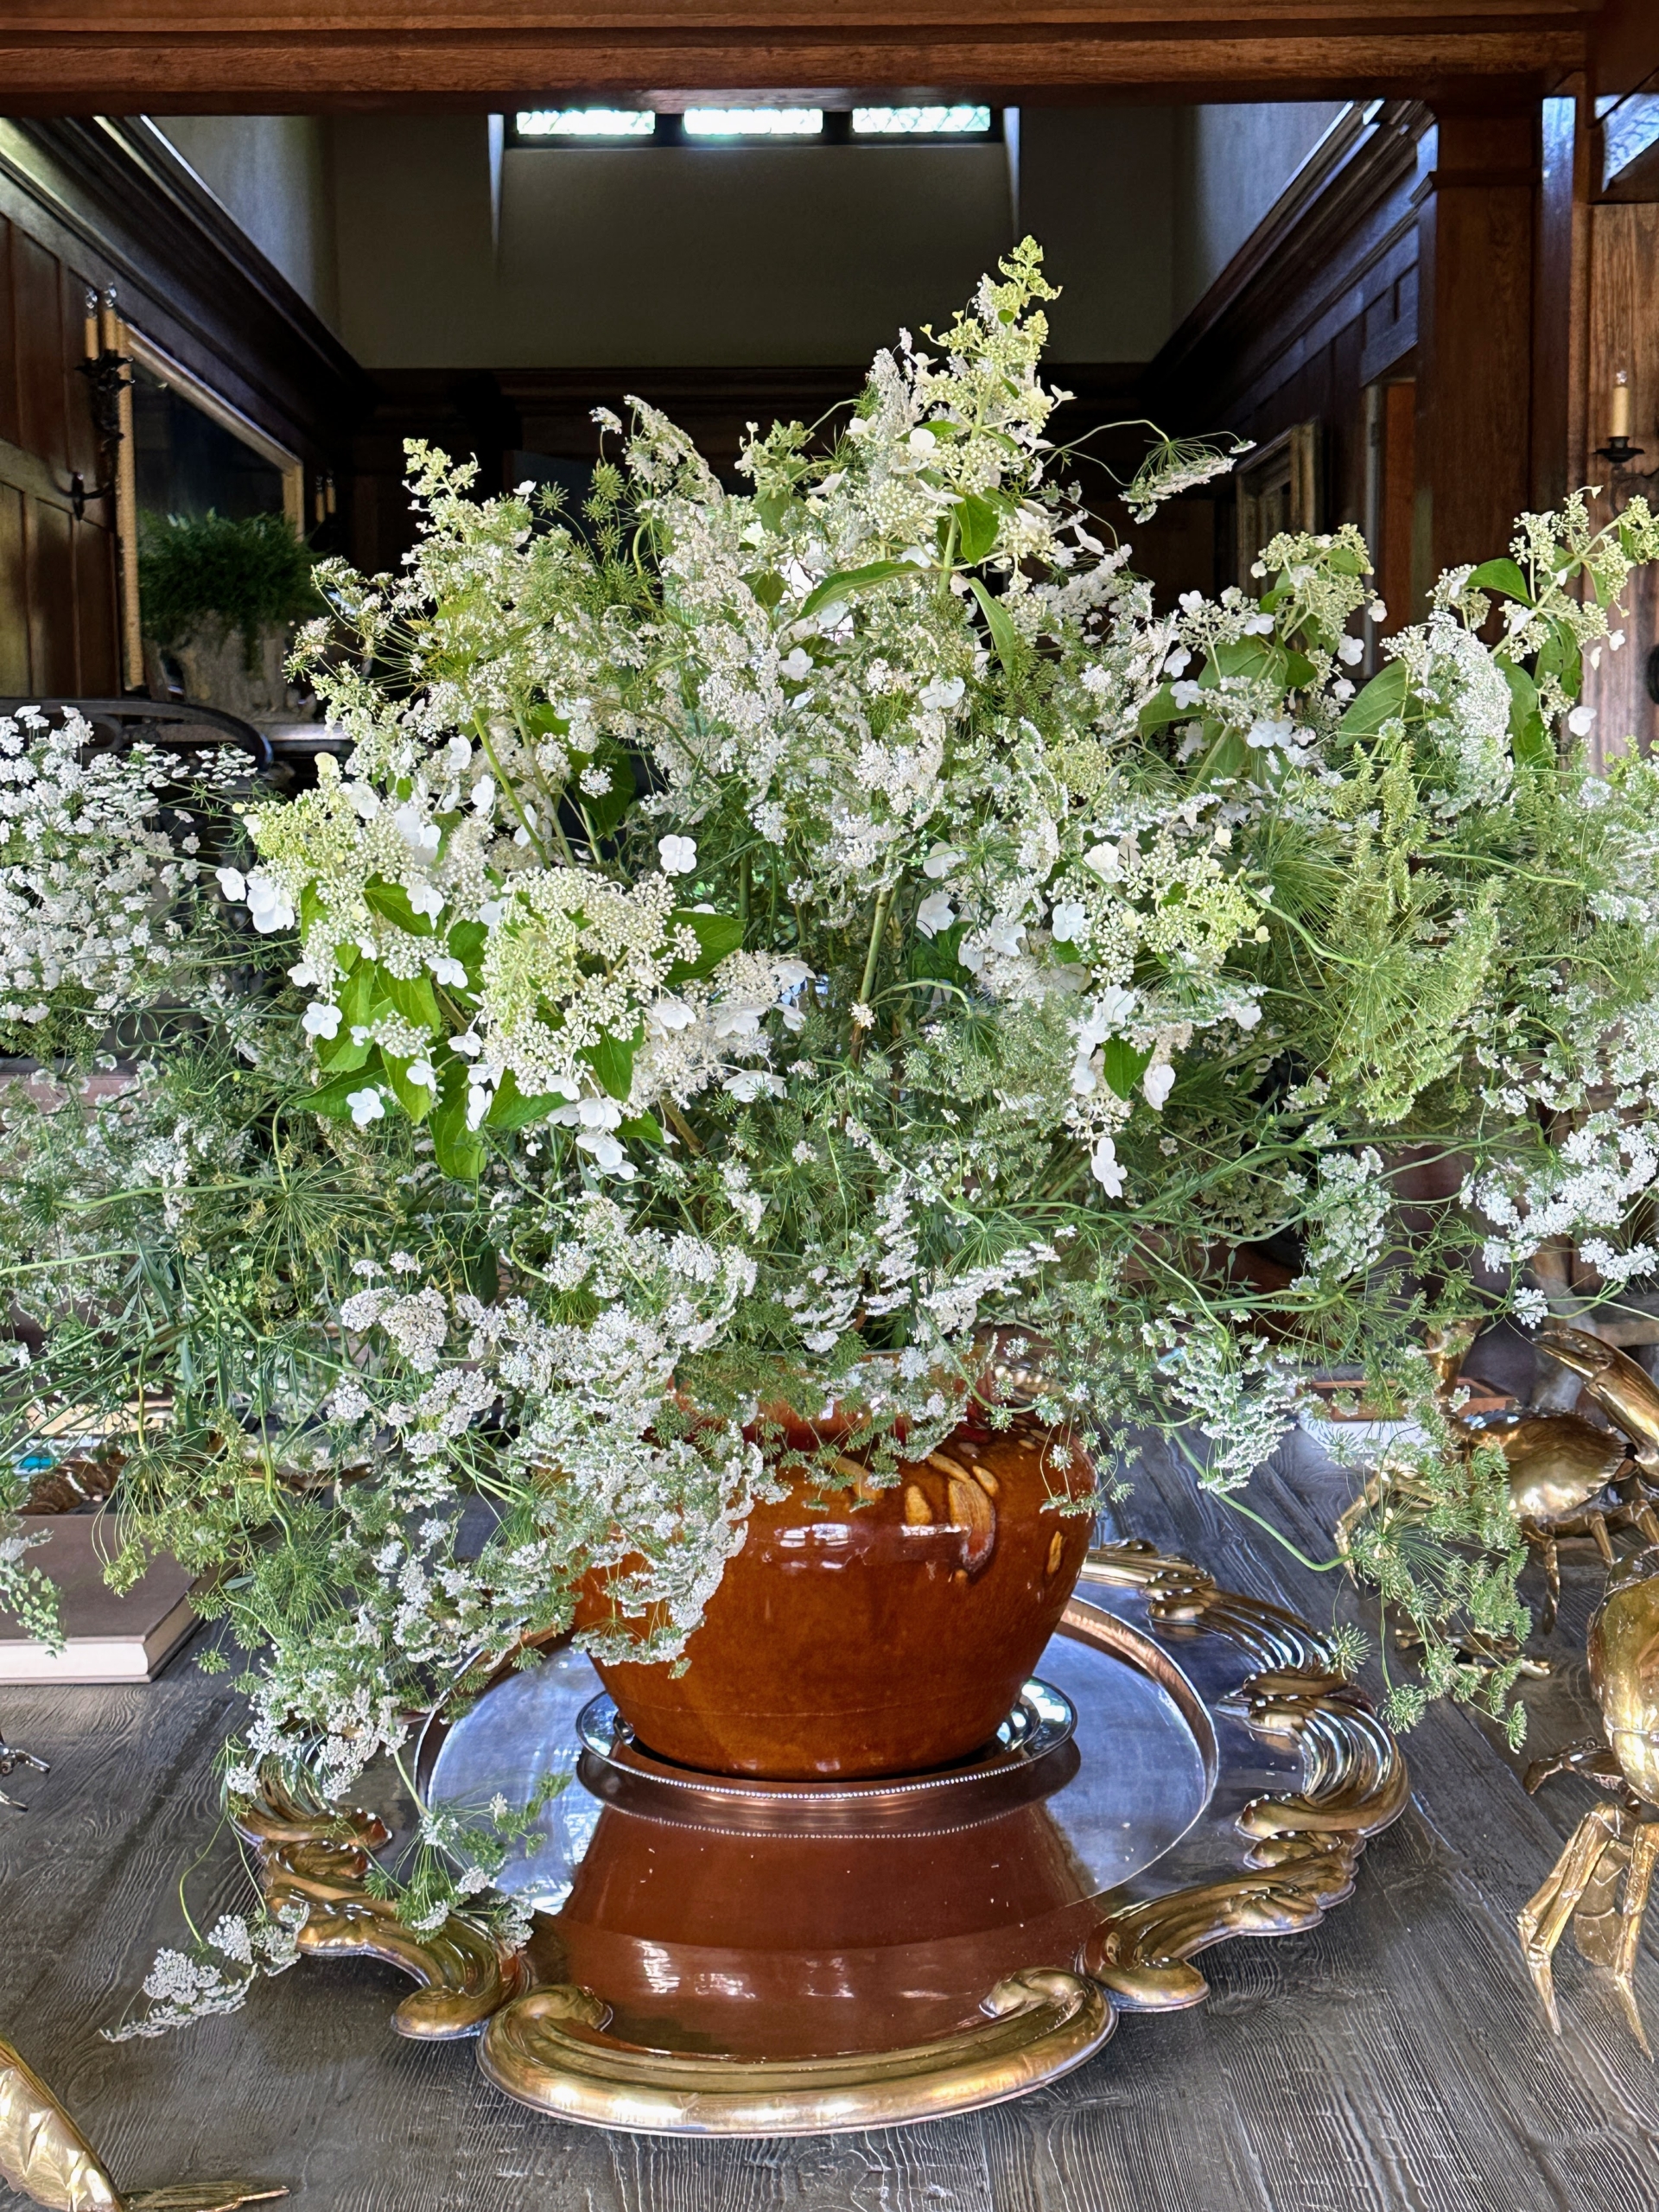
This arrangement is made with lacecap hydrangeas and Ammi majus, the false Queen Anne’s Lace.
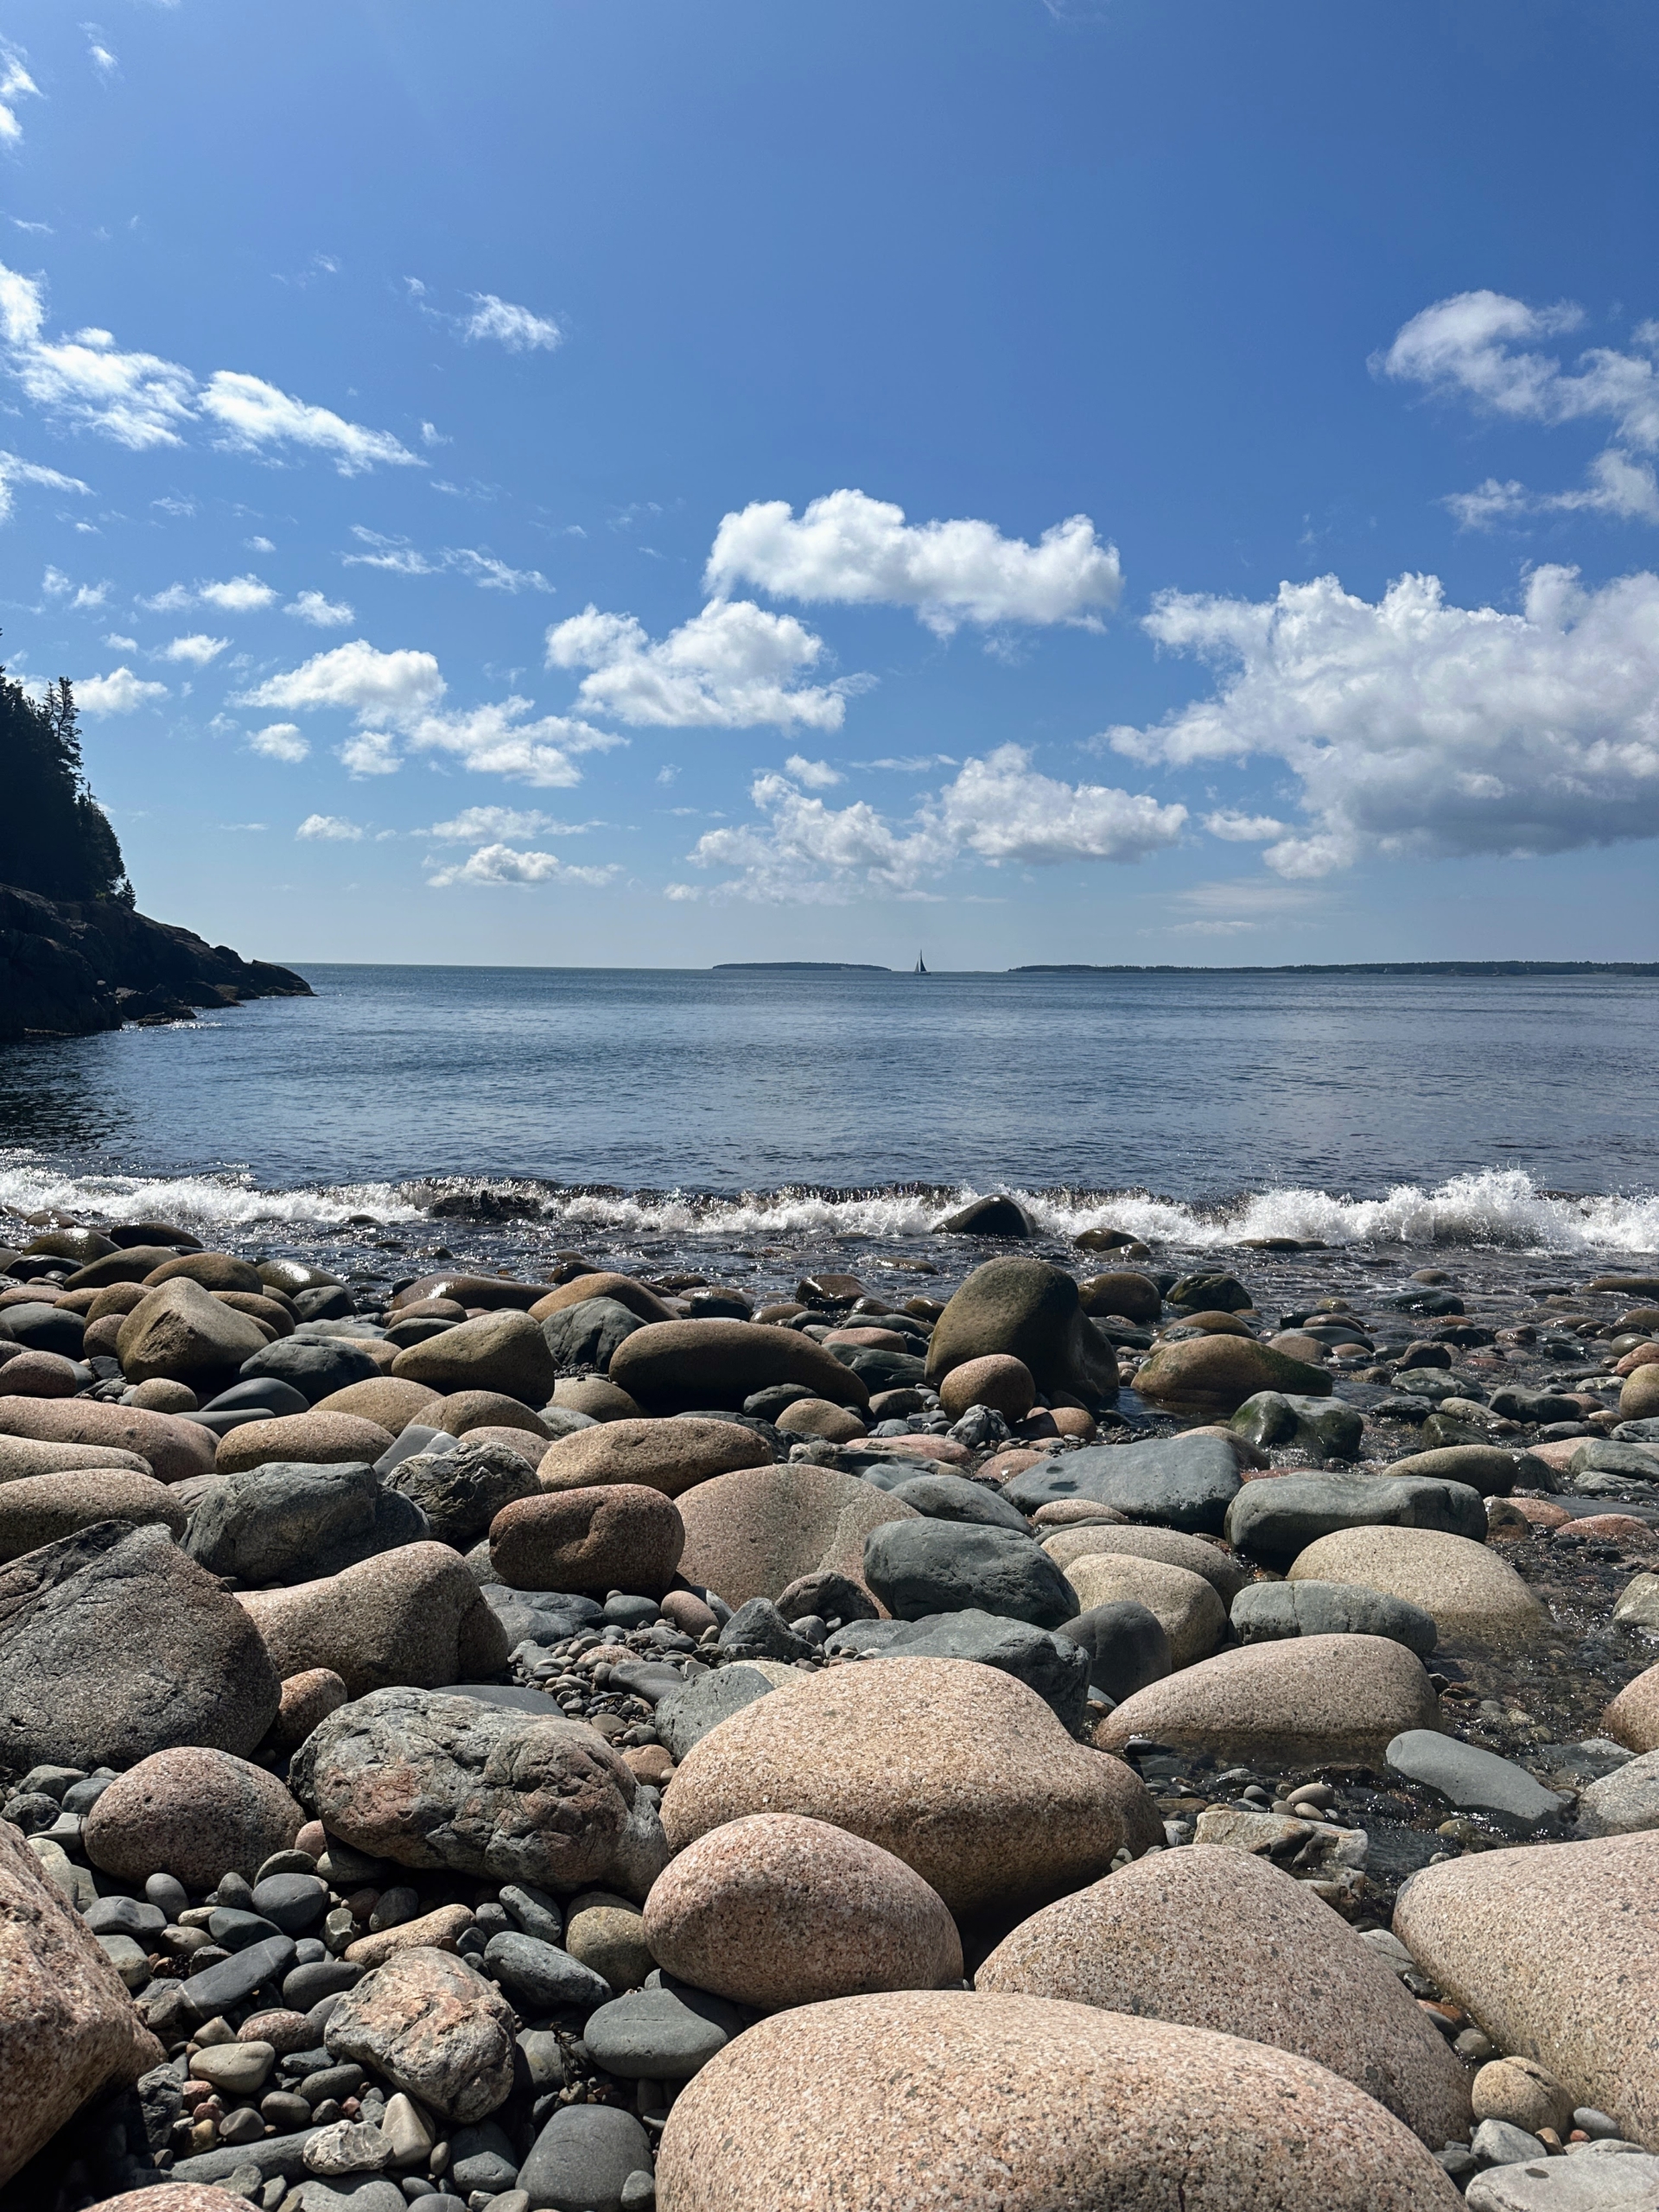
On this day, we walked along Bracy Cove’s stony beach.
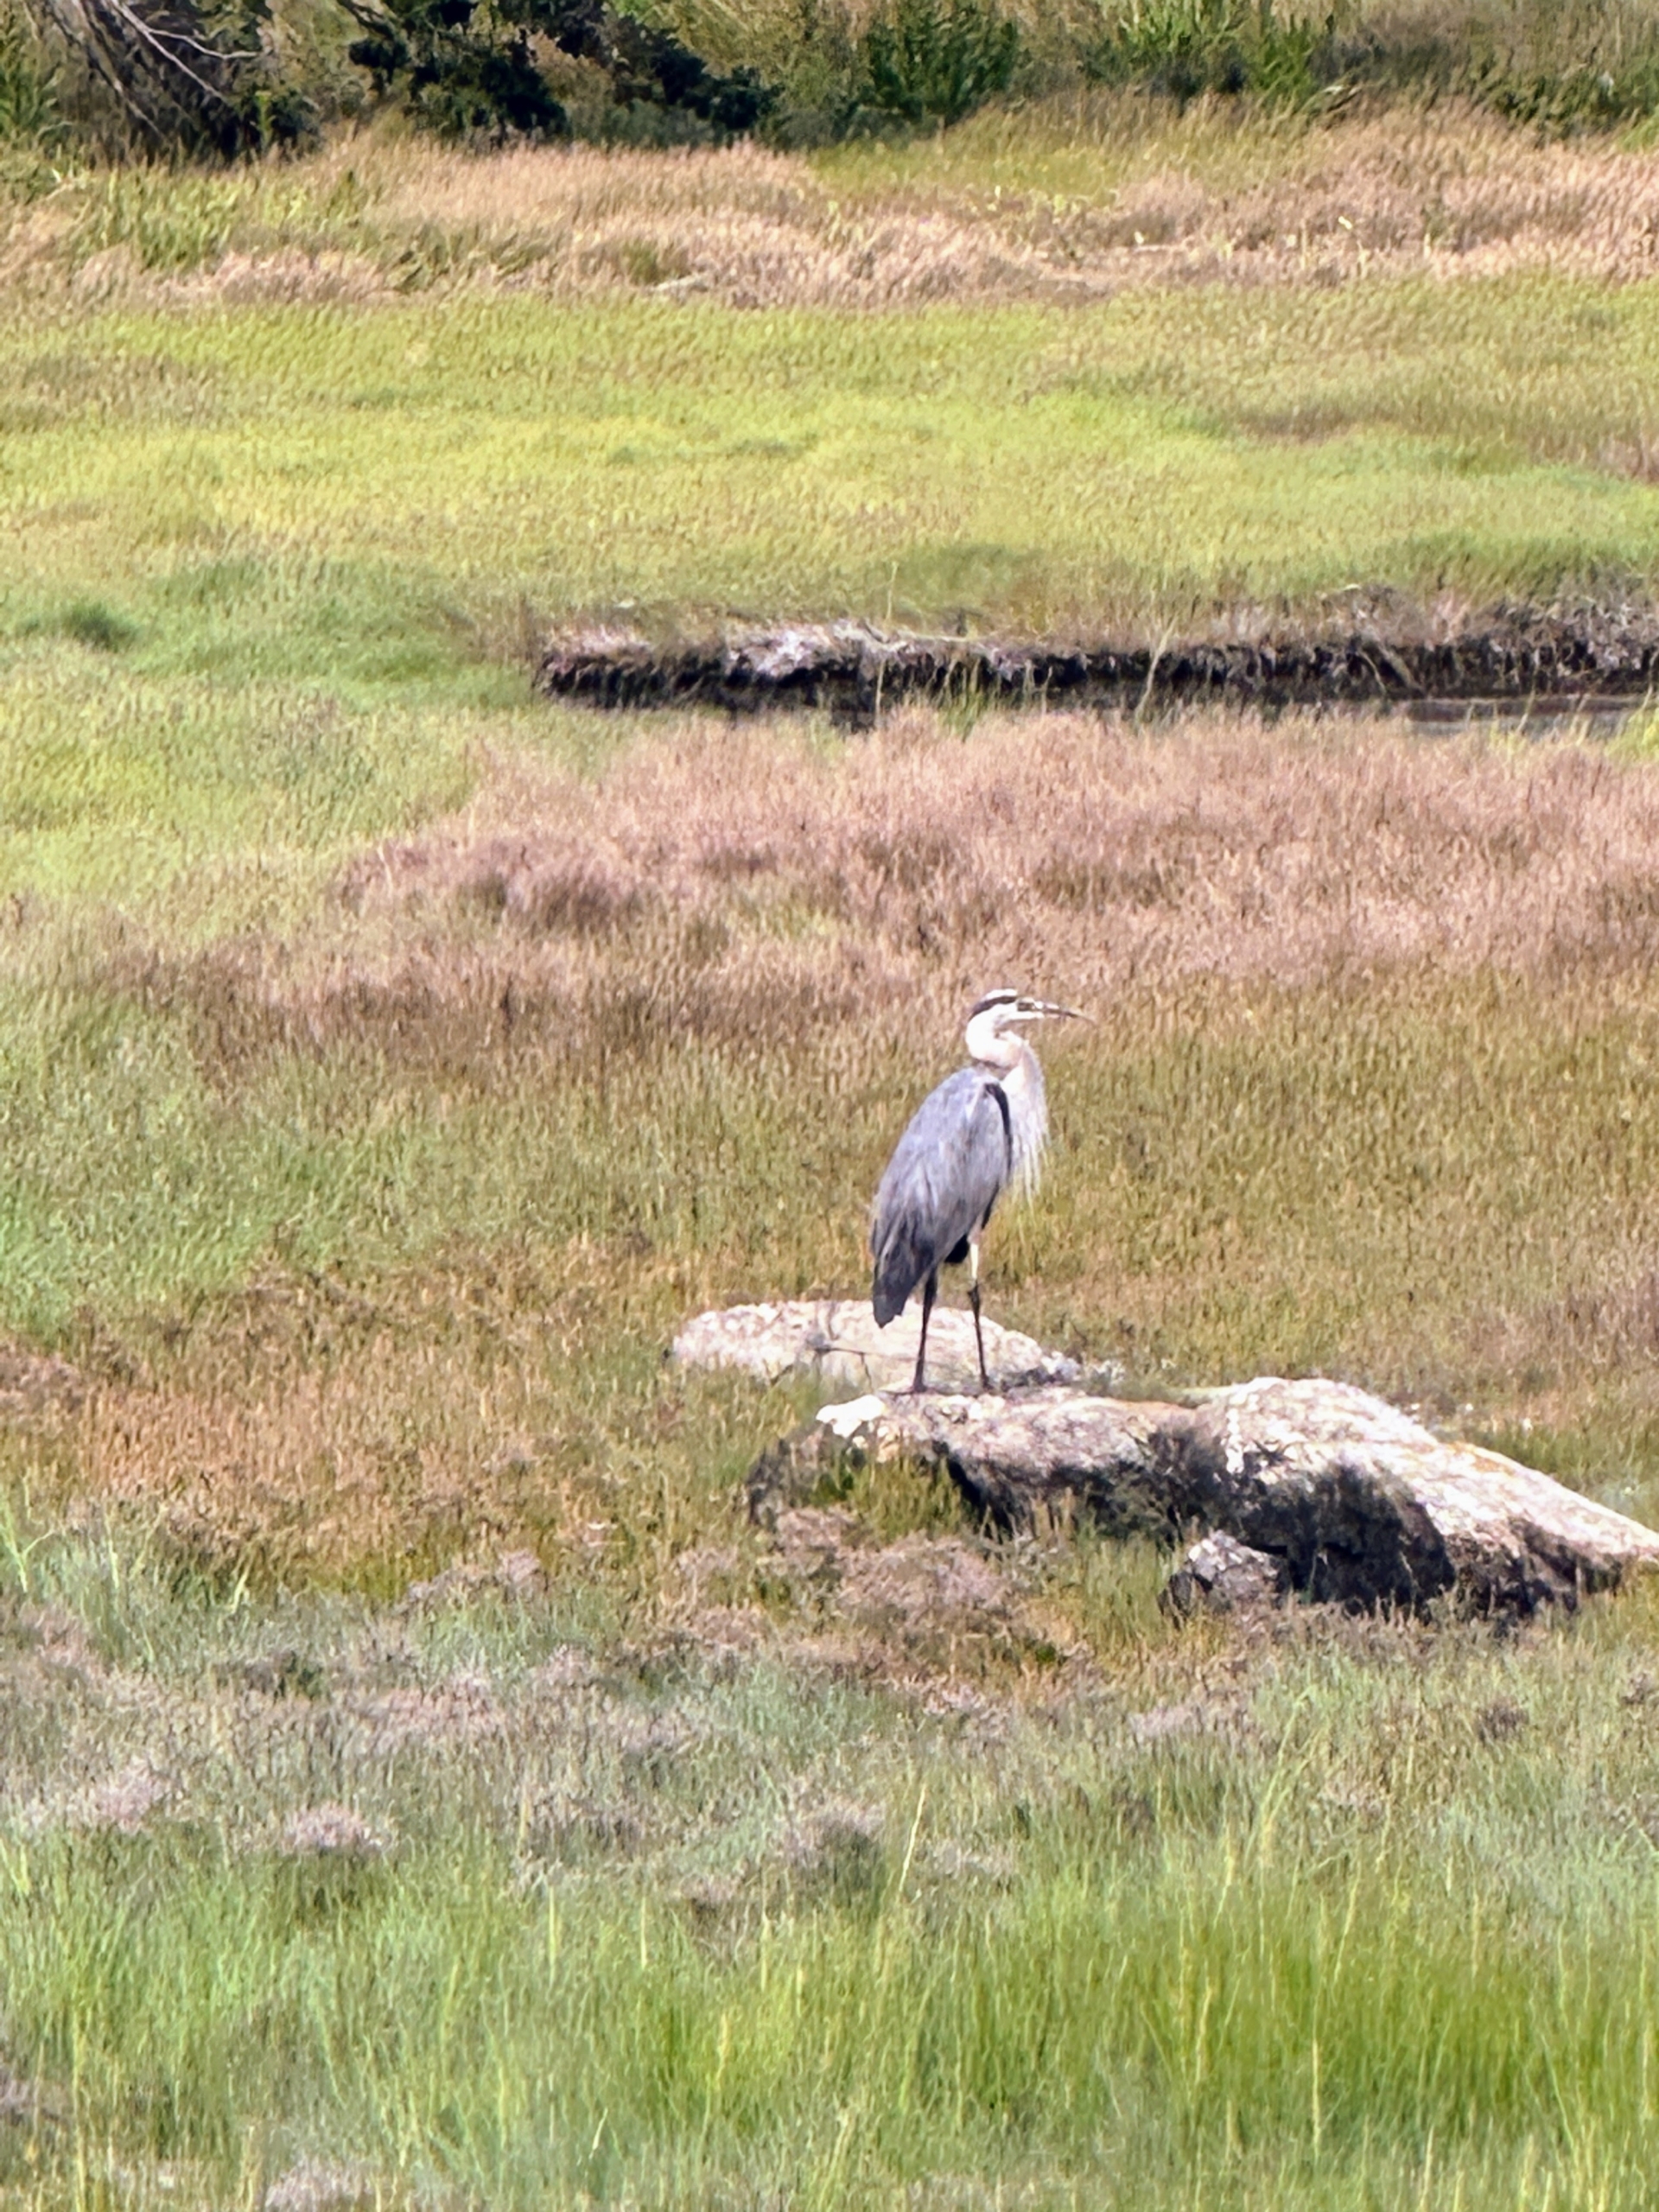
At another point, we also saw this handsome great blue heron just sitting and watching. The great blue heron is a large wading bird in the heron family Ardeidae, common near the shores of open water and in wetlands over most of North and Central America.
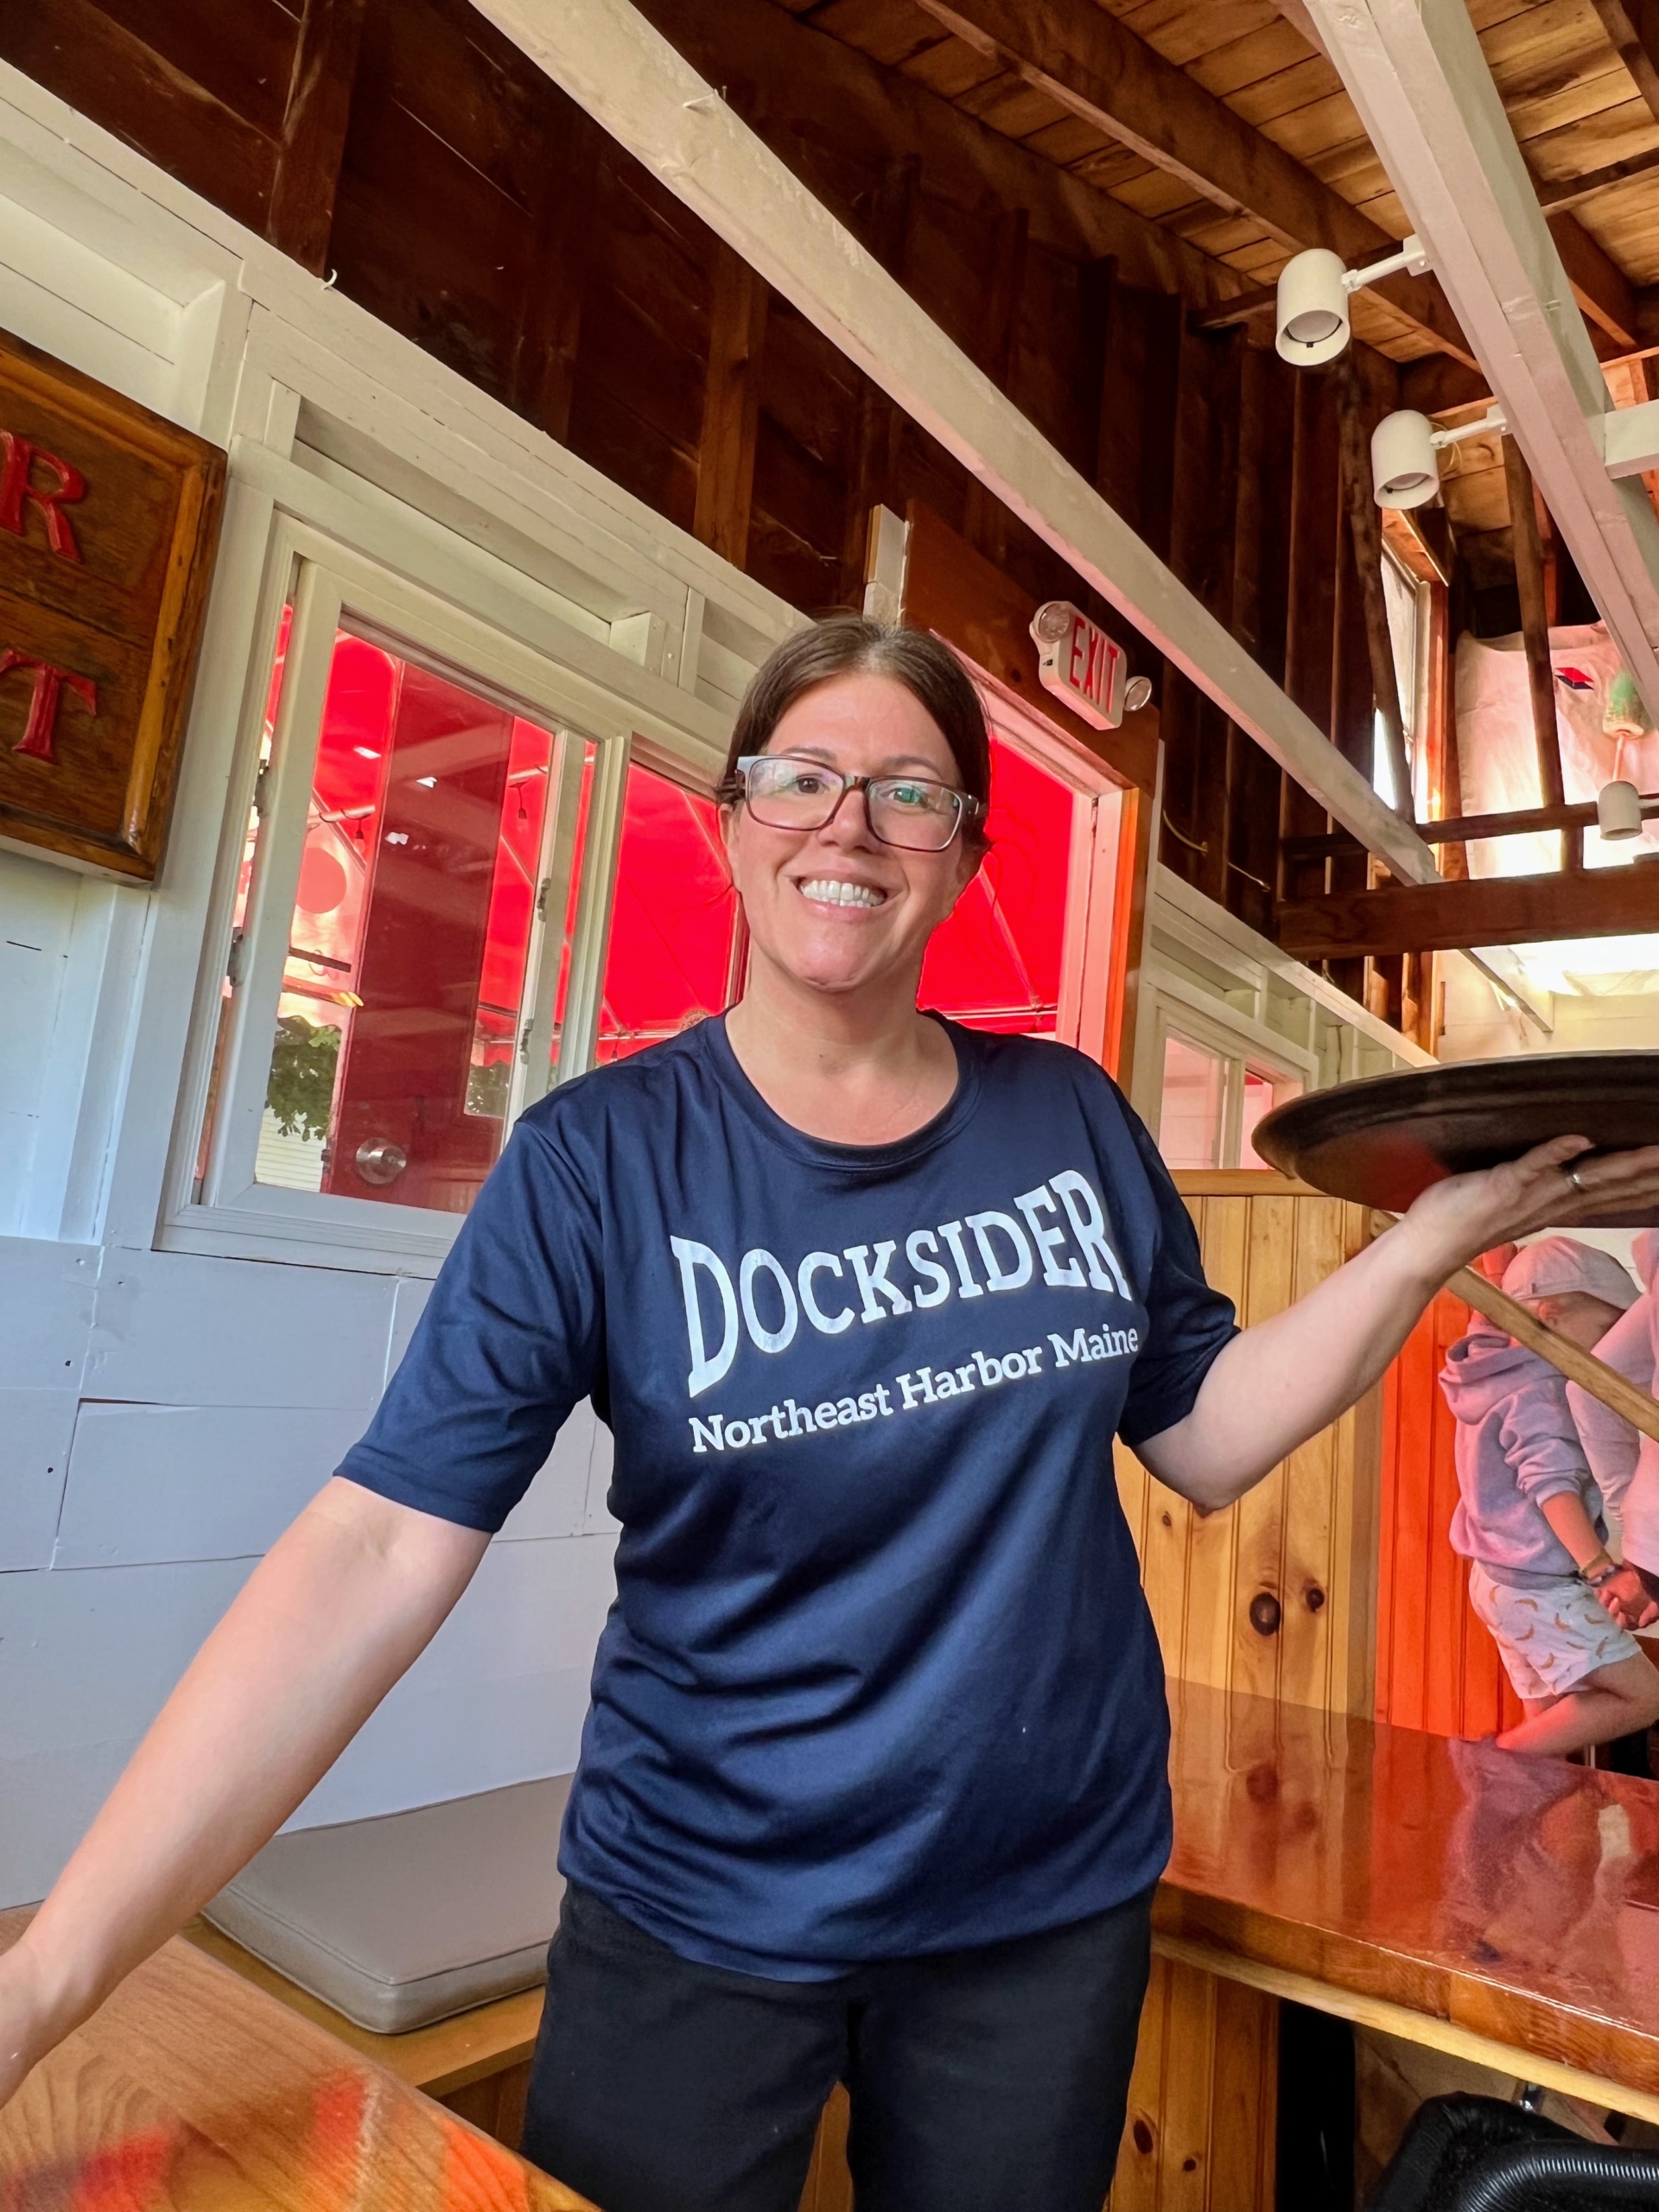
I also enjoyed a wonderful lunch at the Docksider Restaurant in Northeast Harbor. The wait staff was so friendly…
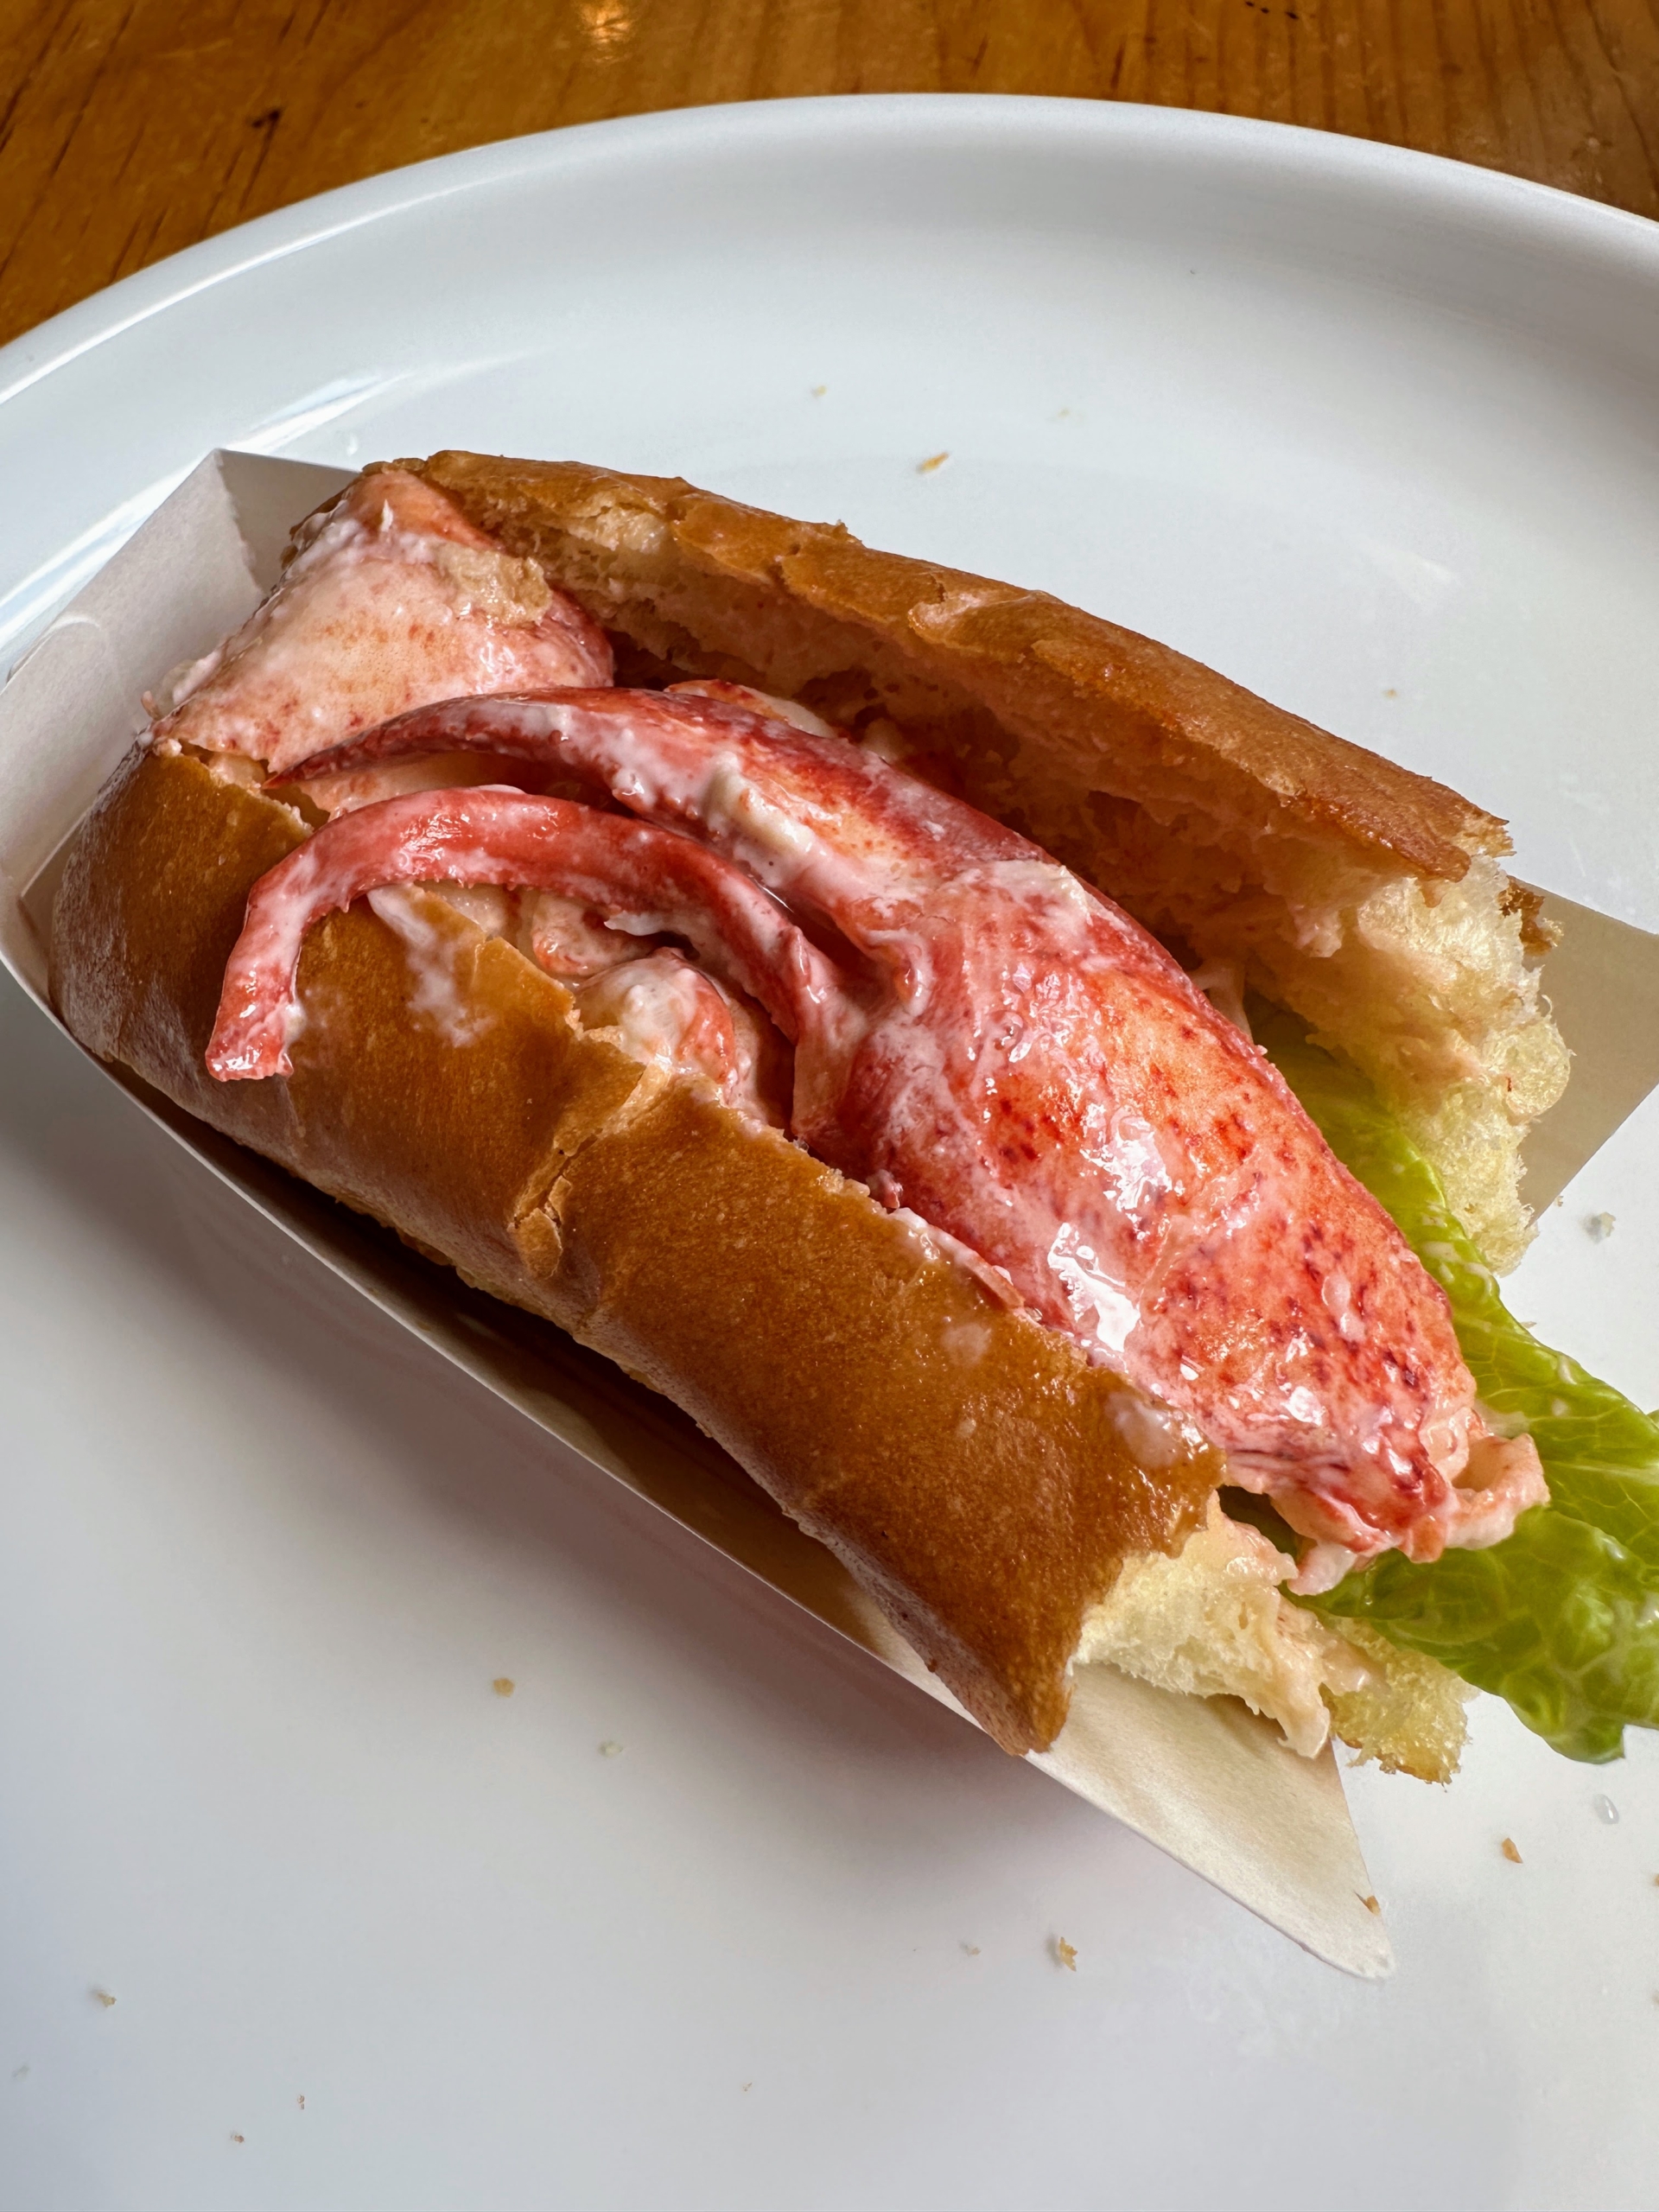
… and the lobster rolls were so amazing. Stop if you’re ever in the area.
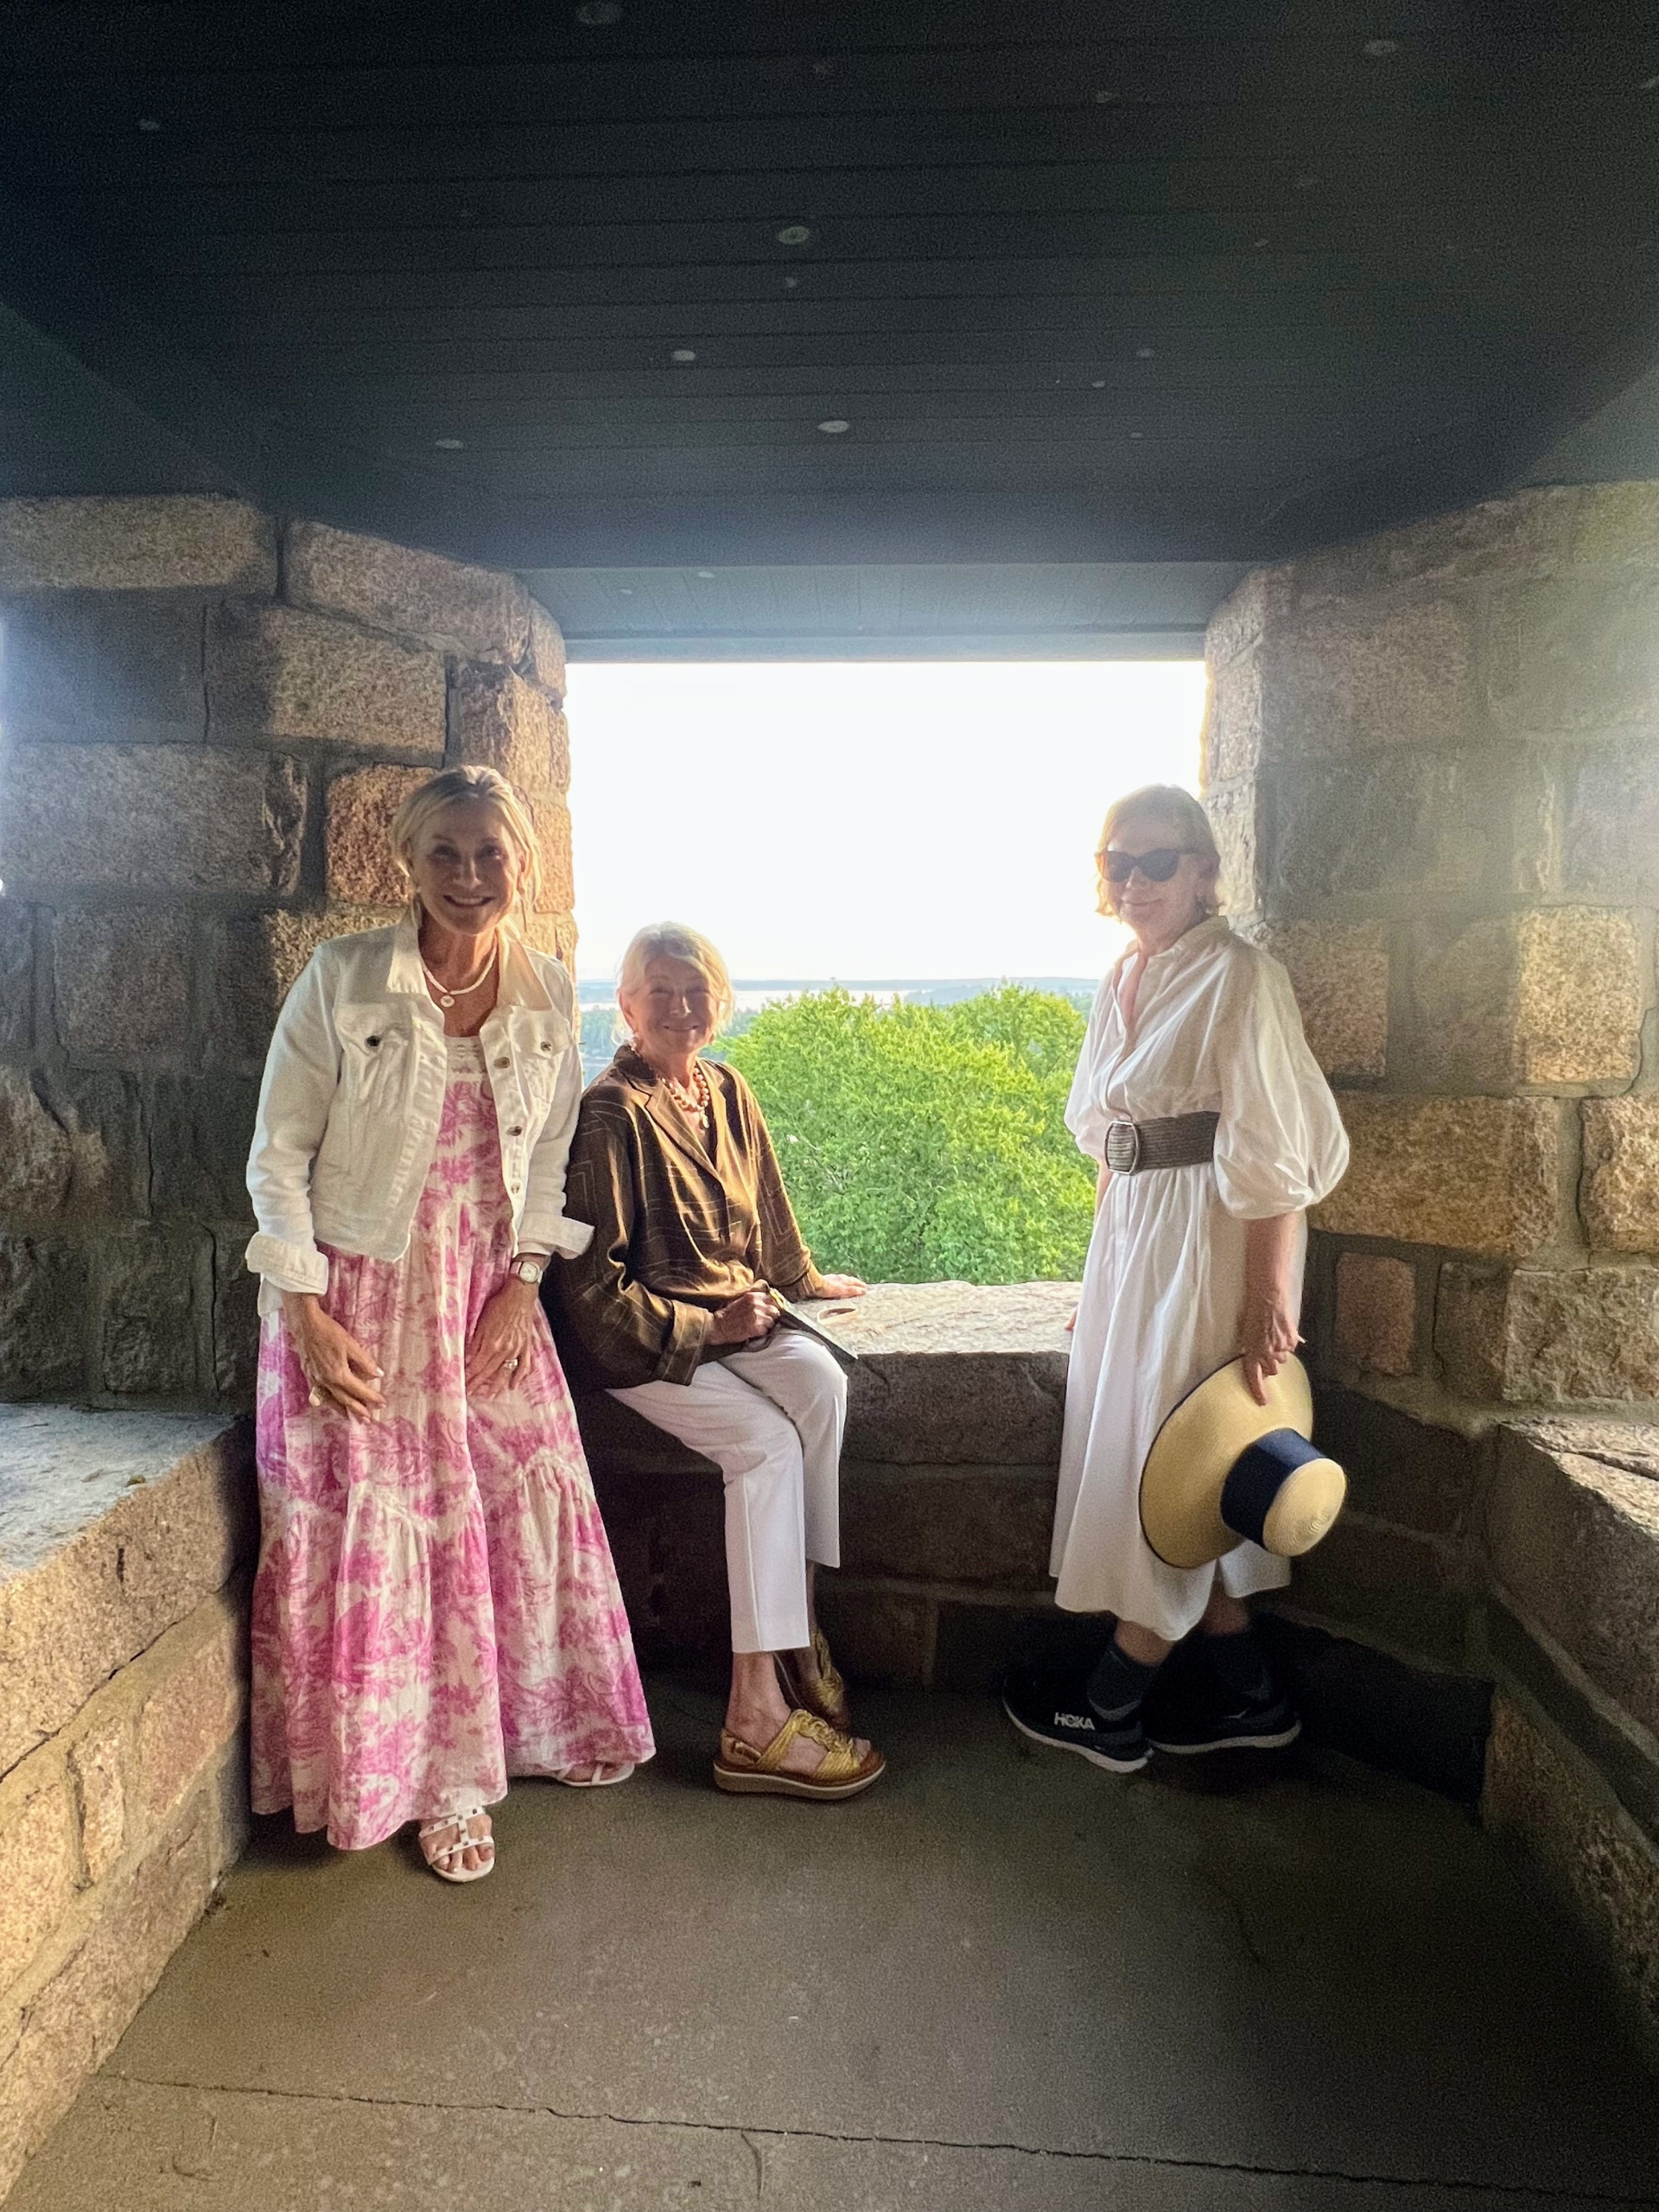
Here I am with my two dear friends, Susan Magrino and Terre Blair. We are in the gazebo of my property at Ox Ledge.
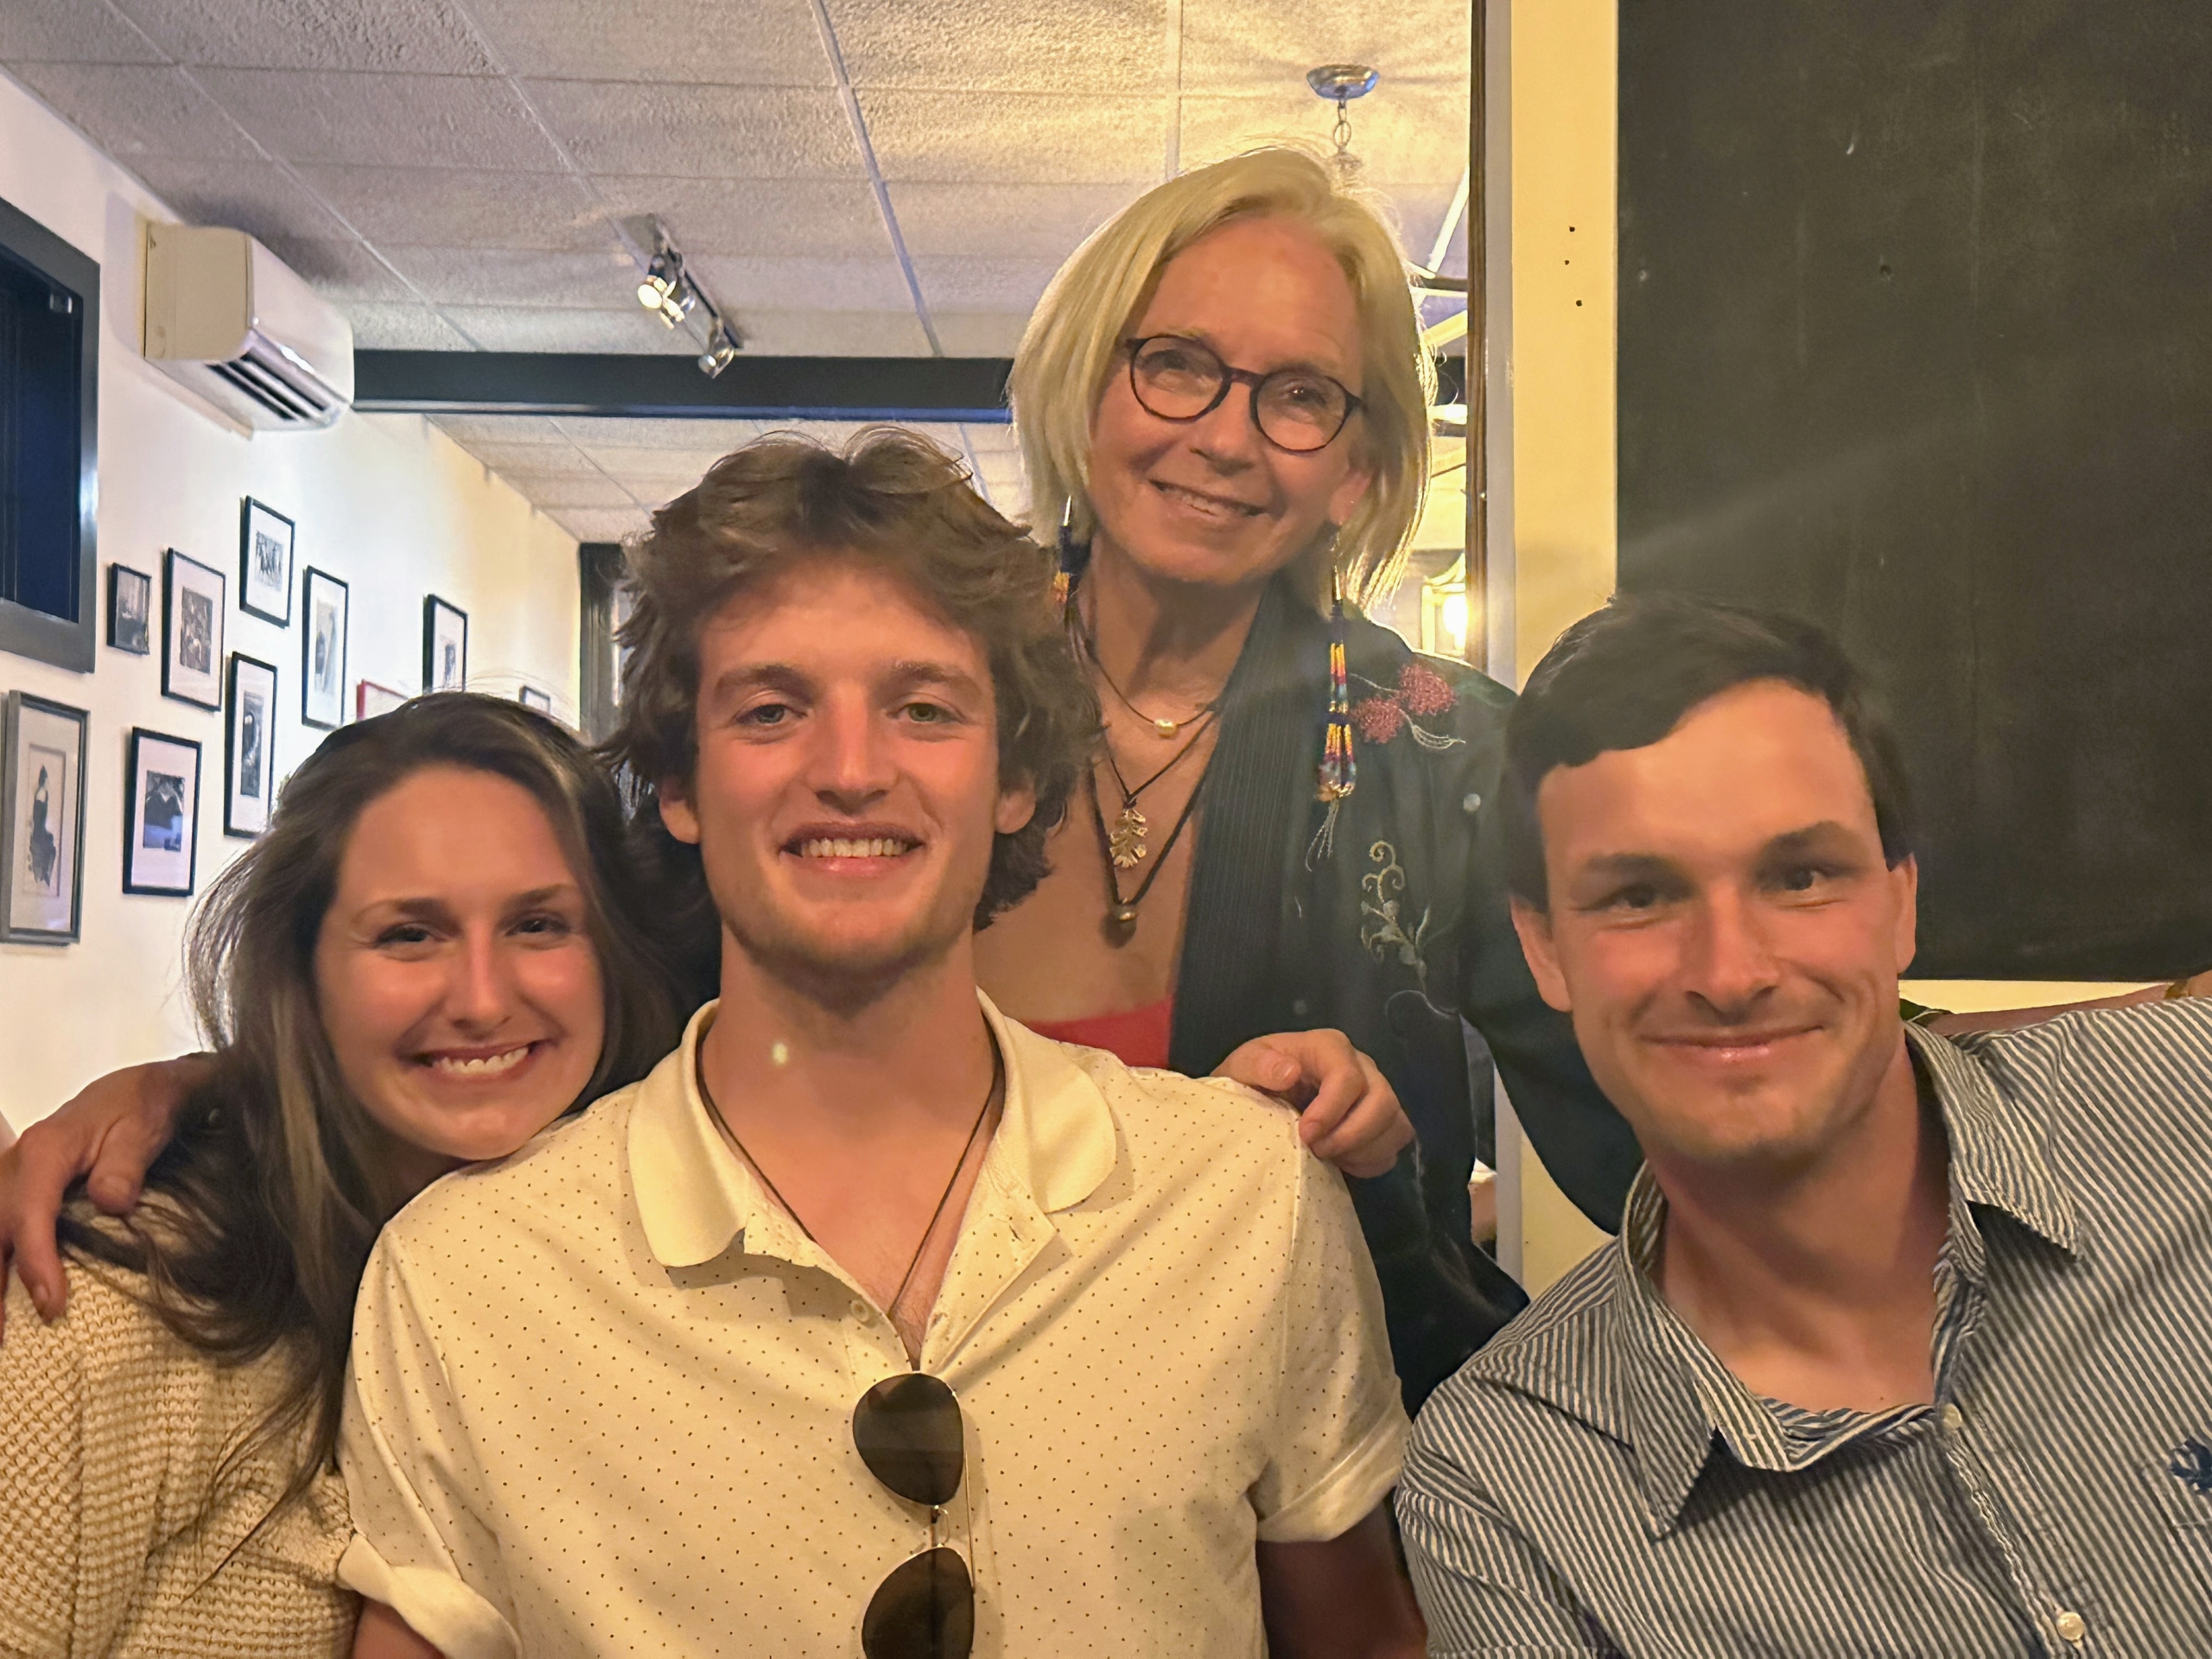
On this evening I took four of my Skylands crew to dinner – Emilee, Amos, Wendy, and Peter. We ate at Copita, also in Northeast Harbor.
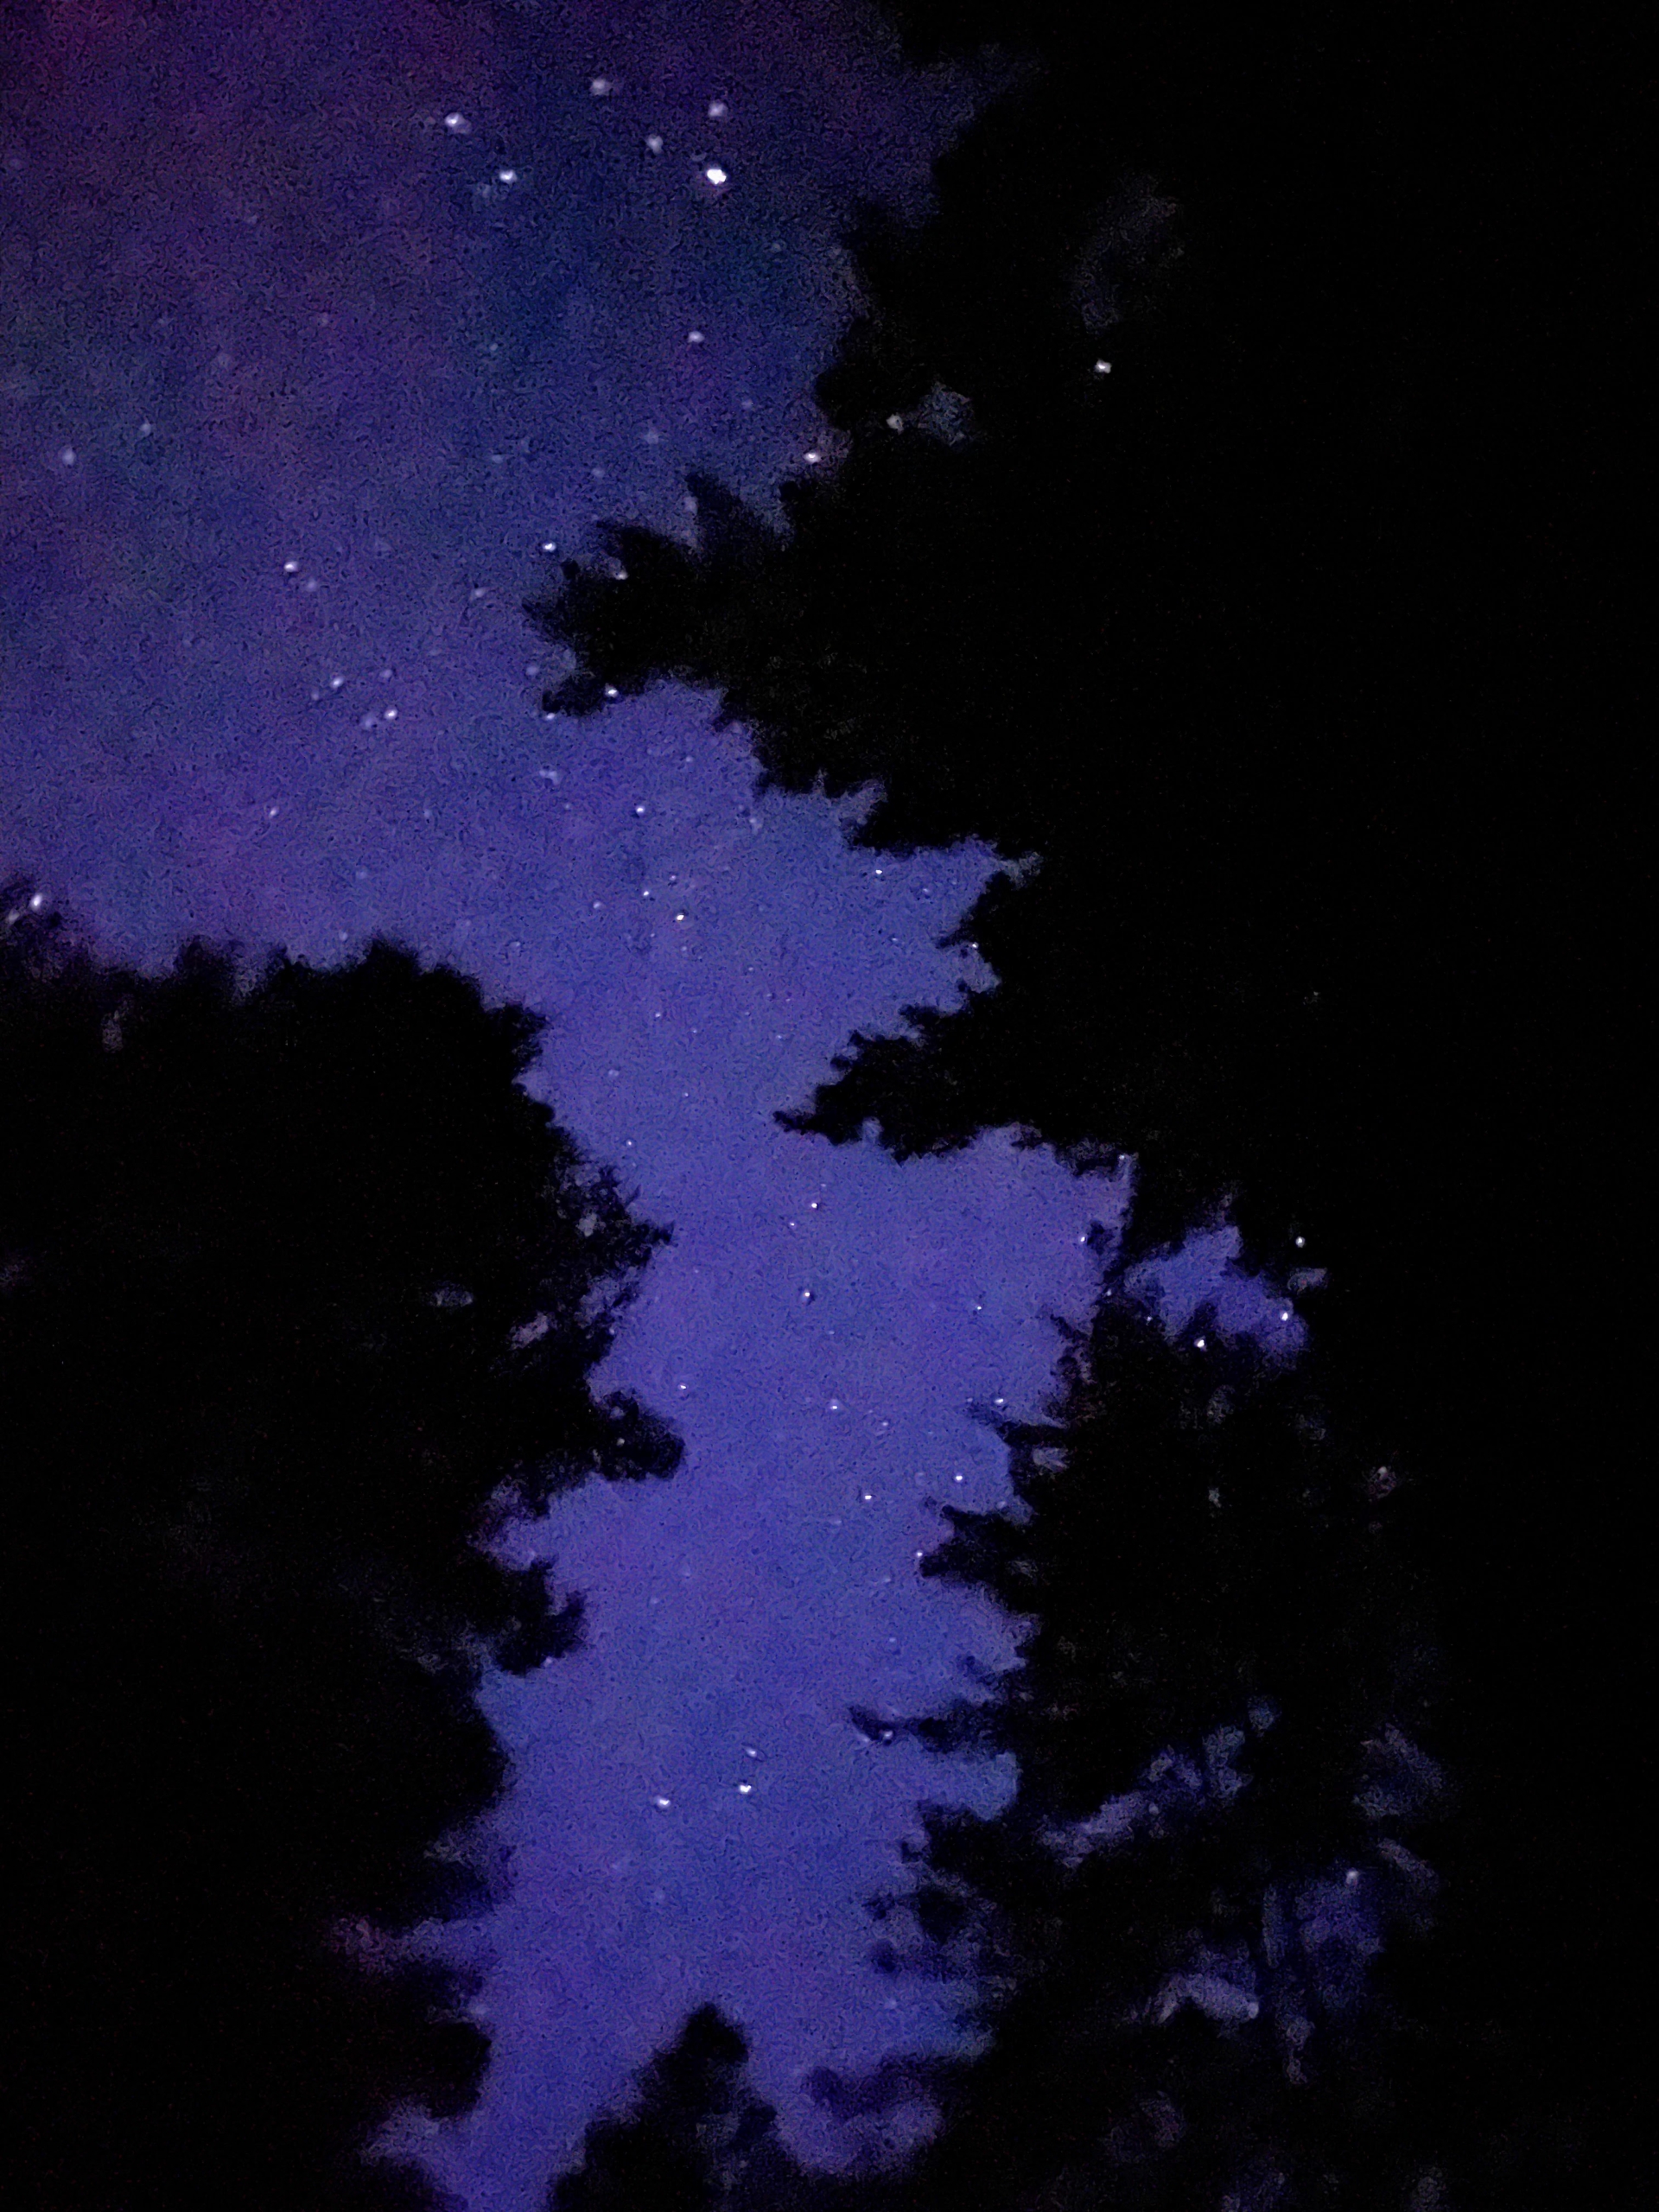
And here’s another nighttime view from my terrace looking at the dark night sky and the gleaming stars. I love Skylands – it is so magical any time of day, any time of year.