Another beautiful and interesting display of lush greenery is growing at my Bedford, New York farm - it's my maze, and it's going to be amazing.
You may have seen some of my photos on my Instagram Stories @MarthaStewart48. Earlier this year, I decided to create a maze of hedges, espaliers, and shrubs in the pasture across the carriage road from my Winter House terrace. A living maze is a puzzle of tall plantings - tall enough to prevent those walking through from seeing the paths ahead. The maze includes rows, openings, and various dead ends, but only one true route leading to the center. We began planting the maze last April, and now we have four rows along one end of the space - it's already stumped me on horseback. And yesterday, another delivery of trees arrived. It's truly an exciting transformation.
Here are some photos of the maze in its infancy, enjoy.
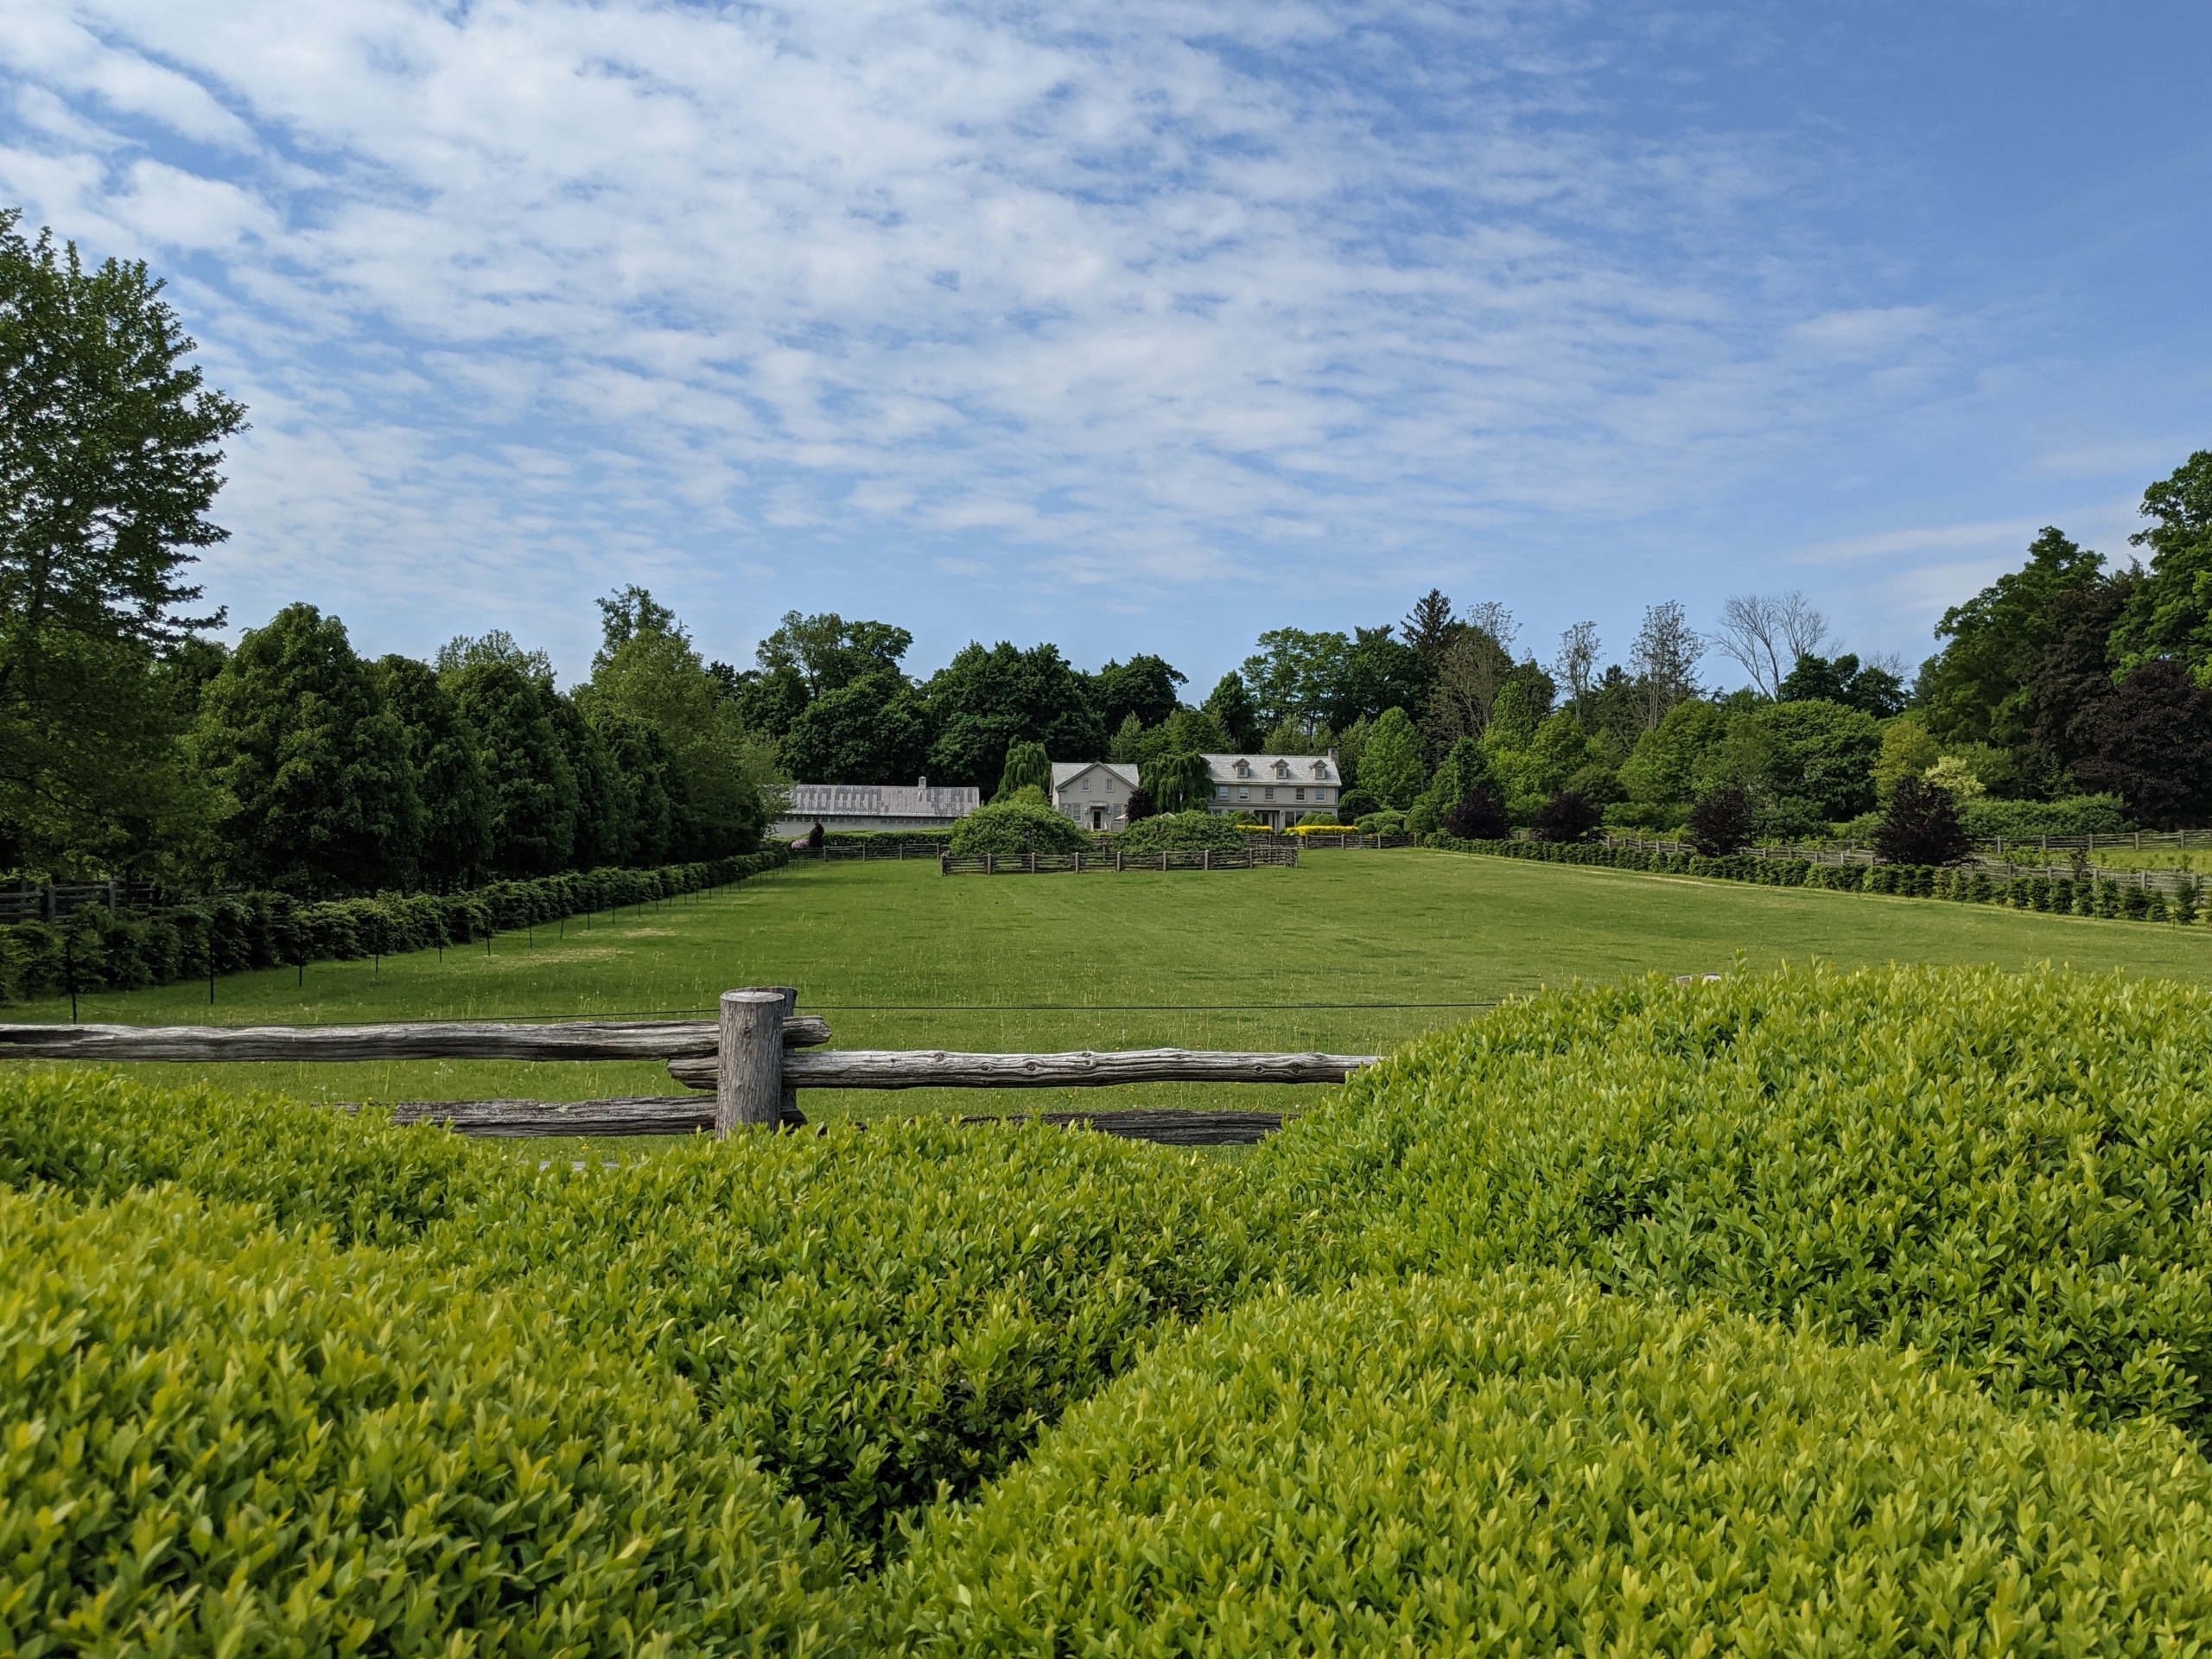
This three acre paddock, with the ancient apple trees, is among the most beautiful green spaces here at my farm. The view from my terrace parterre on any given day is stunning.
Here is a view of the area looking south from the allee of boxwood leading to my stable.
Earlier this year, I decided I wanted to create a living maze in the space. Mazes, as well as labyrinths, have been popular in European gardens and estates for centuries. And now, I am creating one at Cantitoe Corners.
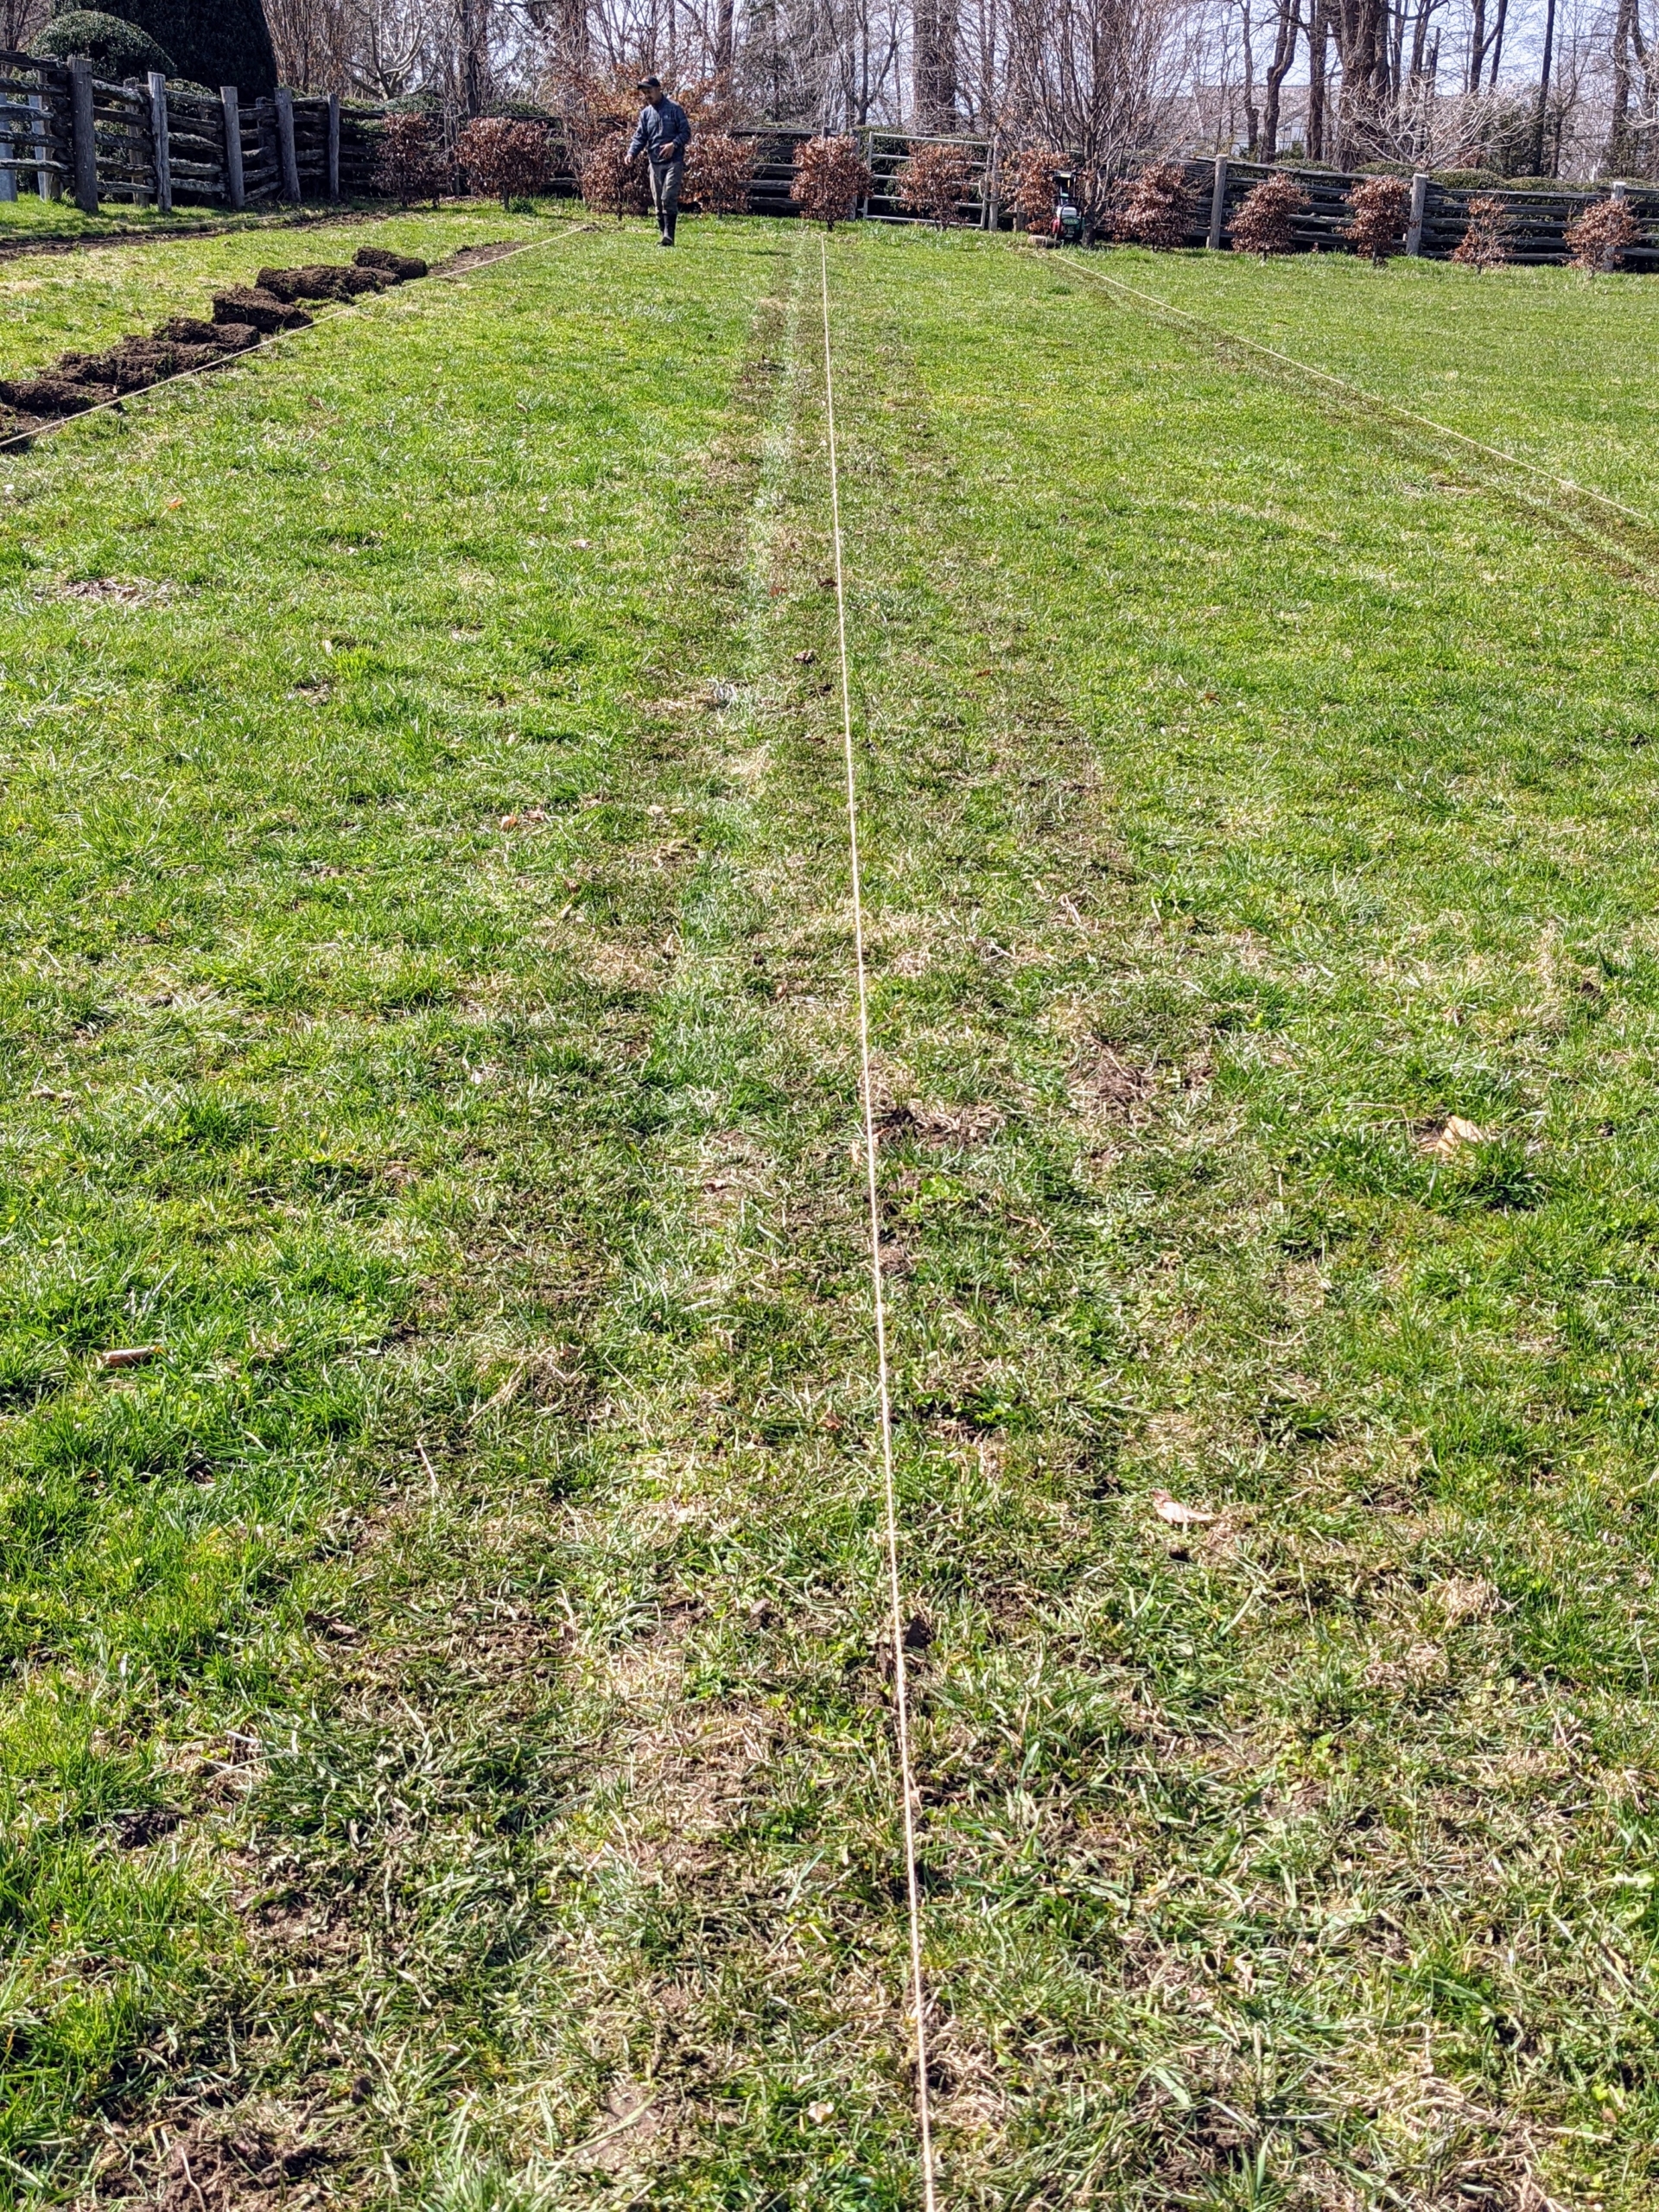
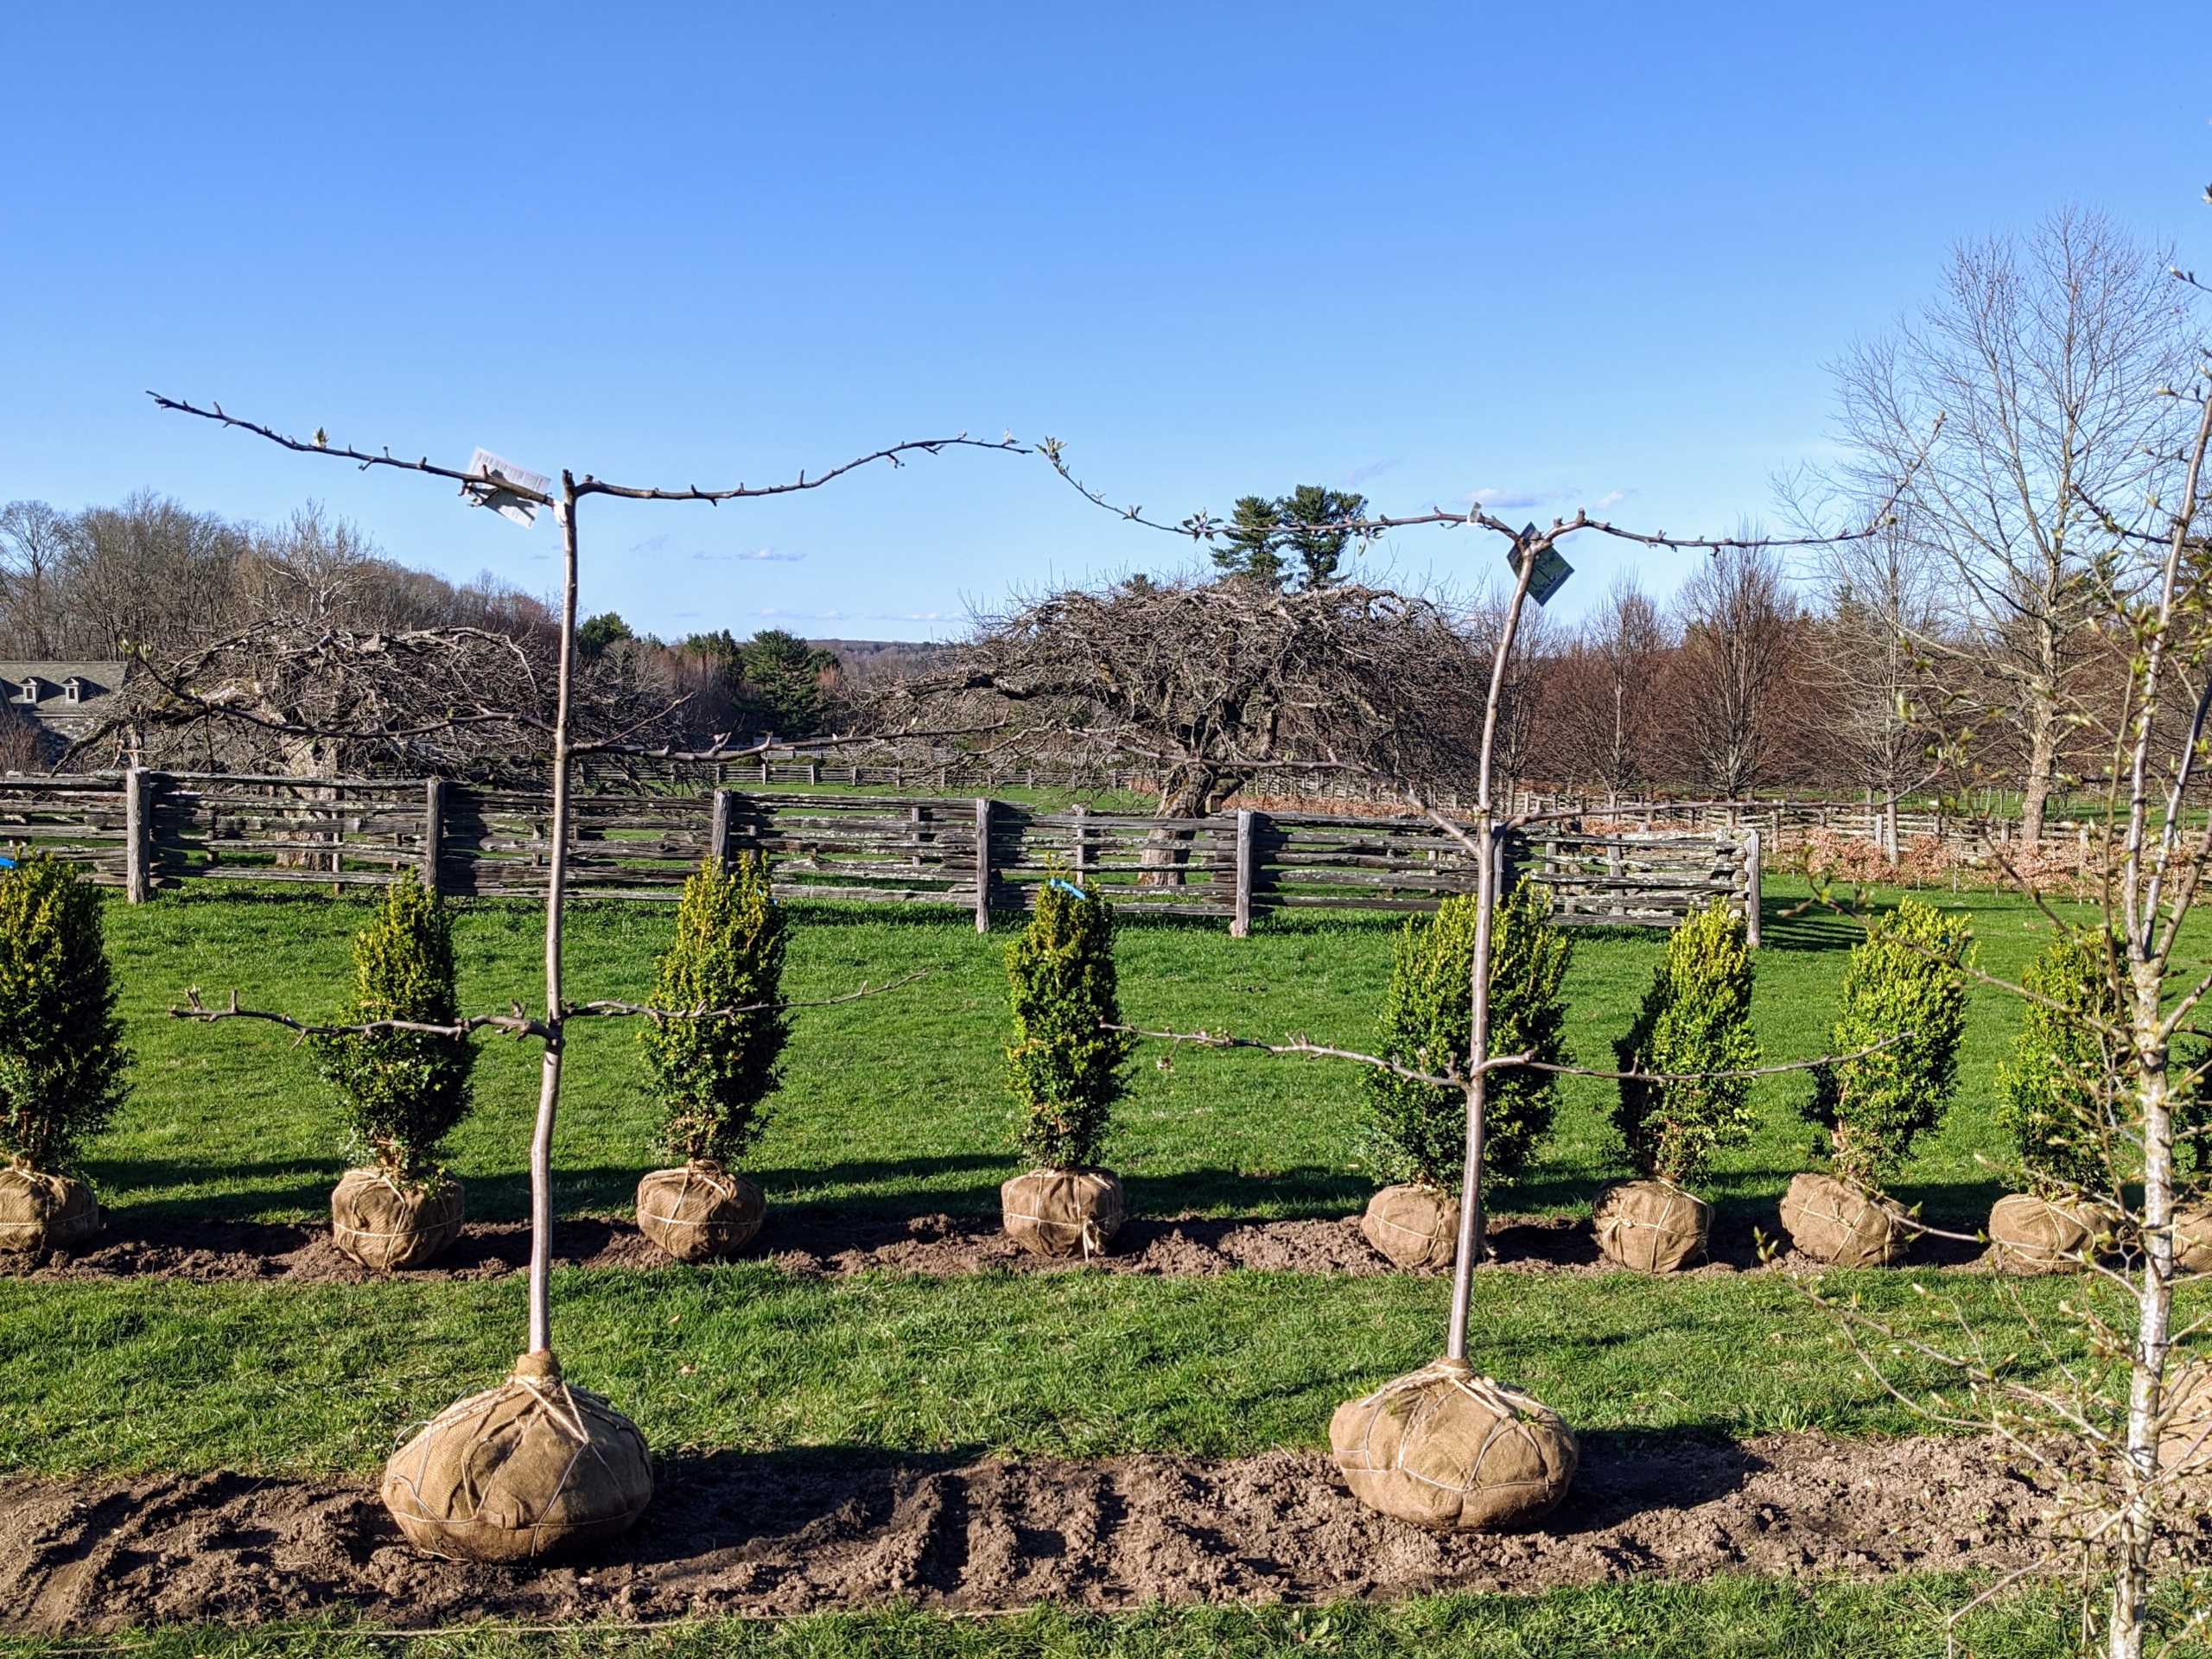
First, I drew out a plan on paper, and then last April, my outdoor grounds crew started to prepare the planting beds. Here, we used twine to designate each row for planting and its adjacent footpath.
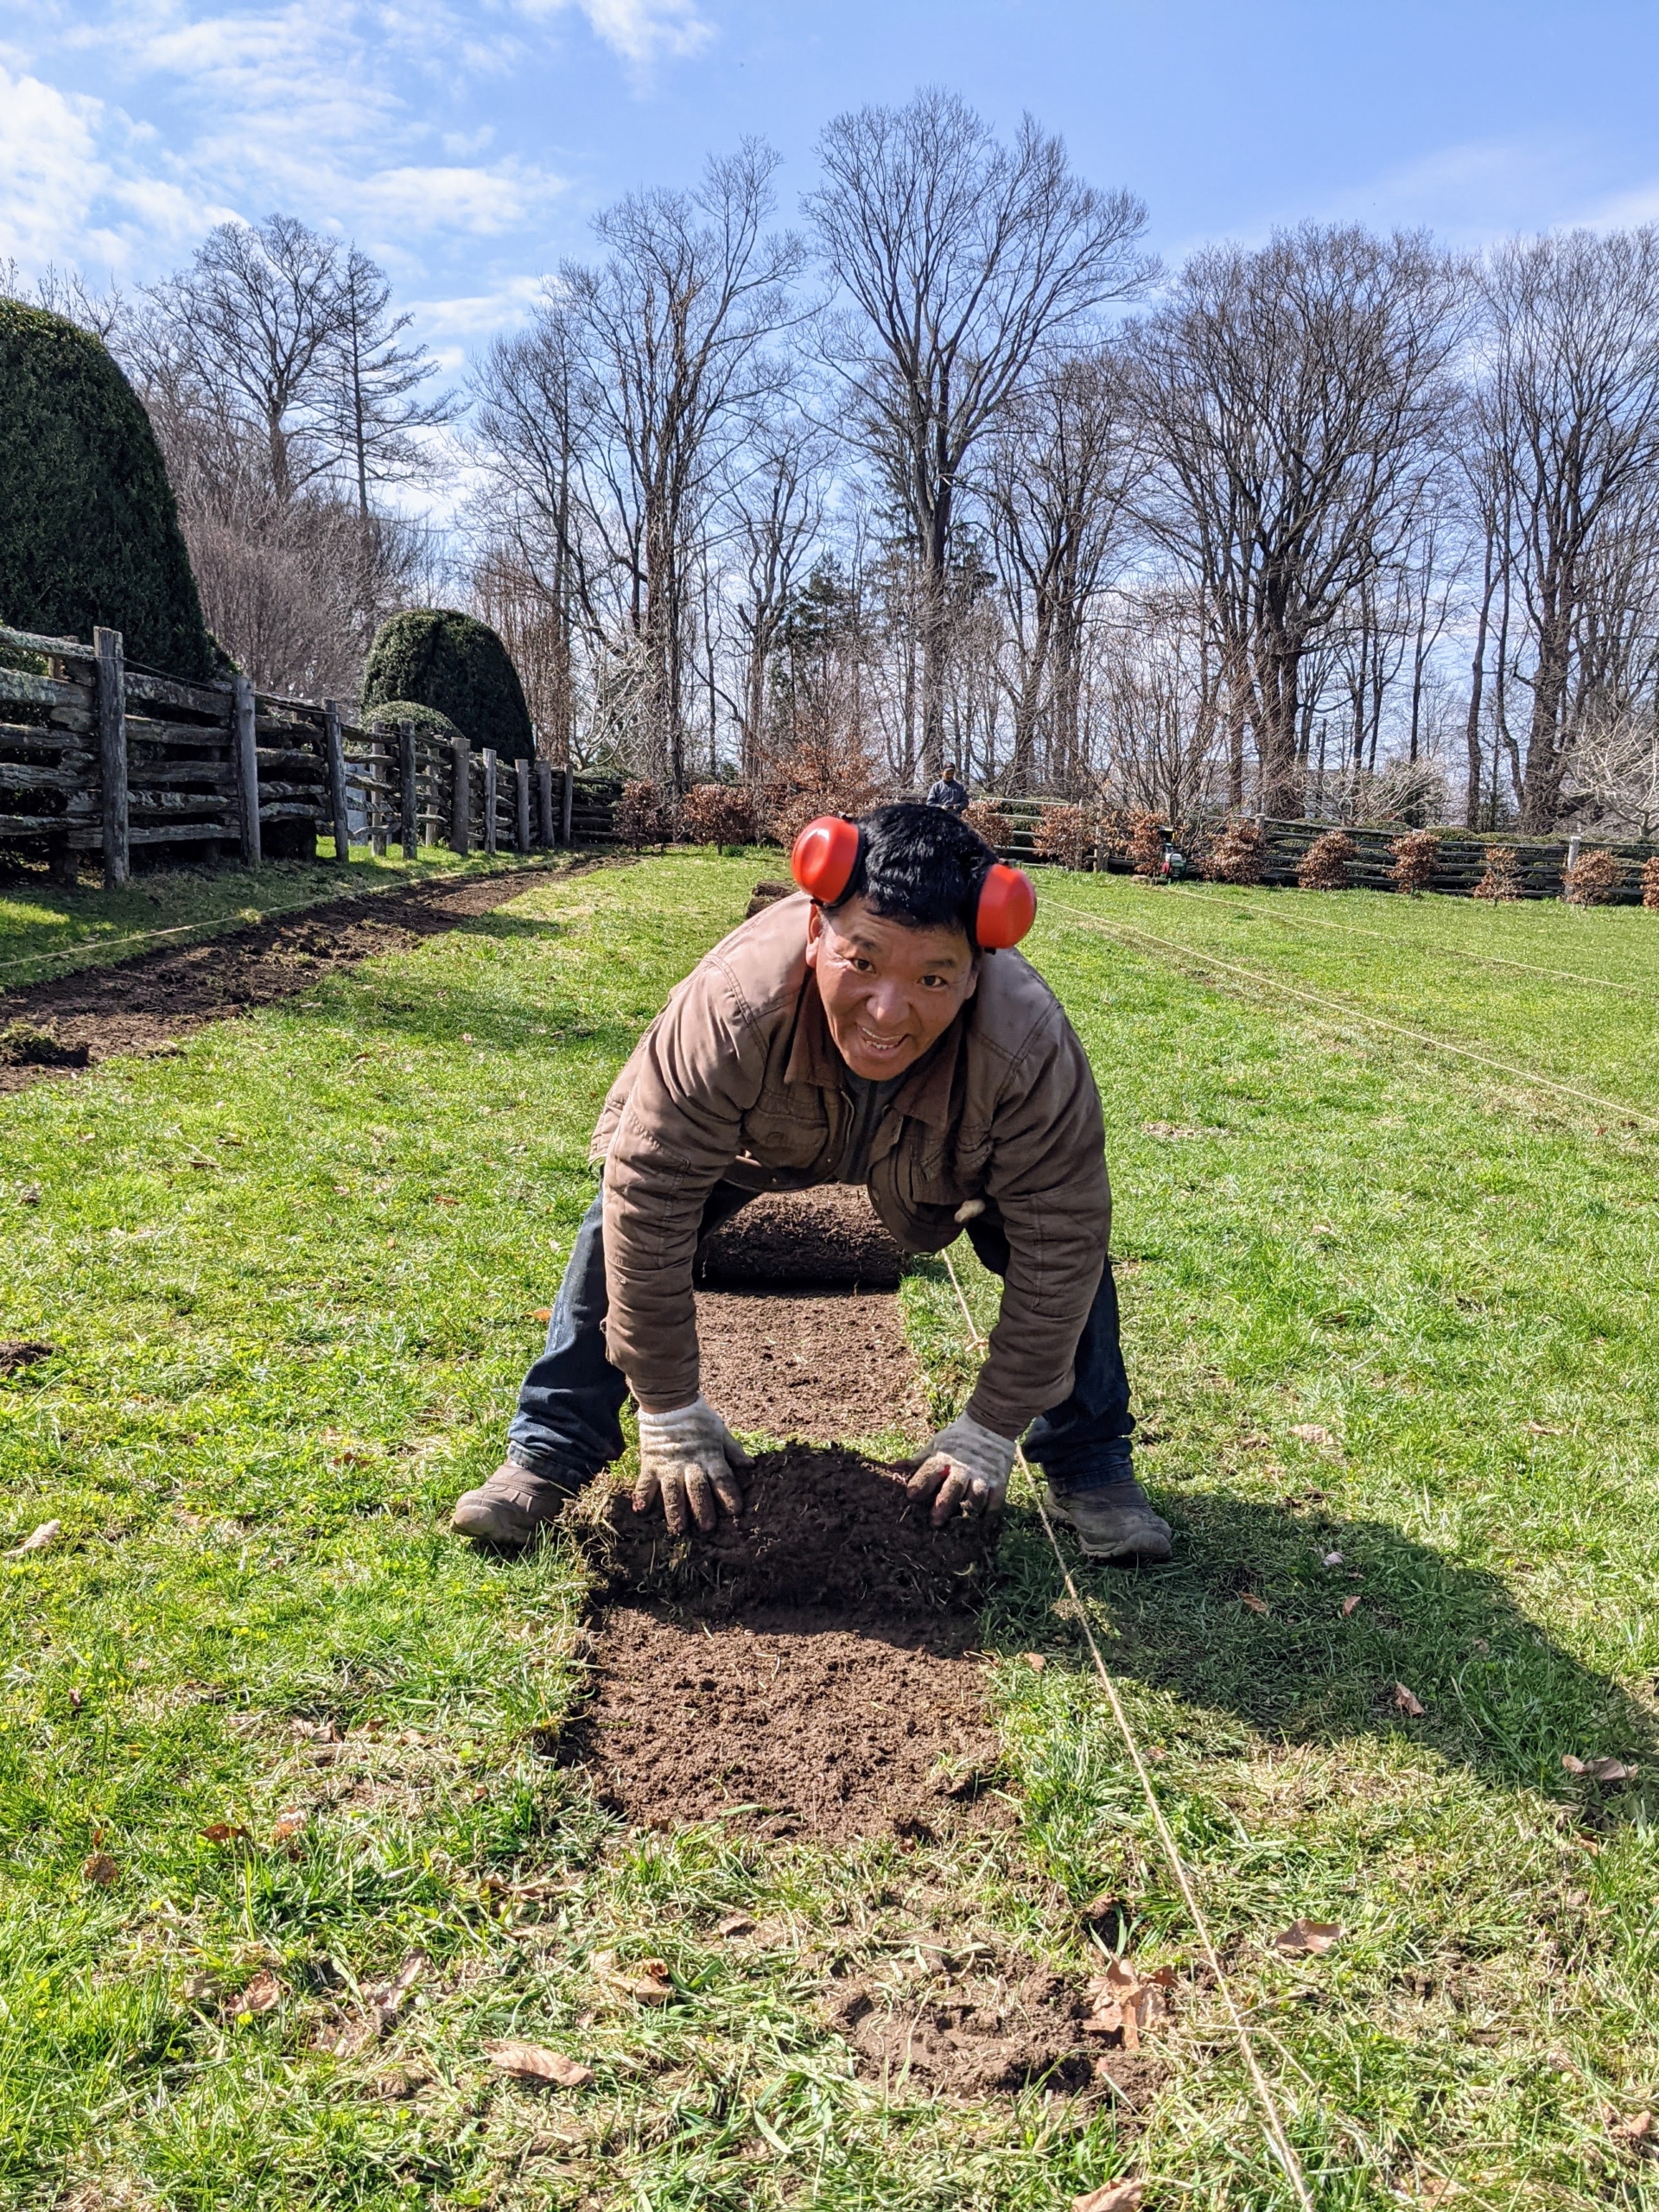
Phurba removes the sod from one of the rows. We always do this carefully and neatly, so the sod can be used elsewhere around the farm.
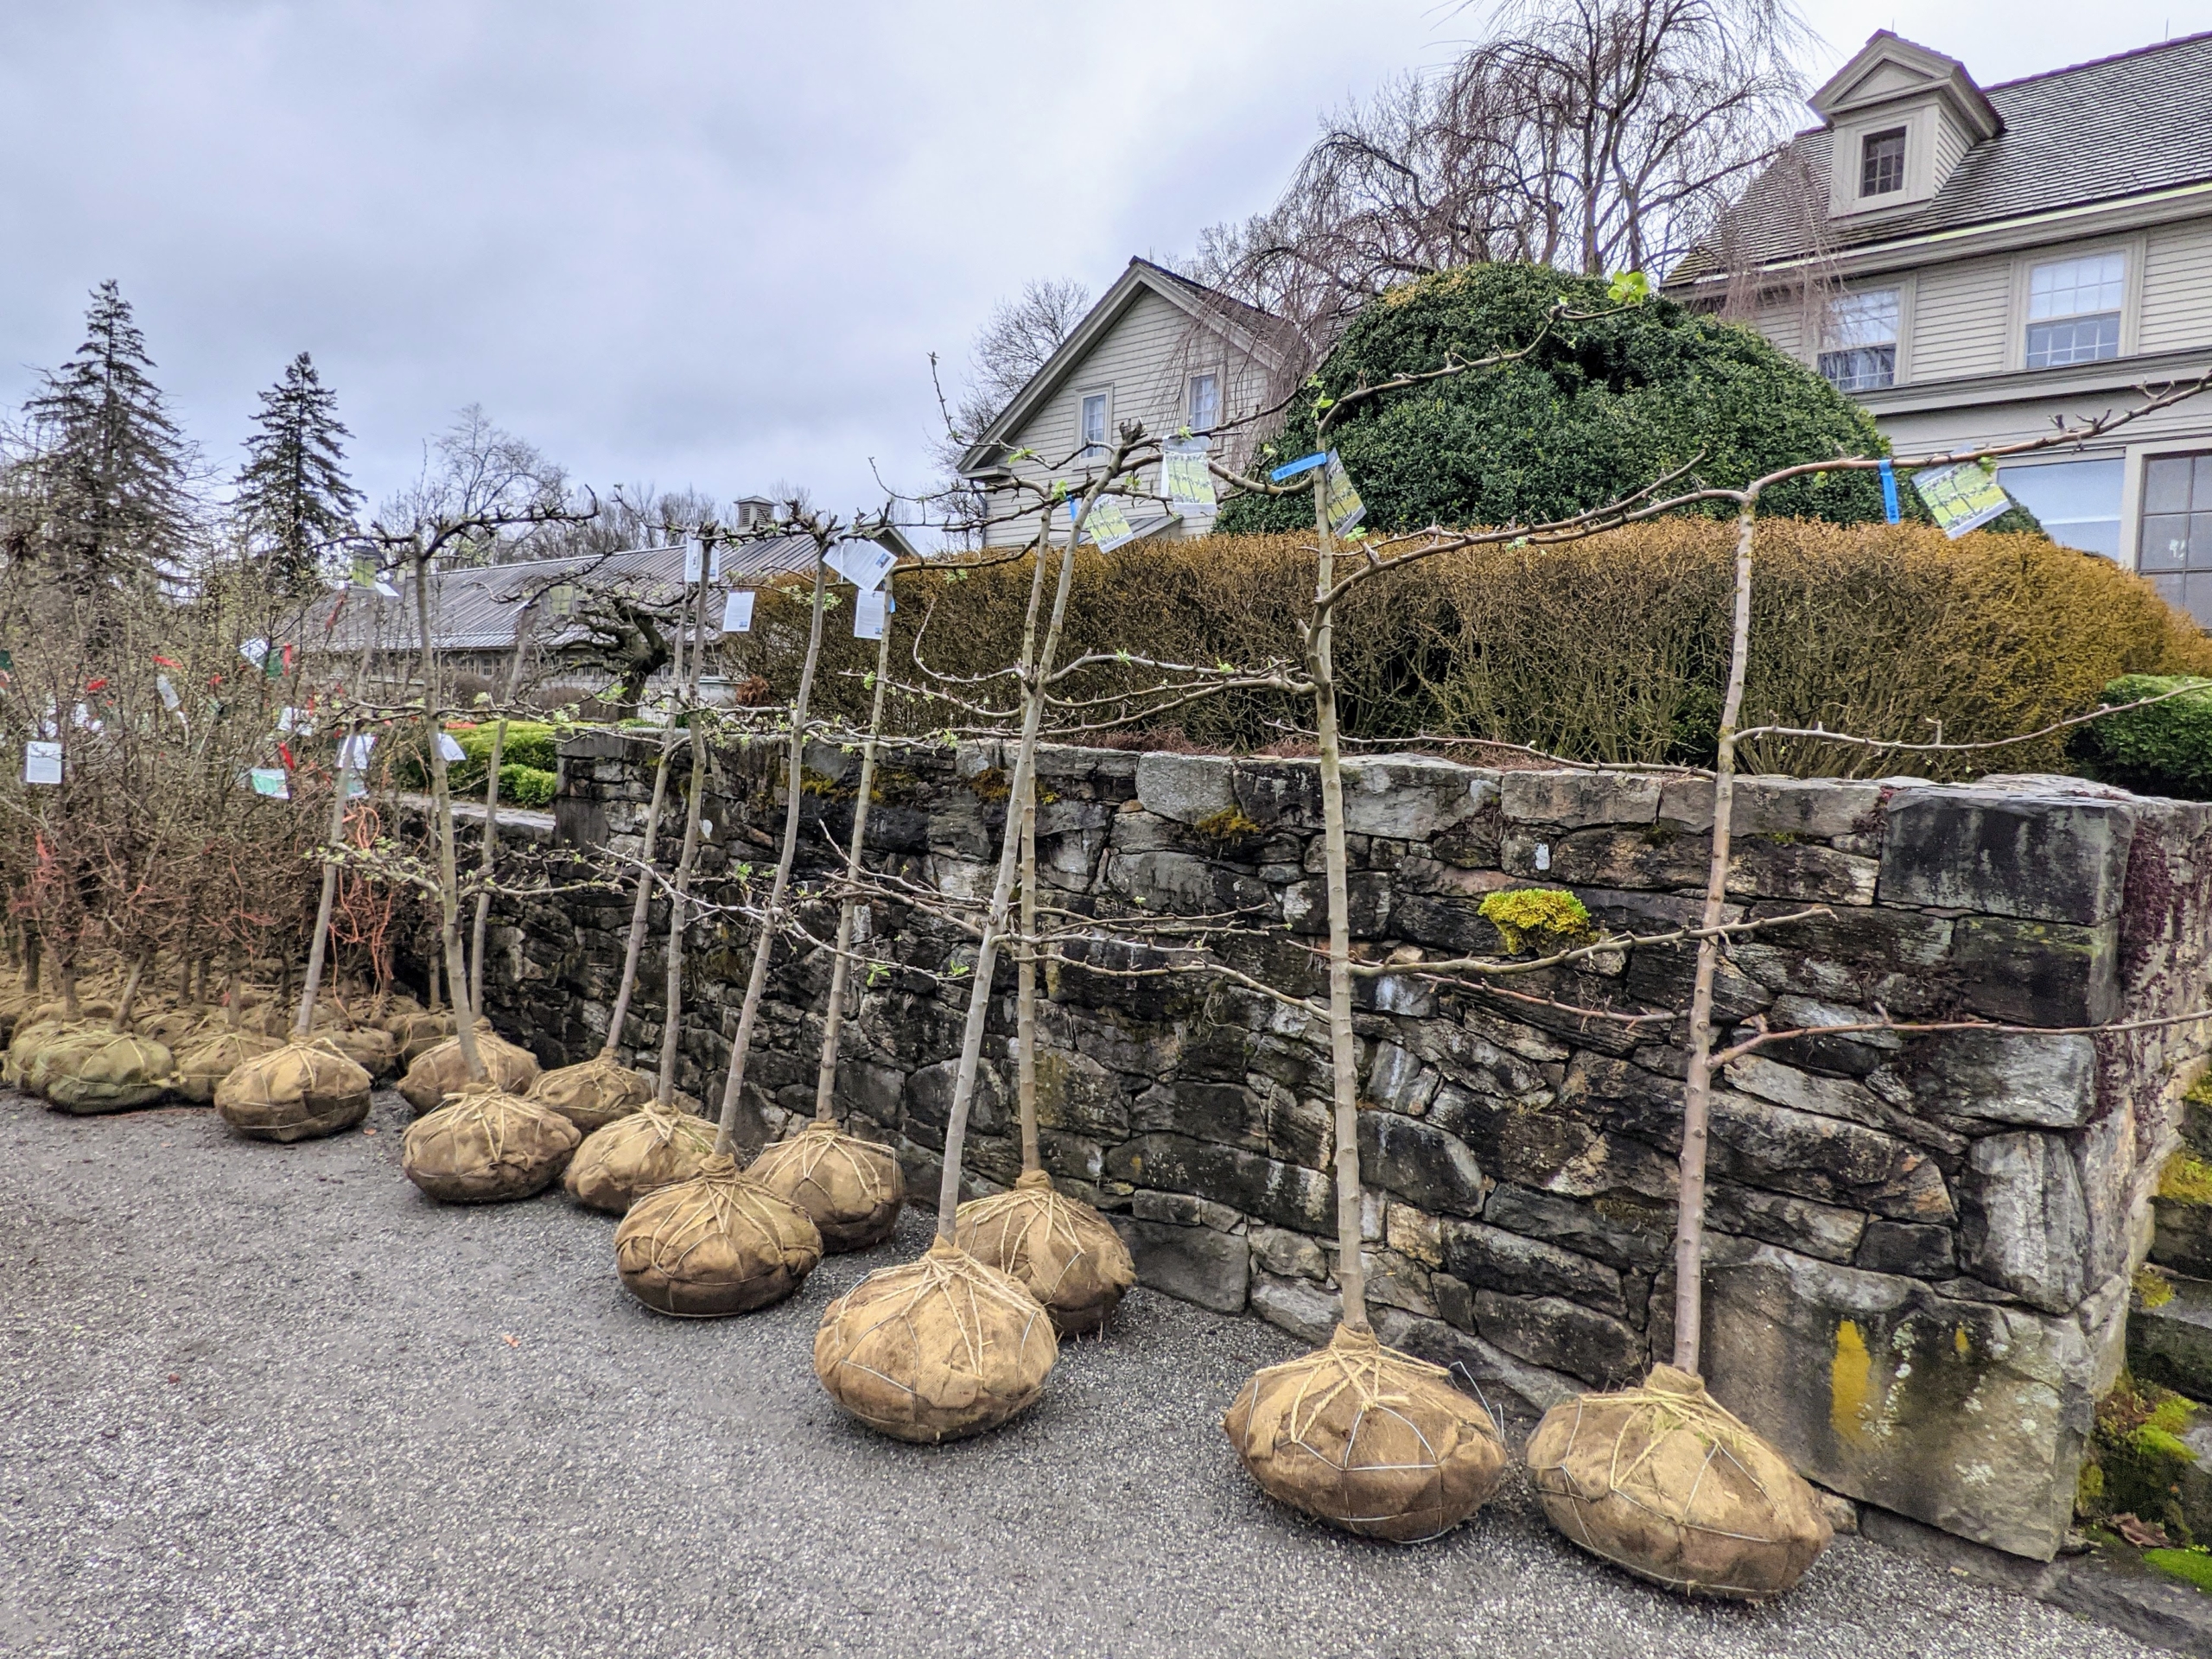
Then, we ordered the first set of trees and shrubs. These are espaliered apple trees. Among them, Liberty apples, Gala apples, Braeburn apples, and Yellow Delicious apples.
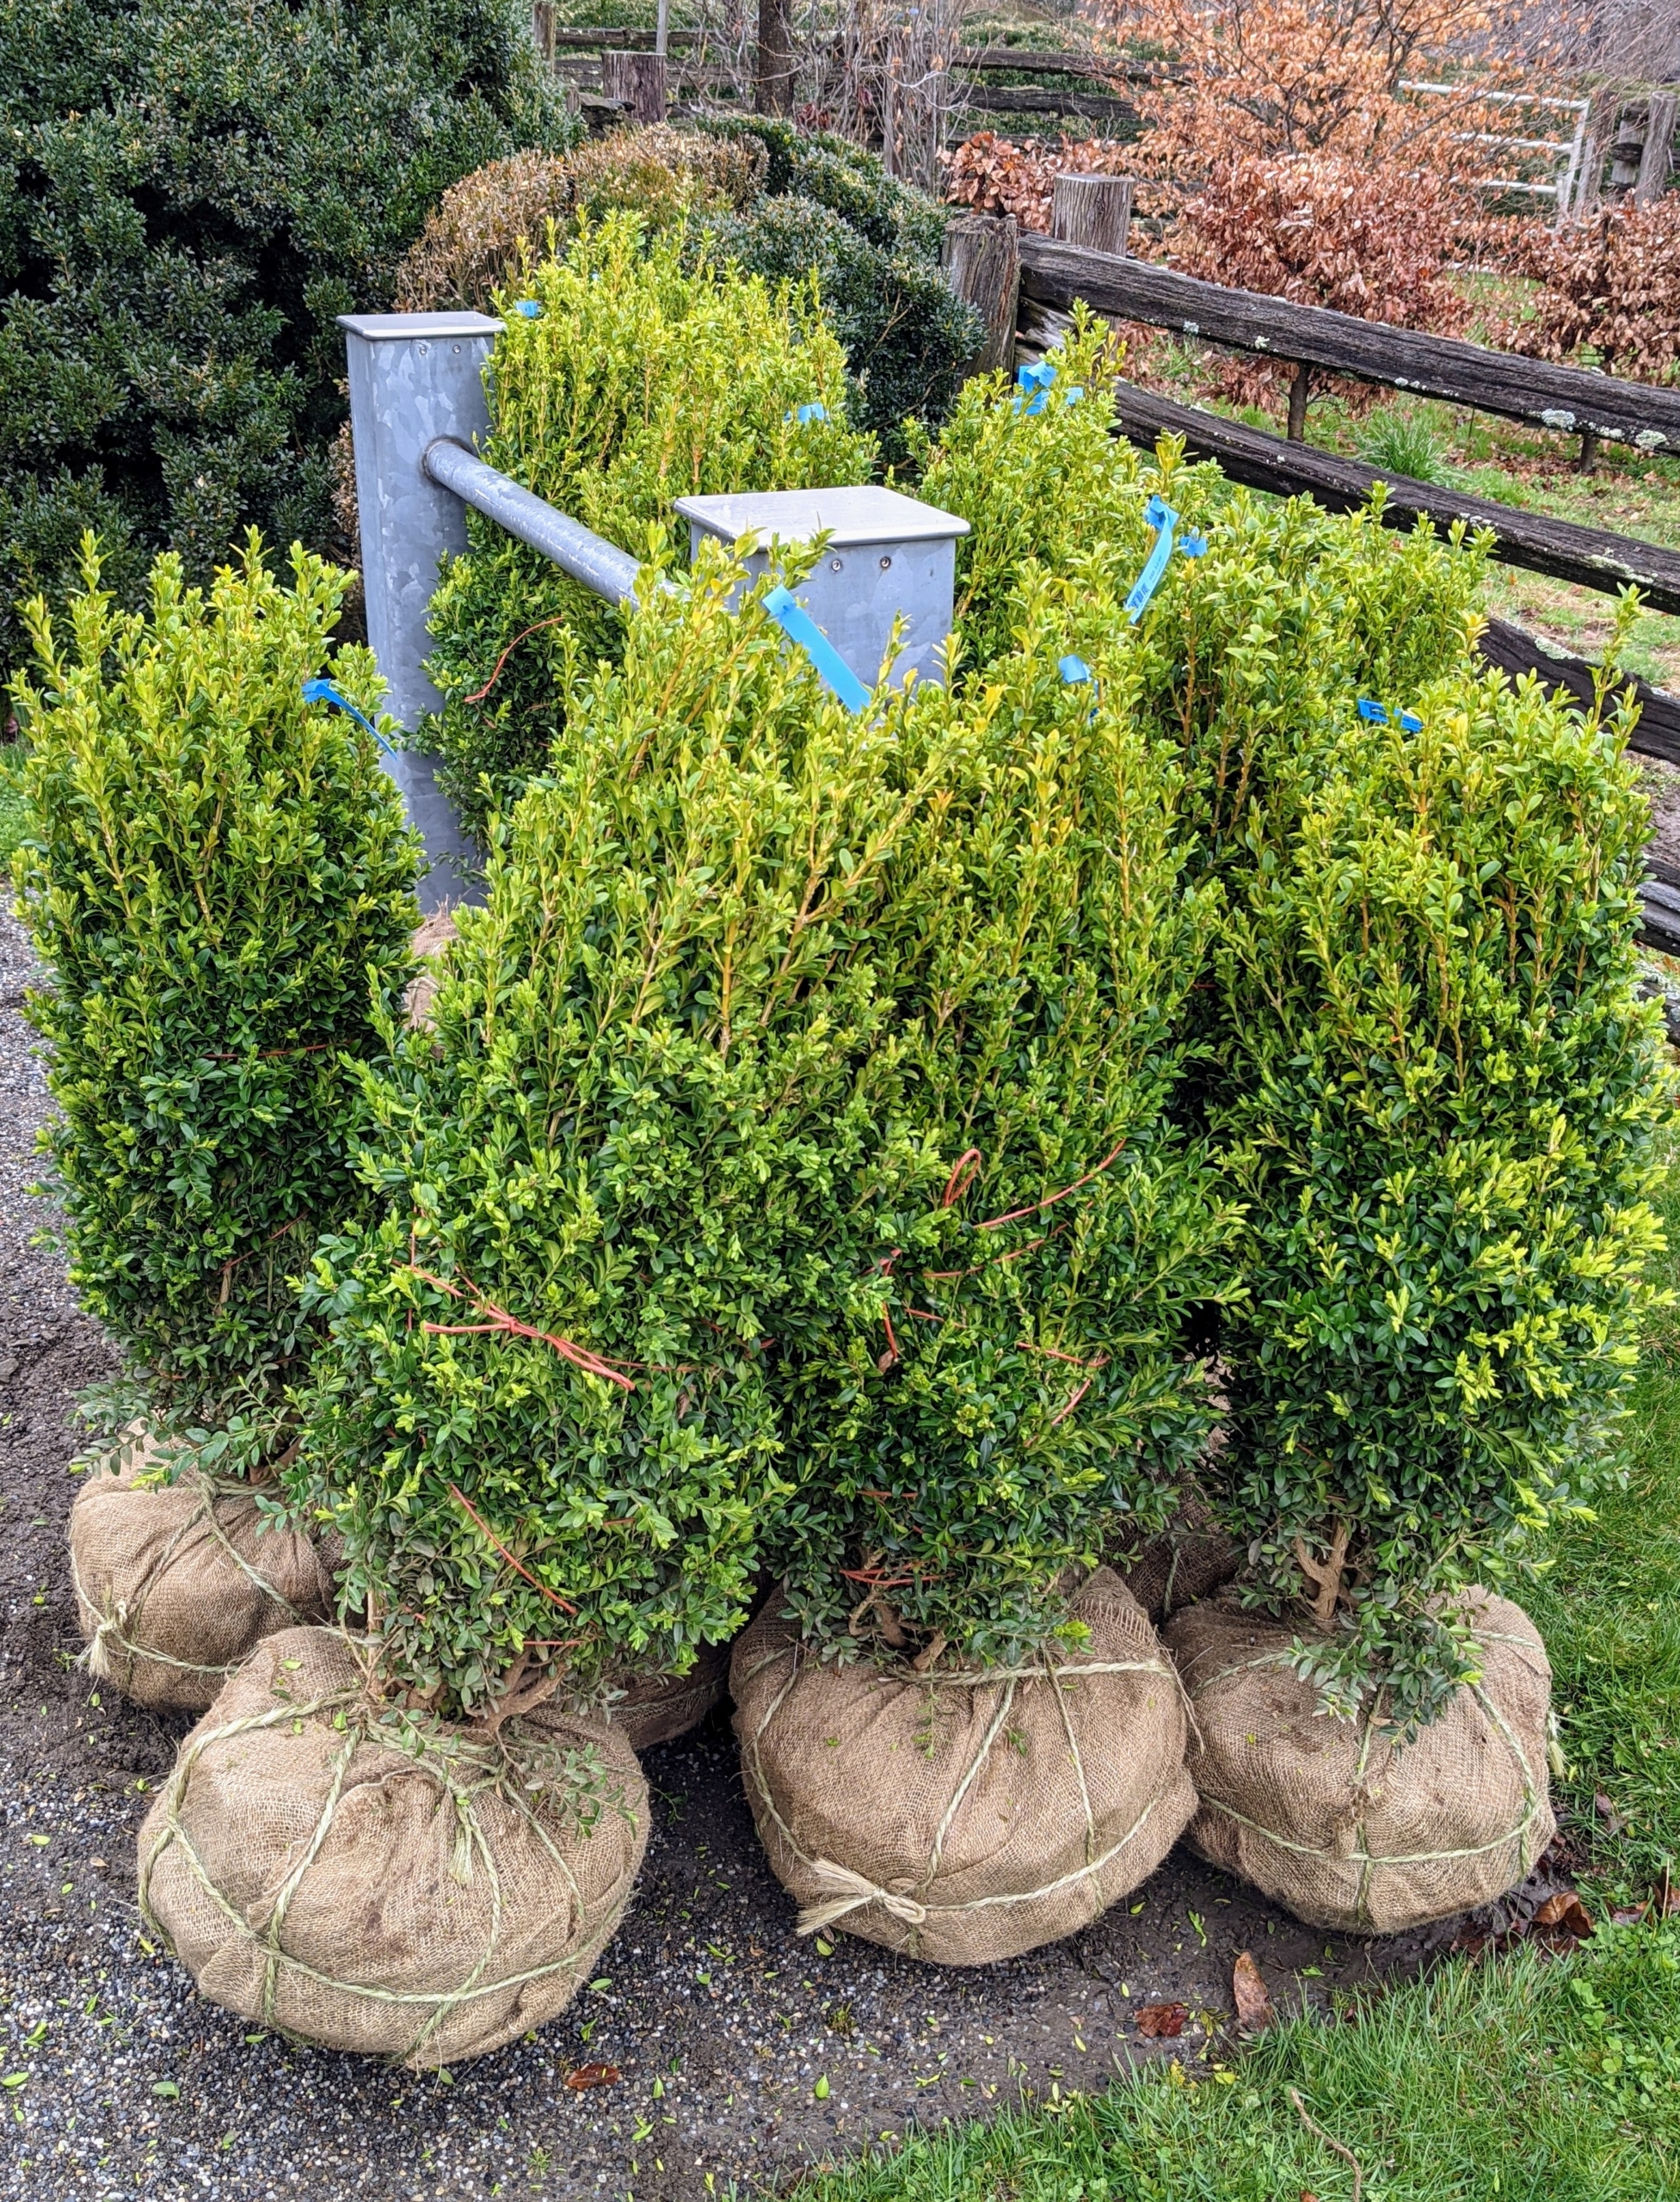
And, of course boxwood. I love boxwood, Buxus, and have hundreds of shrubs growing on my property. I use boxwood in borders and hedges, as privacy screens, as accent plants in my formal gardens, in the long allée to my stable, and now in the maze.
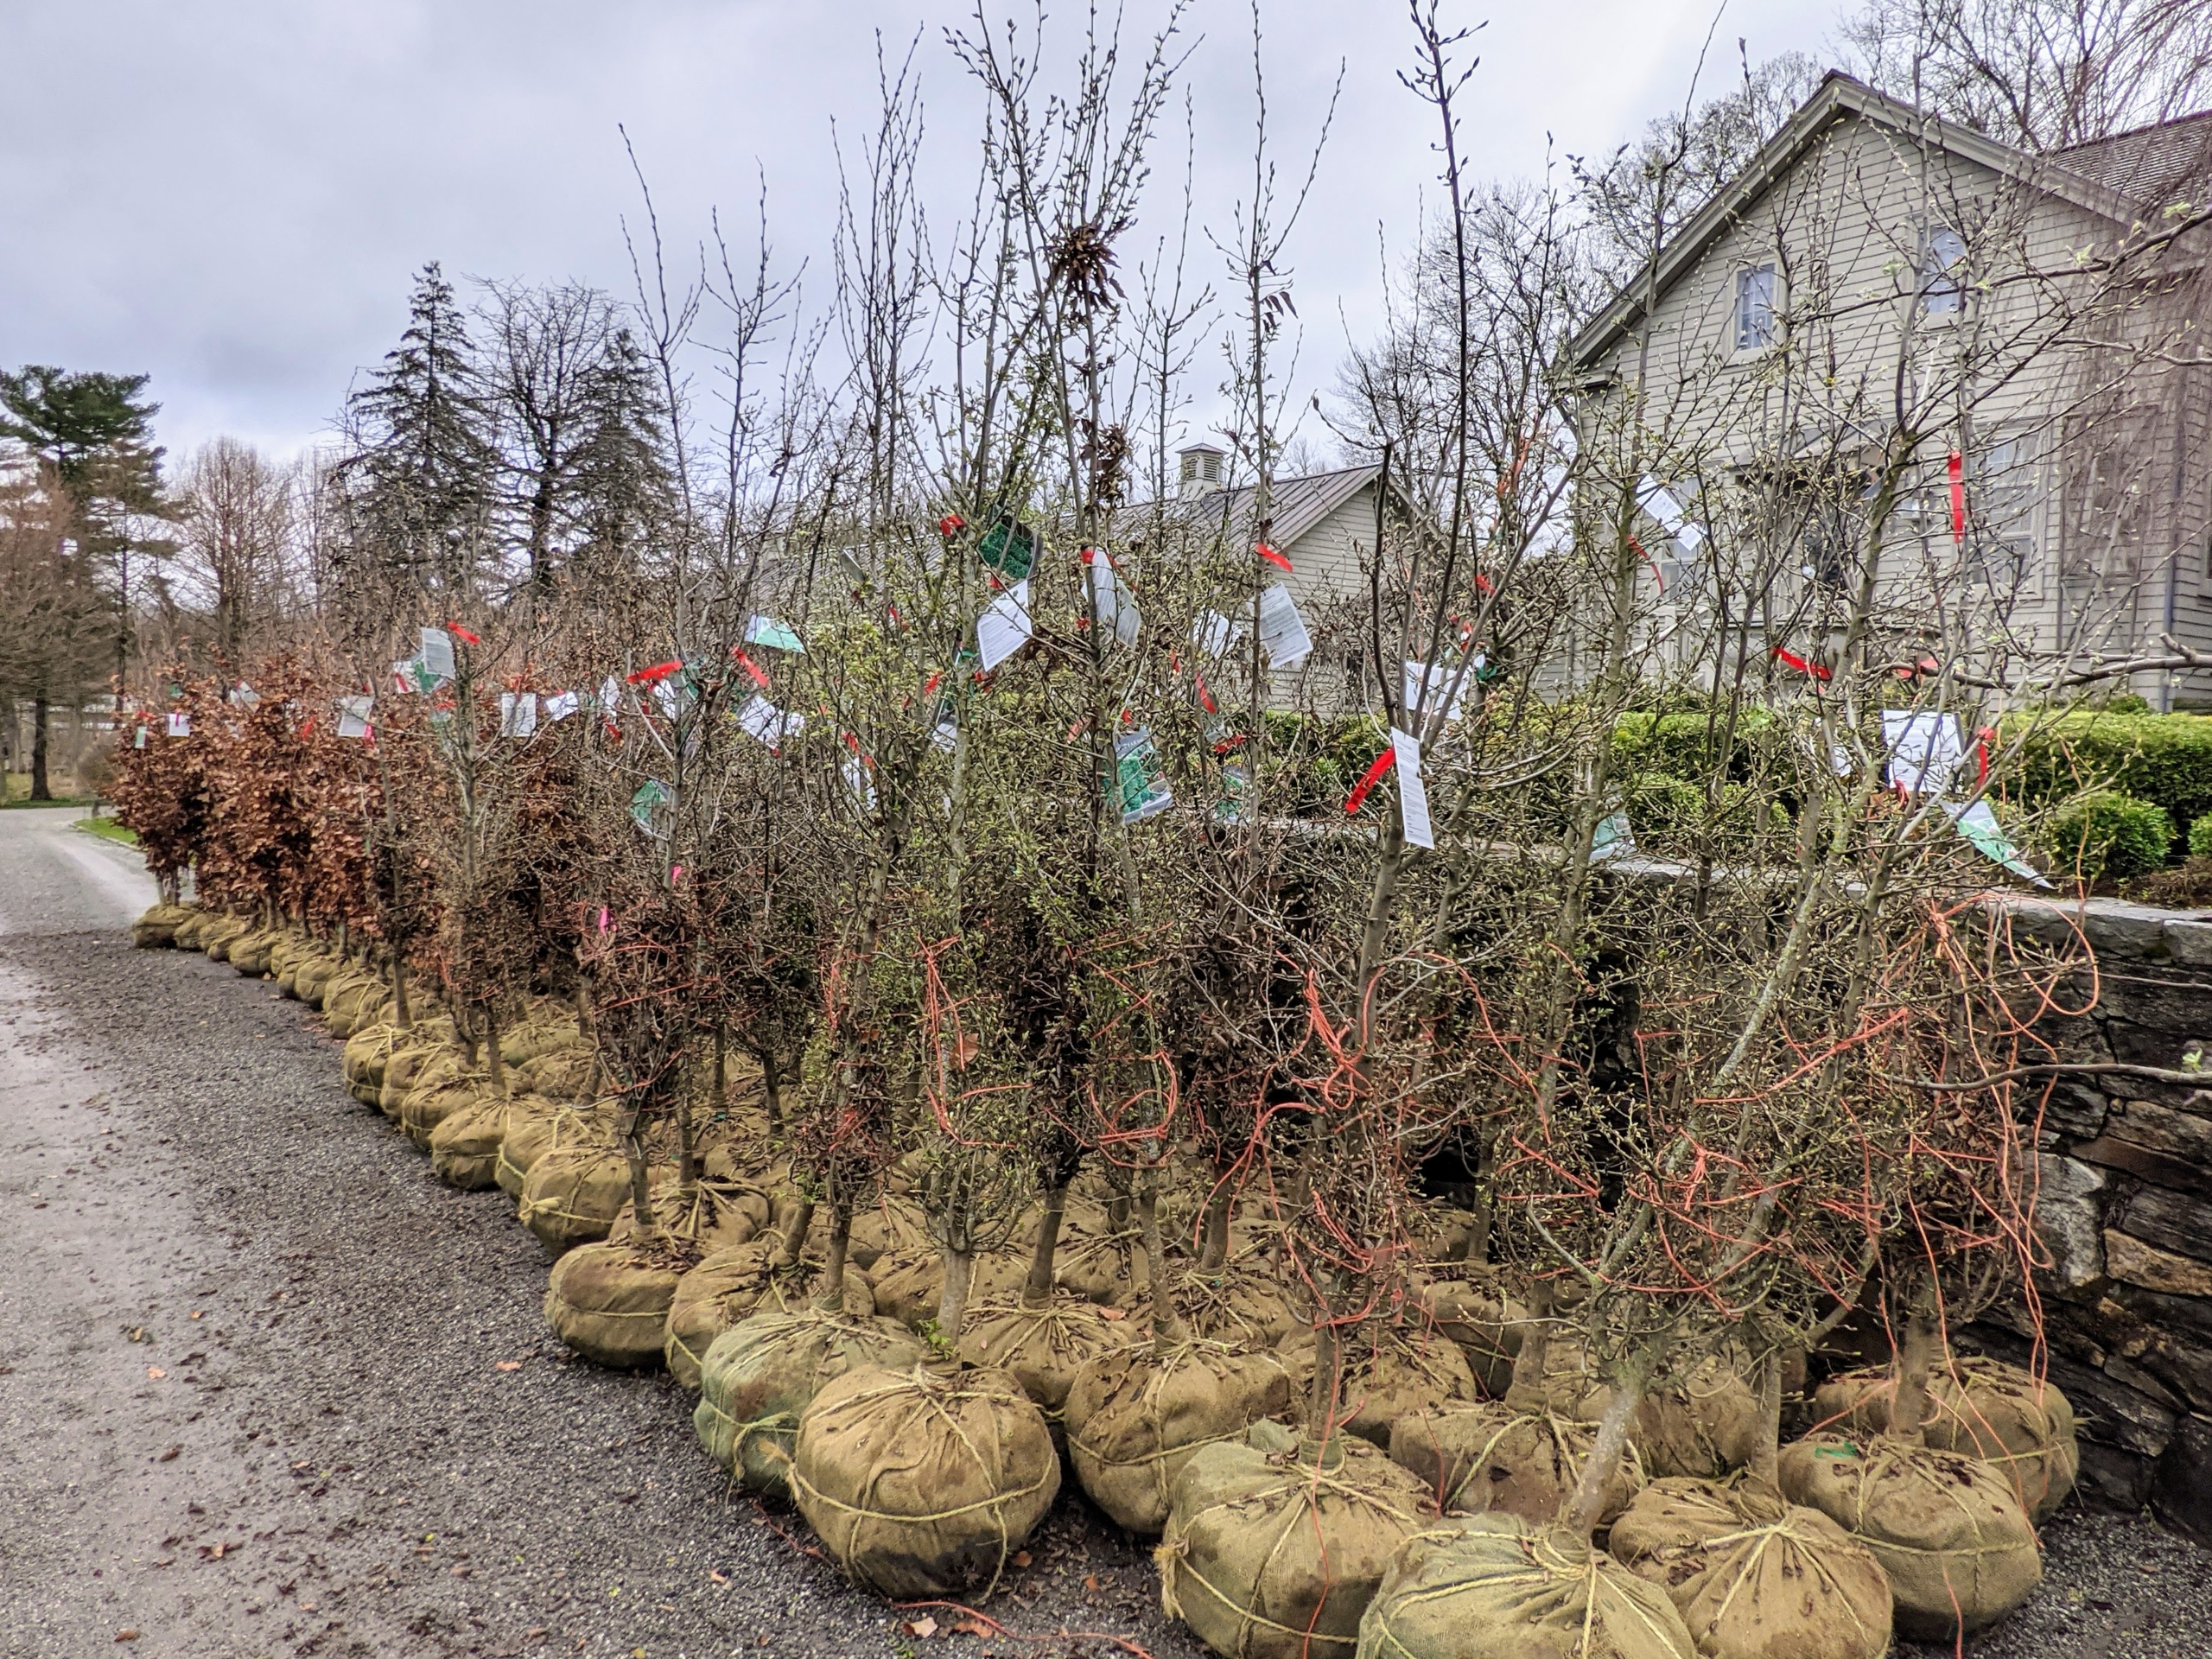
I also ordered a selection of European hornbeams, green columnar beech trees and purple columnar beech trees. This photo was taken in early spring, so they had not yet leafed out.
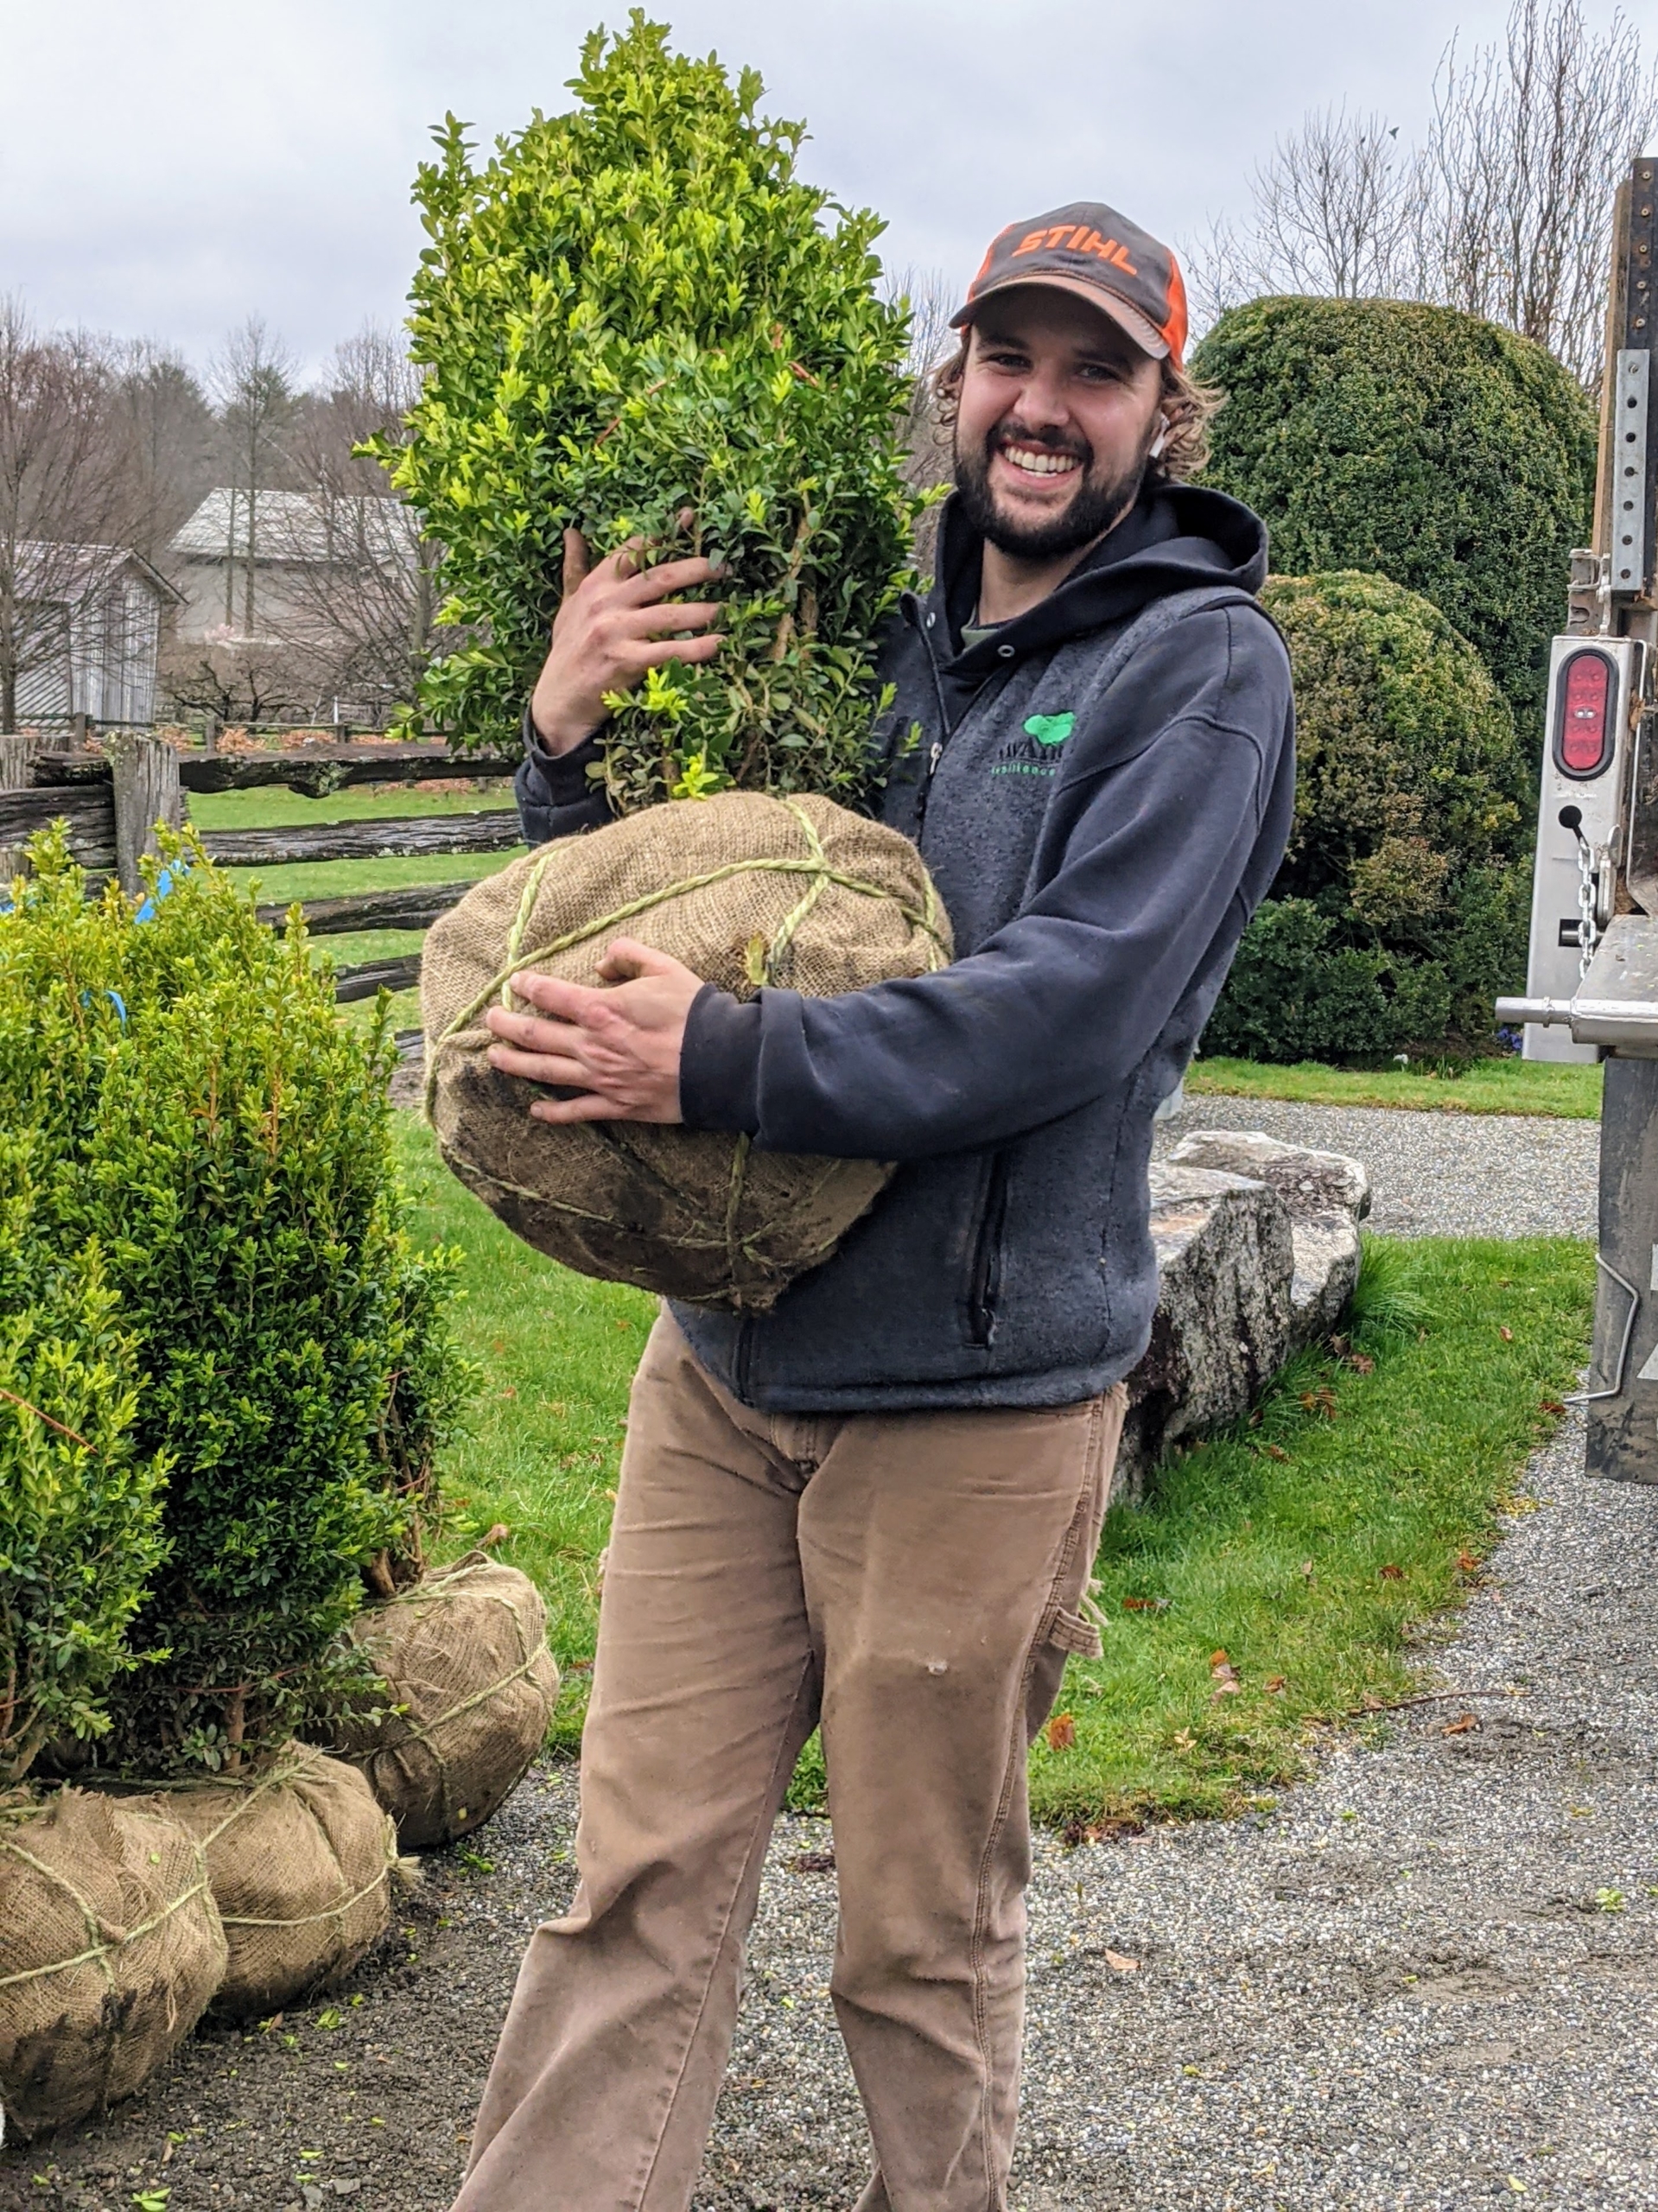
Here’s my gardener, Brian O’Kelly, unloading some of the many specimens for our maze.
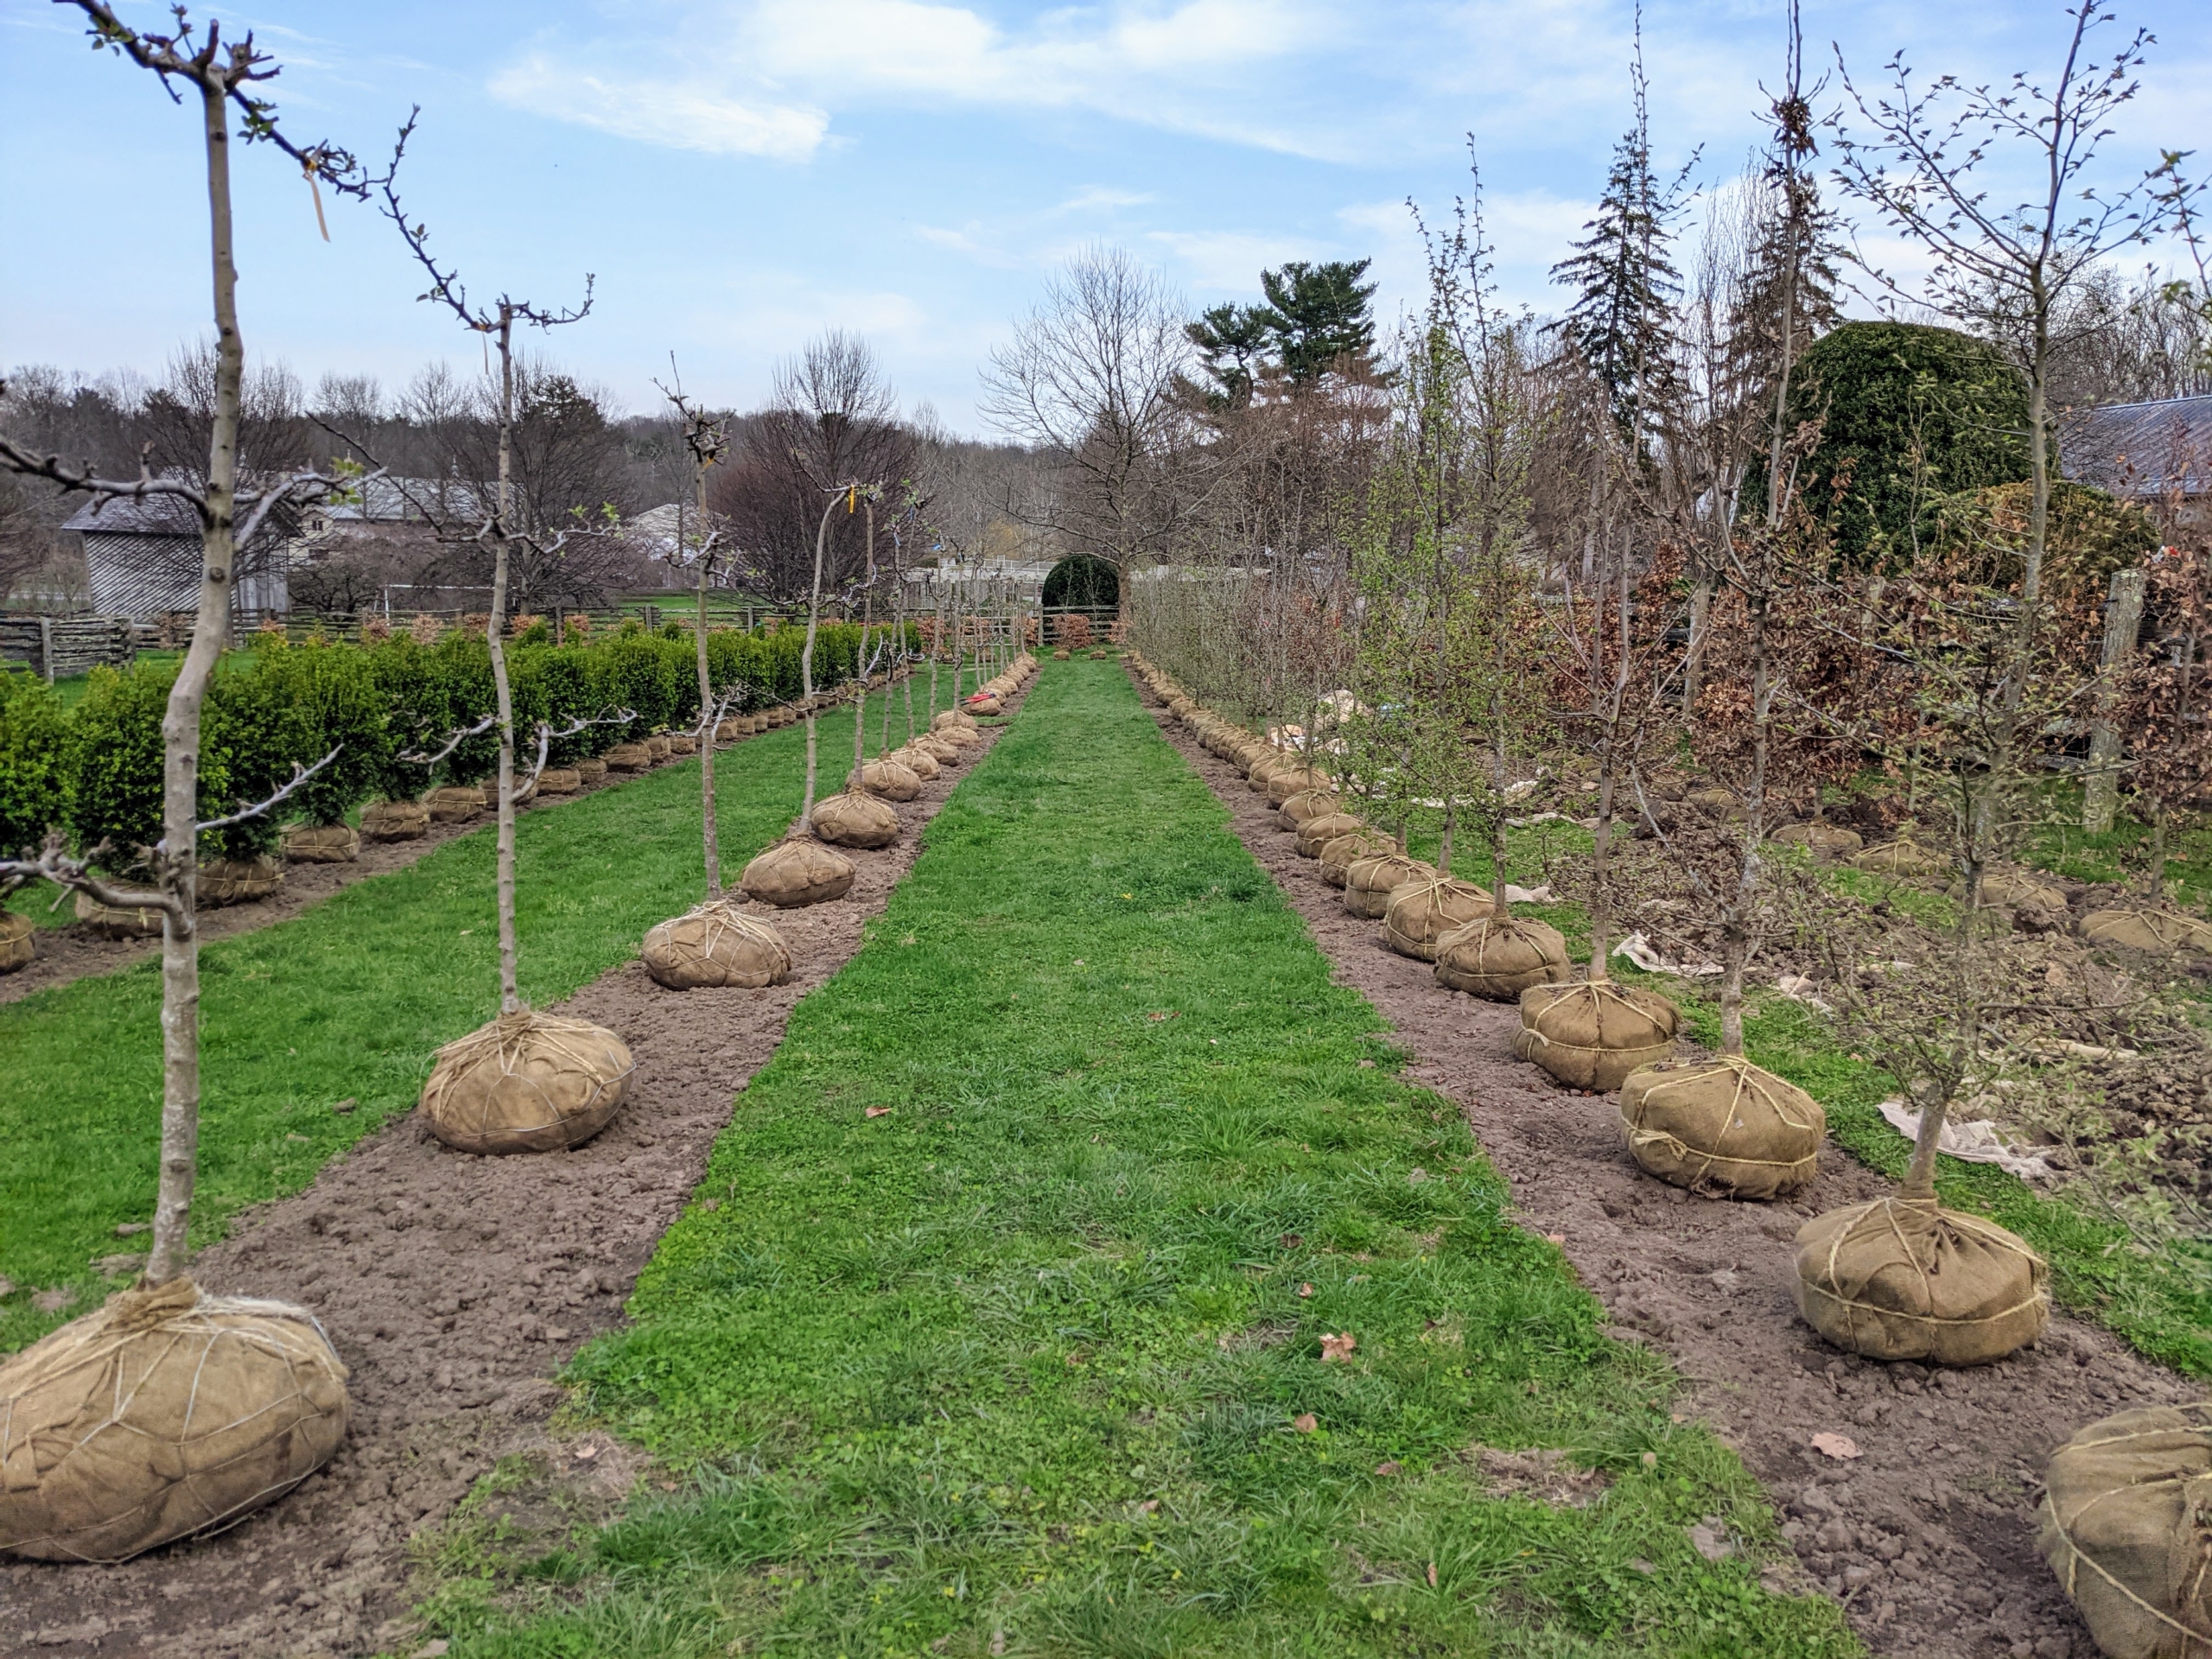
The next step is to place them evenly along the beds of each row. When planting a maze, use relatively fast-growing trees that will be at least six feet tall and two feet wide at maturity.
Here is a view of the placed espalier trees. Espalier refers to an ancient technique, resulting in trees that grow flat, either against a wall, or along a wire-strung framework. Many kinds of trees respond beautifully to the espalier treatment, but fruit trees, like apple and pear, were some of the earliest examples. Espaliered trees can grow between four and eight feet apart – enough to allow them room as they grow, but still be close enough for a proper espalier.
And here are the boxwood, each one equally spaced from the next.
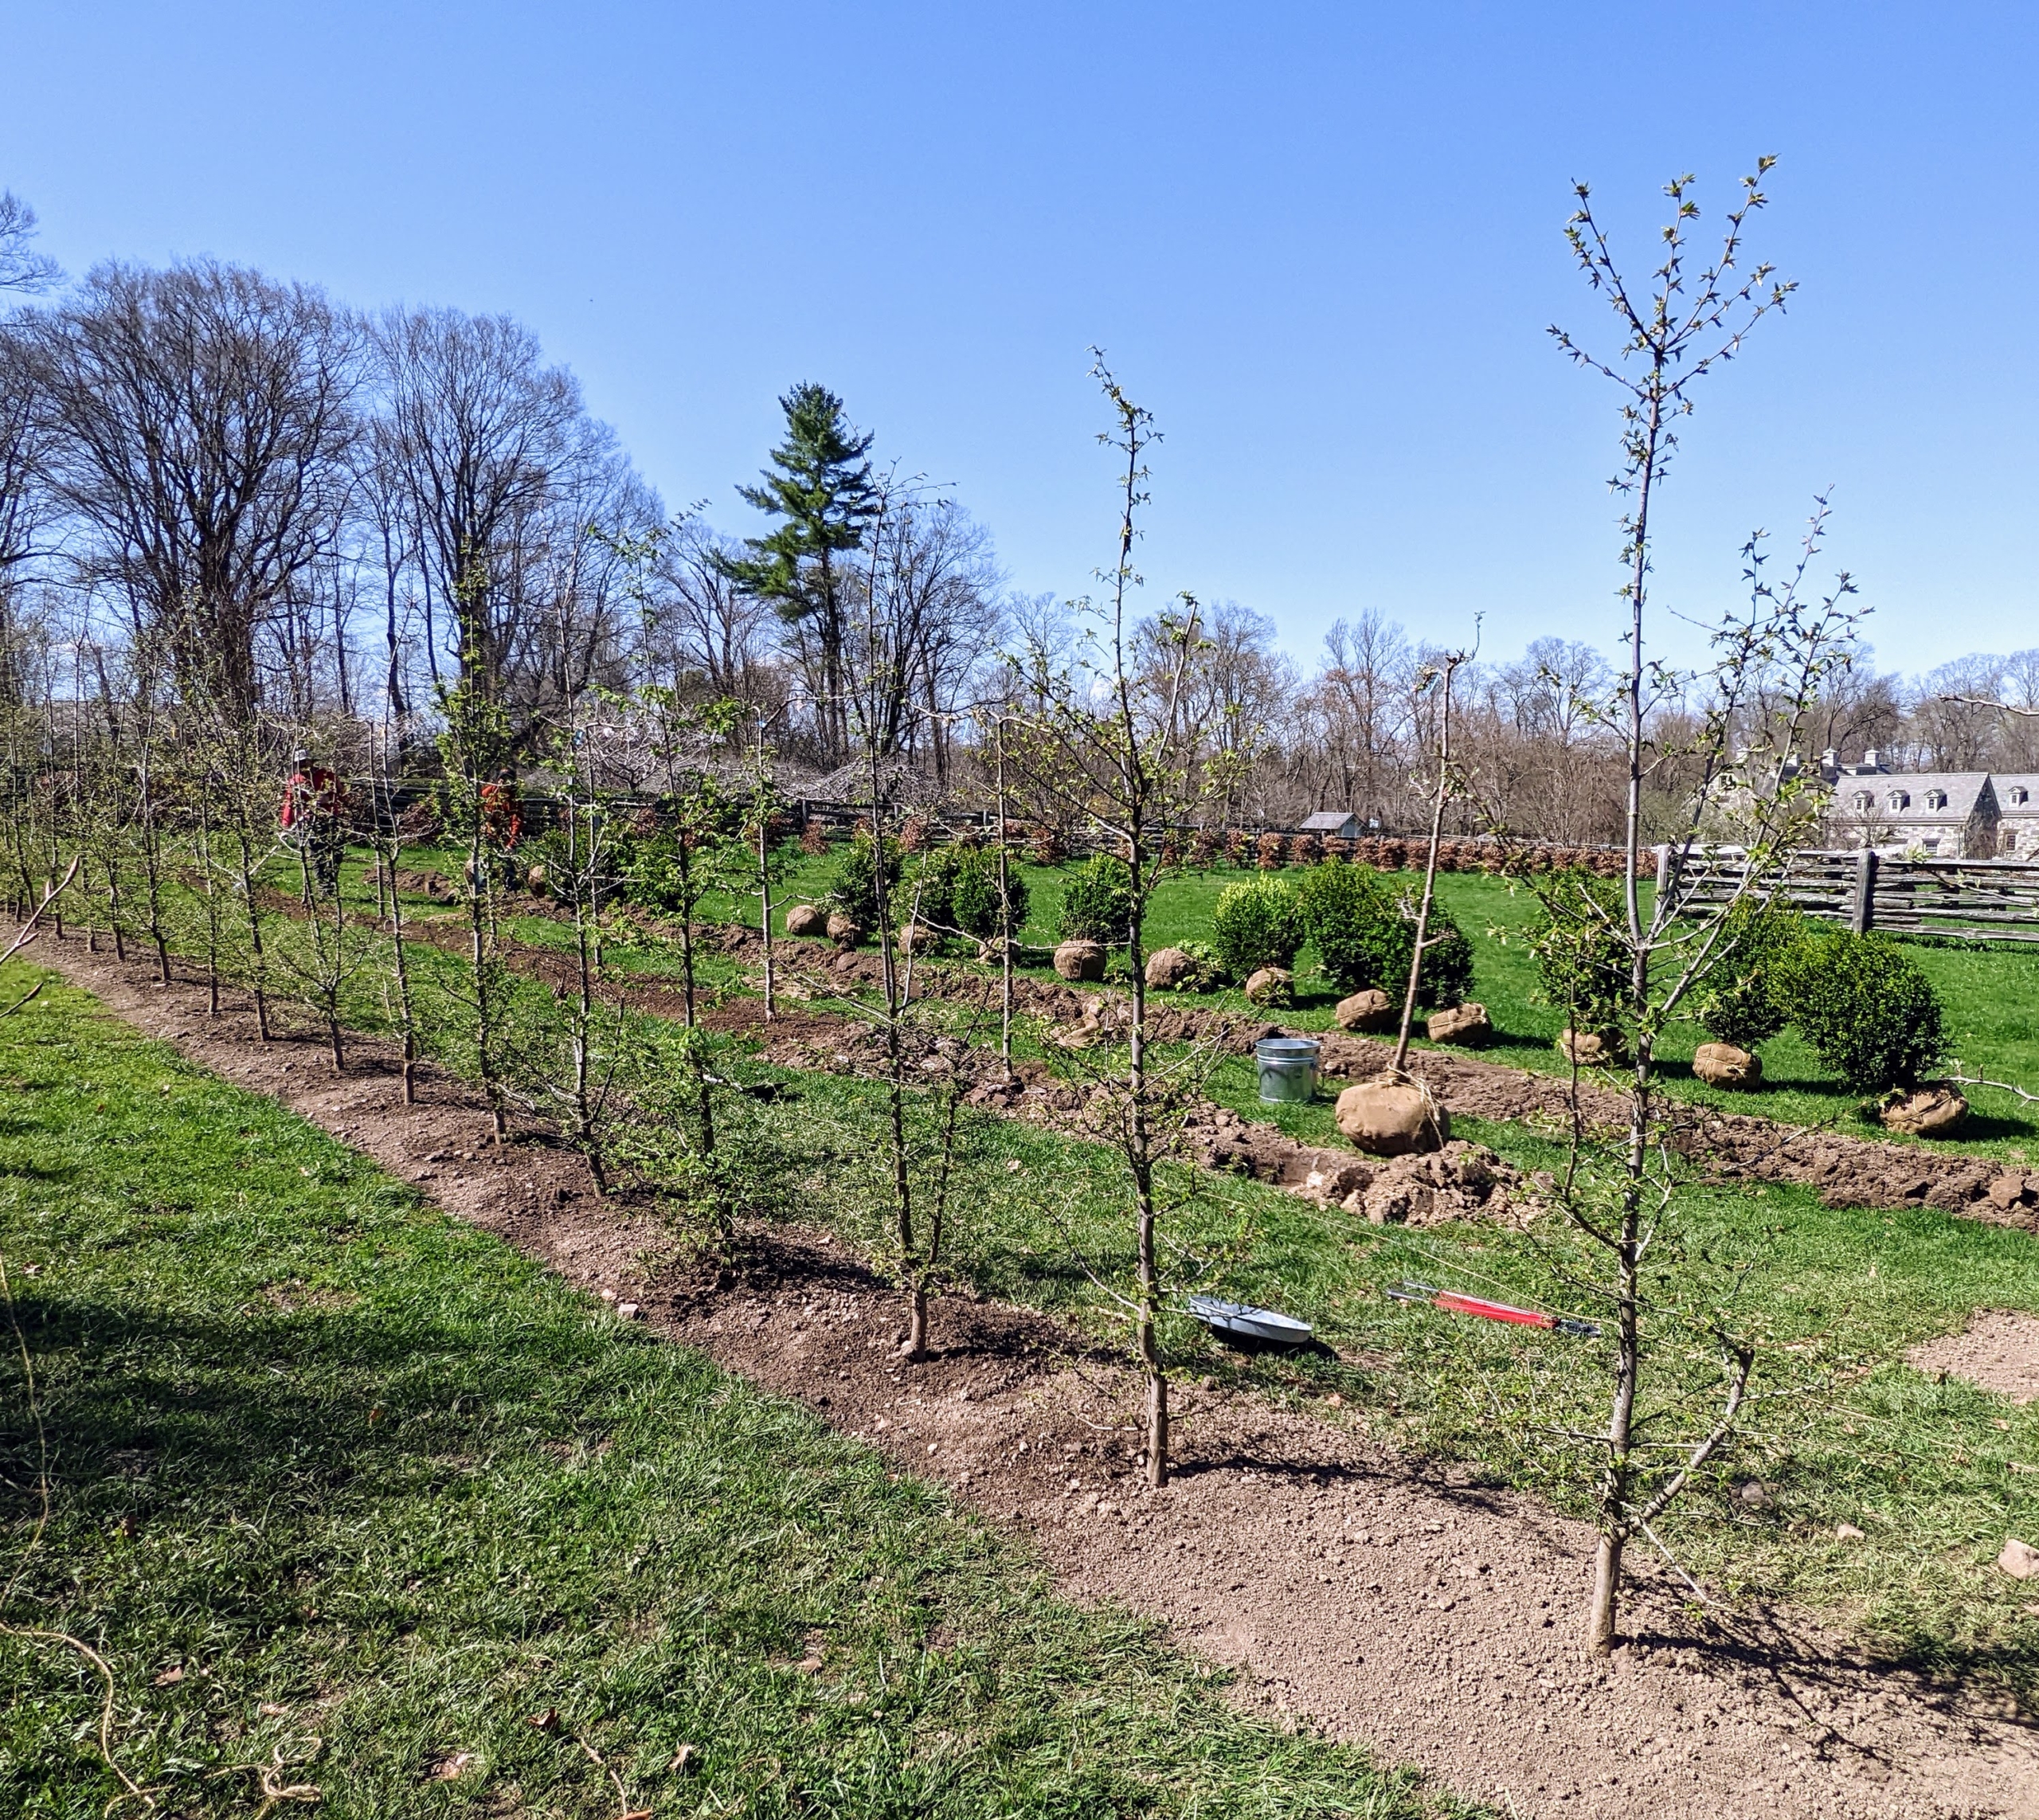
Then, it was time to plant the trees. The crew worked hard to get them all into the ground as quickly as possible.
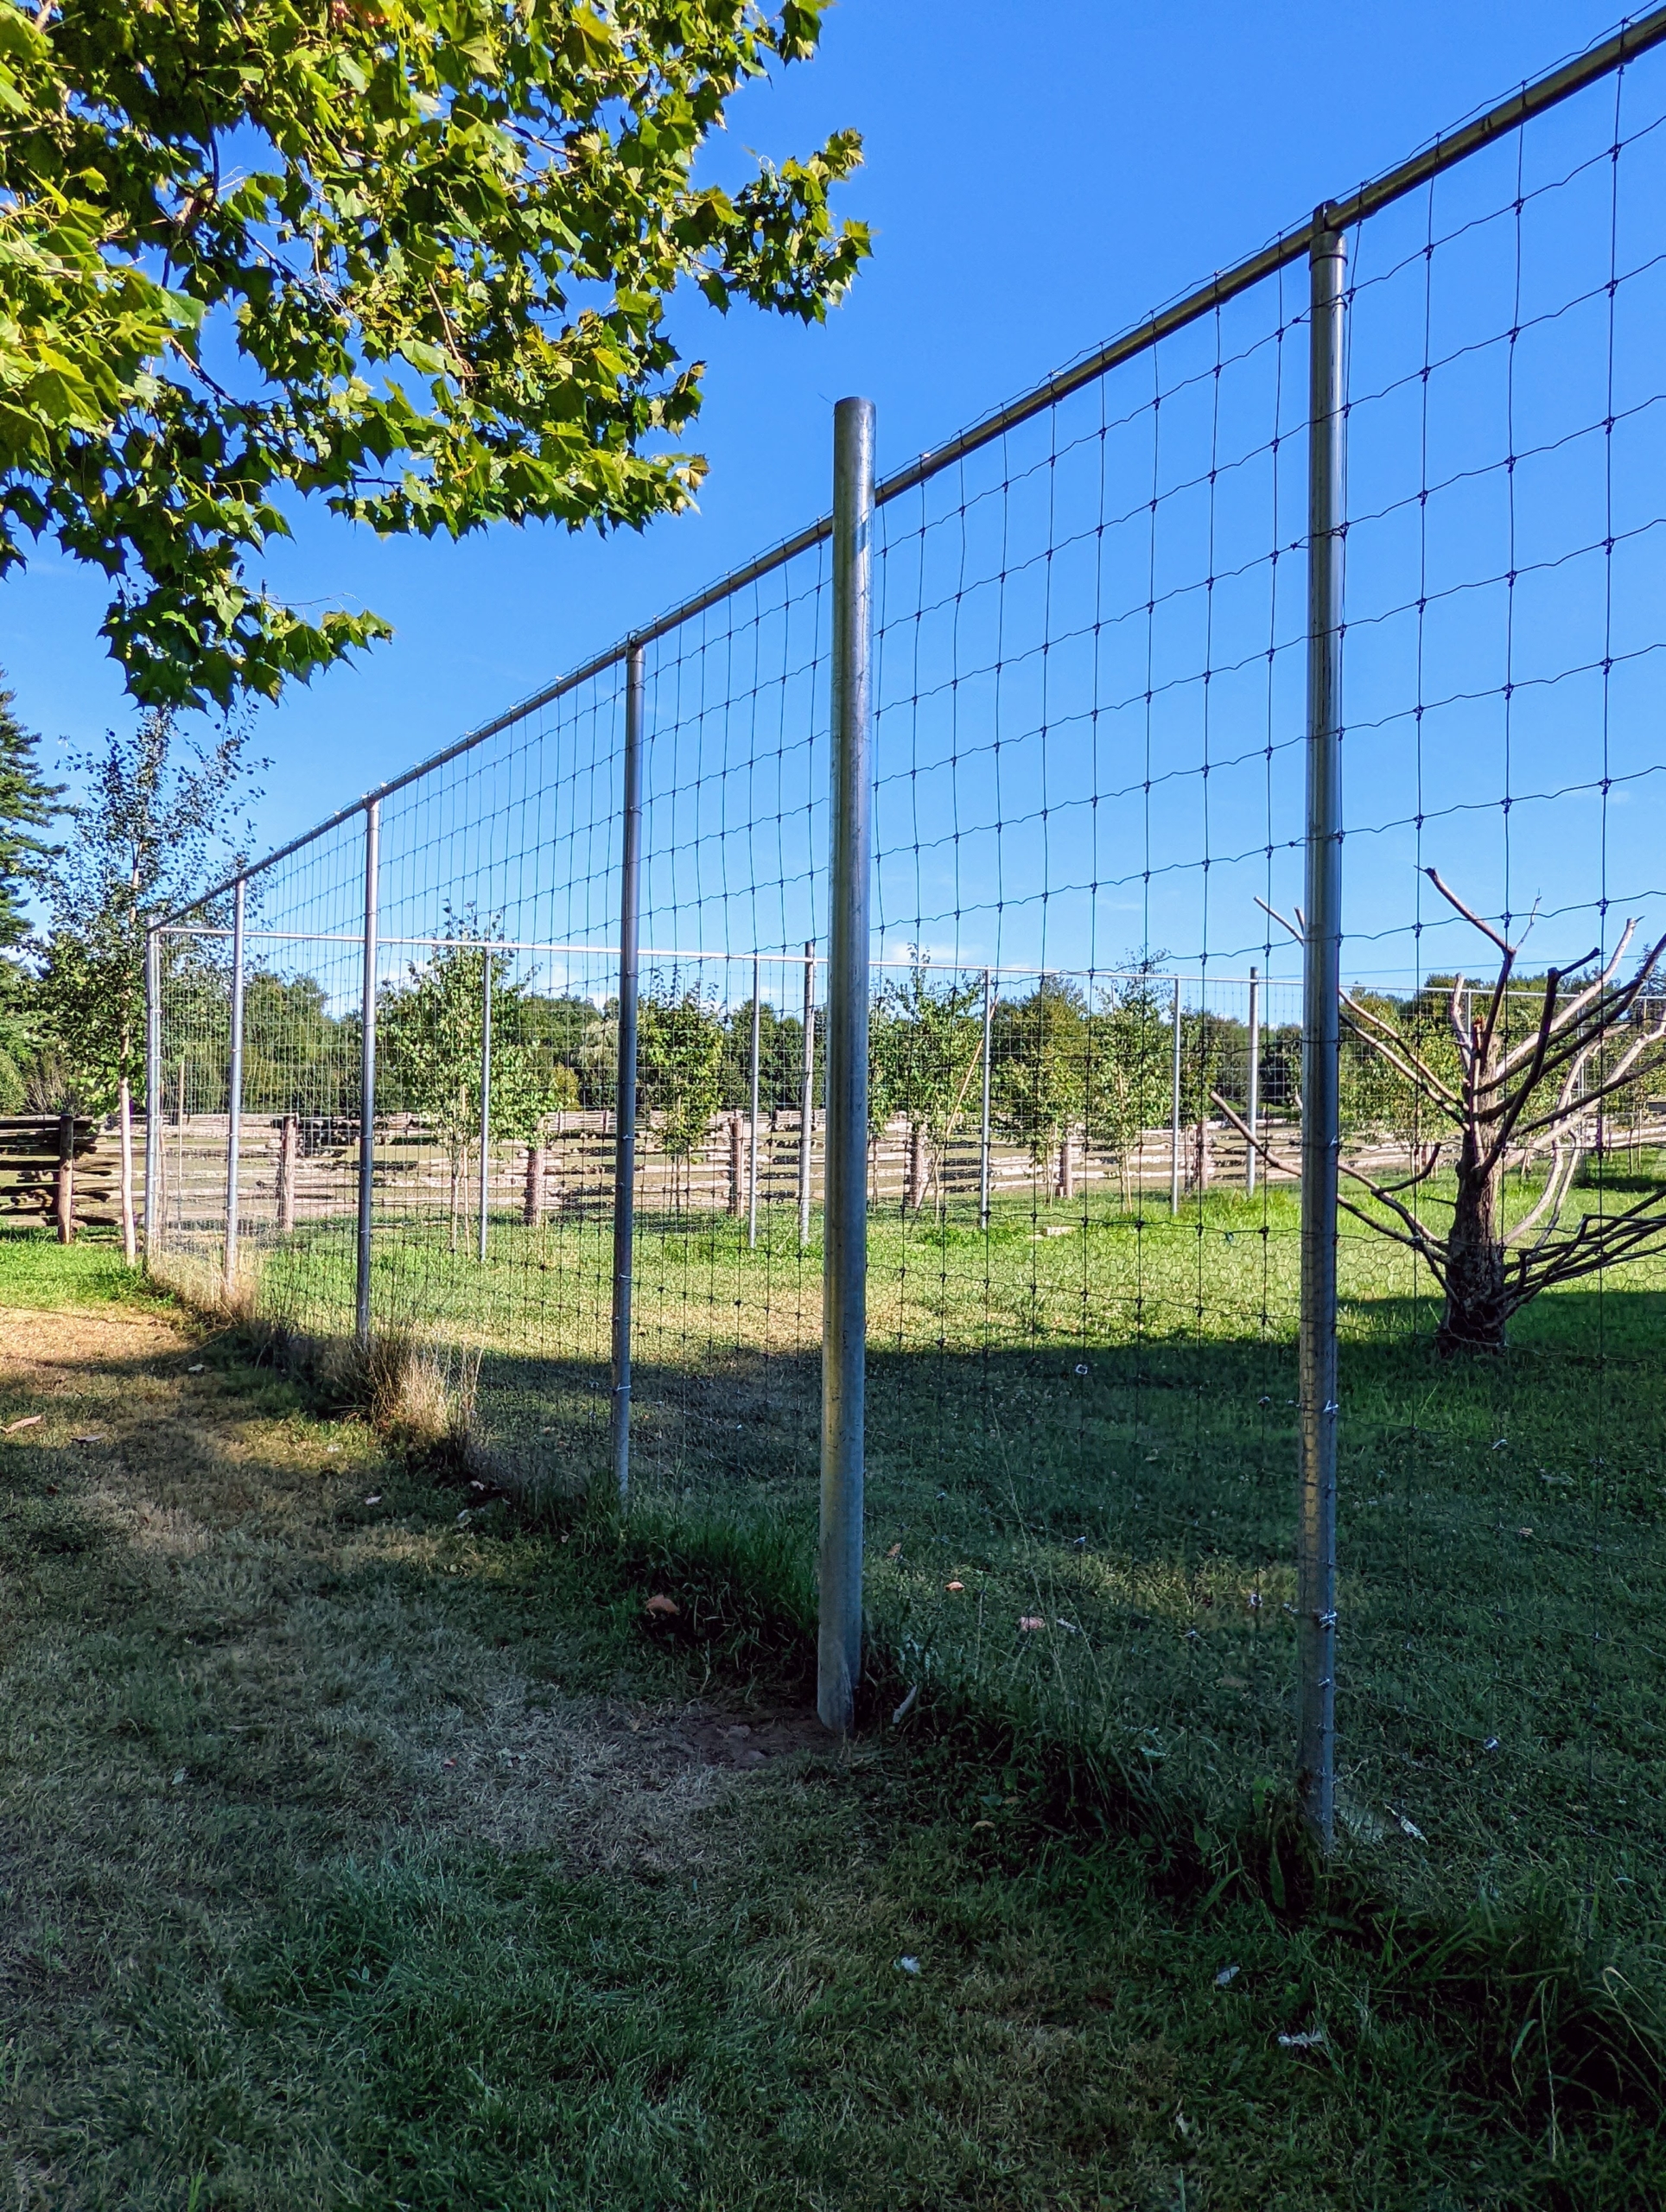
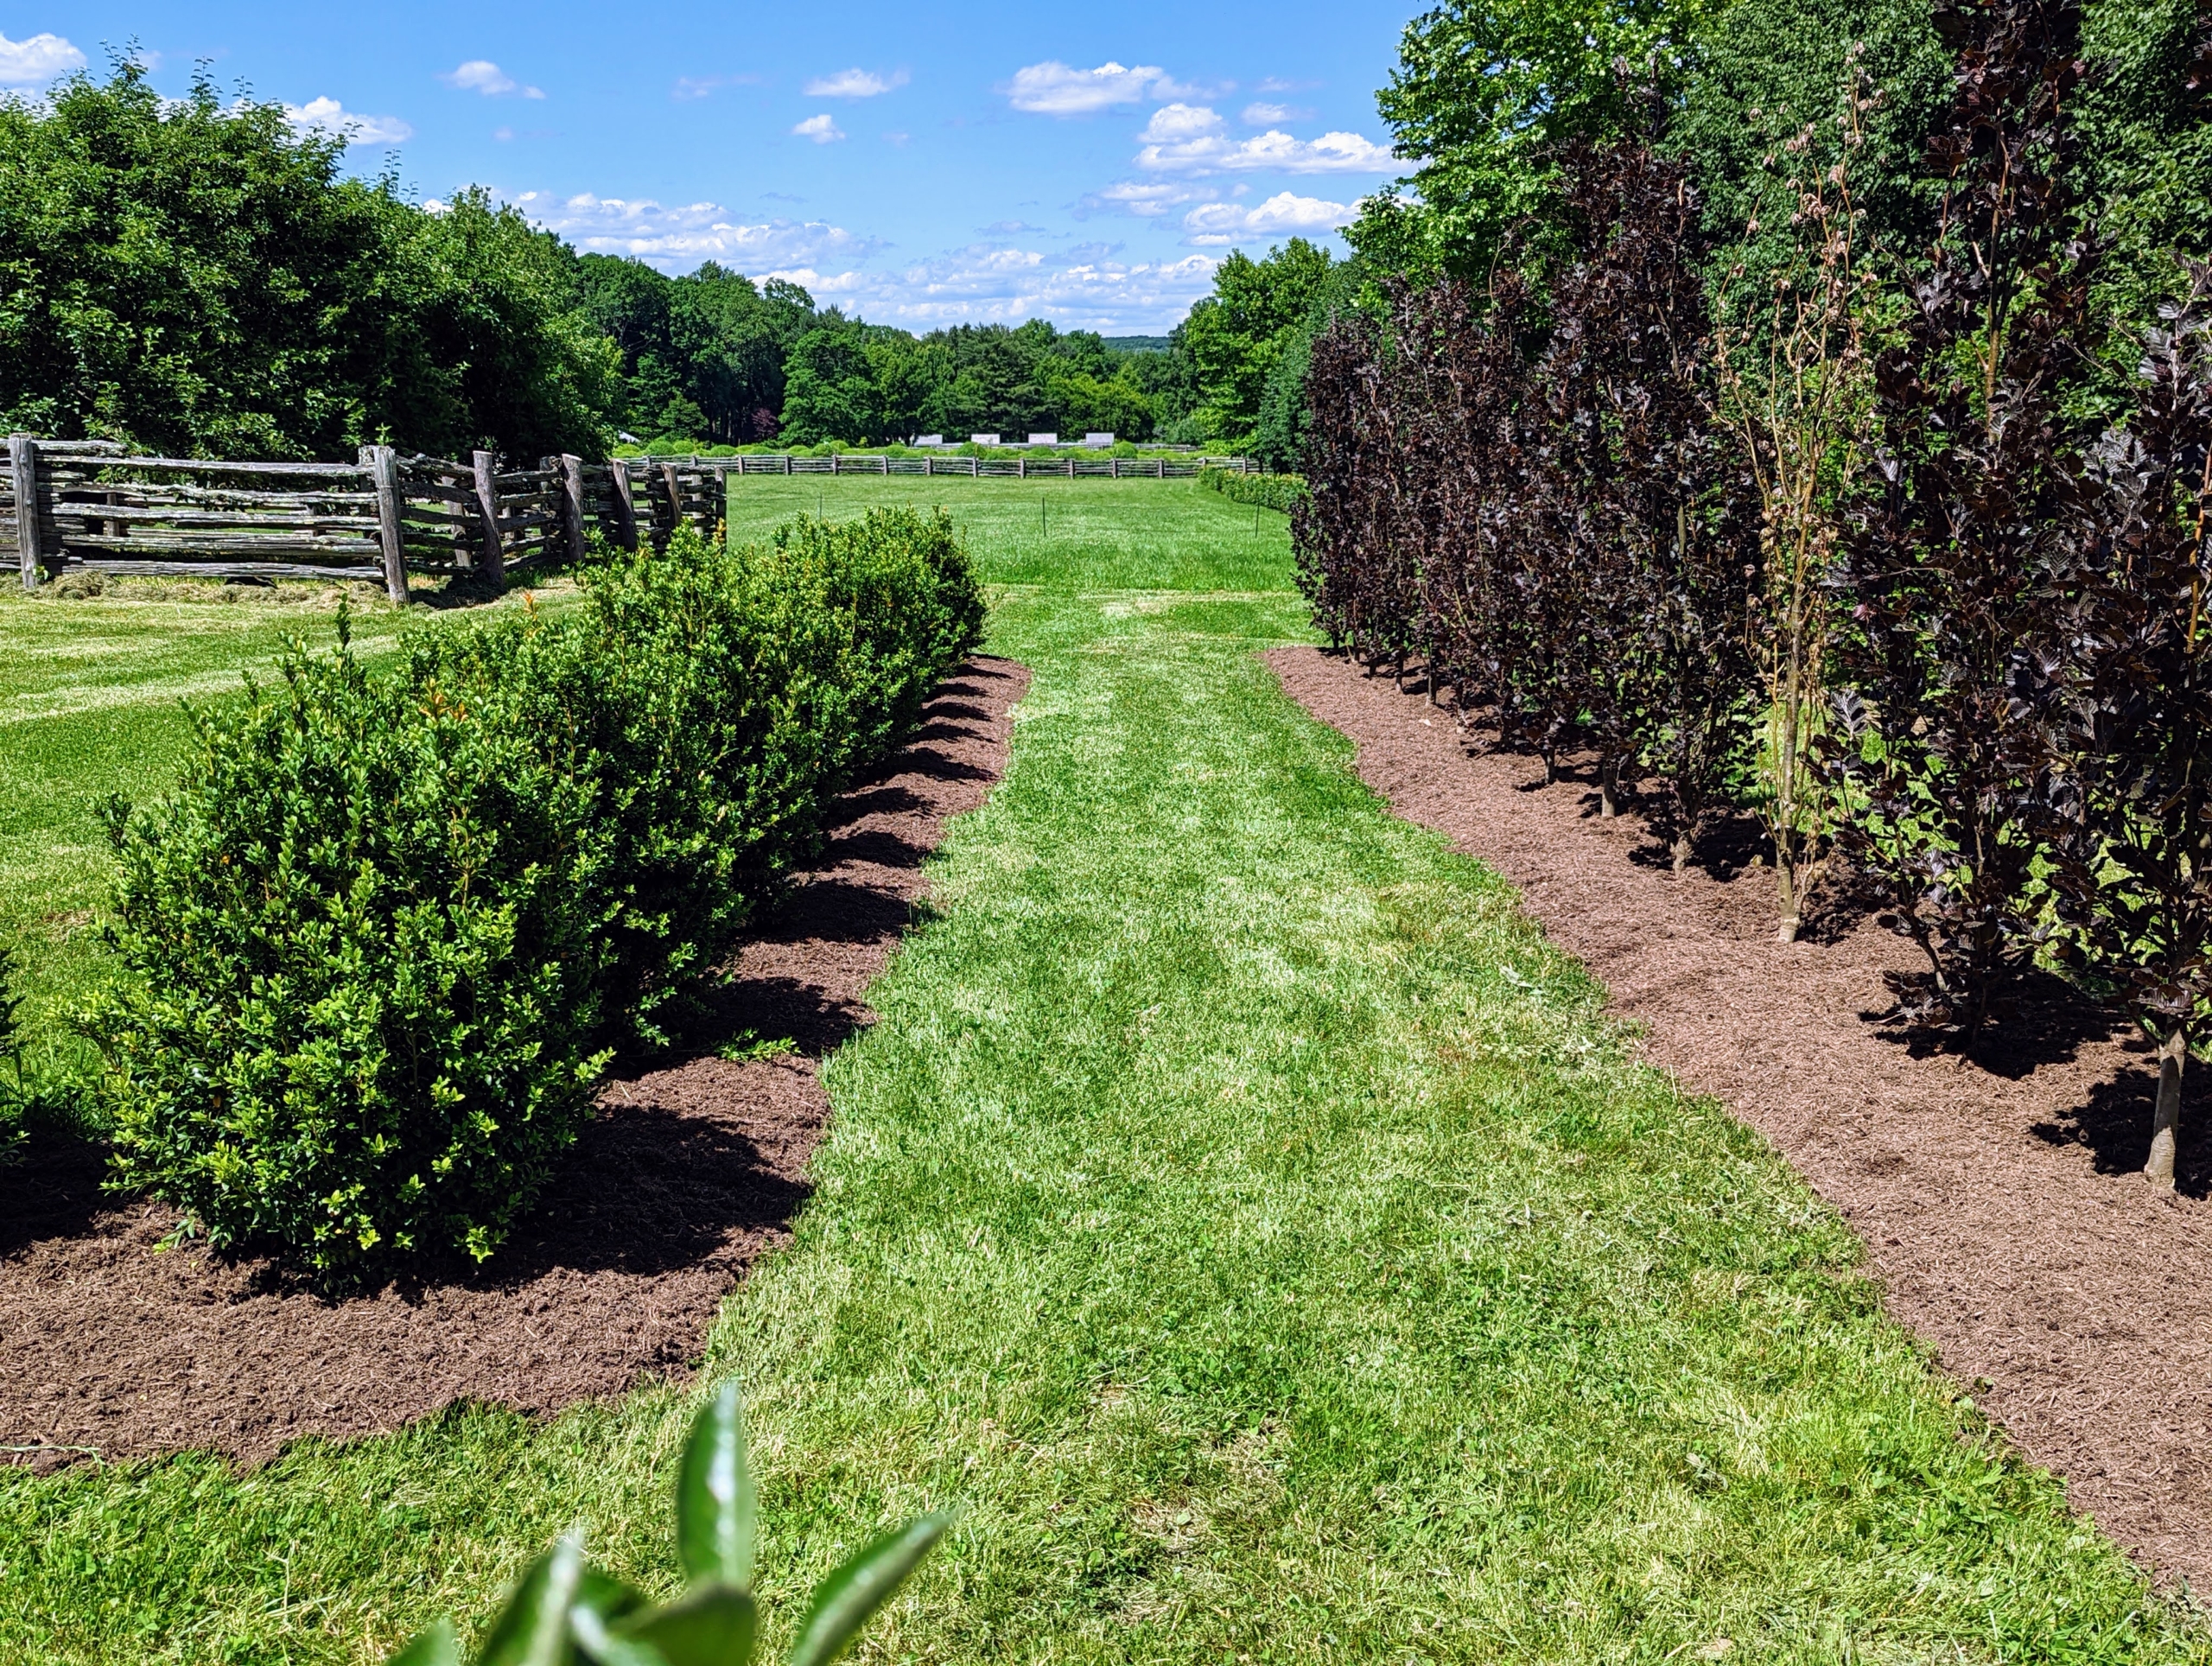
Four rows in all to start, but many, many to go, and each path leading to an opening — or a dead end.
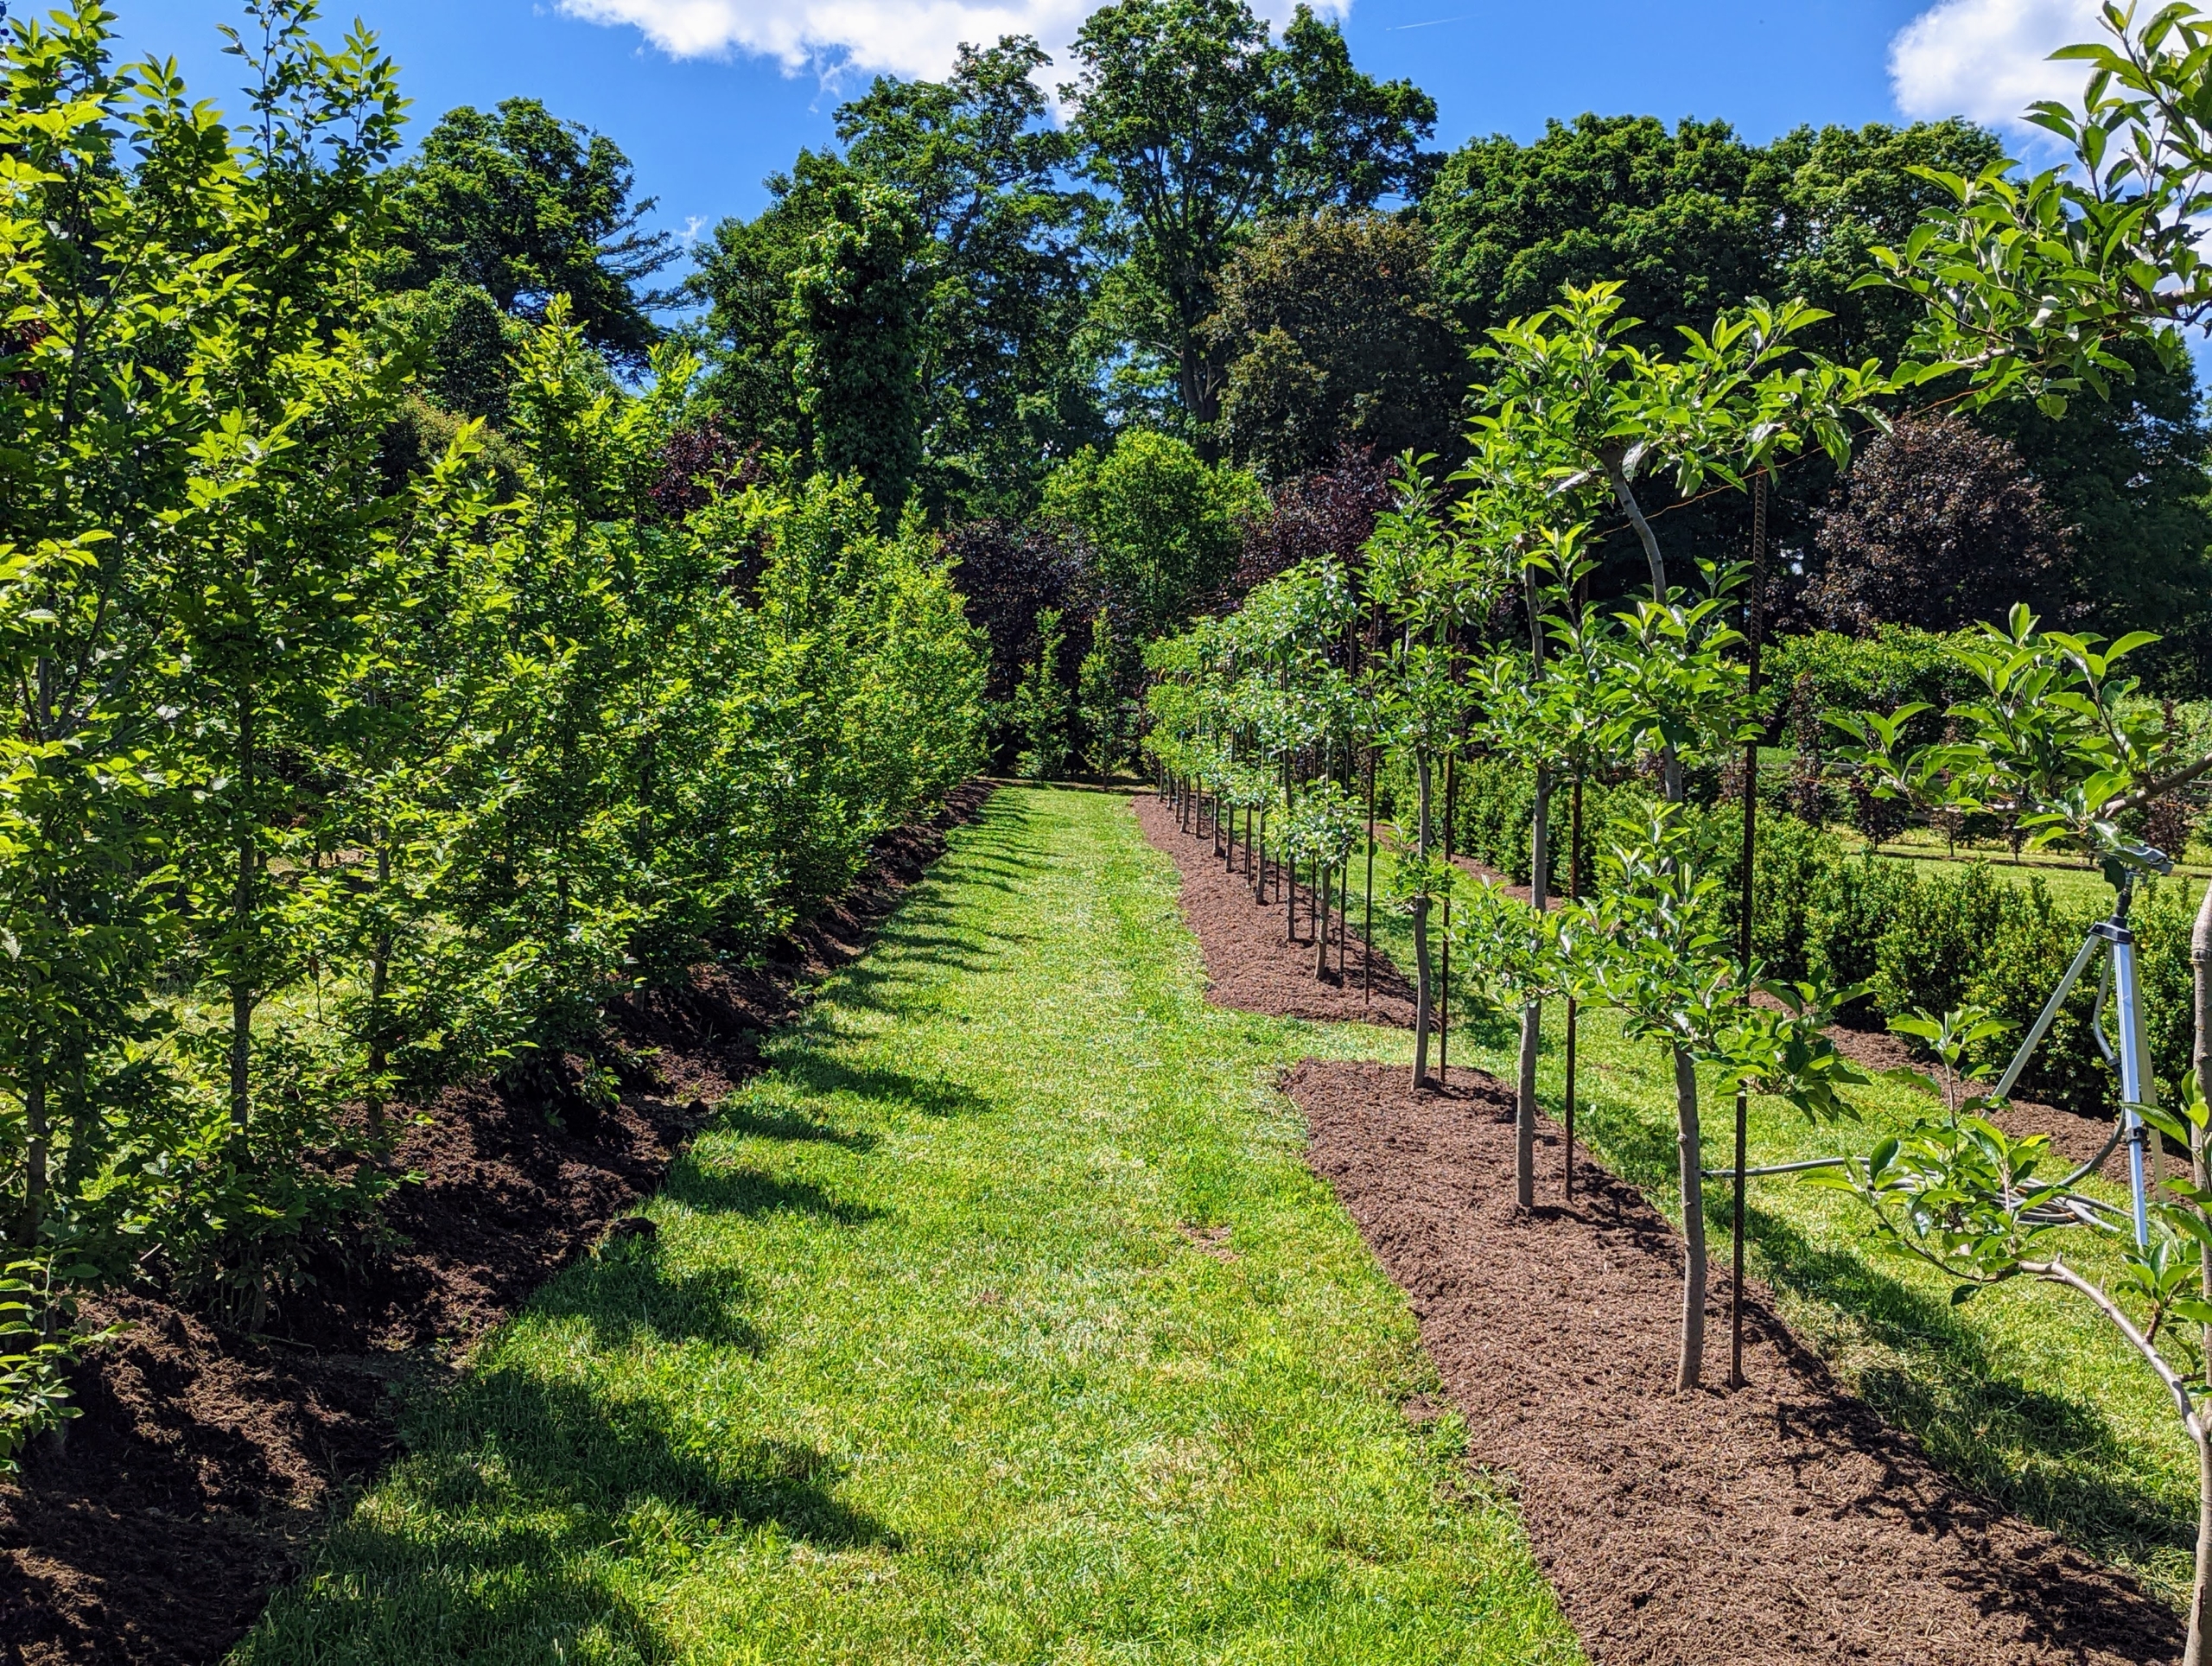
By June, all the plantings are leafed out and growing beautifully. The beds are also mulched with nutrient-rich material made right here in my compost yard.
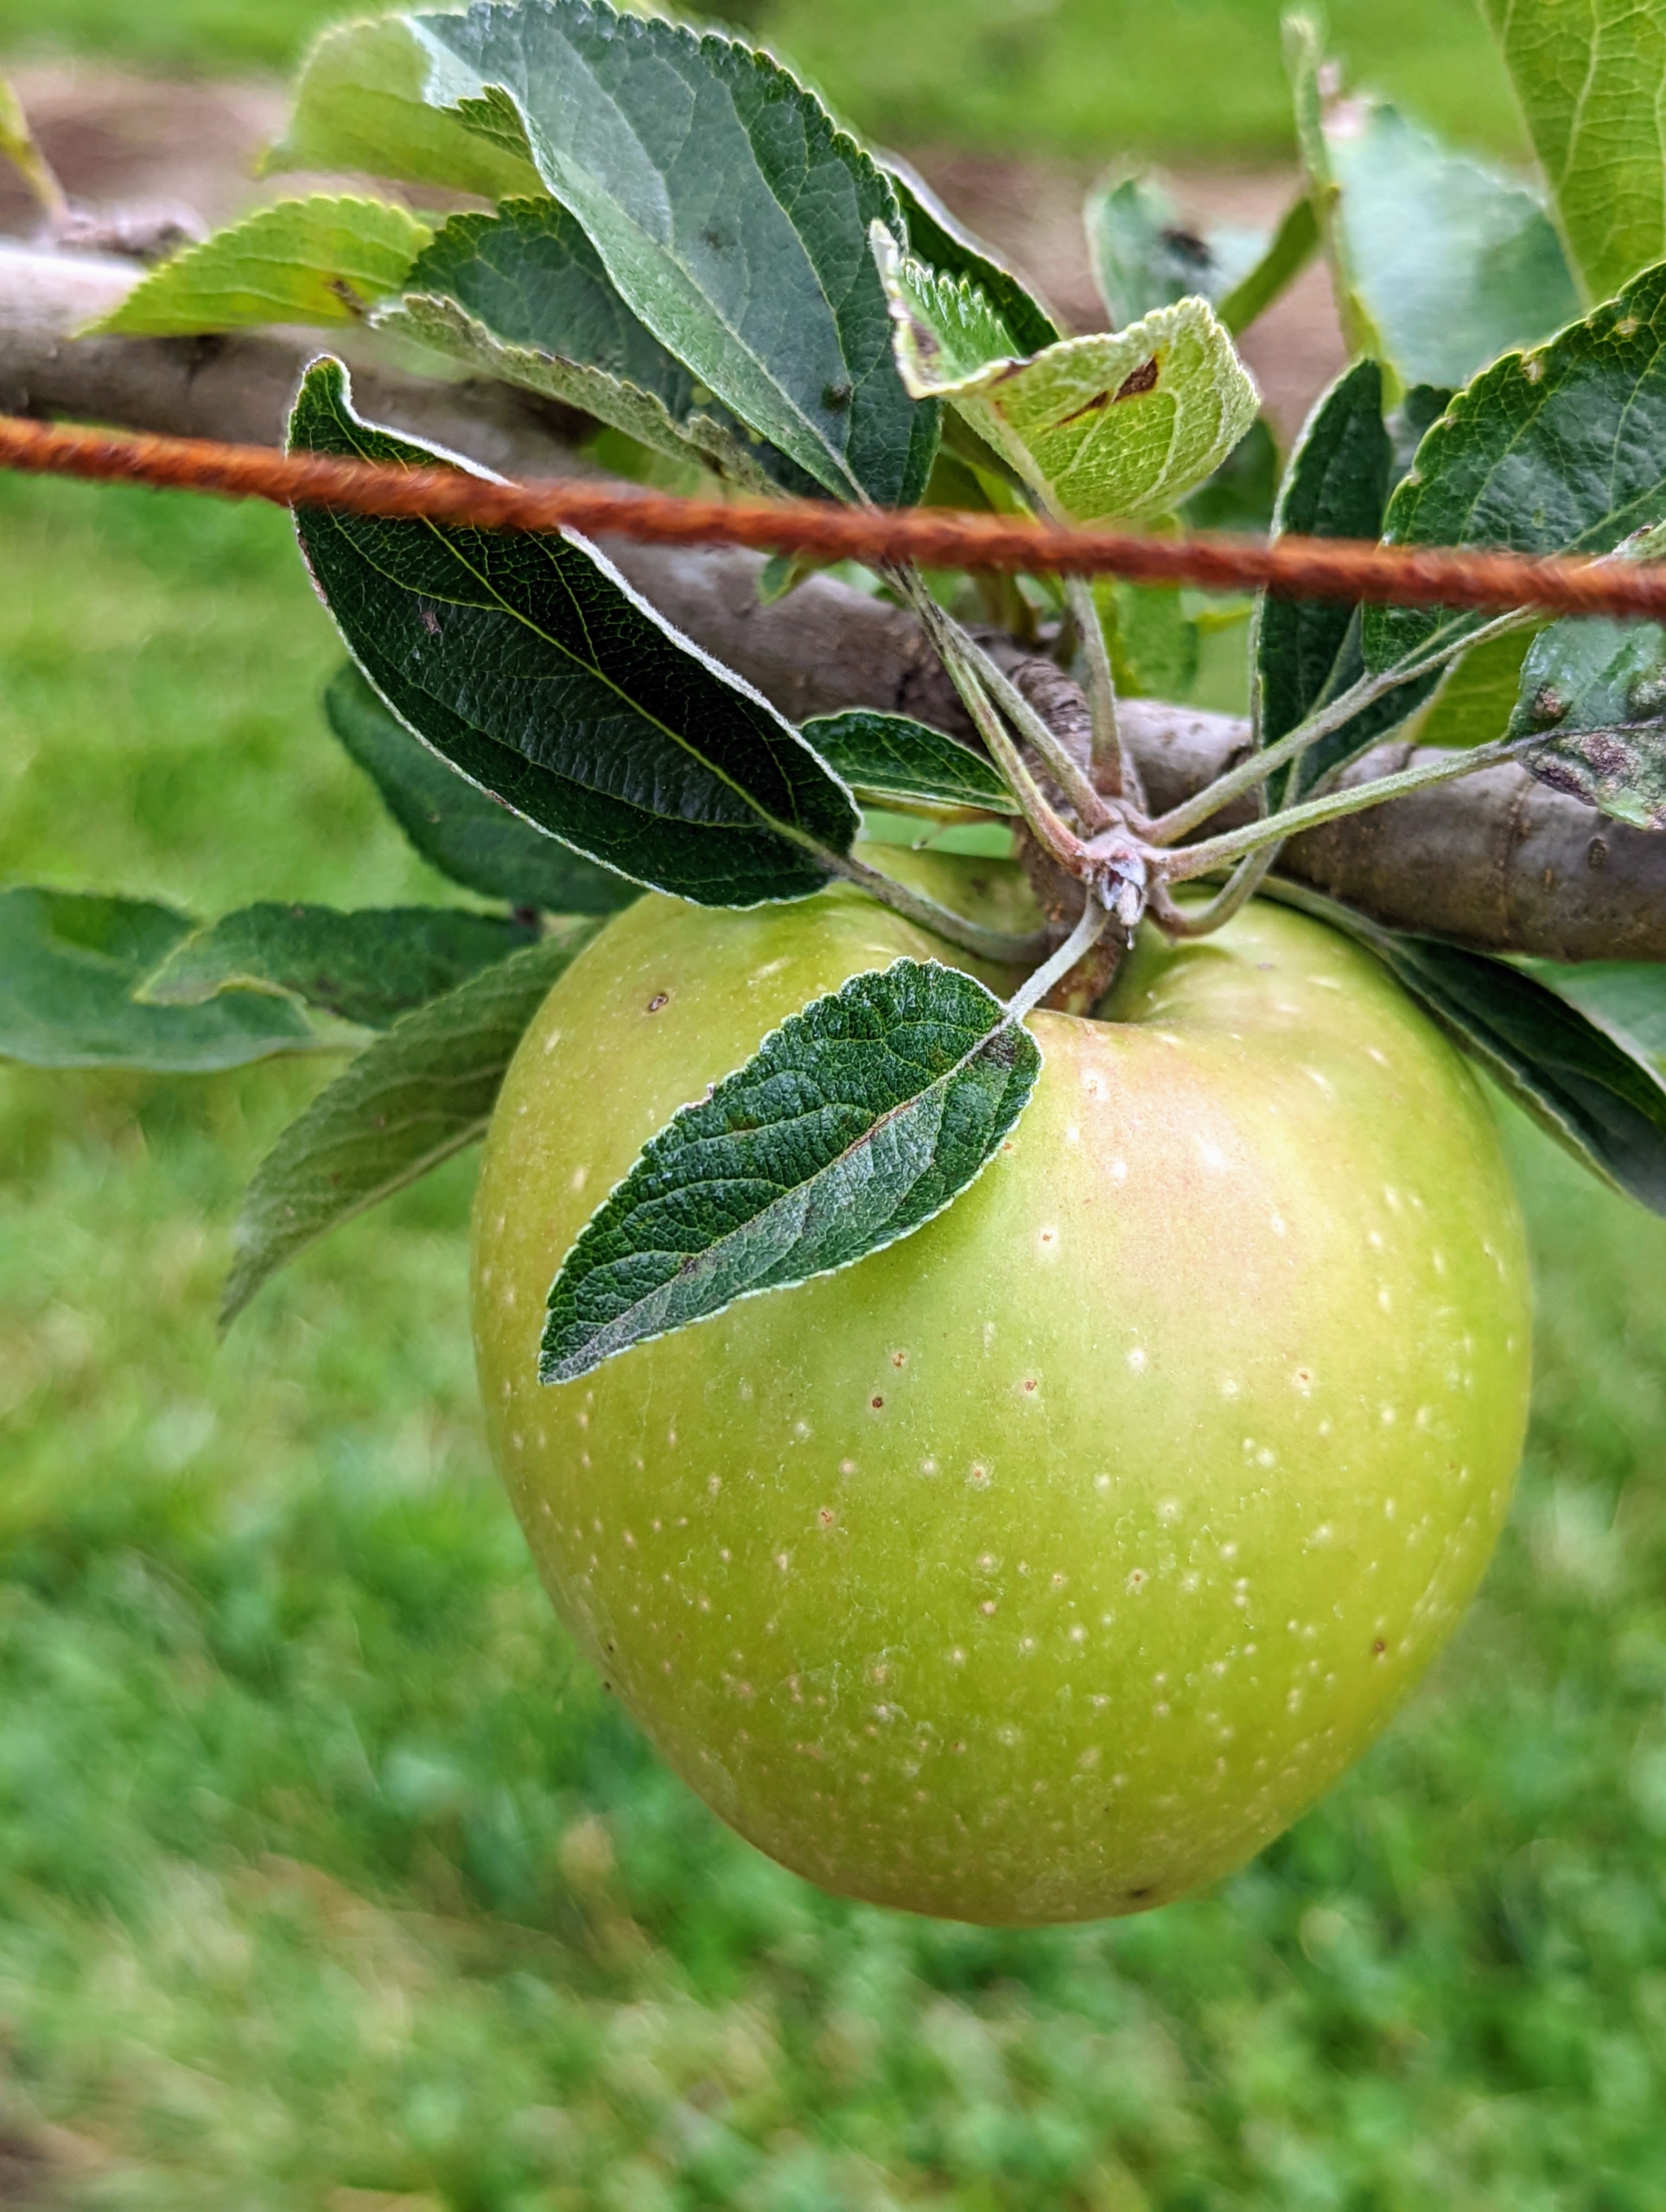
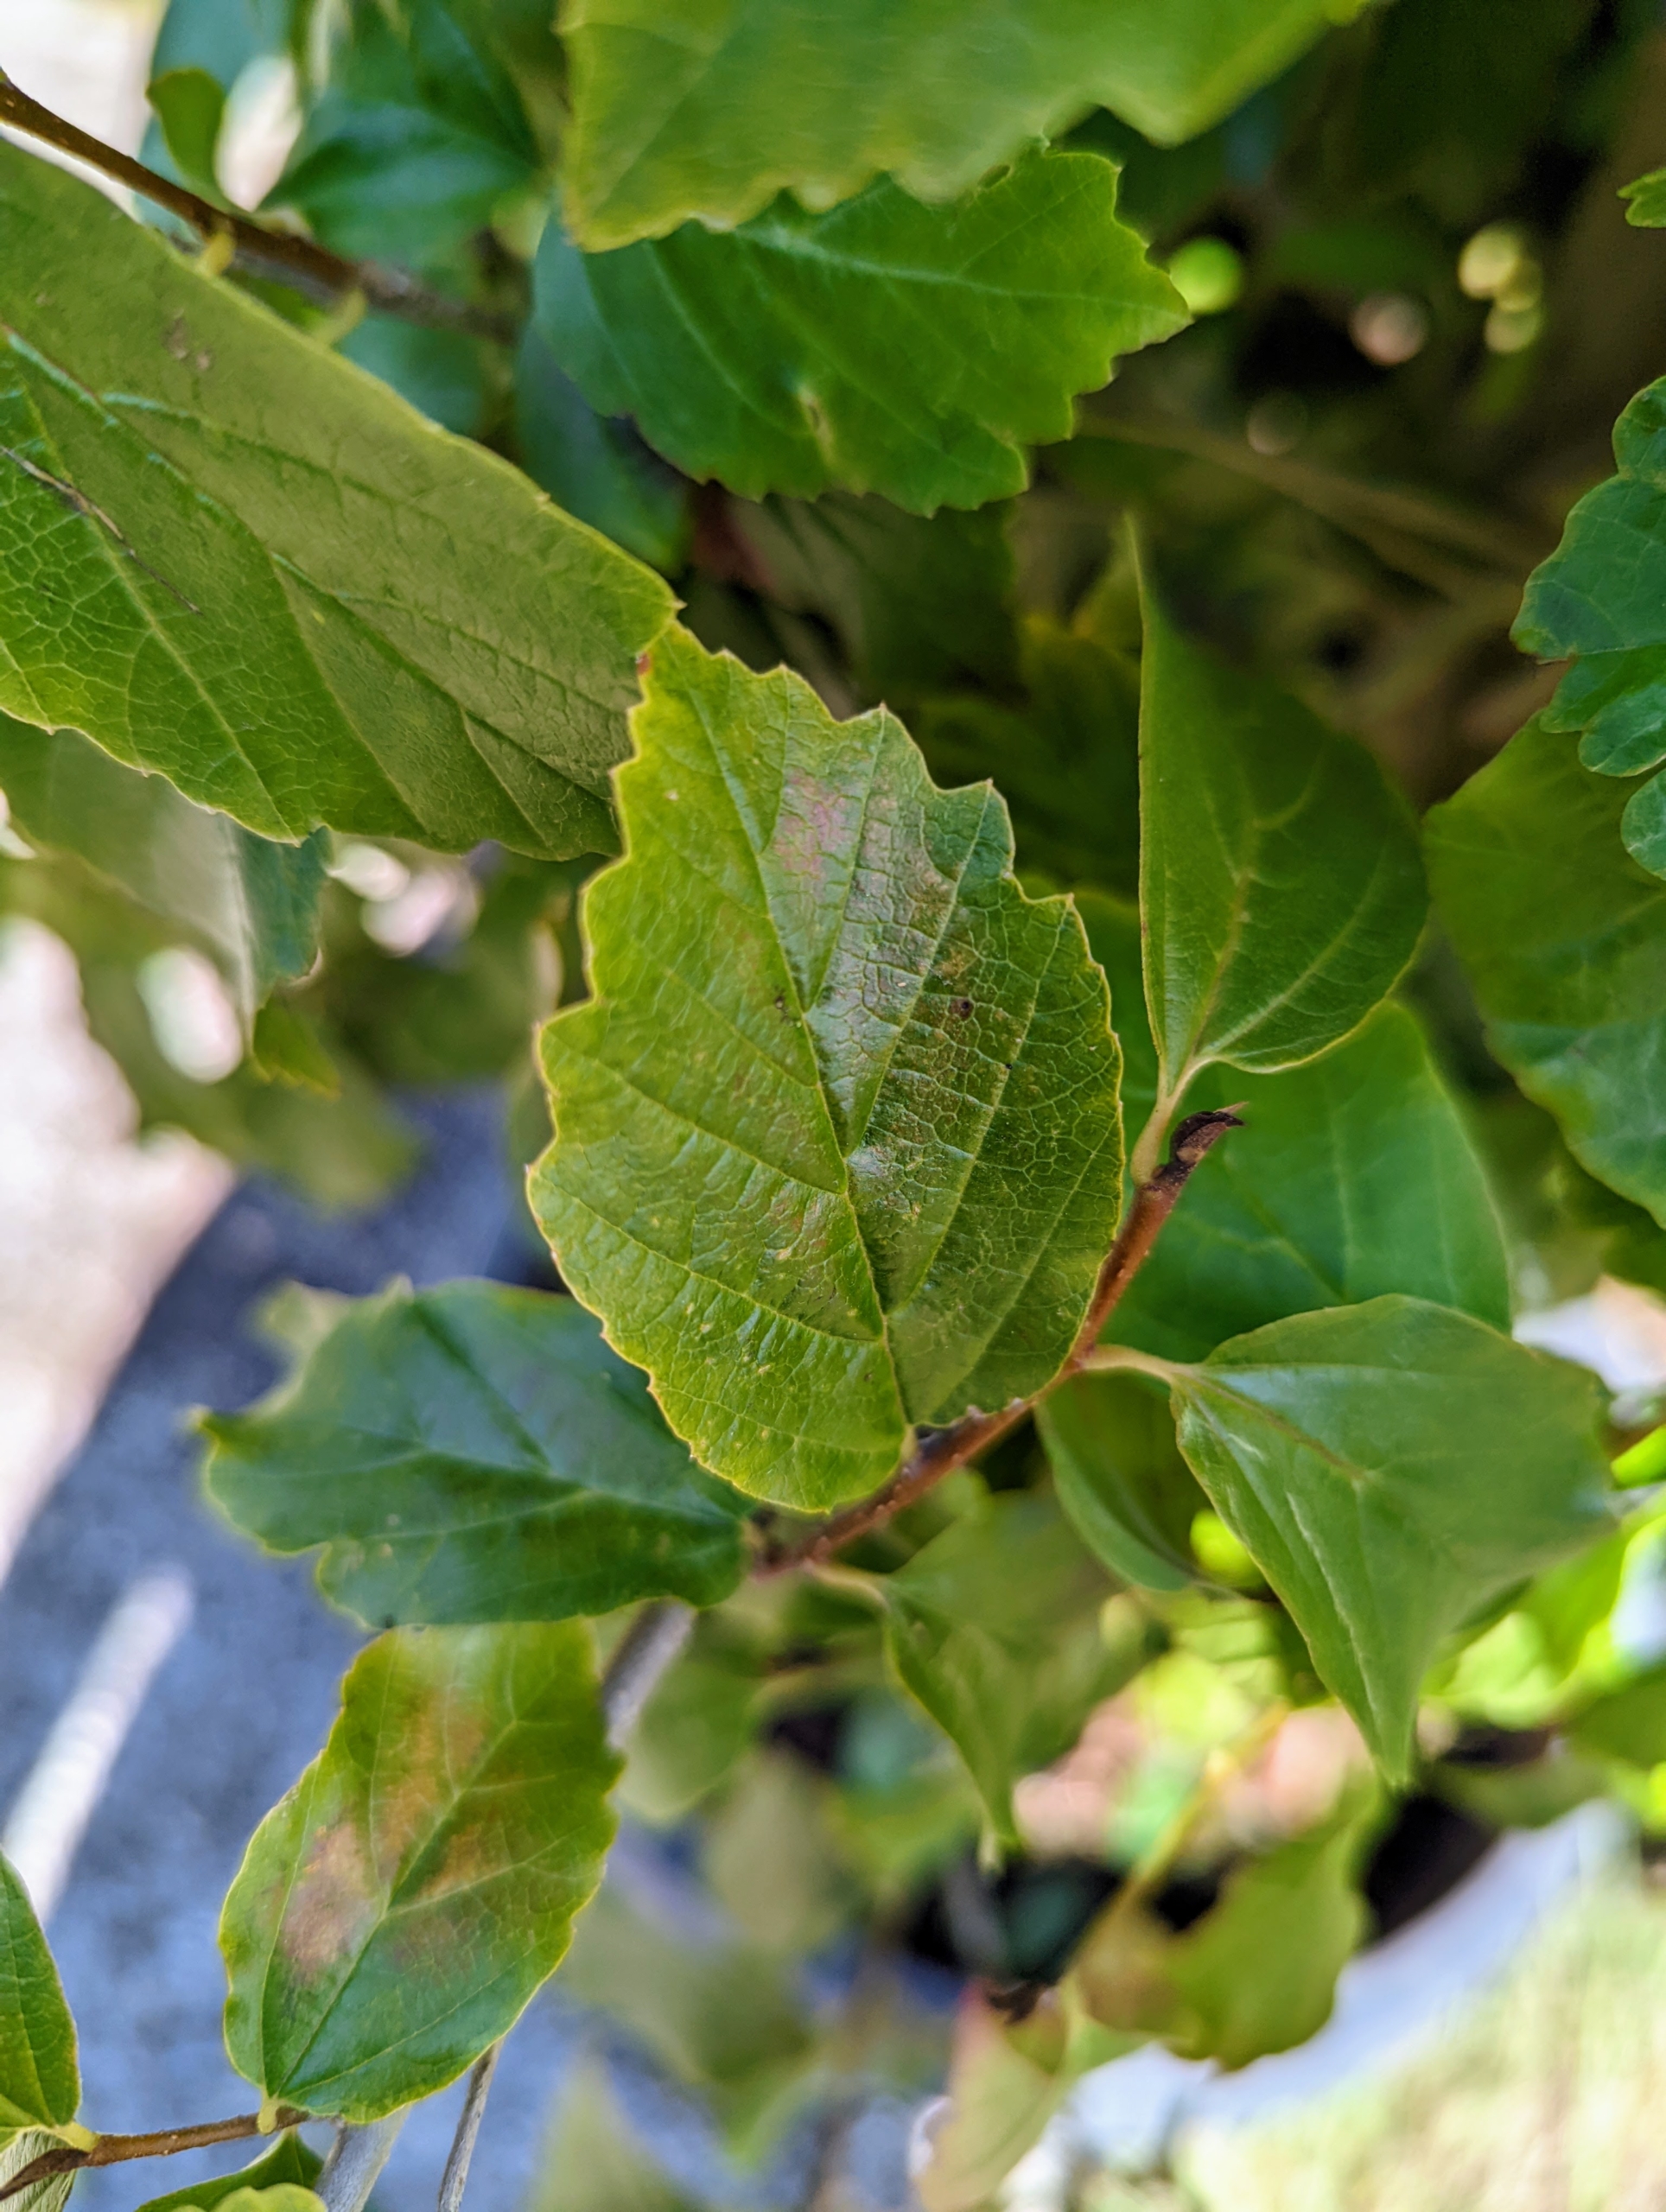
We’ve already seen many apples developing on the trees this summer.
The boxwood is on the left and the purple columnar beech on the right – both of these will make great hedges in a few years. In the distance, one can see the tops of the chicken coops.
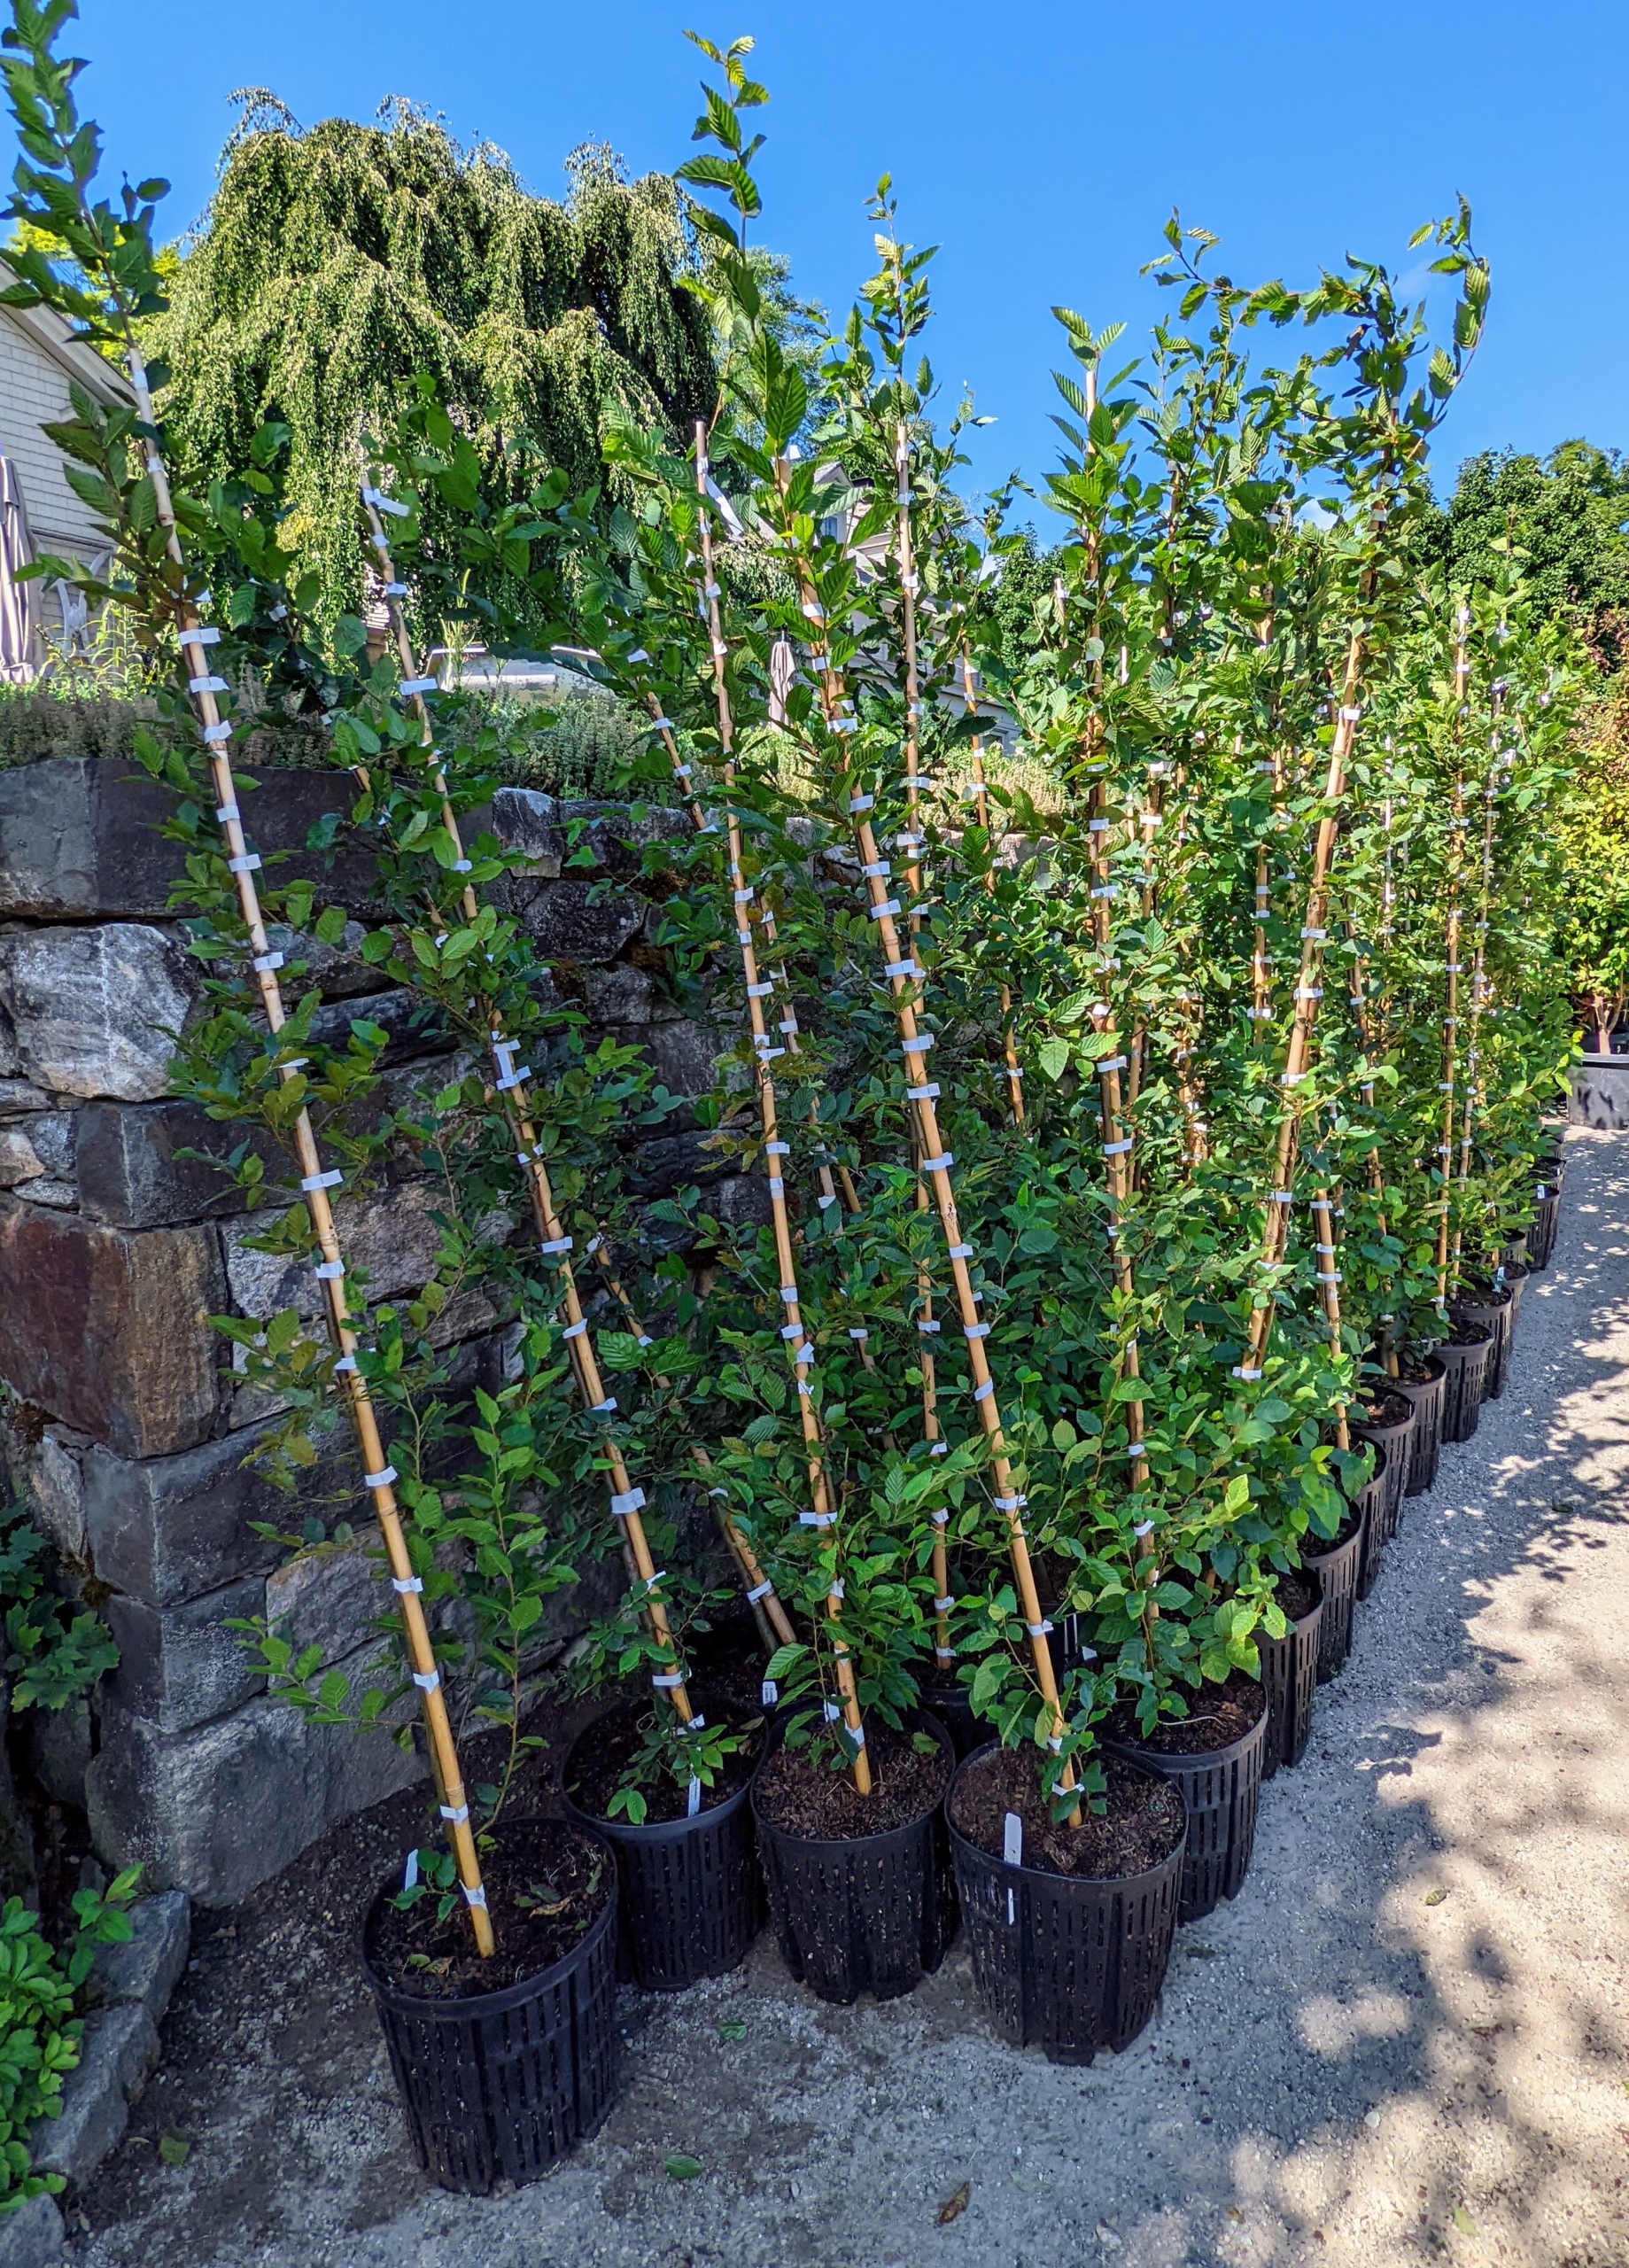
And yesterday, more trees for the maze – these are parrotia trees. Parrotia is in the family Hamamelidaceae, closely related to the witch-hazel genus Hamamelis. It is native to northern Iran and southern Azerbaijan and it is endemic in the Alborz mountains. It grows best in USDA Zones 5 to 8.
Parrotias have a long-lasting, elaborate autumn color display of ever-changing leaves that show off yellow, orange, burgundy and red hues. These are now green, but looking closely, one can see slight color changes already.
And more European hornbeams. Botanically known as Carpinus betulus, the hornbeam is a fast-growing deciduous tree. In fact, it can grow about four to five feet per year – perfect for the maze.
My outdoor grounds crew foreman, Chhiring Sherpa, has been with me for 20 years and has planted many of trees here at the farm.
I will continue to share photos of its progress. It will take a few years before it is mature and fully developed, but this maze will be amazing. I can’t wait…
“It is a confusing path, hard to follow without a thread, but, provided [you are] not devoured at the midpoint, it leads surely, despite twists and turns, back to the beginning.” — Plato
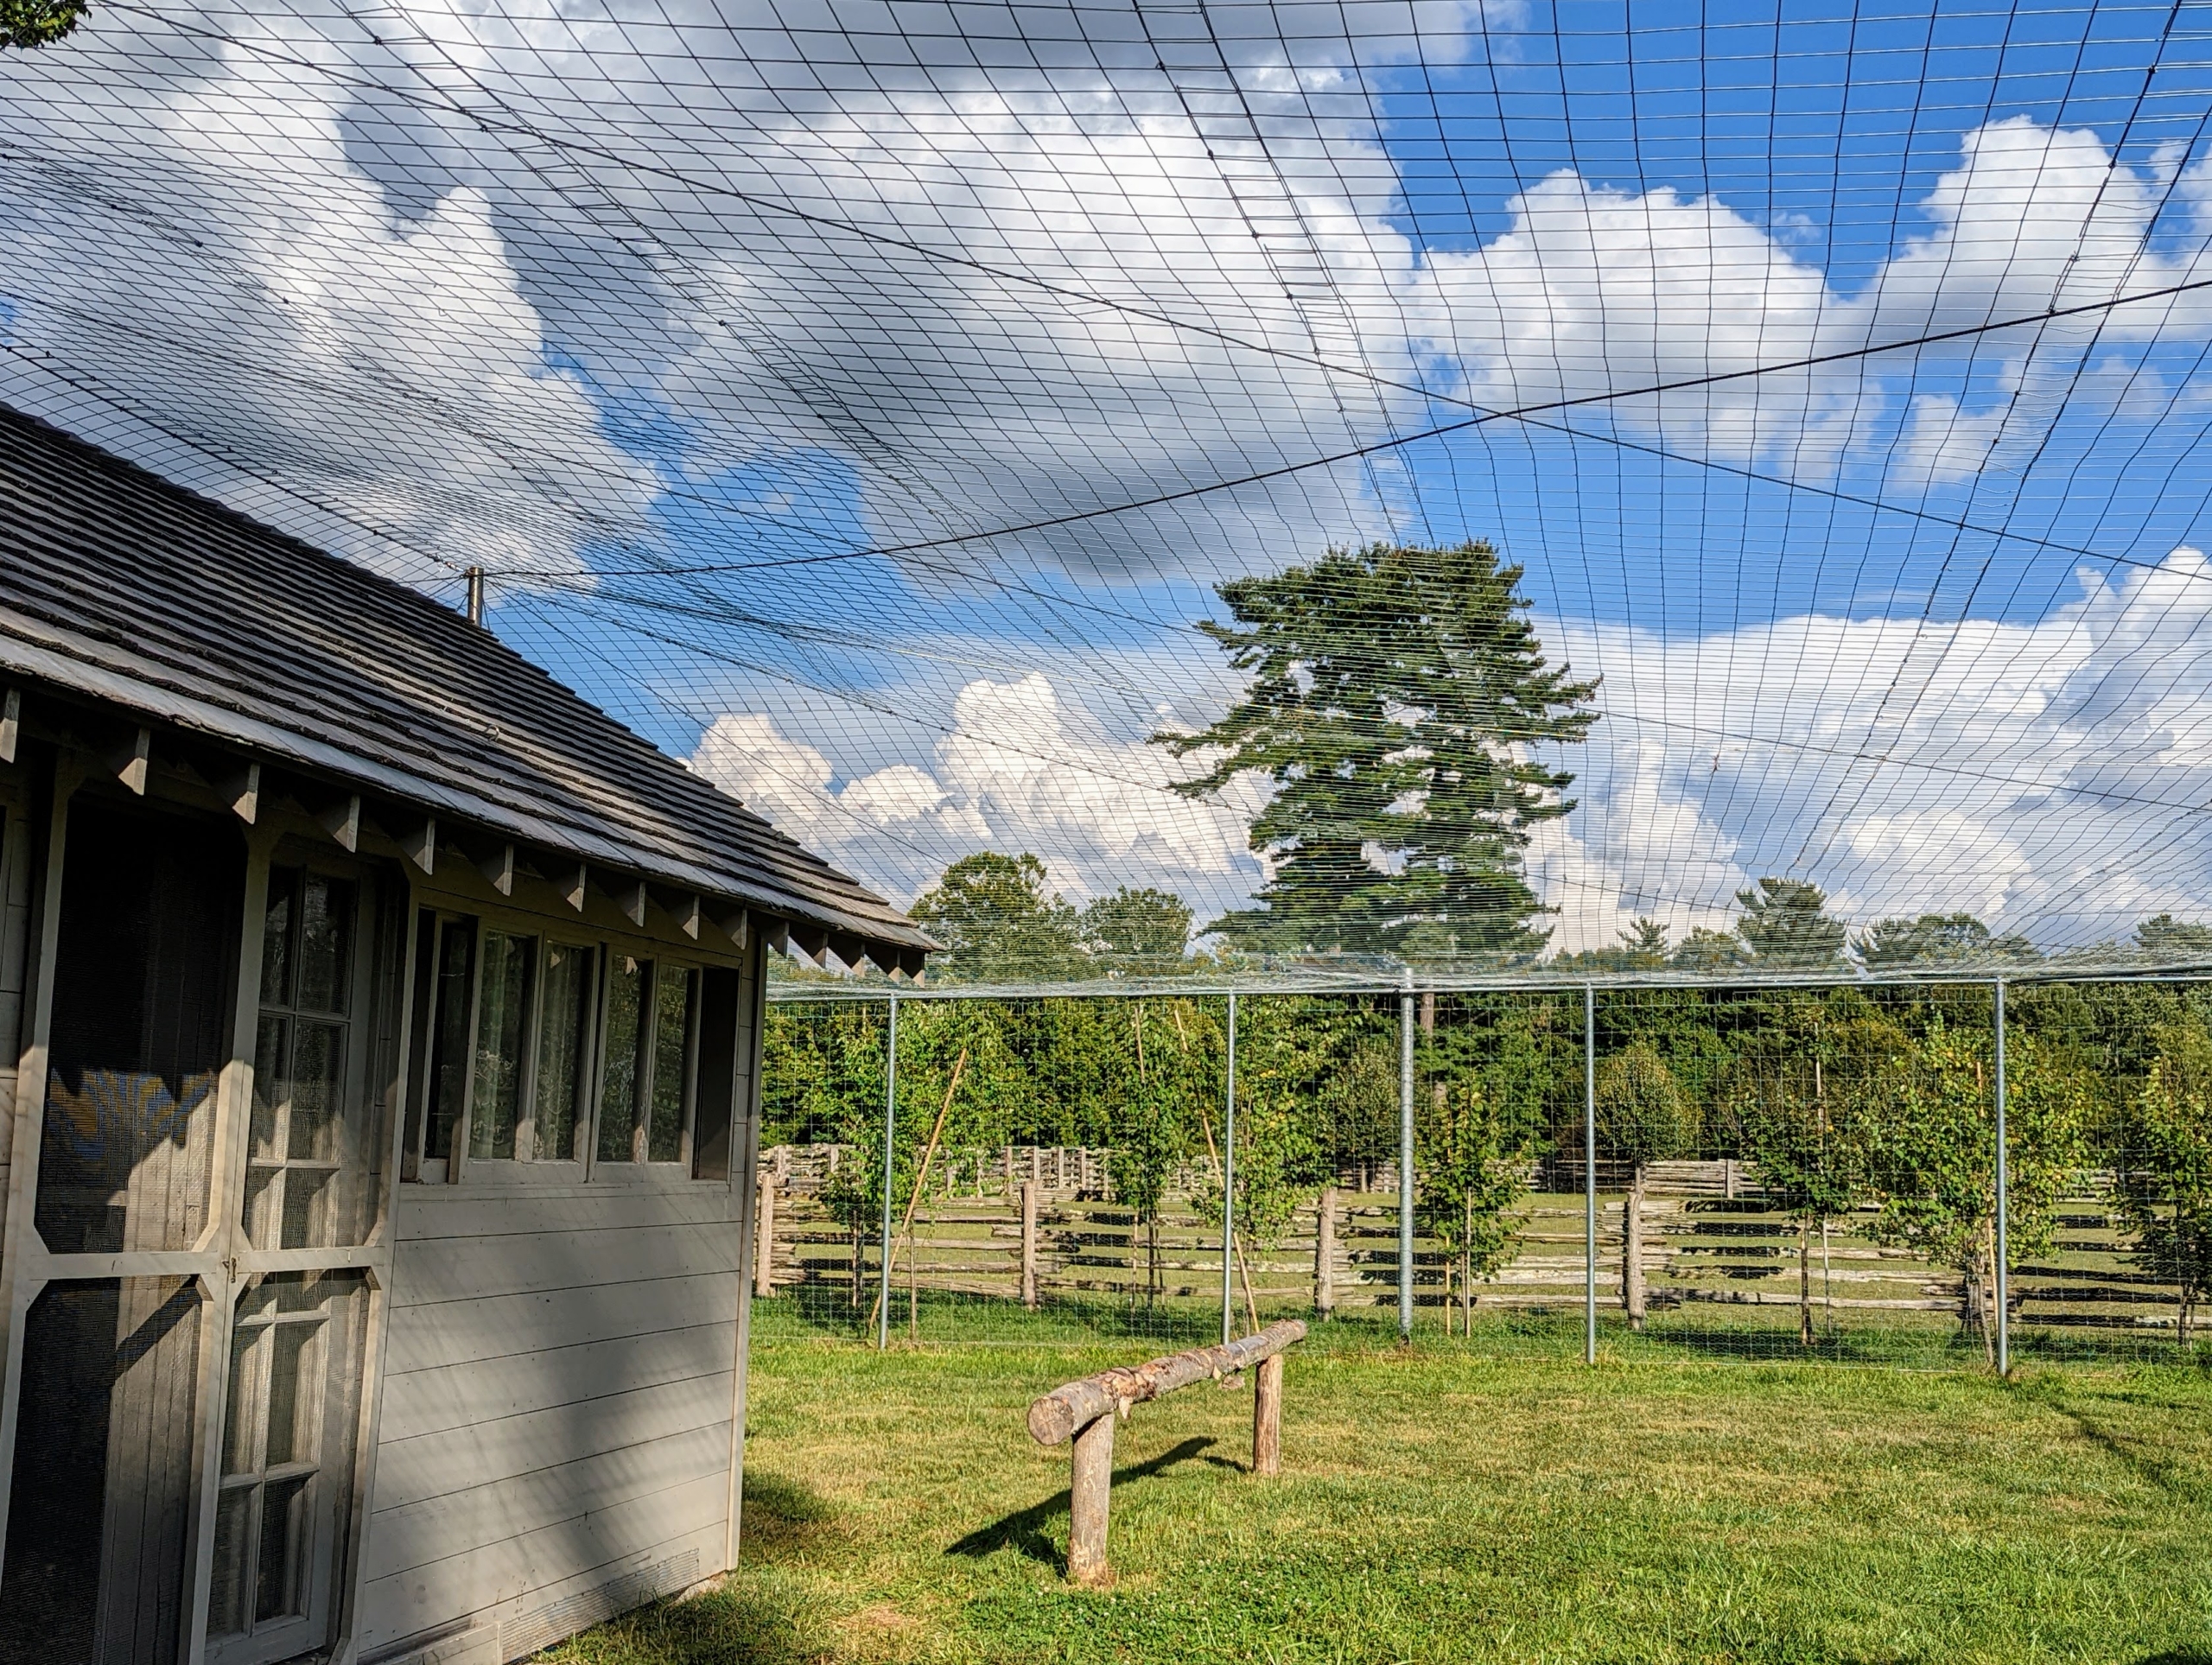
My peafowl will now be safe from predators in their enclosure.
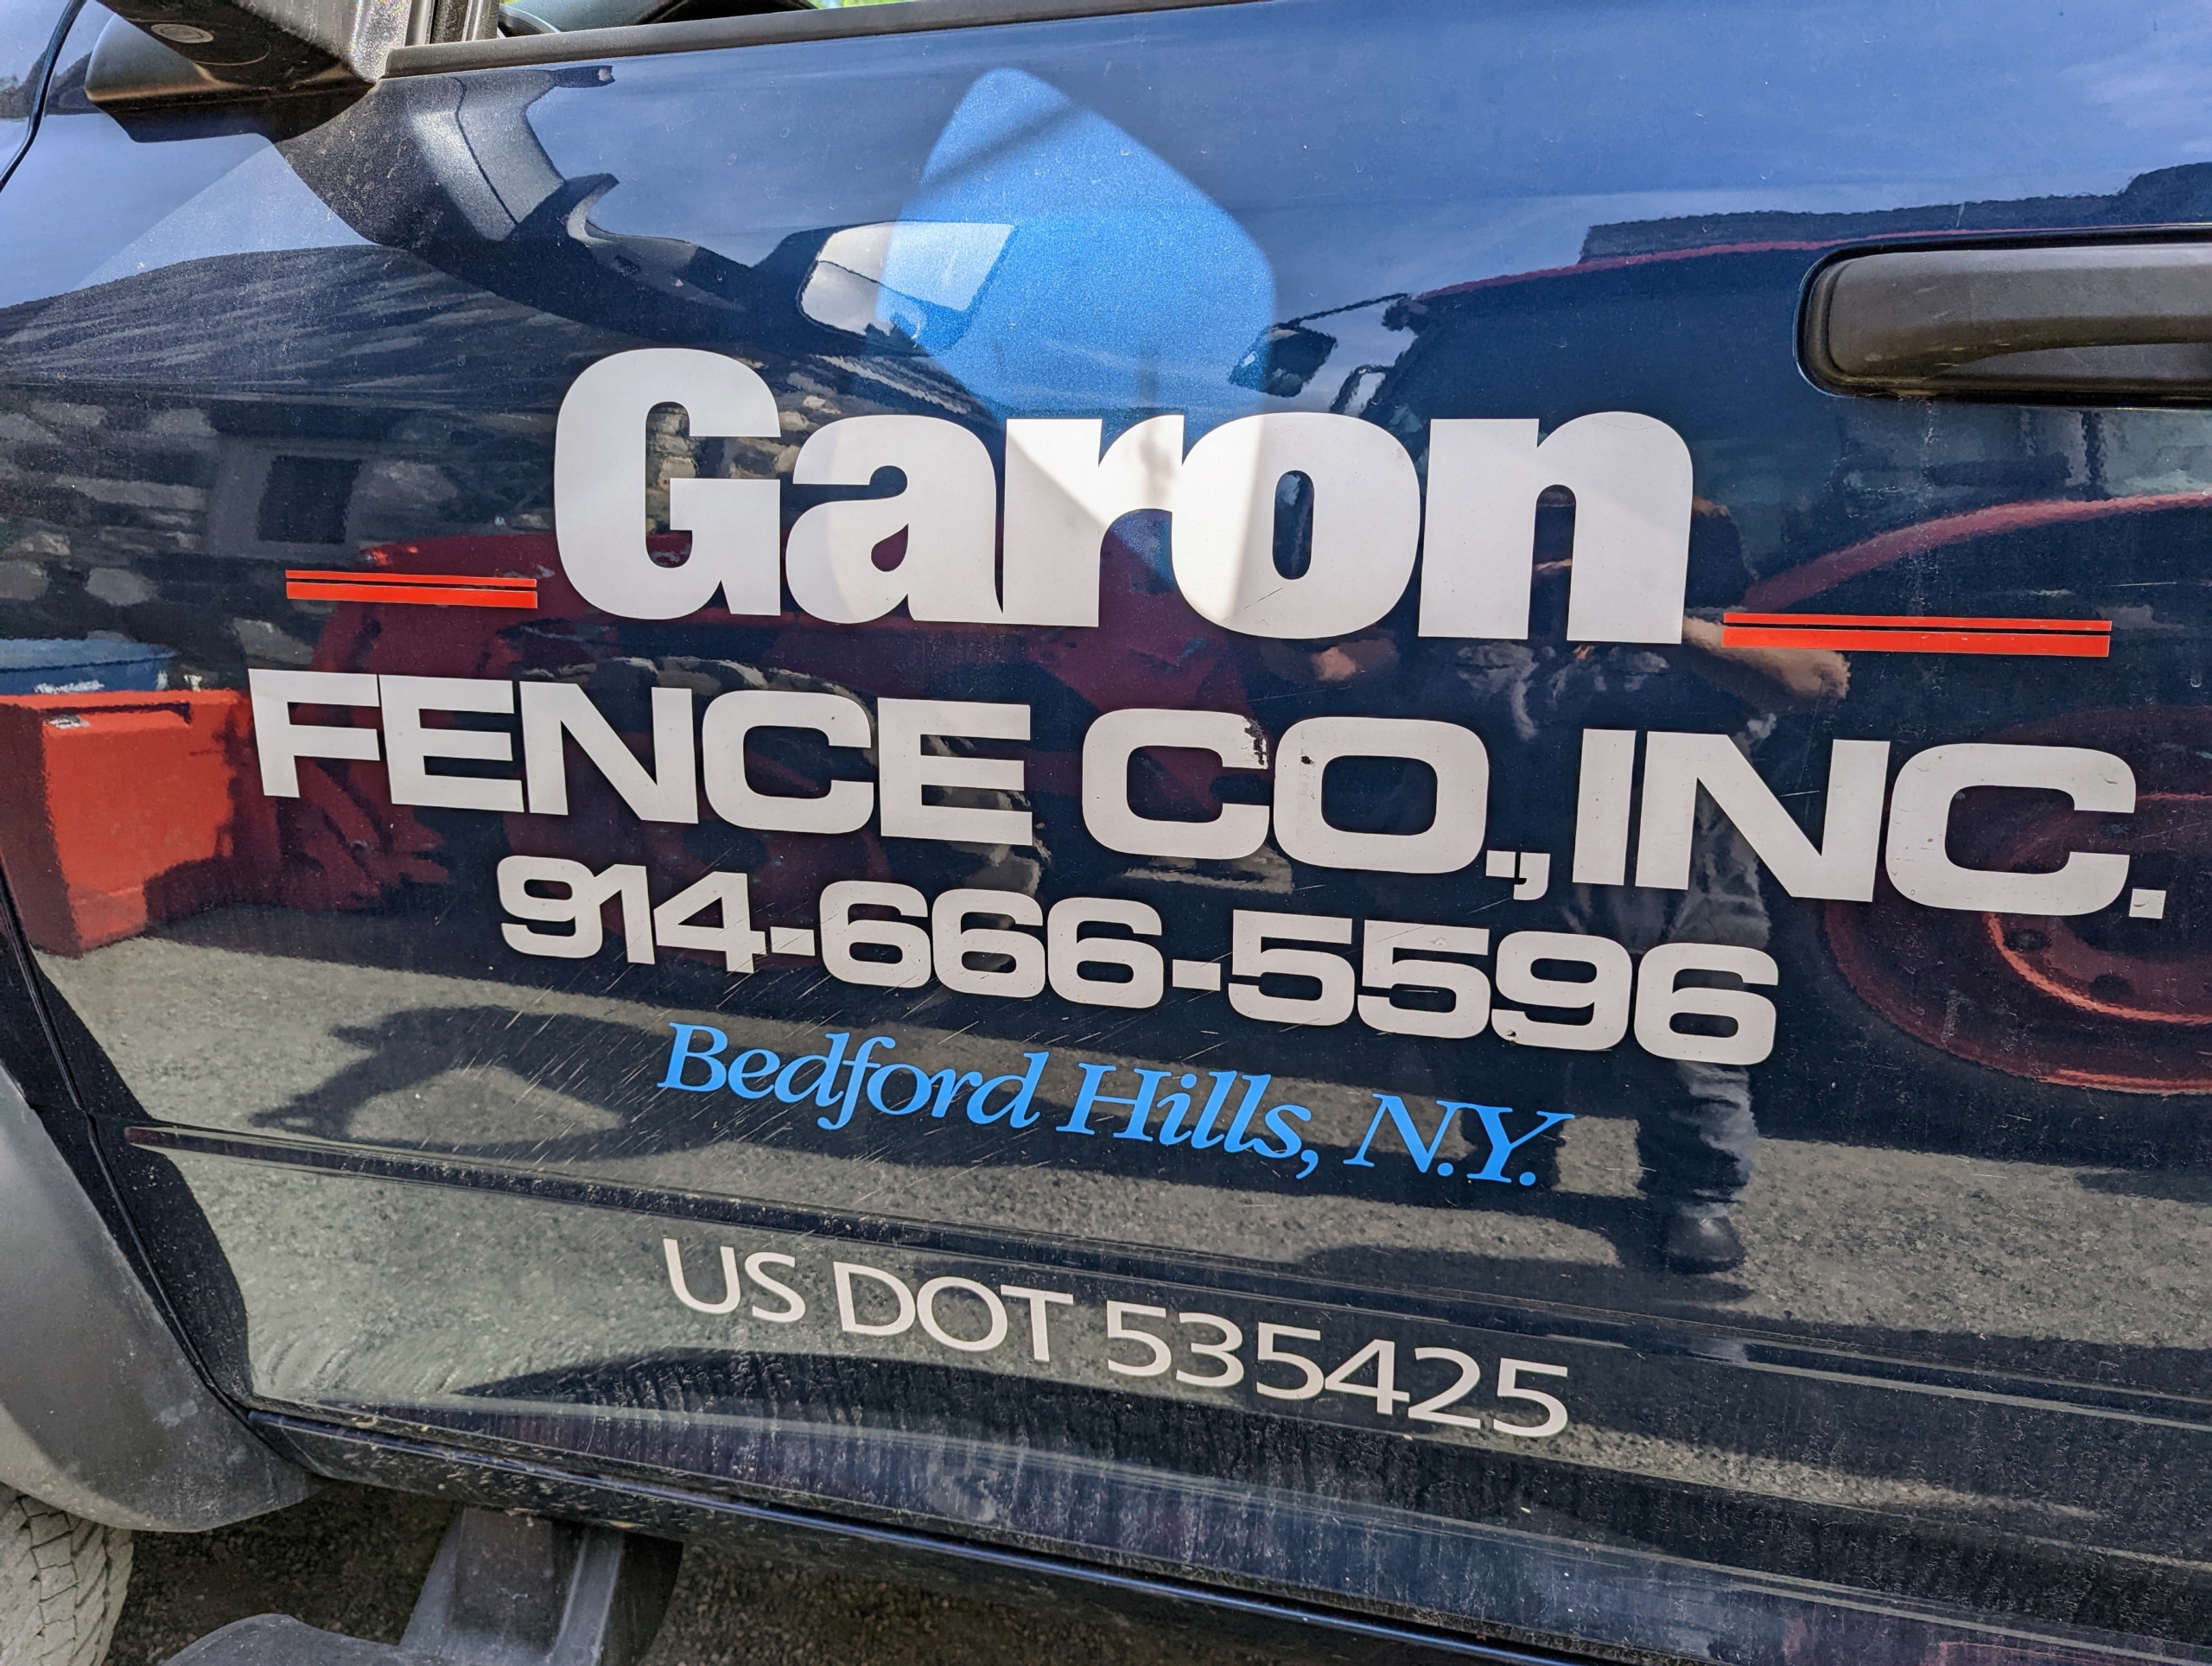
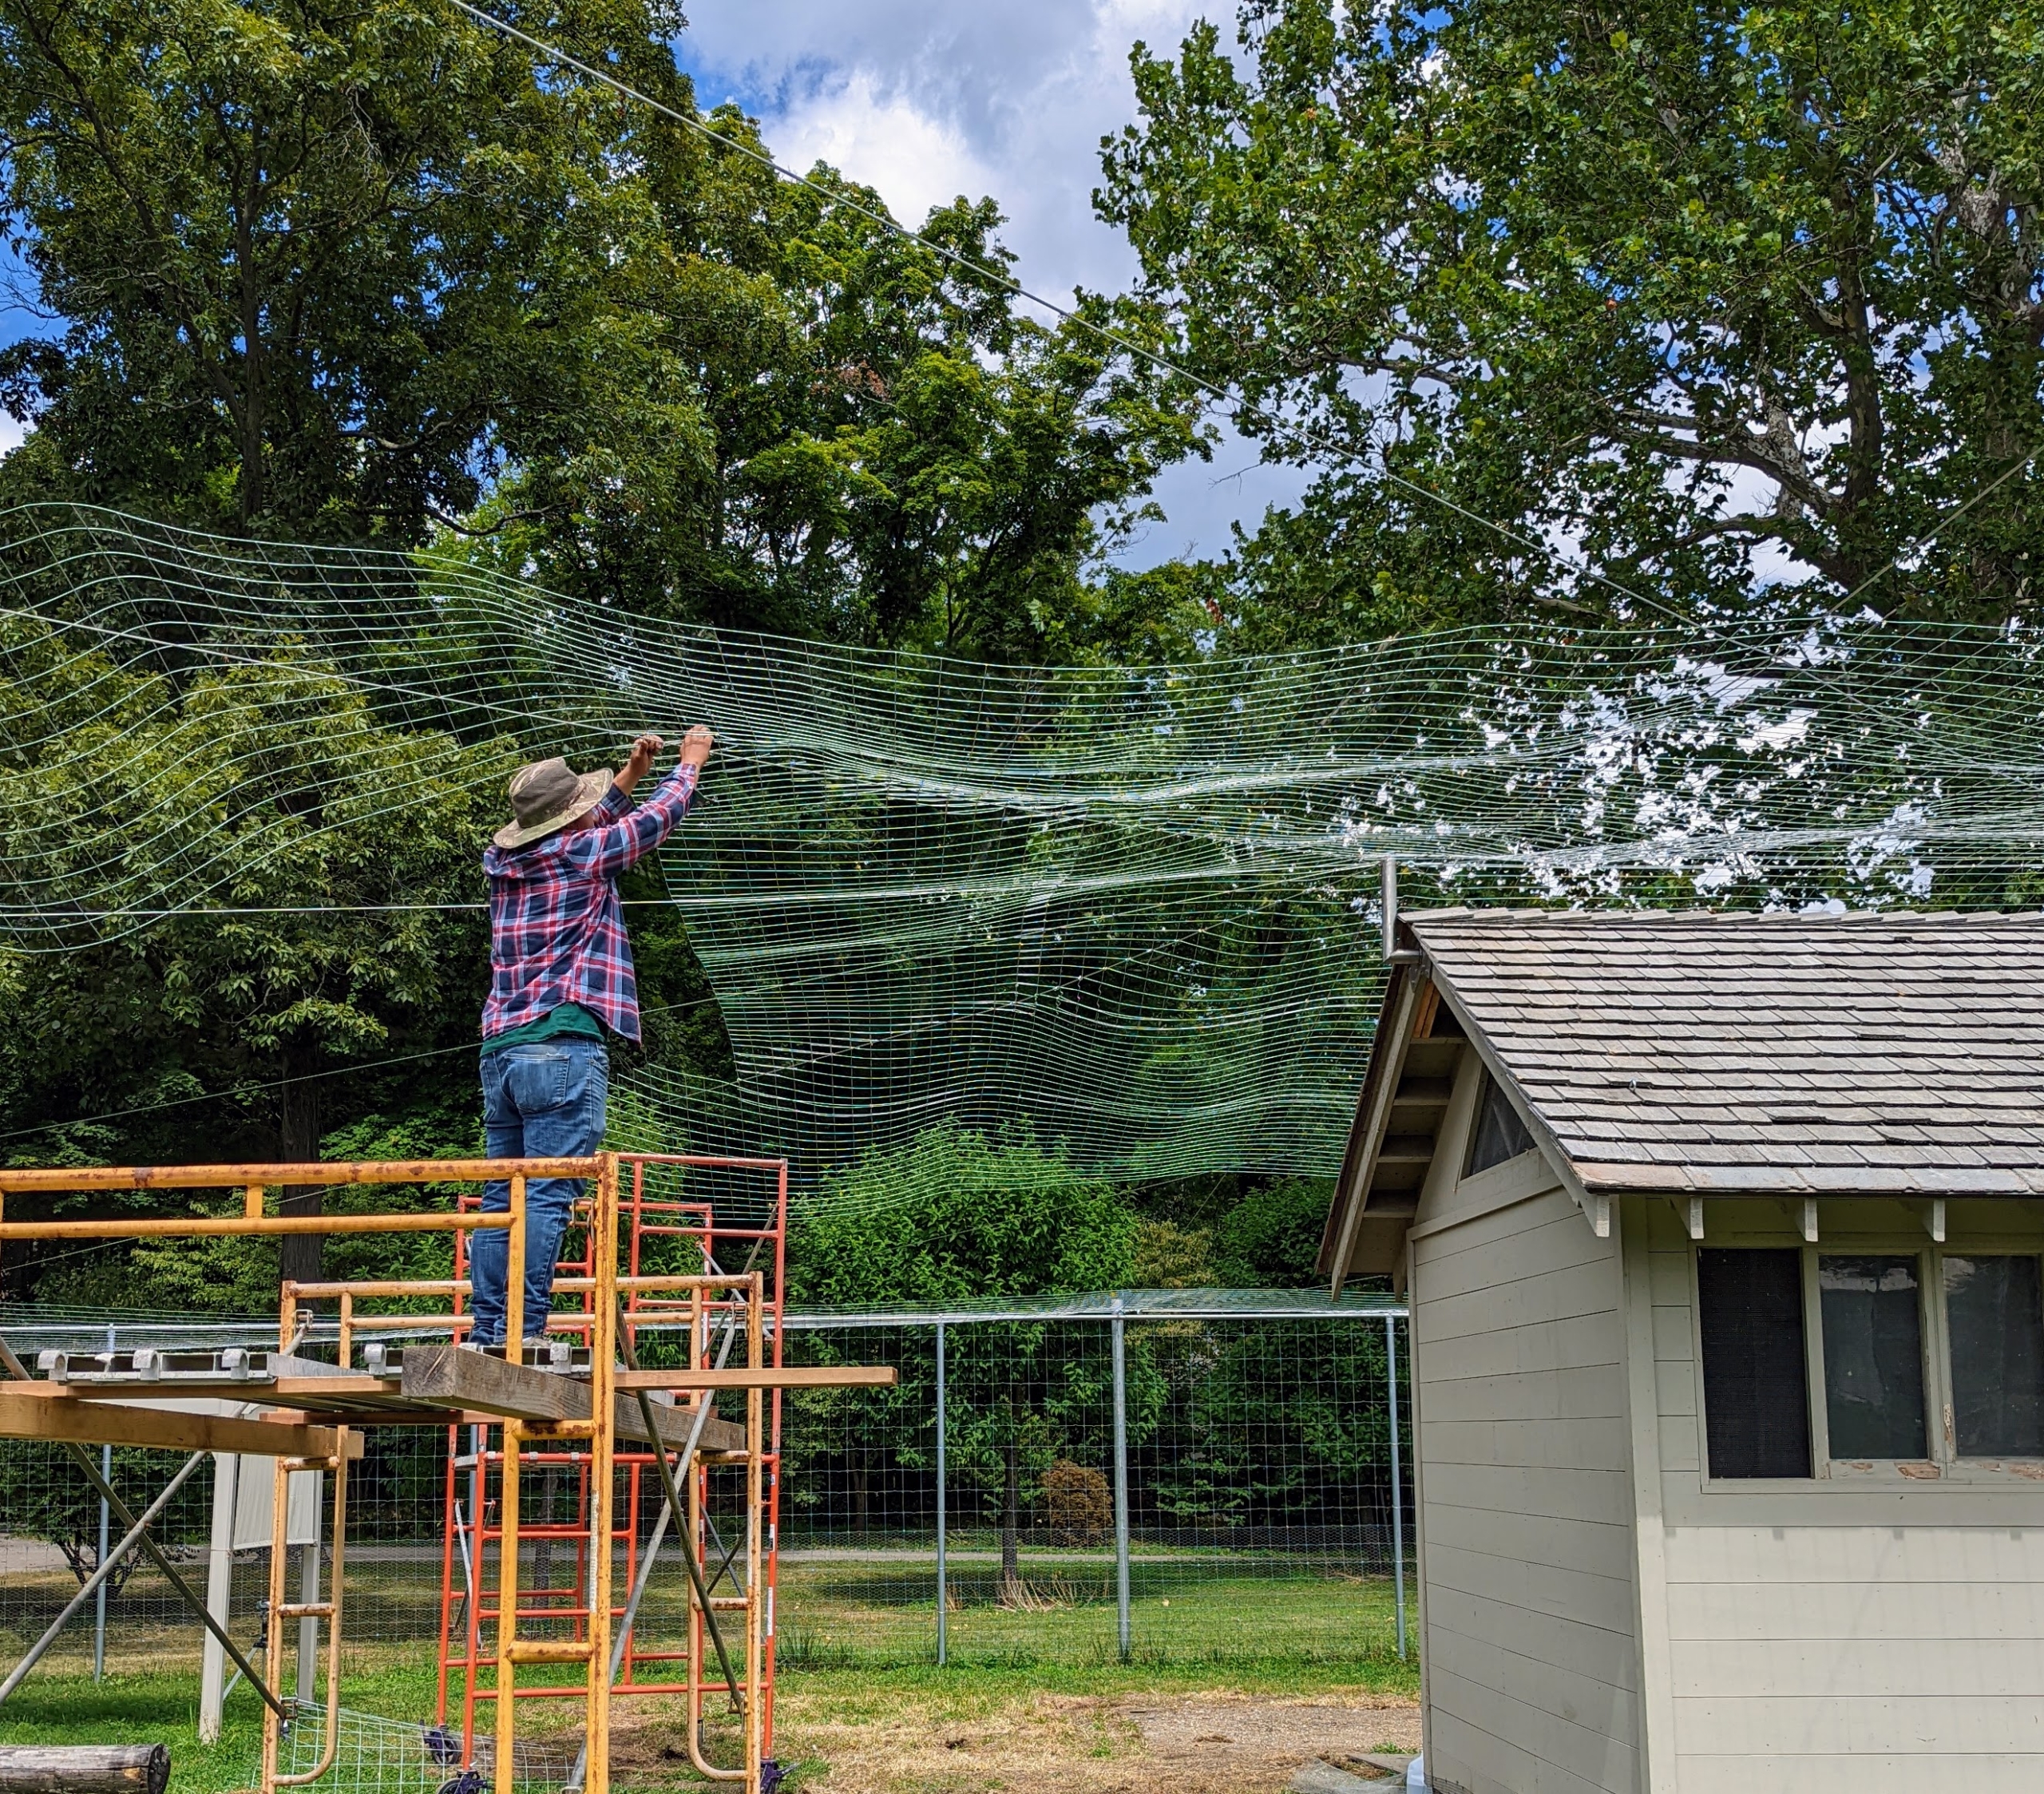
Recently, I shared photos of a big project underway in my peafowl yard. I wanted to install fencing above the pen to keep the peacocks and peahens safe. The first step was to move the coop 25-feet toward the center of the space, so it could support the new wire fencing. Once that was complete, our friends from Garon Fence Co. Inc. in nearby Bedford, Hills, came in to do their part - secure strong steel posts around the perimeter of the yard, attach cables to brackets on the coop roof, and then spread strong fence fabric to cover the entire area. It was a big undertaking, but it is comforting to know it will keep my beautiful birds free from harm.
Enjoy these photos.
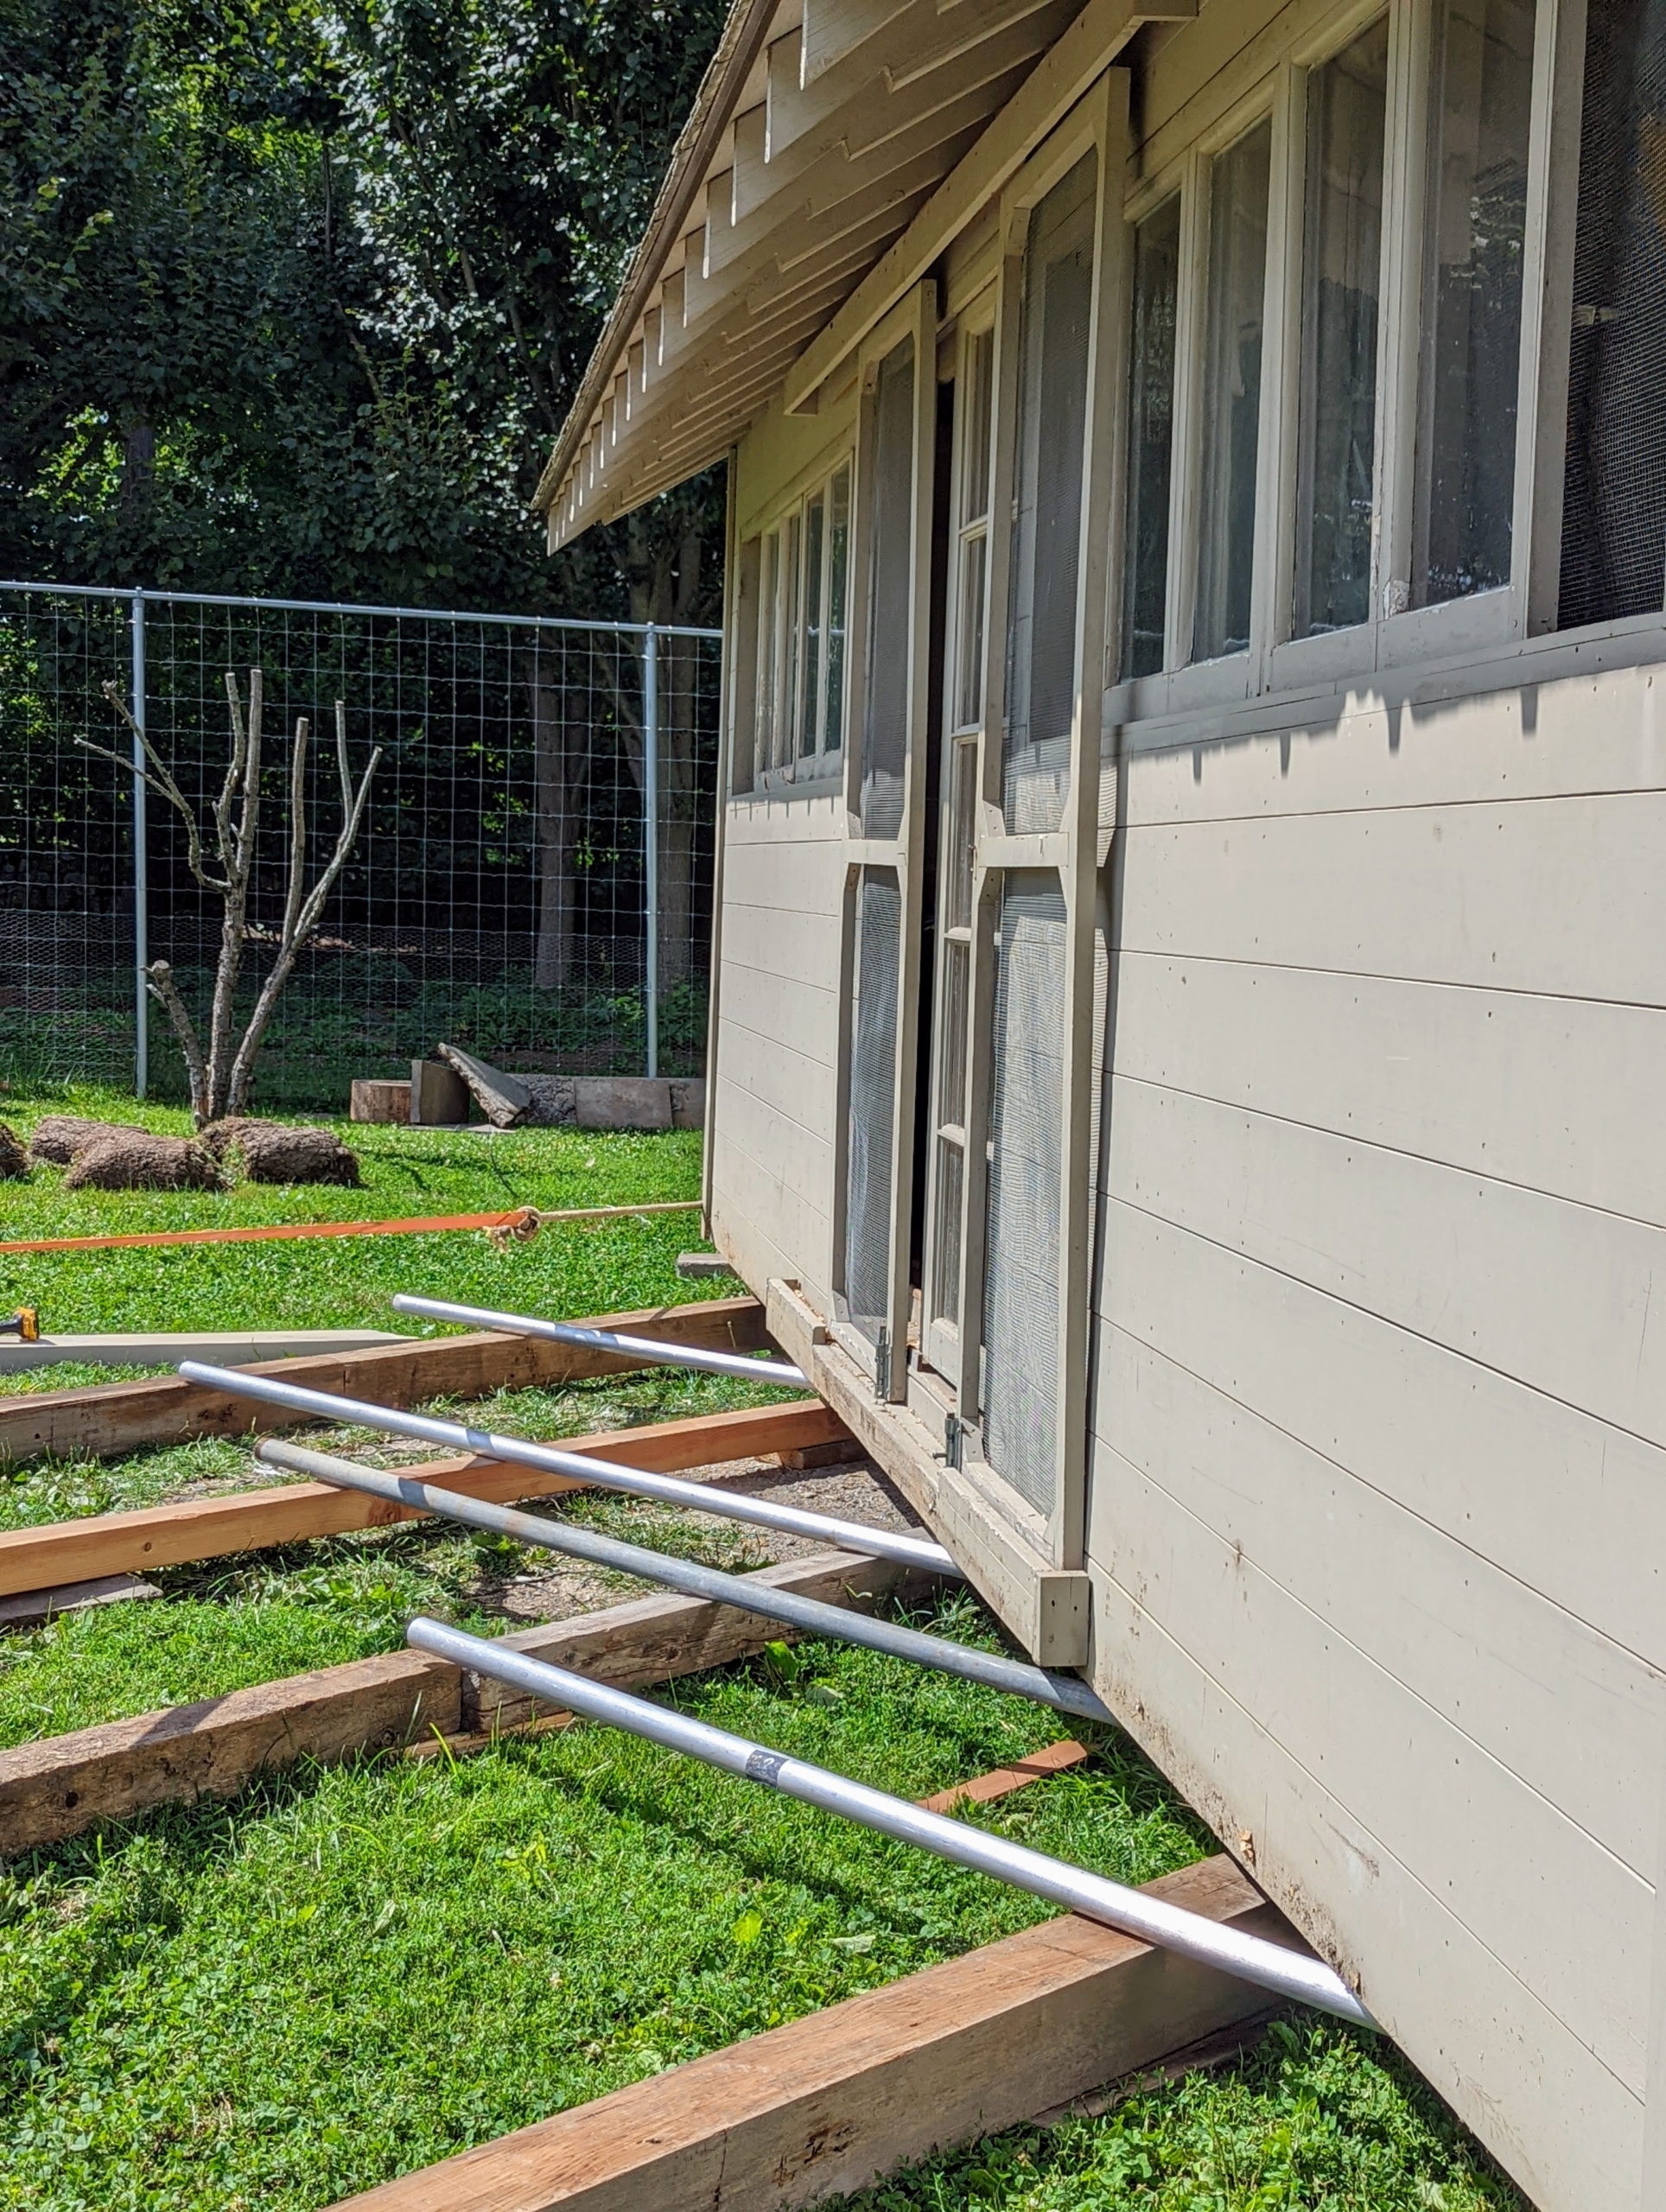
Earlier this month, I showed you how we moved the peafowl coop a short distance using an old fashion method of rolling the structure over aluminum poles into its desired place. Here is the coop just before it was moved.
Here, it has already moved several feet into place – one can see the designated footprint. Pete uses a jack to move the aluminum poles where needed.
And here is the coop in its new spot – the center of the peafowl pen. My property manager, Doug White, and I devised a plan that would allow this structure to support wire fencing above the space in order to keep wild predators from getting in.
We used the team from Garon Fence Co. to put up the new fence top. I’ve used Garon for other projects. This company put up the fencing around my peafowl yard a couple of years ago. They also replaced the fence around my chicken coops.
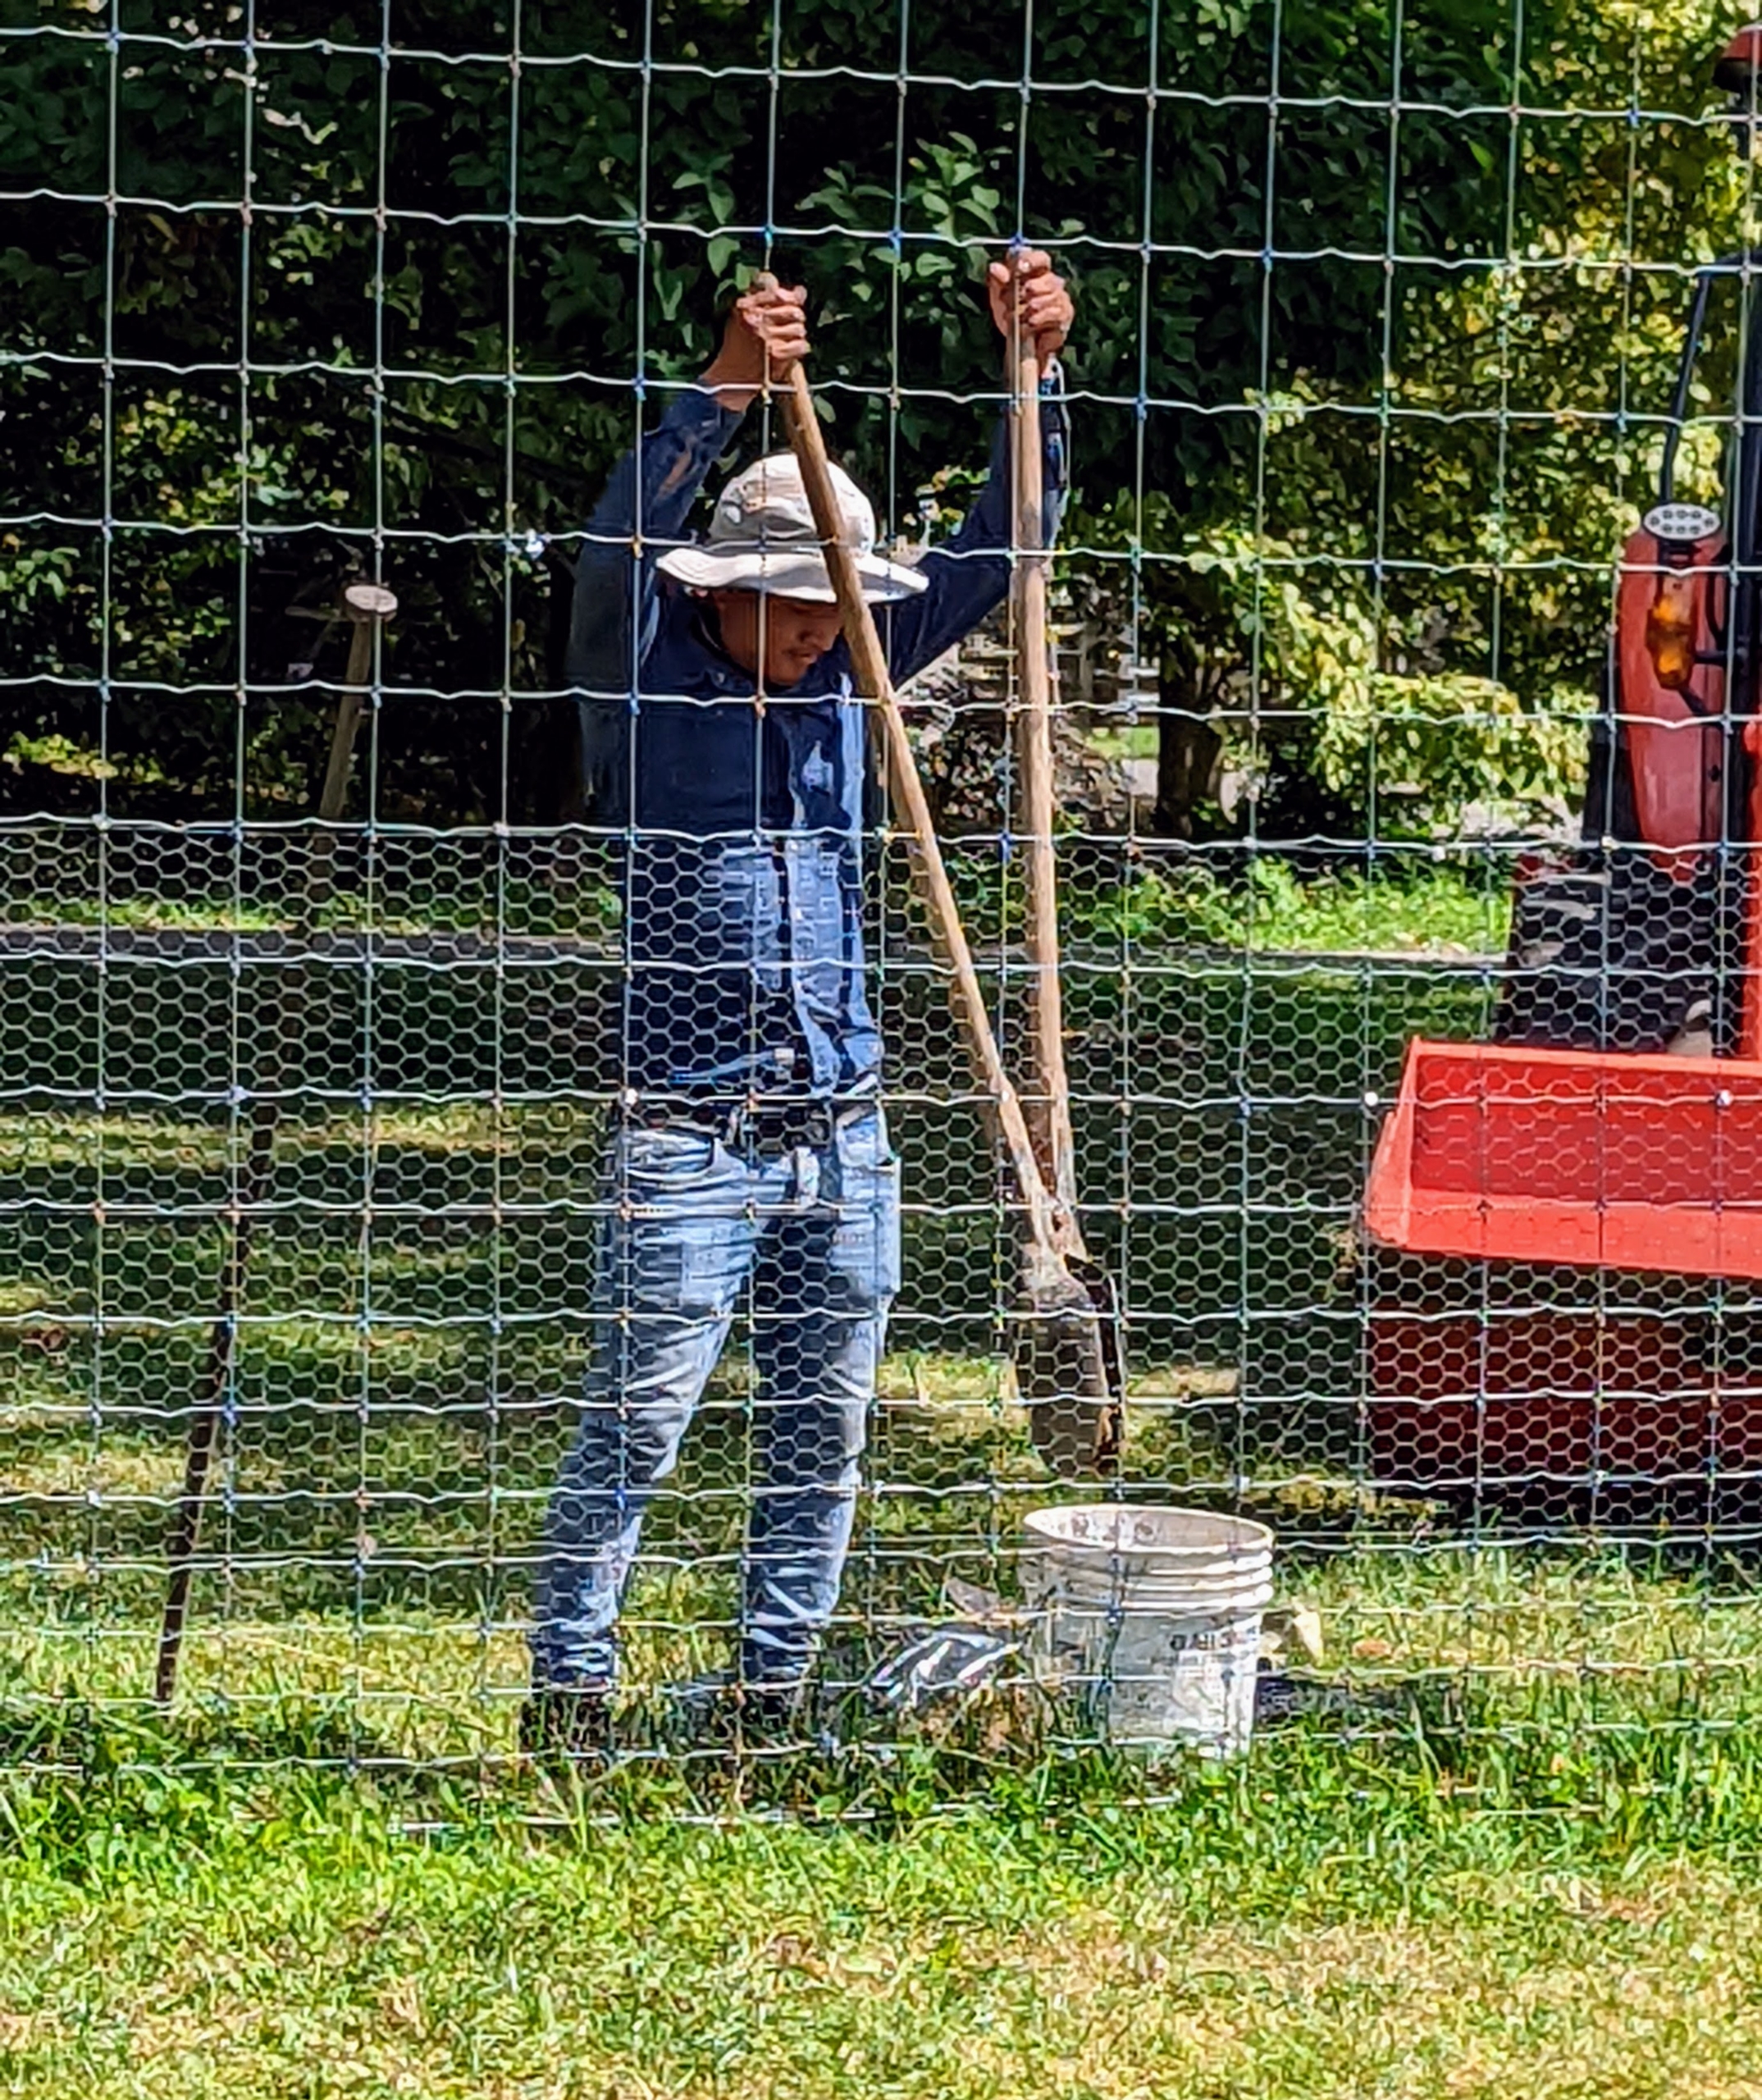
The first step is to dig holes for the steel posts. Each post hole is dug four feet deep – all by hand.
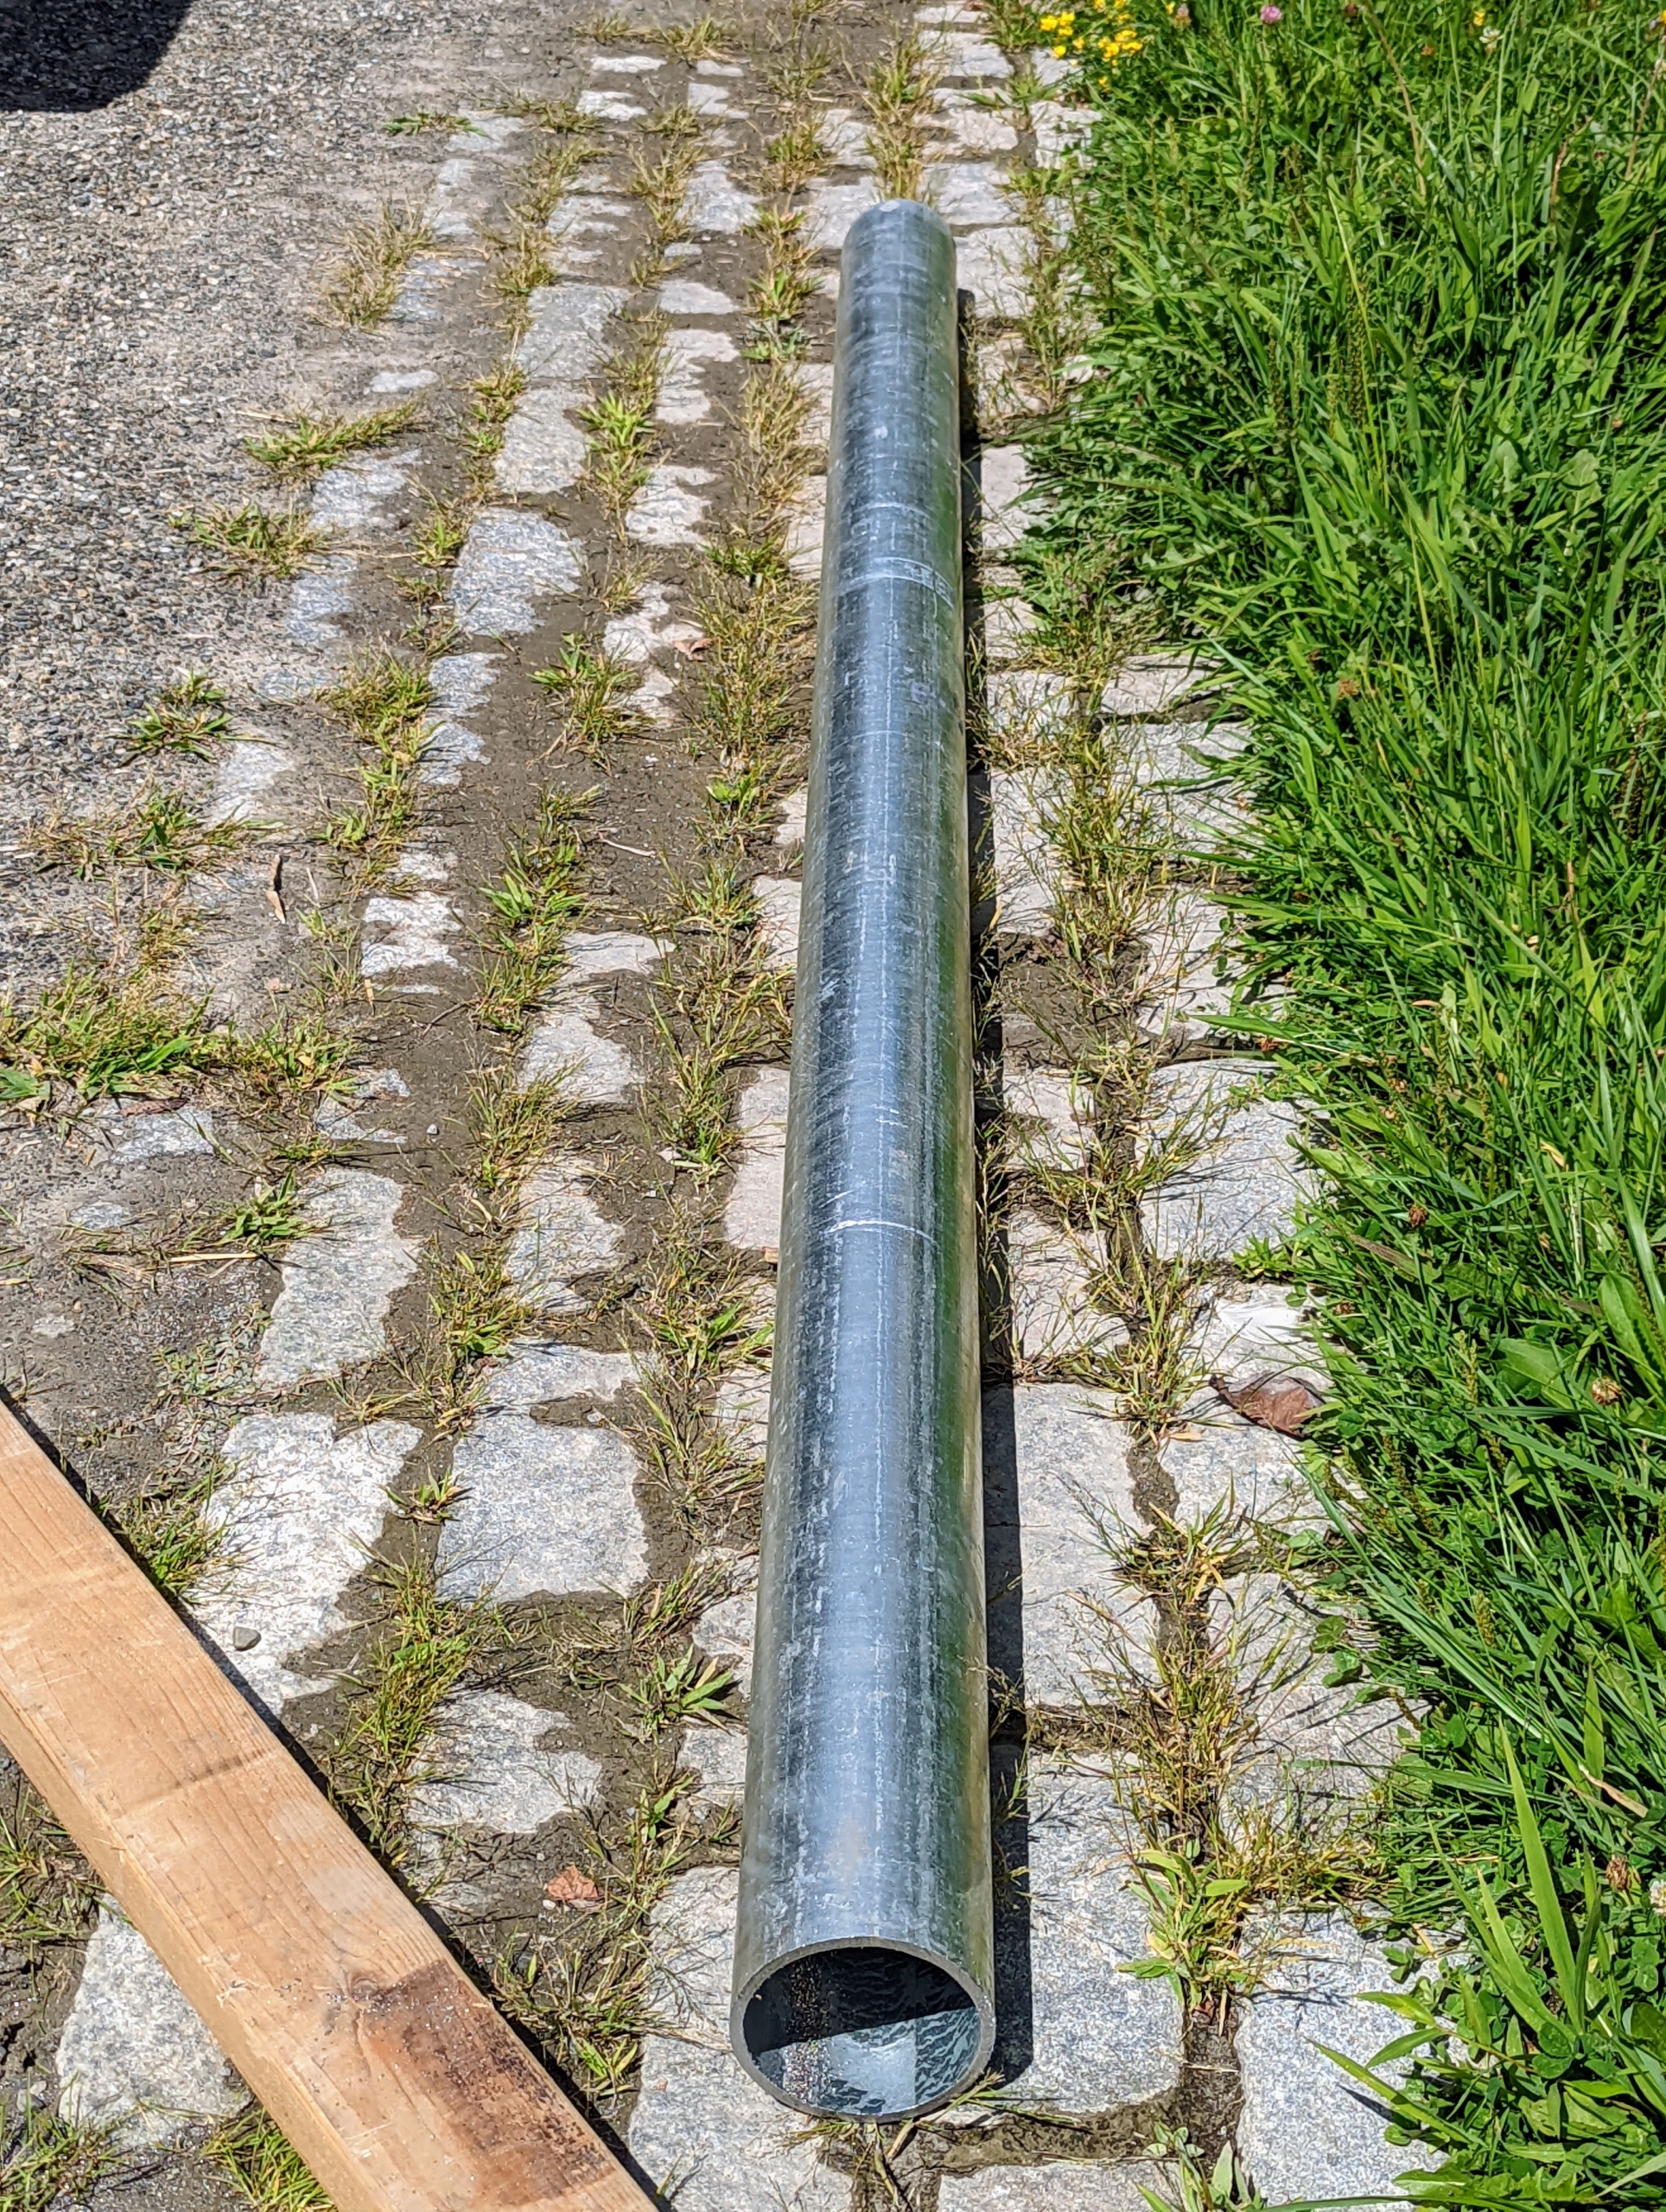
These are the galvanized steel posts. They are 14-feet tall and will be buried four feet into the ground. These are made for strength, durability, and corrosion resistance.
After the posts are secured and leveled in the concrete, they’re left to dry thoroughly.
A total of 14-posts are secured around the enclosure.
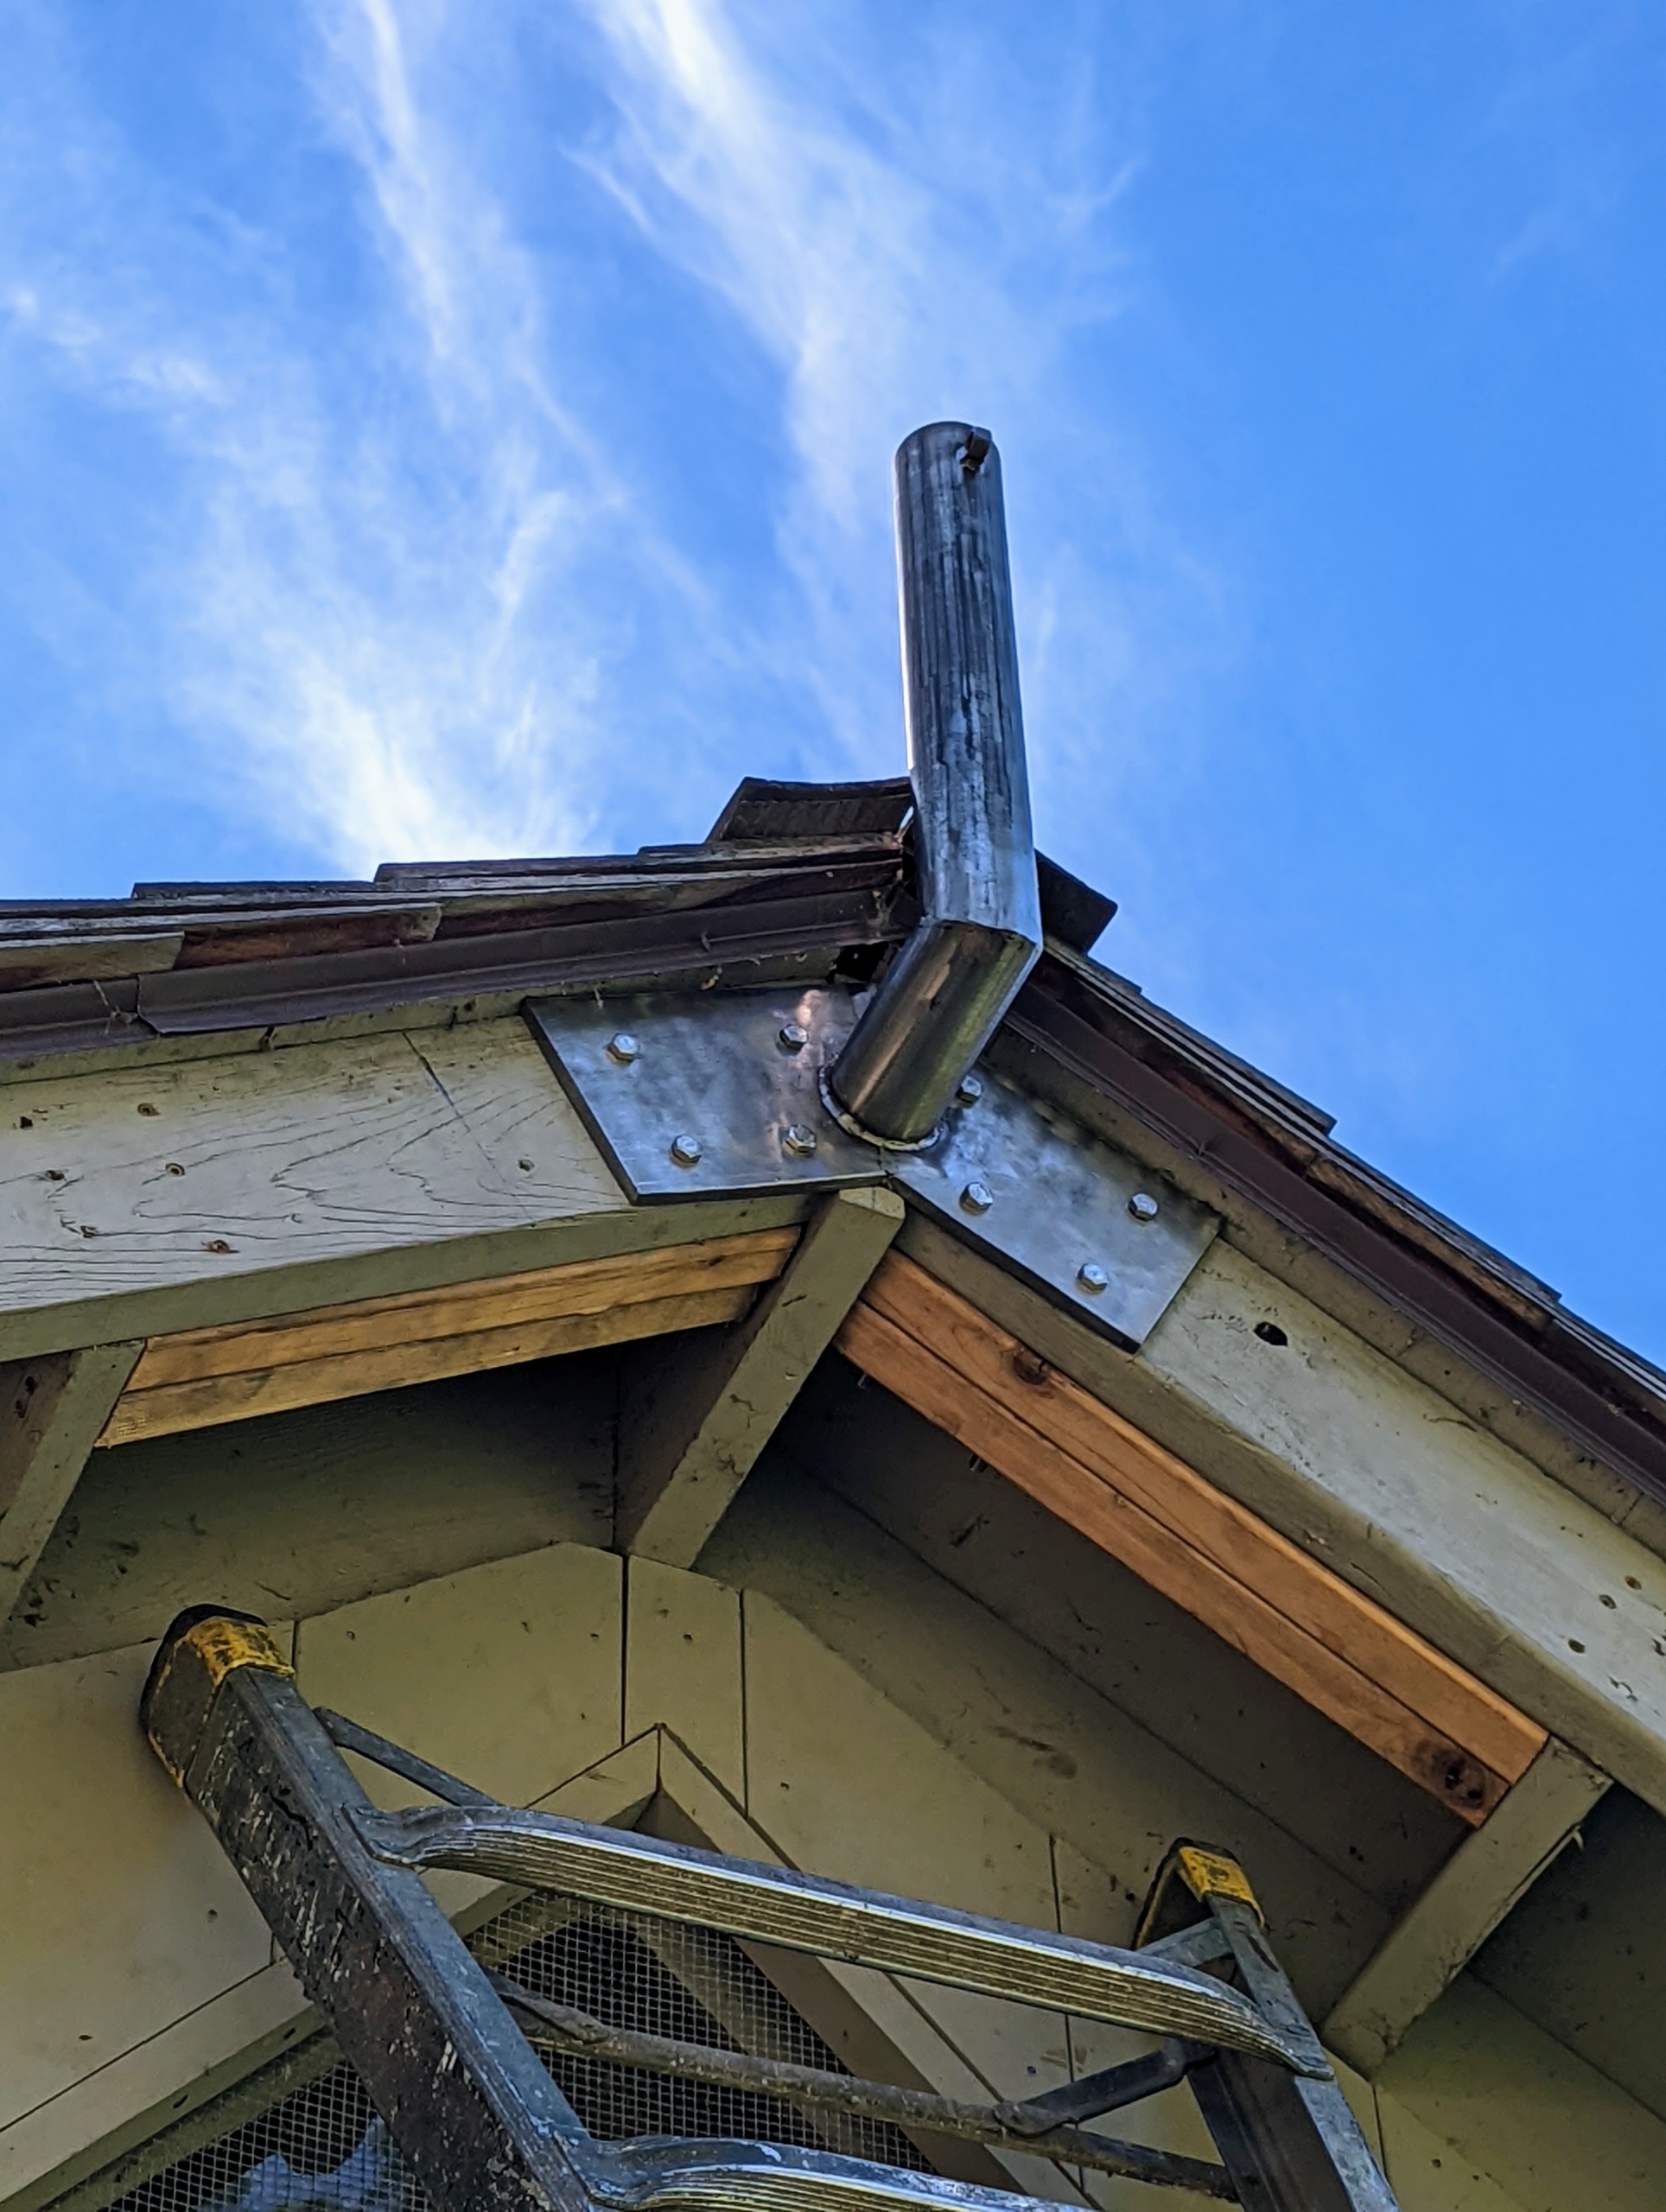
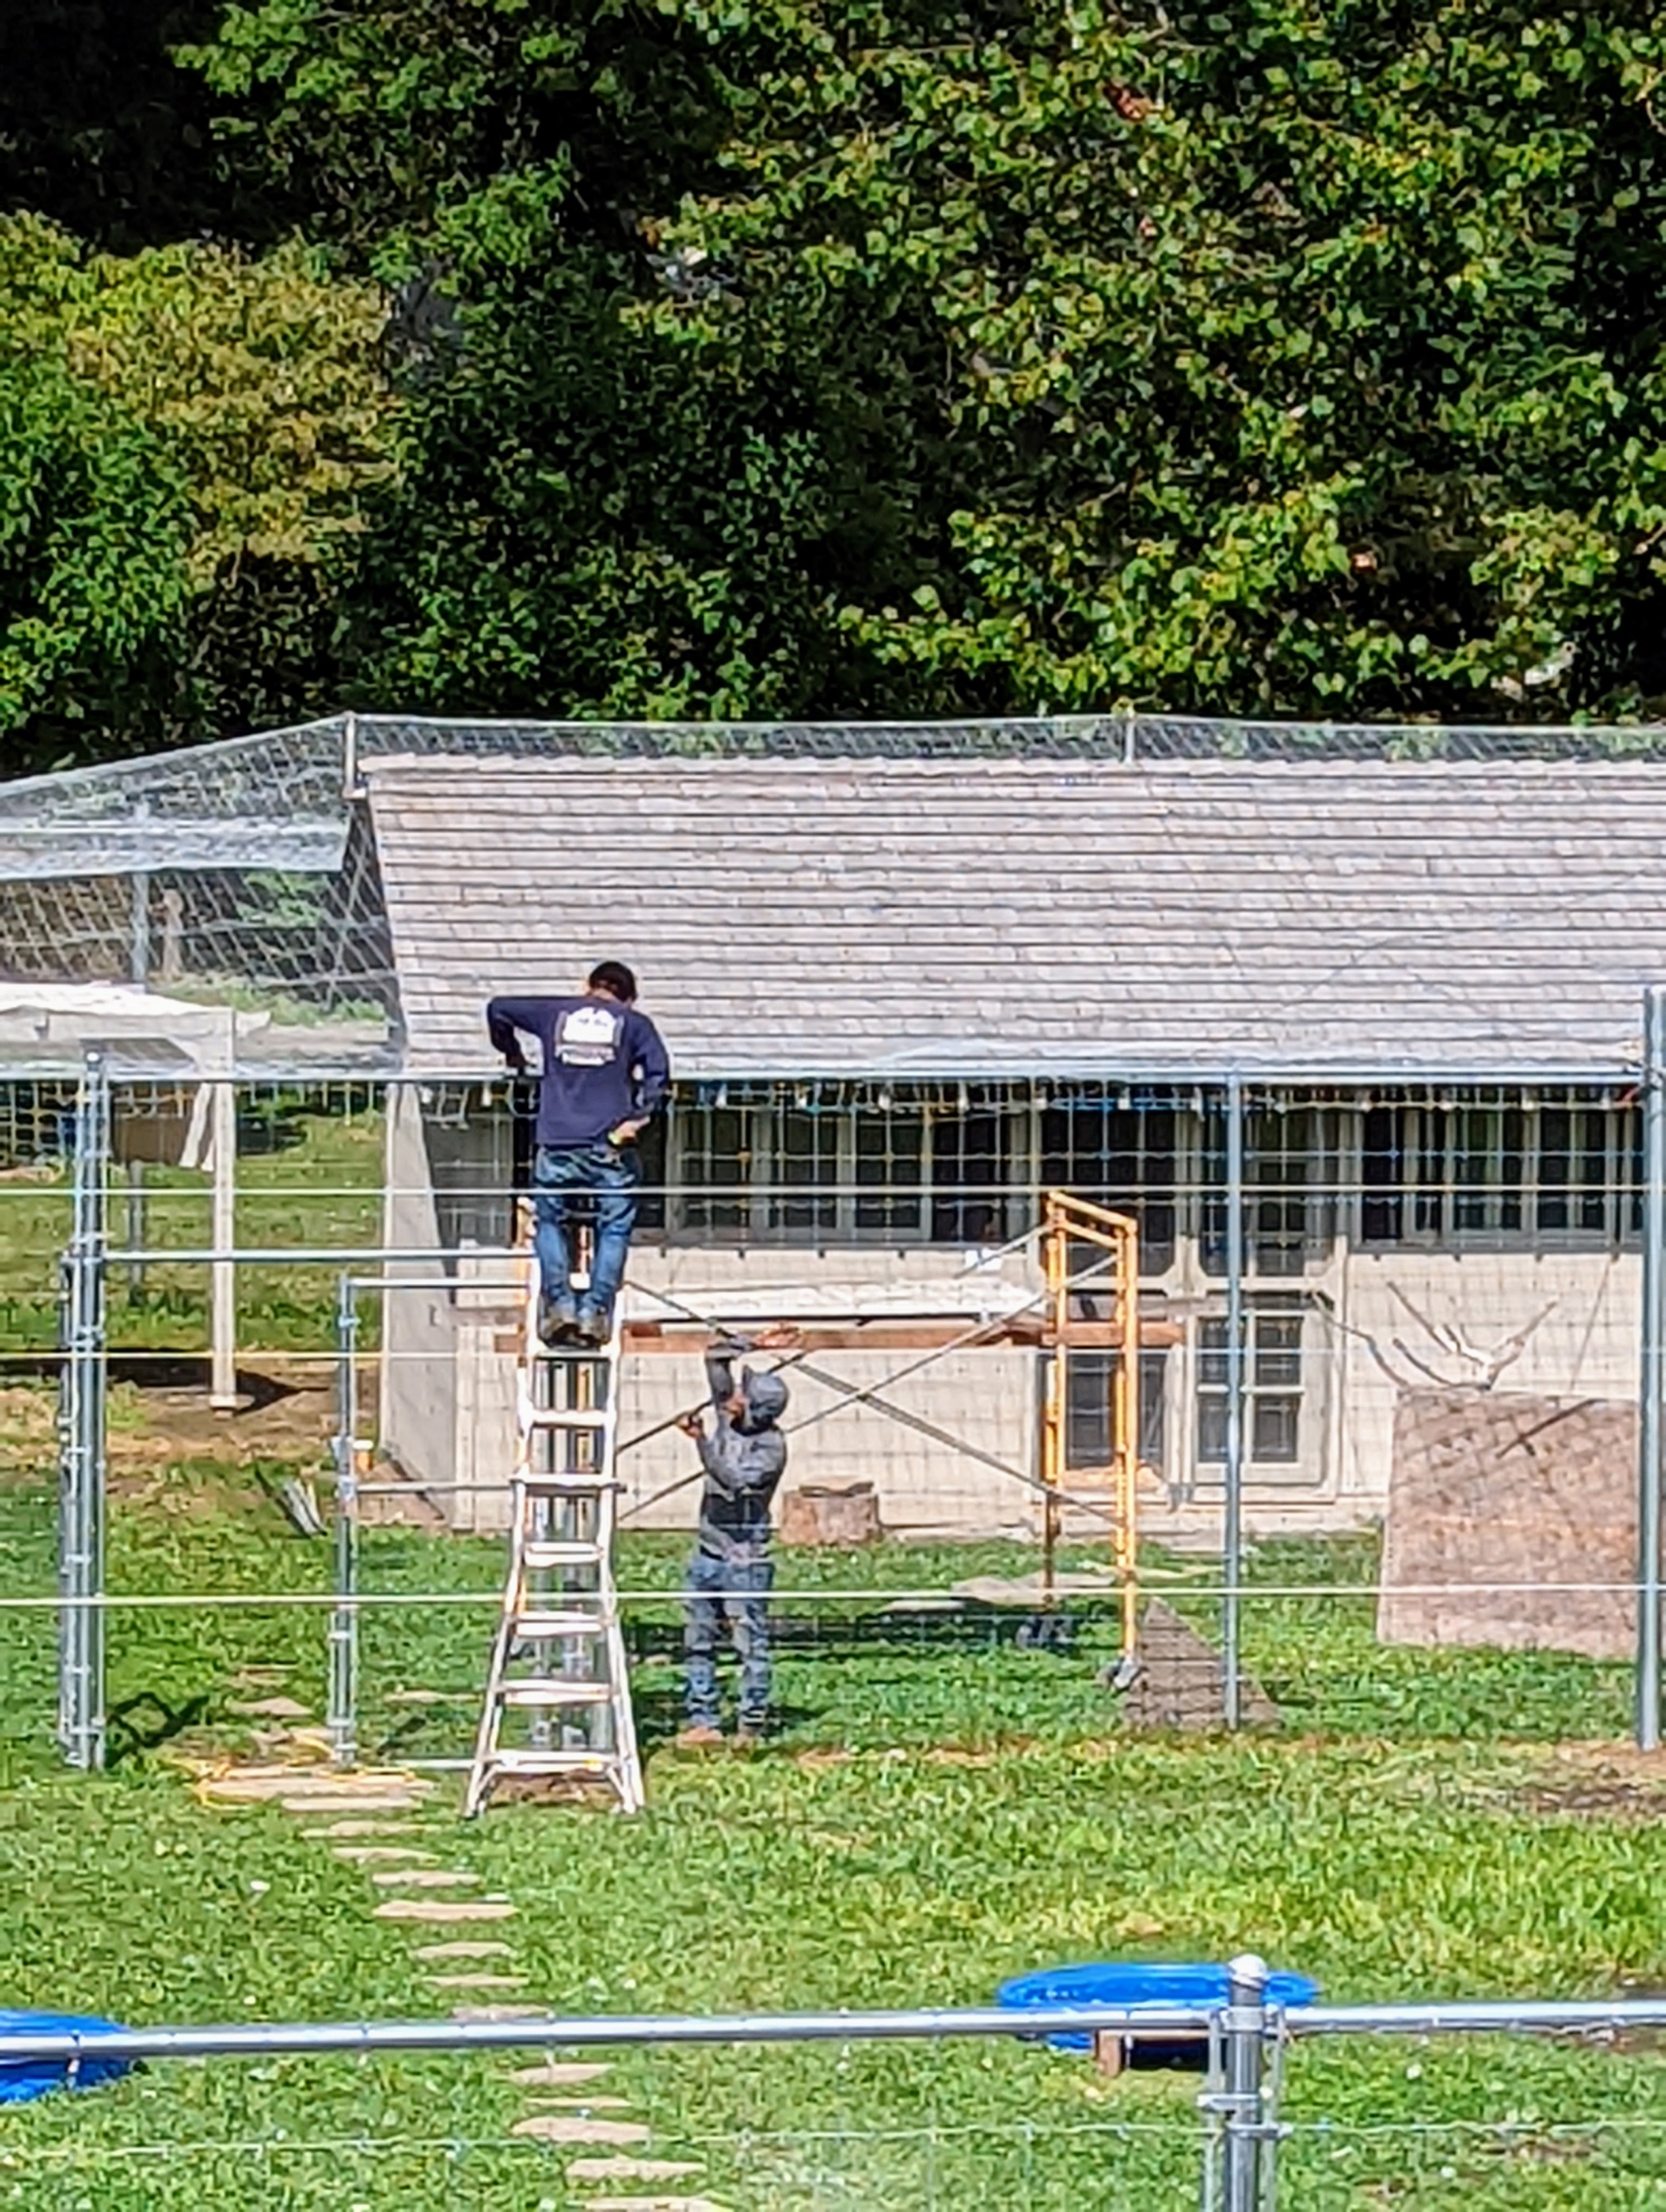
Next, Garon Fence Co. foreman, Raul, below, installs a steel bracket just under the peak of the coop roof.
Here is one fully installed. There is one on each end of the peafowl coop roof. This will support the cable that will hold up the fence fabric.
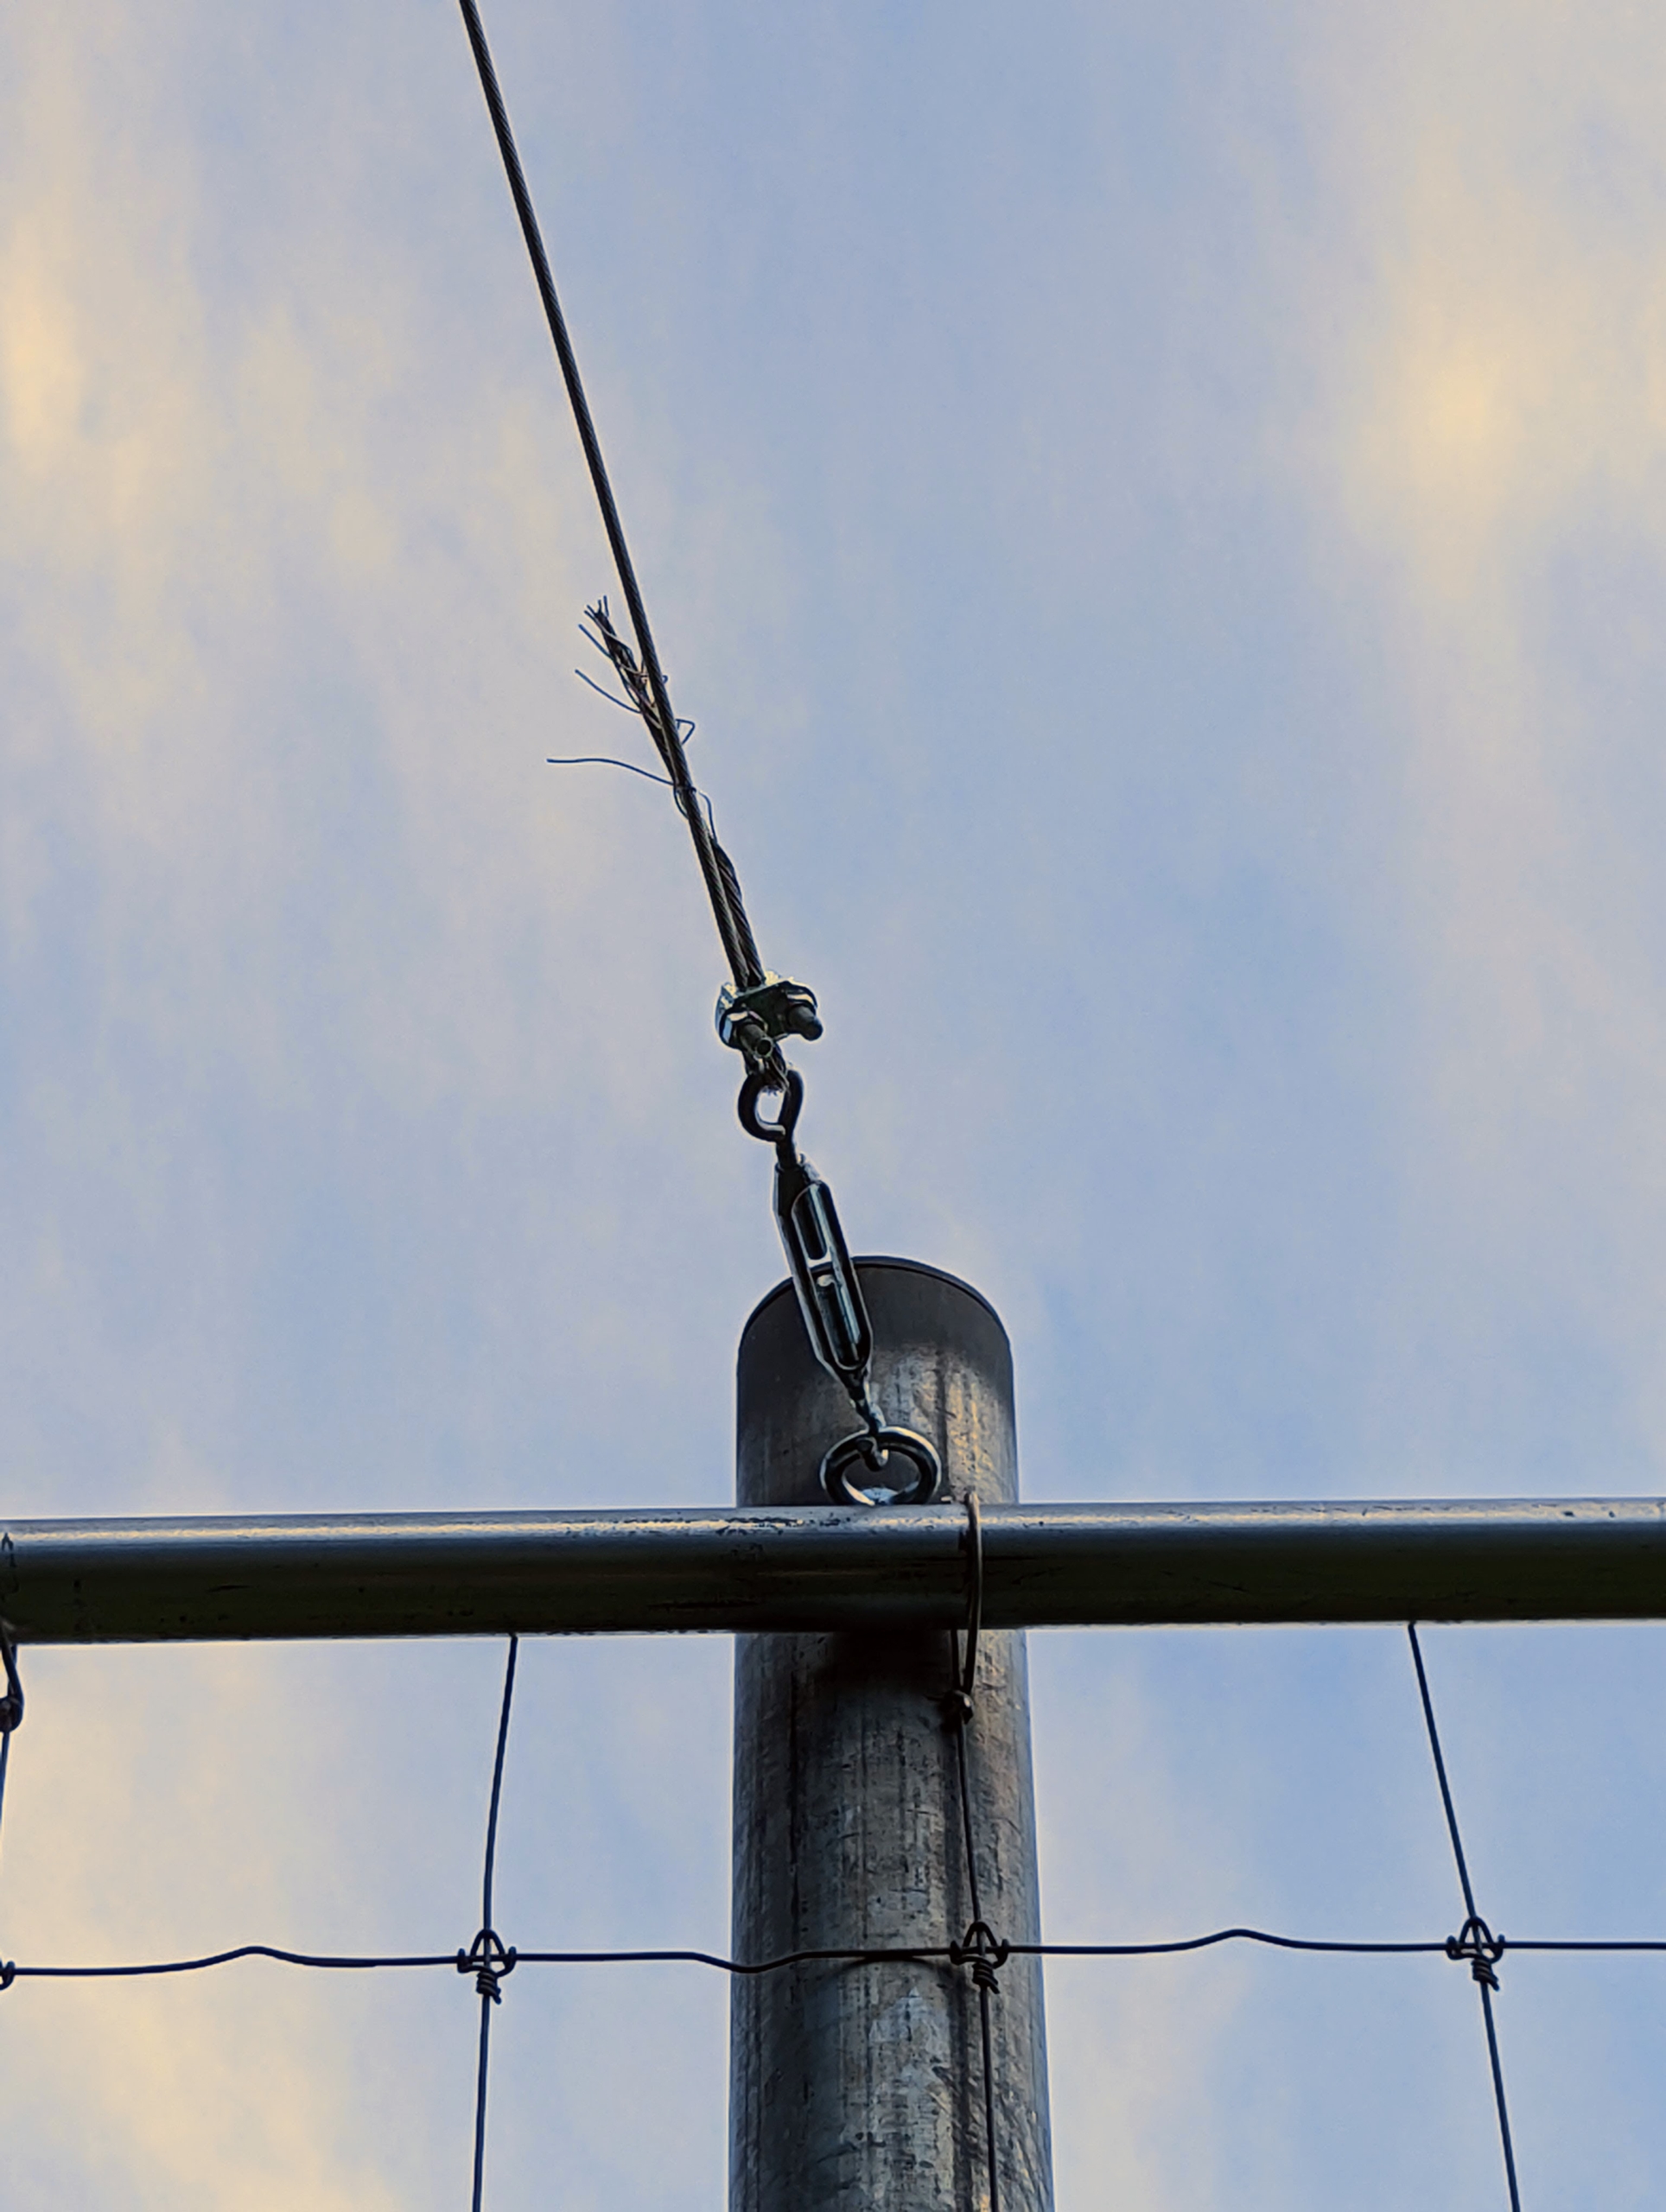
The cable is then run from each of the posts to the brackets on the coop.
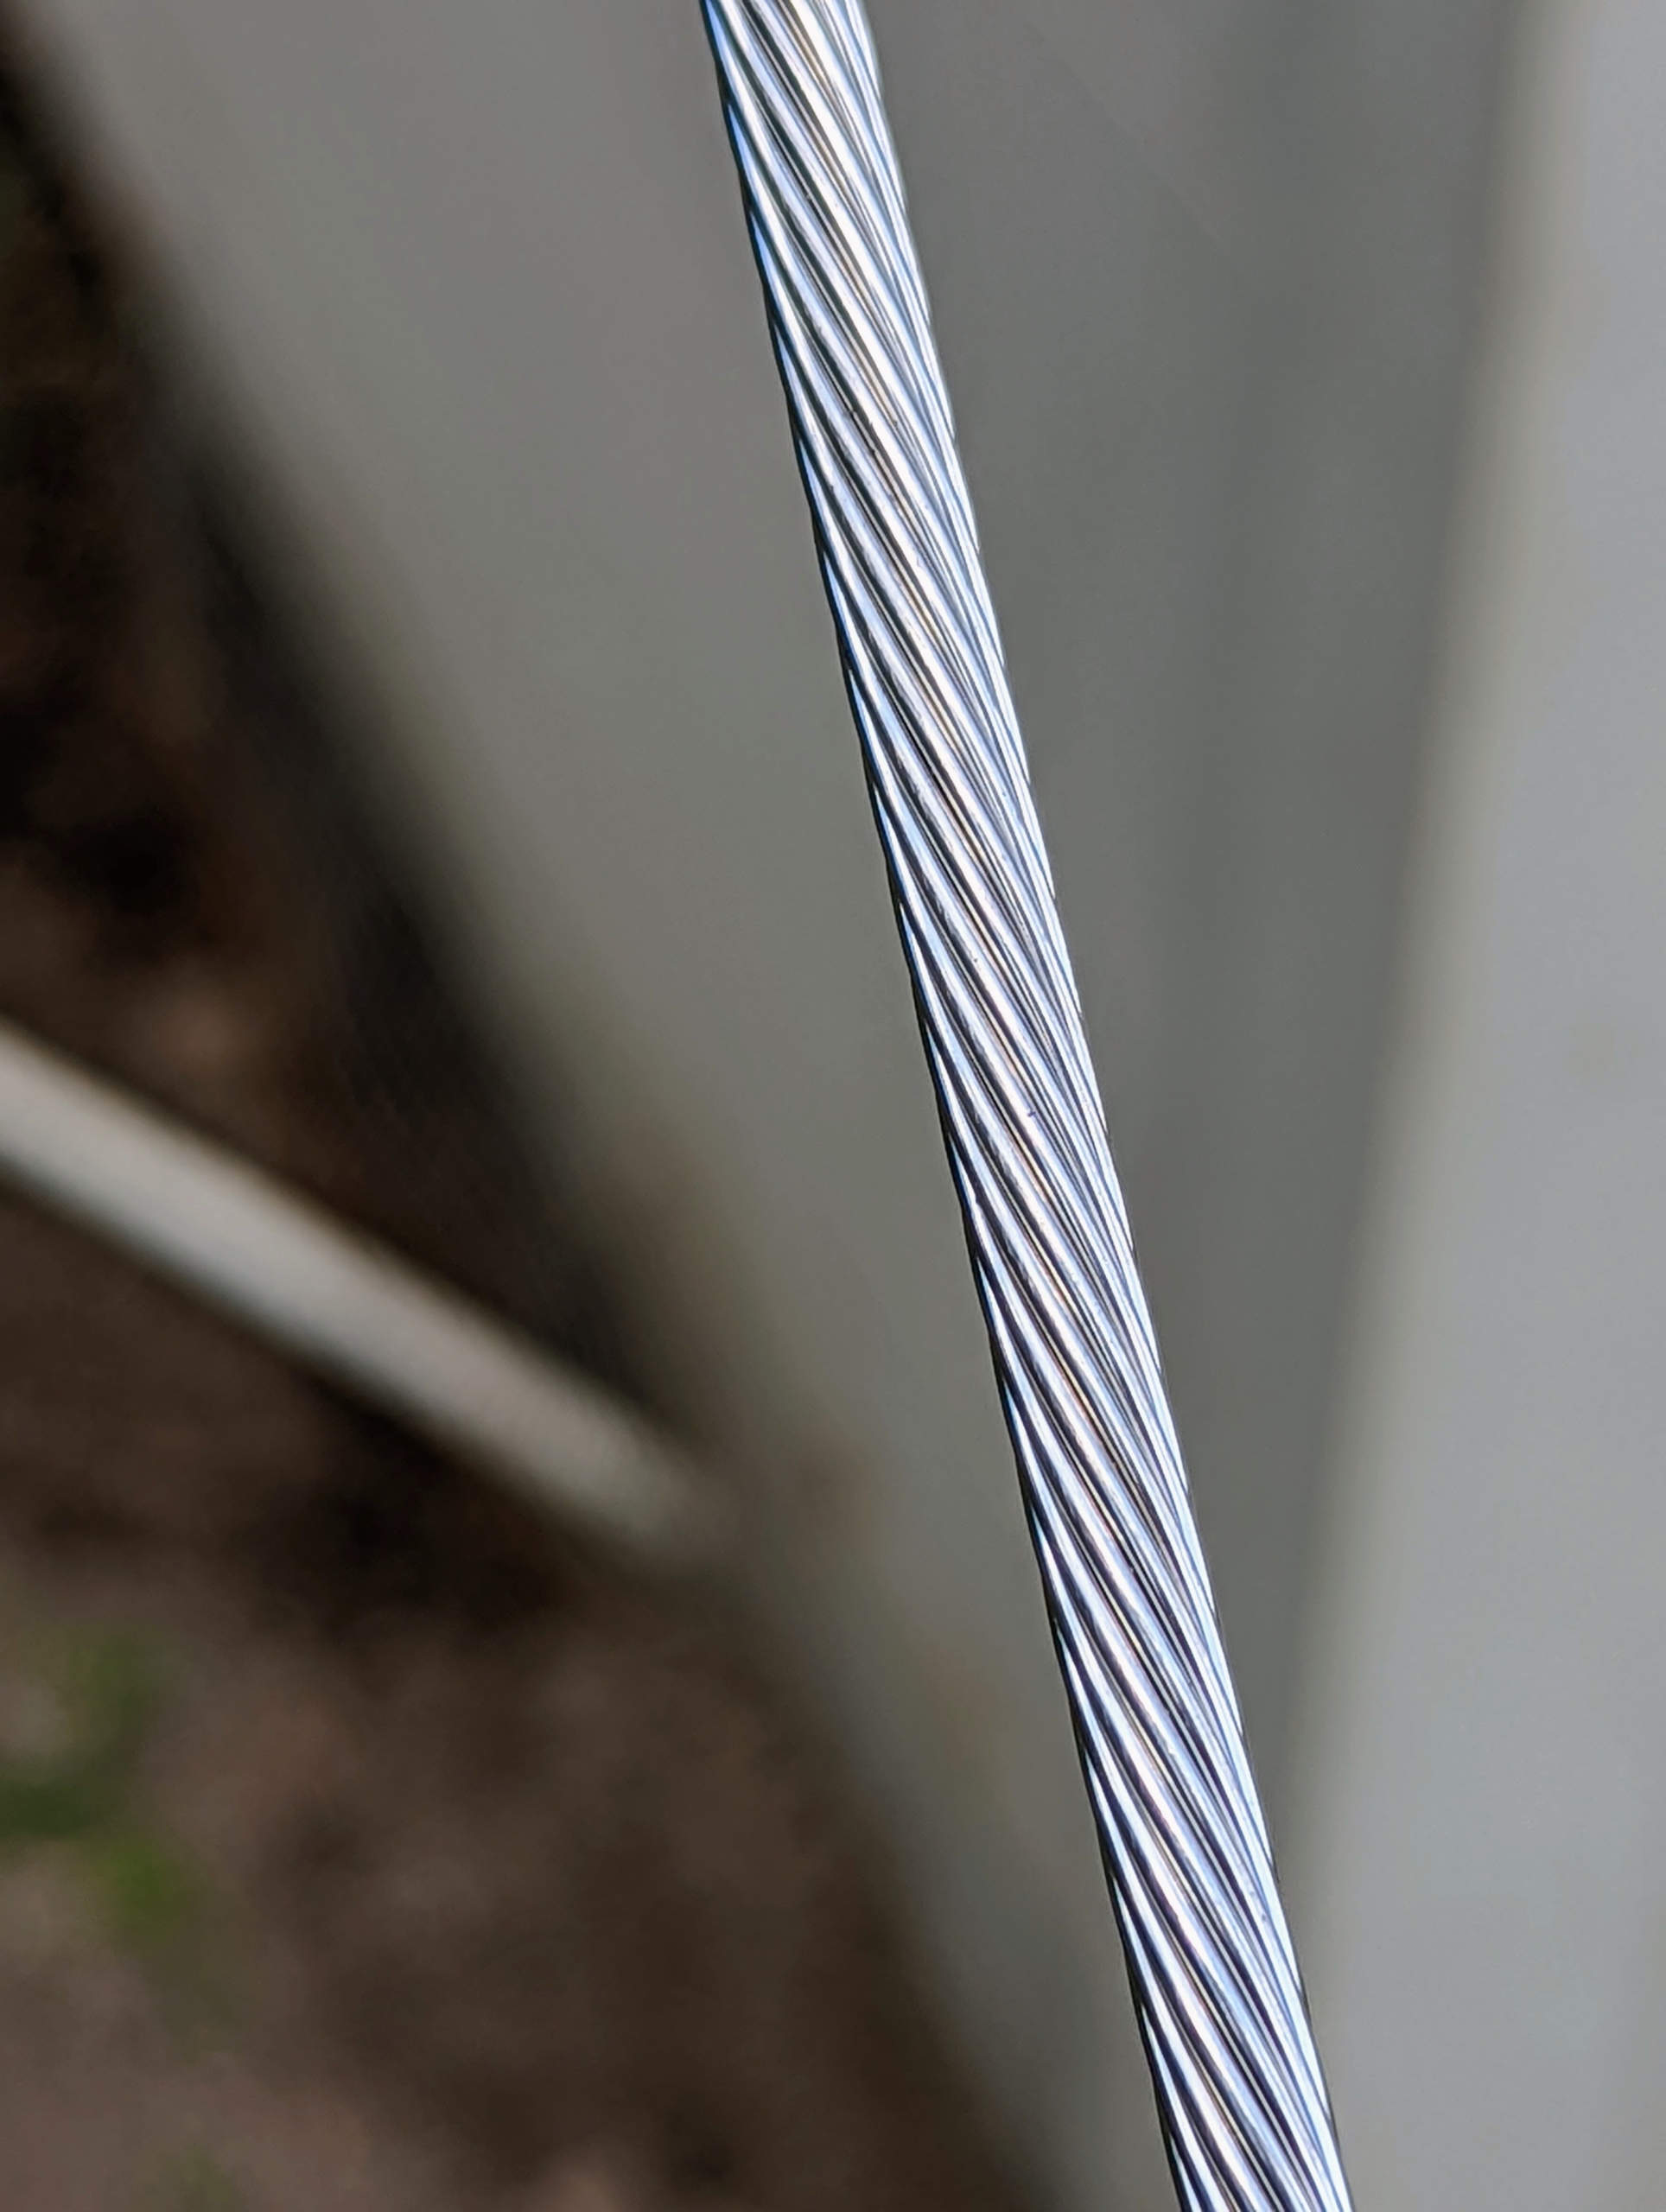
This is 316 gauge cable. It is corrosion resistant and can hold more than 330-pounds.
Here is a view from the side showing how the cable is attached to the brackets in the center of the yard.
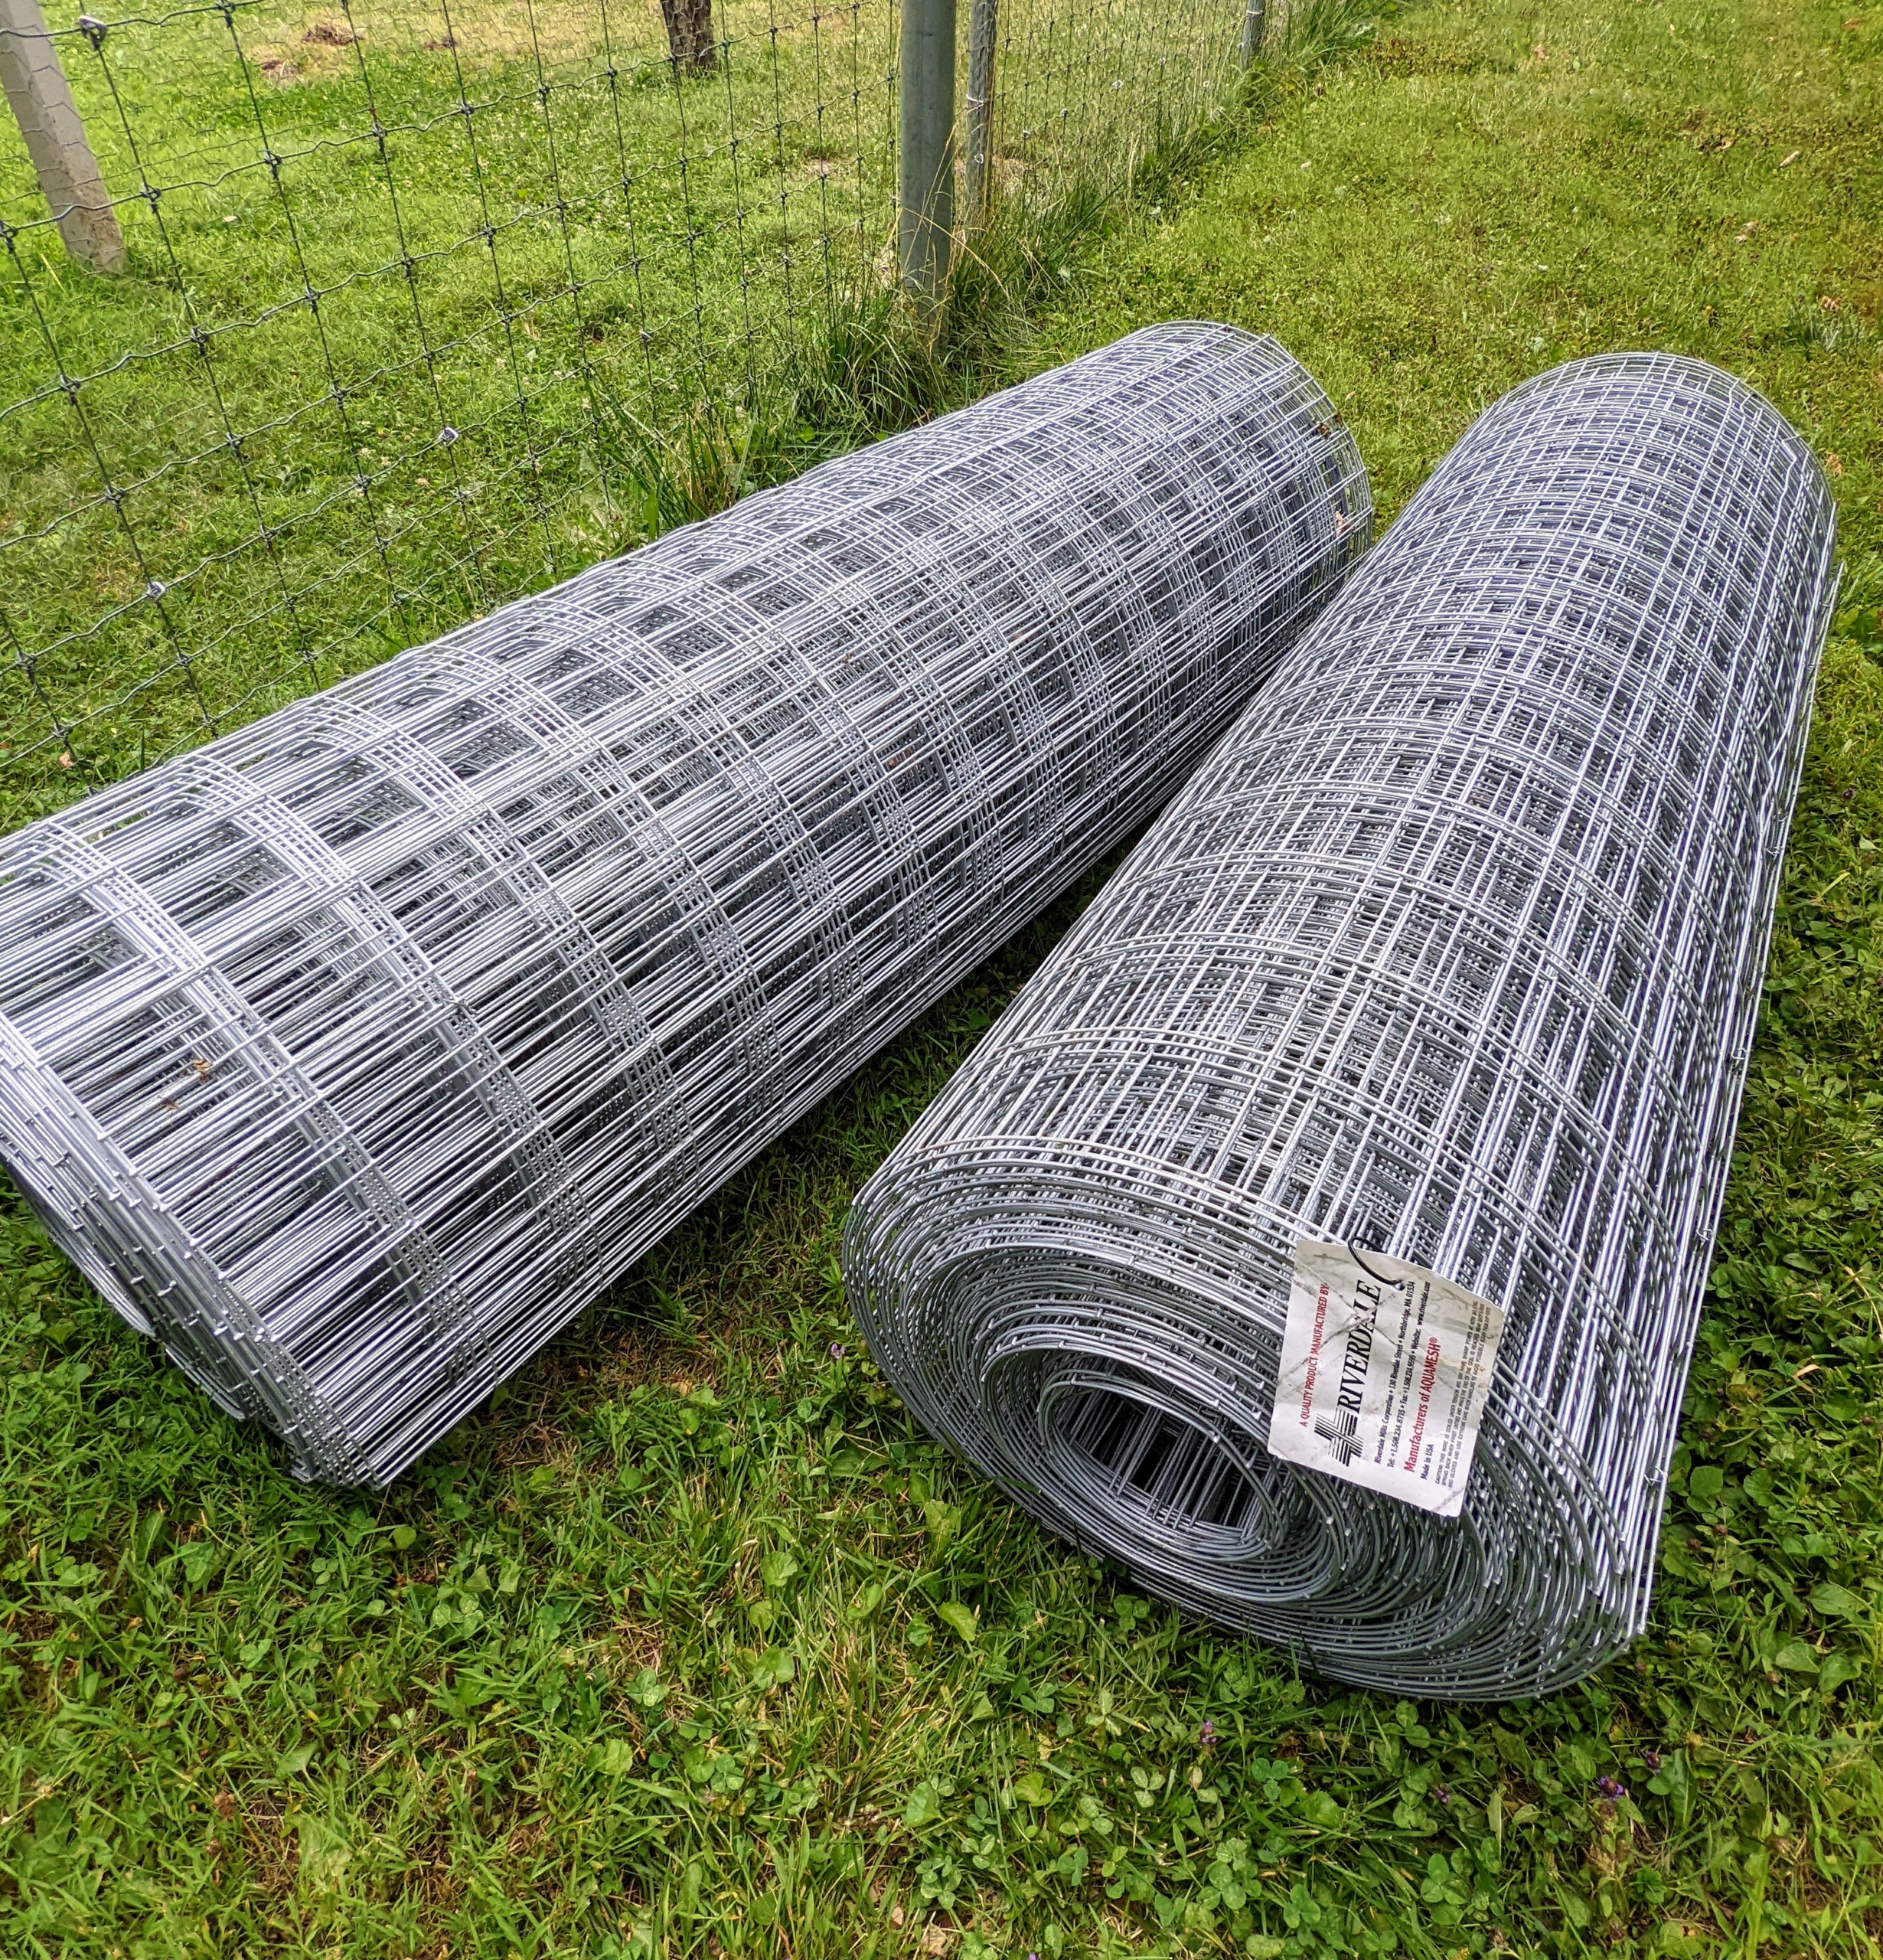
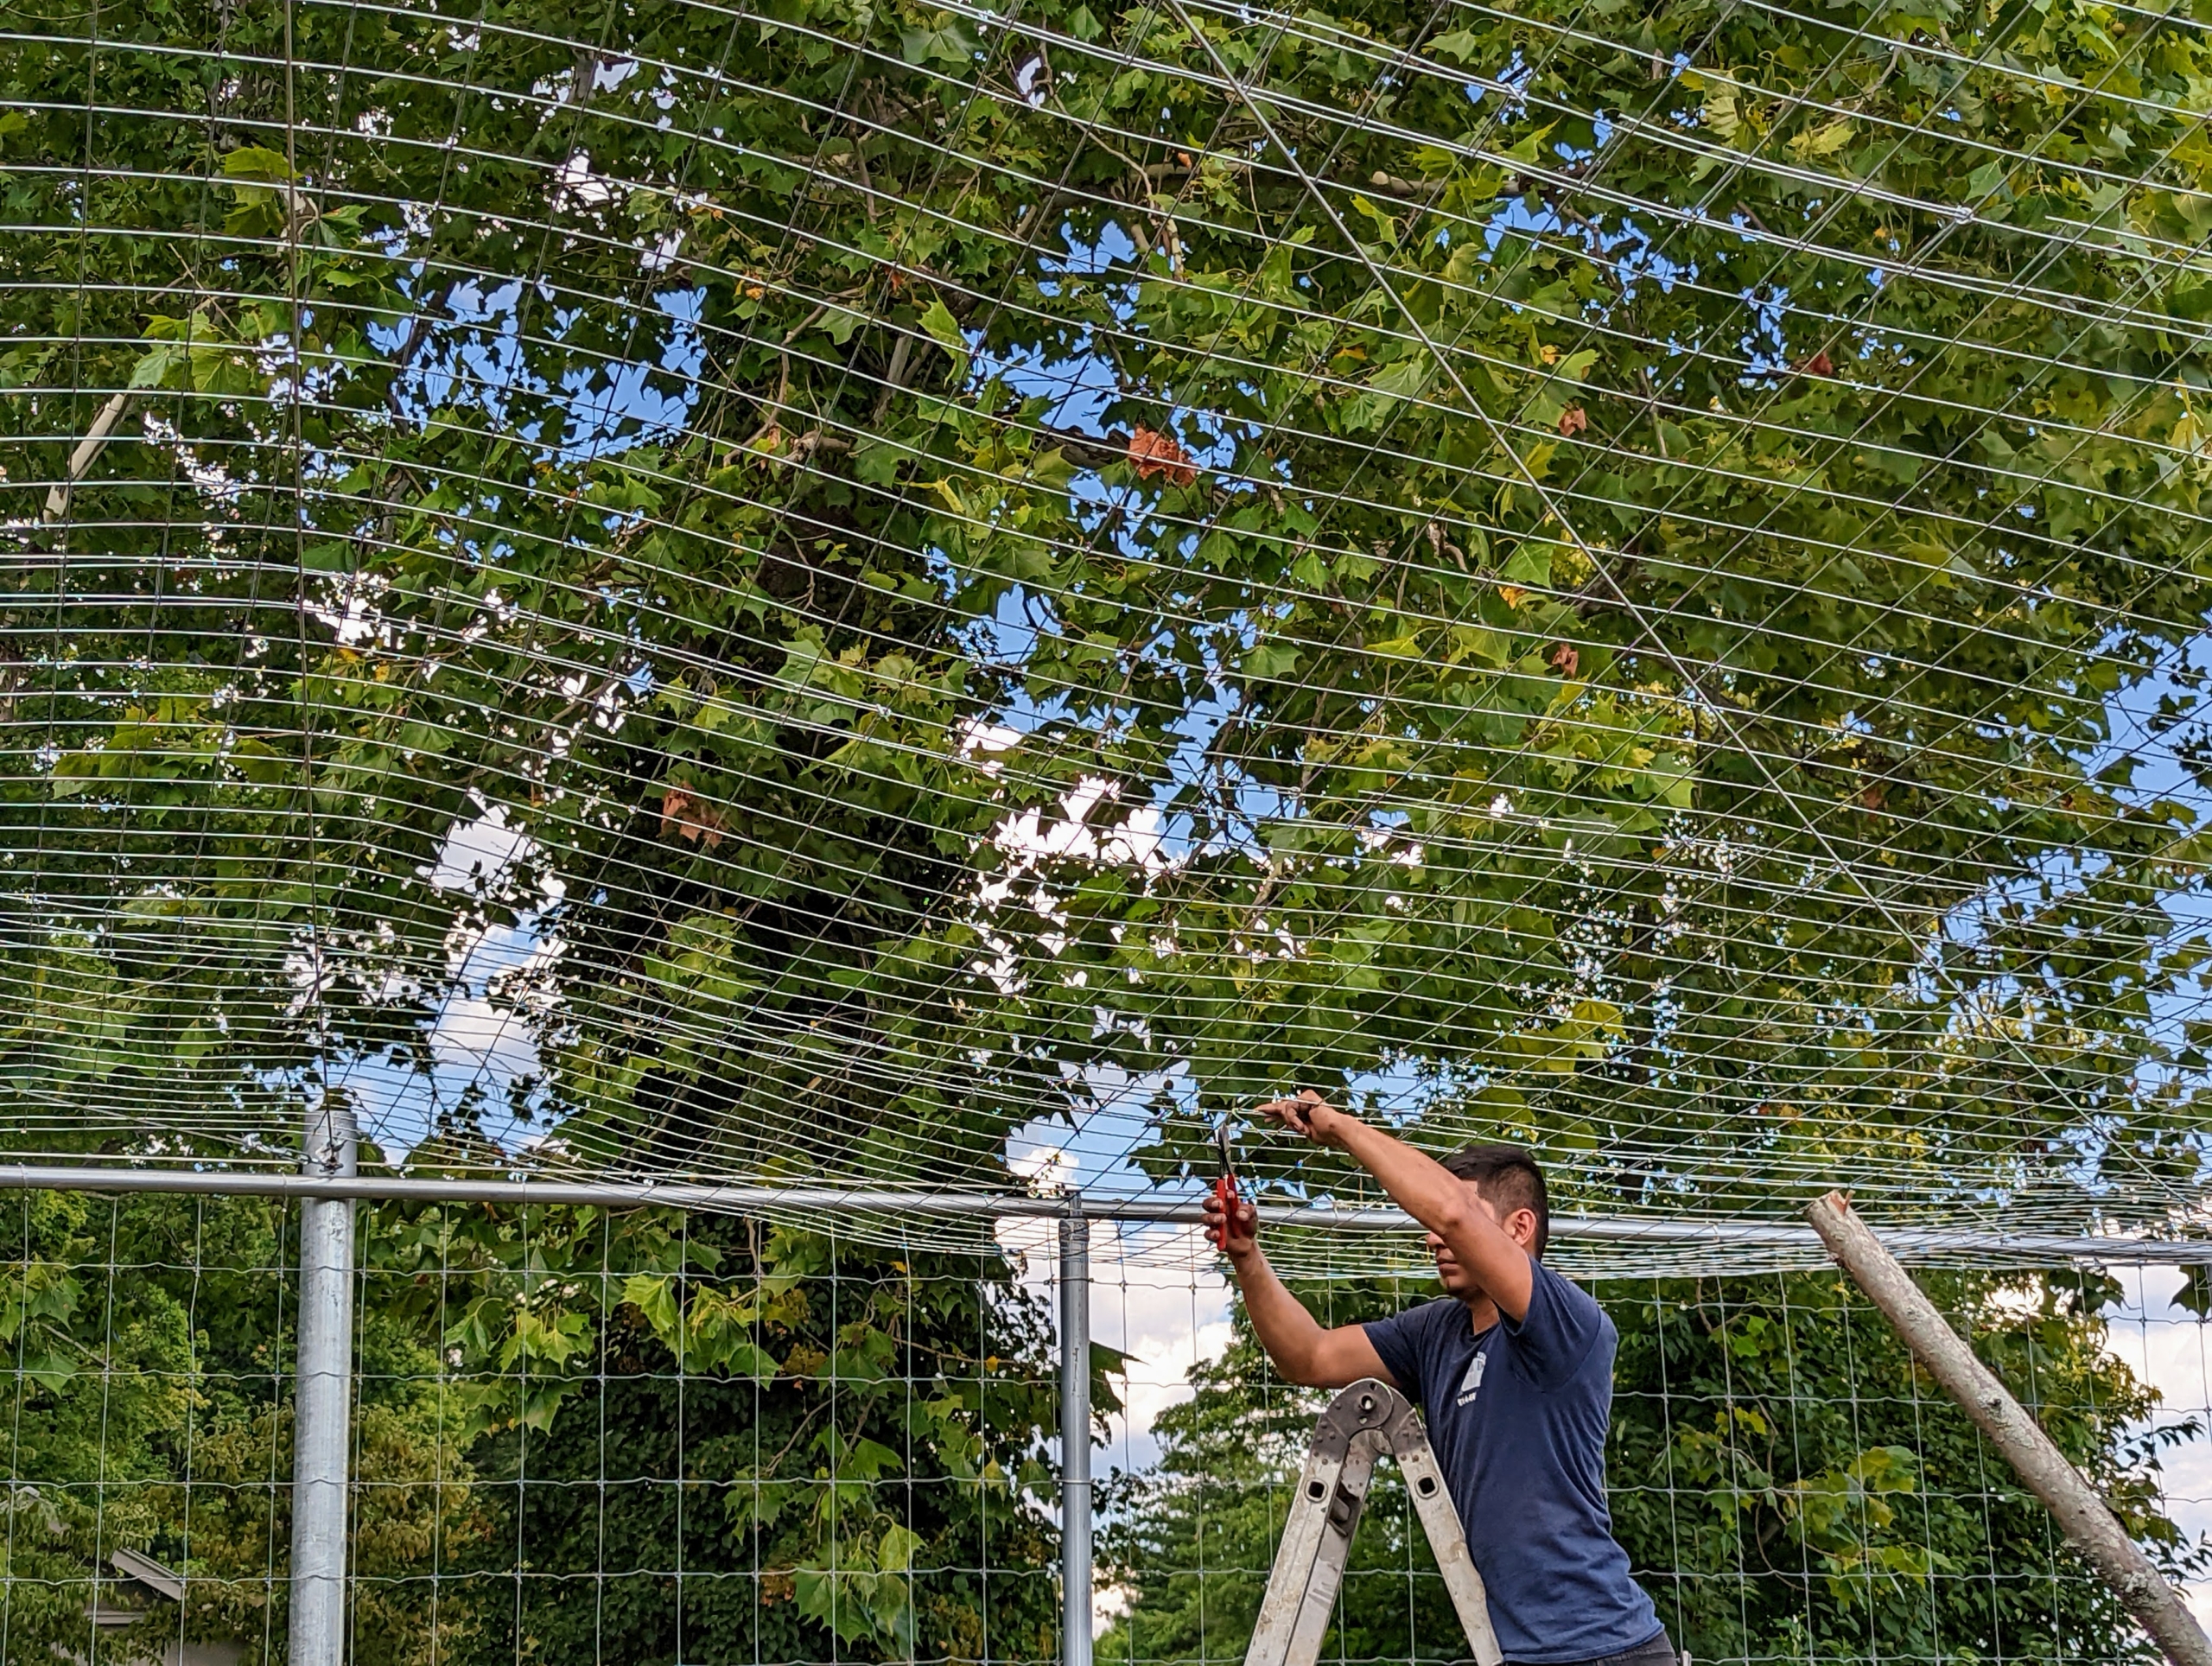
The next step is to install the fence fabric. This is 4×4 inch wire fencing. Each roll is 60-inches wide and 200-feet long.
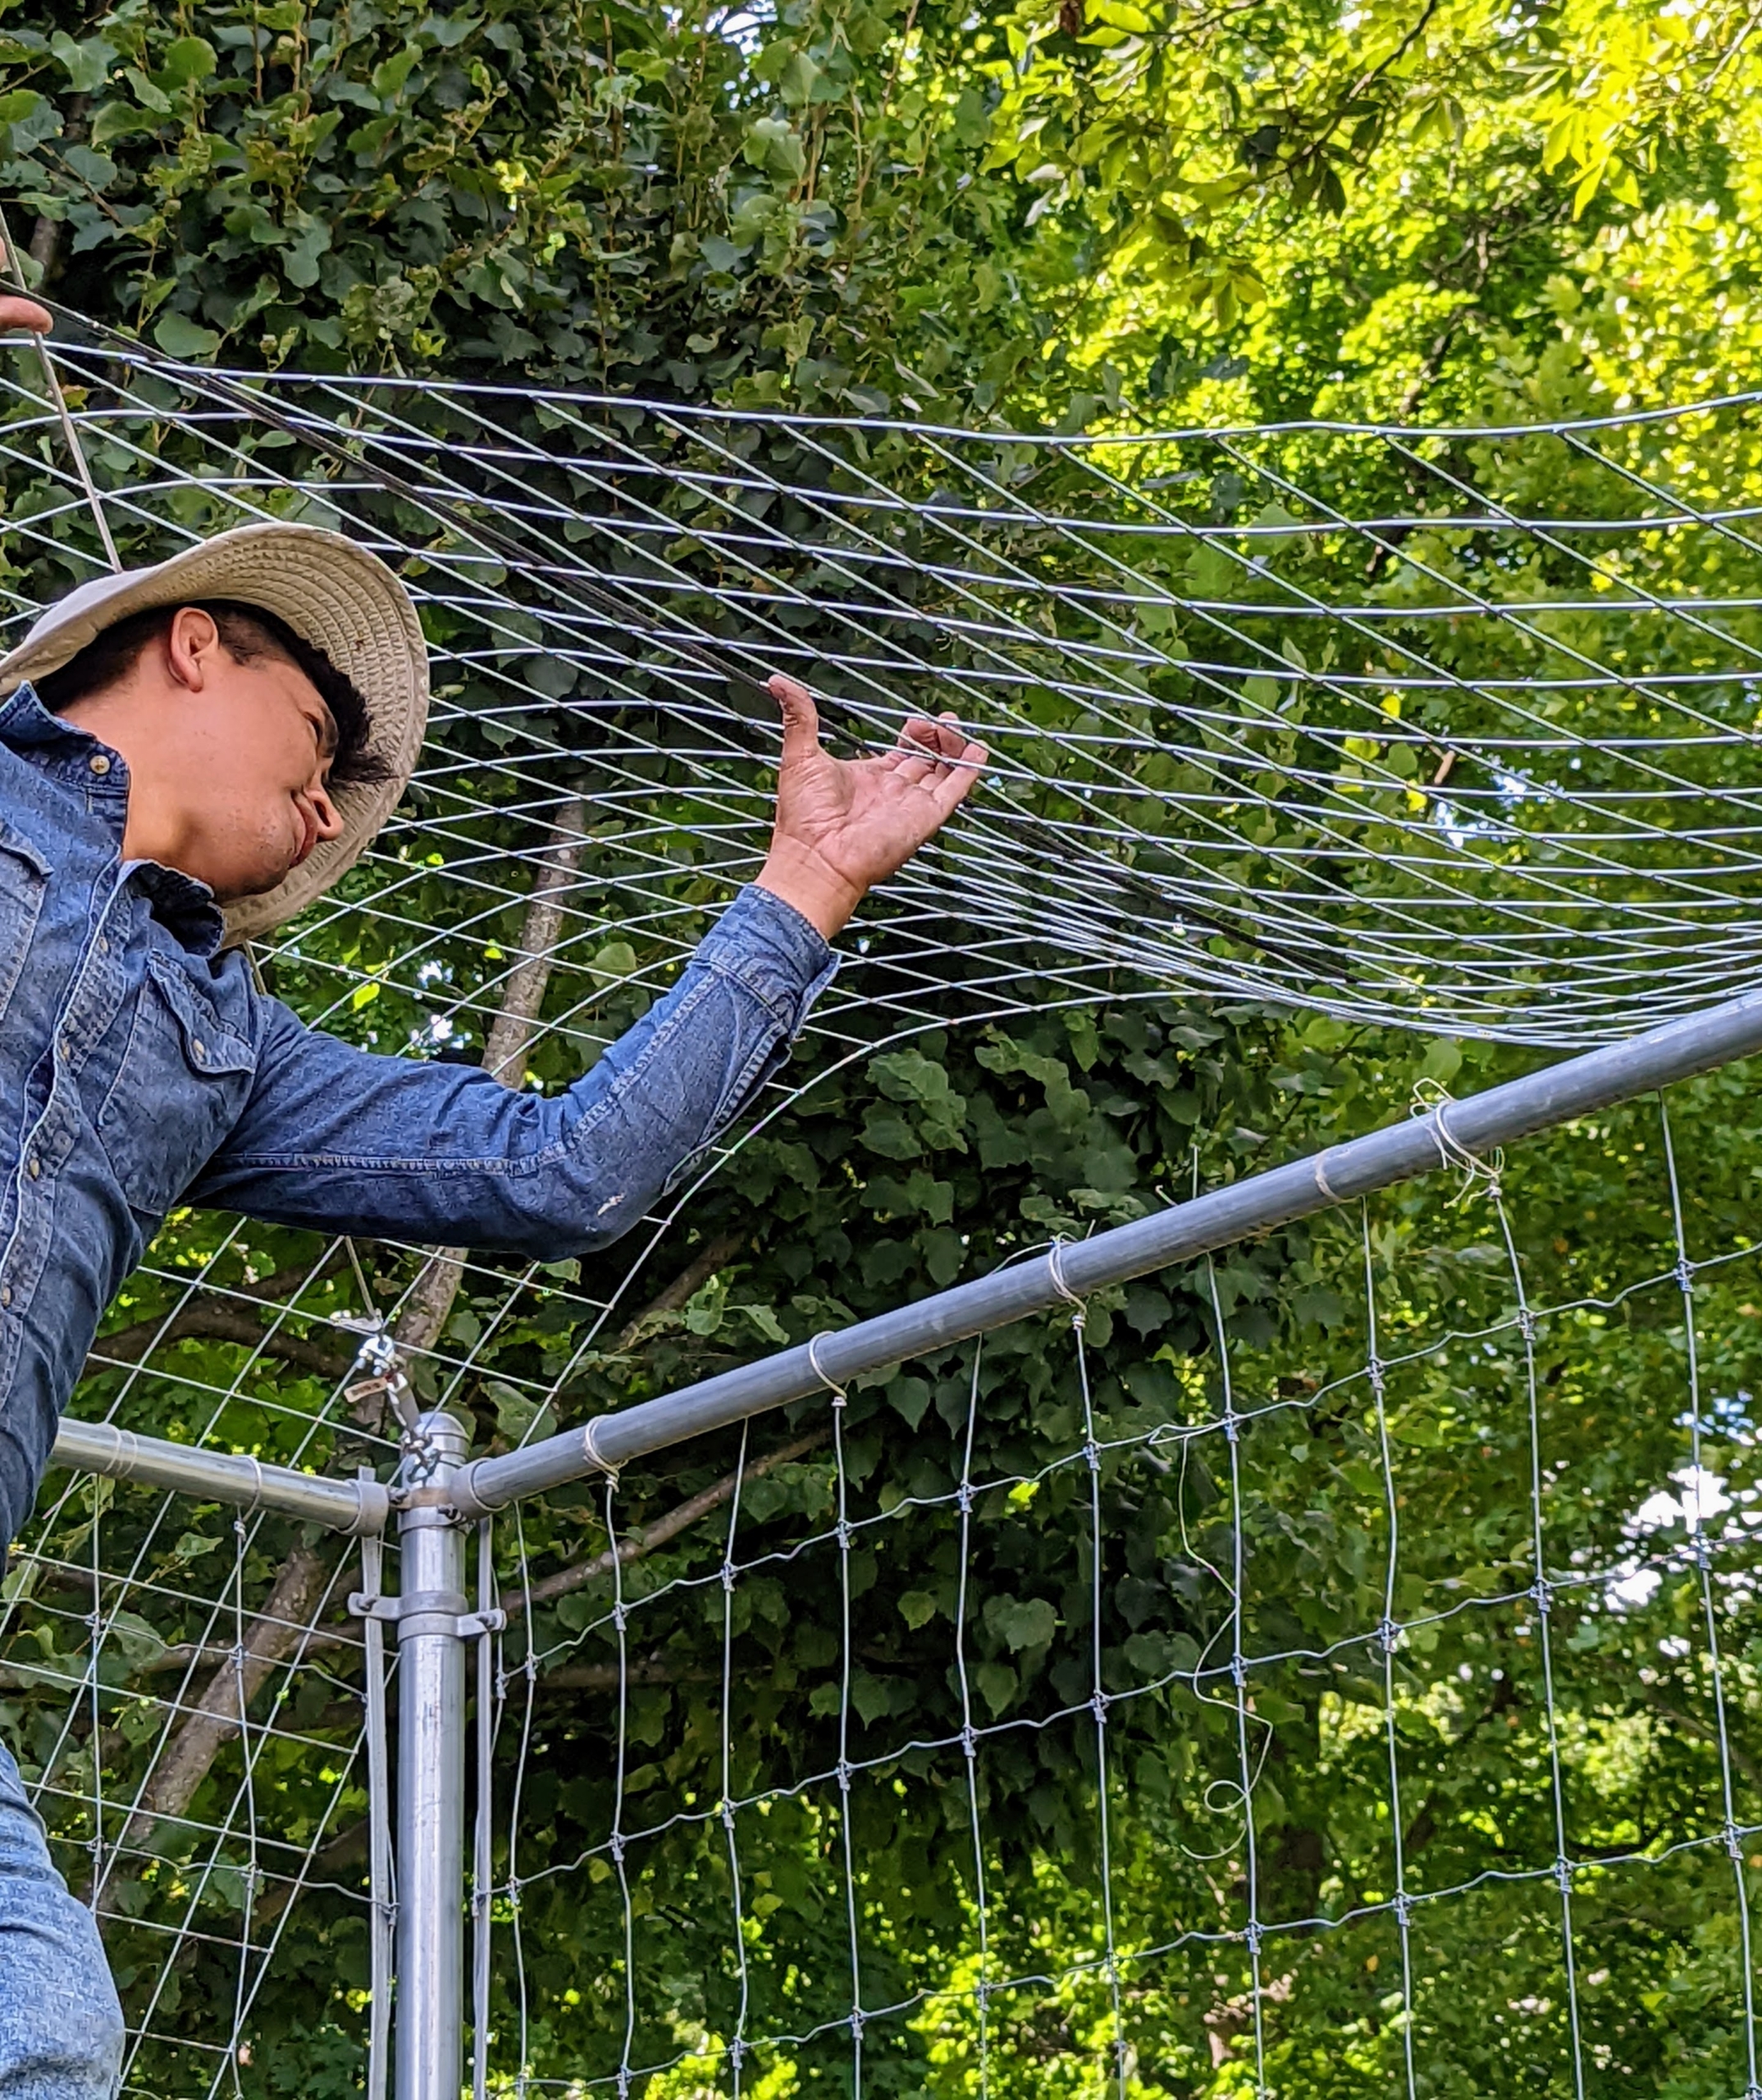
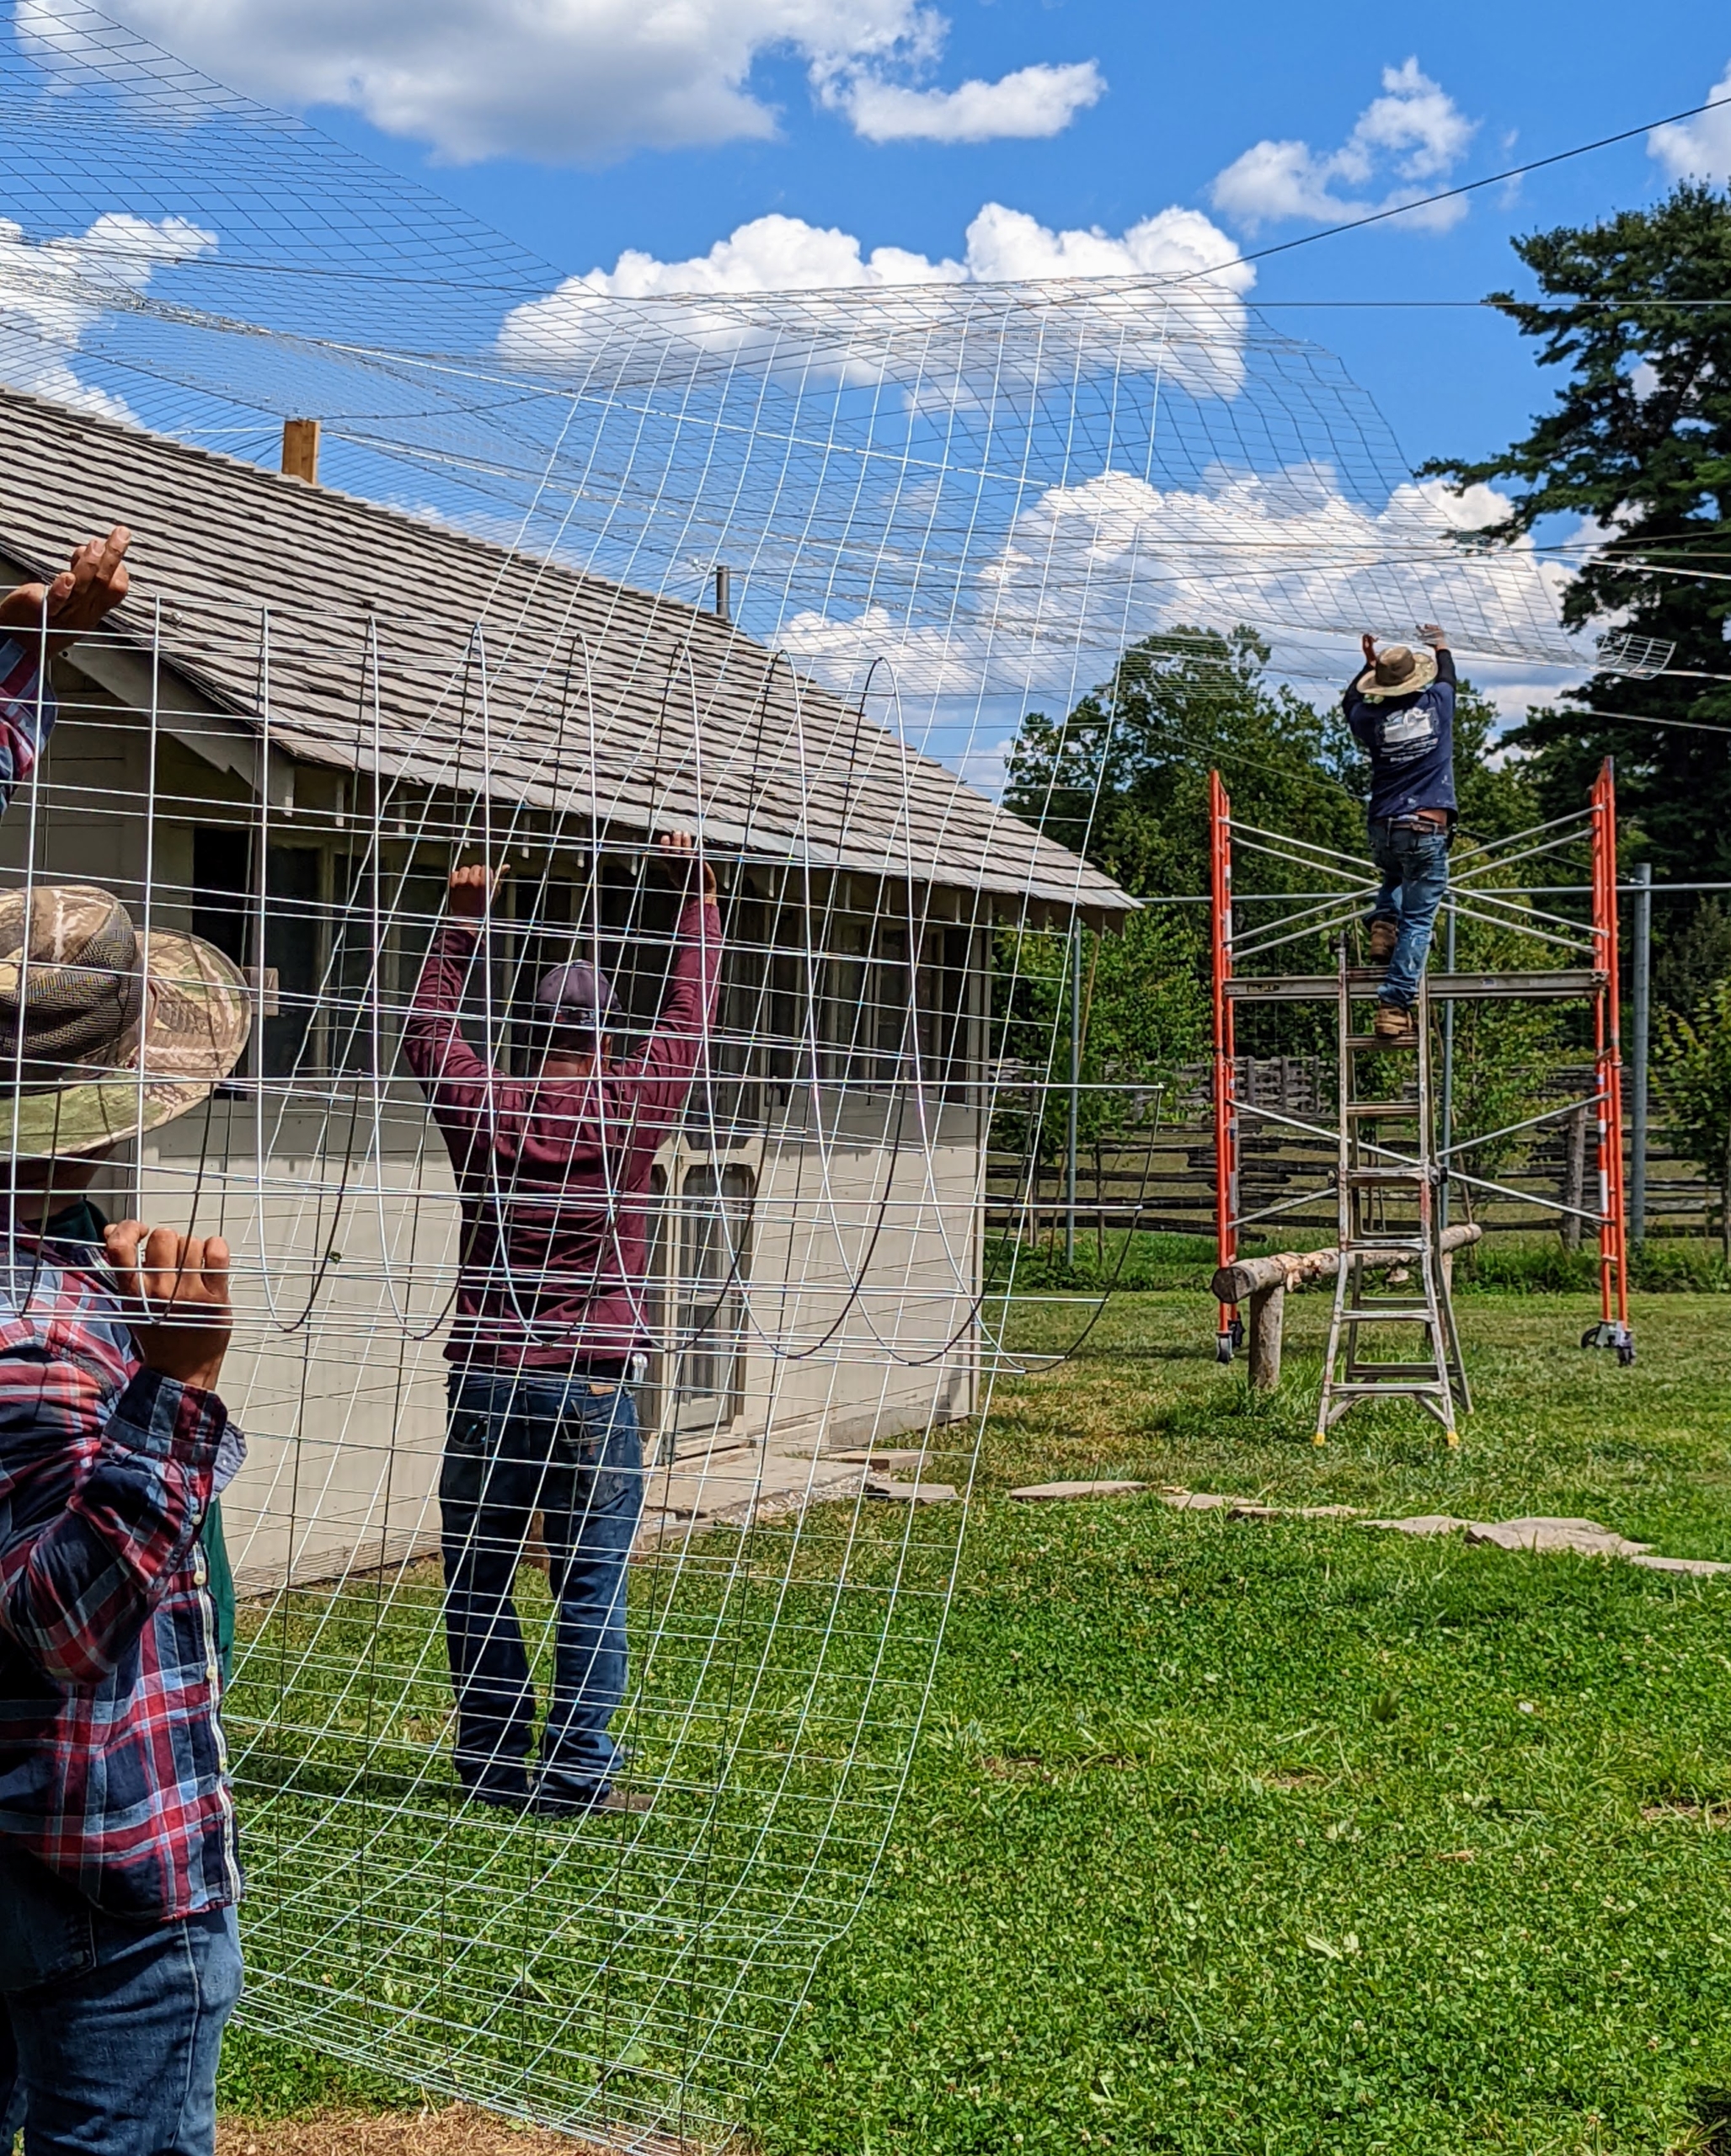
The fence fabric is carefully spread over the cables from the center out.
It takes several crew members to carefully unroll the fence fabric and attach it to the posts.
At first it looks a bit wavy, but as it is installed, the tension is increased and it is pulled taut.
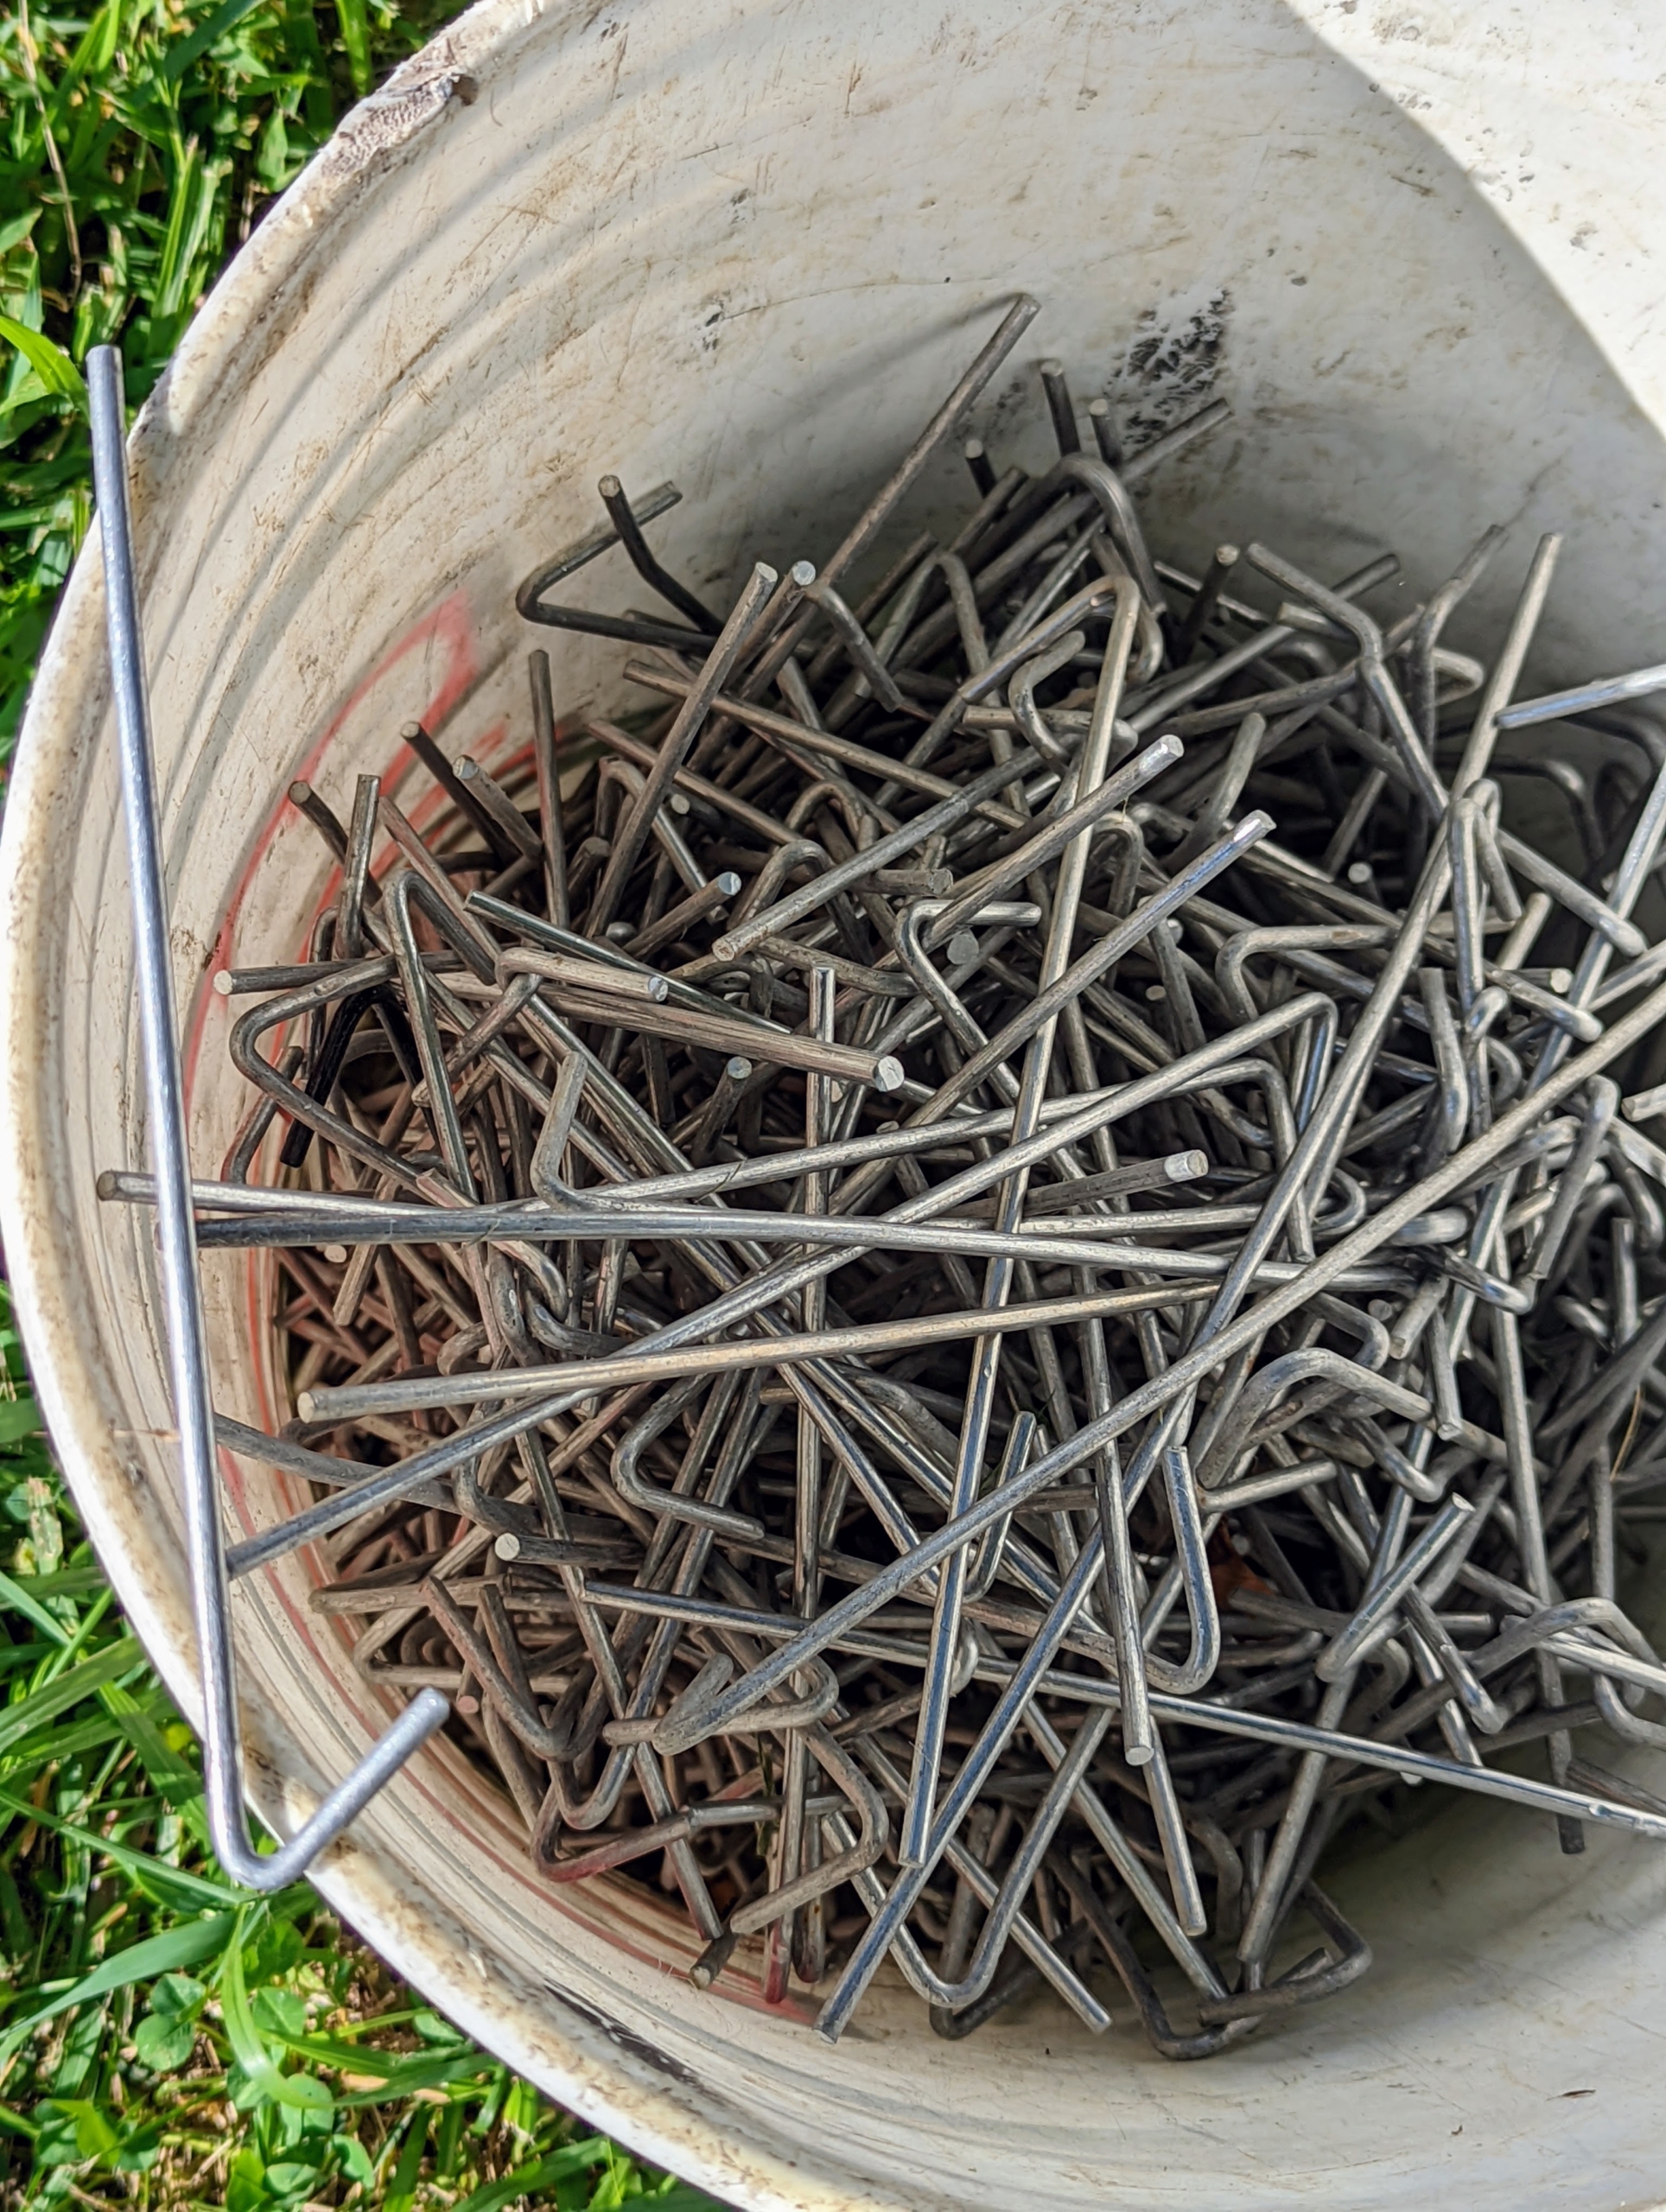
They secure it with these chain link fence wire ties, also known as chain link hook ties, or chain link fence tie wires. They are constructed from a heavy duty bendable gauge wire.
The wire ties are placed along the edge of the fence fabric, attaching one strip to the next.
Here is a section showing how it overlaps and connects to the next strip. It is a large pen, so the fence fabric must be installed carefully.
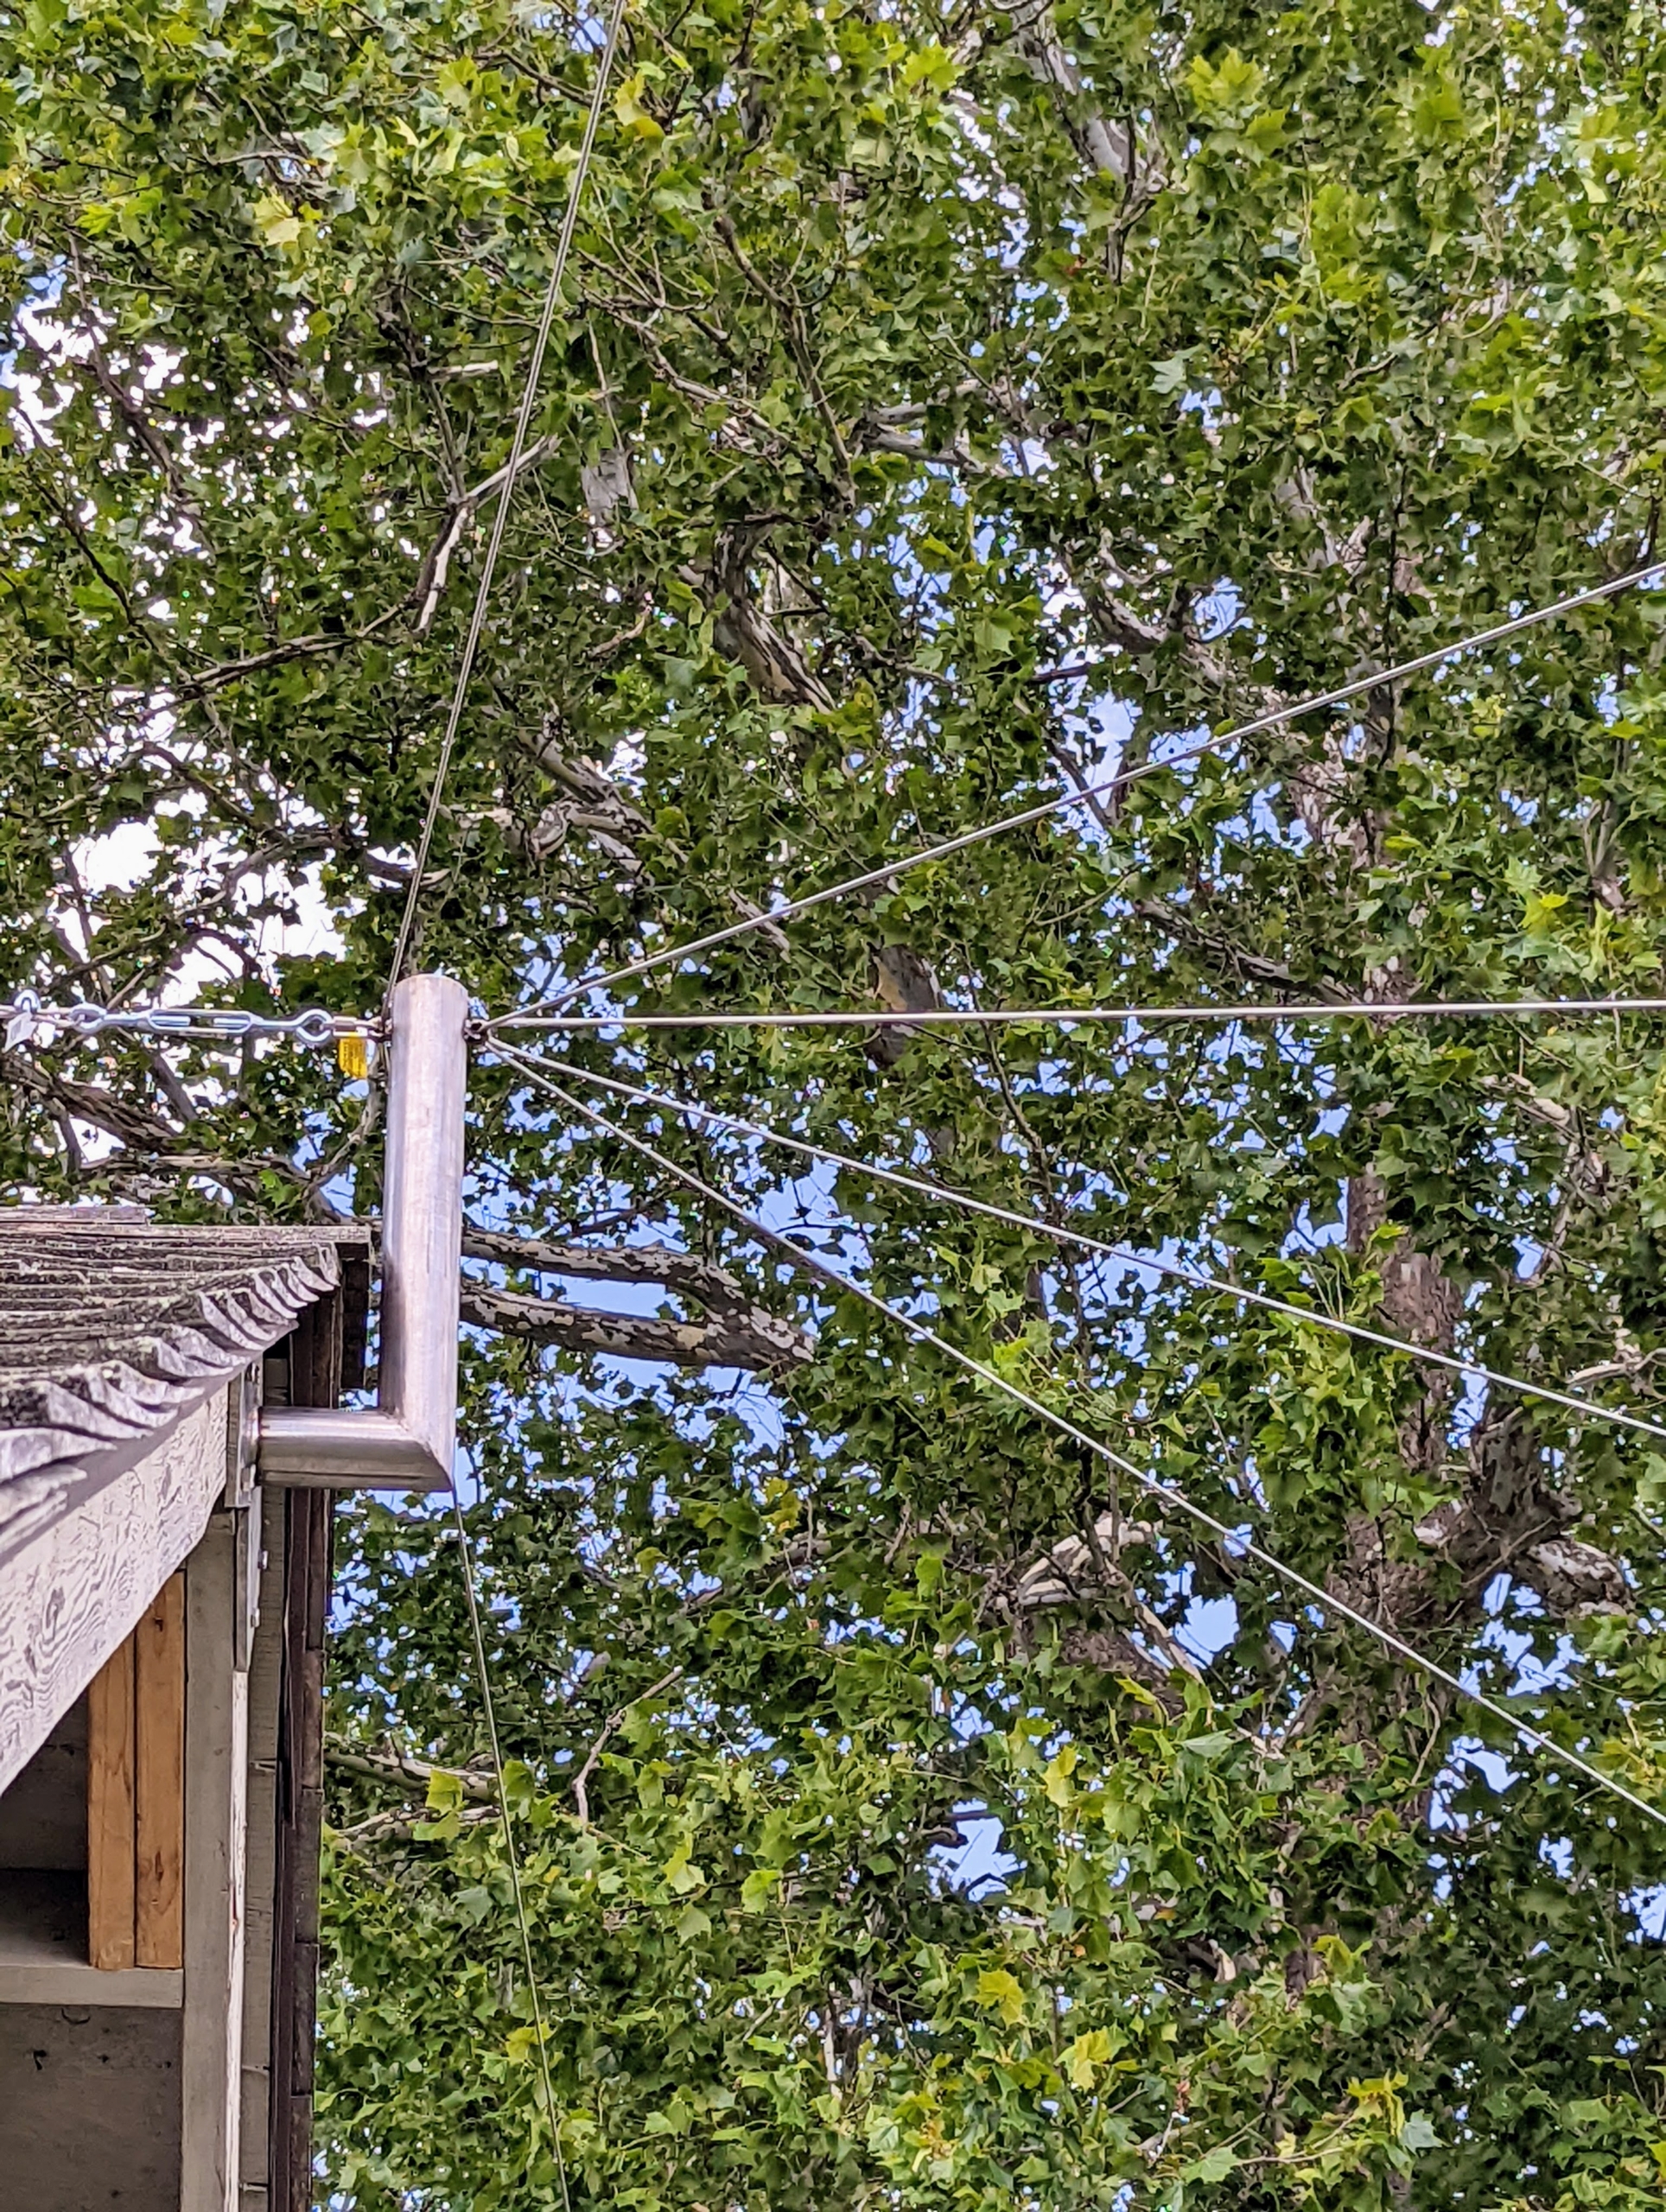
The entire project takes a couple of weeks to complete. This photo is taken from my stable hayloft. It shows how the brackets hold up and support the fence fabric above the roof of the coop.
Here is another view from the ground looking up – the fence fabric does not touch the roof at all, but helps to support it, so it won’t sag from heavy snow cover.
And here is one side all done. I think my peafowl will be very happy with their improved enclosure. I am glad it will keep them safe from wild, hungry animals.
Another important project is checked off our list here at my Bedford, New York farm.
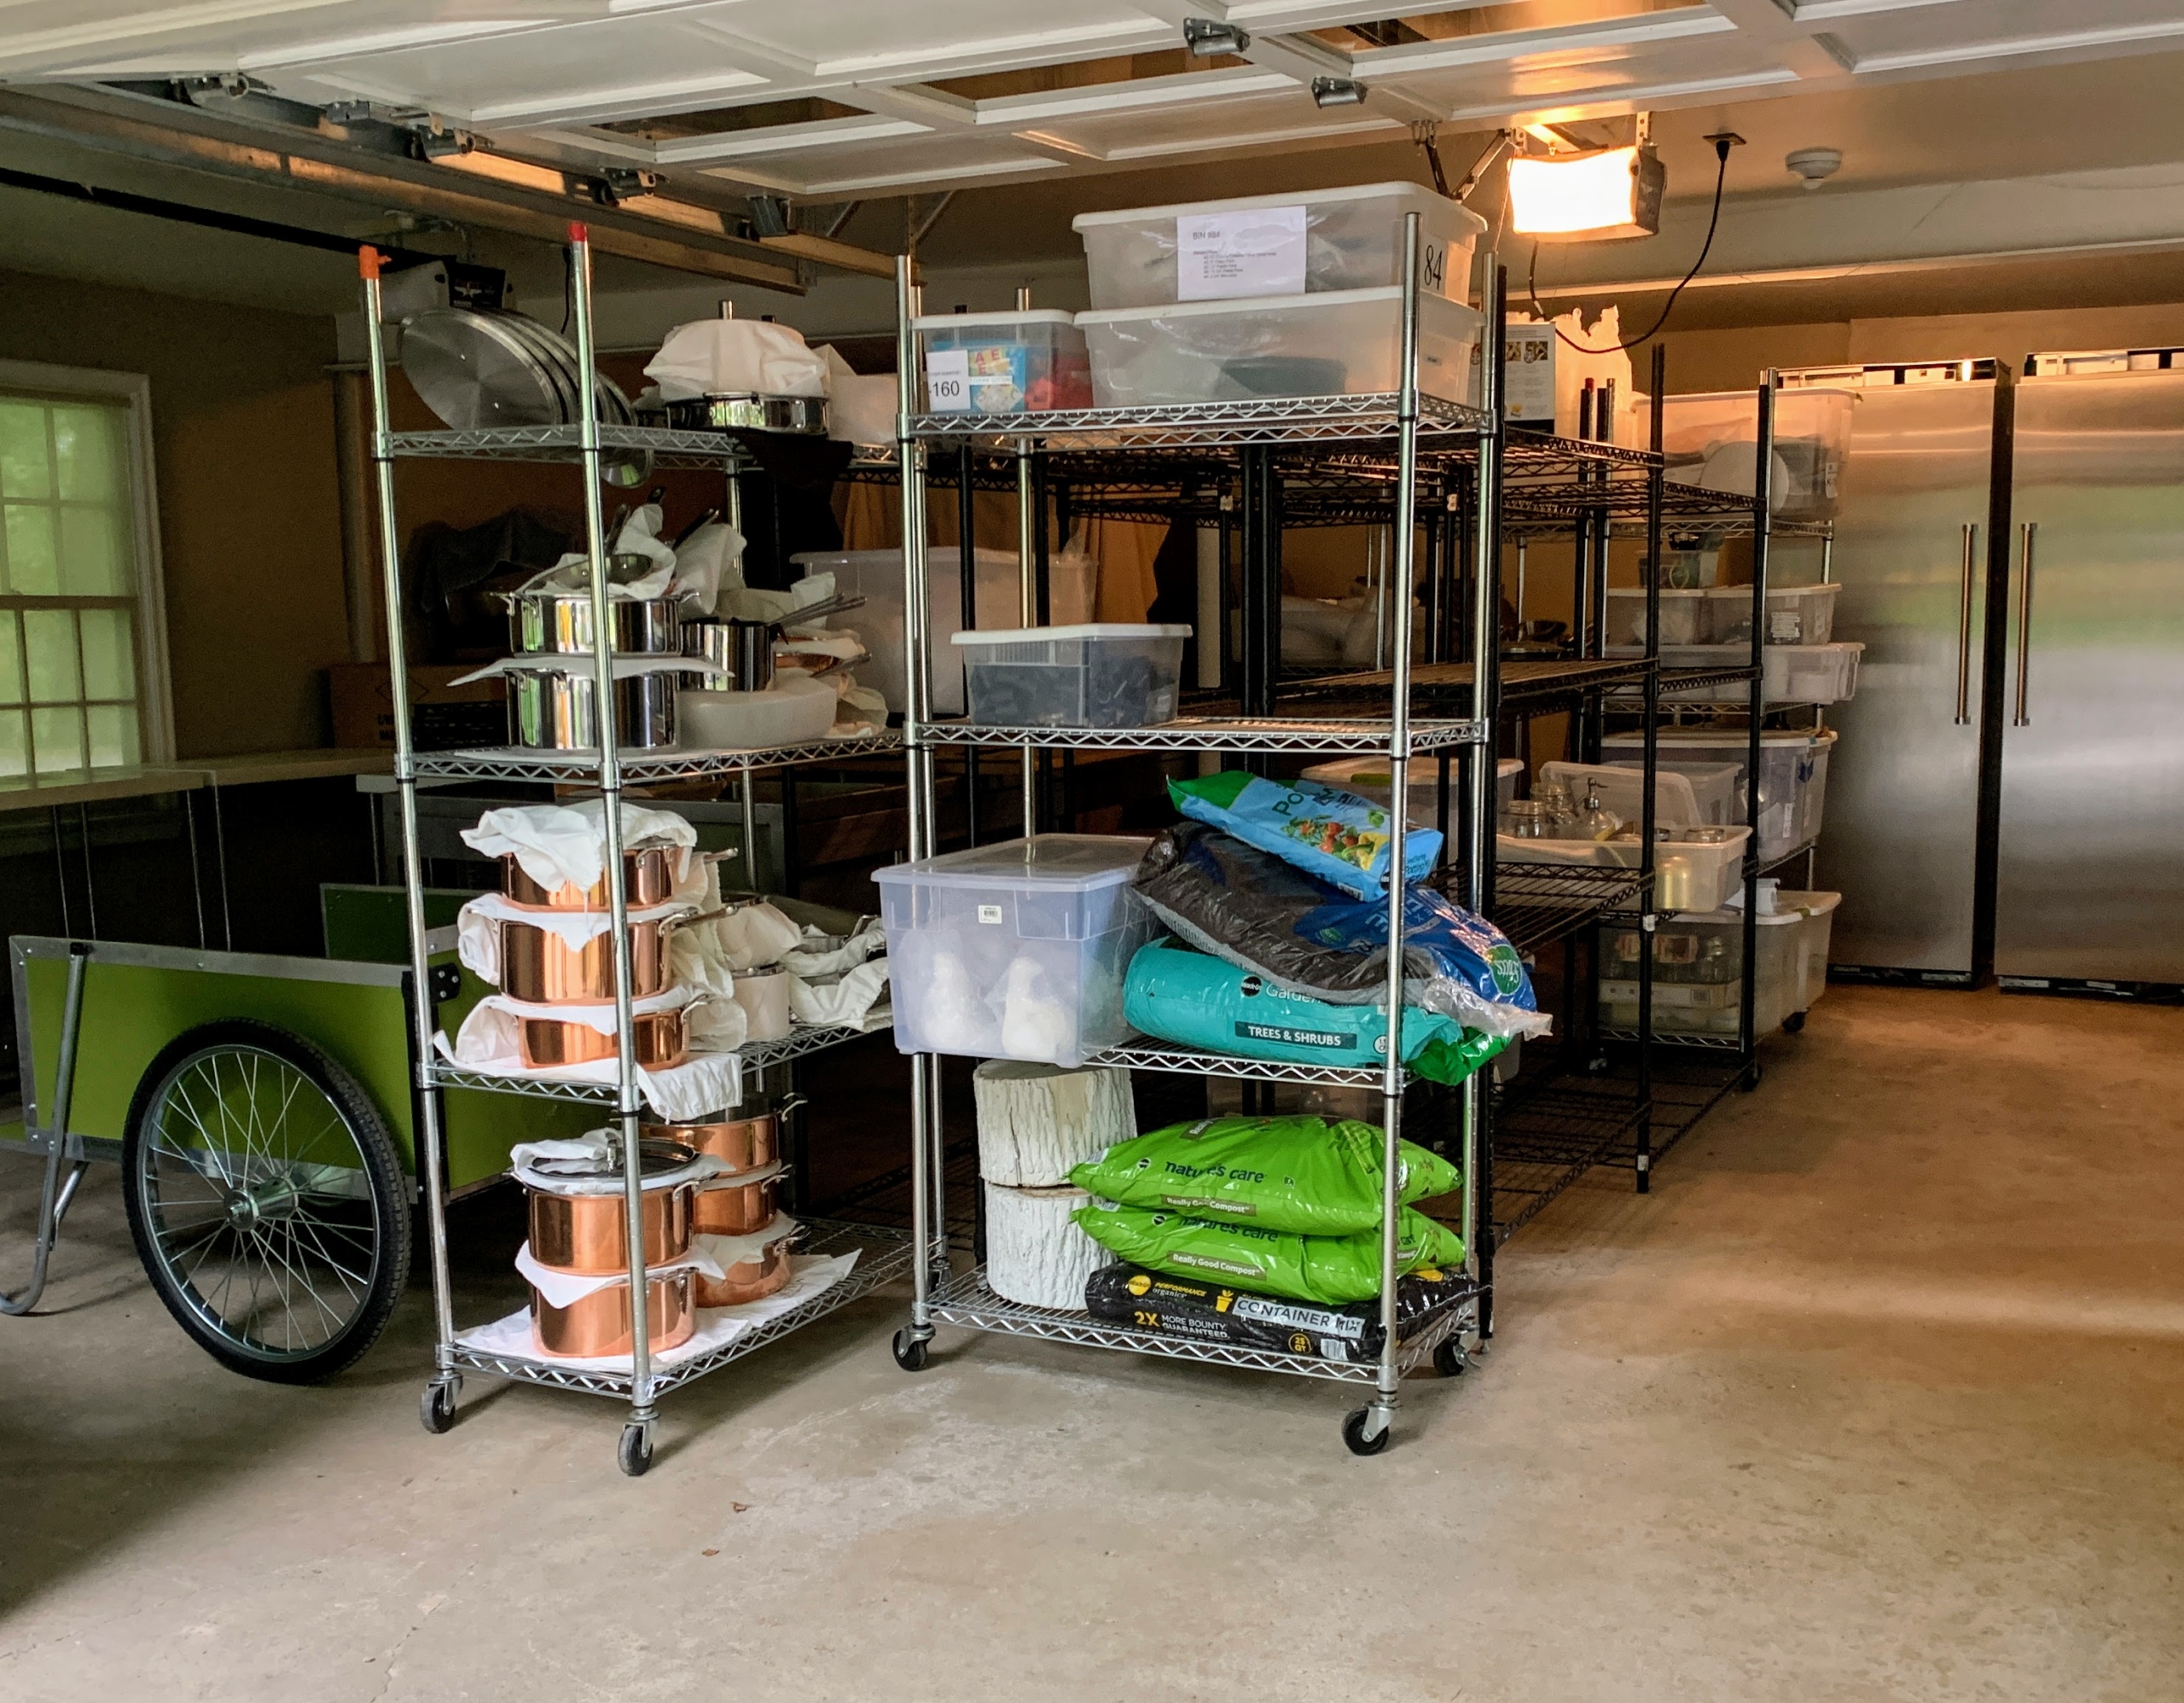
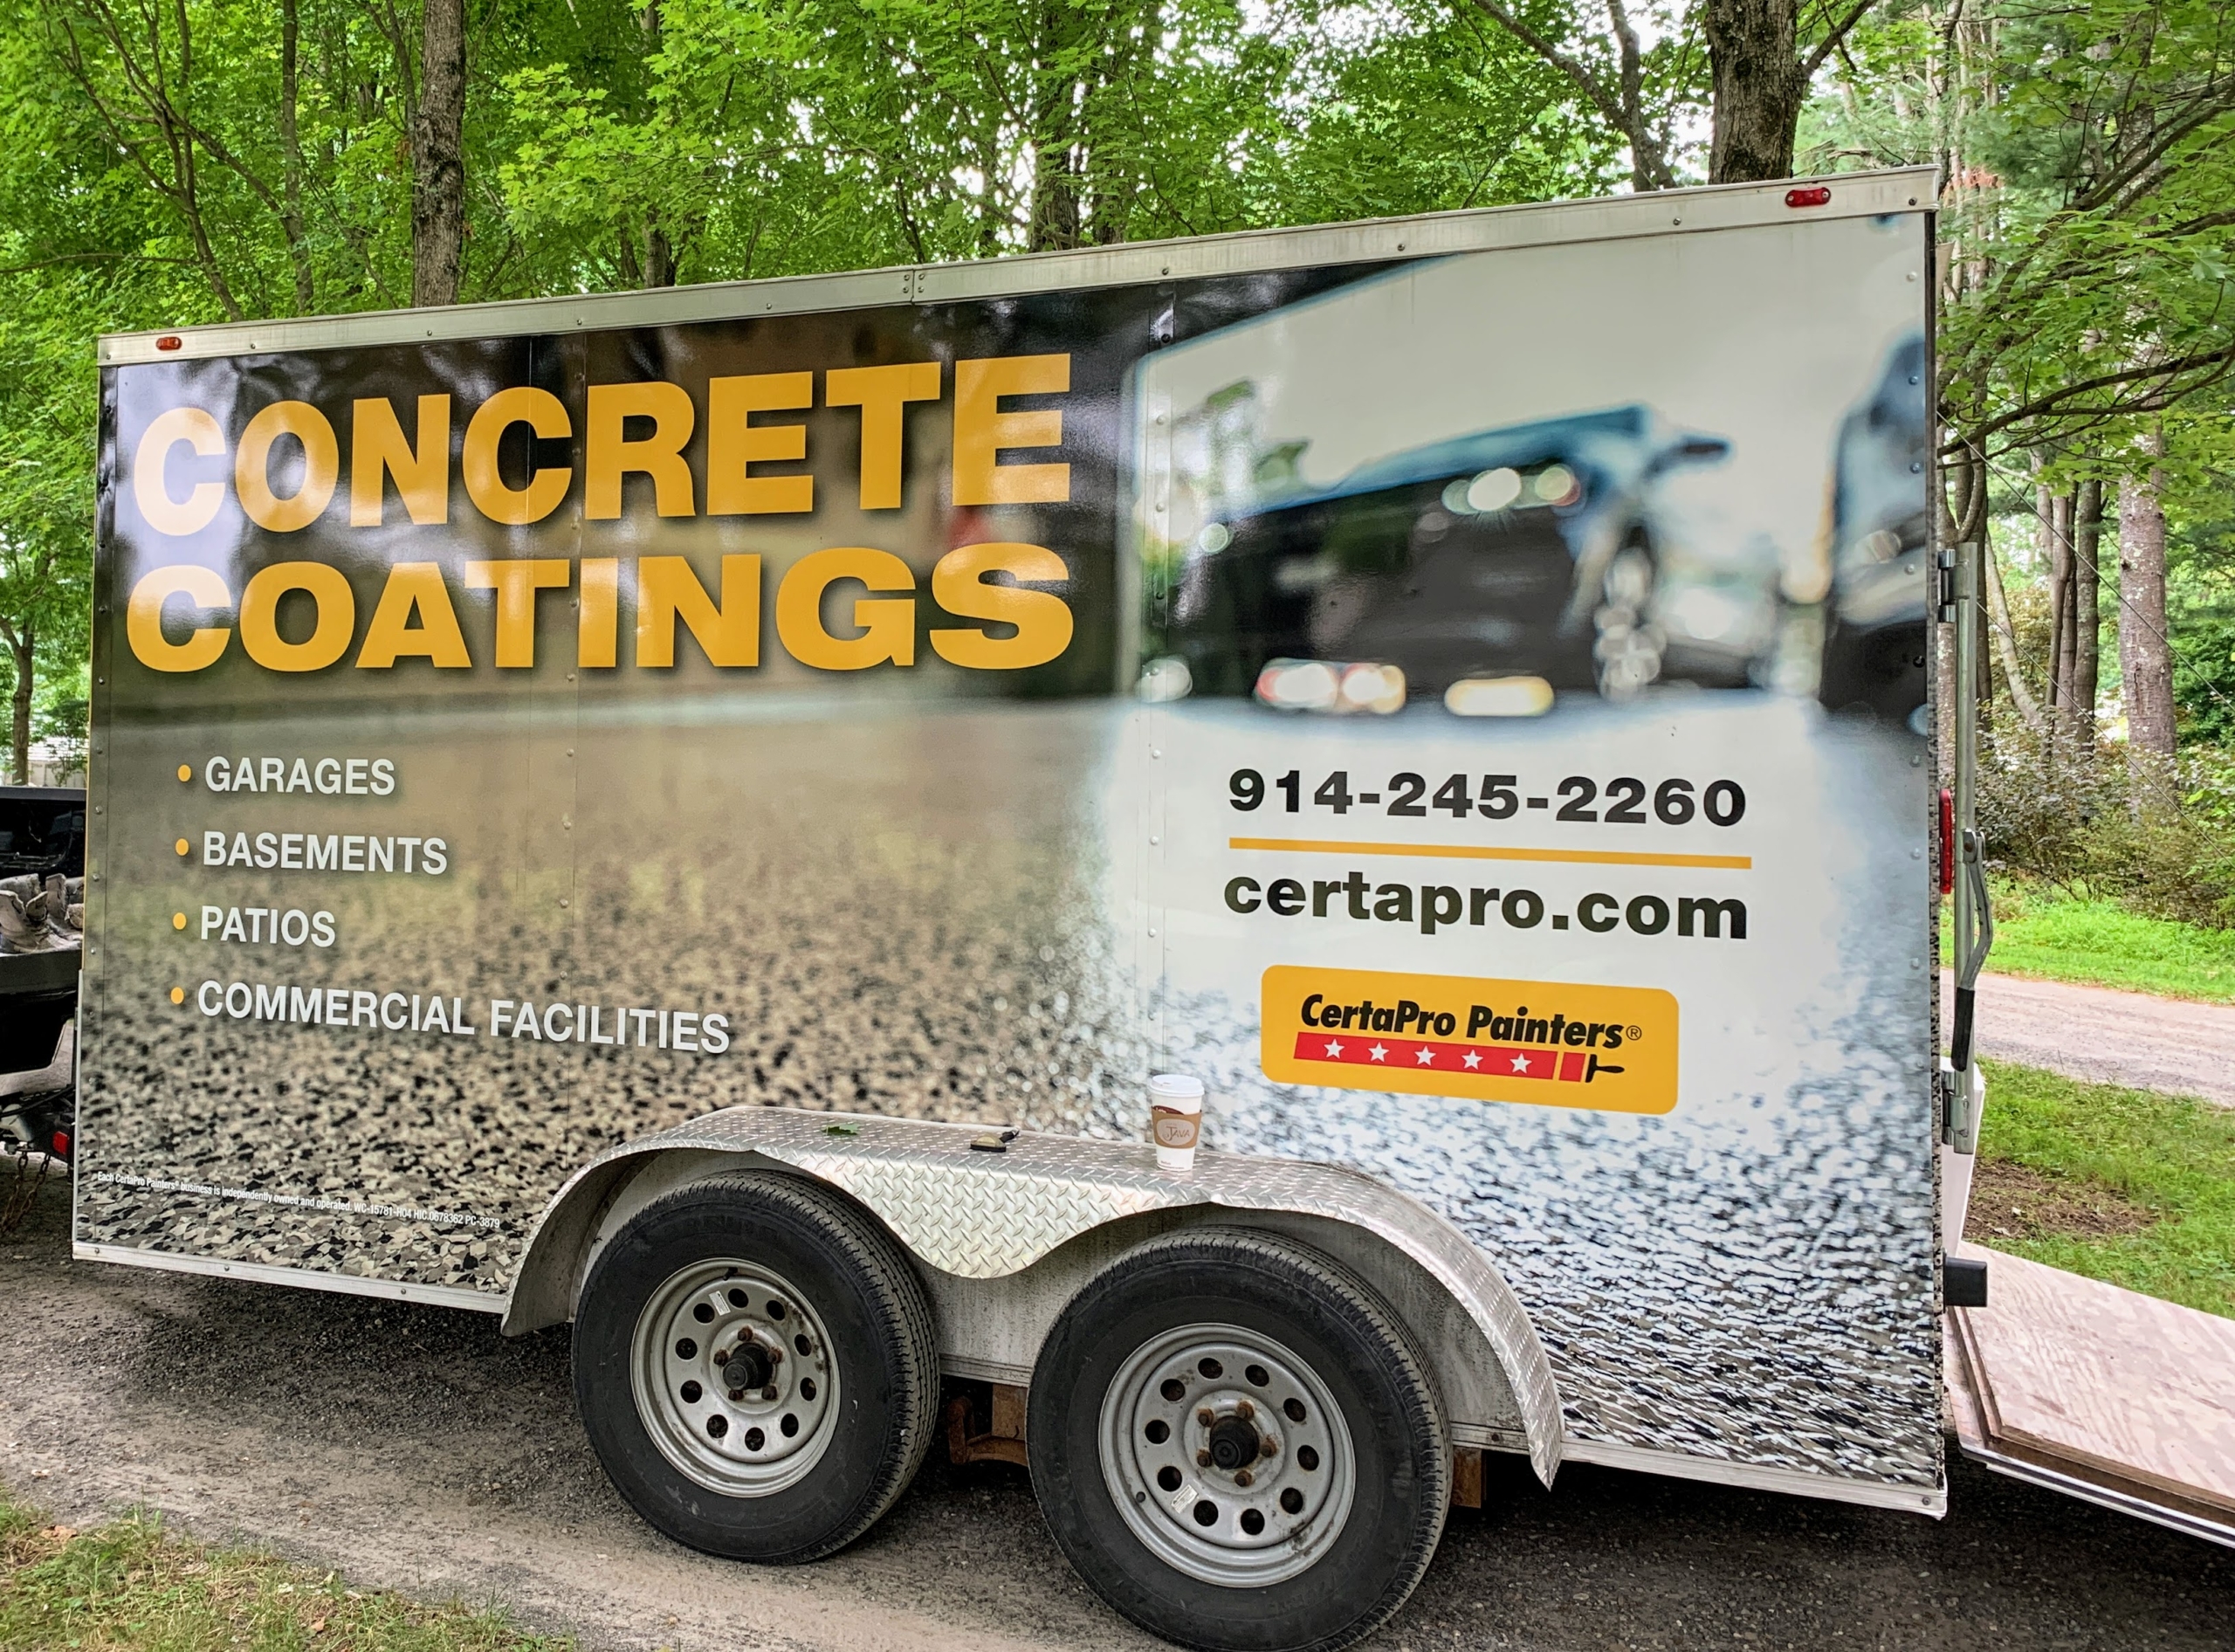
Last year, I decided to convert the first floor of a guest house, so it could function more as a production work space and studio. I redid the studio kitchen and outfitted the prep kitchen, changed several of the doors, installed a cookbook library, and created adequate work stations for the crew. I also wanted to create a more usable work area in the garage. Yesterday, we had a team from CertaPro Painters here in Westchester County, come to coat the concrete garage floor with a special poly flake finish. The entire process took a full day, but the end result was great.
Here are photos of the transformation, enjoy.
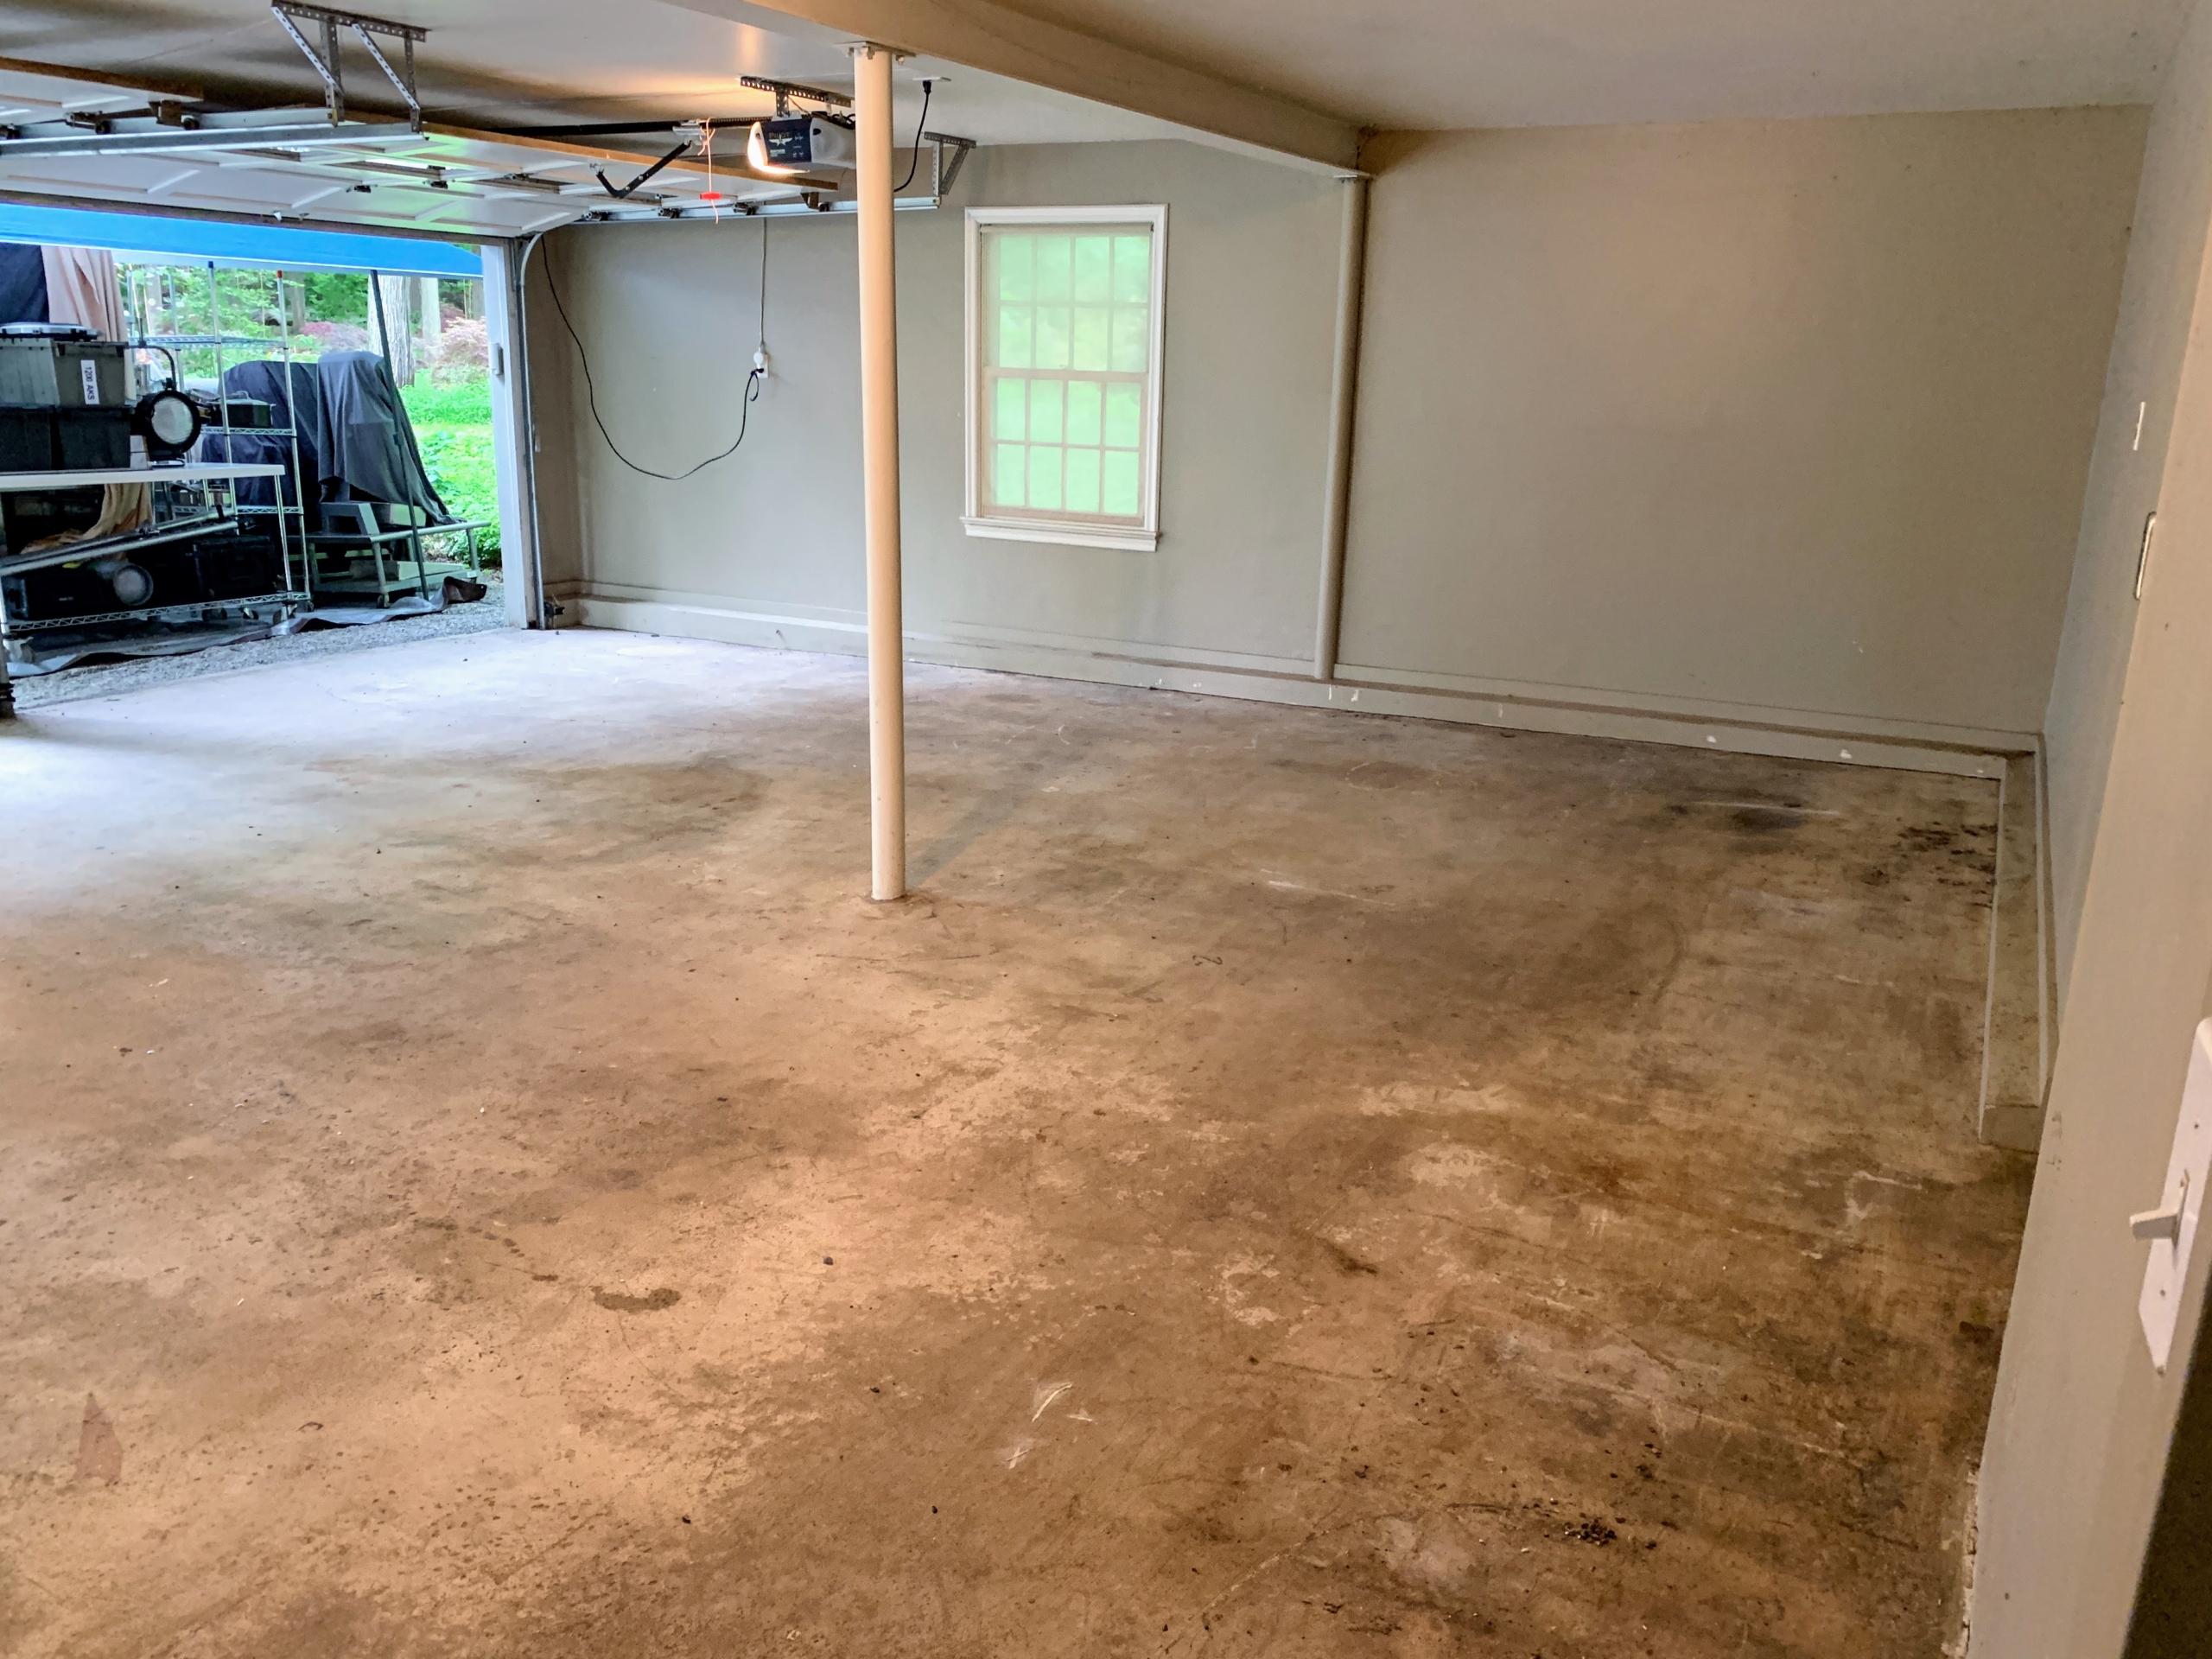
Until now, this two-car garage had been used for storage – mostly items needed for various video and photography shoots. I knew it could be utilized more efficiently, so I decided to convert it into a shoot prep area and an organized storage space for production props and equipment.
We called in a crew from CertaPro Painters, a national residential painting company that also specilaizes in concrete floor coatings.
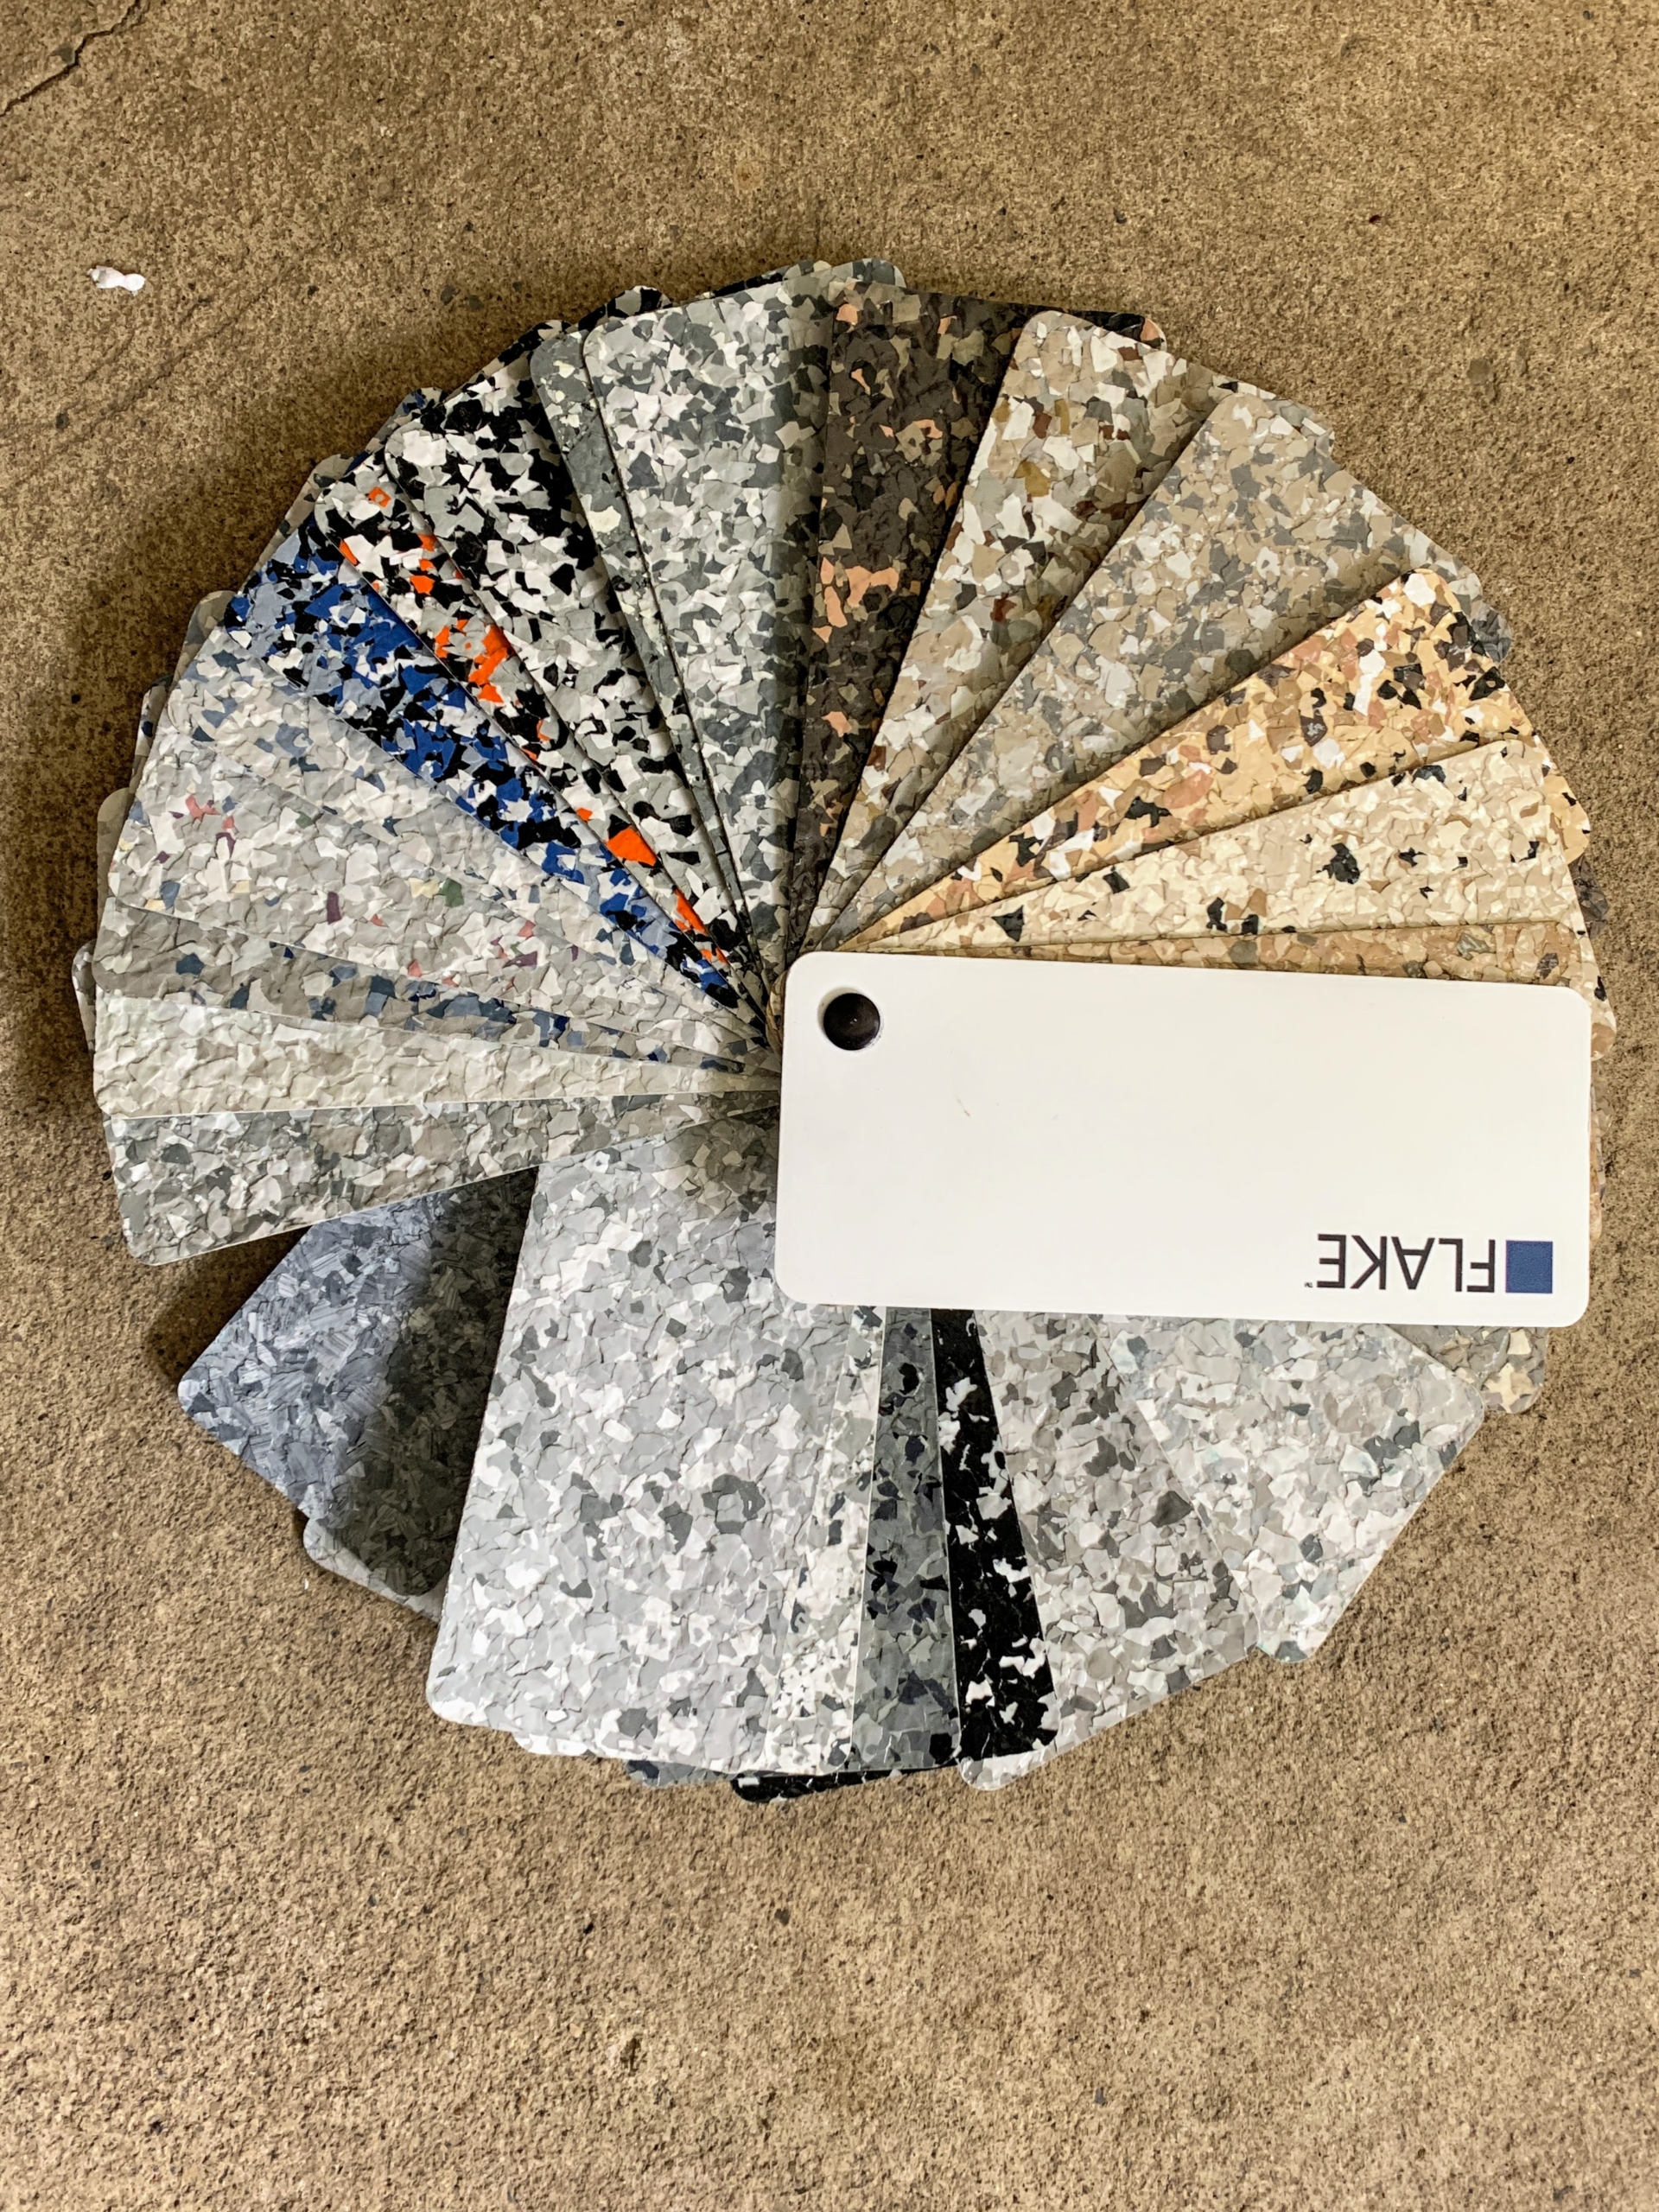
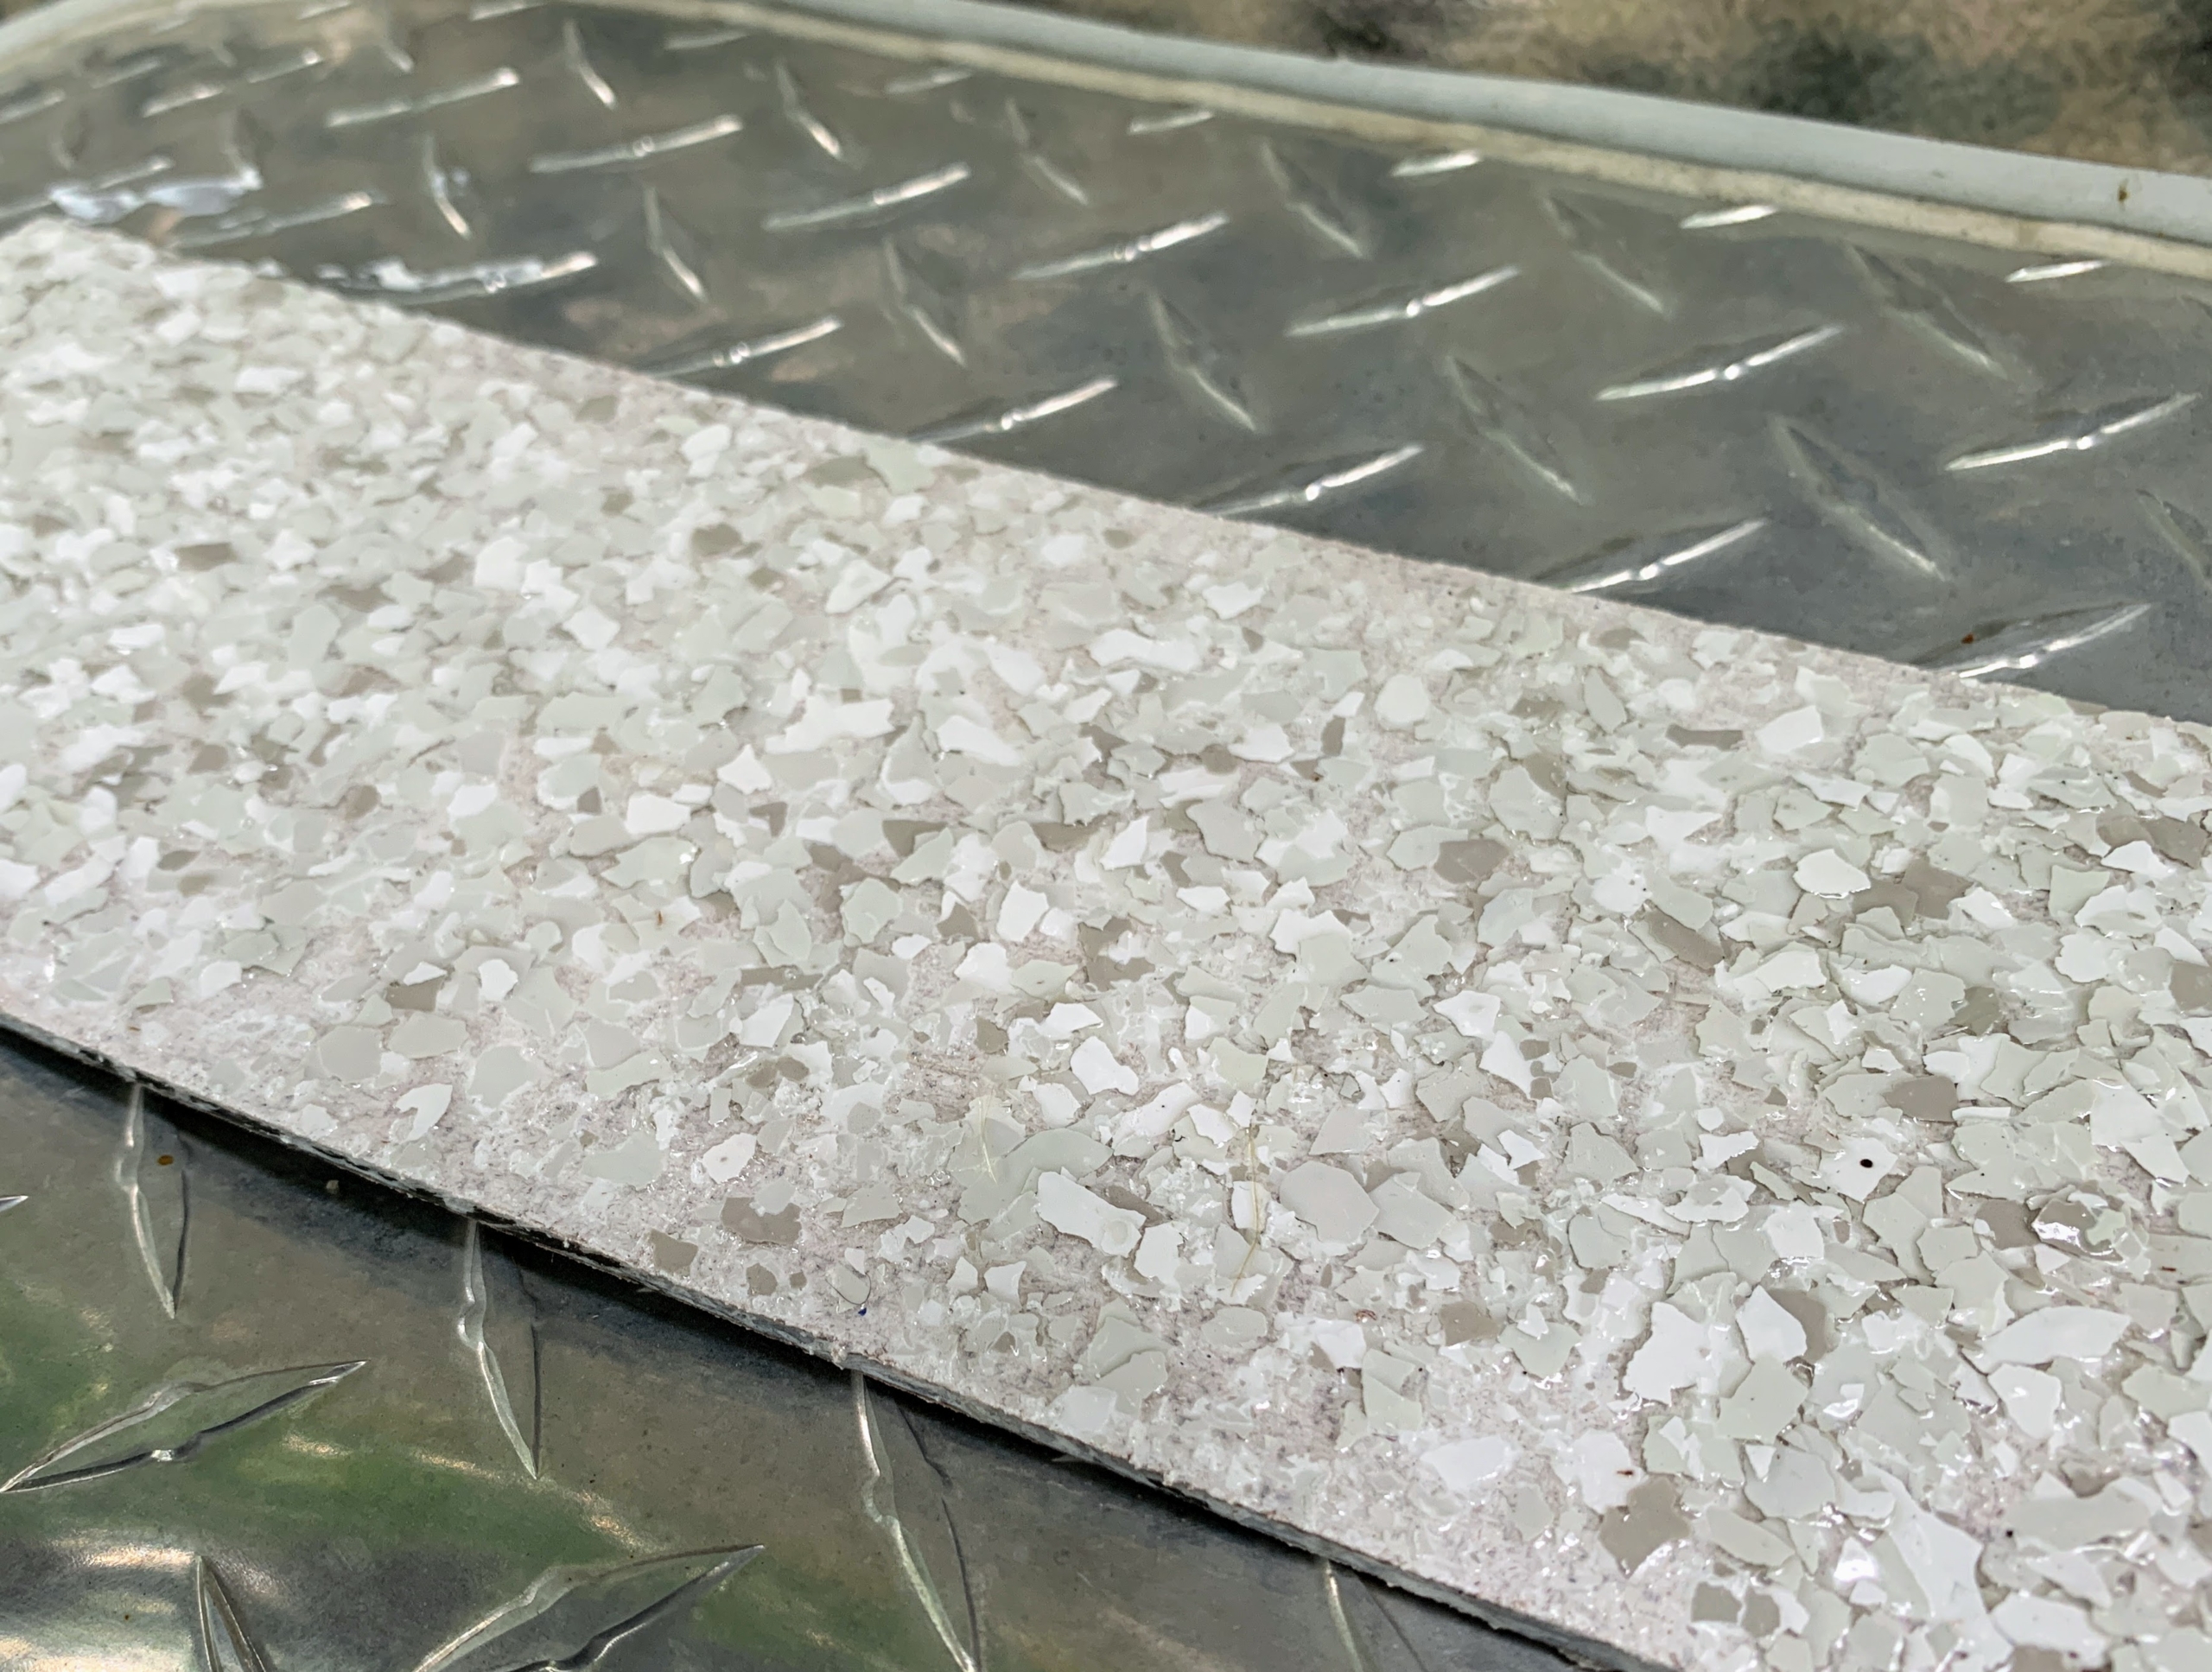
The flake floor coatings can be done in one of more than 40-different color patterns.
I chose this light gray and white flaked patterned floor – it will look clean and bright.
The very first step was to empty the garage completely.
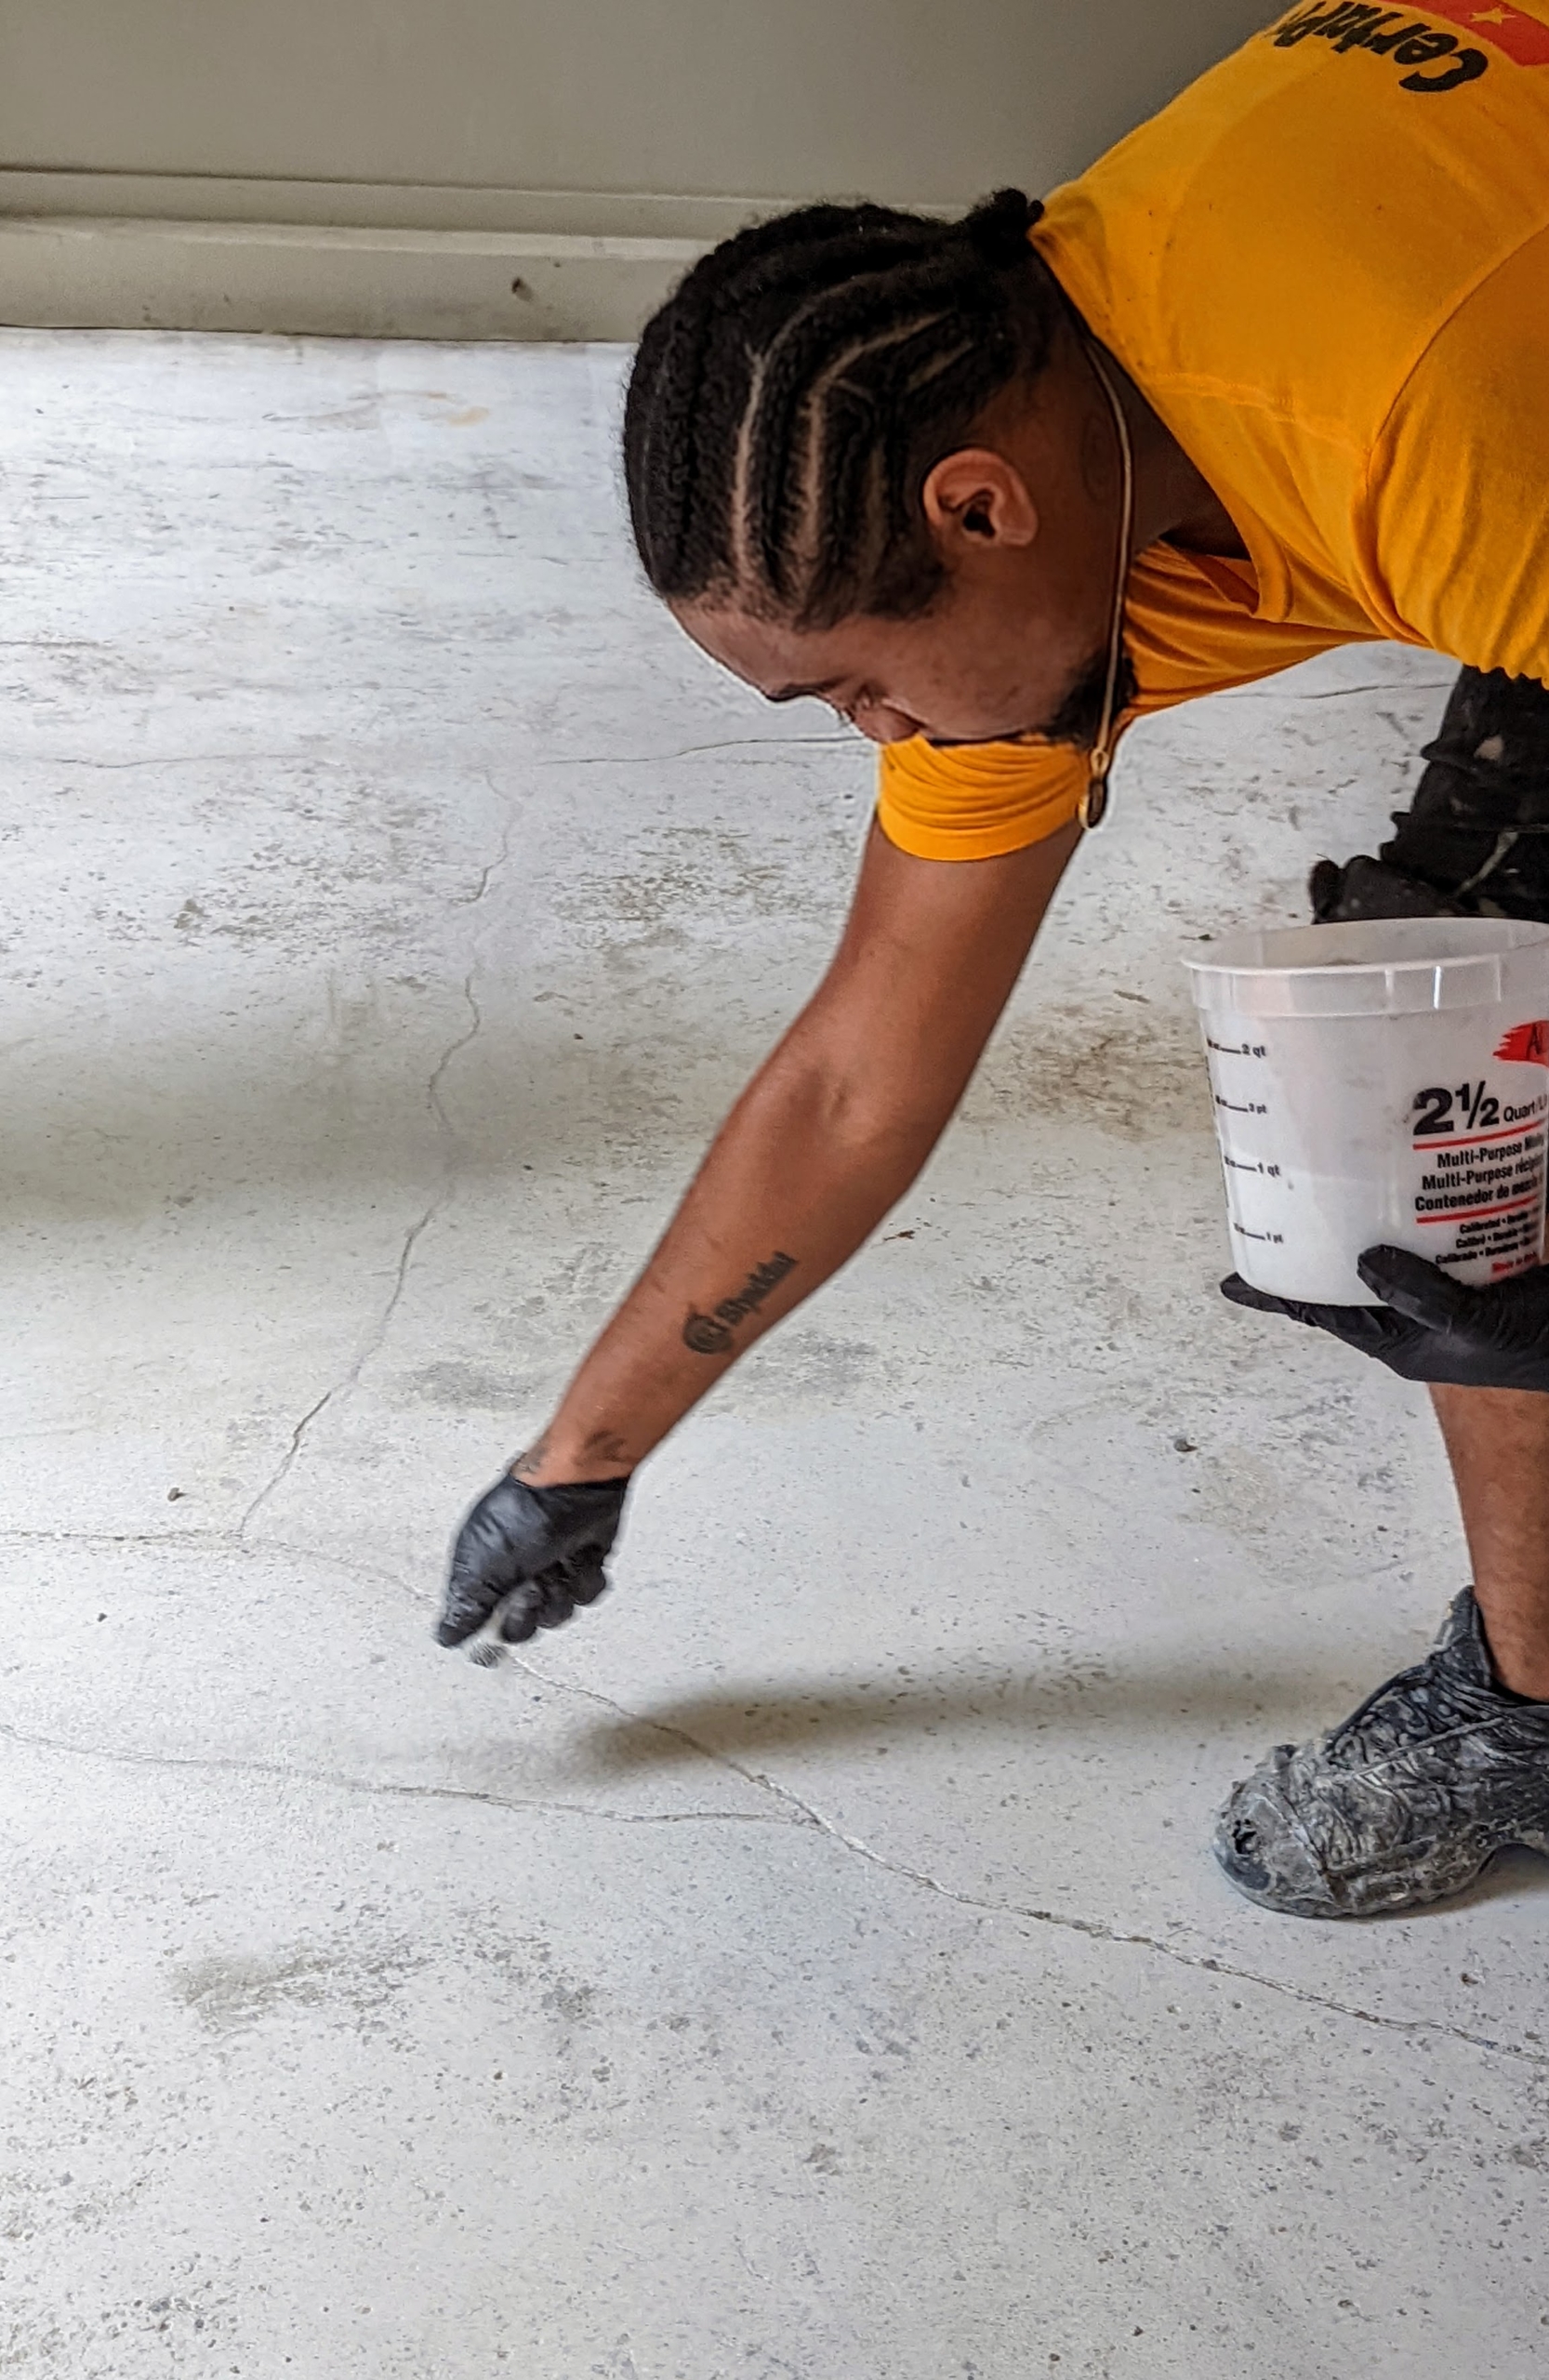
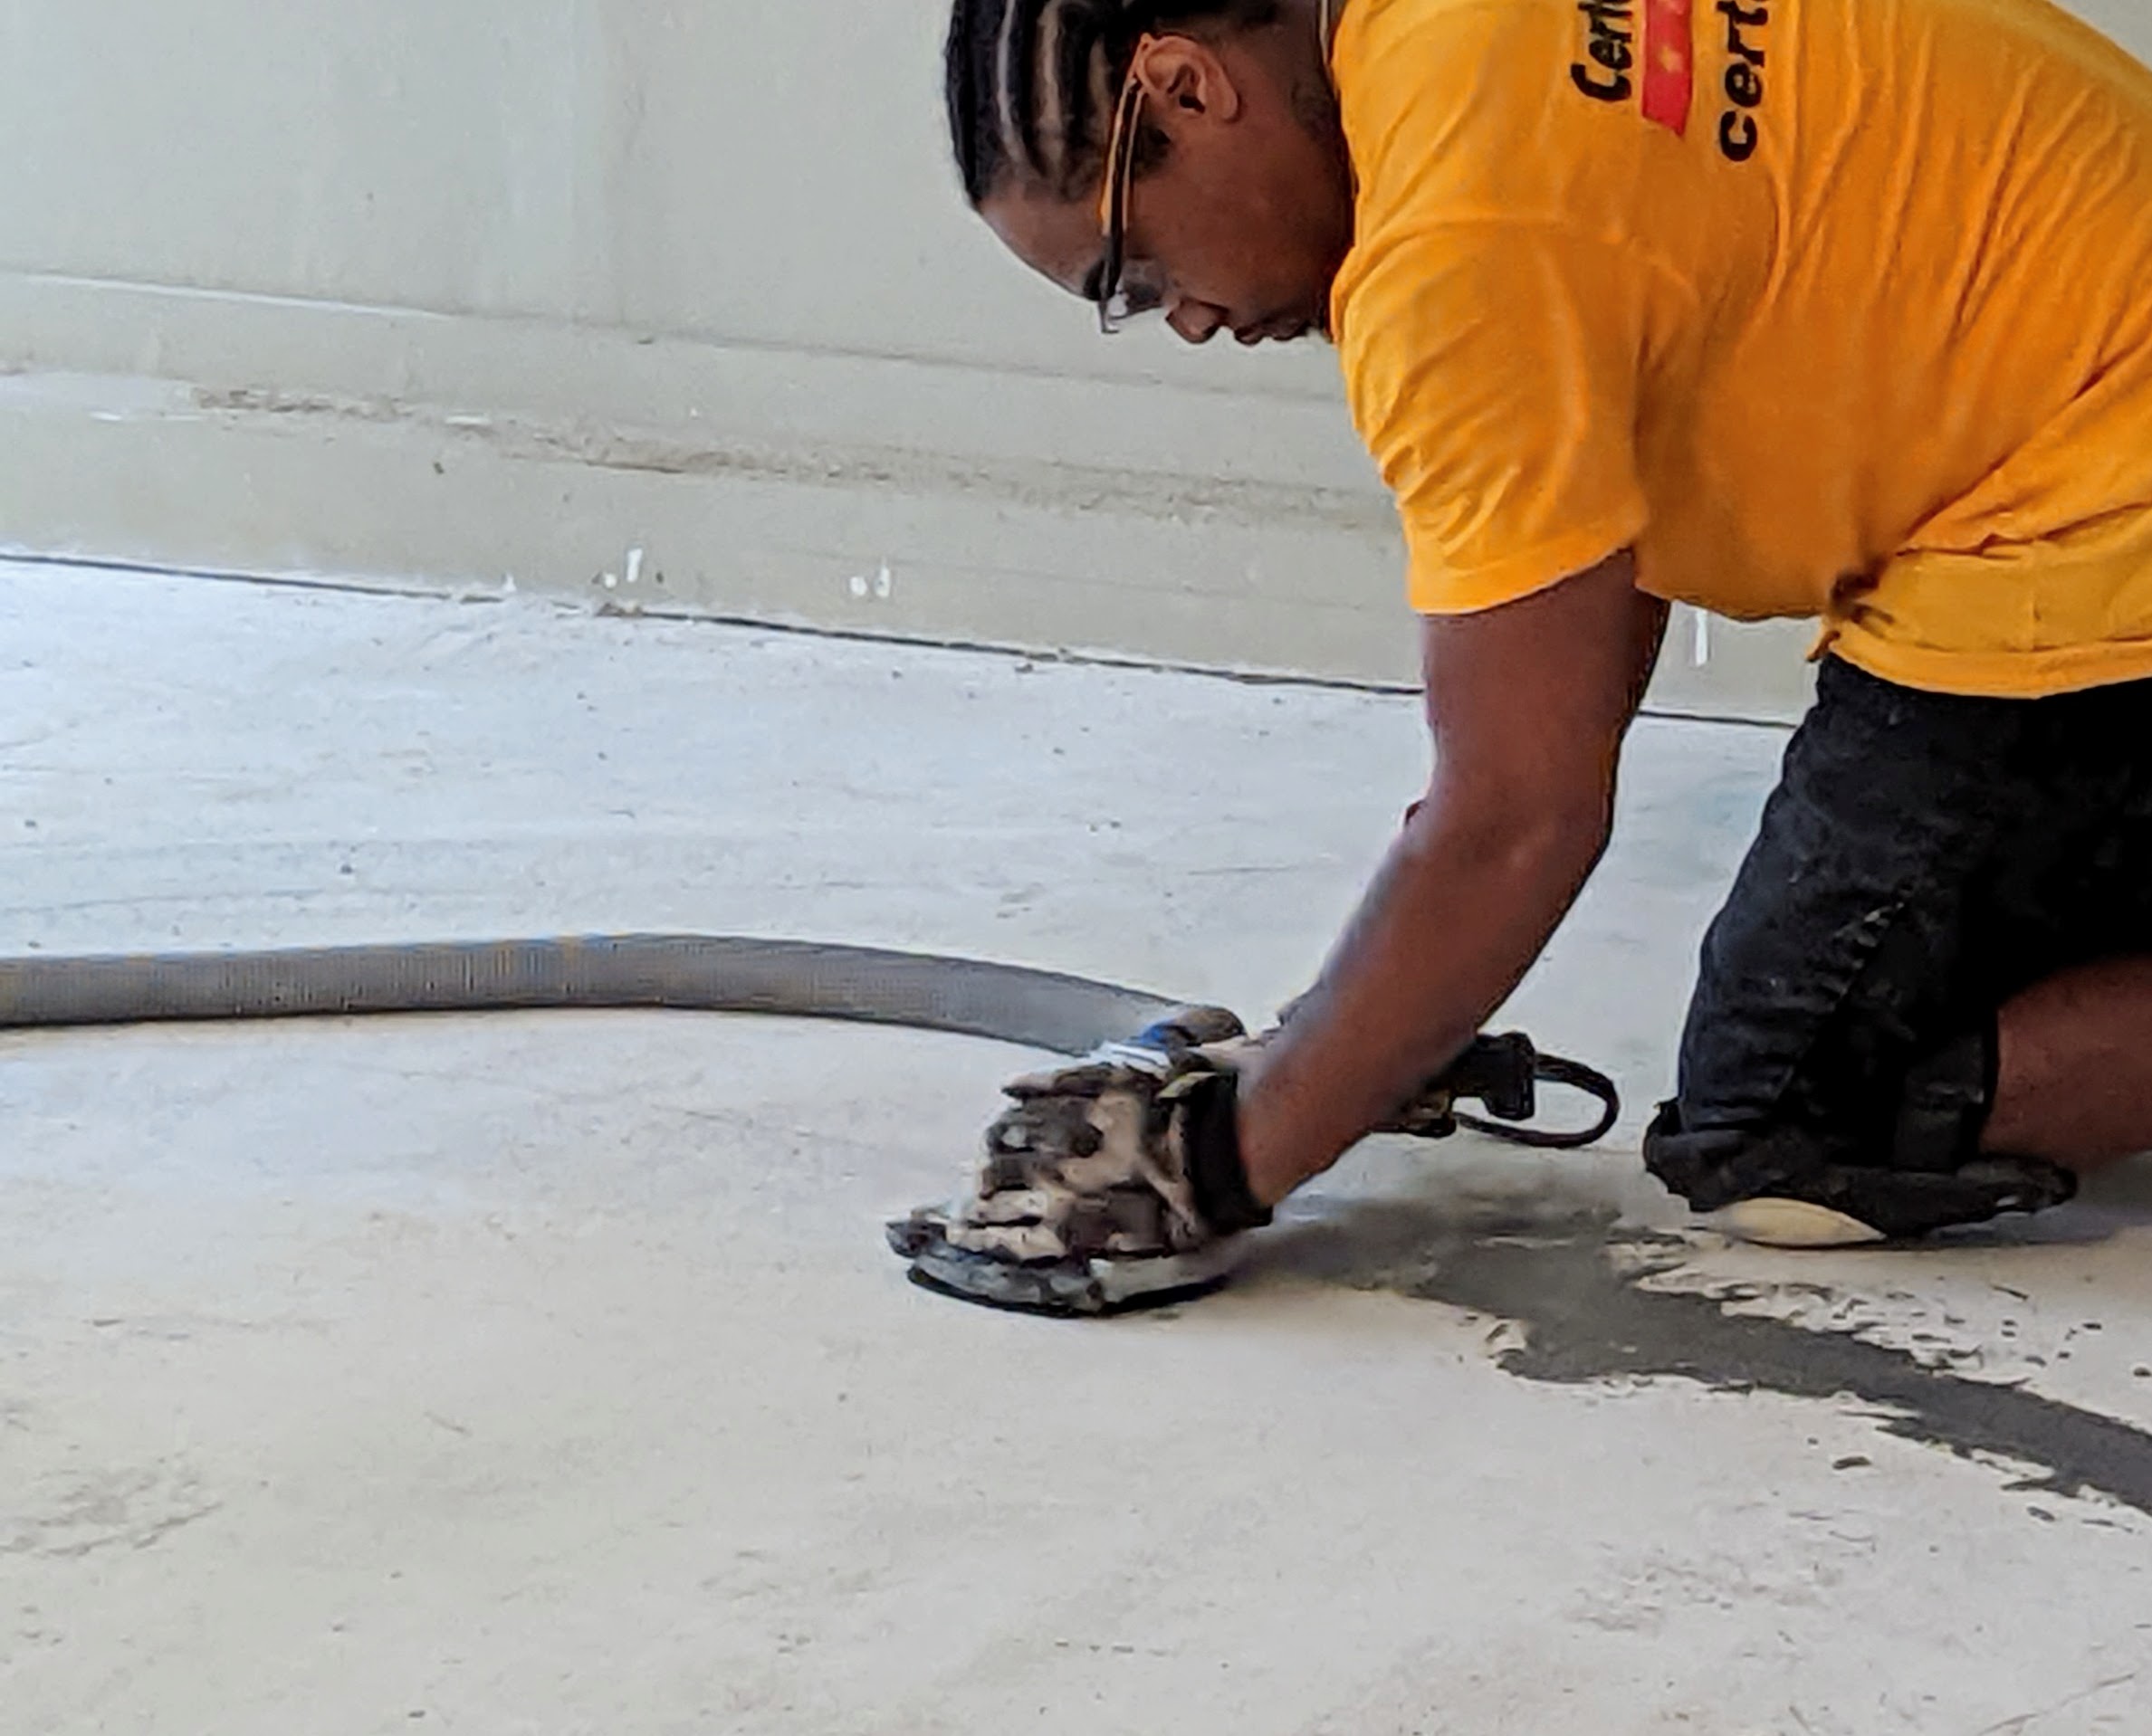
Next, Omar grinds the floor down until the entire space is smooth. It must also be clean and free from any dust or debris that may inhibit adhesion of the resins.
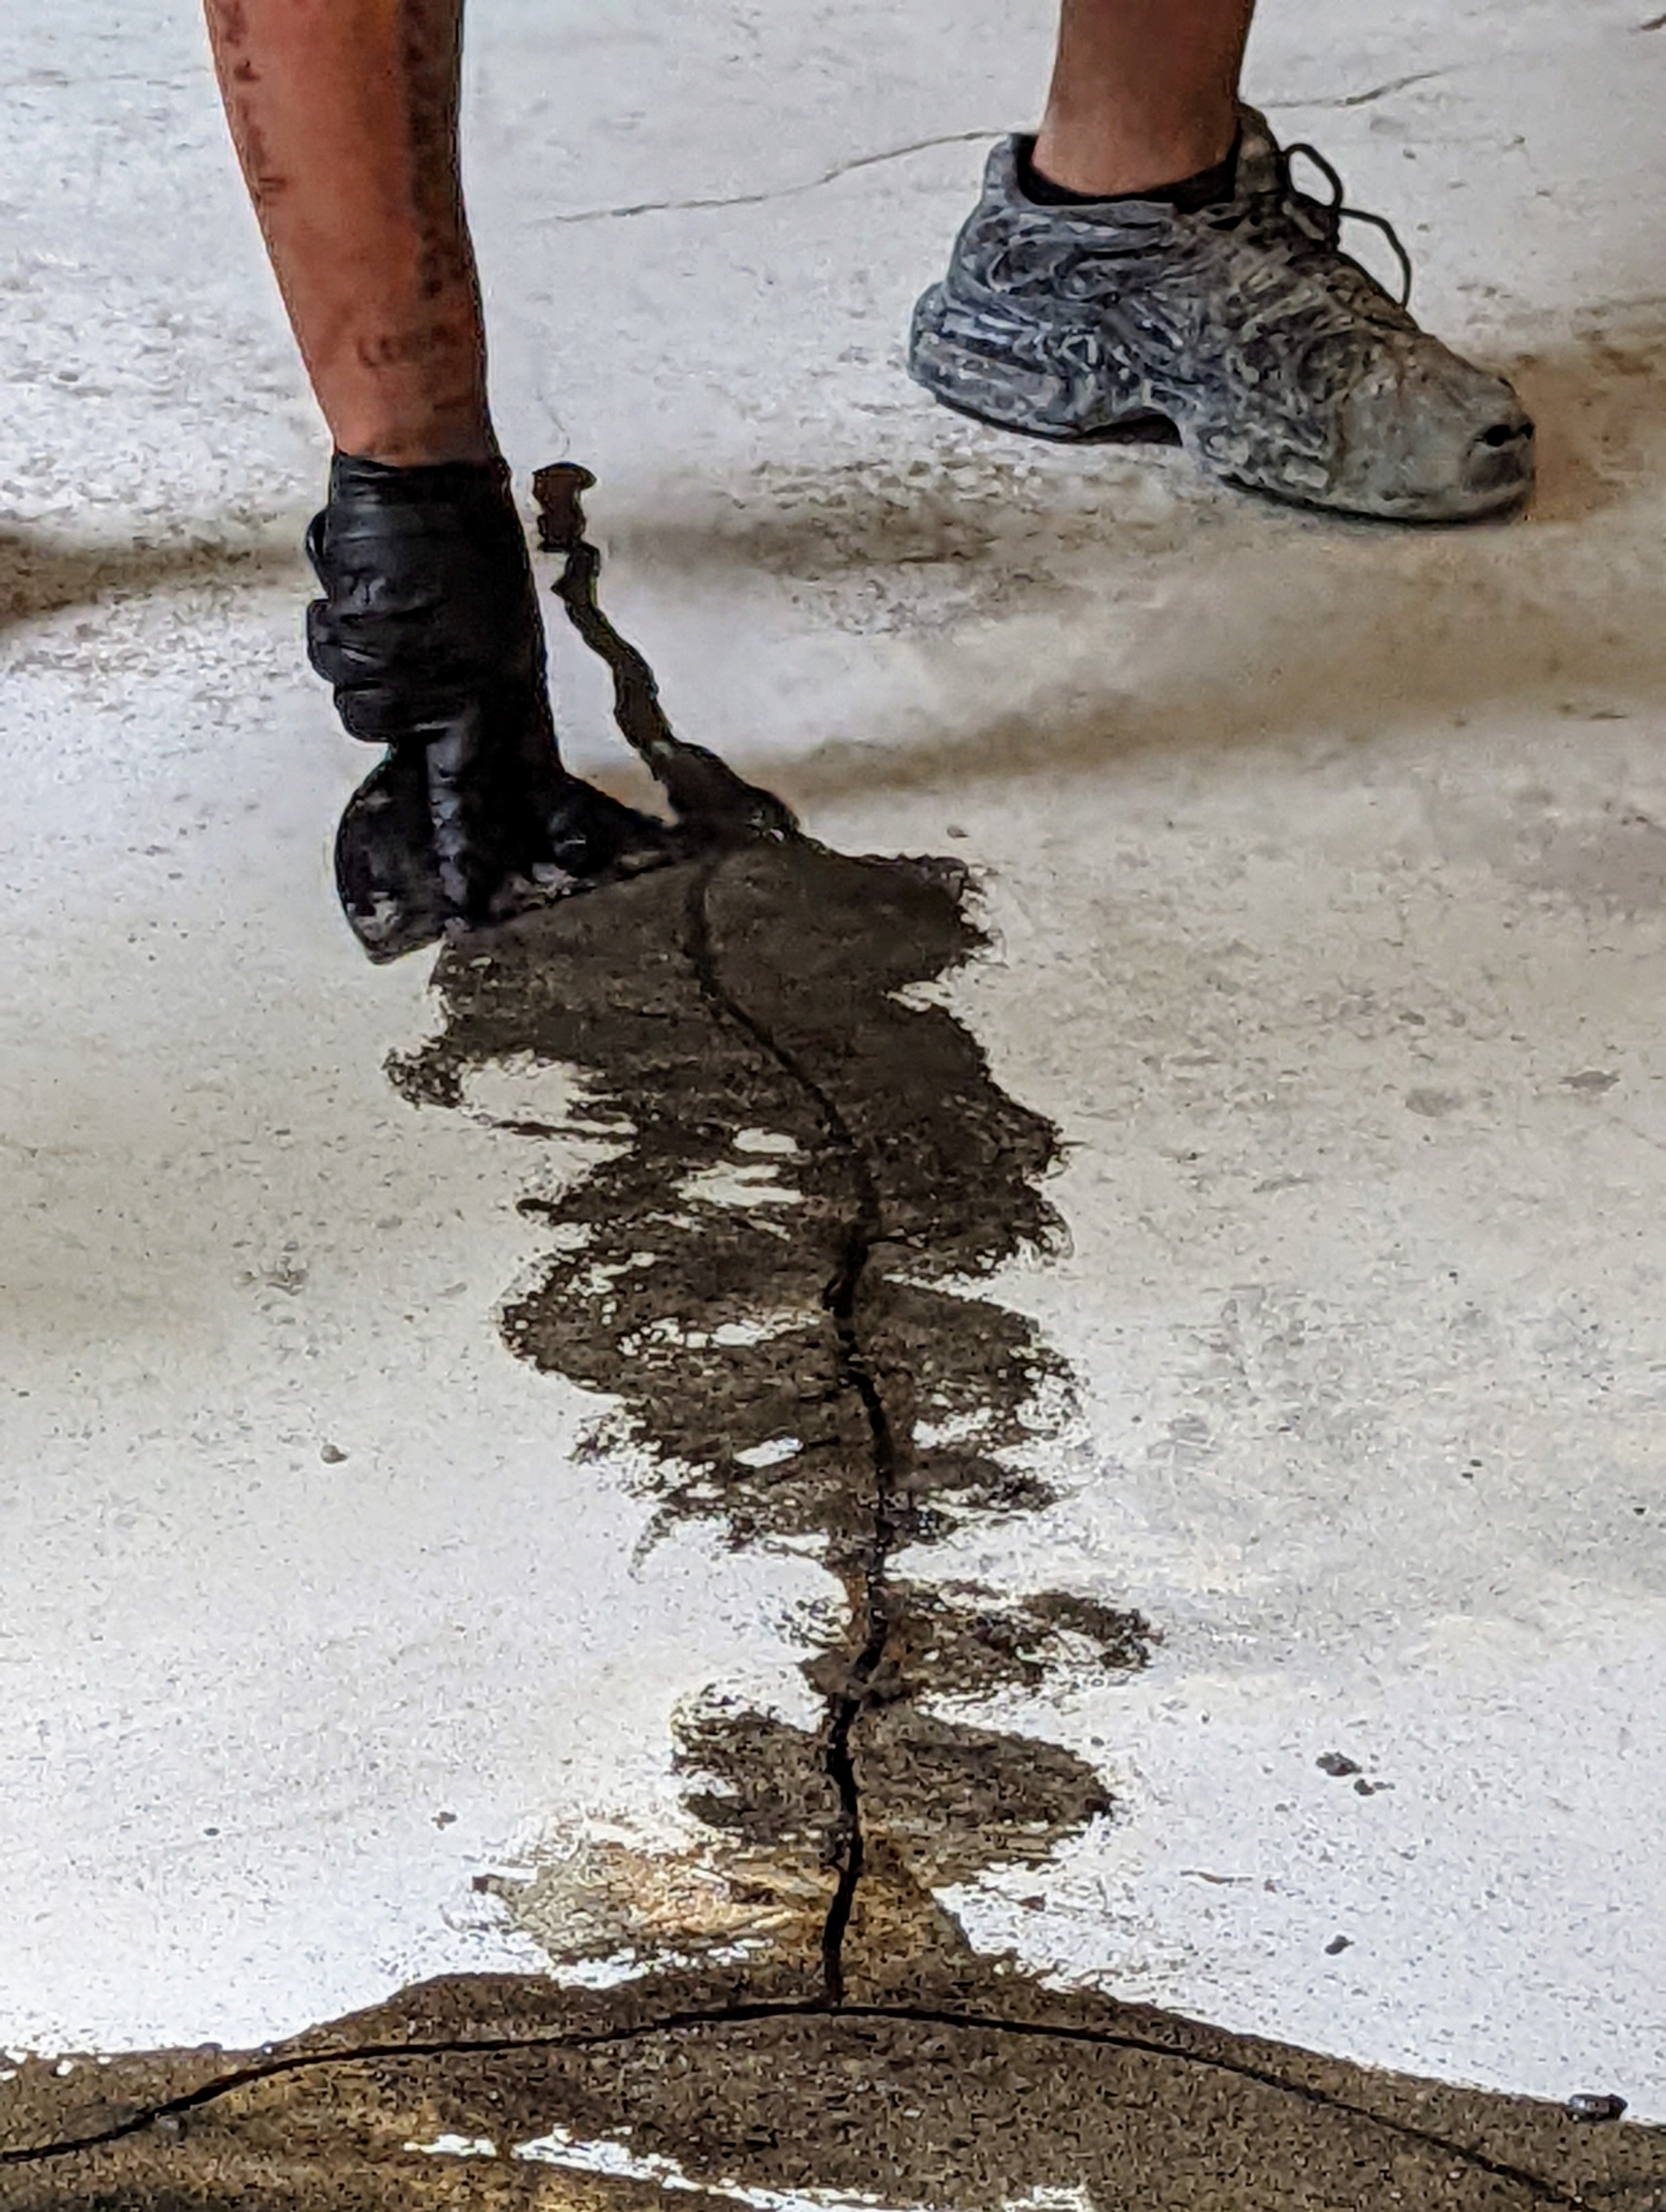
Next, any cracks in the concrete are filled with a fine sand.
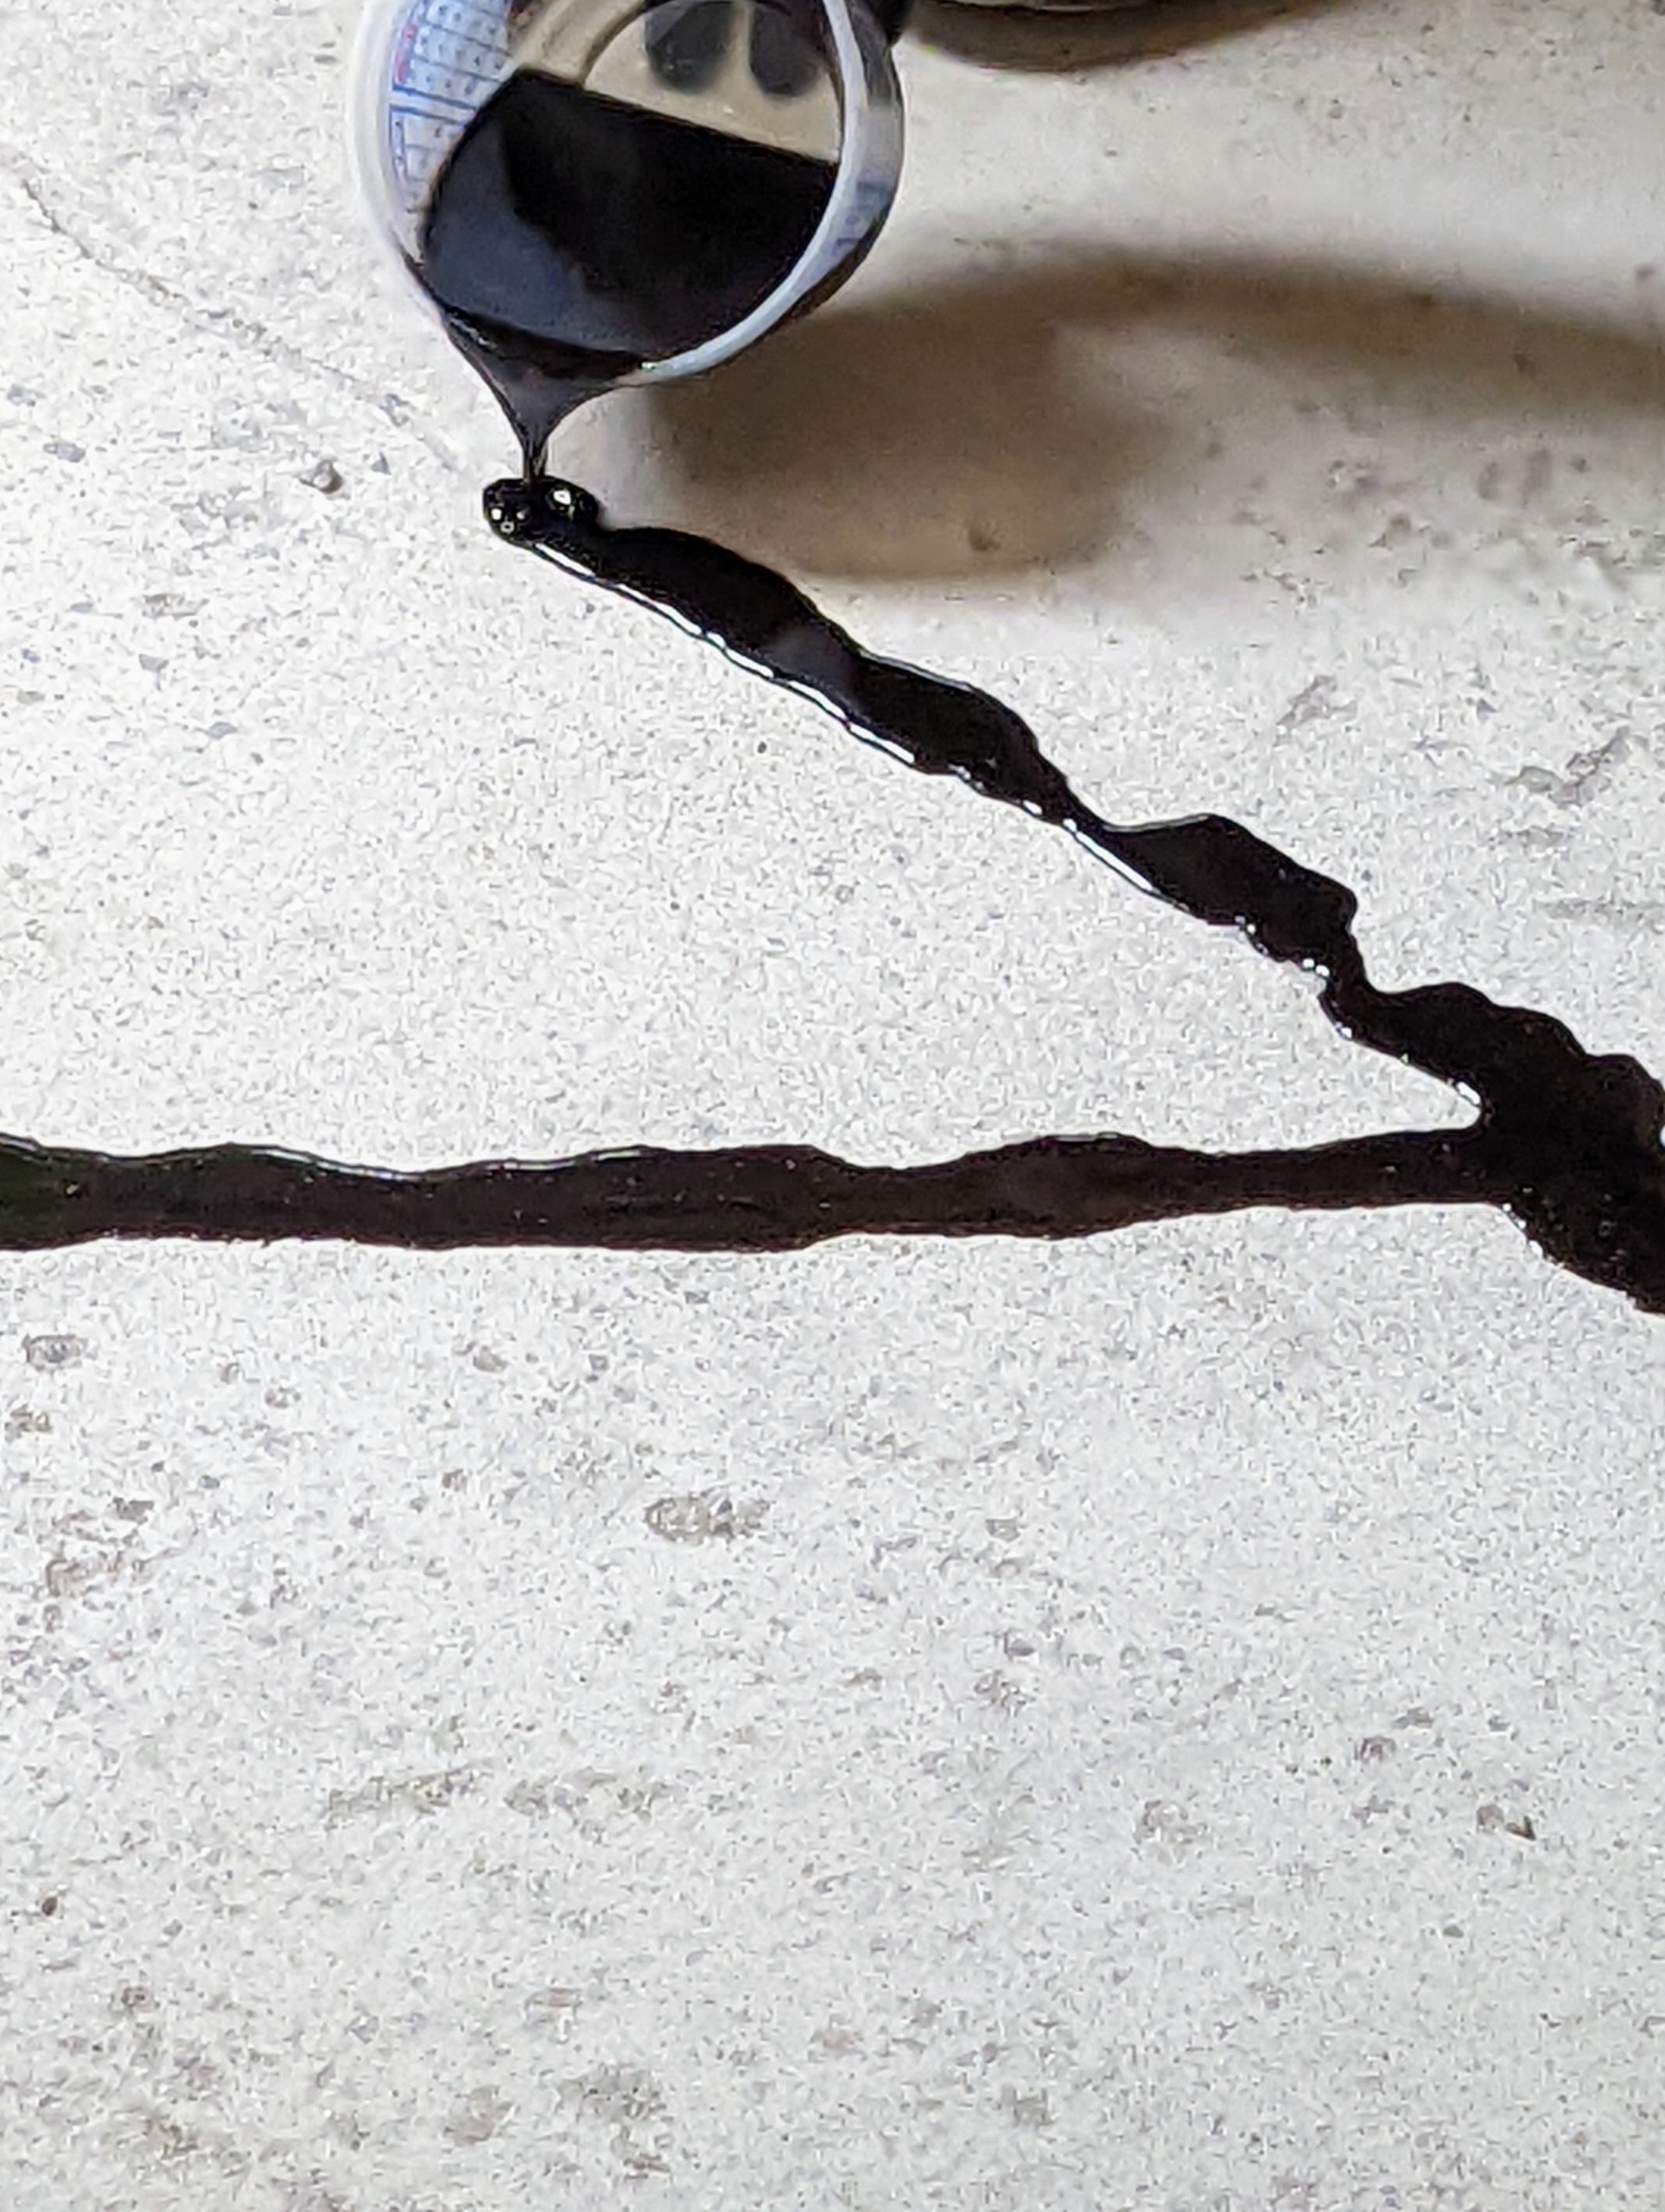
Here, Jordan pours in a crack filler over the sand to fill all the voids.
Omar follows with a putty knife and evens out all the cracks, spreading any excess sand or filler liquid.
After a short wait, Omar grinds the cracked areas.
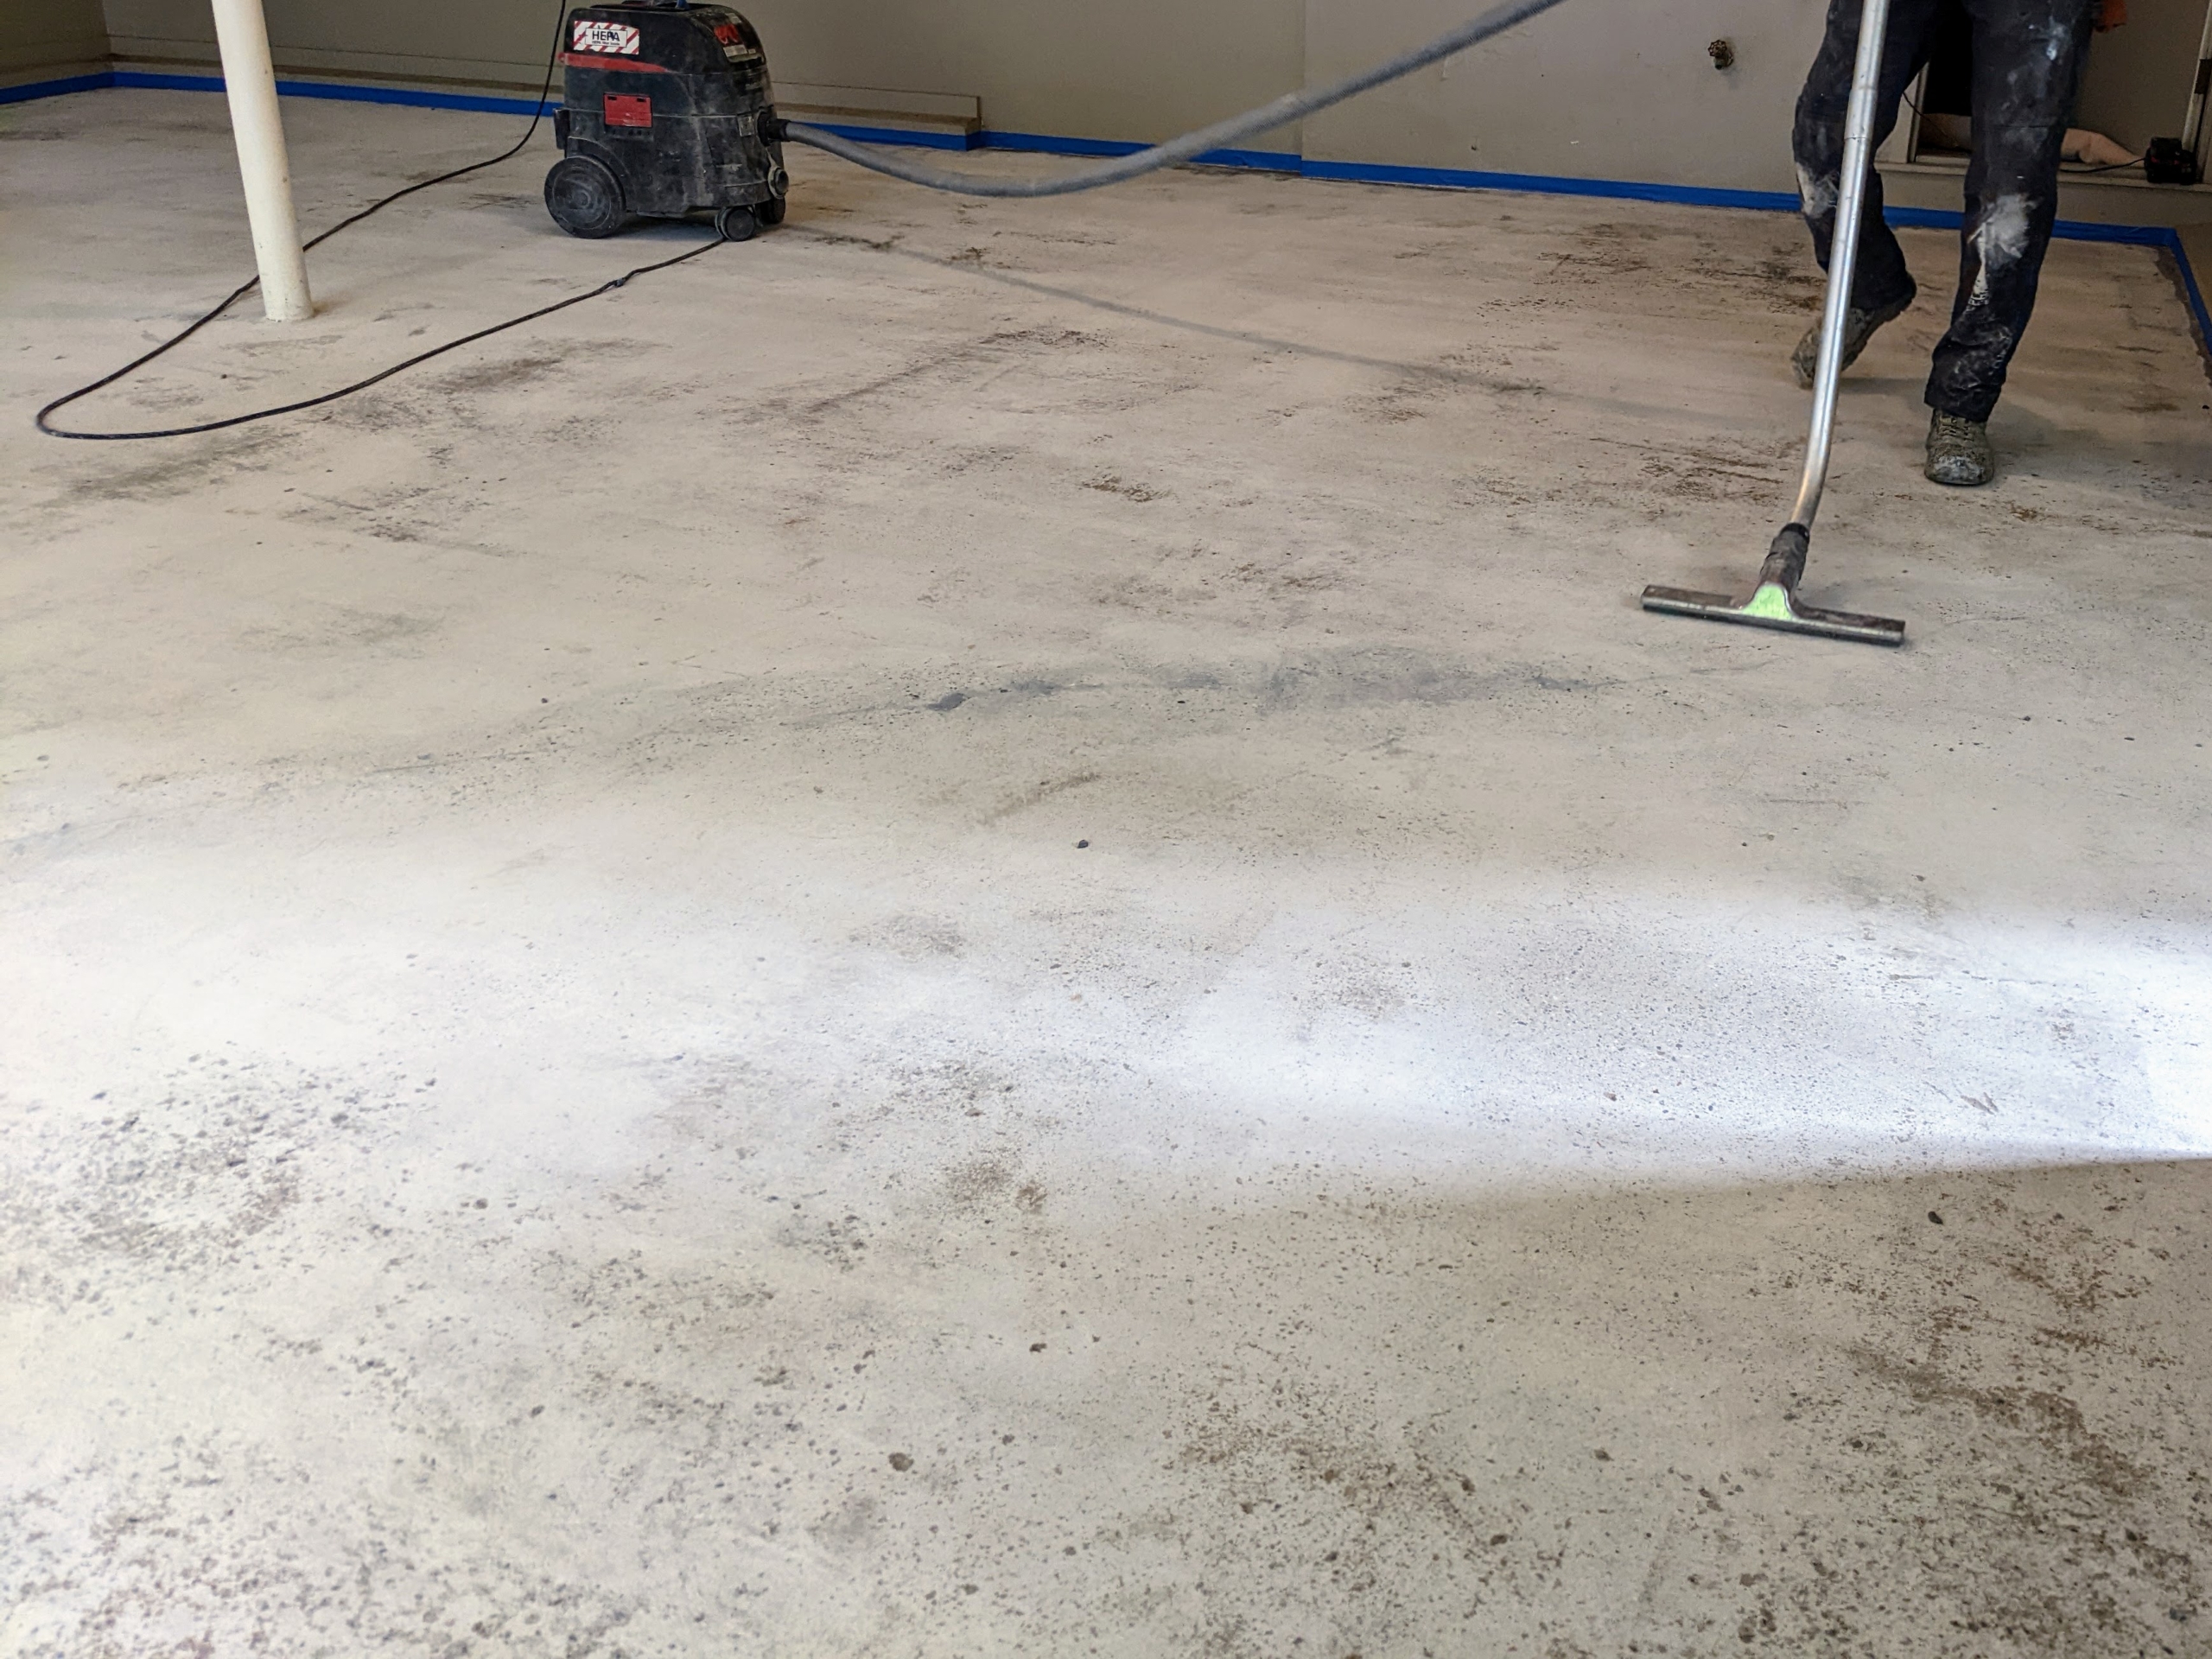
And then Jordan thoroughly vacuums the entire floor.
The next step is to prepare the glue or Polyaspartic – a tinted primer base coat that will allow the flakes to adhere to the surface.
Omar uses a floor painting roller to apply this base coat. This will ensure maximum adhesion to the prepared substrate. Priming also helps to seal any air in the concrete that could cause bubbling on the finished surface.
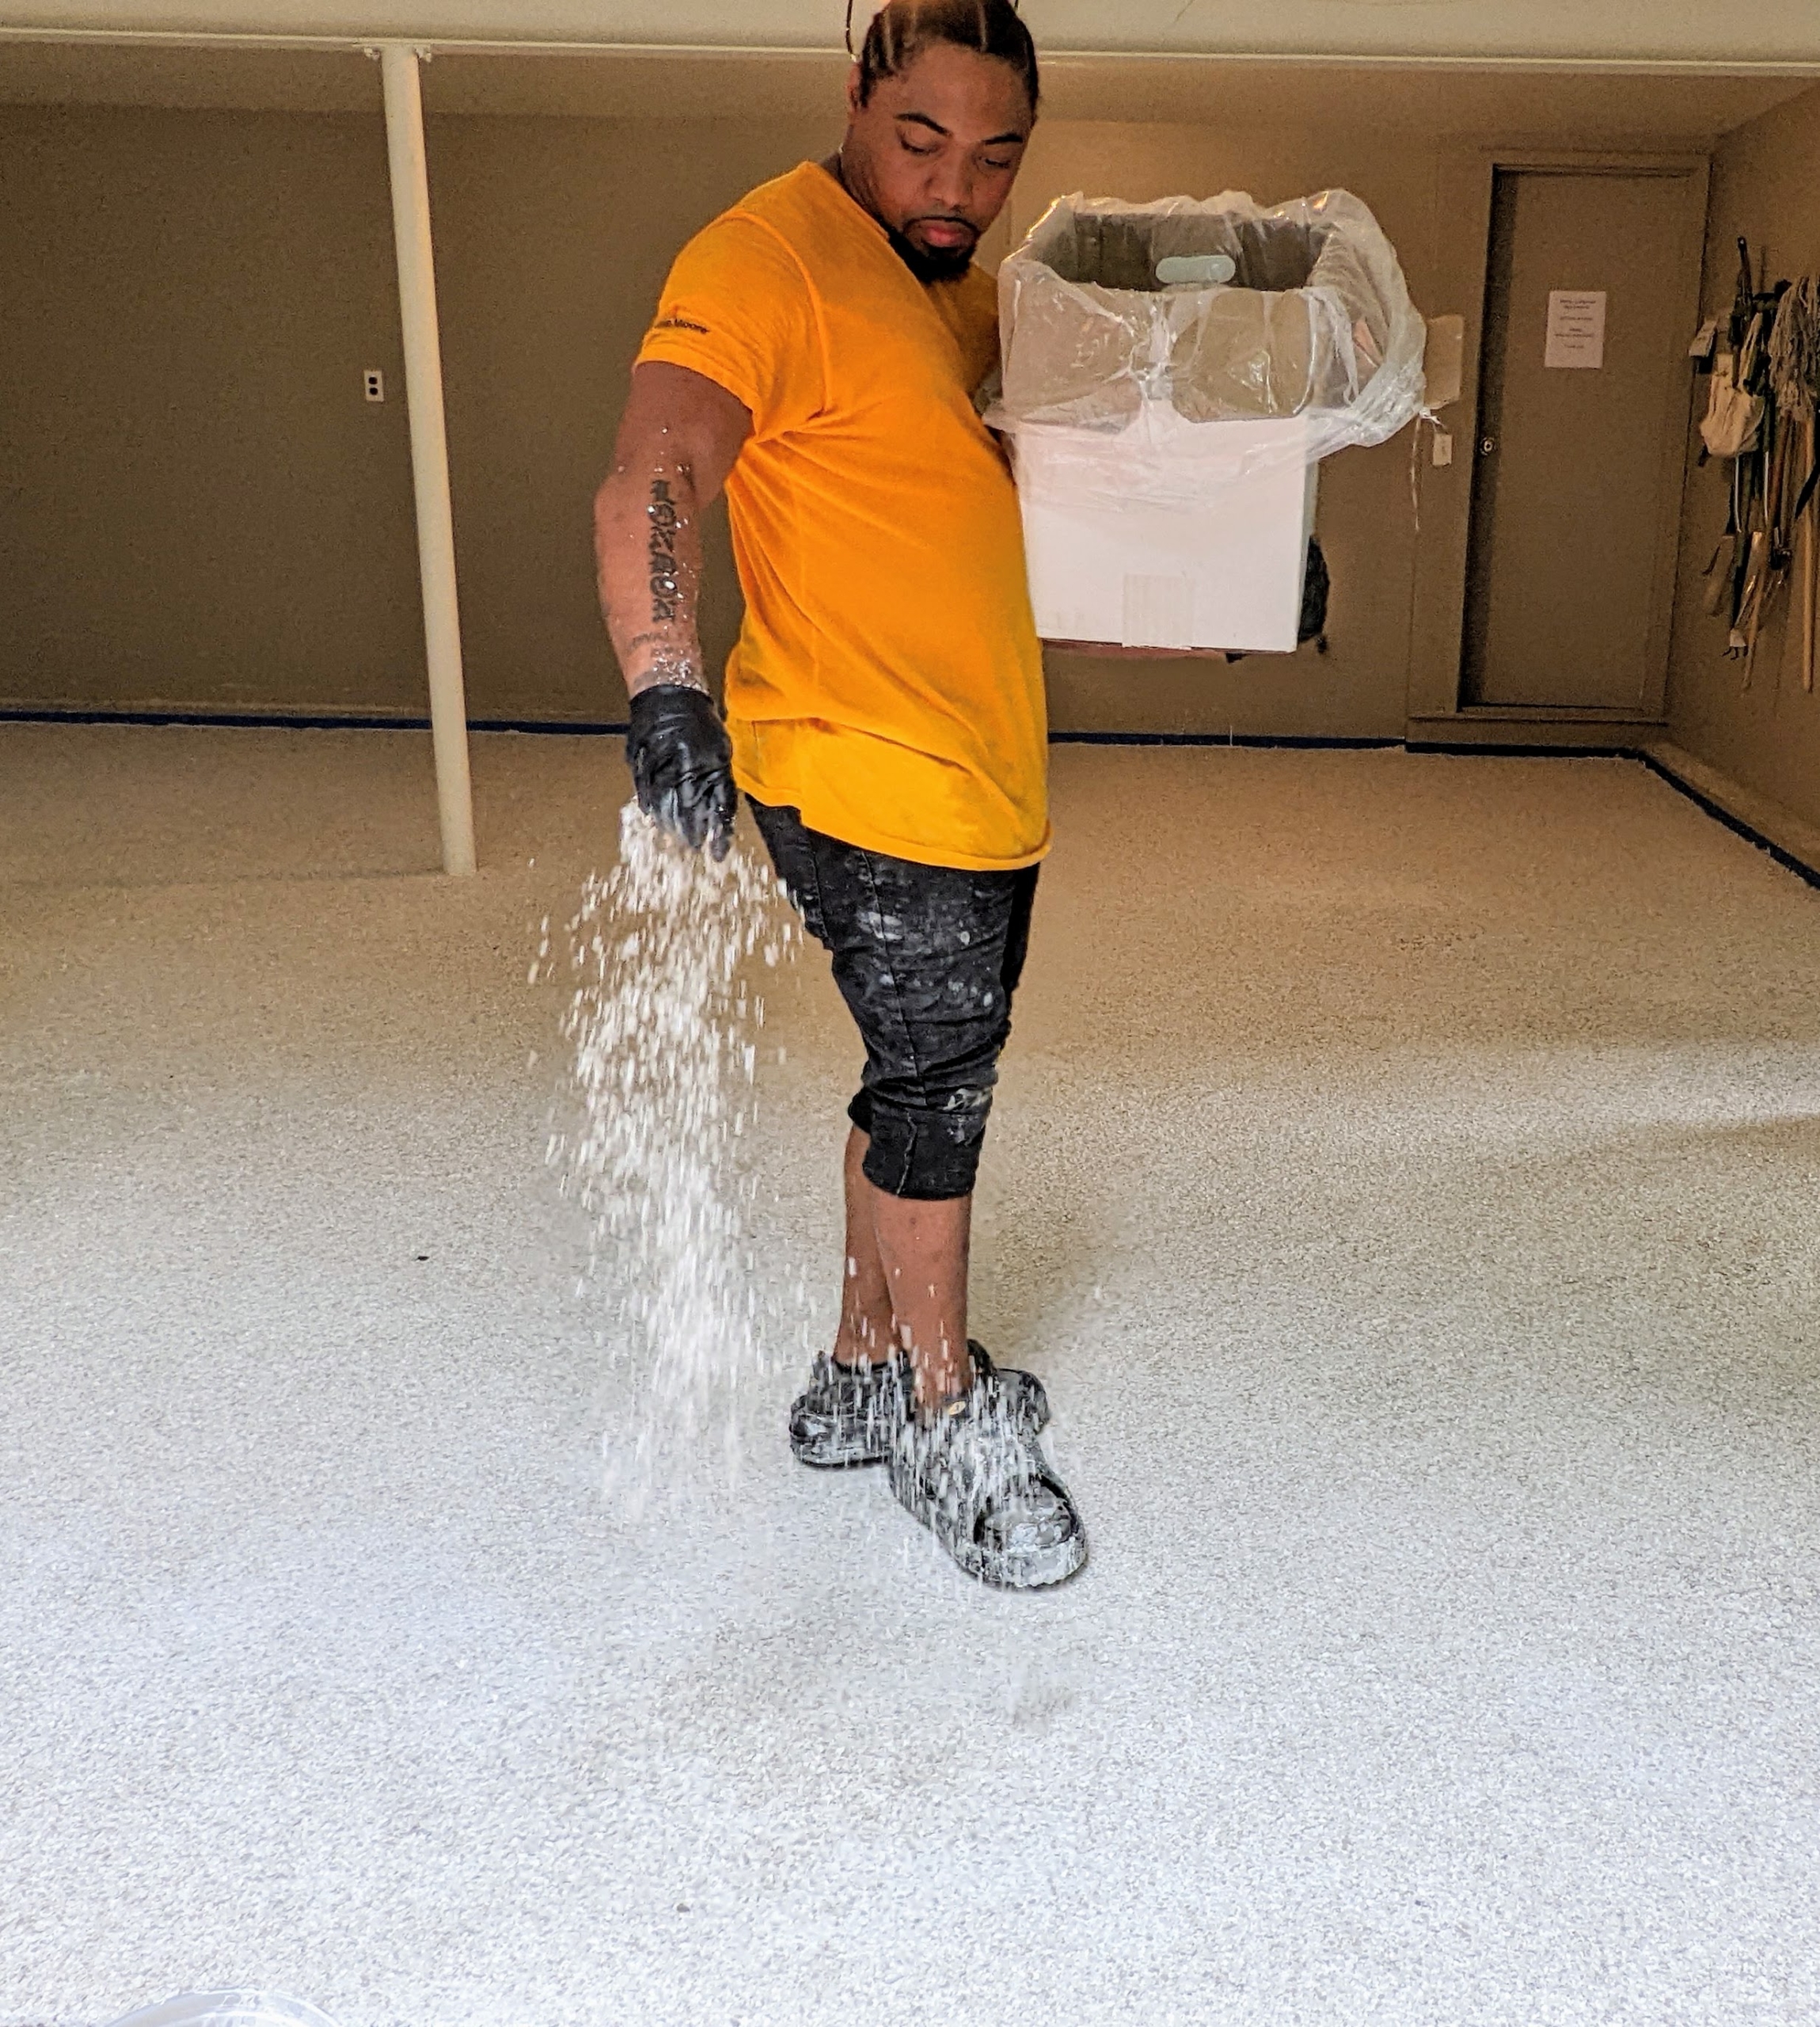
Then, Omar puts on special spiked sandals and broadcasts the entire floor with flakes. It is important to cover the entire space thoroughly and quickly.
These flakes are actually polymer paint aggregates made up of a combination of acrylic and vinyl resins. The combination creates thin chips that easily adhere to the floor.
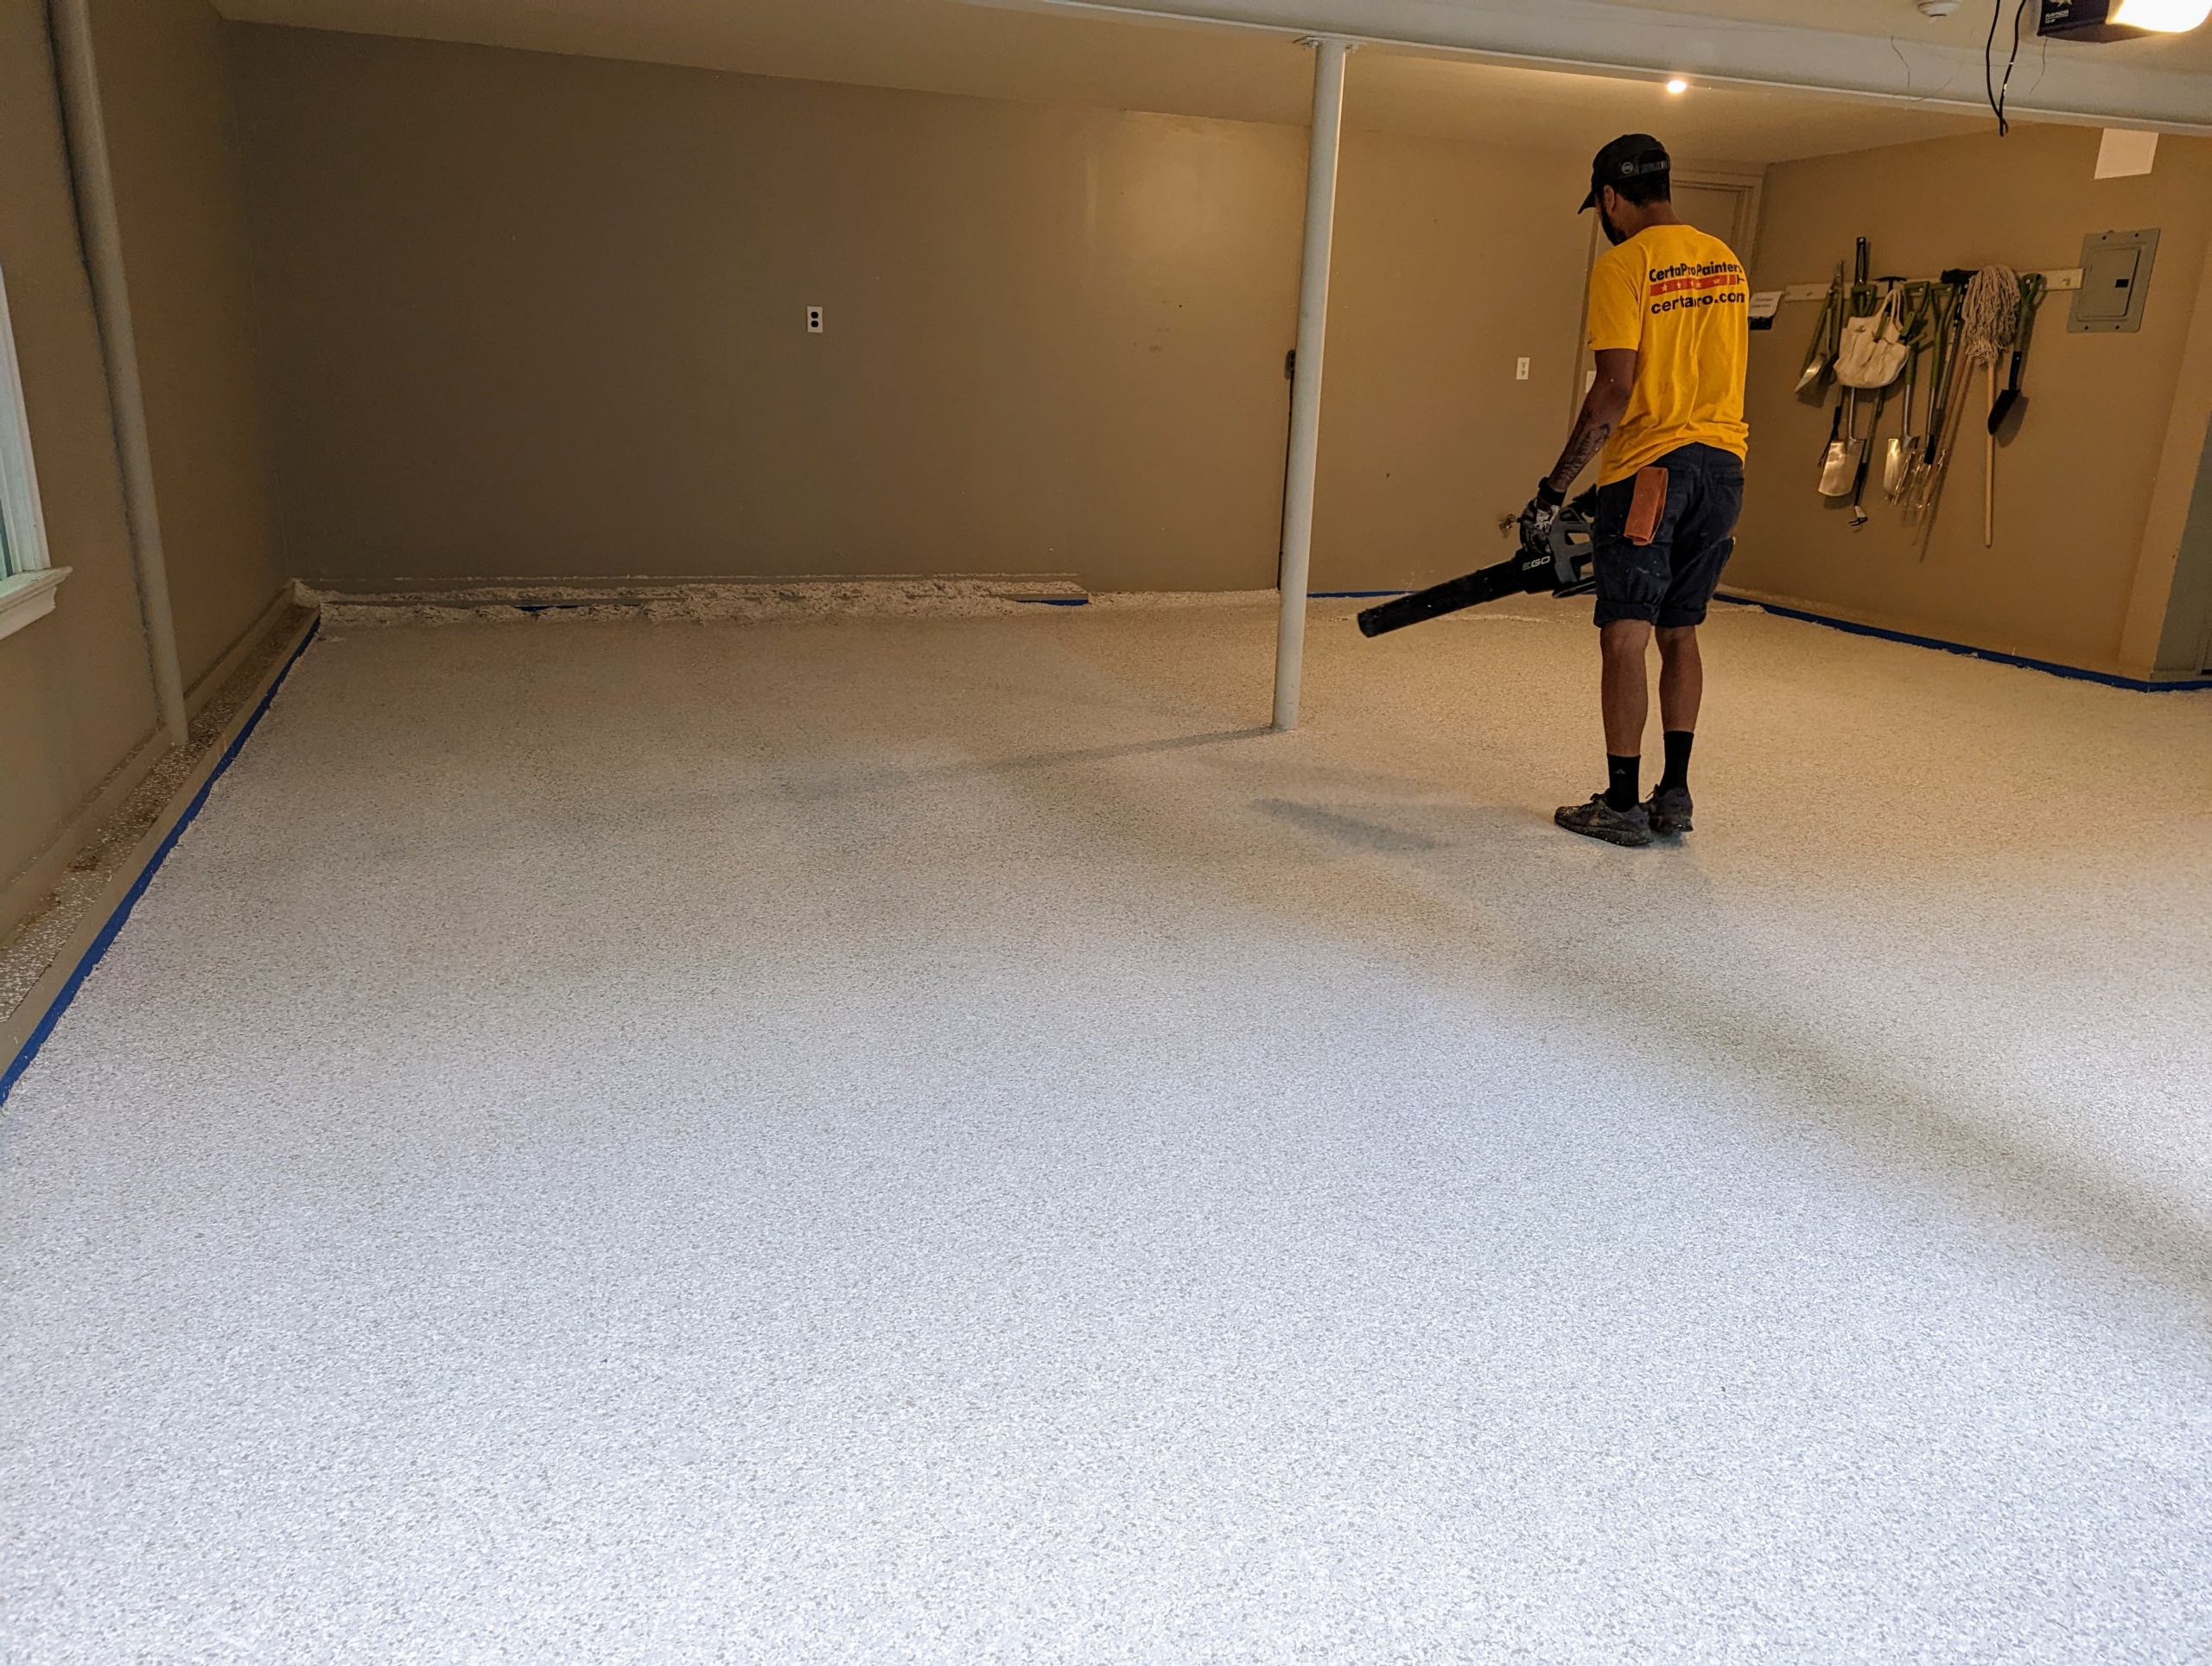
The flakes need a couple hours to dry completely. The next step is to scrape any loose chips from the surface. Omar uses a large scraper to also knock any chips that are protruding.
As Omar scrapes, Jordan blows the loose chips to the back of the garage.
These loose chips can be recycled and saved for another floor.
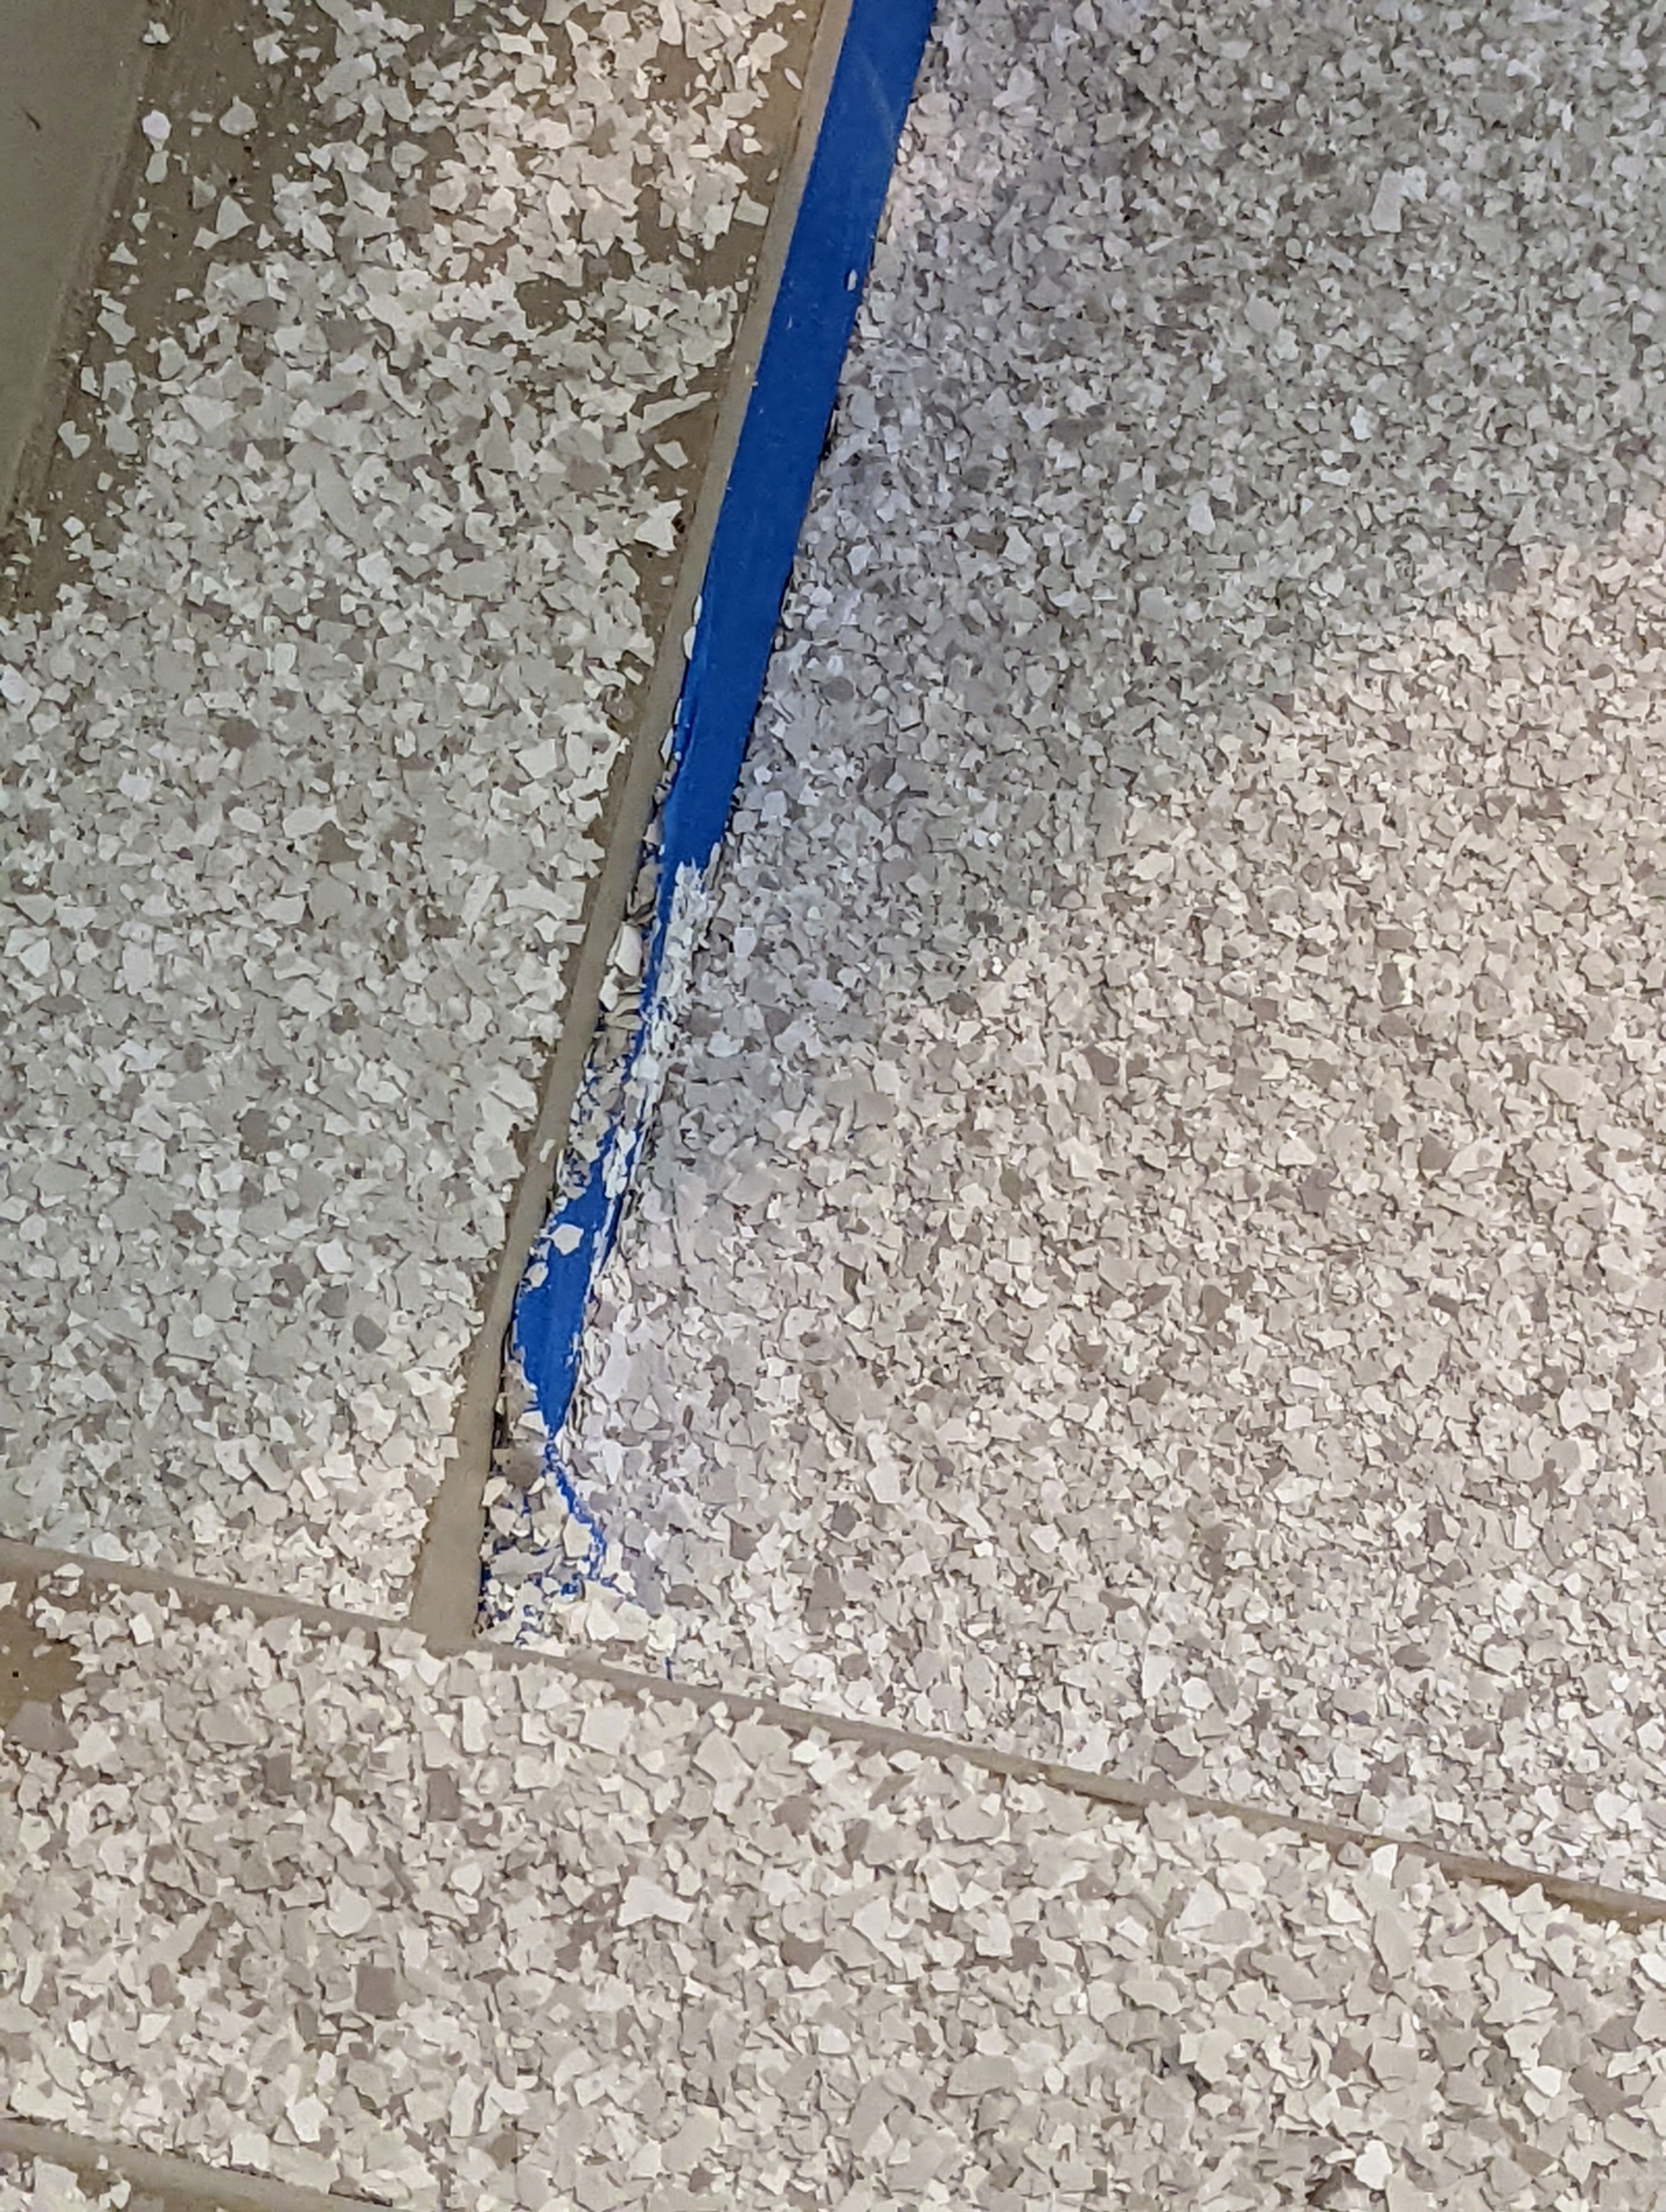
Then Omar removes the painter’s tape from cove joints, where the floor meets the wall.
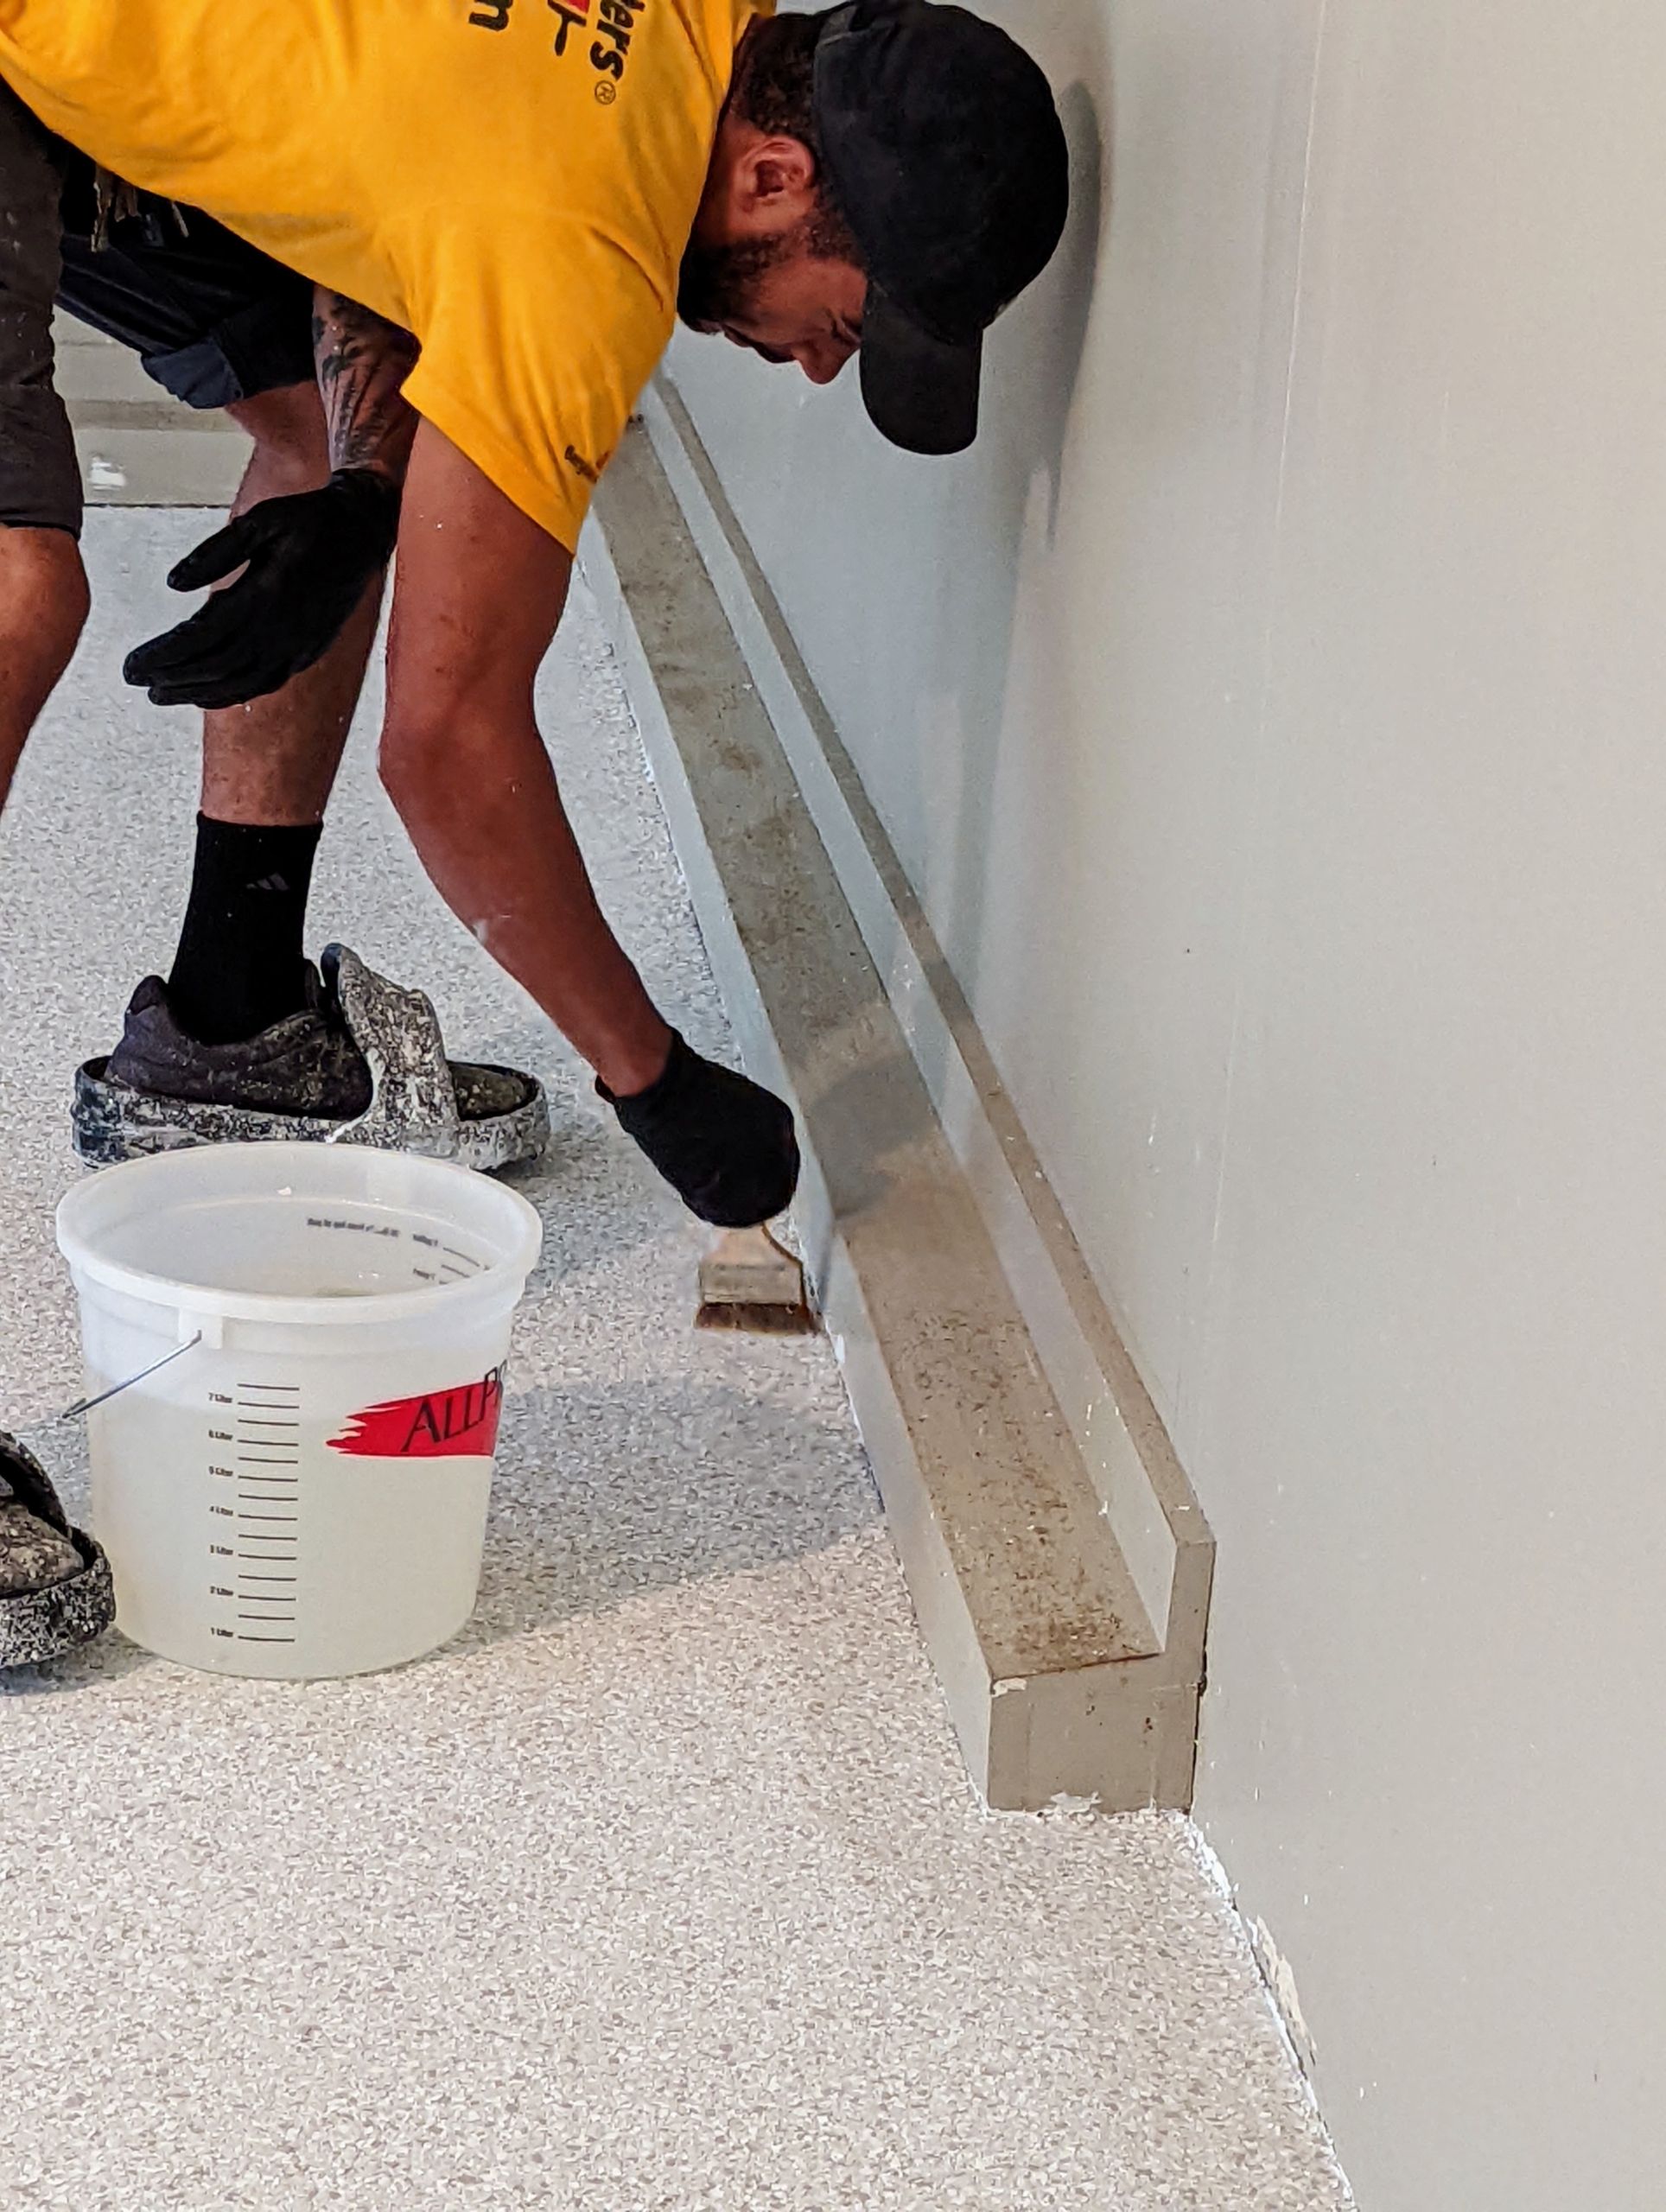
The last step is to cover the floor with the sealer, or top coat. Jordan starts by cutting in at the edge all around the perimeter of the garage. He does this with a regular paint brush.
Next, he pours generous amounts of polyurea clear coat and sealer in the middle of the floor.
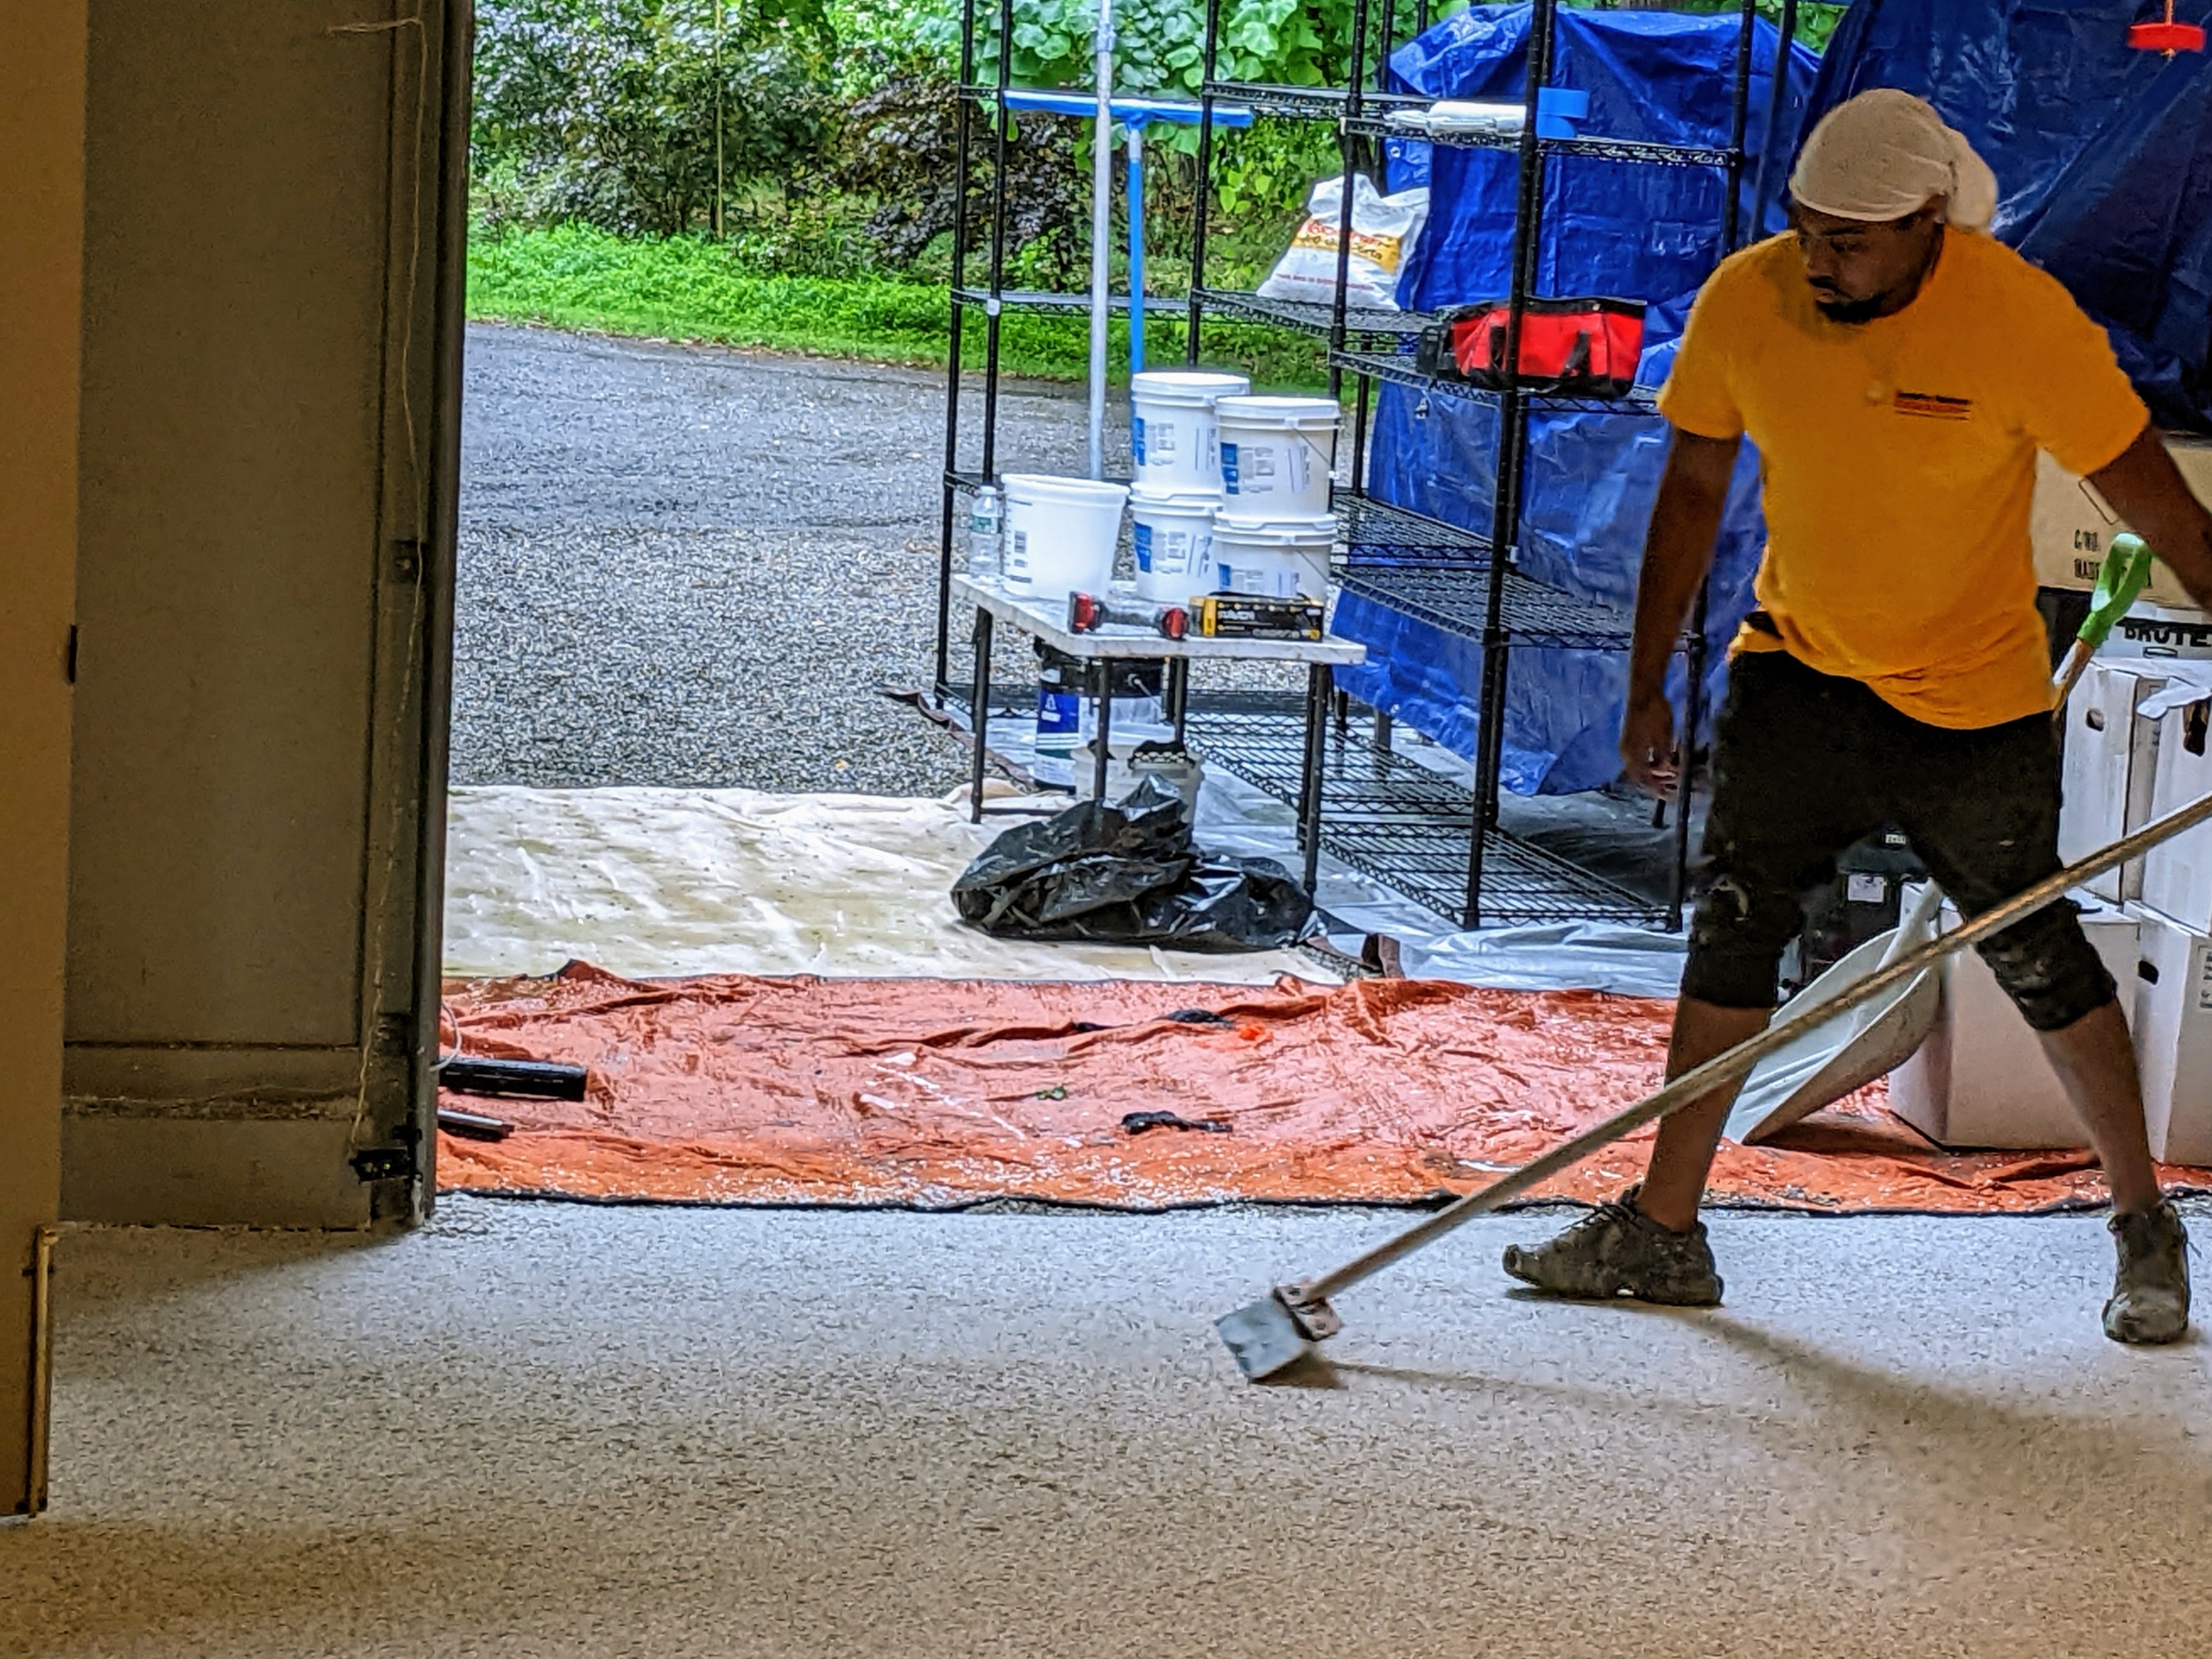
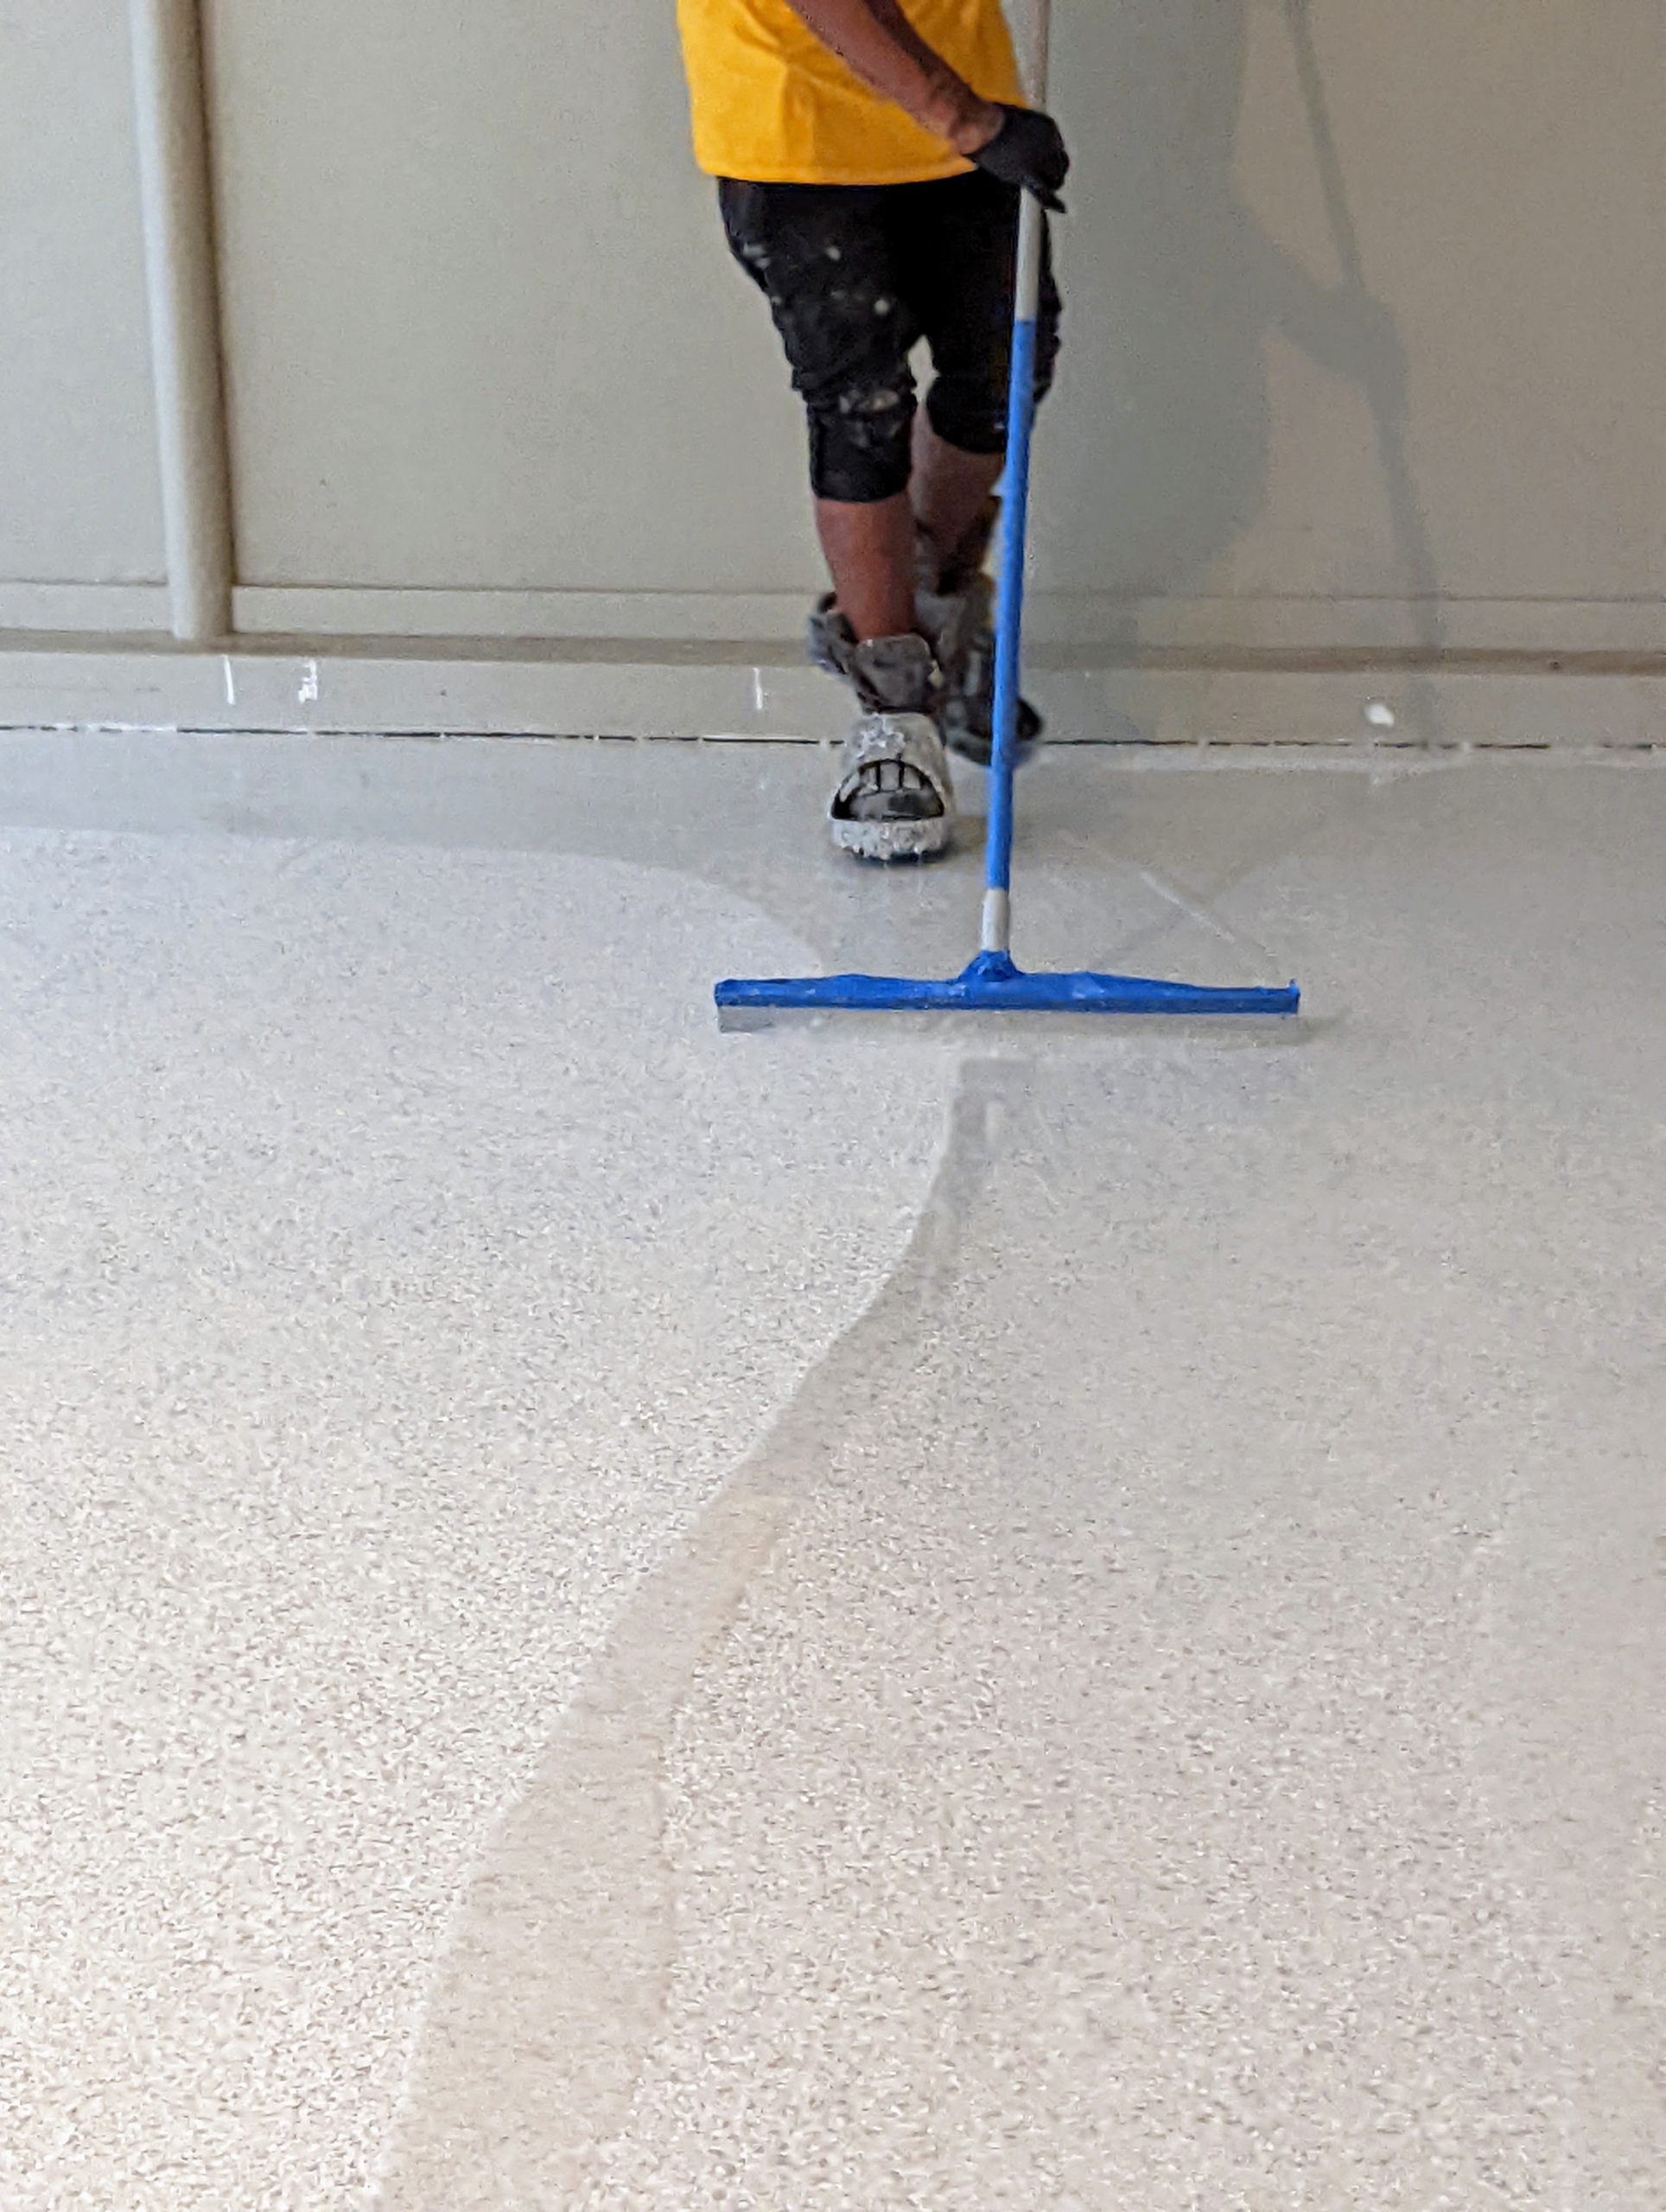
Omar uses a commercial grade squeegee broom to spread the sealer.
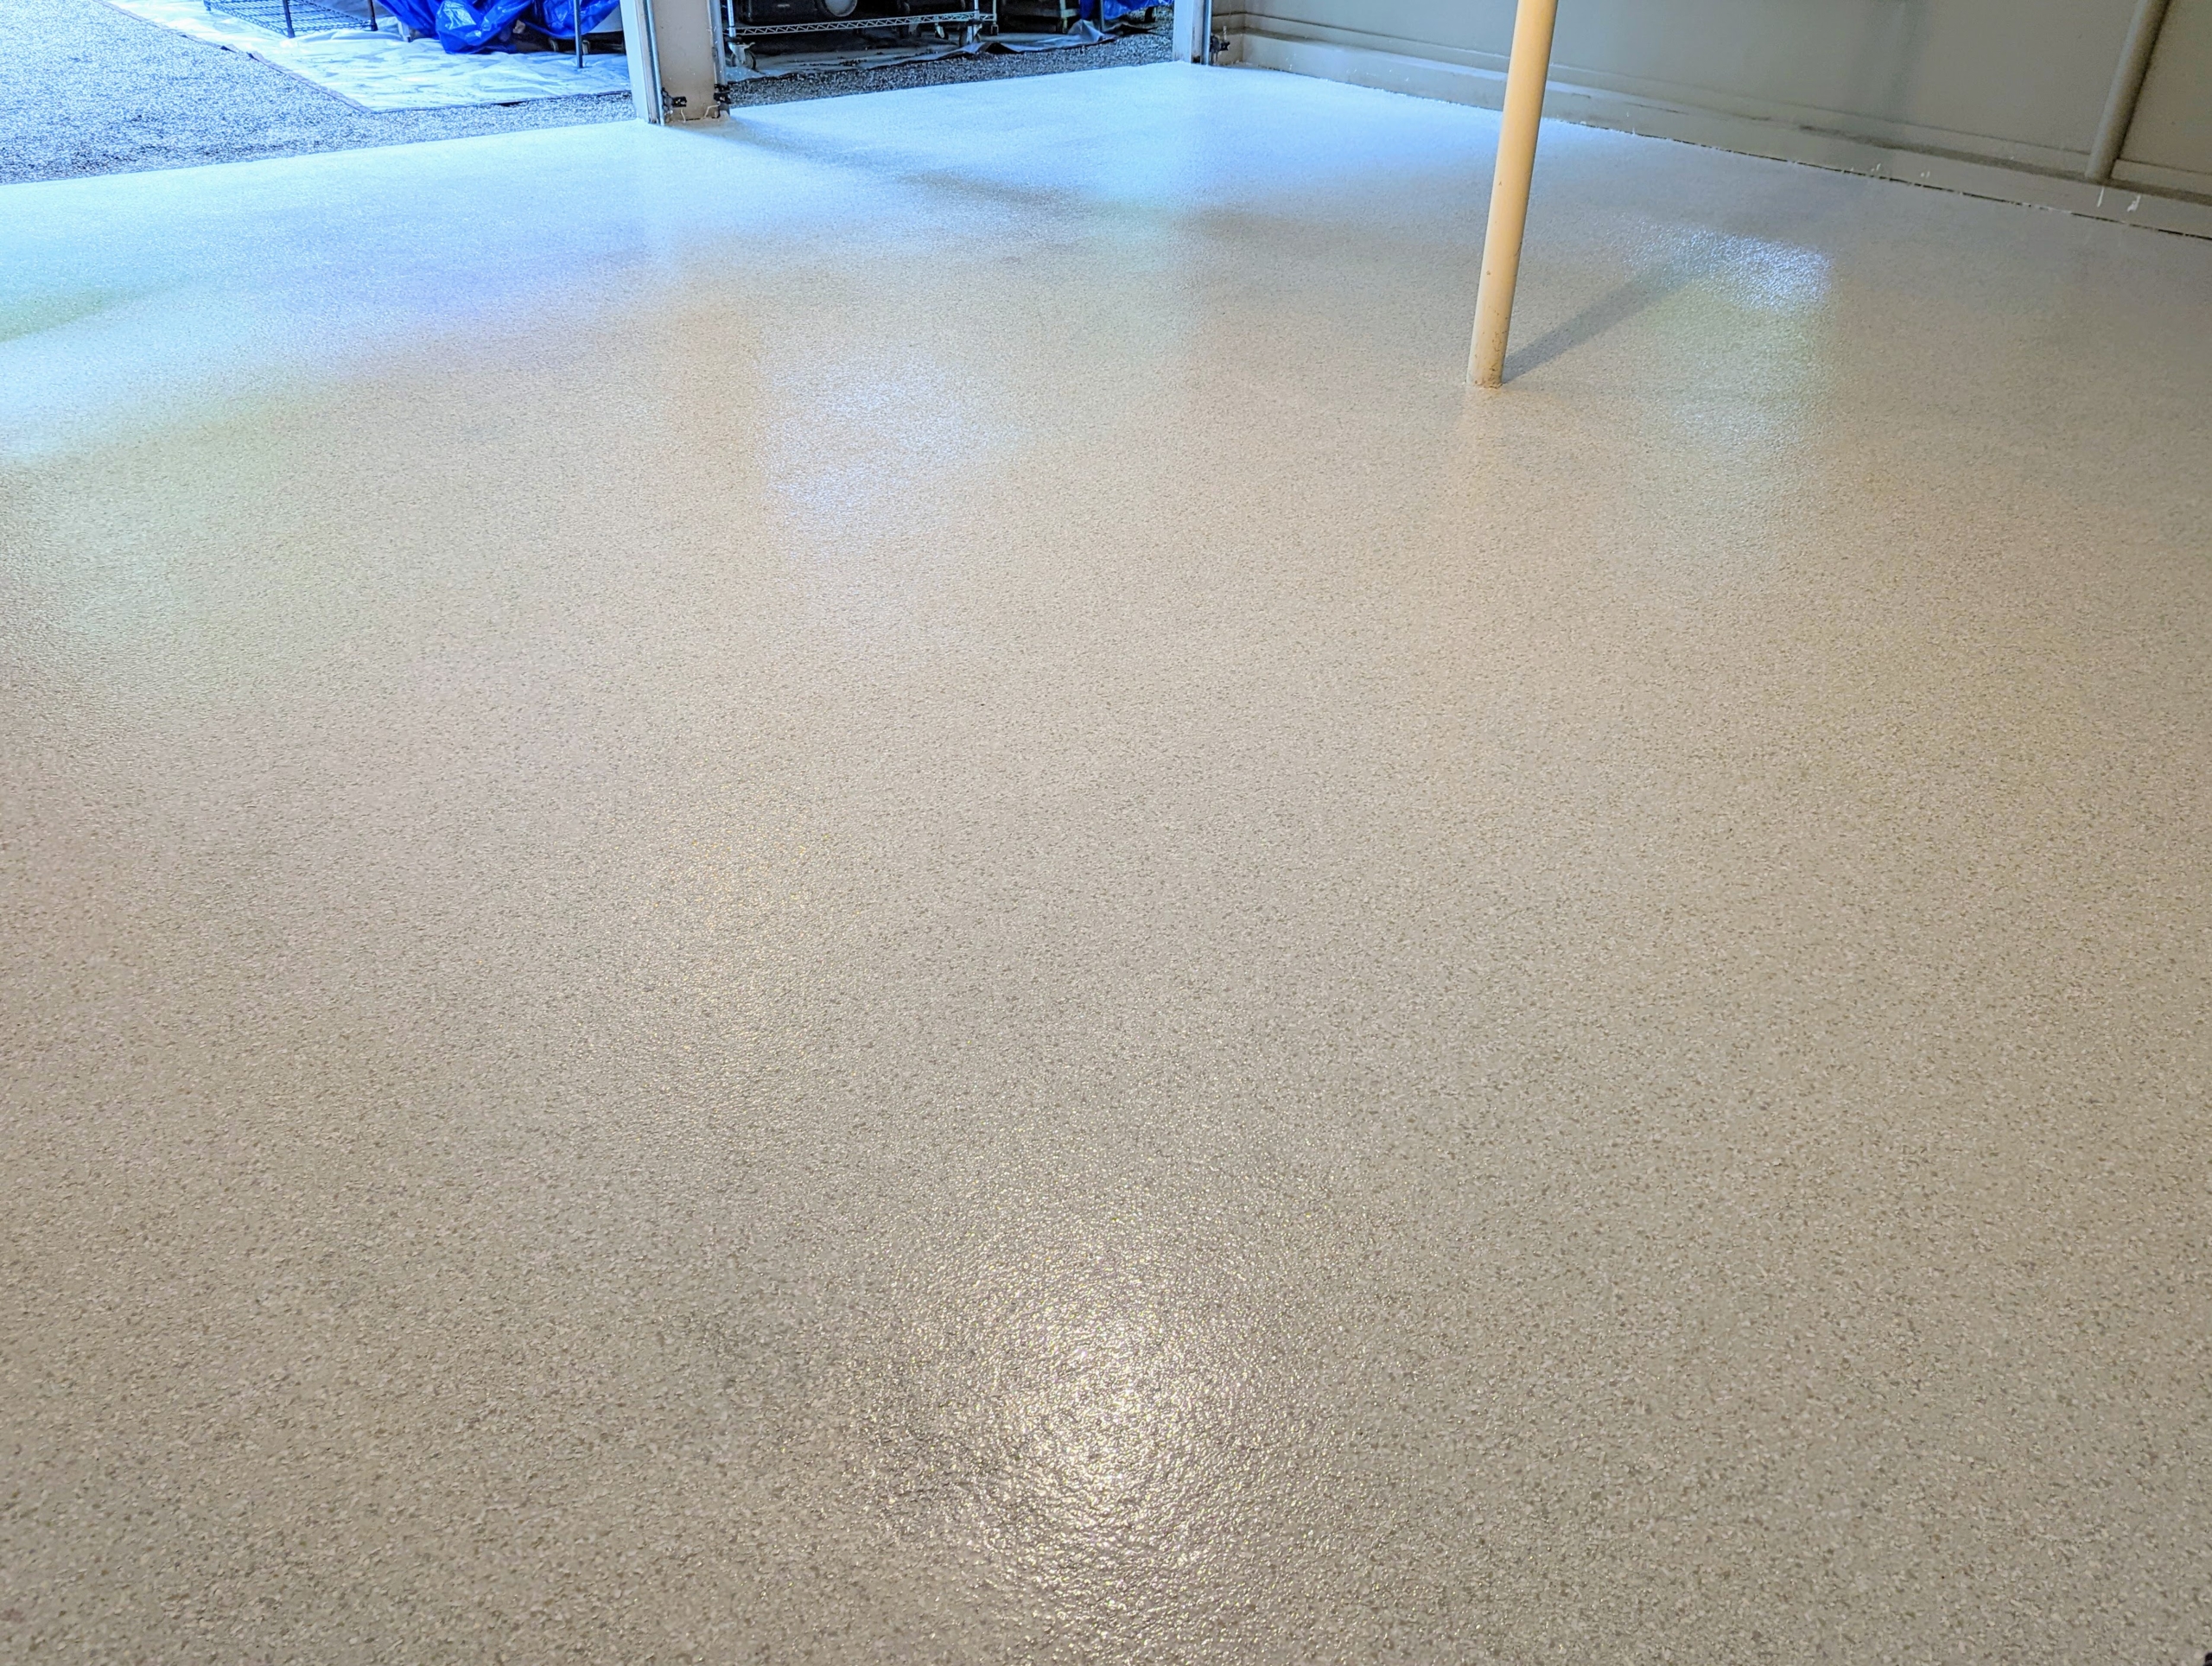
And here is the finished floor once the entire floor is coated. This floor will be left to dry for 48-hours.
It looks great and so different from before. It’s an affordable way to upgrade any concrete surface. And it doesn’t need re-finishing later – it is a maintenance-free floor. It will be a perfect work space for our production crews very soon.


![I will continue to share photos of its progress. It will take a few years before it is mature and fully developed, but this maze will be amazing. I can't wait... “It is a confusing path, hard to follow without a thread, but, provided [you are] not devoured at the midpoint, it leads surely, despite twists and turns, back to the beginning.” — Plato](https://static.themarthablog.com/2022/08/PXL_20220817_192525104-scaled.jpeg)