It's no secret that I love gardening, and I love plants of all kinds - in particular, potted plants. I keep many in my greenhouses, including a wide-ranging group of orchids - all the vibrant colors and variations in shape and size make me so happy.
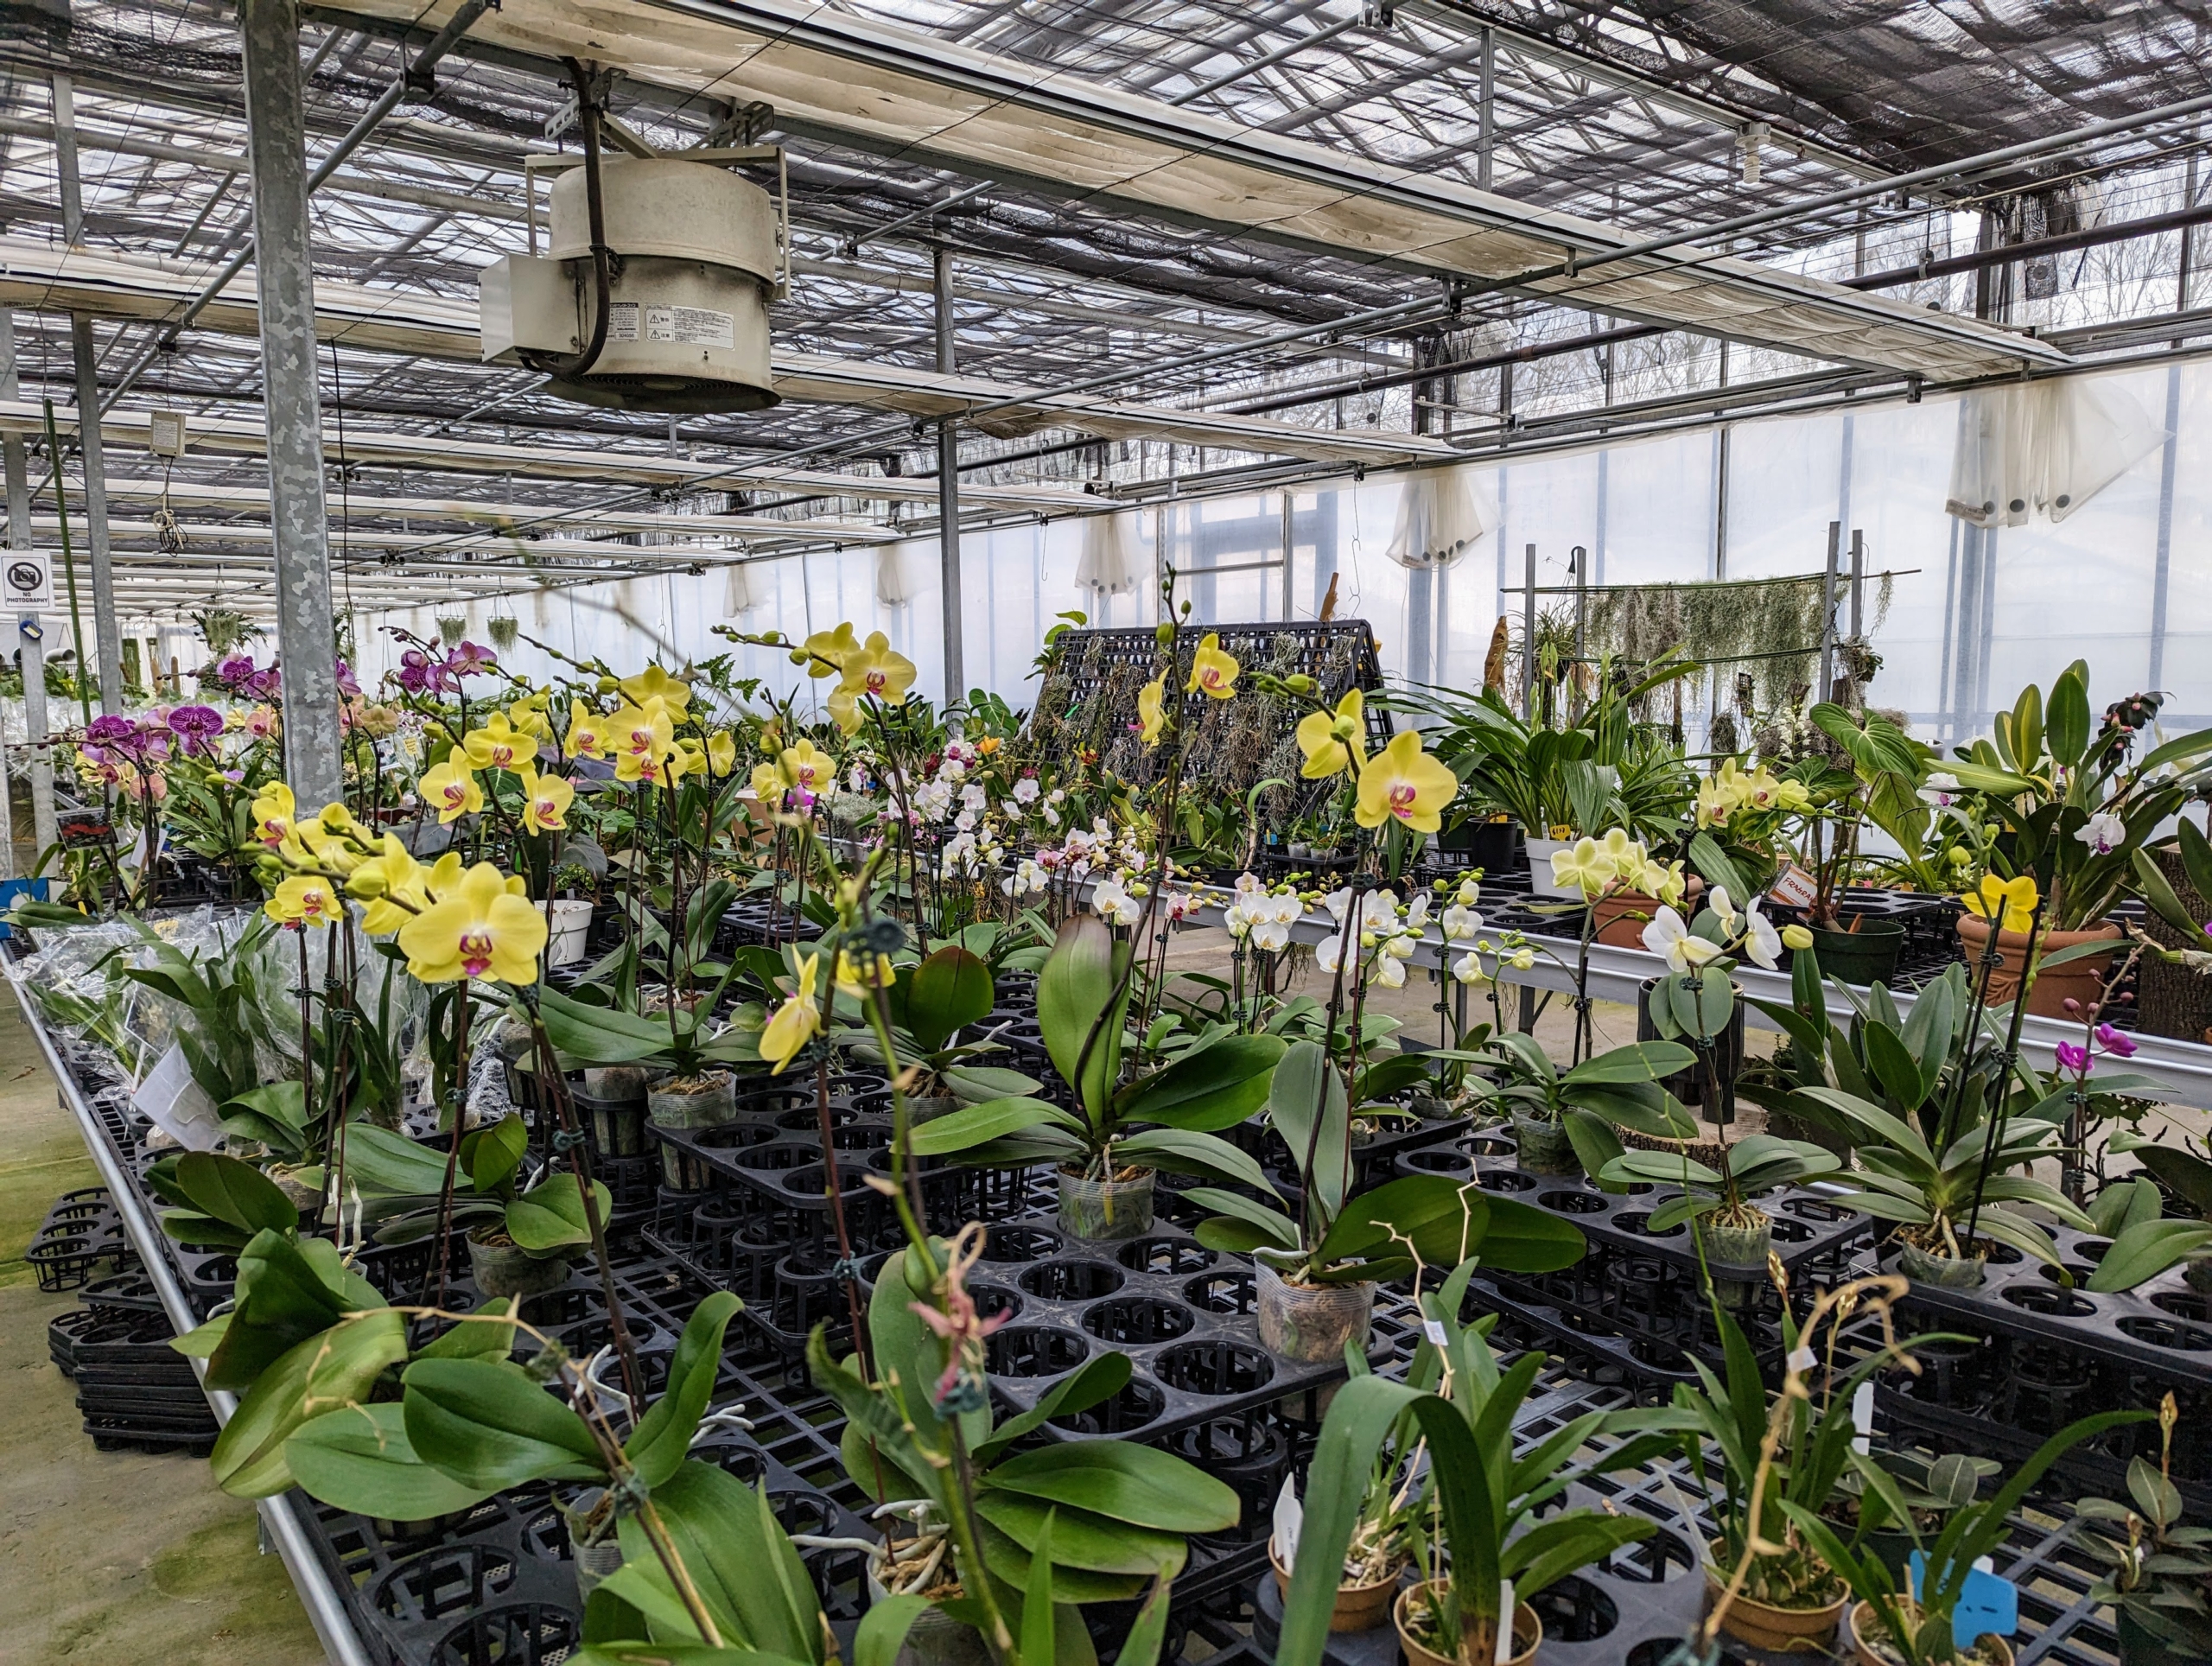
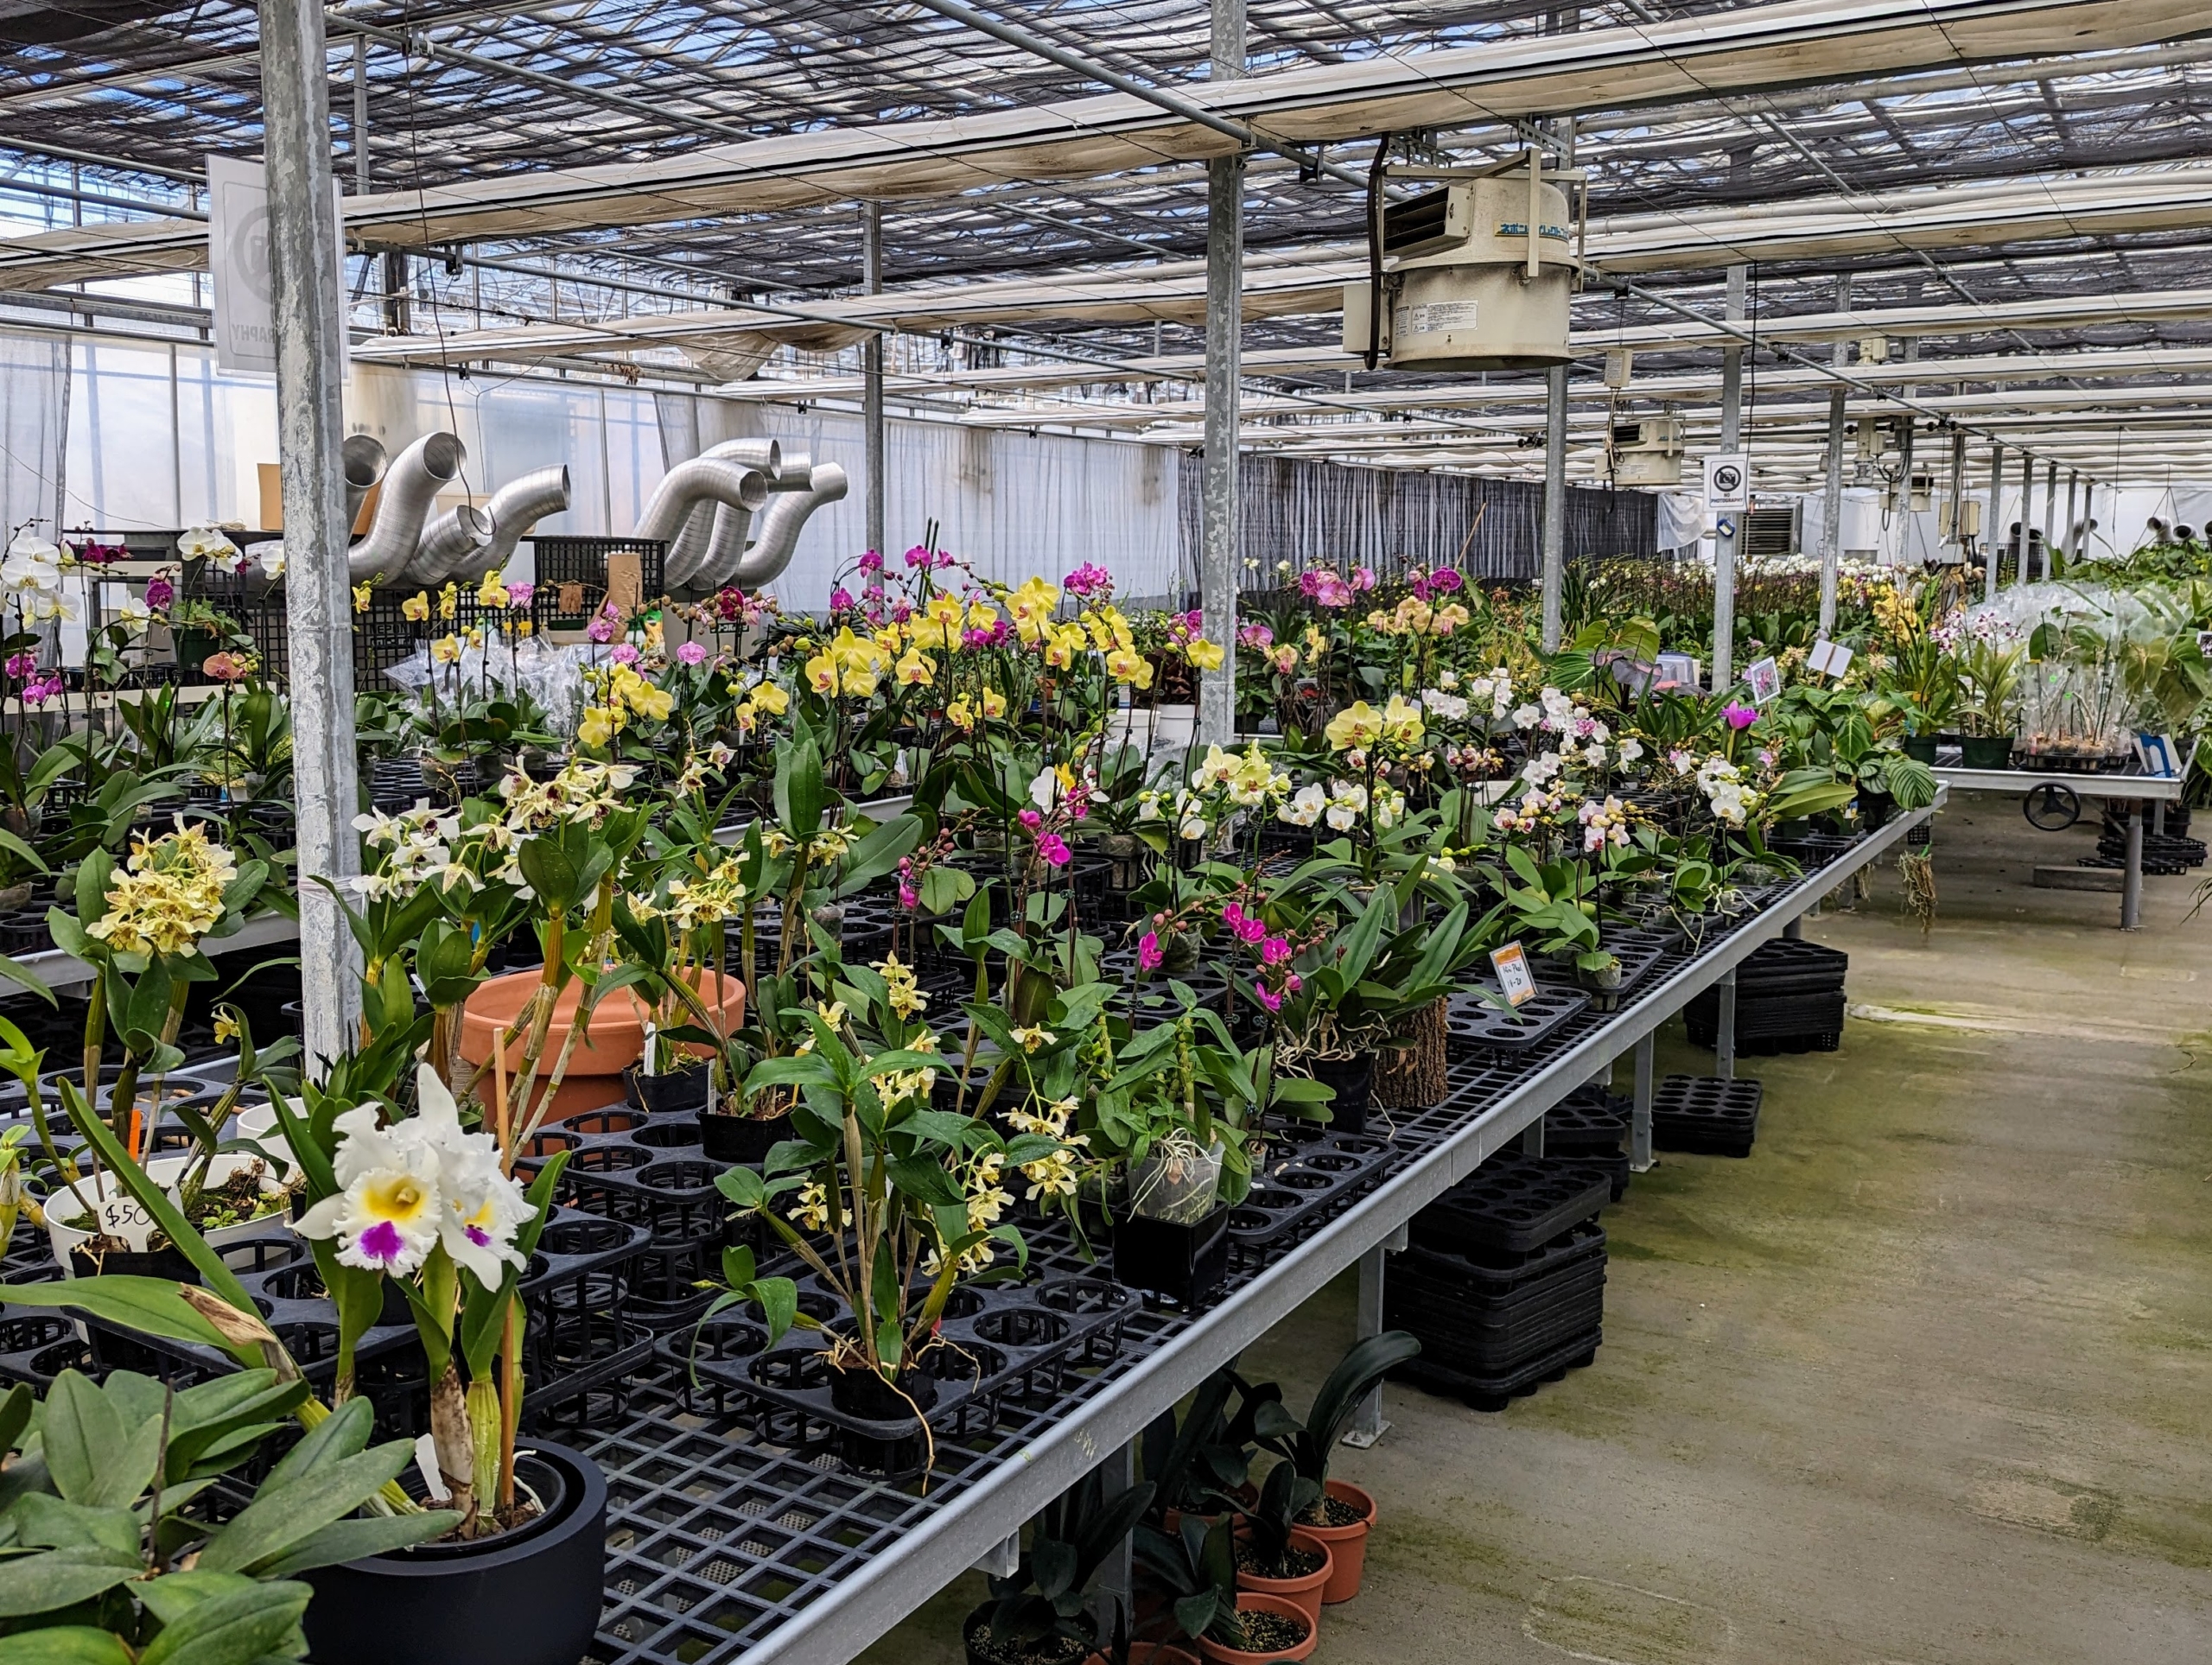
Last week, I visited White Plains Orchids, a family-operated nursery not far from my Bedford, New York farm. There, I found some beautiful orchids and a few other container specimens to add to my collection.
Enjoy these photos.
Whenever I get the opportunity, I always try to visit and support the businesses in my neighborhood. White Plains Orchids is the only orchids nursery in Westchester County.
Its main greenhouse is filled with orchids, those flowering and often fragrant plants that bloom indoors from late winter to spring.
Orchids grow on every continent except Antarctica. They are native to the tropical regions of Asia, Australia, the Himalayas, and the Philippines. The orchid forms one of the largest families in the plant kingdom, with more than 25,000 species worldwide.
The size of orchids depends on the species. They can be quite small or very large. However, every orchid flower is bilaterally symmetrical, which means it can be divided into two equal parts.
Rule of thumb – orchids that receive a proper balance of light, humidity and temperature will have healthy bright green leaves. Too little light would make the leaves very dark. The size, shape, and texture of leaves depend on the habitat. Orchids that live in dry climate have large, thick leaves covered with wax, while species that live in warm and humid areas have thin, elongated leaves. And certain species of orchids do not have leaves at all.
Optimum temperatures for orchids in winter are 45 to 55-degrees Fahrenheit at night and 65 to 75-degrees Fahrenheit during the day. When plants are in bud, temperatures must be as constant as possible.
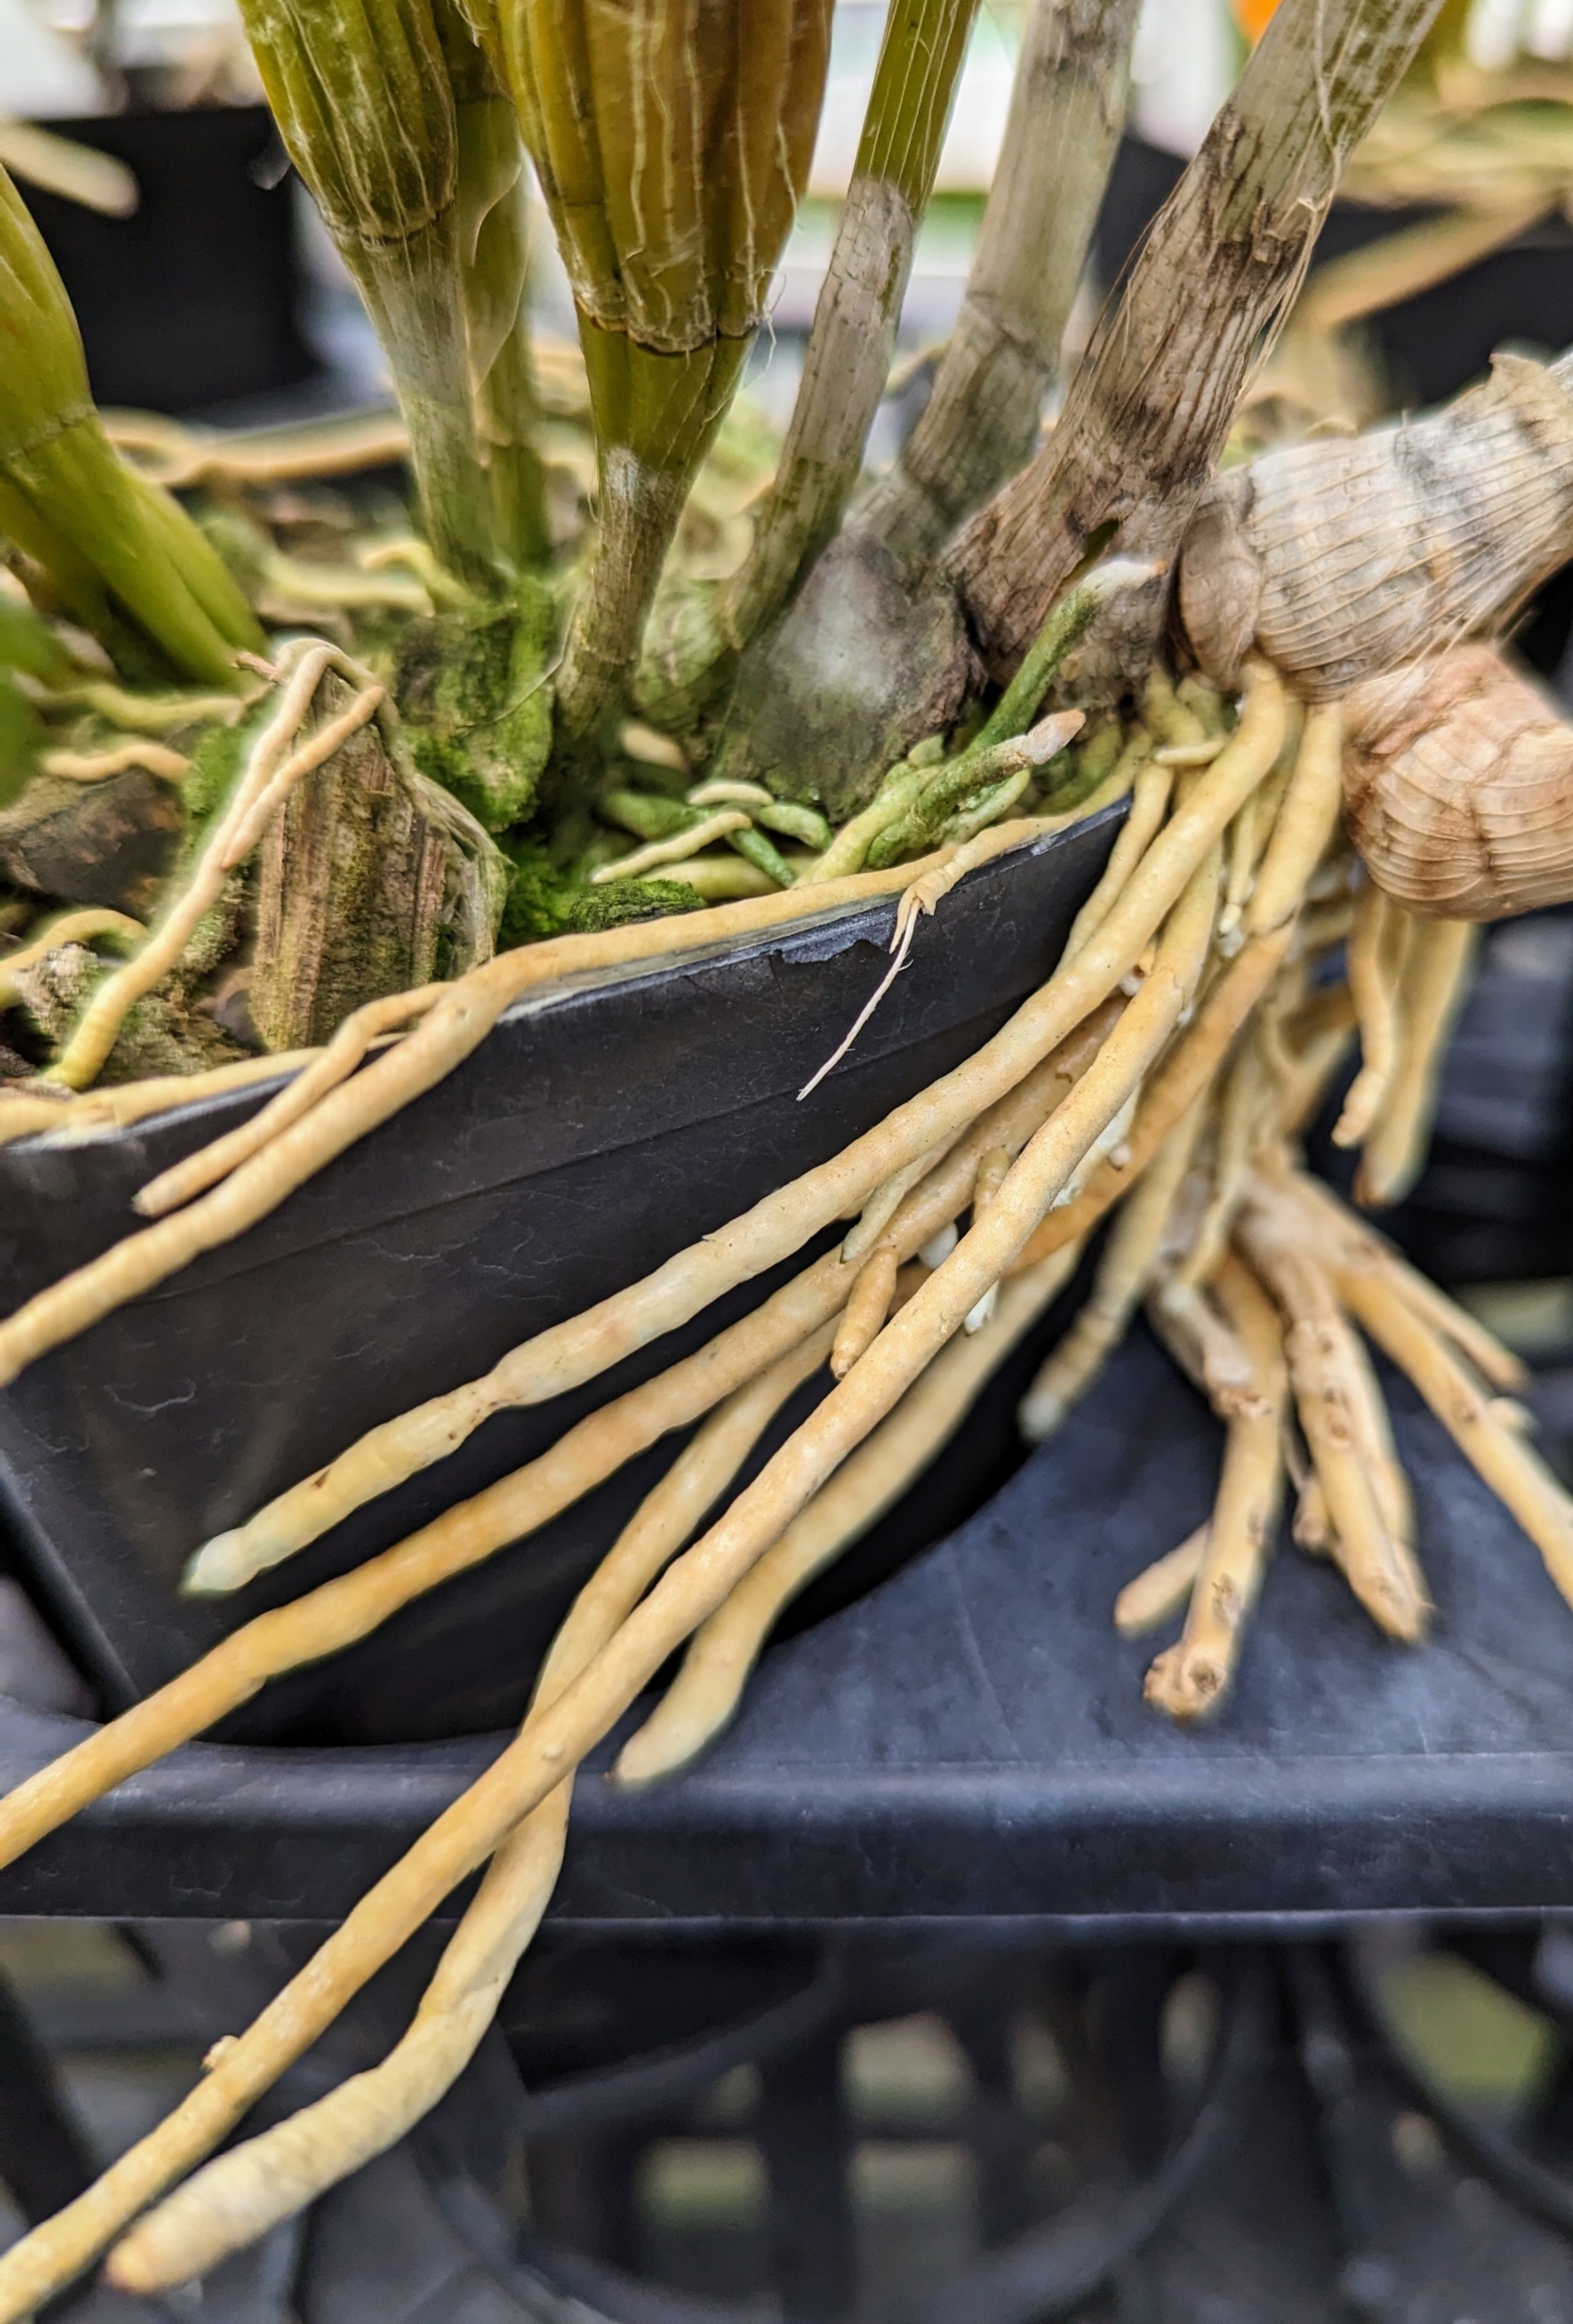
Most orchid genera are epiphytic, meaning they grow on trees and rocks rather than in soil. Orchid roots need to breathe and therefore cannot live buried in dirt.
This is Eric Wang, senior sales associate at White Plains Orchids. His parents are also orchid experts and have more than 30-years experience in selling all different varieties here in New York and in the Dominican Republic.
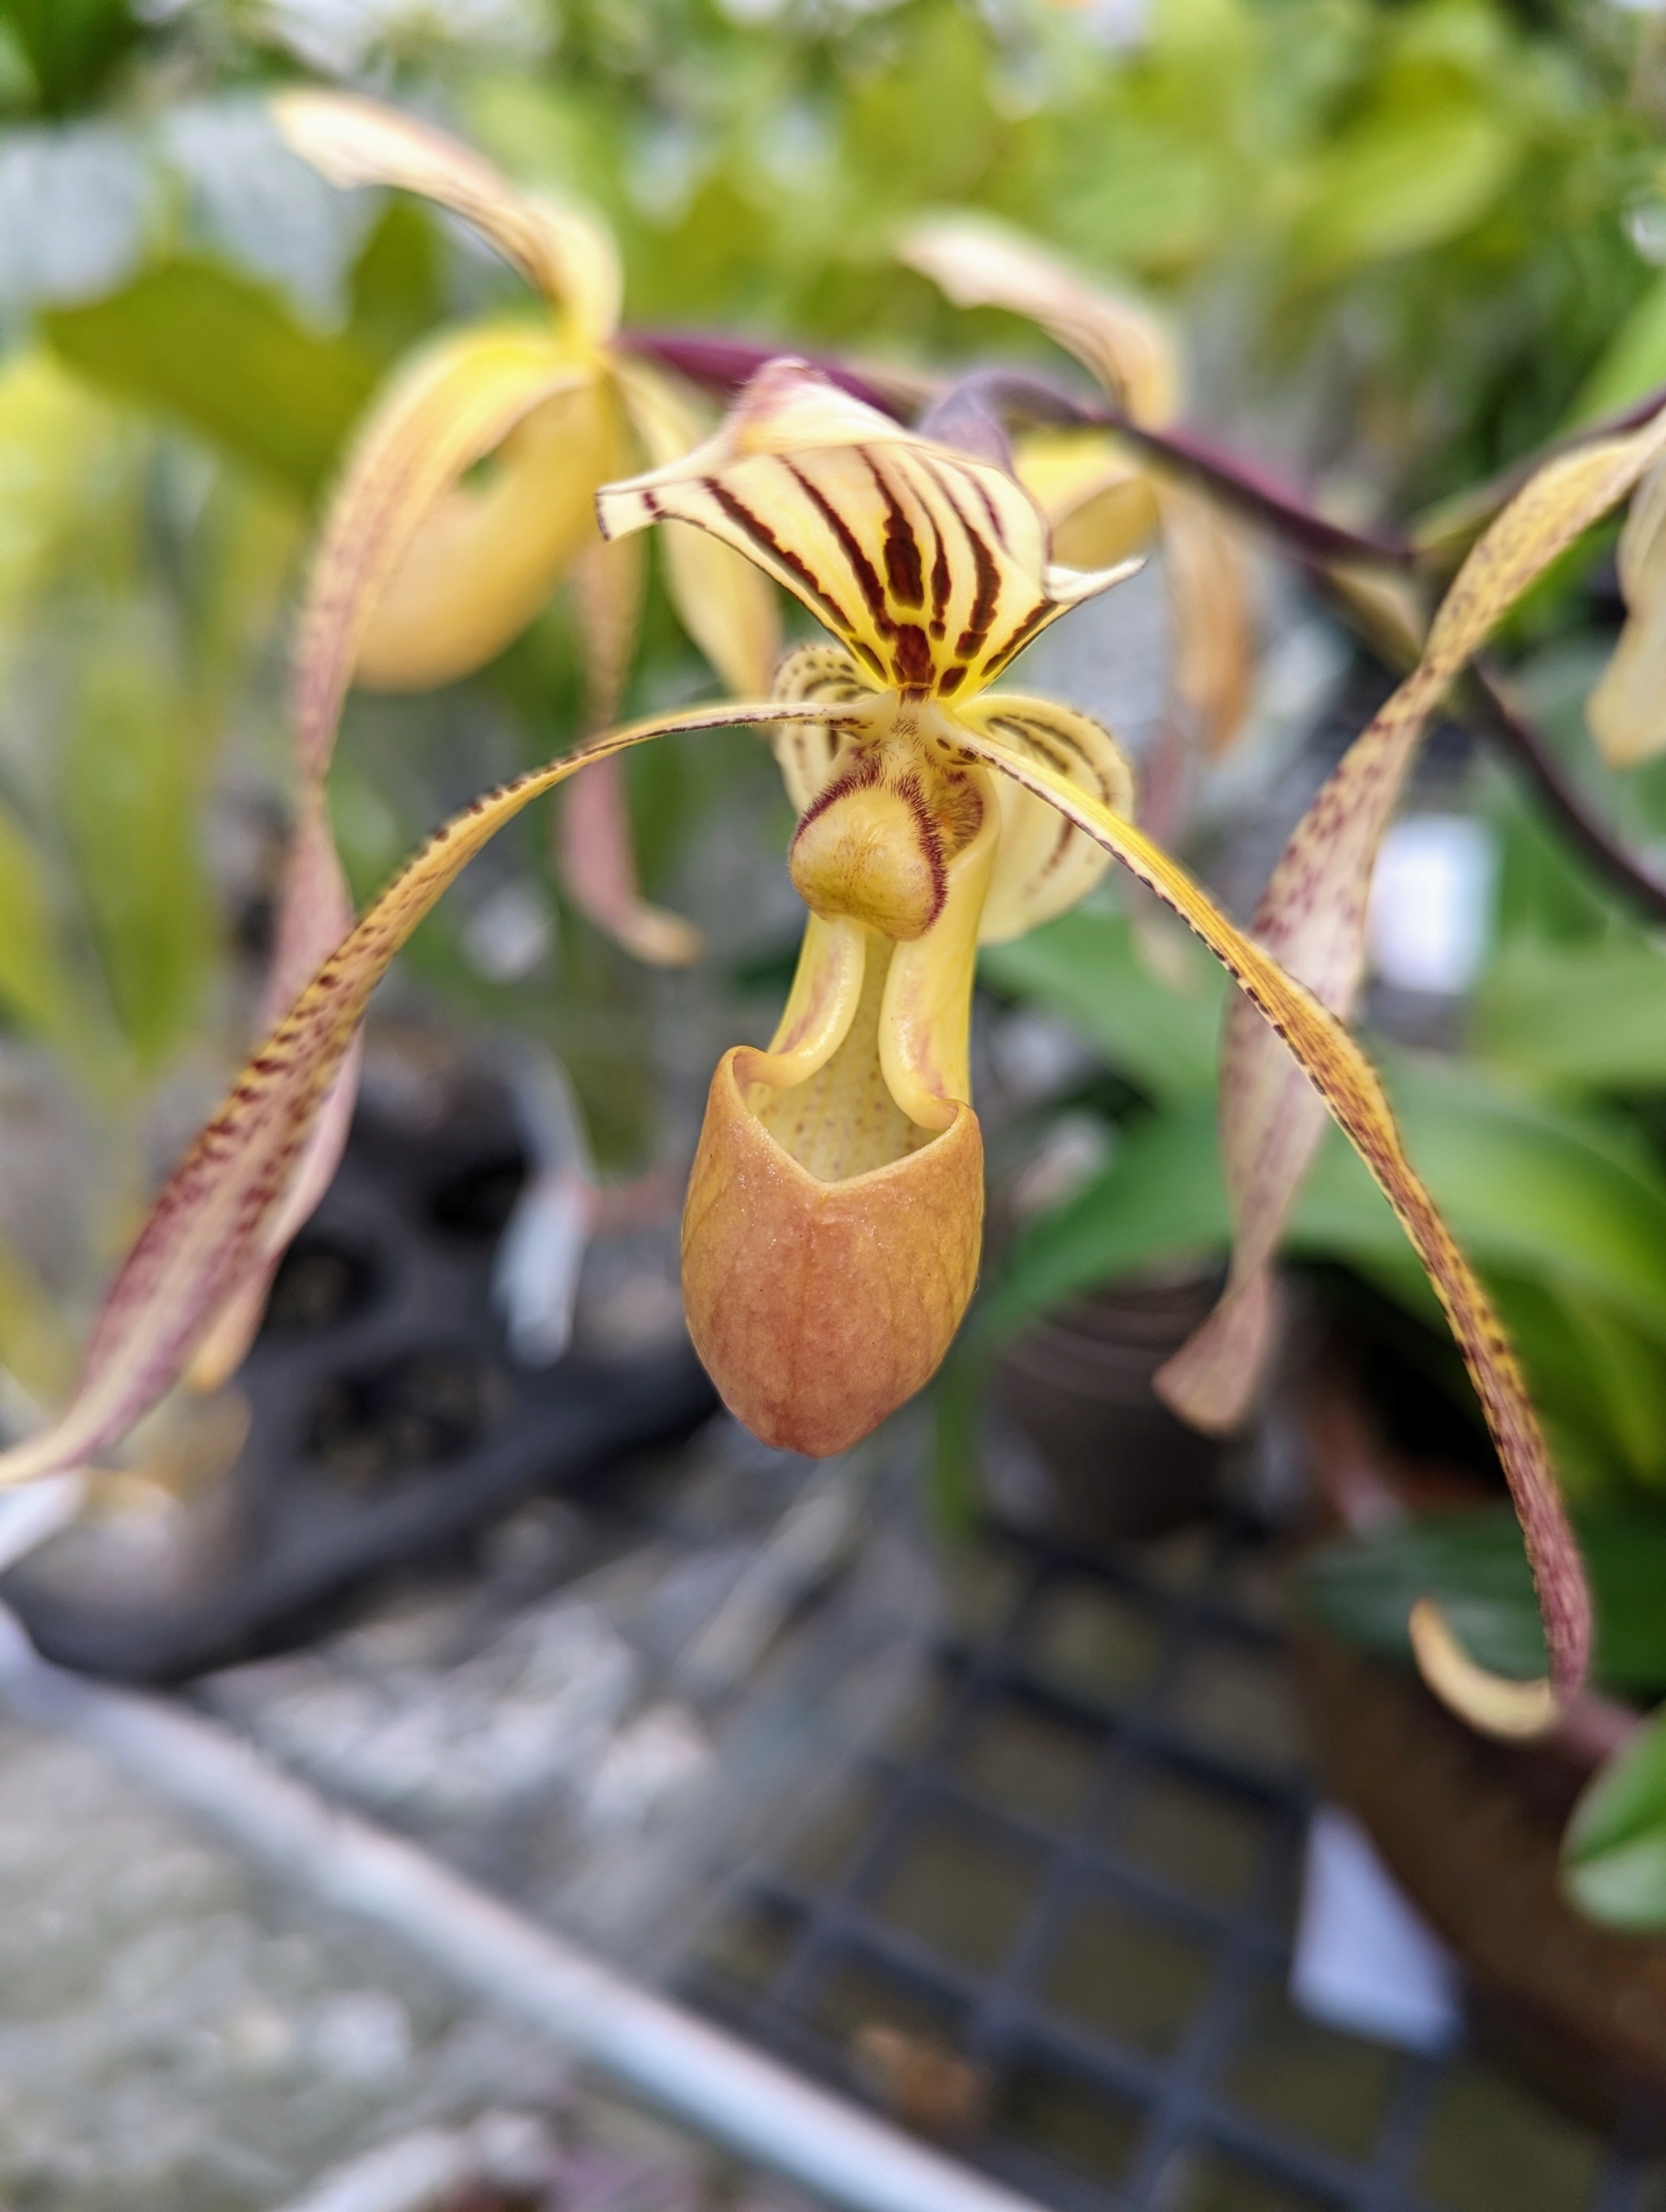
Dendrobium is a large orchid genus, with more than a thousand species. The evergreen canes are topped by a single three to five-inch long inflorescence, each one producing four to eight flowers.
Dendrobiums need lots of light, but not direct sun. A lightly shaded south window is best. This is Dendrobium Roy Tokunaga. Its main feature is an incredibly long bloom time – it begins to flower in November, and continues blooming for close to six months.
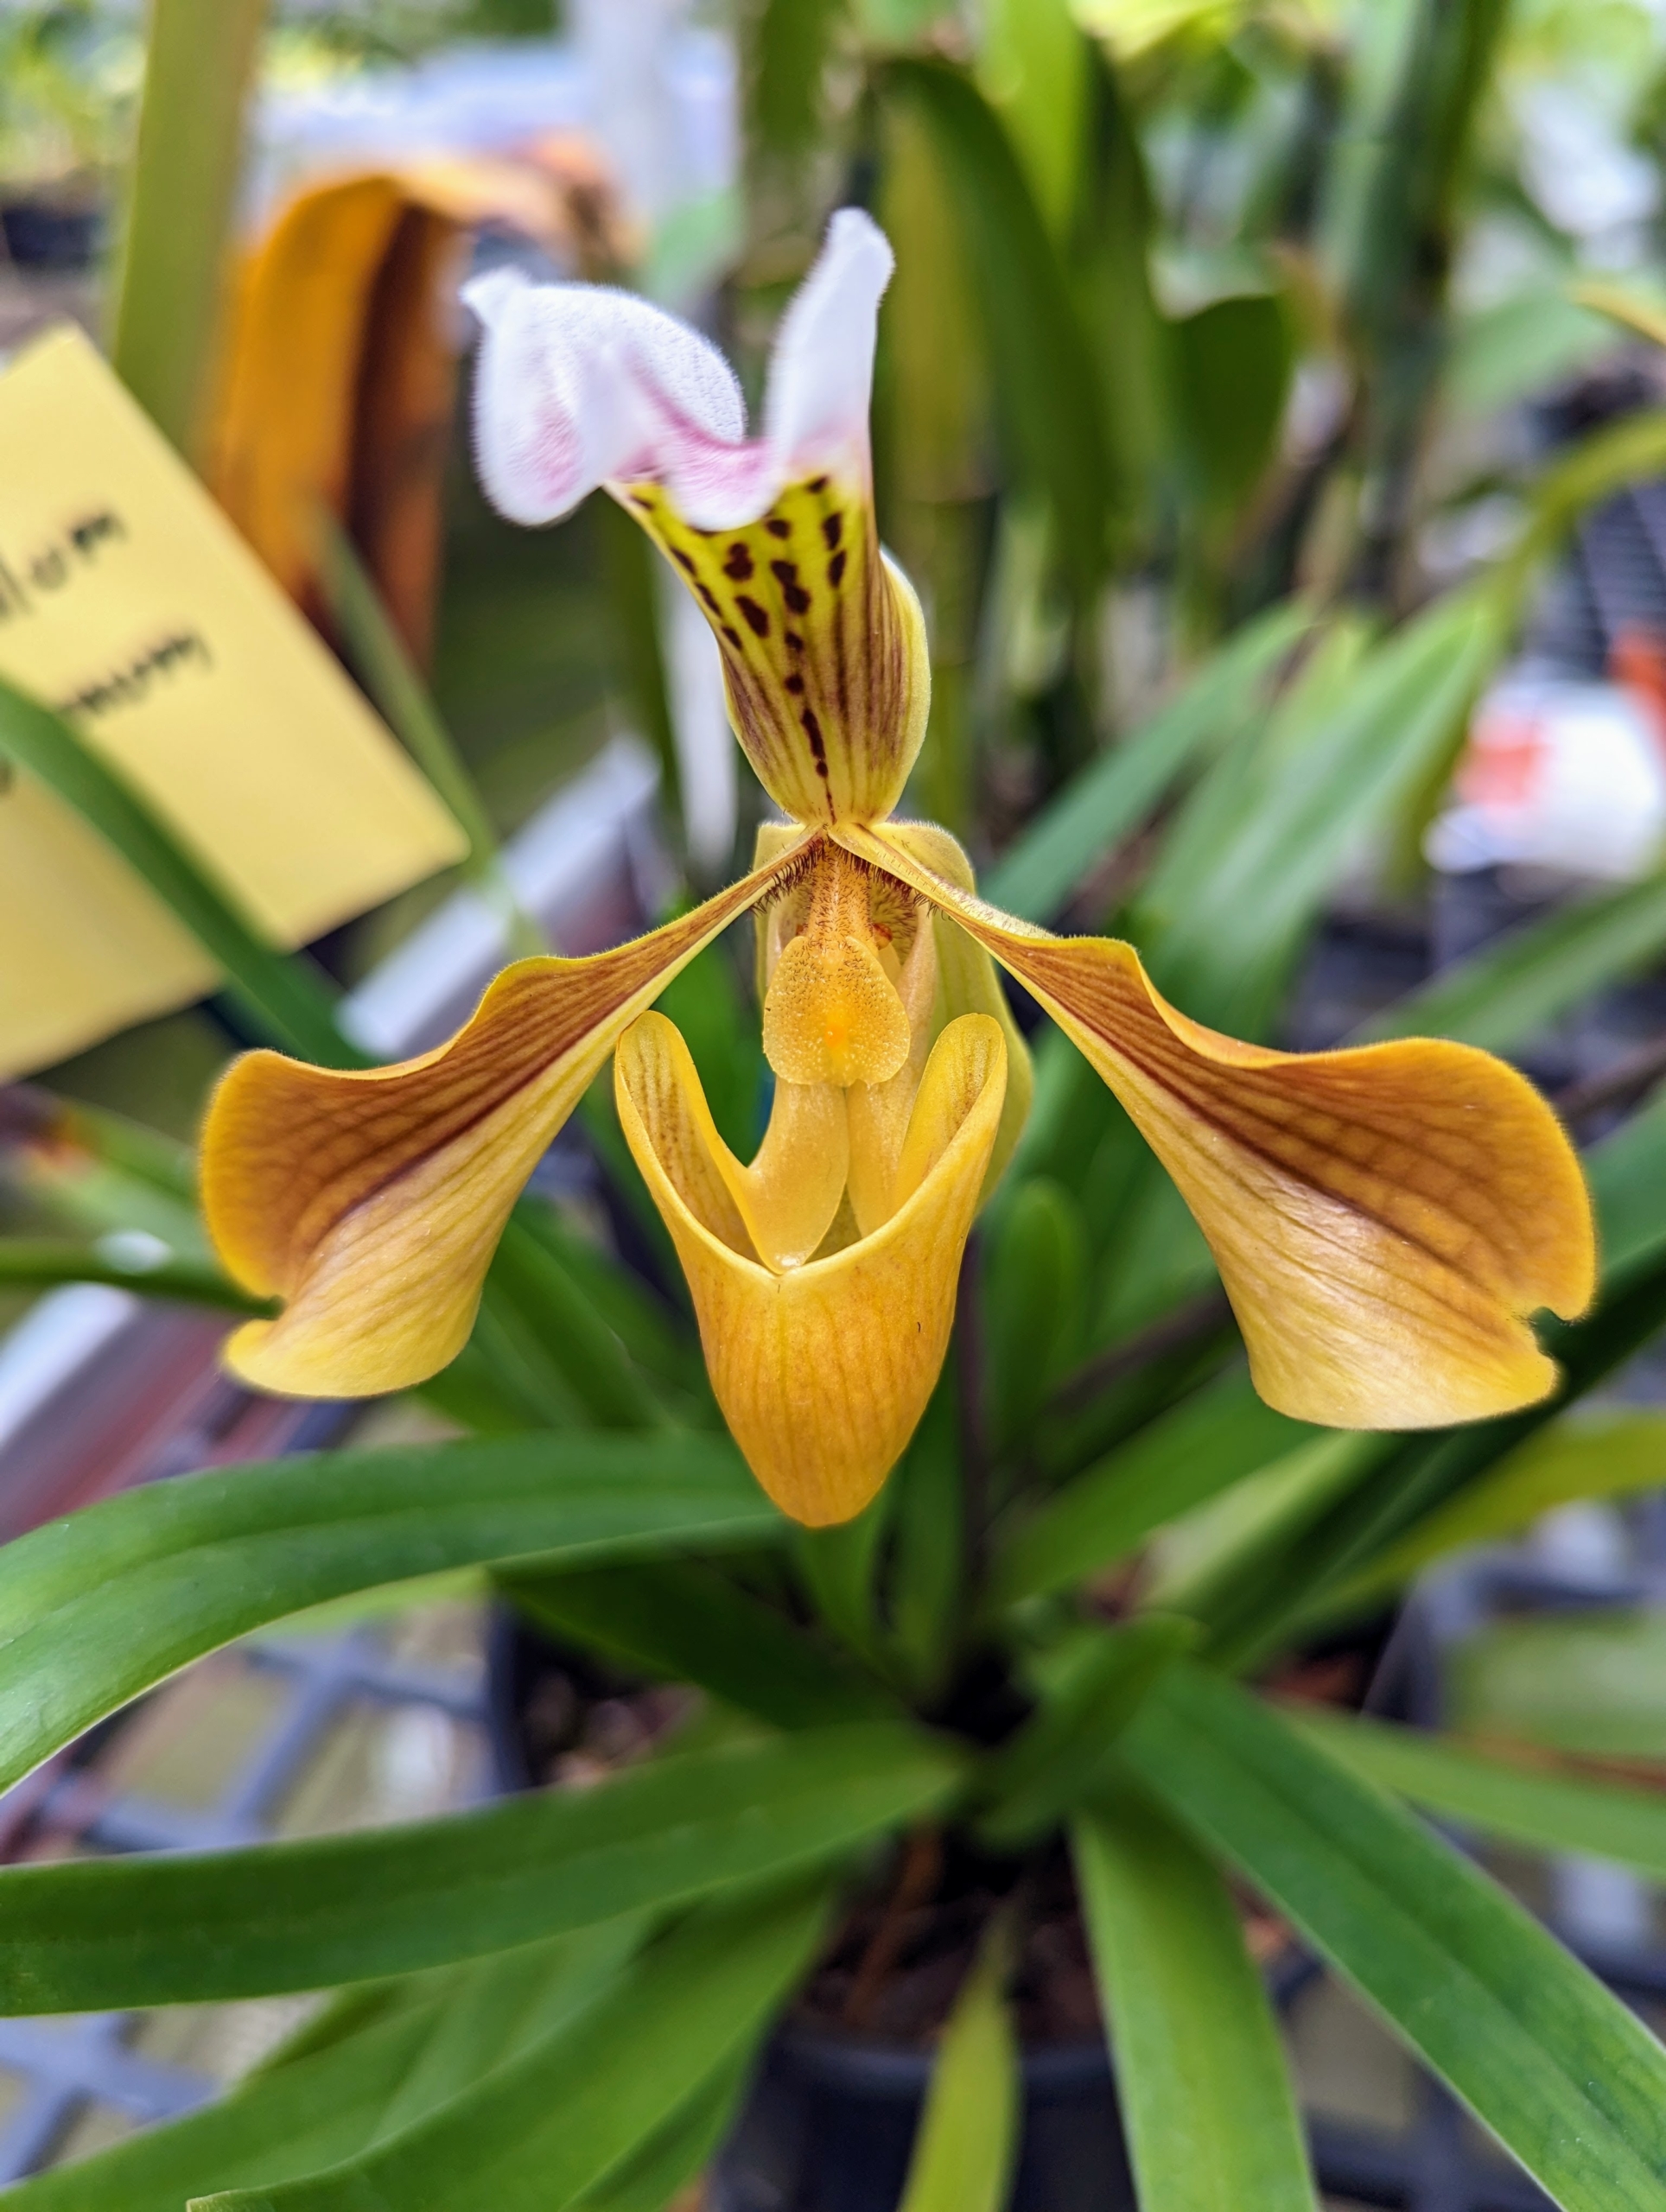
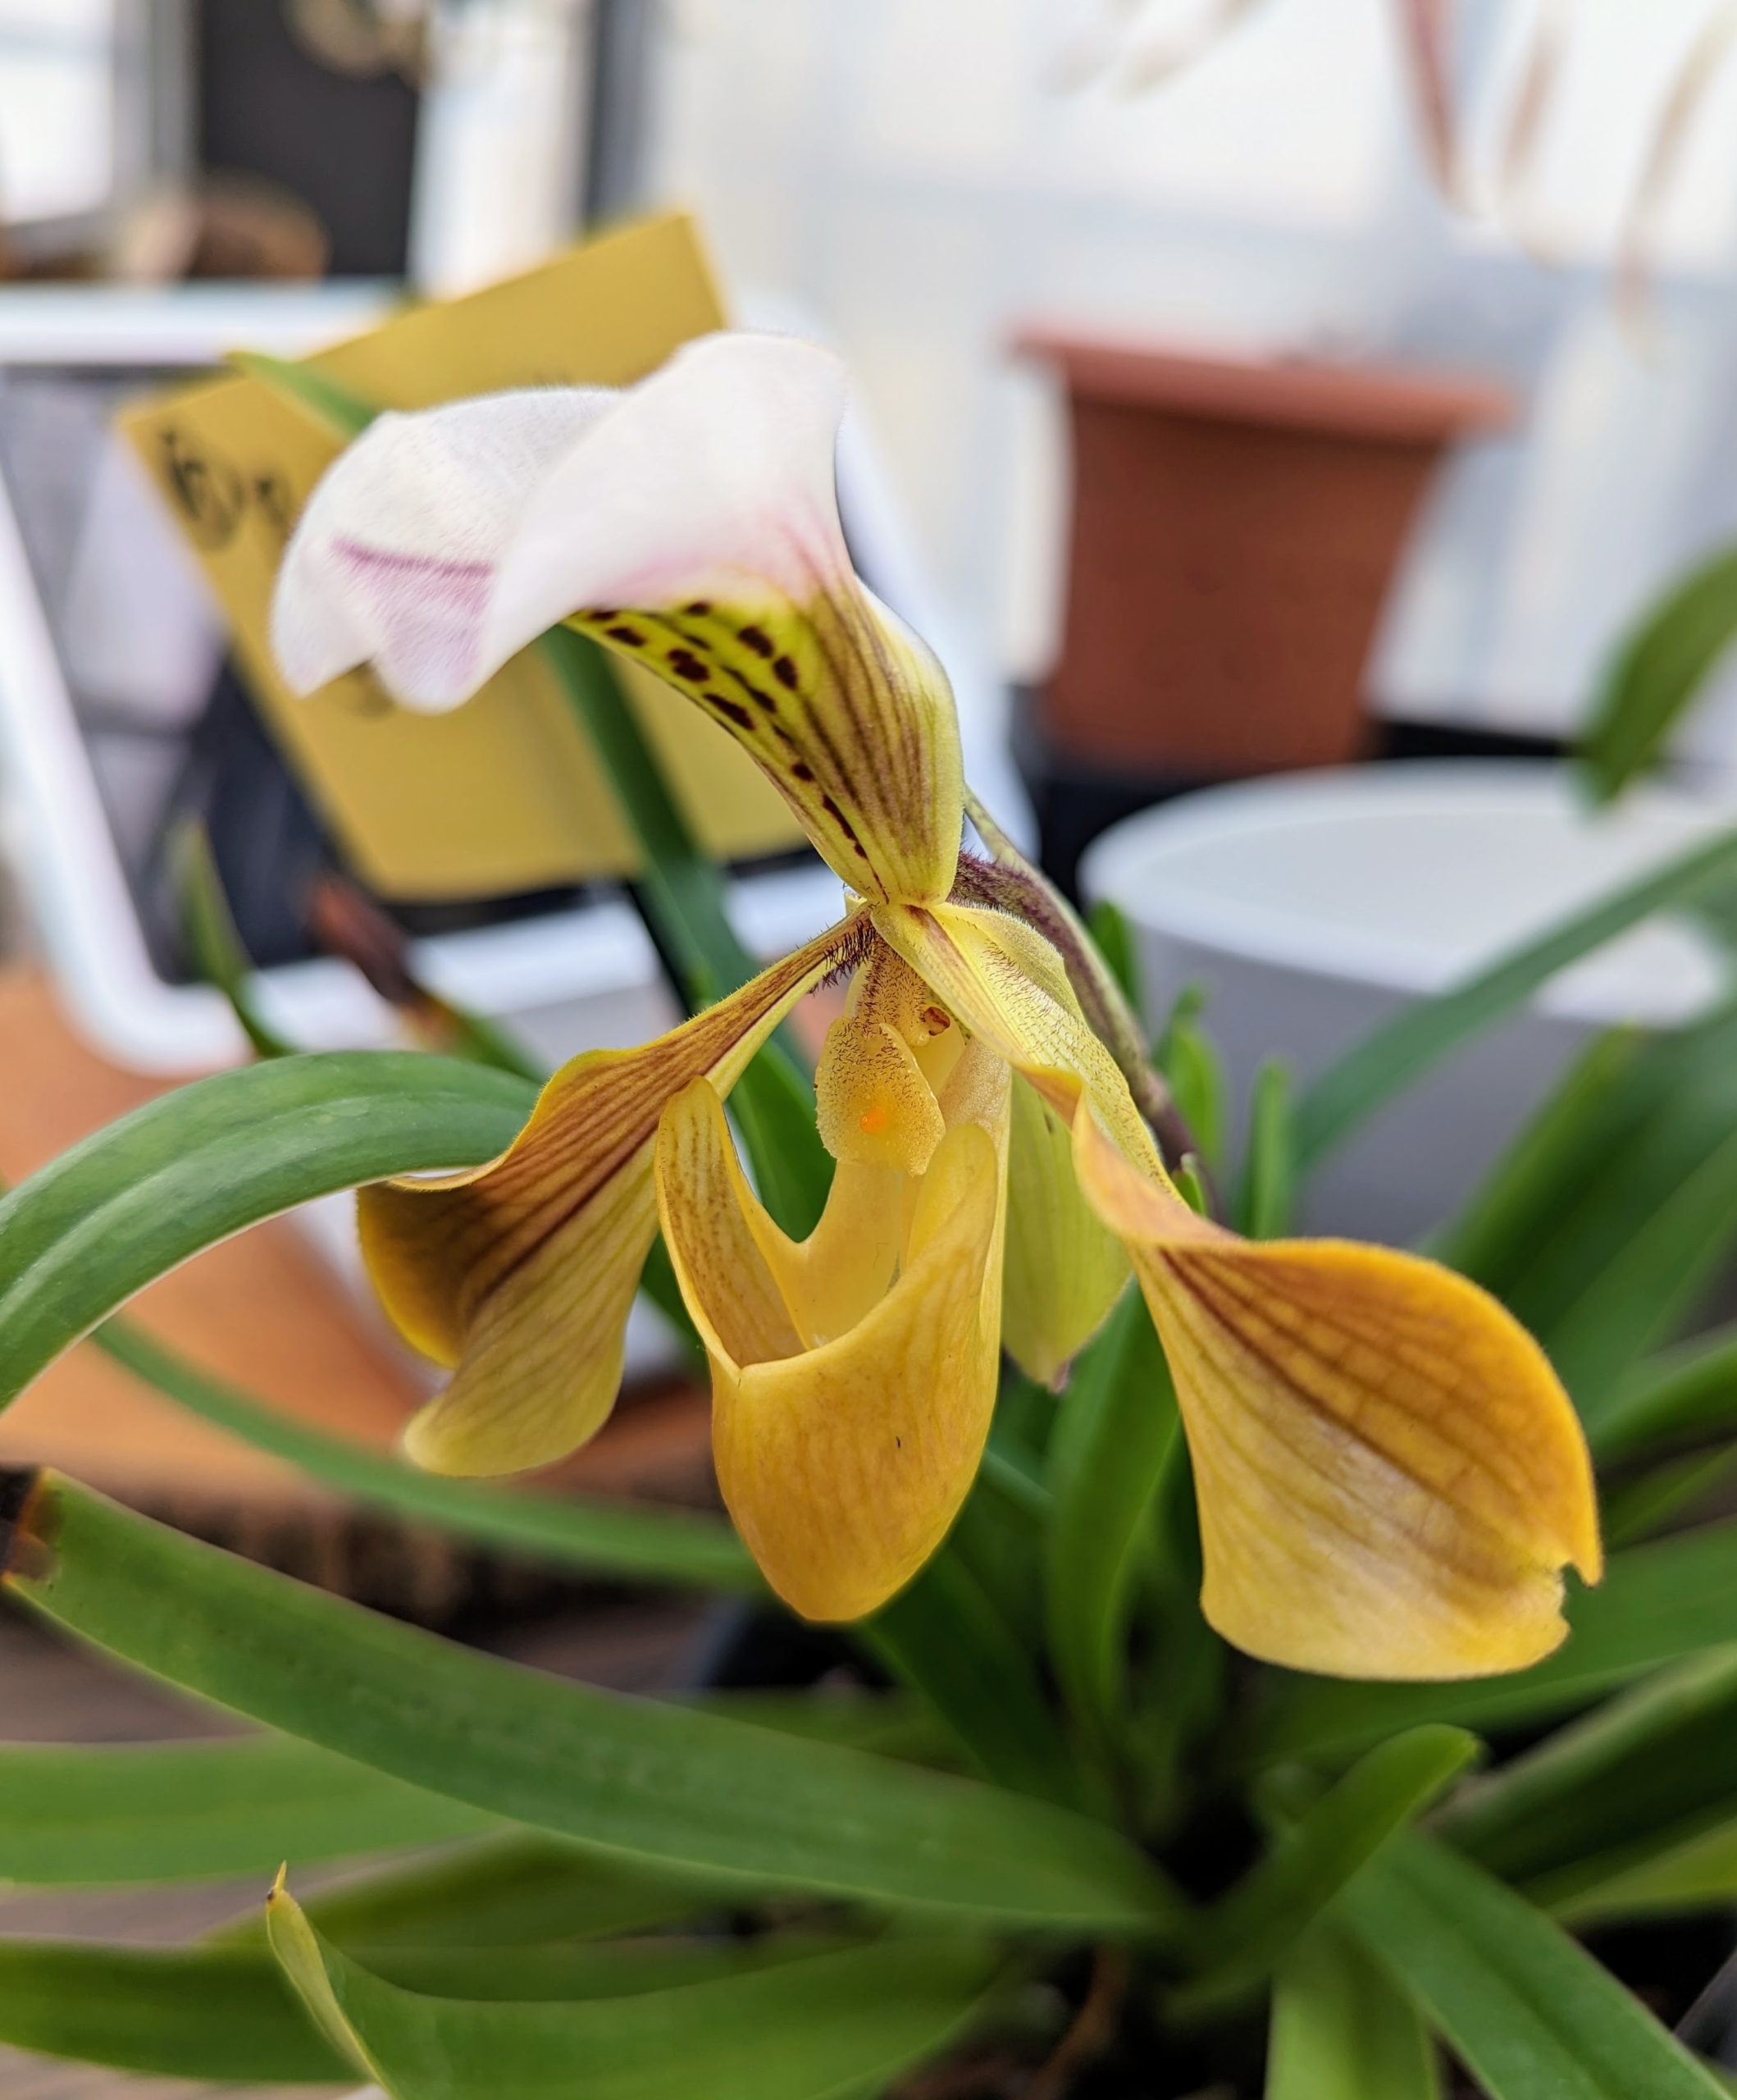
Paphiopedilum orchids are often called ‘lady slippers’ or ‘slipper orchids’ because of their unique pouch-like flowers.
Here’s another view. This is Paphiopedilum gratrixinum. The pouch of a slipper orchid traps insects so they are forced to climb up, collect or deposit pollen, and fertilize the flower. Slipper orchids have two fertile anthers — meaning they are diandrous.
This orchid is called Paphiopedilum ‘Ernie Barnham.’
This stand is filled with miniature orchids. These plants have the same requirements as full-sized orchids. They need the proper amount of water, indirect sunlight, regulated temperature and a fairly high humidity level between 55 and 75 percent.
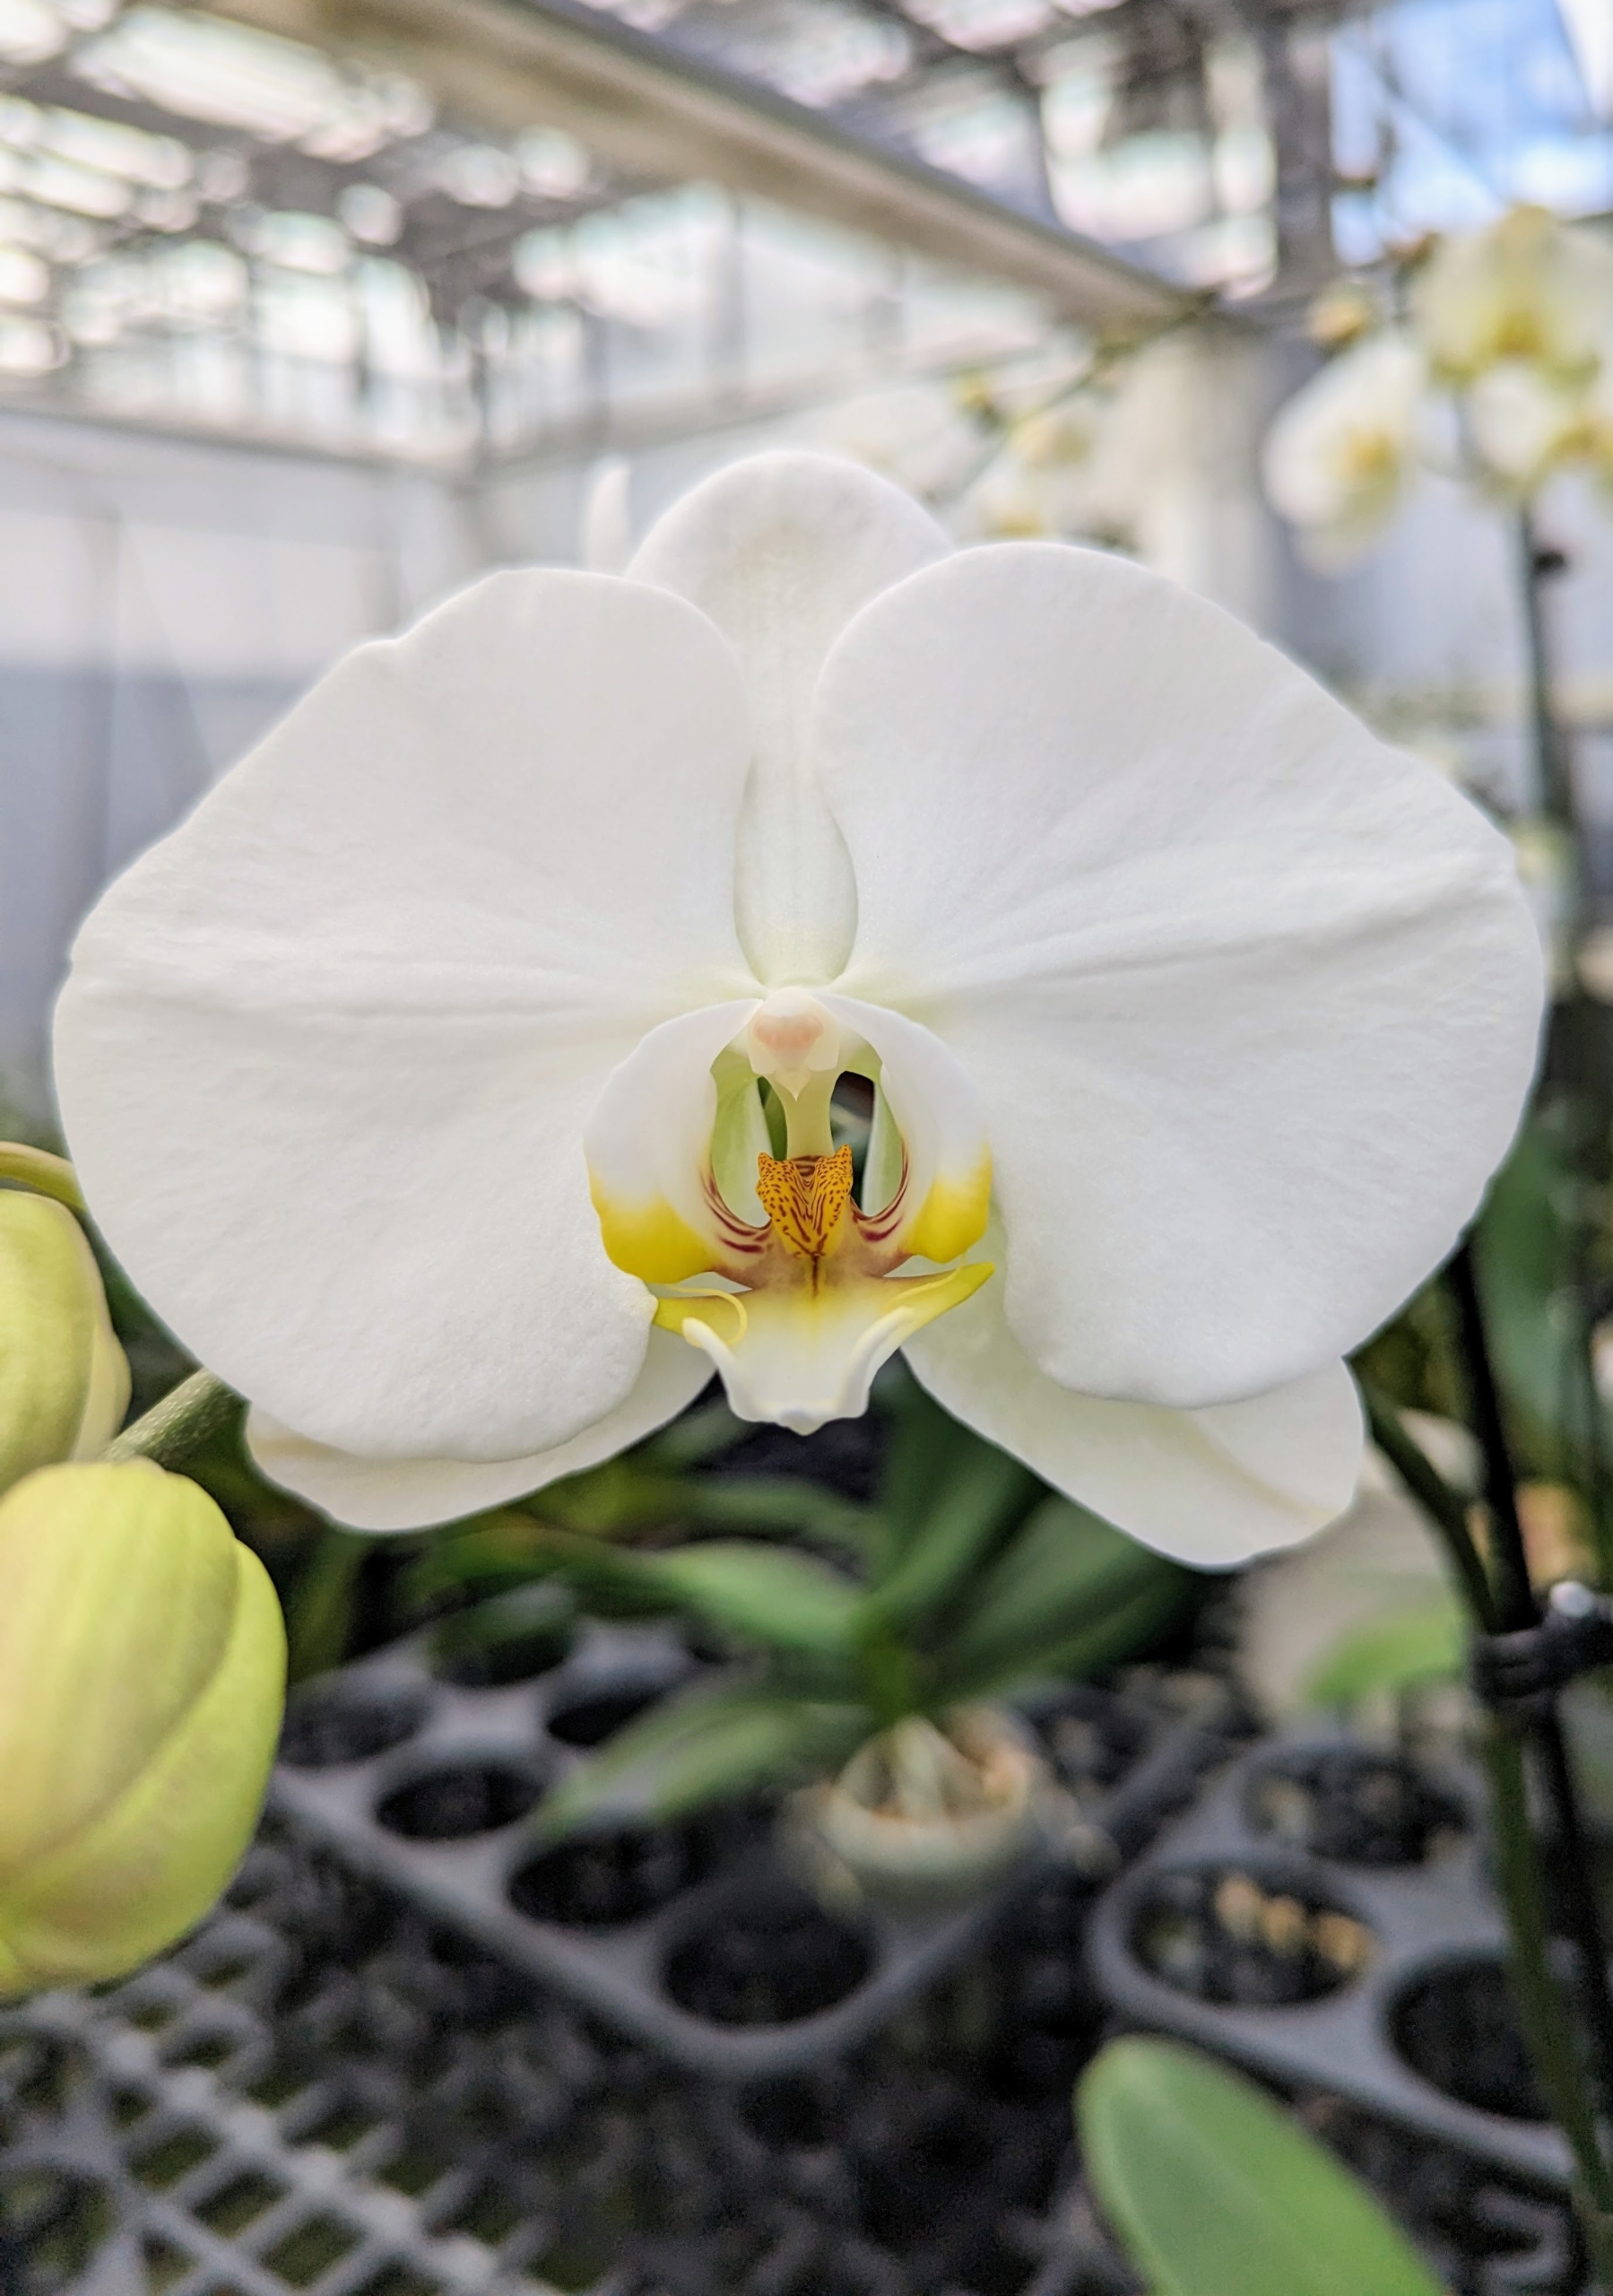
This is Phalaenopsis Sogo Yukidian ‘V3 White Dream’. Phalaenopsis, the moth orchid, is perhaps the best orchid for growing in the home and is also a favorite with greenhouse growers. Well-grown plants can flower often, sometimes with a few flowers throughout the year, though the main season is late winter into spring.
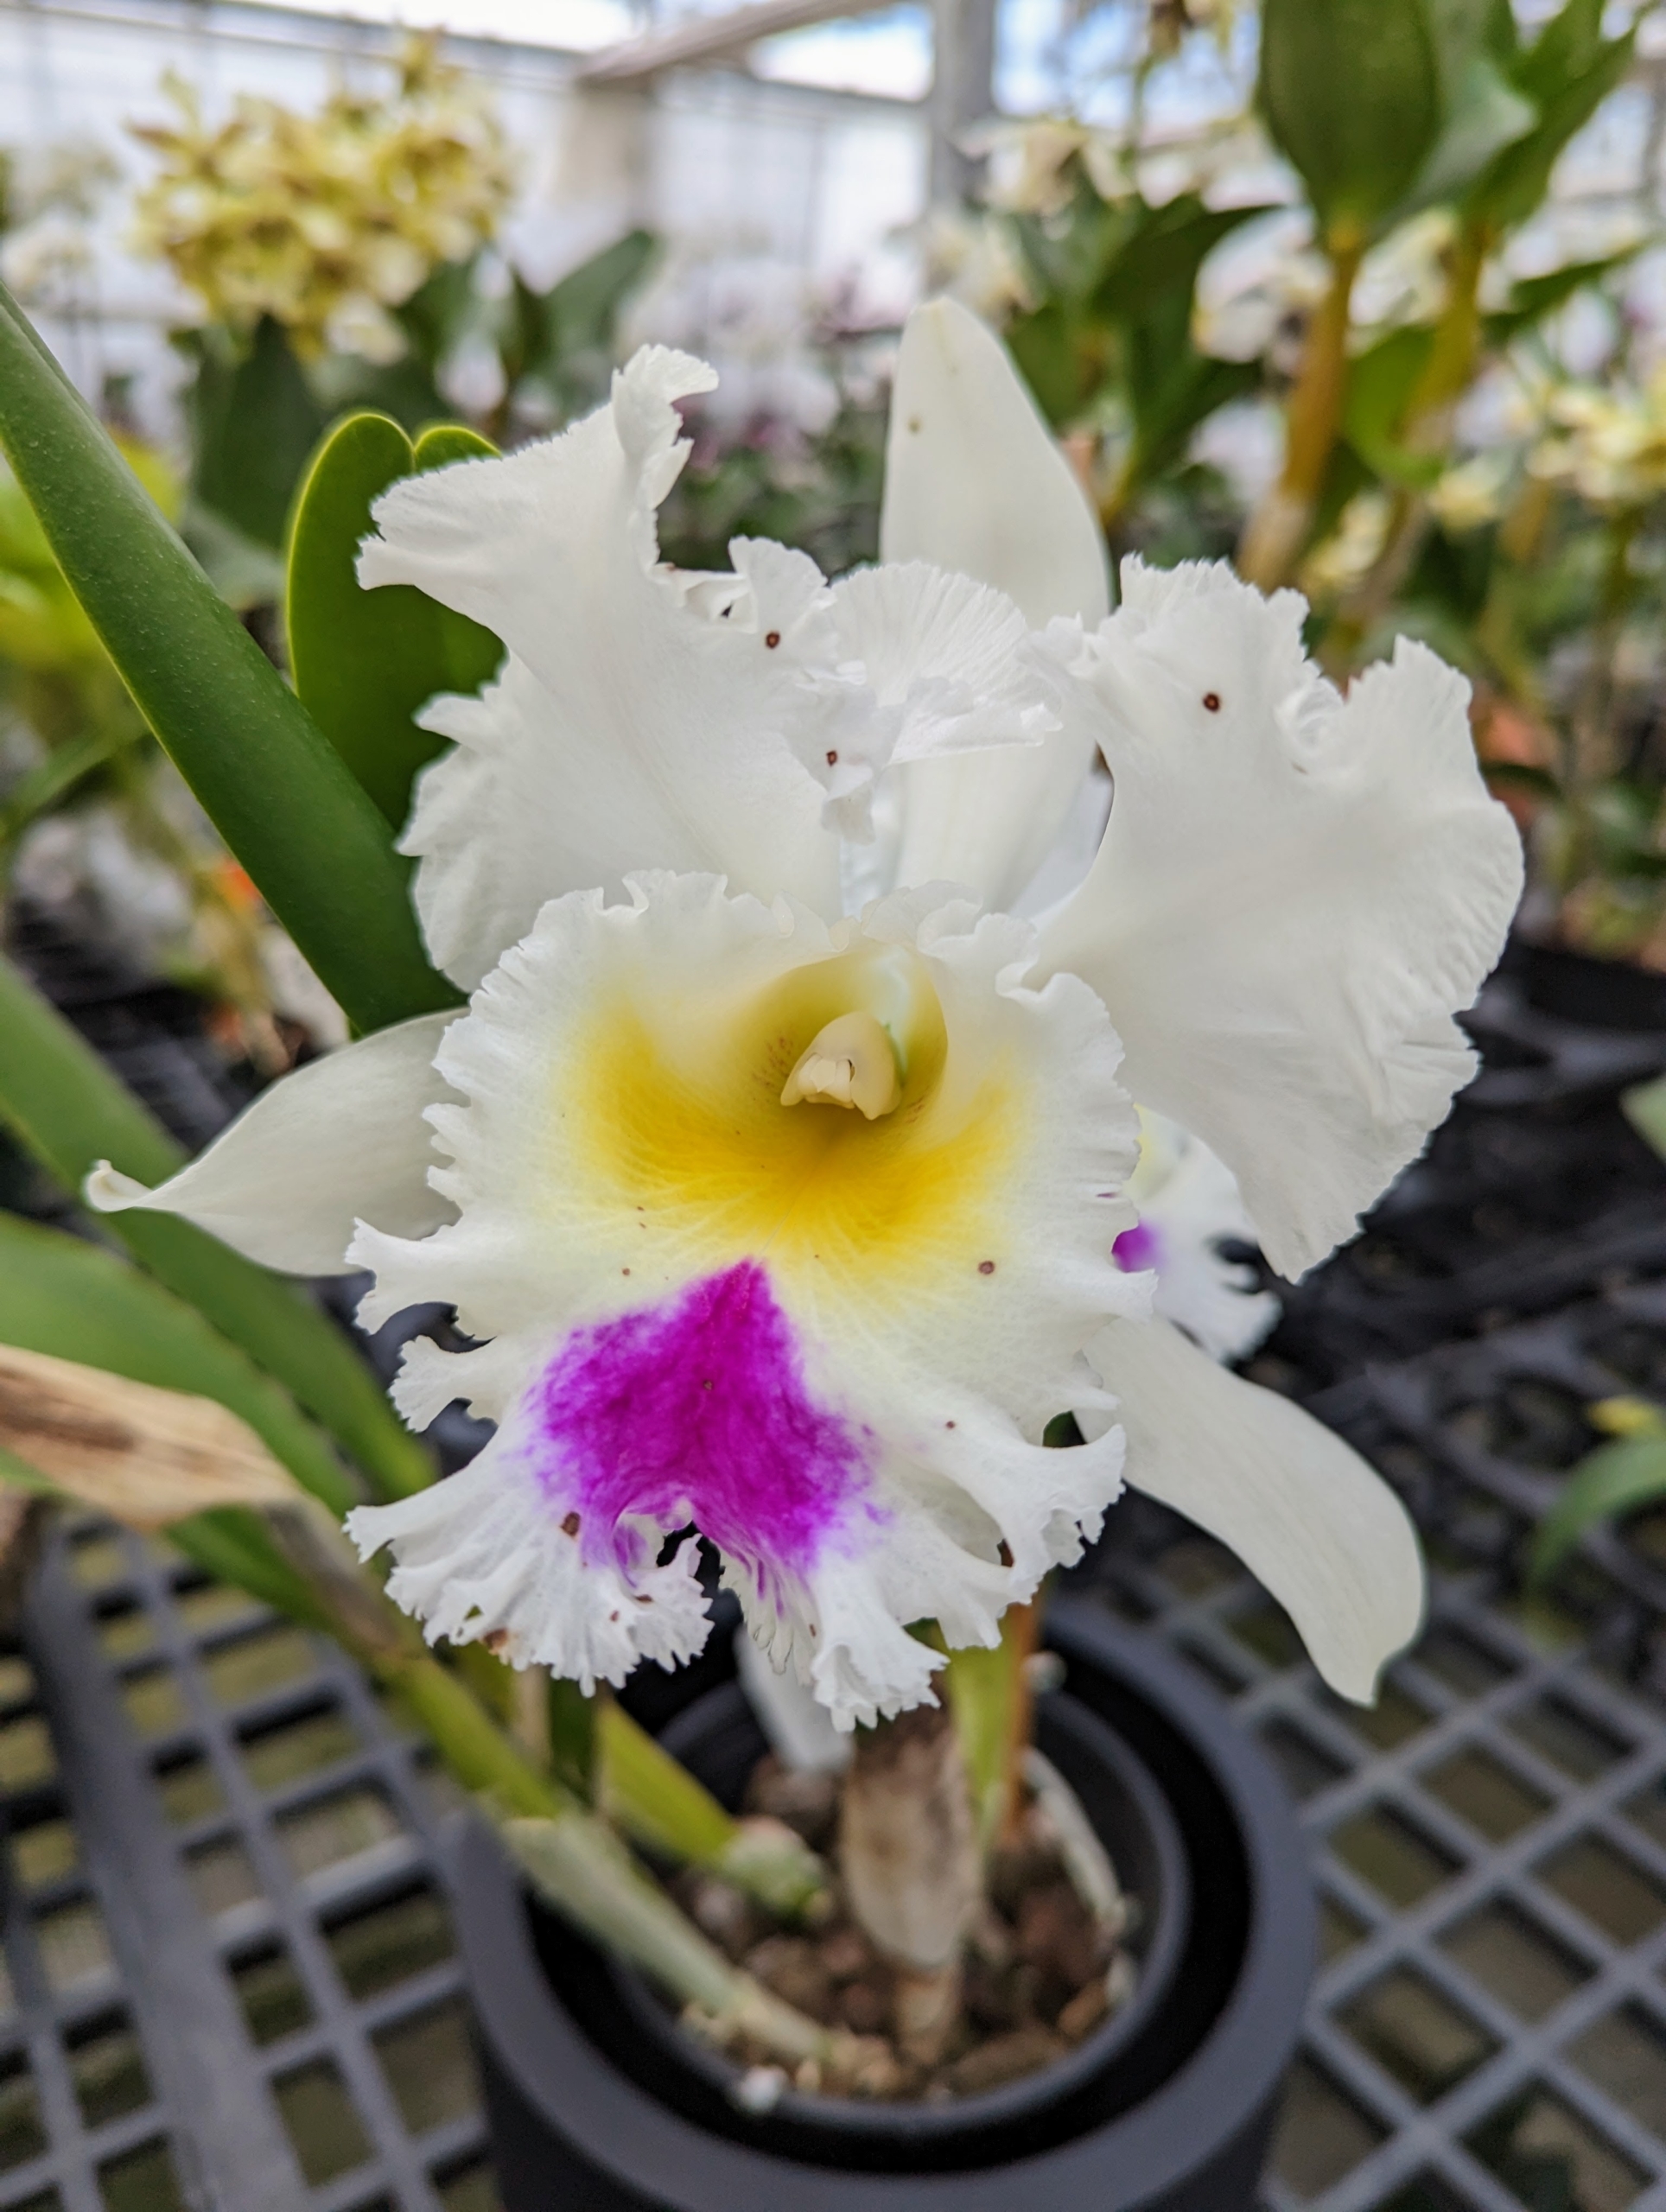
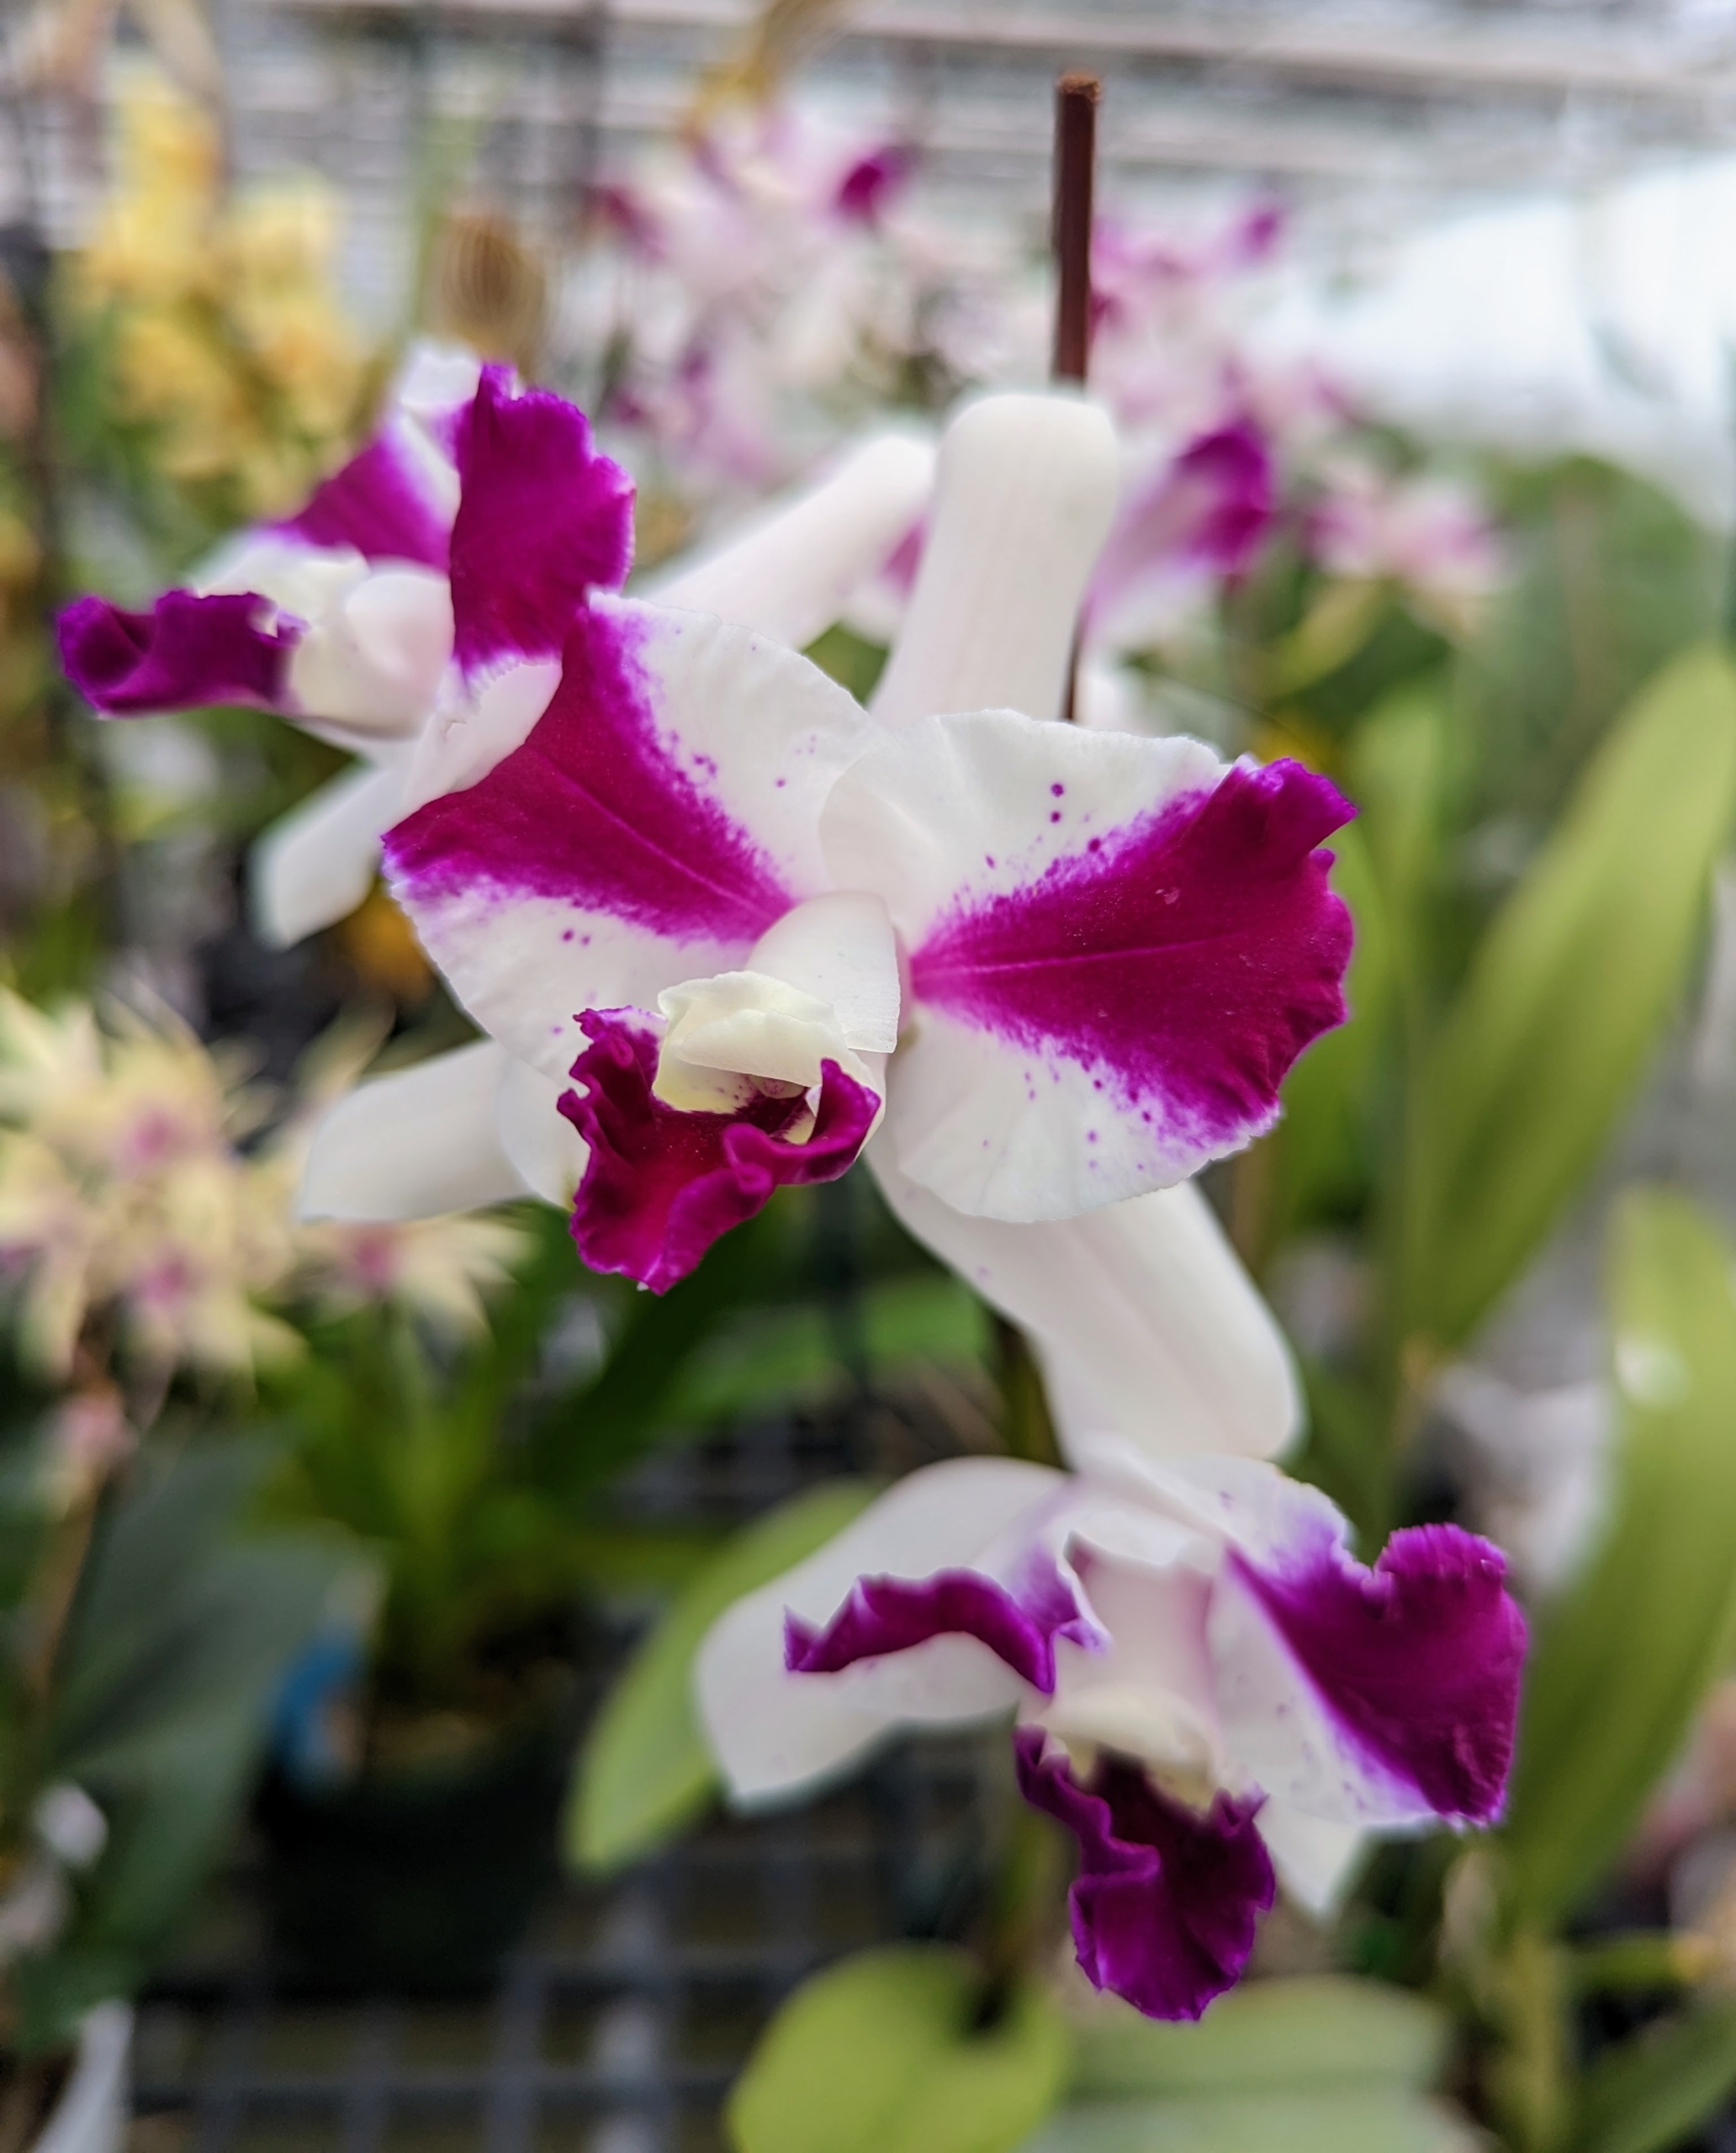
This is a Cattleya quadricolor orchid with its purple, white, lavender and yellow bell-shaped half-open flowers.
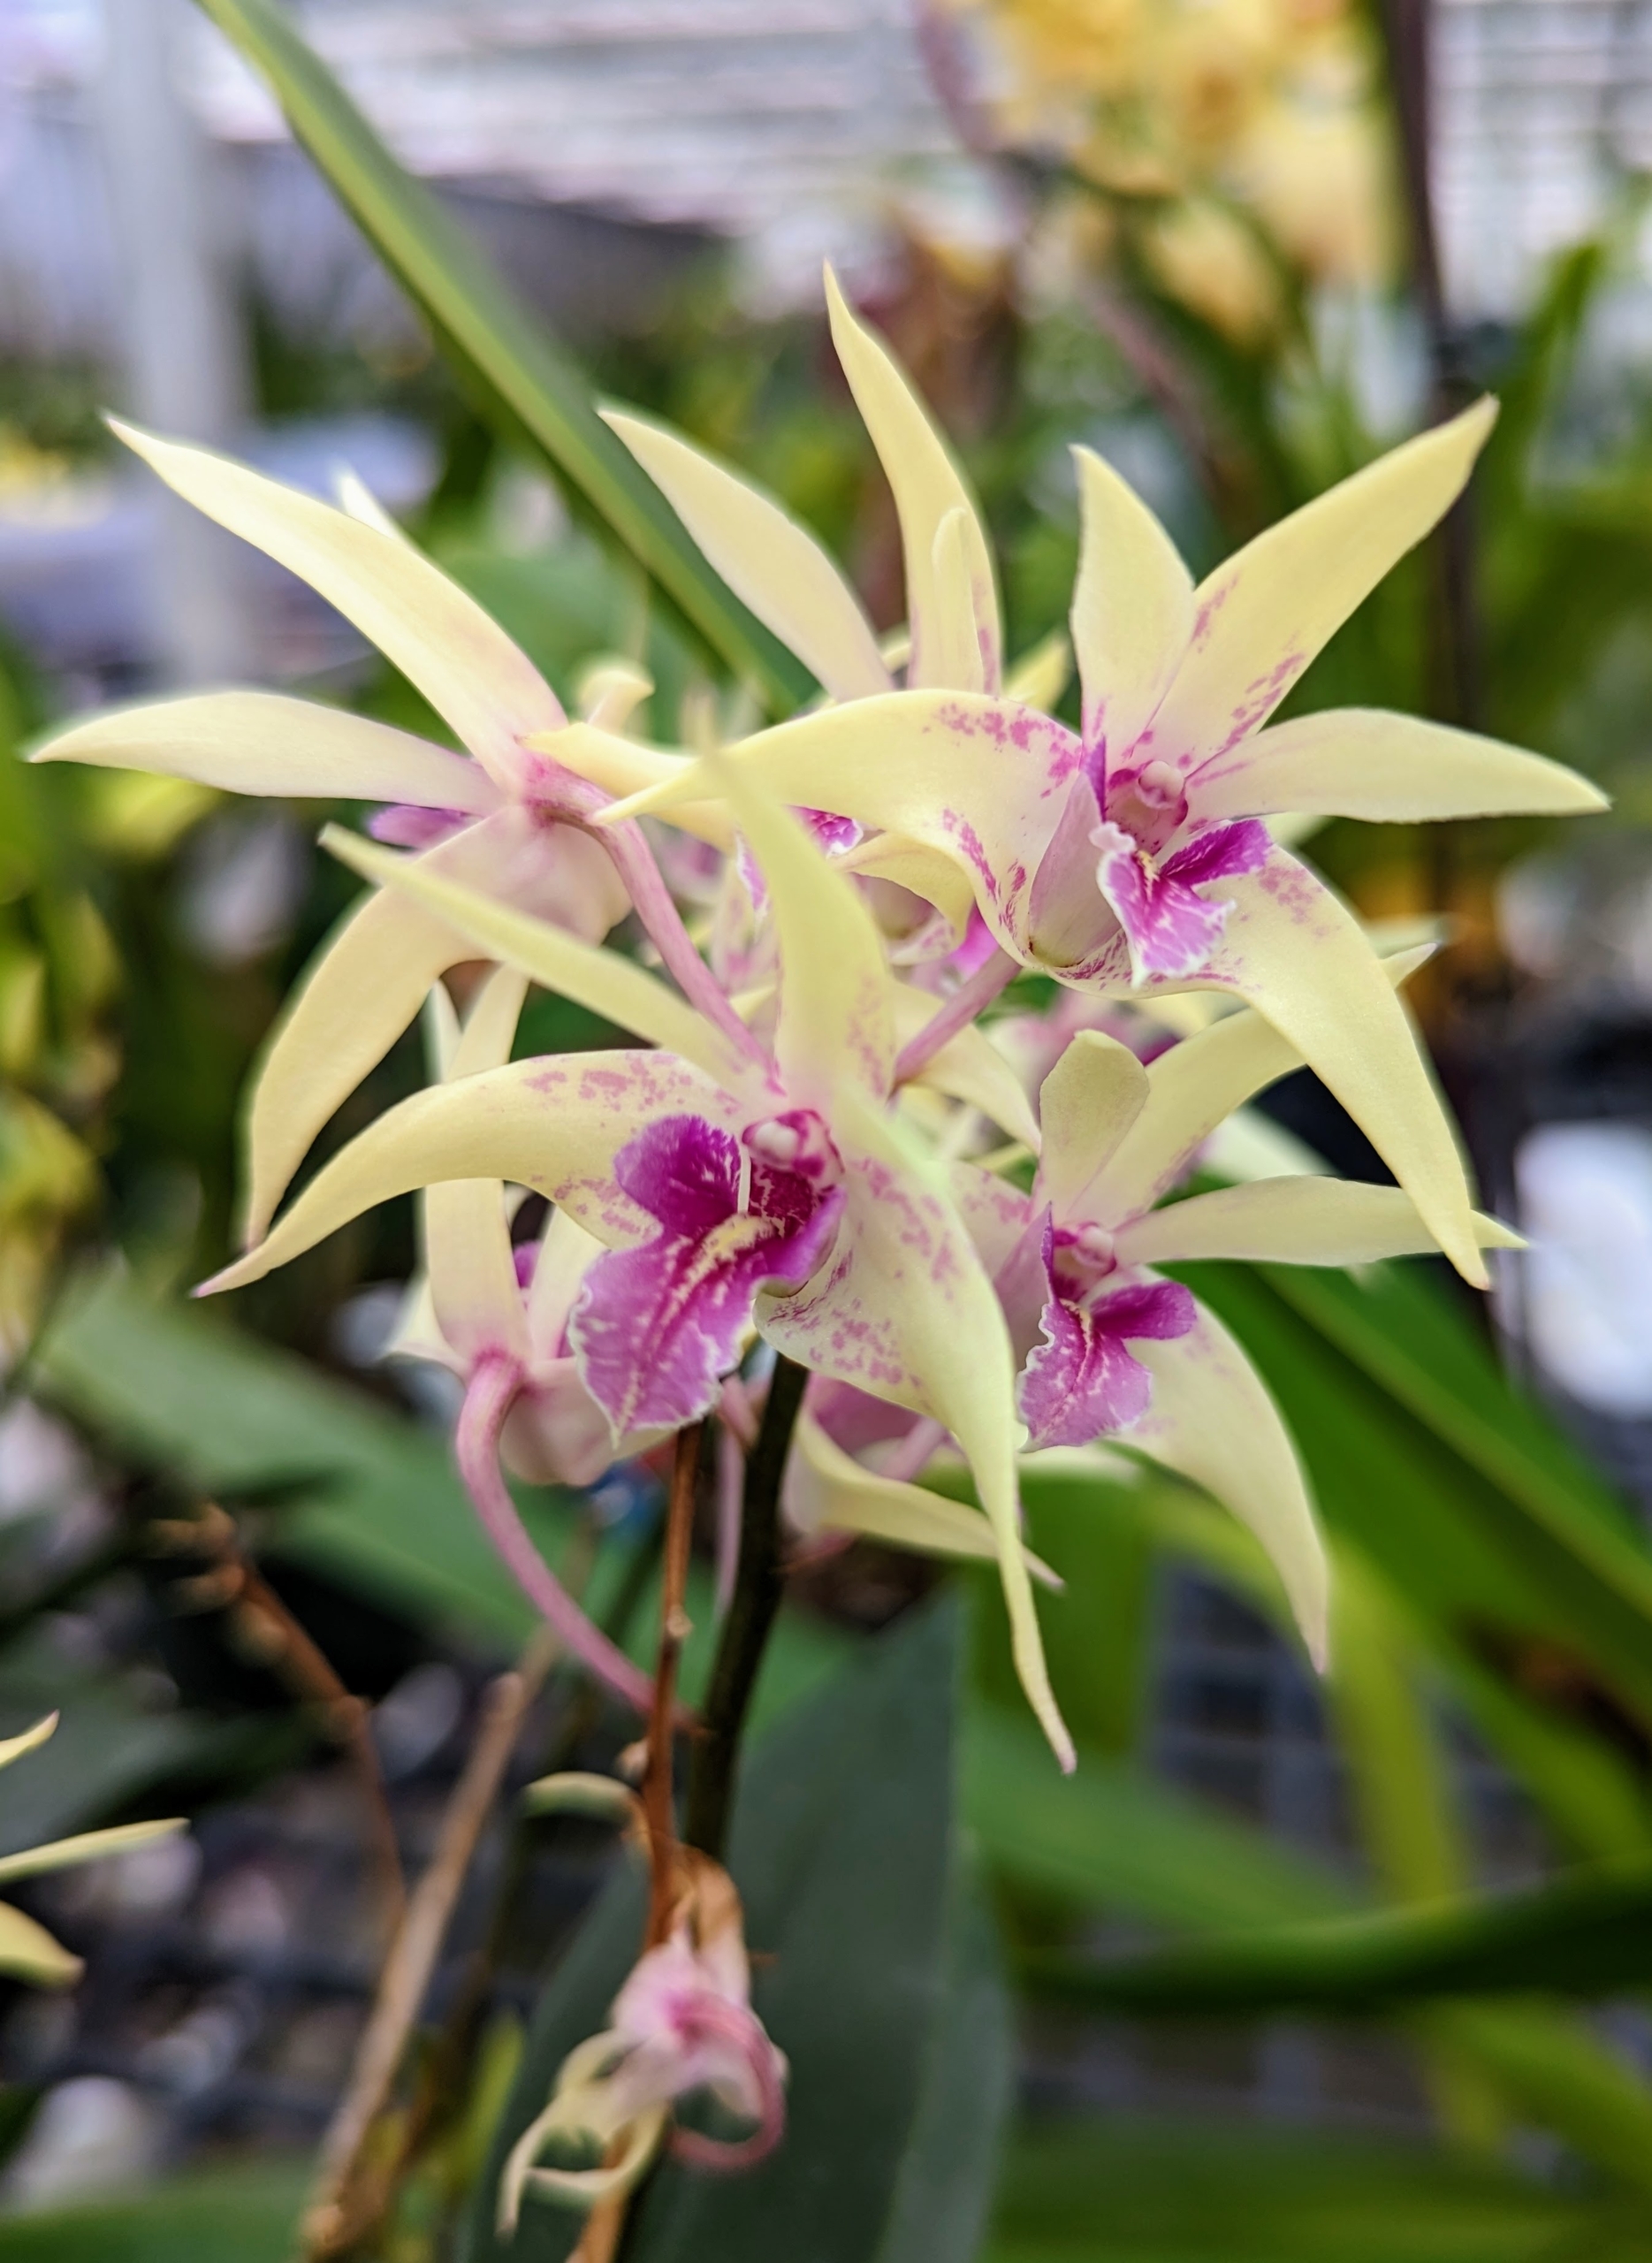
And this is a hybrid, Laeliocattleya Purple Cascade ‘Fragrant Beauty.’
There were also some other plants at the nursery. These are potted Philodendron Thai Sunrise – known for their long lime green leaves. They are all packaged and ready for transport.
Anthurium is an epiphytic species of flowering plant native to Colombia. It is grown in more temperate climates as a greenhouse or houseplant for its large, pendulous leaves that can be several feet long. This will be a nice addition to my greenhouse.
If you love orchids as much as I do, try to visit a nursery that specializes in these beautiful plants, or of you’re in the New York City area from the end of February through April, visit the New York Botanical Garden. Look out for more on orchids from the NYBG in an upcoming episode of “Martha Gardens” on Roku.
If you're in the Northeast this weekend, I hope you're staying warm and cooking up one of our Martha Stewart & Marley Spoon meal kits. Remember, there's no need to shop for specific ingredients - everything is delivered right to your door.
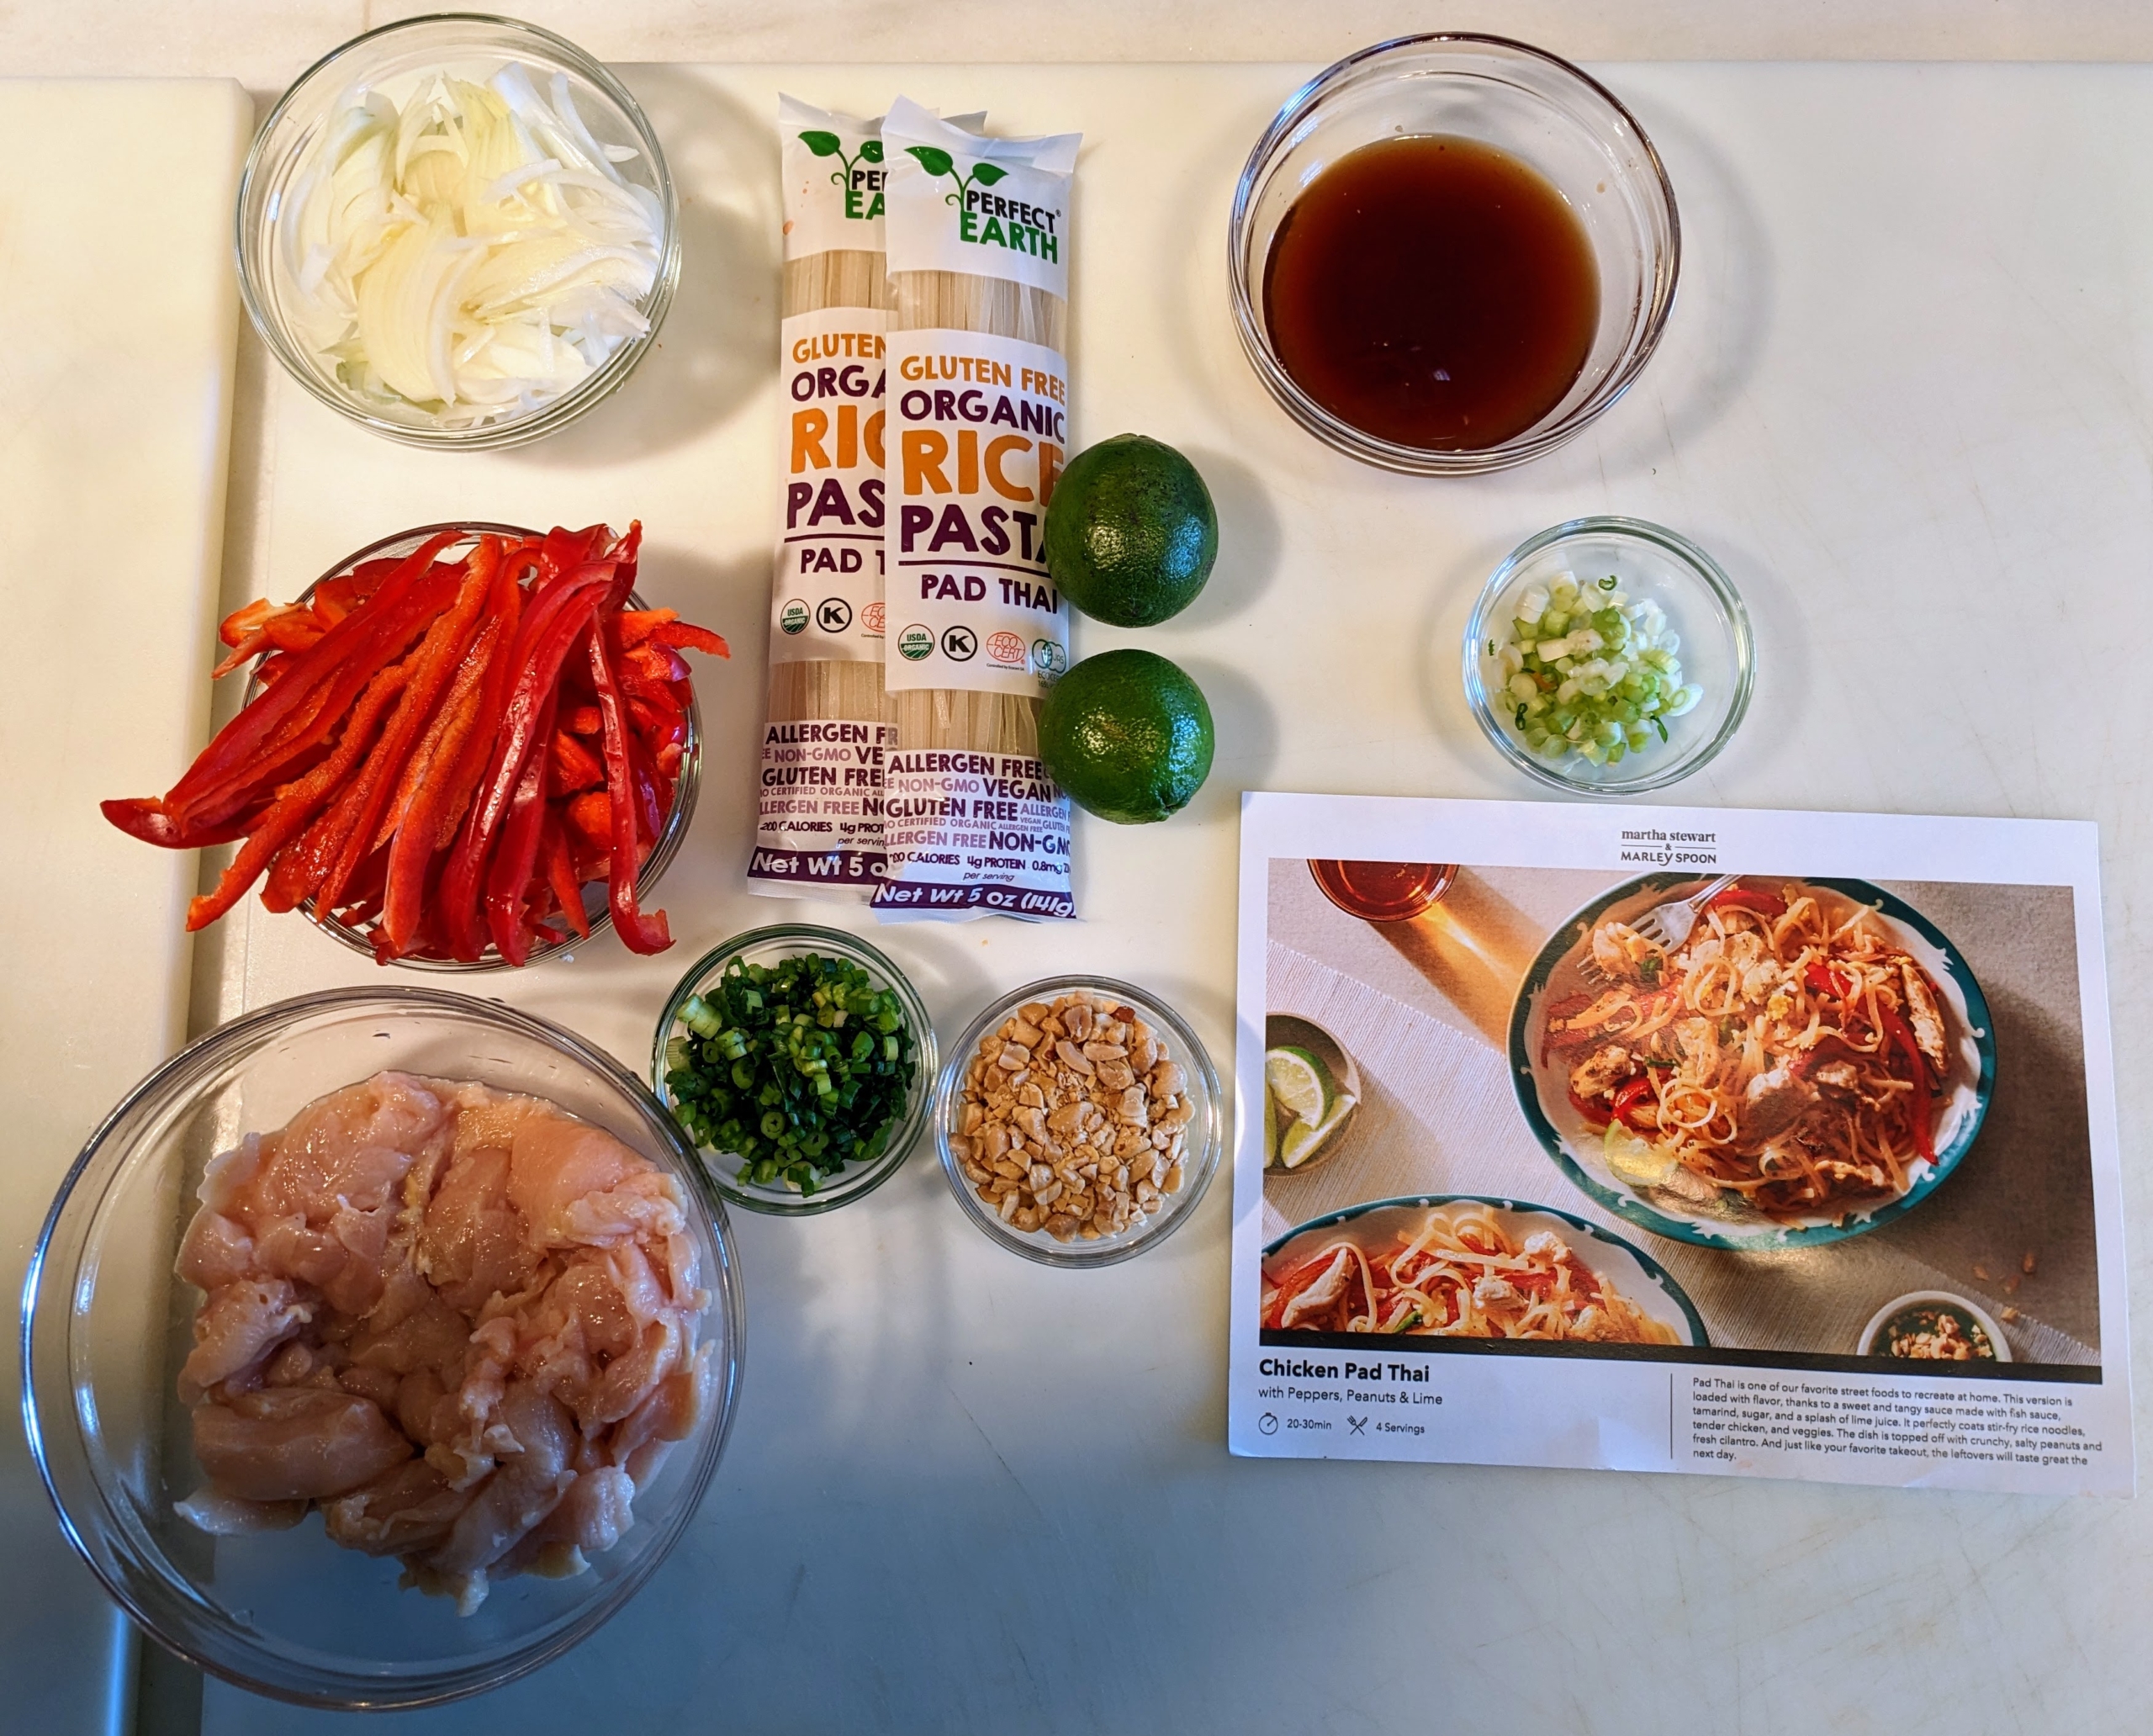
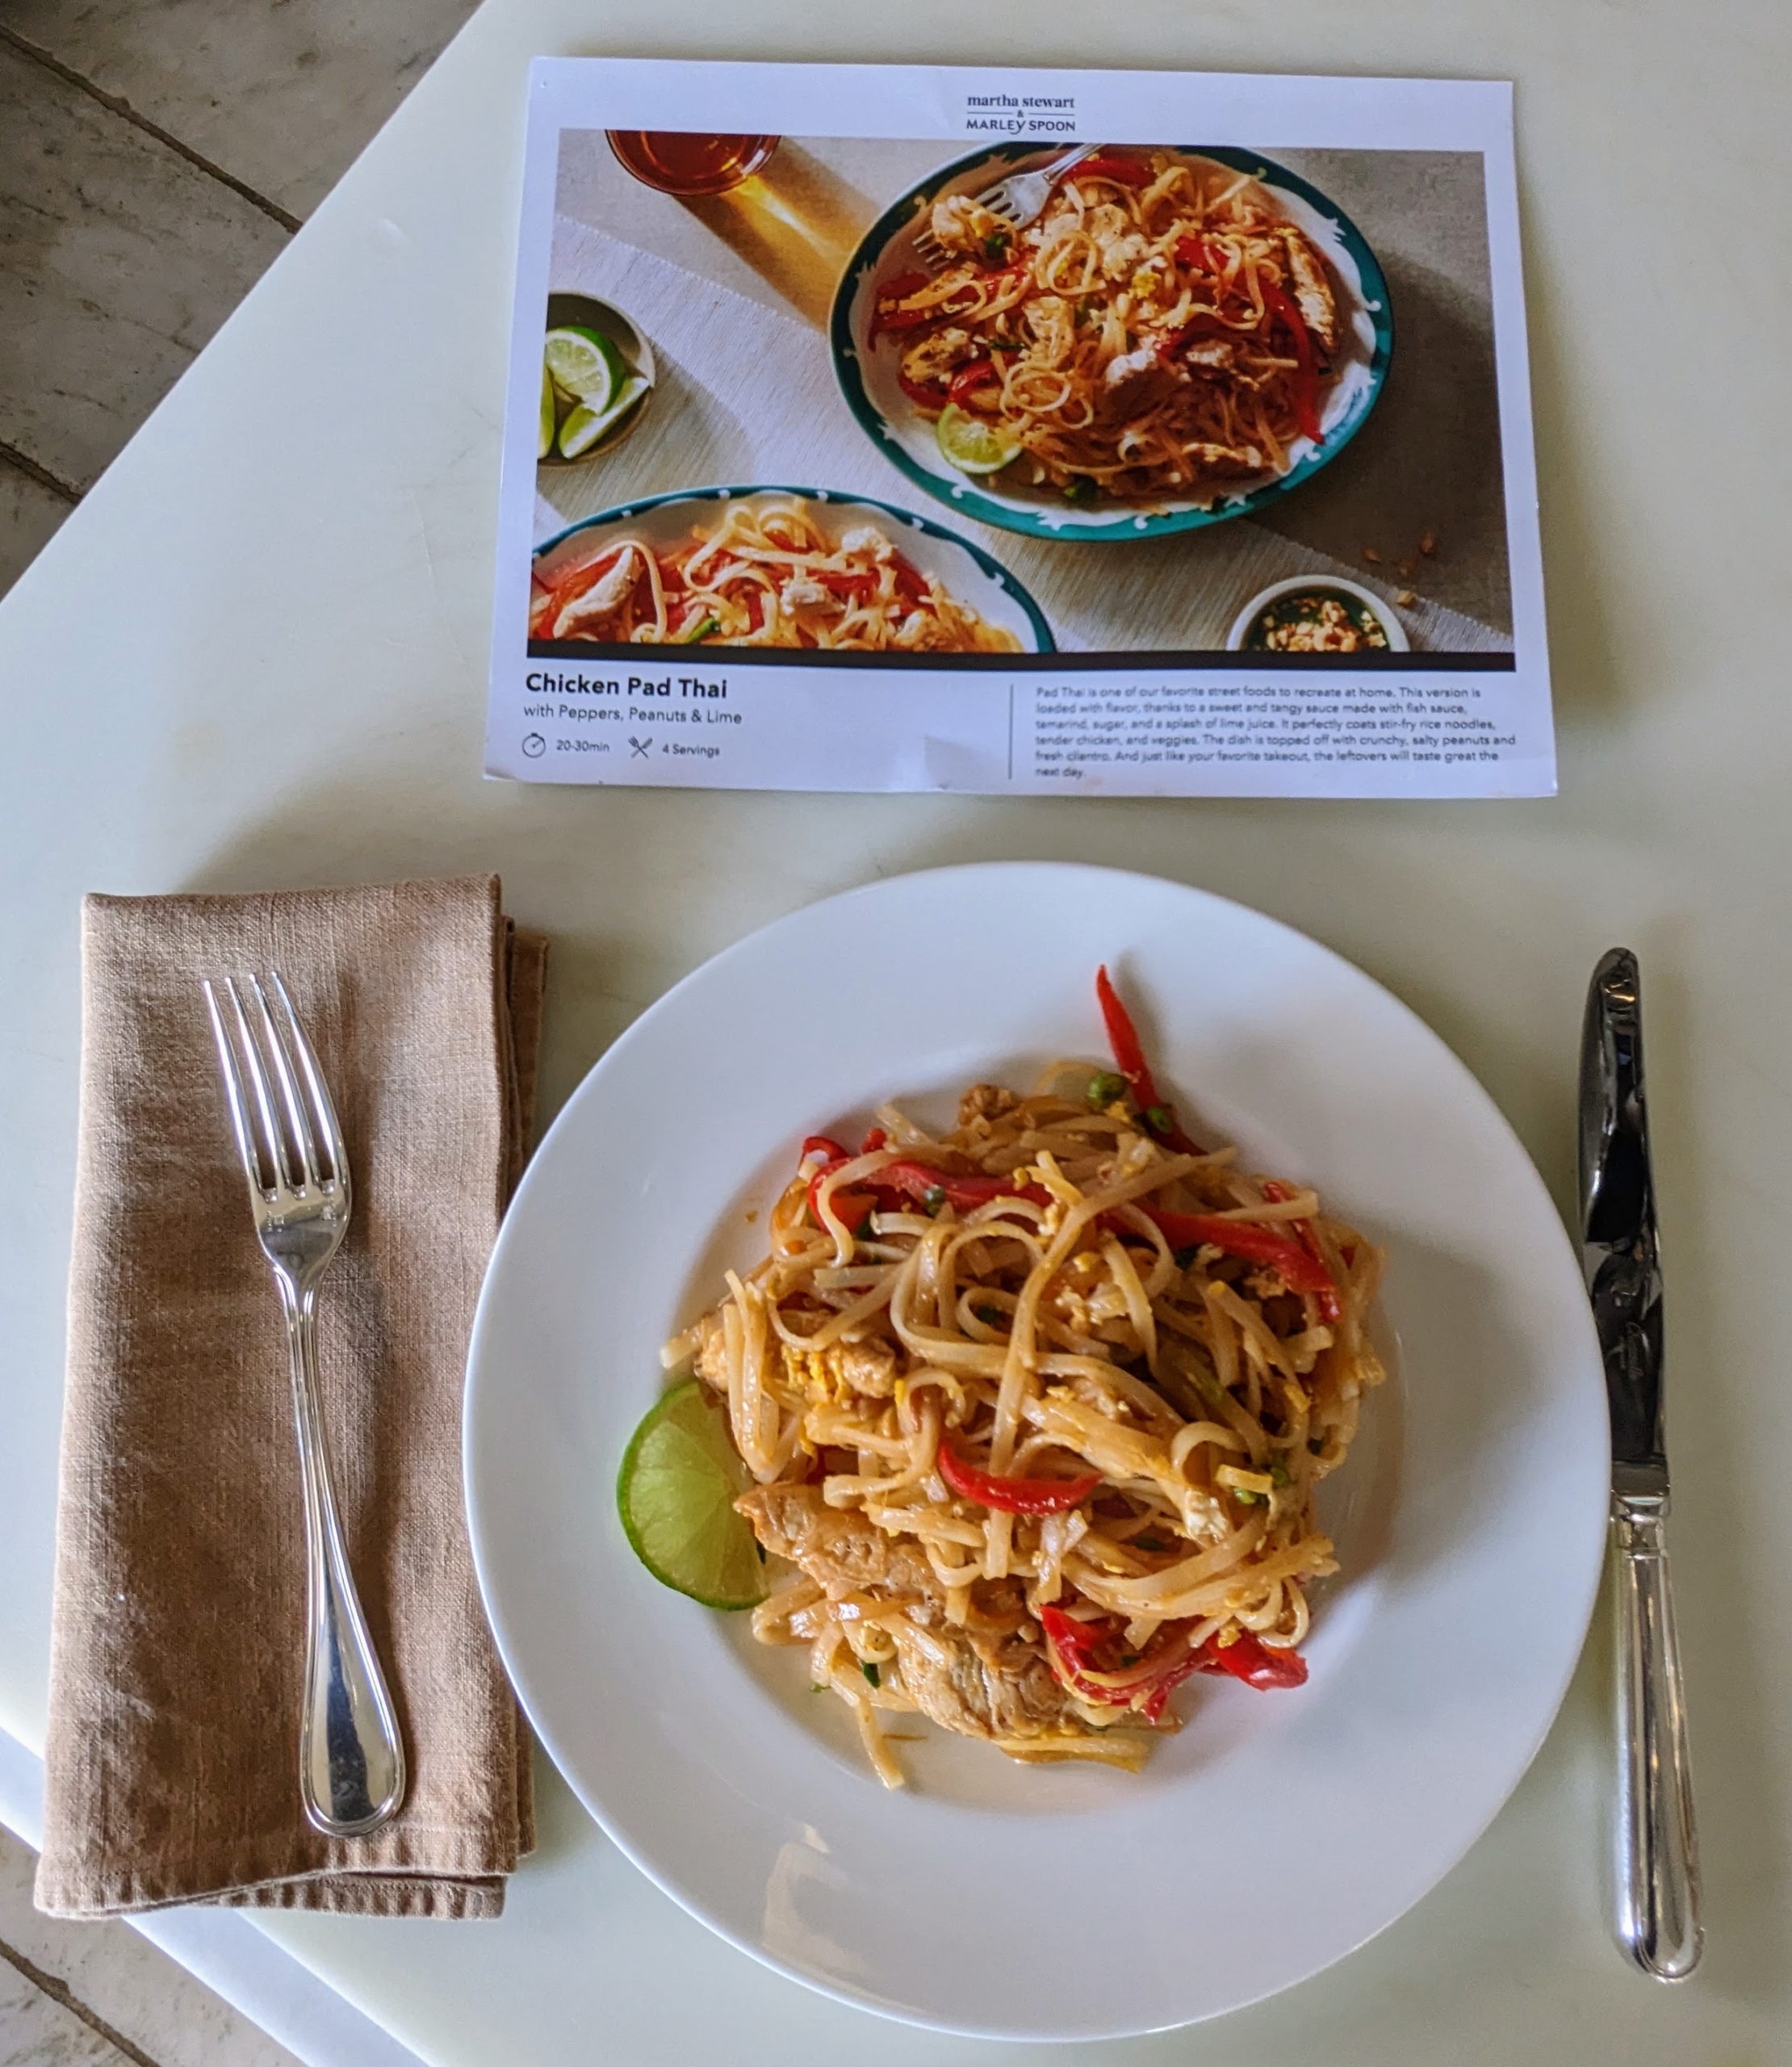
Yesterday was also very cold here at my Bedford, New York farm - temperatures were in the low 20s with wind chills in the single digits. For lunch, my housekeeper, Elvira Rojas, cooked one of the meals I selected from this week's menu - Chicken Pad Thai with Peppers, Peanuts & Lime. It was excellent and just the perfect size for four. Plus, just as promised on the recipe card, the entire dish was done in less than 40-minutes. Our delivery meal service features so many inspiring recipes and cooking ideas, and you can customize the menu and choose the recipes that best fit your busy lifestyle. To order your Martha Stewart & Marley Spoon meal kits, please go to the web site.
Enjoy these photos.
The first thing we do is take out all the ingredients from our Martha Stewart & Marley Spoon box and place them on the counter where everything is easy to see. All these ingredients are fresh and pre-portioned, so there is no waste. Each meal comes with a large recipe card, which lists the ingredients and each of the six steps plus large photos to help show each stage of the process.
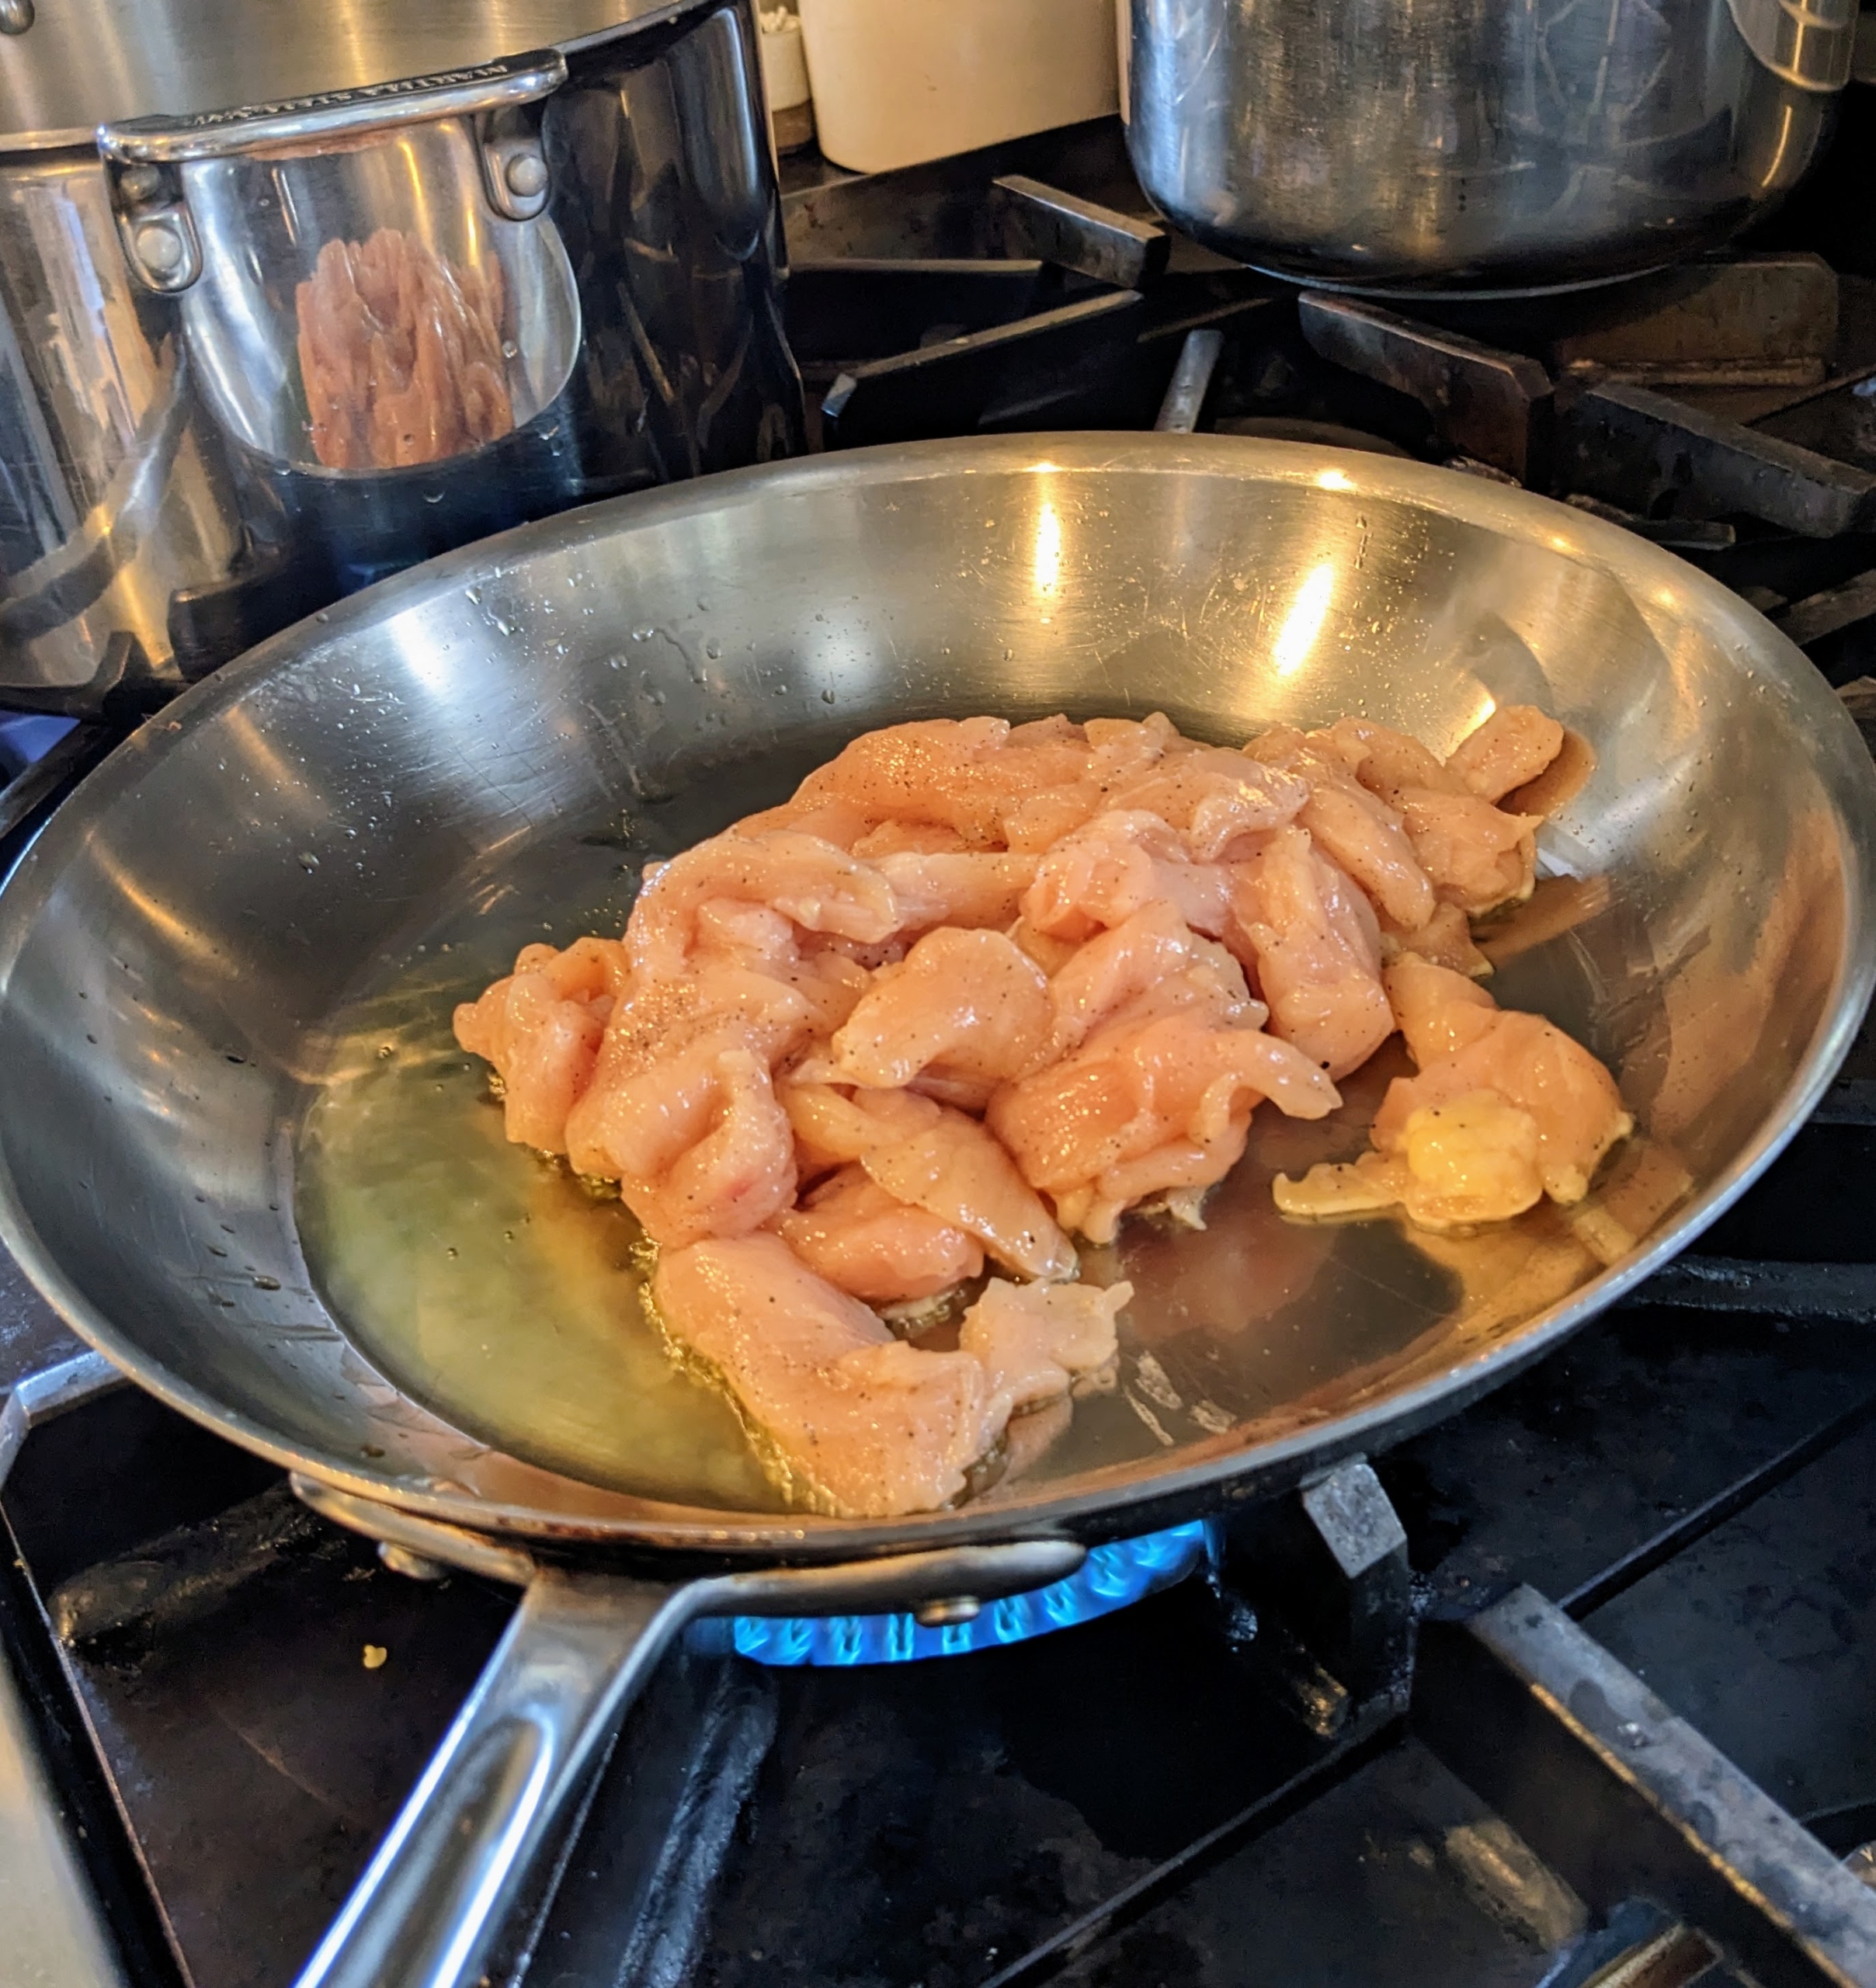
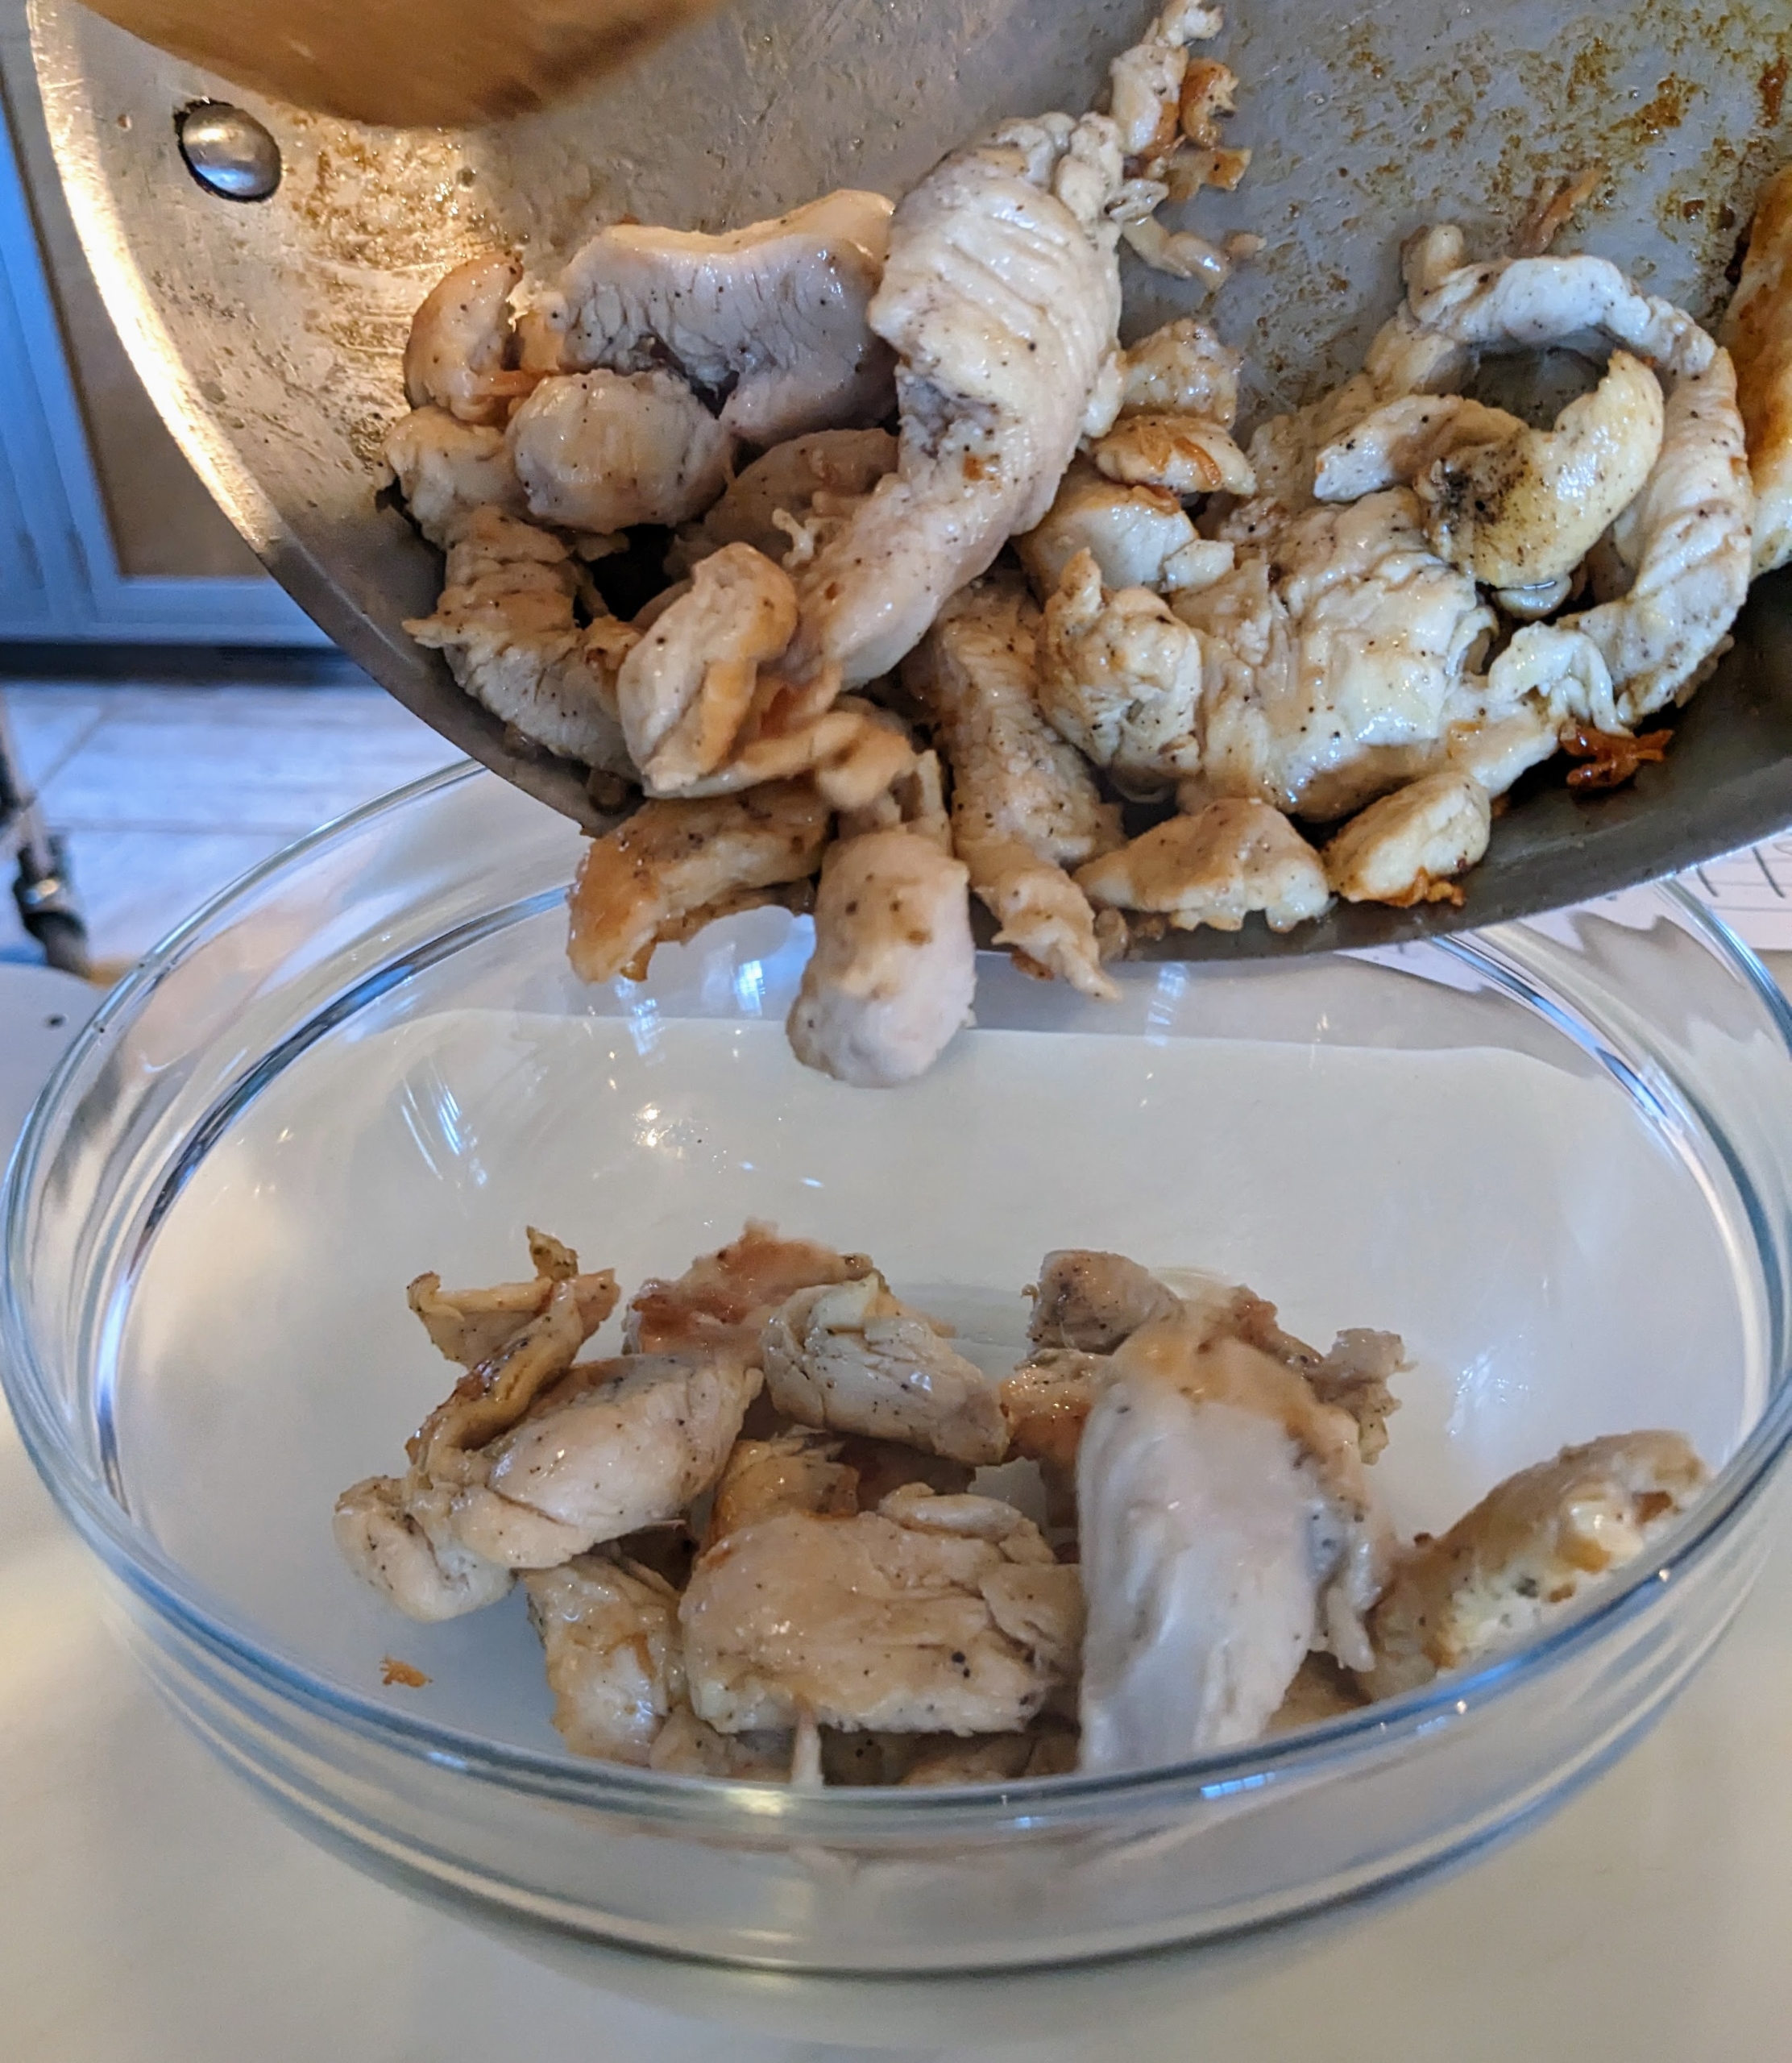
Elvira heats a tablespoon of oil in a large skillet over high and drops in the chicken to cook through.
She stirs occasionally while it cooks for about four to five minutes.
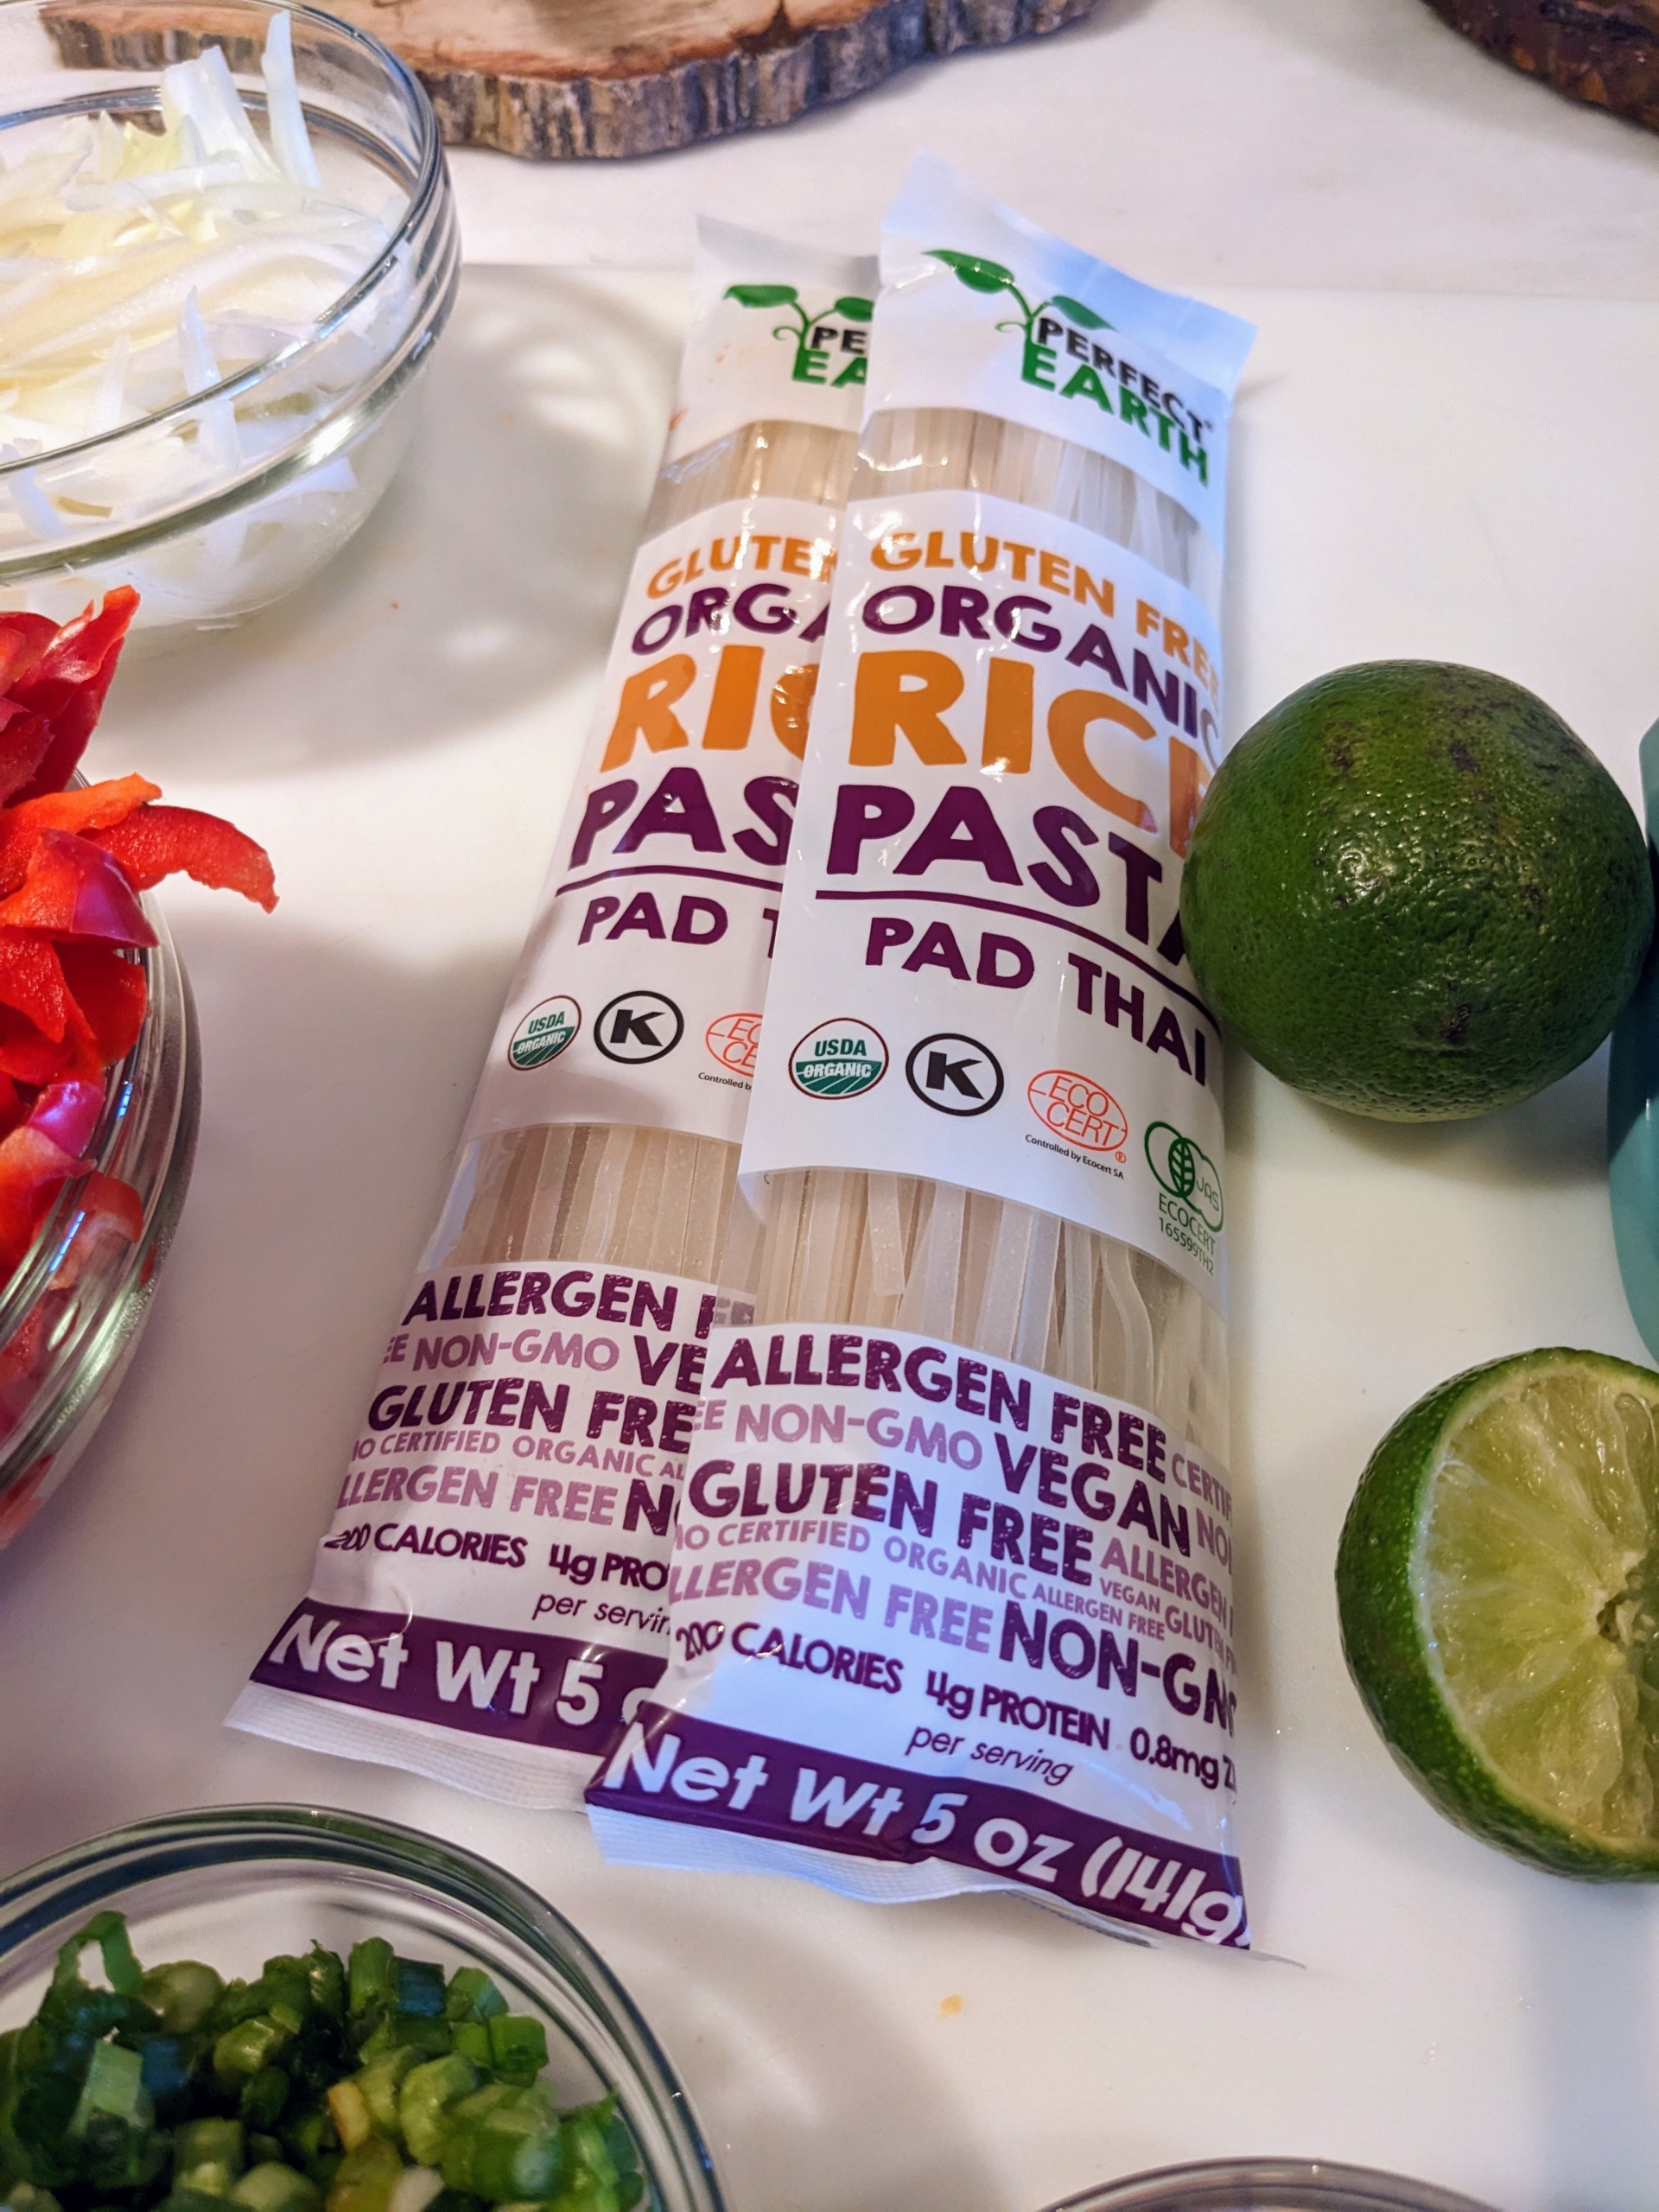
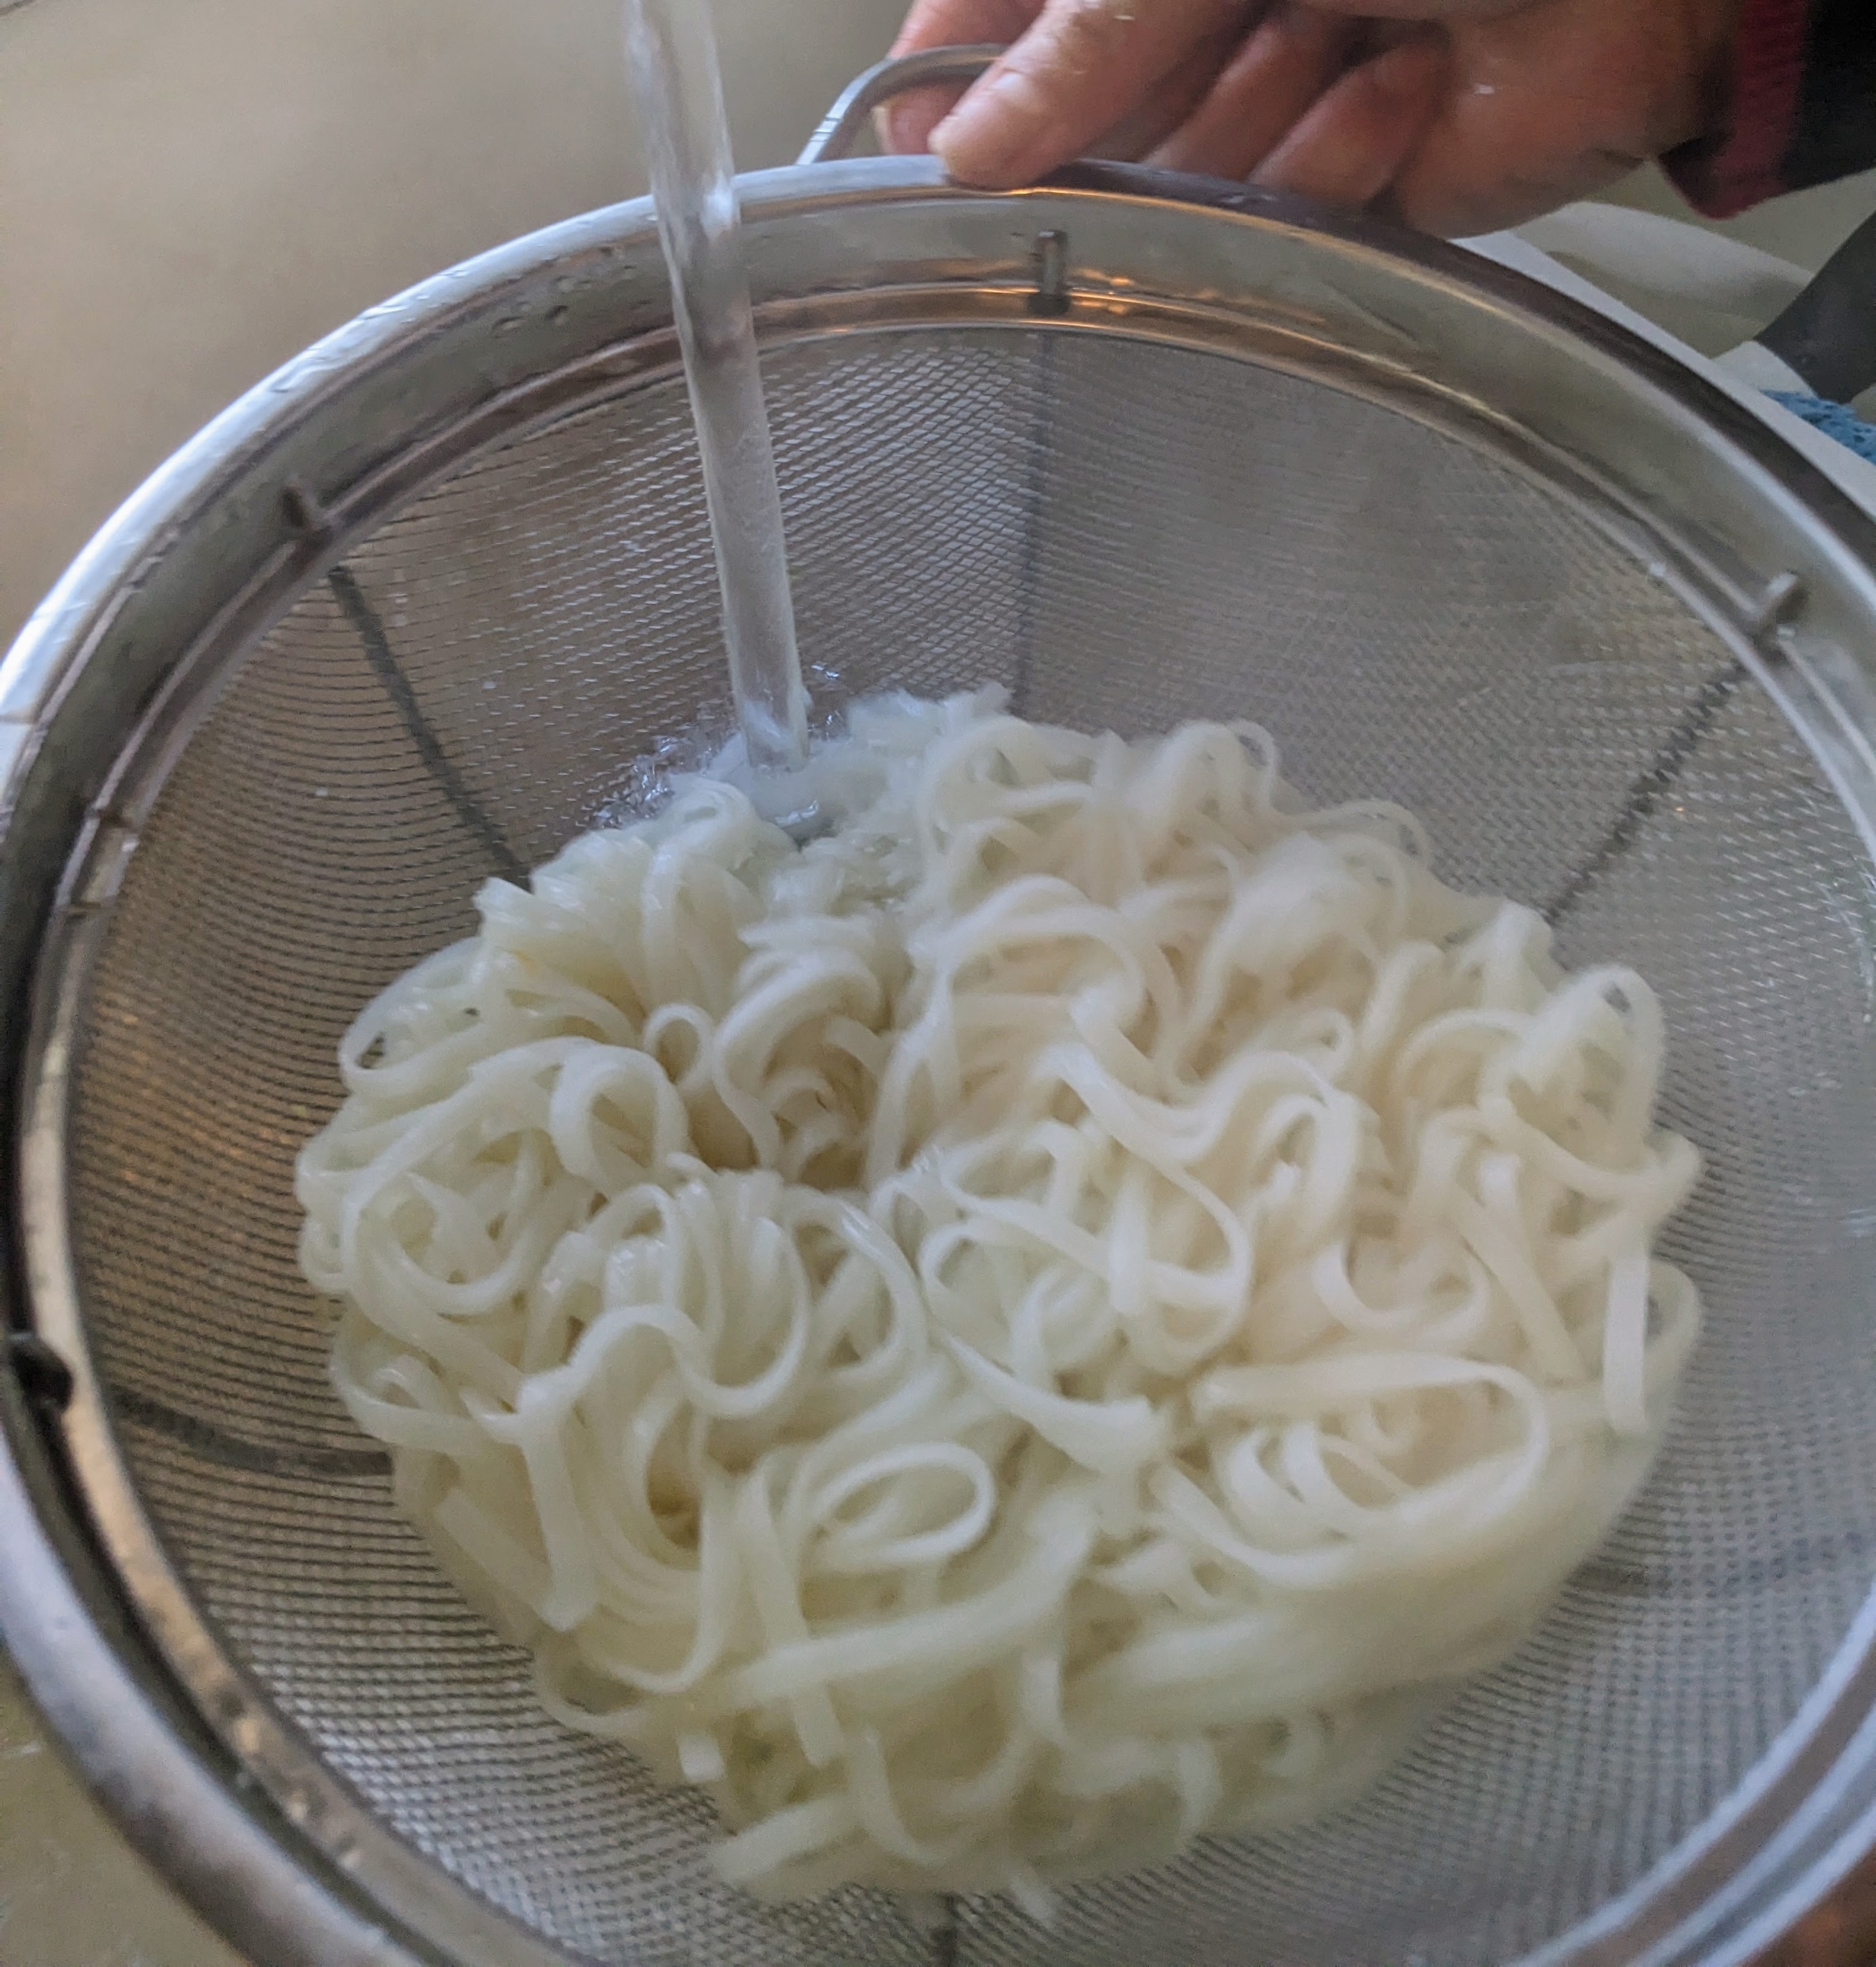
Pad Thai is made with dried rice noodles that are cut thick and flat. They can be found in any Asian specialty store or Asian section of the grocery.
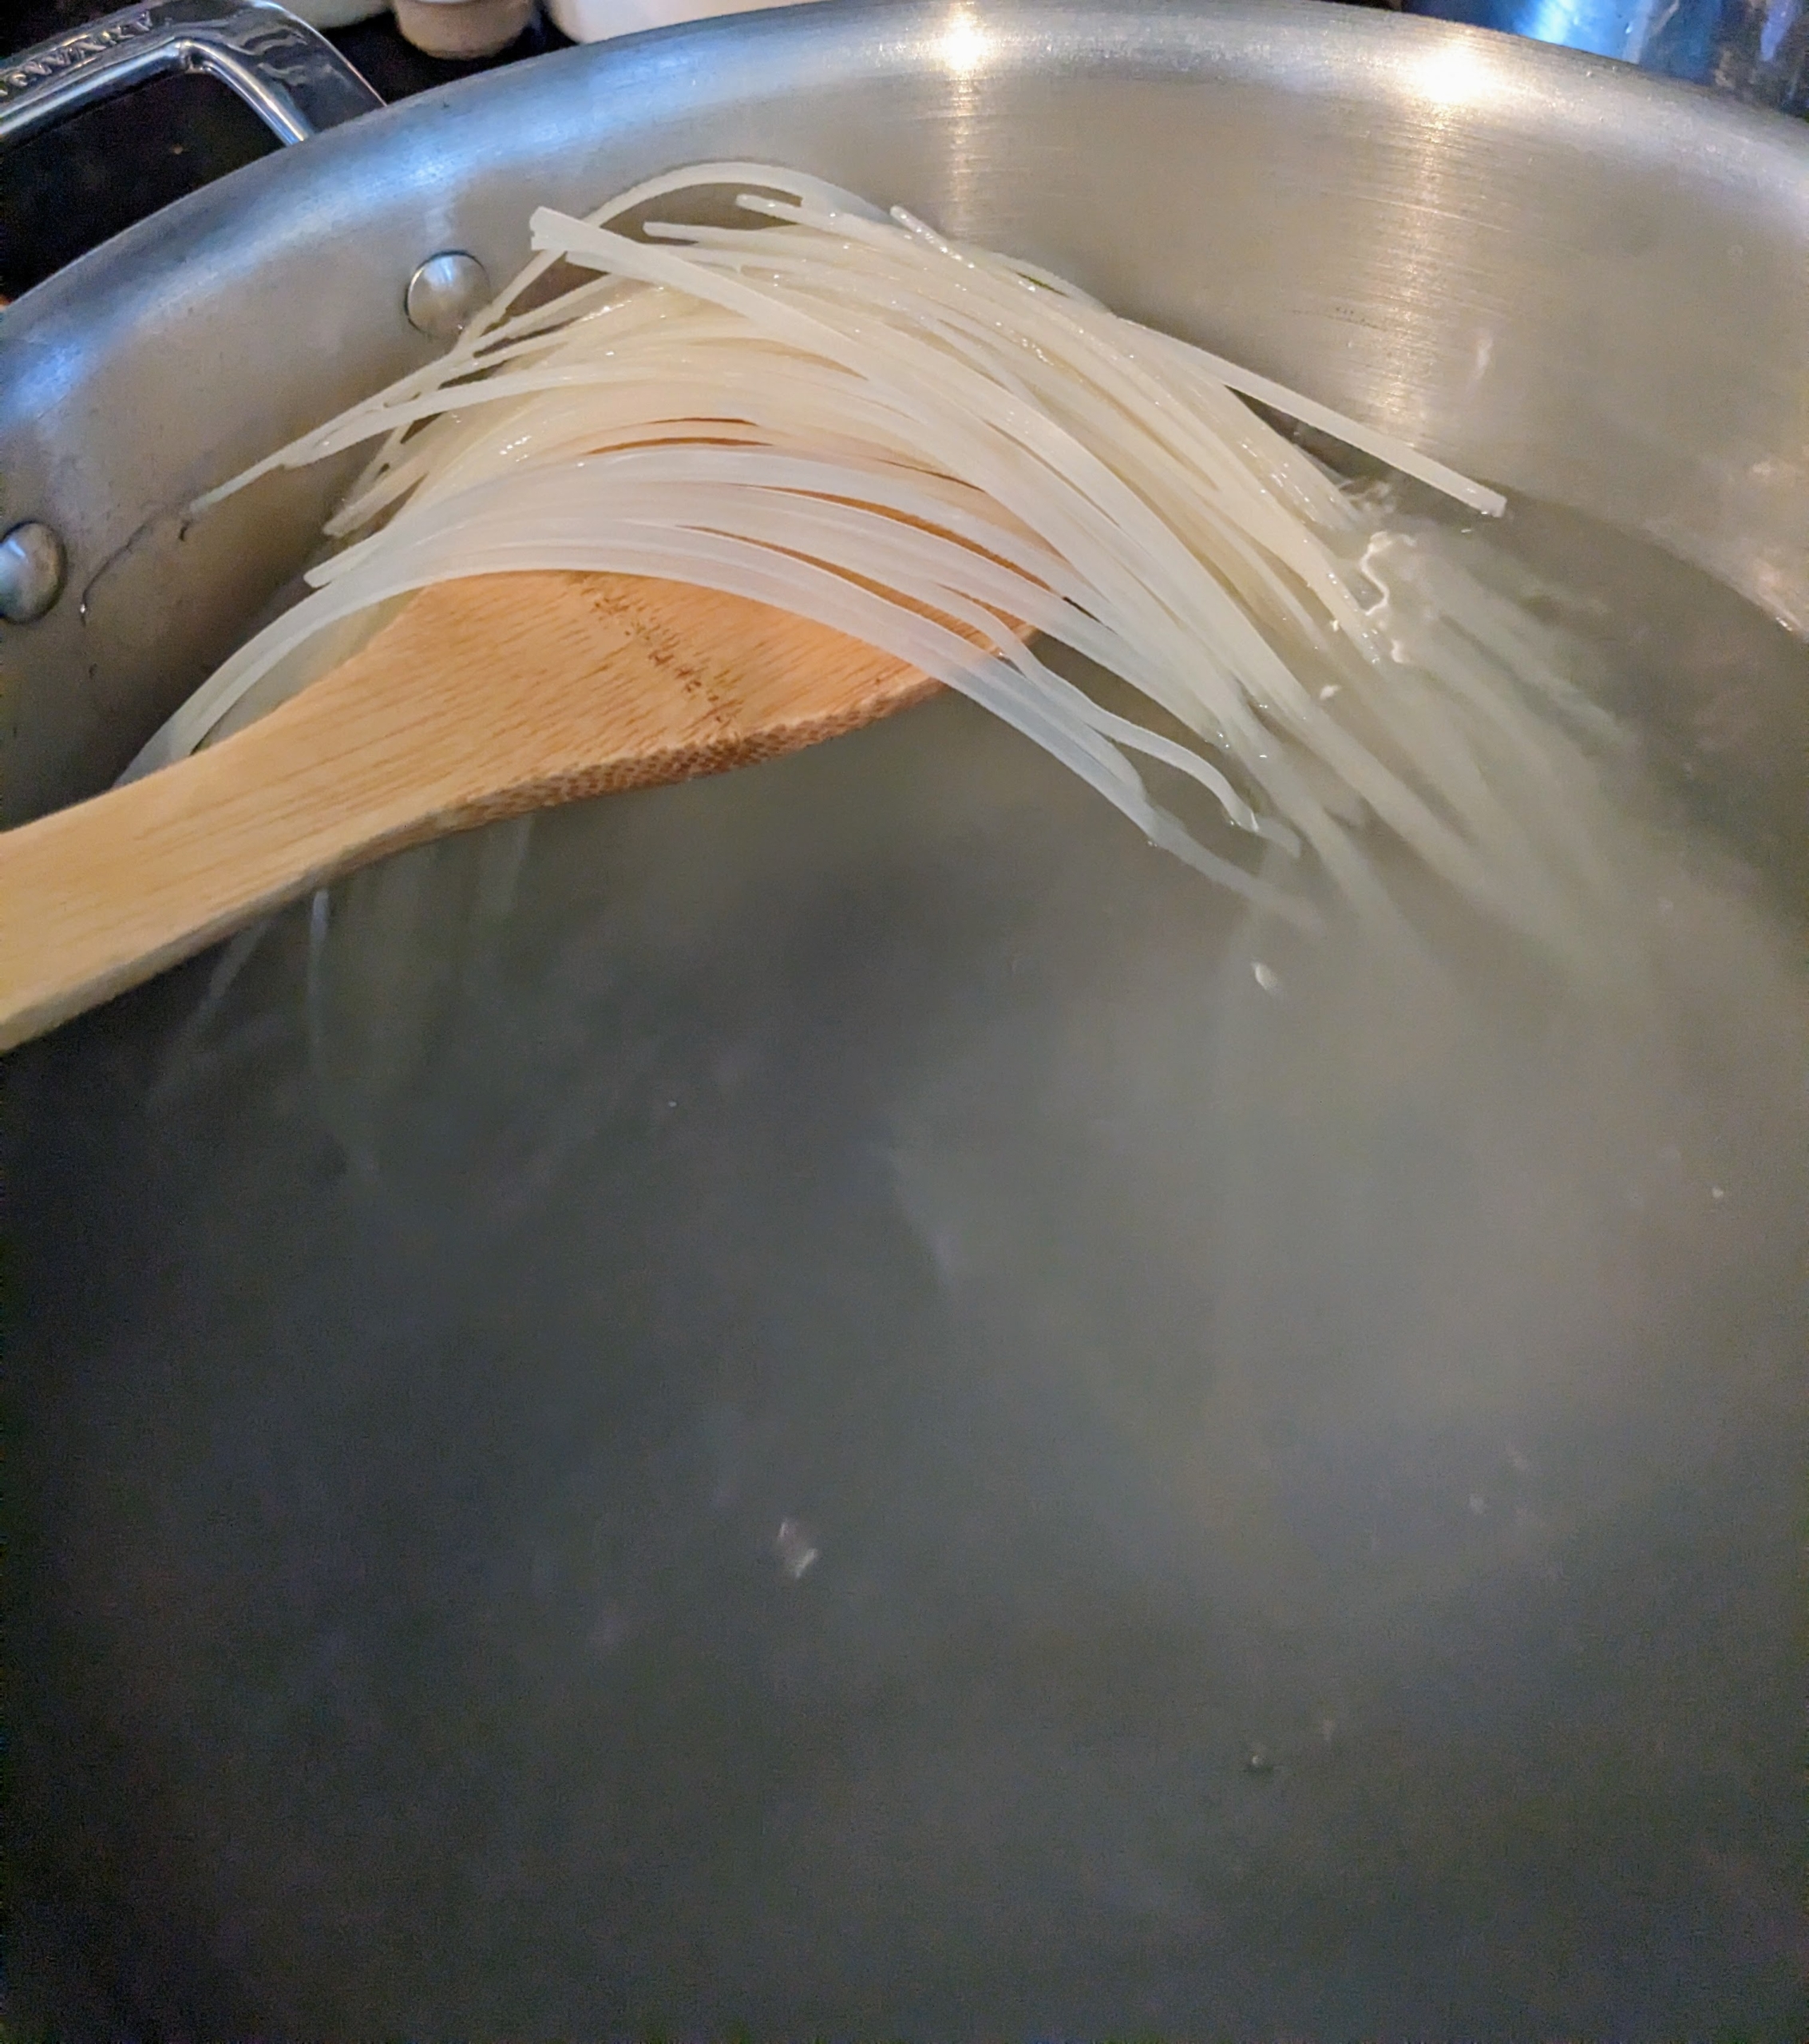
The noodles are cooked in a medium pot of salted boiling water for about six to eight minutes until al-dente.
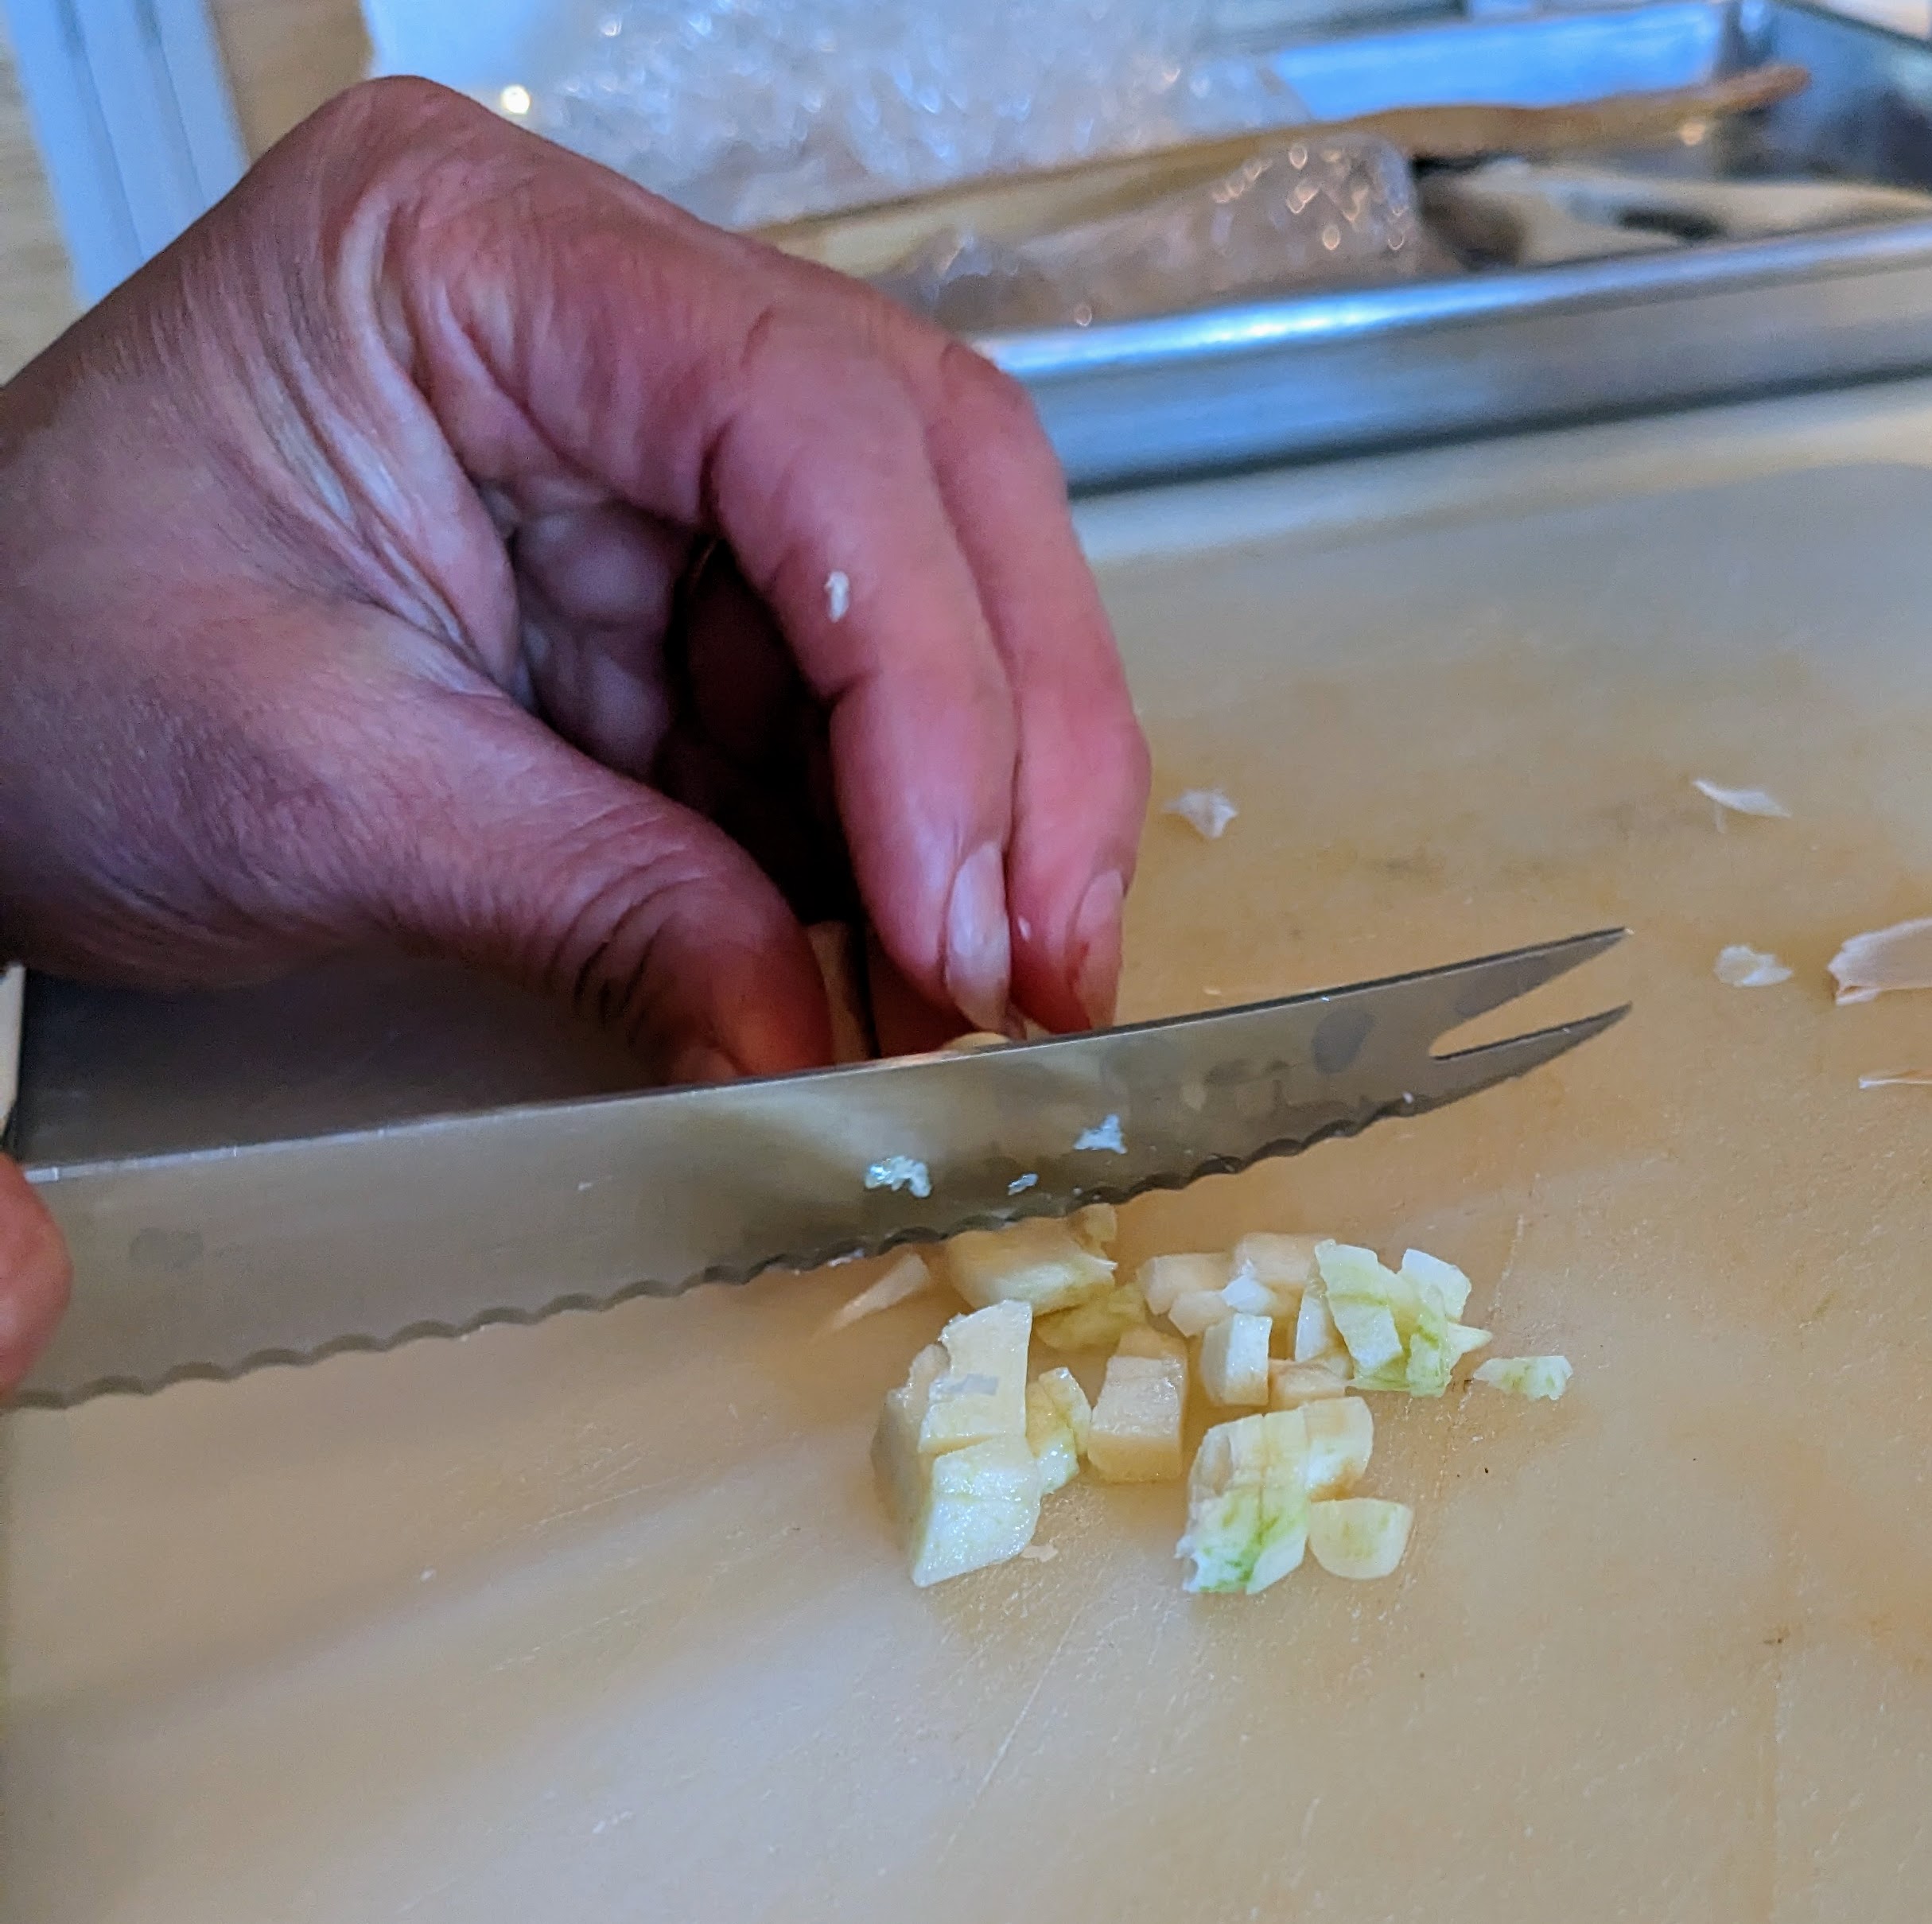
She also chops the garlic and all the other vegetables.
Here is the chicken almost cooked – always make sure poultry is cooked through. To be sure, one can poke the chicken to see if the juices run clear. If they do, it’s done.
Once the chicken is cooked, Elvira transfers it to a separate bowl.
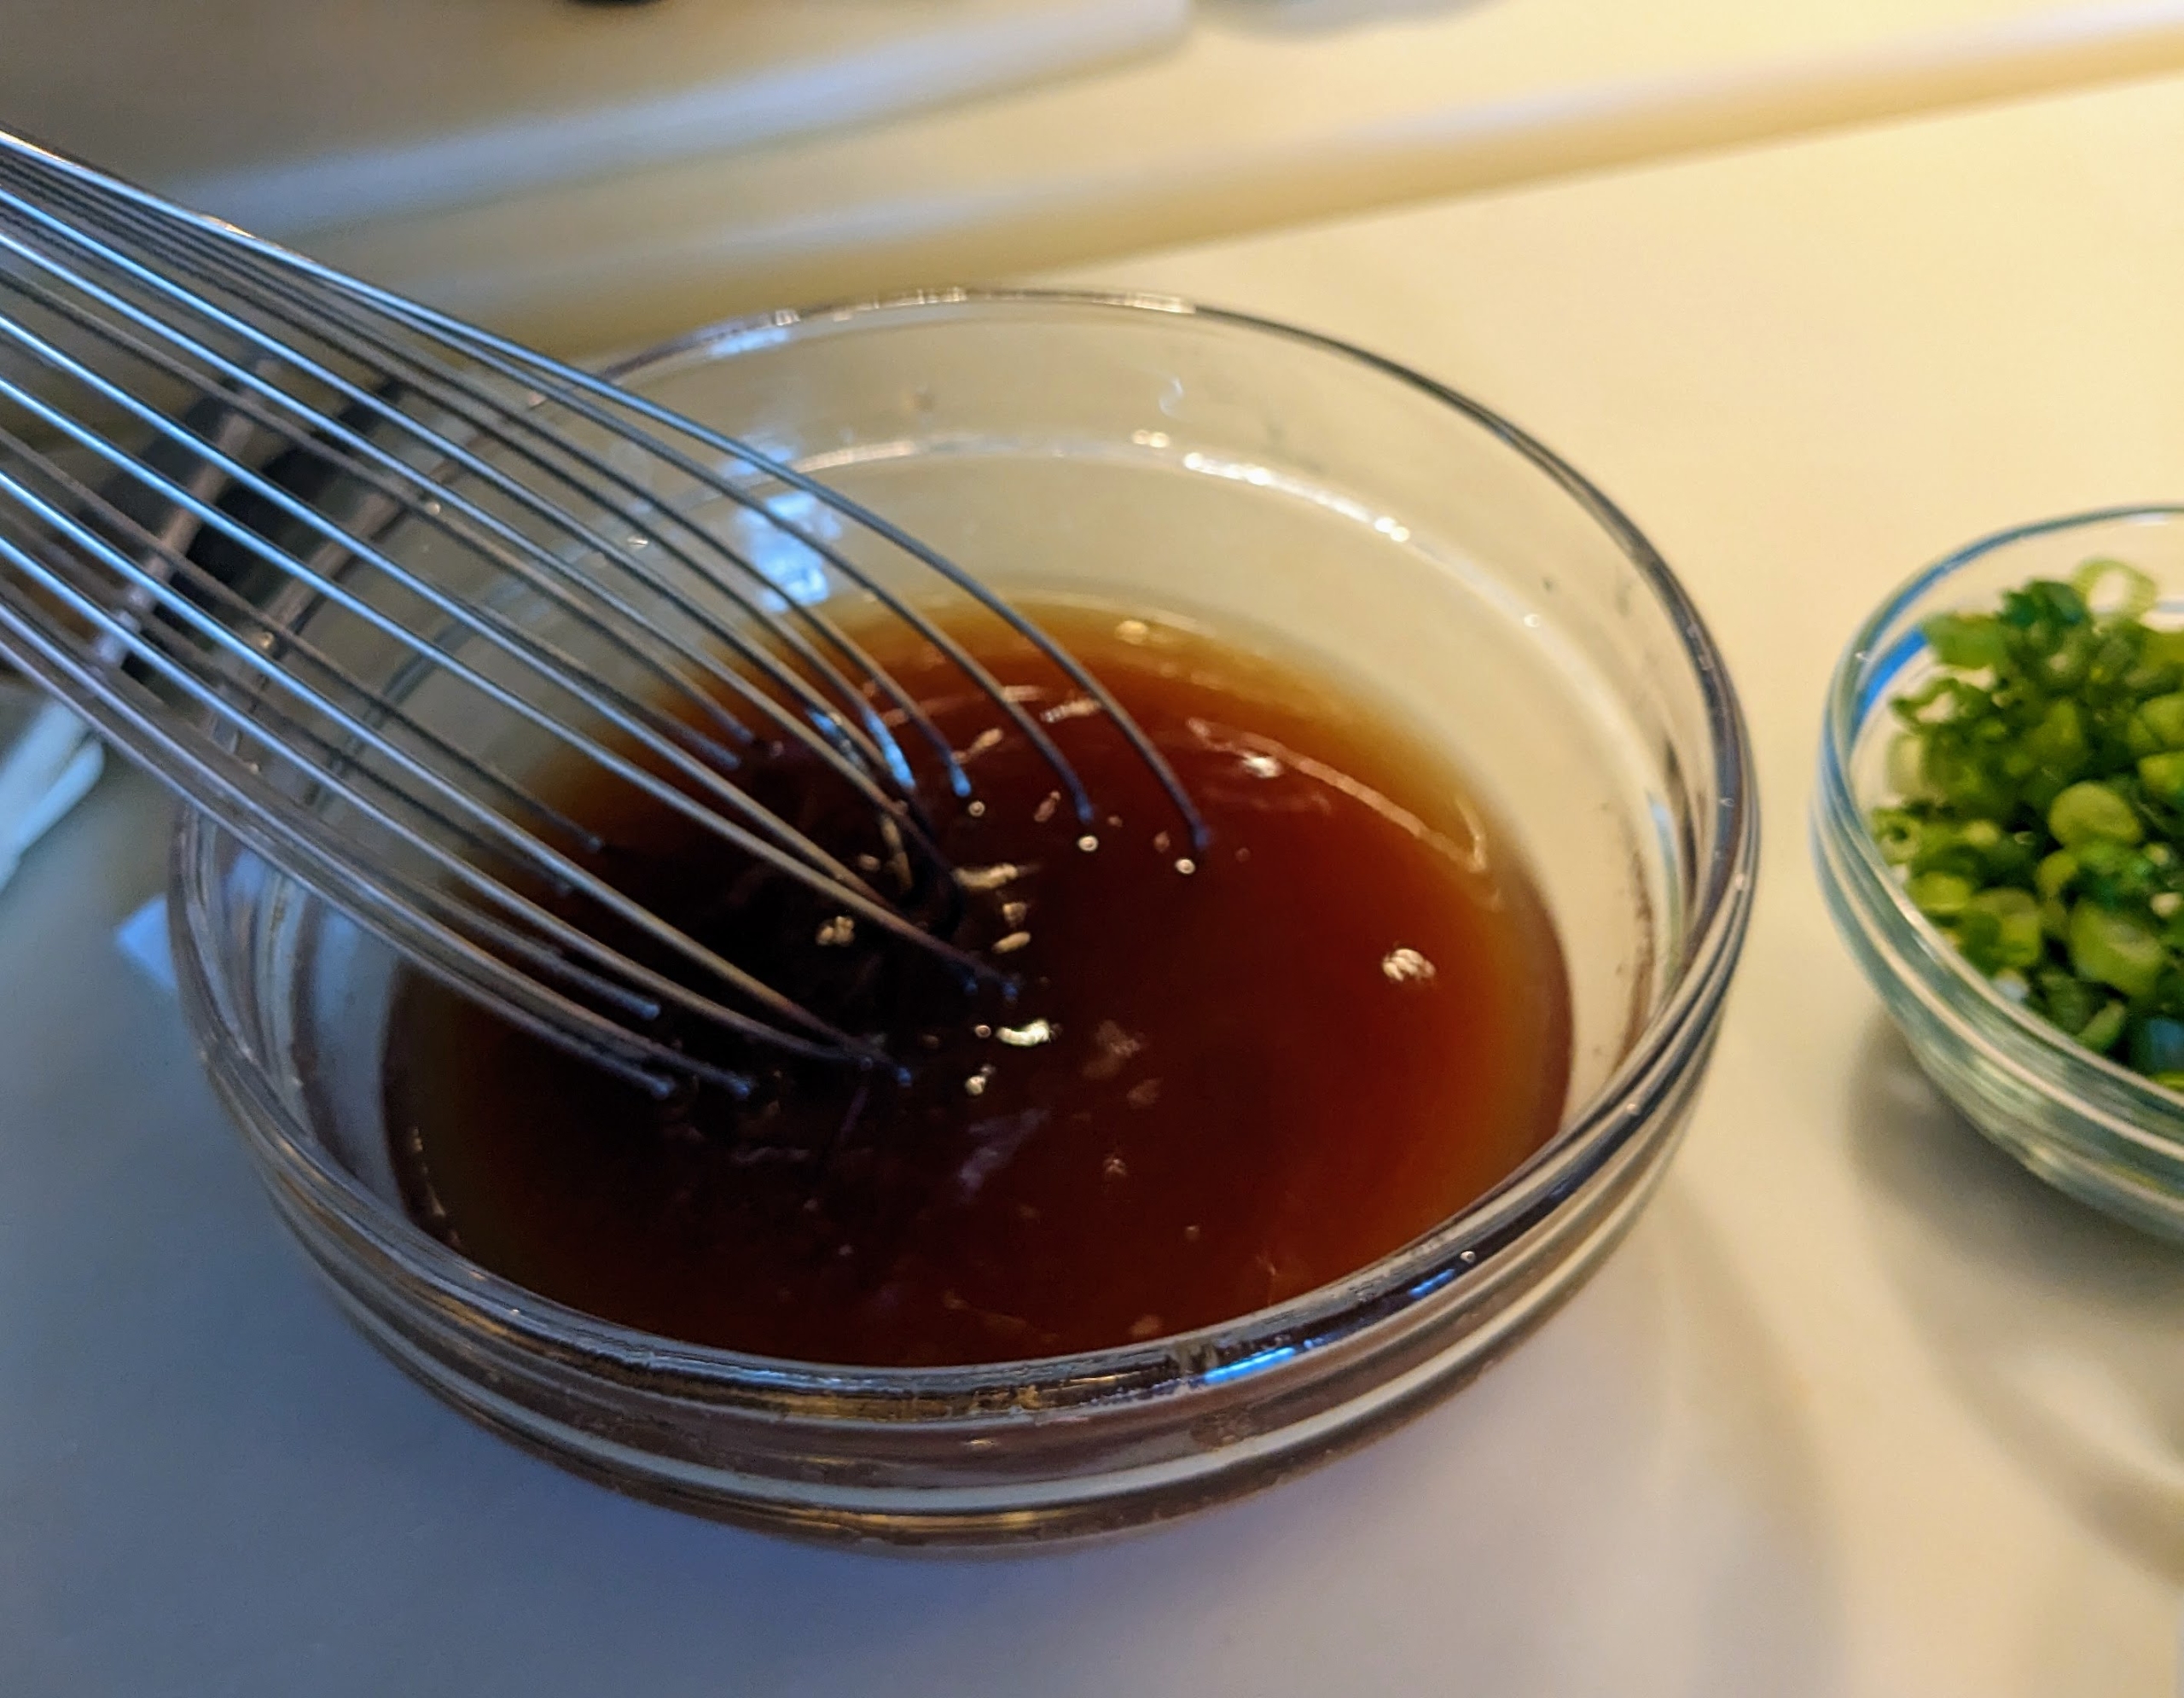
Next, the sauce is prepared. Elvira whisks together the fish sauce, sweet & sour sauce, and two tablespoons sugar.
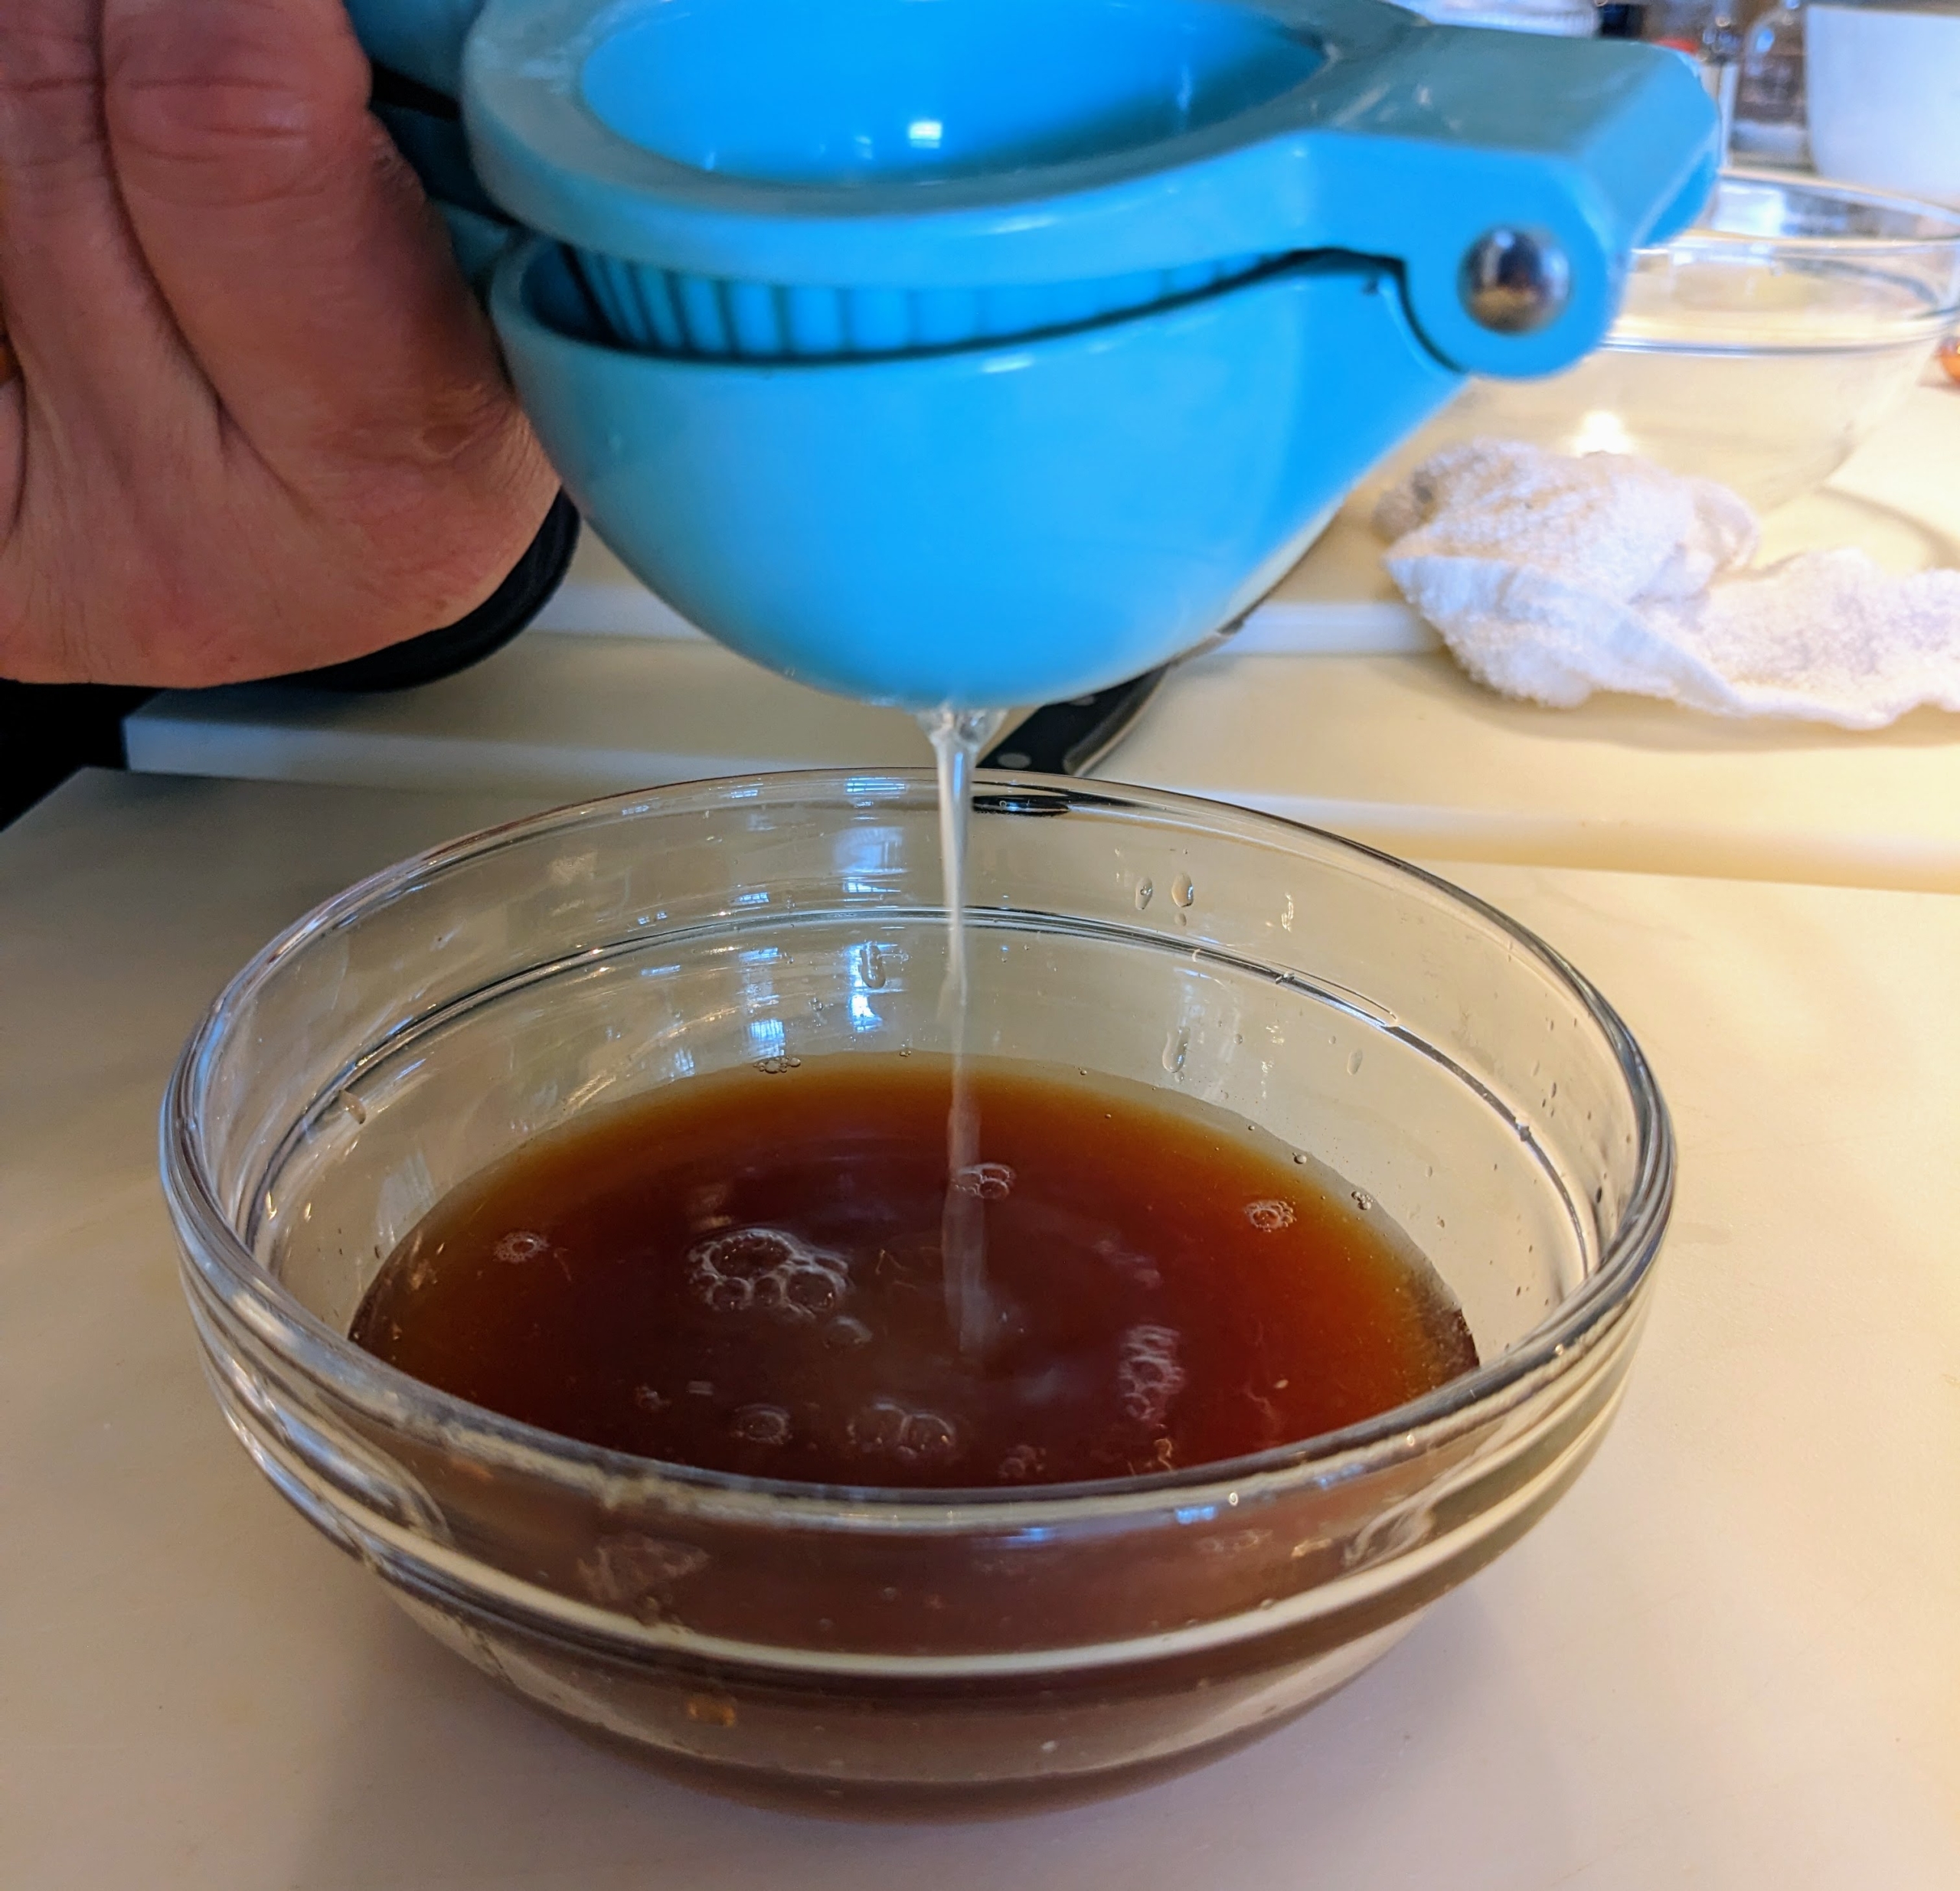
Then she adds two tablespoons lime juice into the sauce.
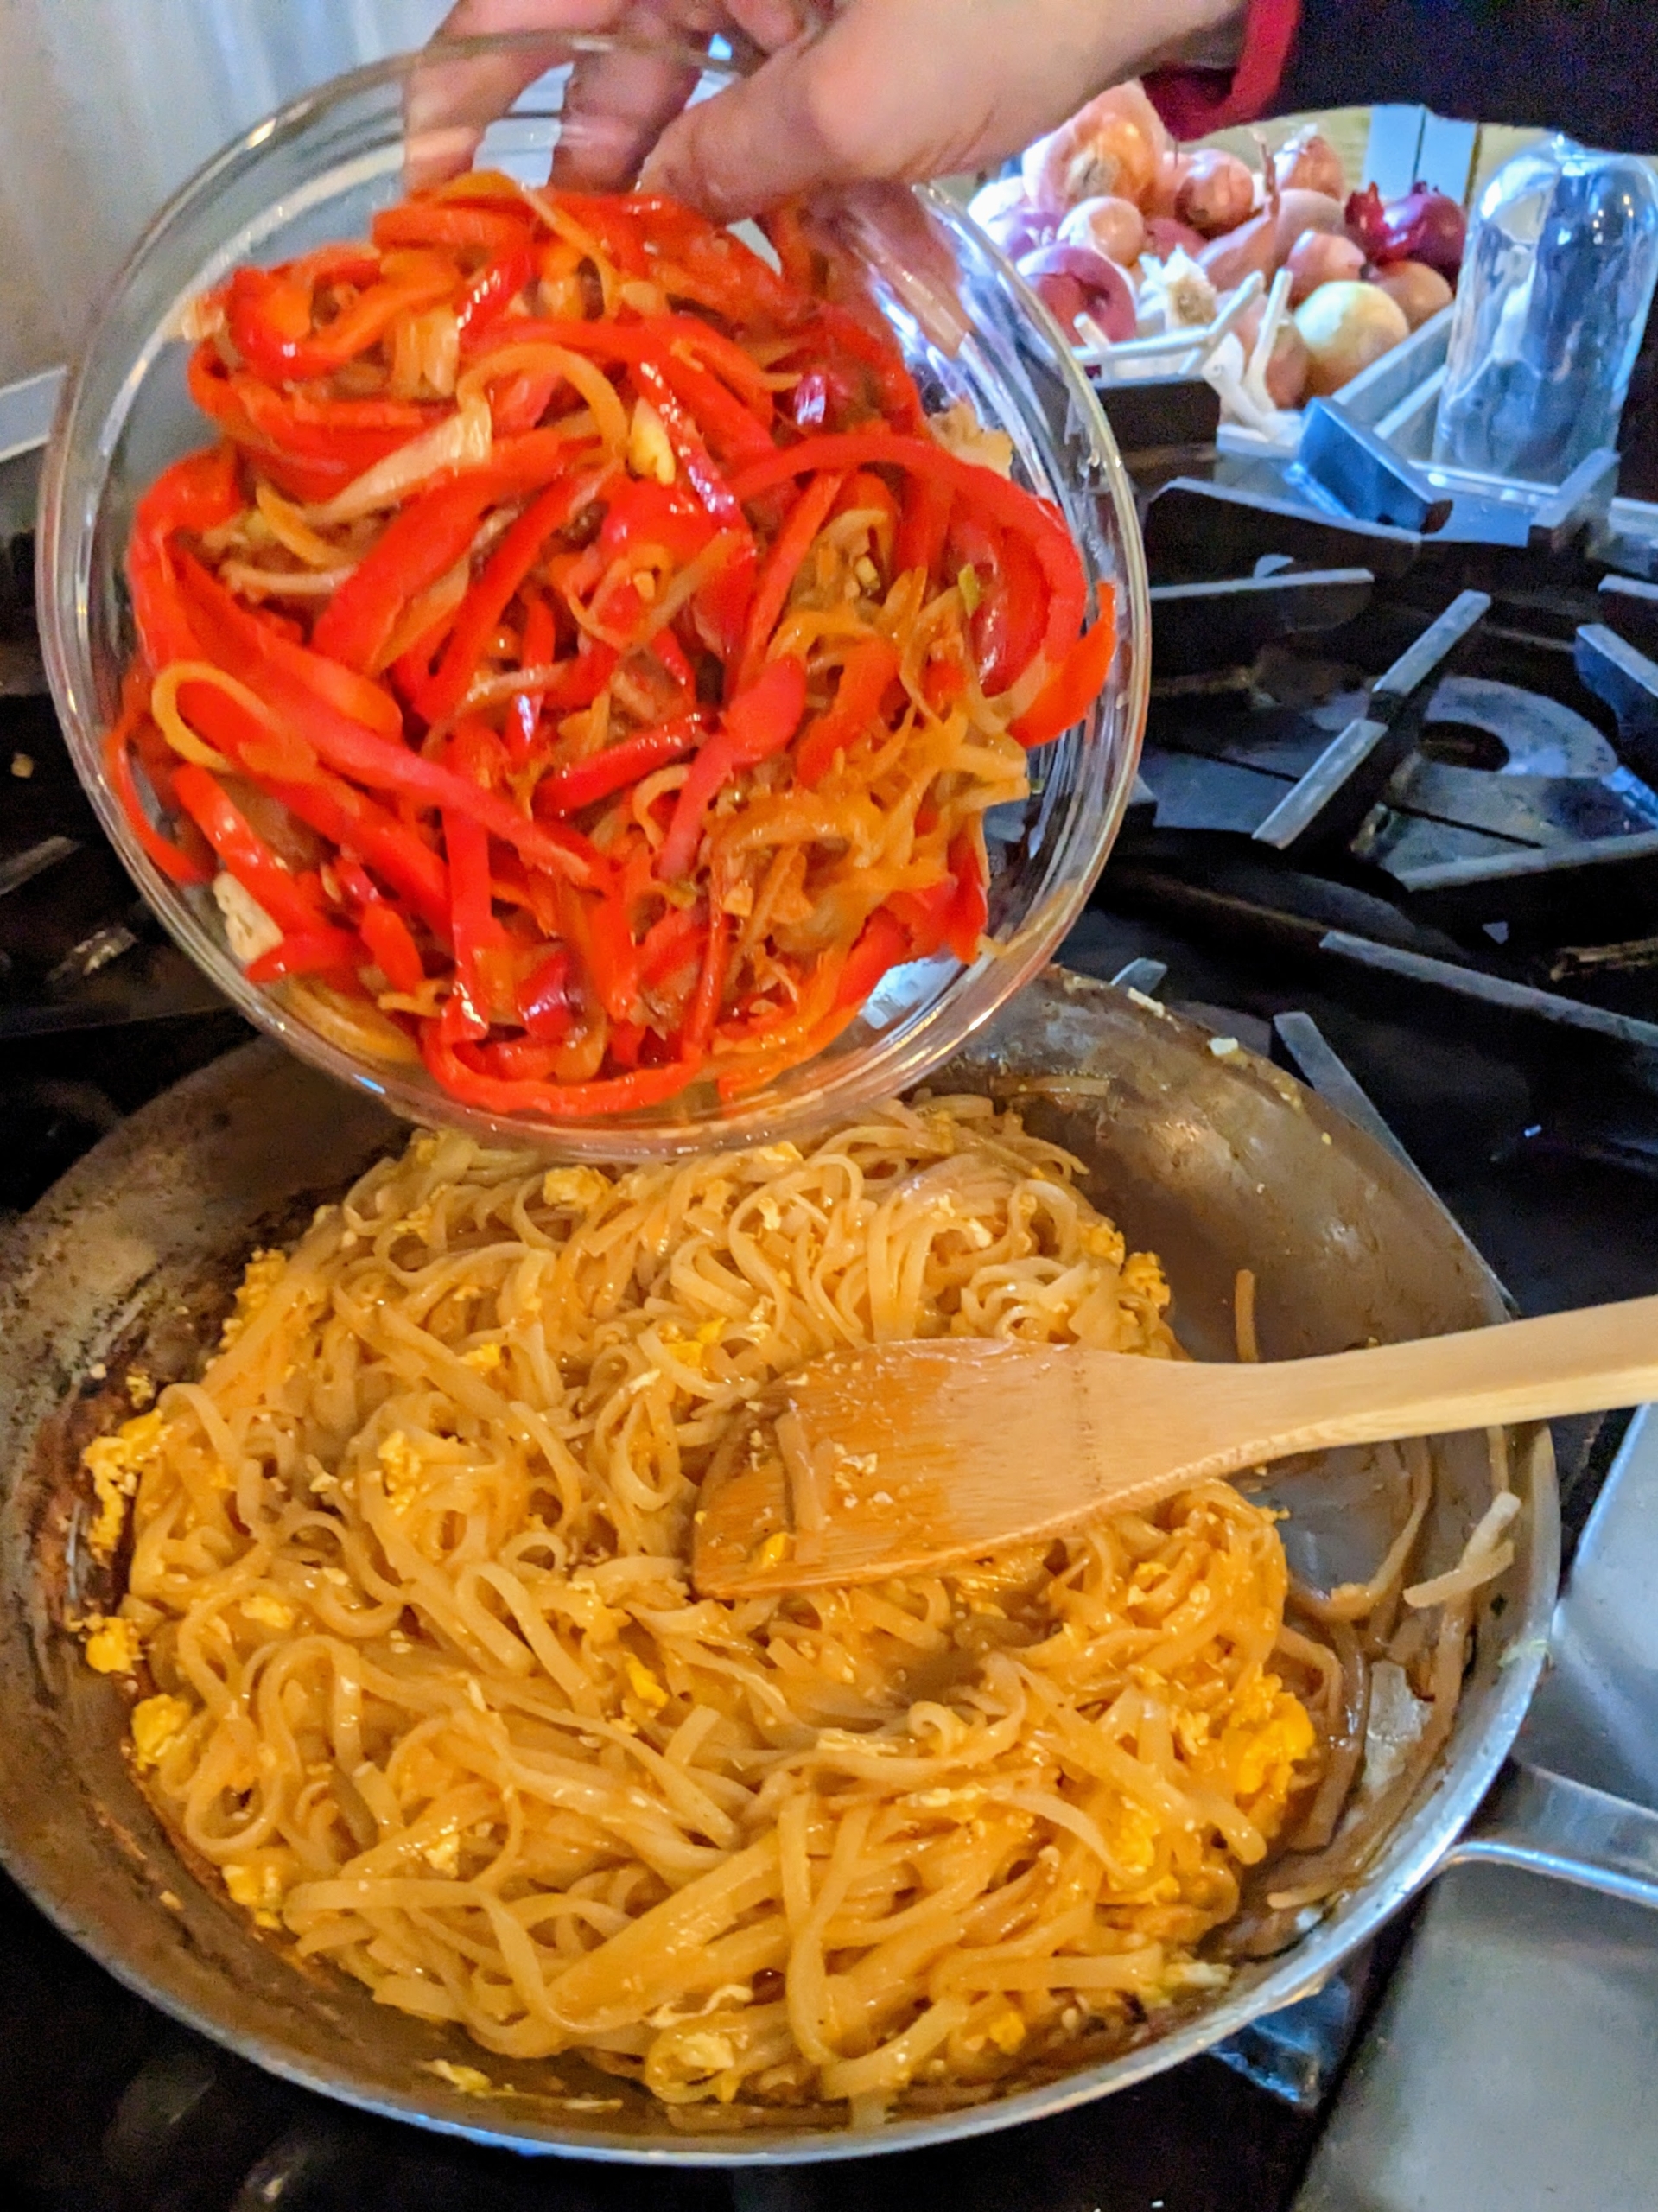
In the same skillet, Elvira adds the peppers, shallots, and scallion whites. She cooks everything until they are tender and then removes them from the skillet and adds to the same bowl as the chicken.
Once the noodles are done, they are drained and rinsed under cold water and tossed with two teaspoons oil to prevent sticking.
Elvira adds the garlic, noodles and sauce to the skillet stirring and tossing often until the noodles start to absorb the sauce. This takes about two to four minutes.
Next, the noodles are pushed to one side and the eggs are added to the empty space.
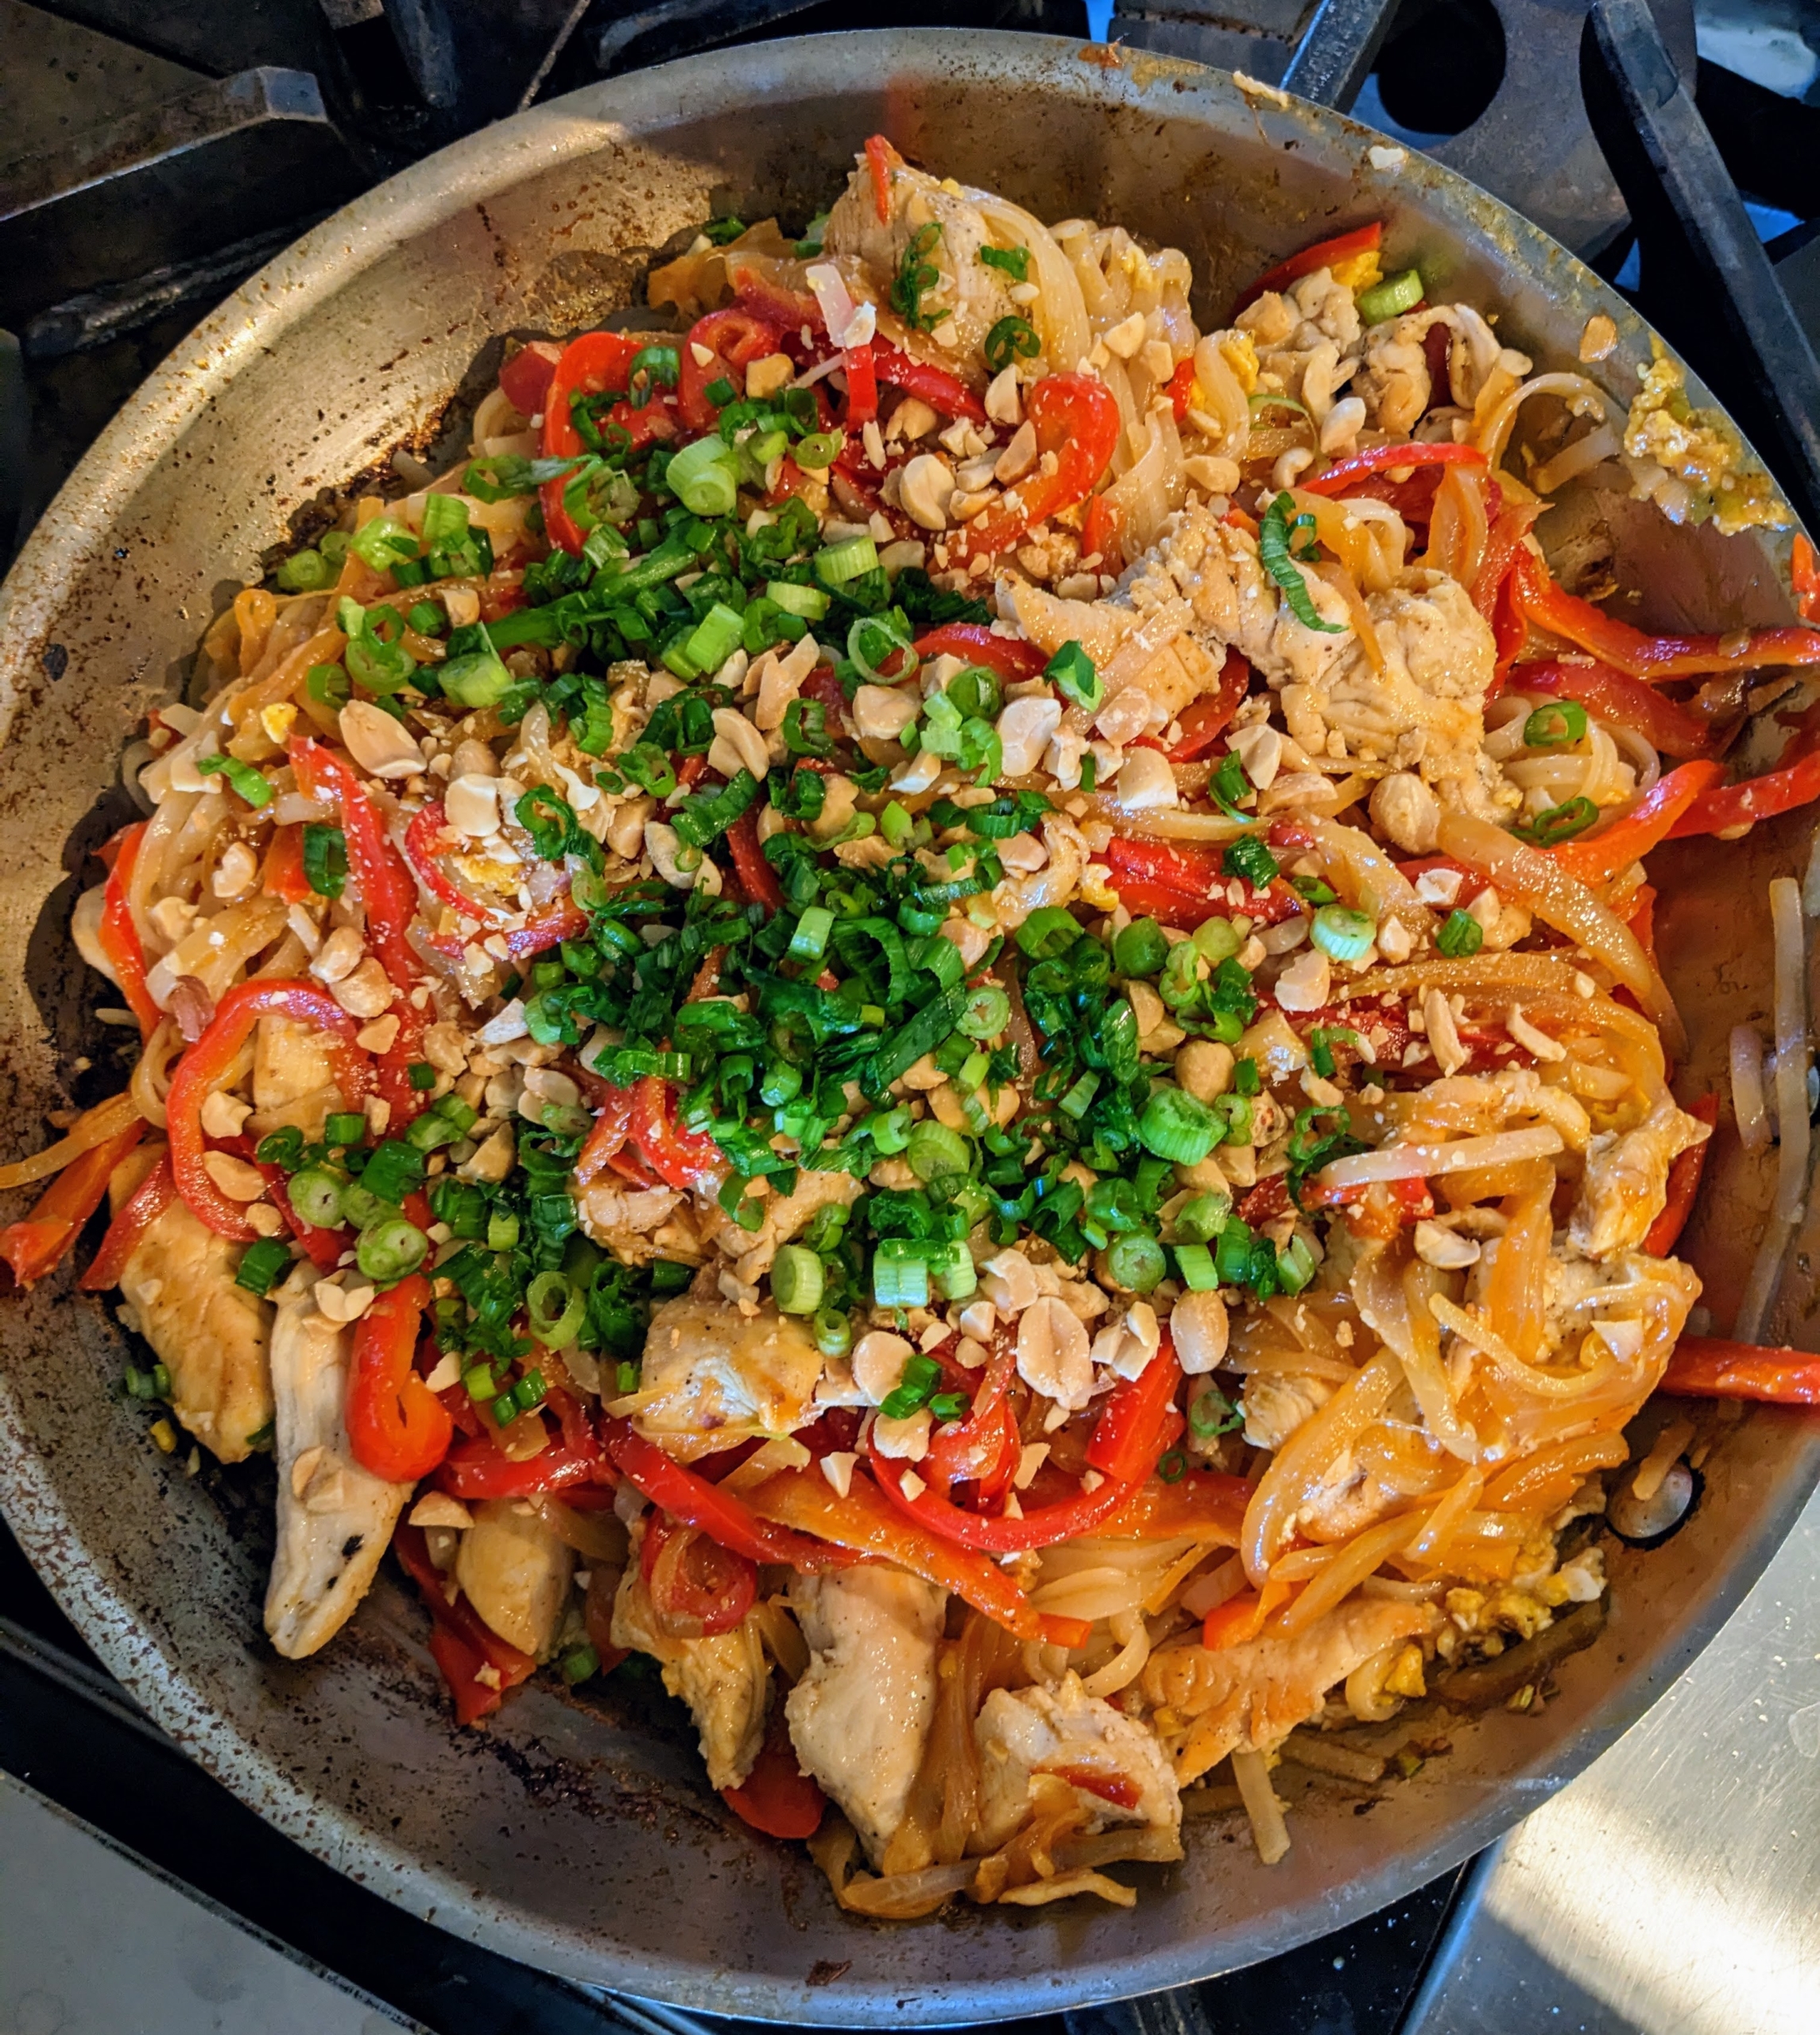
Once the eggs are broken, cooked and stirred in with the noodles, Elvira adds the chicken and vegetables.
Then she adds the peanuts, scallion dark greens and seasons with salt and pepper to taste. It’s that easy.
After just a few minutes, our Chicken Pad Thai with Peppers, Peanuts & Lime looks great just like the photo. Serve with a lime wedges on the side and it’s ready – a delicious meal on a very cold winter day. Be sure to visit Martha Stewart & Marley Spoon today and sign up!
Be sure to tune in to my latest podcast on the iHeart media app, Apple Podcasts, or wherever you get your podcasts. We're releasing another interesting and fun episode today - this one with three longtime devotees of the Martha Stewart brand.
Many of you who follow this blog have also read my magazines, watched my television shows, and purchased my products. Over the years, I've worked hard to build and nurture an effective brand that not only provides how-to content, but also imparts interesting information that teaches, delights, and inspires. Andrew Ritchie, Bernie Wong, and Dennis Landon have not only supported me and the brand, but have also shared their experiences and all they've learned with others. Andrew is the creator of the “Martha Moments” blog and online community. Bernie and Dennis post their gardening, baking, and entertaining projects through Instagram @BernieWongGreen. And all three continue to heed one of my own favorite sayings - "learn something new every day."
Enjoy these photos and remember to listen to today's podcast.
Andrew designed and founded his “Martha Moments” blog in 2006 as a content archive written for fans and collectors of the Martha Stewart brand. It was a big hit and continues to delight readers 17 years later.
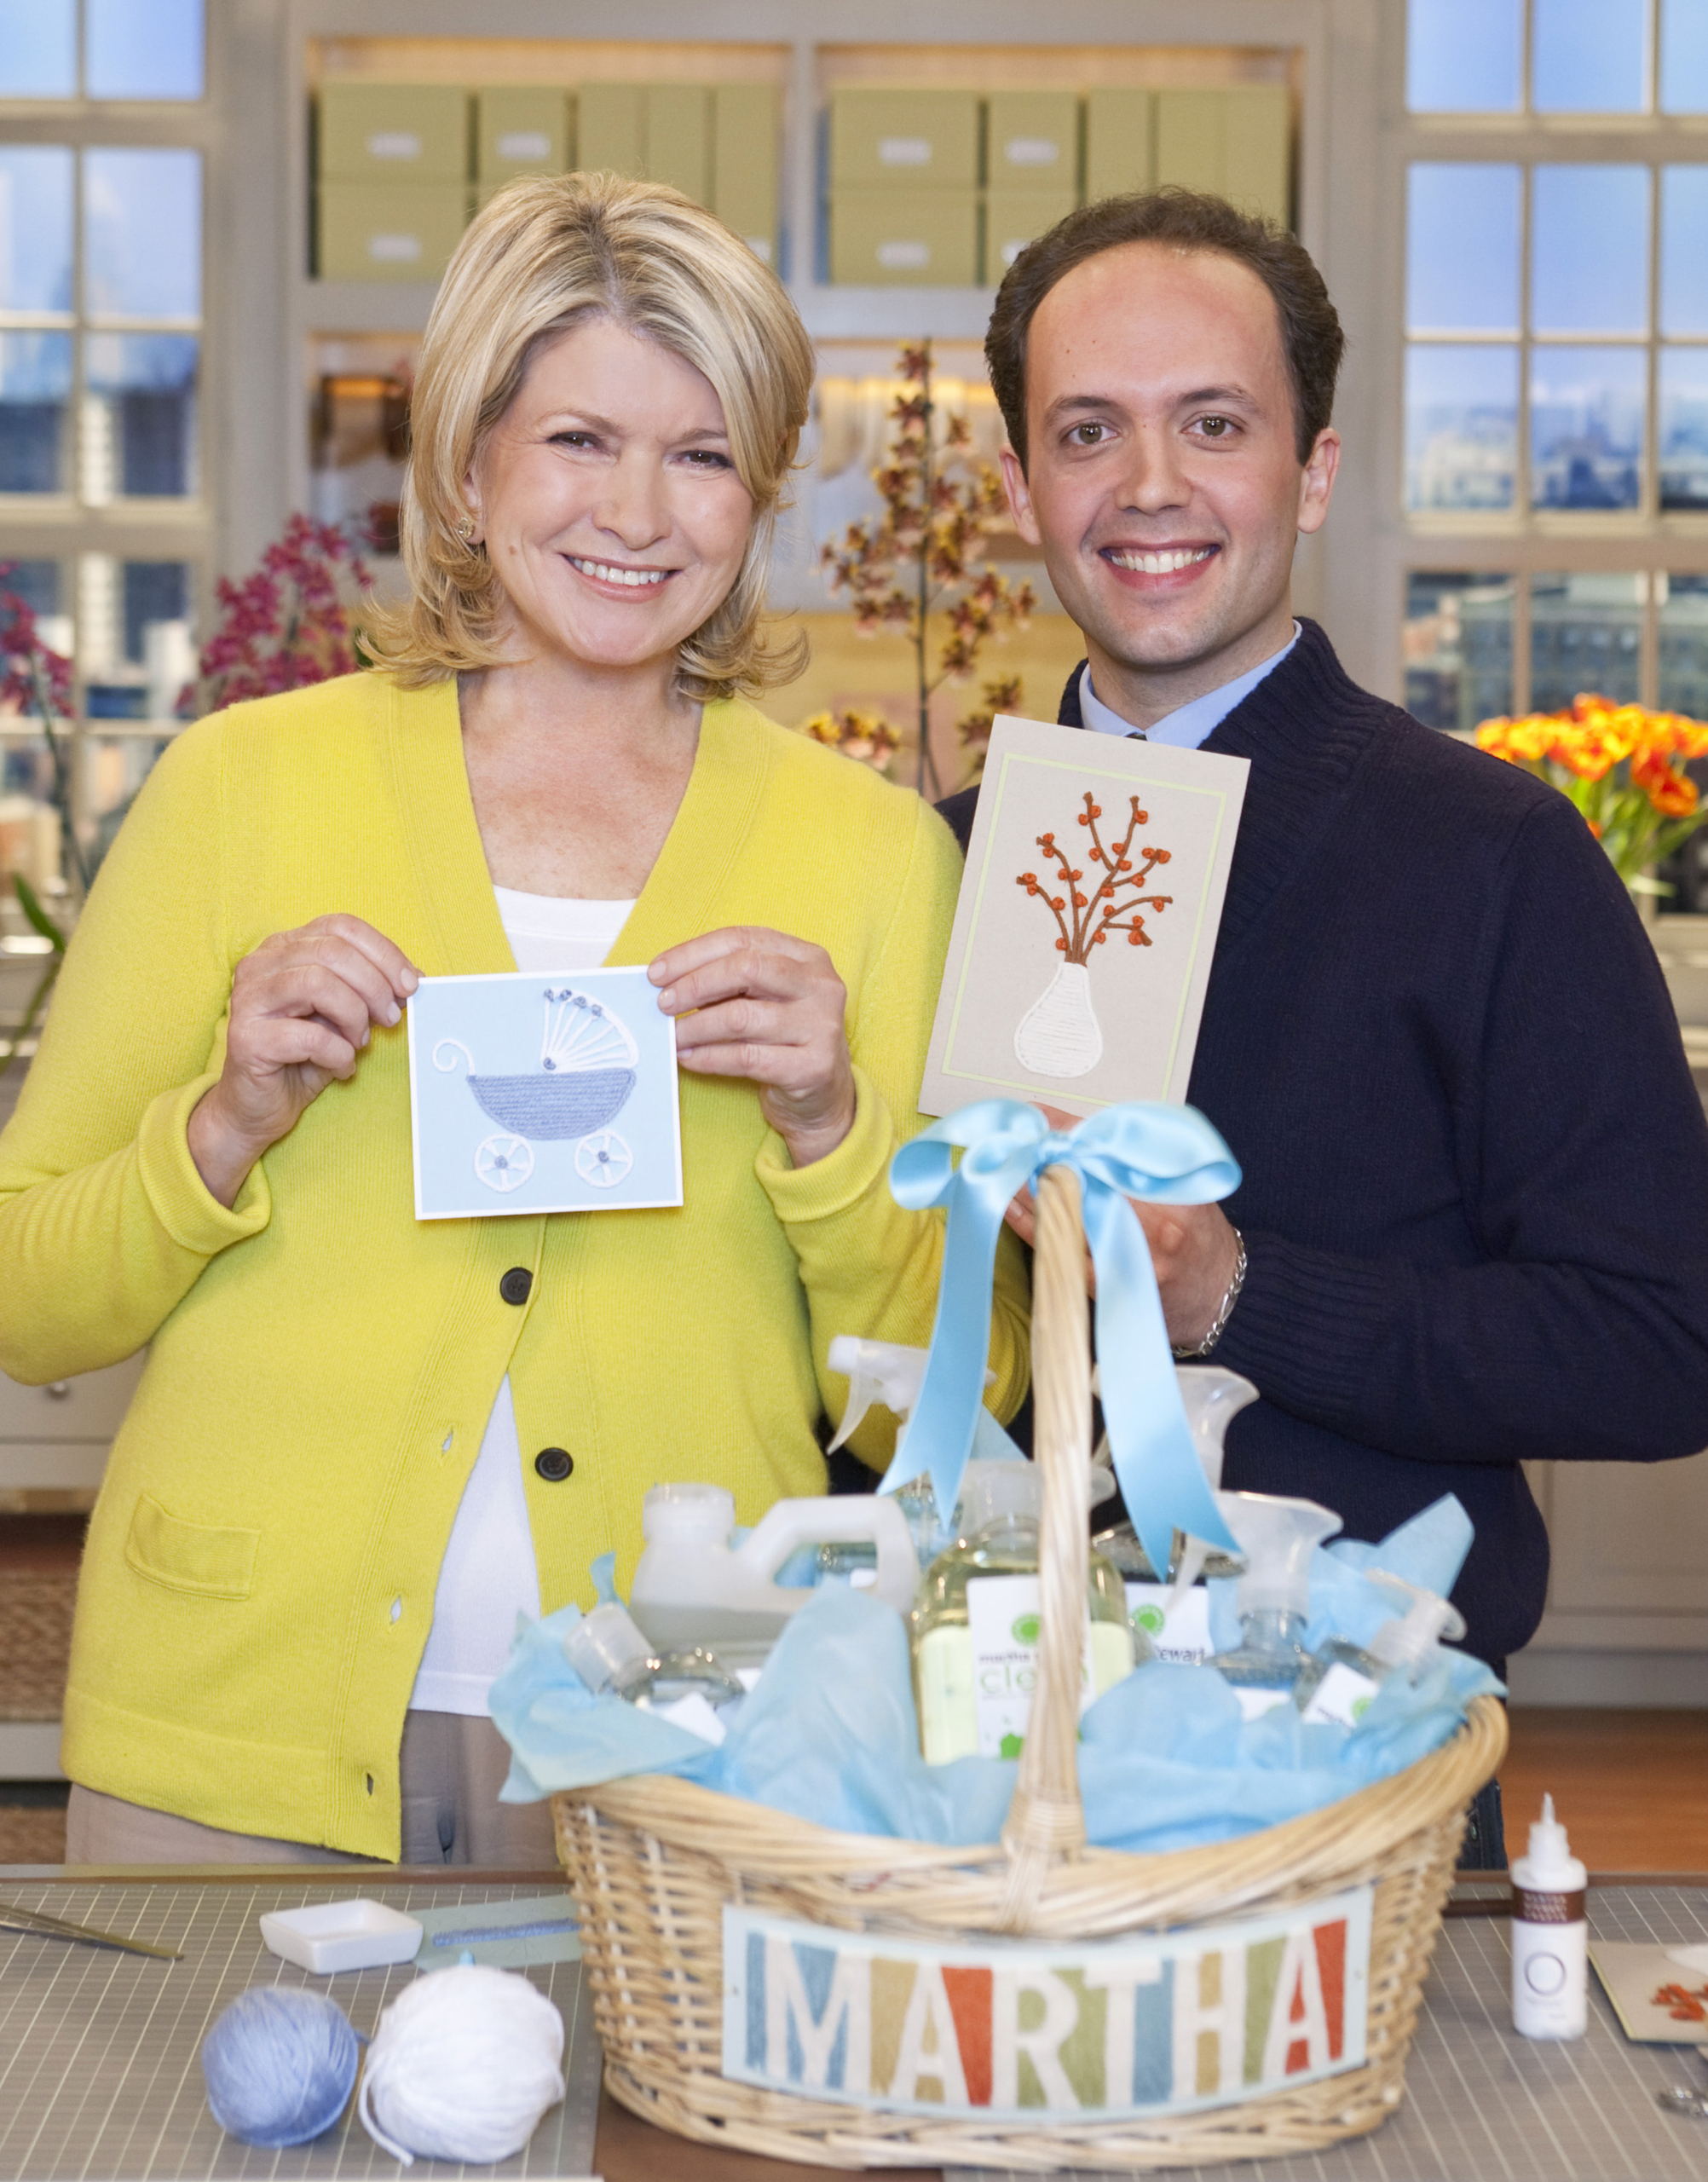
I invited Andrew to talk about his blog on my television show in 2010. Here’s a photo of us on set. I taught him how to make yarn cards. Andrew says it was his “first big Martha Moment!”
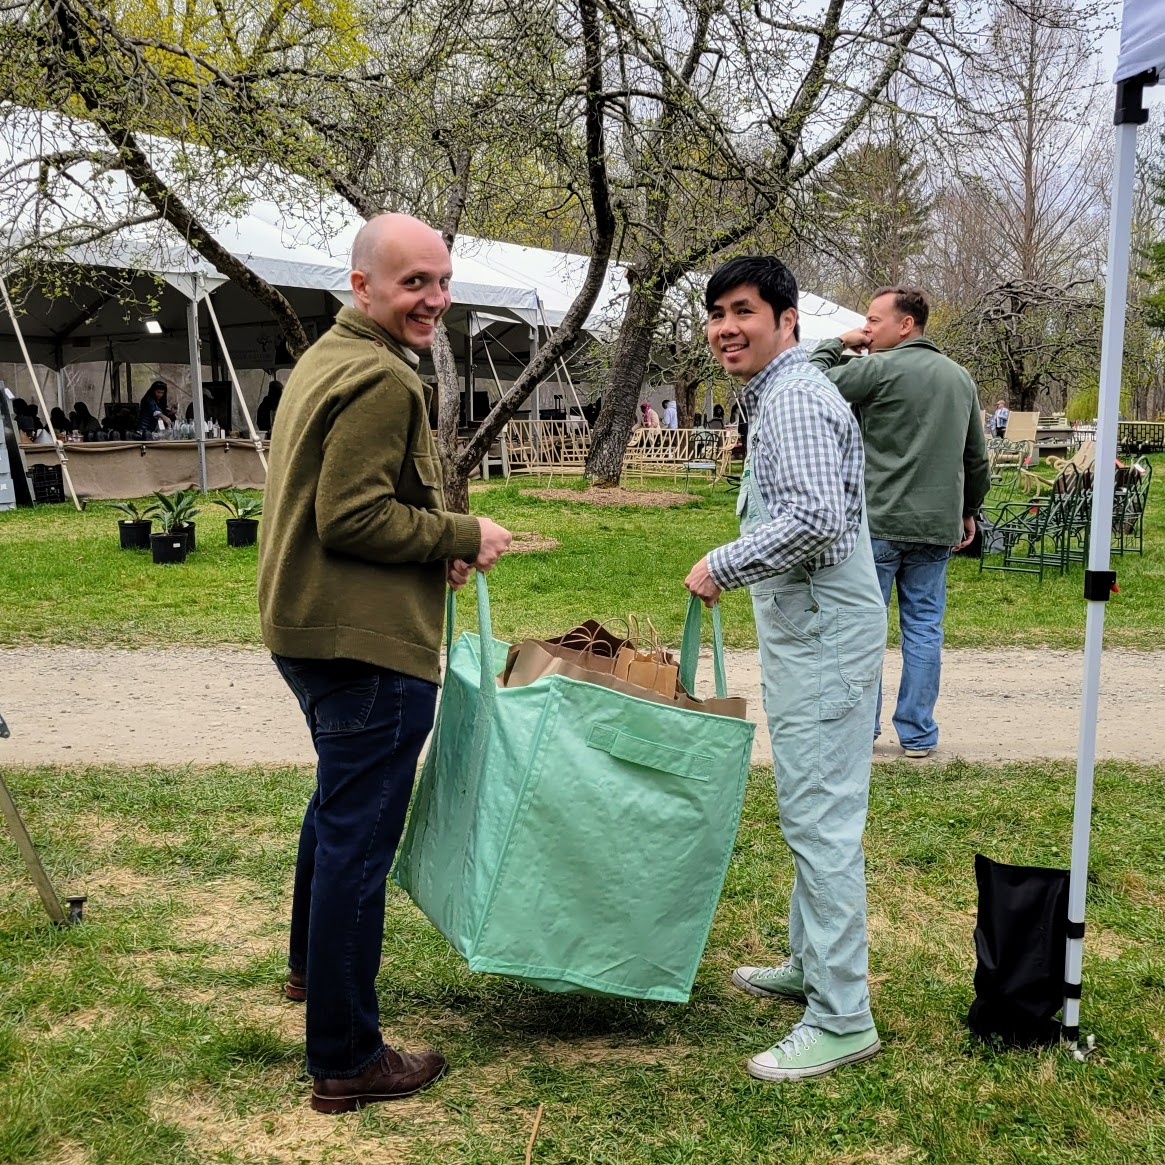
Andrew, Bernie, and Dennis first met through “Martha Moments” – listen to their stories on my podcast. They then traveled from their home states to attend my “Great American Tag Sale” last year. Here they are on the shuttle van.
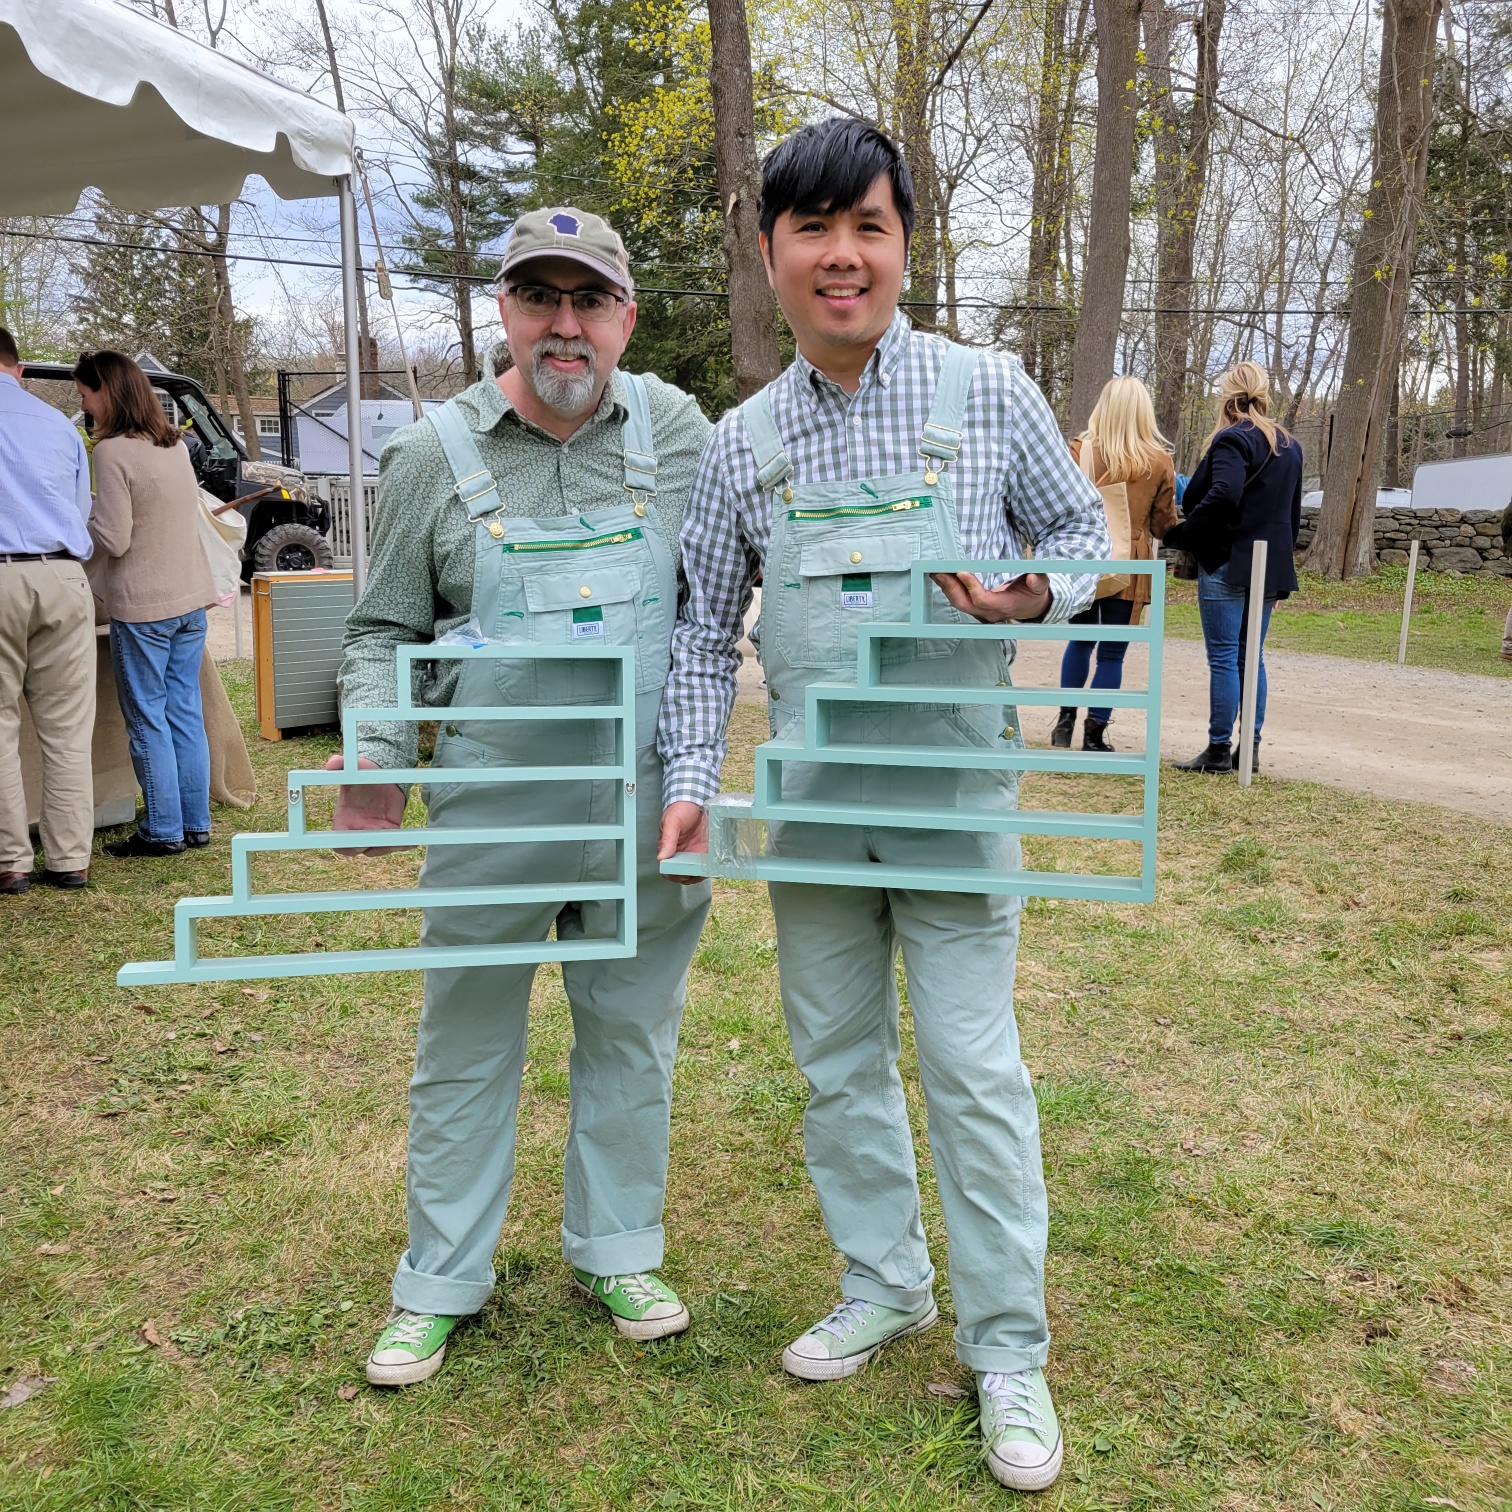
I met Bernie and Dennis at the tag sale. Here is a photo of the three of us. If you also came to my tag sale, you may have seen them too – in their matching “Martha green” overalls.
All three of them got a ton of great items from the sale.
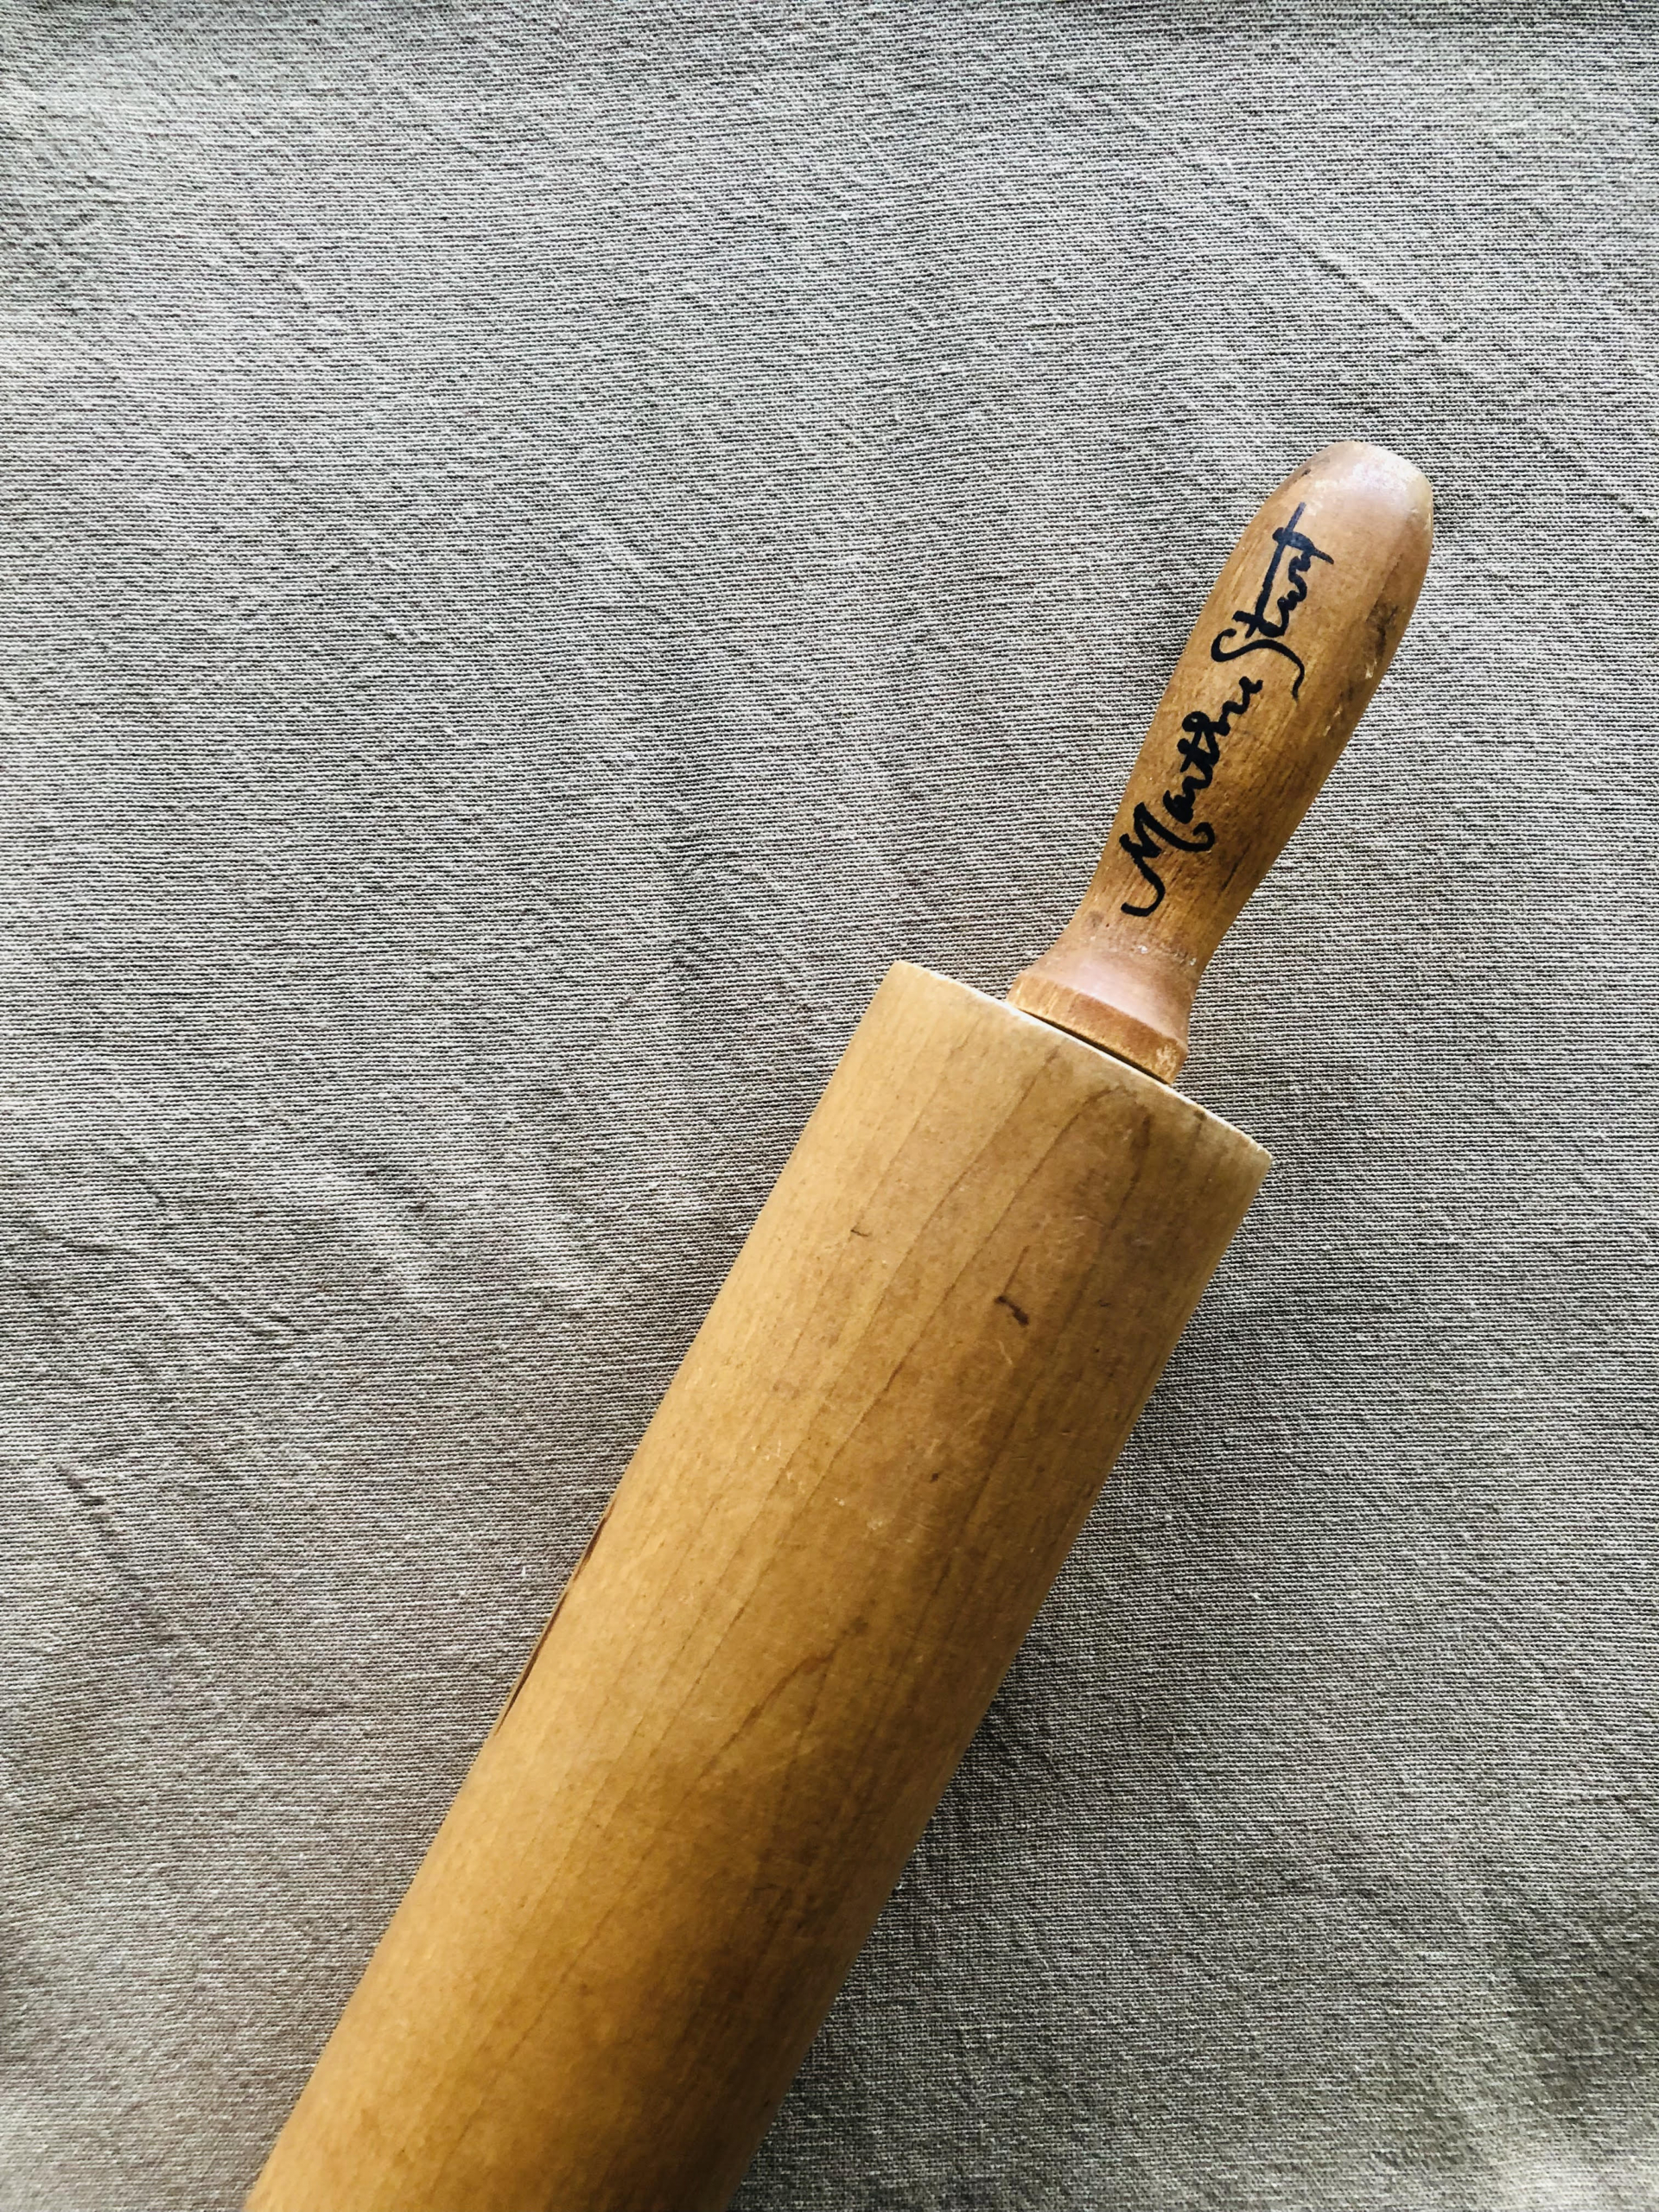
Andrew purchased this rolling pin from the tag sale and asked me to sign it for him.
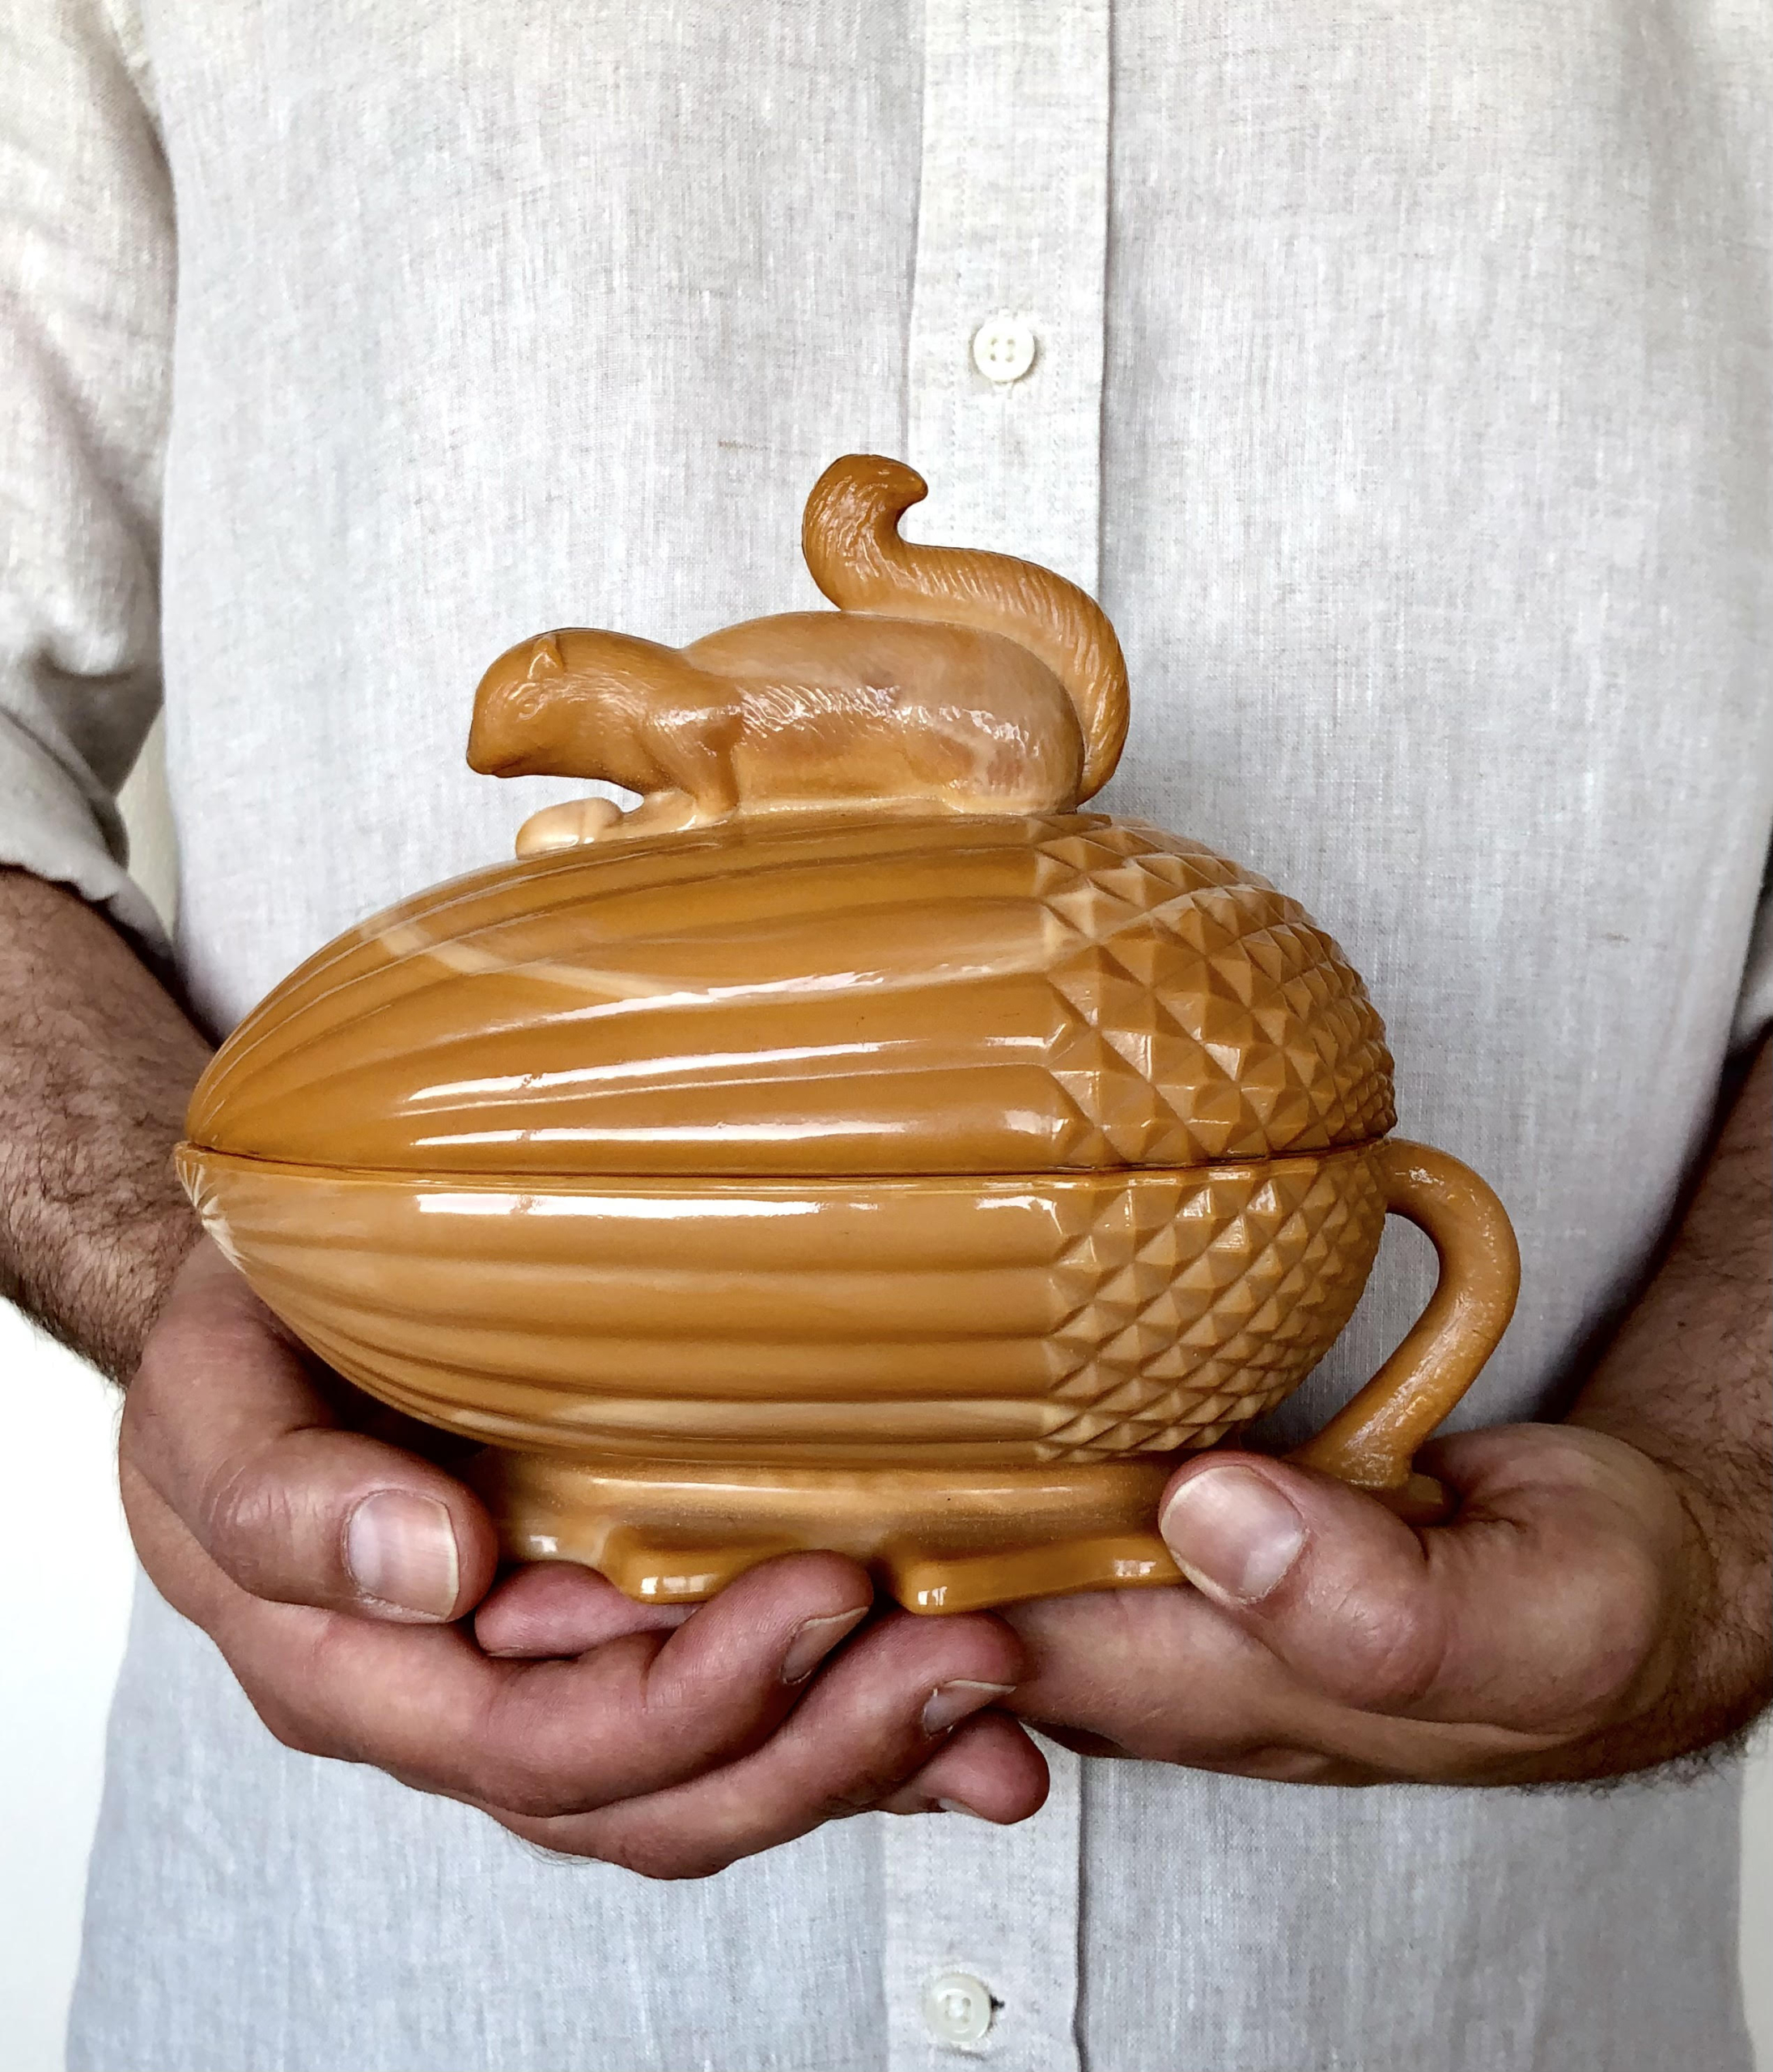
Andrew also got a Martha by Mail squirrel and acorn caramel glass dish, which he long wanted and was so excited to find. Martha by Mail was our mail order catalog. It was loved by so many.
Dennis and Bernie bought these Martha by Mail spice racks.
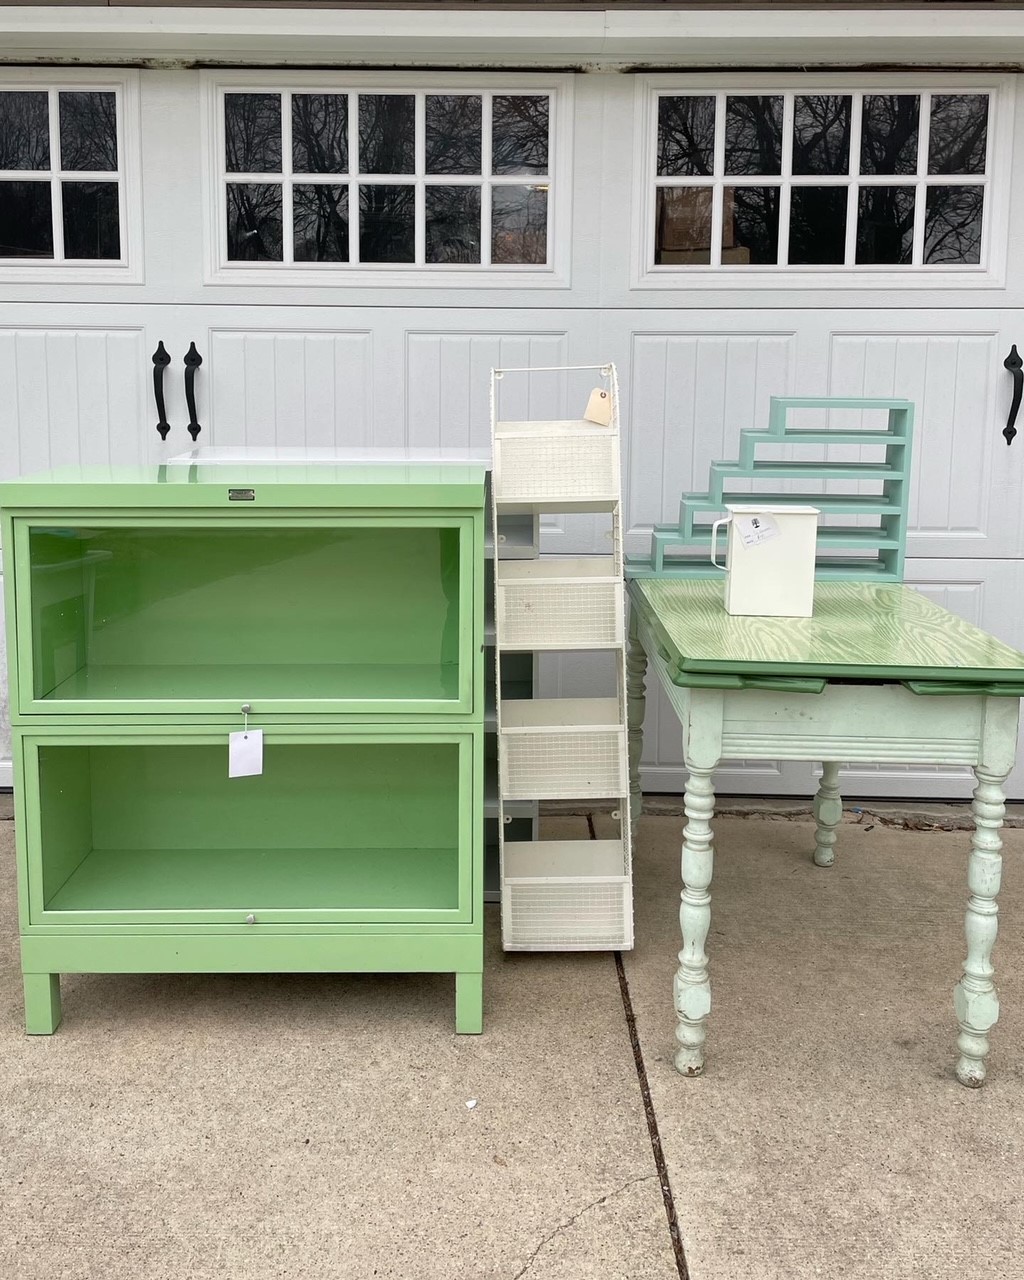
Bernie and Dennis drove all their tag sale finds home in a trailer – they love green.
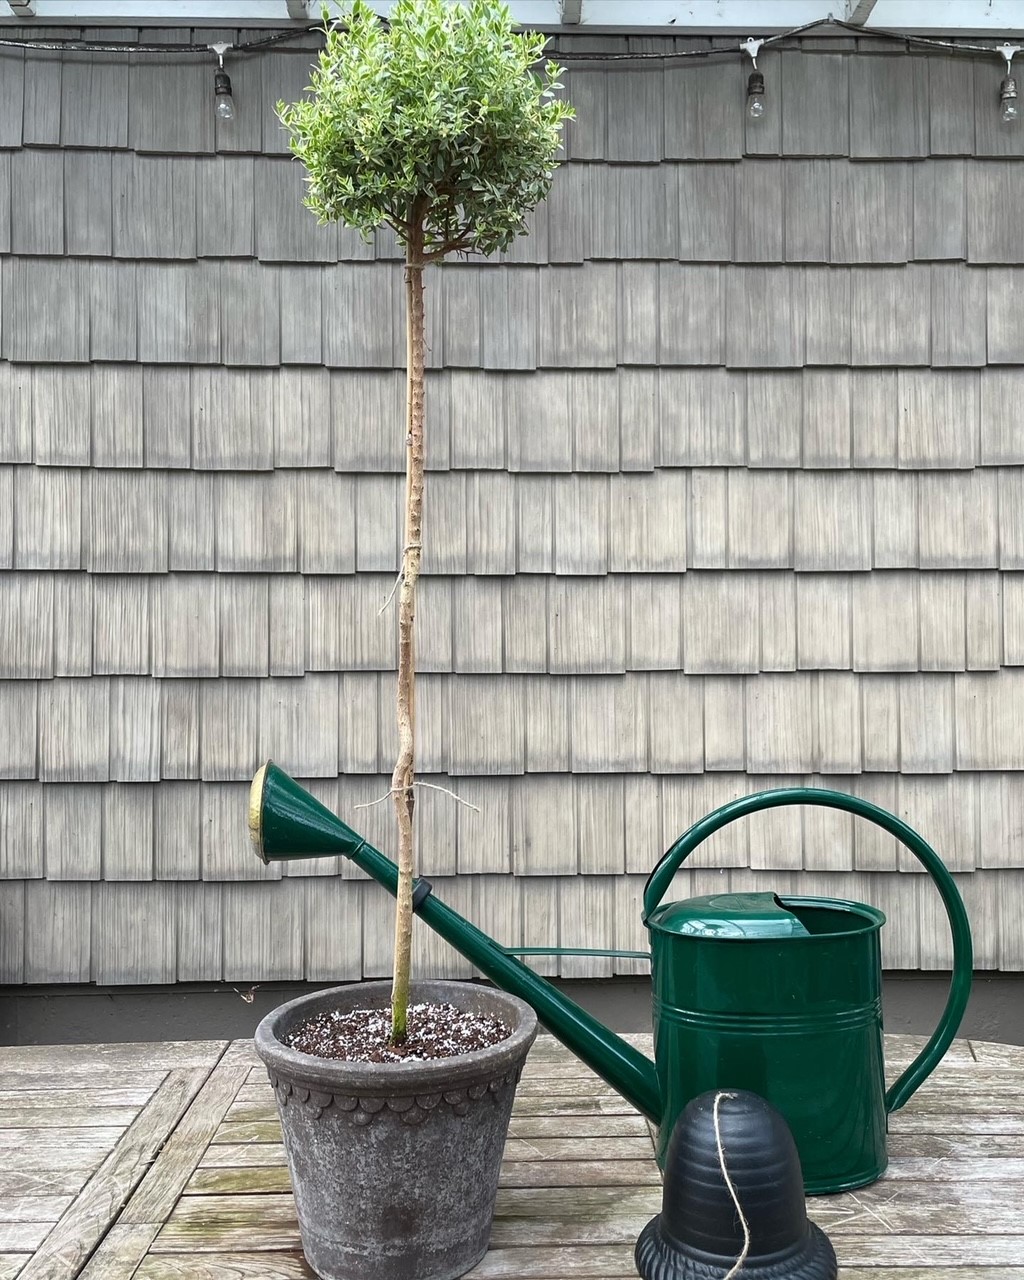
They are avid gardeners. Here’s their favorite watering can and cast iron twine dispenser – also bought at the tag sale.
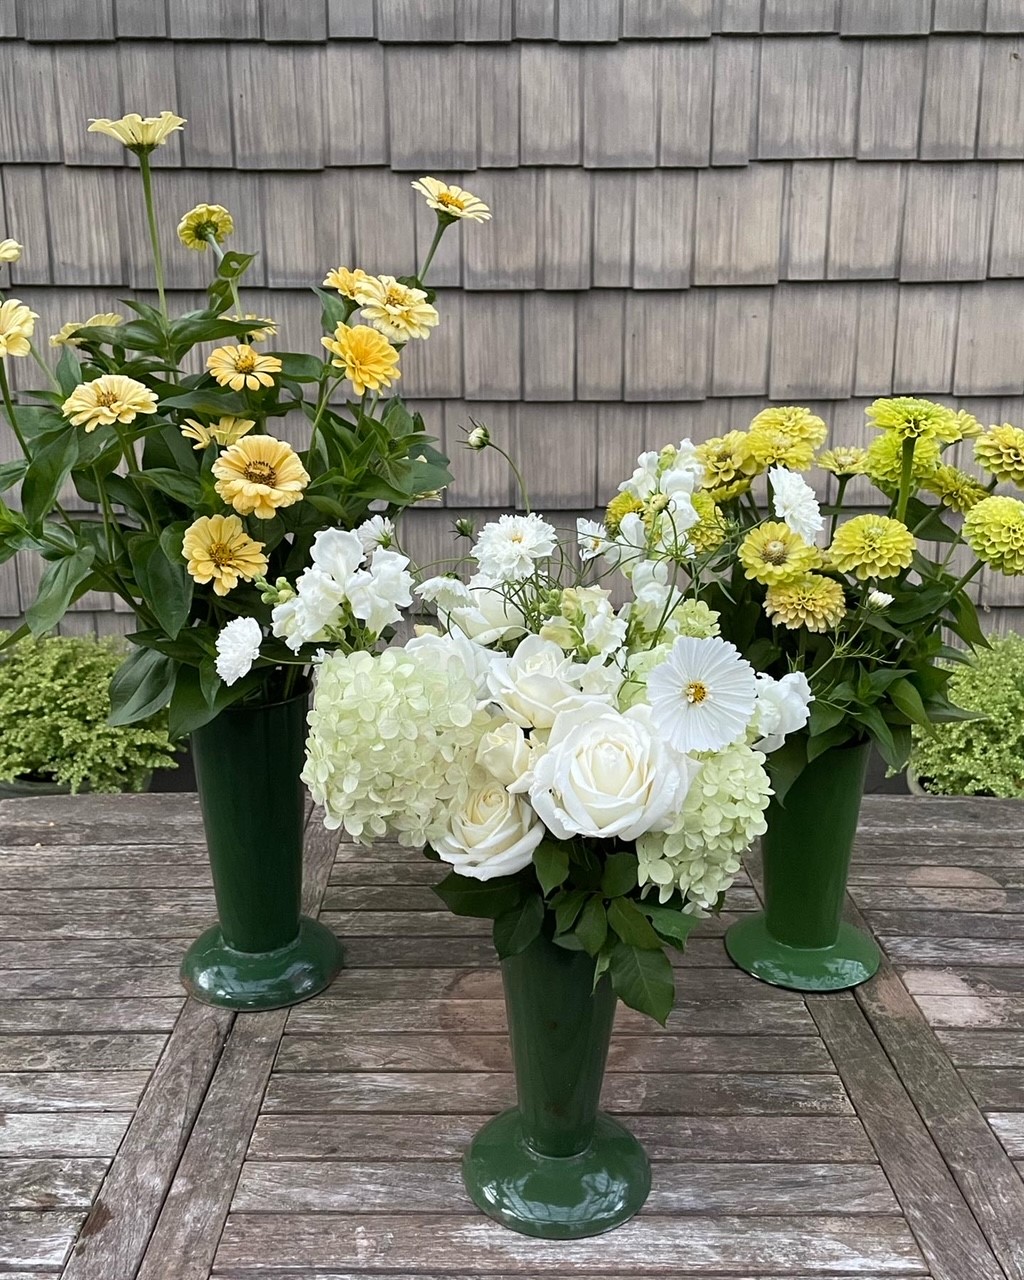
And green enamel flower holders from the tag sale with flowers from their garden.
Here’s Andrew’s new wicker plant stand that I used to display potted plants in my Tenant House here at Bedford. Now it’s home to a Boston fern in Andrew’s dining room in Ottawa, Canada.
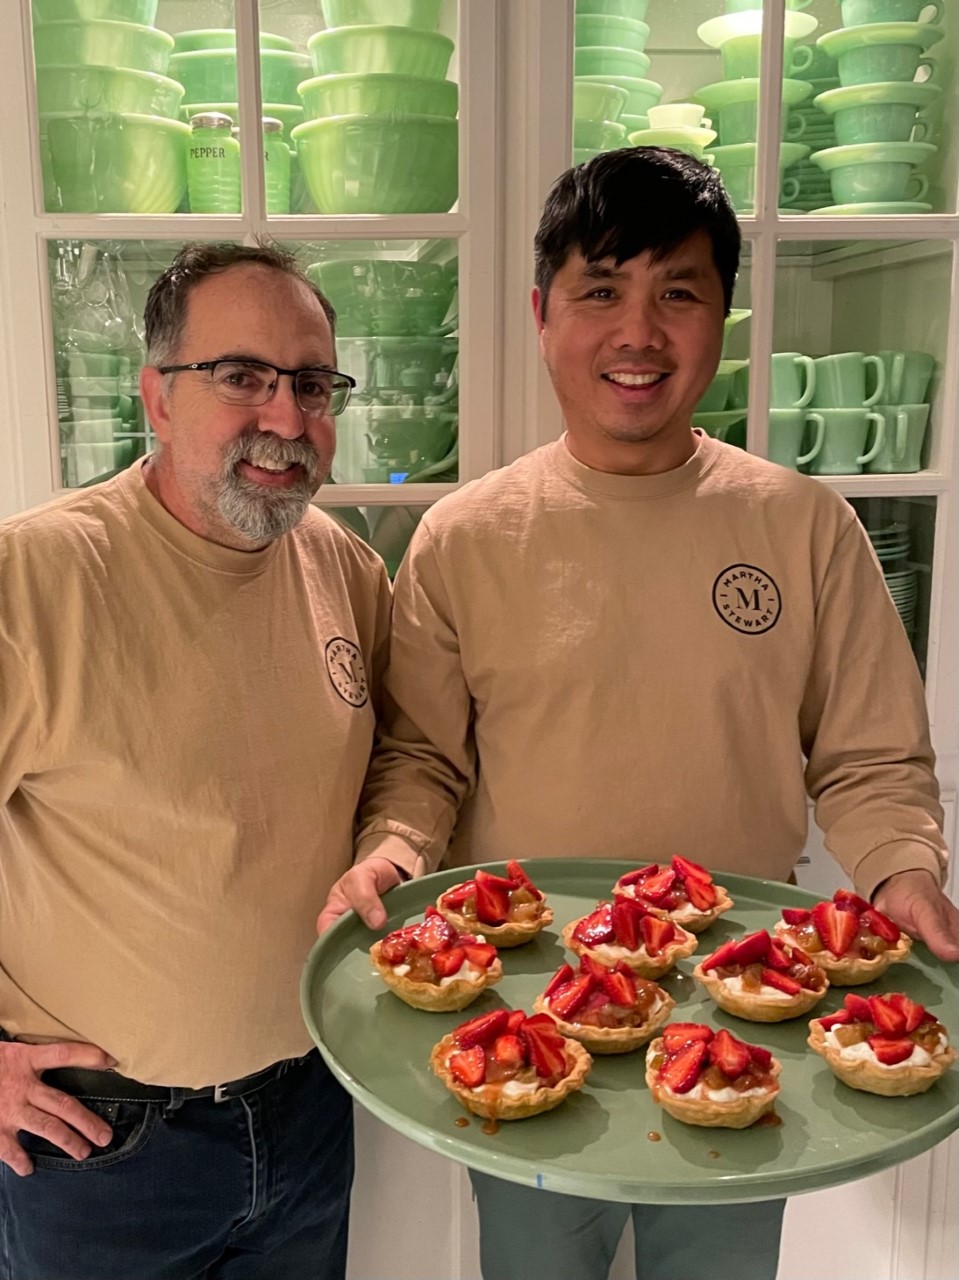
Weeks later, Dennis and Bernie hosted a viewing party to watch the Great American Tag Sale show. Here they are serving up treats on a Martha by Mail tray.
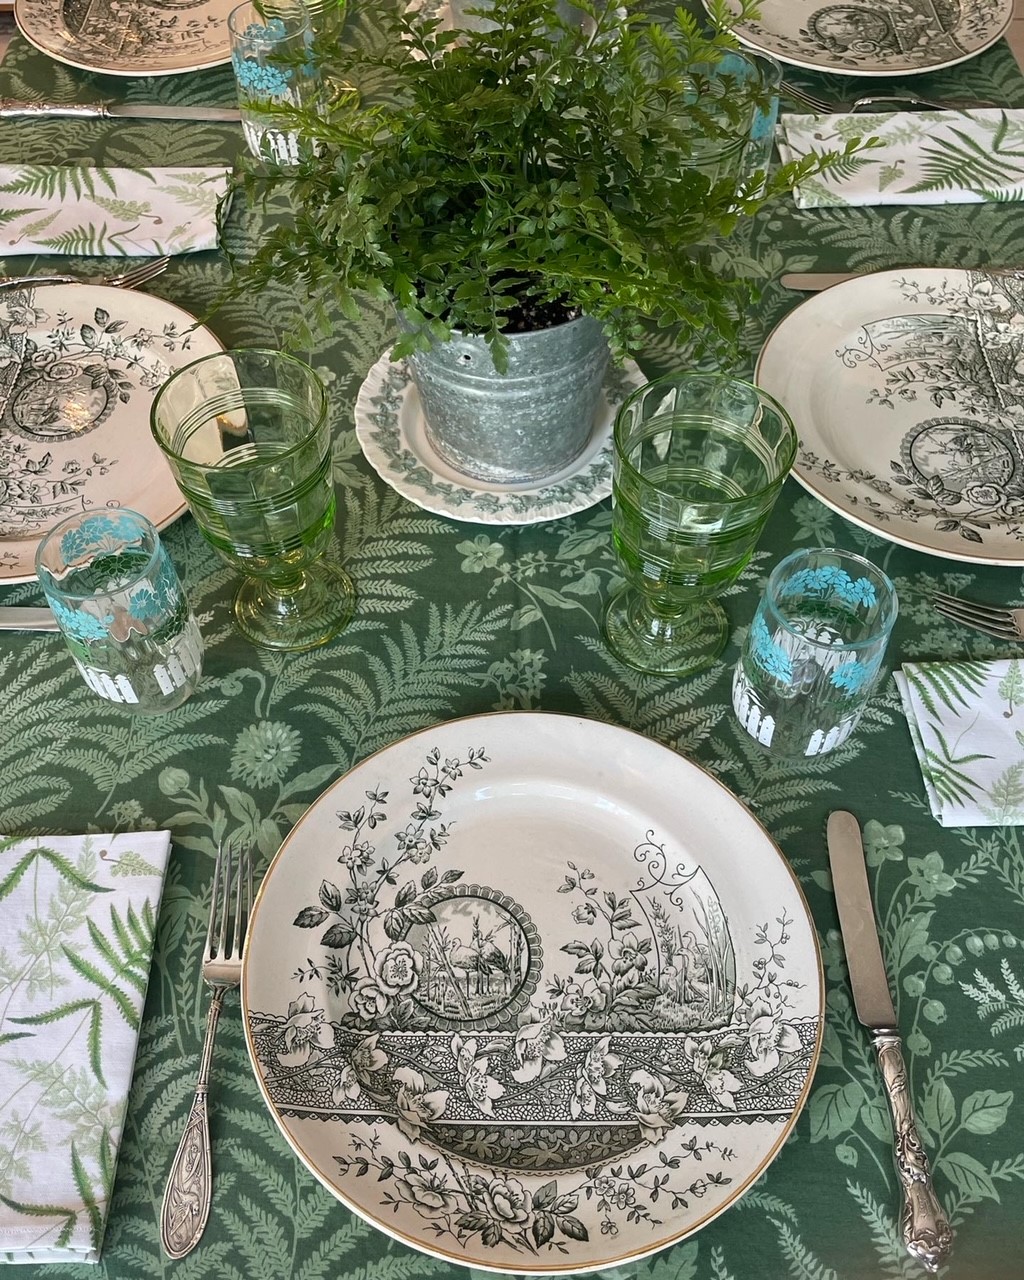
In this photo, their table is set for lunch with a fellow “Martha Moments” friend. Many of their entertaining and table setting ideas were inspired by my shows and the stories in our magazines.
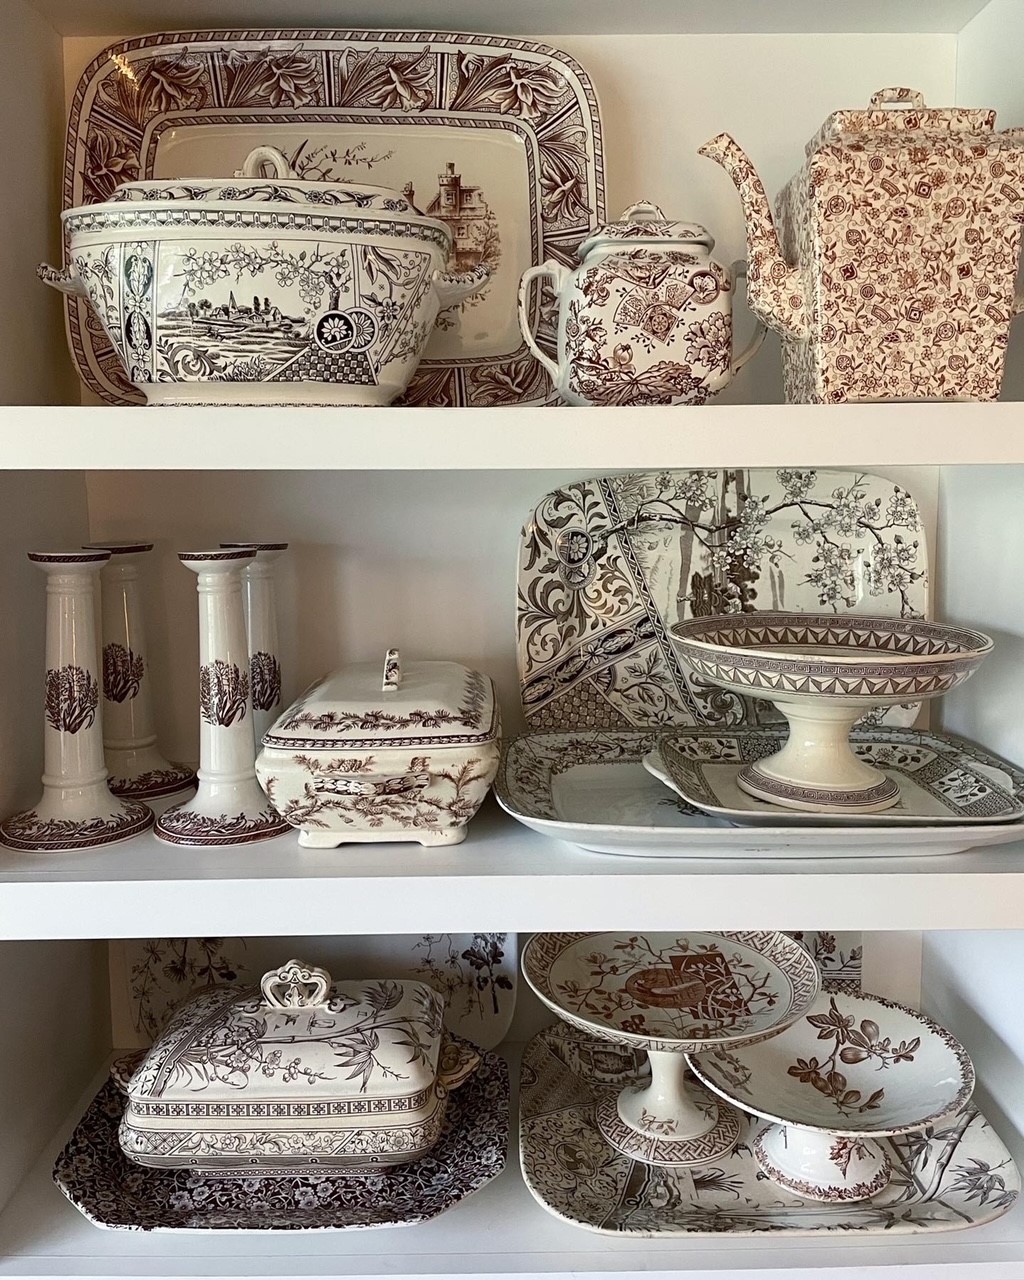
They developed a love for brown transferware and have their own collection.
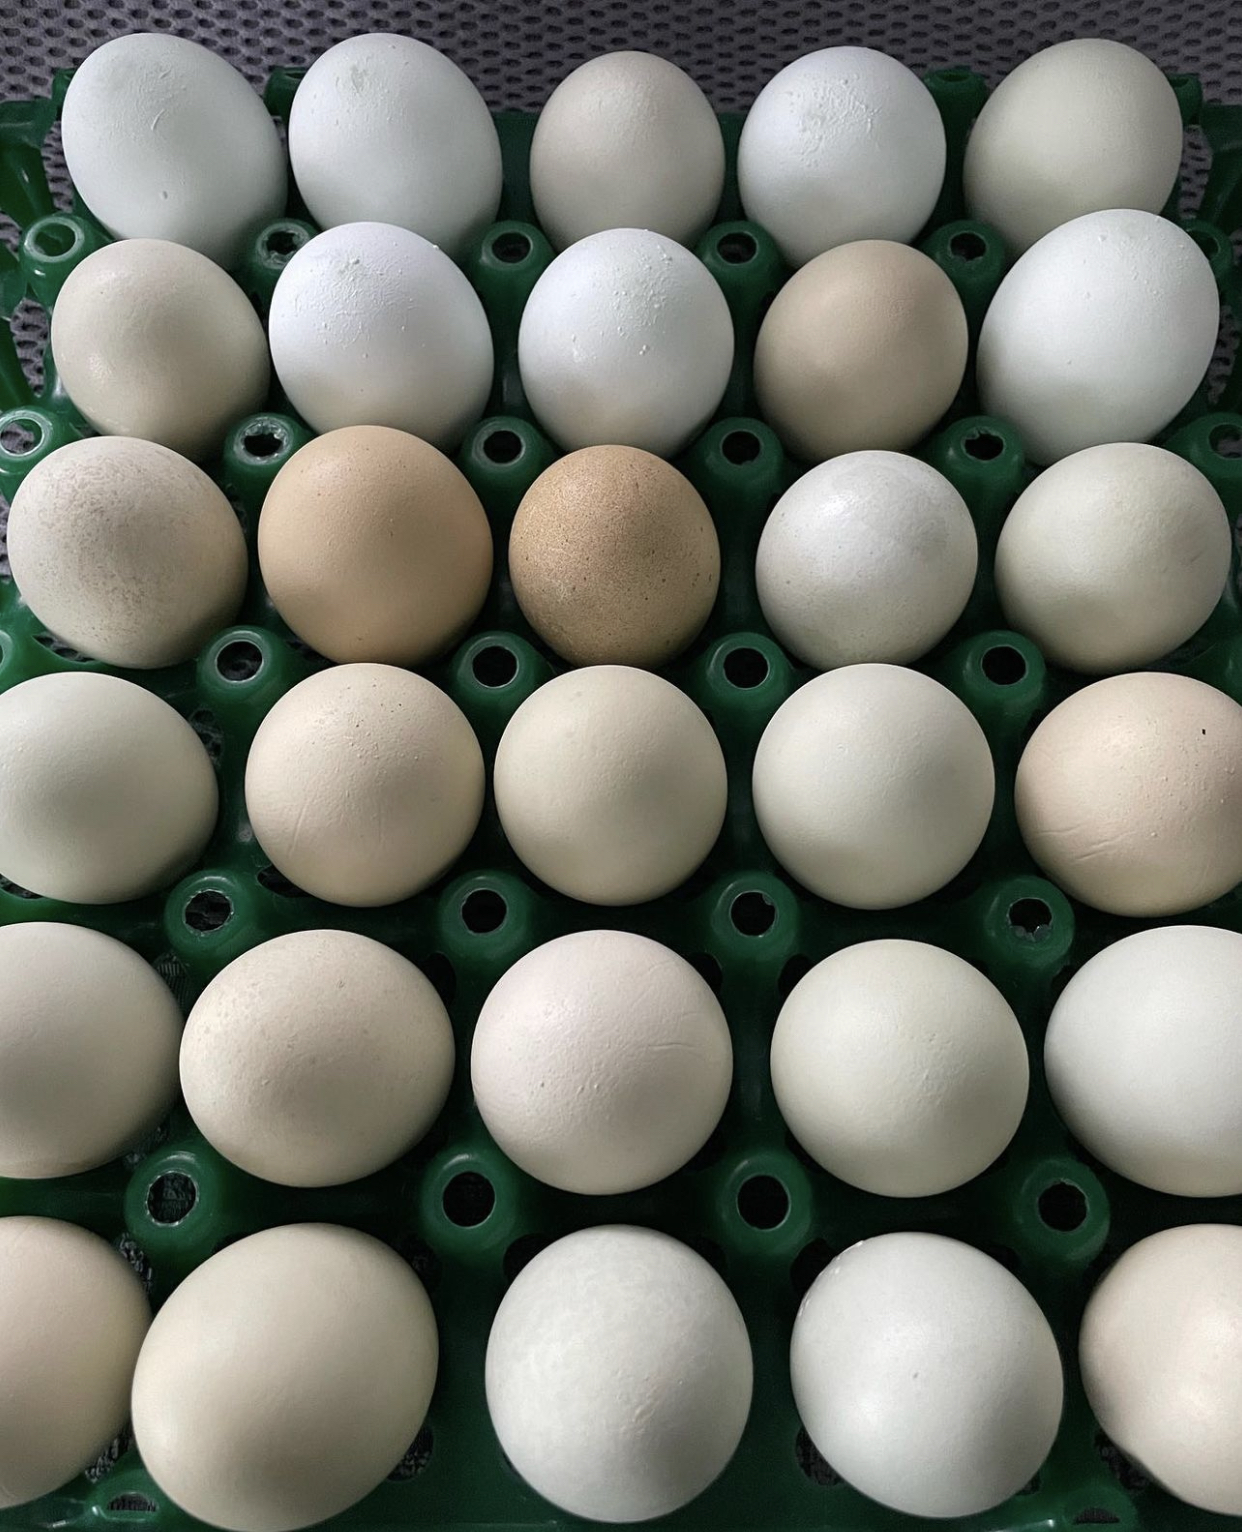
Bernie and Dennis share my love for chickens and appreciate the delicious eggs their hens produce every day.
And if you follow Bernie on Instagram @BernieWongGreen, you know he loves to bake and often uses these tried and true cookie cutters.
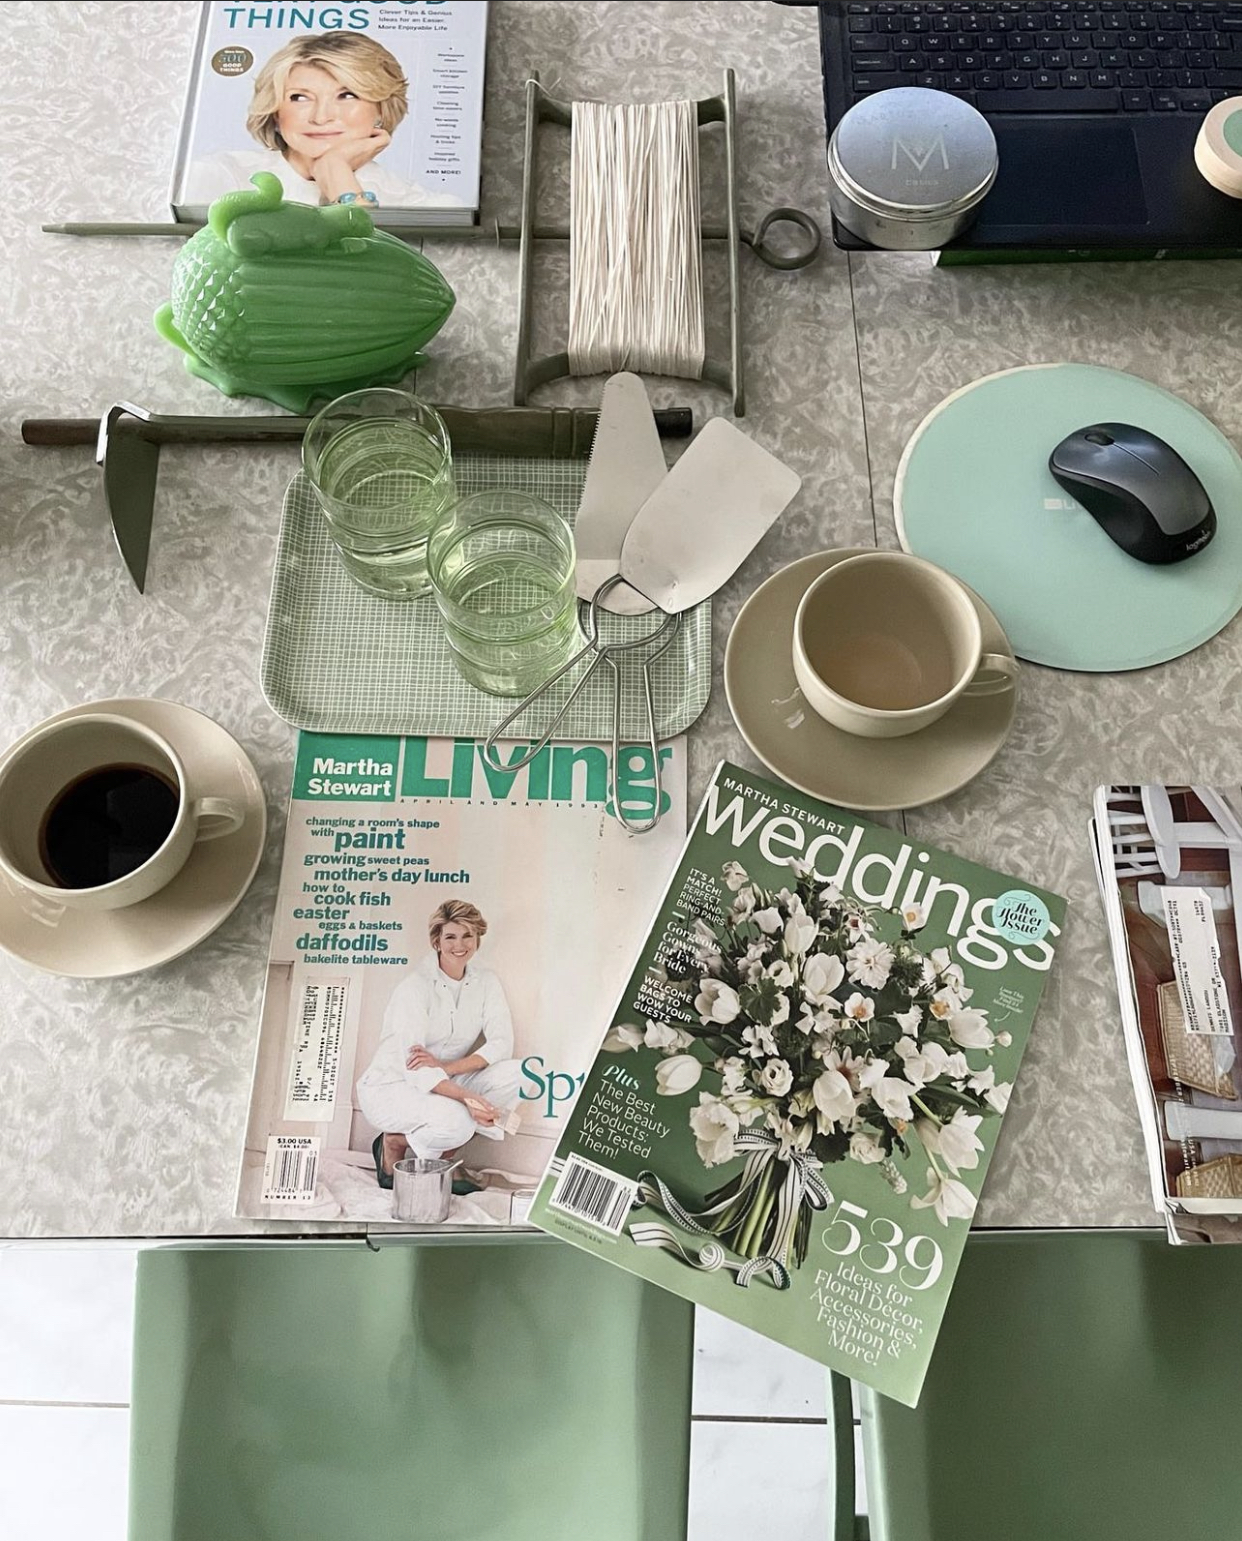
In this photo, Bernie and Dennis look through previous issues of my magazine “Living” and read through my books. It’s nice to see how much our hard work has taught and inspired readers and viewers over the years. Listen to my podcast with Andrew, Bernie and Dennis to hear how they all met, how two of these three fell in love and married, what tips and “Good Things” they value most, and so much more.