My gardeners have been very busy in my large, half-acre vegetable garden. Last week, they planted the season's onions which were all started from seed in my greenhouse. The seeds came from Johnny's Selected Seeds, a source I've been using for years. Onions, leeks, and shallots are all part of the genus Allium. They are hardy, thrive in full sun, and are easy to grow in a variety of soils and climates.
Here are some photos, enjoy.
This day was perfect for planting in the vegetable garden. Onions should be planted when temperatures are still a bit cool and then warm when they begin to mature. Early planting gives the onions time to develop tops and store energy for the bulbs.
I always grow my onions from seed. Onion seeds are less expensive than other growing options such as sets and starts. Starting onions from seed can also offer a wider variety of onion types.
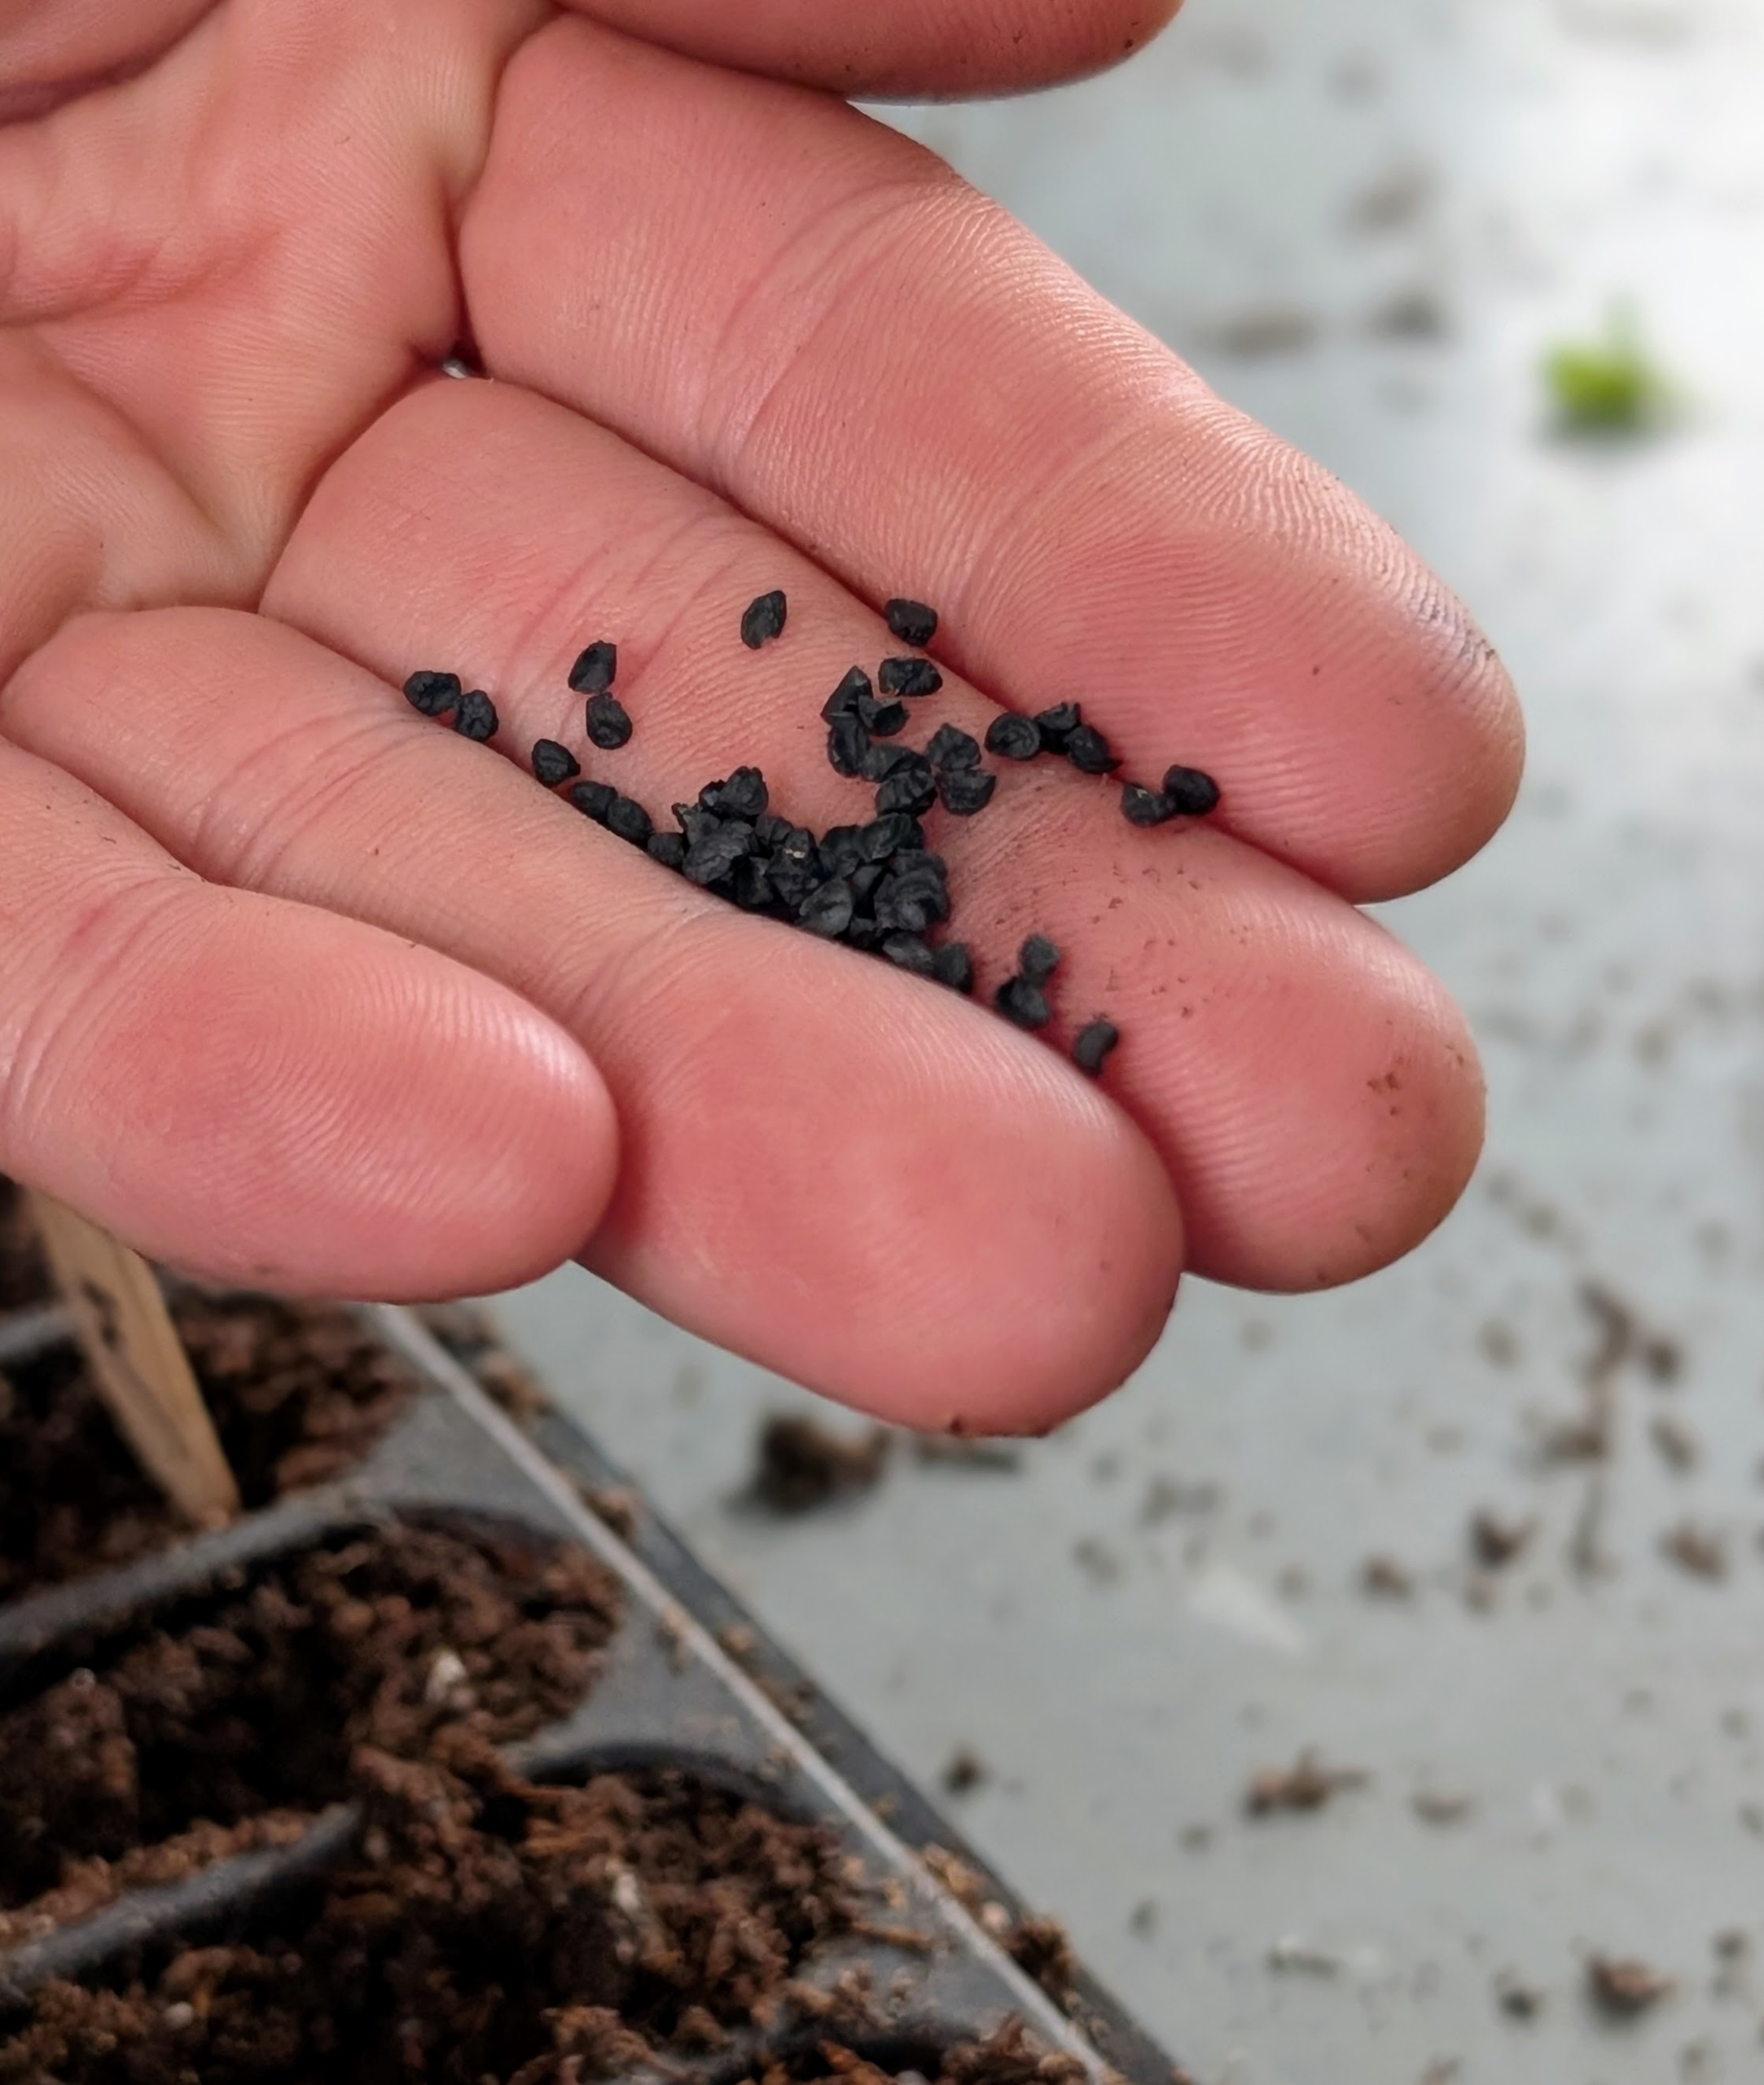
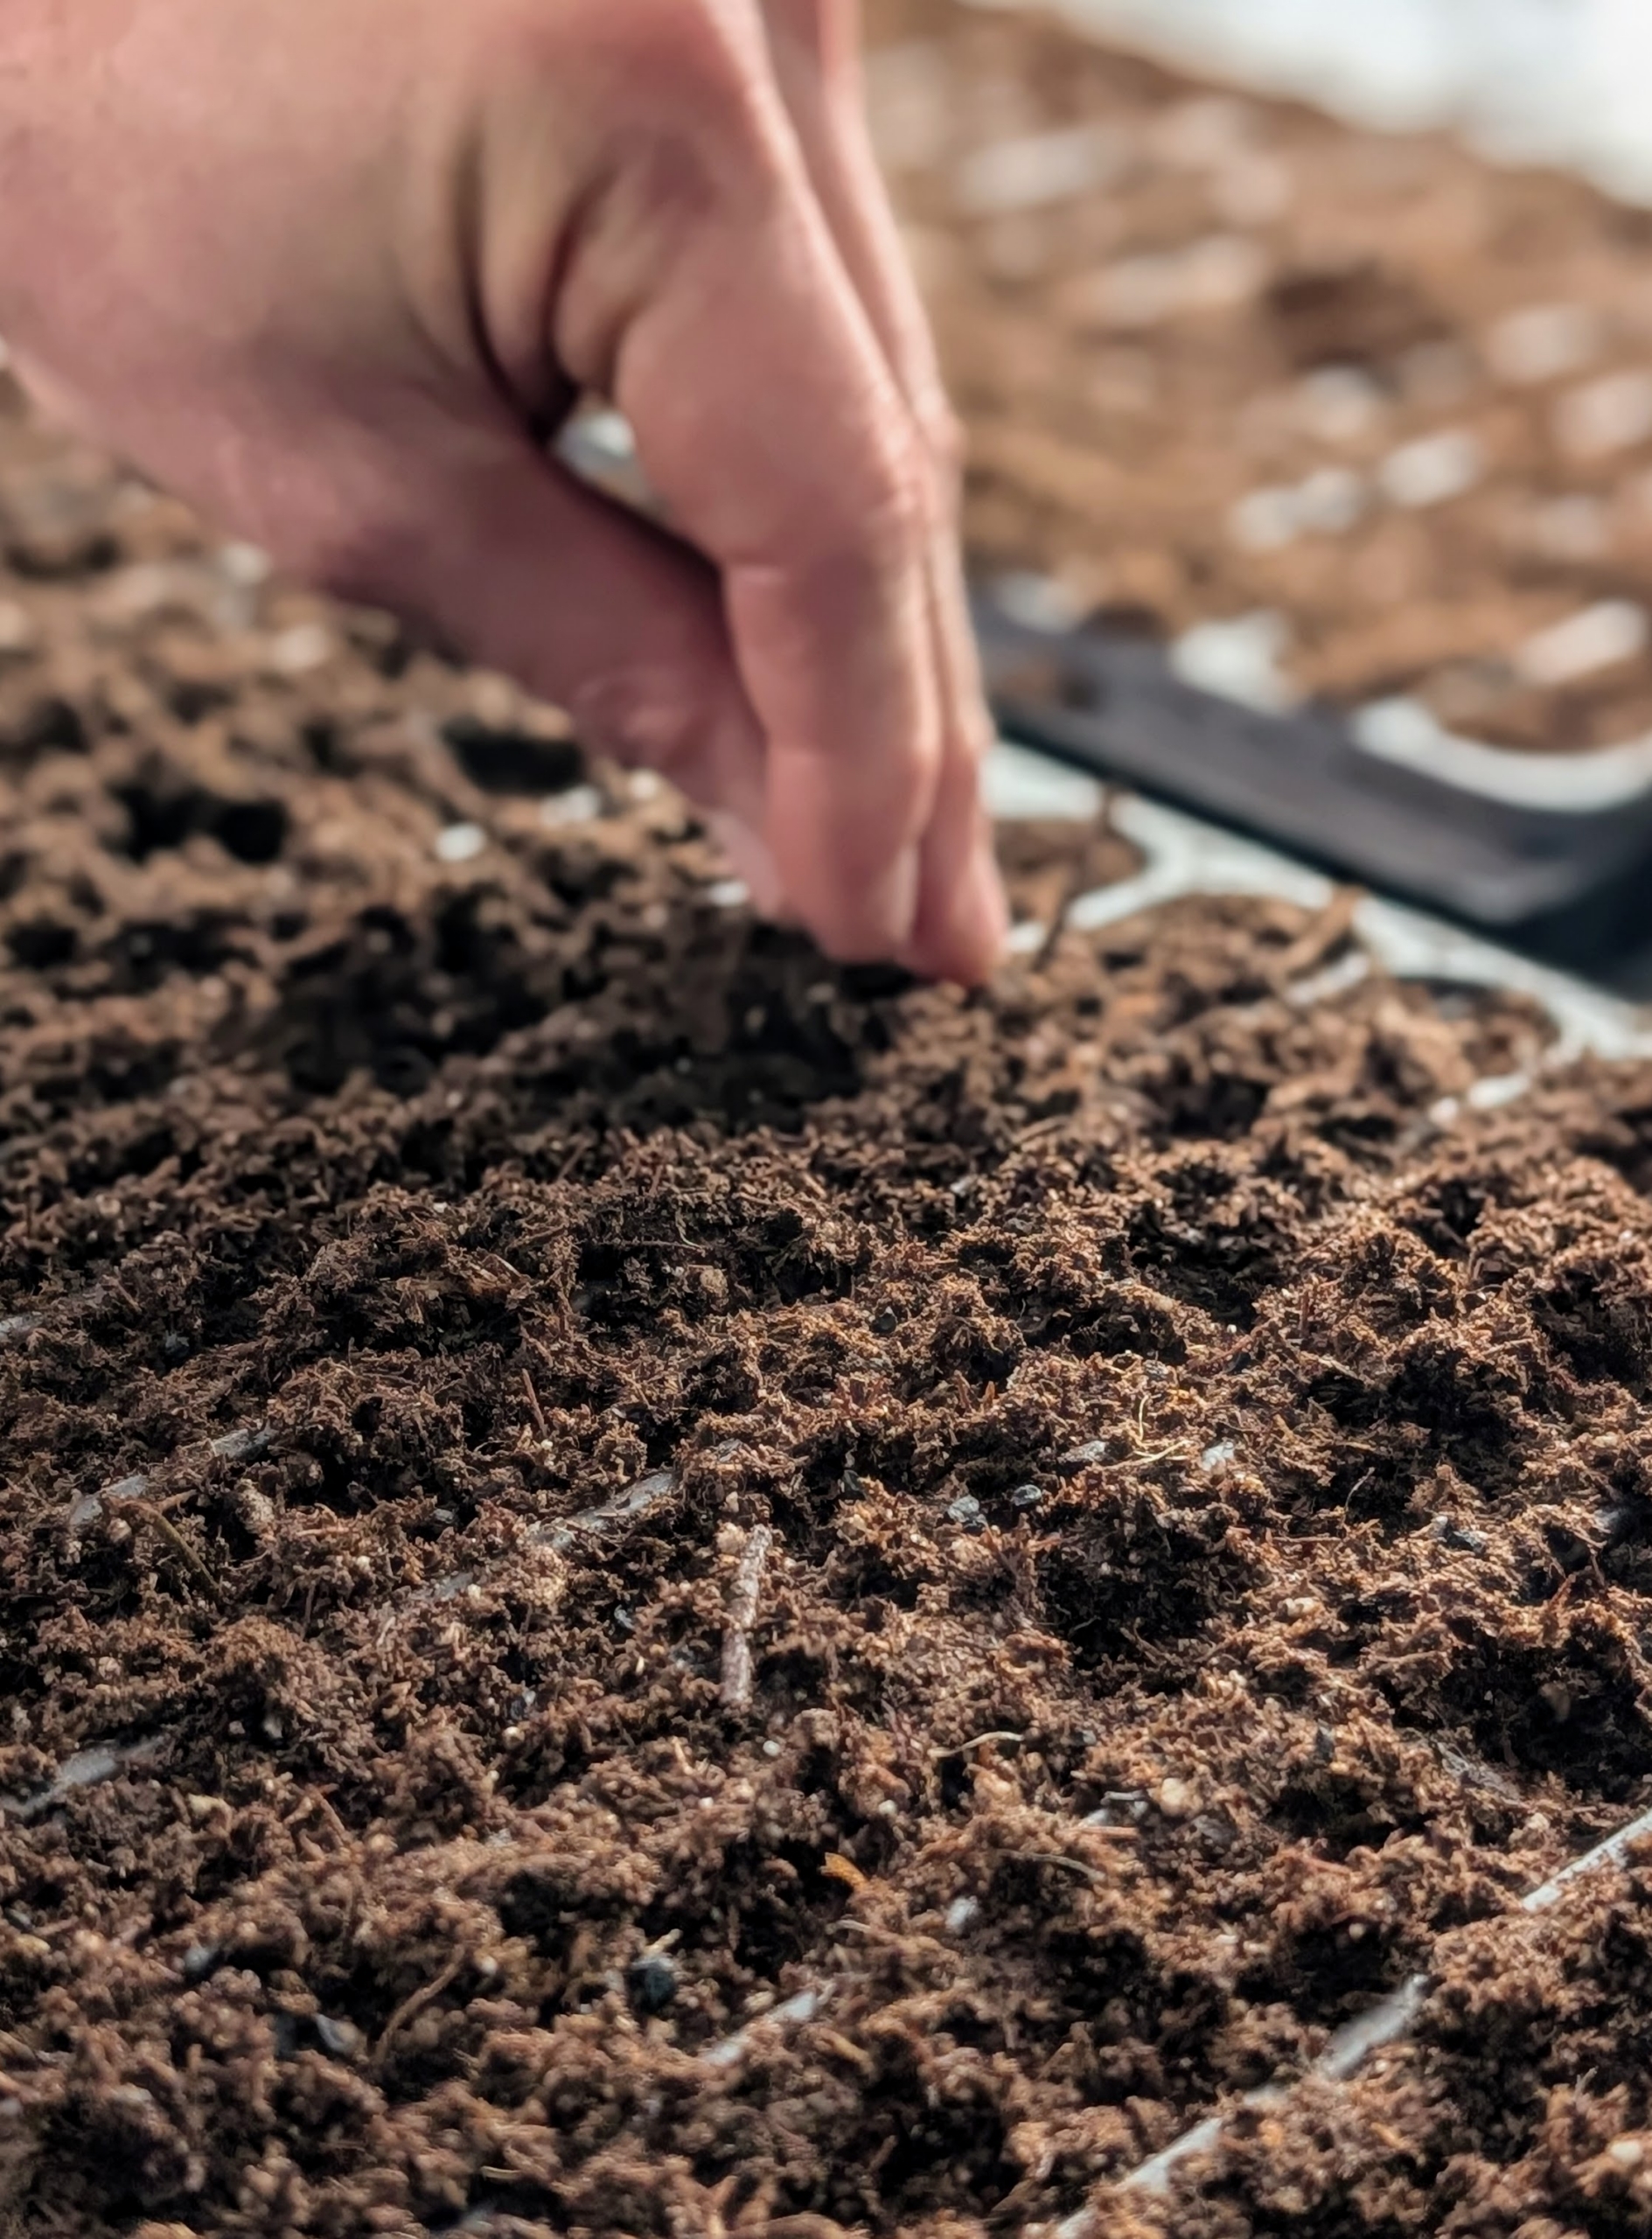
I started my onions in mid-January. Onion seeds are very small.
My head gardener, Ryan McCallister, starts the seeds in trays, dropping them slowly and carefully, so they are evenly distributed along the rows.
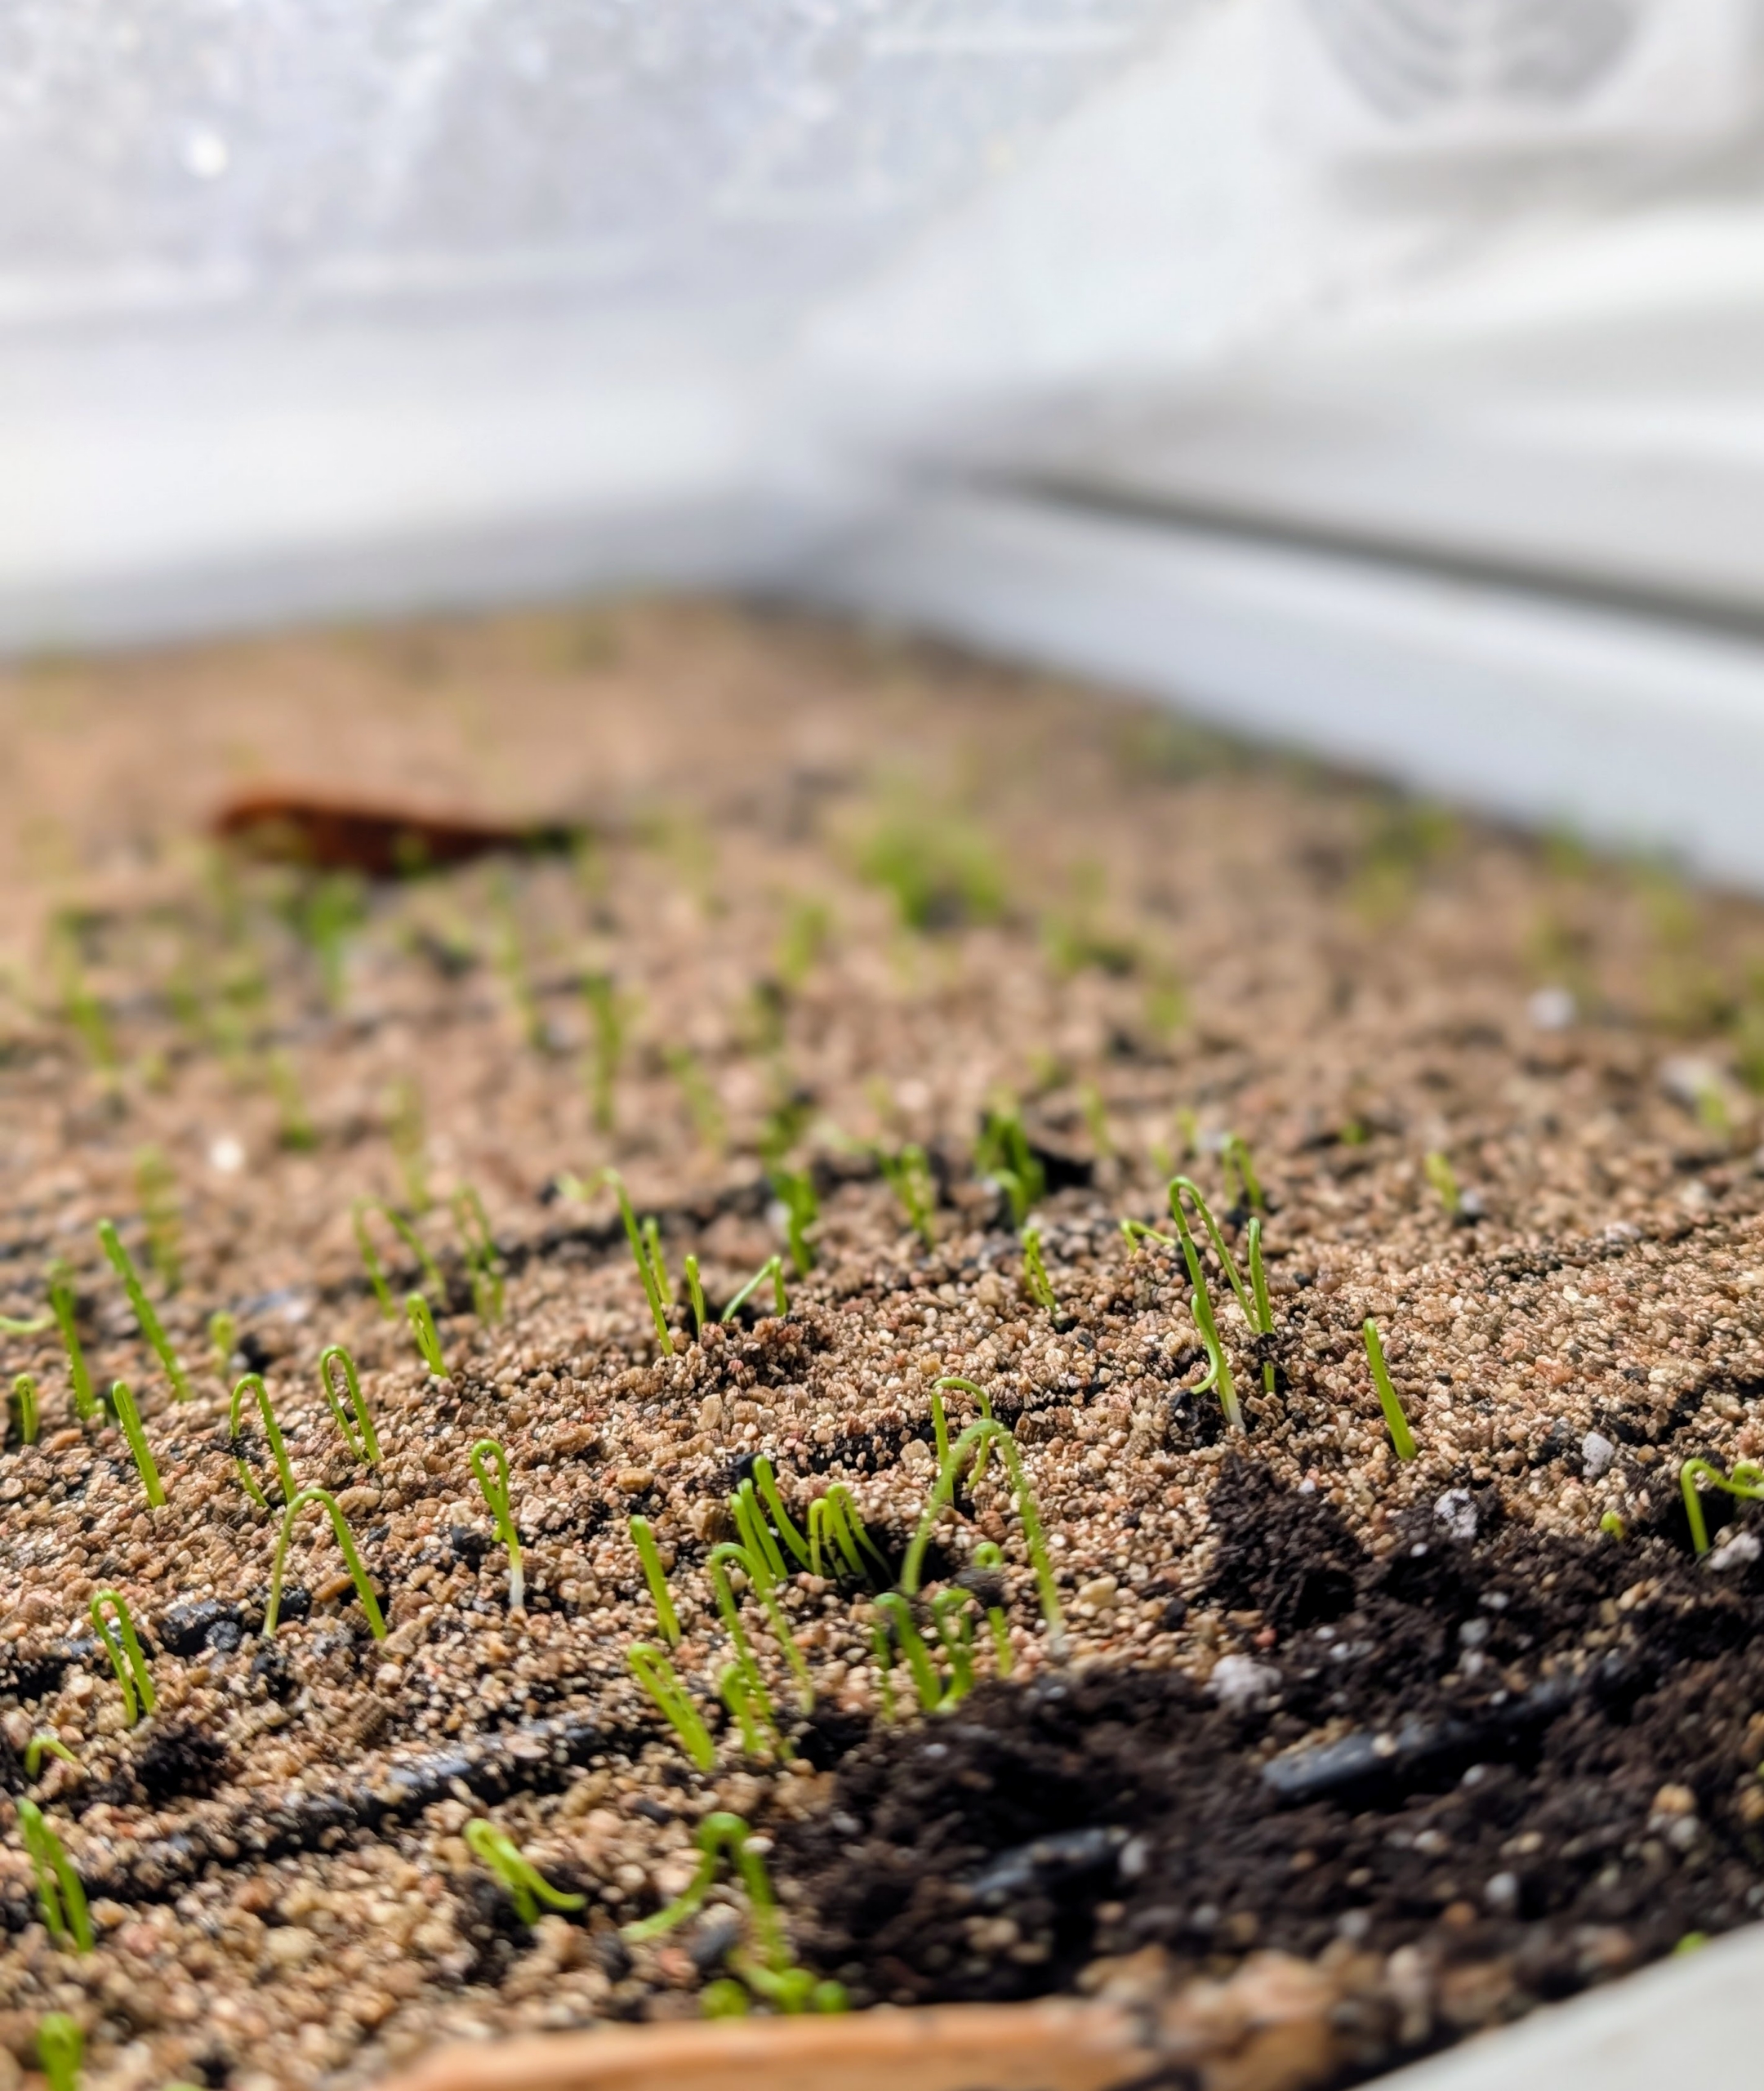
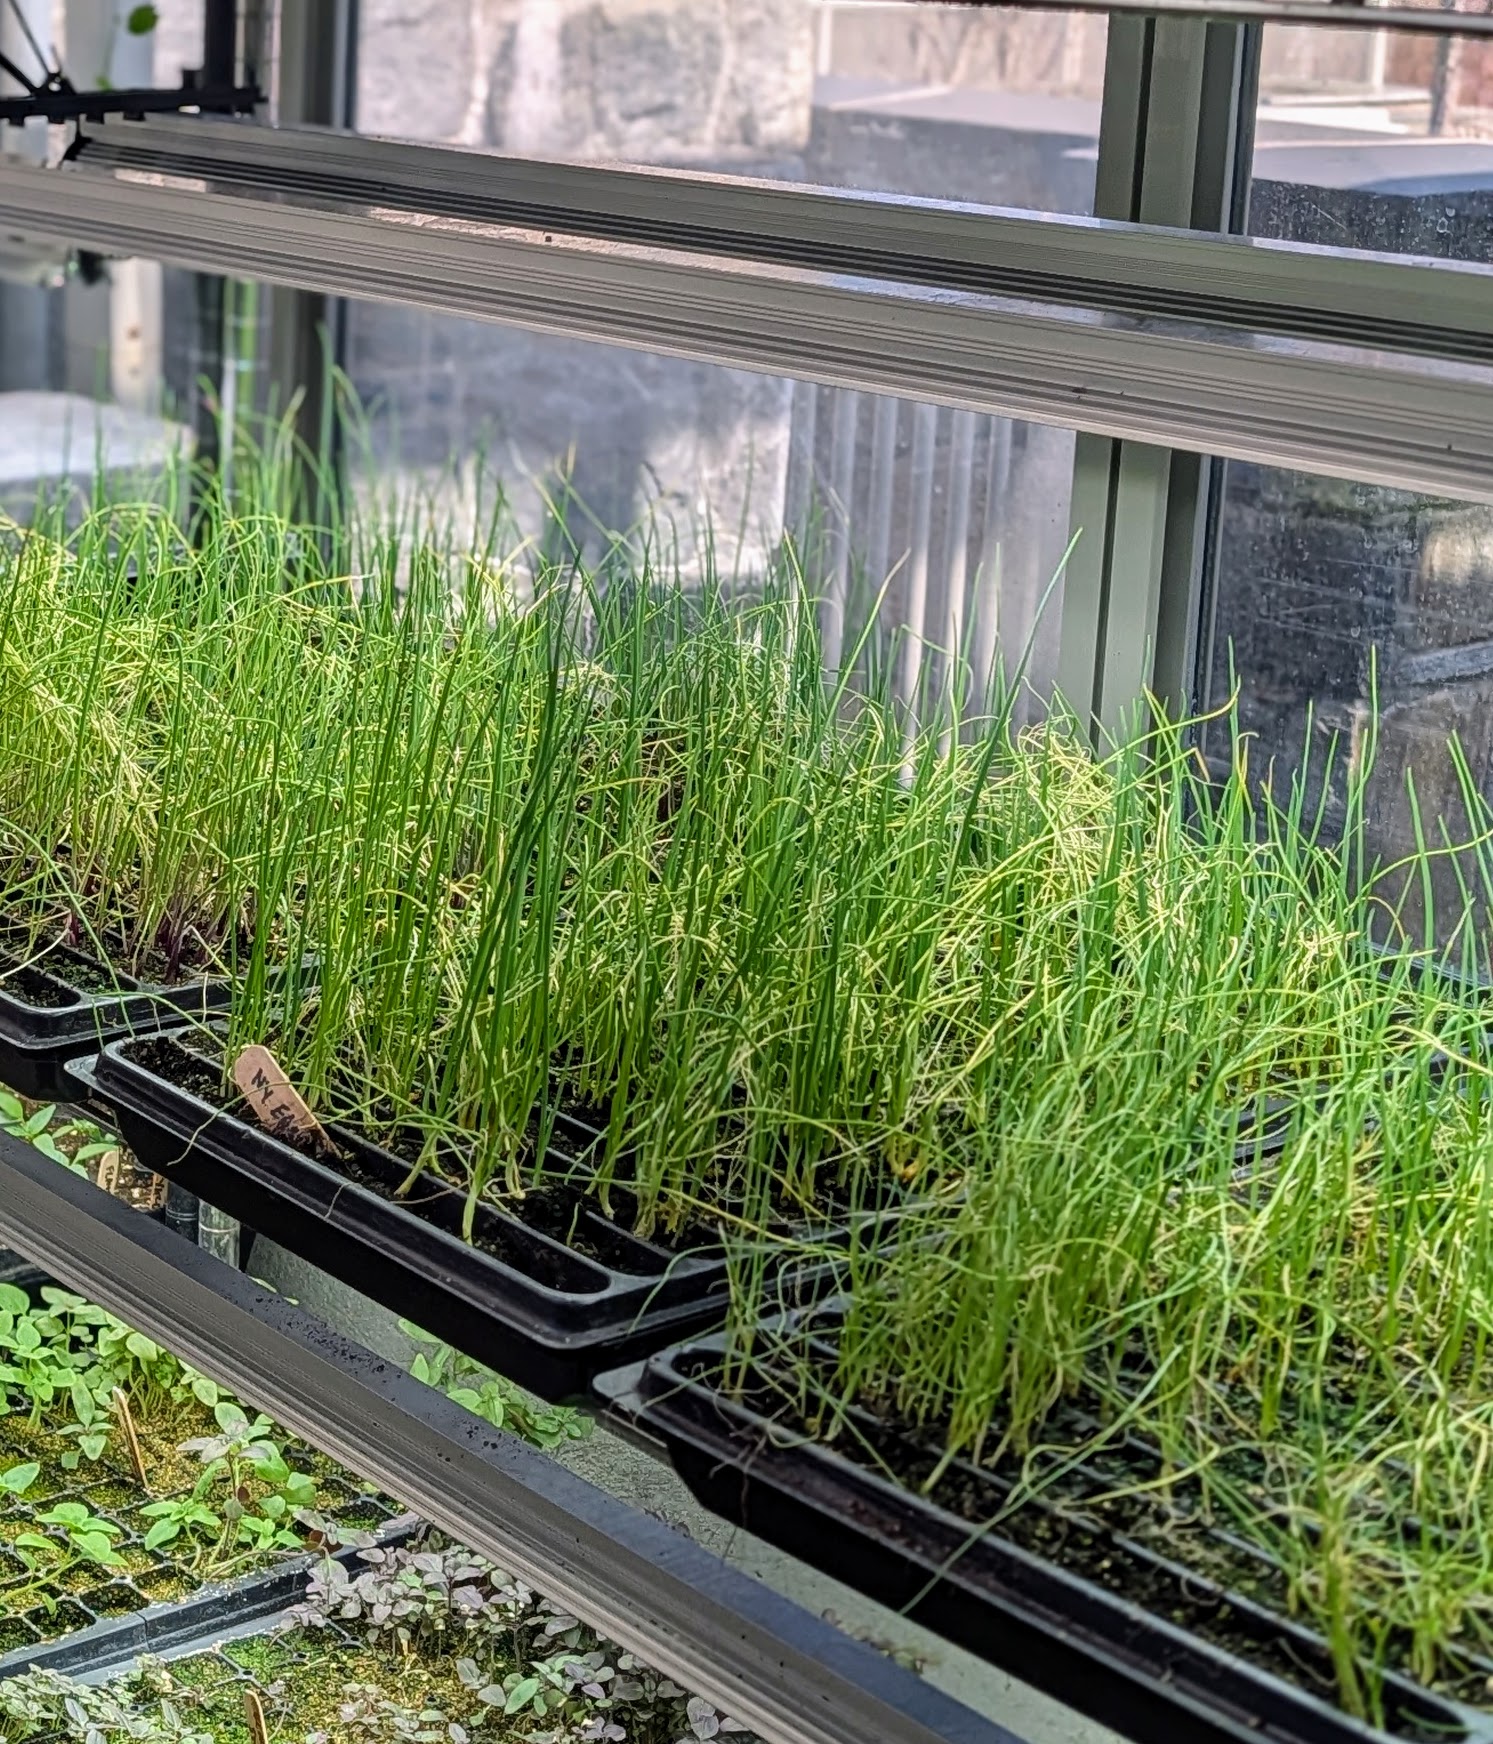
Here they are just five days later in my Urban Cultivator.
And here they are a few weeks later – growing nicely in my greenhouse. Because I use a lot of onions for cooking and for sharing with my family, I grow lots of onions.
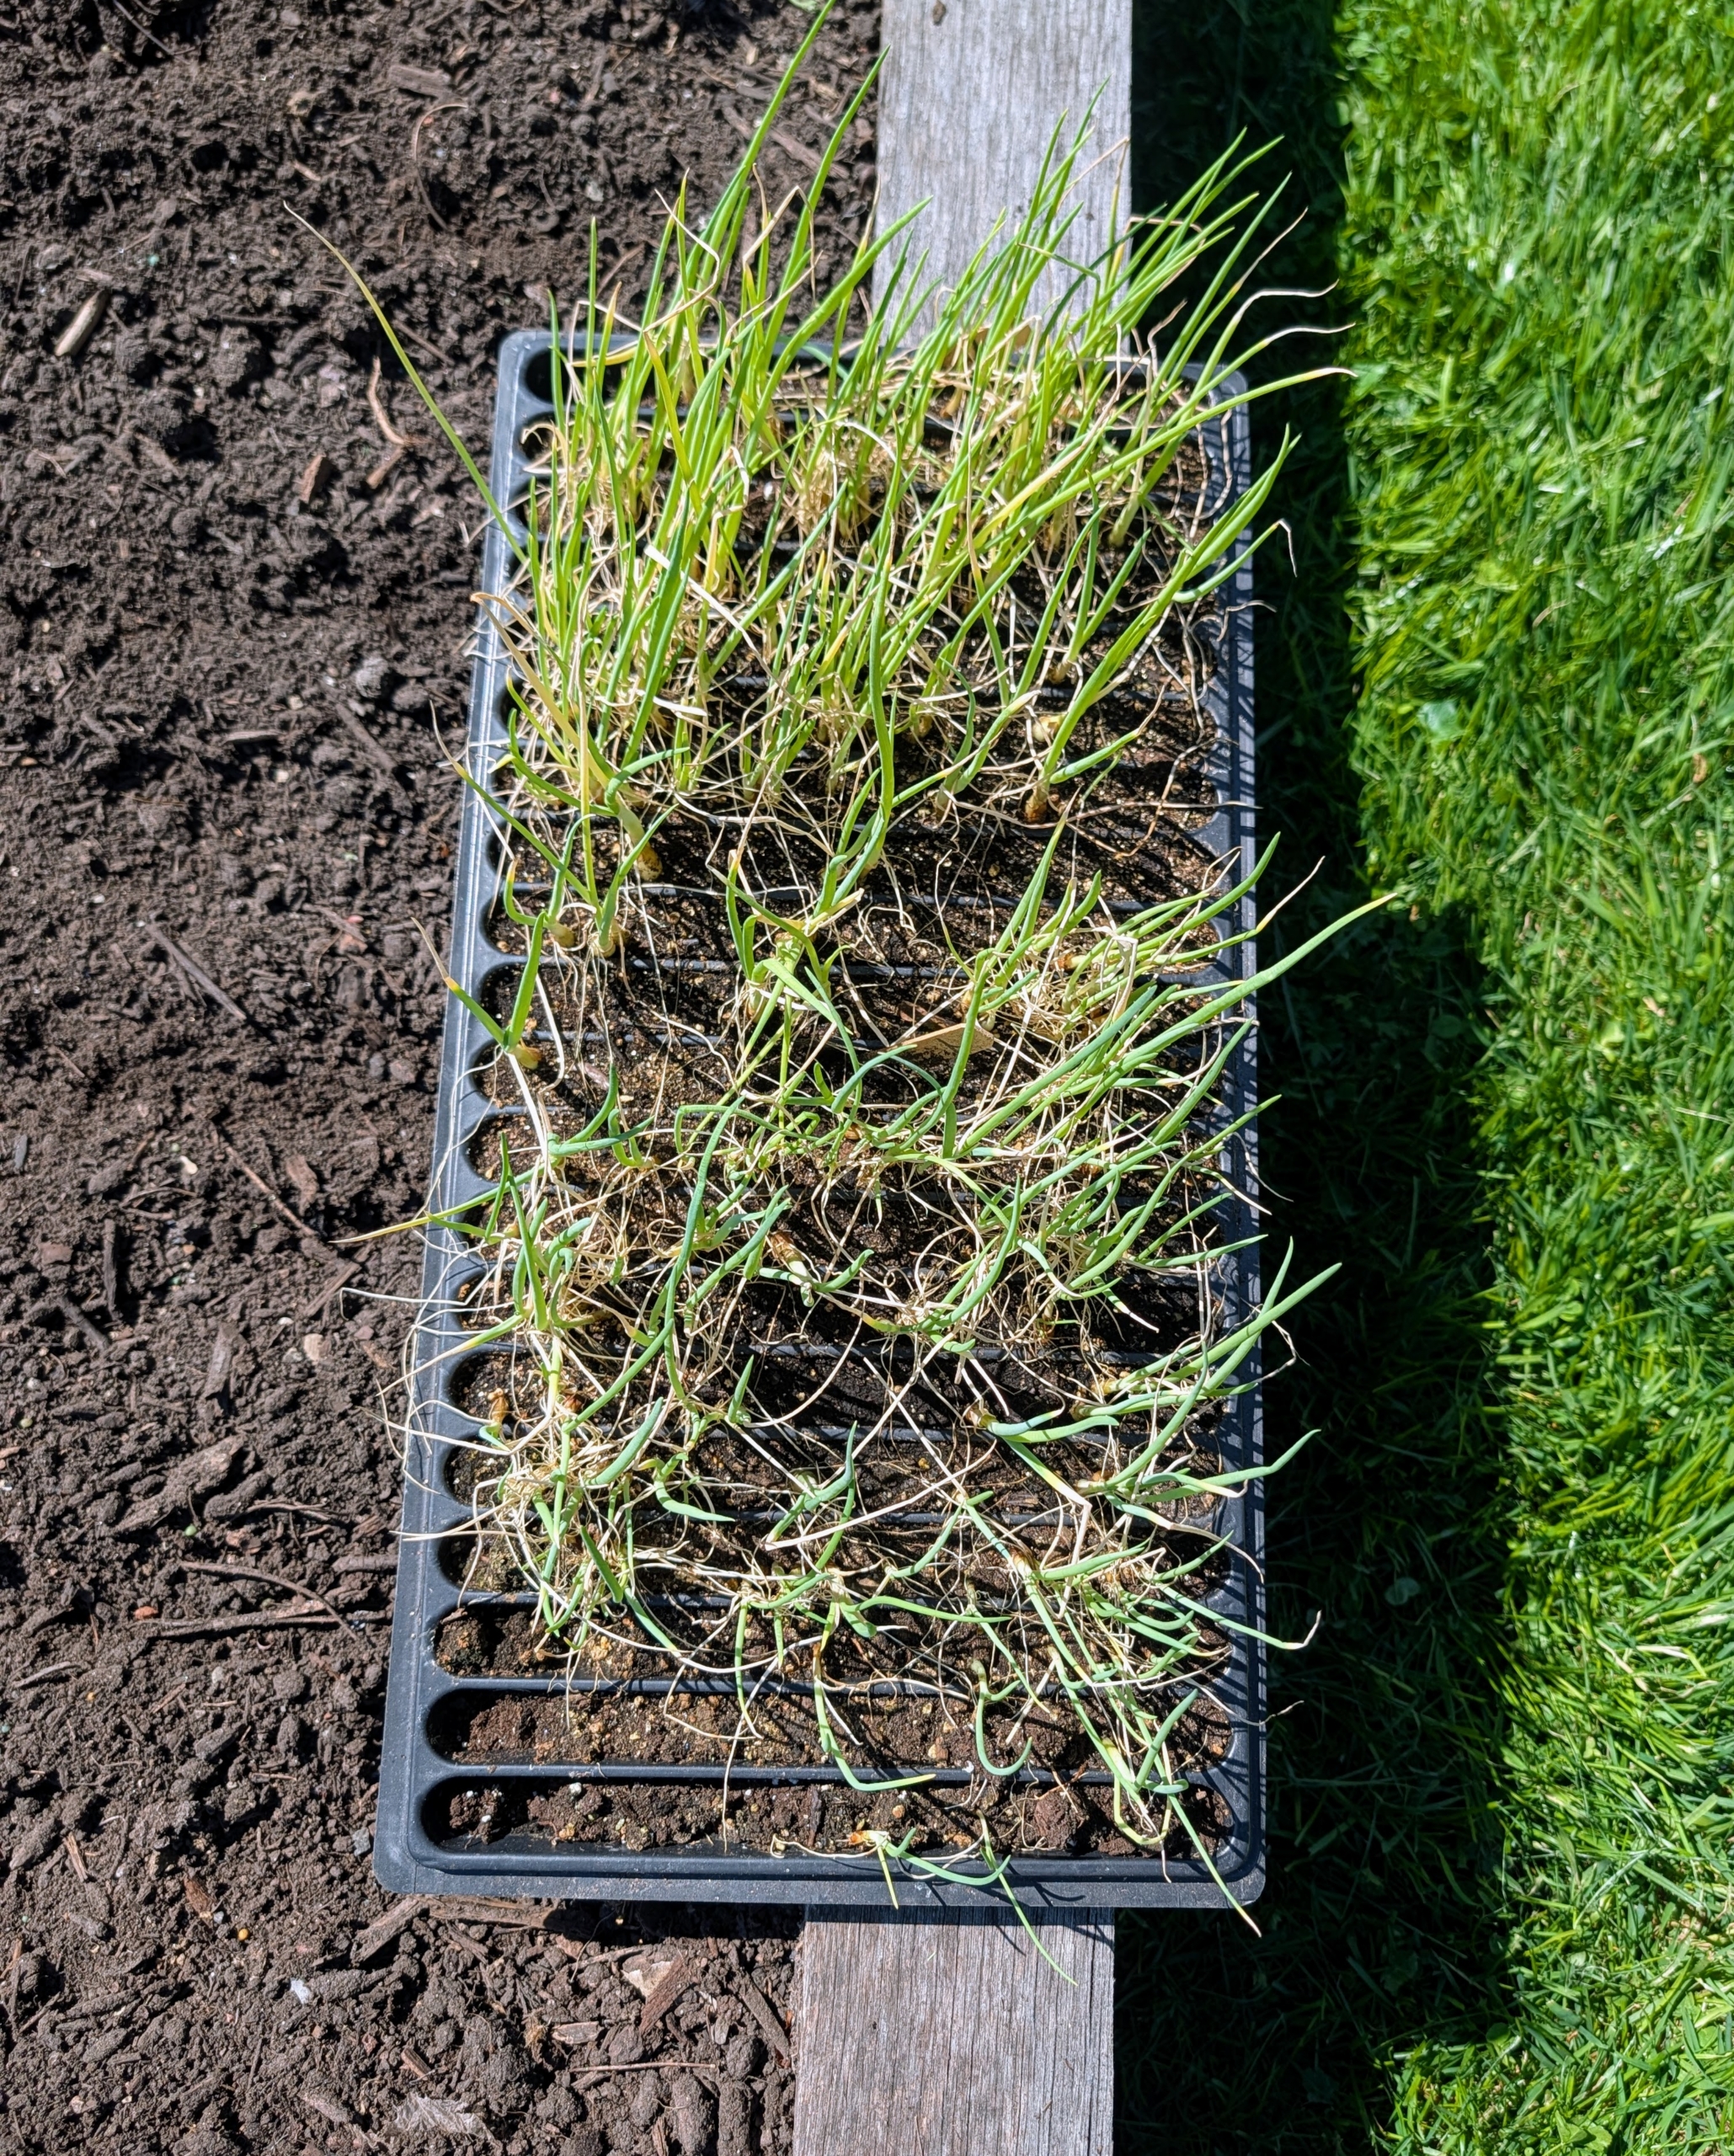
And then last week, Ryan took them all out to plant in the garden. Onions are closely related to garlic, leeks, shallots, scallions and chives.
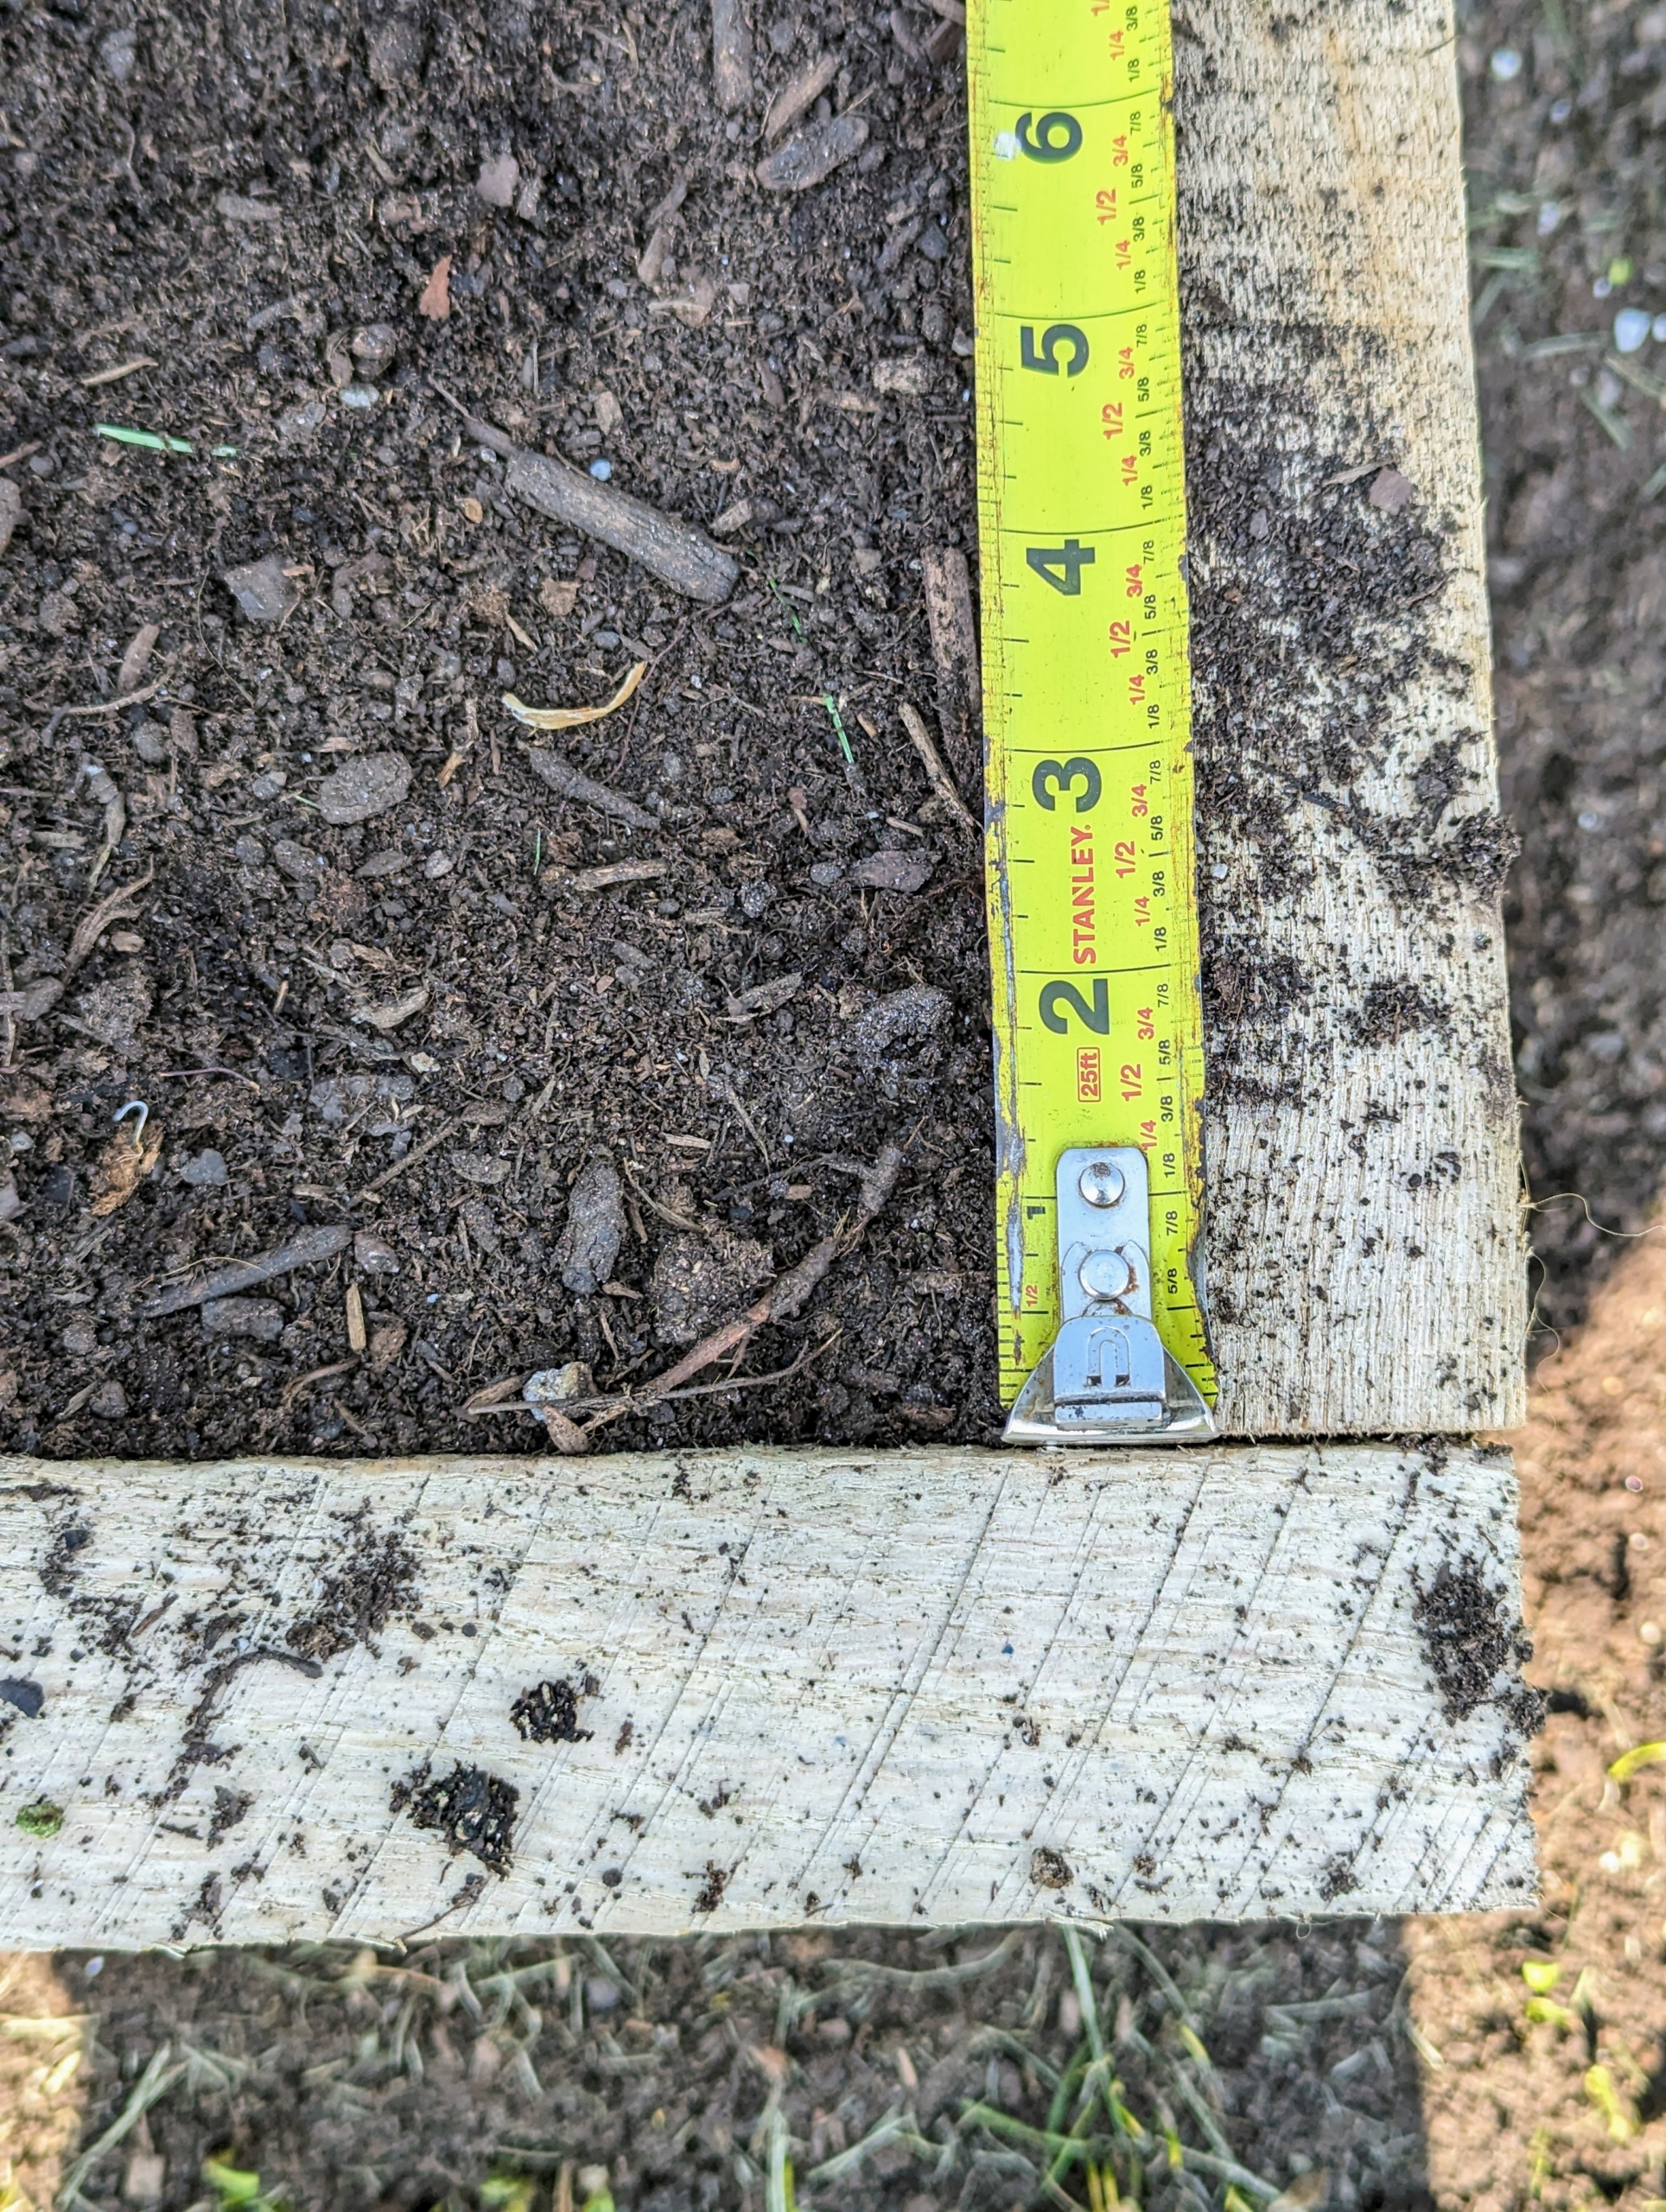
The soil in all the beds was amended and fed. Here, Ryan measures the bed for proper placement. Healthy green plants should be 1 to 1 1/2 inches deep in rows 12 to 15 inches apart.
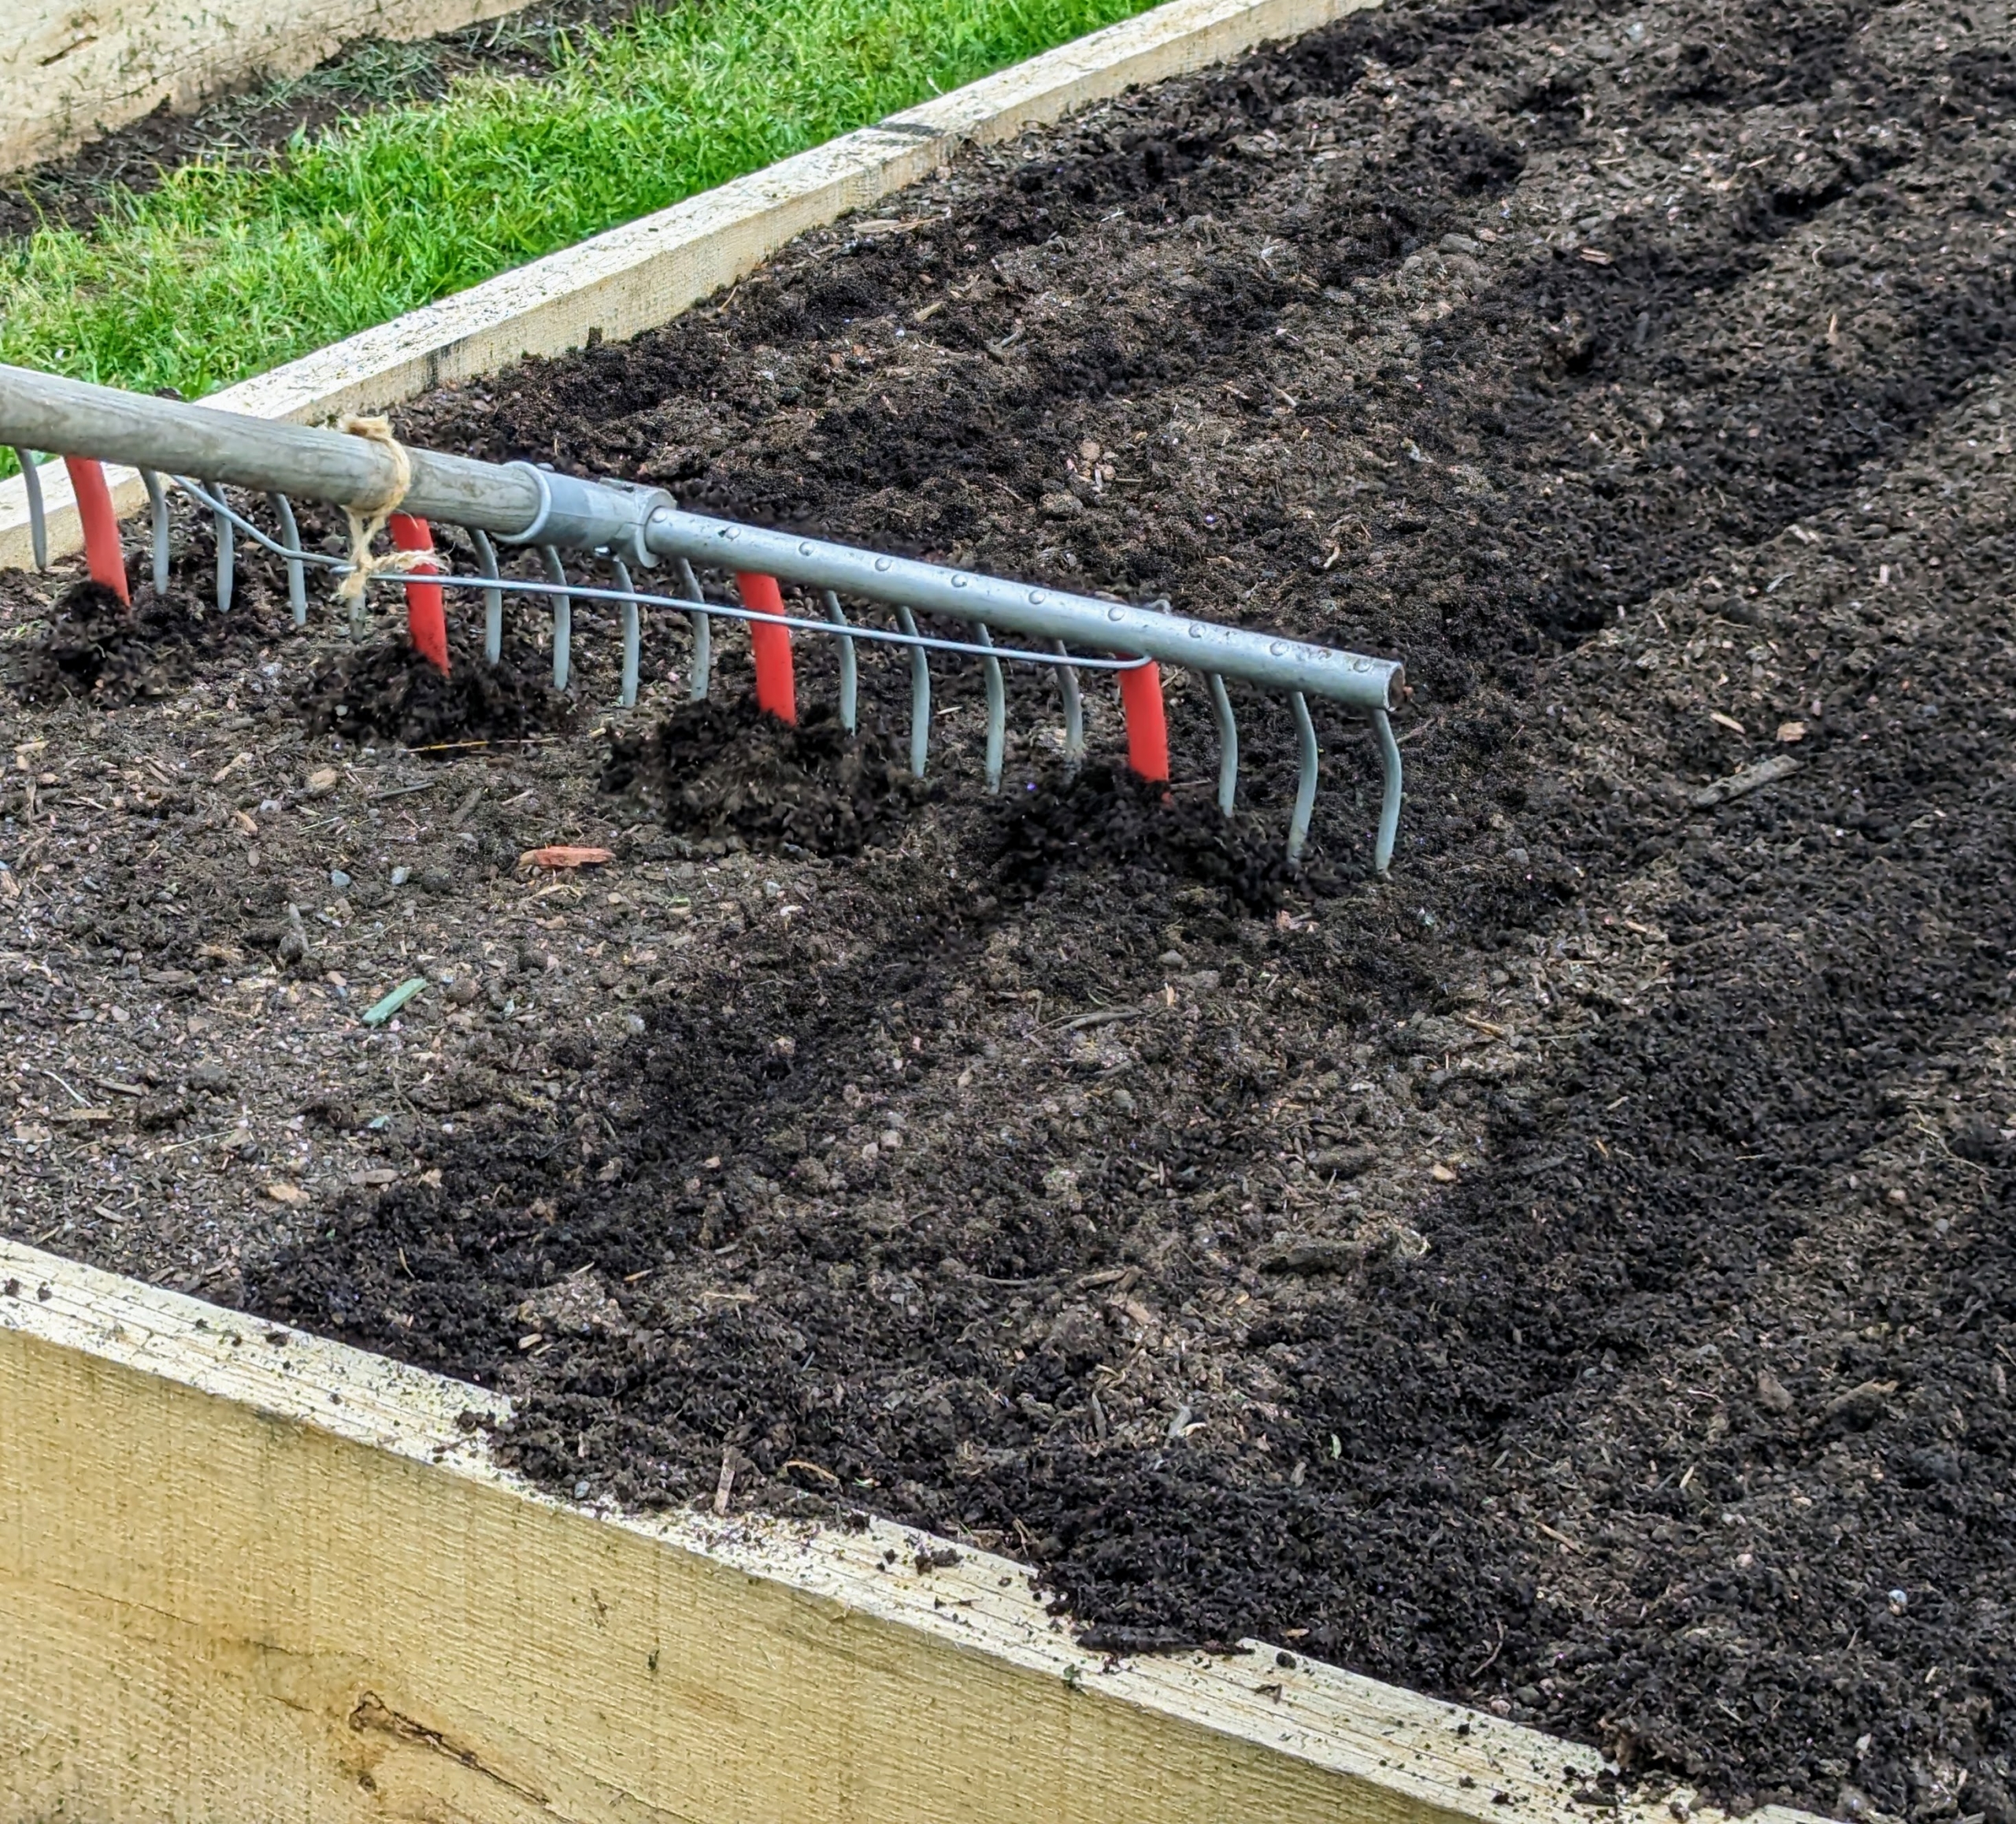
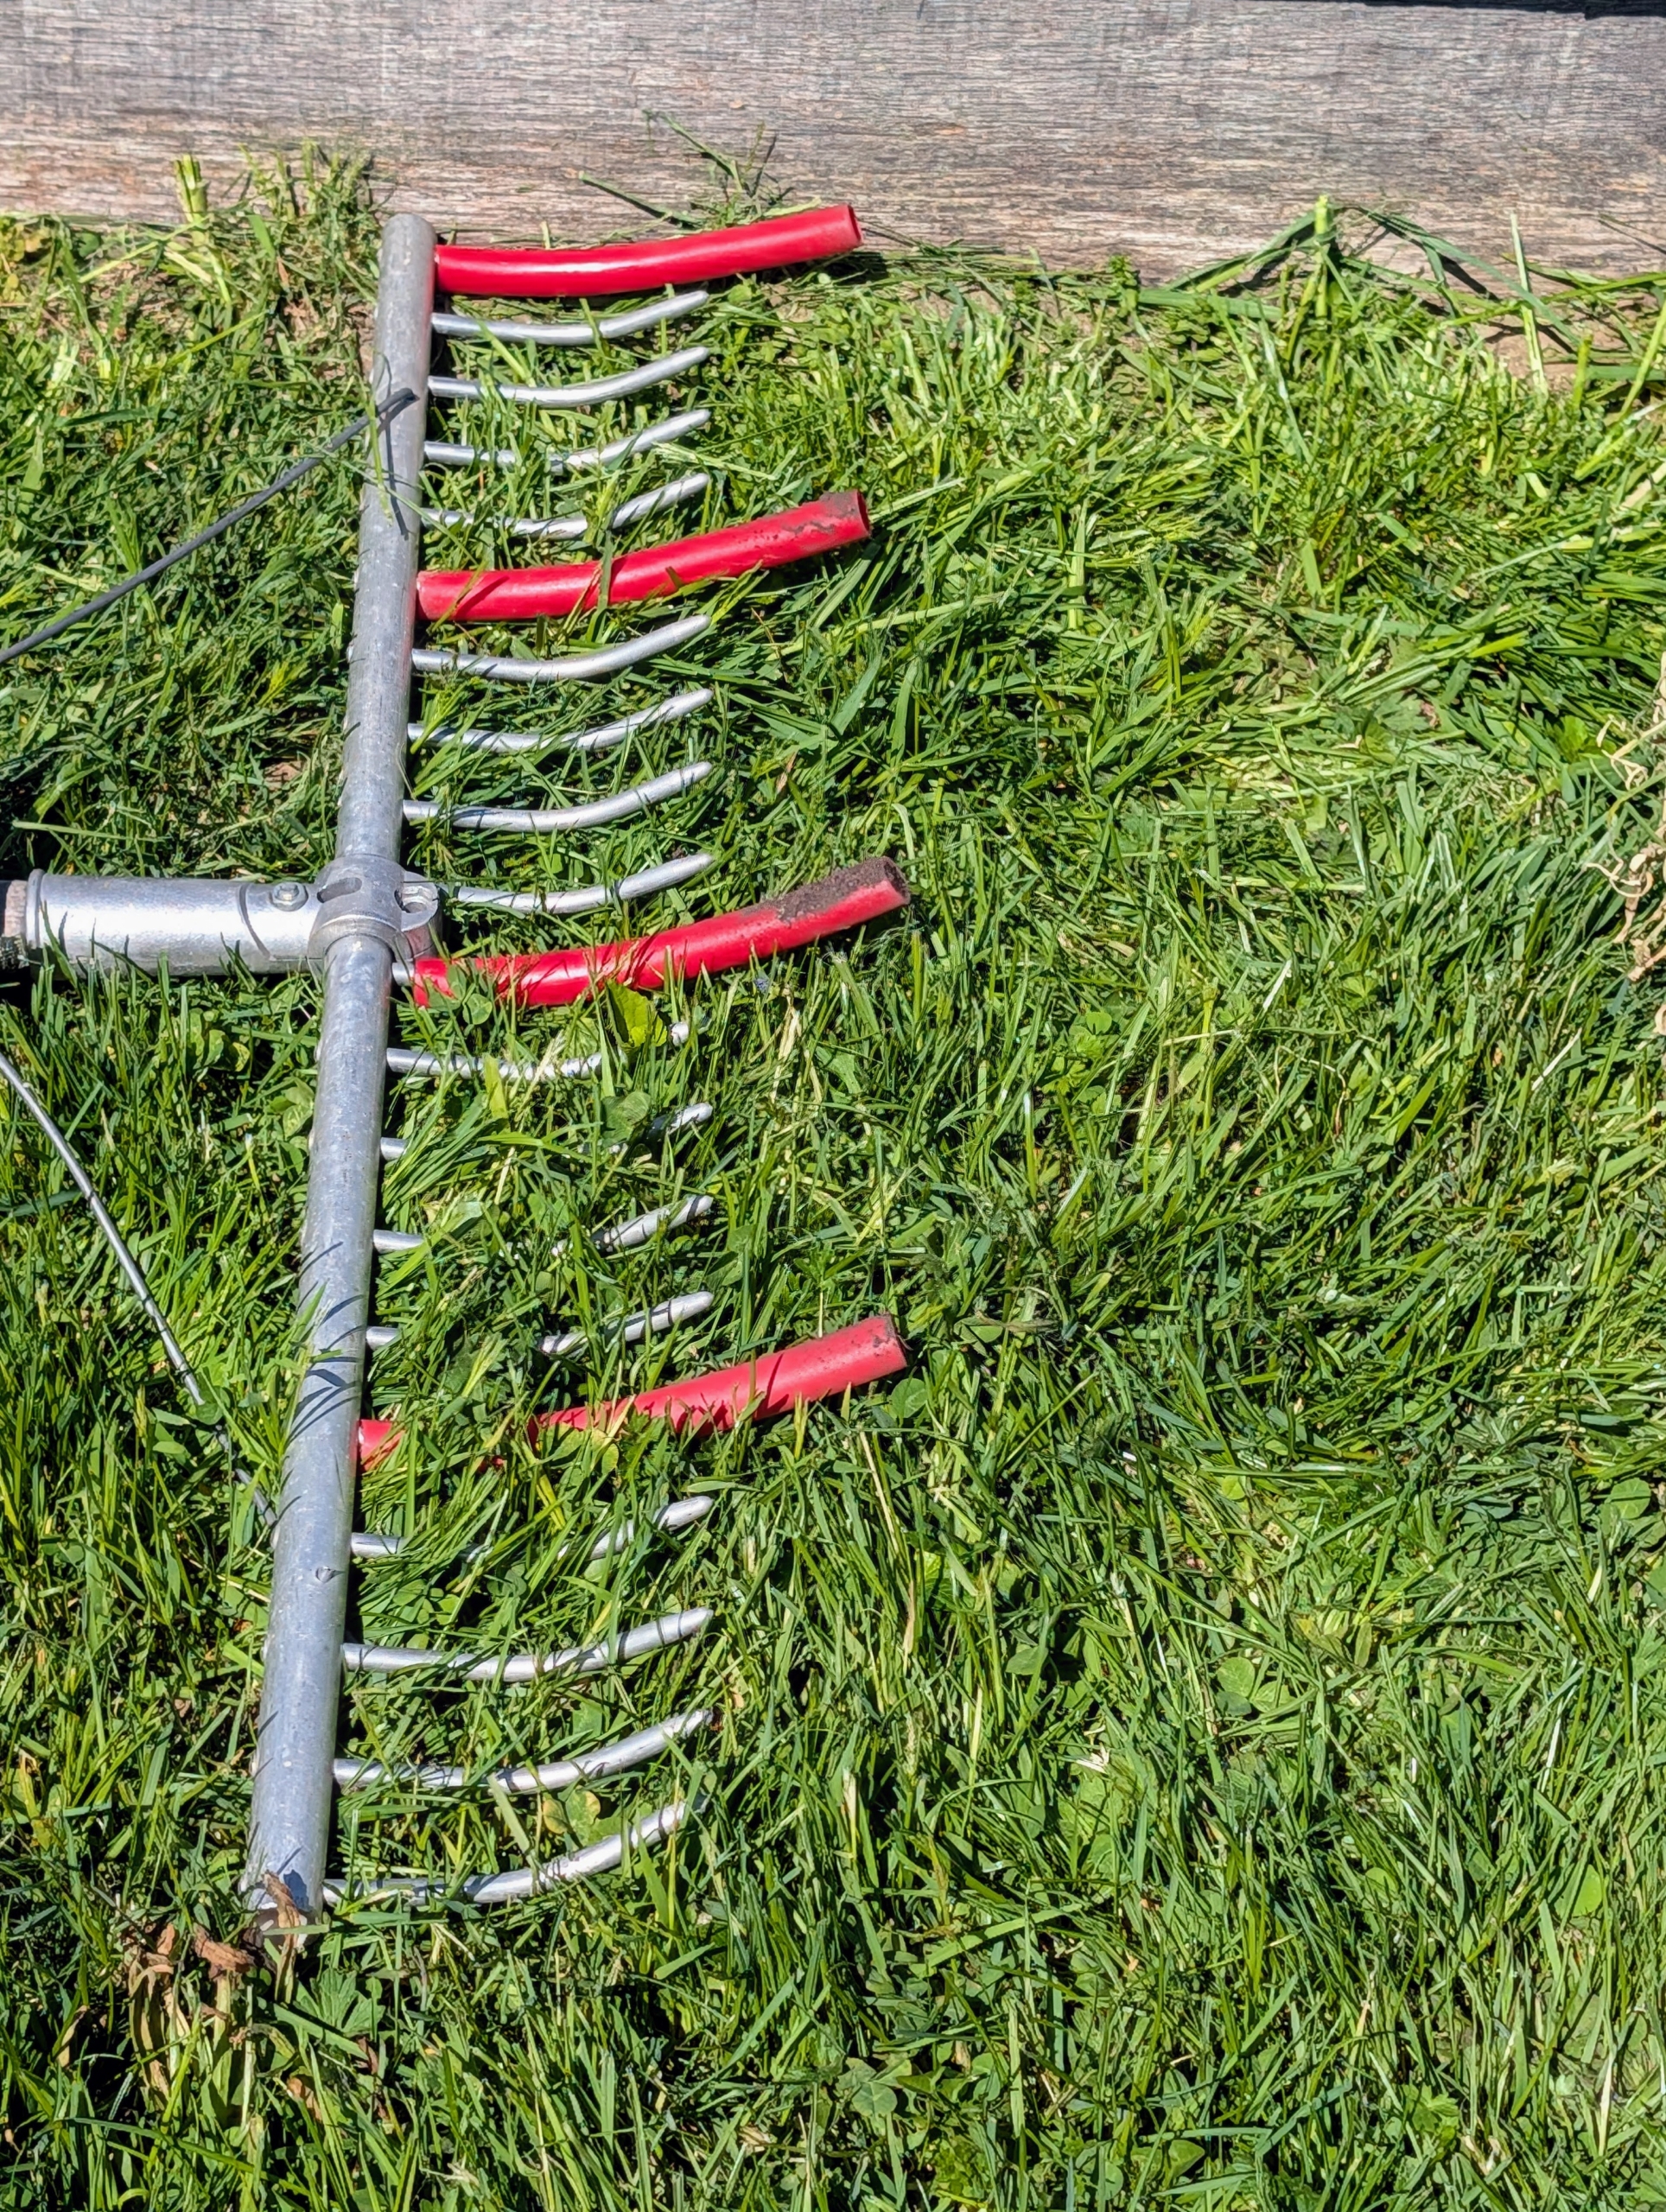
Ryan creates the rows using a bed preparation rake from Johnny’s Selected Seeds.
Hard plastic red tubes slide onto selected teeth of the rake to mark the rows.
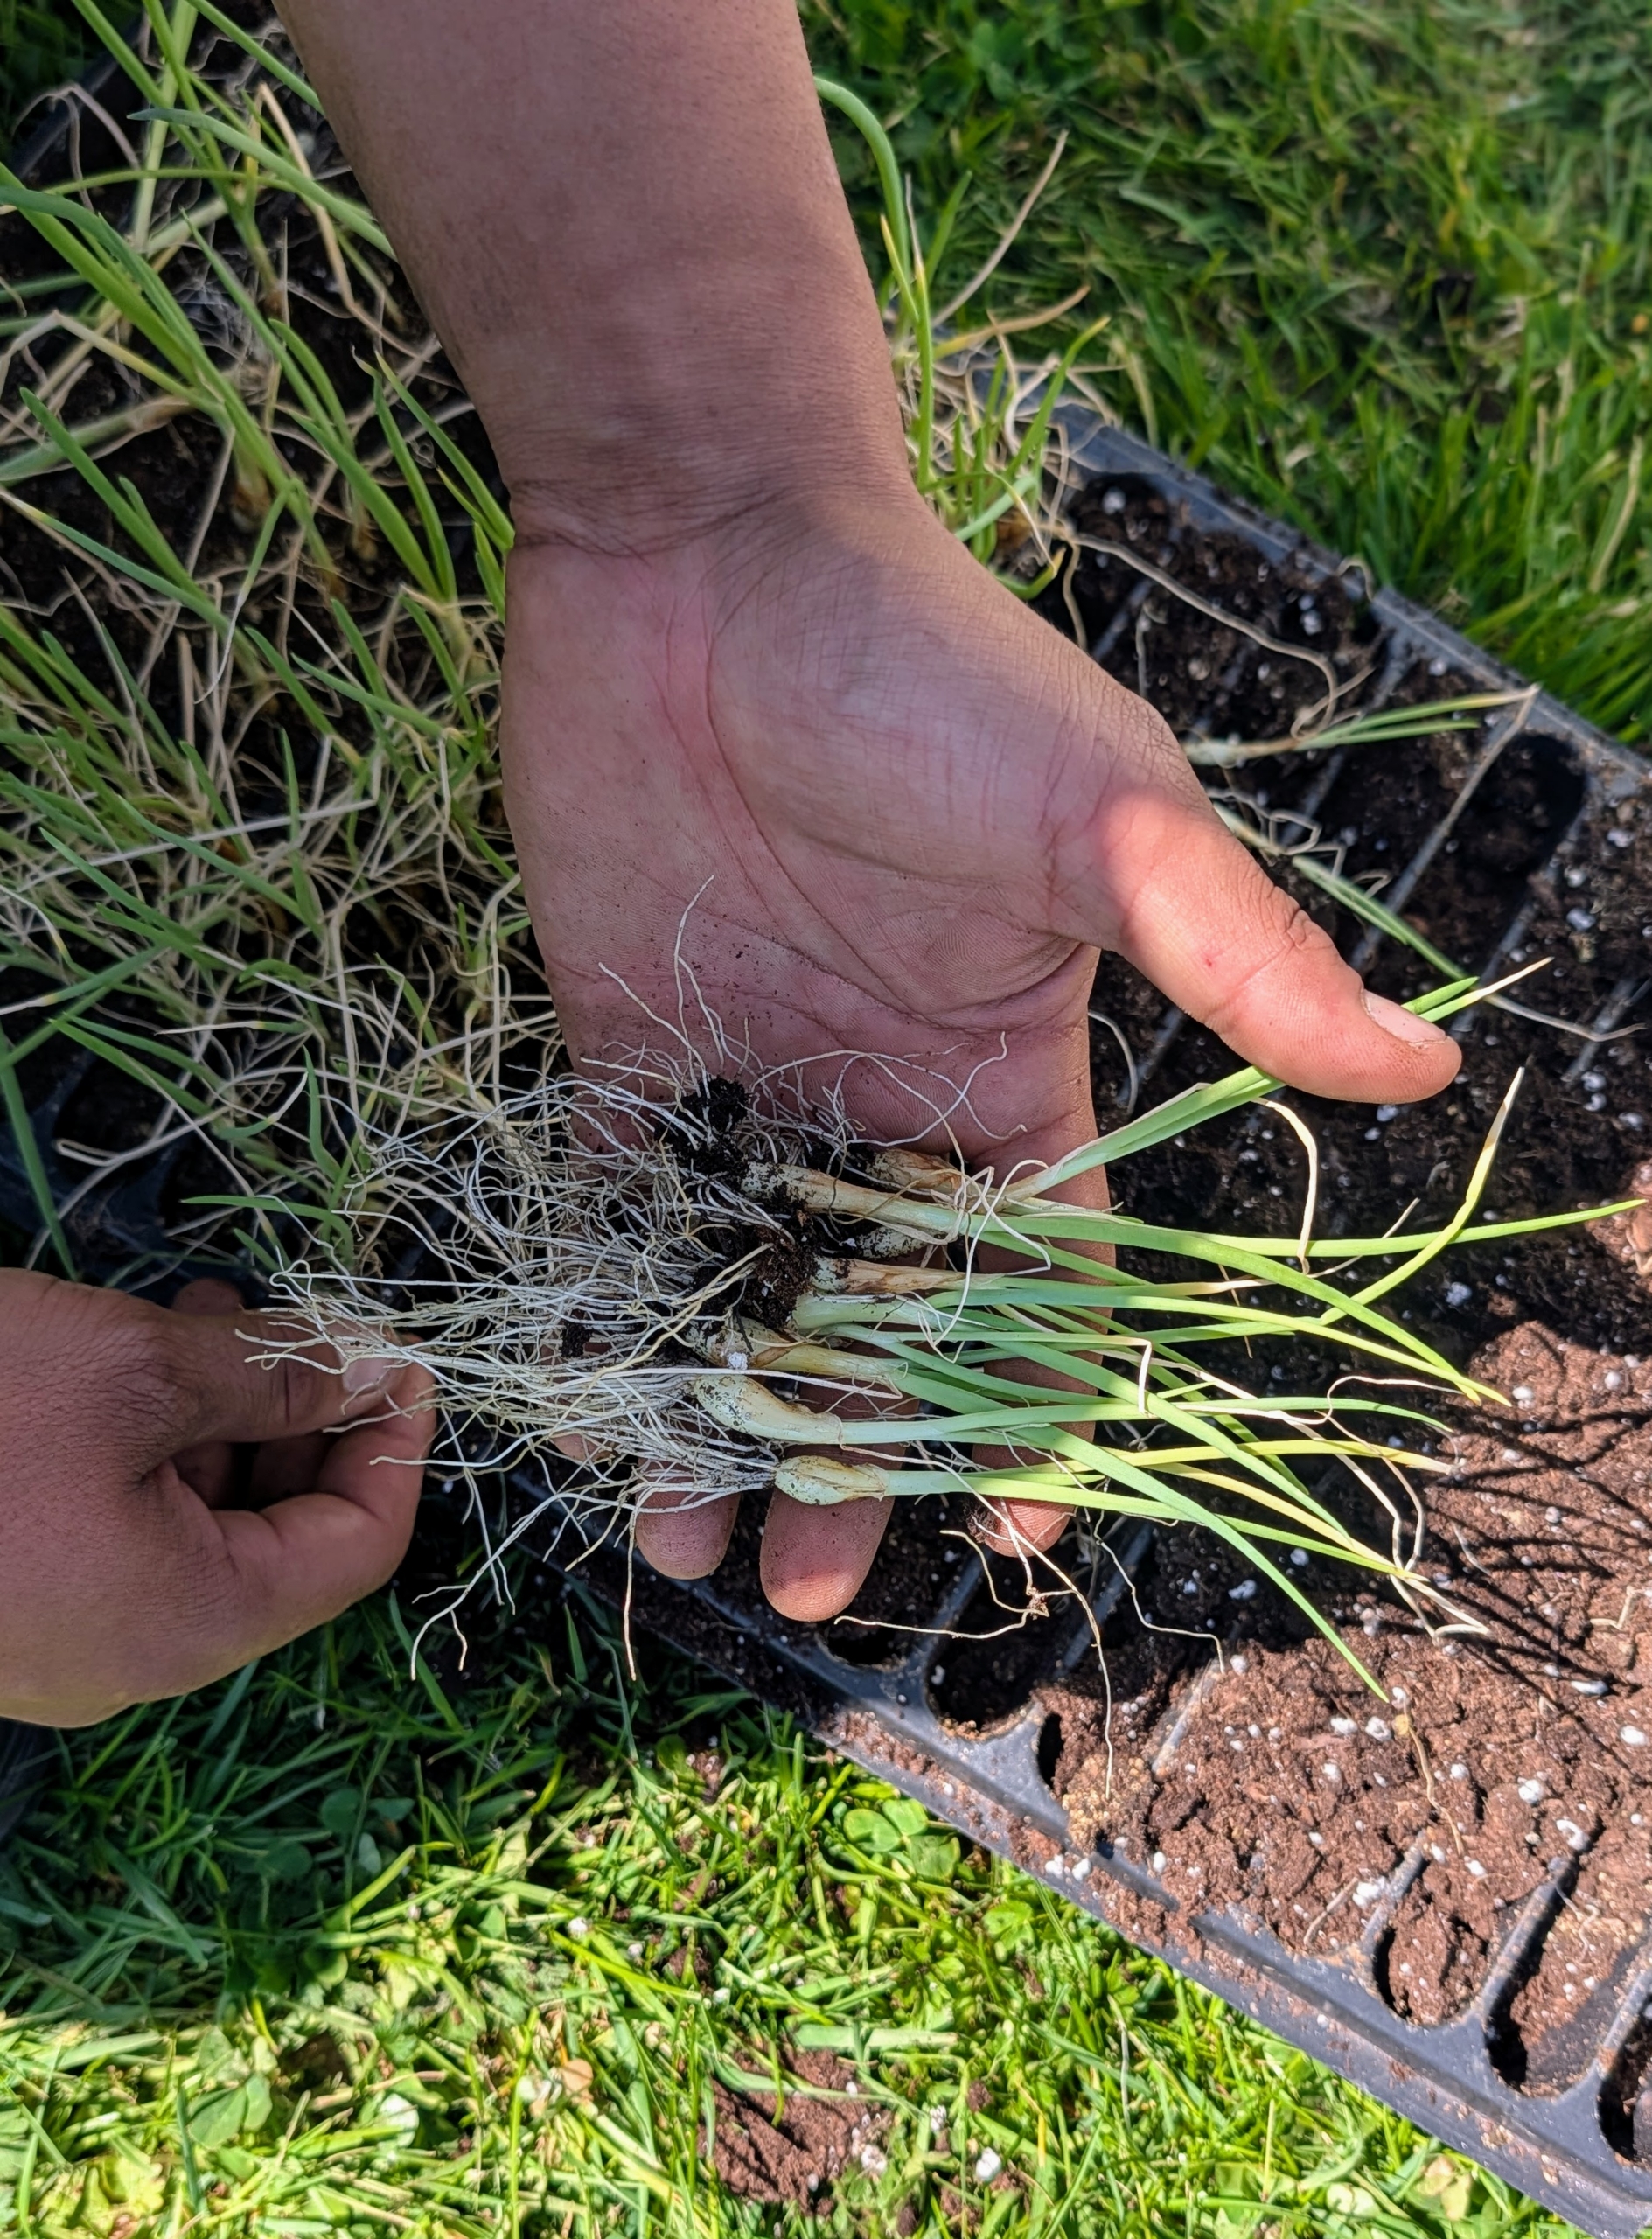
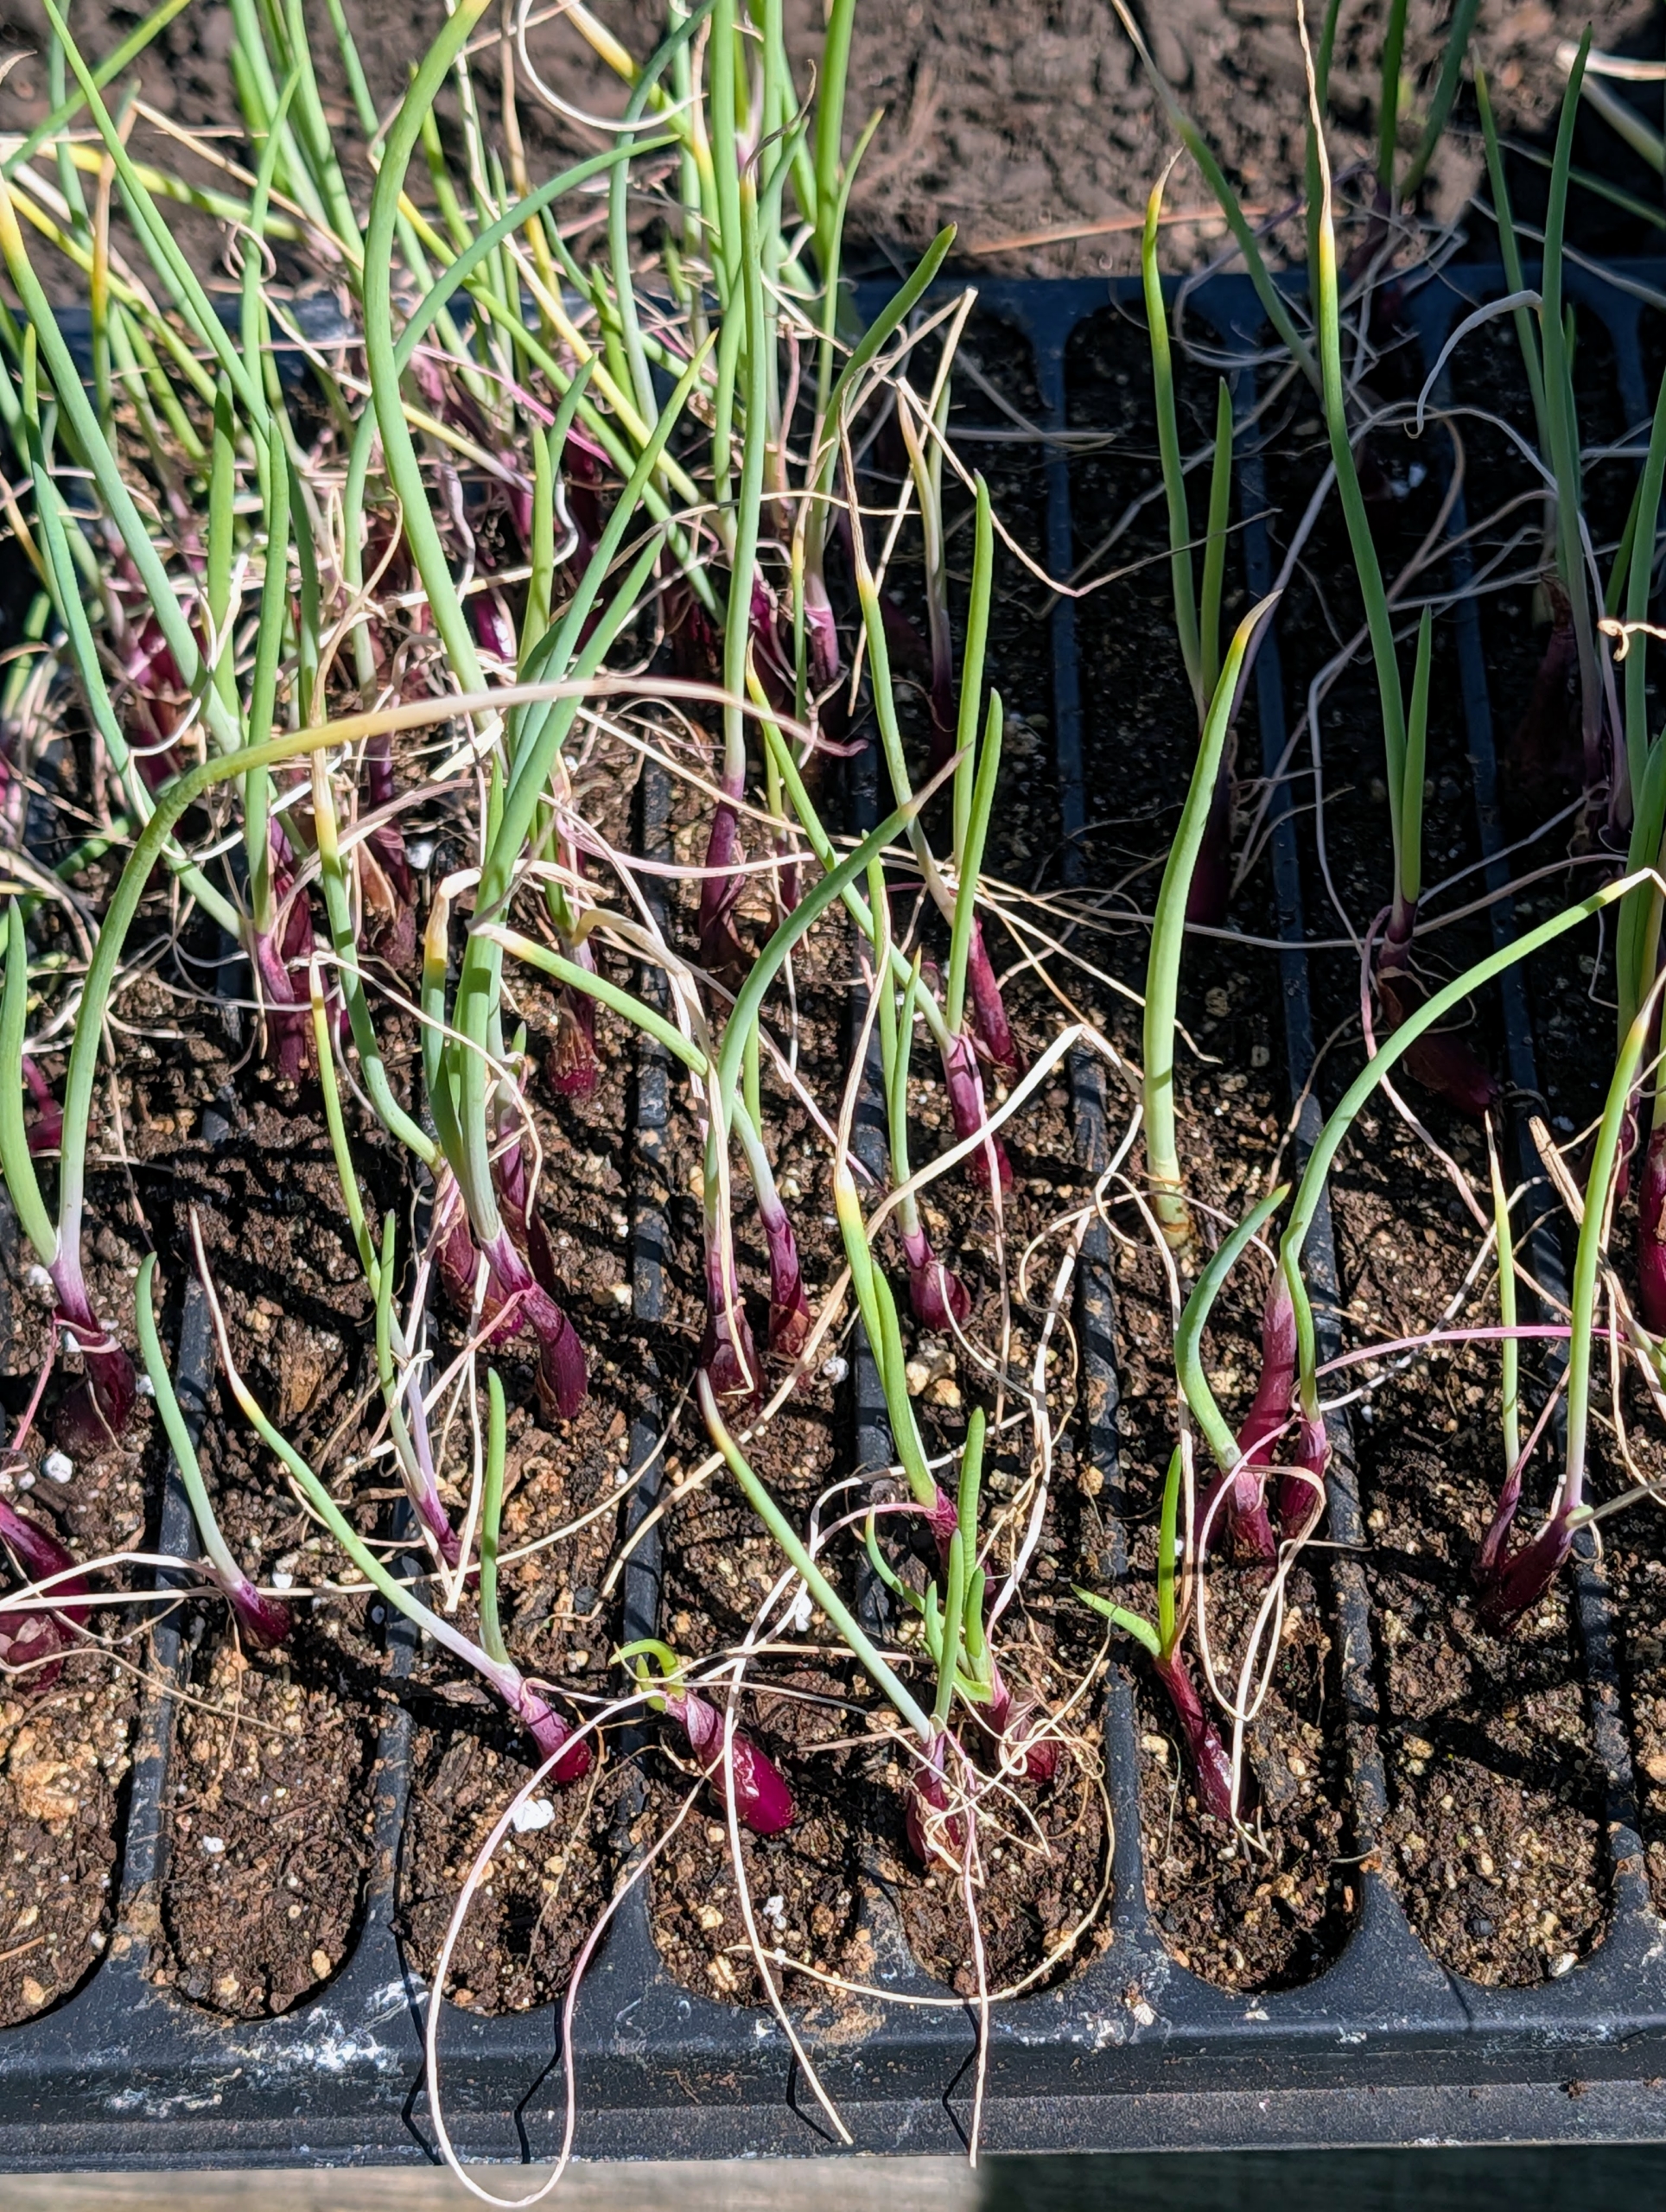
Matthew separates the plants and picks the most robust ones to plant first.
He places each one down in the row a few inches from the next.
Onion roots are slender, thread-like structures that grow from the bottom of the bulb, with some thicker roots storing nutrients and water.
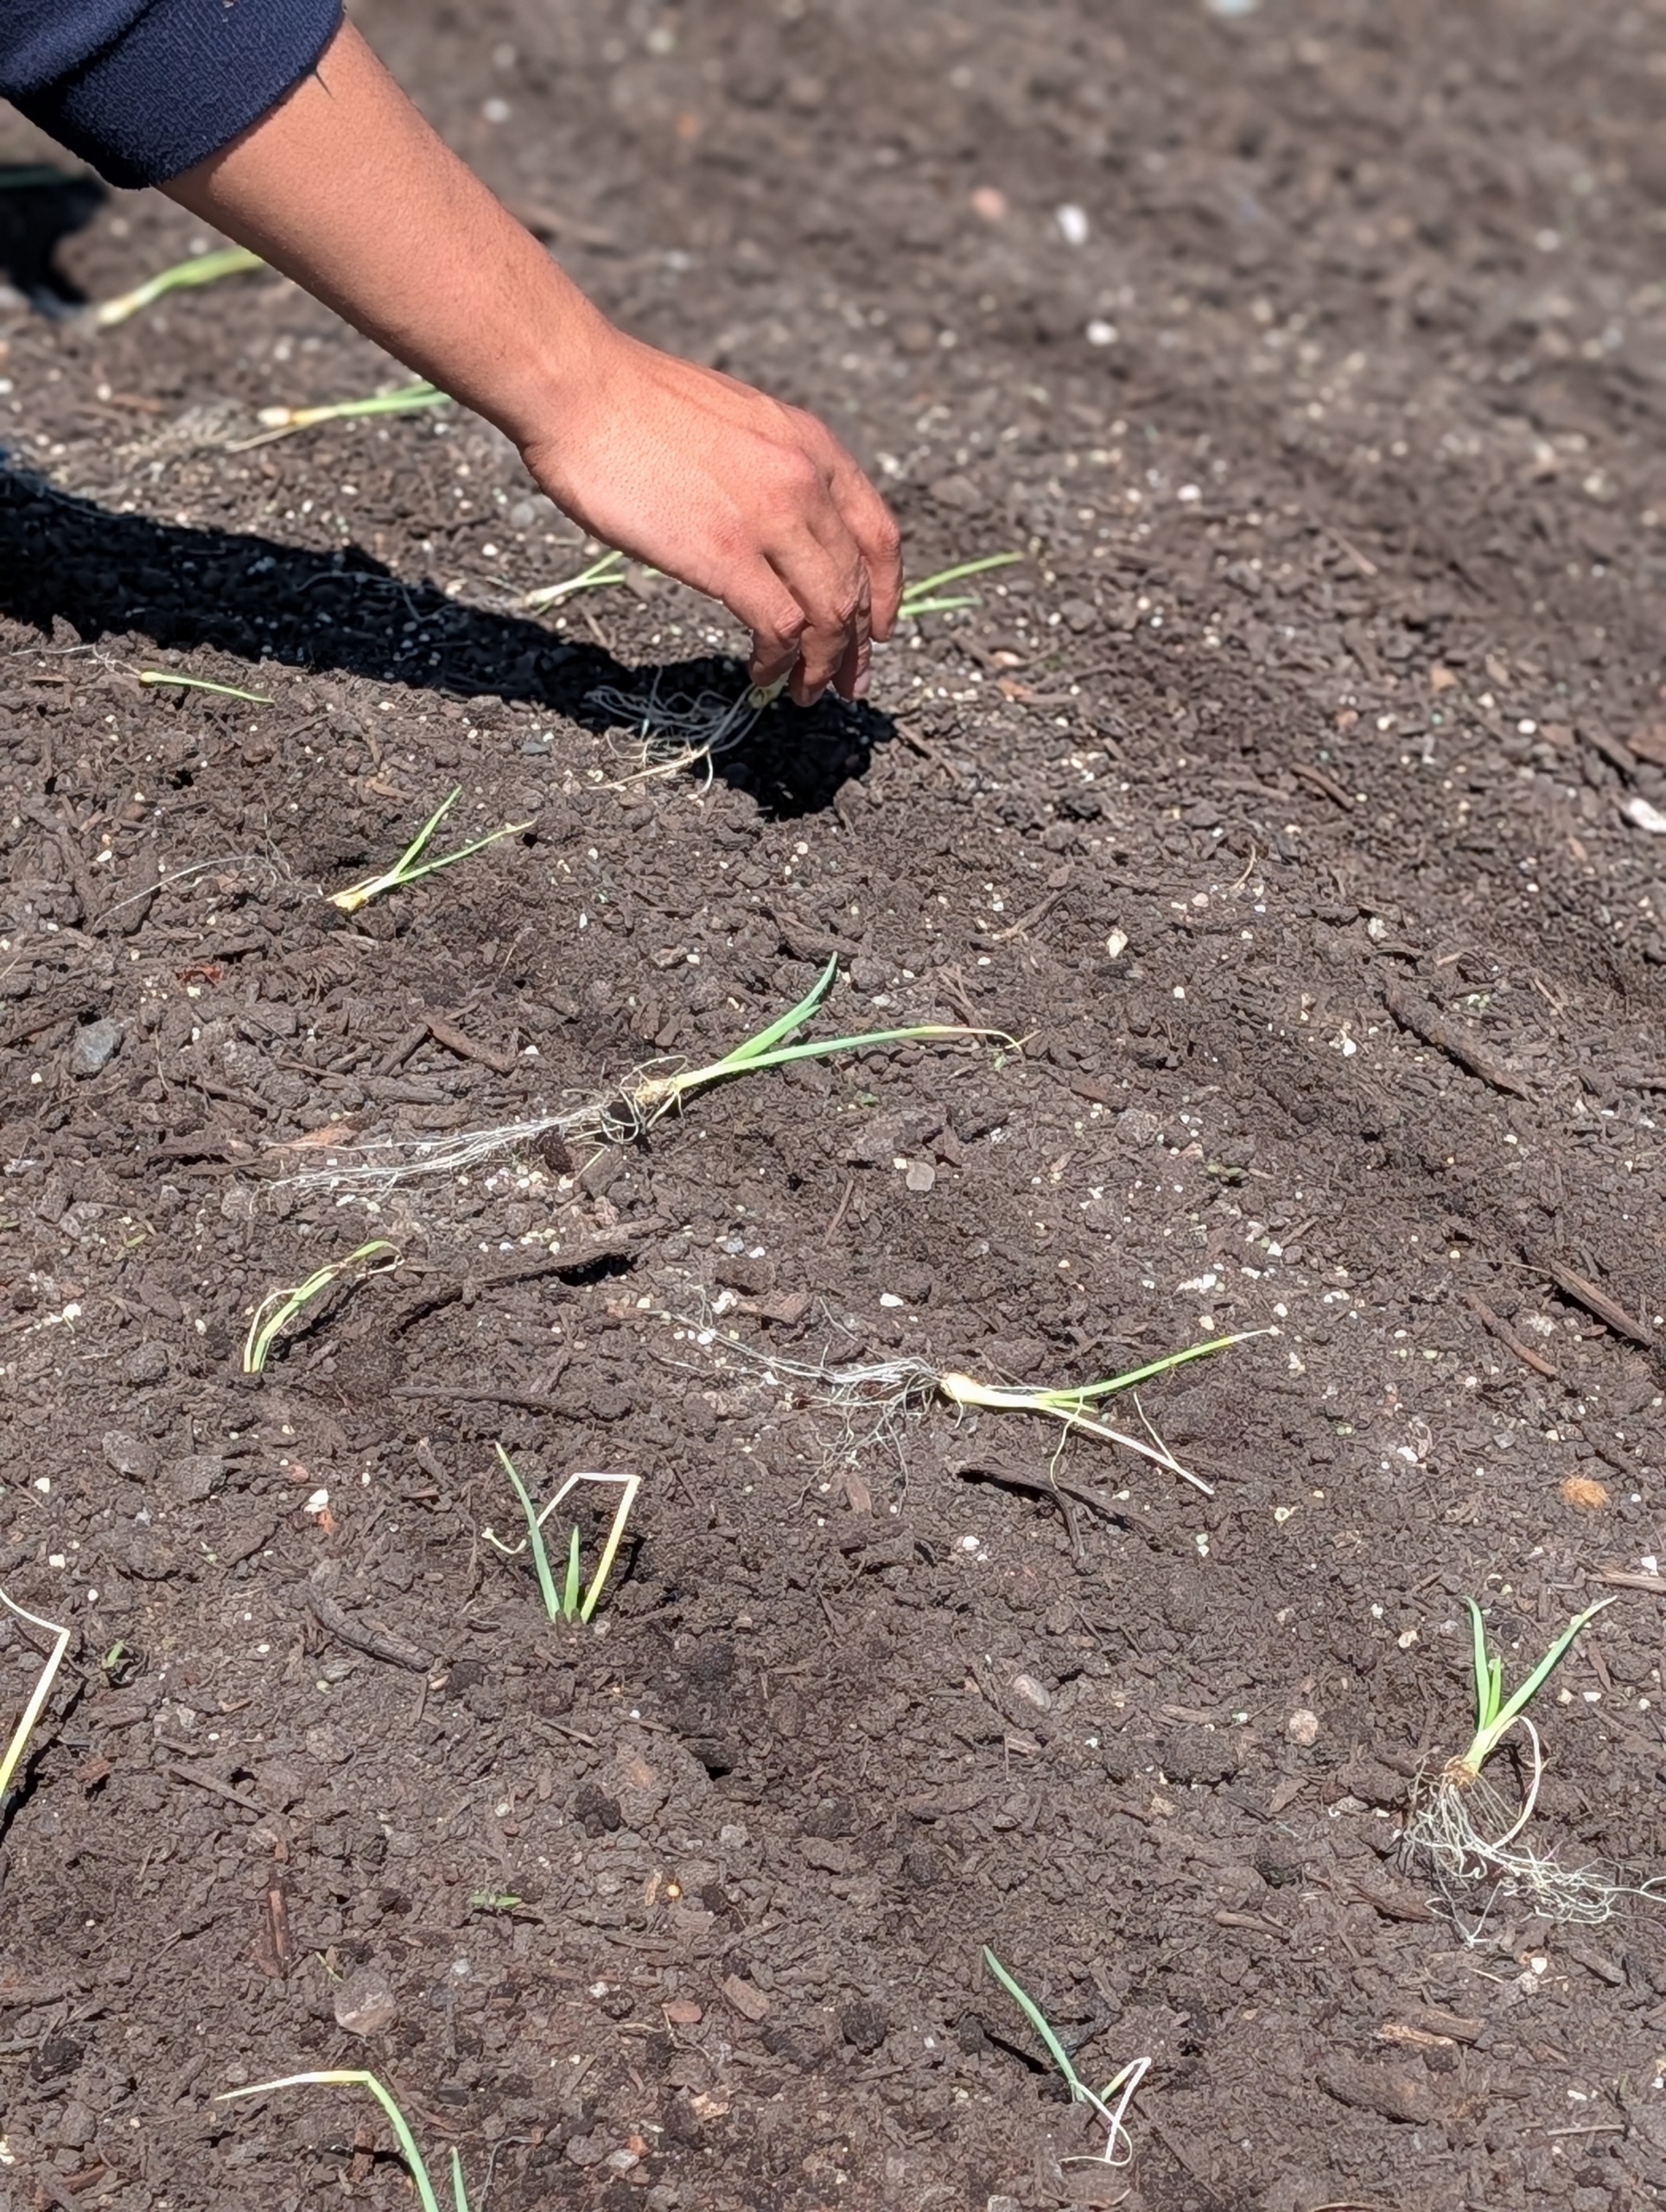
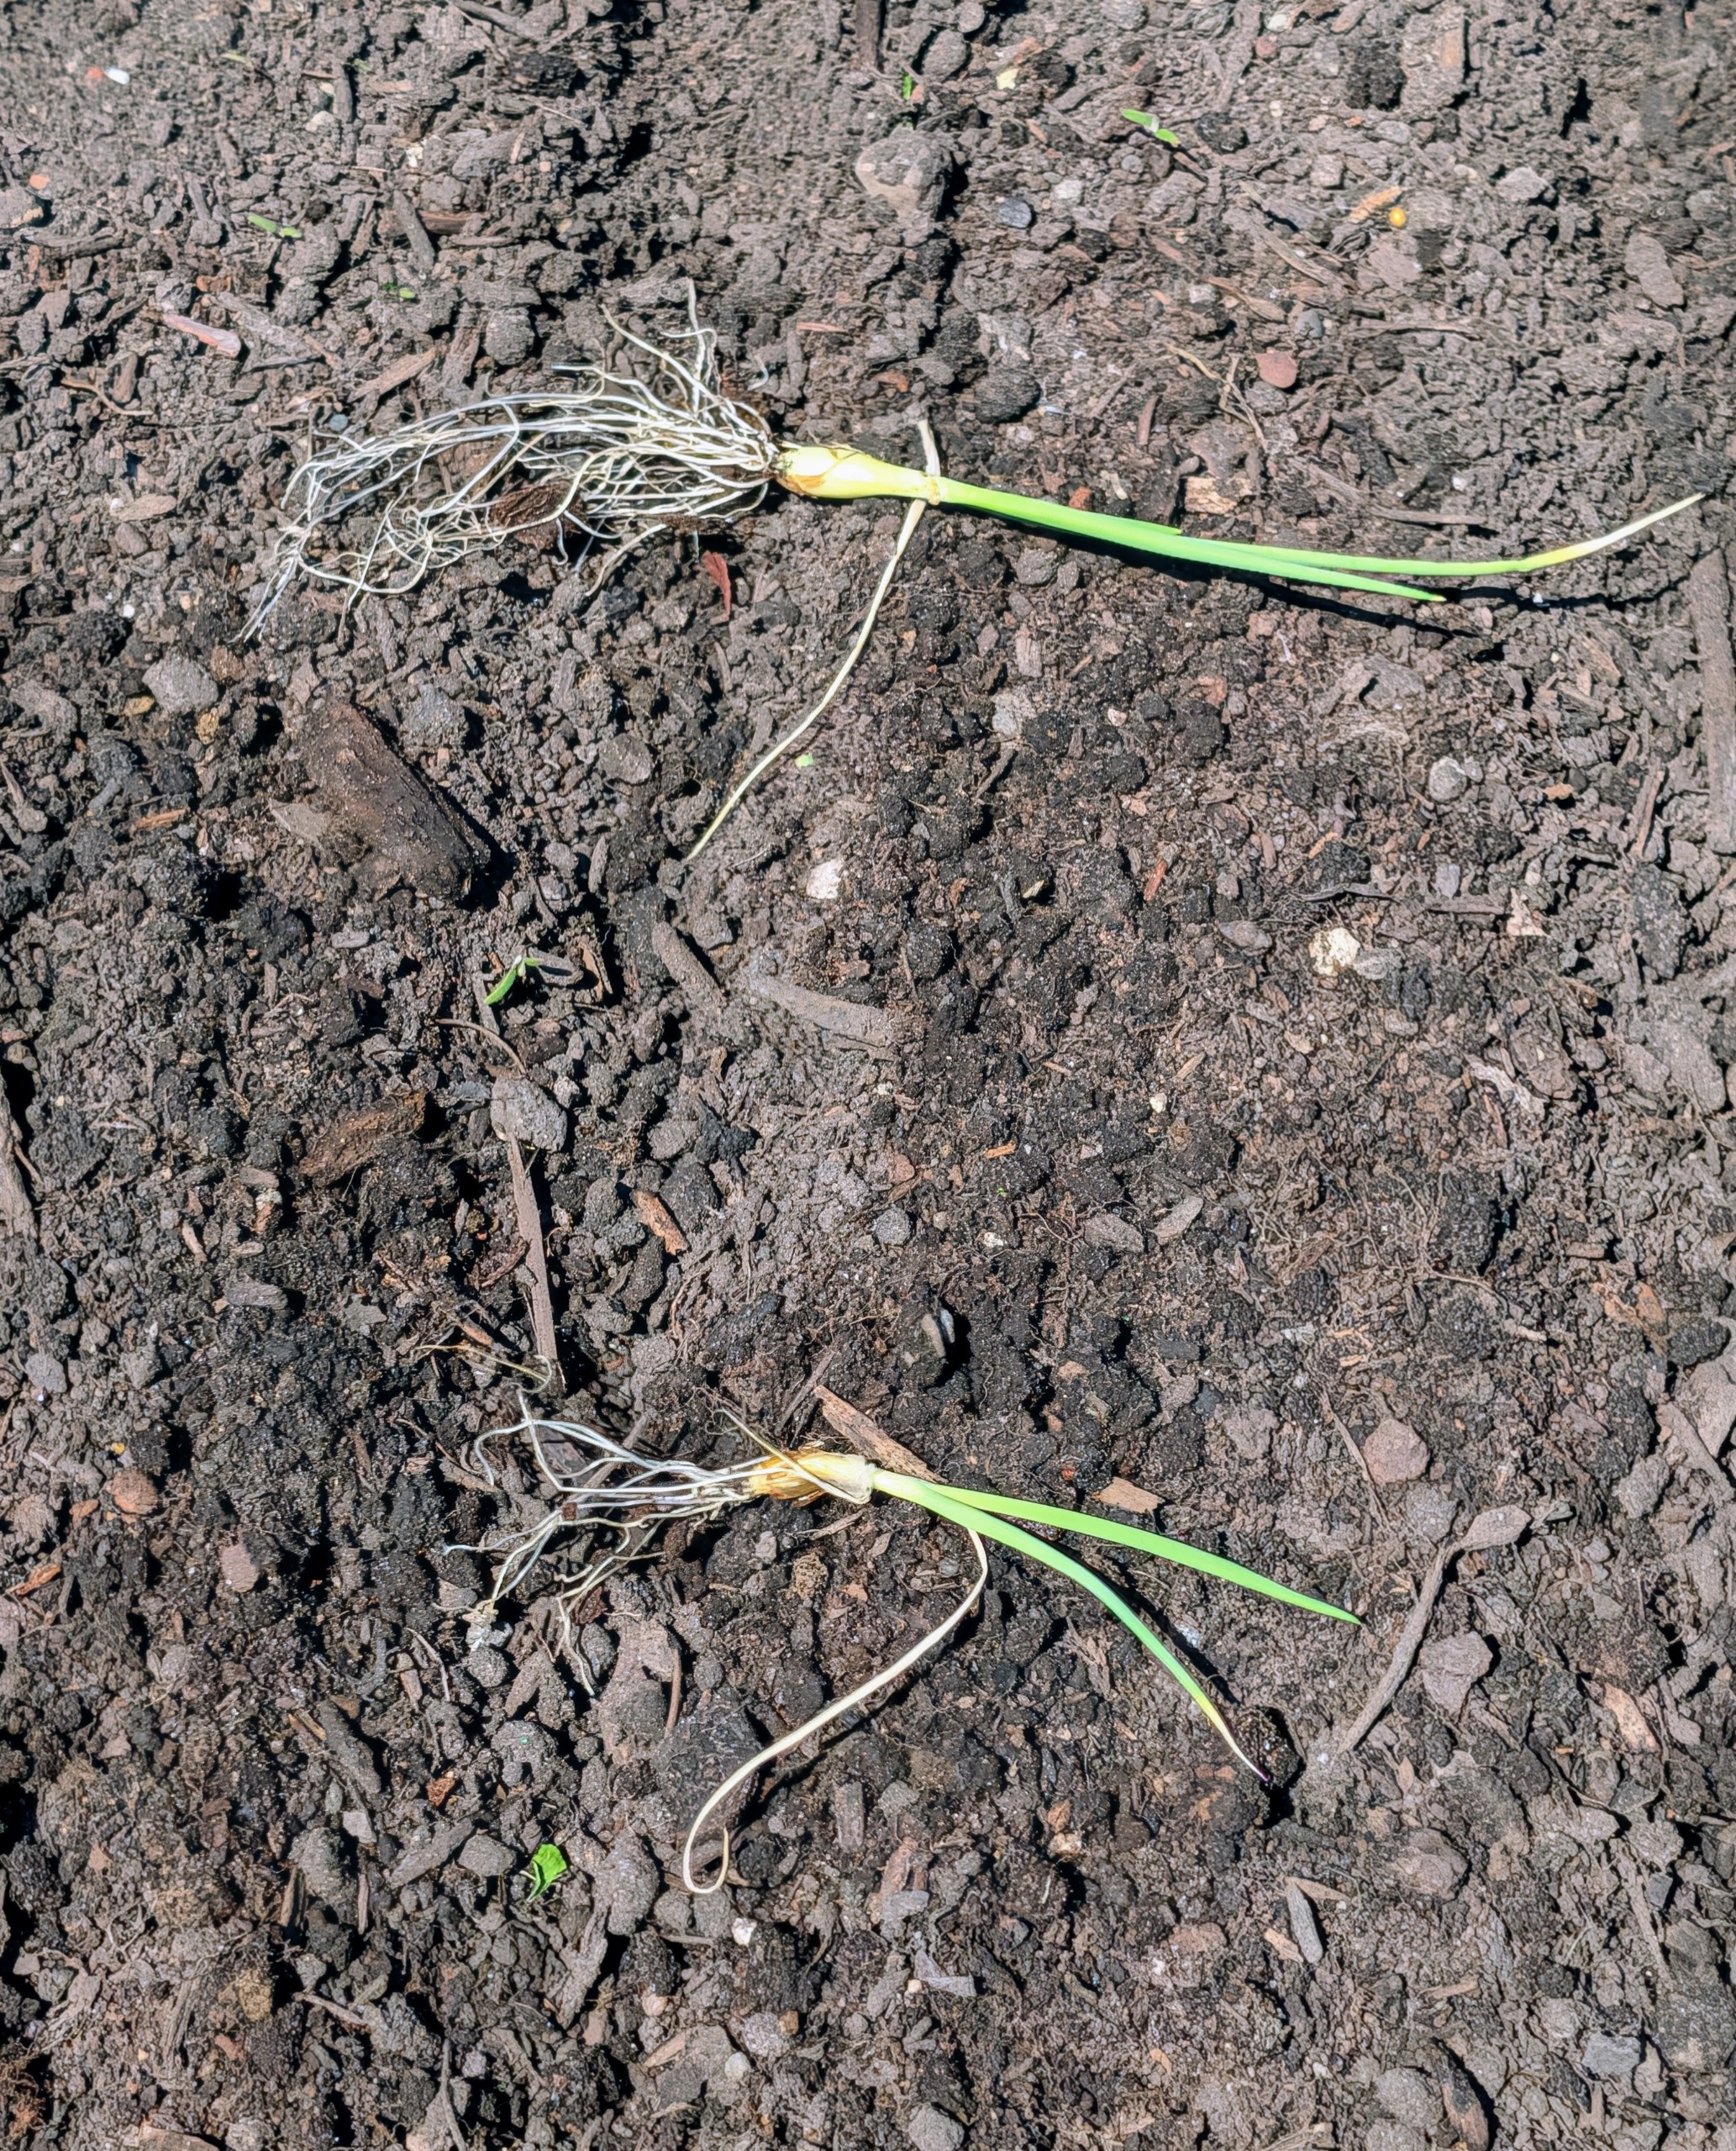
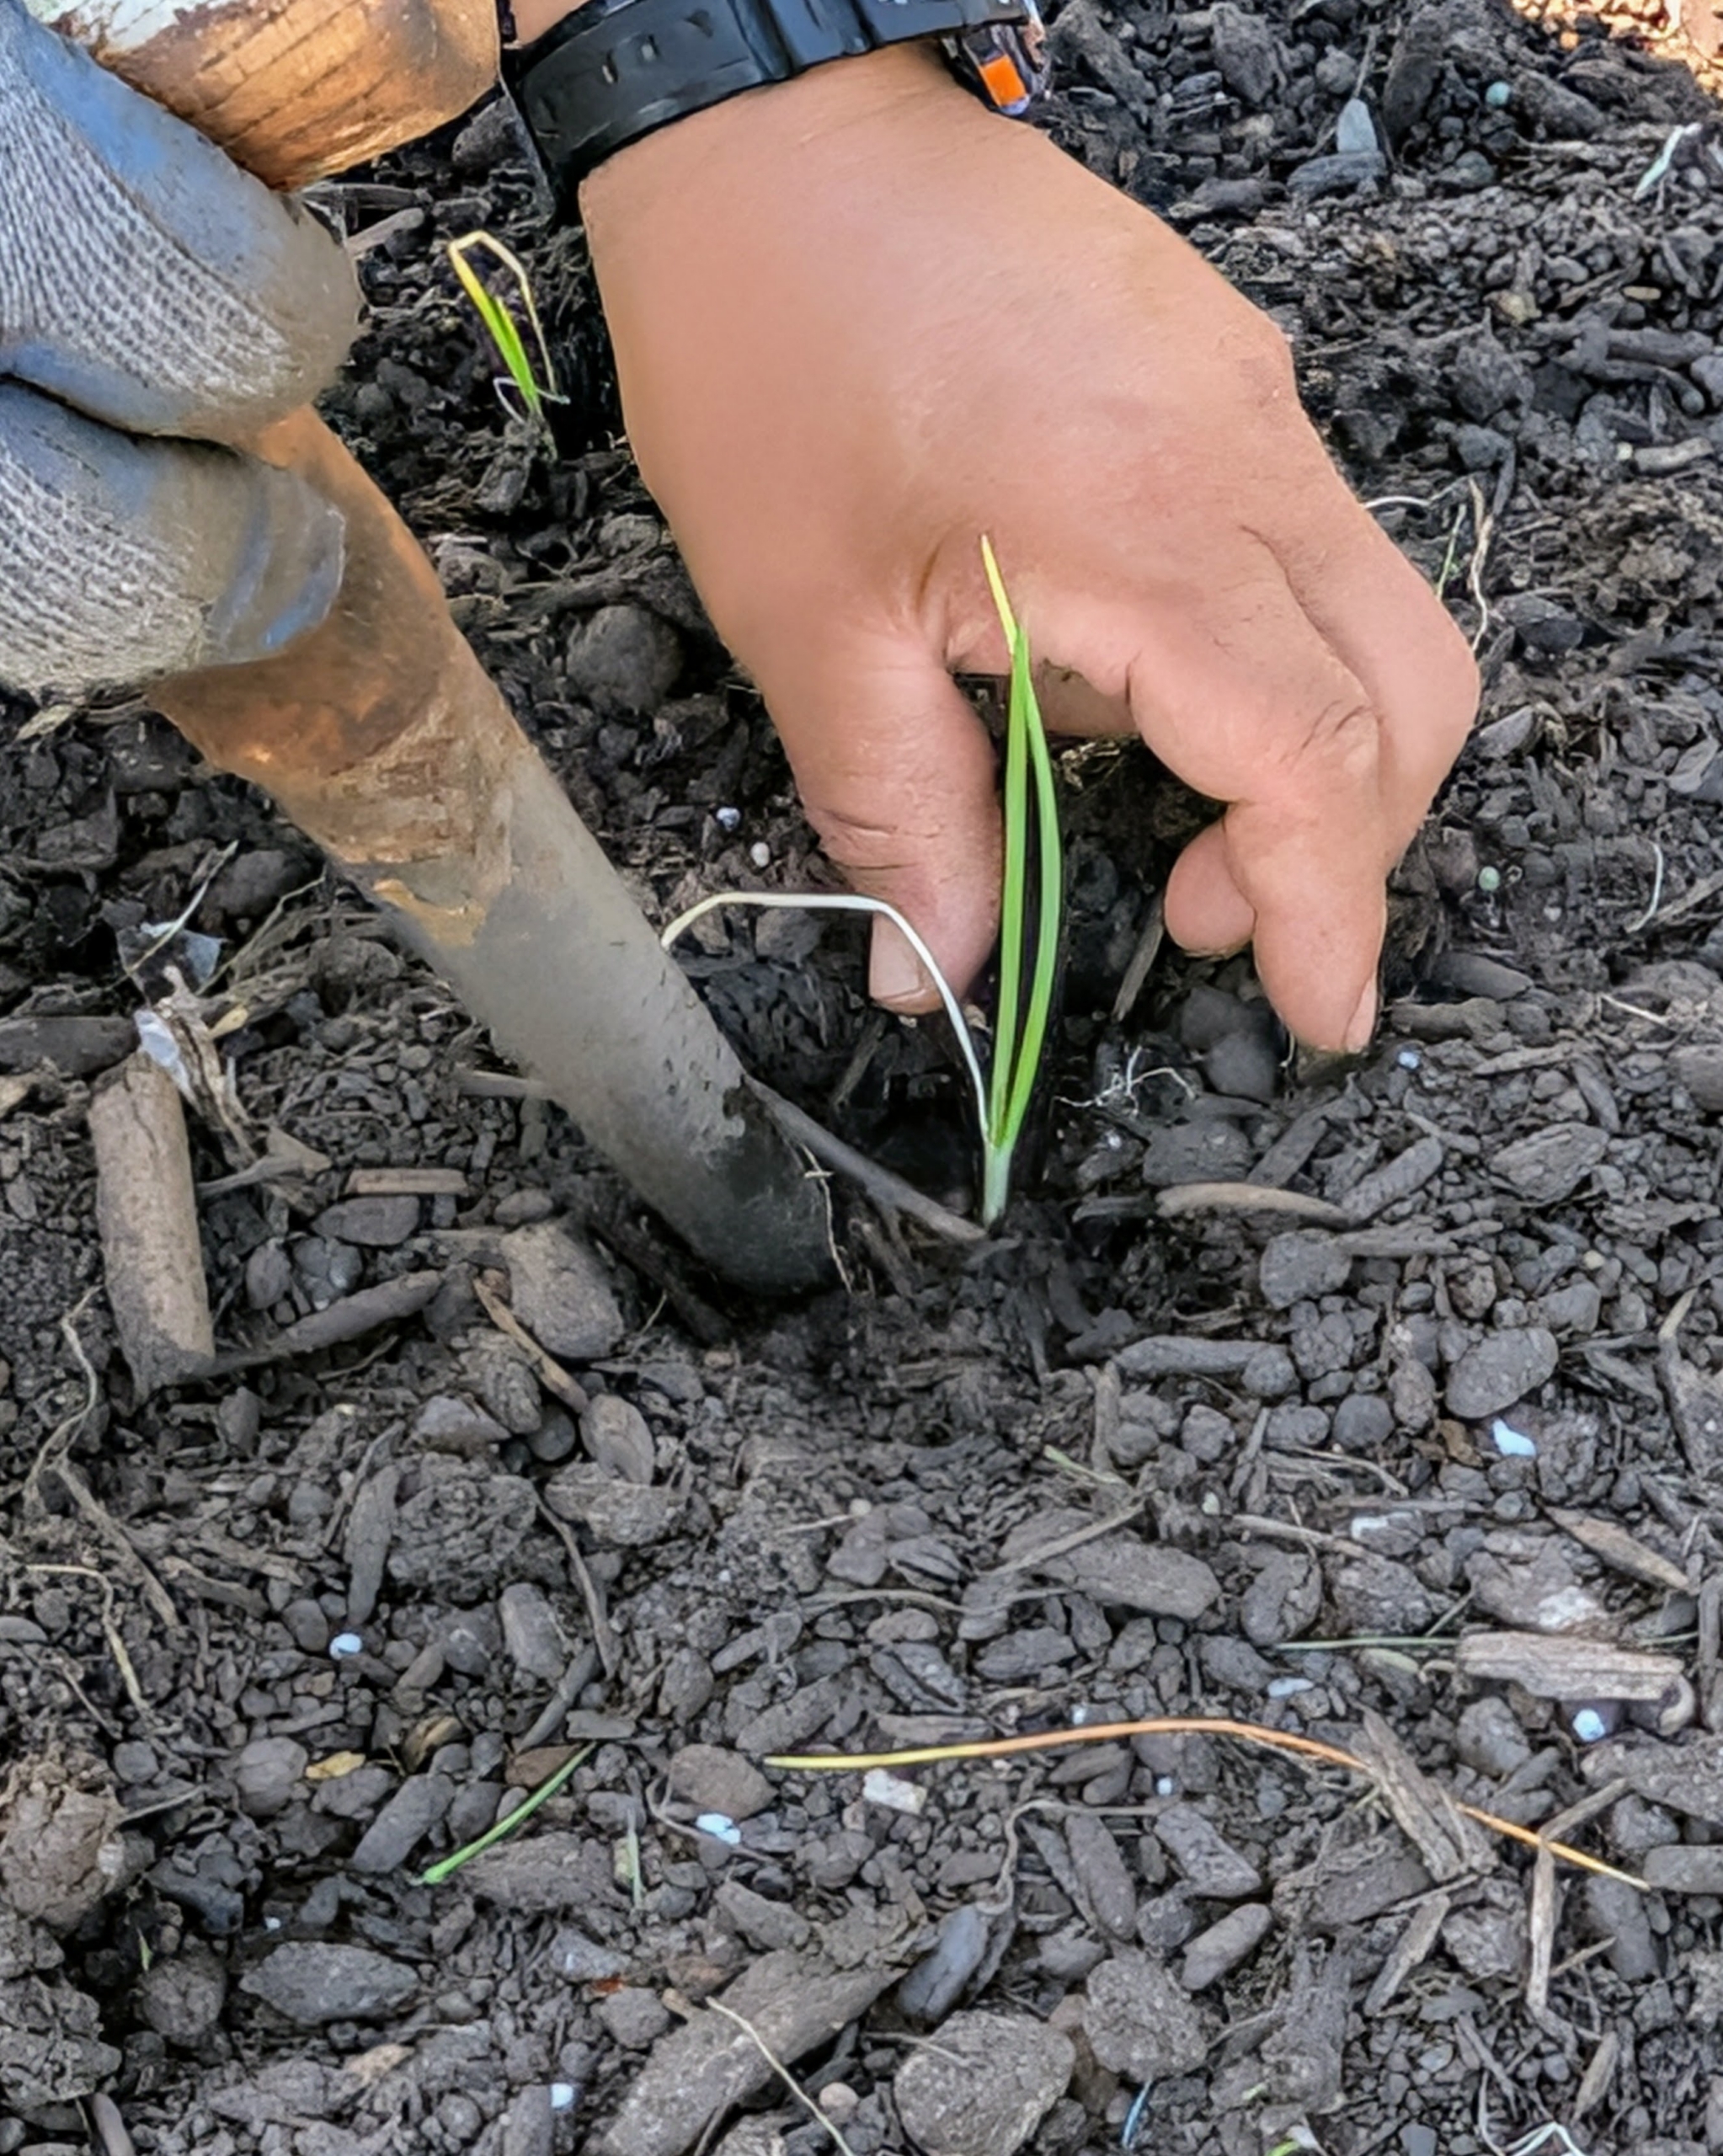
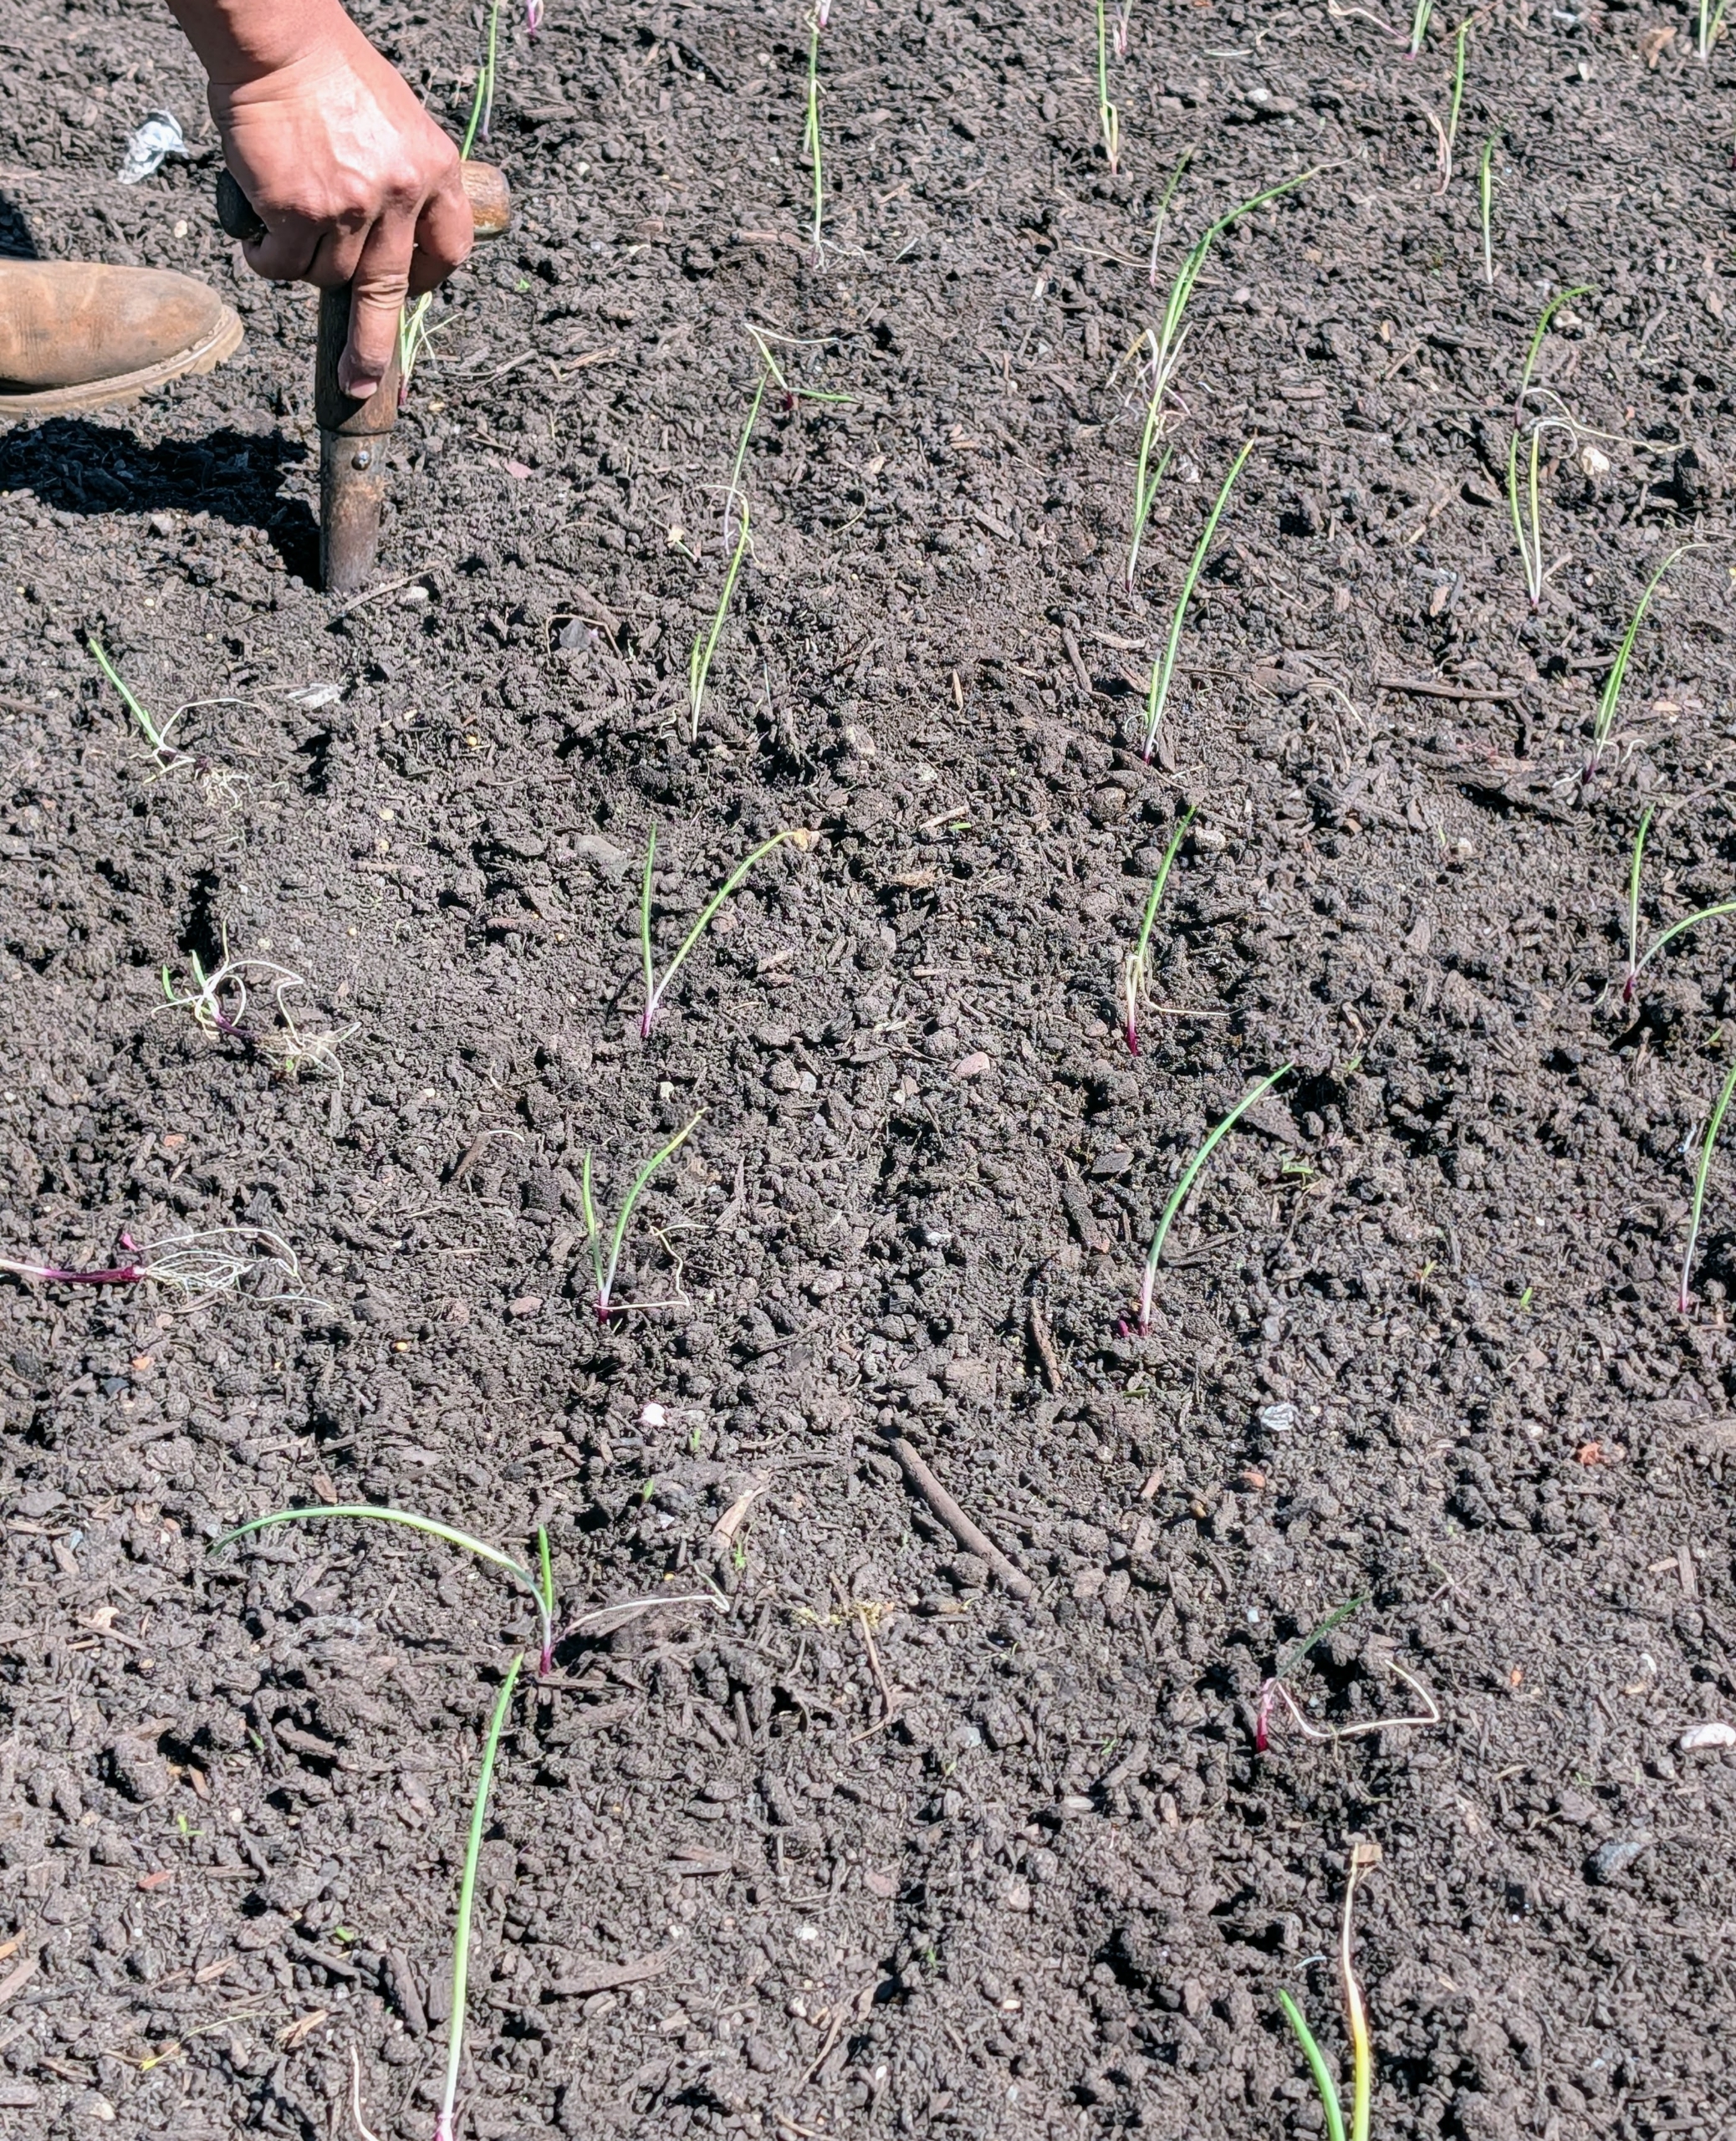
Using the dibber, Phurba carefully positions the plant with the root end down and pushes it into the soil about two-inches deep until all the roots are well covered.
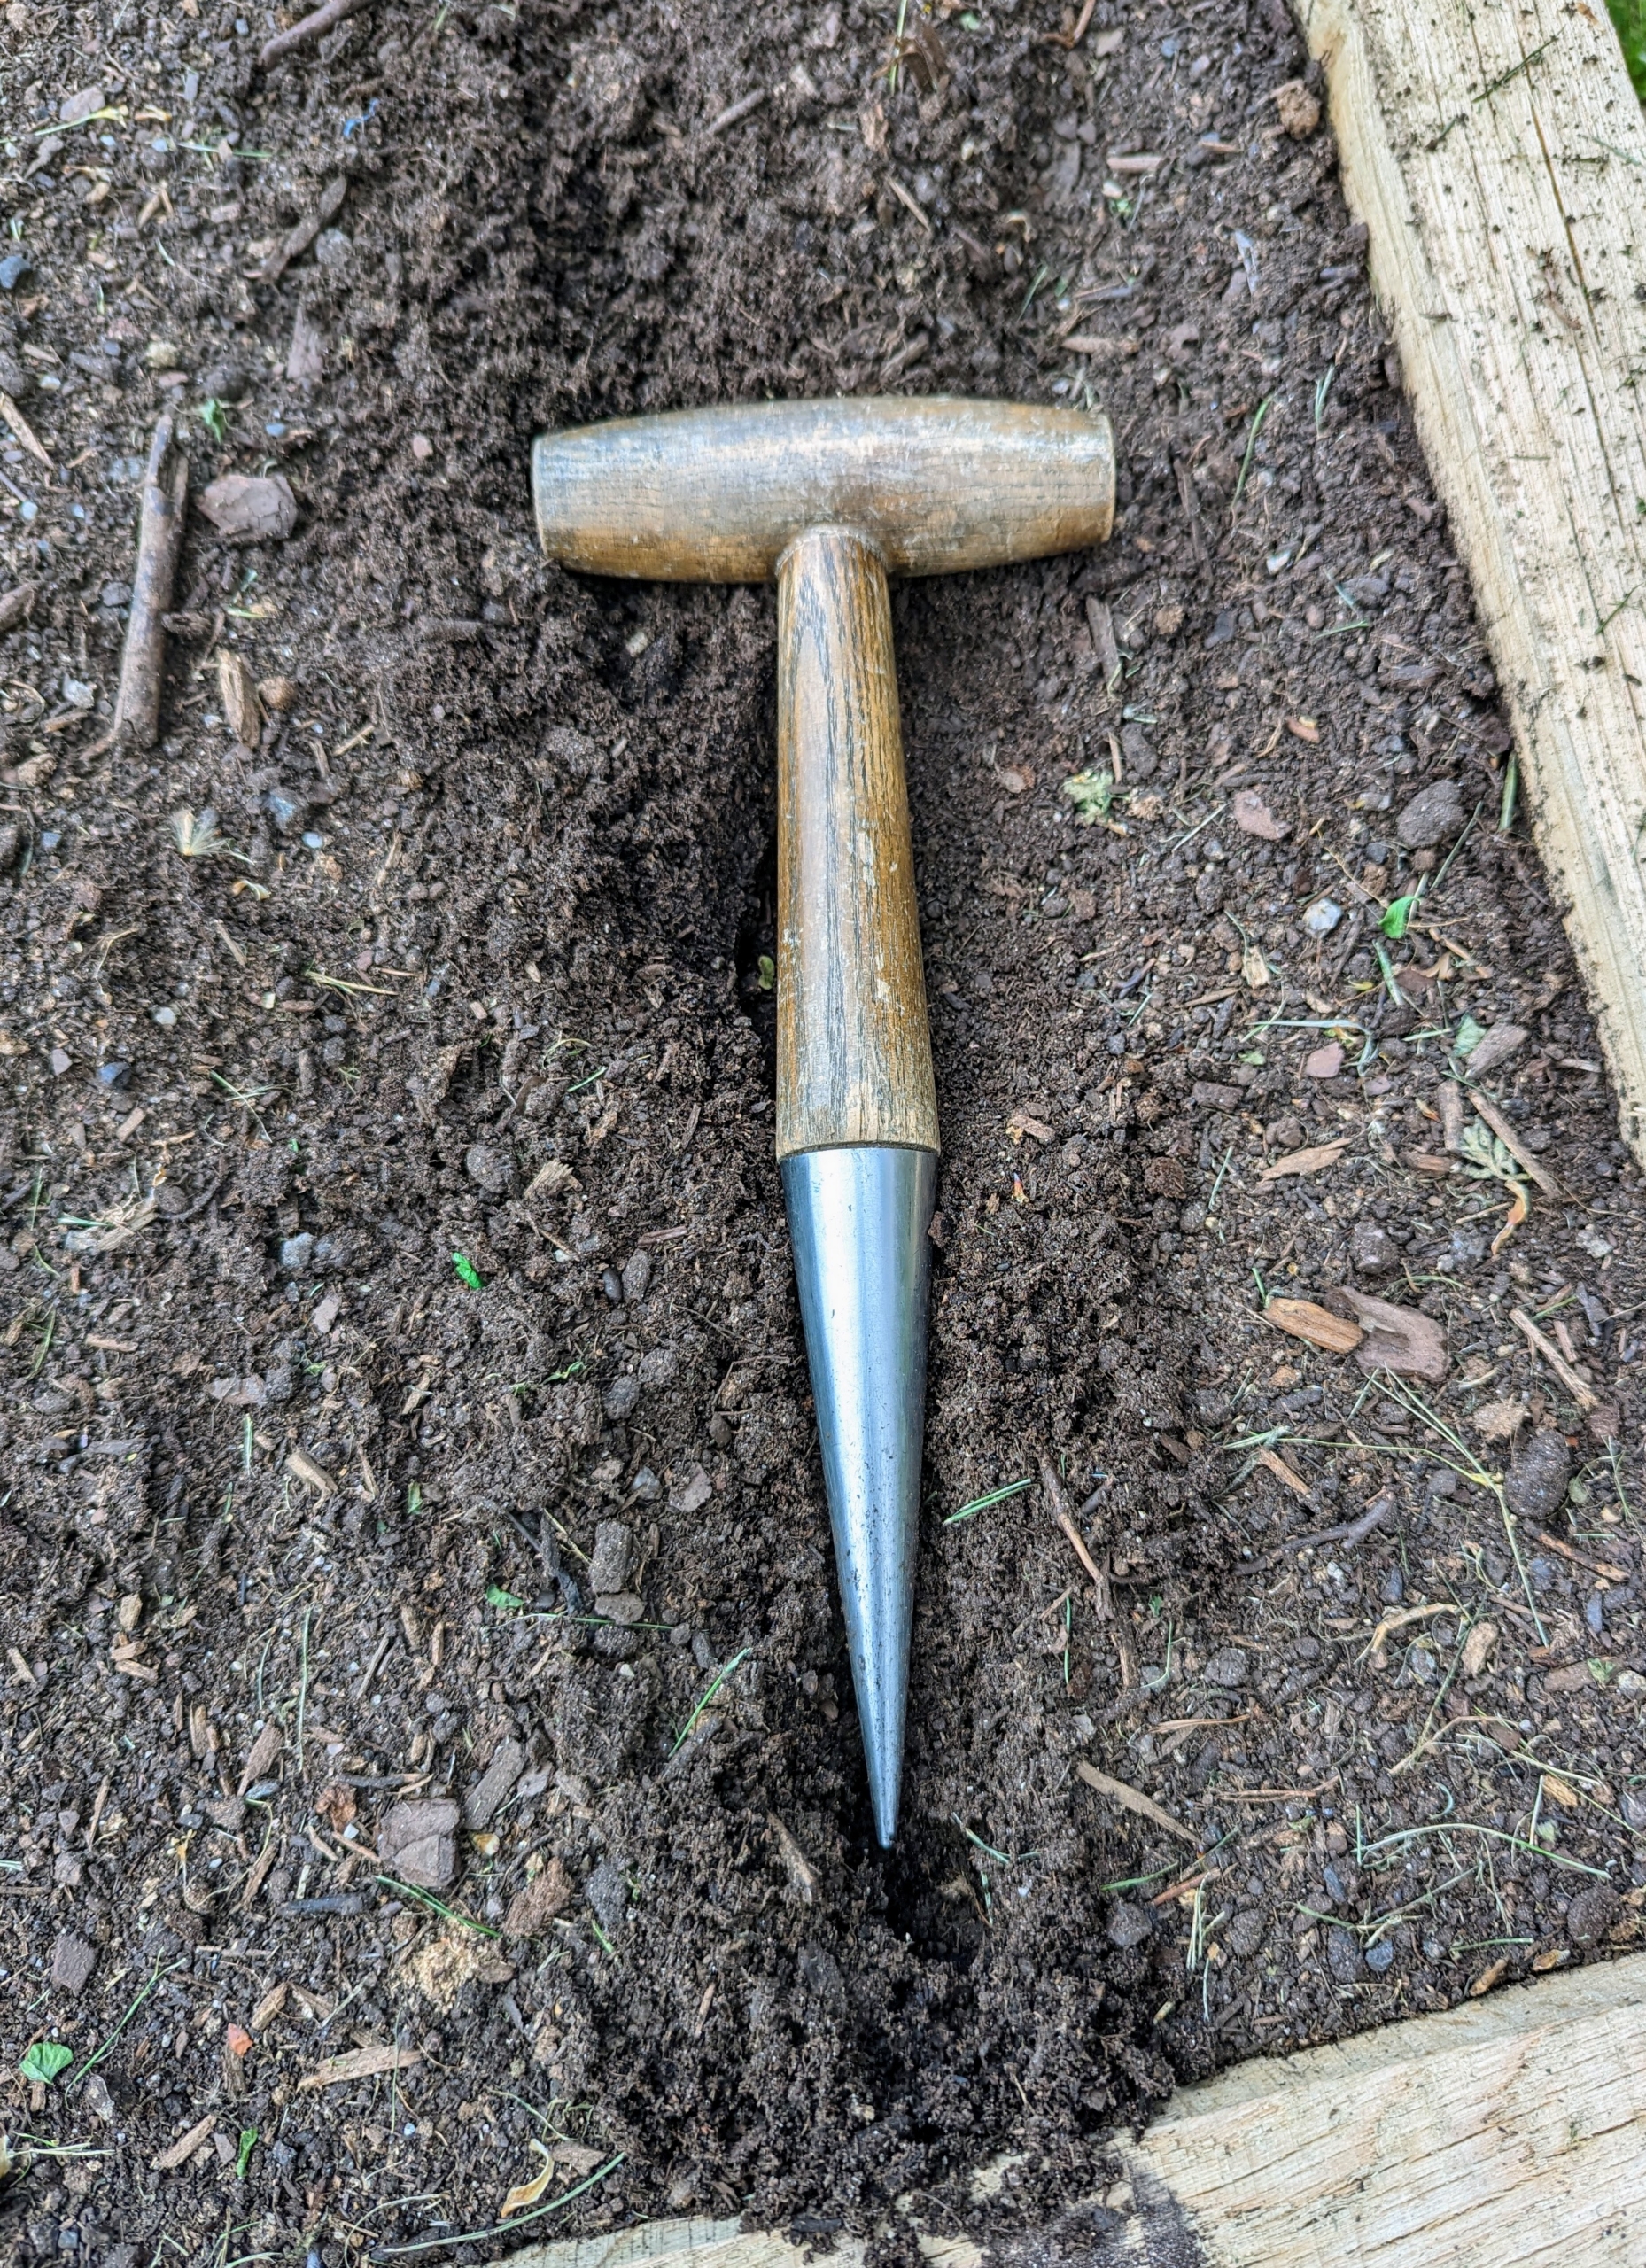
A dibber or dibble or dibbler is a pointed wooden stick for making holes in the ground so that seeds, seedlings or small bulbs can be planted. Dibbers come in a variety of shapes including the straight dibber, the T-handled dibber like this one, the trowel dibber, and the L-shaped dibber.
Phurba makes sure the top of the plant’s neck isn’t covered too deeply. If too much of the plant is buried, the growth of the onion will be reduced and constricted.
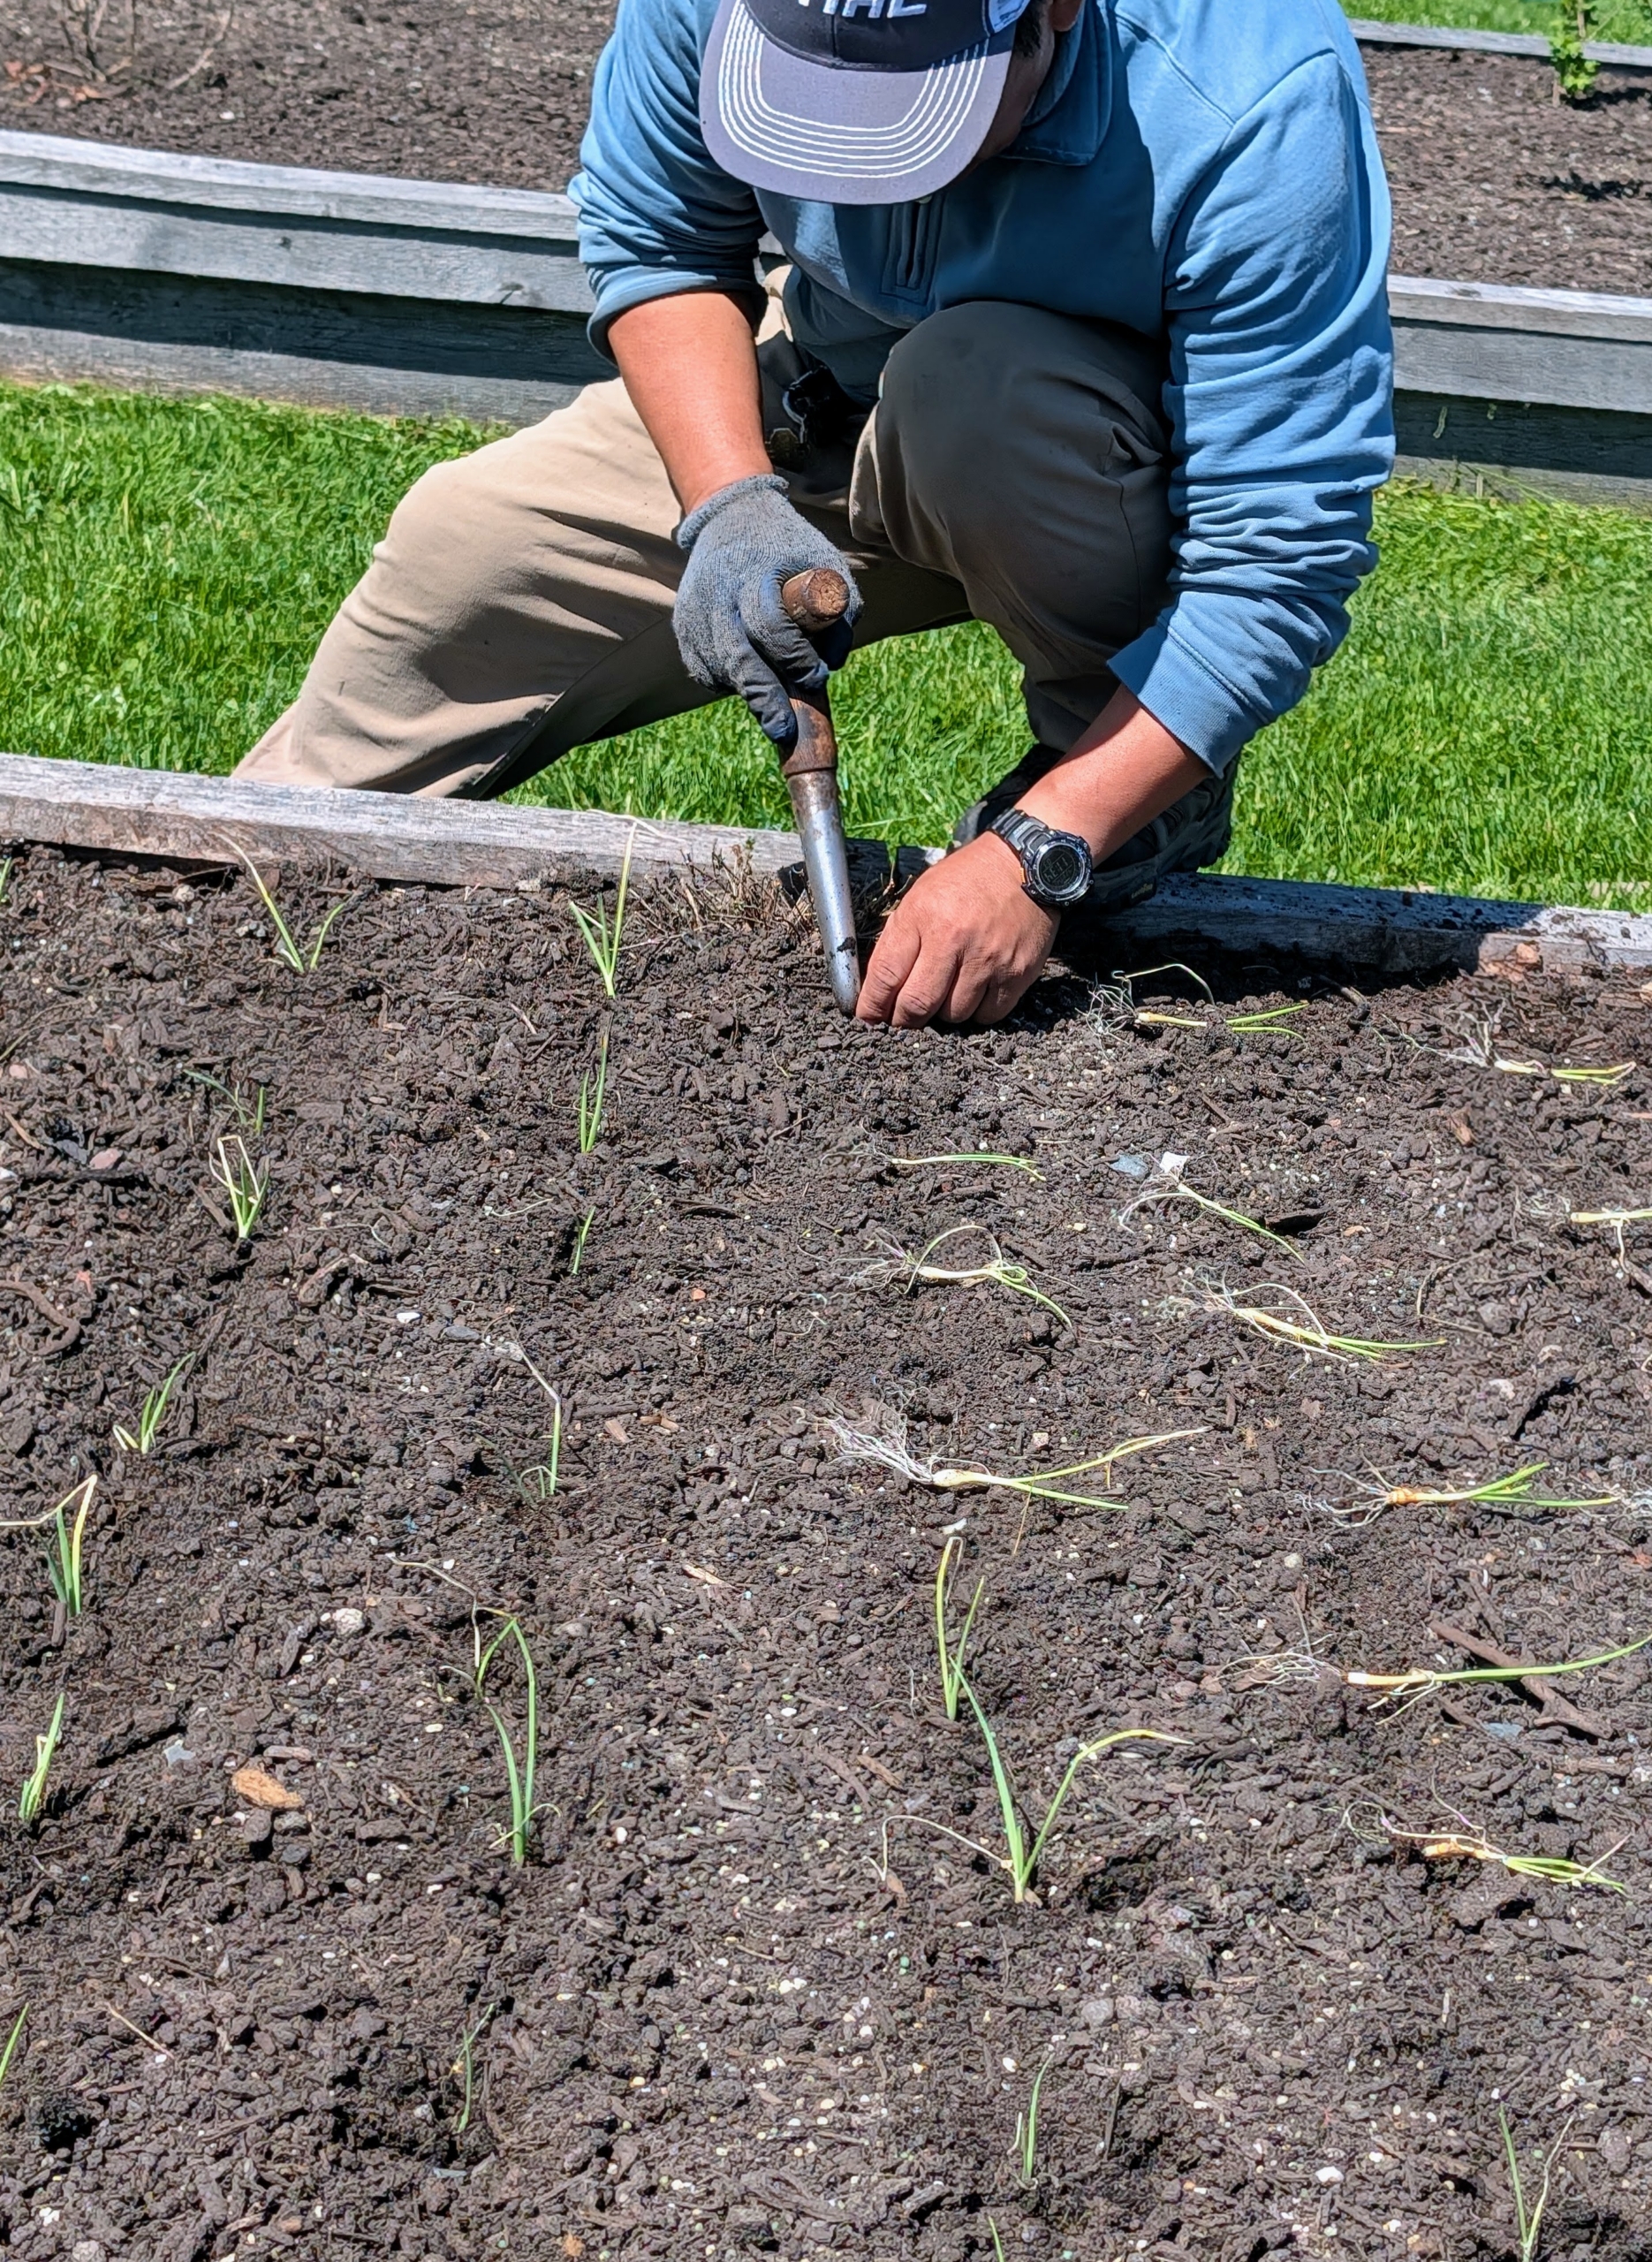
It’s a tedious job, but Phurba and Matthew get through pretty quickly.
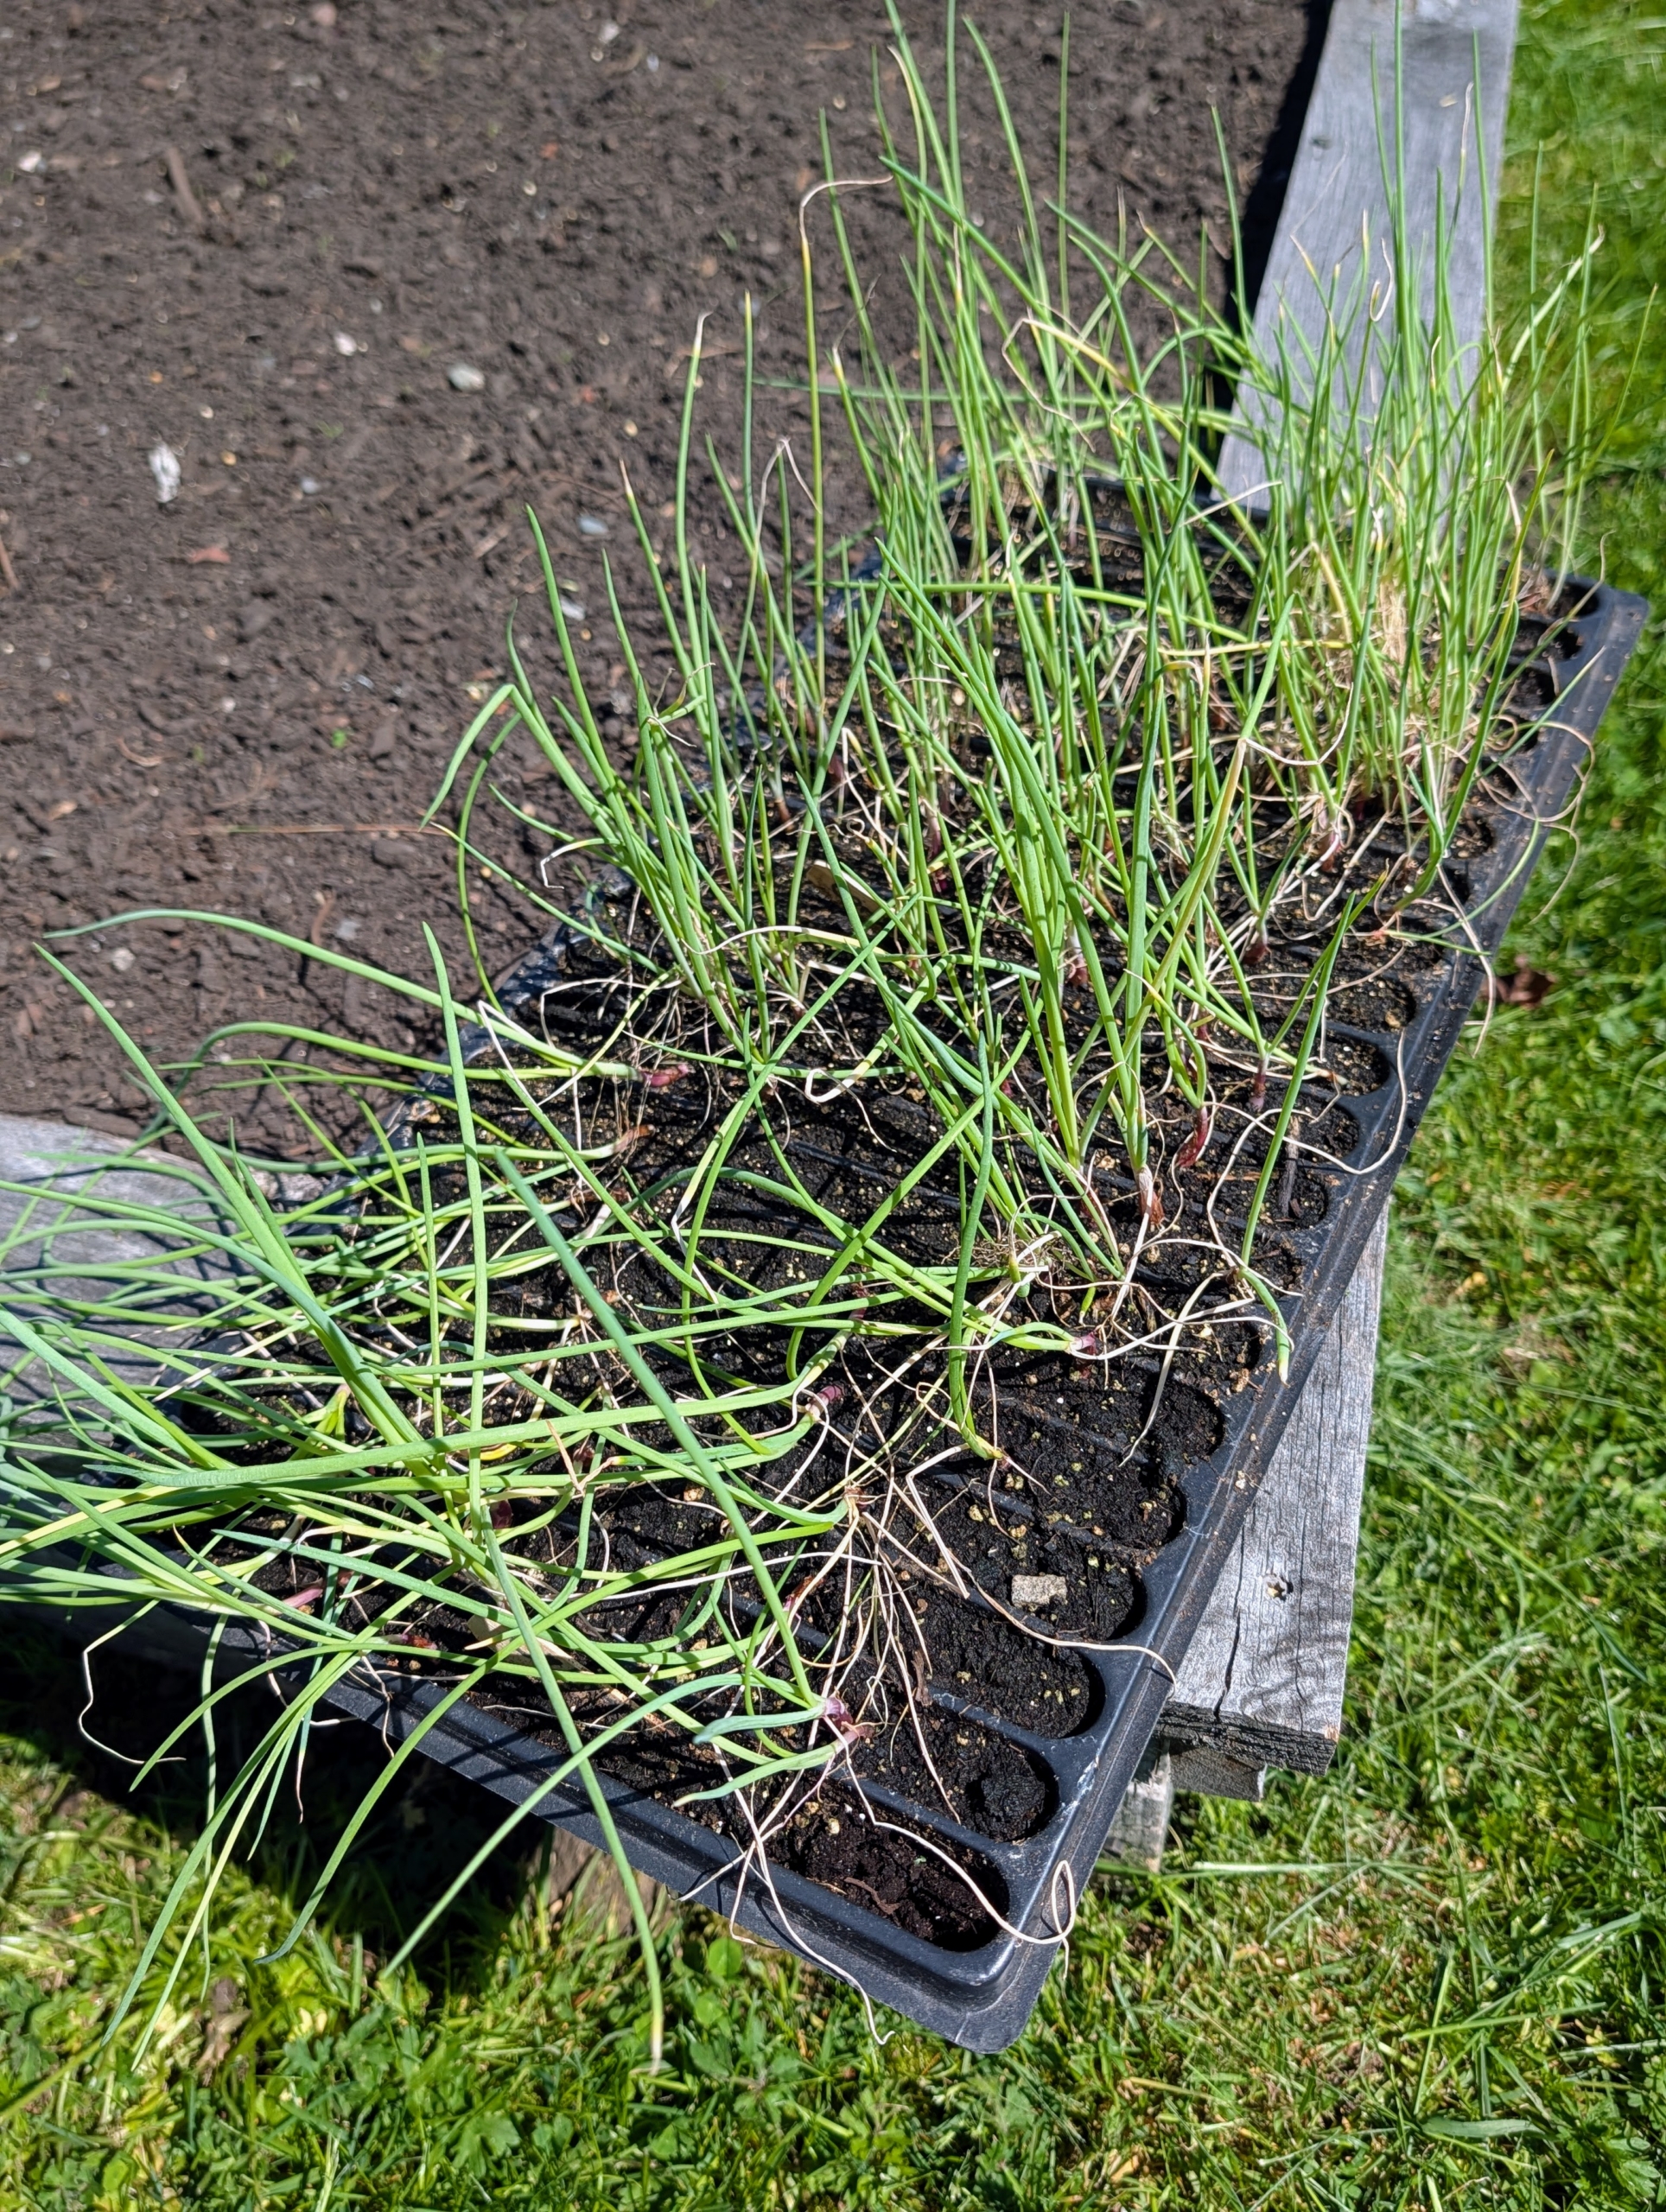
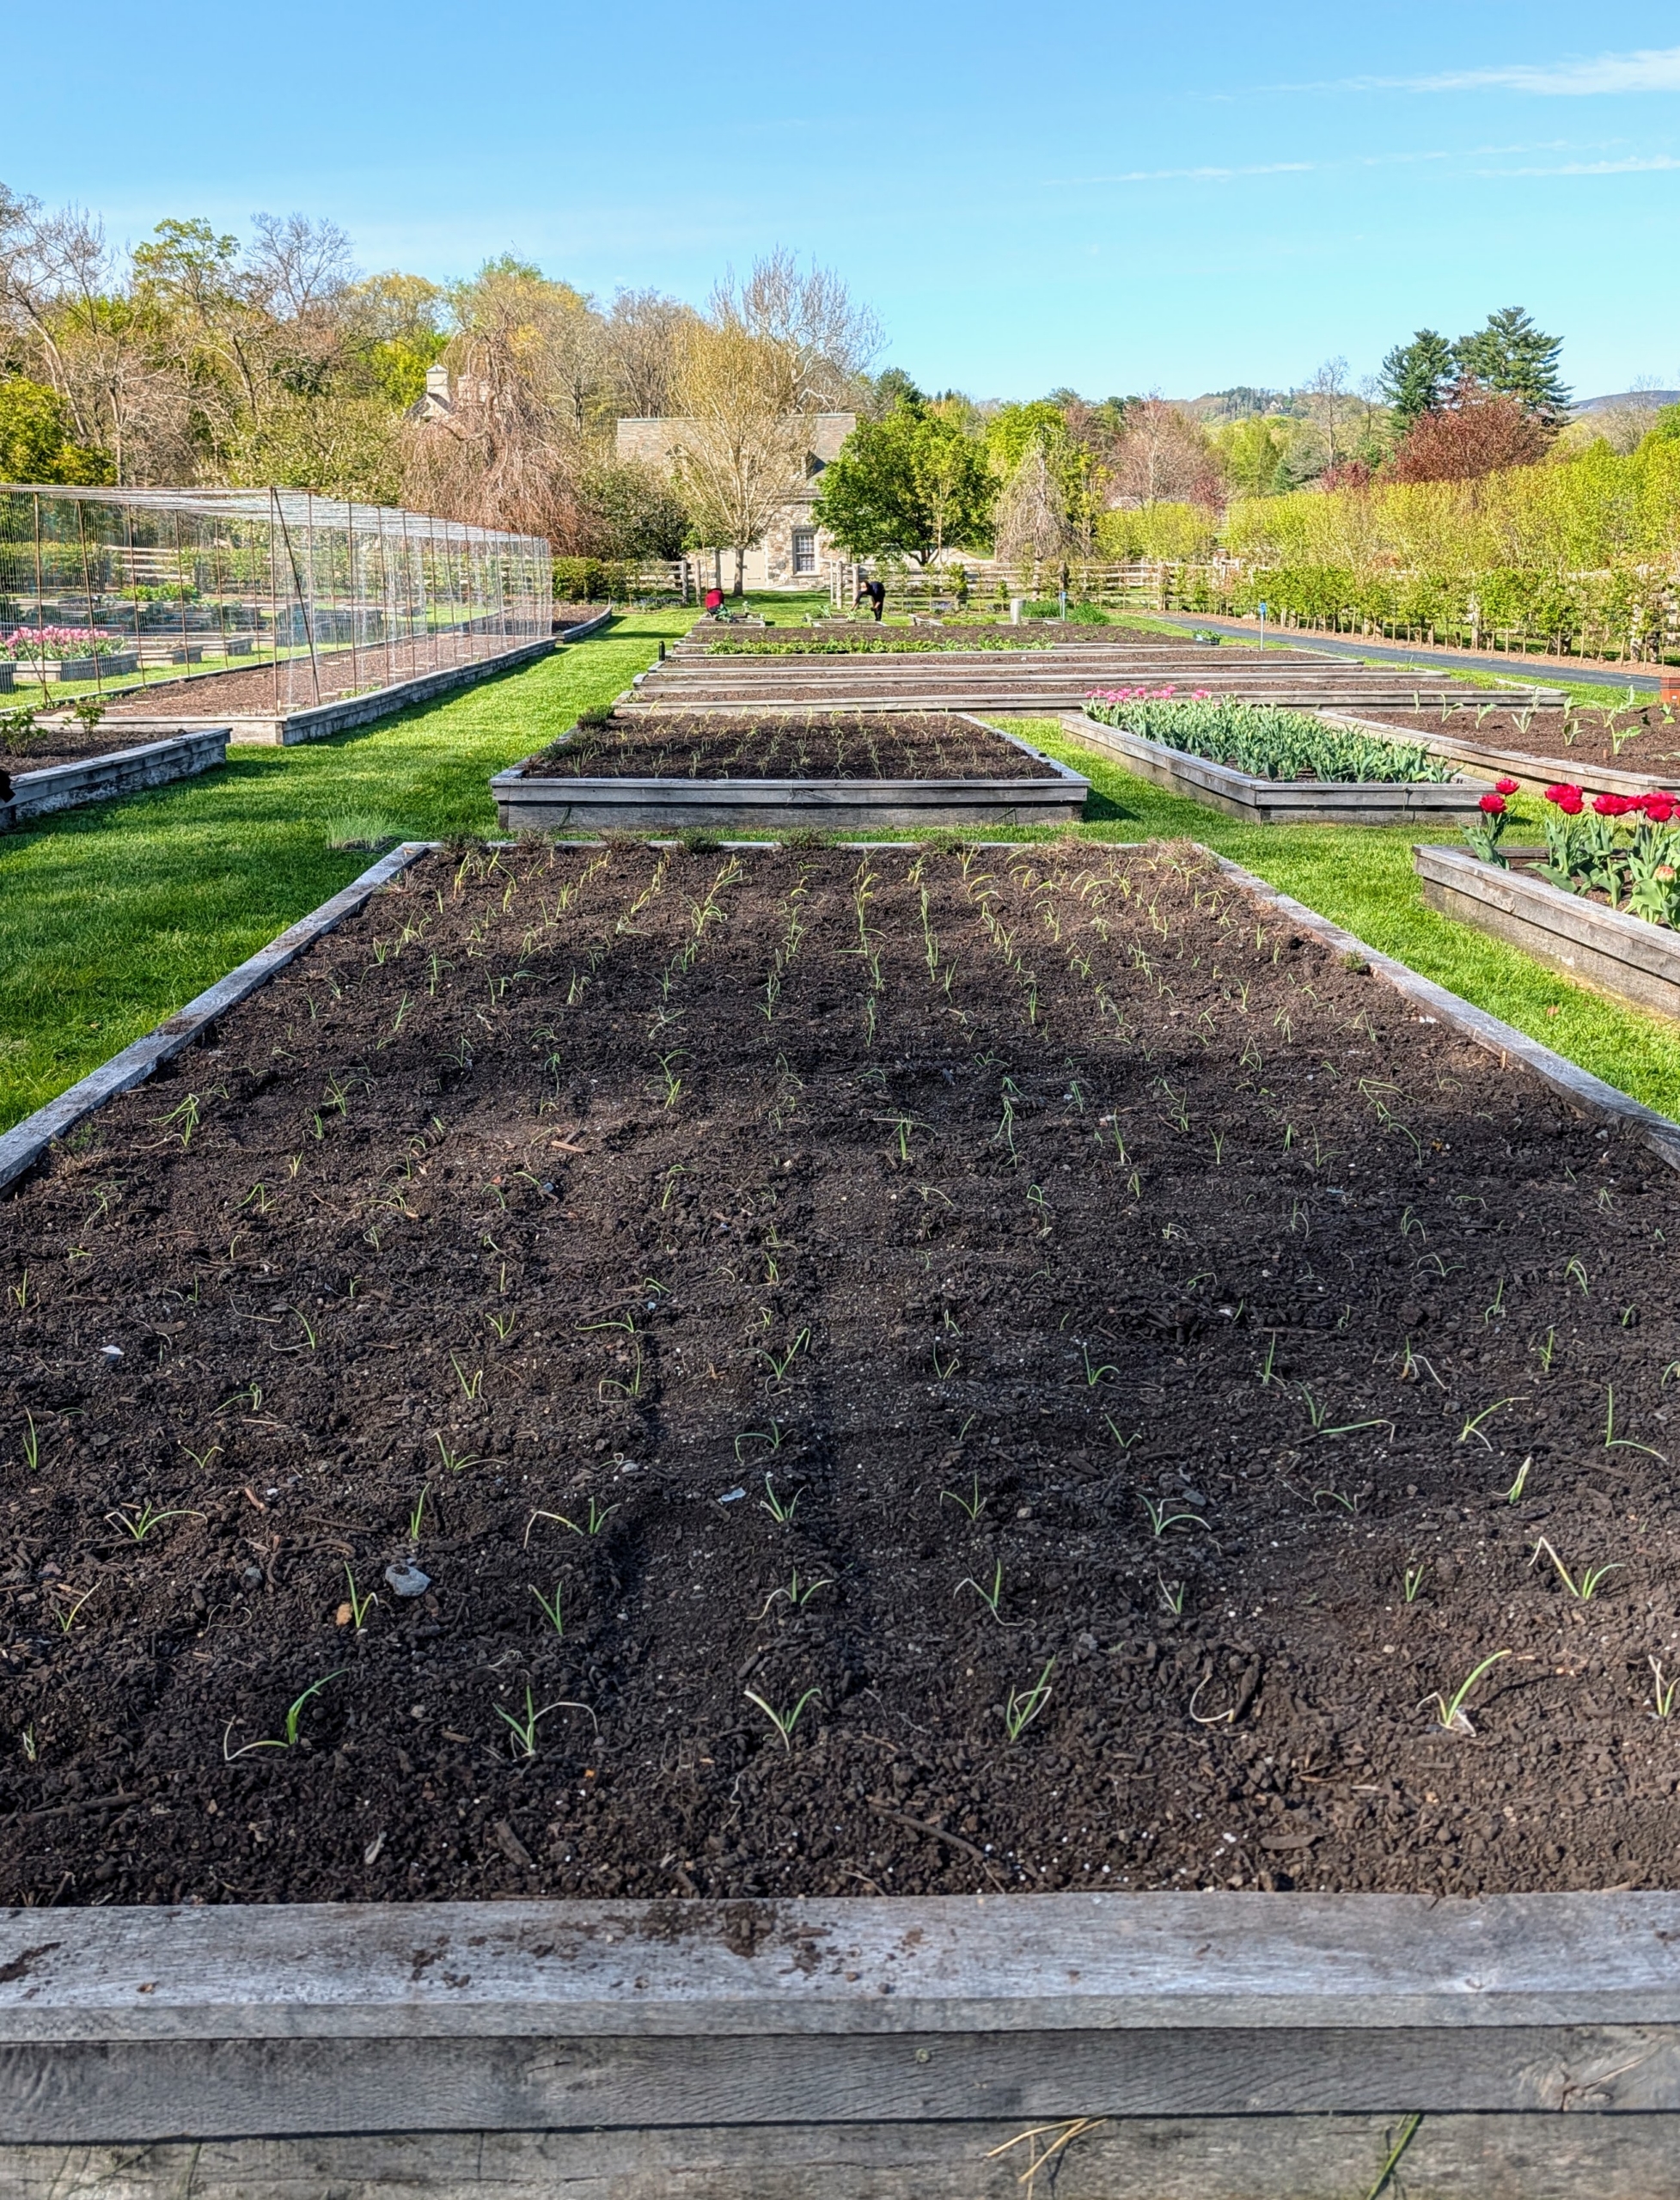
Here is the tray of red onion plants also ready to be put into the ground. The beds include red onions, white onions, yellow onions.
Onions are categorized in two growing types: long-day and short-day. Long-day onions begin sprouting in late spring to summer when days are between 14 and 16 hours long. Short-day onions begin sprouting when days are between 10 and 12 hours in length – winter and early spring.
We’re off to a wonderful growing season – it won’t be long now before I have bounties of fresh, nutritious vegetables.
The gardens at my Bedford, New York farm are changing every single day.
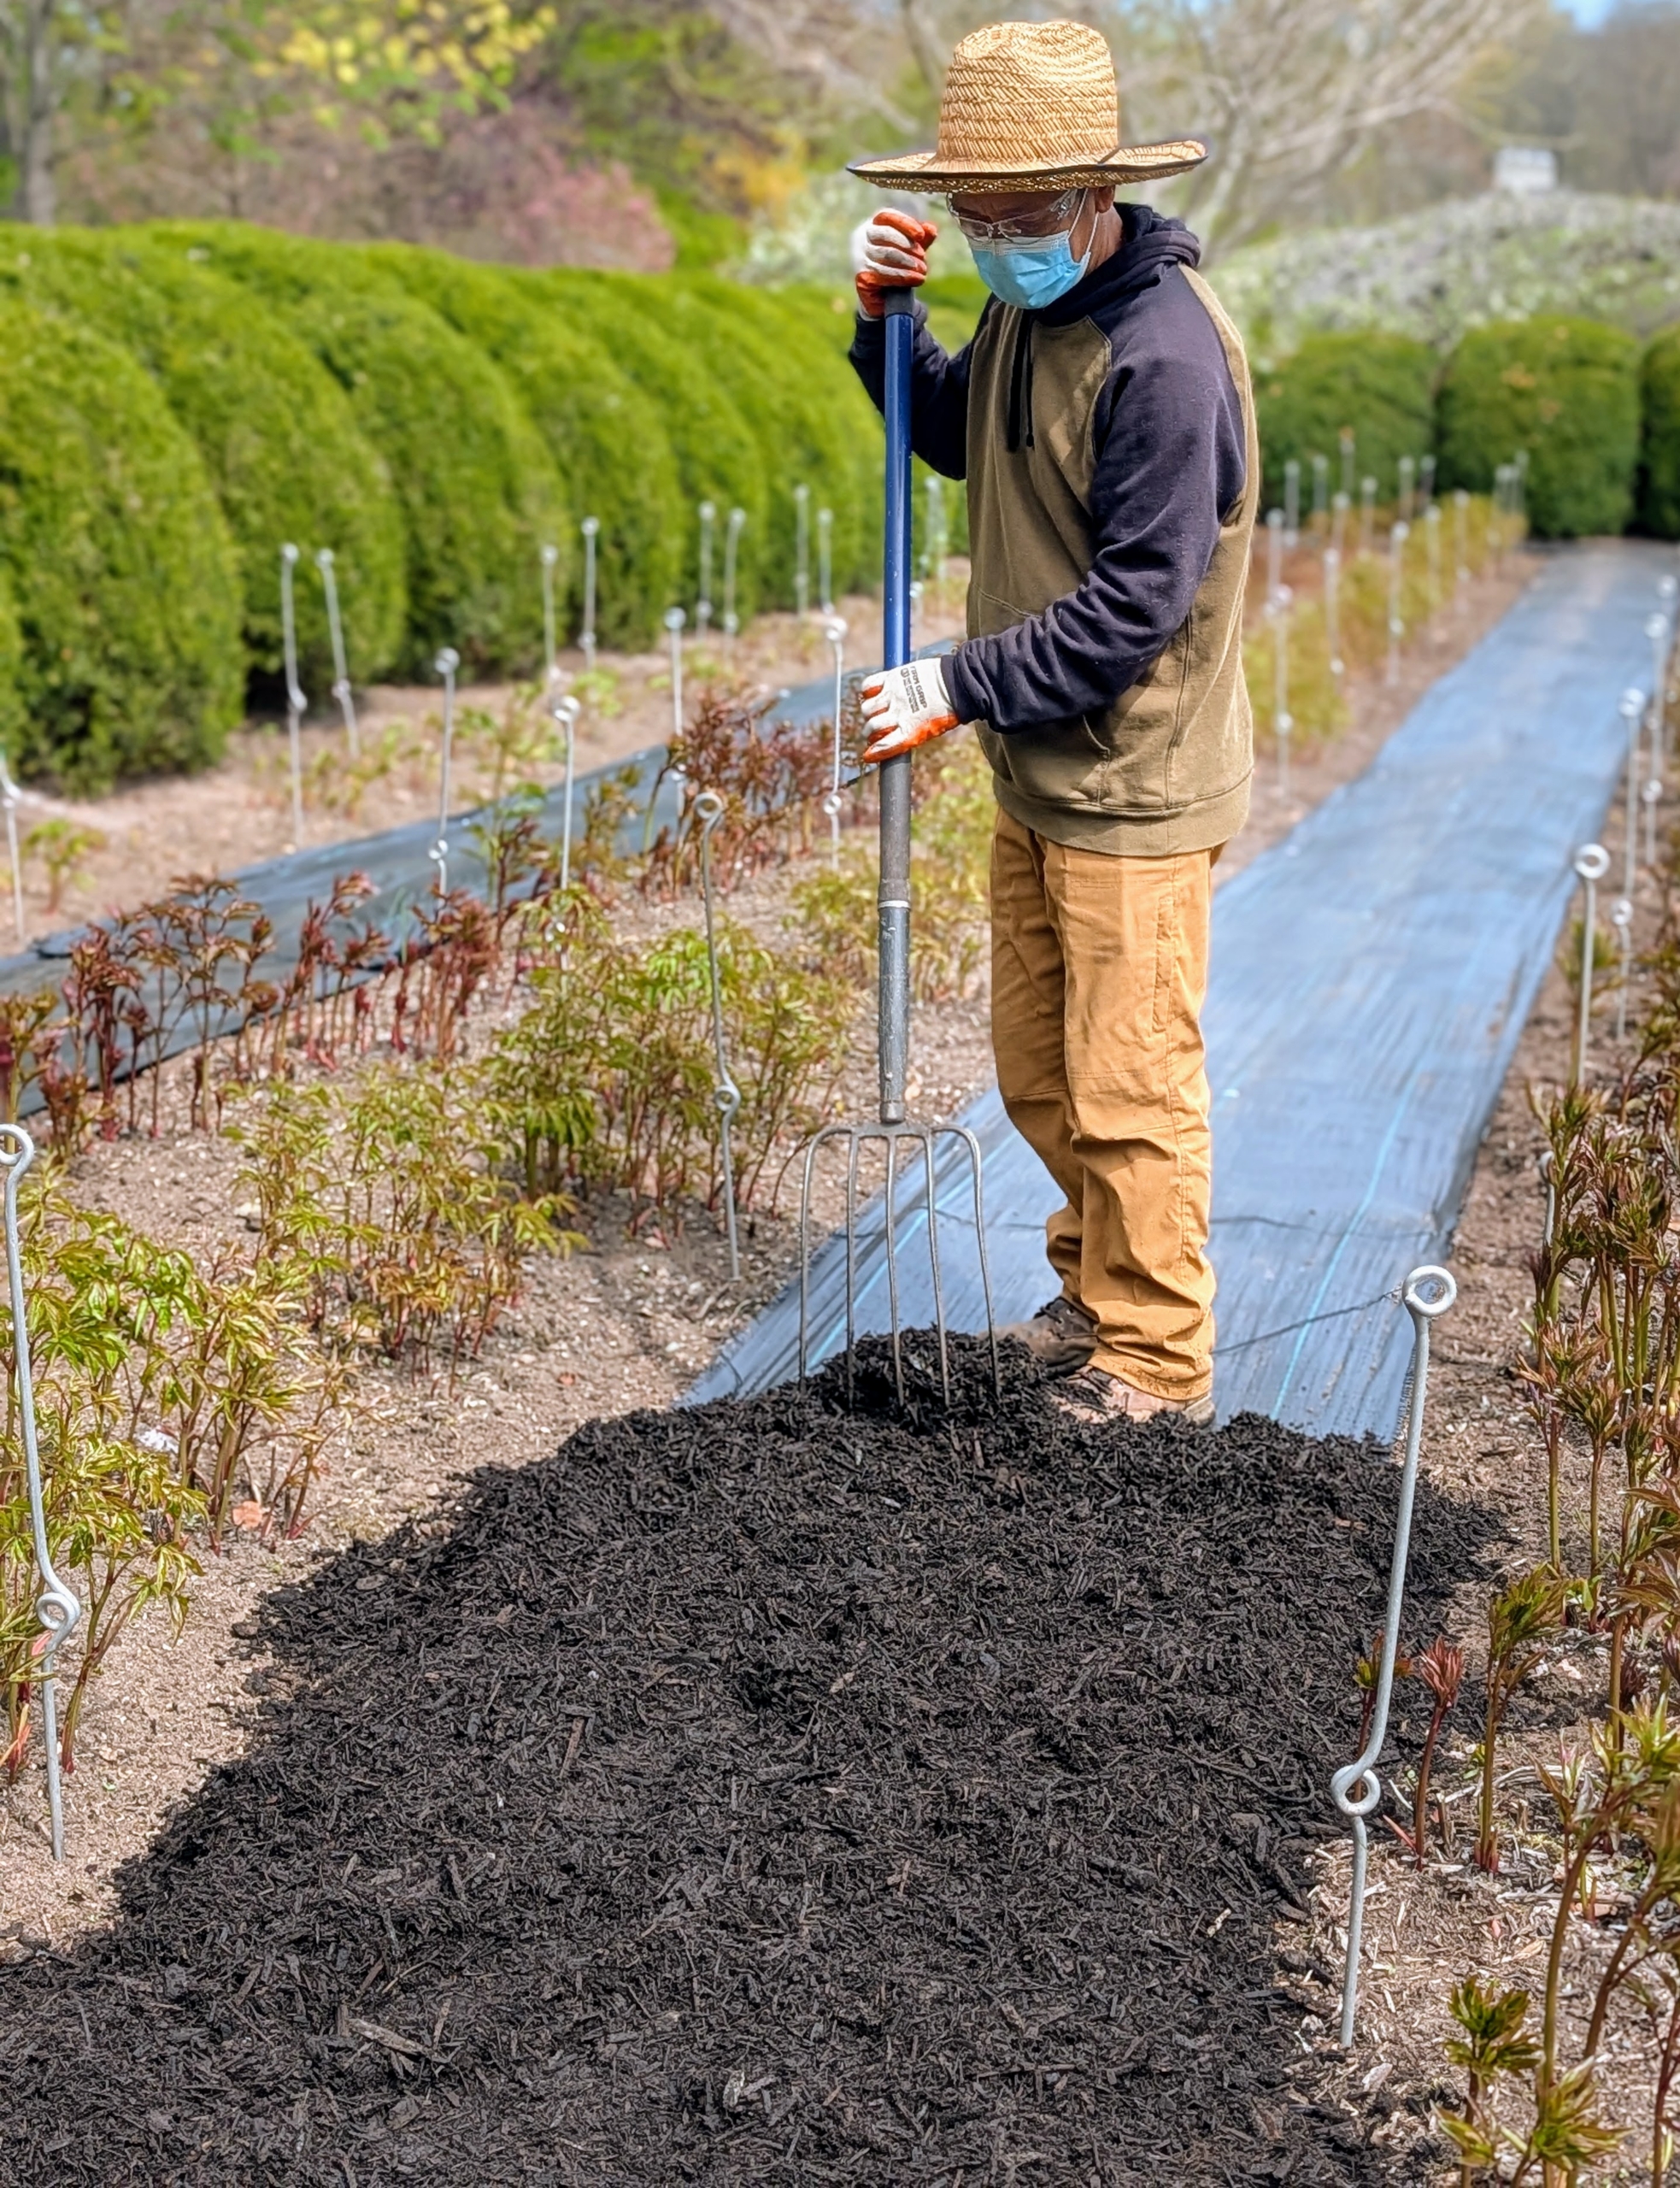
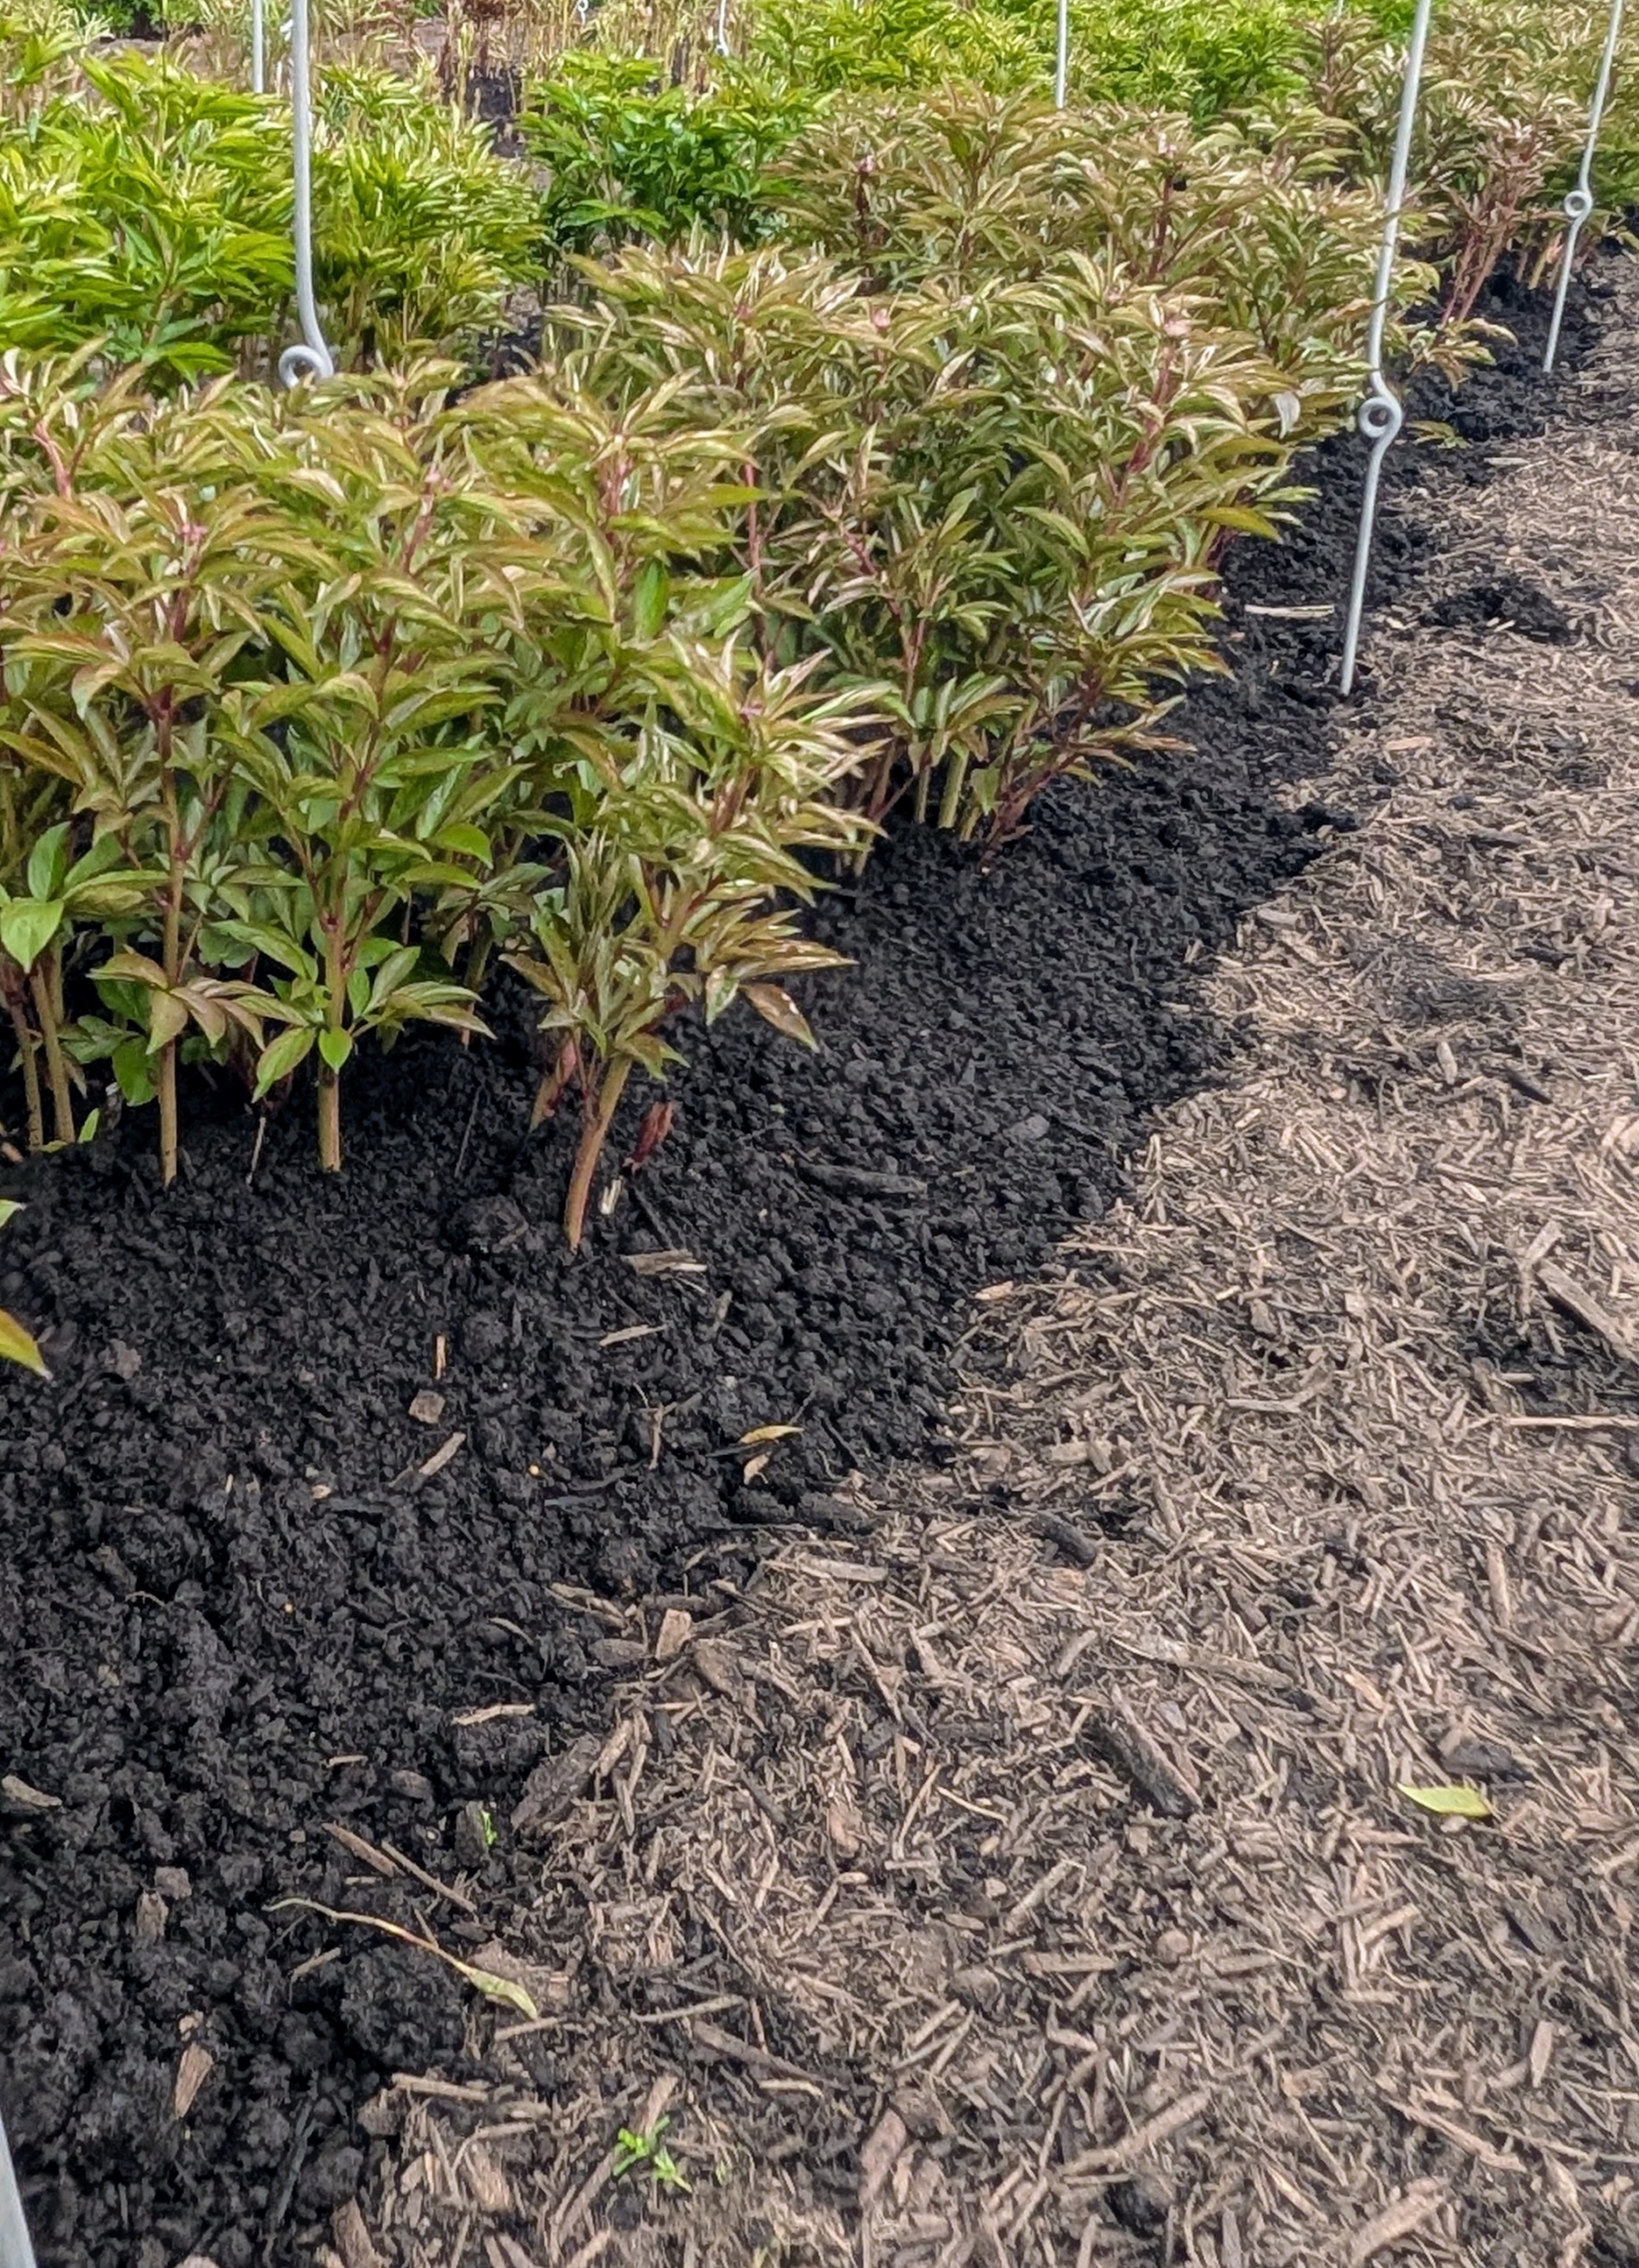
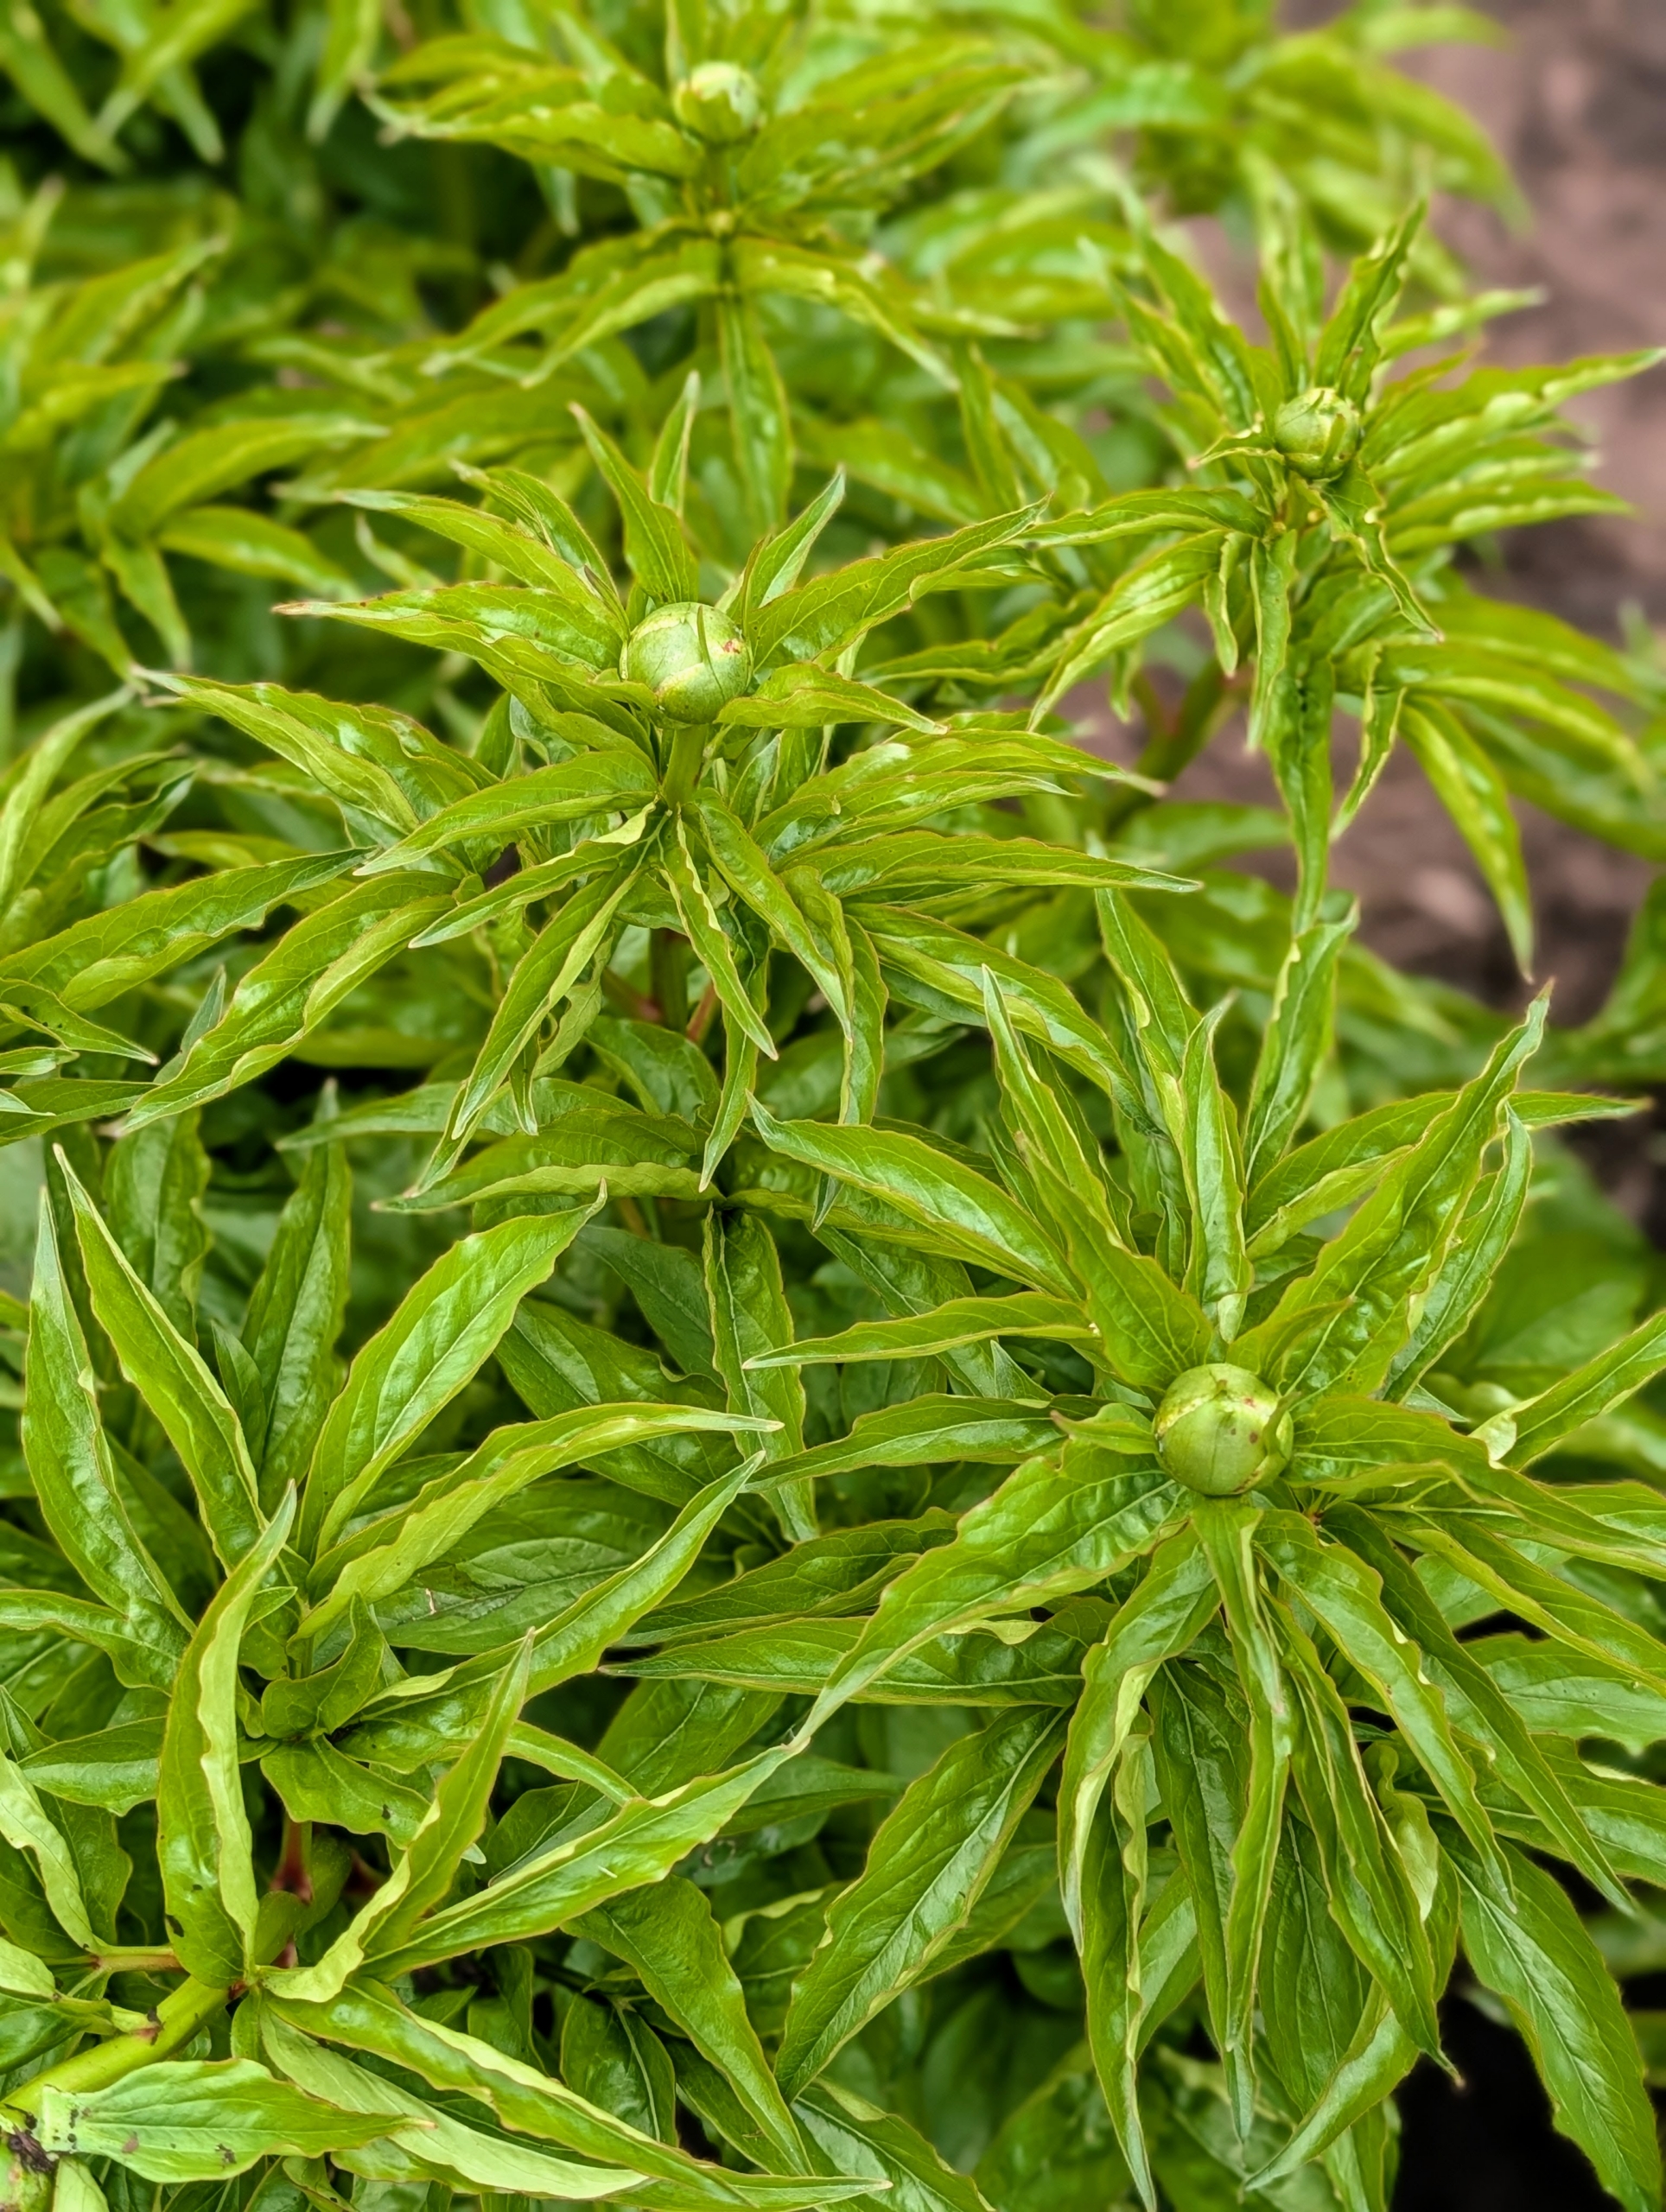
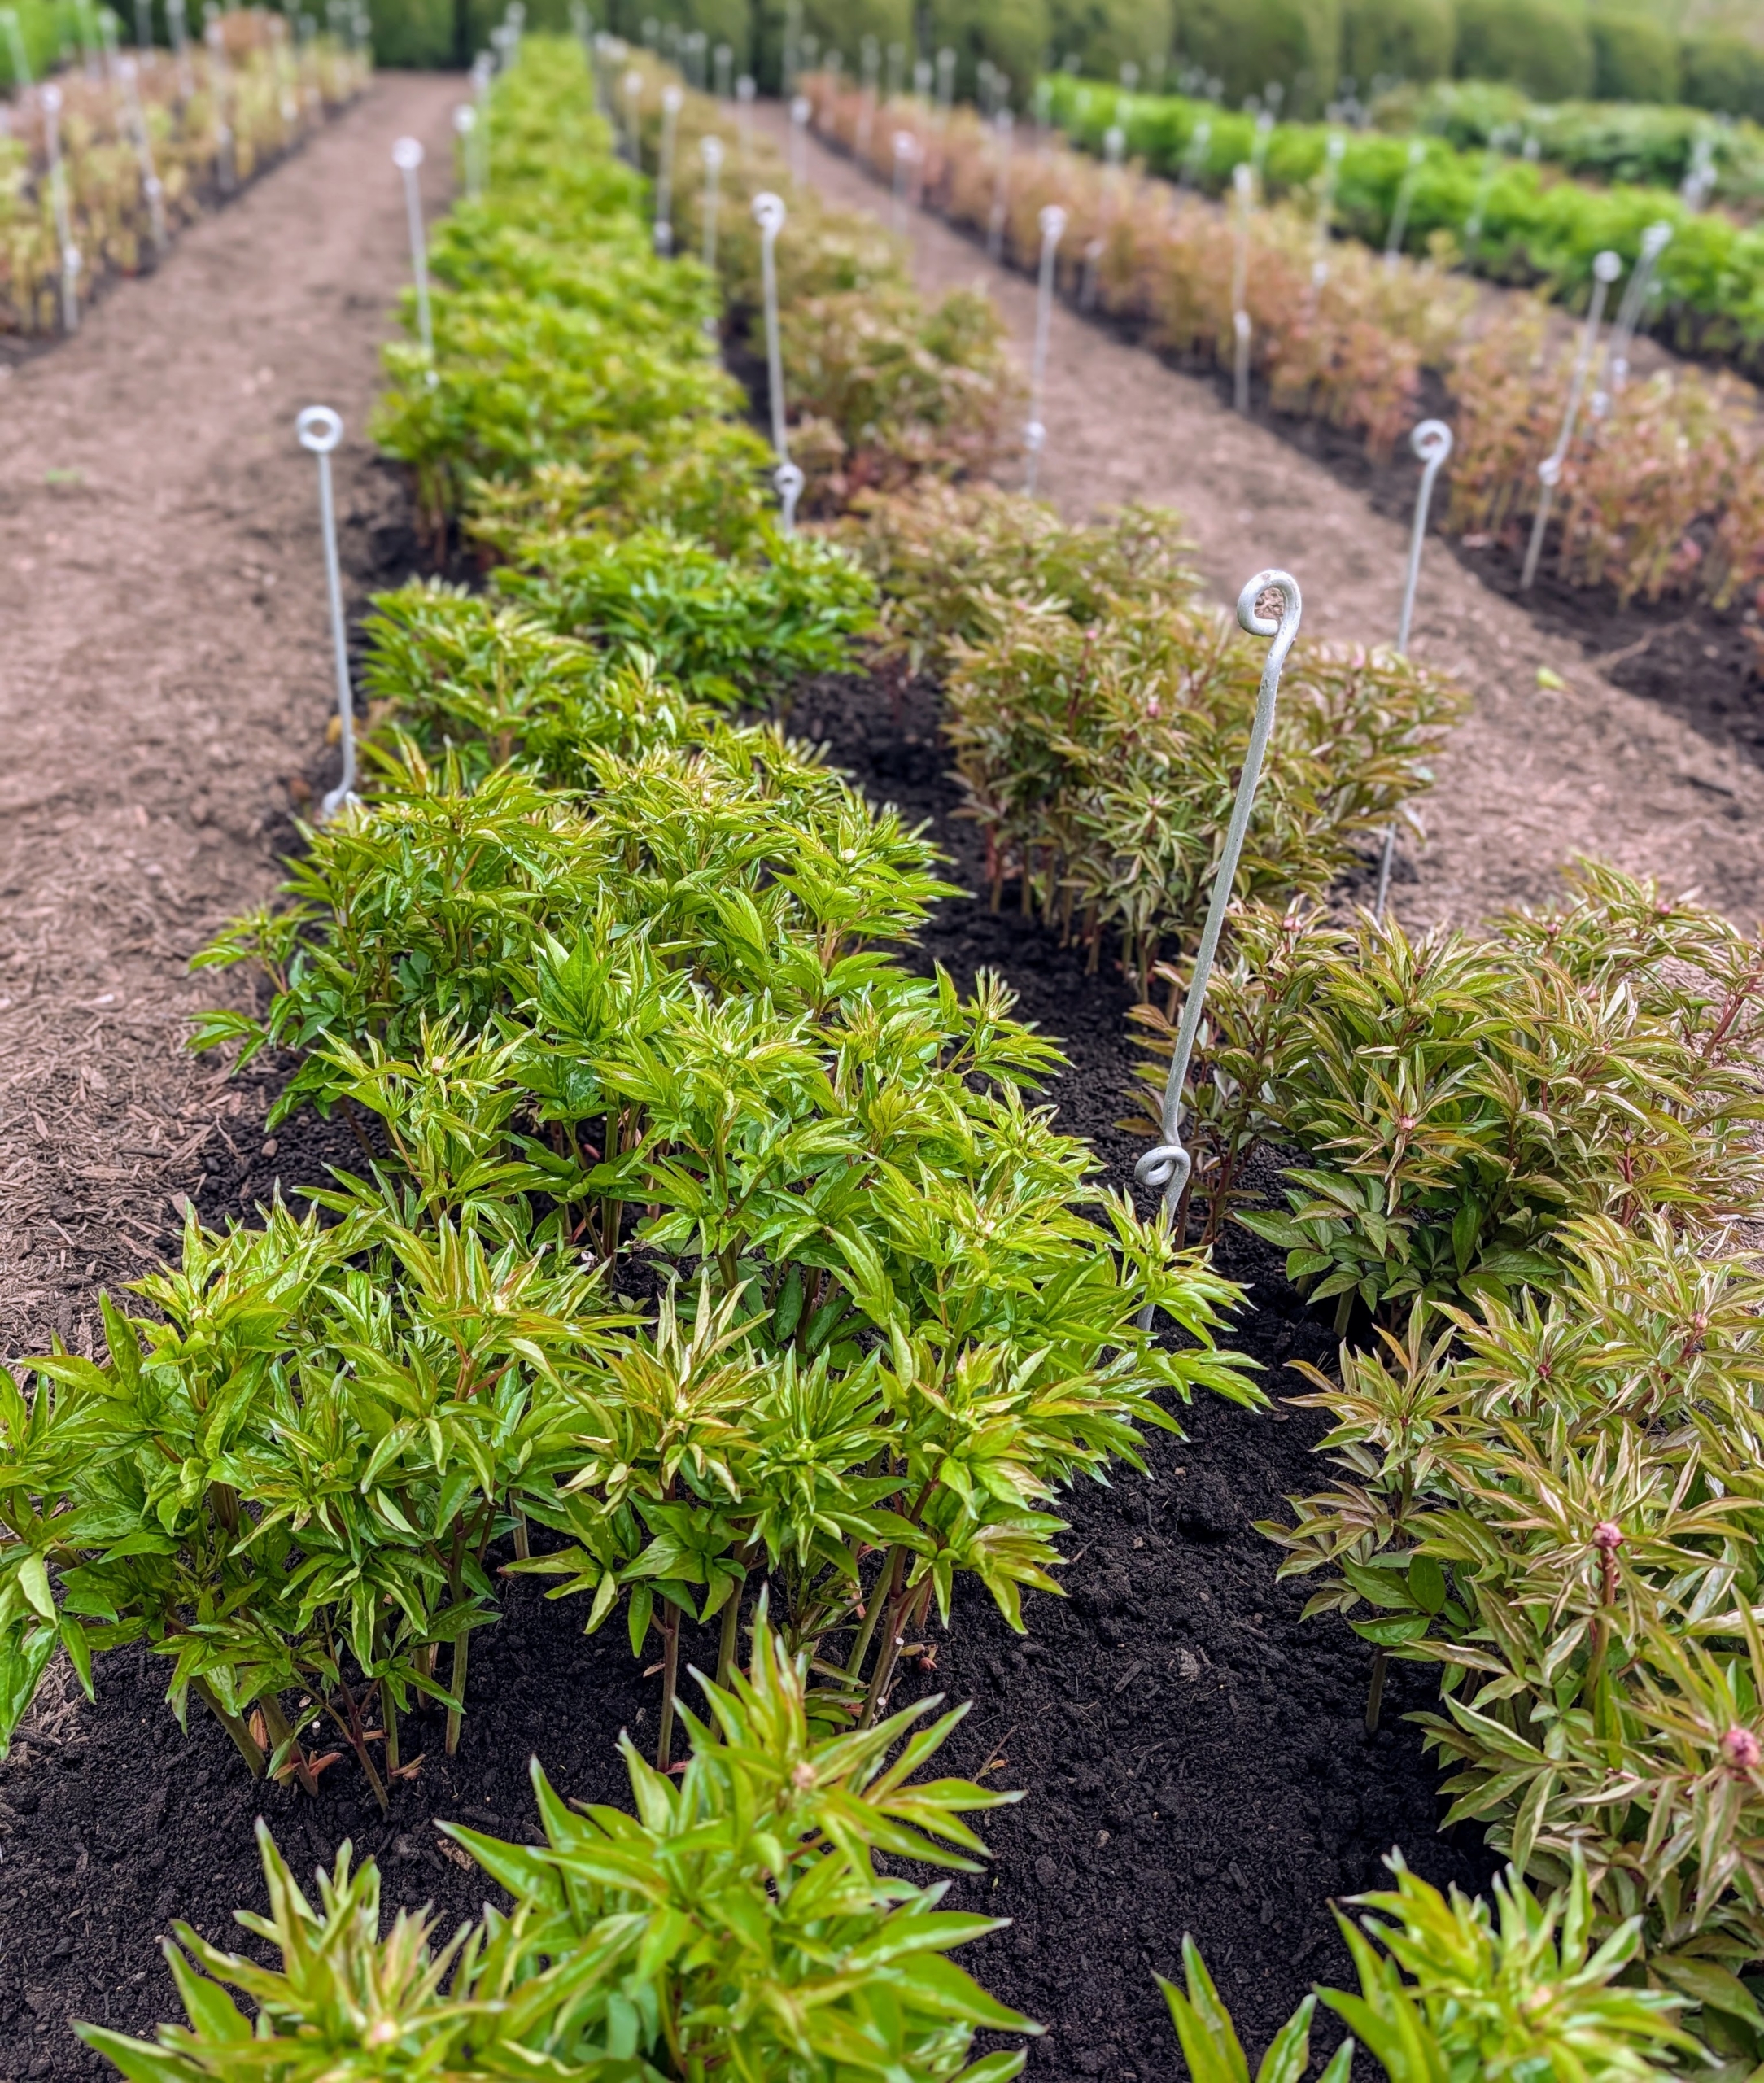
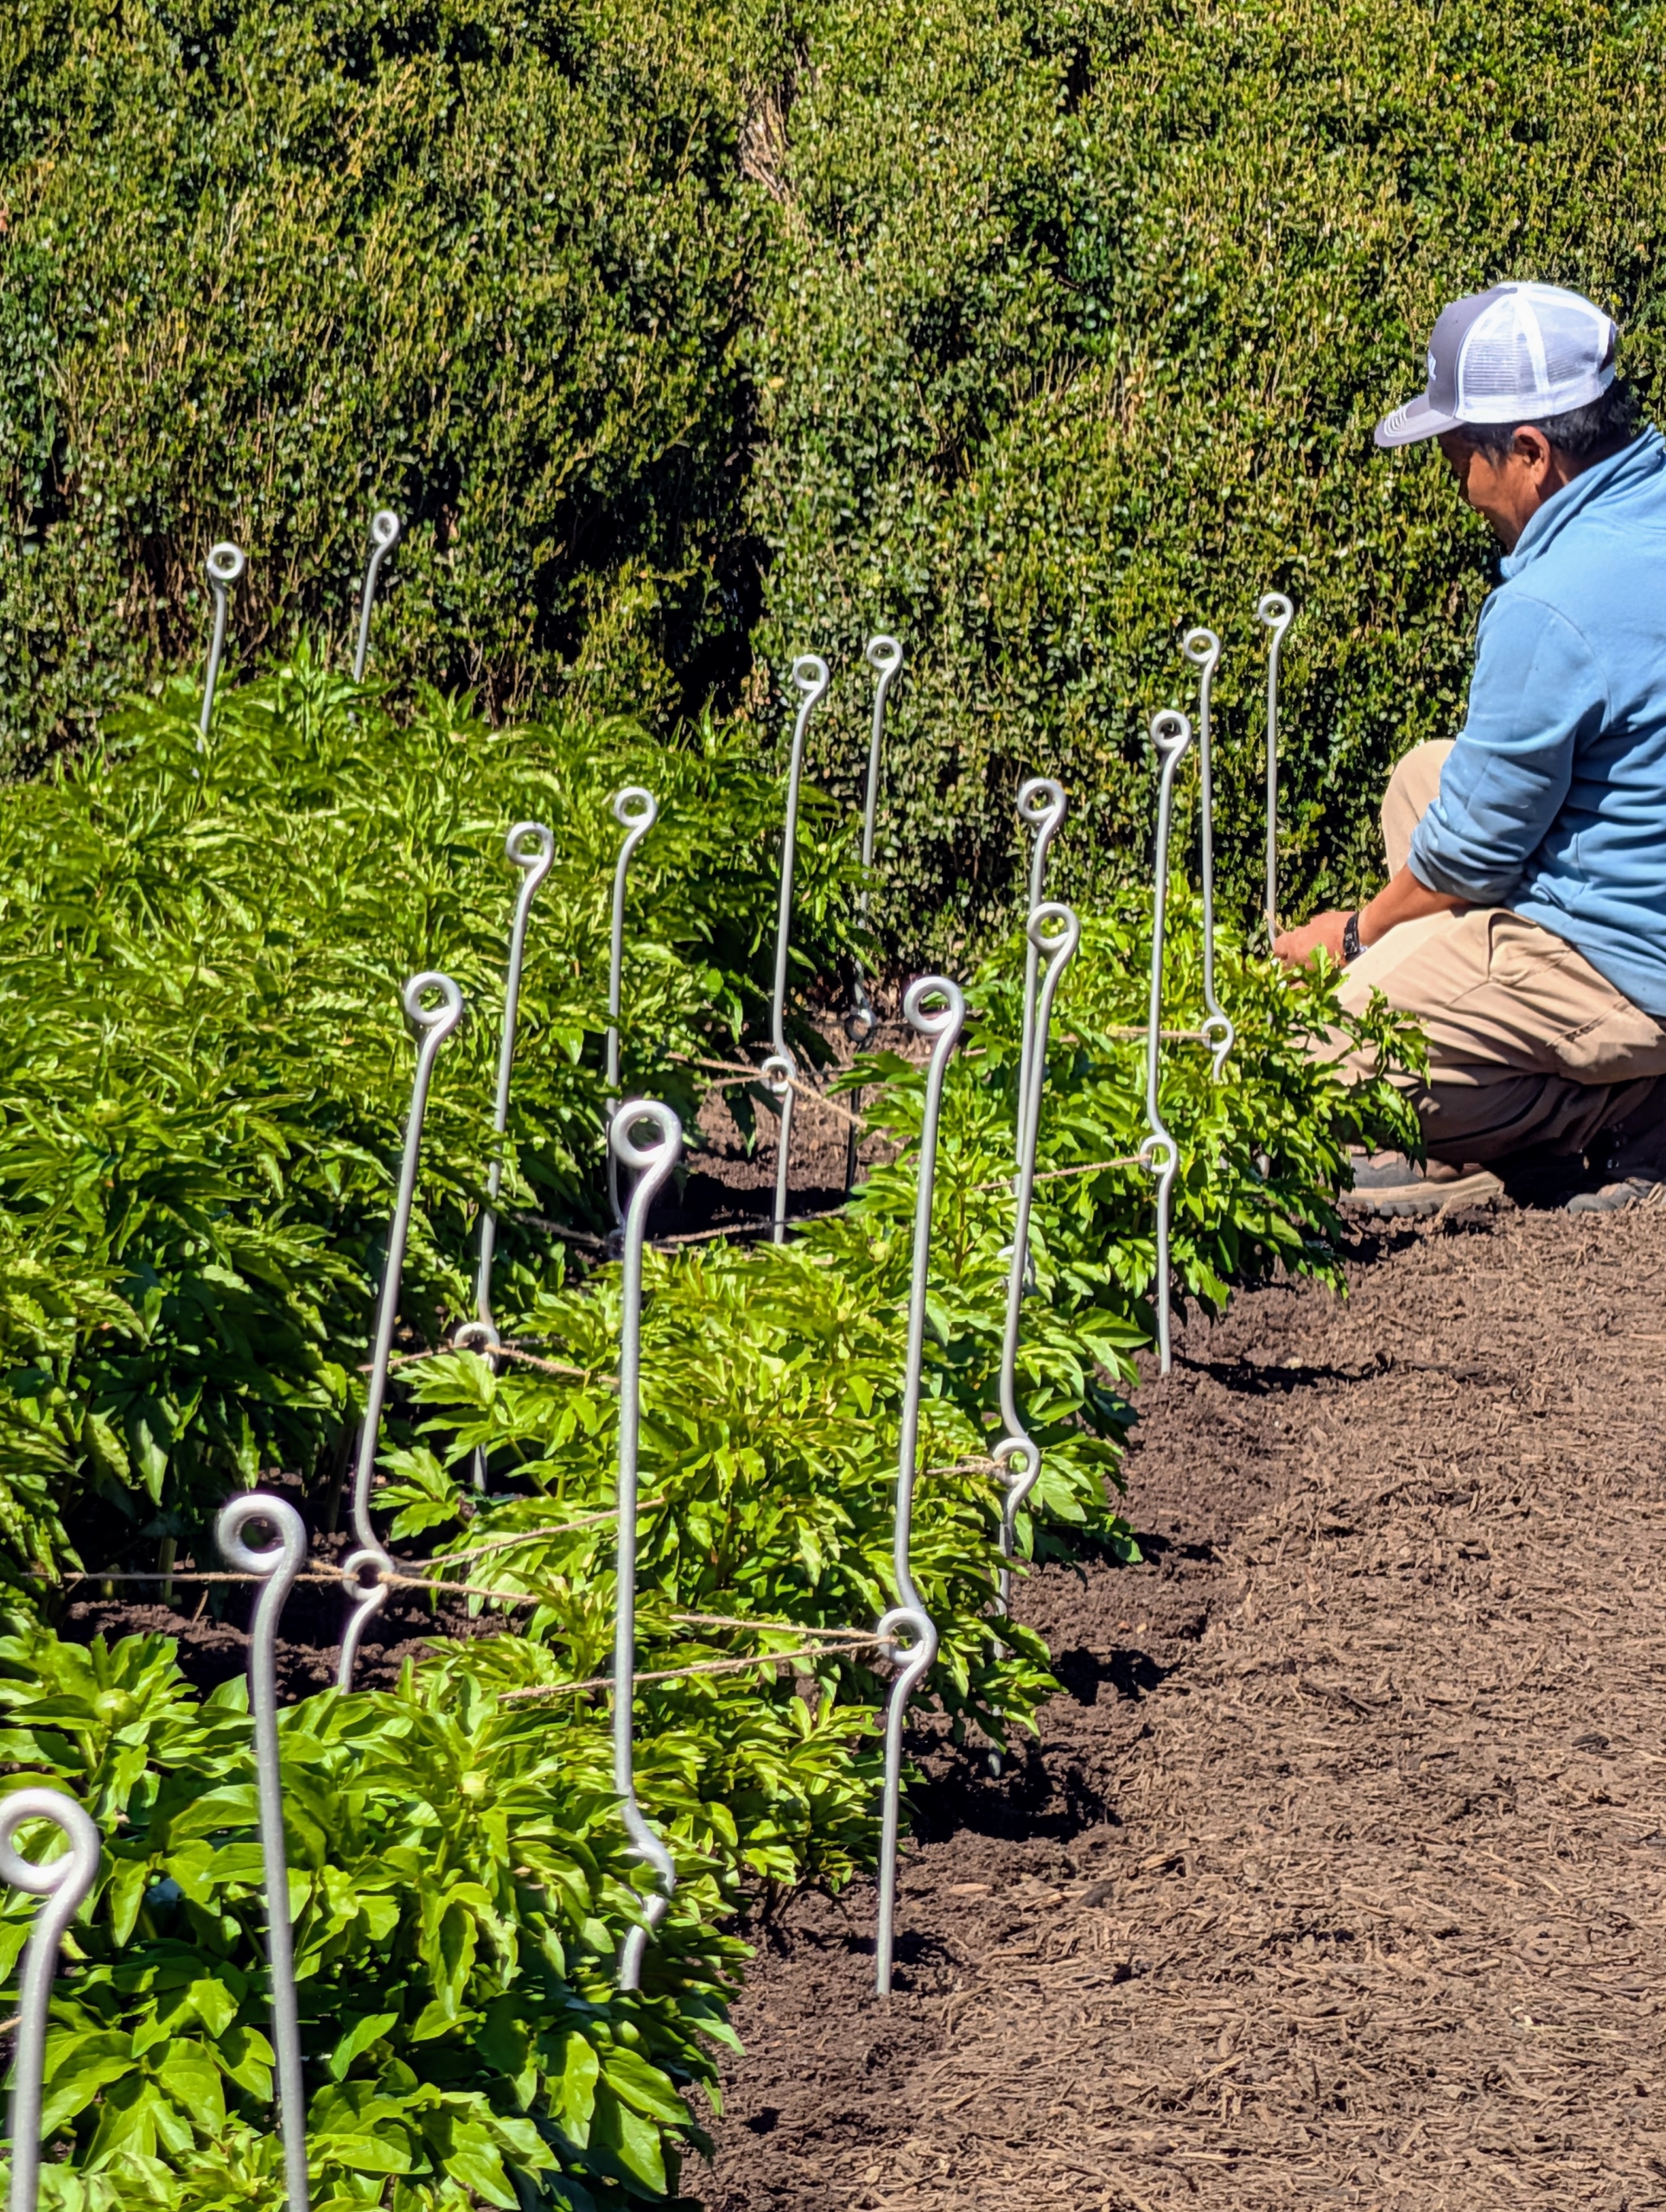
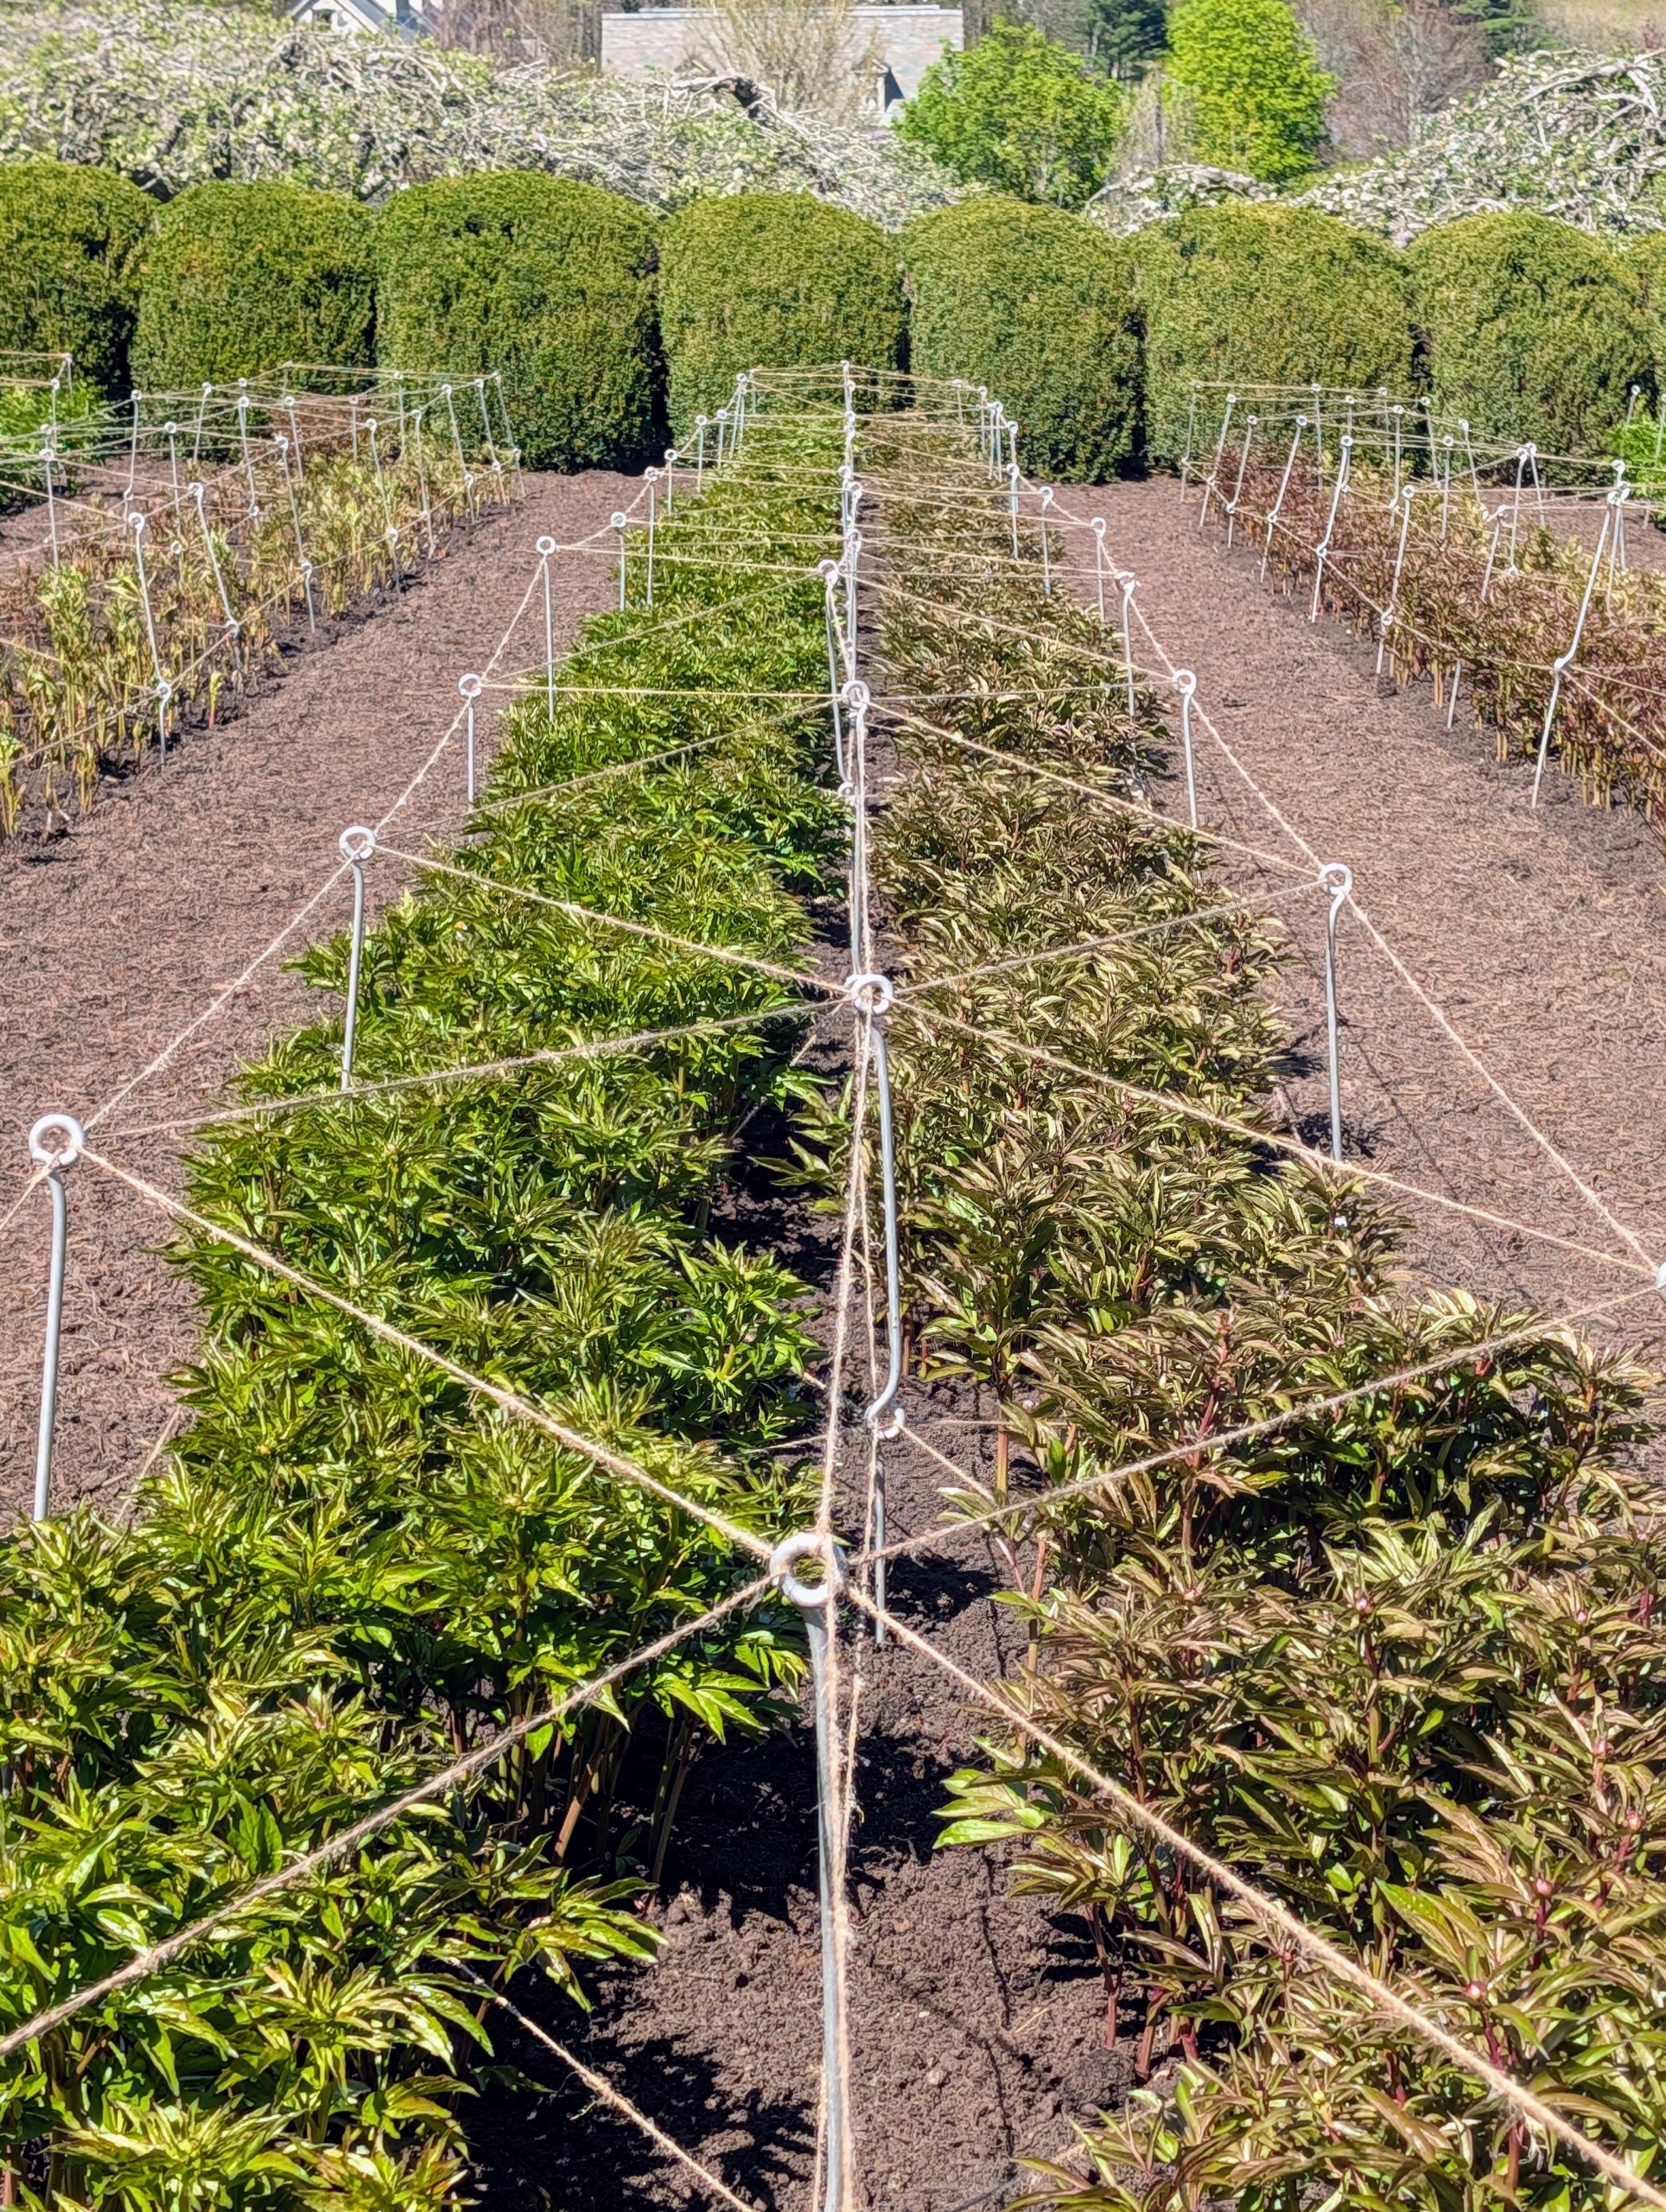
One of the most anticipated sights on the farm is my herbaceous peony garden in full bloom. No garden is complete without these beautiful plants, which show off their large, imposing flowers in May and June. True perennials, herbaceous peonies can live for 100-years, becoming more impressive over time. This week, my gardeners and outdoor grounds crew tended the beds - adding food, mulch and compost, and then carefully staking all the rows of plants so the massive flower heads don’t droop to the ground.
Enjoy these photos.
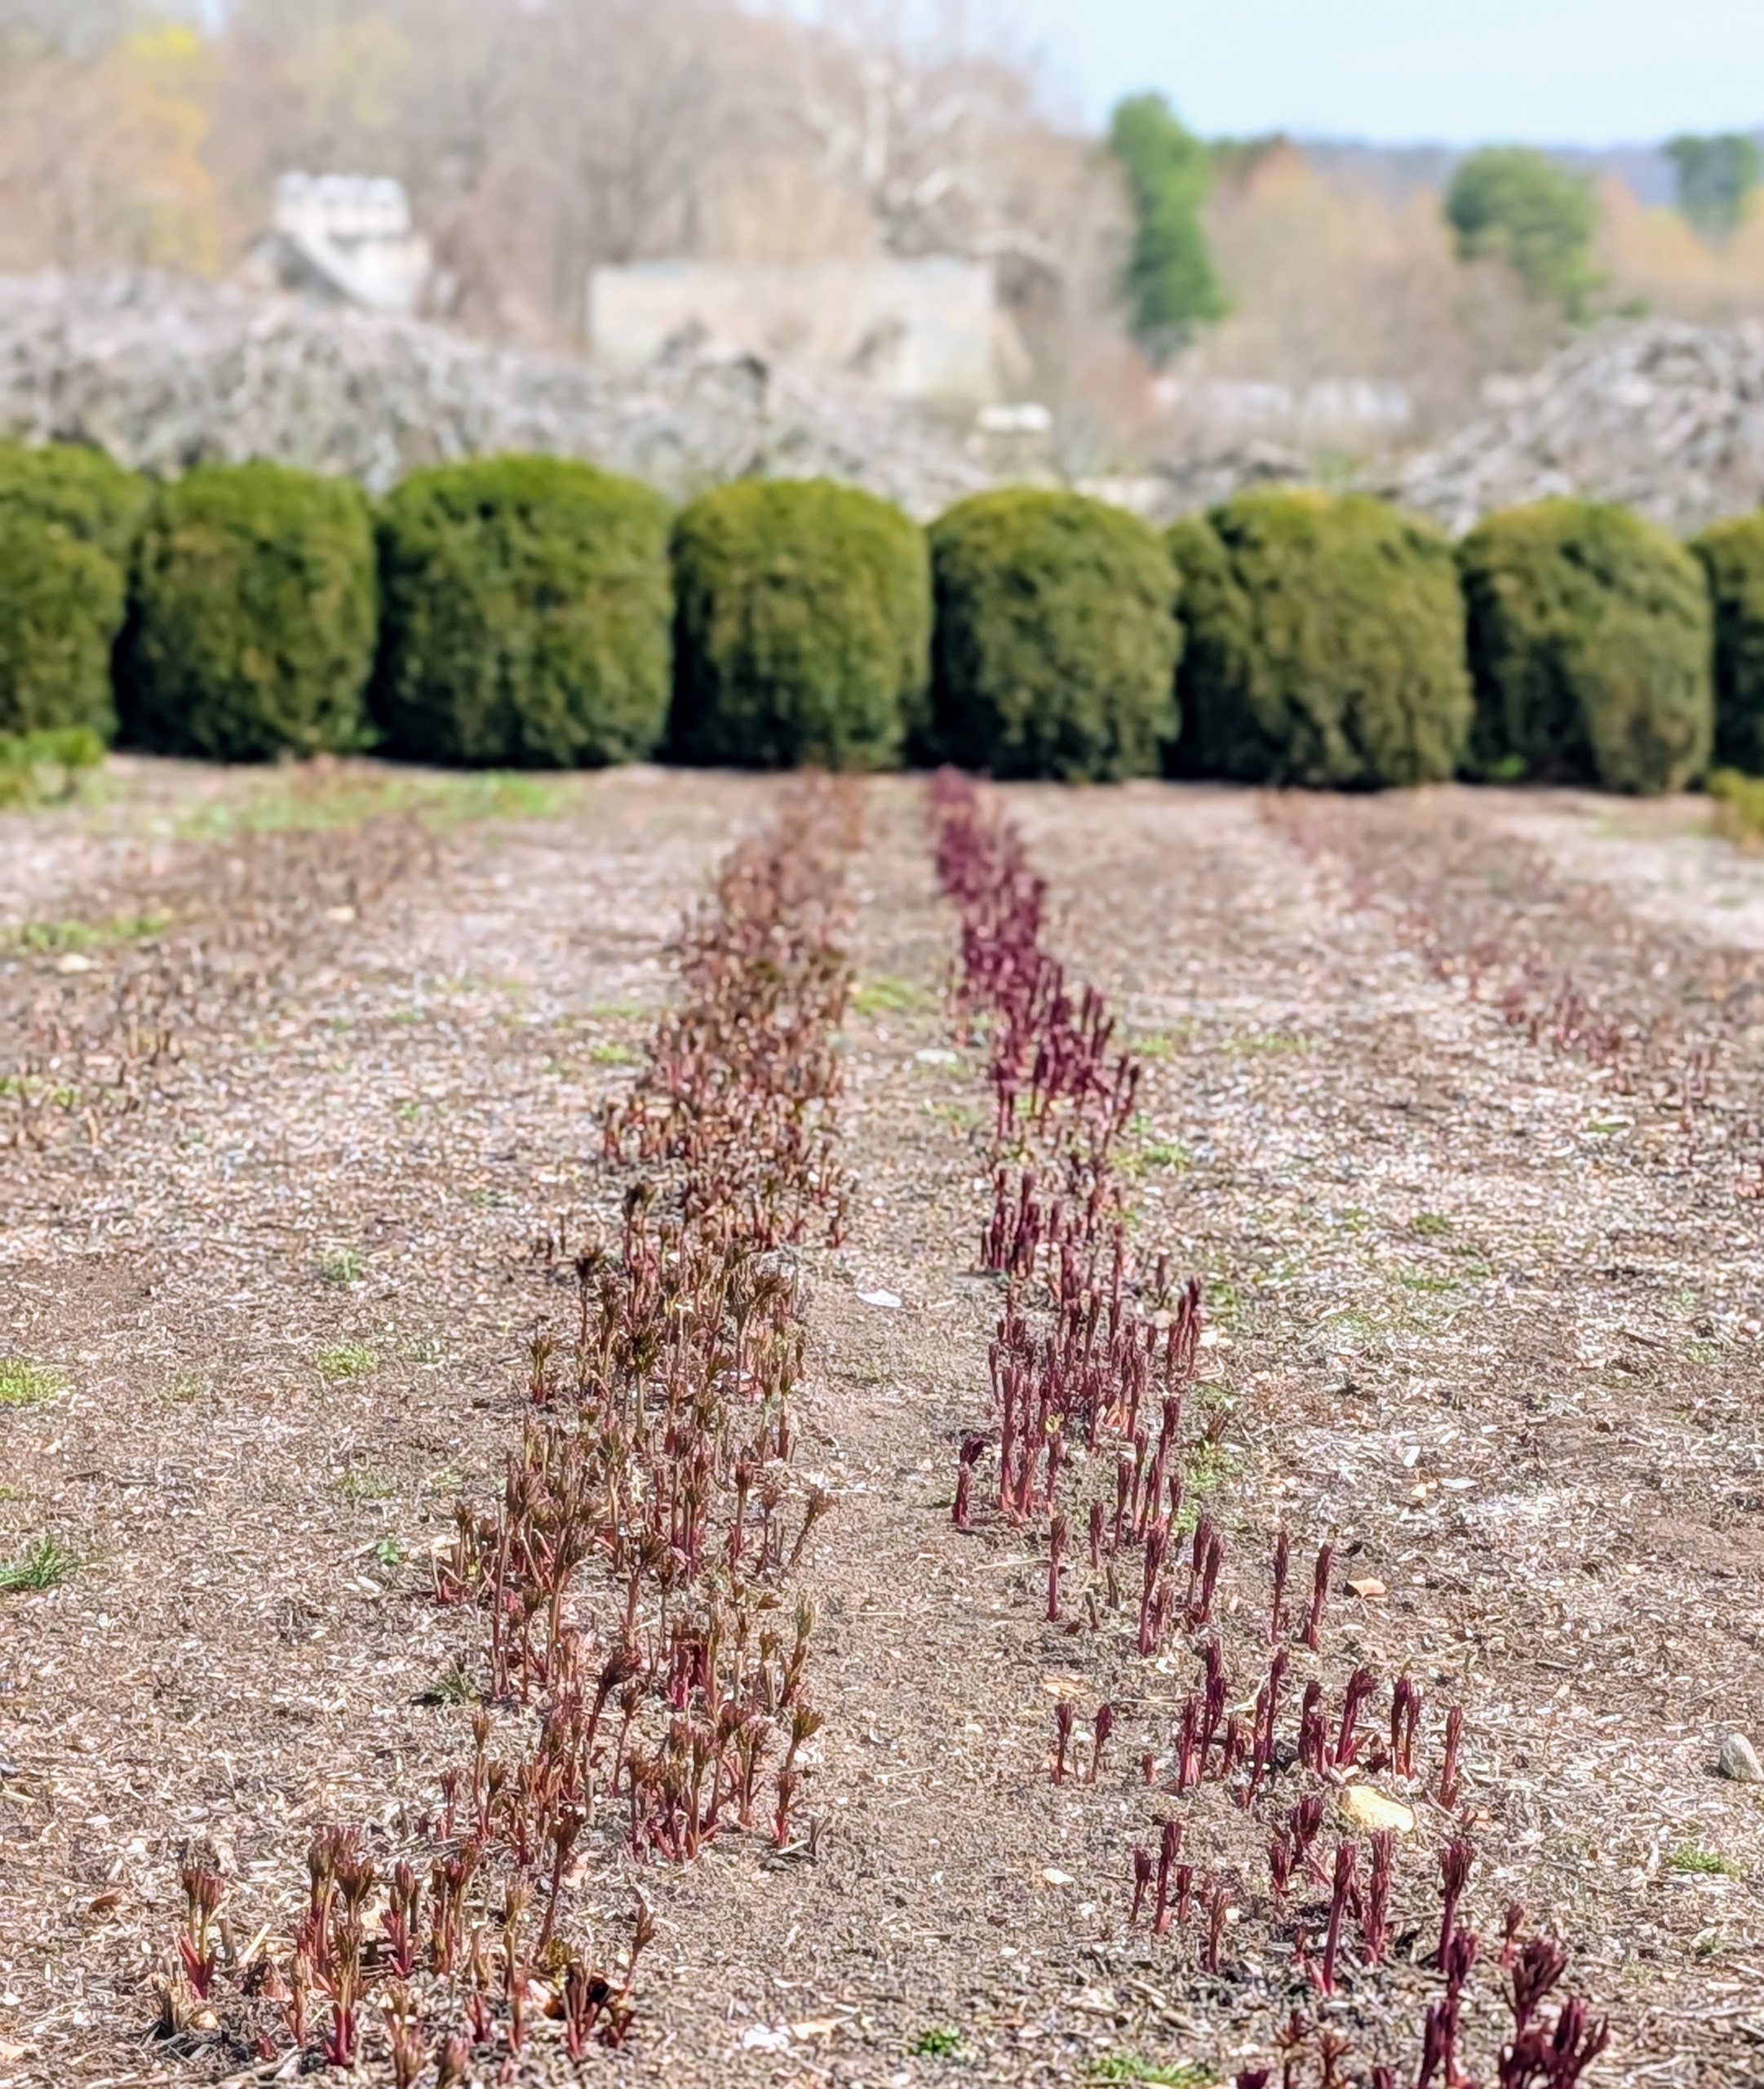
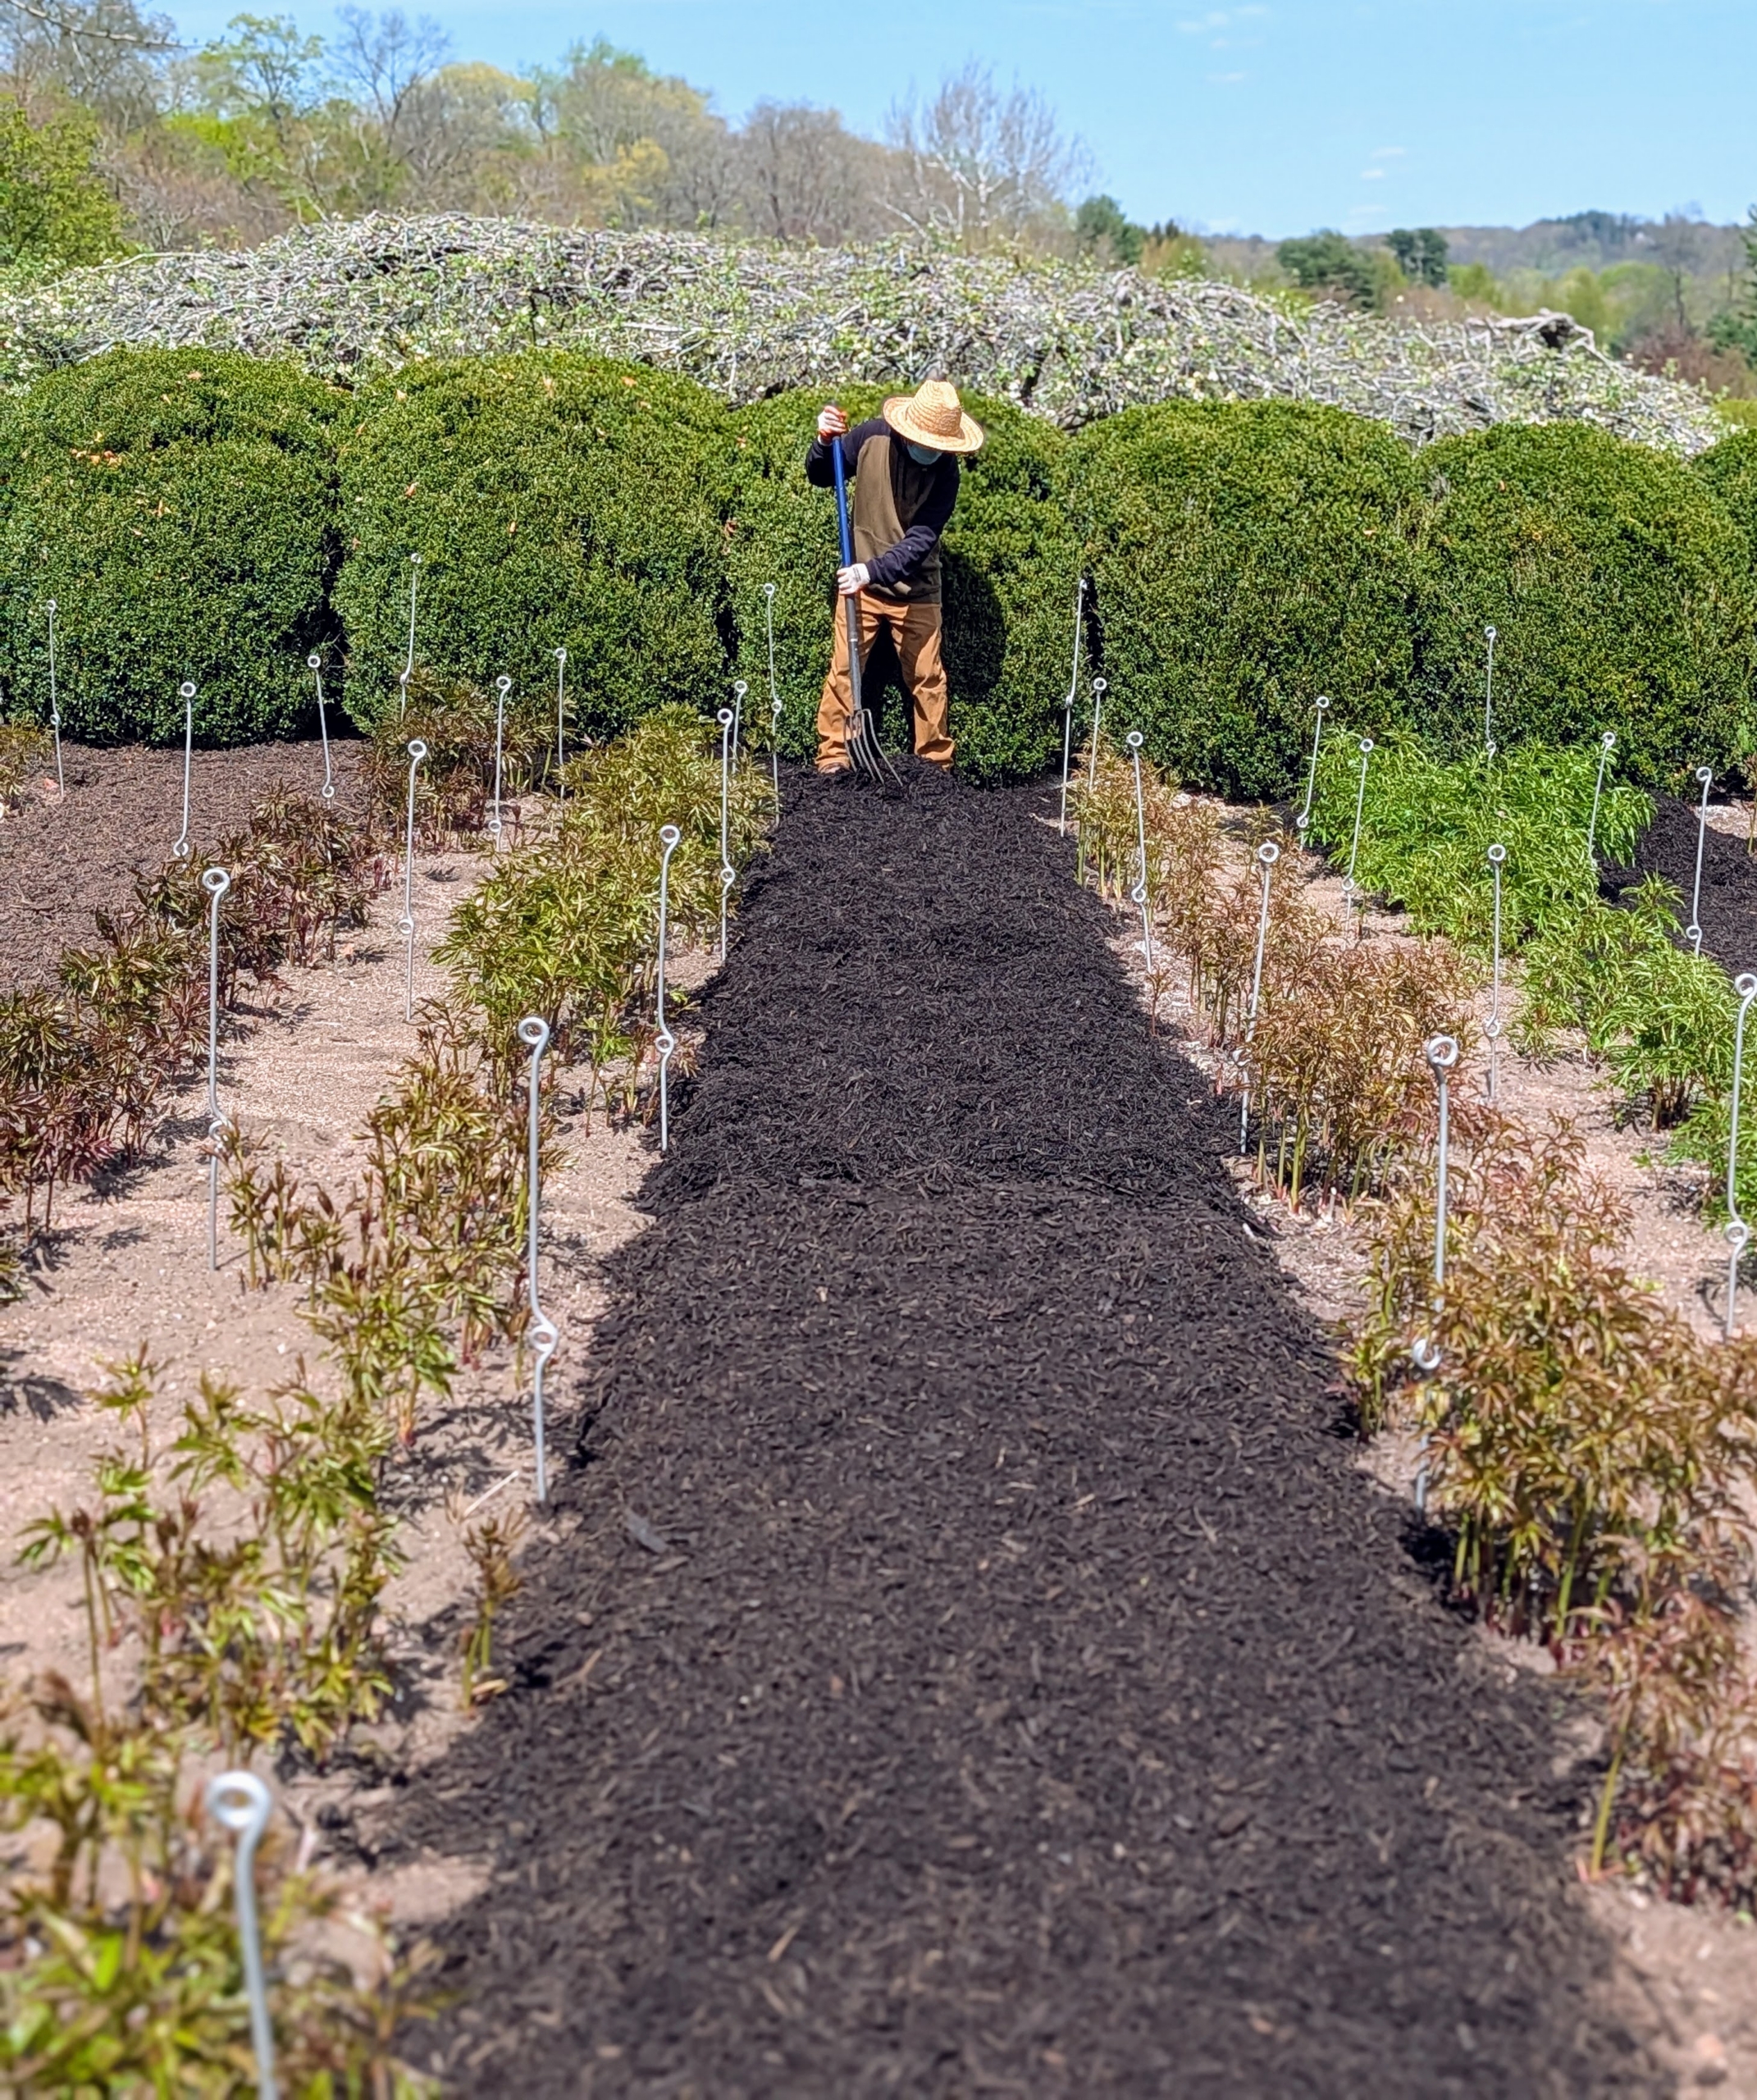
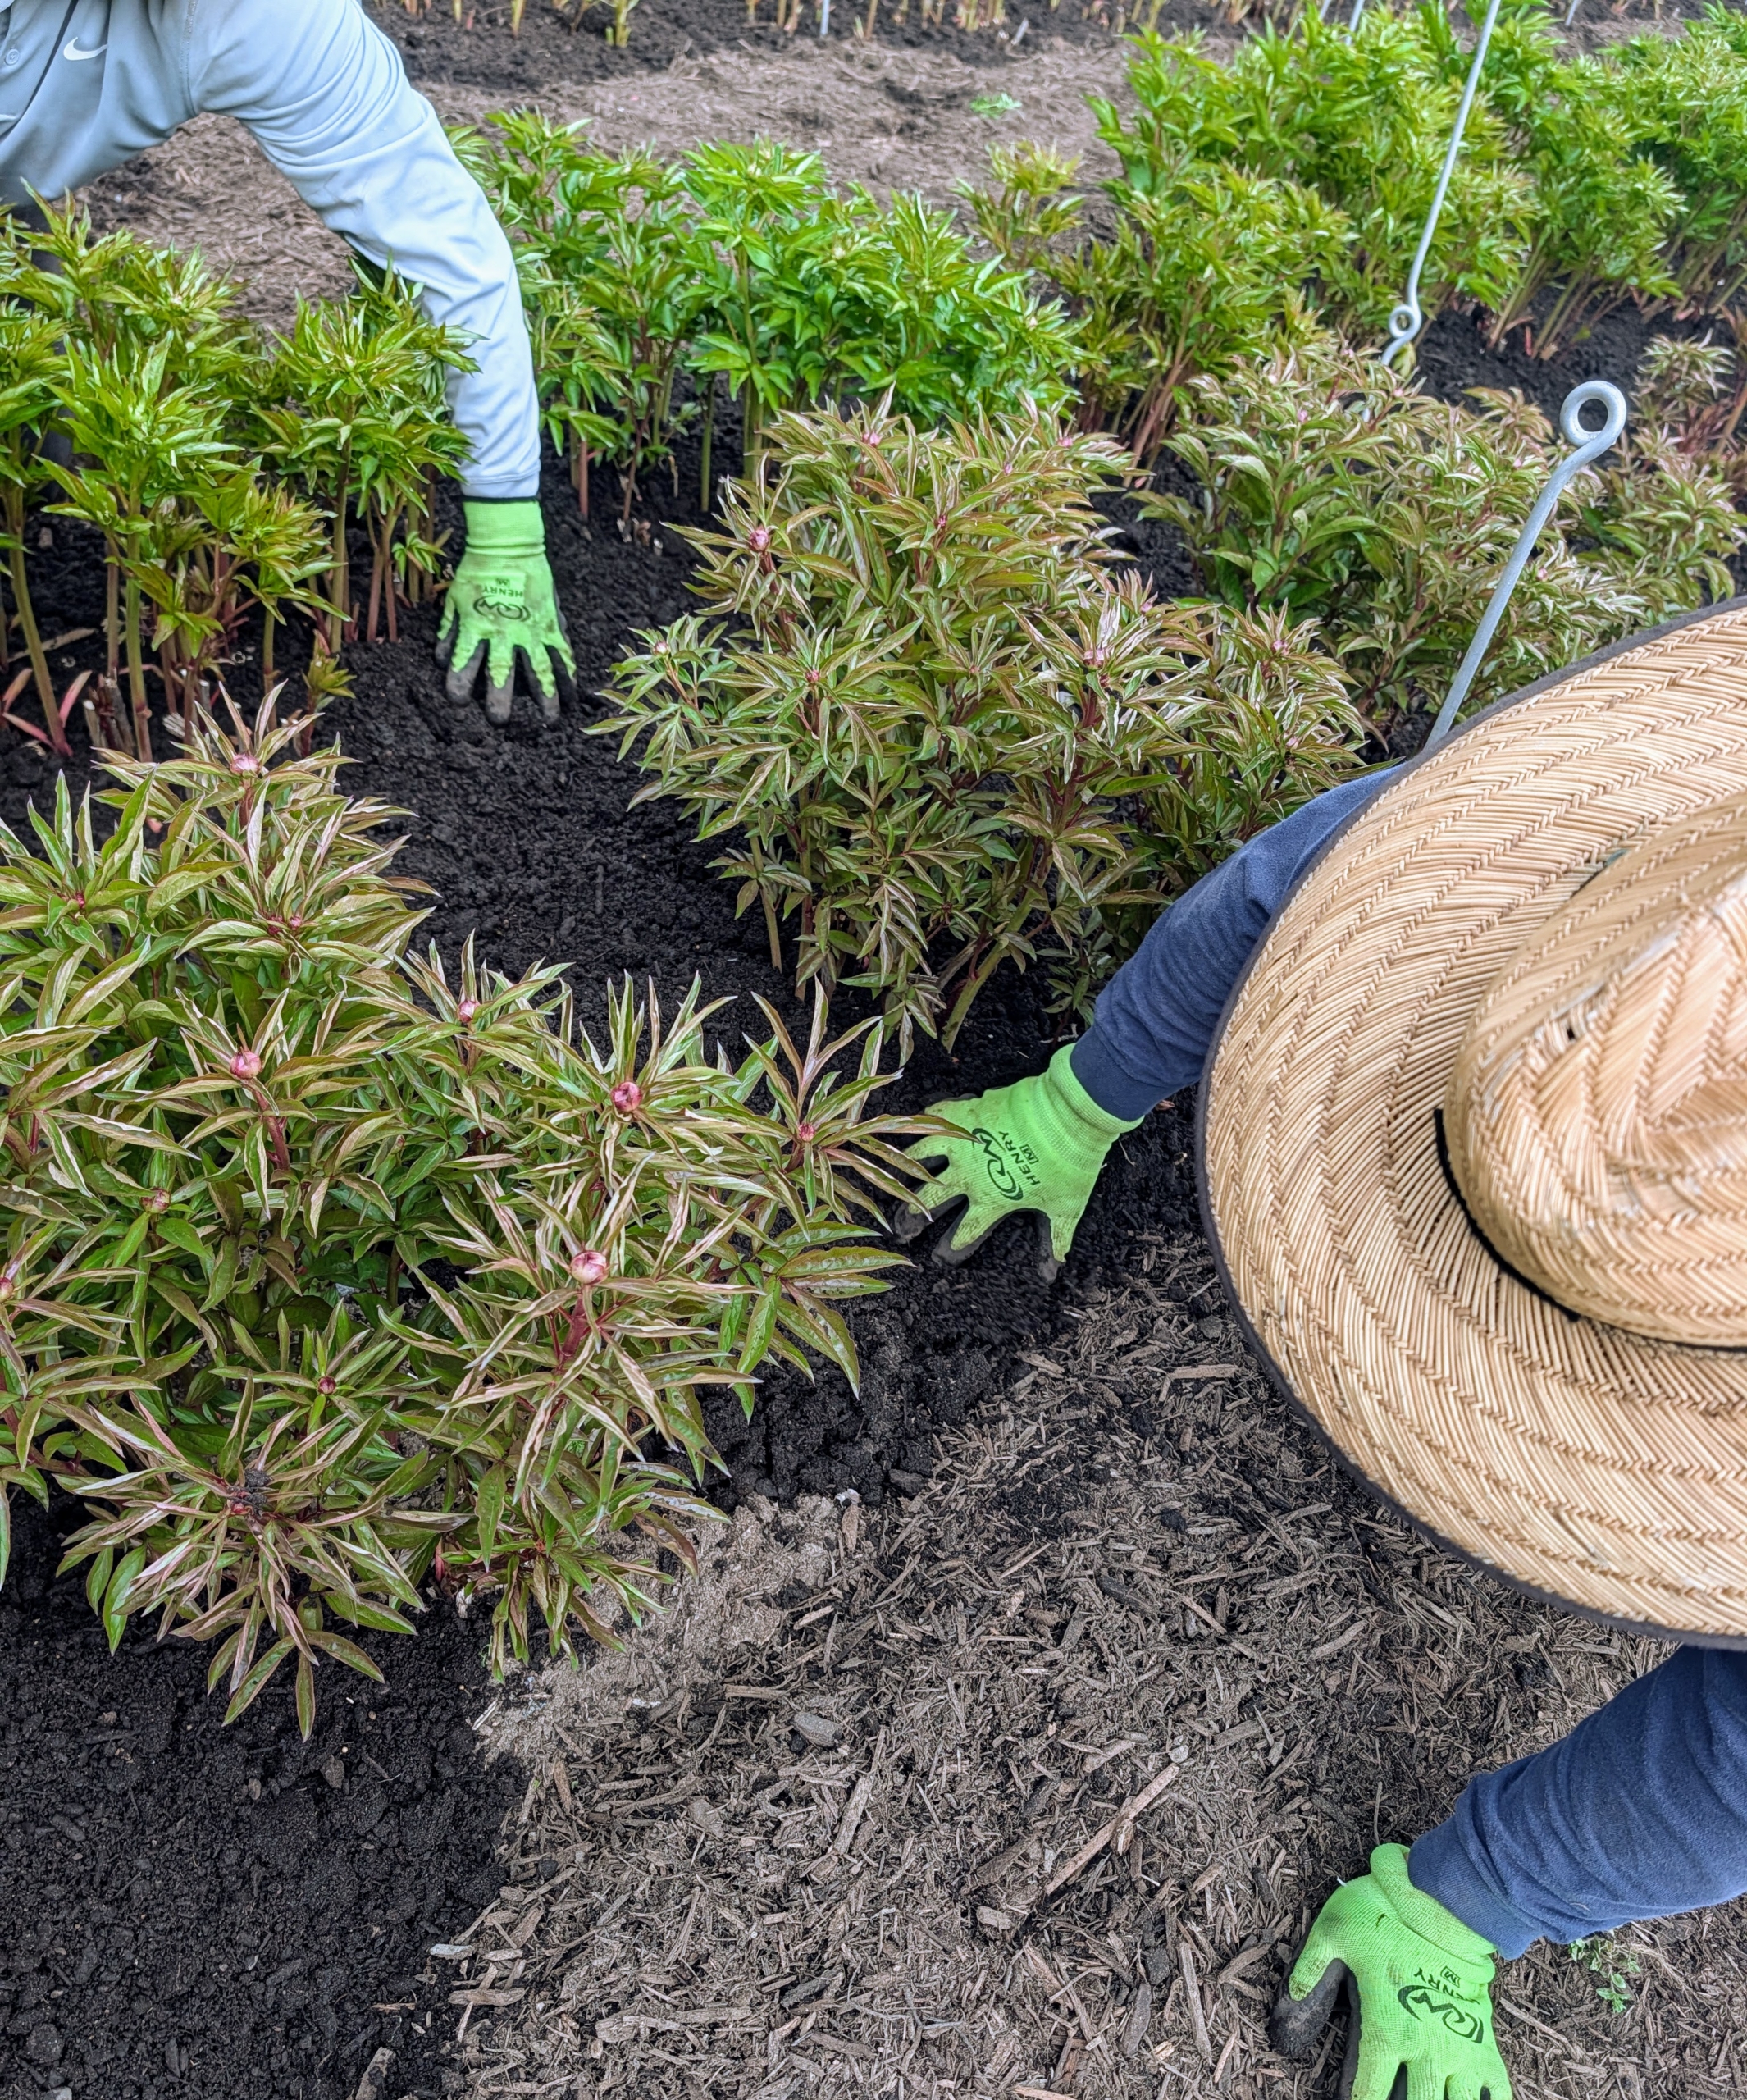
In April, the herbaceous peonies begin emerging from the ground, but they grow very quickly and need to be supported to protect the large heavy flowers. My peony garden is planted with 11 double rows of 22 herbaceous peony plants, 44 in each row of the same variety, all surrounded by a hedge of rounded boxwood shrubs, making it a focal point on the property.
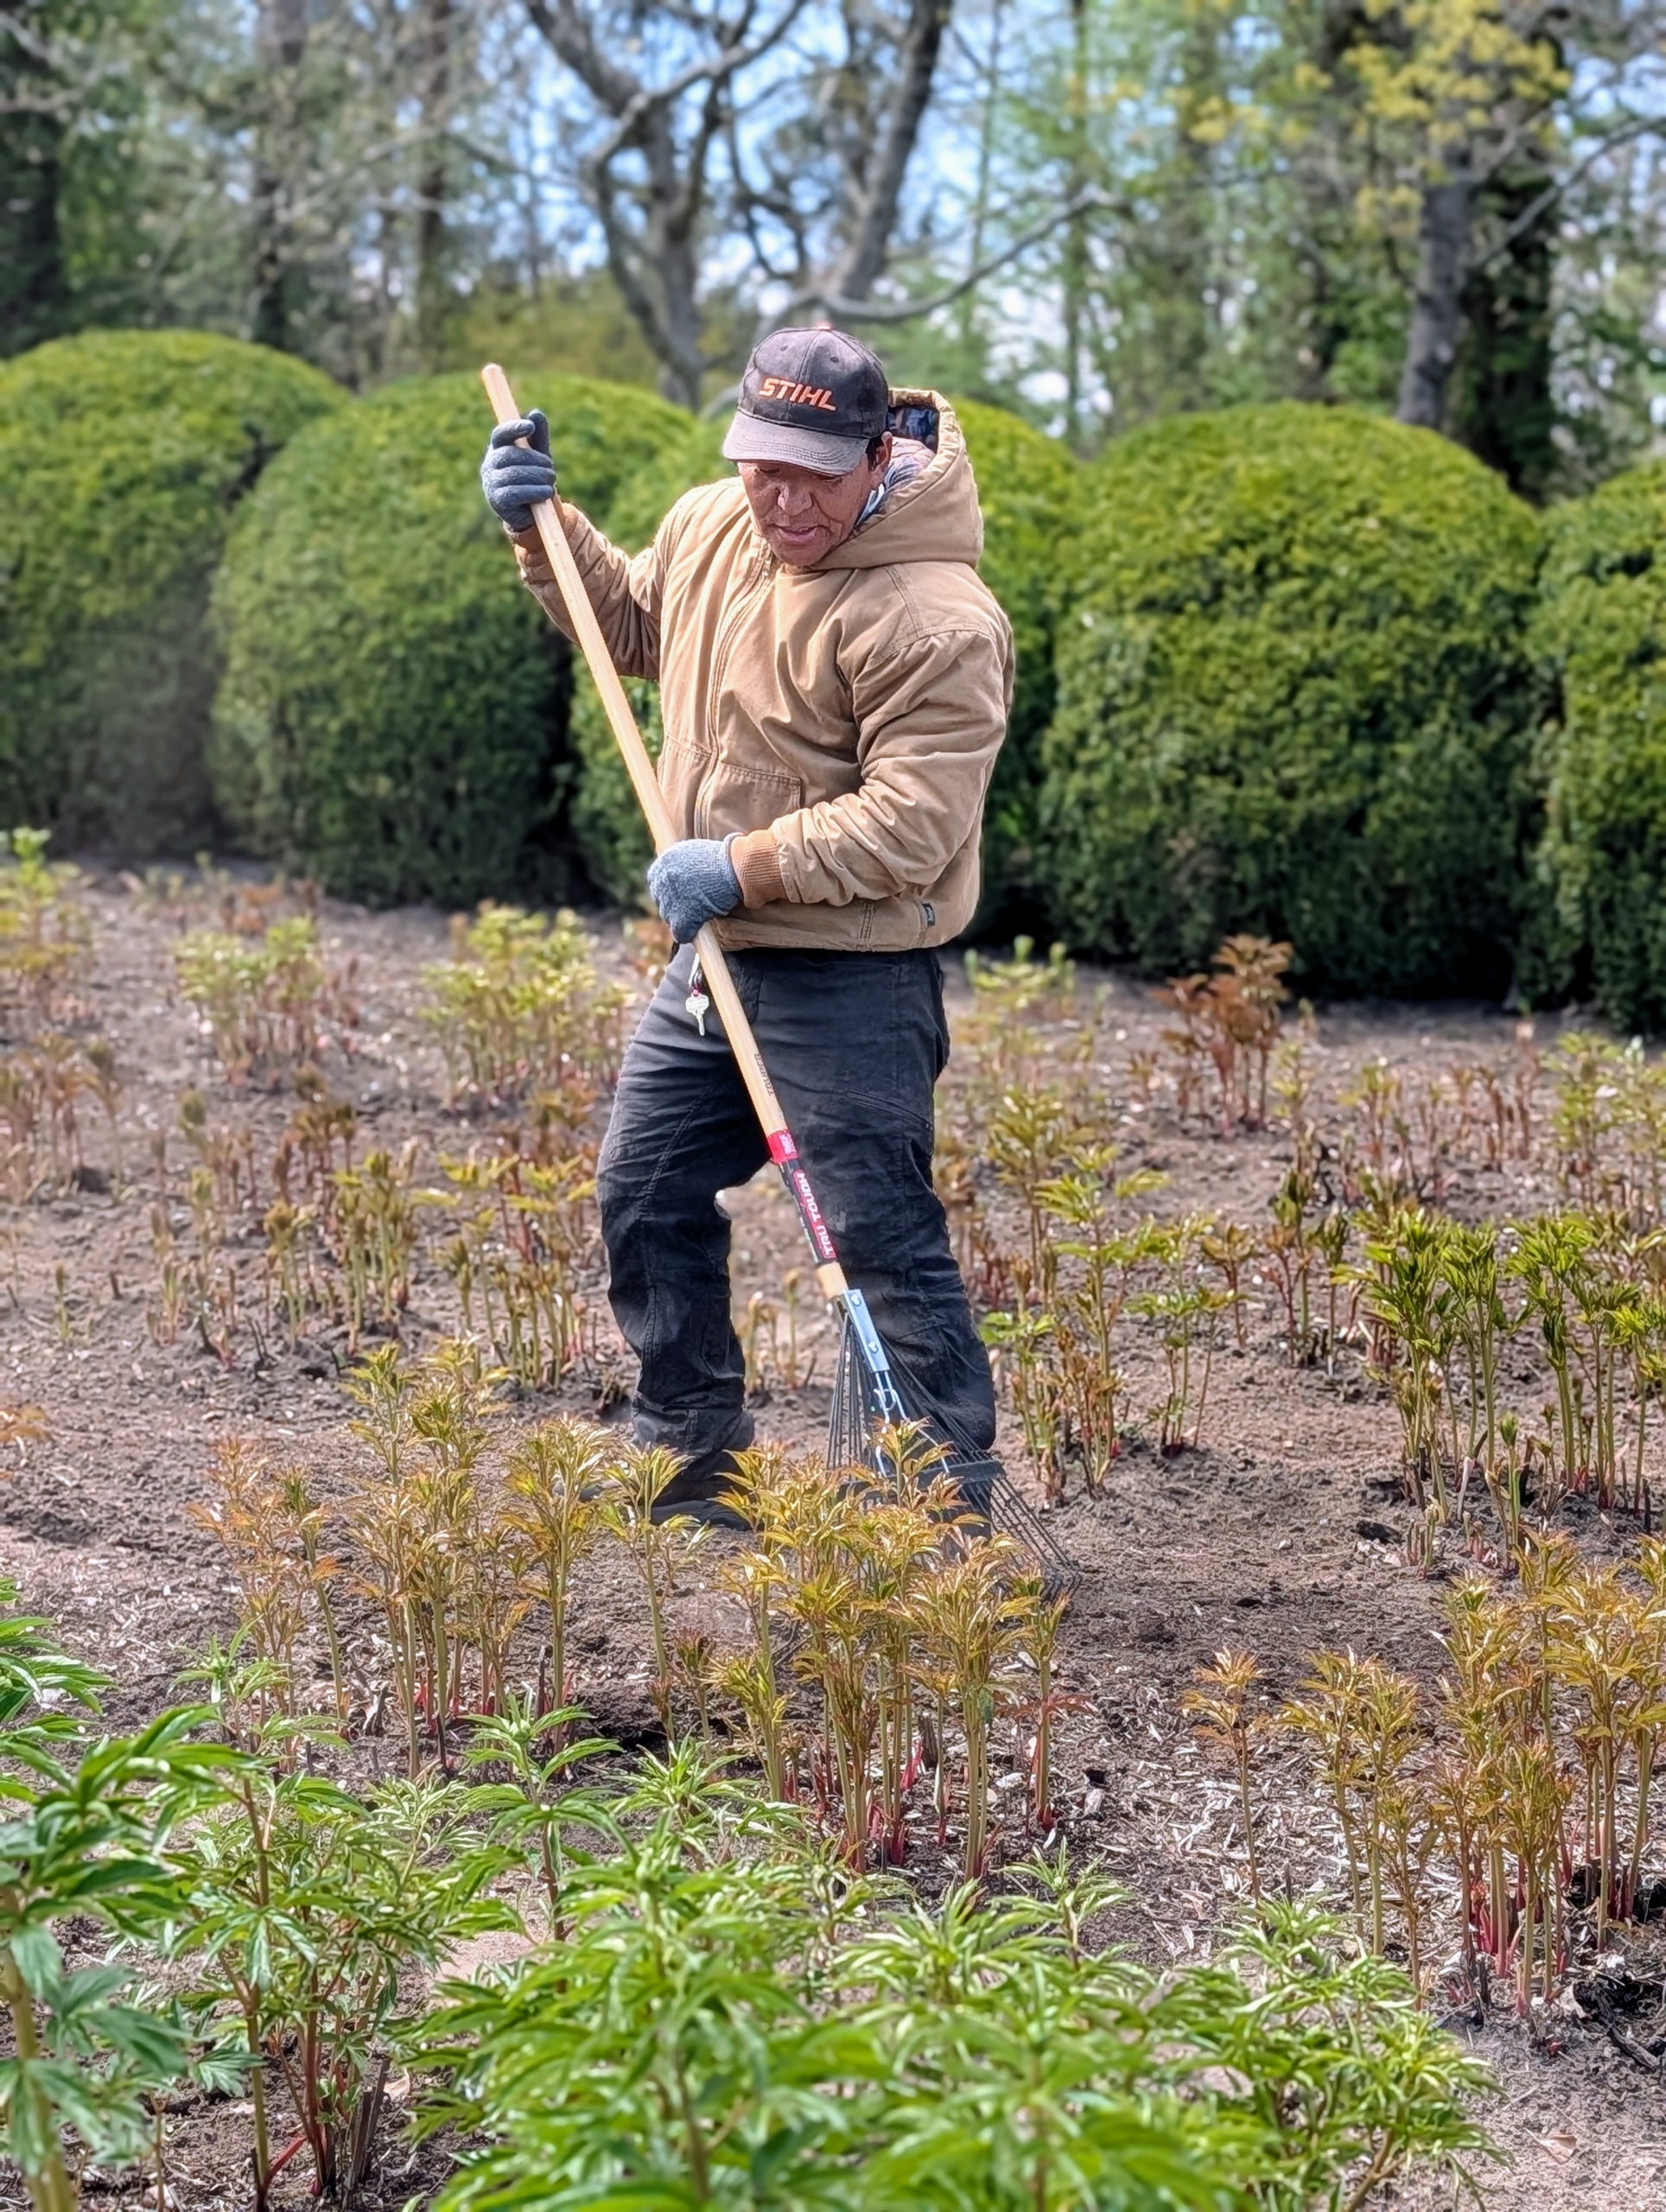
Phurba begins by cleaning and weeding the beds. This is still easy to do since the plants are small.
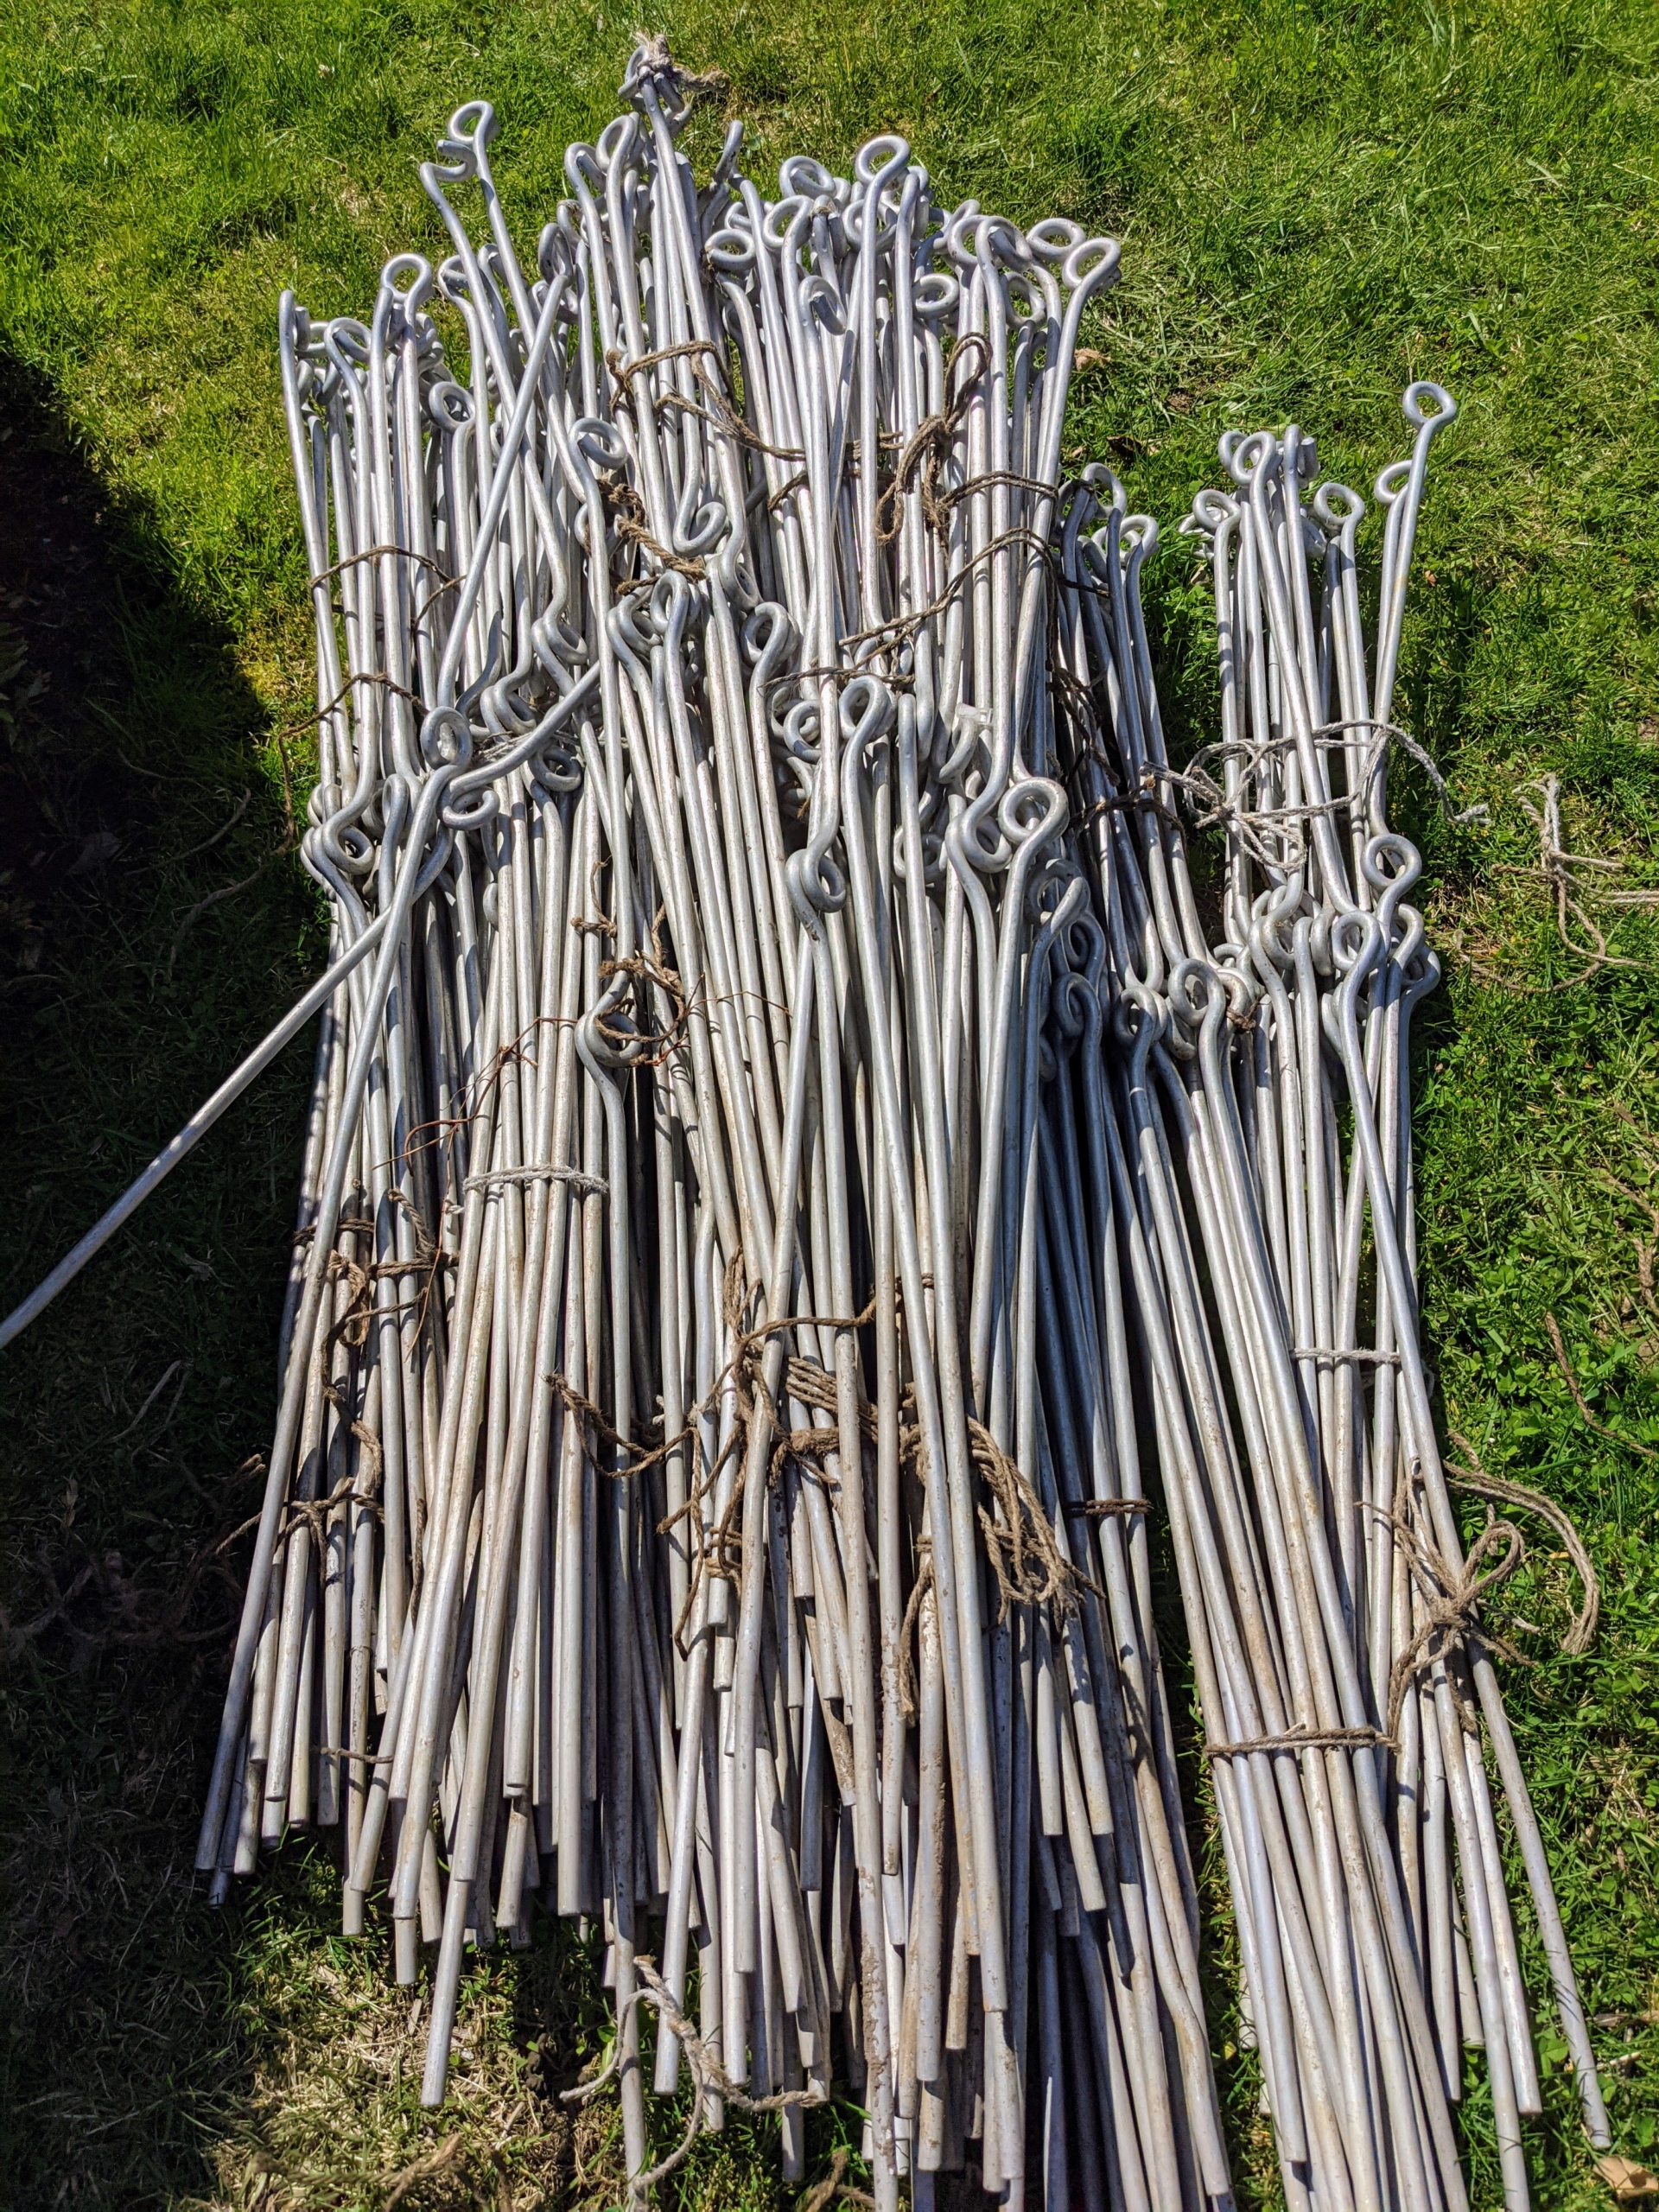
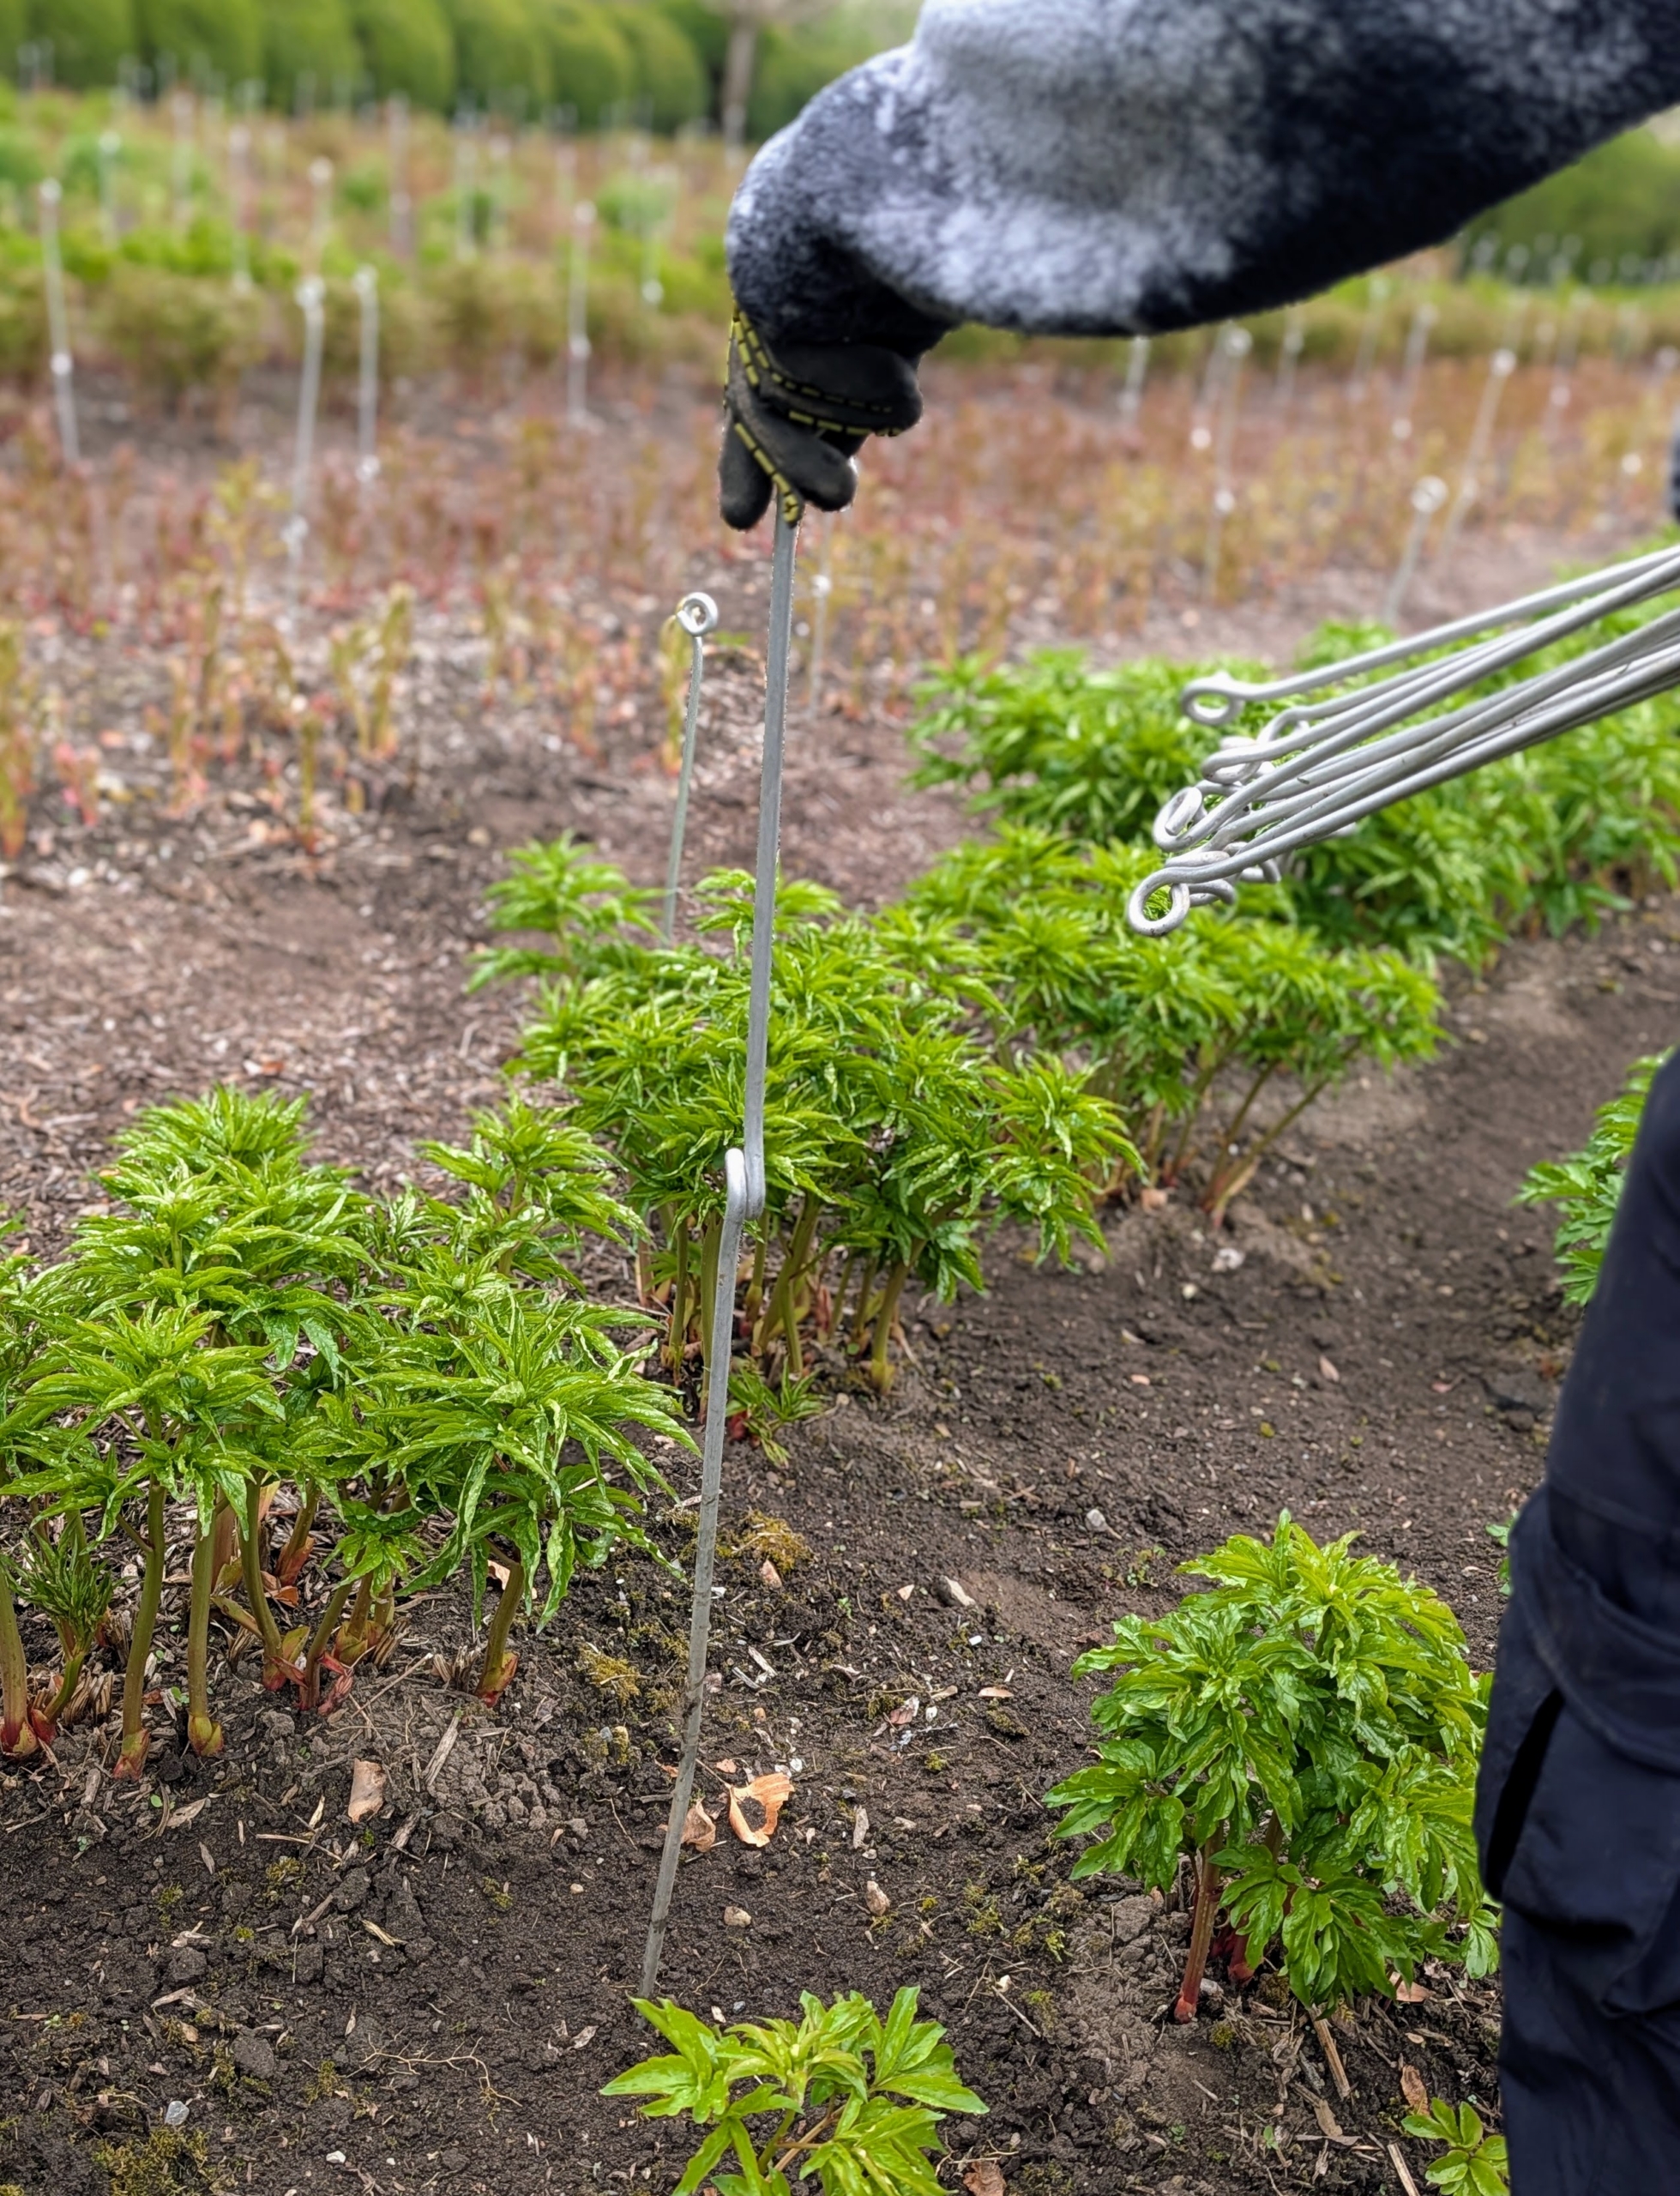
Instead of rings that are available at many garden centers, I use these metal stakes I designed myself for my own farm.
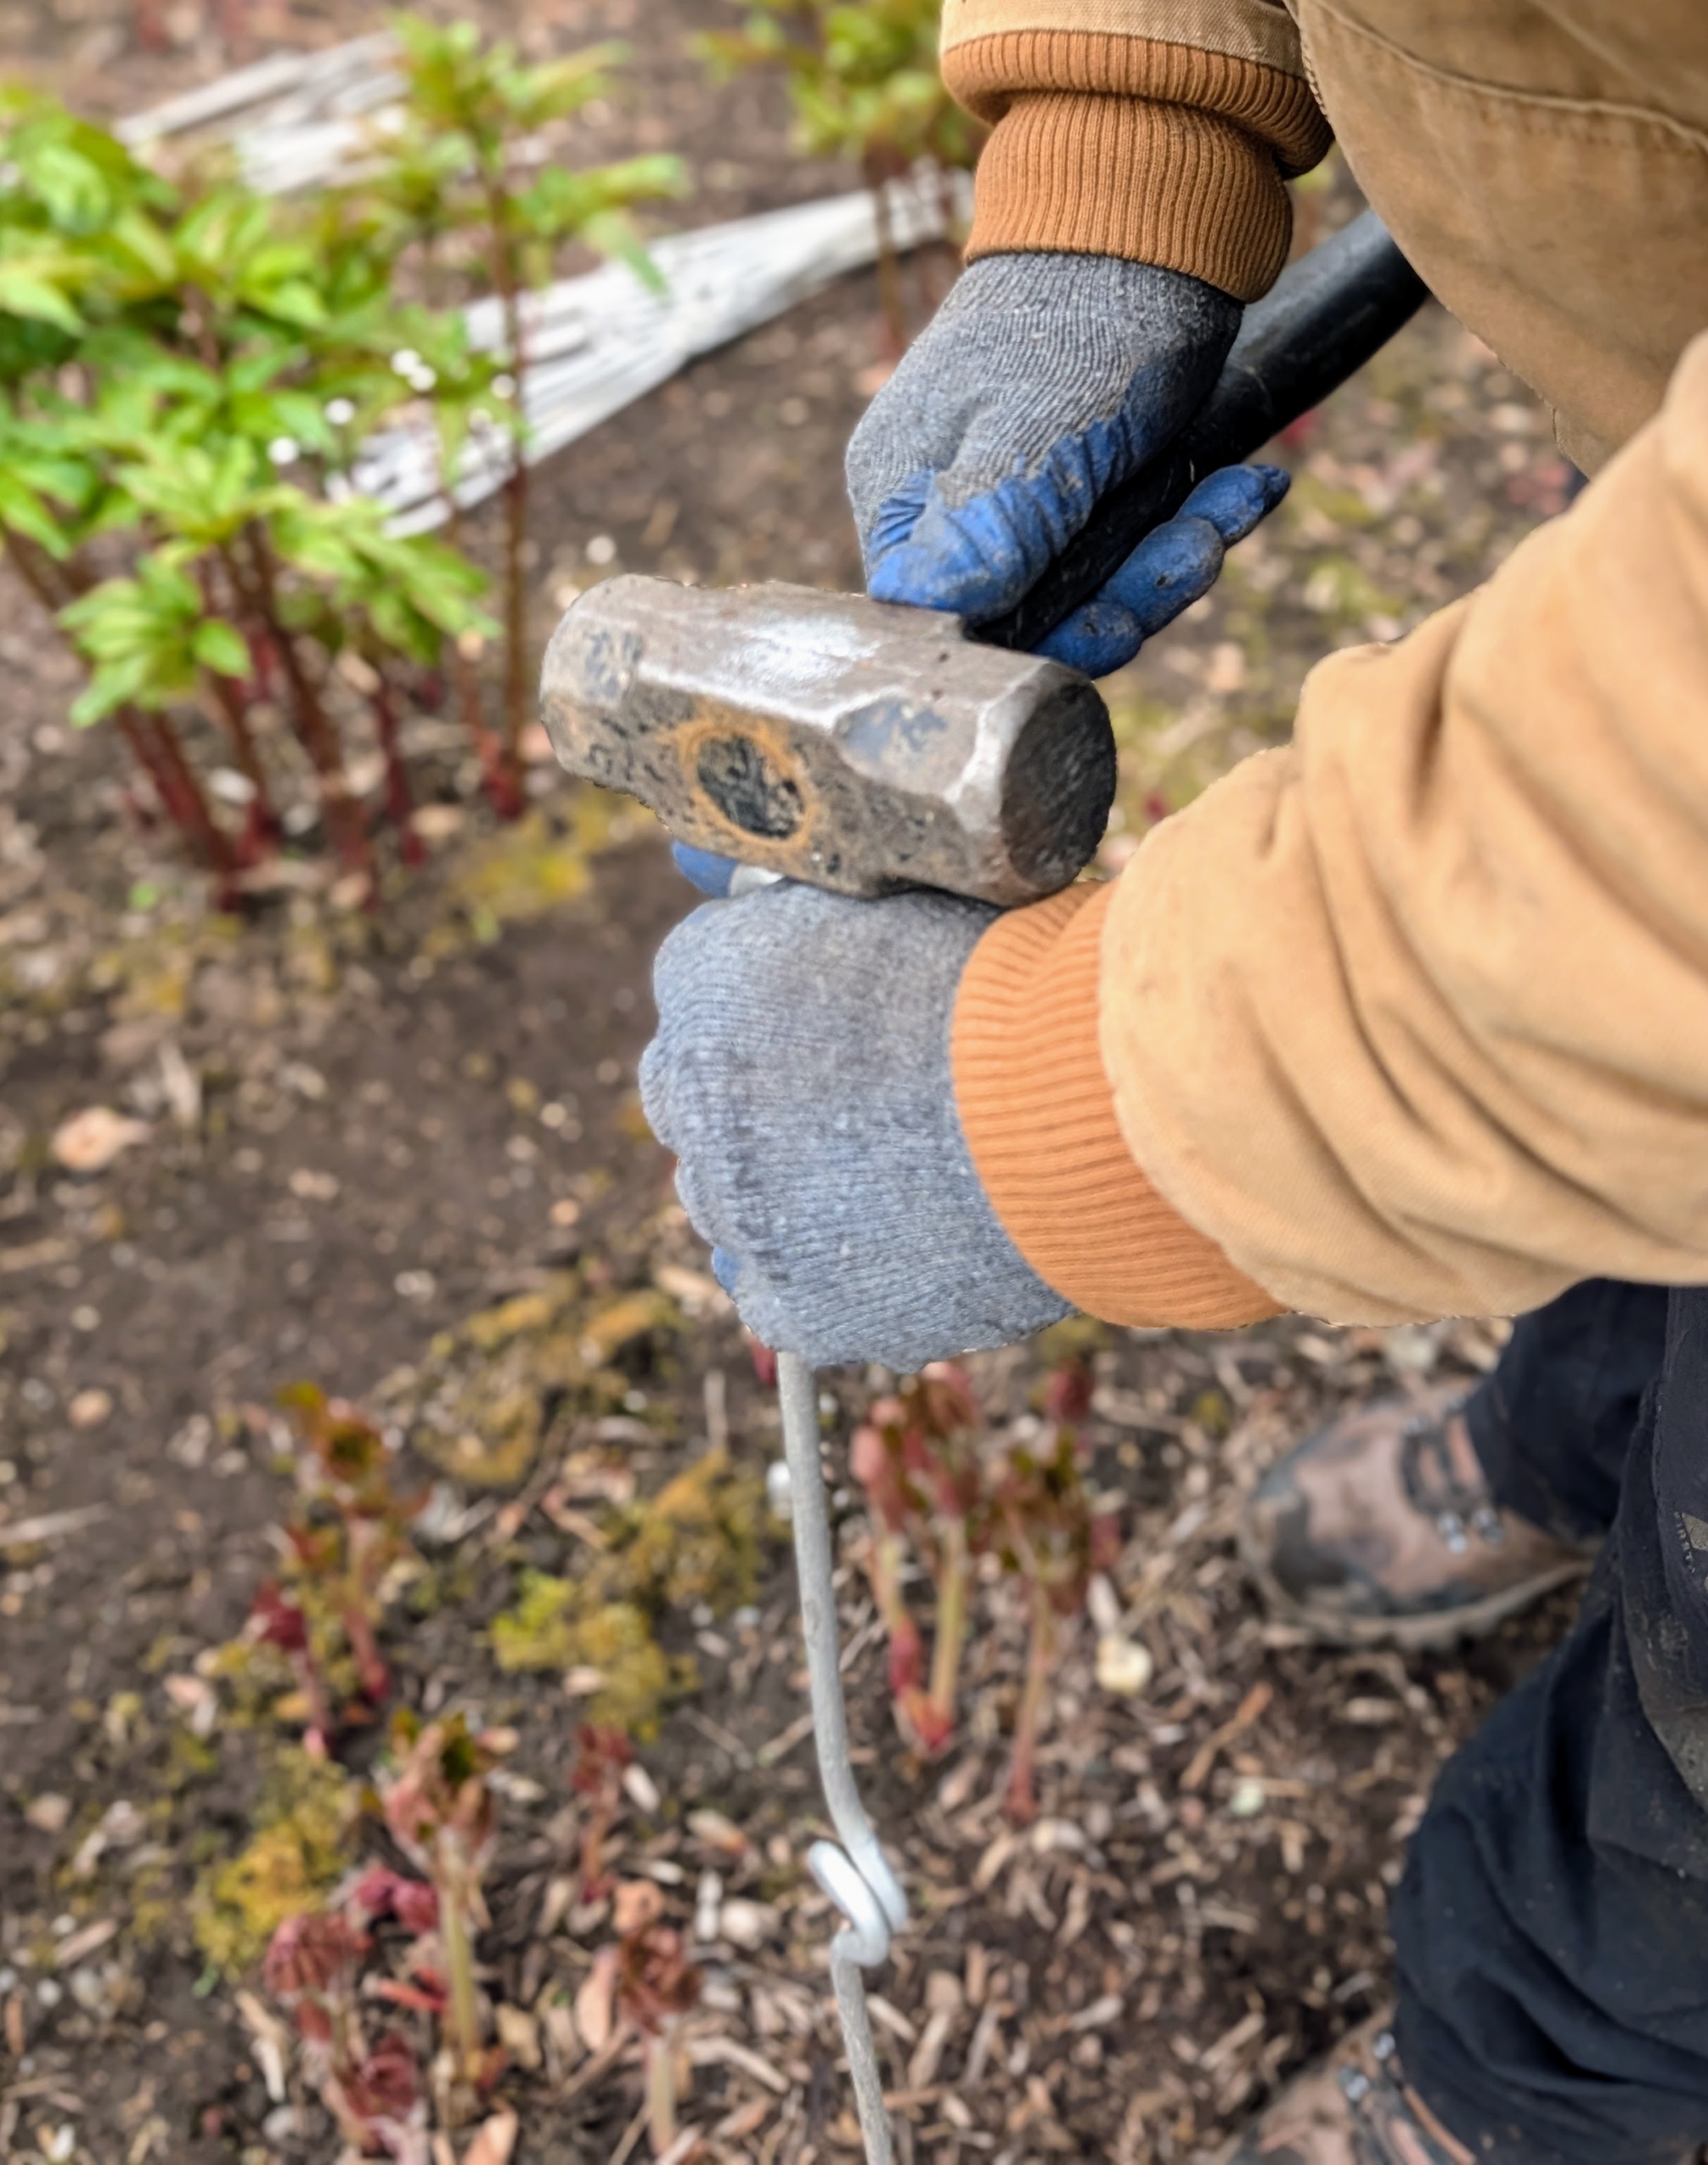
Matthew starts by inserting a stake every four-feet up and down both sides of each row.
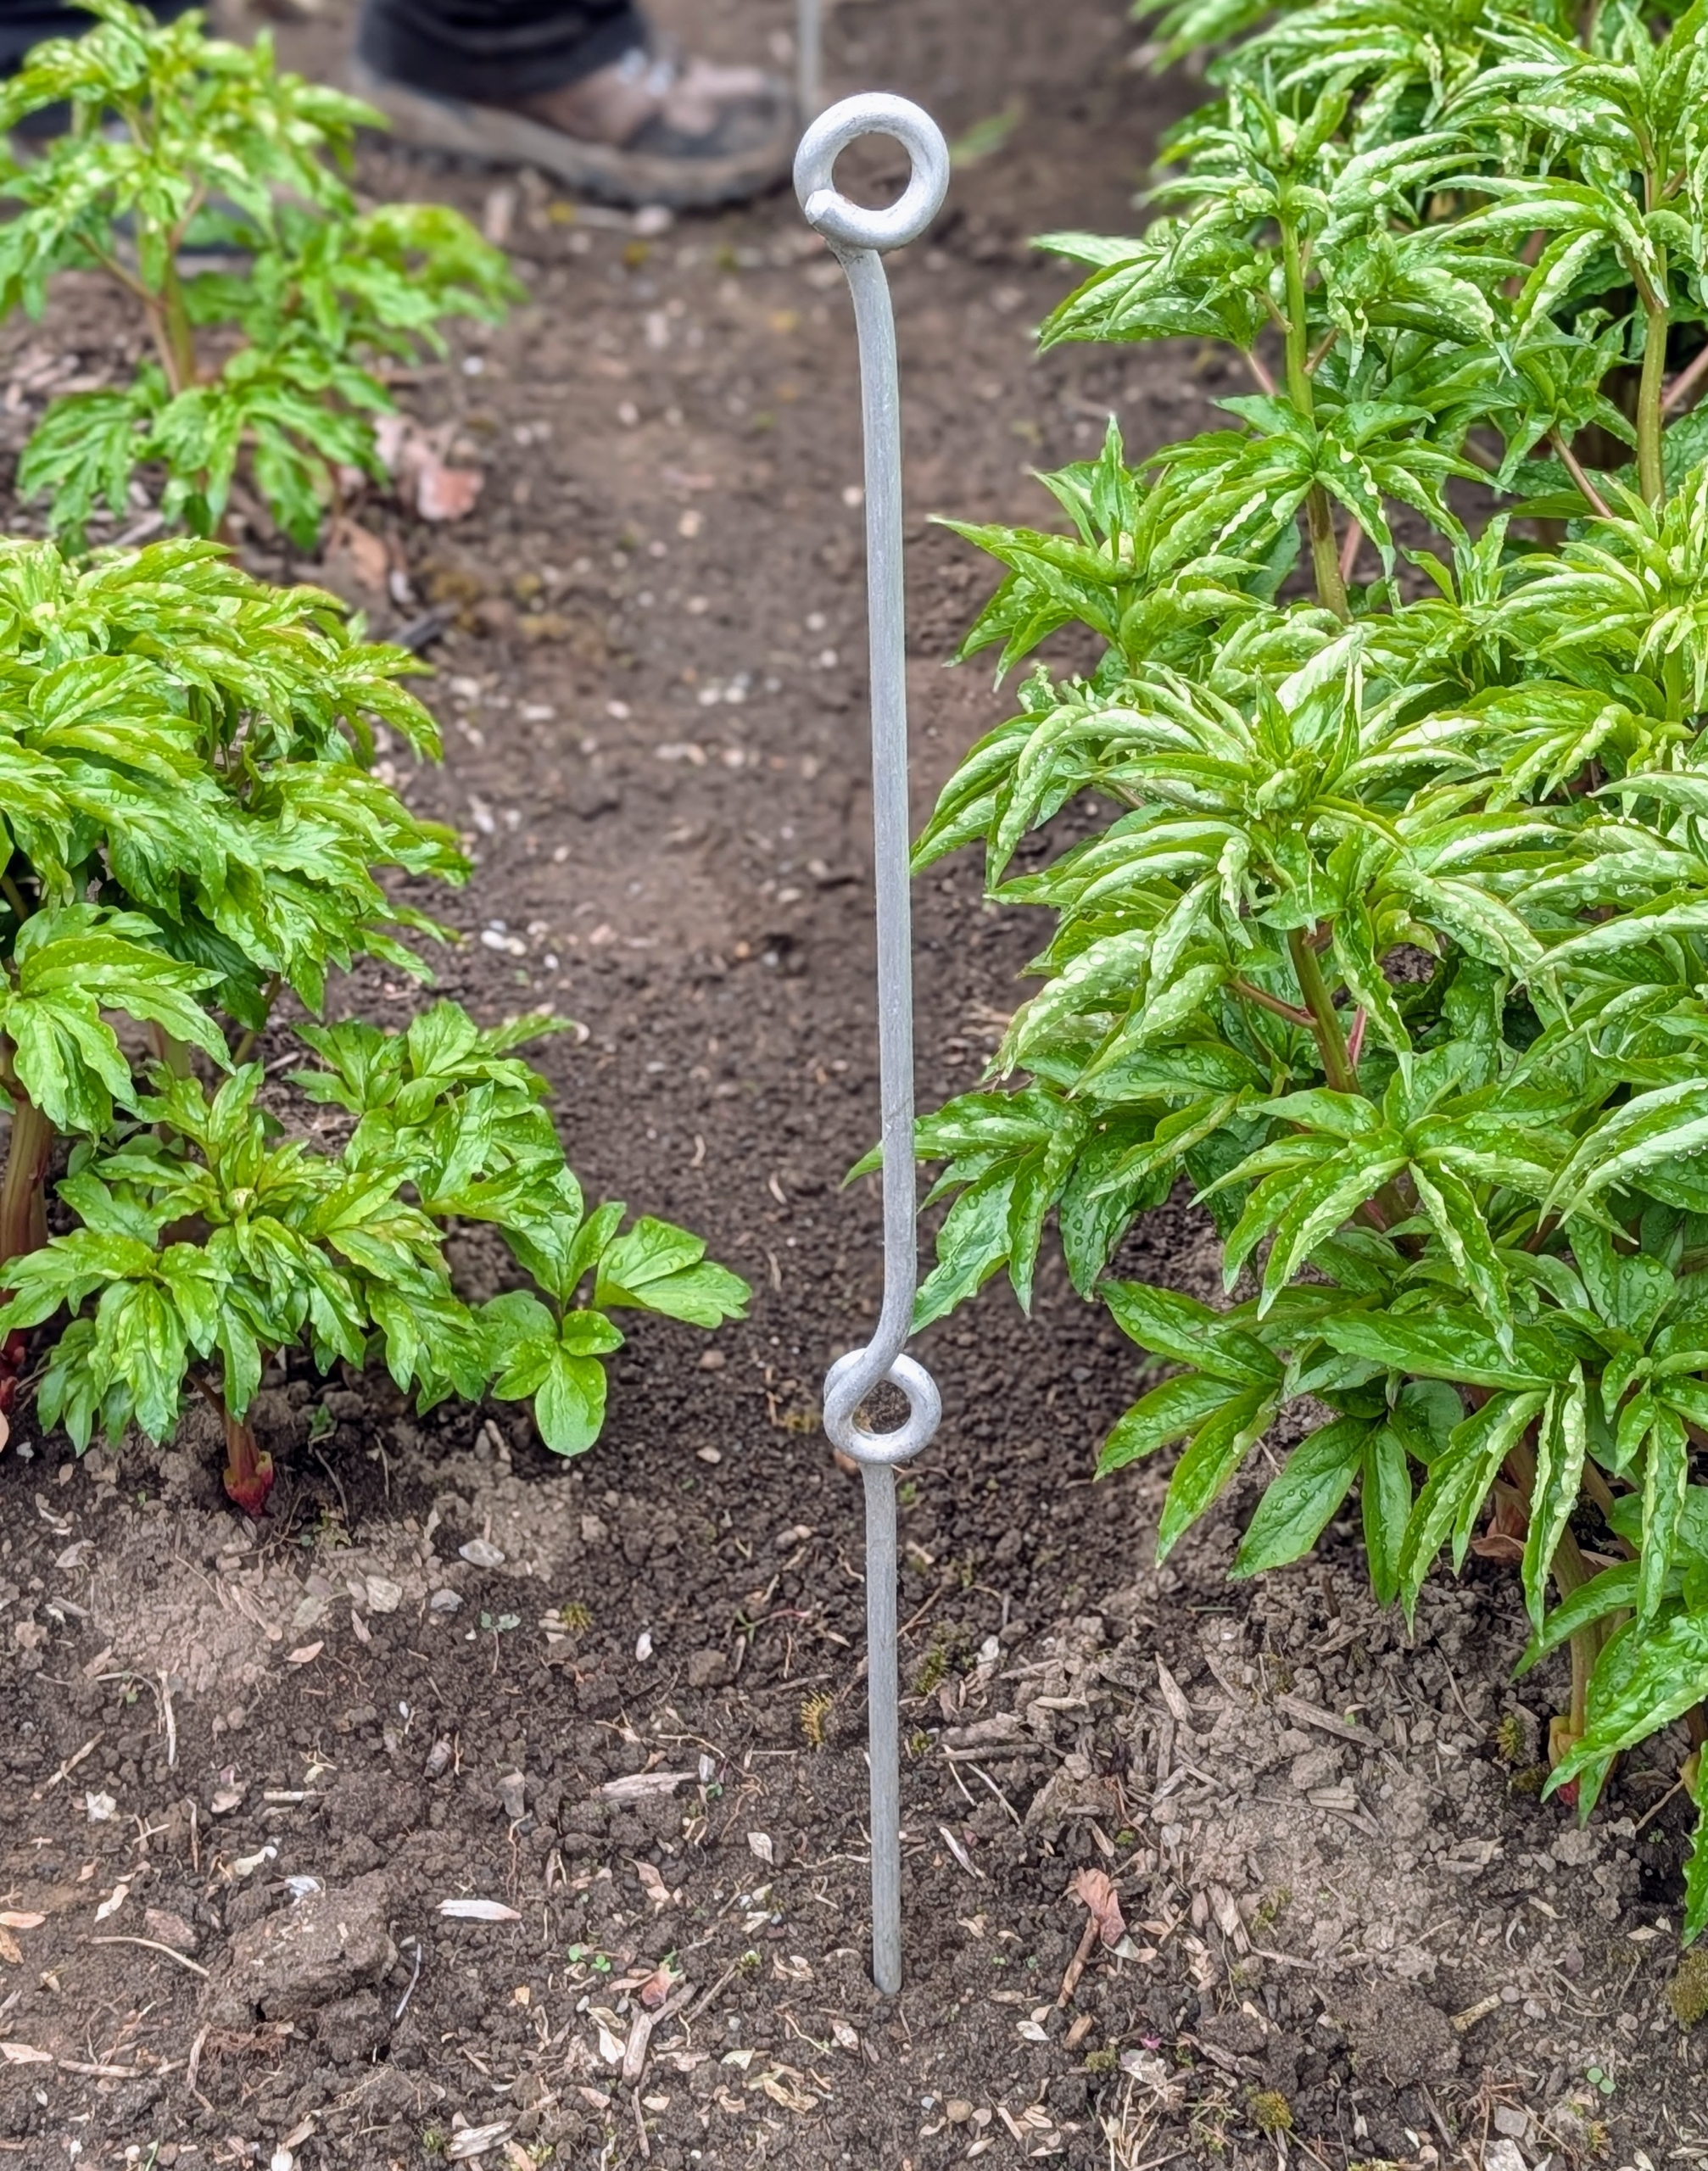
Each metal support has two eyes, one at the top and one in the middle. The stakes are about three feet tall.
Once they are in position, they are pounded down several inches deep into the ground.
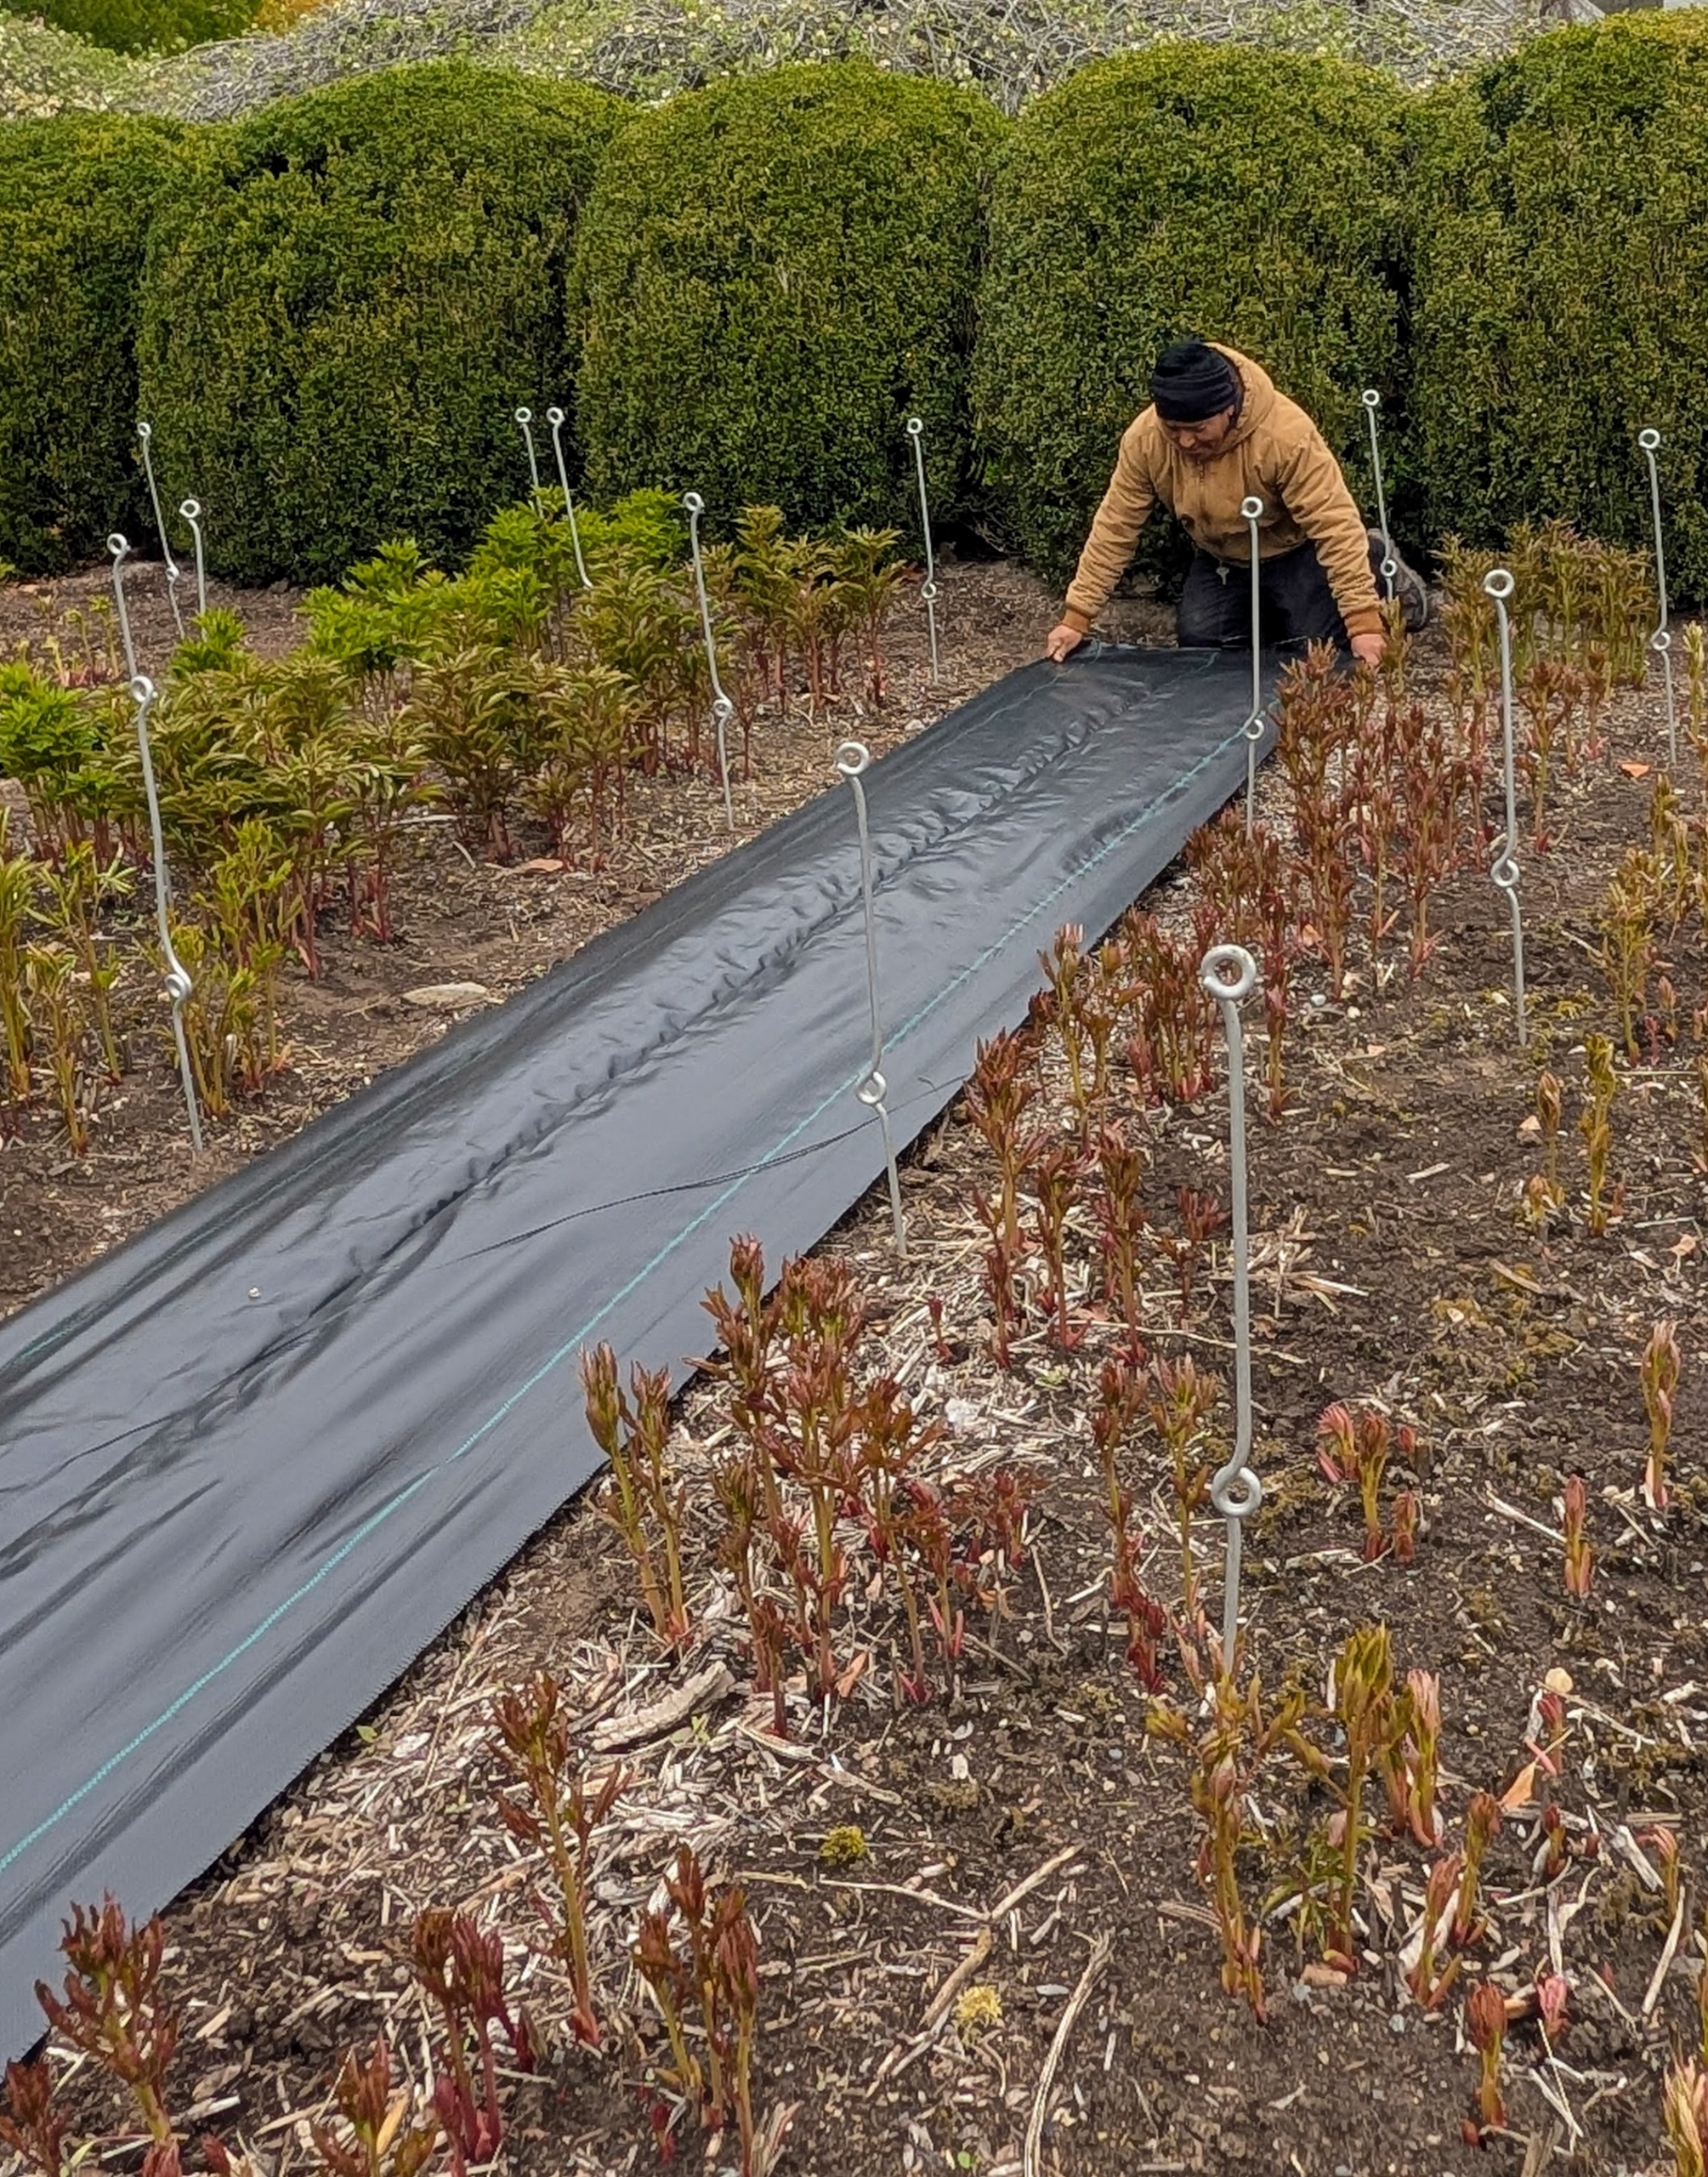
This year, I decided to line all the footpaths with an industrial strength weed cloth to cut down on those pesky weeds. Weed cloth is available in a variety of widths, but the fabric can also be cut to fit if needed.
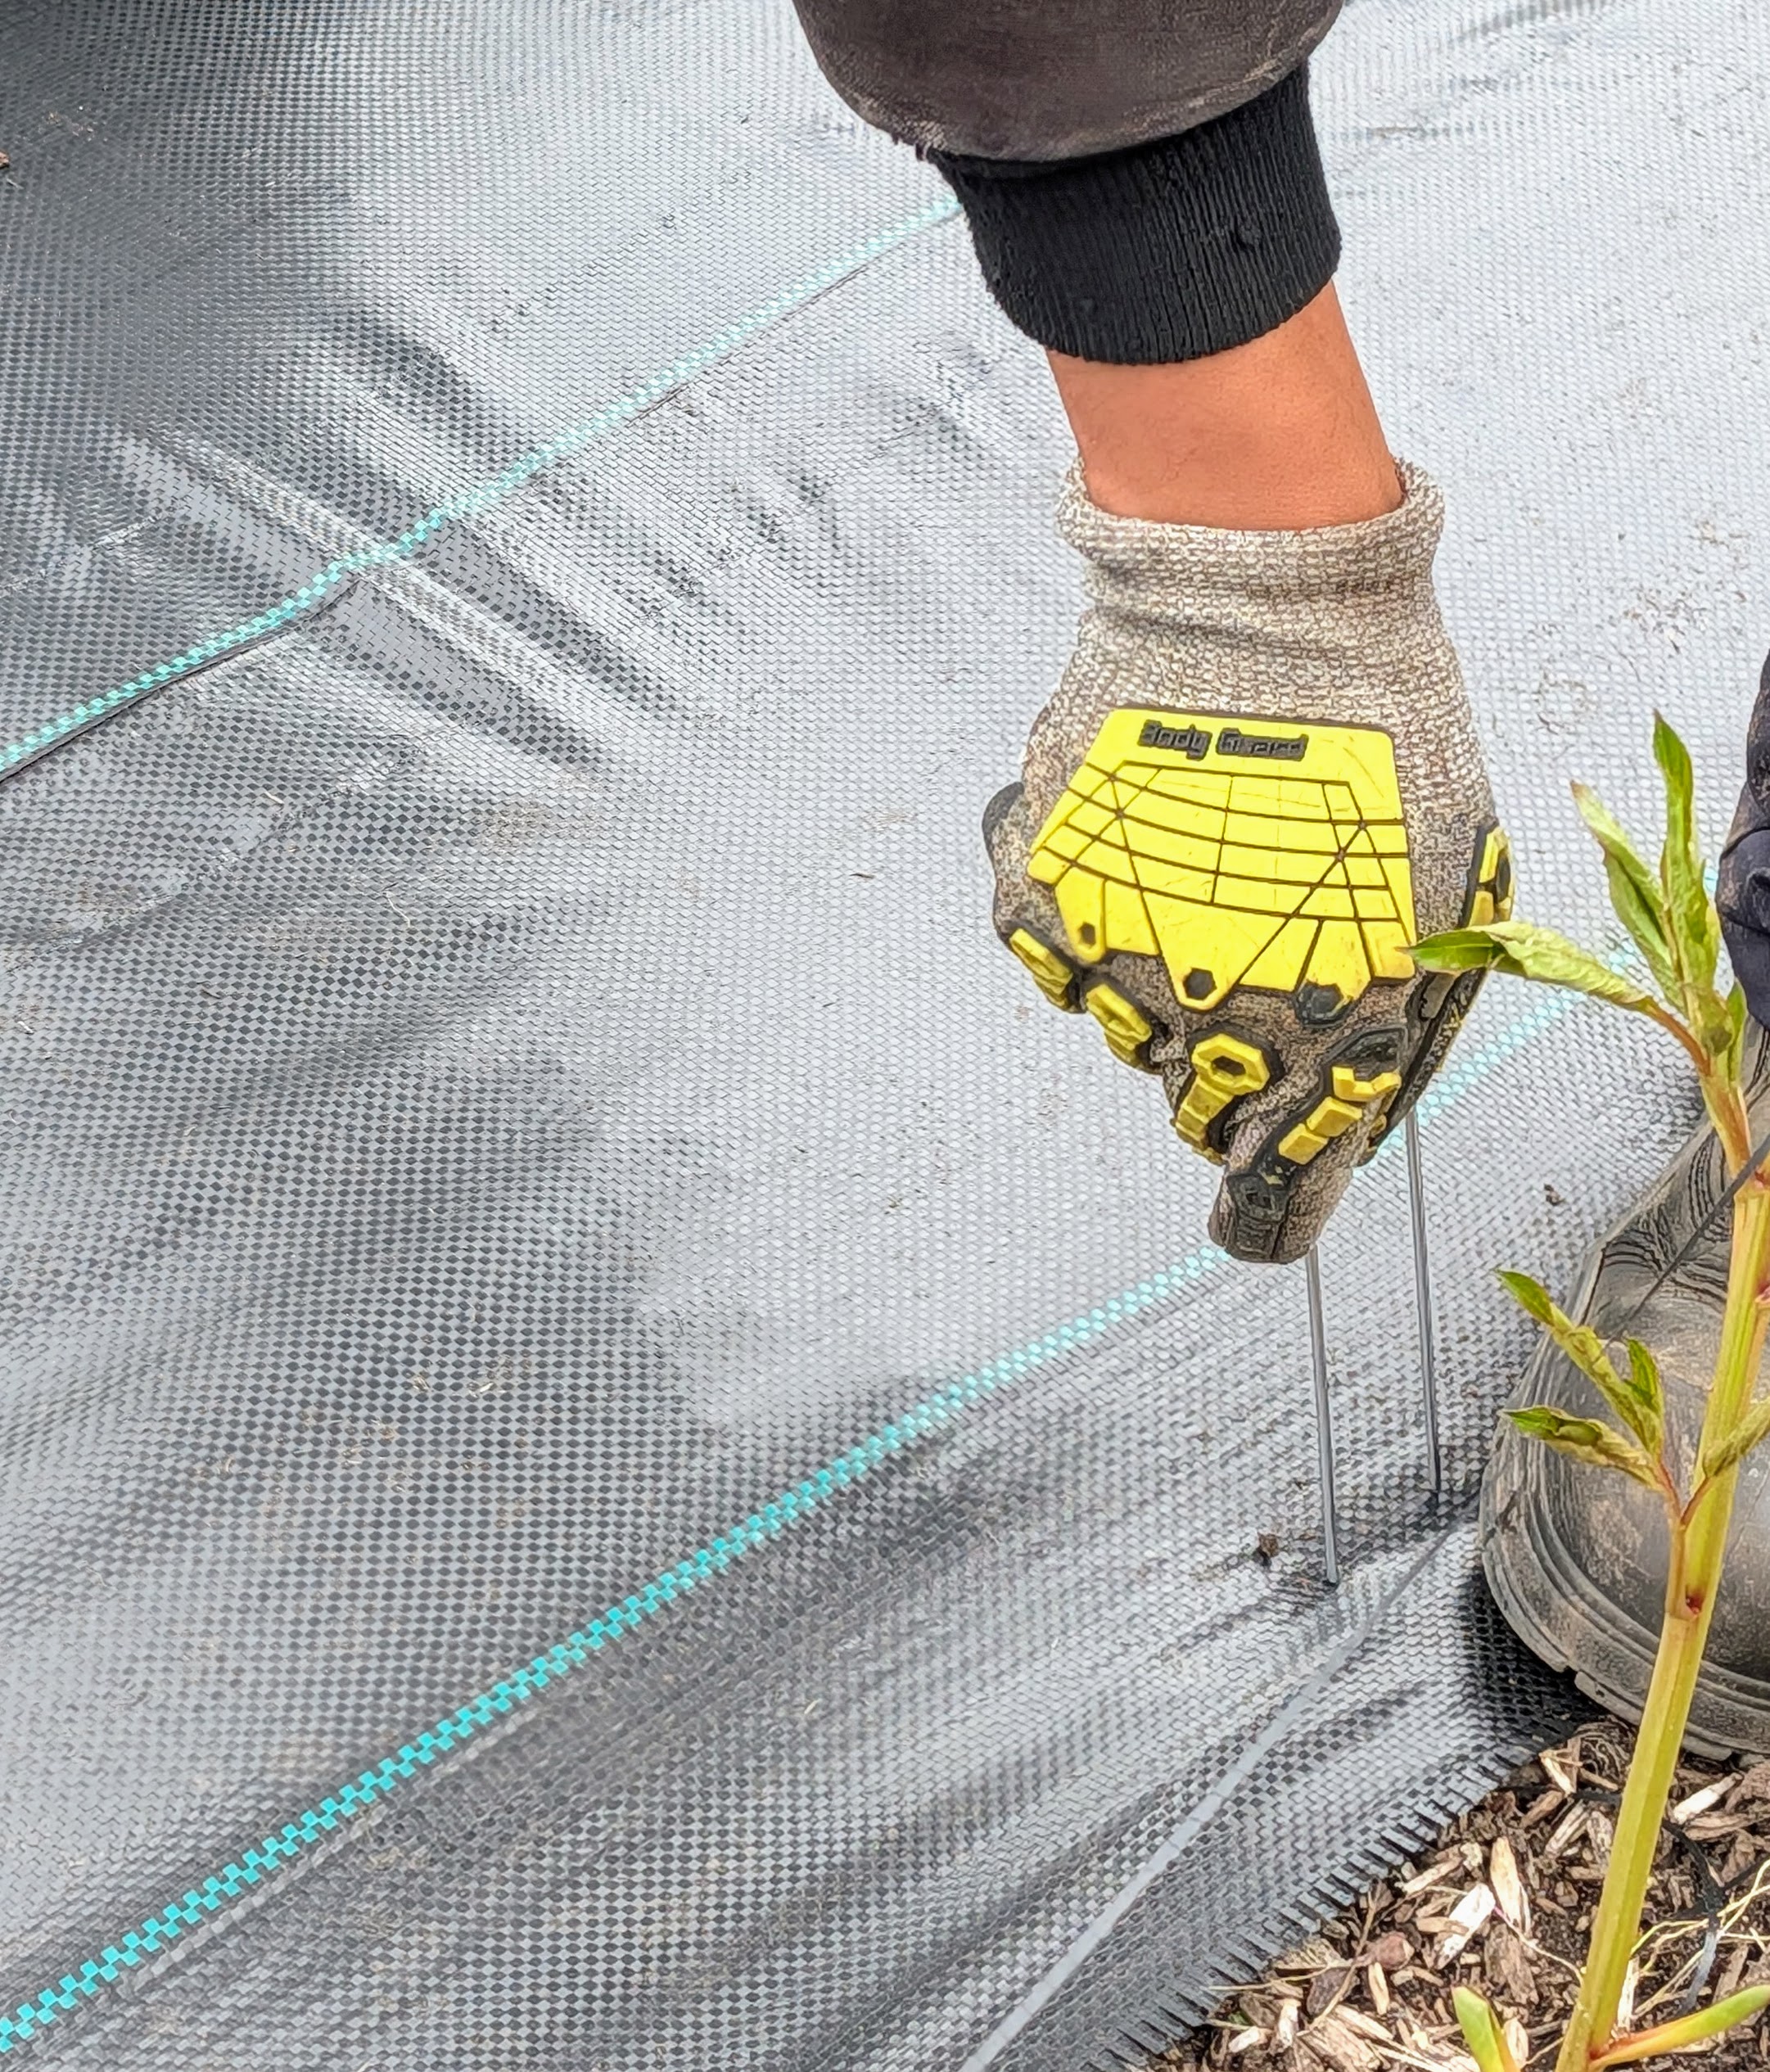
As the weed cloth is unrolled and positioned in the space, Matthew inserts a garden staple. These are placed every couple of feet on the edges and in the center to ensure the fabric stays in place.
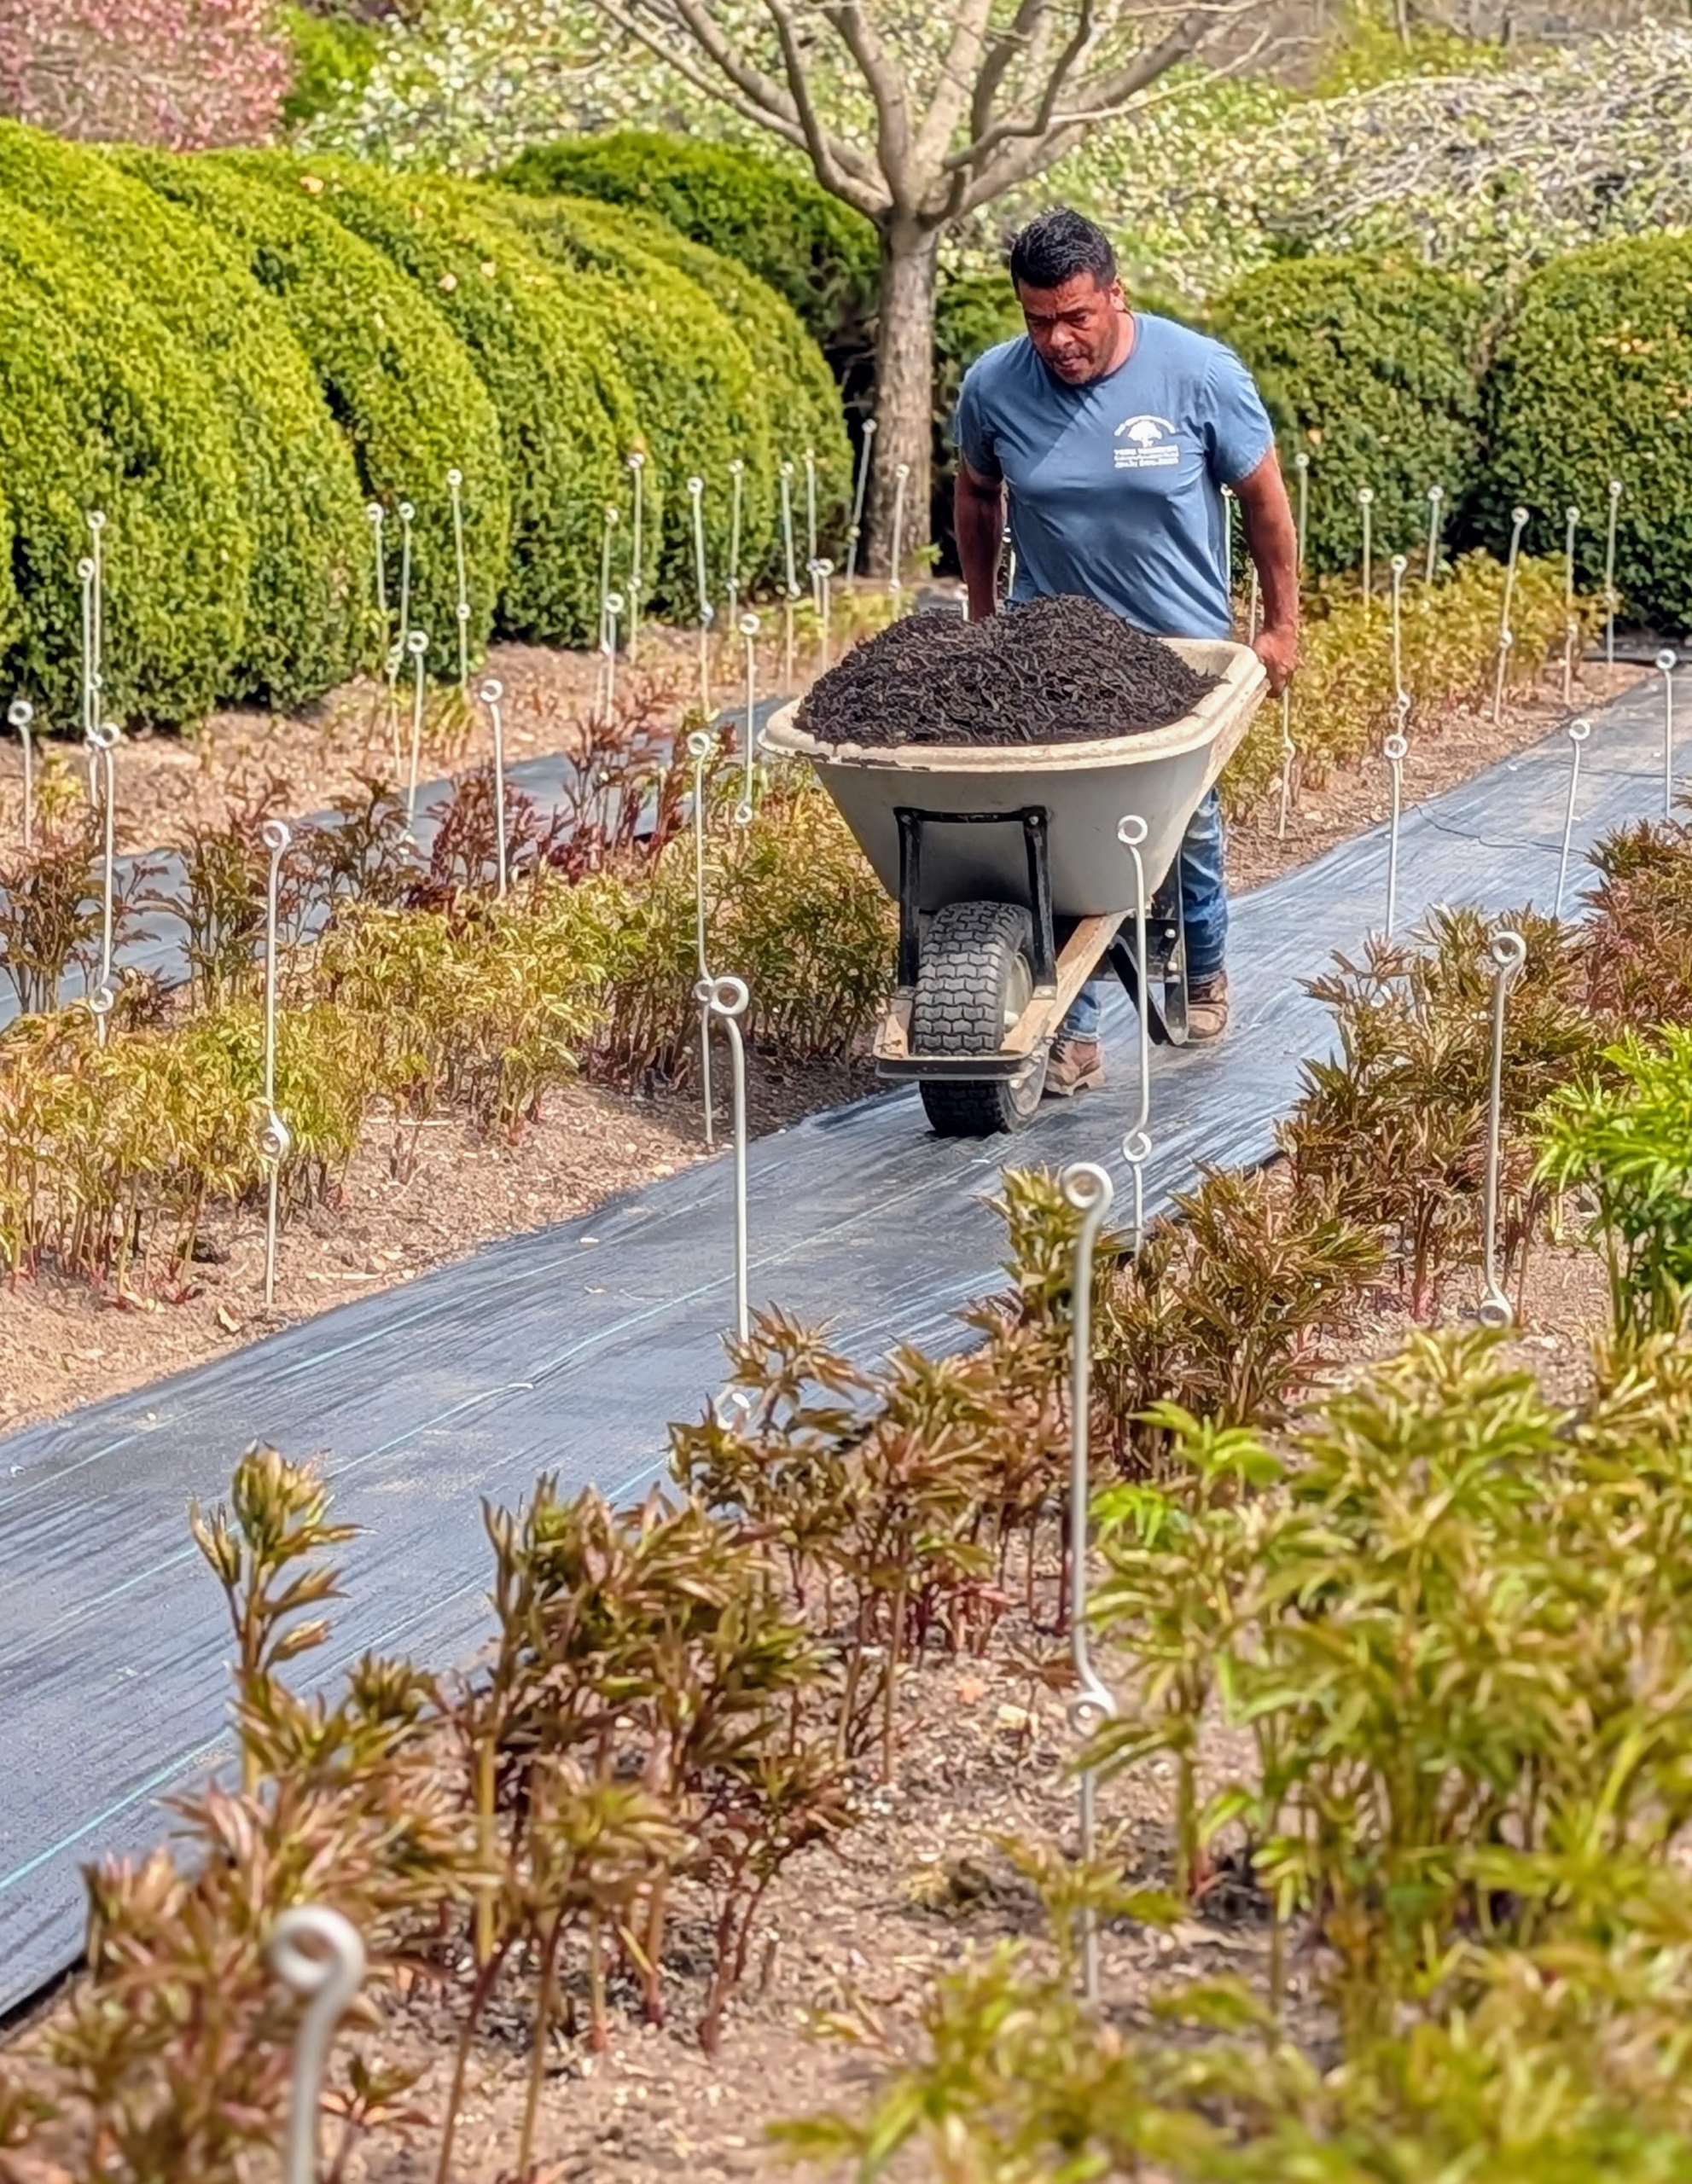
After the weed cloth is put down, wheelbarrows of mulch are brought into the garden.
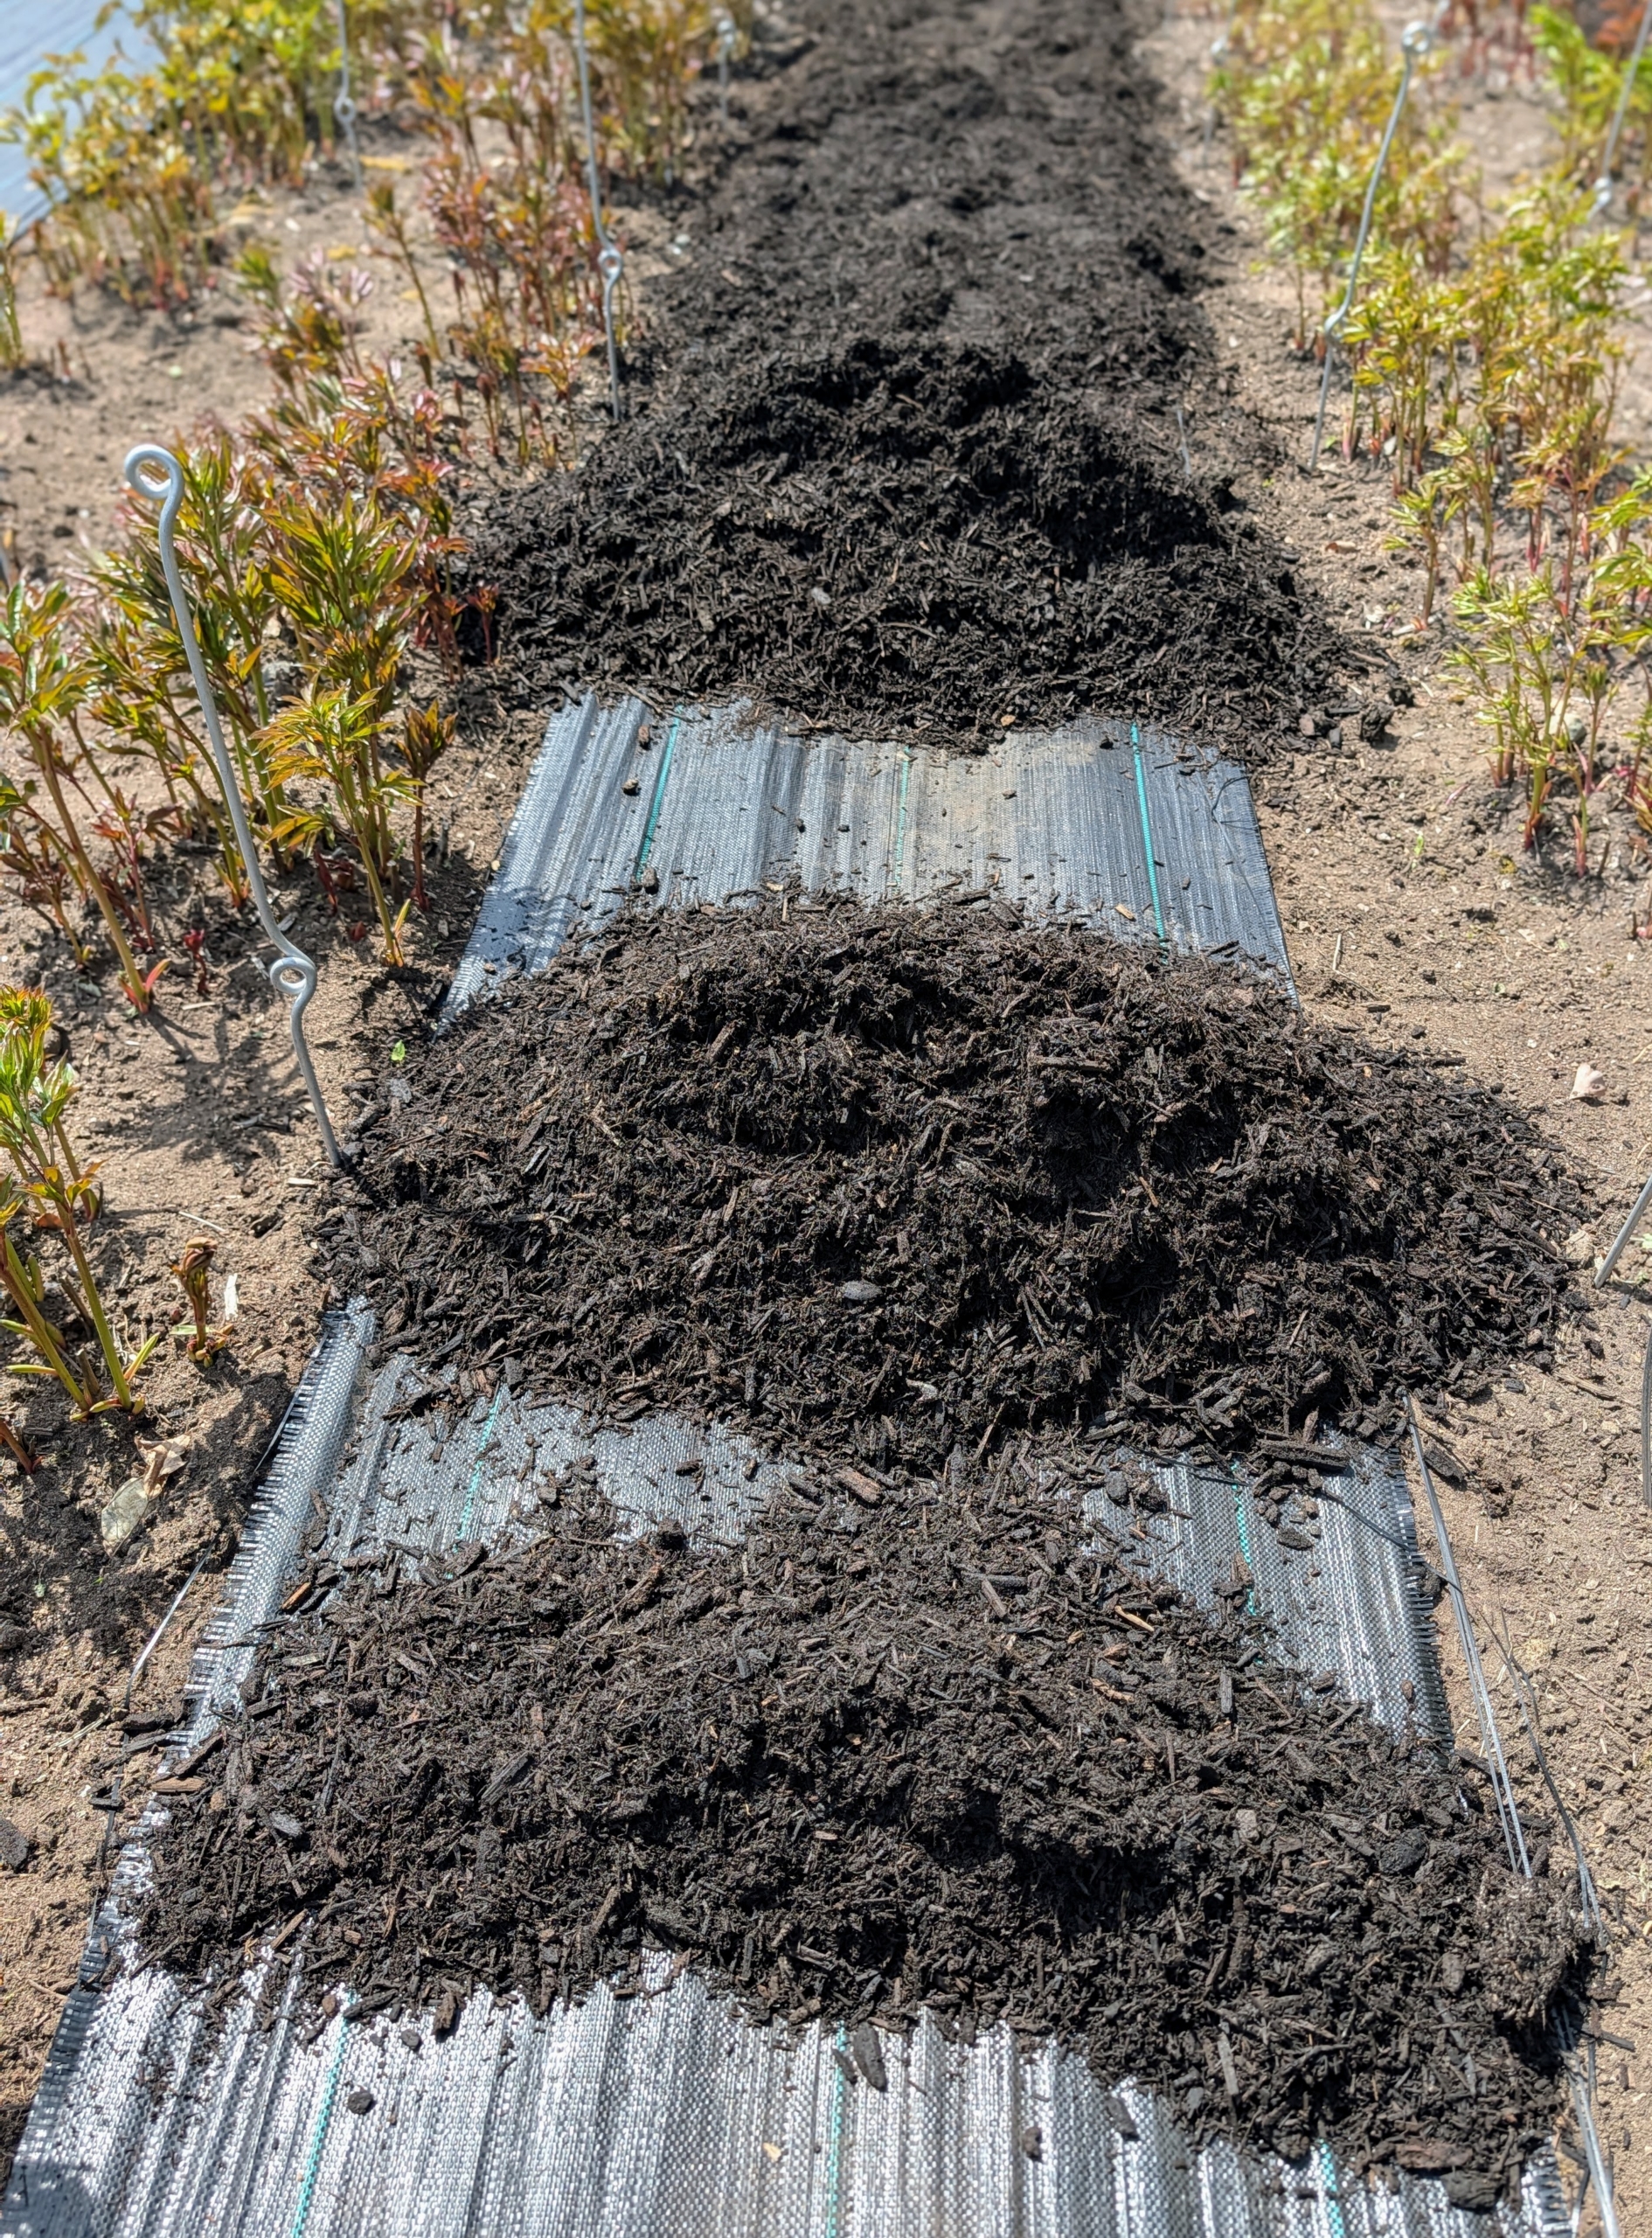
Arnold drops manageable mounds of mulch in each row.
Chhiring then spreads an even layer over the weed cloth.
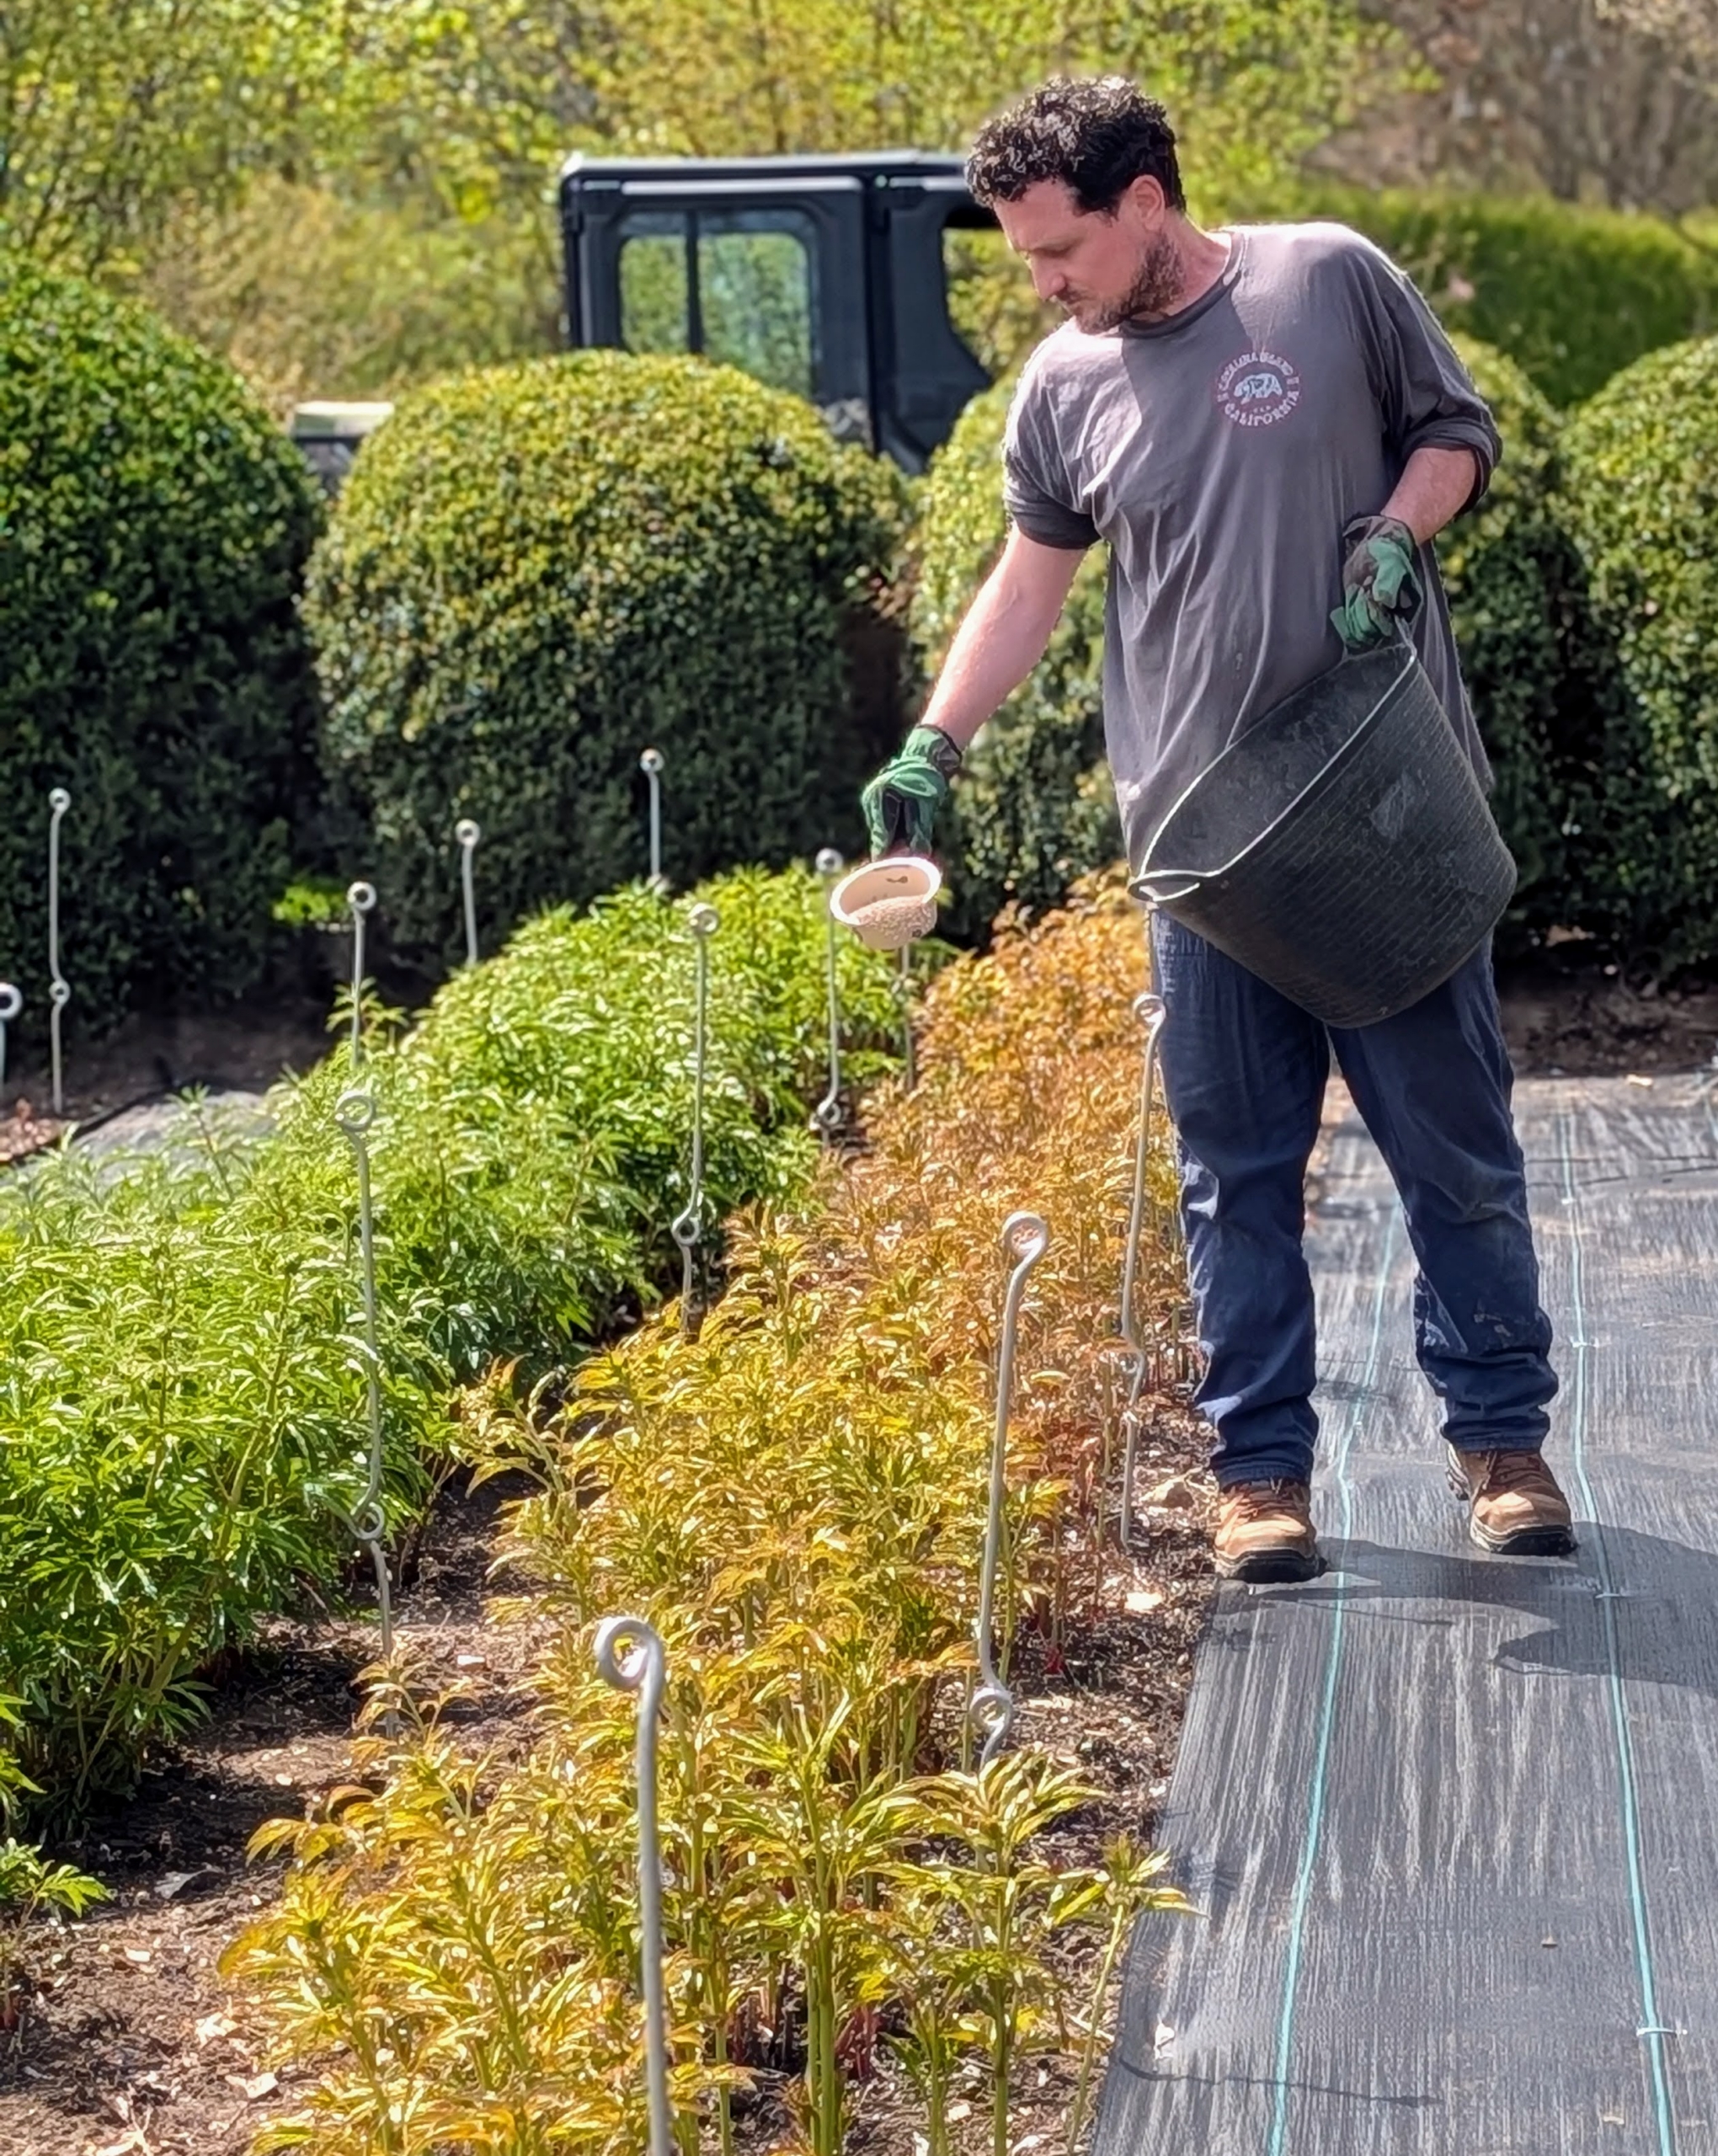
Meanwhile, Ryan feeds the peonies with azomite. Azomite is a natural, broad-spectrum mineral powder mined from volcanic ash. It contains more than 60 essential elements, including magnesium, calcium, potassium, silicon, and many micronutrients. It helps remineralize the soil for optimal growth, flowering, and resilience.
The paths look so wonderful topped with mulch.
The next step is to cover the beds with compost. I make my own mulch and compost right here at my farm.
Do you know the difference between the two? Compost, which is decomposed organic matter such as horse manure and leaf mold, enriches the soil with nutrients, while mulch, which is mainly wood chips, protects the soil surface, conserves moisture, and hopefully keeps weeds away.
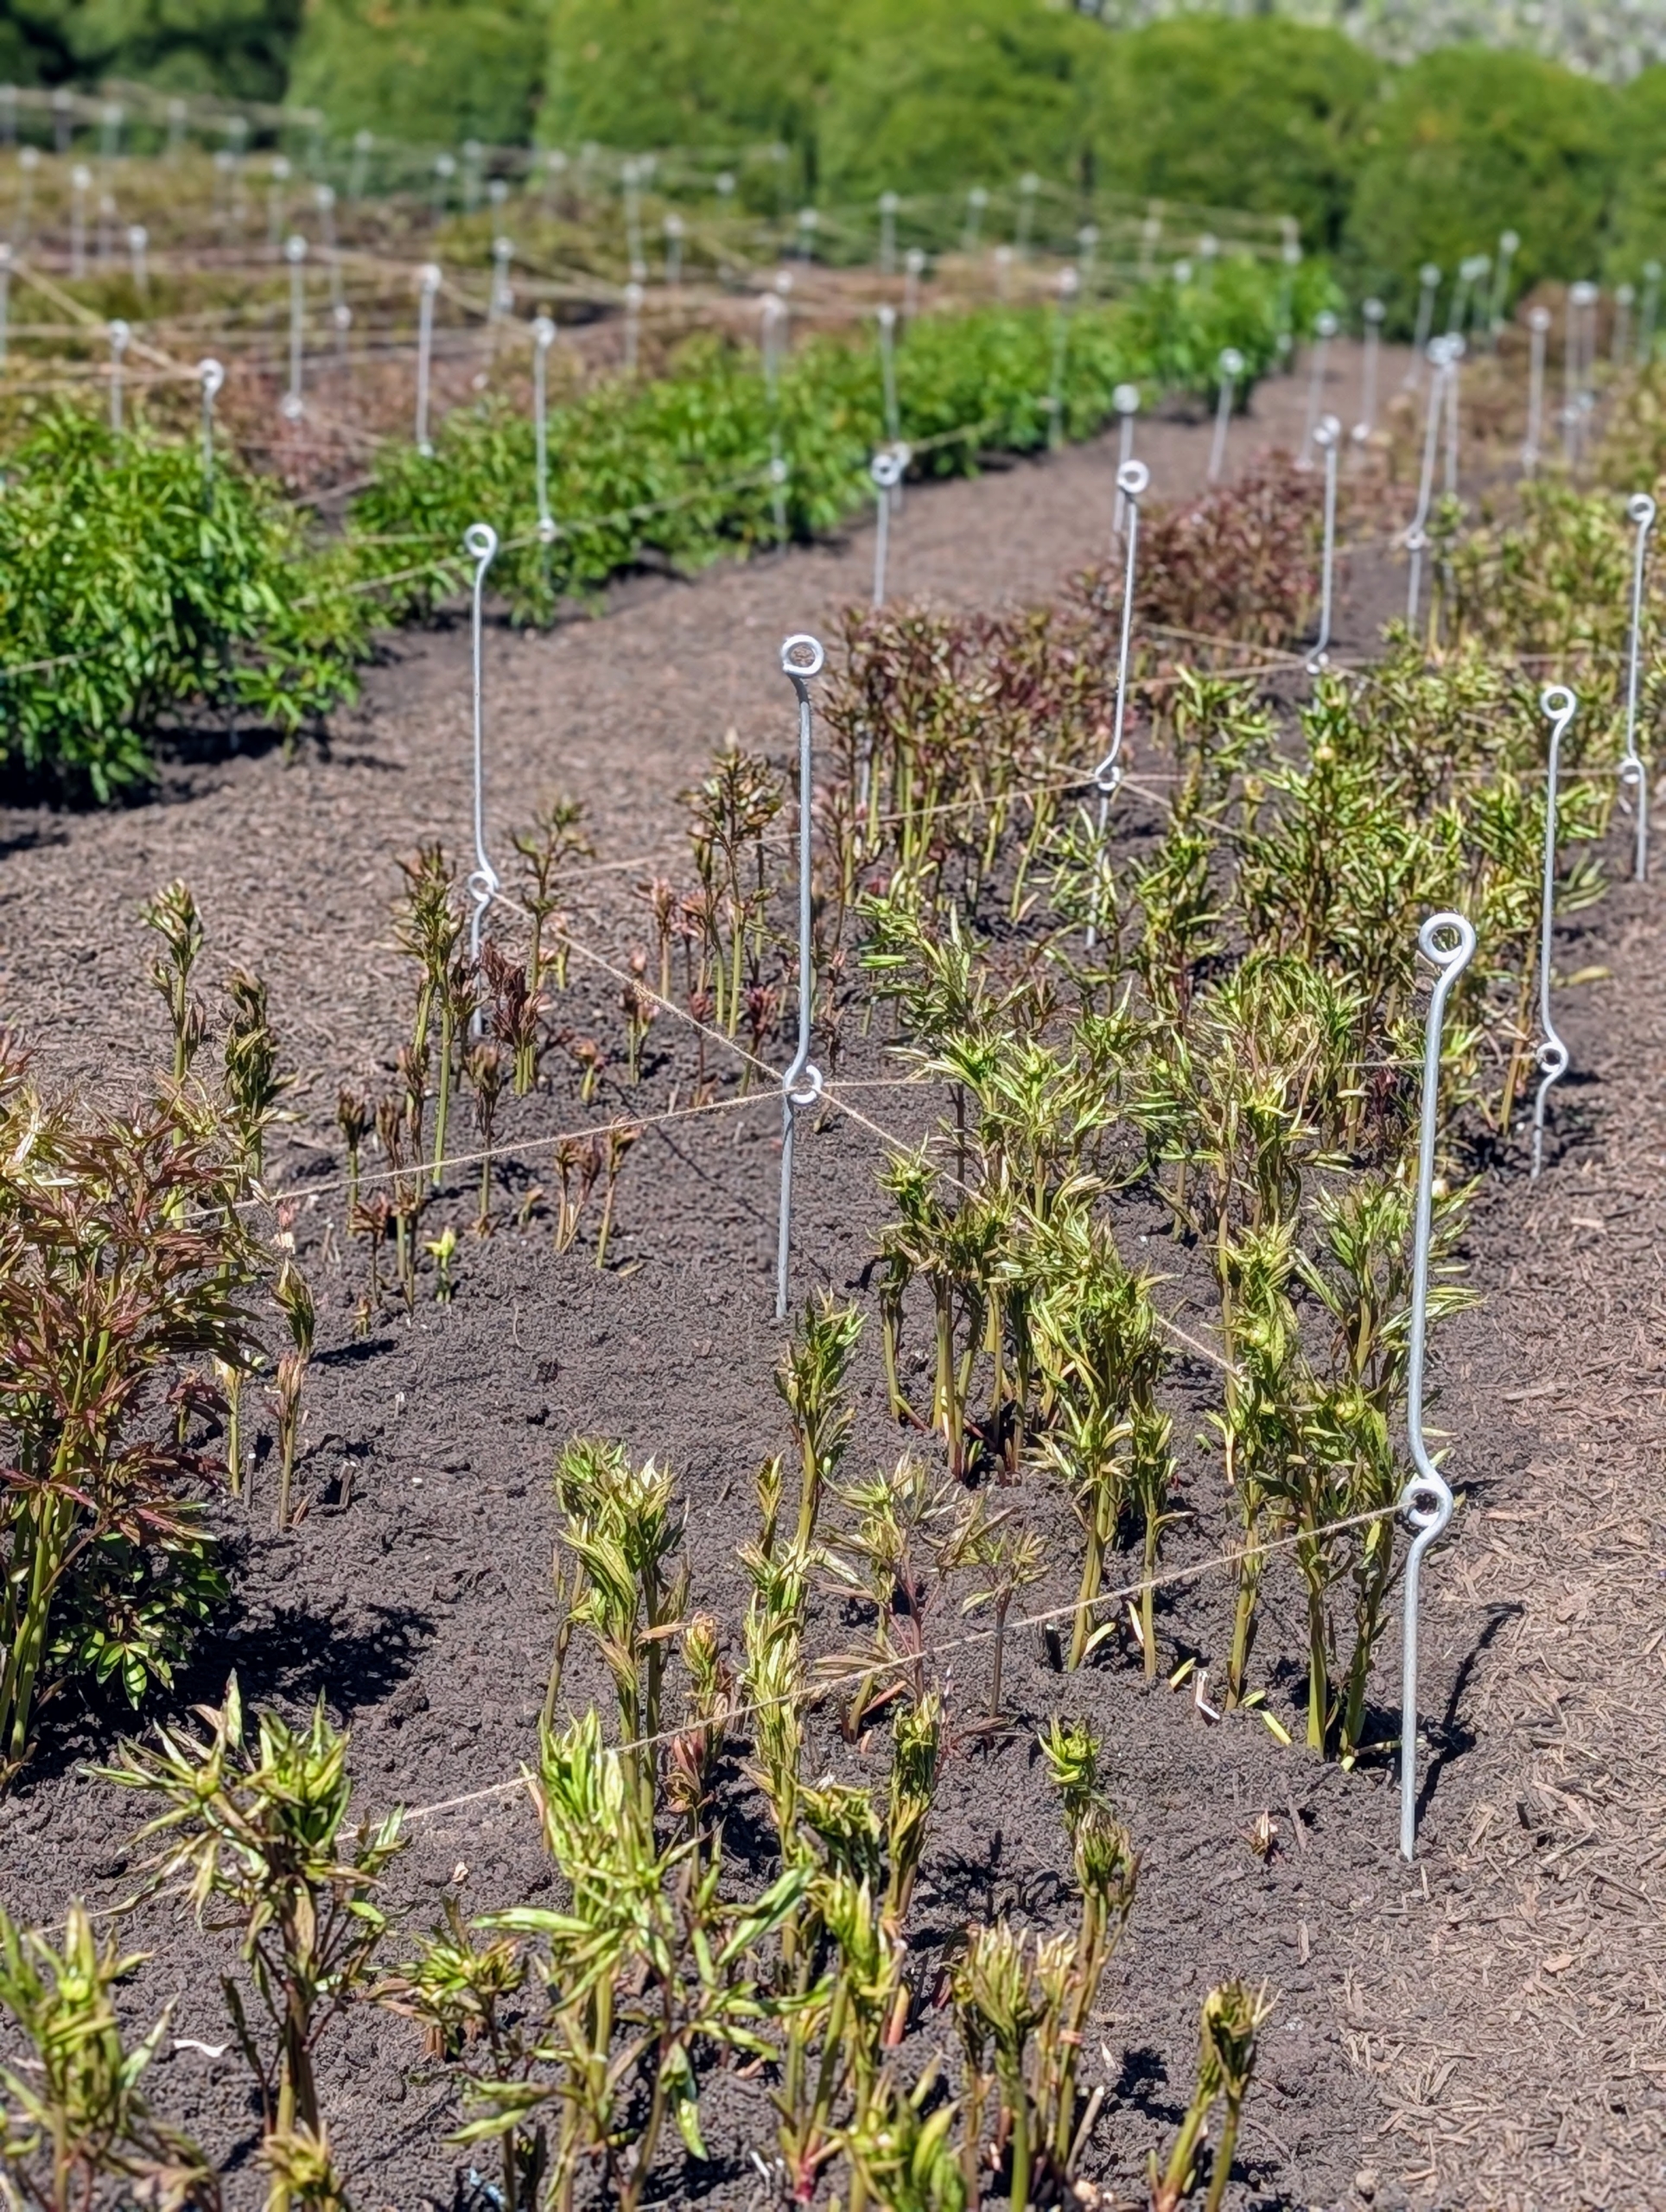
Like clockwork, the buds are now forming.
Right now, the tallest plants are still just about a foot to a foot and a half tall – a good time for staking.
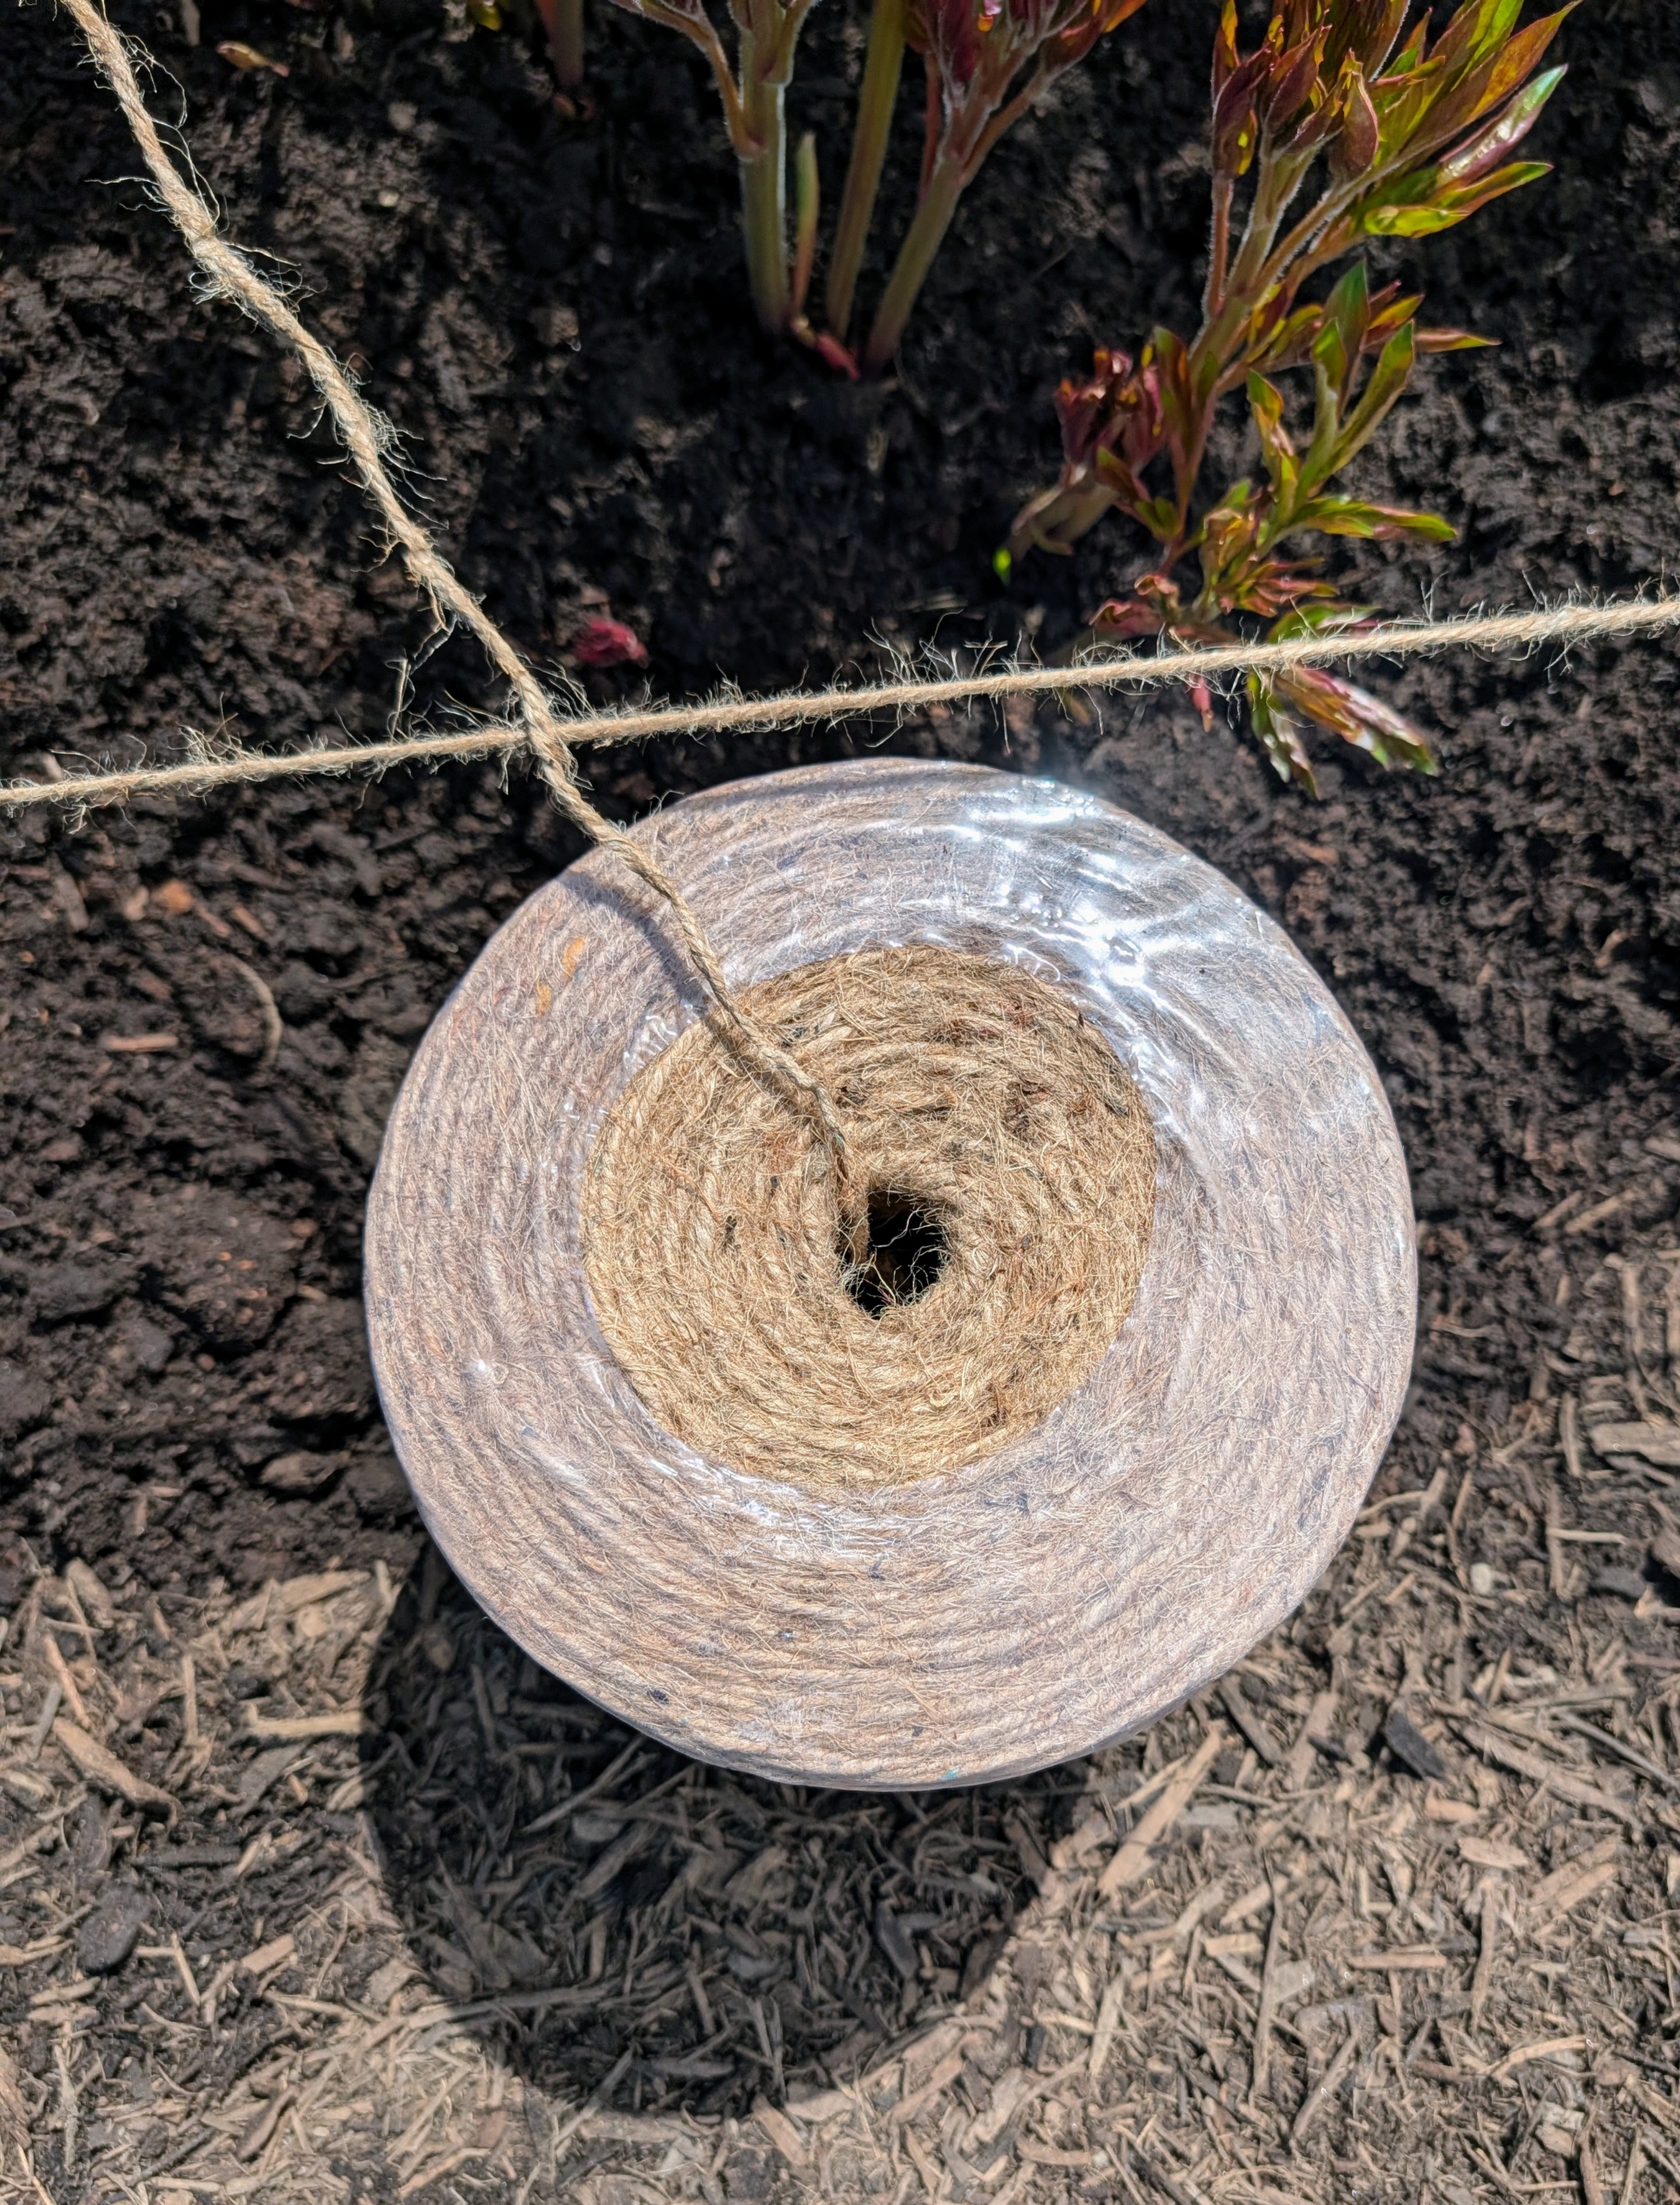
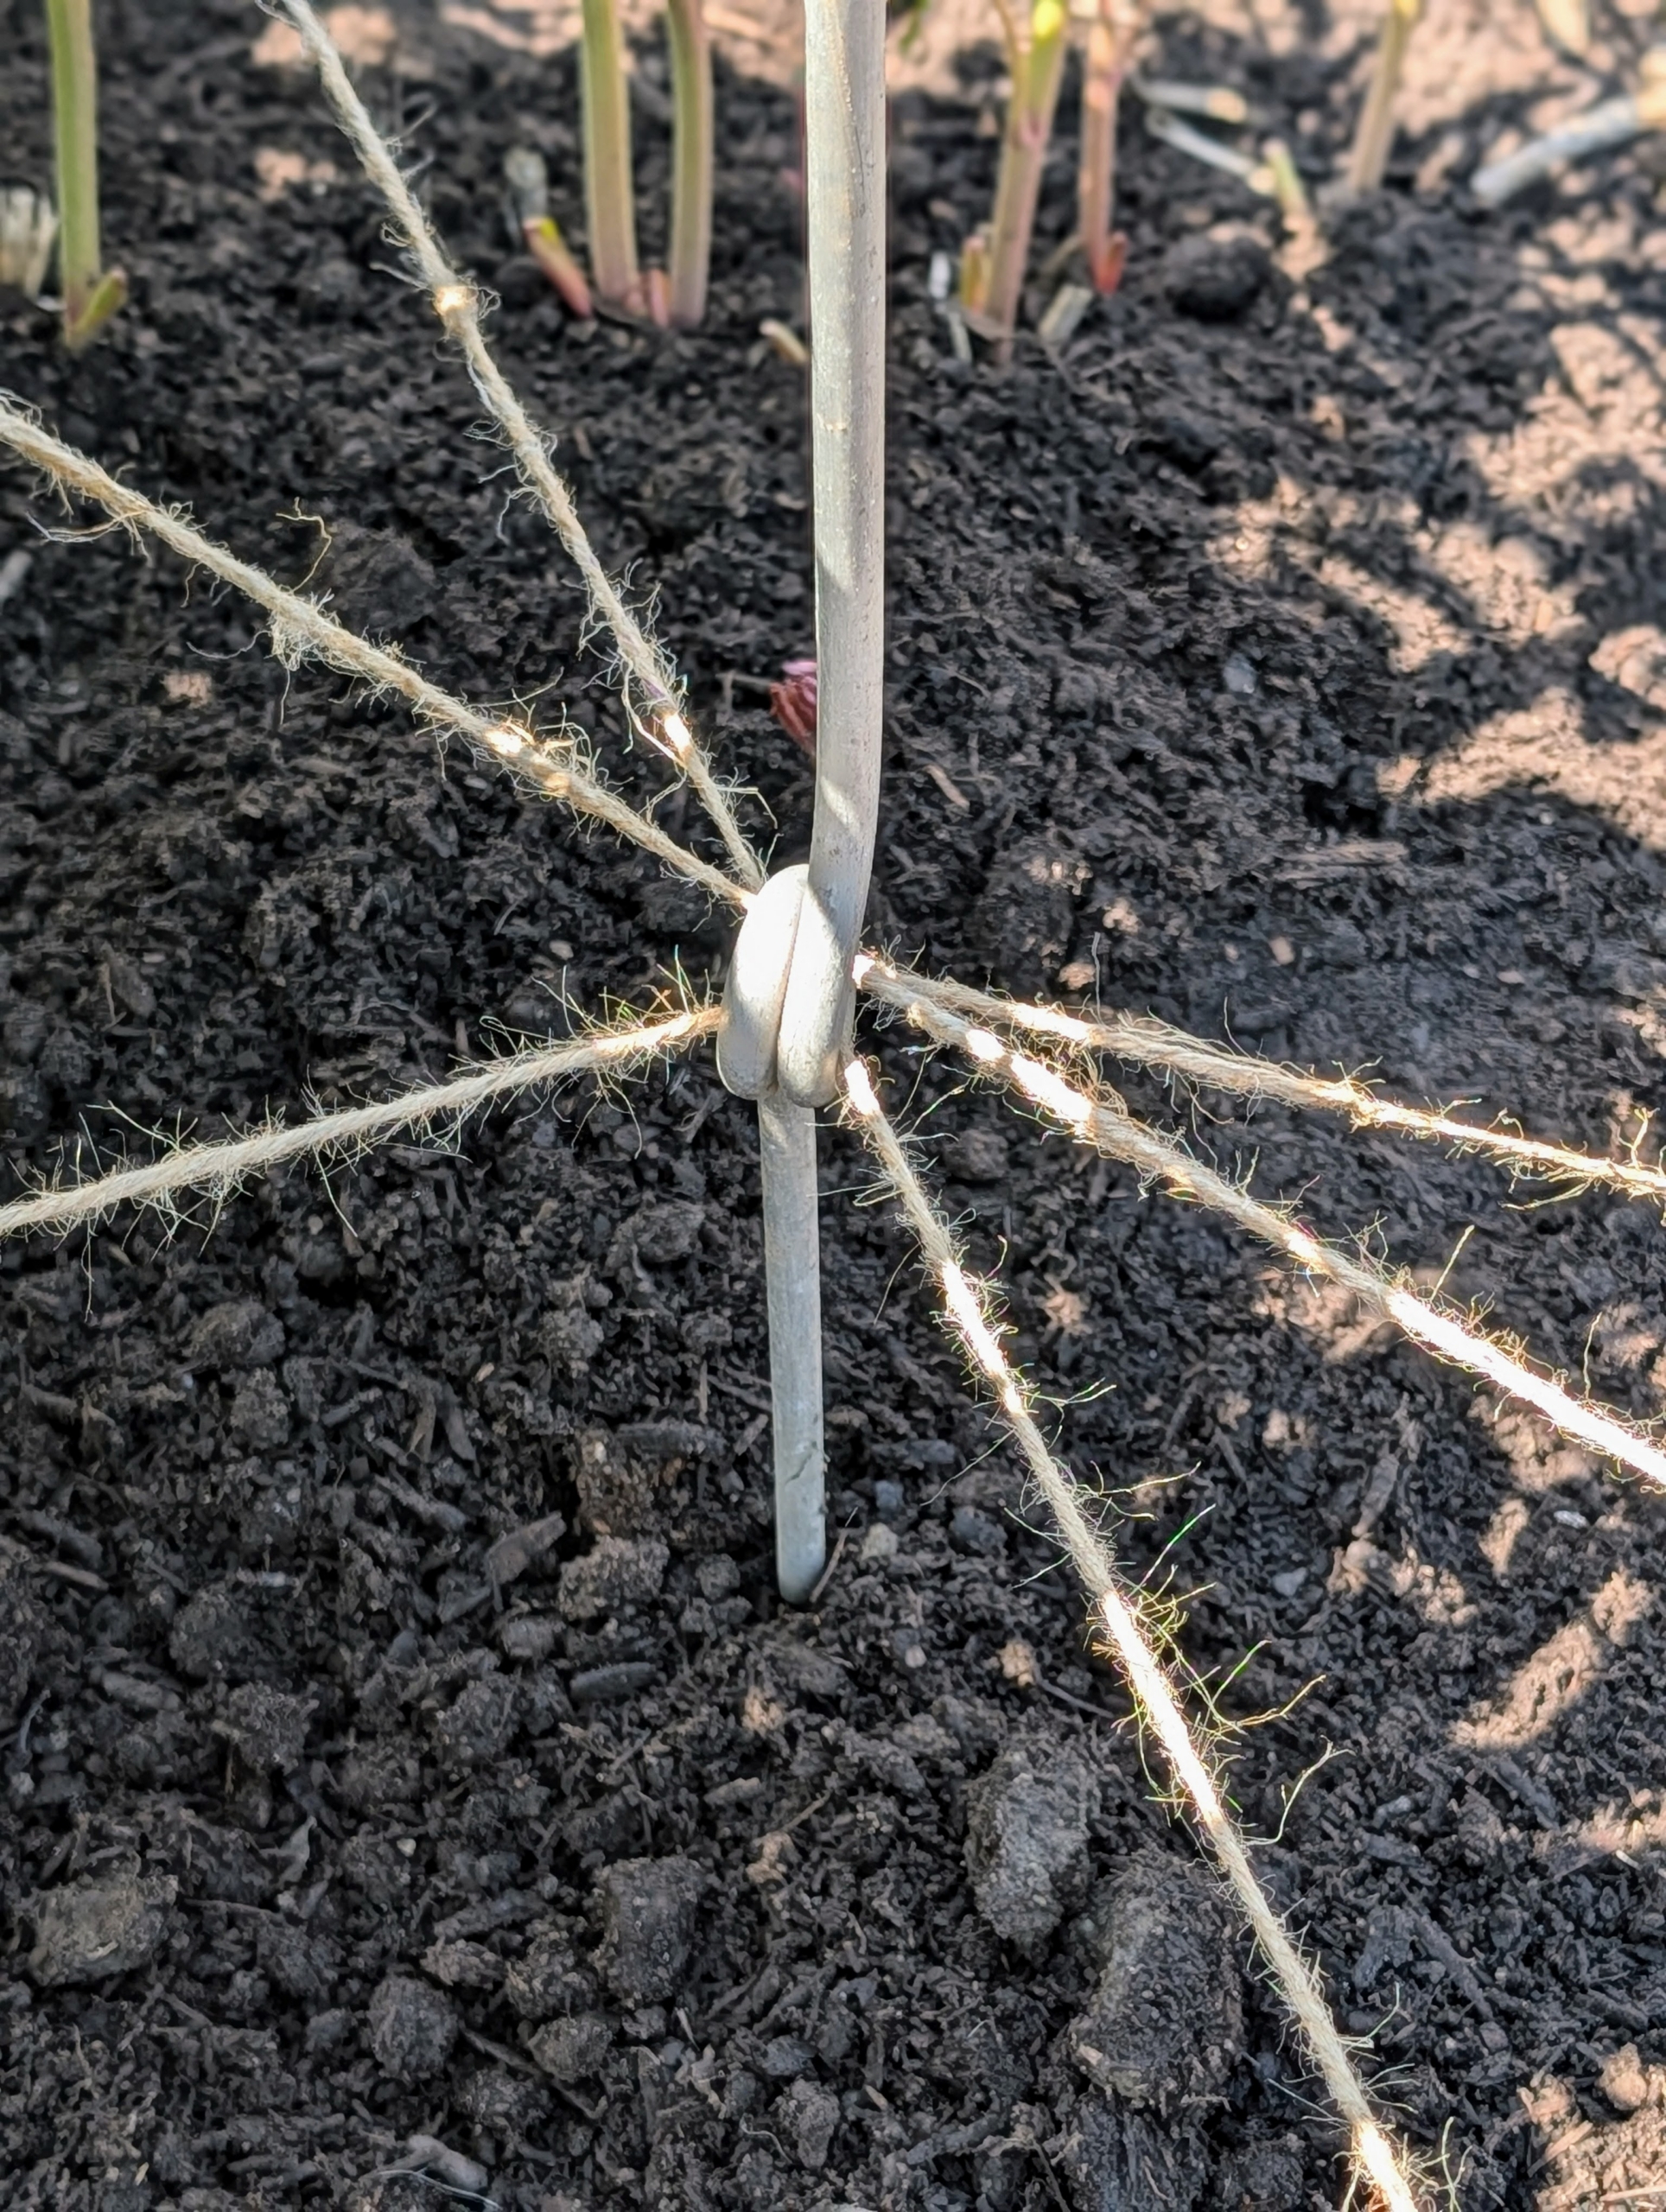
We use a natural jute twine for this project and for many gardening projects around the farm. Twine like this is available in large spools online and in some specialty garden supply shops.
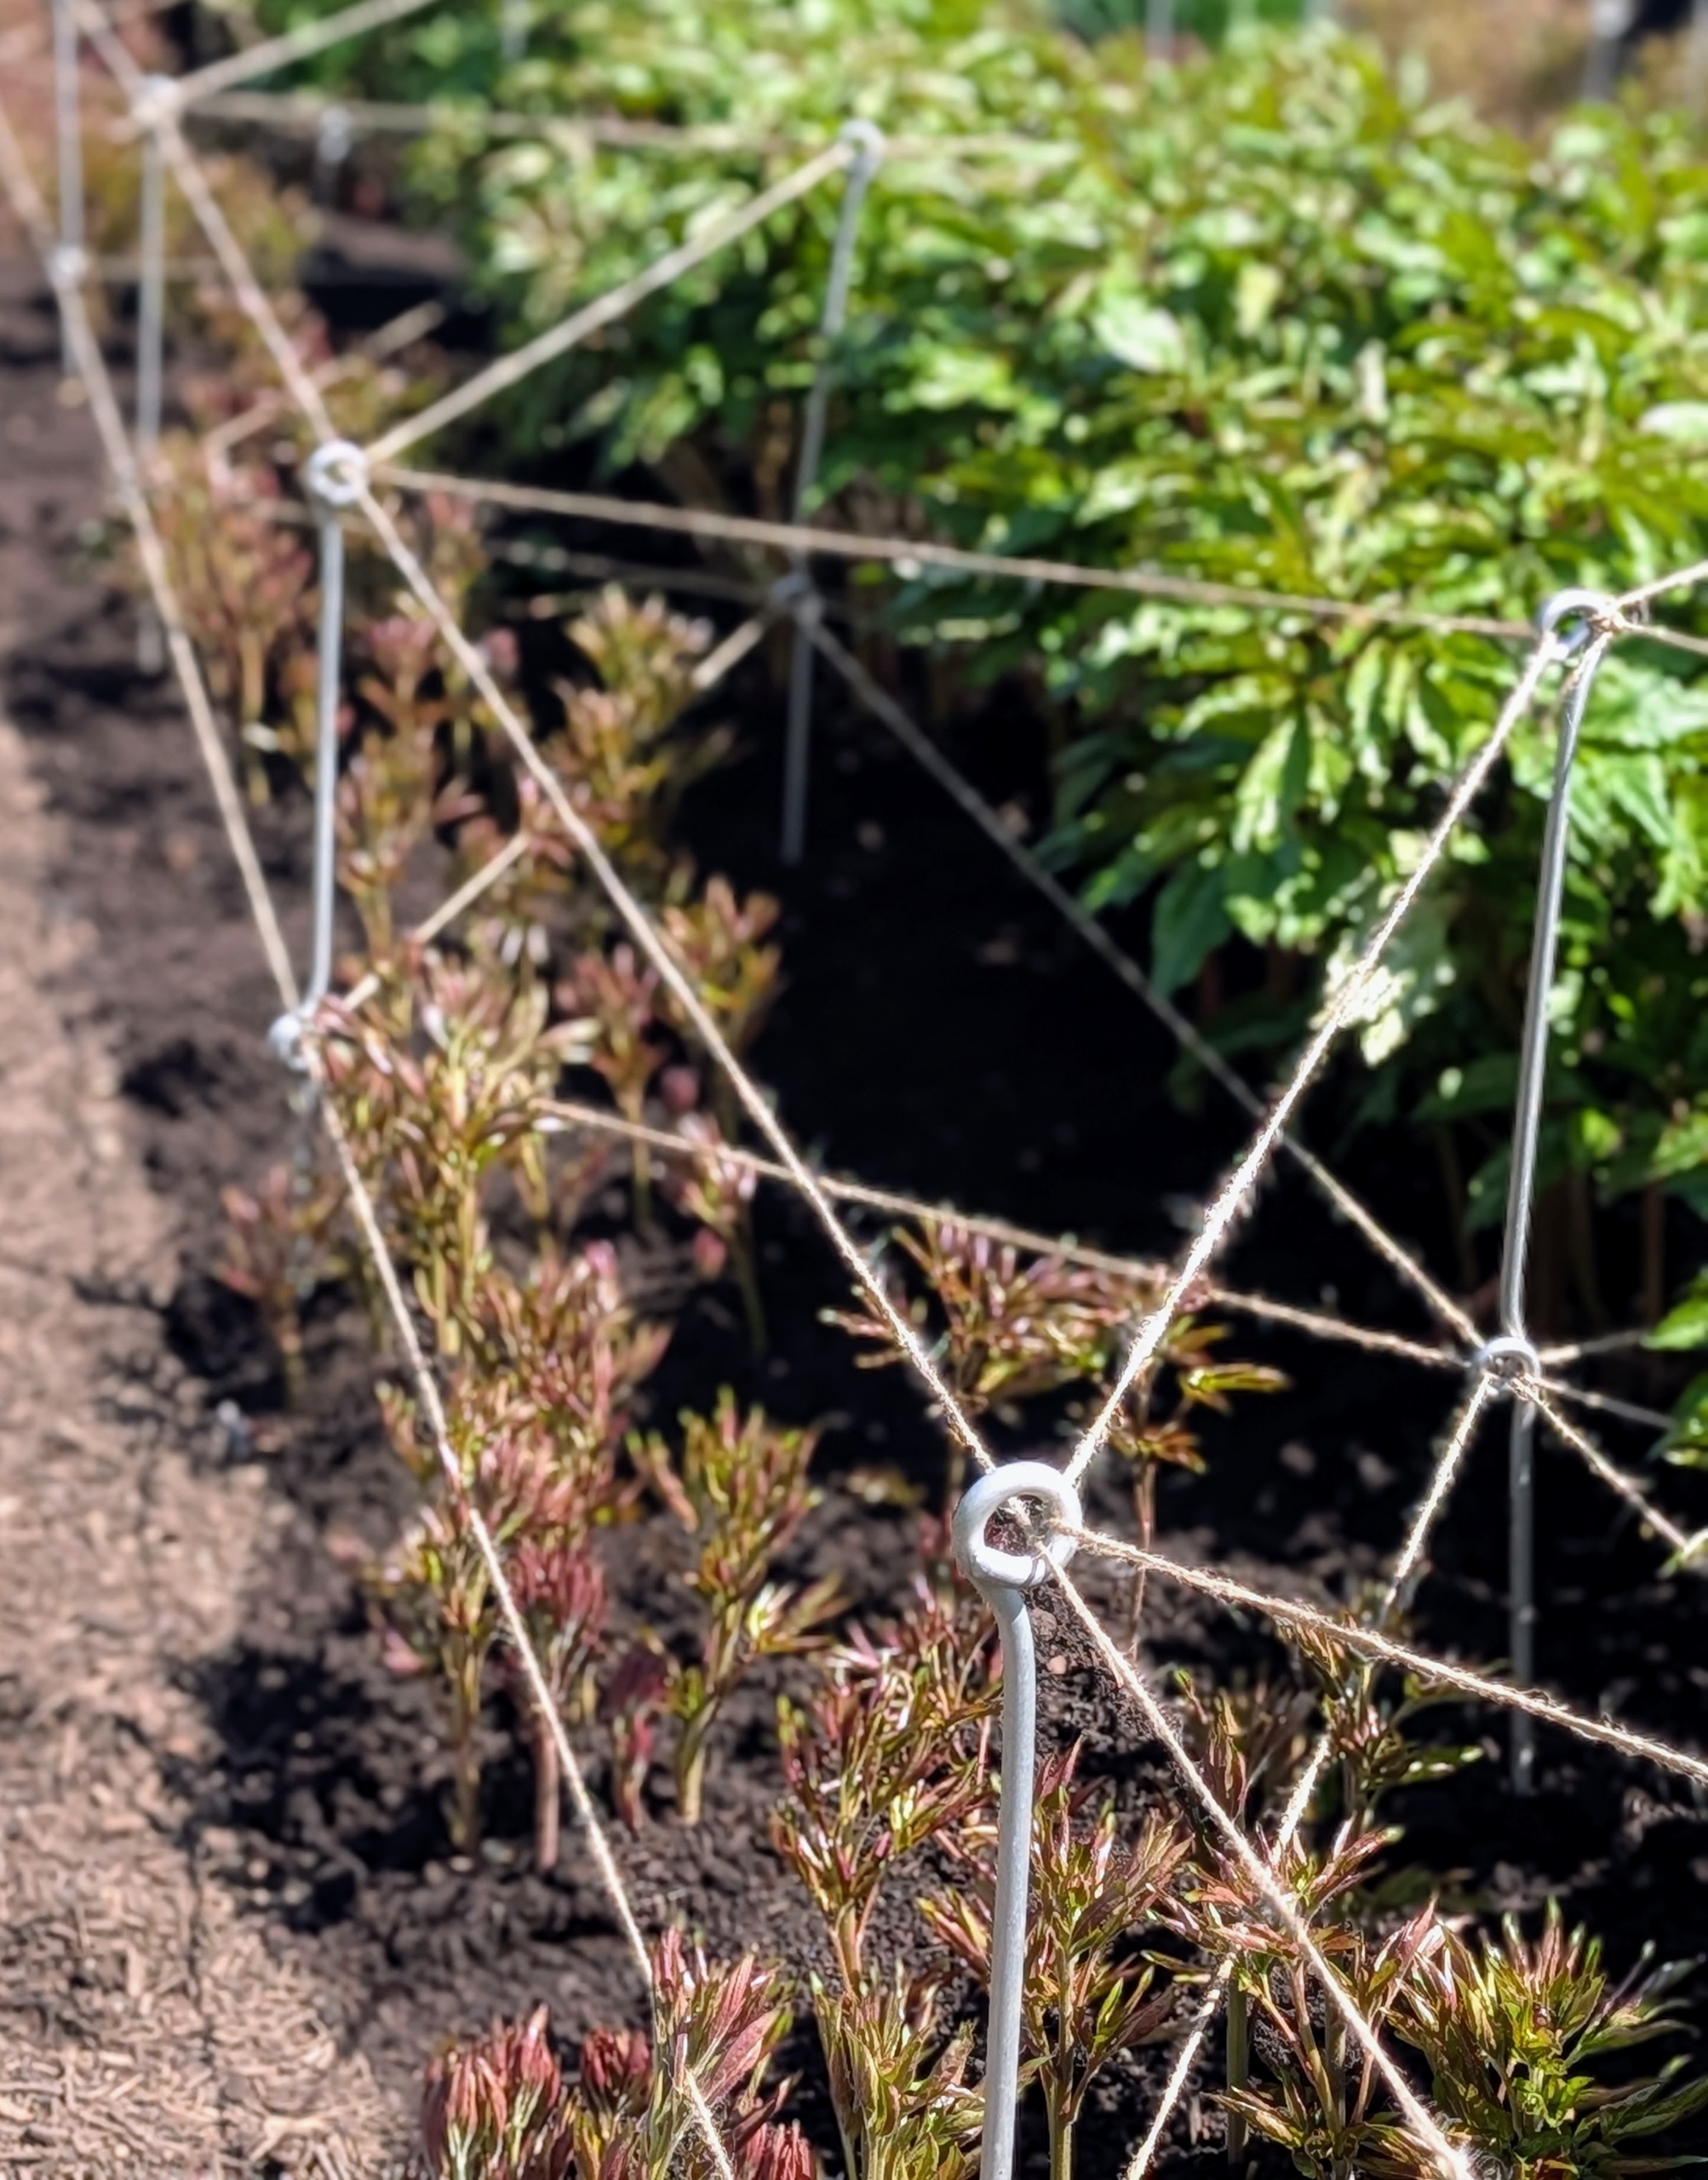
Phurba begins lacing twine through the middle stake eyes in a zigzag pattern all the way down the row.
This technique allows support from every direction.
Twine is threaded through all the top holes following the same pattern. Here, one can see there is about a foot of space in between the top and middle eyes – enough room to support the stems at different levels.
I designed the eyes to be big enough for the many threads of twine. These have worked so well for me over the years.
Here is what a row looks like all done – very neat and tidy, and every peony plant supported by twine. The stakes and twine create such an artistic and geometric pattern. In just about five to six weeks, rows and rows of stunning pink and white herbaceous peonies will be flowering here at my farm.
To create a successful perennial garden, it's important to select the right plants for the area, use nutrient-rich soil, and monitor its development - feeding, grooming, and adjusting care as the garden matures.
Some of the most beautiful growth this time of year is behind my Tenant House and outside my gym building. In these areas I've planted Epimediums, trout lilies, mayapples, ferns, Syneilesis, Polygonatum, Cotinus, Stewartia trees, and other interesting plantings.
Enjoy these photos.
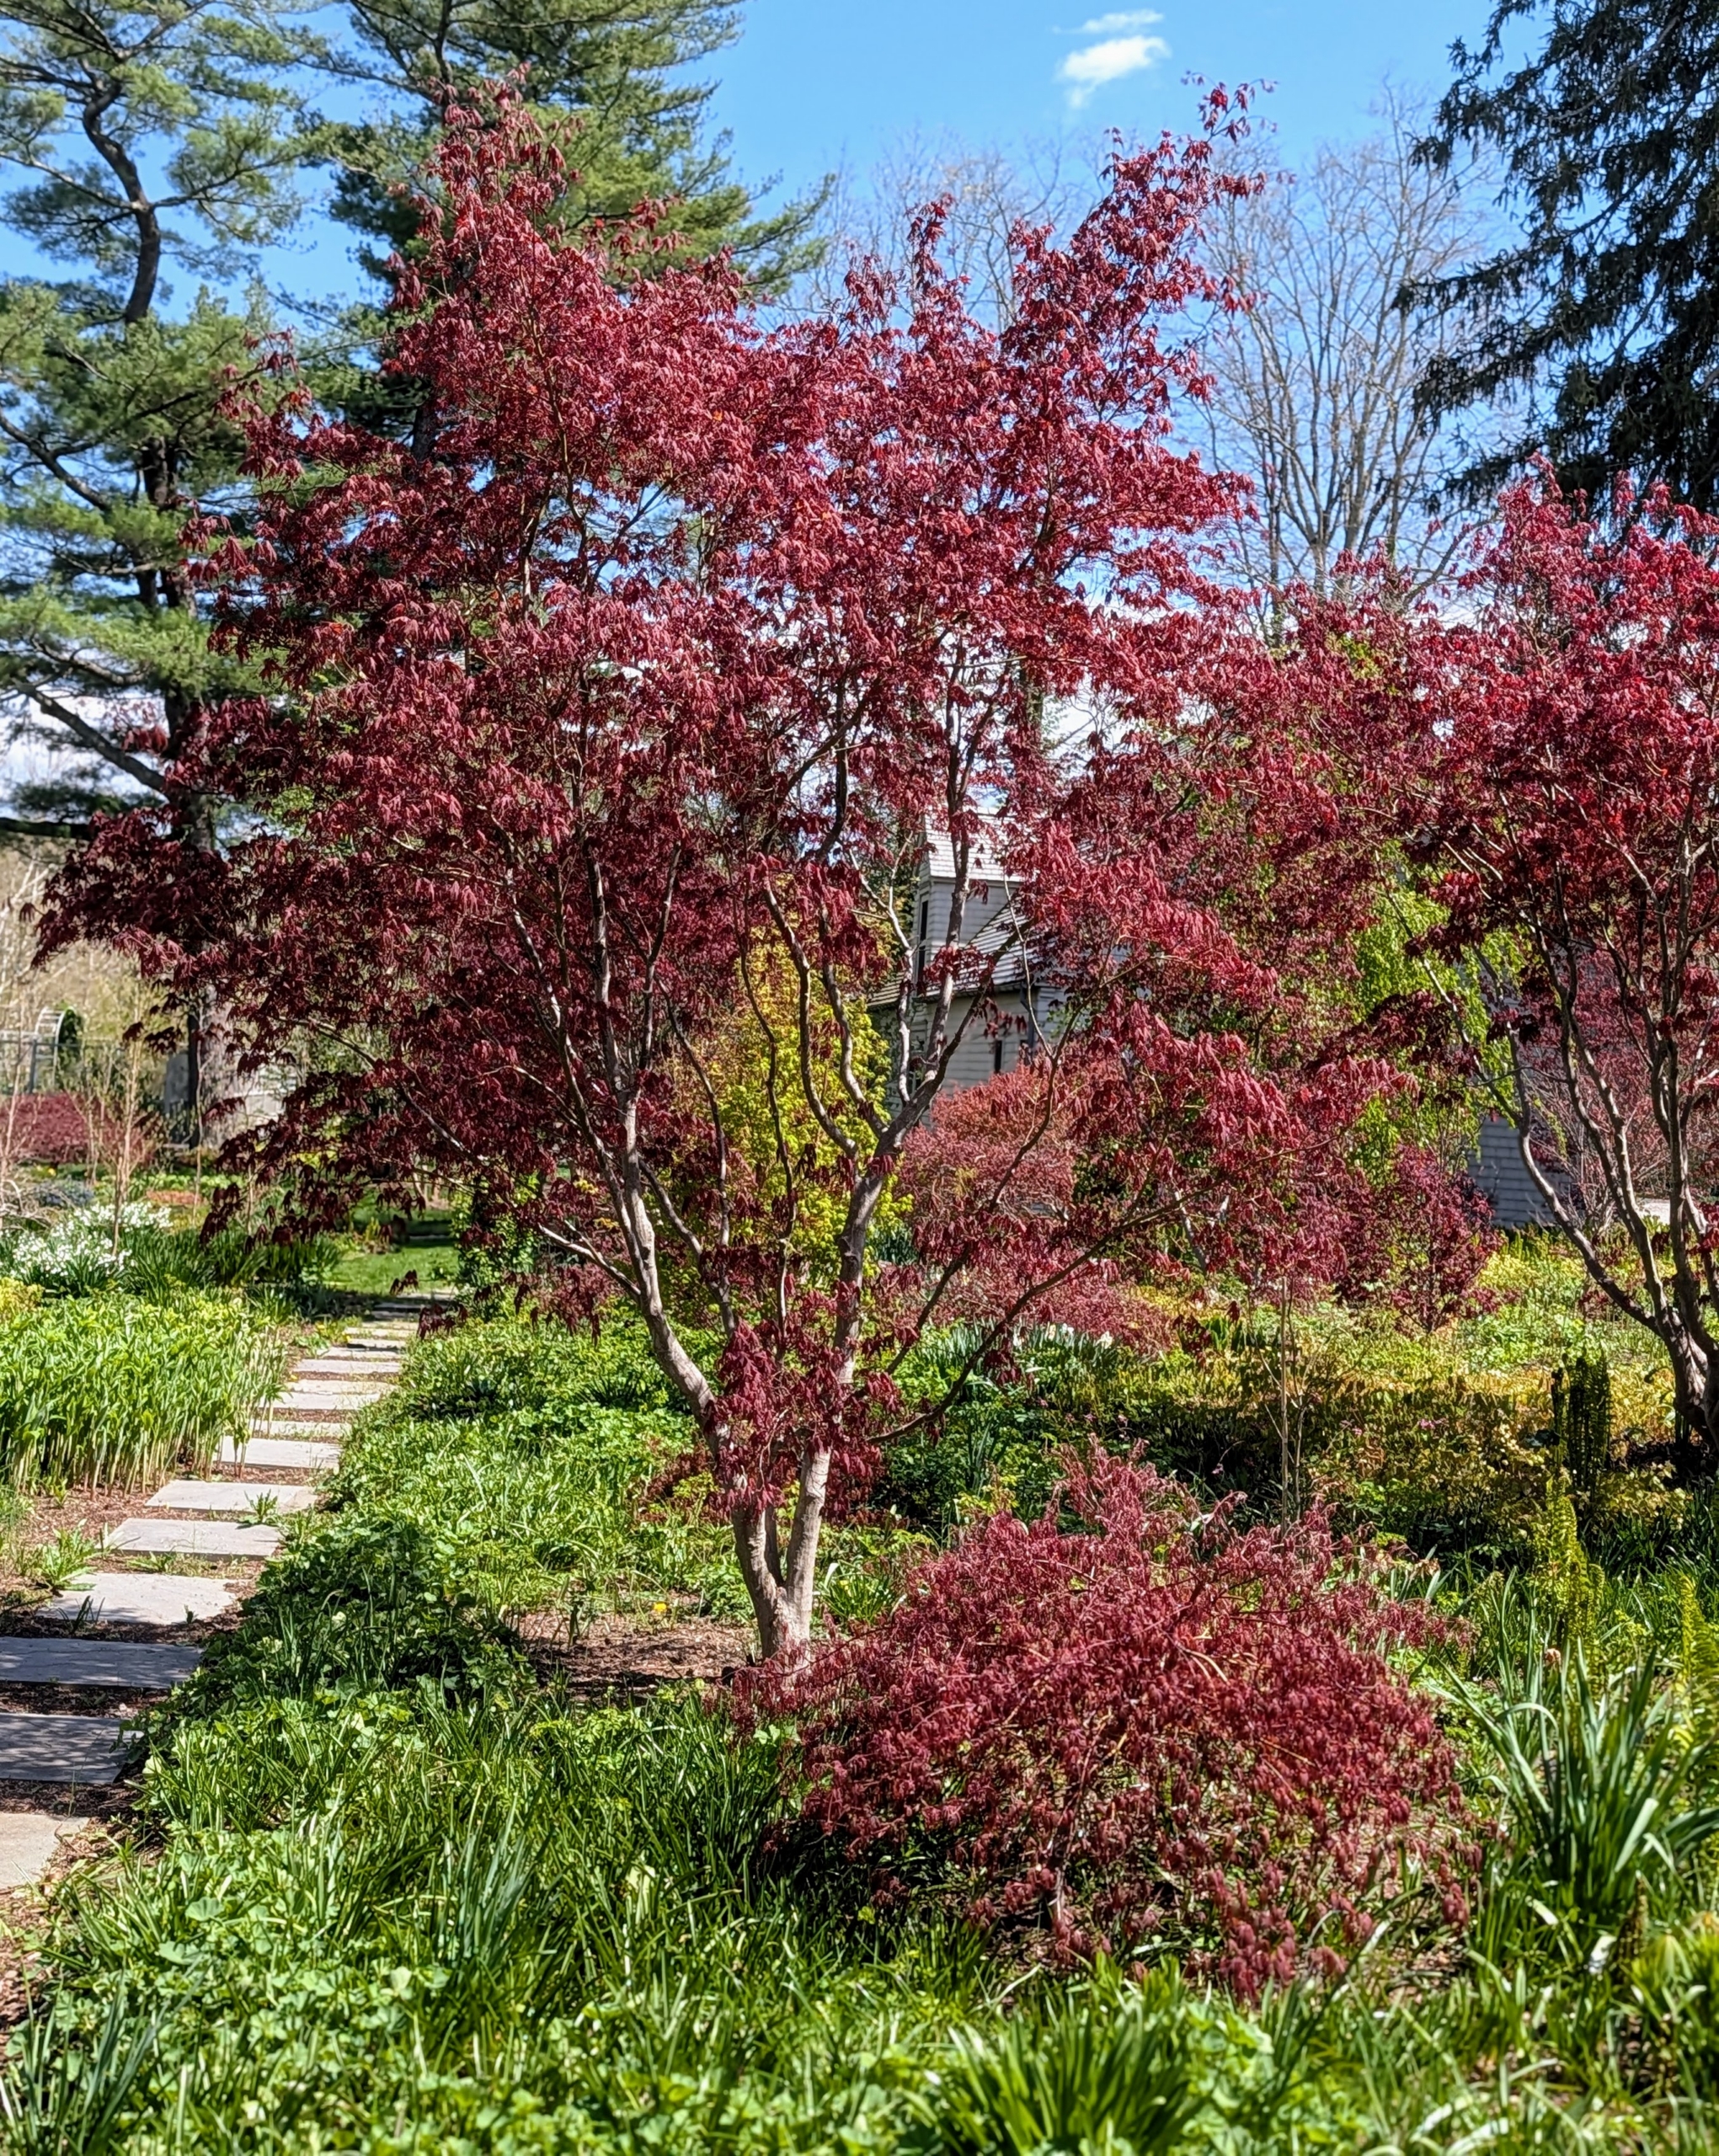
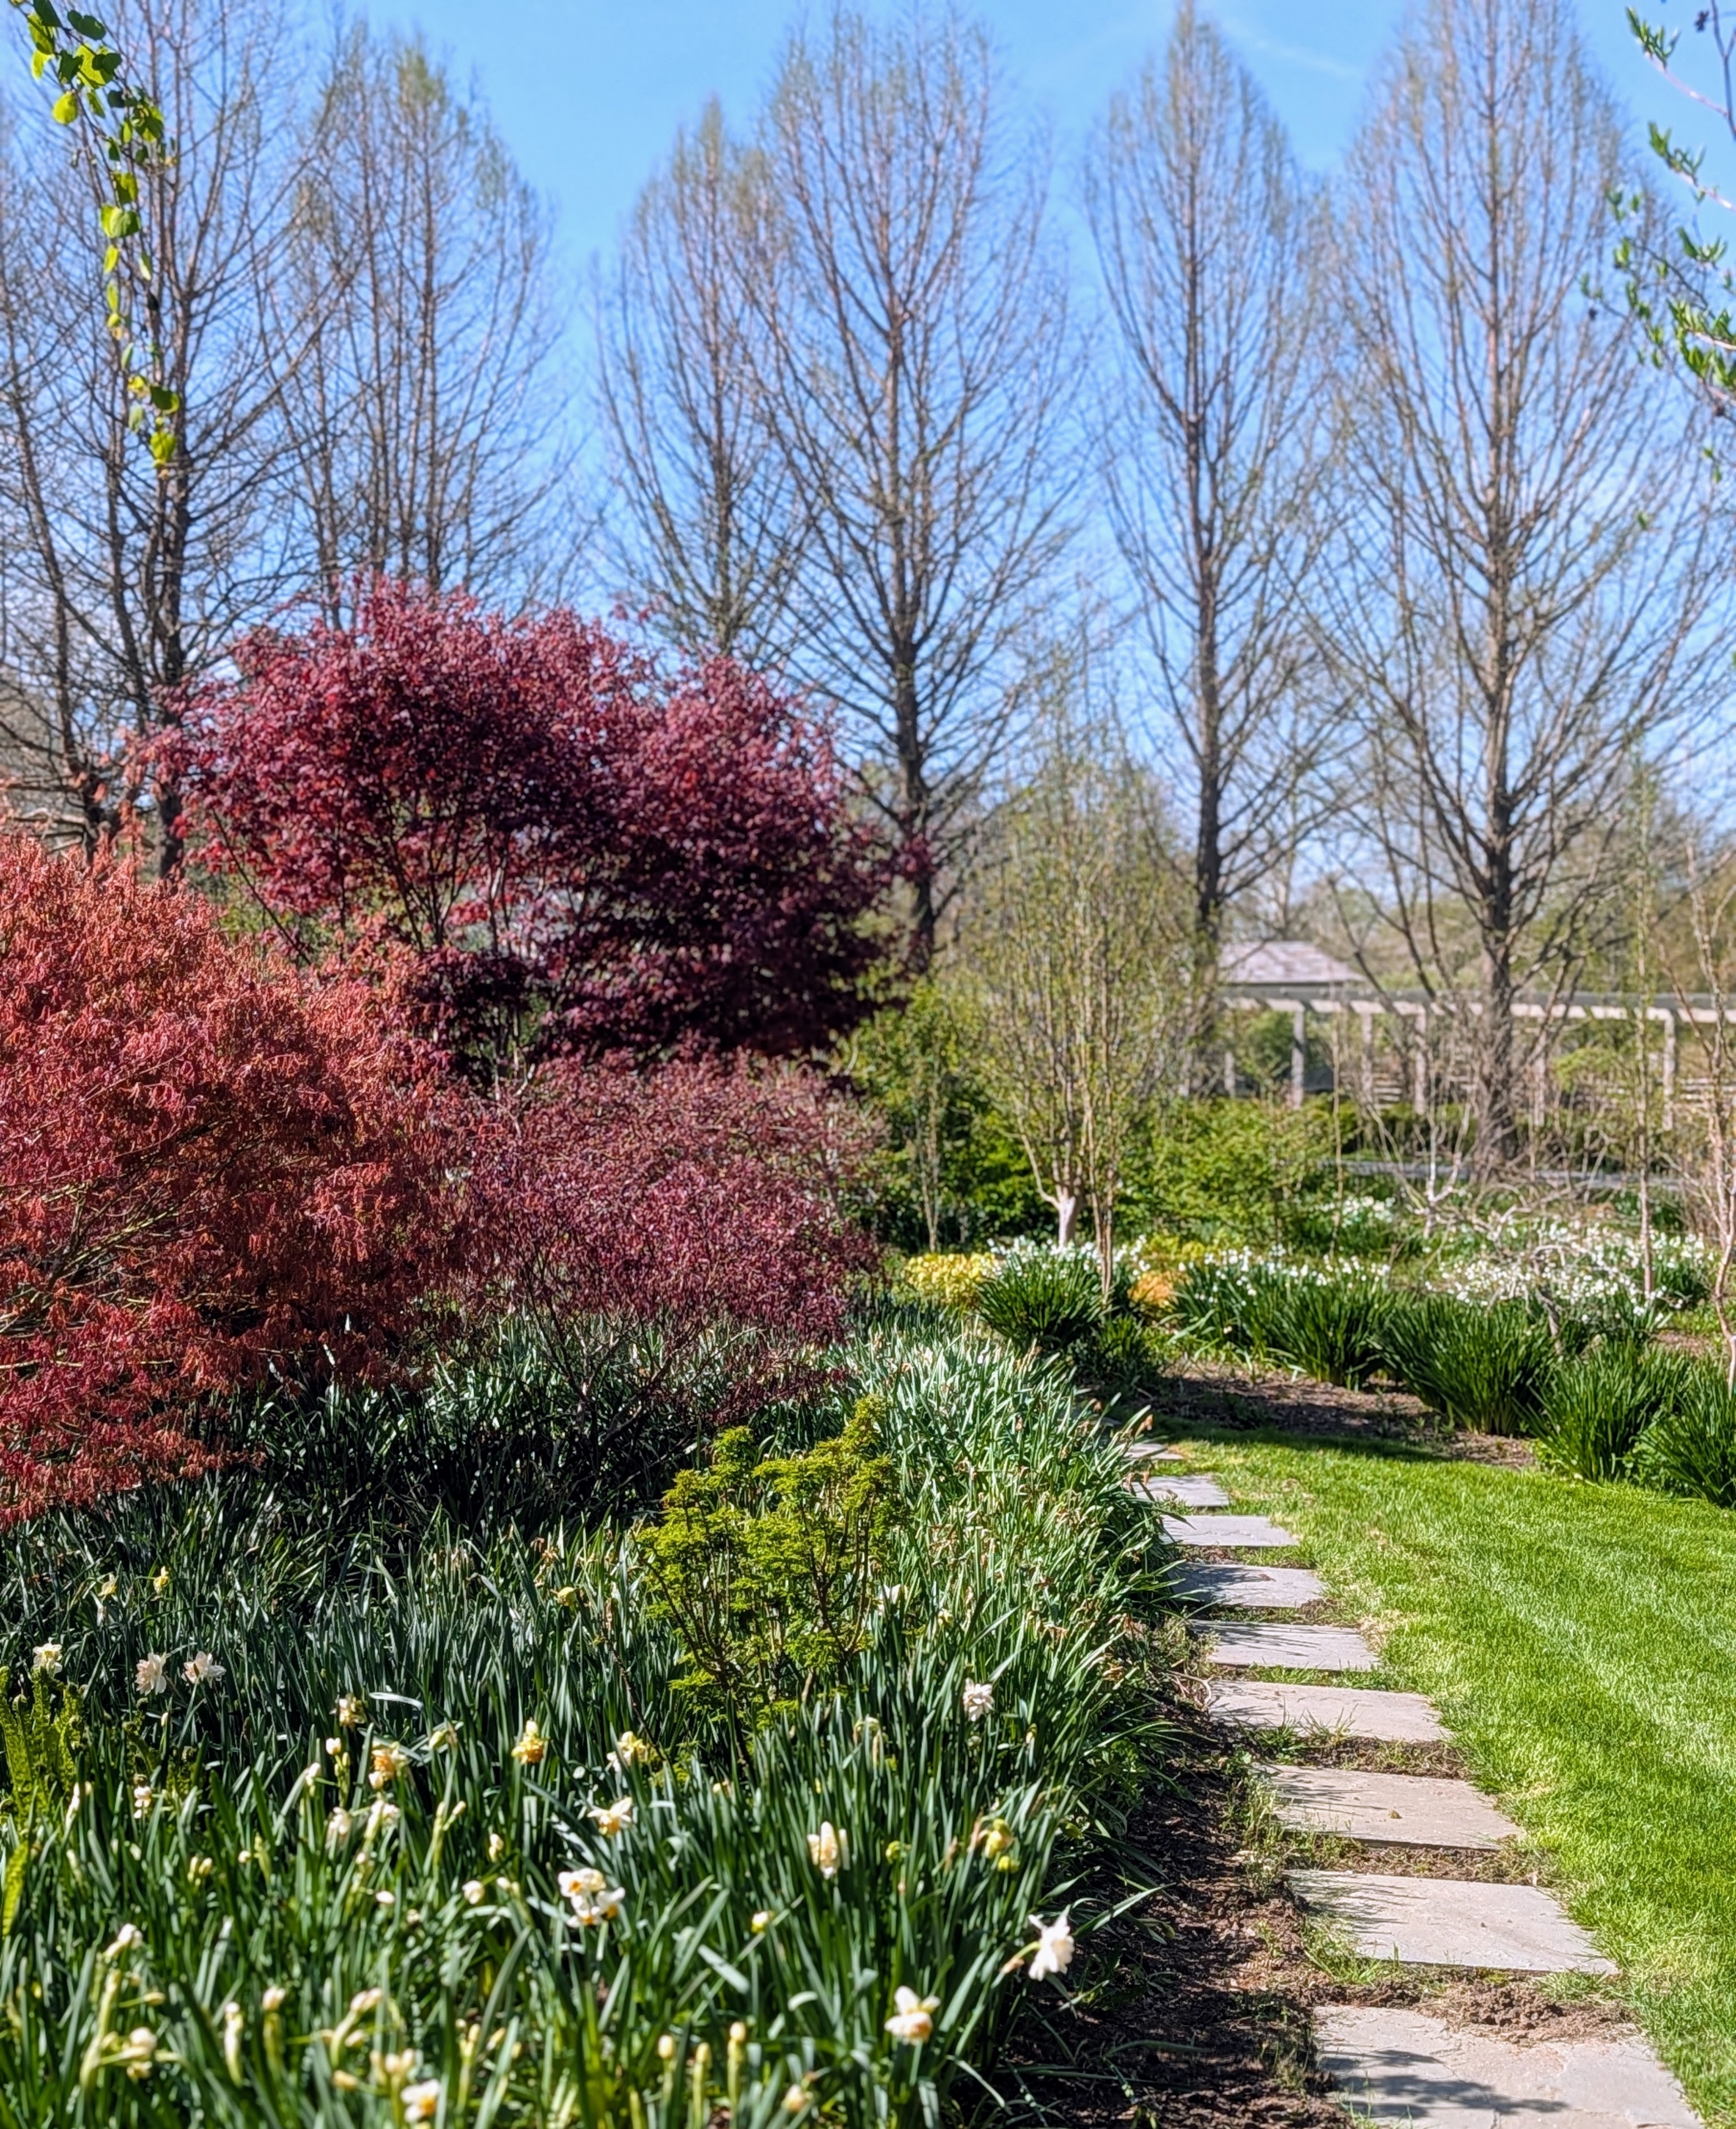
Behind my Tenant House I designed lovely perennial gardens that come alive this time every year. The burgundy trees are Japanese maples. With more than a thousand varieties and cultivars, the iconic Japanese maple is among the most versatile small trees for use in the landscape.
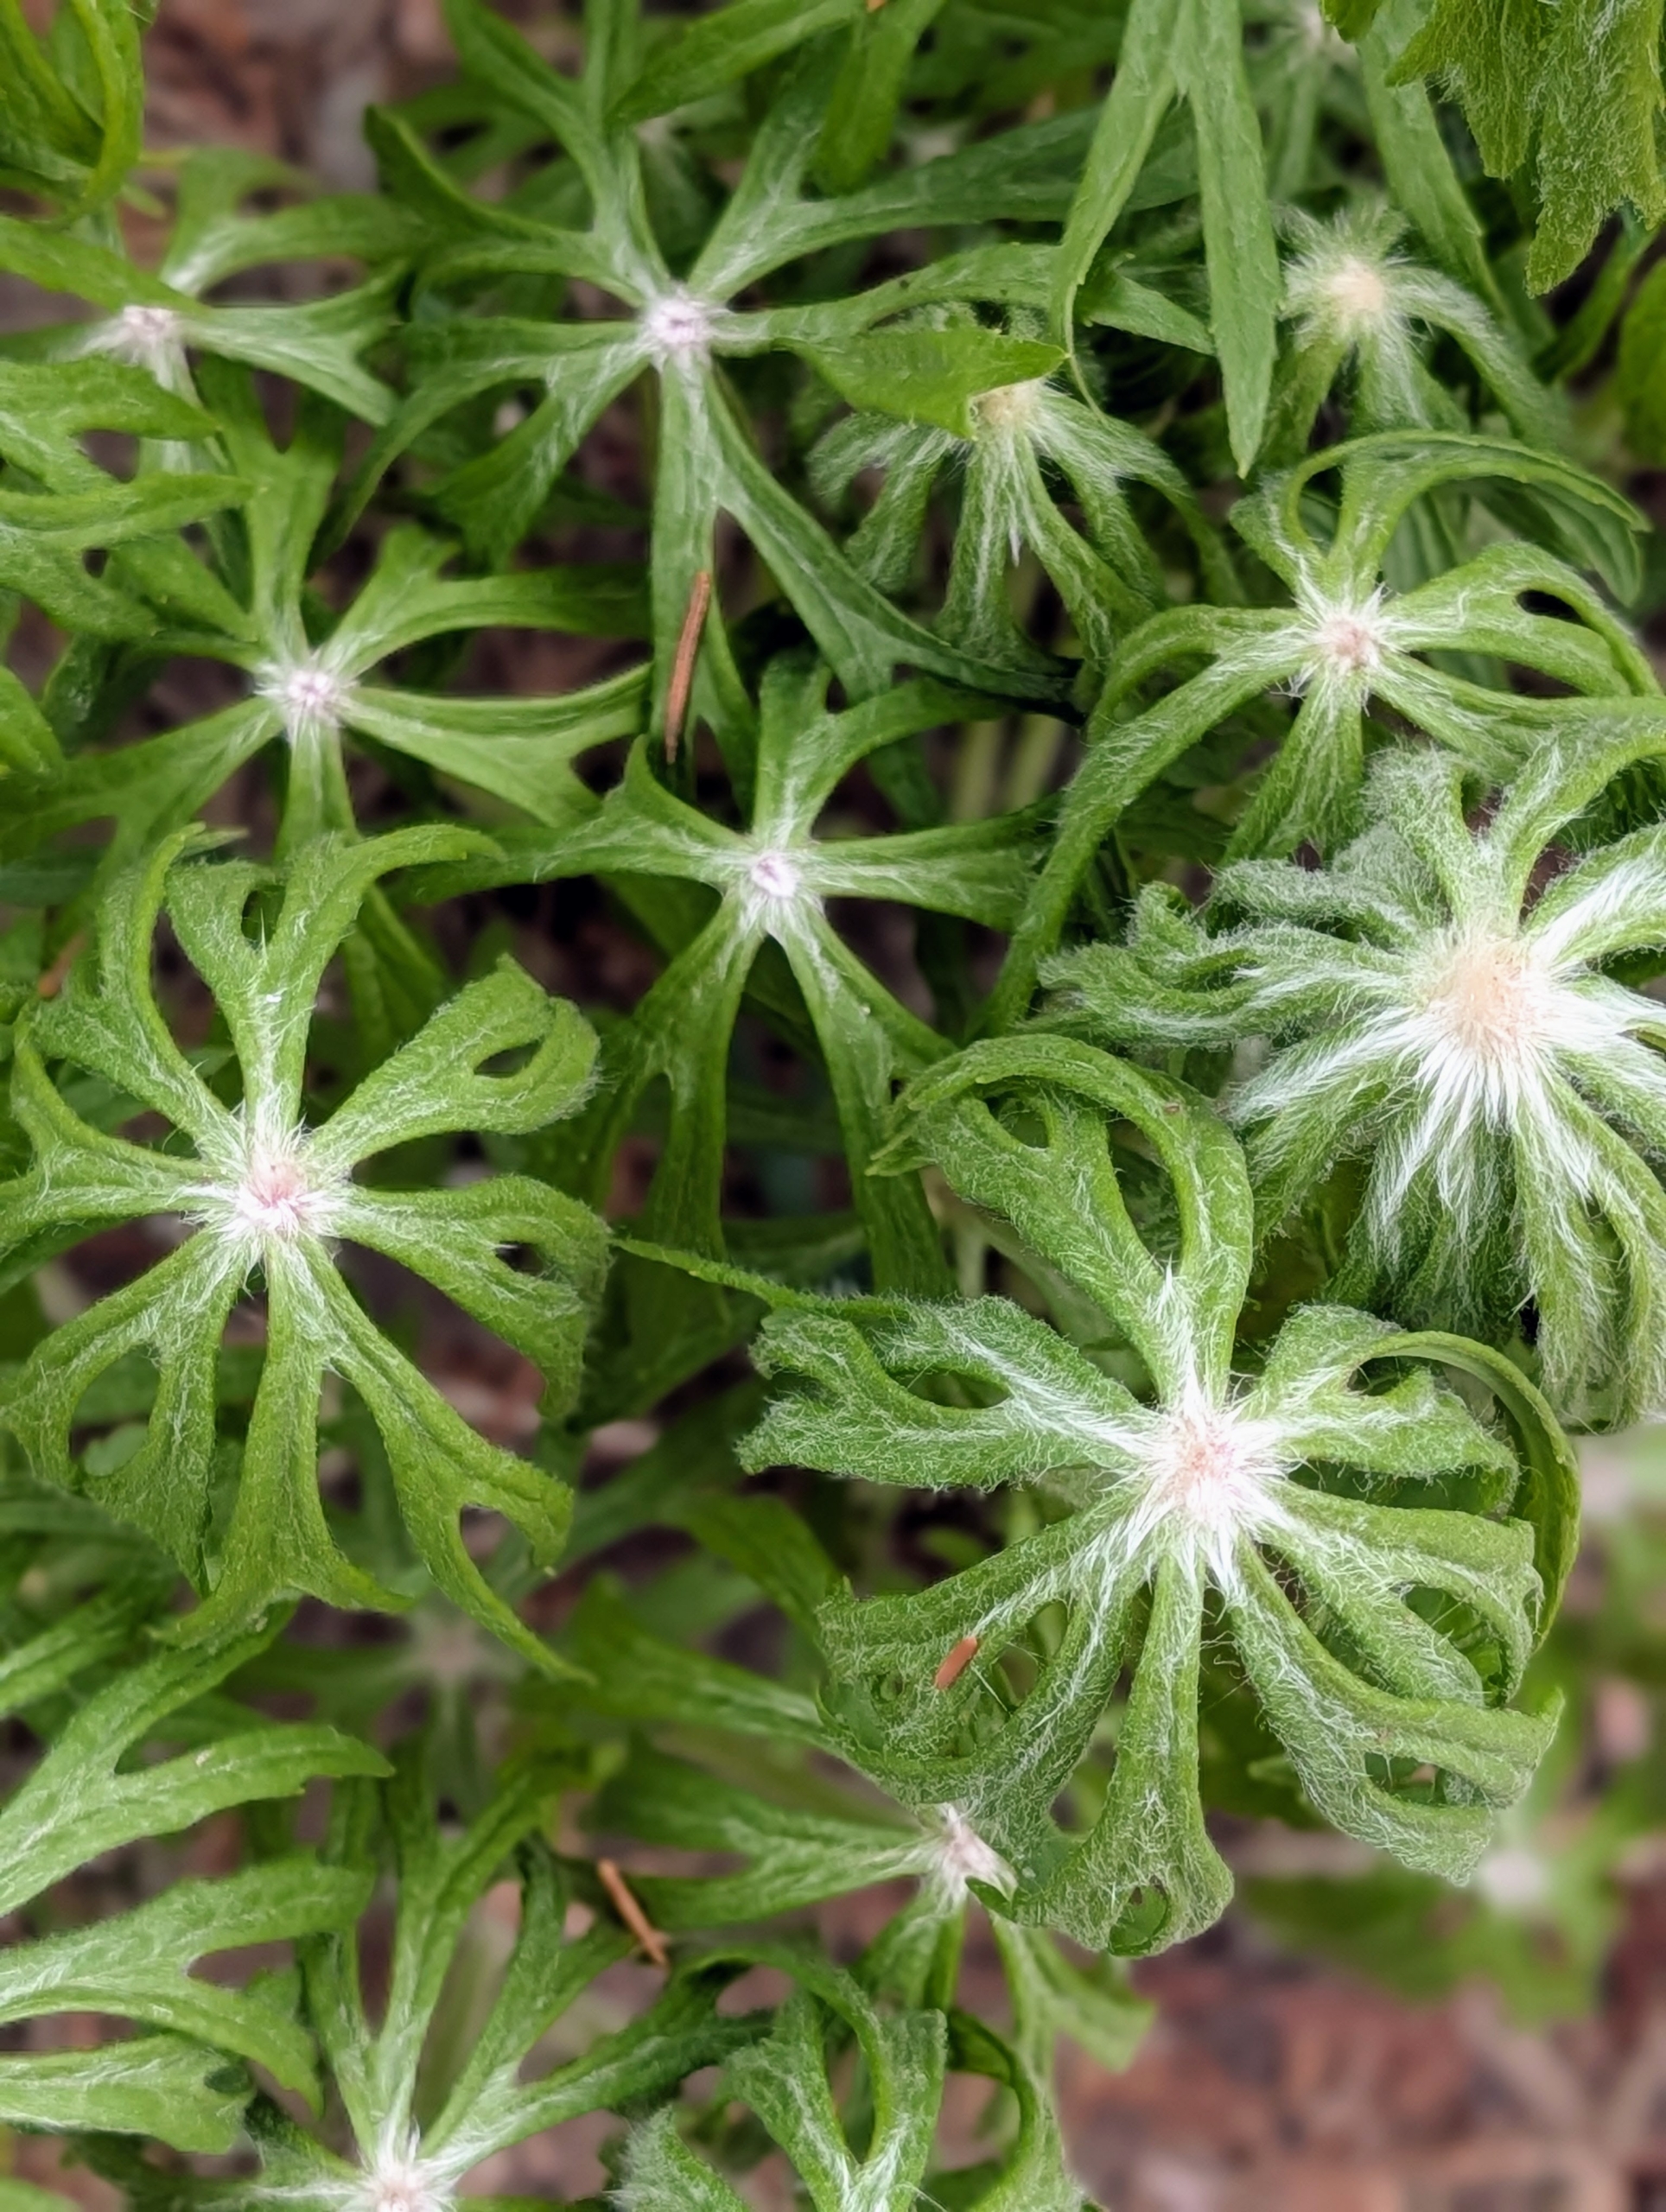
When plant shopping, I always look for the most interesting plants to add to my gardens. This is Syneilesis – a tough, drought-tolerant, easy-to-grow woodland garden perennial. Commonly called shredded umbrella, it has leaves that are narrow, dissected, and cascade downward like an umbrella. If grown in the proper environment, syneilesis will slowly spread to form an attractive colony.
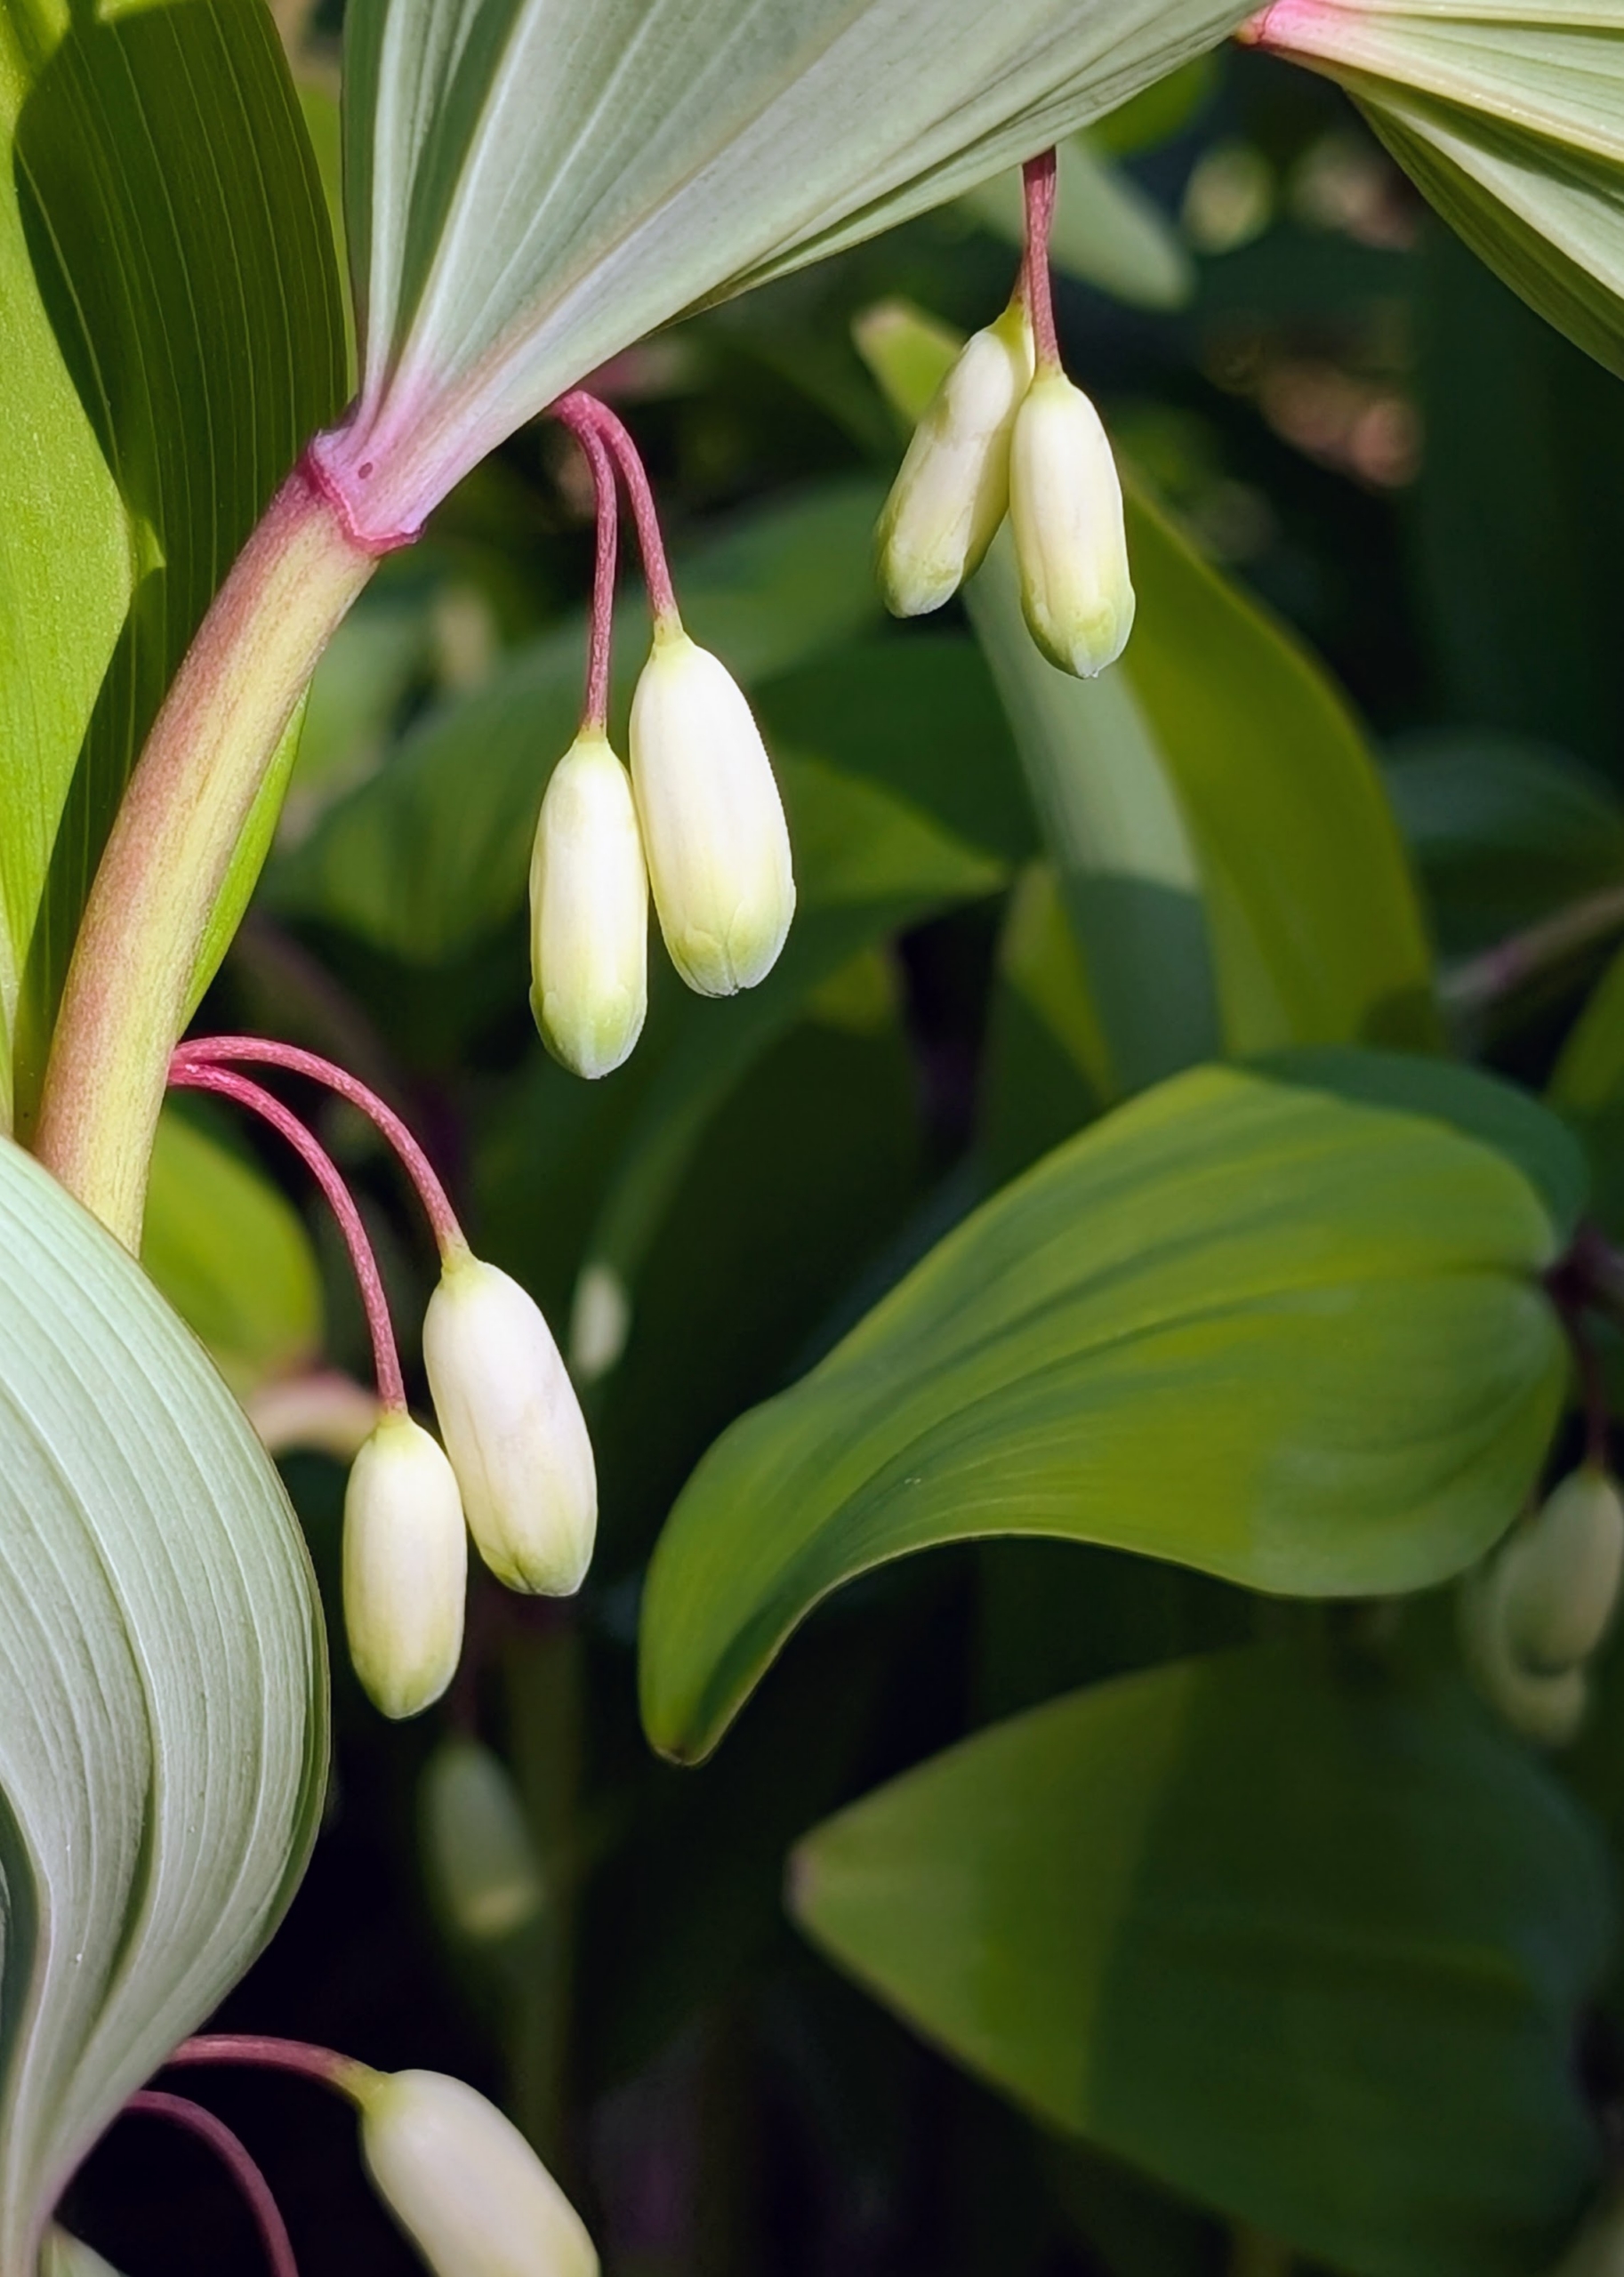
And this is Solomon’s Seal – a hardy perennial native to the eastern United States and southern Canada. These plants produce dangling white flowers, which turn to dark-blue berries later in the summer.
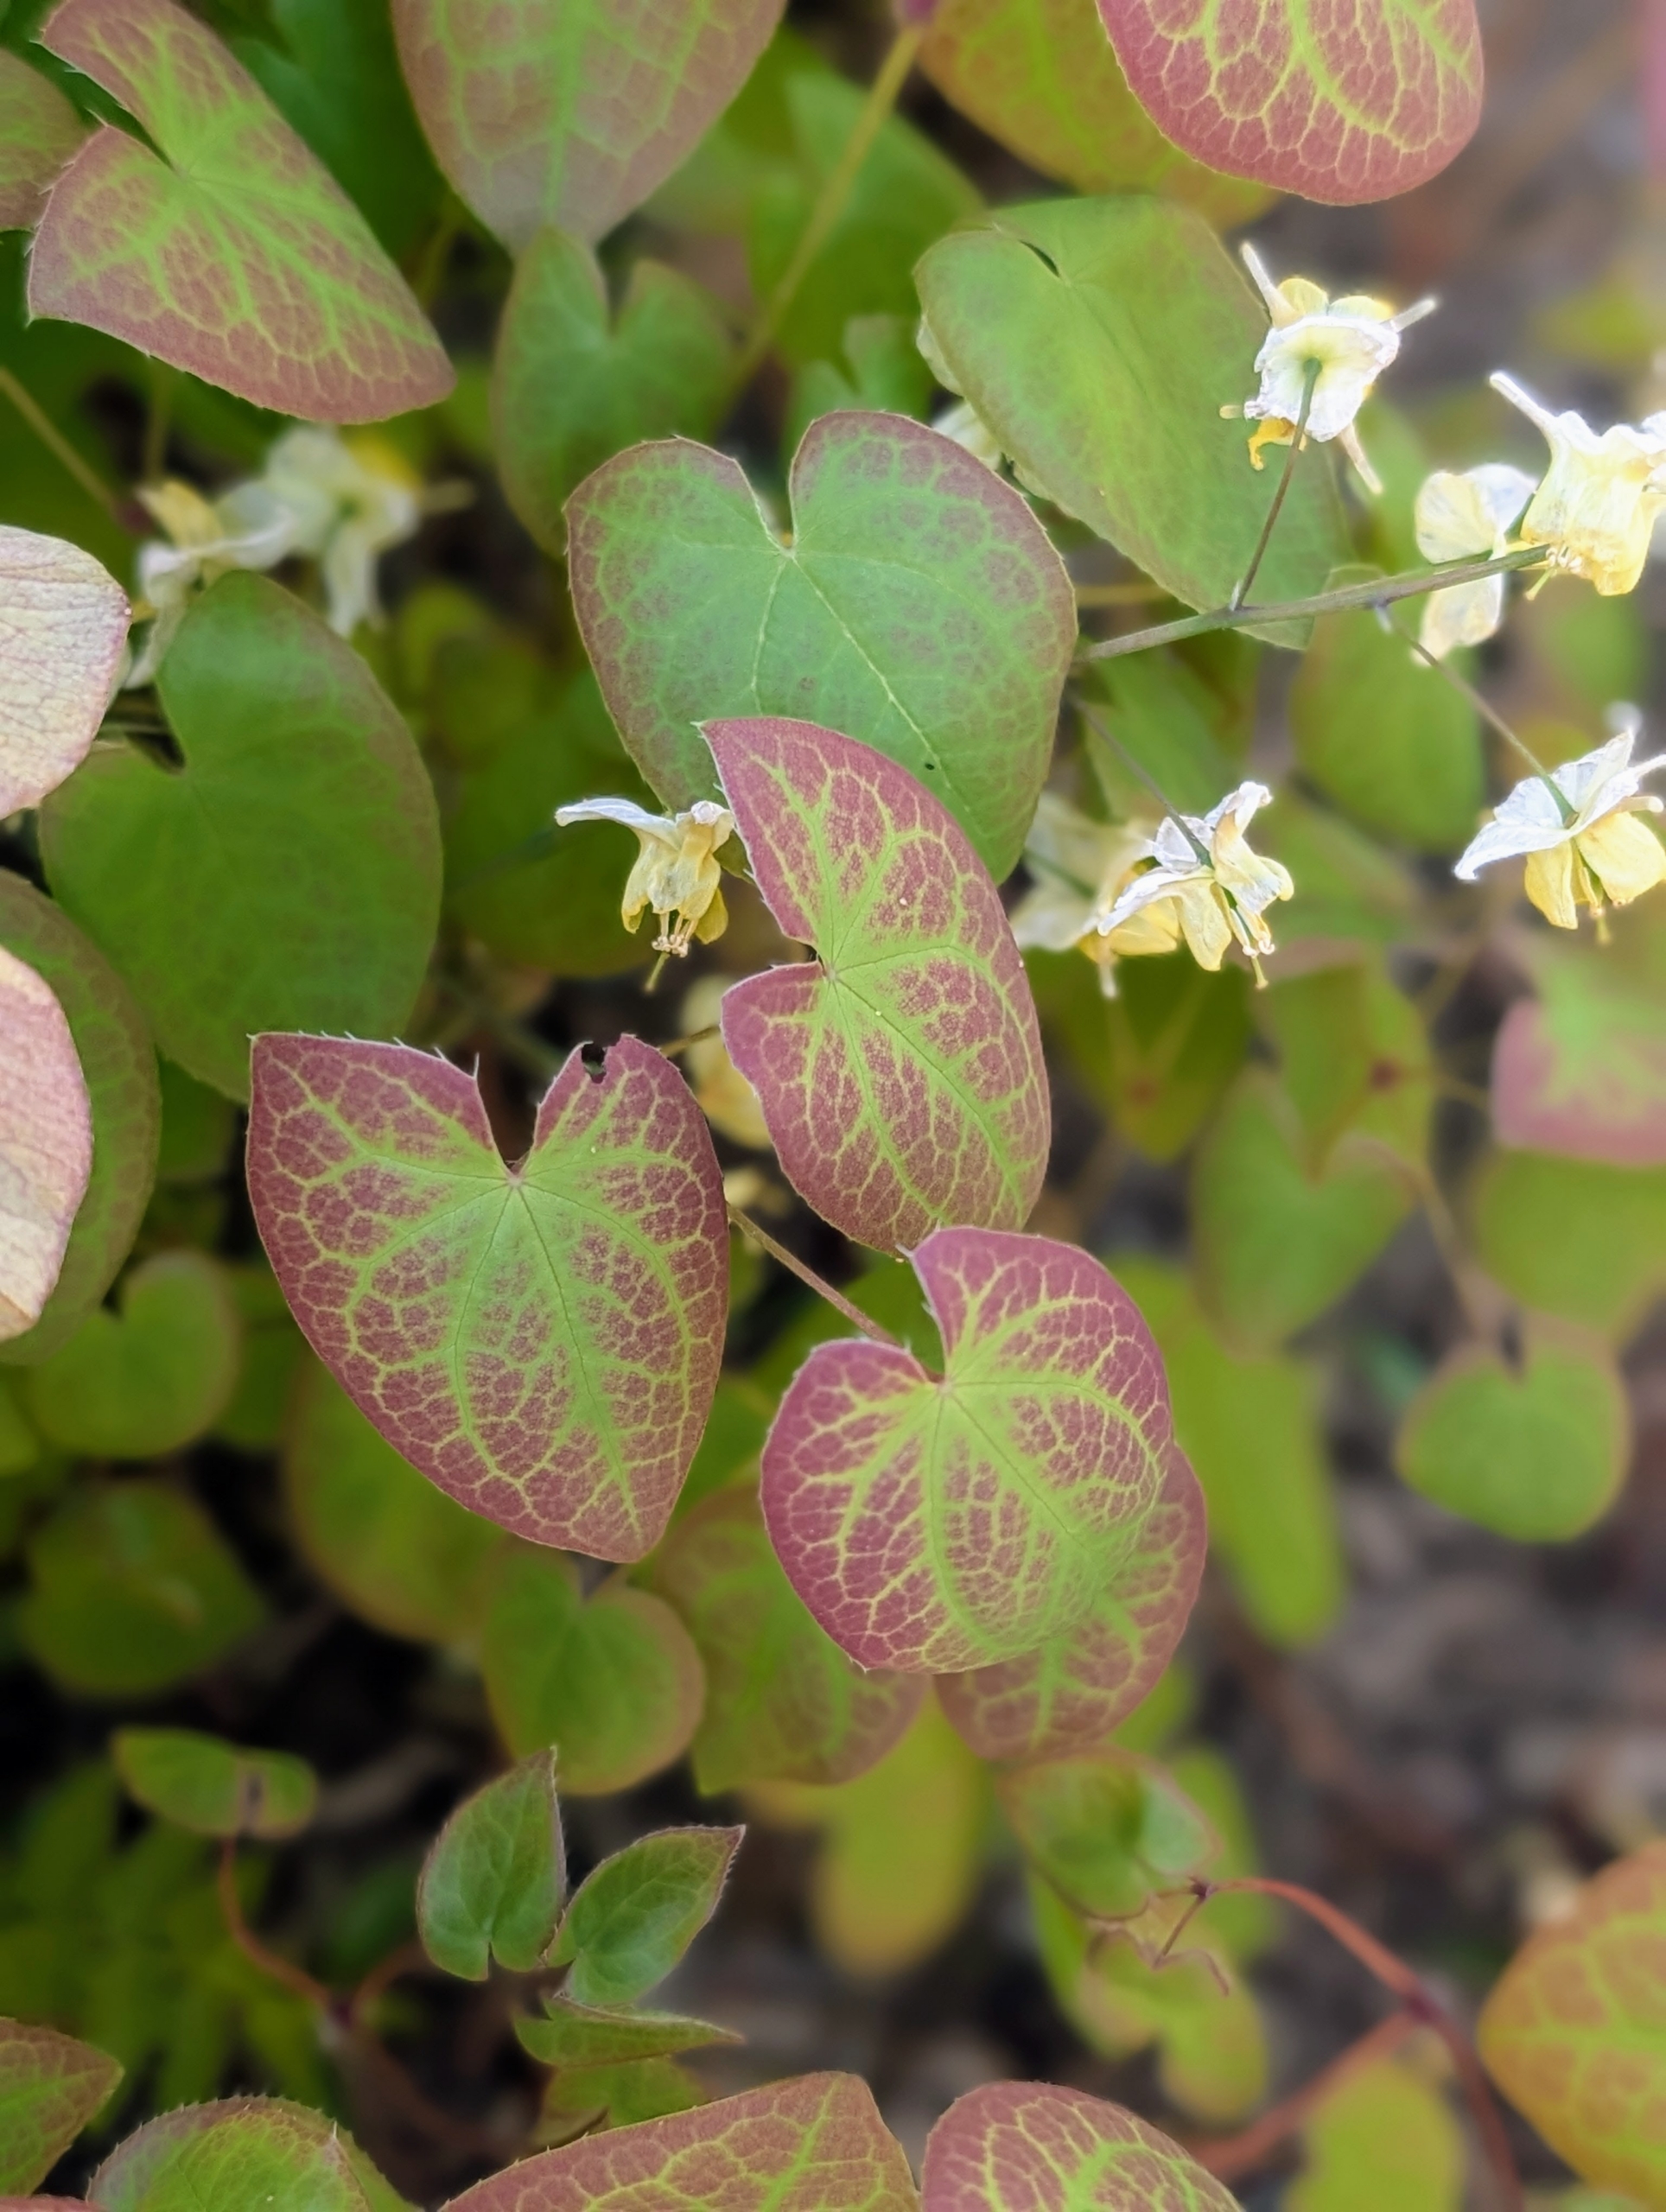
Epimedium, also known as barrenwort, bishop’s hat, fairy wings, horny goat weed, or yin yang huo, is a genus of flowering plants in the family Berberidaceae. The leaves are made up of leaflets, which can range in number from three to 50 and in size from as tiny to six inches long. They are generally heart-shaped, but can range from round to arrow-shaped.
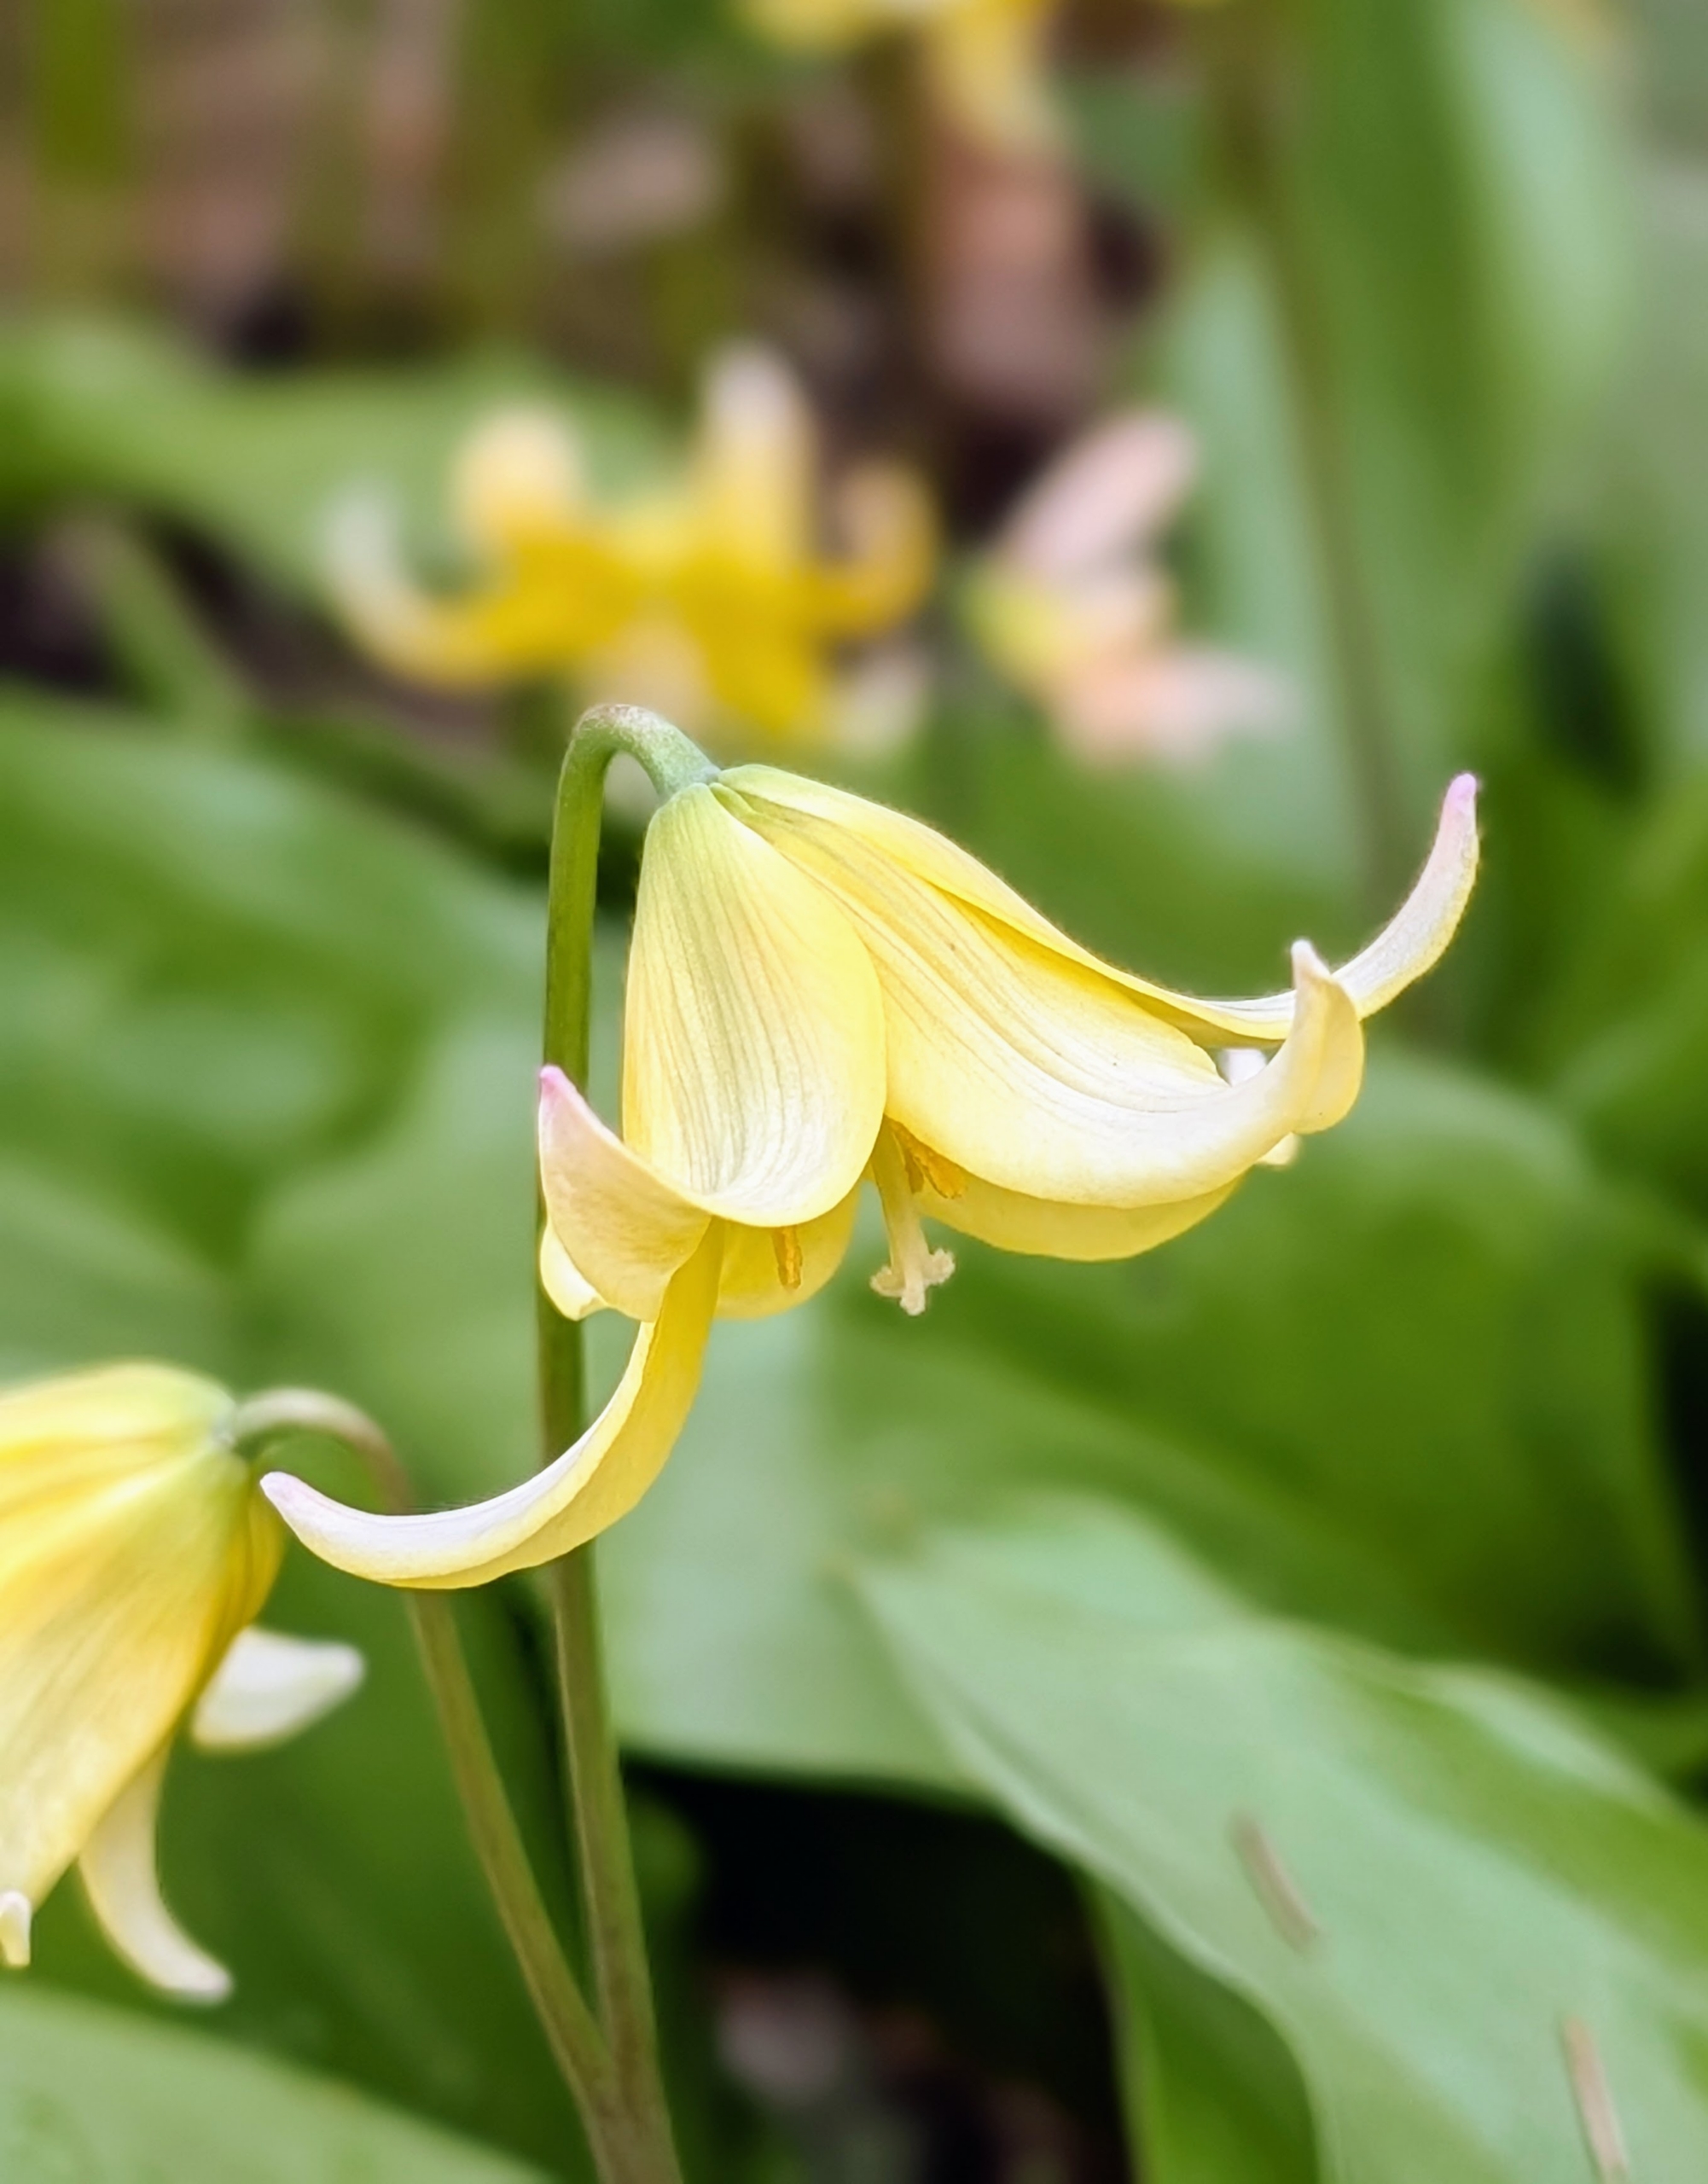
This is a trout lily. Its delicate blooms, which resemble turks cap lilies do best in dappled light.
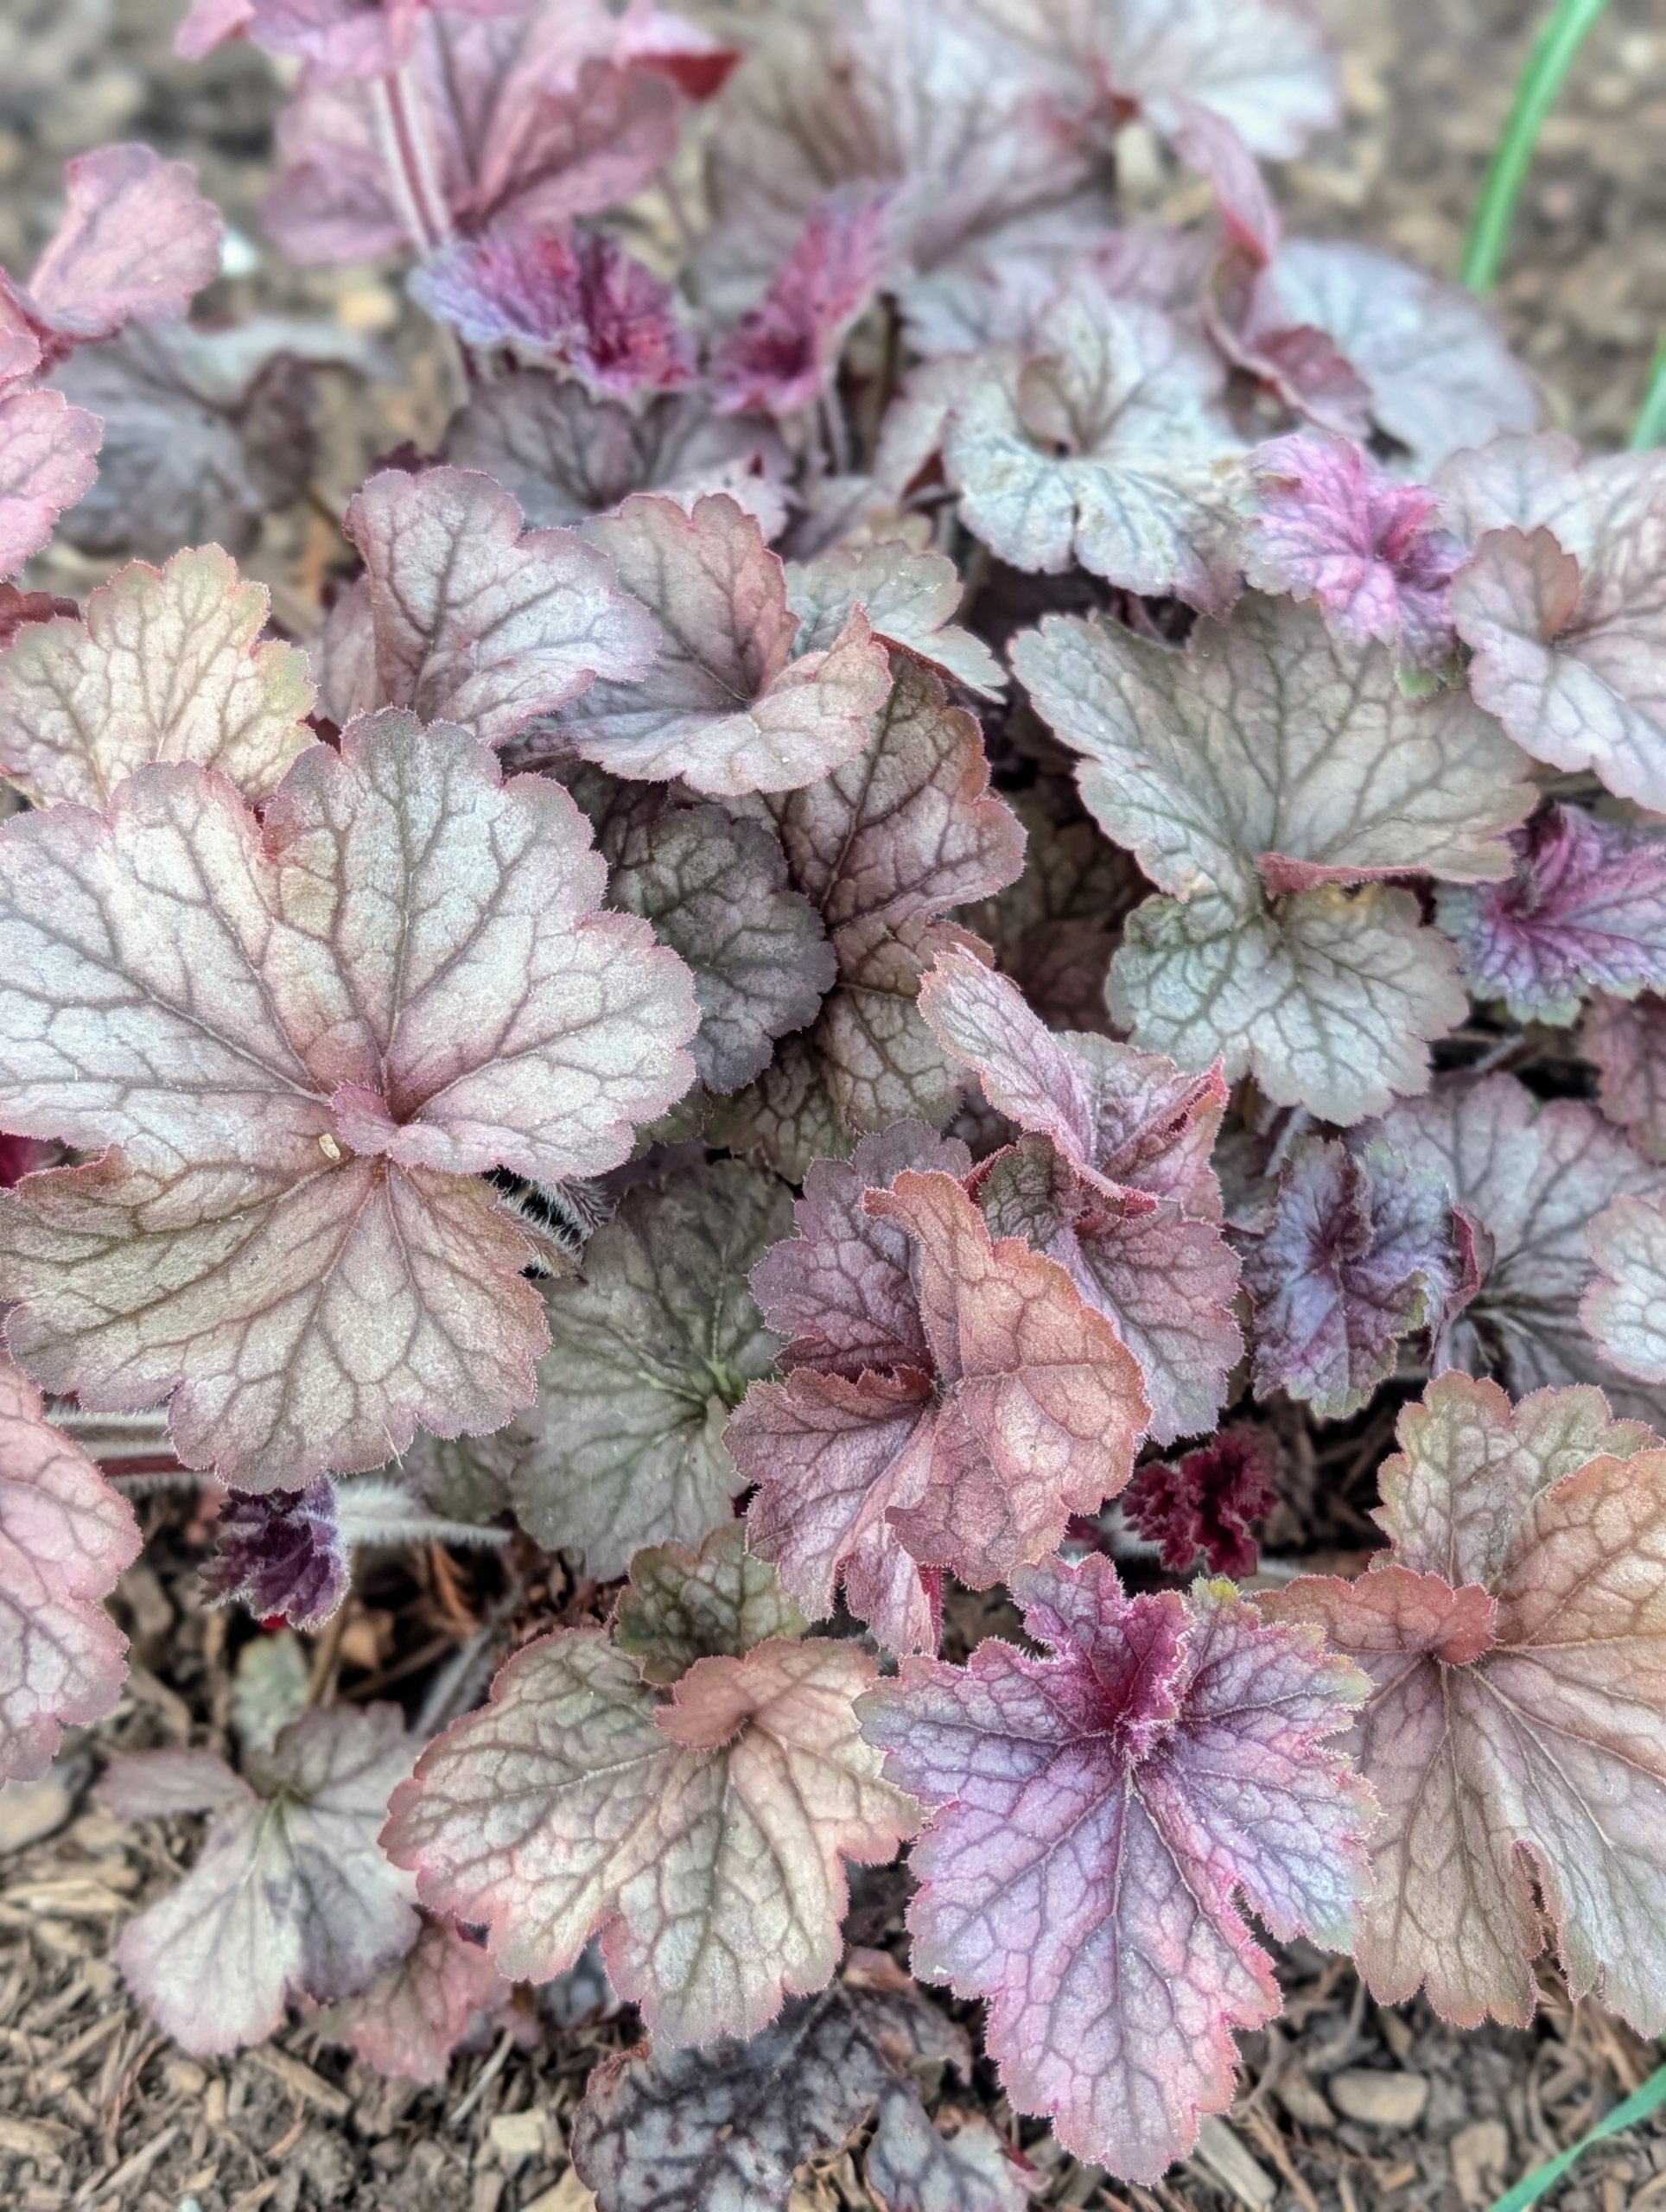
Heuchera plants grow into mounds and are exceptionally heat tolerant. Heuchera is a genus of largely evergreen perennial plants in the family Saxifragaceae, all native to North America. Common names include alumroot and coral bells. This is a ‘Northern Exposure Silver’ Heuchera.
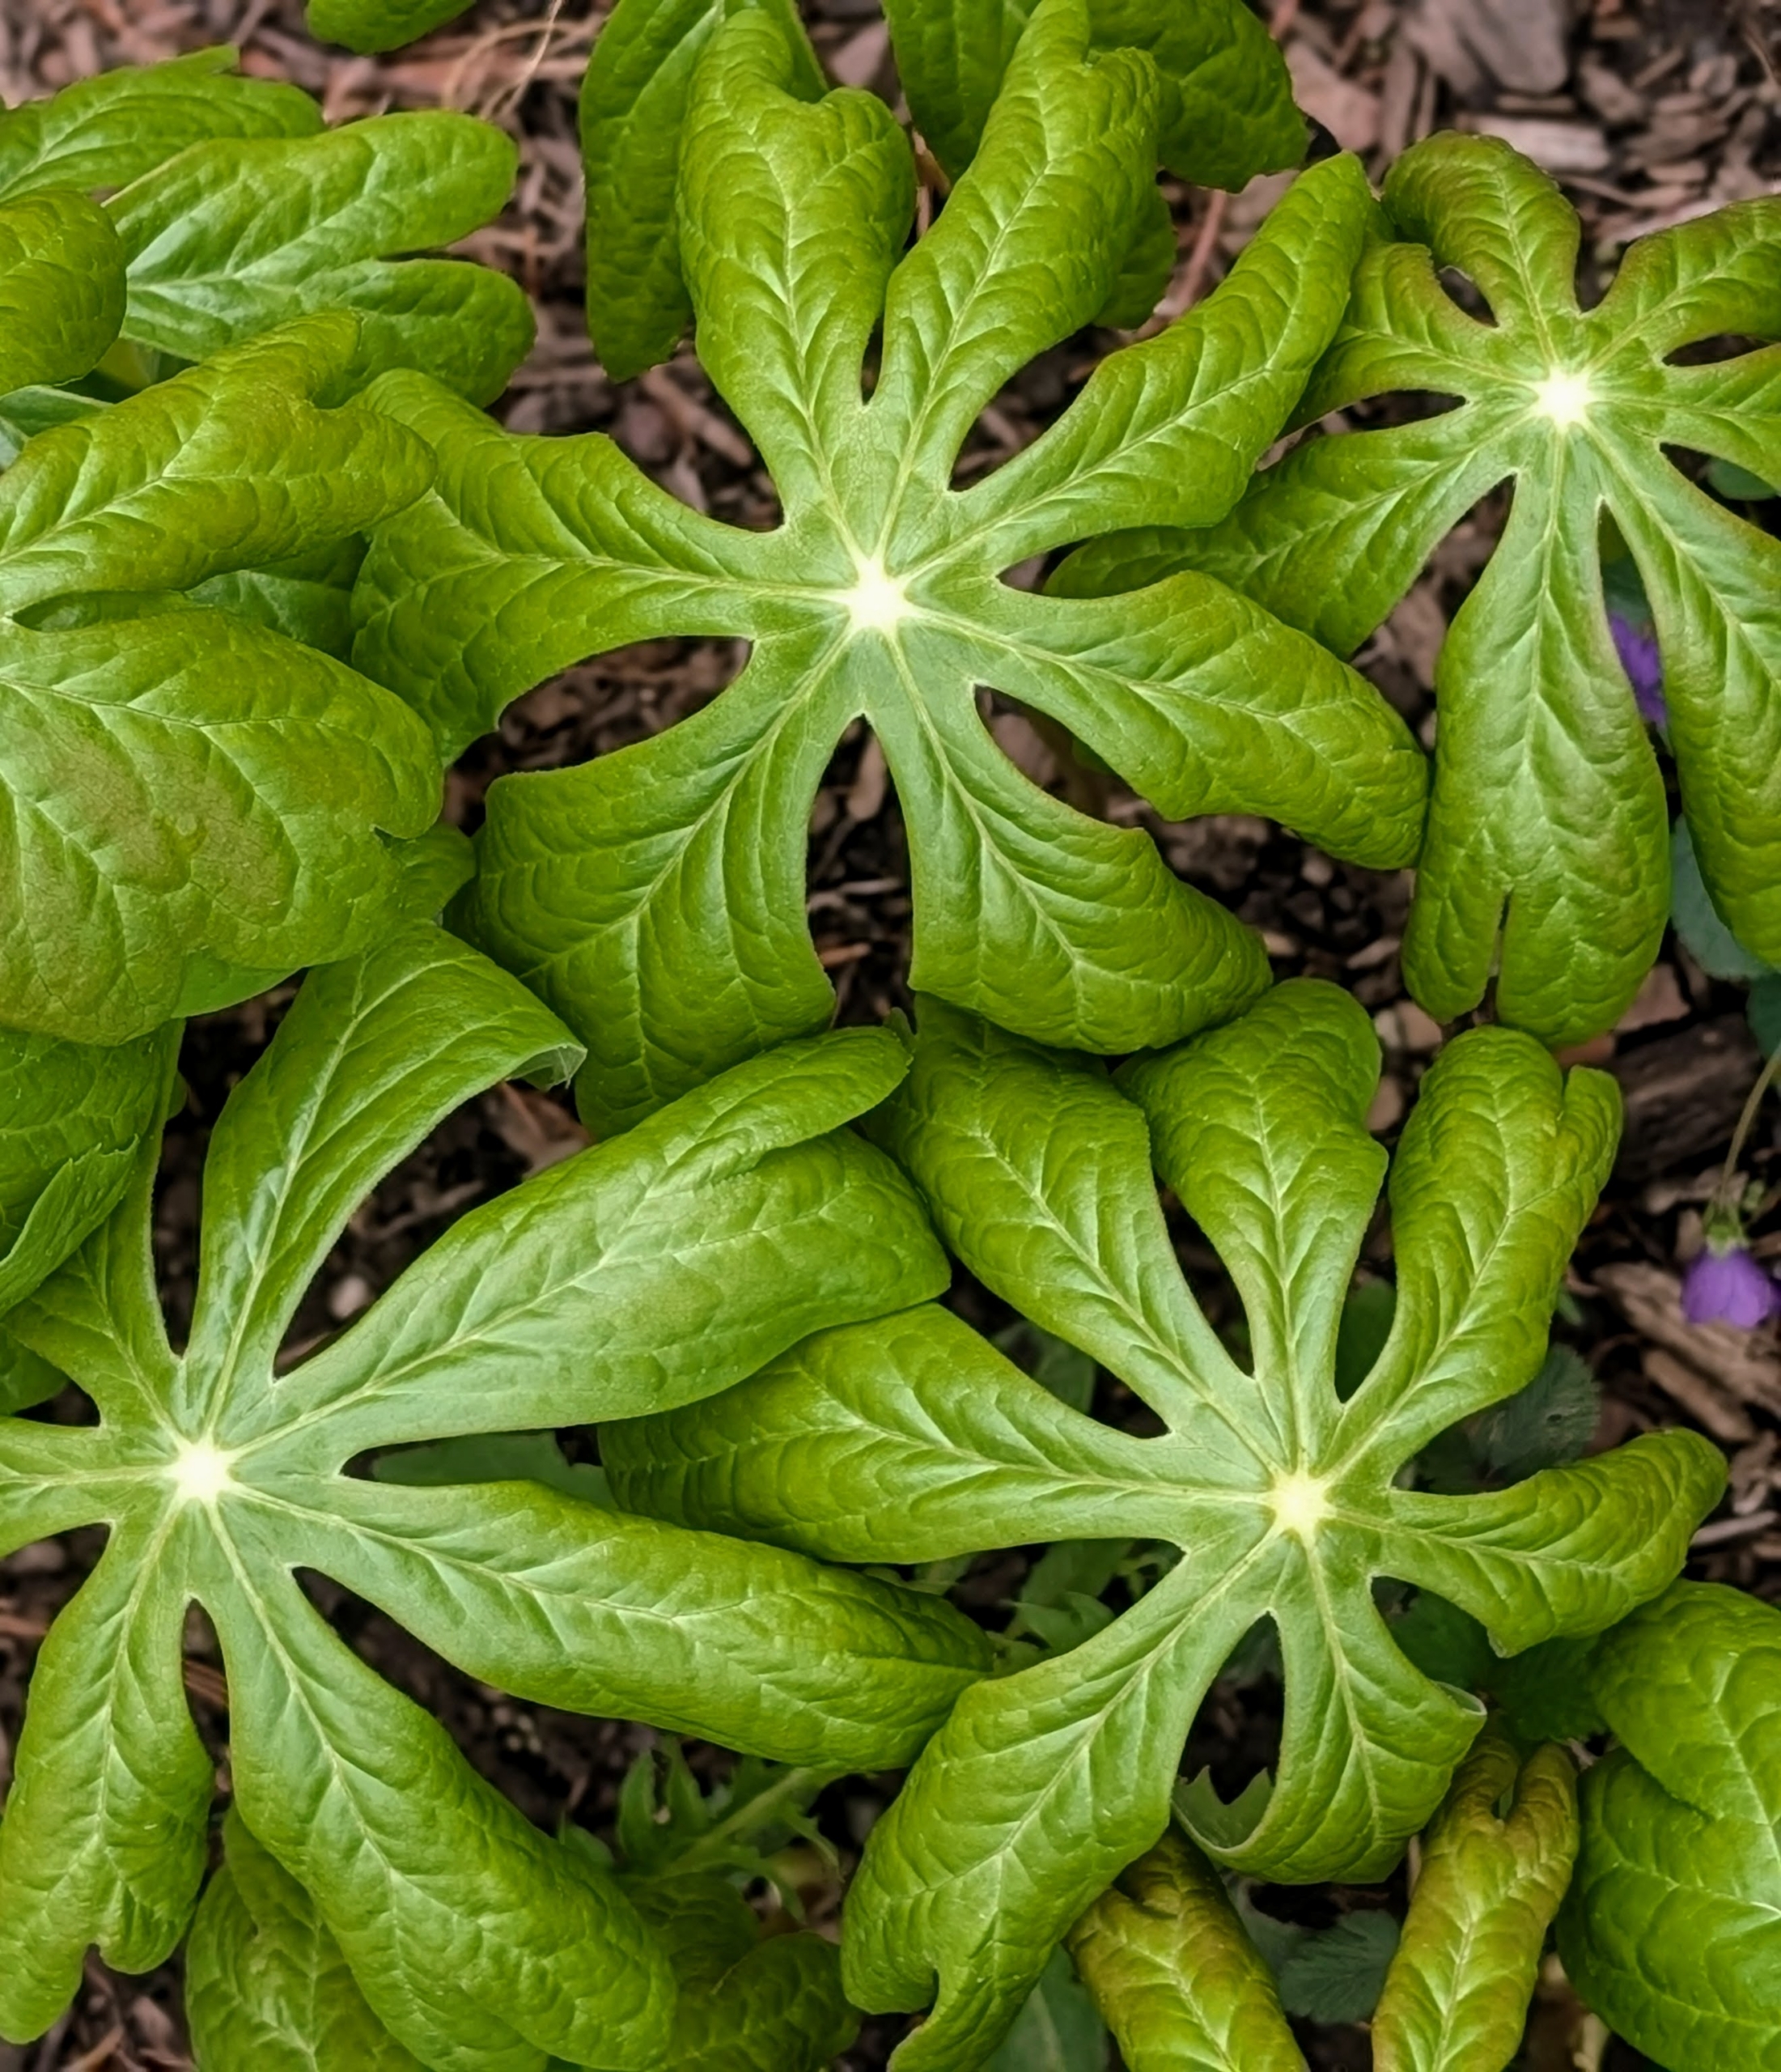
Podophyllum peltatum is commonly known as mayapple, American mandrake, wild mandrake, and ground lemon. Mayapples are woodland plants, typically growing in colonies from a single root. The leaves are deeply lobed and can grow up to one foot wide making them stand-out in the garden bed. This is a ‘Northern Exposure Silver’ Heuchera. The burgundy foliage becomes heavily frosted with silver, forming a dense mound. This plant also features sprays of small pink flowers on red stems that rise above the foliage from spring through summer.
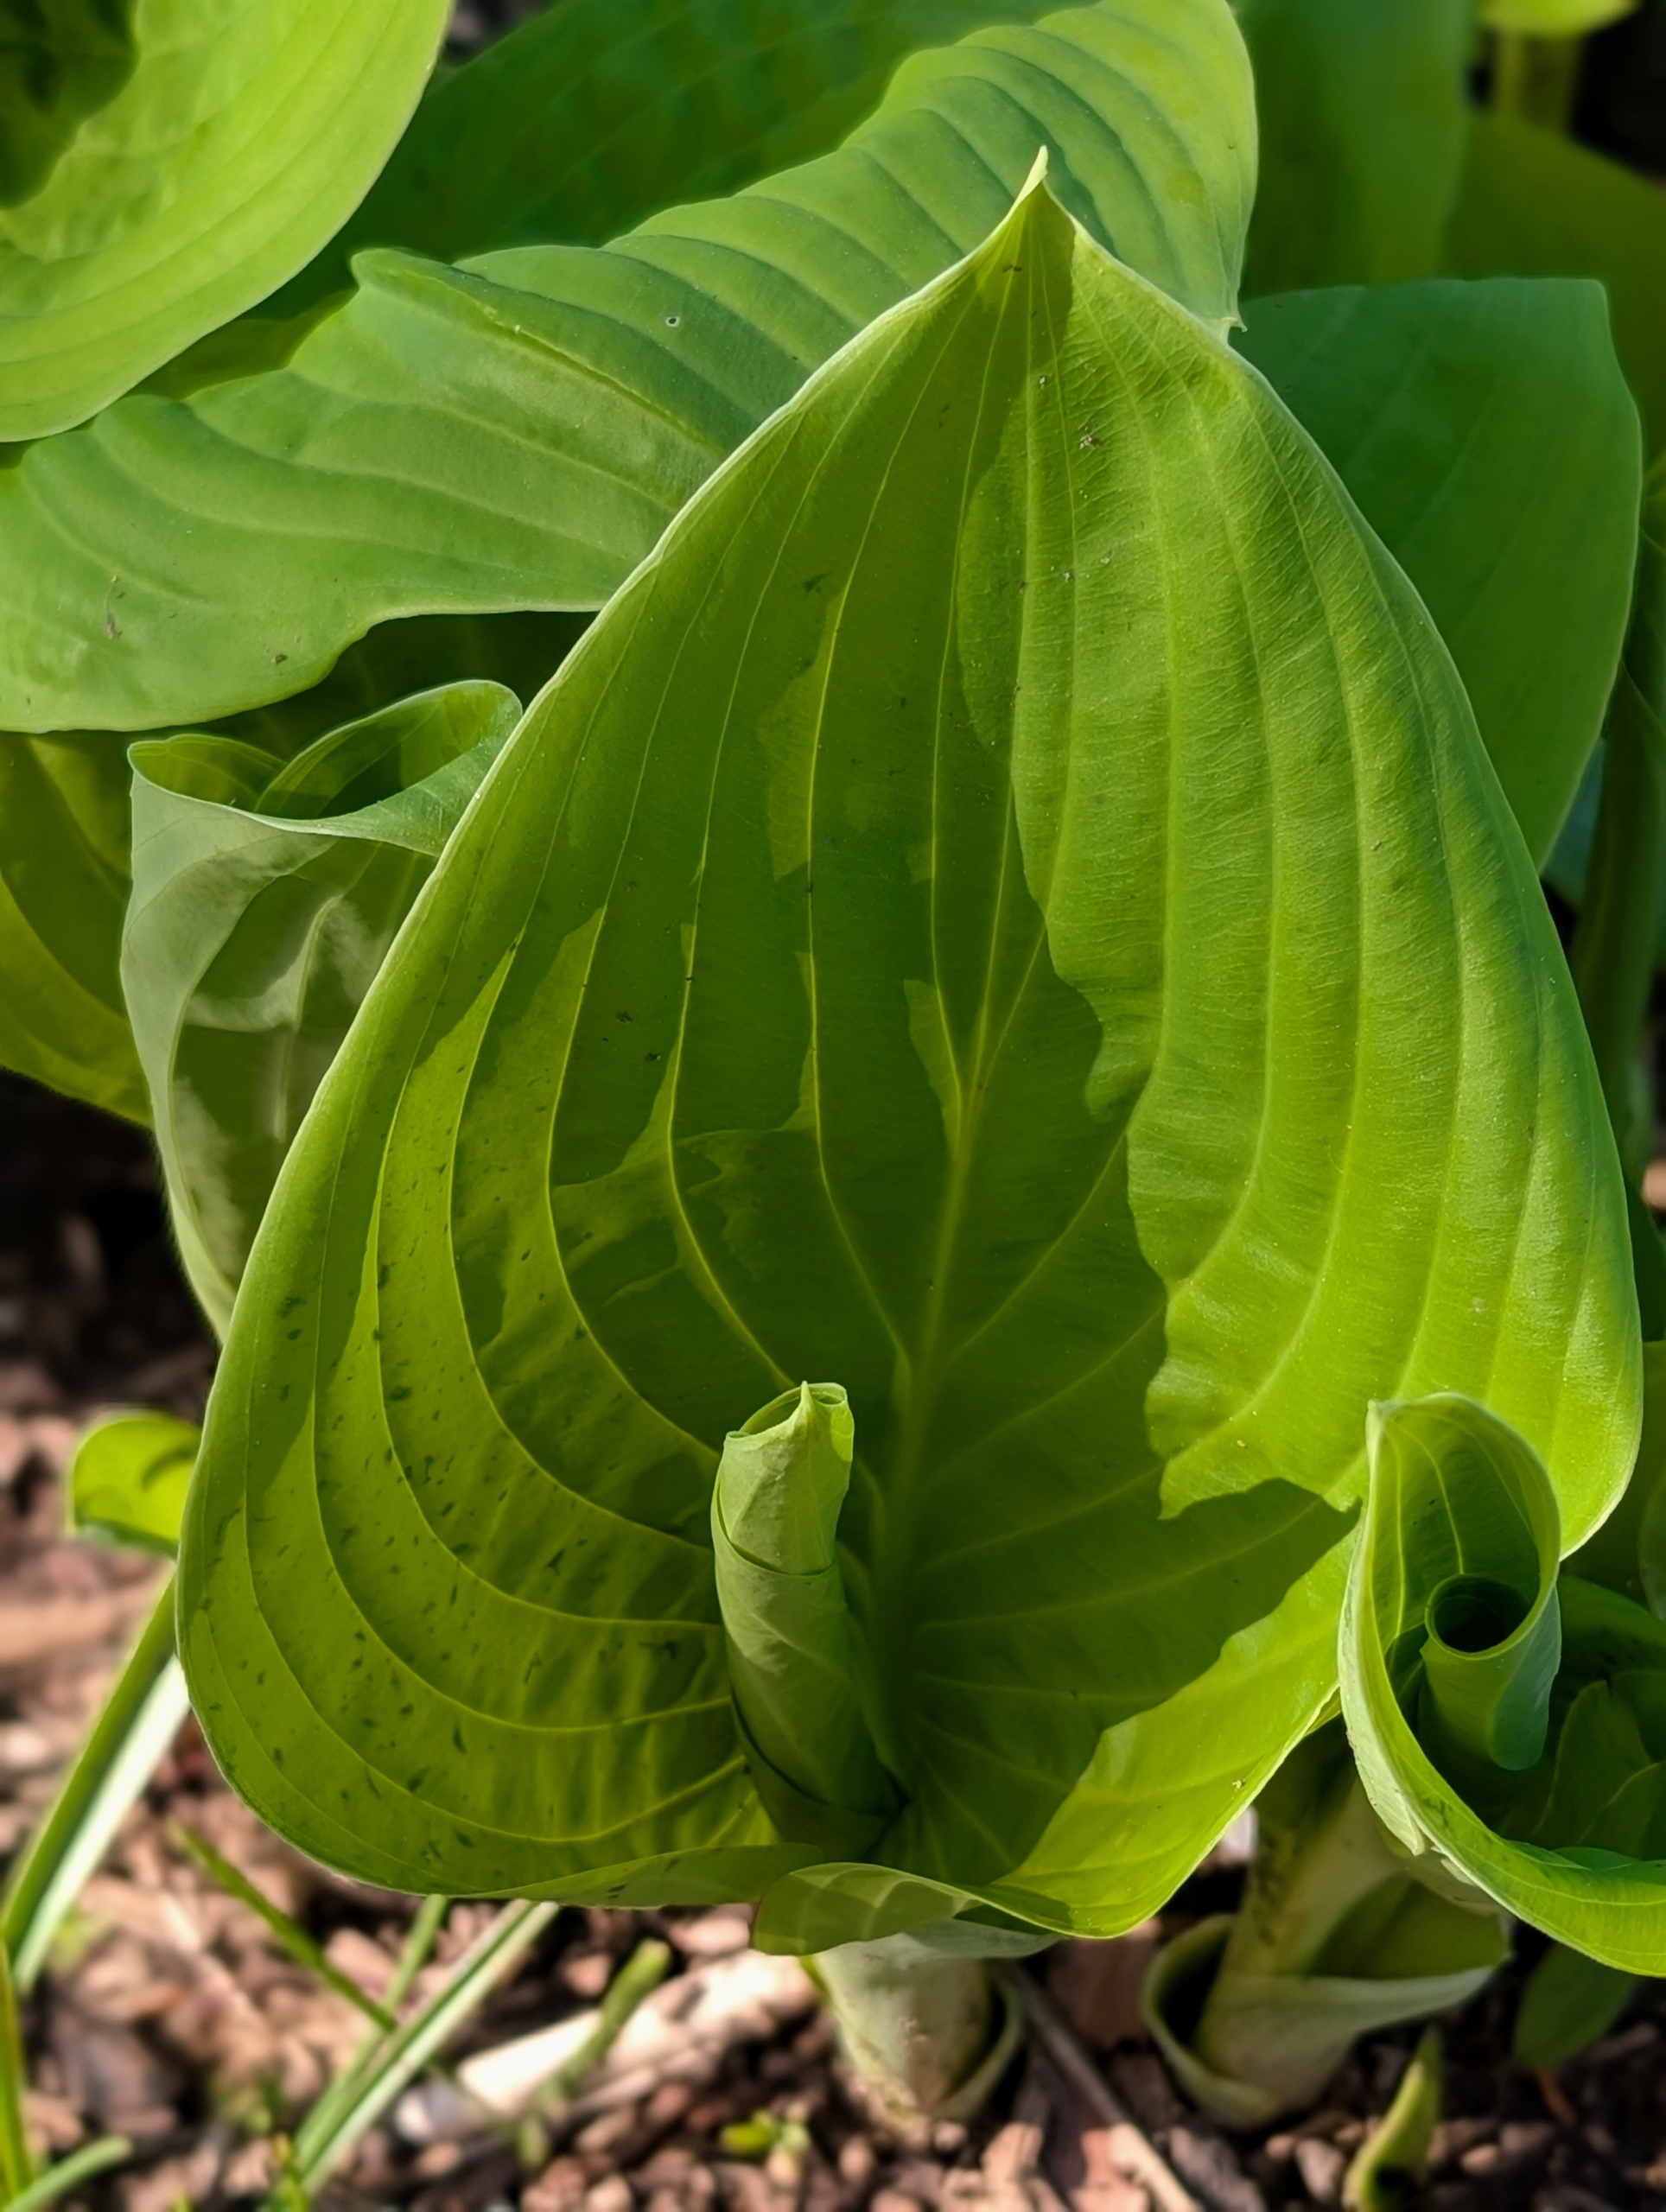
All the hostas are also growing quickly. The lush green foliage varies in leaf shape, size and texture, and their easy care requirements make them ideal for many areas.
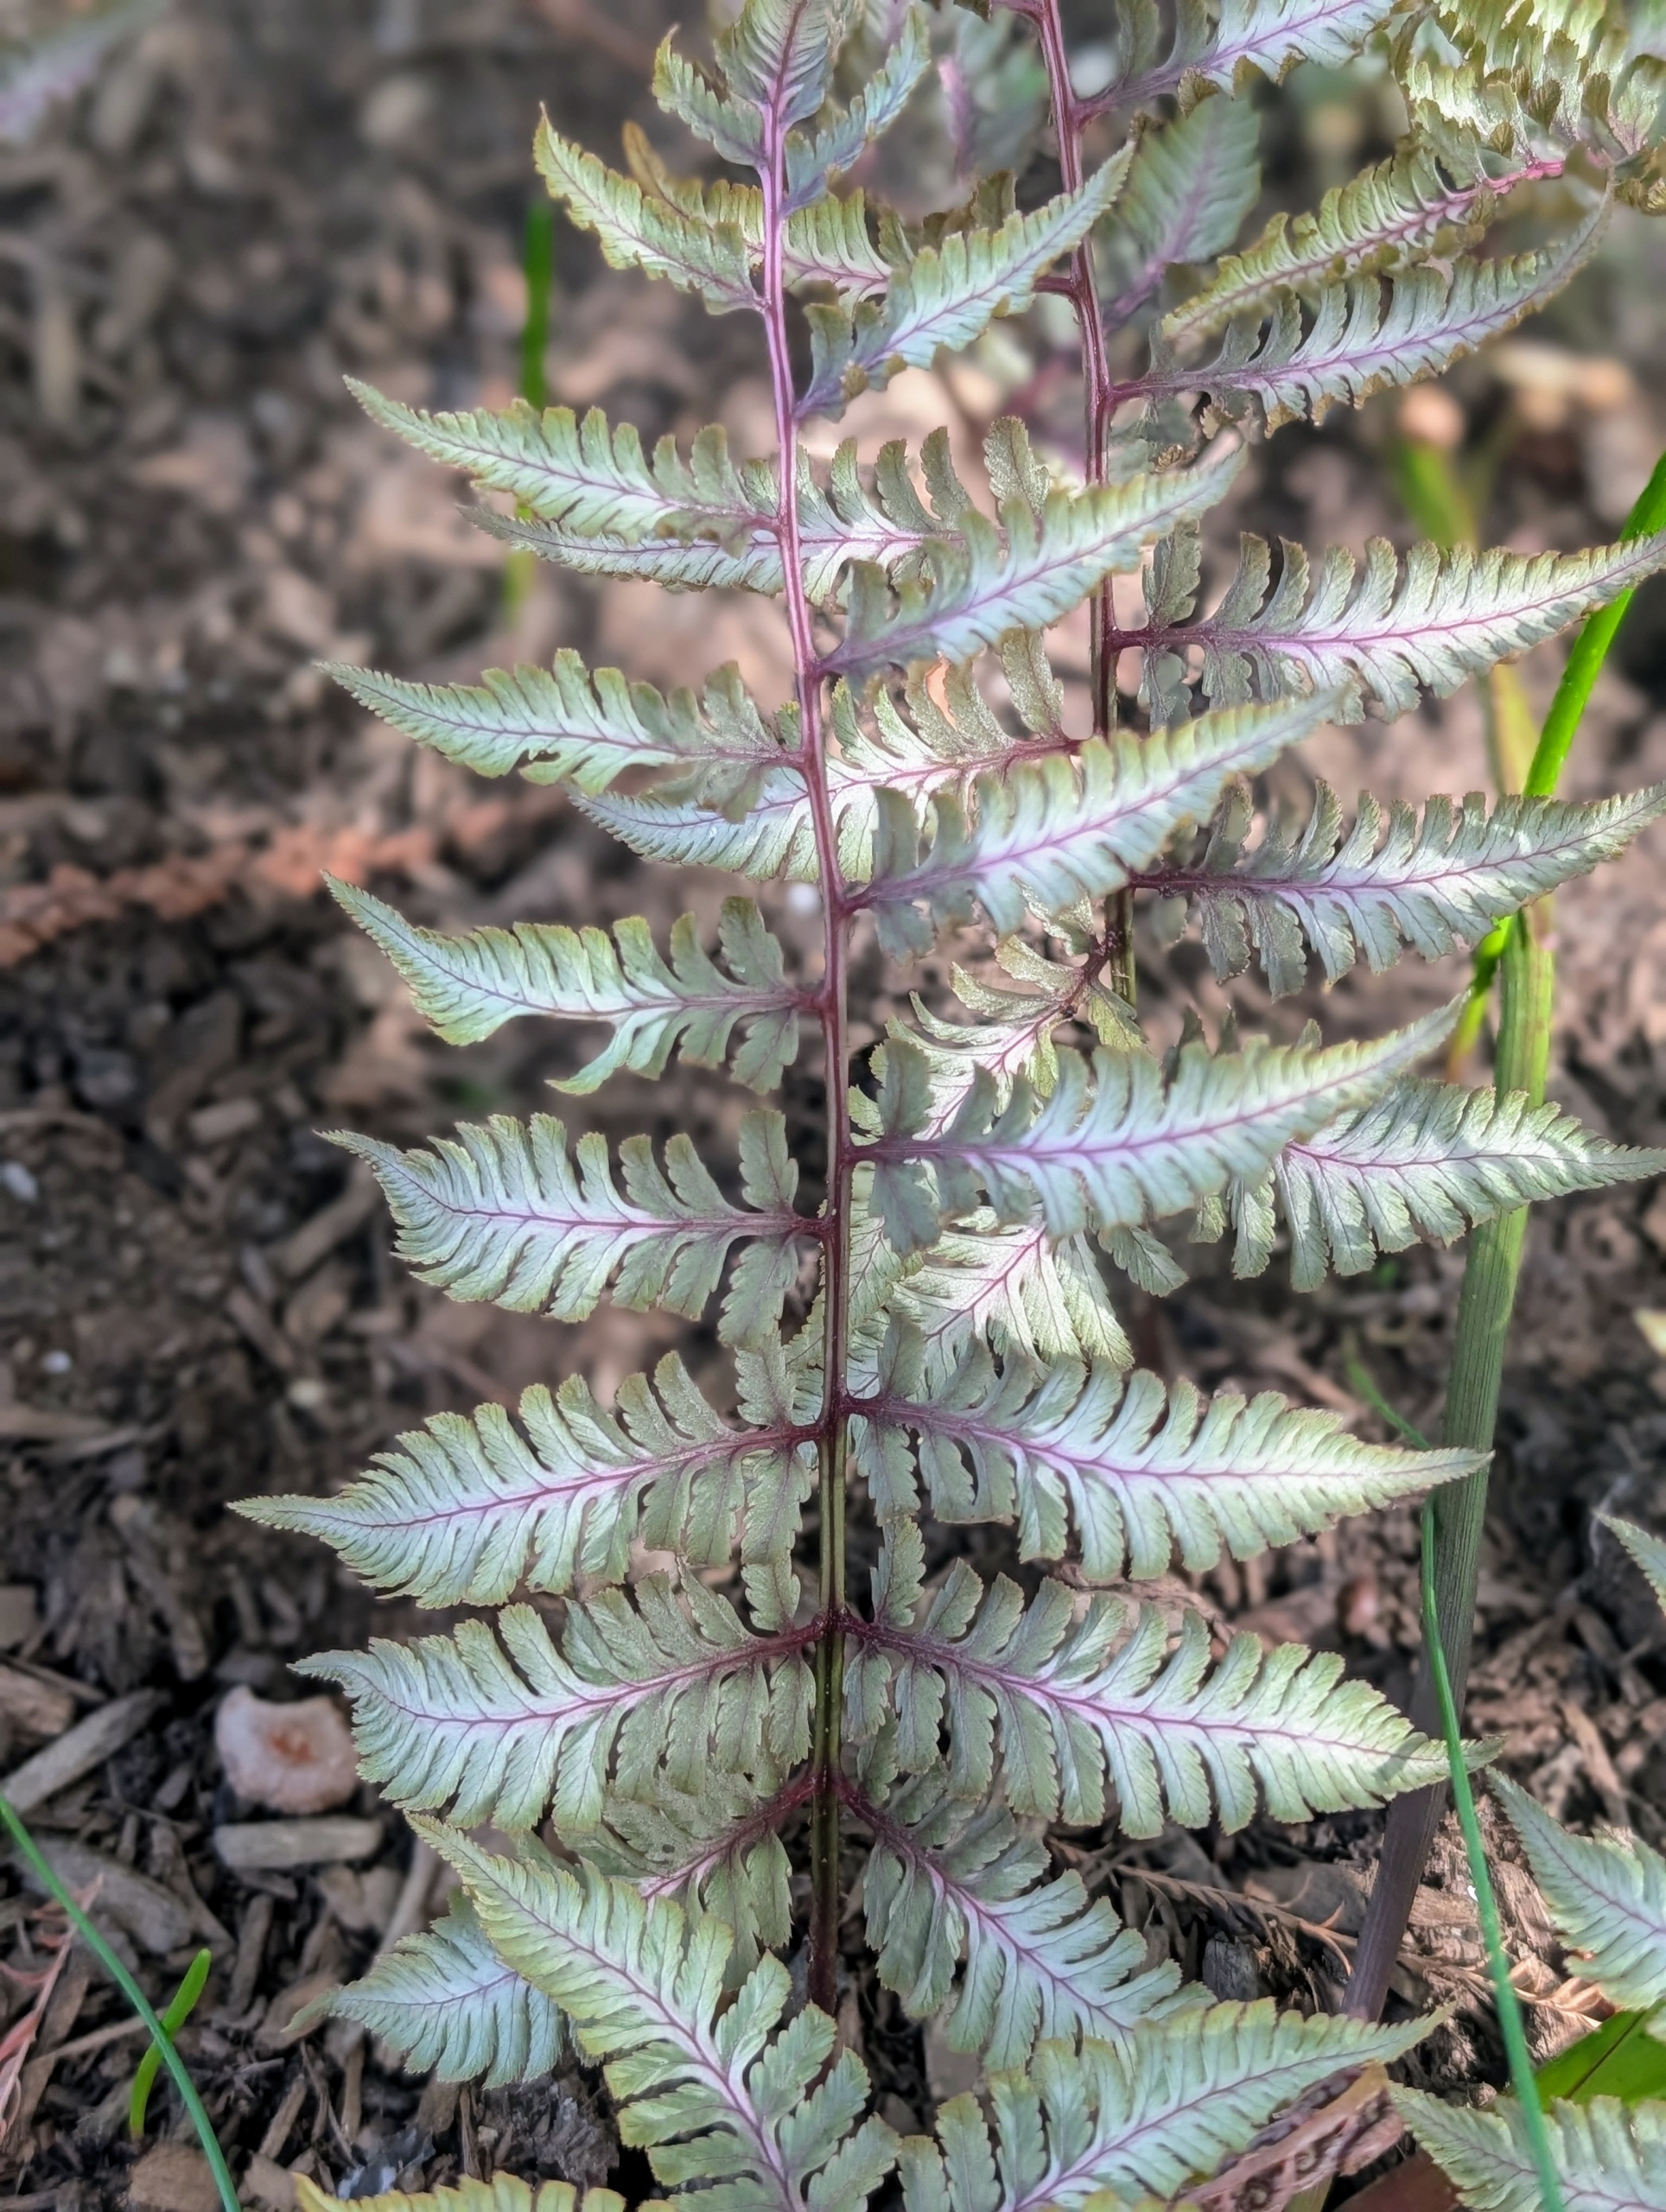
Some of the ferns in this area include the Japanese painted ferns – beautiful mounds of dramatic foliage with luminescent blue-green fronds and dark central ribs that fade to silver at the edges.
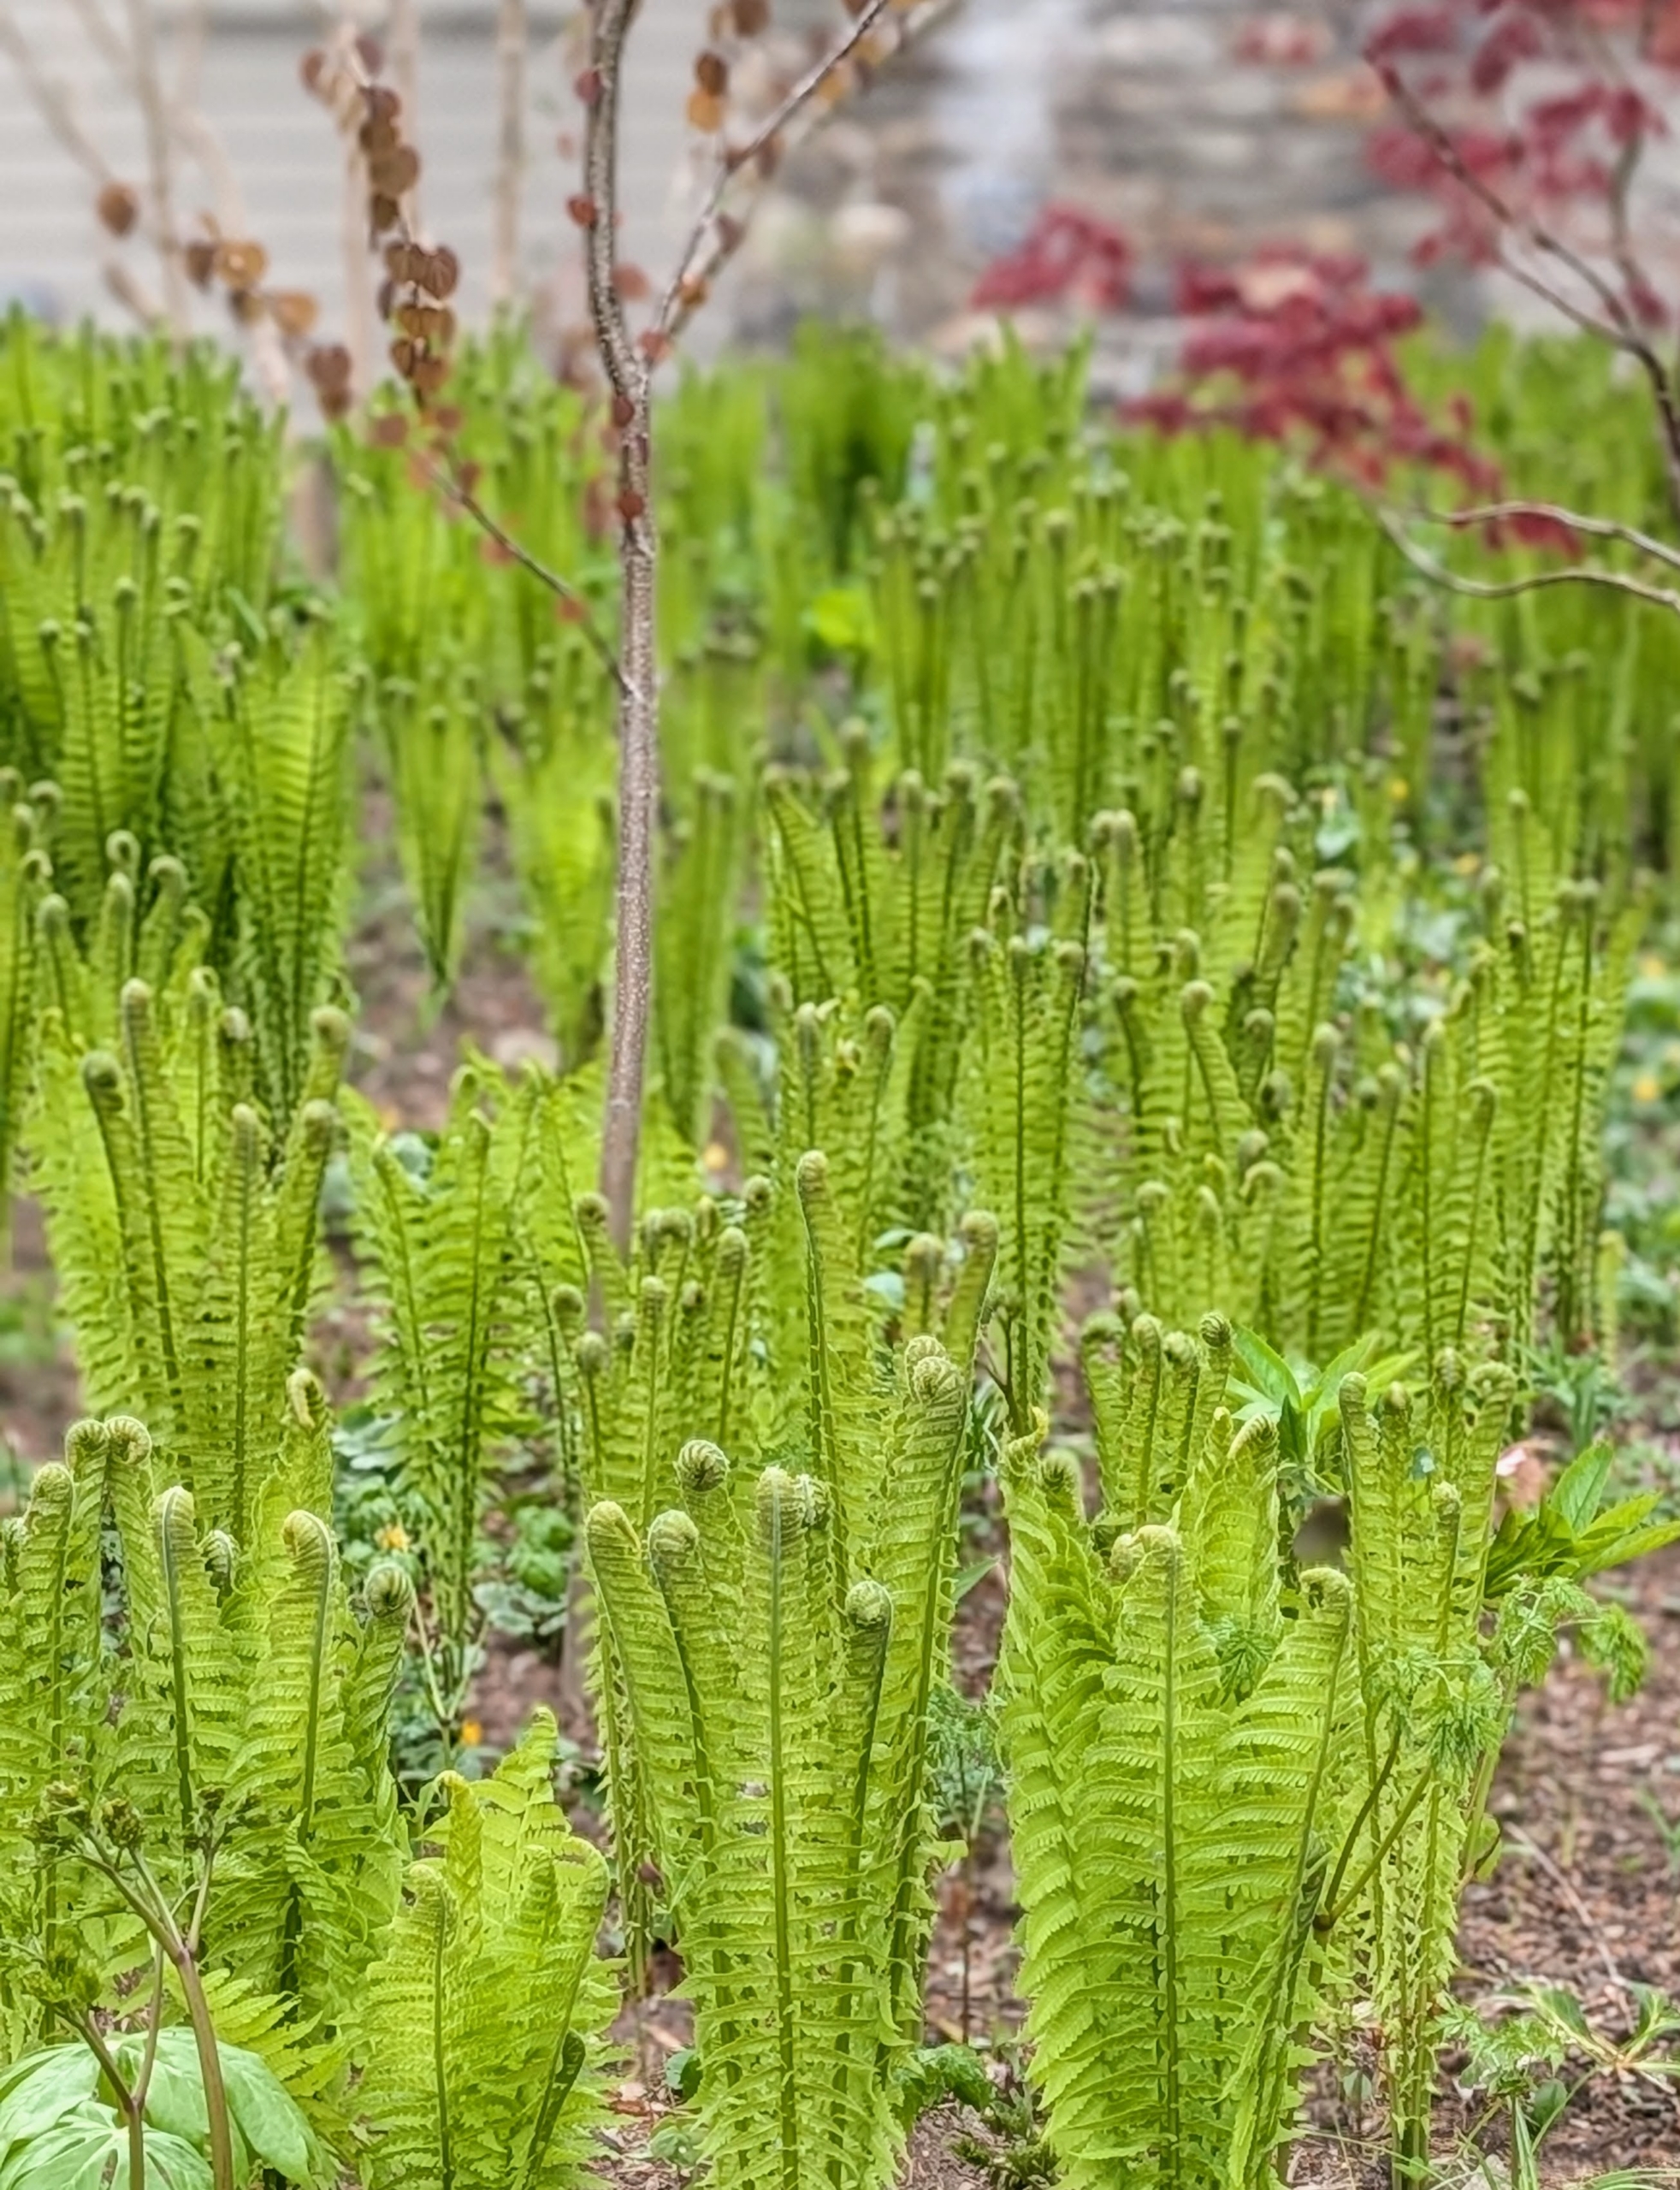
All around, I also have lots of ostrich ferns growing. Matteuccia struthiopteris is native to North America. Once established, these grow to a height of three to six feet. Ostrich fern grows in vase-shaped clumps called crowns. The showy, arching, sterile fronds are plume-like and reminiscent of the tail feathers of – you guessed it – ostriches.
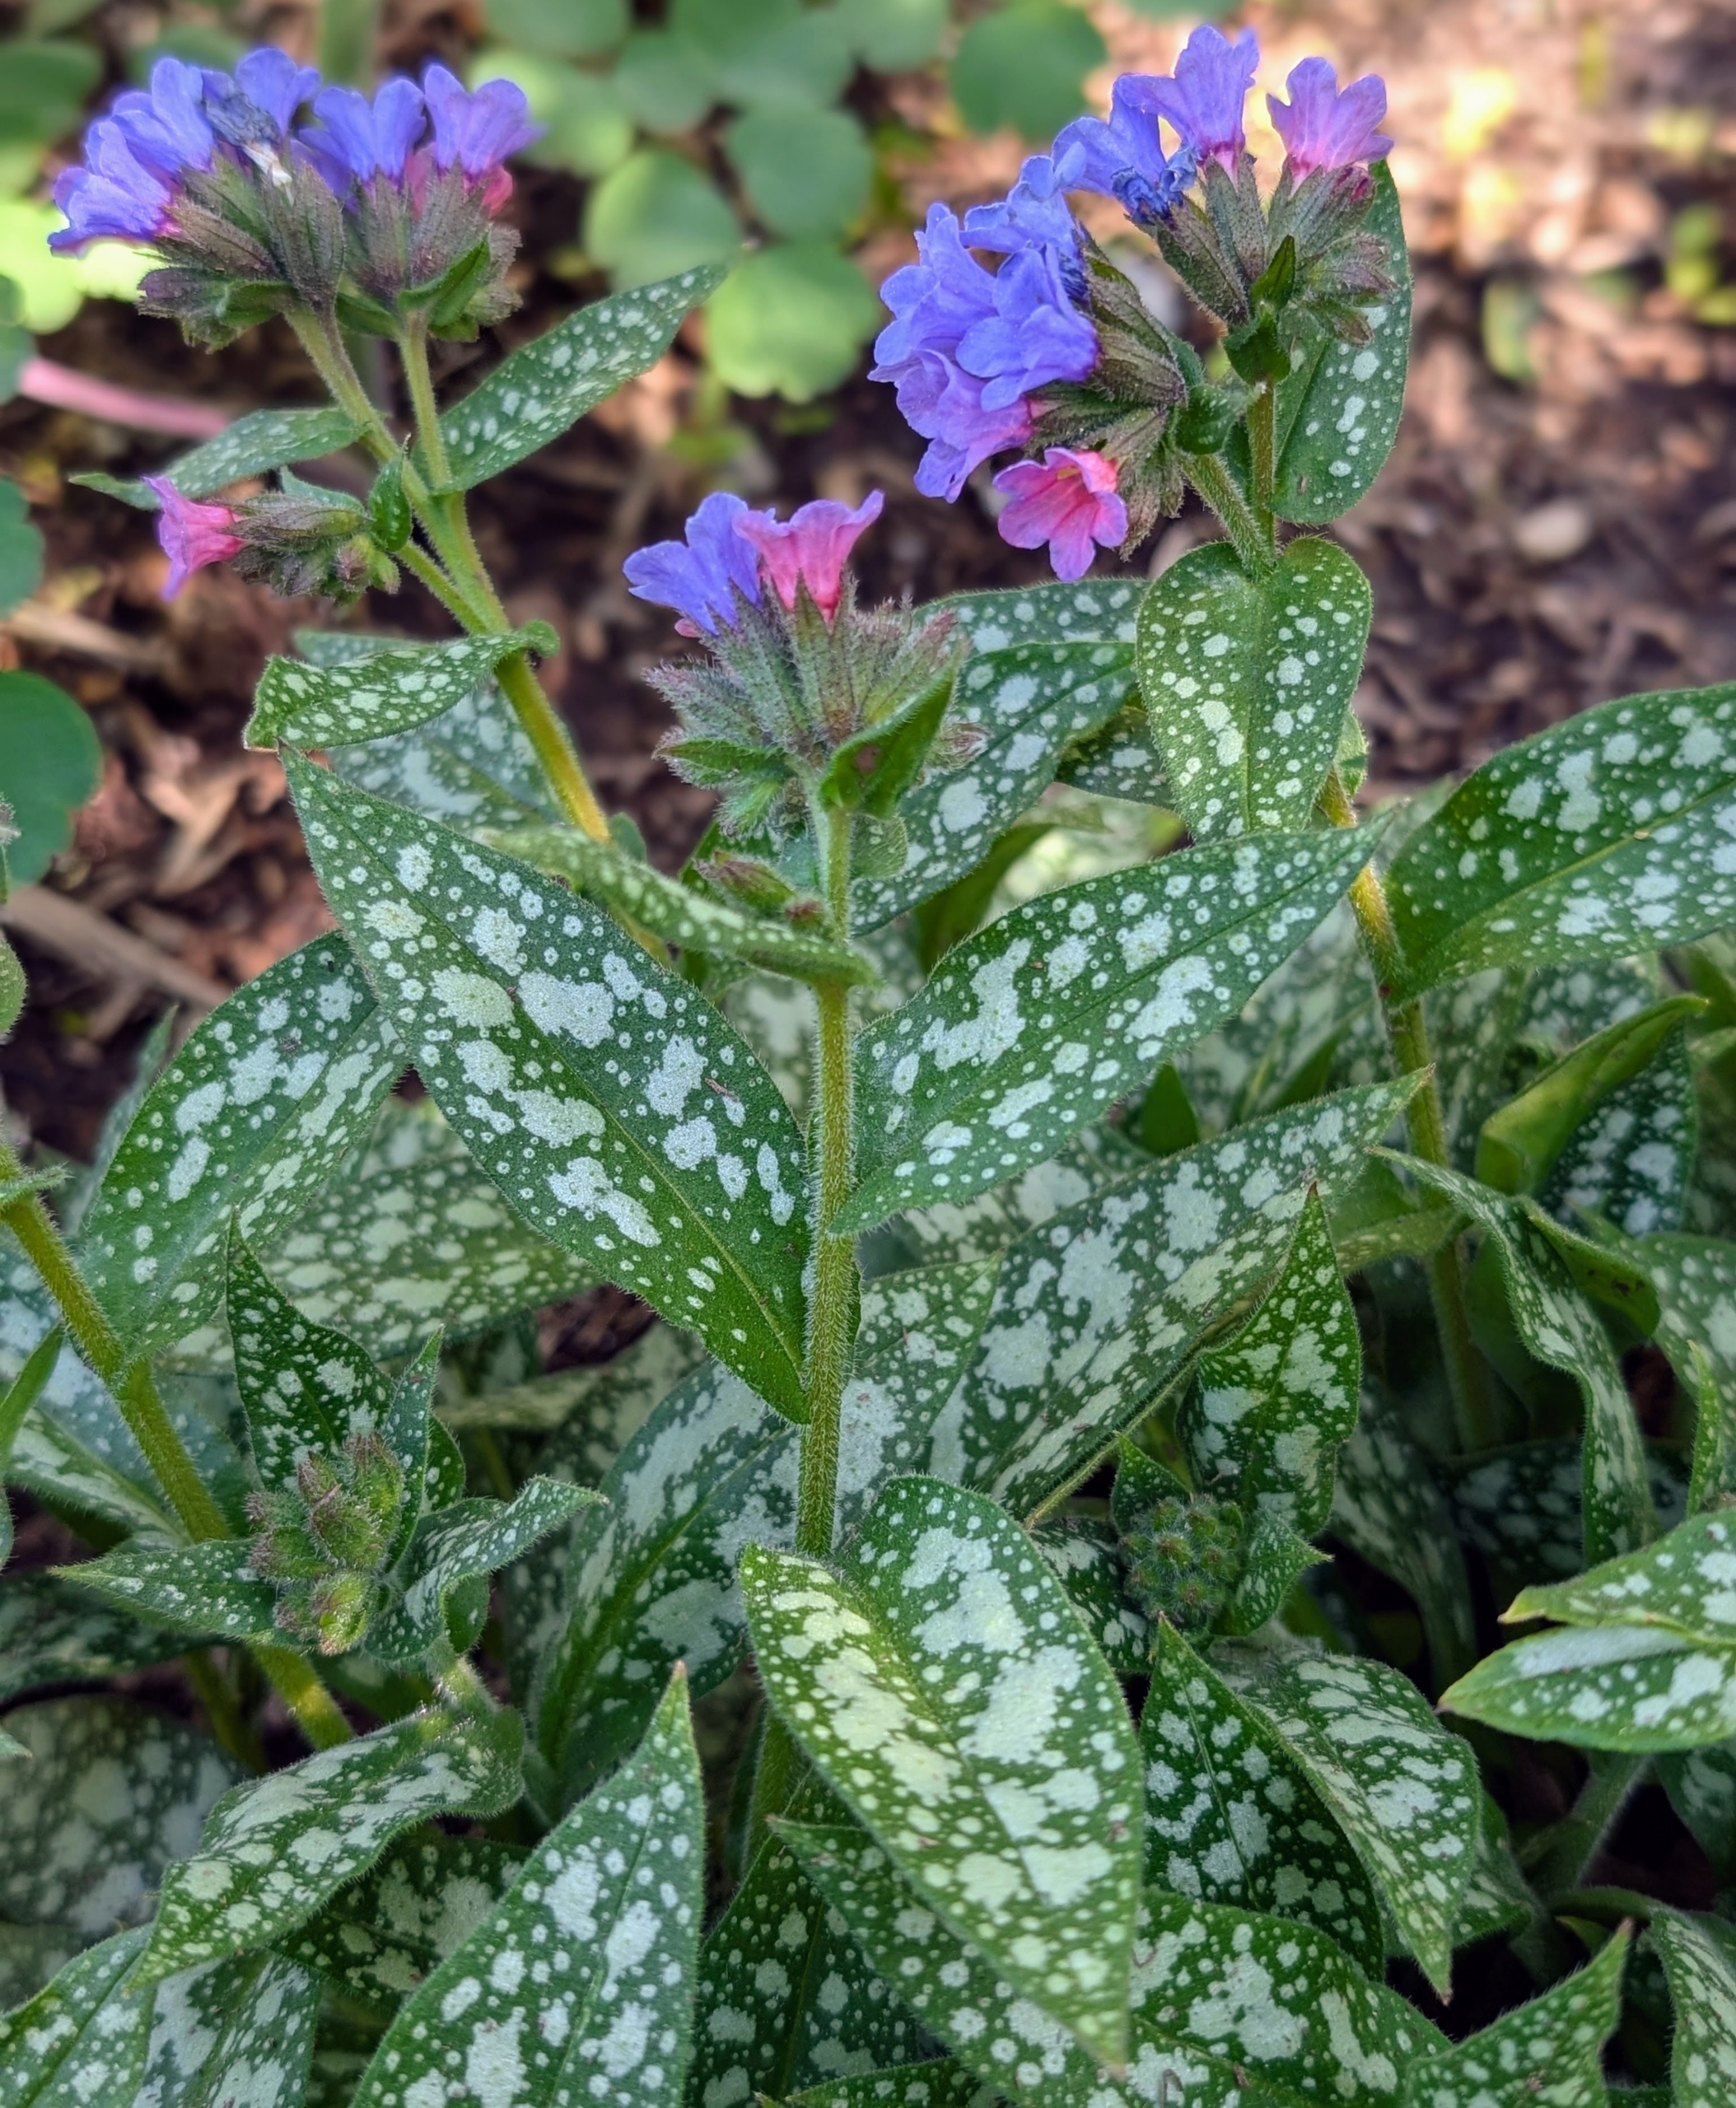
Lungwort plants, Pulmonaria, are most often grown for their interesting leaves, which are green with random white spots. The leaves also have a rough, hairy fuzz covering them. The flowers, commonly known as lungwort, are bell- or funnel-shaped with five petals. They typically start out pinkish and mature to violet blue.
These are the dainty leaves of Thalictrum, or Meadow Rue – a robust, upright, clump-forming perennial featuring clouds of lavender mauve flowers later in the season.
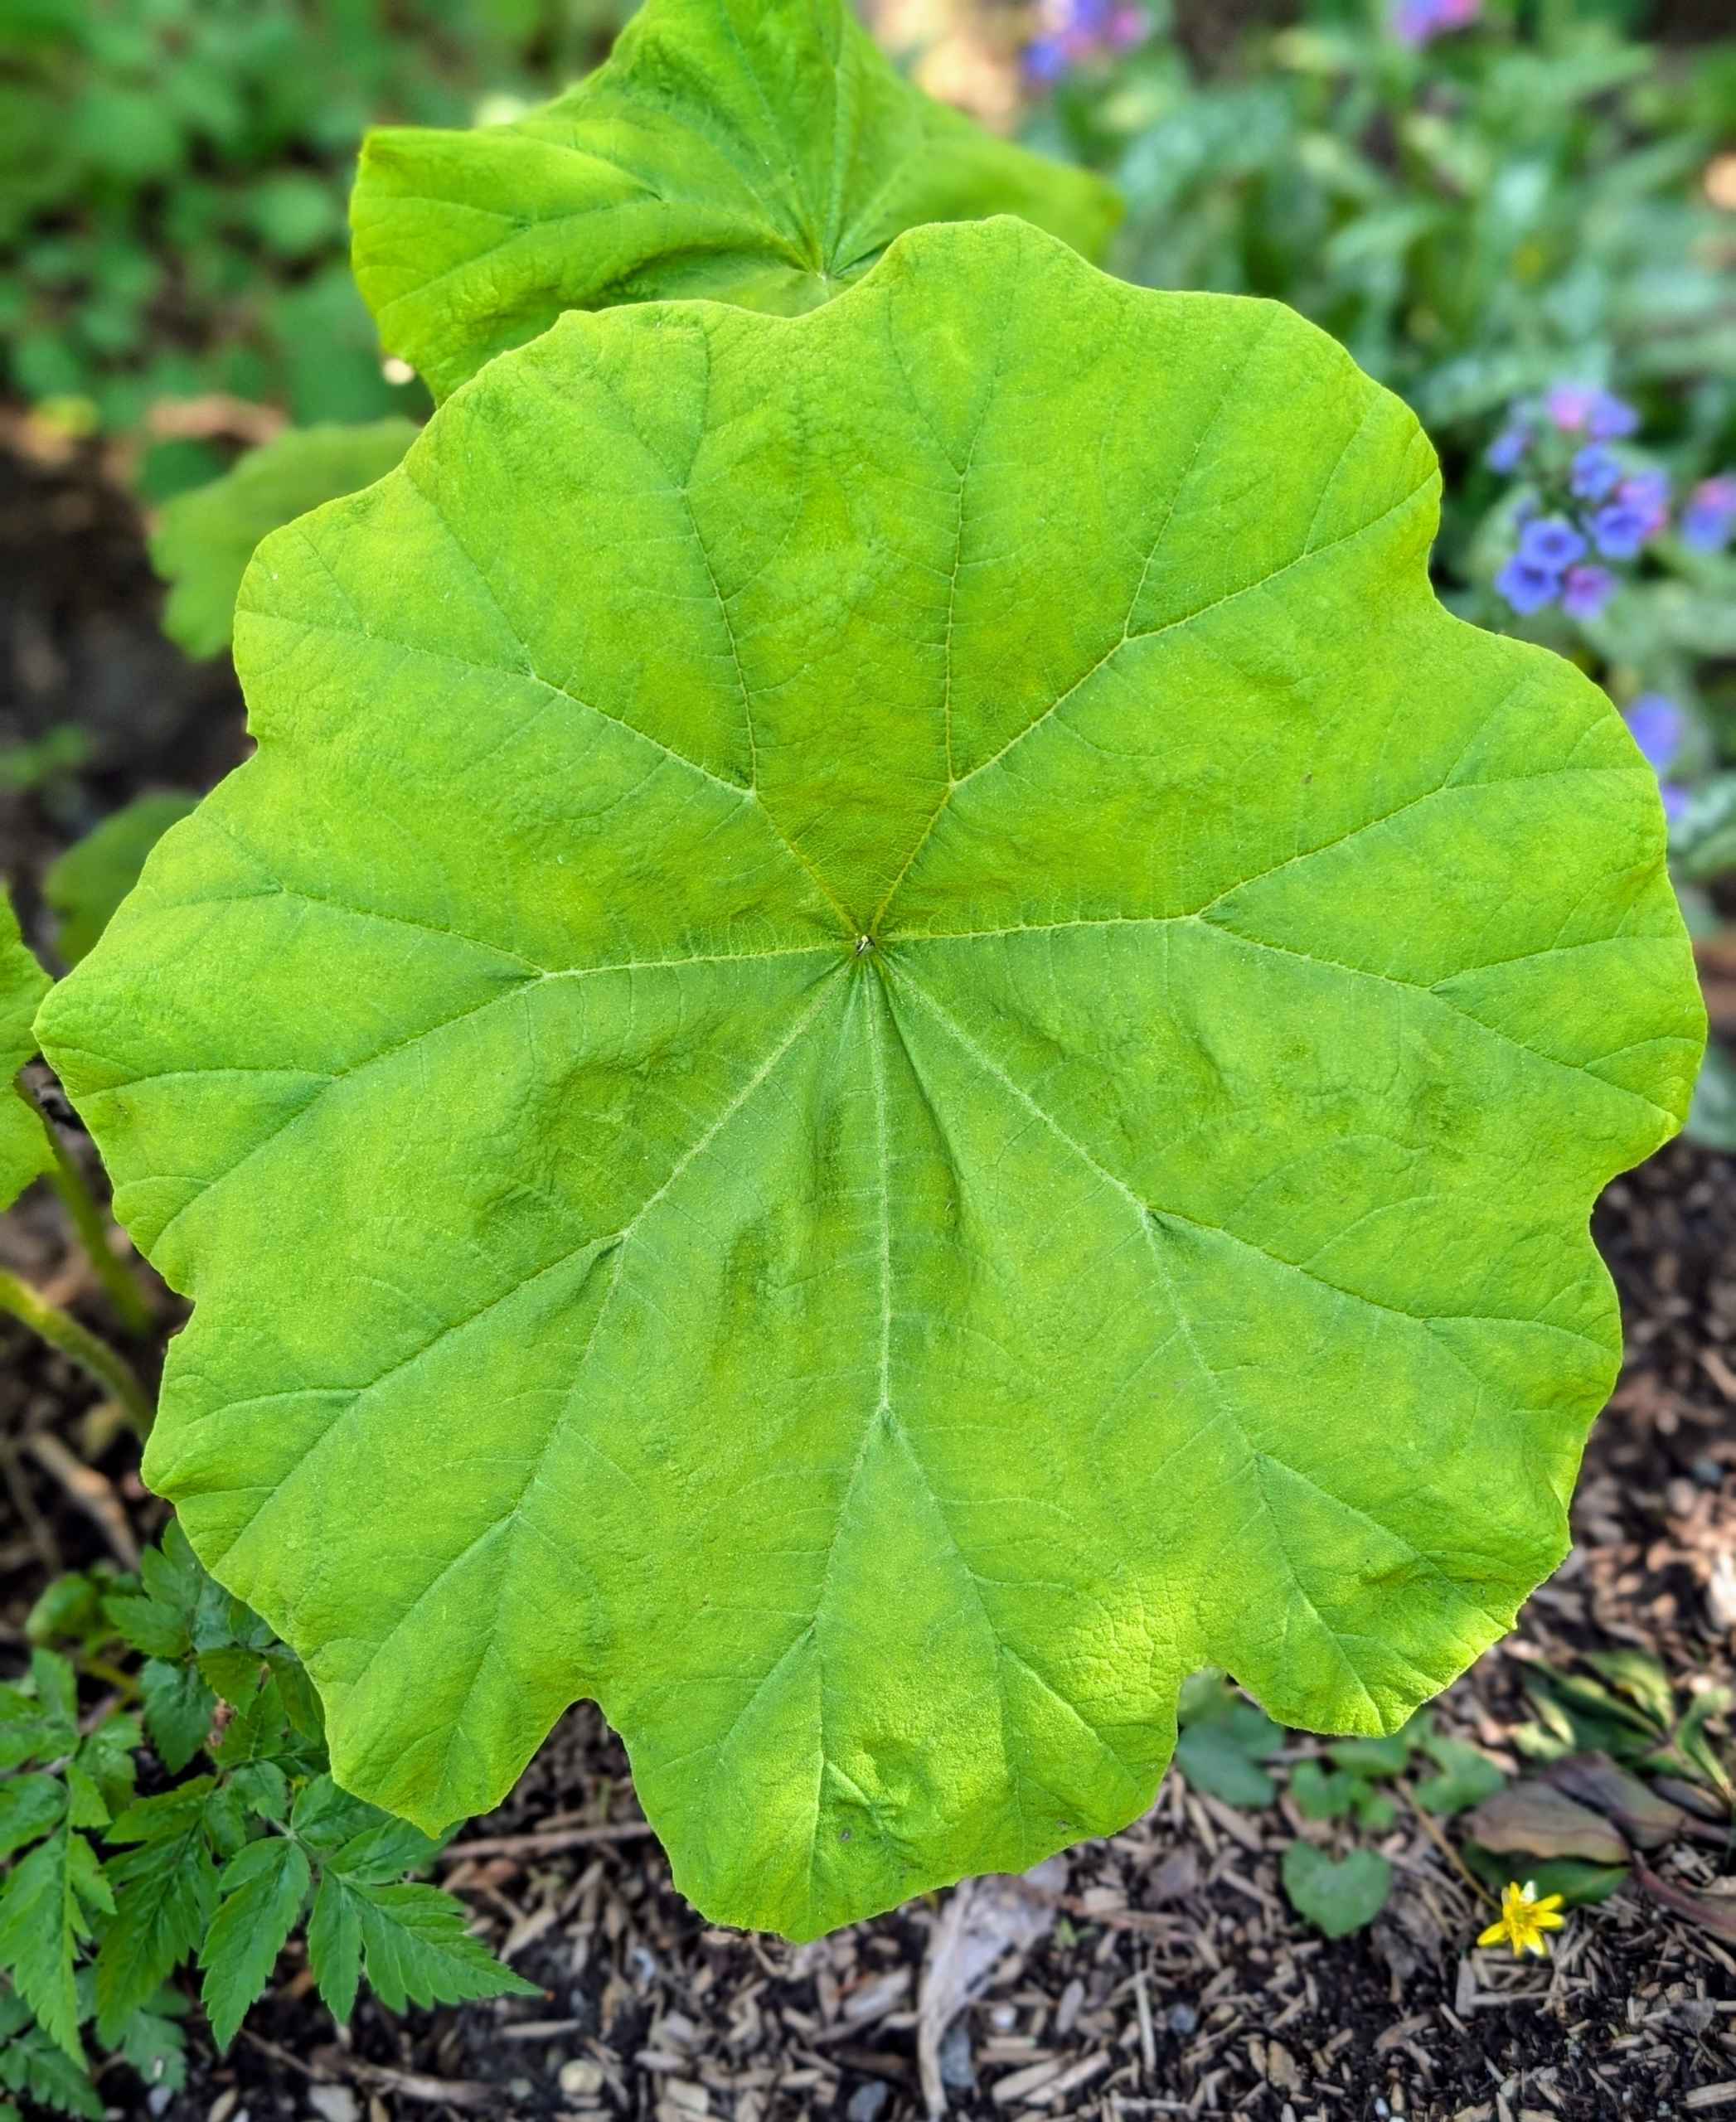
Astilboides is an interesting plant with huge, bright green leaves that are round and flat and measure up to 24-inches across. The effect is dramatic, and beautiful among other hardy perennials.
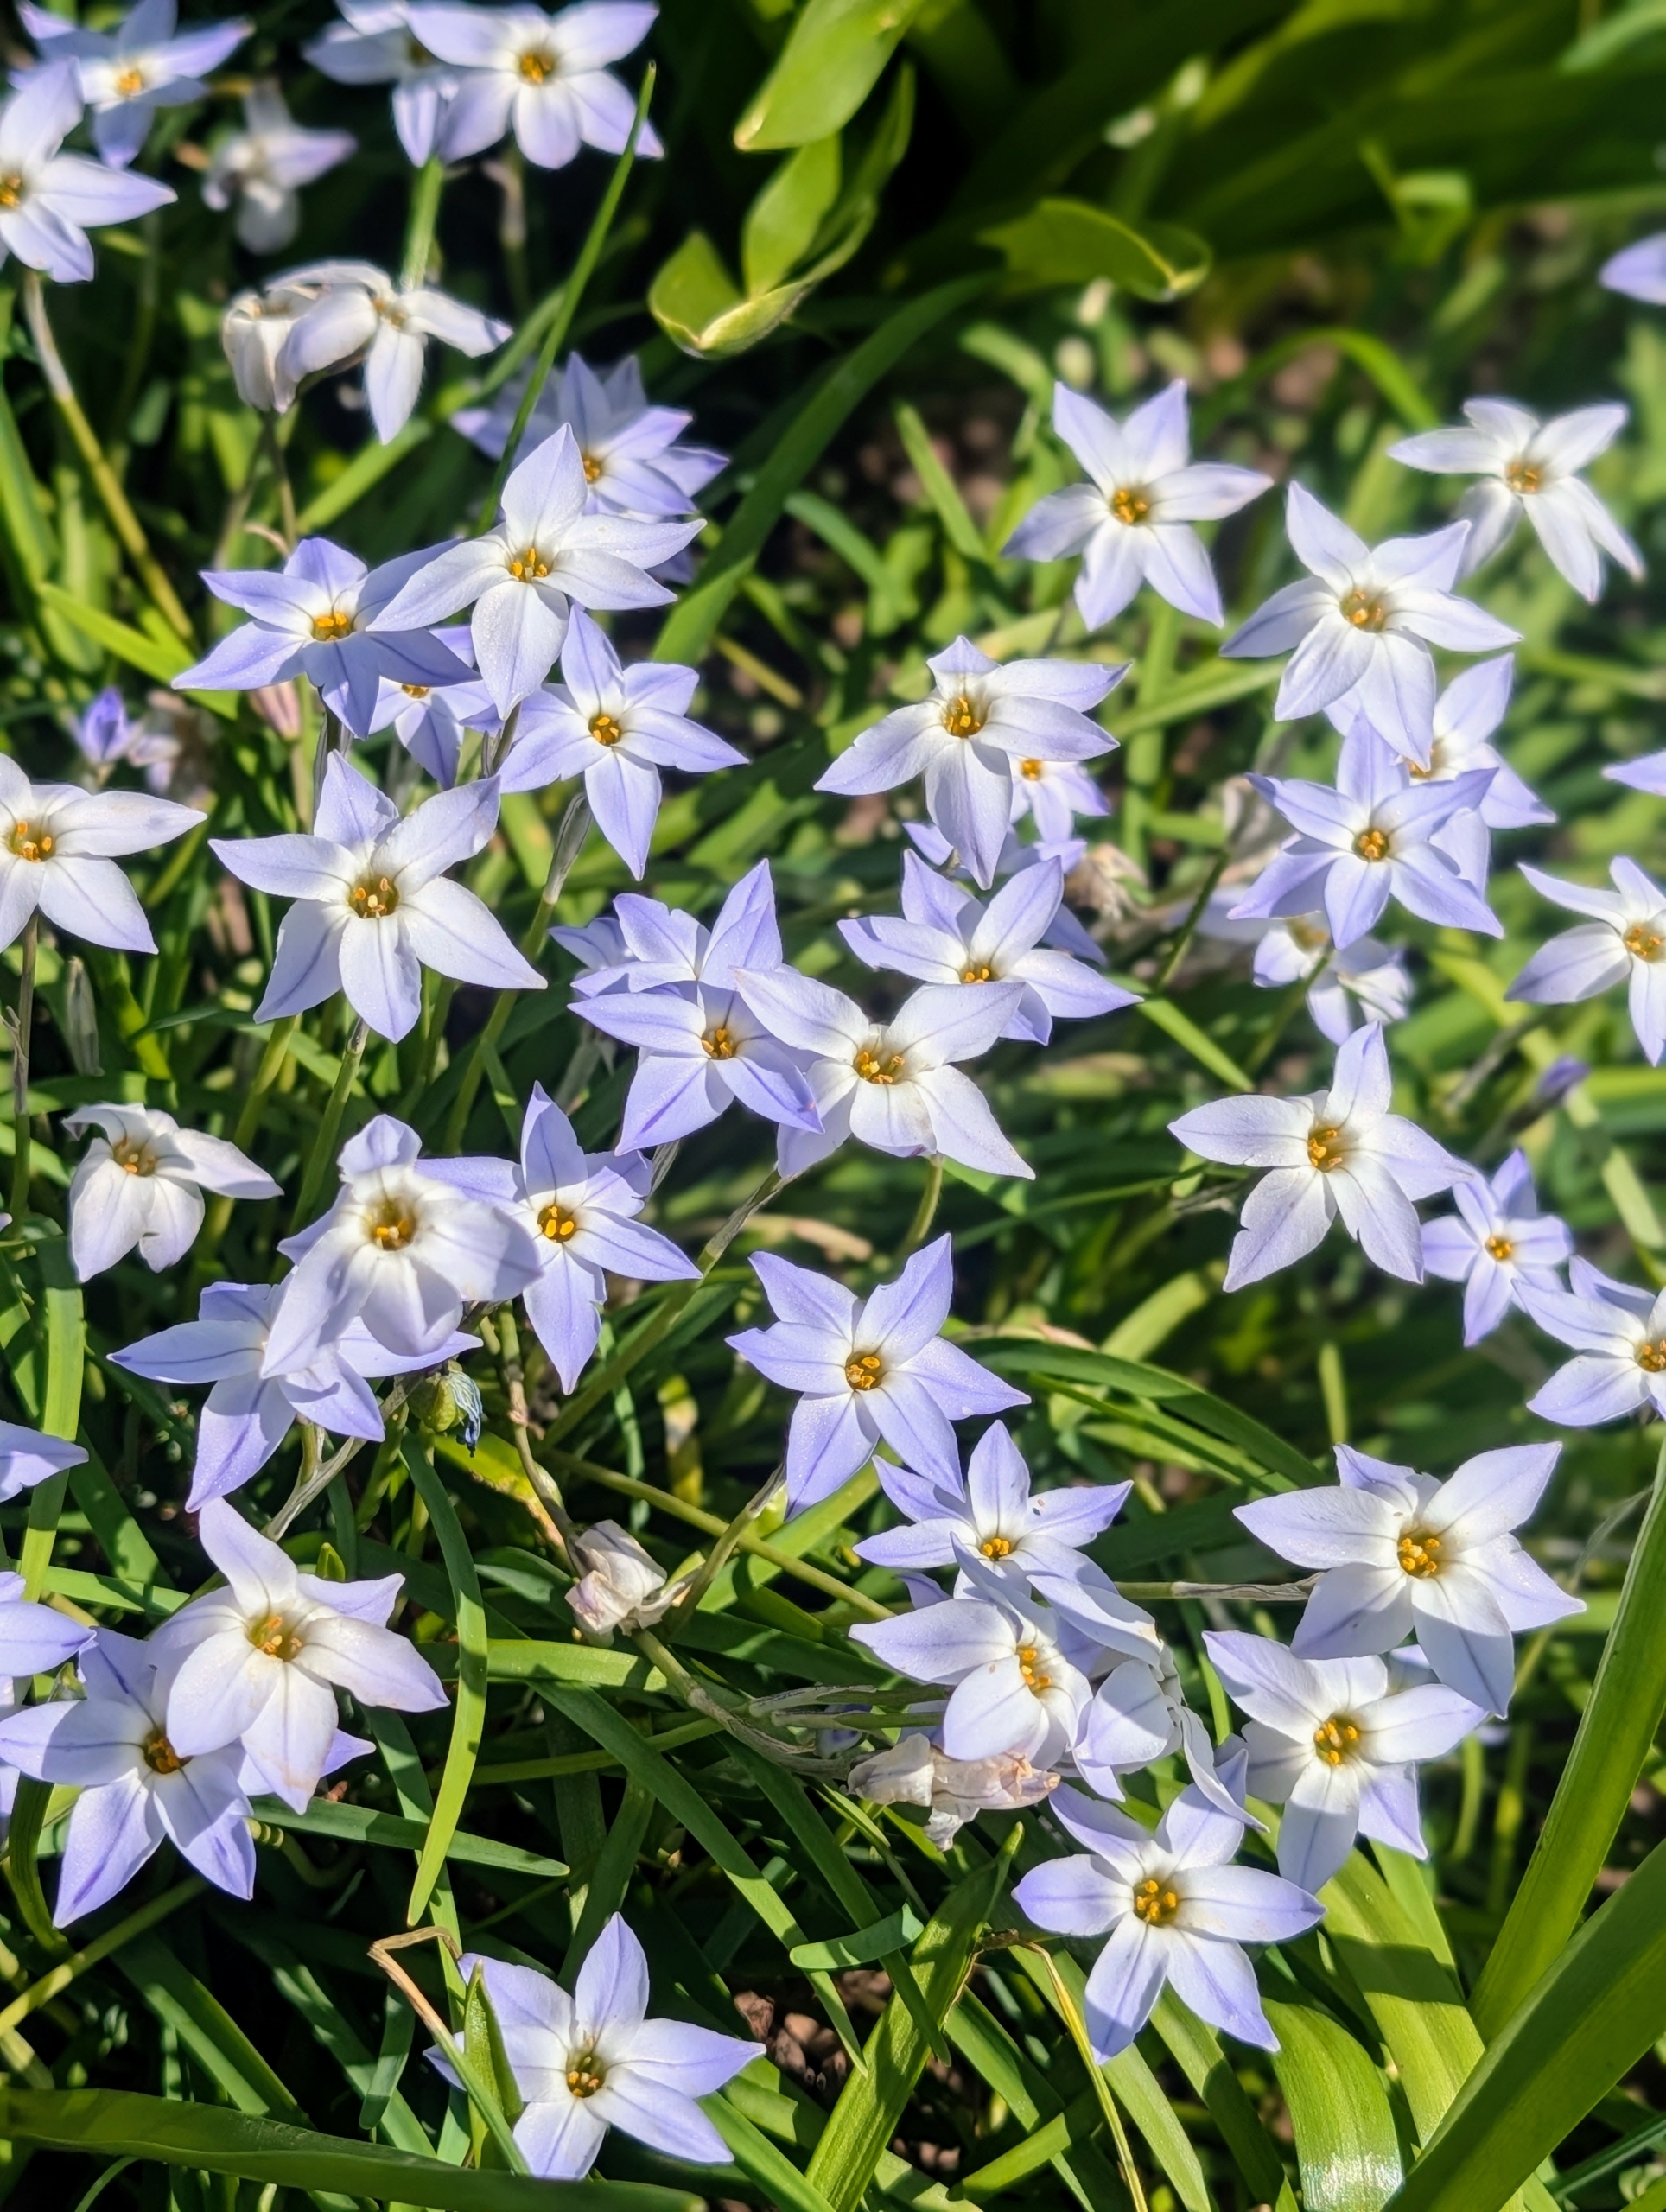
Ipheion uniflorum, commonly called spring starflower, is native to Argentina and Uruguay and features grass-like foliage and solitary star-shaped flowers on six-inch tall stems. Flowers range in color from almost white to violet blue. Flowers have a mild spicy fragrance, and when bruised the foliage emits an oniony aroma.
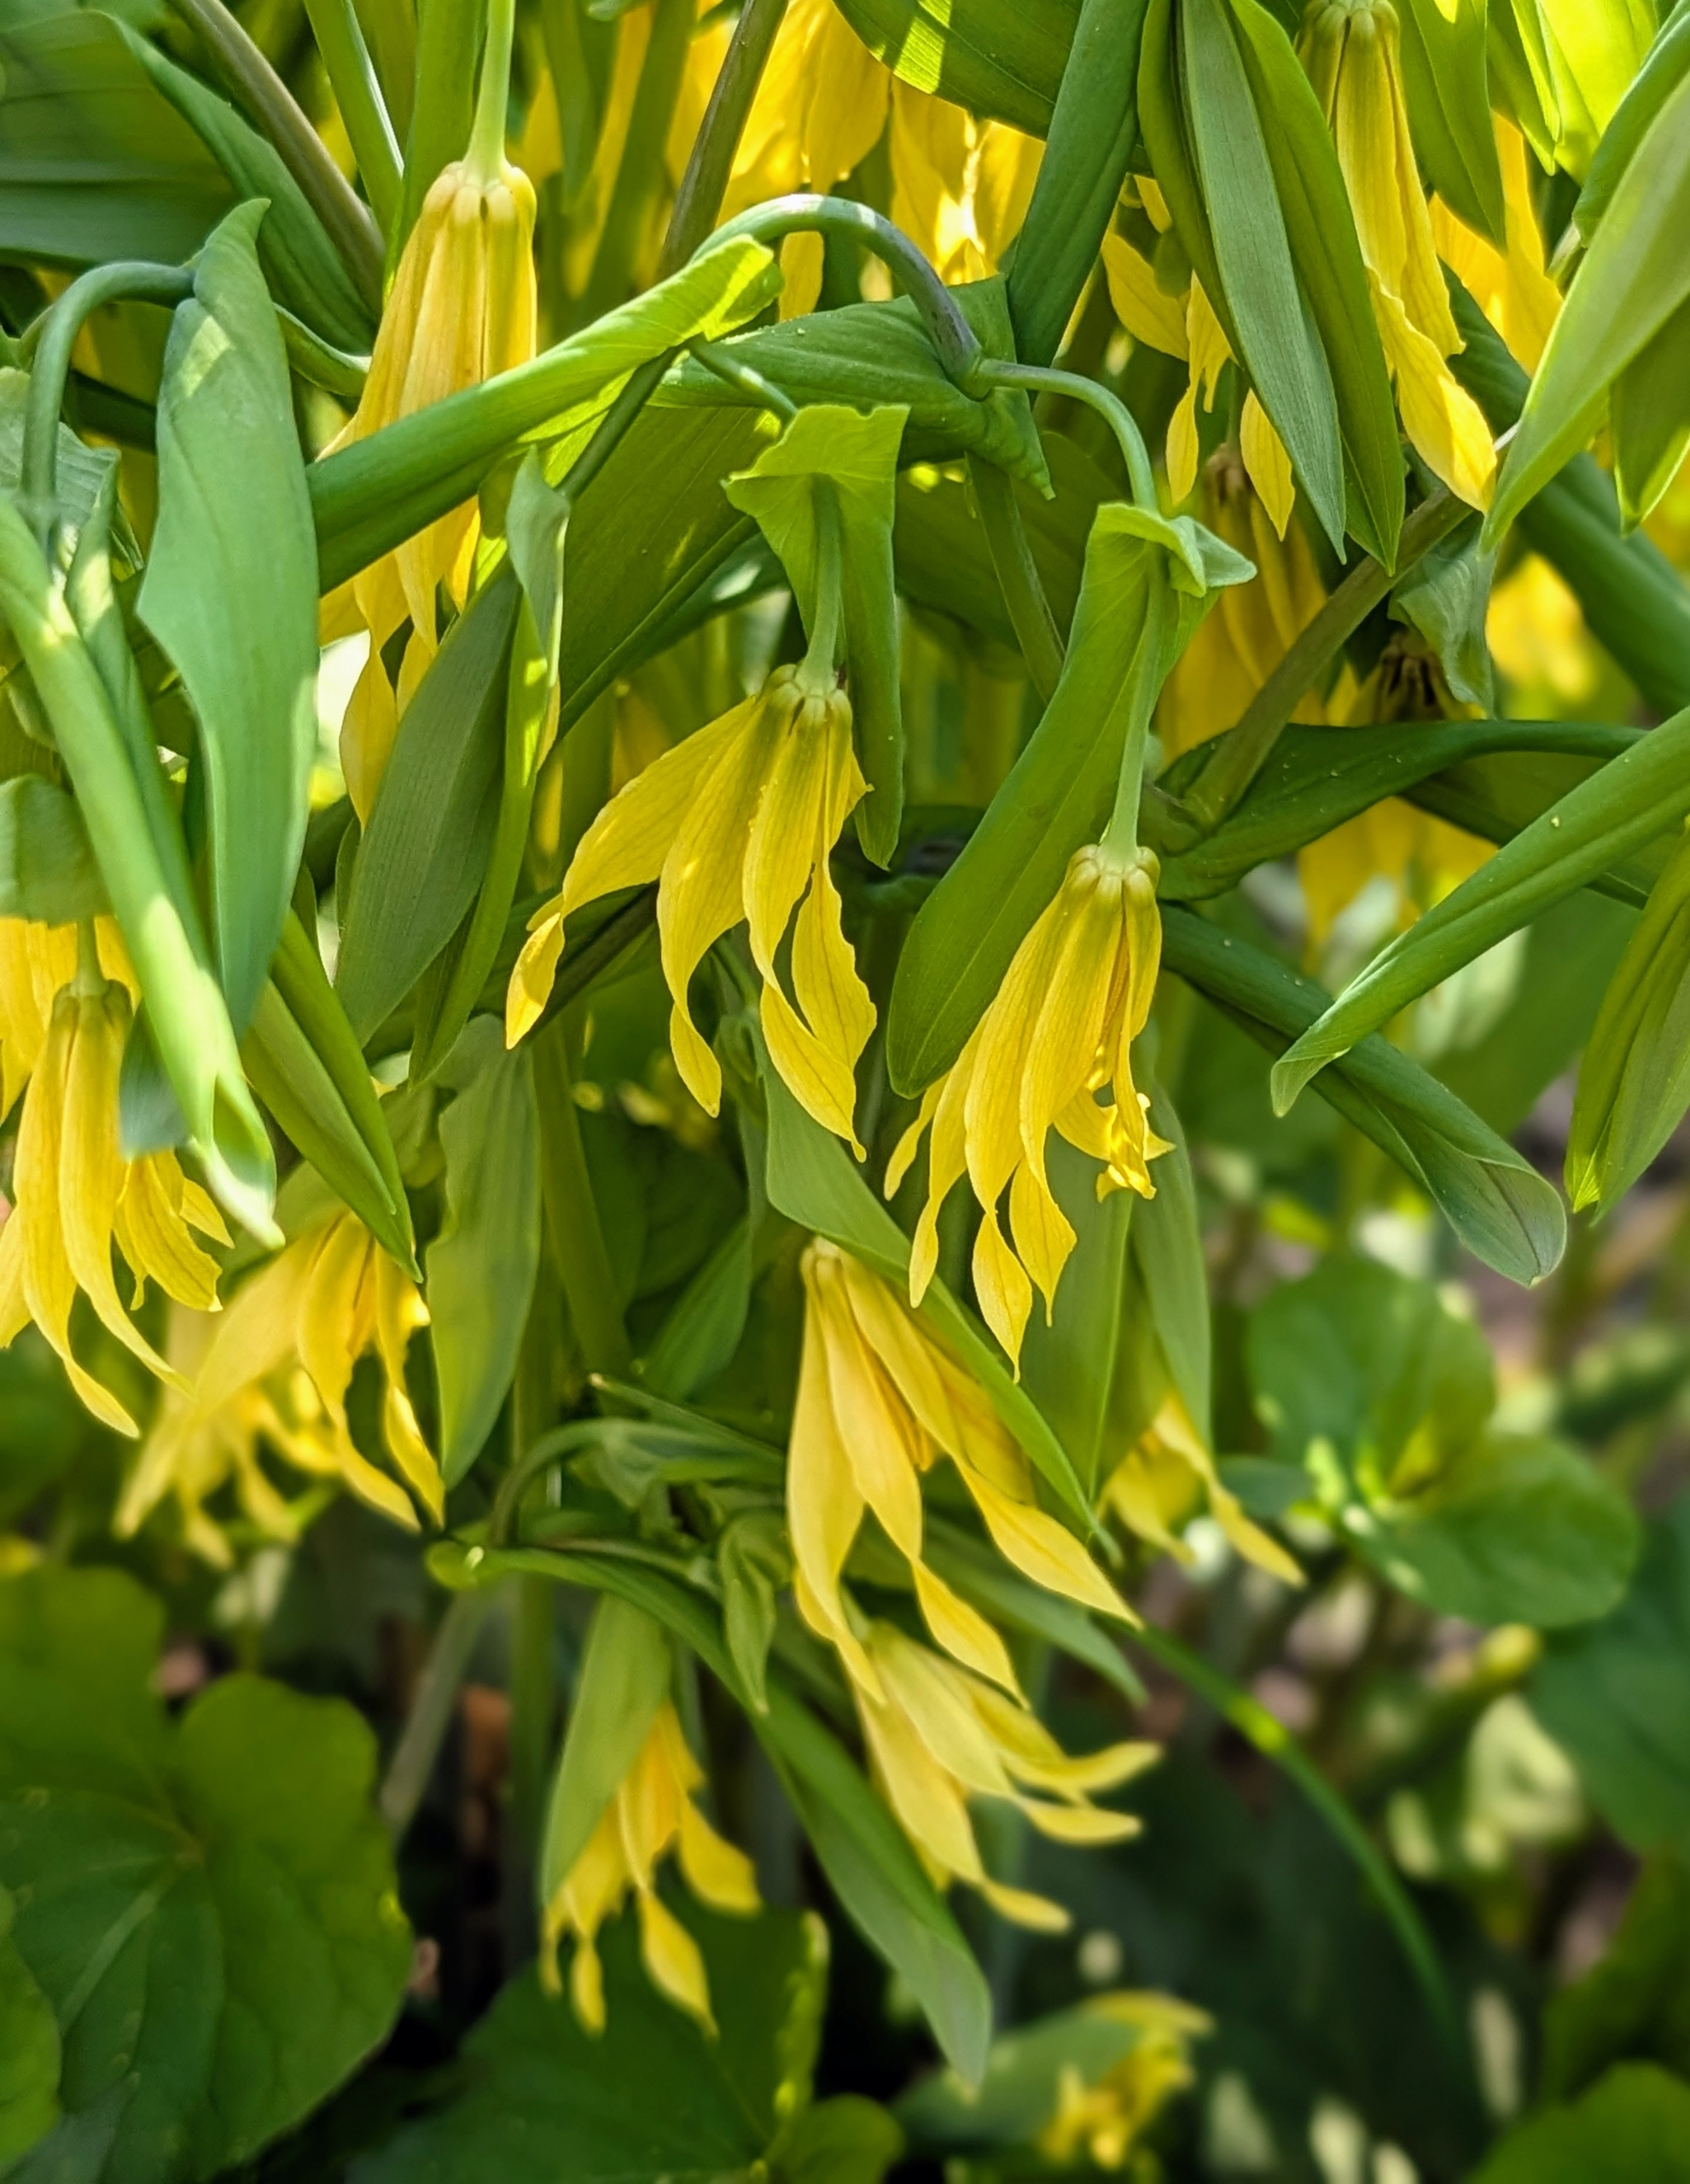
Uvularia grandiflora, the large-flowered bellwort or merrybells, is a species of flowering plant in the family Colchicaceae. Blooming mid to late spring, the flowers are twisted both in bud and in flower giving it a slightly droopy appearance.
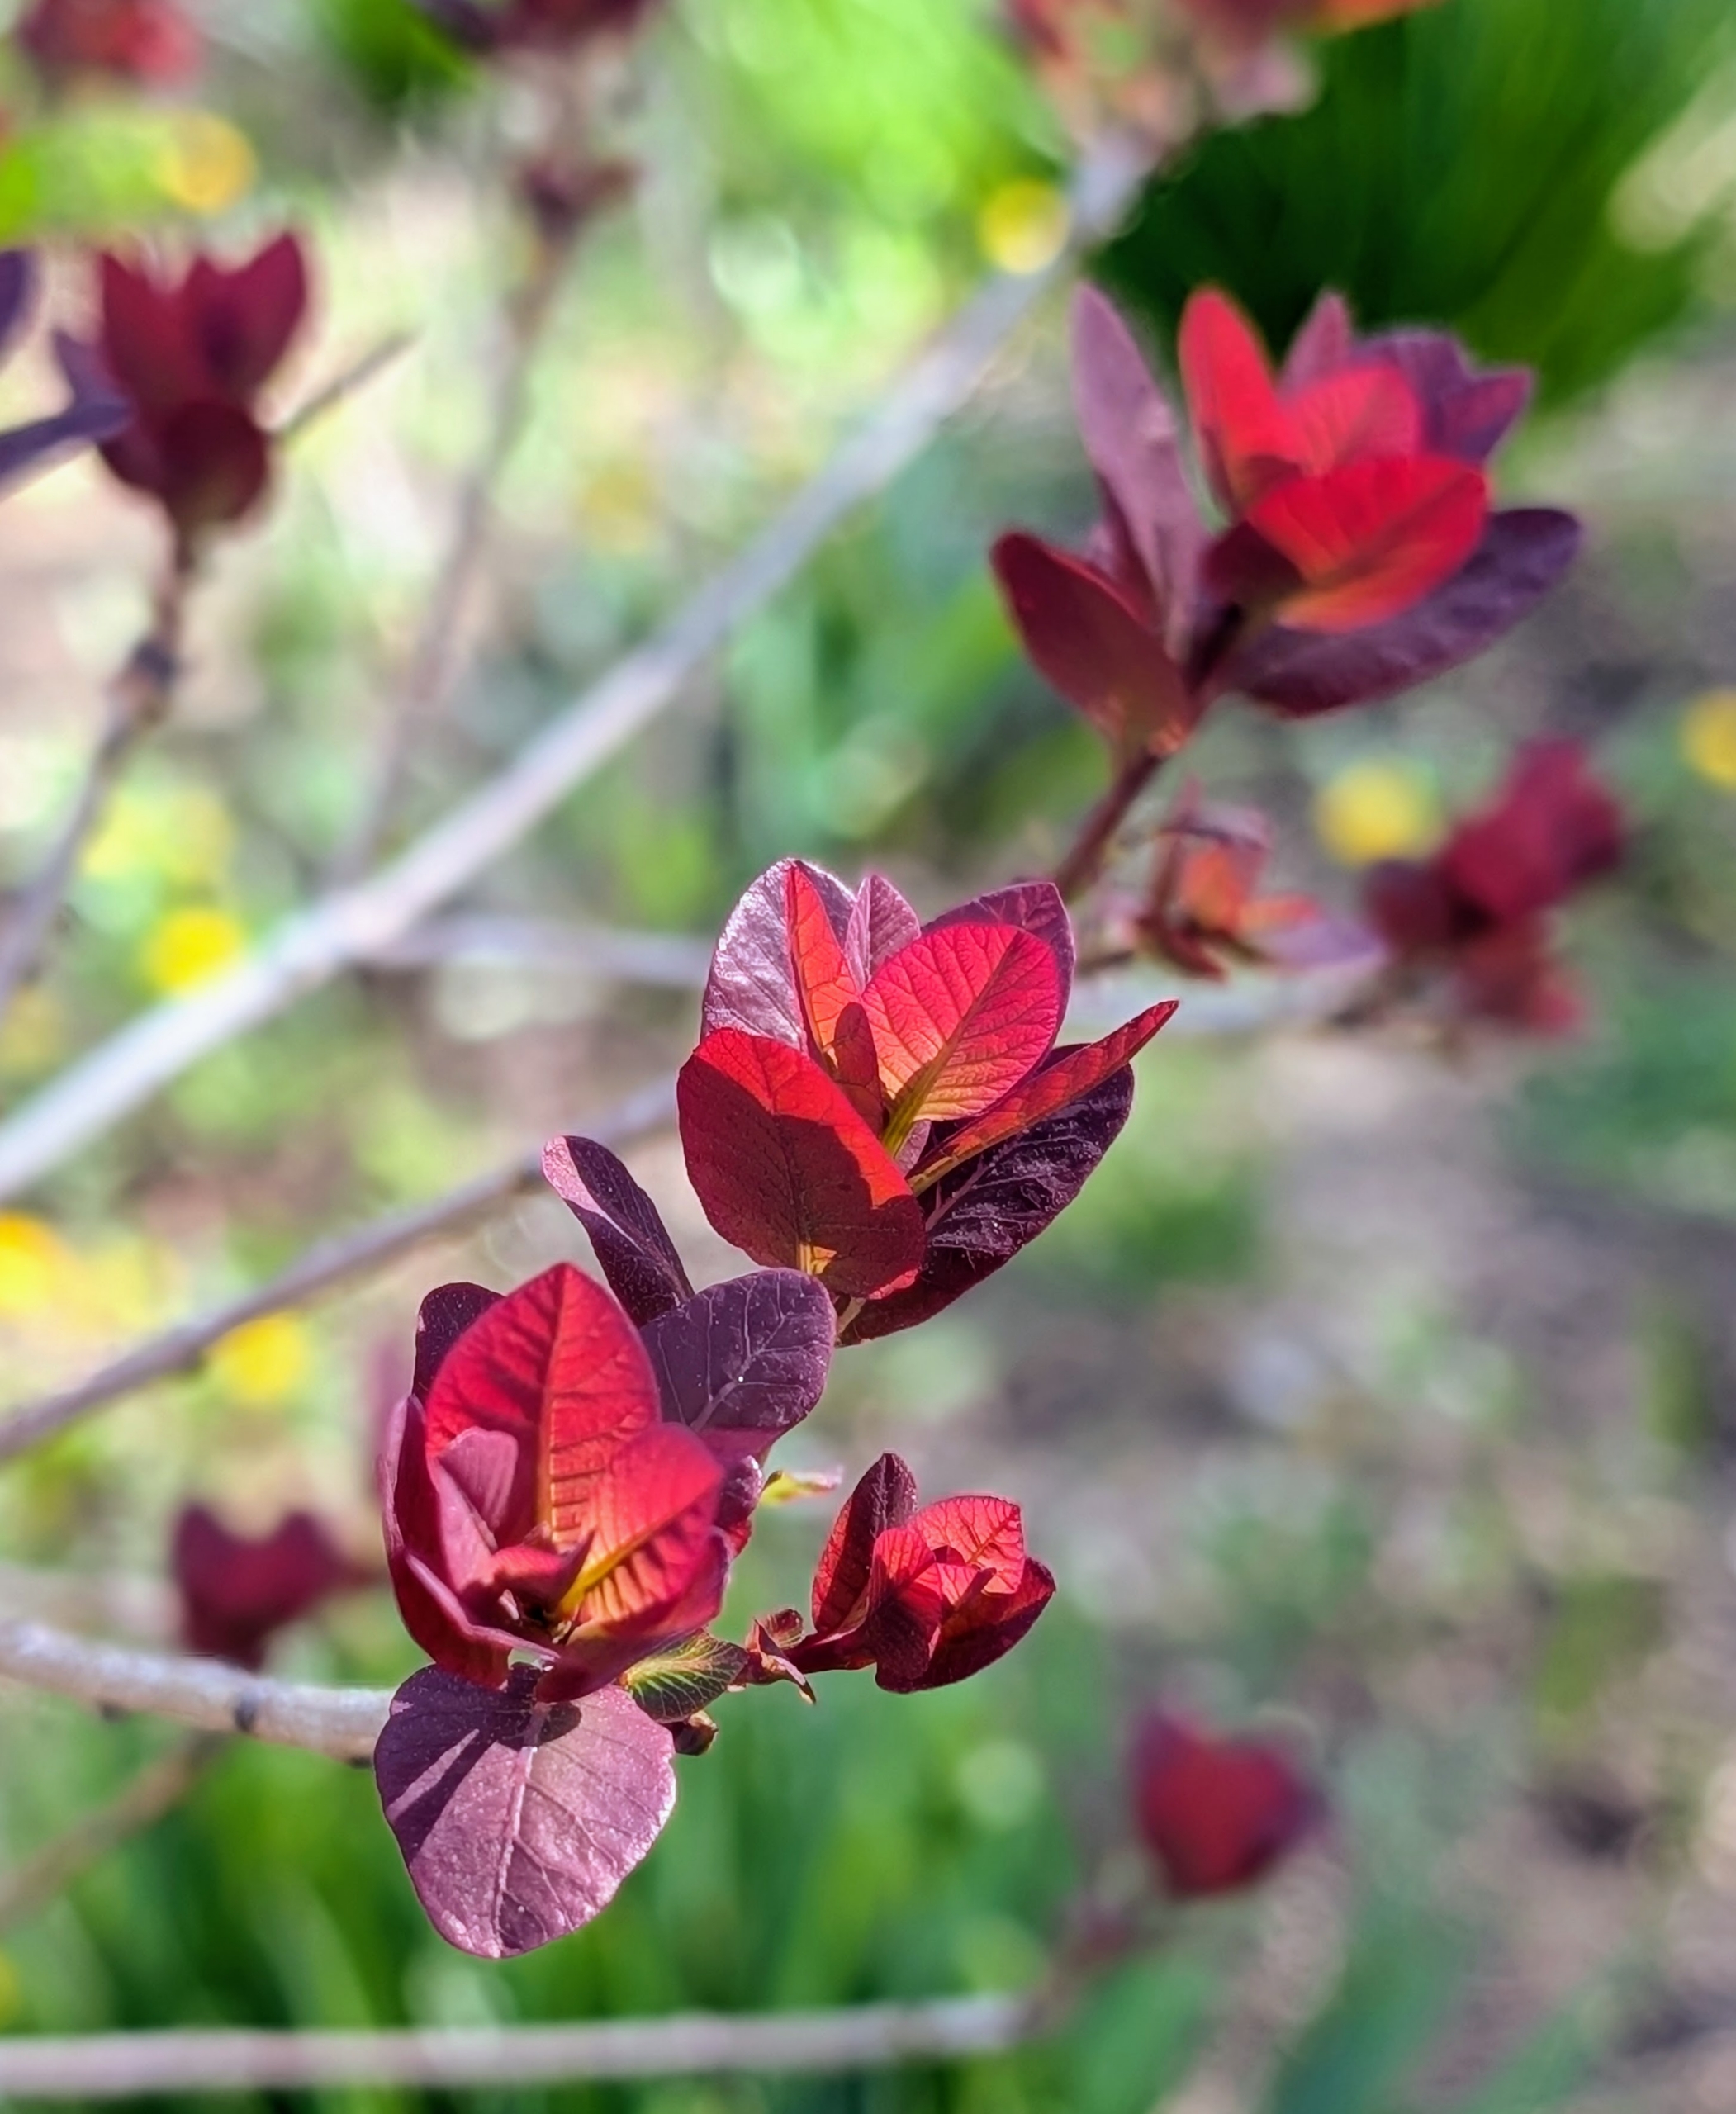
The Cotinus are leafing out too. Cotinus, the smoketree, or smoke bush, is a genus of two species of flowering plants in the family Anacardiaceae, closely related to the sumacs. Their smooth, rounded leaves come in exceptional shades of deep purple, clear pinkish-bronze, yellow, and green.
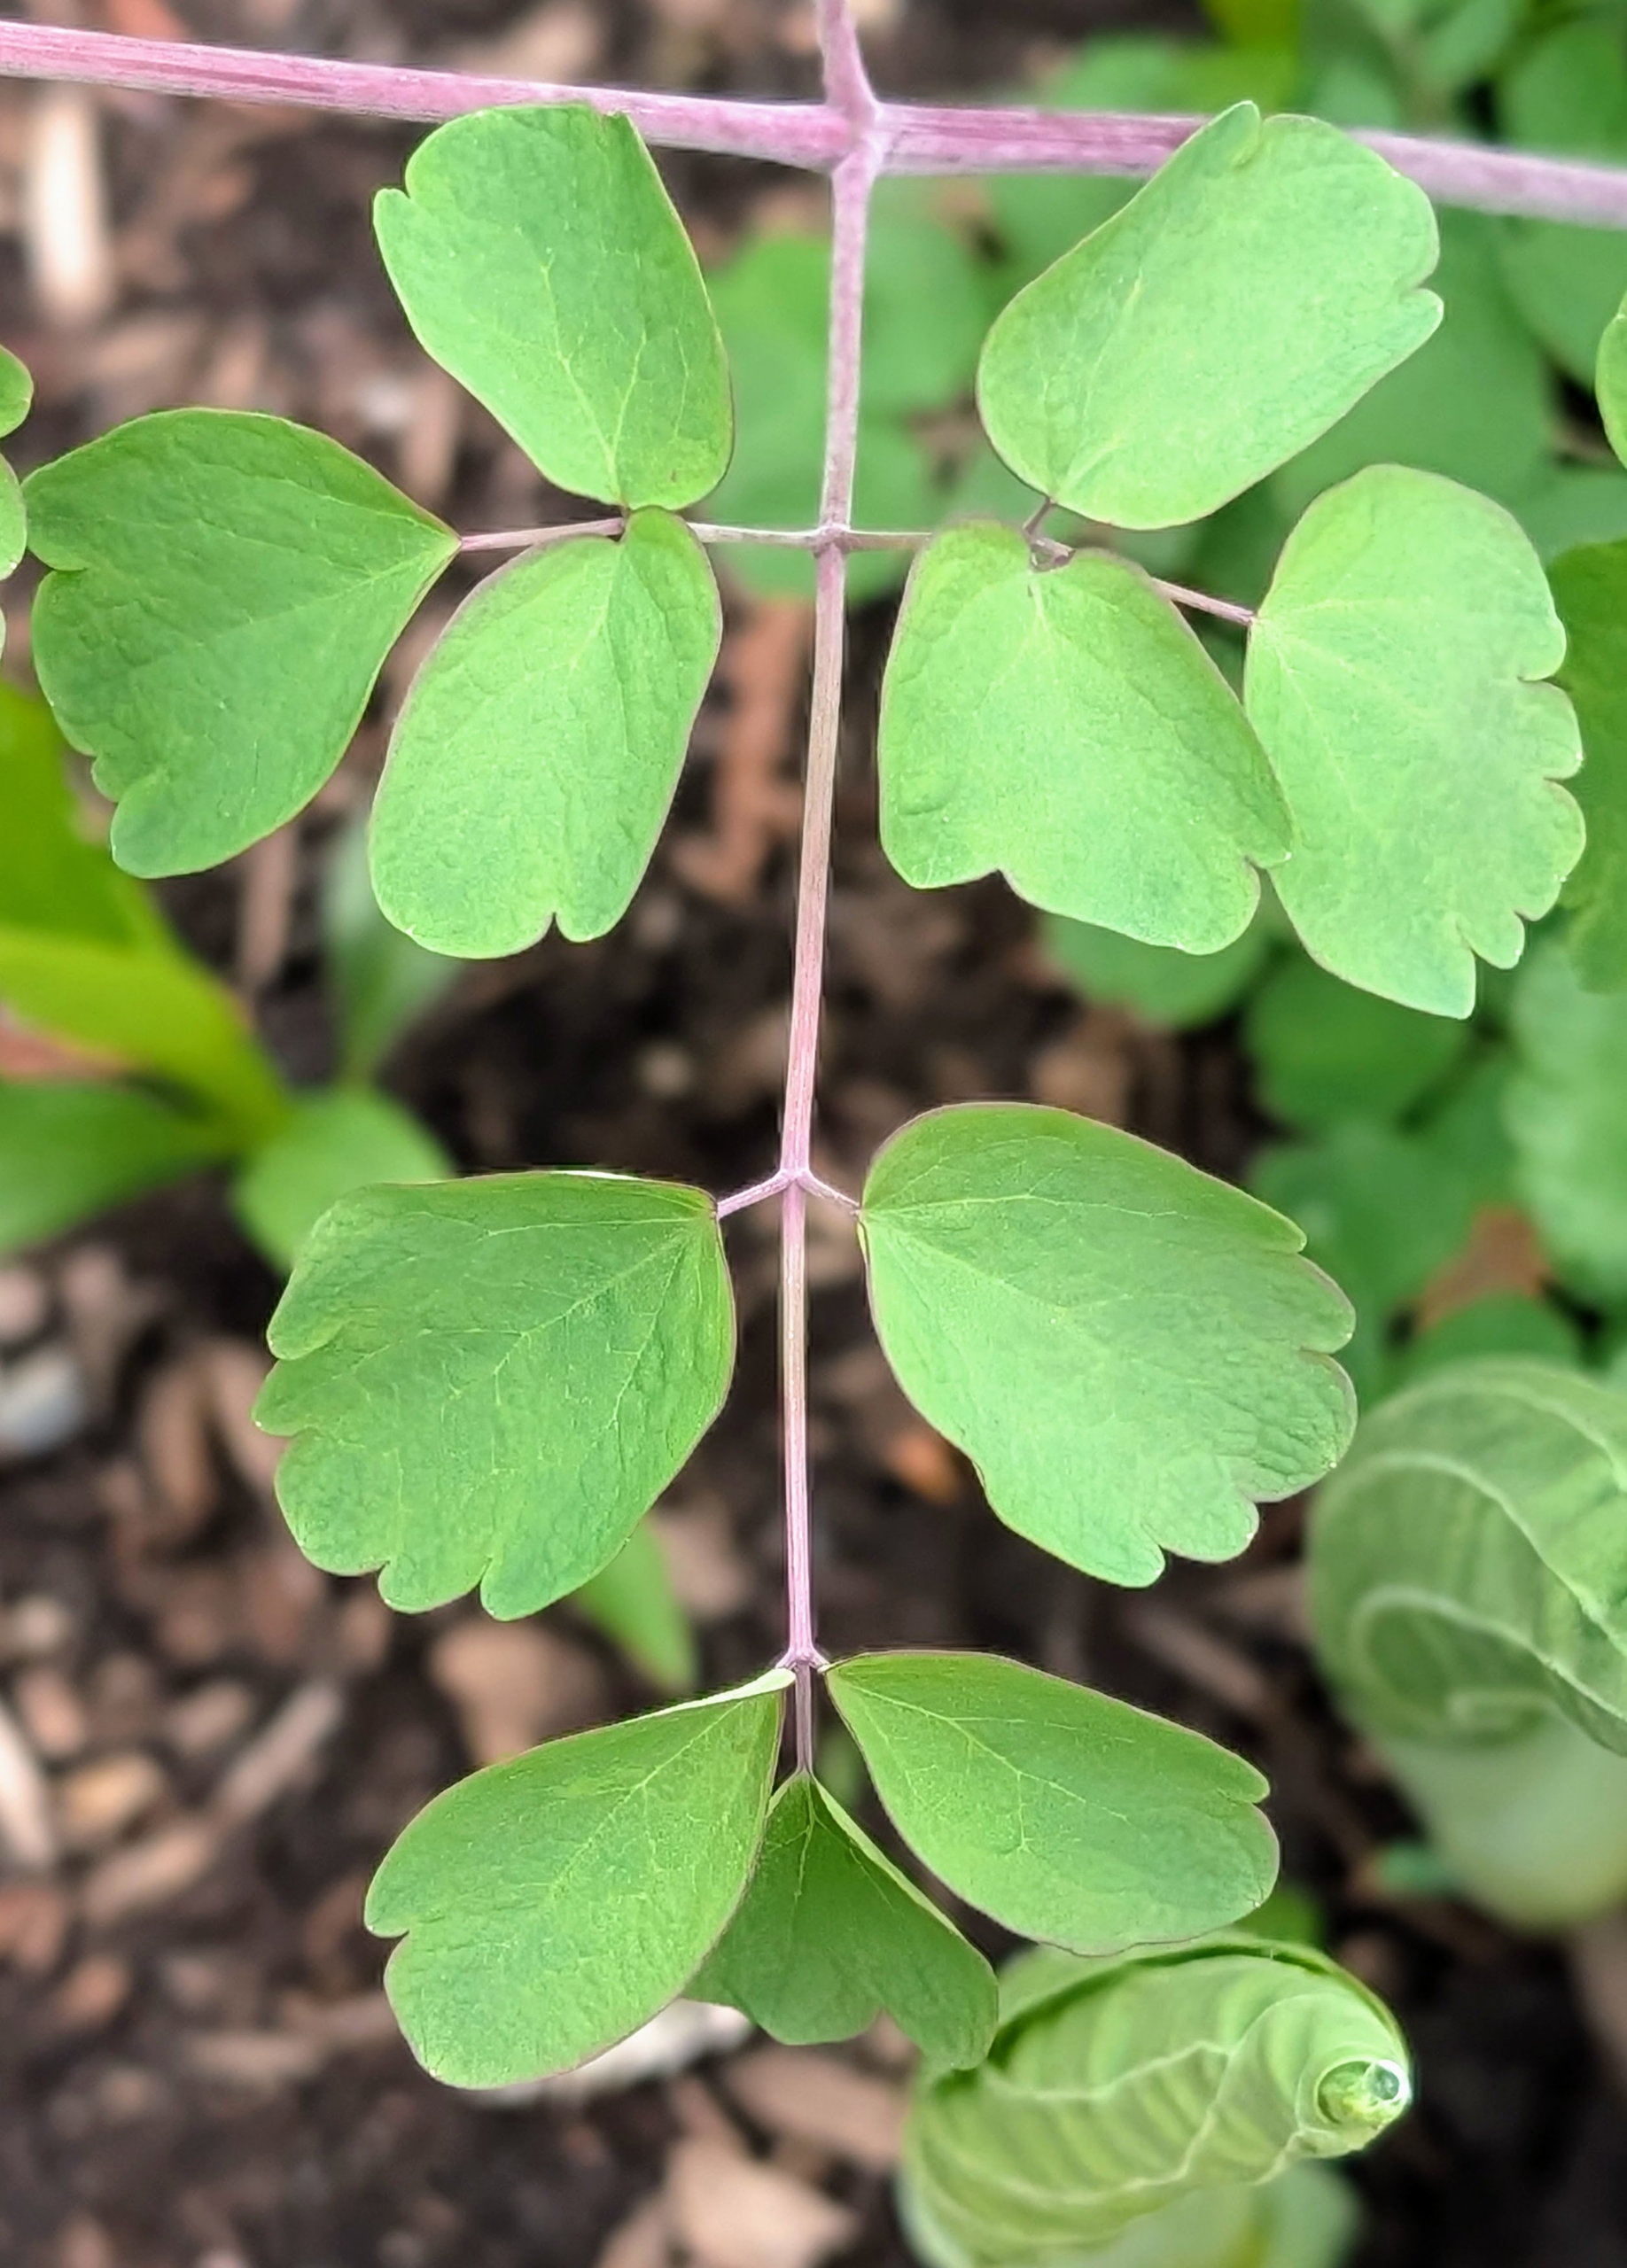
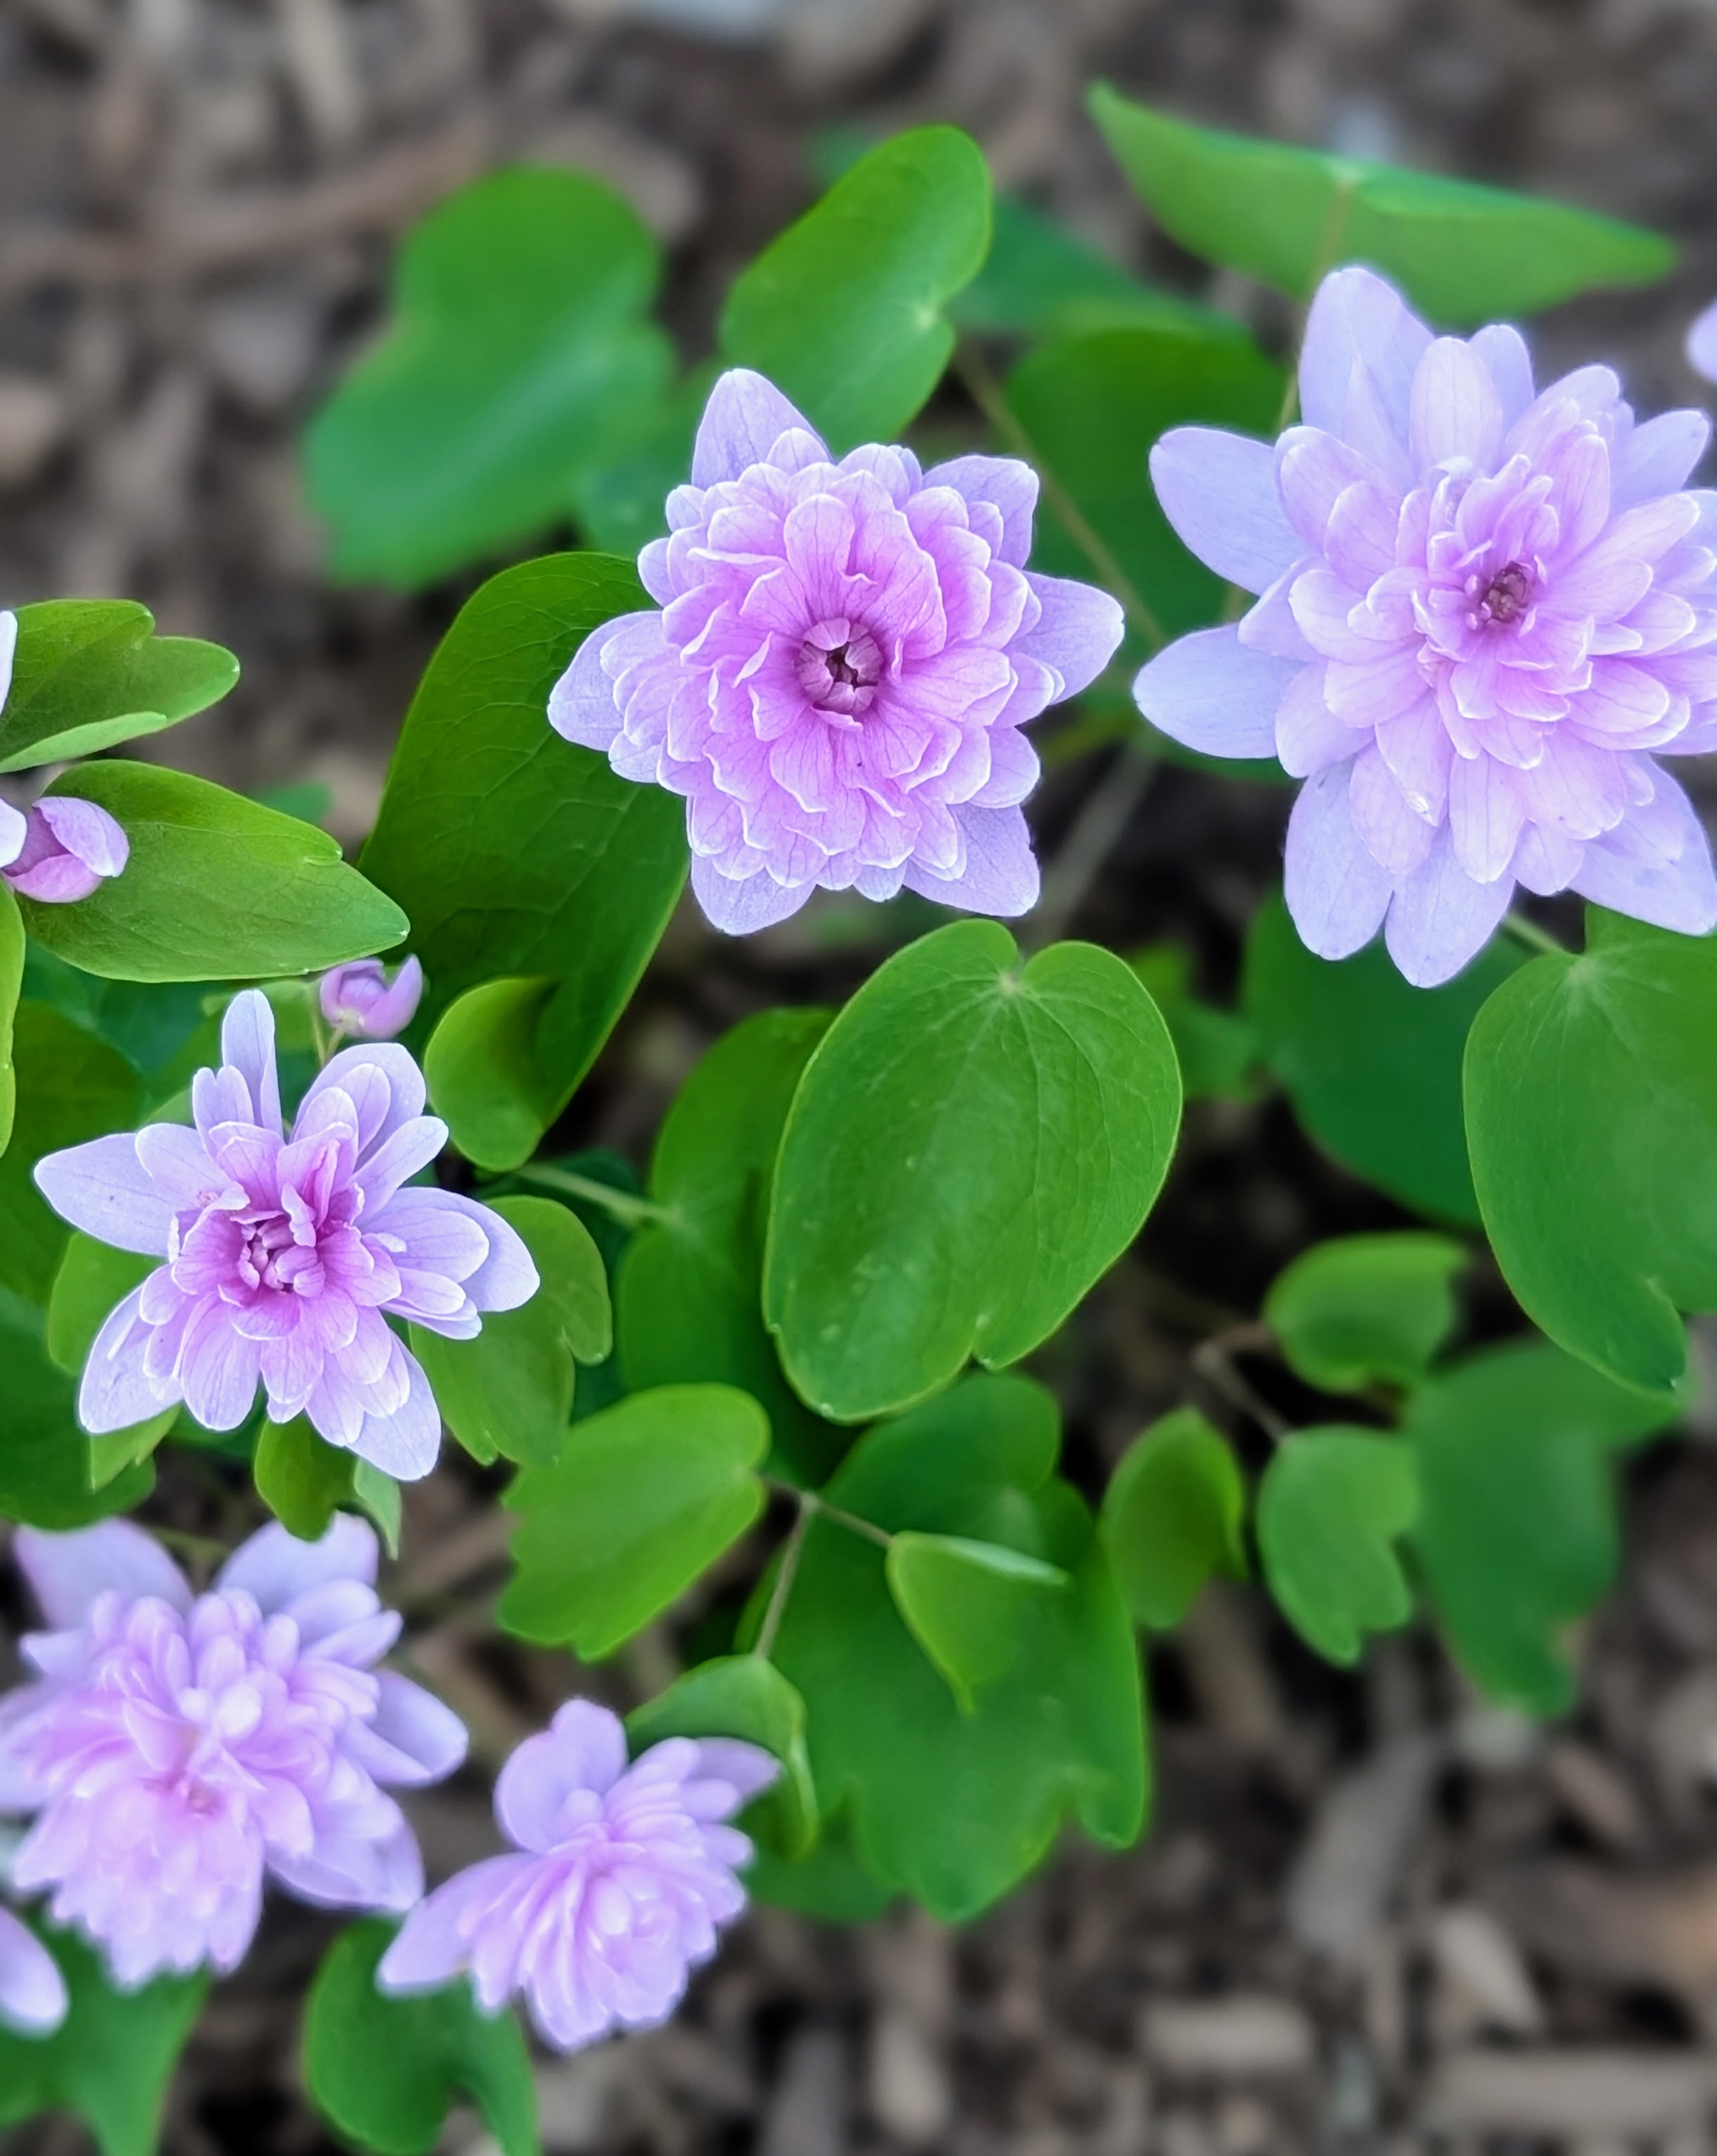
Anemonella thalictroides is an easy-to-grow, deer-resistant, durable, but dainty looking plant. The genus name Anemonella roughly translates as ‘little anemone’ because its flowers are miniature copies of the windflower. These are a light pale pink.
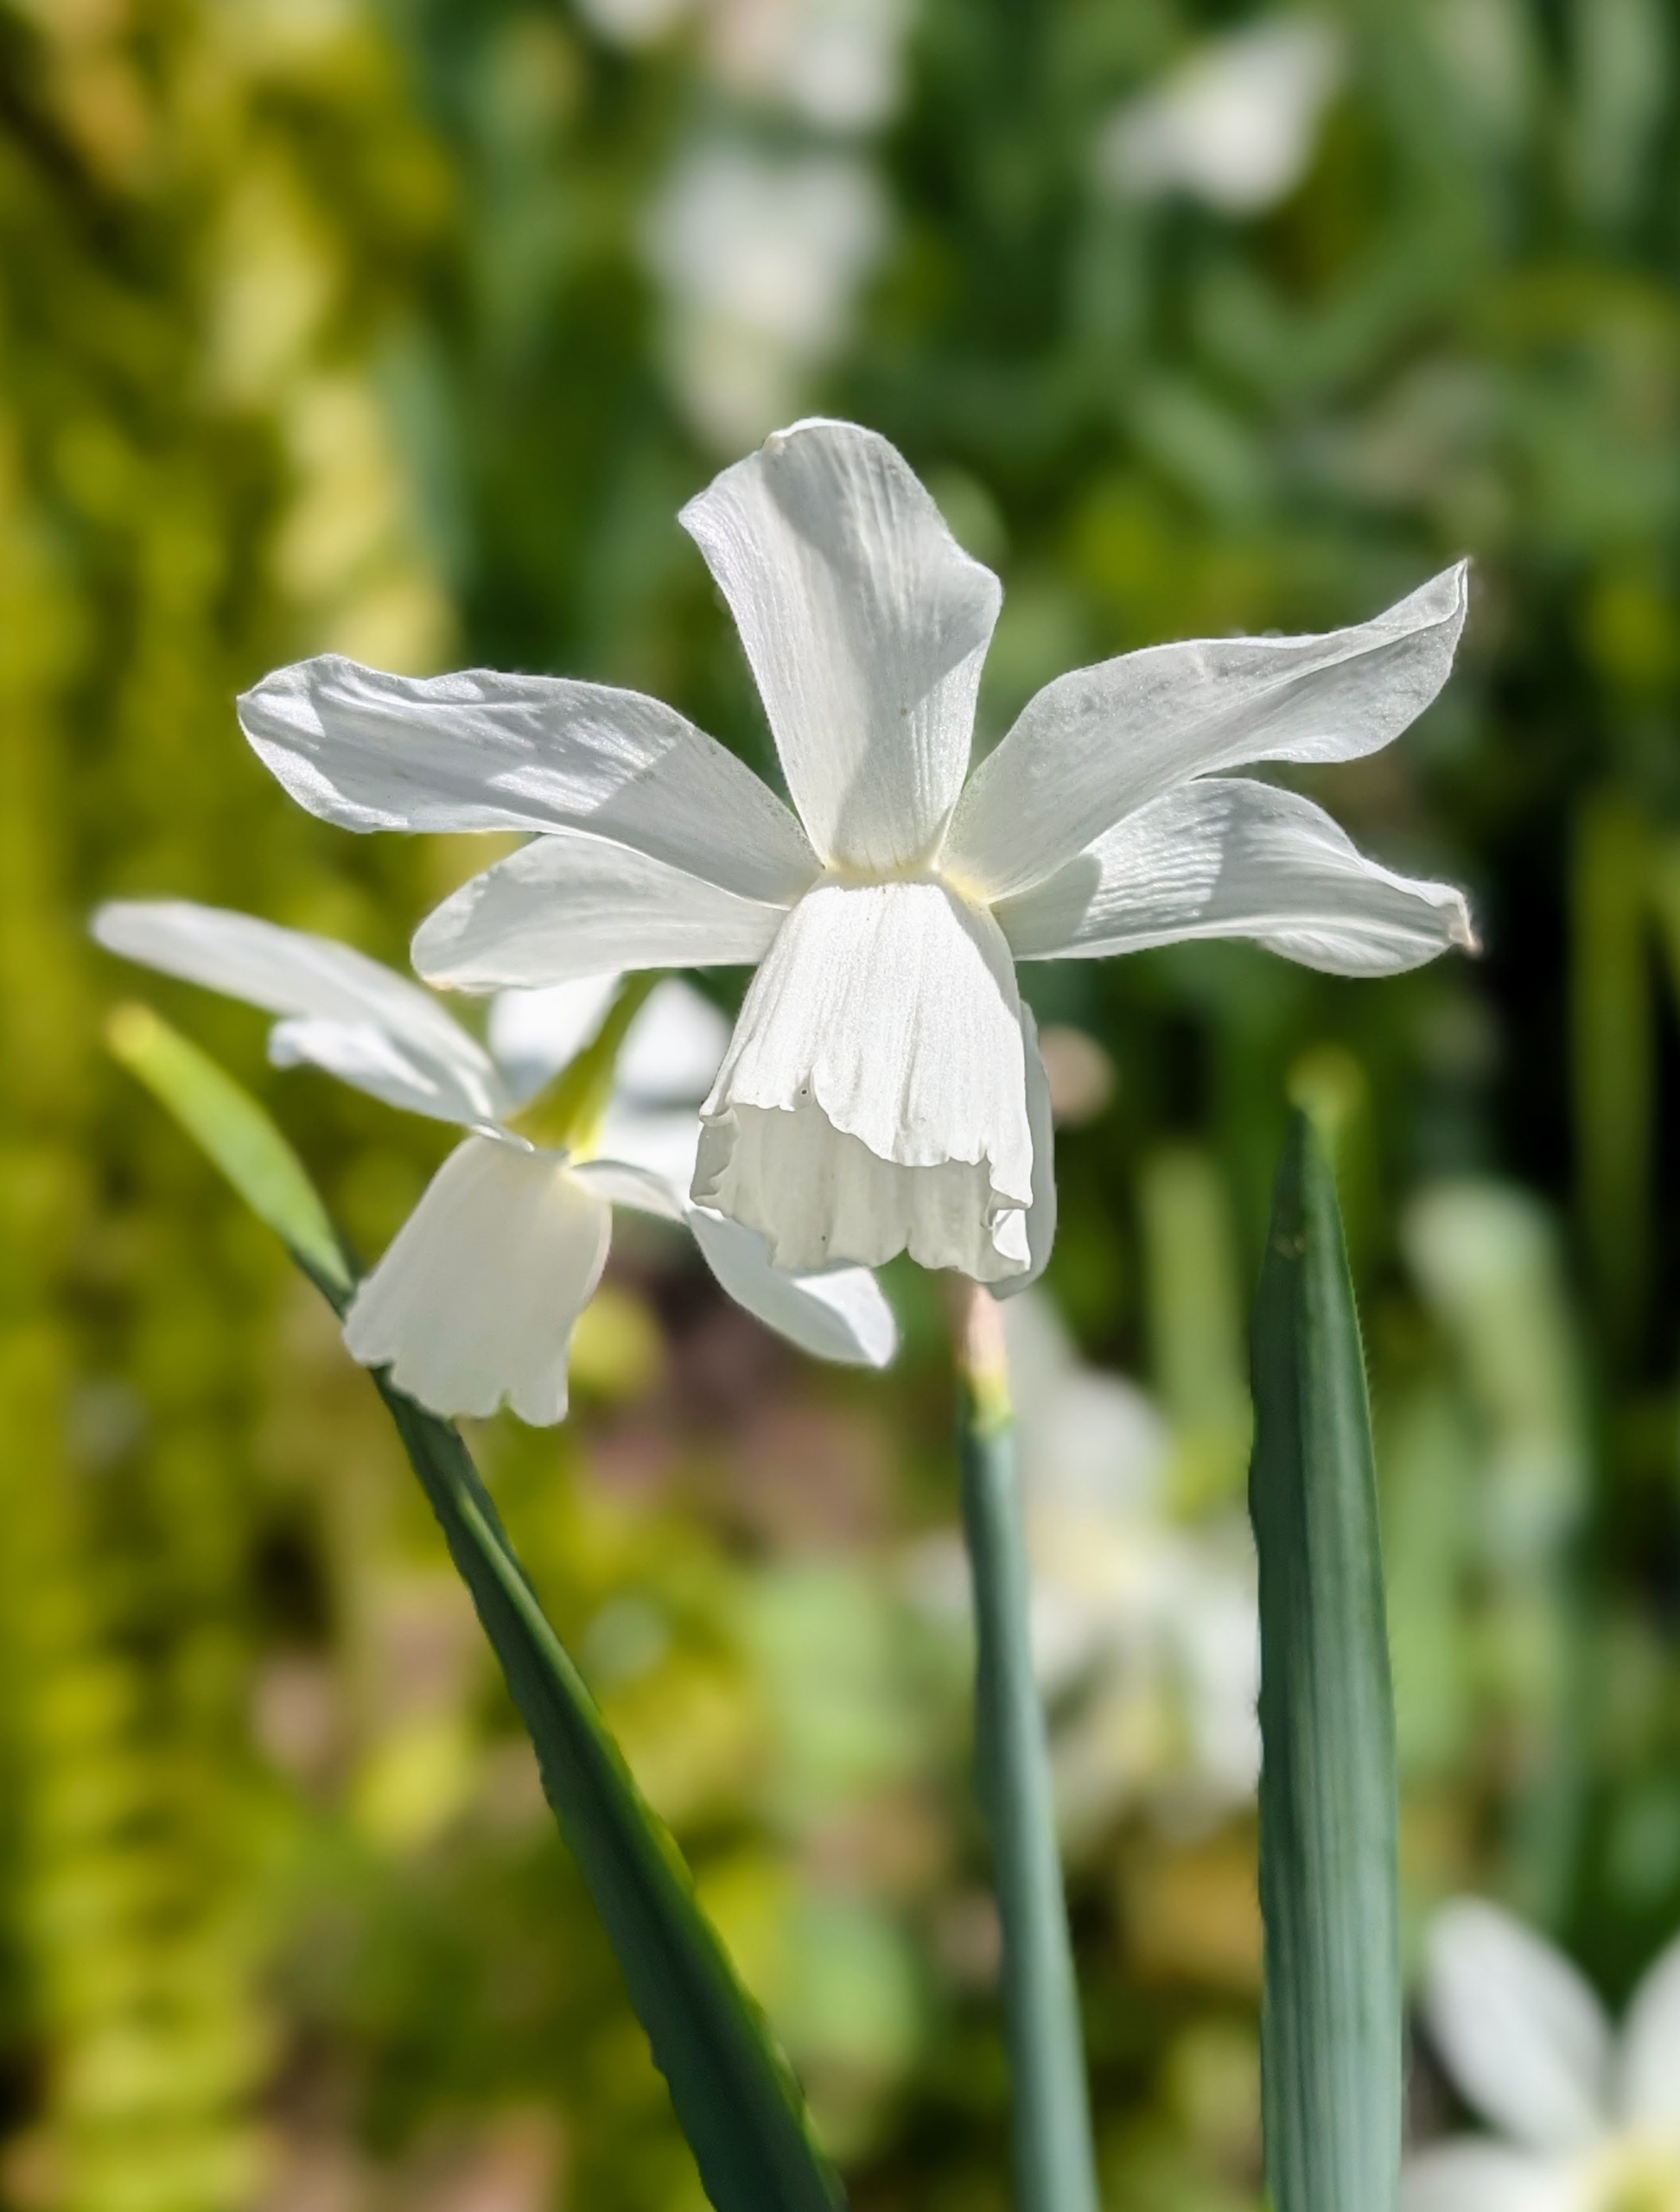
And we still have daffodils bordering the garden beds with bright colors! My daffodil blossoms come in many combinations of yellow, orange, and white.
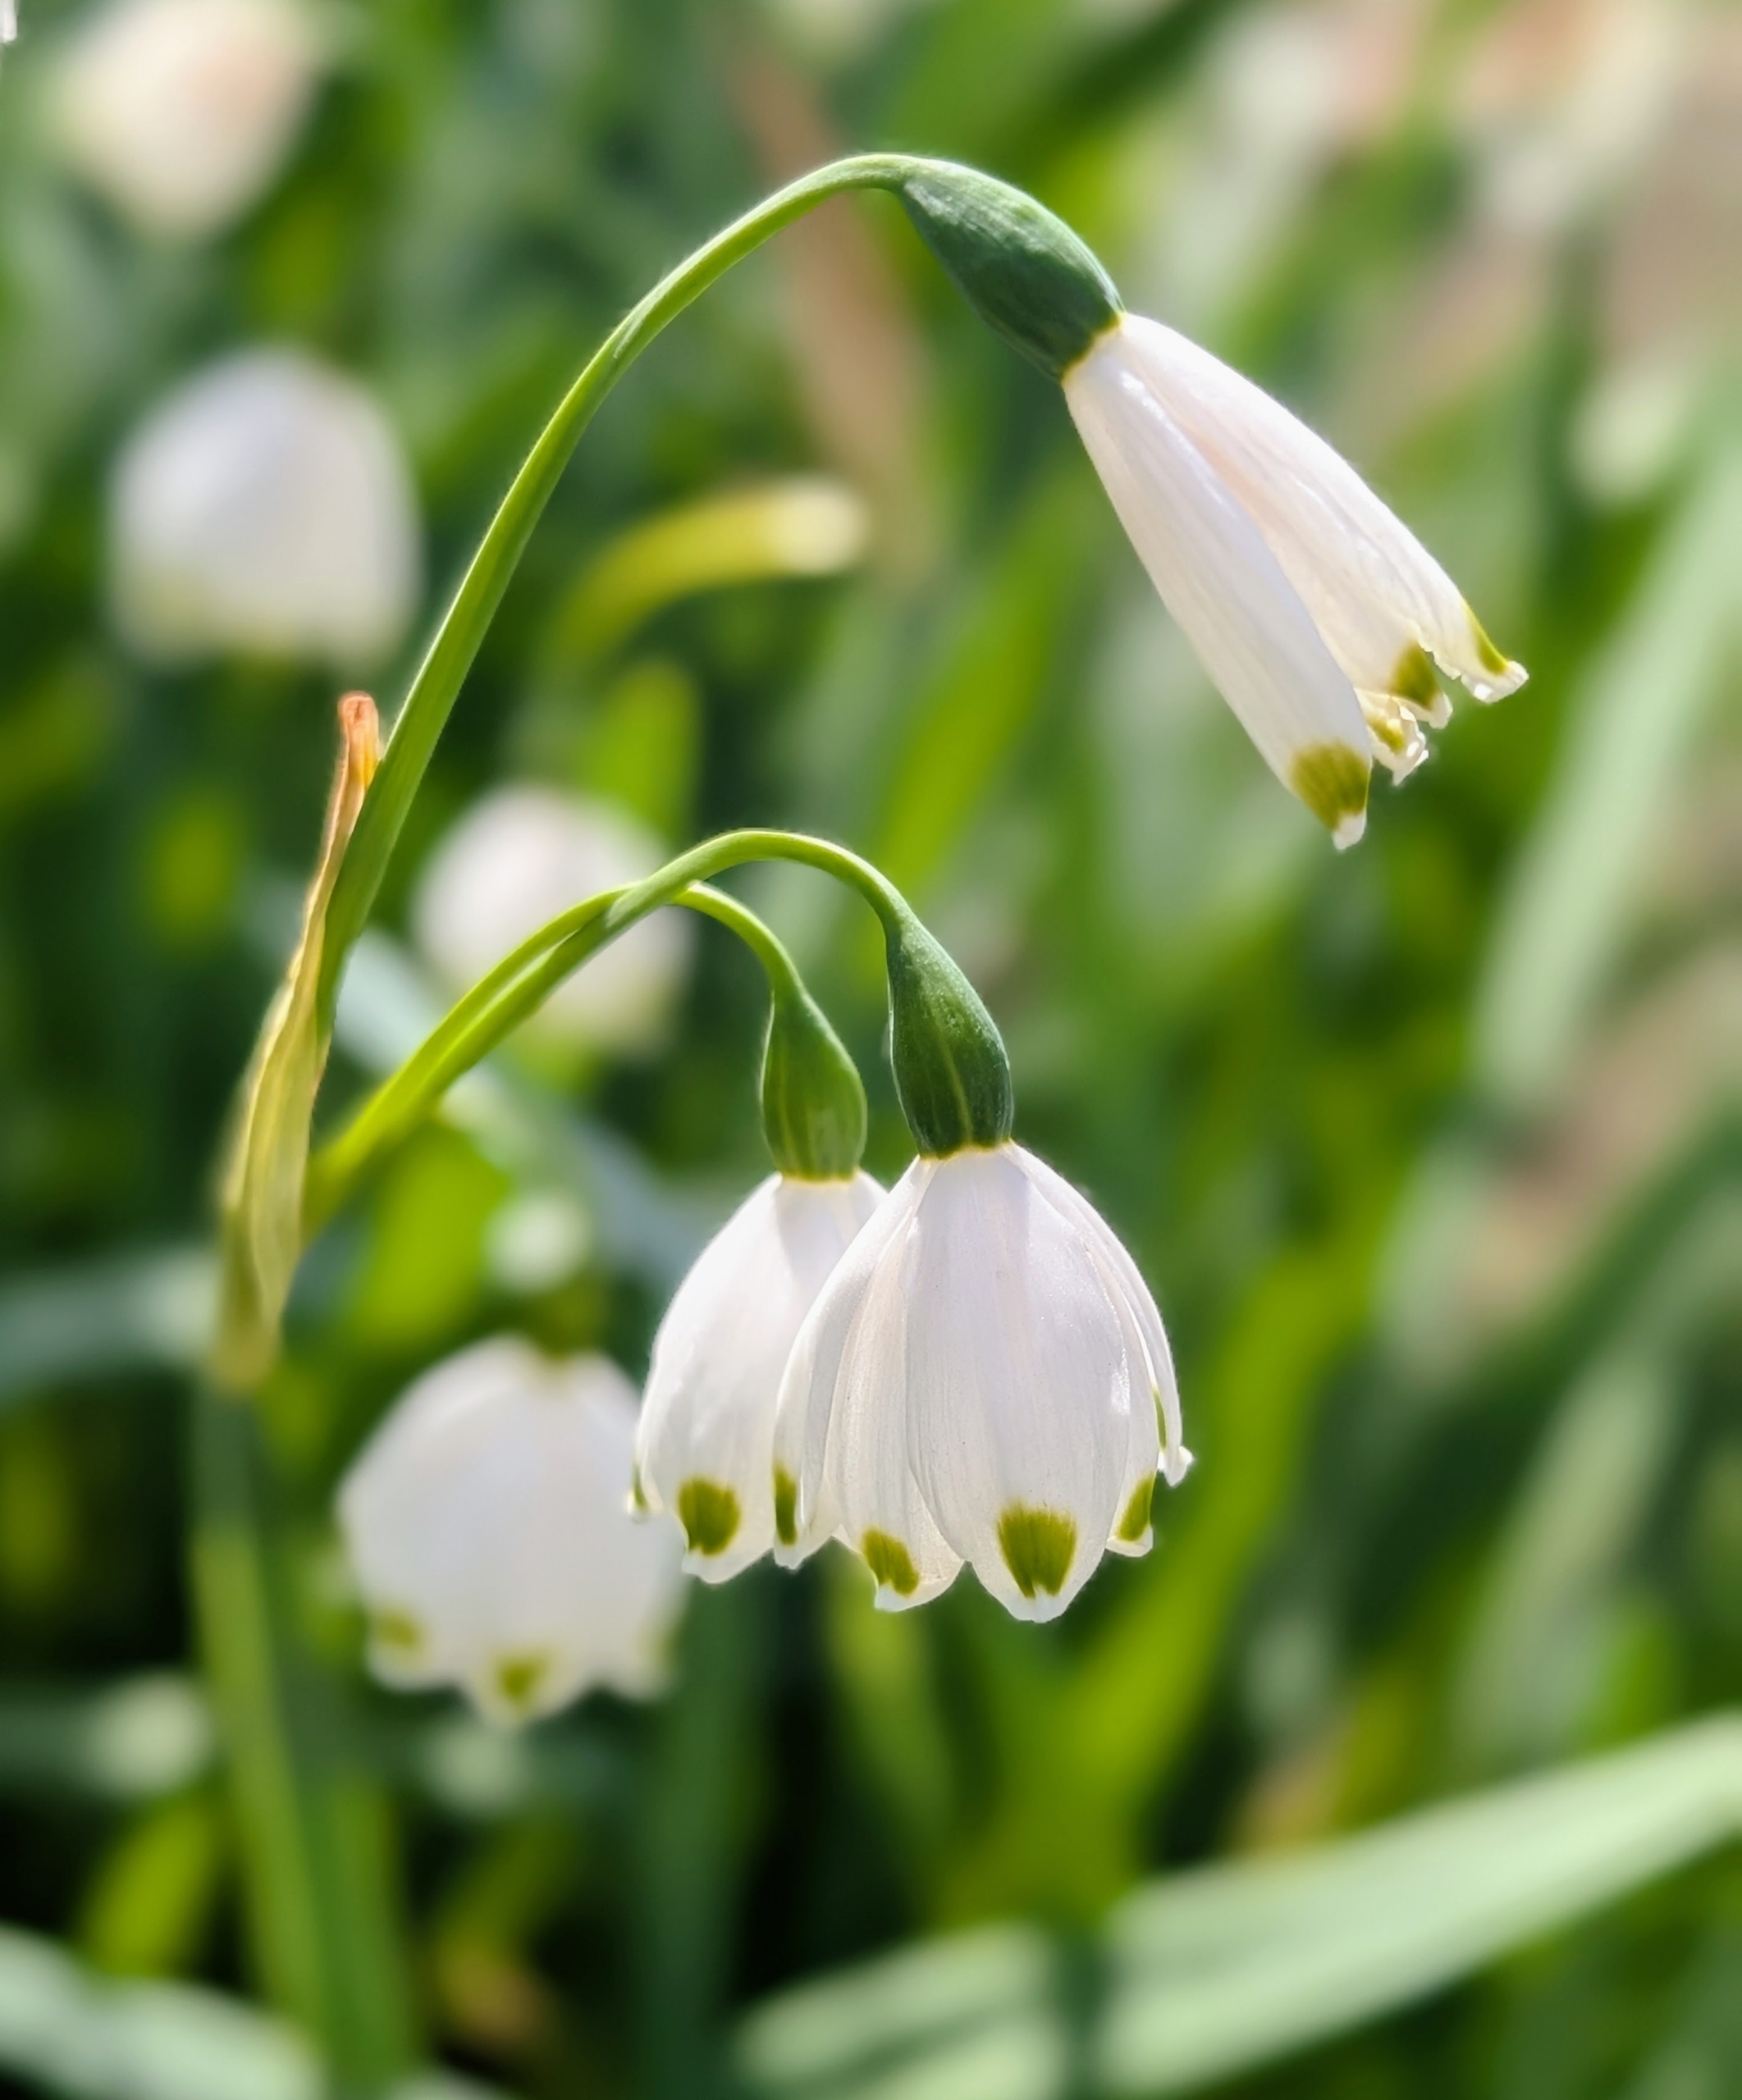
The Snowflakes are growing beautifully this year. The Snowflake is much taller than the Snowdrop, that blooms earlier in the season, and has more than one flower per stem. Snowflake petals are even, each with a green spots on the end, whereas Snowdrops have helicopter-like propellers that are green only on the inner petals.
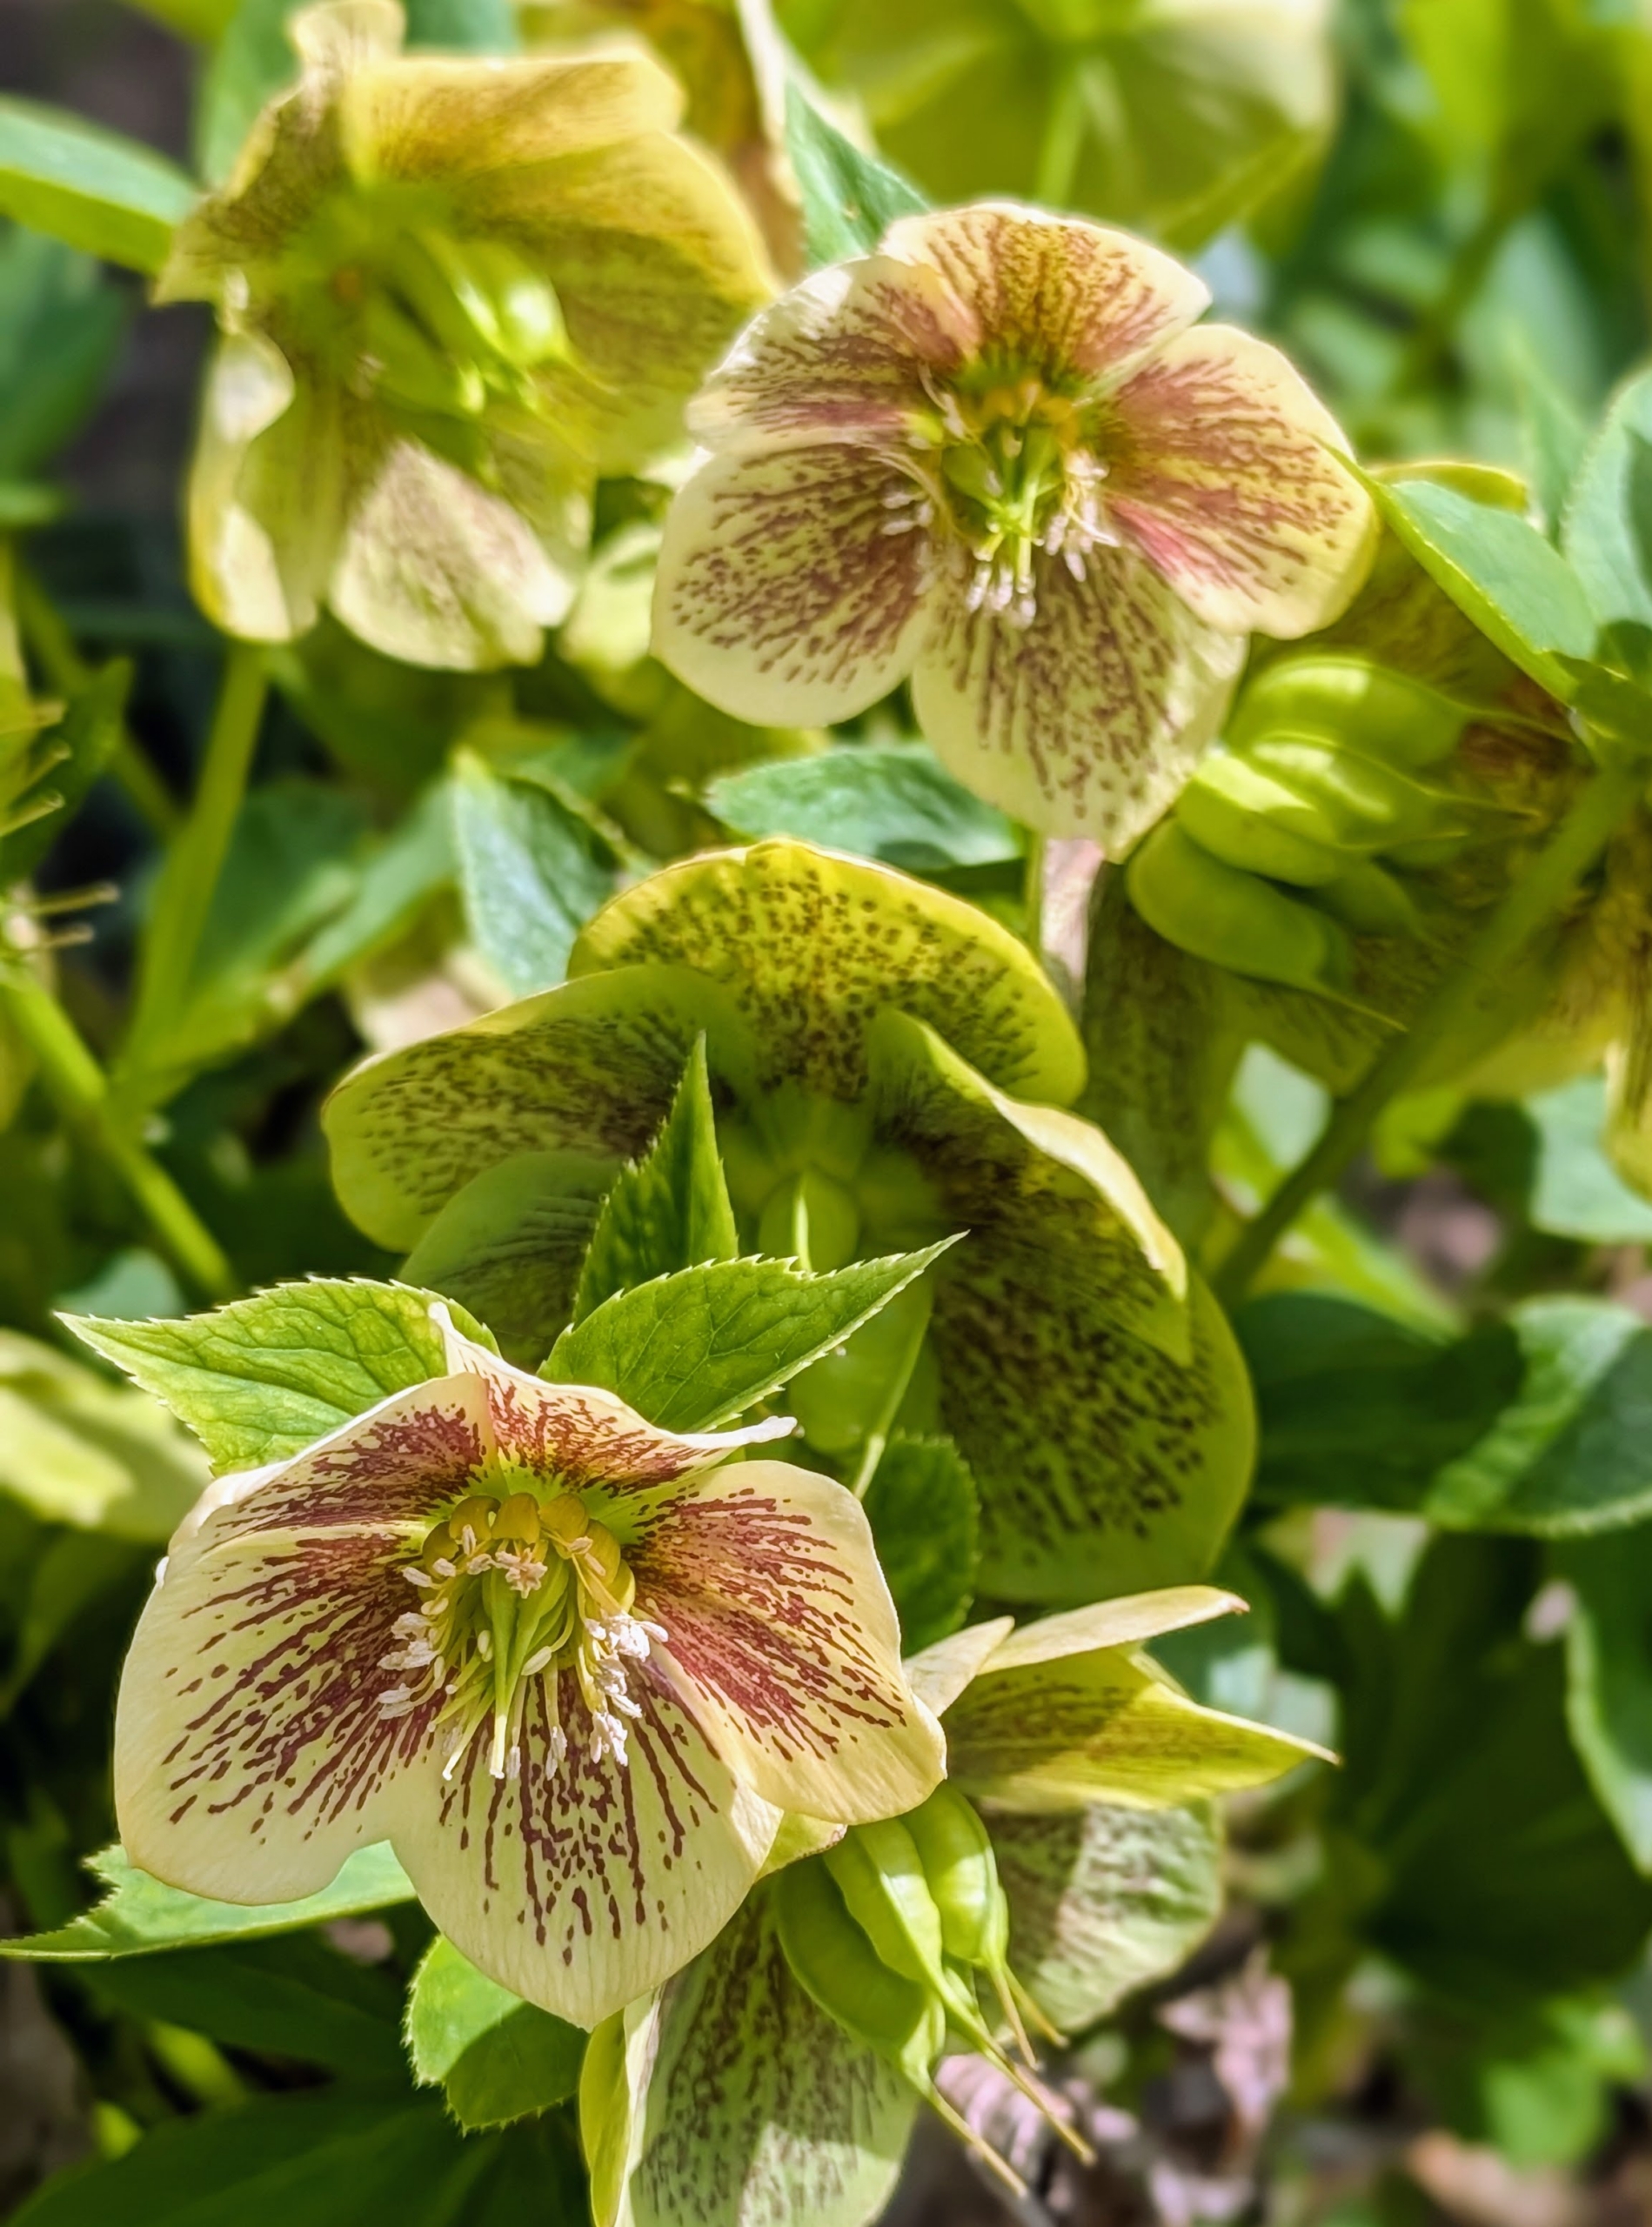
The hellebores continue to show beautifully at the farm. Hellebores are members of the Eurasian genus Helleborus – about 20 species of evergreen perennial flowering plants in the family Ranunculaceae. They blossom during late winter and early spring for up to three months. Hellebores come in a variety of colors and have rose-like blossoms.
Every year, more and more plants grow in these beds, cover the space, and create a lush, green carpet of beautiful foliage.