I am so fortunate to always have delicious organic produce growing here at my Bedford, New York farm.
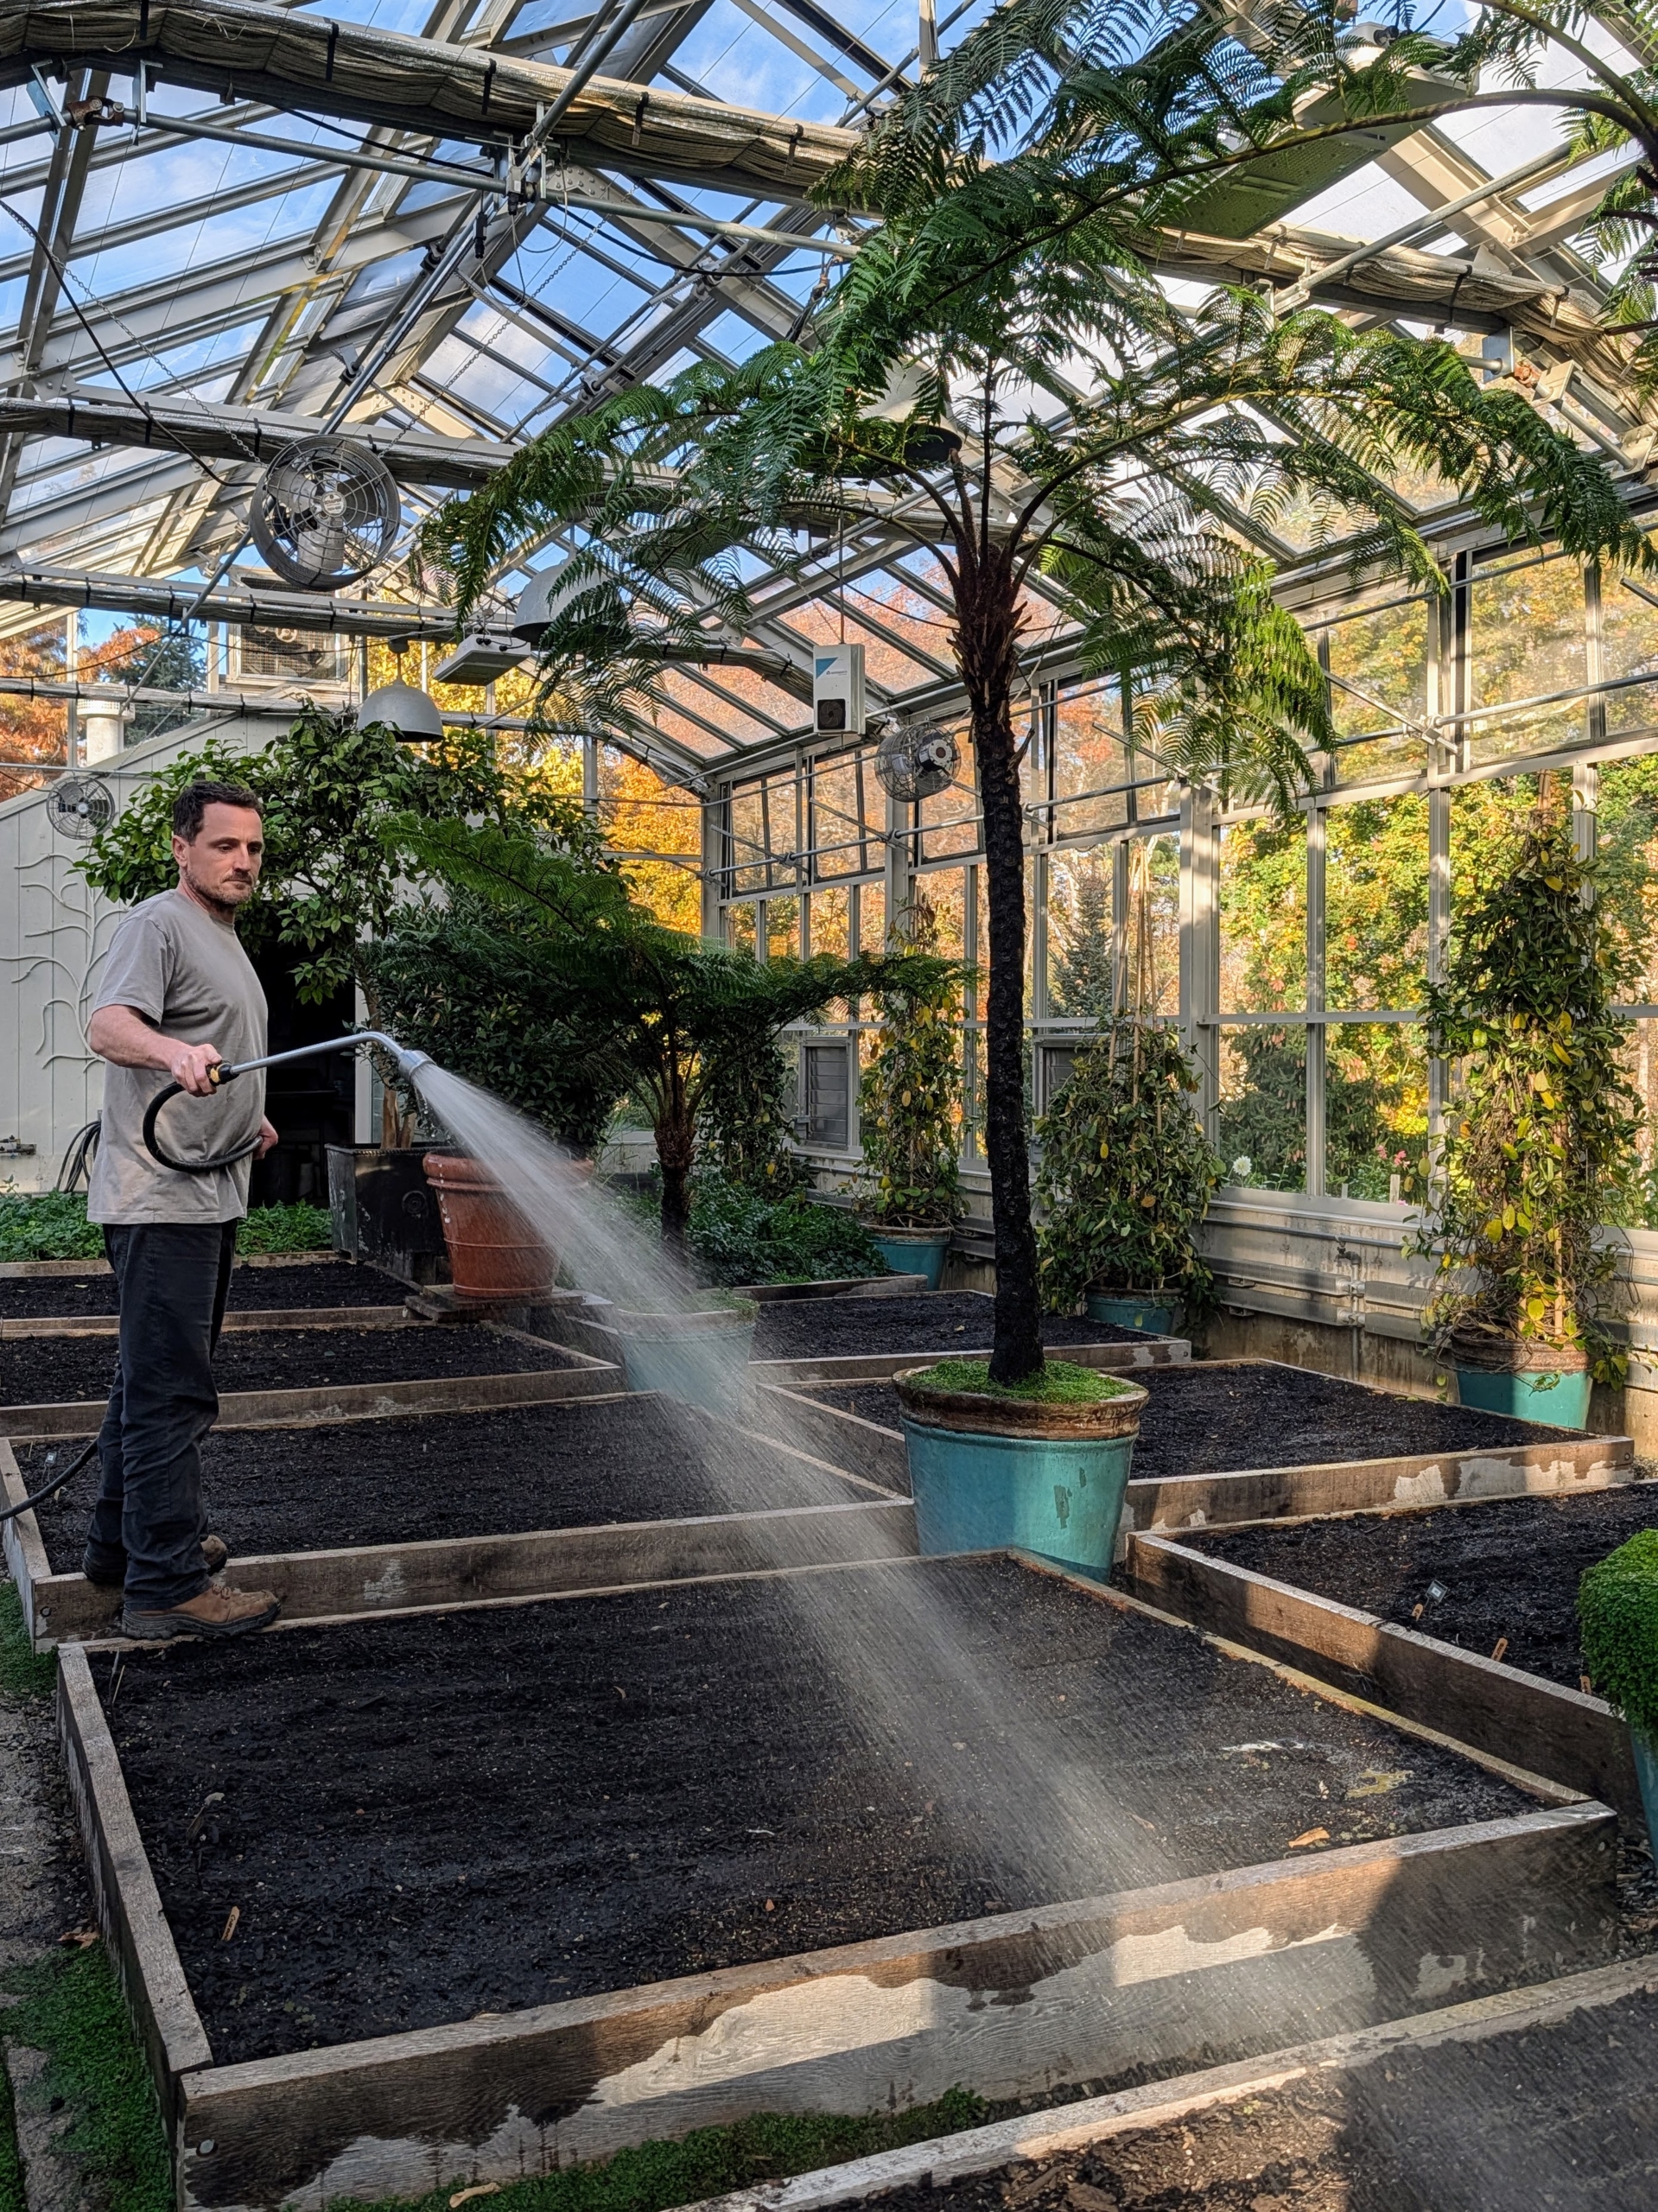
As my outdoor grounds crew continues with fall chores, attention is directed toward planting my vegetable greenhouse. I love this greenhouse - its construction several years ago was inspired by Eliot Coleman, an expert in four-season farming. It uses minimal artificial heat - in fact, most of its energy comes directly from the sun, and it successfully grows a variety of cold-hardy crops. And yesterday, my head gardener Ryan McCallister, planted the first seeds of our next growing period.
Enjoy these photos.
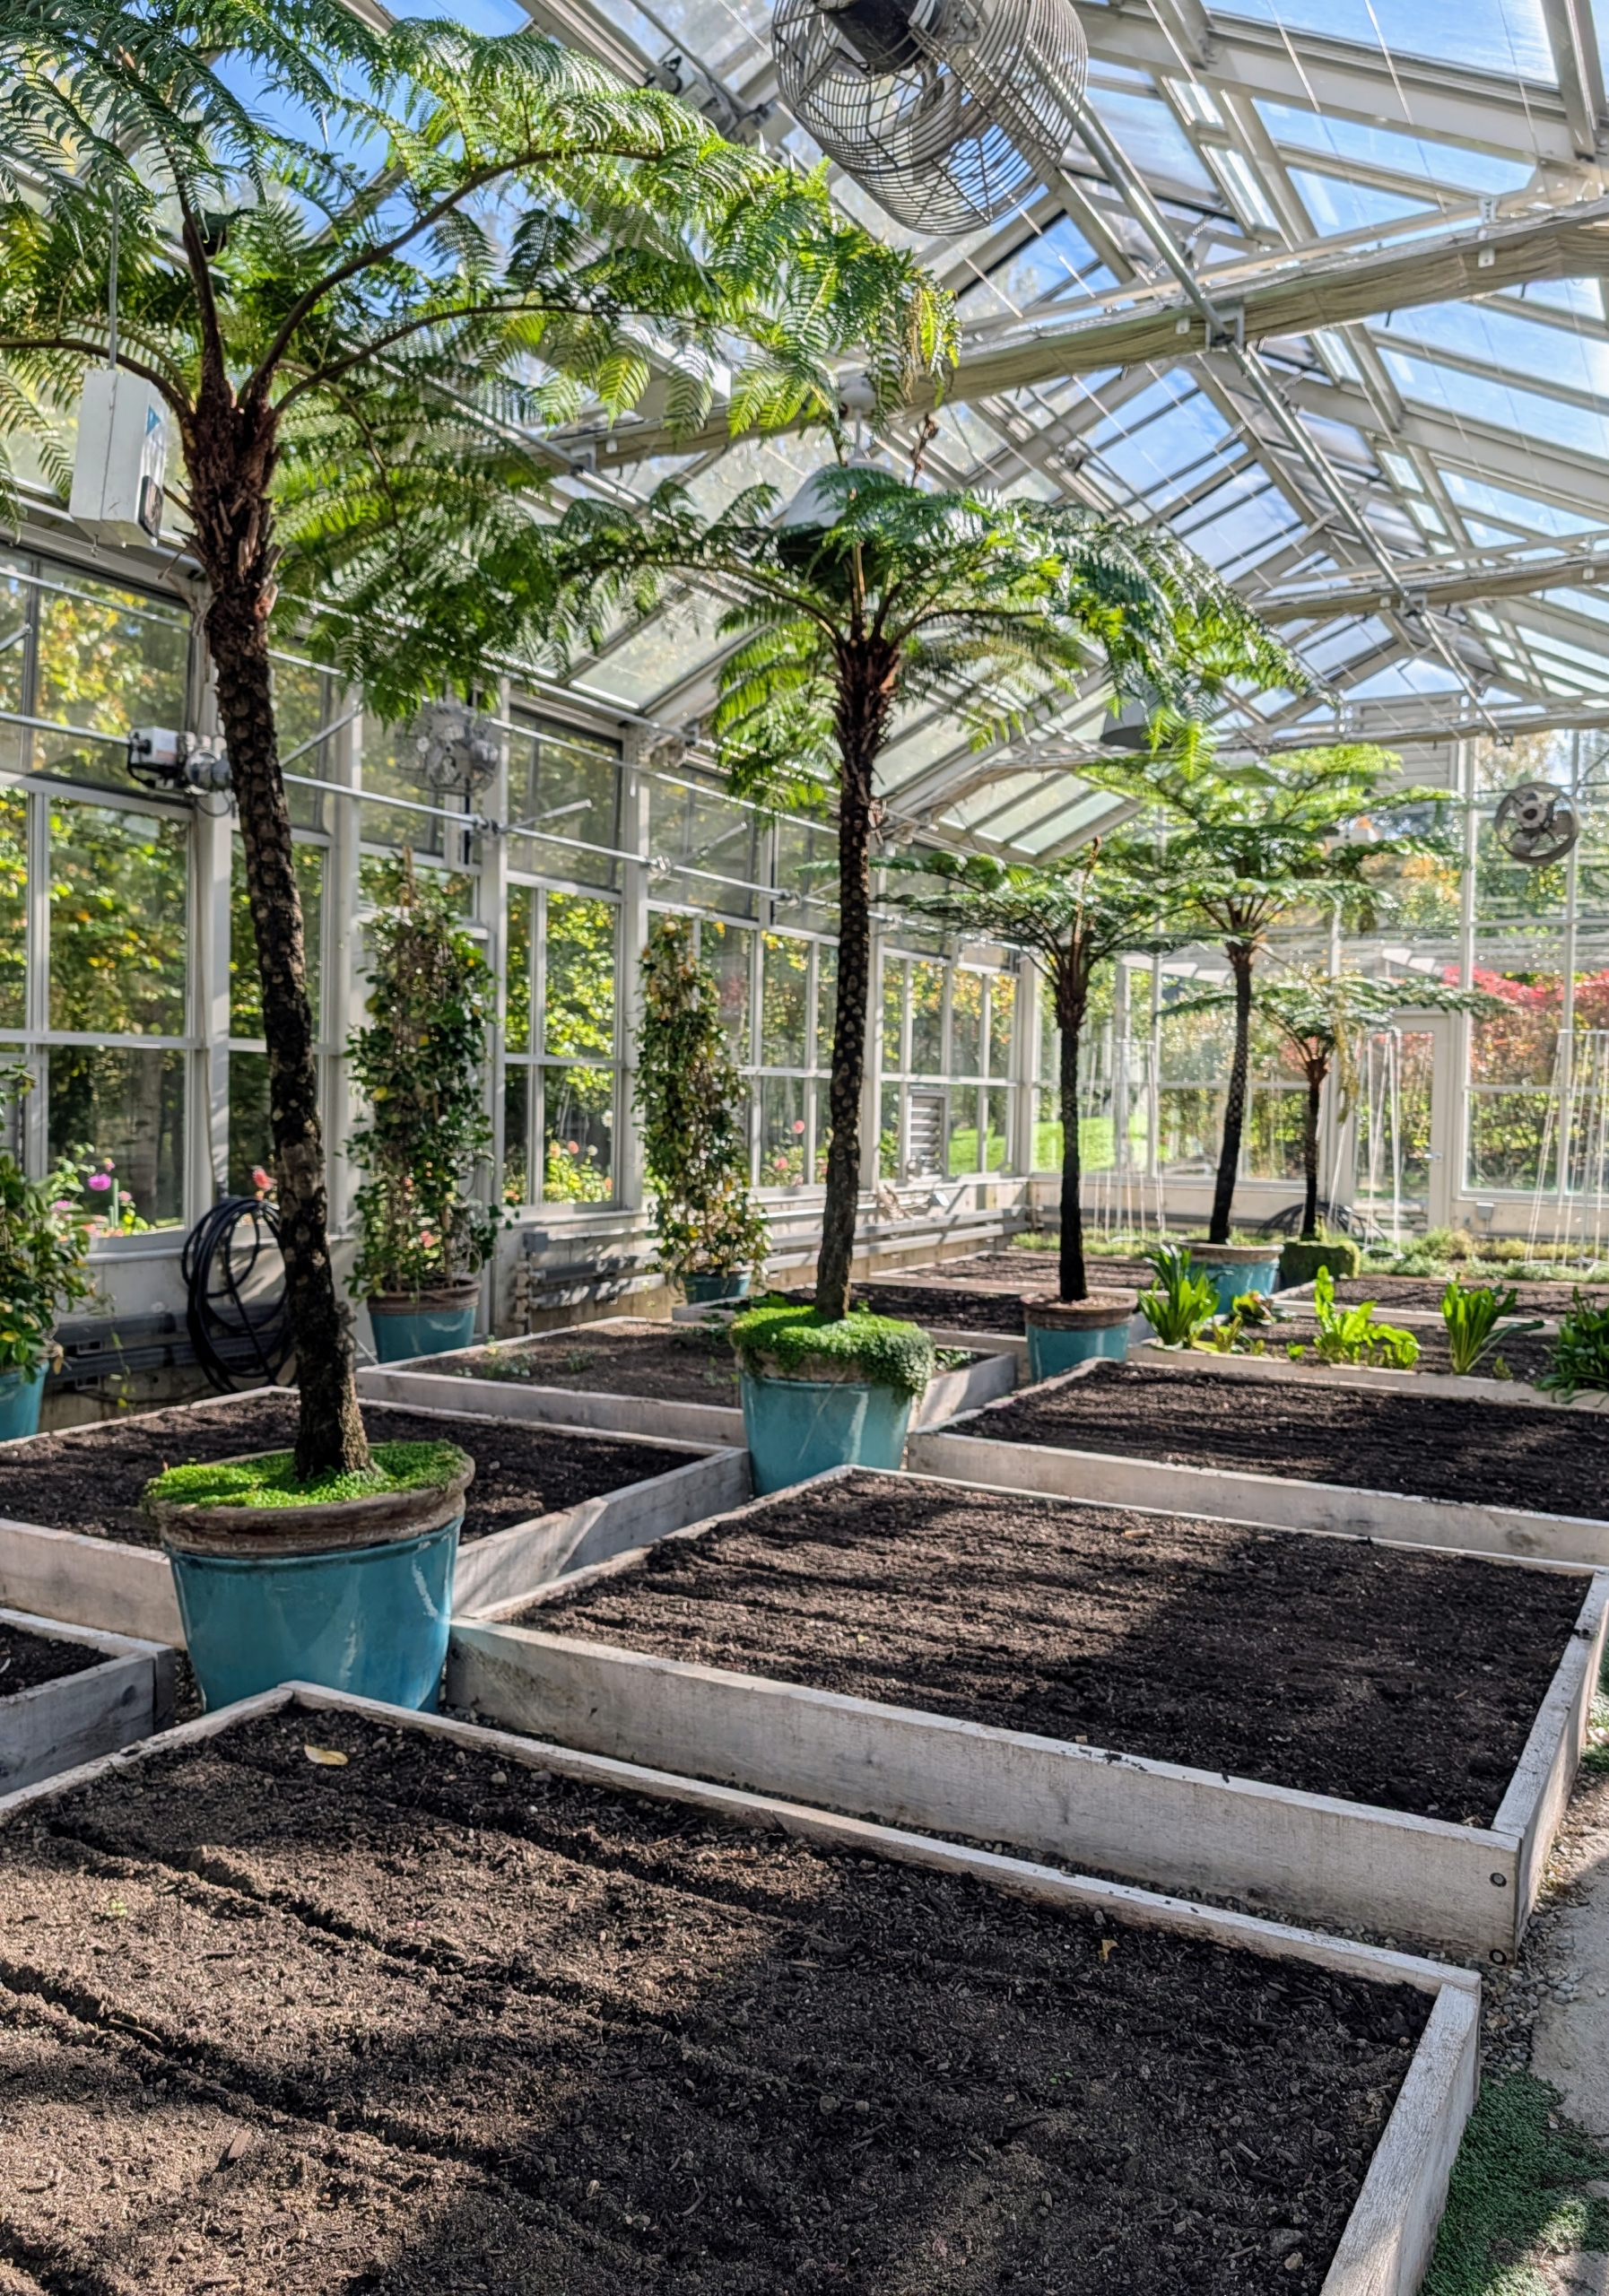
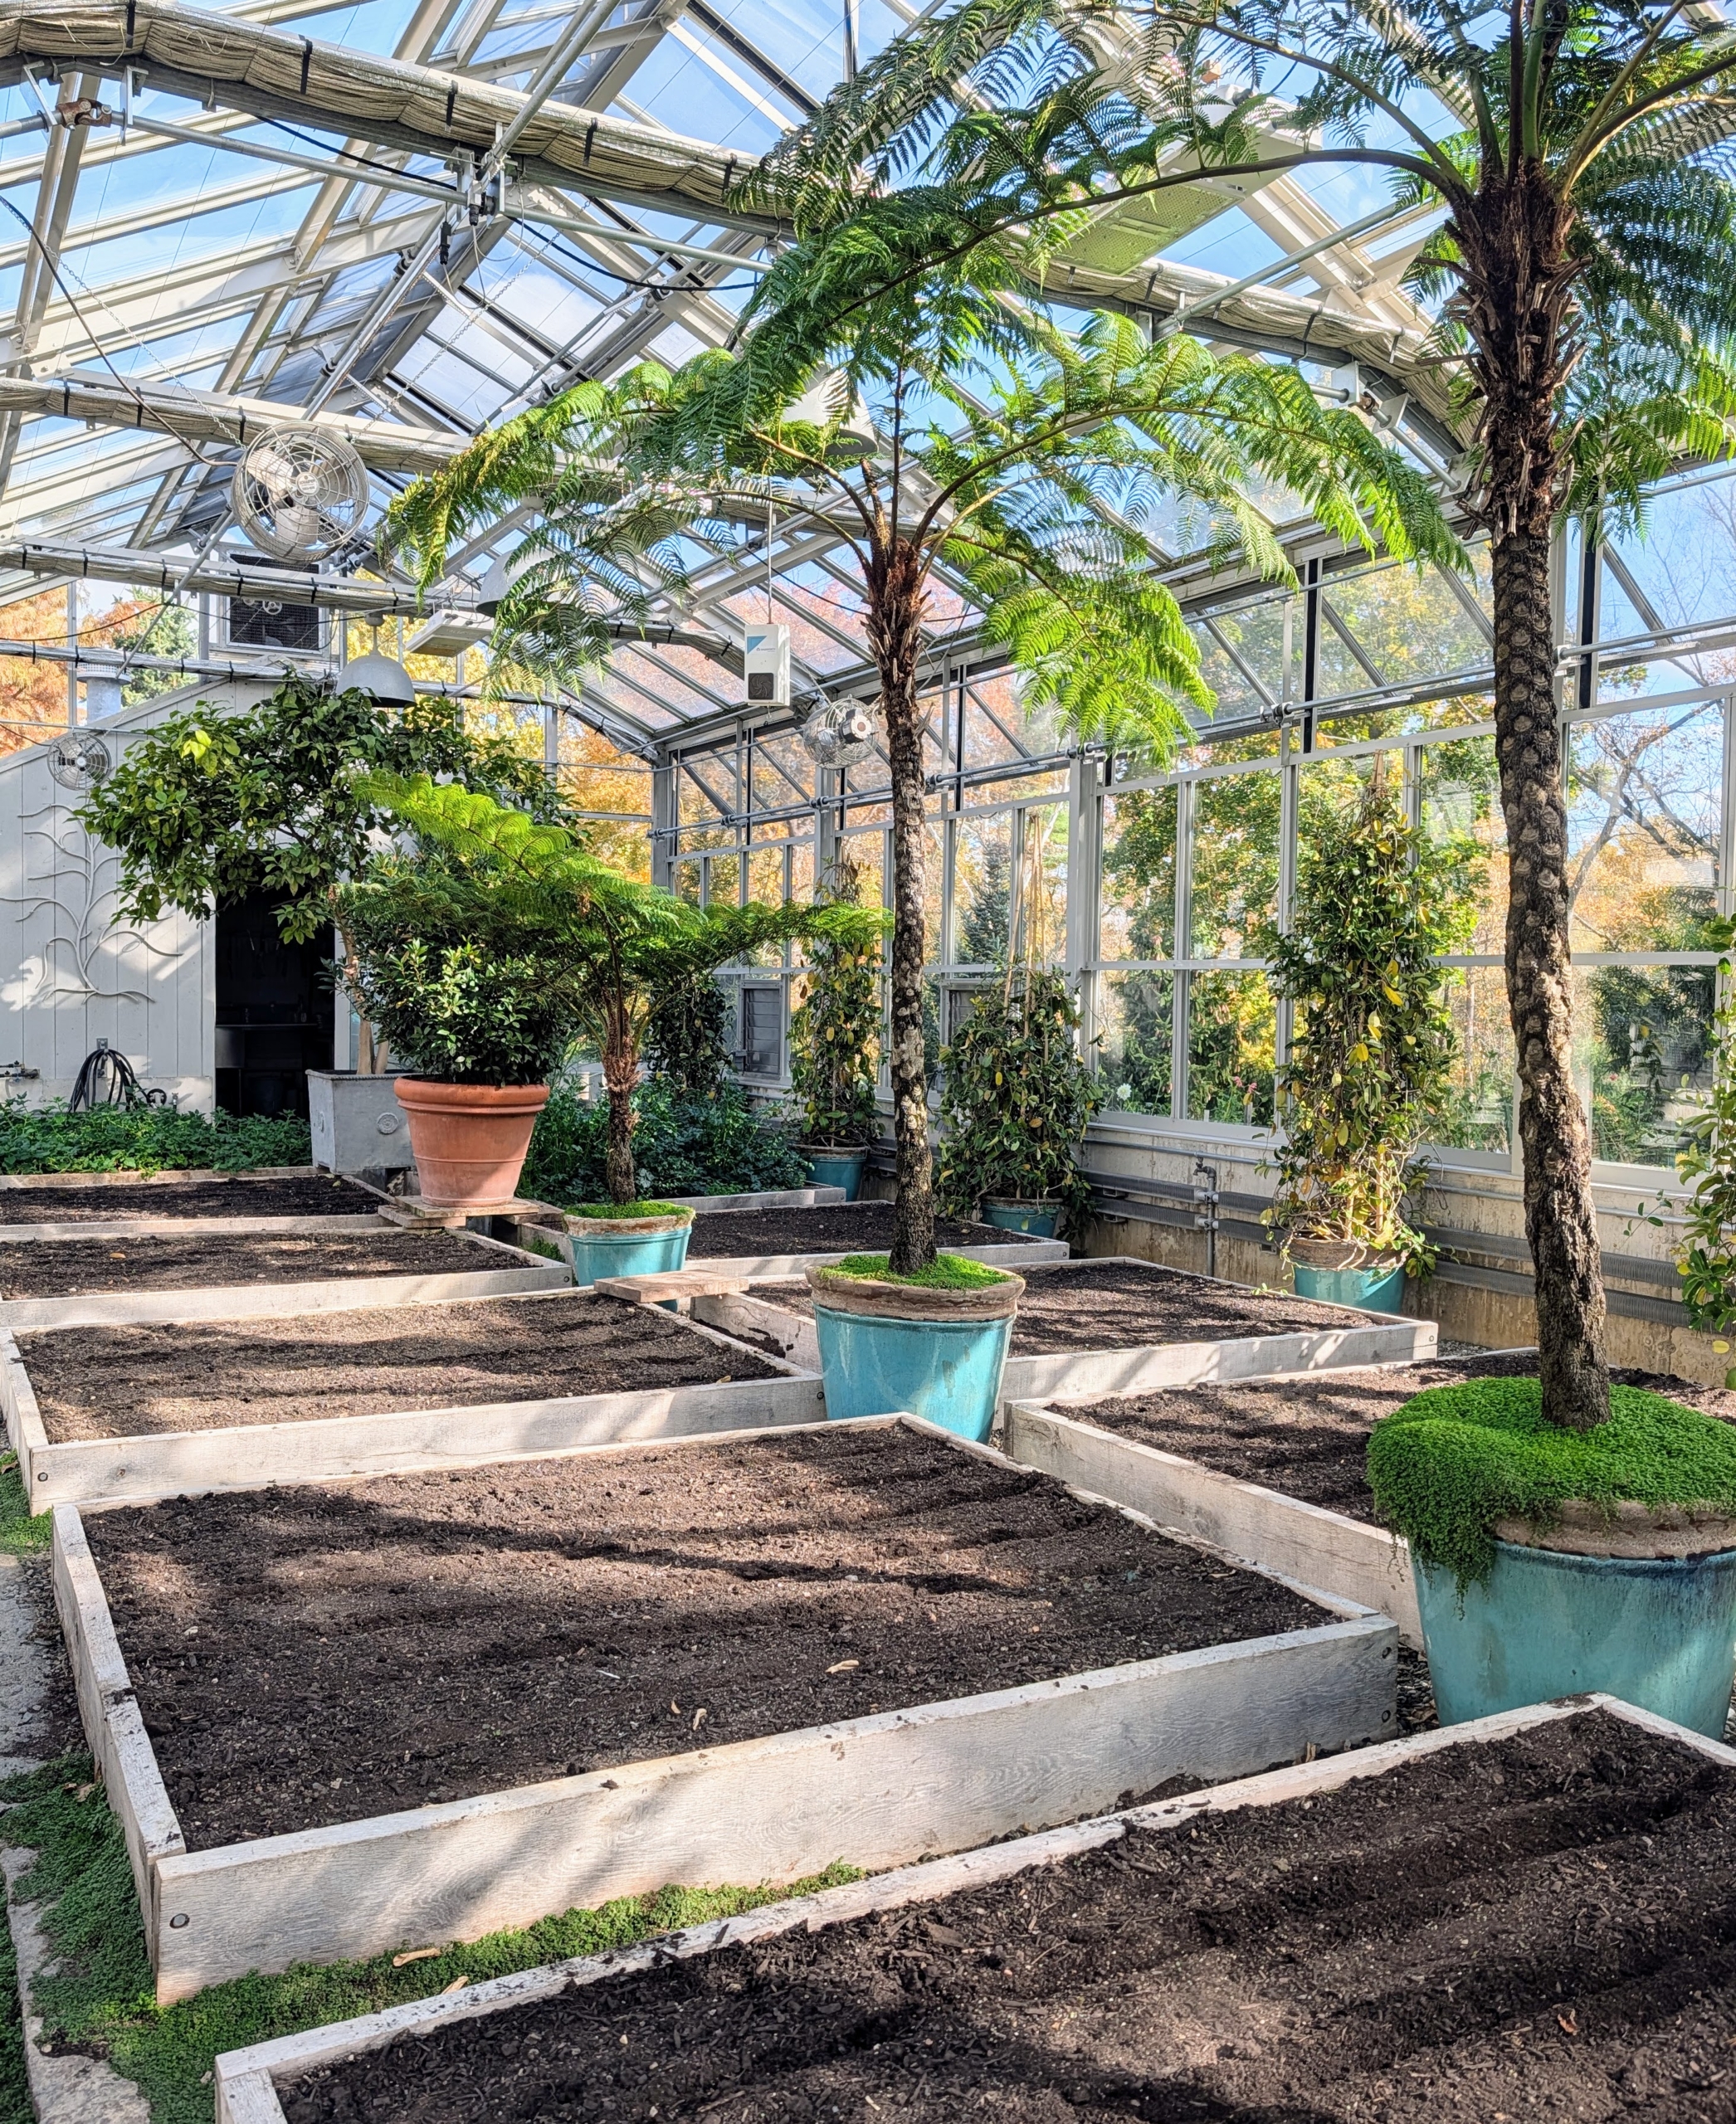
This is the inside of my vegetable greenhouse. The ideal temperature when in full use is around 80 to 85-degrees Fahrenheit to keep all the vegetables growing their best. We have a large thermometer at the entrance to the structure, so the temperature can be checked easily several times a day.
Most of the energy in this greenhouse comes from the sun through these giant windows, which can be programmed to open for ventilation or cooling when needed. I also have a grow light system installed for nighttime use.
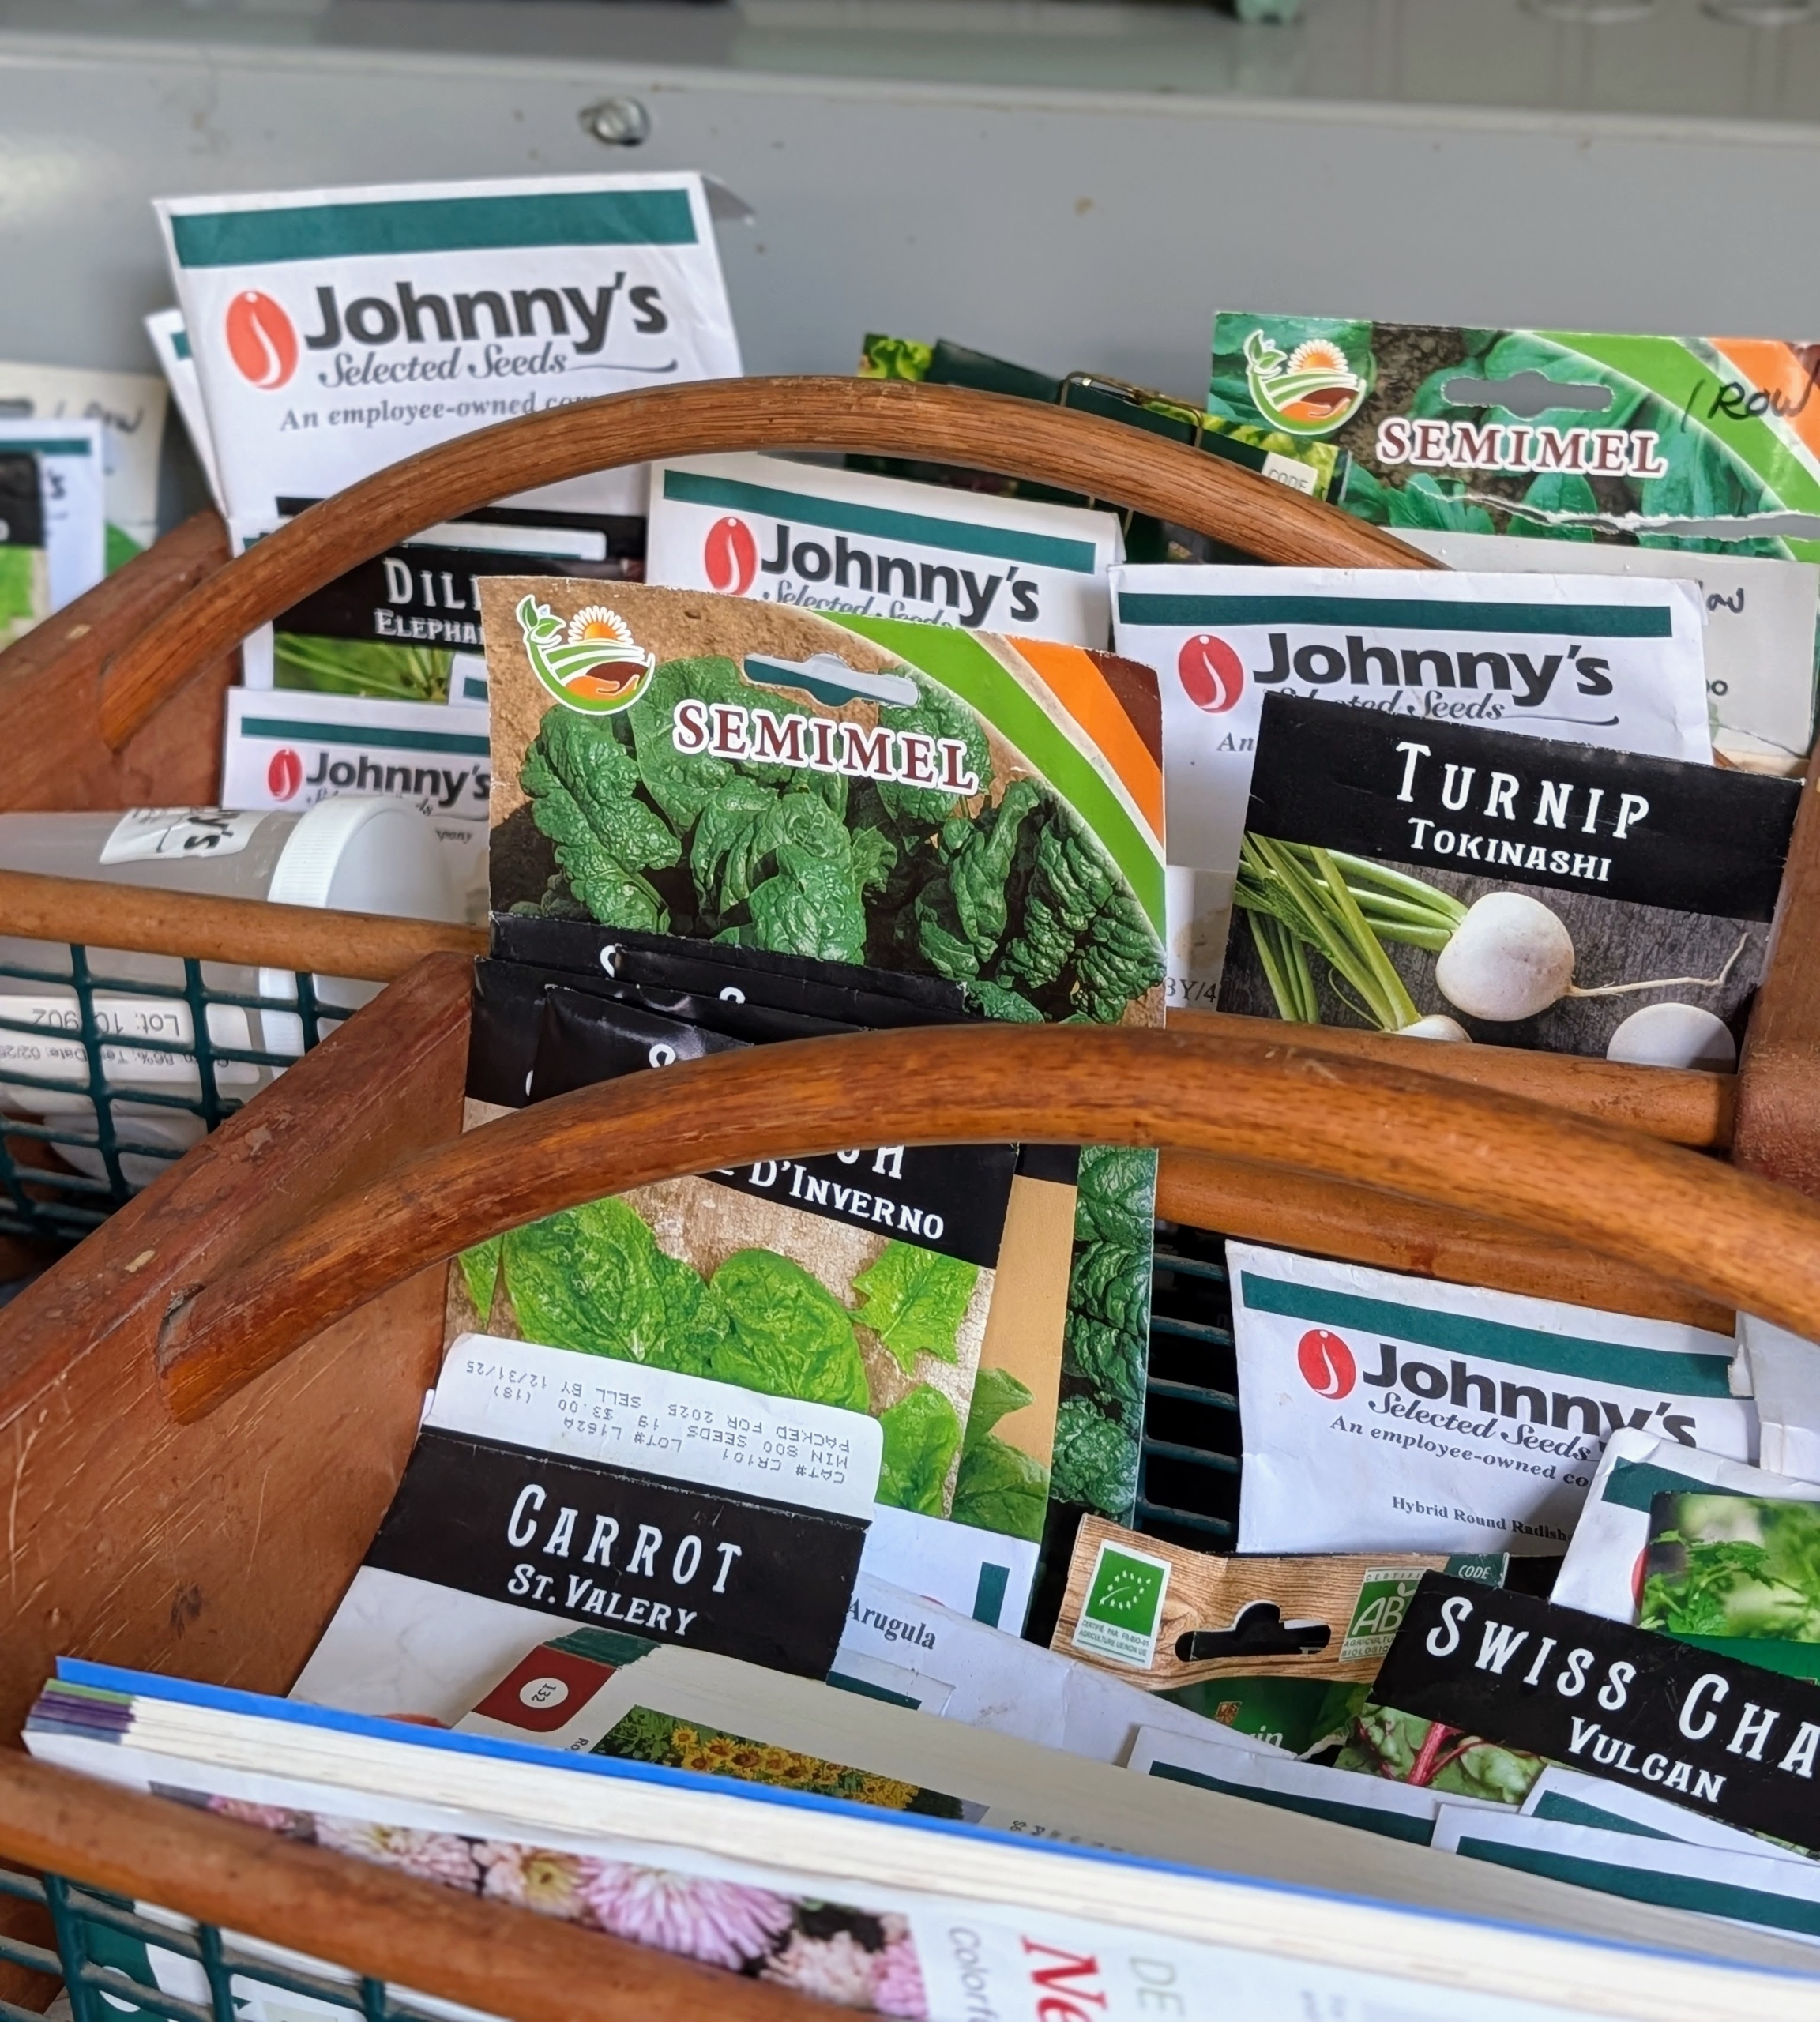
On one end is the head house where I keep a number of favorite seeds. I am always on the lookout for different seeds when I travel, but seeds are also widely available online and at garden centers. Some of my favorite source include Johnny’s Selected Seeds, Baker Creek Heirloom Seeds, Vilmorin, and Botanical Interests.
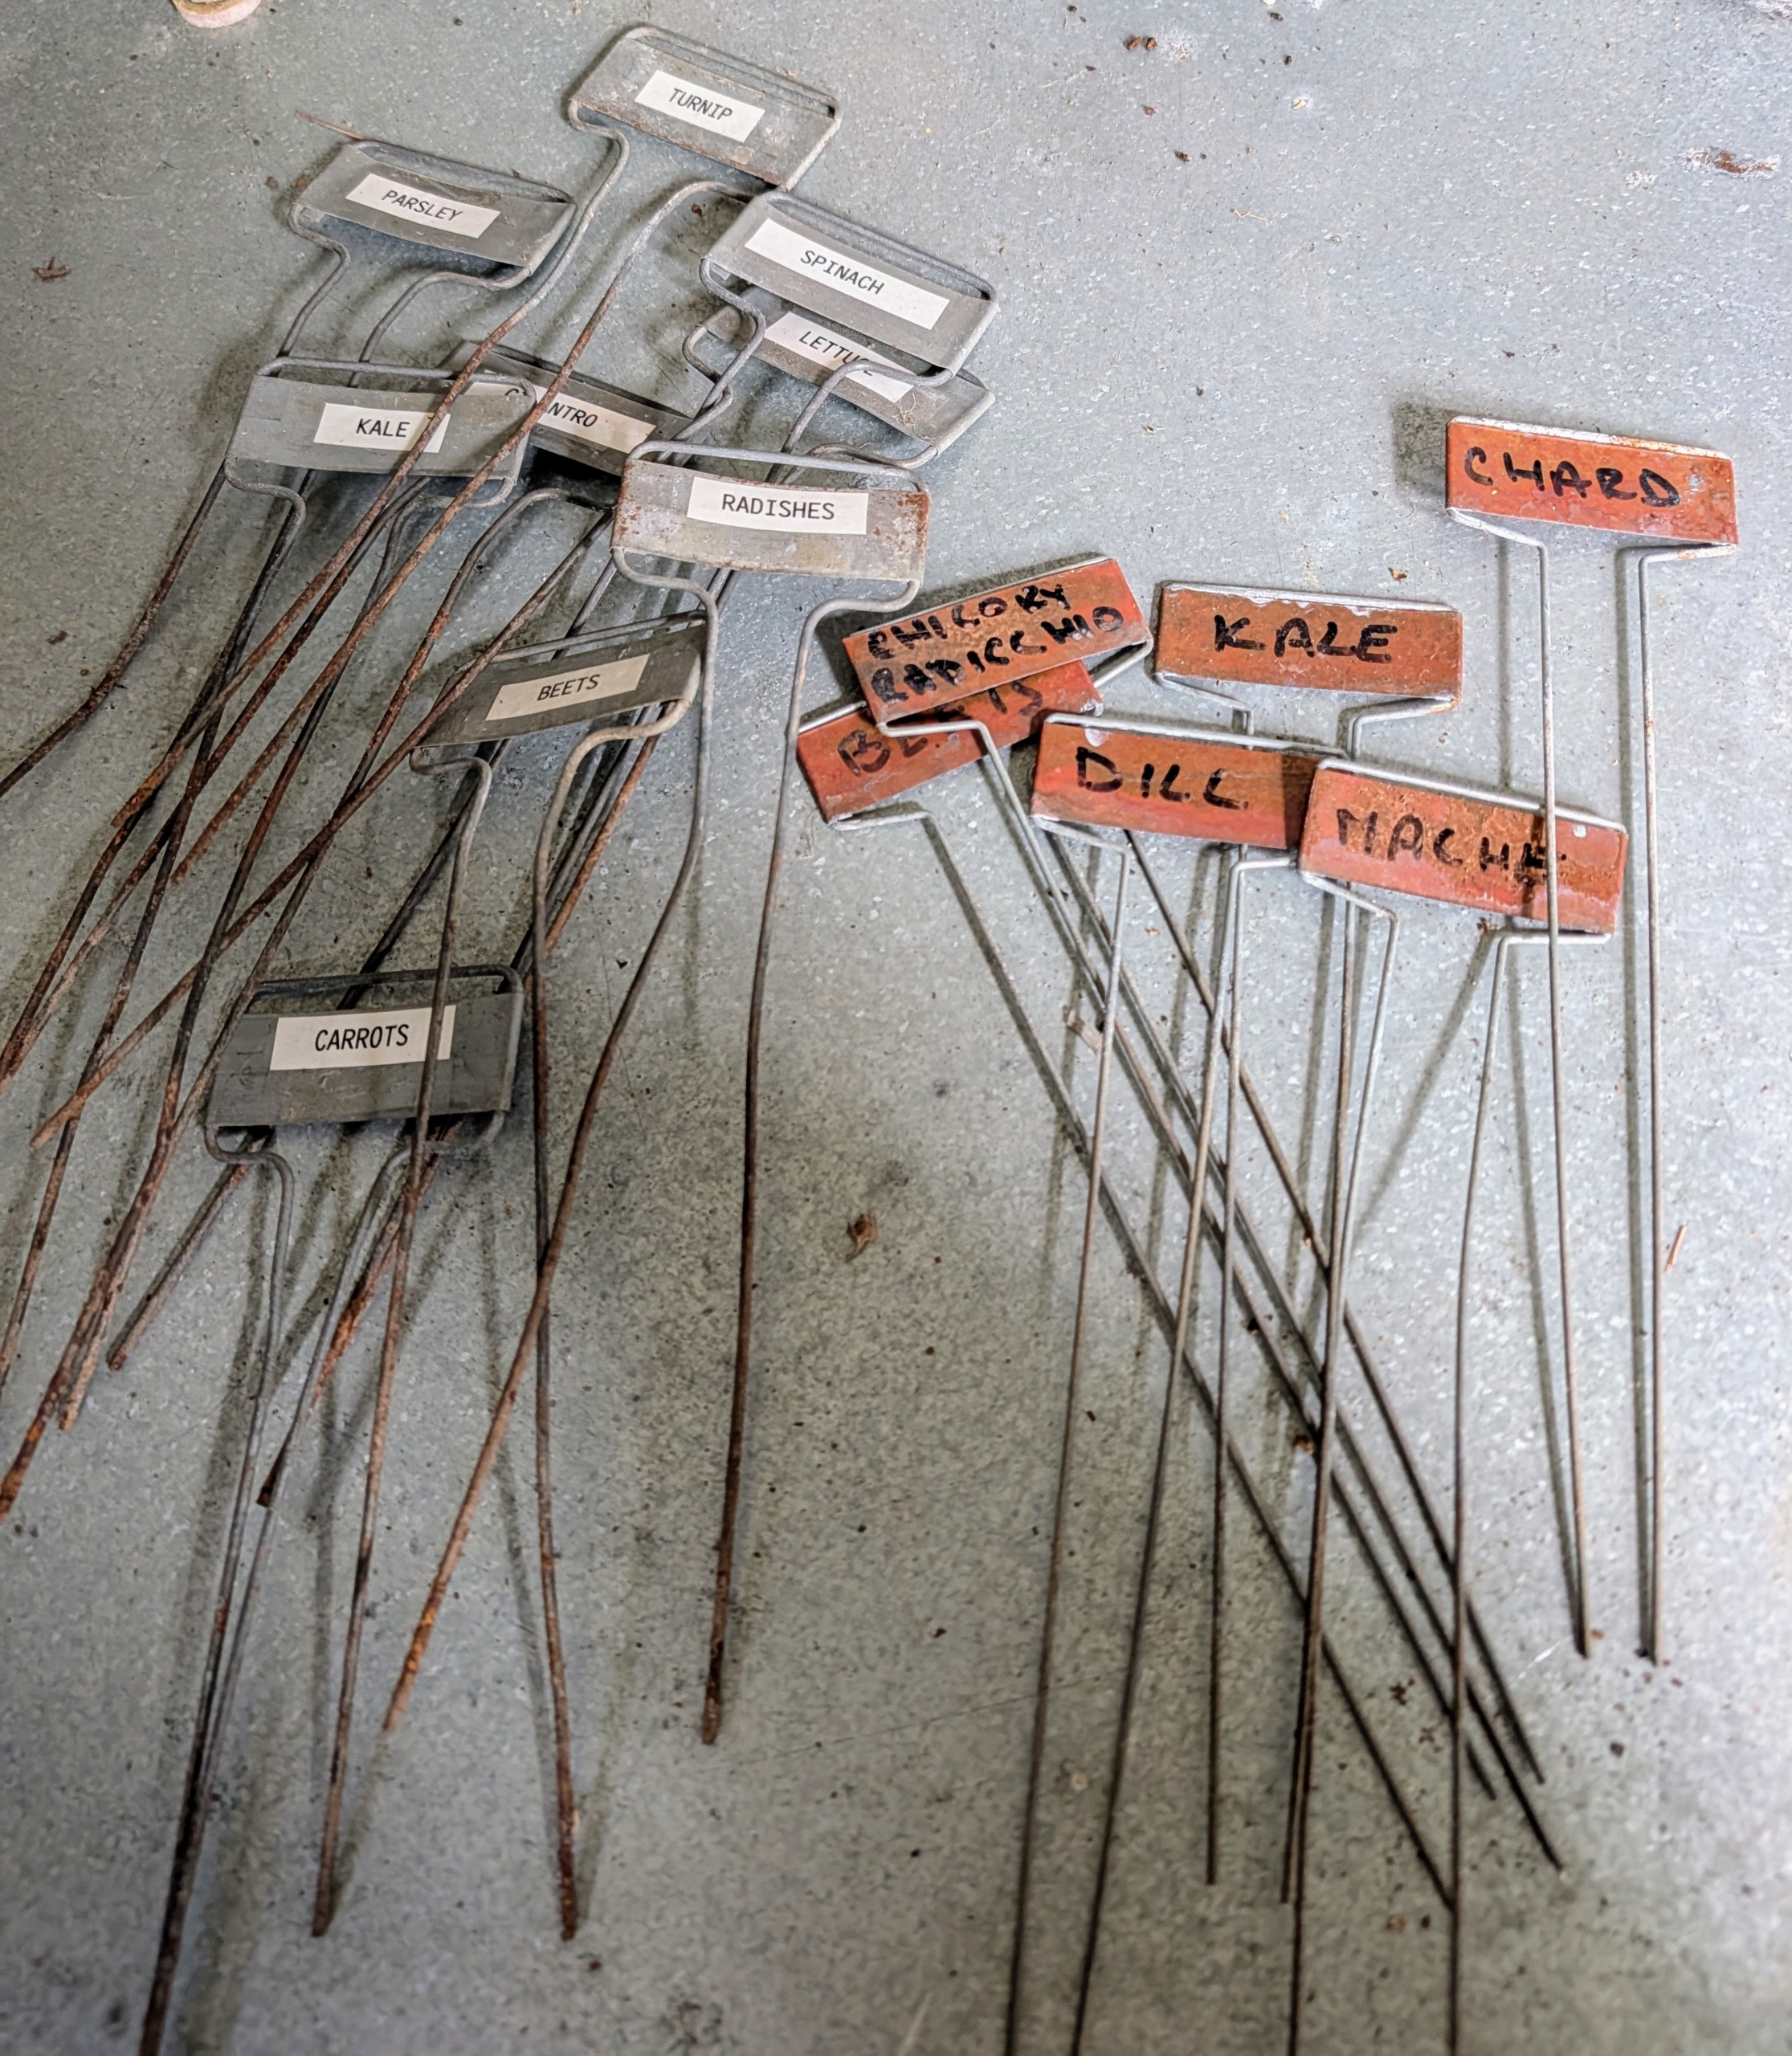
I reuse markers season to season inside this greenhouse. These are already labeled and ready to insert into the beds.
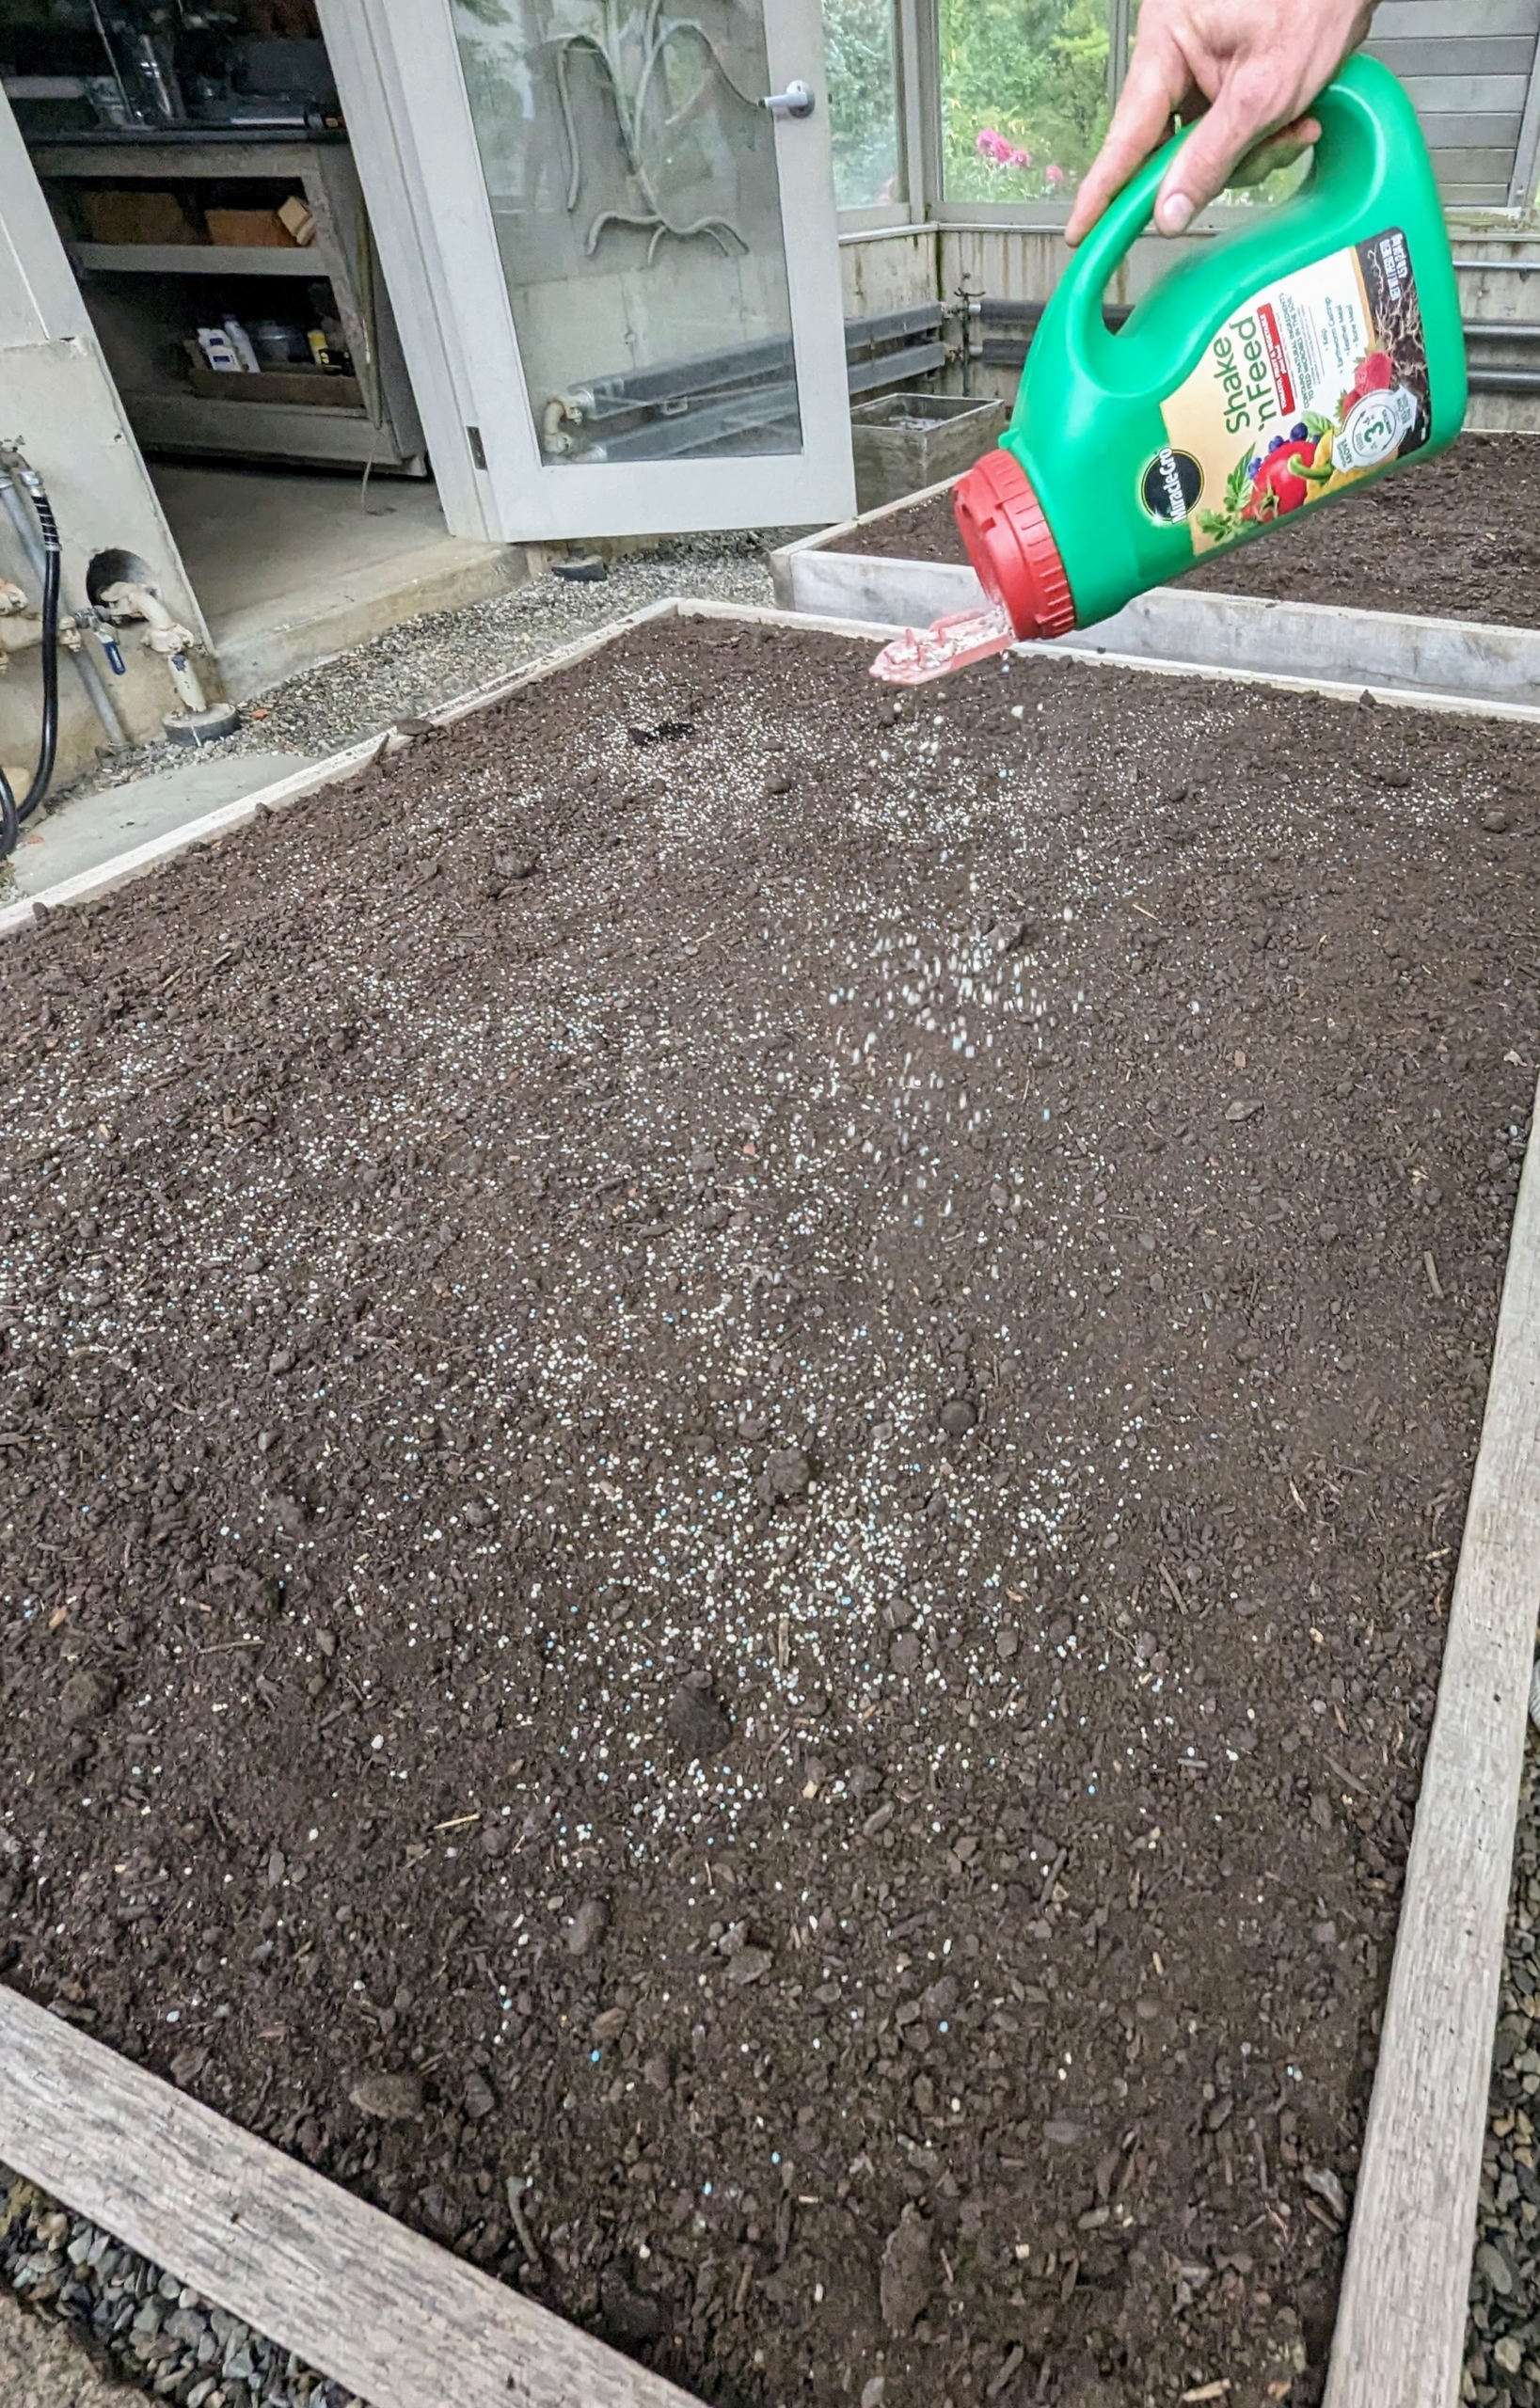
I spend a good amount of time preparing the soil before planting any seeds. I have 17 wooden garden boxes that fit the entire length and width of the structure. Earlier this year, the beds were tilled, amended with good compost, raked and fed. I use a fertilizer specially formulated for growing vegetables – Miracle-Gro® Shake ‘n Feed® Tomato, Fruit & Vegetable Plant Food.
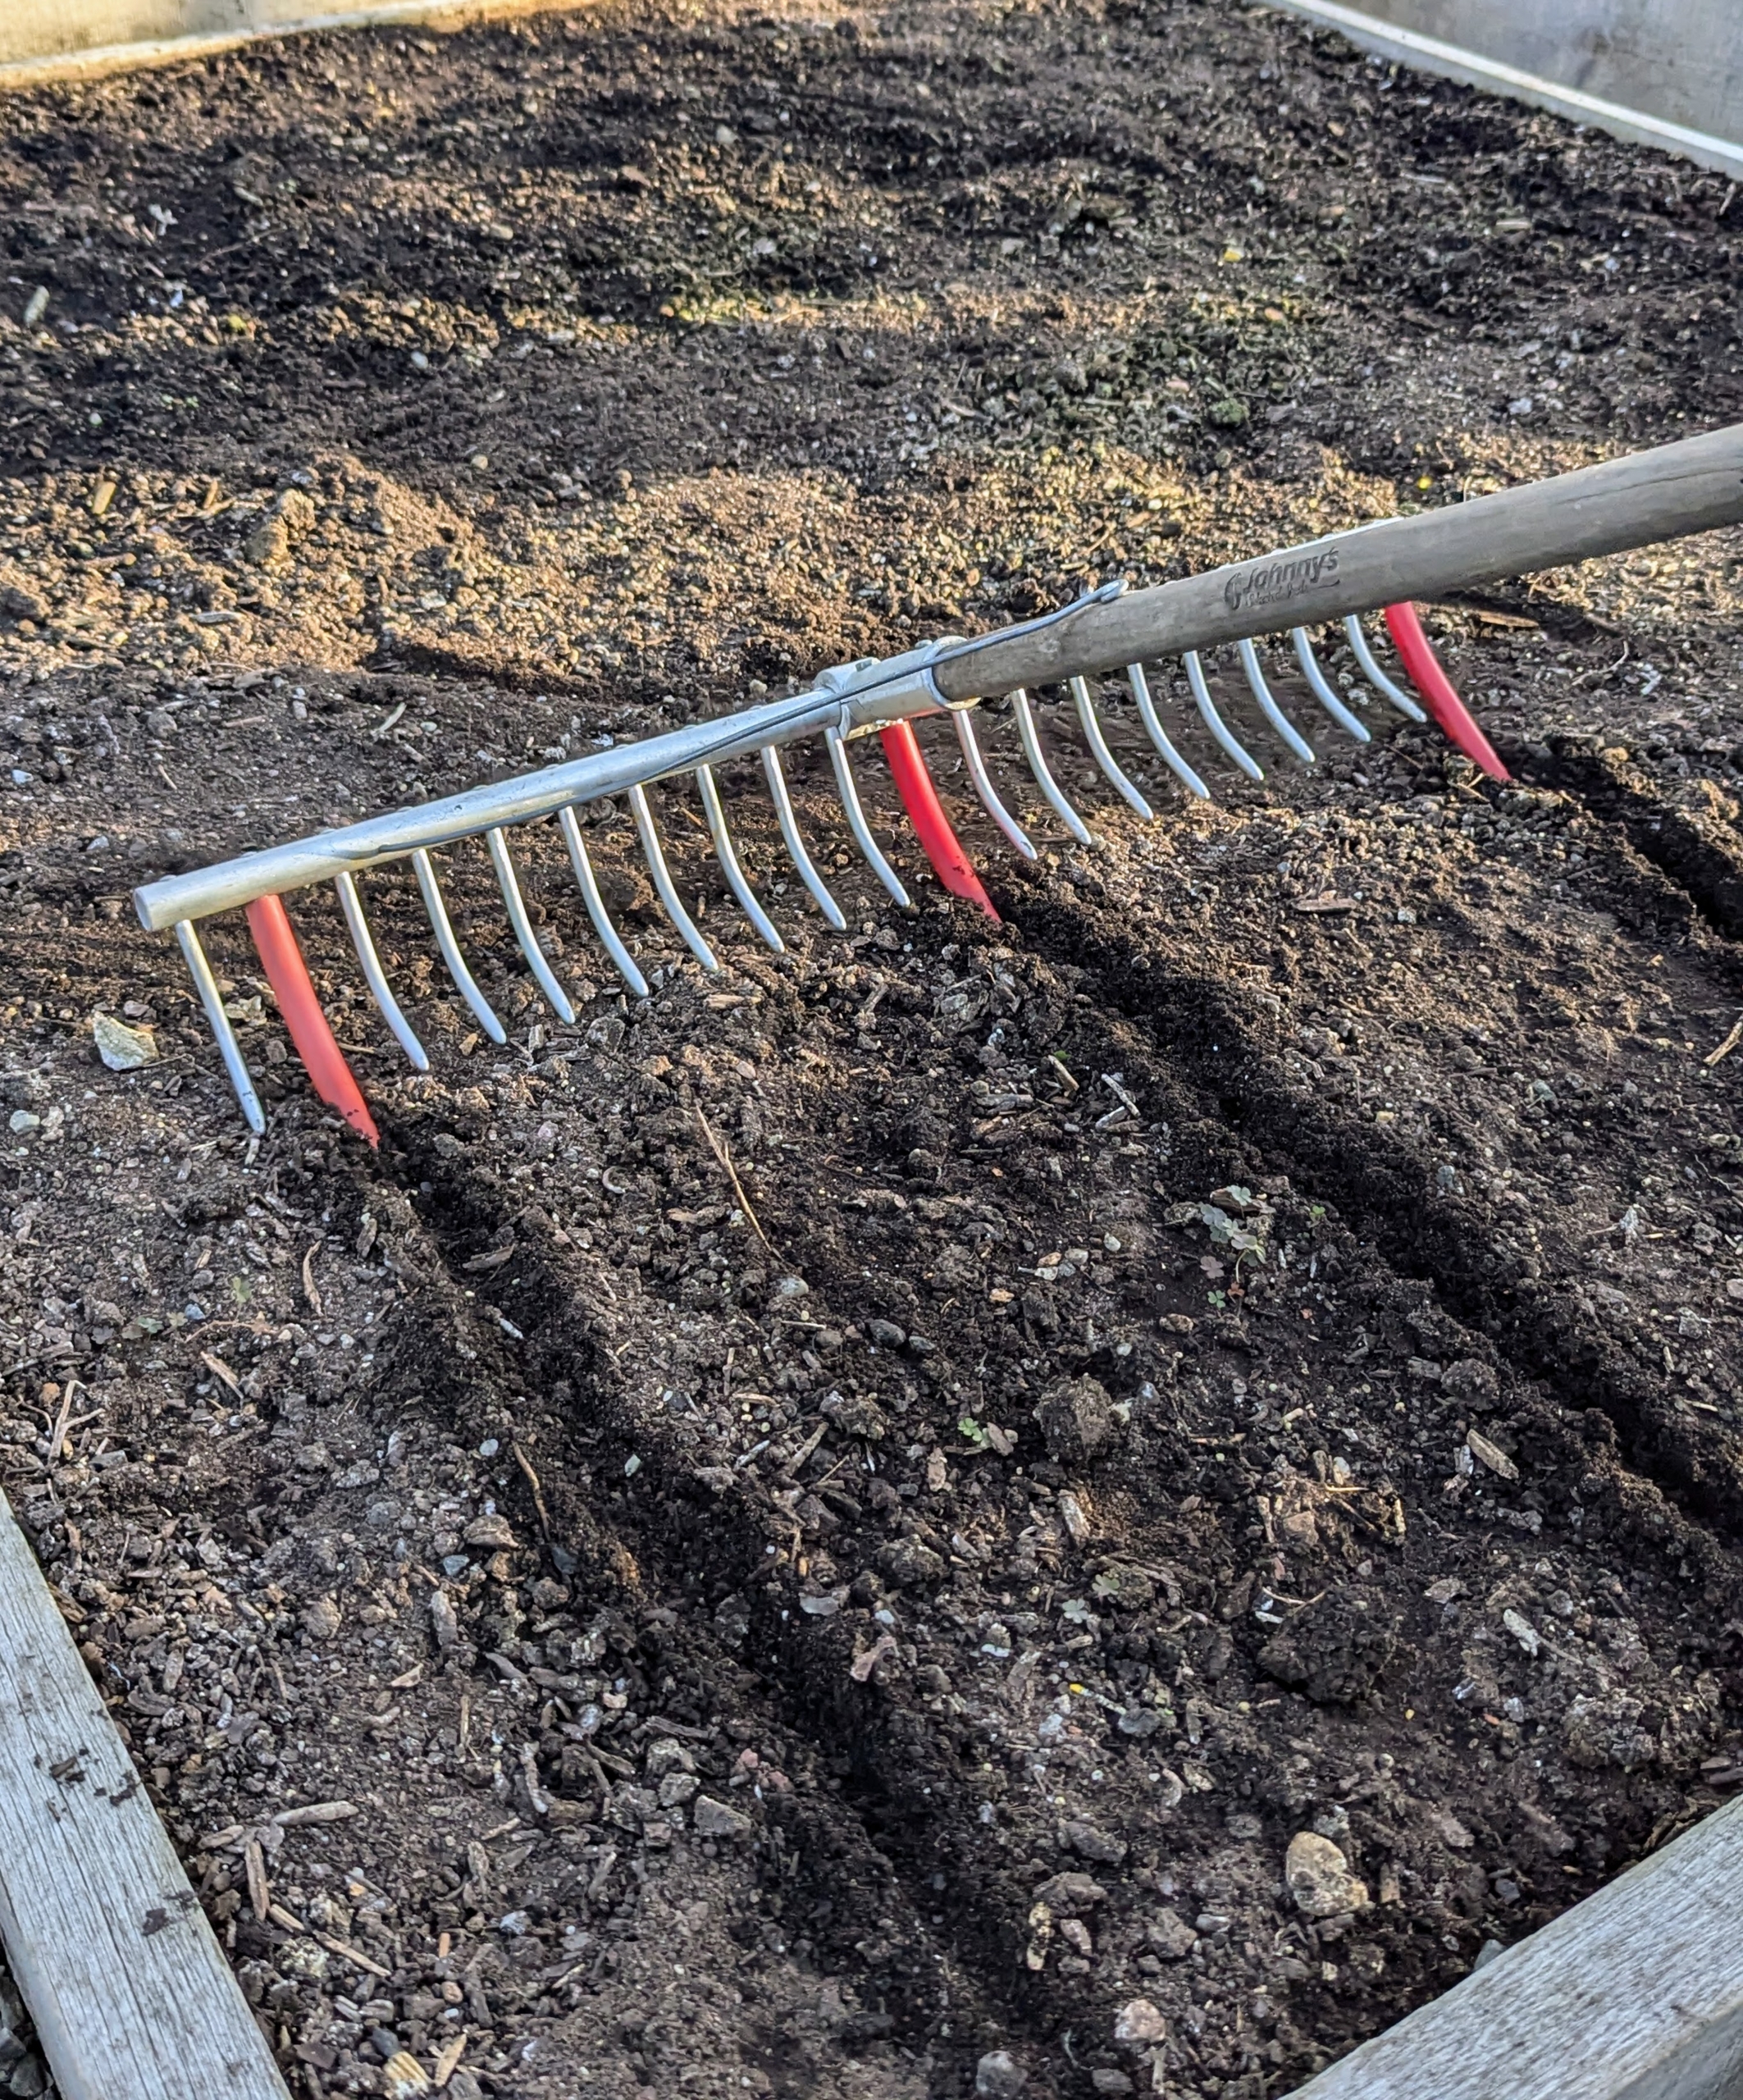
To start, Ryan uses this bed preparation rake from Johnny’s Selected Seeds to create furrows in the soil. Hard plastic red tubes slide onto selected teeth of the rake to mark the rows. In general, seeds should be planted at a depth of two times the width, or diameter, of the seed. A seed that’s about 1/16-of-an-inch thick should be planted an eighth-of-an-inch deep.
Some vegetables, such as kale, need to be planted a little deeper. Ryan uses a hoe to go over a few of the planting rows to deepen them another inch or two.
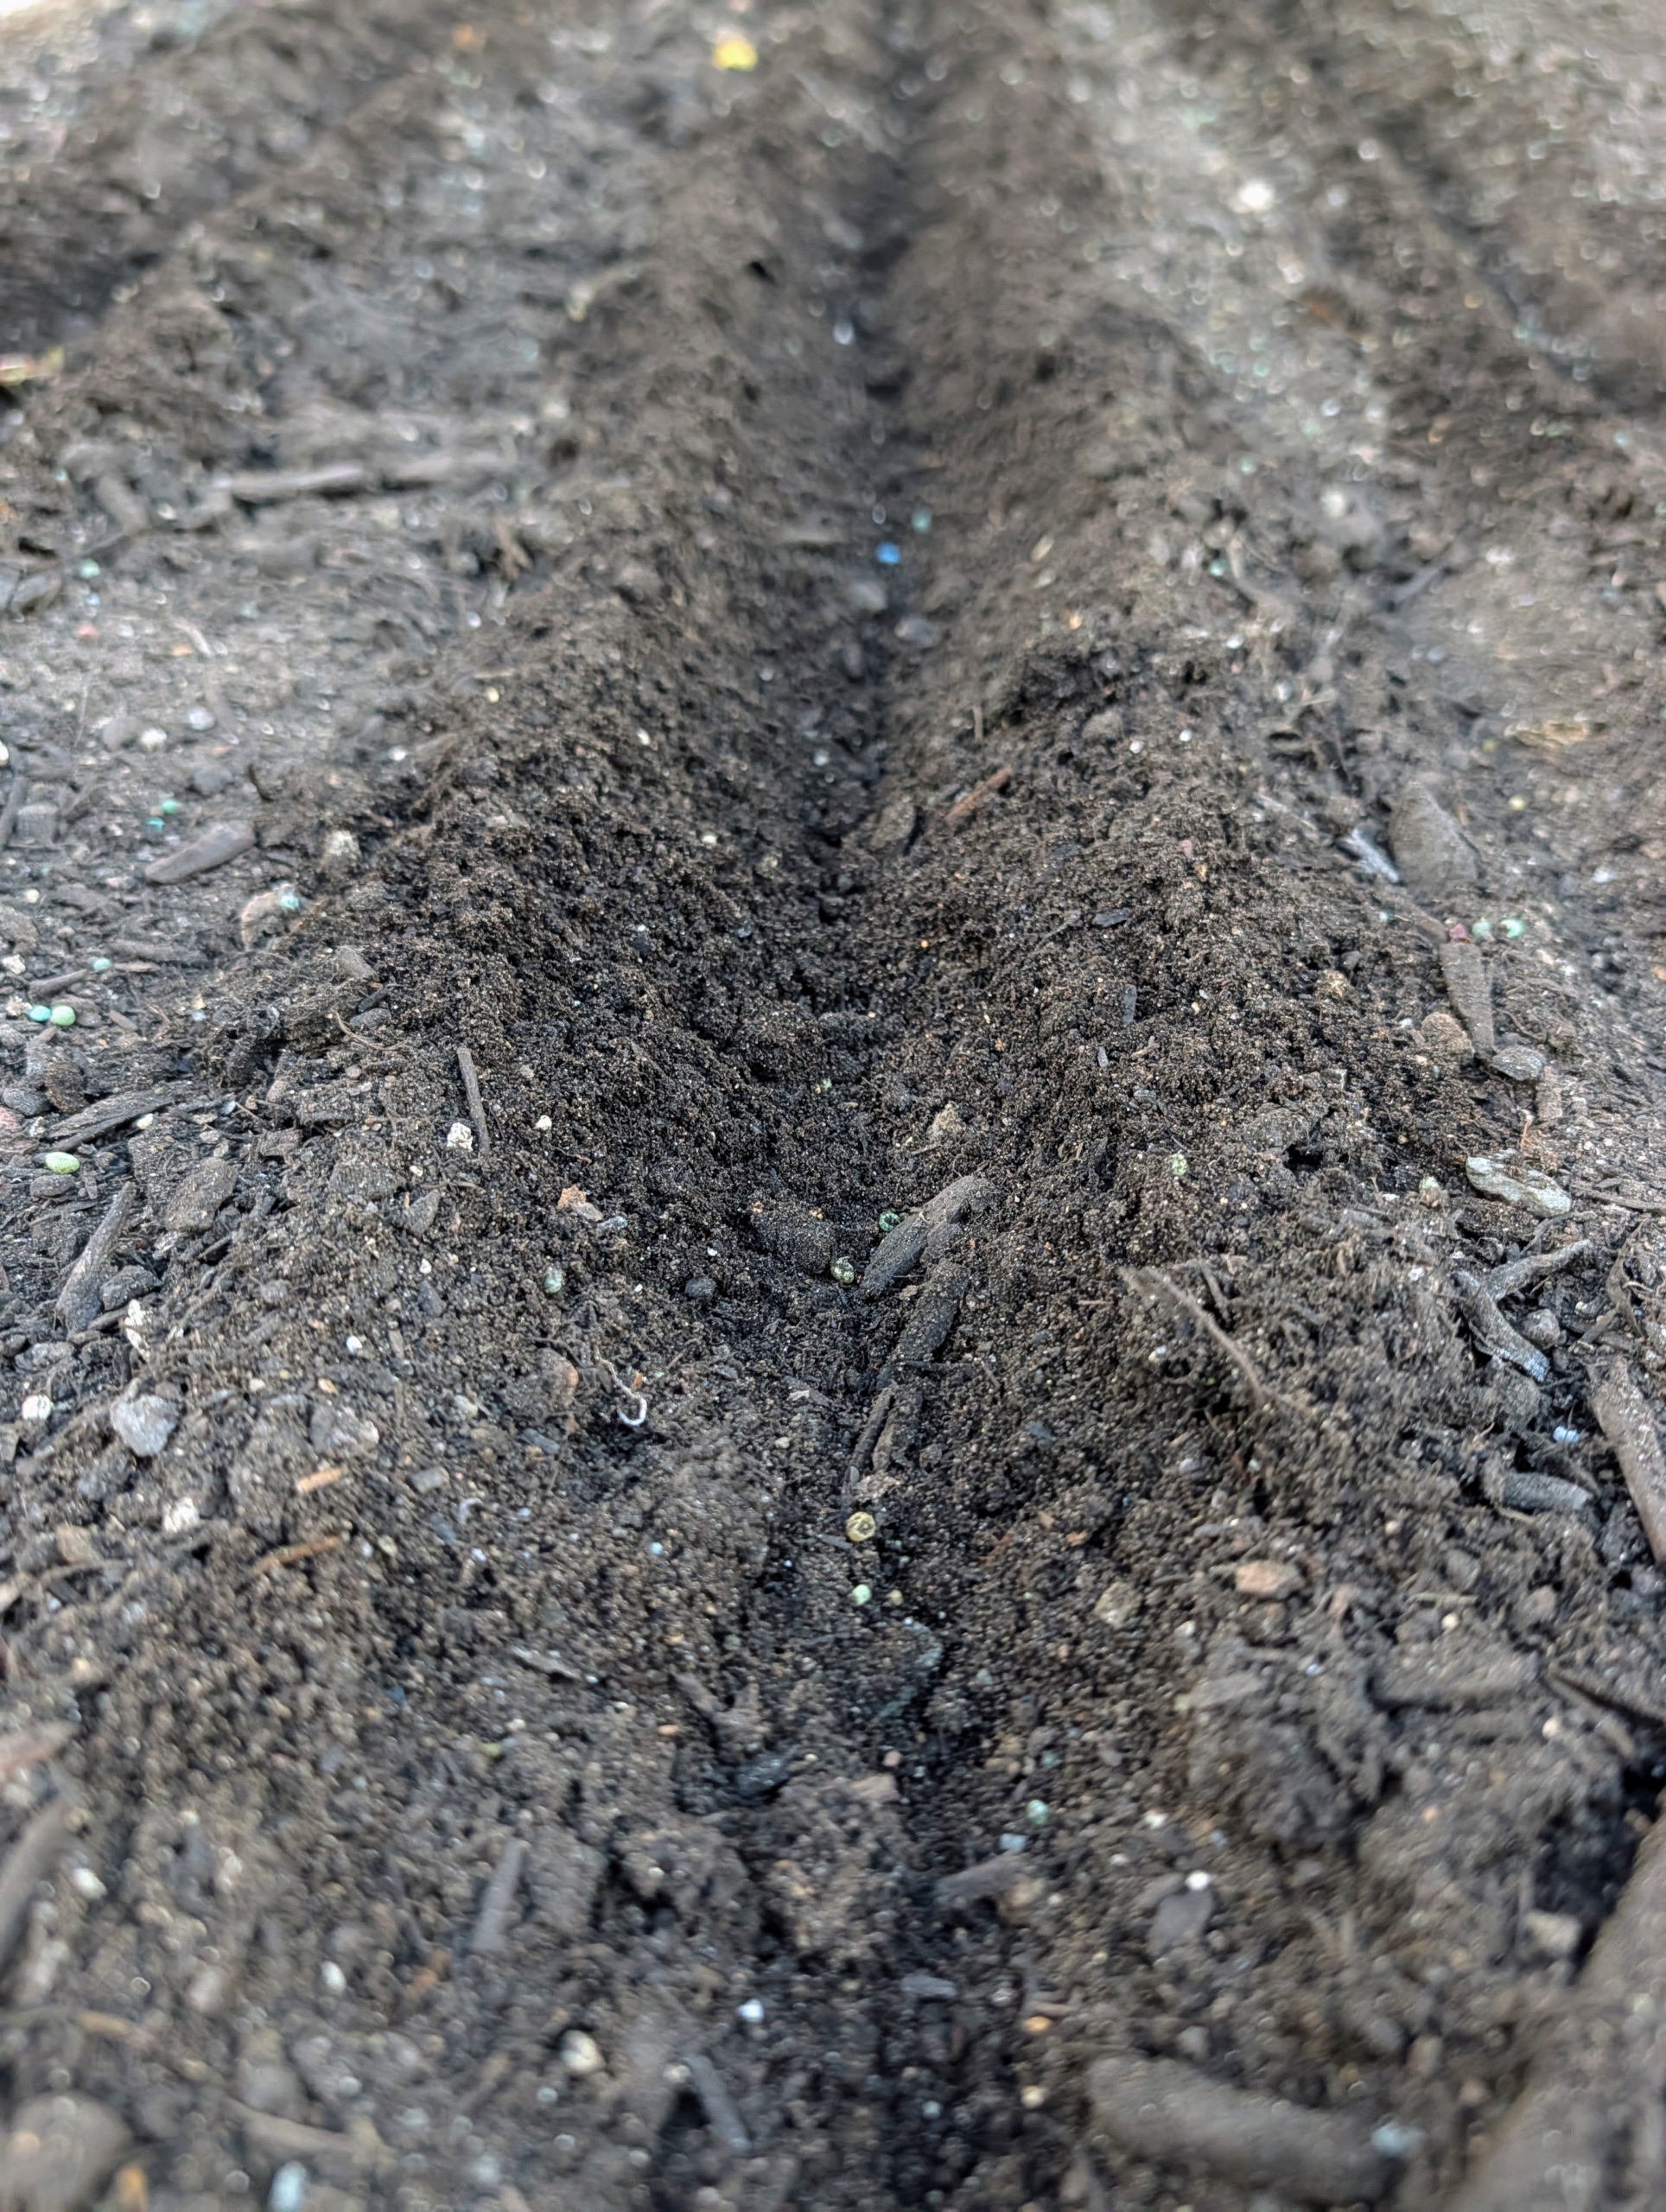
Here is a closer look at one of the furrows. All these beds are raised. Raised bed gardening allows good drainage, prevents soil compaction, and provides protection for those plants that may otherwise get trampled.
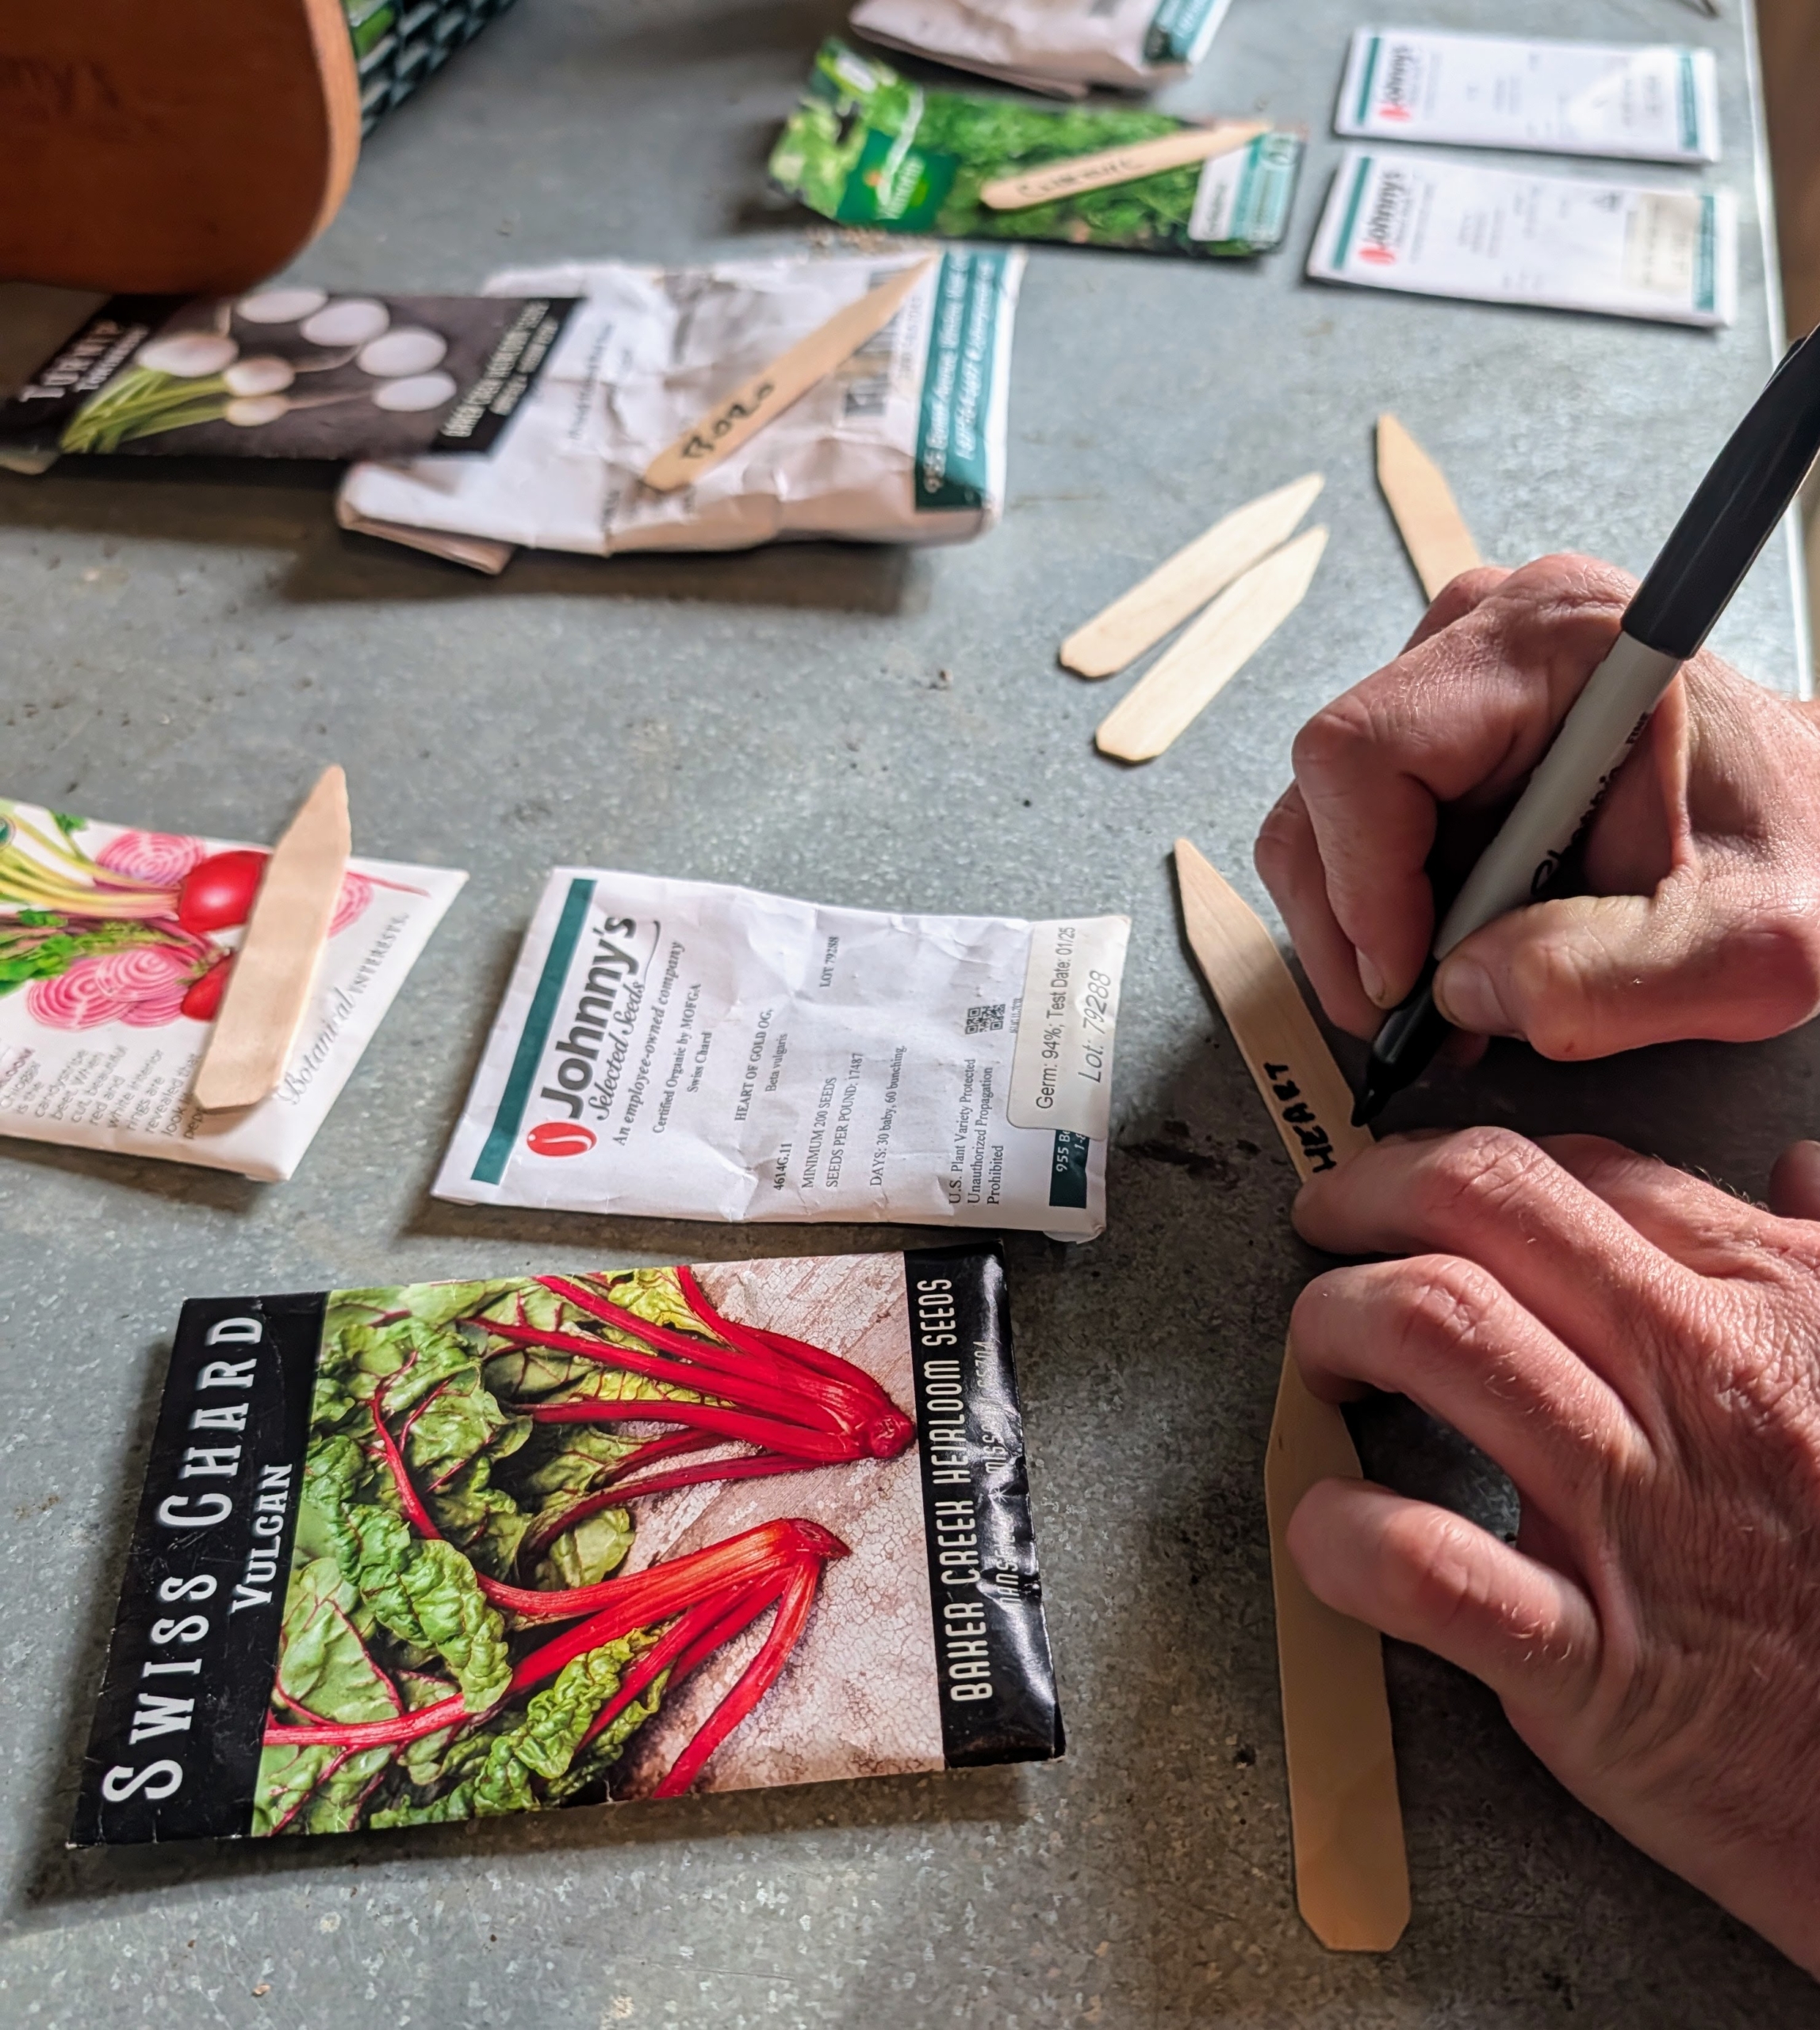
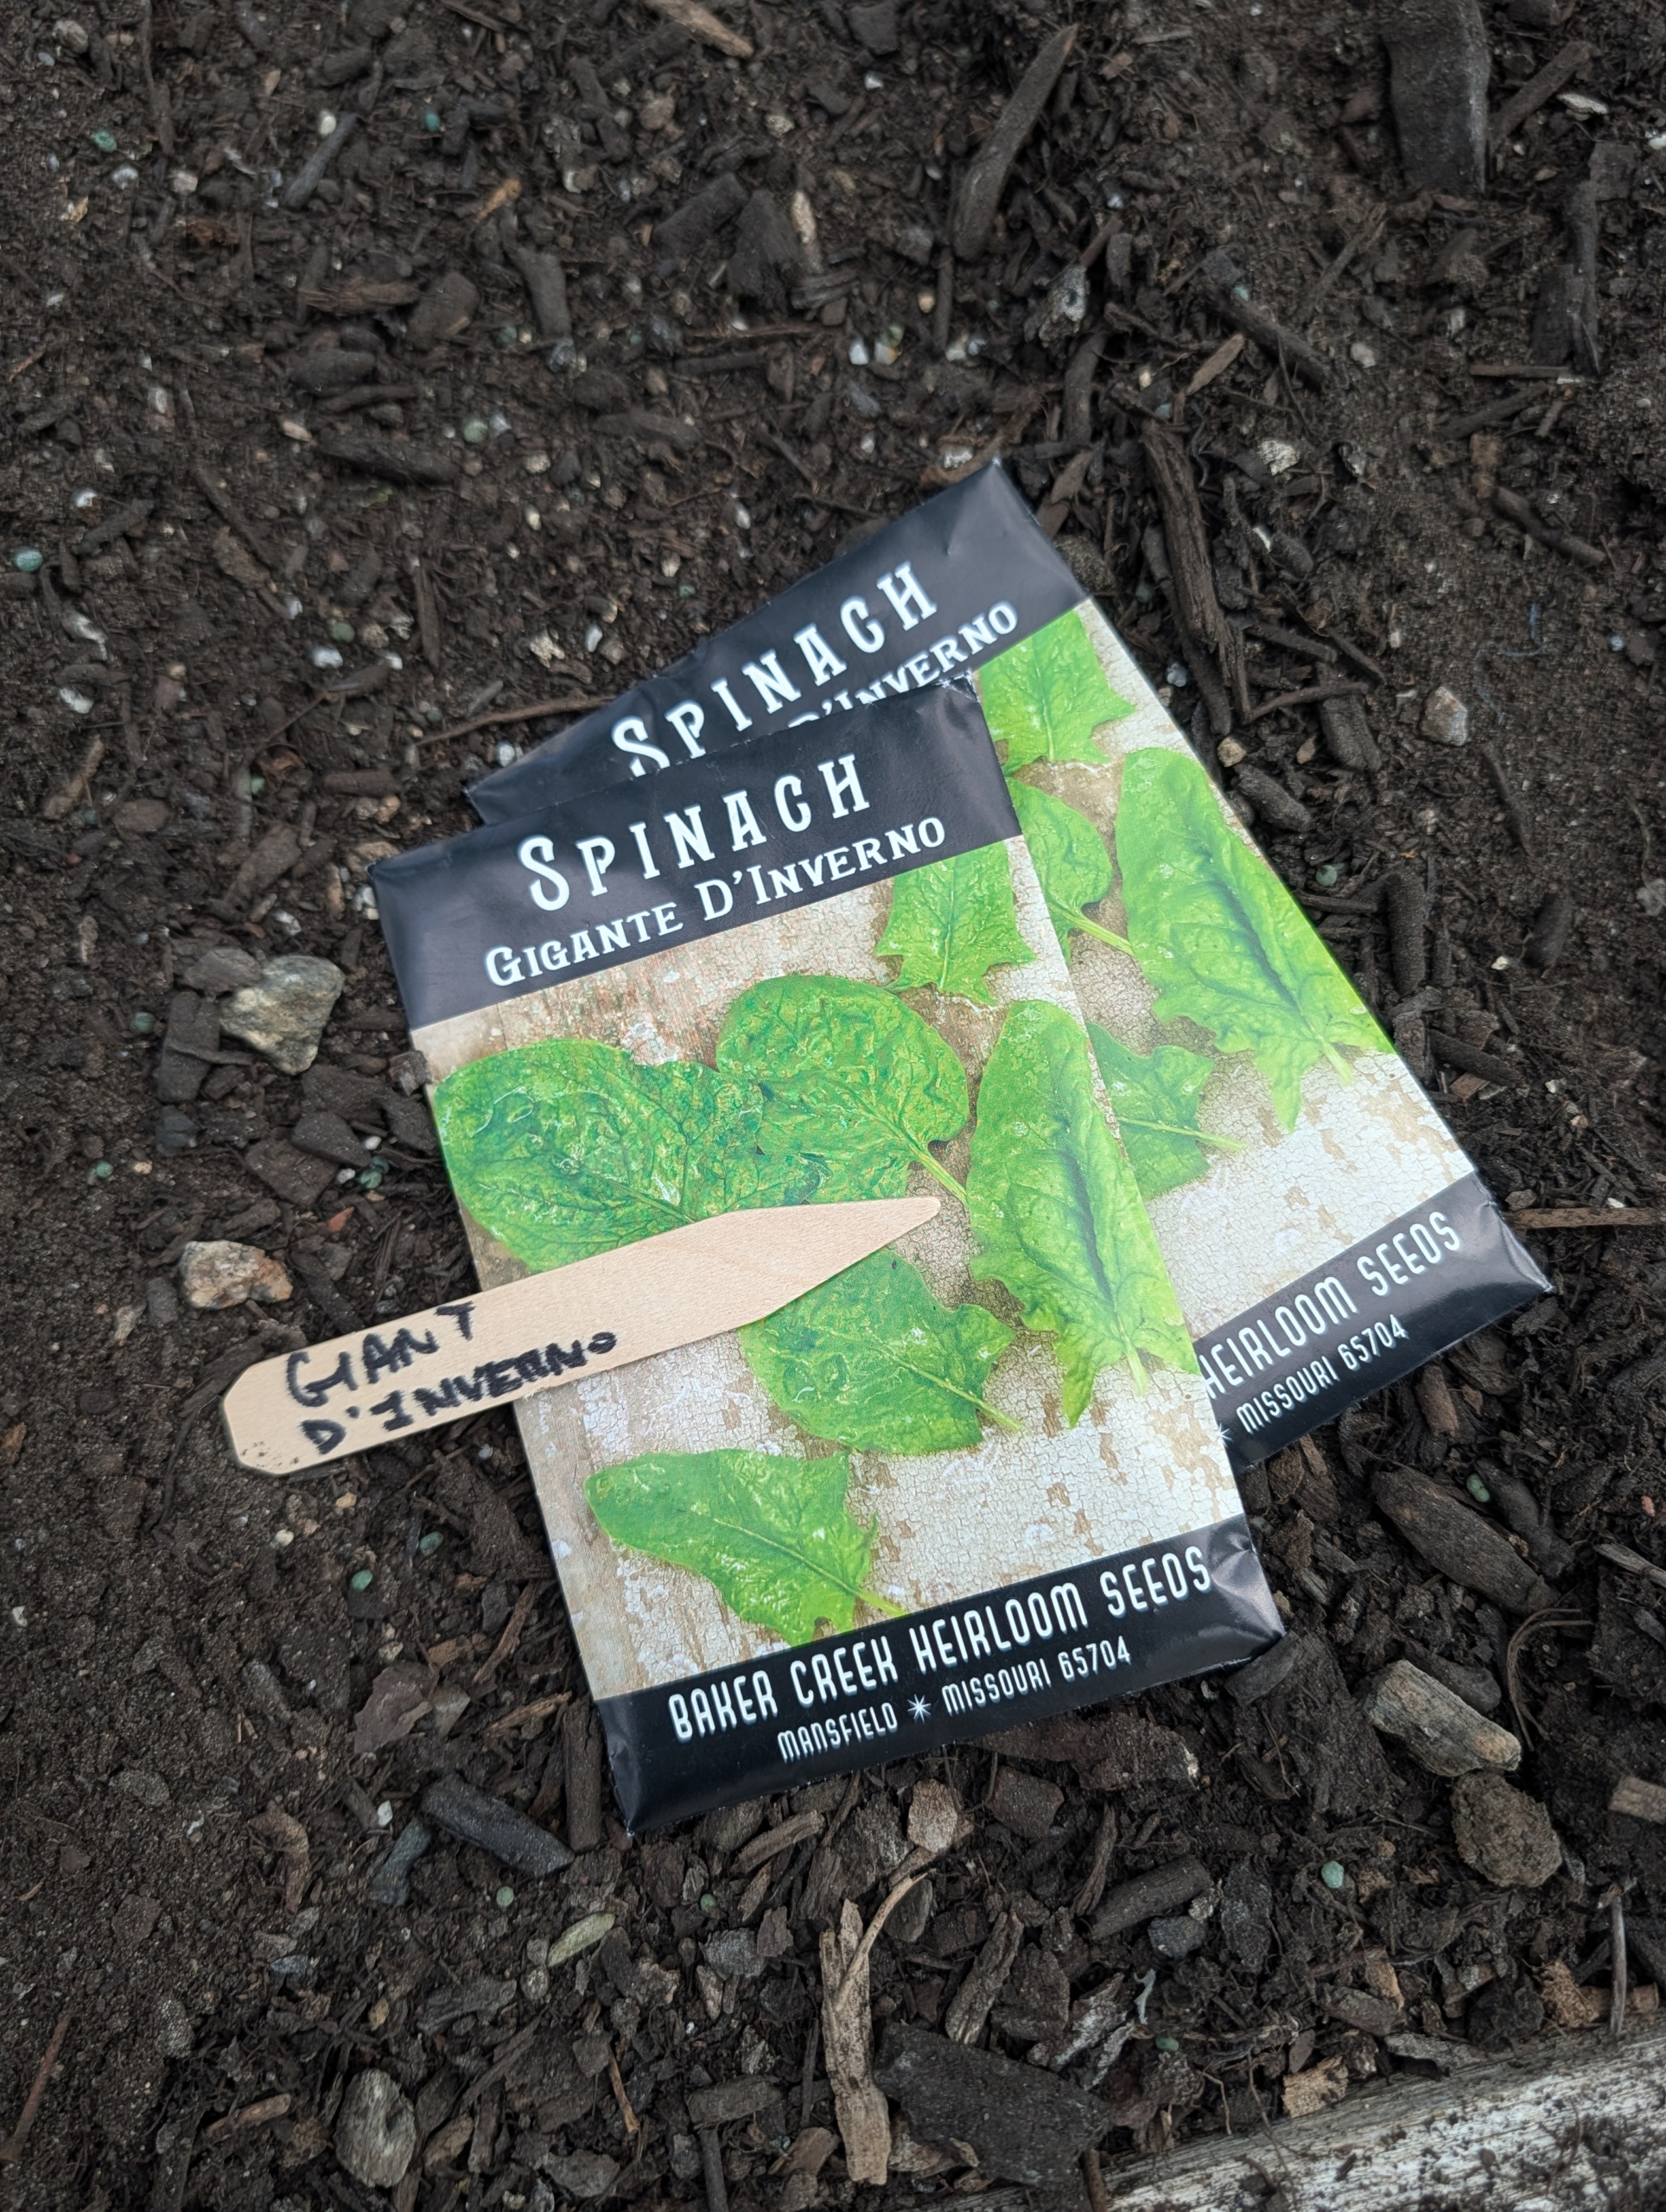
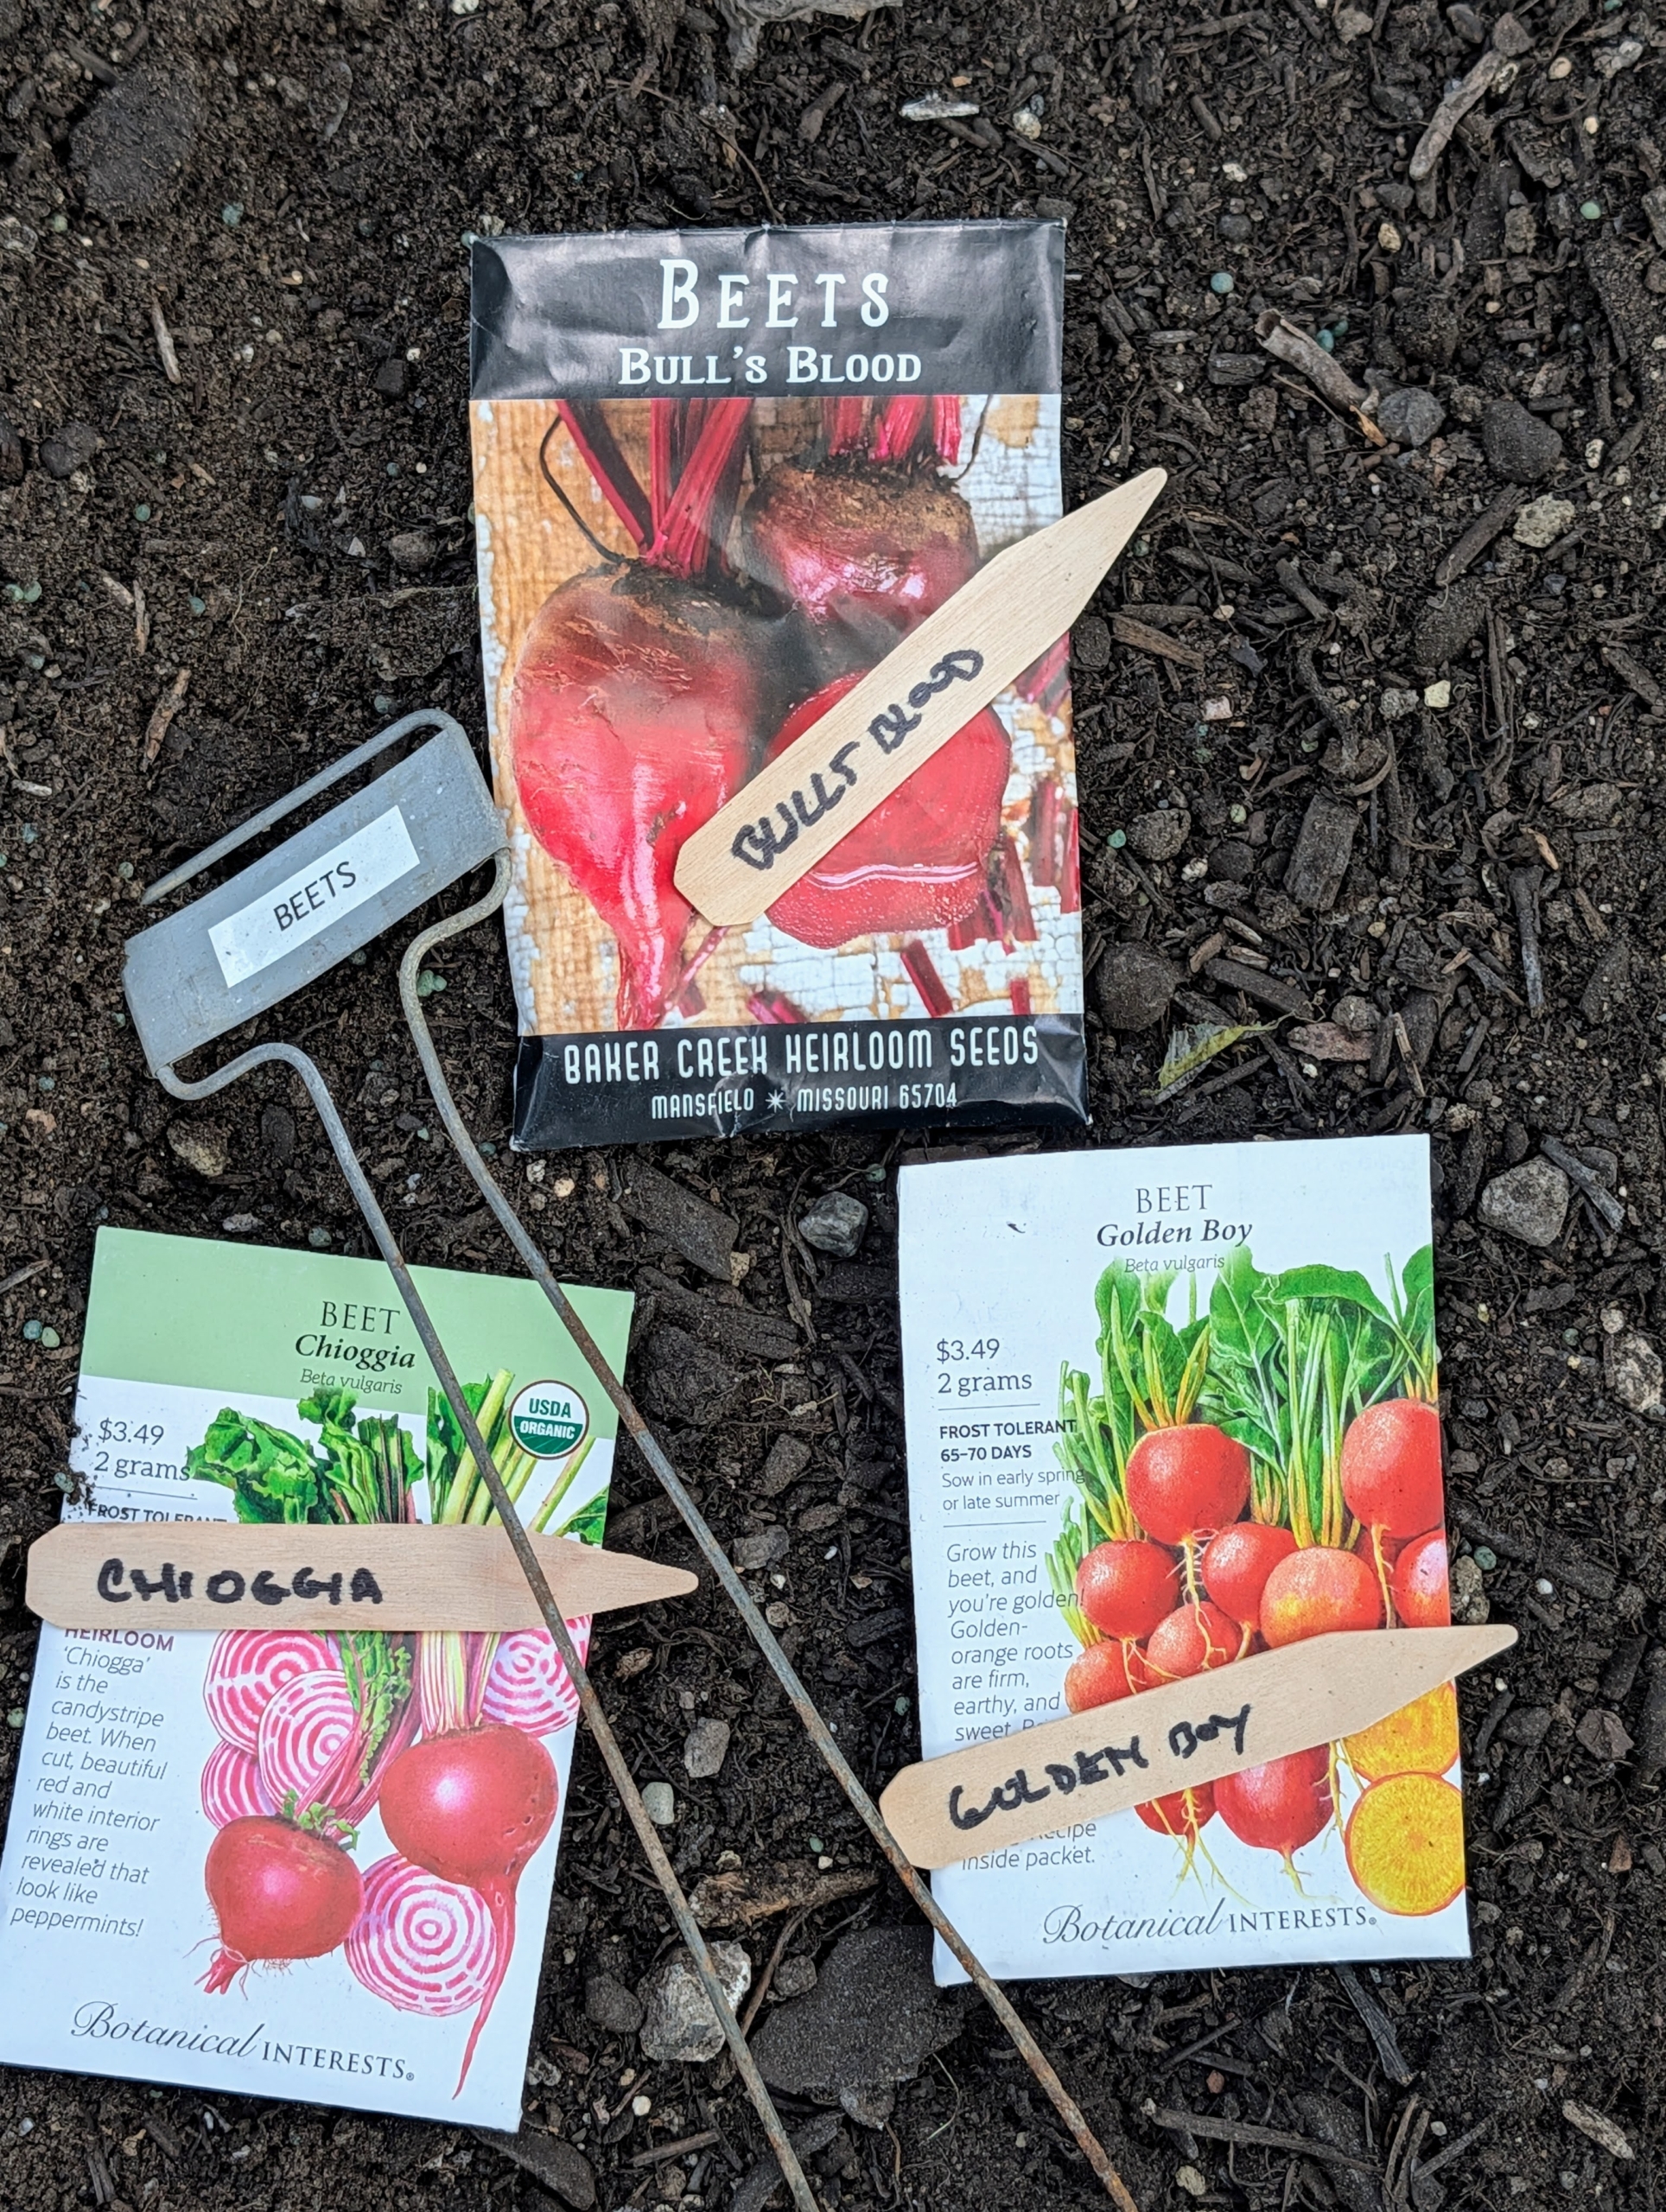
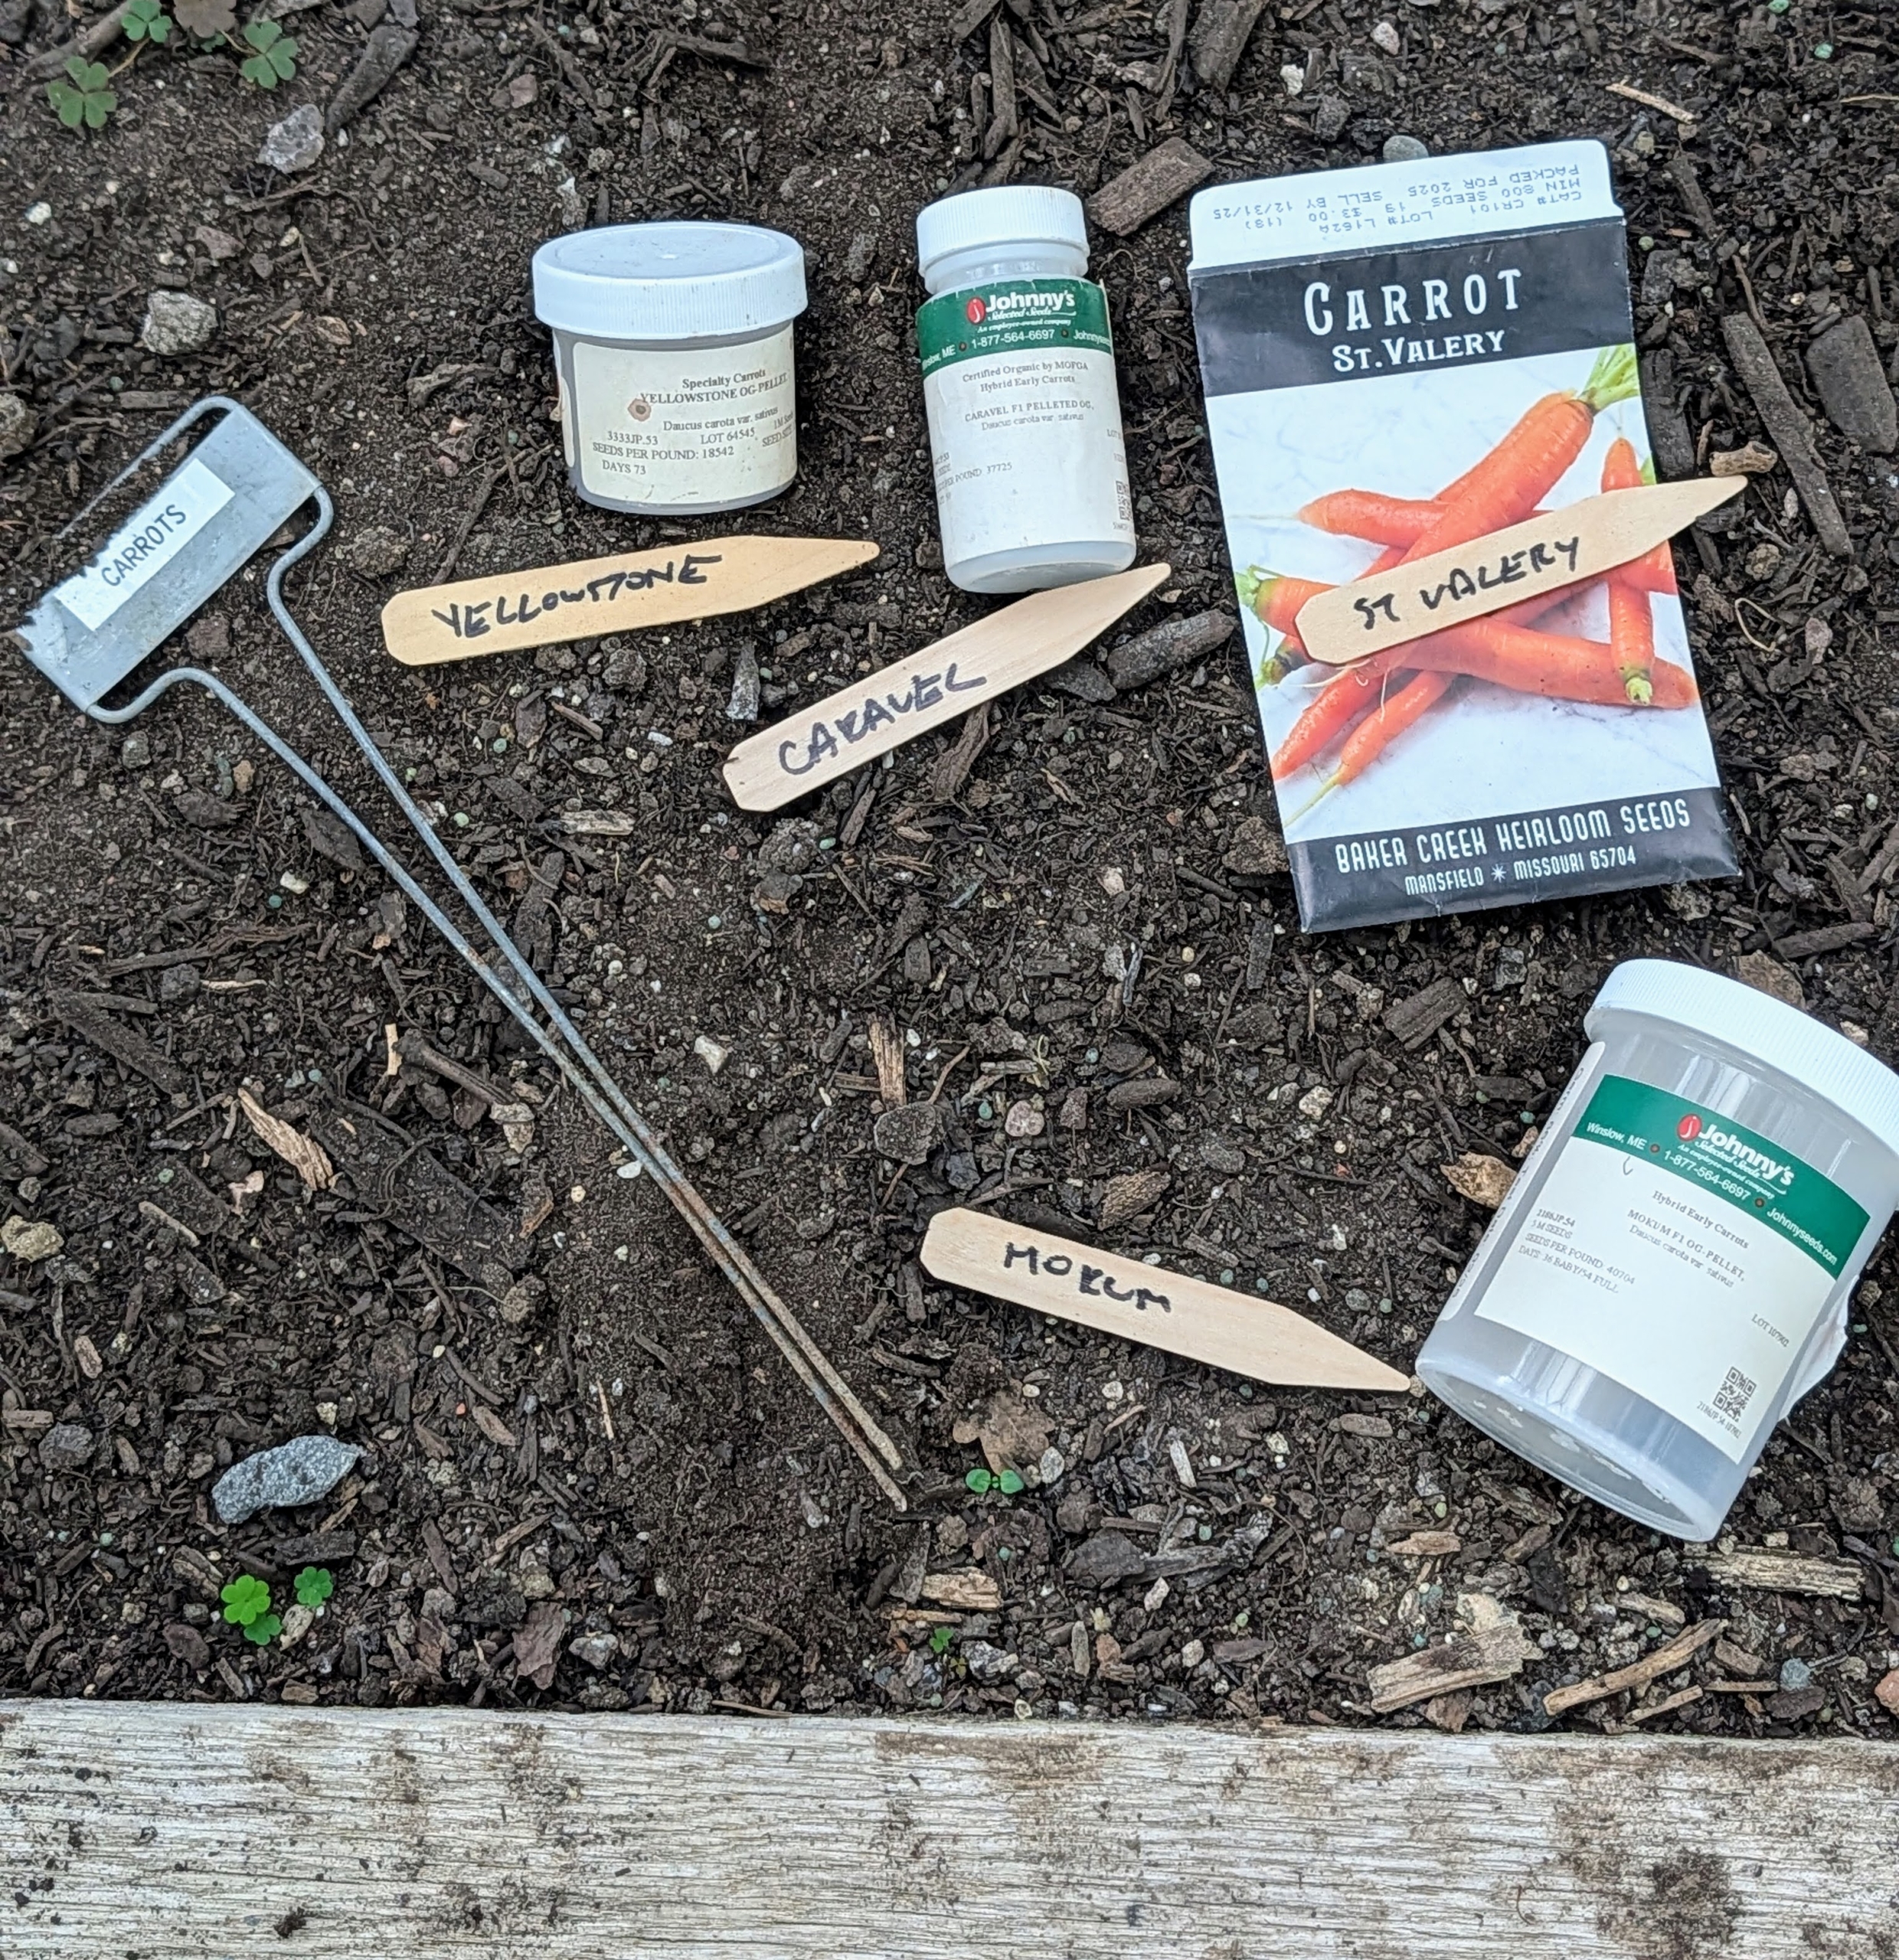
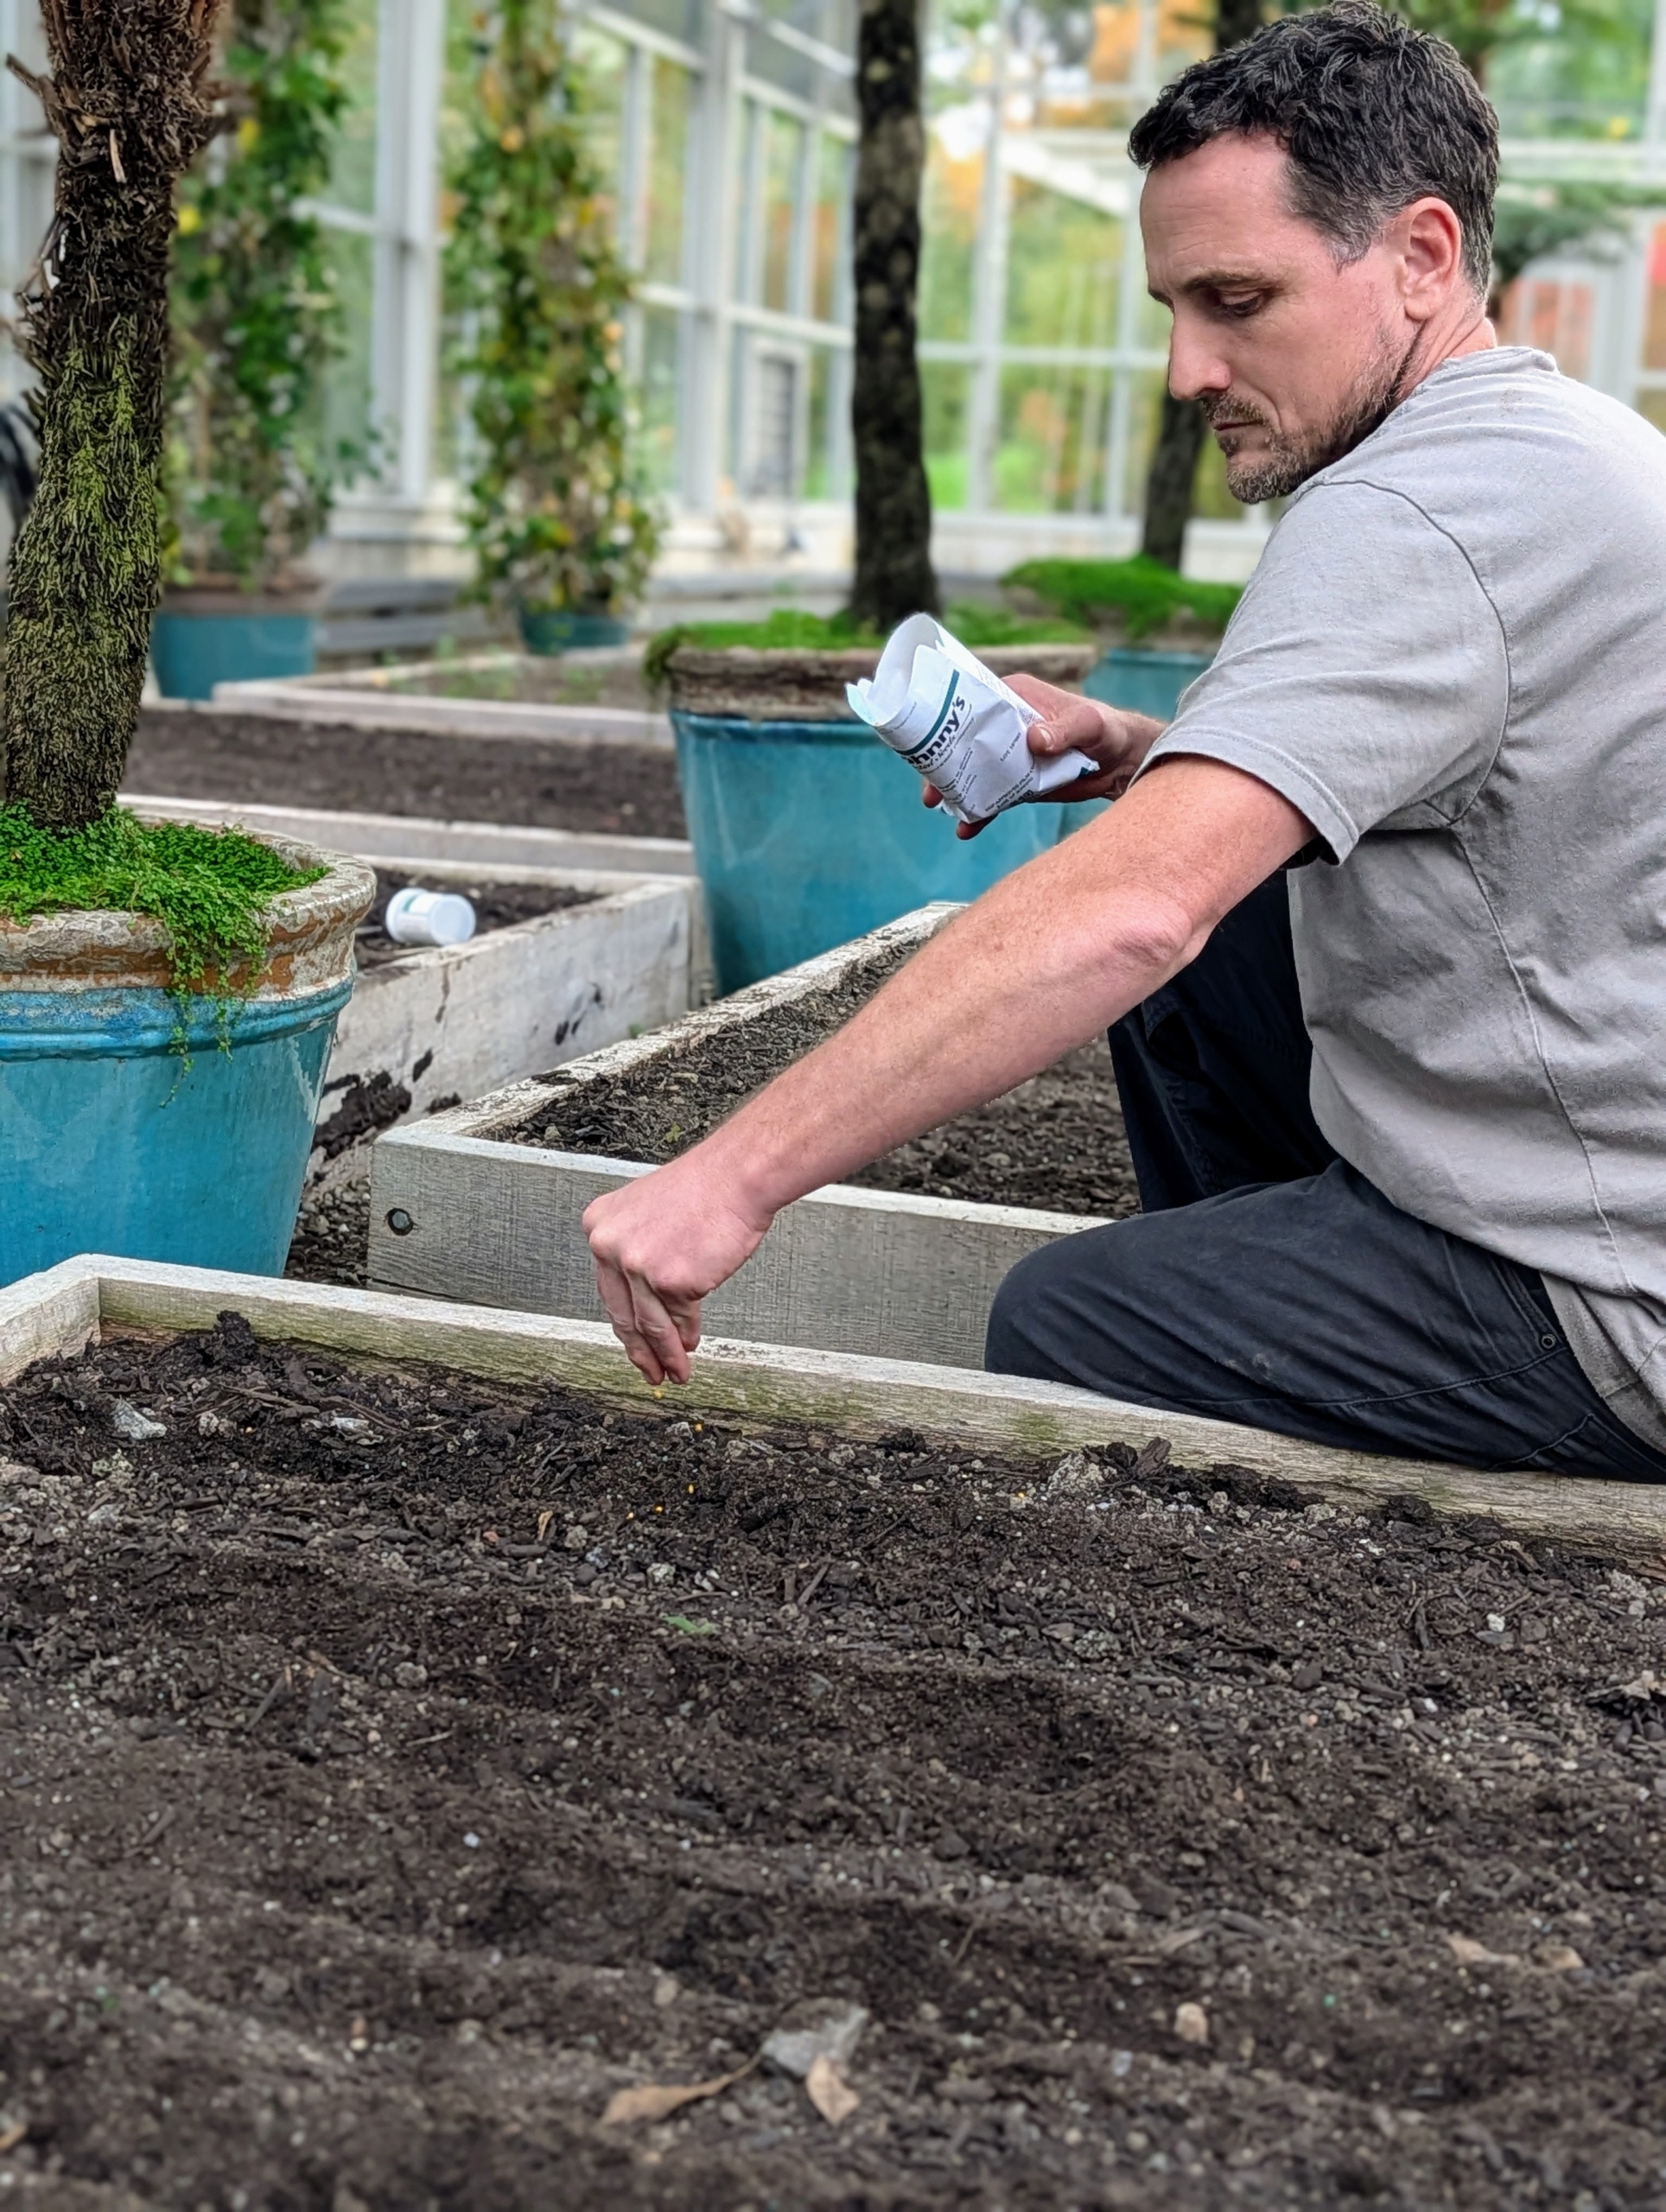
Next, after Ryan selects what seeds he is using, he makes corresponding markers.
Each packet is placed next to its corresponding marker at the foot of its designated planting row. I like to make sure we keep track of what varieties grow well, so I know what to use again. Ryan lays out all the packets first, strategically selecting what goes in each bed, so every crop is planted in a different location from last season. This is called rotation planting which helps maintain soil fertility, enhances its structure, and helps prevent pests and diseases.
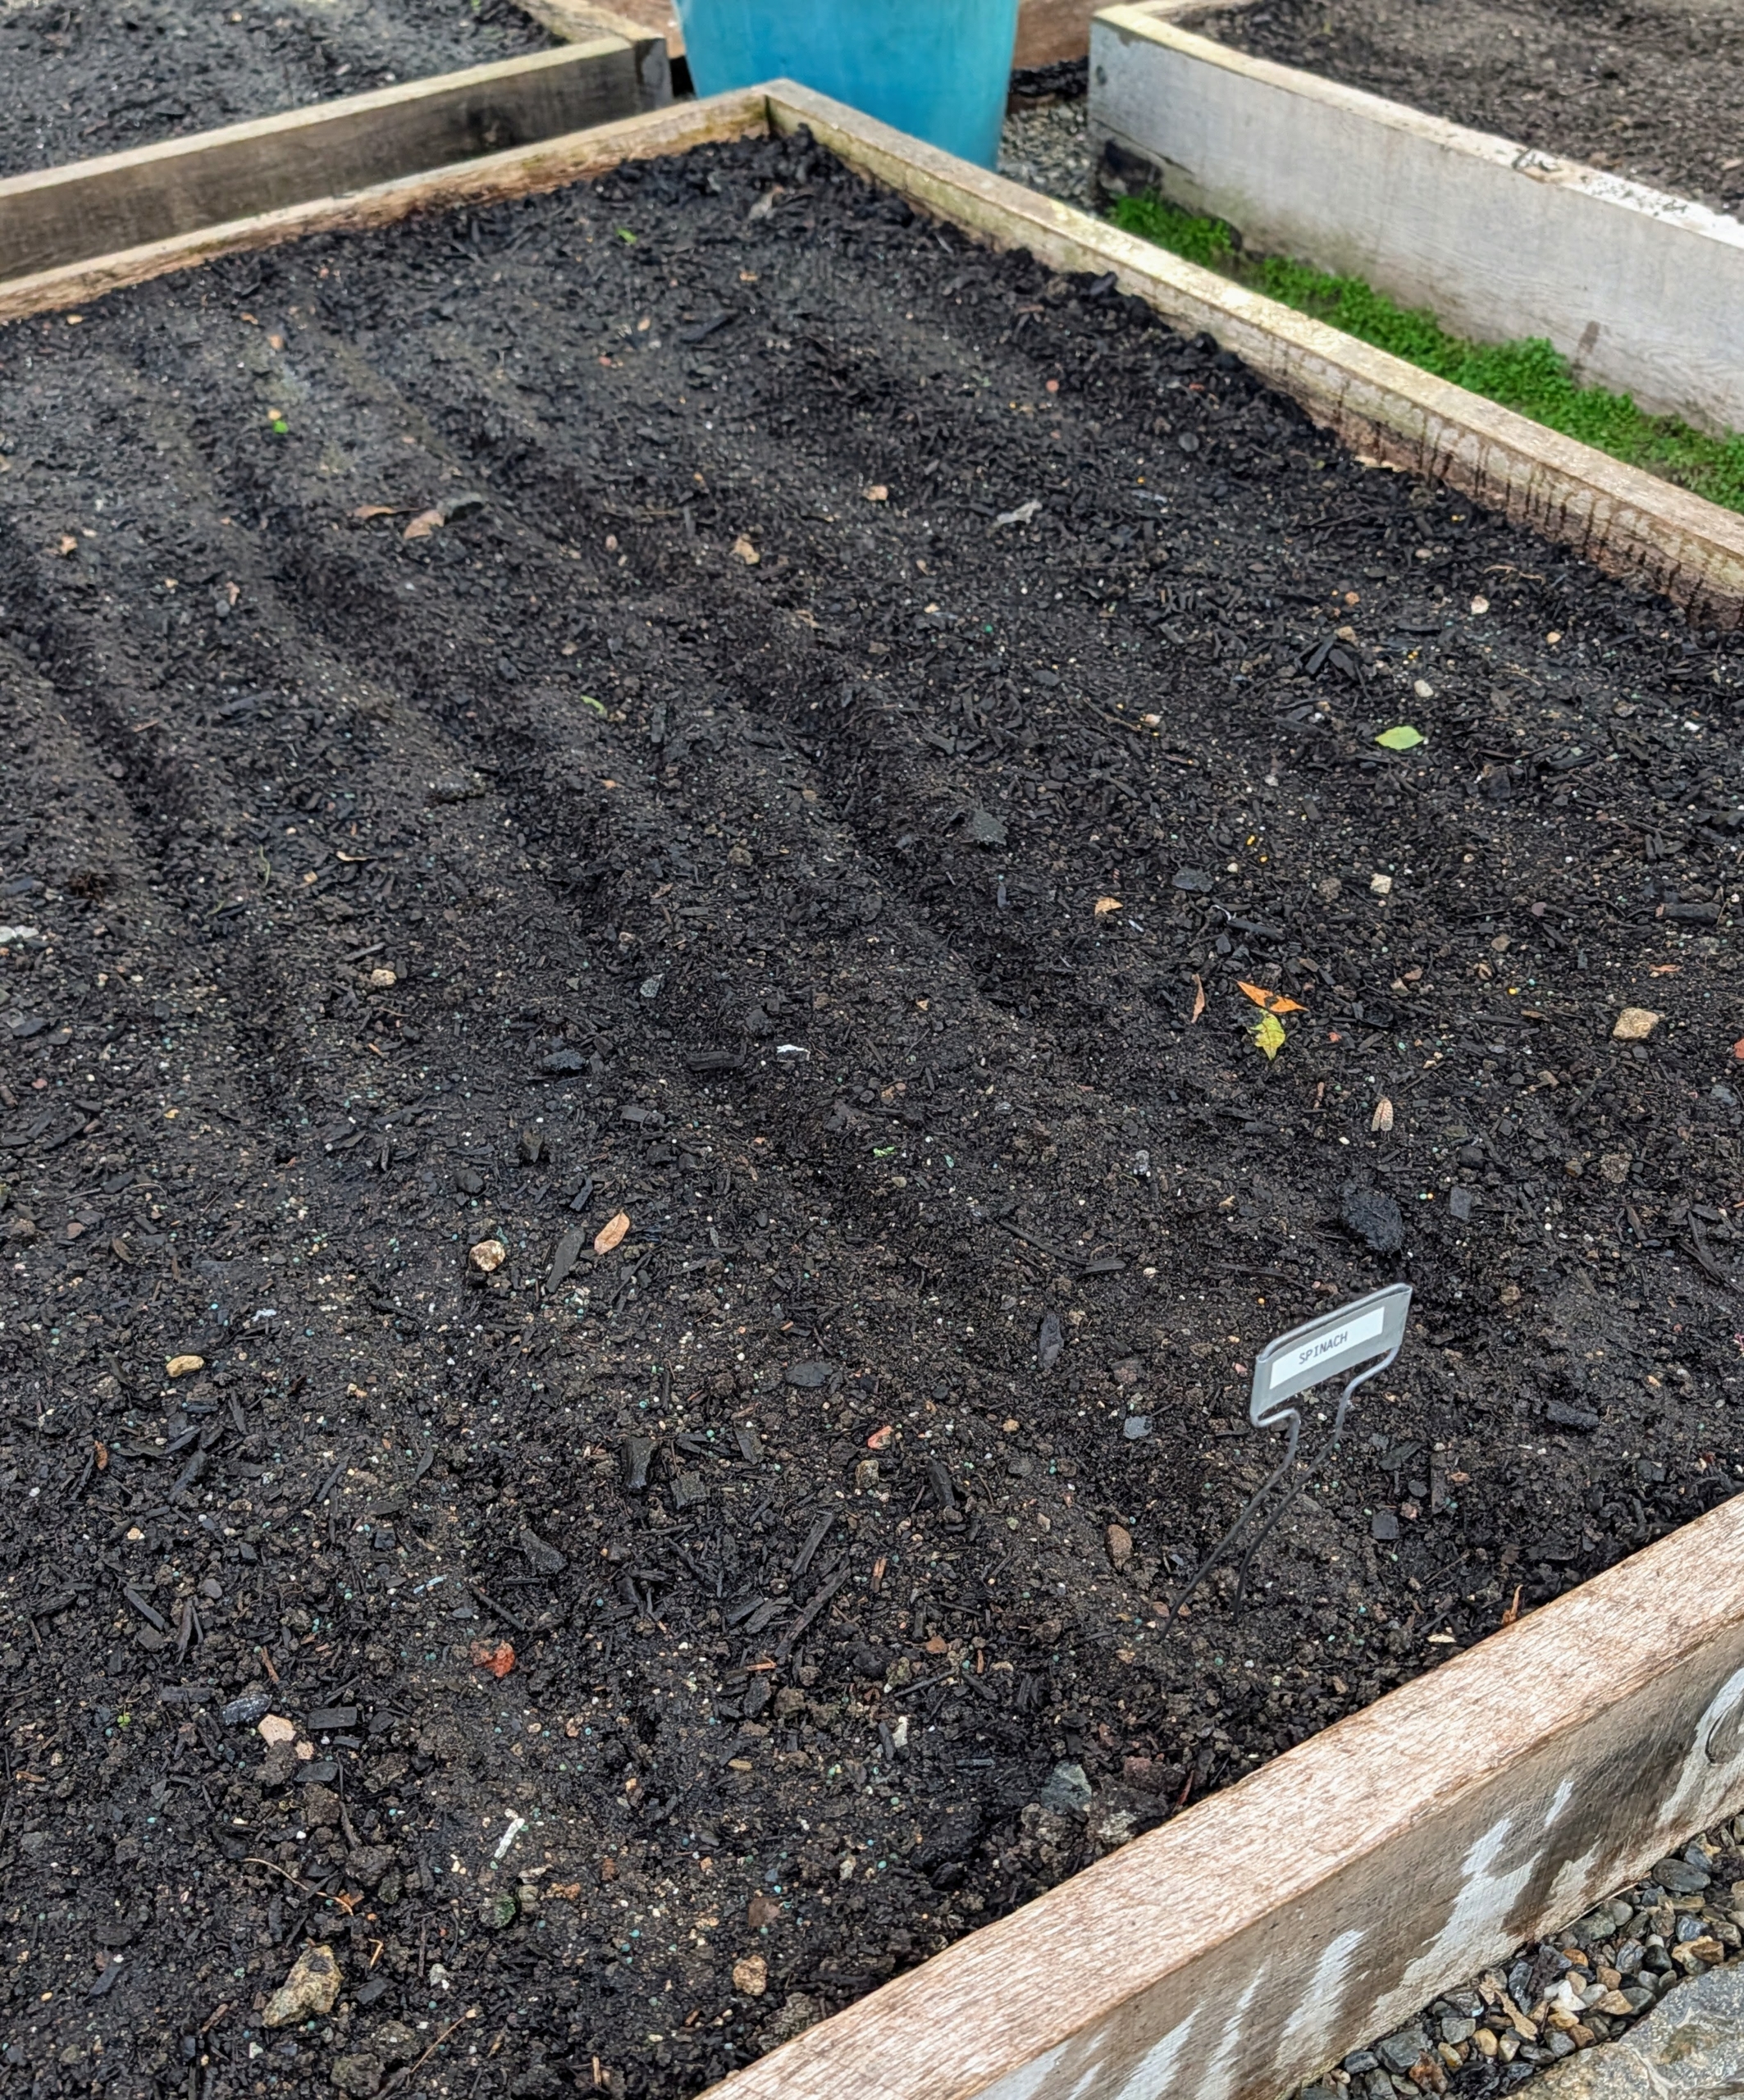
Ryan will plant two beds of spinach. I use spinach every day in my green juice – it’s always picked fresh. Spinach is an excellent source of vitamin K, vitamin A, vitamin C, folate, and a good source of manganese, magnesium, iron and vitamin B2.
Every season, I also plant beets. Beets are sweet and tender – and one of the healthiest foods. Beets contain a unique source of phytonutrients called betalains, which provide antioxidant, anti-inflammatory and detoxification support.
This bed is designated for carrots of various types and colors.
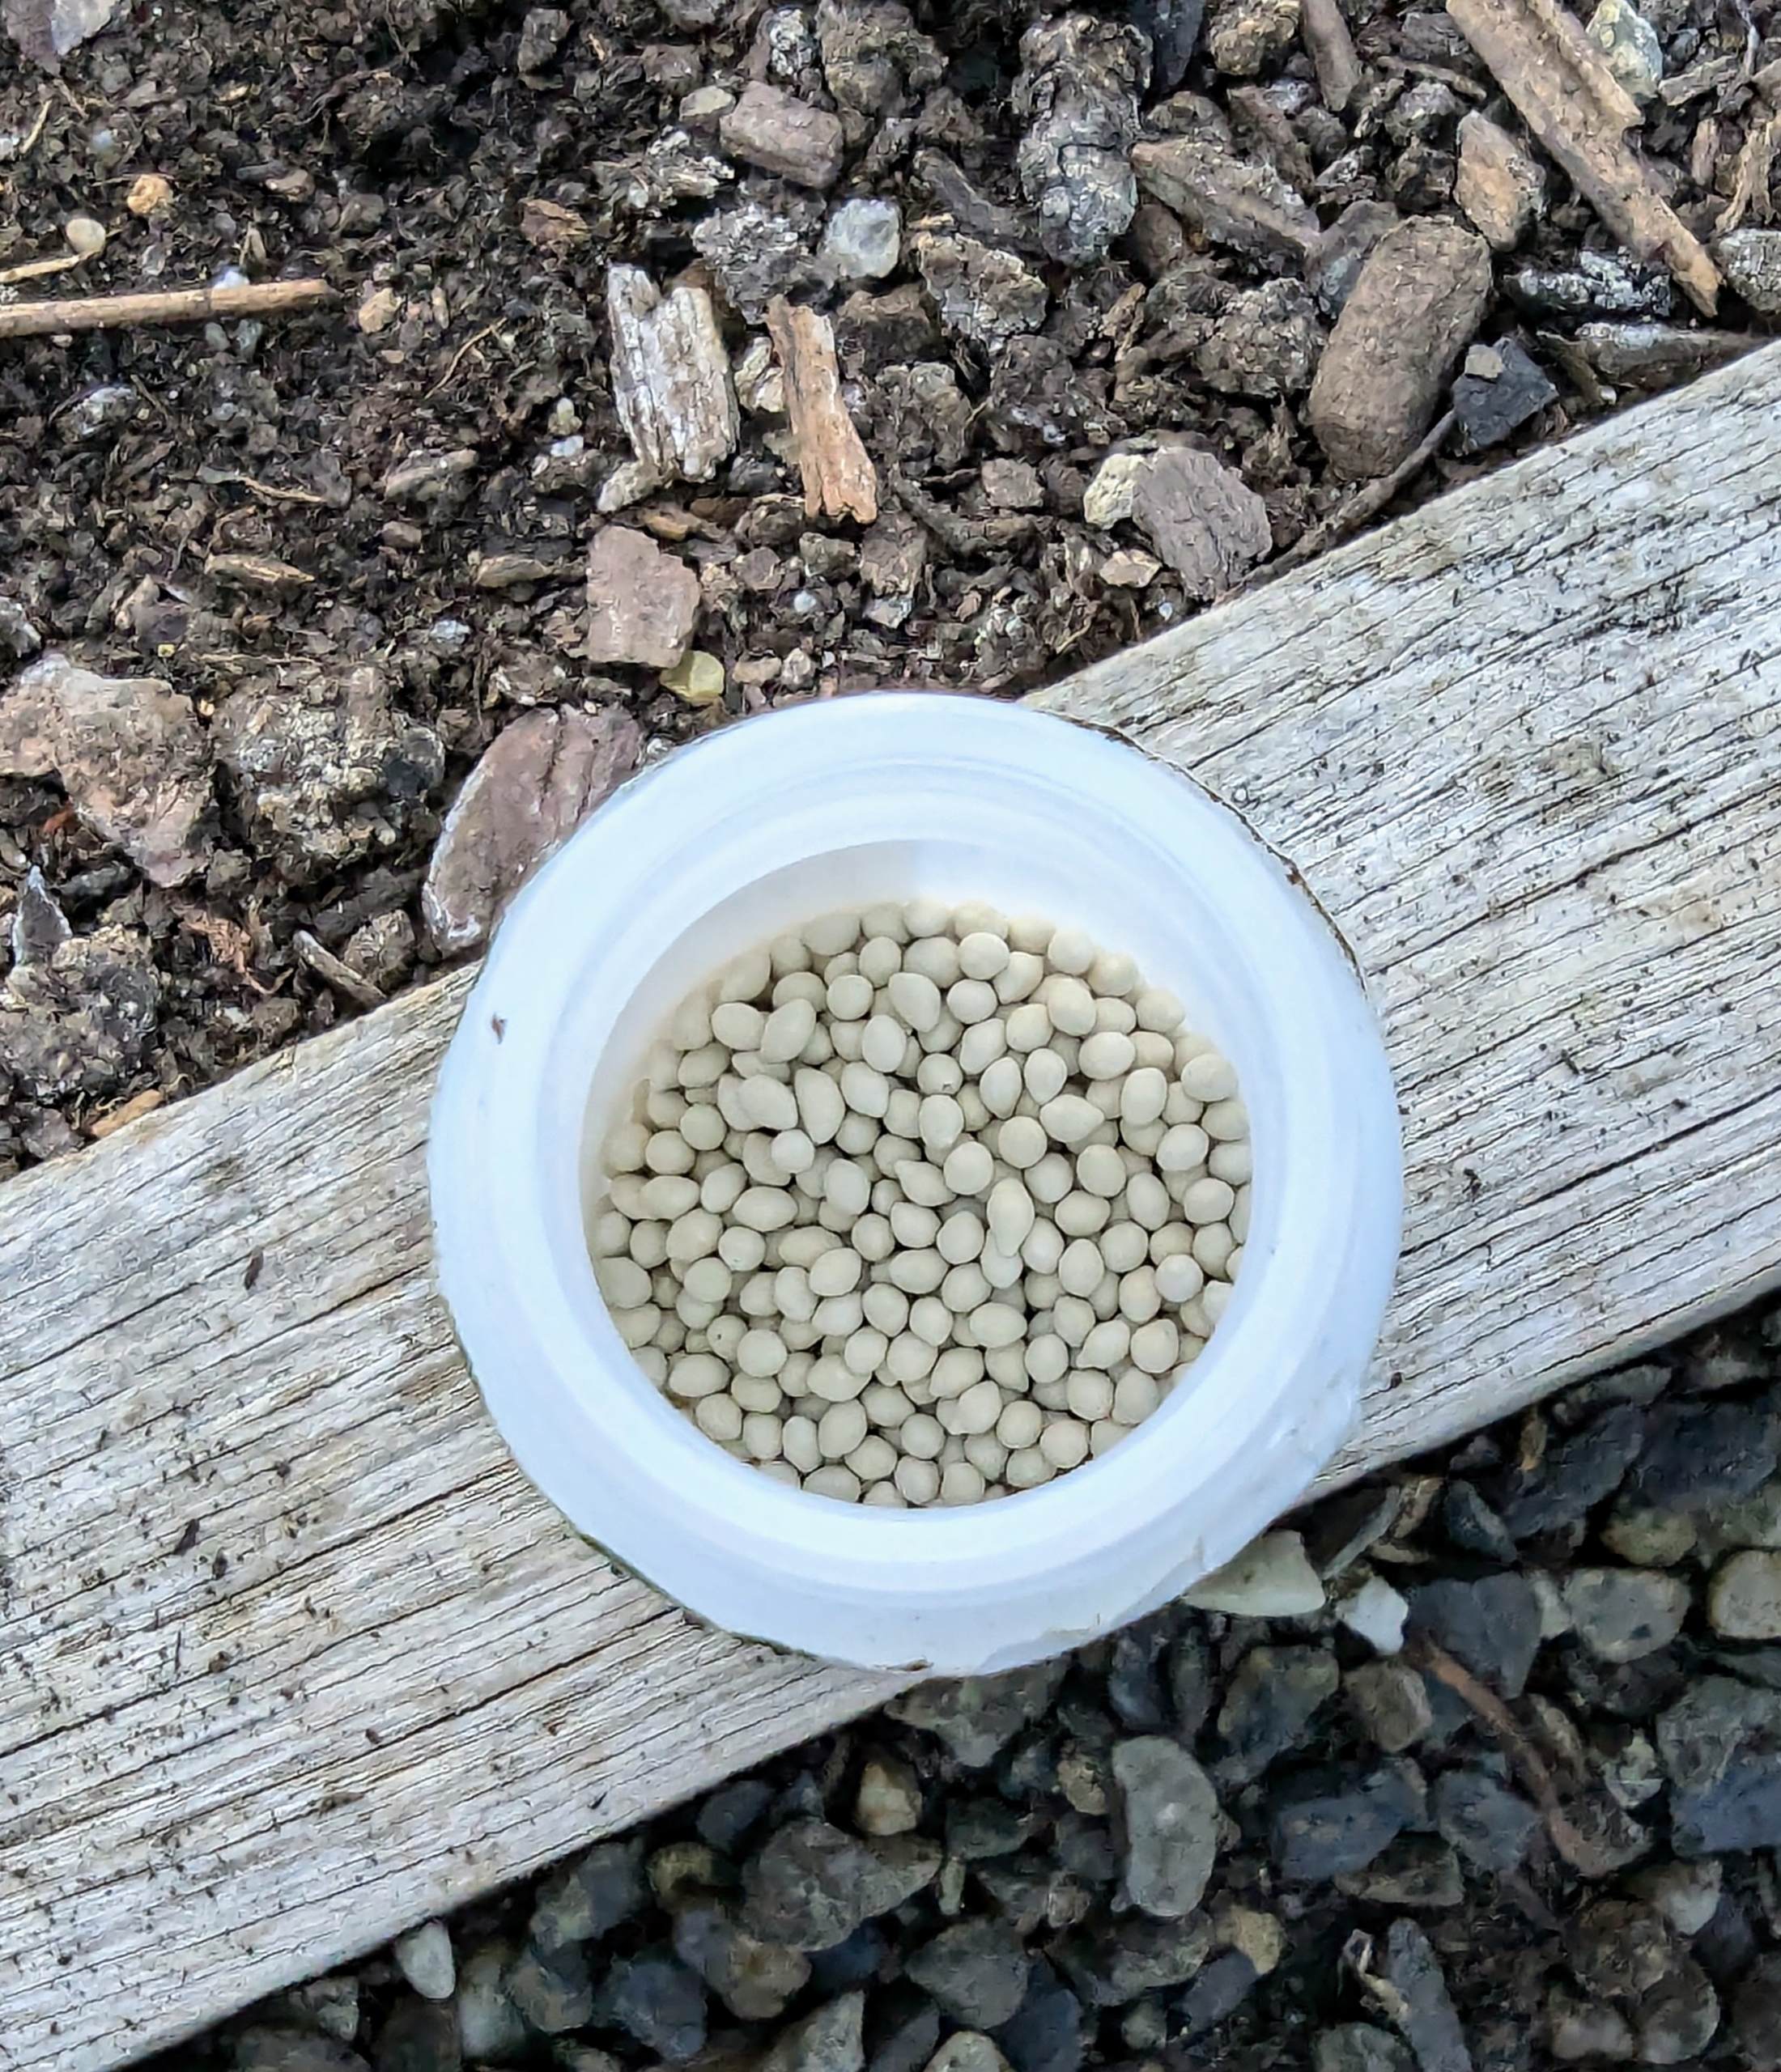
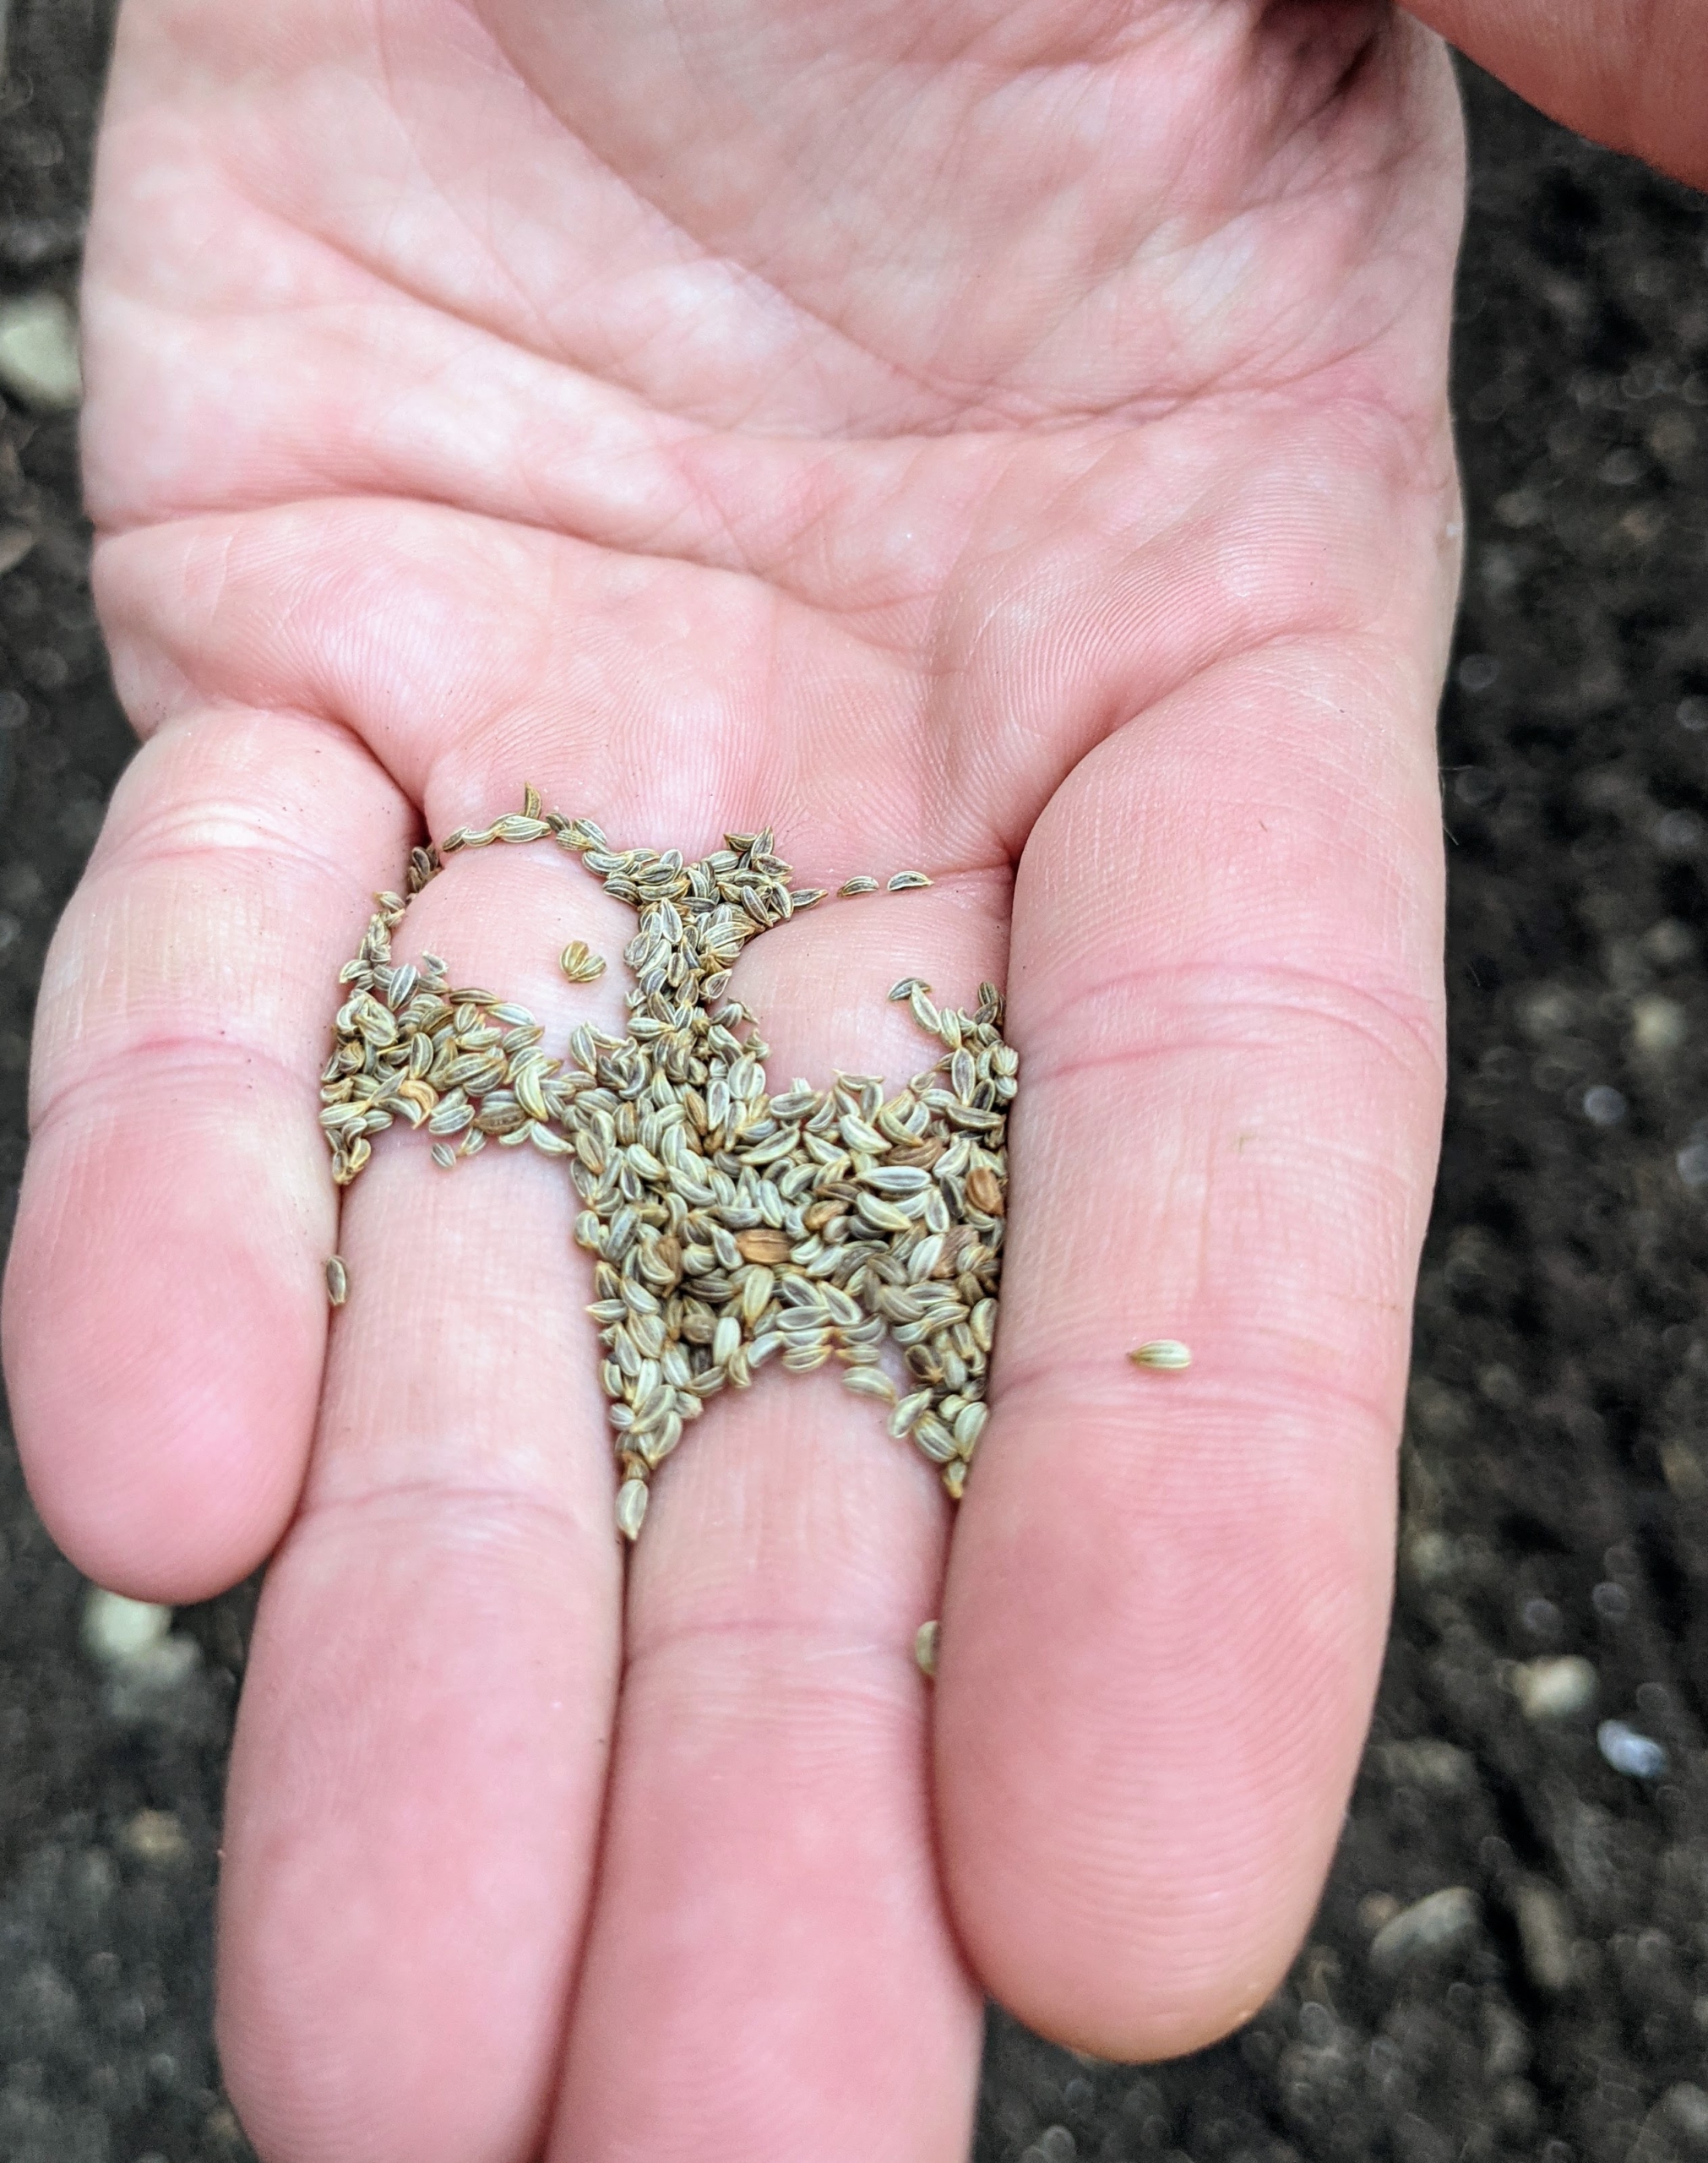
These seeds are pelleted, or coated, carrot seeds. Pellets make seed handling easier for small-seeded crops.
Other vegetable seeds are not coated.
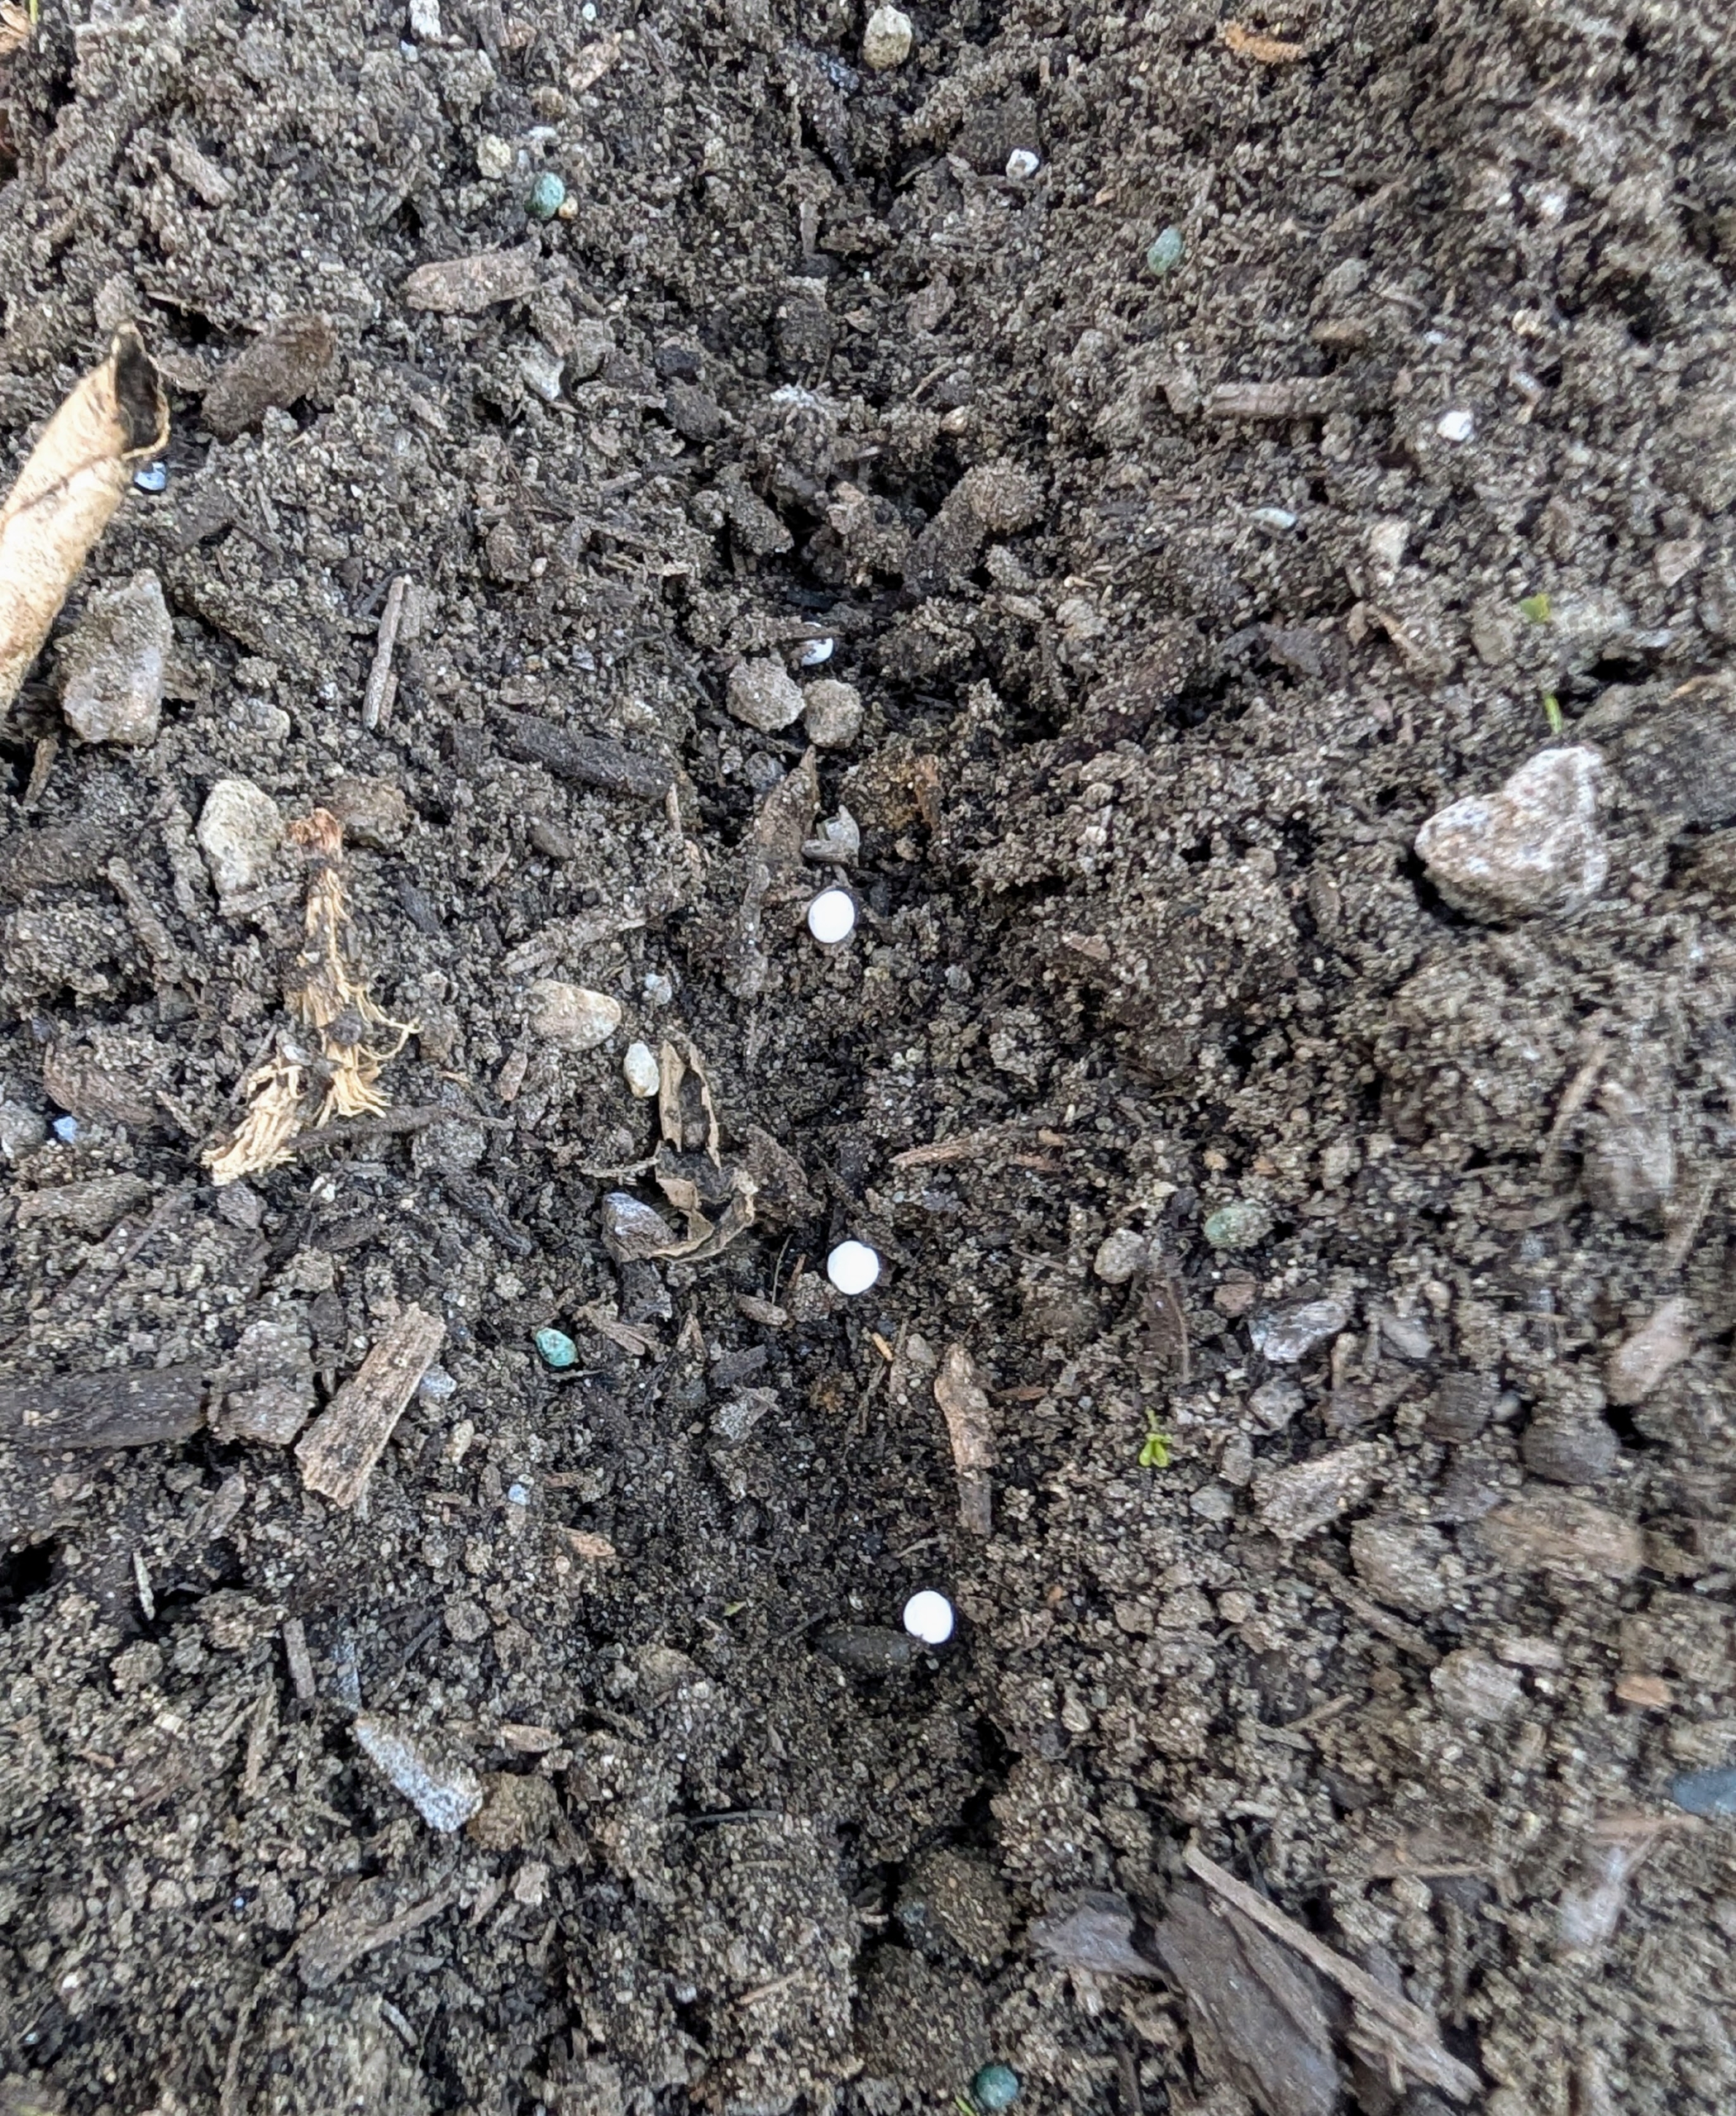
Ryan drops seeds carefully in the bed. These raised beds were designed for easy reach from all sides, so that work can be done quickly and efficiently.
He drops two or three seeds equally spaced. Once the seeds germinate, the weaker, less robust seedlings will be removed in a process called thinning. Thinning allows the best and strongest plants to grow, and gives them more resources like sunlight, nutrients, and water.
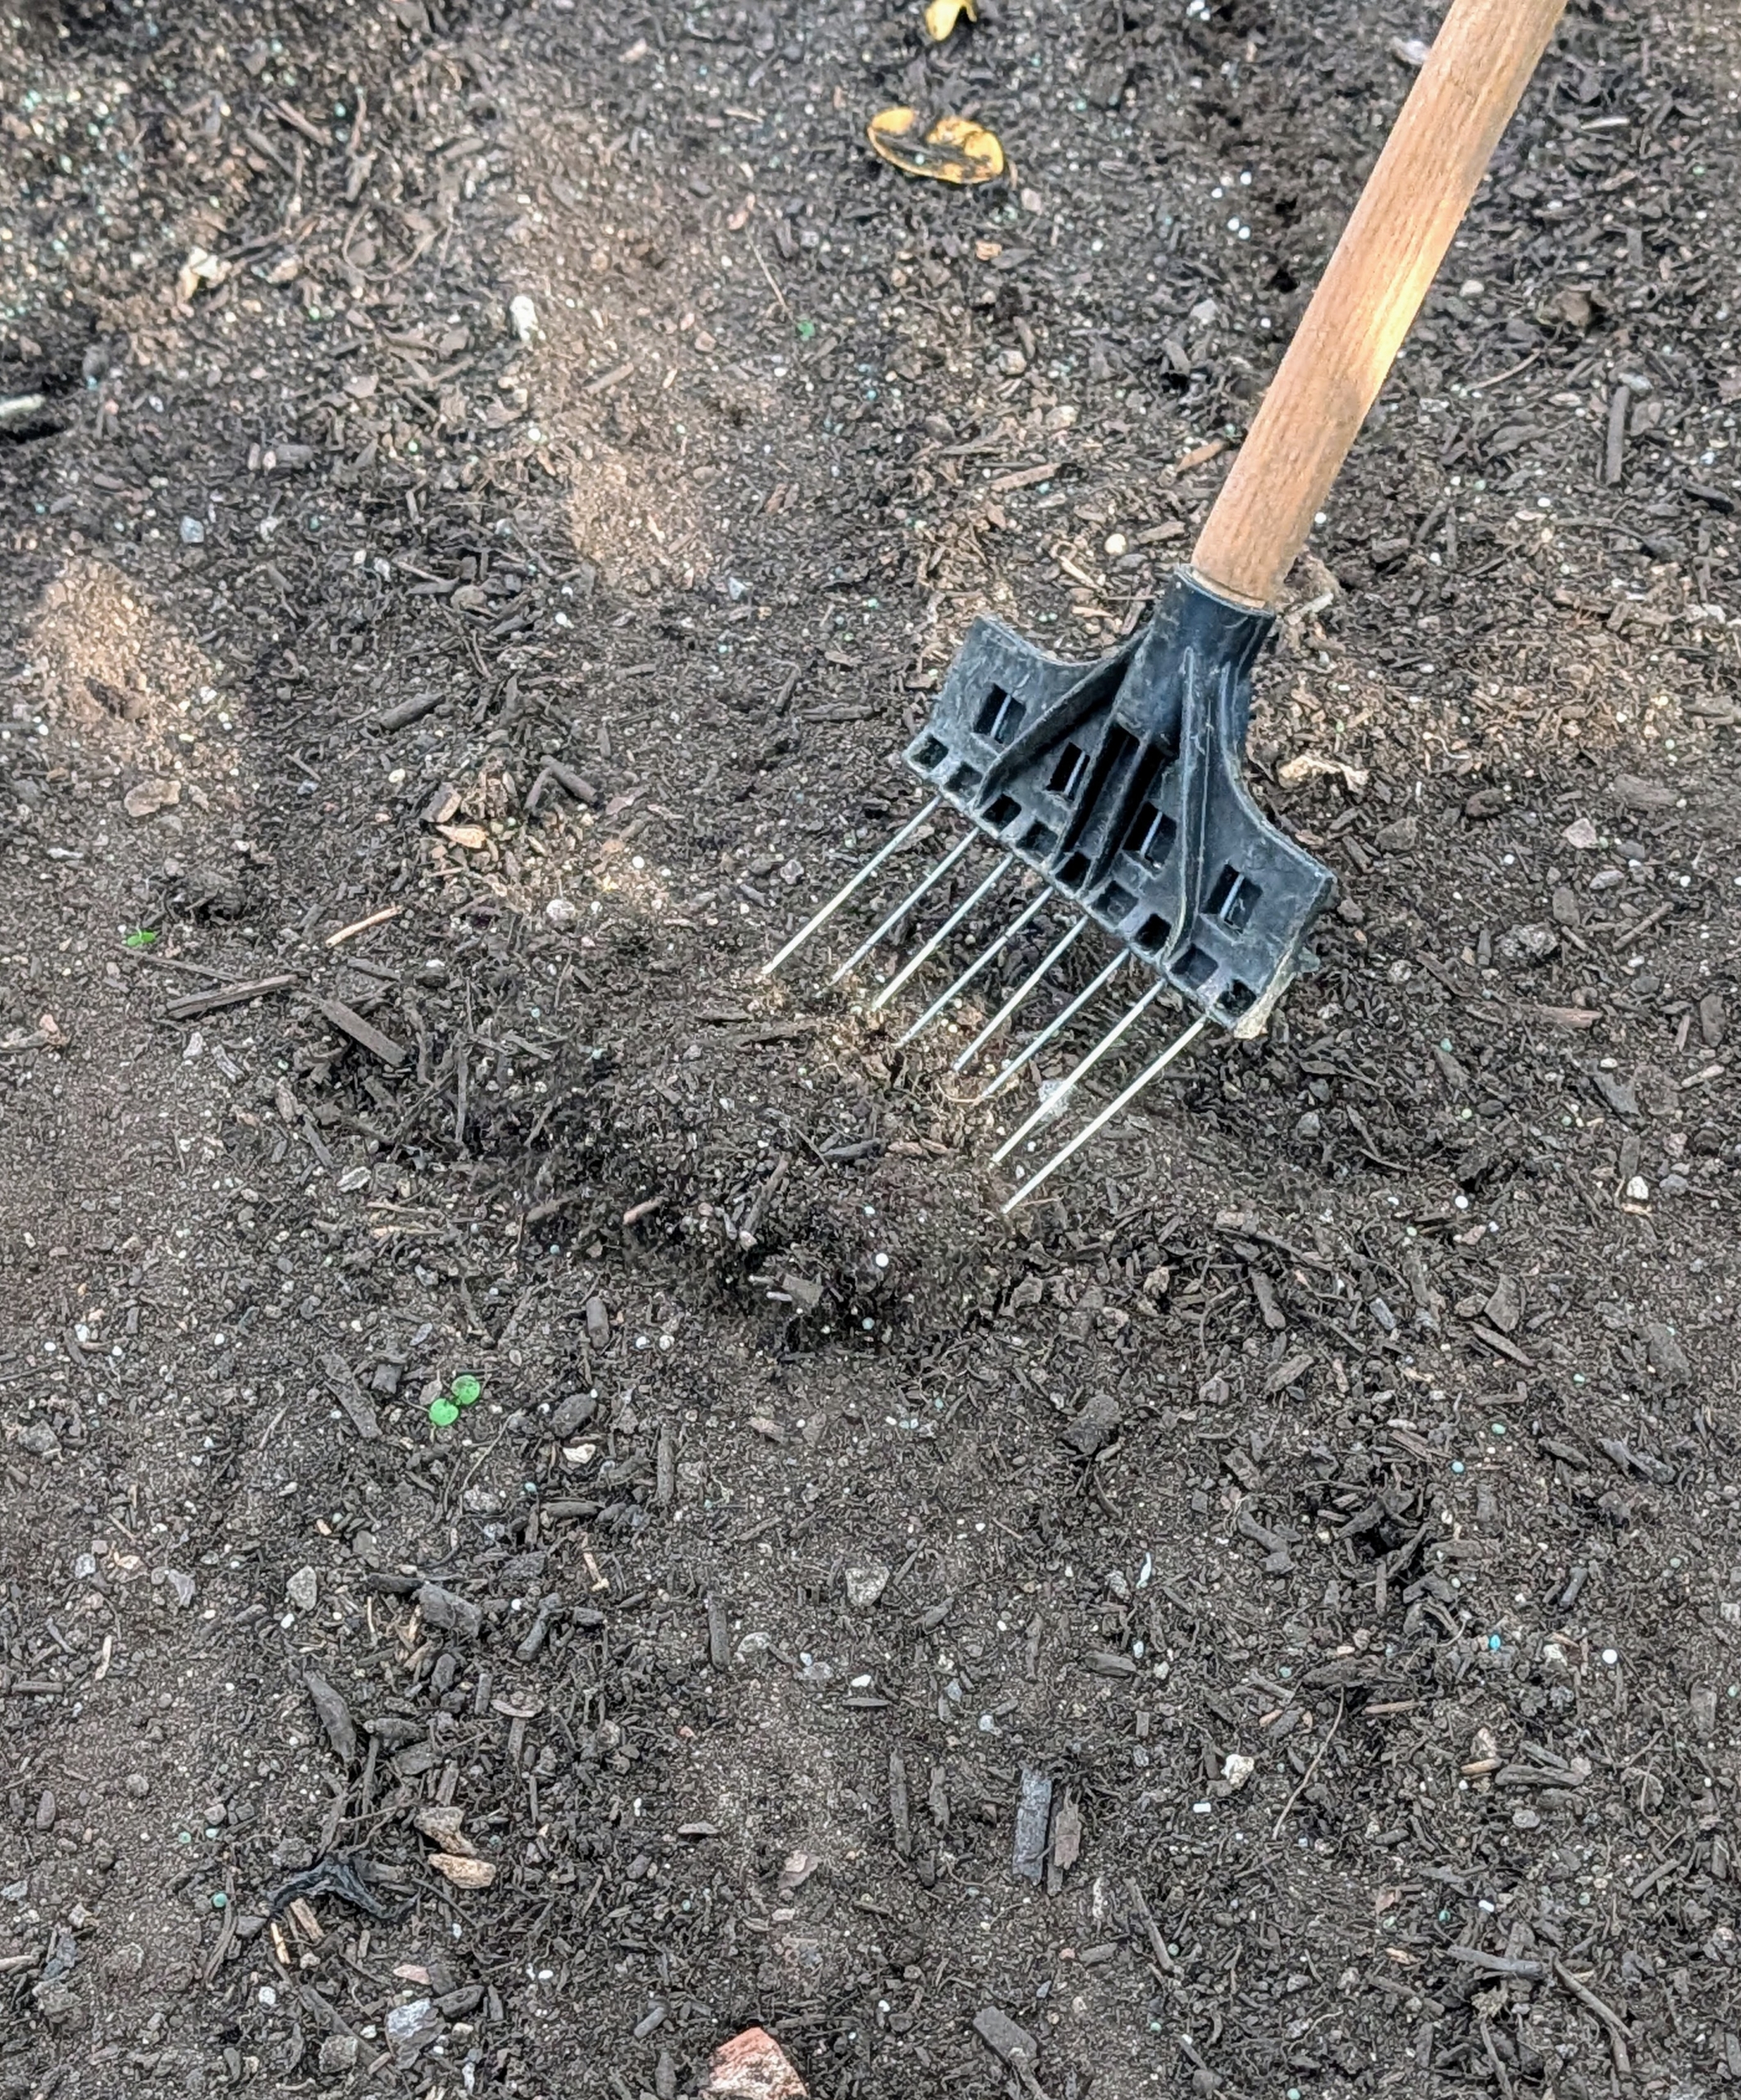
Once all the seeds are dropped into their various beds, Ryan uses the back of a small soft rake to backfill all the planted furrows.
And then everything is given a thorough drink of water.
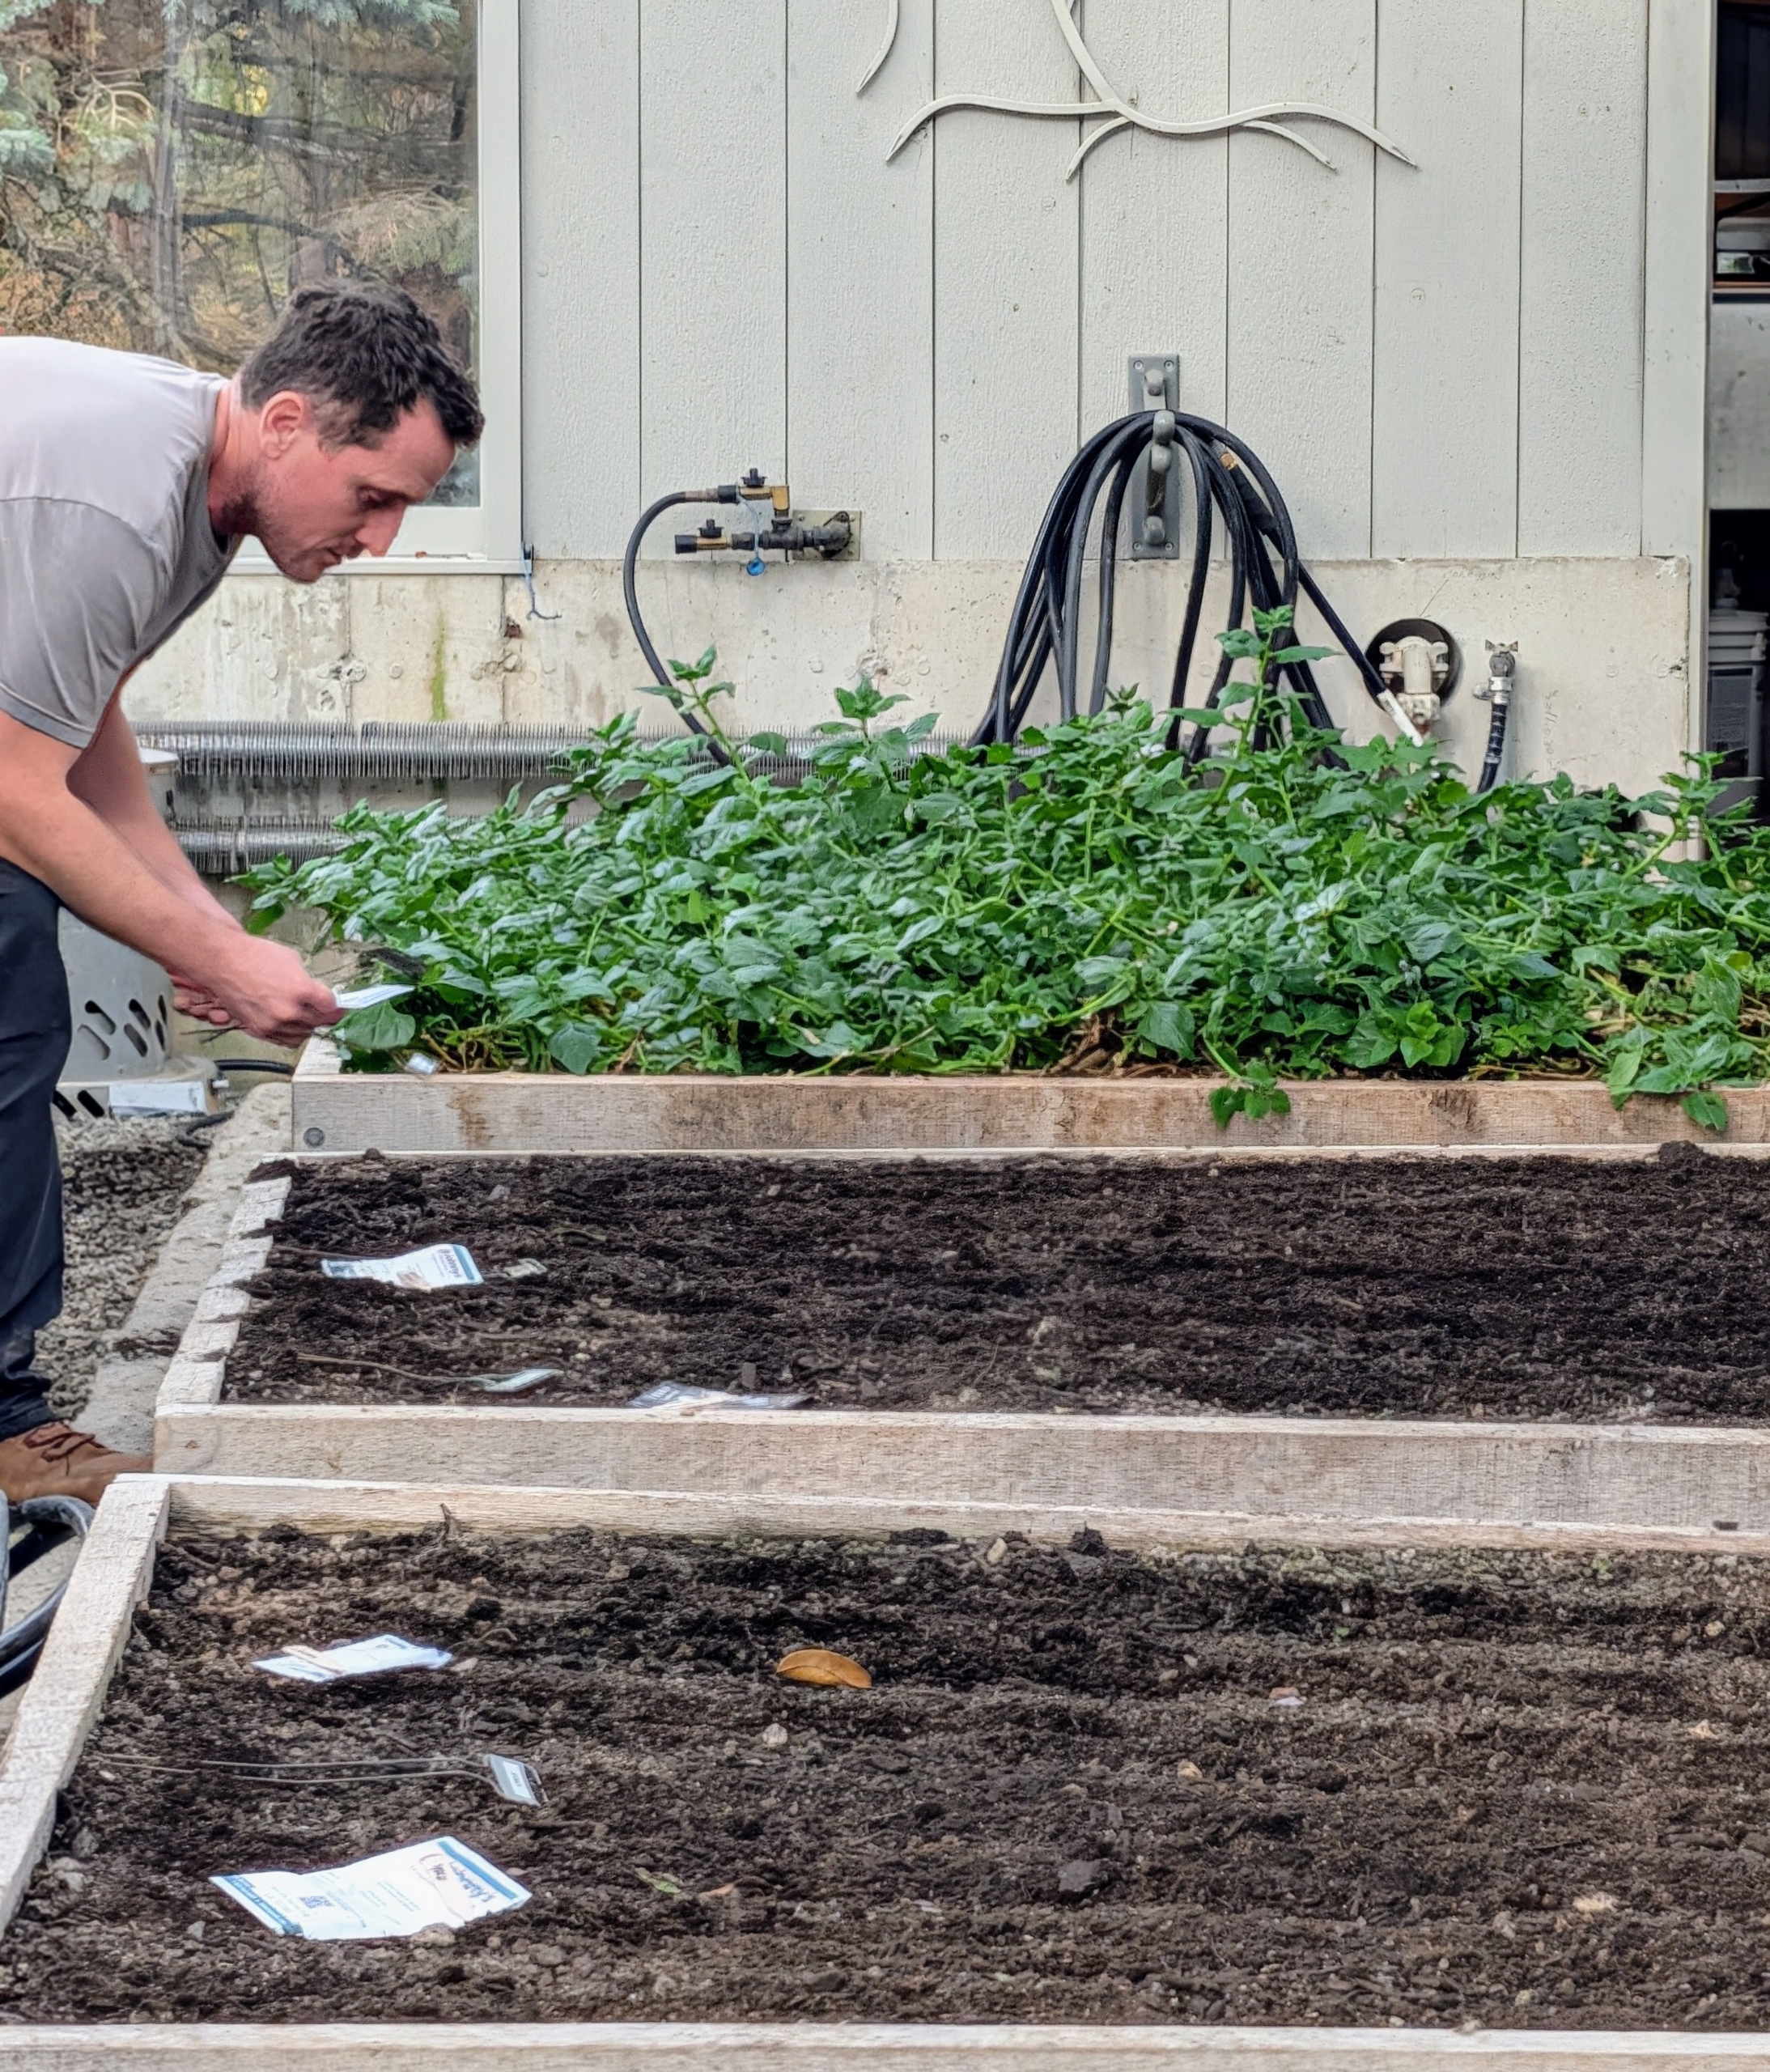
Notice, some rows are left unplanted. Ryan will drop seeds again in a couple of weeks as part of succession planting or staggered planting which allows for continuous harvesting throughout the growing season.
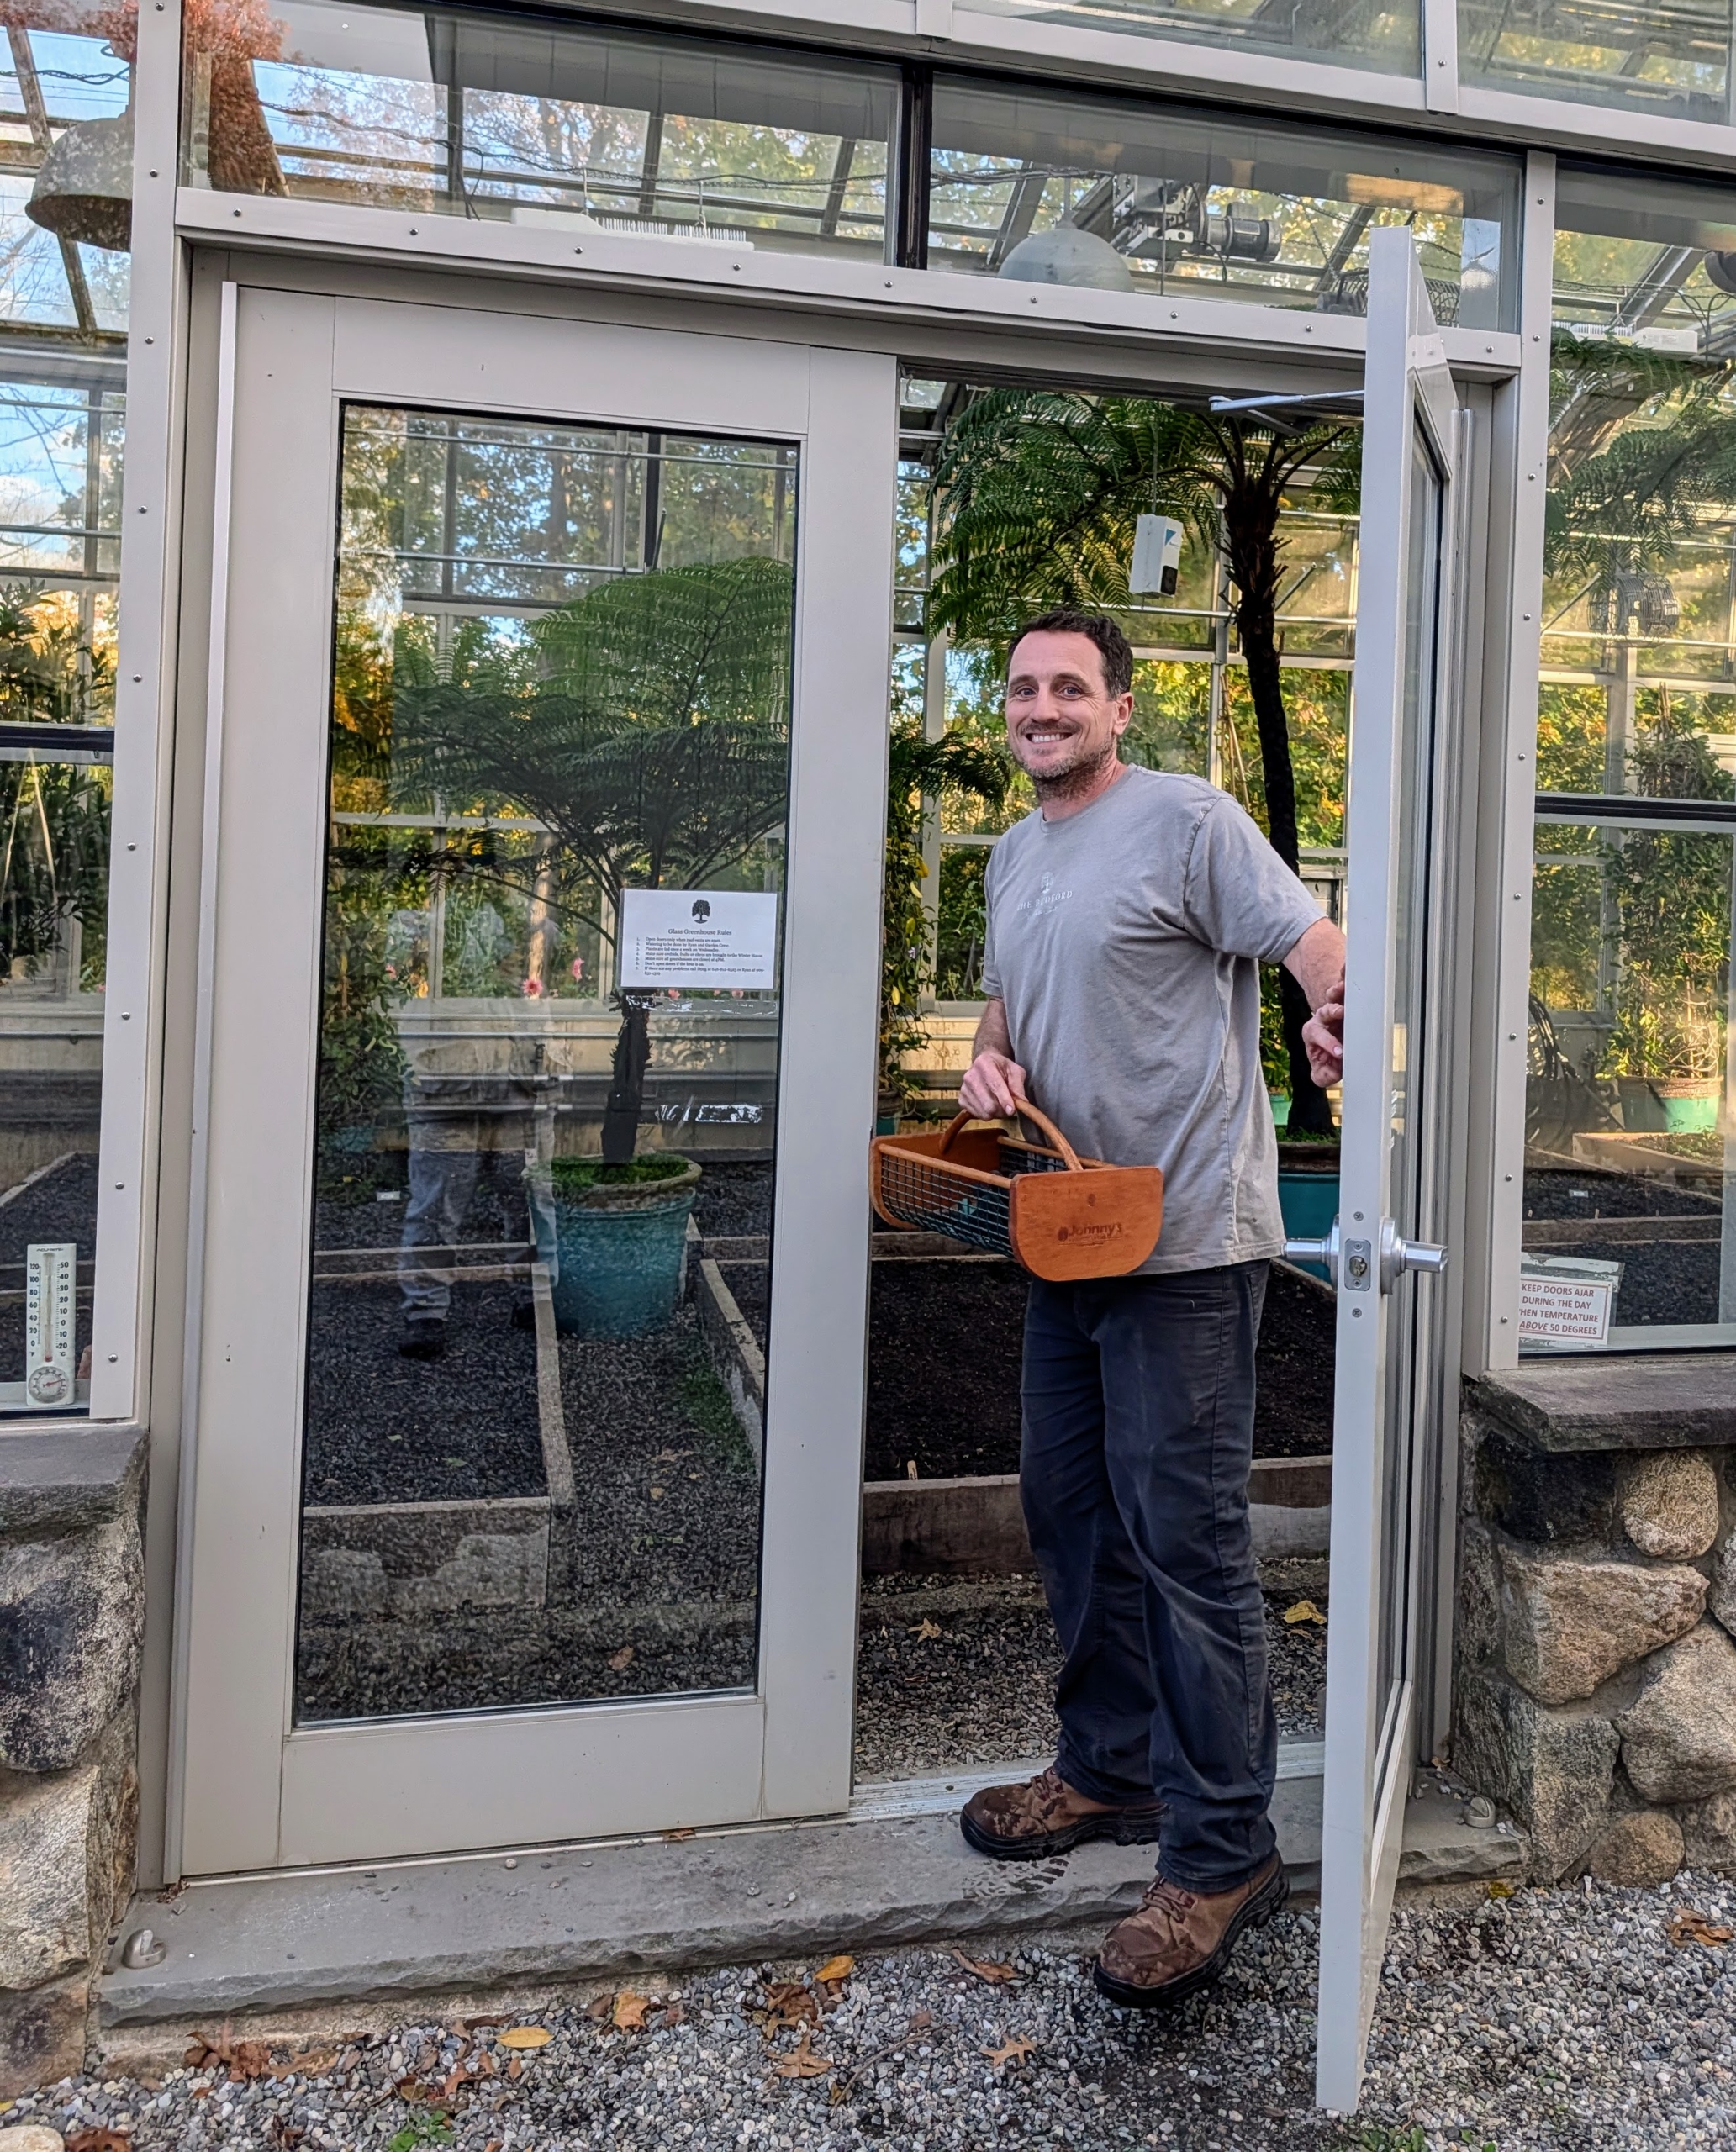
Every bed is planted. It’s the beginning of an exciting new growing season – indoors. In a couple of months I’ll have nutritious and fresh vegetables to eat, share, and enjoy from this greenhouse.
What chores are you doing this weekend? Now that the days are getting colder and all the trees are dropping their leaves, my outdoor grounds crew is busy with fall cleanup.
To stay organized during seasonal transitions, I create very detailed lists of all that needs to be done around my farm. My team has been working hard blowing leaves, covering air-conditioner pits, bleeding and storing hoses, moving cold sensitive plants indoors, and emptying raised garden beds. Autumn specific tasks take weeks to complete, but so far, the weather has cooperated and allowed us lots of time to ready the property for the cold season ahead.
Here are some photos, enjoy.
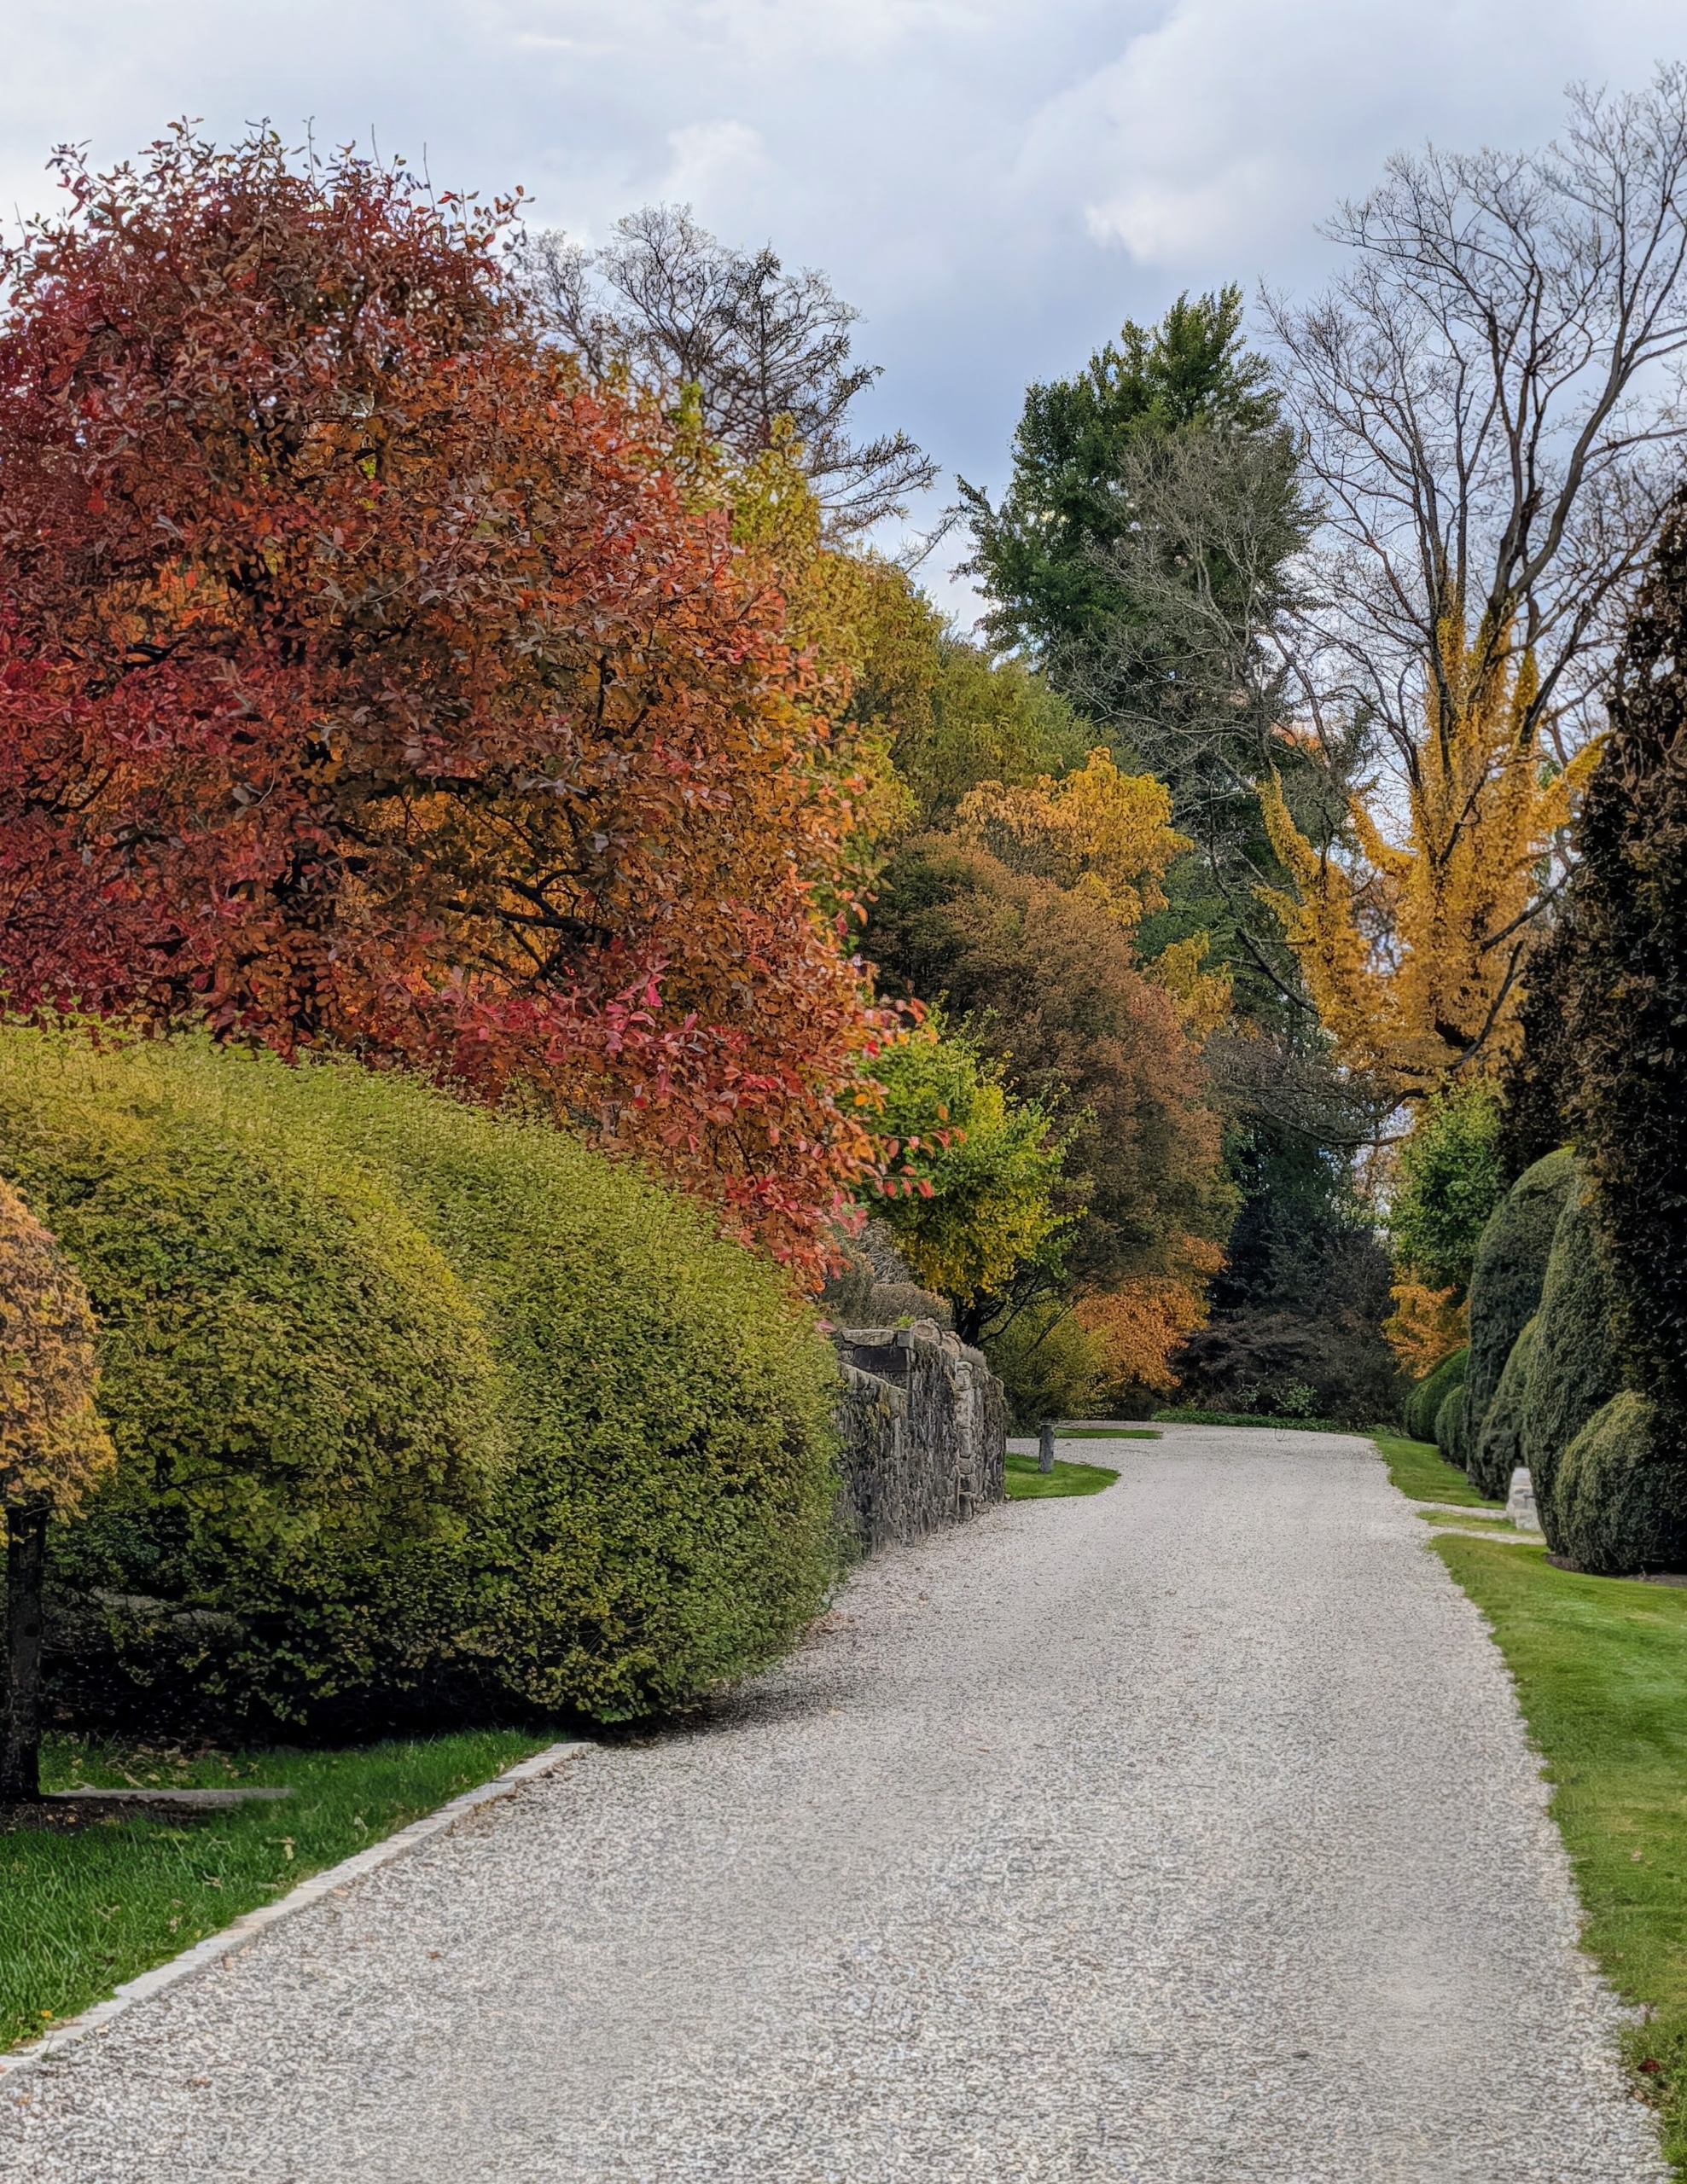
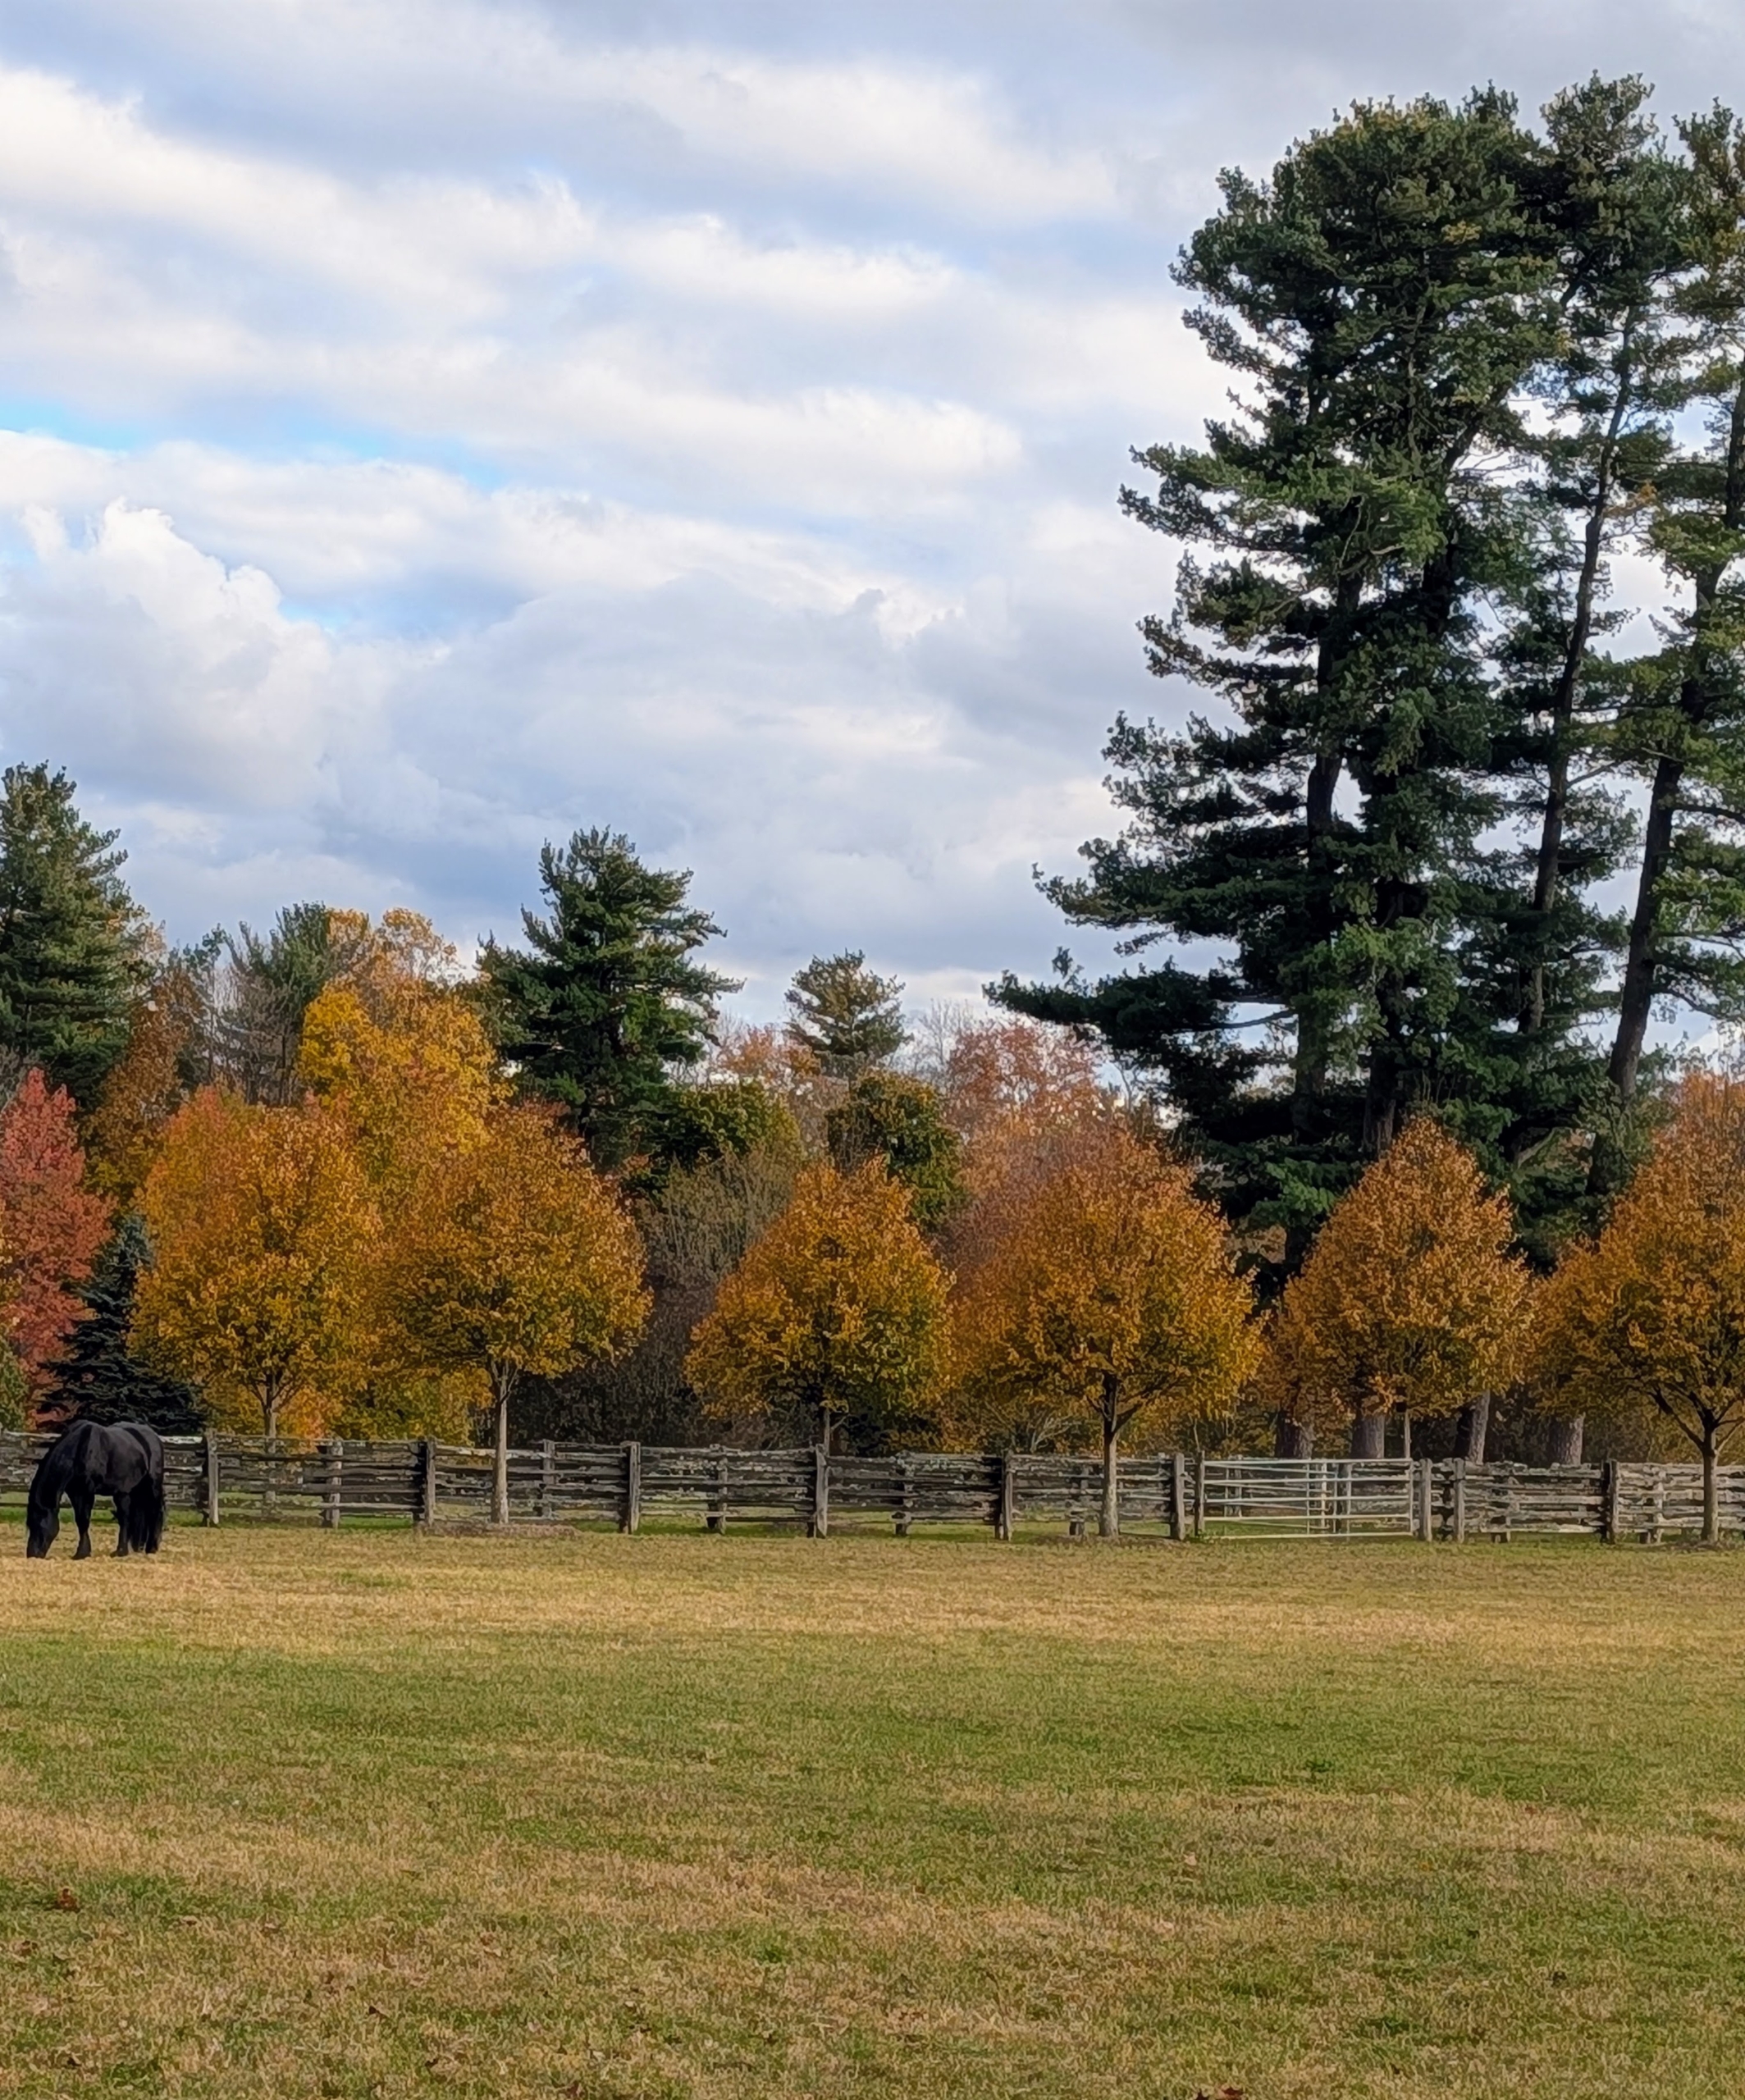
It is so beautiful this time of year when all the deciduous trees show their stunning autumn colors before dropping their leaves. Here at my farm, it is also weeks of hard work to clean up all the fallen leaves. This is the carriage road outside my home – freshly blown.
This is an allée of lindens. As the weather grows colder and sunlight decreases, the trees seal the spots where the leaves are attached – this process is what causes them to change color and fall to the ground. Rather than expend energy to protect these fragile organs, trees shed leaves to conserve resources for the next year.
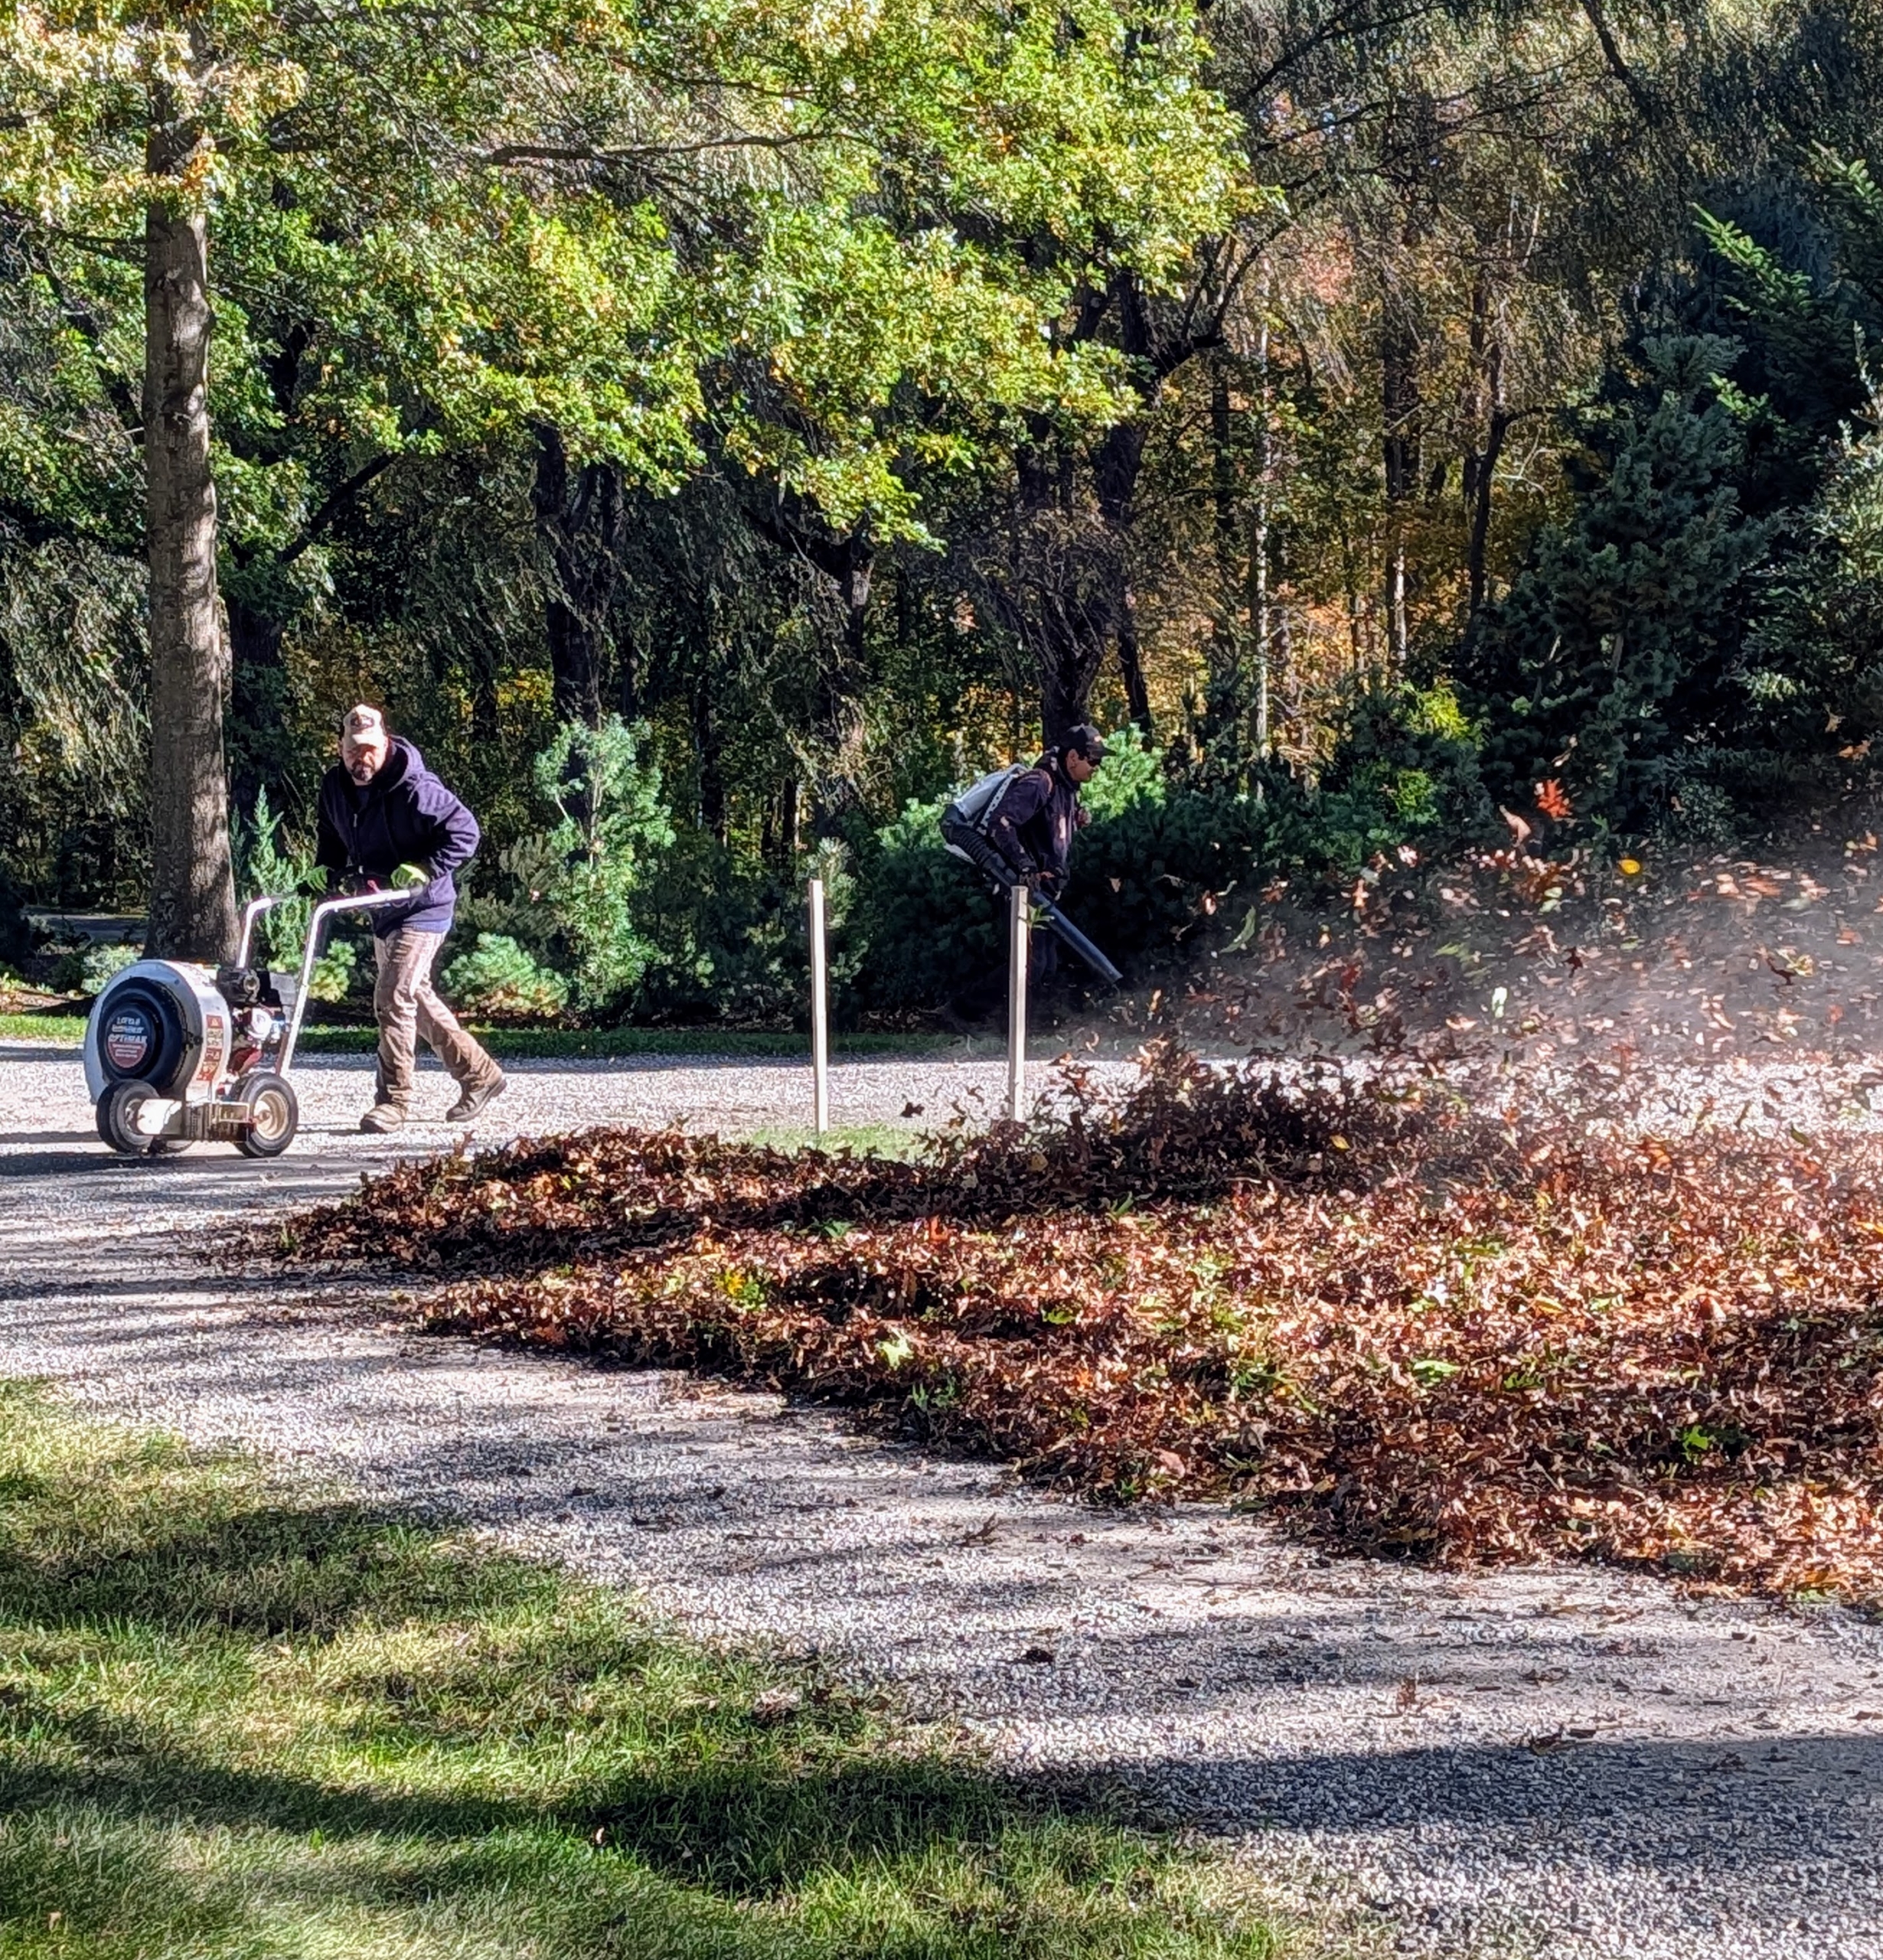
Adan, who takes excellent care of my lawns has now split his time between mowing grass and blowing leaves.
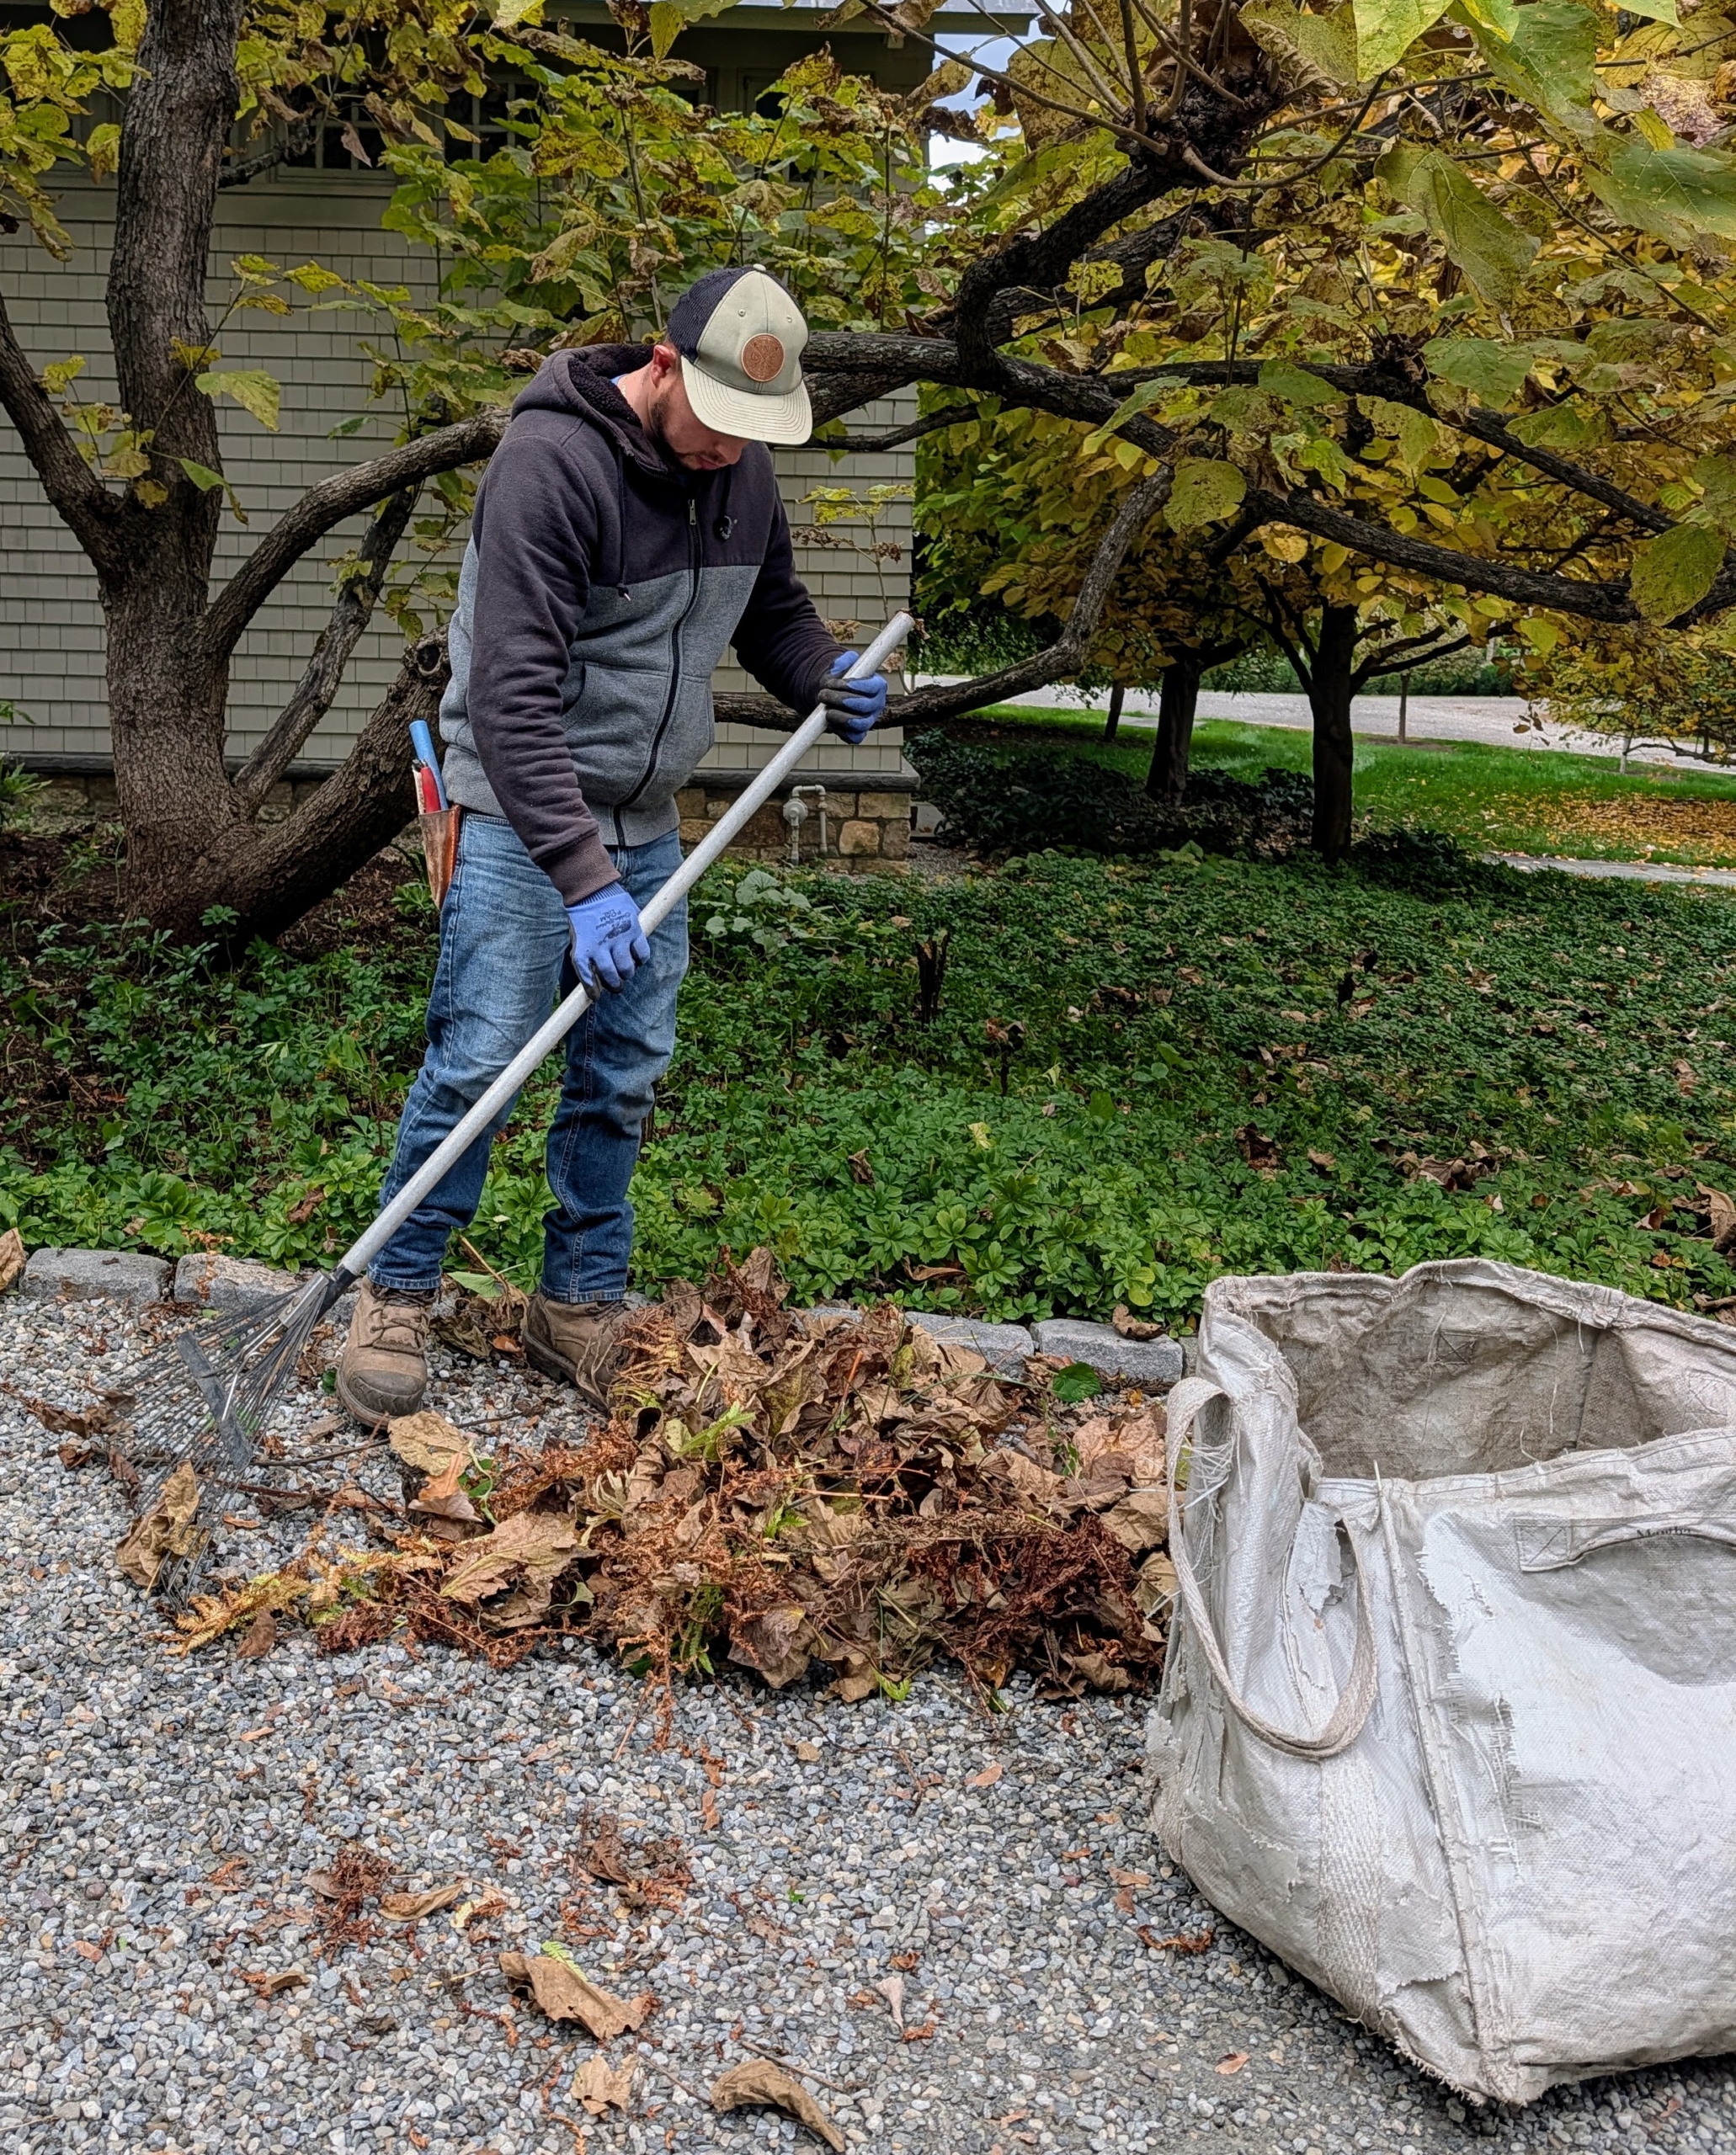
Alex uses a soft rake to gather any debris from the carriage road. After the season, it is also a good idea to clean any well-used summer tools before storing.
It takes a lot of time to cut down and remove all the old, dead plants, and root systems. When cutting back perennials this time of year, they should be trimmed to a height of one to two inches above the ground, close to the base of the plant. These deciduous ferns are being cut down to the crown.
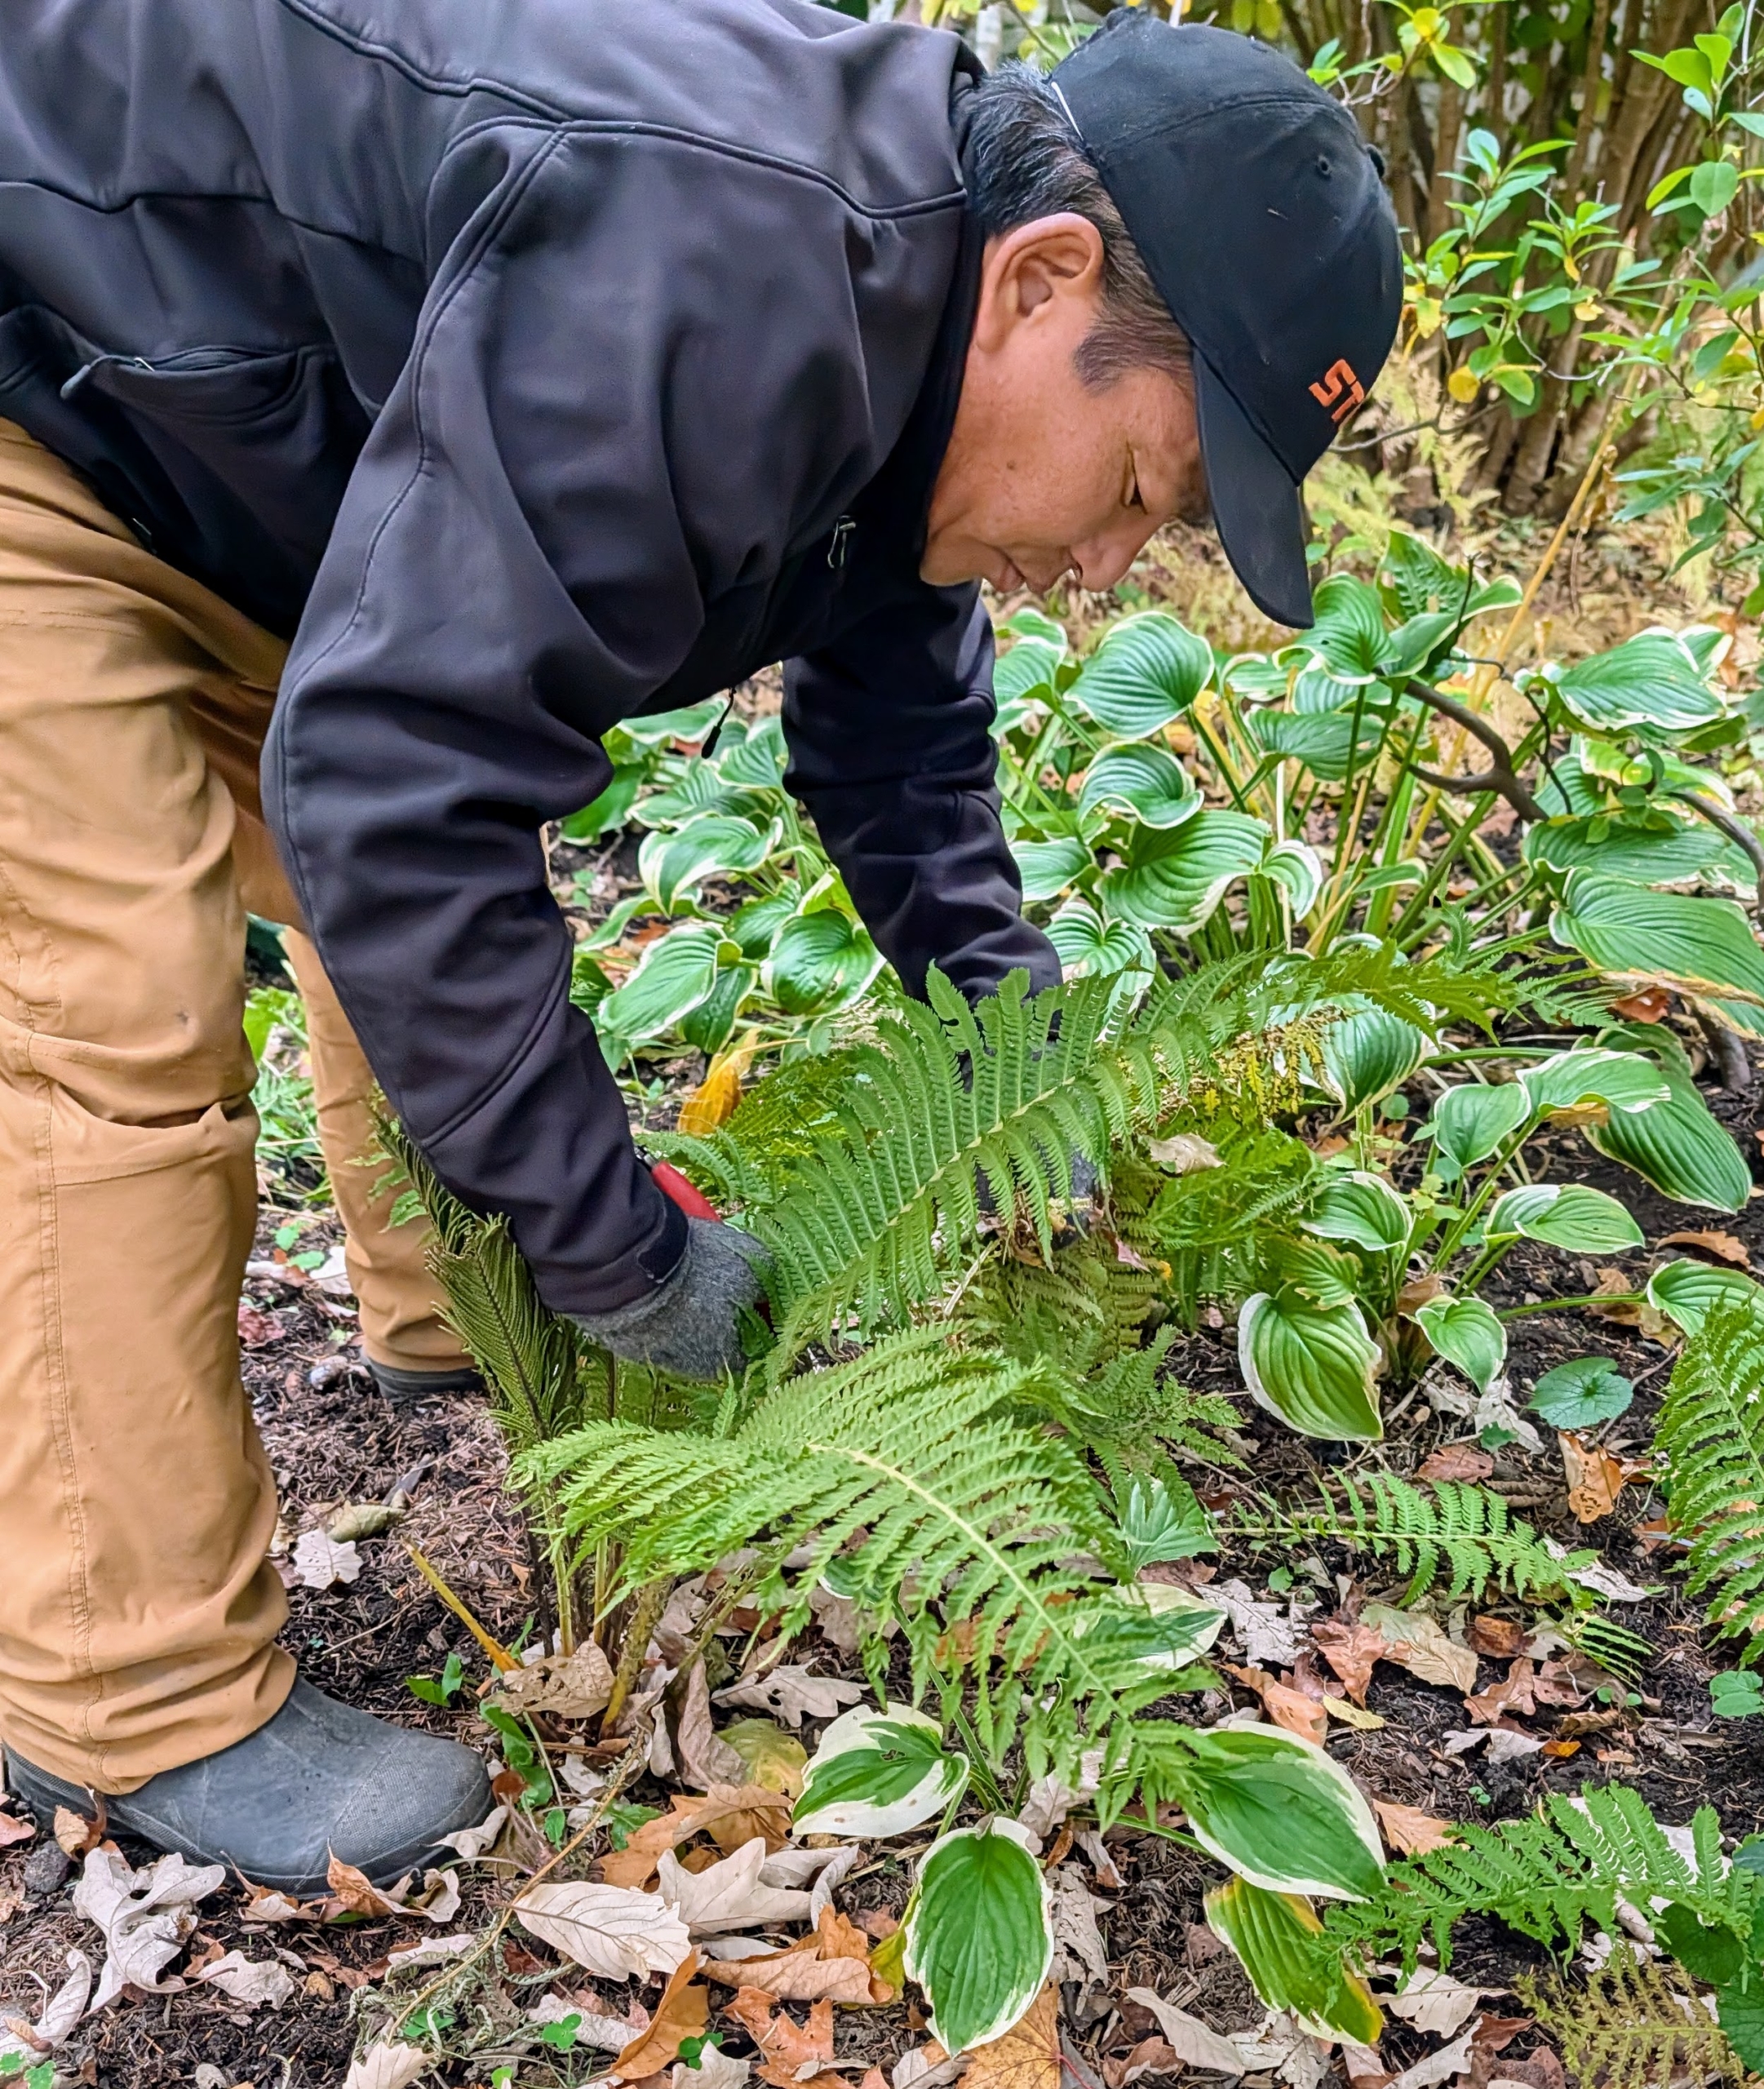
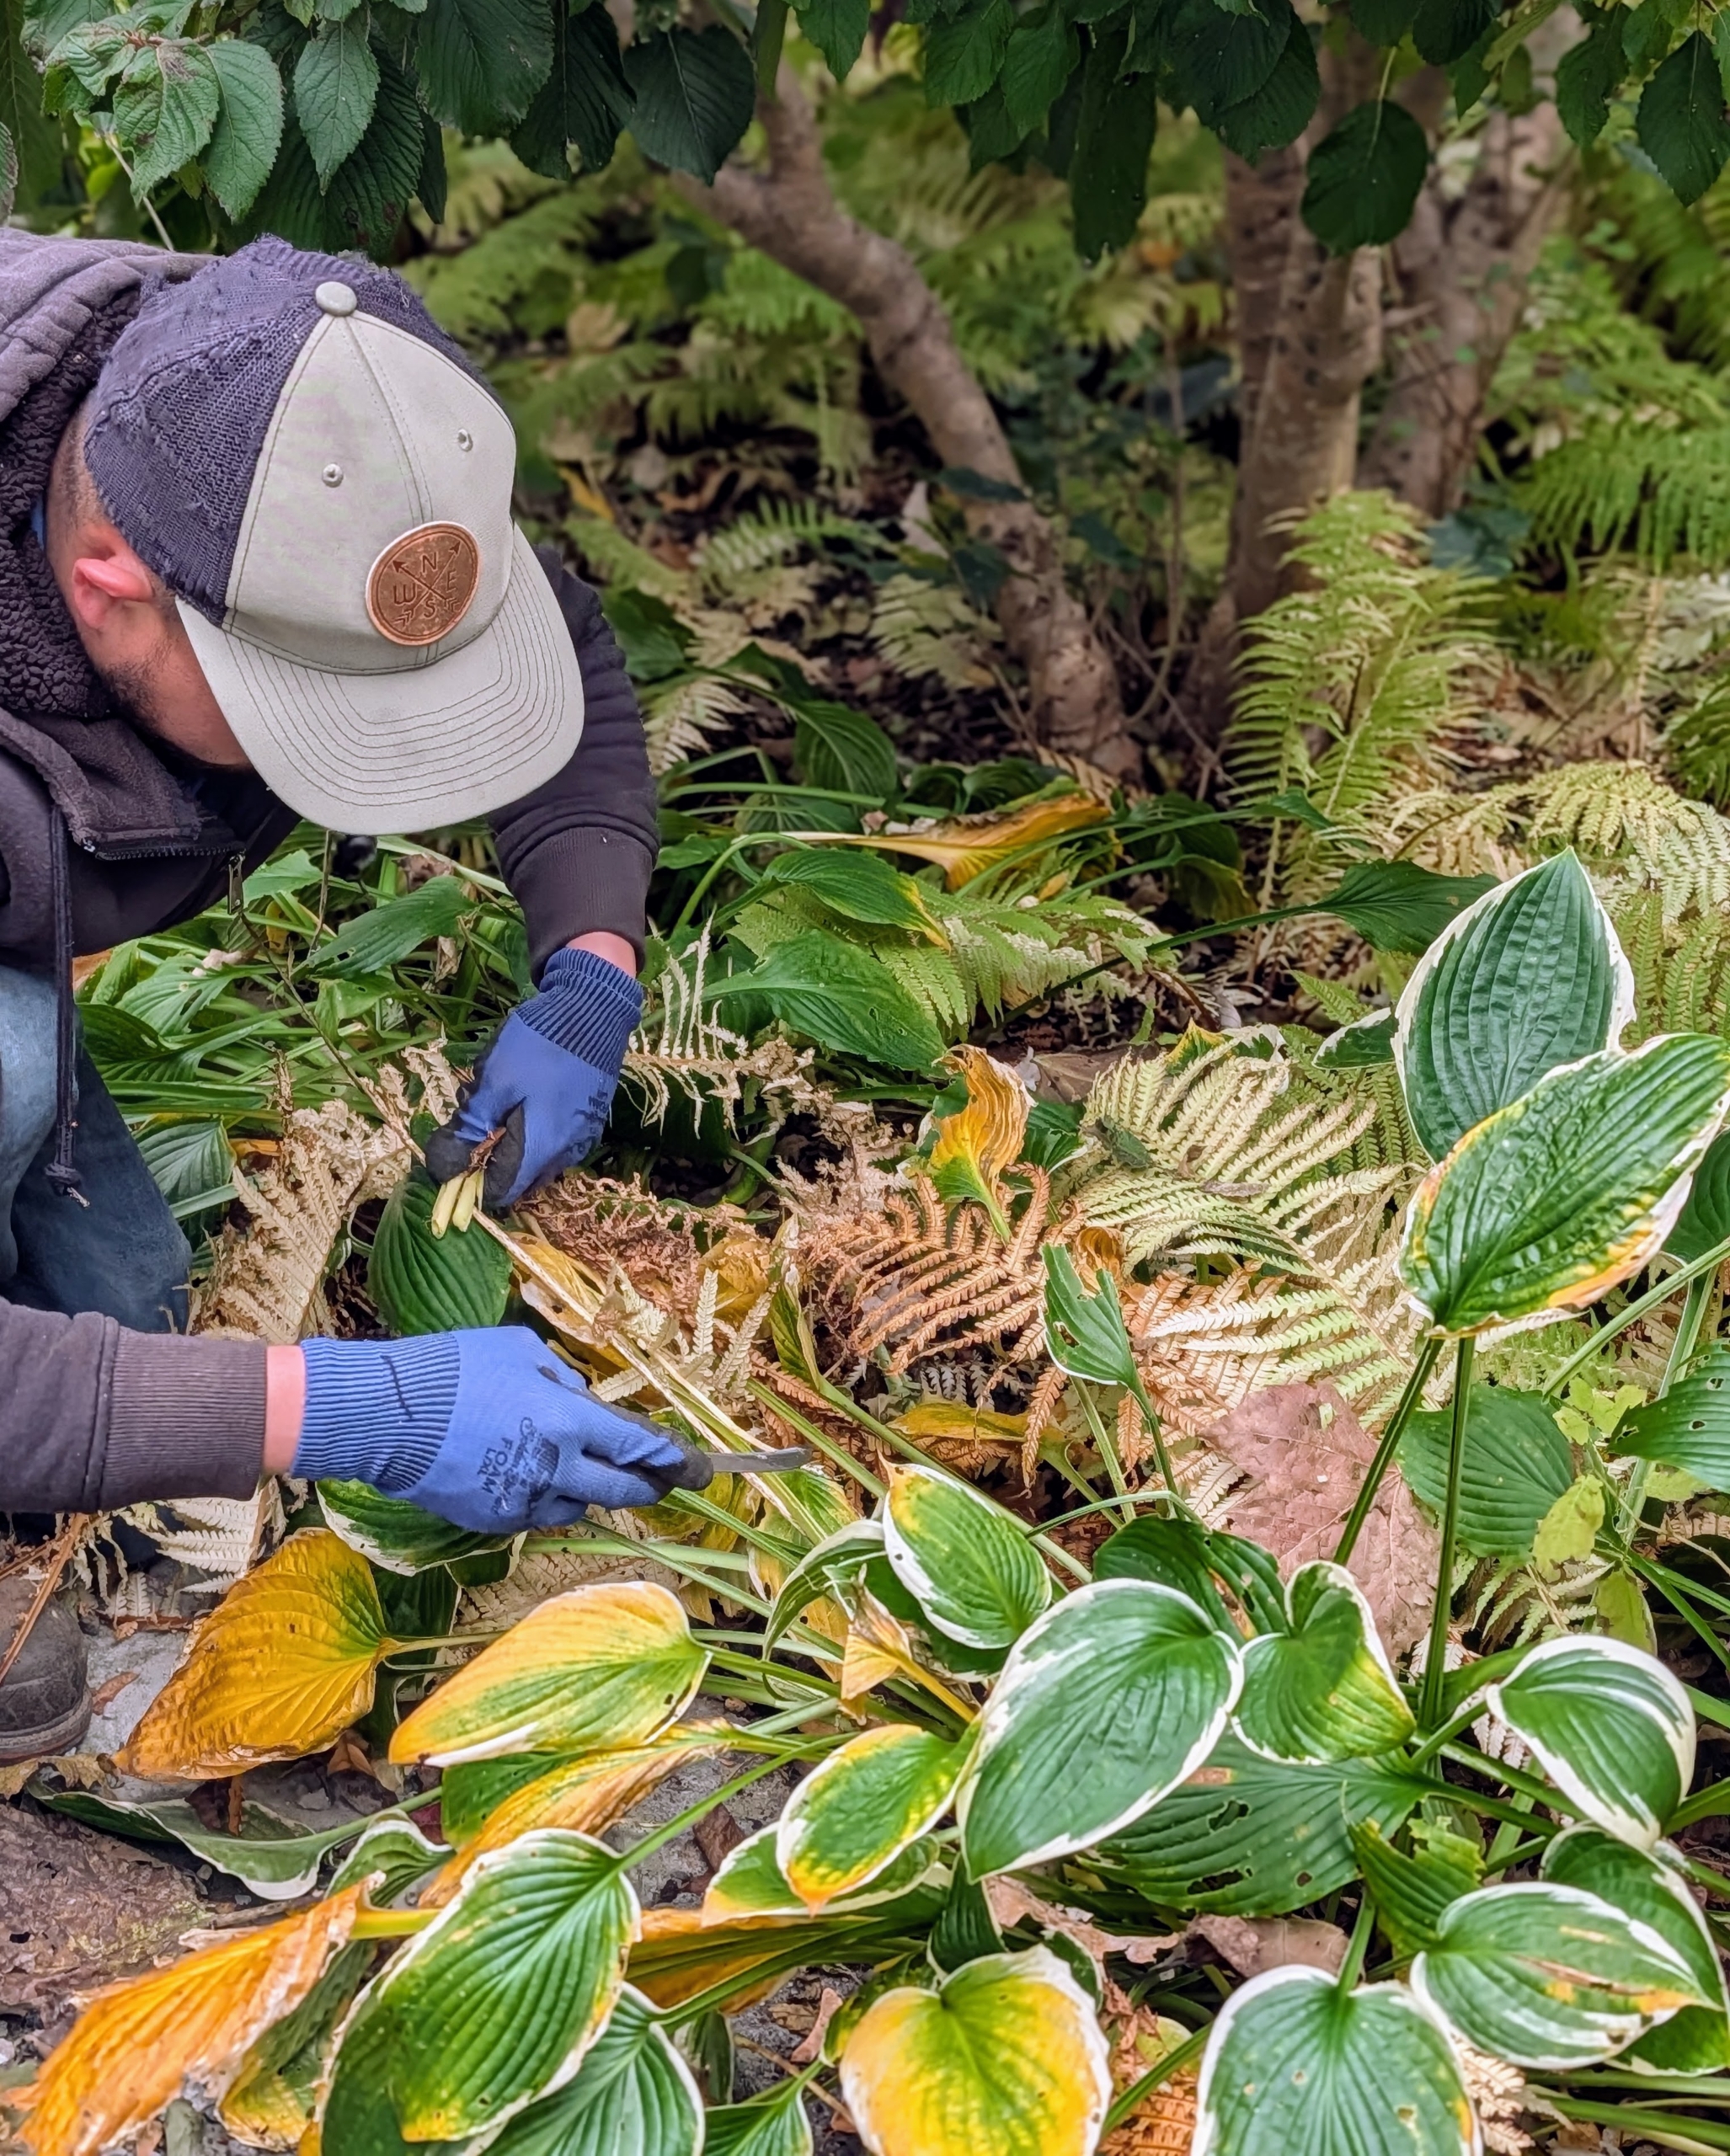
Alex is nearby cutting back the dead, brown or yellow foliage from the hosta plants.
Removing these yellow leaves prevents disease and maintains a tidy and clean appearance. Cutting them back also signals the plant to focus energy for the dormant period.
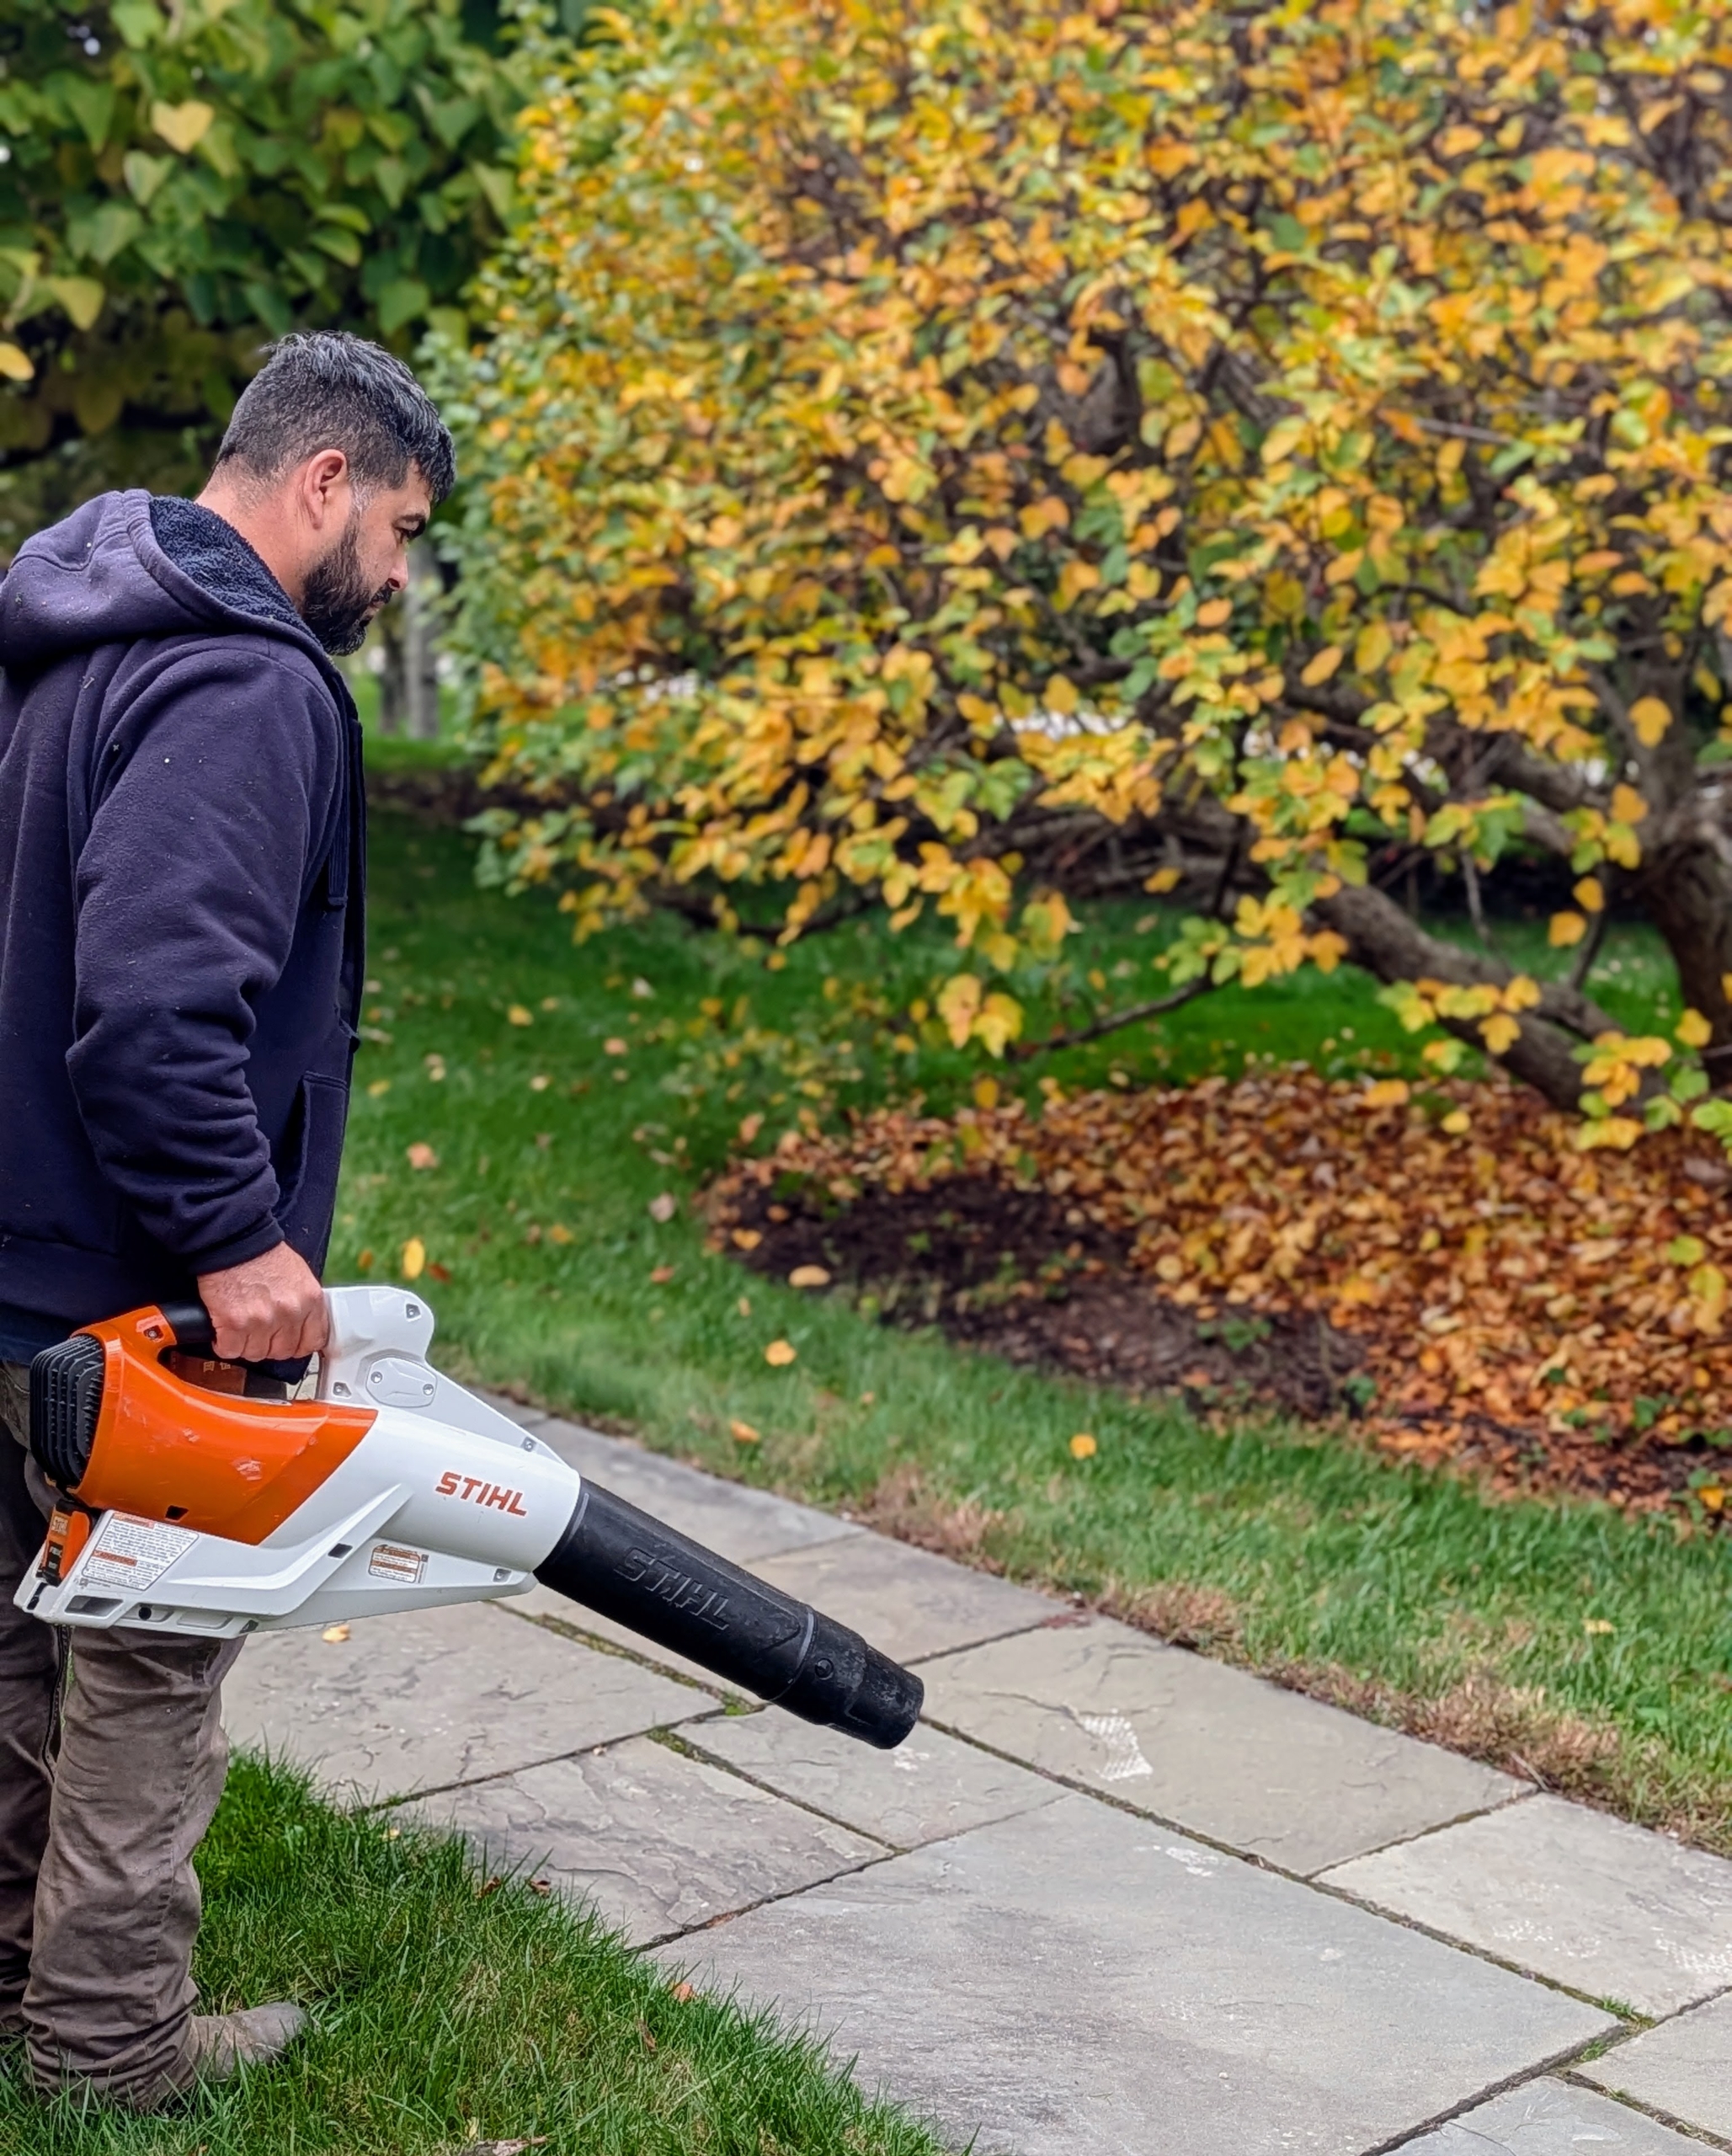
Adan blows the leaves to one area, so he can mow the grass in front my studio. Here he is using a battery powered handheld blower from STIHL – powerful, but much quieter than other blowers.
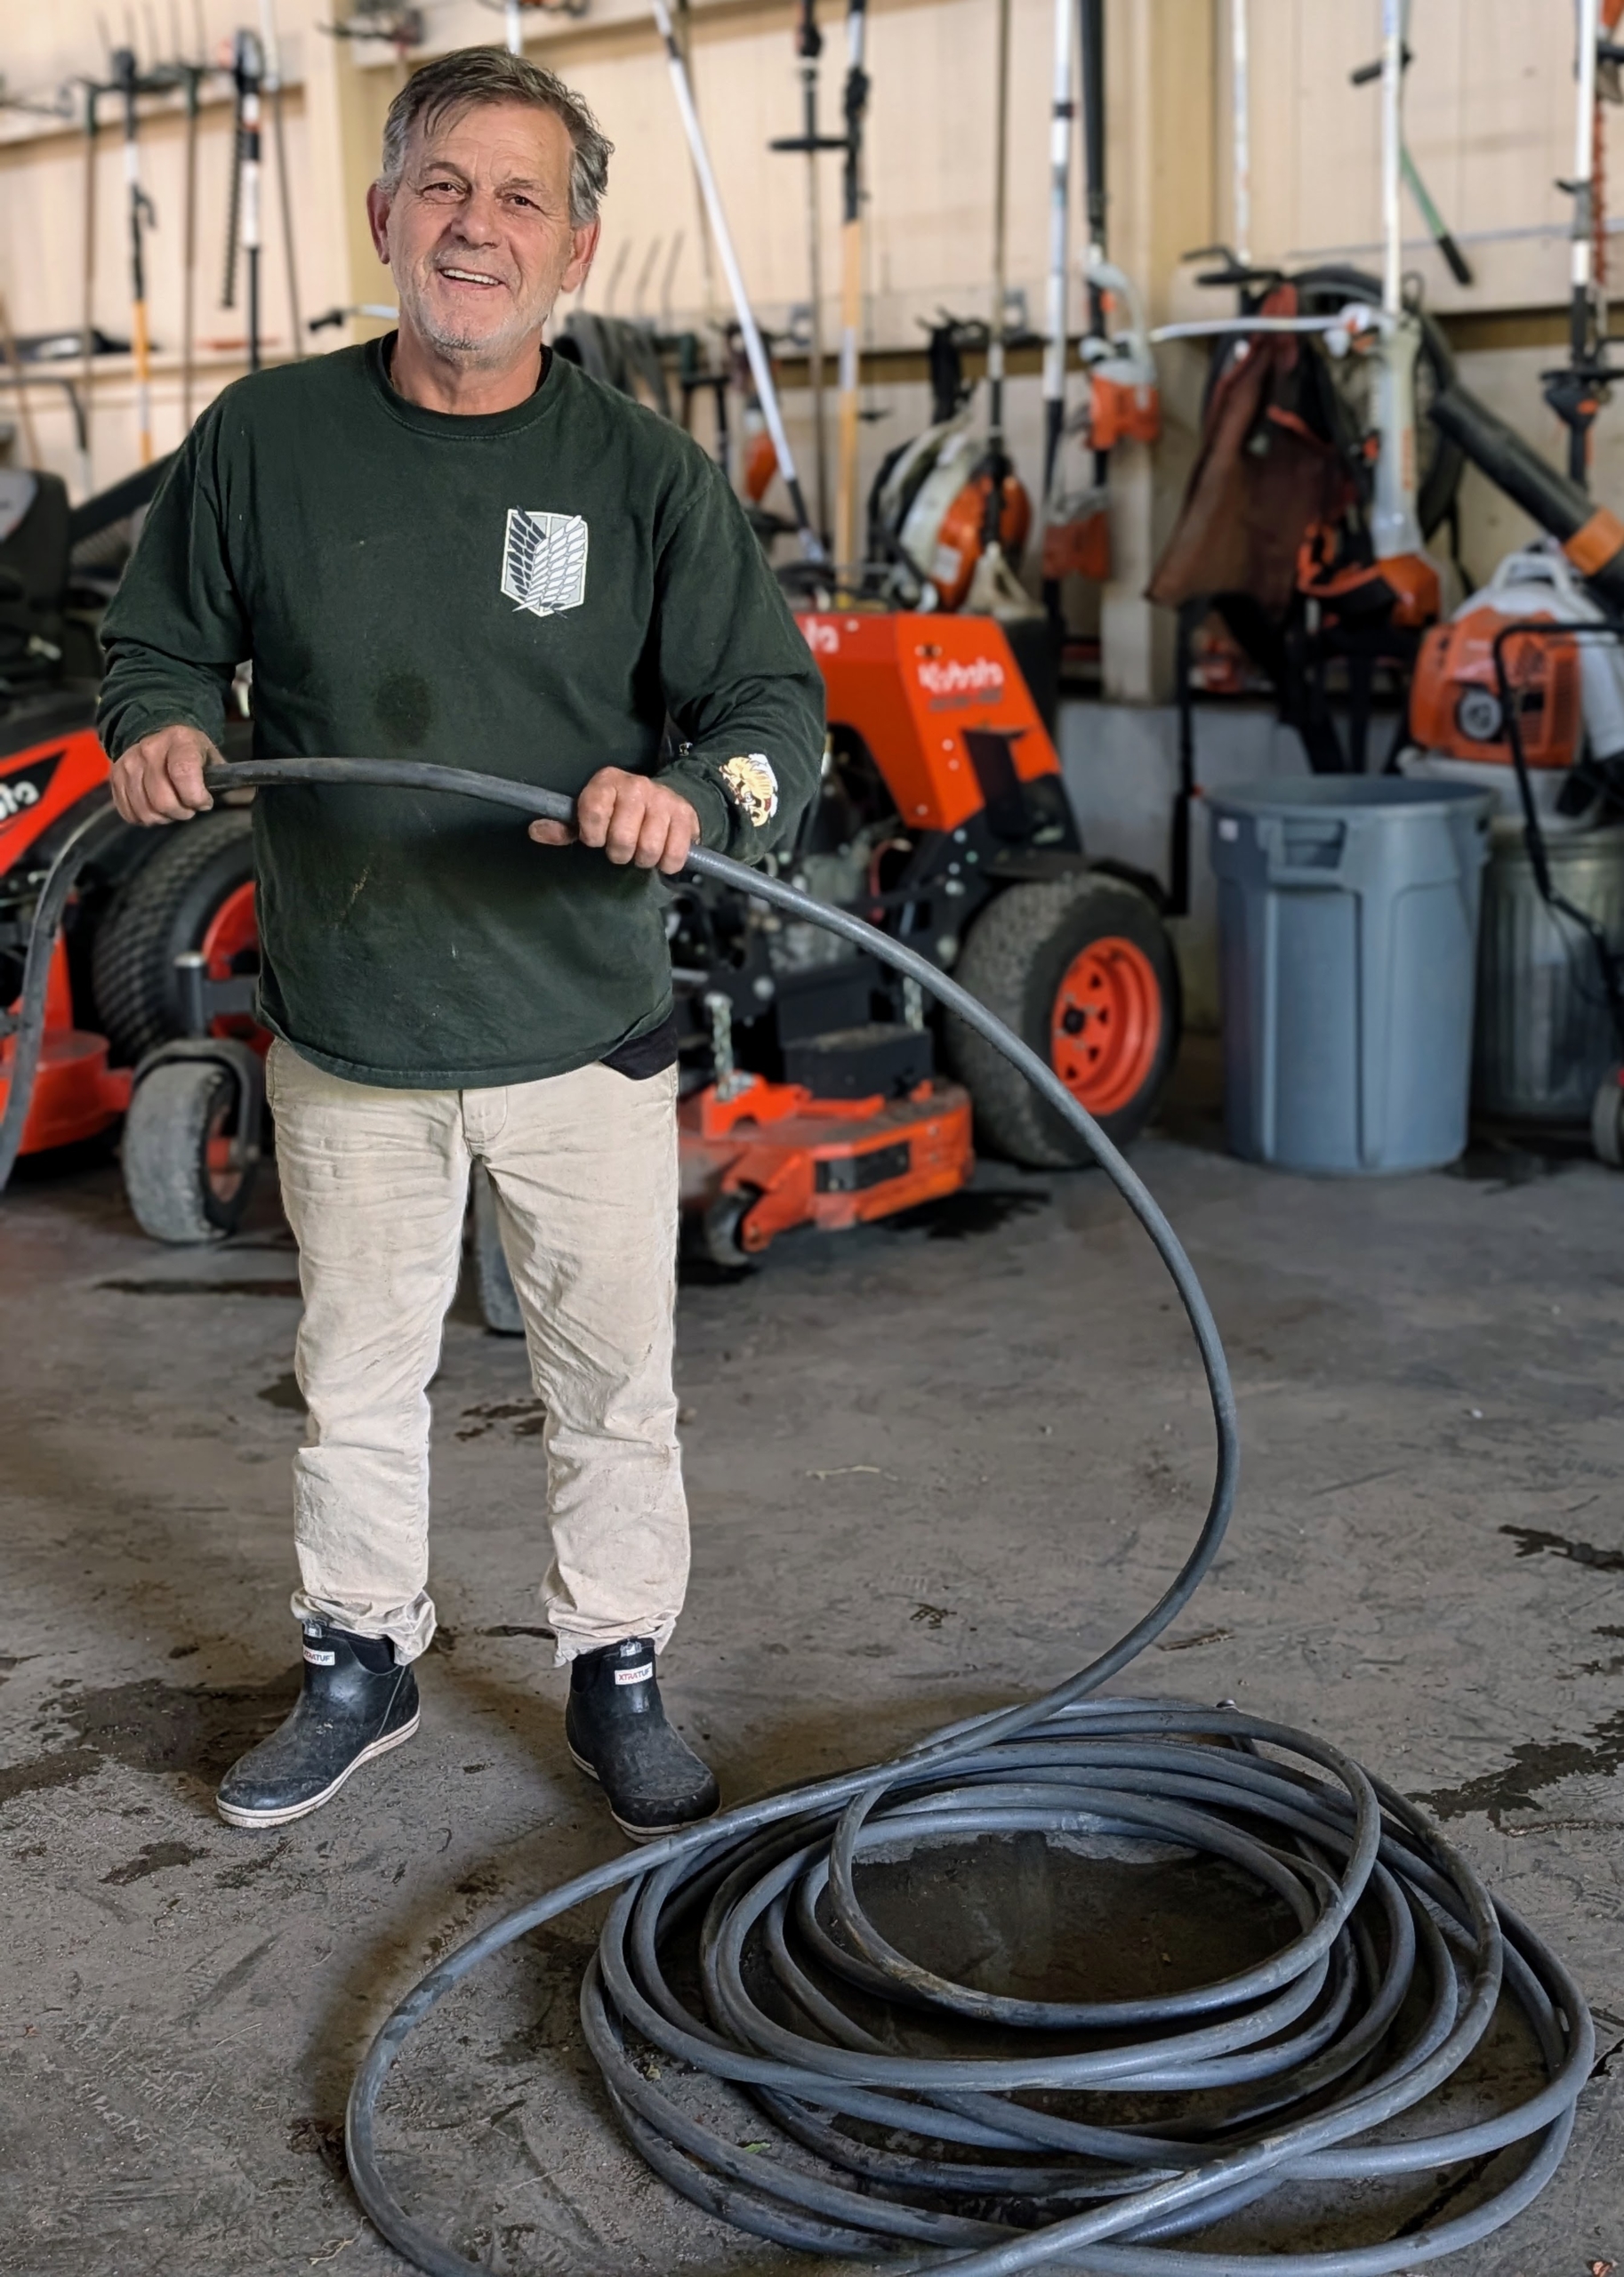
Fernando, who has worked with me for more than 30 years is bleeding and coiling up the hoses in preparation for storage. Proper maintenance and storage will prevent the hoses from cracking and extend the life of the hoses.
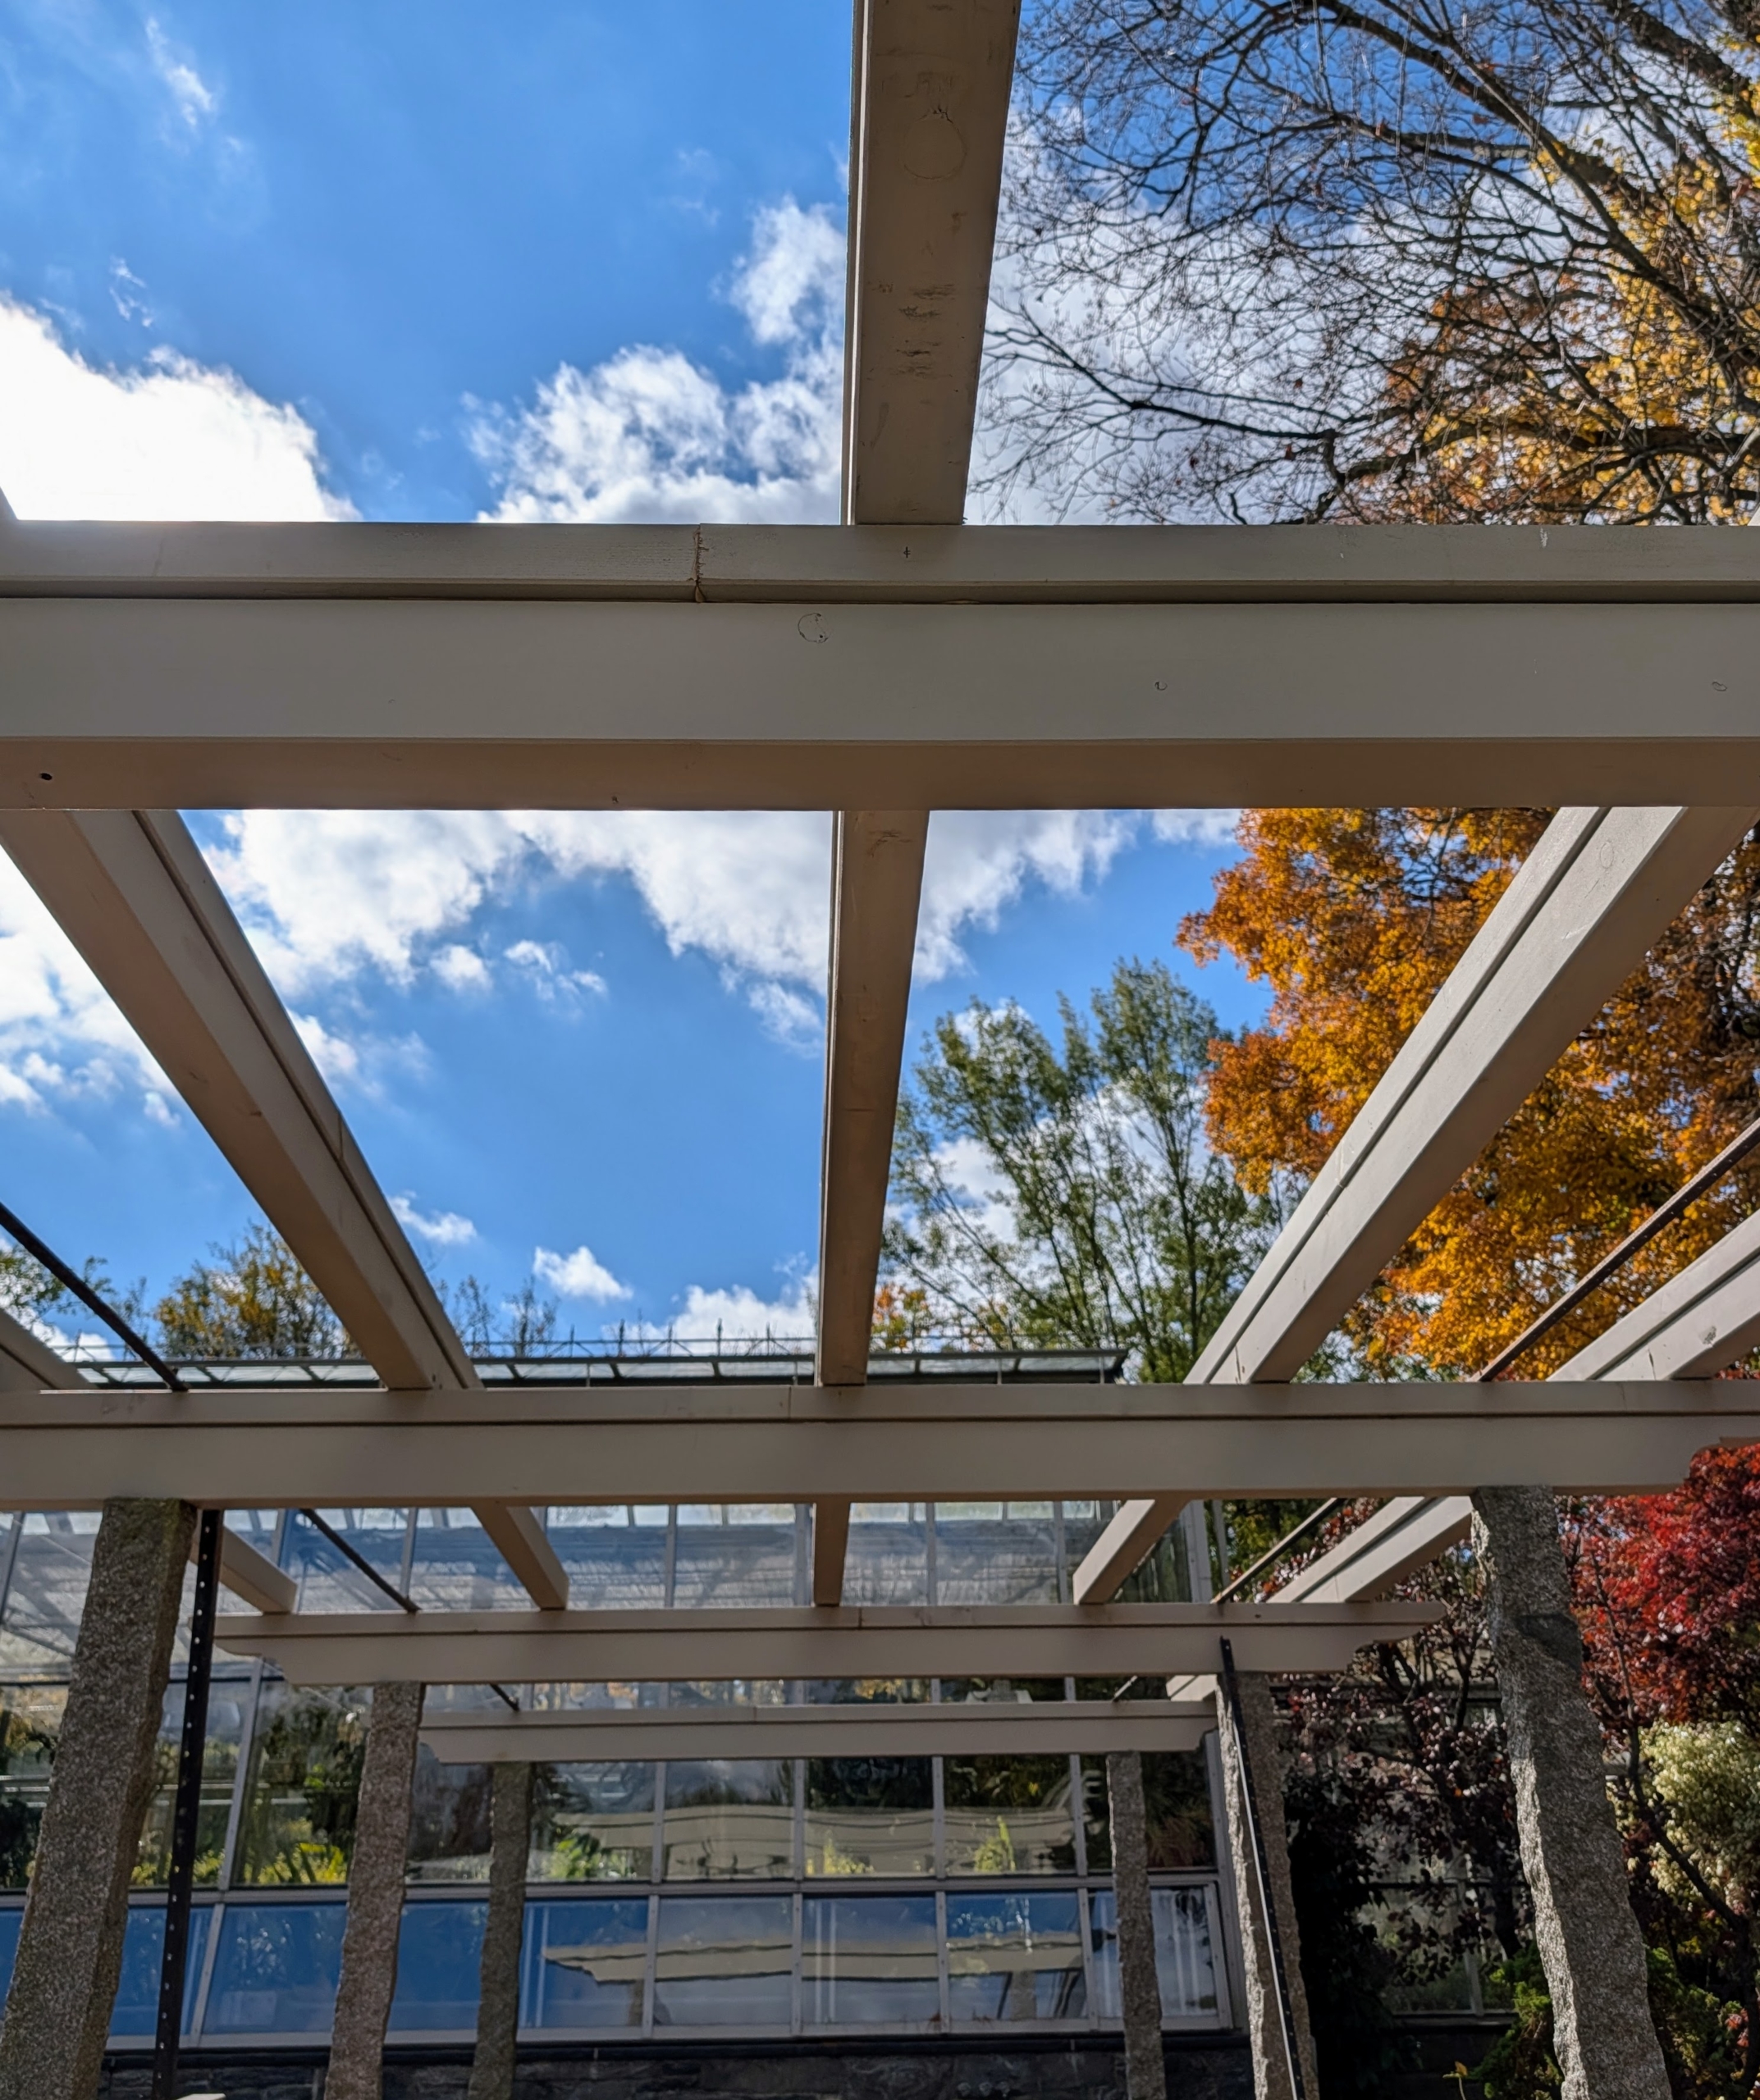
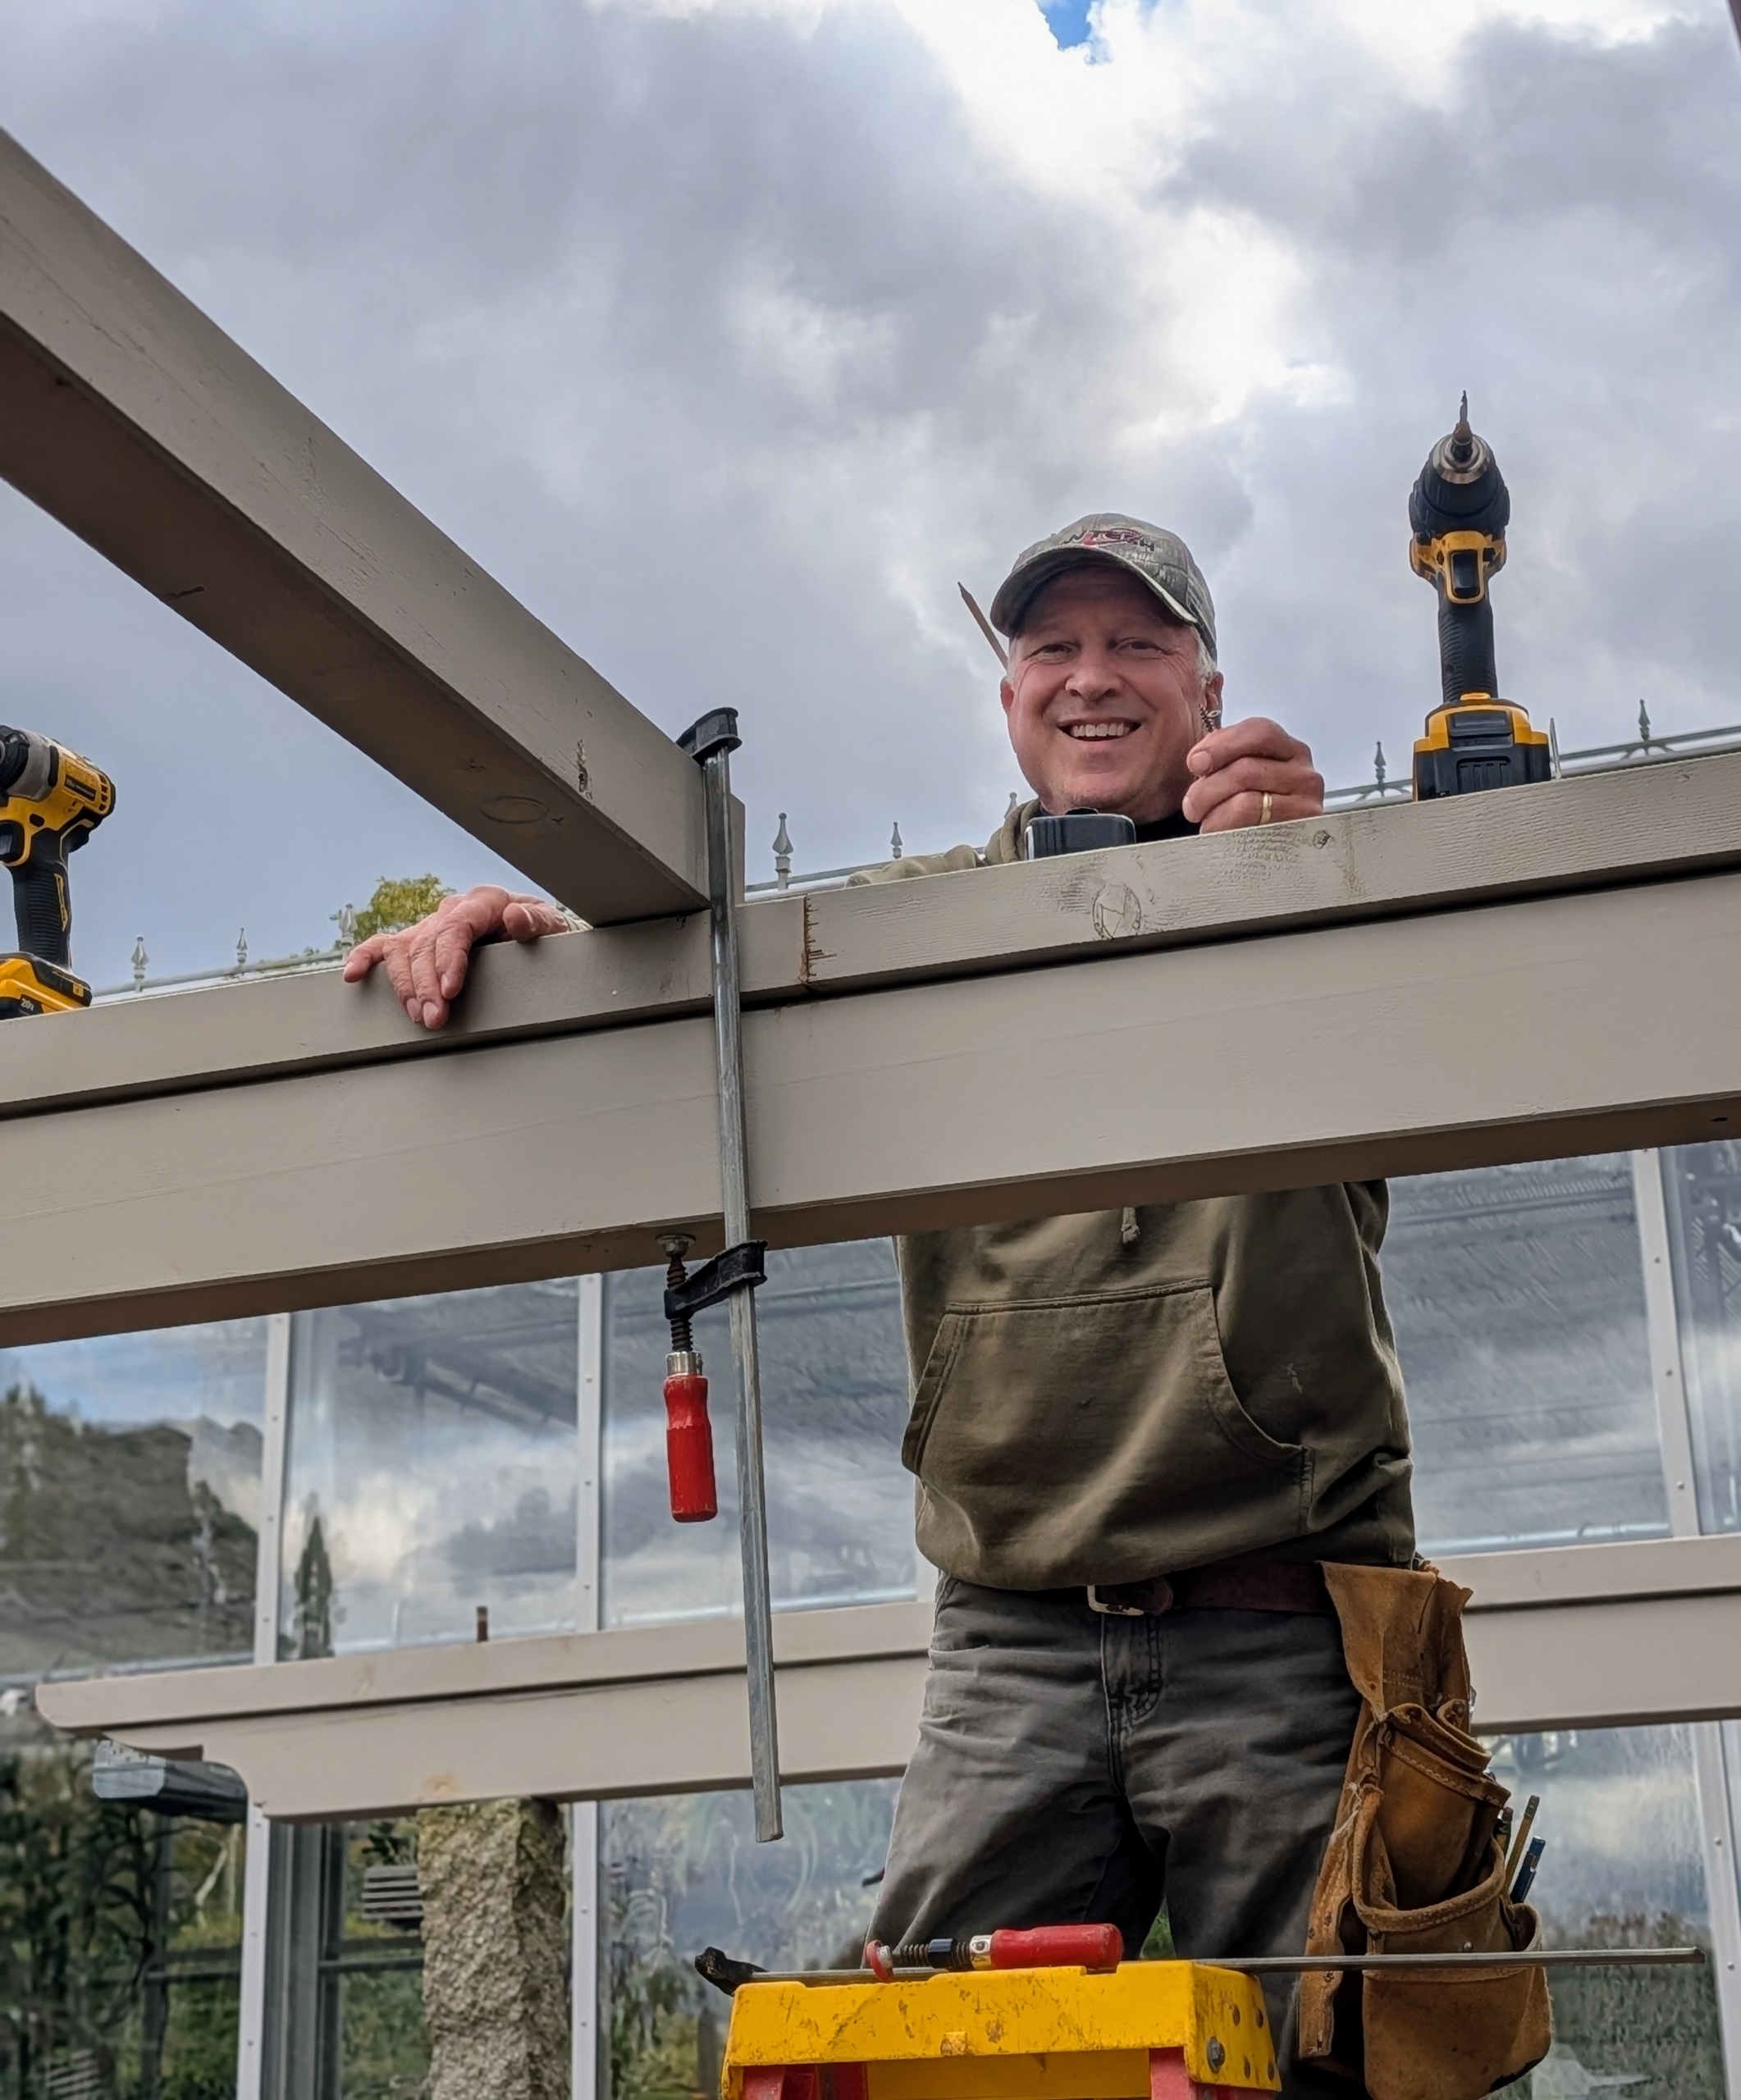
The small pergola outside my main greenhouse is being restored. The old wooden beams and rafter tails are removed and replaced. Luckily, a lot of the wood is still usable. Once complete, the entire pergola will get a fresh coat of paint – Bedford Gray, of course.
Here’s my property manager, Doug, securing a beam and checking all the cross pieces being used. He is also an excellent carpenter and will cut any new rafter tails needed for the project.
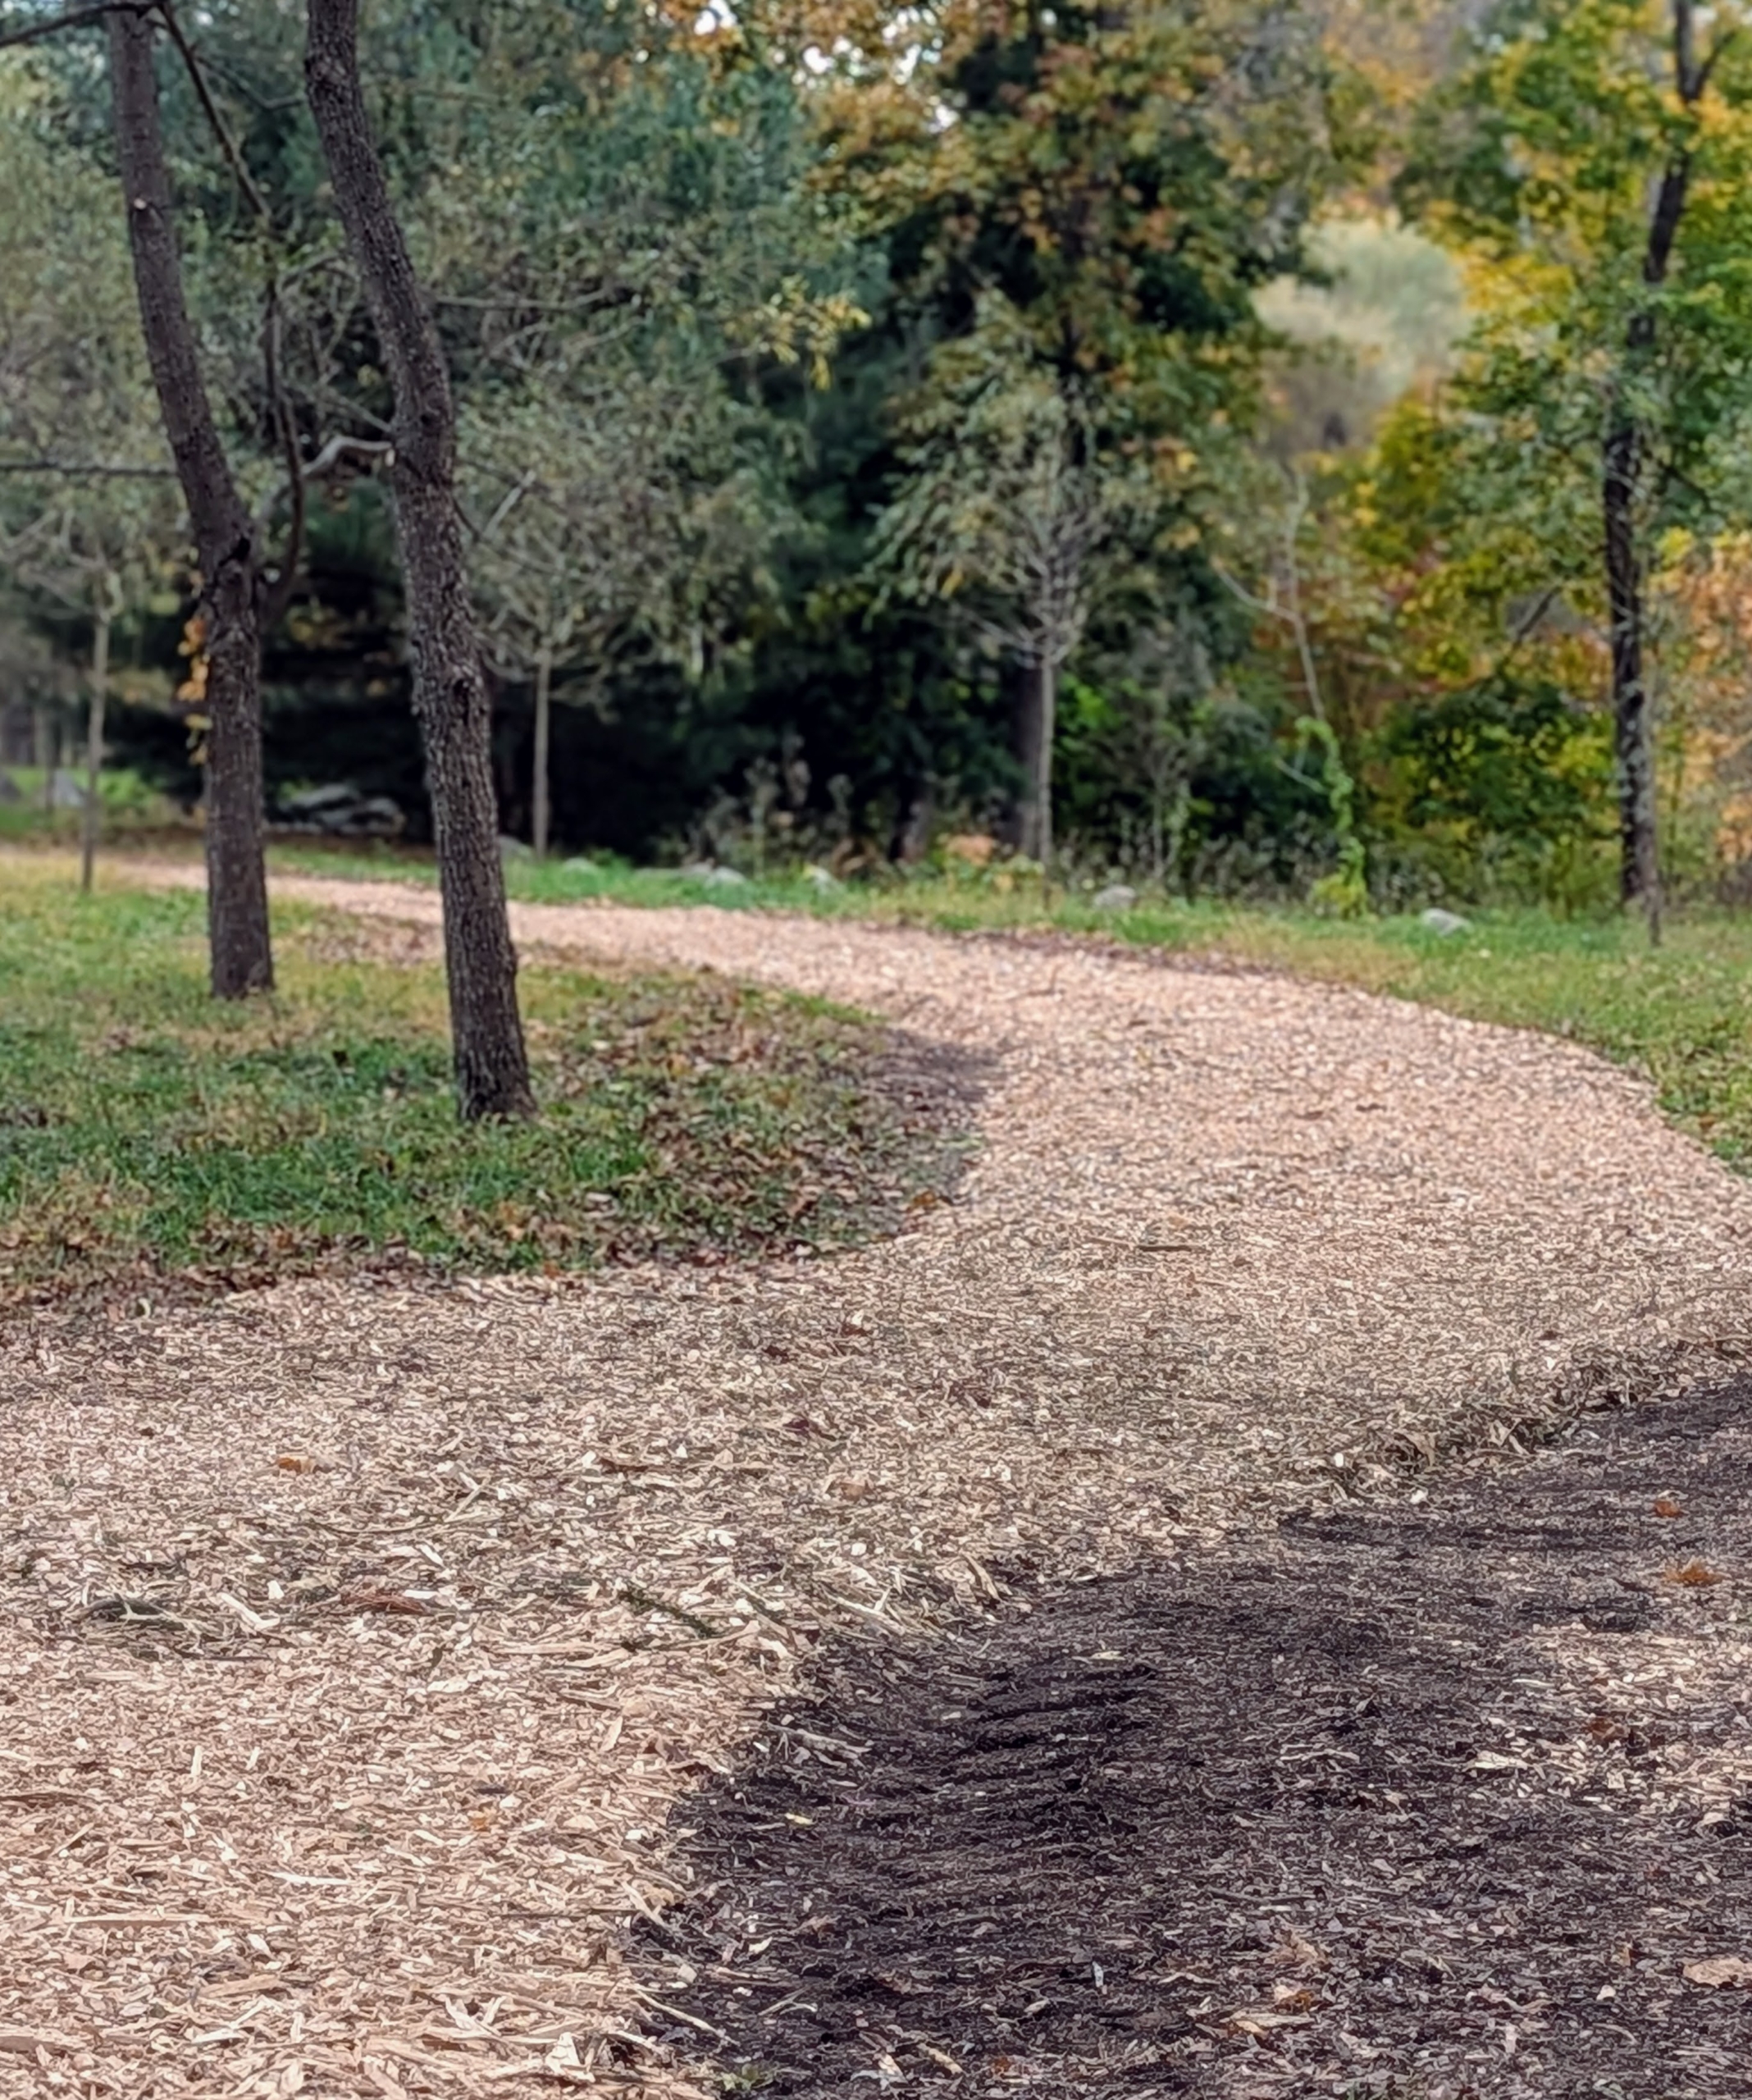
A new path to my pond is groomed and topped with a layer of wood chips made right here from down trees. Wood chips look neat and tidy, but they also prevent any soil erosion from runoff and enrich the soil as they decompose.
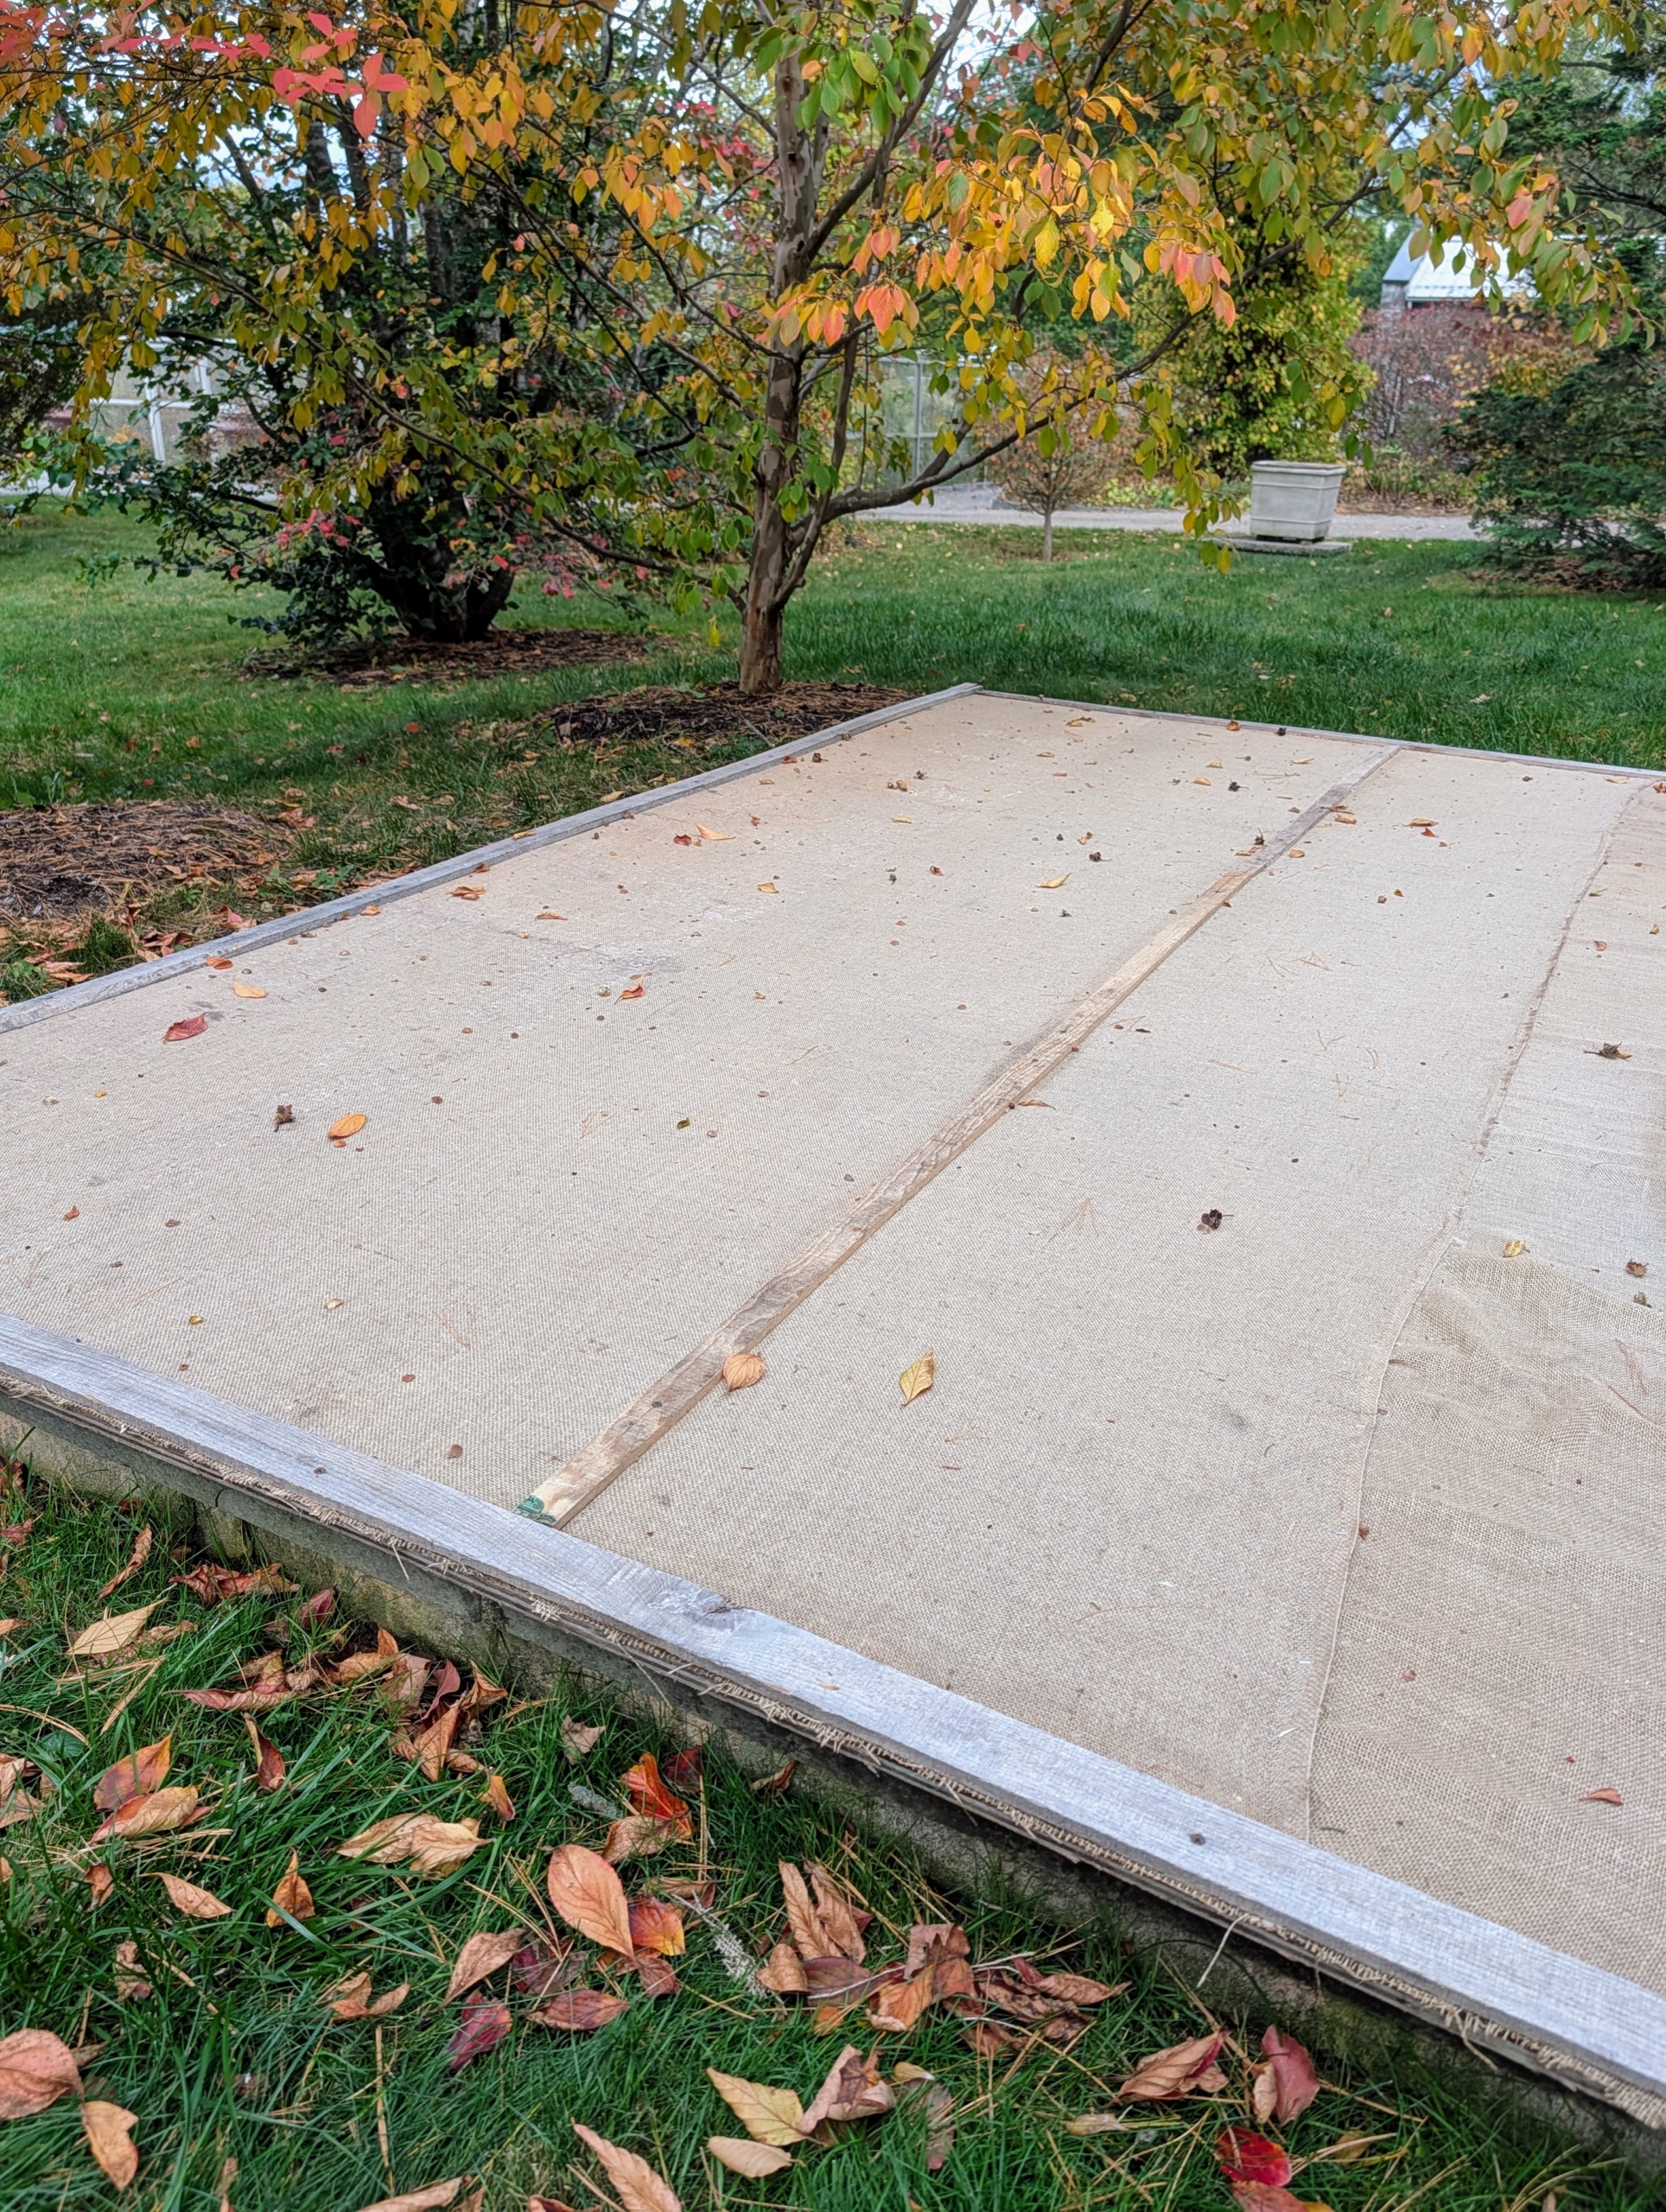
I keep all my air conditioners in large pits, where they are well hidden behind each house. These air conditioner pits are covered with industrial strength plastic, plywood, and then burlap to protect them from the winter elements. Covering these pits also makes them easier to maintain. Any snow or debris that falls can be brushed to the side before accessing the units below.
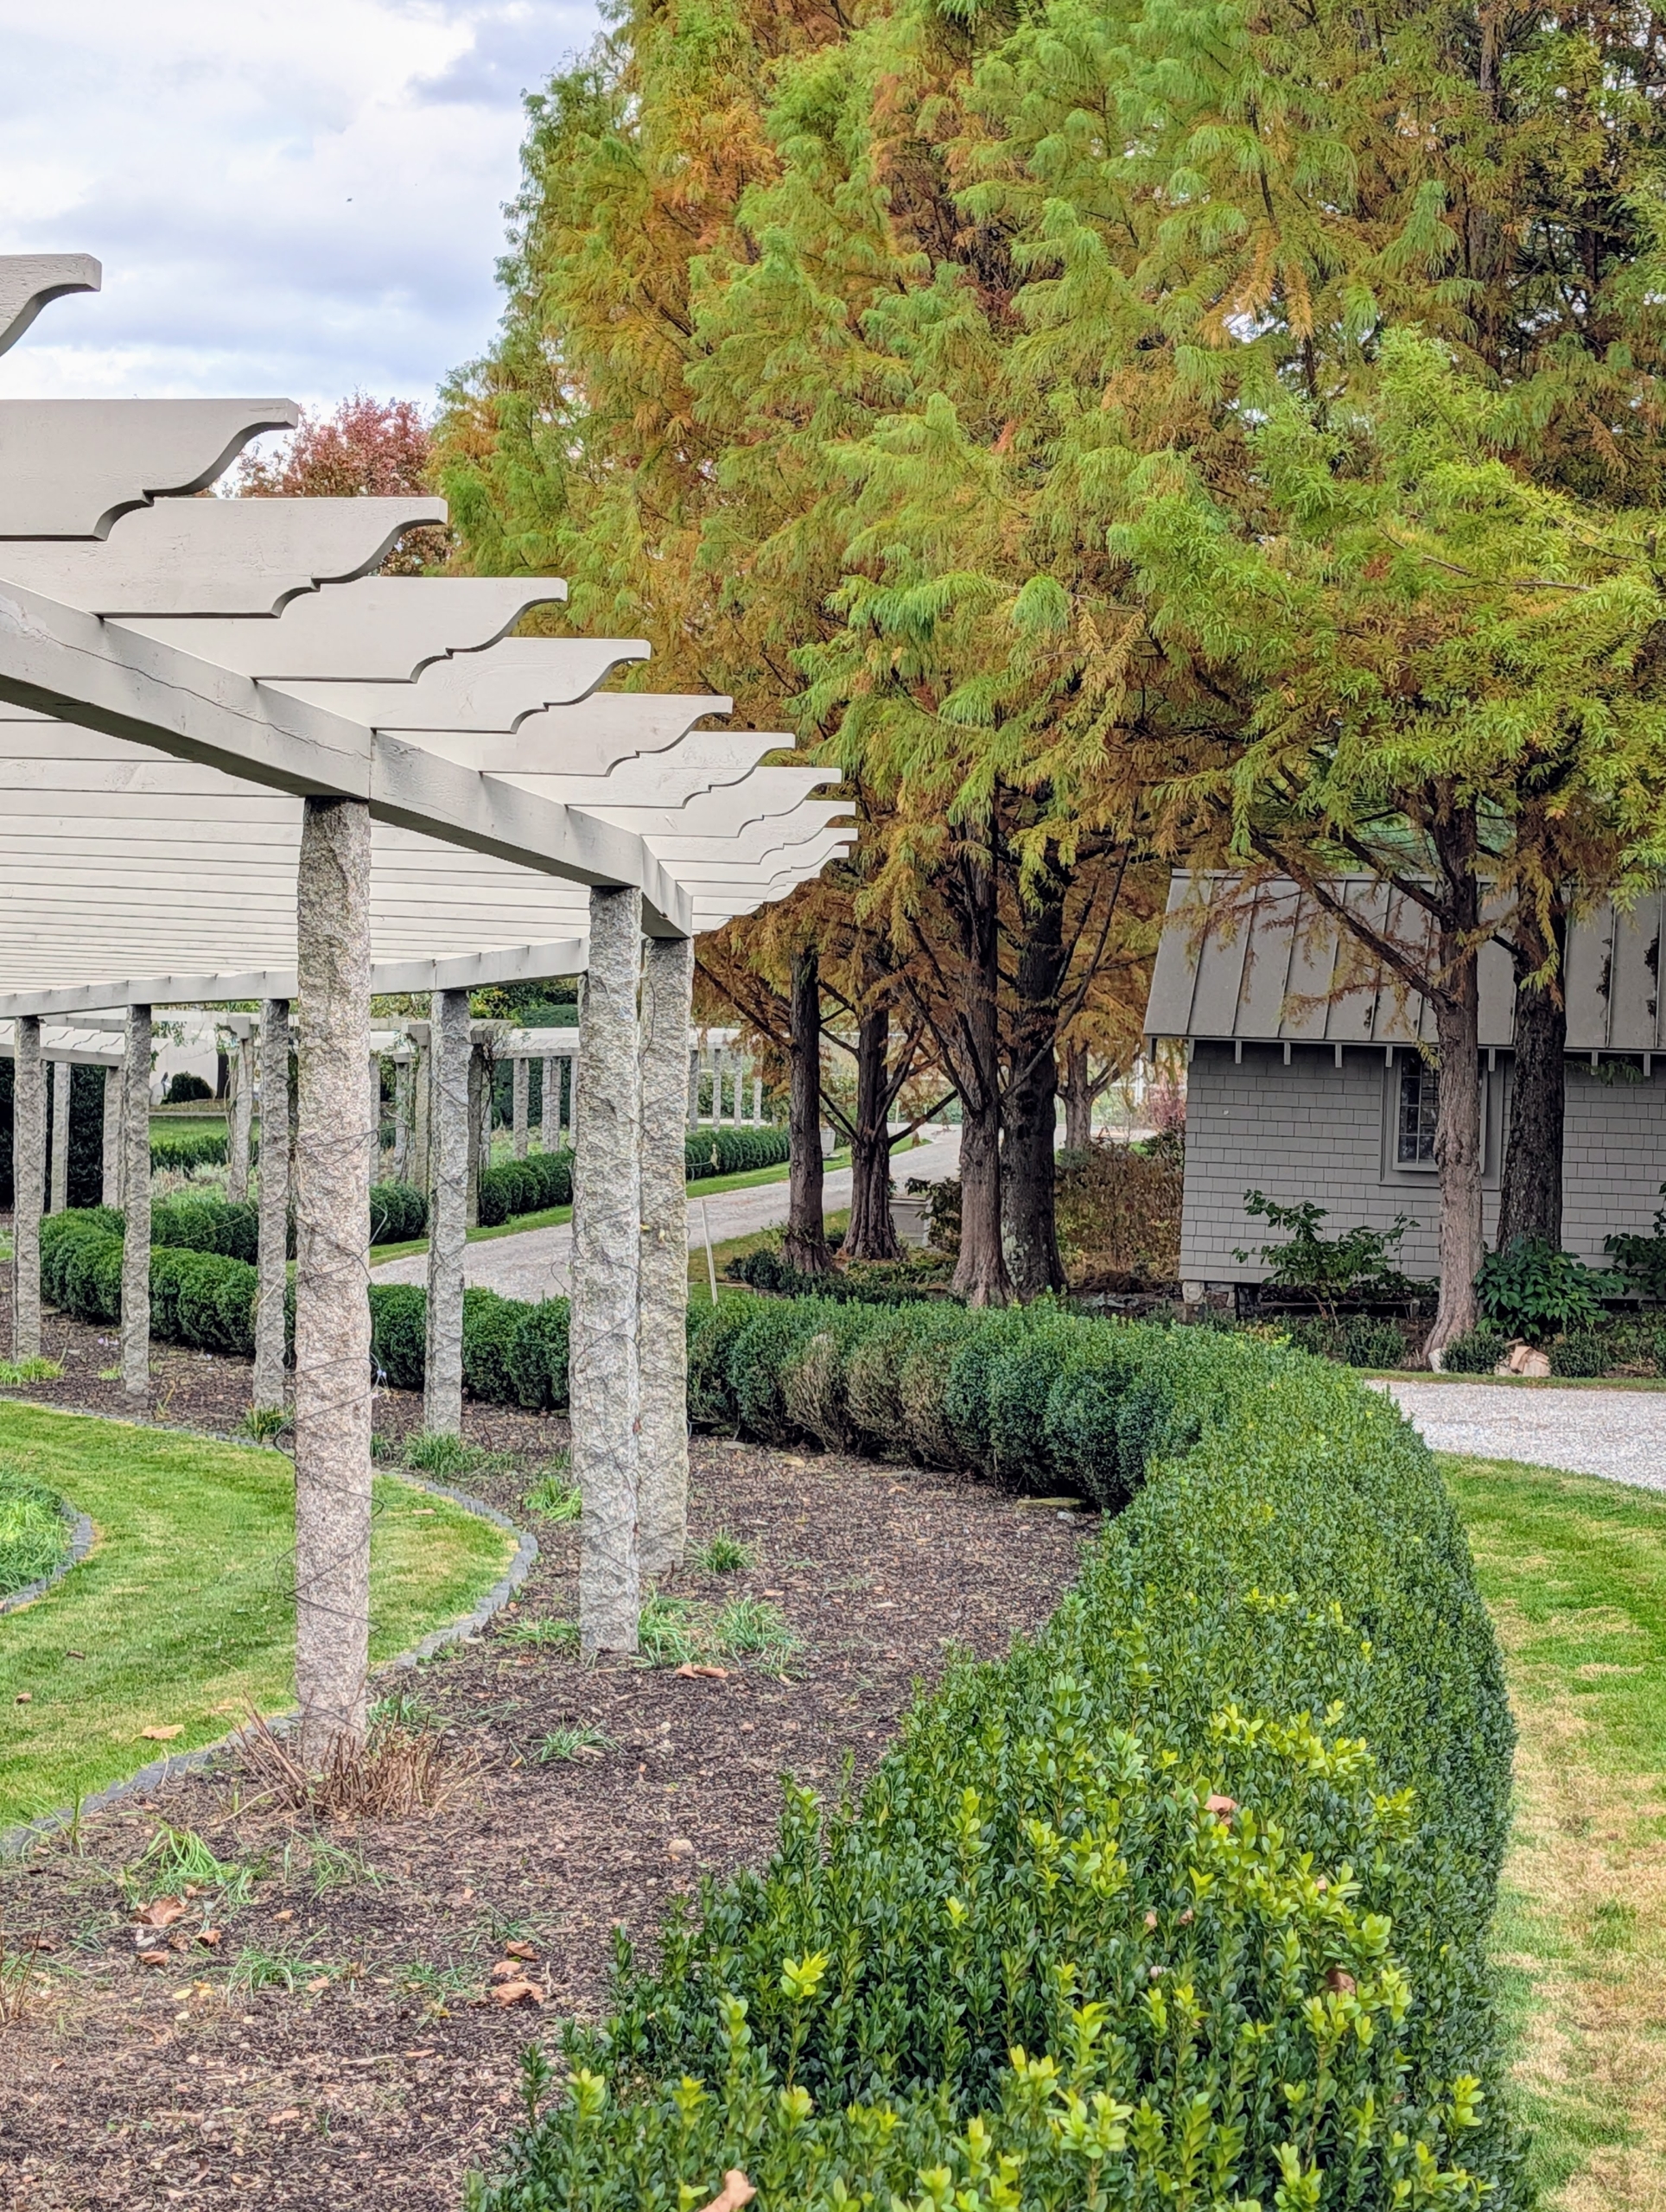
My long and winding pergola garden beds are all weeded and cleared of old plant material. Soon, they will be planted with spring-blooming bulbs.
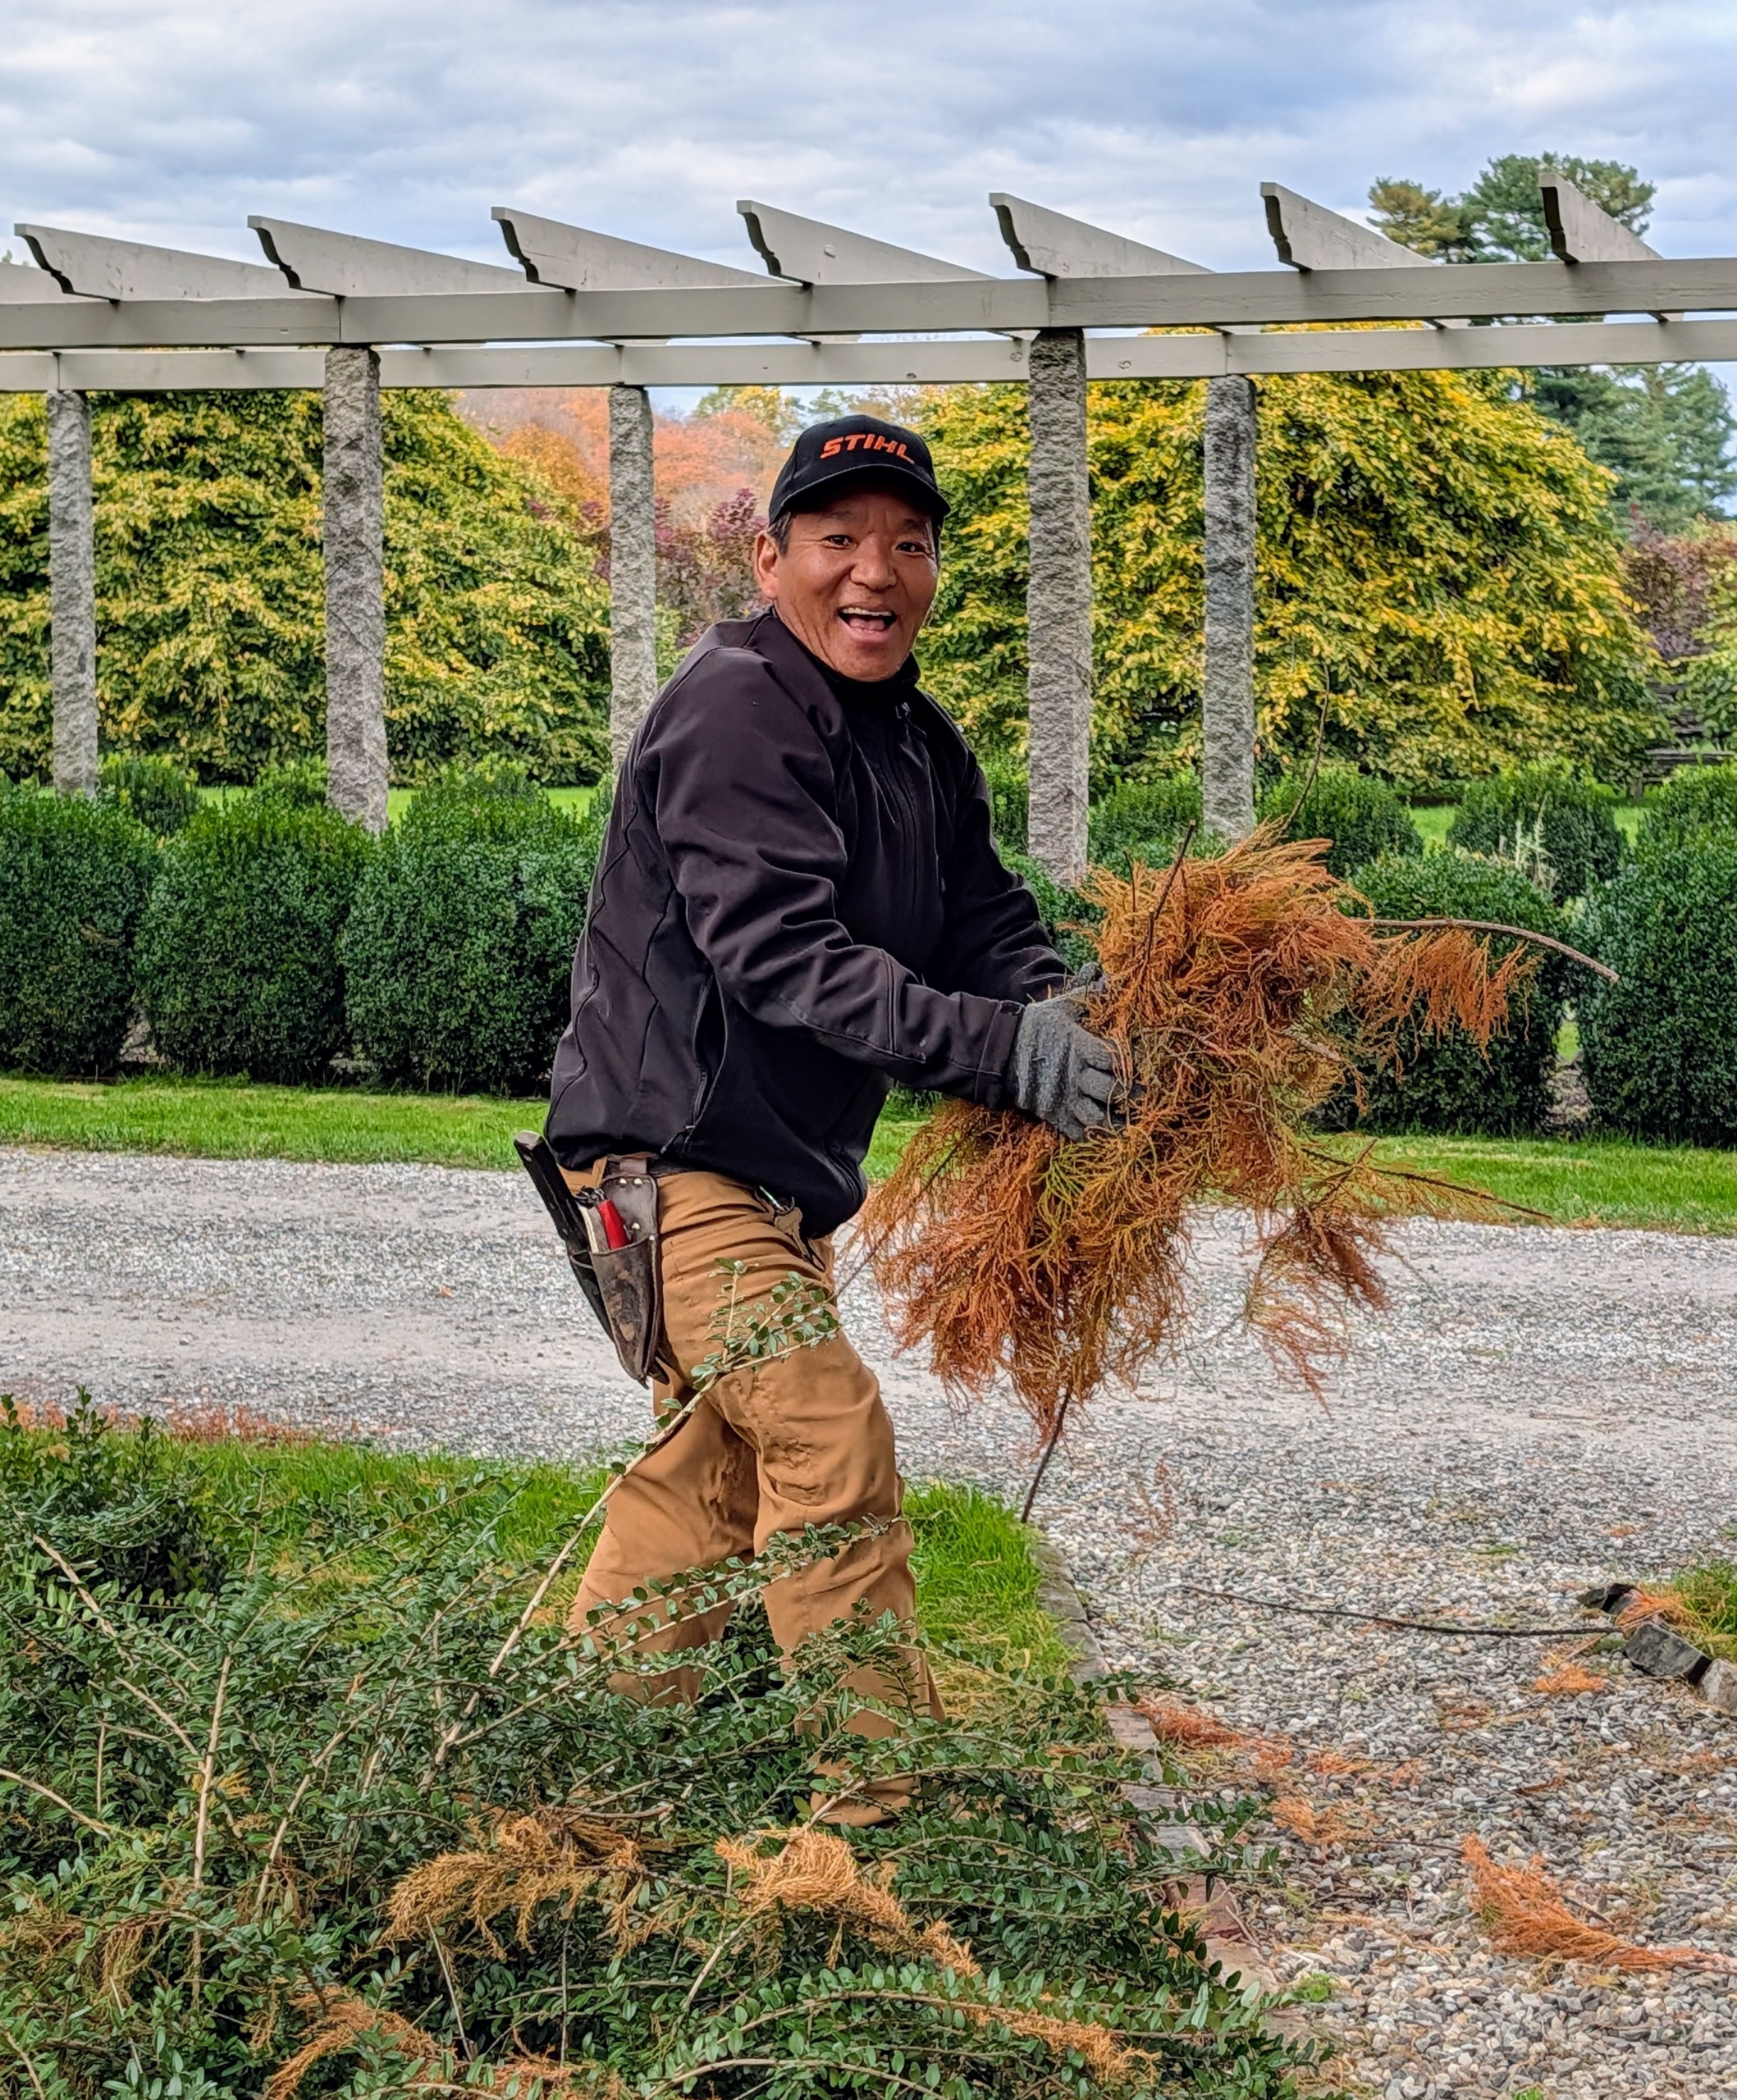
Here’s Phurba picking up some of the fallen feathery brown foliage from the bald cypress trees. Oftentimes, I also like to bag the foliage and use it as mulch – I always try to reuse and repurpose whenever possible.
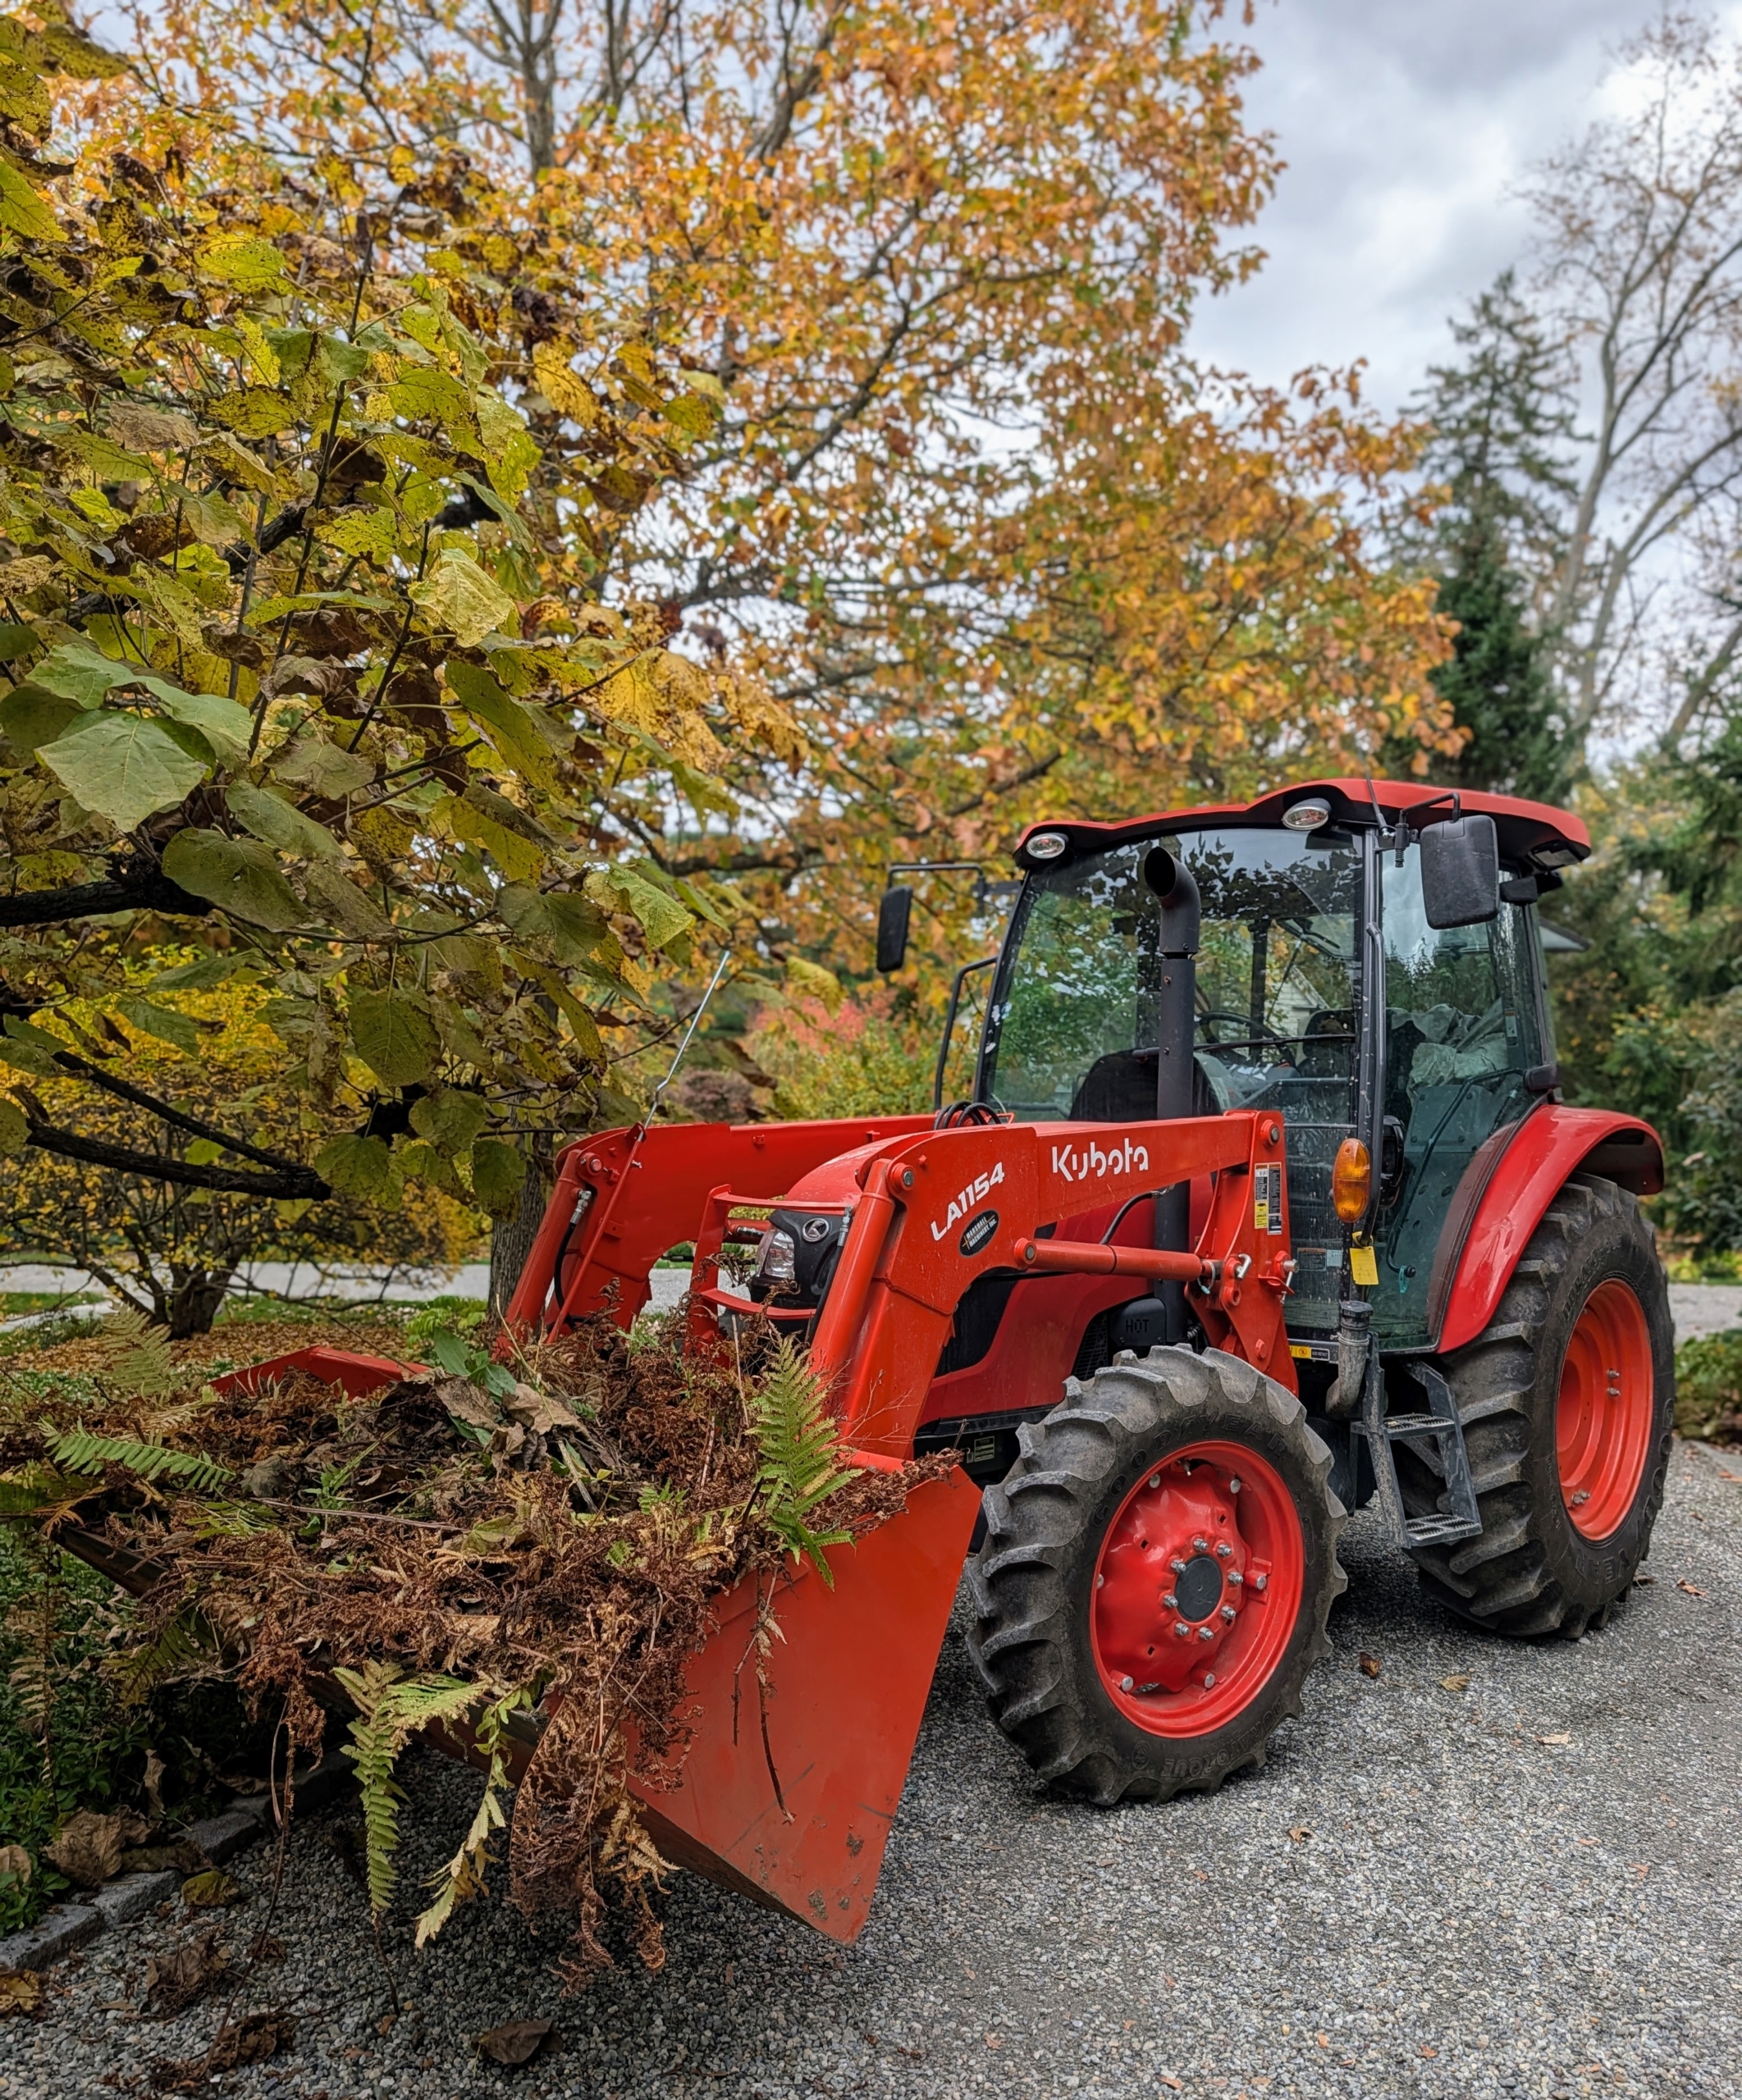
My dependable Kubota tractors are always at work. Here’s another load ready to be taken to the compost pile.
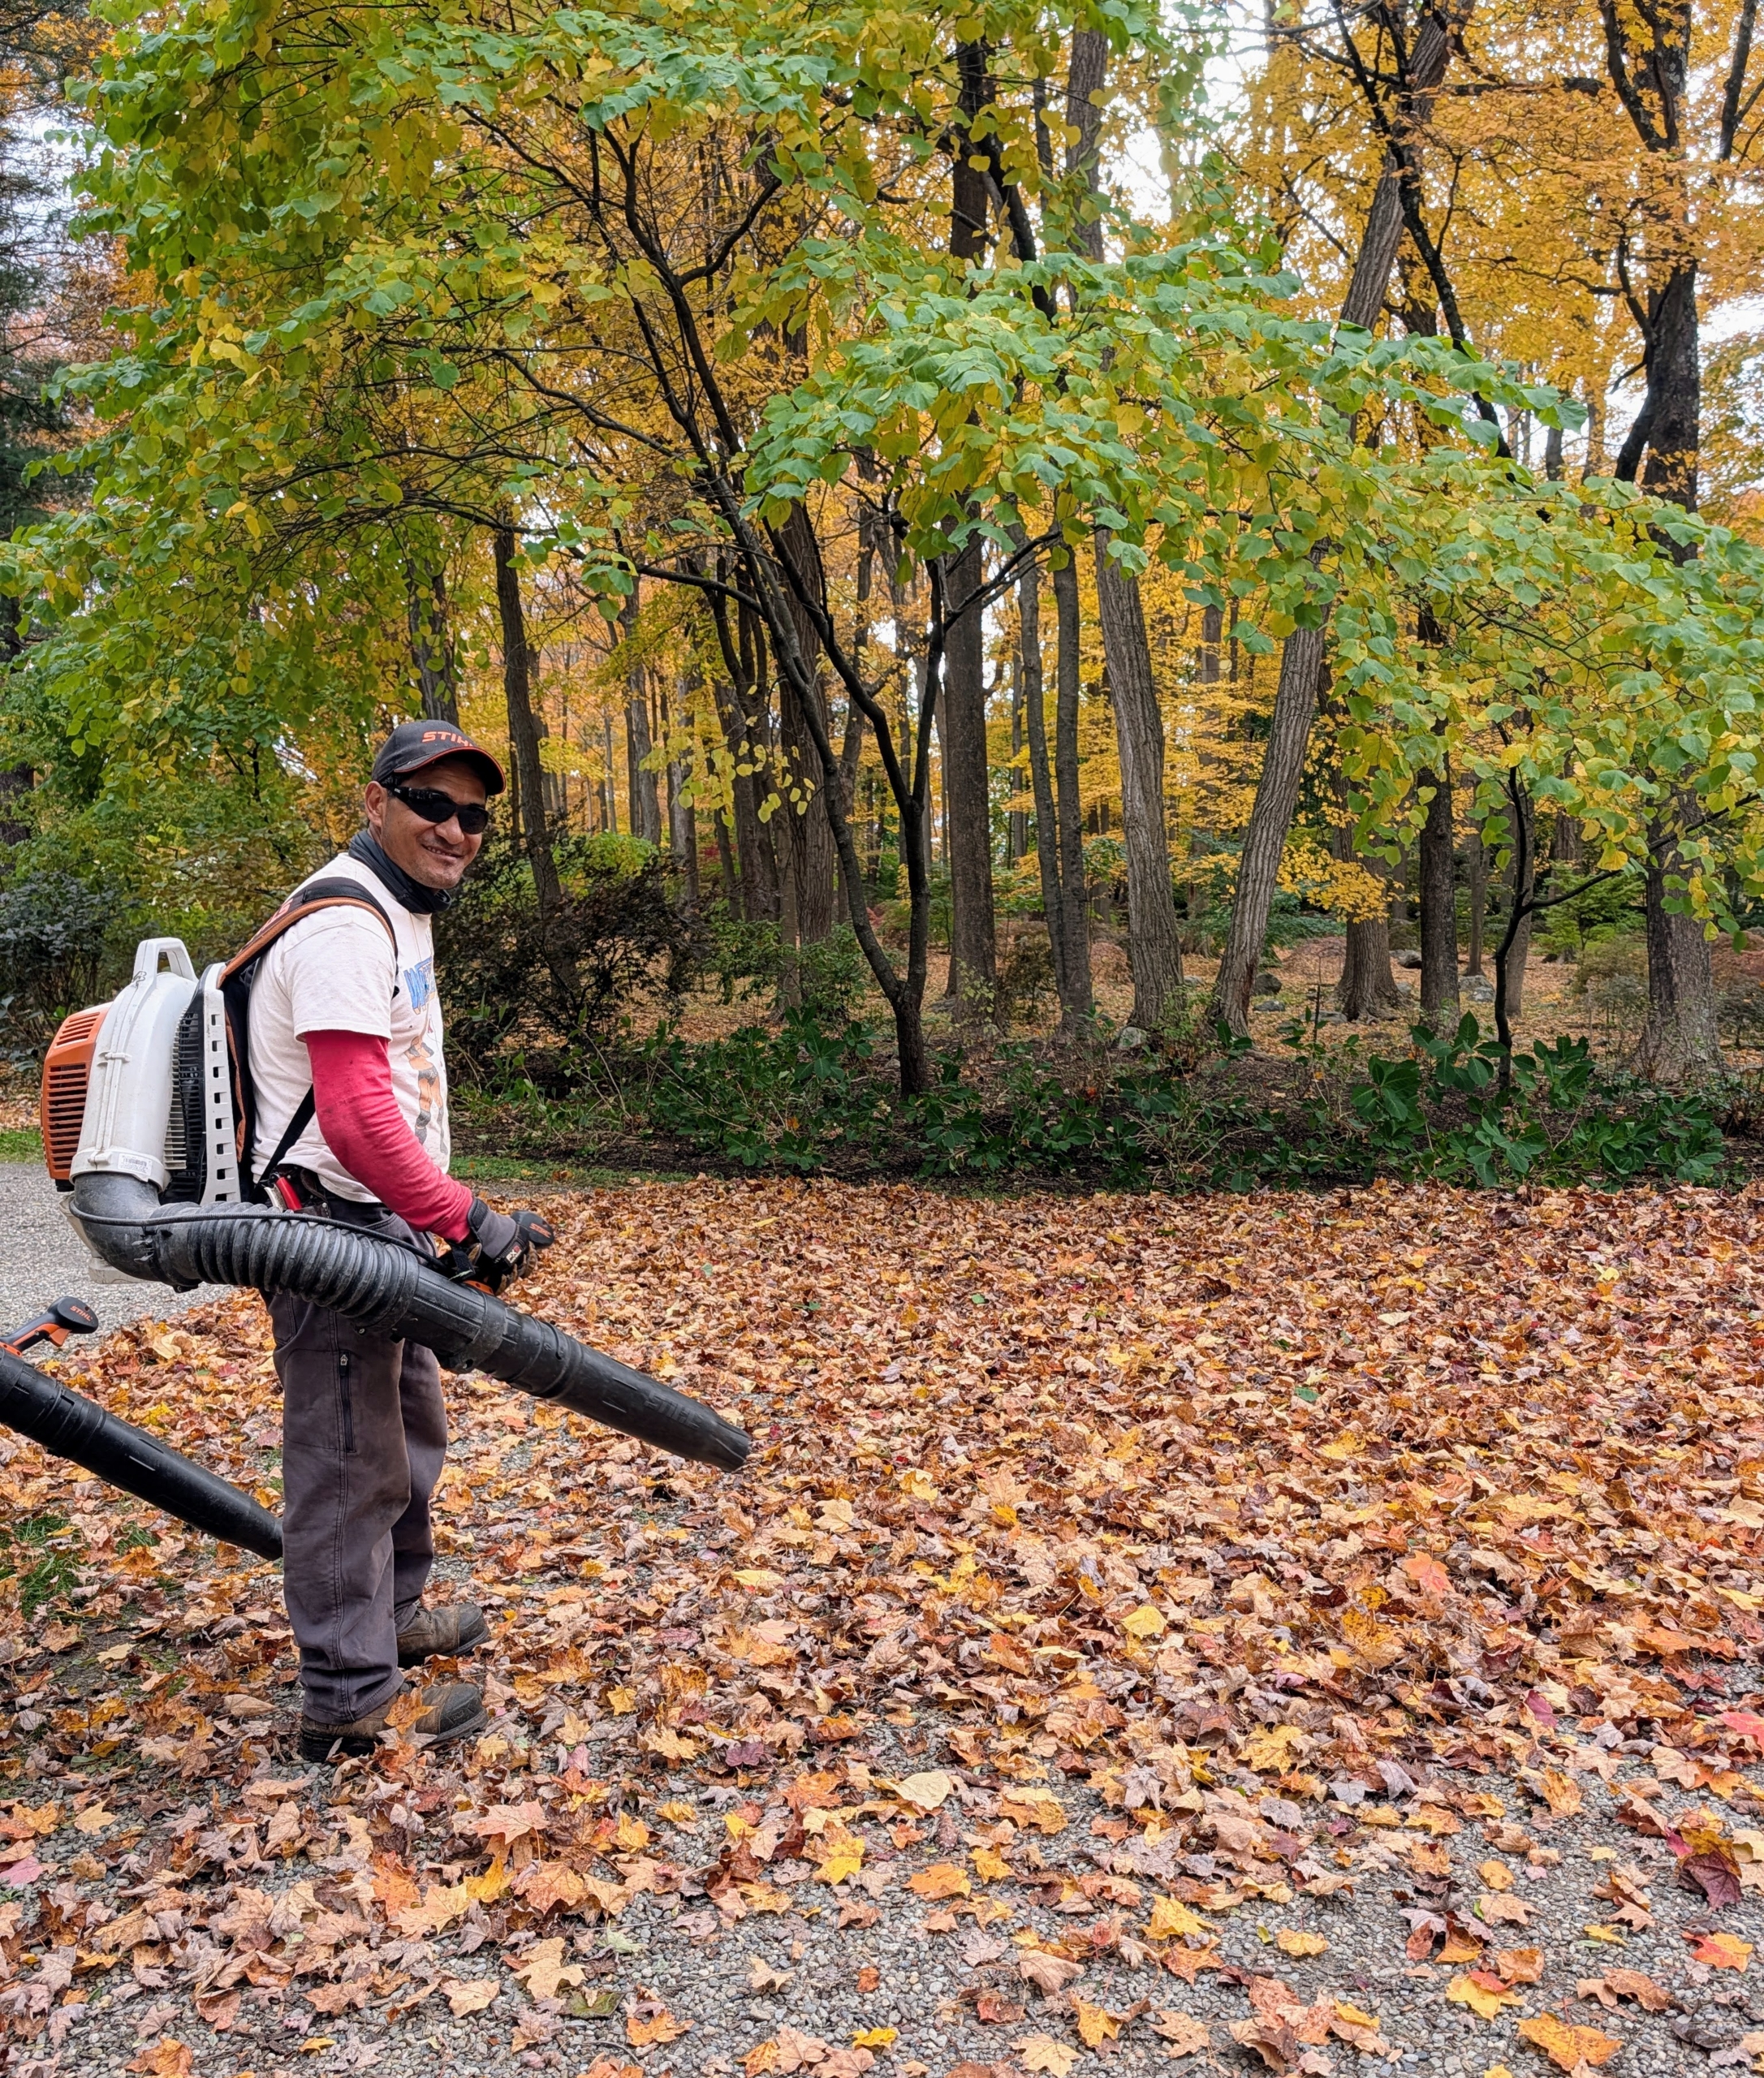
Pasang is using one of my trusted STIHL backpack blowers down by my production studio house. I’ve been using STIHL’s blowers for years here at my farm. These blowers are powerful and fuel-efficient. The gasoline-powered engines provide enough rugged power to tackle heavy debris while delivering much lower emissions.
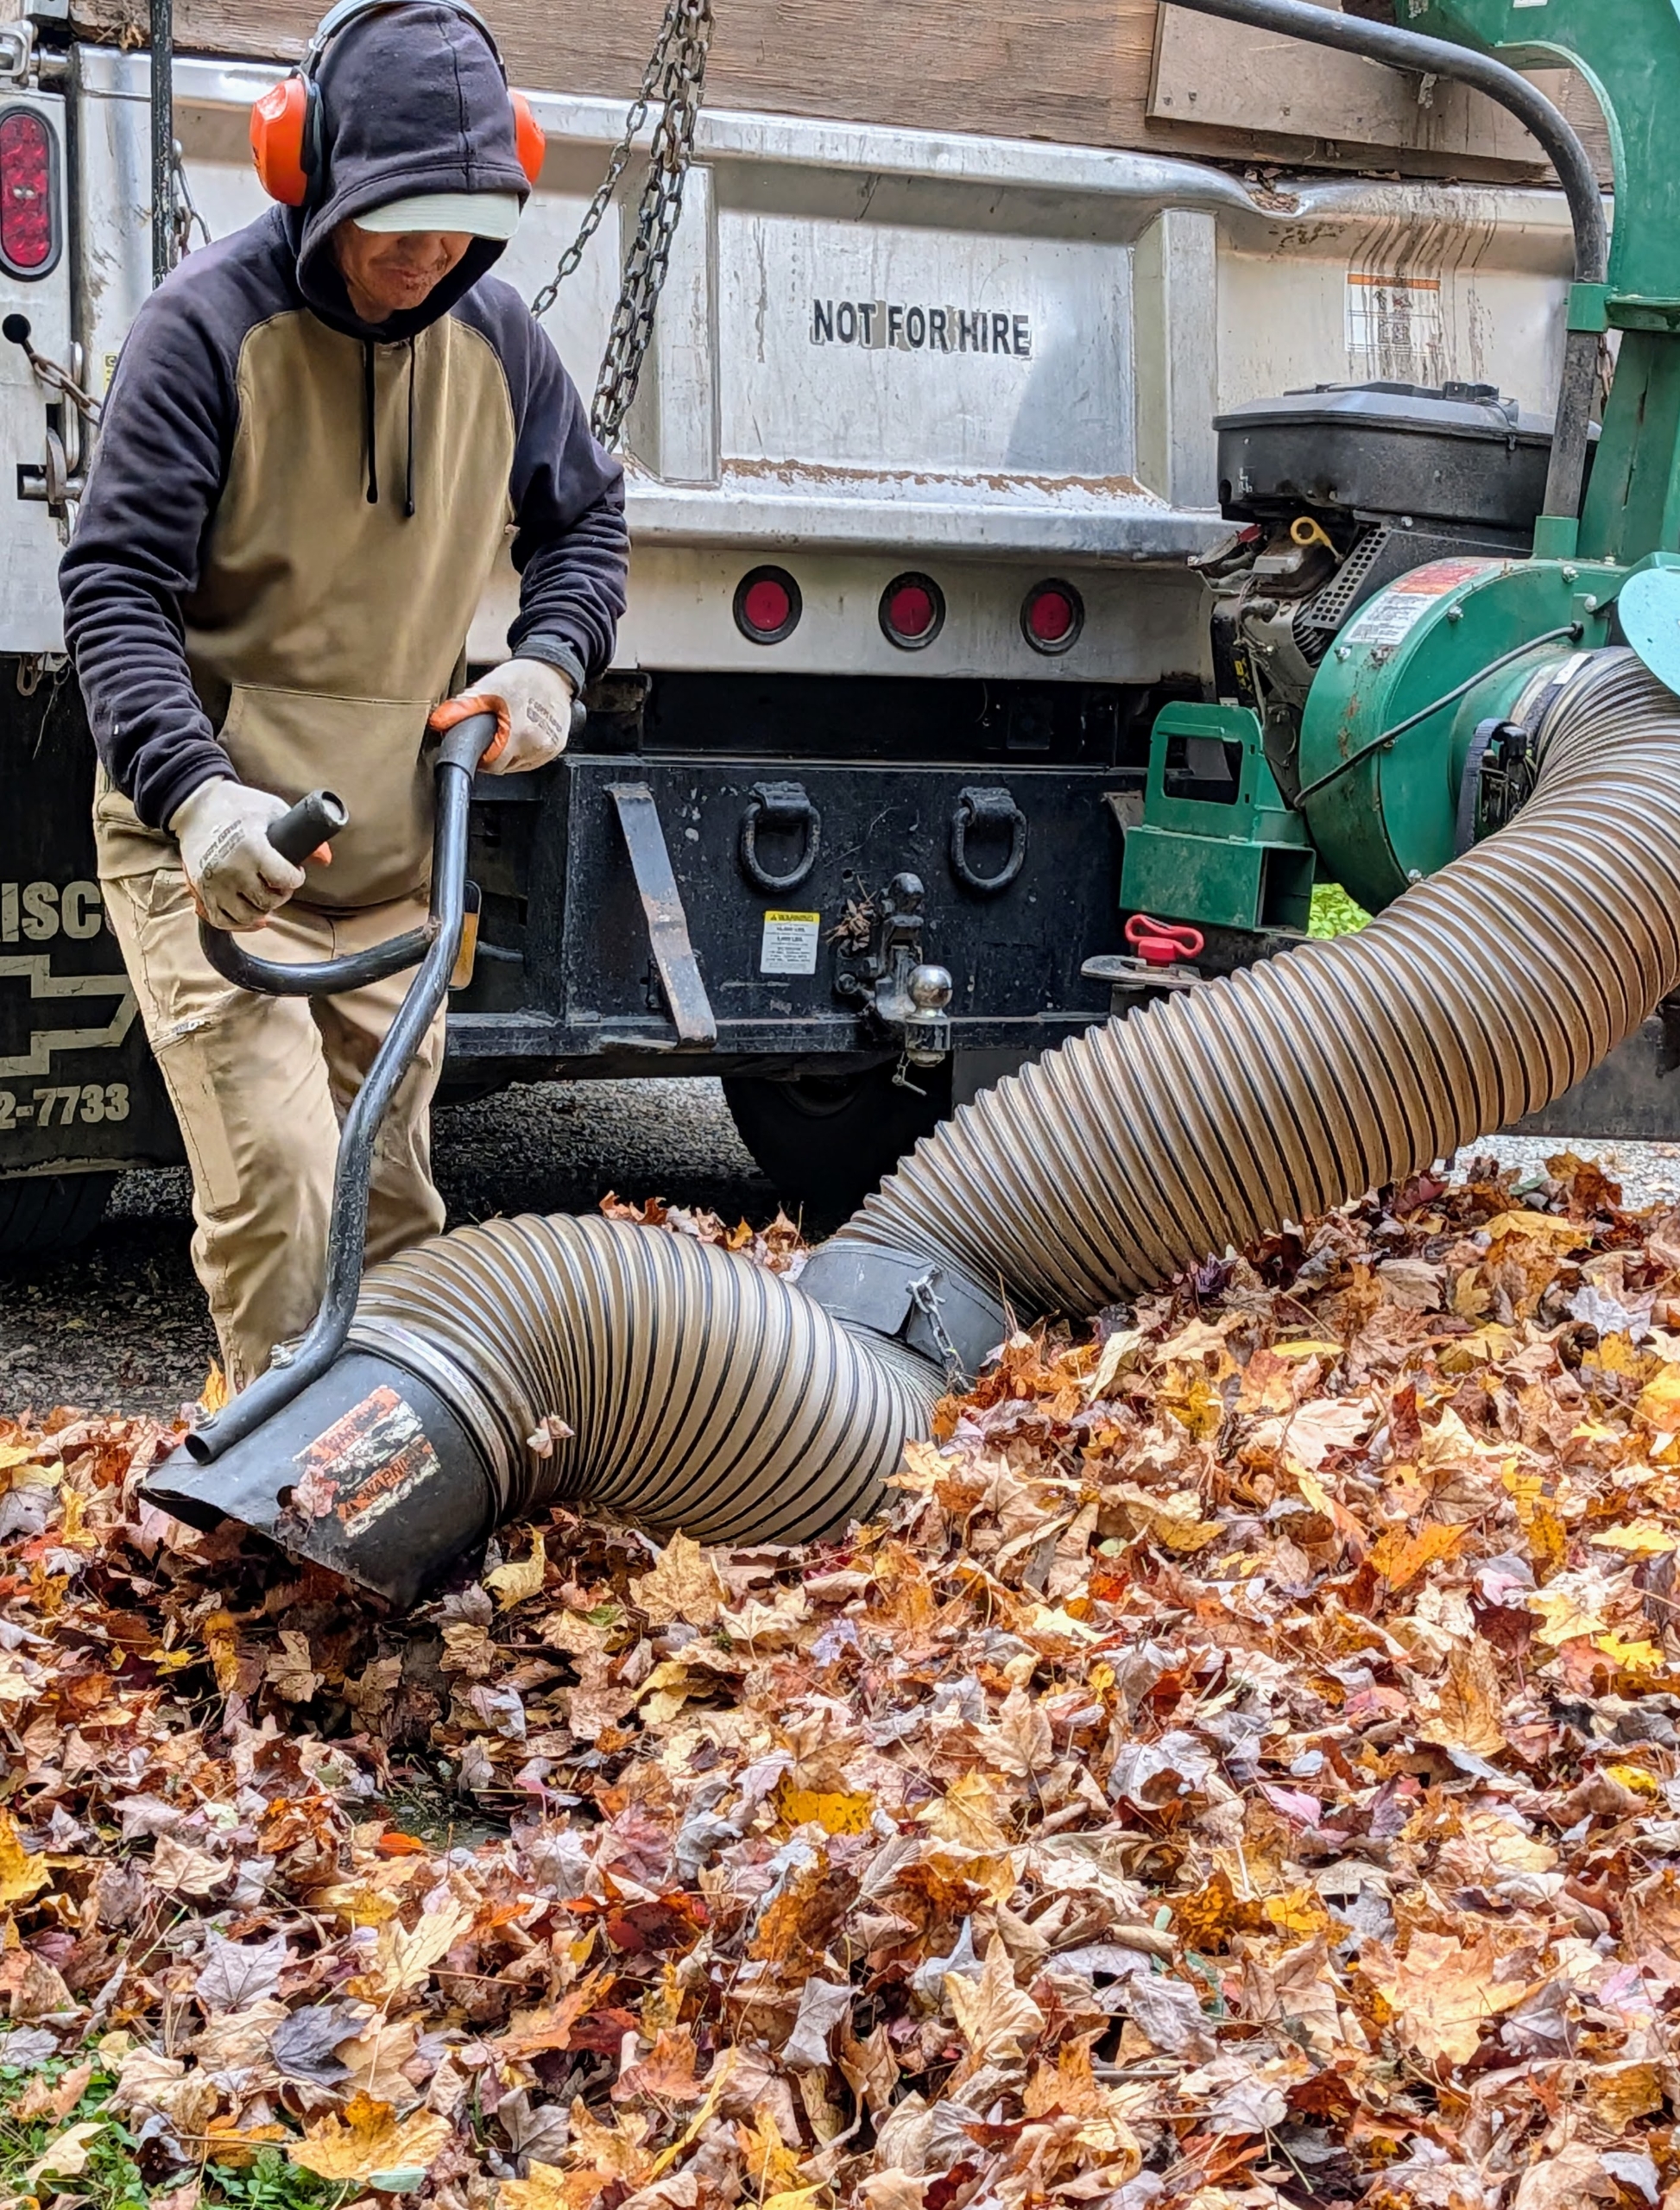
Once the leaves are blown into a manageable pile, they are directed to the opening of a vacuum tube connected to a dump truck. The leaves are then taken to the compost area, where they will decompose and get used again as mulch.
I am fortunate to have an indoor greenhouse, where I can grow fresh vegetables during winter. The 16 beds have been cleaned, fed, and prepared for the next crops to be planted. I also use this greenhouse to store some of the tropical plants that cannot fit in the hoop houses because they are so tall.
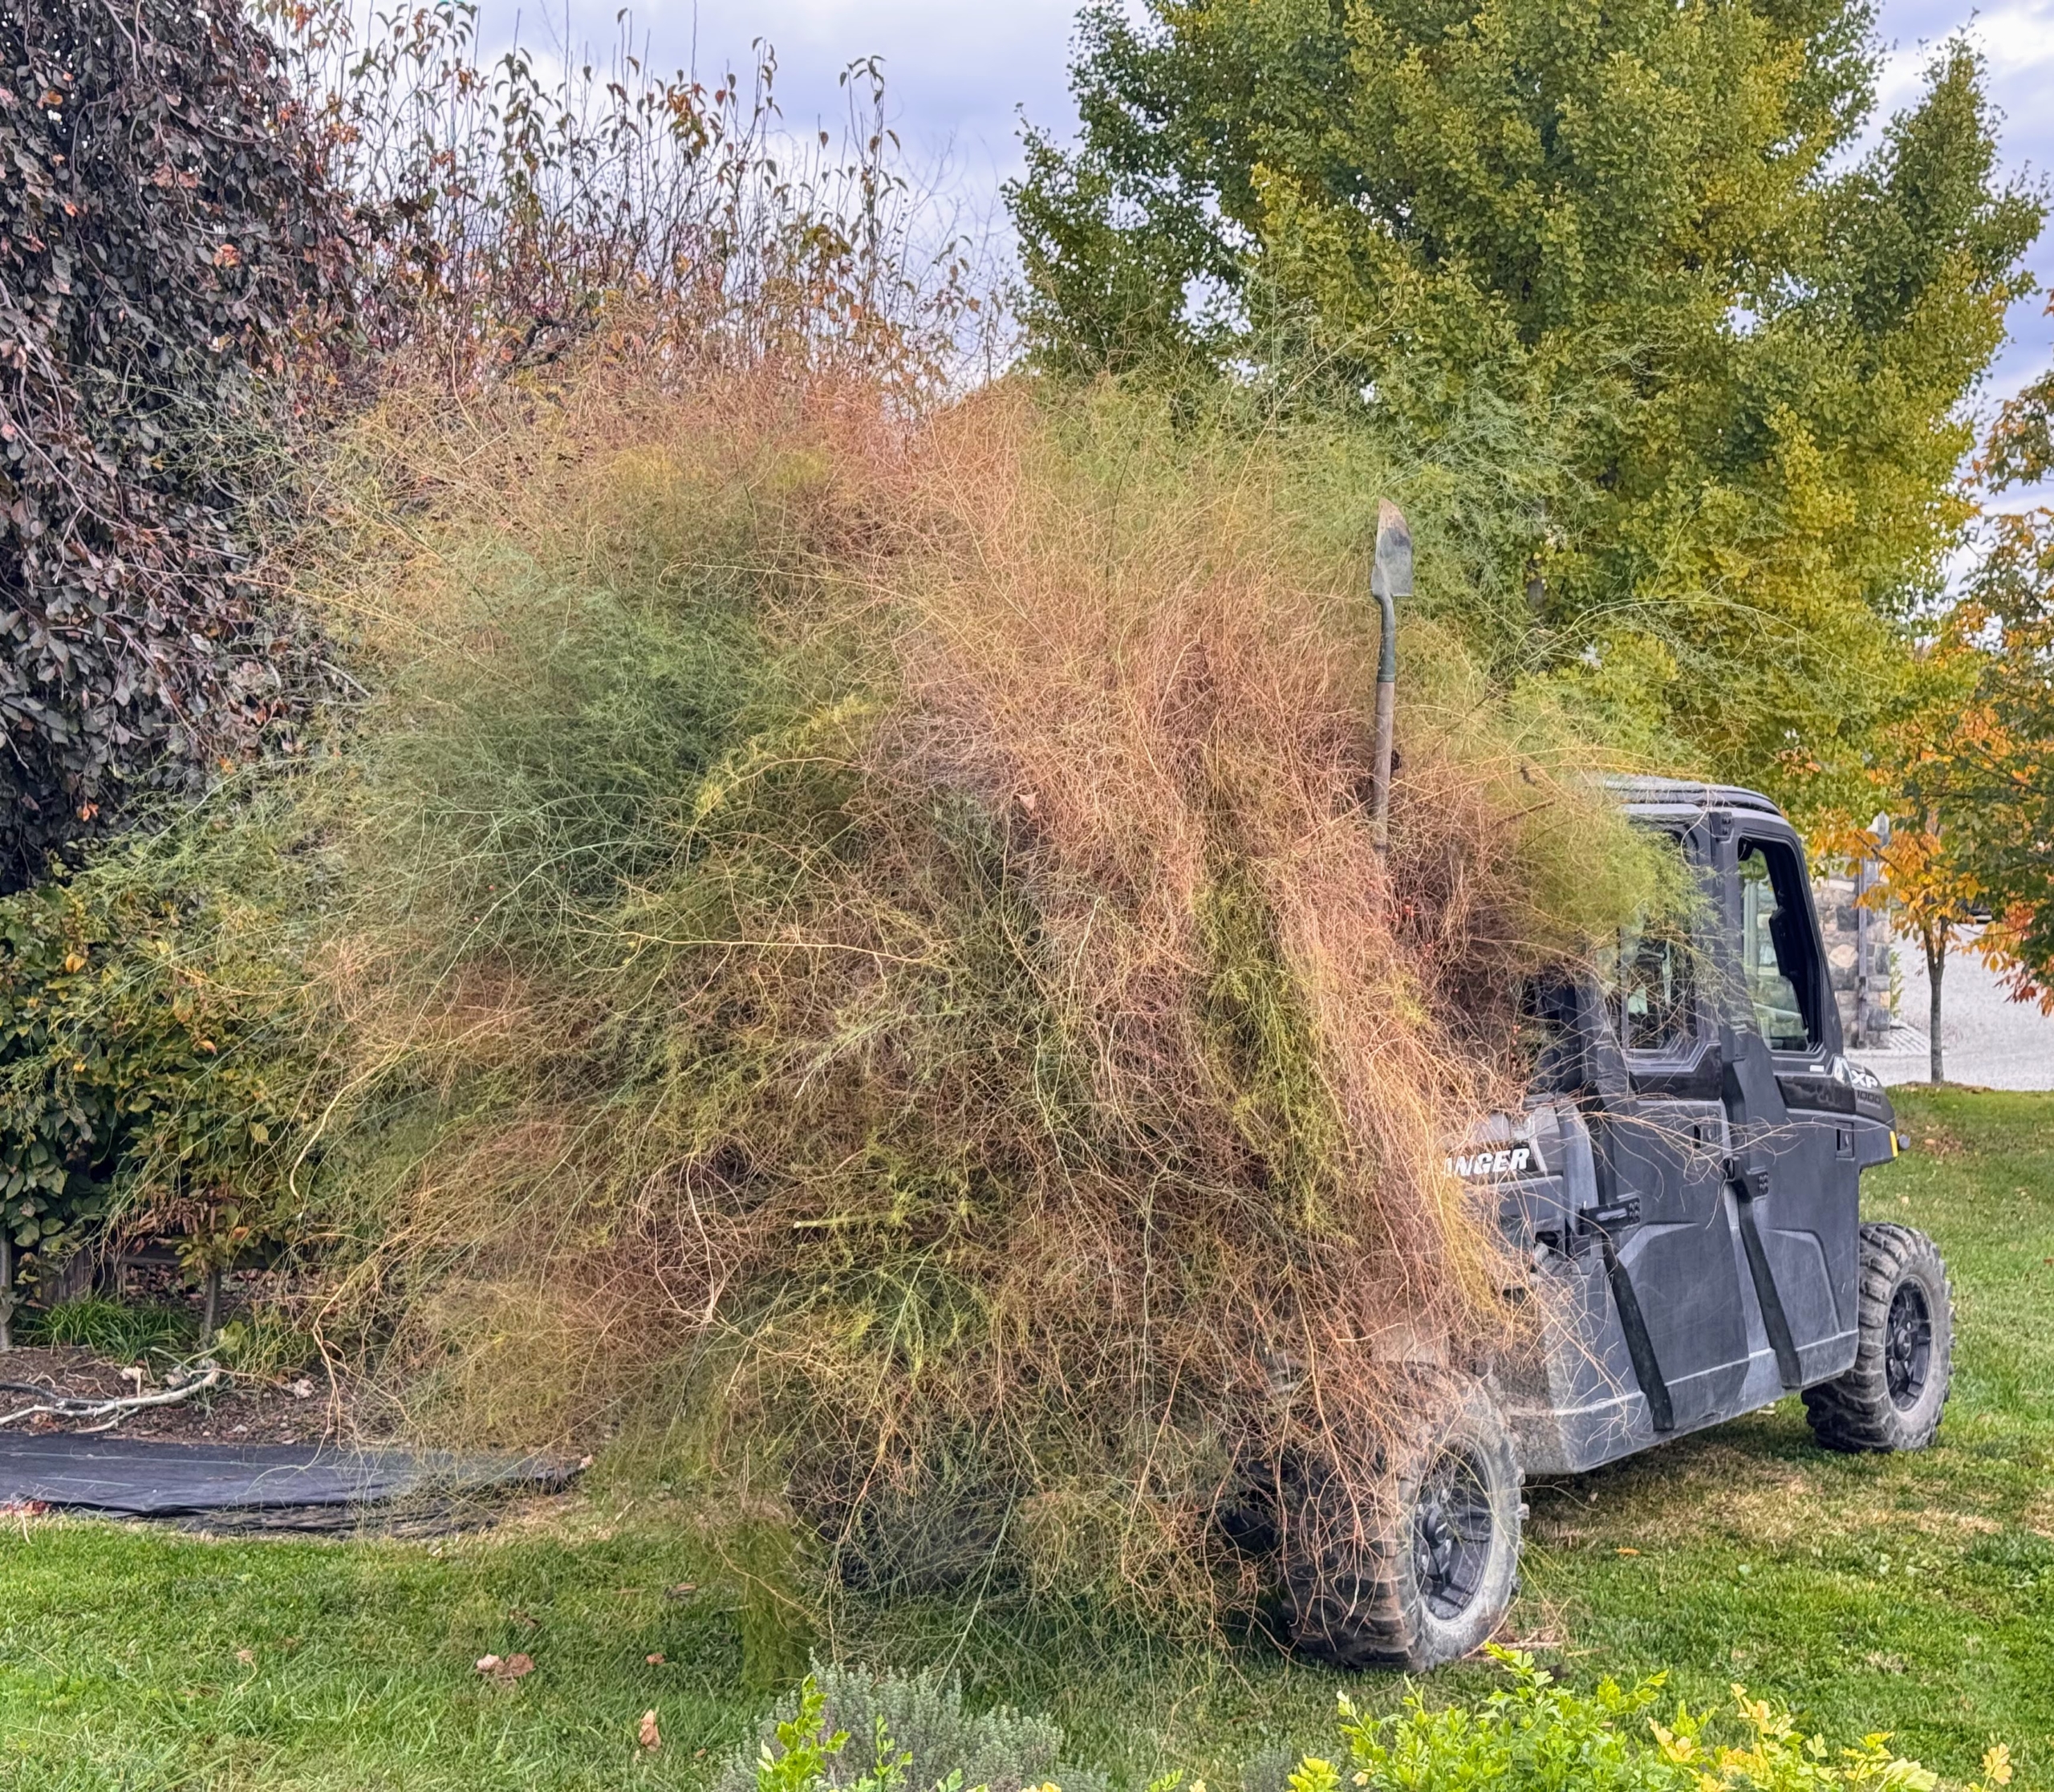
Do you know what’s in the back of the Polaris? These are all the old asparagus ferns. Once they turn brown and have used all their energy for the roots below ground, it’s time to cut them down.
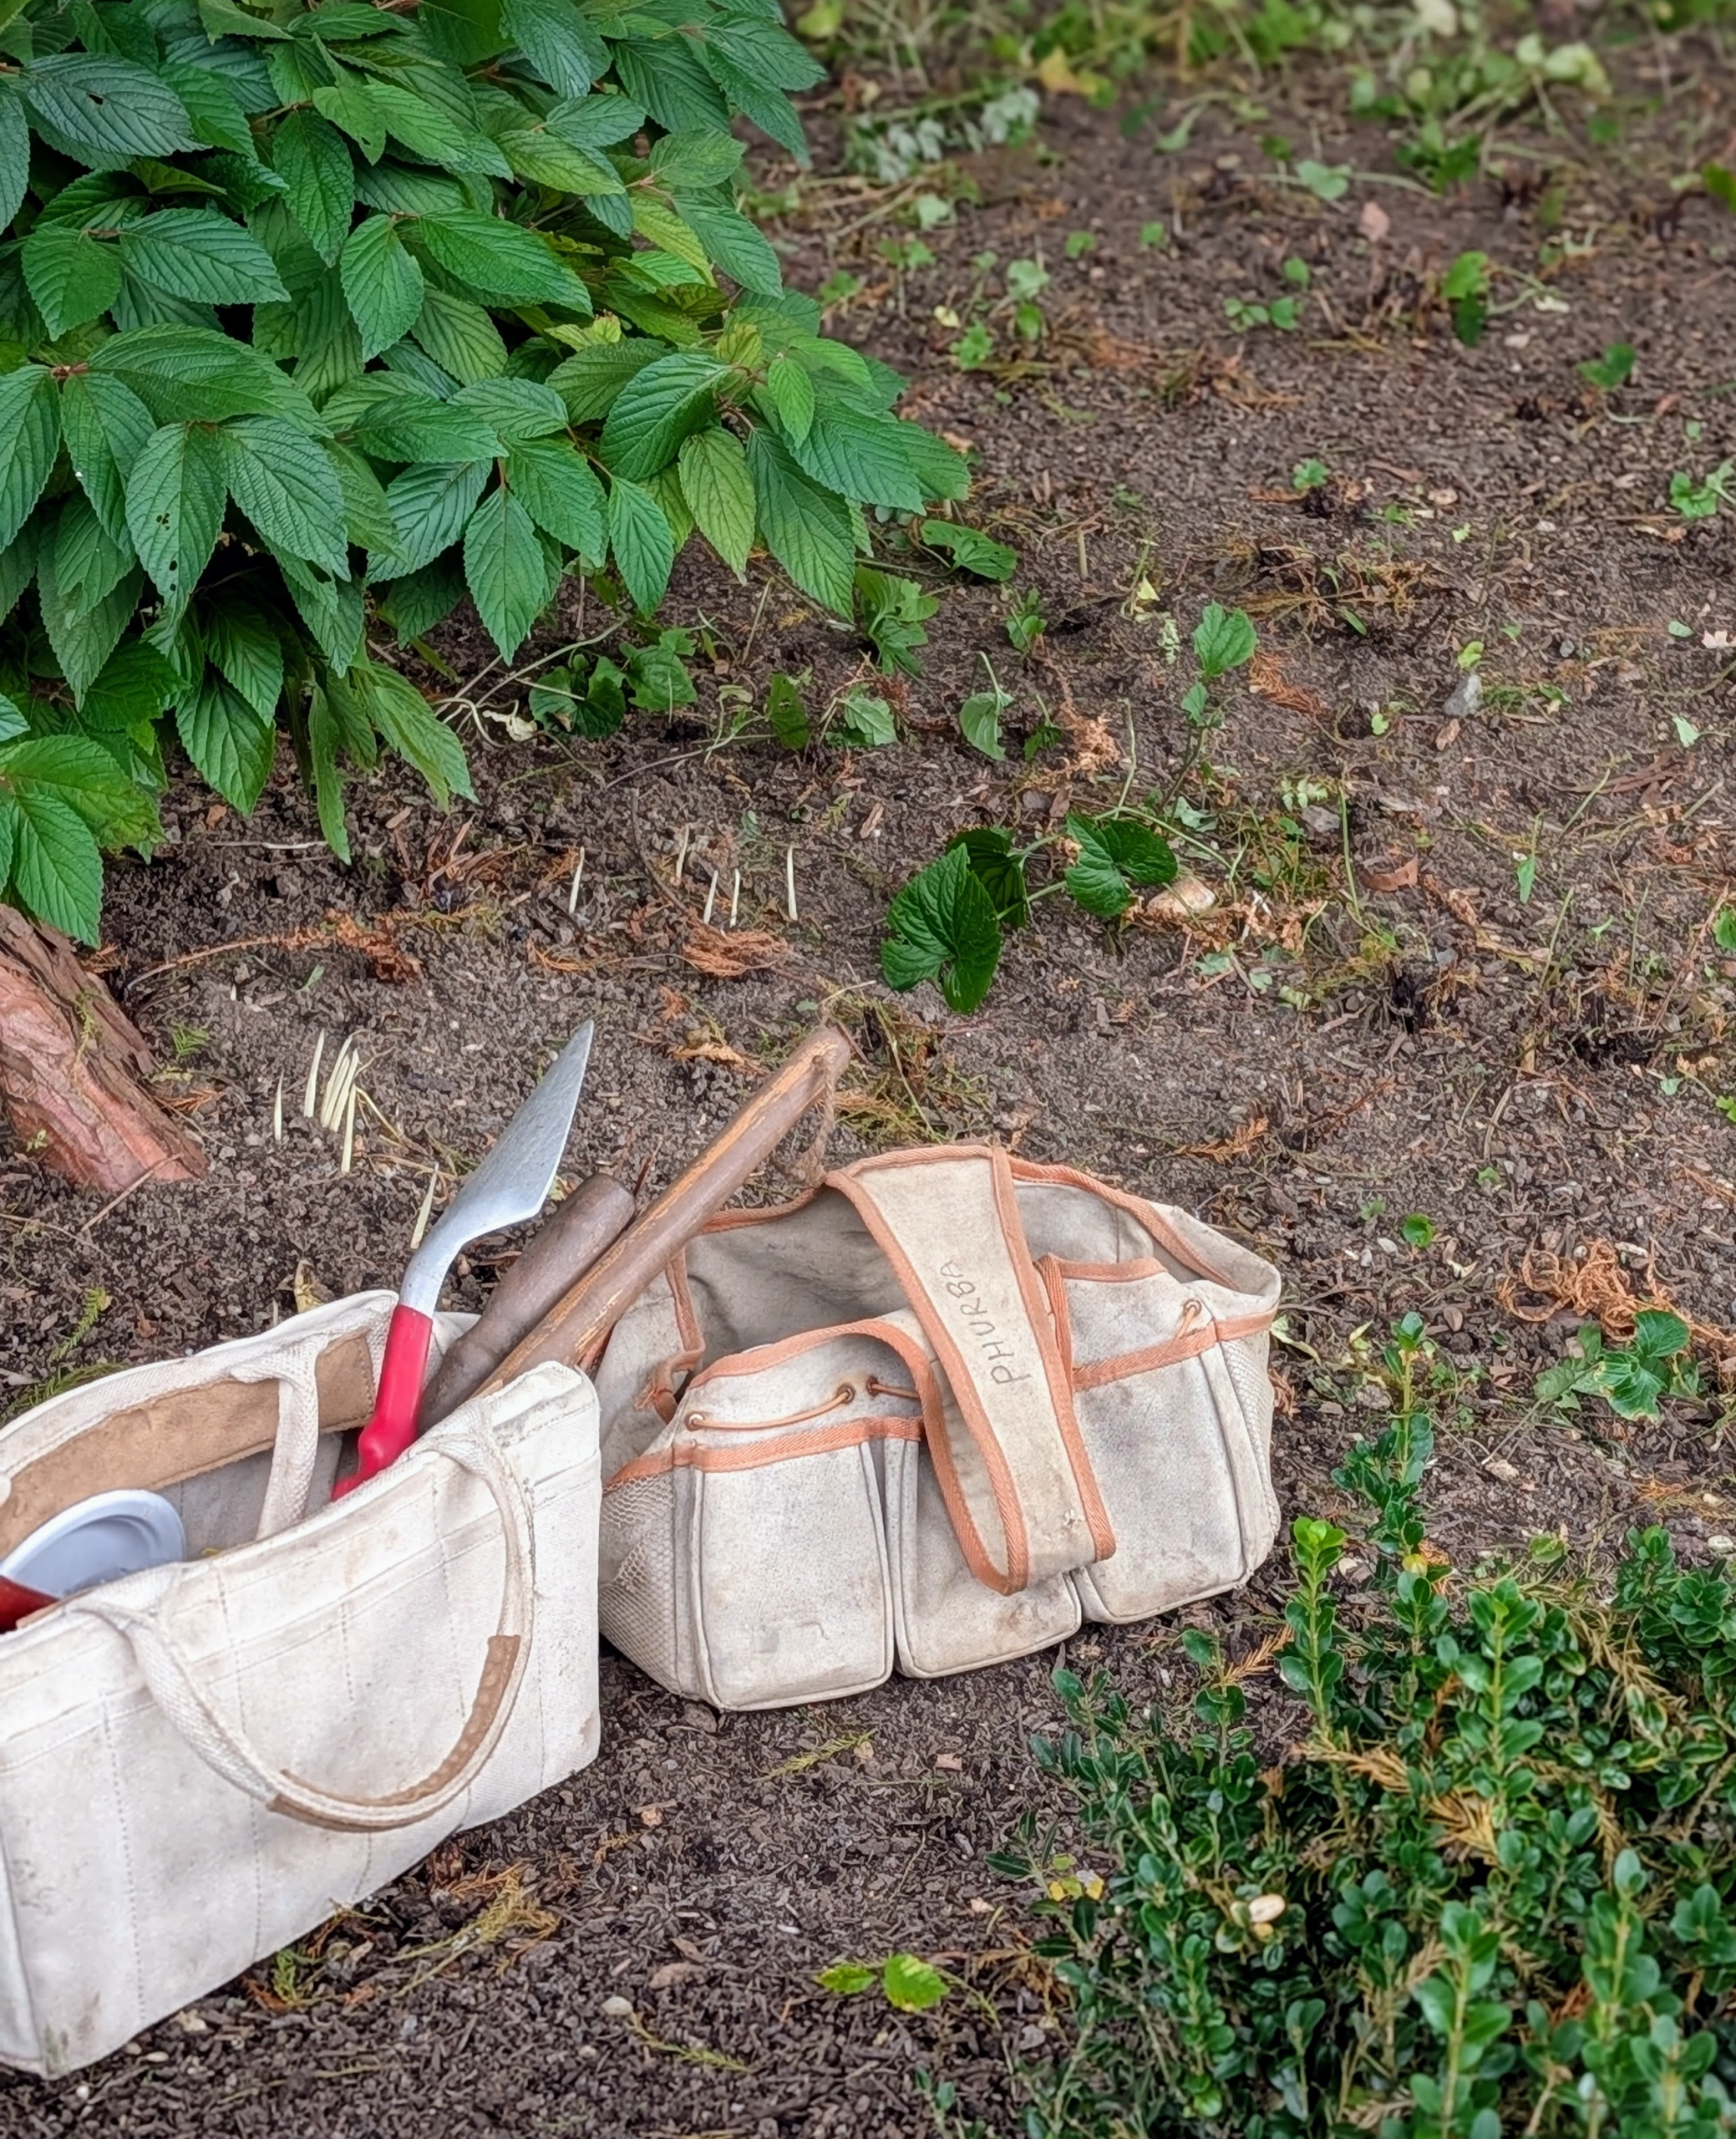
Every member of my outdoor grounds crew has a bag for tools and other necessary supplies. I always encourage them to bring whatever they may need to the project site to save time later.
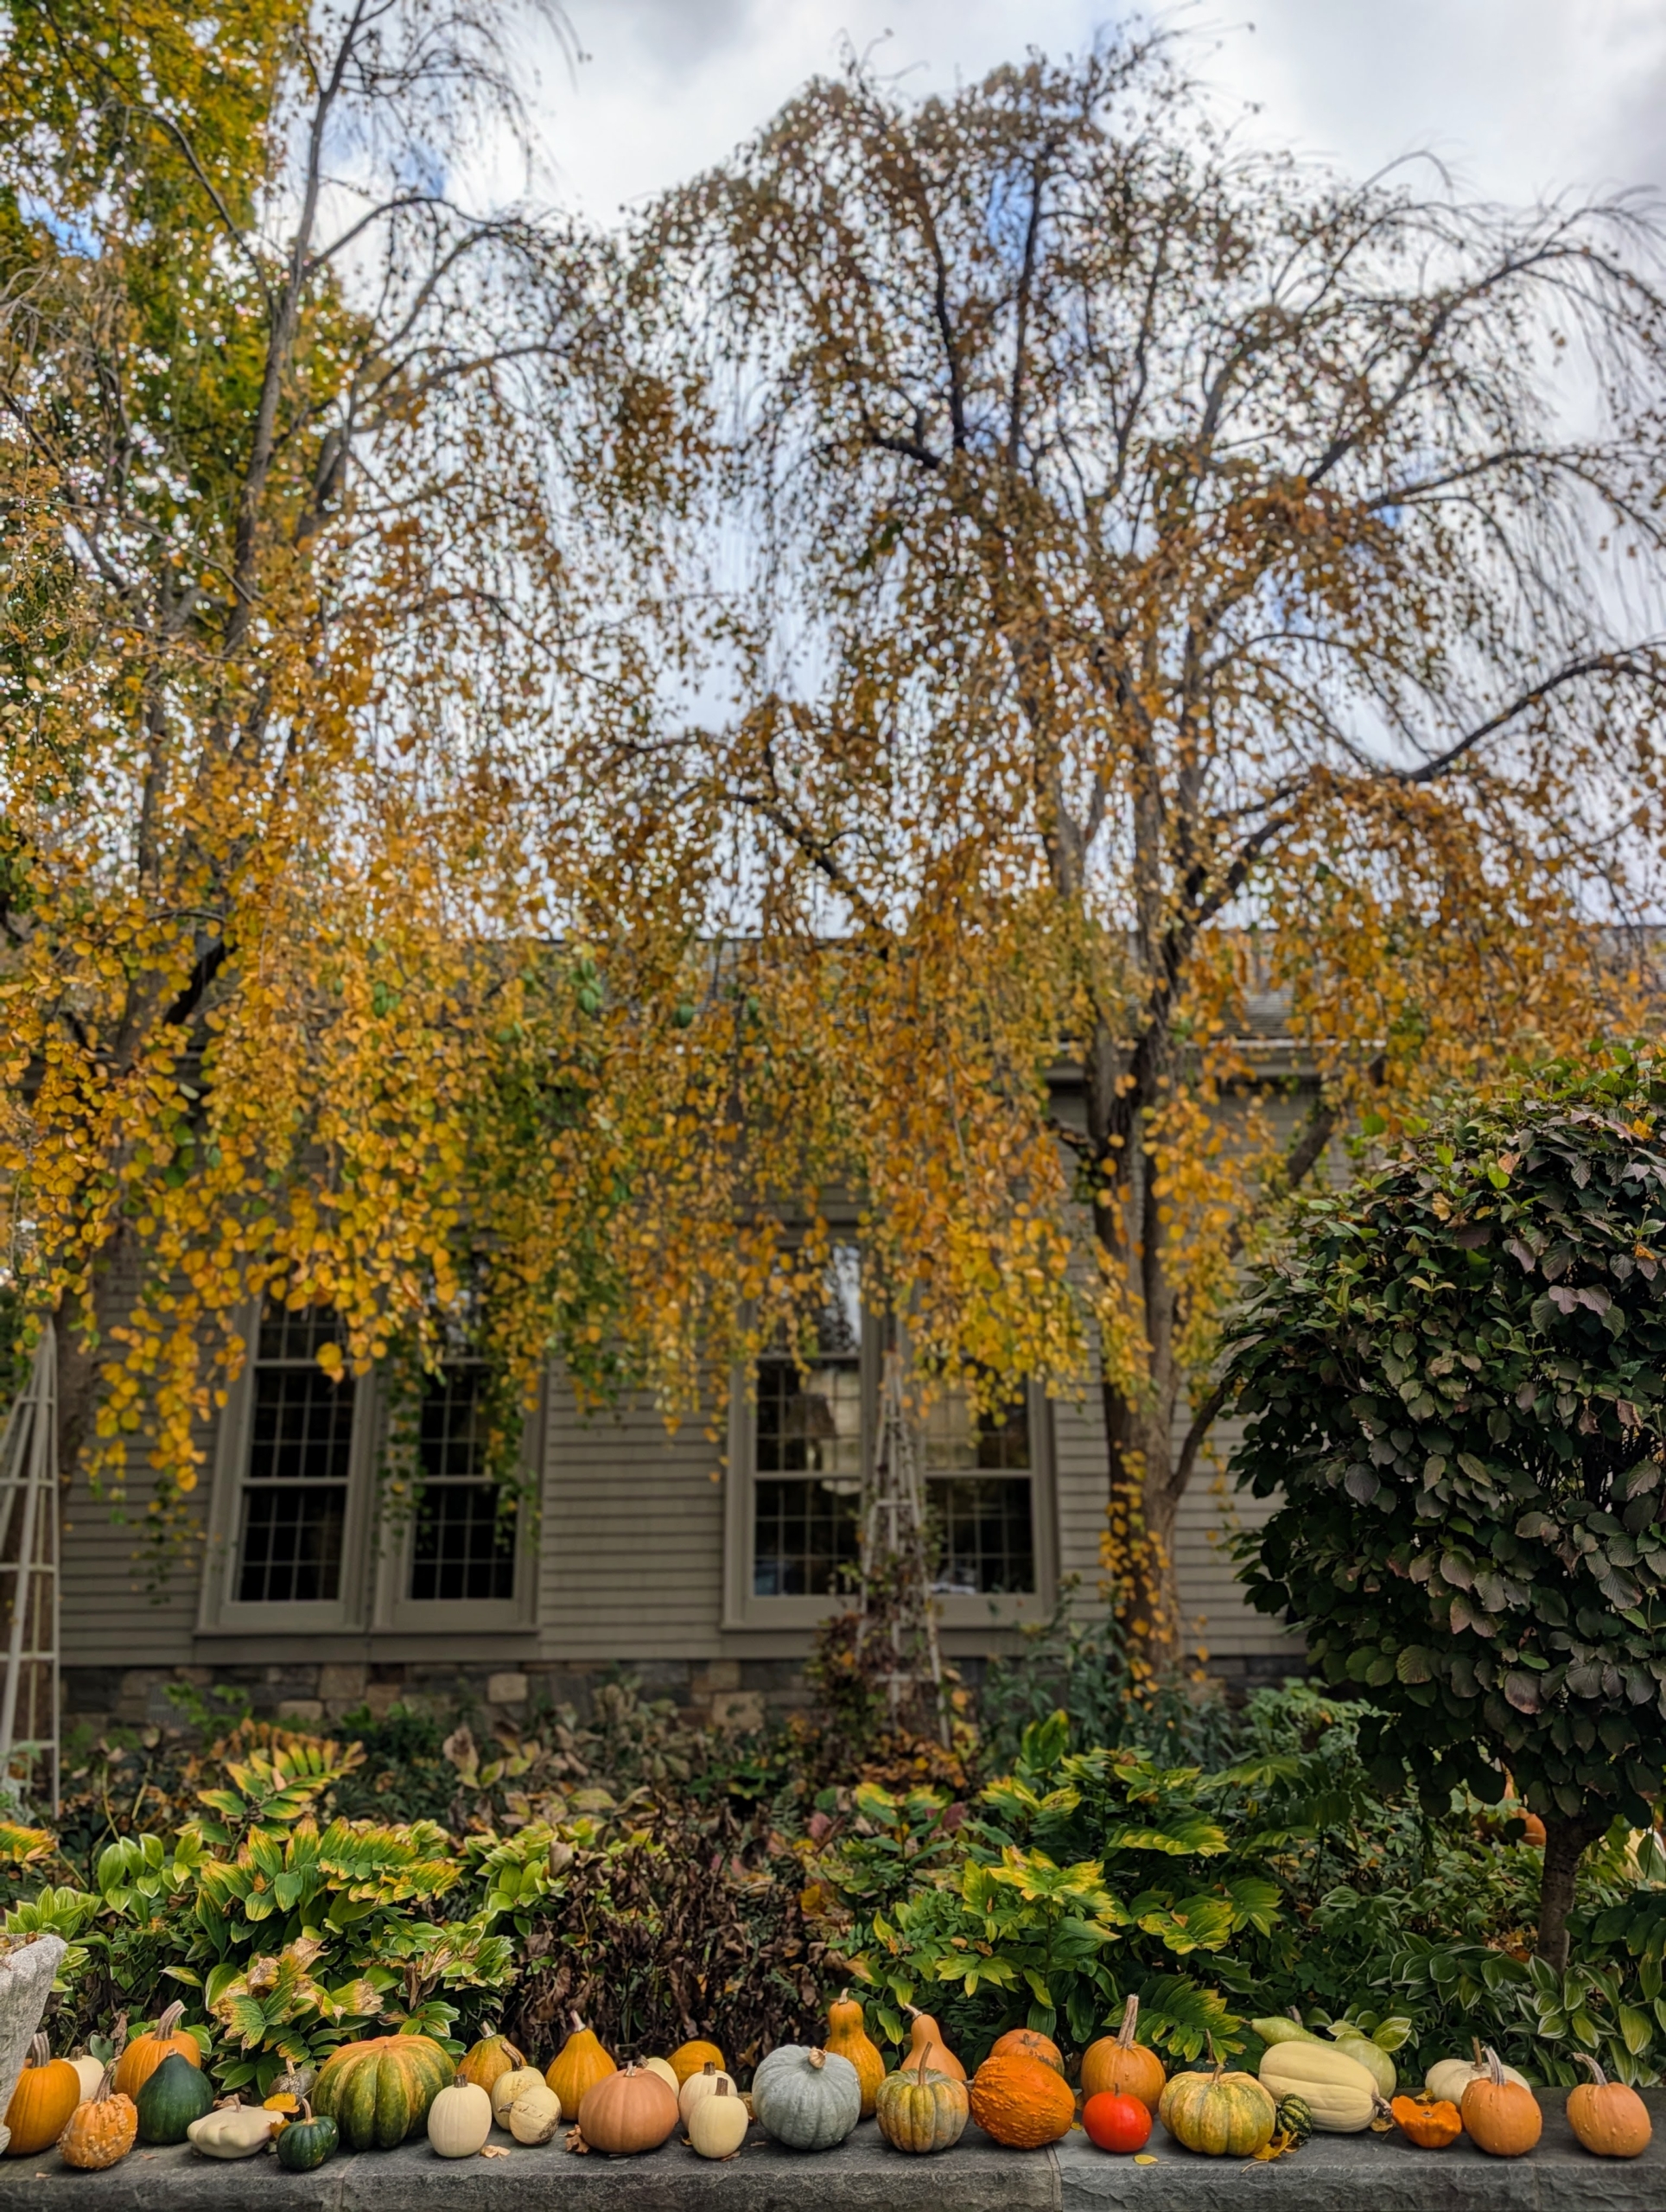
And of course, there’s always time for some autumn decorating. These are the season’s harvested pumpkins from my garden – all displayed nicely along the wall in front of my Winter House. This fall has been very productive. I hope you’re getting all your fall chores done too.
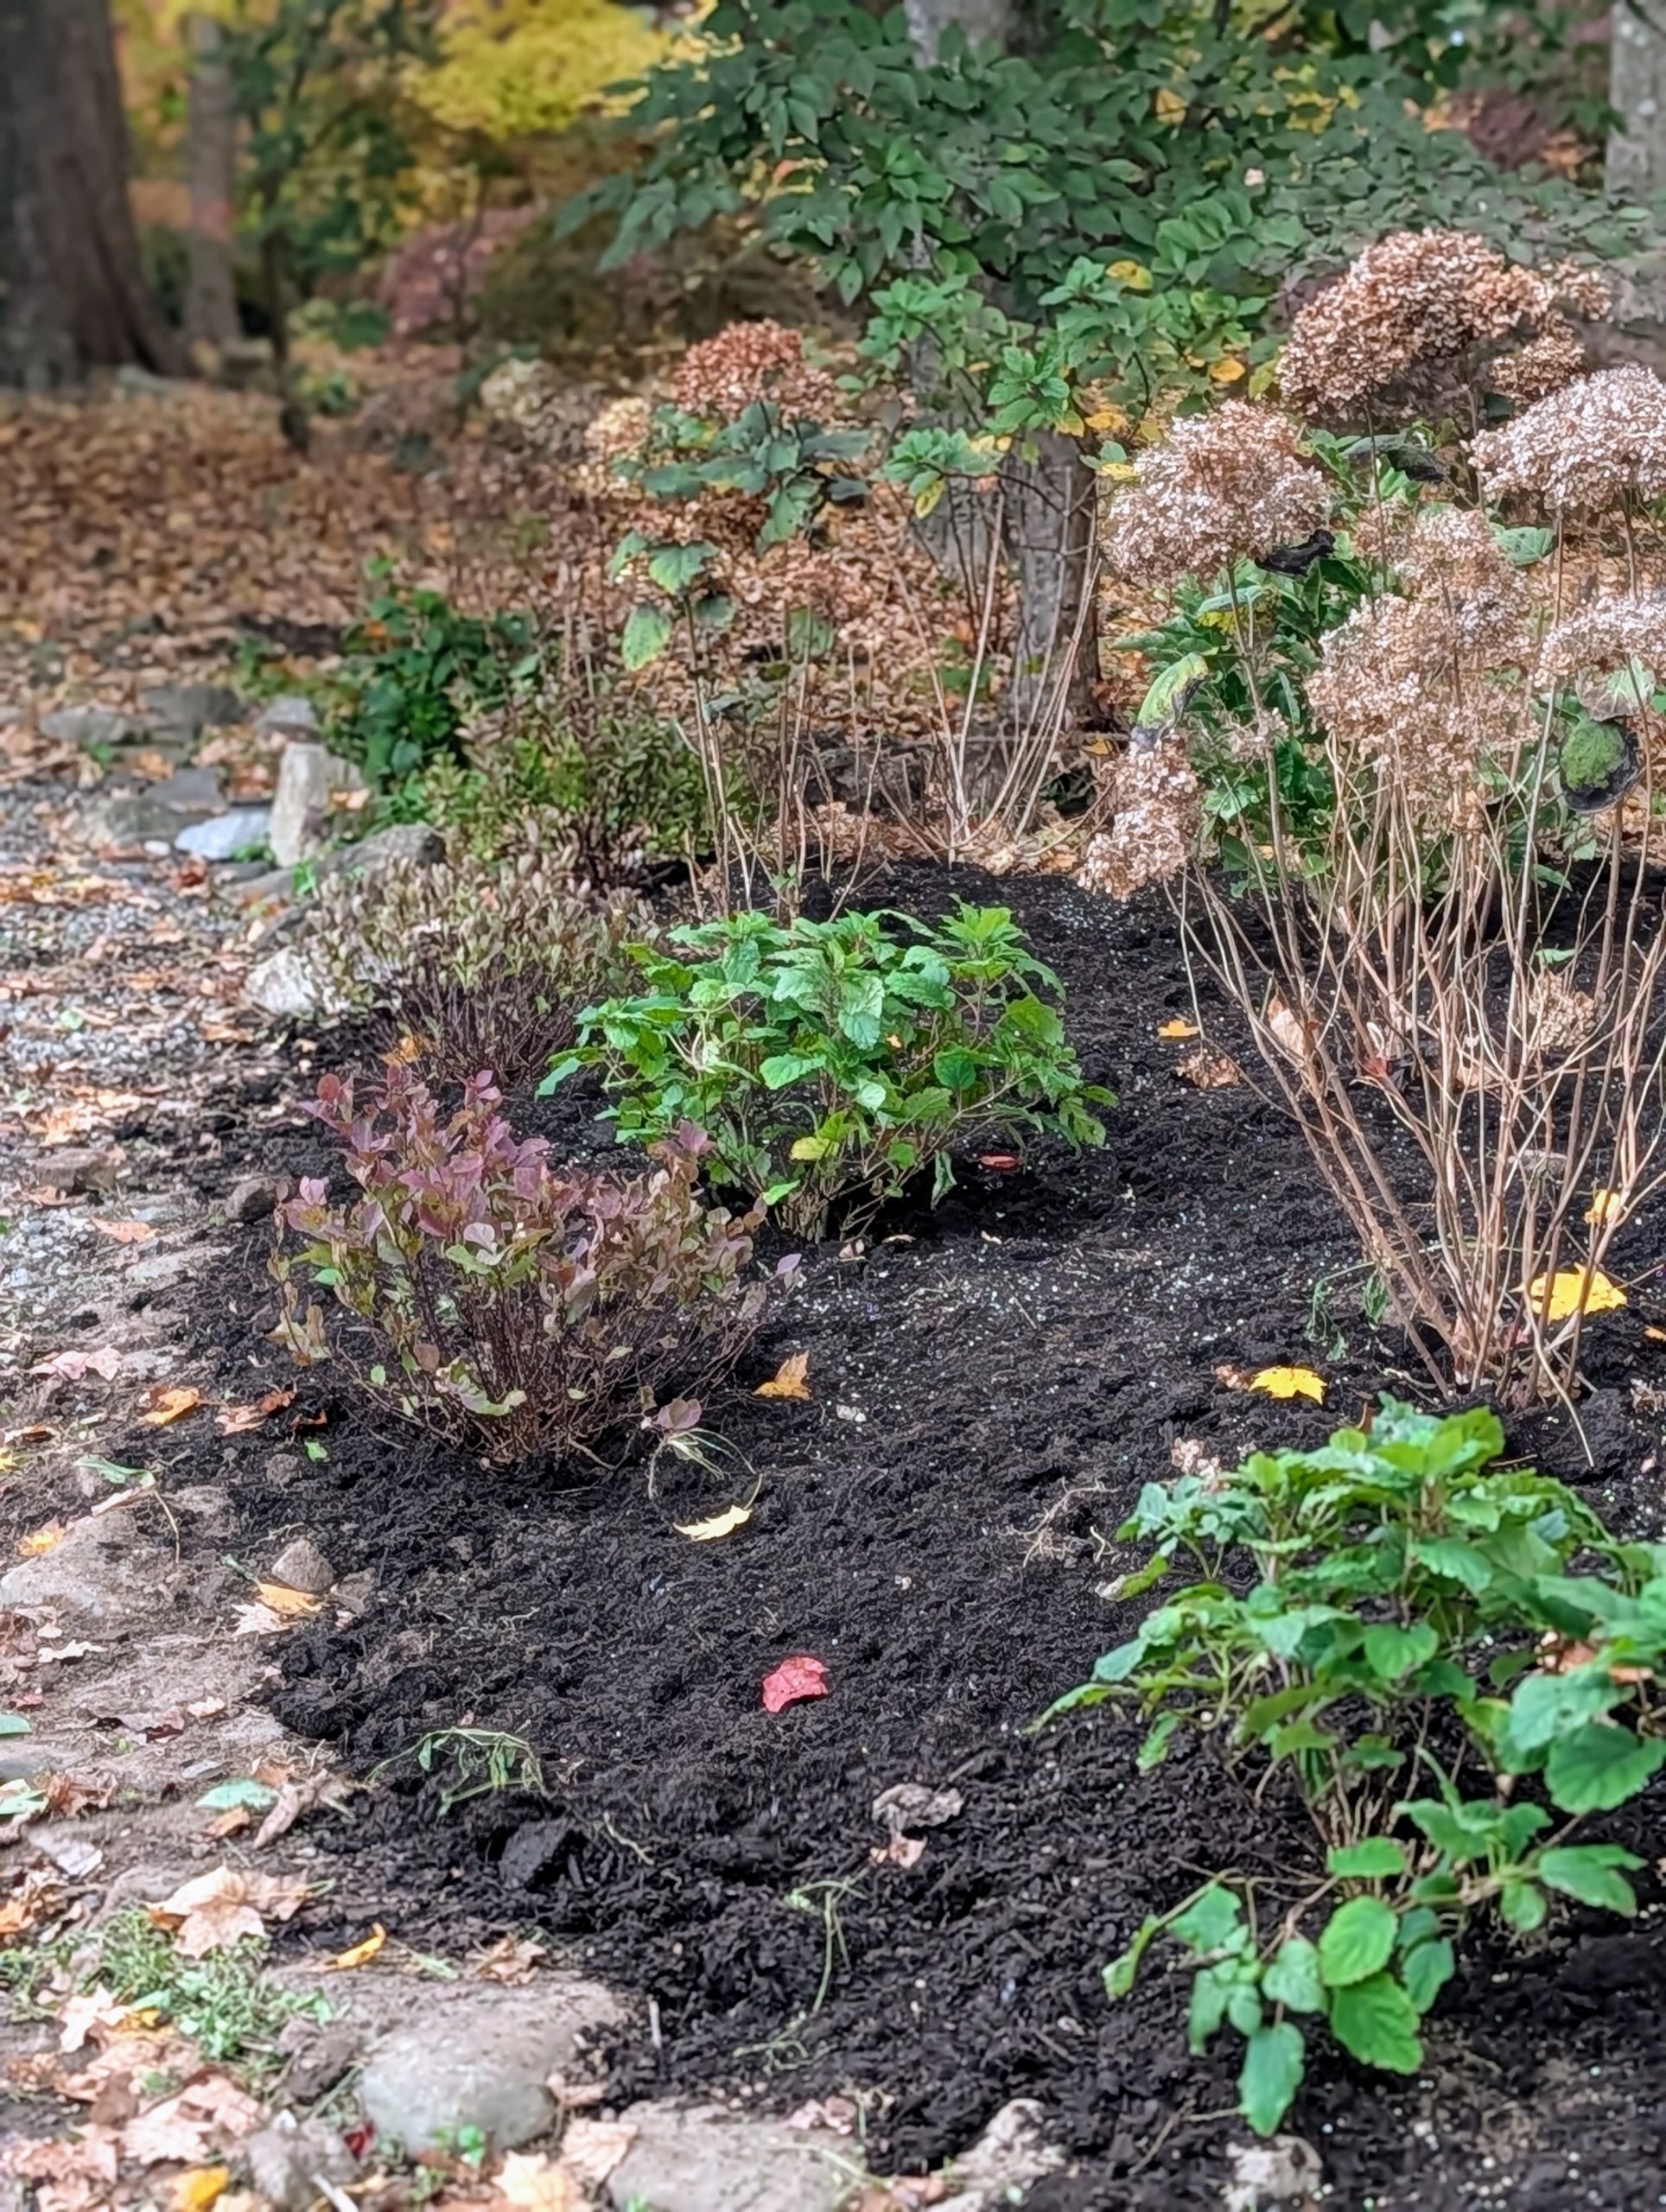
Change is constant in a garden and a good time to remove and replace plants is now - during the dormant season.
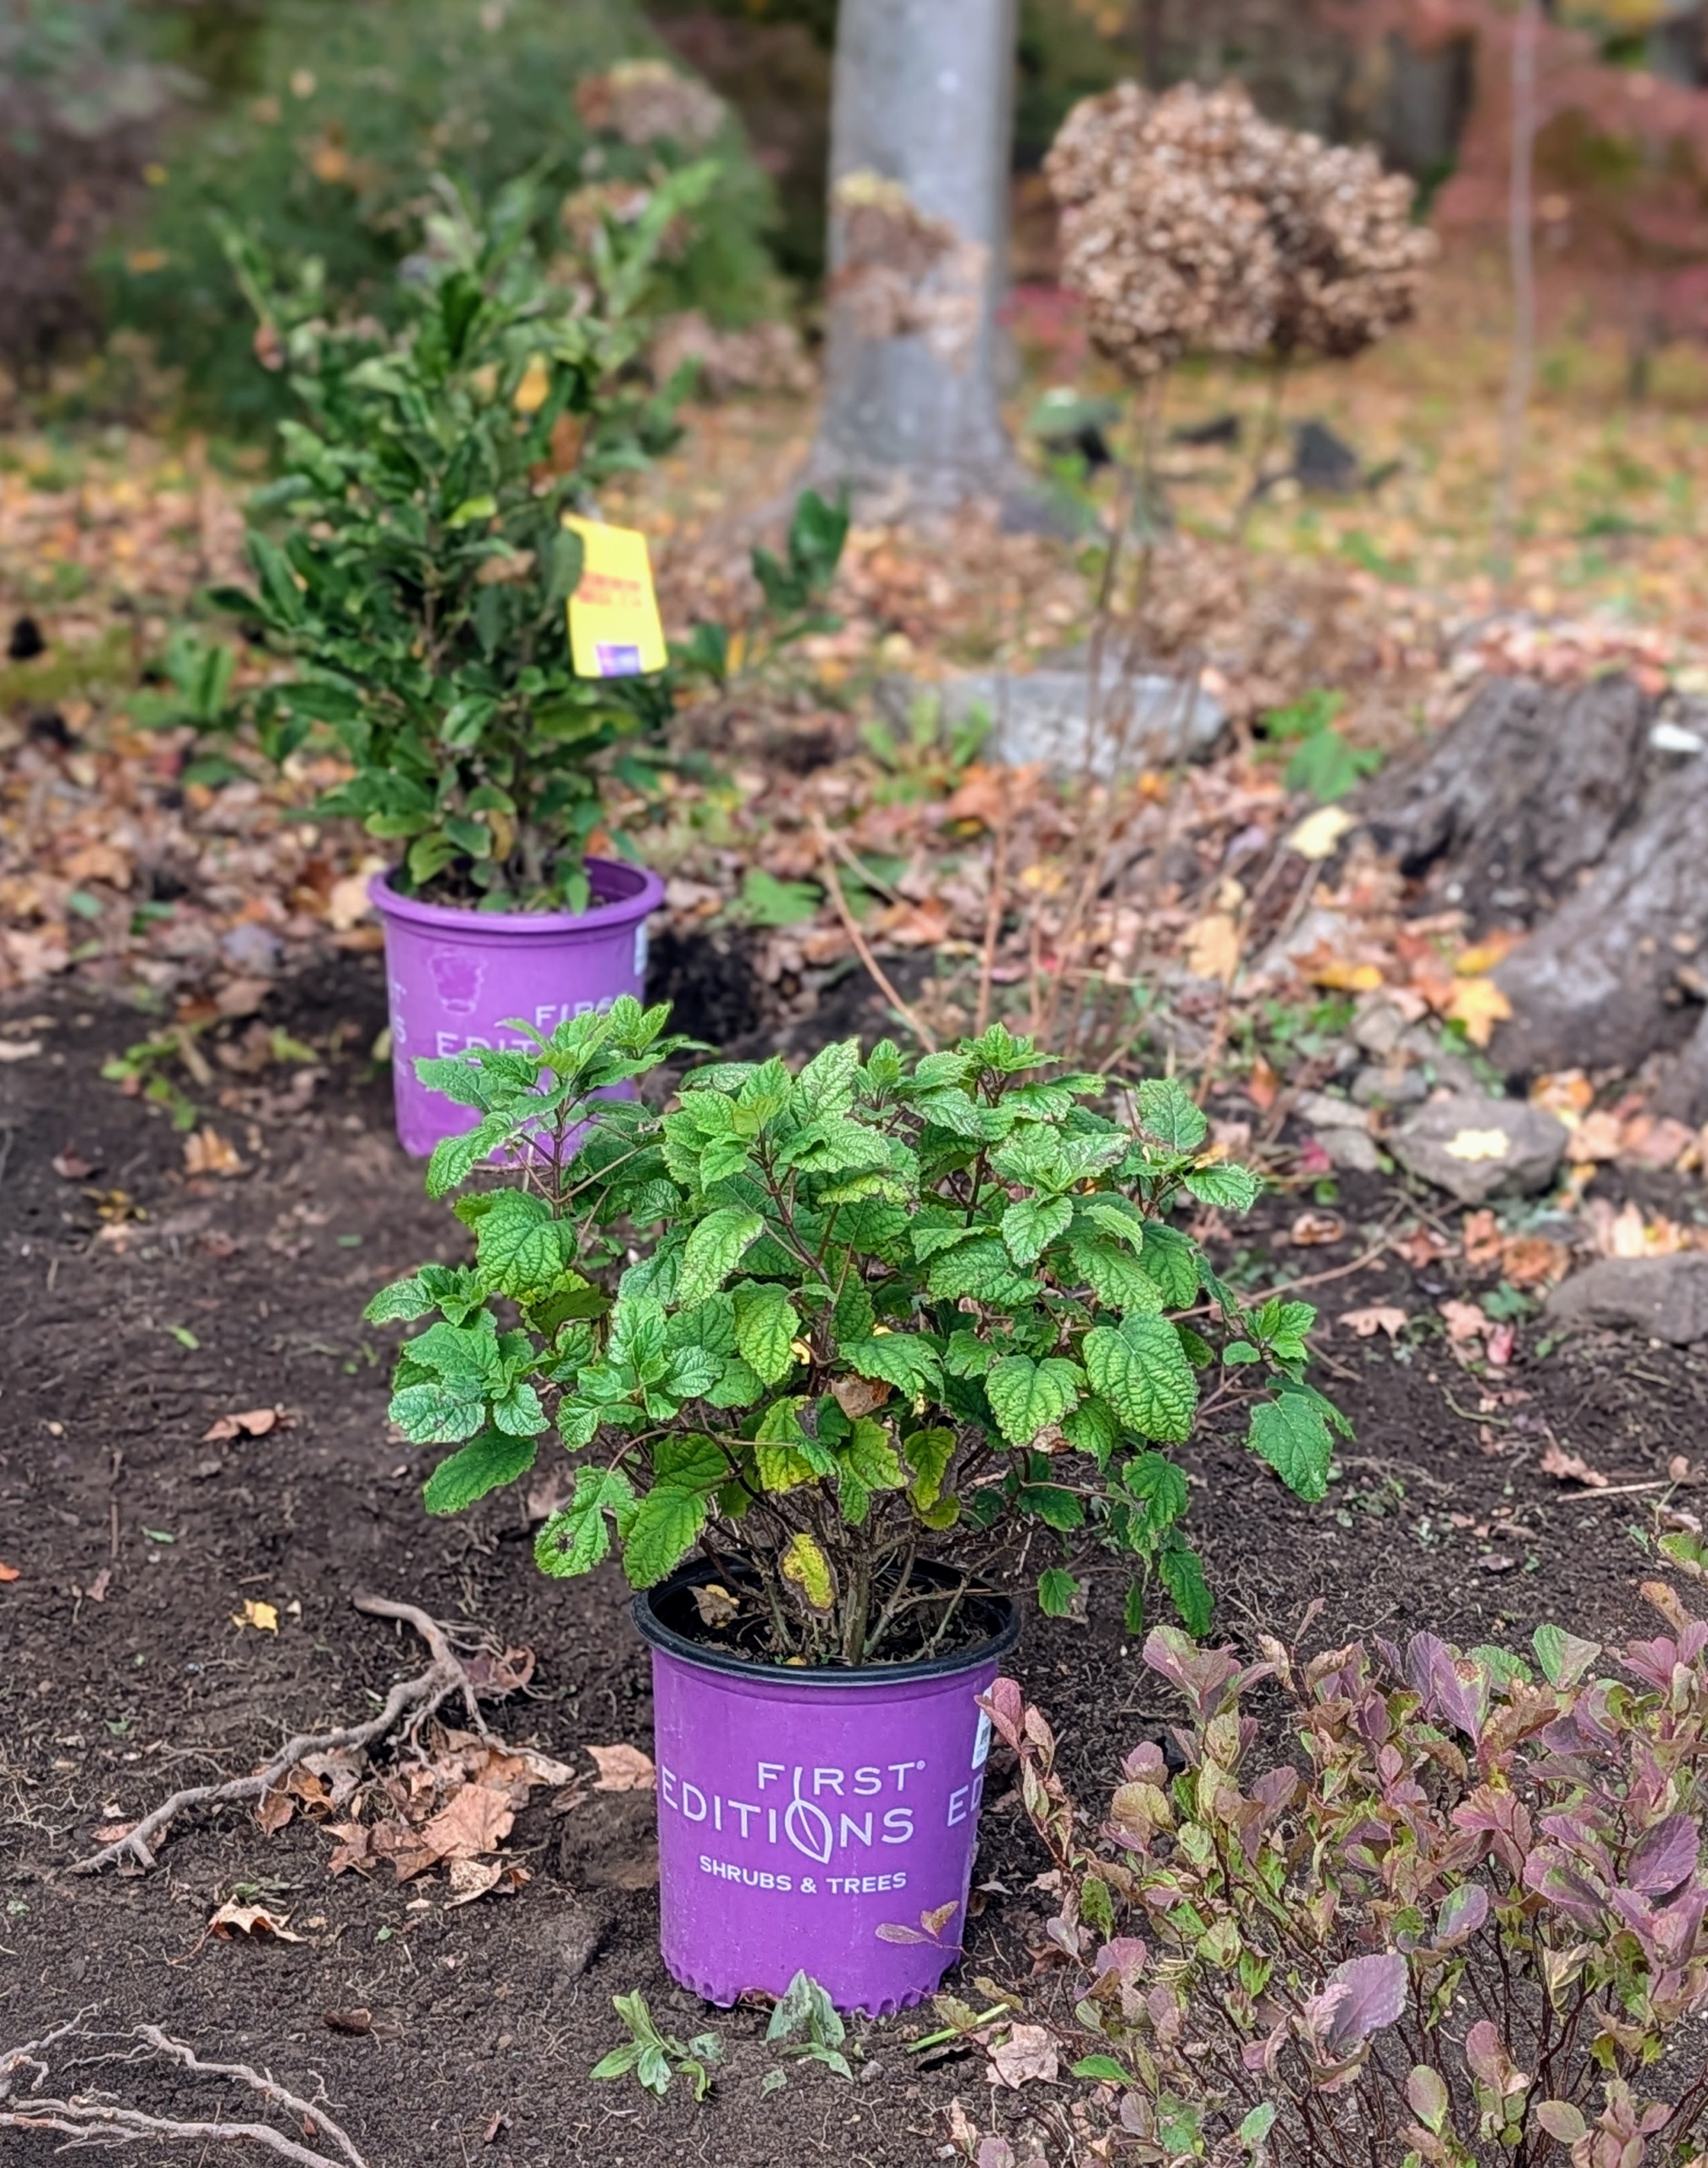
Yesterday, my gardeners and outdoor grounds crew removed a patch of Solomon's Seal, Polygonatum, from a small area outside my citrus hoop house. Removing it during the dormant season minimizes shock and gives the plants time to get established in their new location before the growing season begins. I replaced the Solomon's Seal with Birchleaf Spirea, Star Magnolia, and FlowerFull smooth hydrangeas - all from First Editions Shrubs and Trees. These plants will thrive here where there is full sun to part shade.
Enjoy these photos.
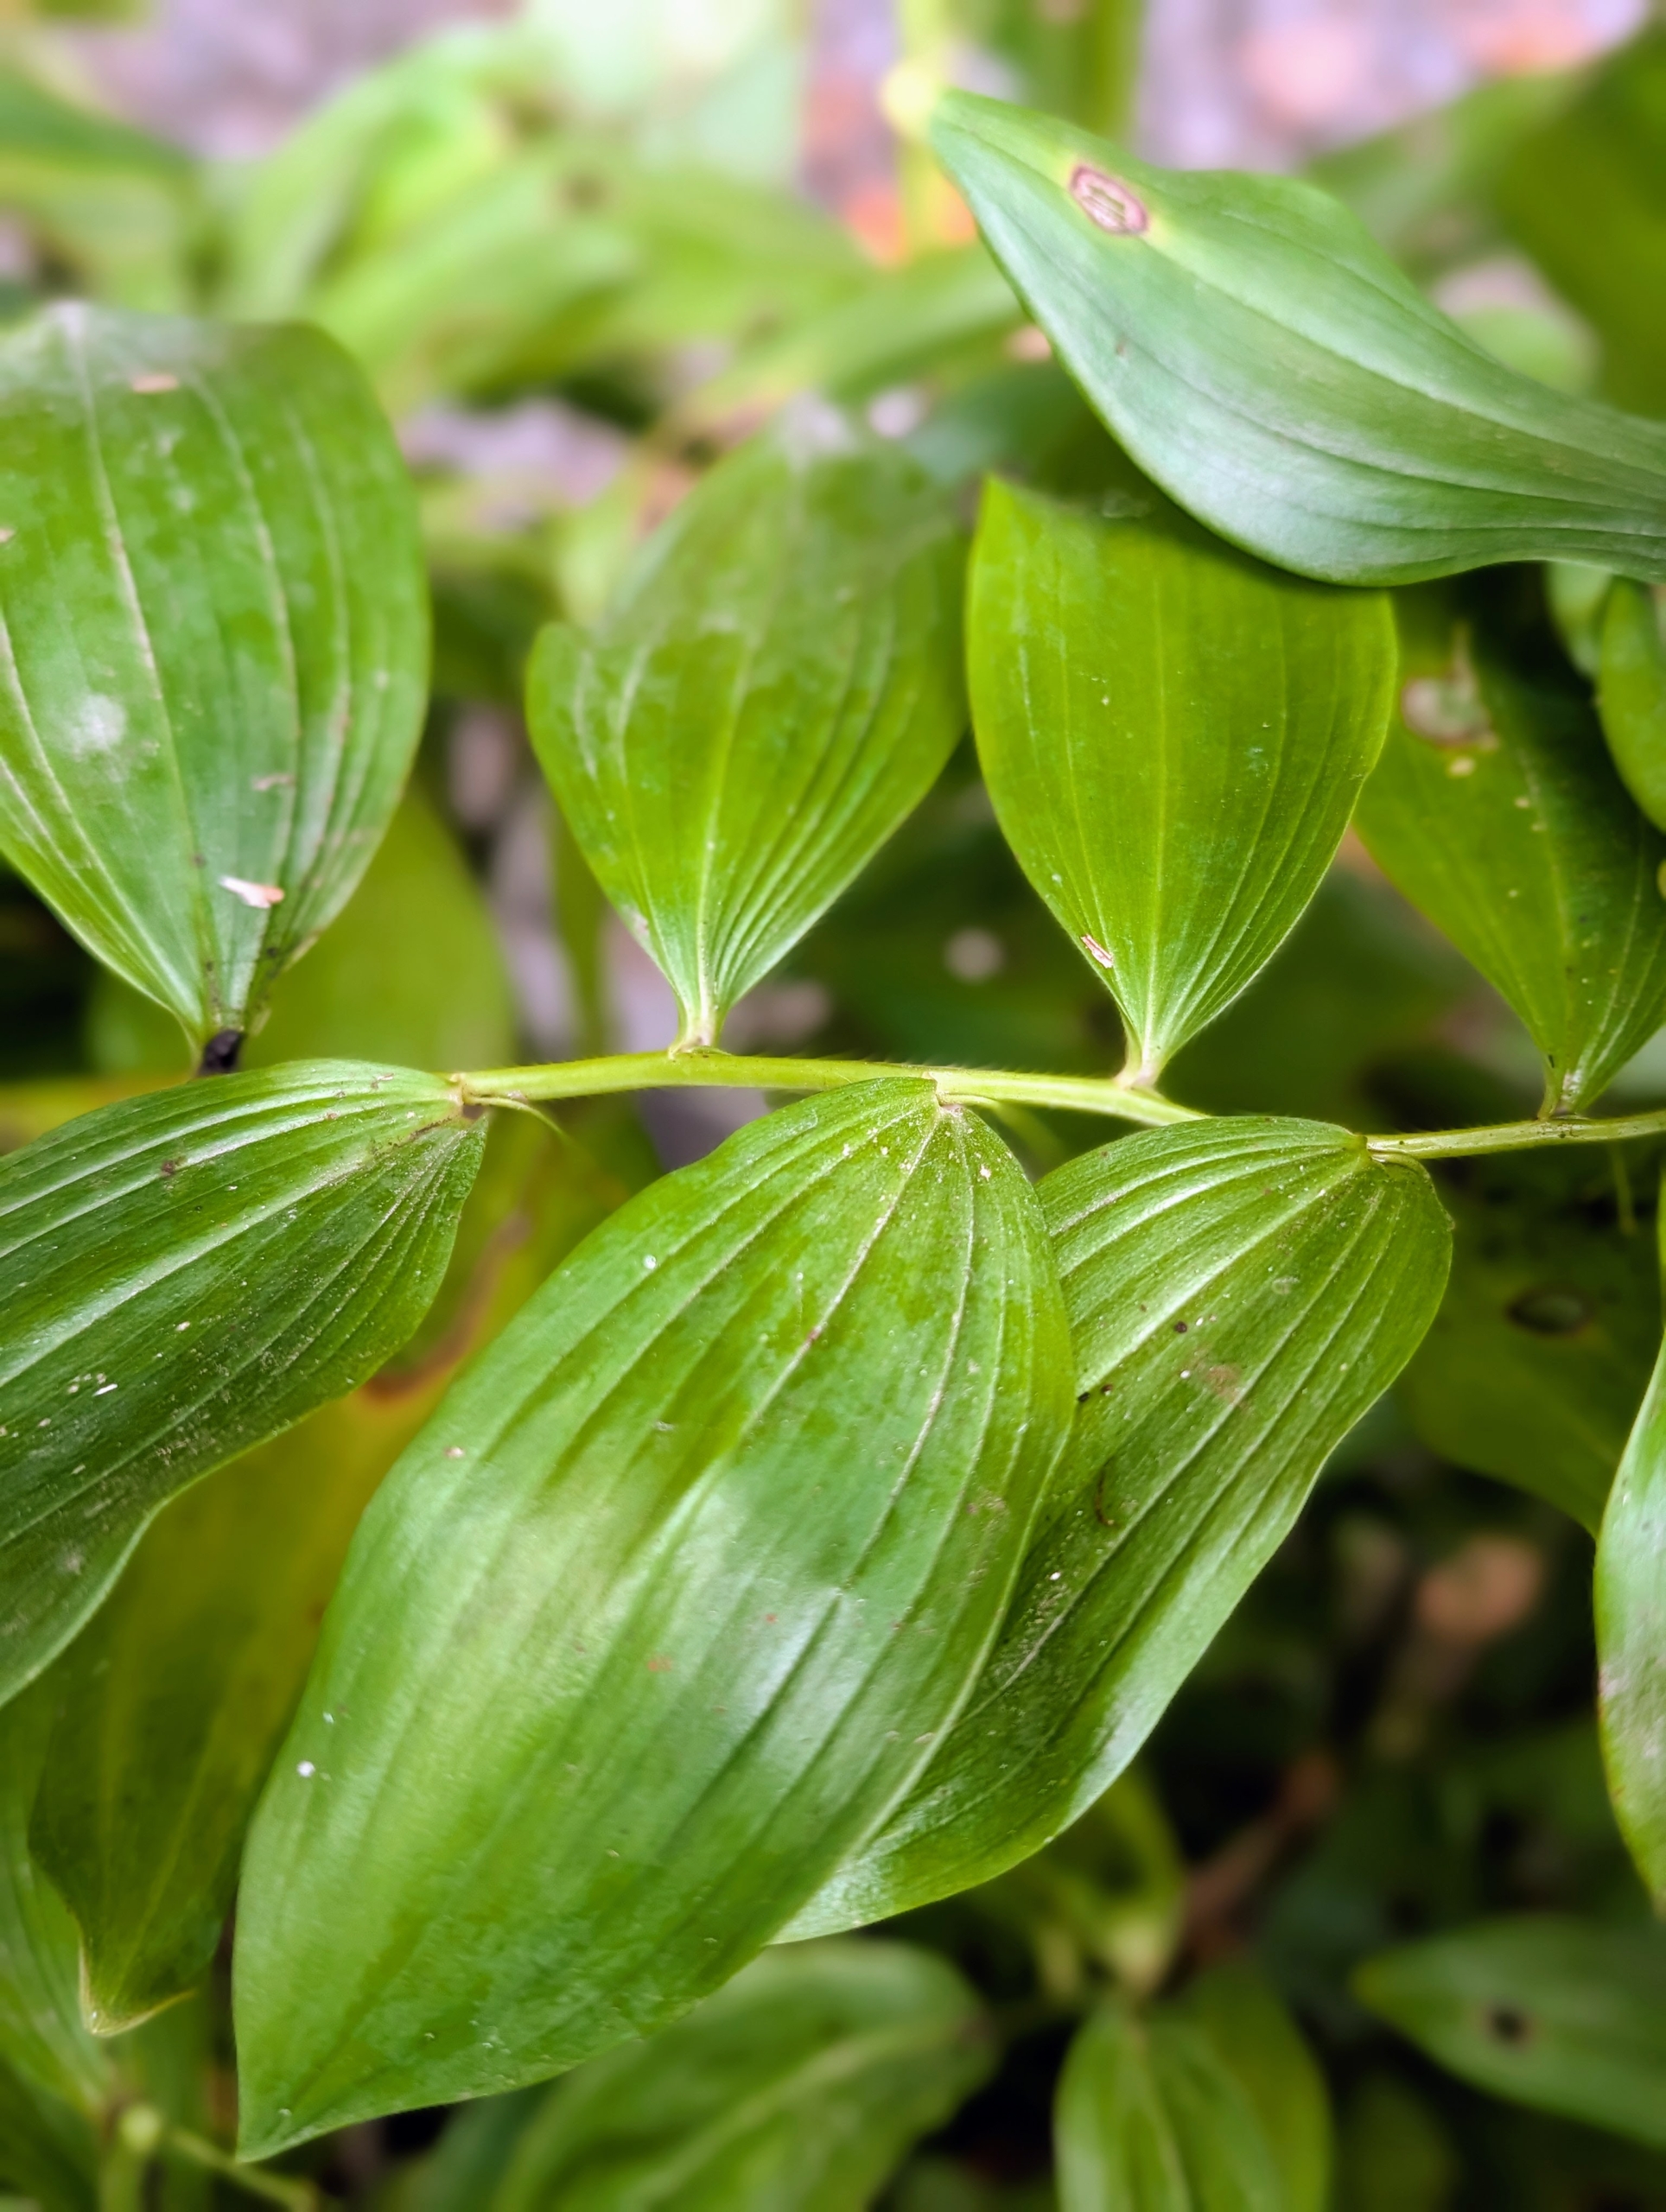
Solomon’s Seal is a perennial known for its slender arching stems and small, white, bell shaped flowers that bloom in spring. I grow a lot of Solomon’s Seal here at the farm.
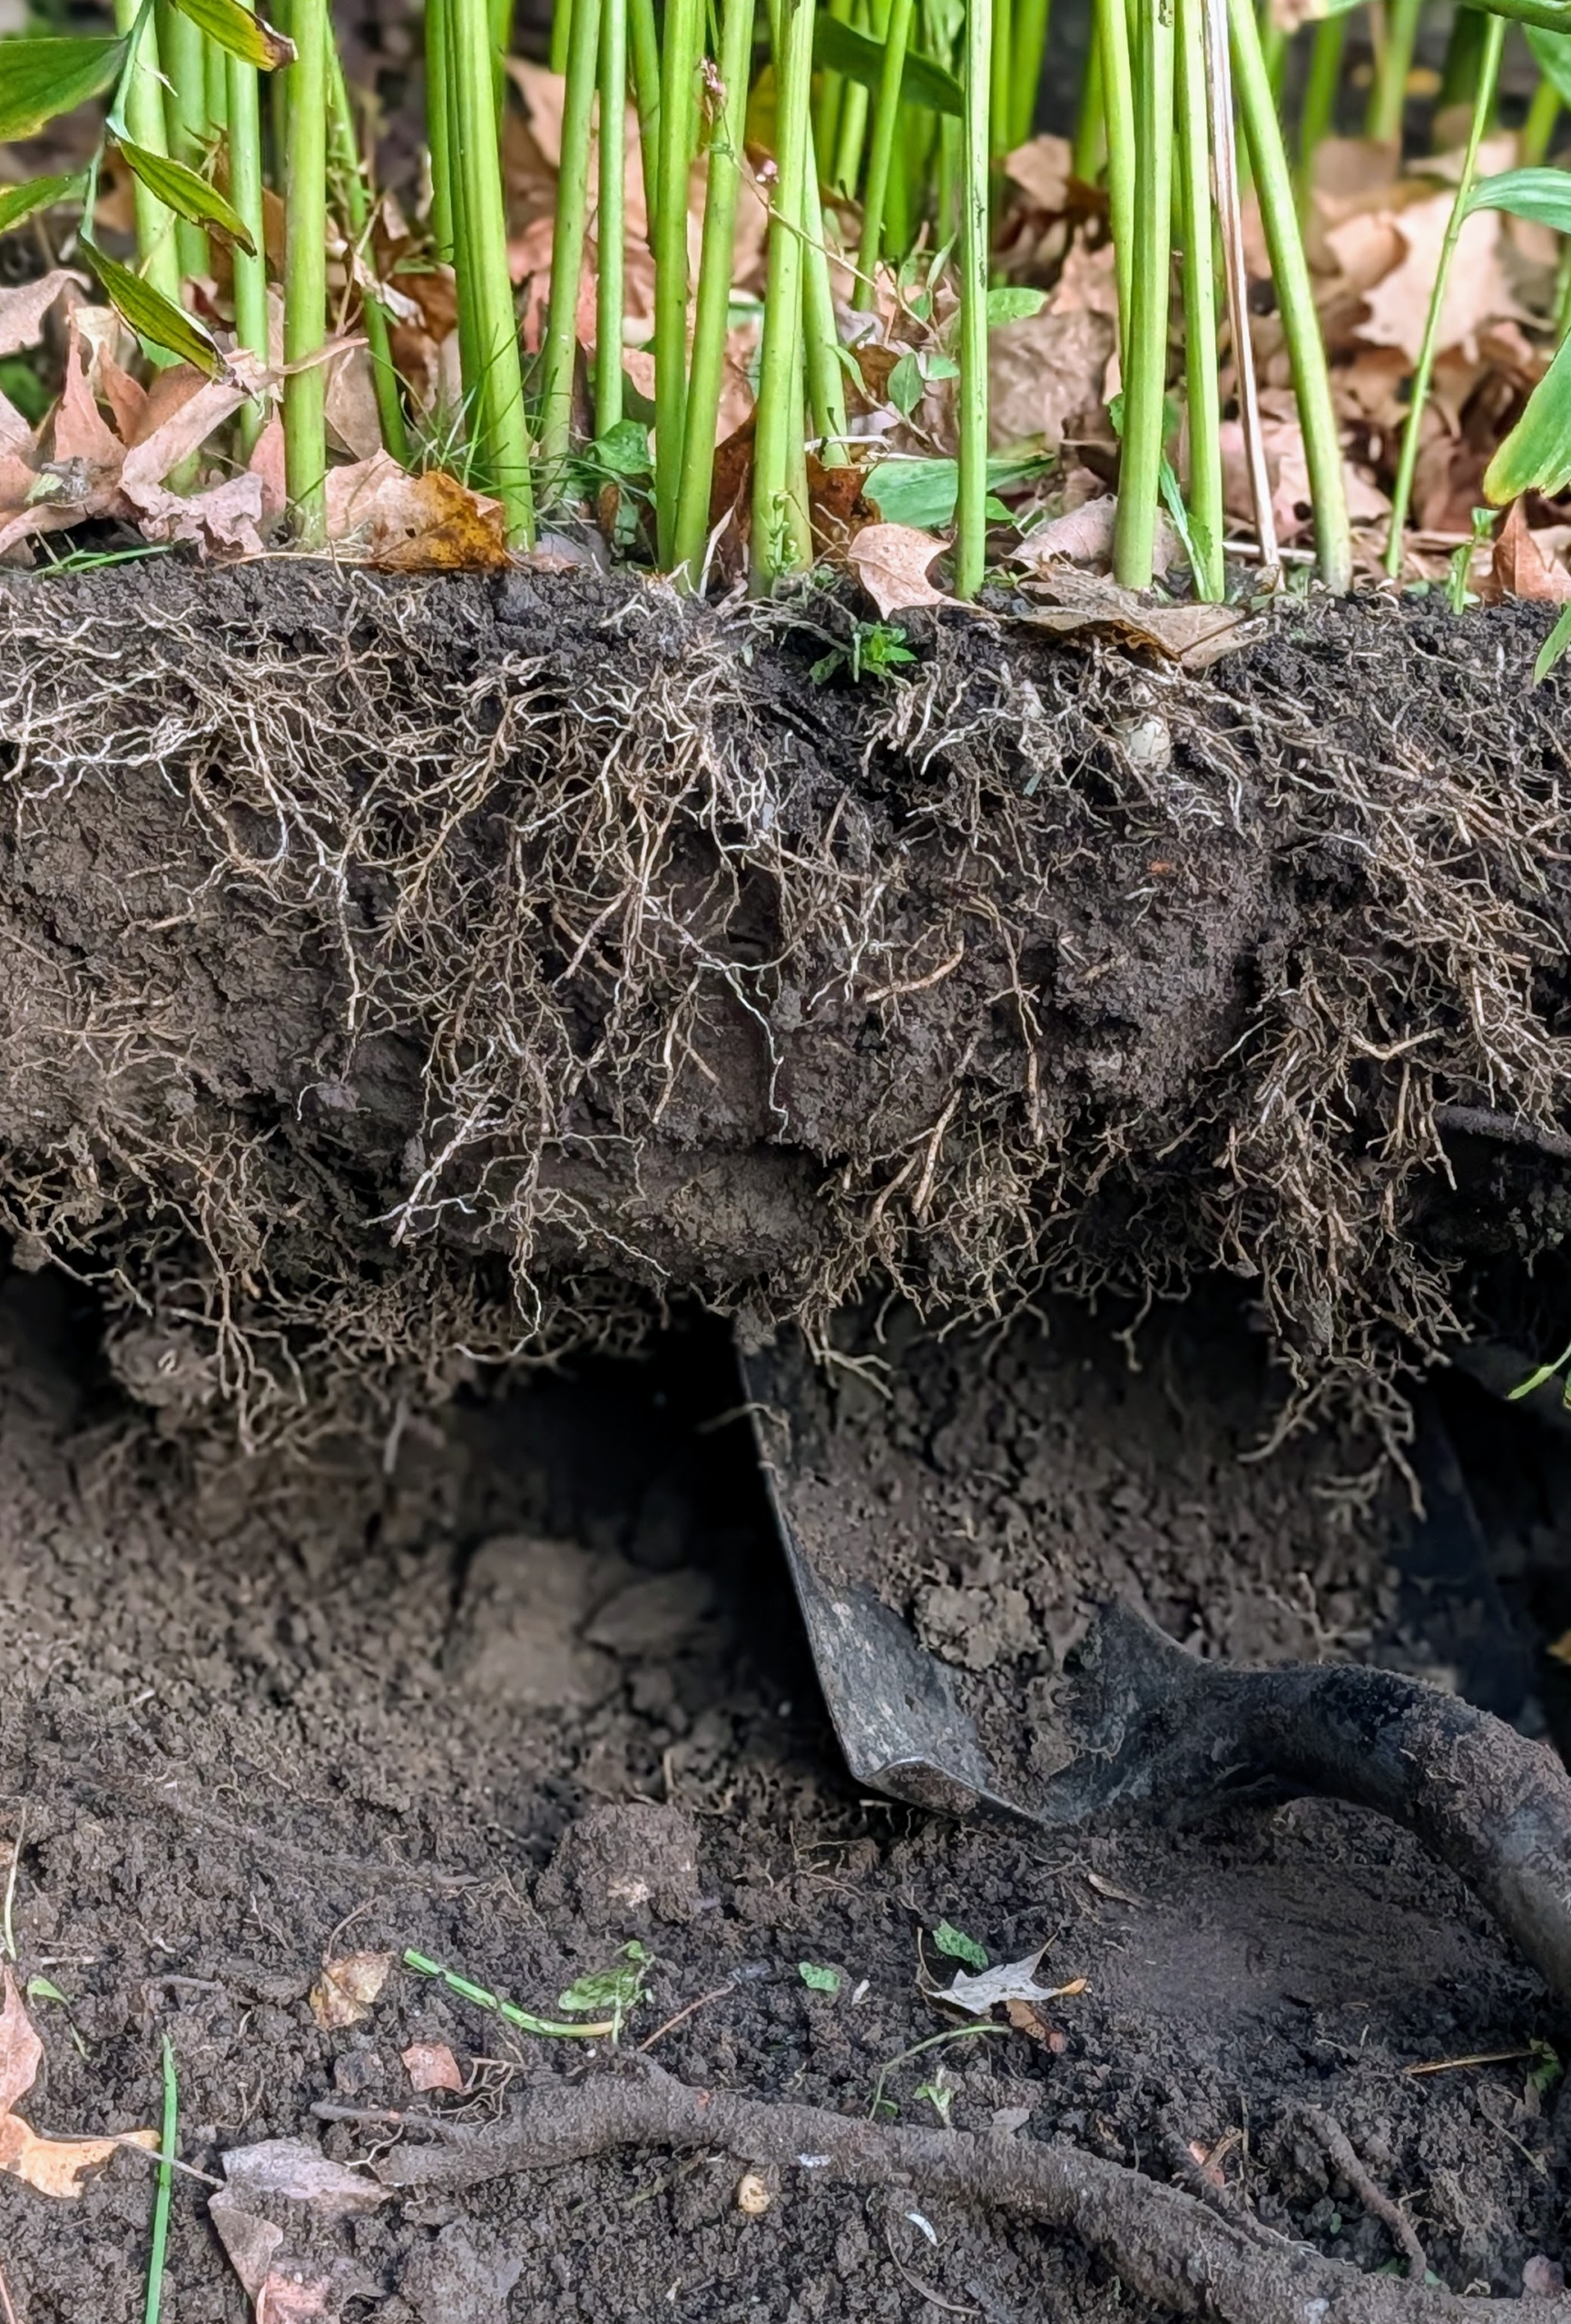
To remove it, Cesar uses a spade and carefully inserts it around the edge of the plant root balls to loosen them.
Then, using a shovel he carefully lifts the plants out of the ground. Solomon’s Seal has shallow roots, making it pretty easy to lift up. And, do you know the difference between a shovel and a spade? Shovels are designed for scooping and moving loose materials, while spades are better suited for cutting through compacted soil. I always say, “use the right tool for the right job.”
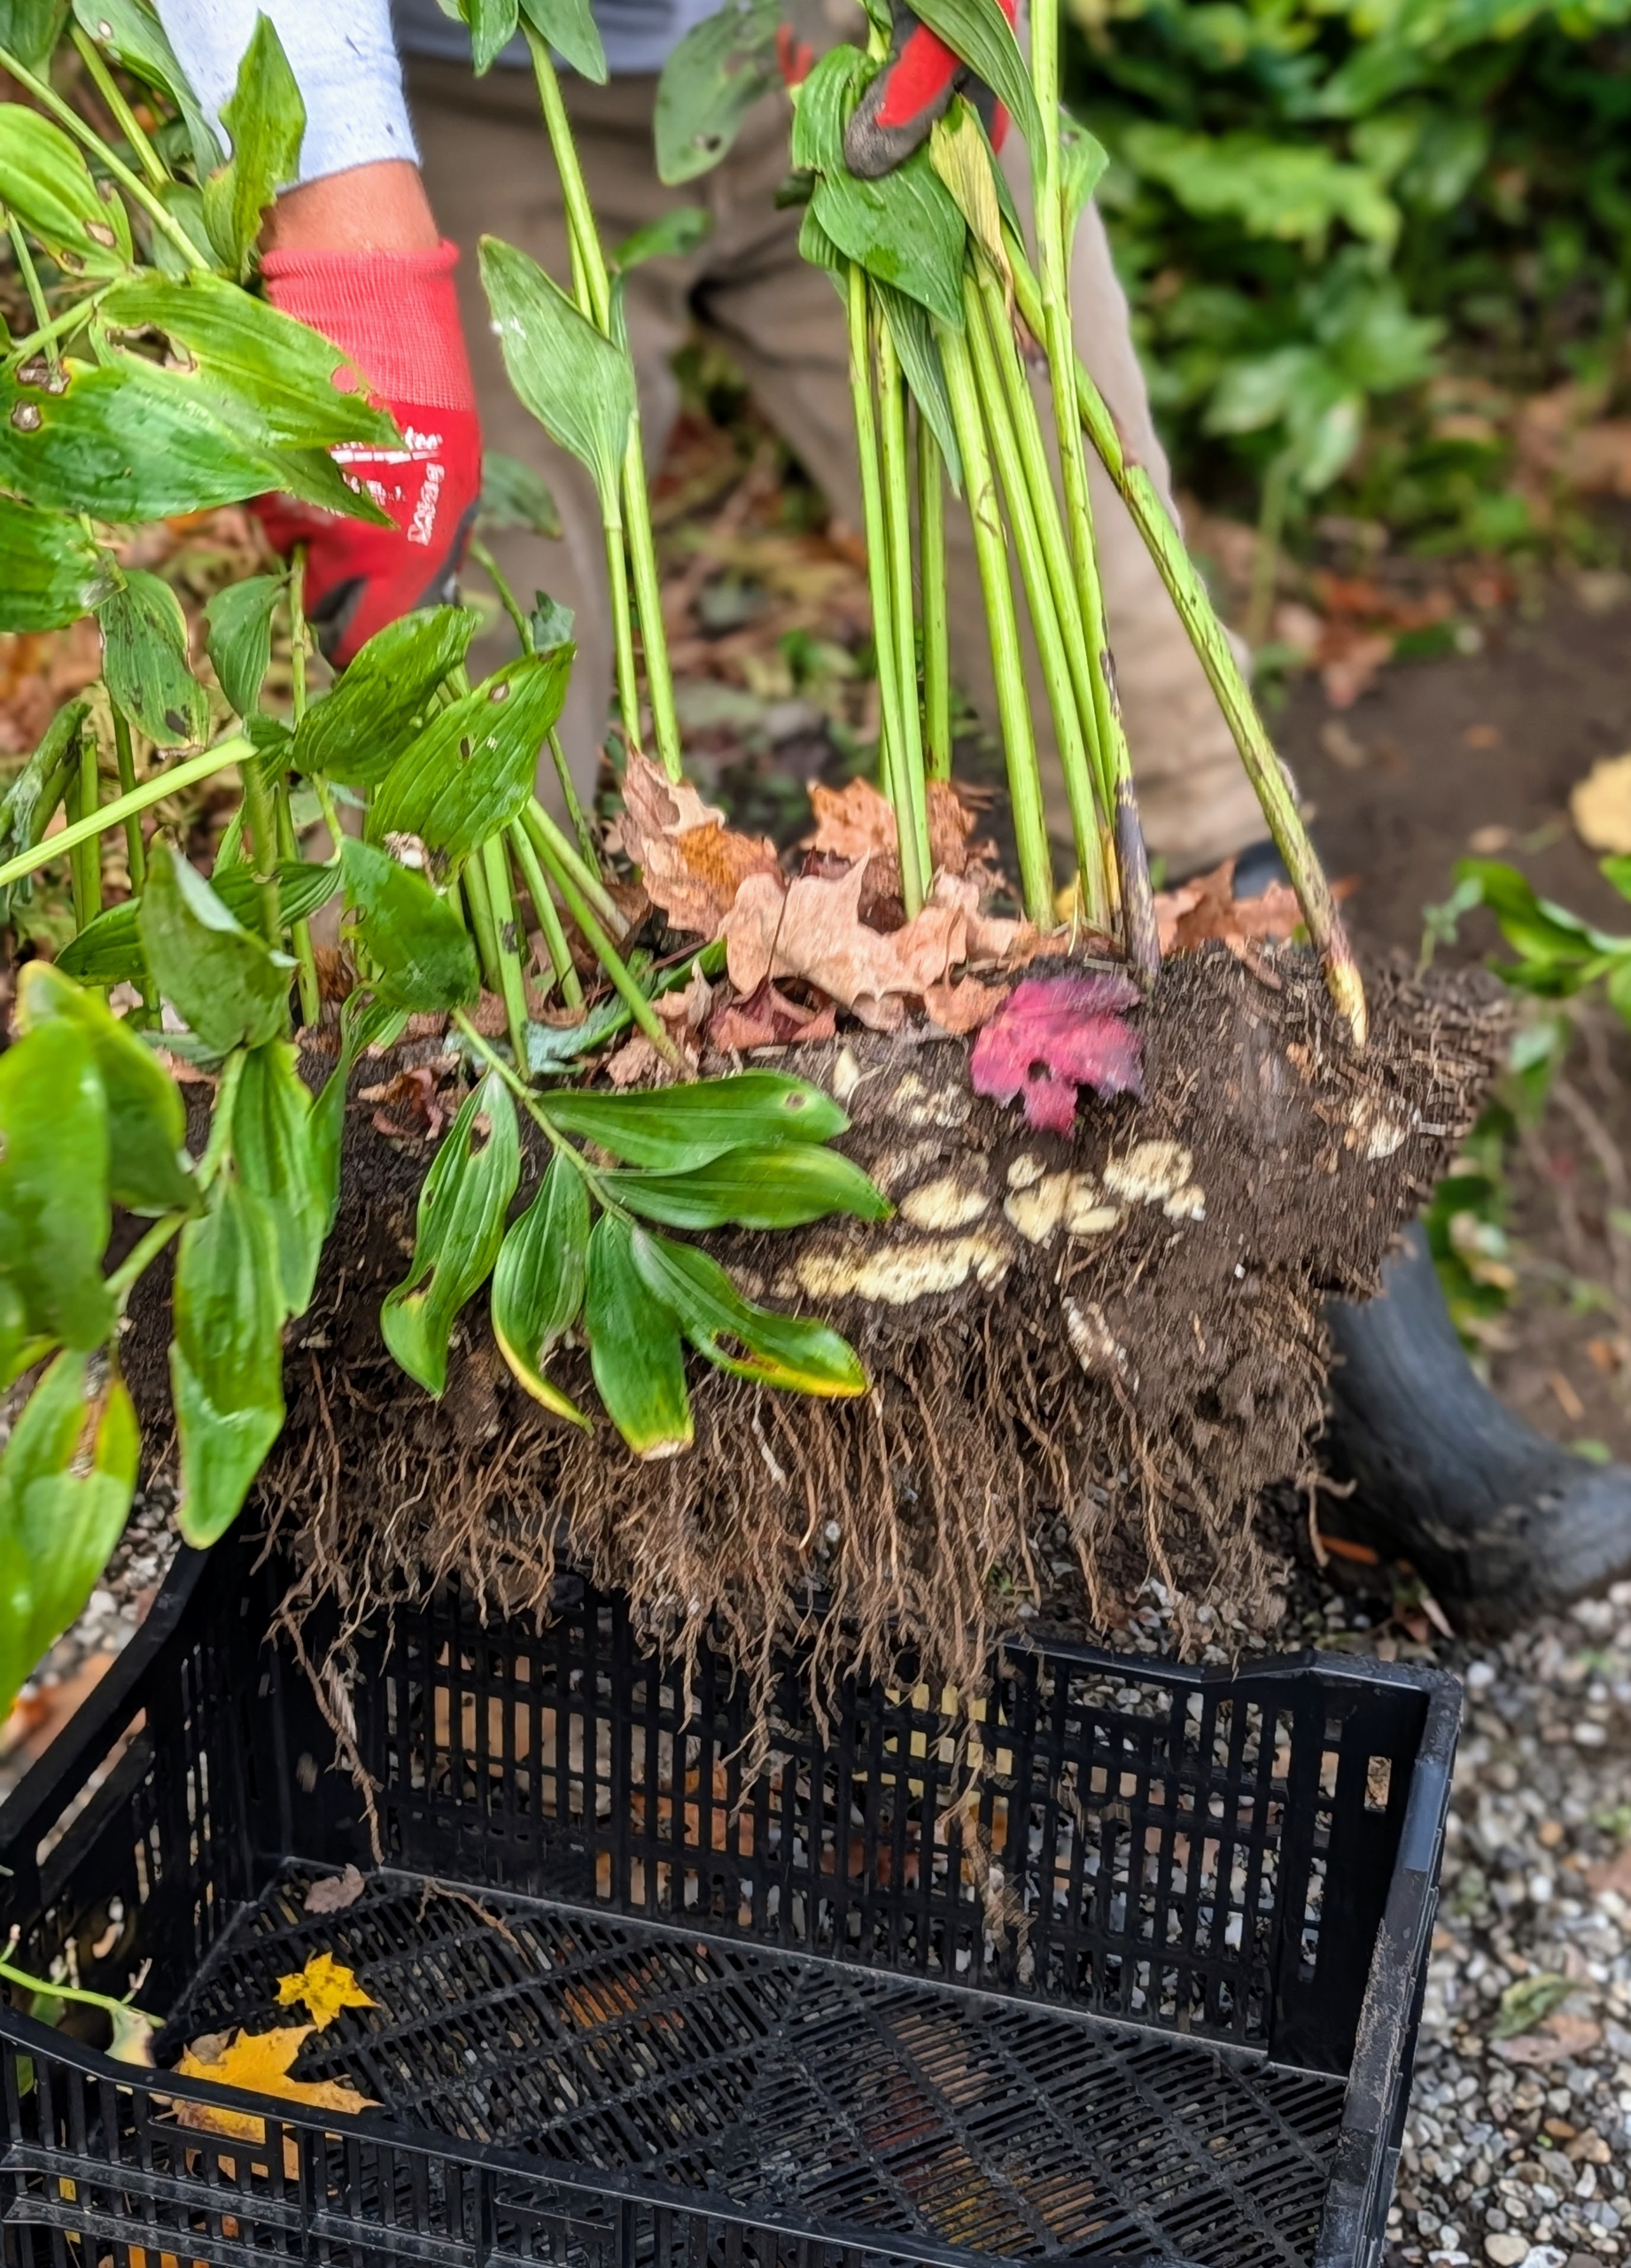
Cesar places the Solomon’s Seal plants carefully into a crate, so they can be transplanted in another bed.
Once all the Solomon’s Seal is removed, the area is raked and new plants are placed strategically around the bed. Always consider mature plant size when placing and make sure there is enough room for them to grow.
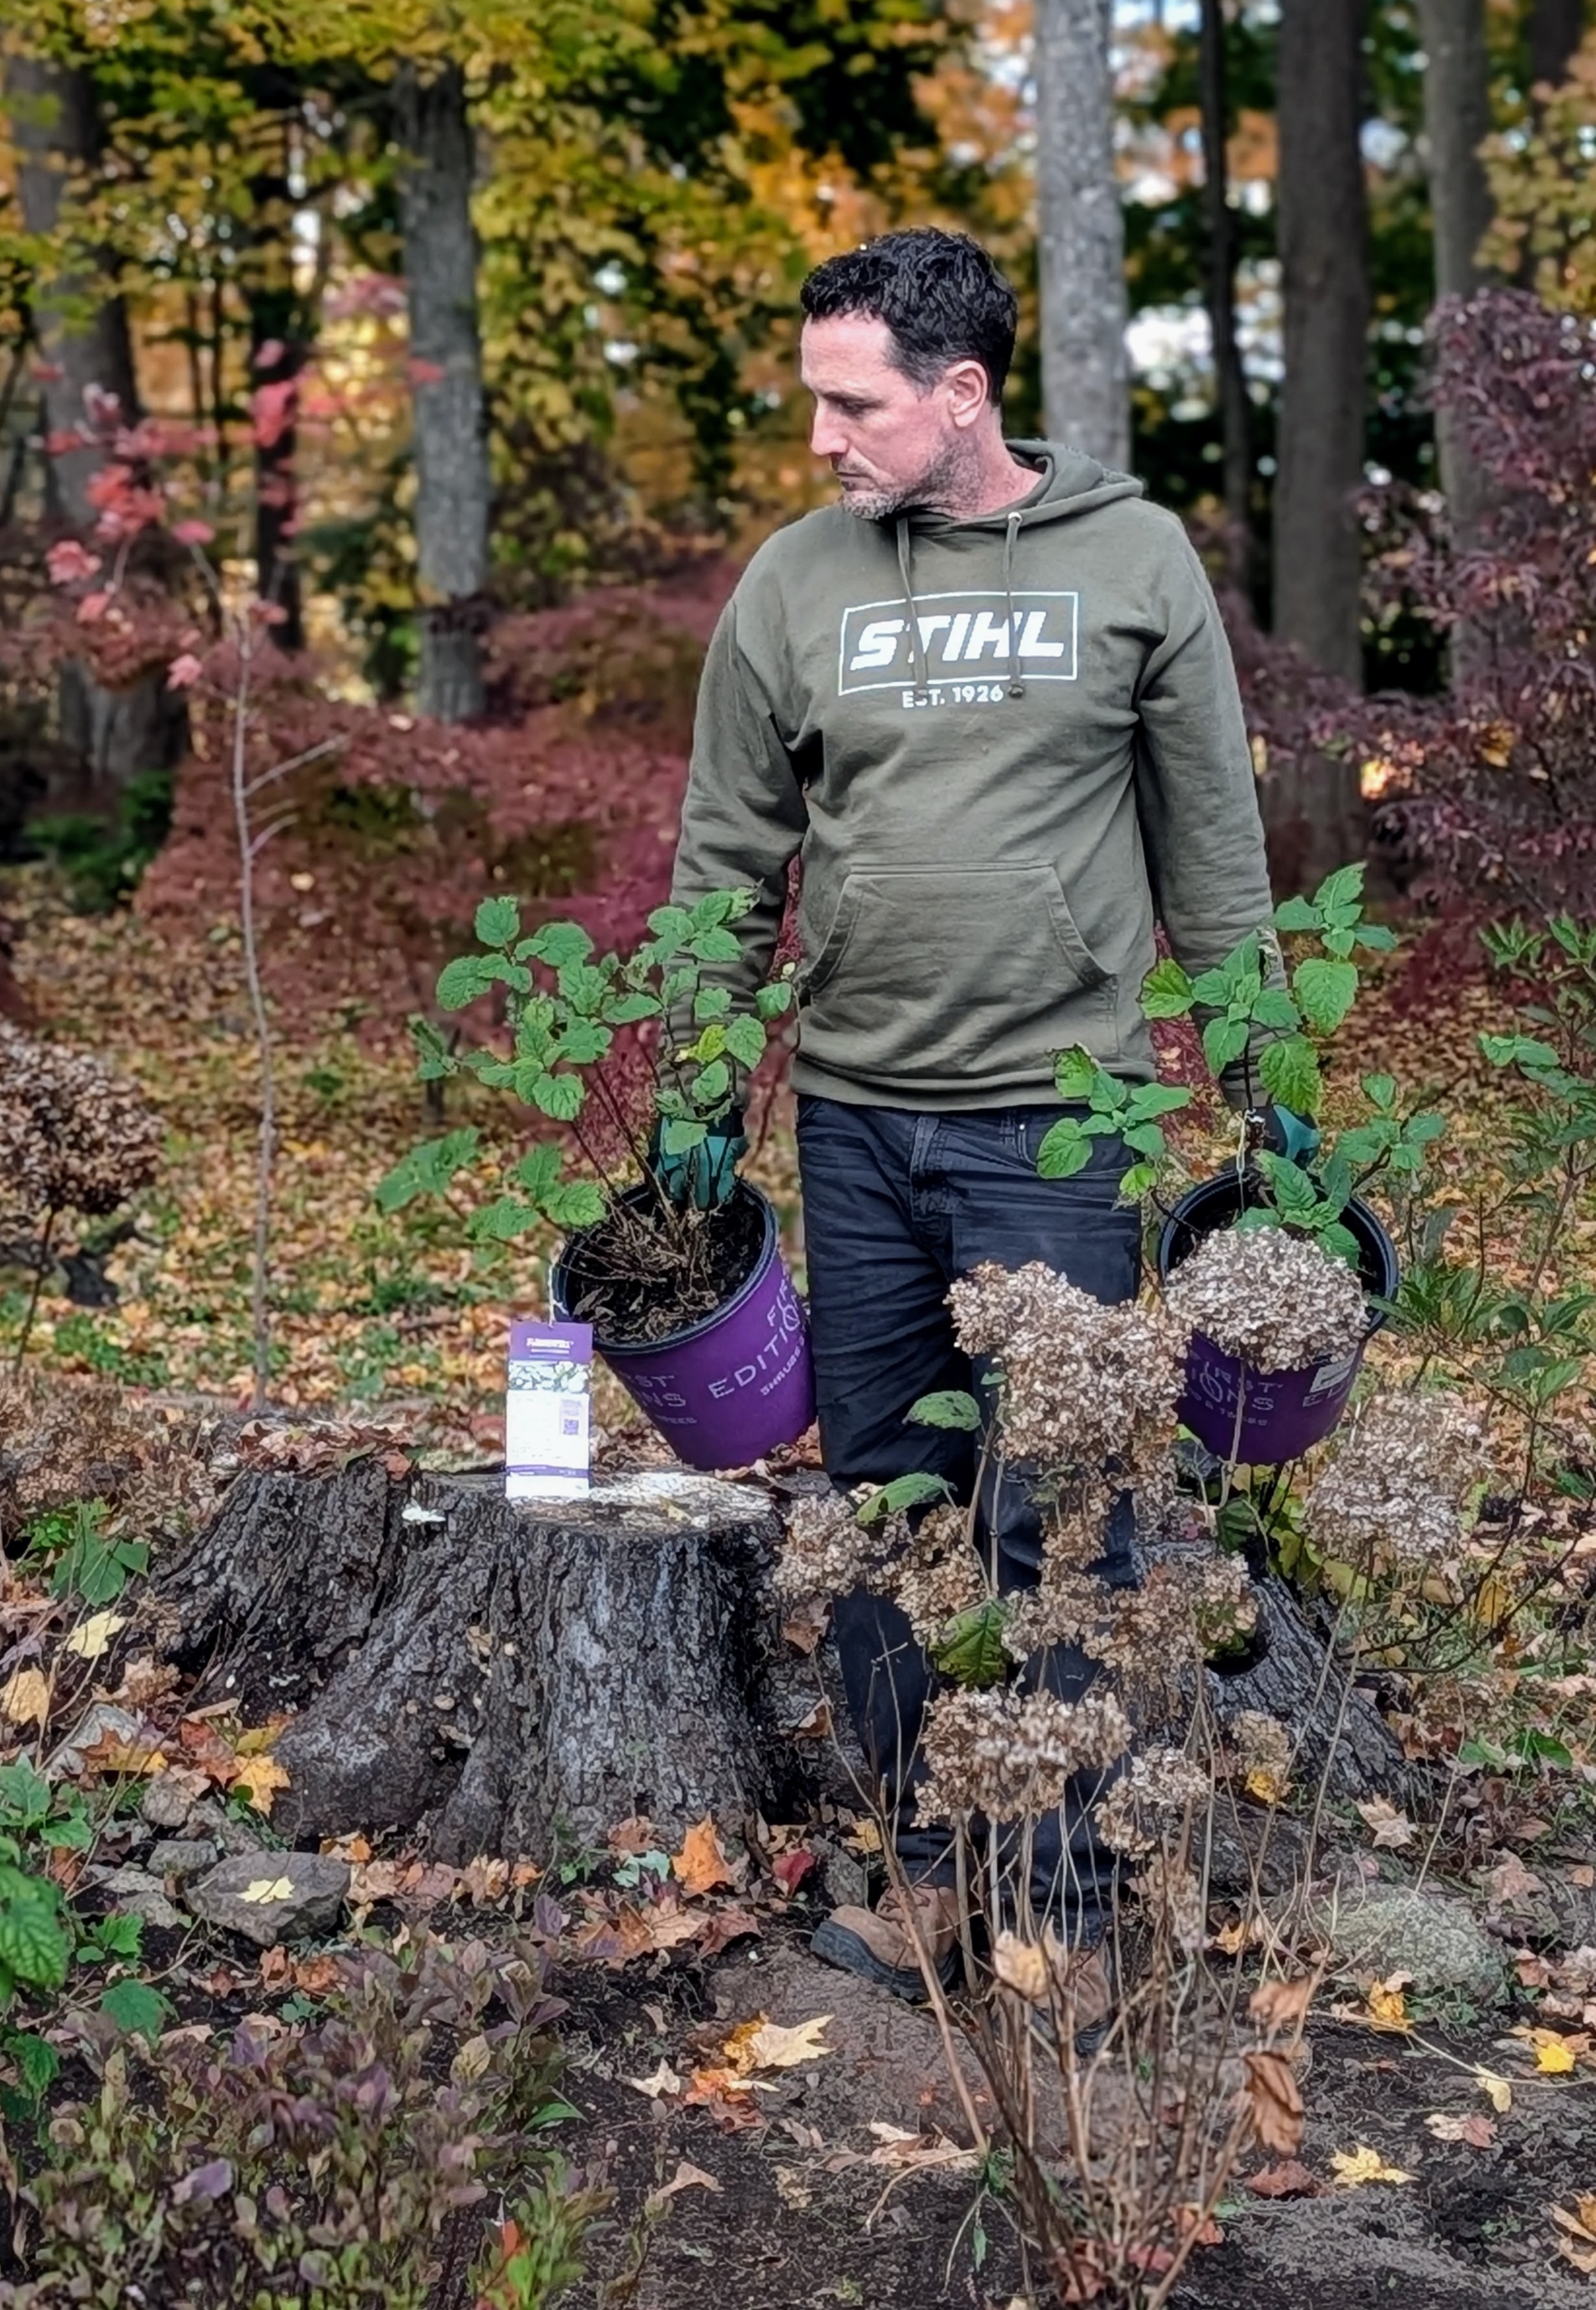
Ryan positions each potted specimen. It is important to also take note of the plant’s light needs and growth habit.
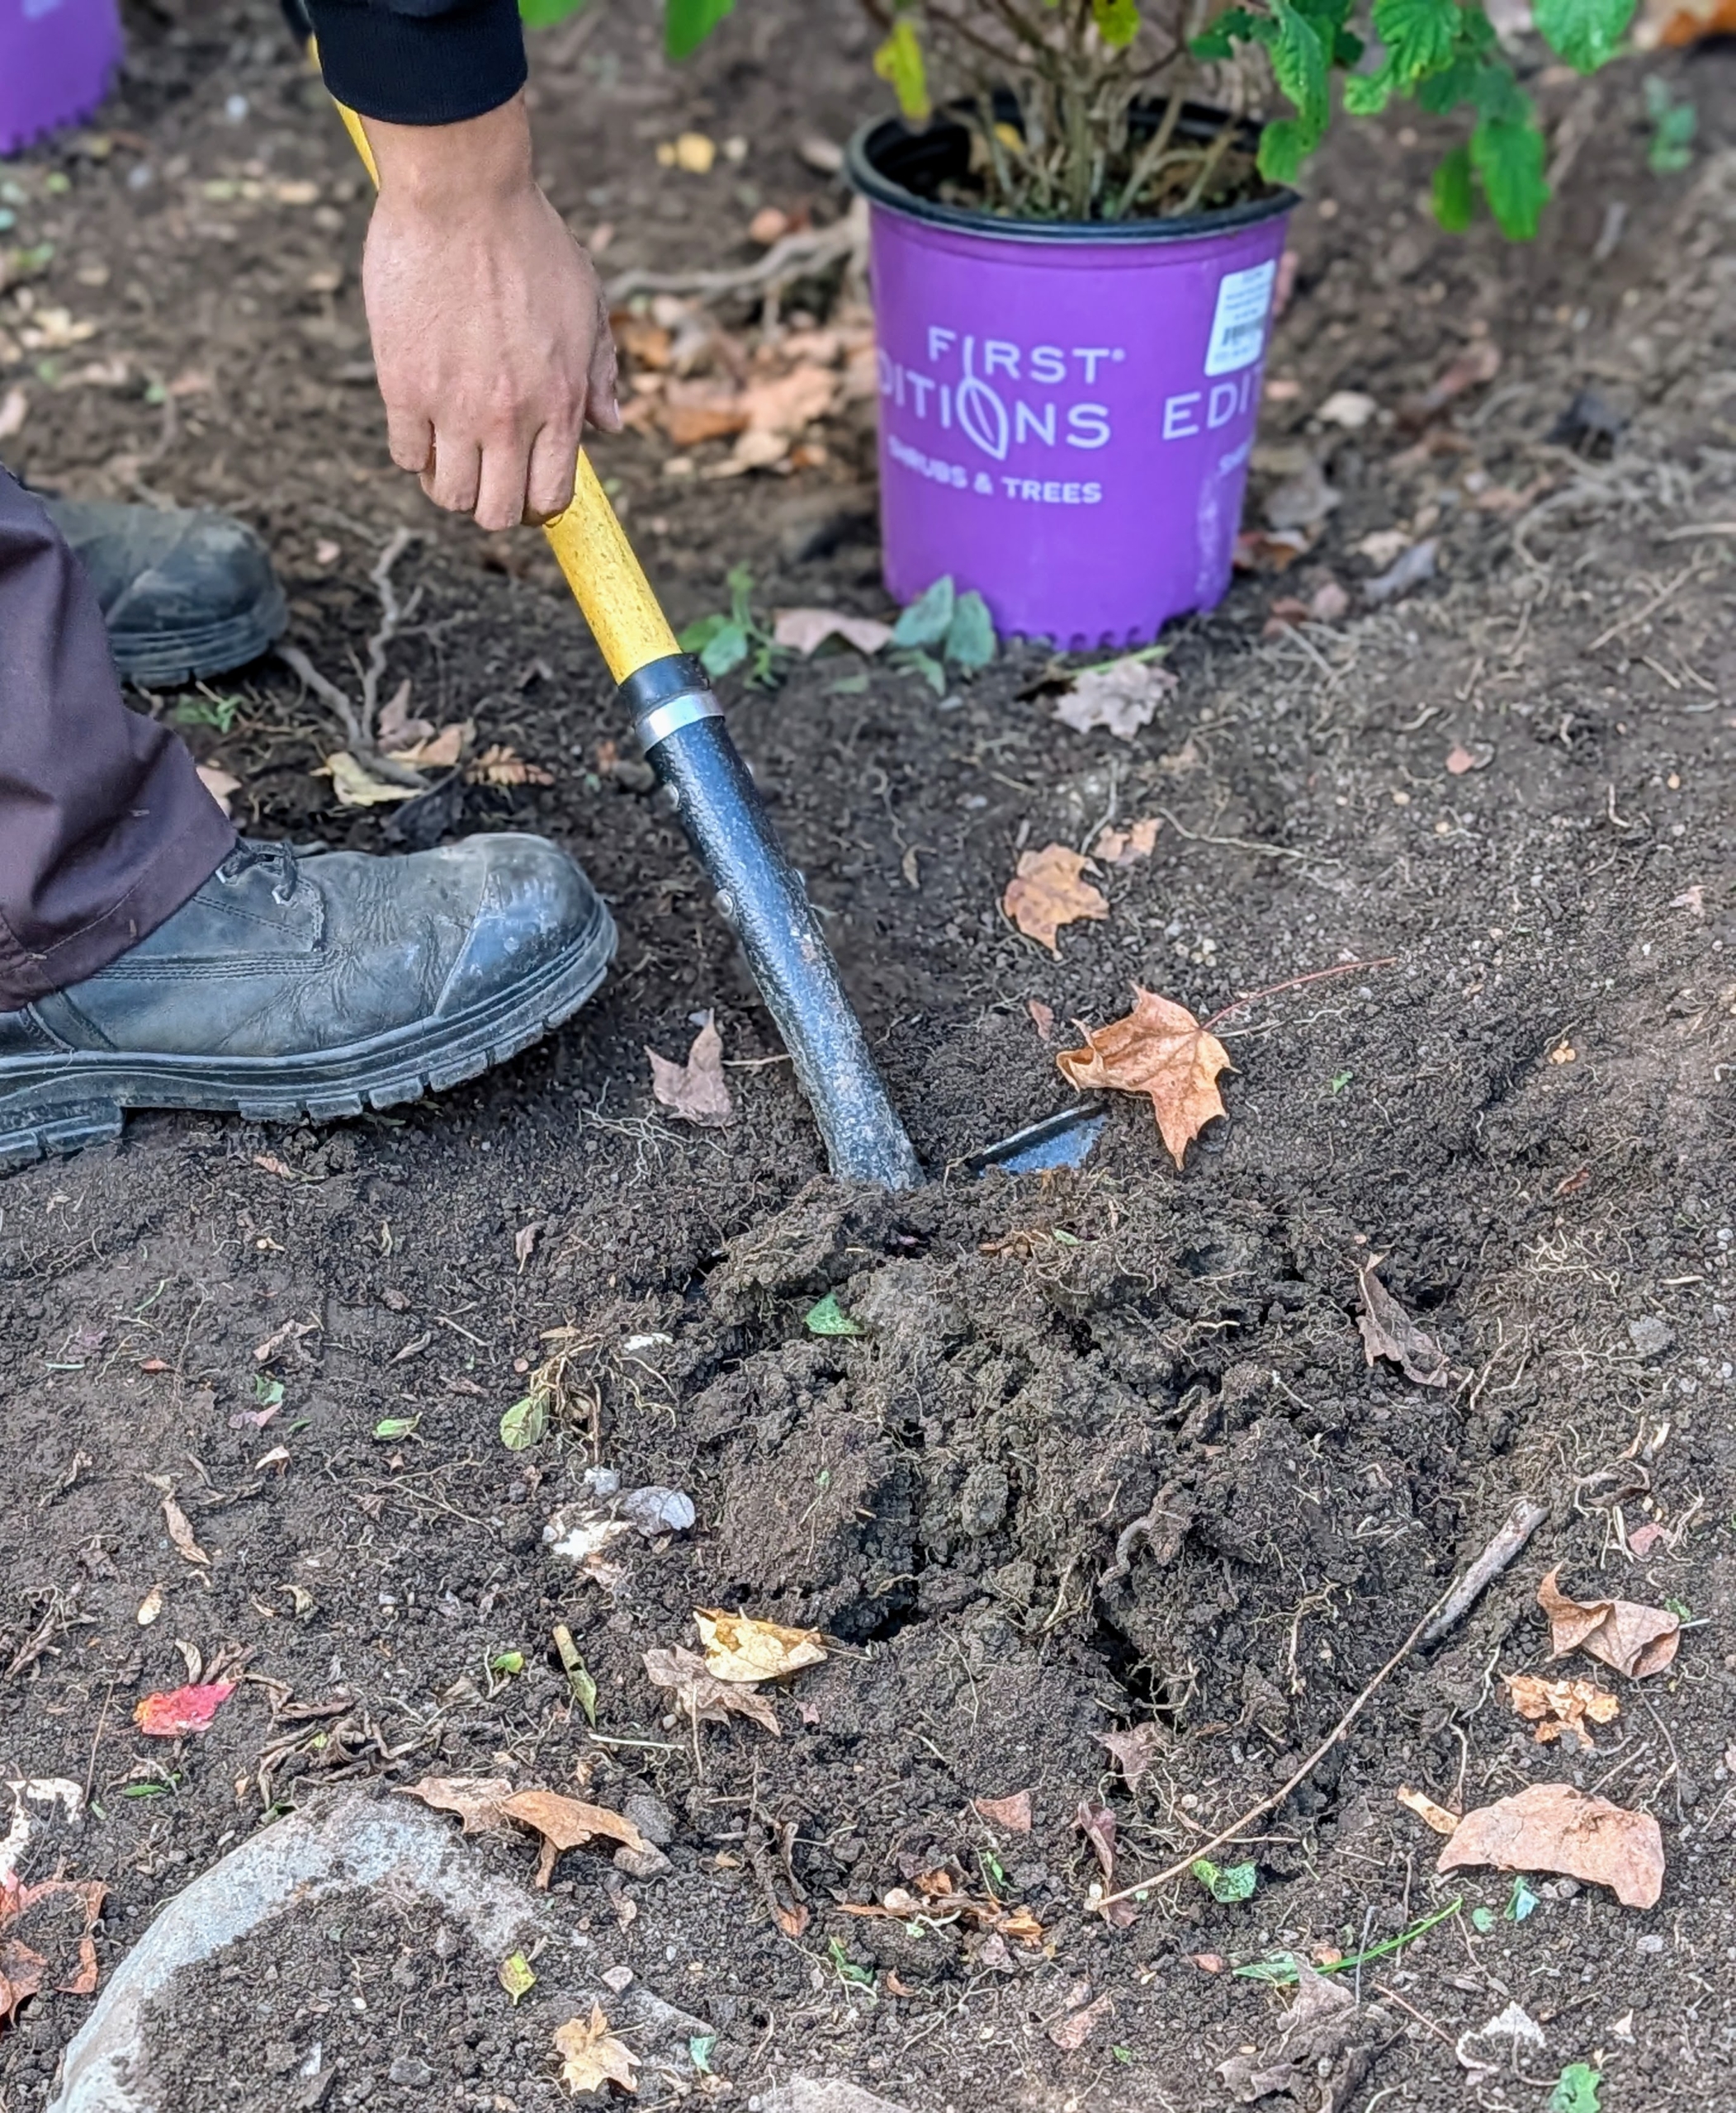
Using a narrow shovel, Matthew starts digging all the holes.
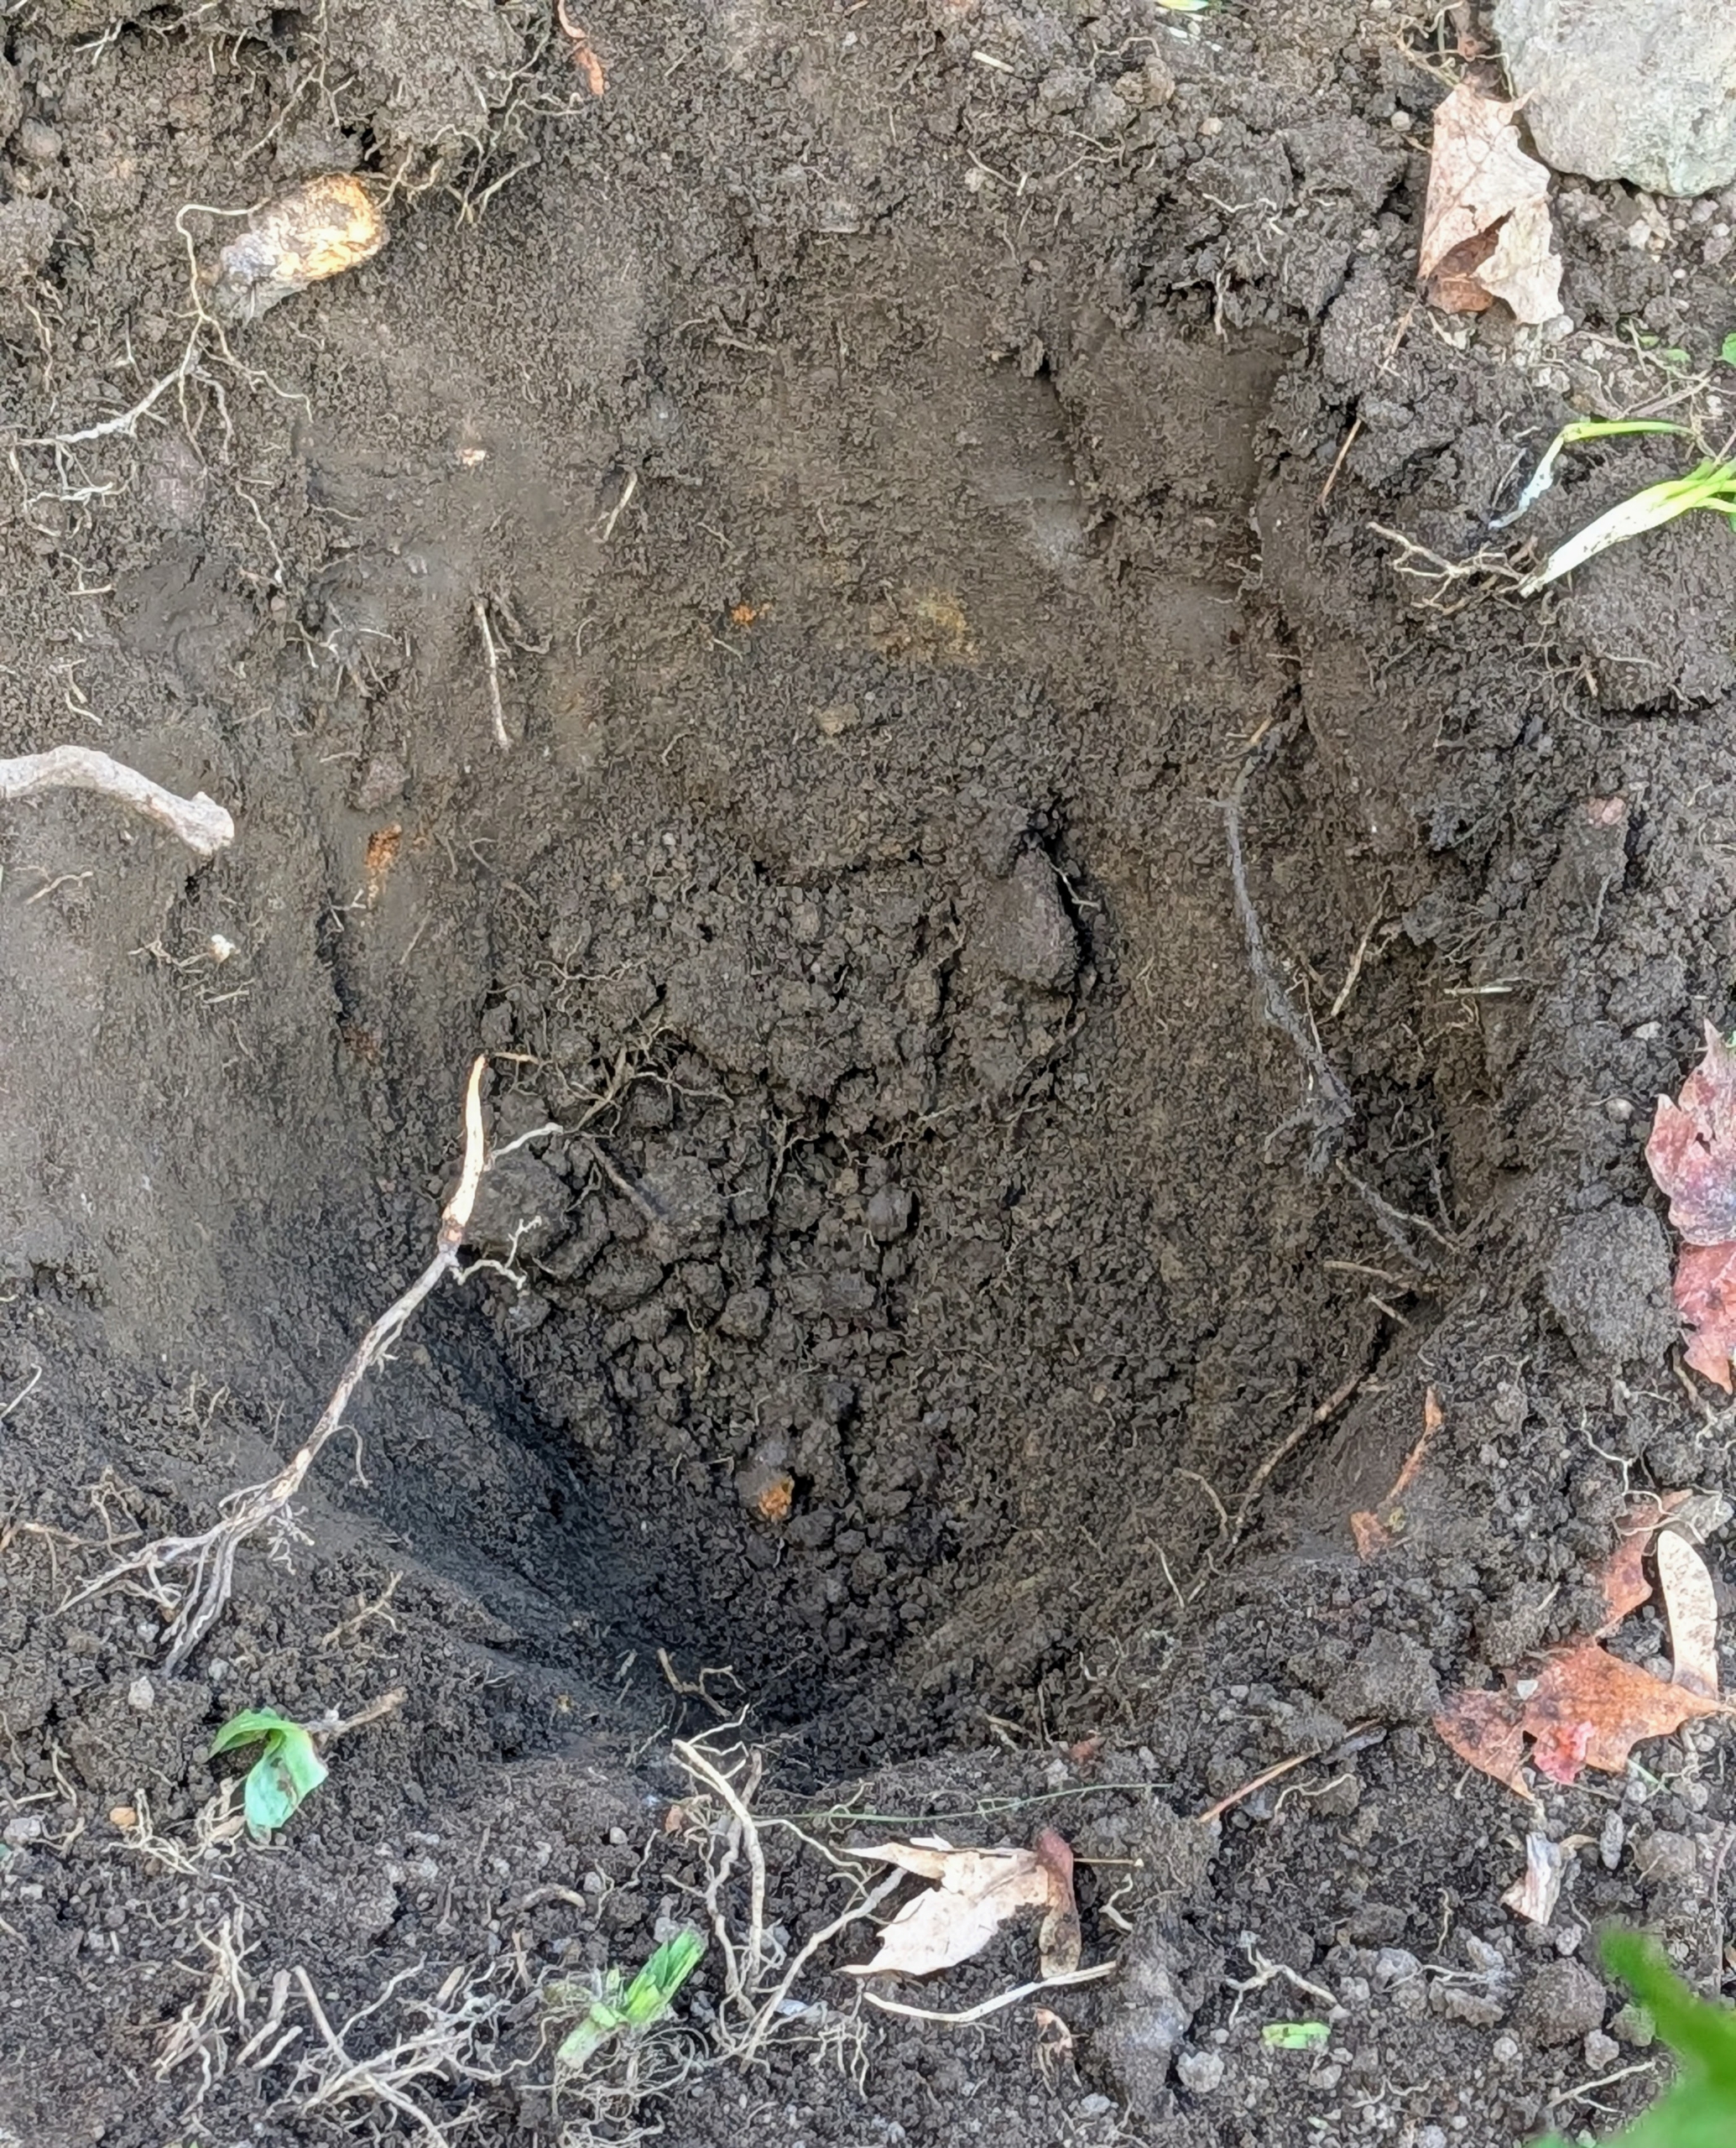
The rule of thumb in gardening is to make a hole two to three times wider than the original pot and slightly deeper.
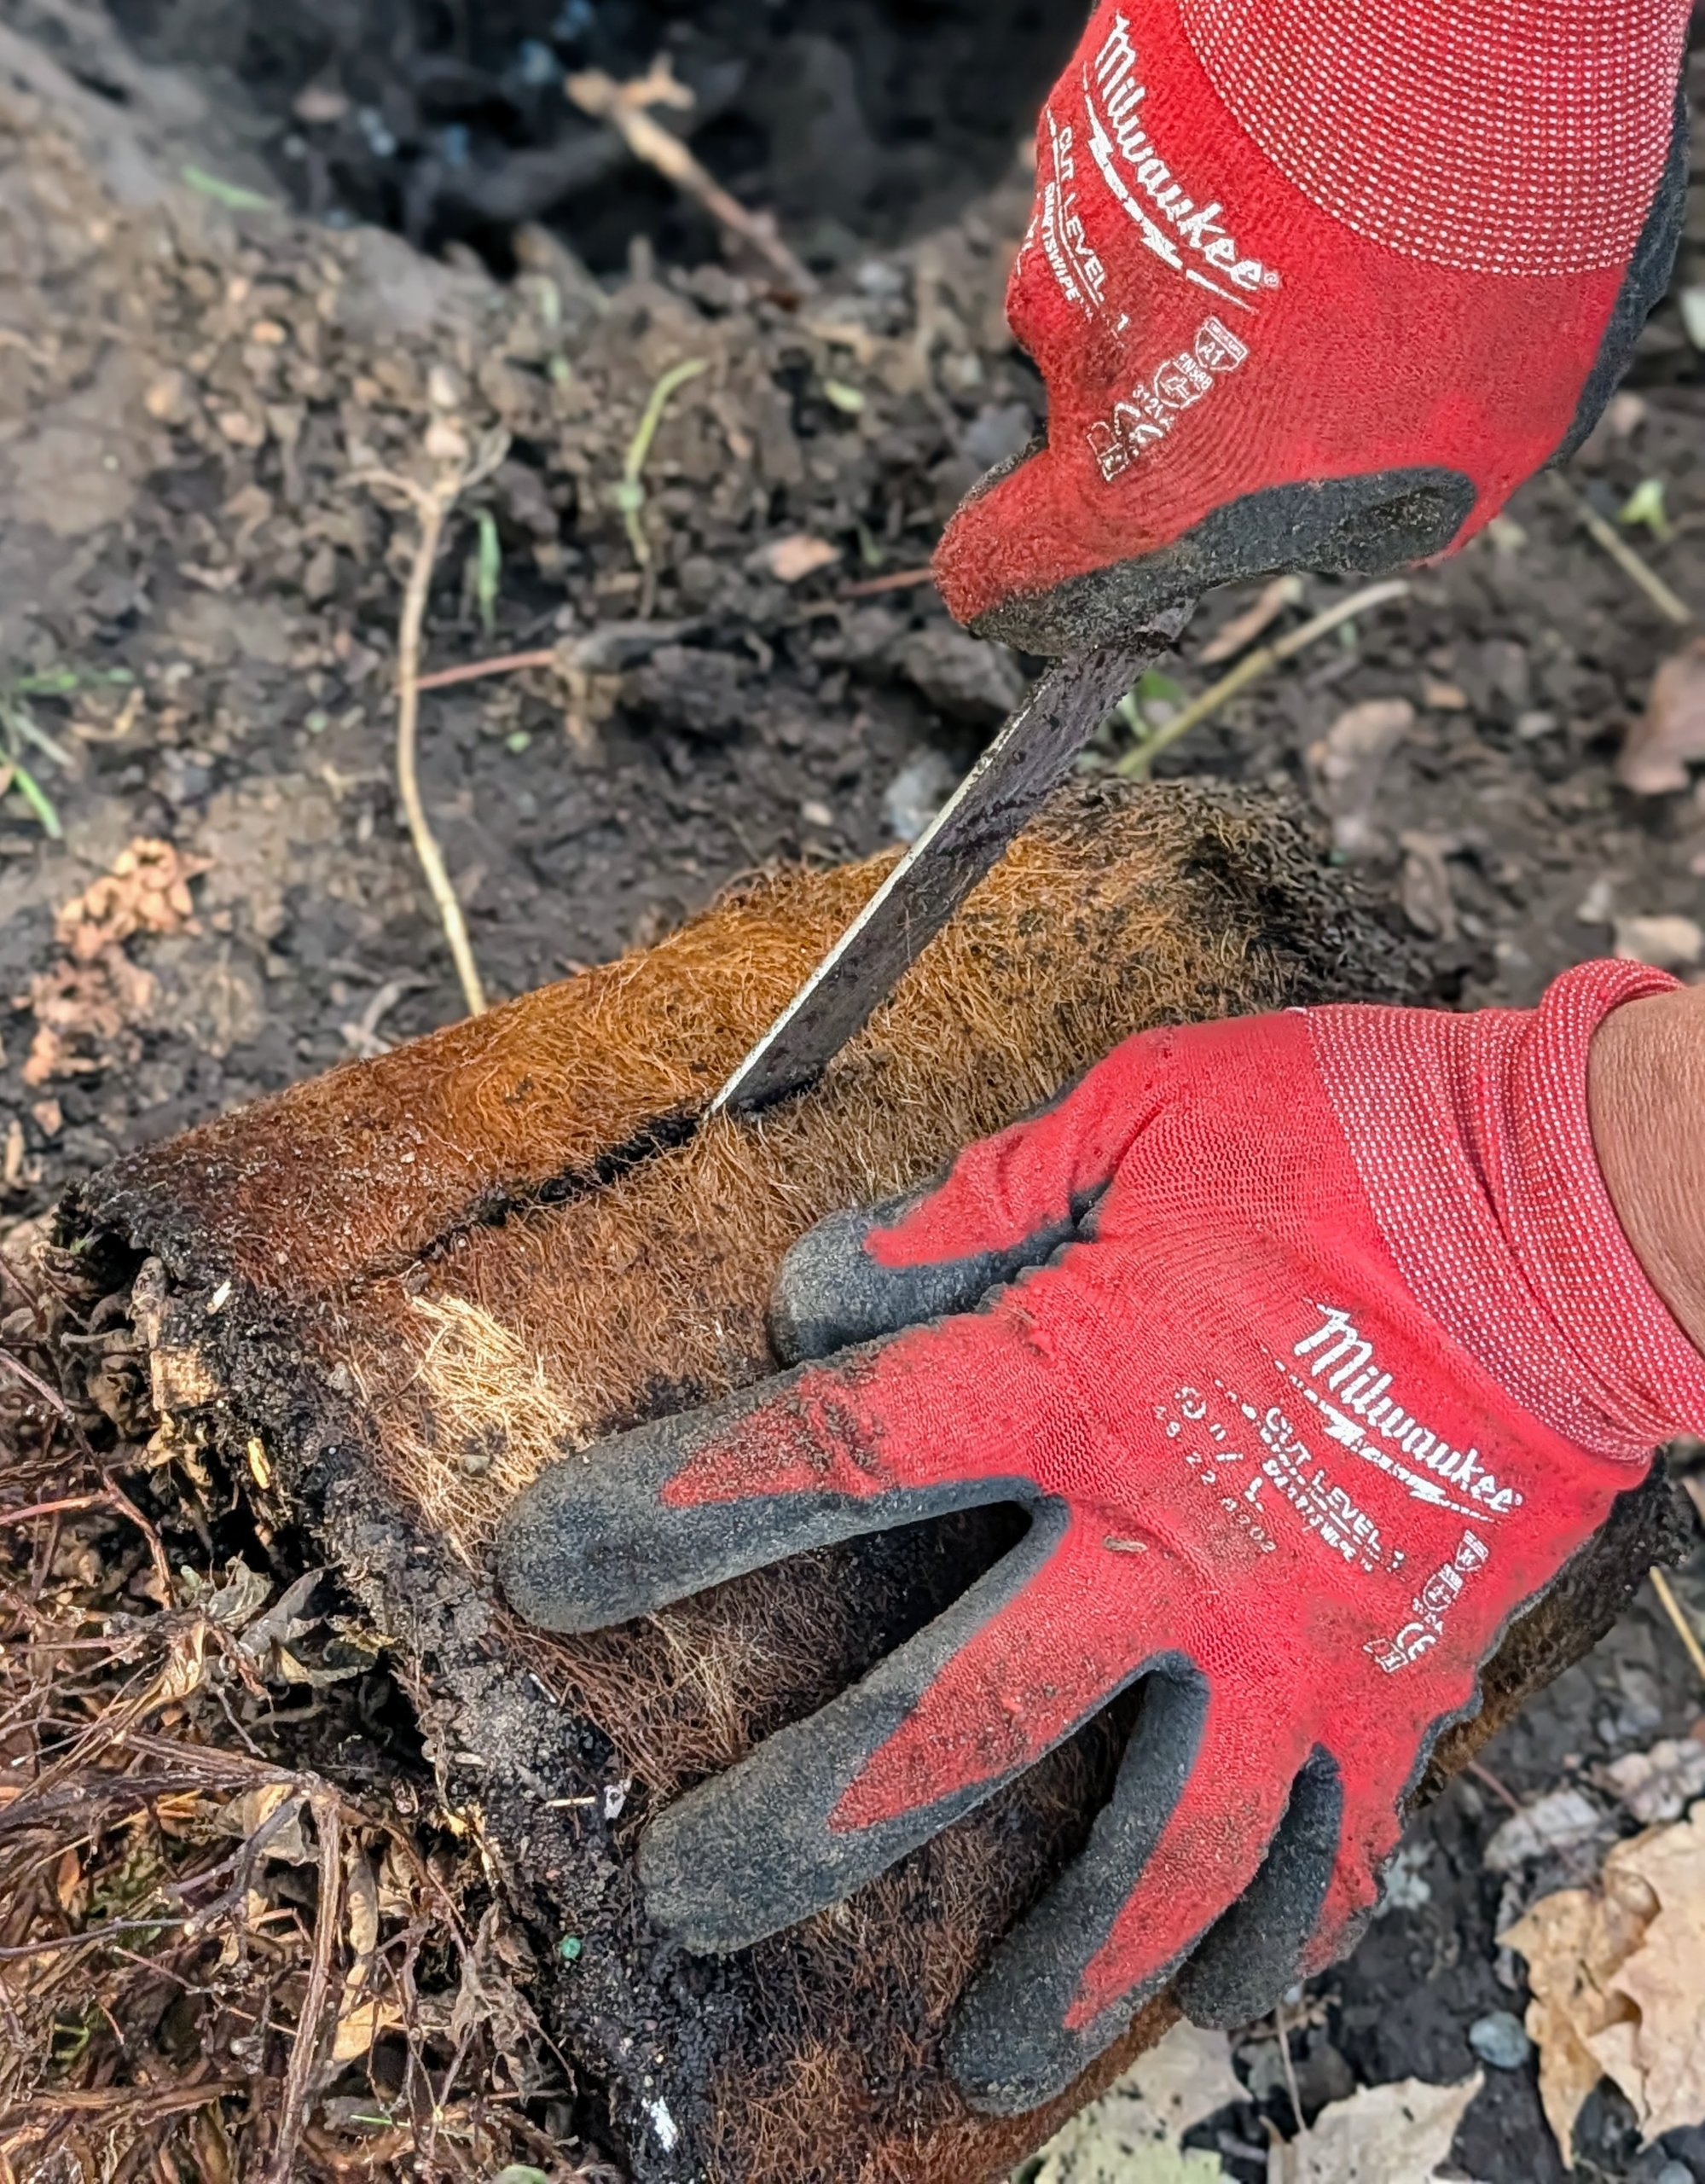
Cesar uses a knife to make beneficial cuts around the root ball to stimulate growth. This is called scarifying.
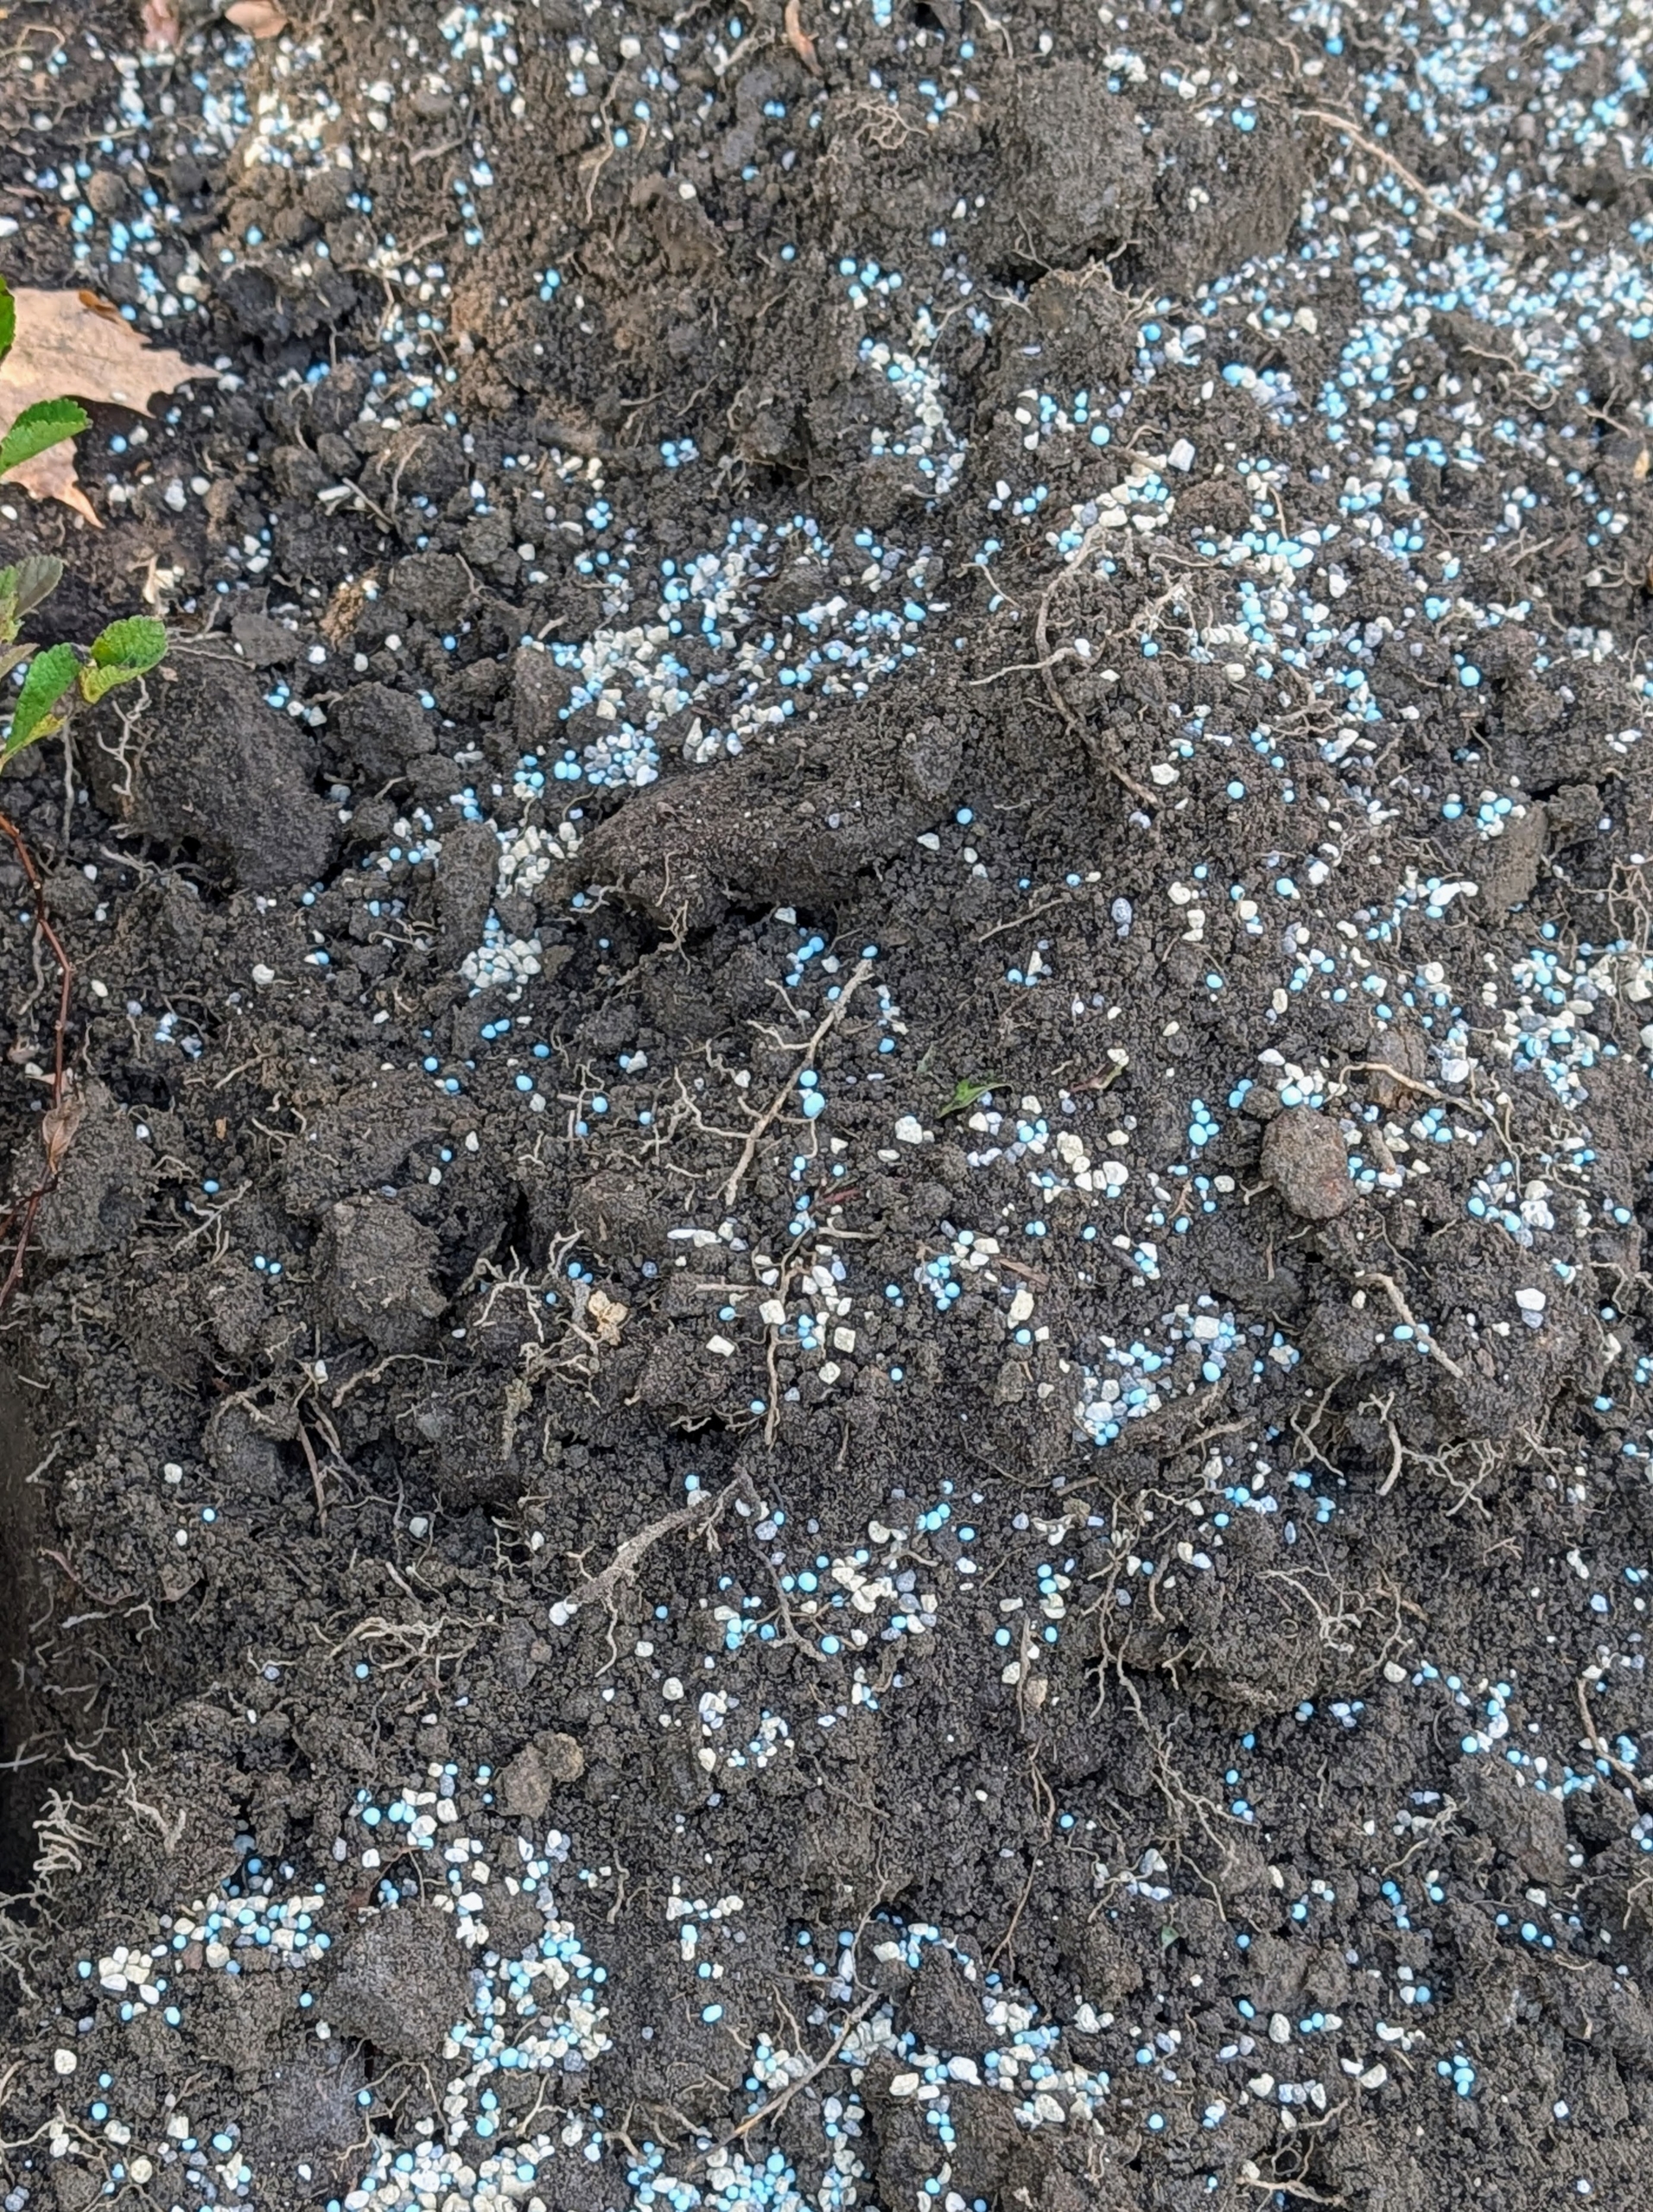
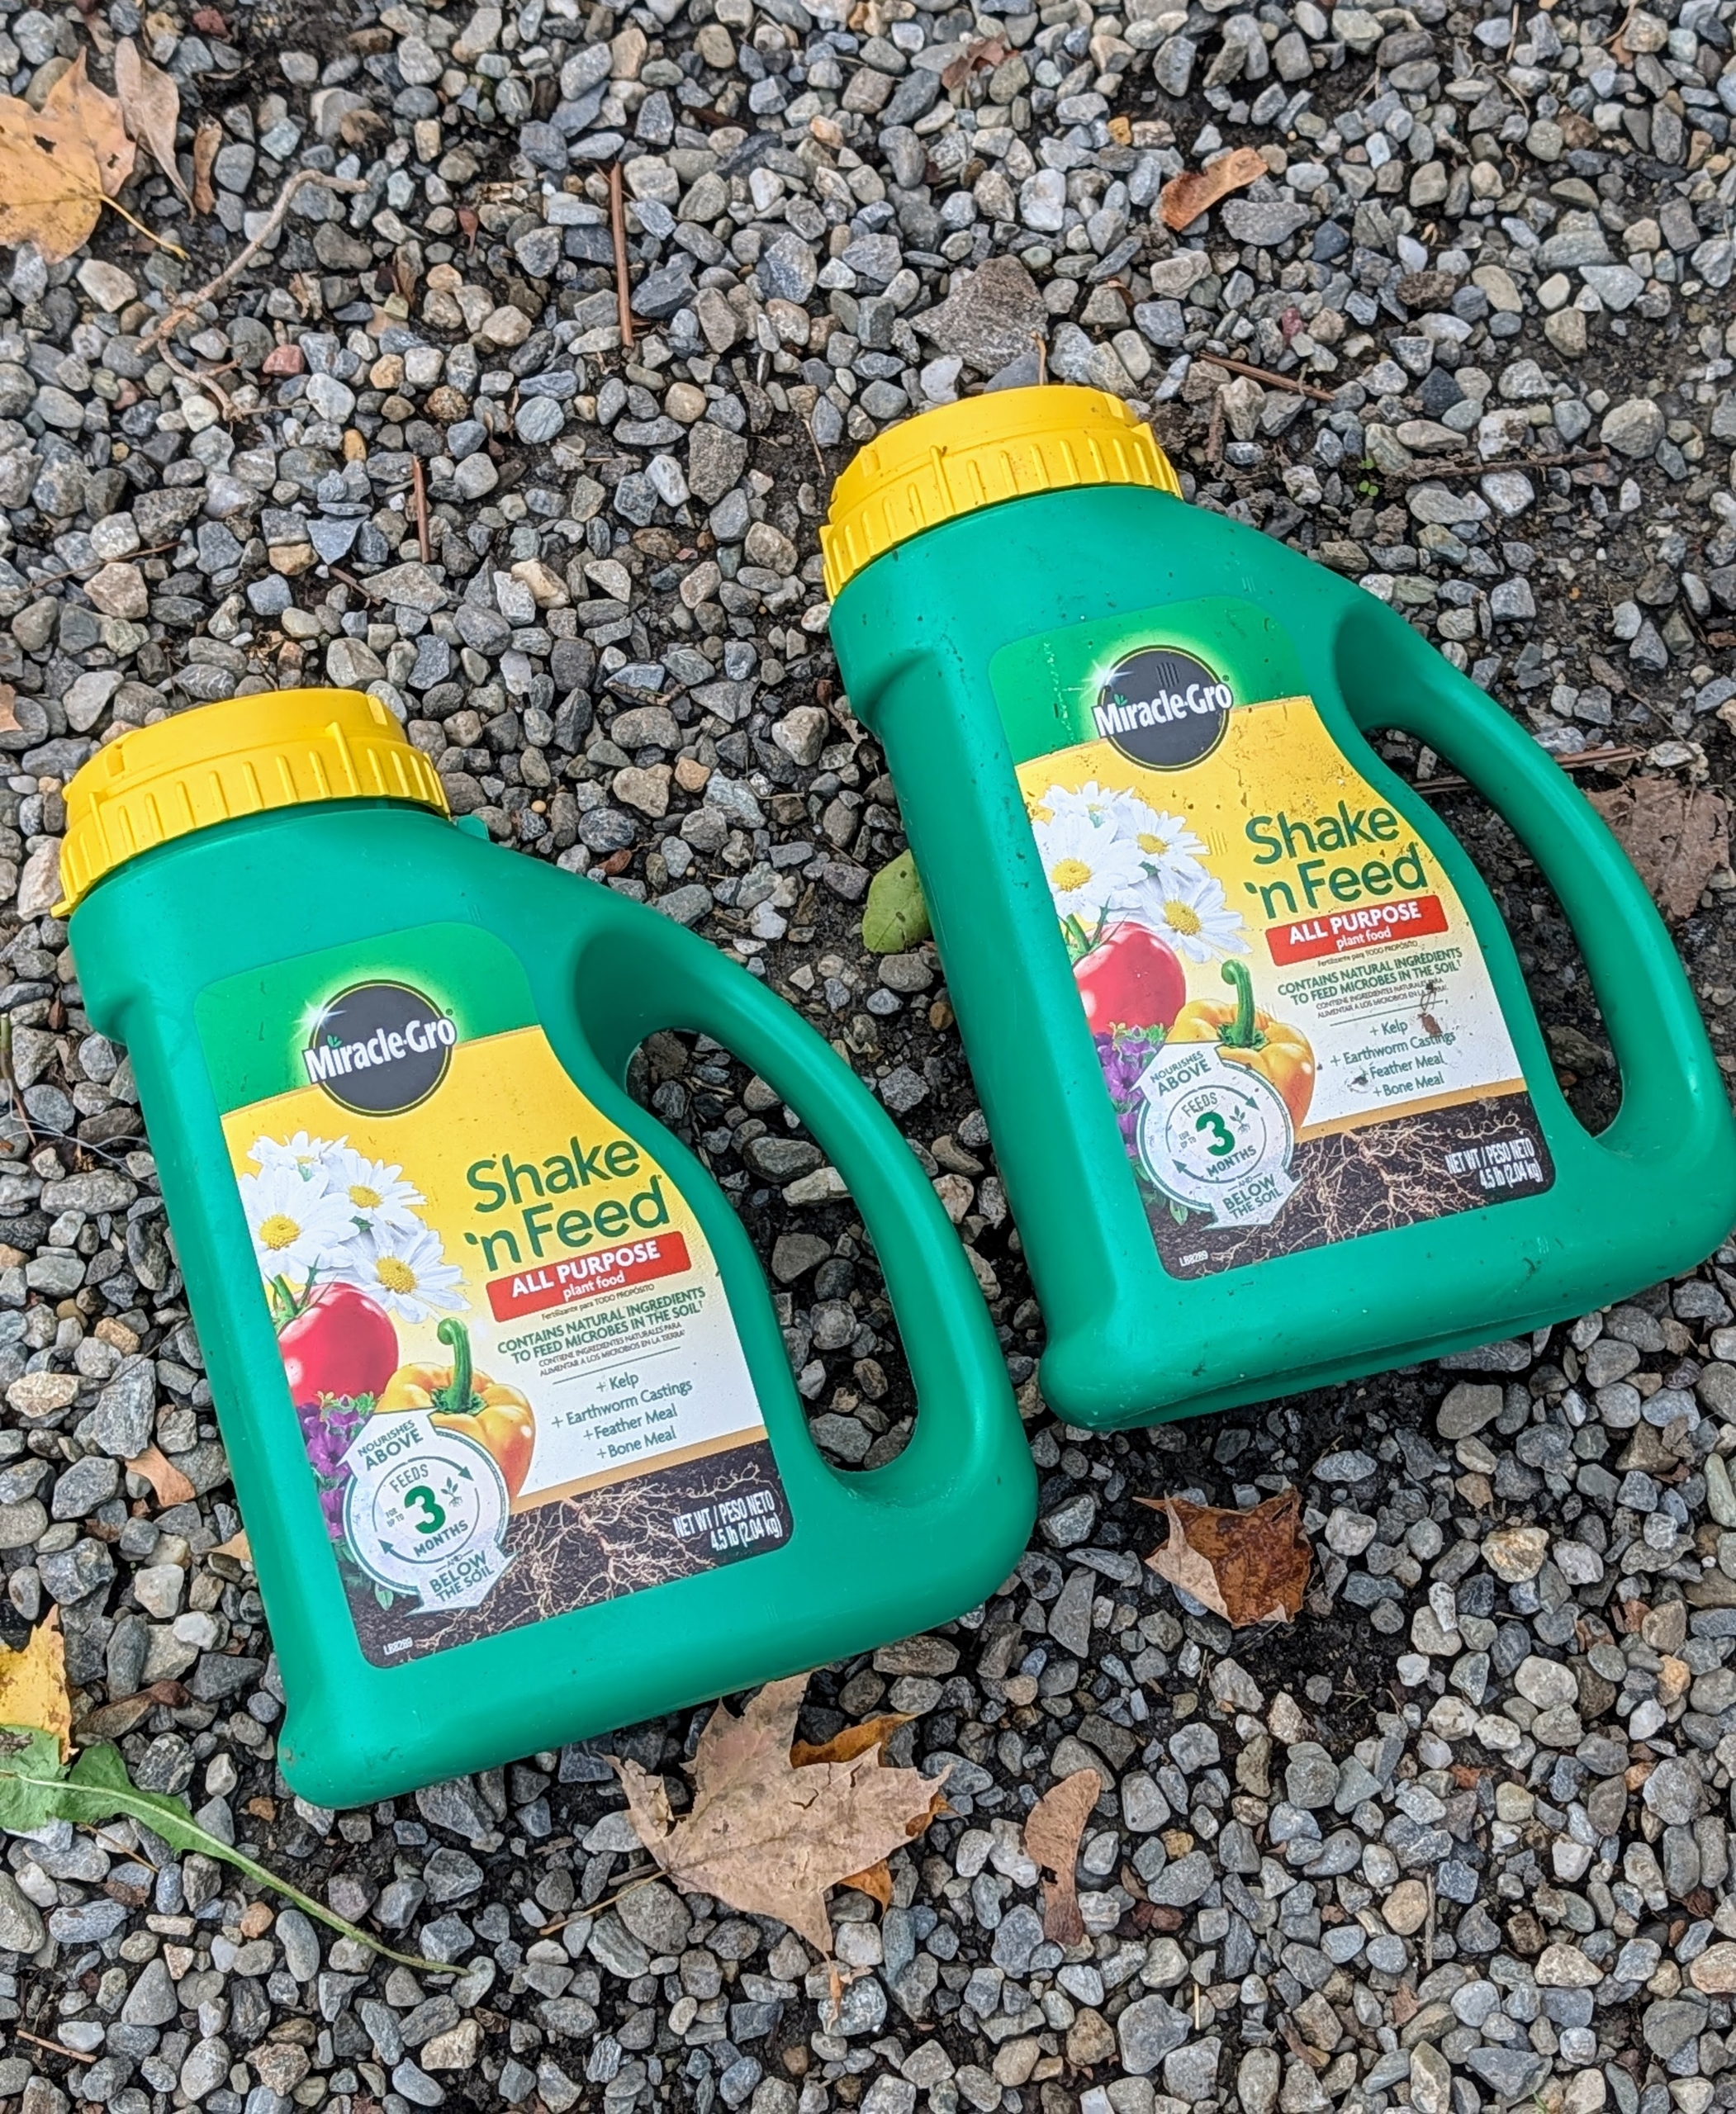
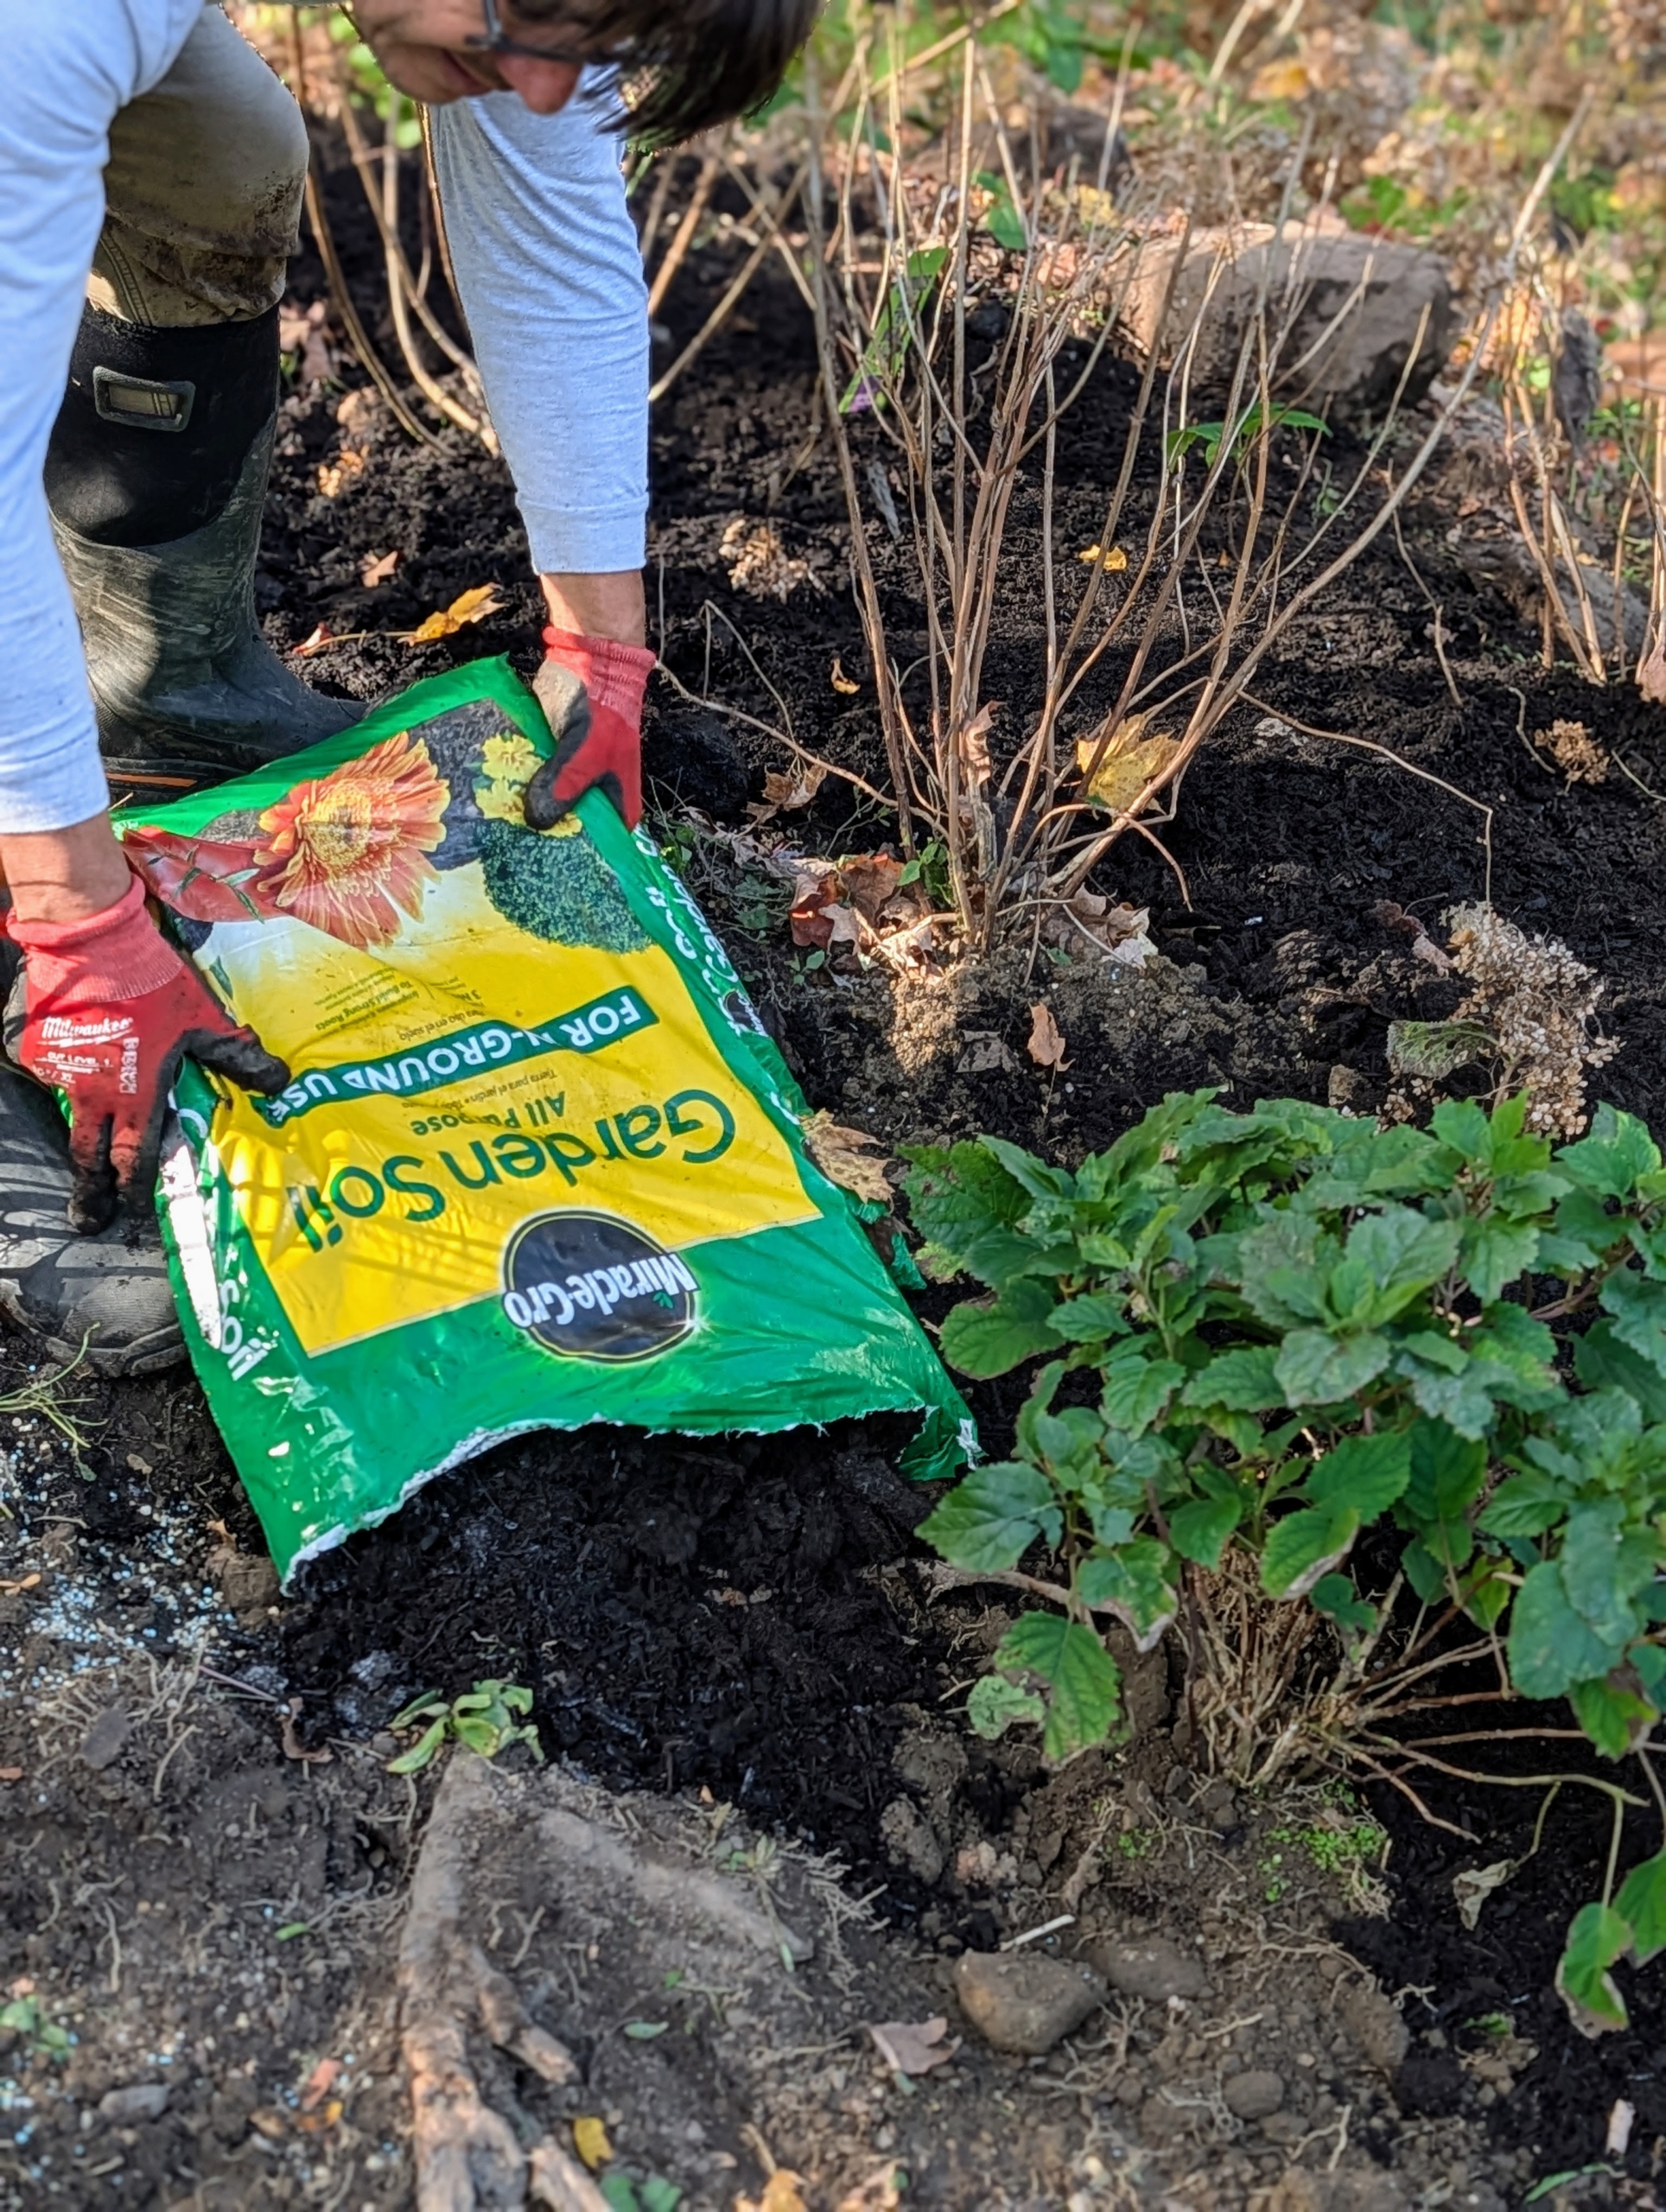
A good all-purpose fertilizer is sprinkled in the hole and on the surrounding soil.
I use Miracle-Gro Shake ‘n Feed All-Purpose plant food, which contains natural ingredients such as kelp, bone meal, earthworm castings, and feather meal.
In the ground, the plant should sit at the same depth it was in the pot.
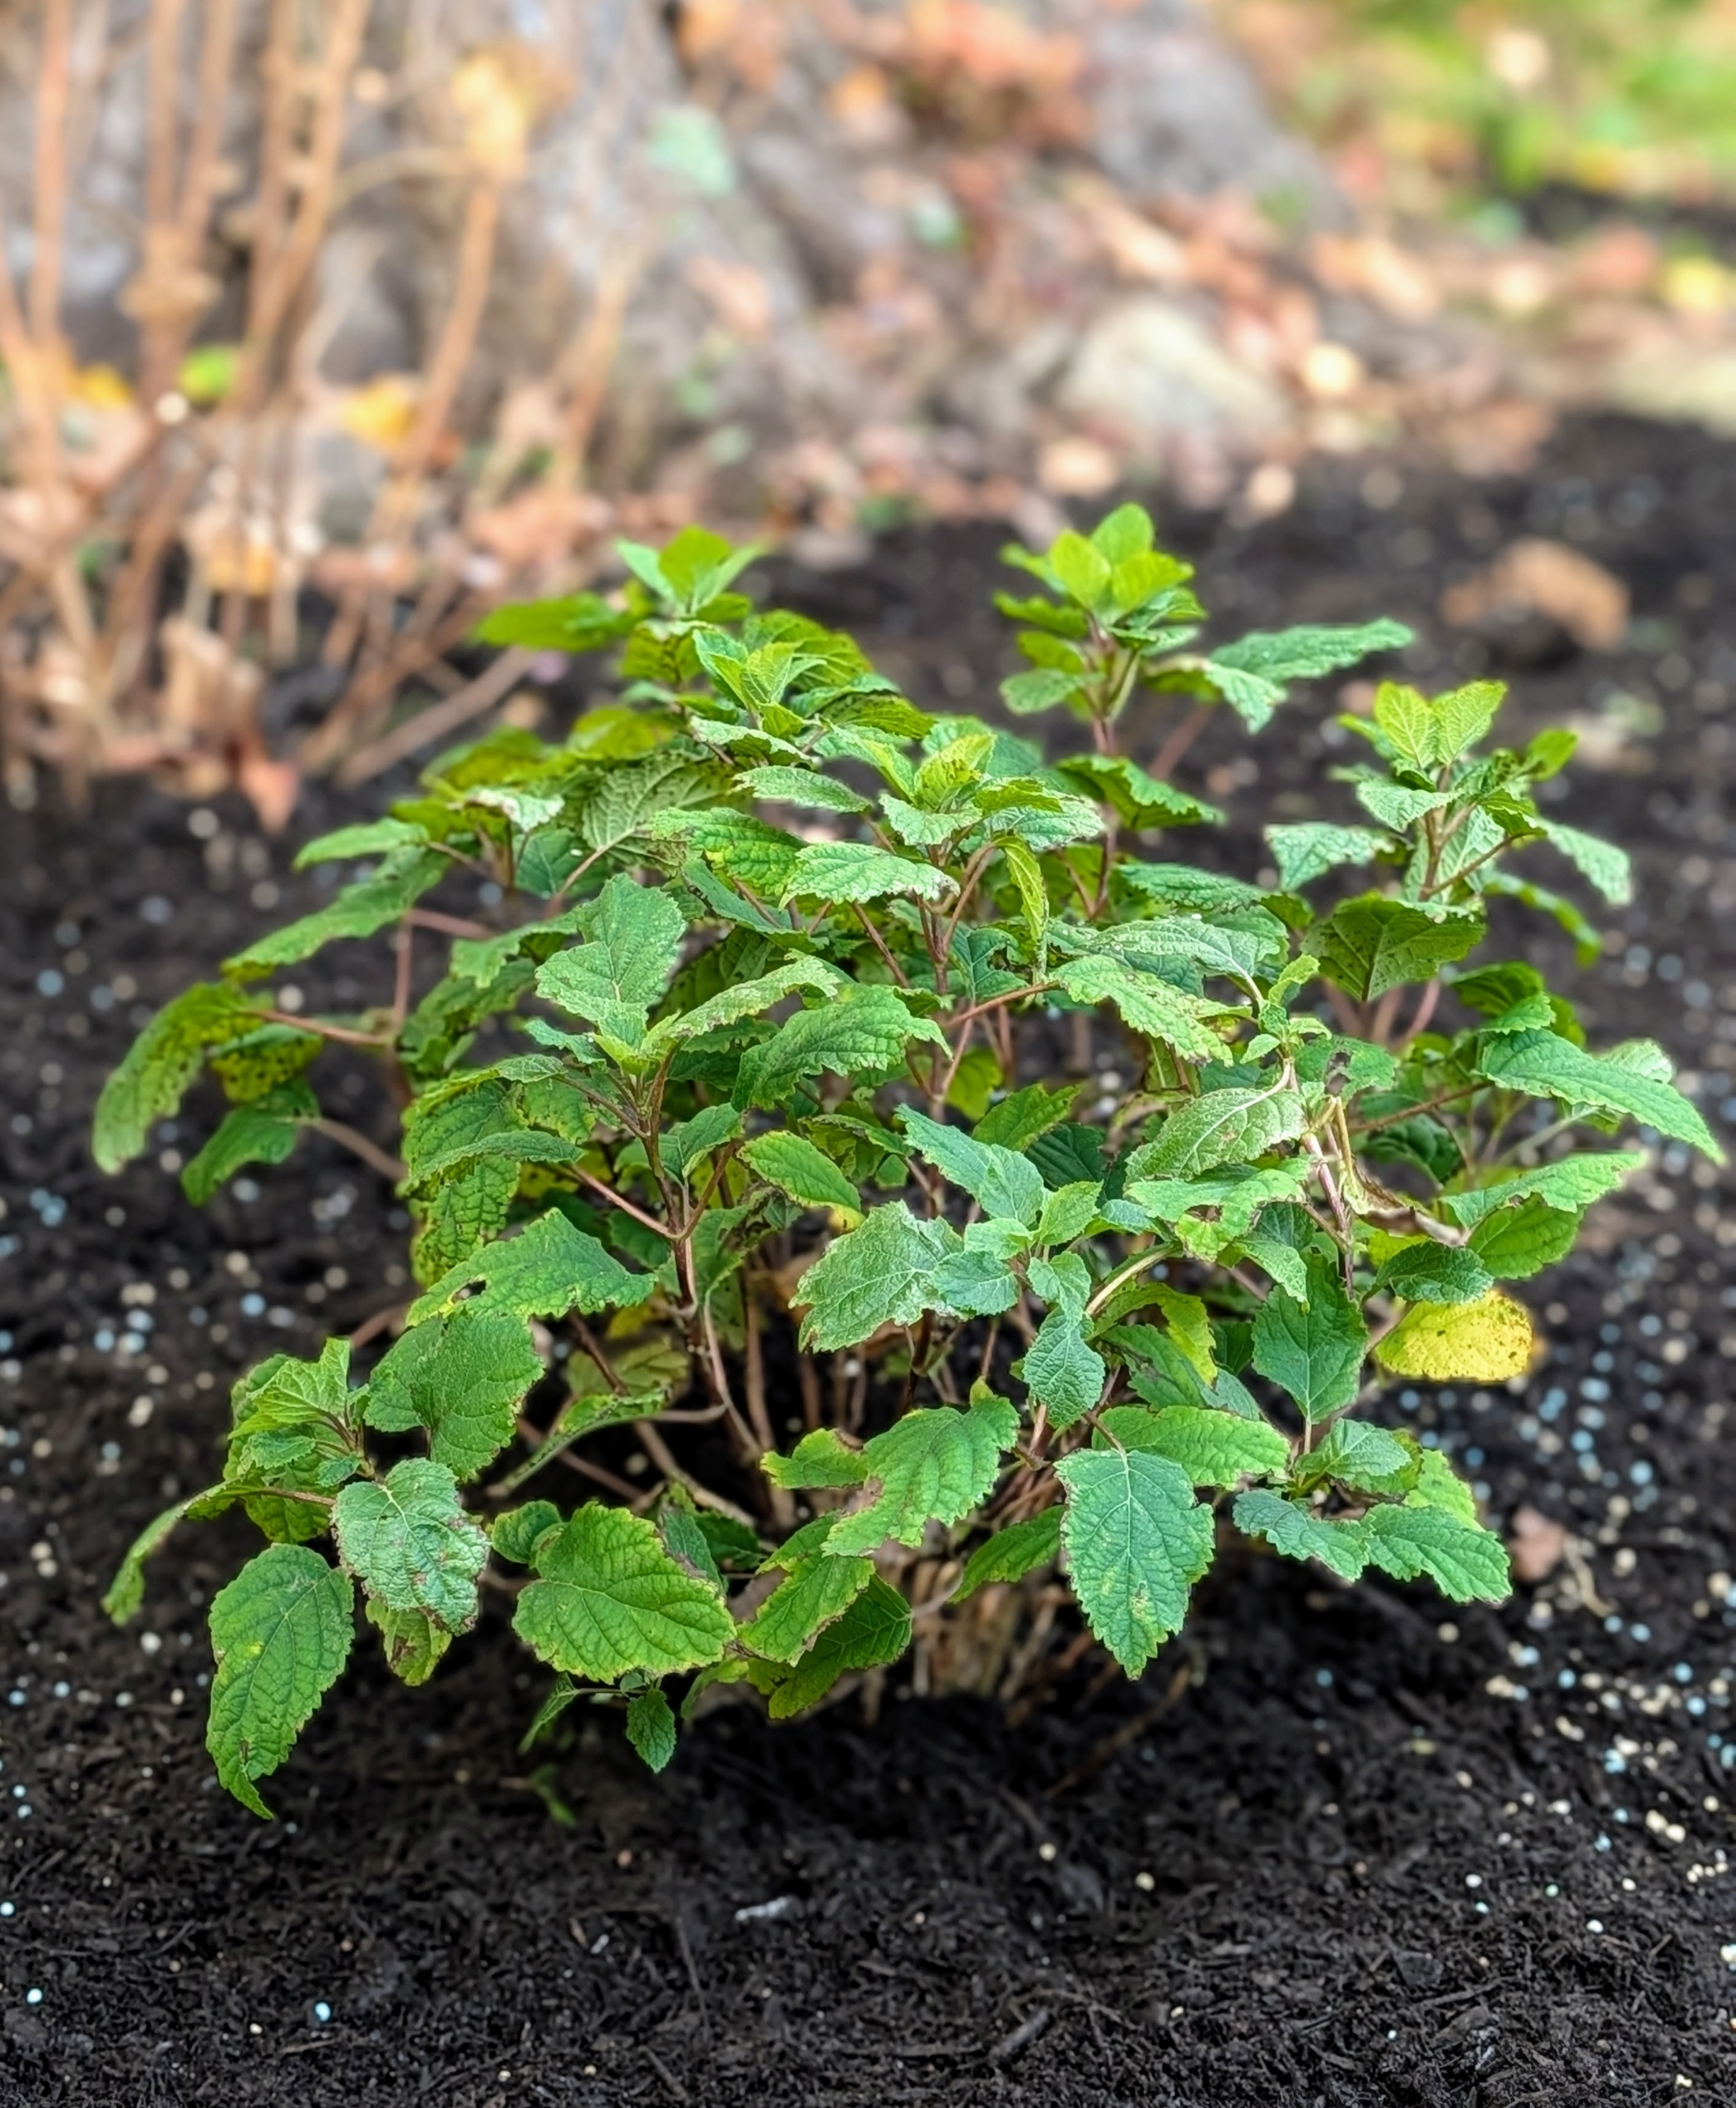
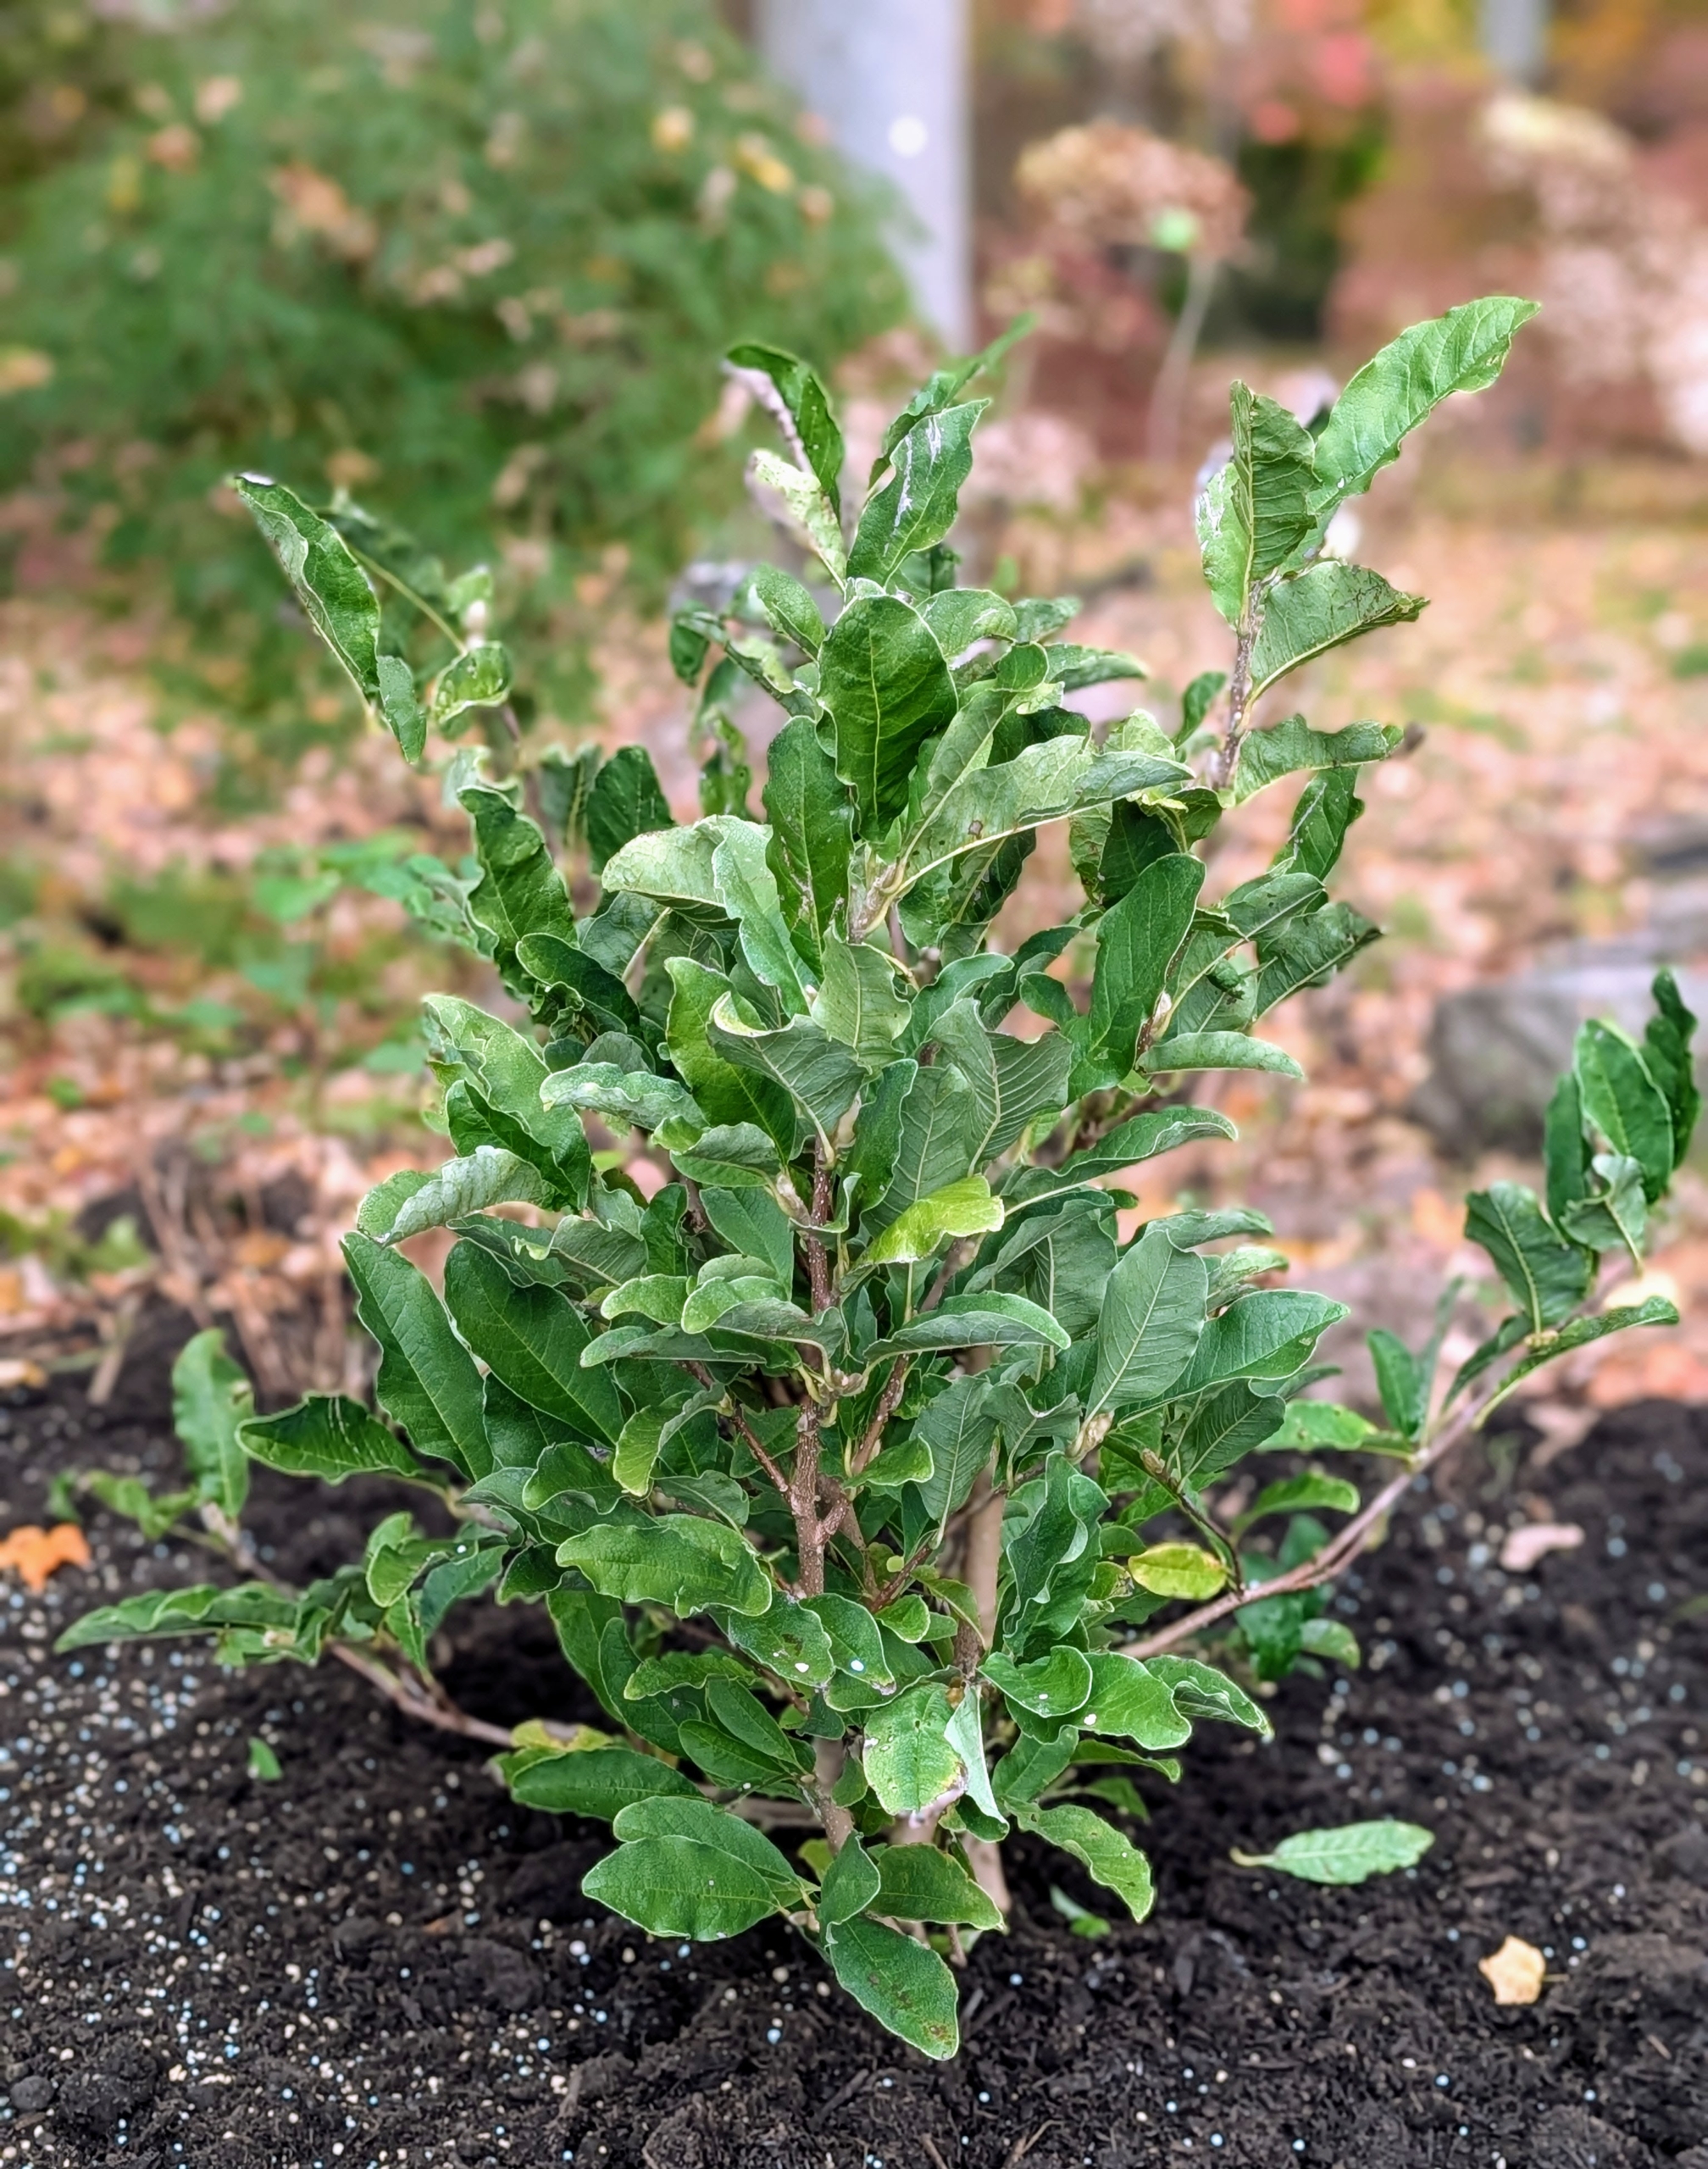
This is FlowerFull® Smooth Hydrangea, which has bold blooms and strong stems that don’t flop in the wind and rain.
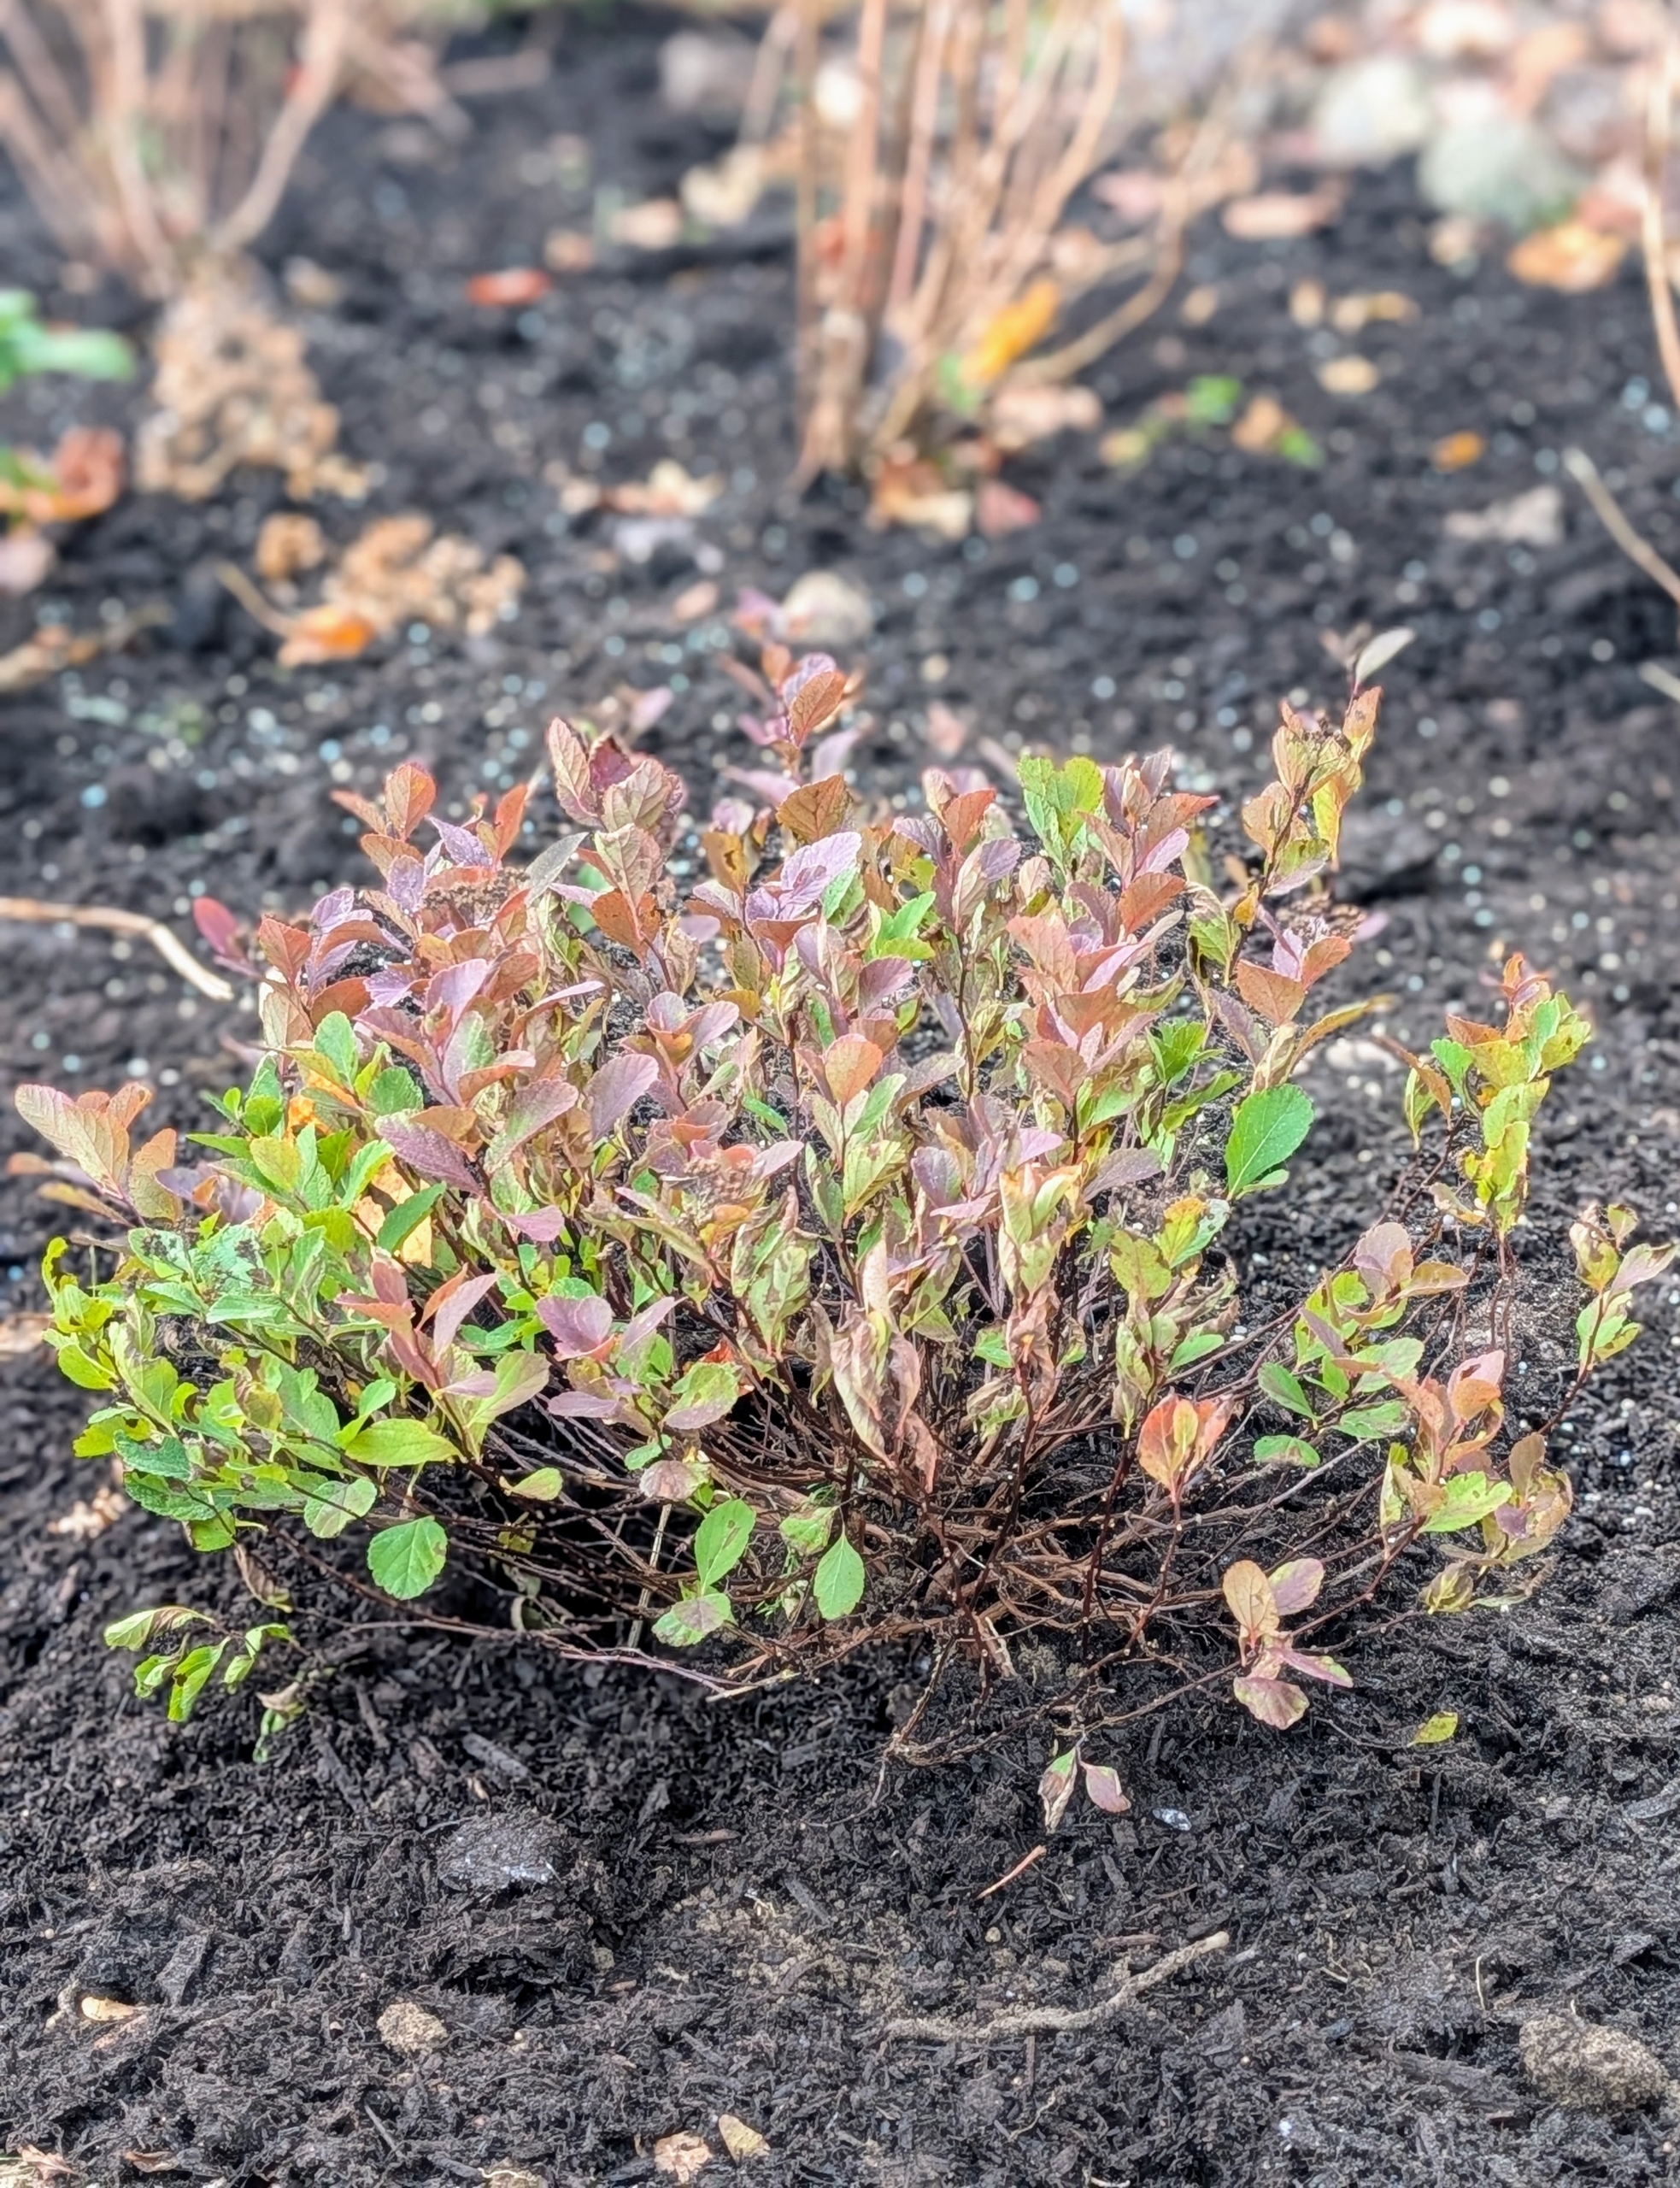
Pink Sparkler™ Birchleaf Spirea is a lovely, rounded shrub that blooms in early summer with large pink flowers.
Centennial Blush Star Magnolia shows off a floral display of fragrant, delicate pink flowers covering the entire plant in spring. Its medium green leaves turn shades of yellow and bronze this time of year.
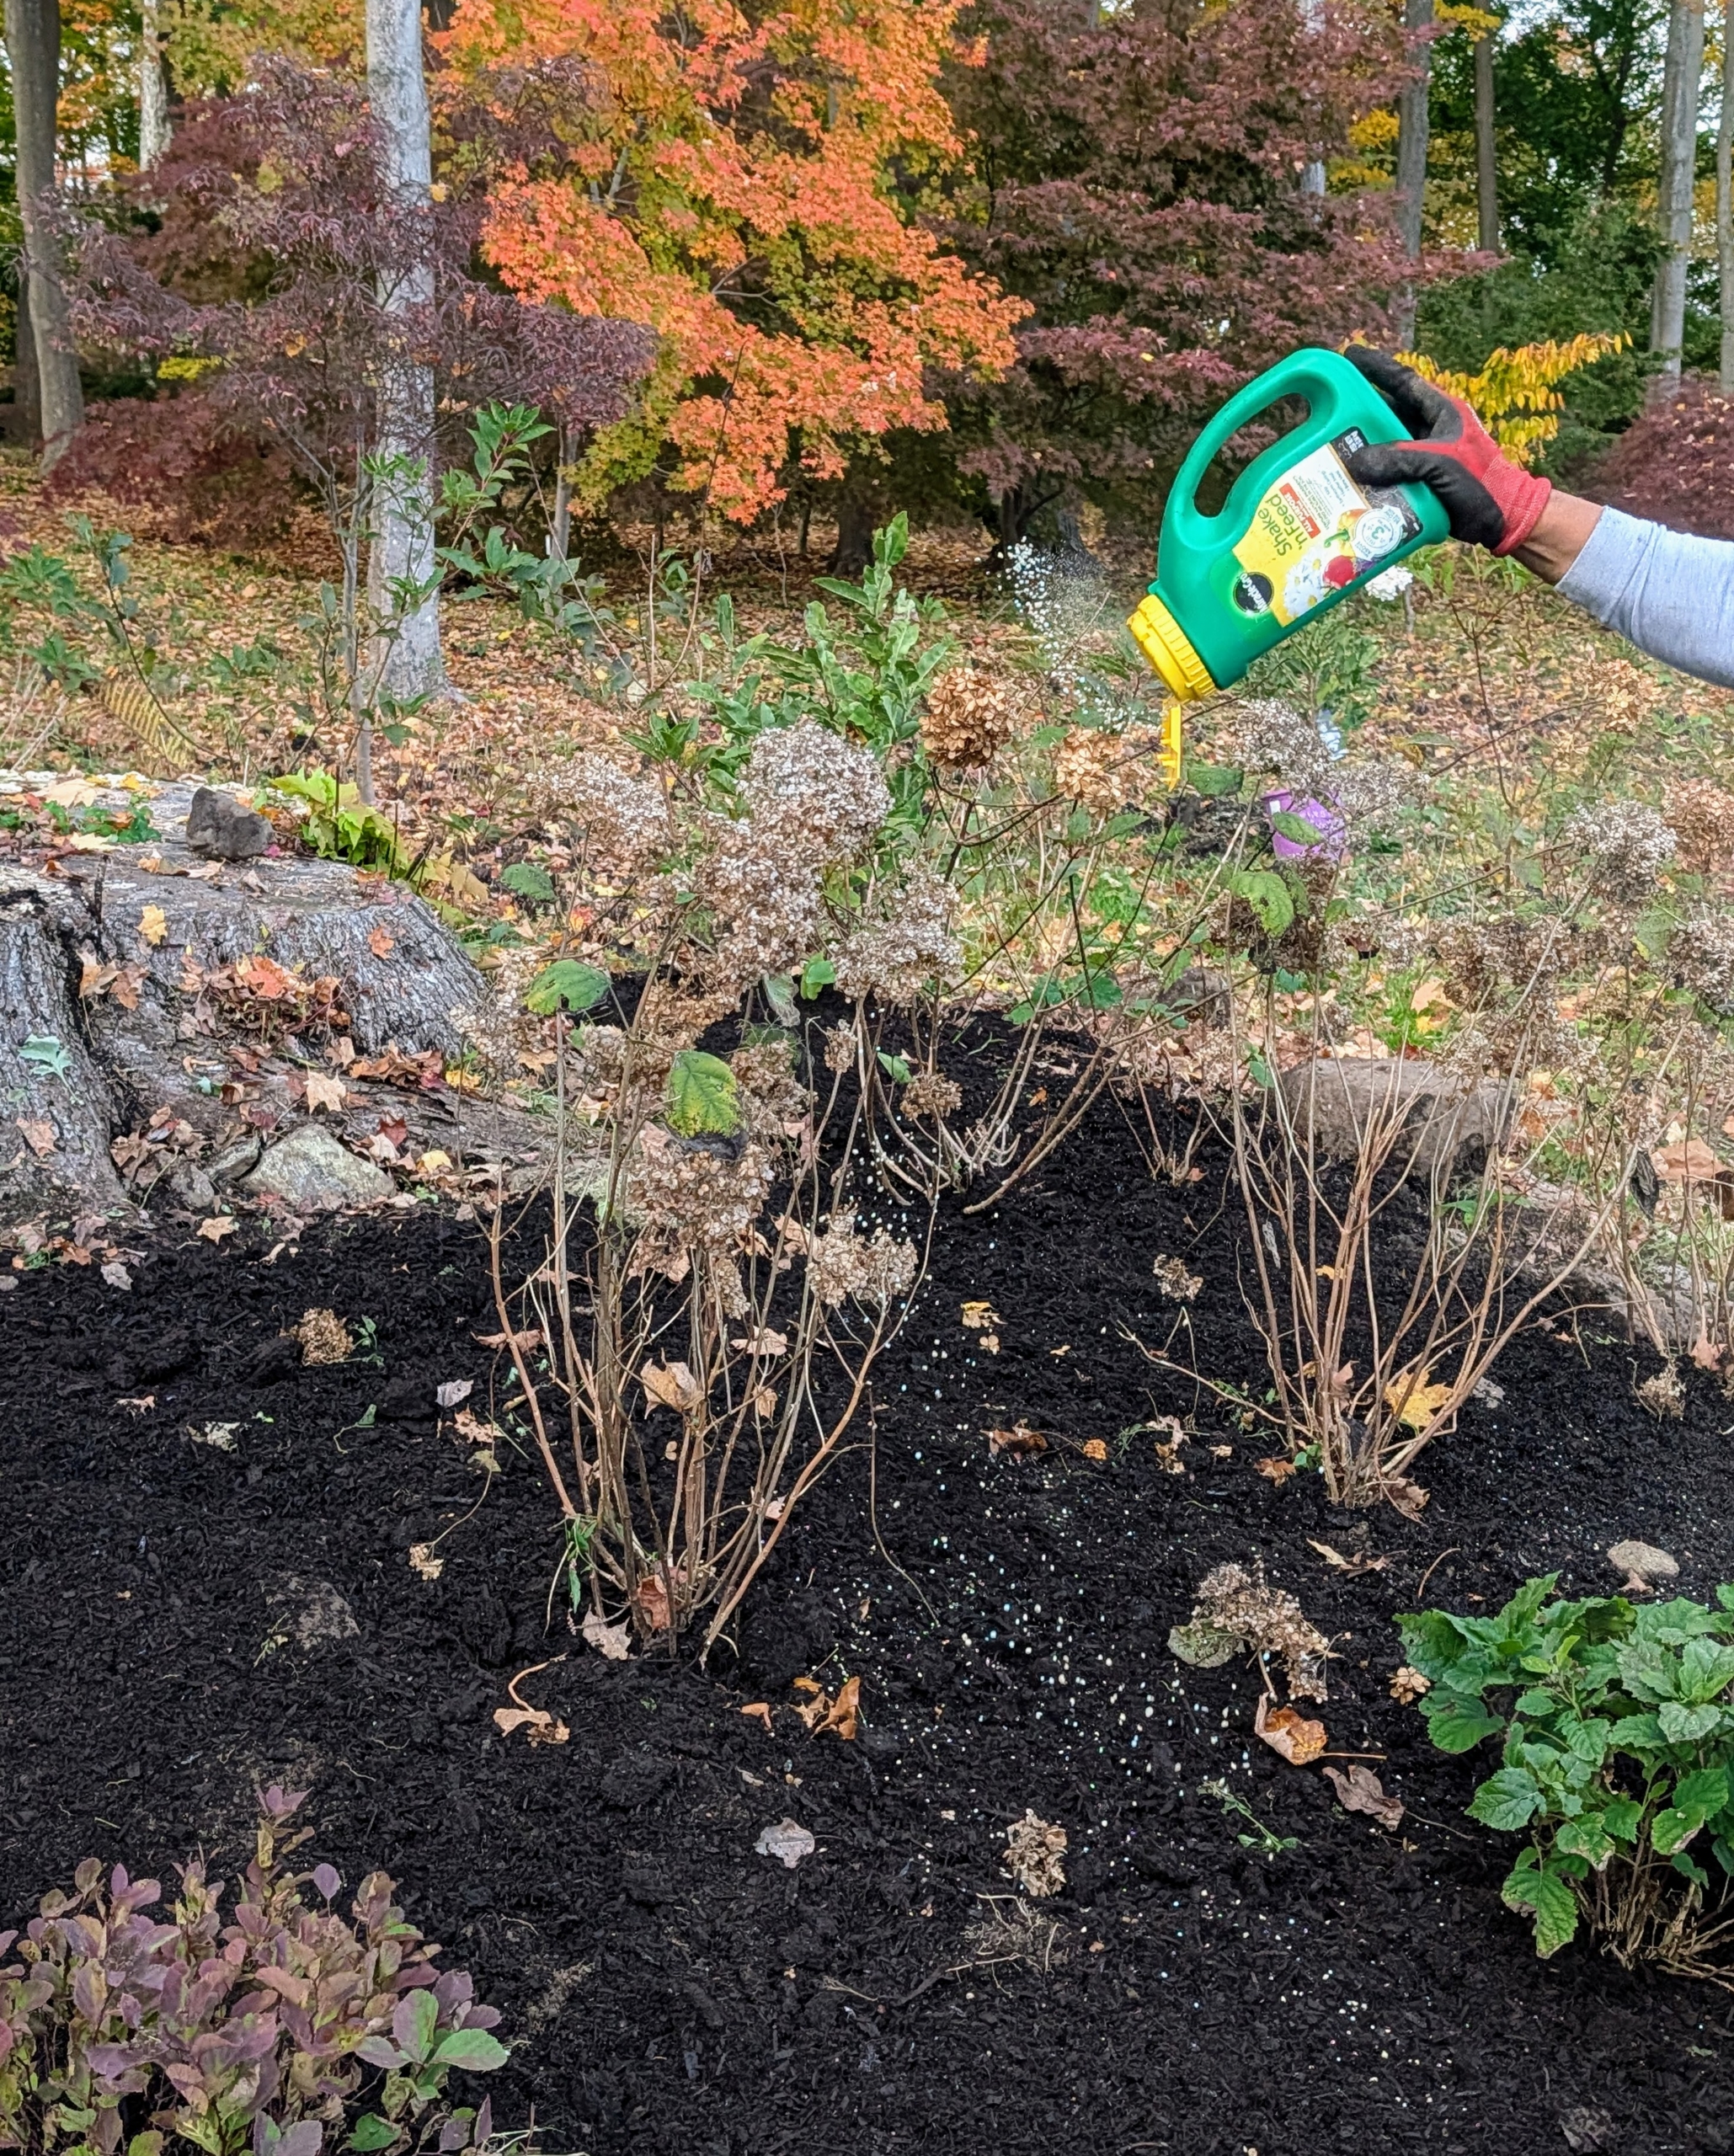
Cesar spreads a fresh layer of Miracle-Gro All-Purpose Garden Soil around the entire bed.
Then he sprinkles more food on top of the garden soil.
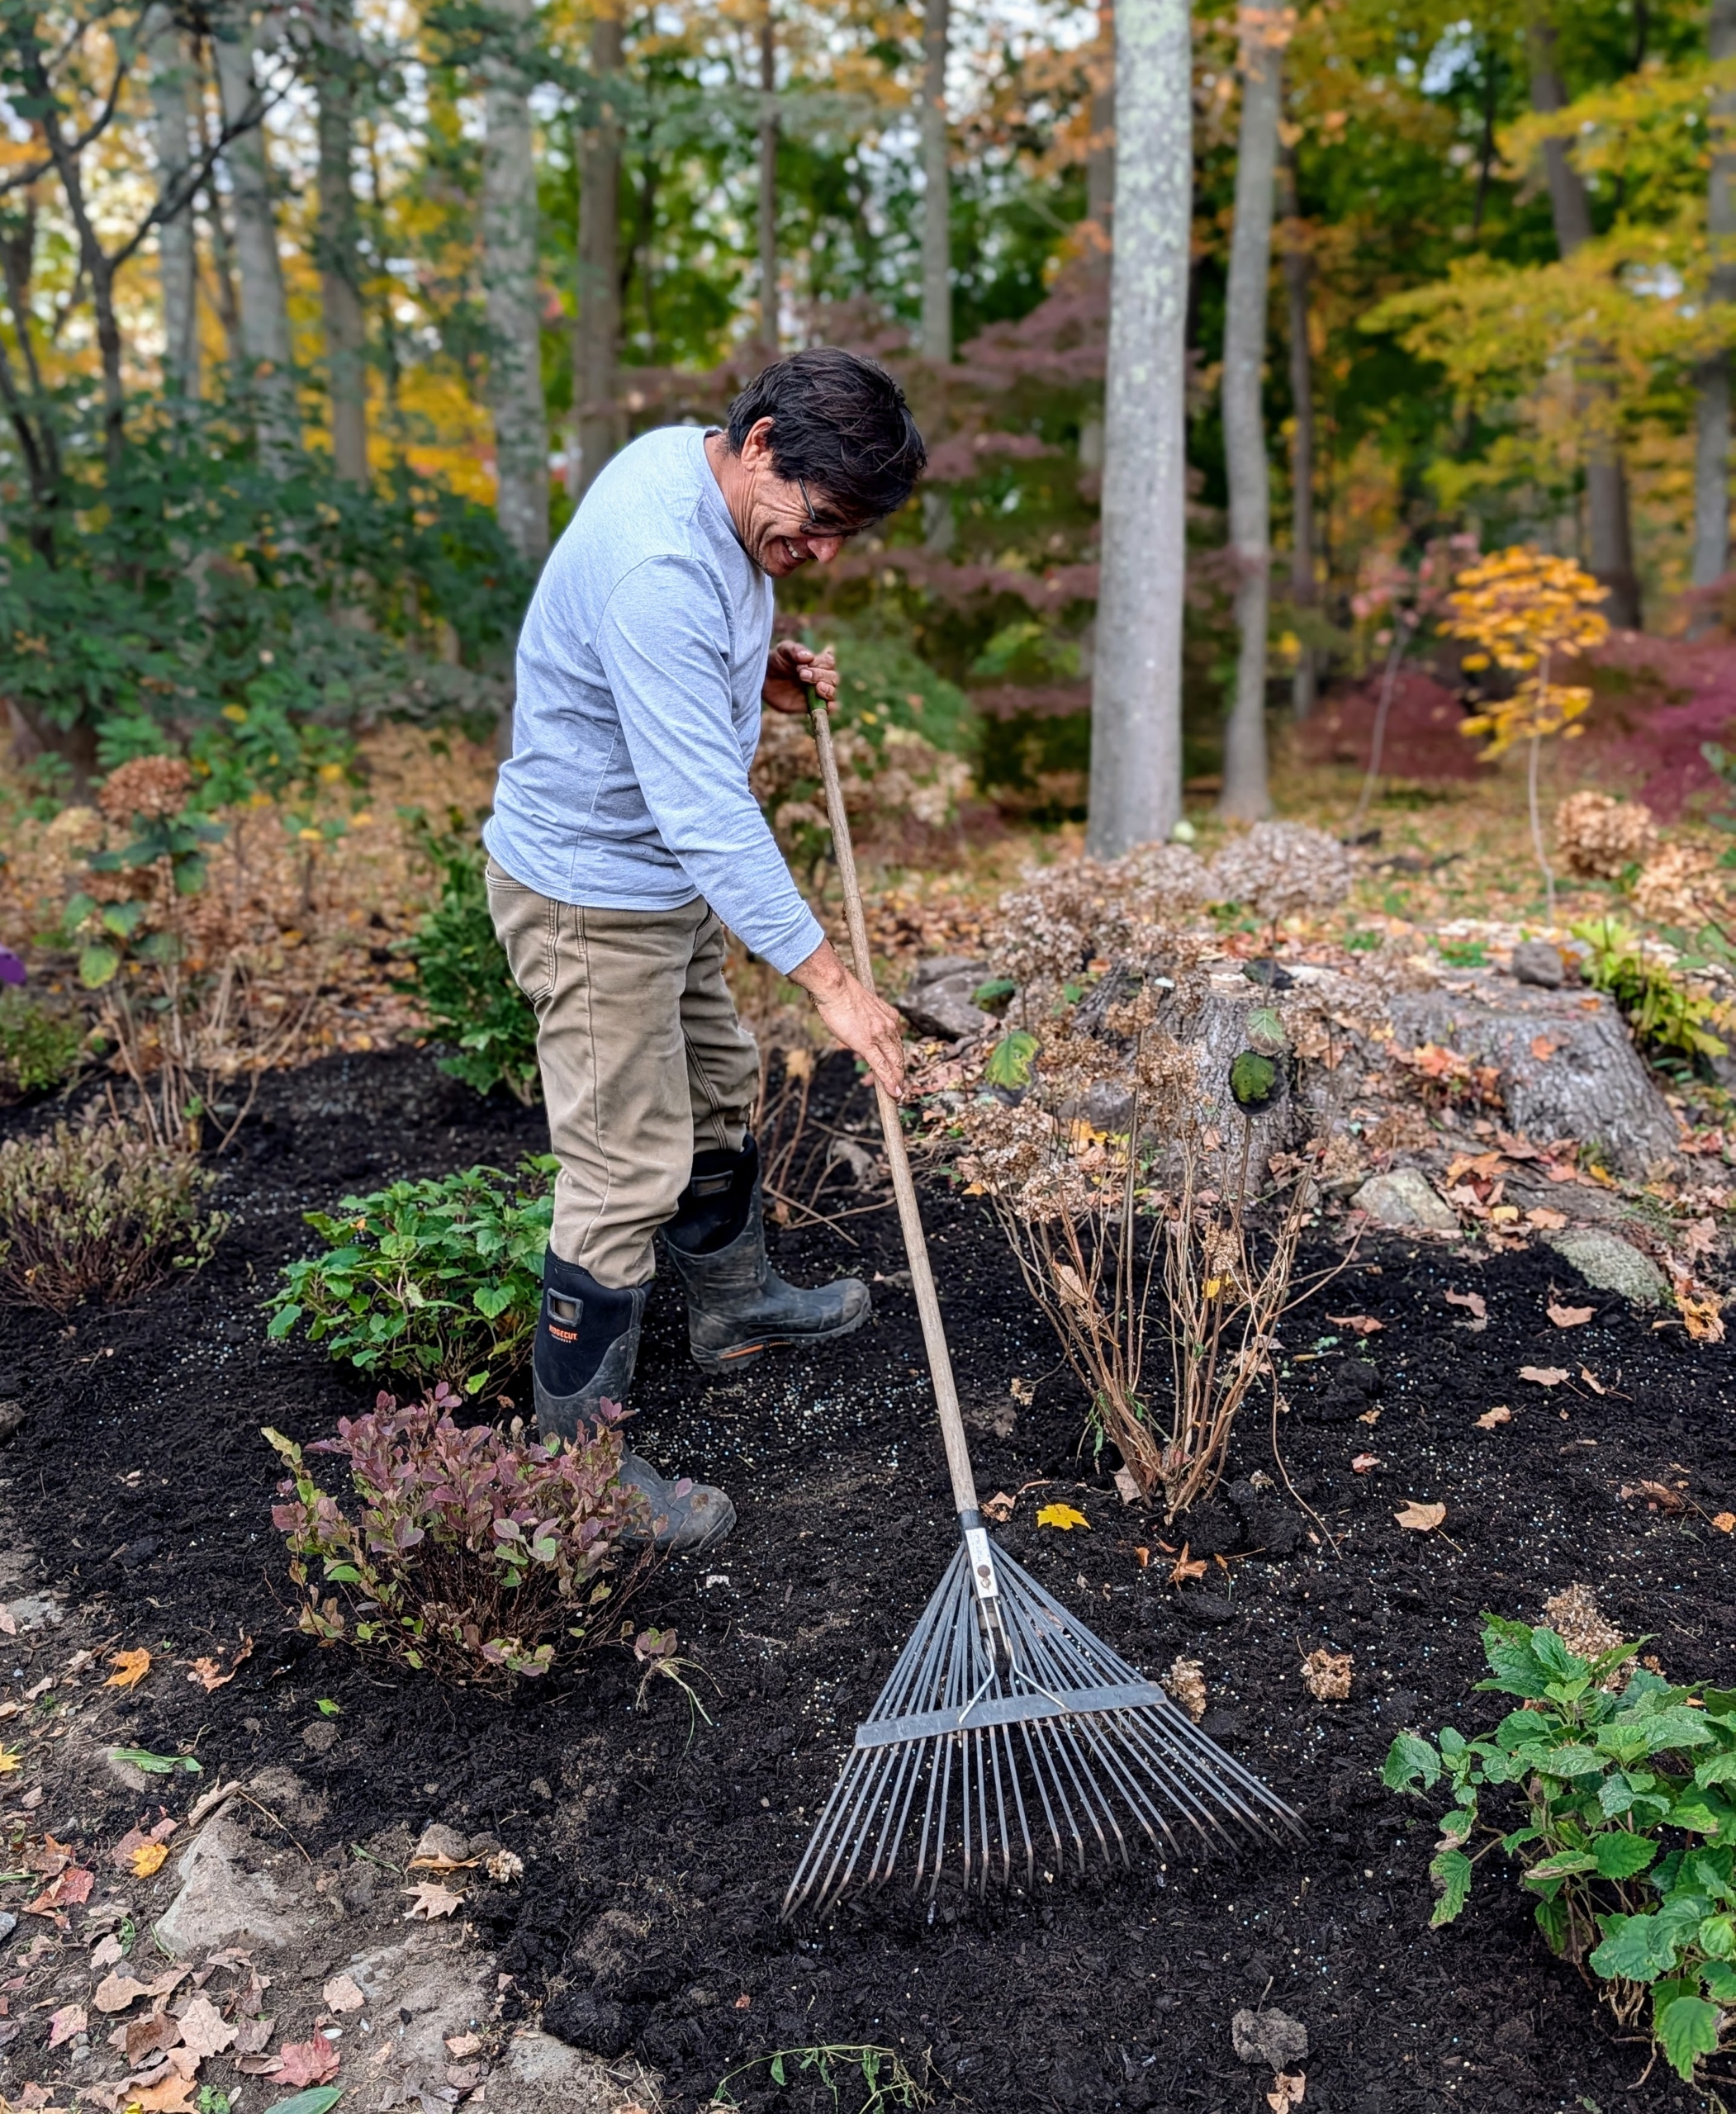
And using a soft garden rake, he rakes everything thoroughly around all the plants, making sure they are all planted properly.
These plants should thrive here and flower next spring.
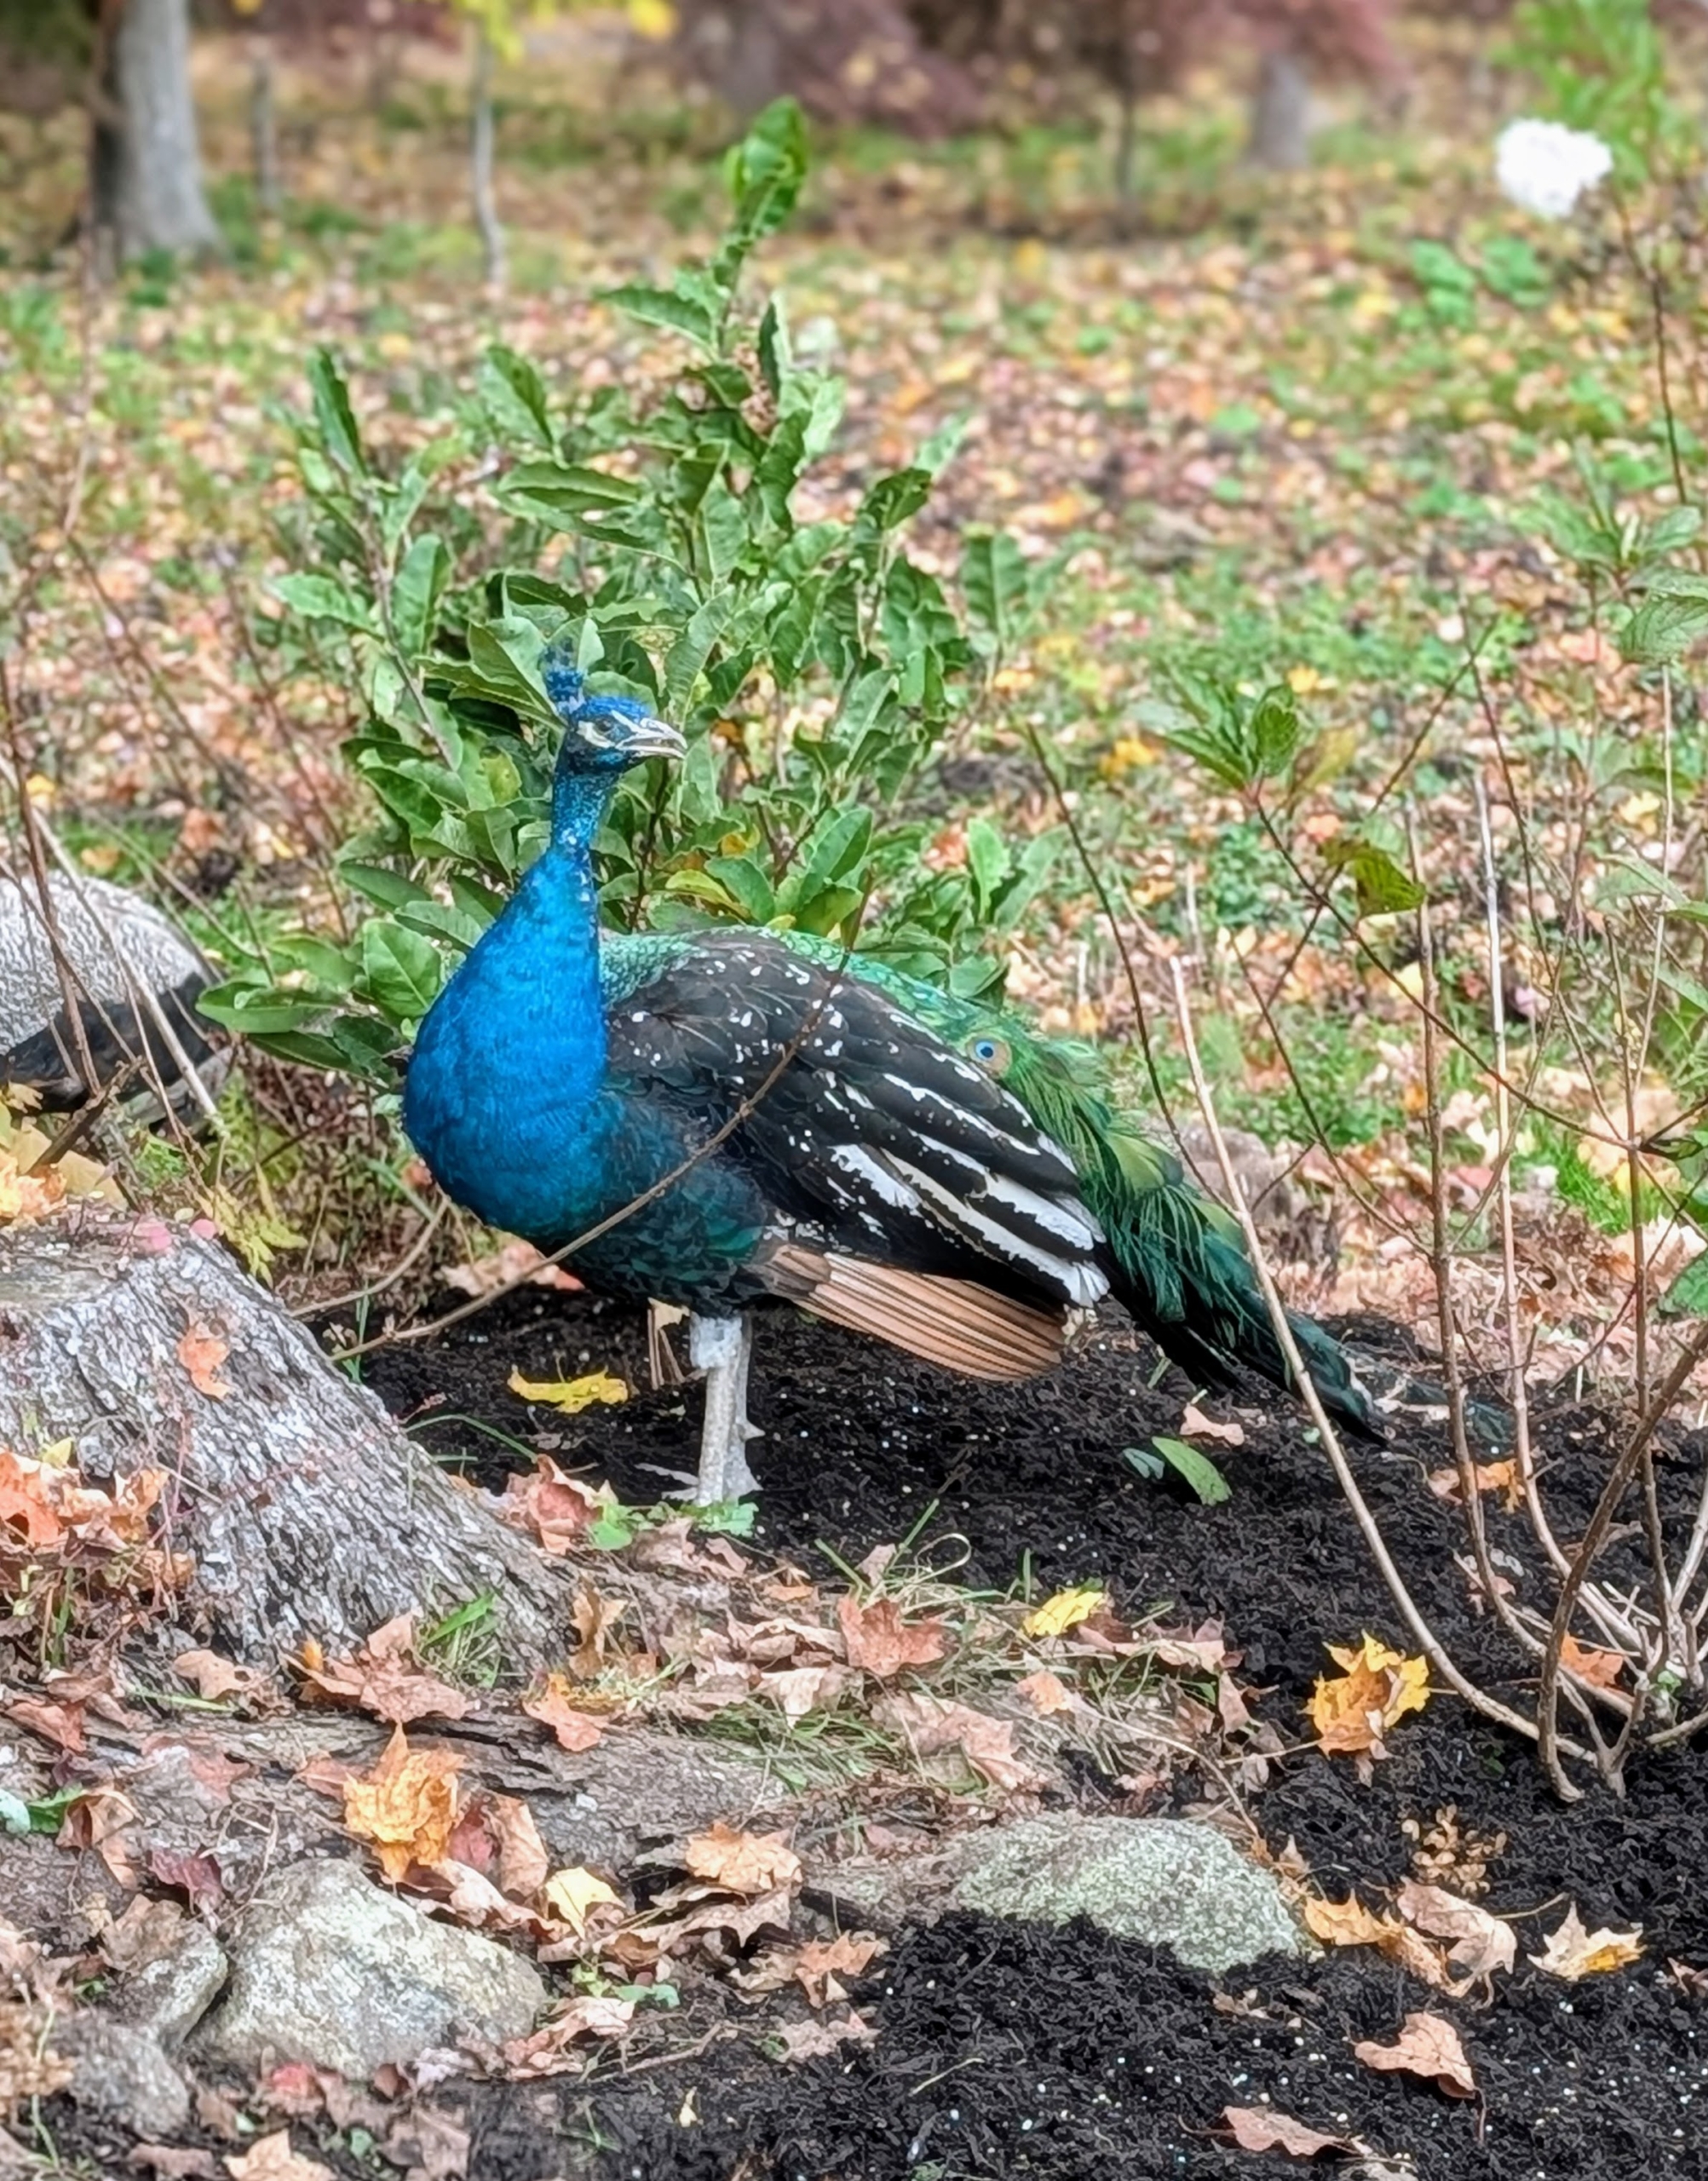
It doesn’t take long before my handsome peacocks find the new bed. I think this “blue boy” approves.
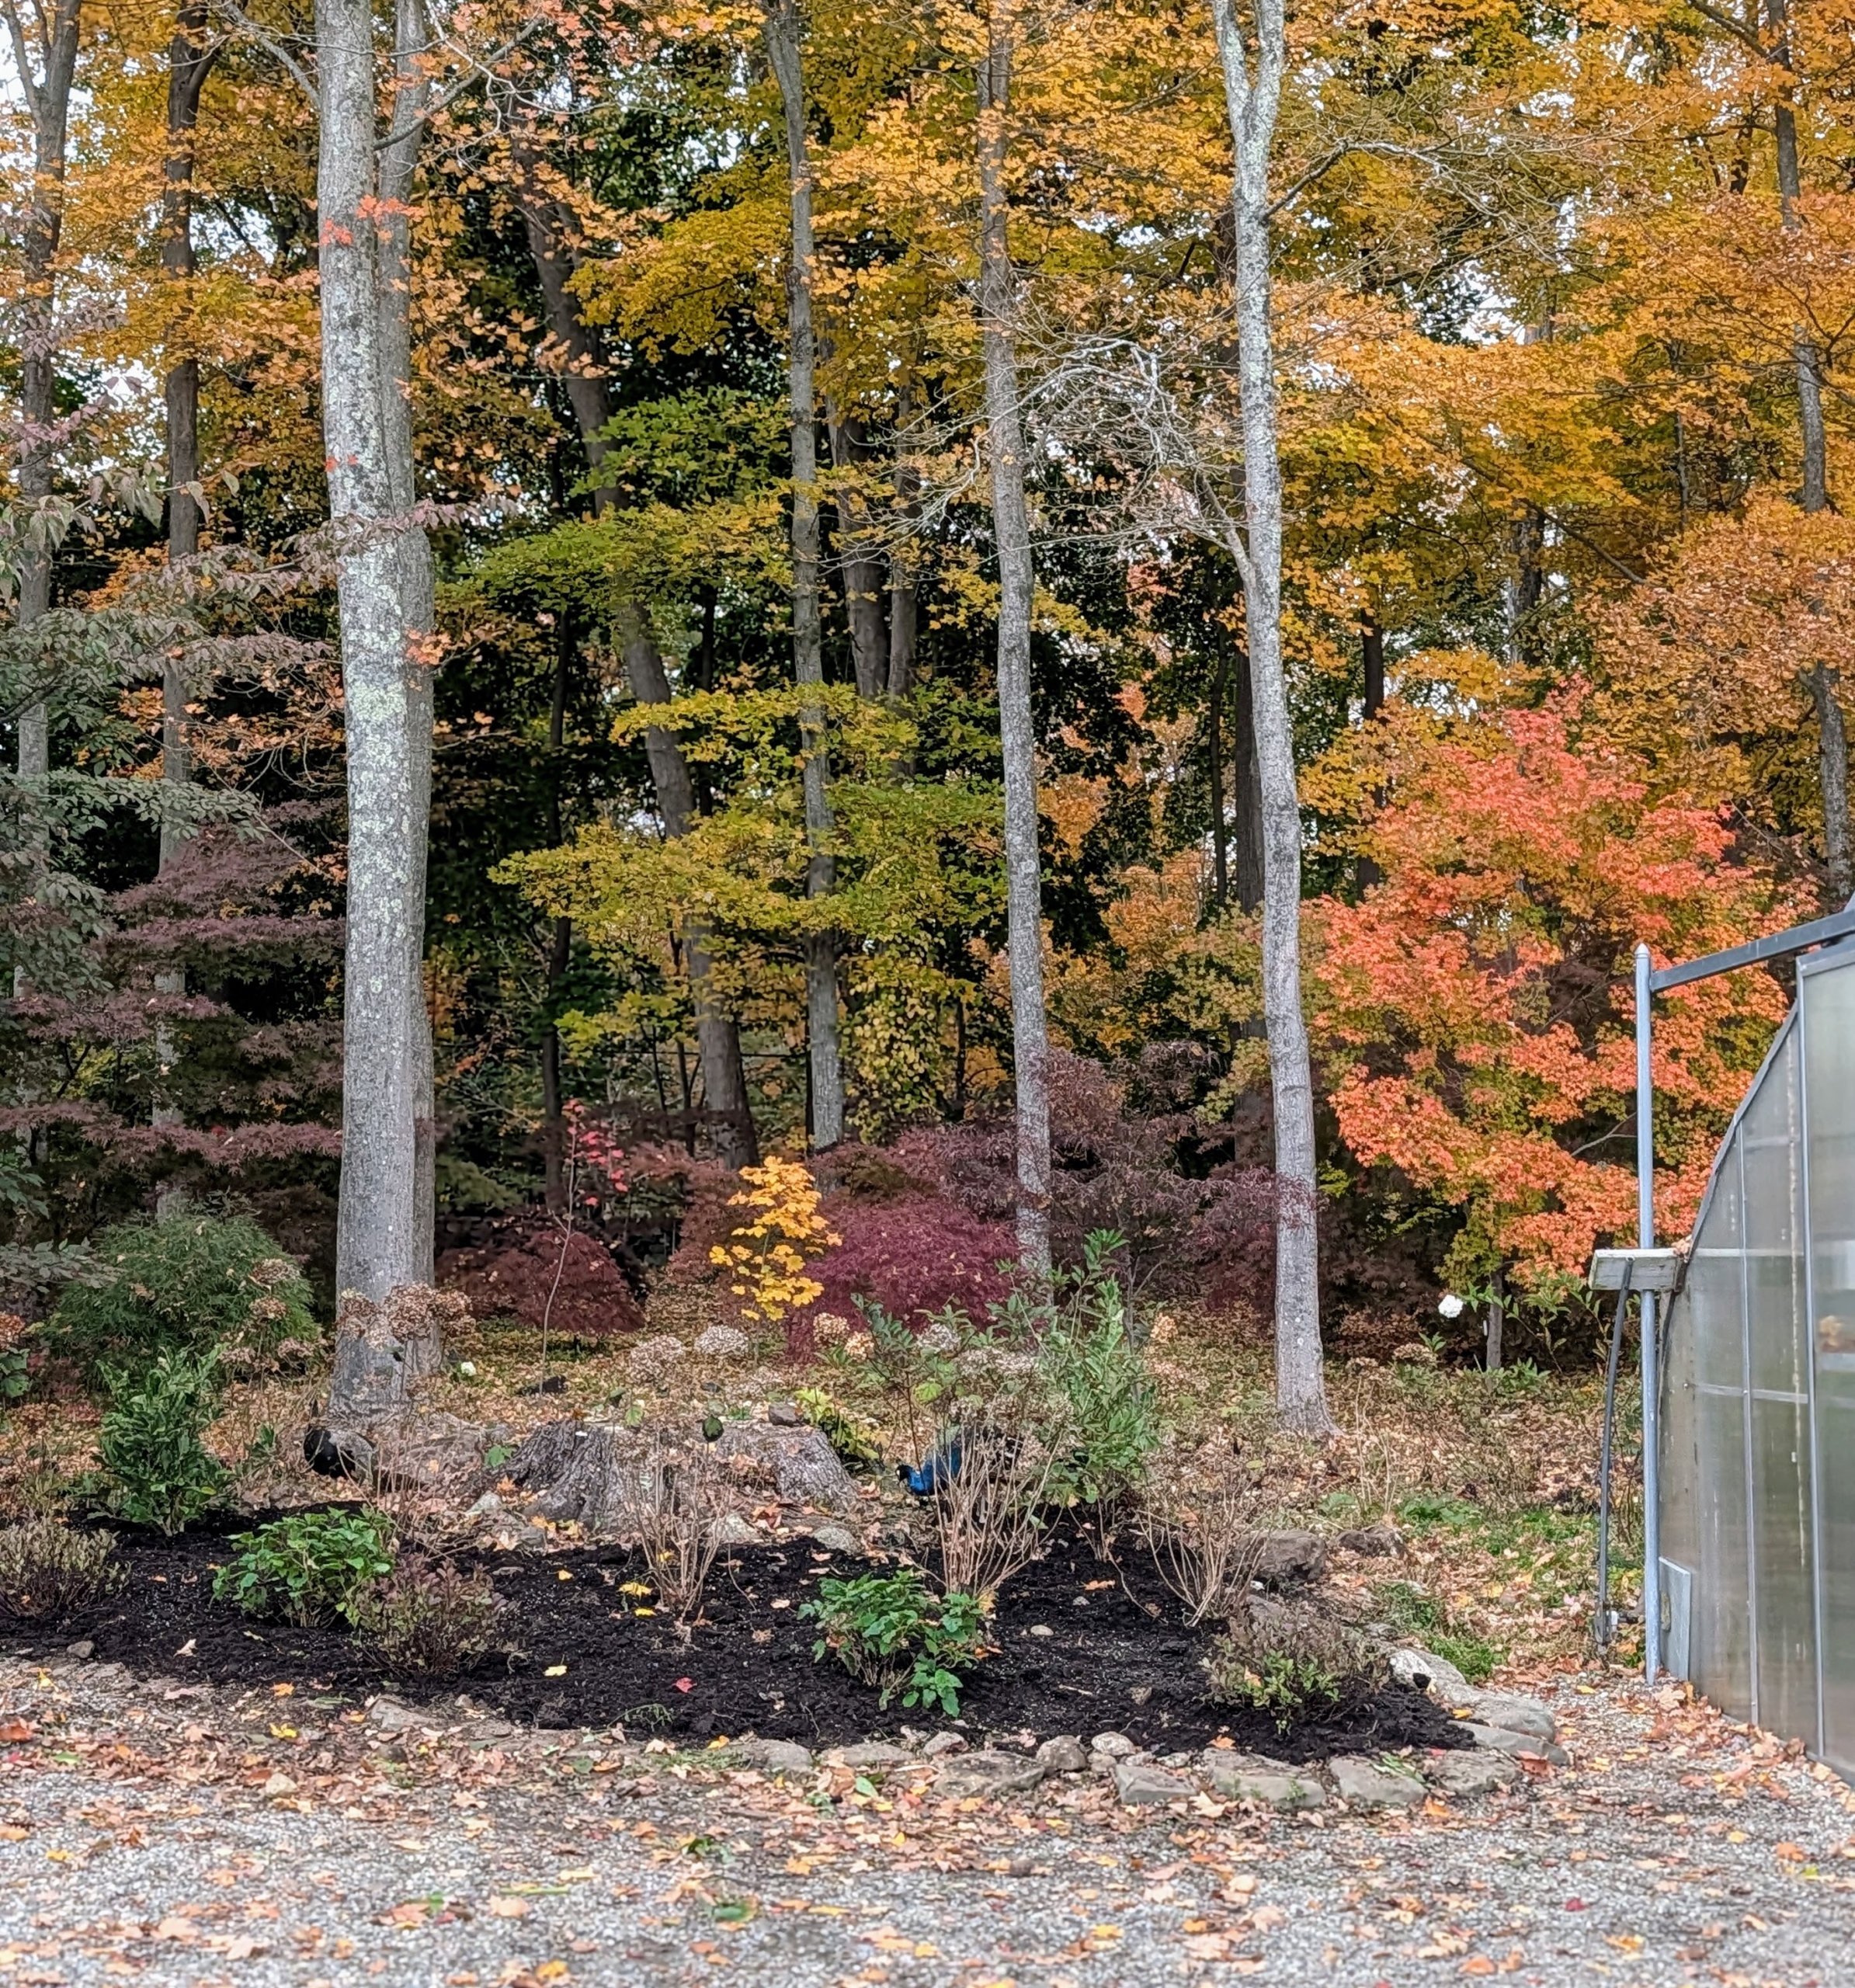
It is the peak of autumn here at the farm, but there is still time to plant in the garden.