Hilma af Klint (1862-1944) was a Swedish painter and mystic whose abstract works are considered some of the first in Western art history. From 1919 to 1920, Hilma completed the 46 botanical illustrations showcasing her interpretations of Sweden's flowers, plants, and trees and their spiritual connections. The display includes Hilma's abstract watercolors of her country's seasons as well as some of her personal notes. My operations manager, Matt Krack, went to see the collection earlier this summer and found it both inspiring and informational.
Here are some of Matt's photos, enjoy.
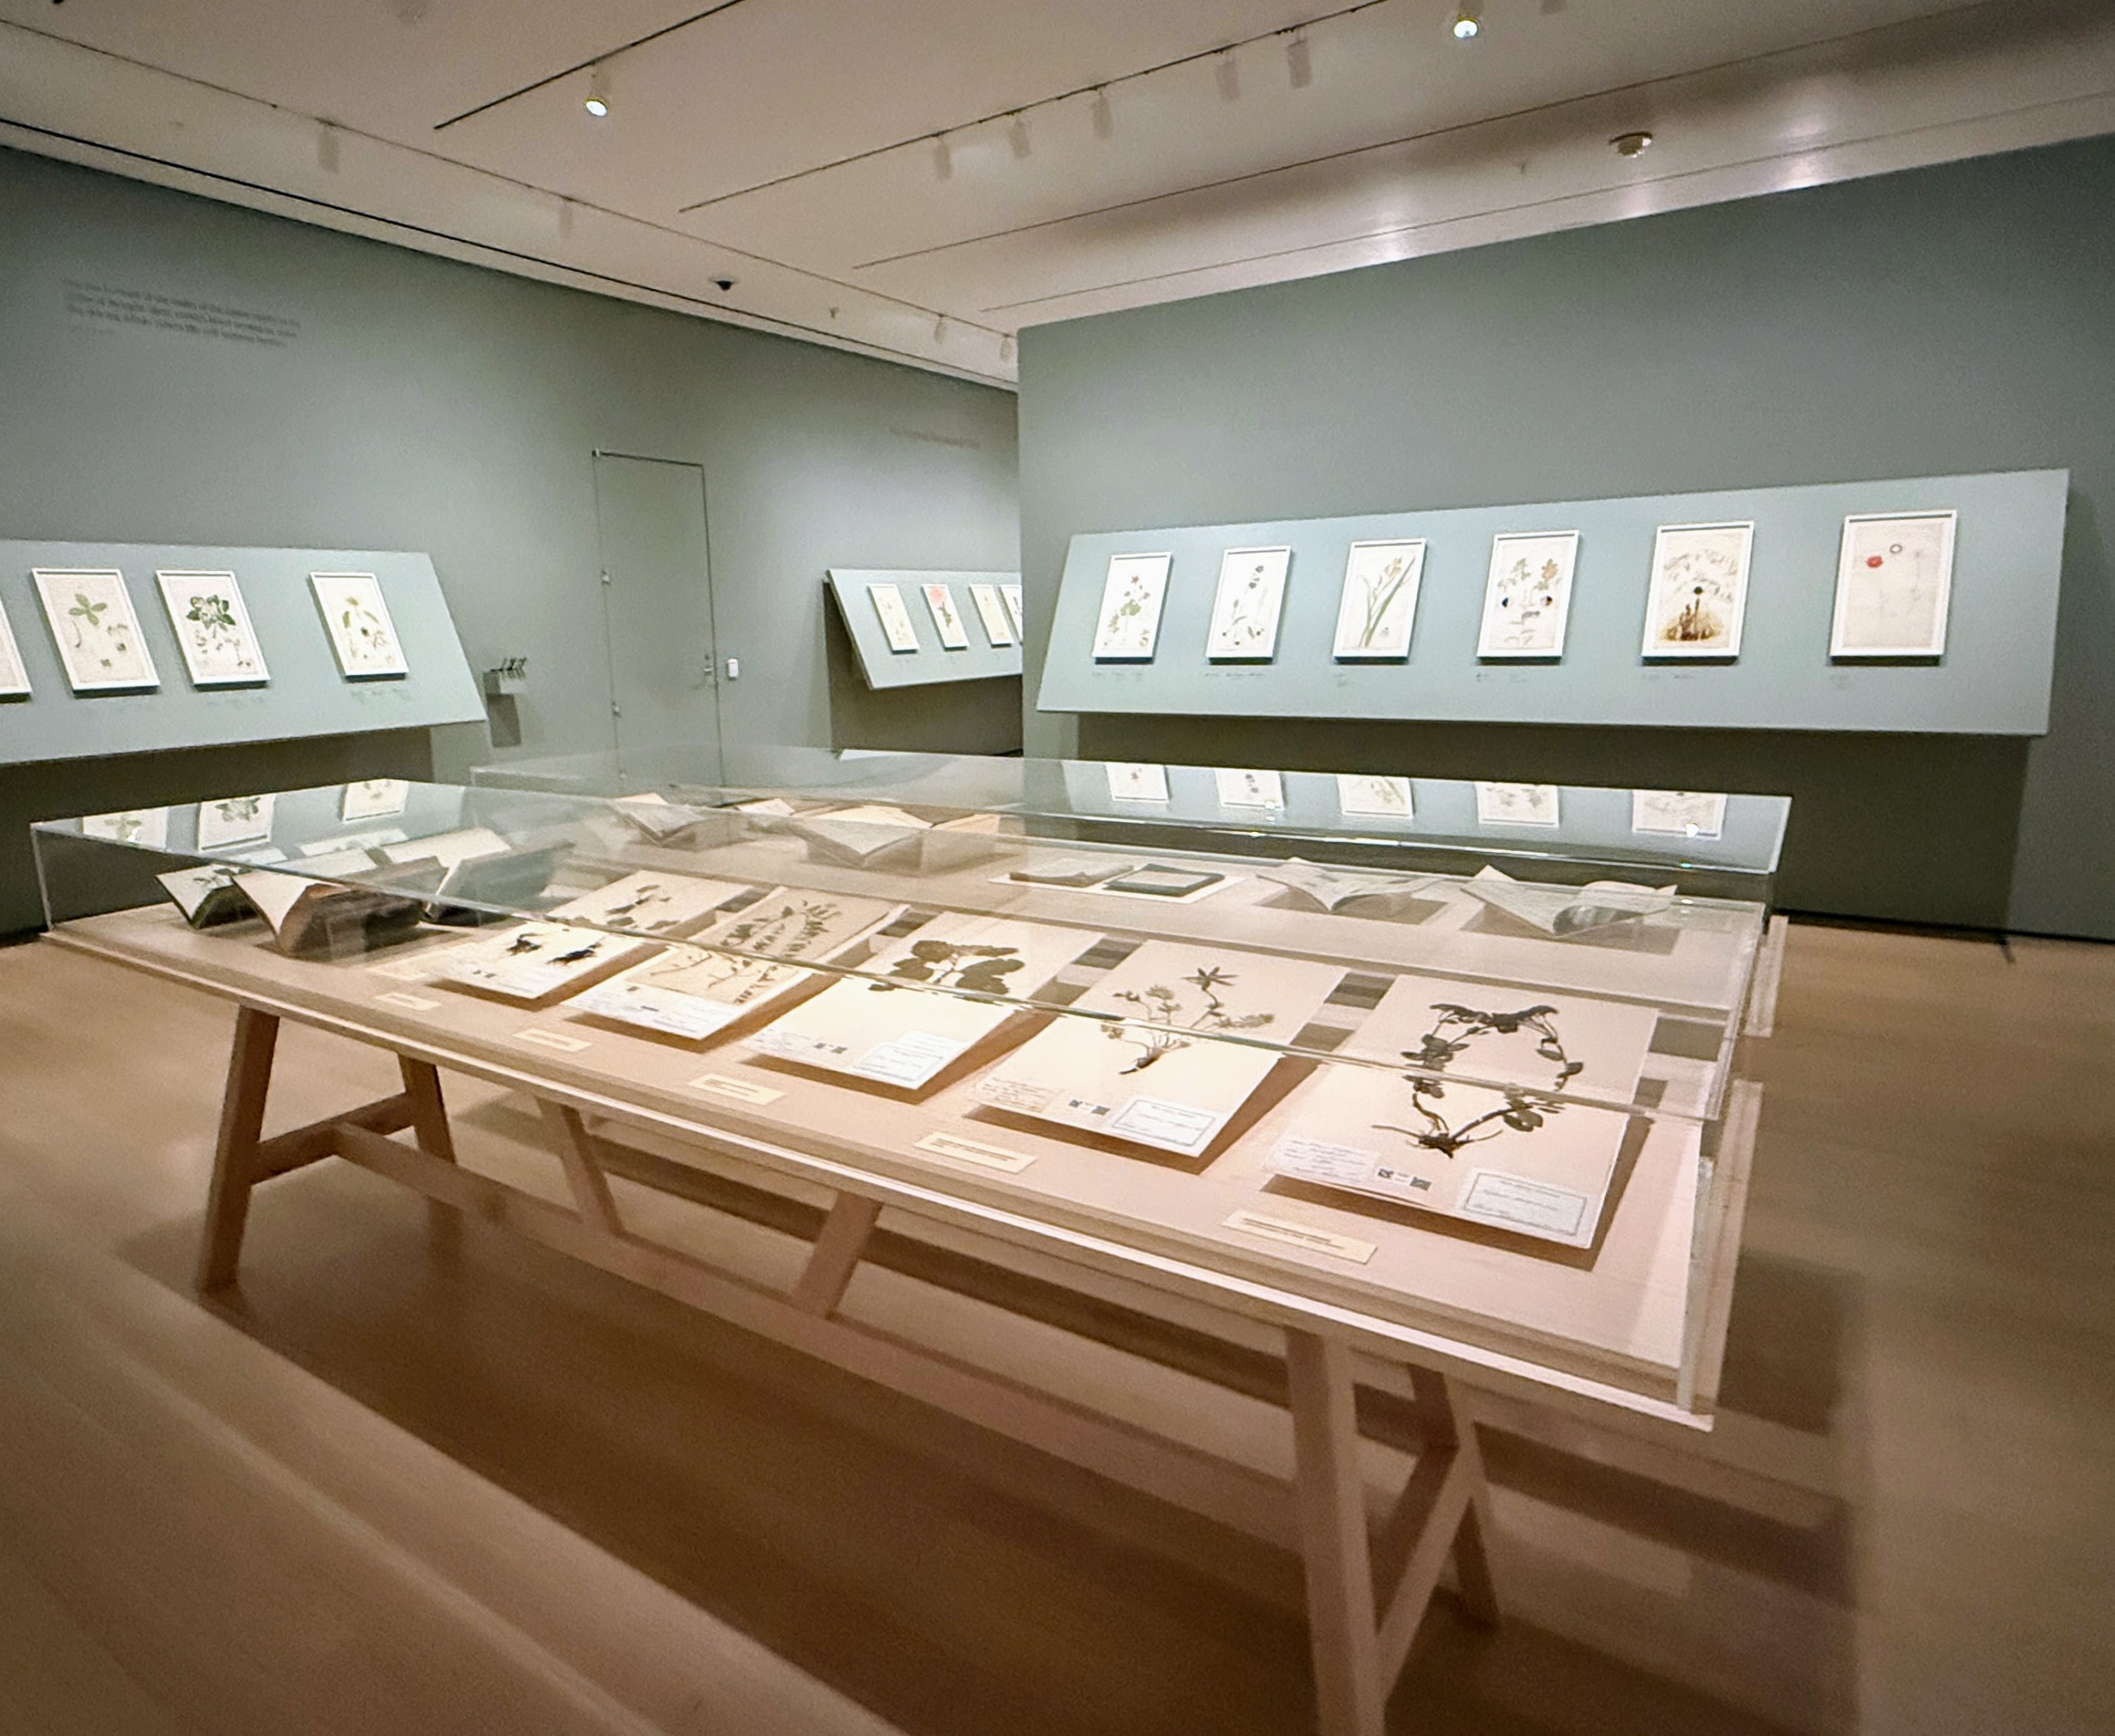
Hilma af Klint studied drawing, portrait painting, and botanical and landscape illustration. Before she died, she requested her work be preserved and not displayed for 20-years after her death. Today, this collection of drawings is on view for the very first time.
The exhibit “Hilma af Klint: What Stands Behind the Flowers” presents her daily observations of nature during the spring and summer months of 1919 and 1920 and how they unveil a deeper look into the human condition.
The portfolio shows Hilma’s connection to nature in everything from sunflowers to tulips and insects, and even the foliage of trees. She shows many of the elements still observed in nature today. In fact, I grow many of the flowers and trees seen in these pieces.
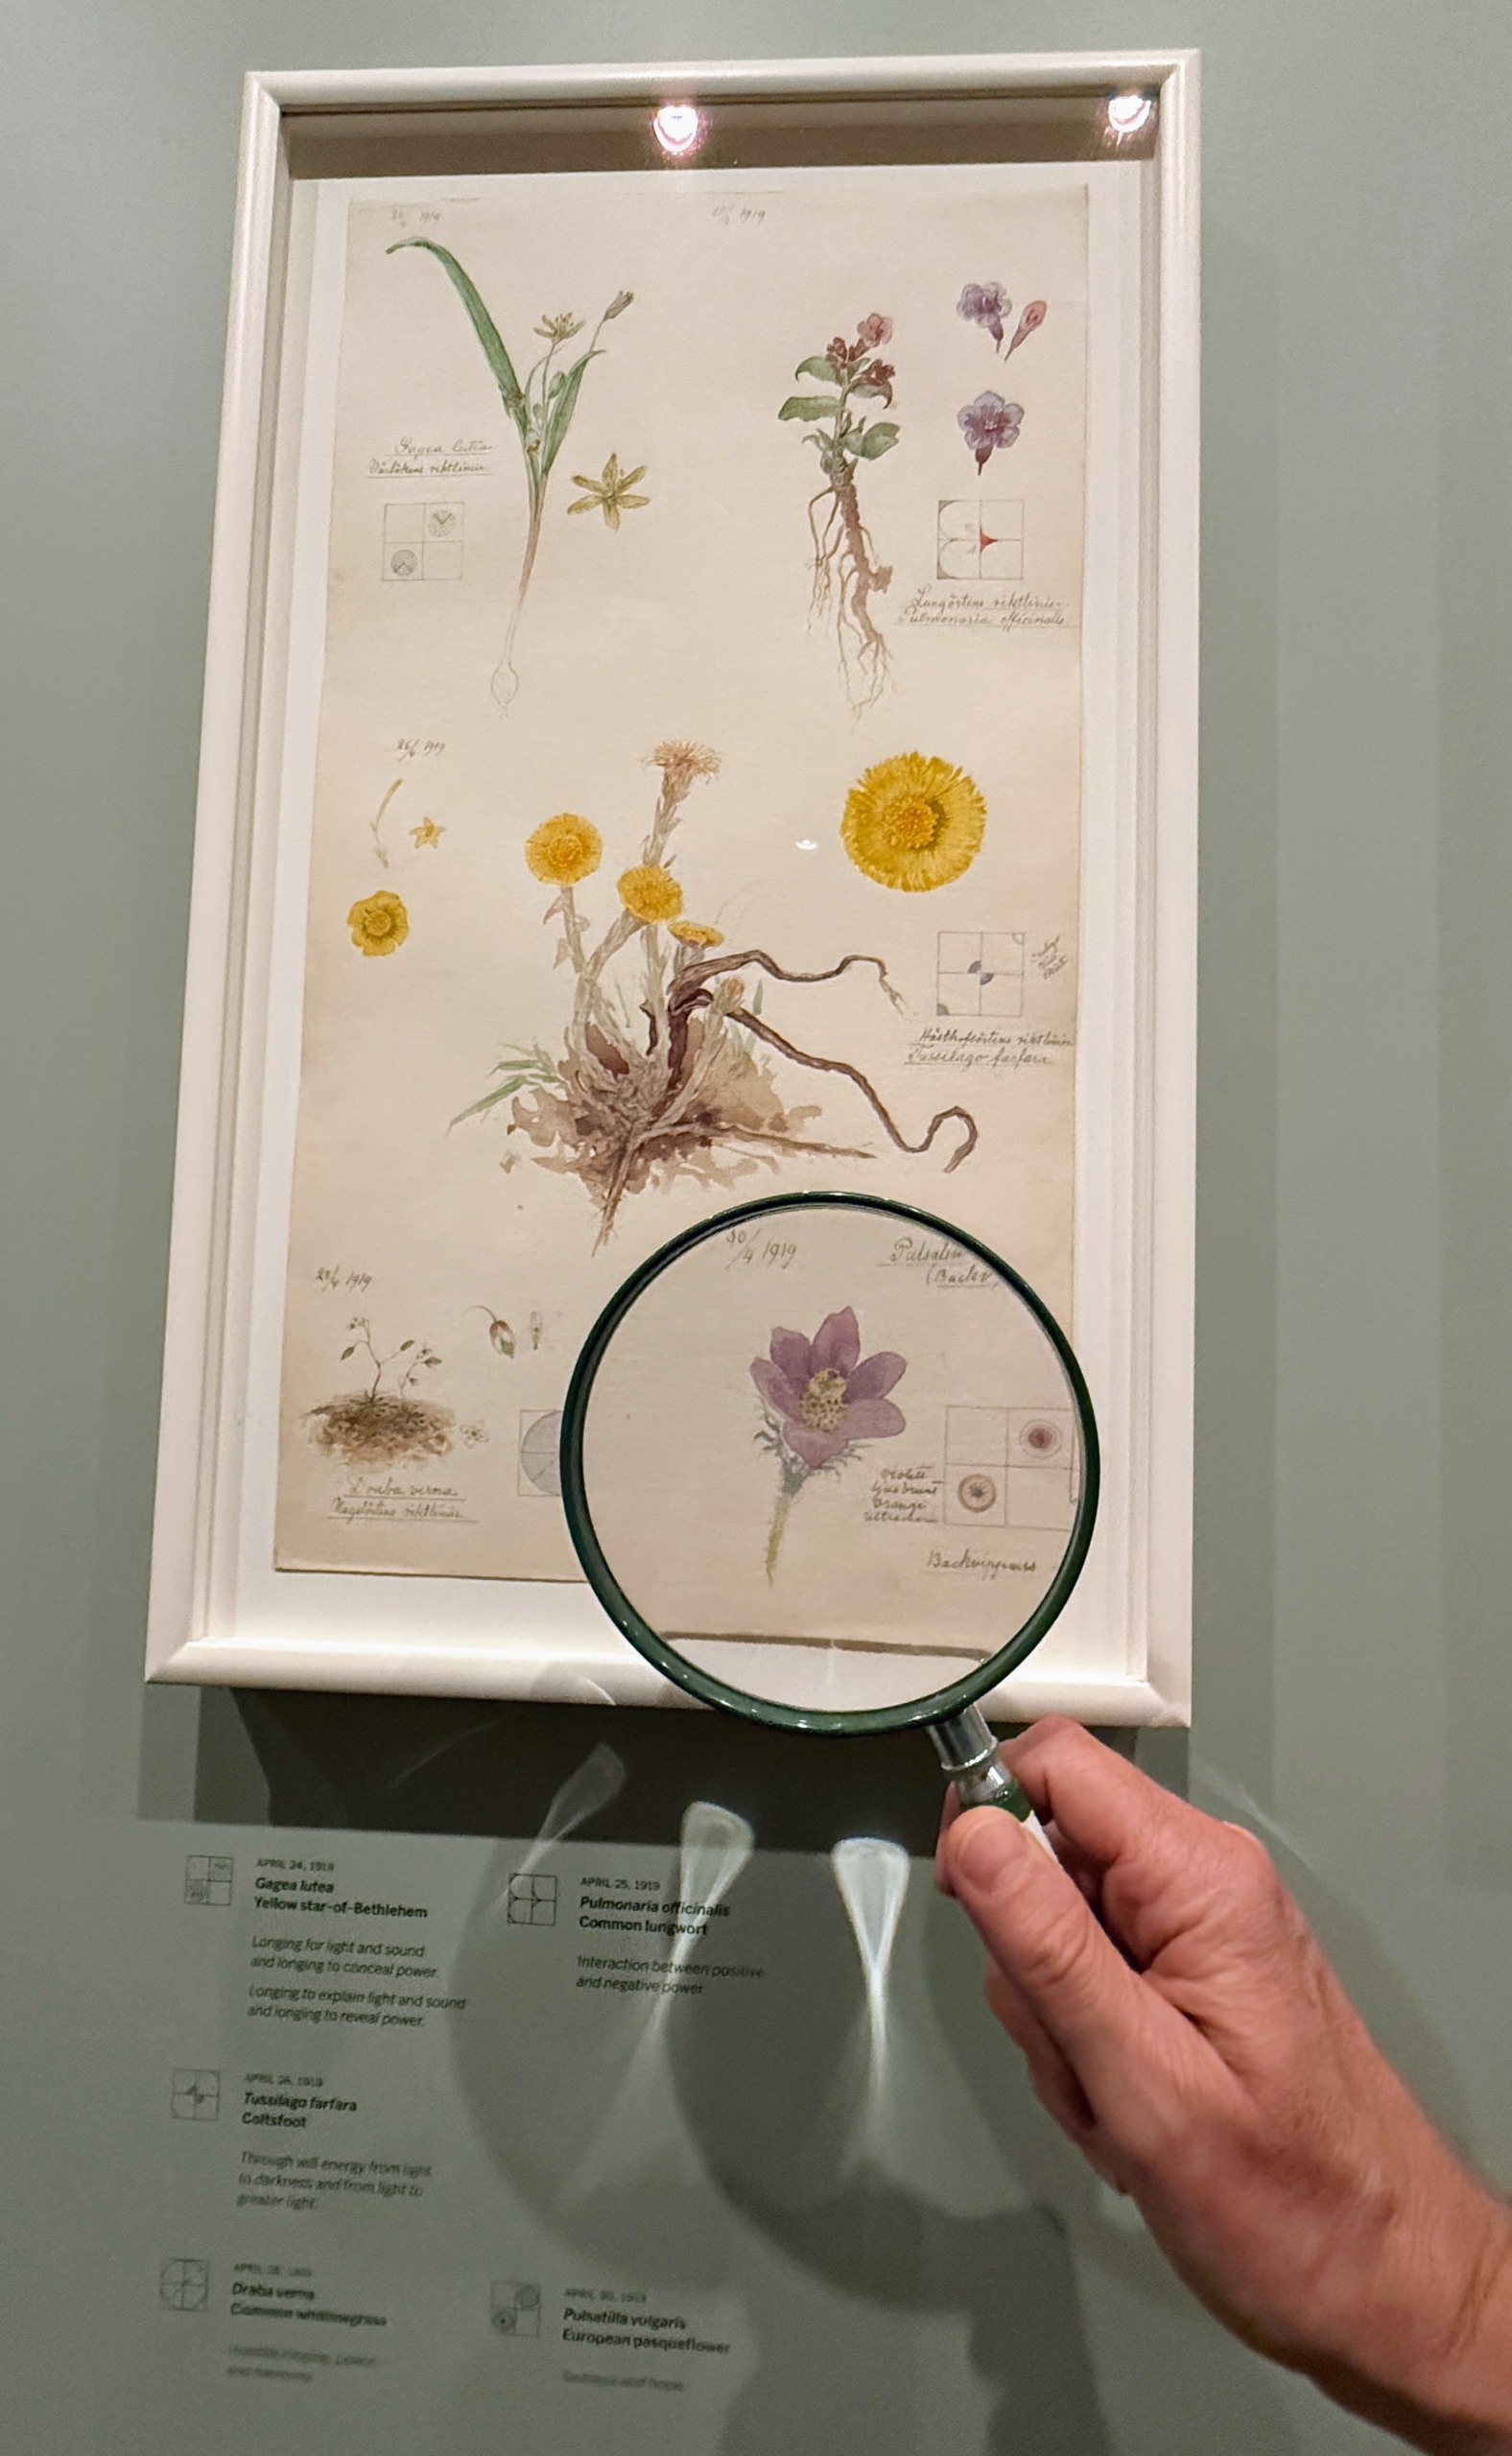
Magnifying glasses are provided for those interested in seeing the minute details of Hilma’s drawings.
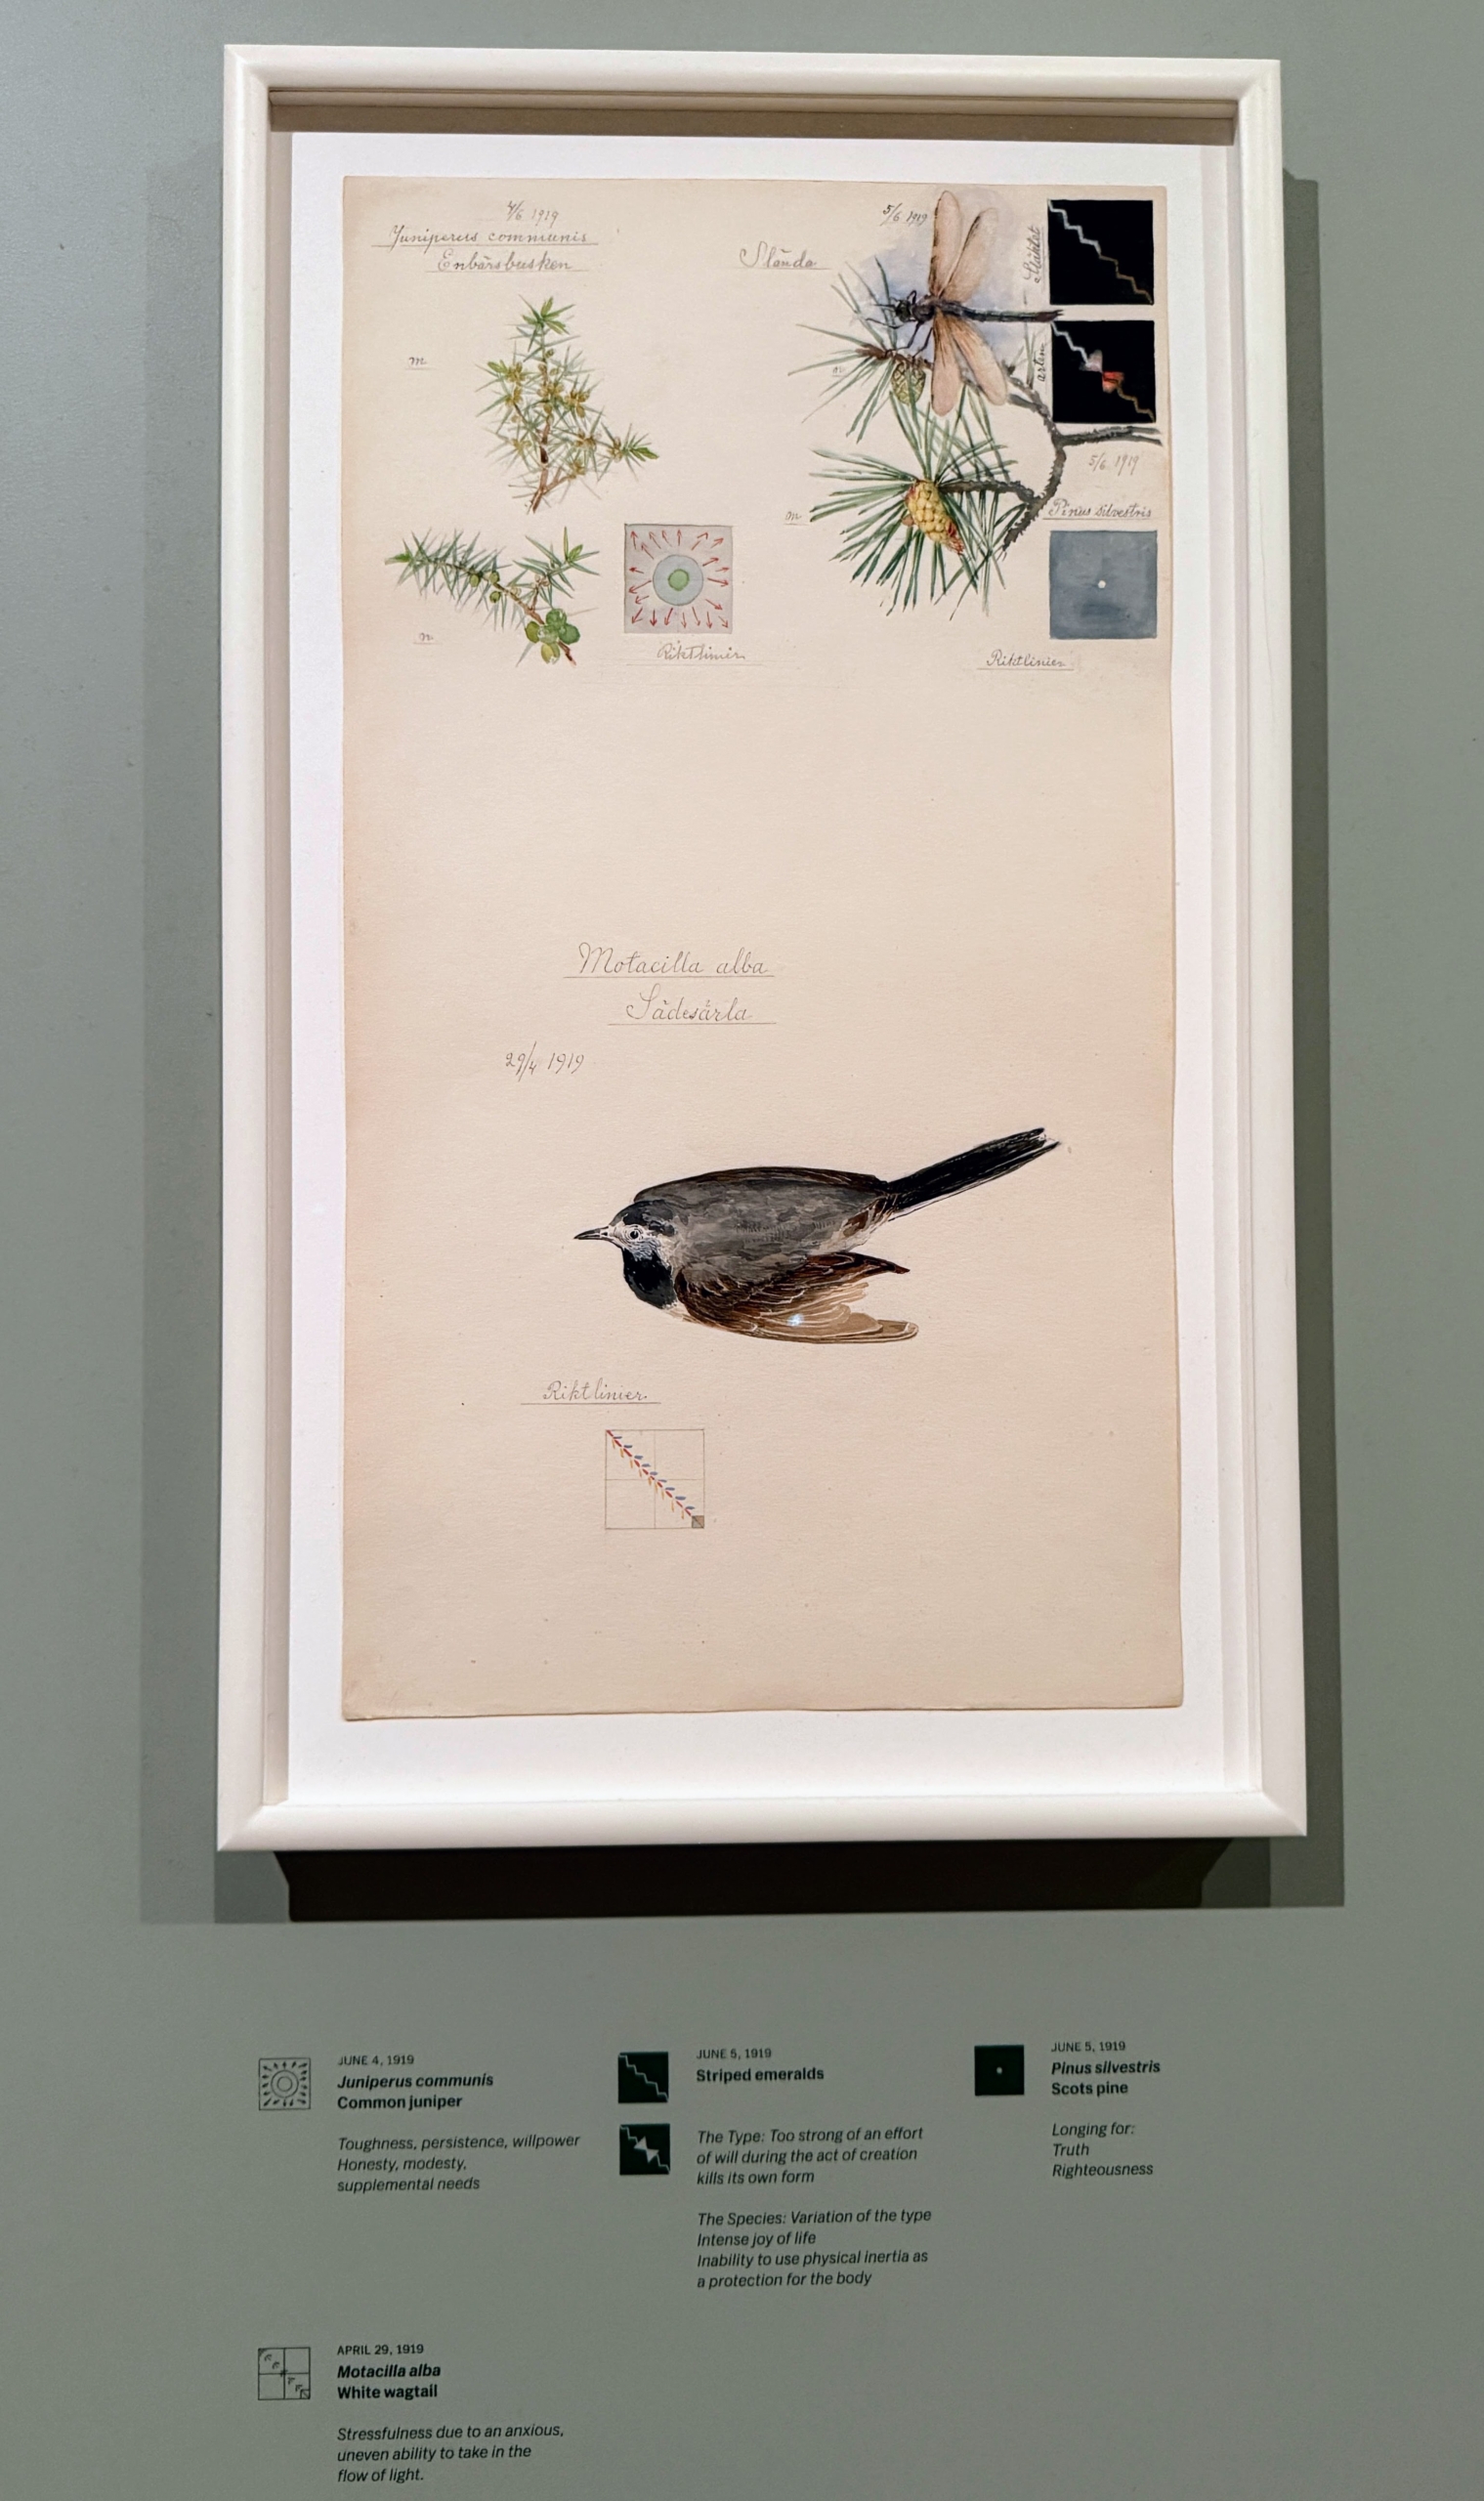
This drawing done in April of 1919 shows Anemone hepatica and on the bottom Corylus avellana, the common filbert.
Many of these works also show diagrams of their spiritual significance. Here is a selection of flowers done in June fo 1919 – True forget-me-not, viburnum, and small cow-wheat. Spiritually, these illustrate tenderness, disobedience and modesty.
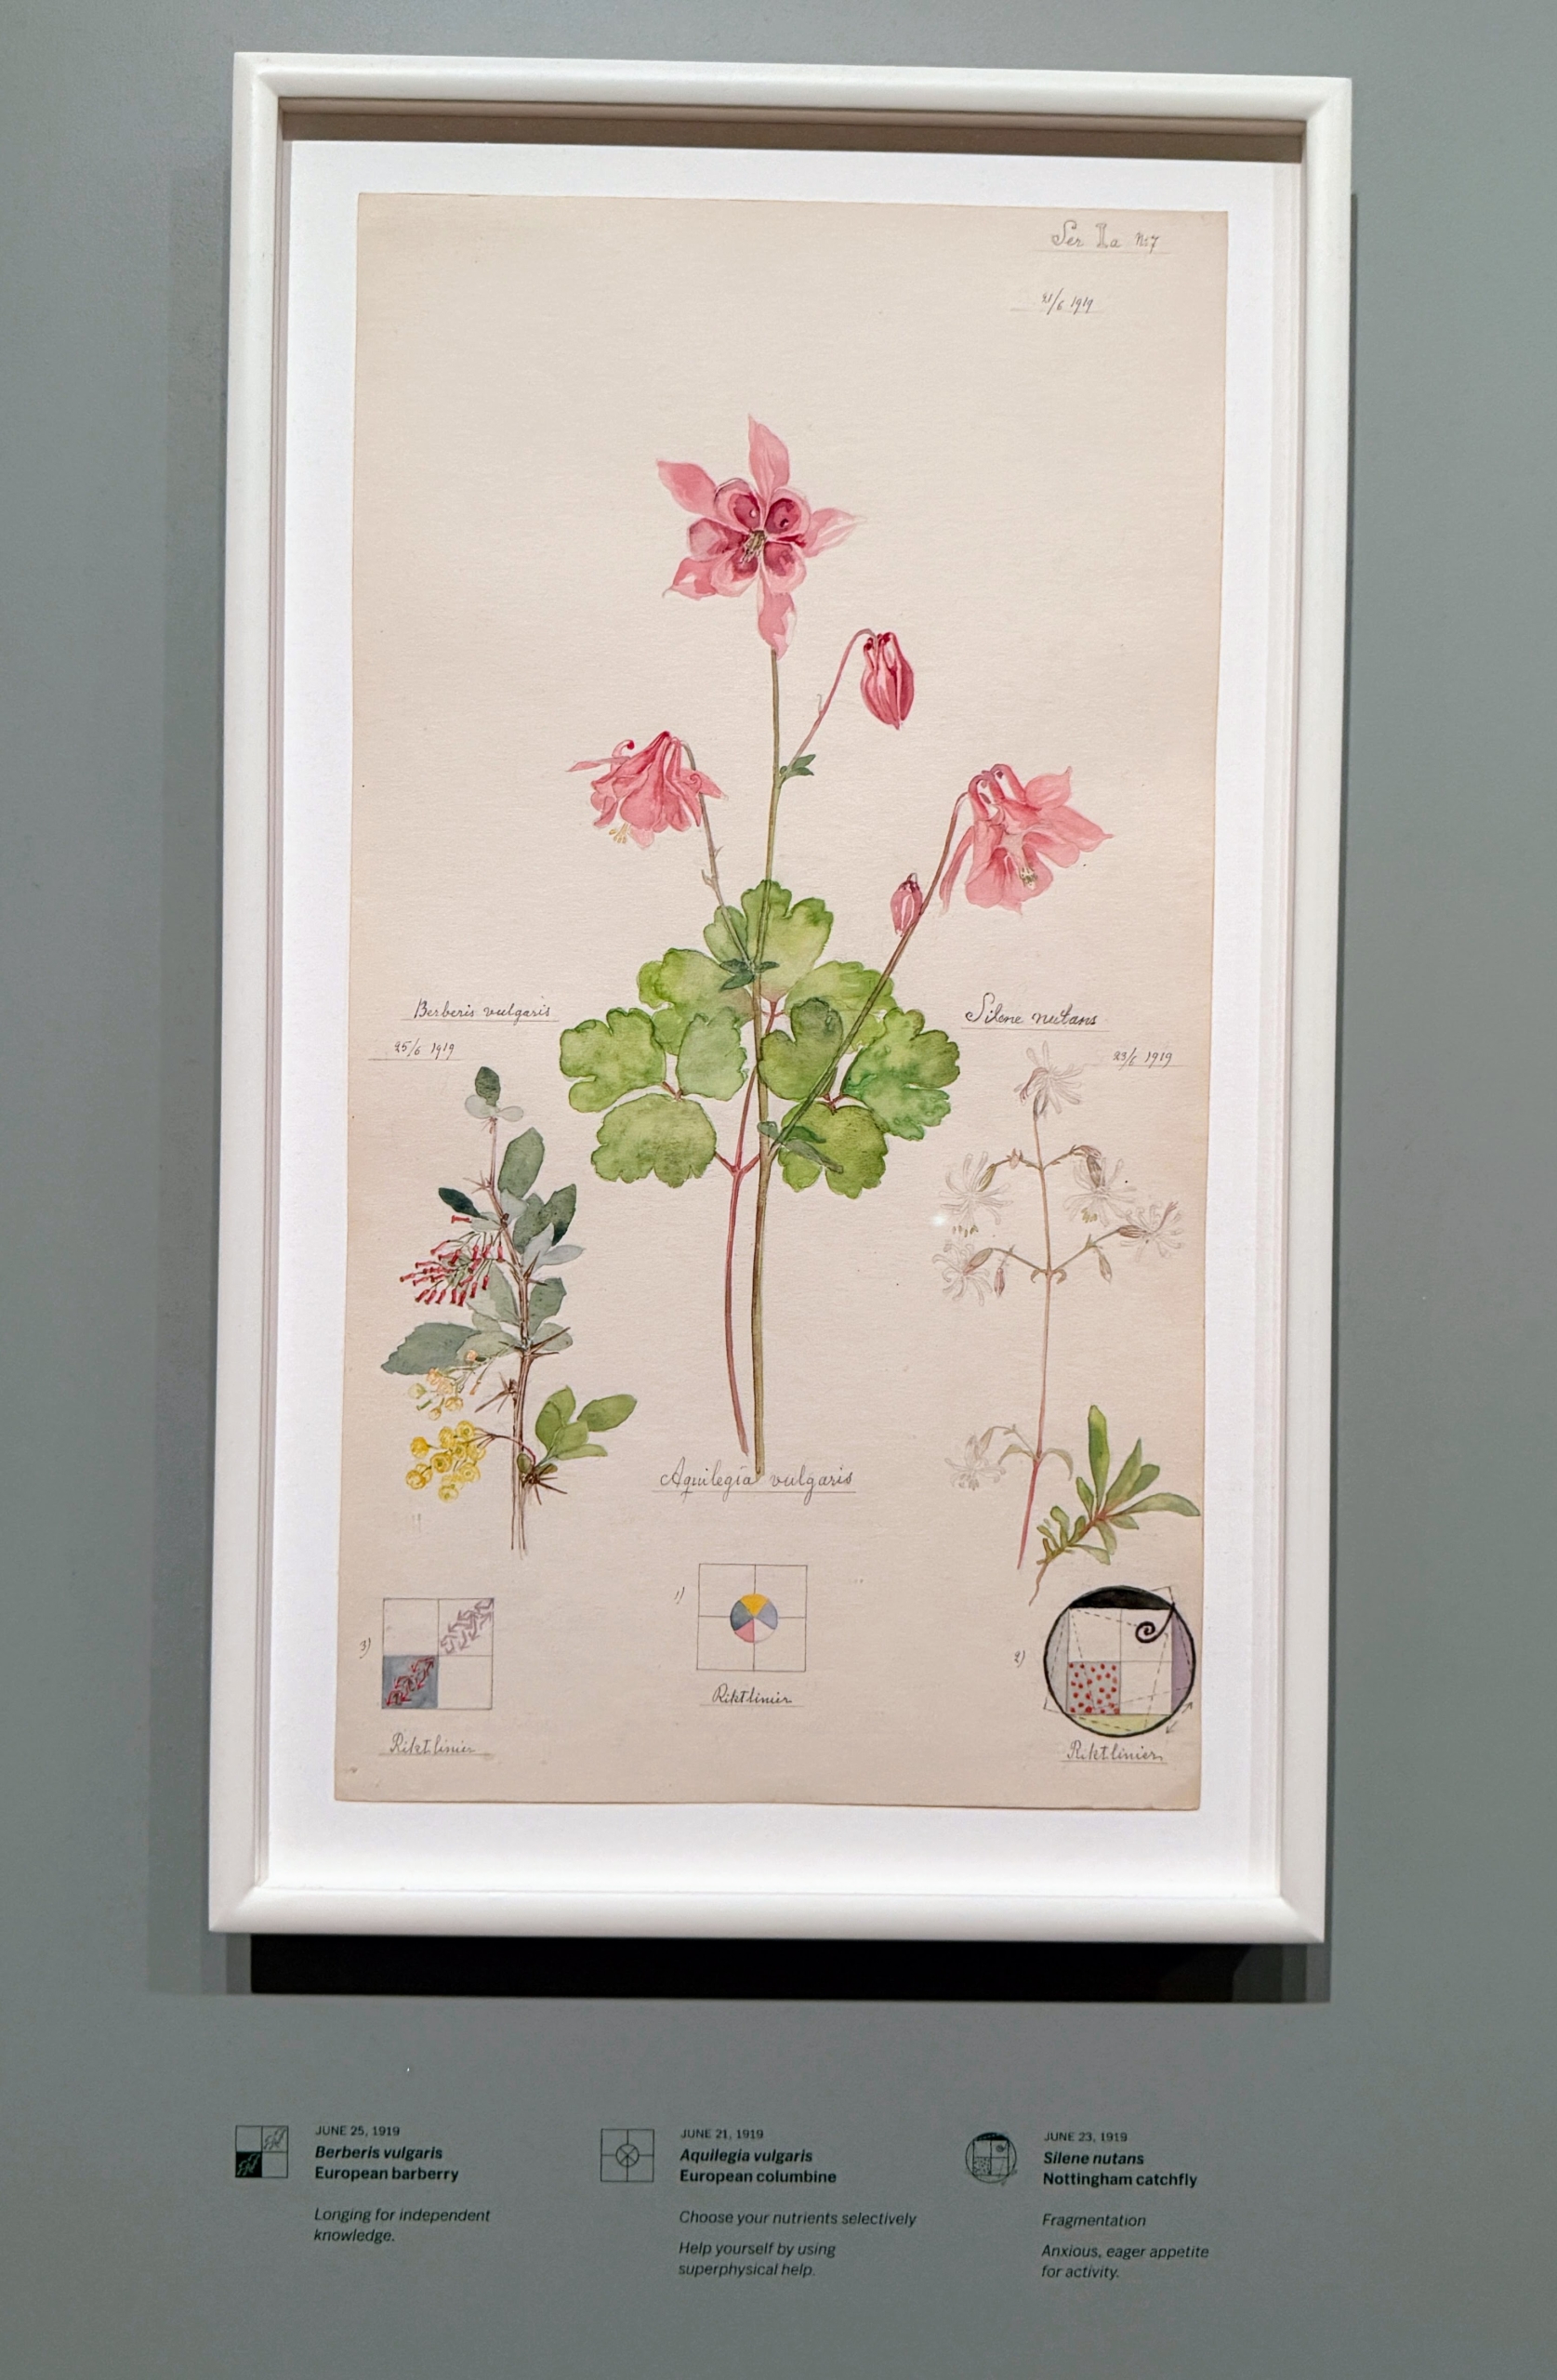
In this piece, Hilma draws European barberry, European columbine, and Silene nutans, Nottingham catchfly.
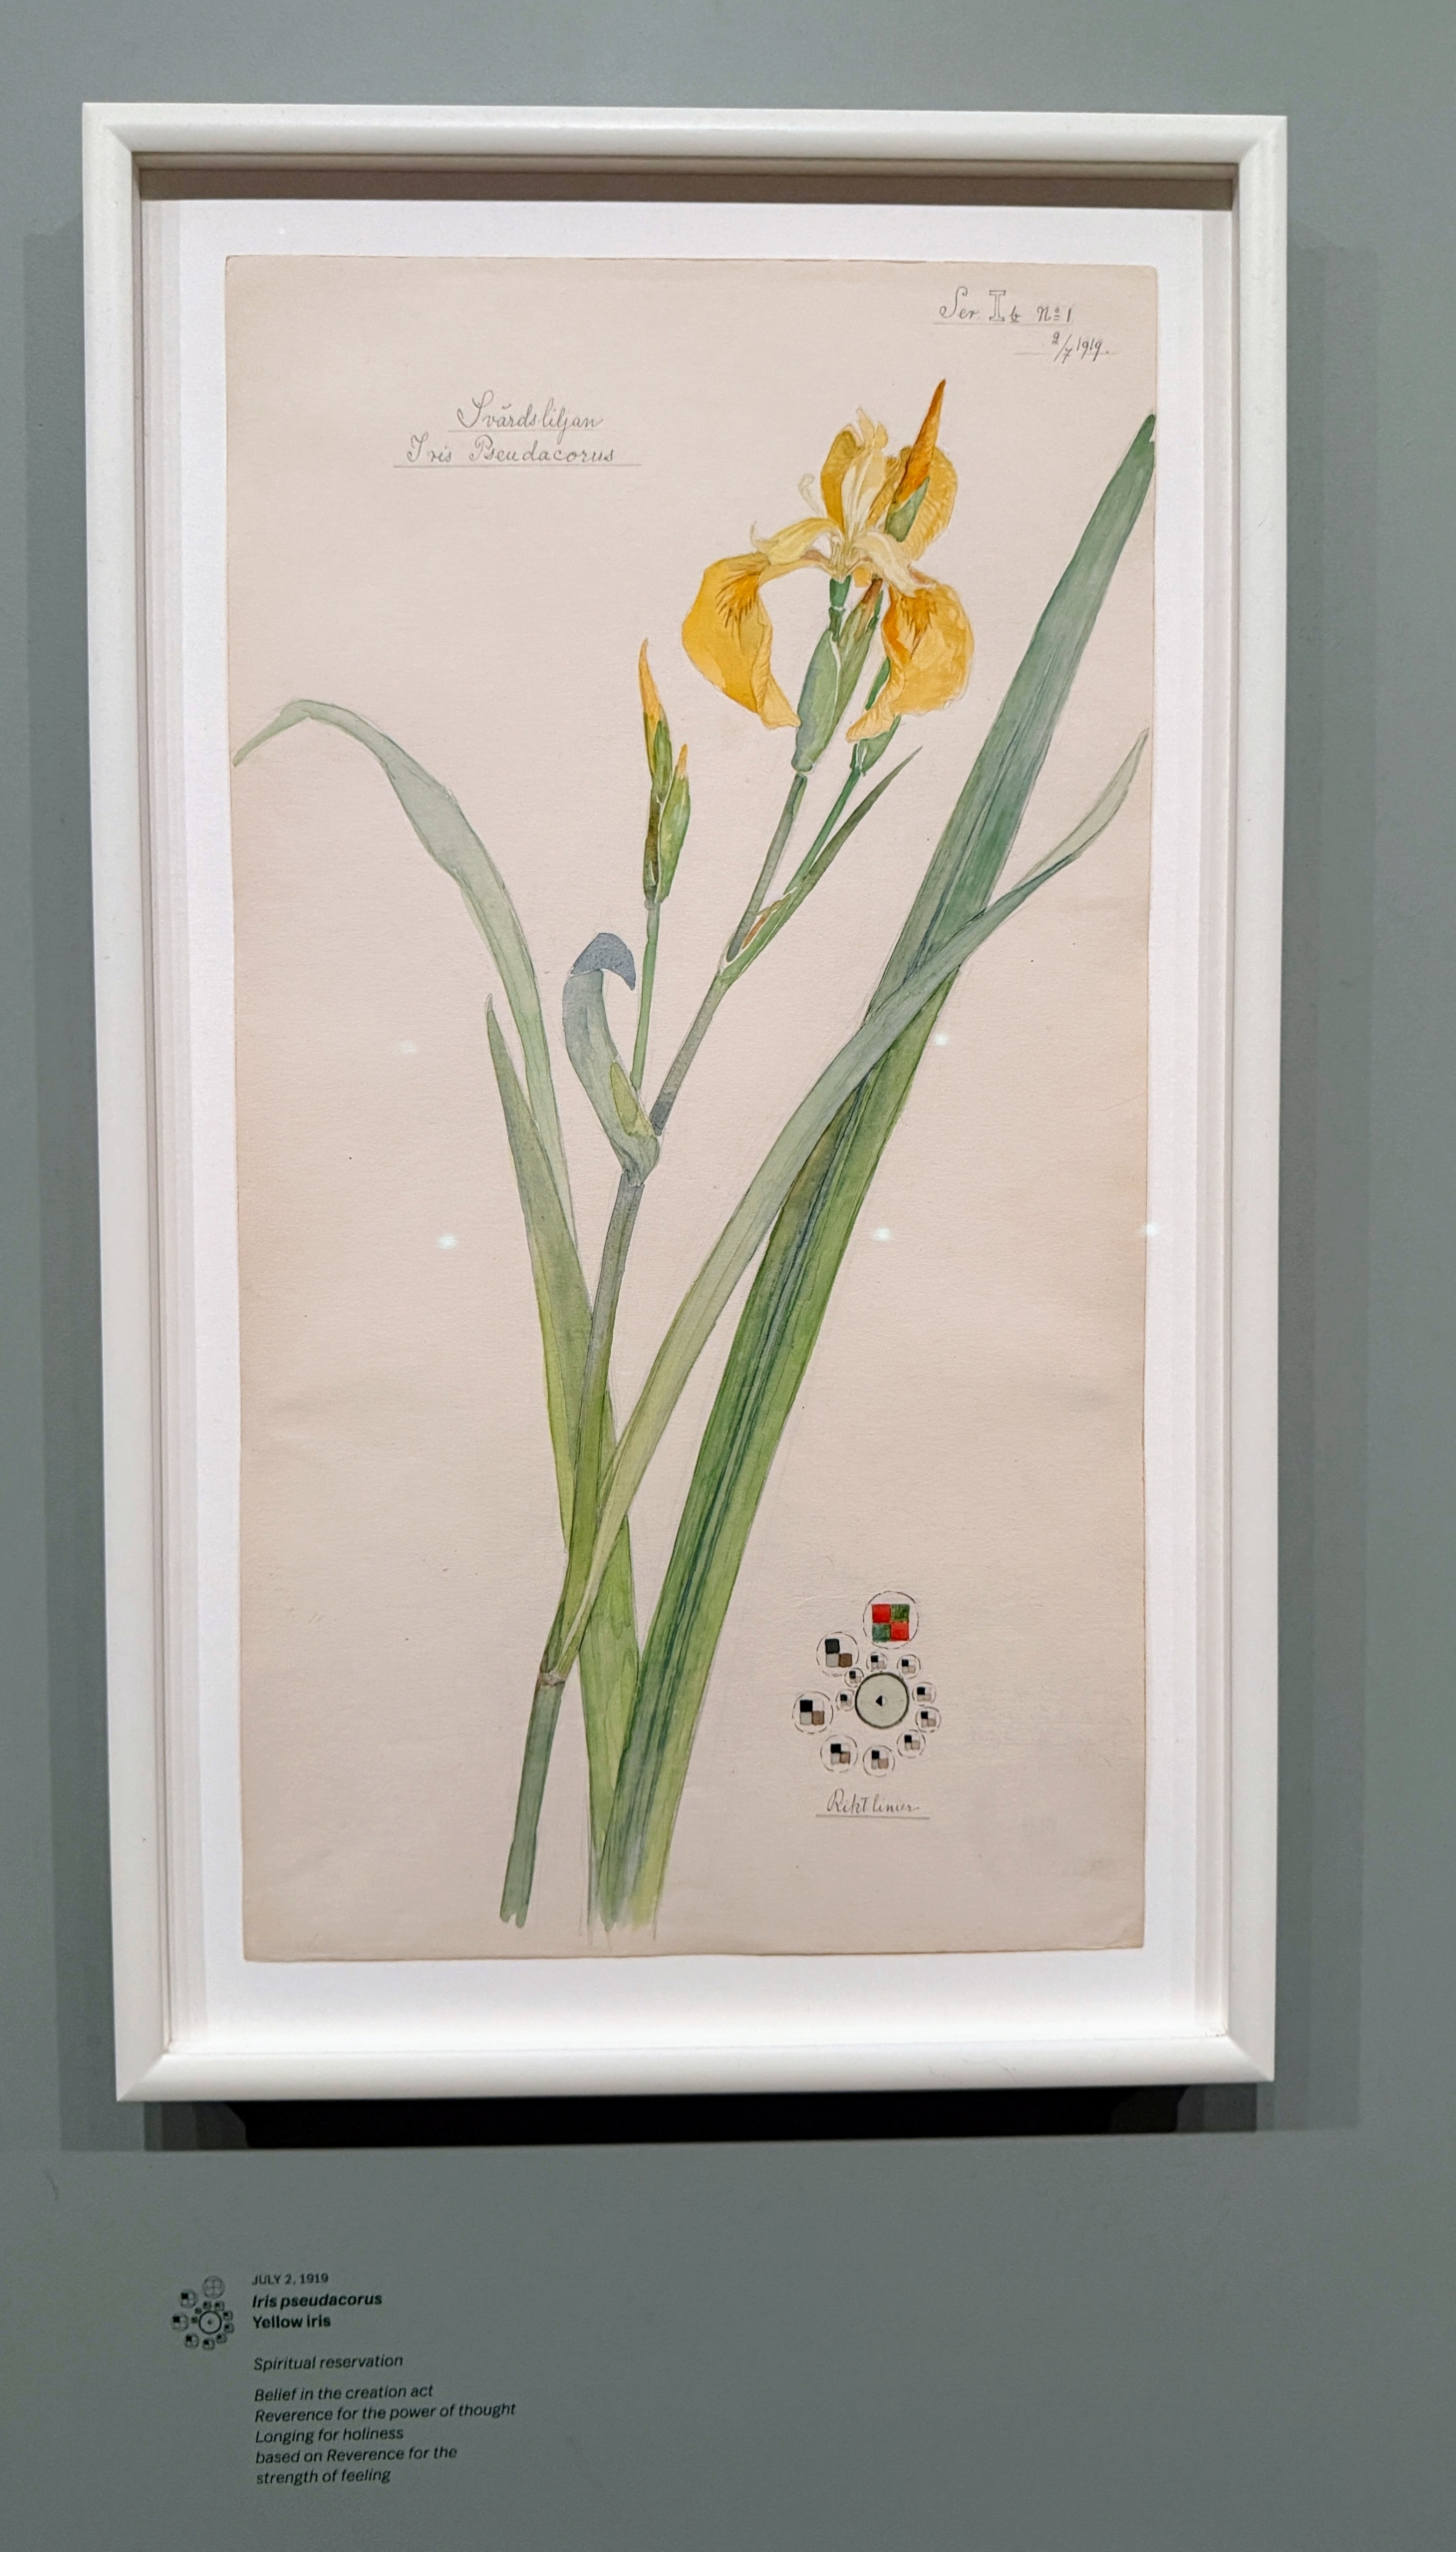
Do you recognize this? It is a yellow iris. Its spiritual connection is described as reverence for the power of thought. Hilma’s visual representations were often matched to very complex spiritual ideas.
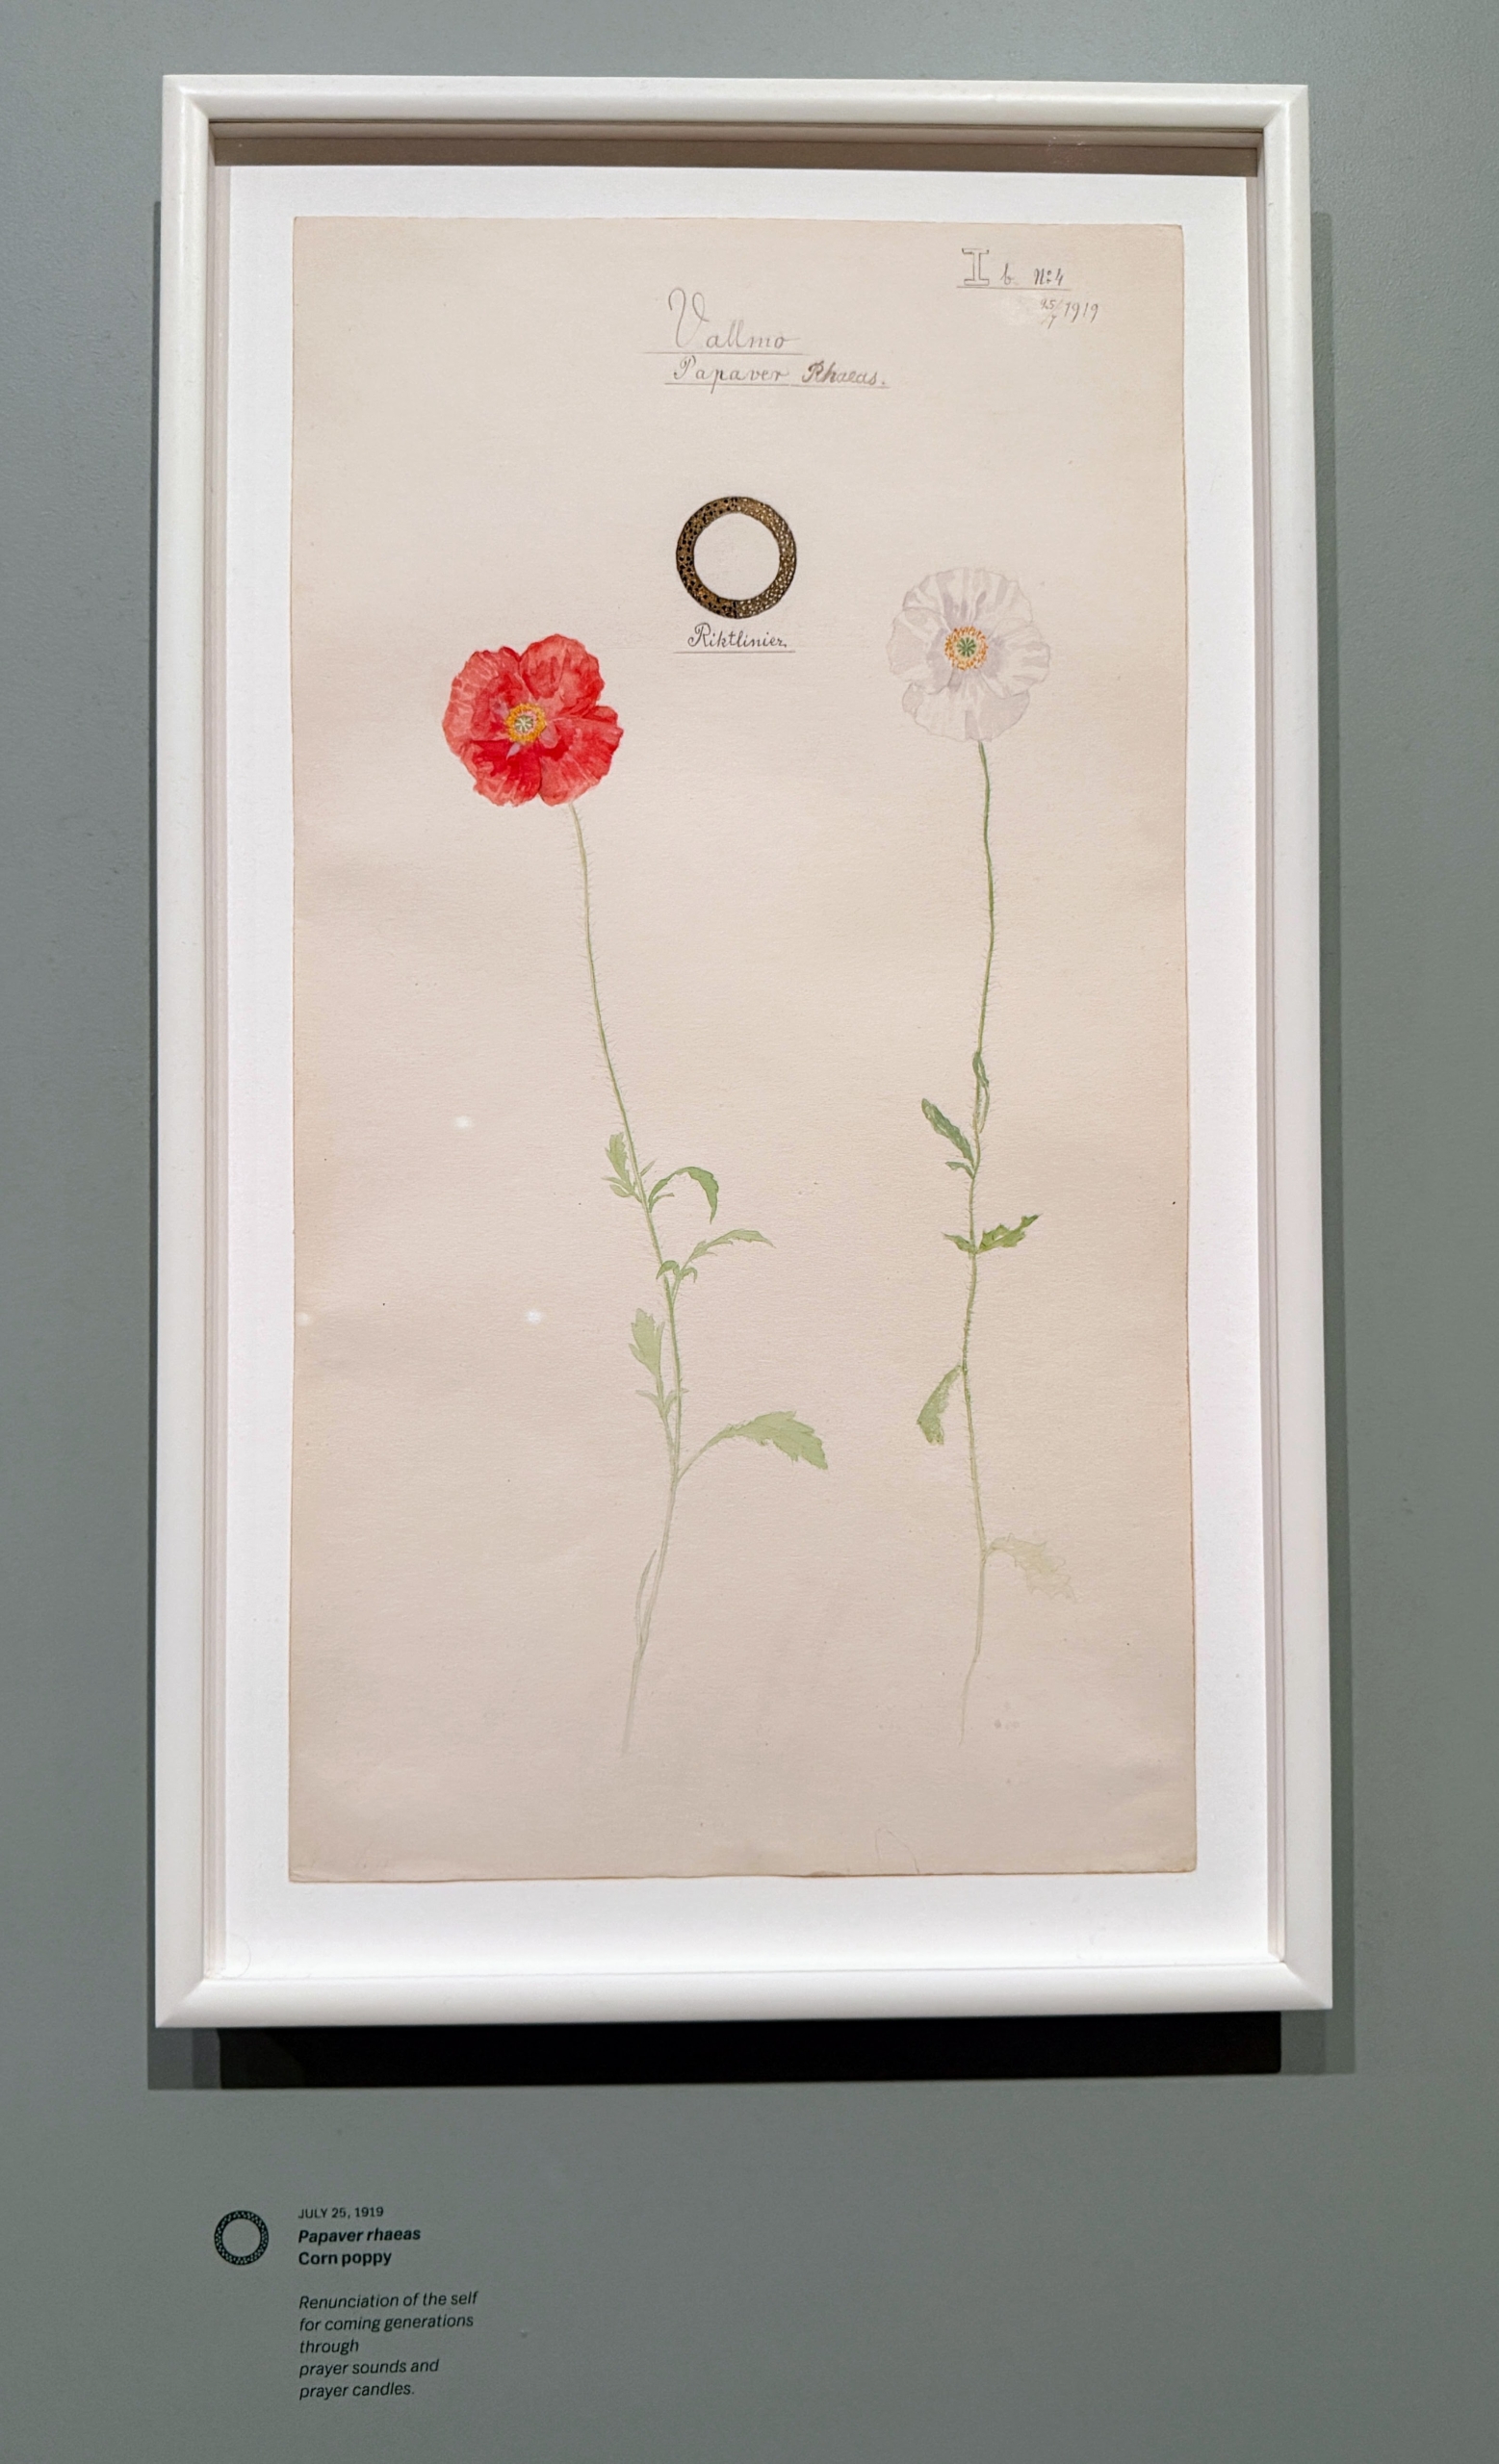
This is Papaver rhaeas or a corn poppy. Hilma’s abstract works also predated many of her male counterparts such as Kandinsky and Mondrian.
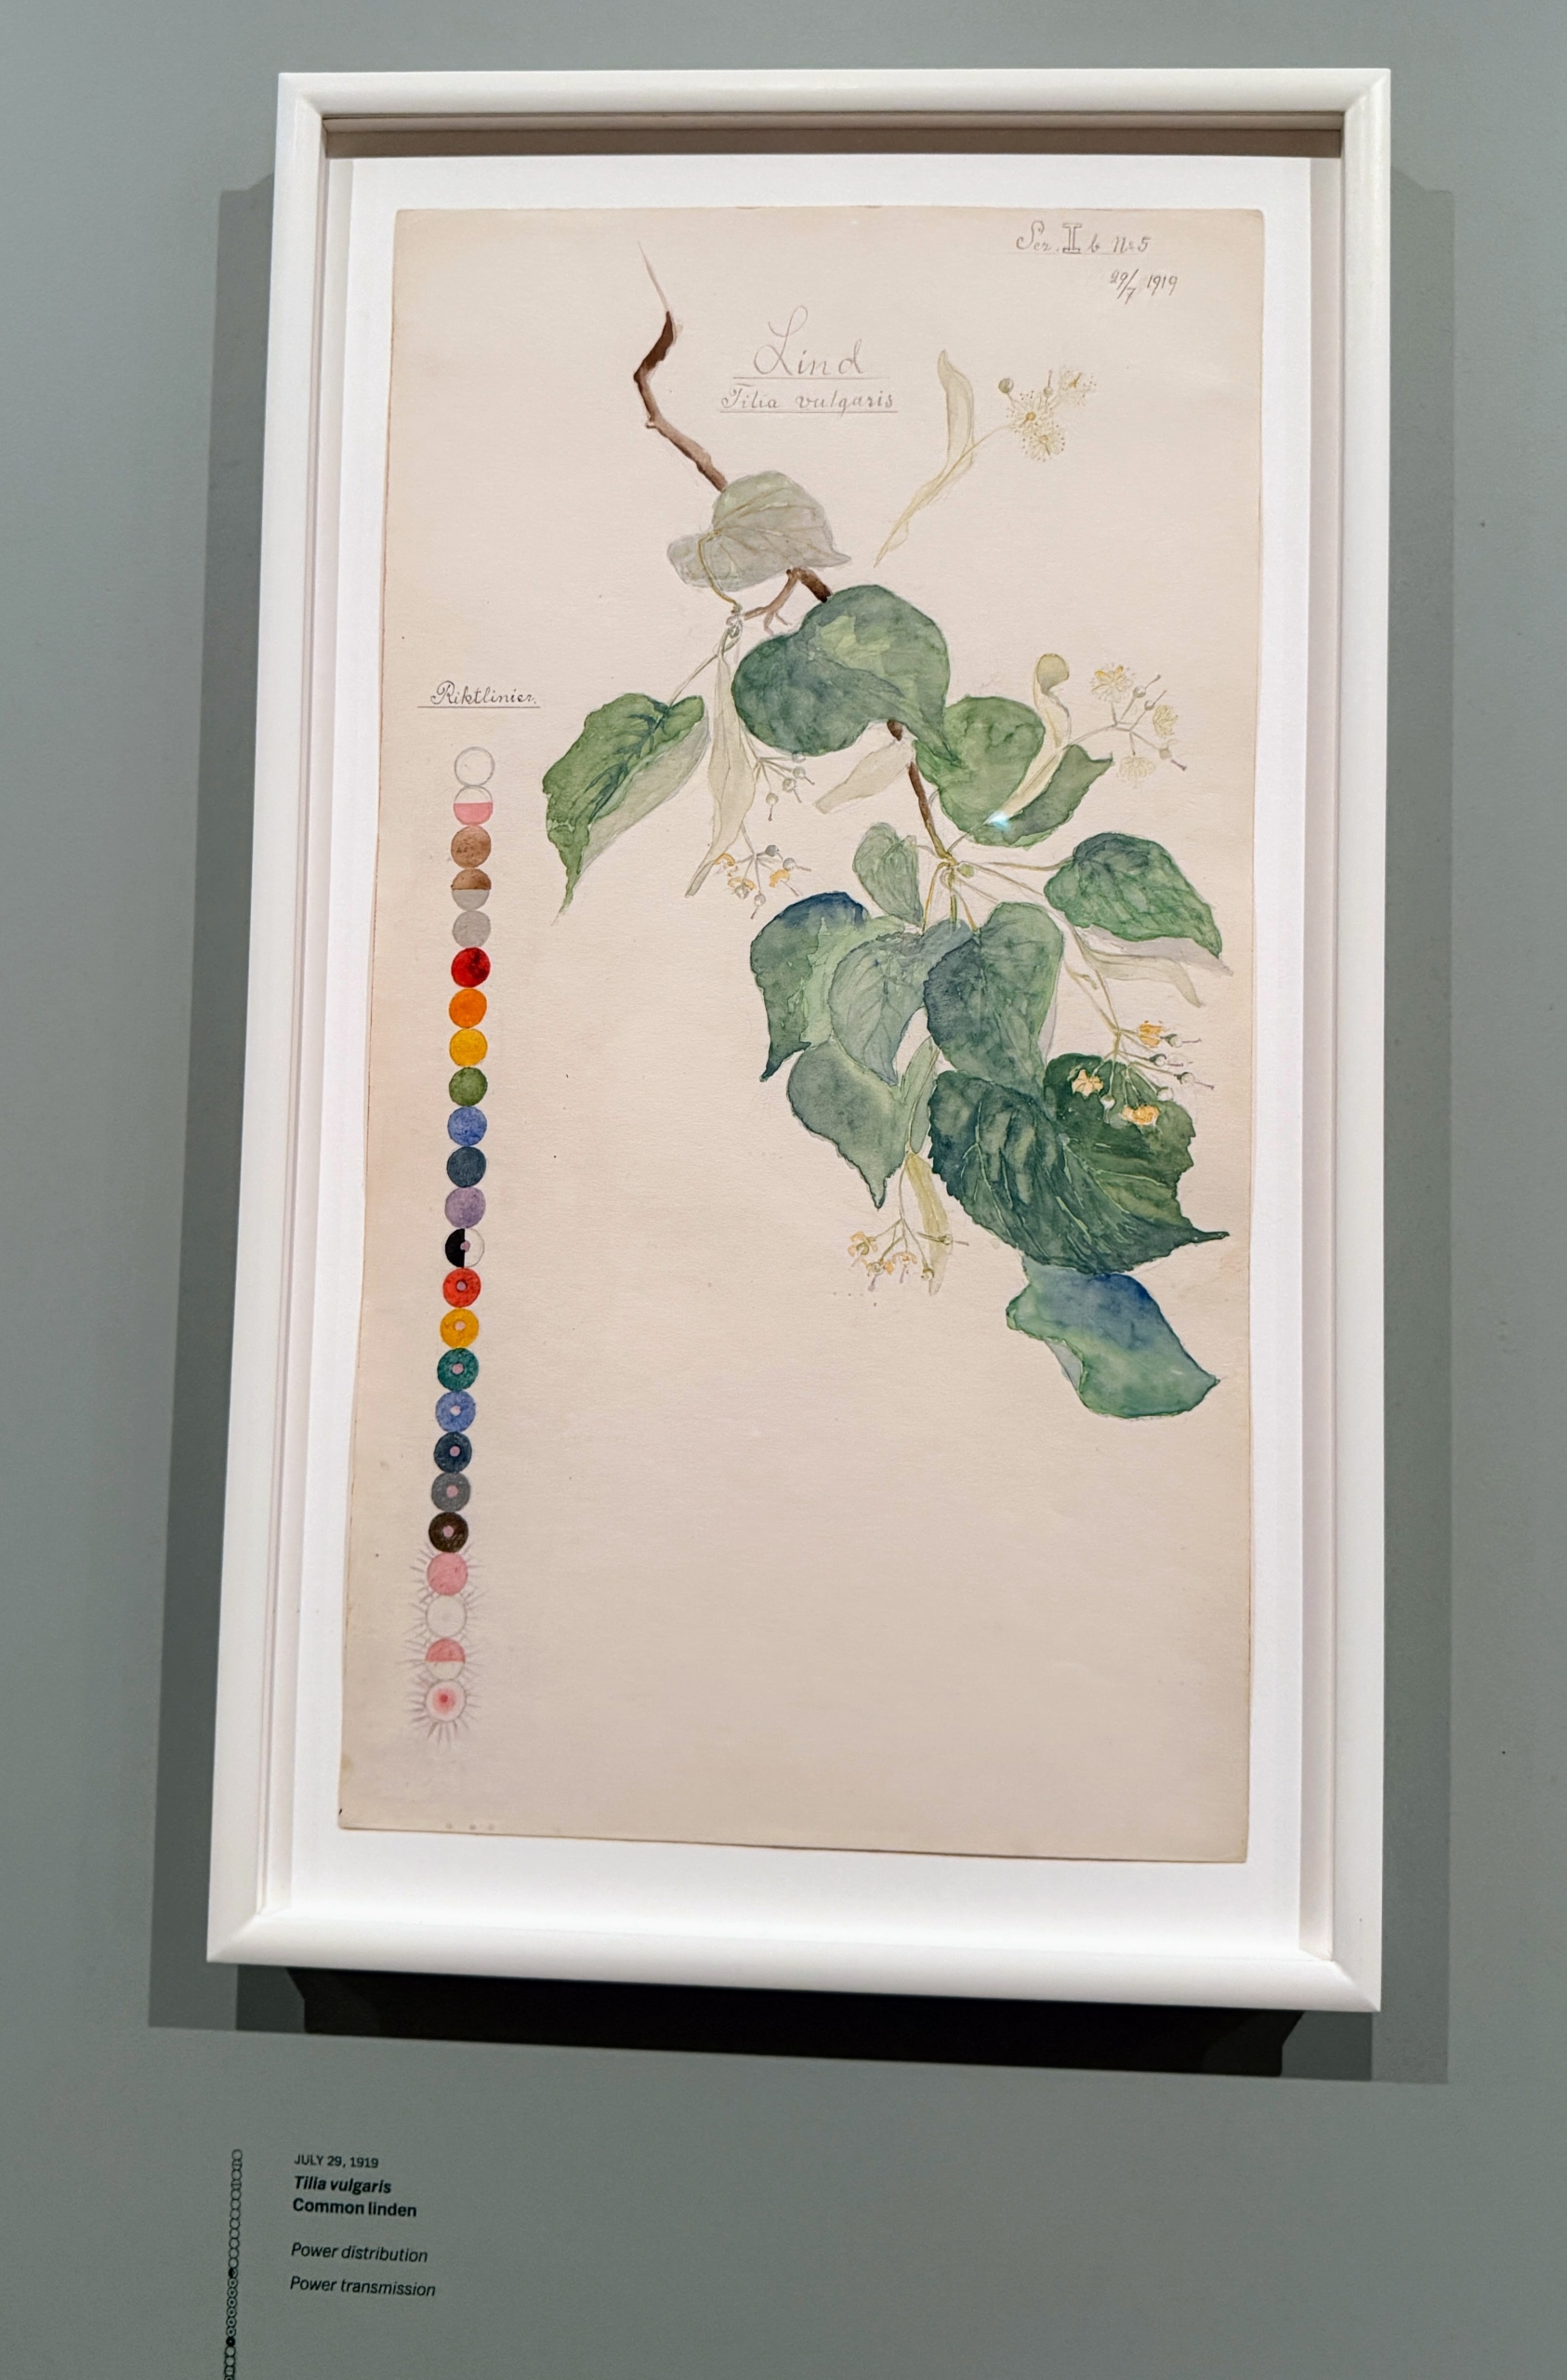
And these are the leaves of Tilia vulgaris, or the common linden. It was drawn on July 29, 1919.
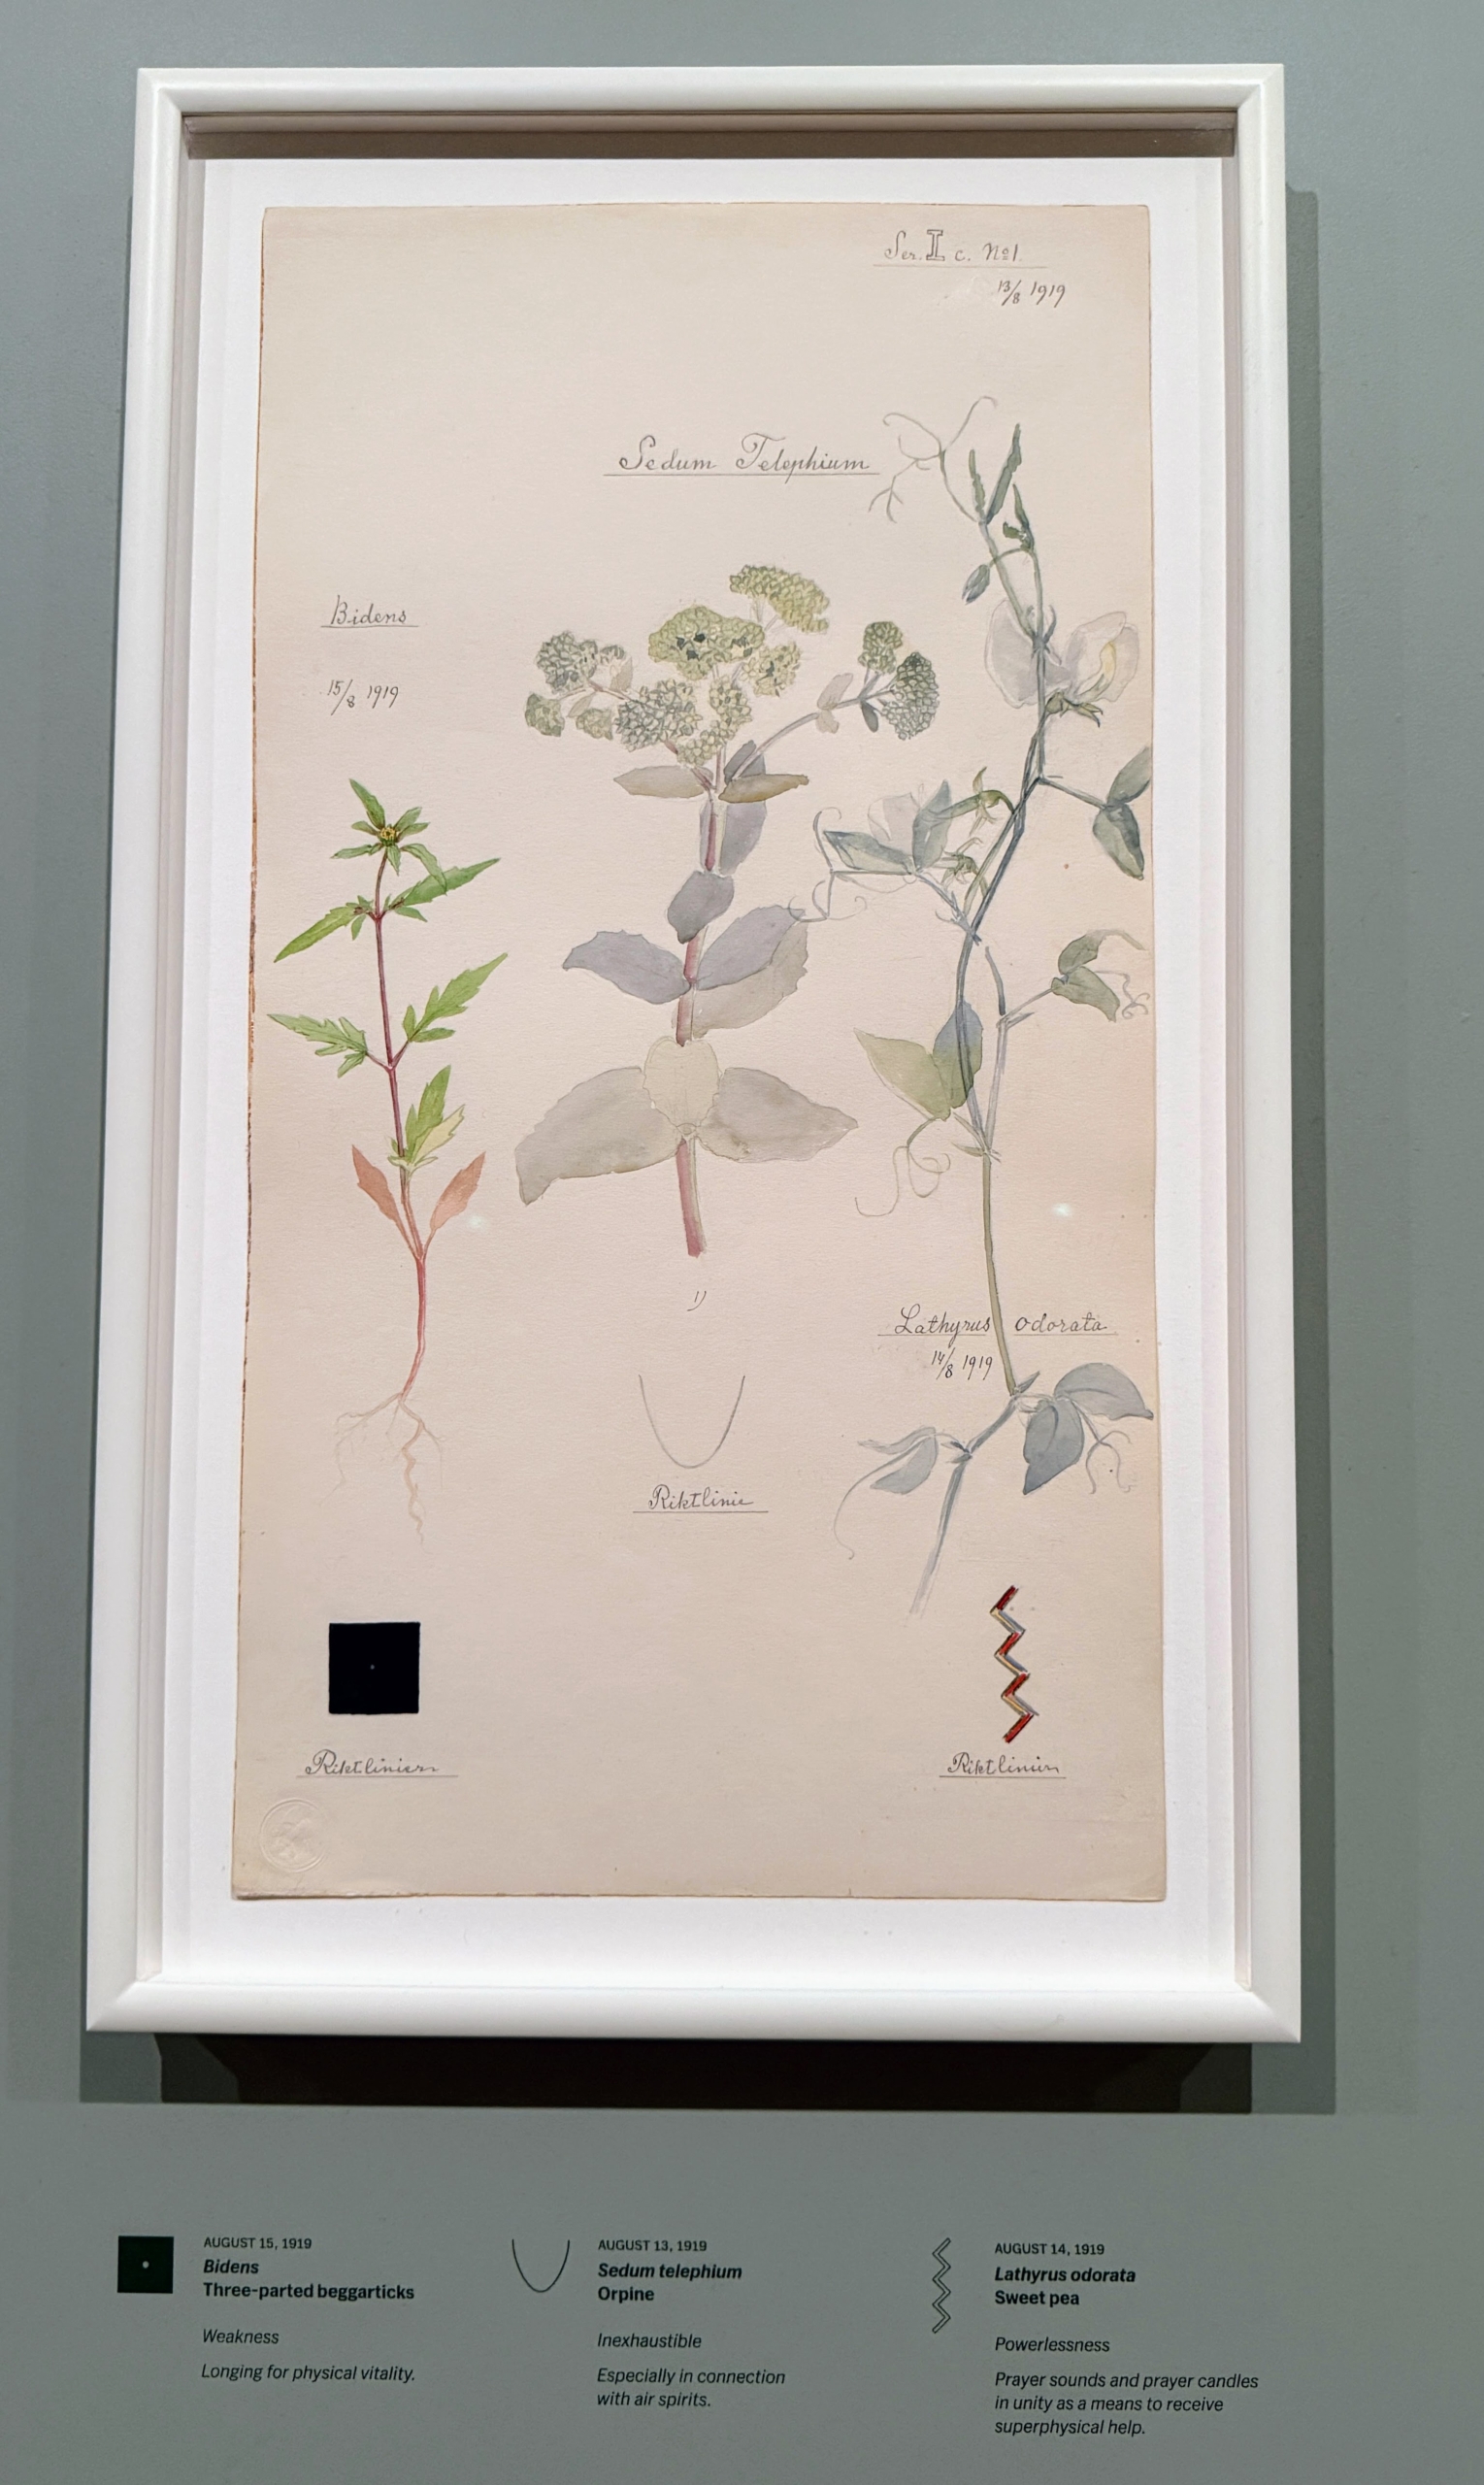
In this piece, Hilma shows Binens, three-parted beggarticks, which is in the sunflower family. She also groups it with Sedum telephium, Orpine, and Lathyrus odorata, the sweet pea.
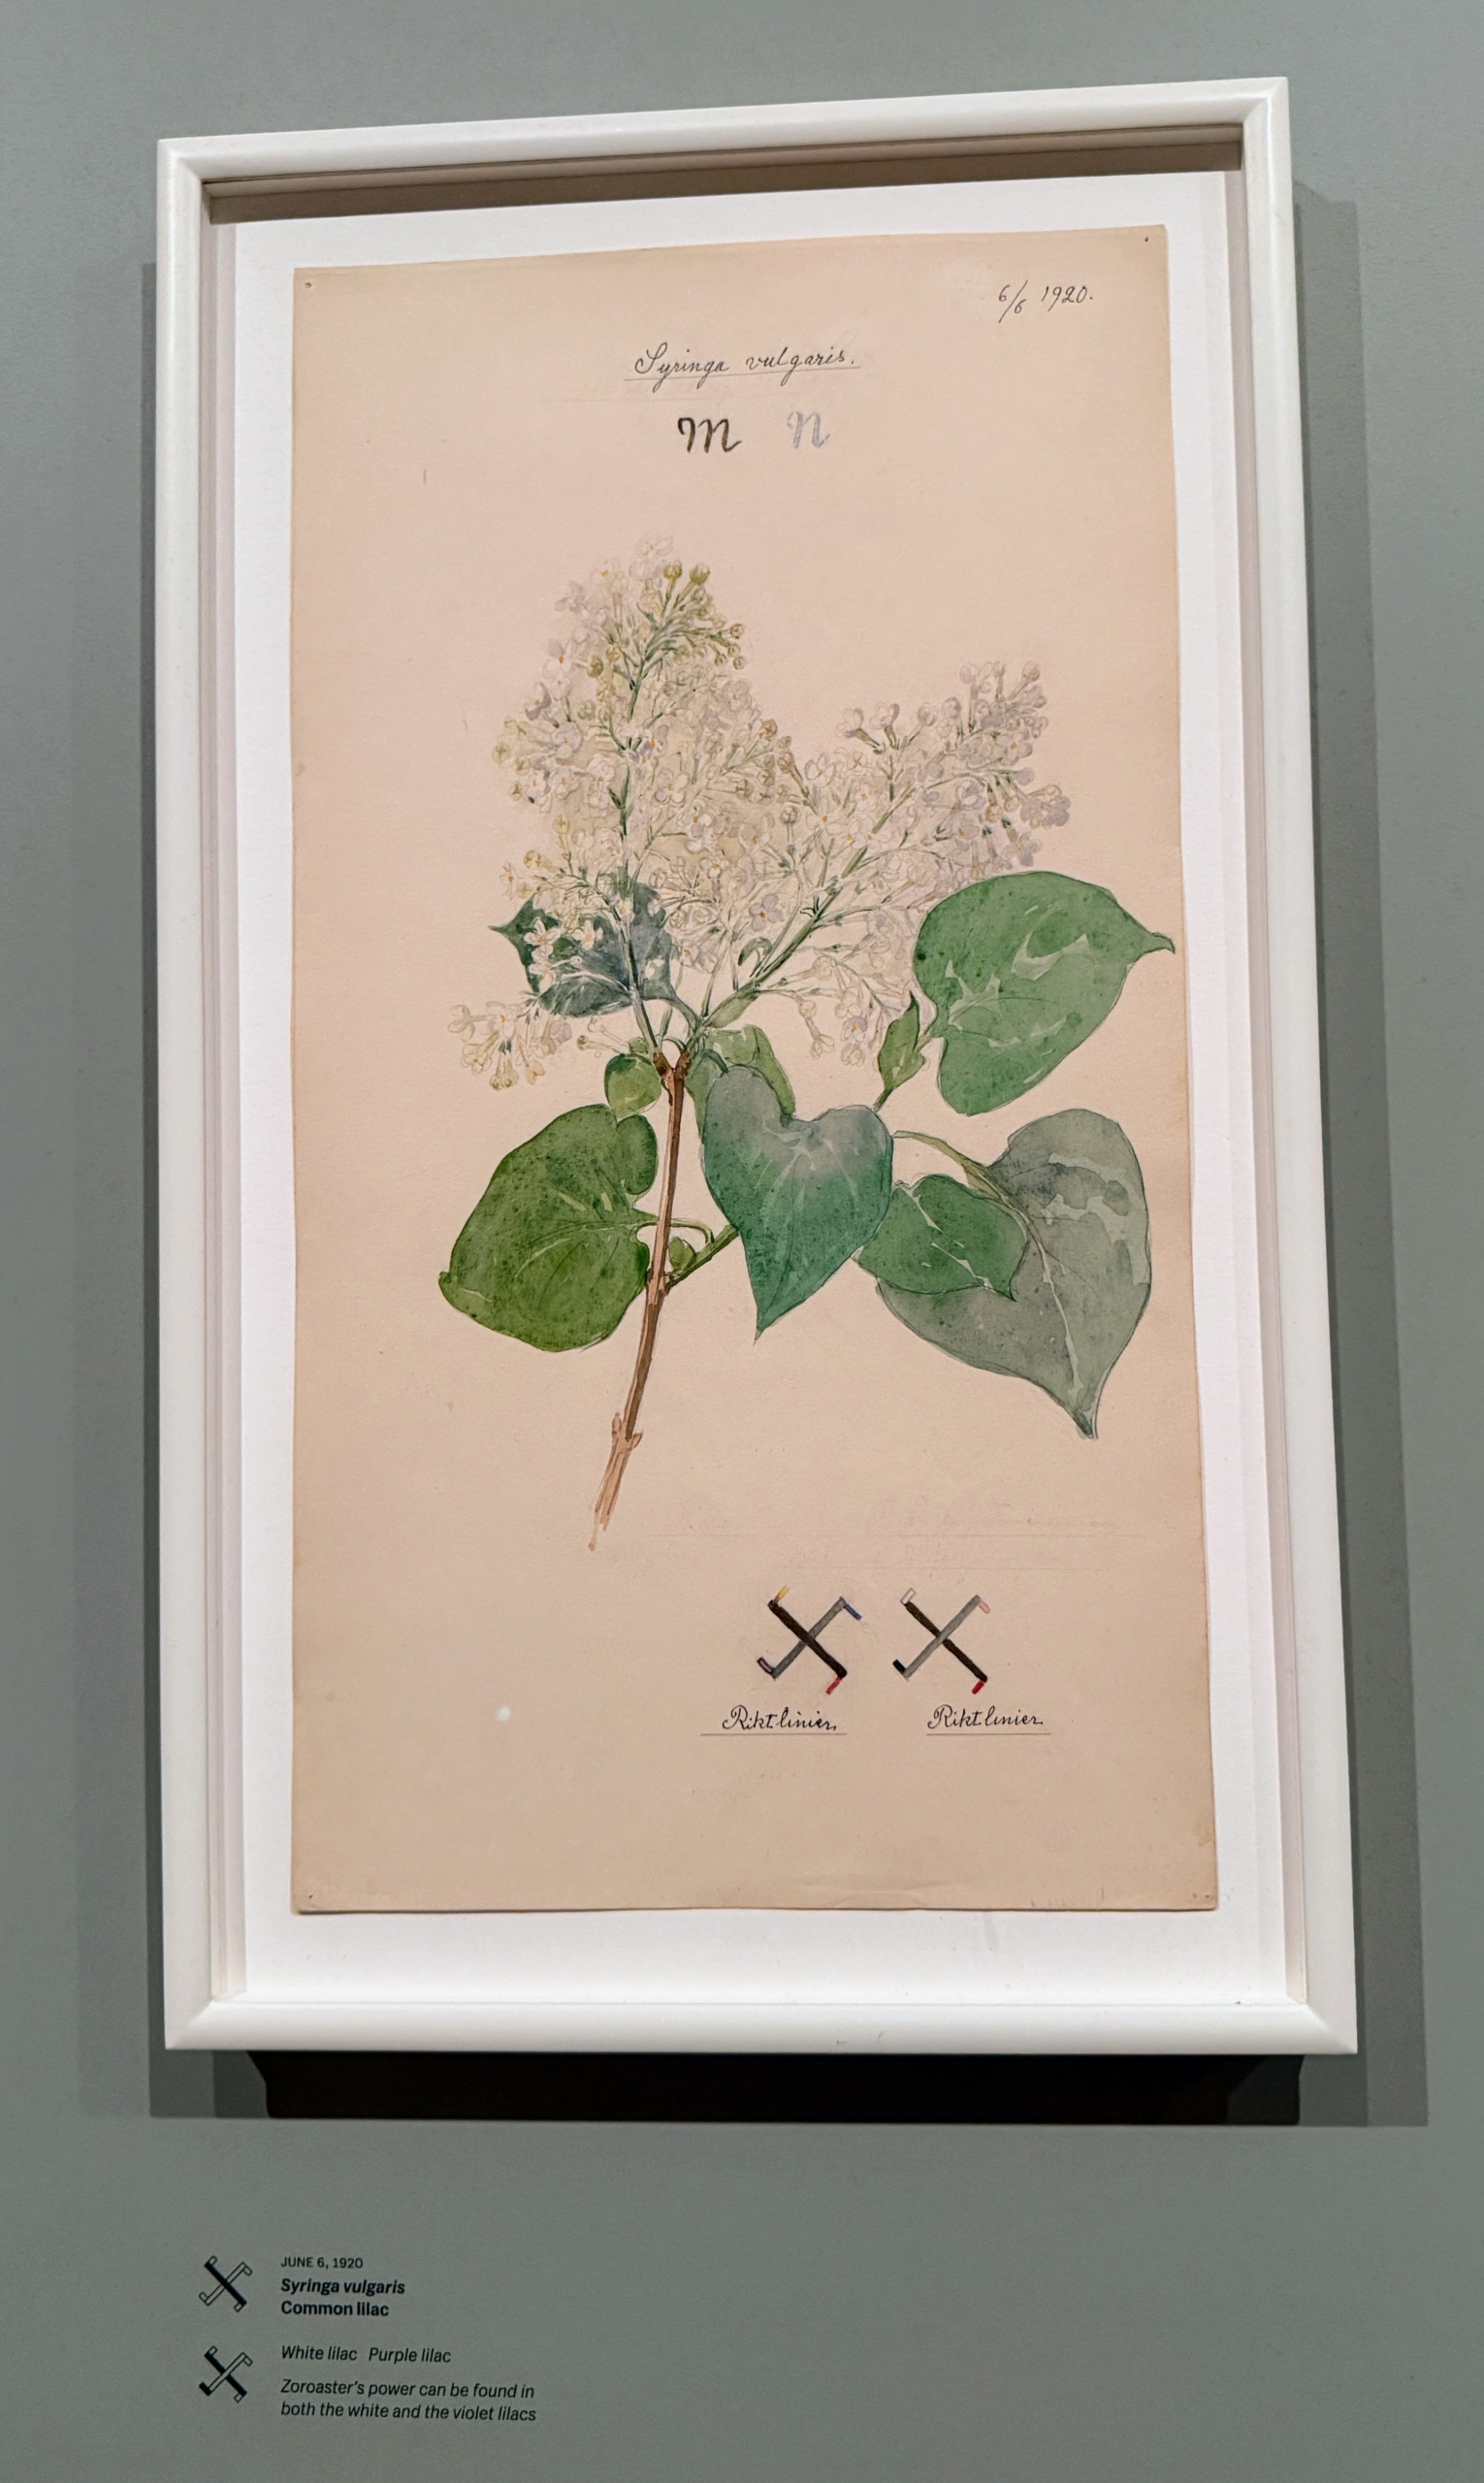
This drawing features a common lilac, Syringa vulgaris. Here, Hilma feels the power of Zoroaster can be found in both white and violet lilacs.
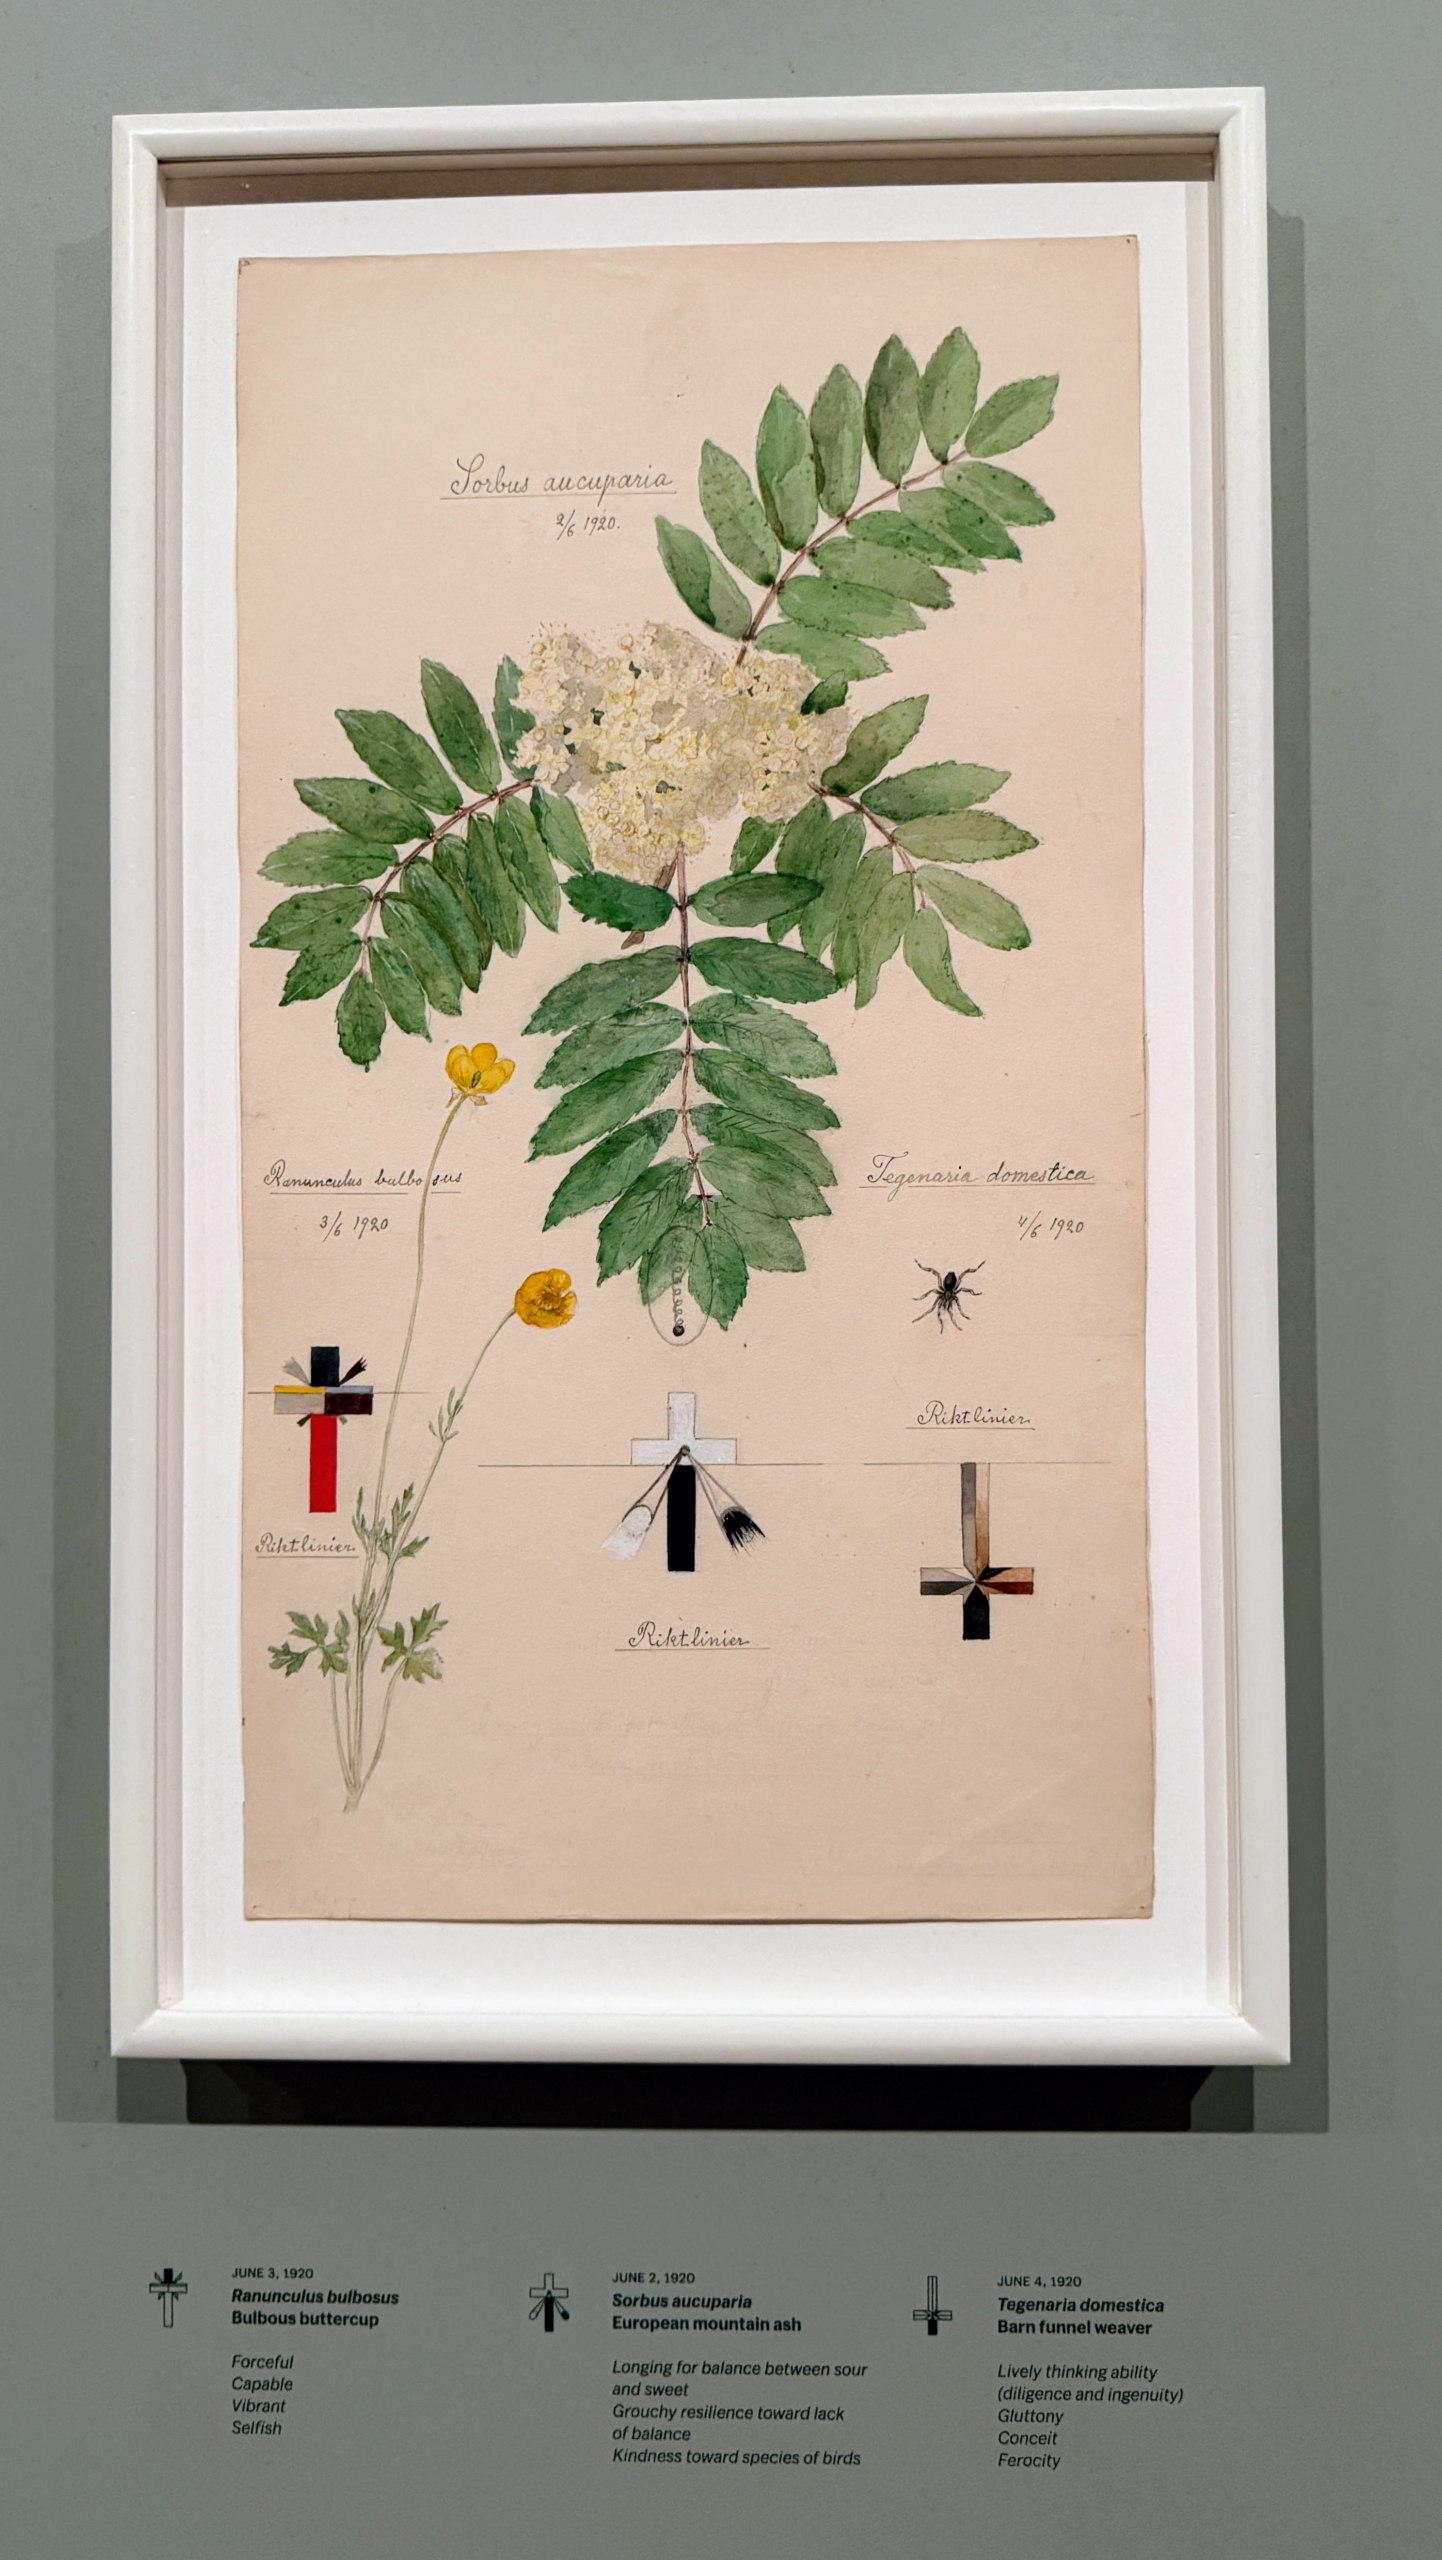
Here, Hilma shows a bulbous buttercup, European ash, together with a barn funnel weaver, or a domestic house spider as it is known in Europe – spiritually describing the ability for lively thinking.
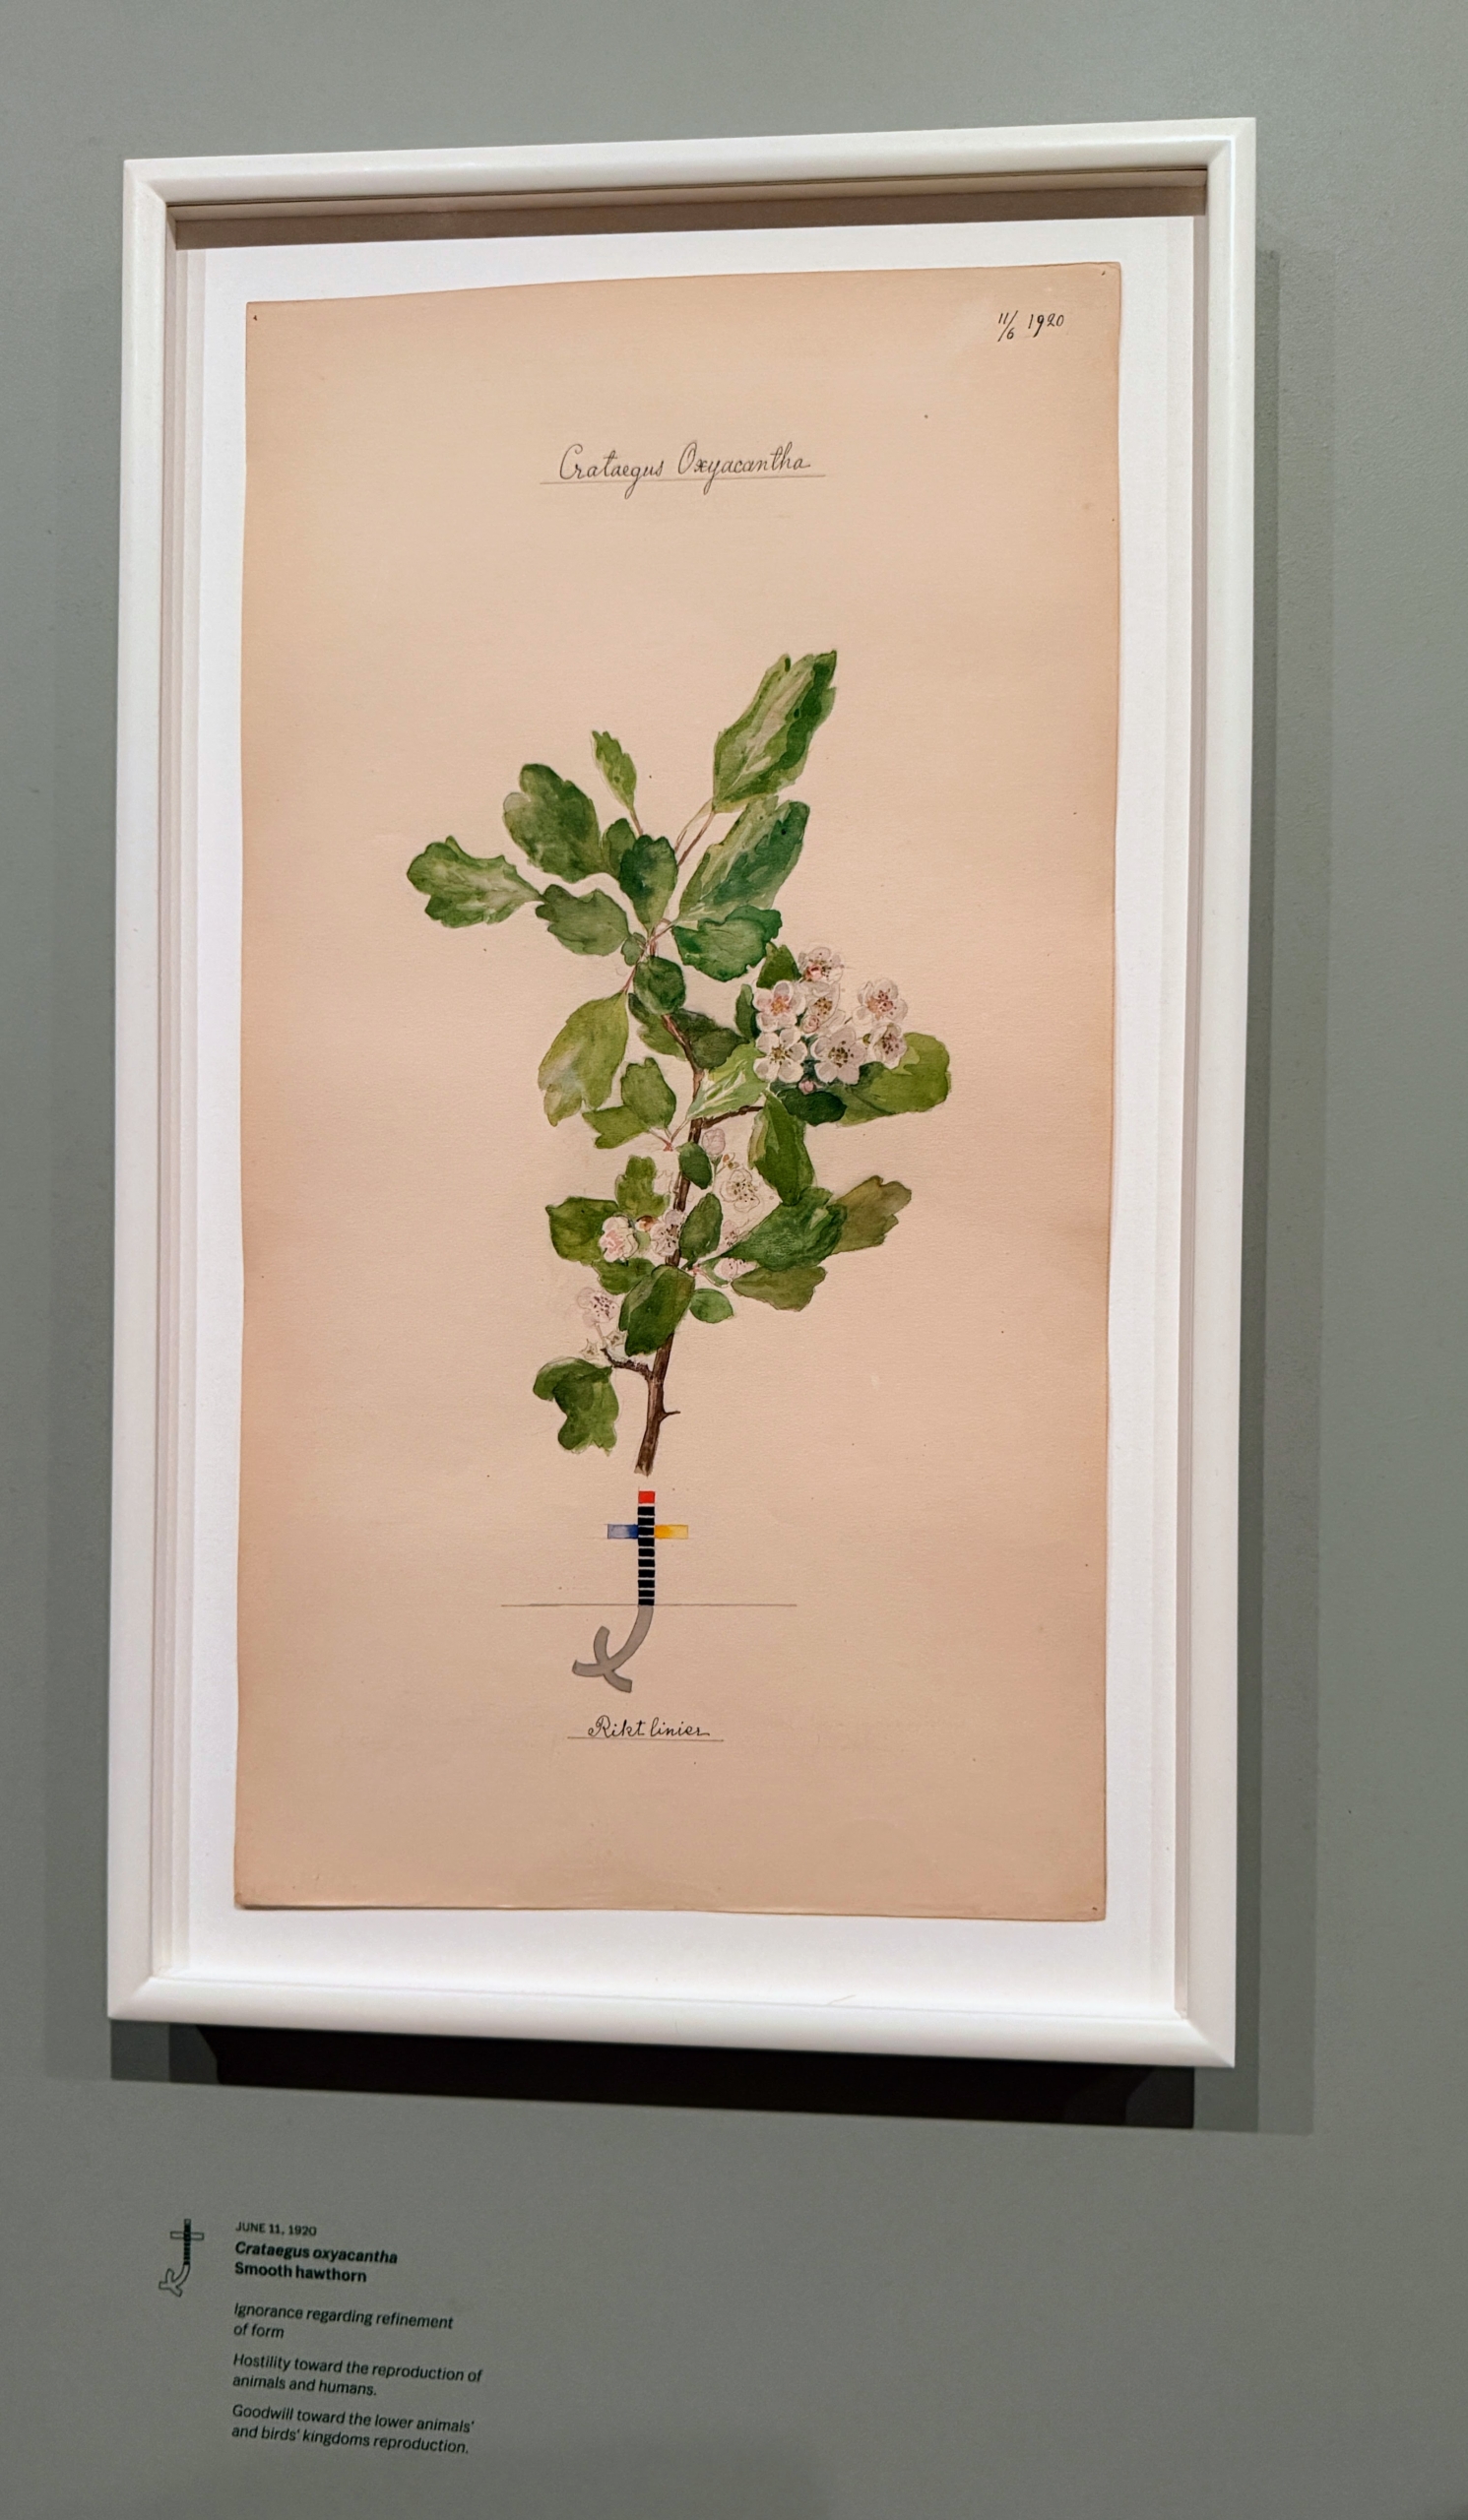
This smooth hawthorn, Crataegus oxyacaantha, is connected to Hilma’s view of reproduction.
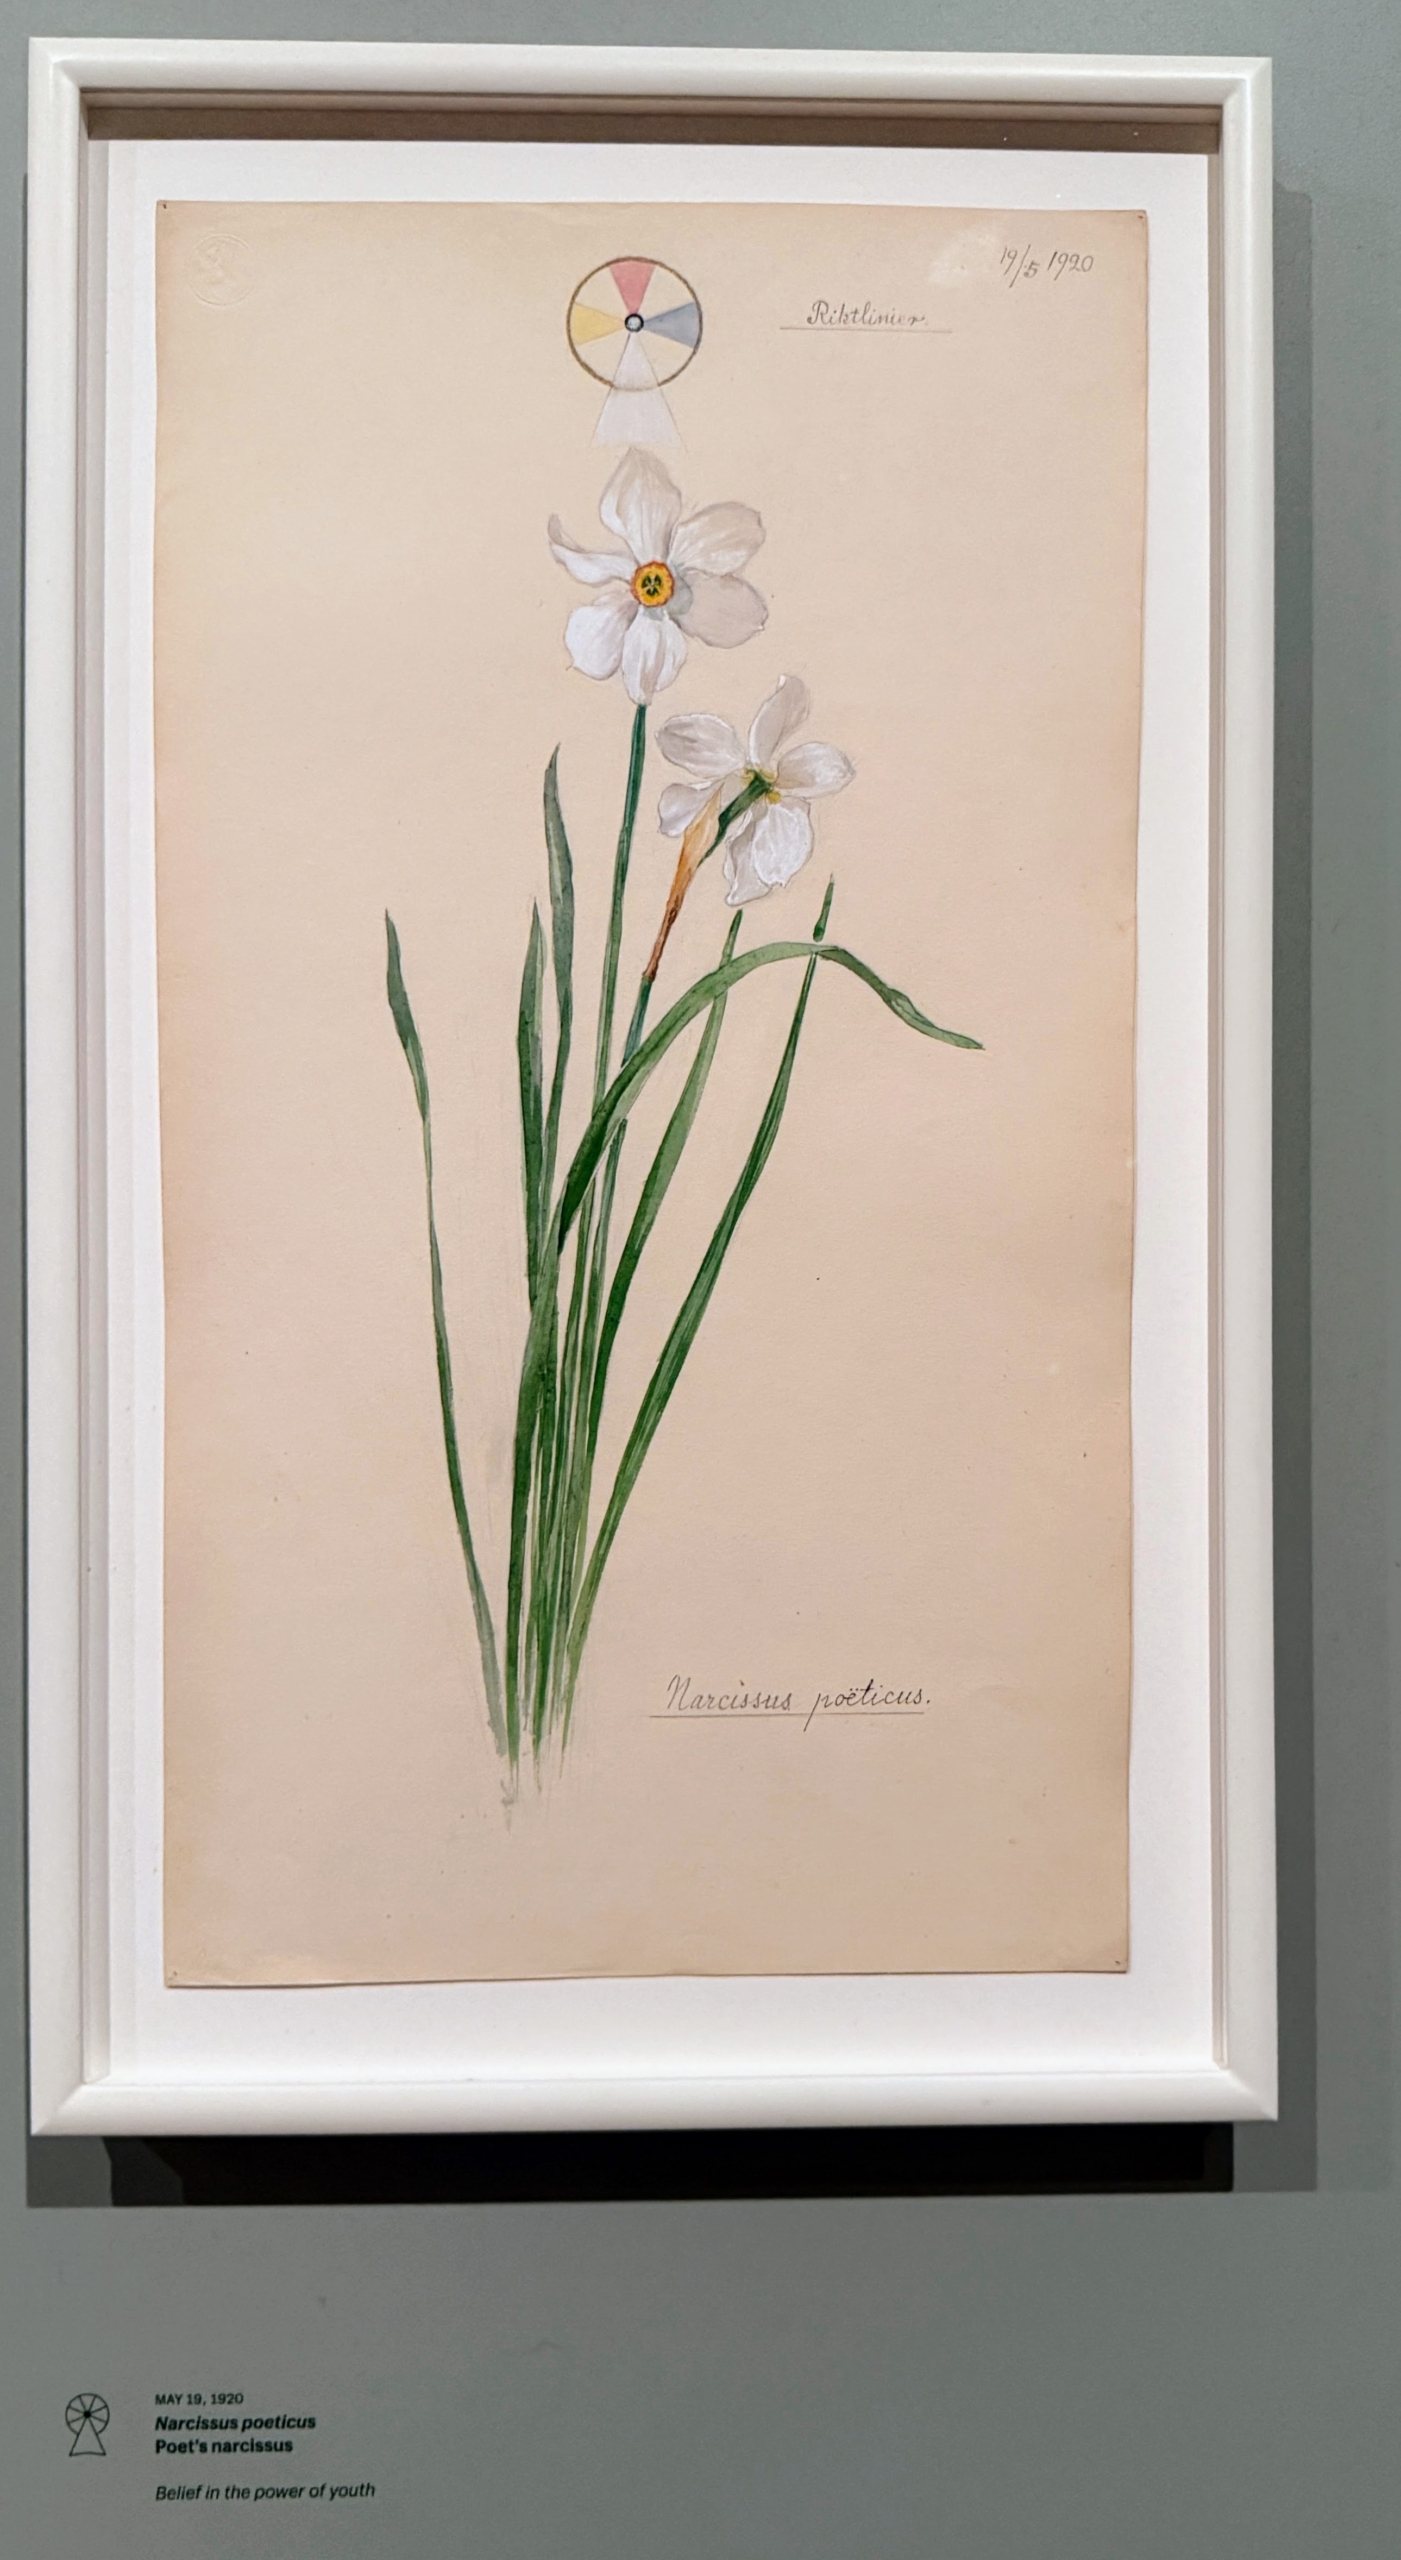
This is a Narcissus poeticus, Poet’s narcissus, showing Hilma’s description of the belief in the power of youth.
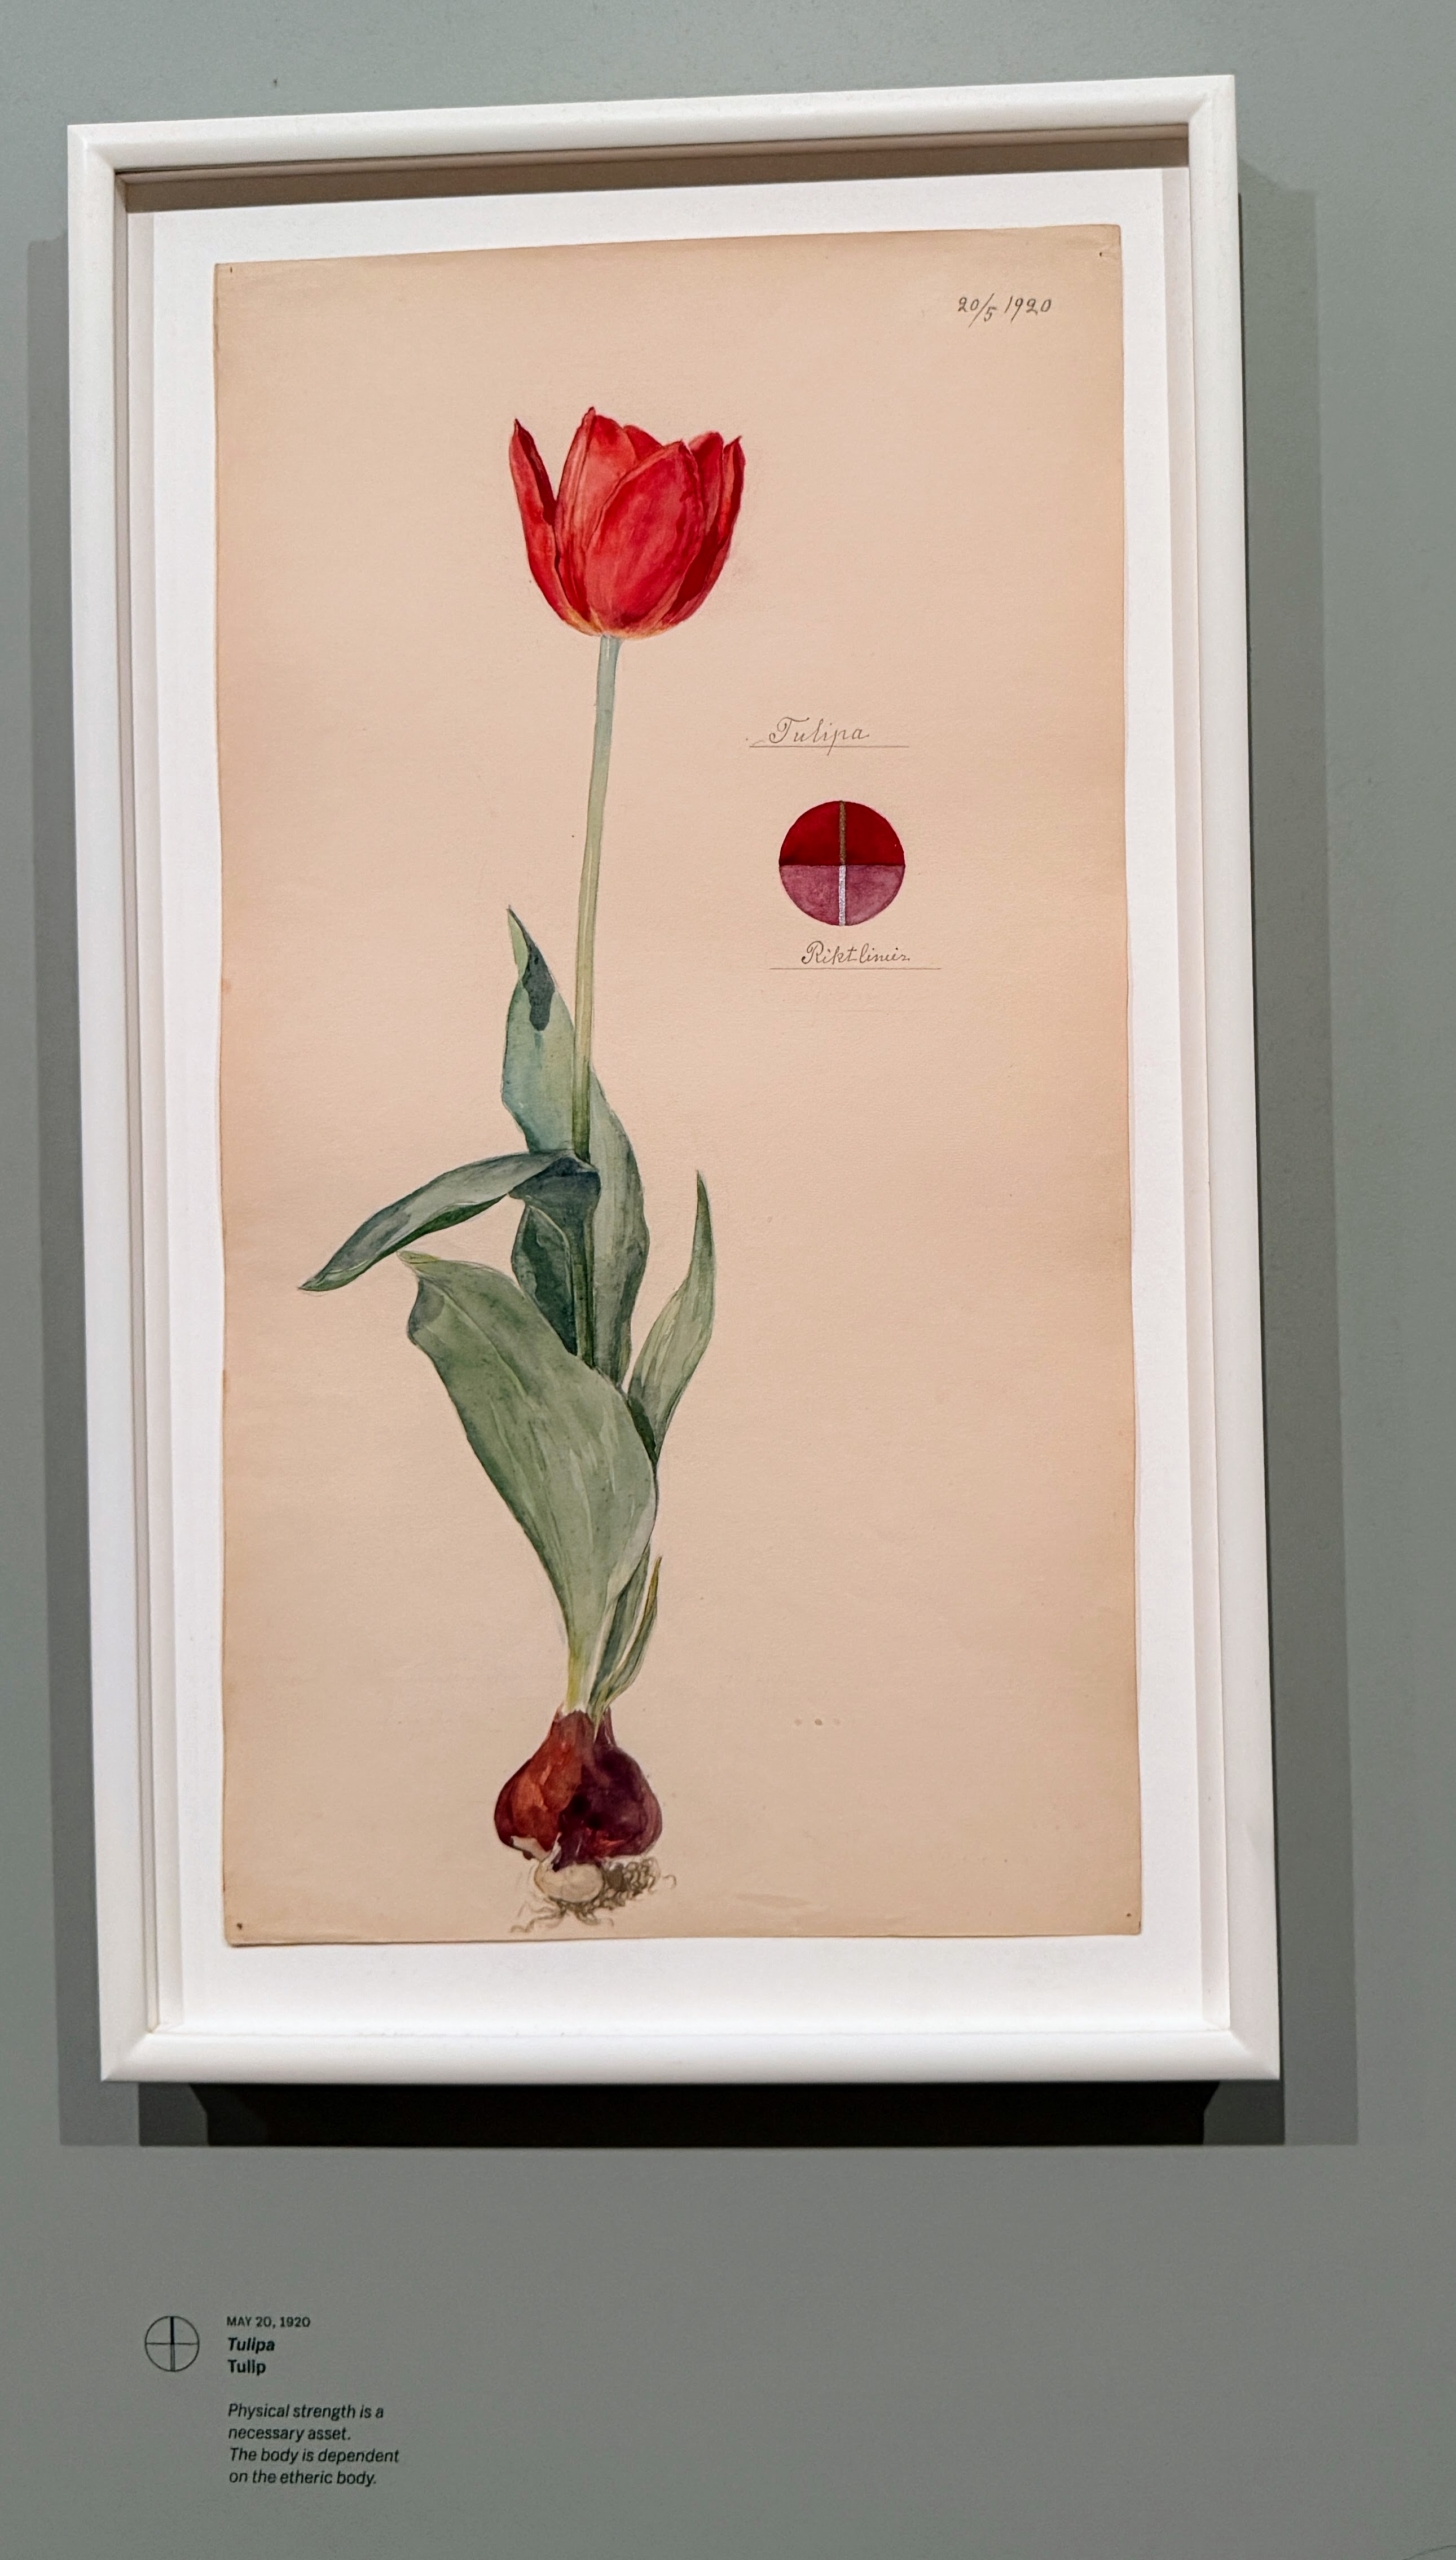
And this is a tulip, complete from bloom to bulb. Hilma uses watercolor, pencil, ink and metallic paint on paper for many of her works.
Here is a beautiful and detailed sketch of a white wagtail bird – a small, slender passerine bird known for its distinctive black, white, and gray plumage and tail-wagging behavior.
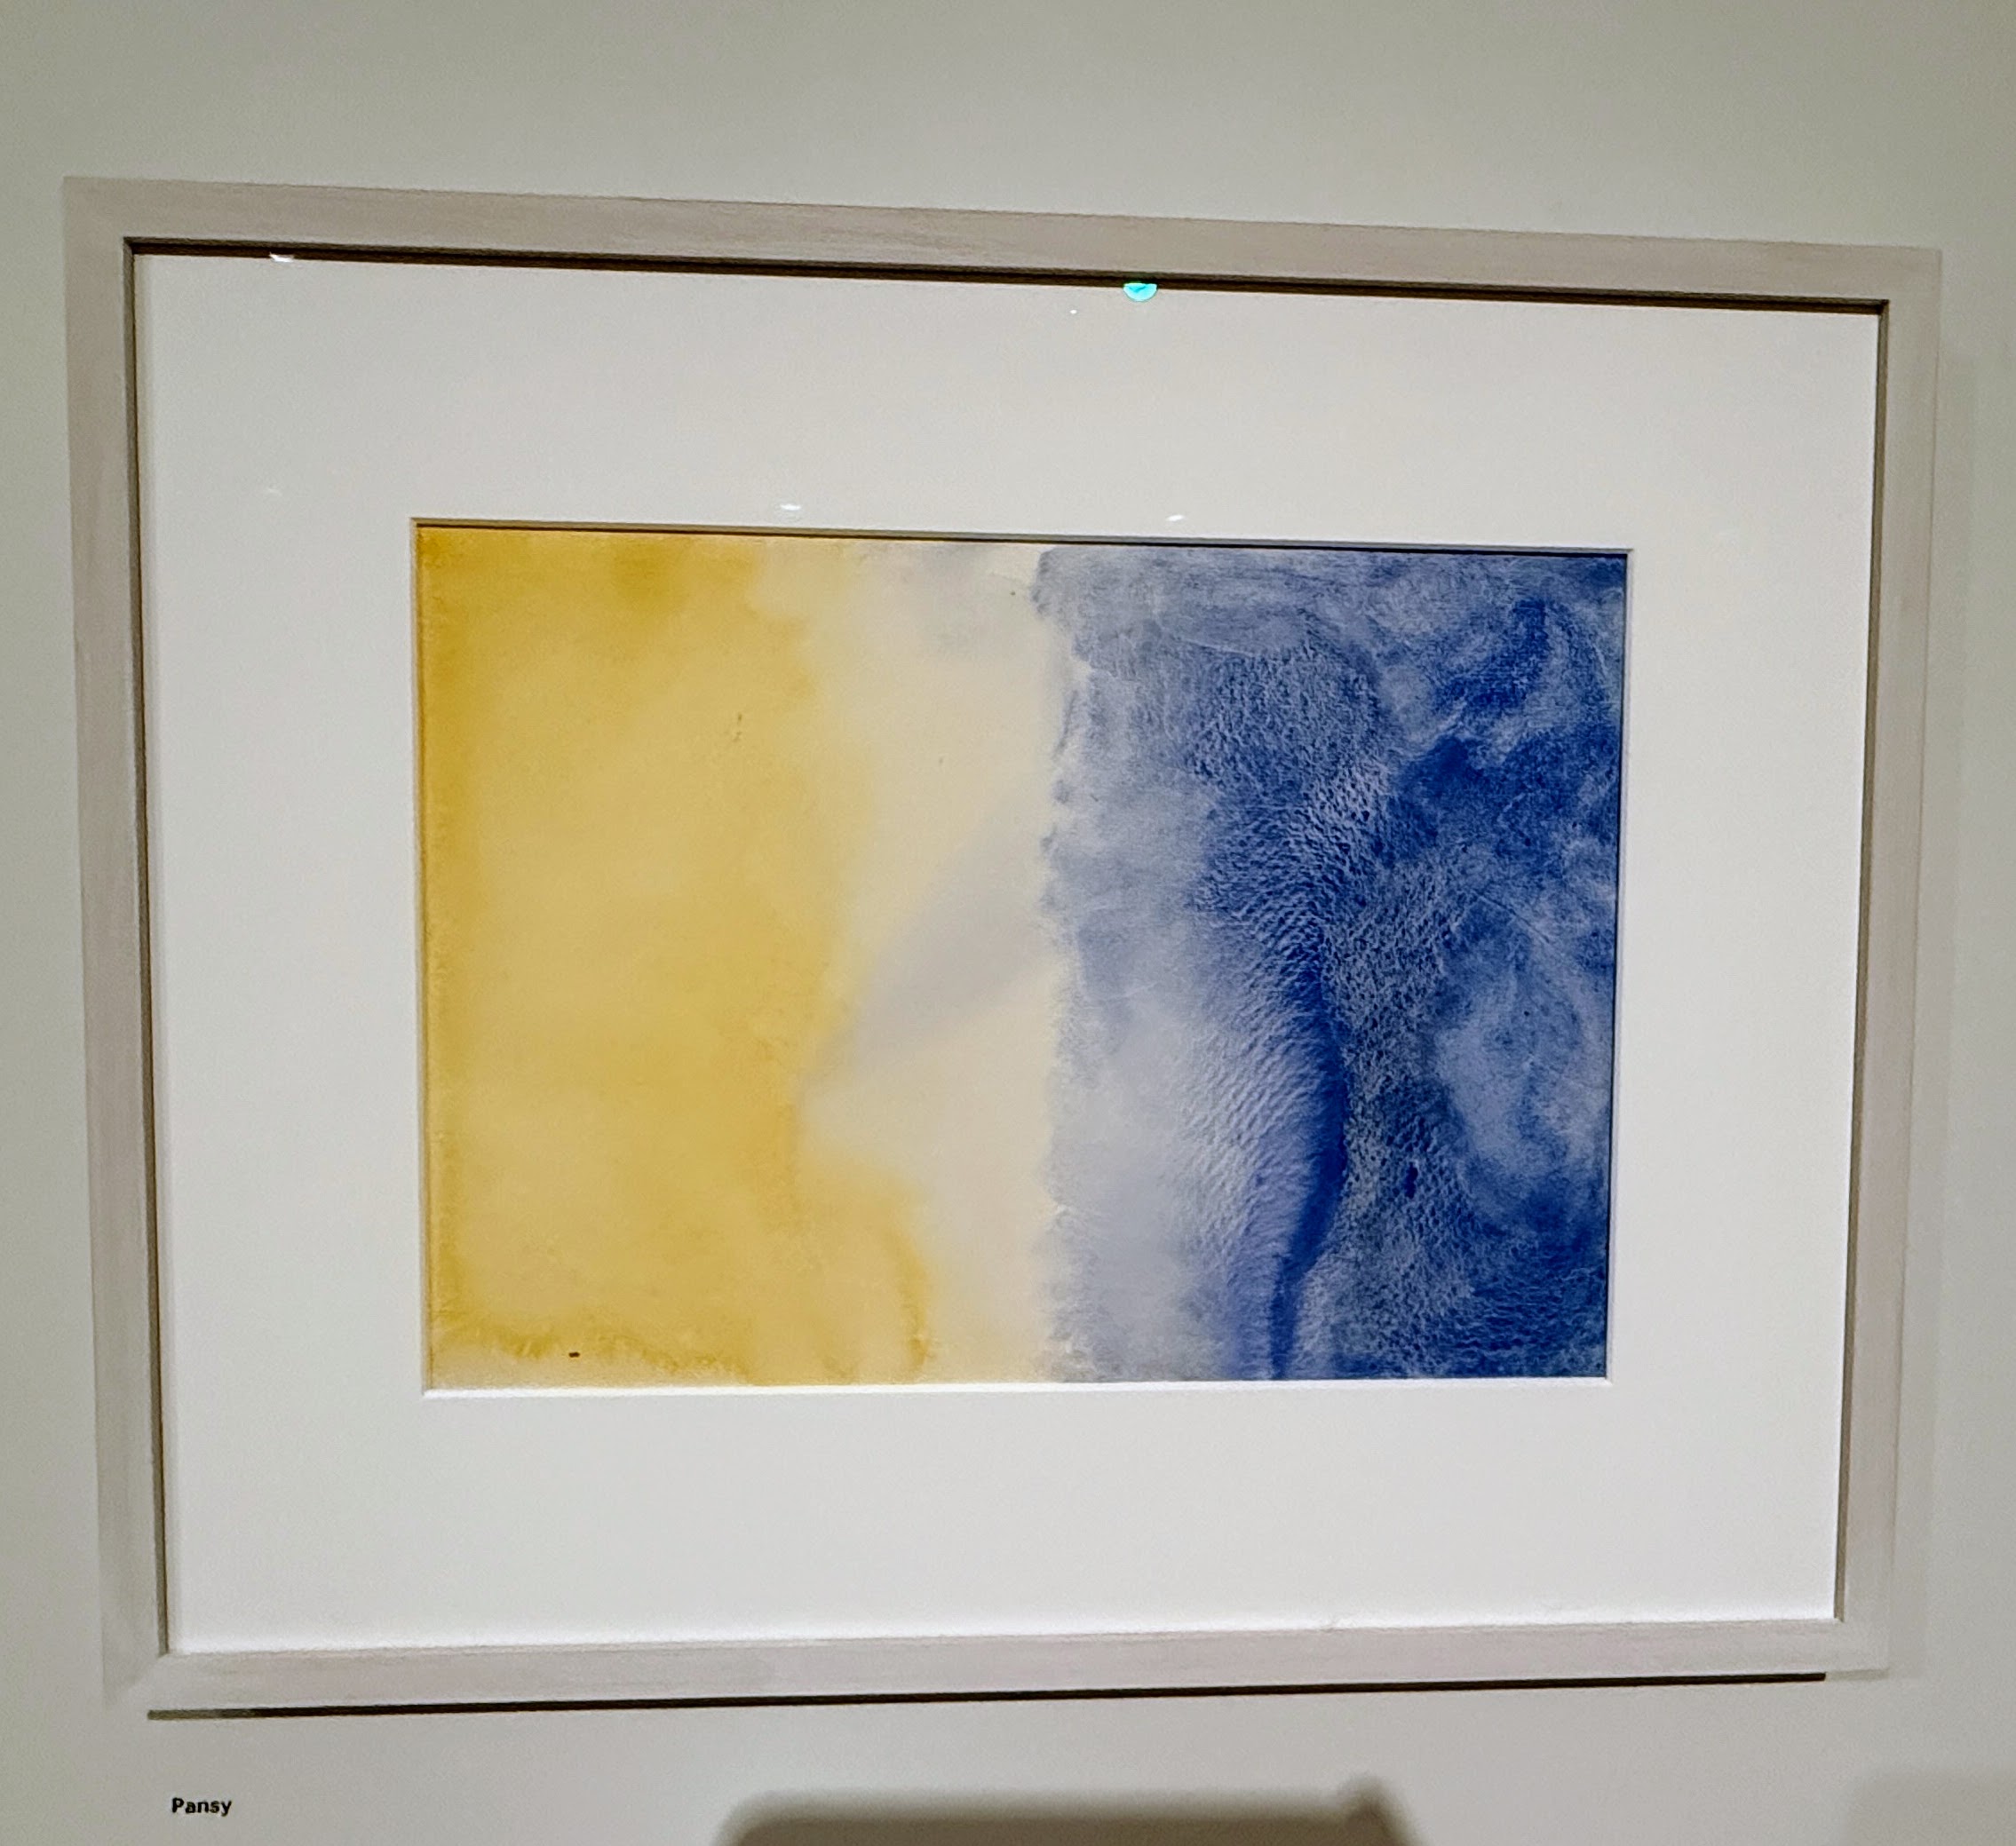
This is one from an arrangement of abstract pieces that closes the exhibit. It is called “Pansy.” The series contains bright and energetic paintings using wet on wet watercolors – a more fun and free use of expression. If you can, do stop in at the MoMA and see the presentation – a first time offering of Hilma af Klint. It’s on view until September 27th.
It's always nice to share photos of the "before" and "after" of a garden project.
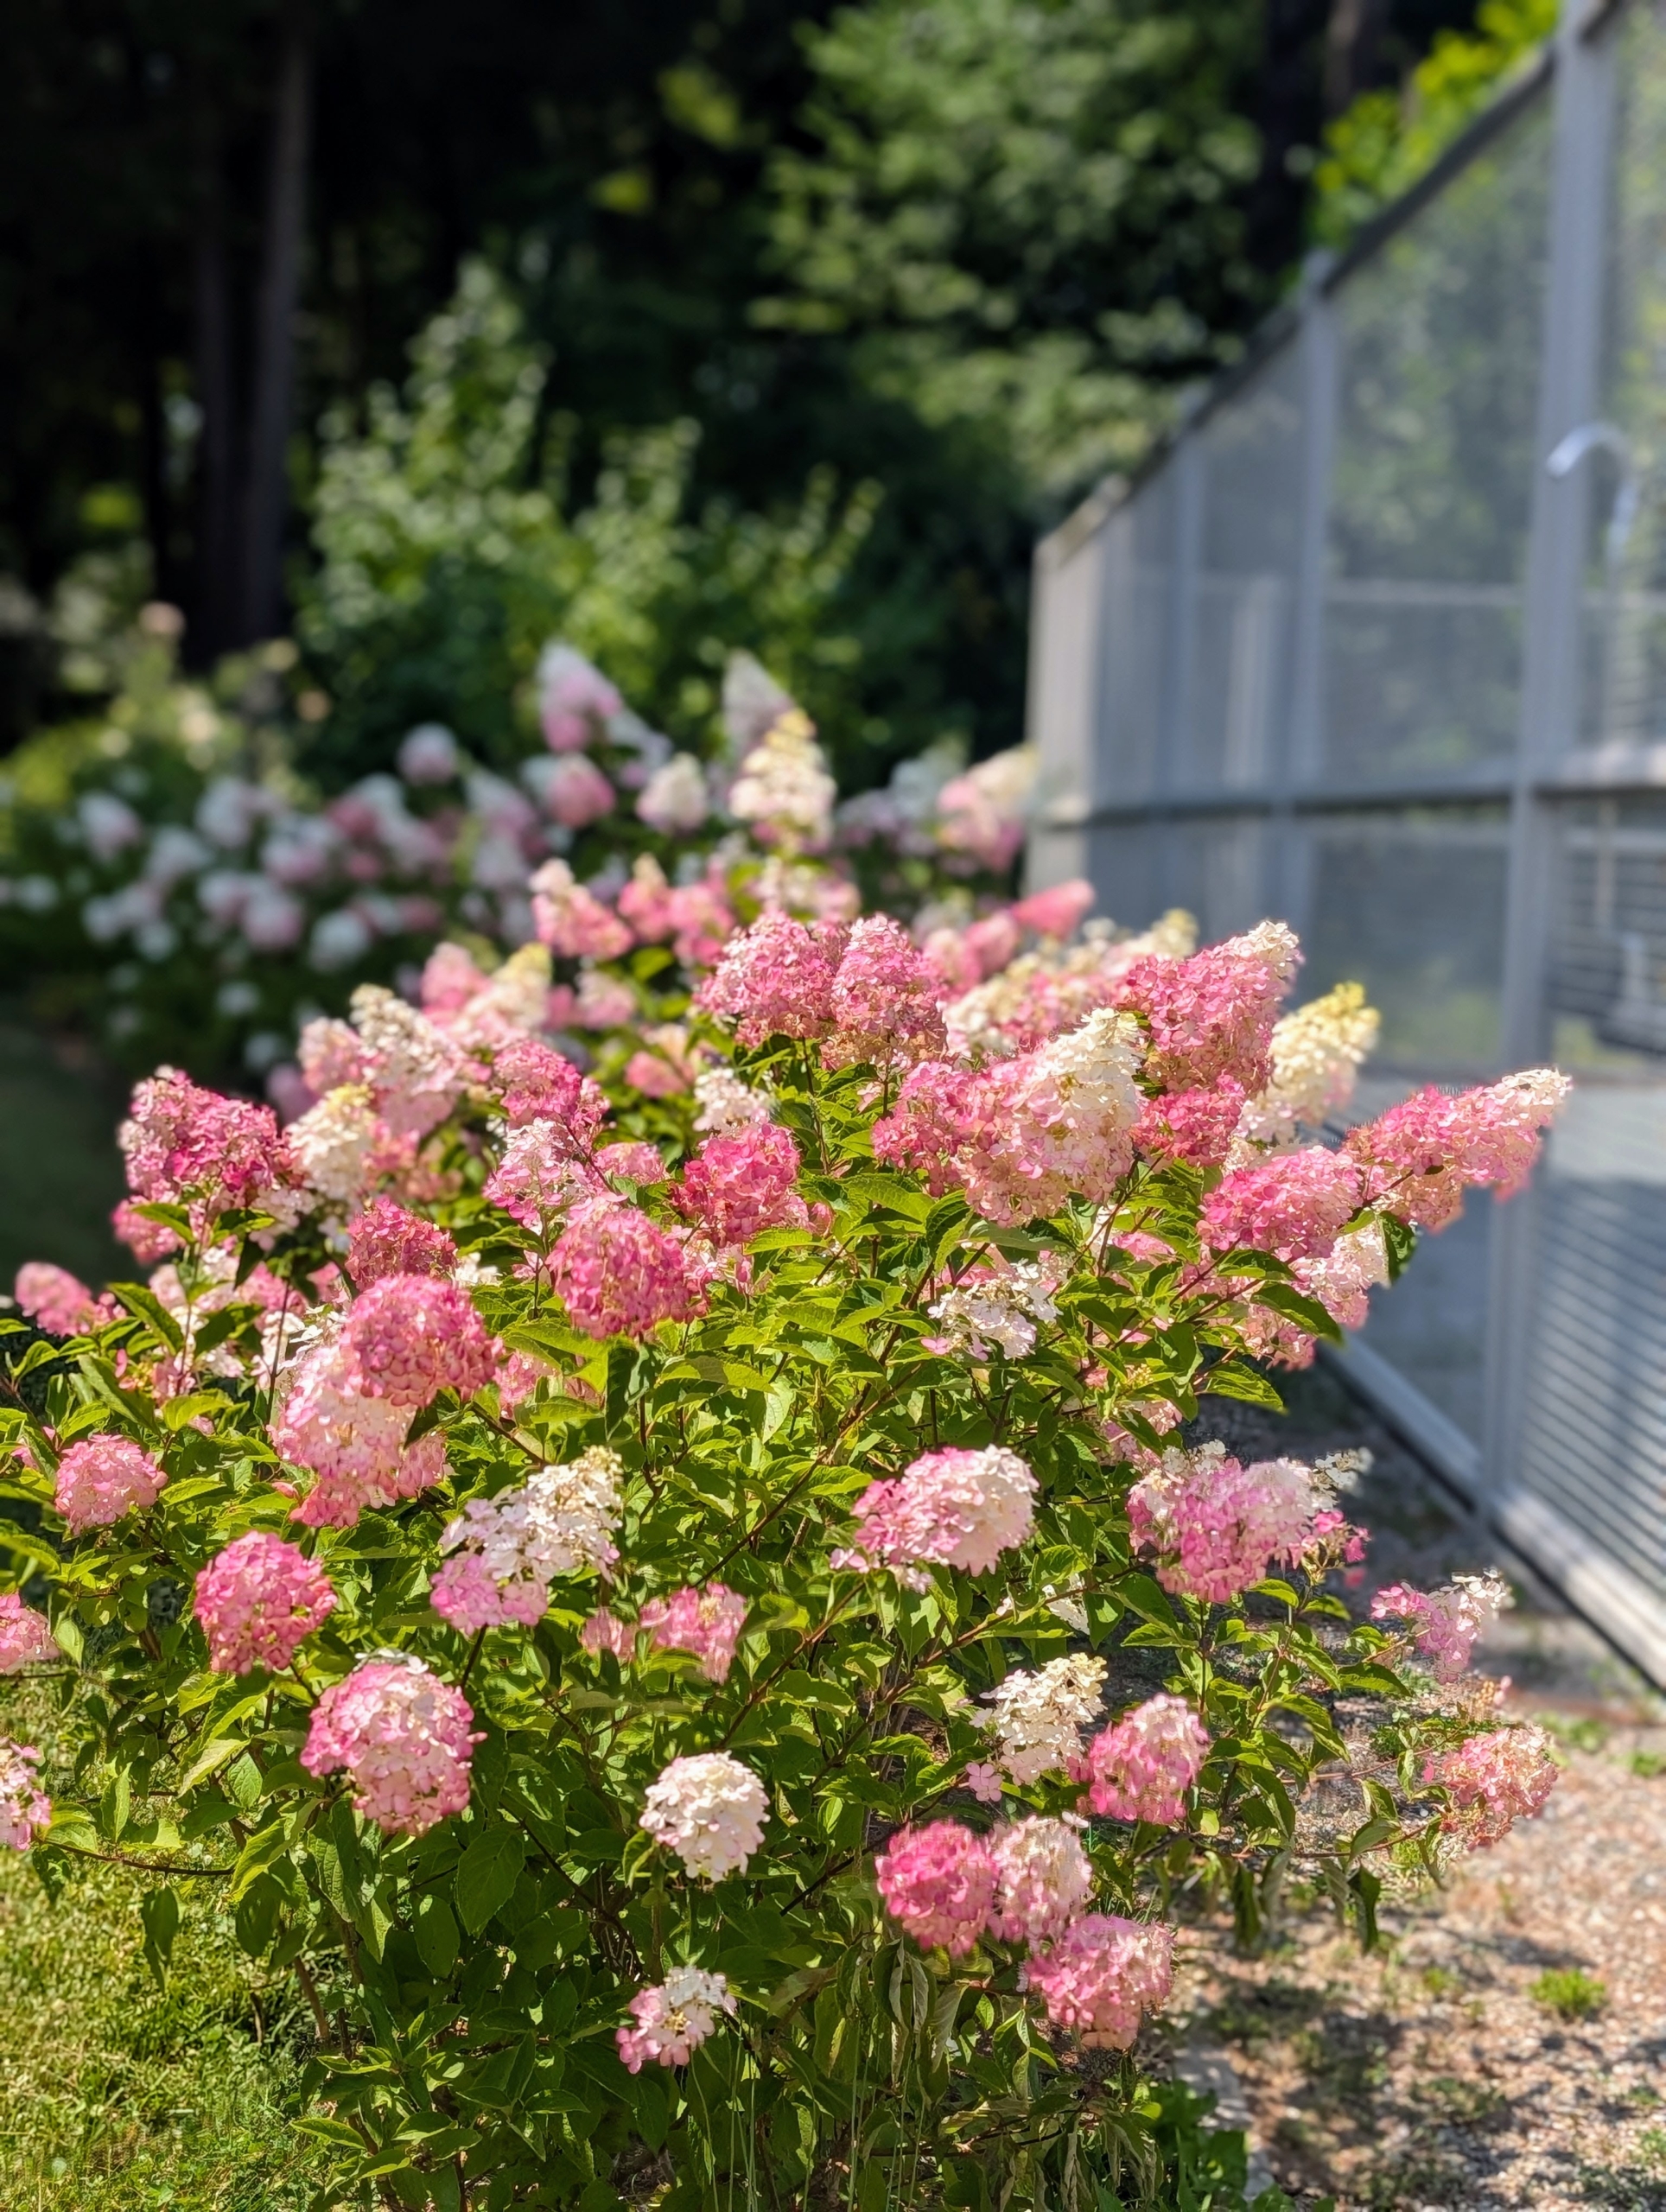
My farm sits on more than 150 acres of gardens, pastures, and woodlands. Every year, I work hard to design new garden spaces and enhance existing ones. I take into consideration a plant's growing needs and mature size and then plant accordingly. Down by my tennis court, I already have a collection of white hydrangeas growing on one side. Last July, I decided the area would look even better with hydrangeas planted all around the court. I planted a combination of white and pink blooming shrubs. And exactly 12 months later they're blooming wonderfully.
Enjoy these photos.
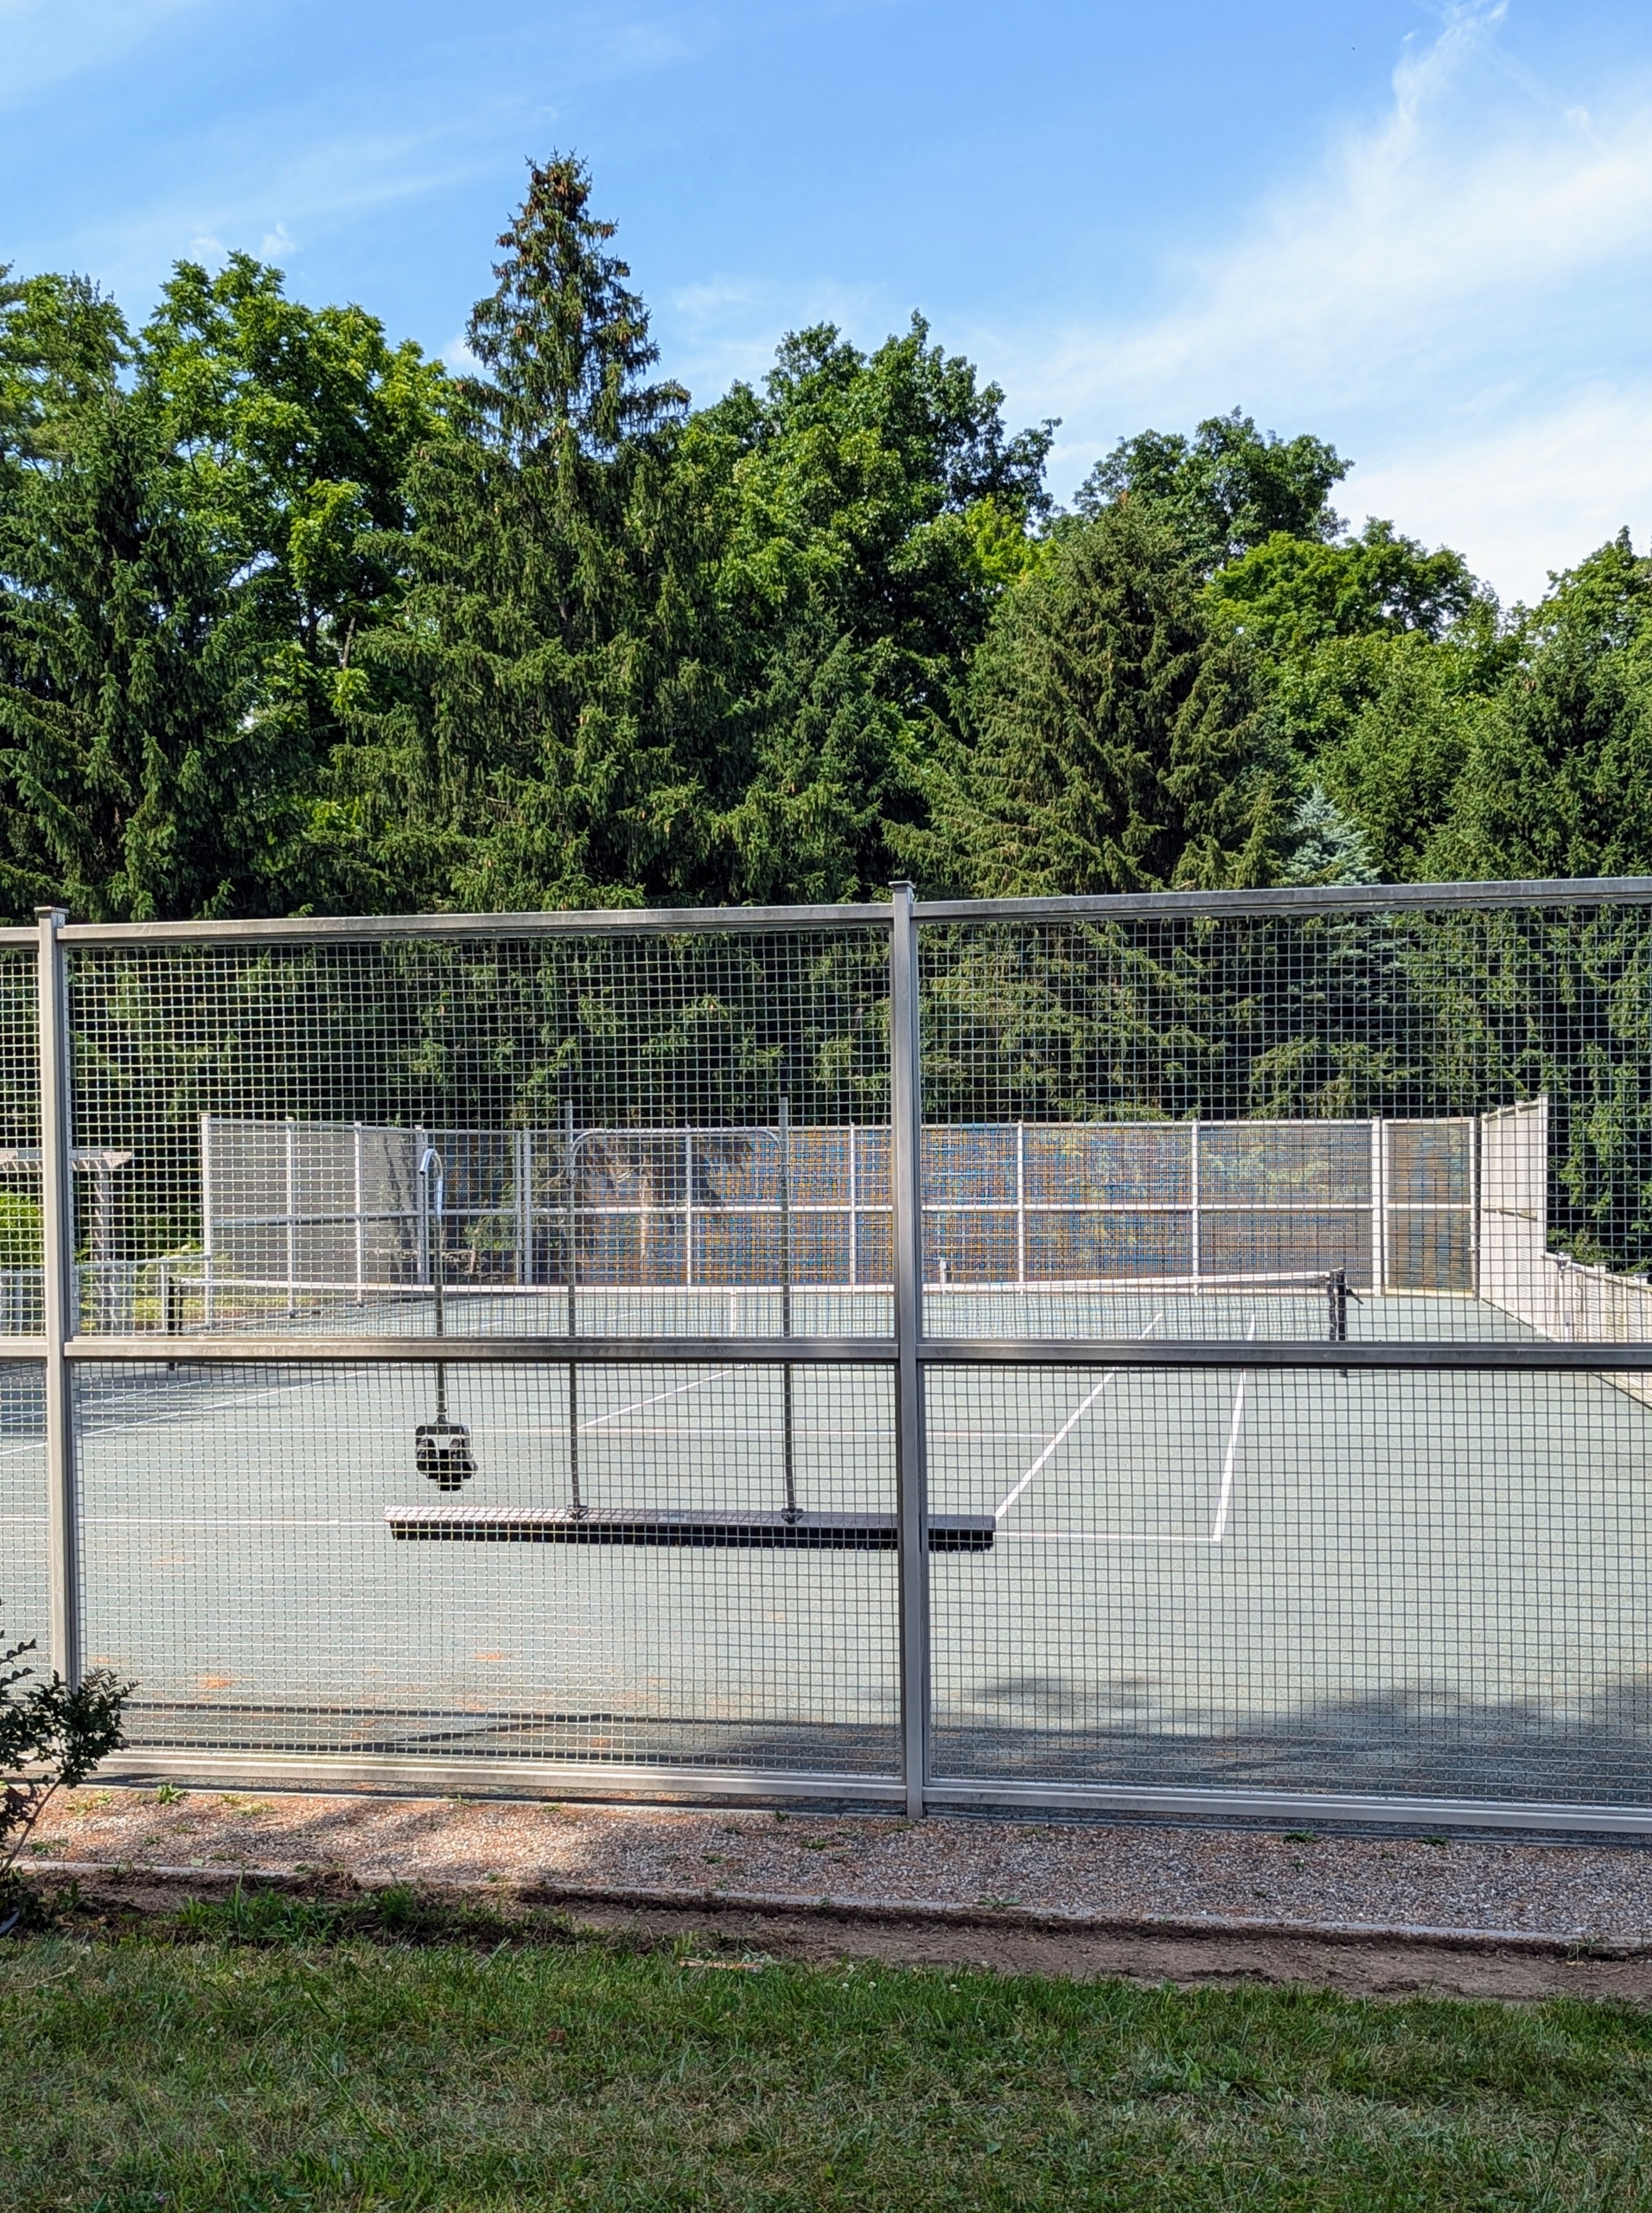
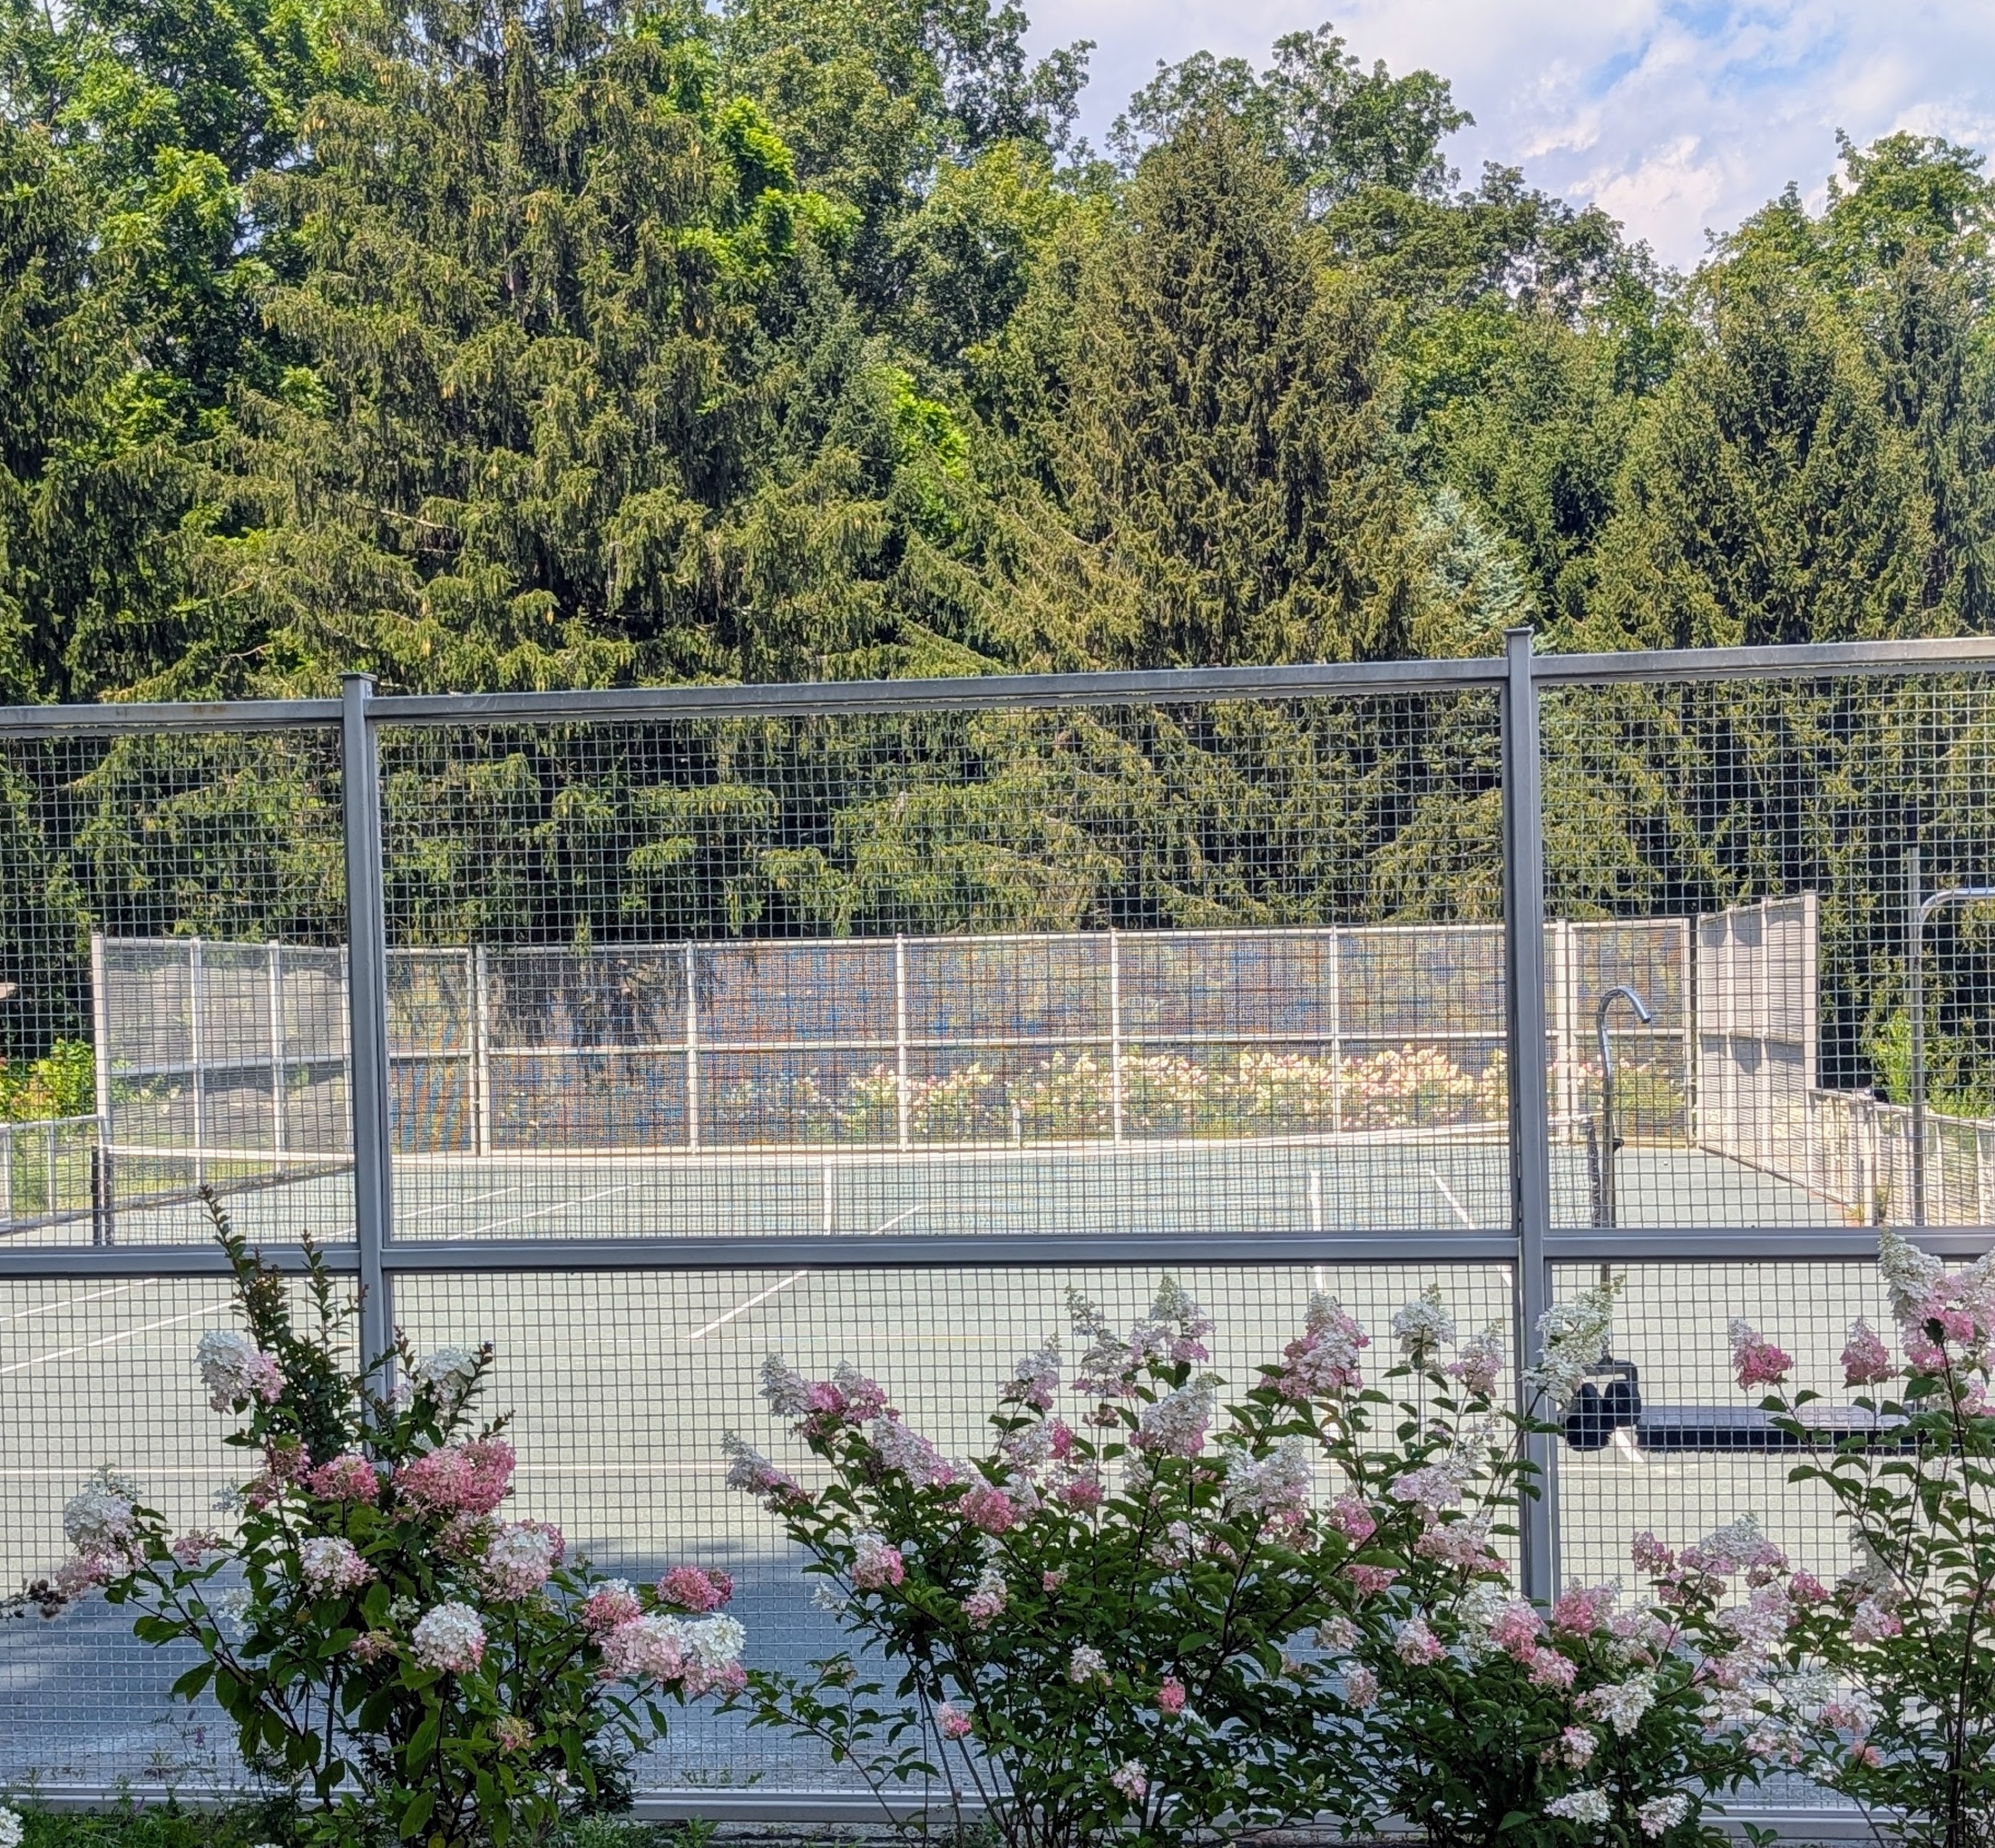
My tennis court is tucked away in a far corner of my farm. The court is surrounded by the same type of fencing as my perennial flower garden. And like all the other structures, it is painted Bedford gray.
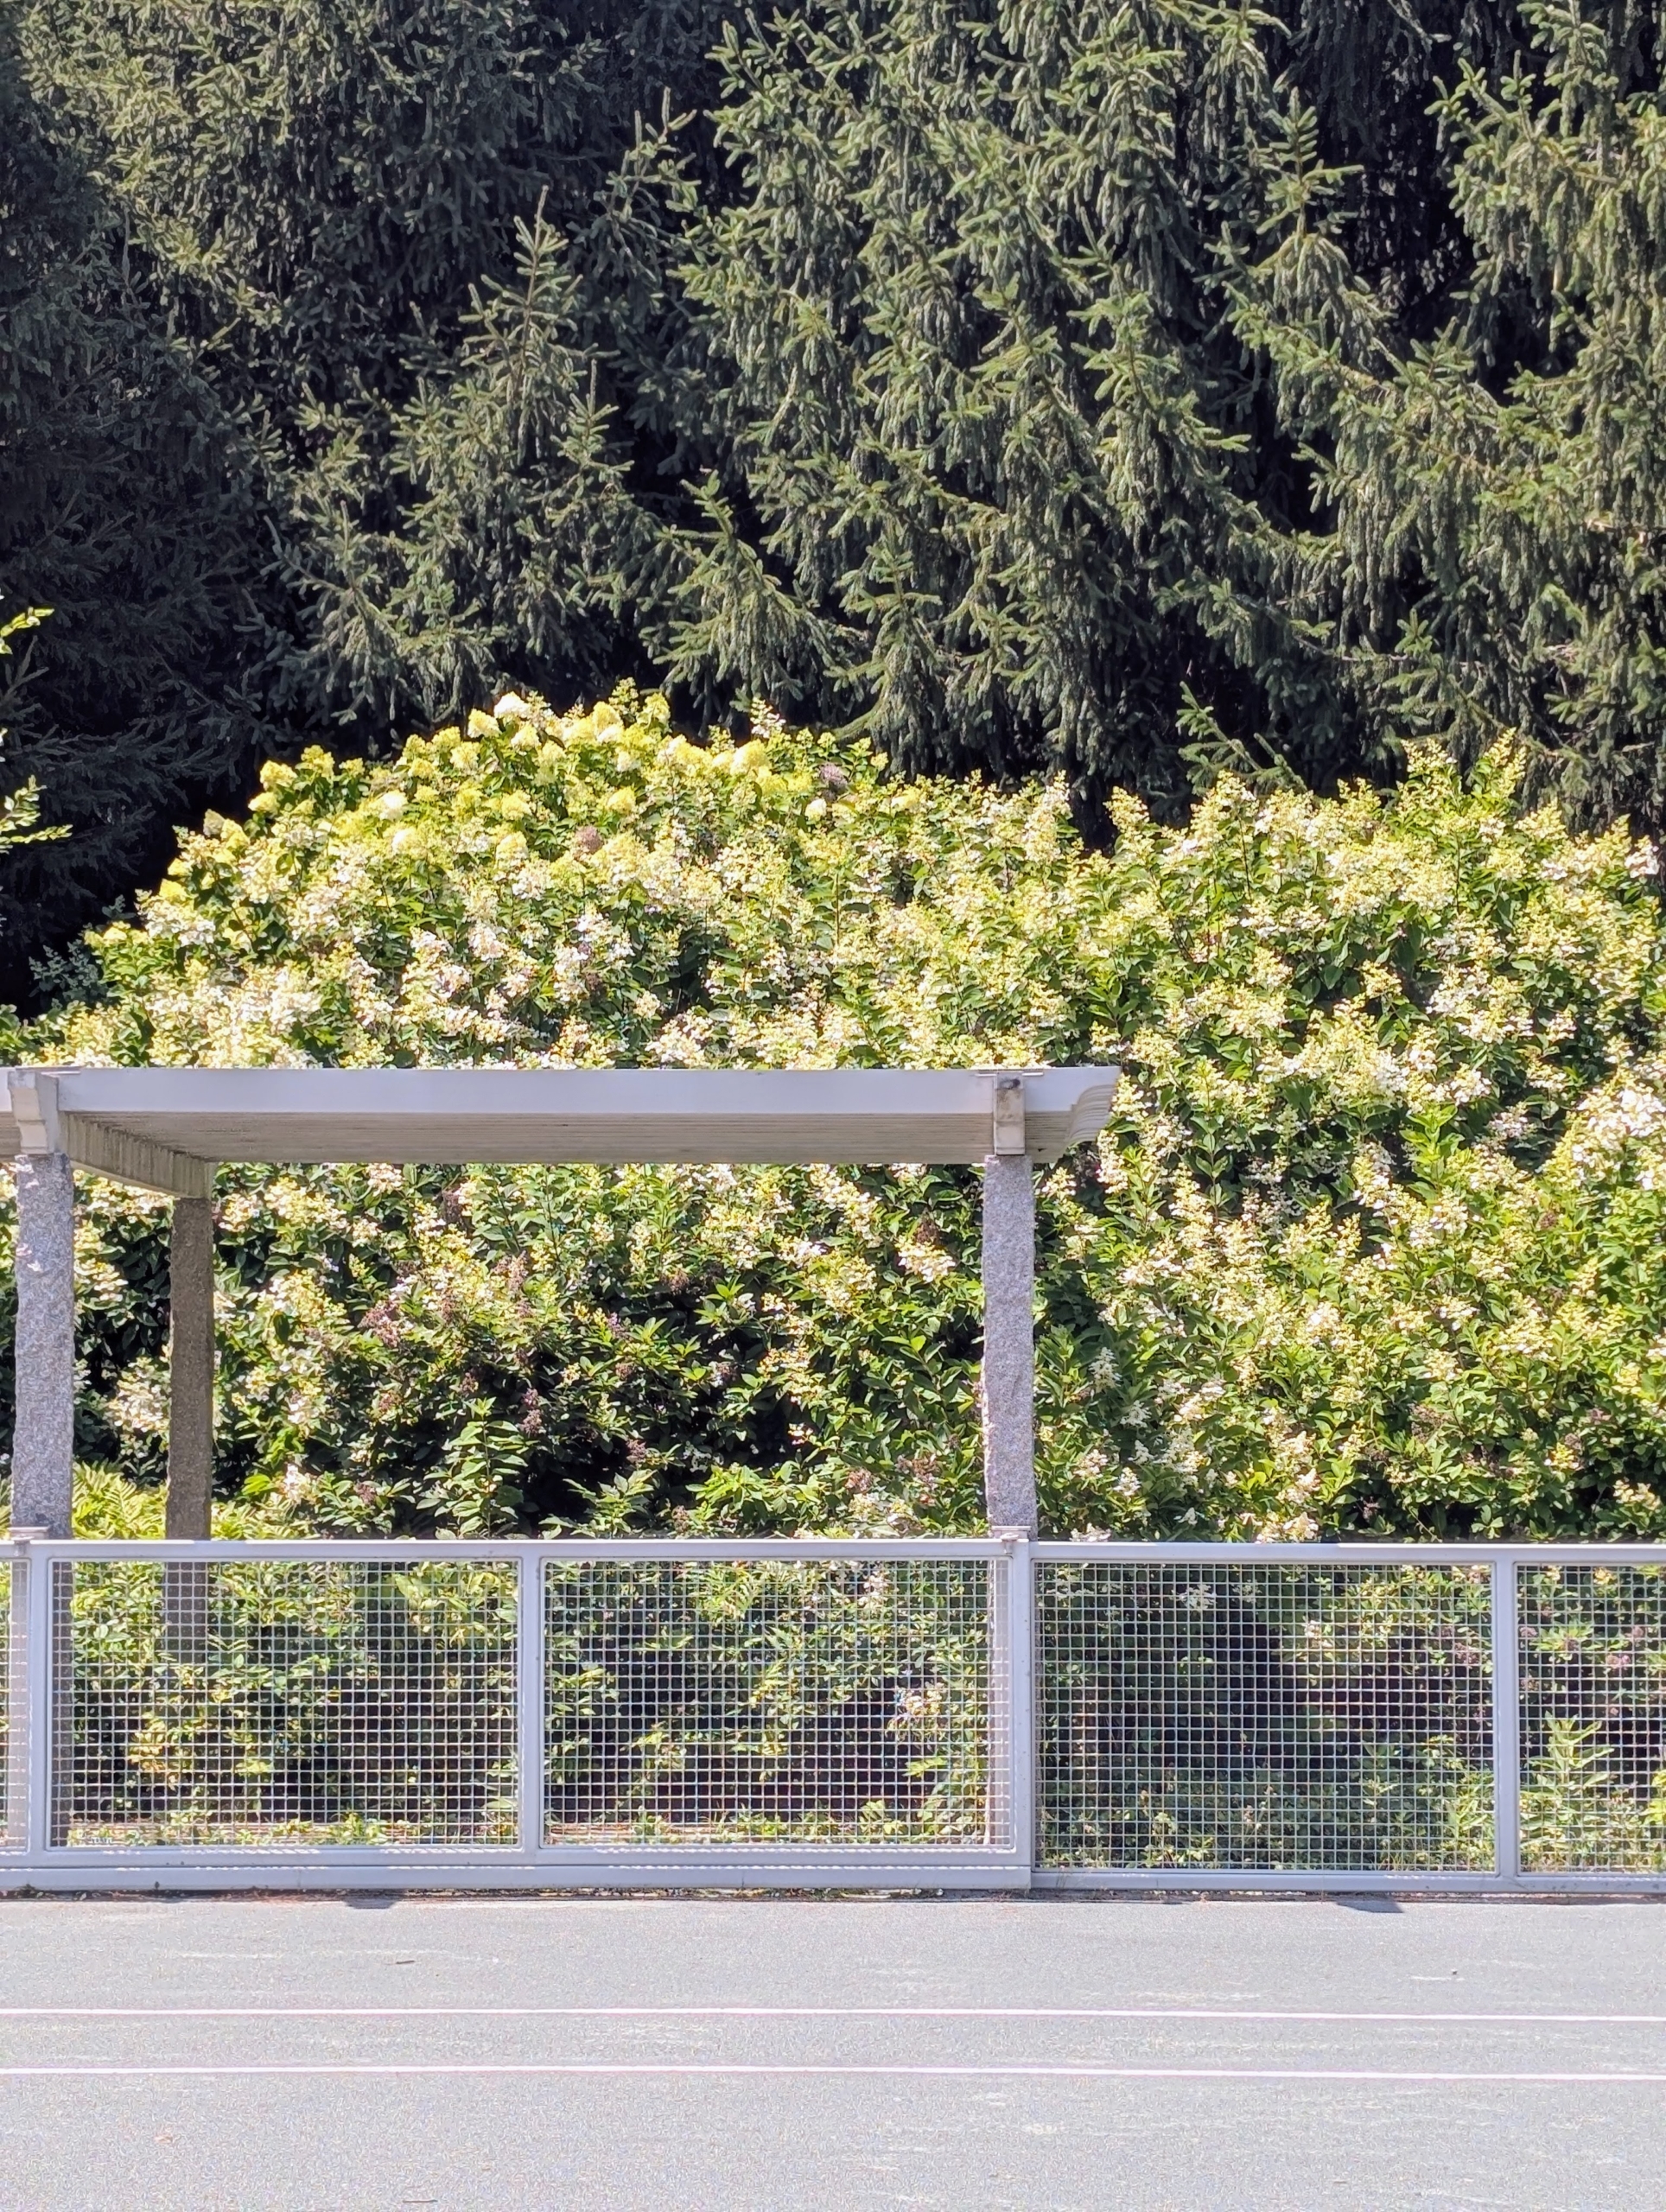
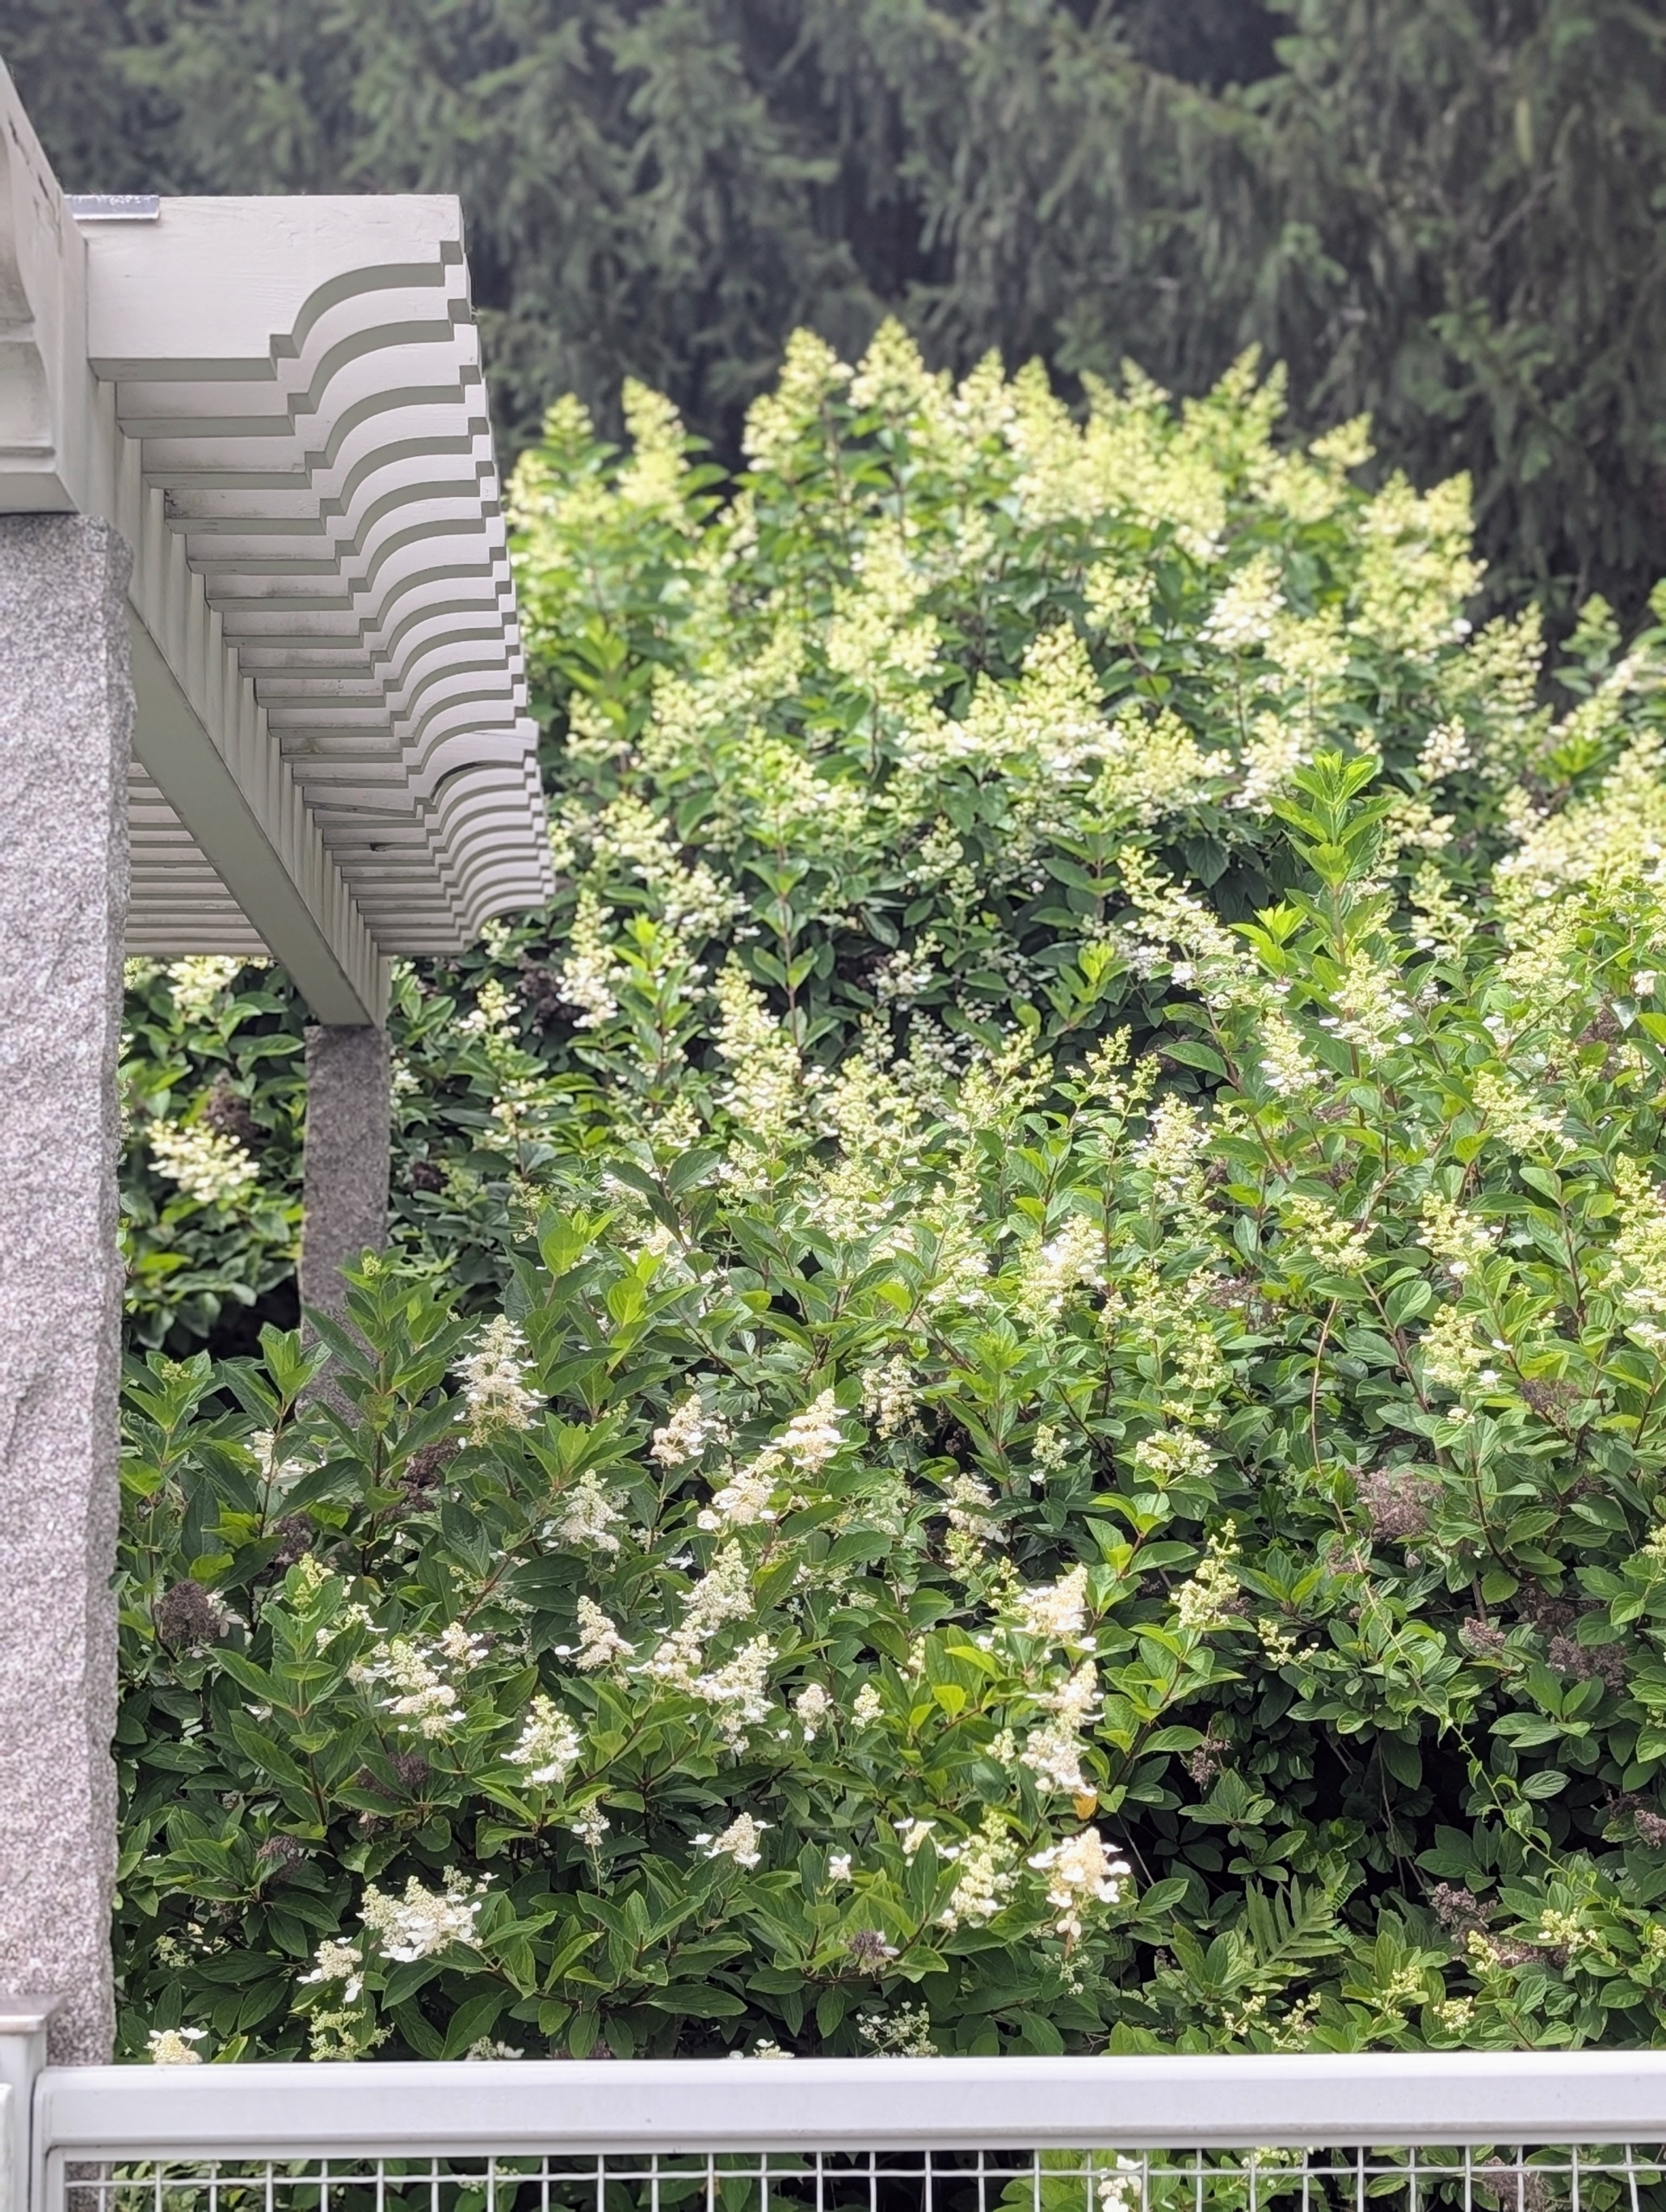
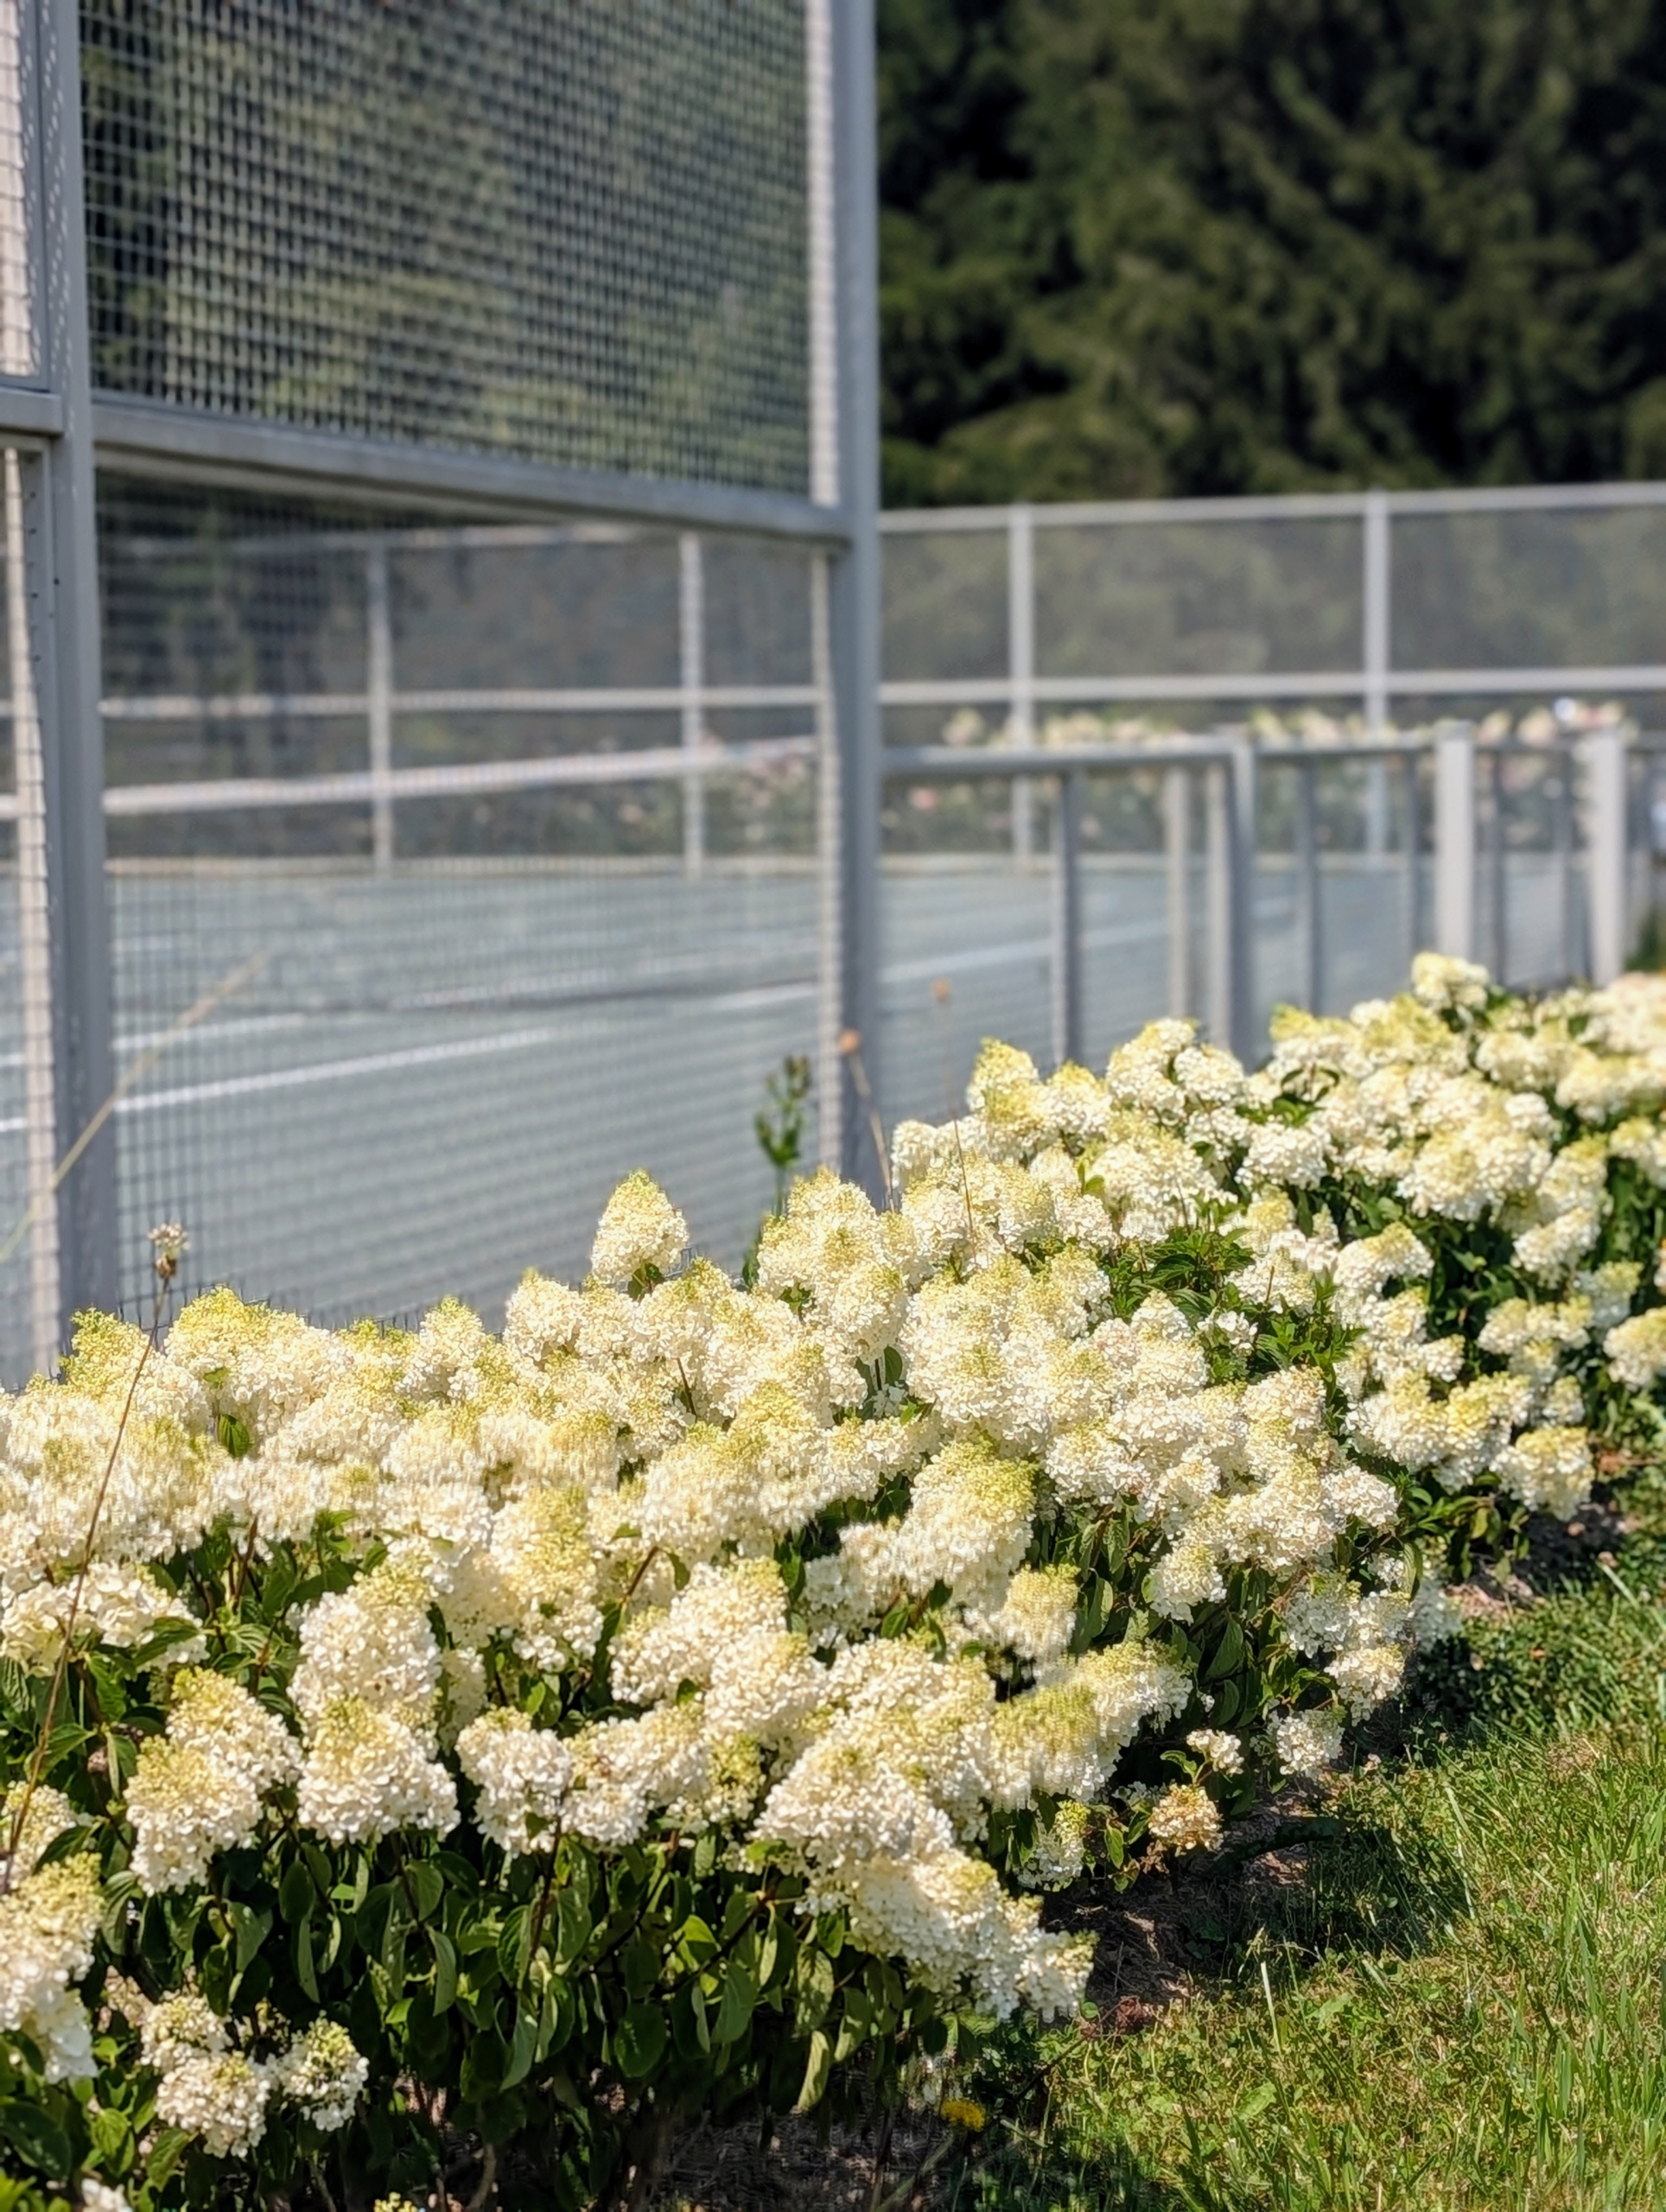
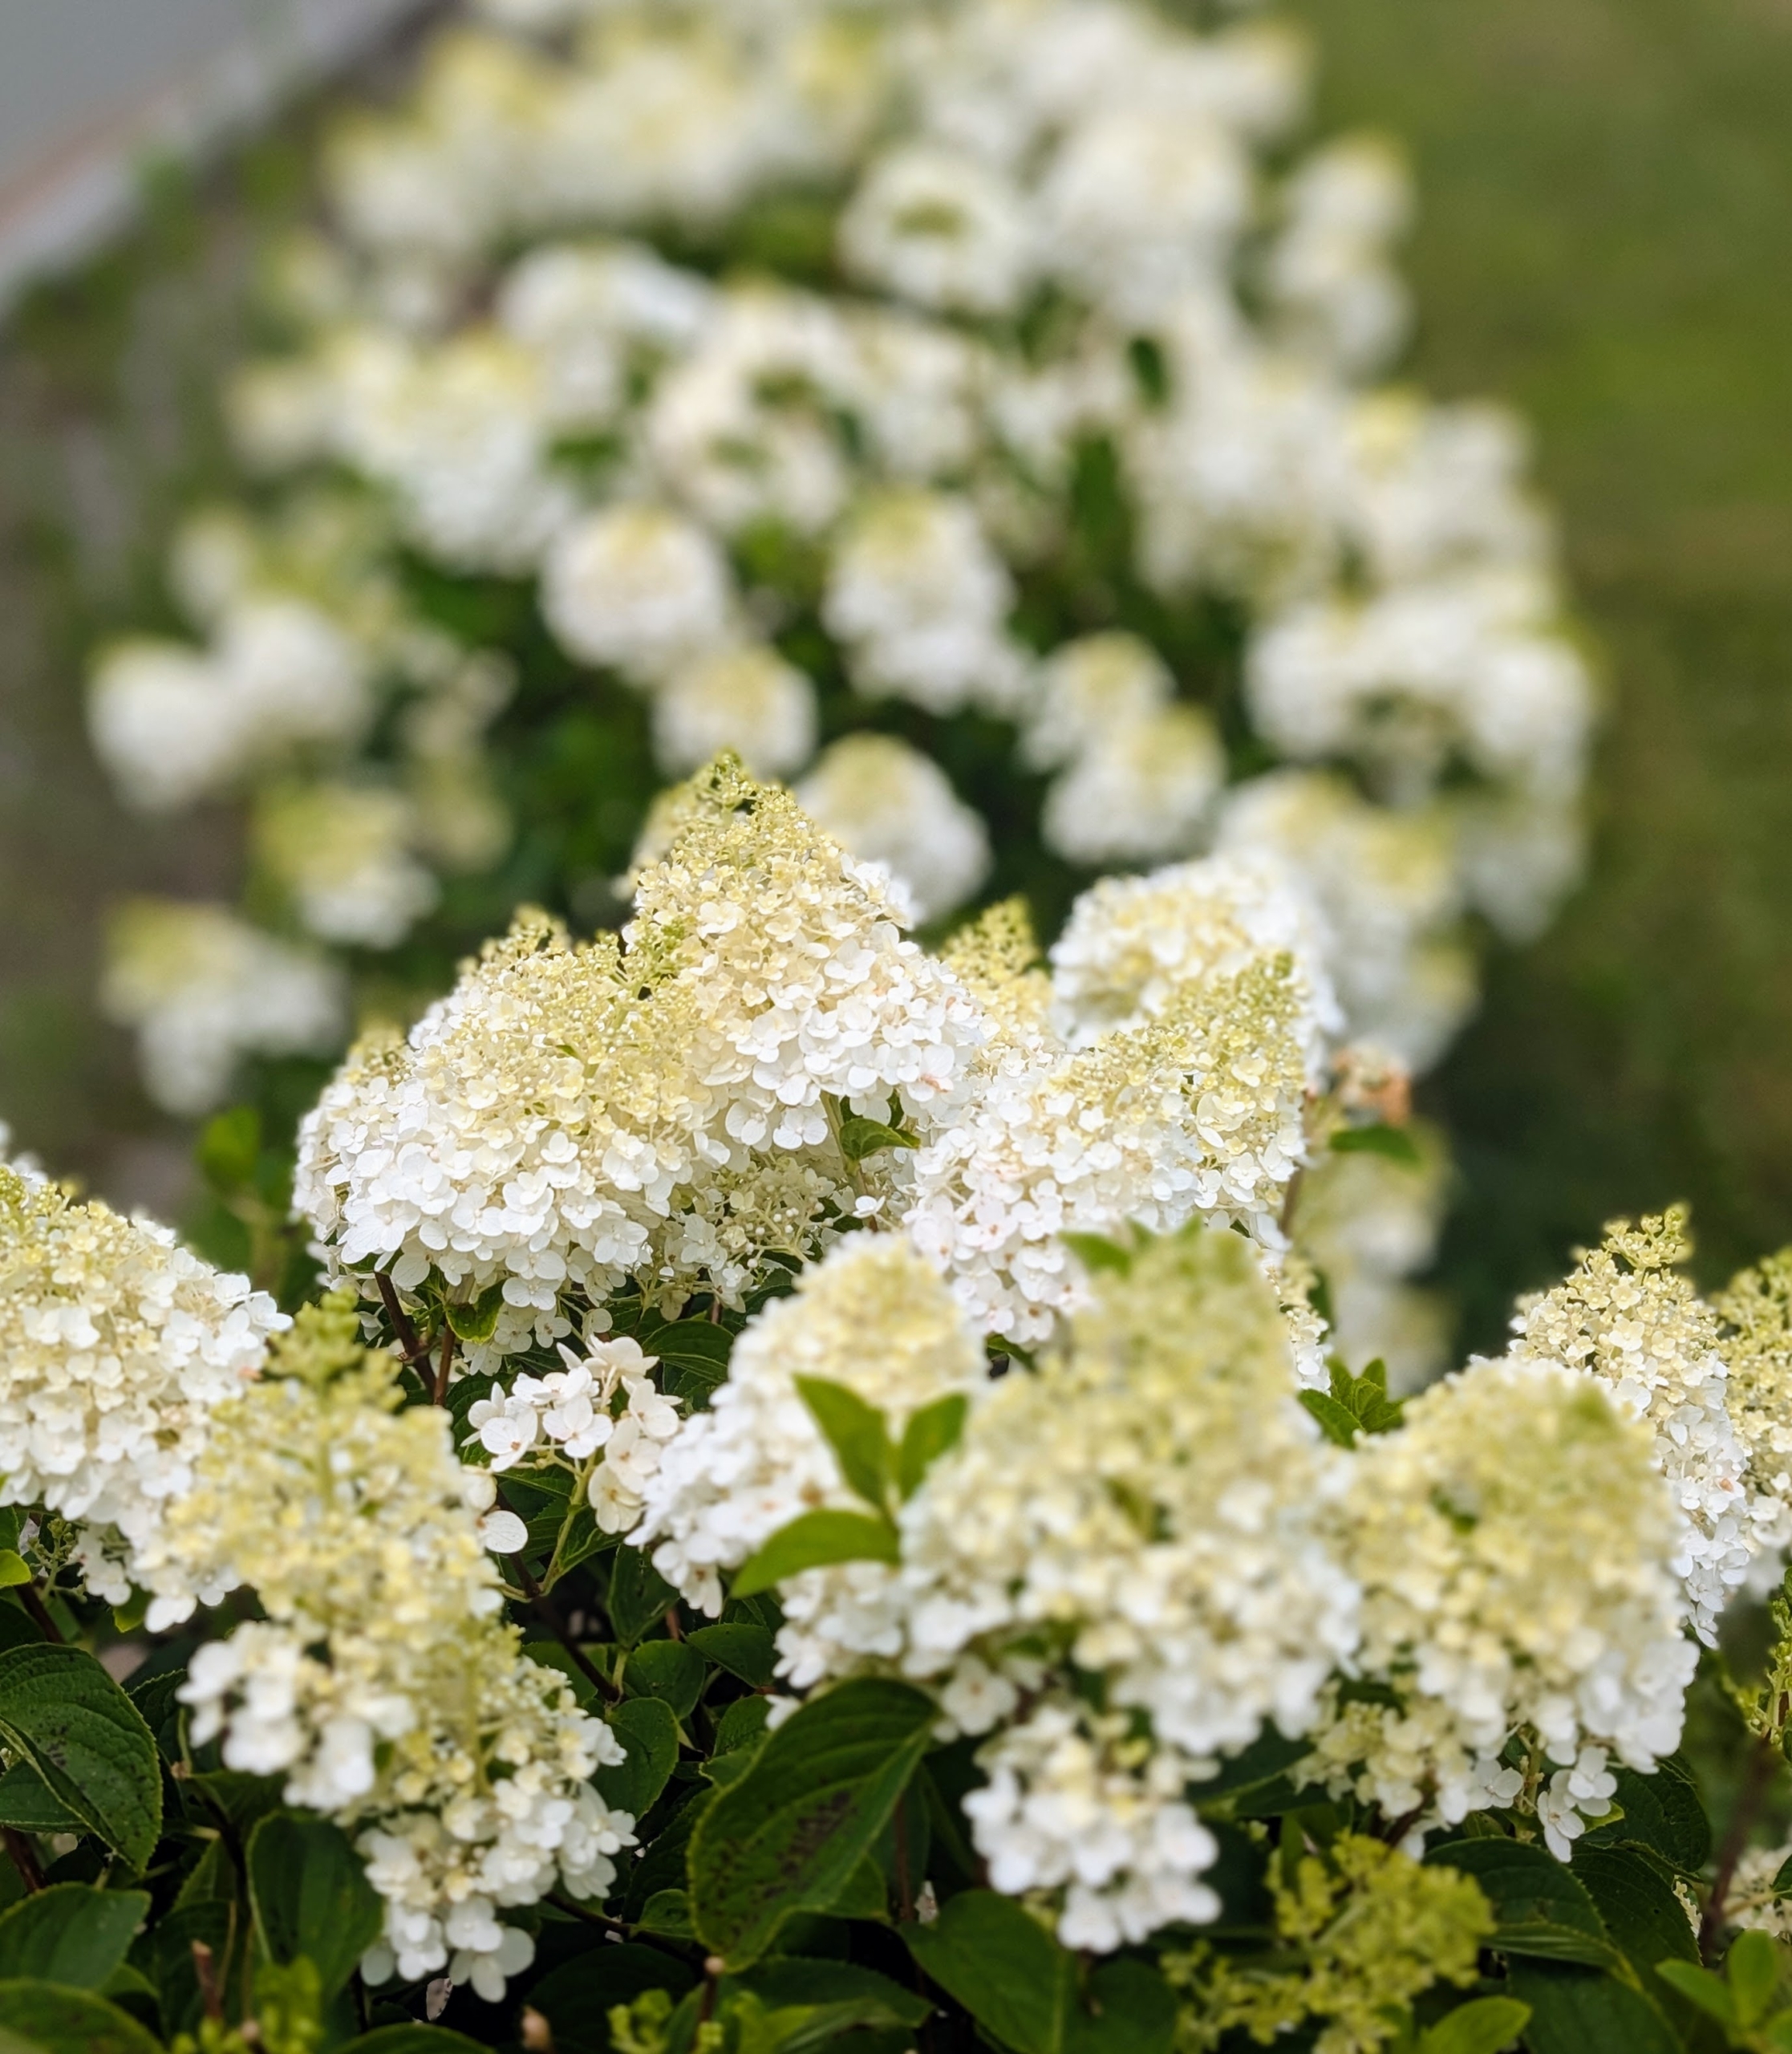
On one side of the court behind and next to the observation pergola, is a selection of beautiful white hydrangeas including Pee Gee hydrangeas.
During summer they bloom so beautifully – the flowers are so big, they can be seen from the carriage road.
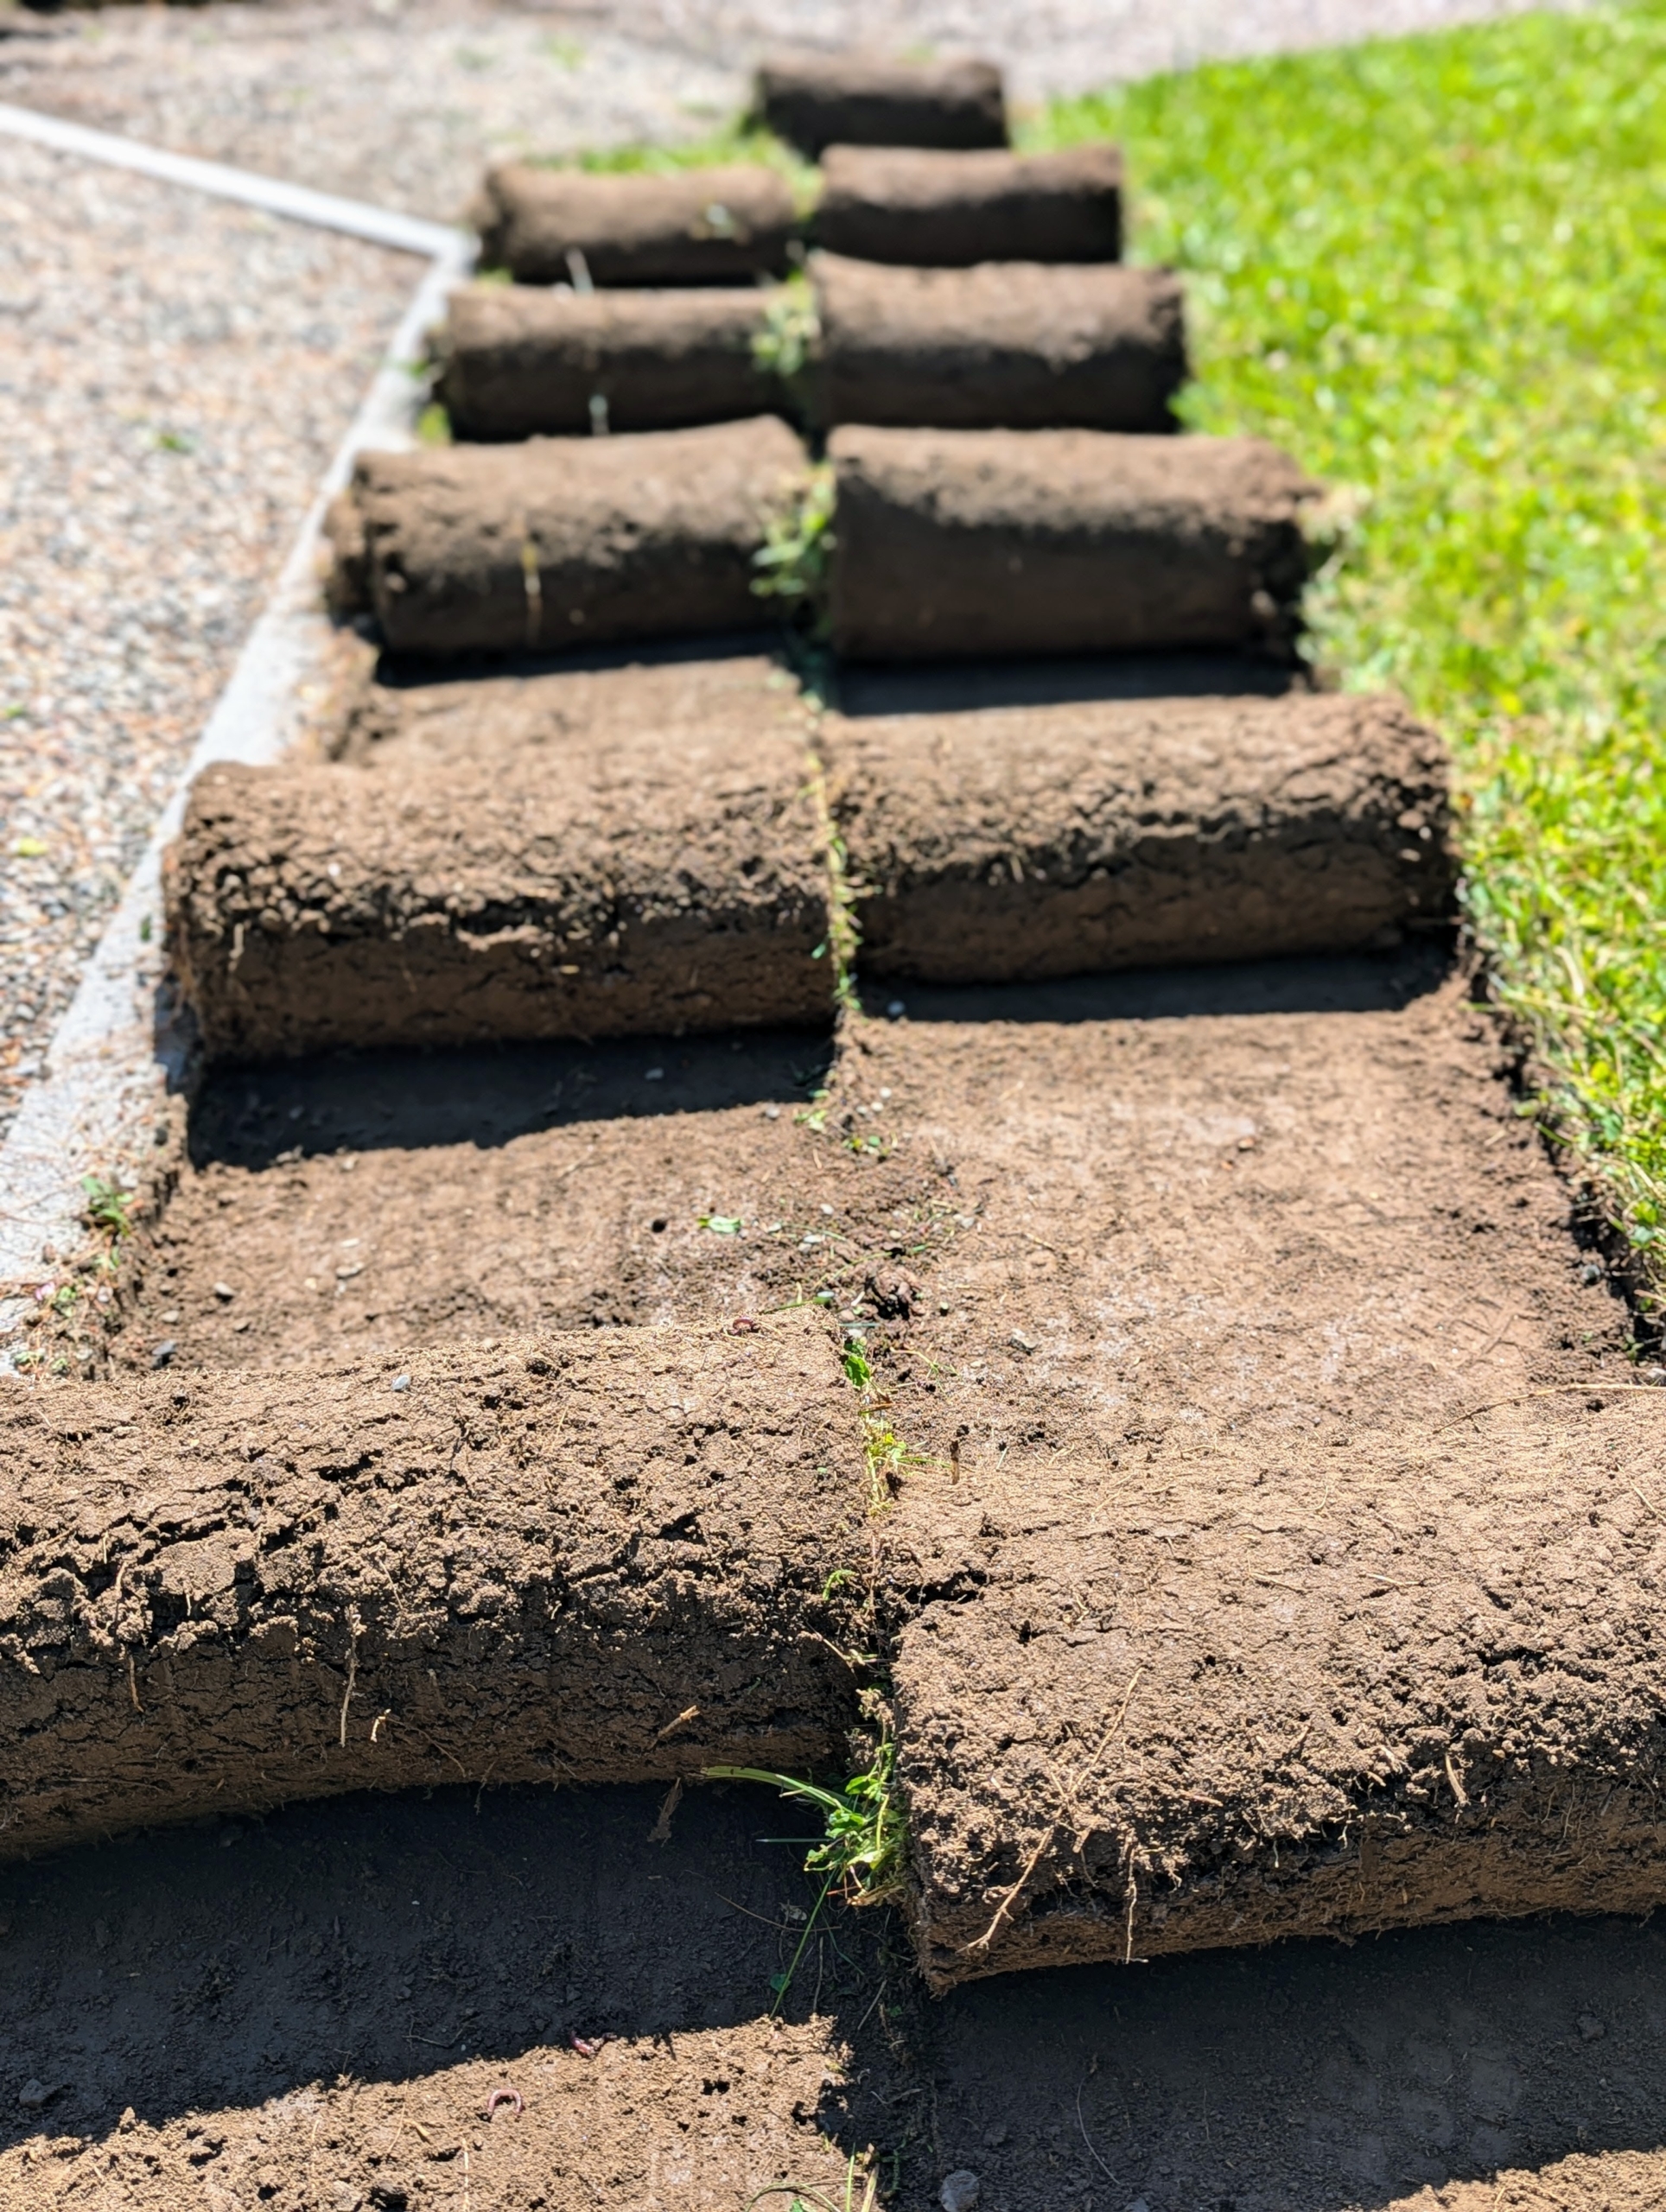
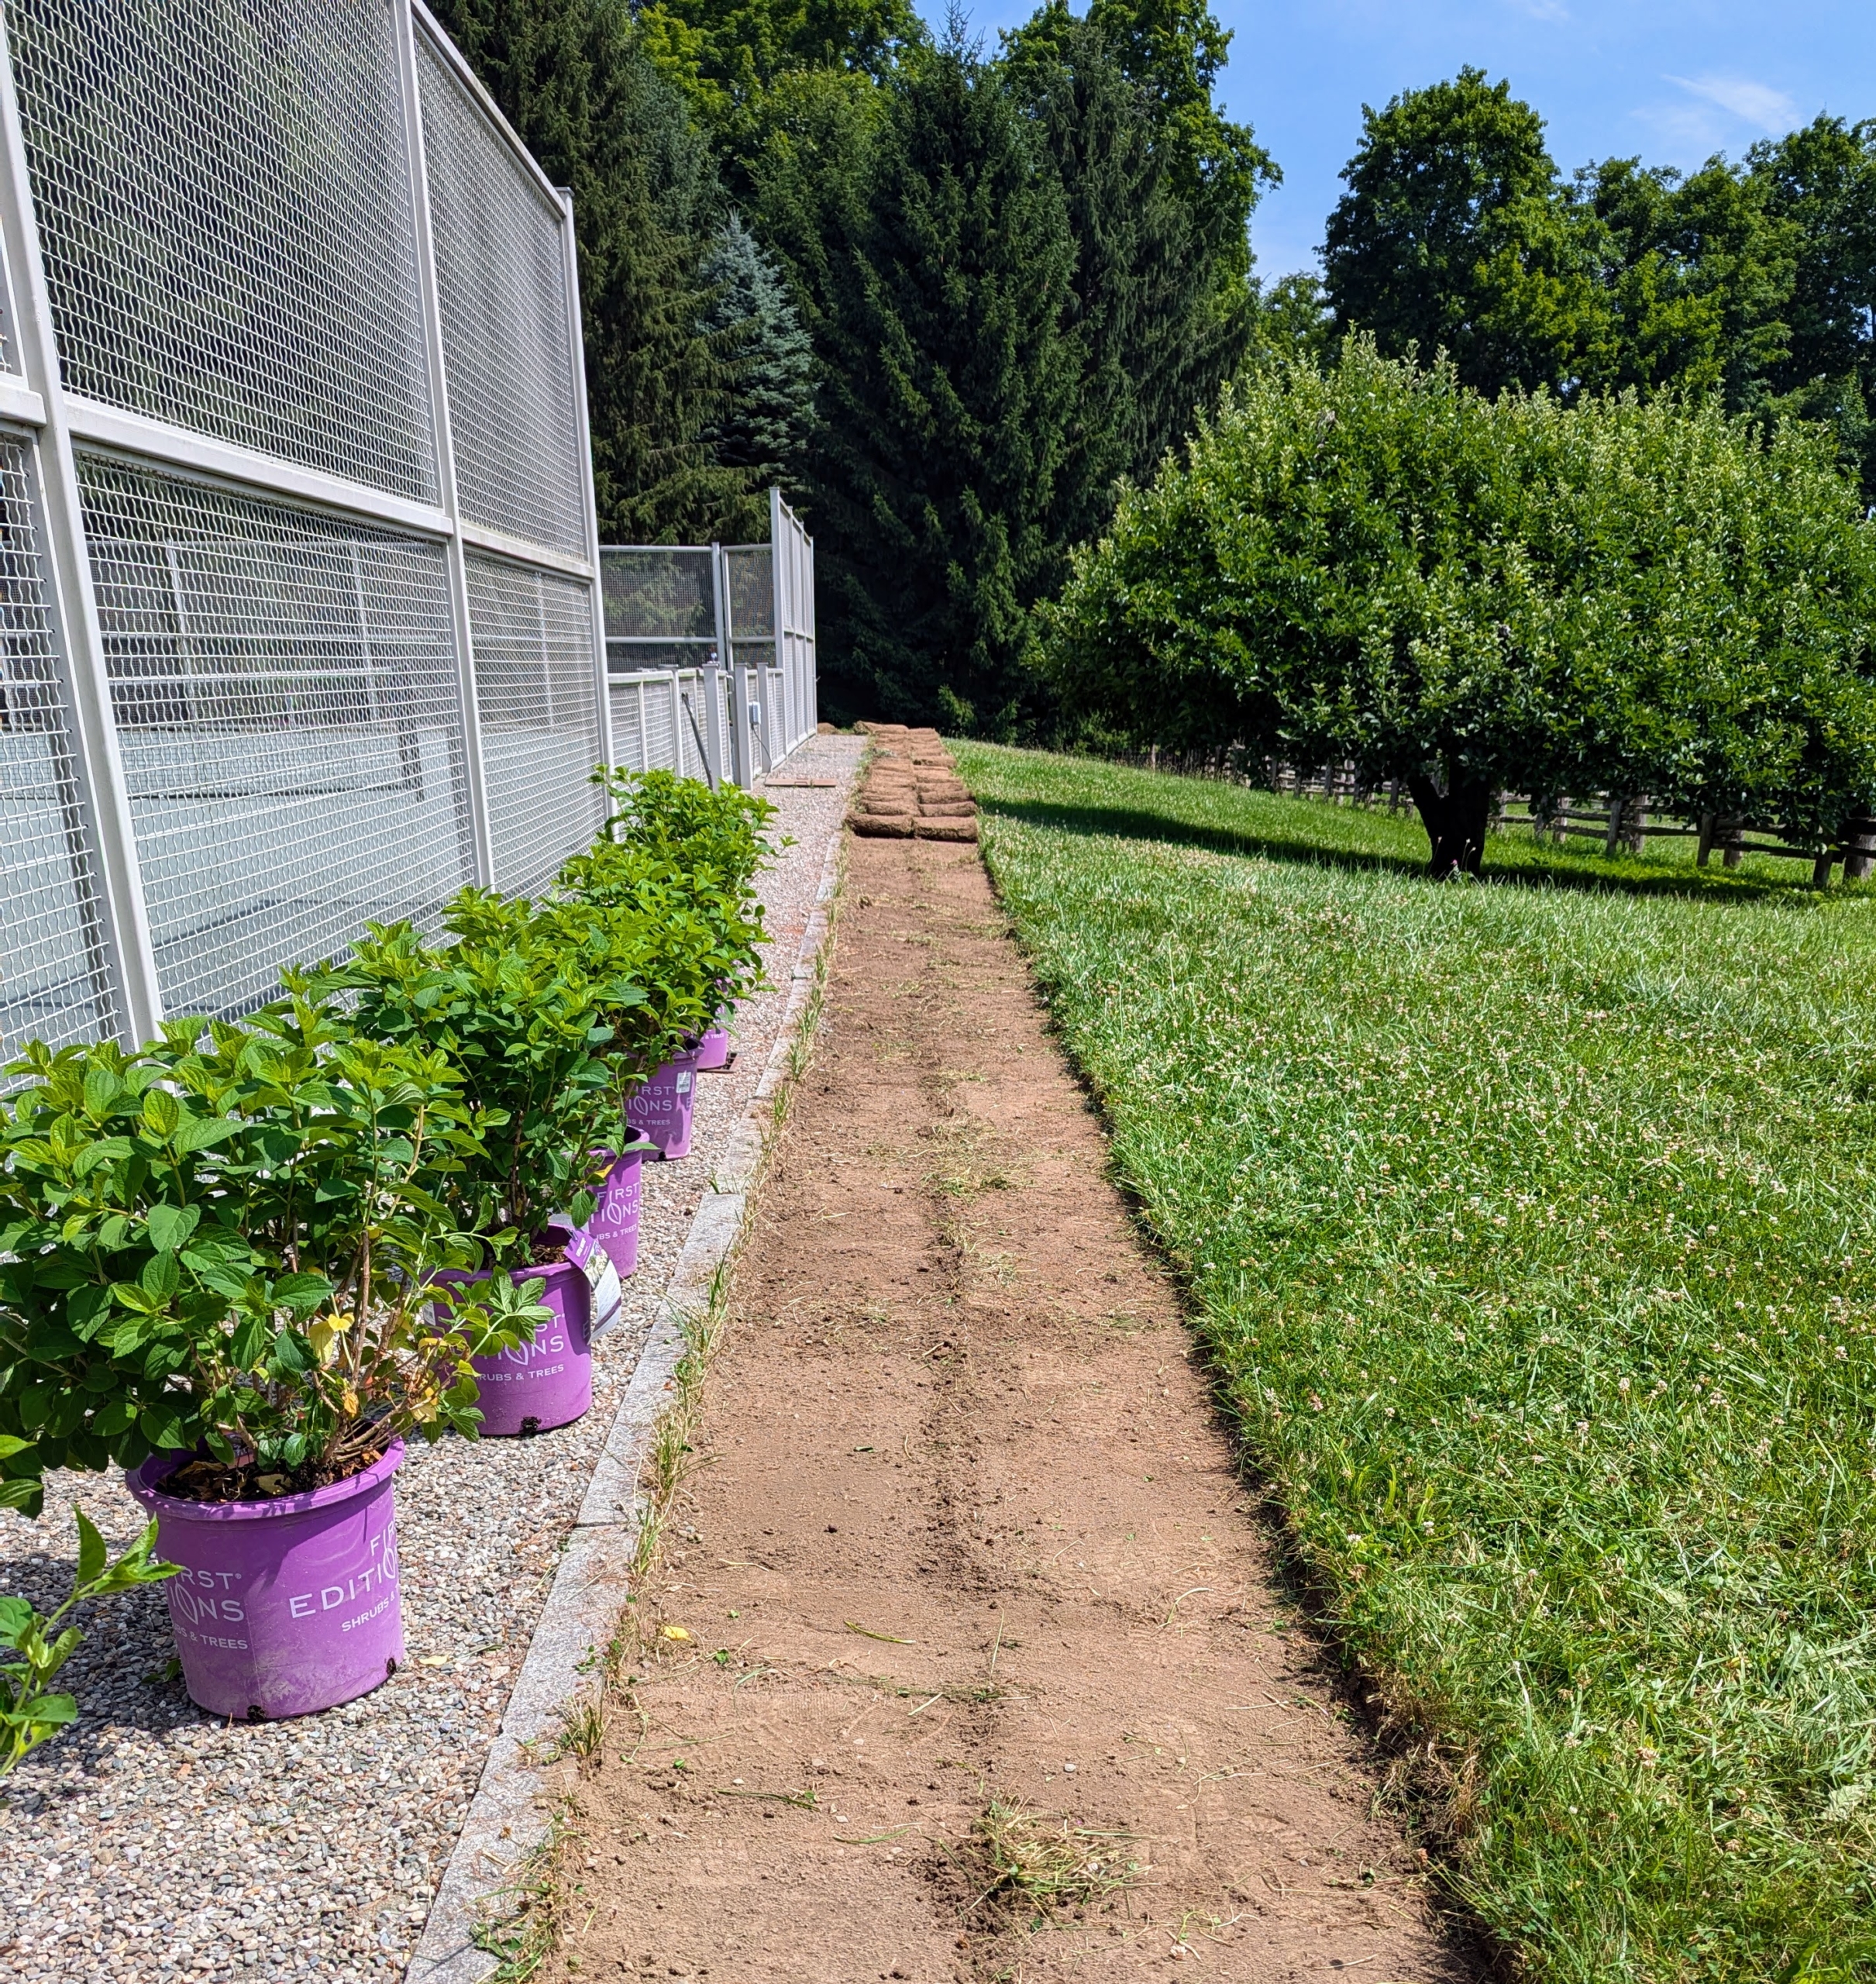
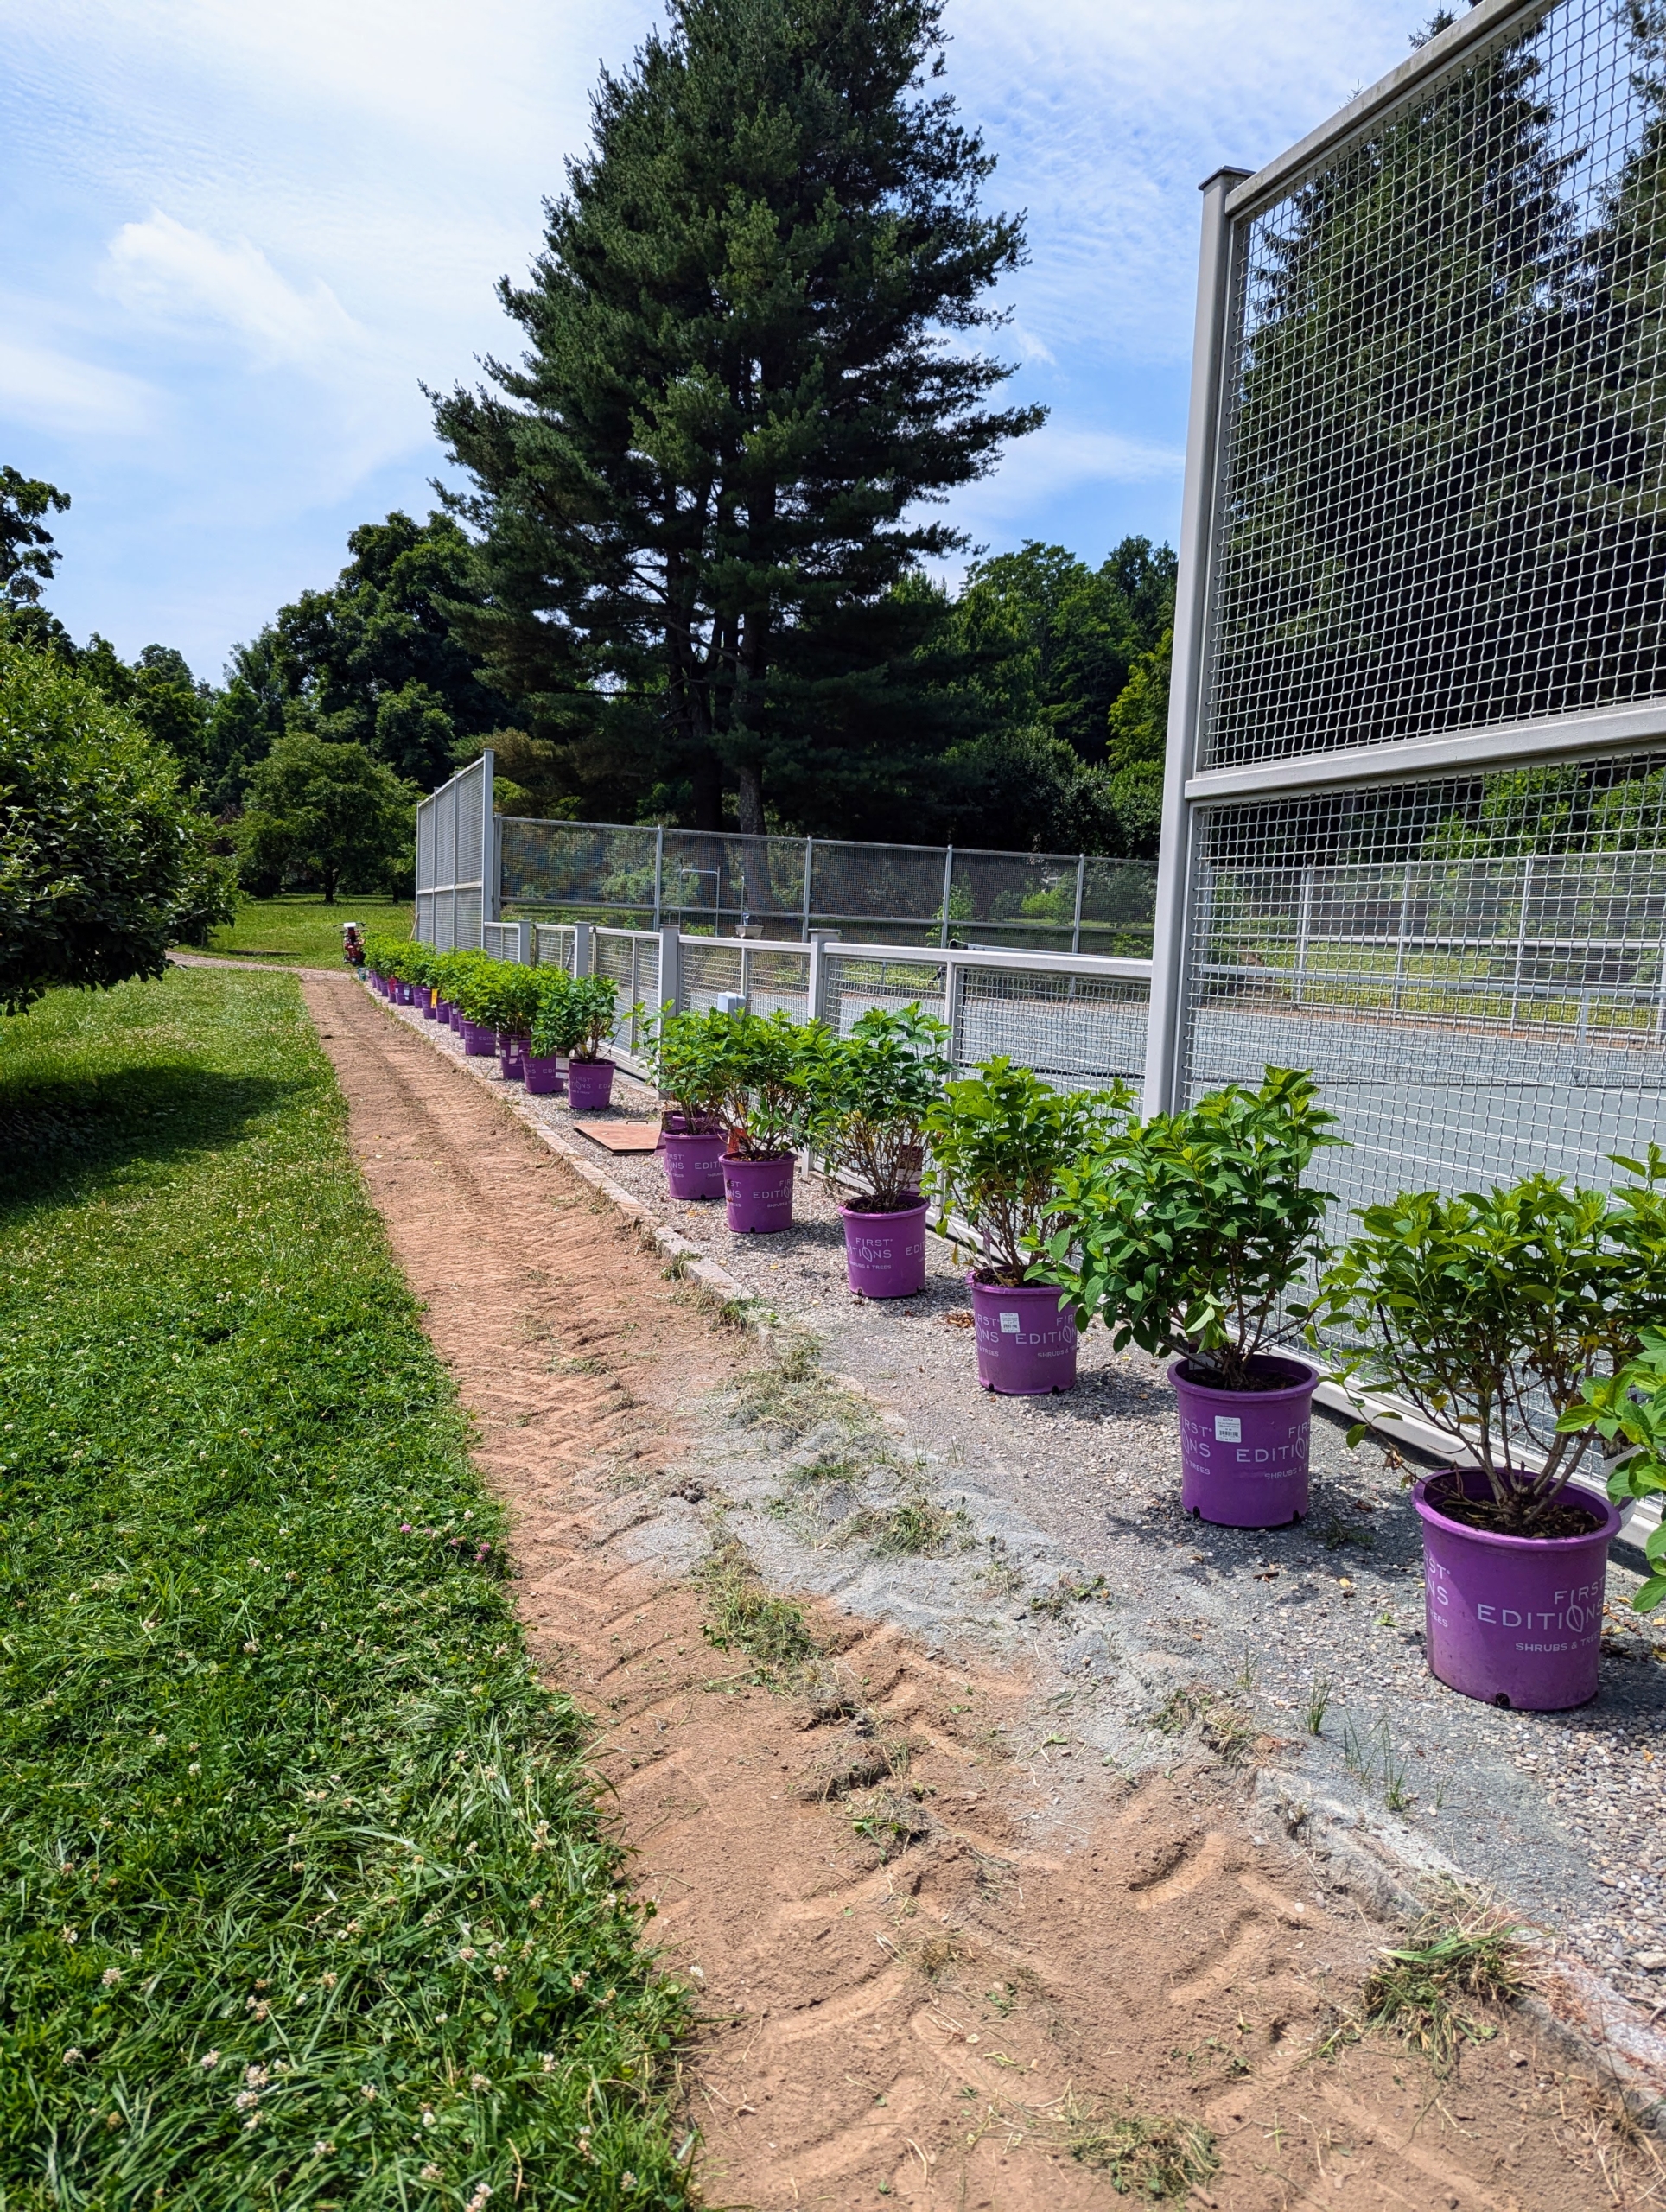
This time last year, I decided to plant more hydrangeas around the other three sides of the court. Two foot wide strips of sod were removed and rolled up in sections for easy carrying. It may not look it, but a section of sod can weigh between 15 and 30 pounds each.
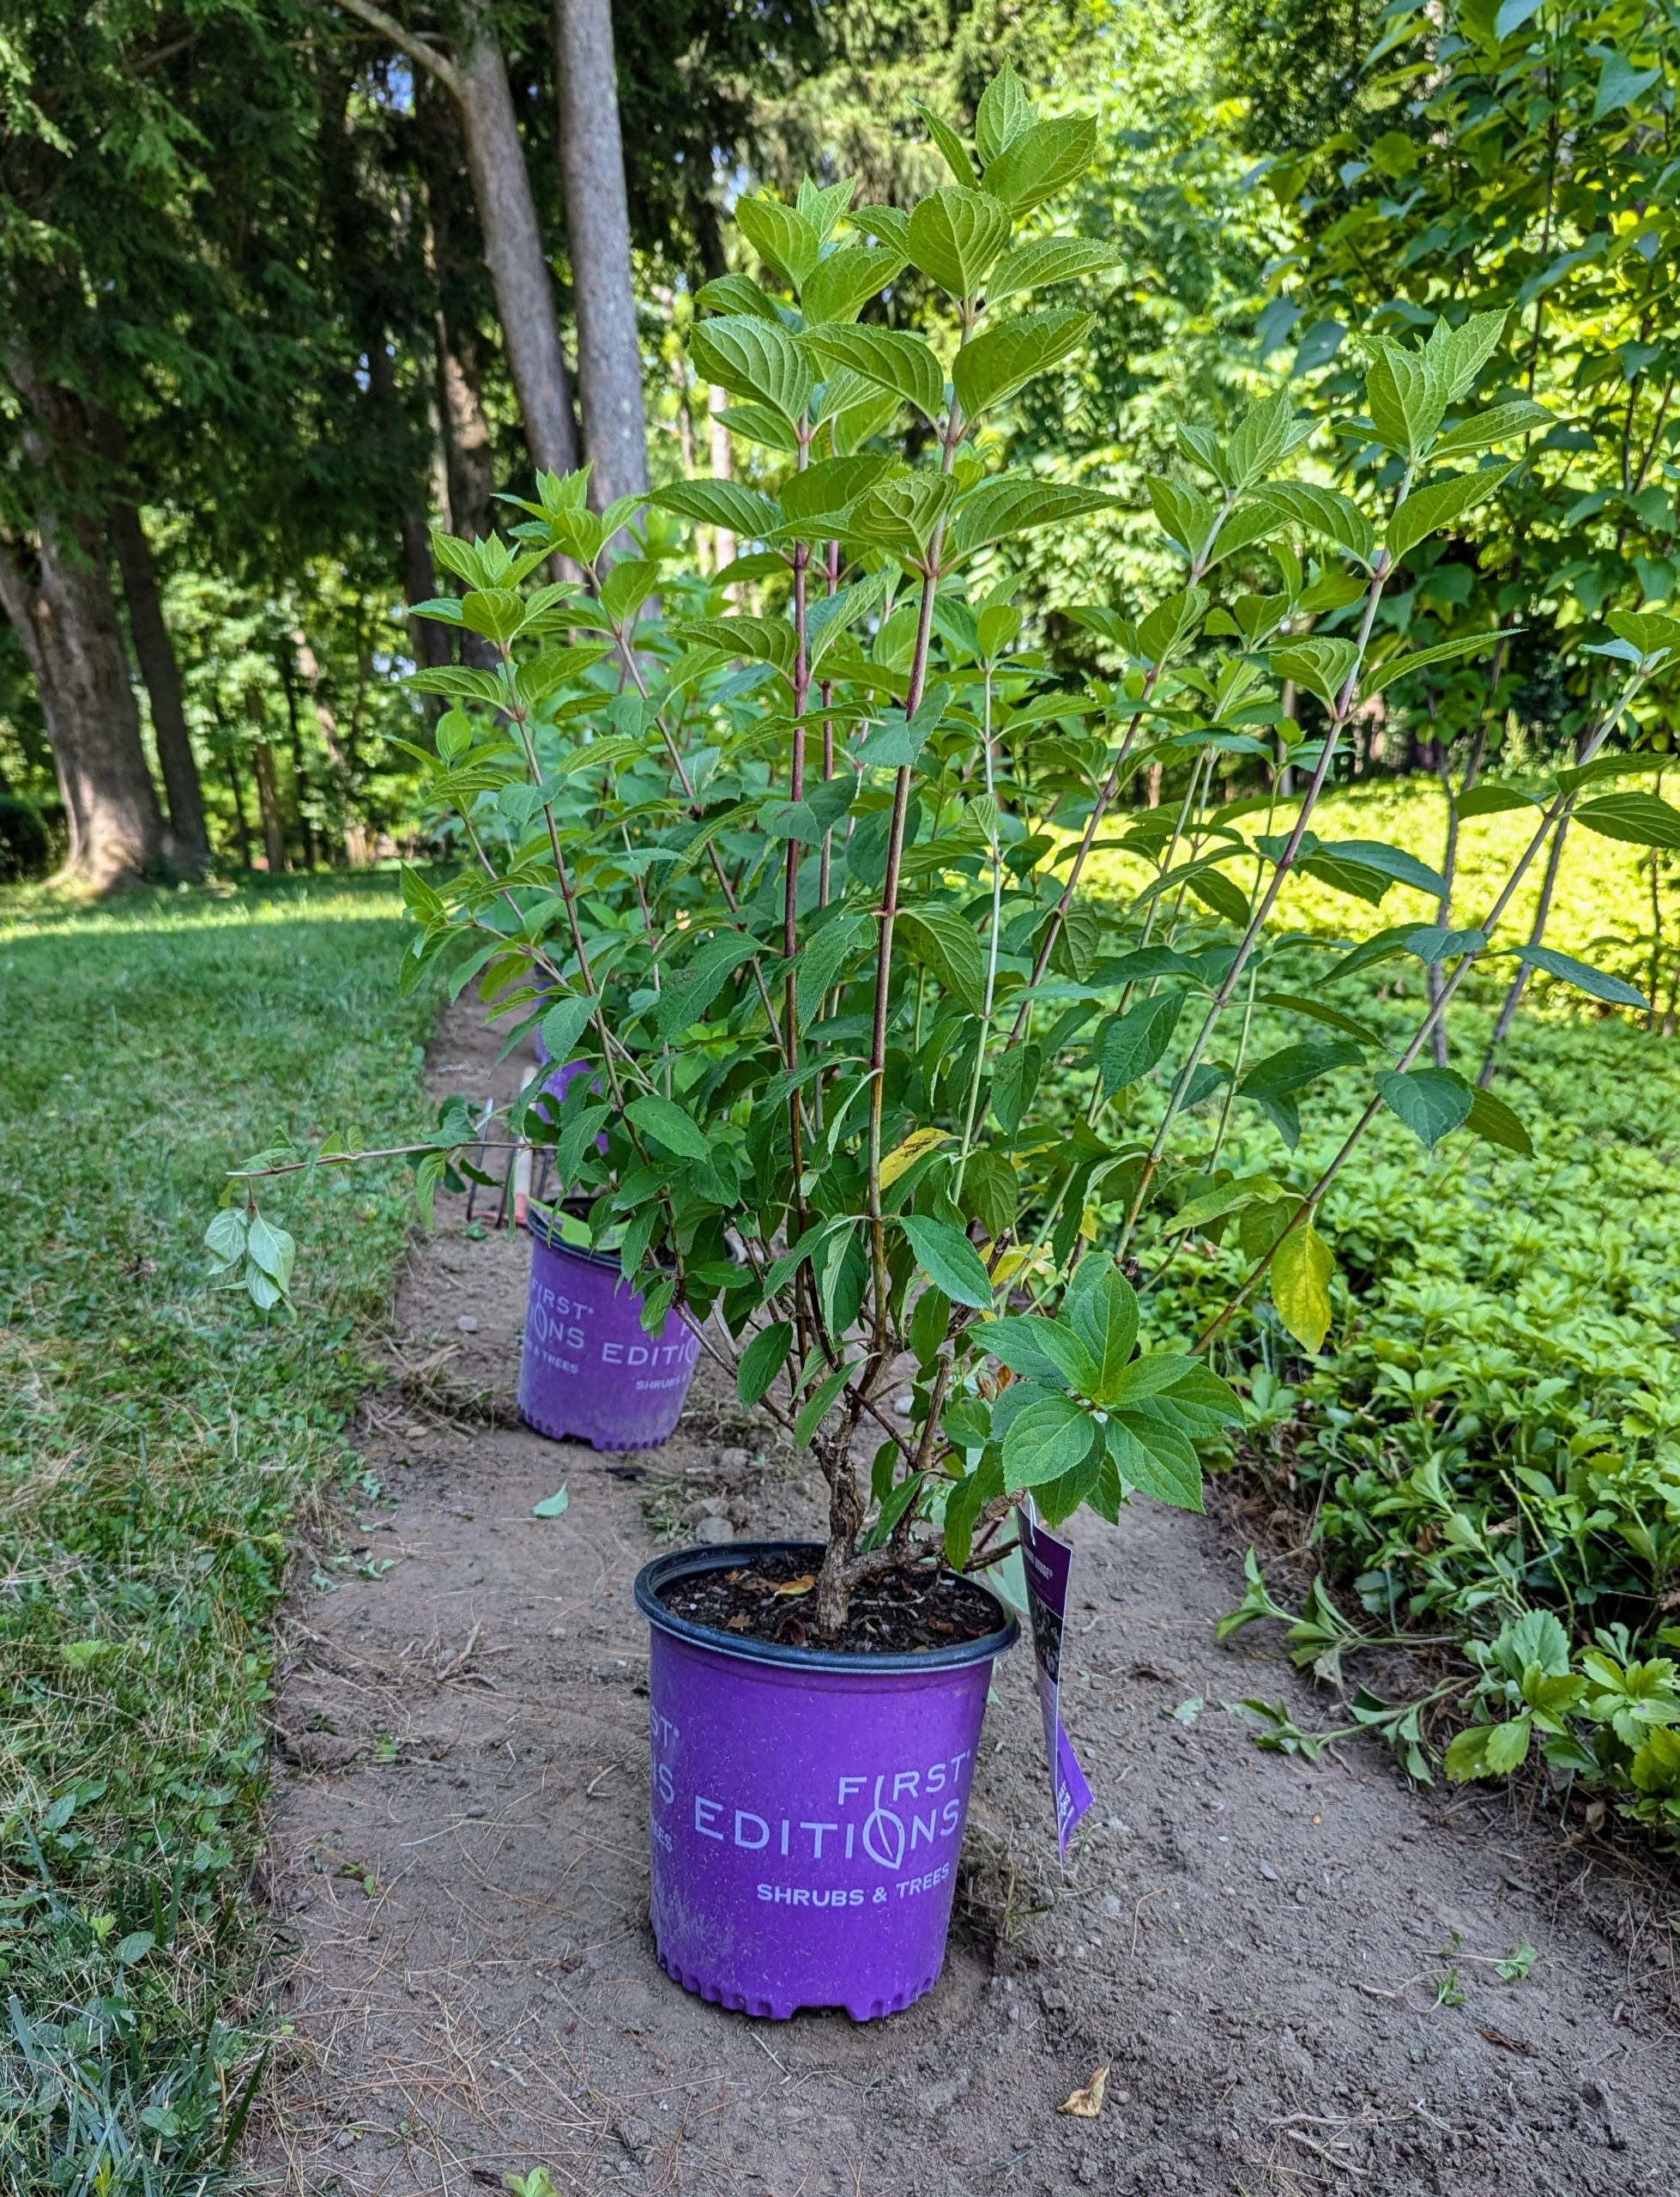
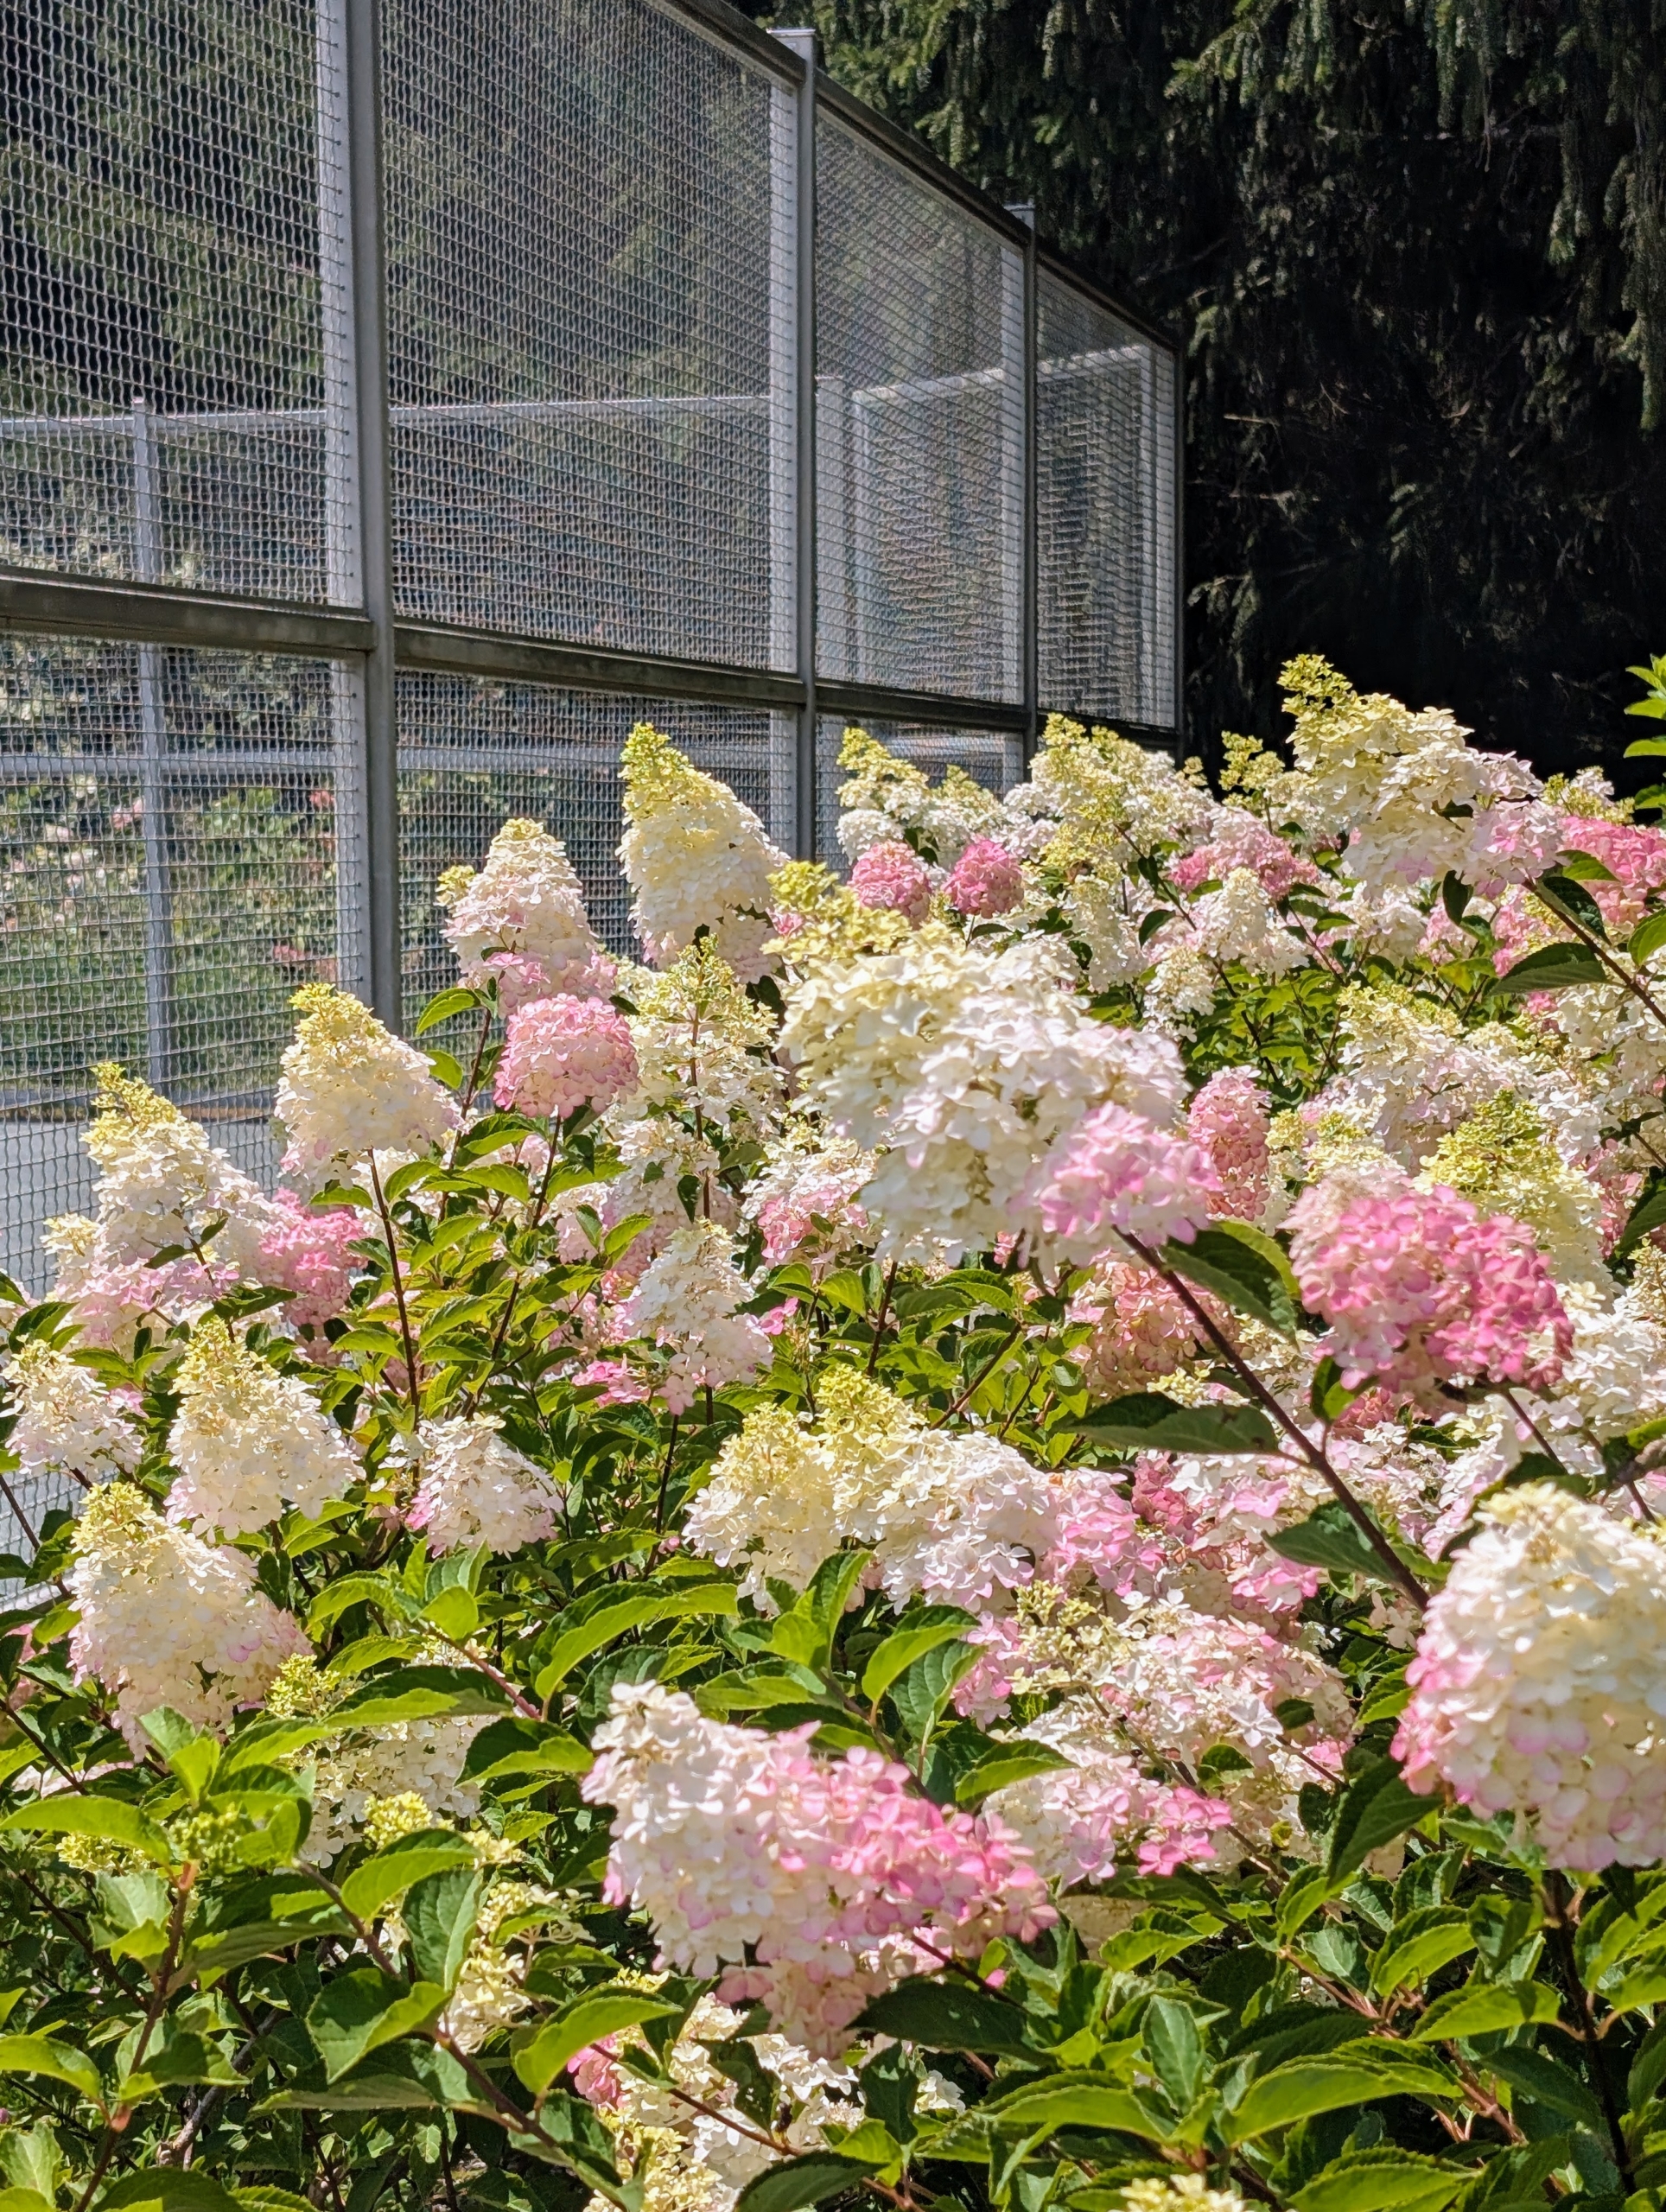
These plants are Little Hottie® Panicle Hydrangeas from First Editions. They’re compact, mid-sized white hydrangeas – perfect for this side of the court.
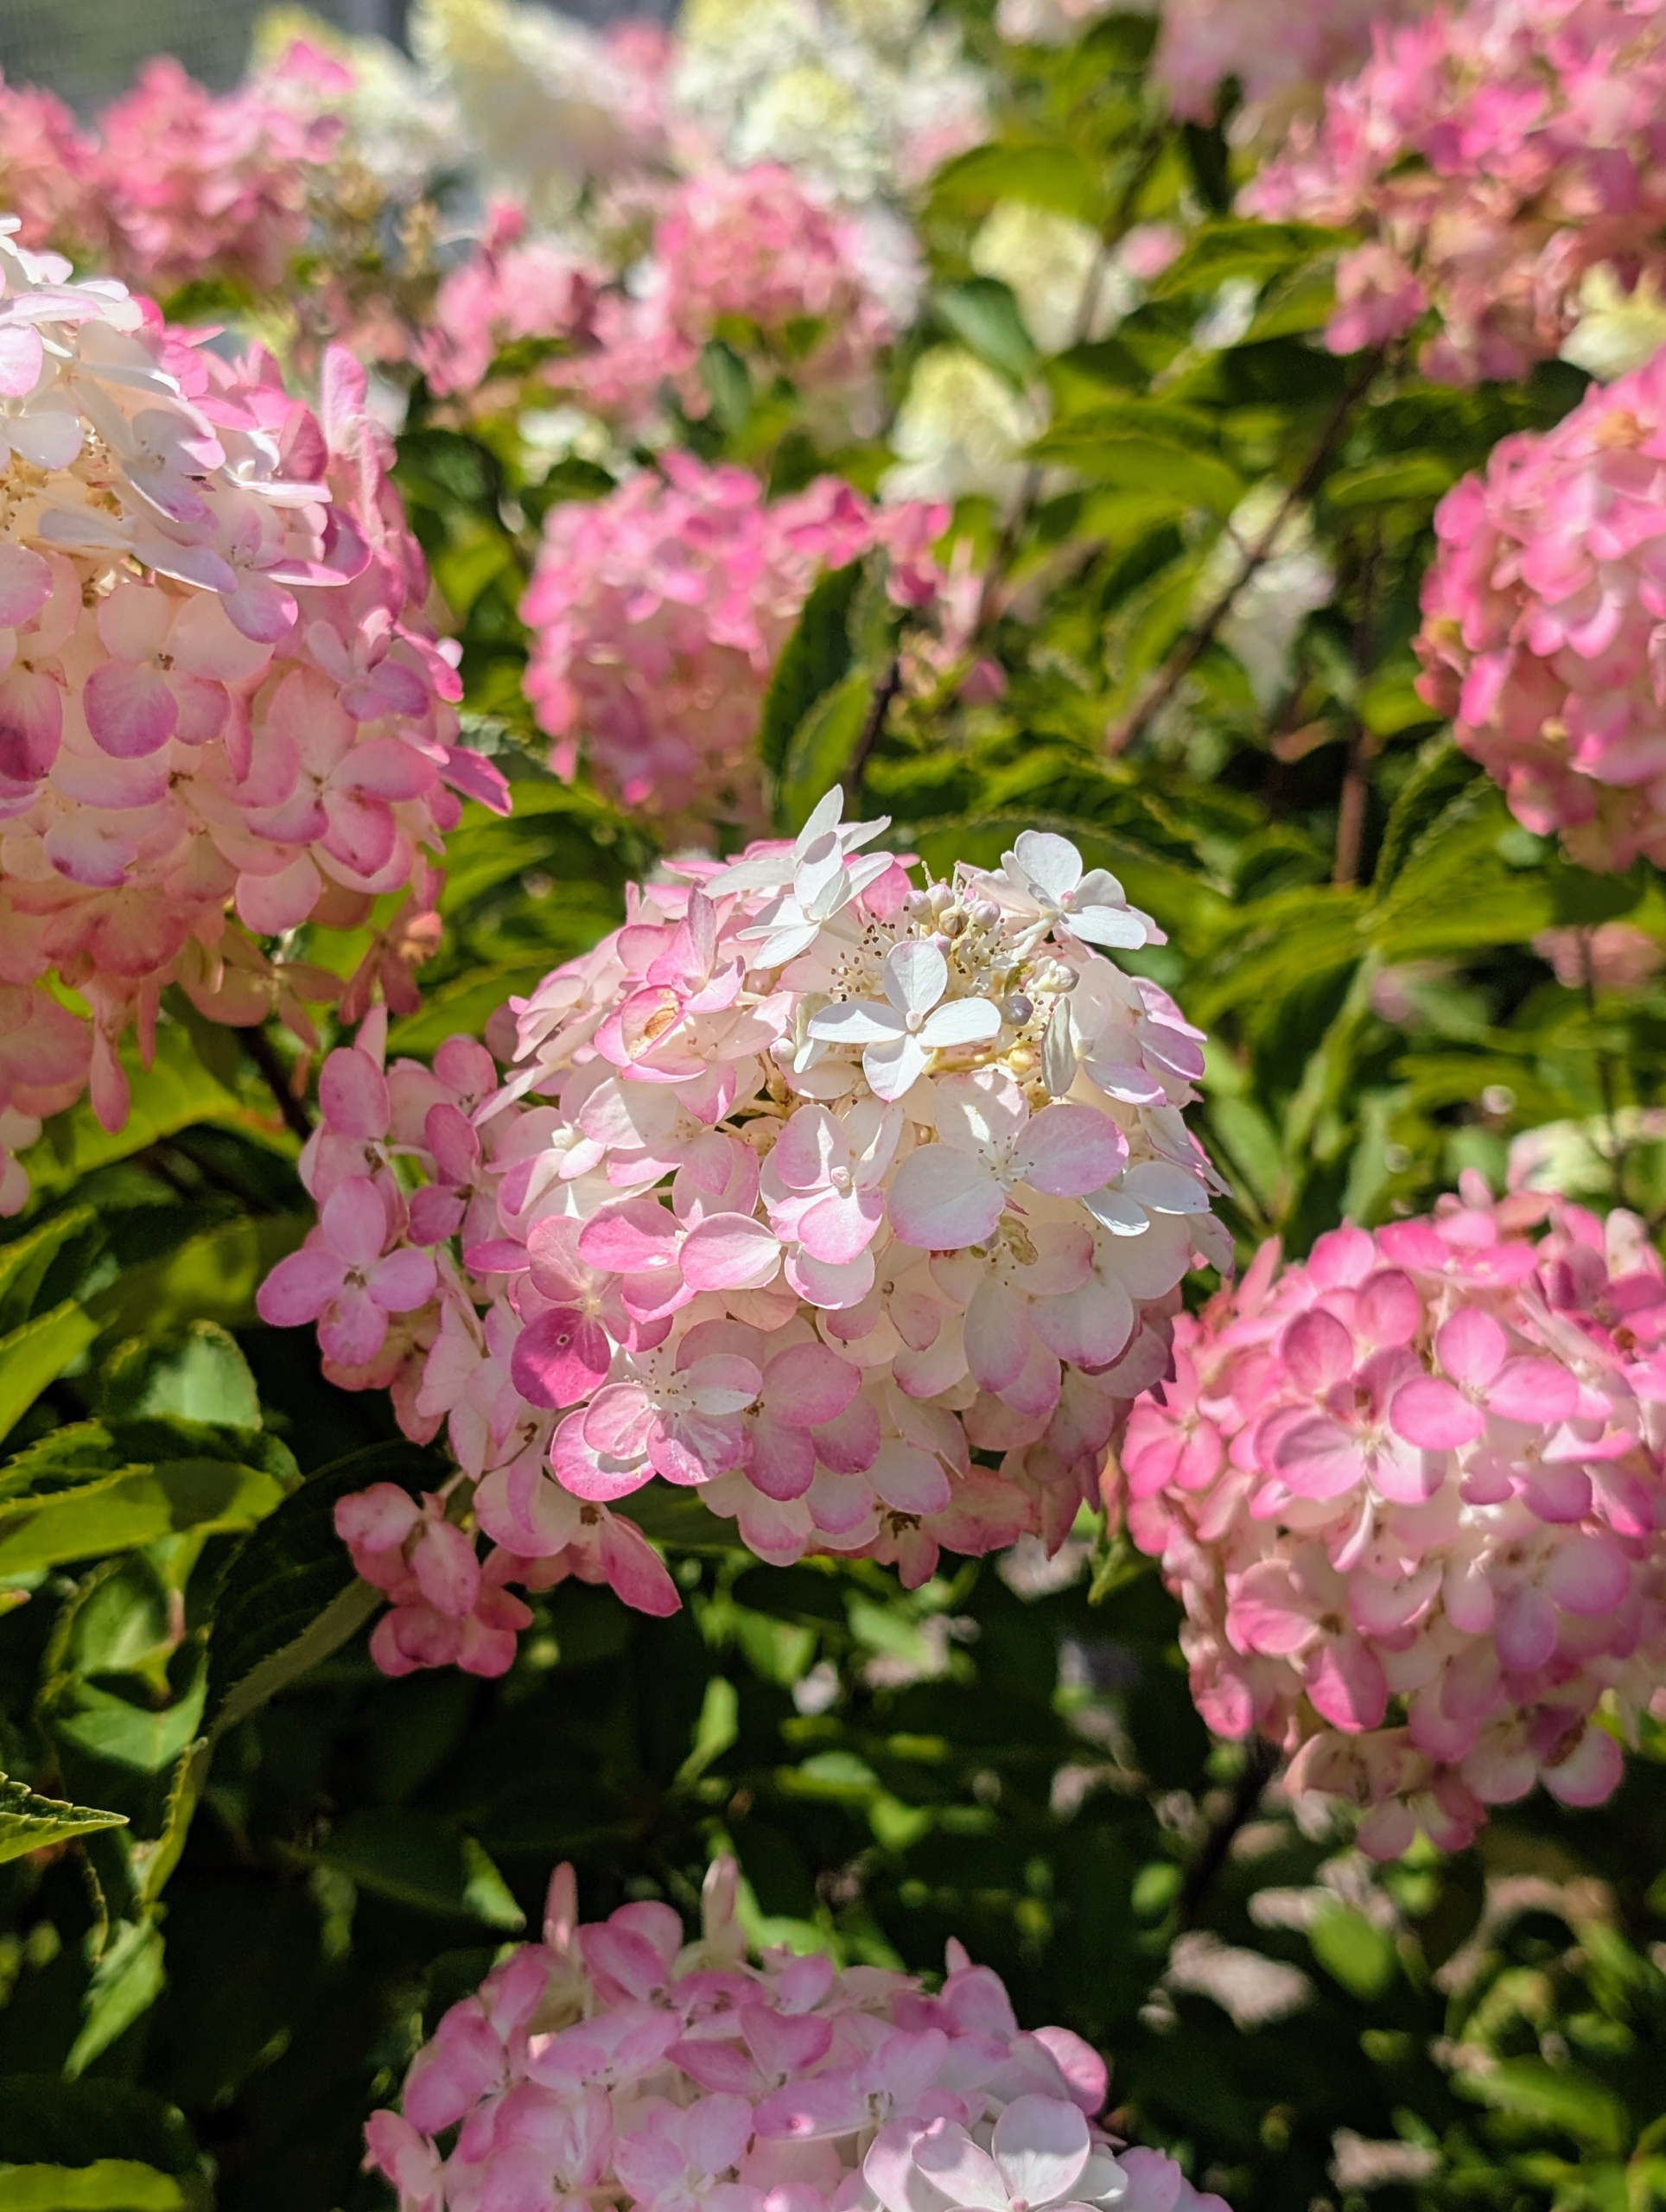
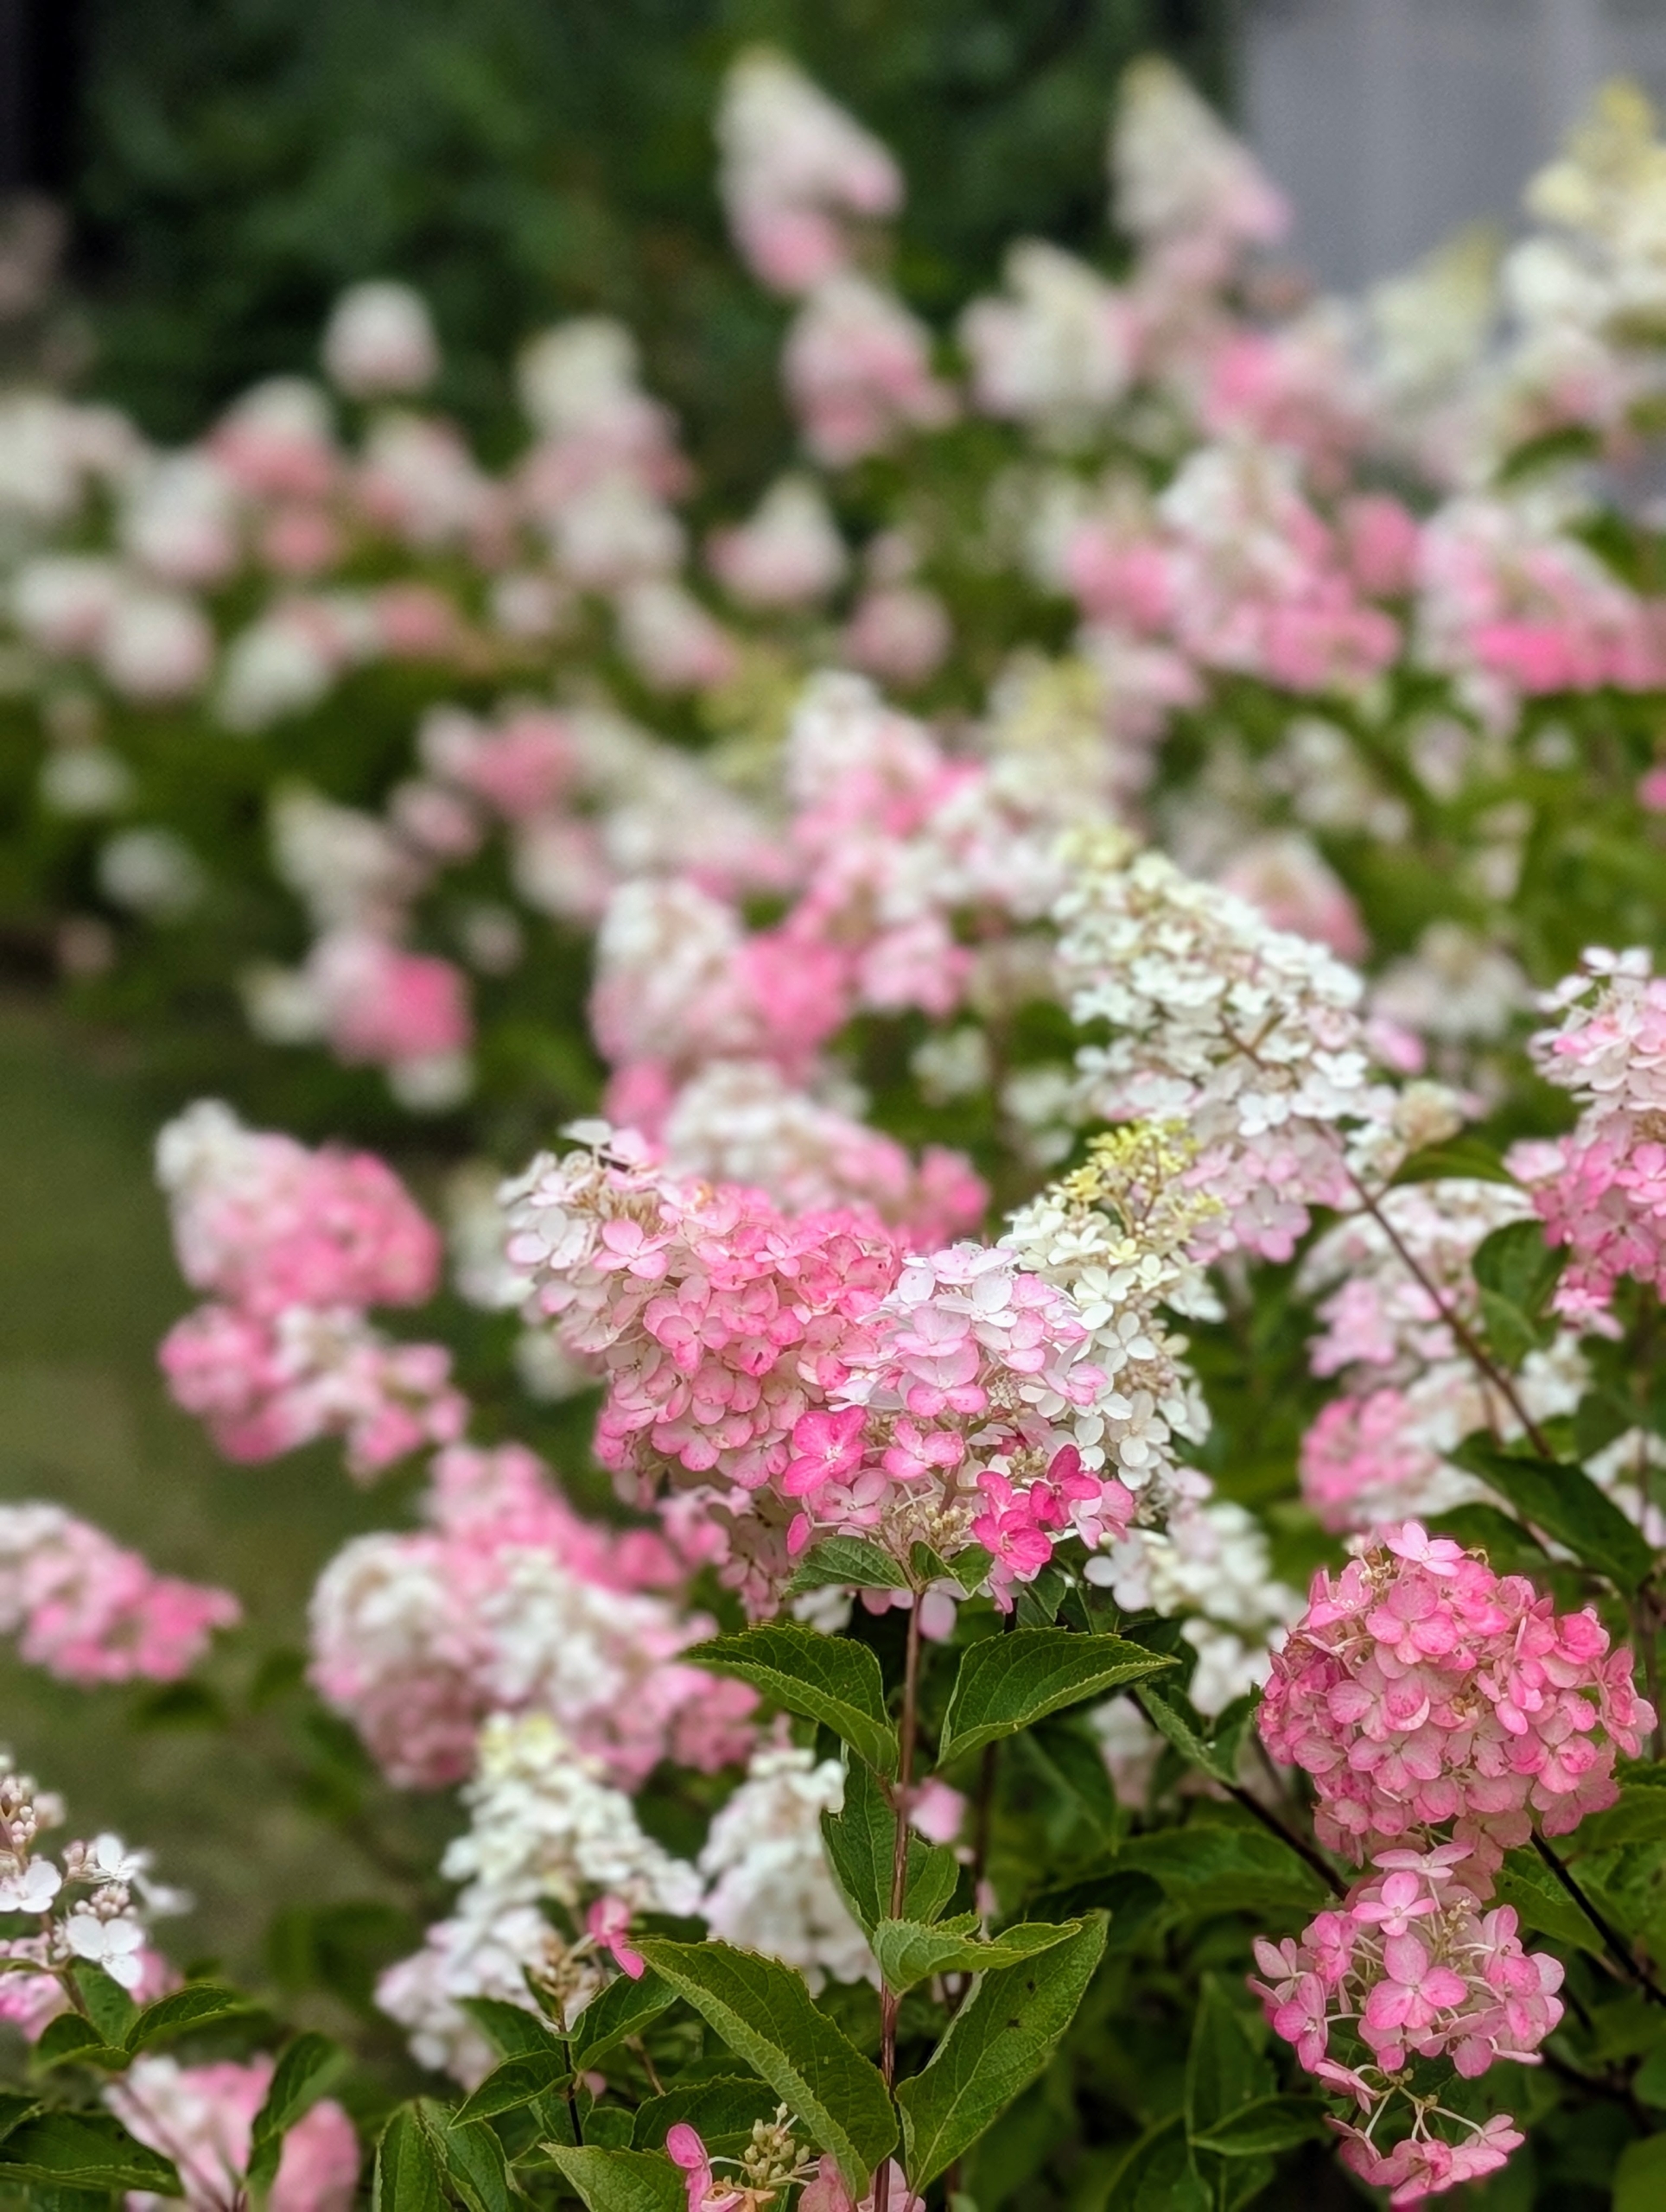
Along both width sides, I added a selection of First Editions Diamond Rouge hydrangeas, Hydrangea paniculata ‘Rendia’ – small, bushy, deciduous shrub that produces large, rounded flower heads that change color over the season – creamy white in summer, changing to pink, and then wine red in fall.
Plants were positioned about two-and-a-half feet apart – I had just enough to fill all three sides.
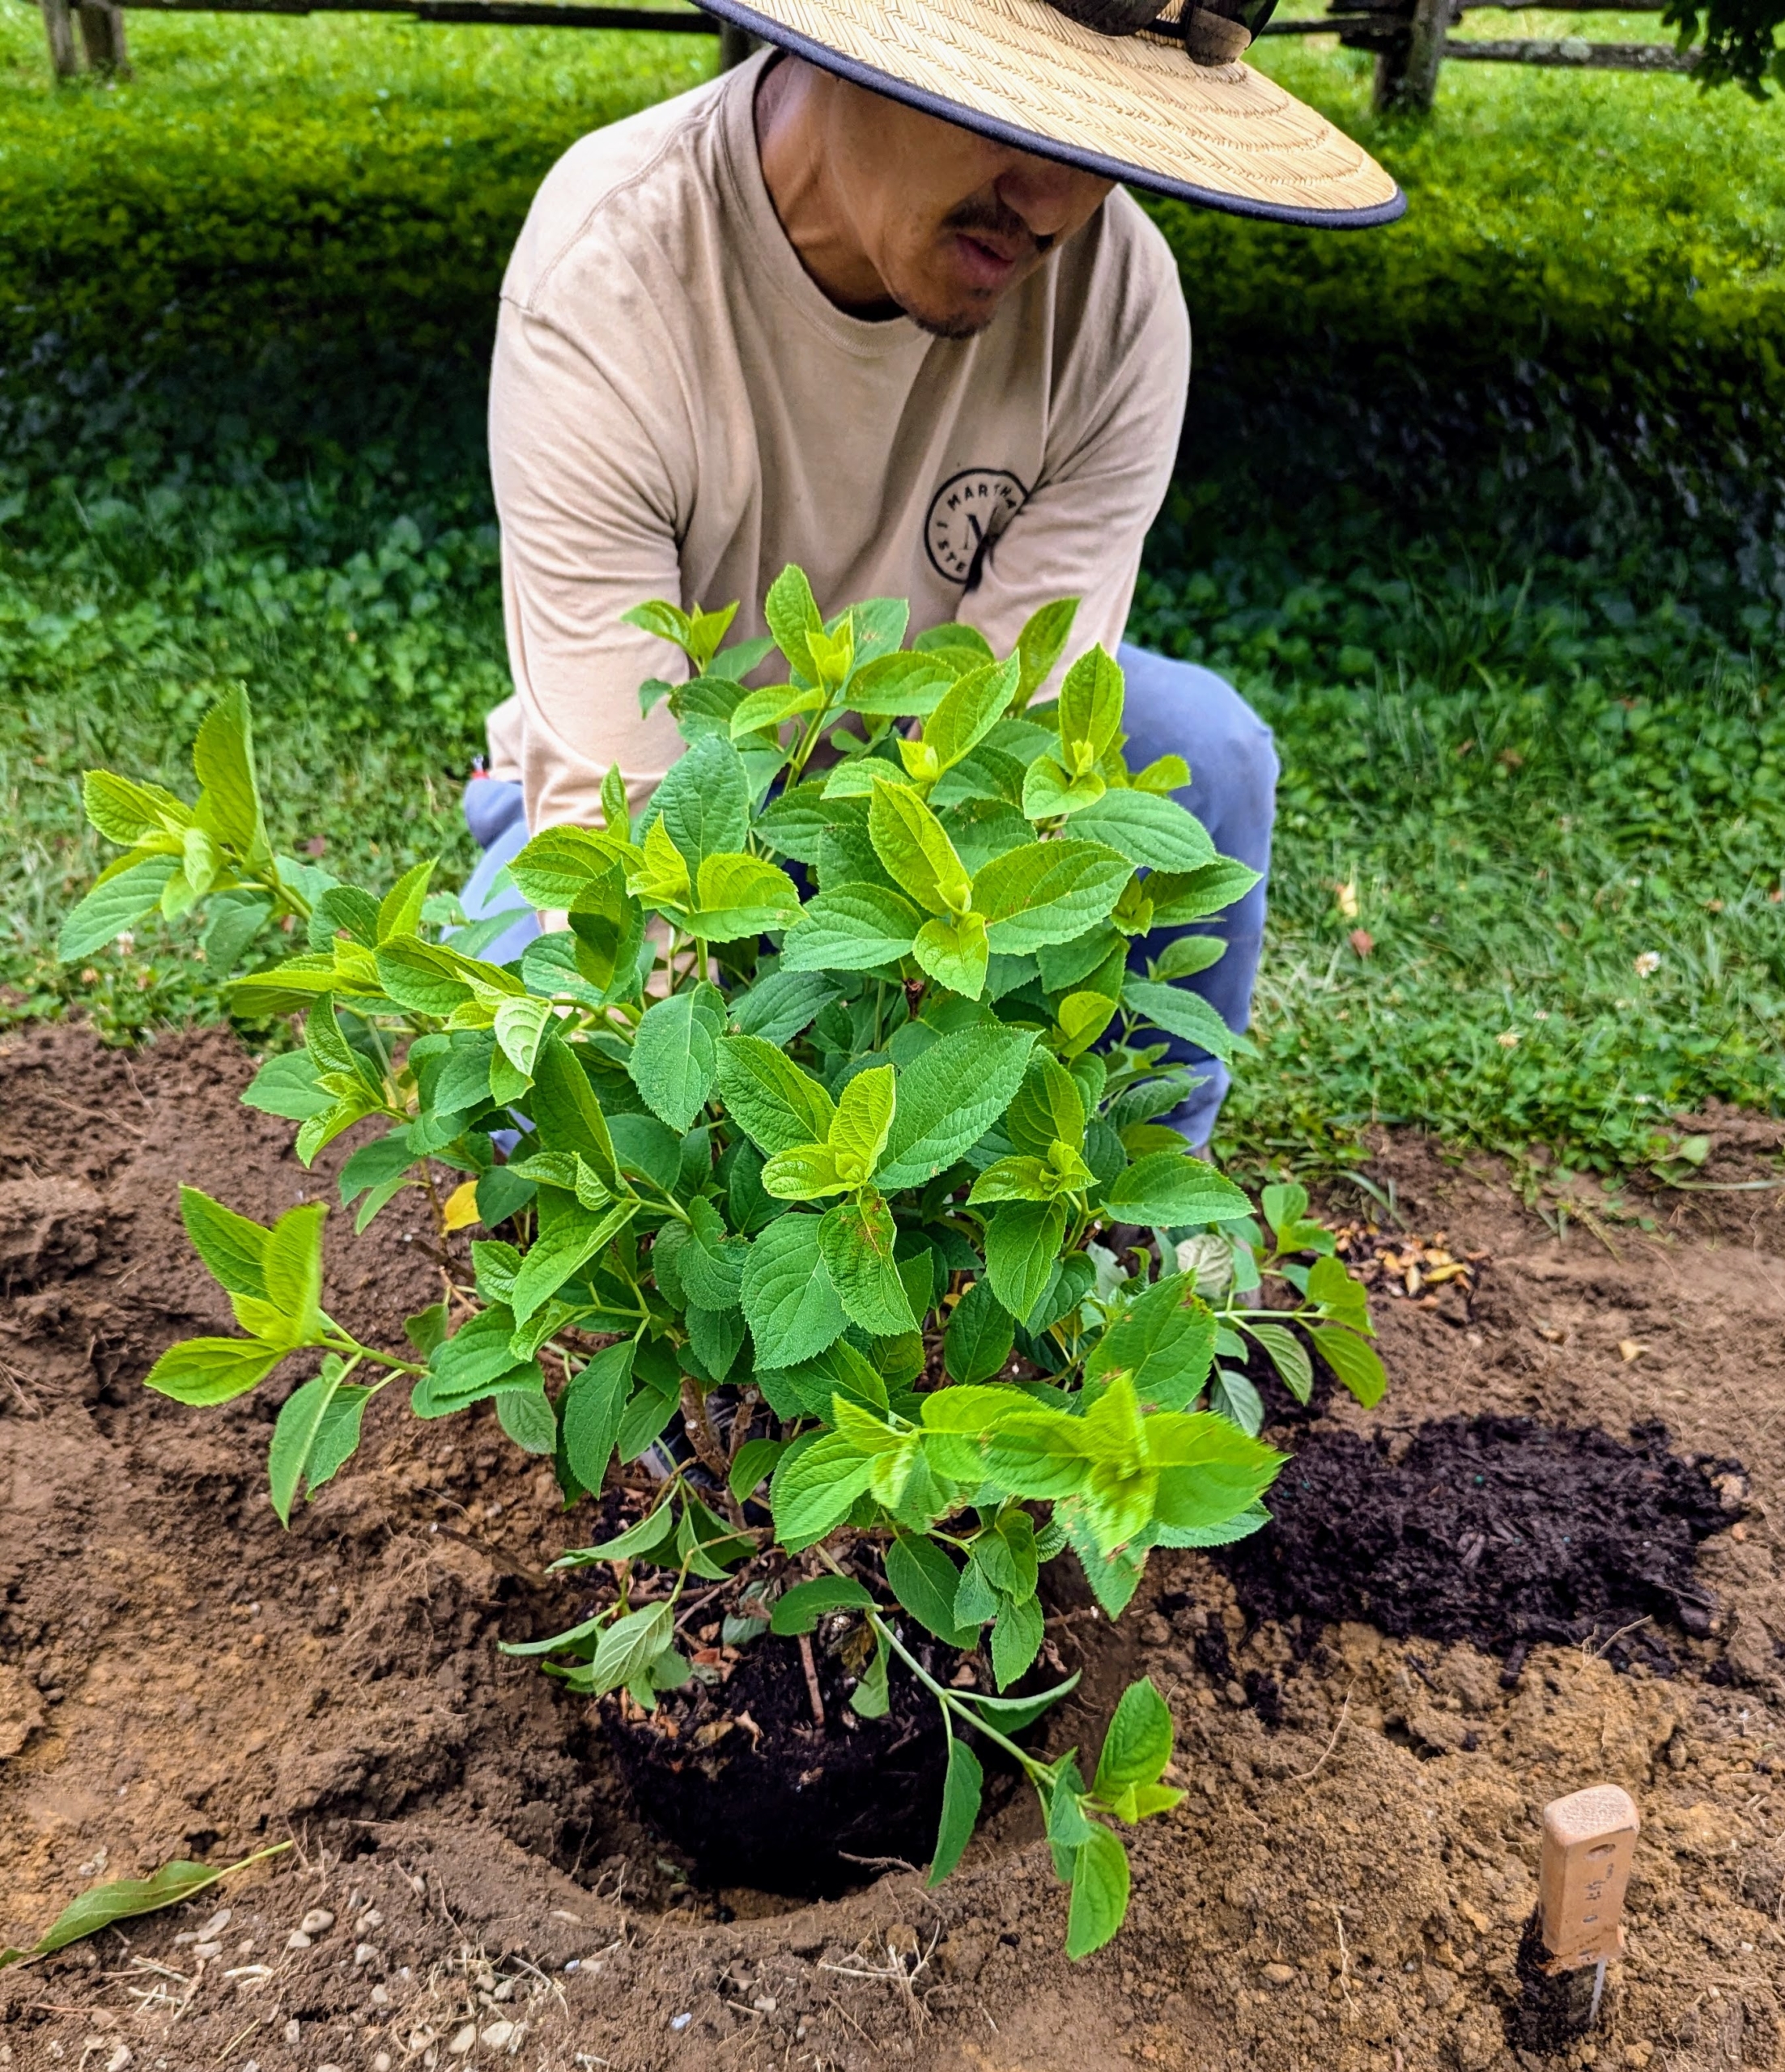
Chhiring planted the hydrangeas similar to the way they were planted in the pots. Hydrangeas have shallow root systems that spread out broadly near the surface of the soil. Planting them too deep can bury the stems, which can promote root rot.
All three sides were then dressed with mulch made right here at the farm. It was delivered from my compost yard on my trusted Kubota M4-071 tractor bucket and then spread in an even two to three inch layer.
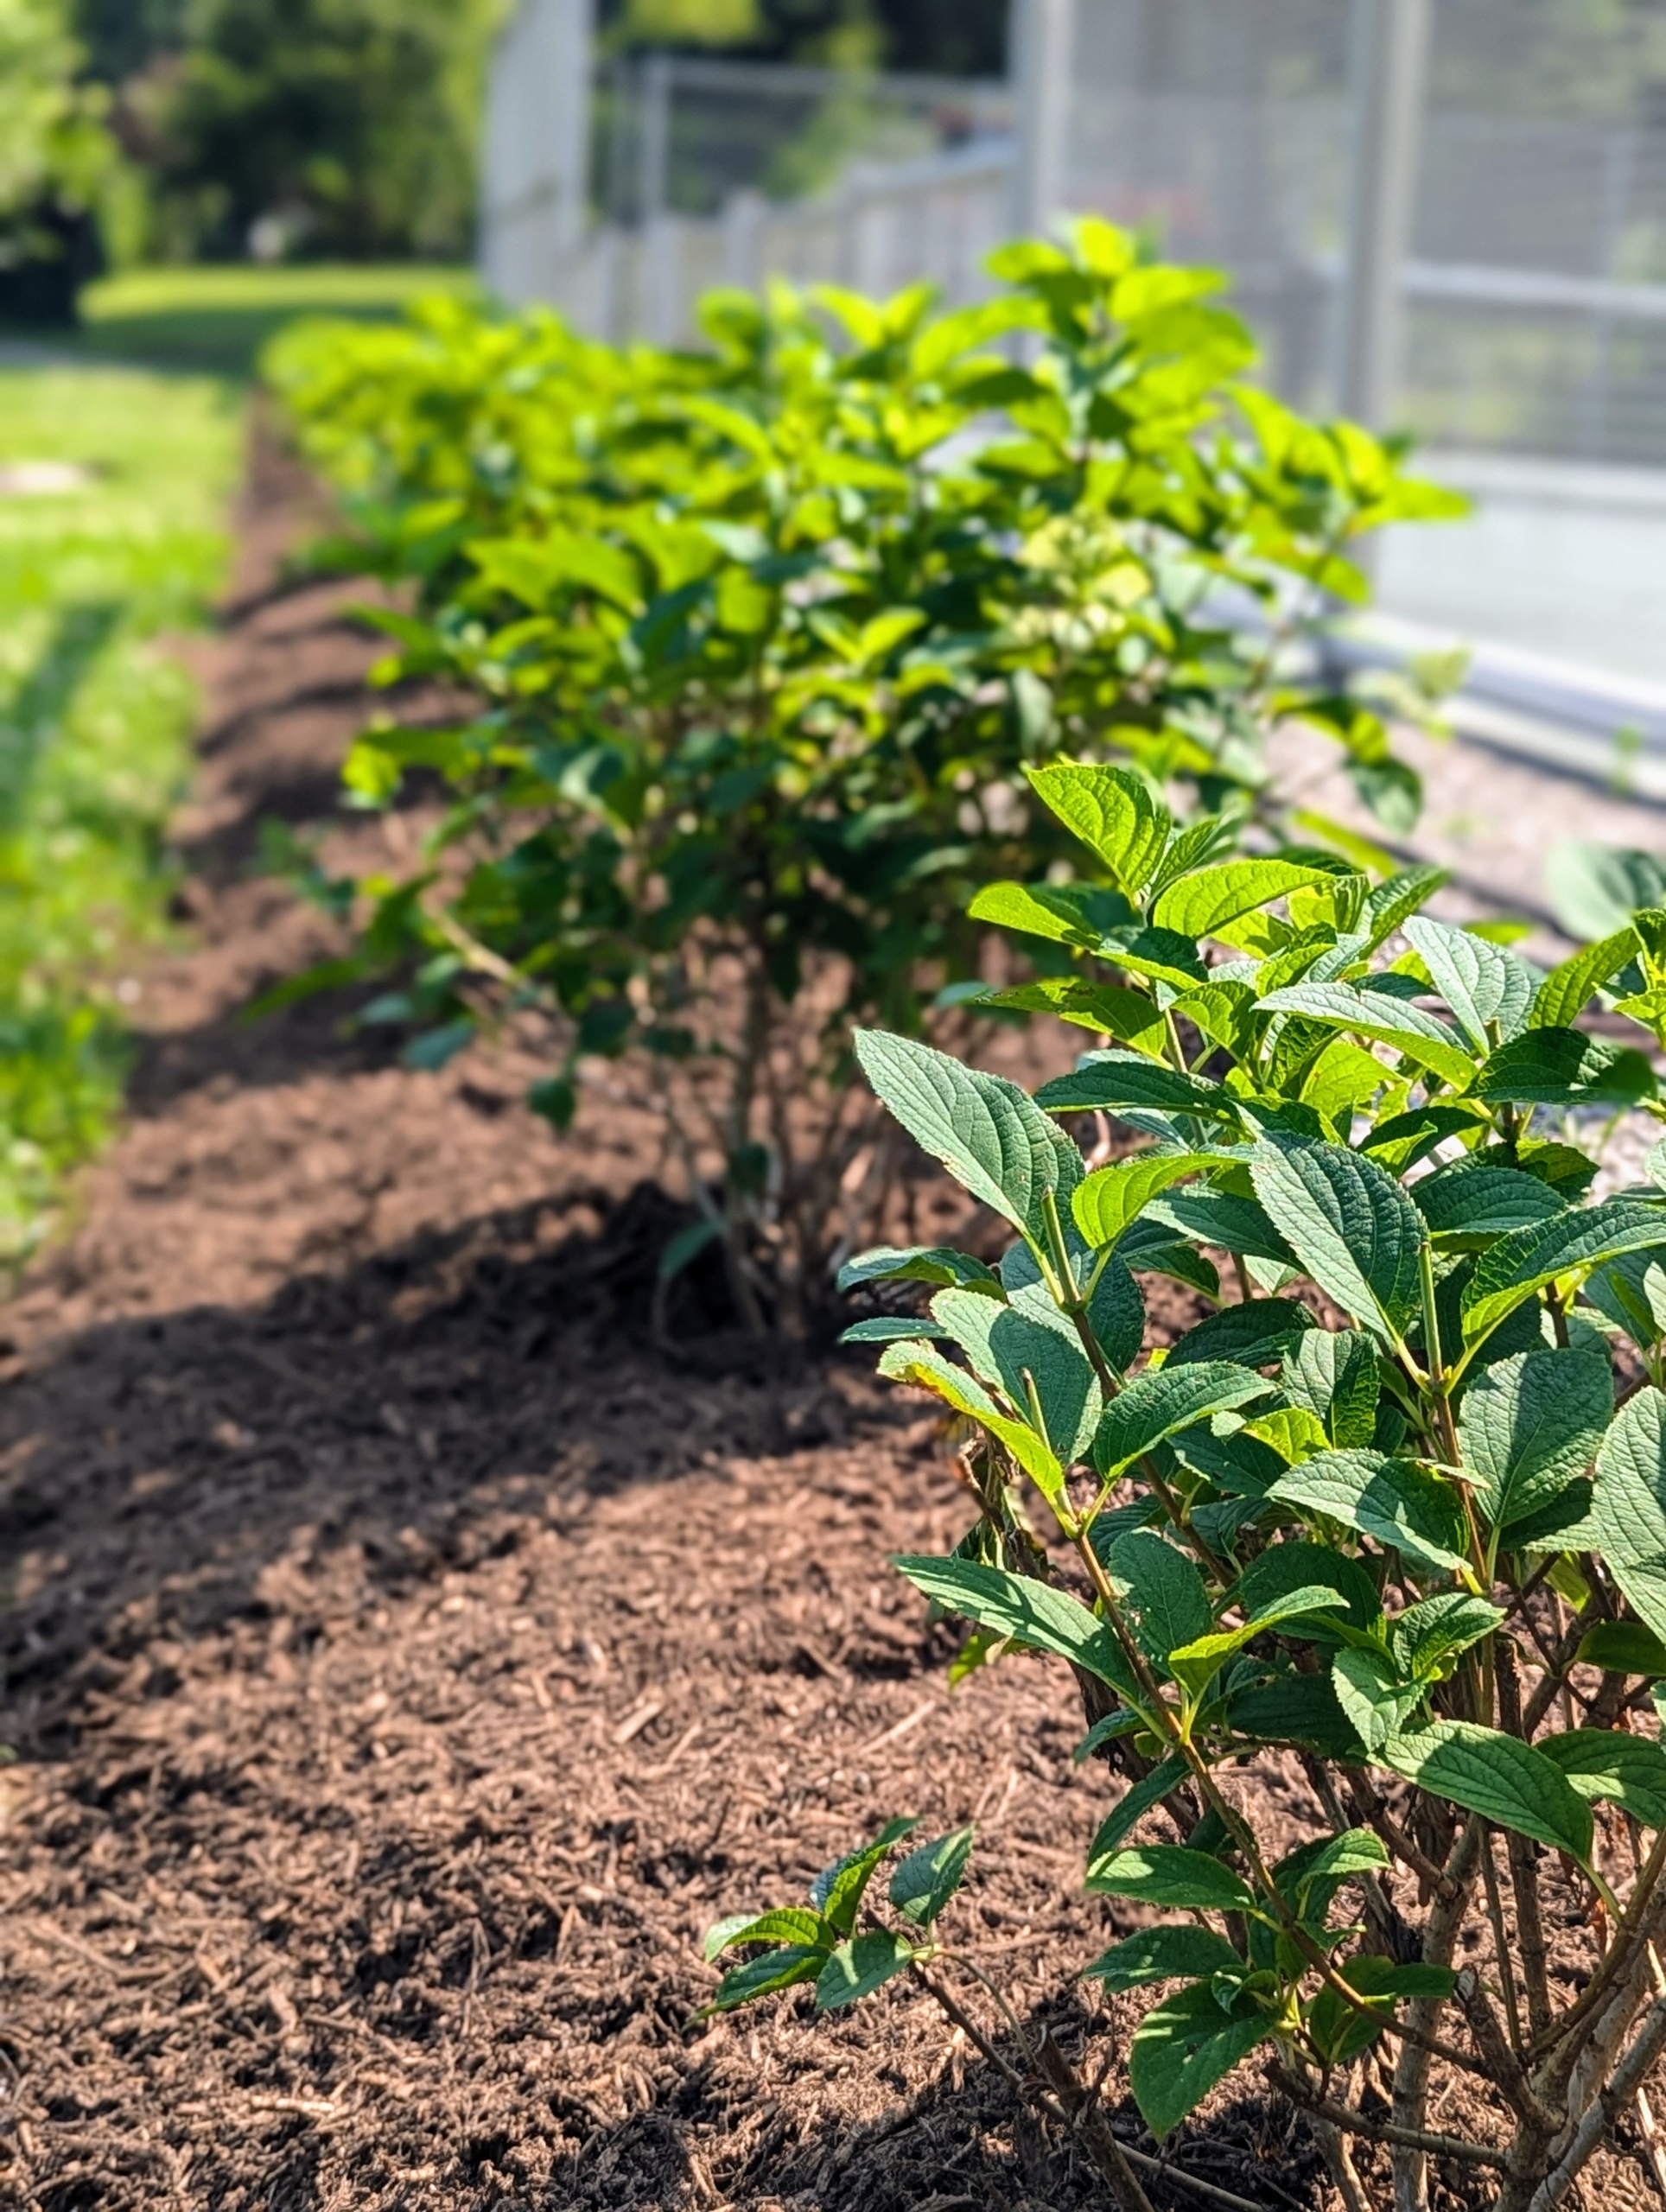
I was confident they would all flourish around my tennis court where they would get at least three to four hours of direct sunlight.
The plants were in such good condition. I was excited to see them all flower profusely the following year.
And look at them now – just dripping with gorgeous blooms.
Diamond Rouge® Panicle Hydrangeas have abundant, long lasting, rounded flower heads that start white and progress to pink, intense raspberry red, and finally wine red.
The flowers start blooming in July and take on pinkish coloration earlier in the season compared to other pink panicle hydrangeas.
Hydrangeas have four petals in their florets. The petals can be found in a multitude of colors including blue, pink, purple, and white, depending on the species and soil pH. I have other colored hydrangeas elsewhere around my farm and they’re all blooming so plentifully this year.
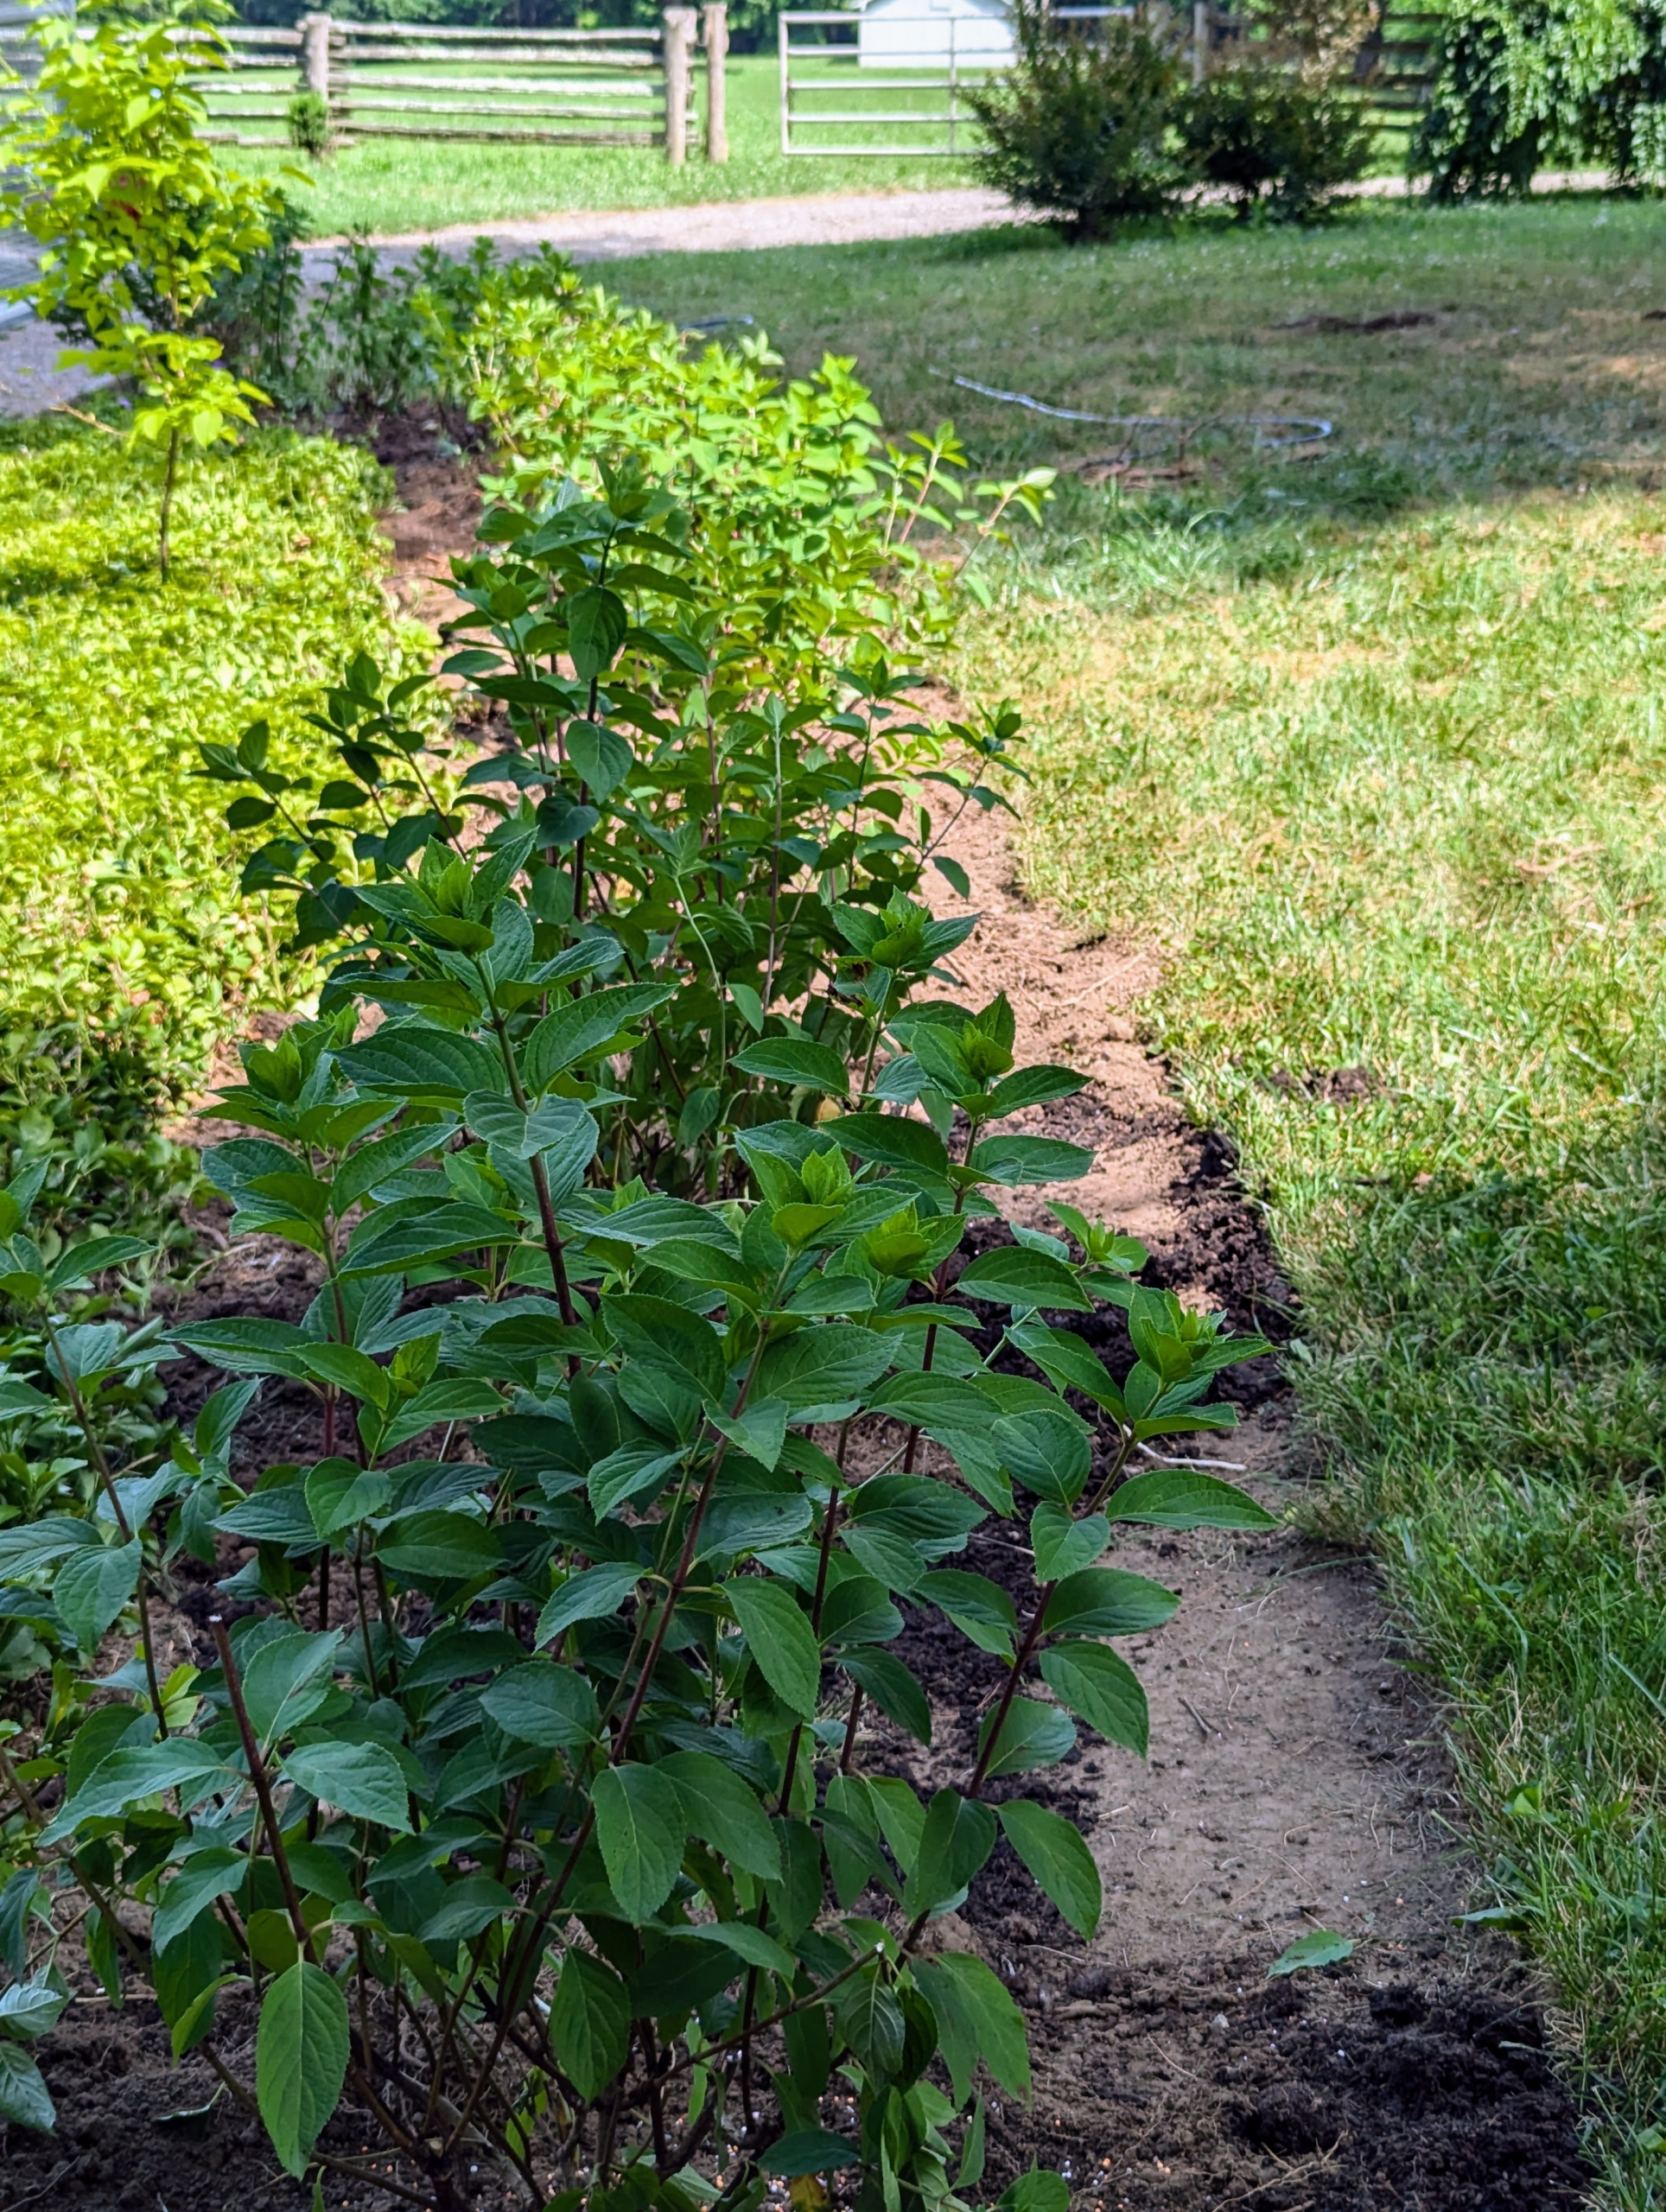
This view shows the front side of hydrangeas and the more mature ones I planted years ago in the back.
And look at the blooms here. The Little Hottie panicle hydrangeas are also bursting with beautiful flowers.
Each low shrub is filled with white to antique white flower clusters.
Under optimal conditions, hydrangeas can bloom from spring to fall for about 10 to 12 weeks. And even with the recent uncomfortable heat and humidity here, these flowers are doing excellently.
What a difference a year makes in the garden. Plant in the proper spot for the specimen, maintain good nutrient rich soil, and water and feed properly – your gardens will thrive like mine.
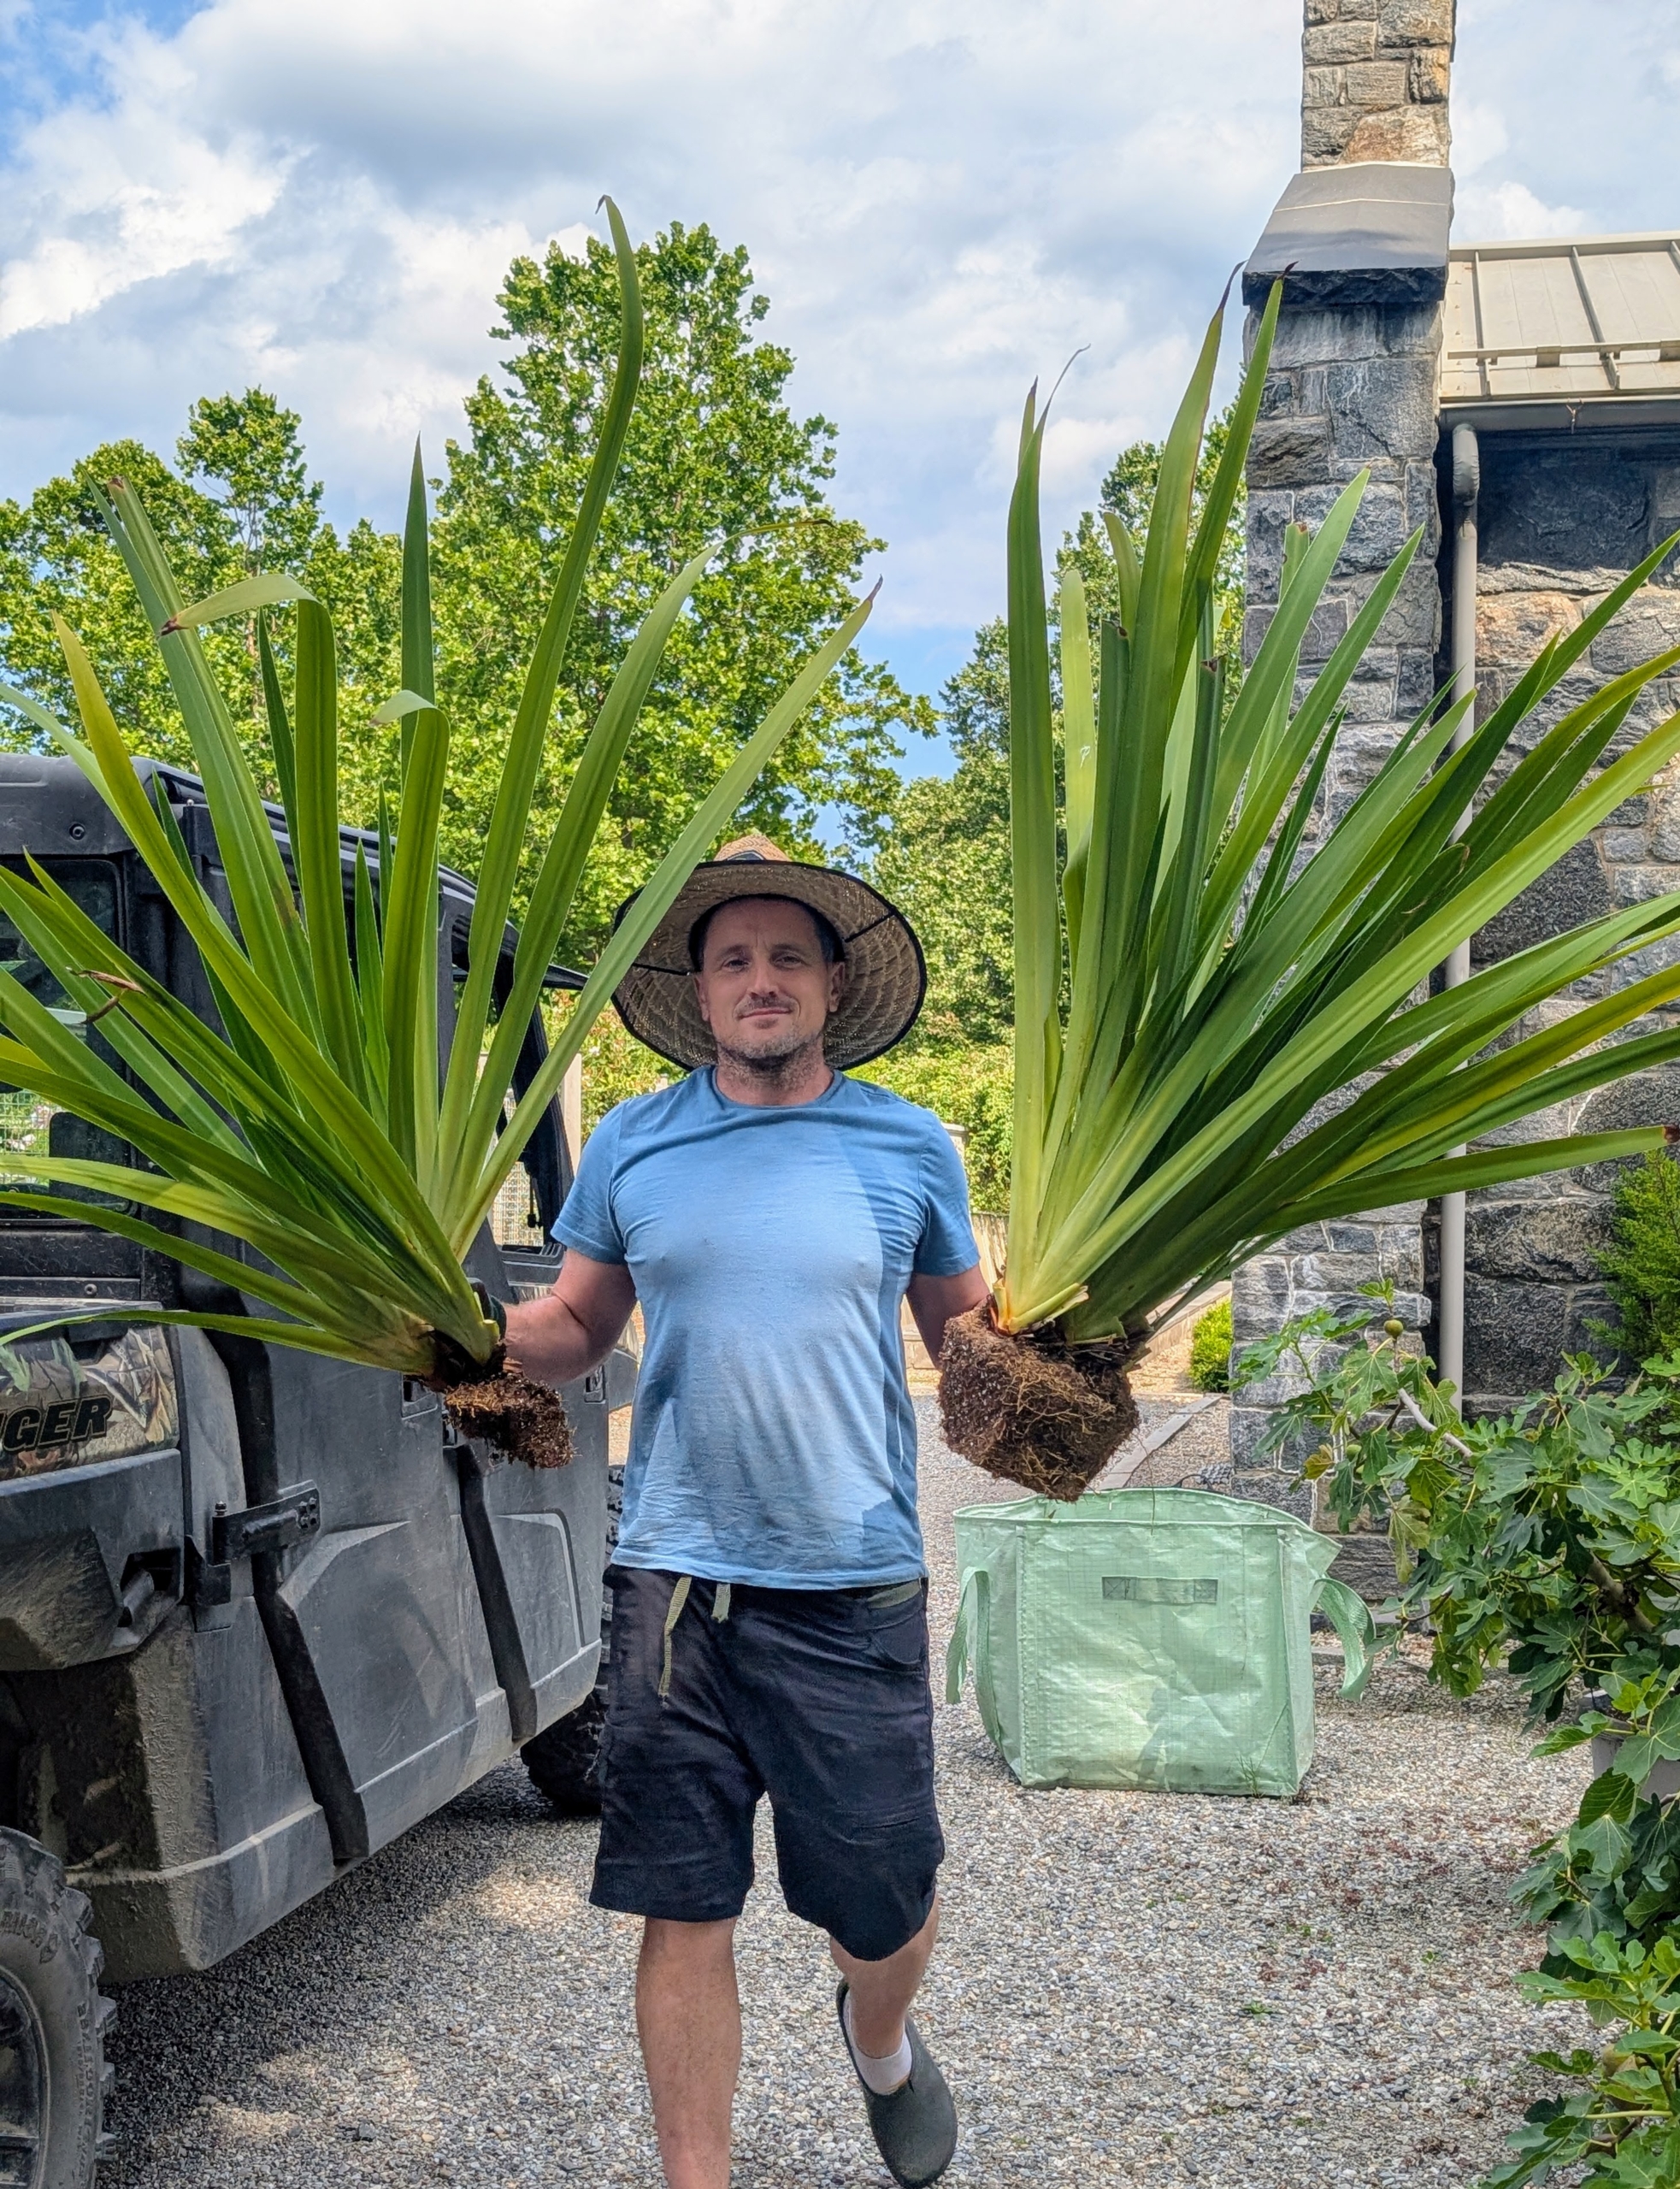
I always enjoy growing my own plants, but there’s something even more exciting and gratifying about propagating them - producing plants by dividing, grafting, or rooting cuttings from existent stems.
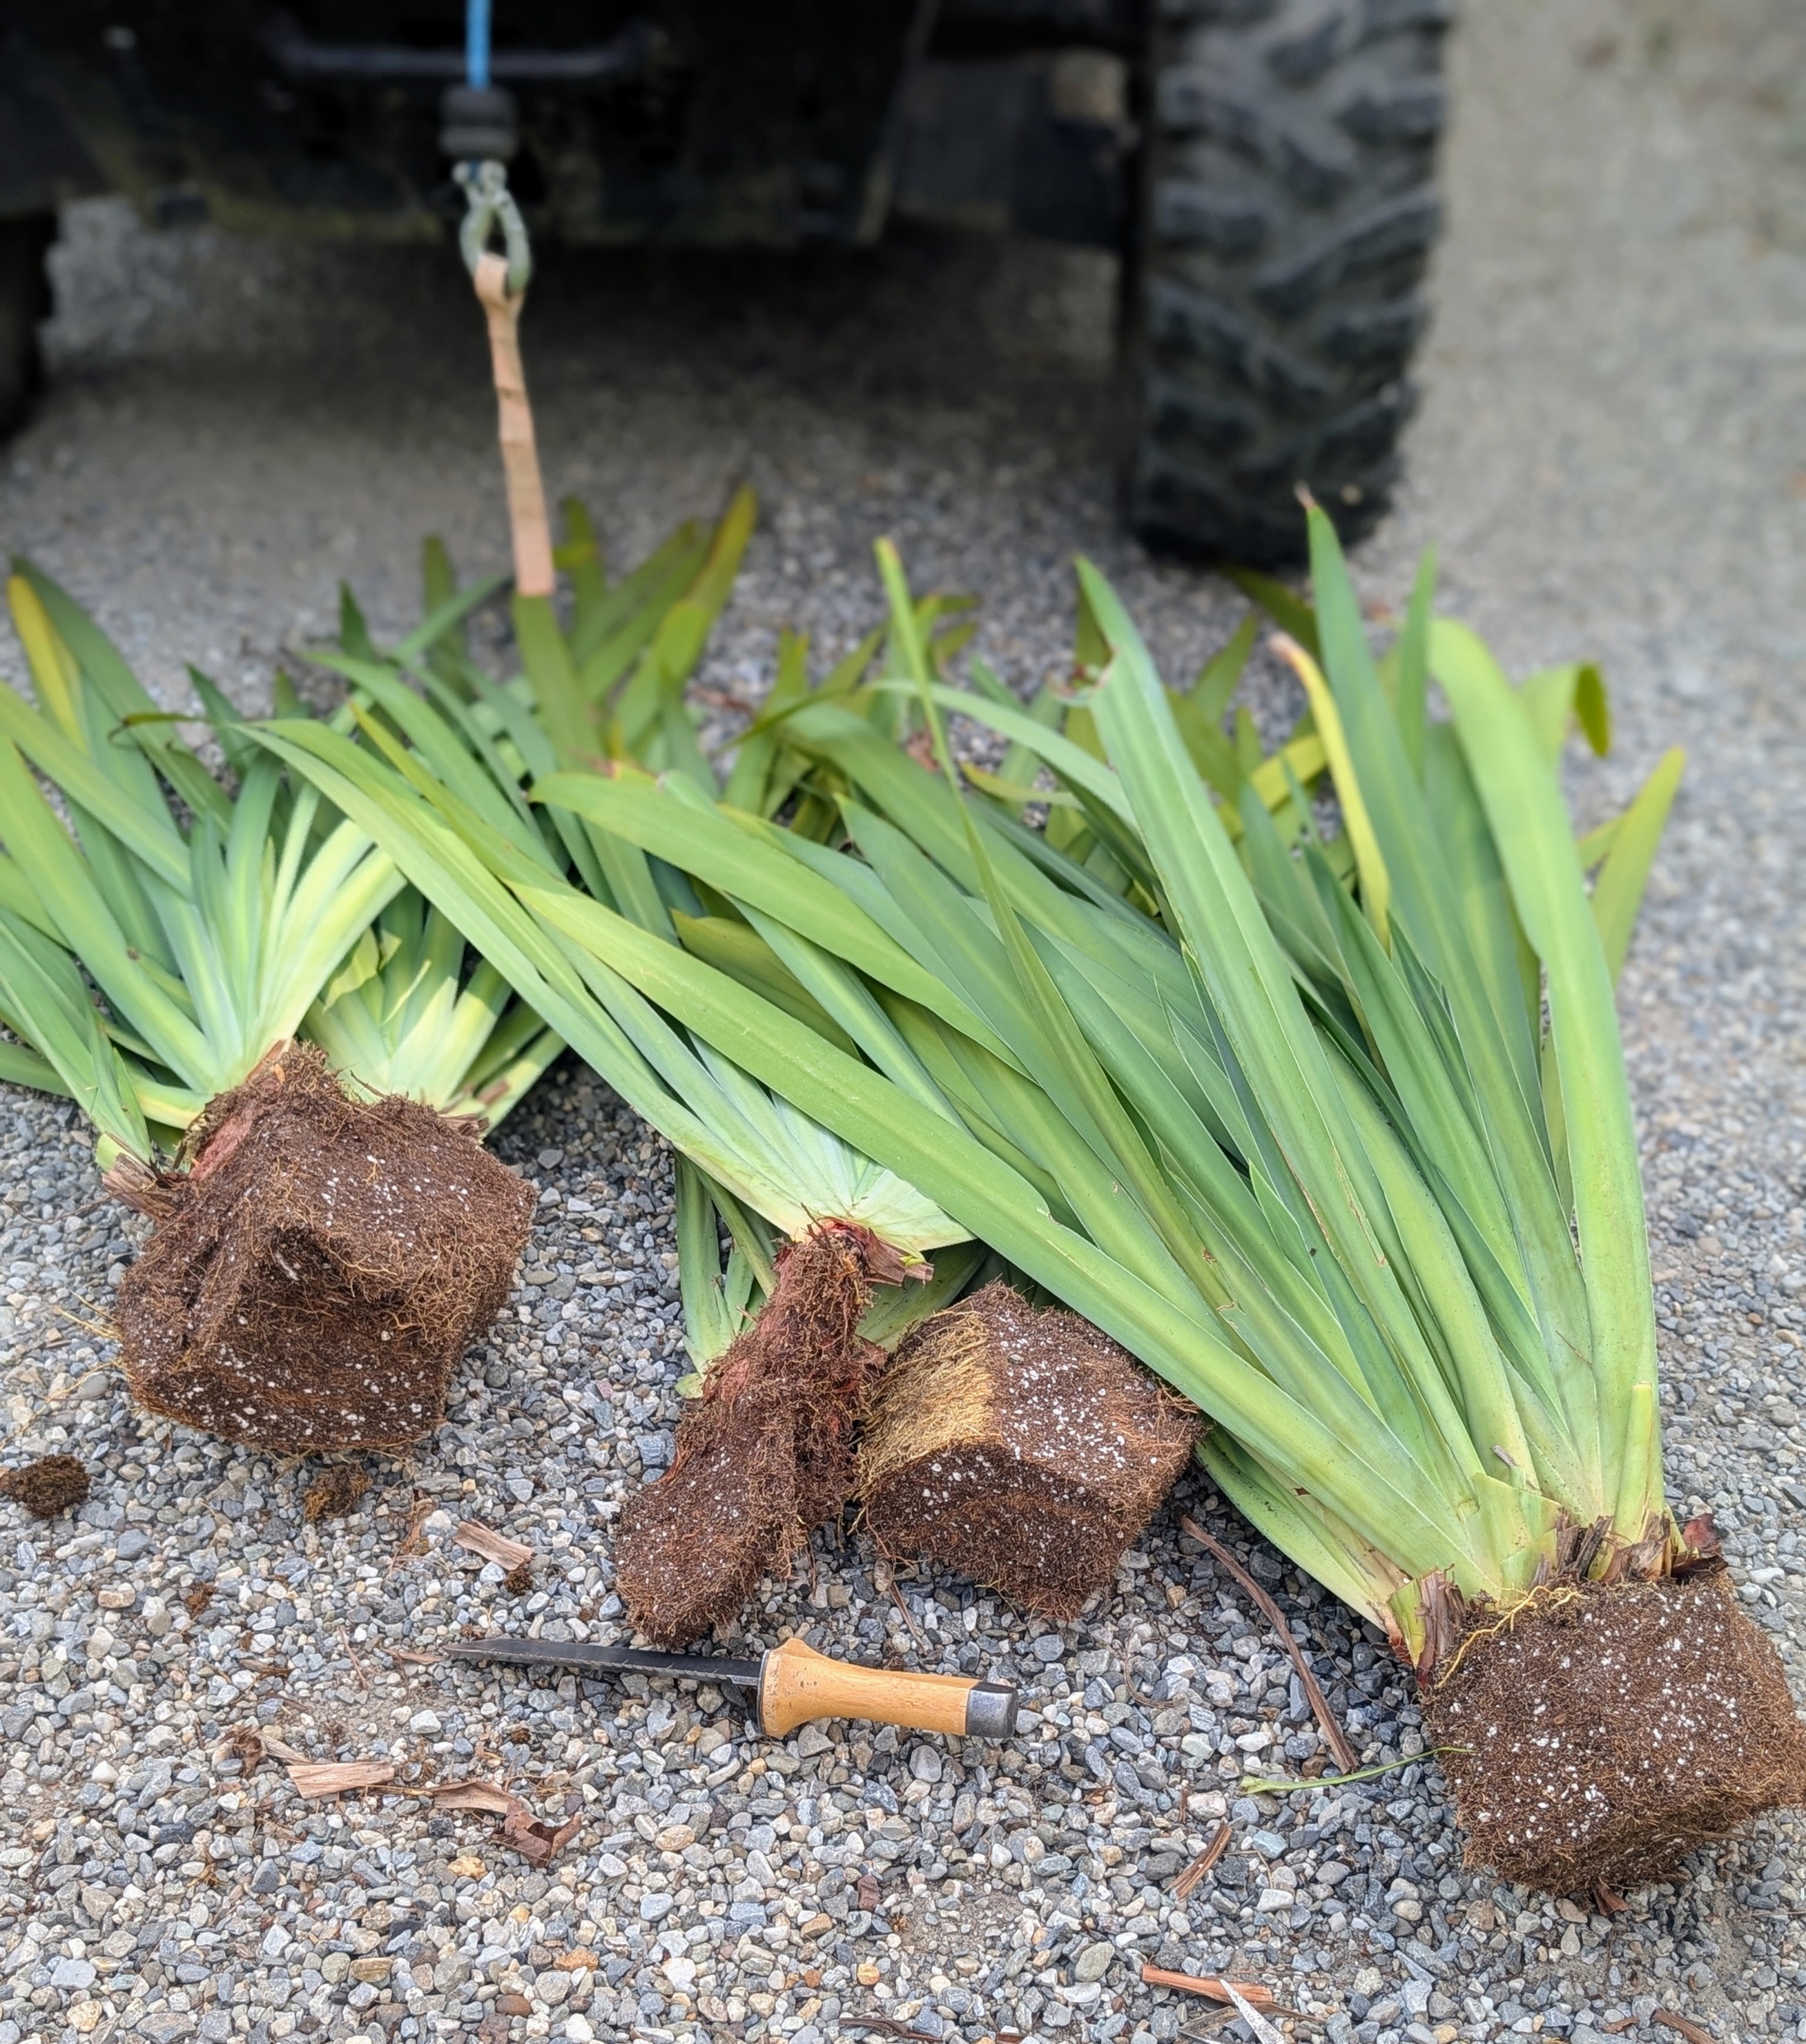
Recently, I asked my head gardener, Ryan McCallister, to divide one large walking iris into four smaller ones. Walking iris, or fan iris, Neomarica caerulea, is a beautiful and sturdy plant known for its fans of pale green foliage and fragrant flowers that bloom in spring, summer, and fall.
Here are some photos, enjoy.
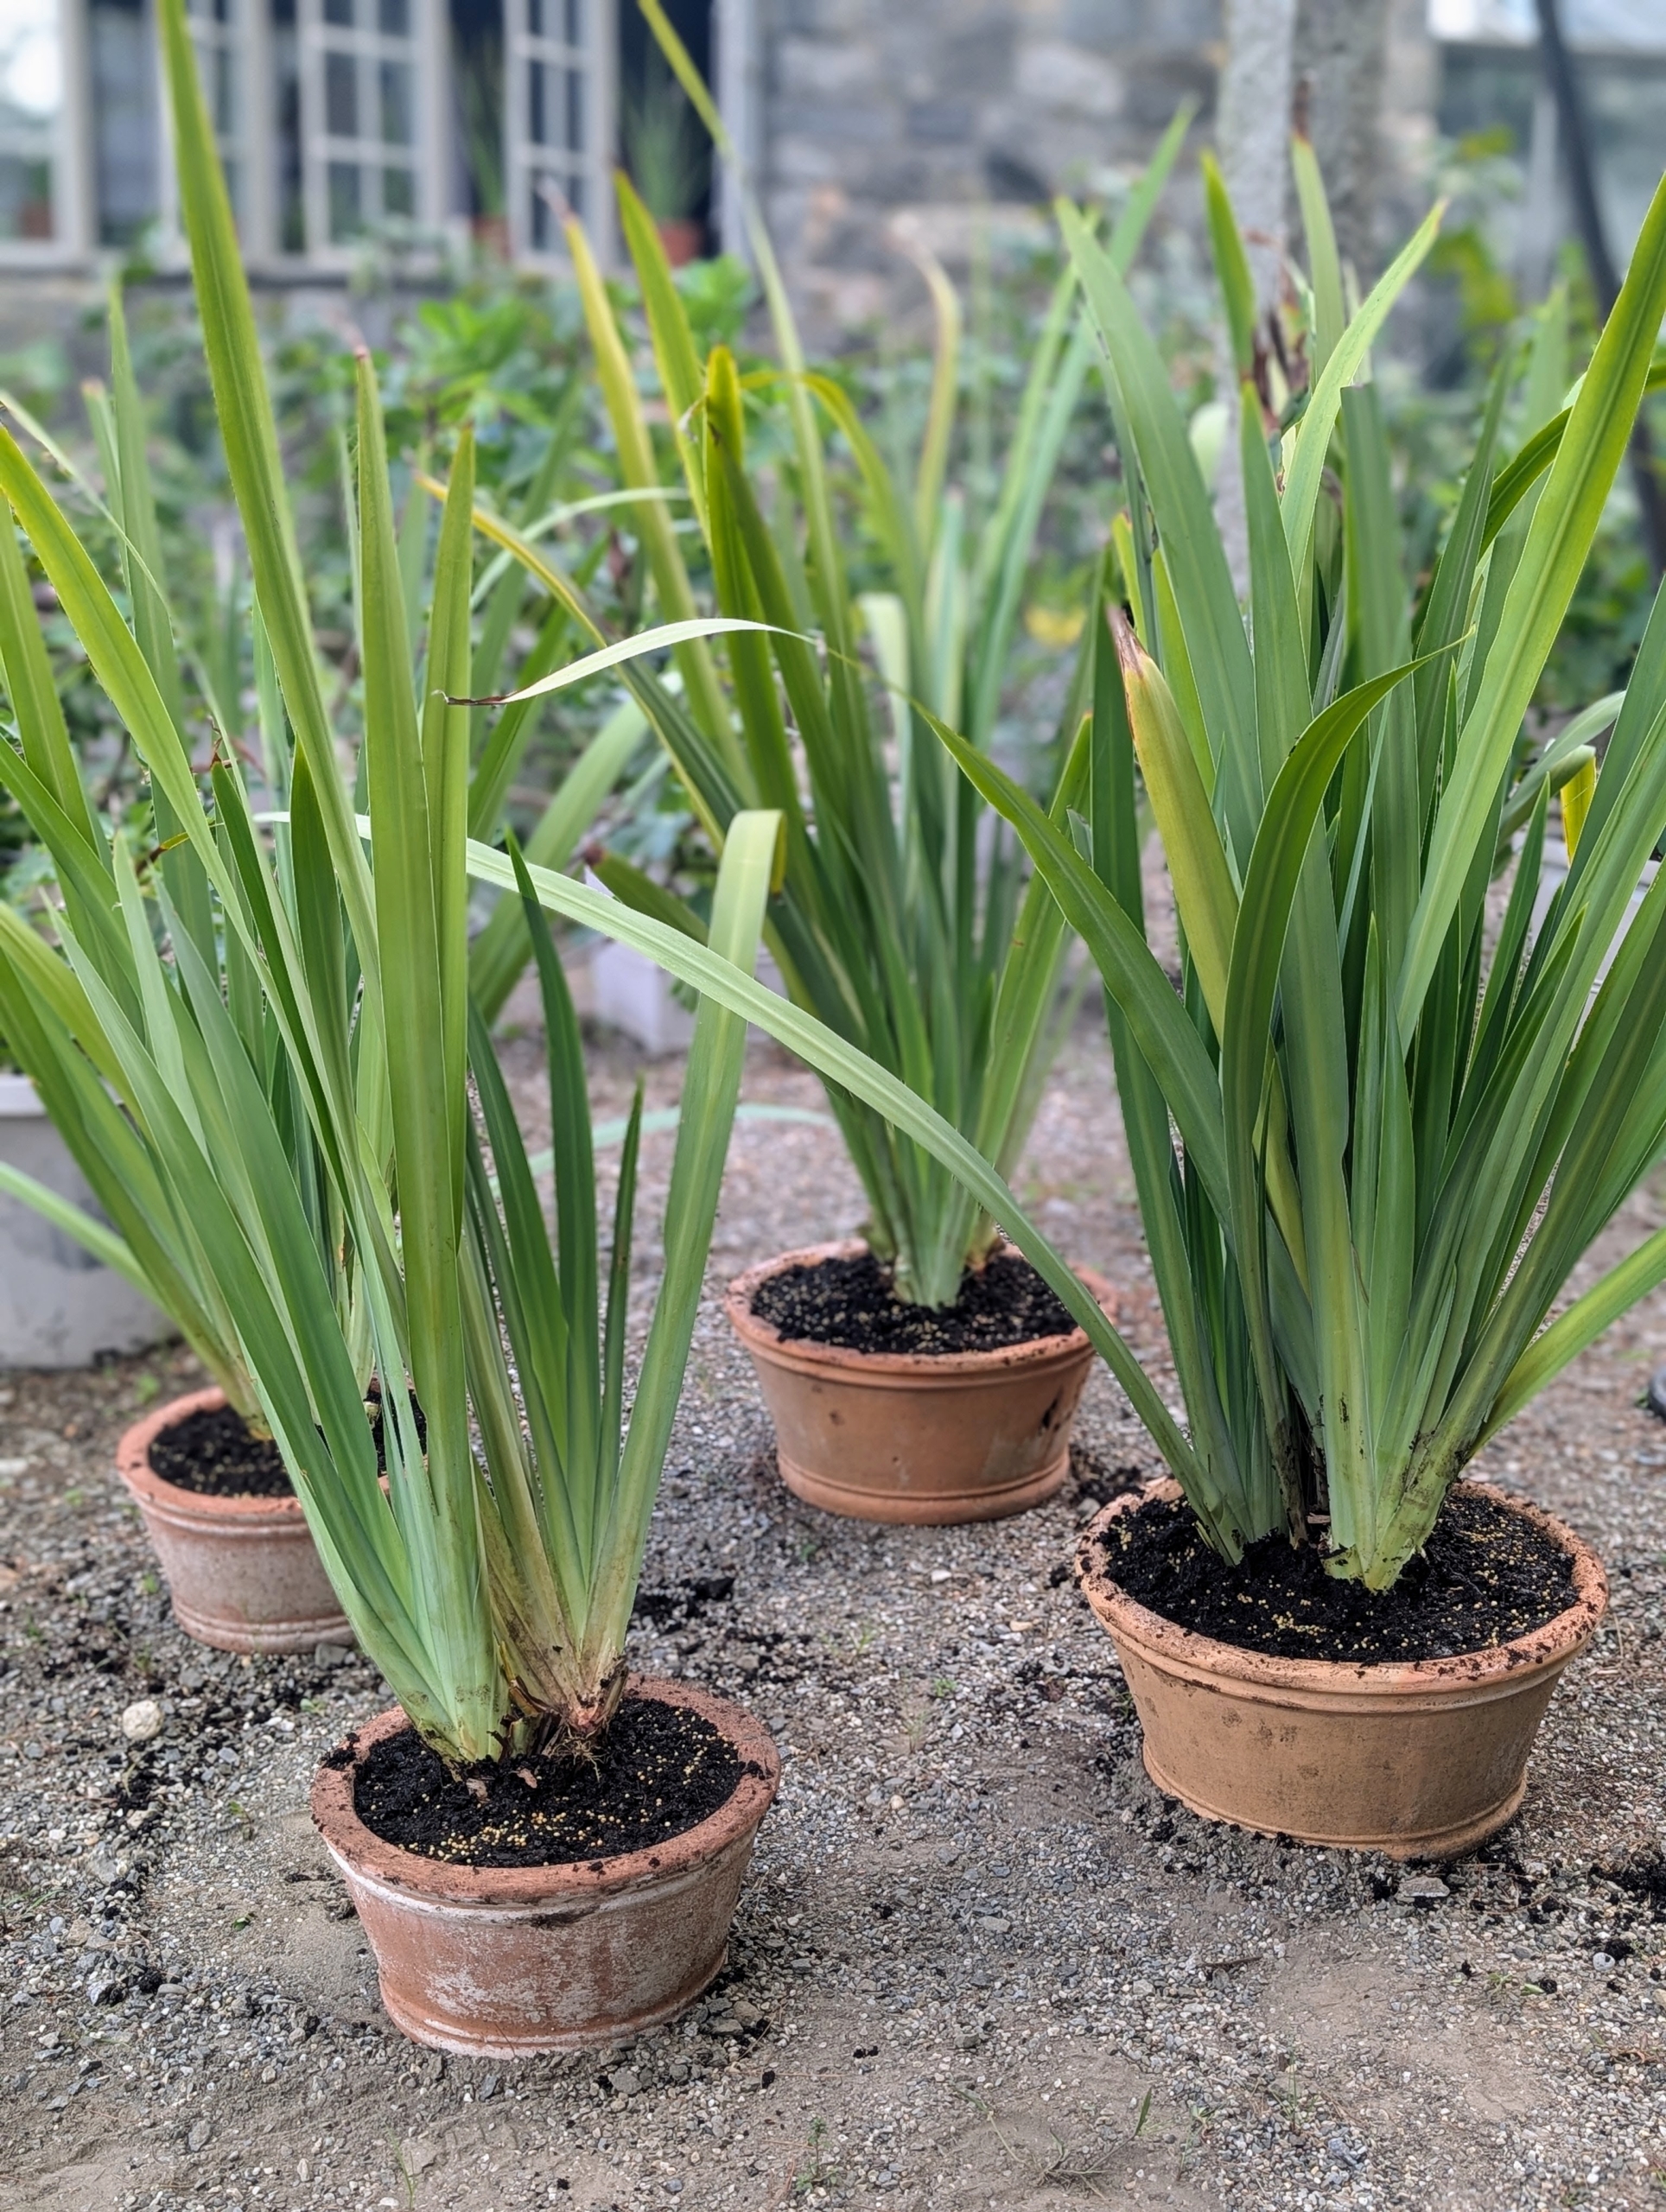
It is definitely rewarding when one plant can be easily divided to make multiple new ones. That’s what happened to one of my walking iris plants – it is now four.
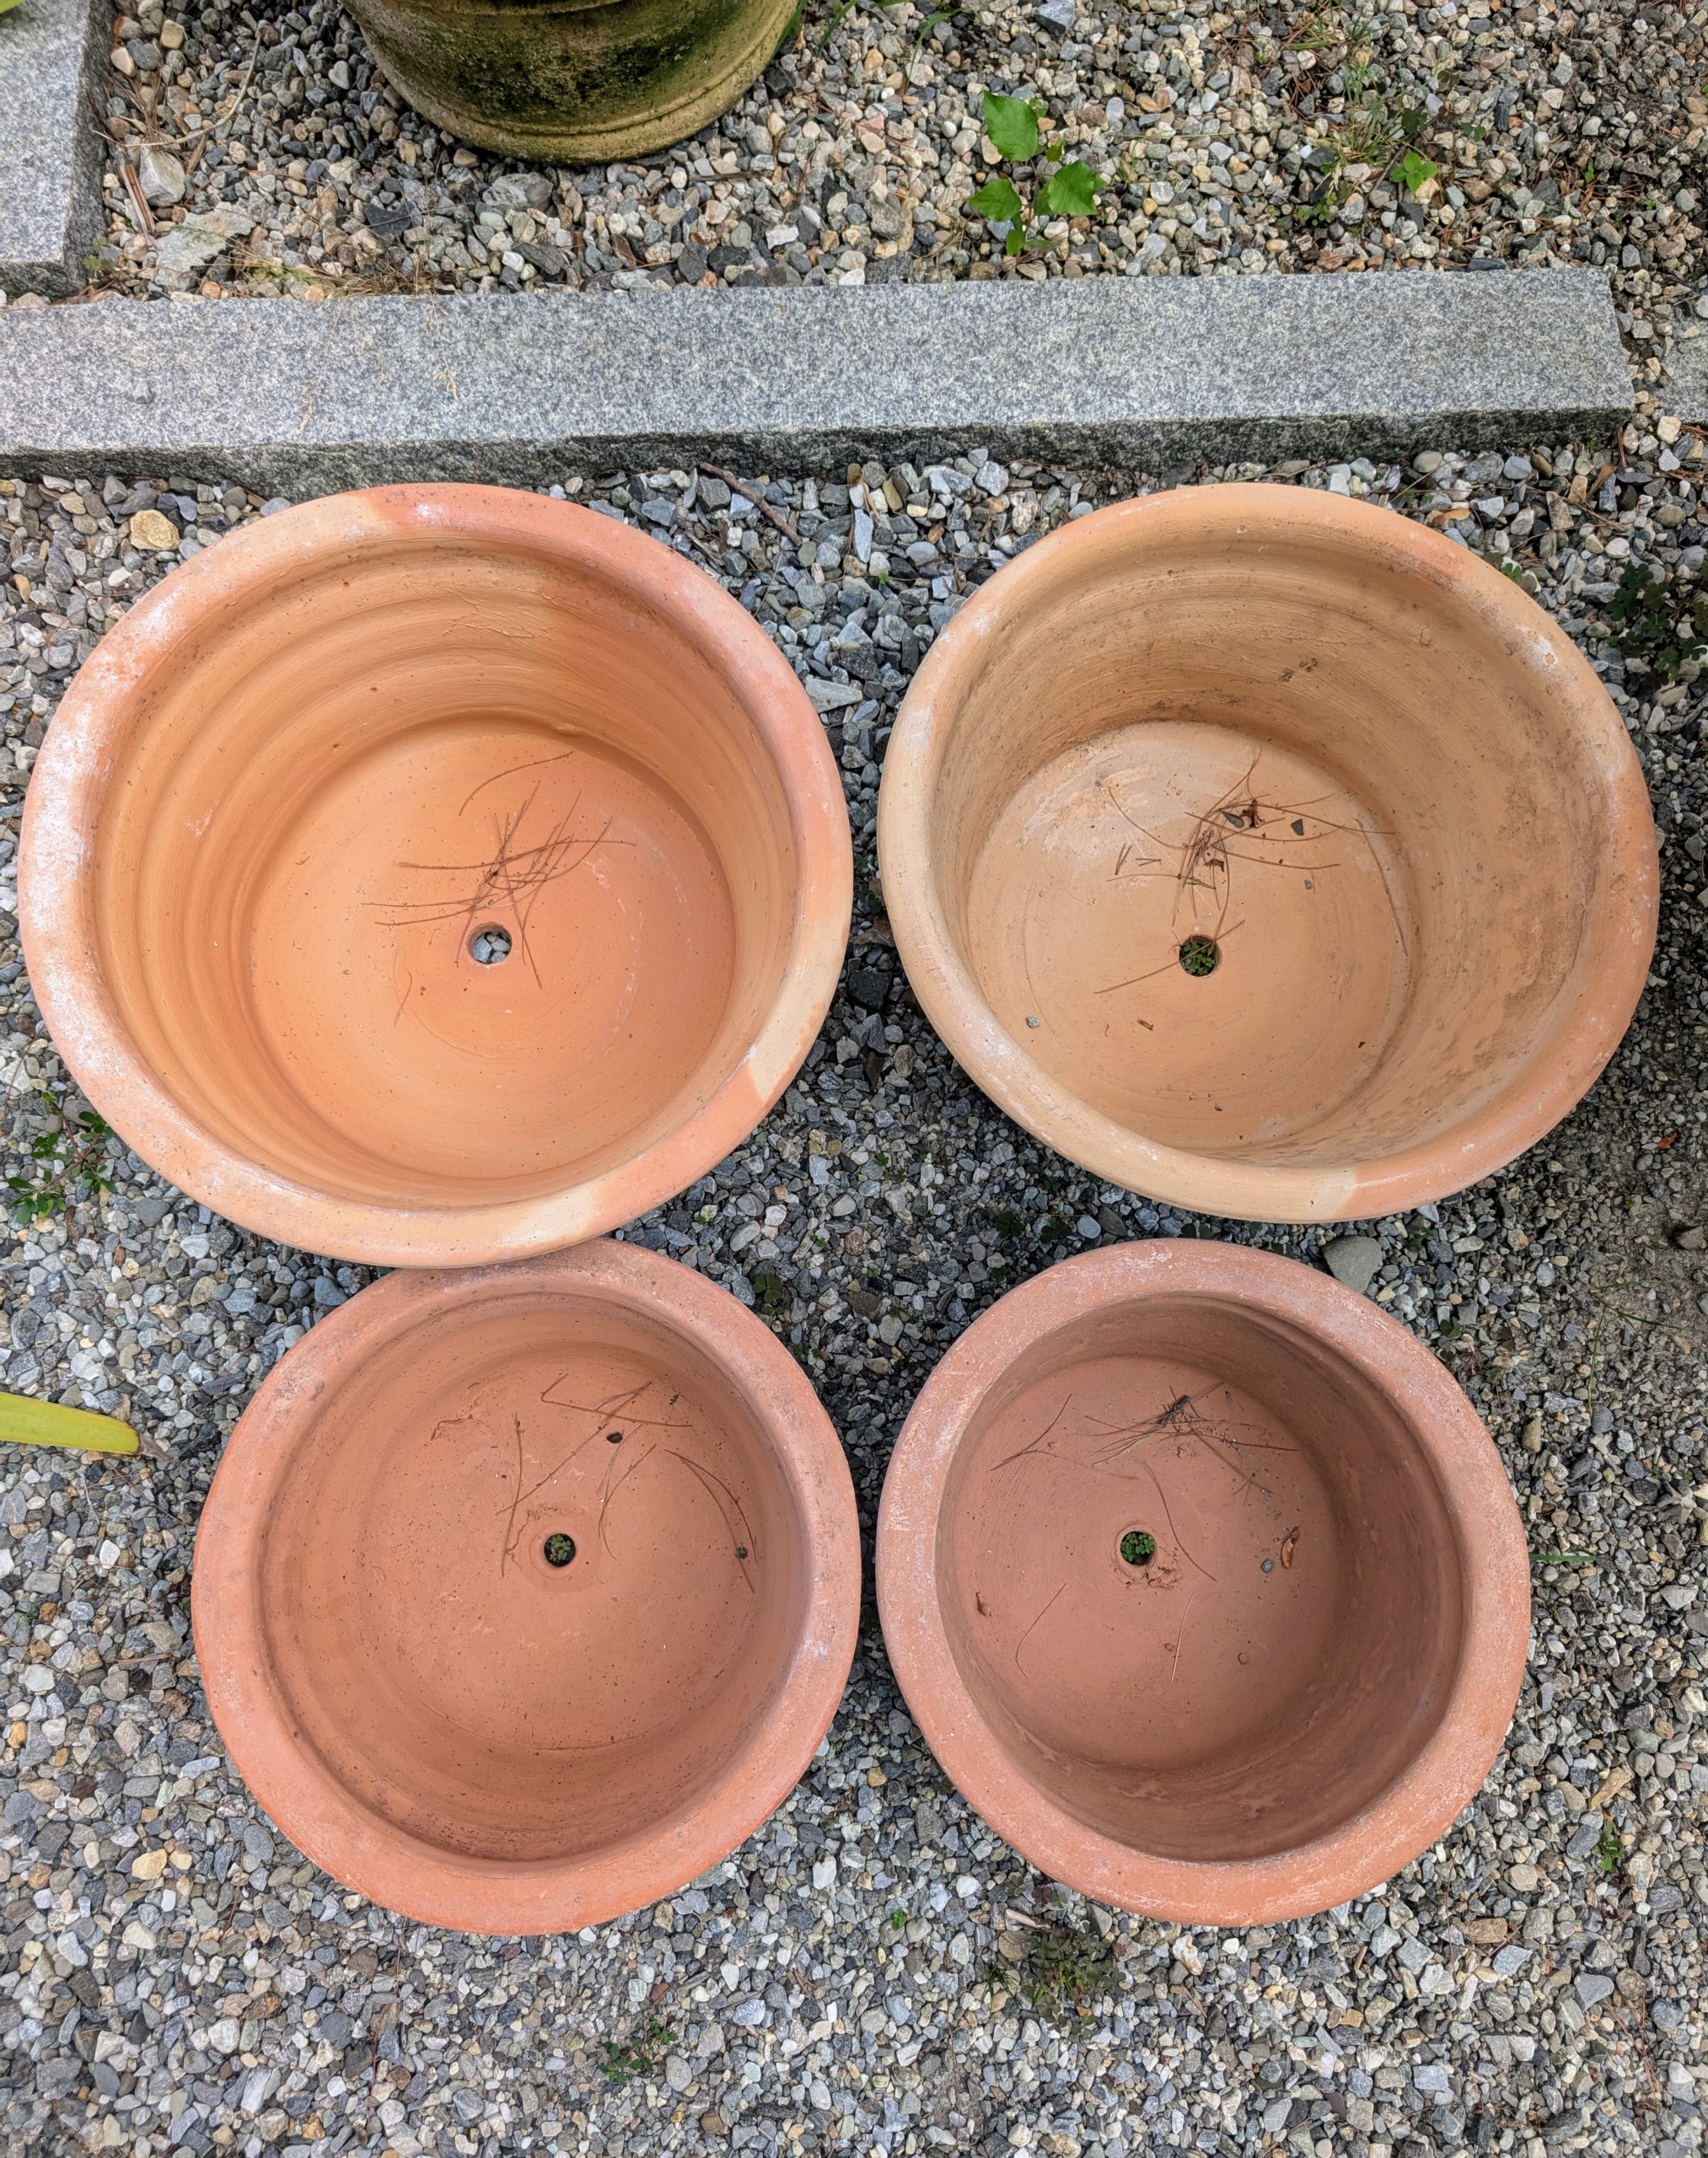
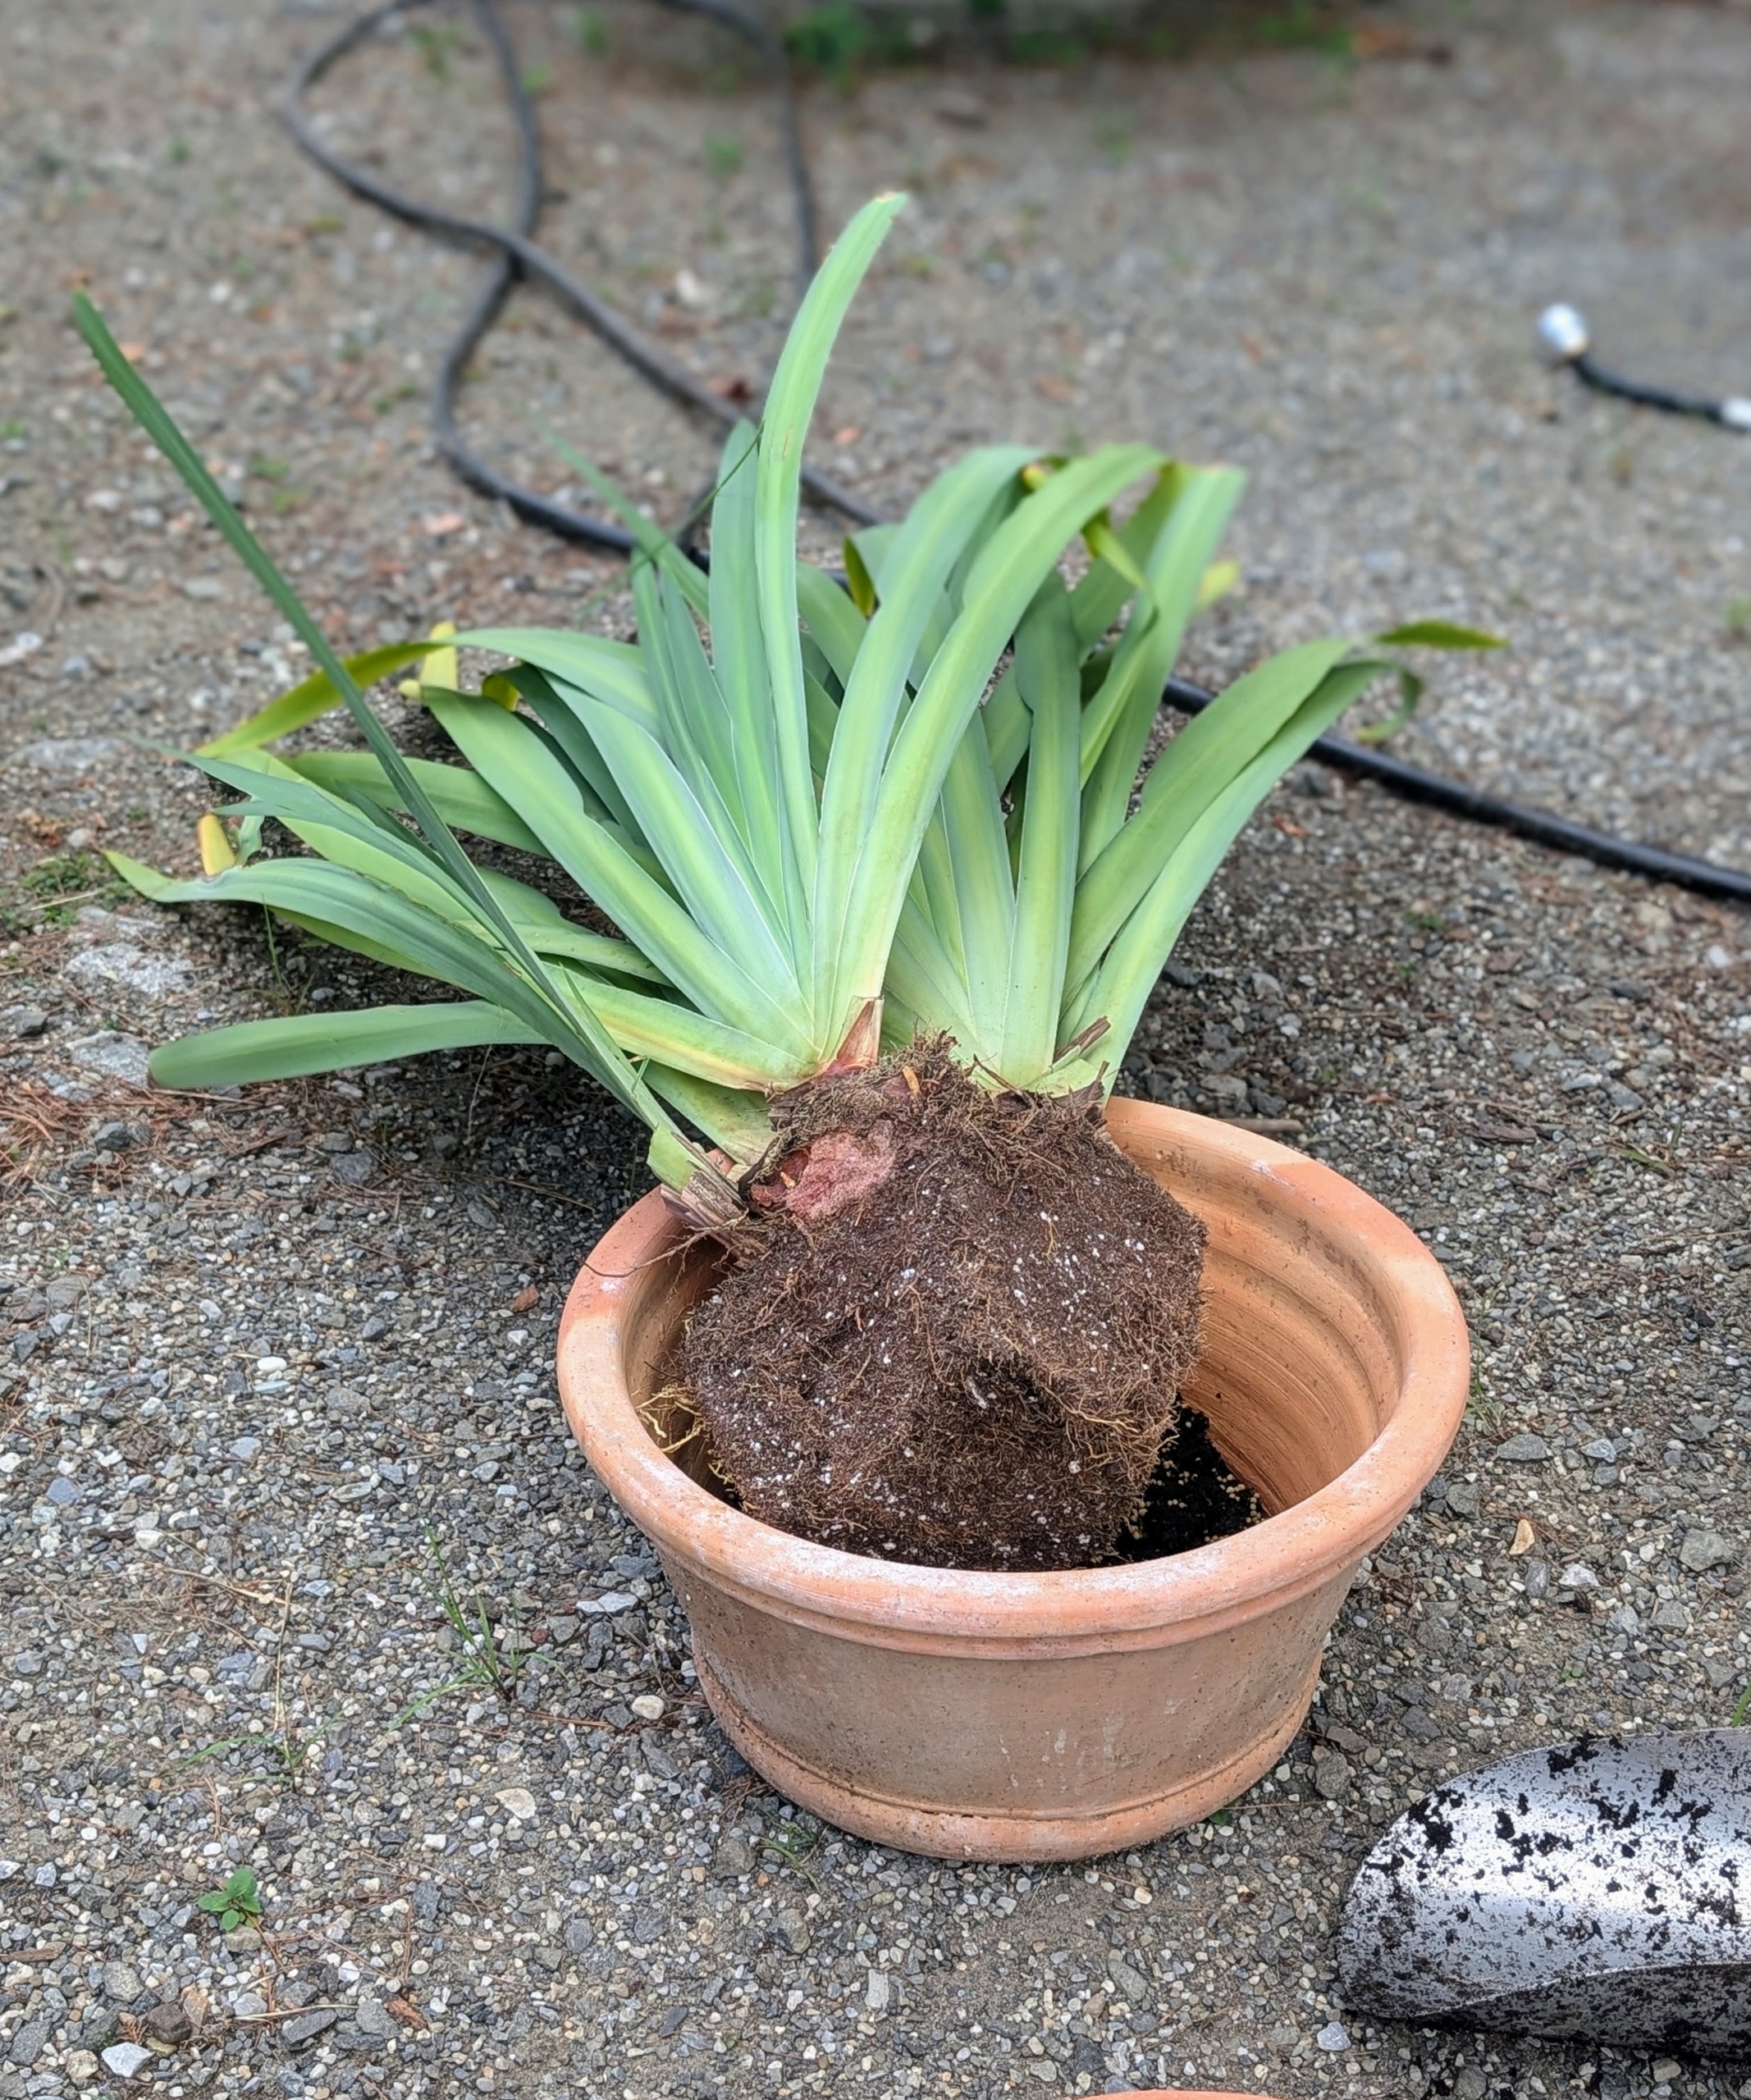
I provided pots and instructed Ryan to use them for transplanting. The best pot for a walking iris is at least eight inches in diameter and about 10-inches deep. It should also be porous. I selected terra cotta, which will provide good water and air exchange.
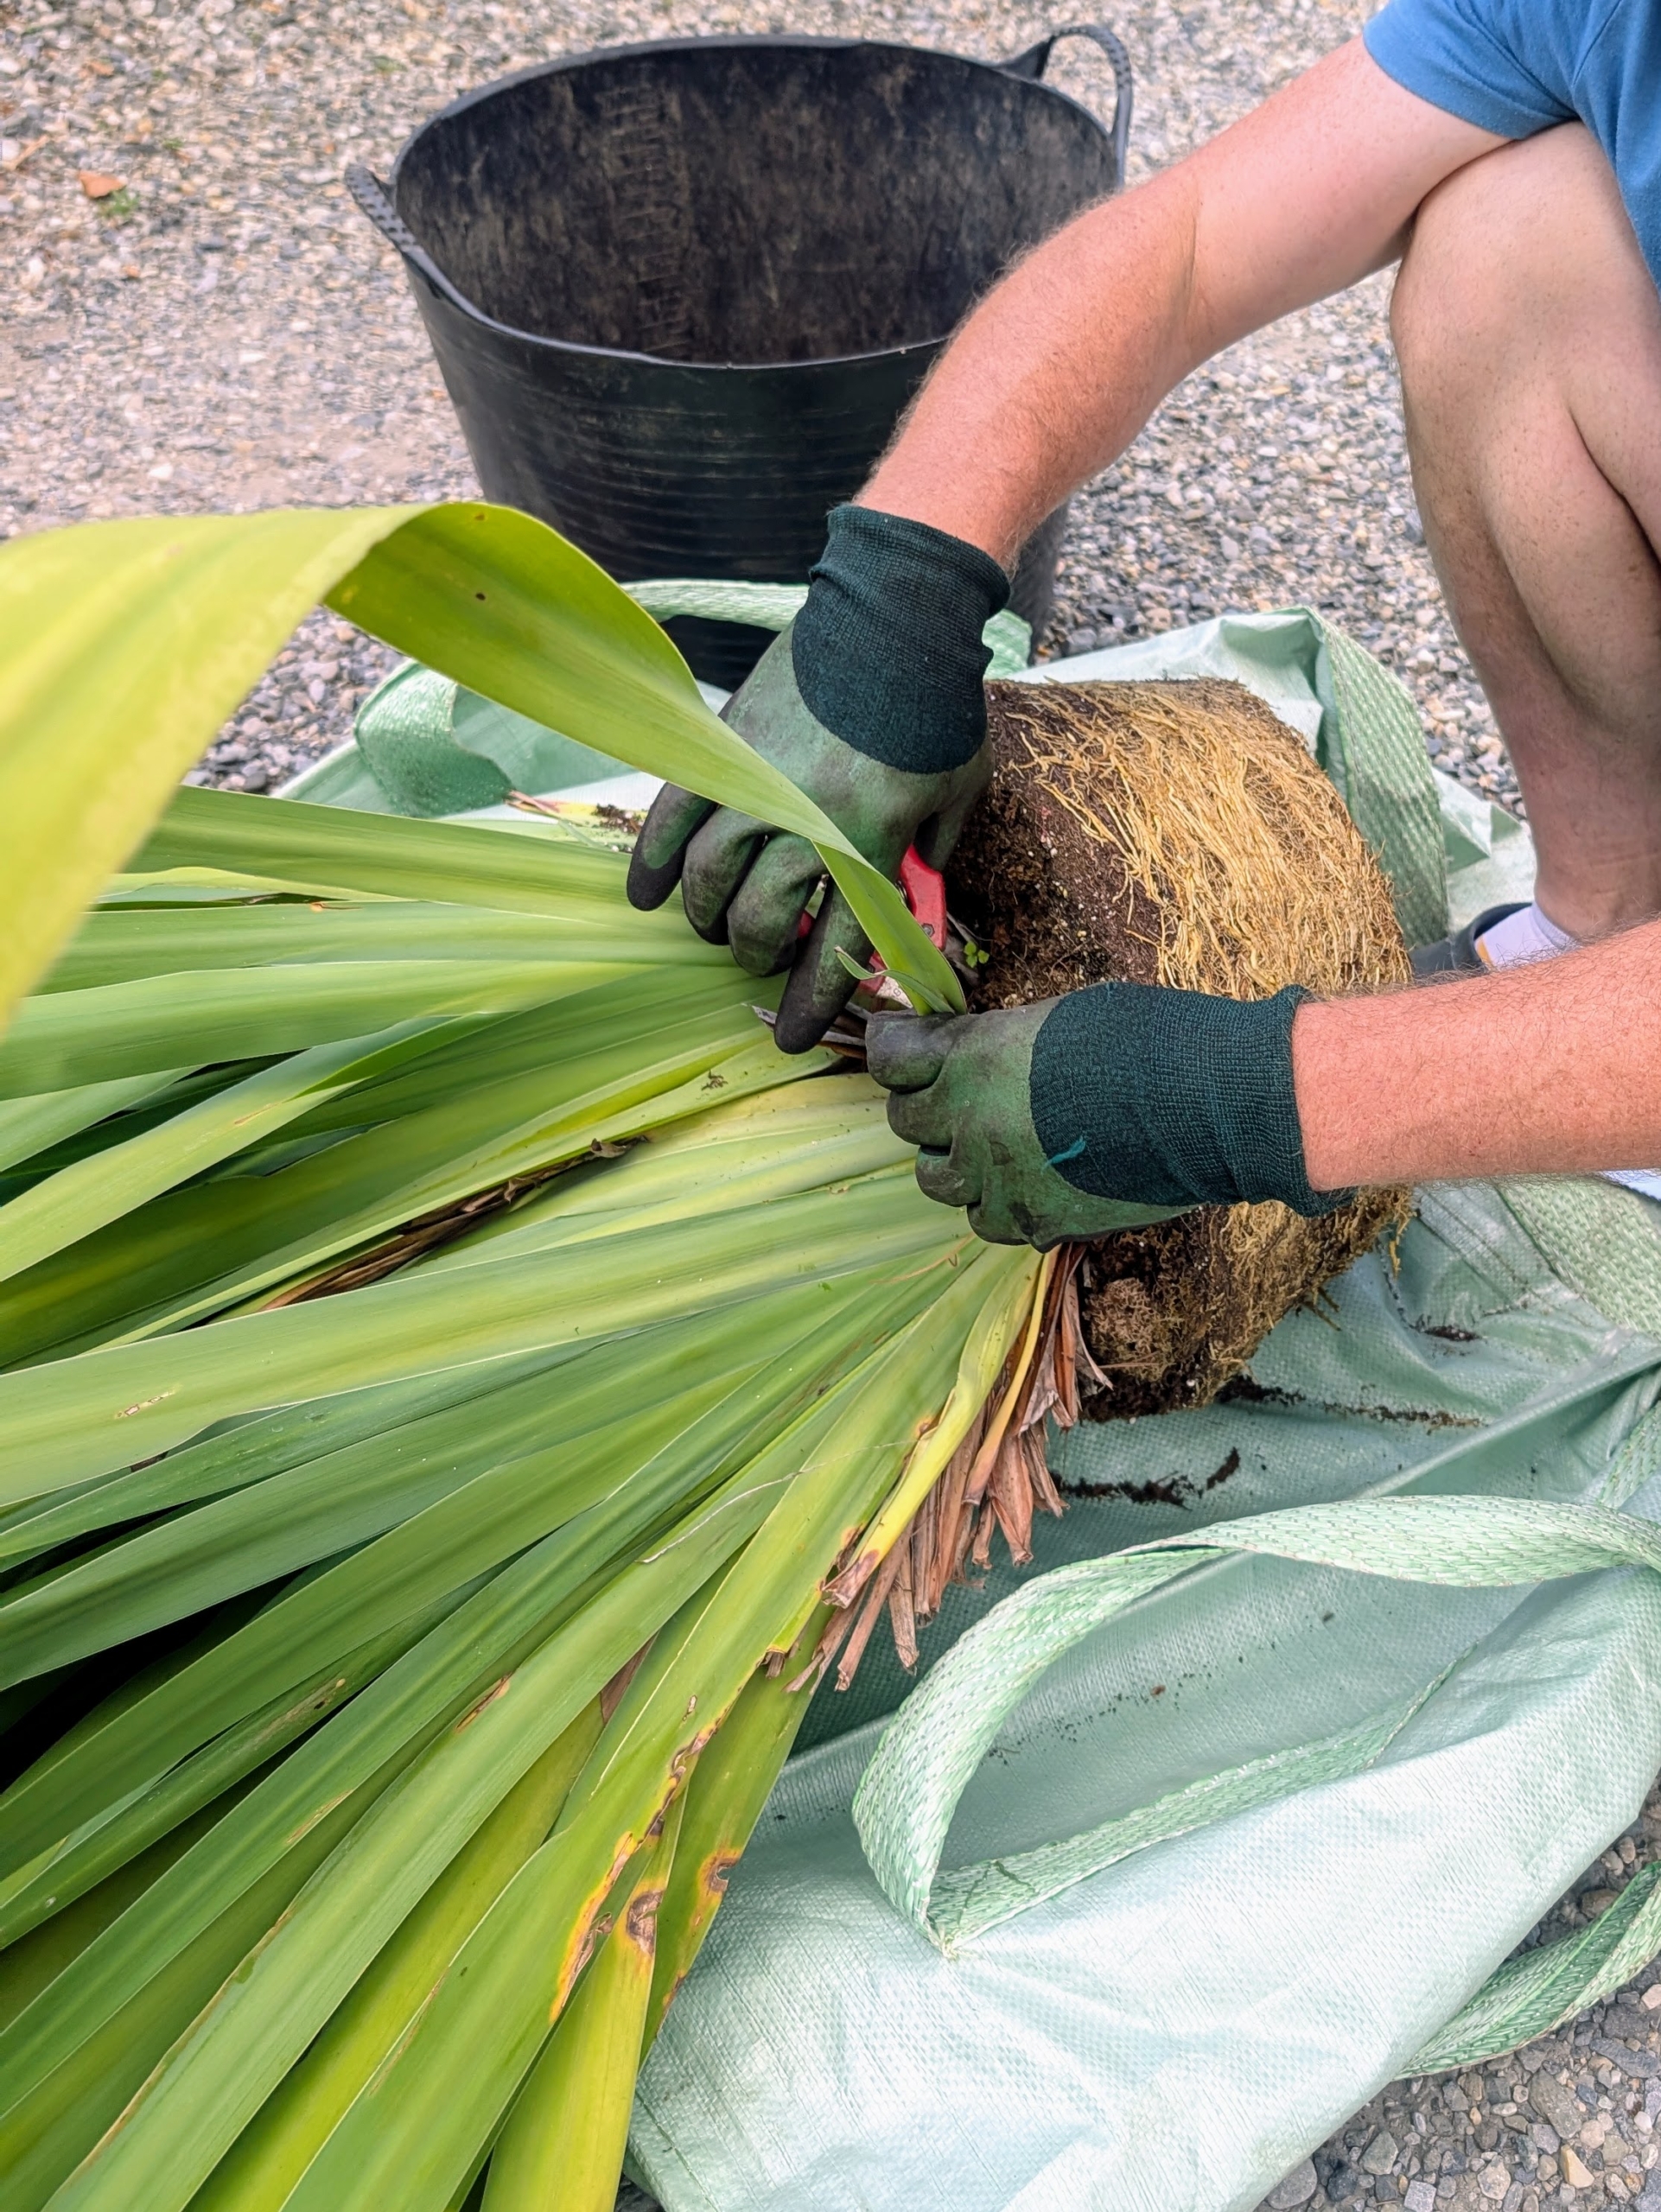
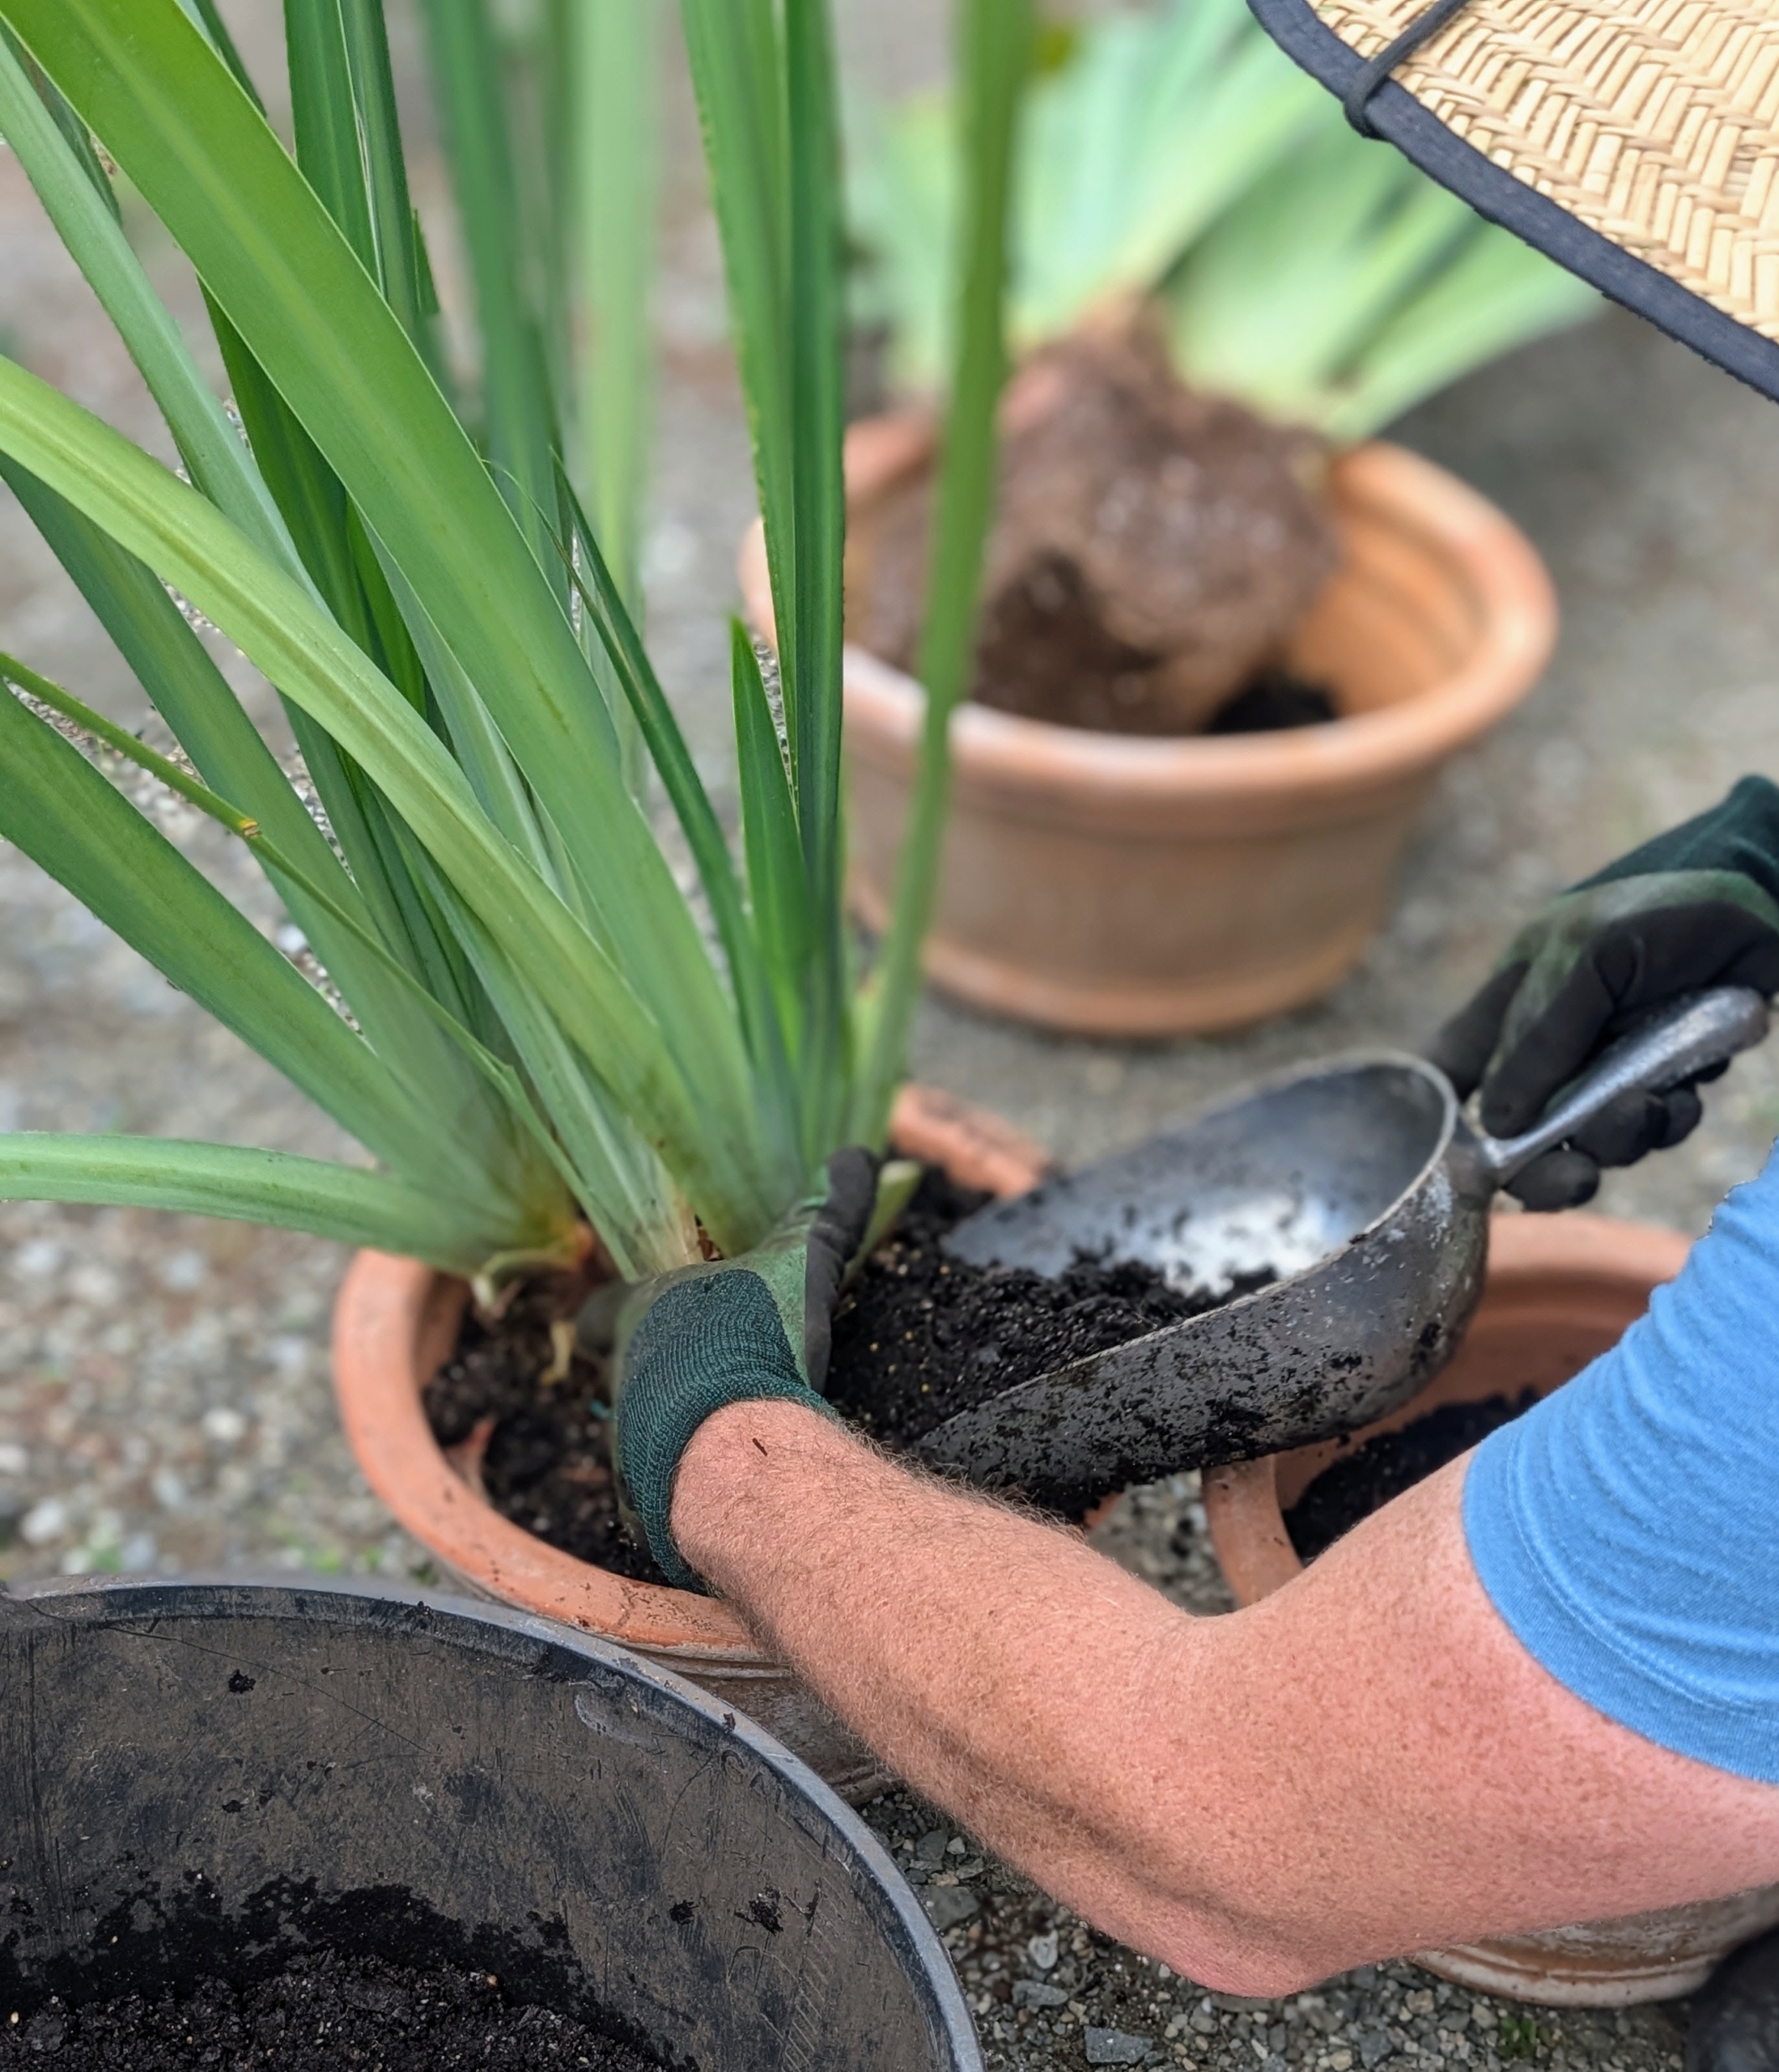
After pulling the walking iris from its original pot and before dividing, Ryan removes any dead or unsightly foliage from the base of the plant.
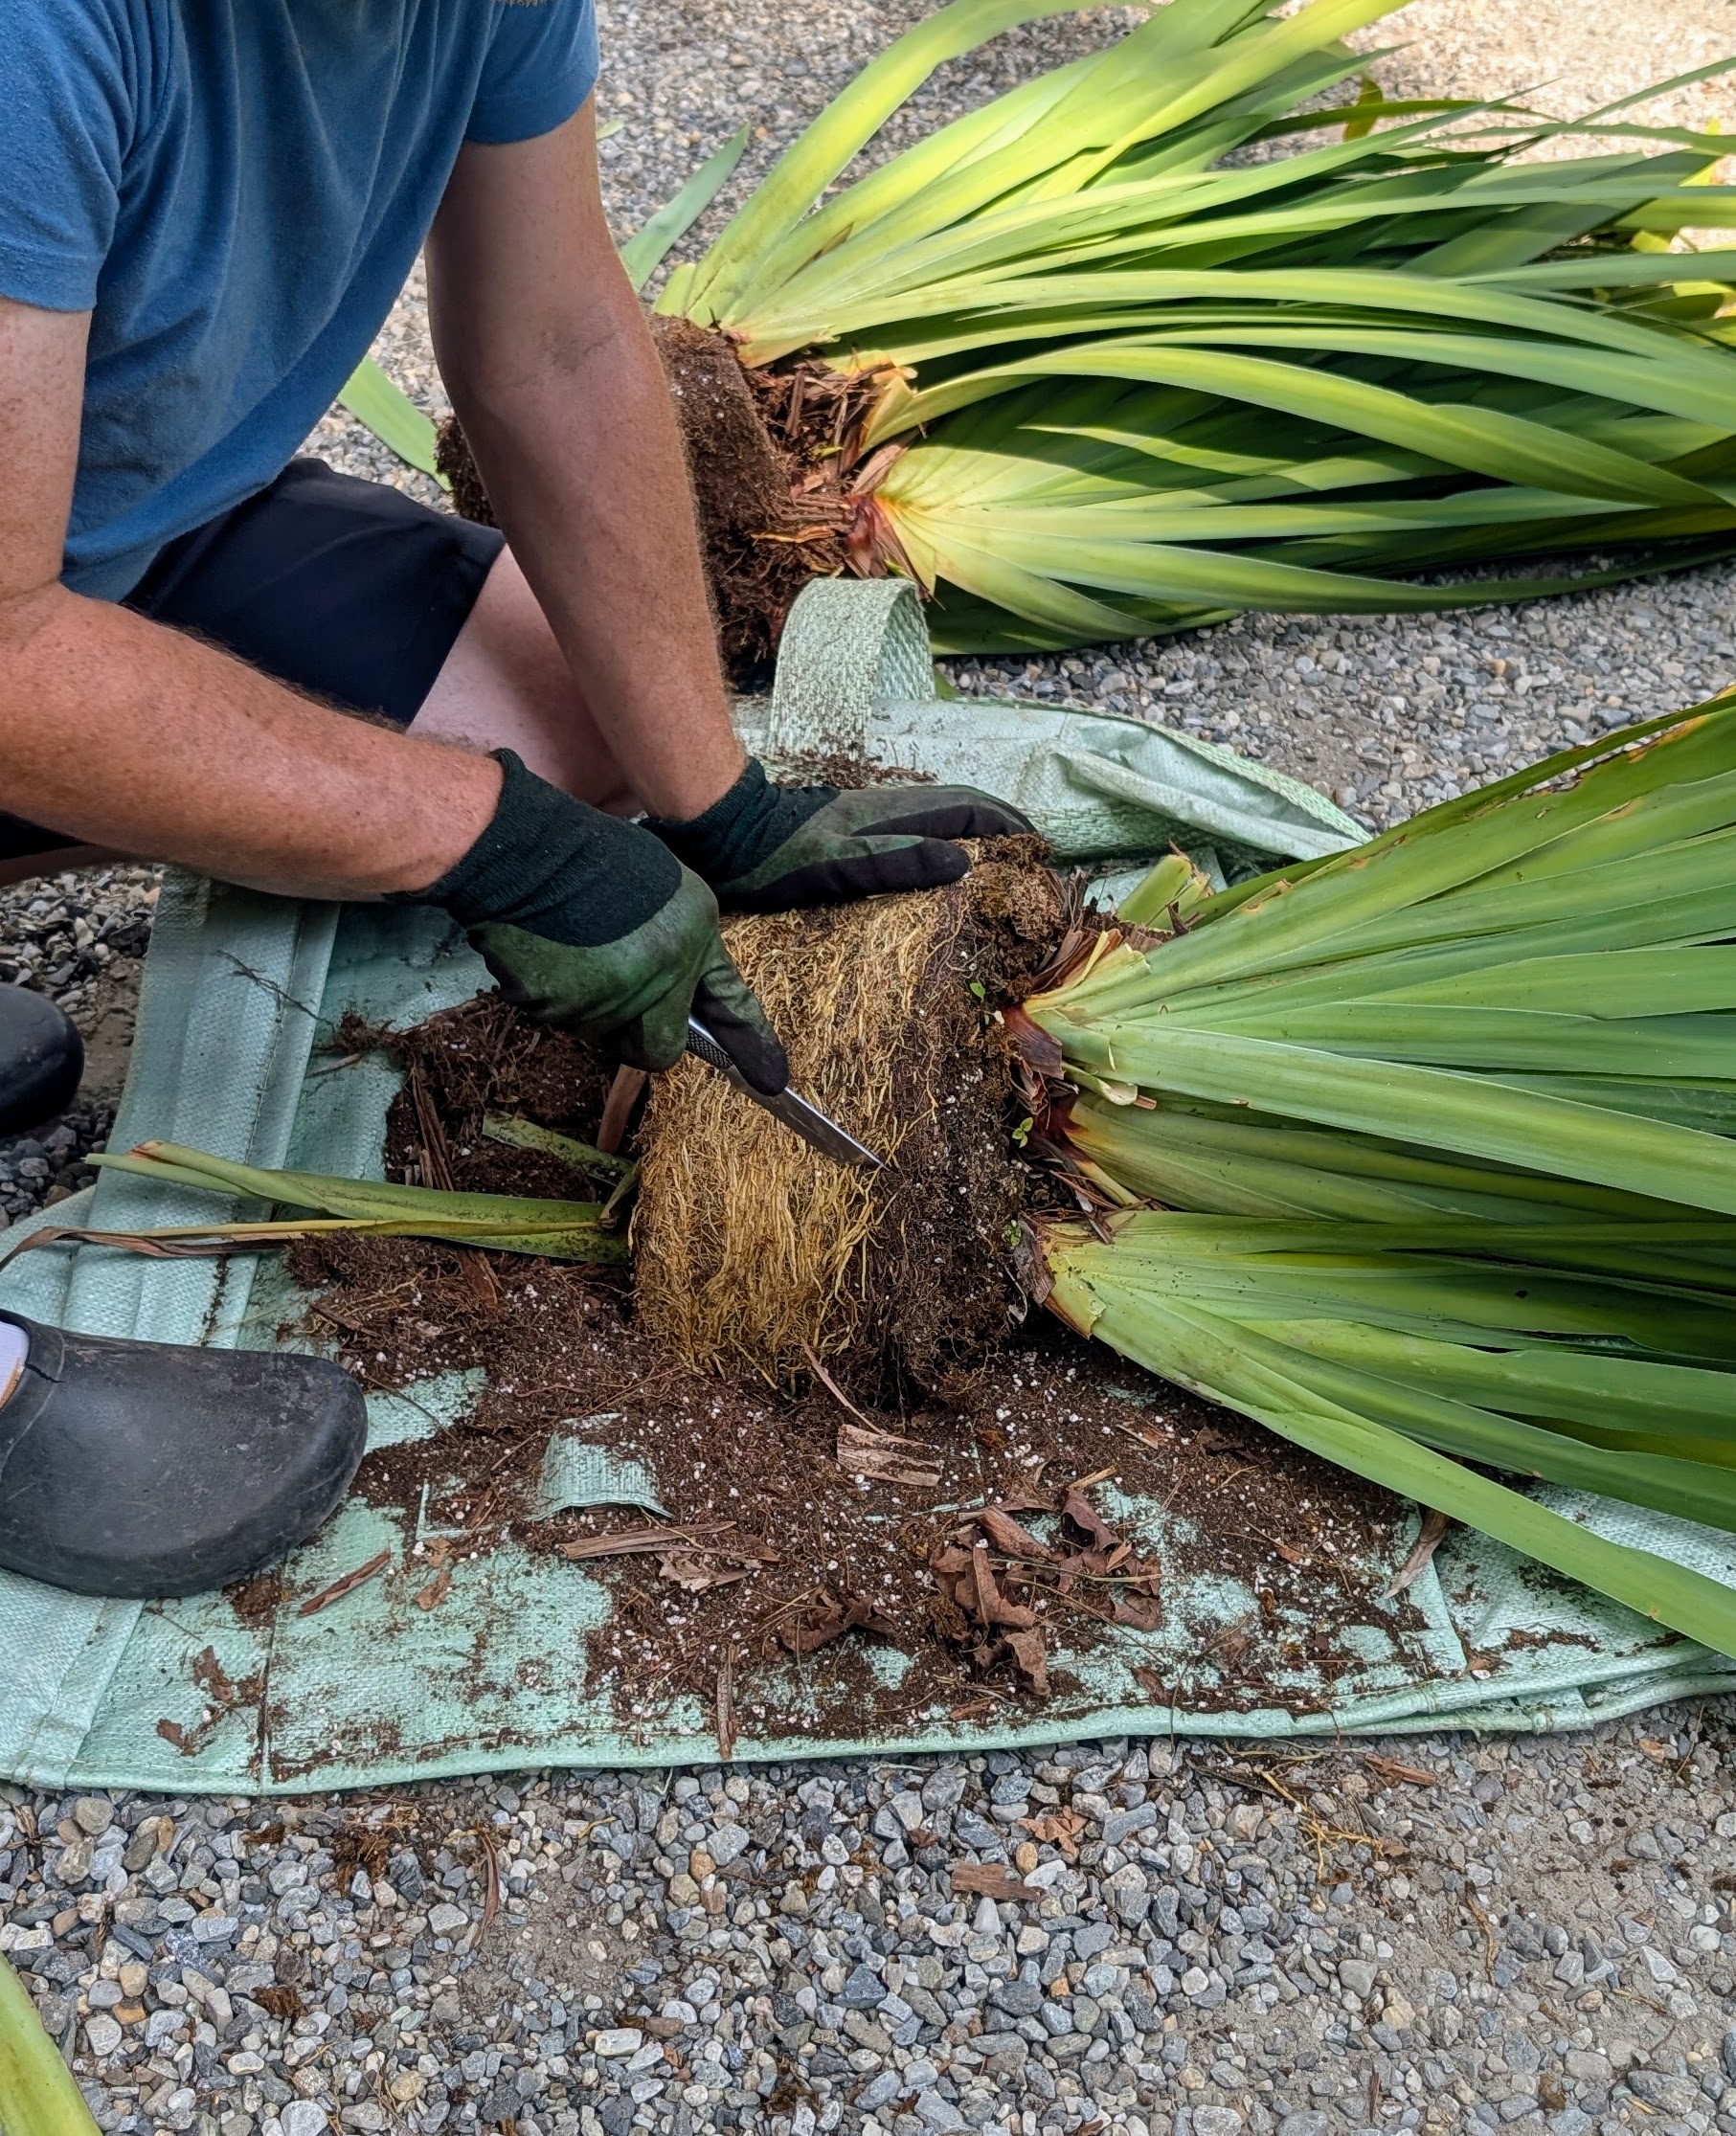
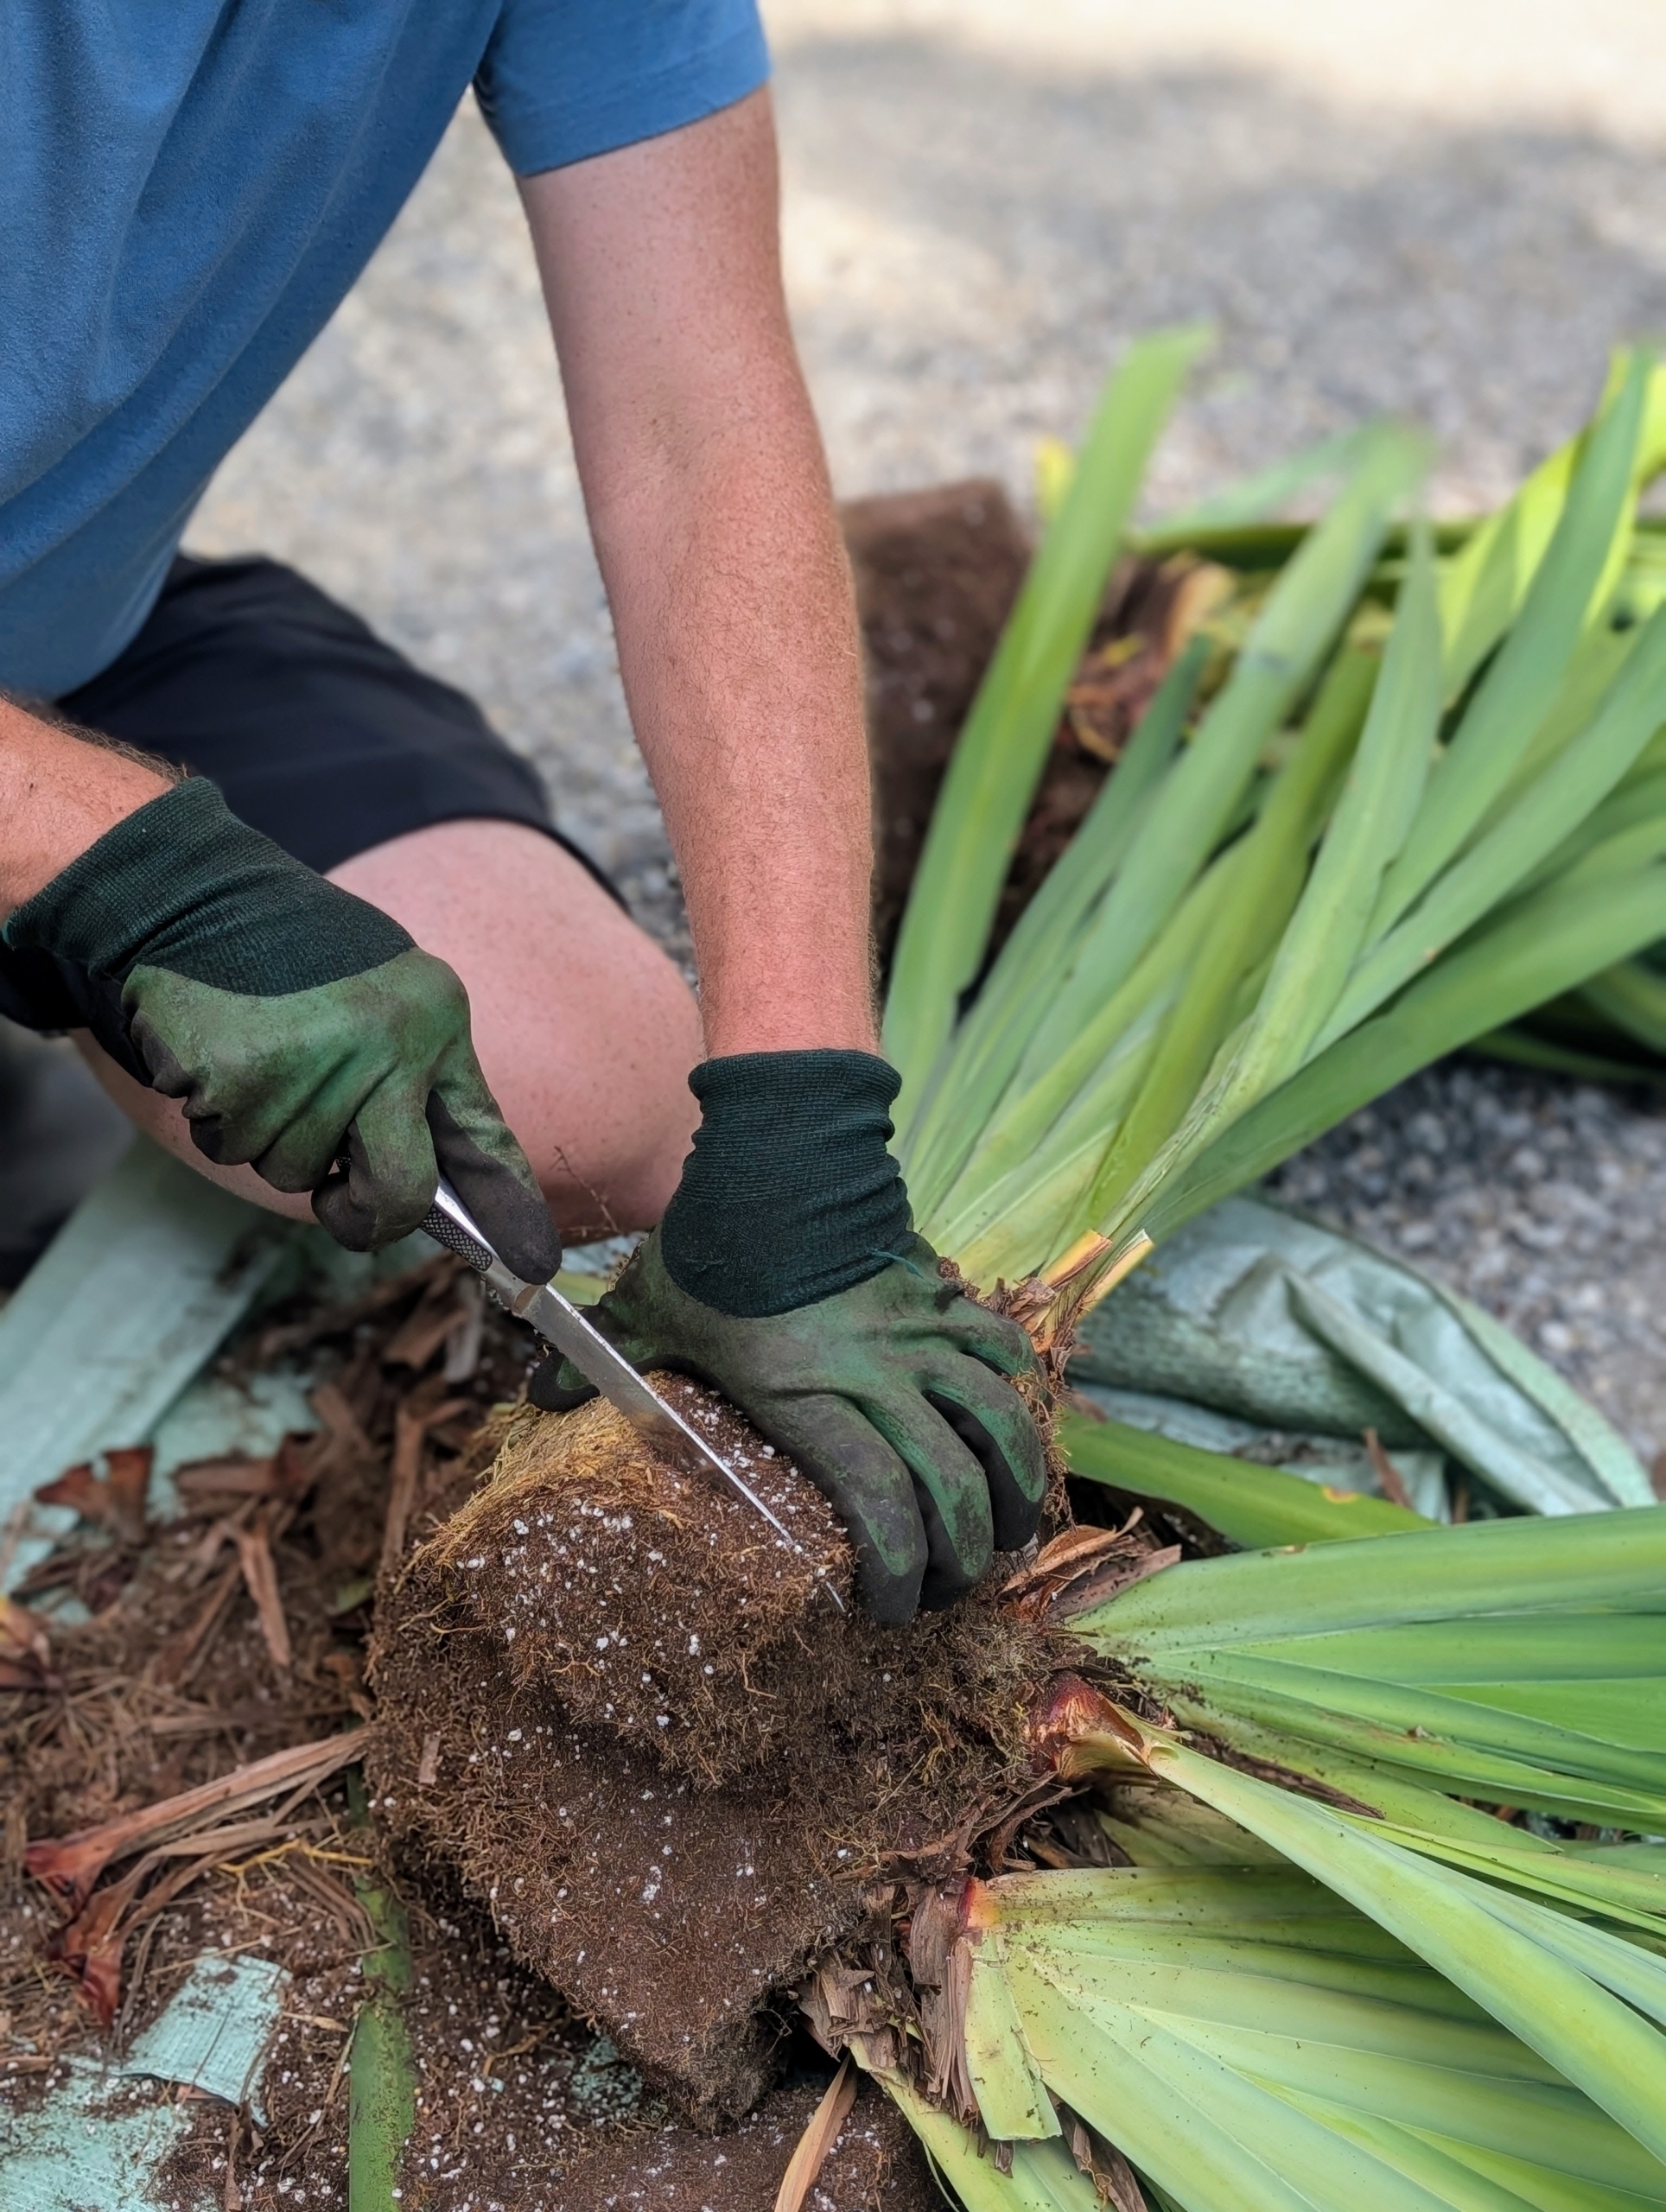
Walking iris plants grow from rhizomes, or thickened stems that grow underground and serve as storage for water and other nutrients. Here is Ryan as he starts to divide the plant in two.
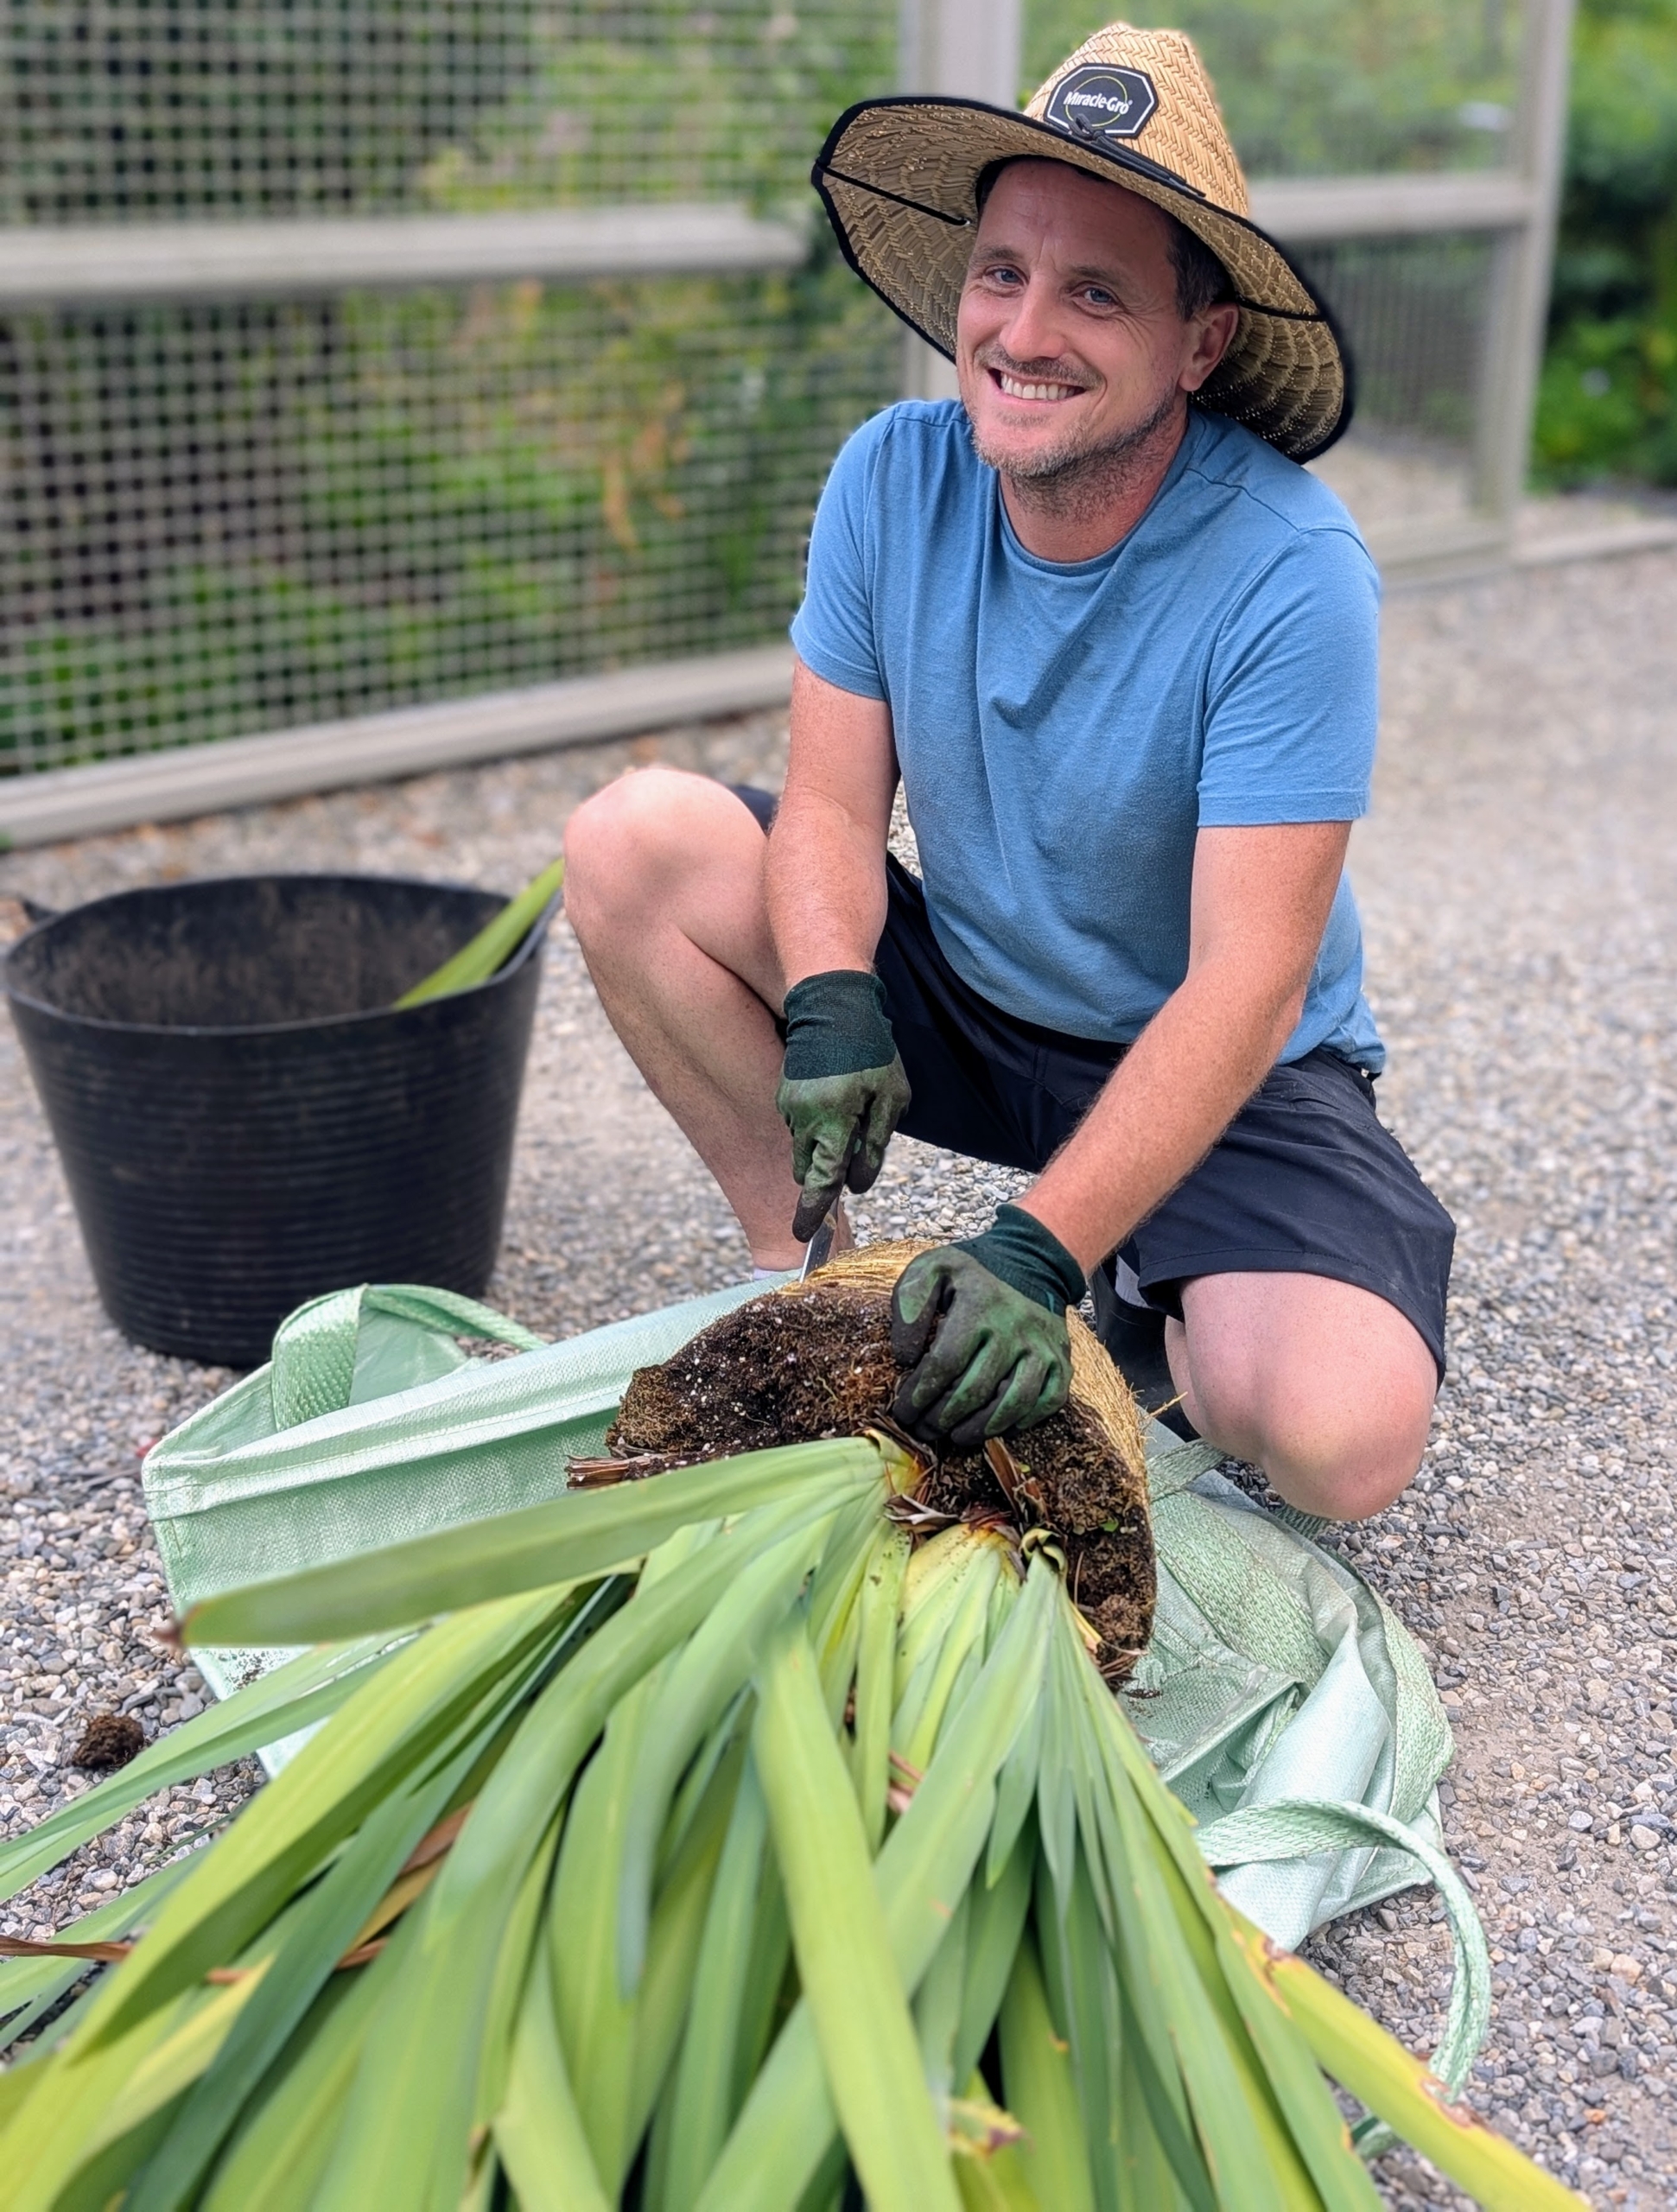
Next, Ryan assesses where he can cut each section again. Here he cuts one of the halves in two using a very sharp knife.
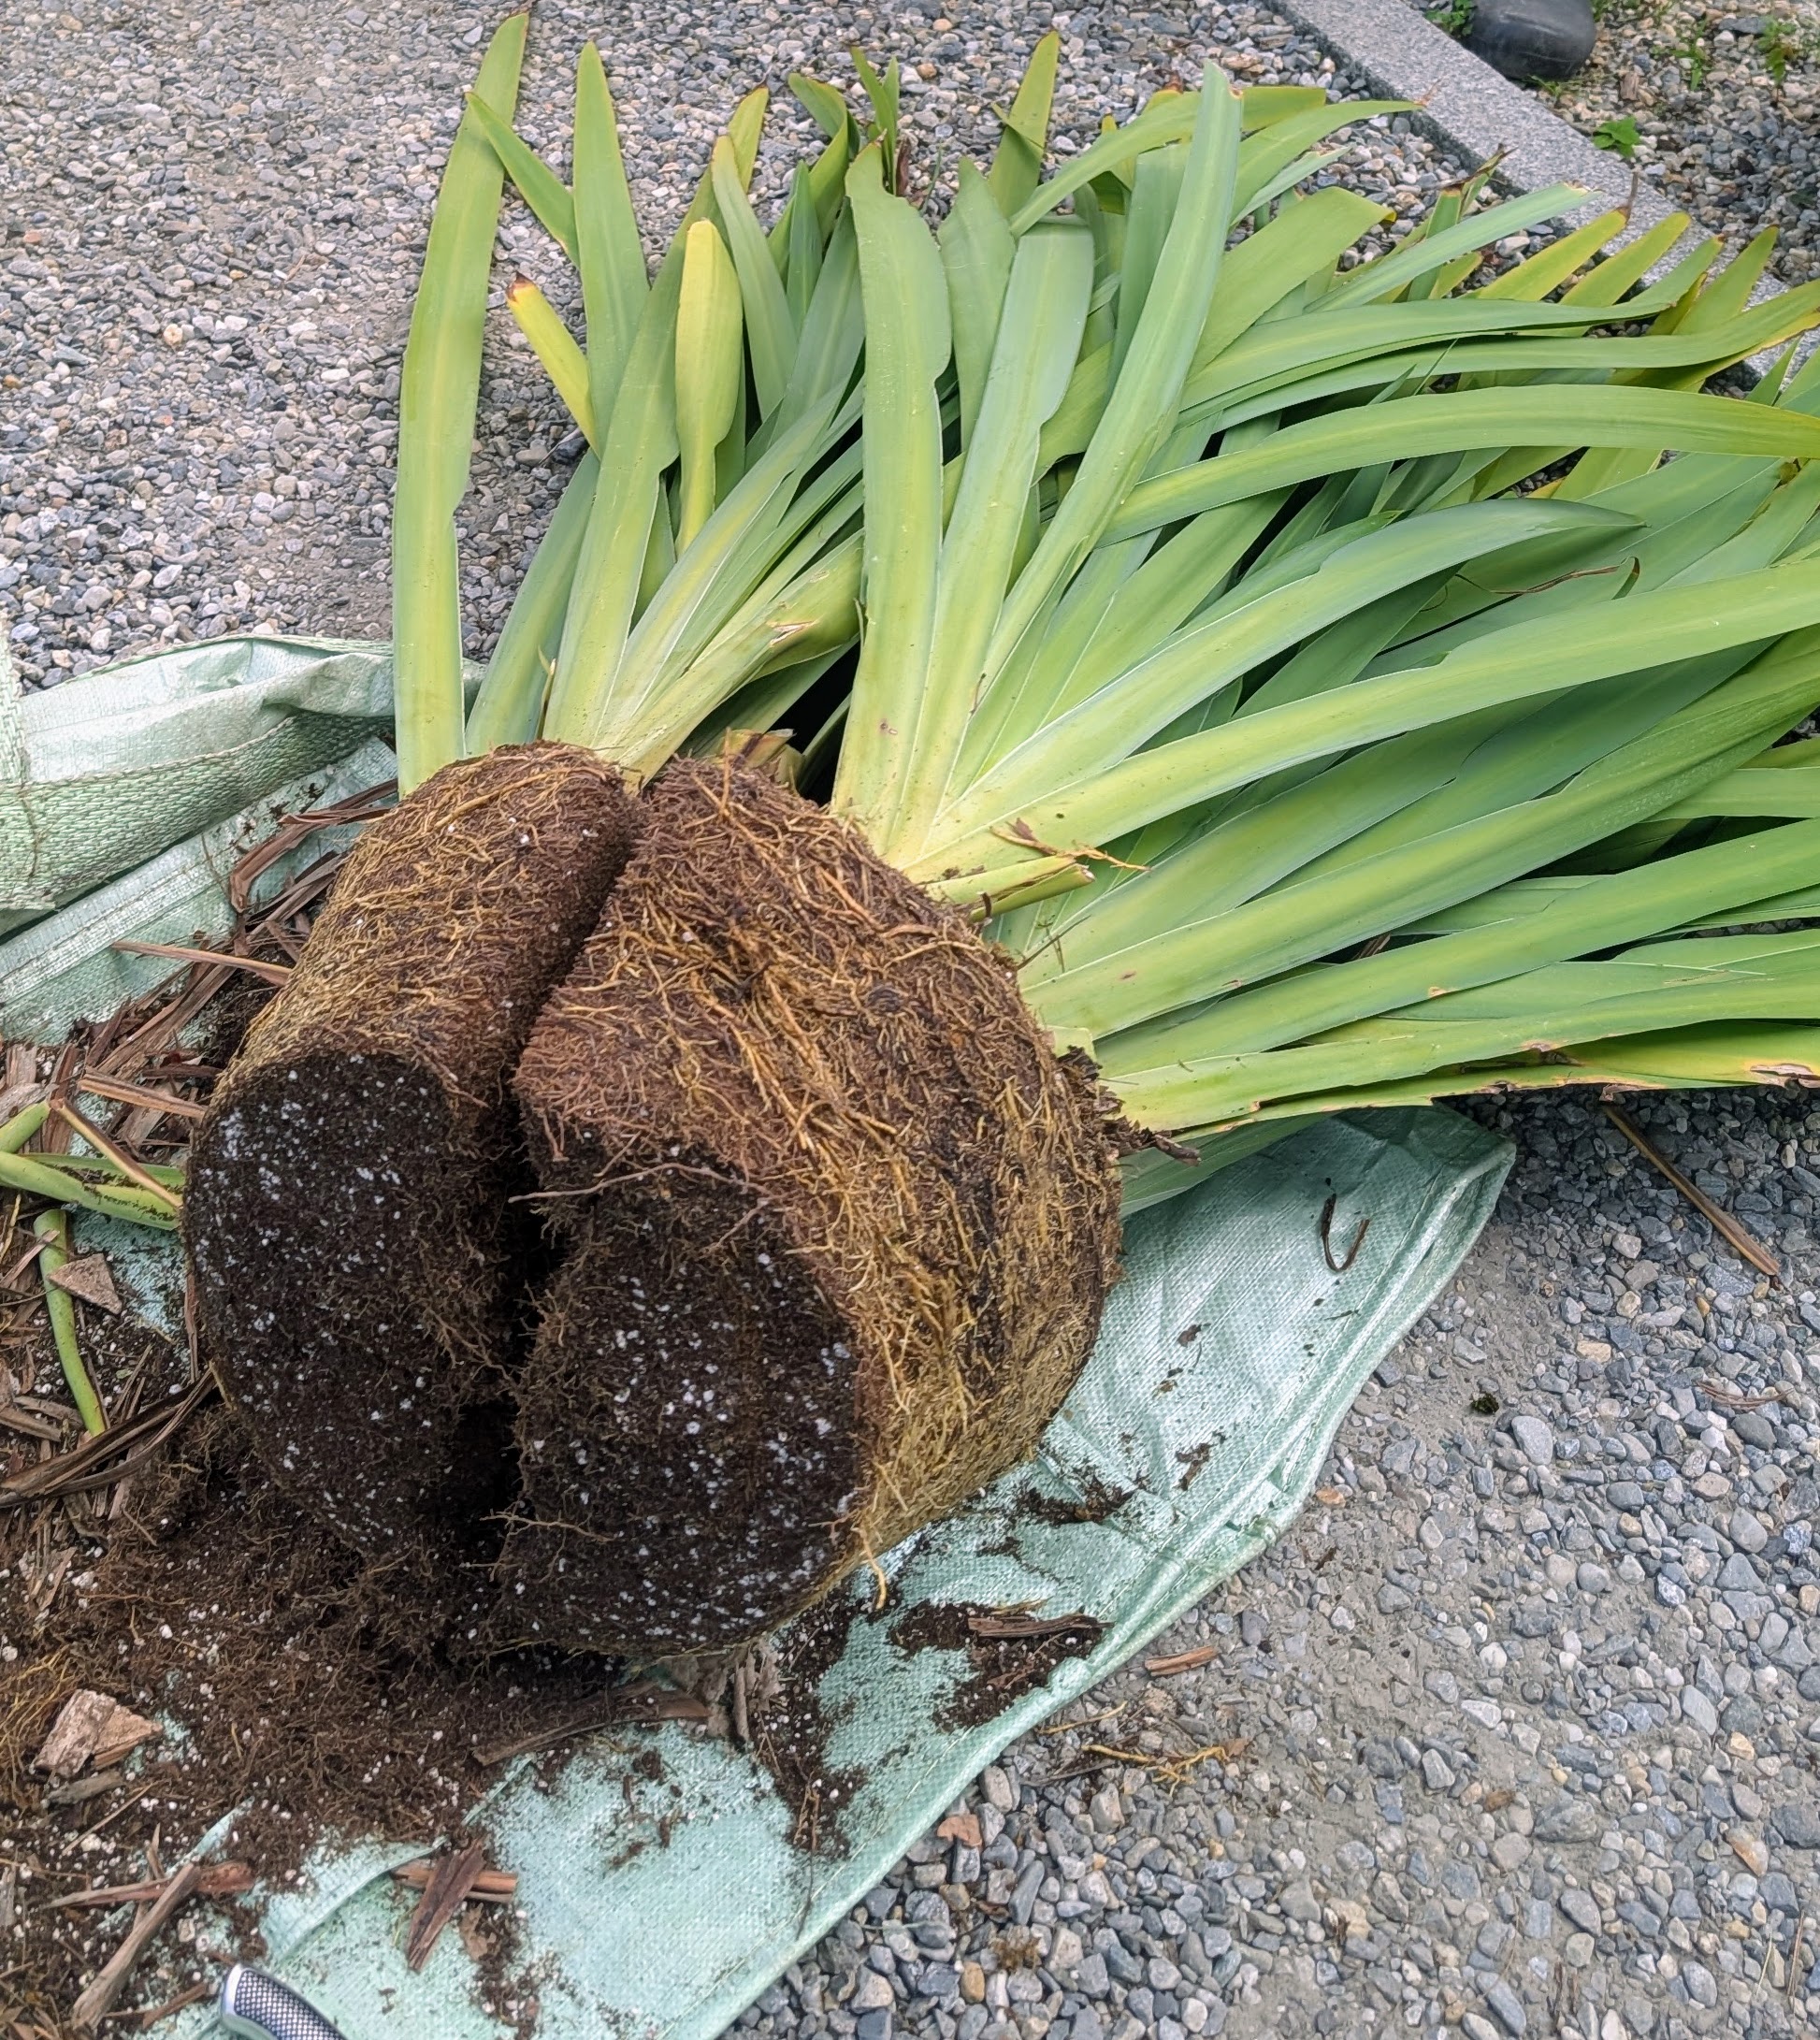
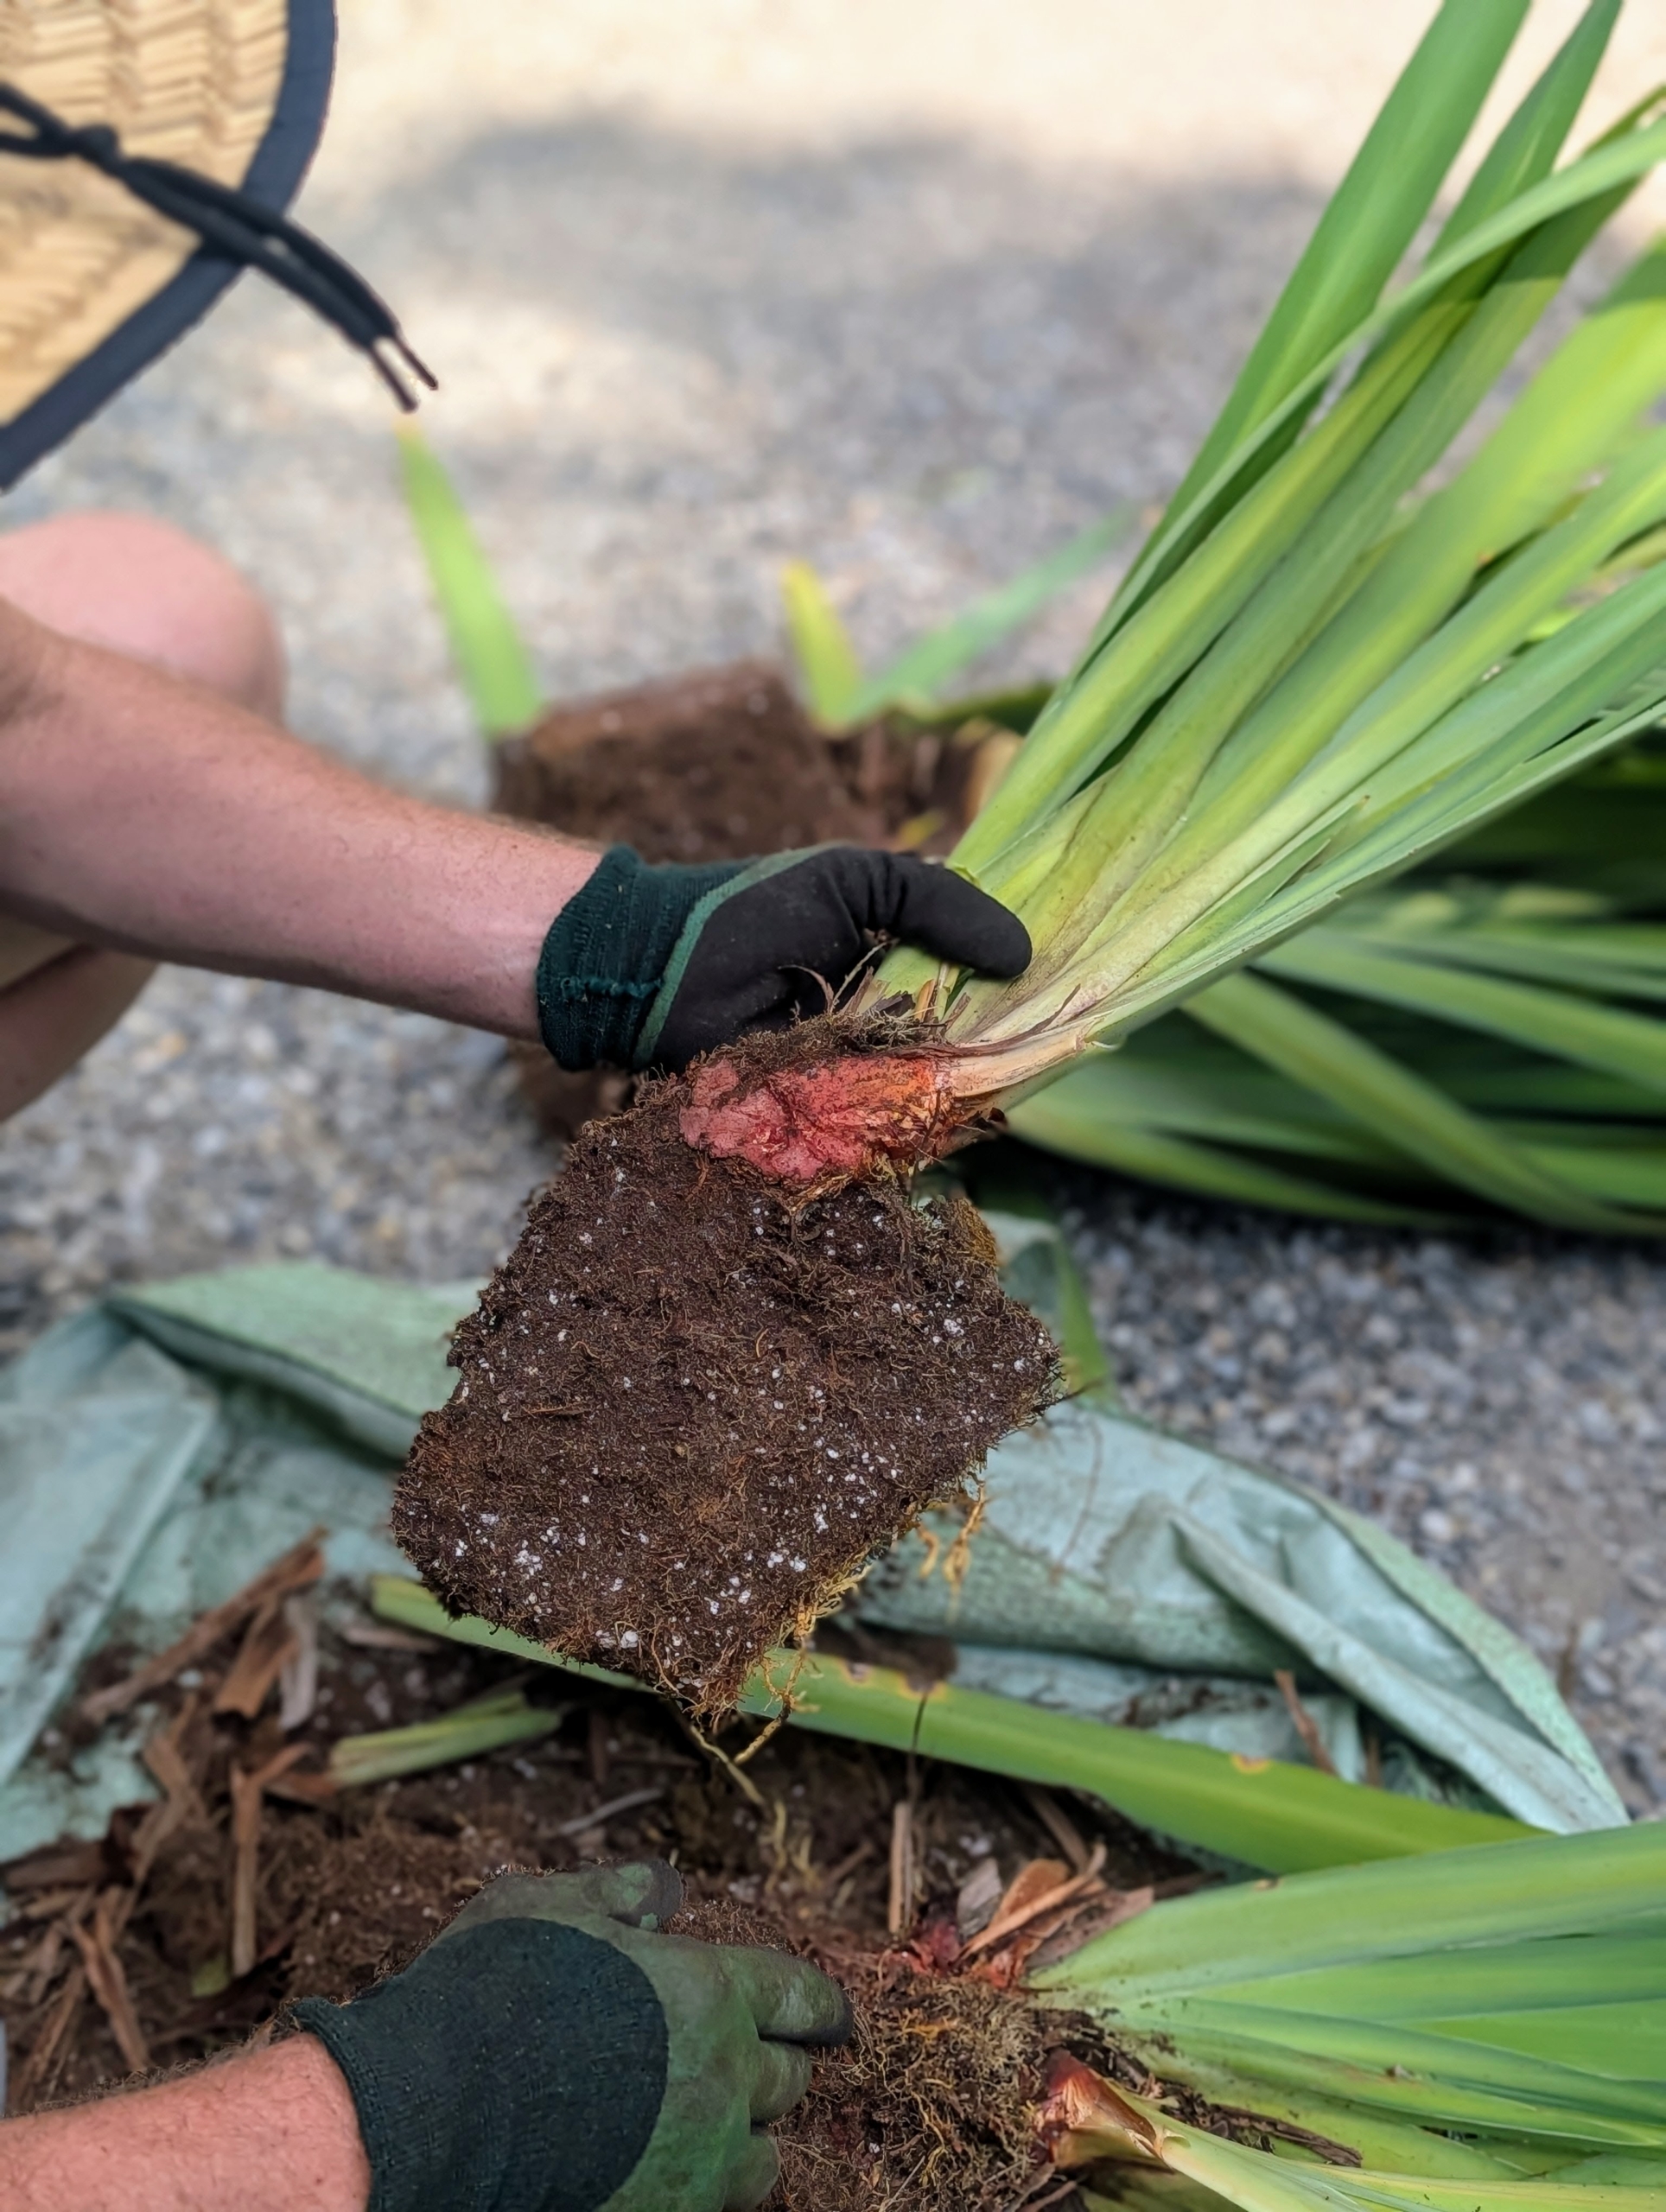
Here is a healthy section of the plant. Section dividing iris plants promotes good health and prevents overcrowding and competition for water and nutrients.
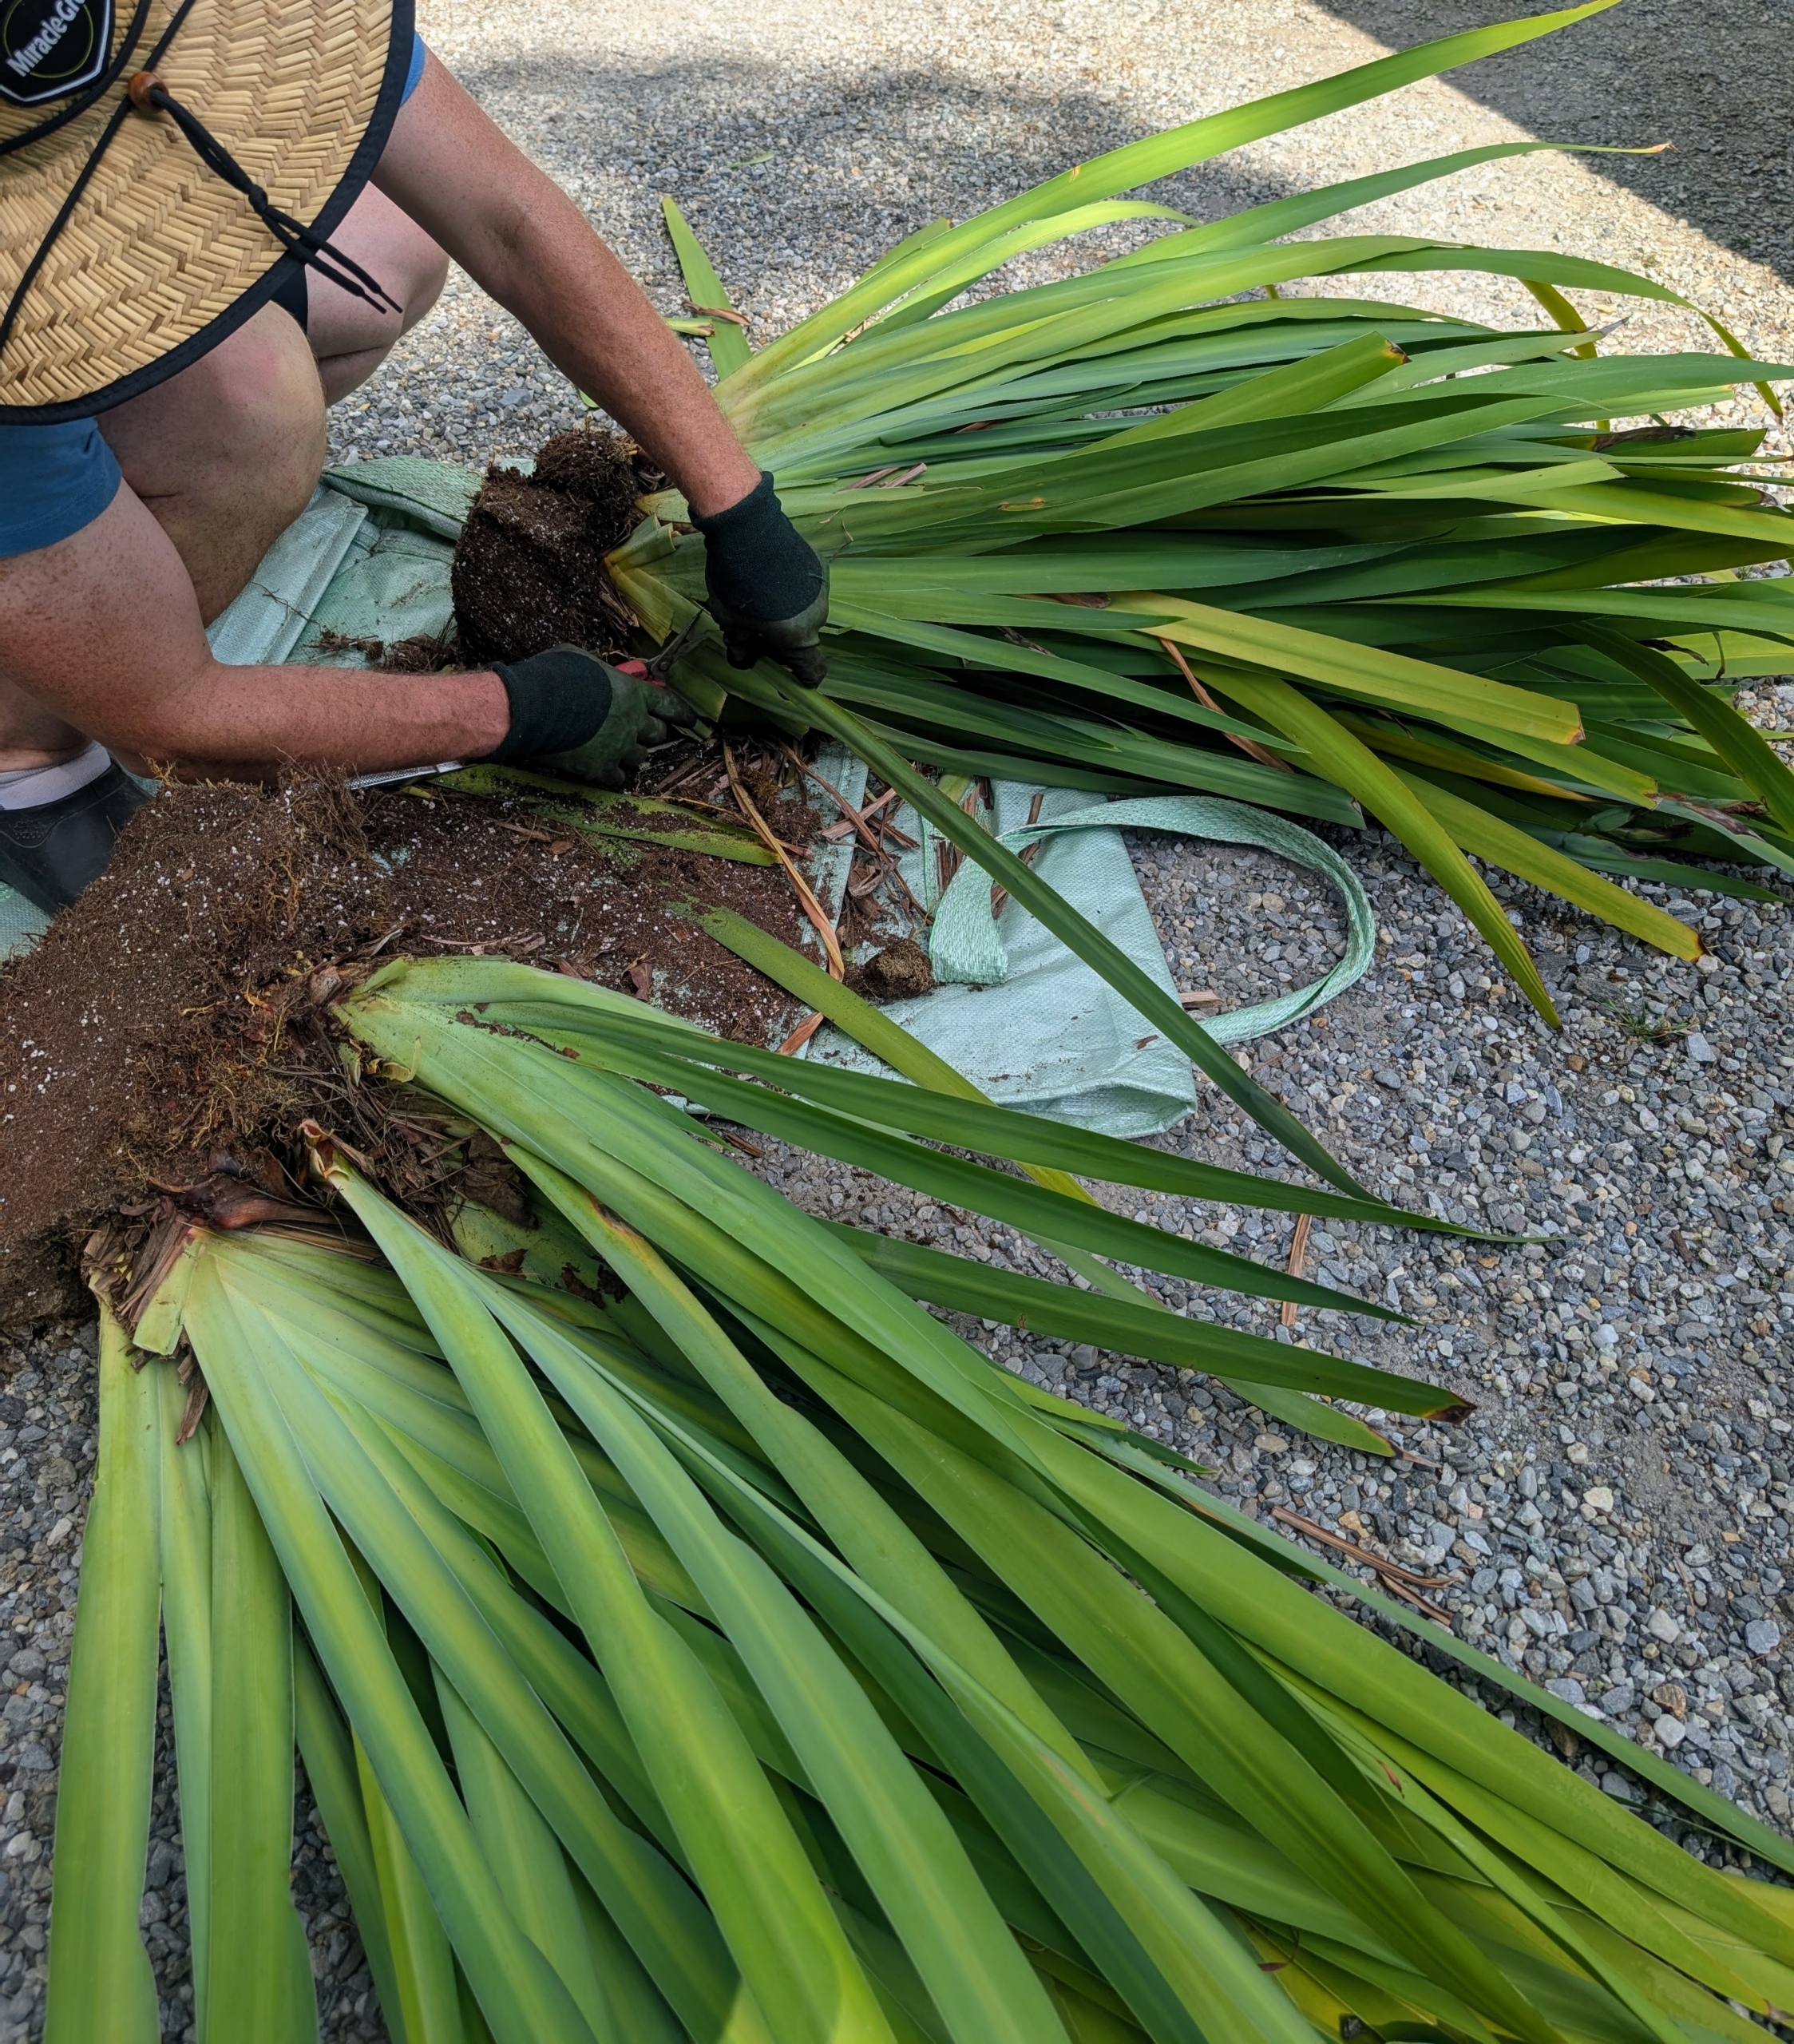
After cutting the plant into four, Ryan cleans up each one removing unnecessary foliage.
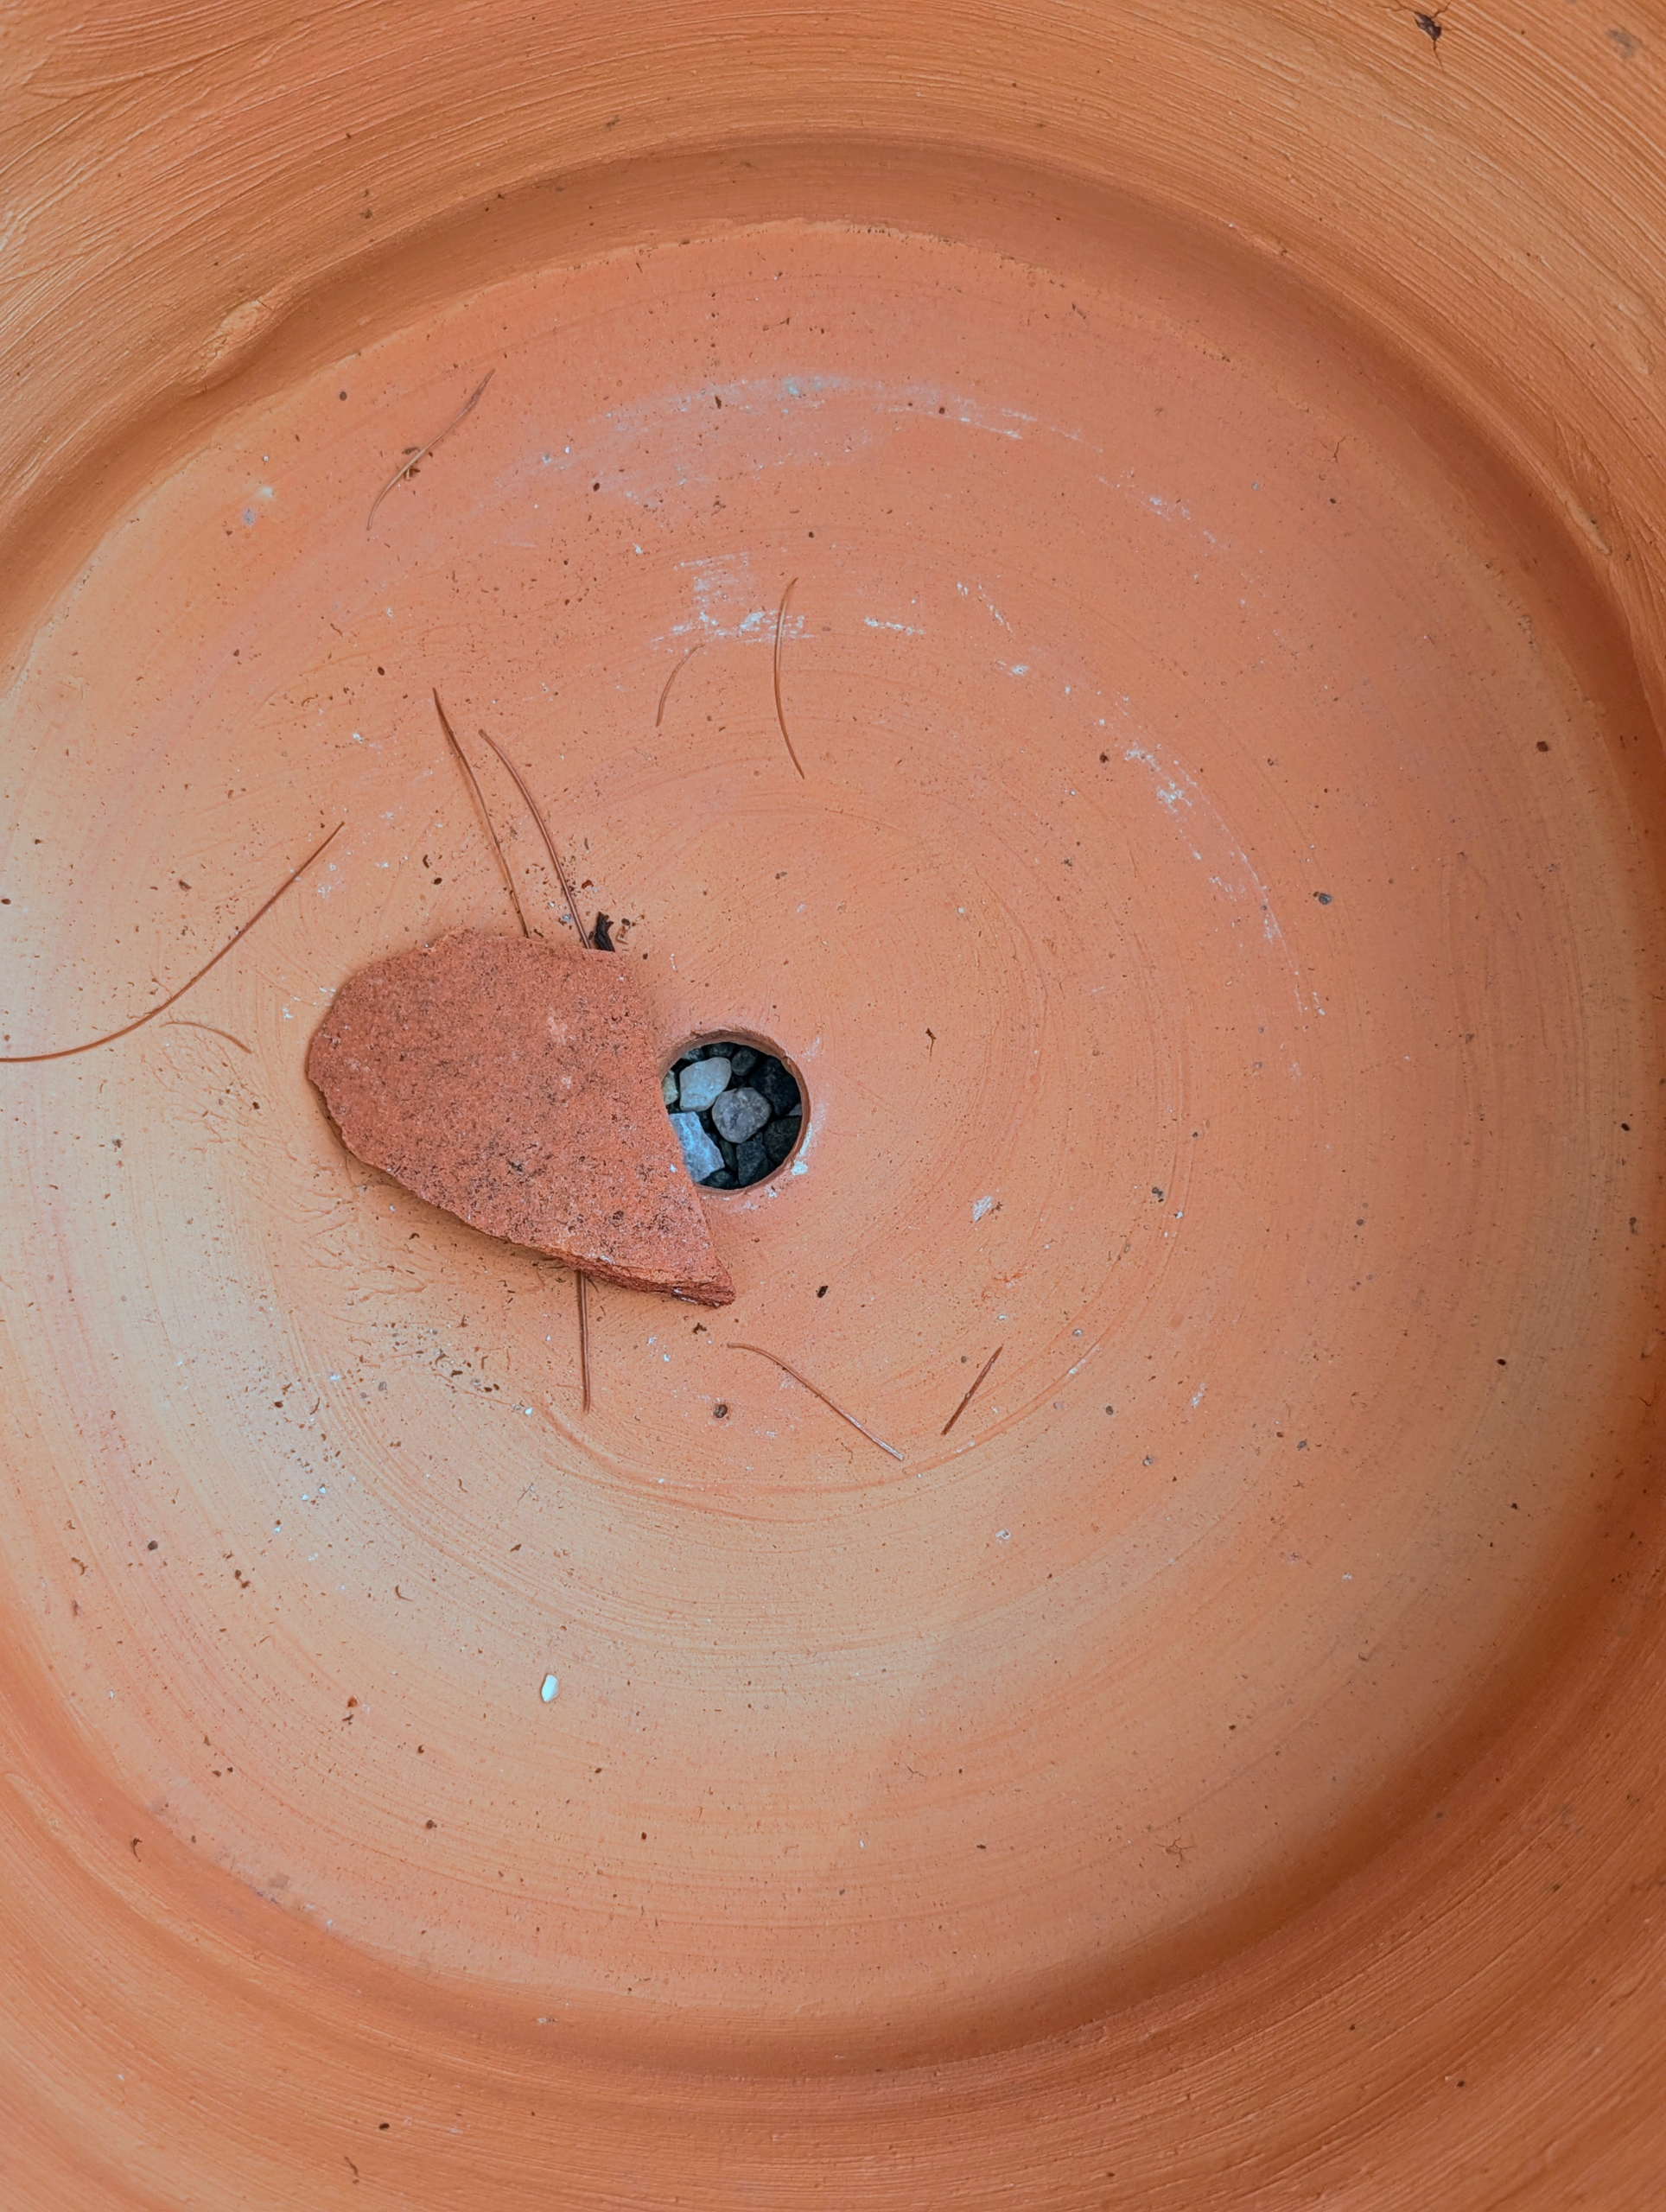
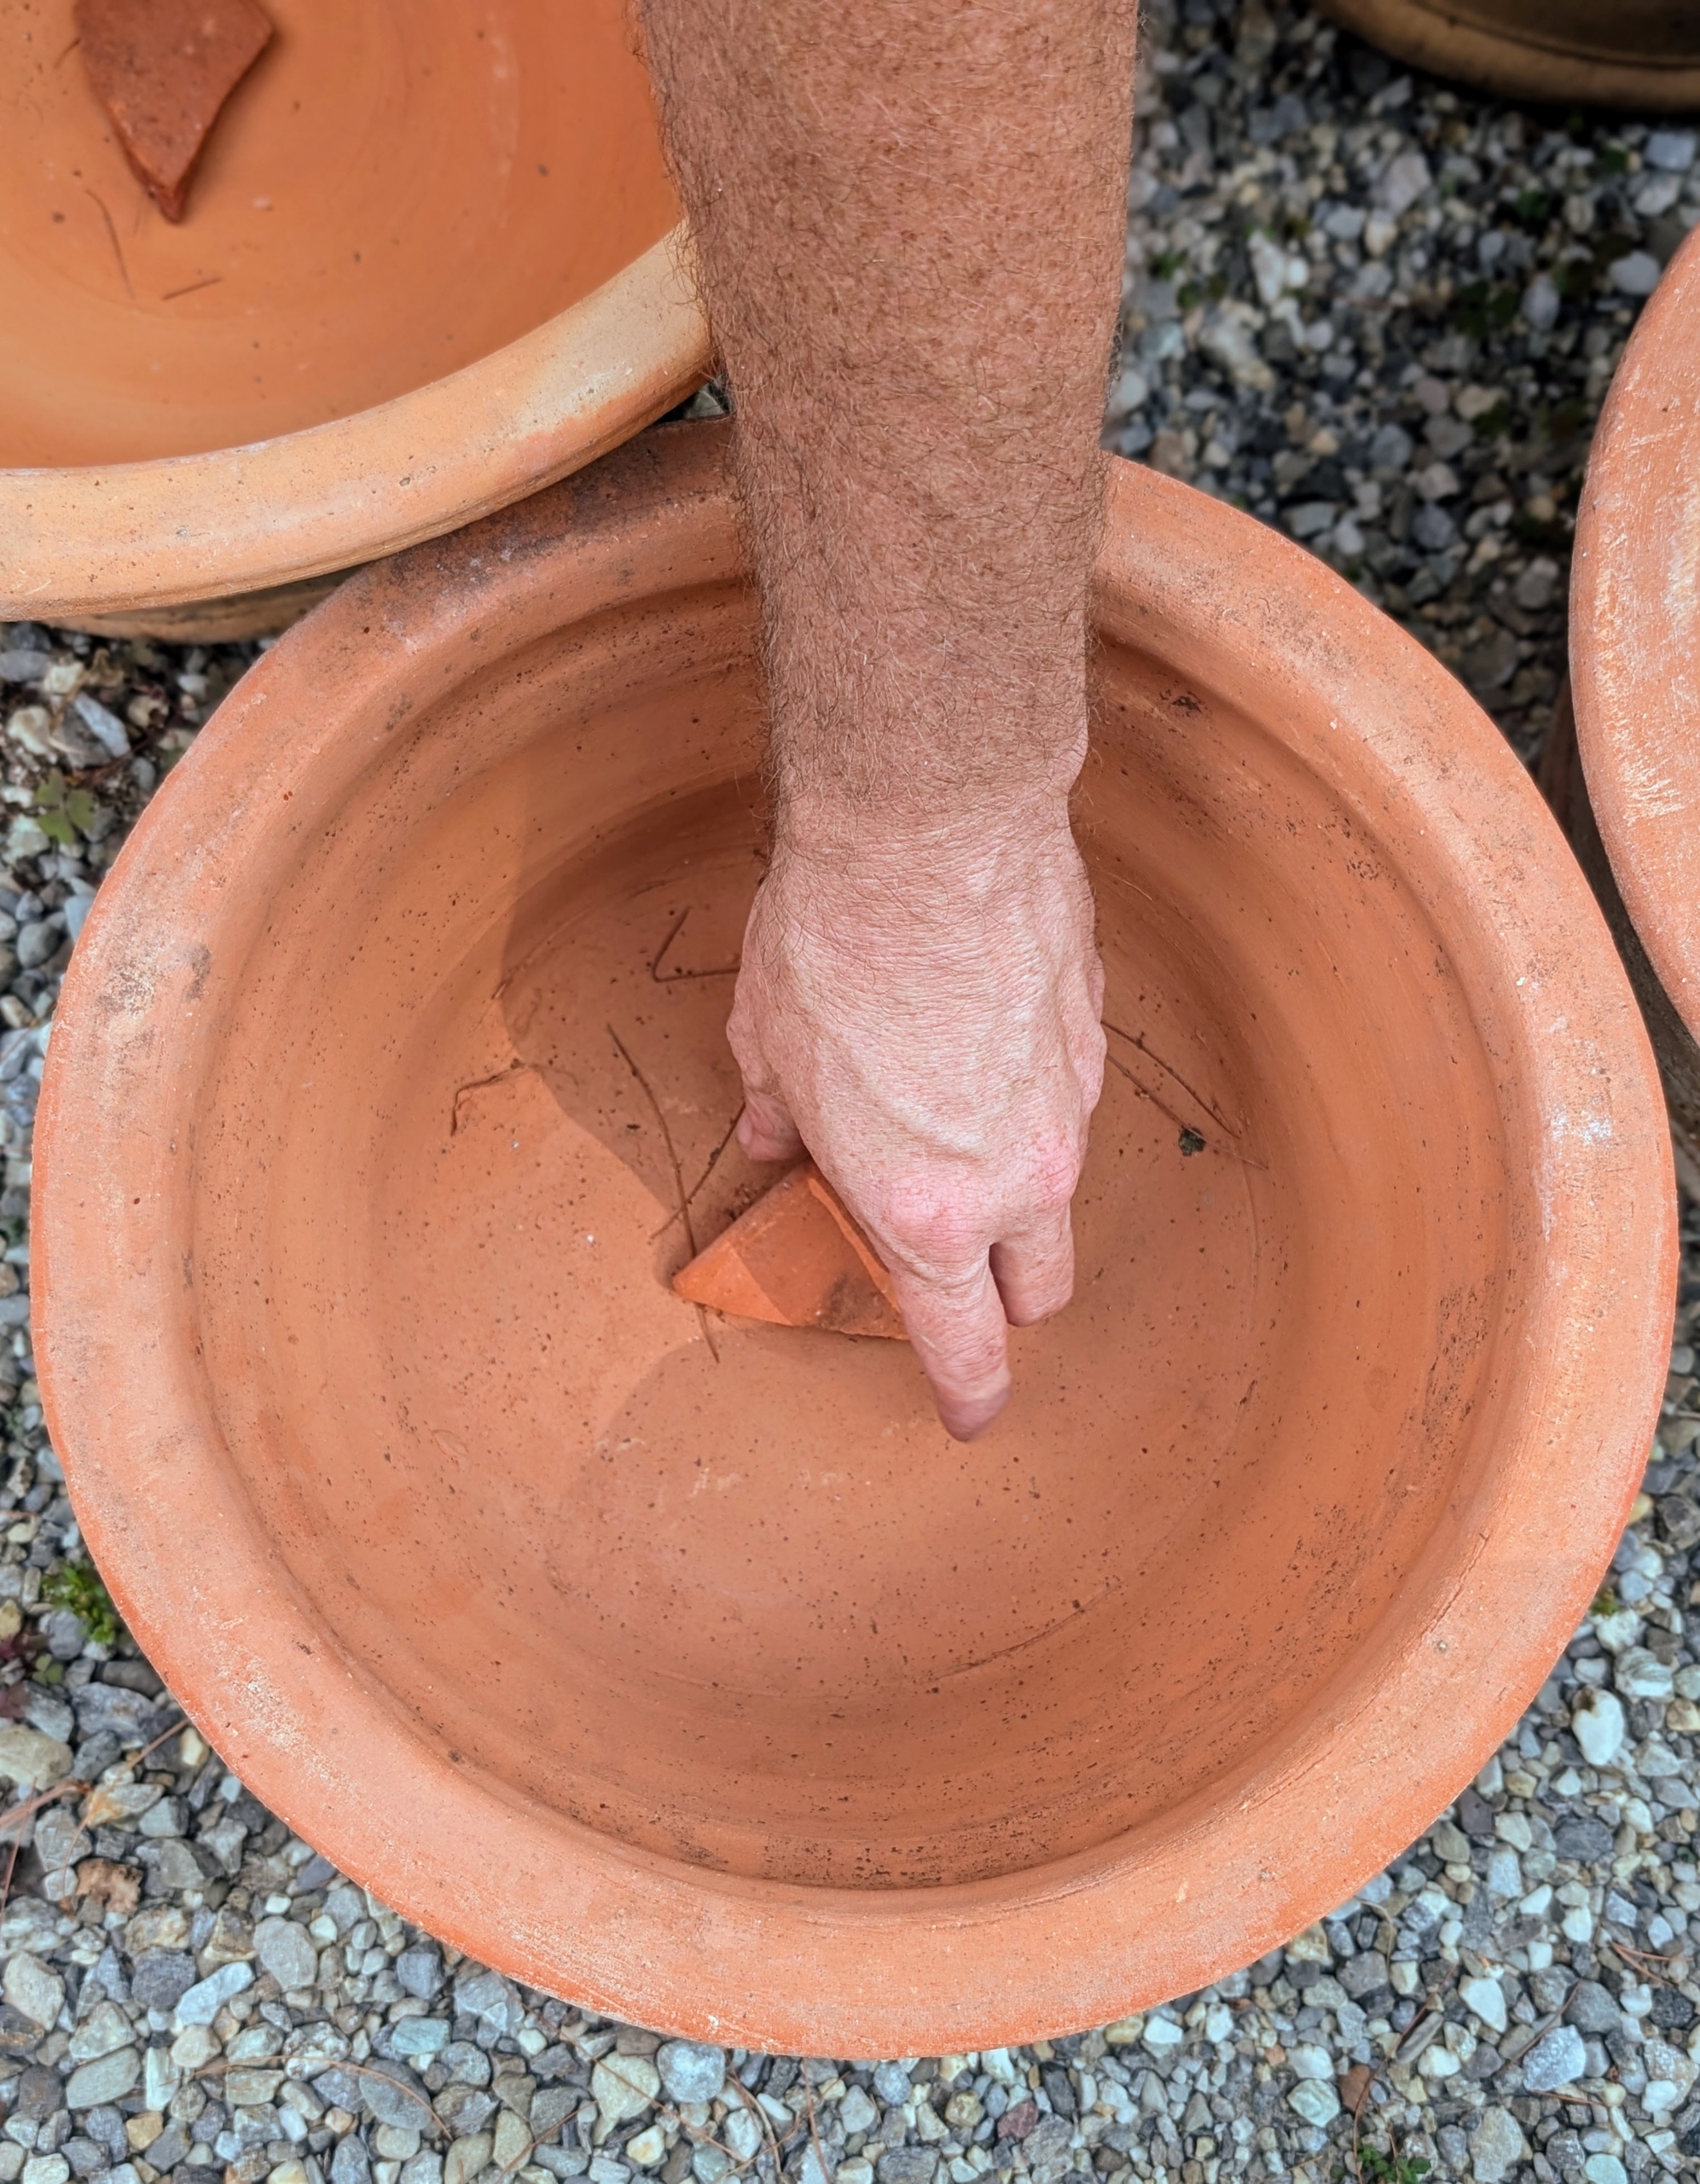
I save all the shards from broken pots for repotting. It doesn’t happen often, but when it does, these shards come in very handy.
Ryan places a shard on top of the pot’s hole to maintain good drainage and to prevent soil from escaping.
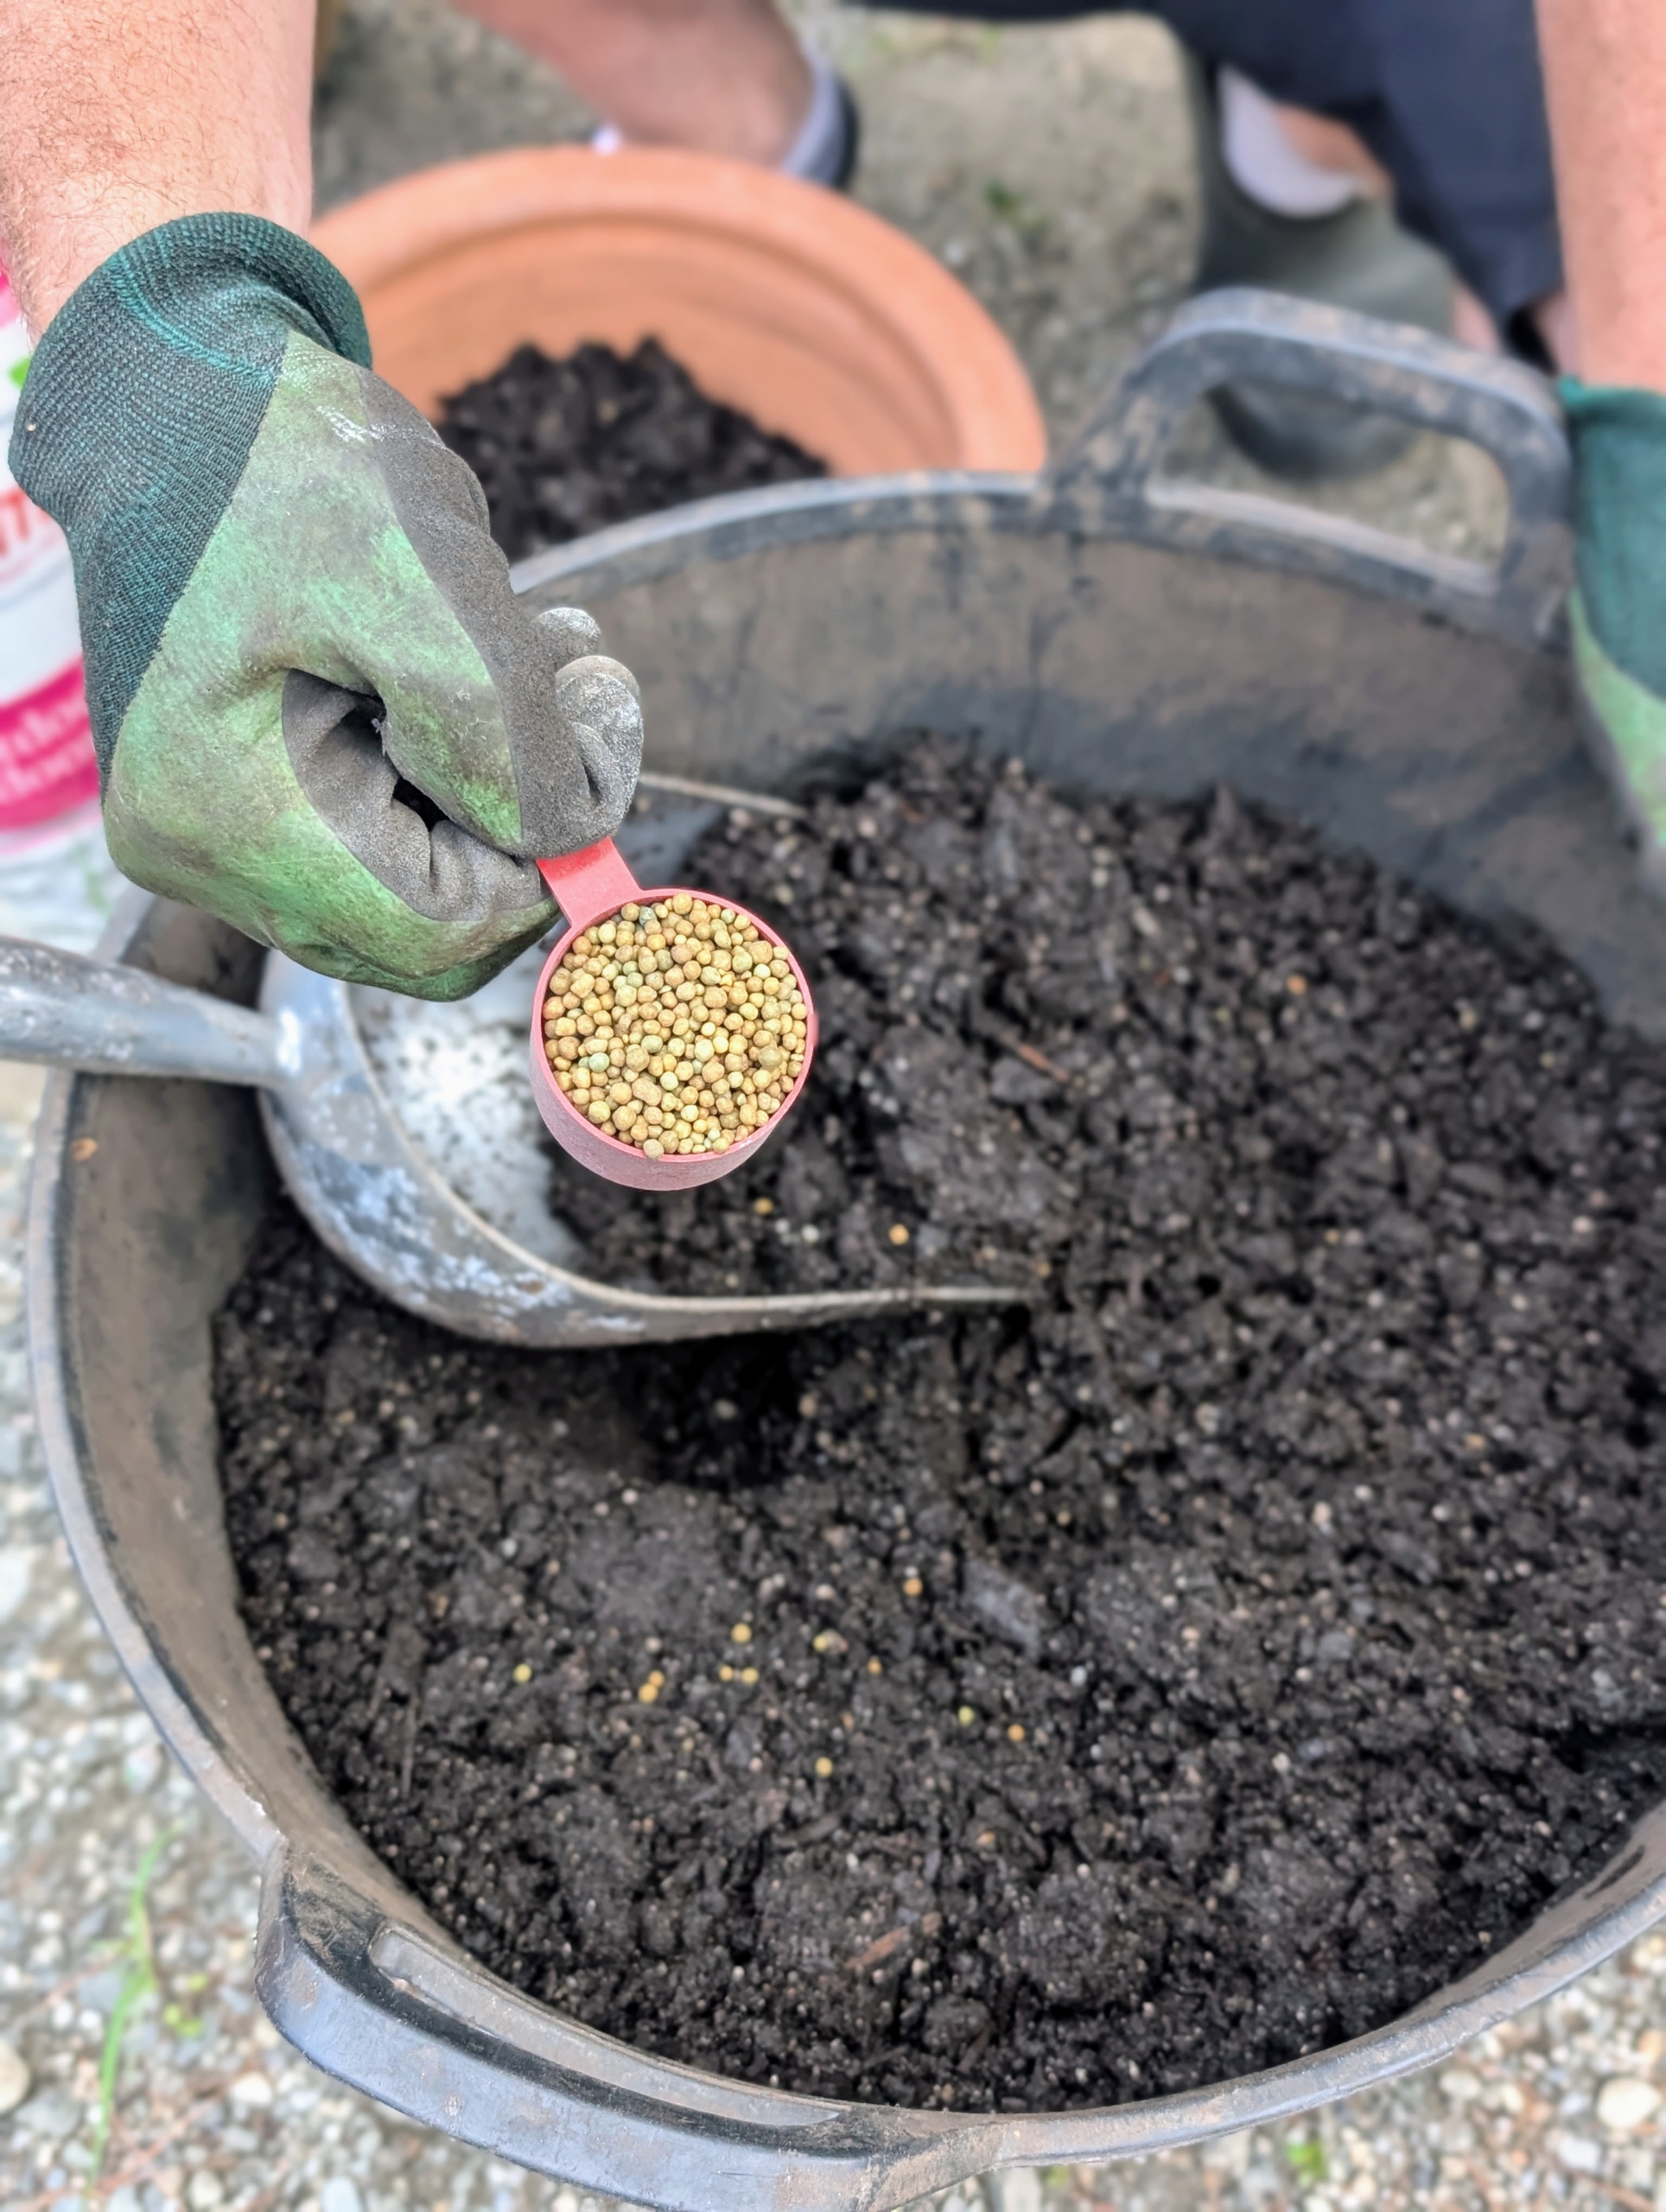
Ryan adds a couple scoops of fertilizer and mixes it thoroughly with the Miracle-Gro potting soil.
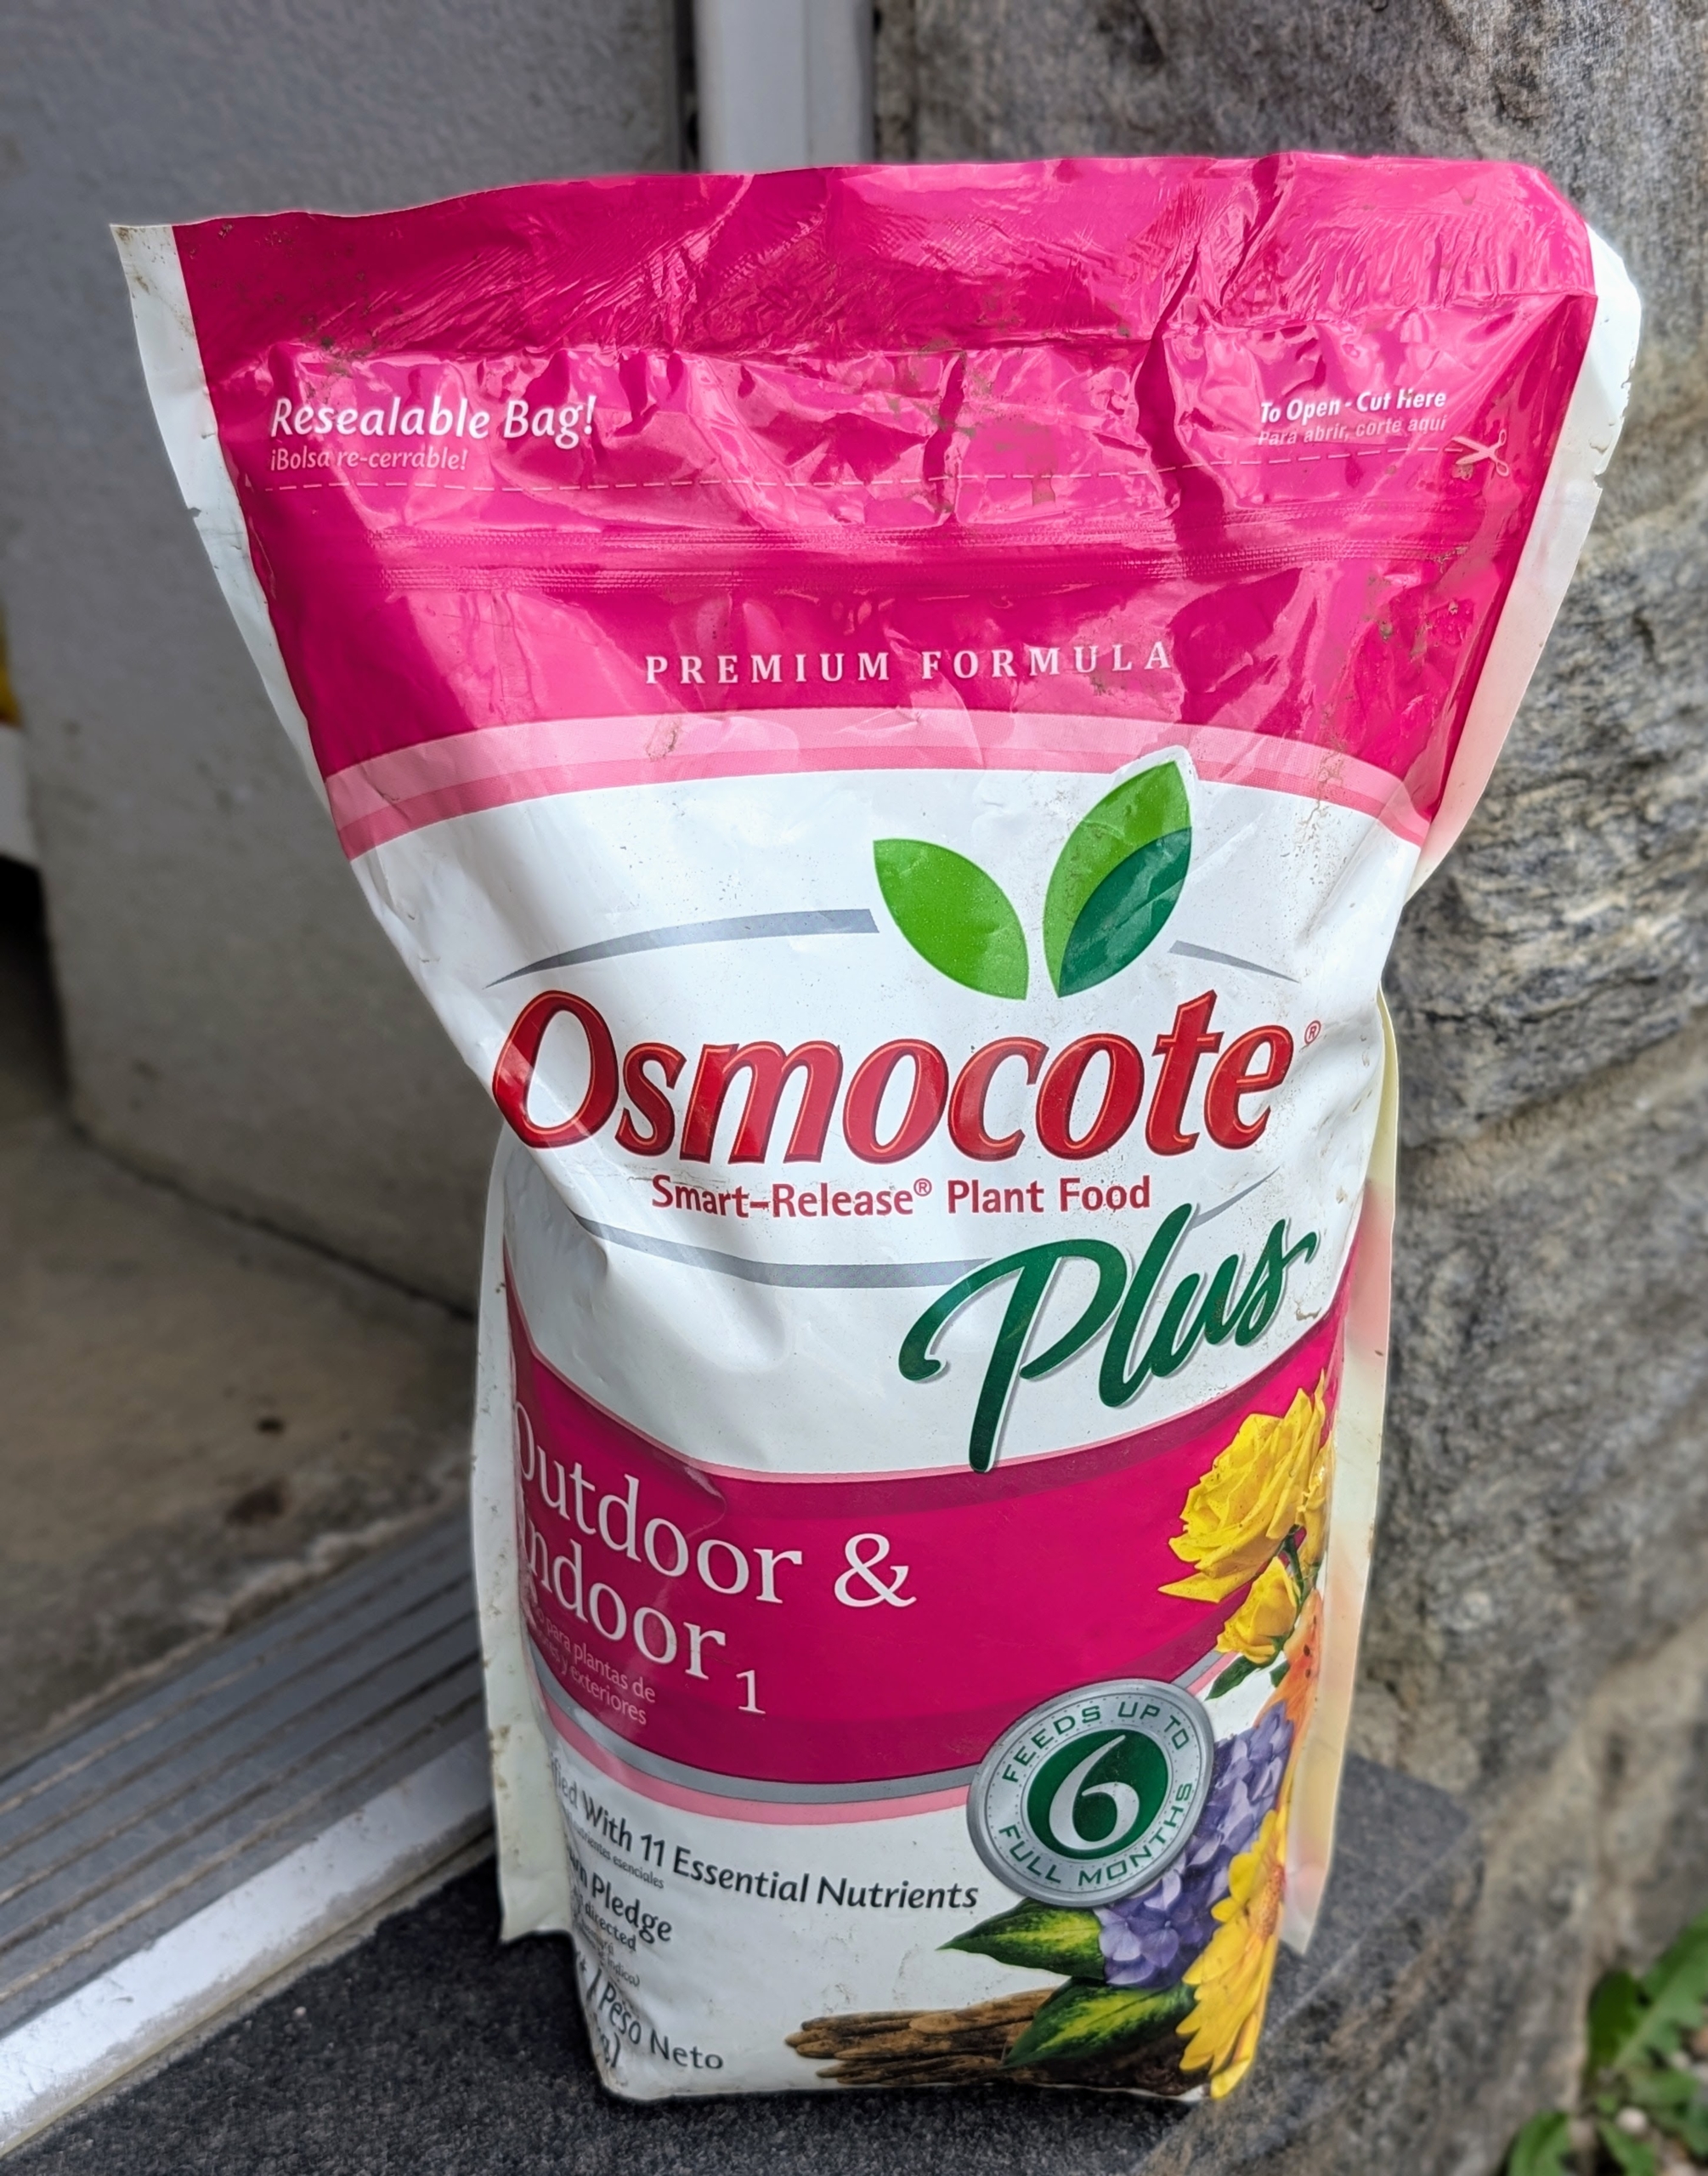
I use Osmocote Plus with added nutrients – it will last for up to six months.
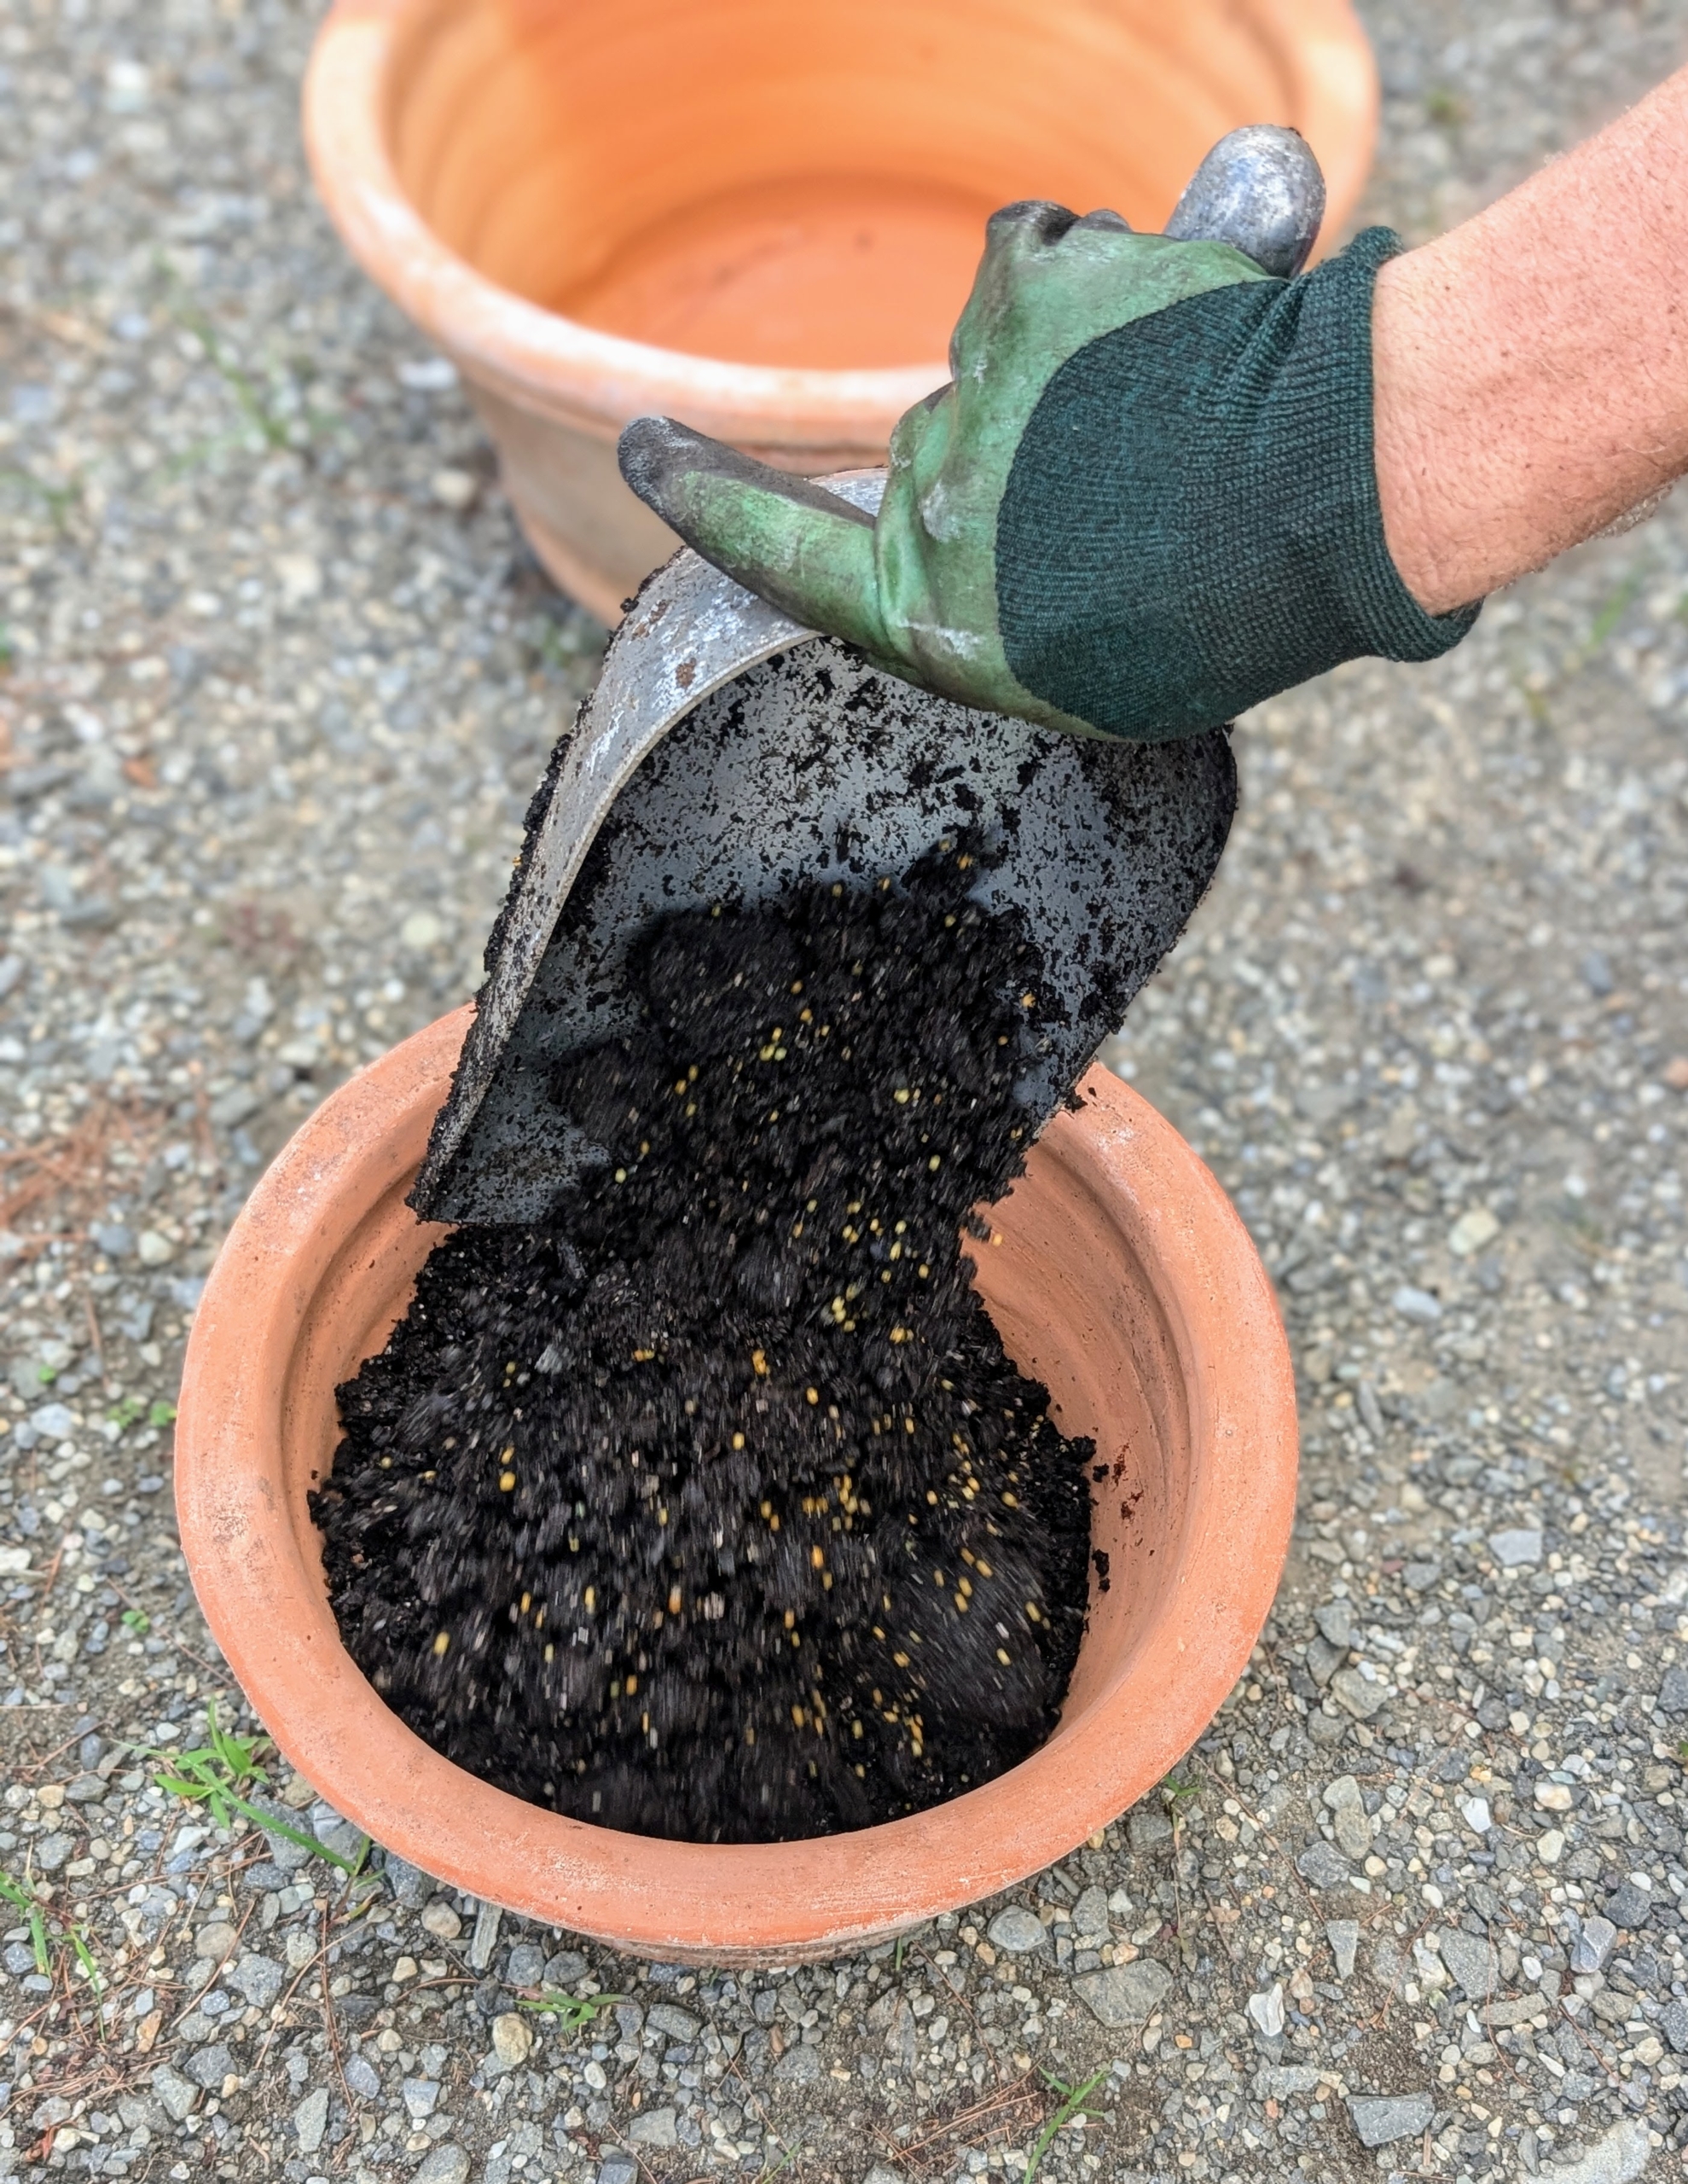
Ryan starts filling the pots with a few inches of soil.
And then gets the divided walking iris sections to plant.
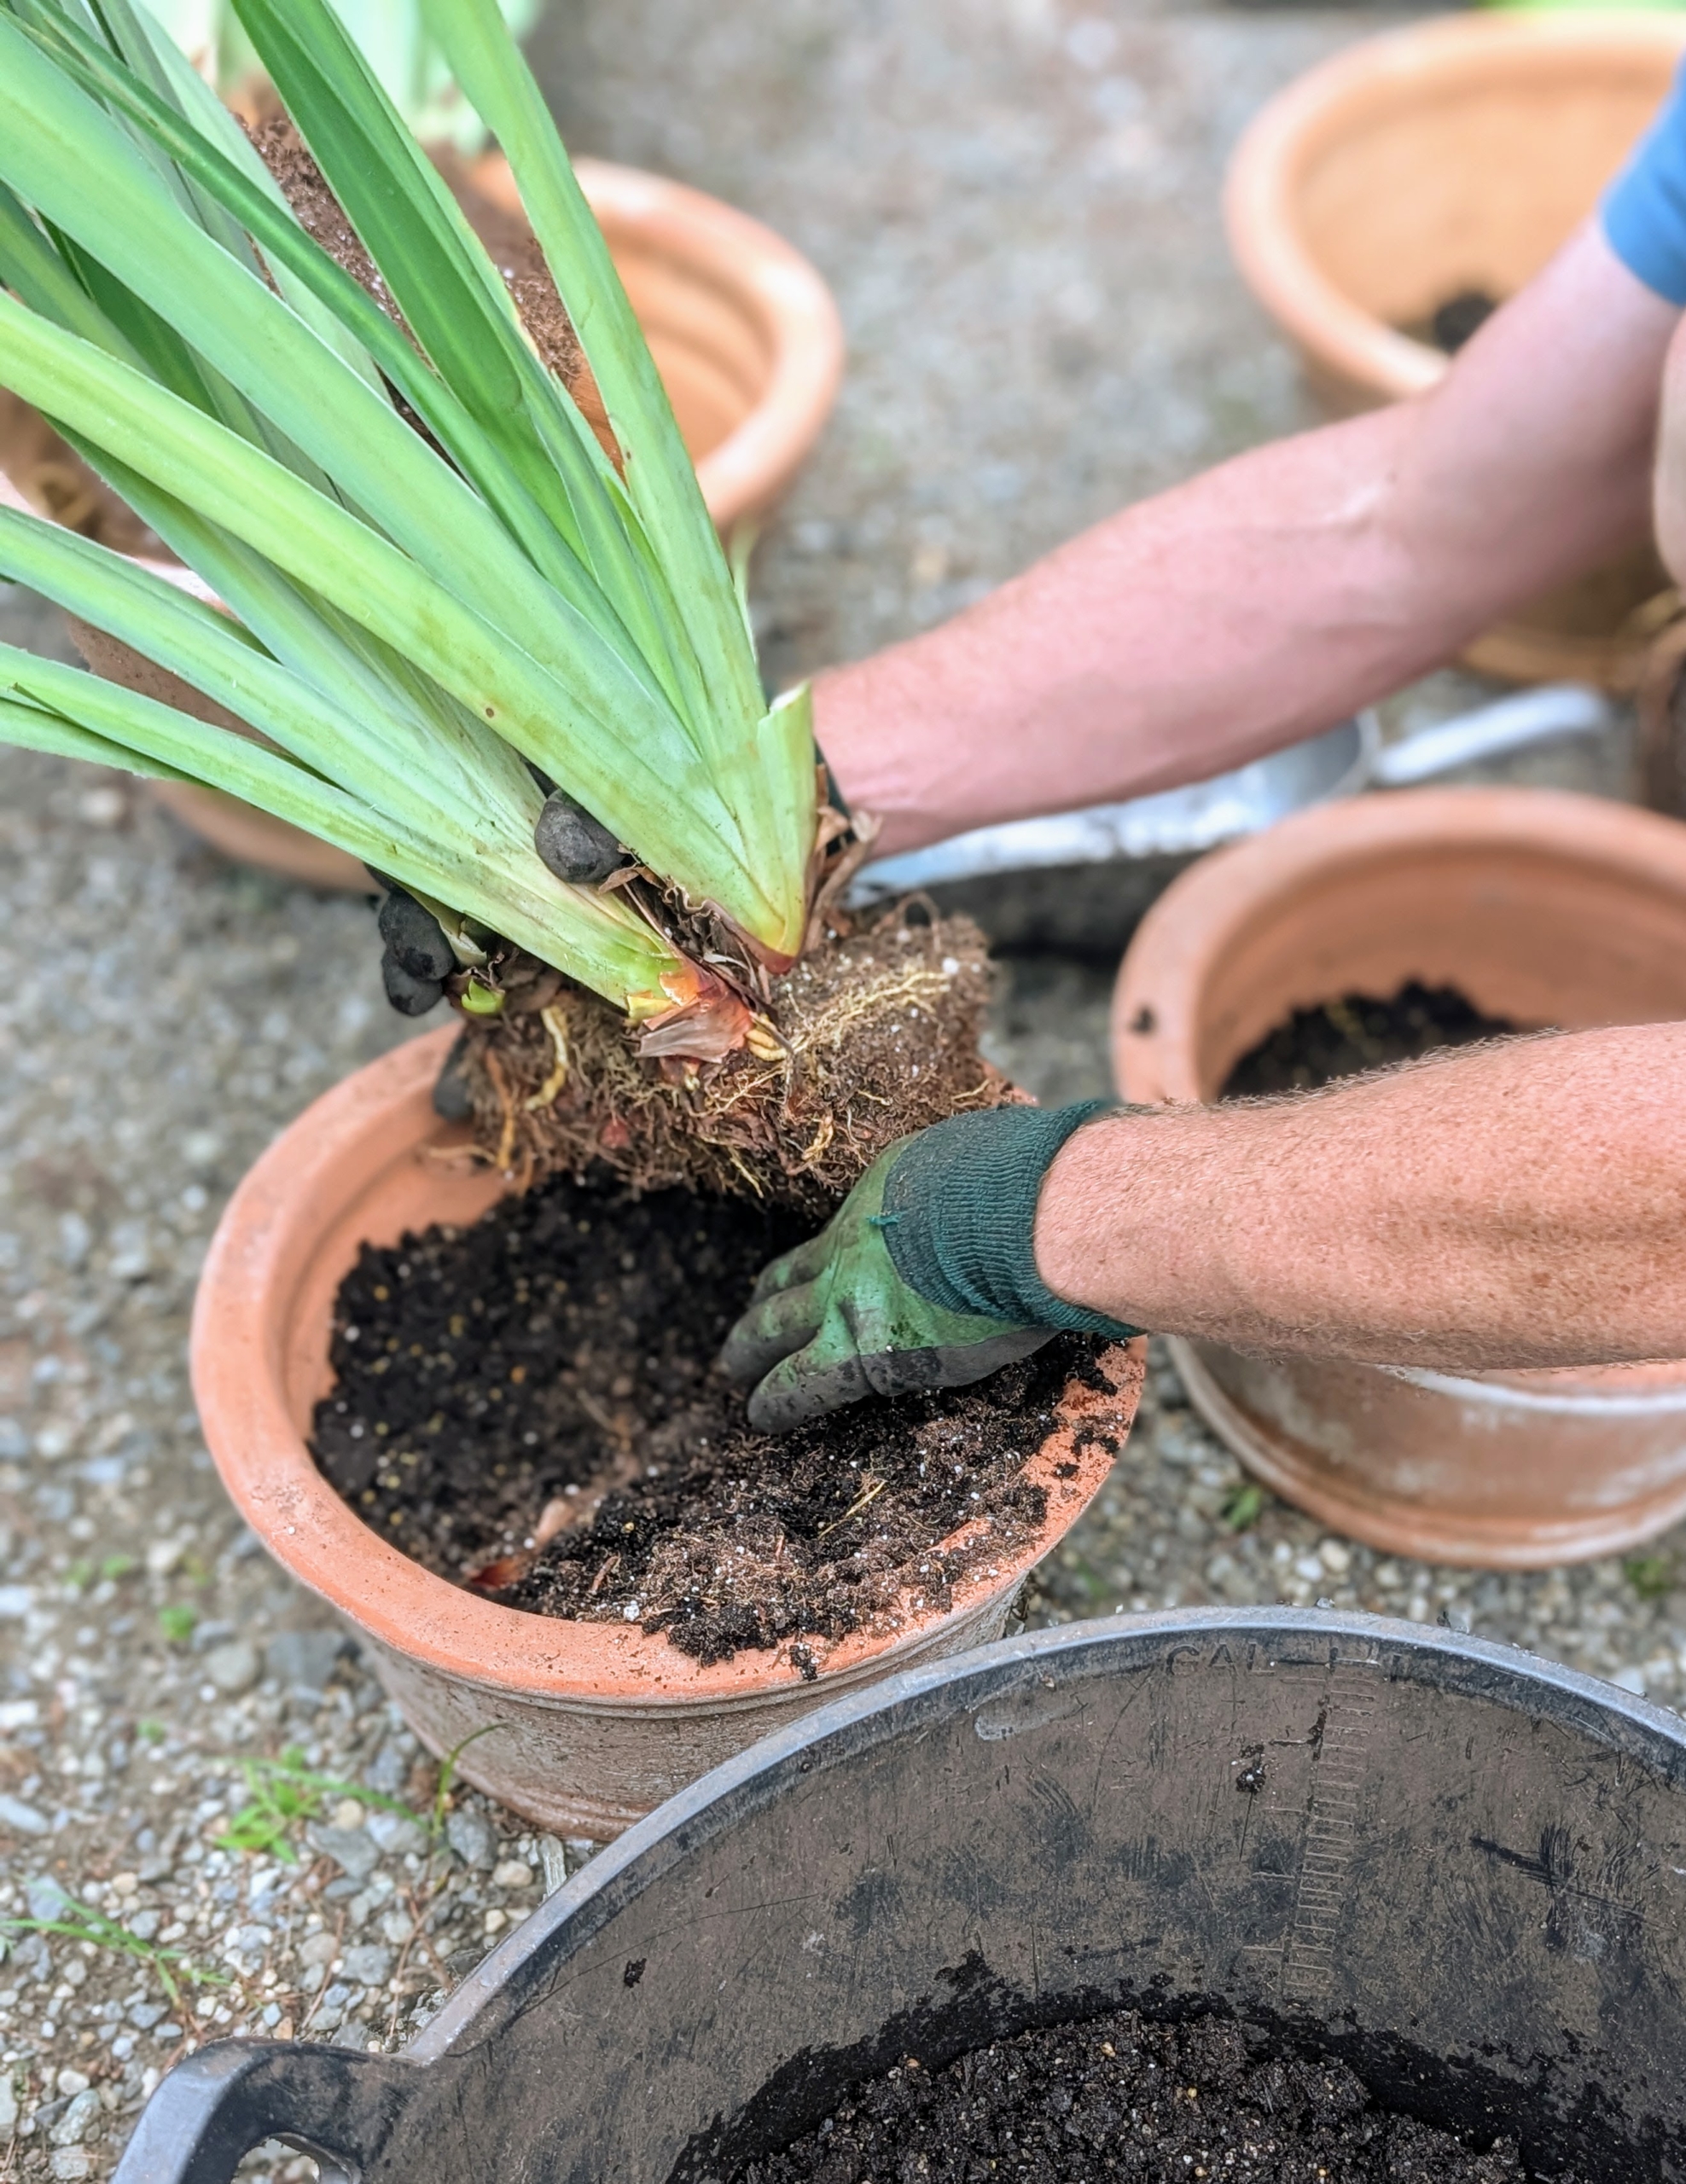
He decides which section will go into each container. When transplanting, the plant should also be inspected for any signs of disease, rot, or pest infestation. These sections are in excellent condition.
Ryan makes adjustments and cuts the bottom of this section to better fit the pot.
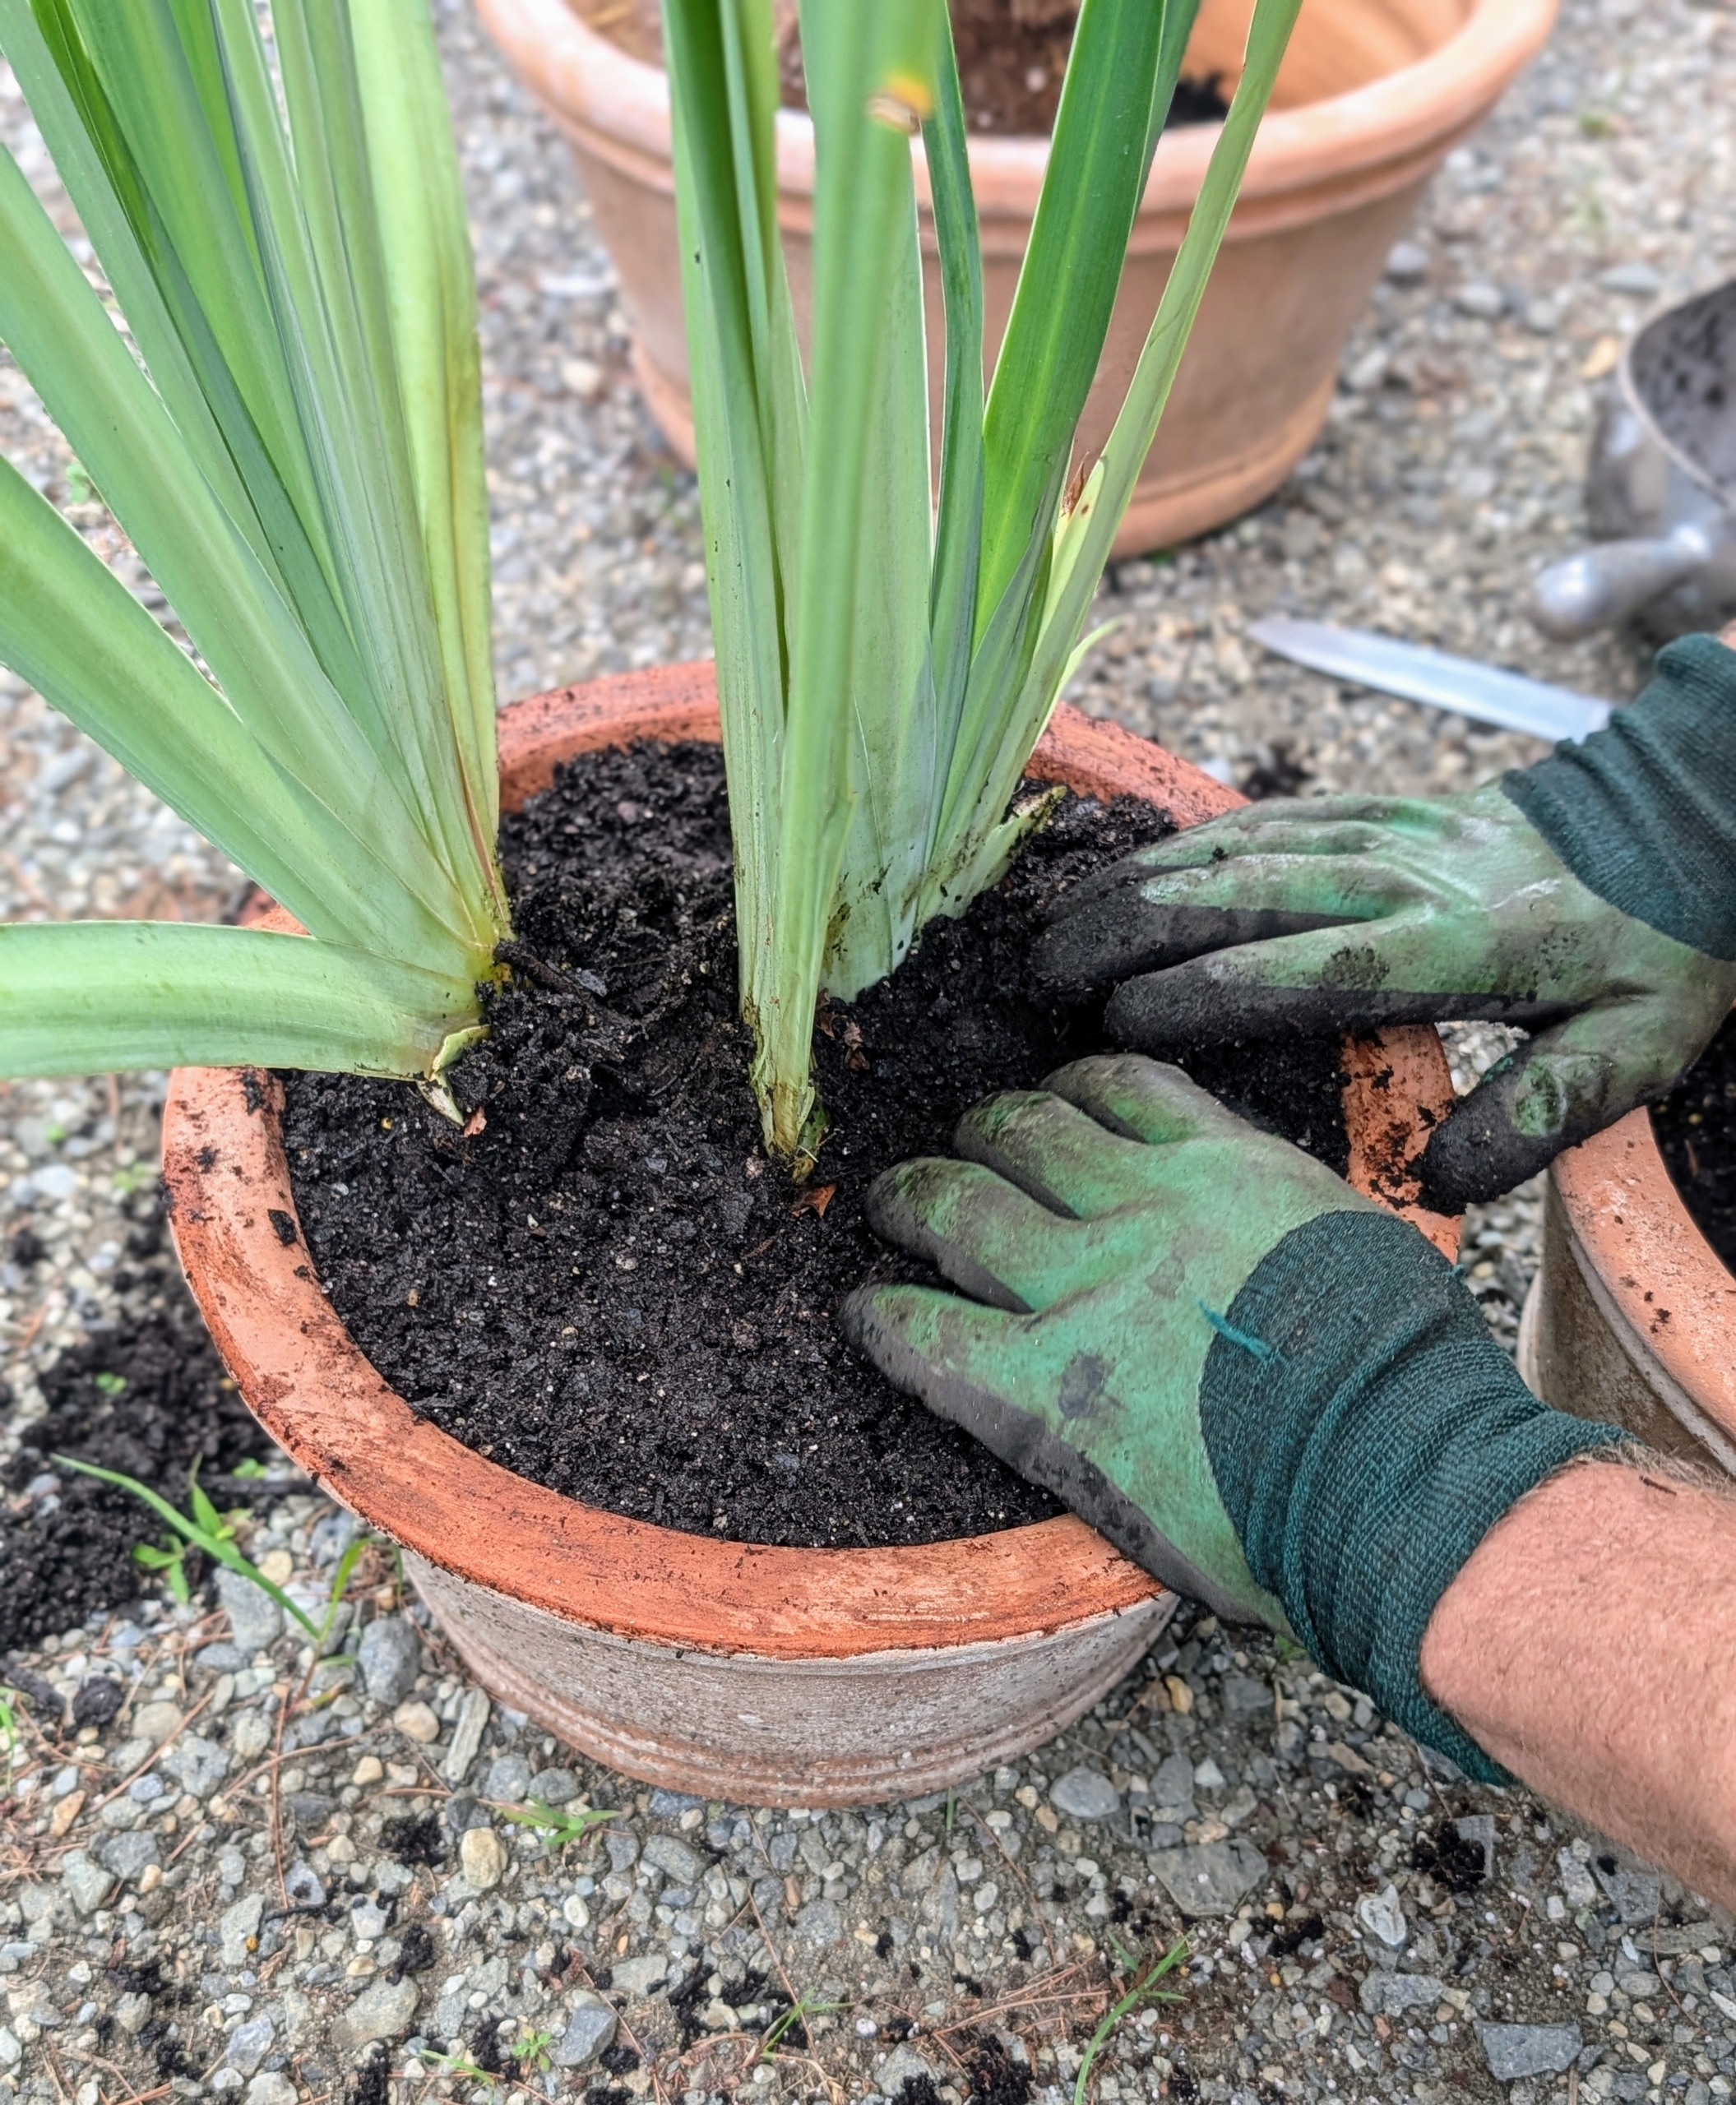
Then Ryan places the plant in the pot at the same height it was in its previous container. If needed, he adds a bit more soil at the bottom.
Then Ryan backfills, keeping the plant straight as he adds soil.
Once the container is filled, Ryan tamps down on the soil gently to ensure good contact with the plant.
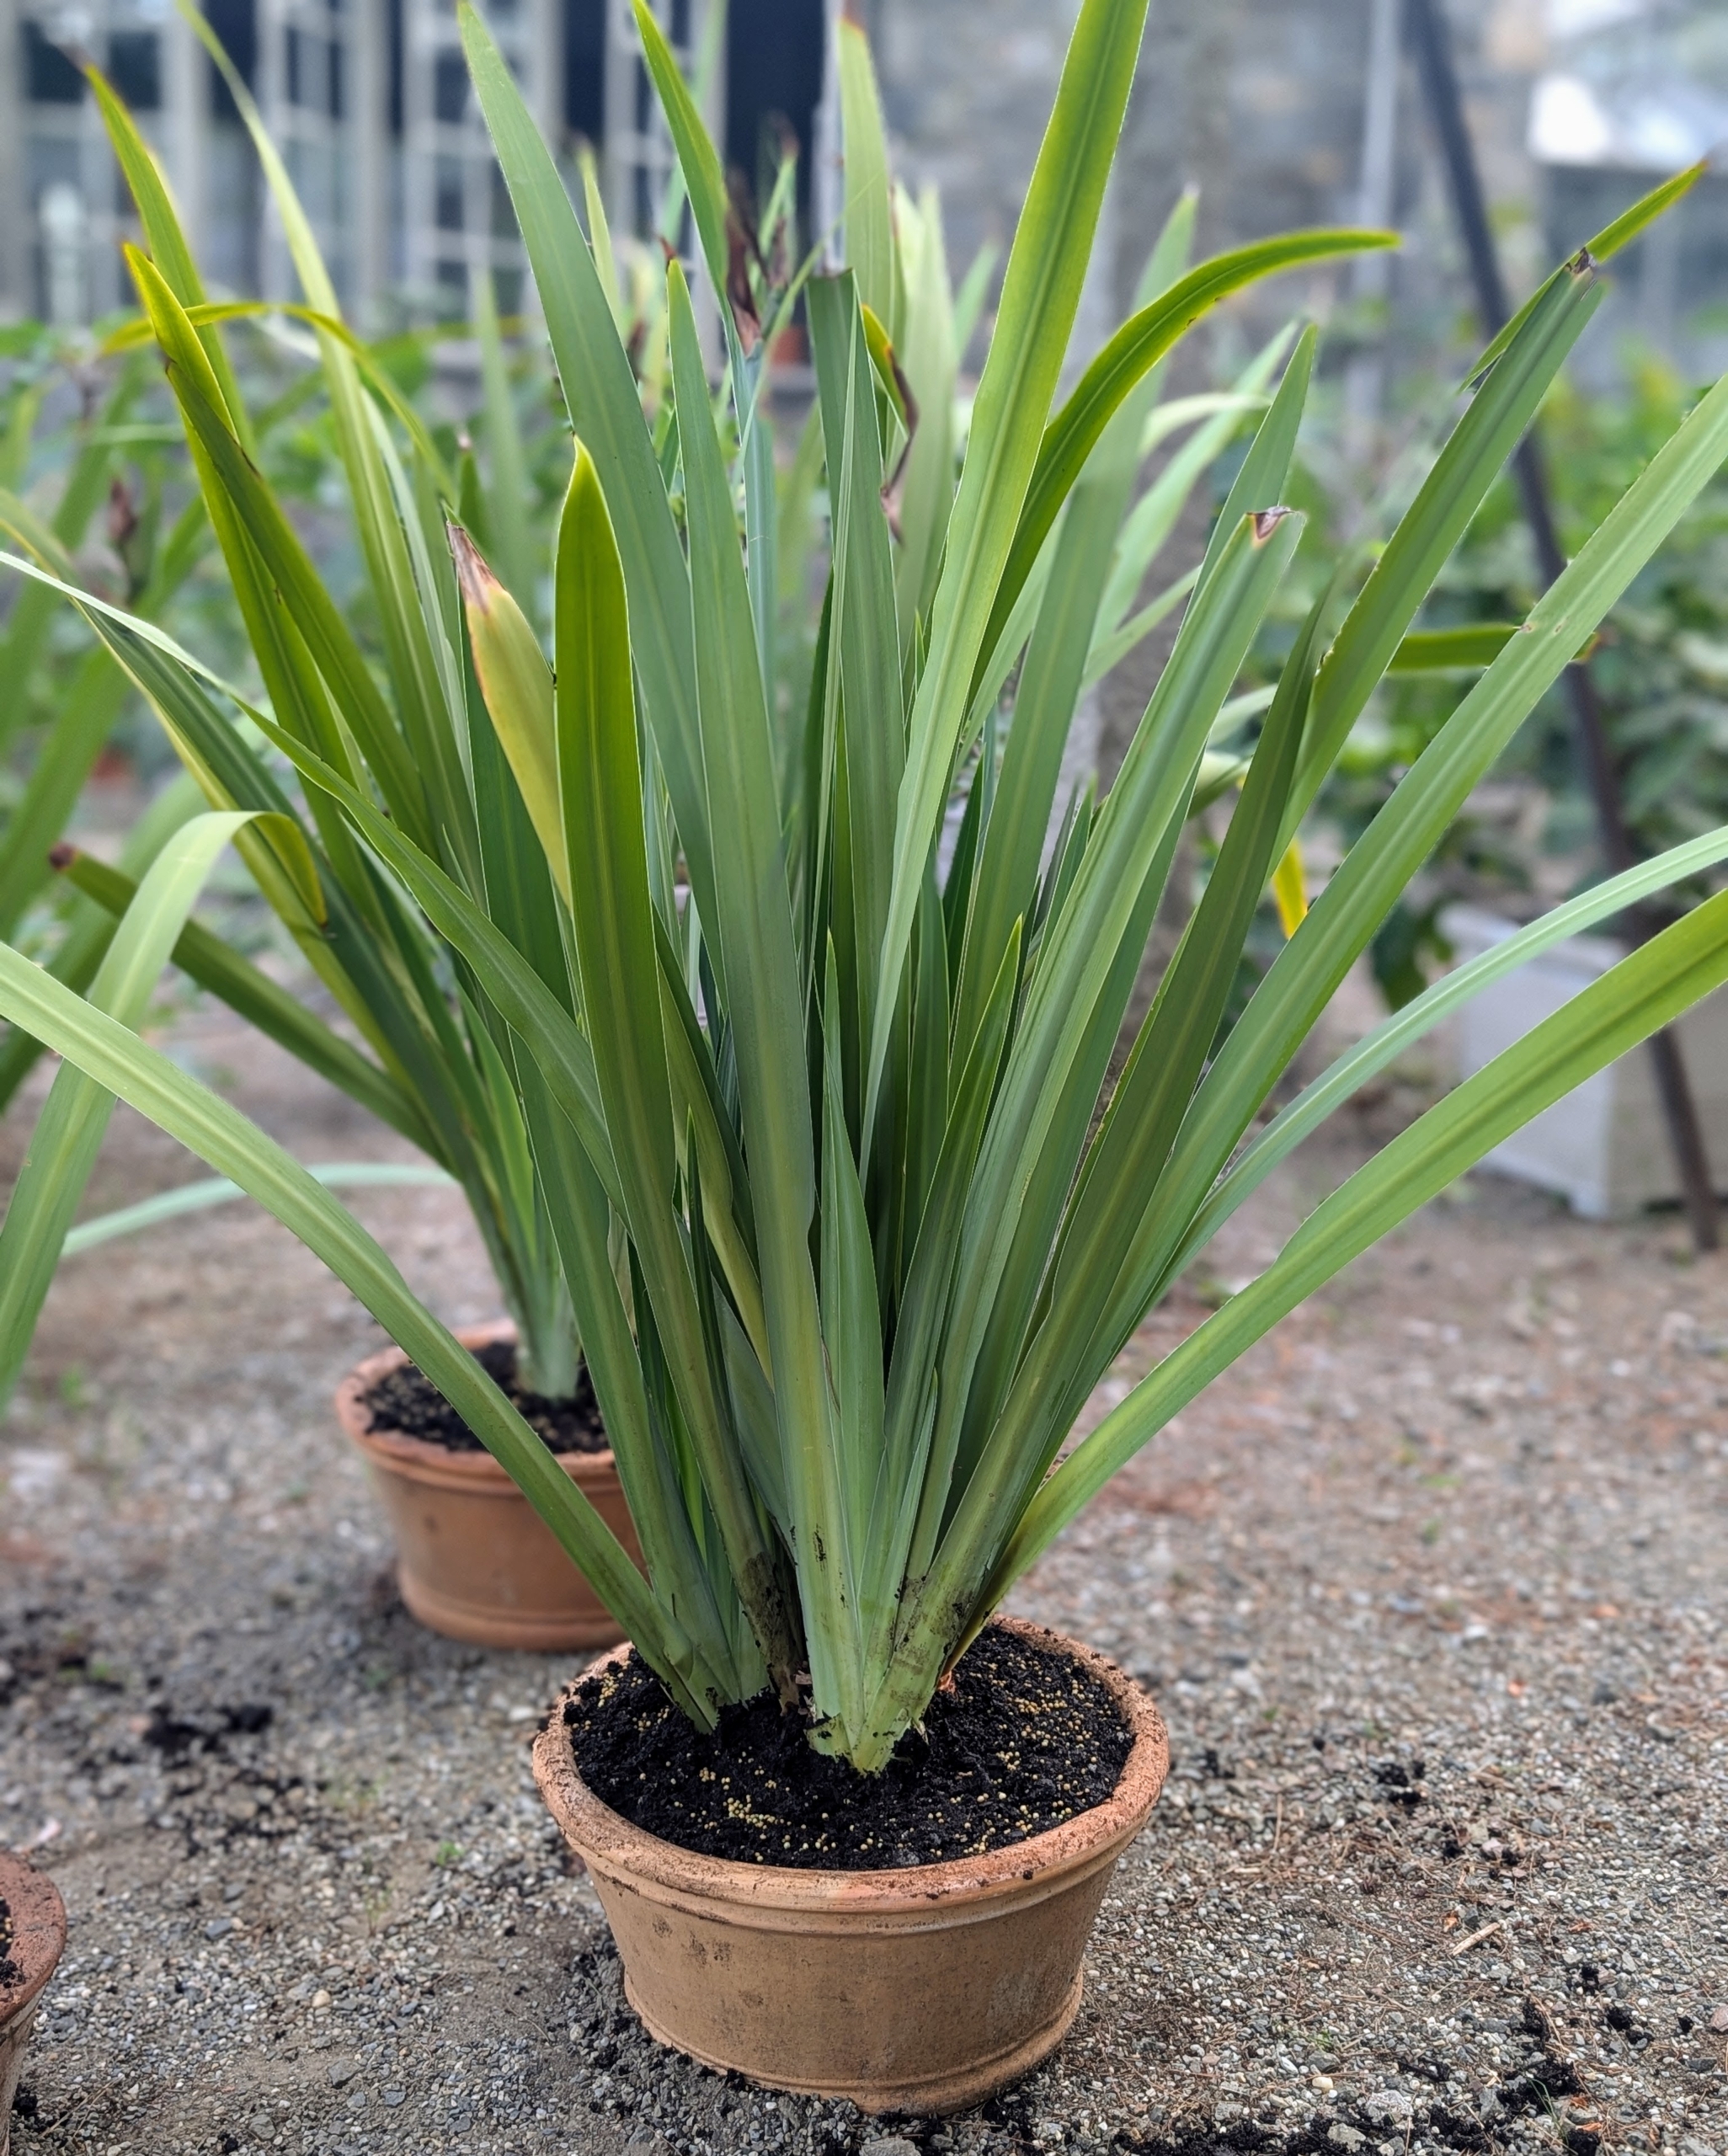
And here is one all potted up. Do you know how the walking iris got its name? After flowering in the garden, the plant’s stalk bends down and forms new plantlets or babies that root in the soil and give the appearance of moving through the earth.
And then there were four… I am excited to watch these potted walking irises flourish and multiply.