It's always nice to share photos of the "before" and "after" of a garden project.
My farm sits on more than 150 acres of gardens, pastures, and woodlands. Every year, I work hard to design new garden spaces and enhance existing ones. I take into consideration a plant's growing needs and mature size and then plant accordingly. Down by my tennis court, I already have a collection of white hydrangeas growing on one side. Last July, I decided the area would look even better with hydrangeas planted all around the court. I planted a combination of white and pink blooming shrubs. And exactly 12 months later they're blooming wonderfully.
Enjoy these photos.
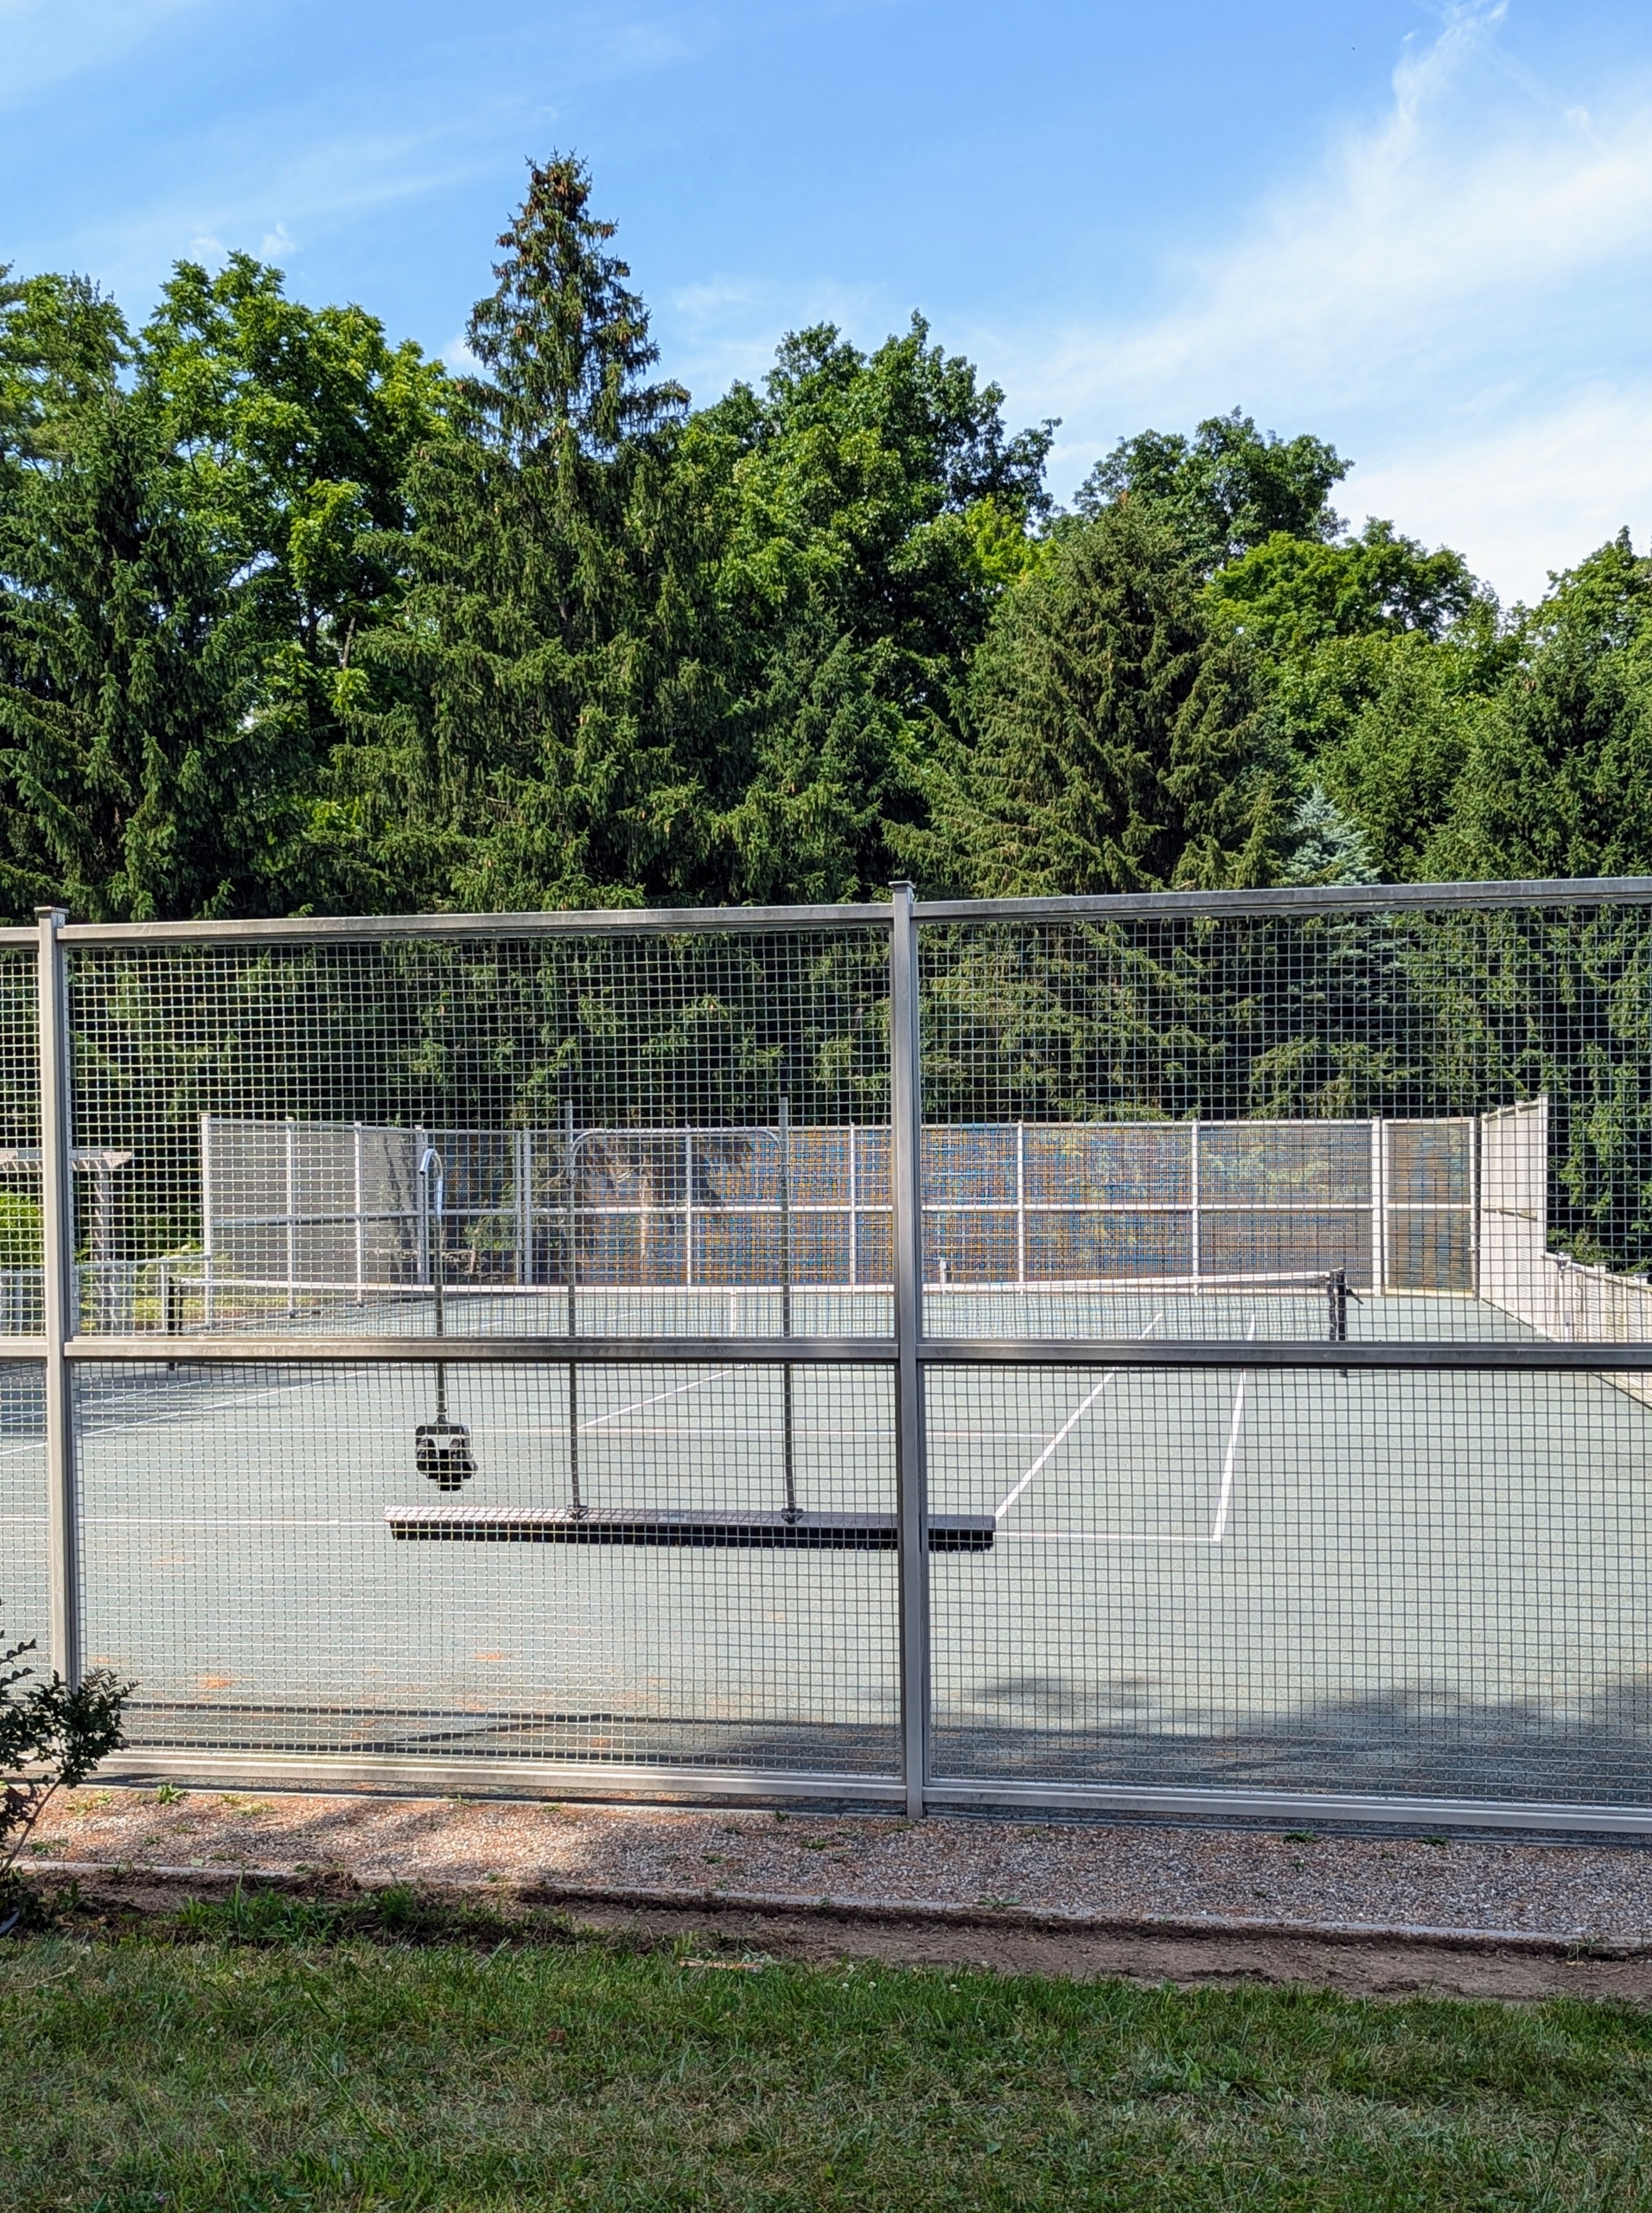
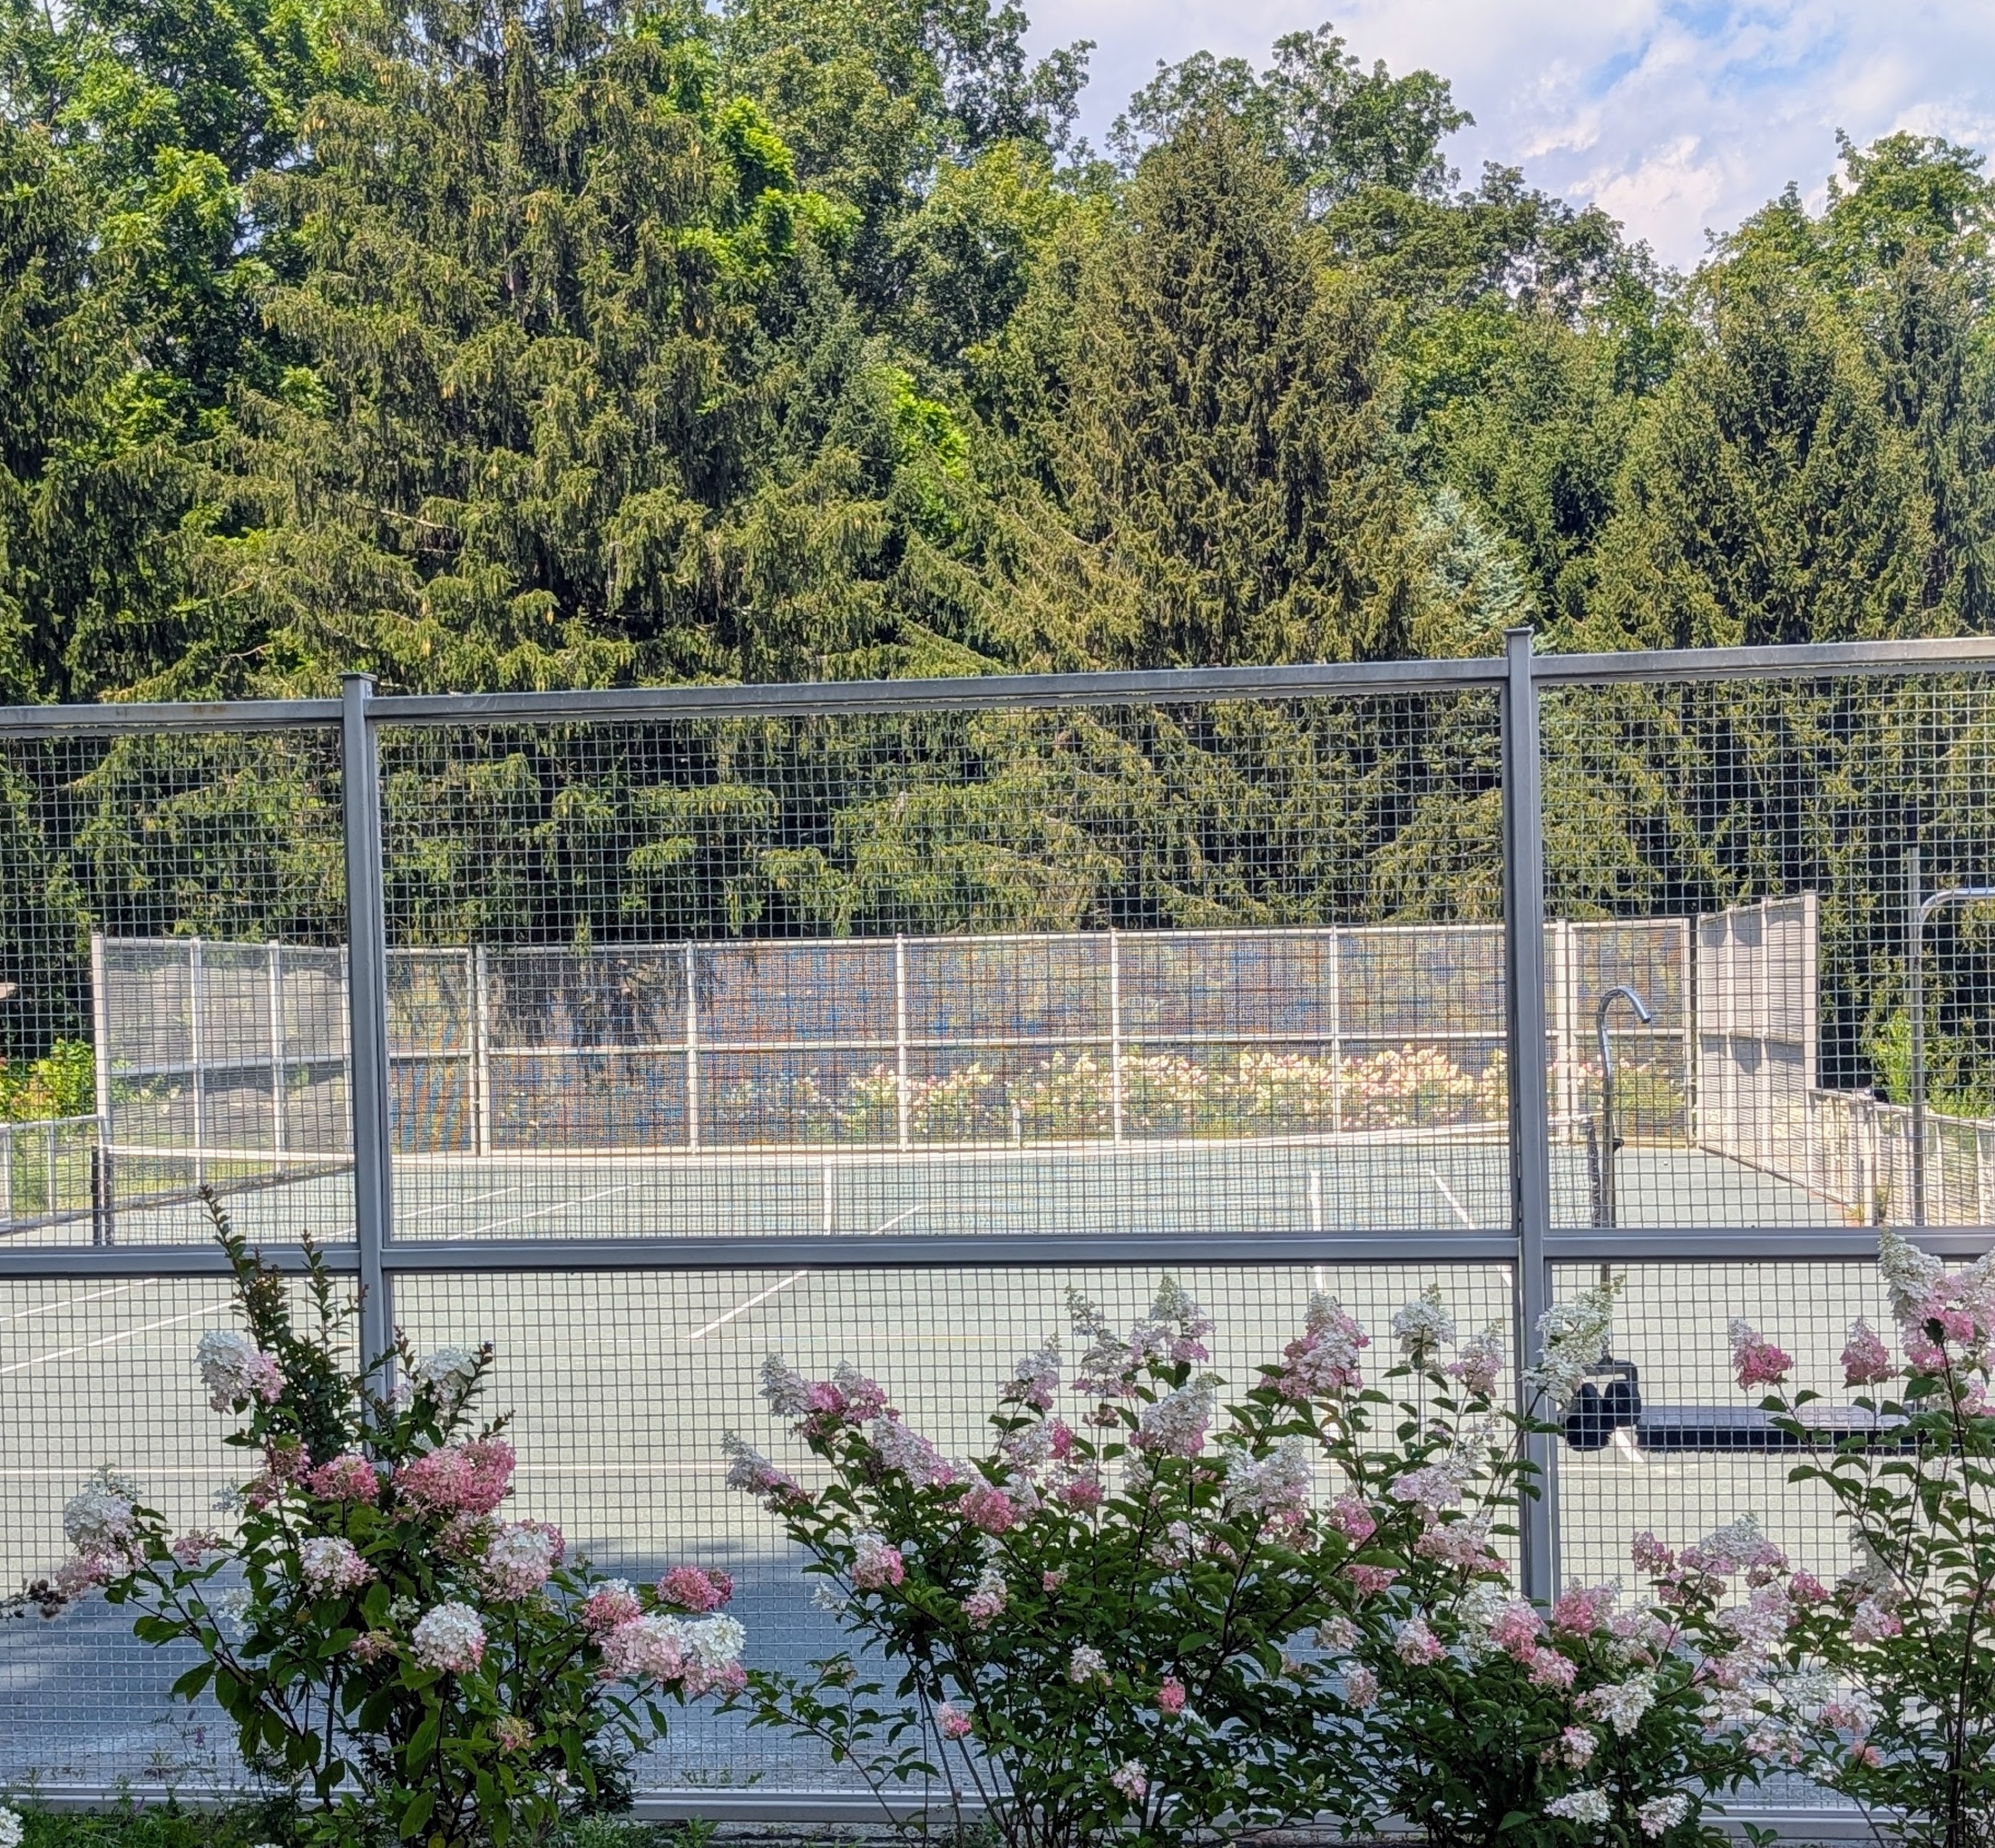
My tennis court is tucked away in a far corner of my farm. The court is surrounded by the same type of fencing as my perennial flower garden. And like all the other structures, it is painted Bedford gray.
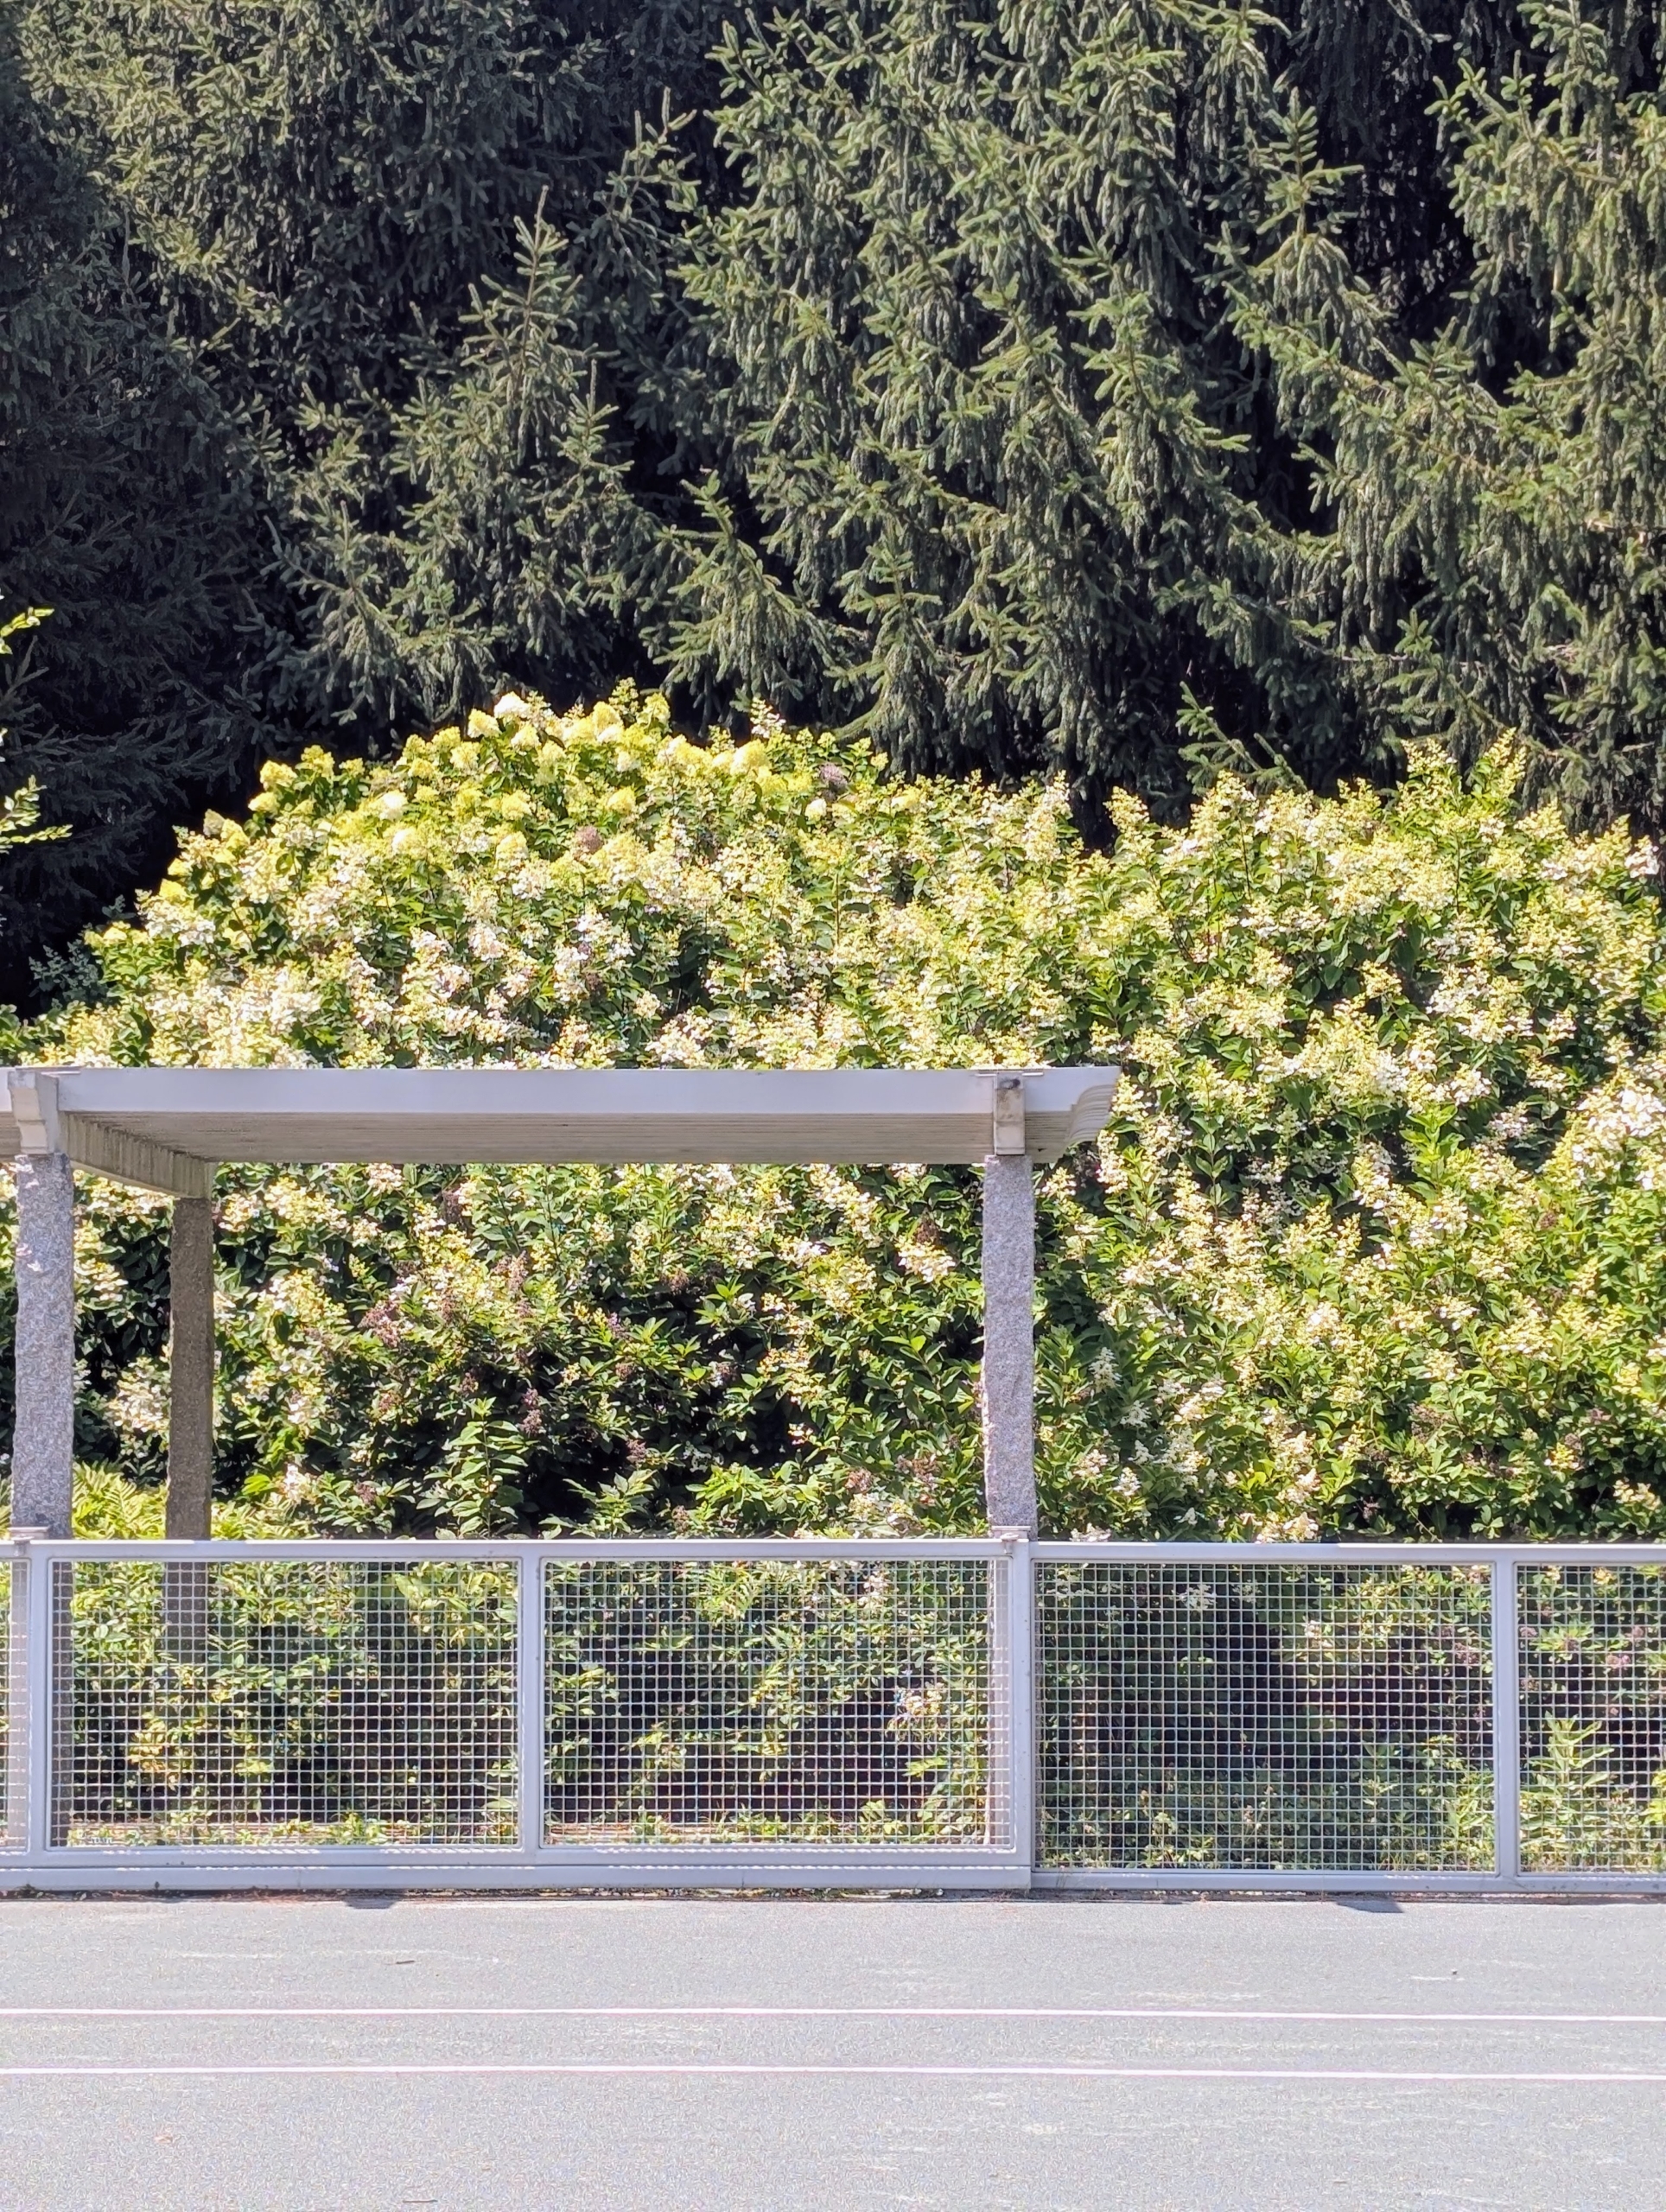
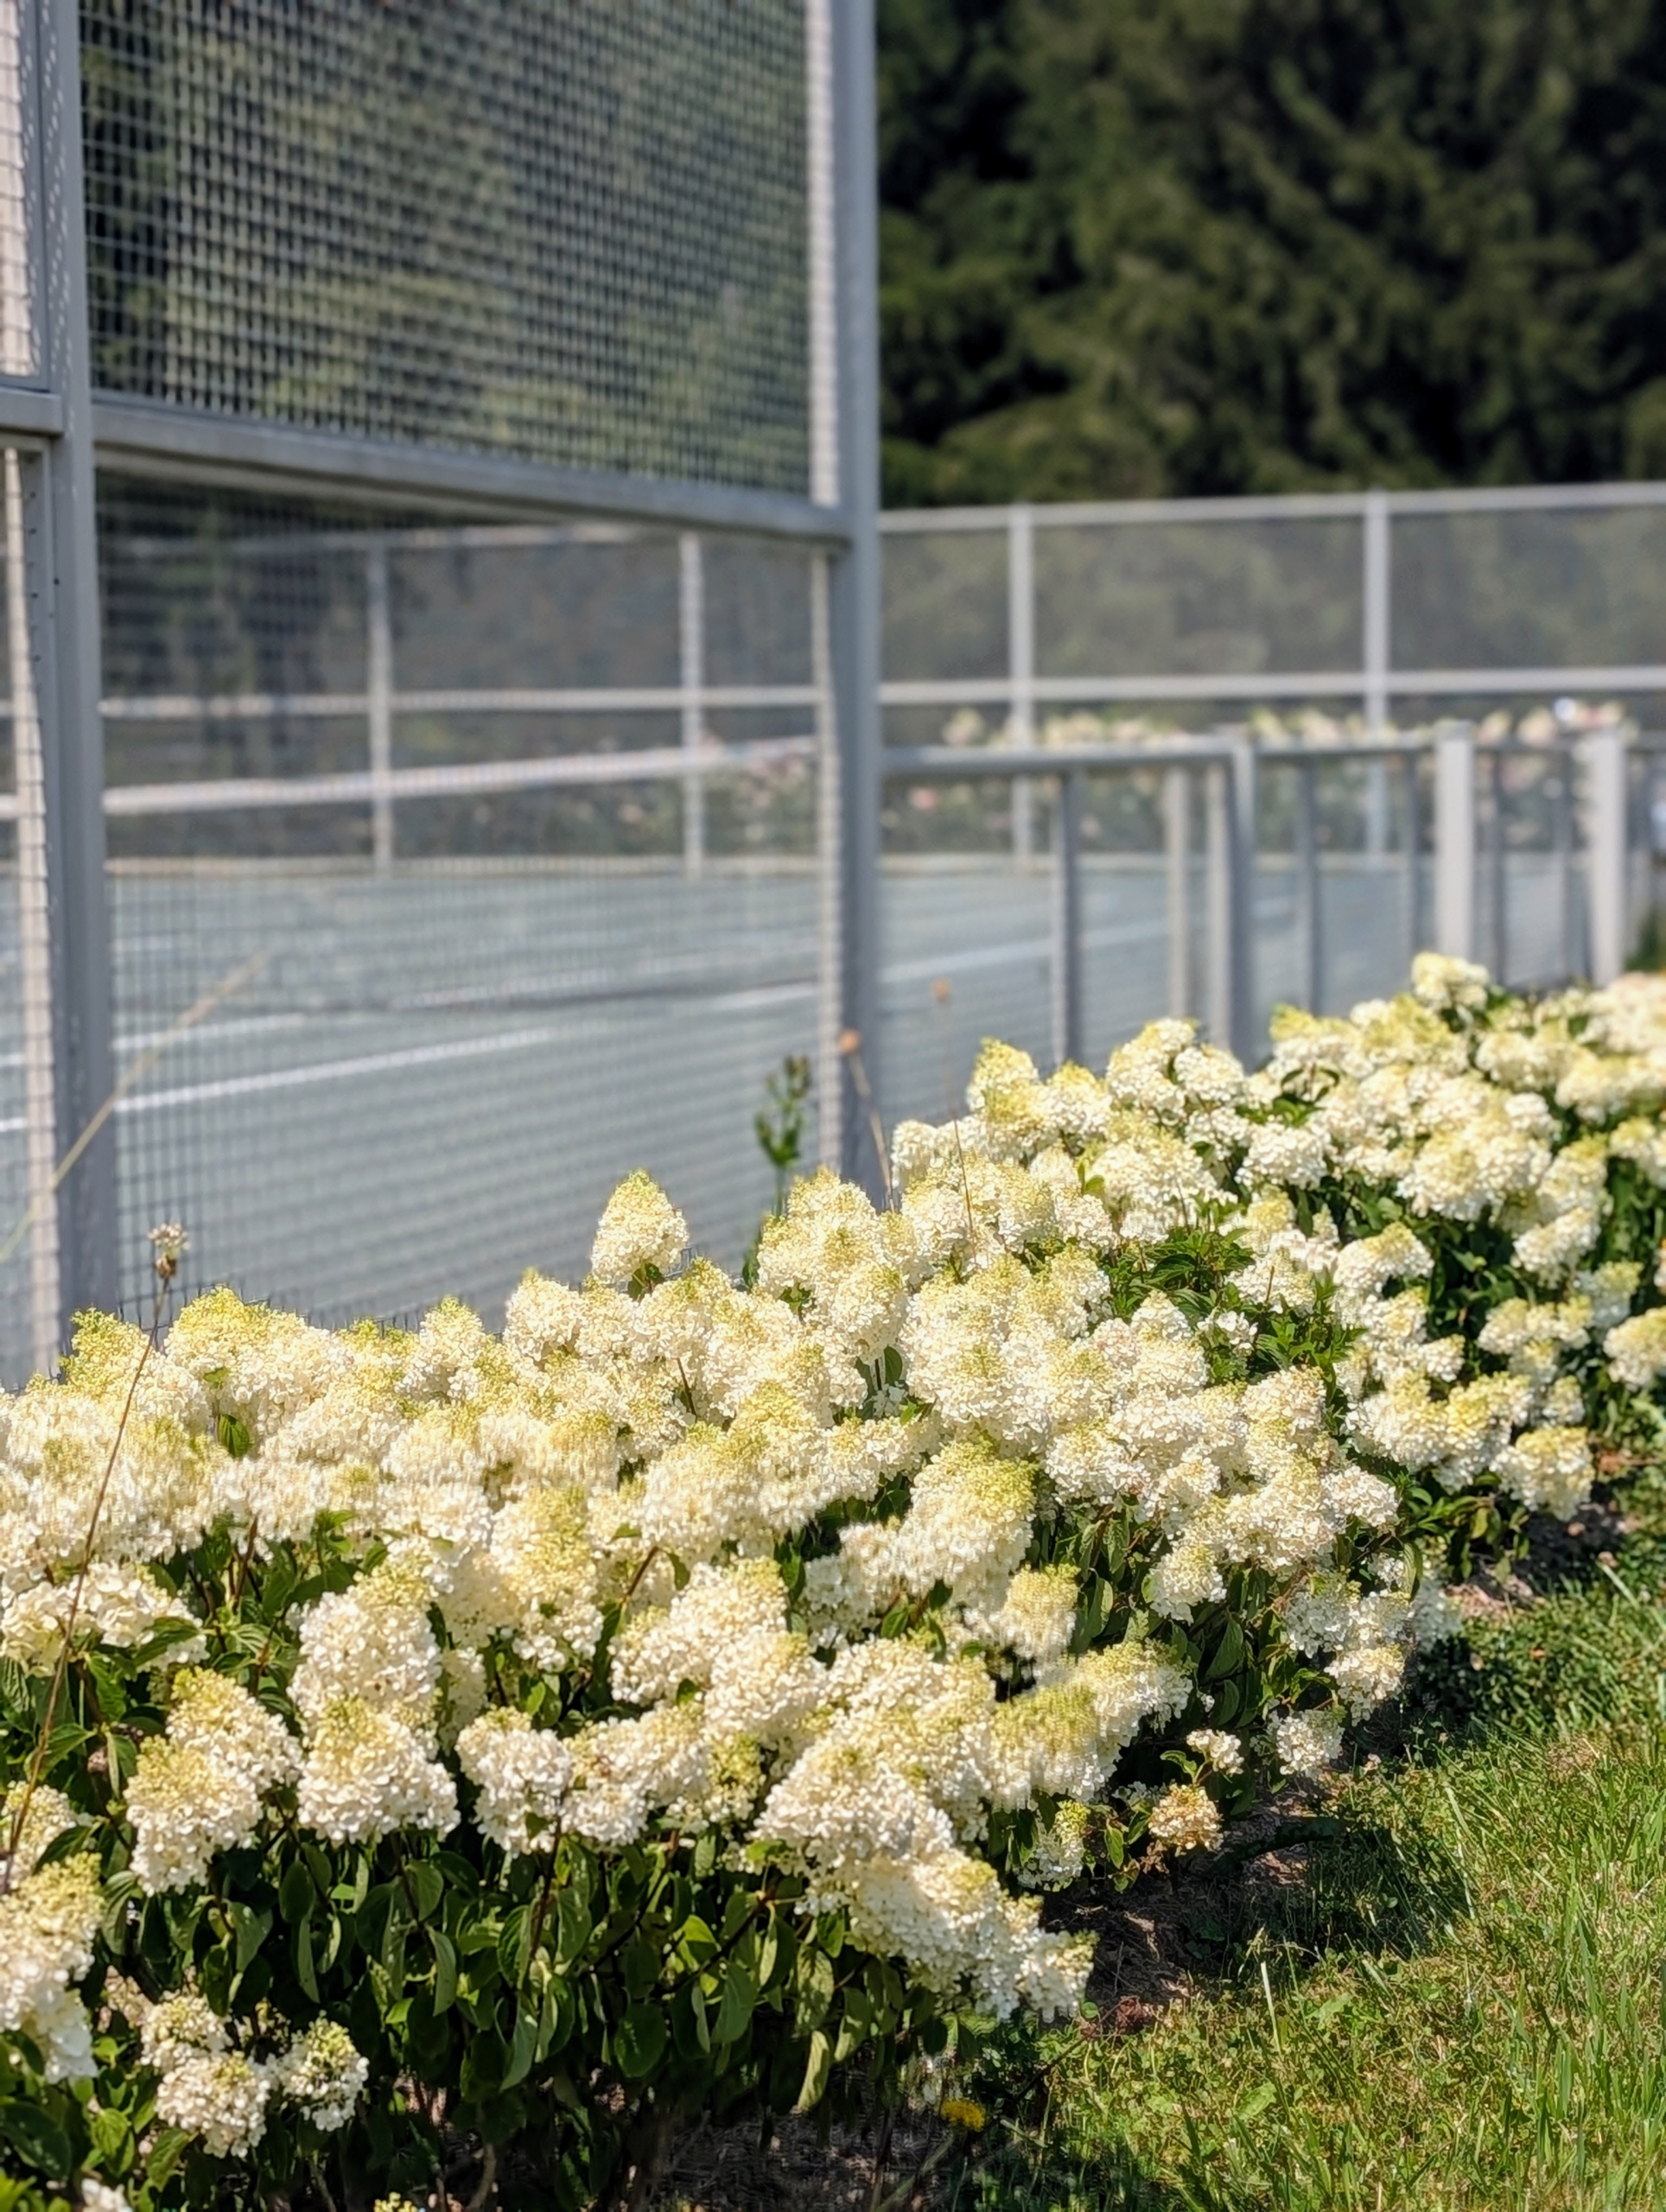
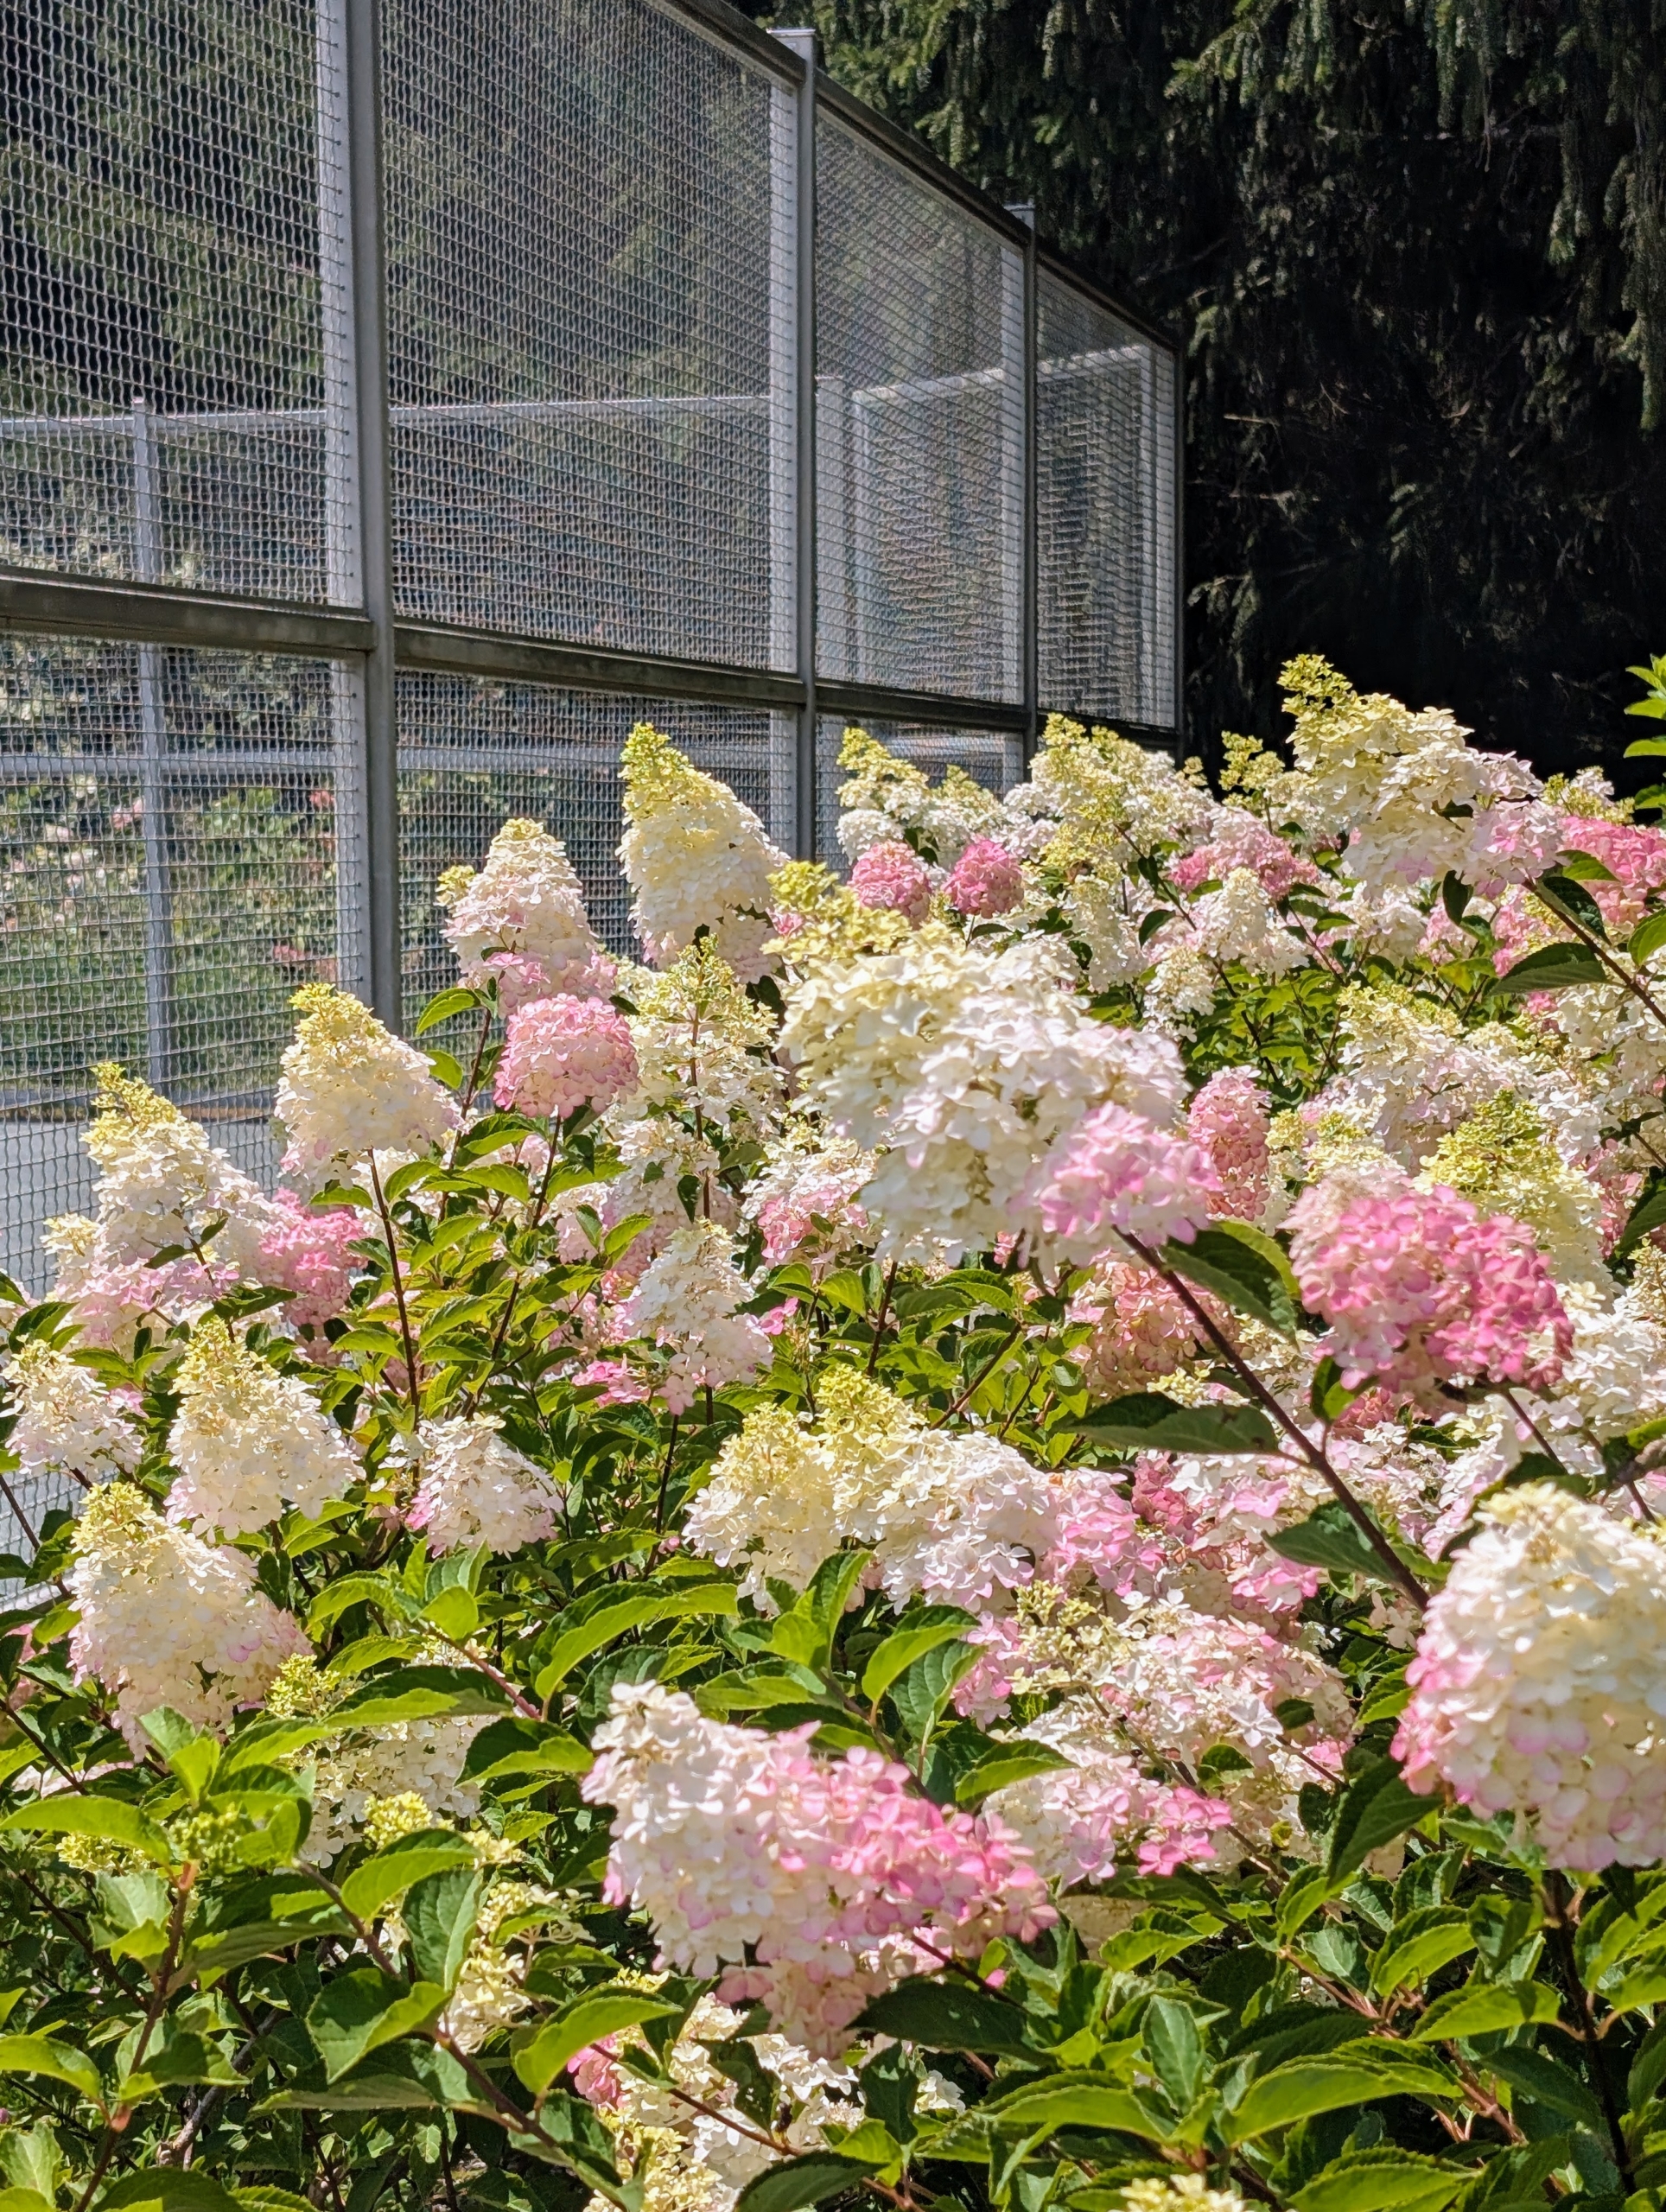
On one side of the court behind and next to the observation pergola, is a selection of beautiful white hydrangeas including Pee Gee hydrangeas.
During summer they bloom so beautifully – the flowers are so big, they can be seen from the carriage road.
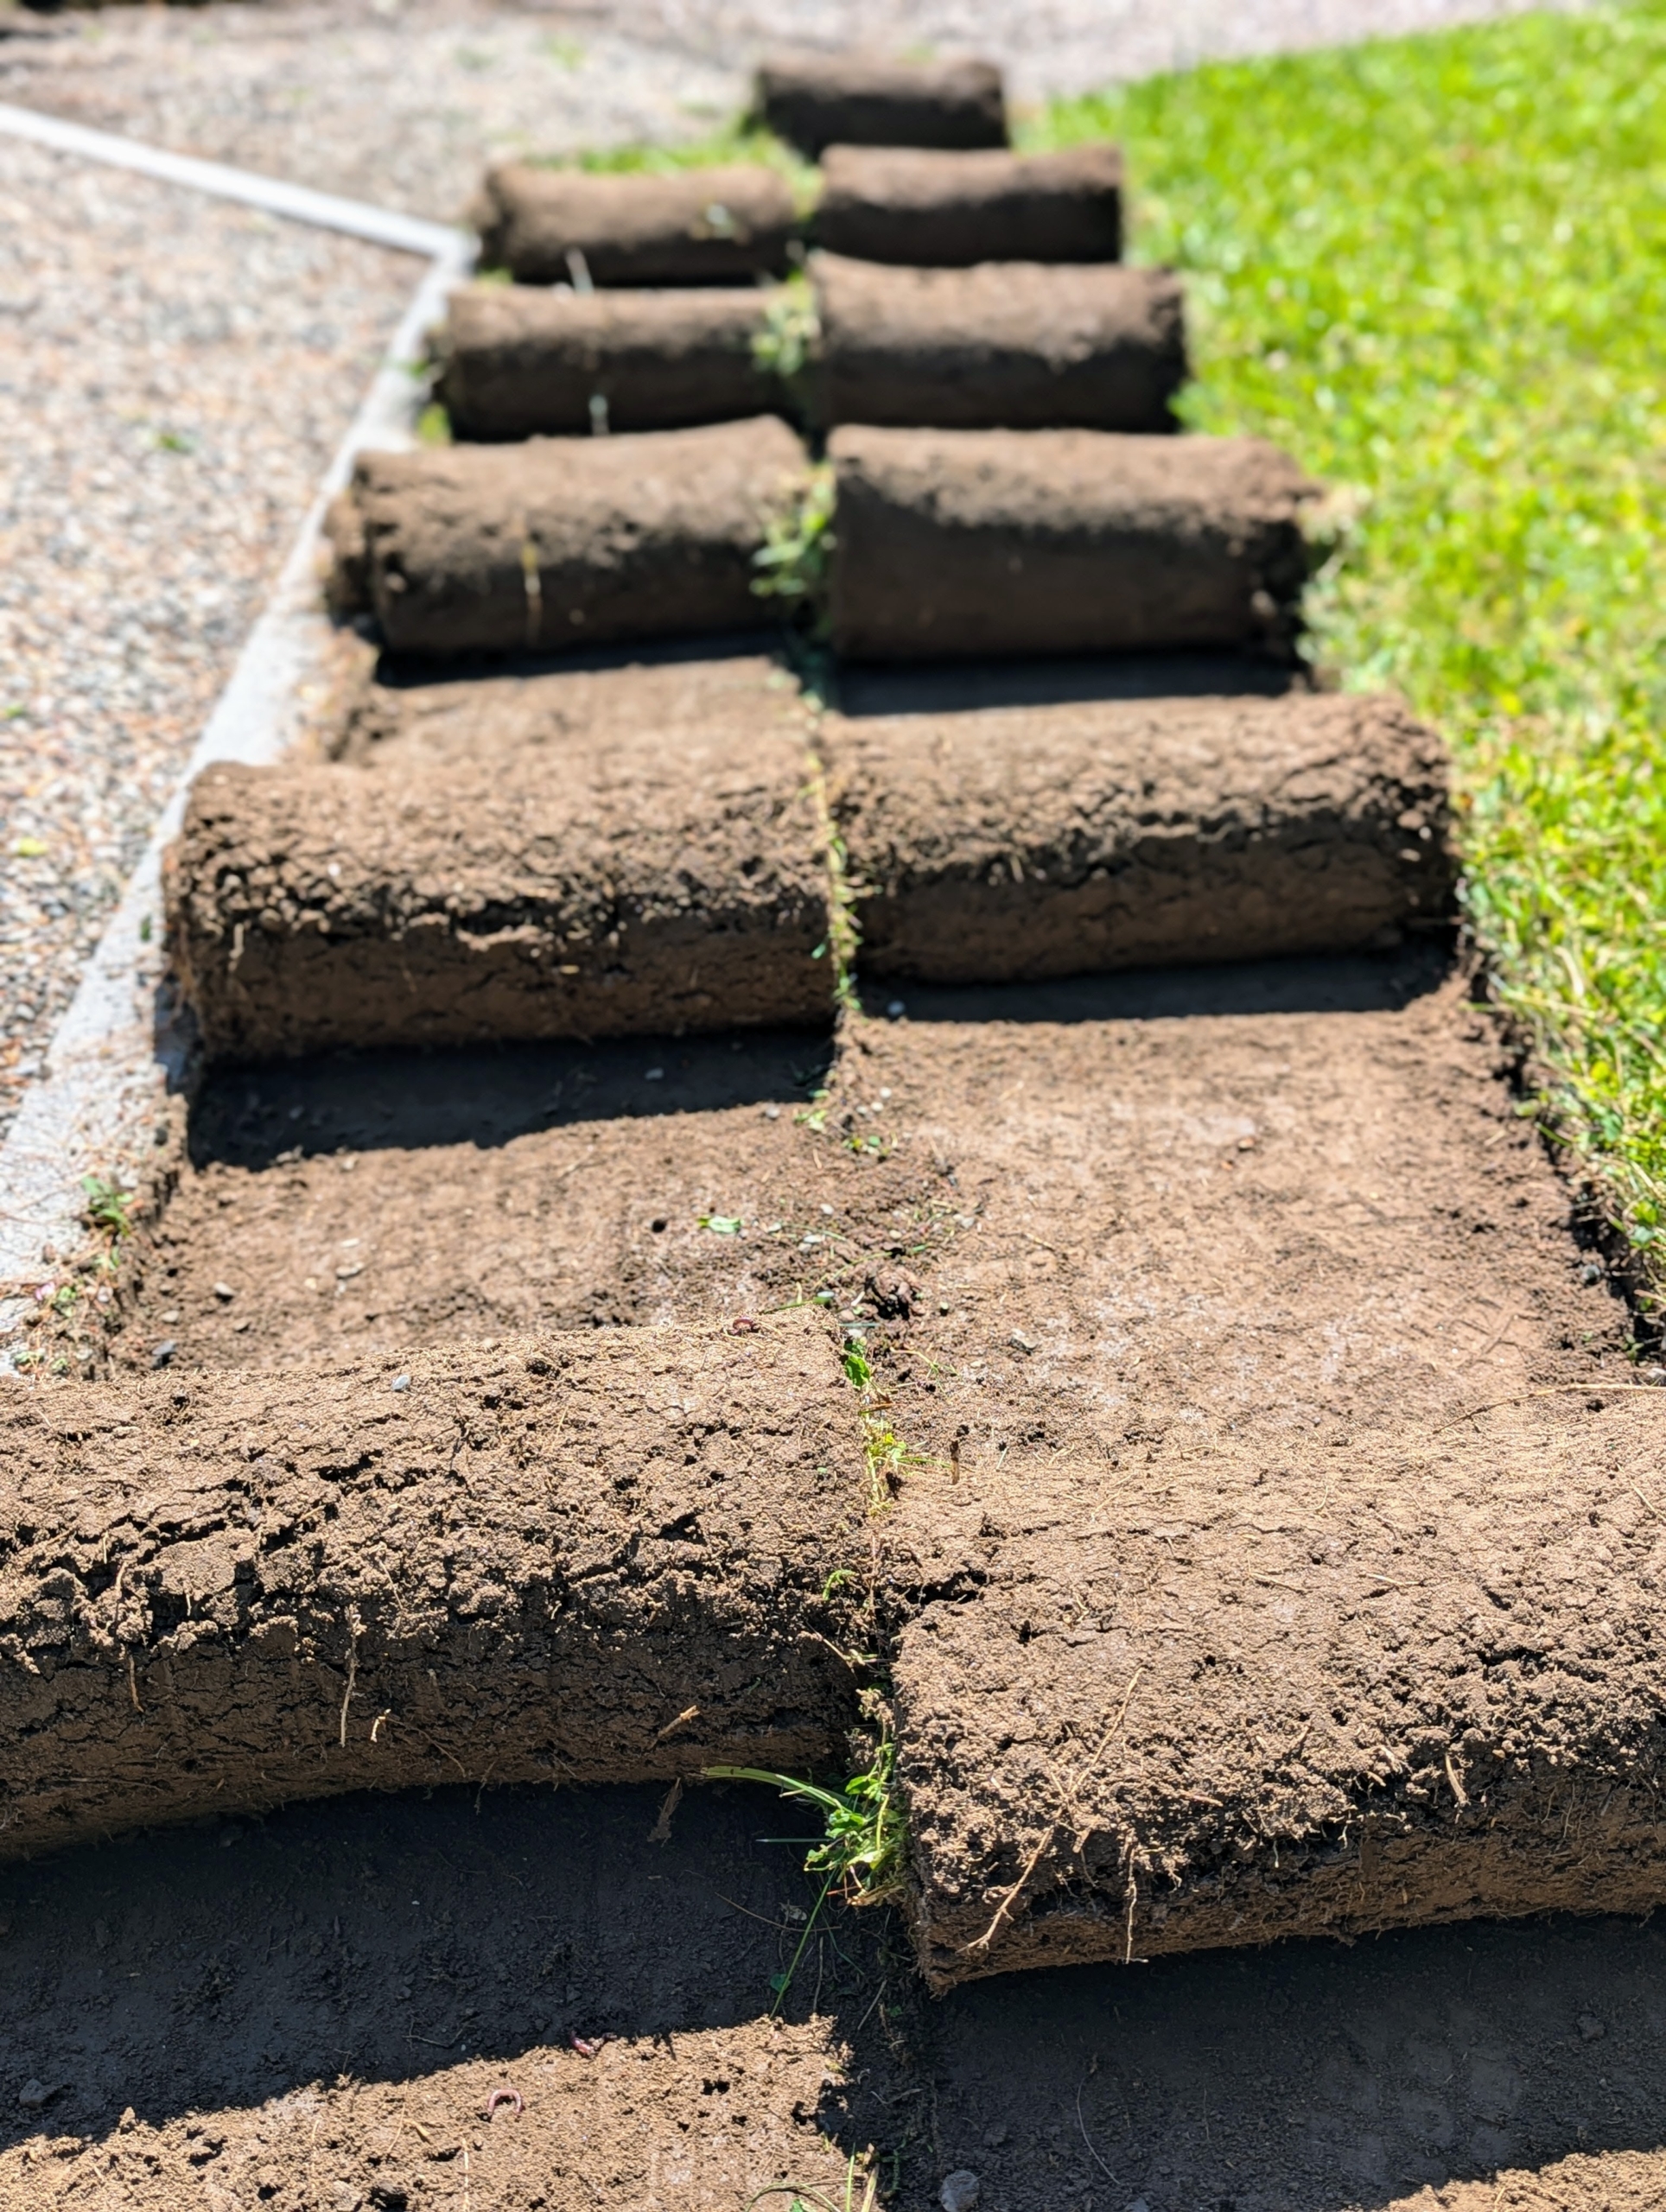
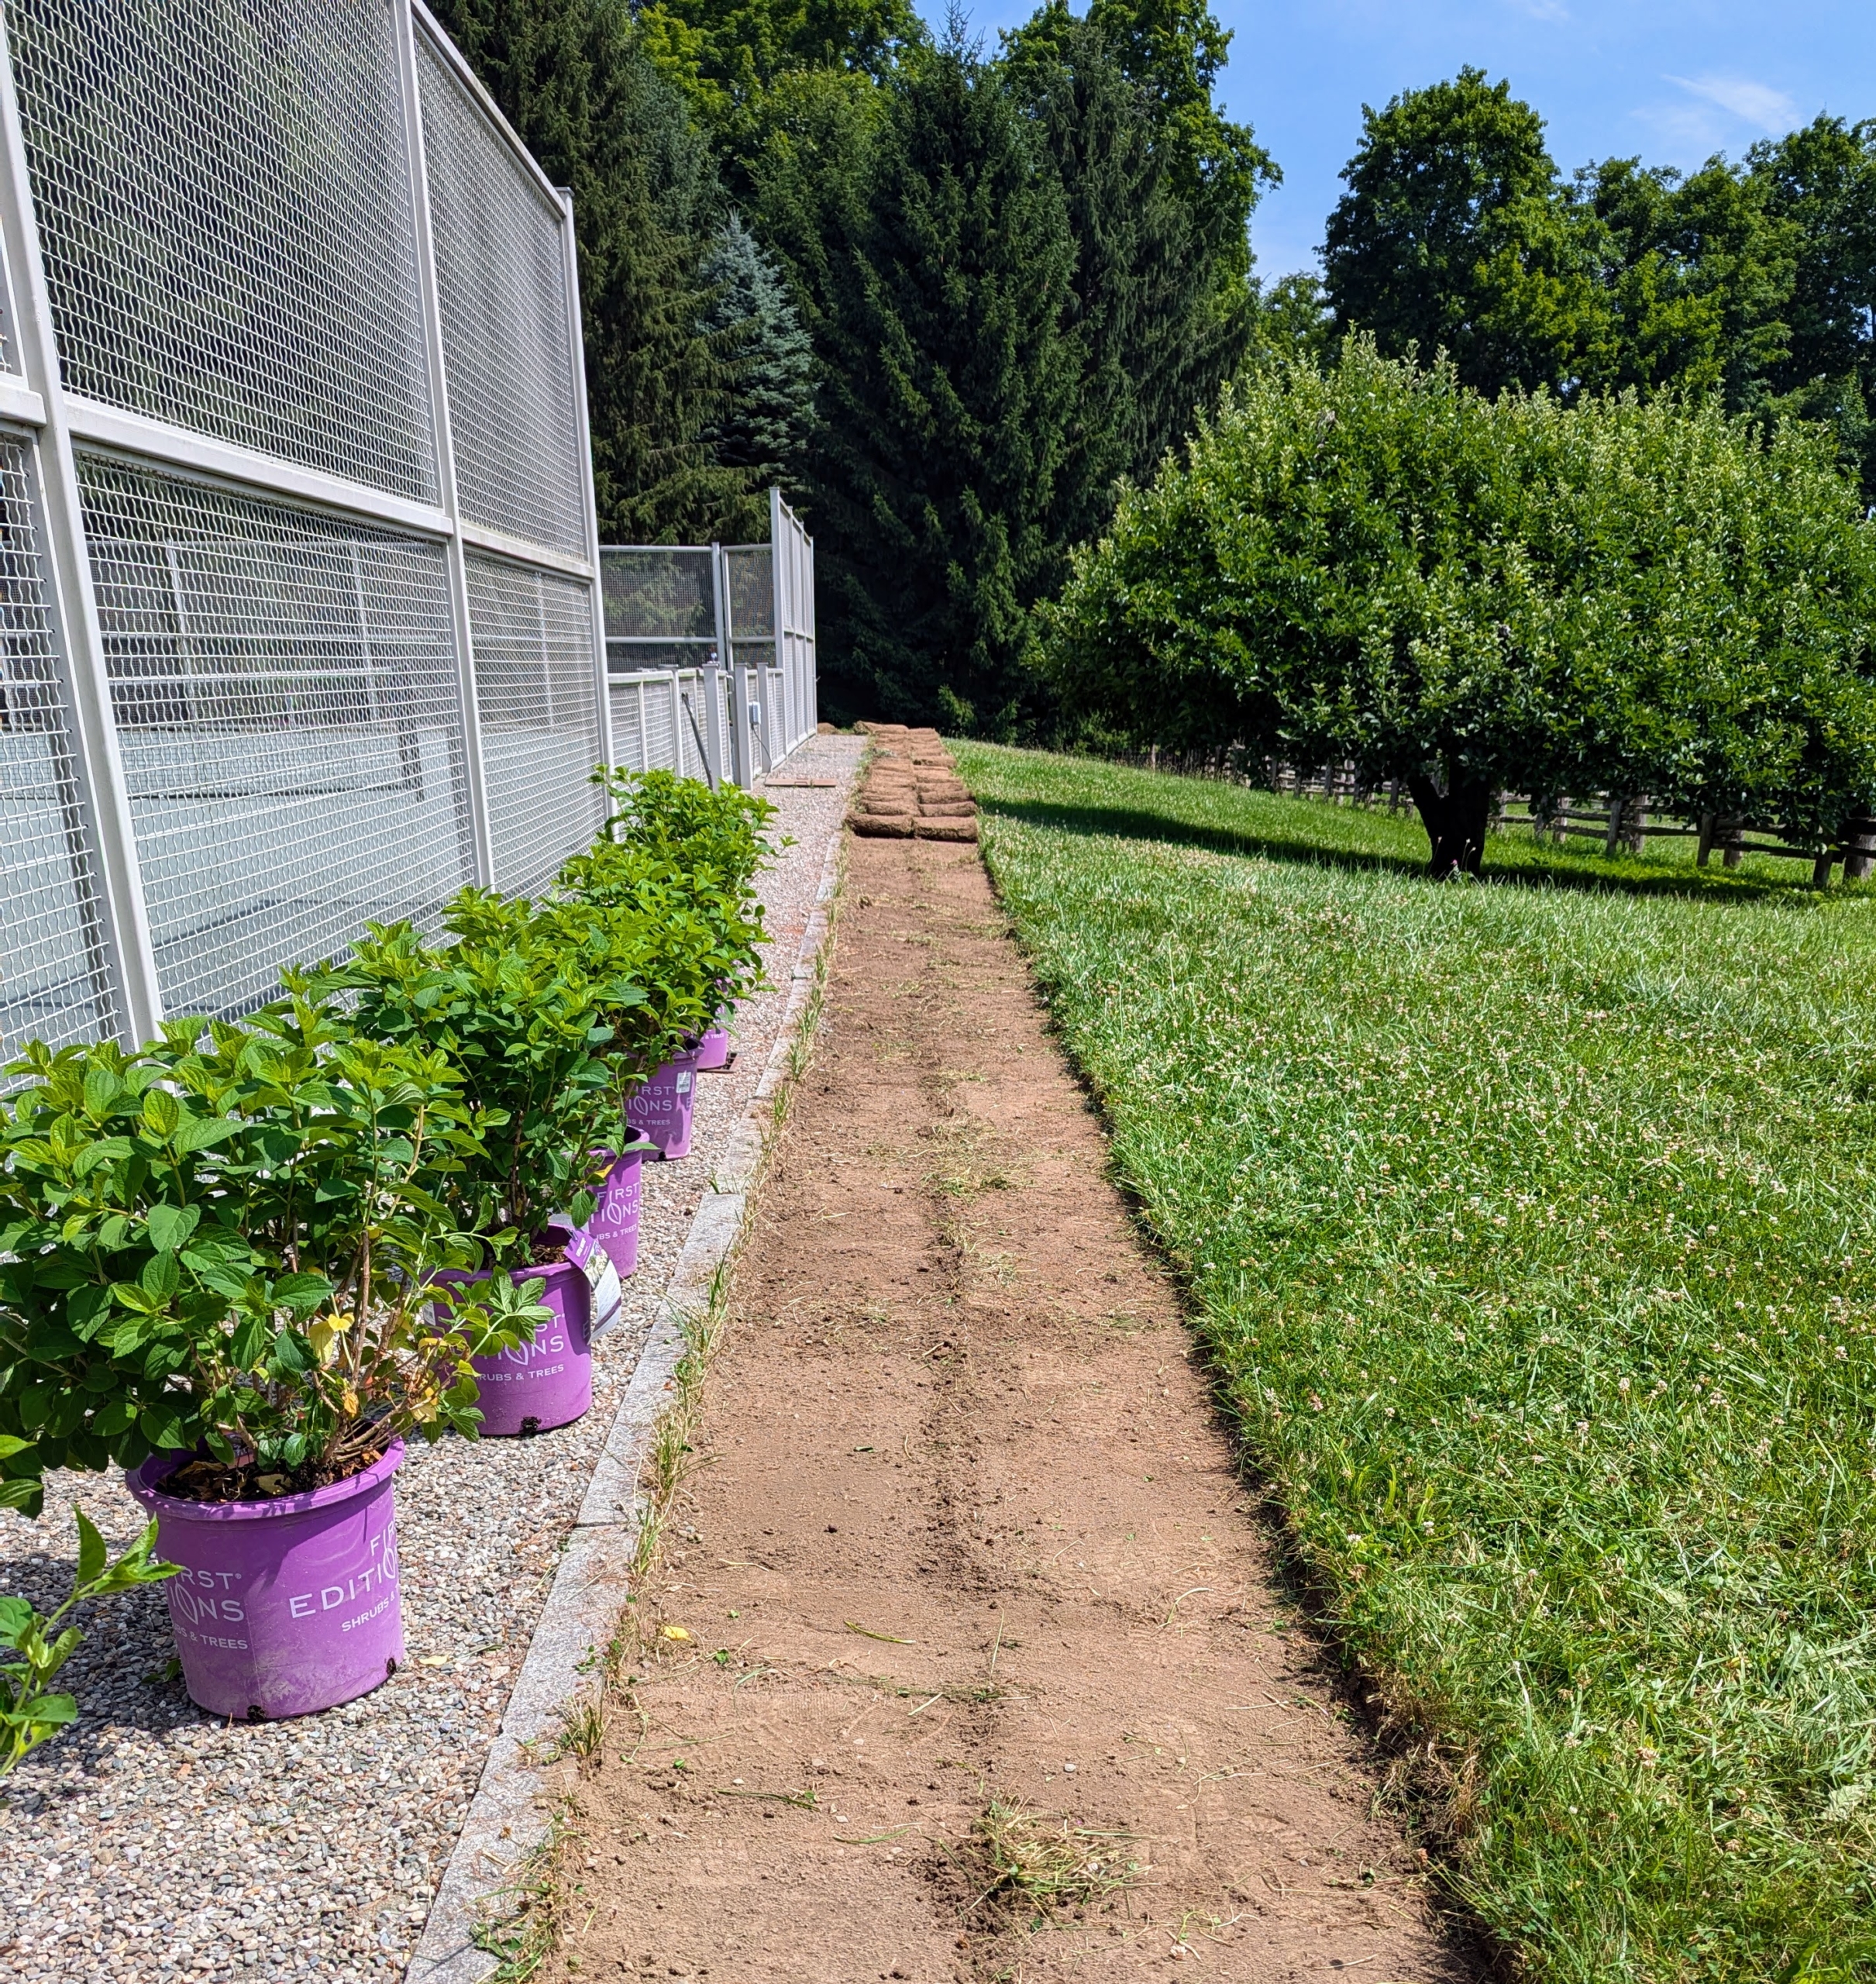
This time last year, I decided to plant more hydrangeas around the other three sides of the court. Two foot wide strips of sod were removed and rolled up in sections for easy carrying. It may not look it, but a section of sod can weigh between 15 and 30 pounds each.
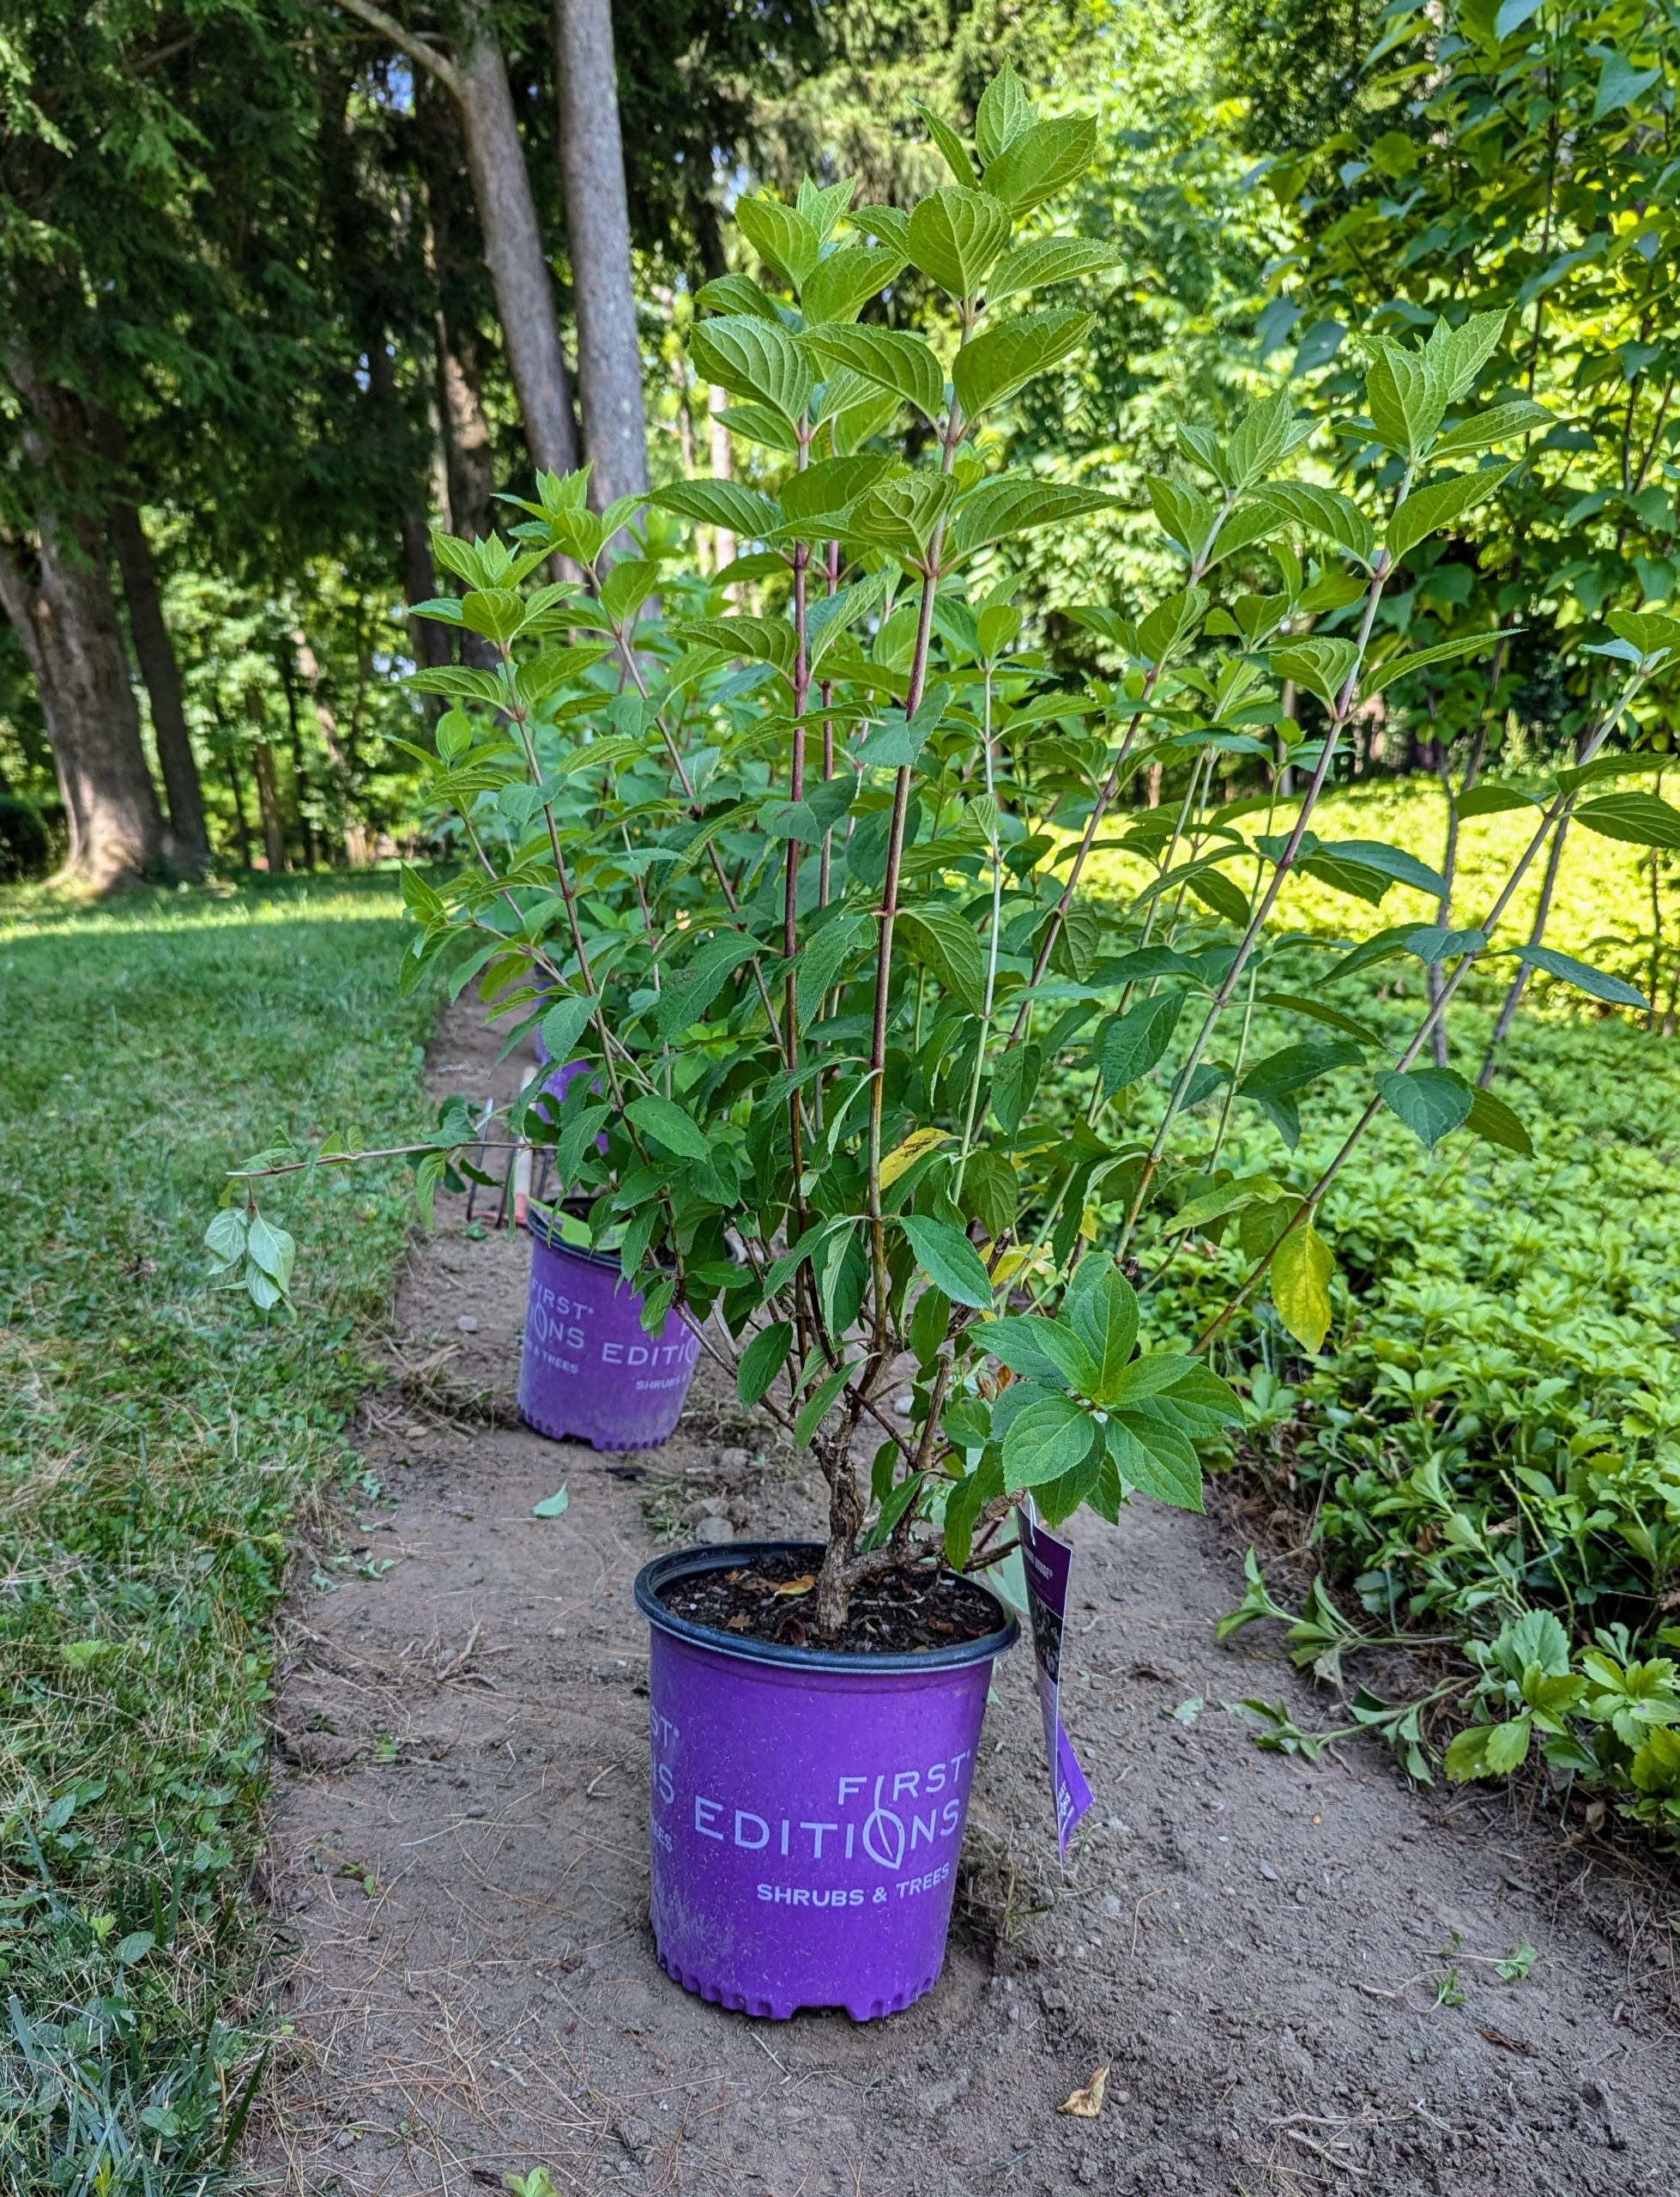
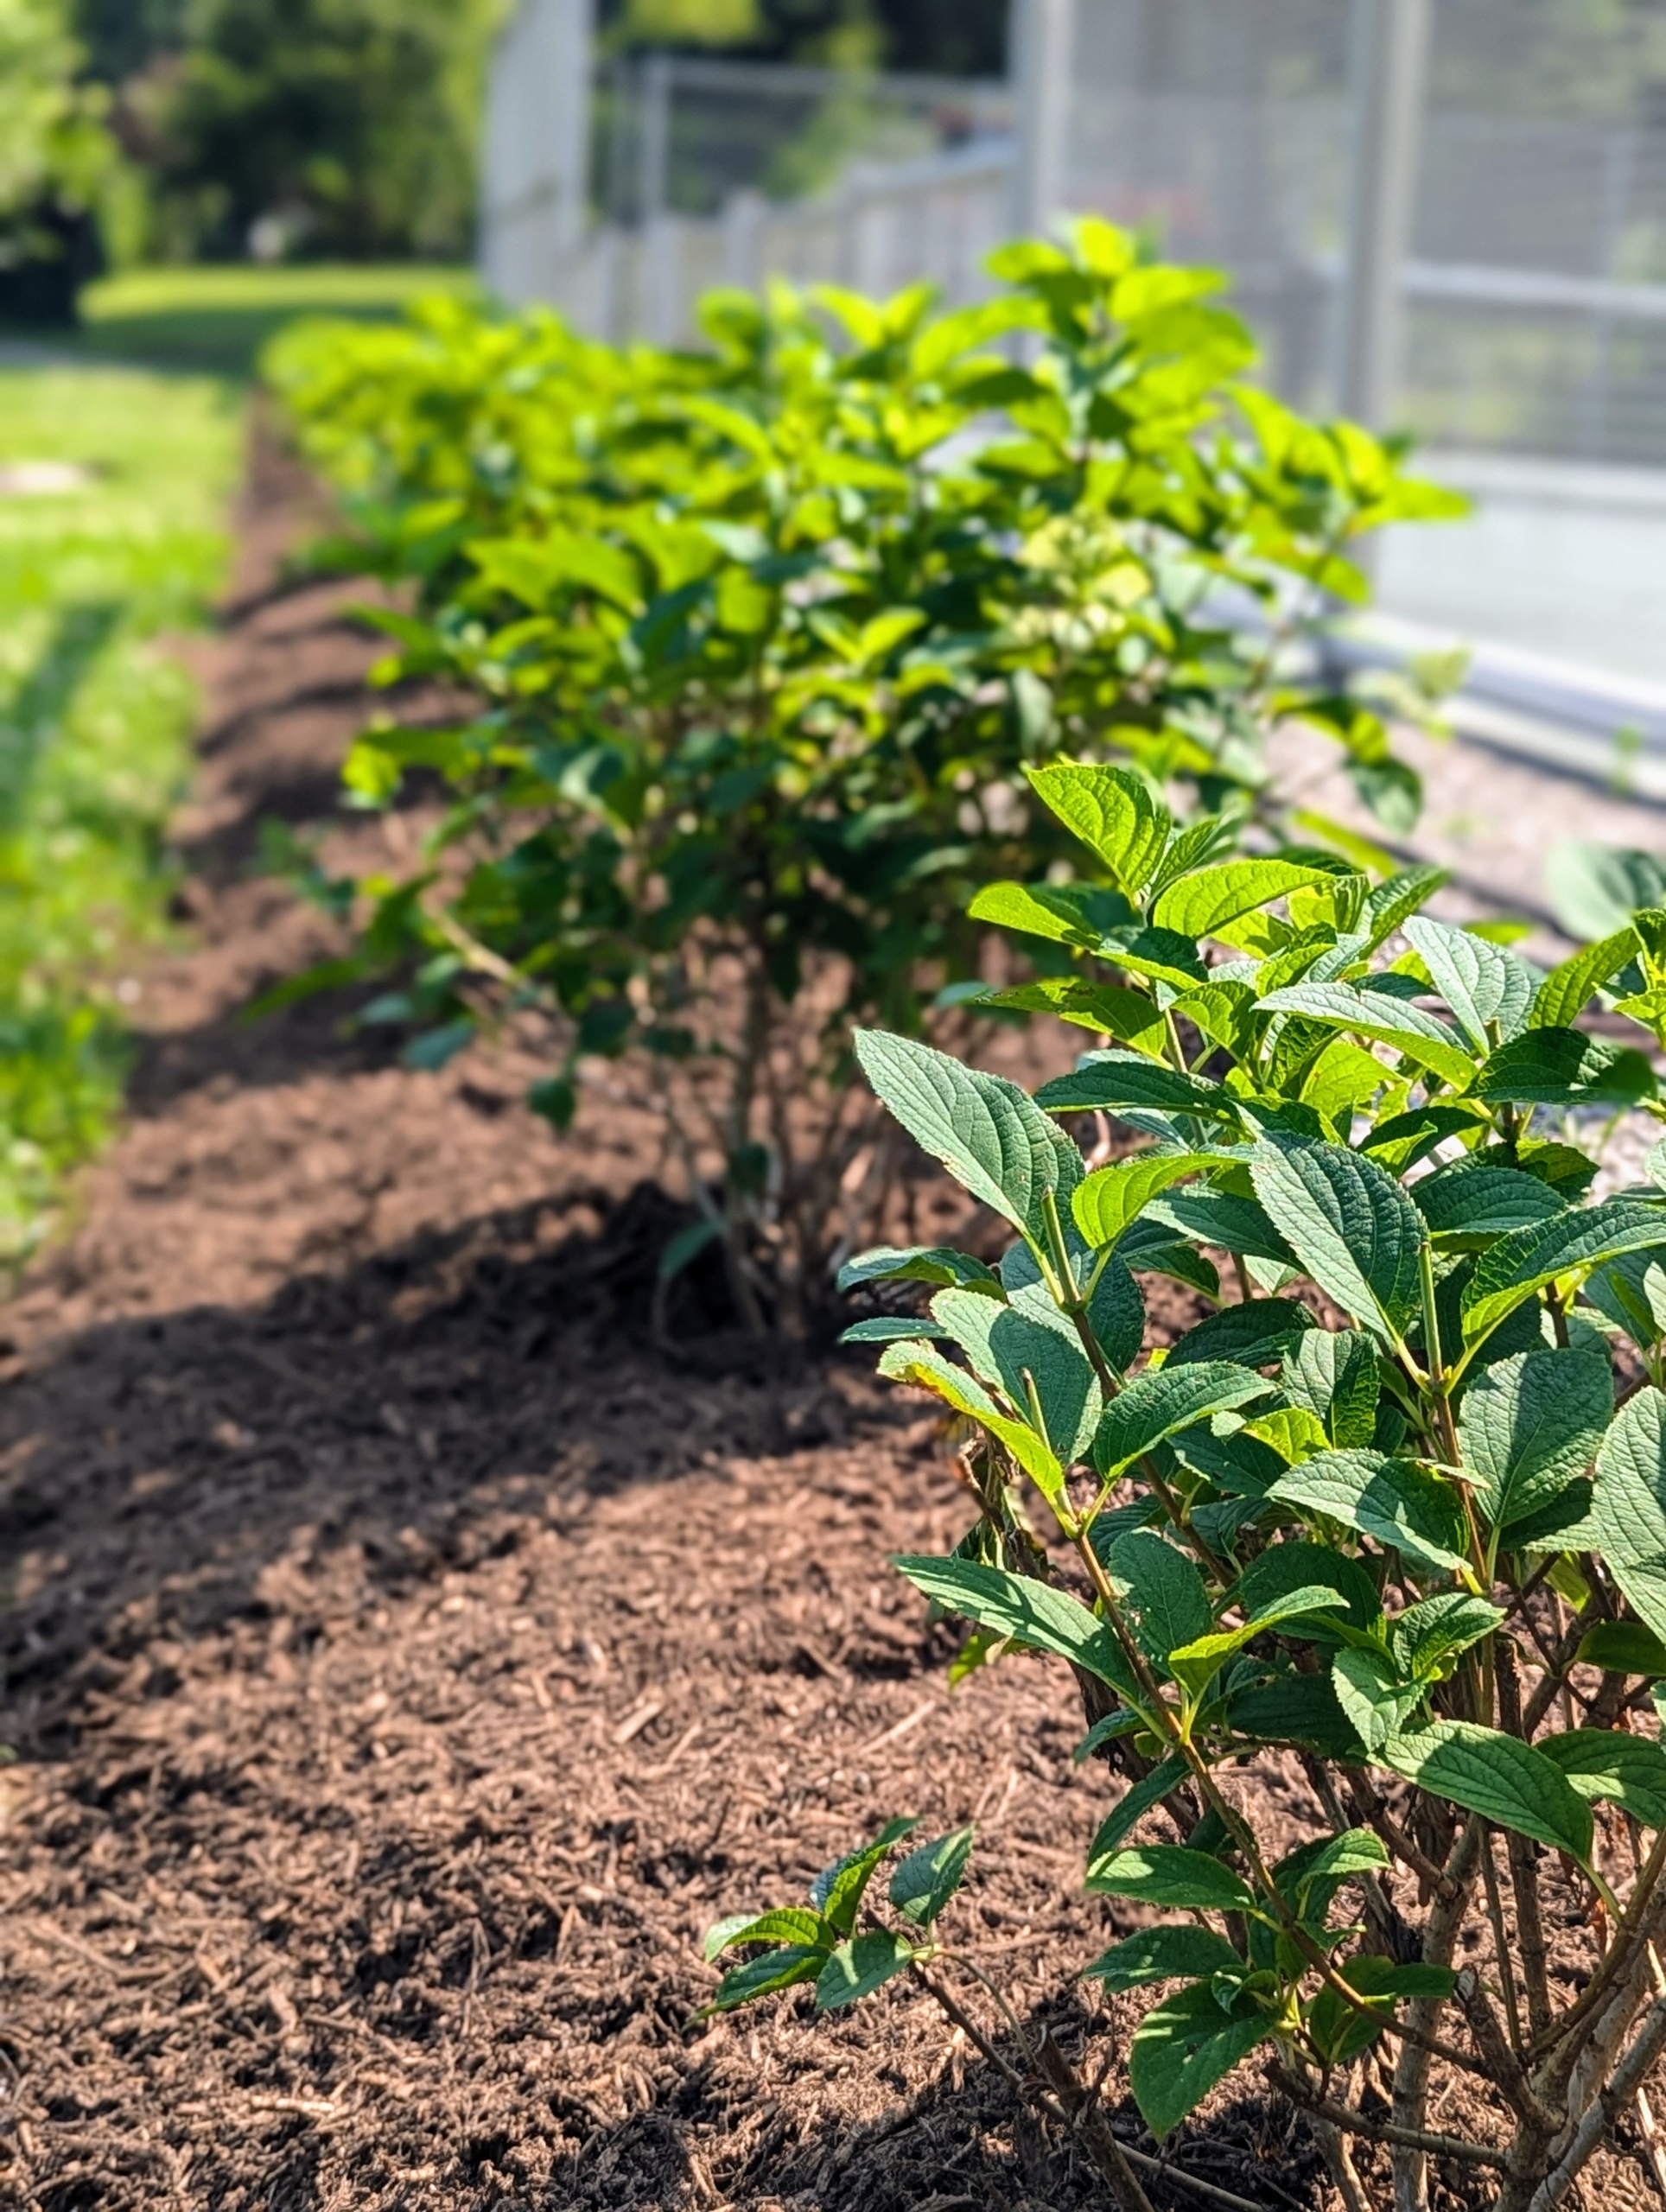
These plants are Little Hottie® Panicle Hydrangeas from First Editions. They’re compact, mid-sized white hydrangeas – perfect for this side of the court.
Along both width sides, I added a selection of First Editions Diamond Rouge hydrangeas, Hydrangea paniculata ‘Rendia’ – small, bushy, deciduous shrub that produces large, rounded flower heads that change color over the season – creamy white in summer, changing to pink, and then wine red in fall.
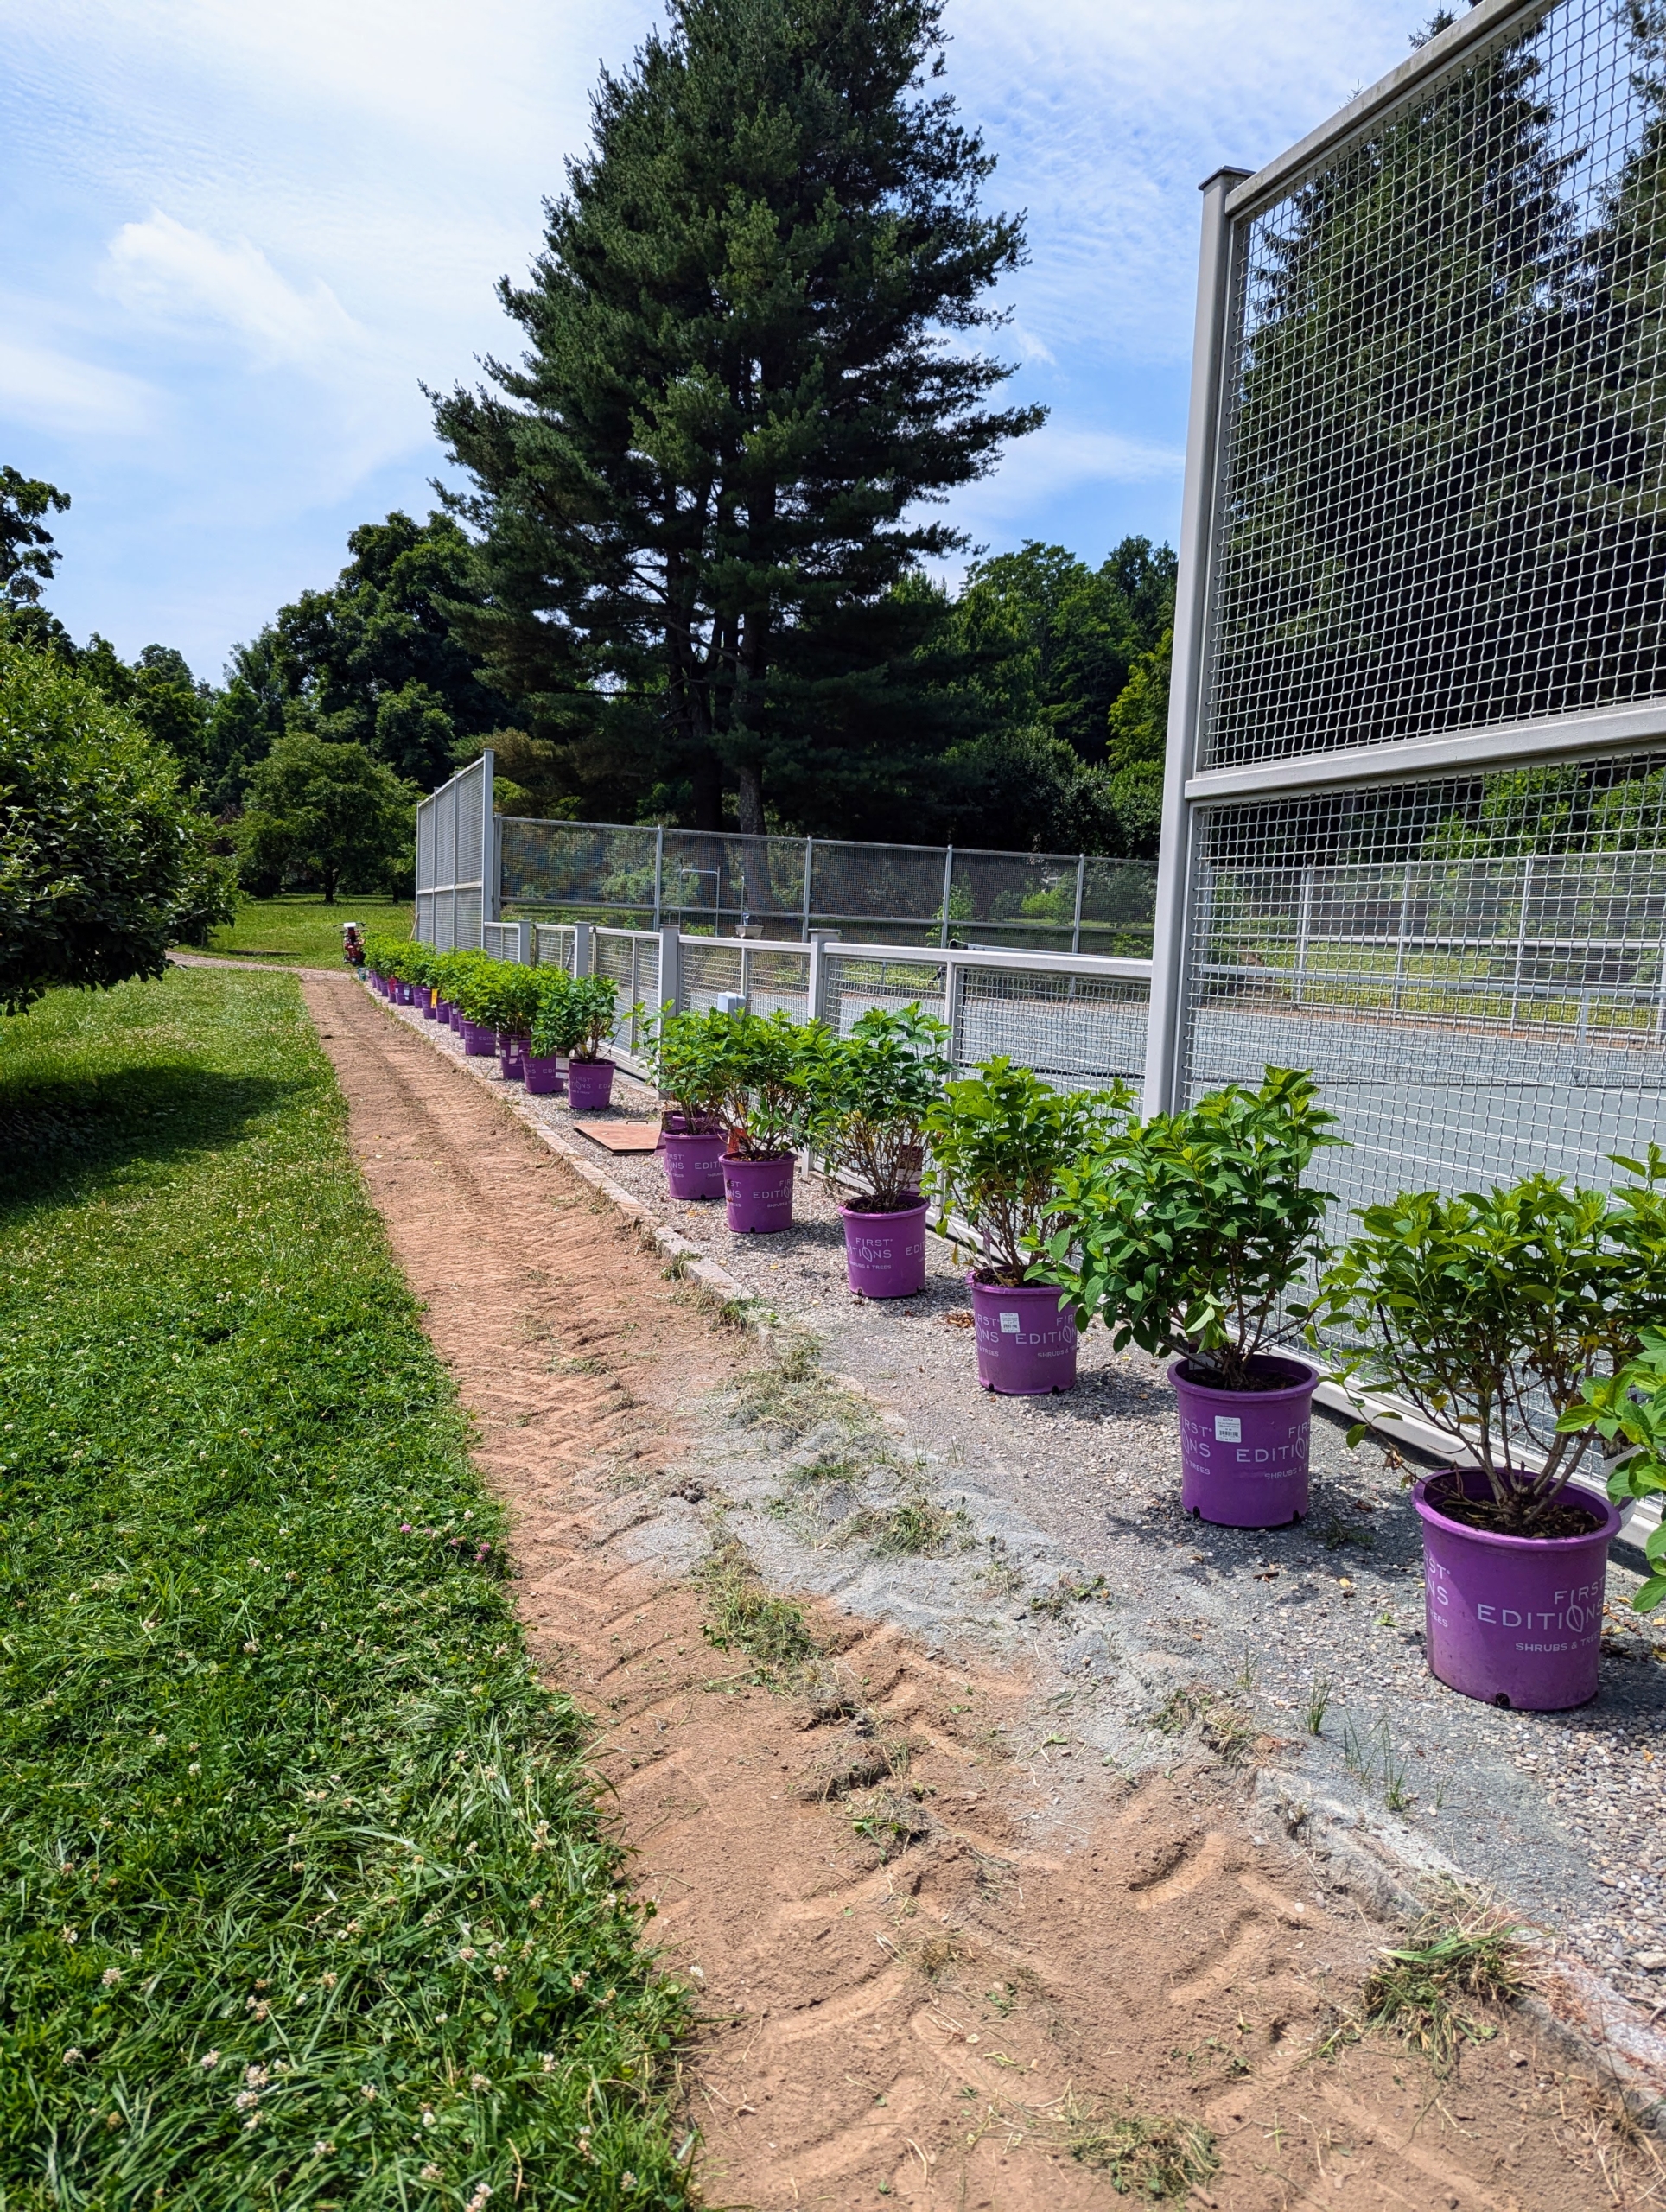
Plants were positioned about two-and-a-half feet apart – I had just enough to fill all three sides.
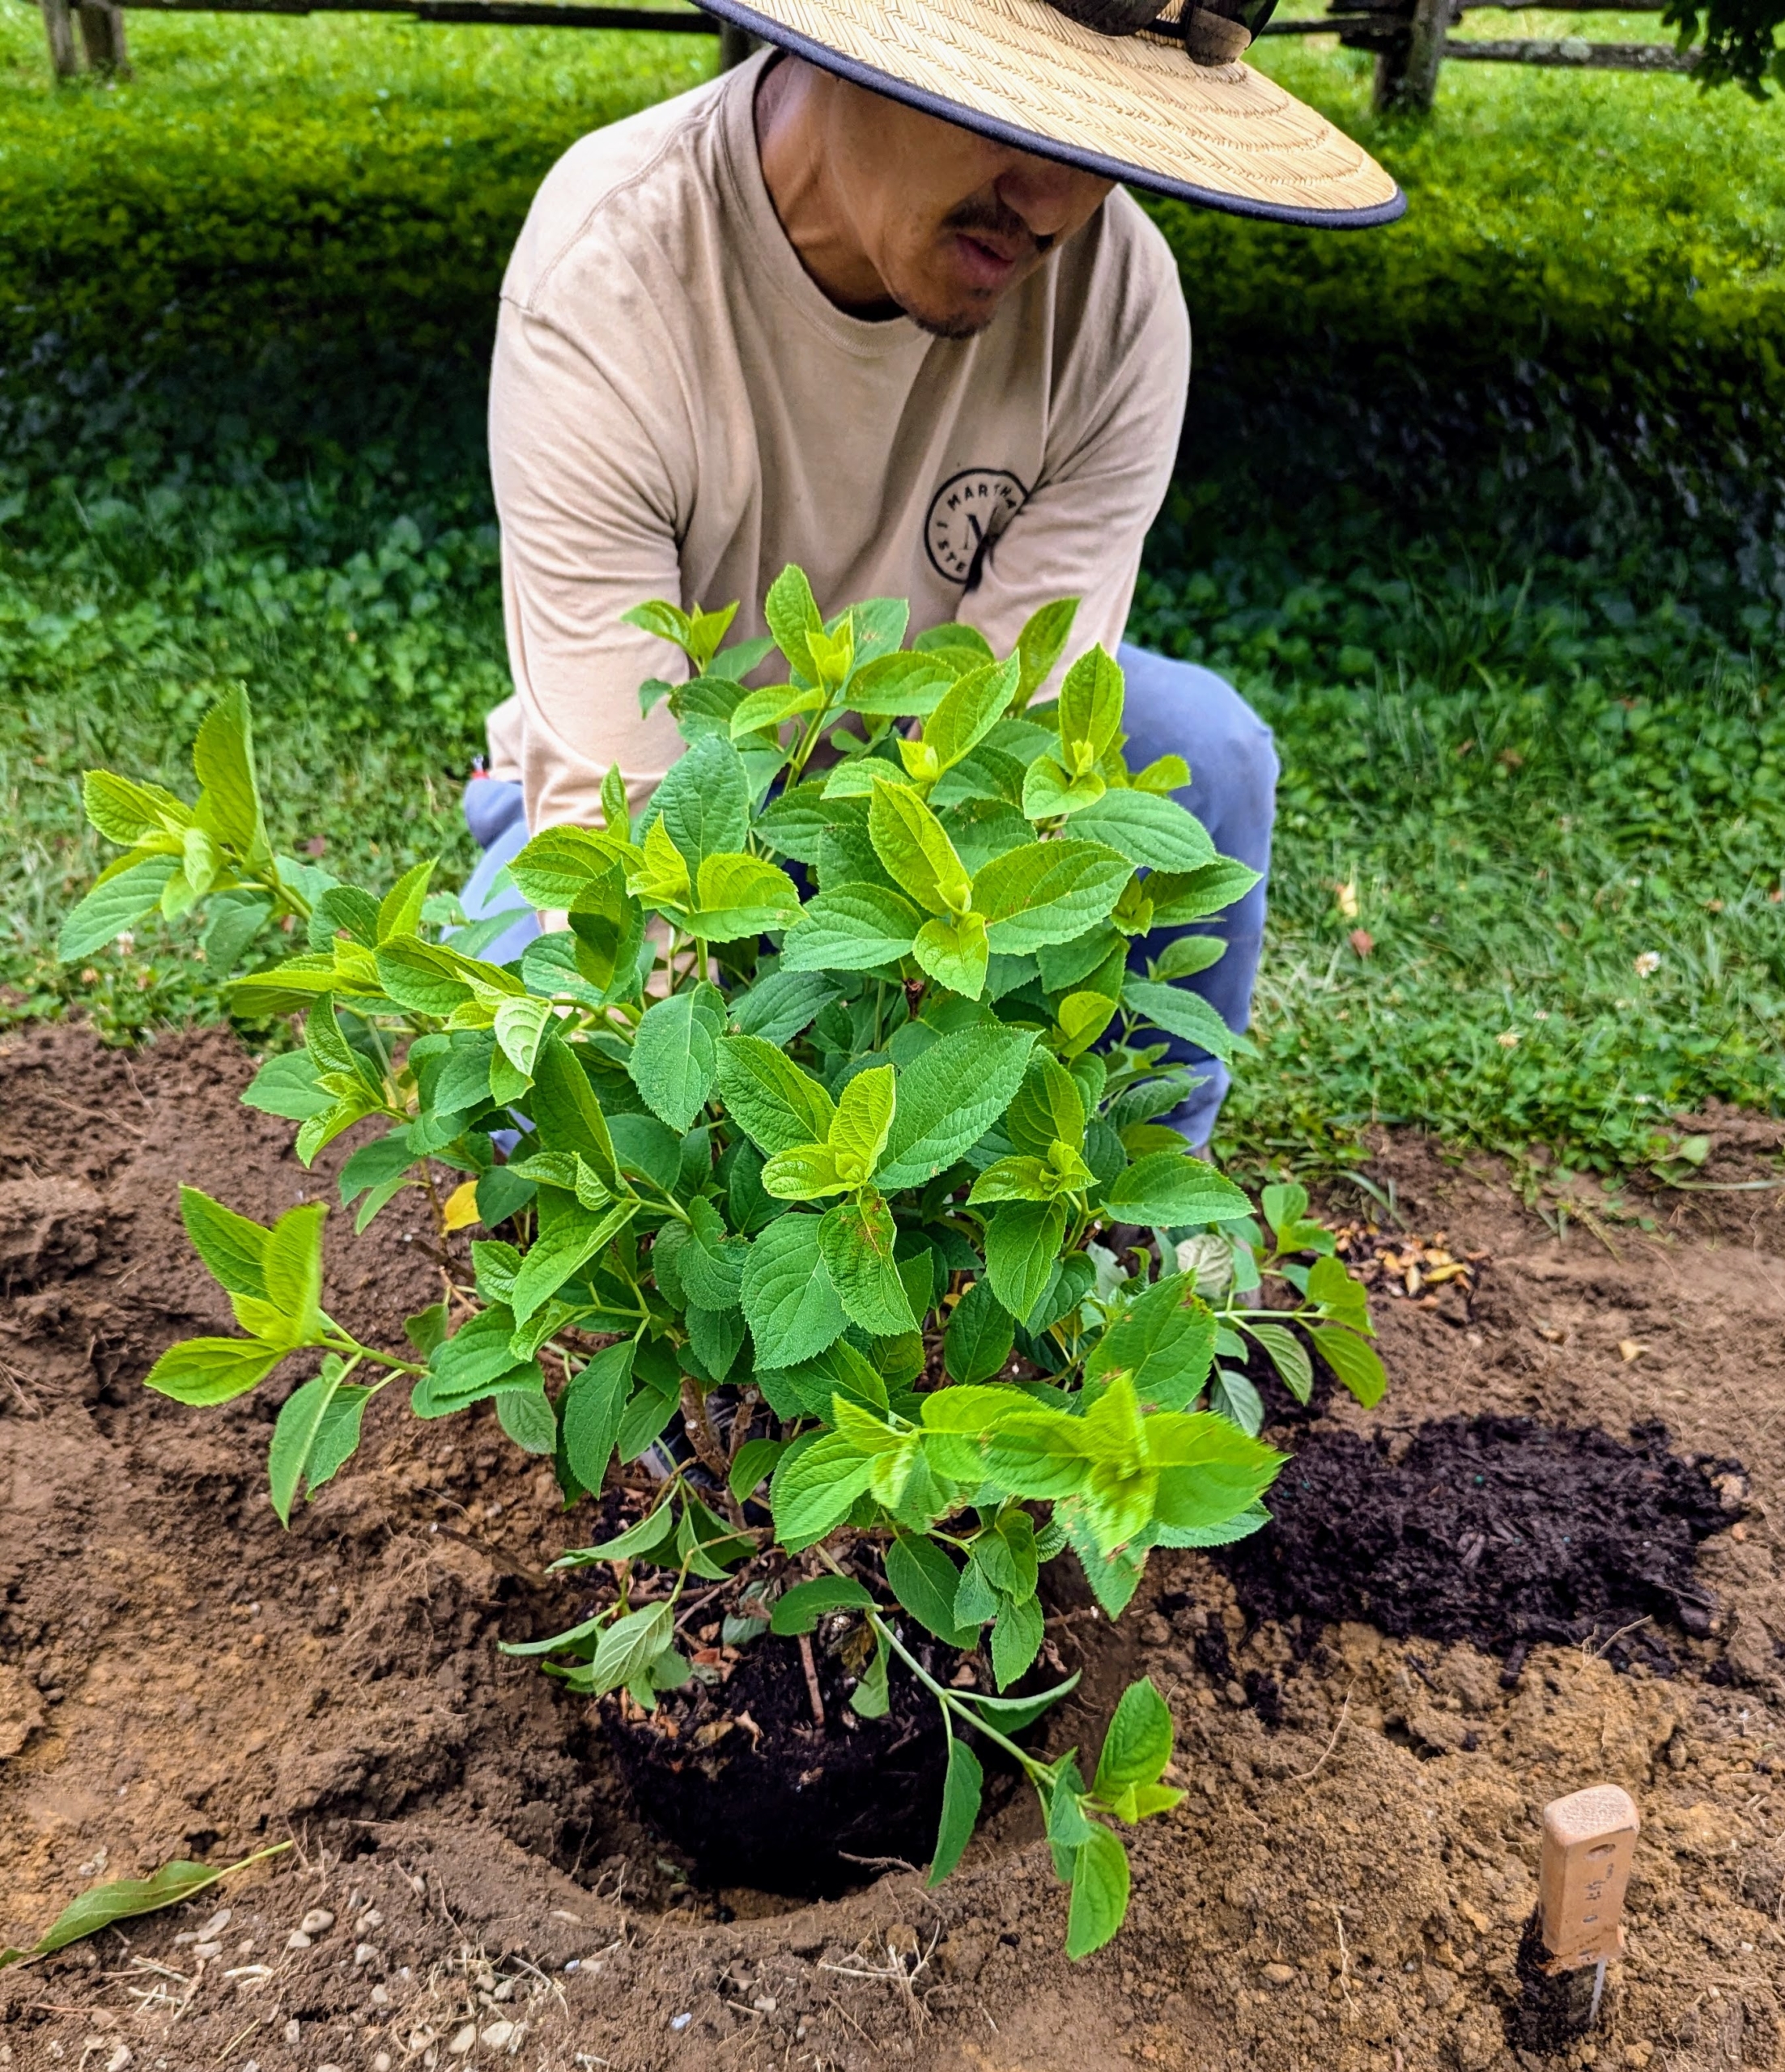
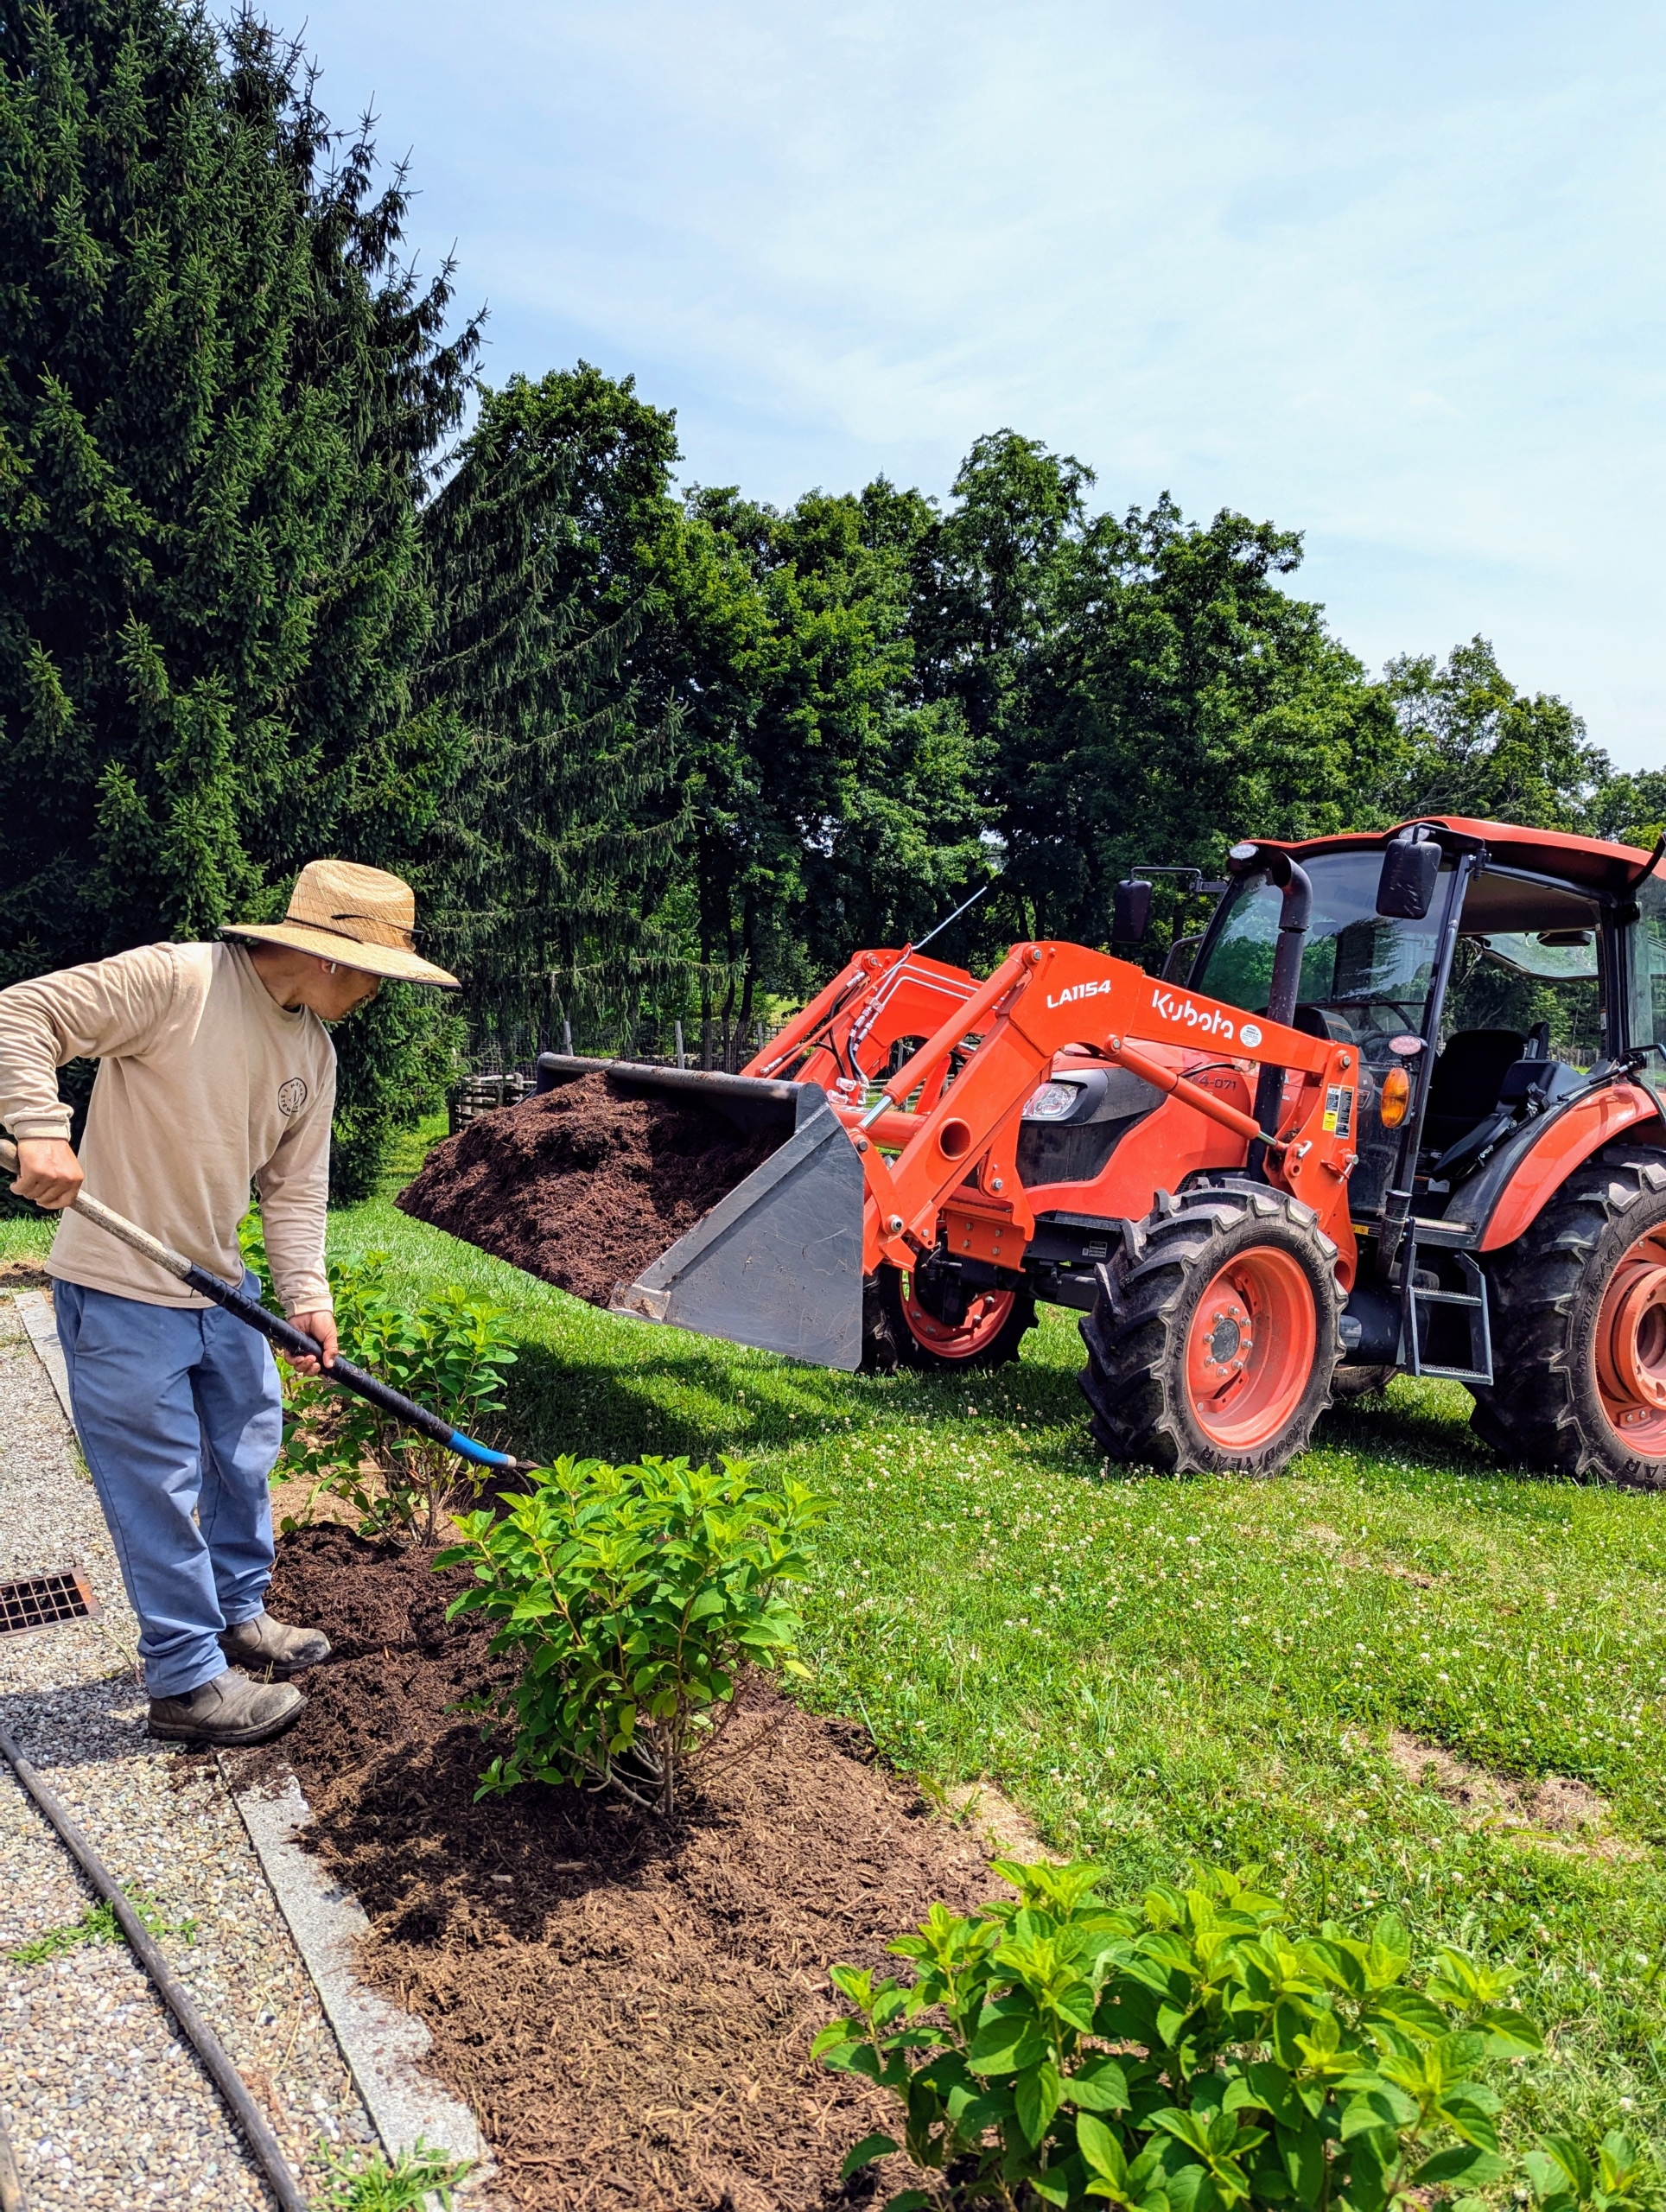
Chhiring planted the hydrangeas similar to the way they were planted in the pots. Hydrangeas have shallow root systems that spread out broadly near the surface of the soil. Planting them too deep can bury the stems, which can promote root rot.
All three sides were then dressed with mulch made right here at the farm. It was delivered from my compost yard on my trusted Kubota M4-071 tractor bucket and then spread in an even two to three inch layer.
I was confident they would all flourish around my tennis court where they would get at least three to four hours of direct sunlight.
The plants were in such good condition. I was excited to see them all flower profusely the following year.
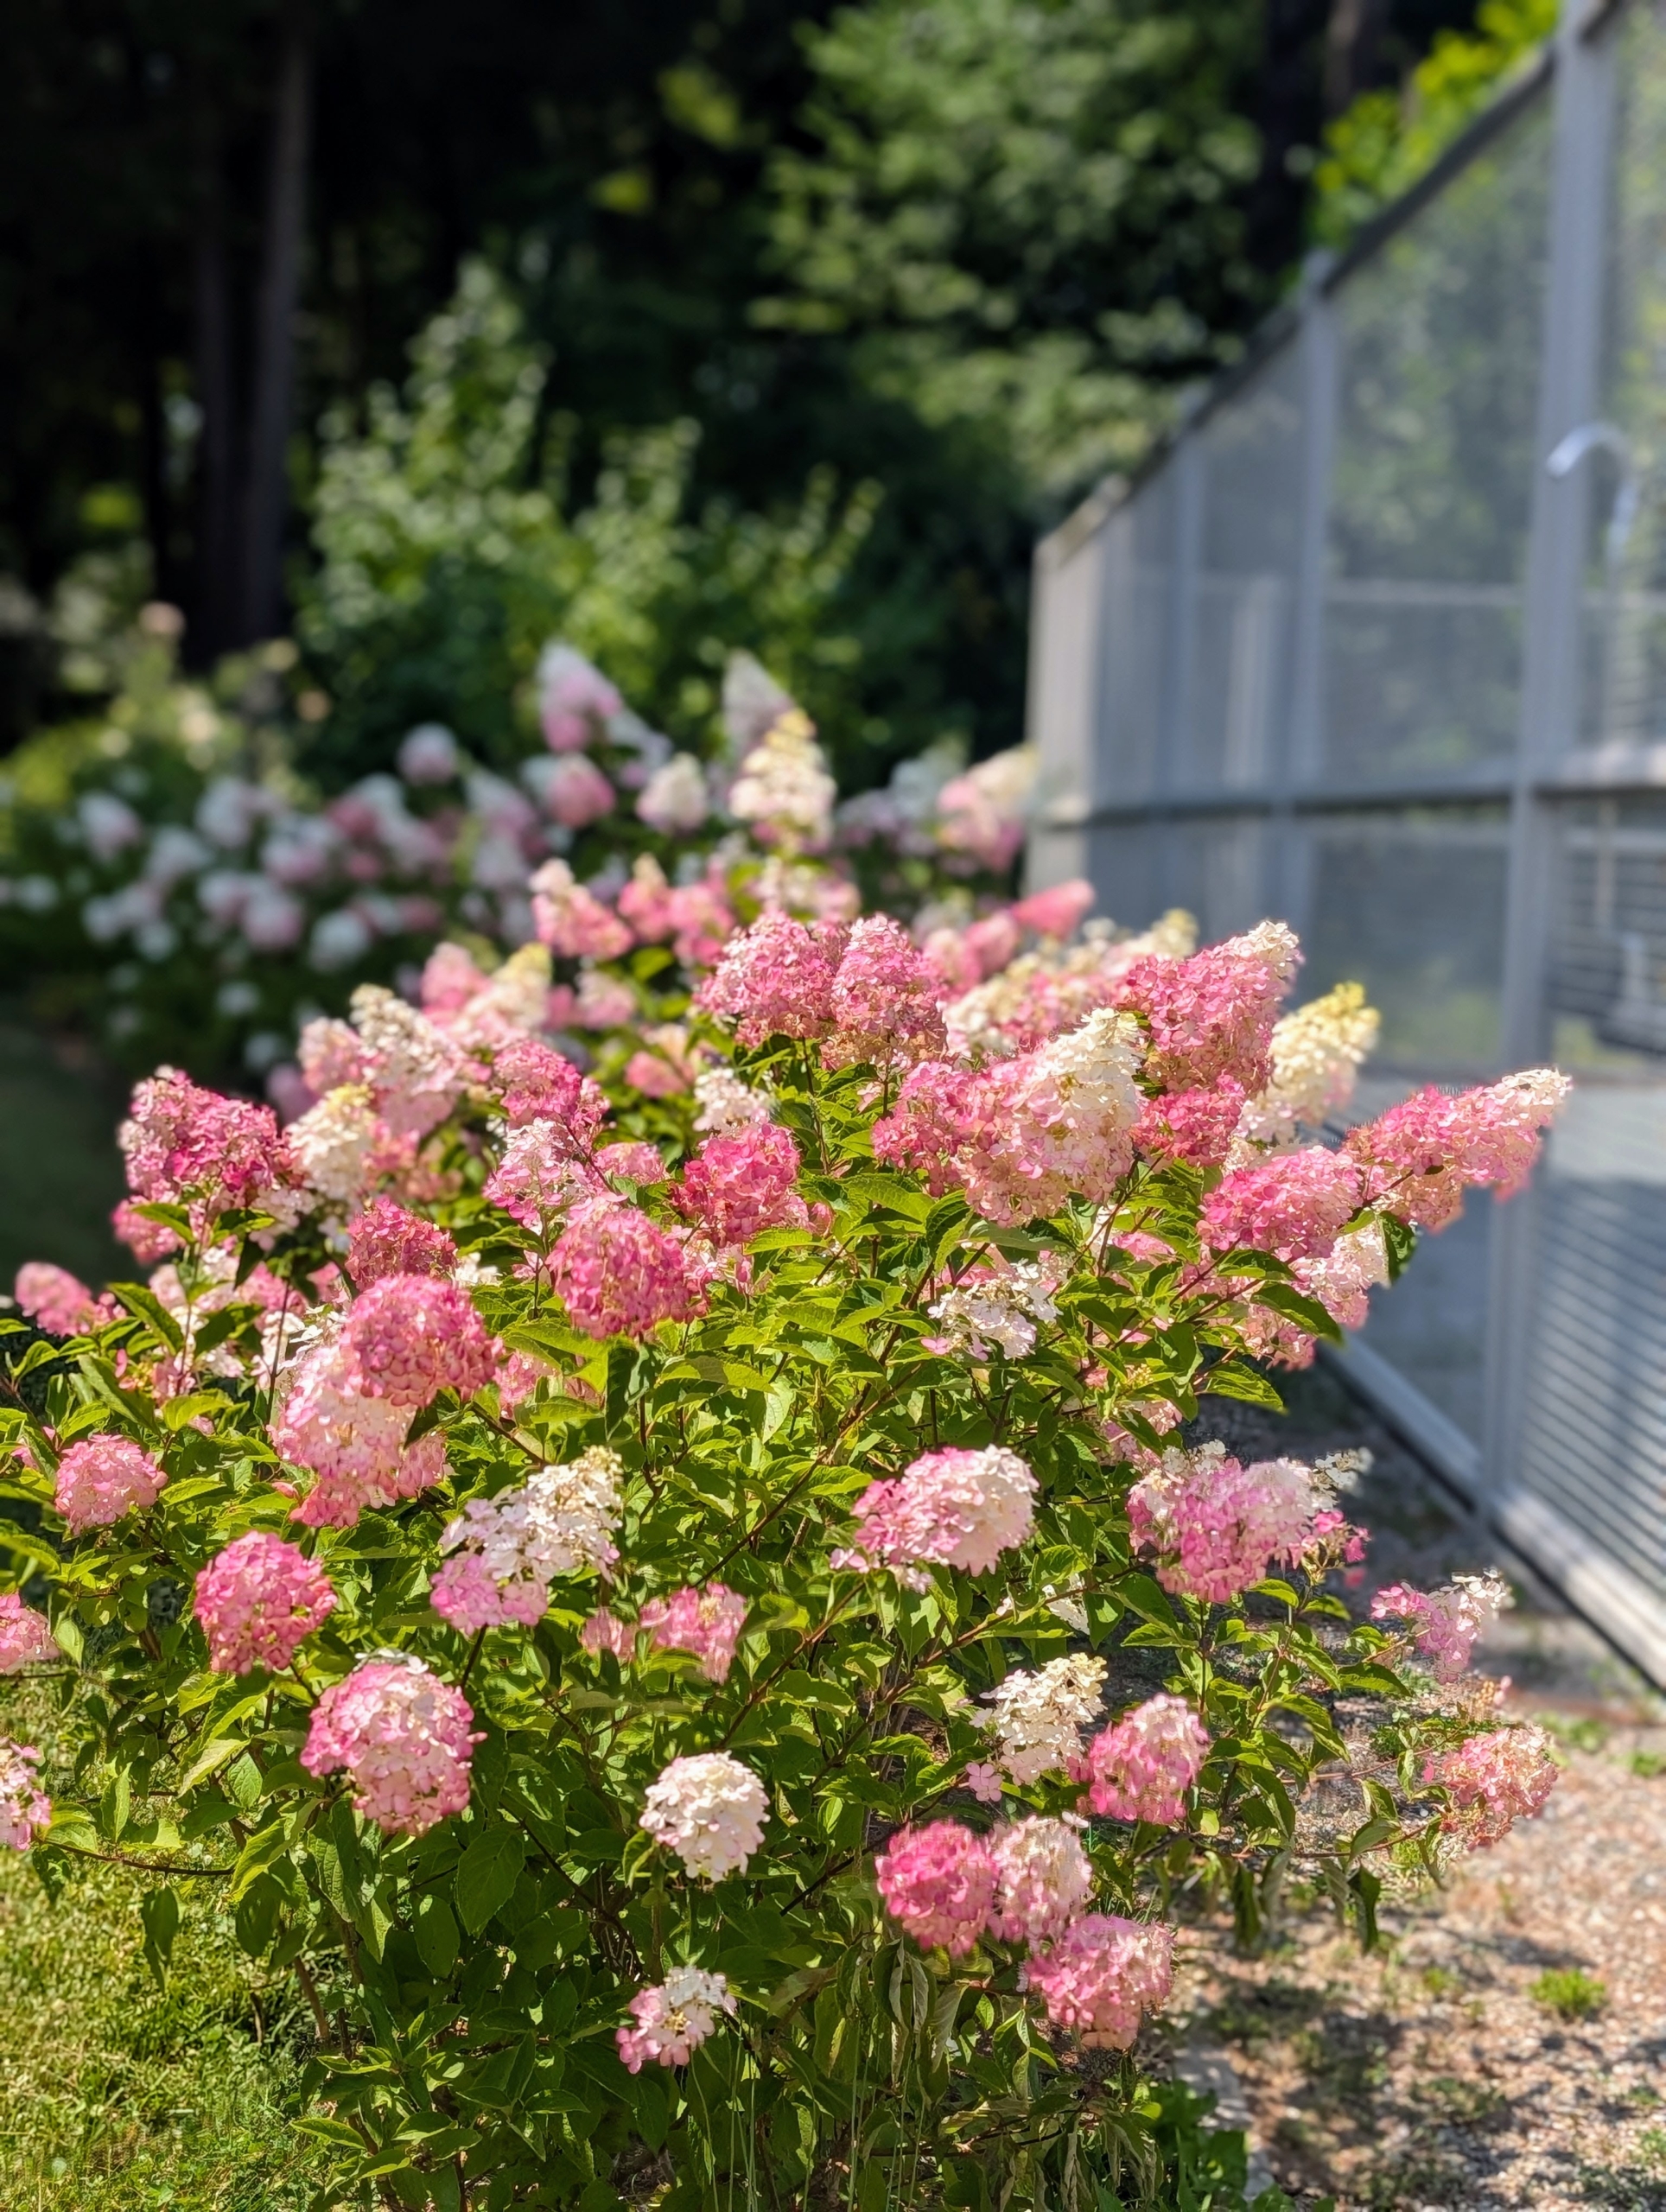
And look at them now – just dripping with gorgeous blooms.
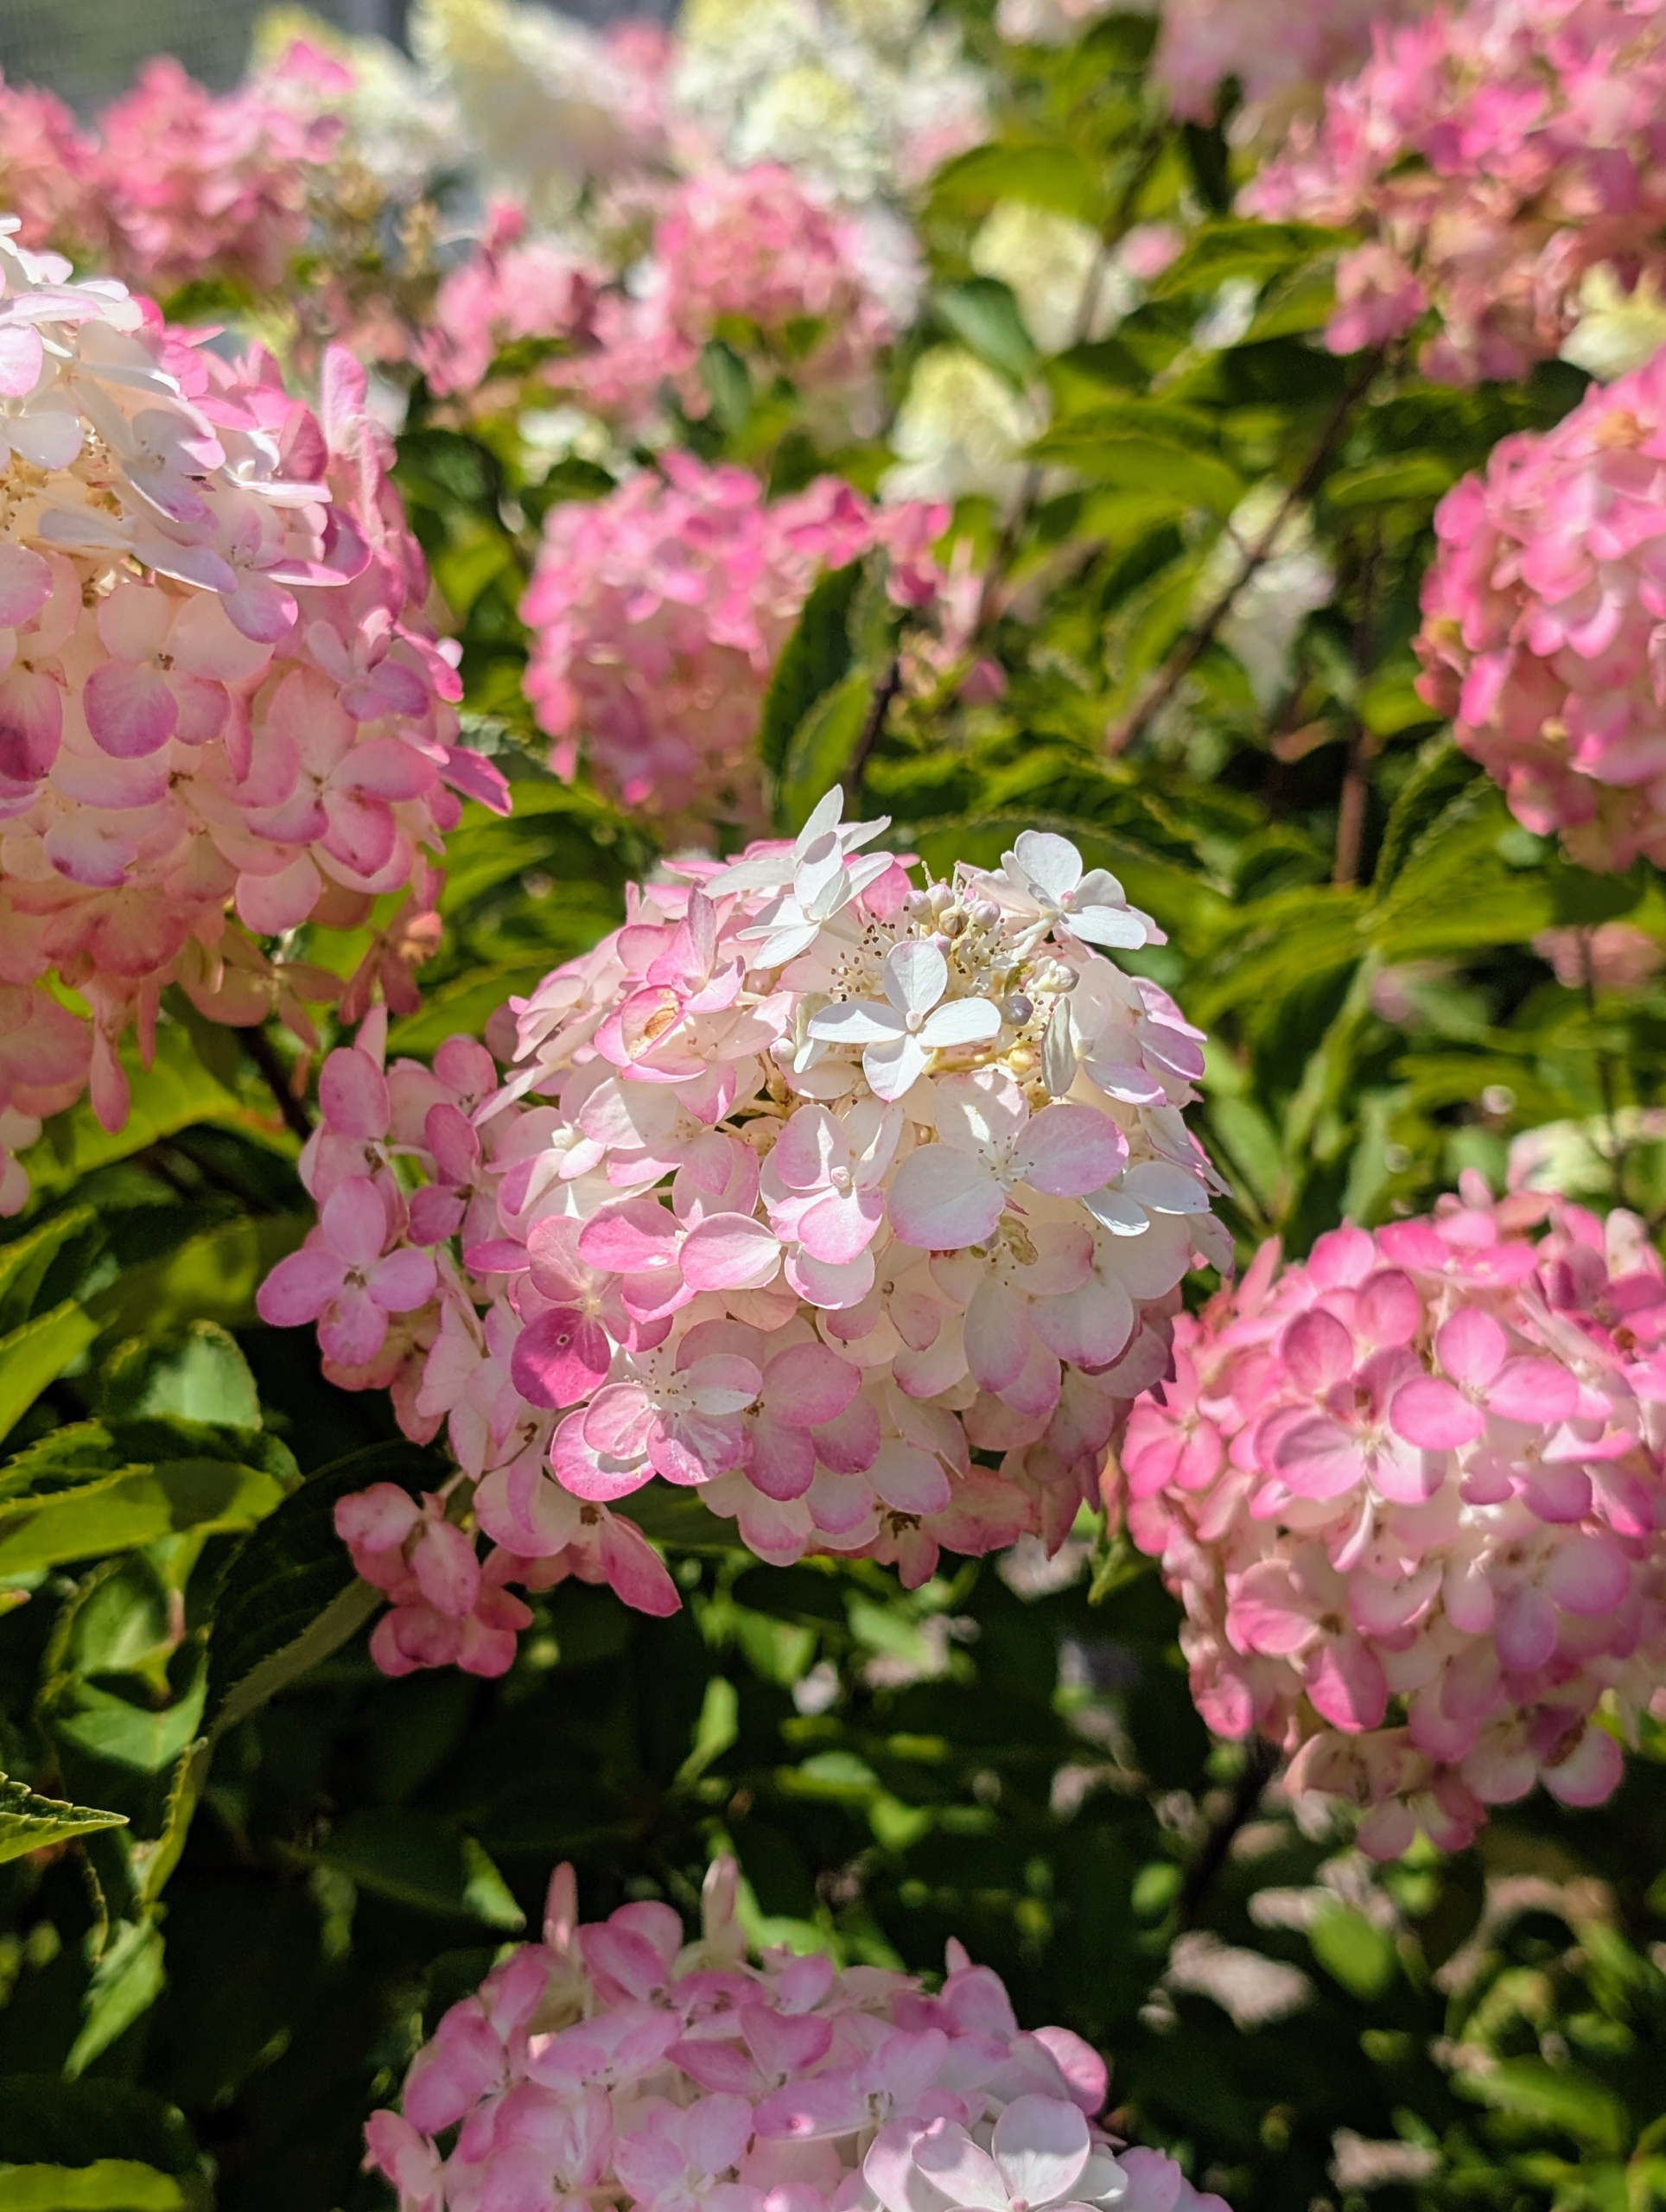
Diamond Rouge® Panicle Hydrangeas have abundant, long lasting, rounded flower heads that start white and progress to pink, intense raspberry red, and finally wine red.
The flowers start blooming in July and take on pinkish coloration earlier in the season compared to other pink panicle hydrangeas.
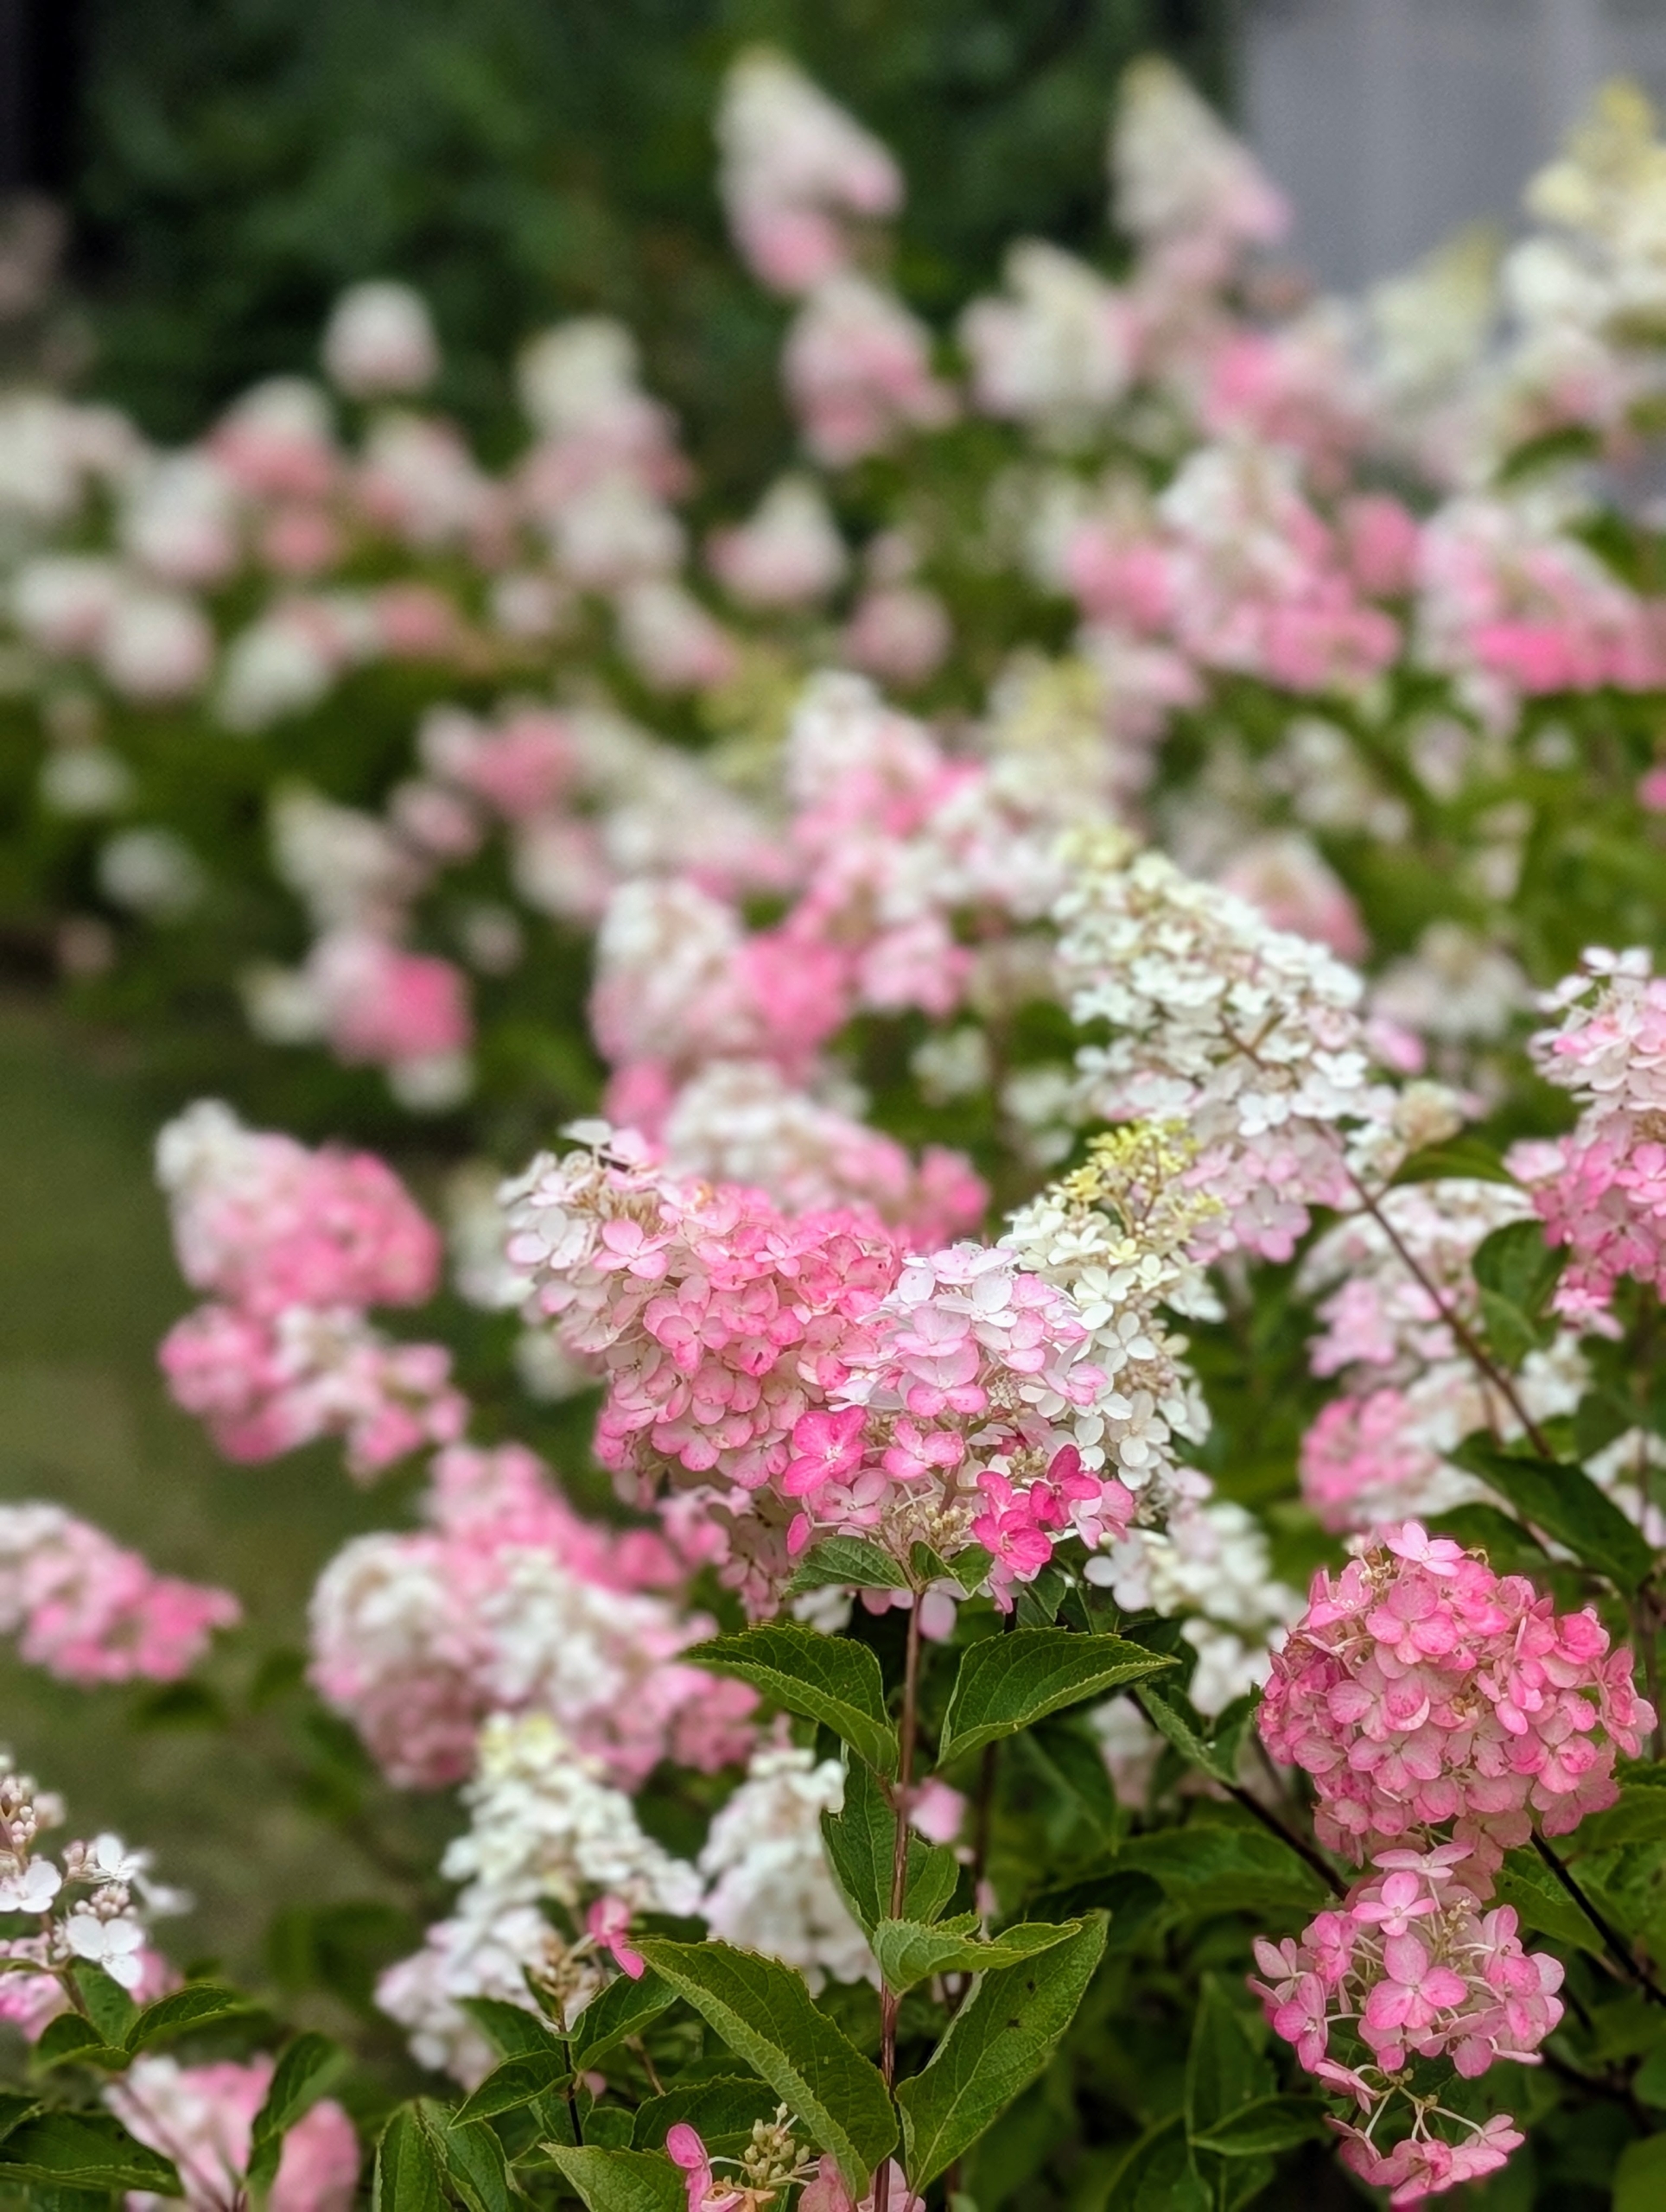
Hydrangeas have four petals in their florets. The petals can be found in a multitude of colors including blue, pink, purple, and white, depending on the species and soil pH. I have other colored hydrangeas elsewhere around my farm and they’re all blooming so plentifully this year.
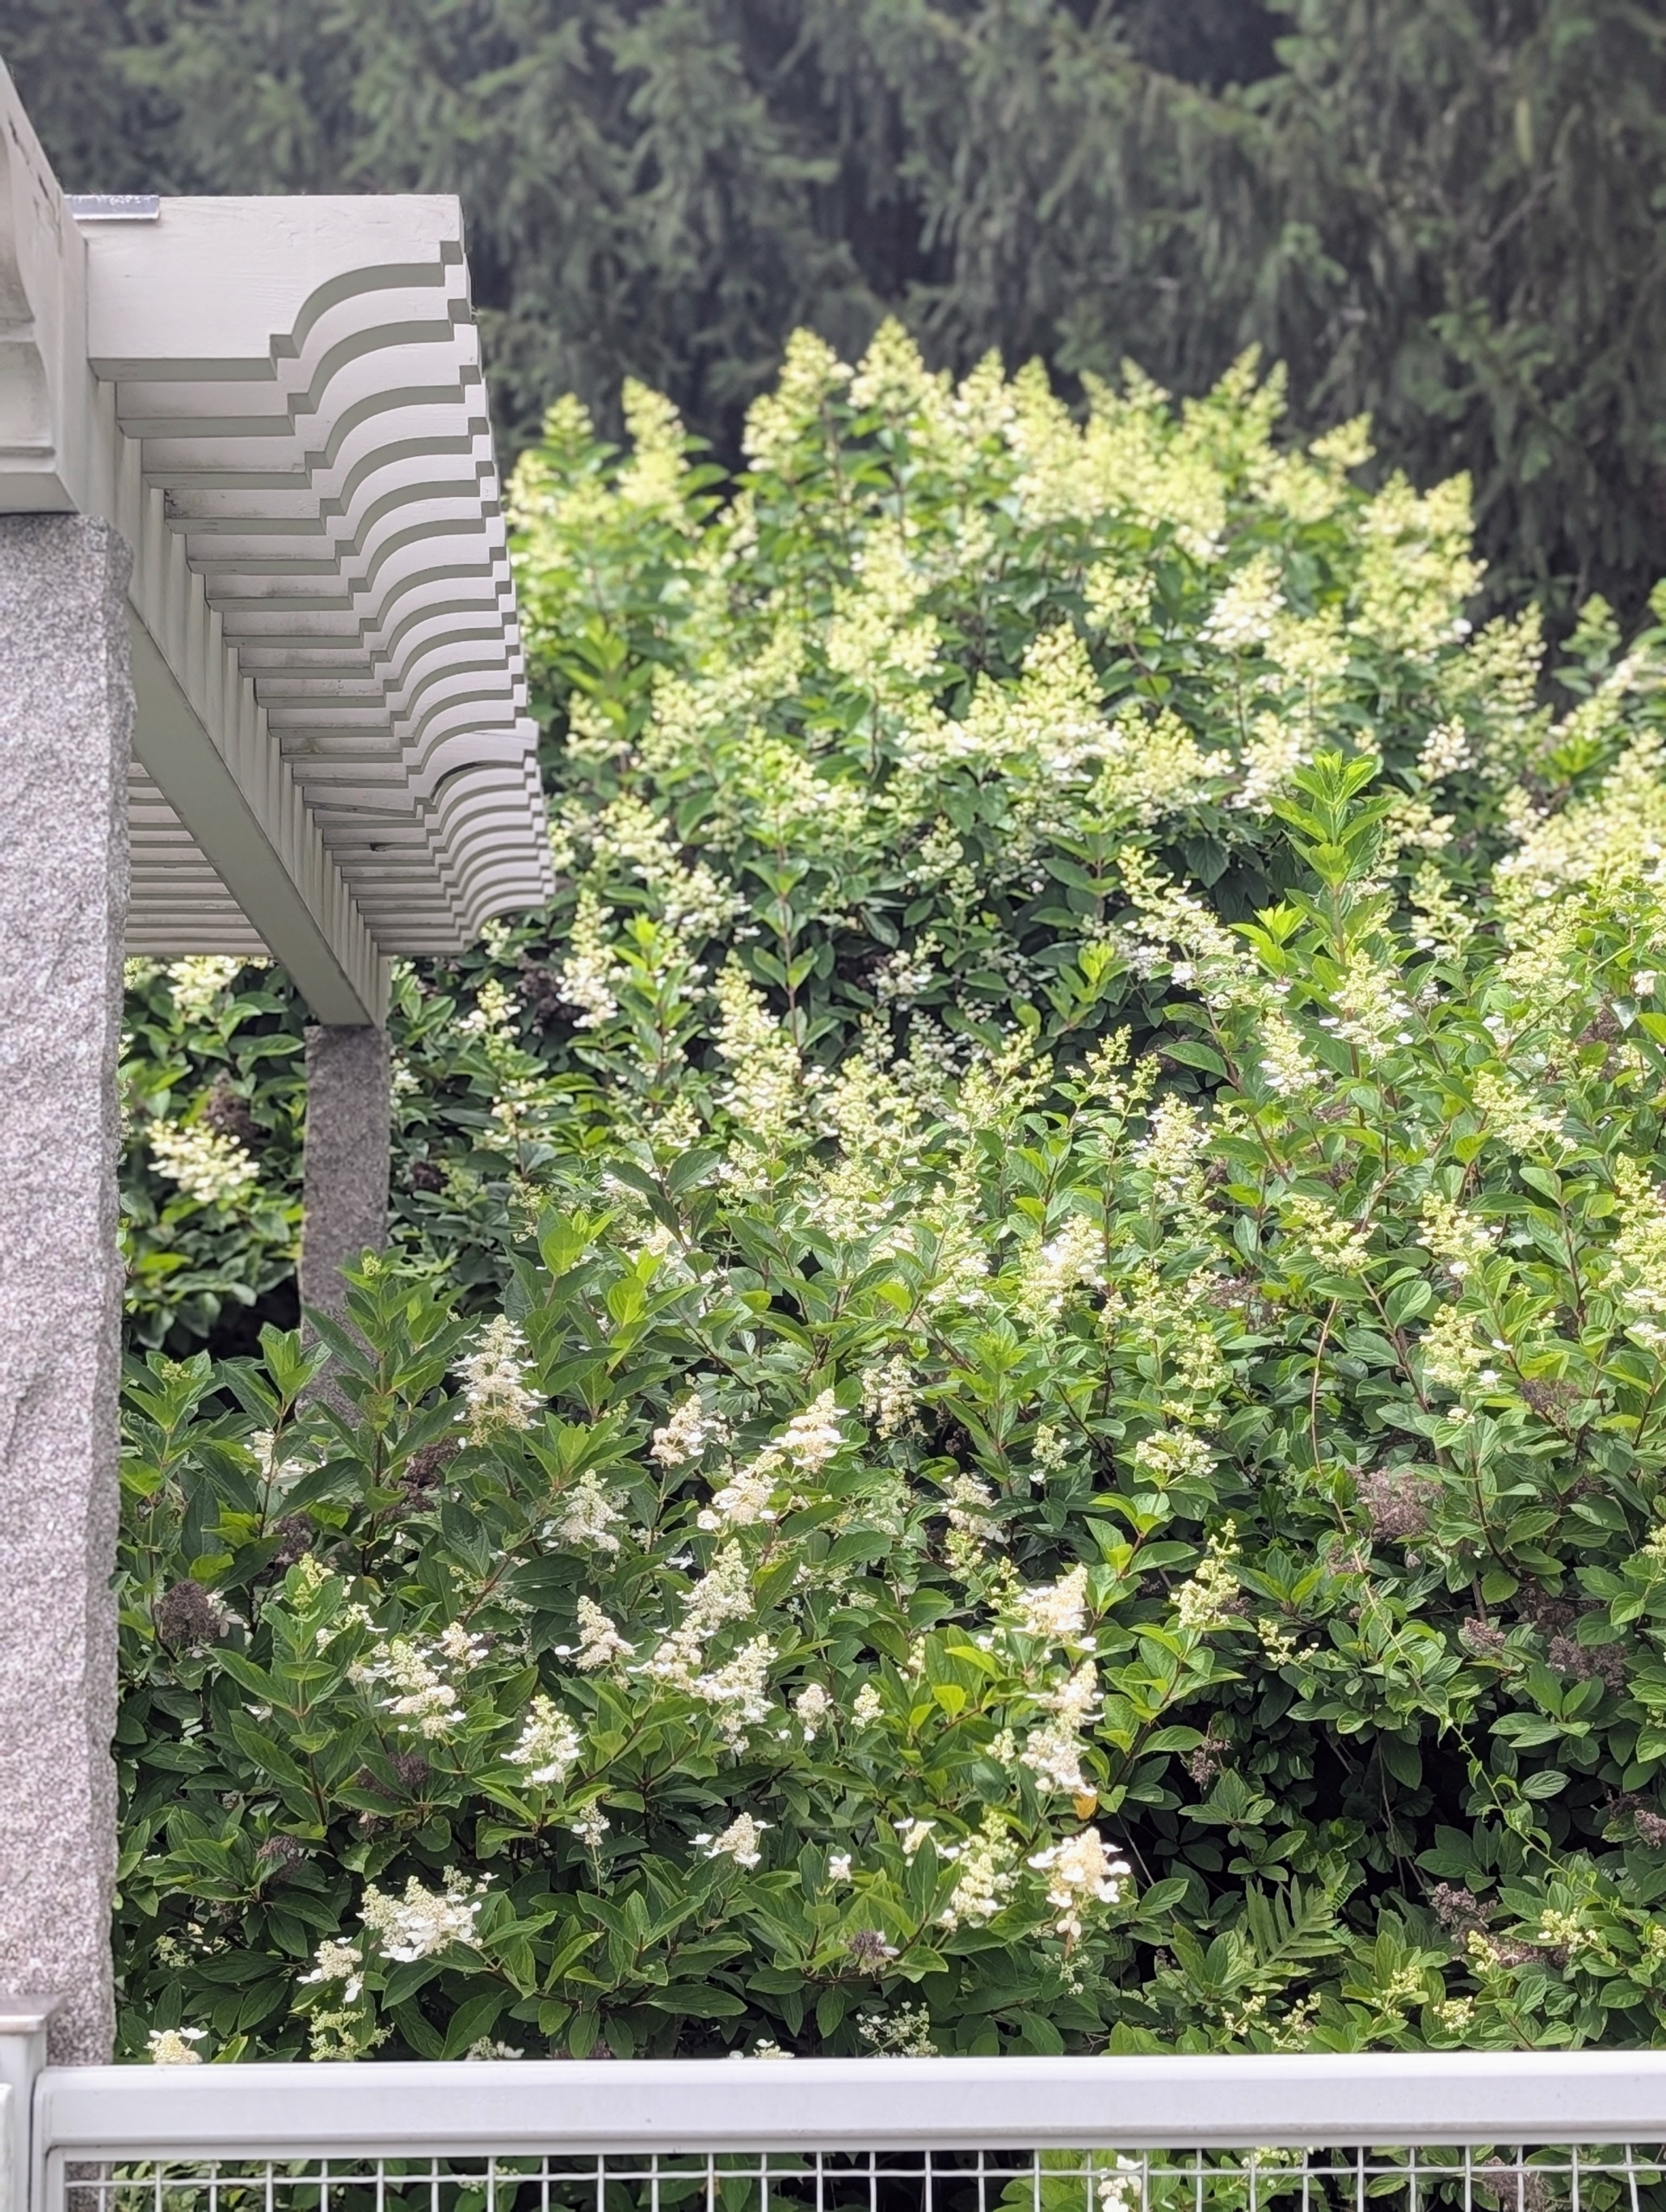
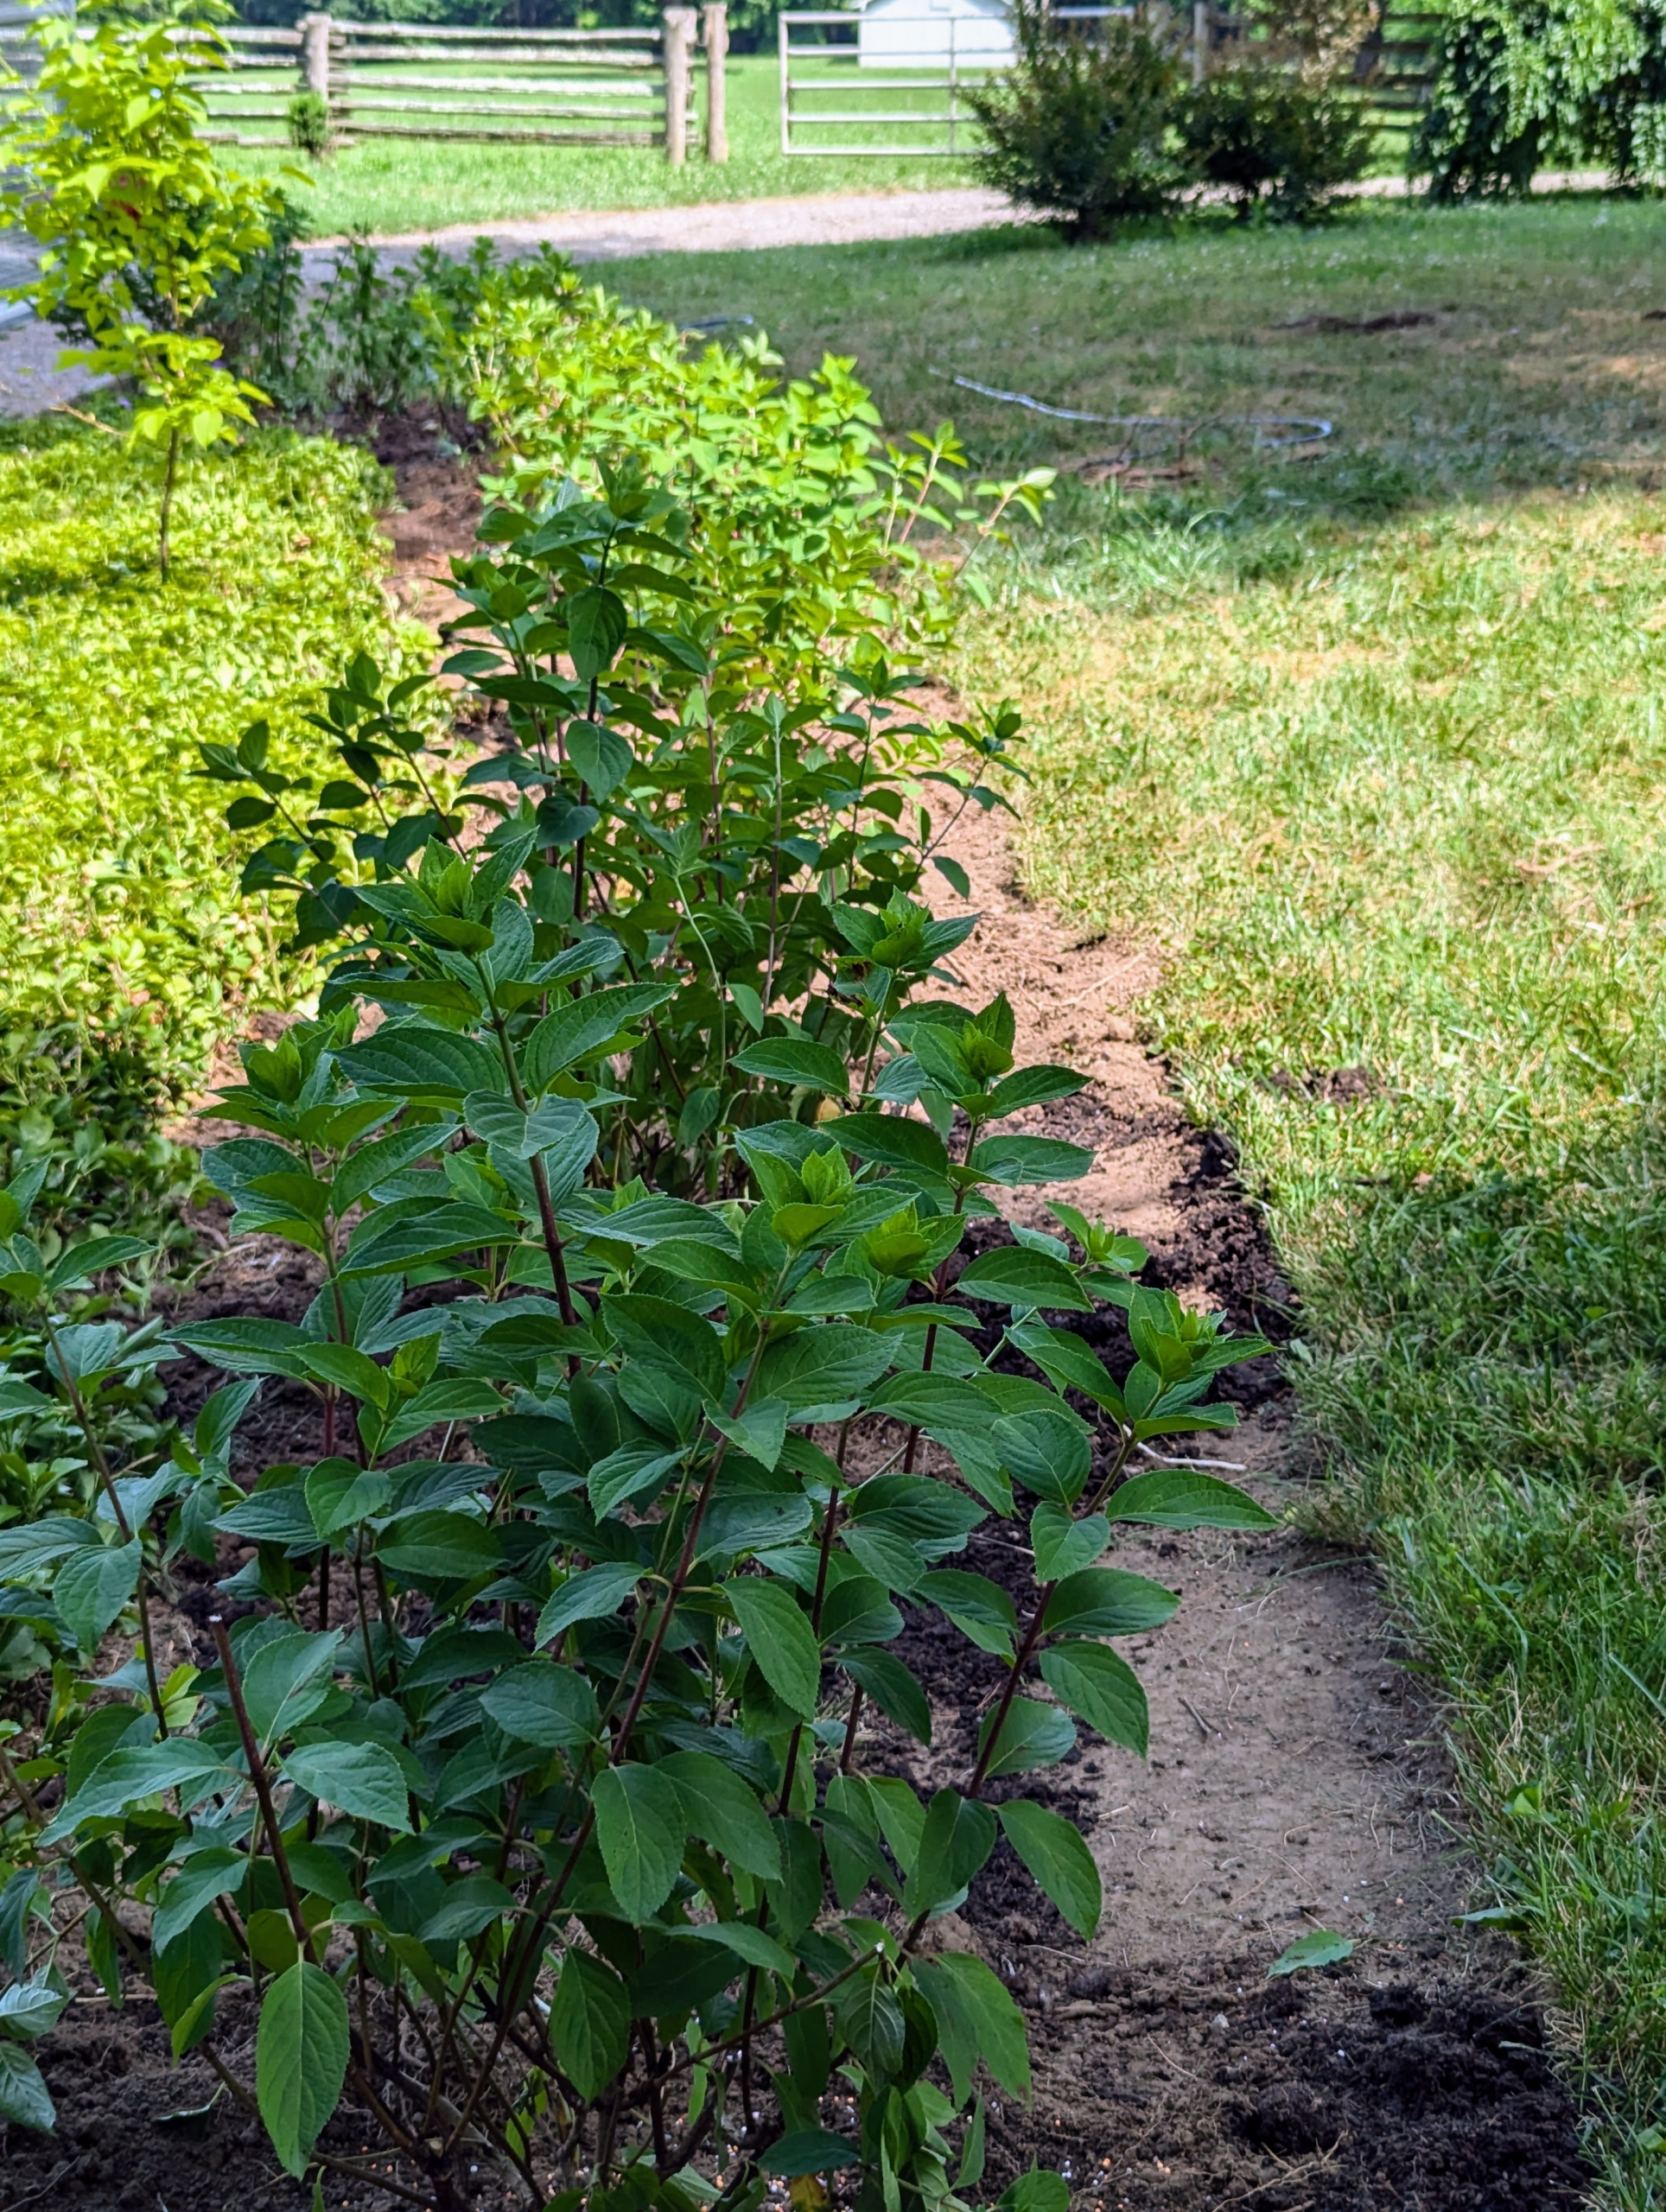
This view shows the front side of hydrangeas and the more mature ones I planted years ago in the back.
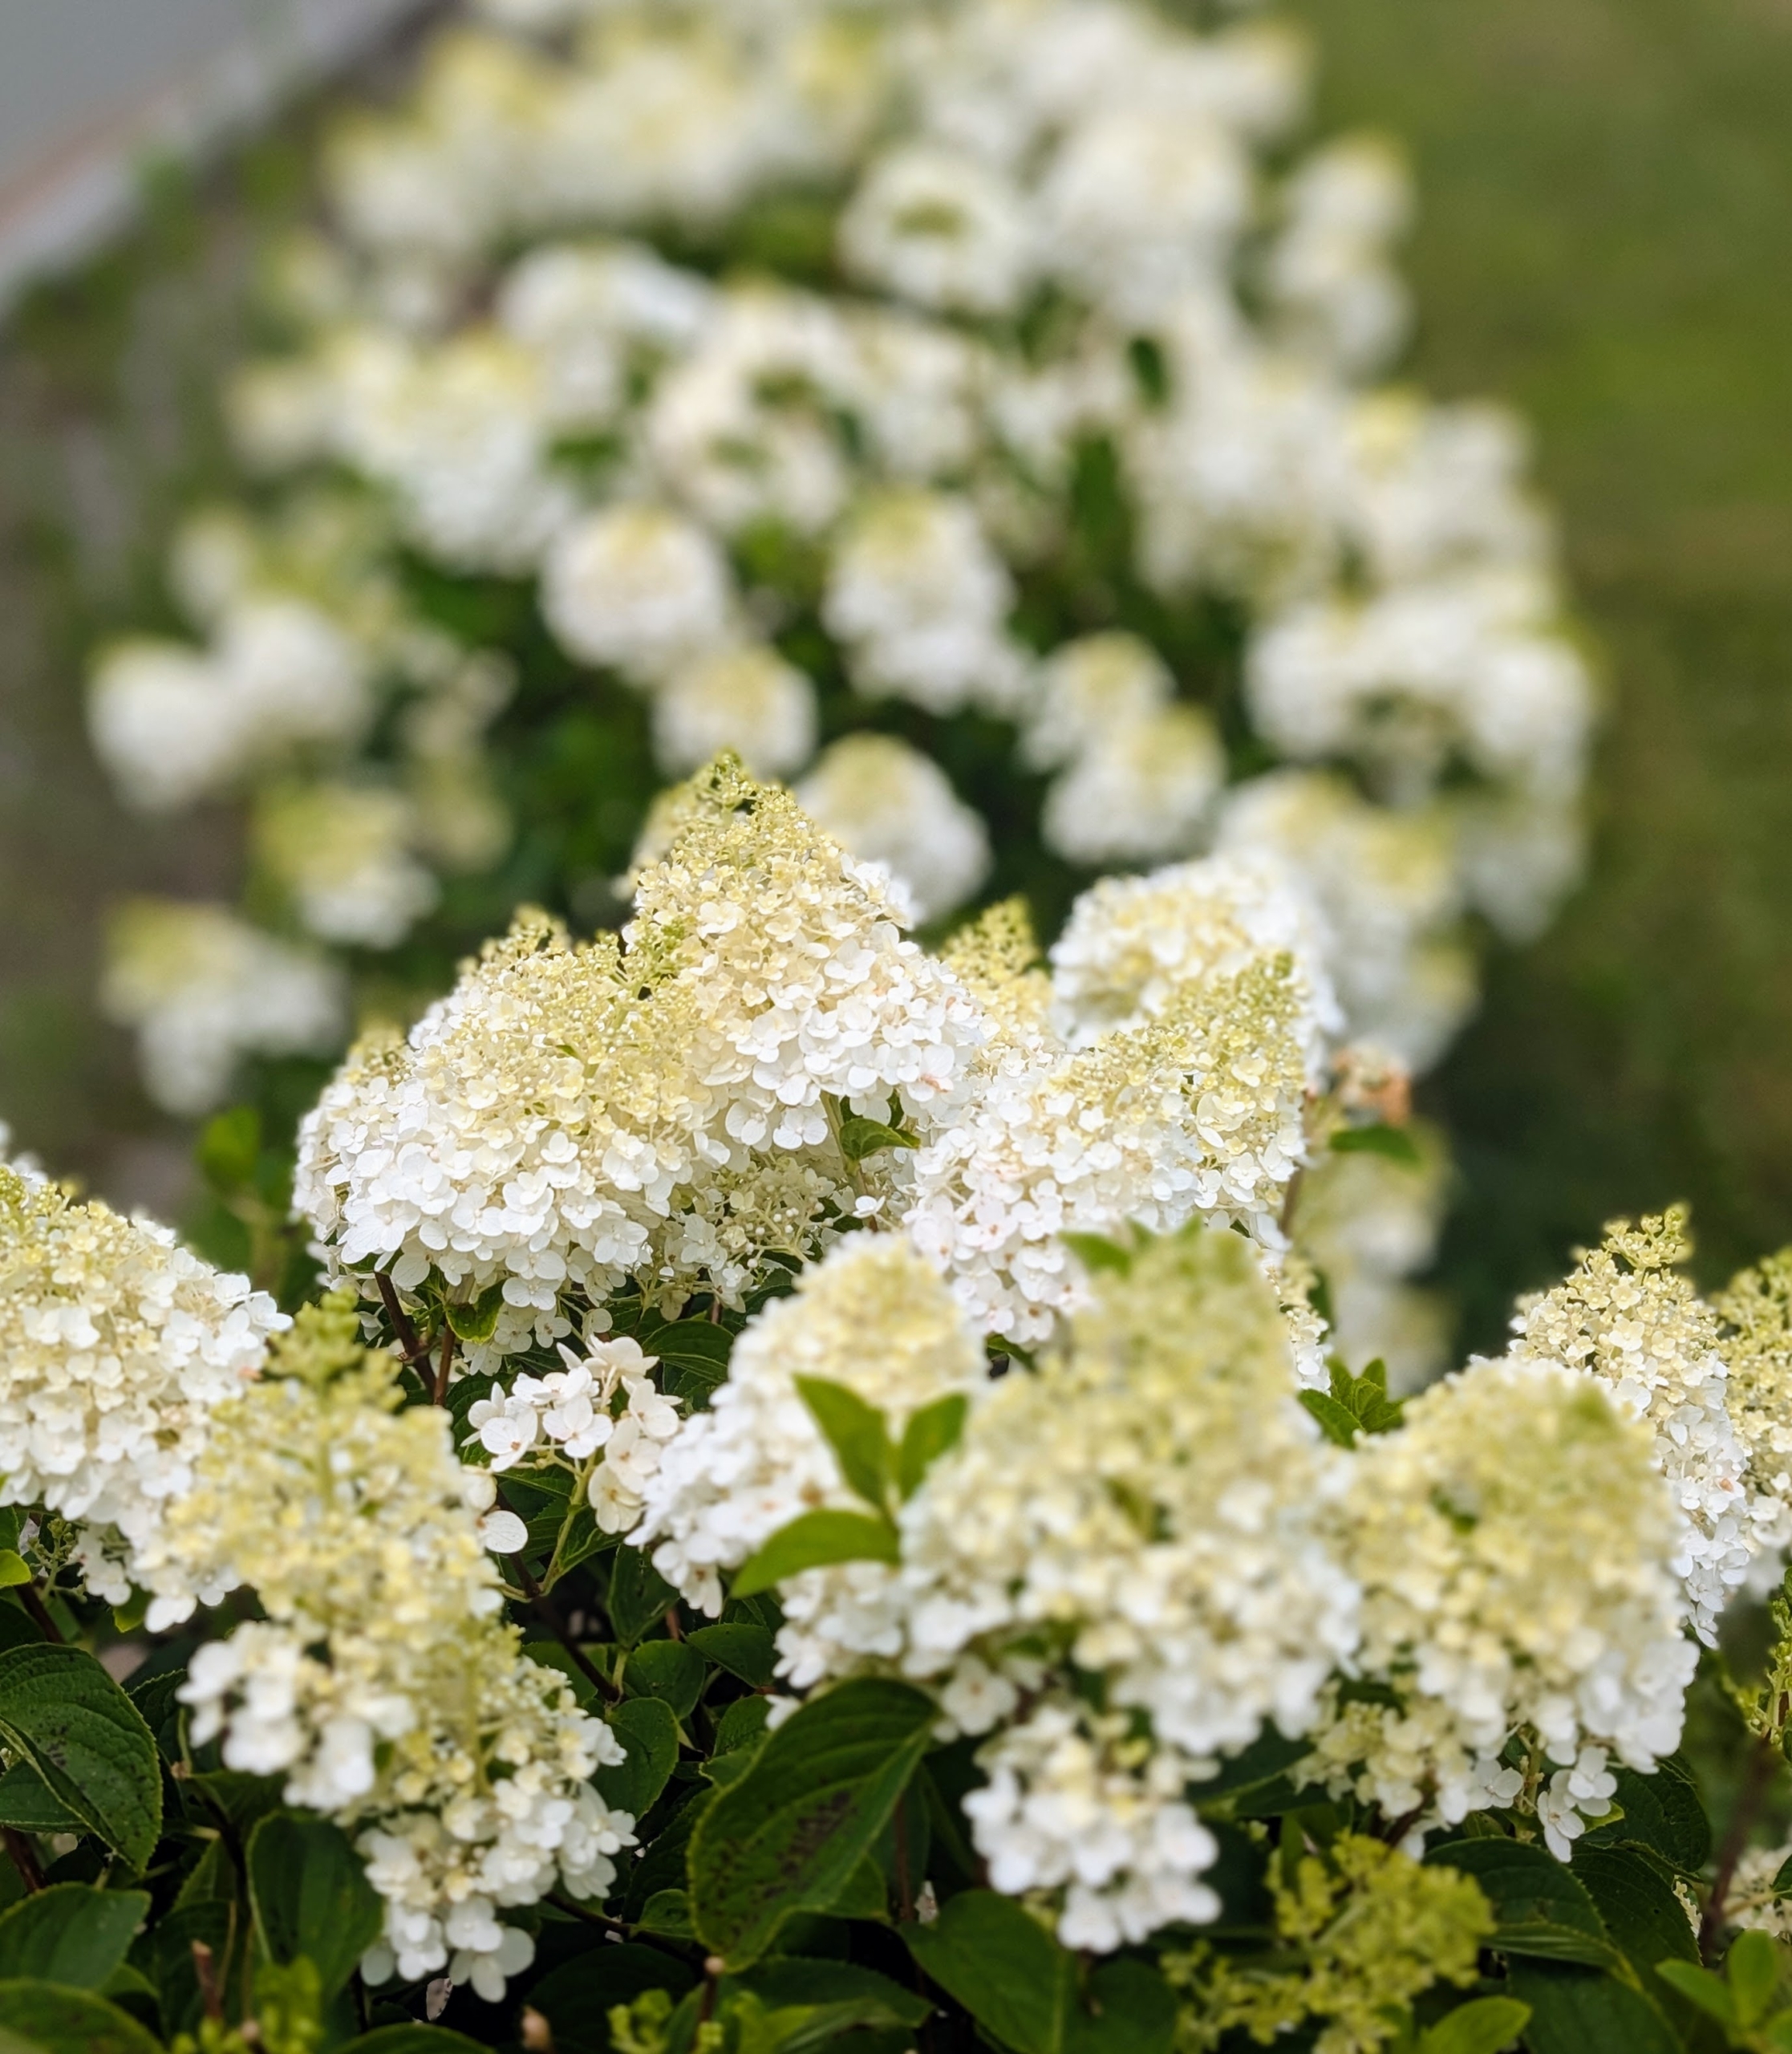
And look at the blooms here. The Little Hottie panicle hydrangeas are also bursting with beautiful flowers.
Each low shrub is filled with white to antique white flower clusters.
Under optimal conditions, hydrangeas can bloom from spring to fall for about 10 to 12 weeks. And even with the recent uncomfortable heat and humidity here, these flowers are doing excellently.
What a difference a year makes in the garden. Plant in the proper spot for the specimen, maintain good nutrient rich soil, and water and feed properly – your gardens will thrive like mine.
I always enjoy growing my own plants, but there’s something even more exciting and gratifying about propagating them - producing plants by dividing, grafting, or rooting cuttings from existent stems.
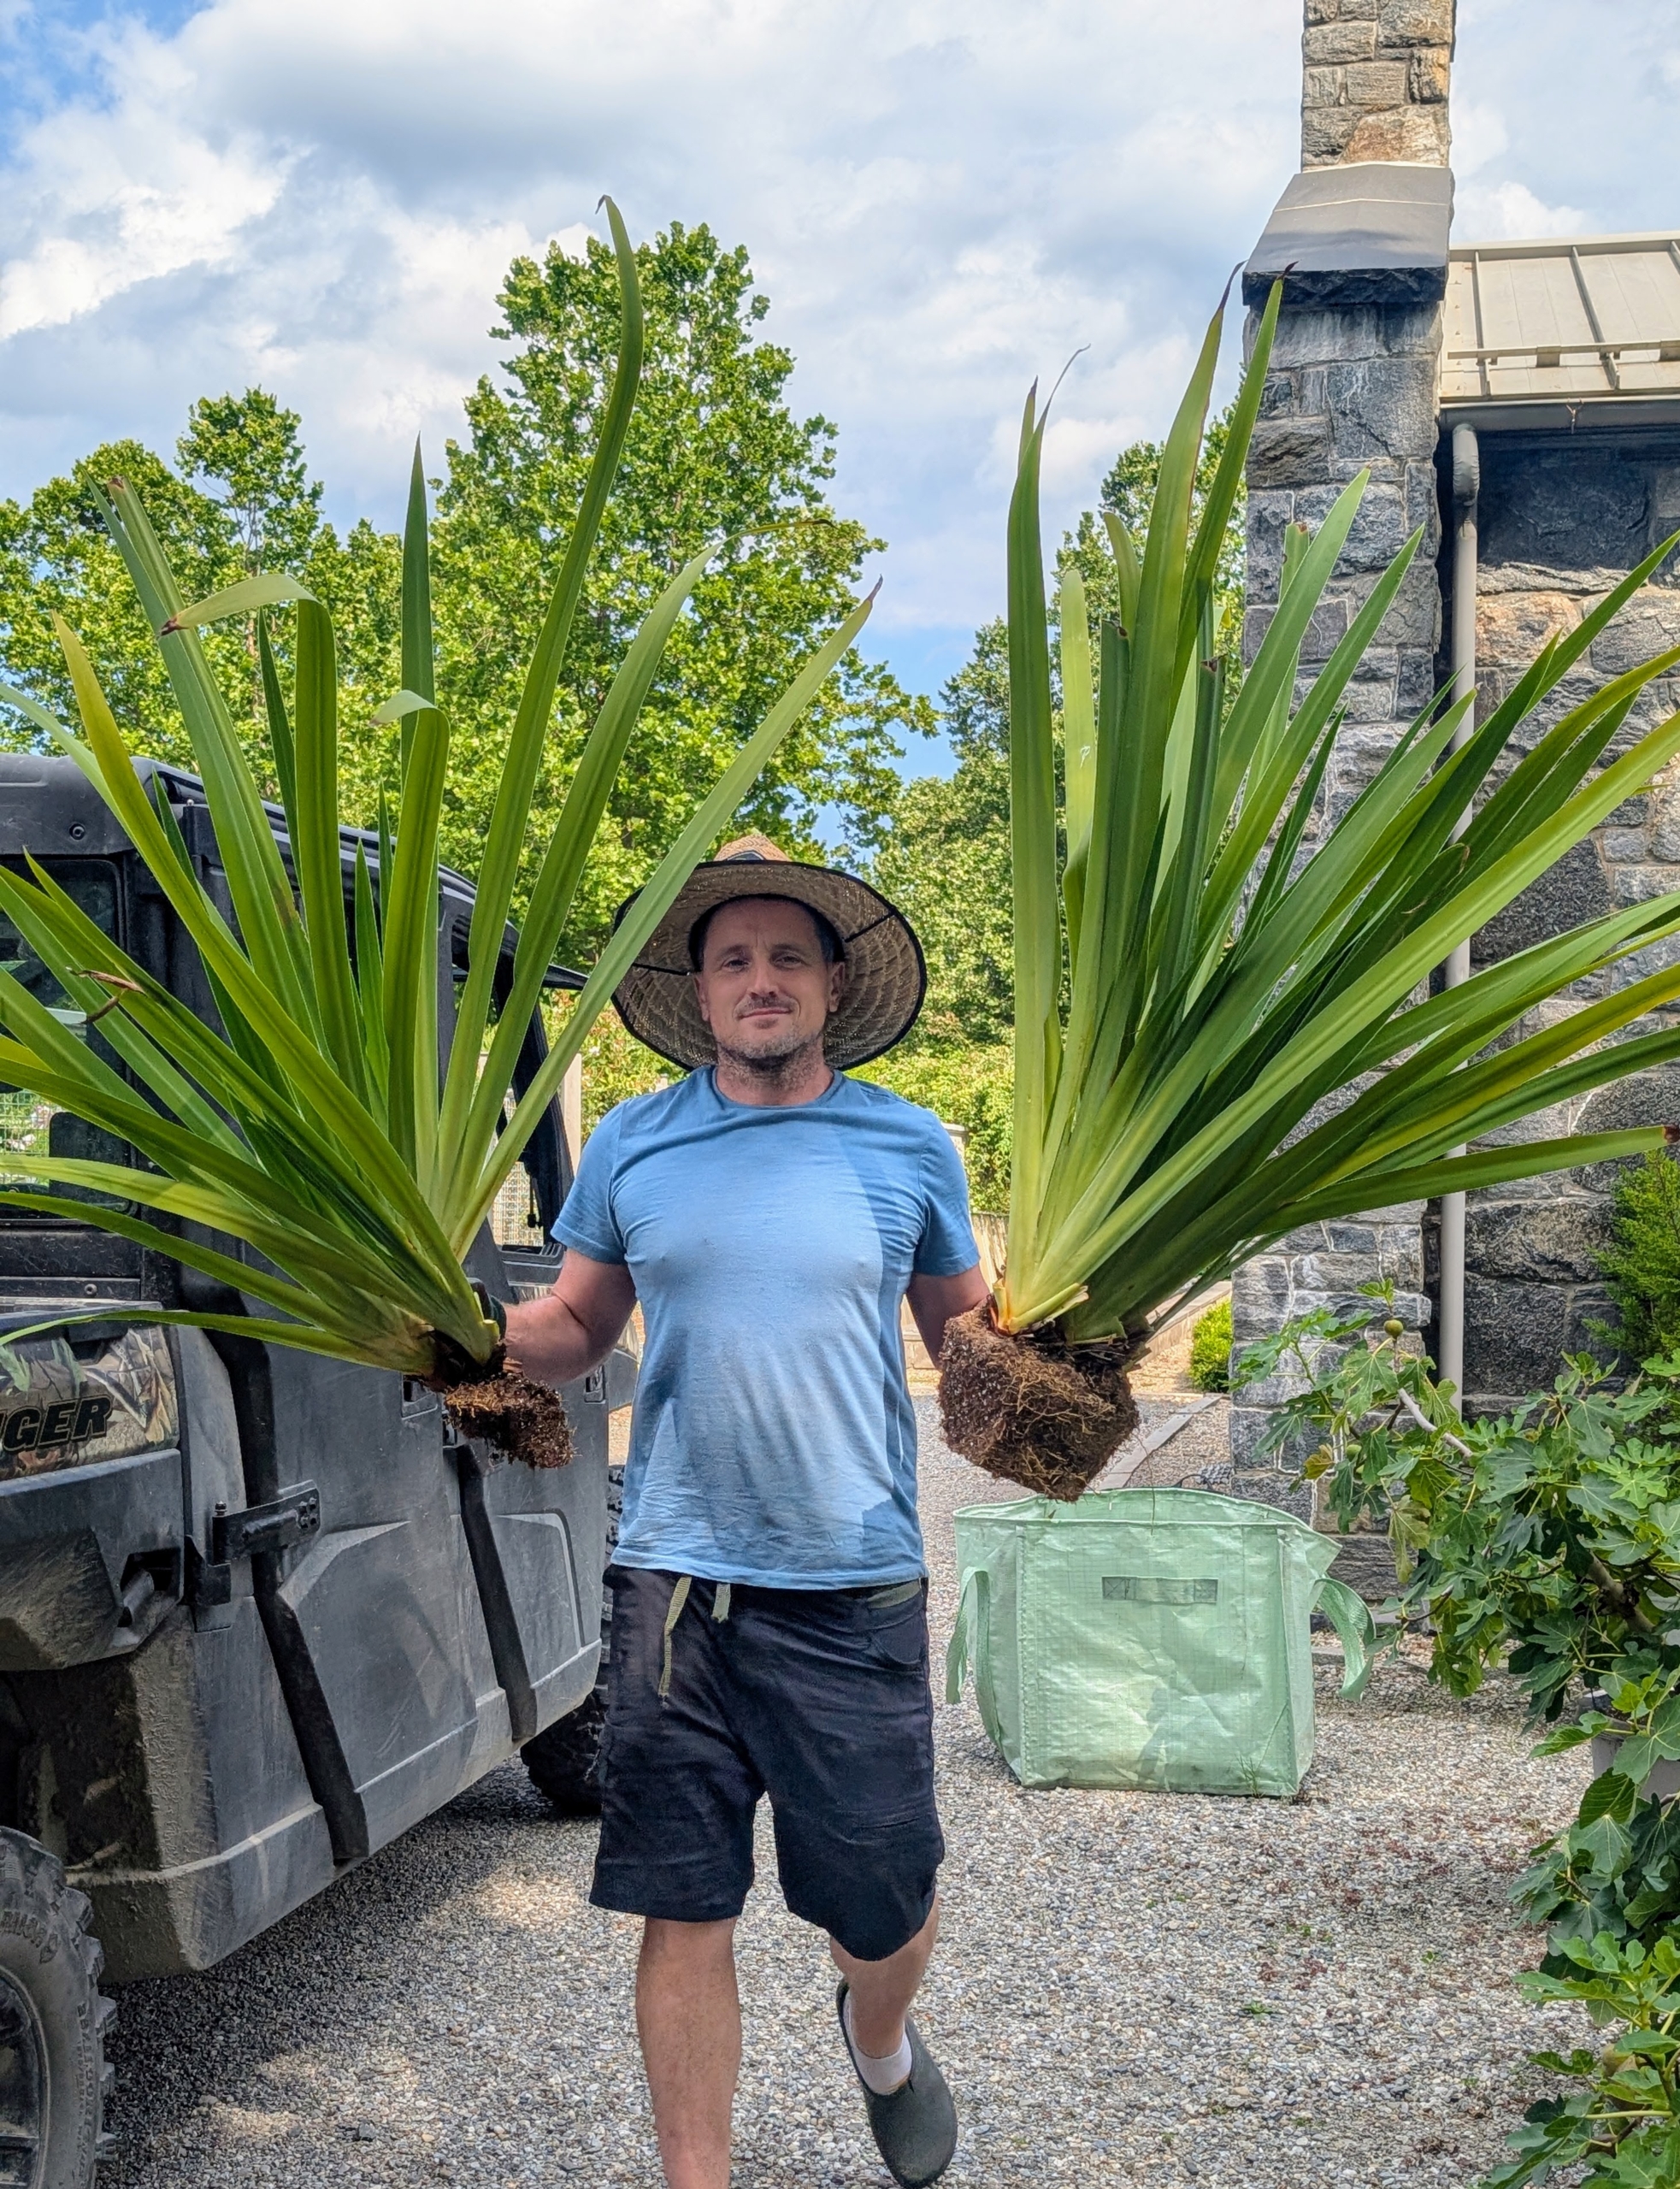
Recently, I asked my head gardener, Ryan McCallister, to divide one large walking iris into four smaller ones. Walking iris, or fan iris, Neomarica caerulea, is a beautiful and sturdy plant known for its fans of pale green foliage and fragrant flowers that bloom in spring, summer, and fall.
Here are some photos, enjoy.
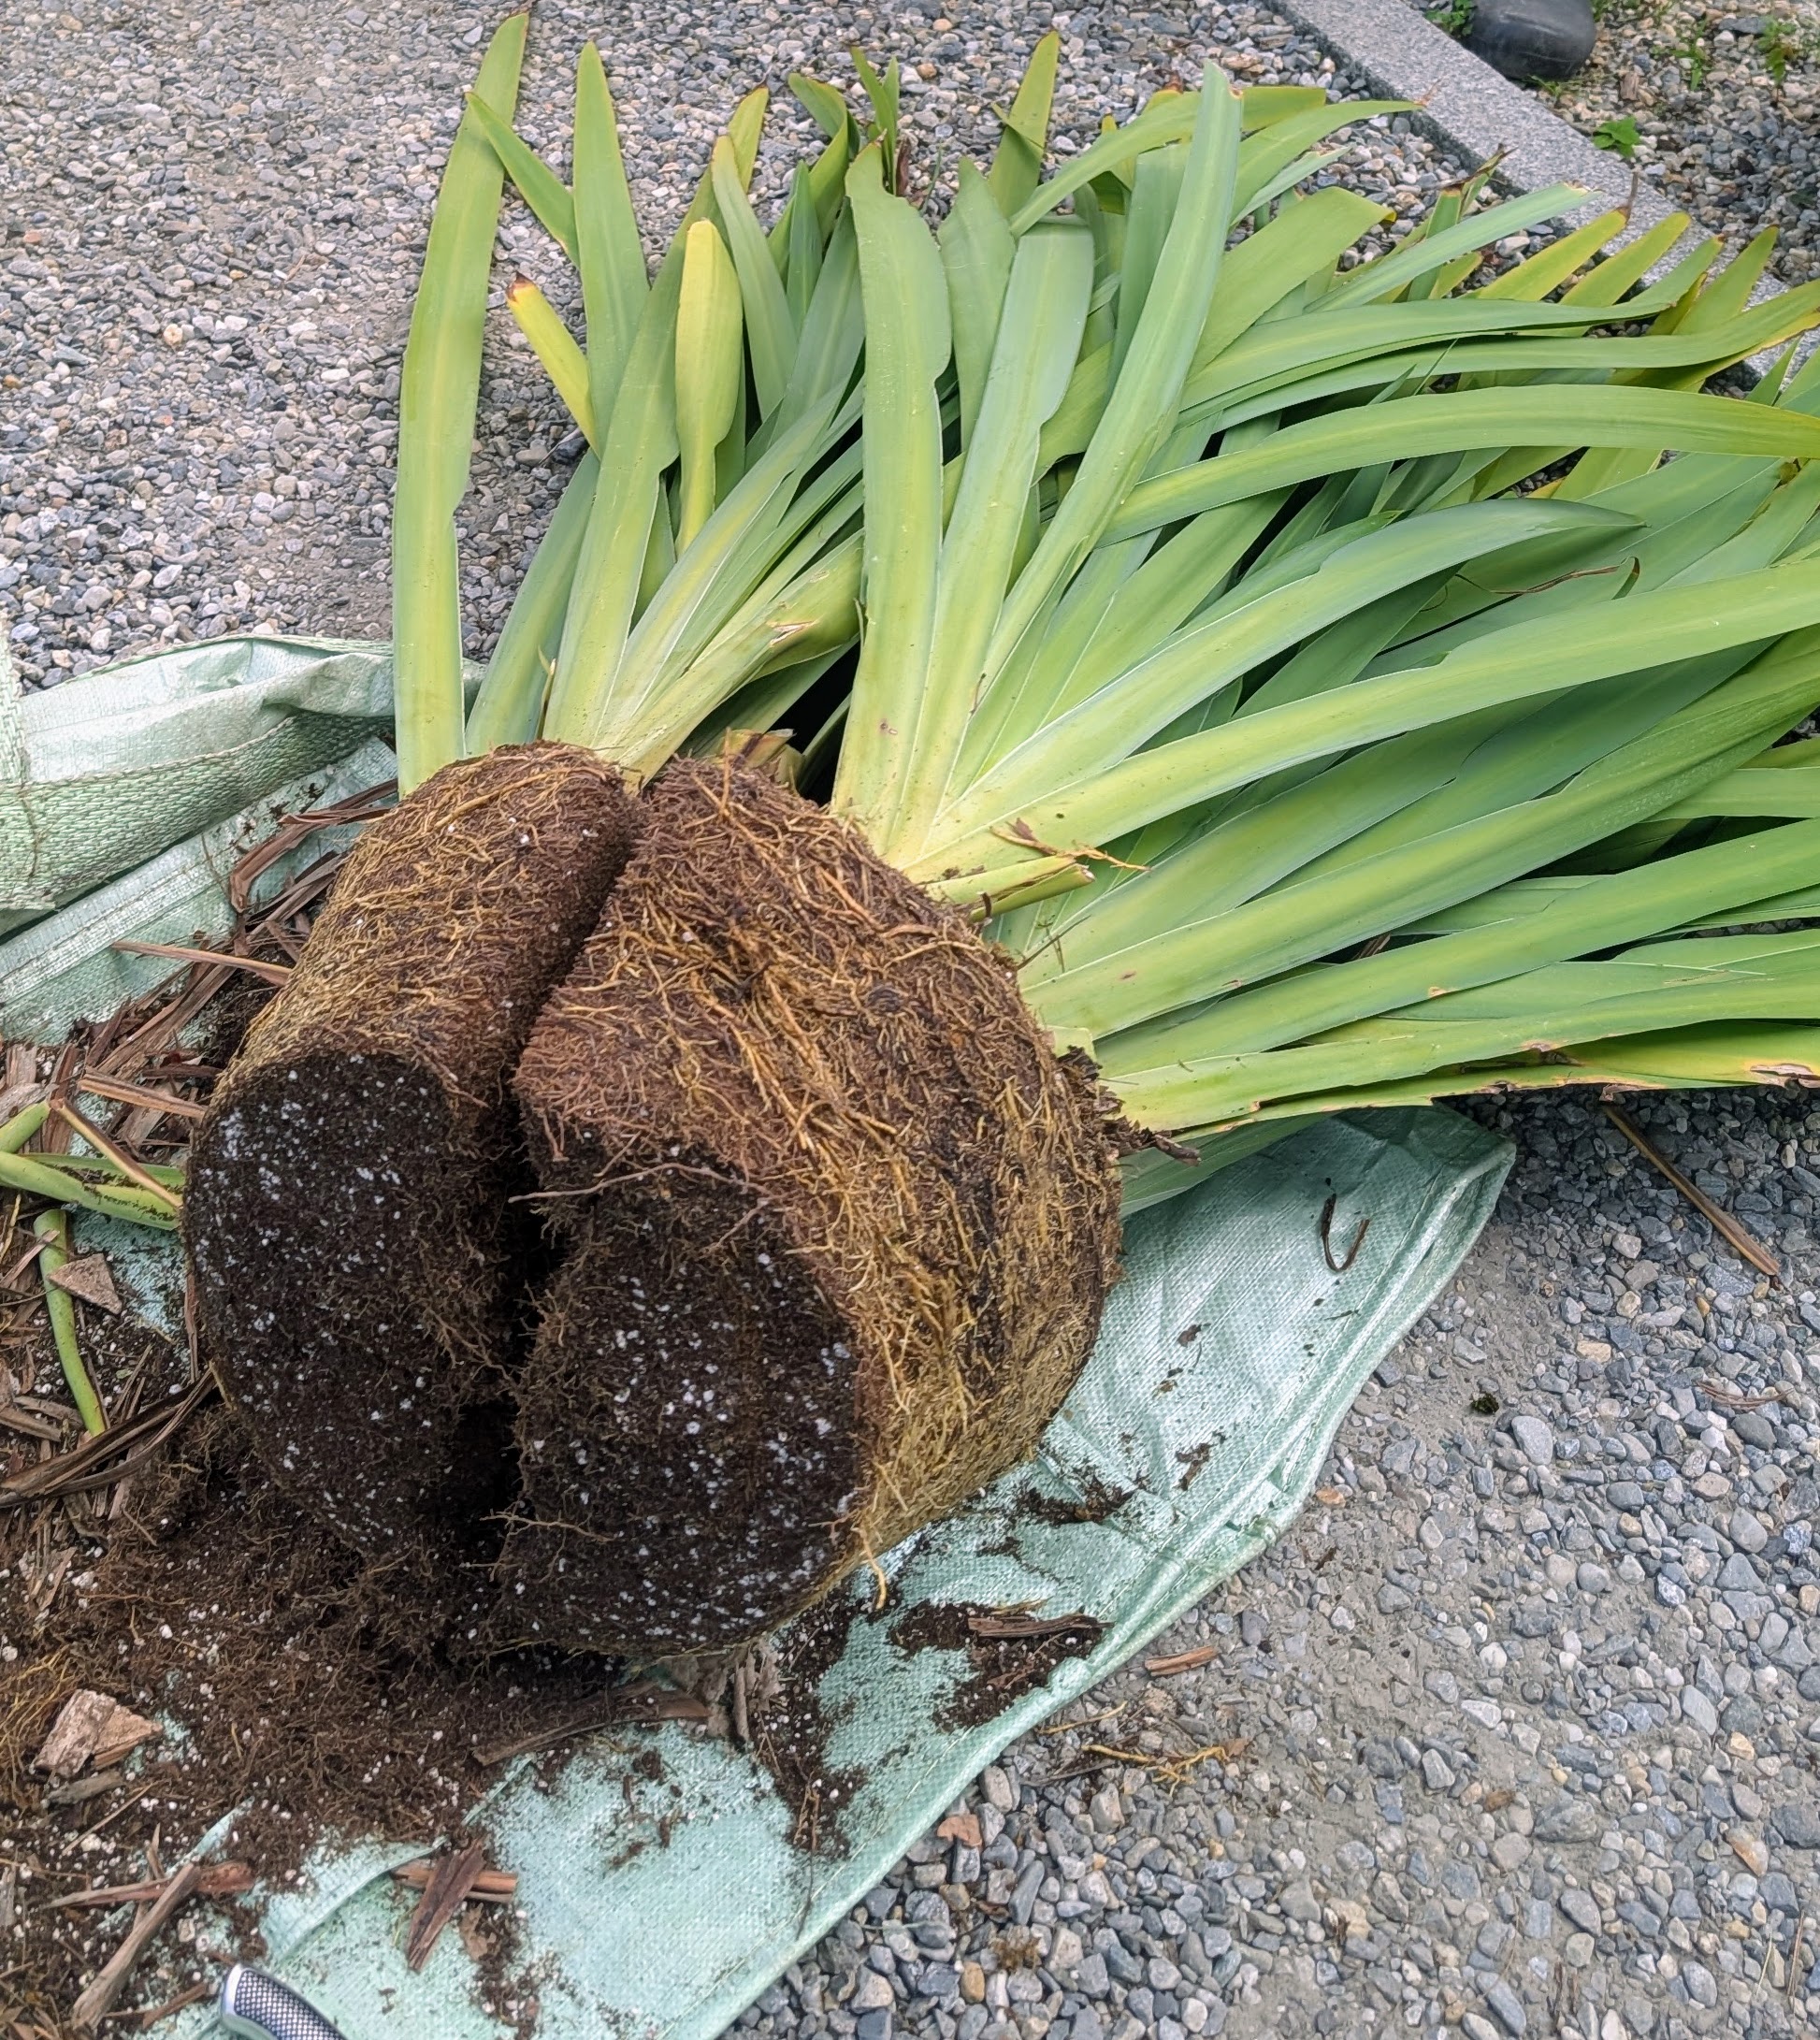
It is definitely rewarding when one plant can be easily divided to make multiple new ones. That’s what happened to one of my walking iris plants – it is now four.
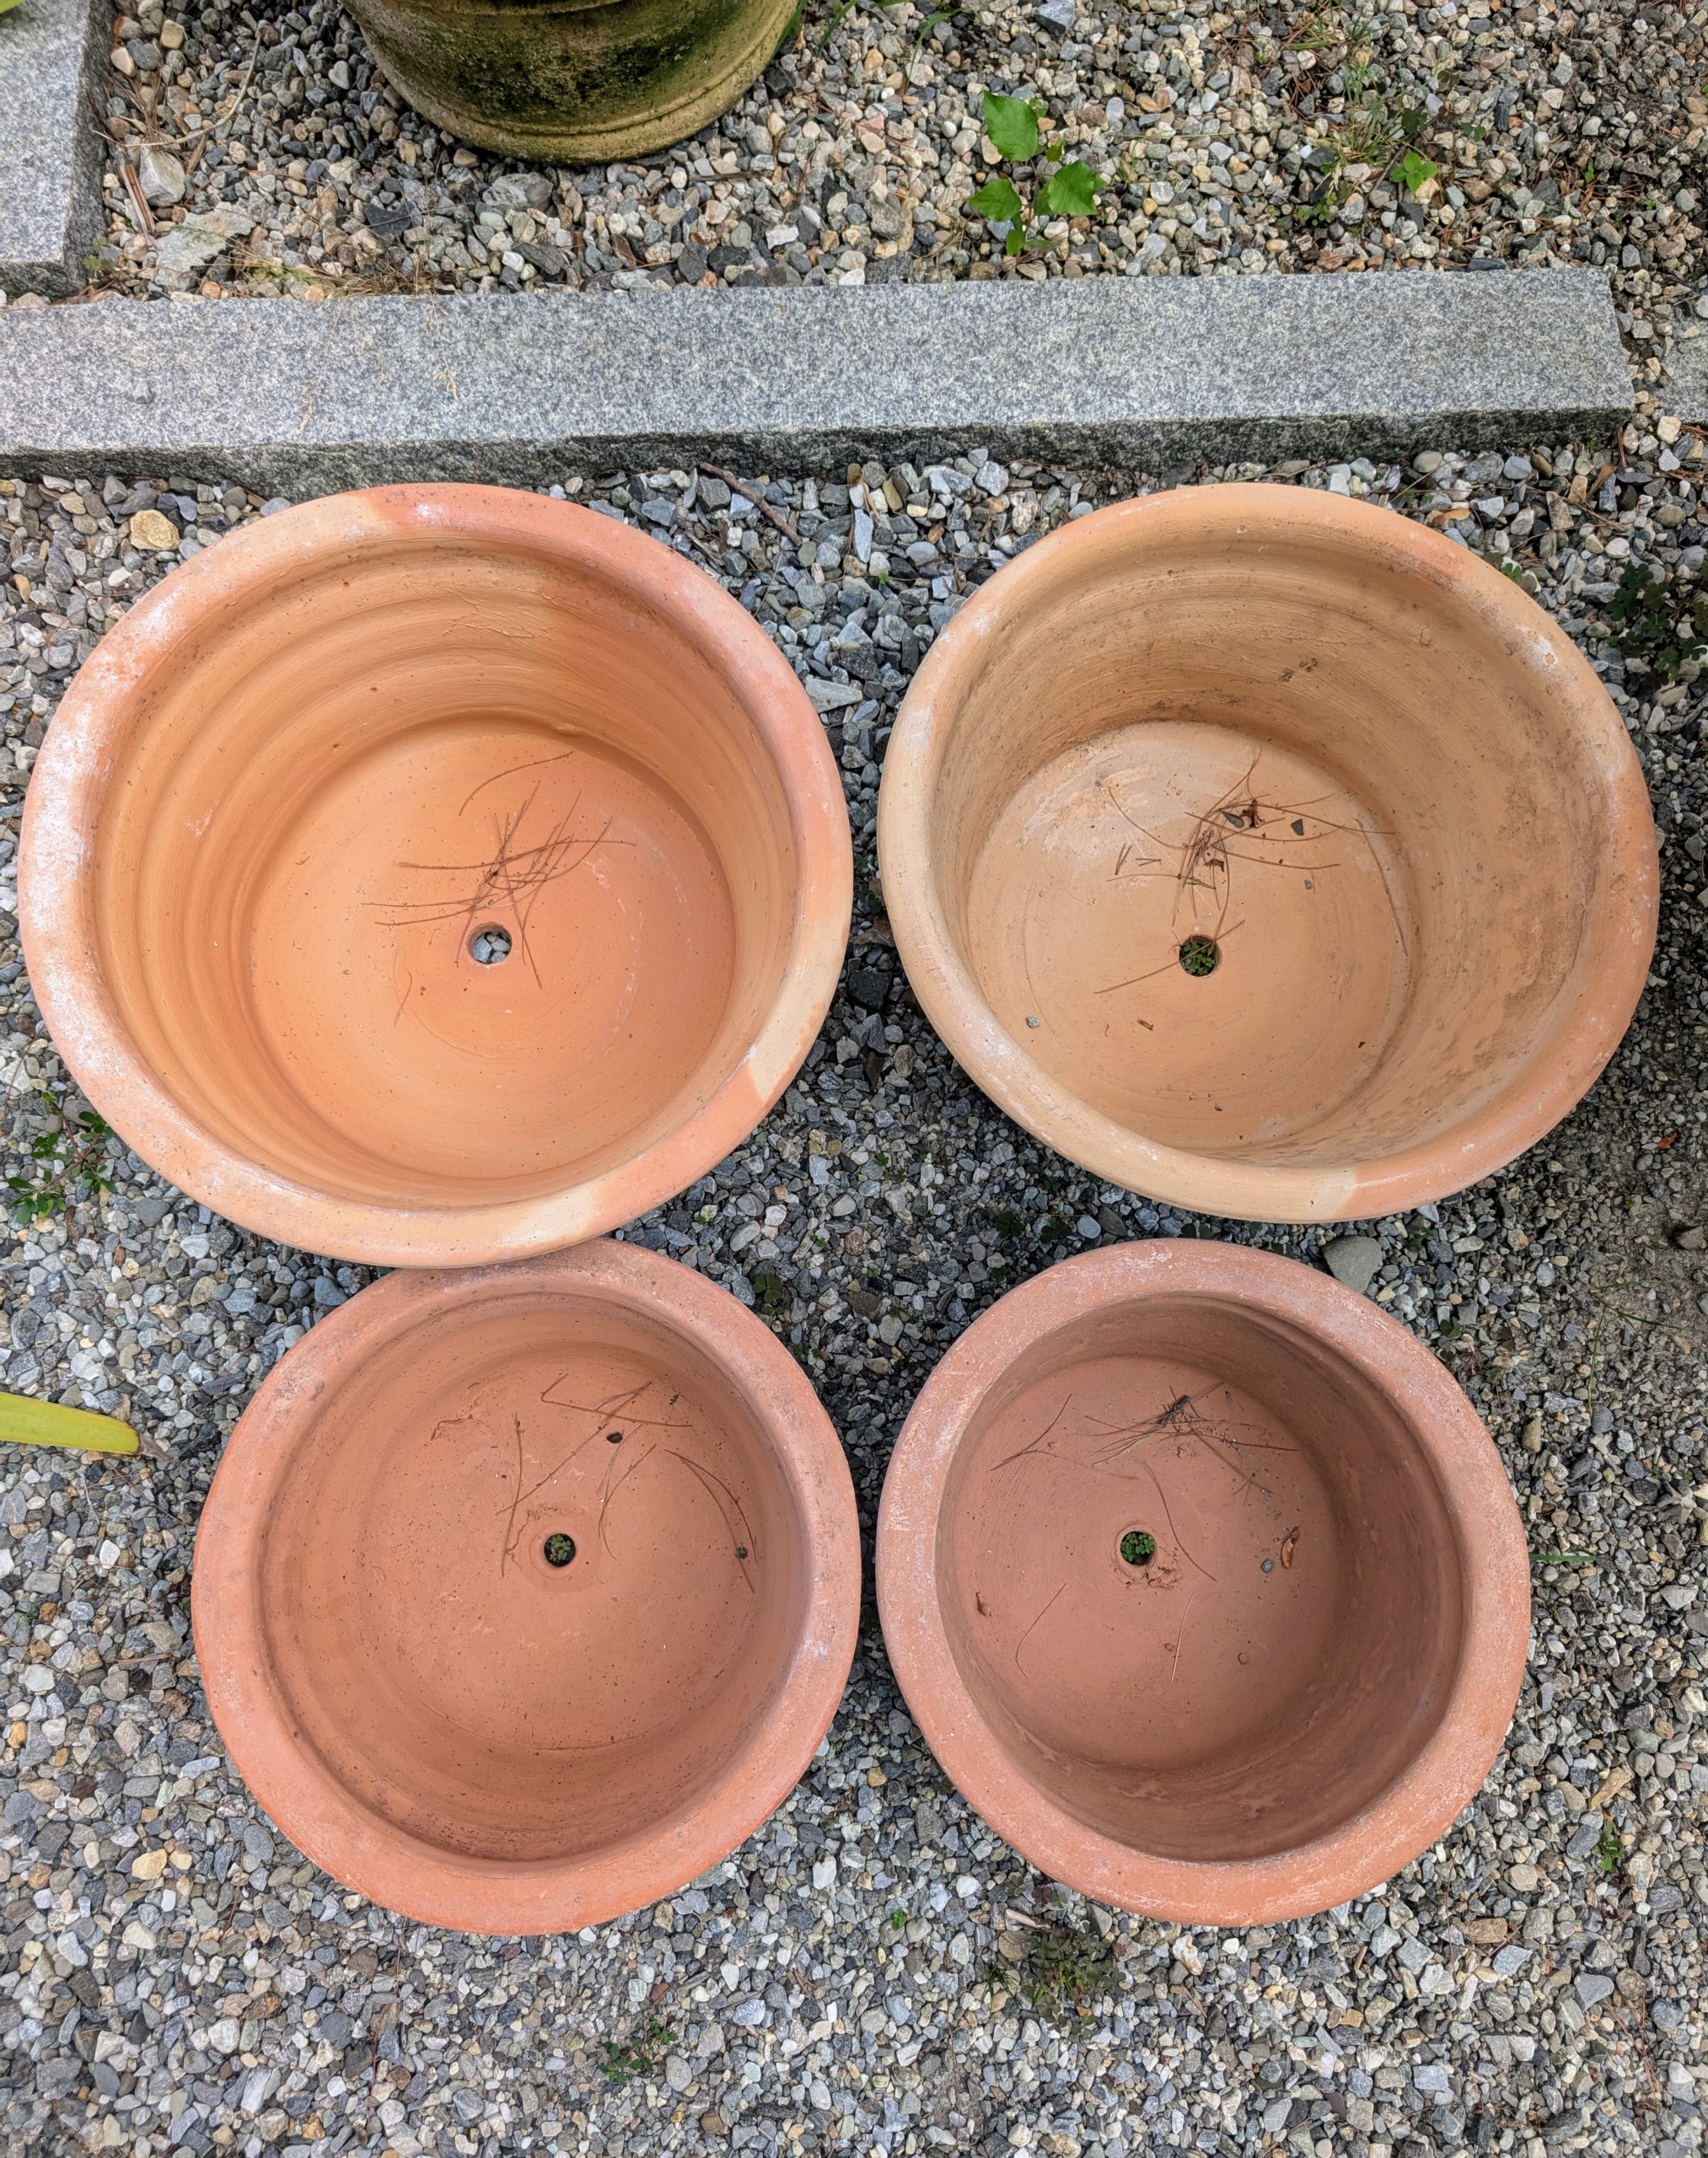
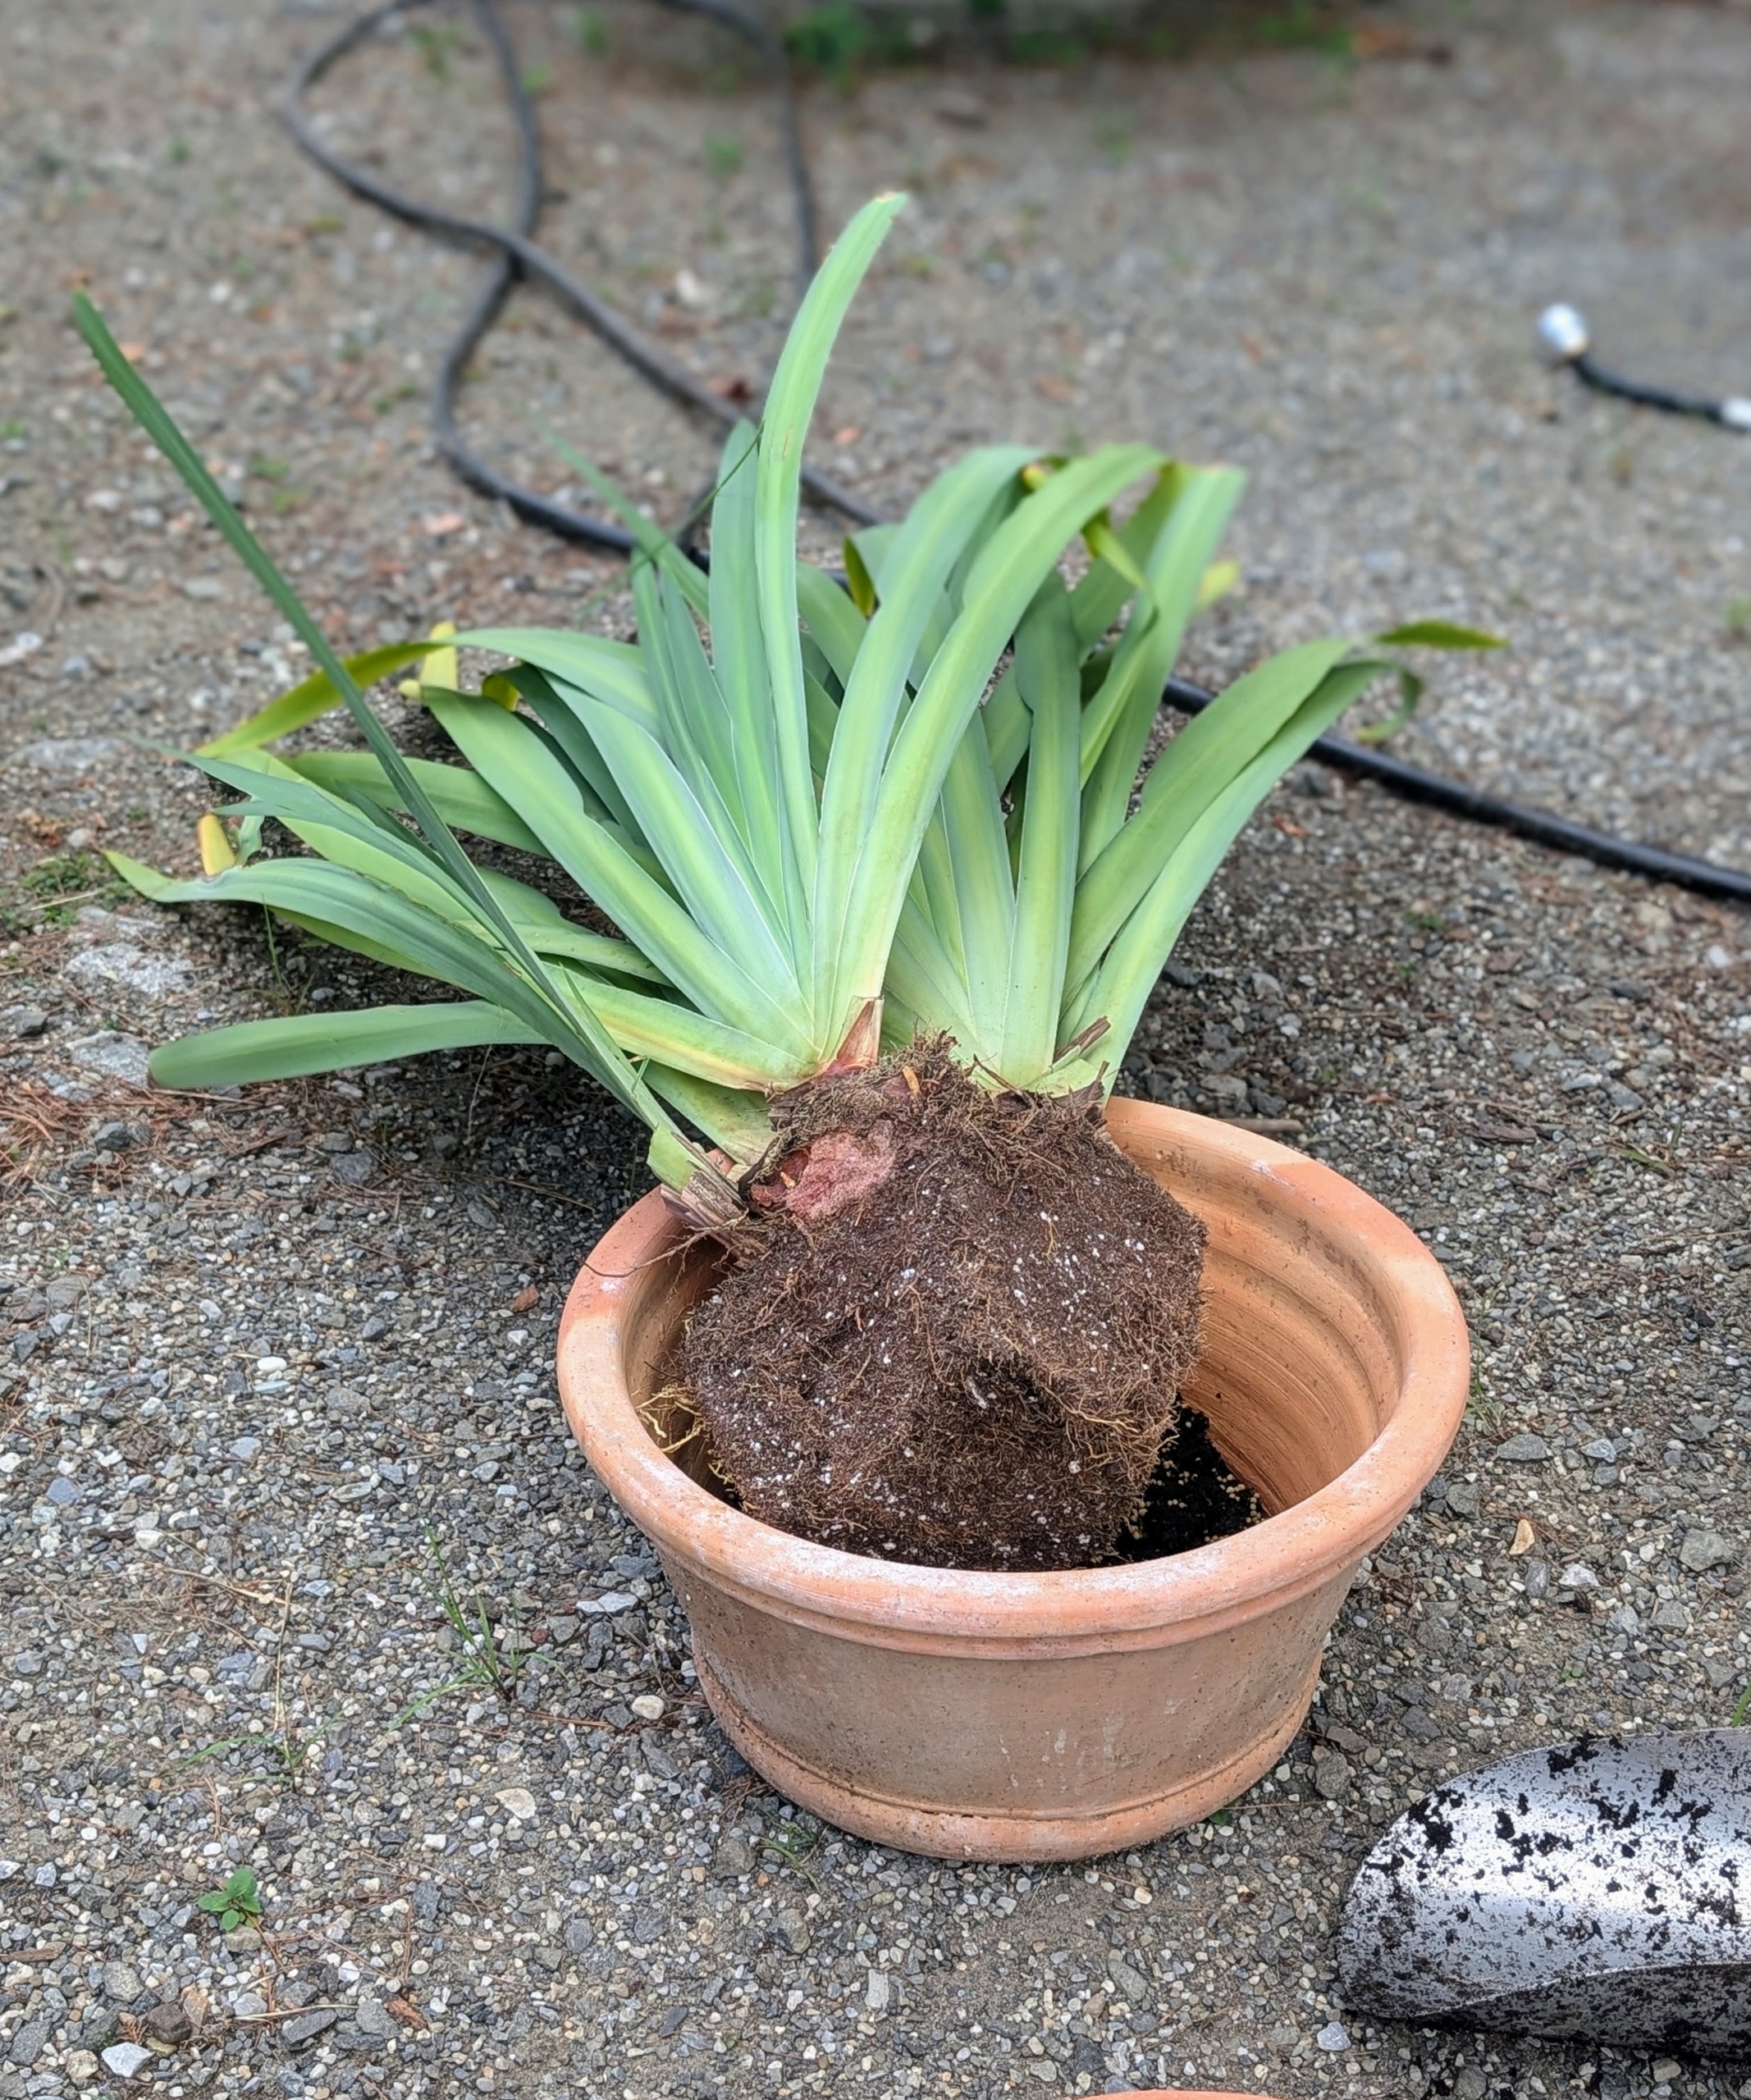
I provided pots and instructed Ryan to use them for transplanting. The best pot for a walking iris is at least eight inches in diameter and about 10-inches deep. It should also be porous. I selected terra cotta, which will provide good water and air exchange.
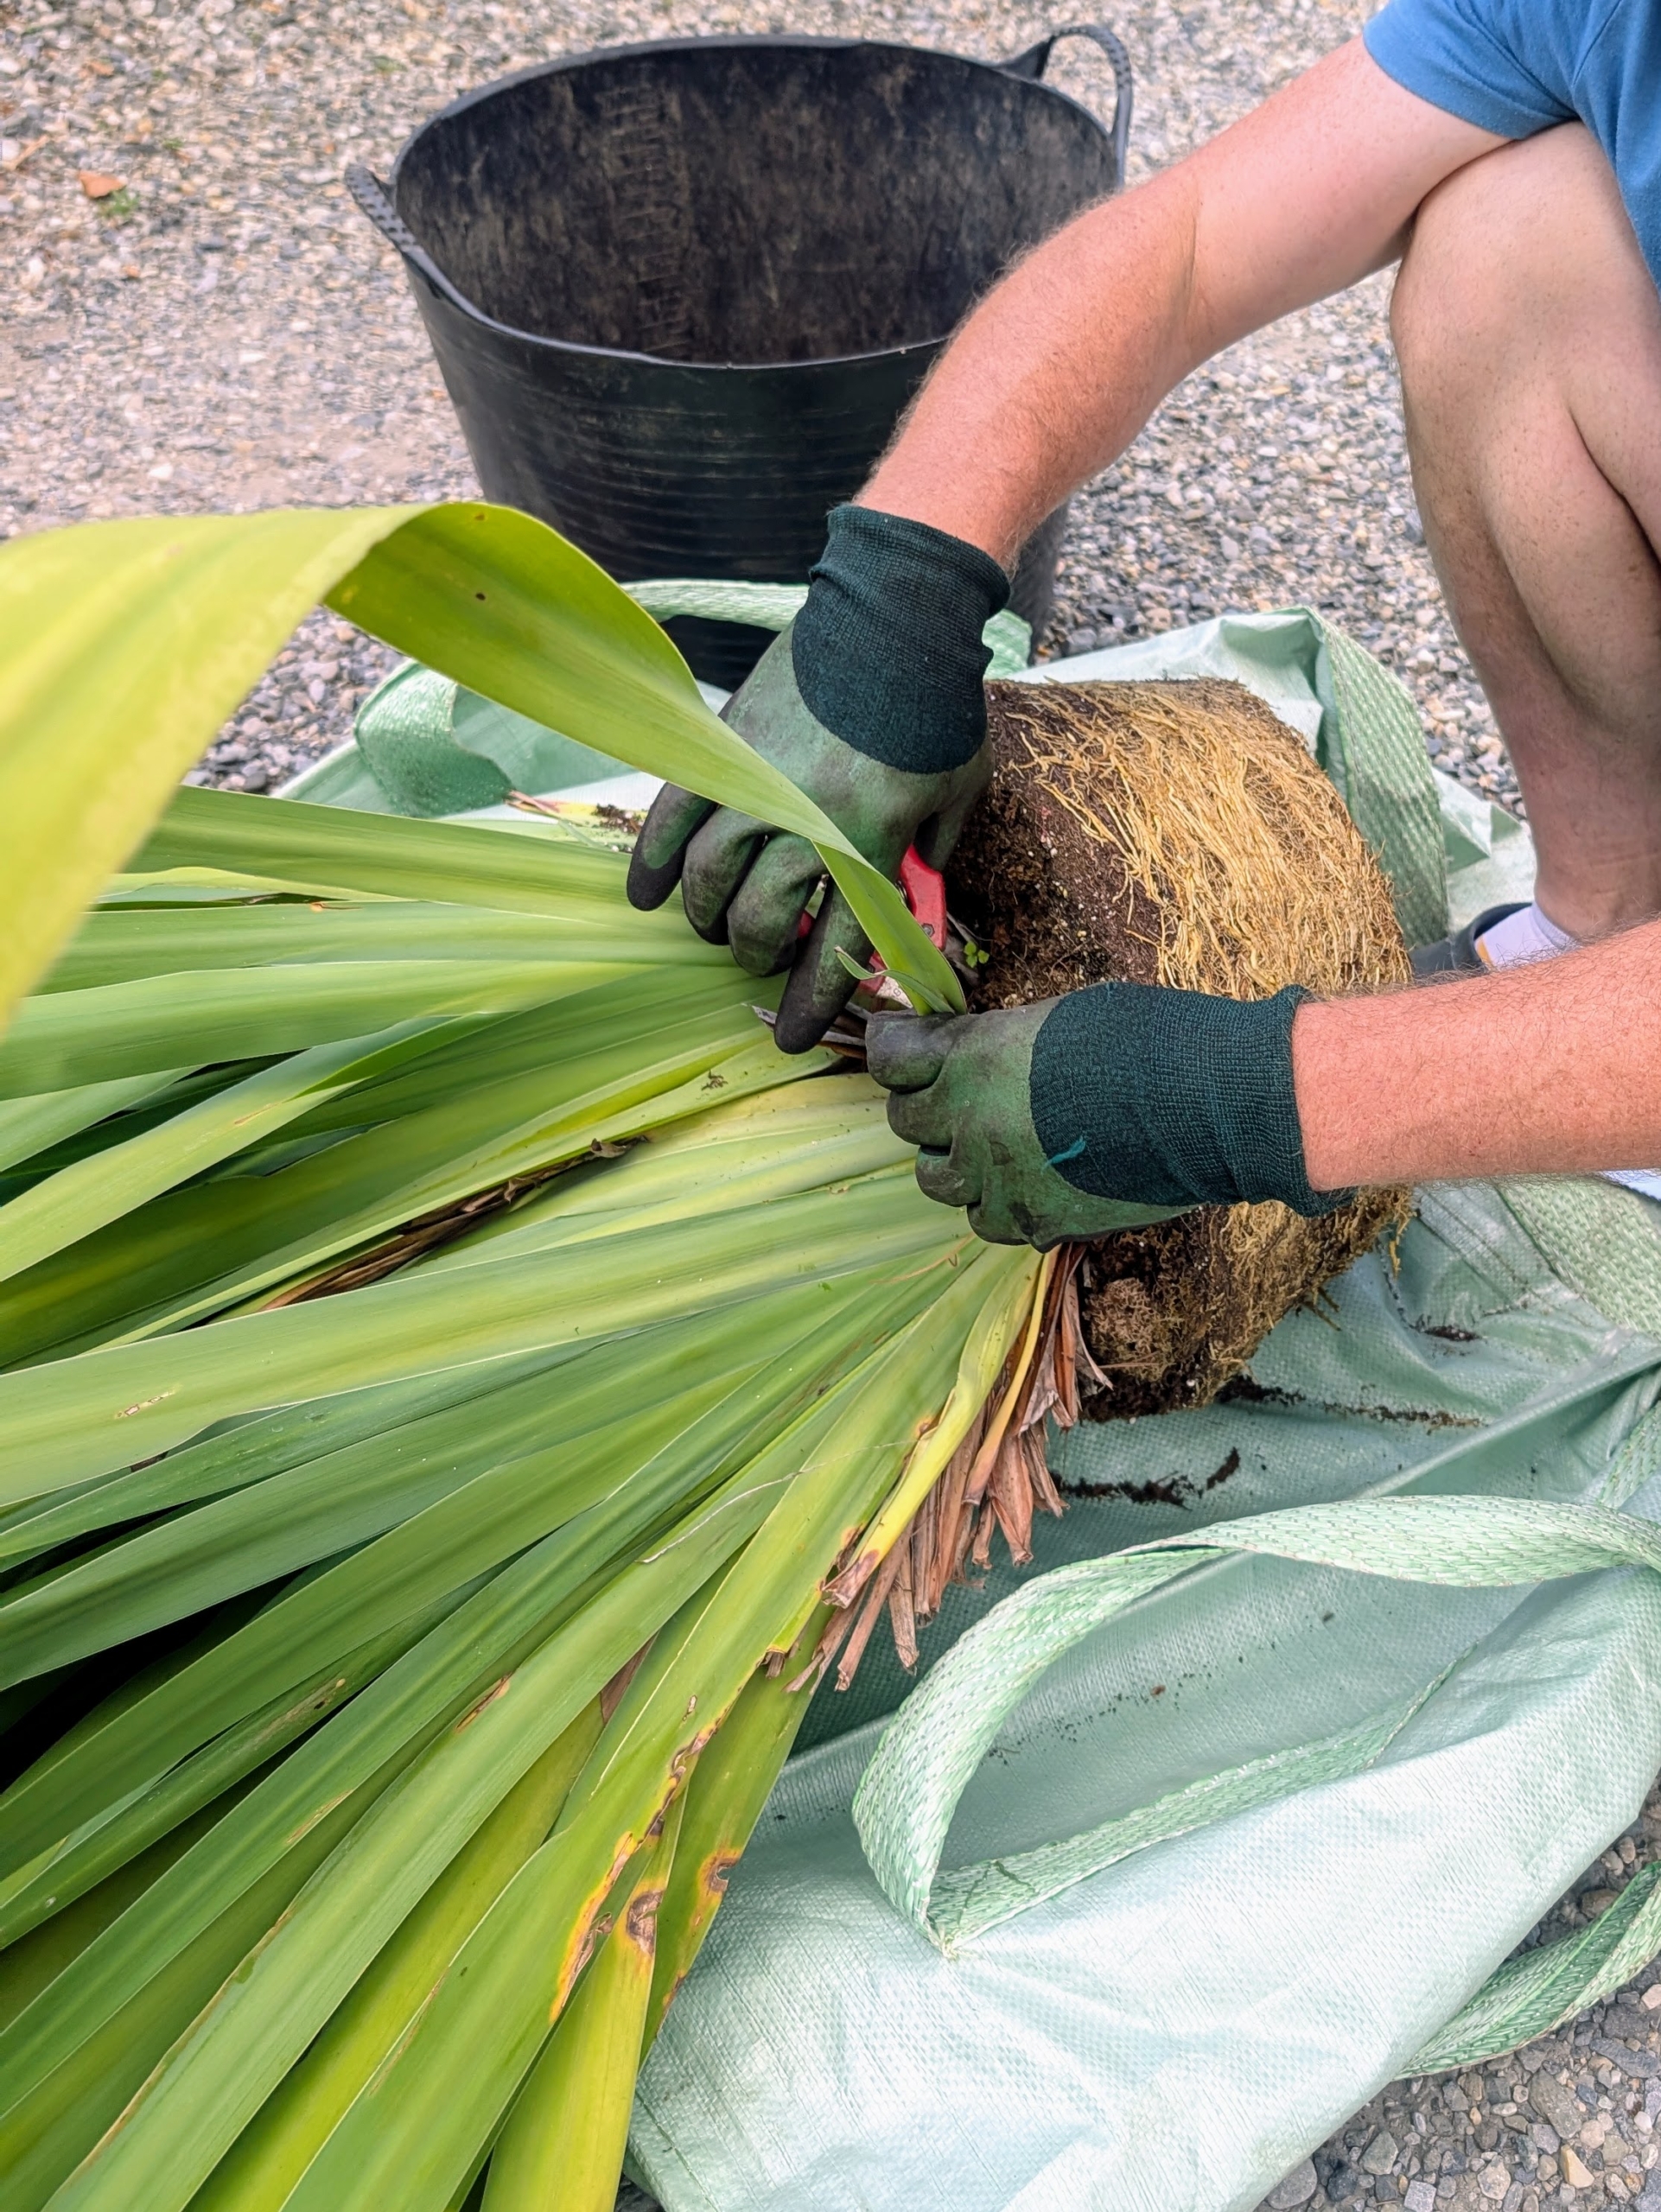
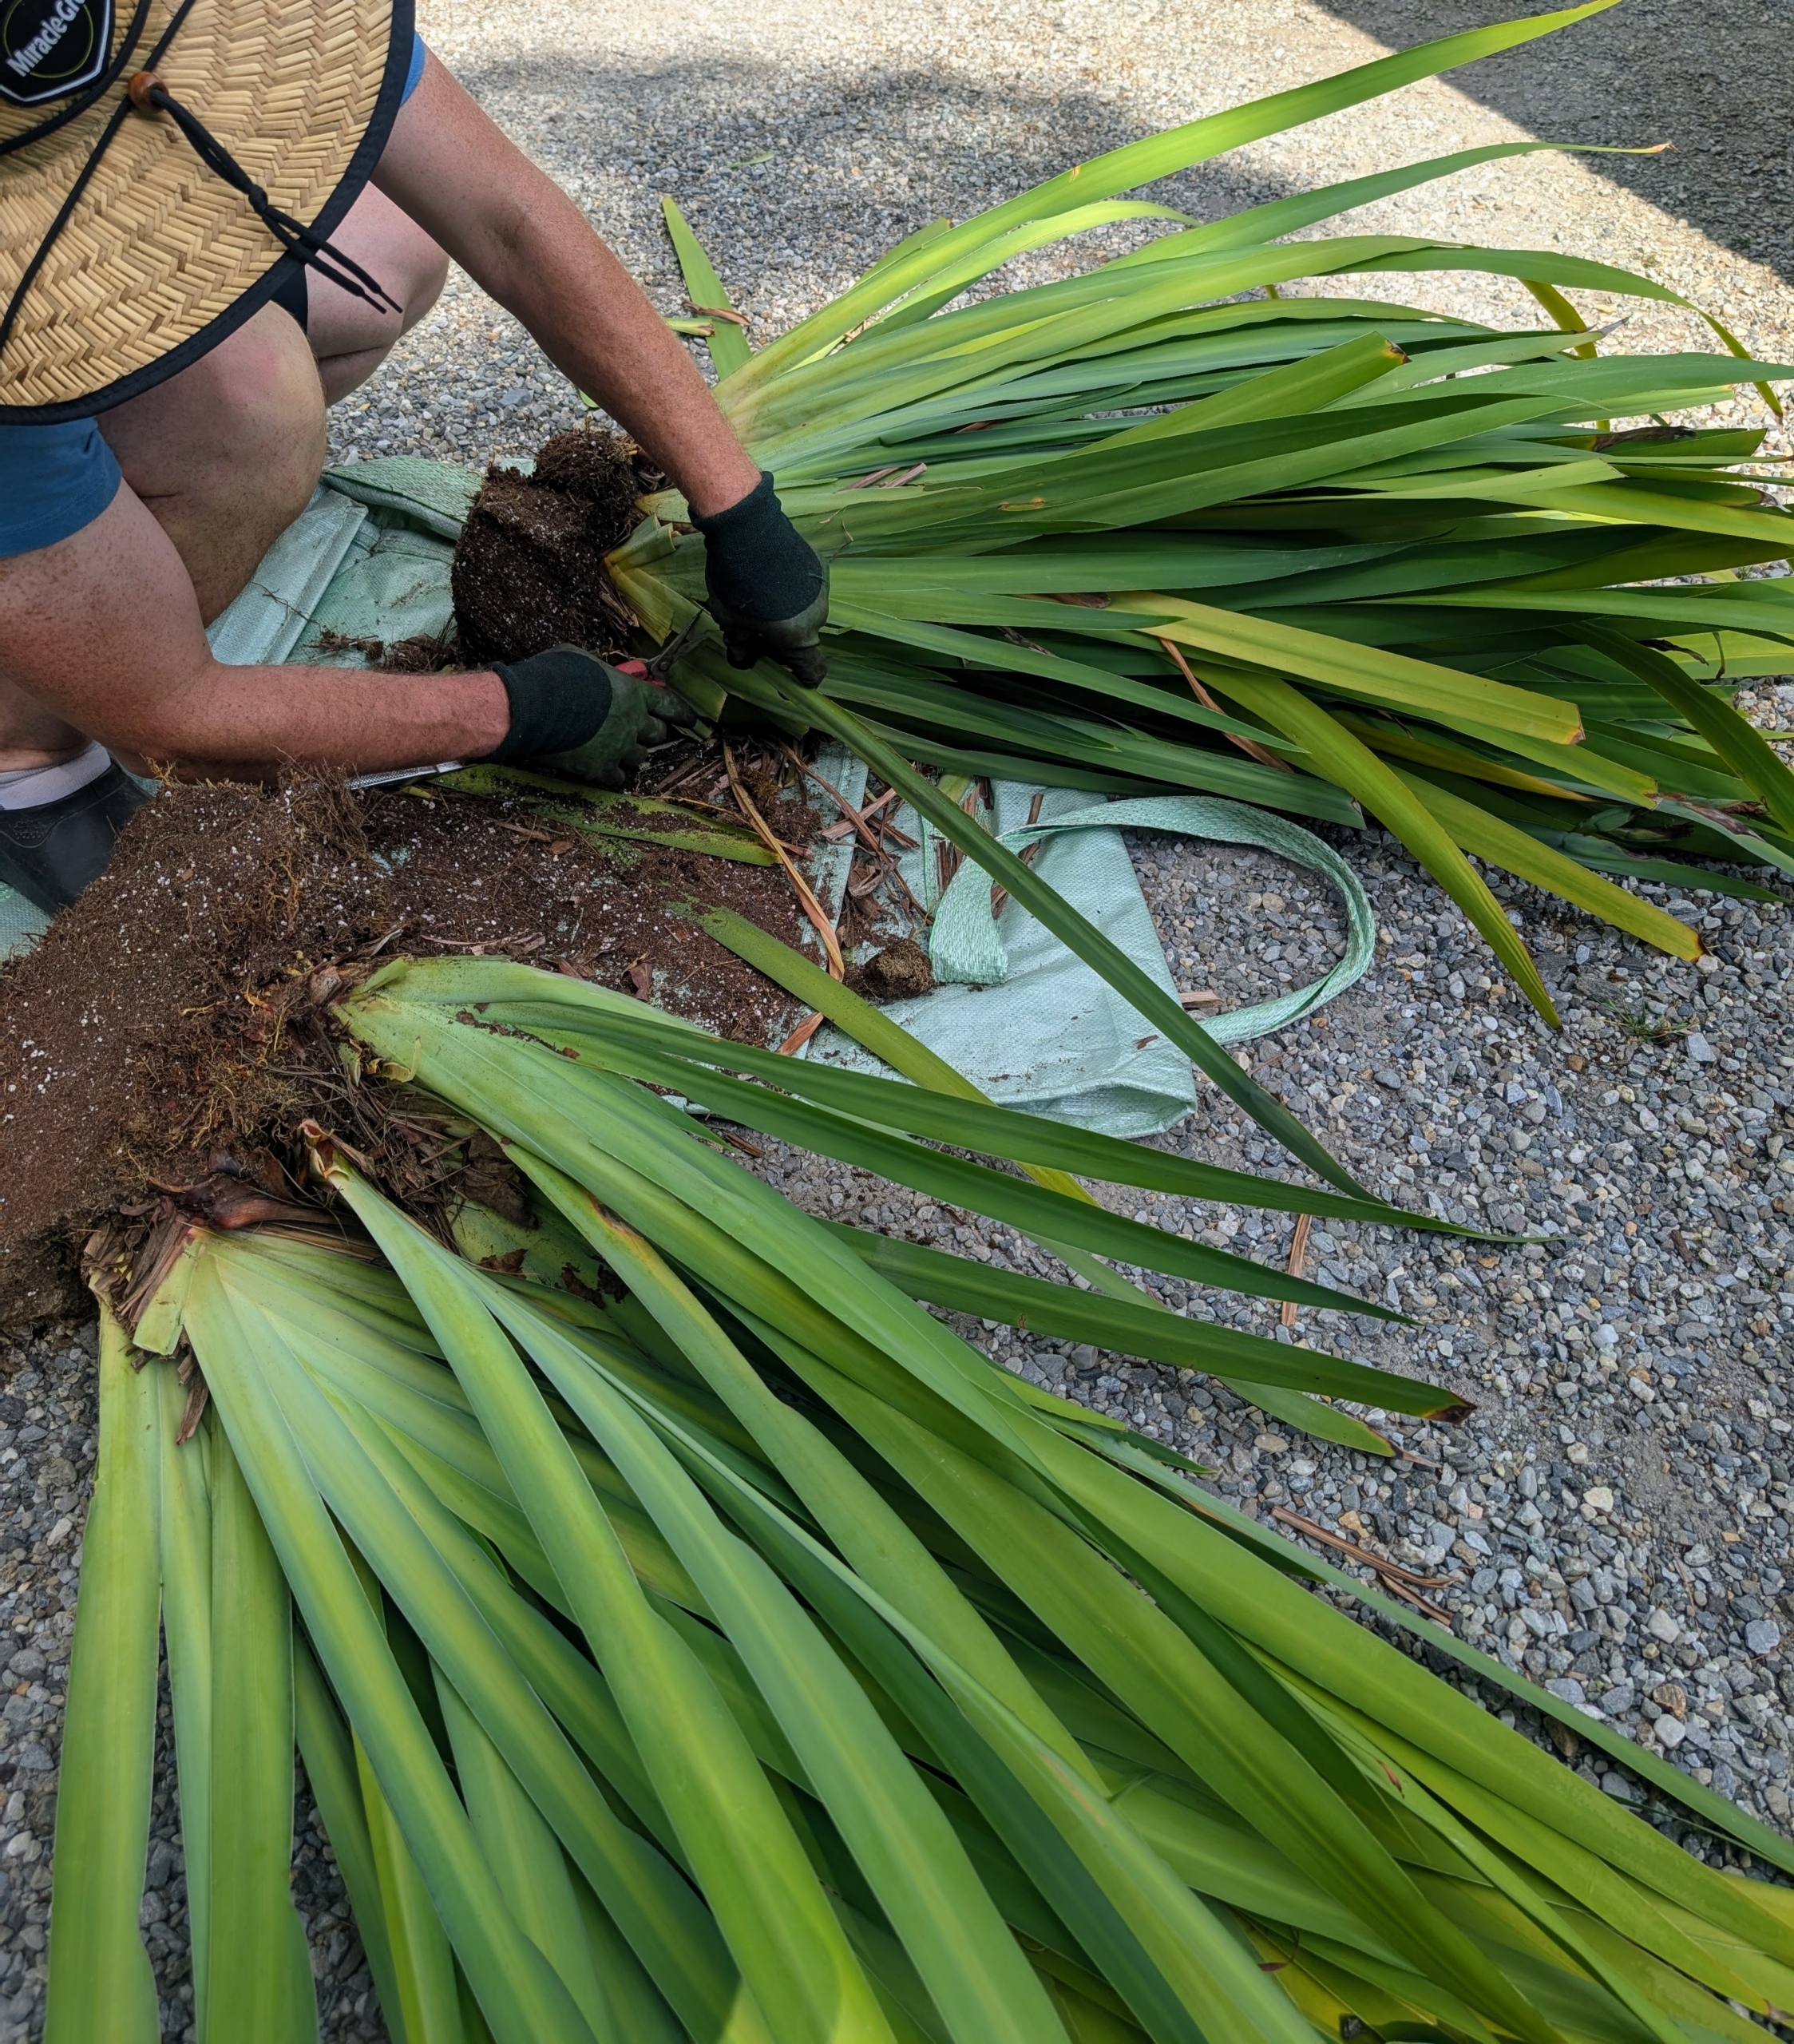
After pulling the walking iris from its original pot and before dividing, Ryan removes any dead or unsightly foliage from the base of the plant.
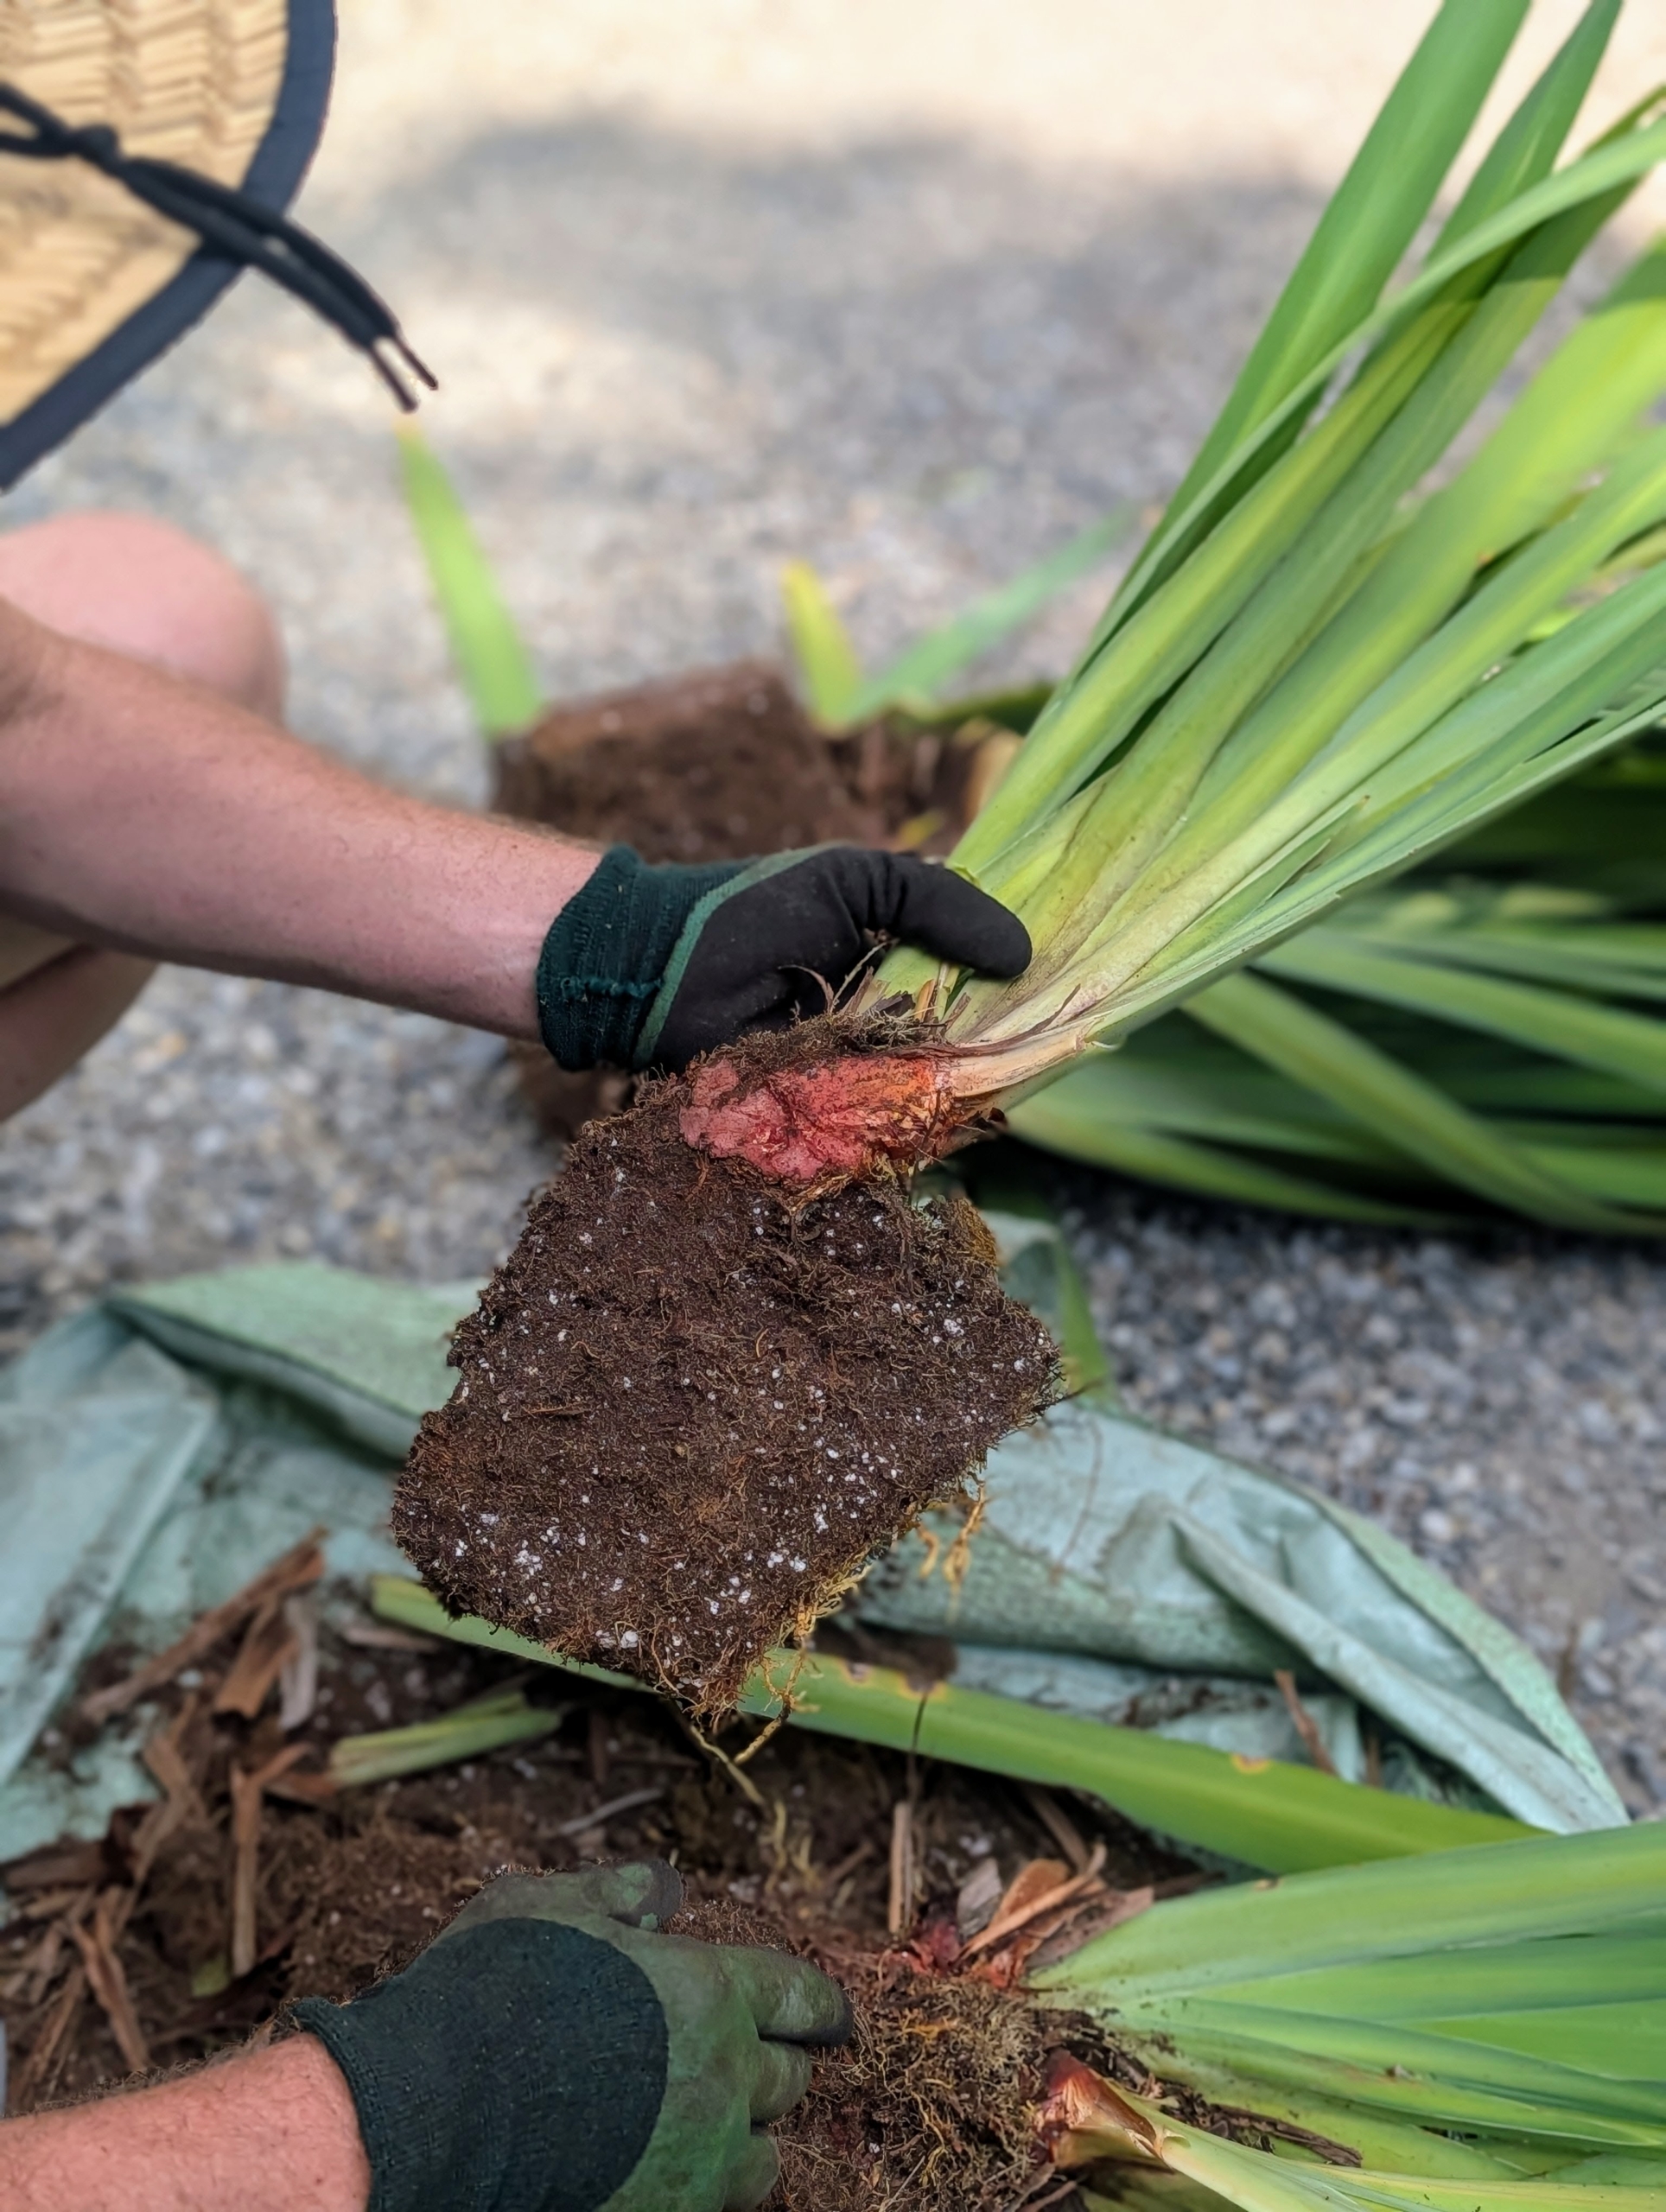
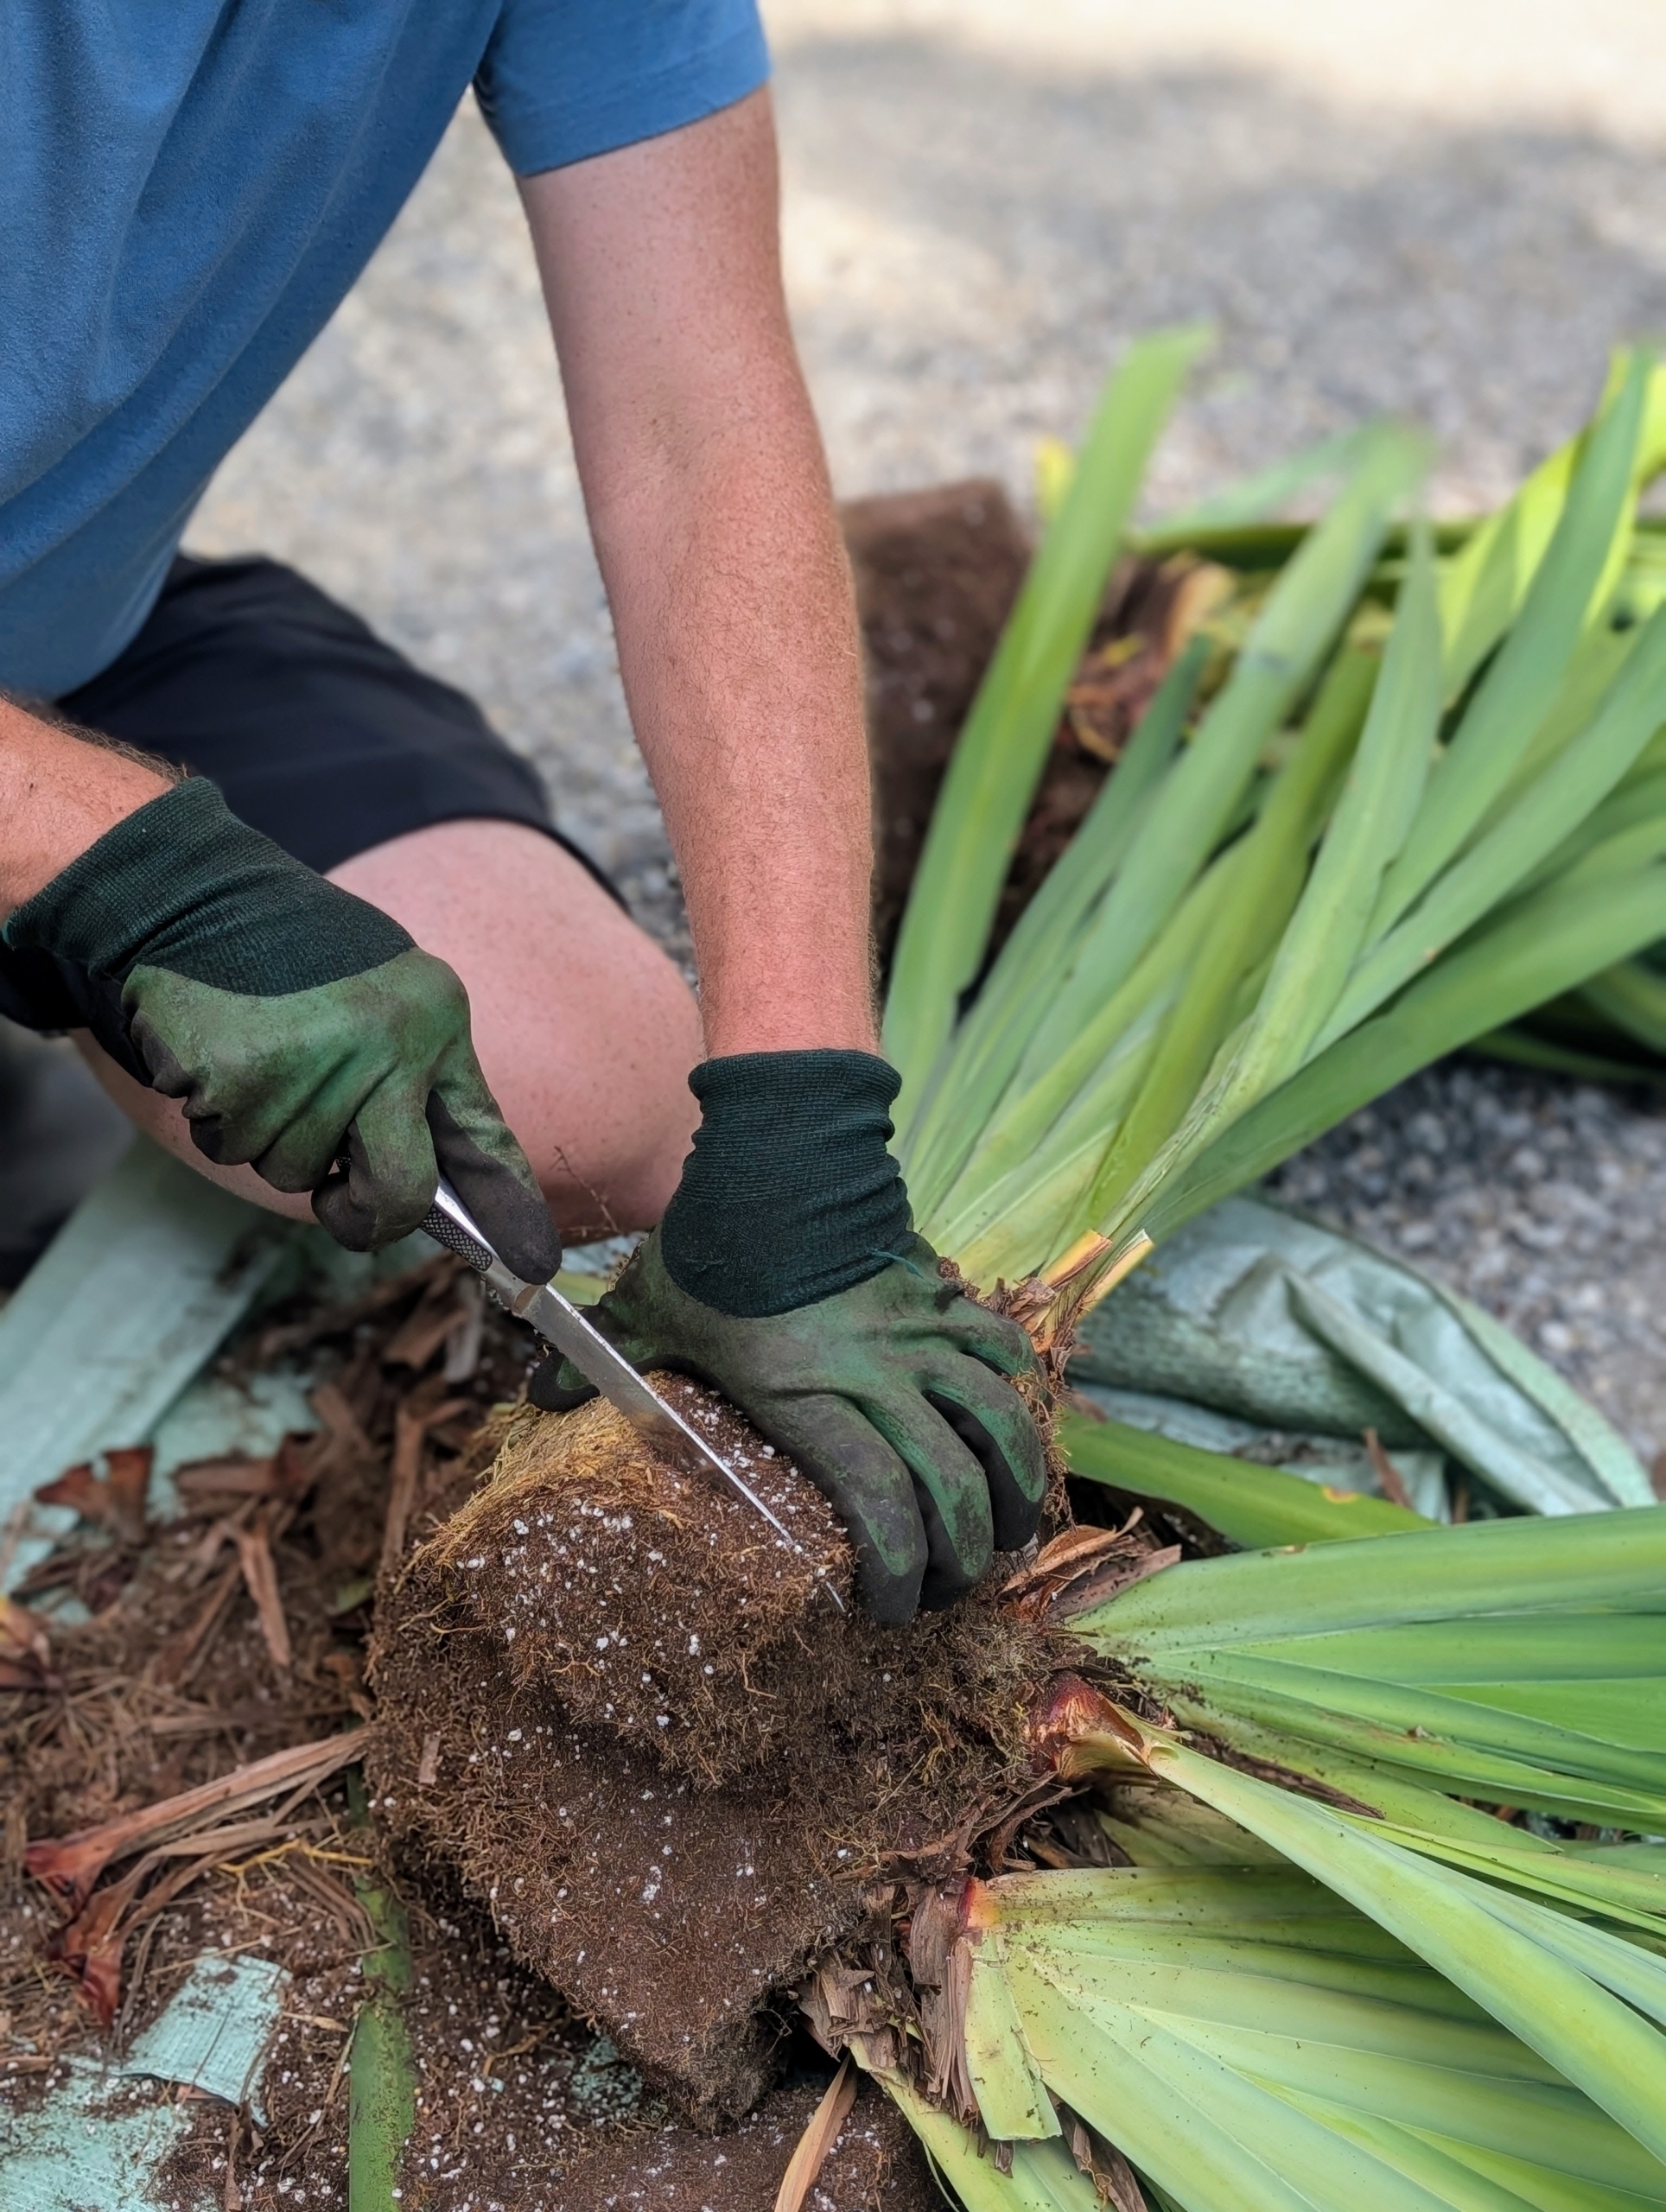
Walking iris plants grow from rhizomes, or thickened stems that grow underground and serve as storage for water and other nutrients. Here is Ryan as he starts to divide the plant in two.
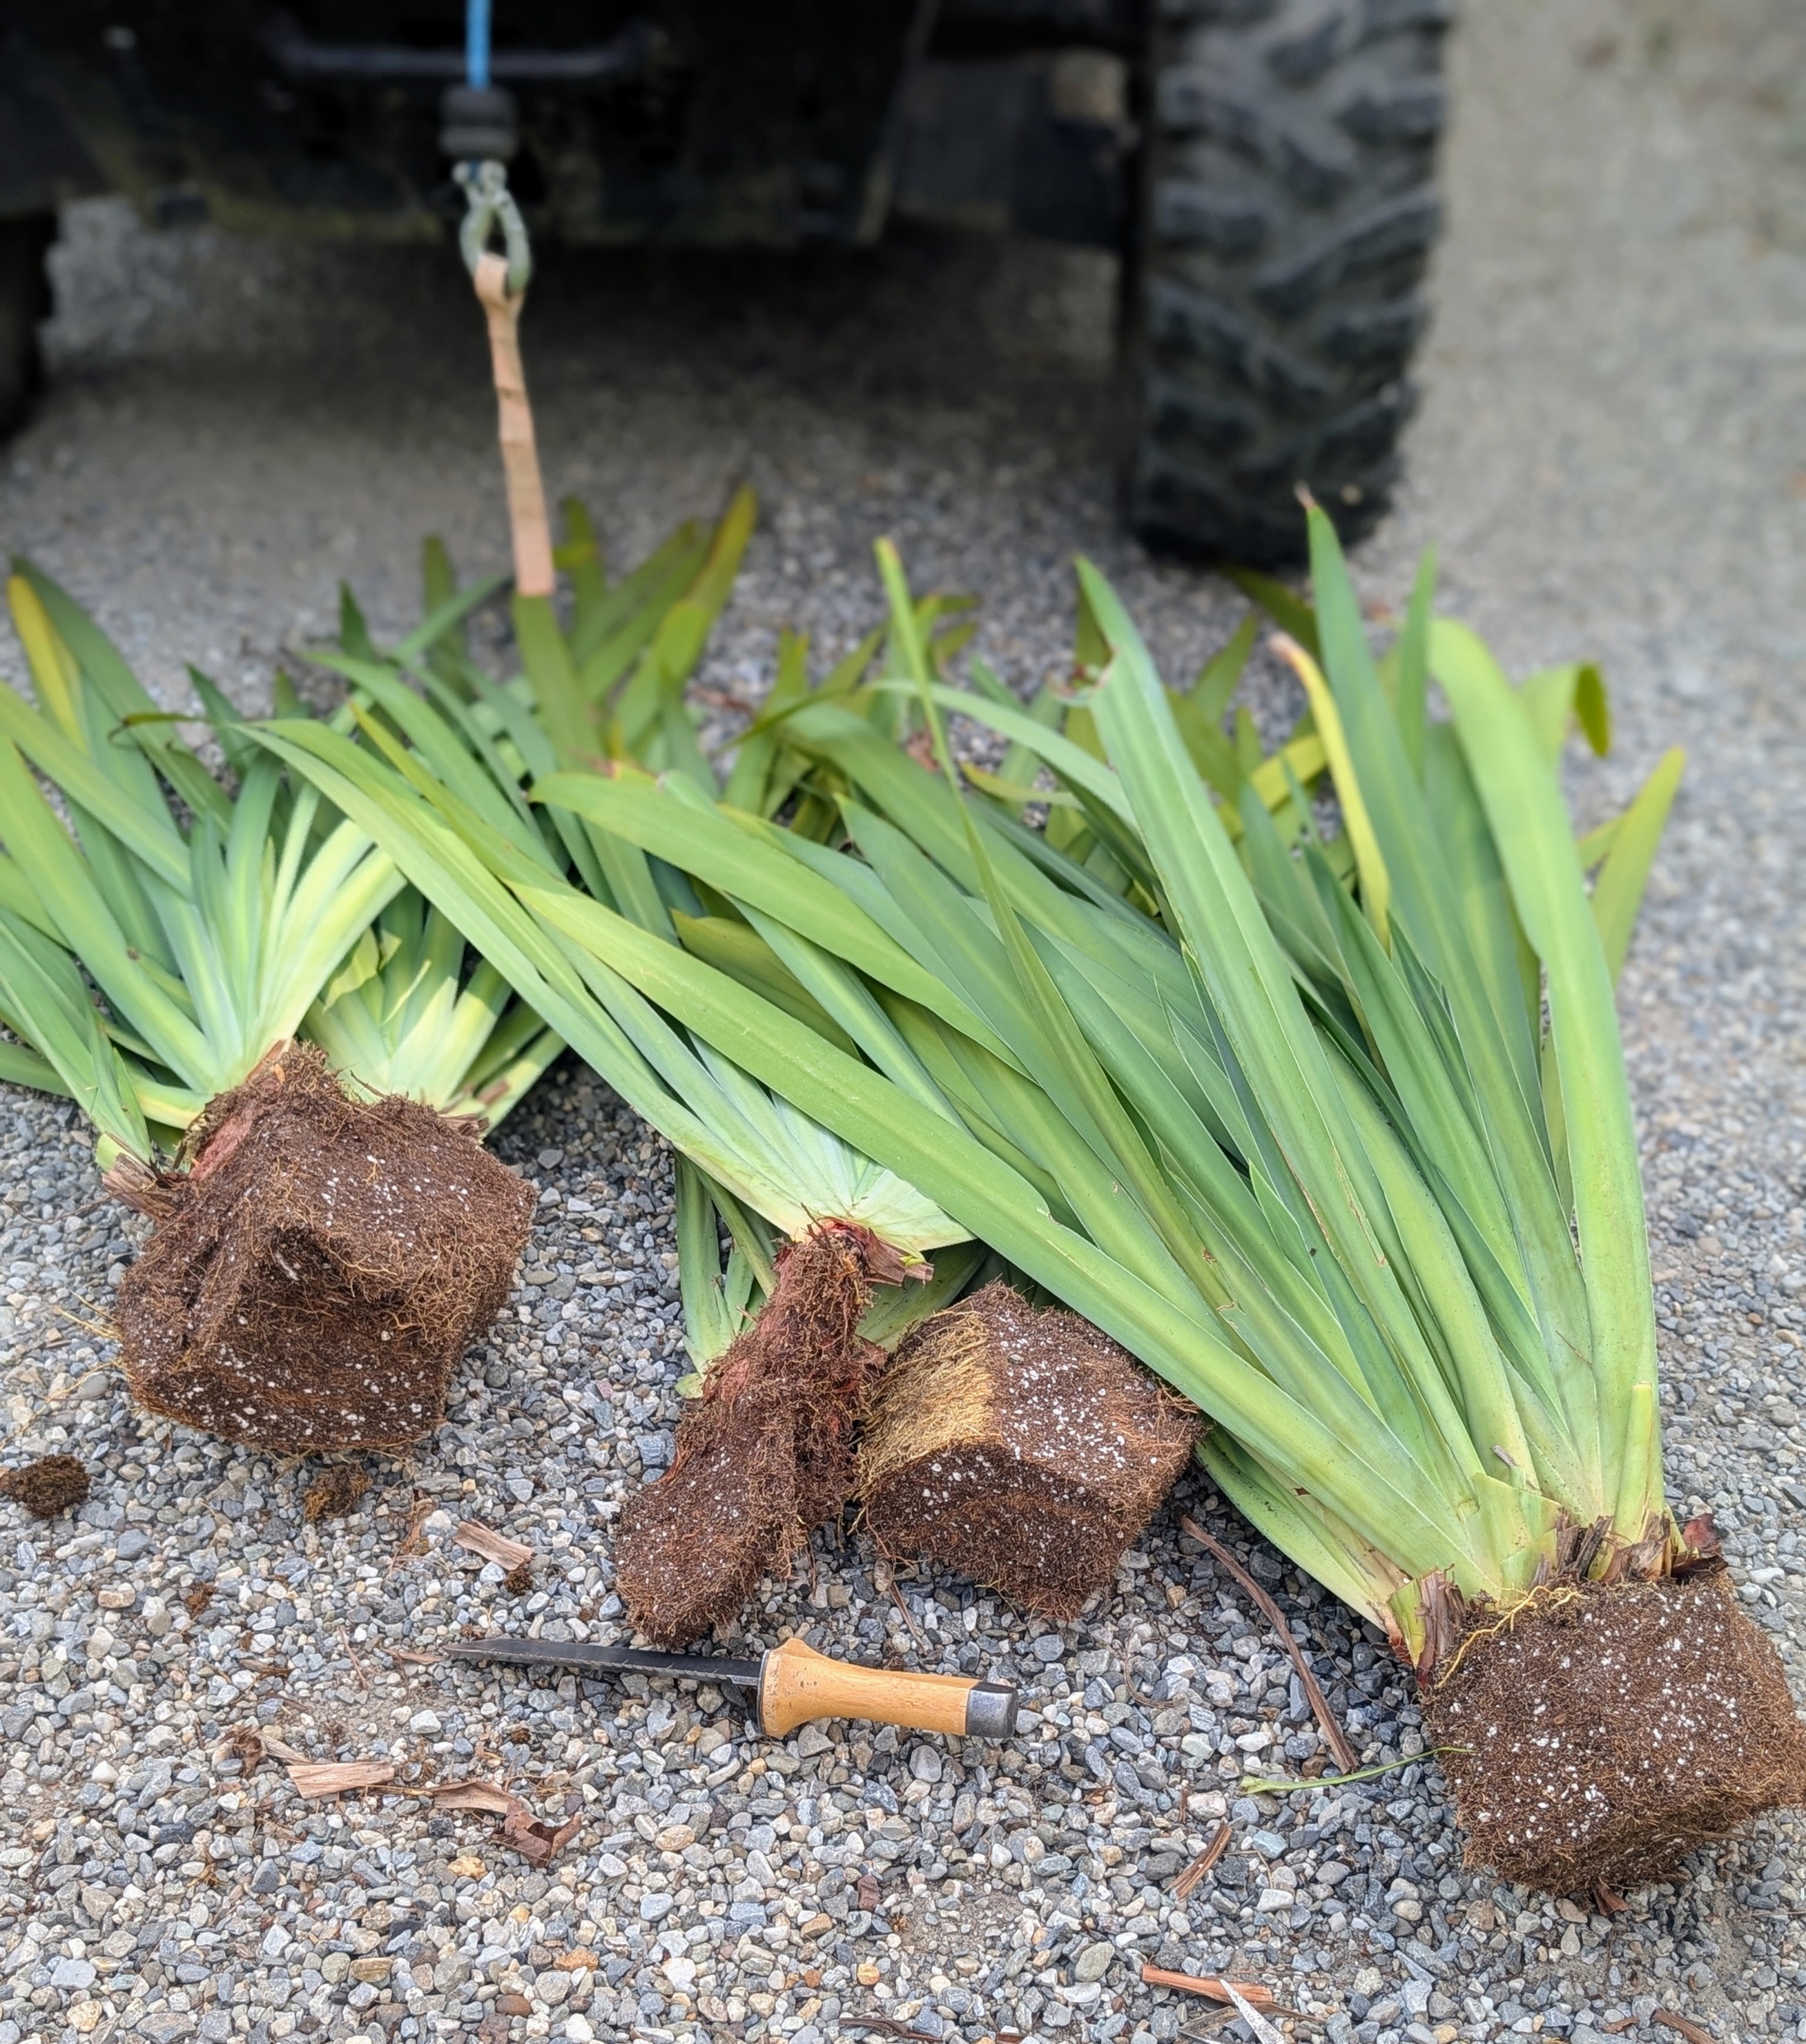
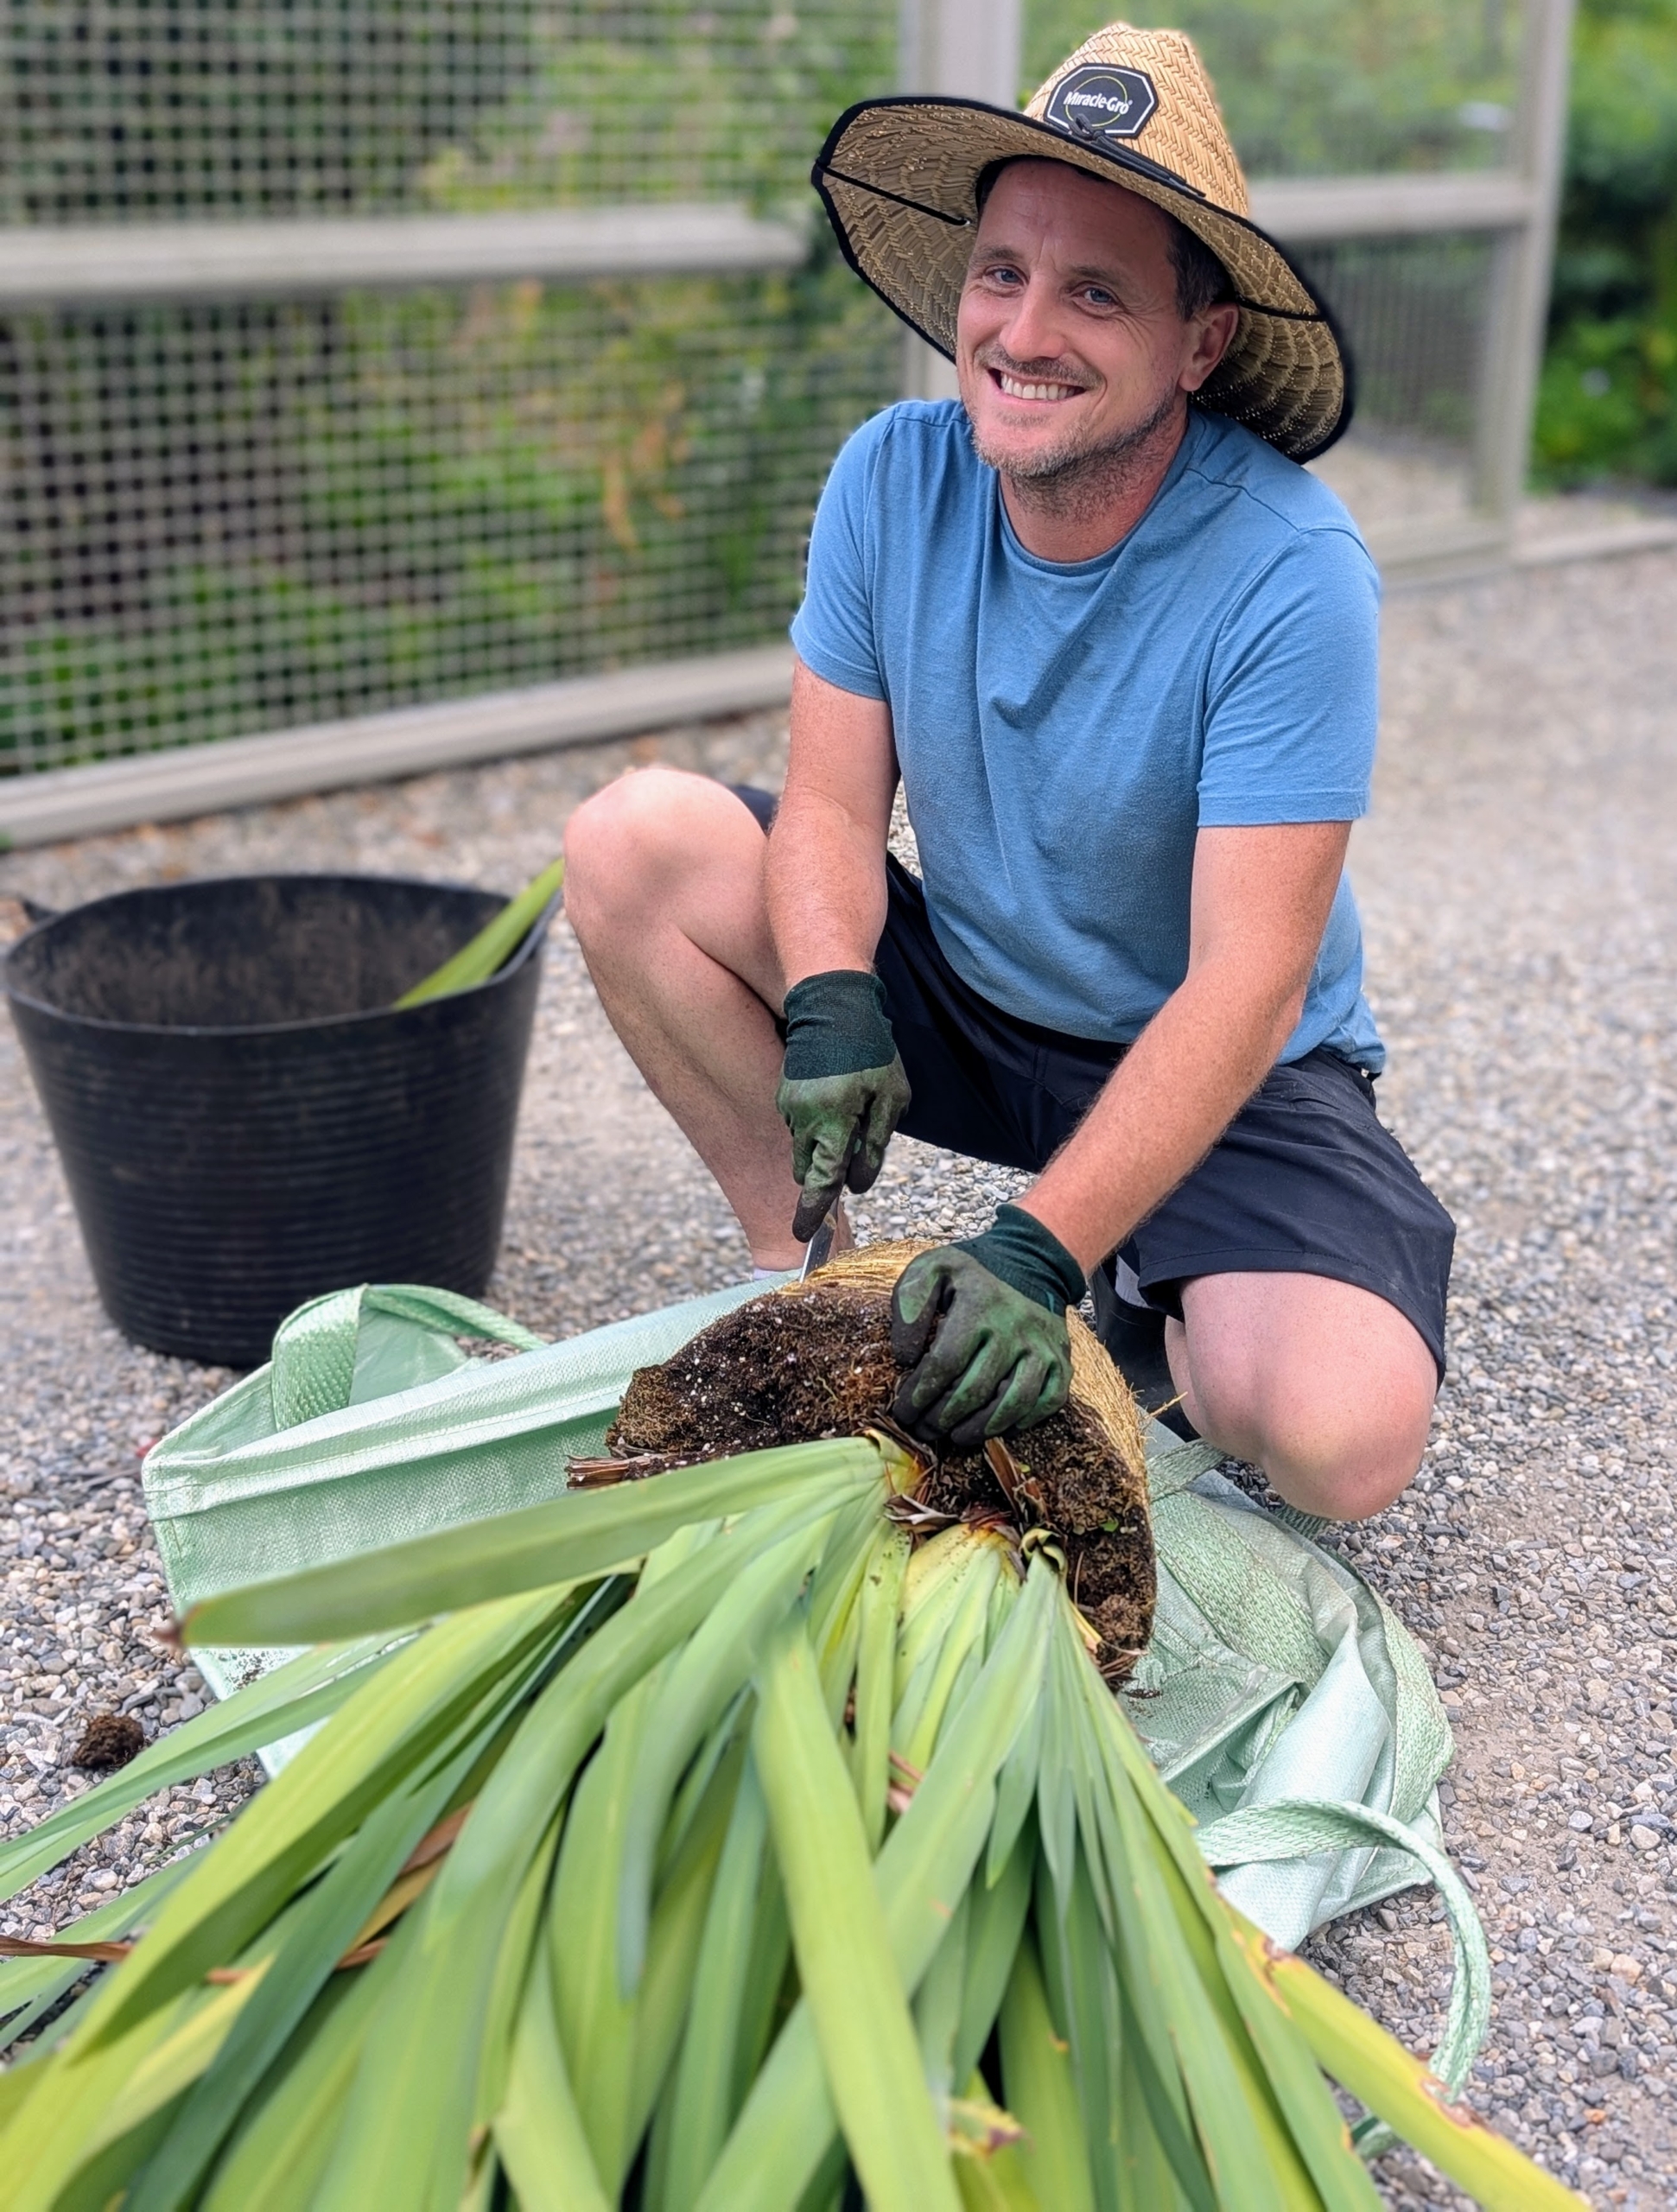
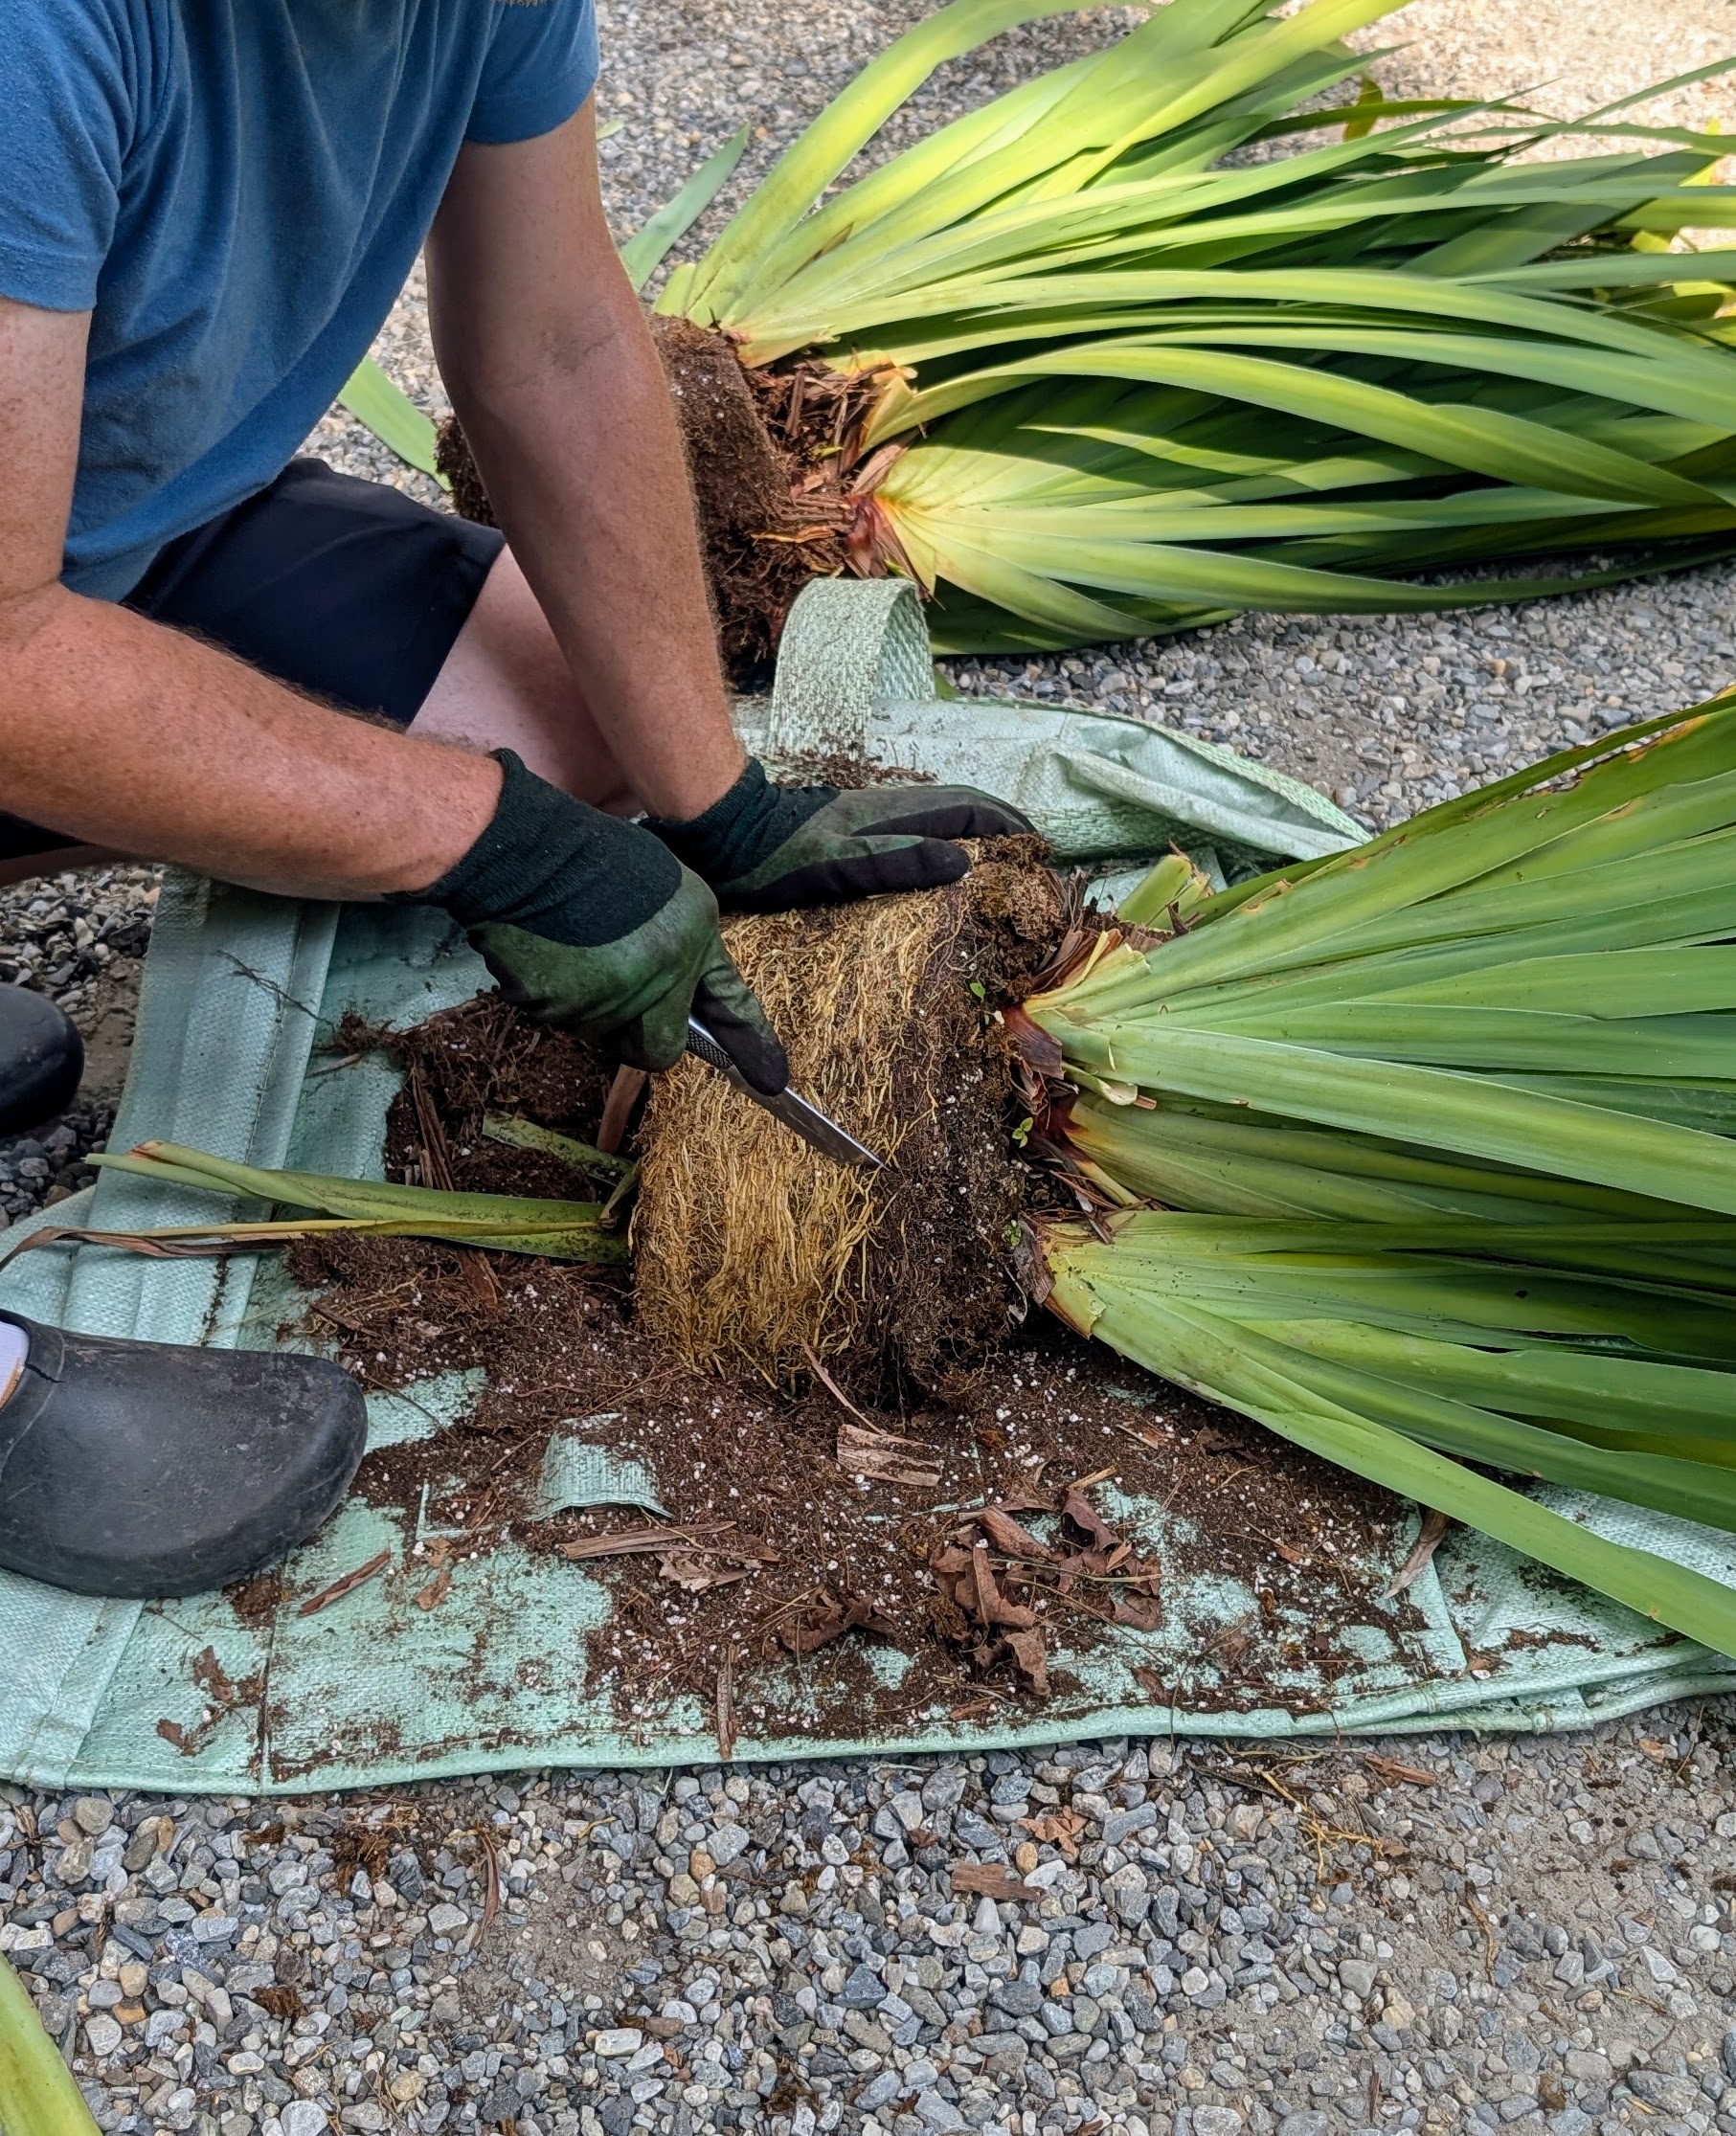
Next, Ryan assesses where he can cut each section again. Here he cuts one of the halves in two using a very sharp knife.
Here is a healthy section of the plant. Section dividing iris plants promotes good health and prevents overcrowding and competition for water and nutrients.
After cutting the plant into four, Ryan cleans up each one removing unnecessary foliage.
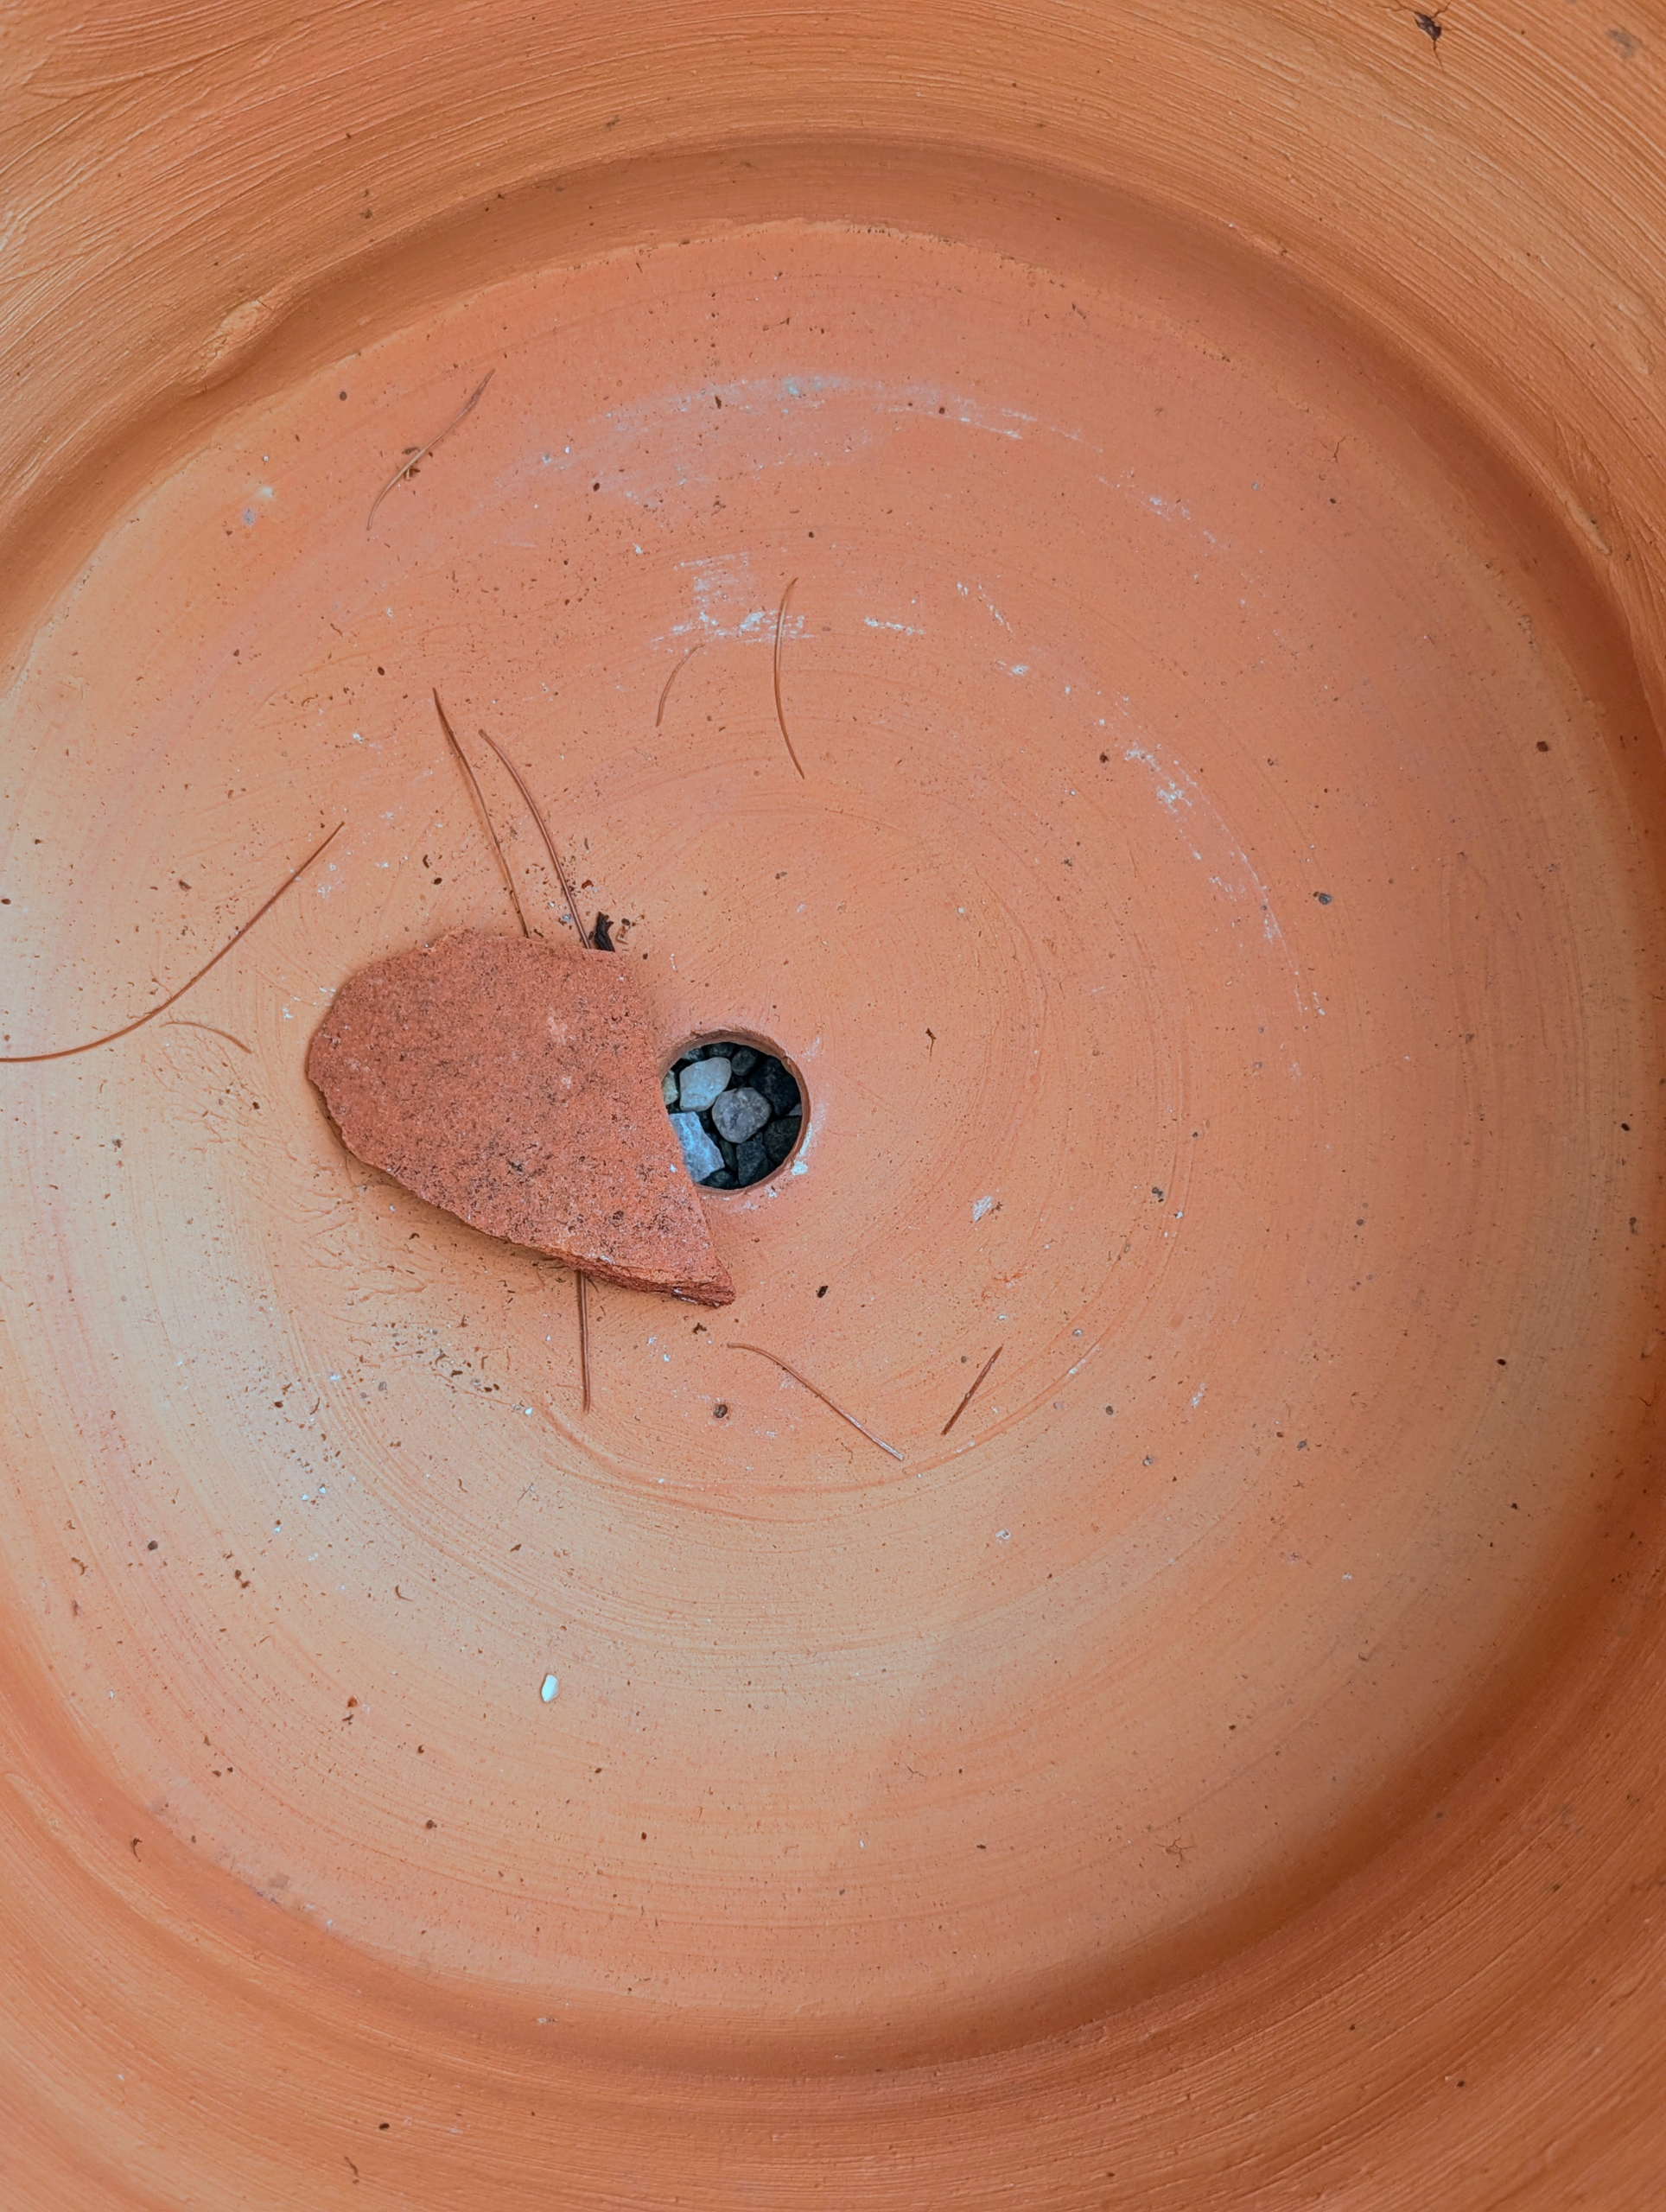
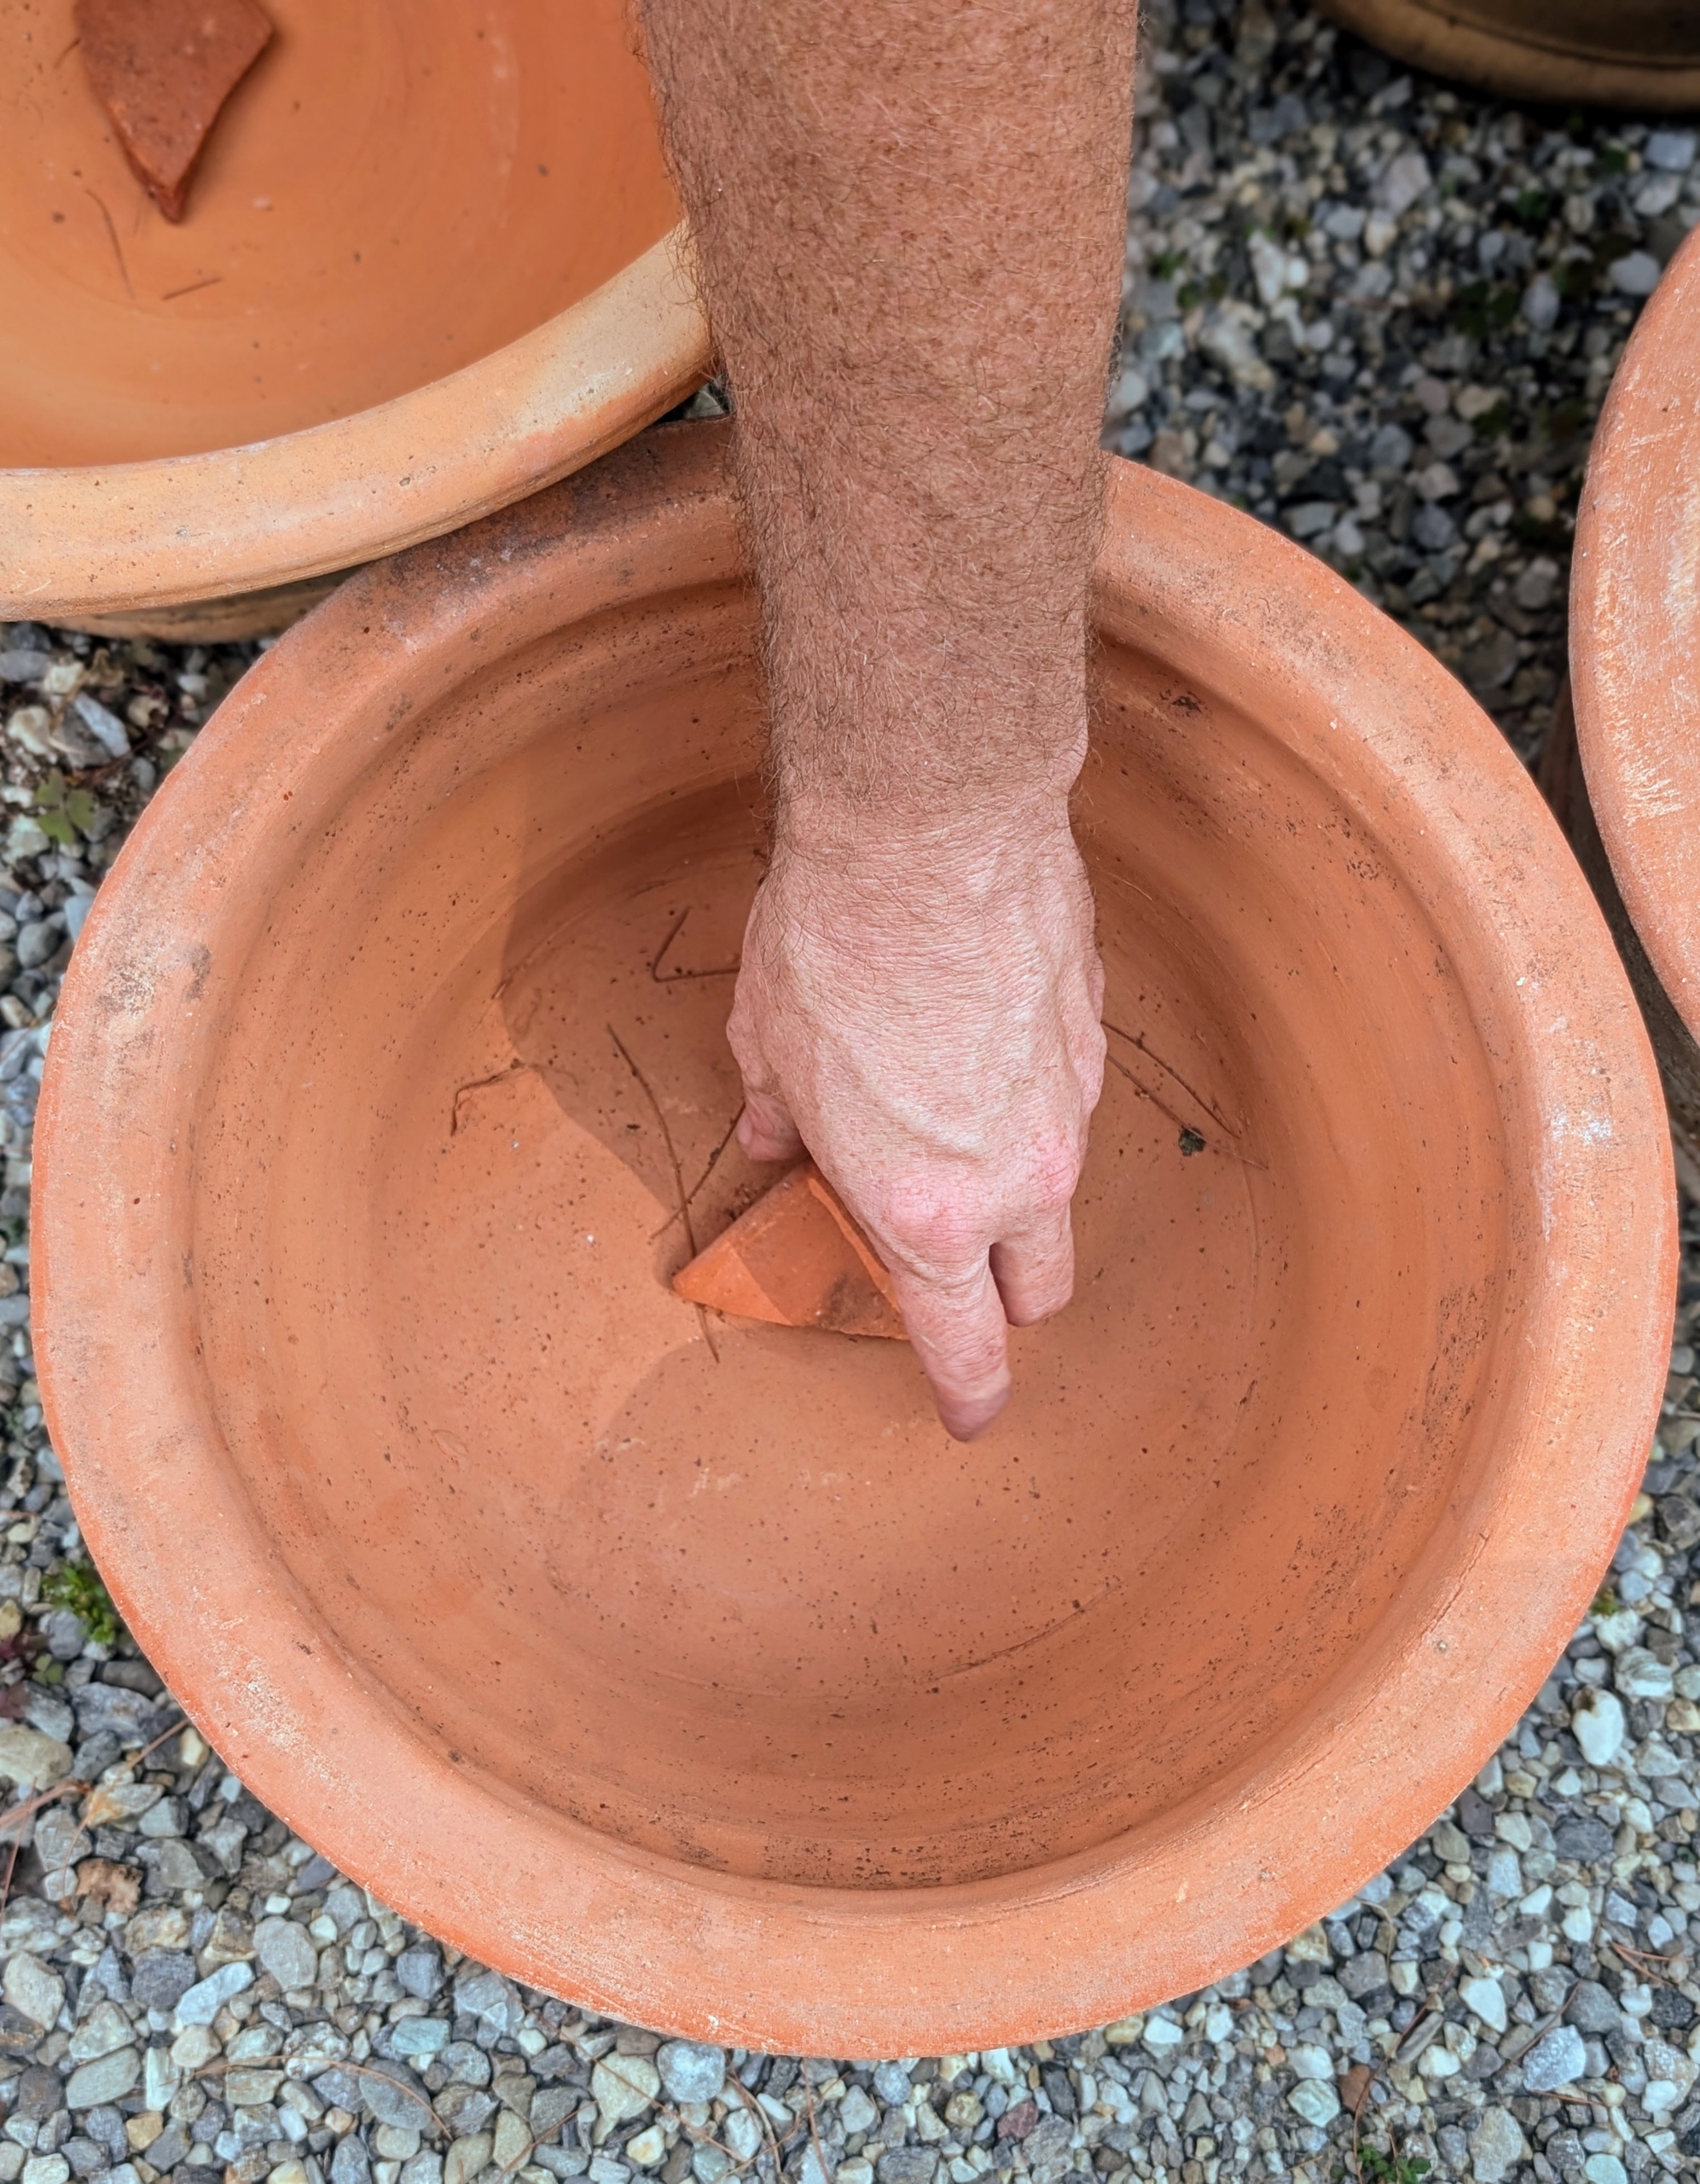
I save all the shards from broken pots for repotting. It doesn’t happen often, but when it does, these shards come in very handy.
Ryan places a shard on top of the pot’s hole to maintain good drainage and to prevent soil from escaping.
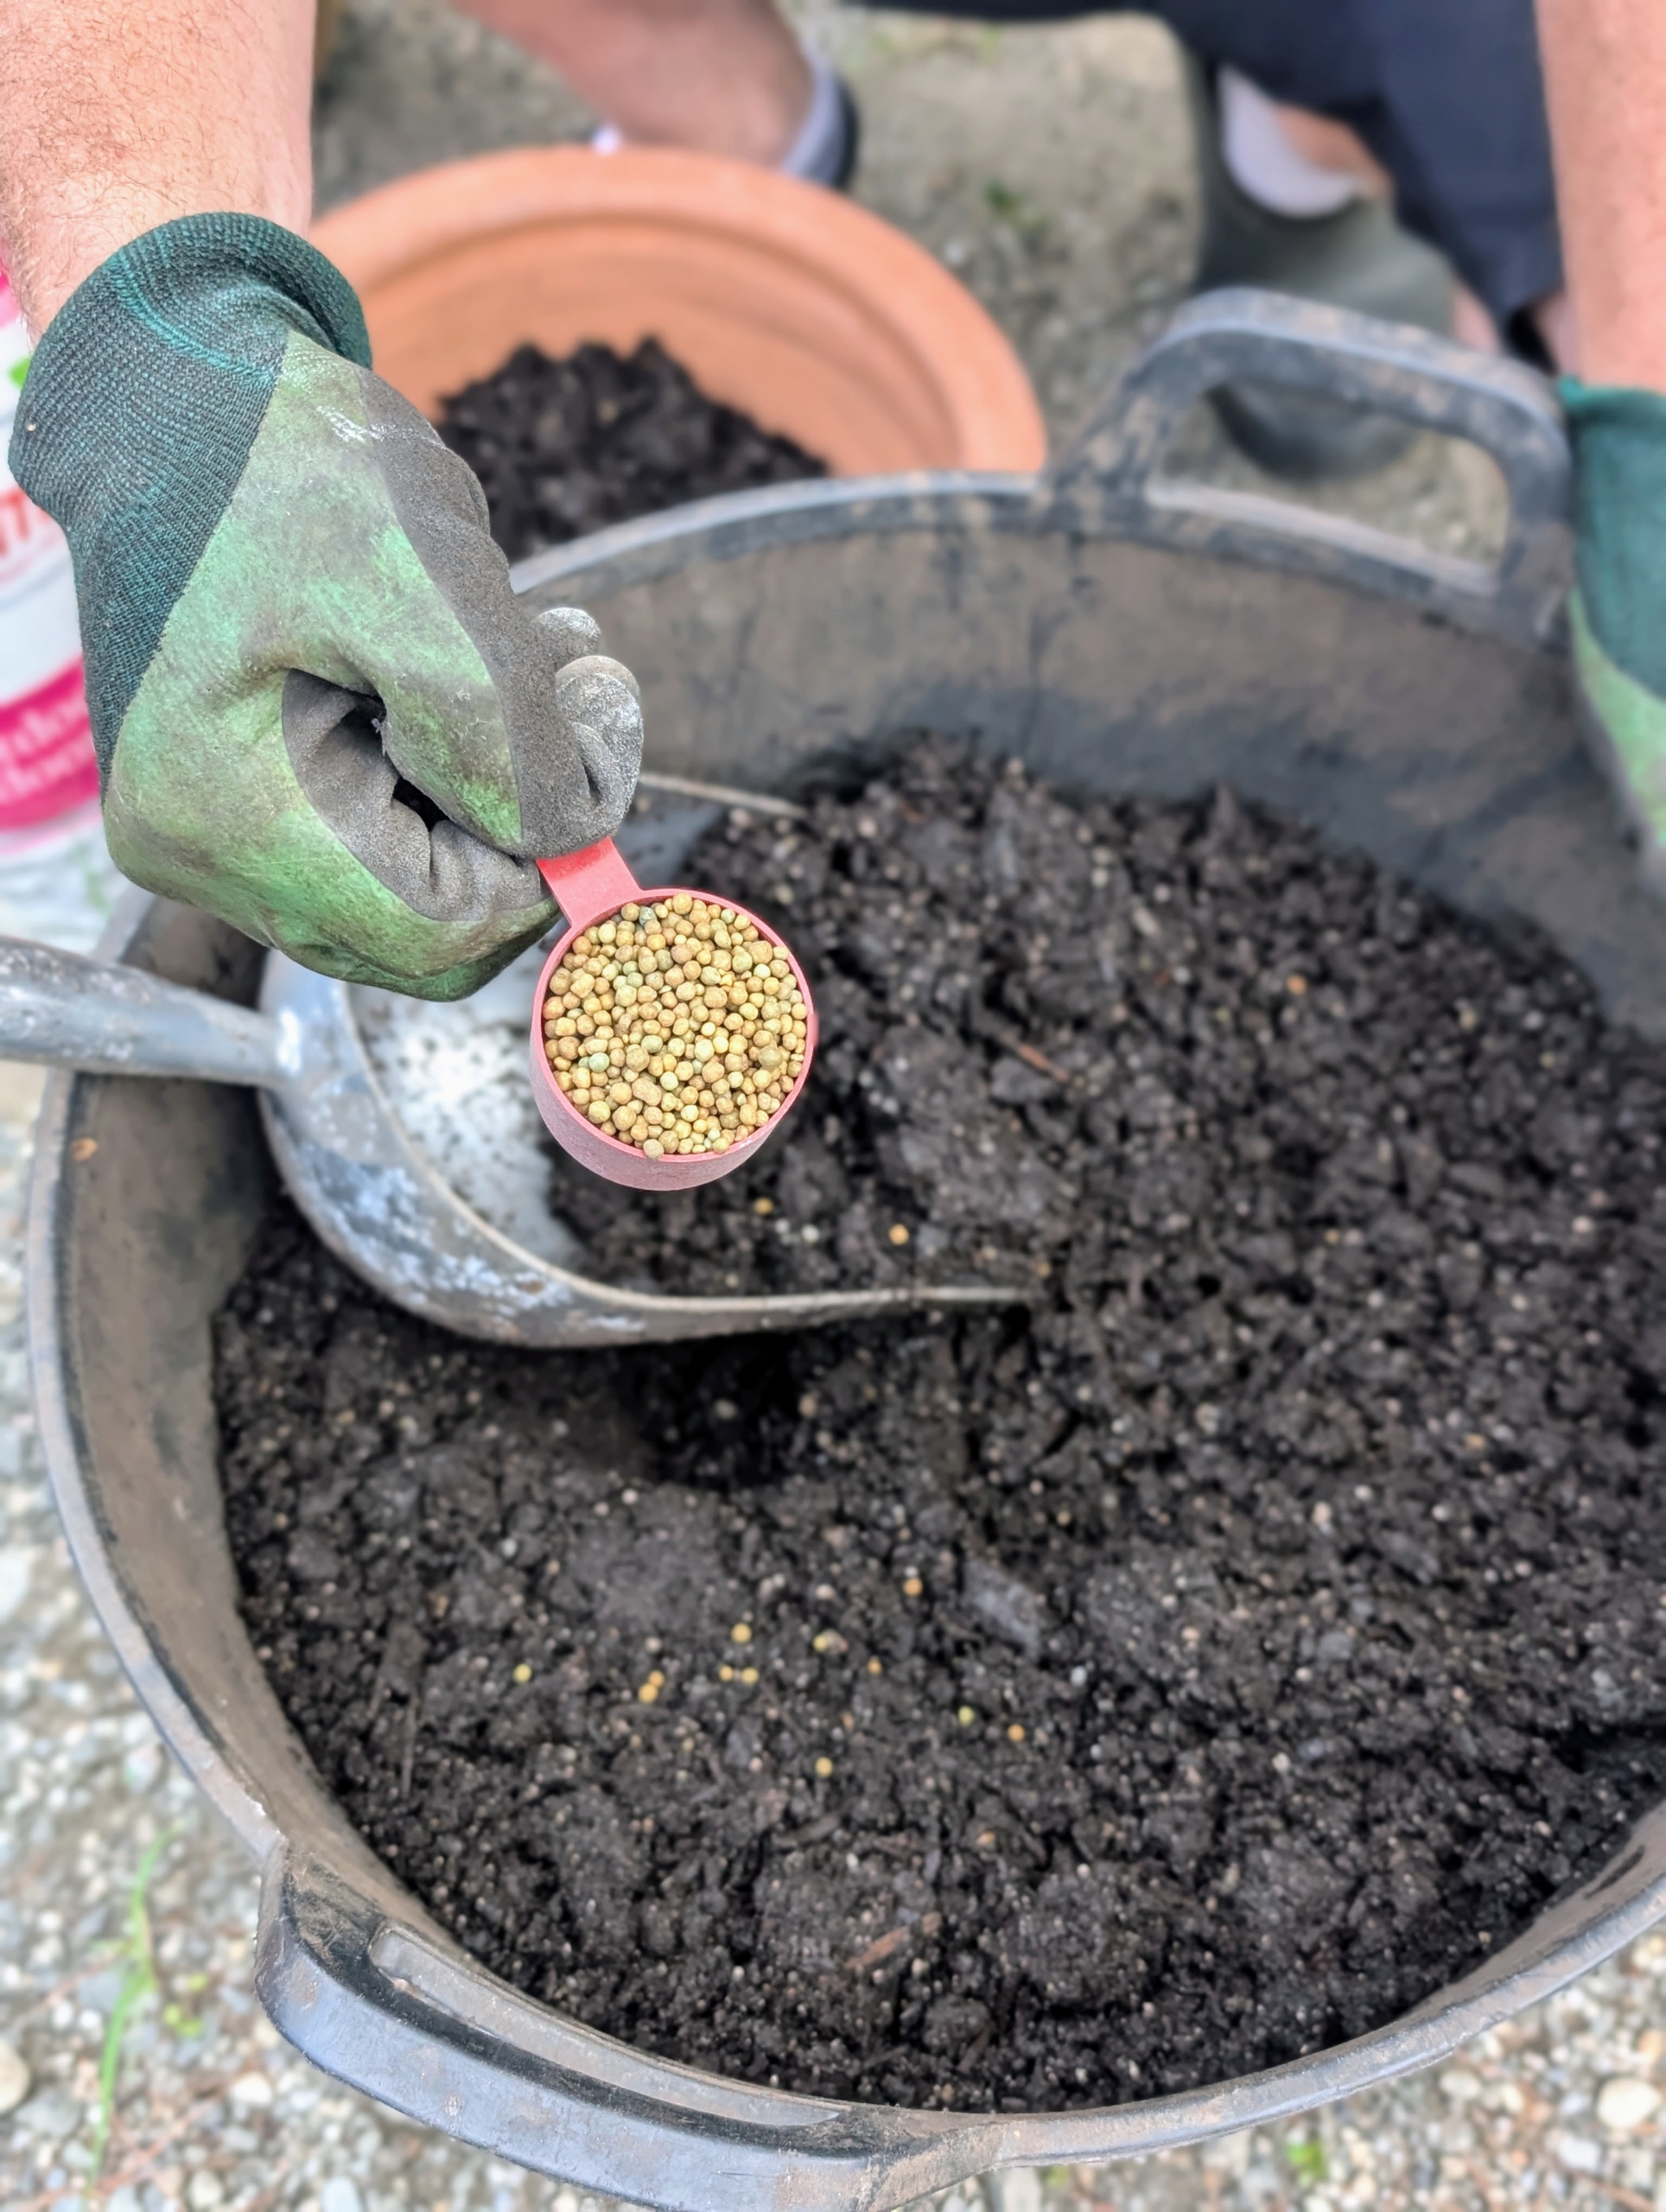
Ryan adds a couple scoops of fertilizer and mixes it thoroughly with the Miracle-Gro potting soil.
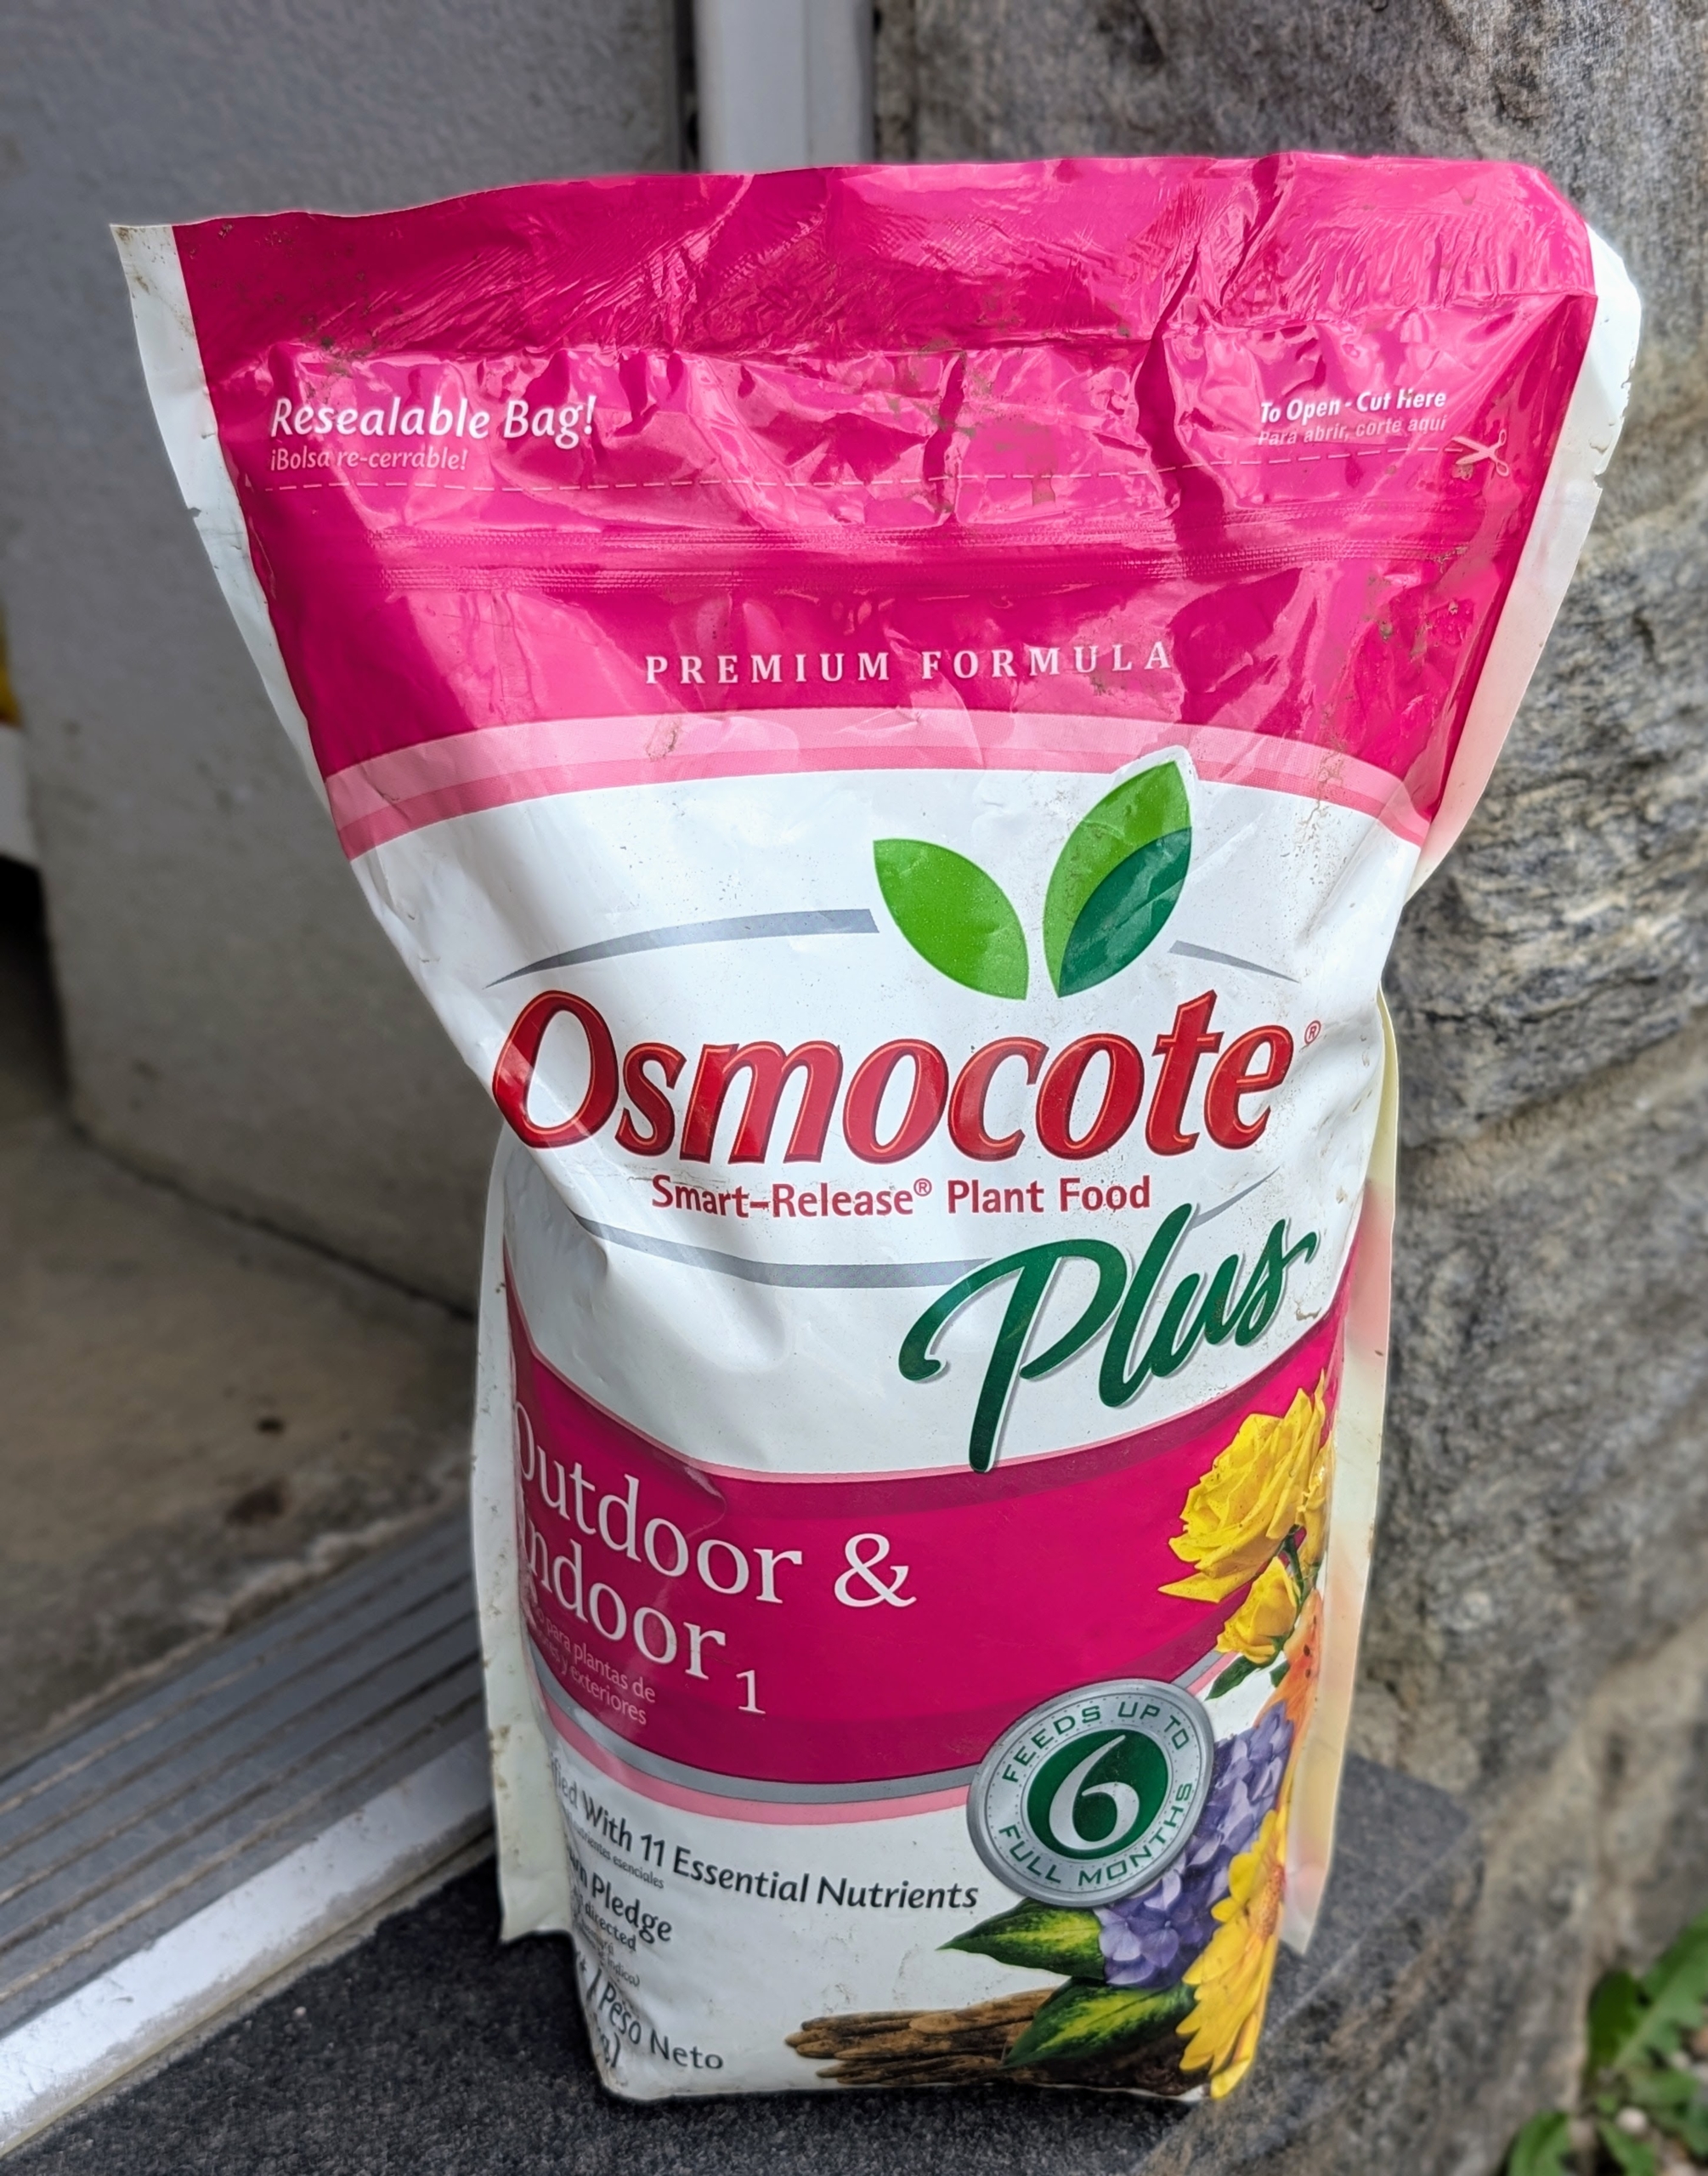
I use Osmocote Plus with added nutrients – it will last for up to six months.
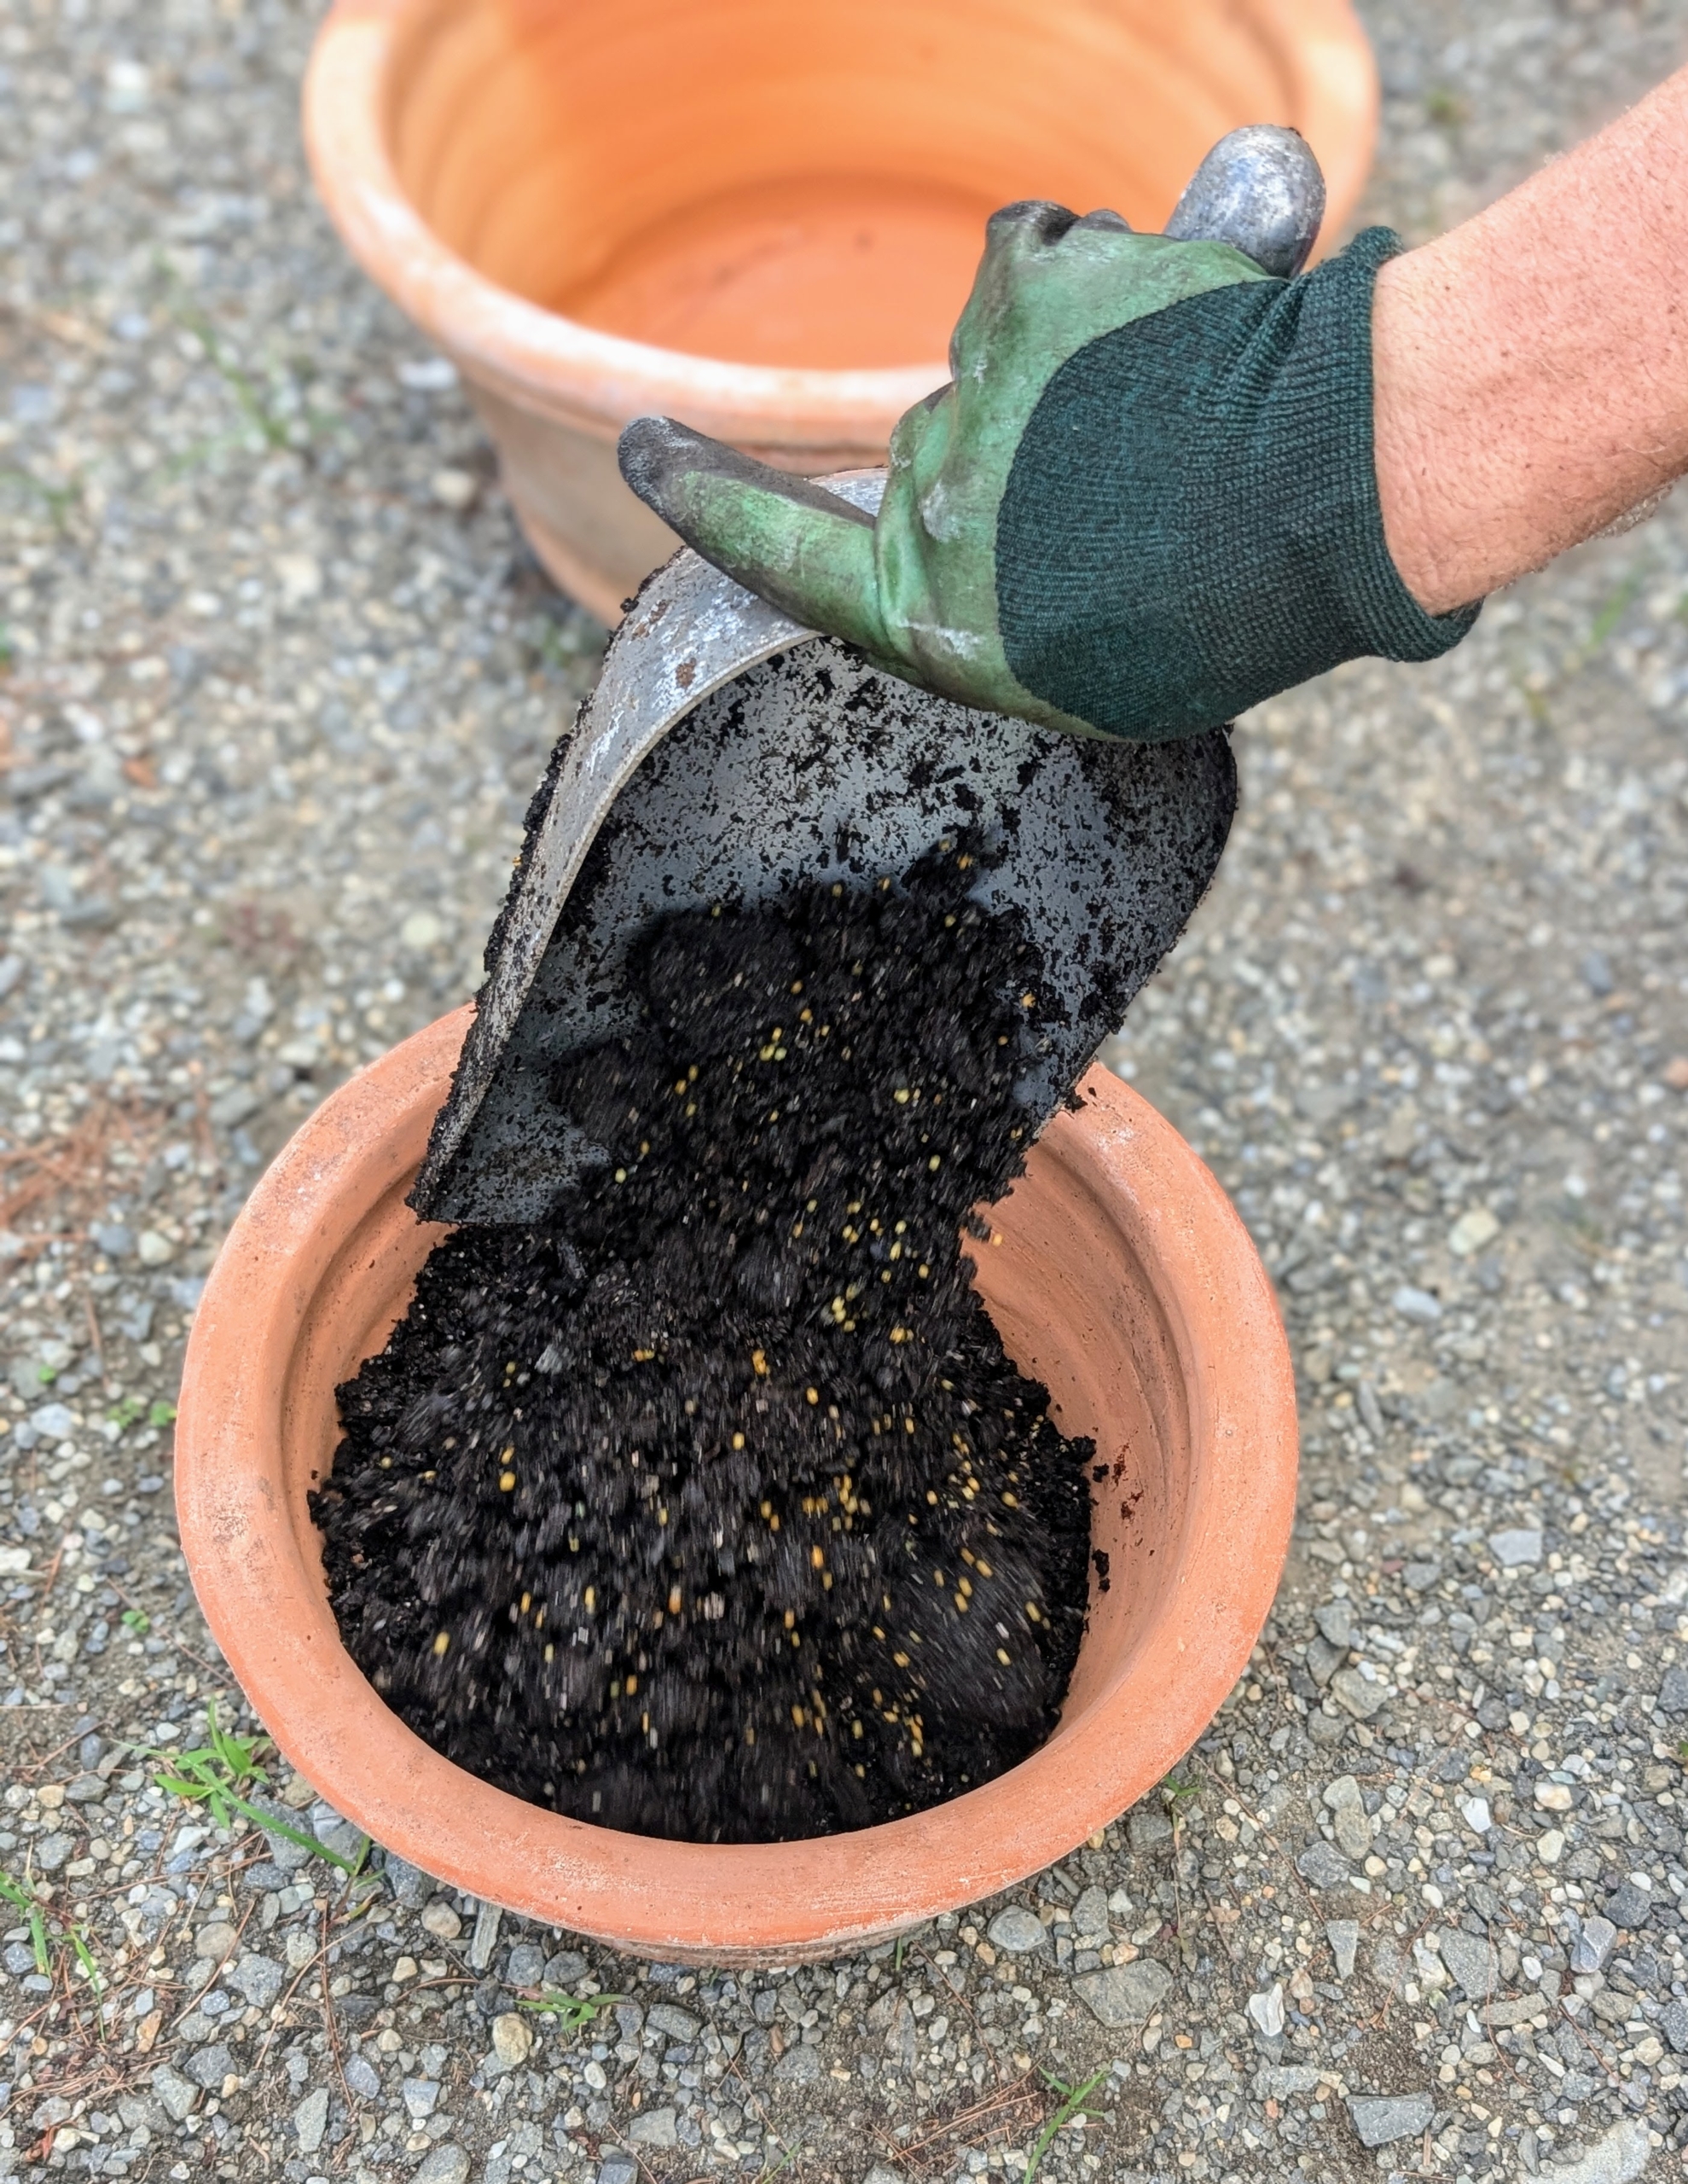
Ryan starts filling the pots with a few inches of soil.
And then gets the divided walking iris sections to plant.
He decides which section will go into each container. When transplanting, the plant should also be inspected for any signs of disease, rot, or pest infestation. These sections are in excellent condition.
Ryan makes adjustments and cuts the bottom of this section to better fit the pot.
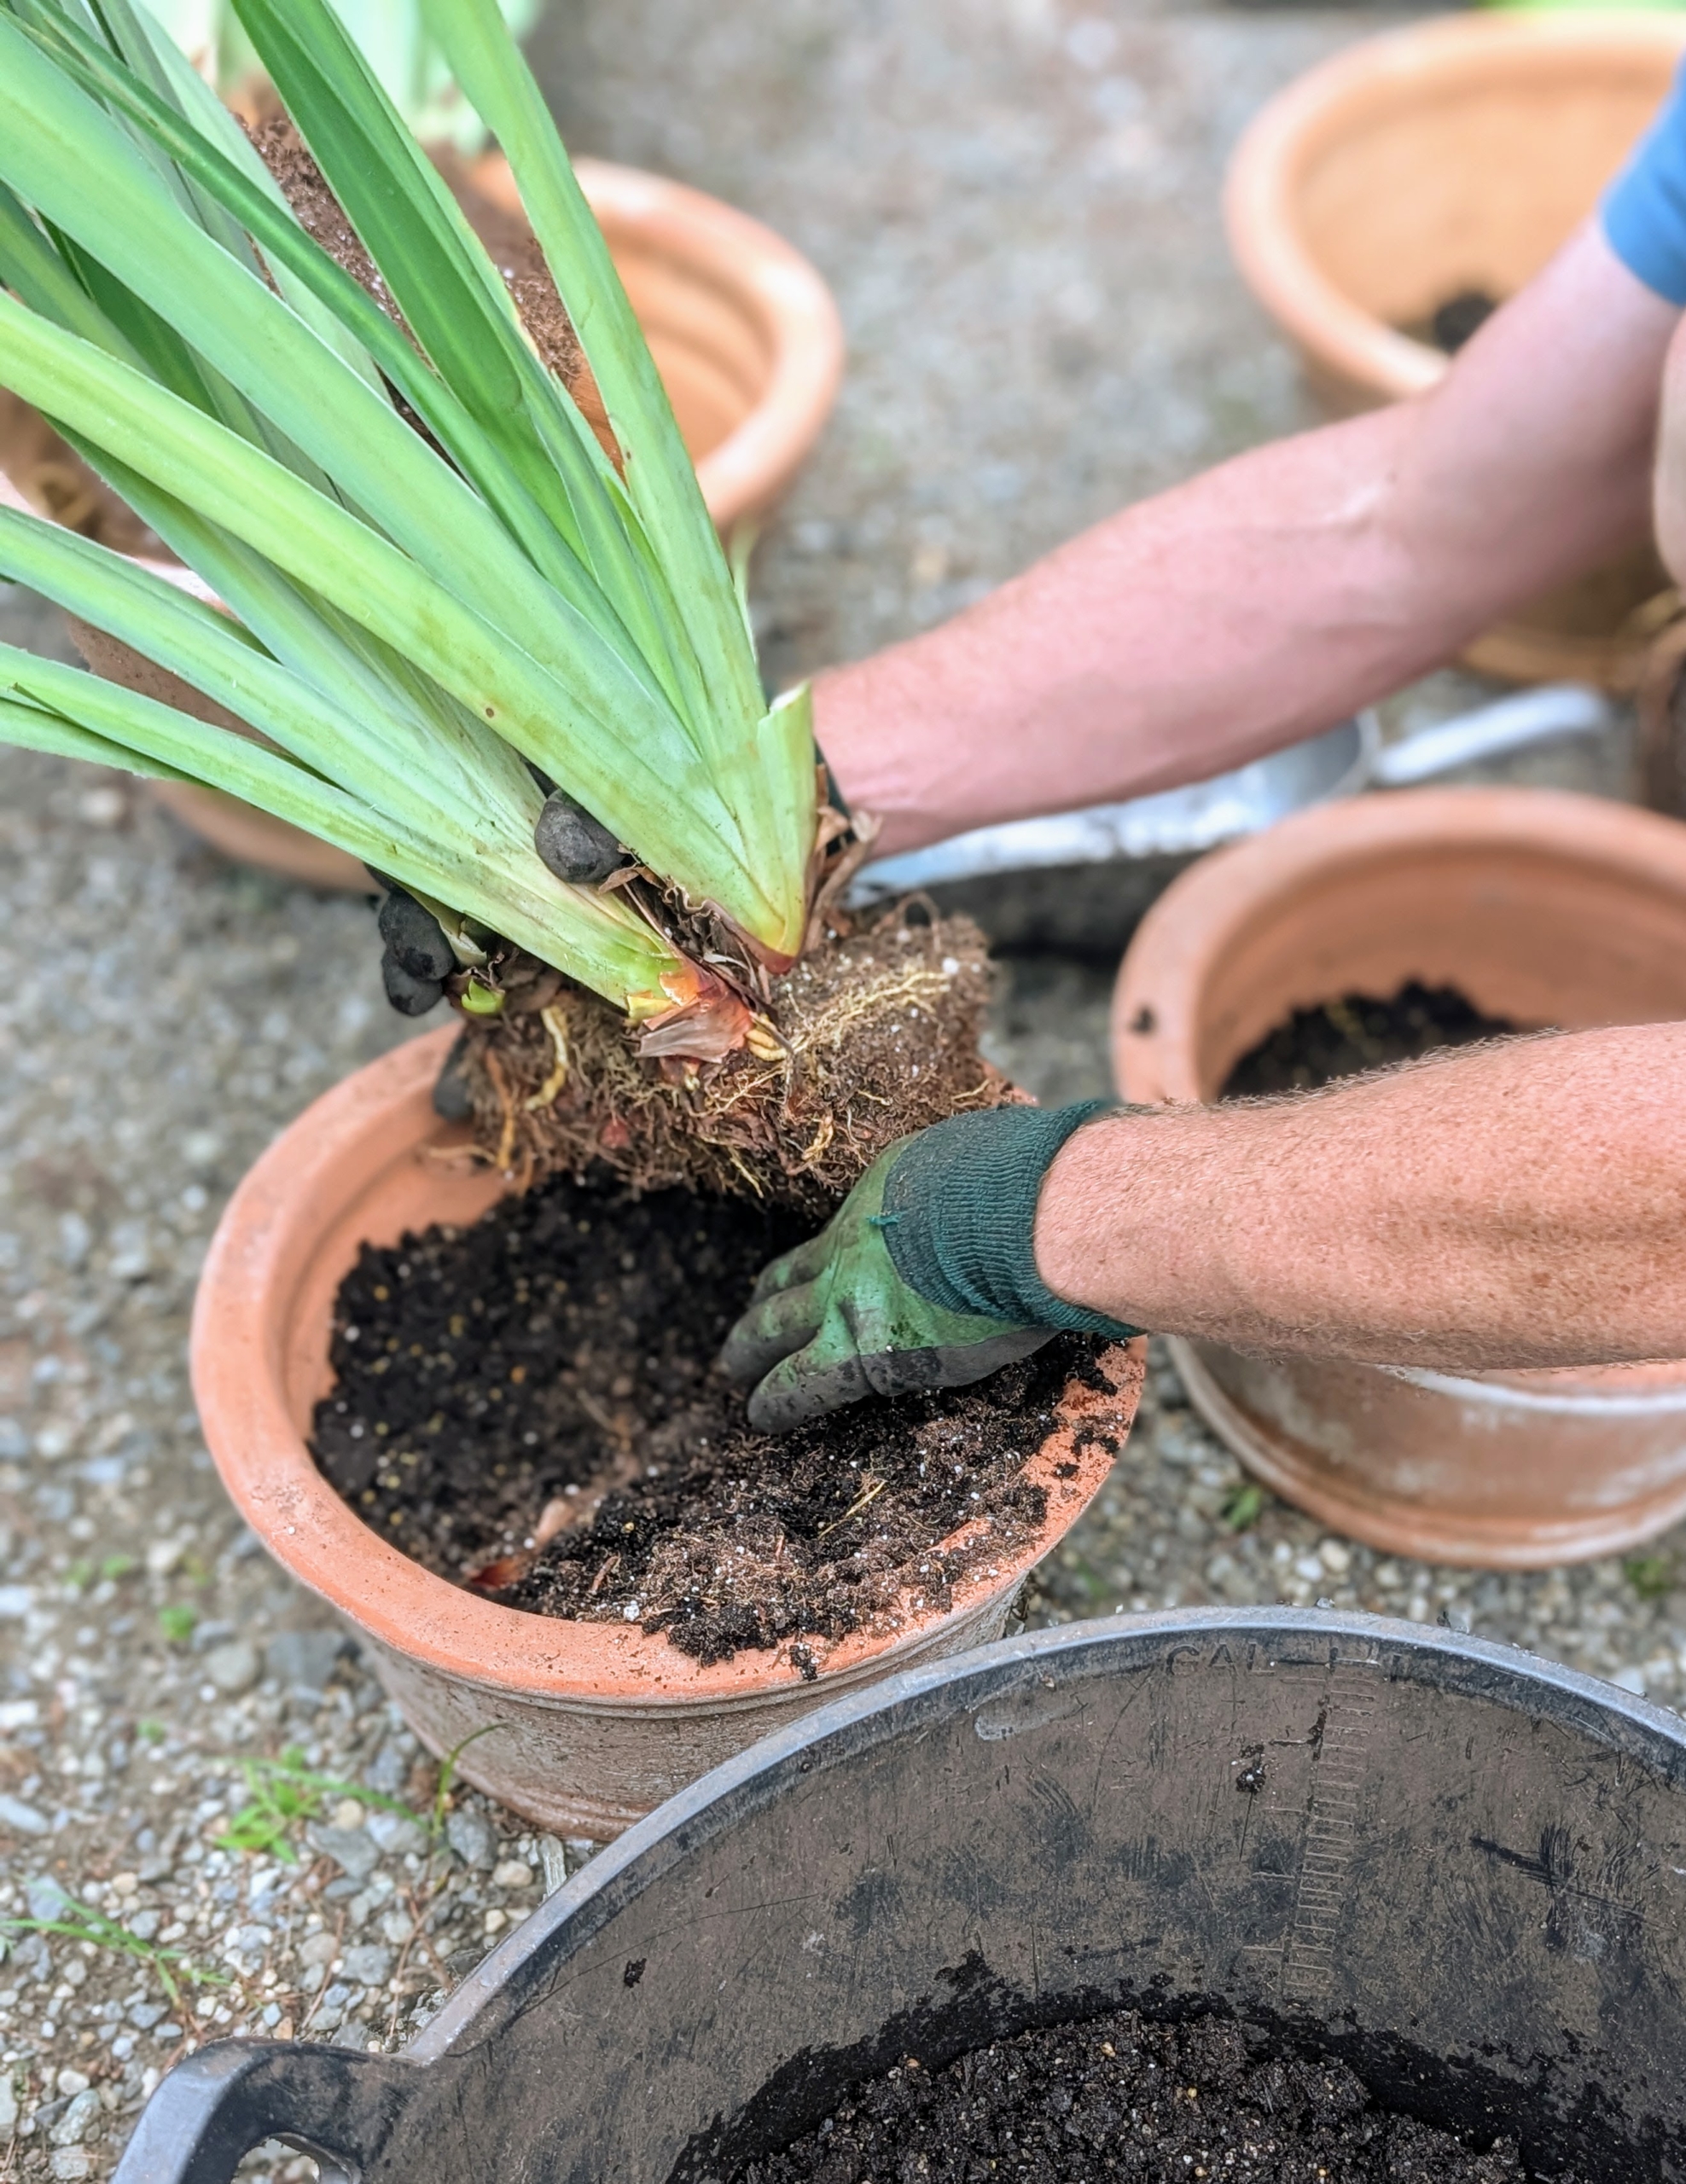
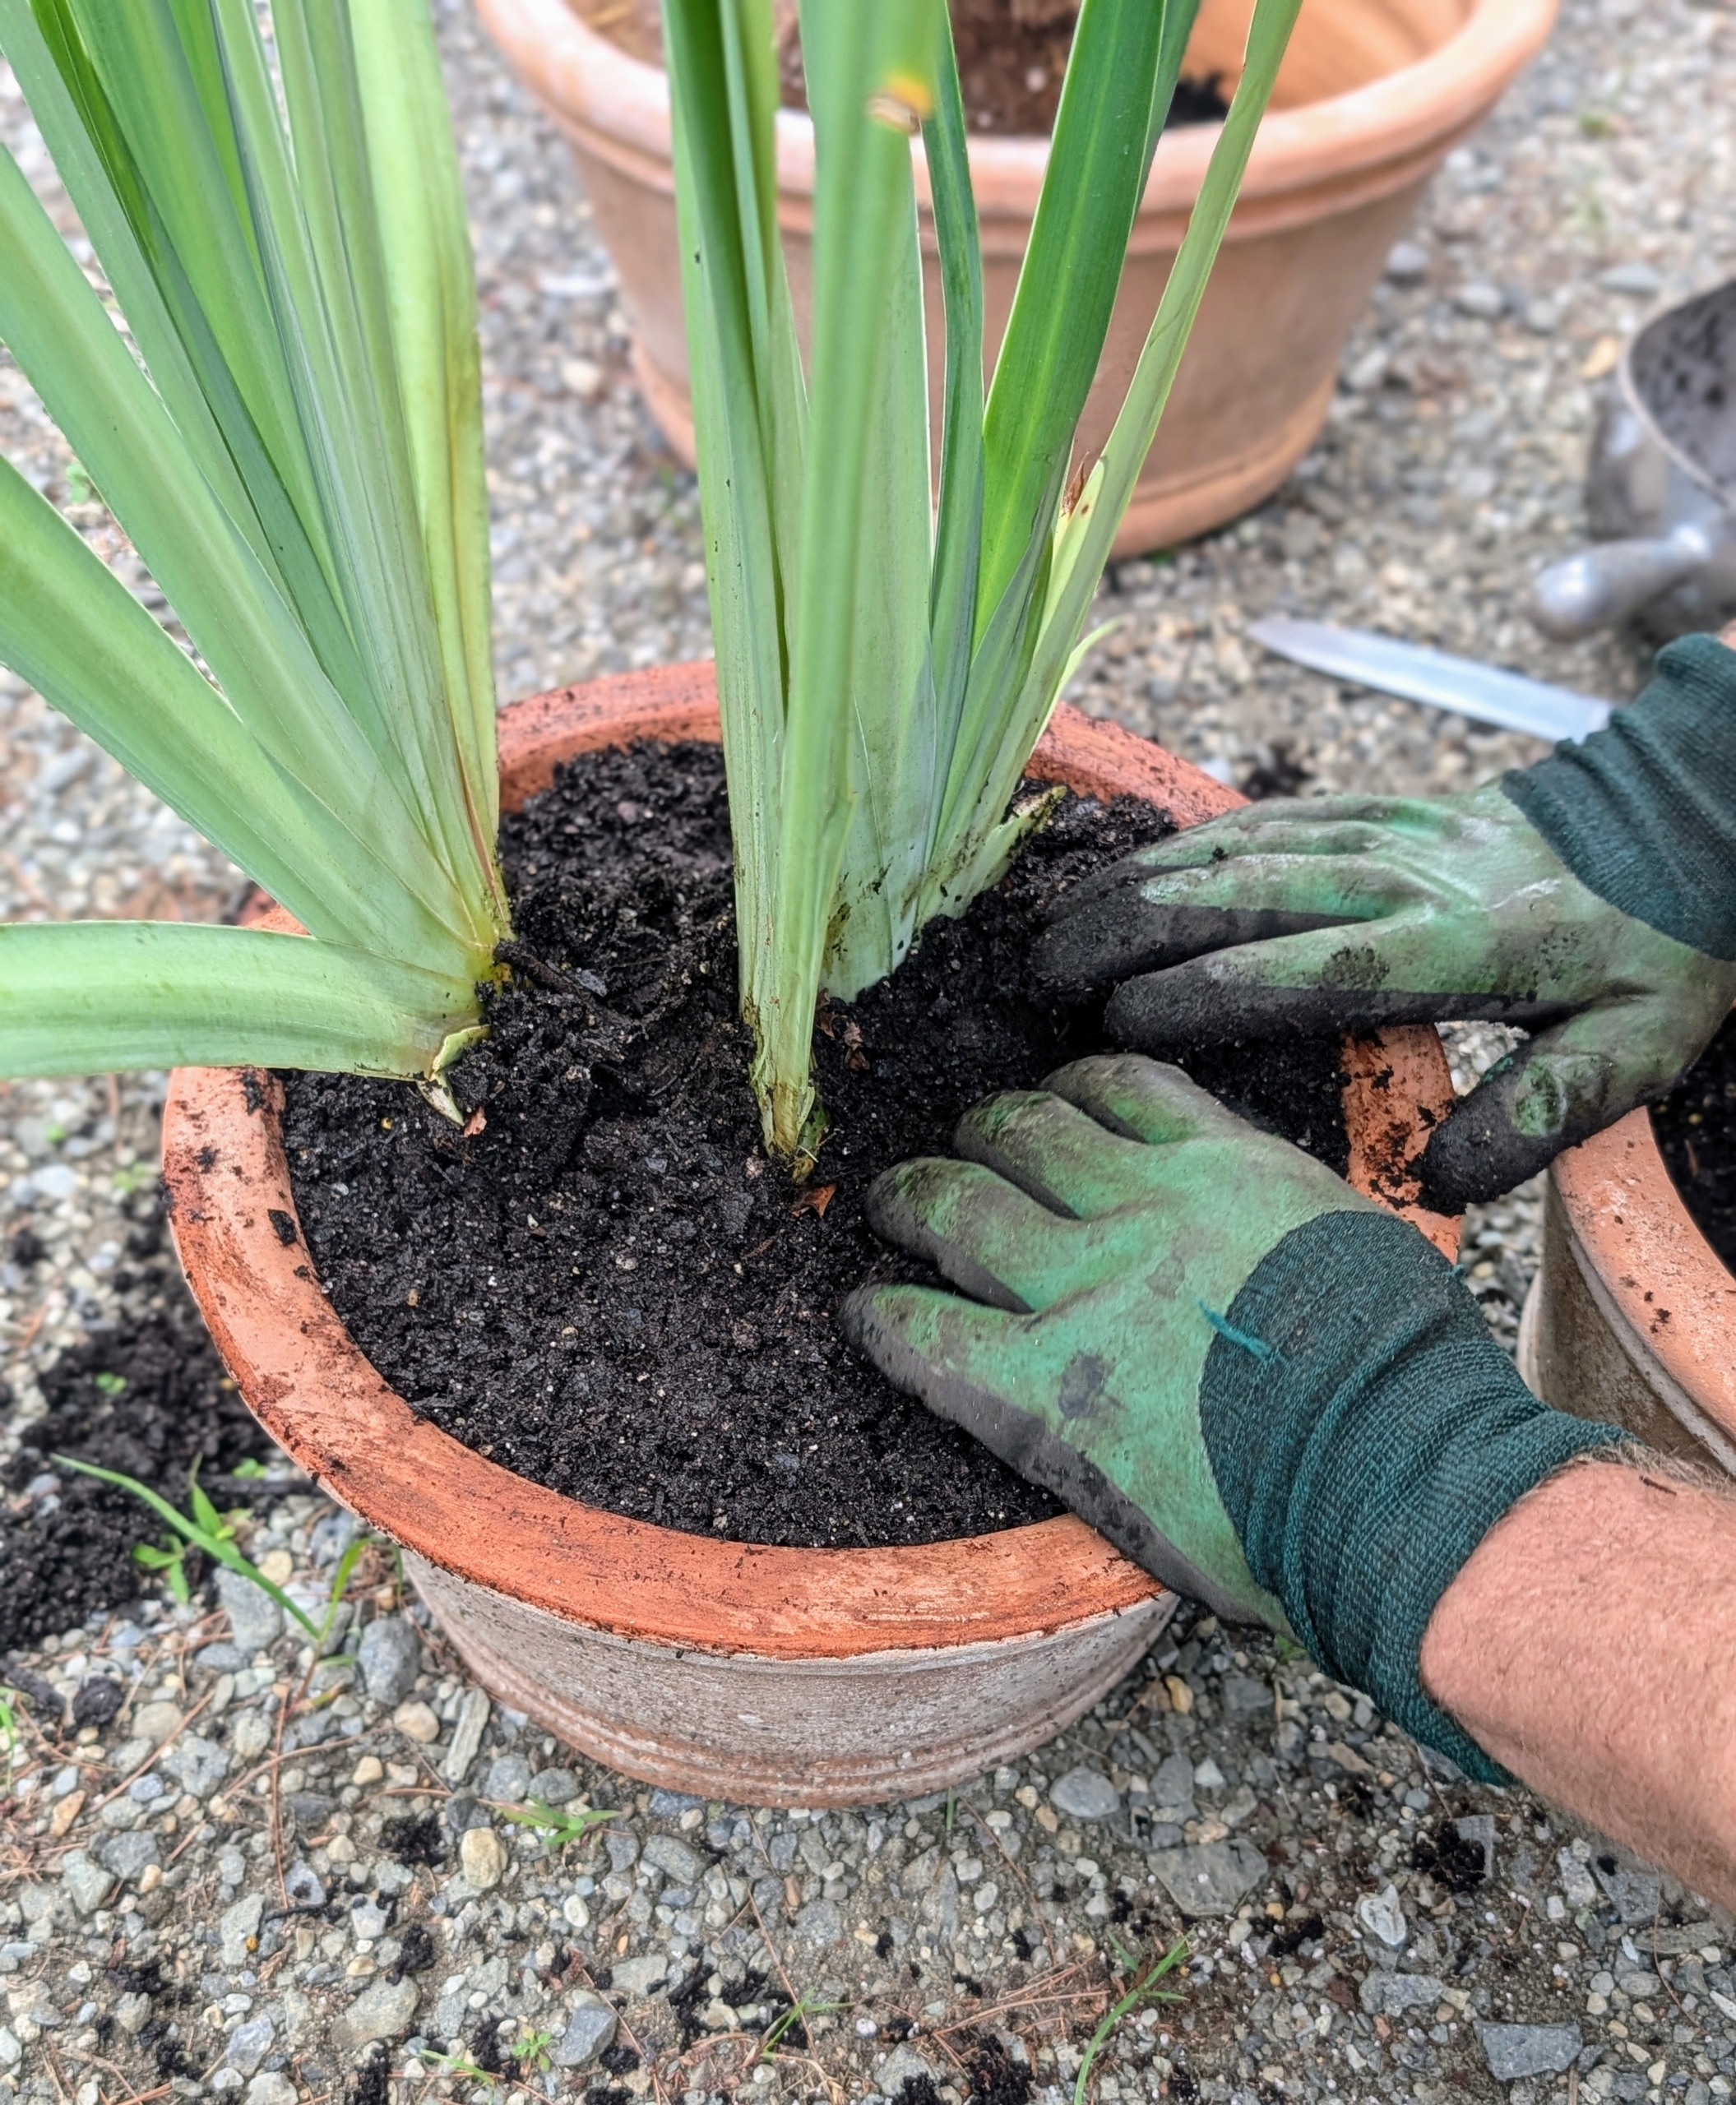
Then Ryan places the plant in the pot at the same height it was in its previous container. If needed, he adds a bit more soil at the bottom.
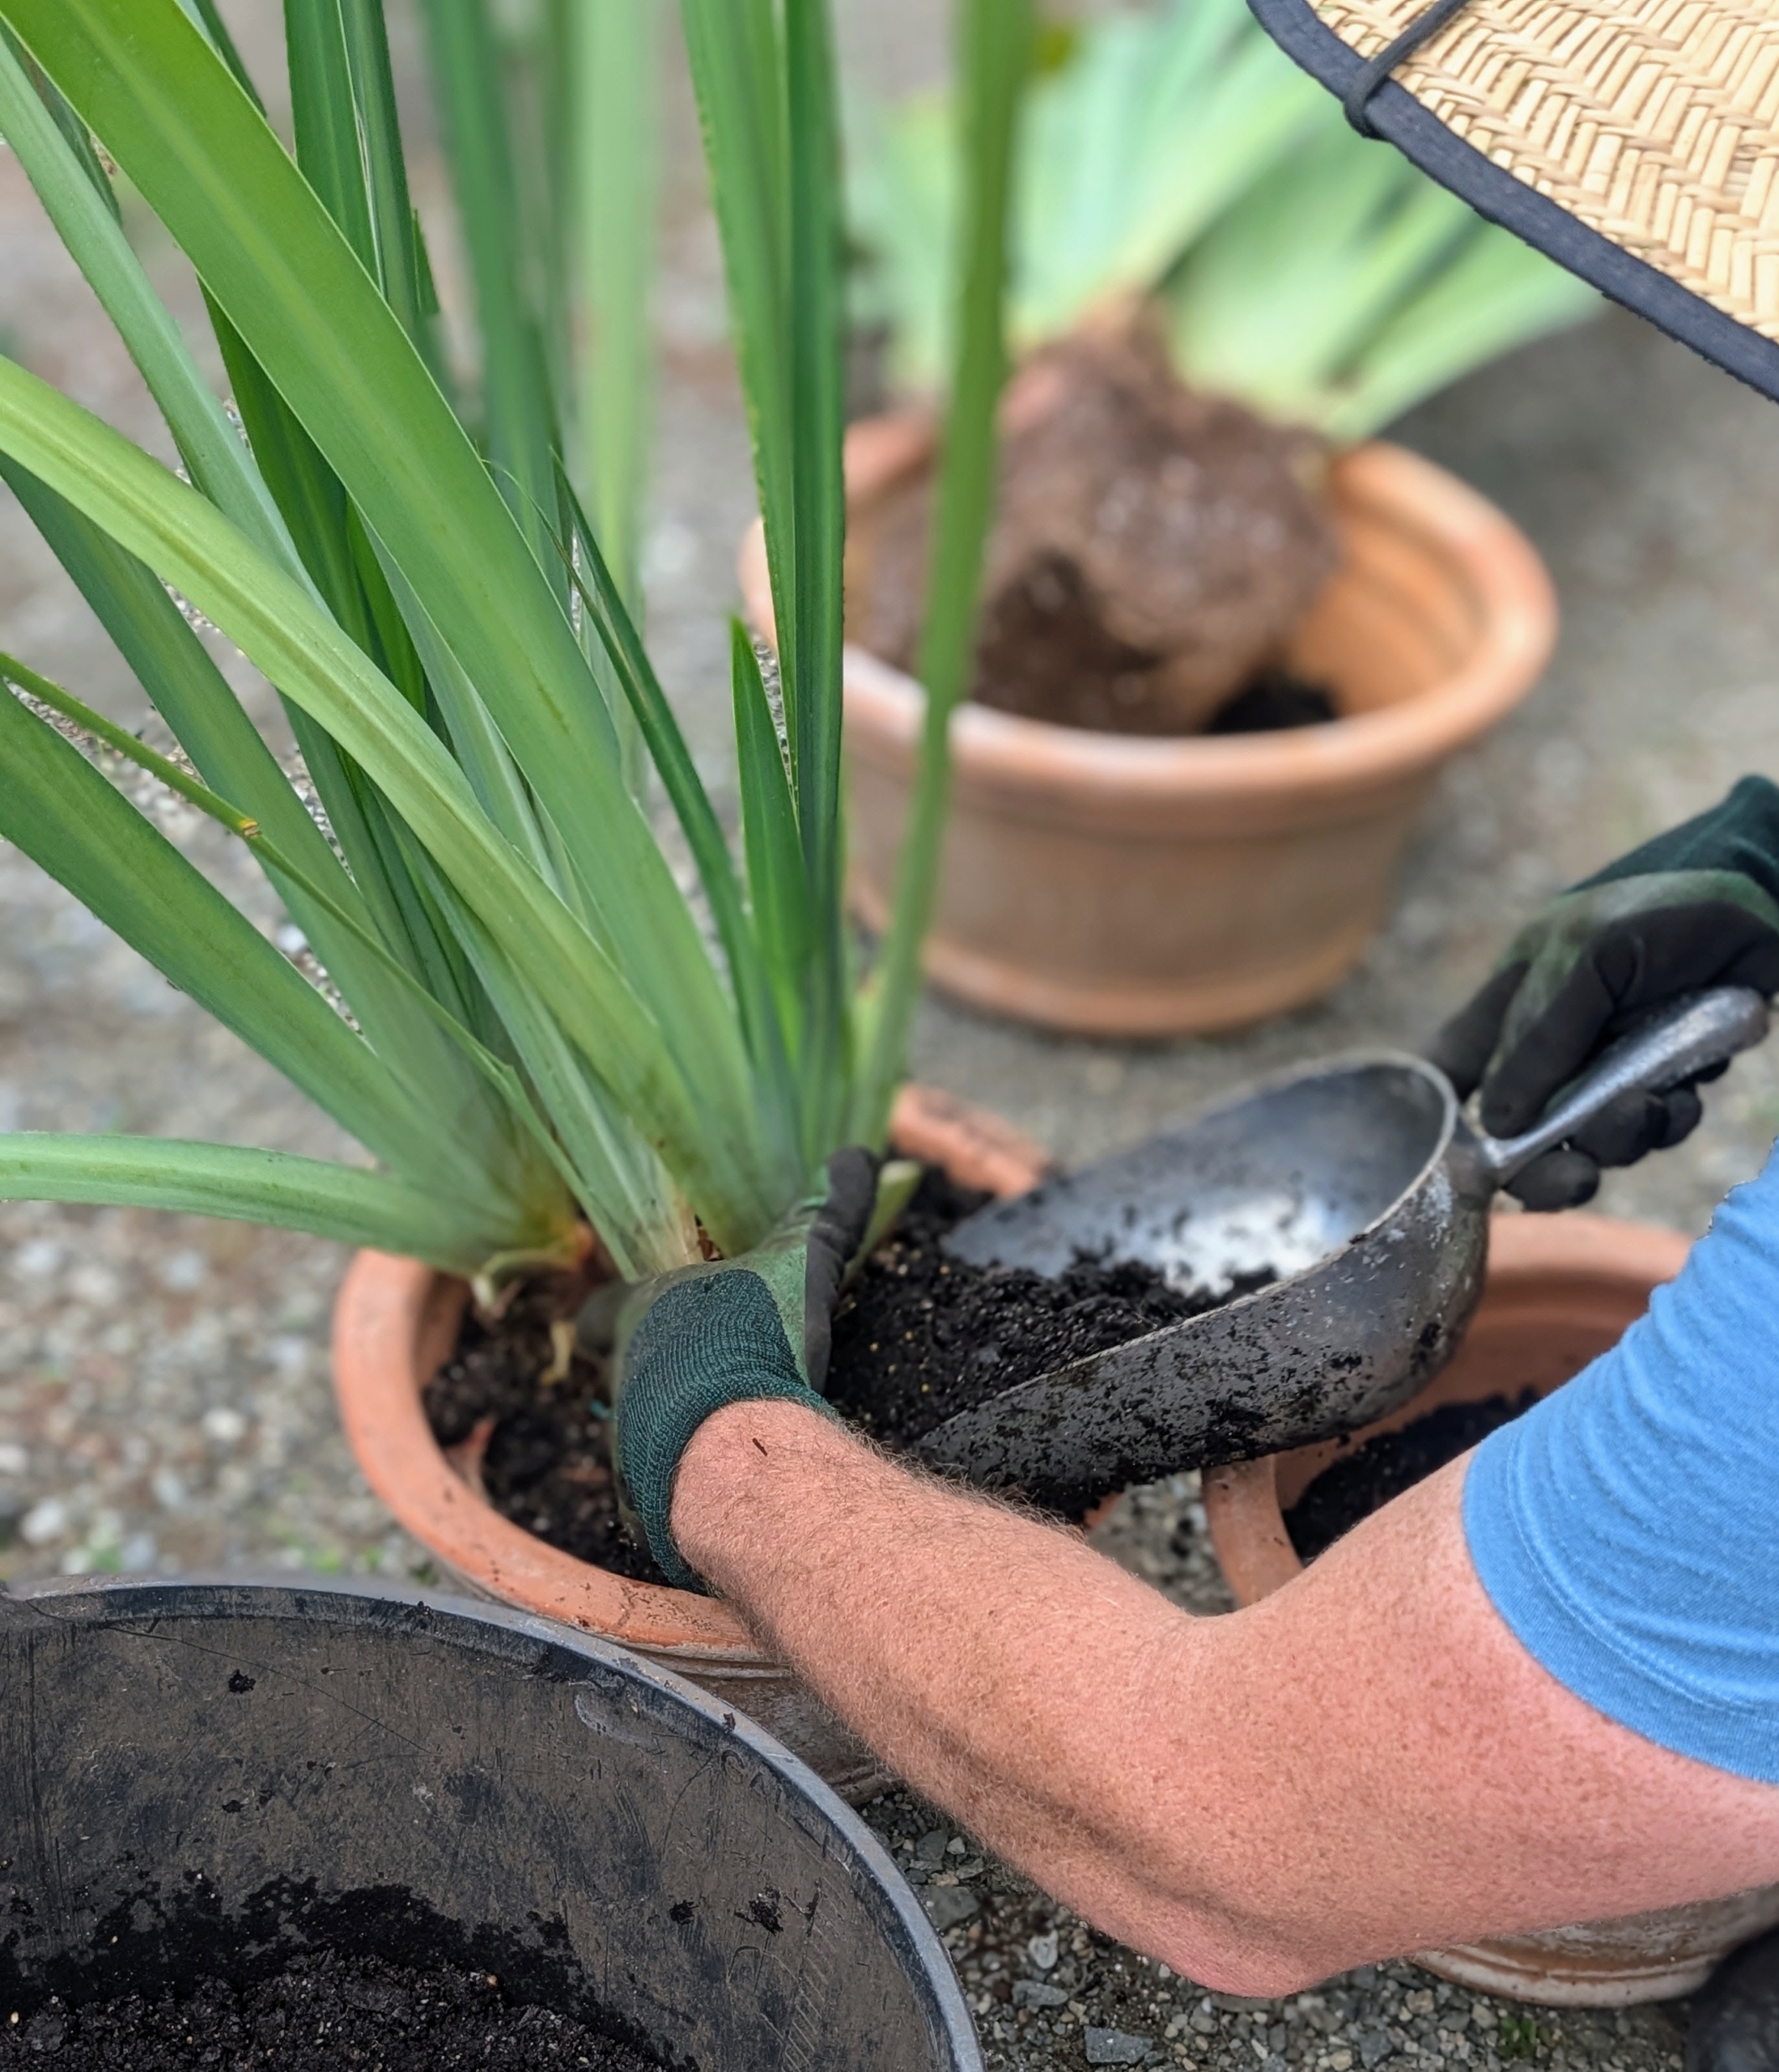
Then Ryan backfills, keeping the plant straight as he adds soil.
Once the container is filled, Ryan tamps down on the soil gently to ensure good contact with the plant.
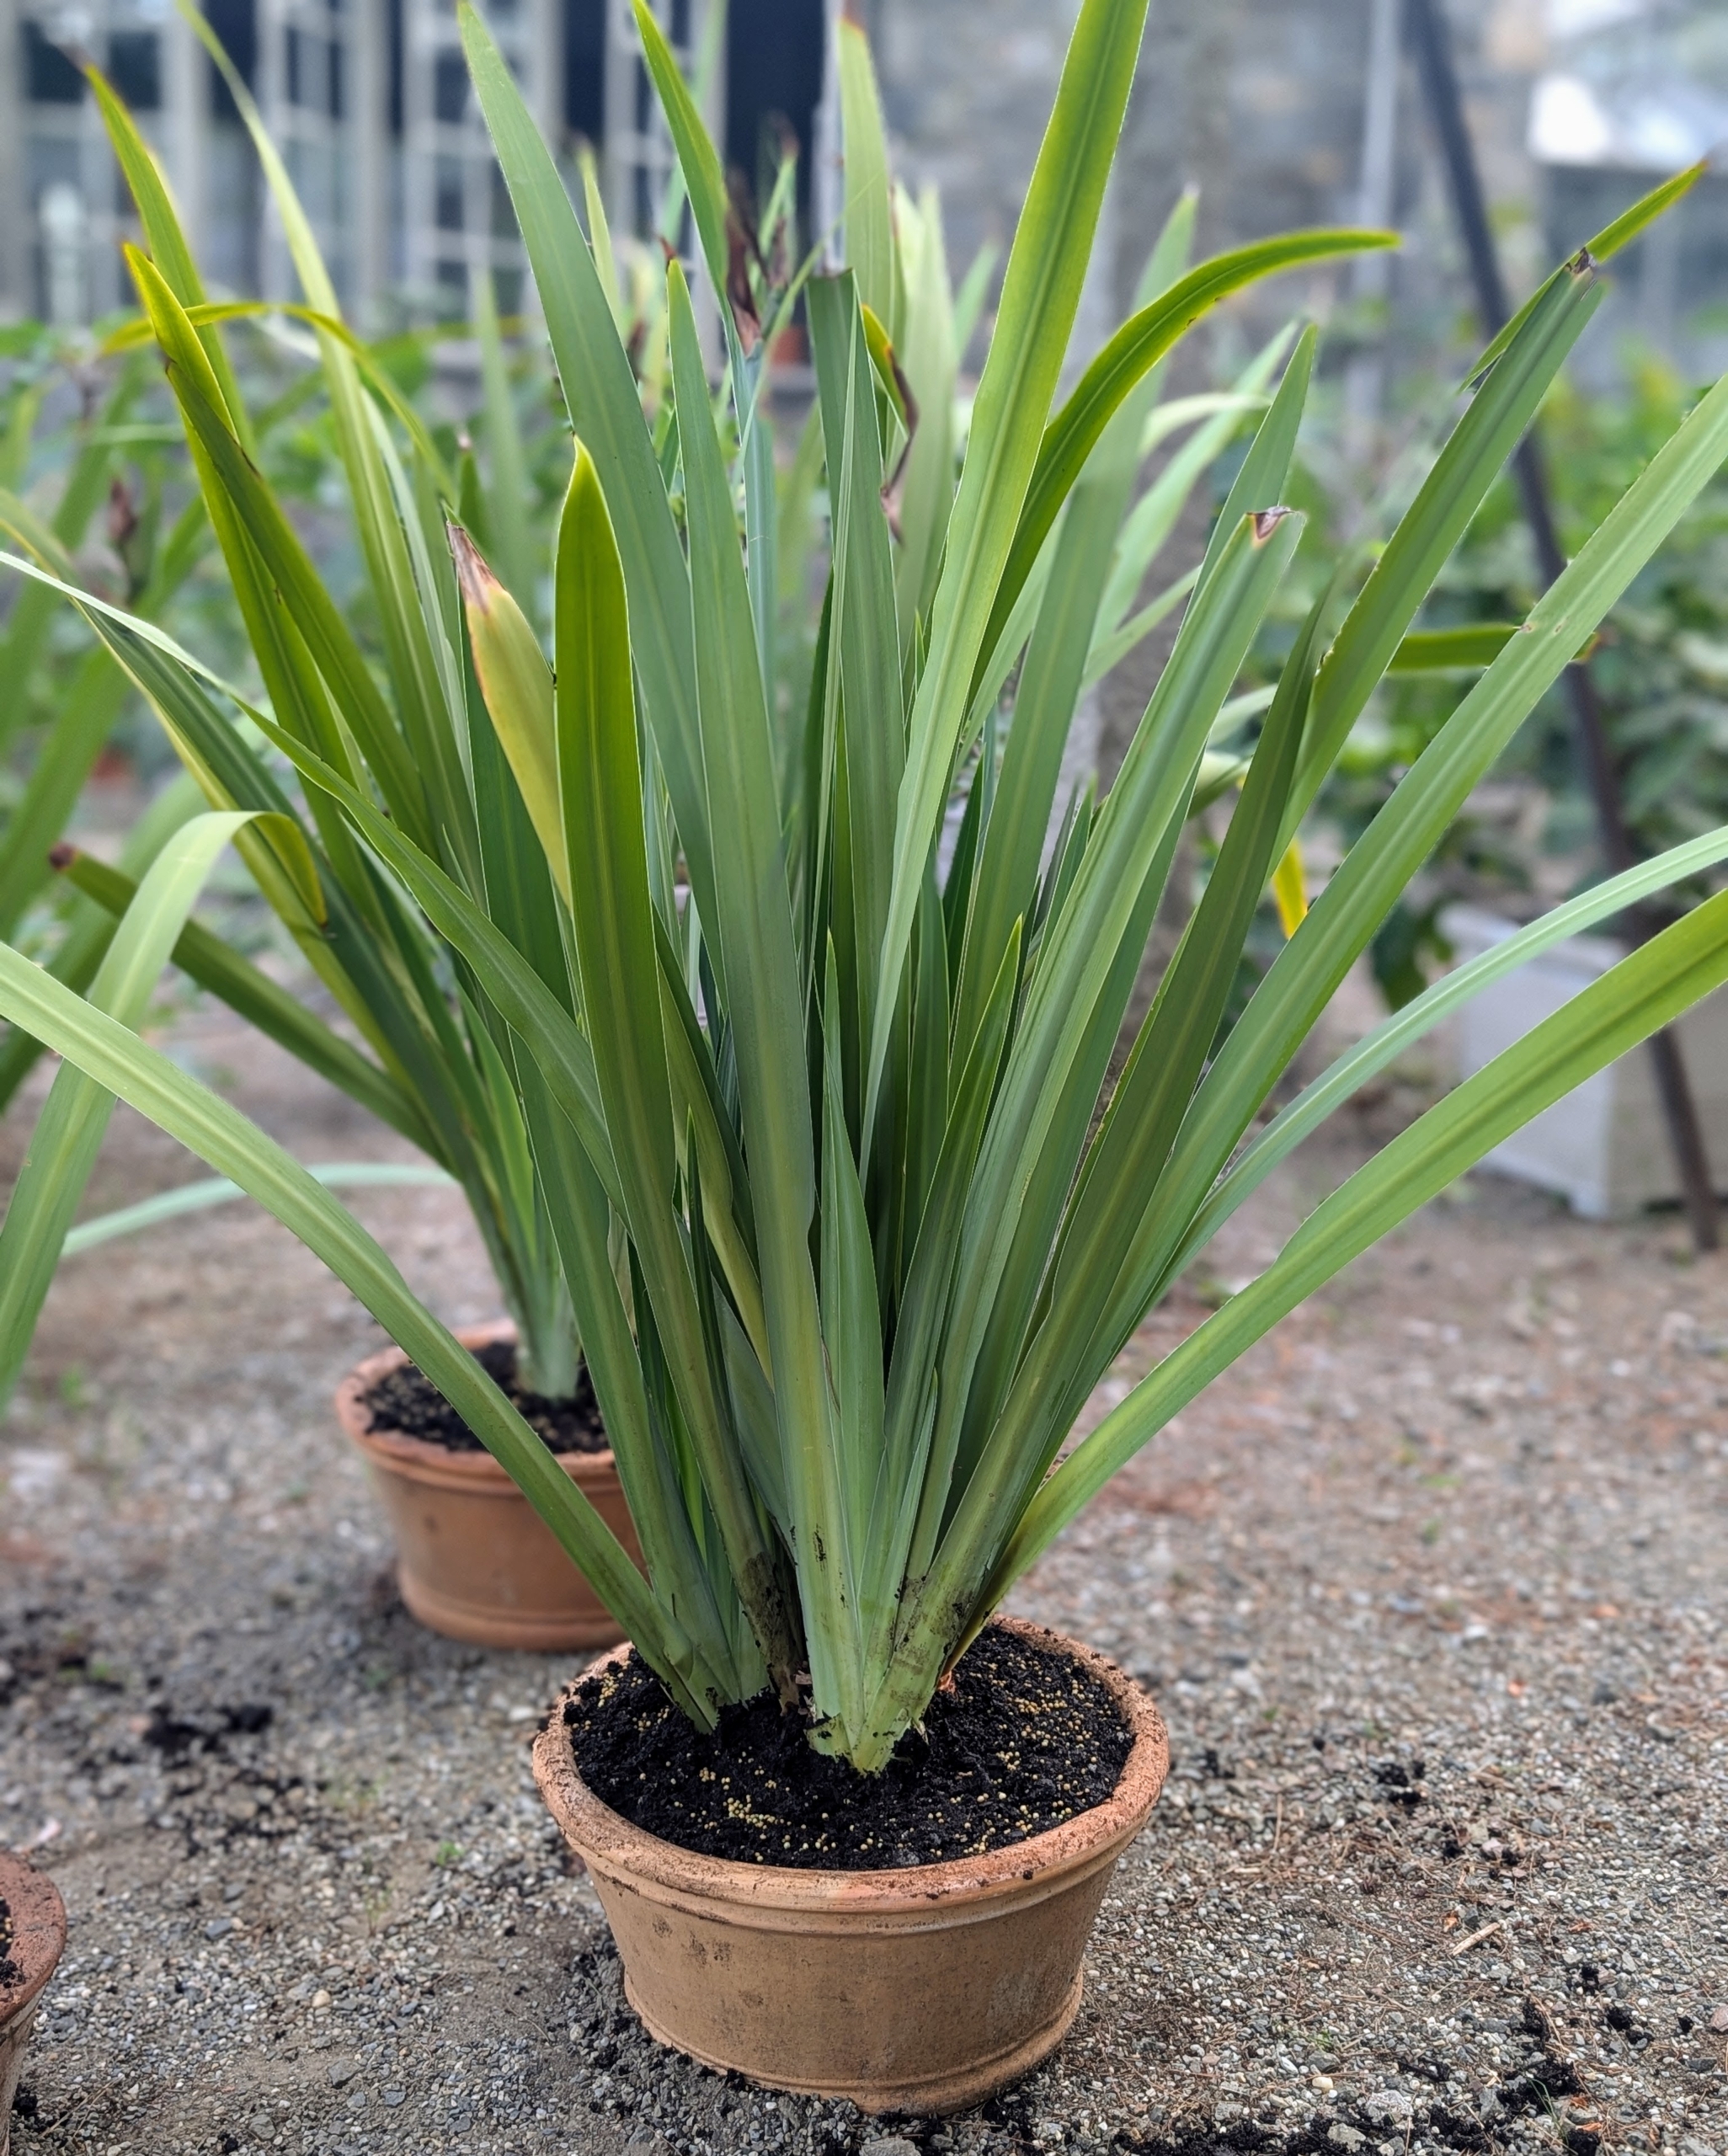
And here is one all potted up. Do you know how the walking iris got its name? After flowering in the garden, the plant’s stalk bends down and forms new plantlets or babies that root in the soil and give the appearance of moving through the earth.
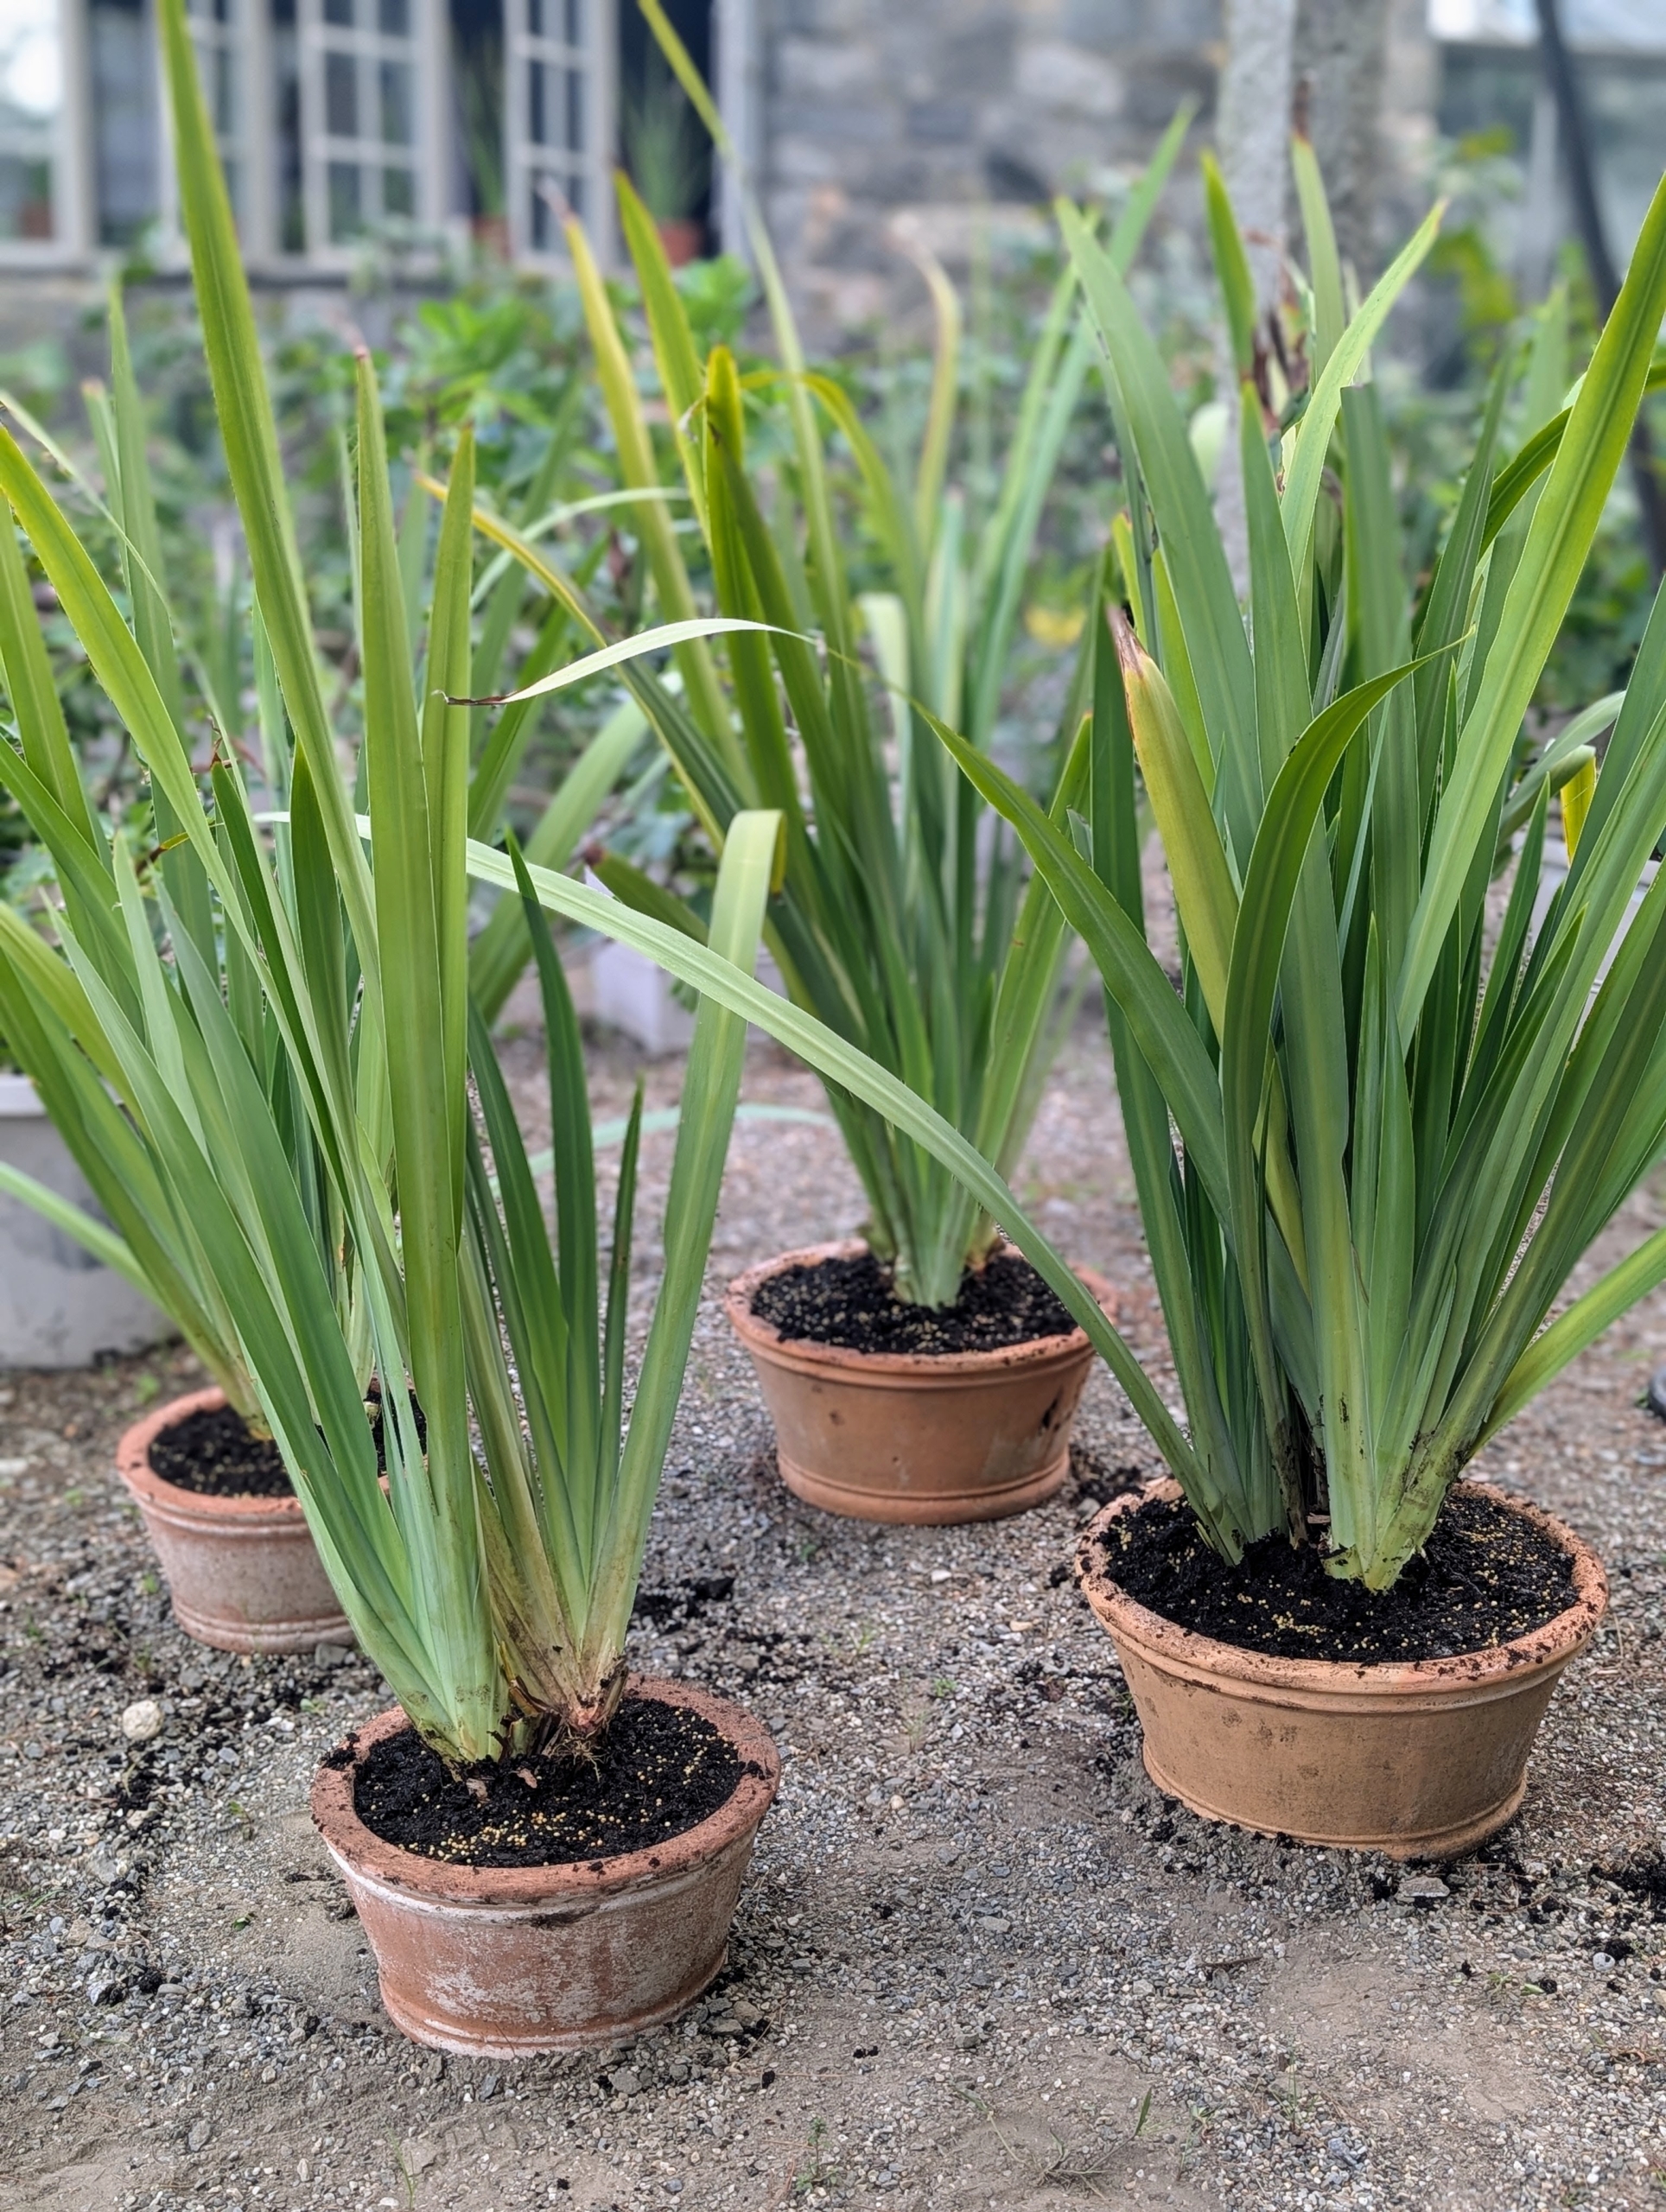
And then there were four… I am excited to watch these potted walking irises flourish and multiply.
Here at my farm, it's been hot and humid with temperatures in the high 80s and 90s. Earlier this week, we got a brief respite with slightly cooler weather but unfortunately, no significant rain and the next couple of days are expected to be uncomfortably warm once again.
Supporting a working farm is a huge job. In order for it to thrive, the animals and gardens need constant tender loving care. I keep a running list of all the chores that need to be done at any given time, so it always looks and functions at its best.
Here are some photos, enjoy.
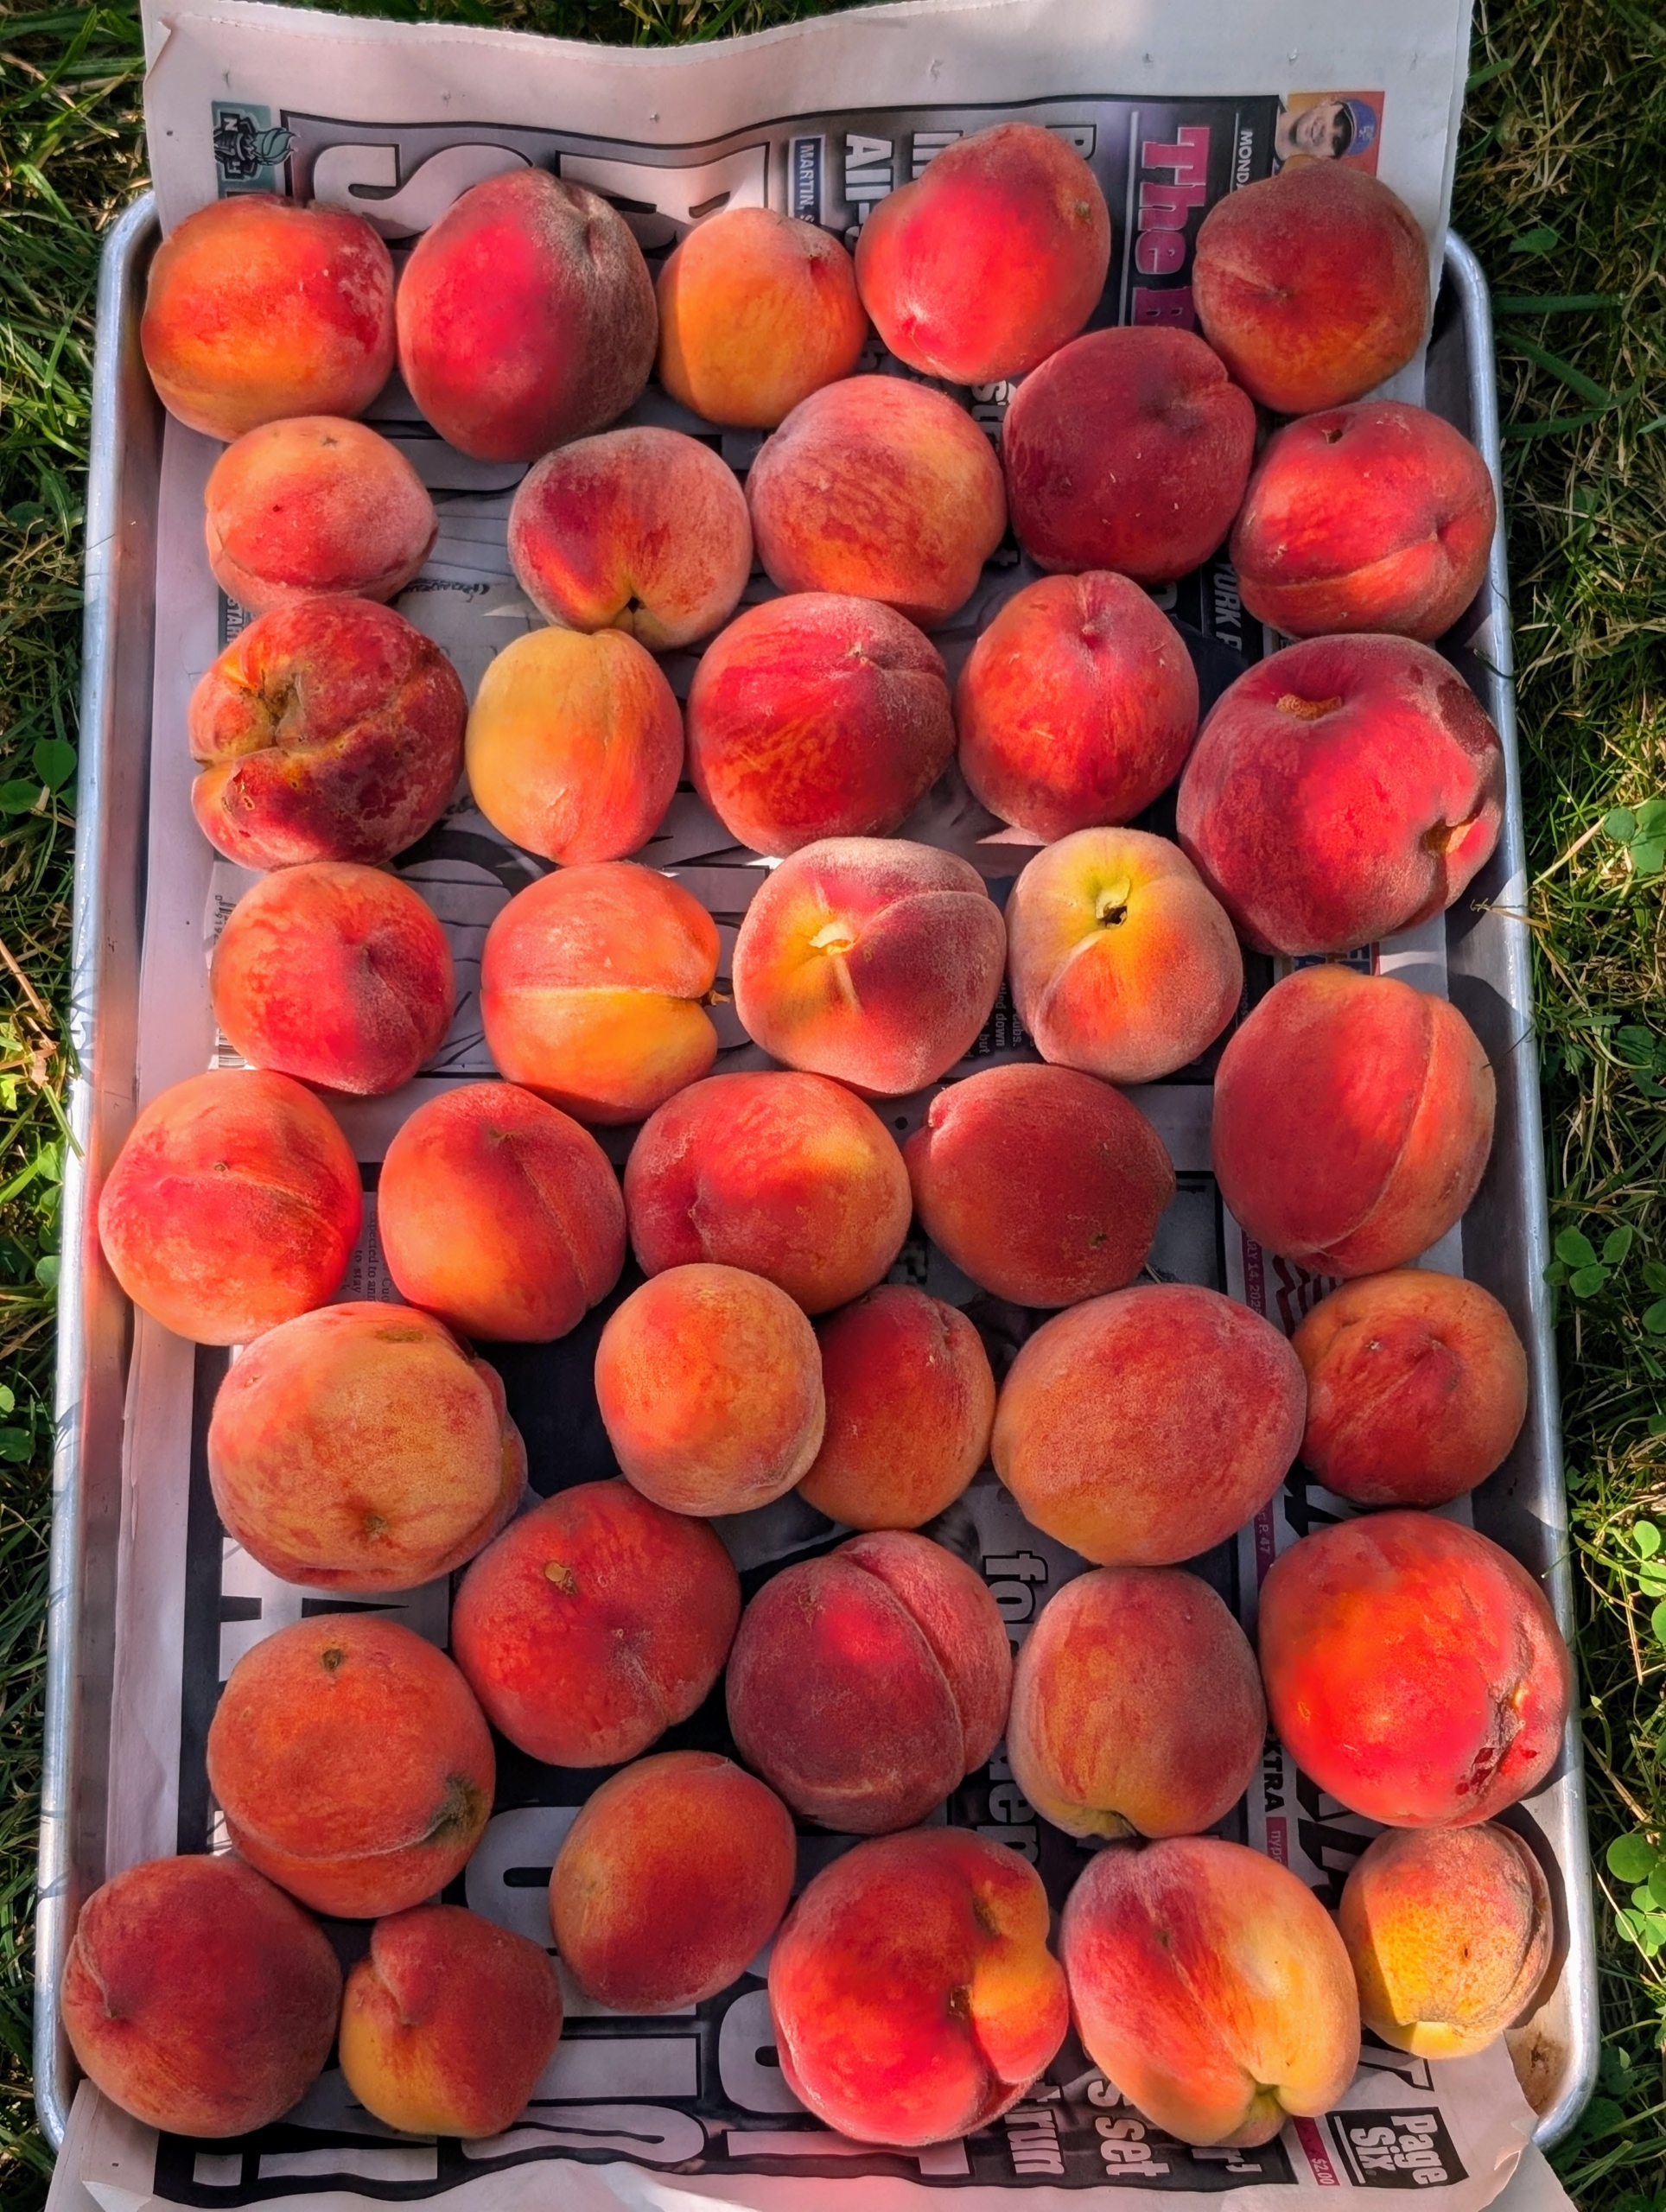
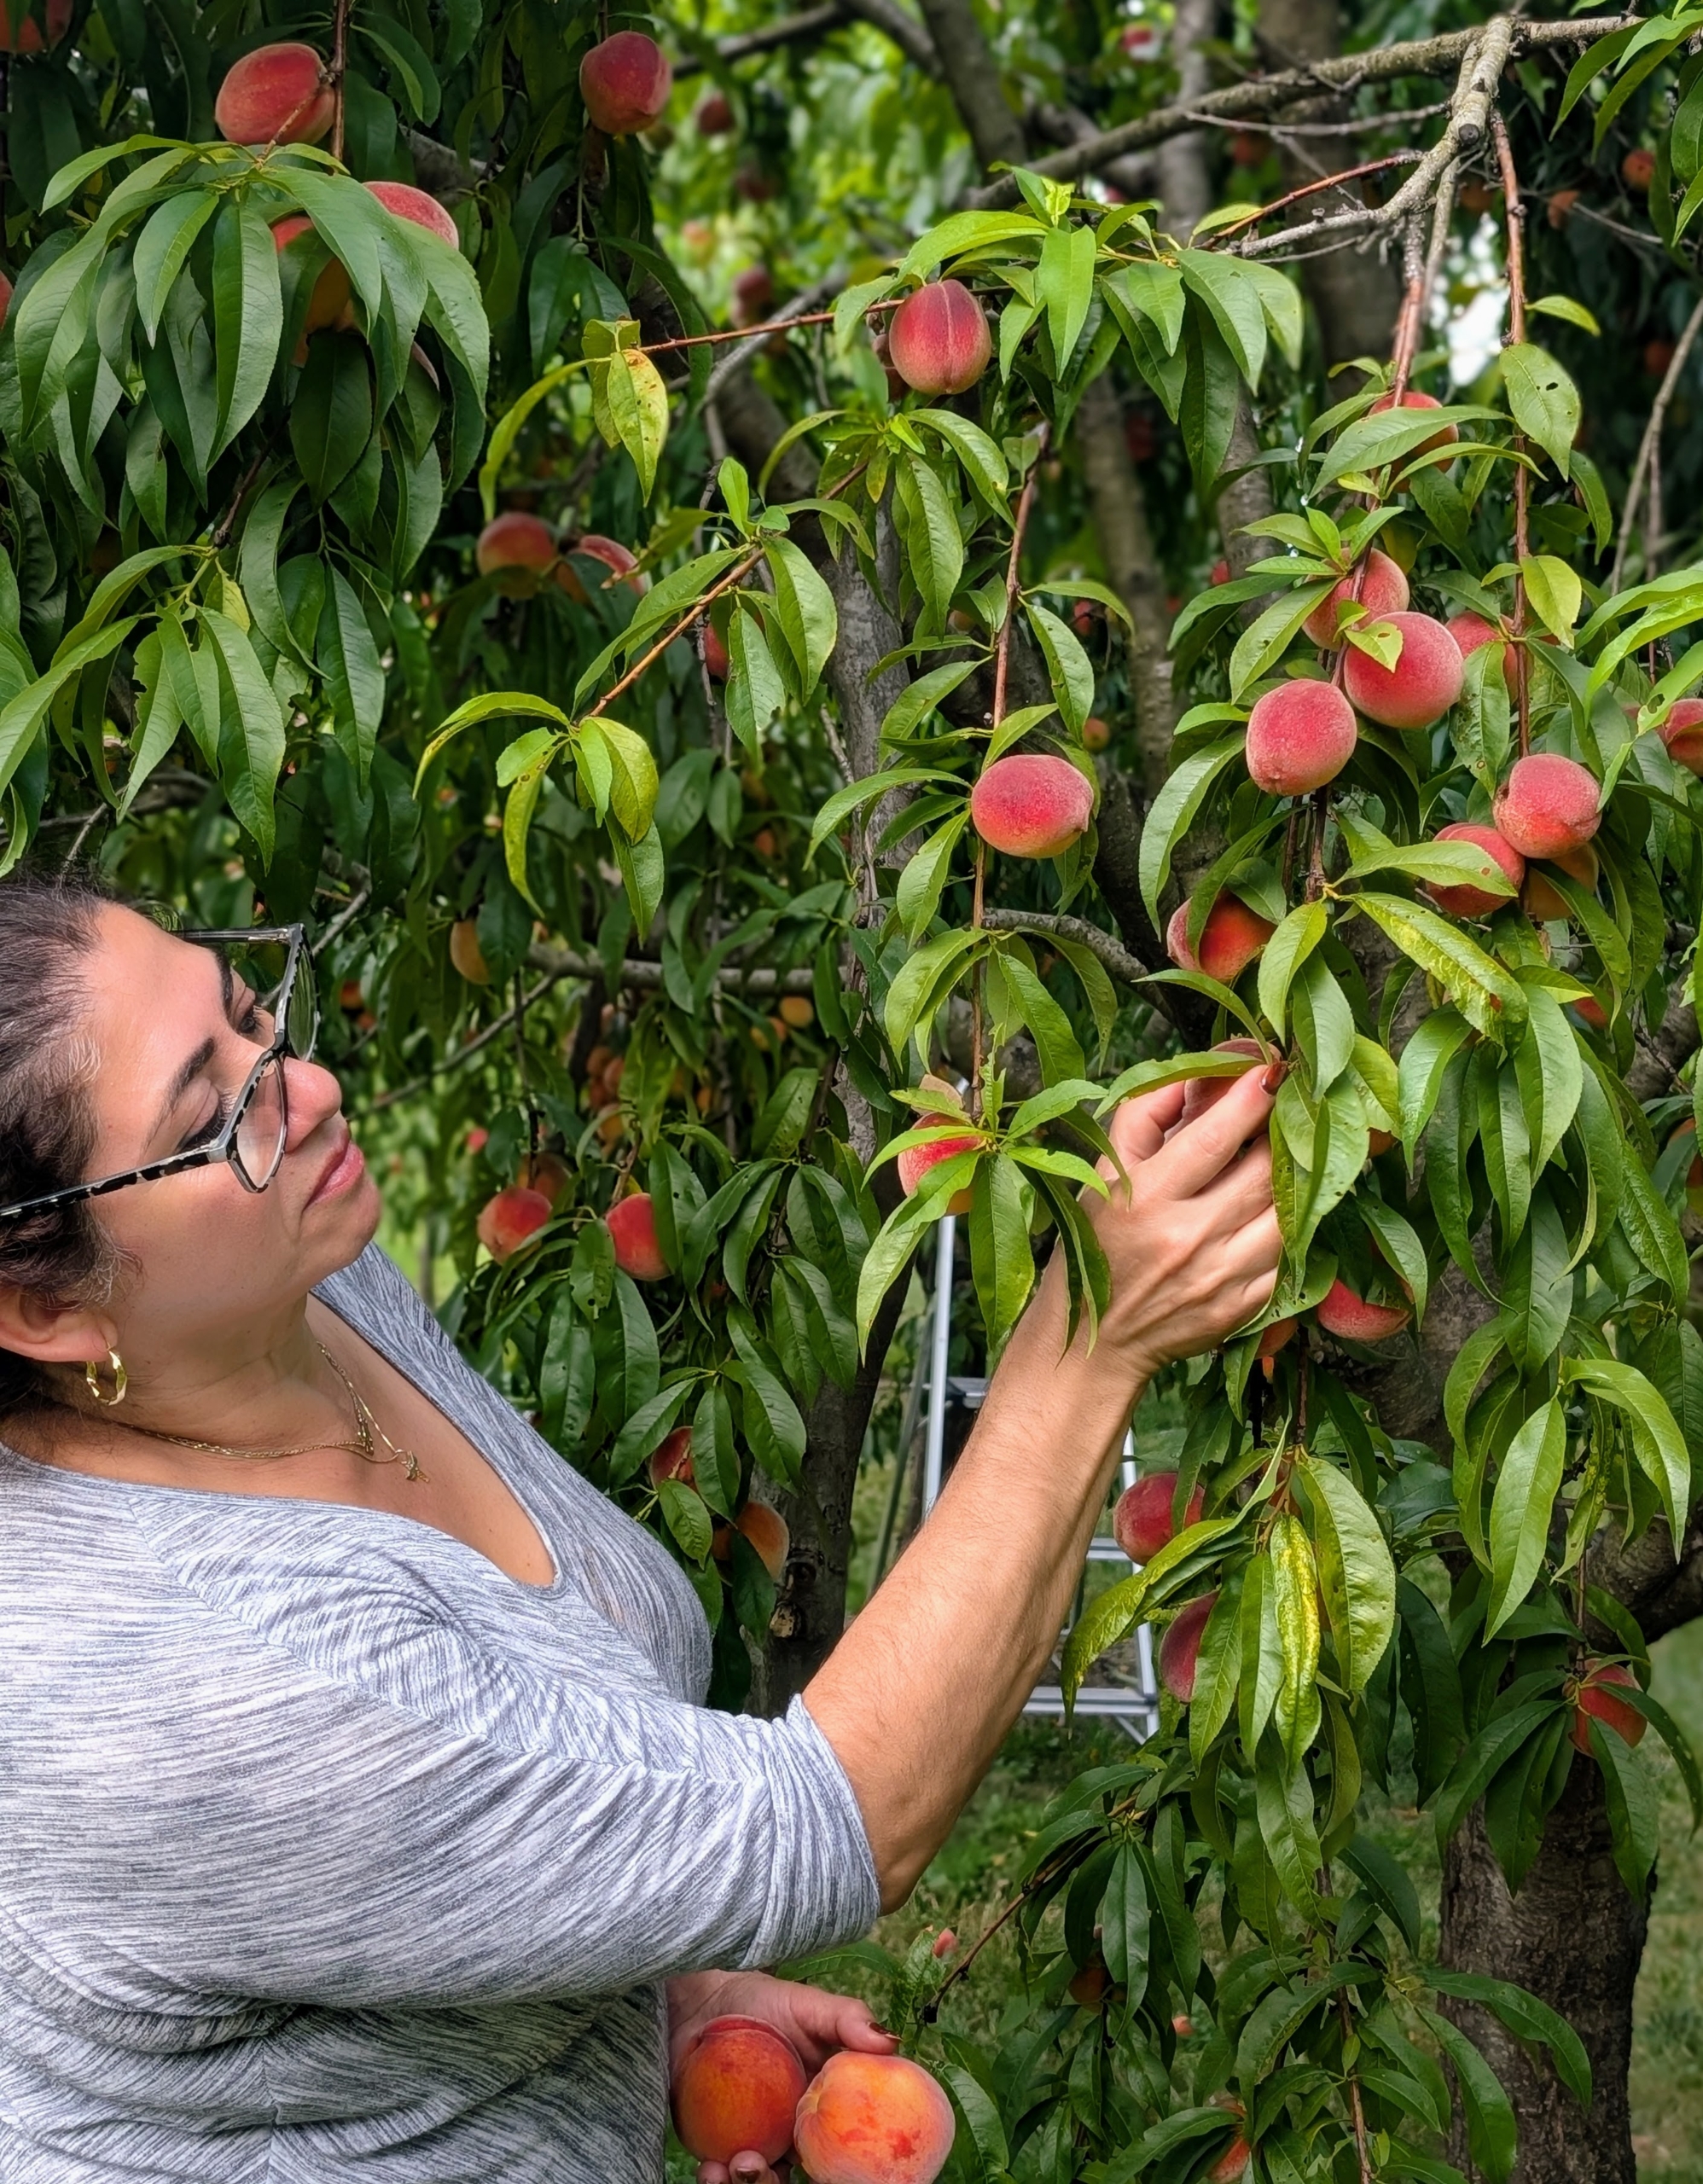
It’s important to check the orchard and garden every day to make sure fruits and vegetables are picked as soon as they’re ready. Here is my first big bounty of fresh, organic peaches – so sweet and delicious!
Enma picks the ripest peaches she can find. Peaches are ready when they are orange-red in color, when the flesh gives slightly to gentle pressure, and when they smell sweet.
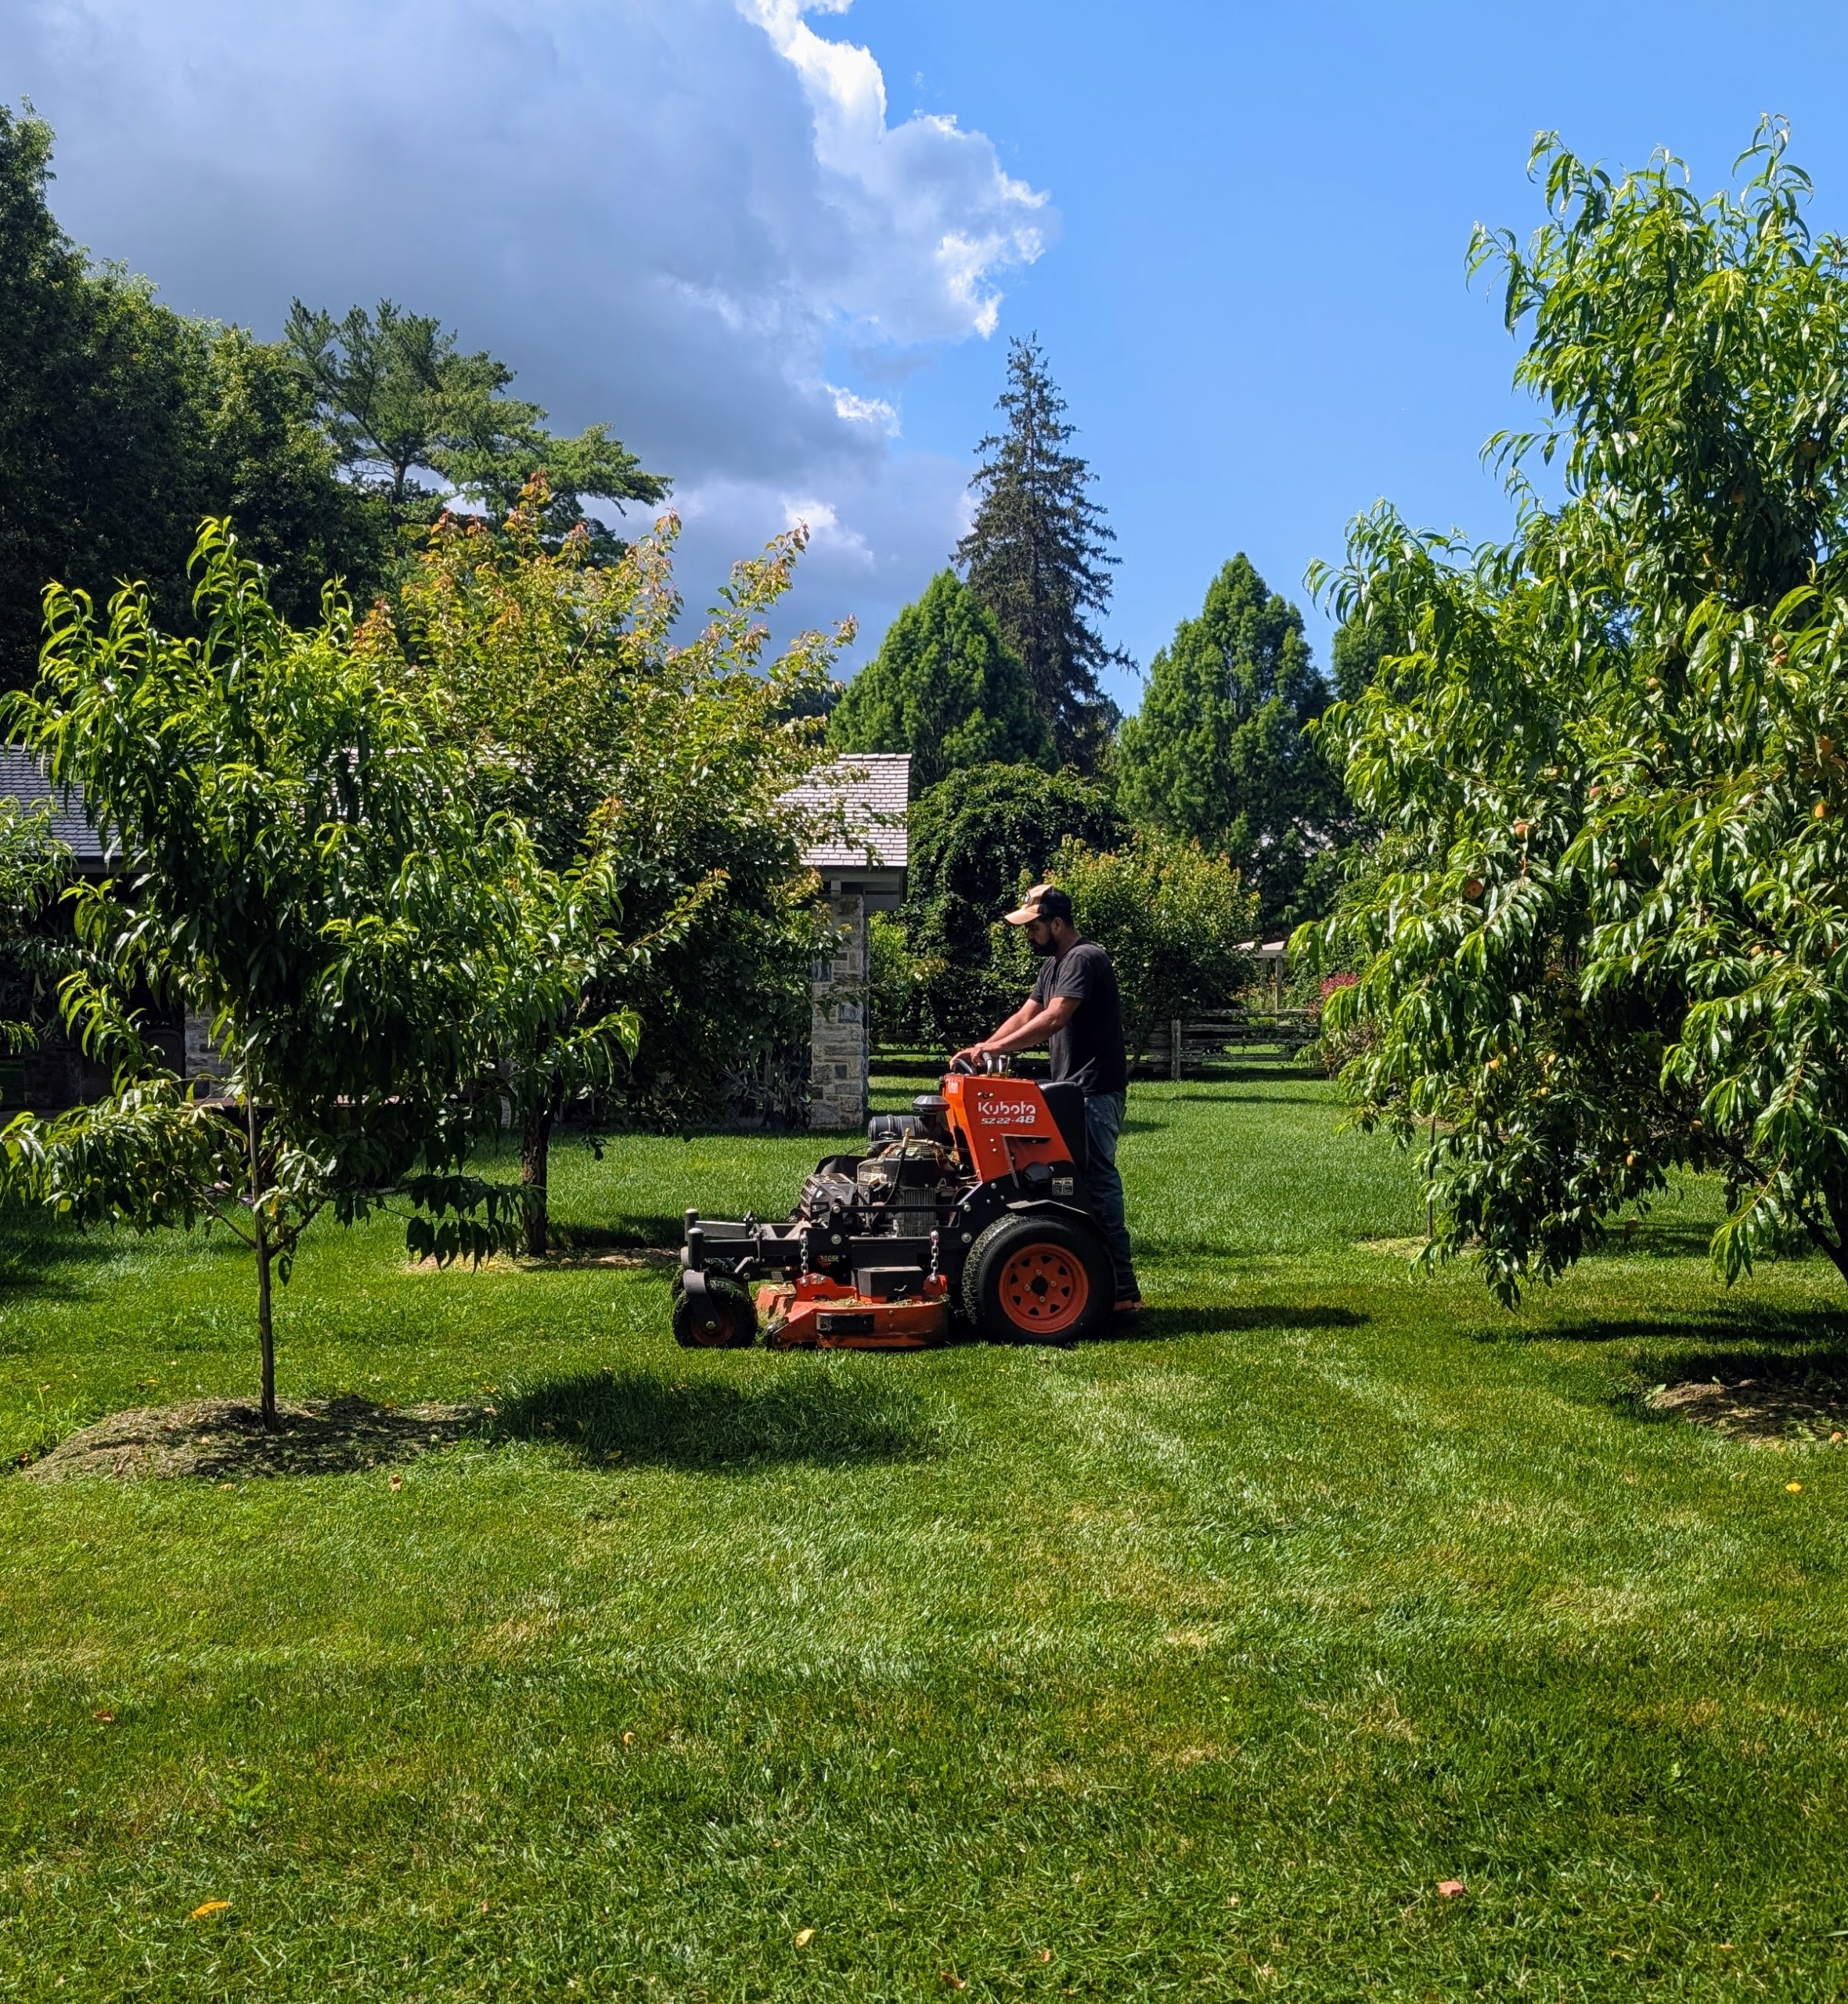
This is my outdoor grounds crew resident mower, Adan, on our Kubota SZ22 Stand On Mower. He mows every day during the summer. He is excellent at keeping up with the growth and knows exactly when to mow what area next. Here he is in the orchard, carefully mowing in between the trees…
… from one end to the other. This stand on mower can do open areas as well as narrower spaces.
We’ve been using STIHL’s backpack blowers for years here at my farm. These blowers are powerful and fuel-efficient. The gasoline-powered engines provide enough rugged power to tackle heavy debris while delivering low emissions. Fernando blows the debris along the garden bed under my allée of lindens.
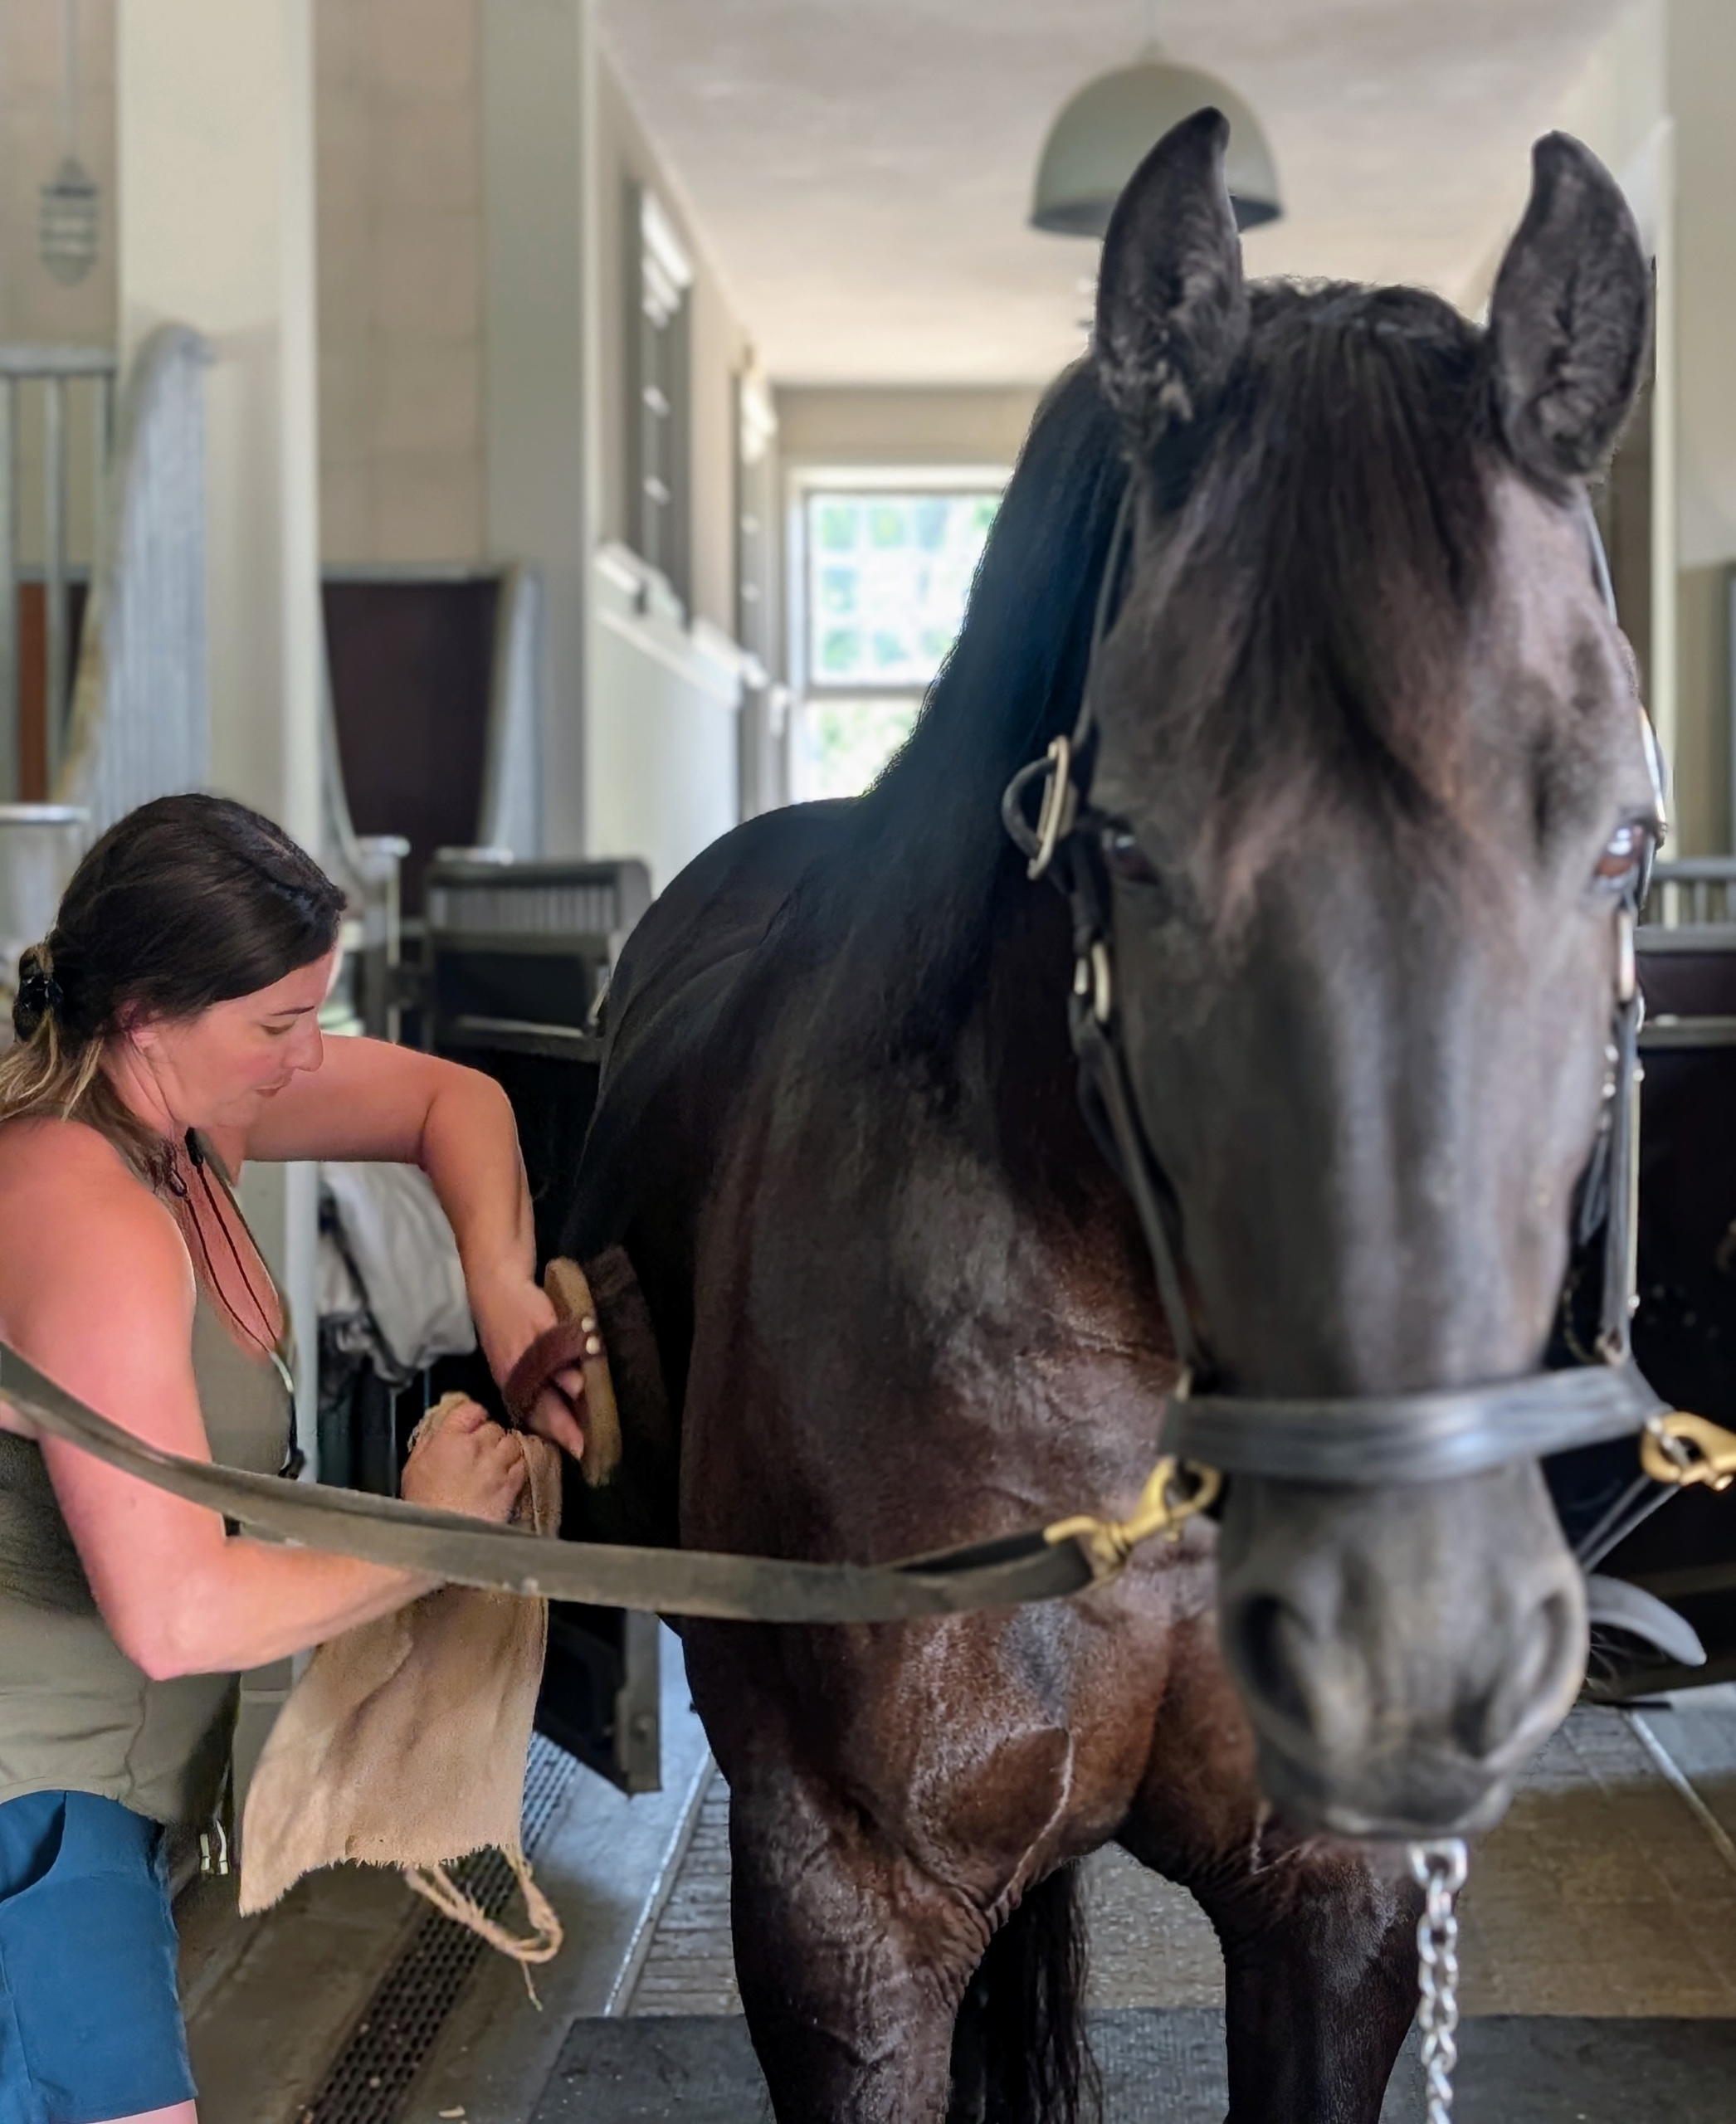
When living with horses, regular grooming is essential to their care and wellness. Grooming not only keeps horses clean, but also stimulates good circulation, encourages healthy bonding with handlers, and allows them to be checked closely for any signs of illness or injury. My stable manager, Helen, grooms the horses every day. Bond doesn’t seem to mind.
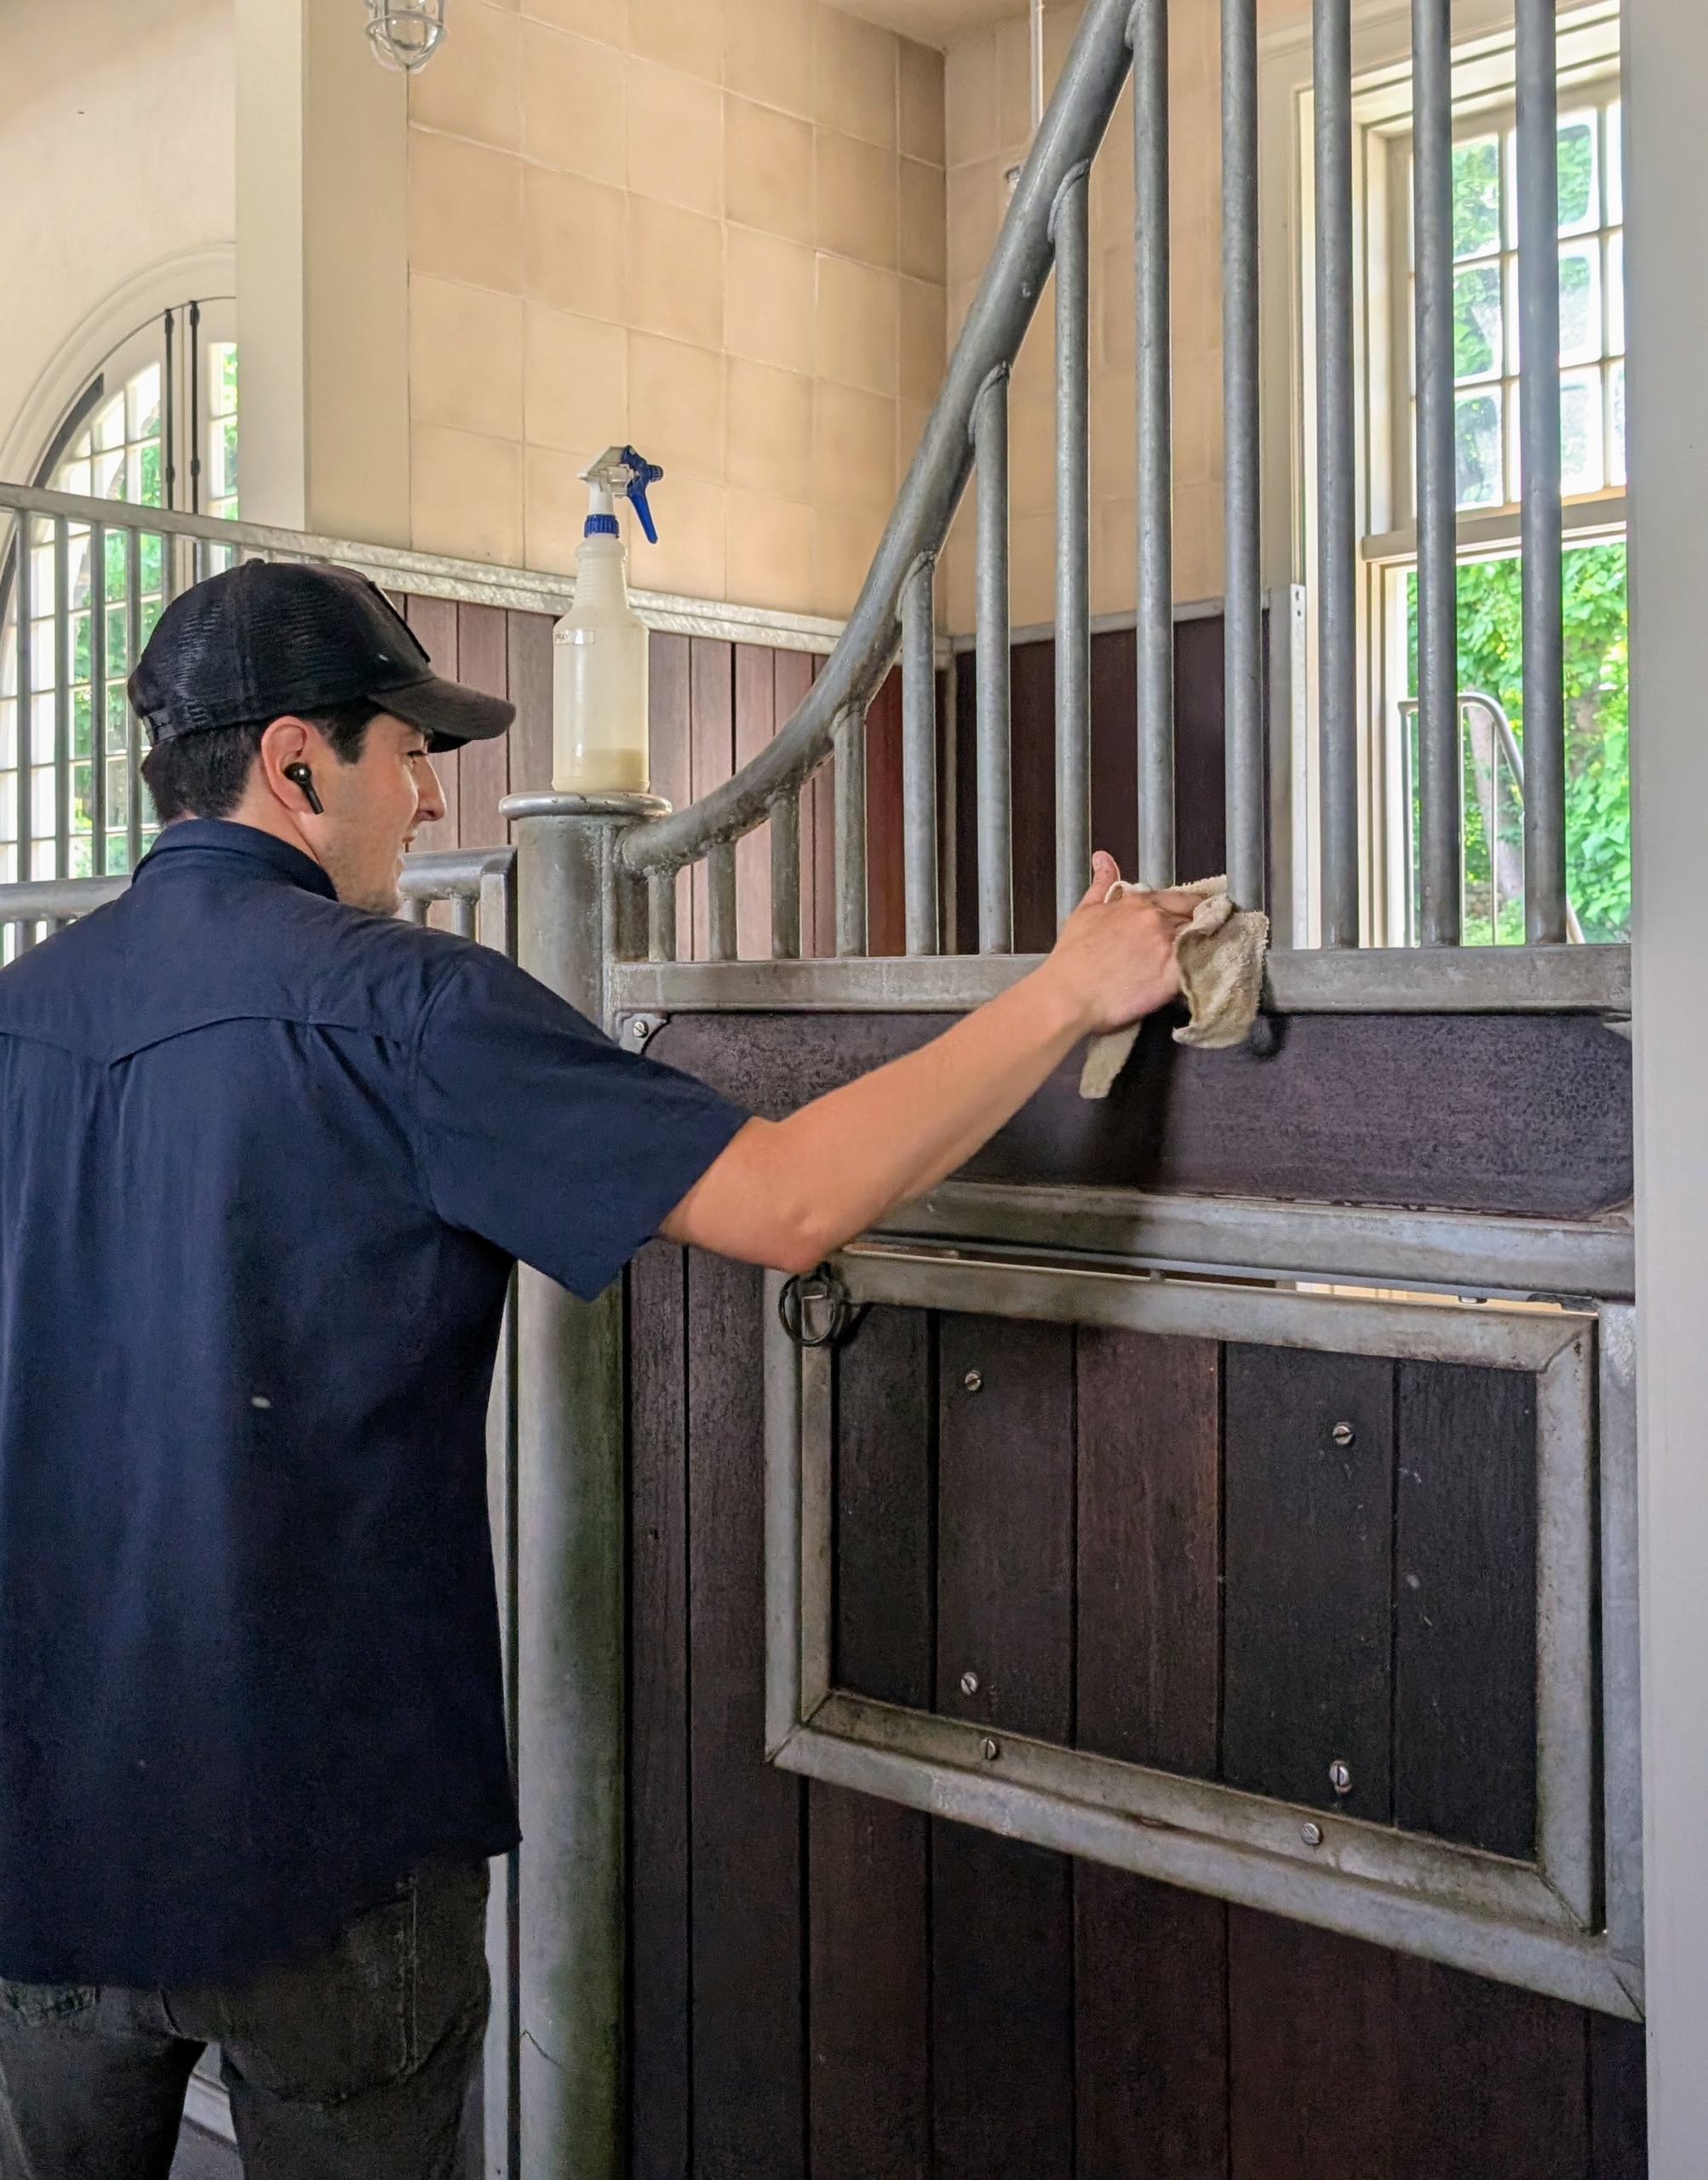
Another regular stable chore involves keeping the building’s interior clean. Here, Juan wipes down the stable bars and doors.
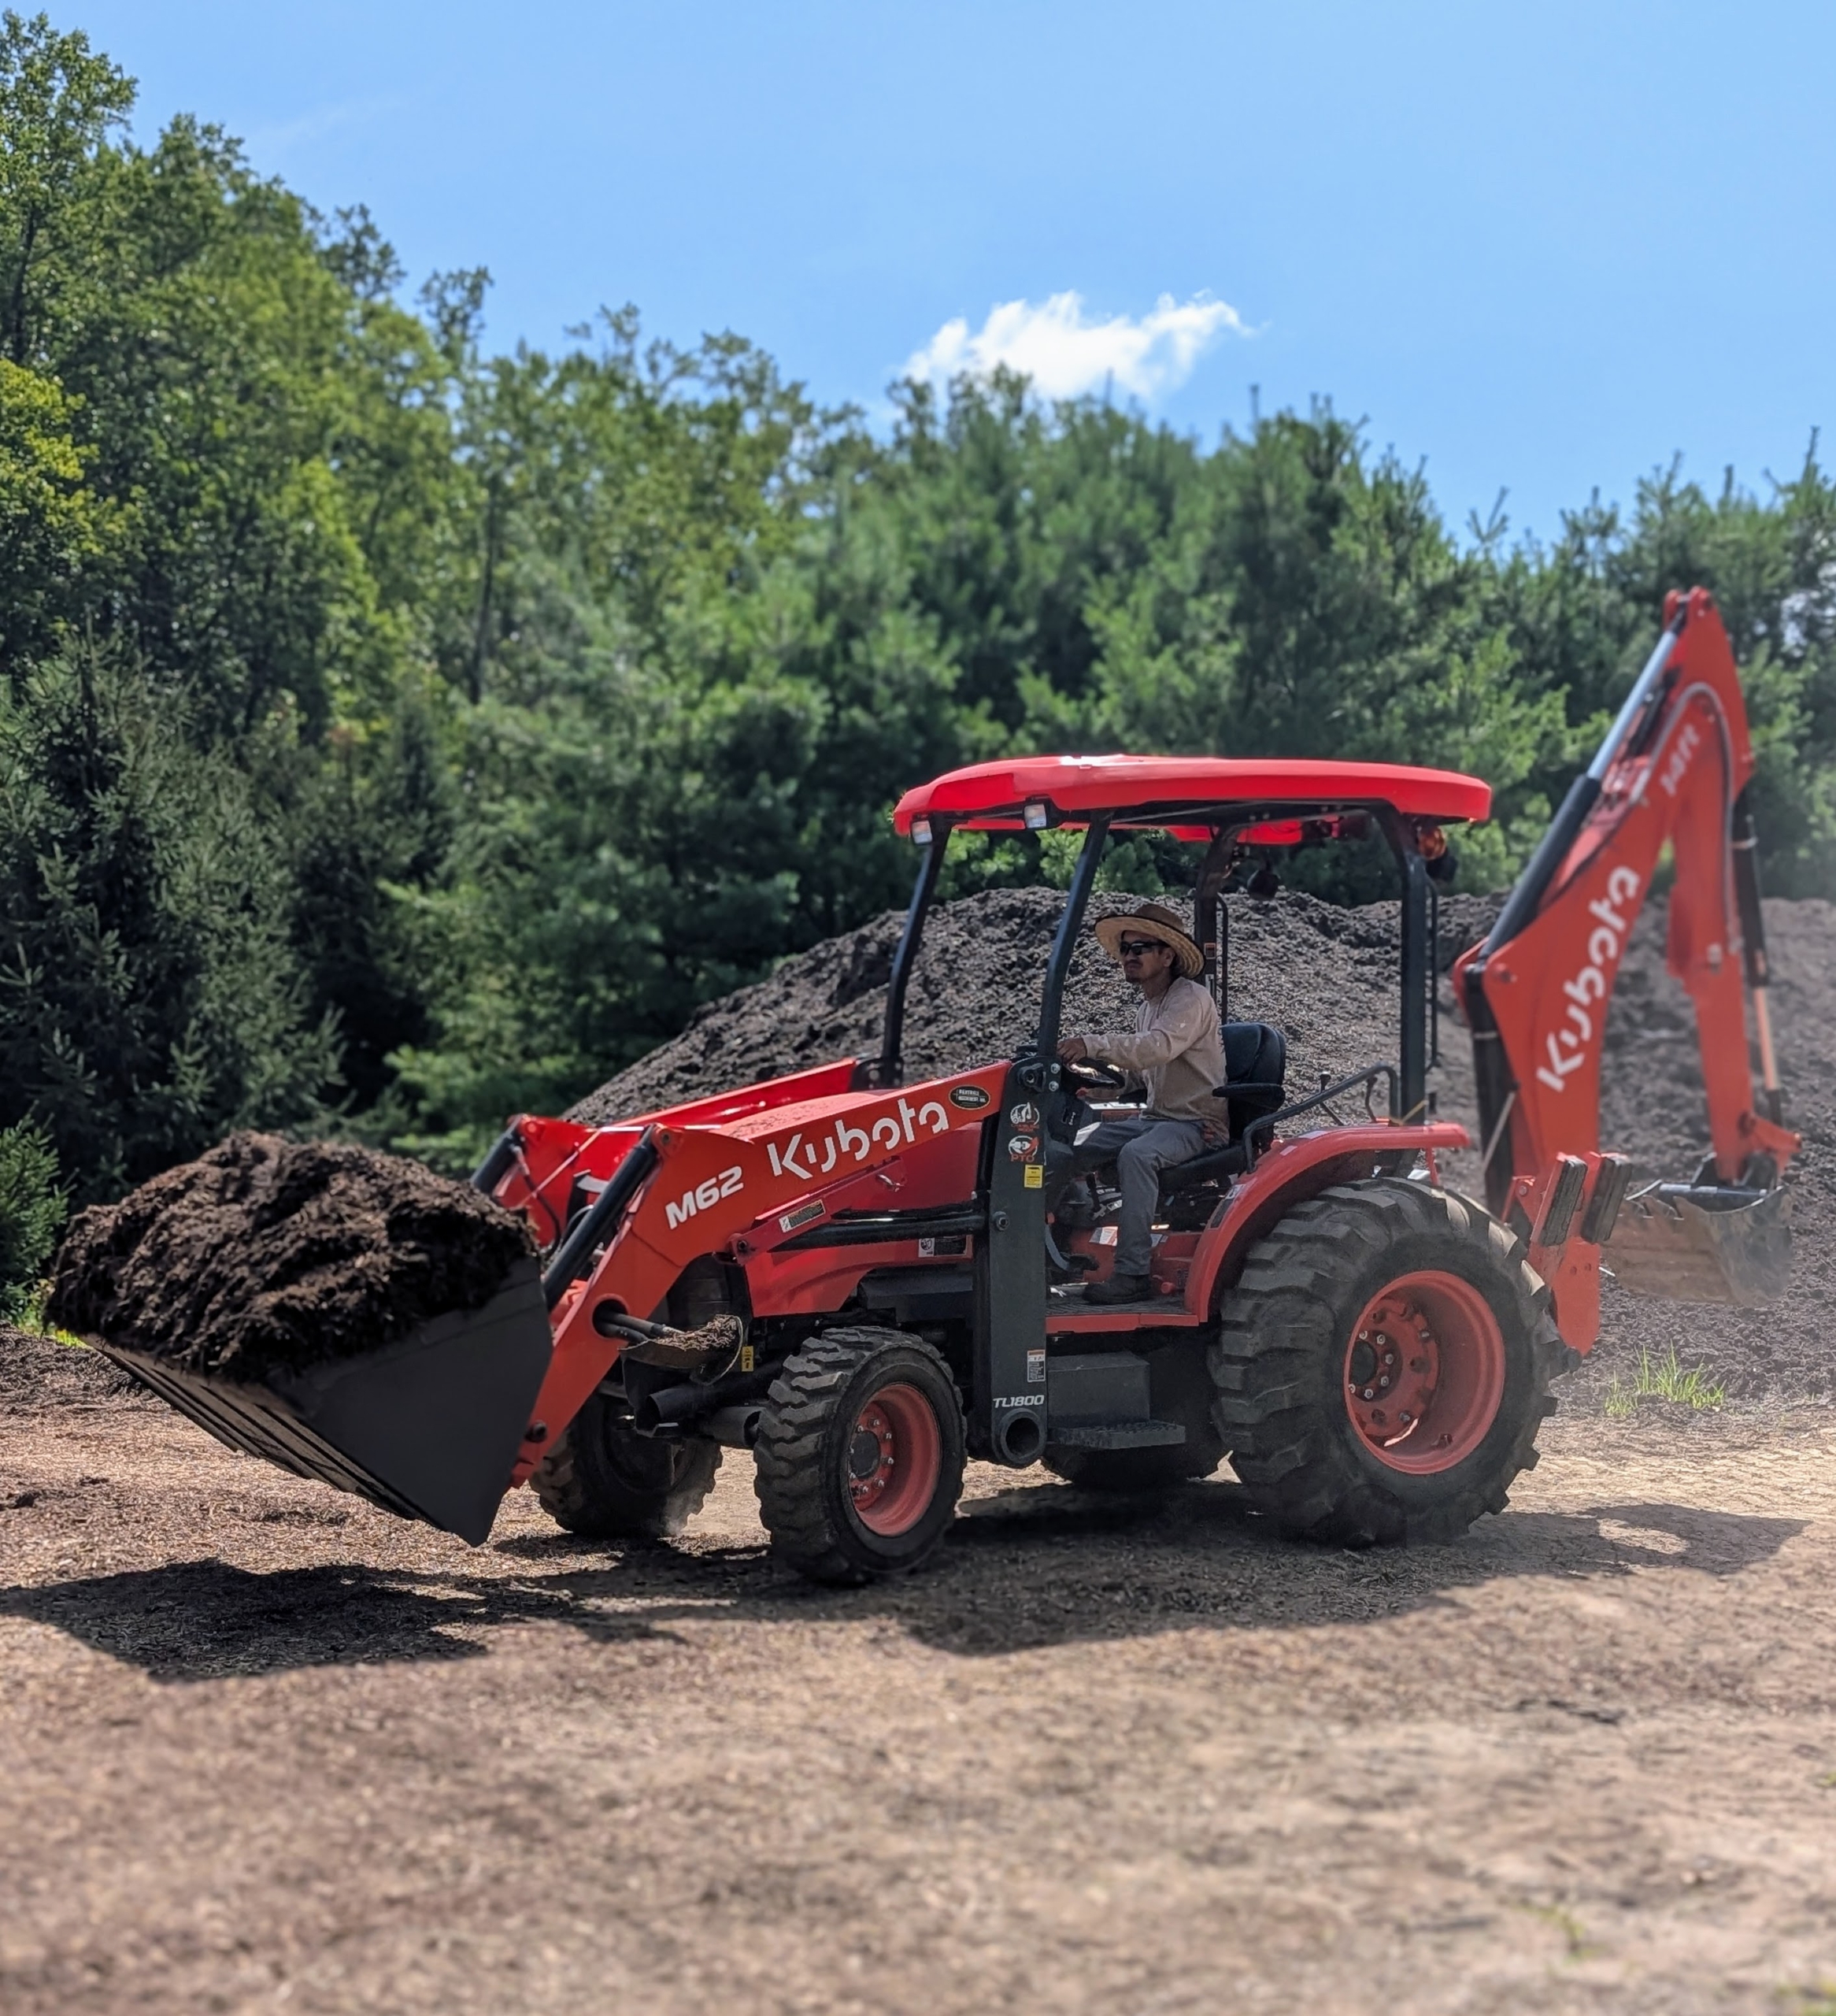
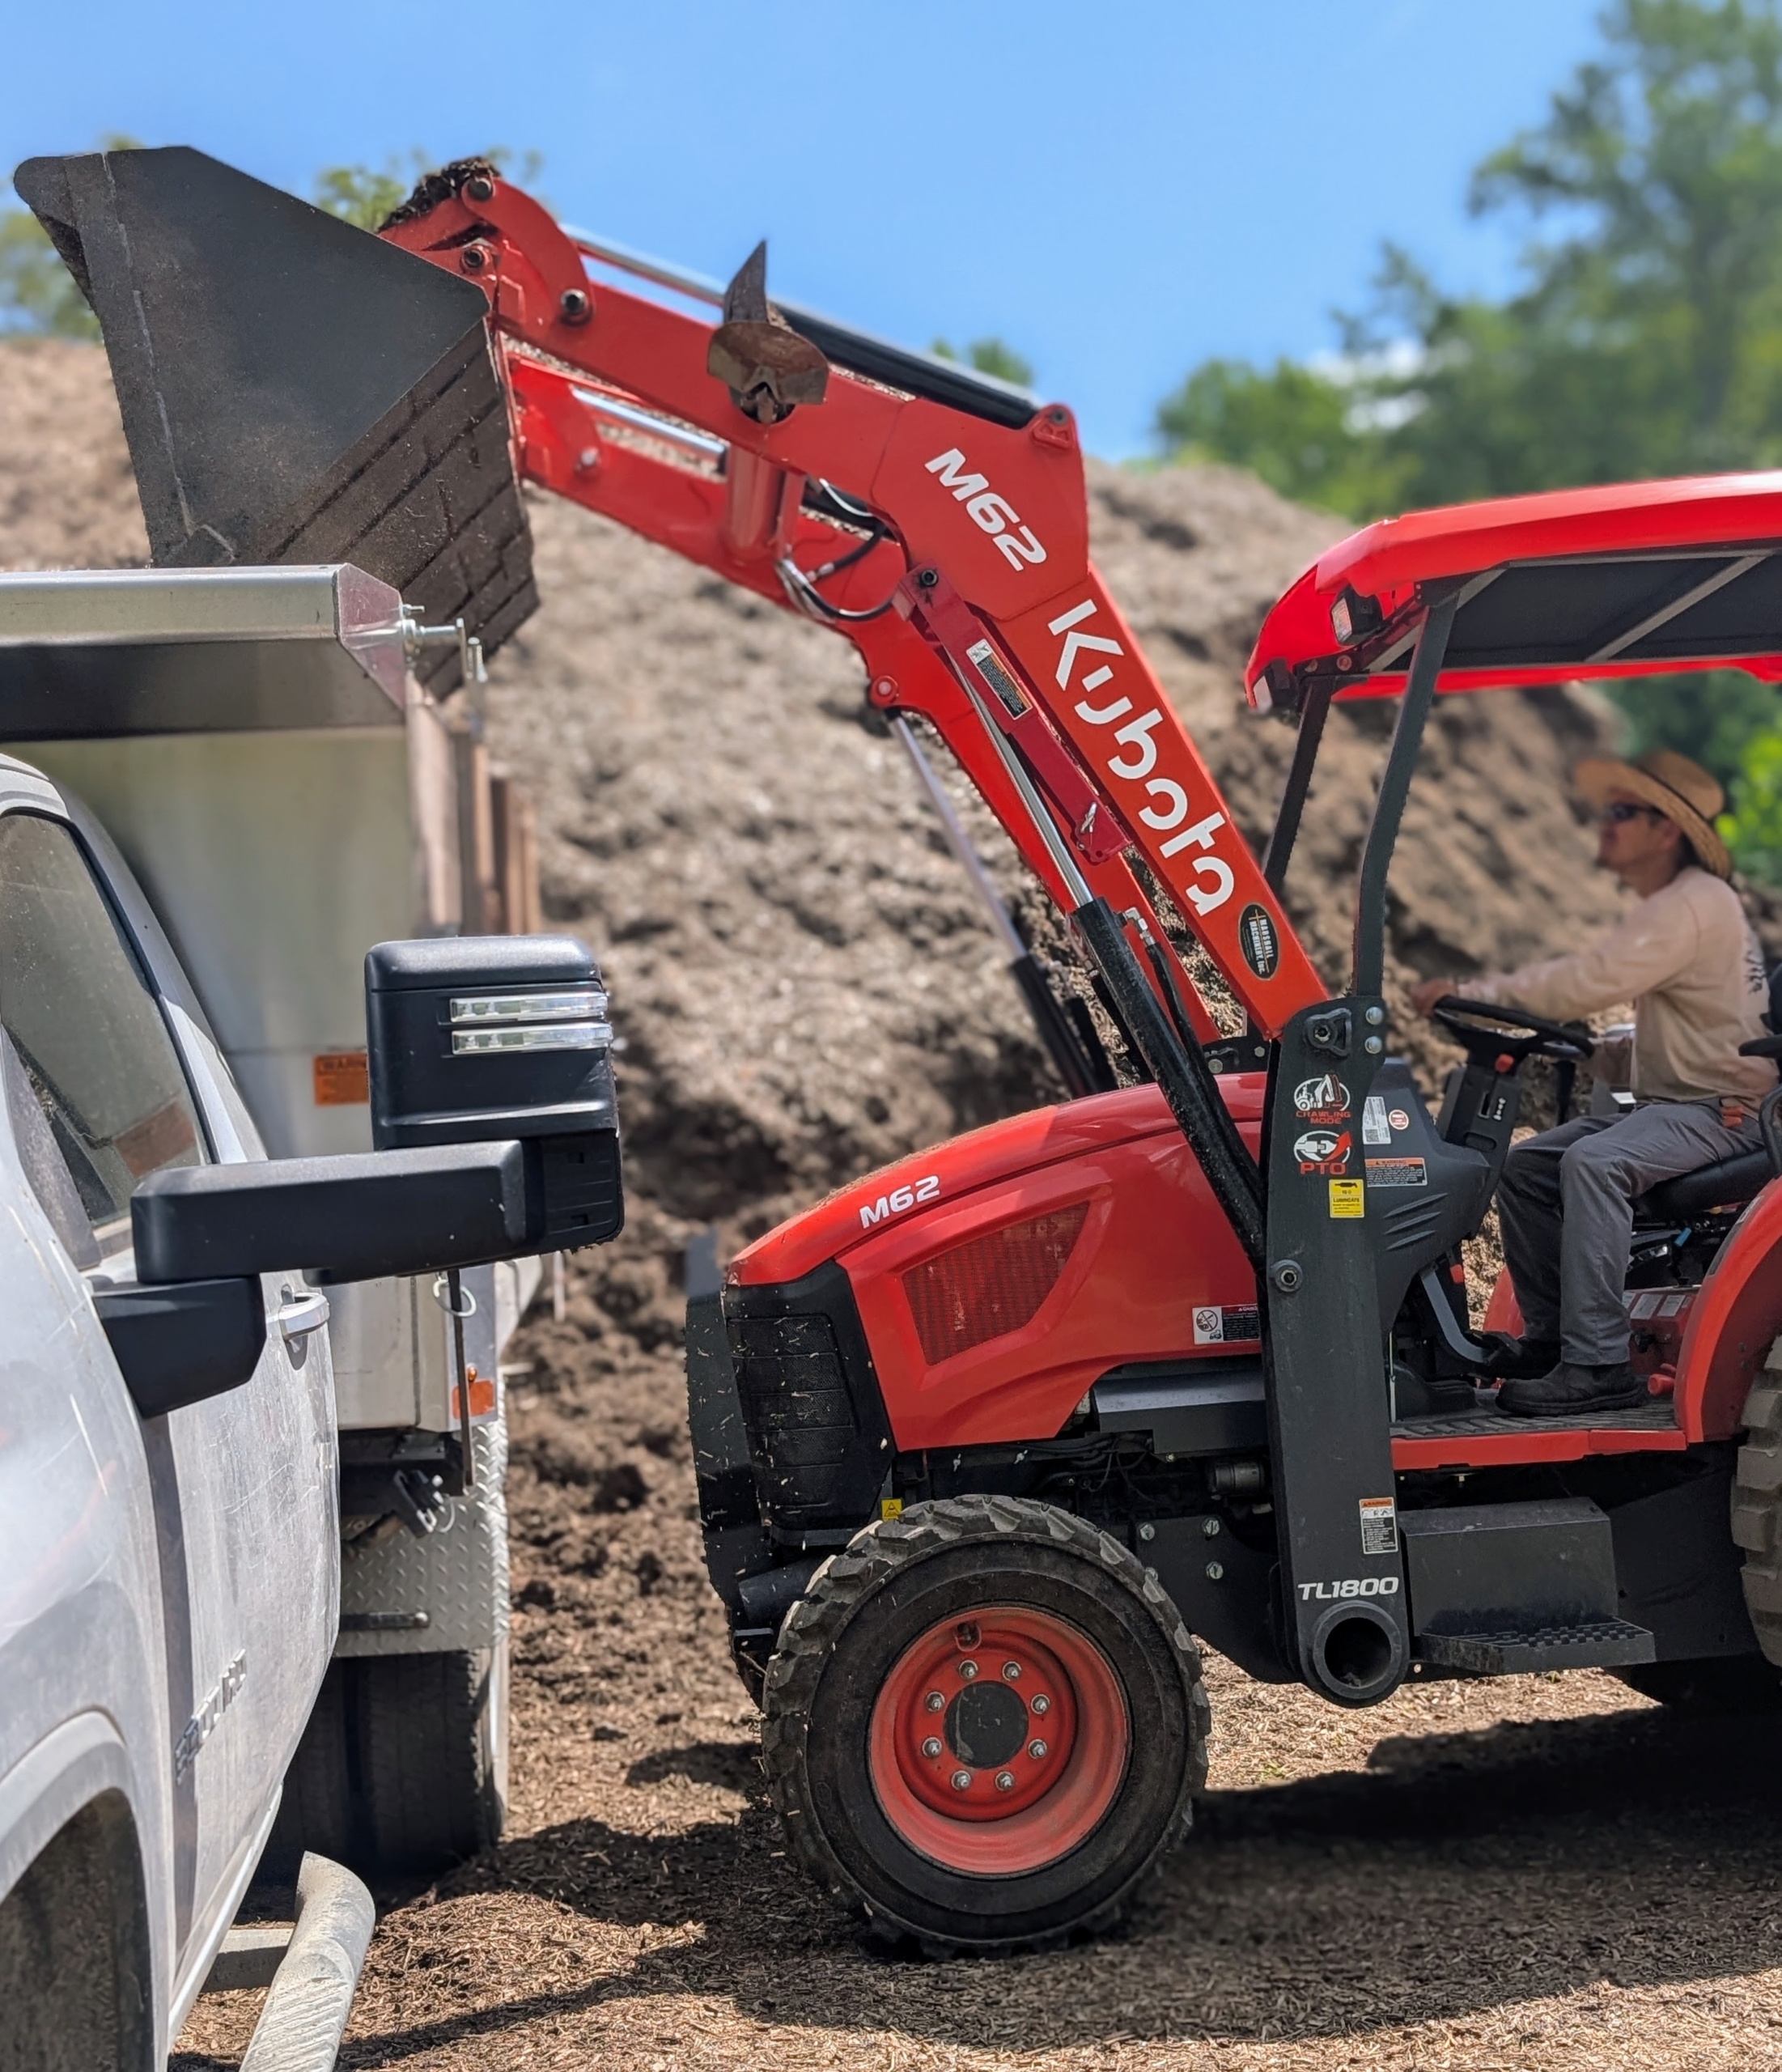
Up in the compost yard, my outdoor grounds crew foreman, Chhiring, continues the tedious job of mulching all the beds around the farm. Thankfully, I am able to make good, nutrient-rich mulch right here. Chhiring is moving a load into the dump truck, so it can be transported to the next area on the list for top dressing – the pinetum.
Chhiring is using my Kubota M62 Tractor Loader Backhoe. It has a 63 horsepower engine, a front loader with a lift capacity of 3,960 pounds, and a powerful Kubota backhoe with 169.8 inch digging depth. Chhiring controls everything from the safety of the tractor’s cab. He can turn and sit facing either direction to maneuver the backhoe or the loader.
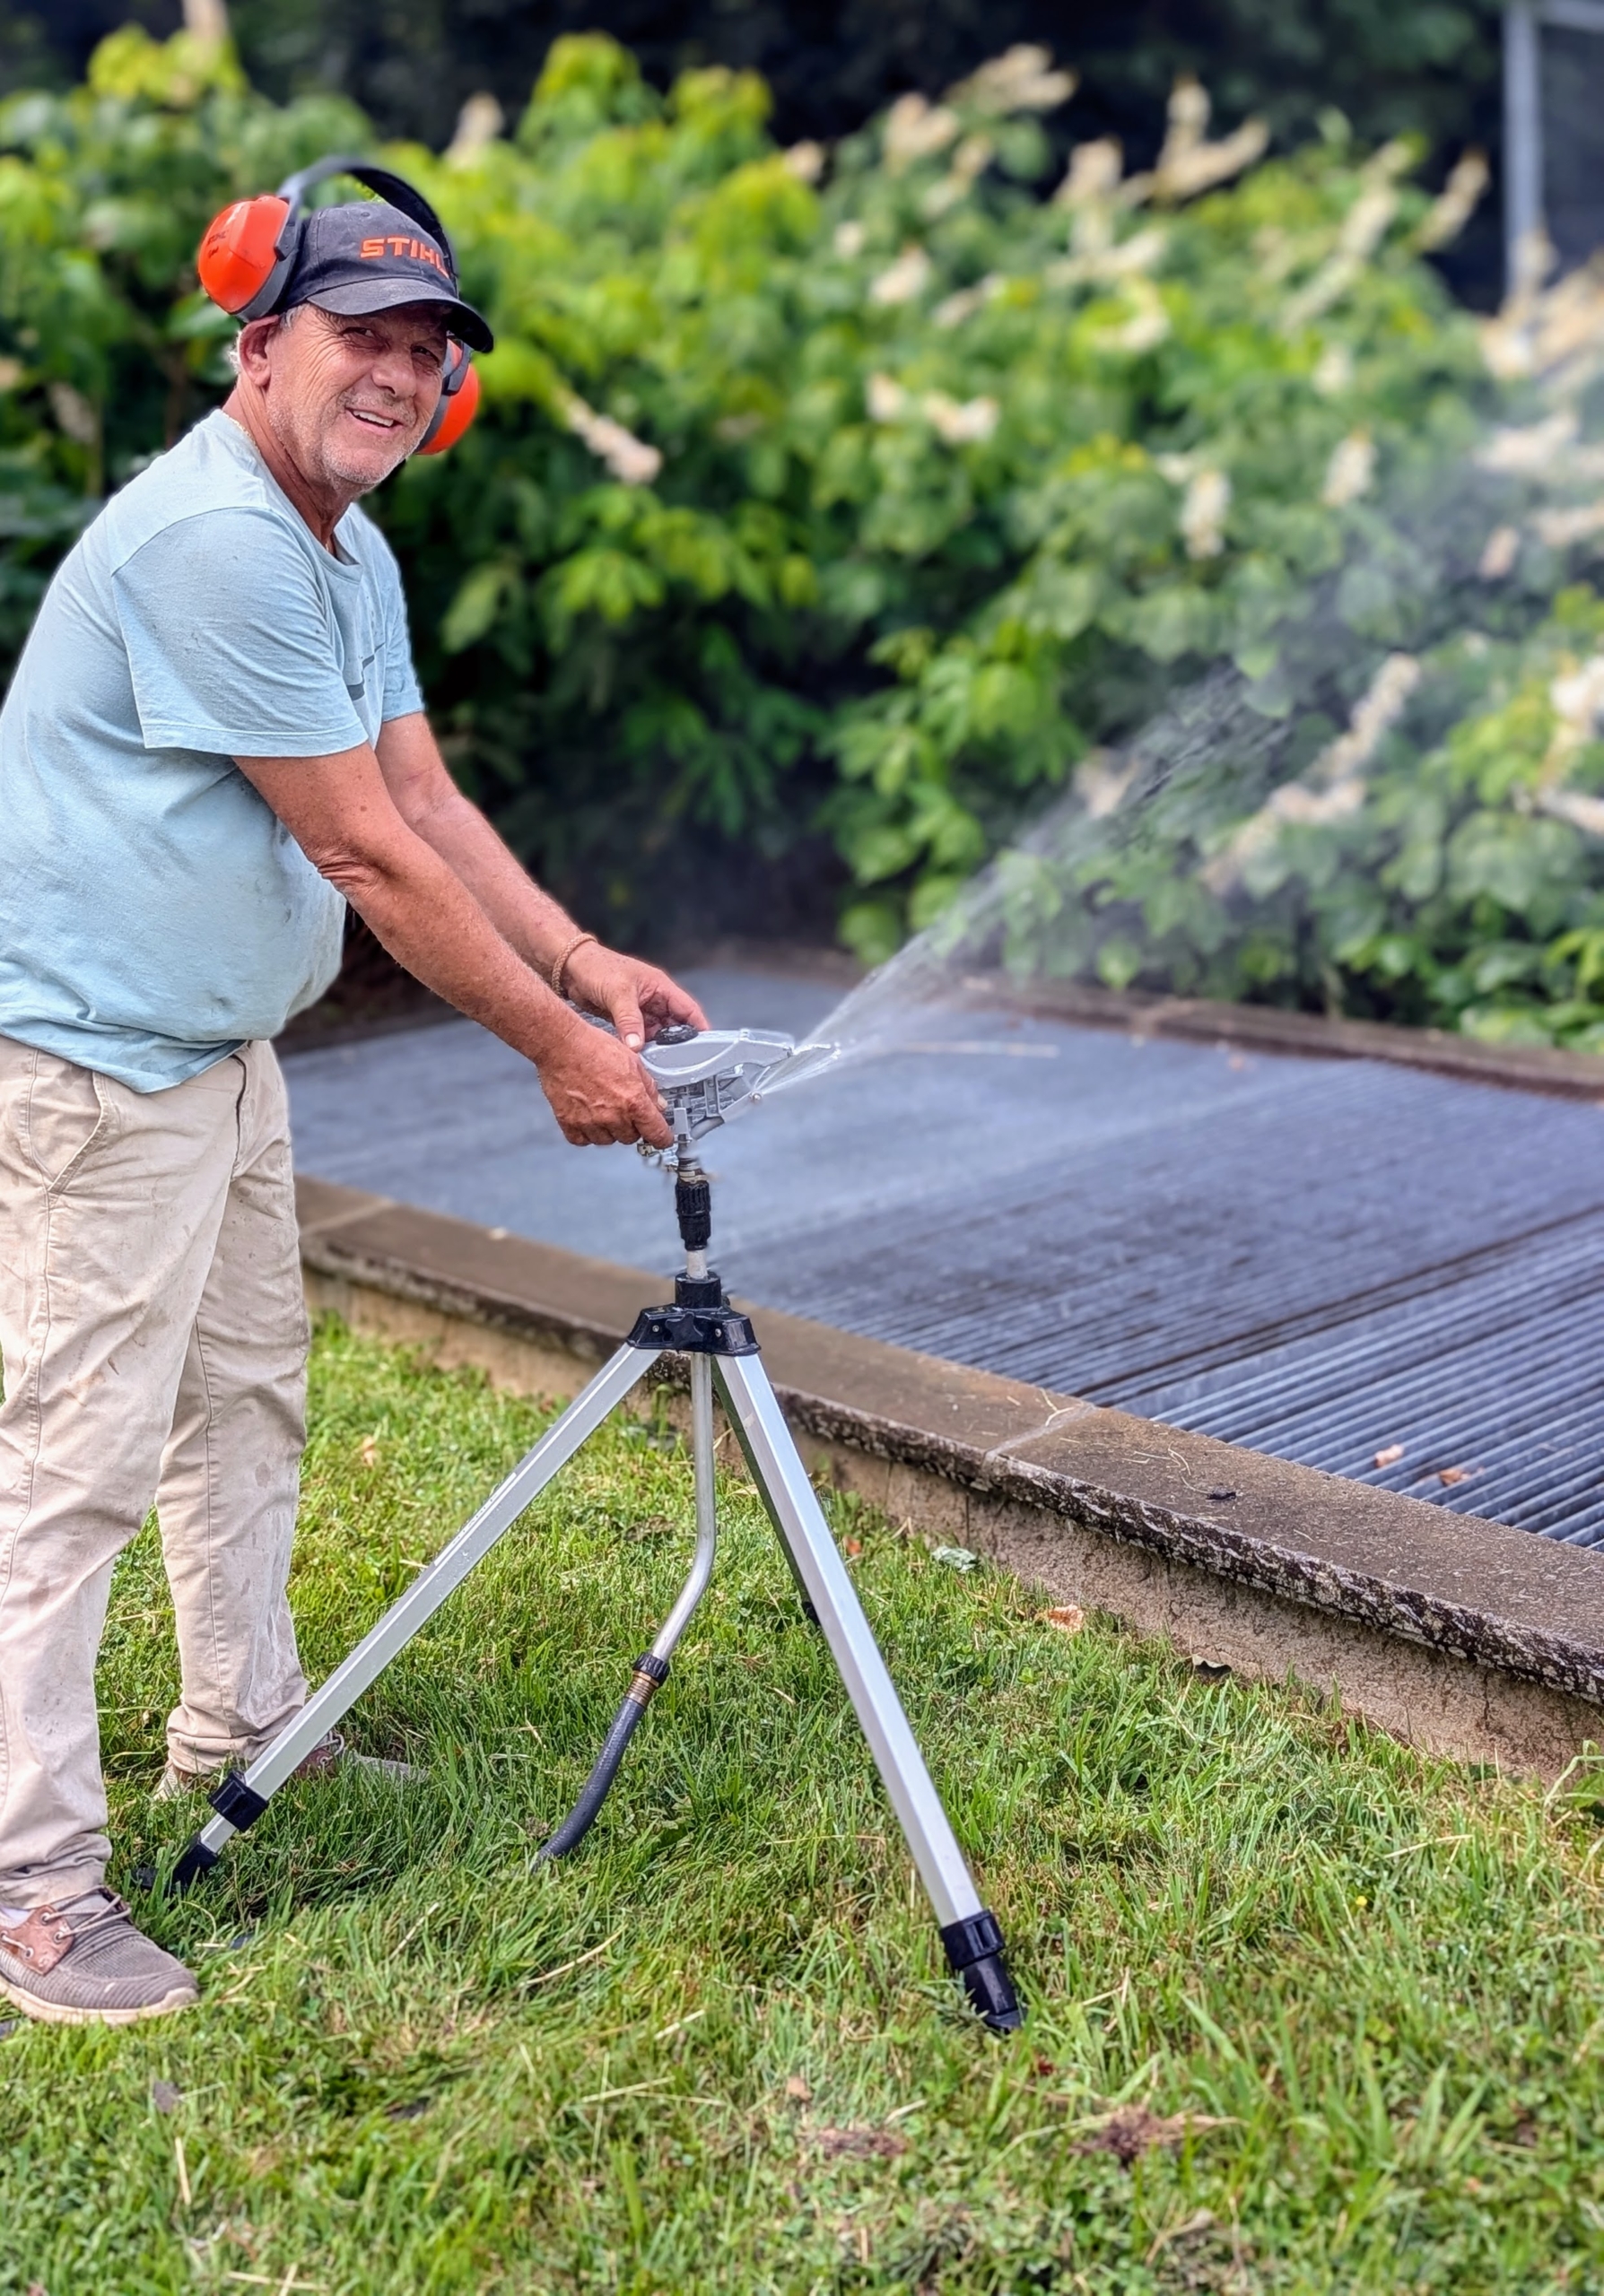
With no rain at all this week, the crew is also busy watering. I use Gilmour garden hoses and sprinklers and I personally show every member how to use them, so they can water properly and efficiently. Fernando positions this sprinkler to water the plantings outside my stable.
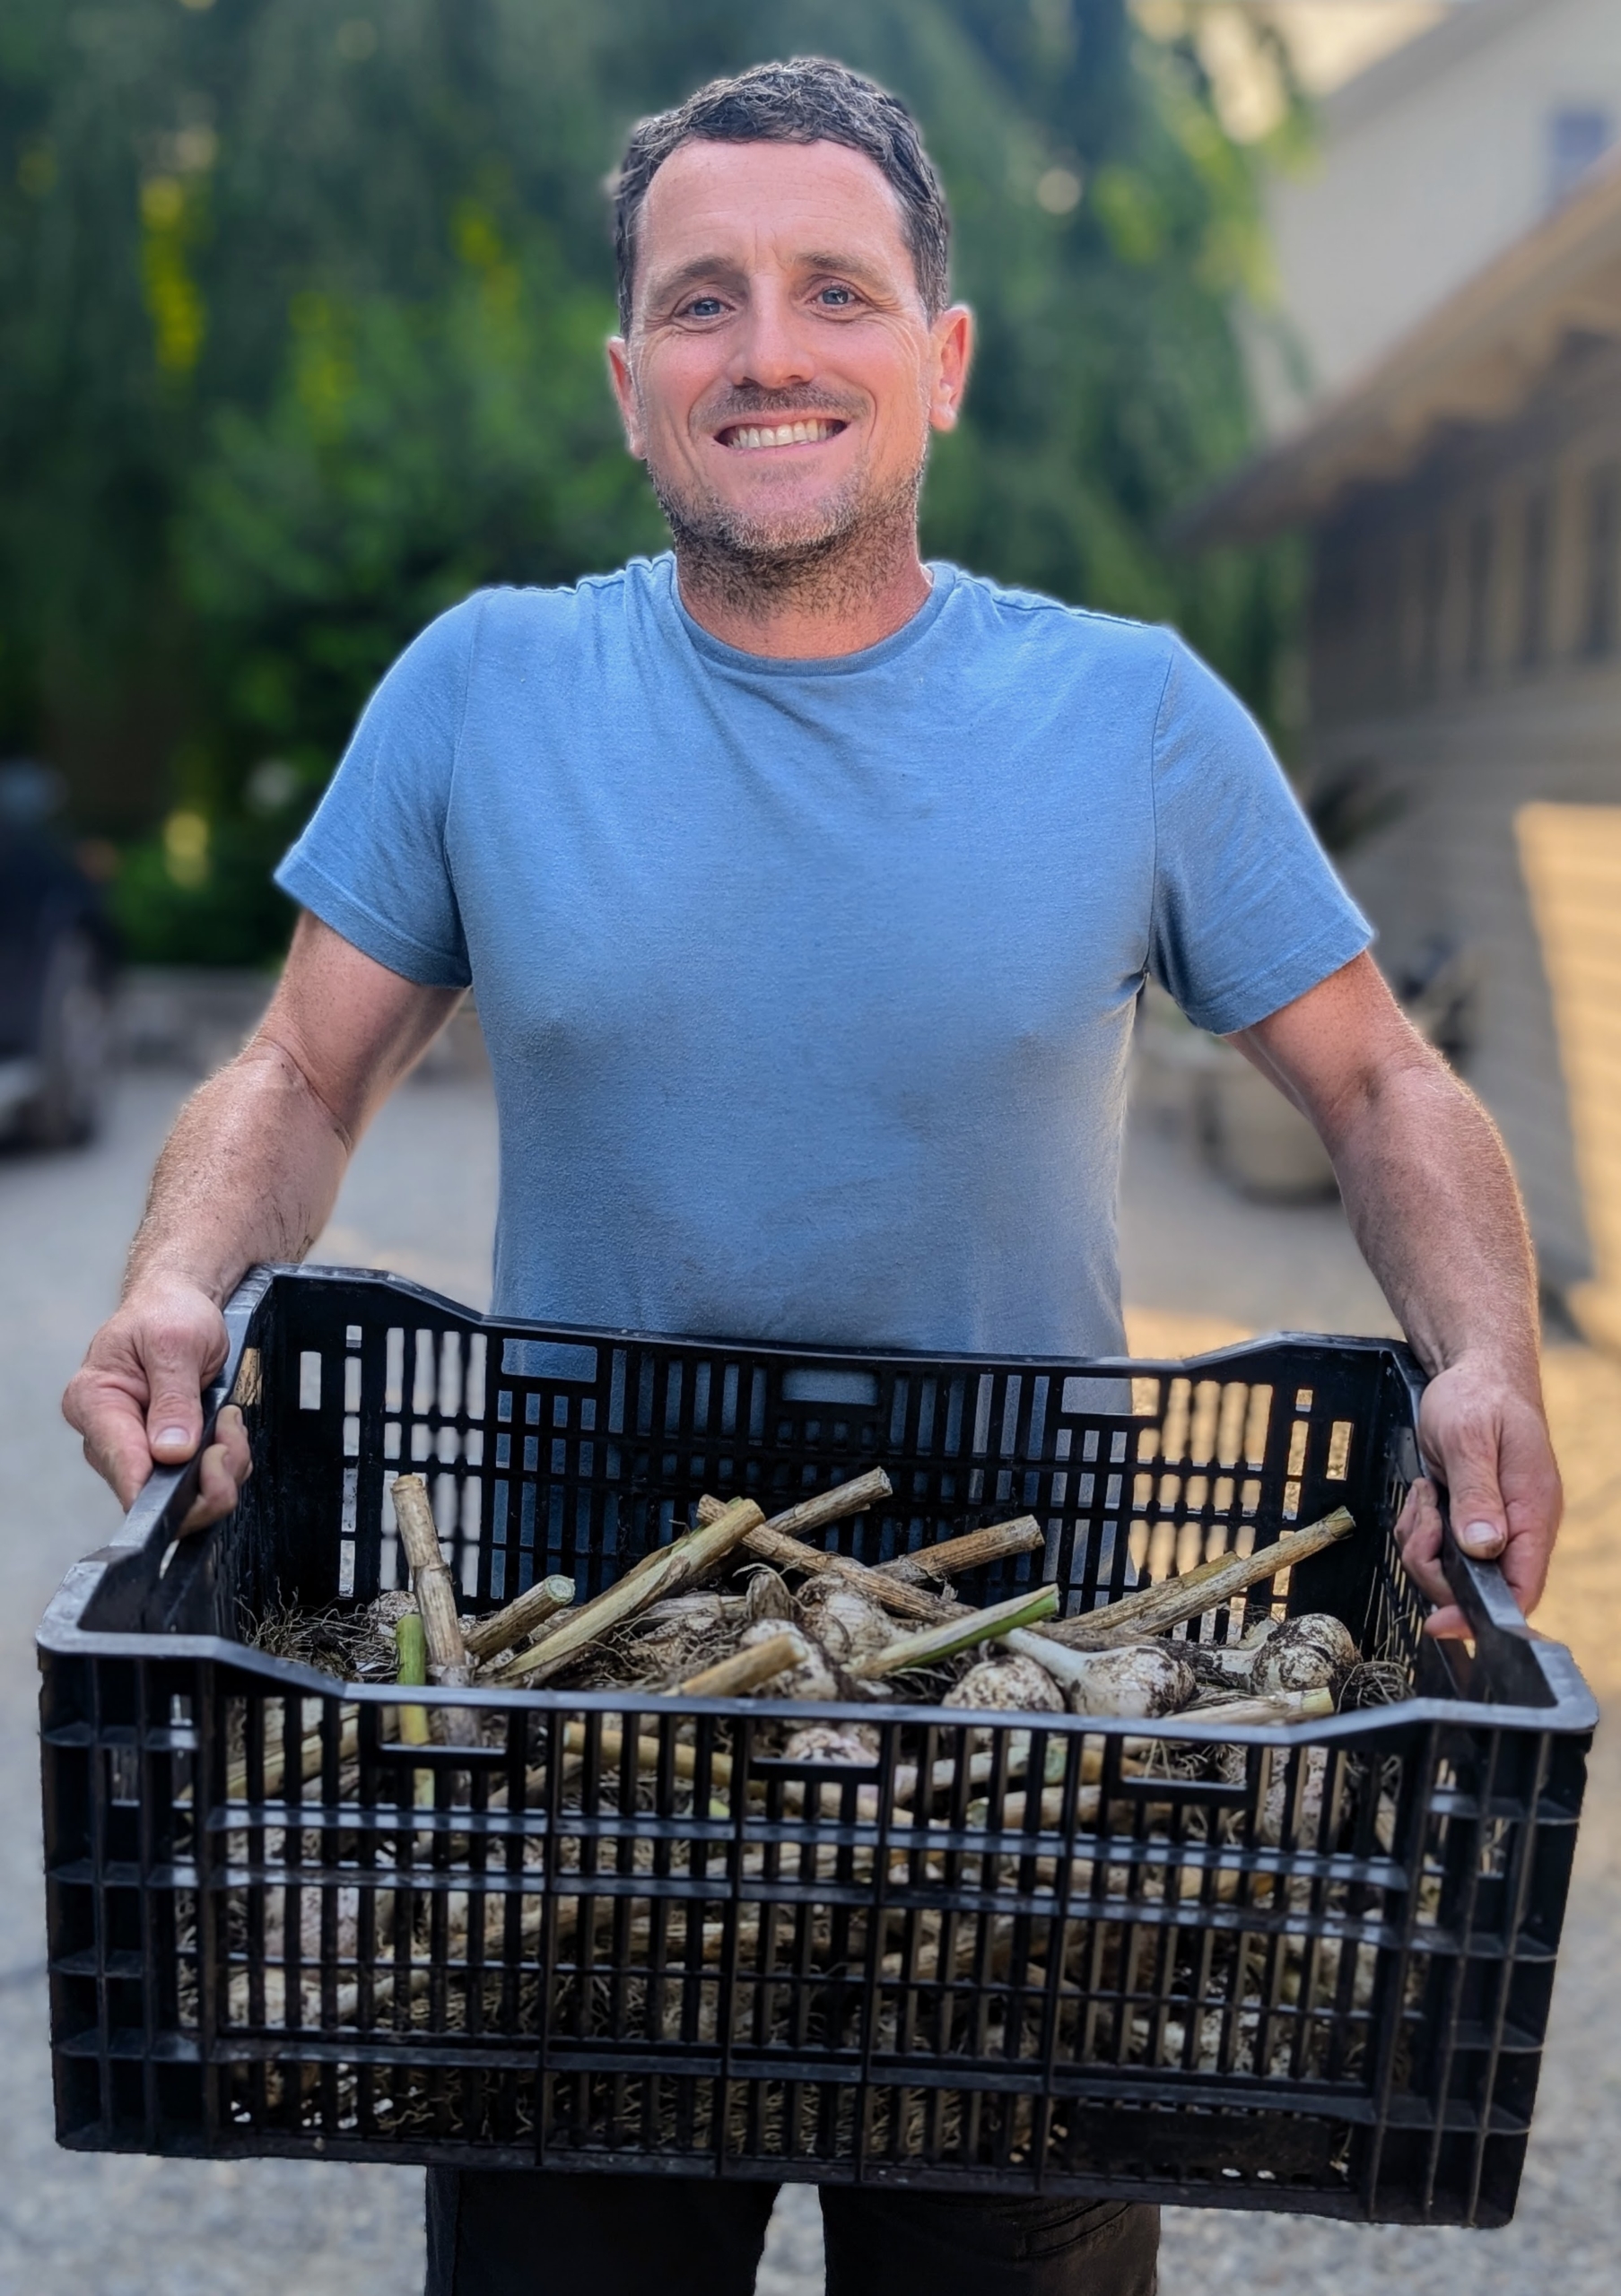
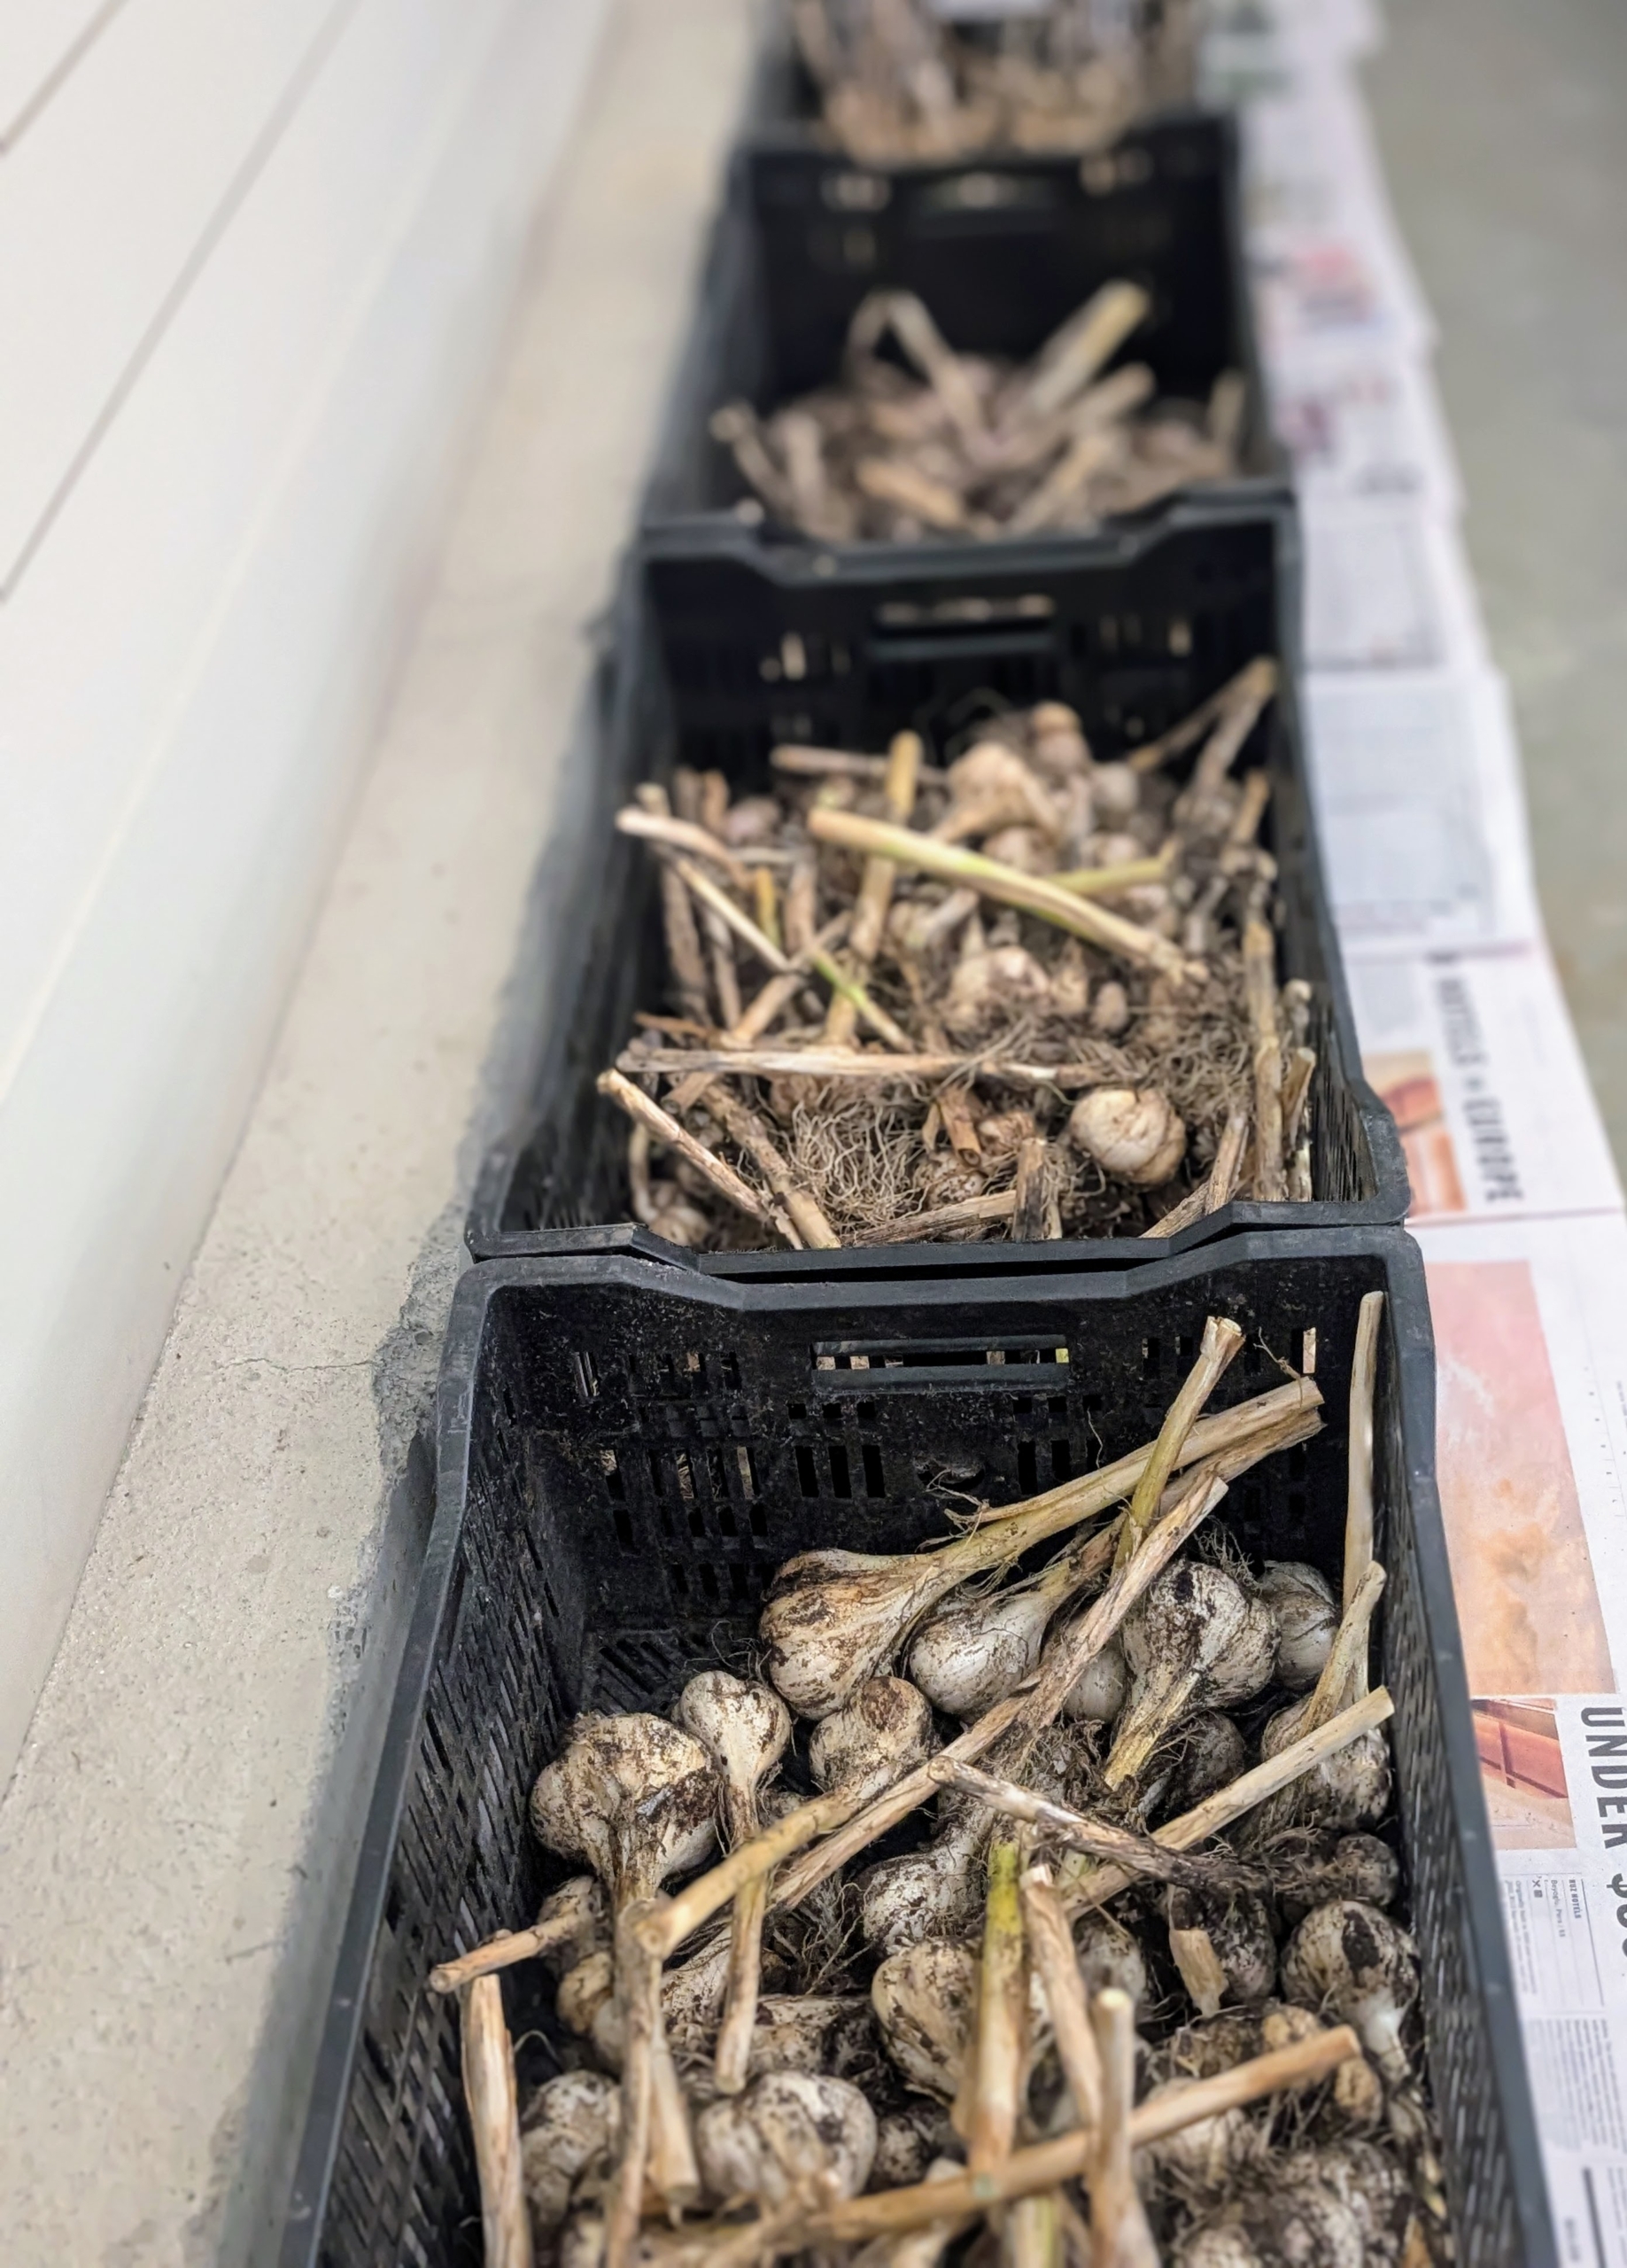
Ryan takes all the newly picked garlic to one area of my carport where it can cure for several weeks in a cool, shady, and dry location. Curing is a process of letting the garlic dry in preparation for long-term storage.
Soon, the garlic will also be cleaned and trimmed. Once the garlic is cured, the most beautiful heads with the biggest cloves will be set aside to use as garlic seeds next season. The rest will be enjoyed by me and my family.
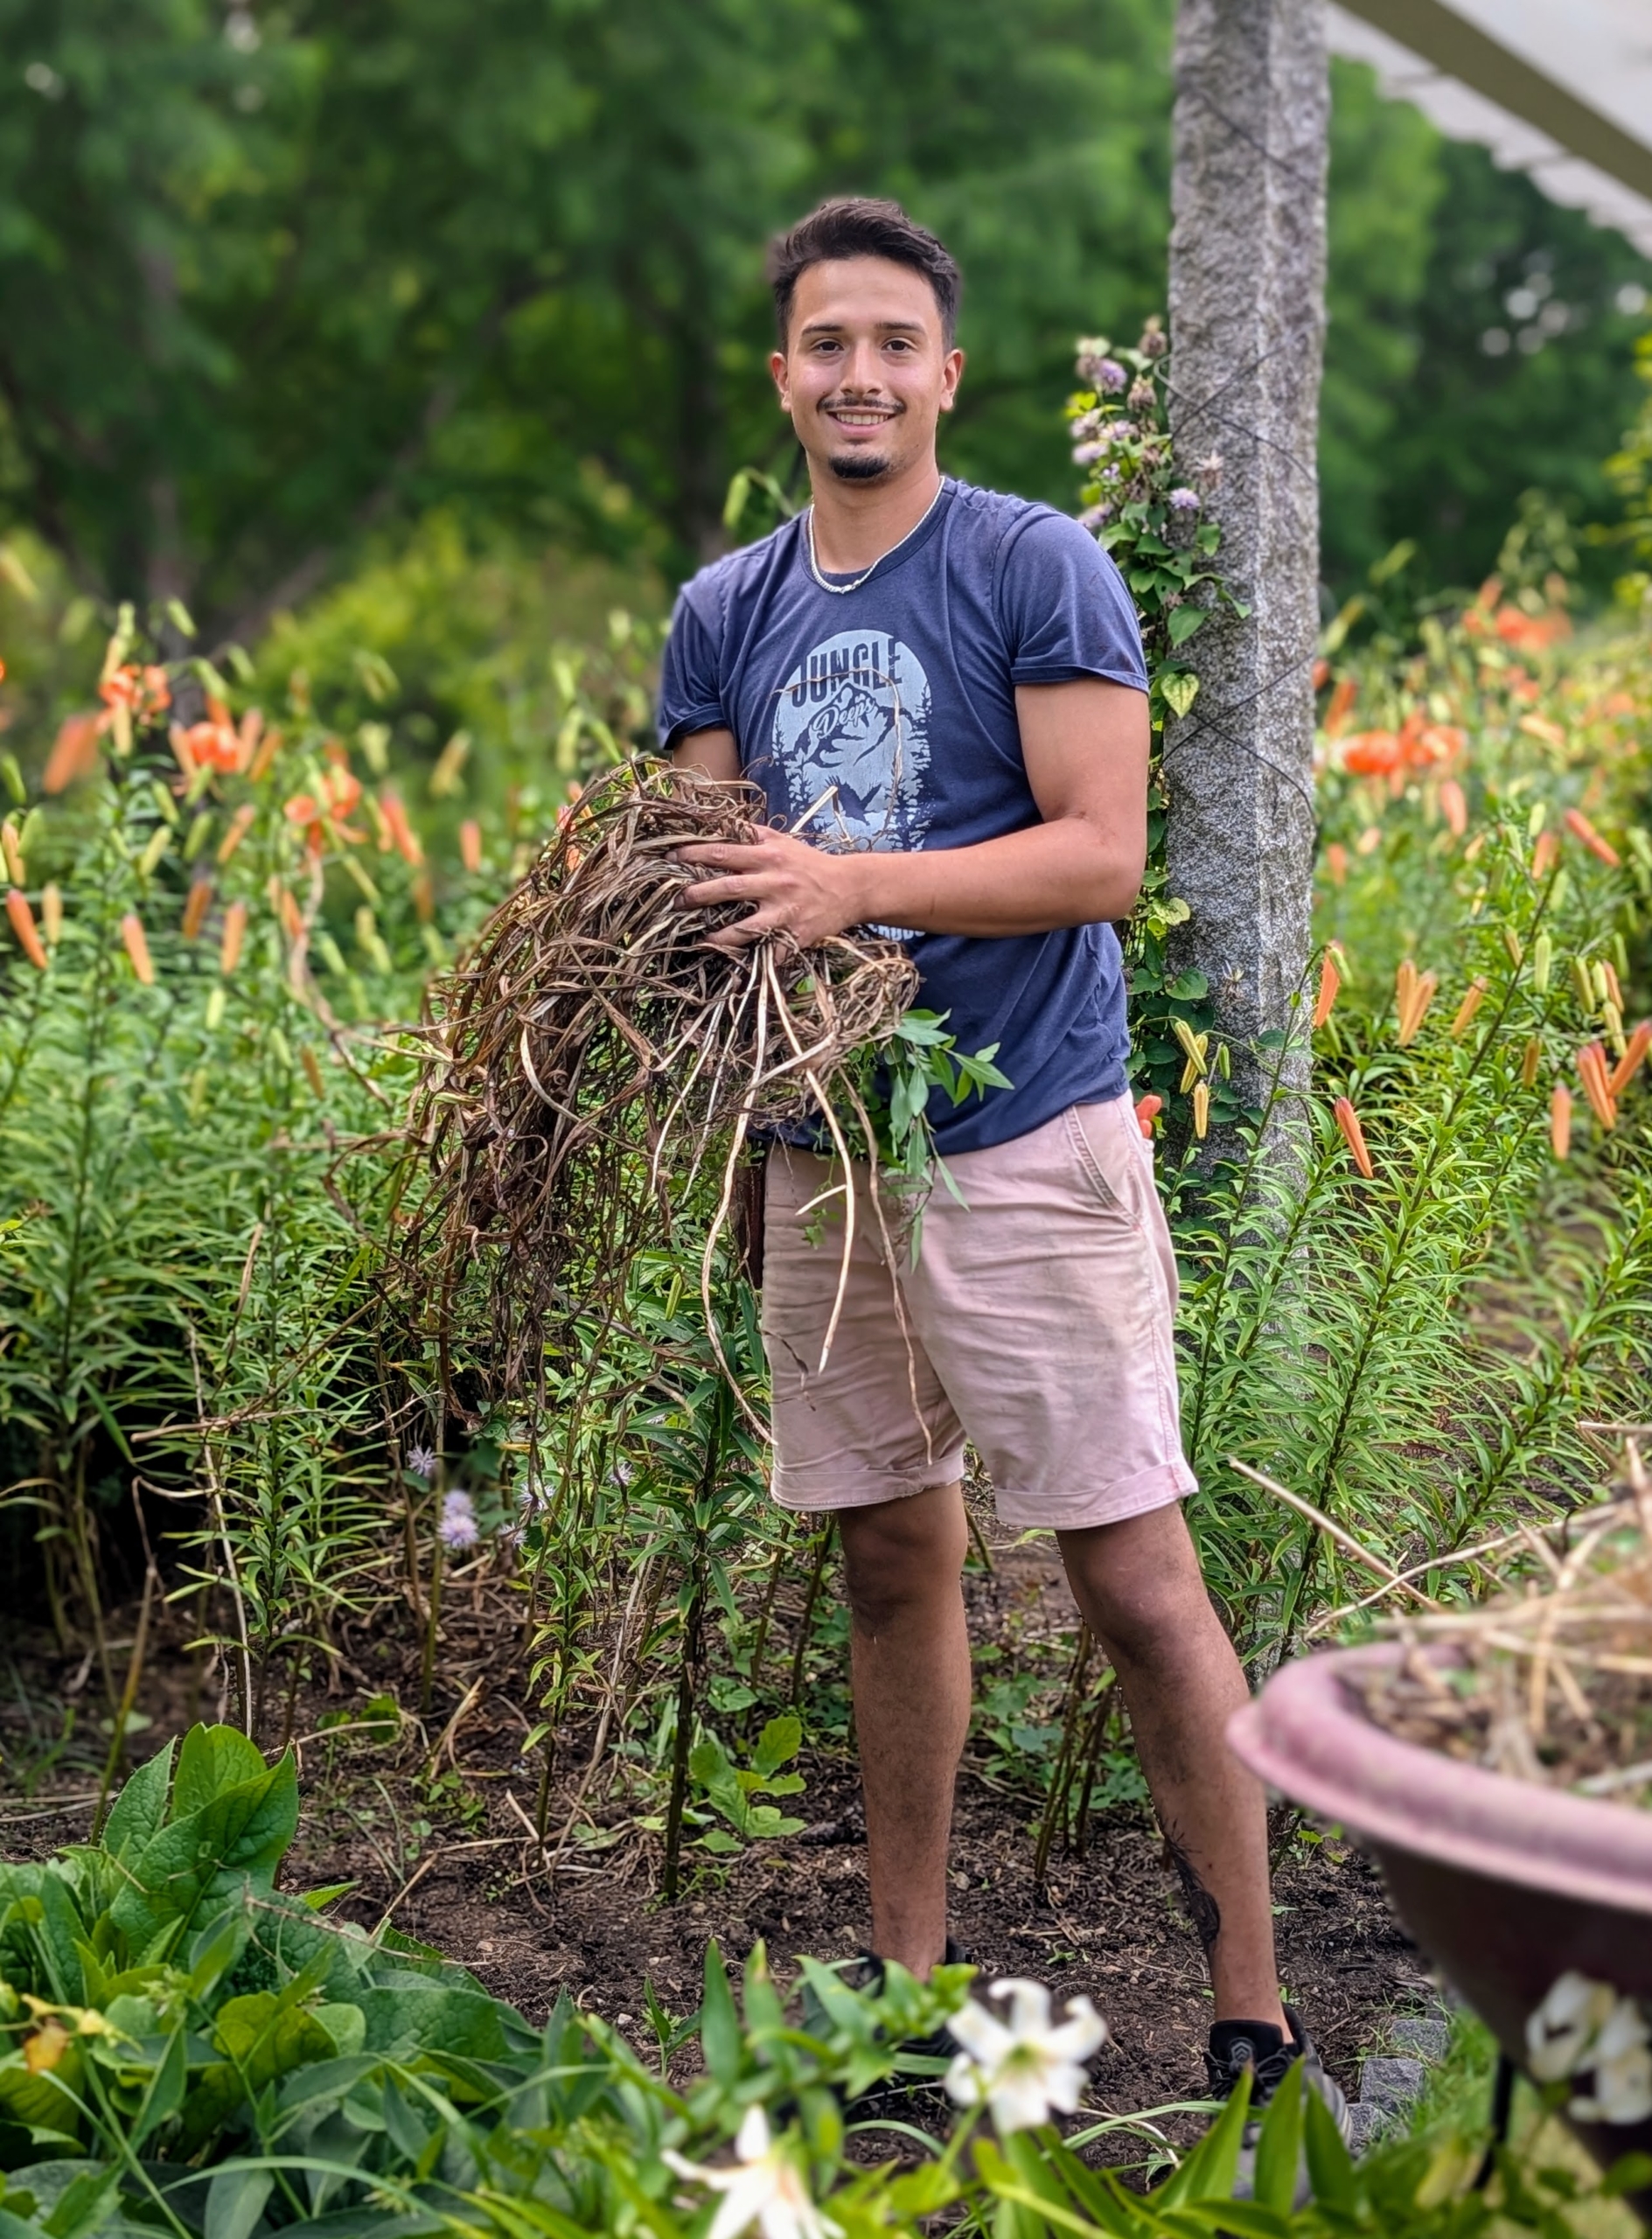
Weeds in the garden are inevitable – left alone, so many of them quickly overtake healthy flowers, plants, and vegetables, stealing their sunlight, water, and soil nutrients. Every summer, my gardeners and crew try try hard to keep up with their rapid growth. Here’s Matthew weeding my long pergola before all the bright, beautiful tiger lilies bloom.
And, right by his side is my Multi-Purpose Reusable Heavy Duty Tote Bag – it’s so useful for carrying weeds, but also for organizing, and storing so many things indoors and out.
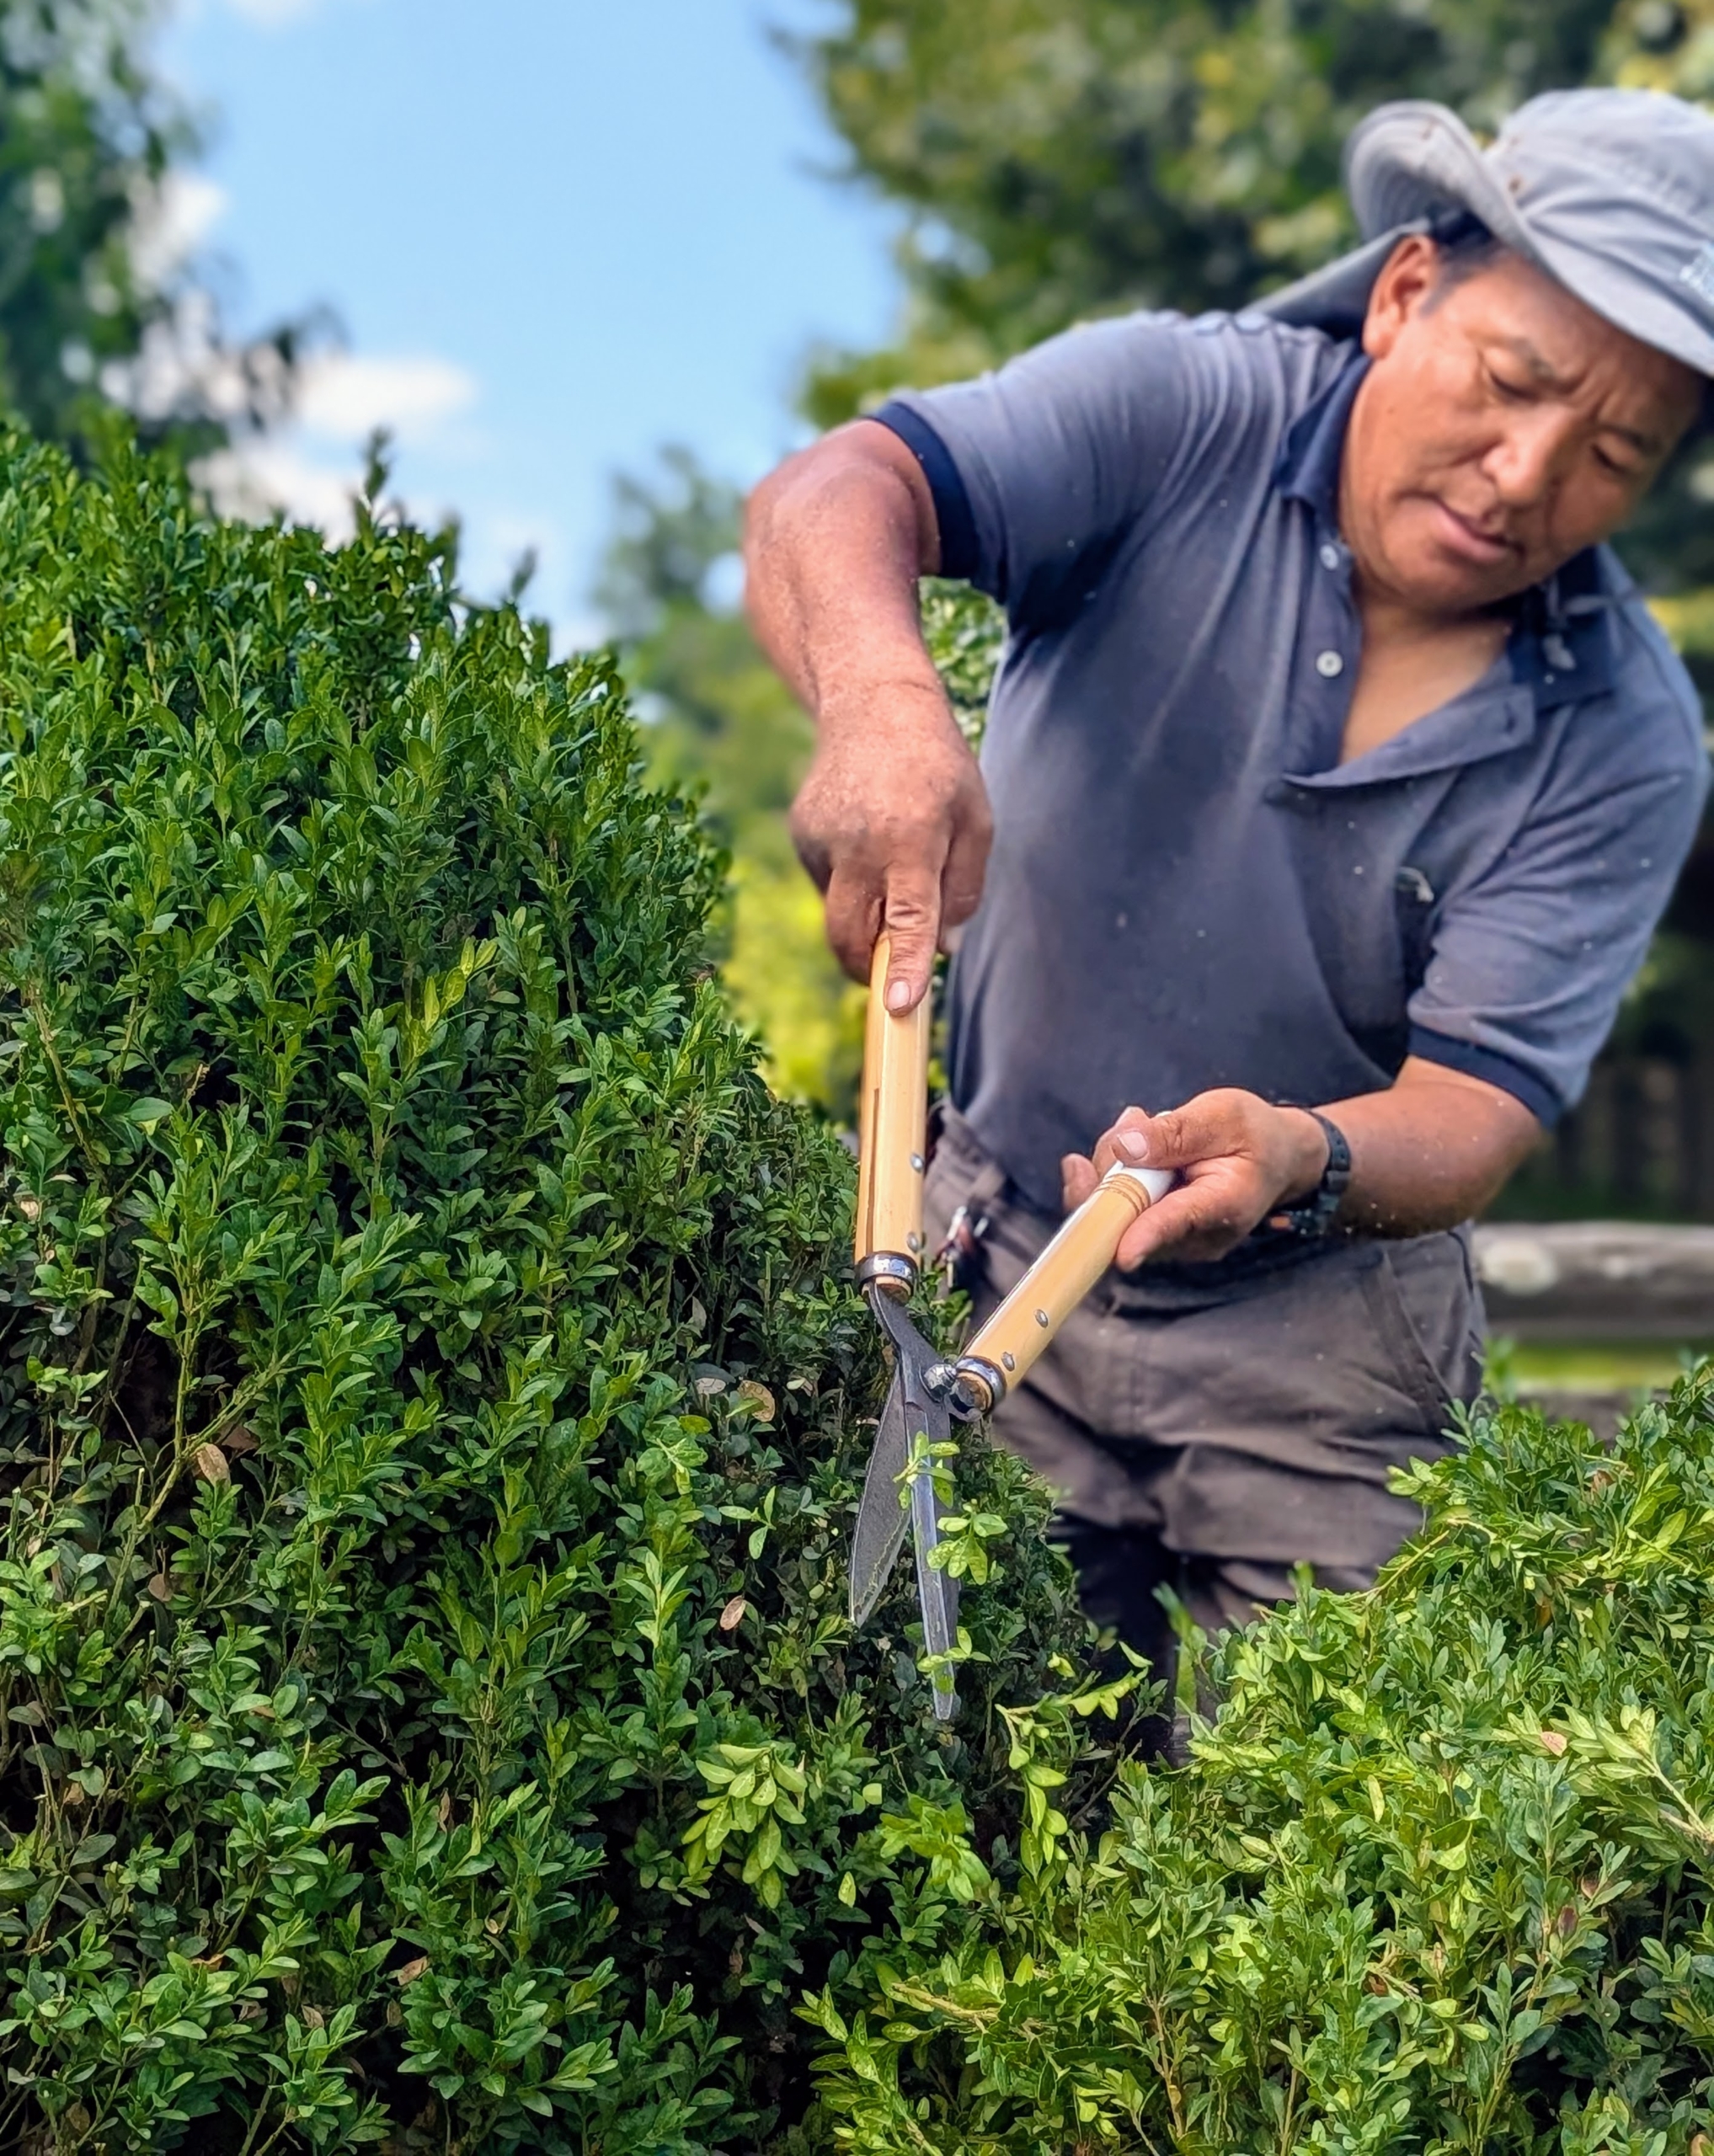
In the long Boxwood Allée, Phurba works on pruning and grooming the shrubs. Phurba is my resident boxwood pruning expert and has been with me for many years.
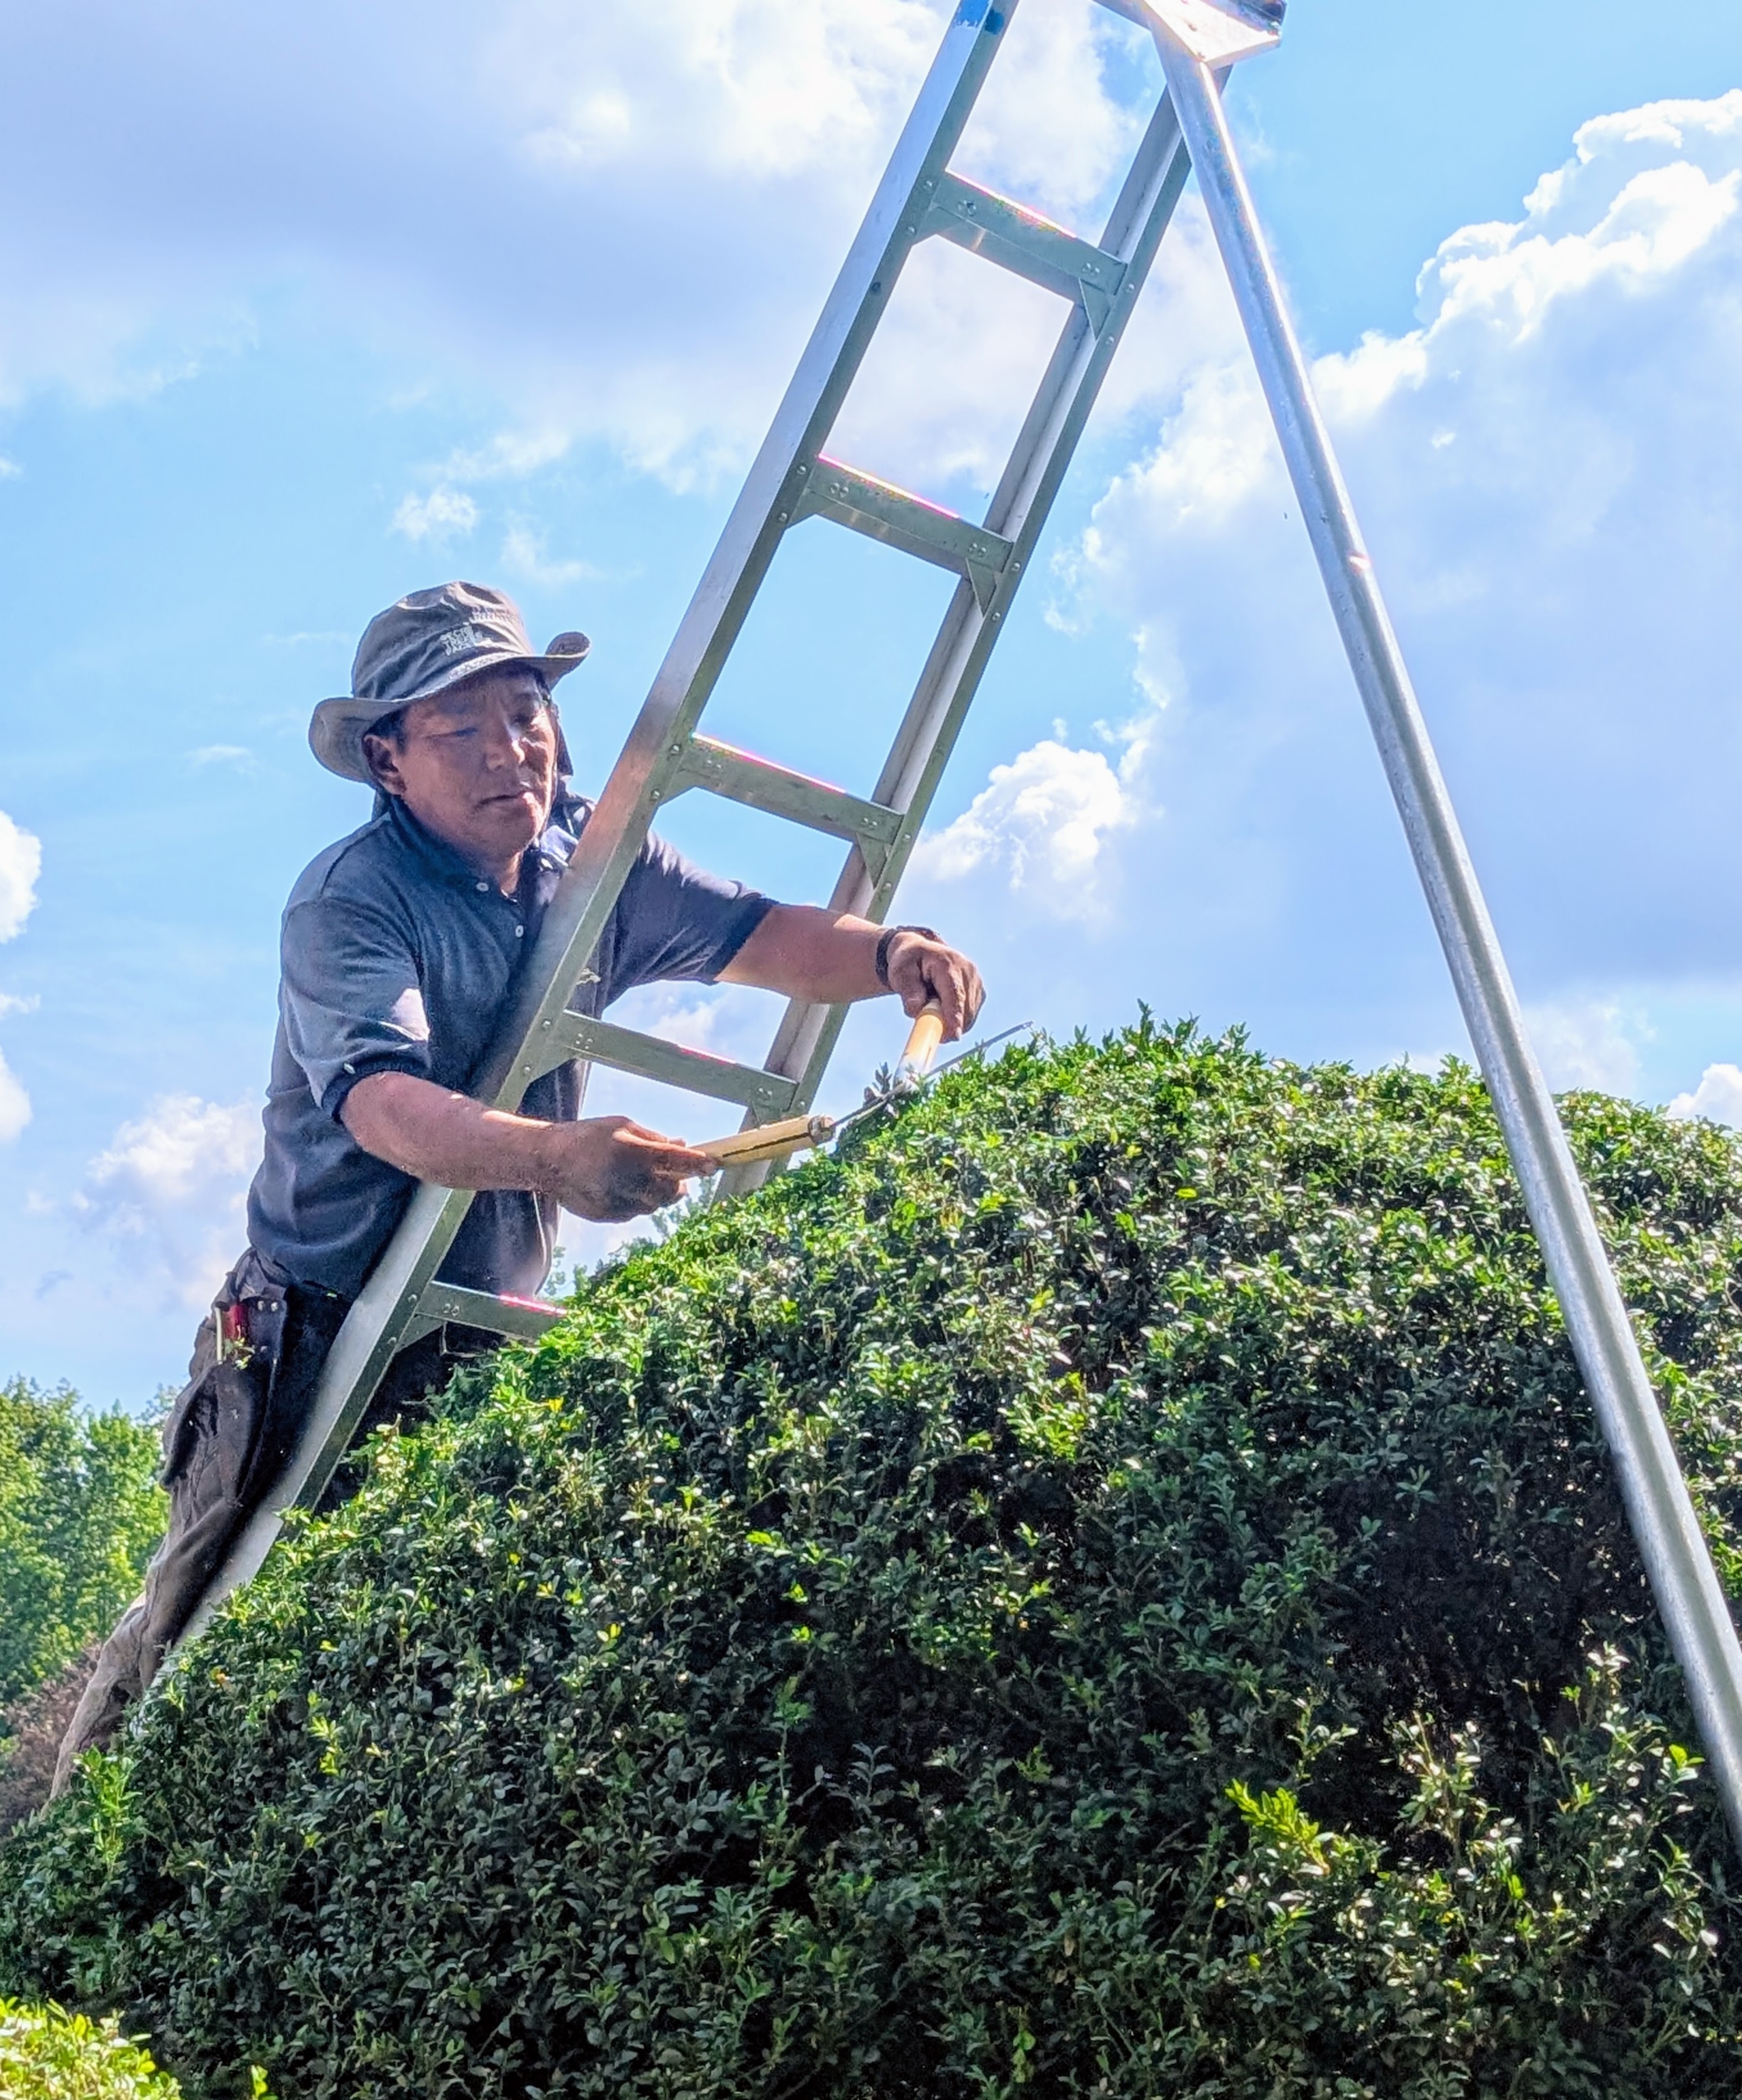
I prefer all the boxwood be trimmed by hand. Phurba uses Japanese Okatsune shears. These shears allow him to sculpt and groom as well as prune the foliage. Phurba also uses an orchard ladder that is light enough to carry as he moves from one shrub to the next.
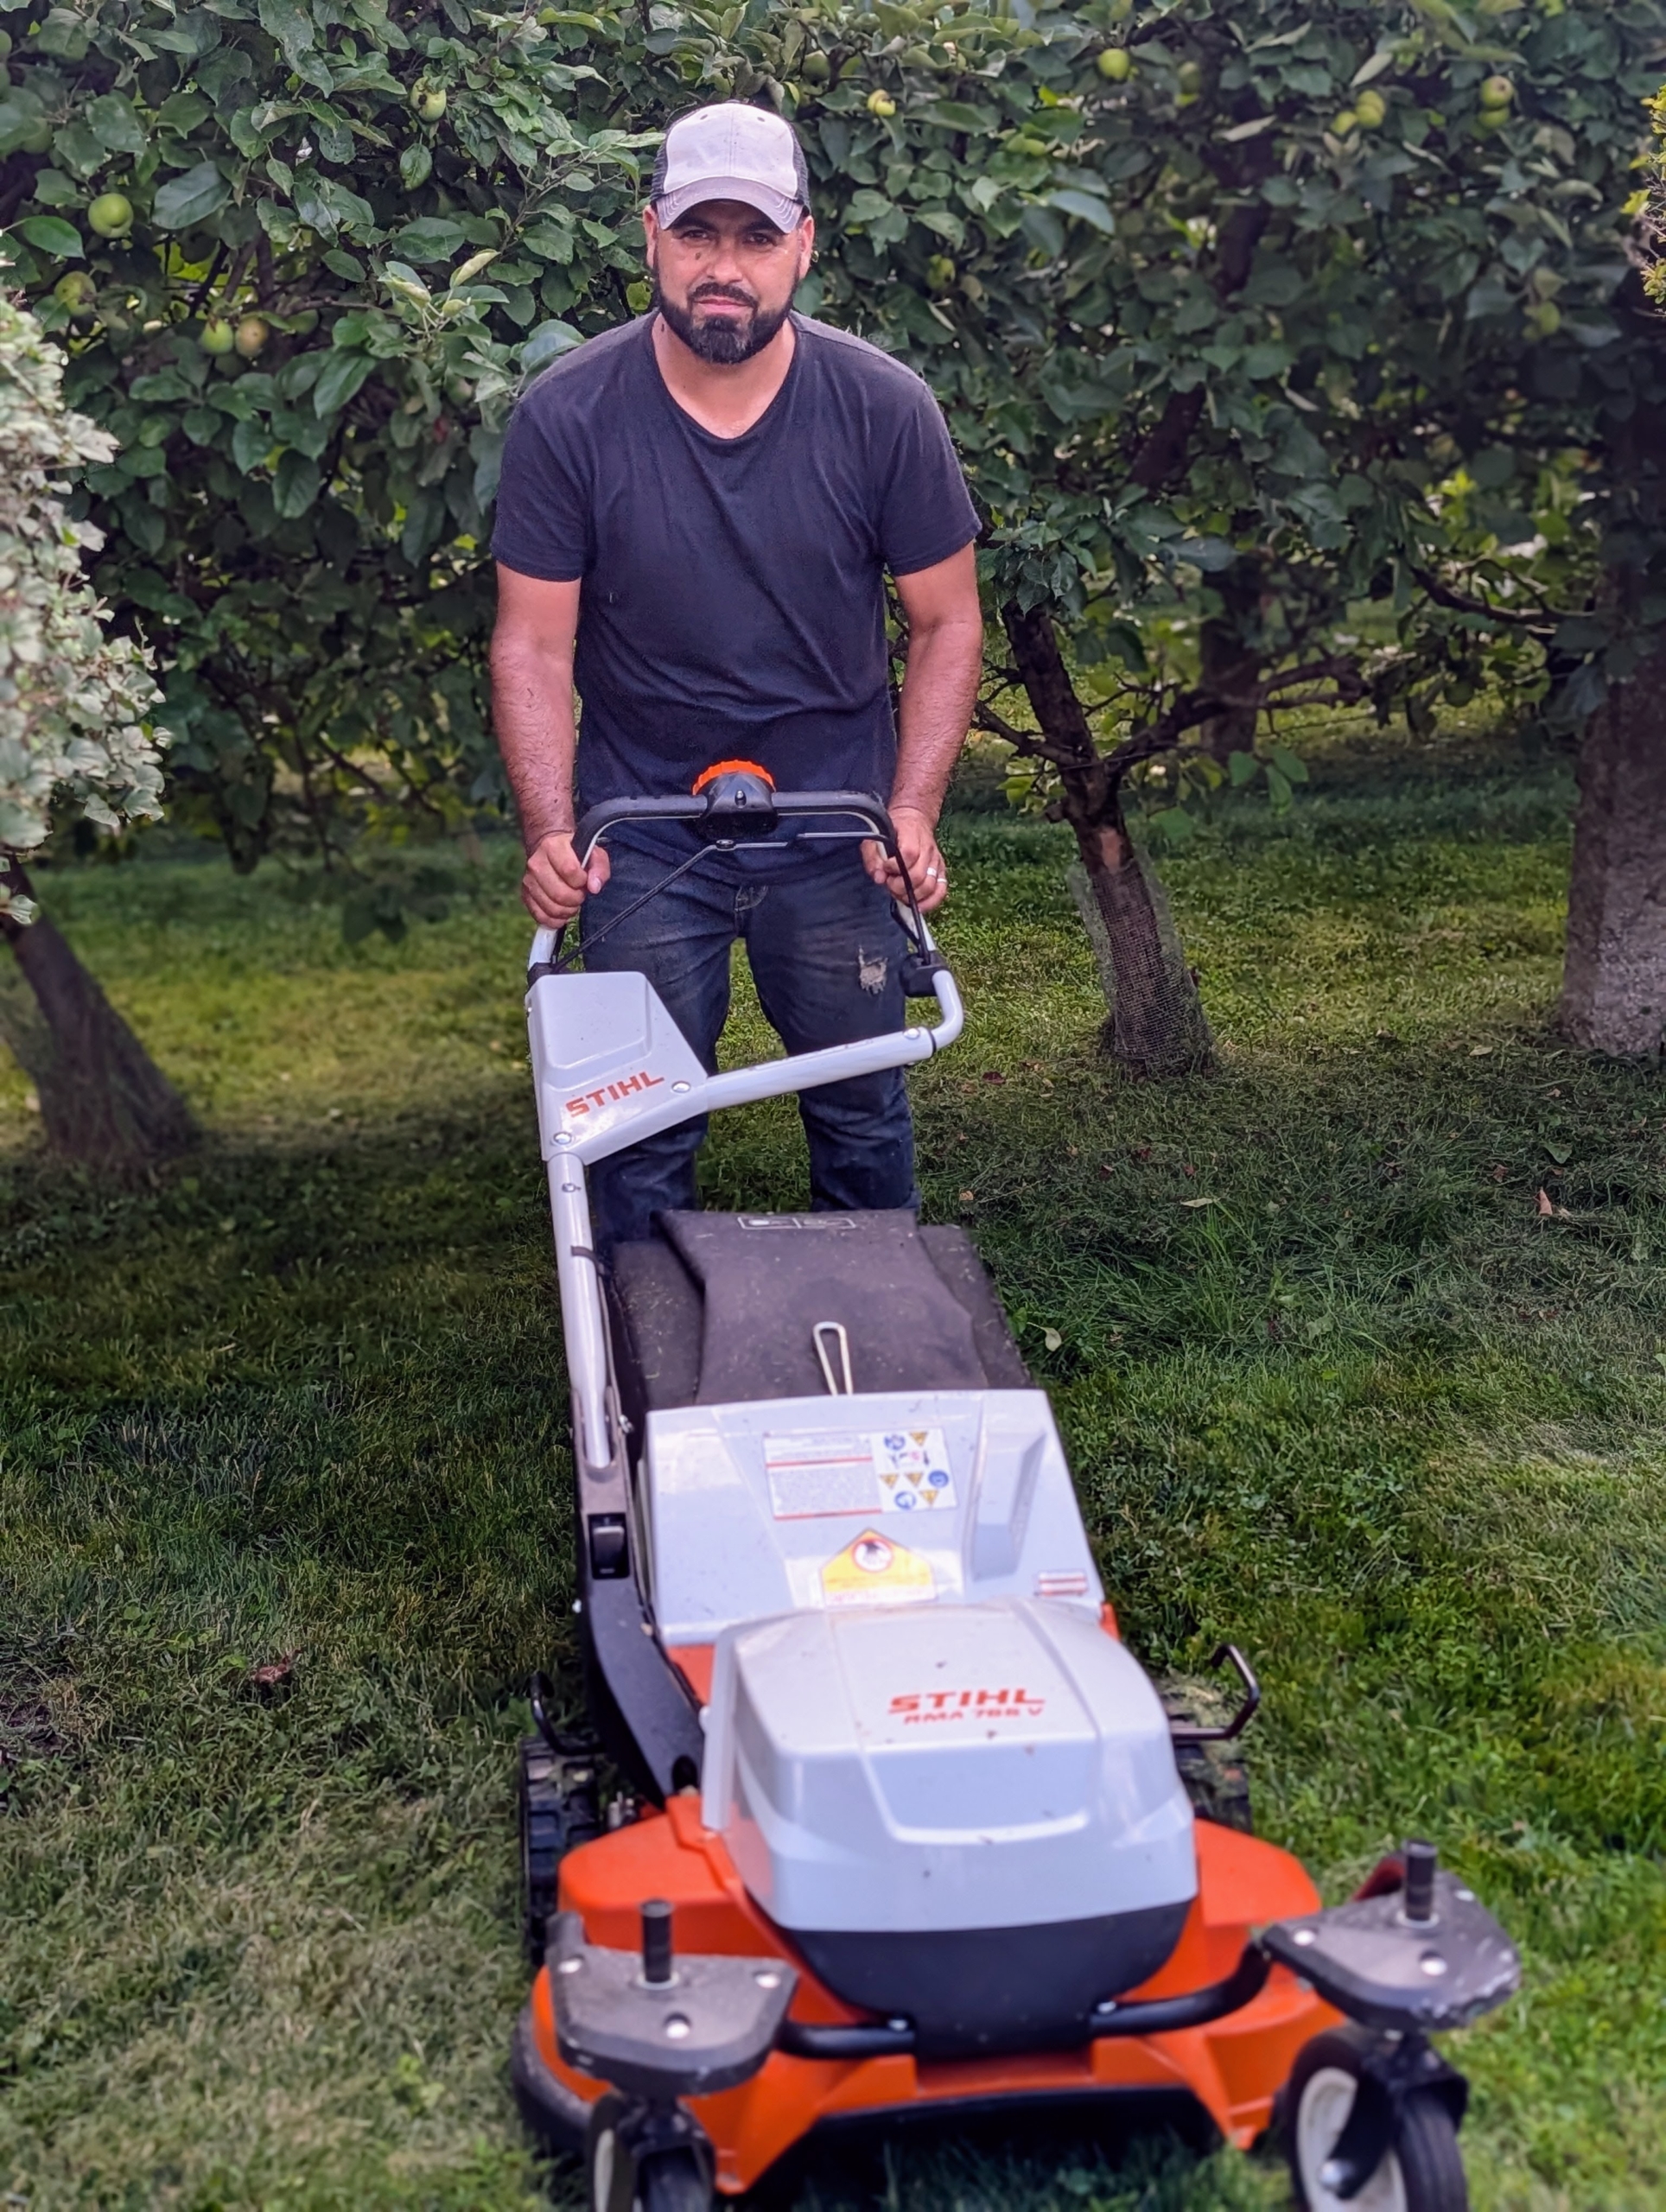
For very narrow spaces such as in between the rows of my dwarf apple espalier, Adan uses a STIHL RM 655 VS gas push mower. While I have replaced many grassy areas with mulch to reduce the amount of mowing around my farm, there is still a lot of mowing to do.
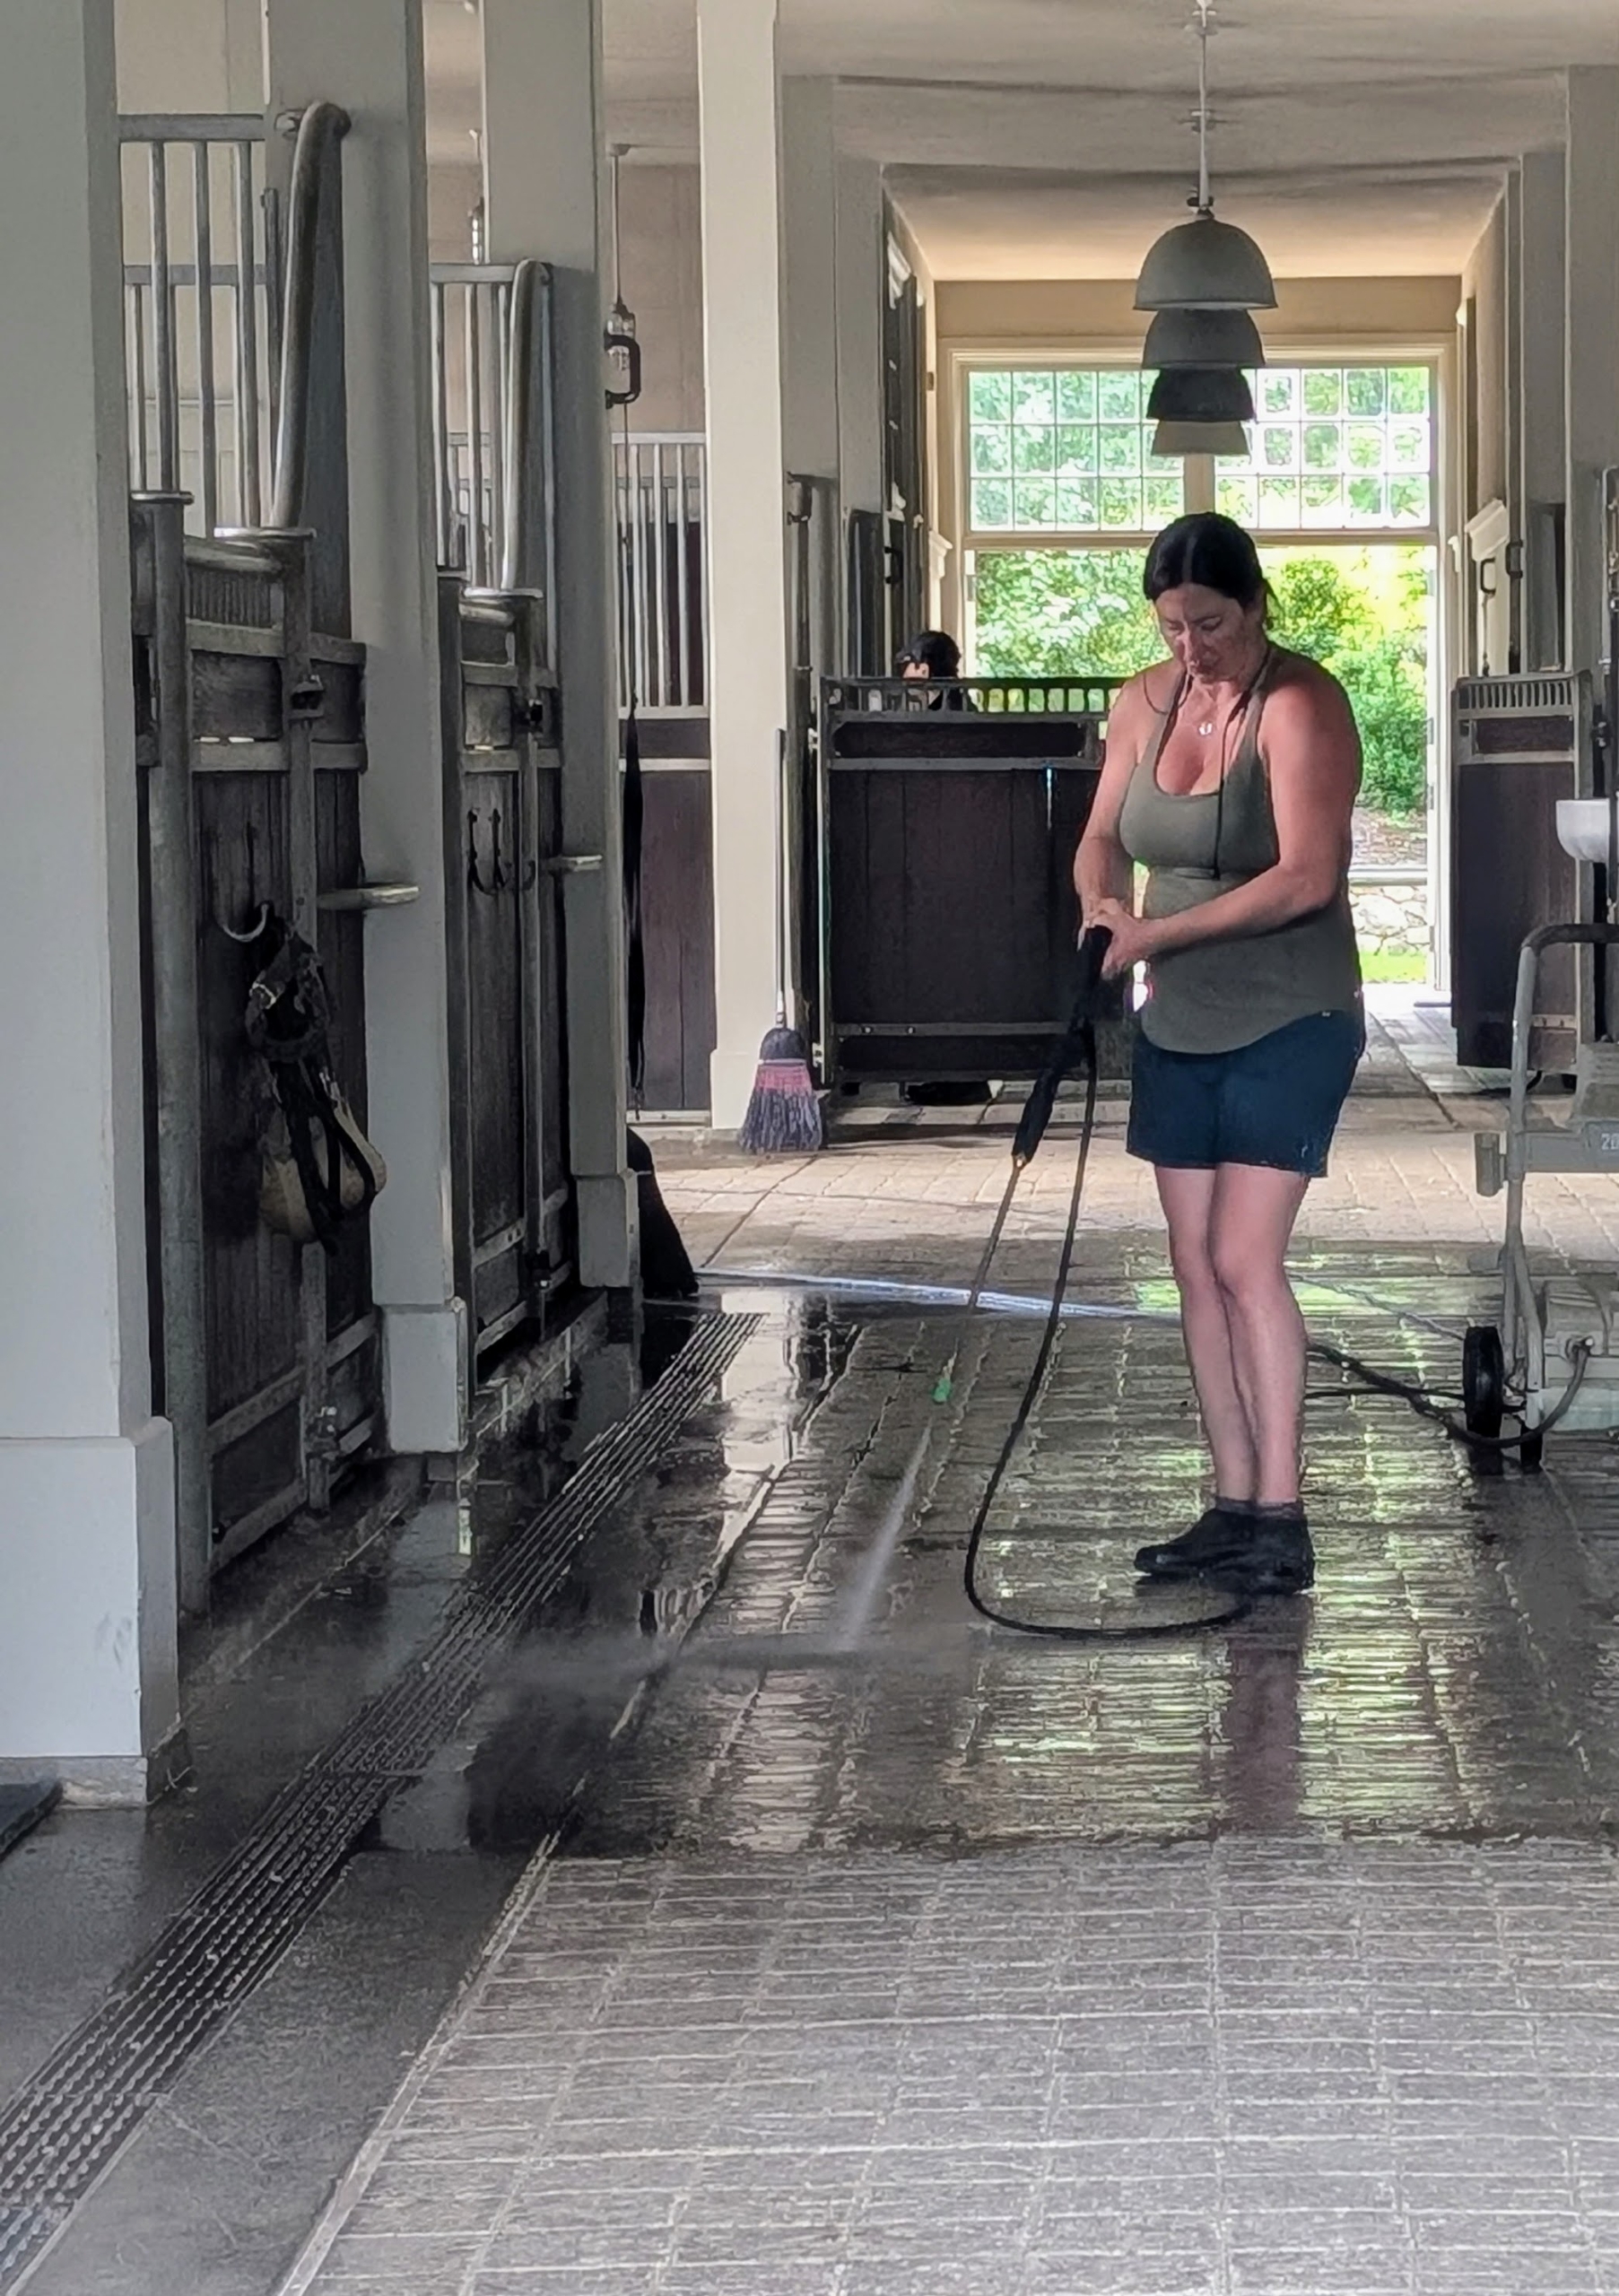
Later in the day, Helen, power washes the stable floor in preparation for a photo shoot. It’s also important to keep various areas clean and tidy for production use.
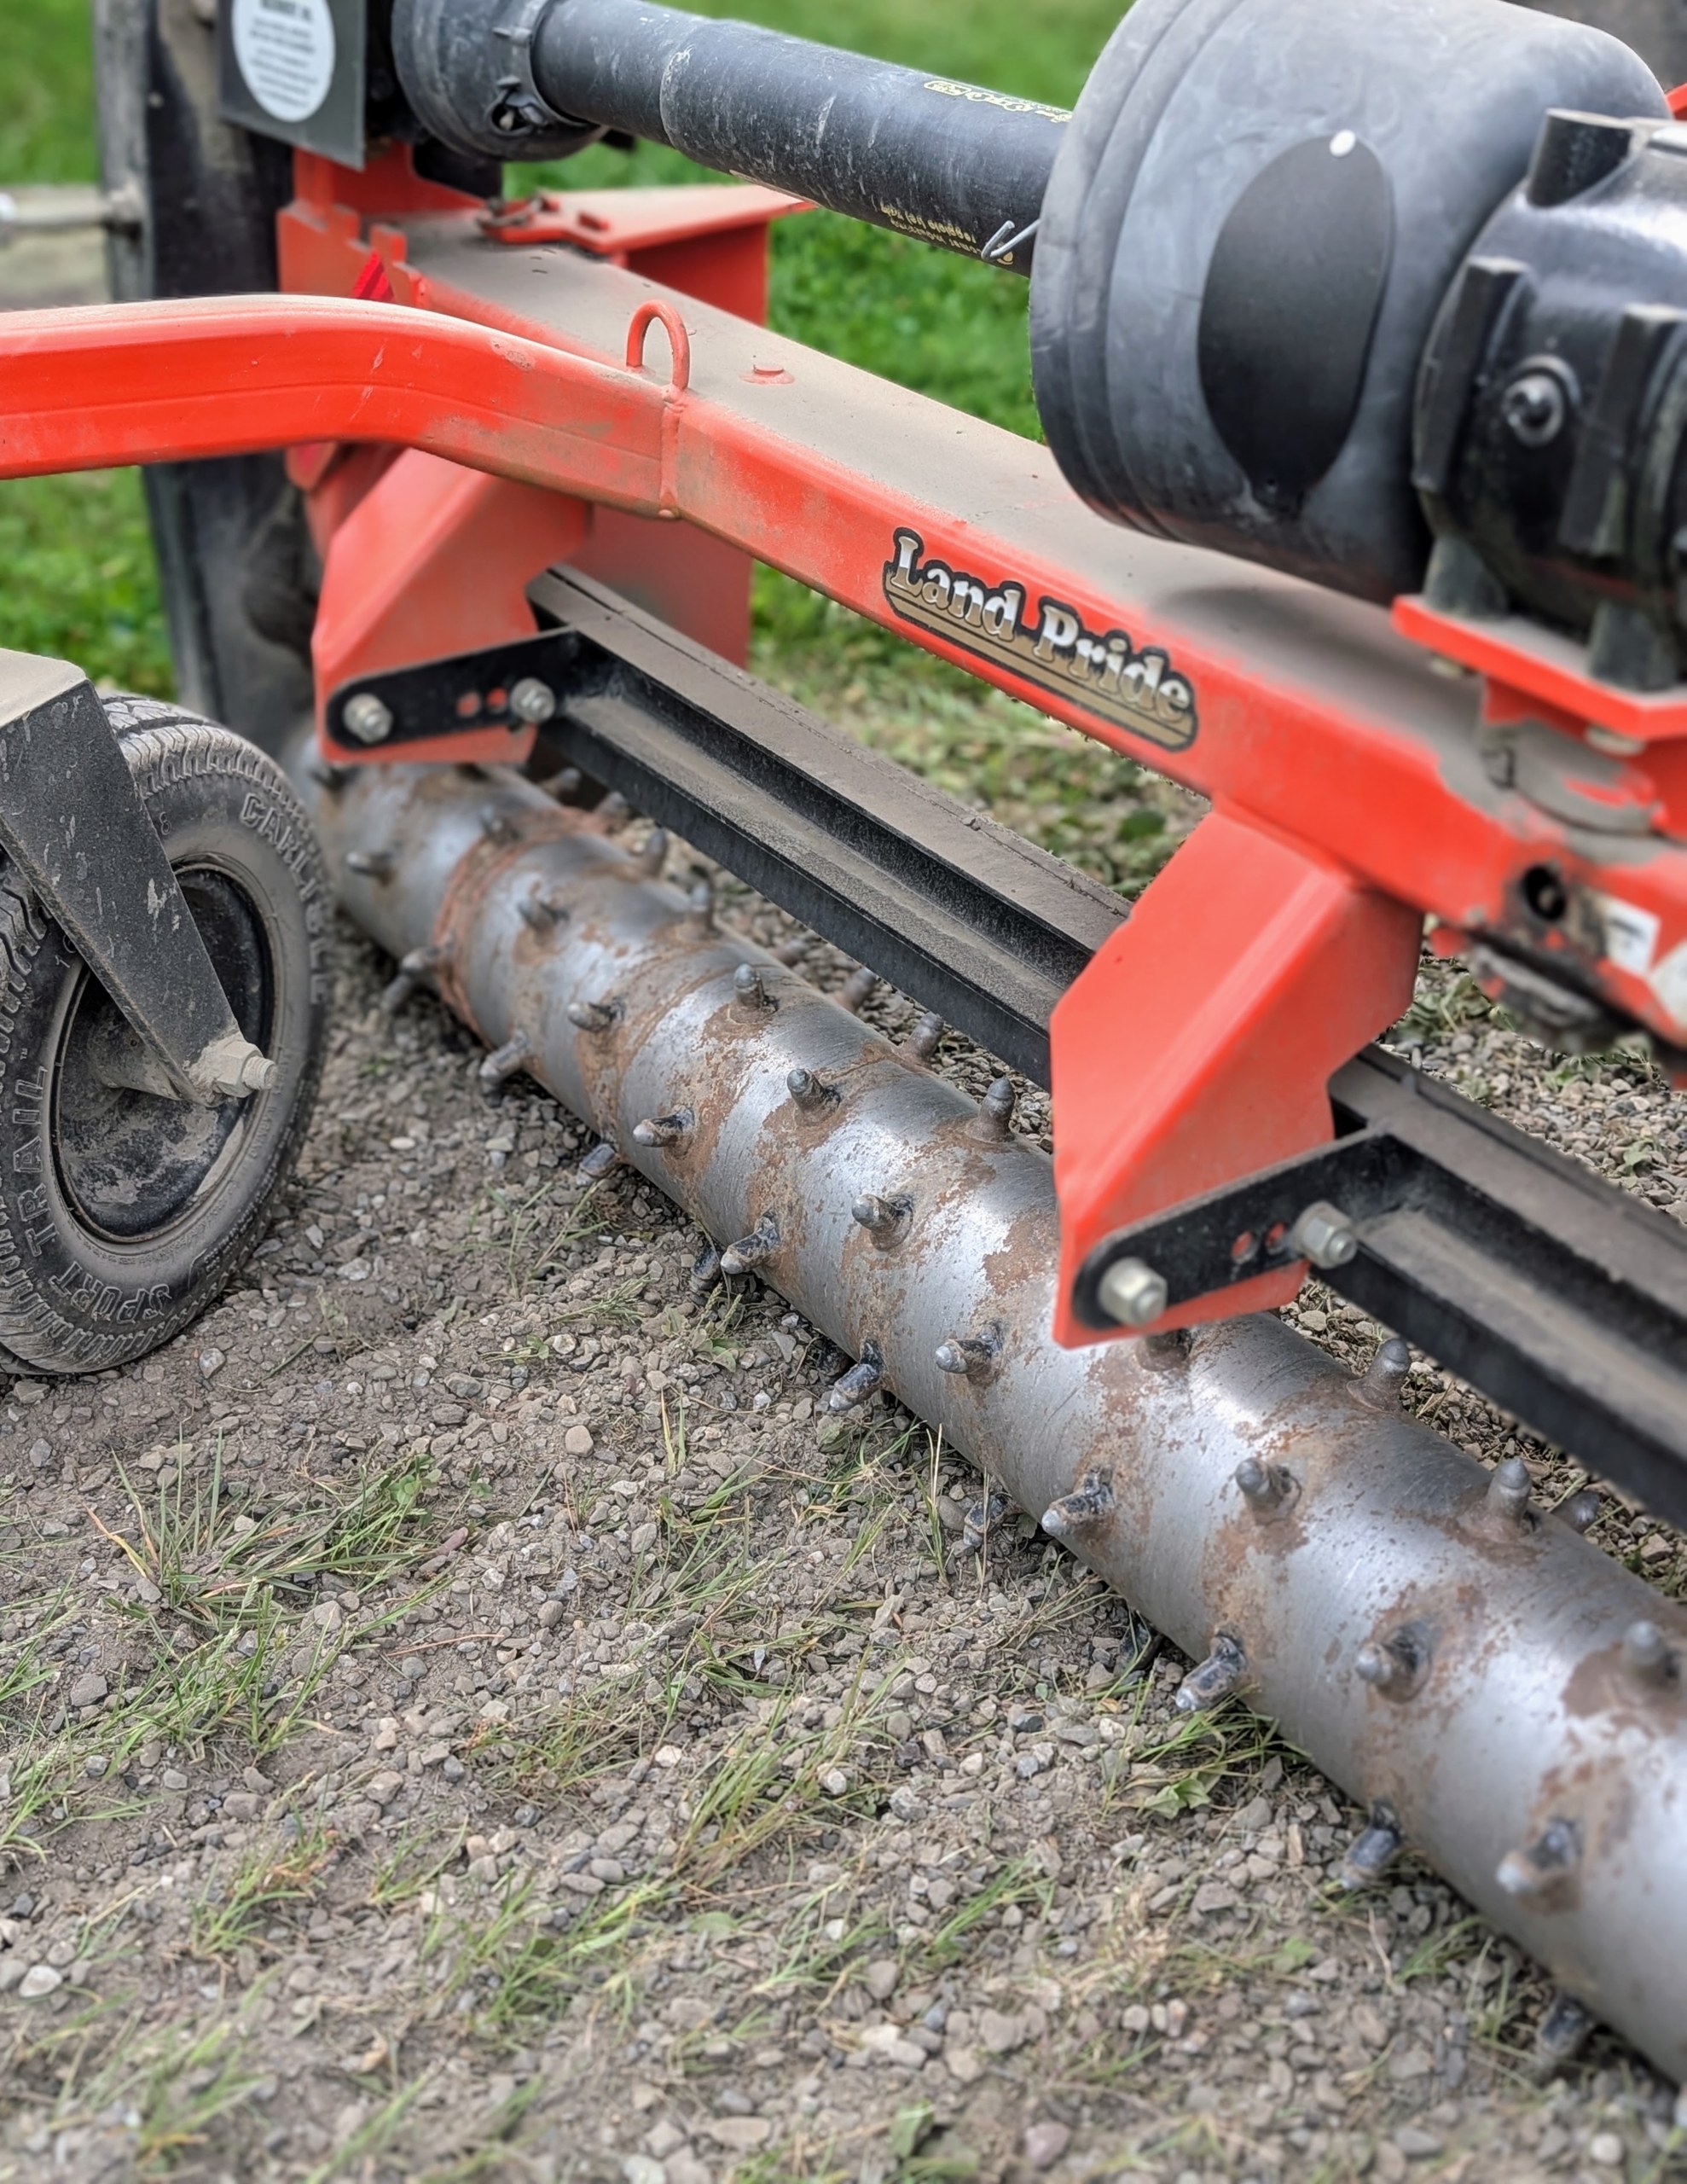
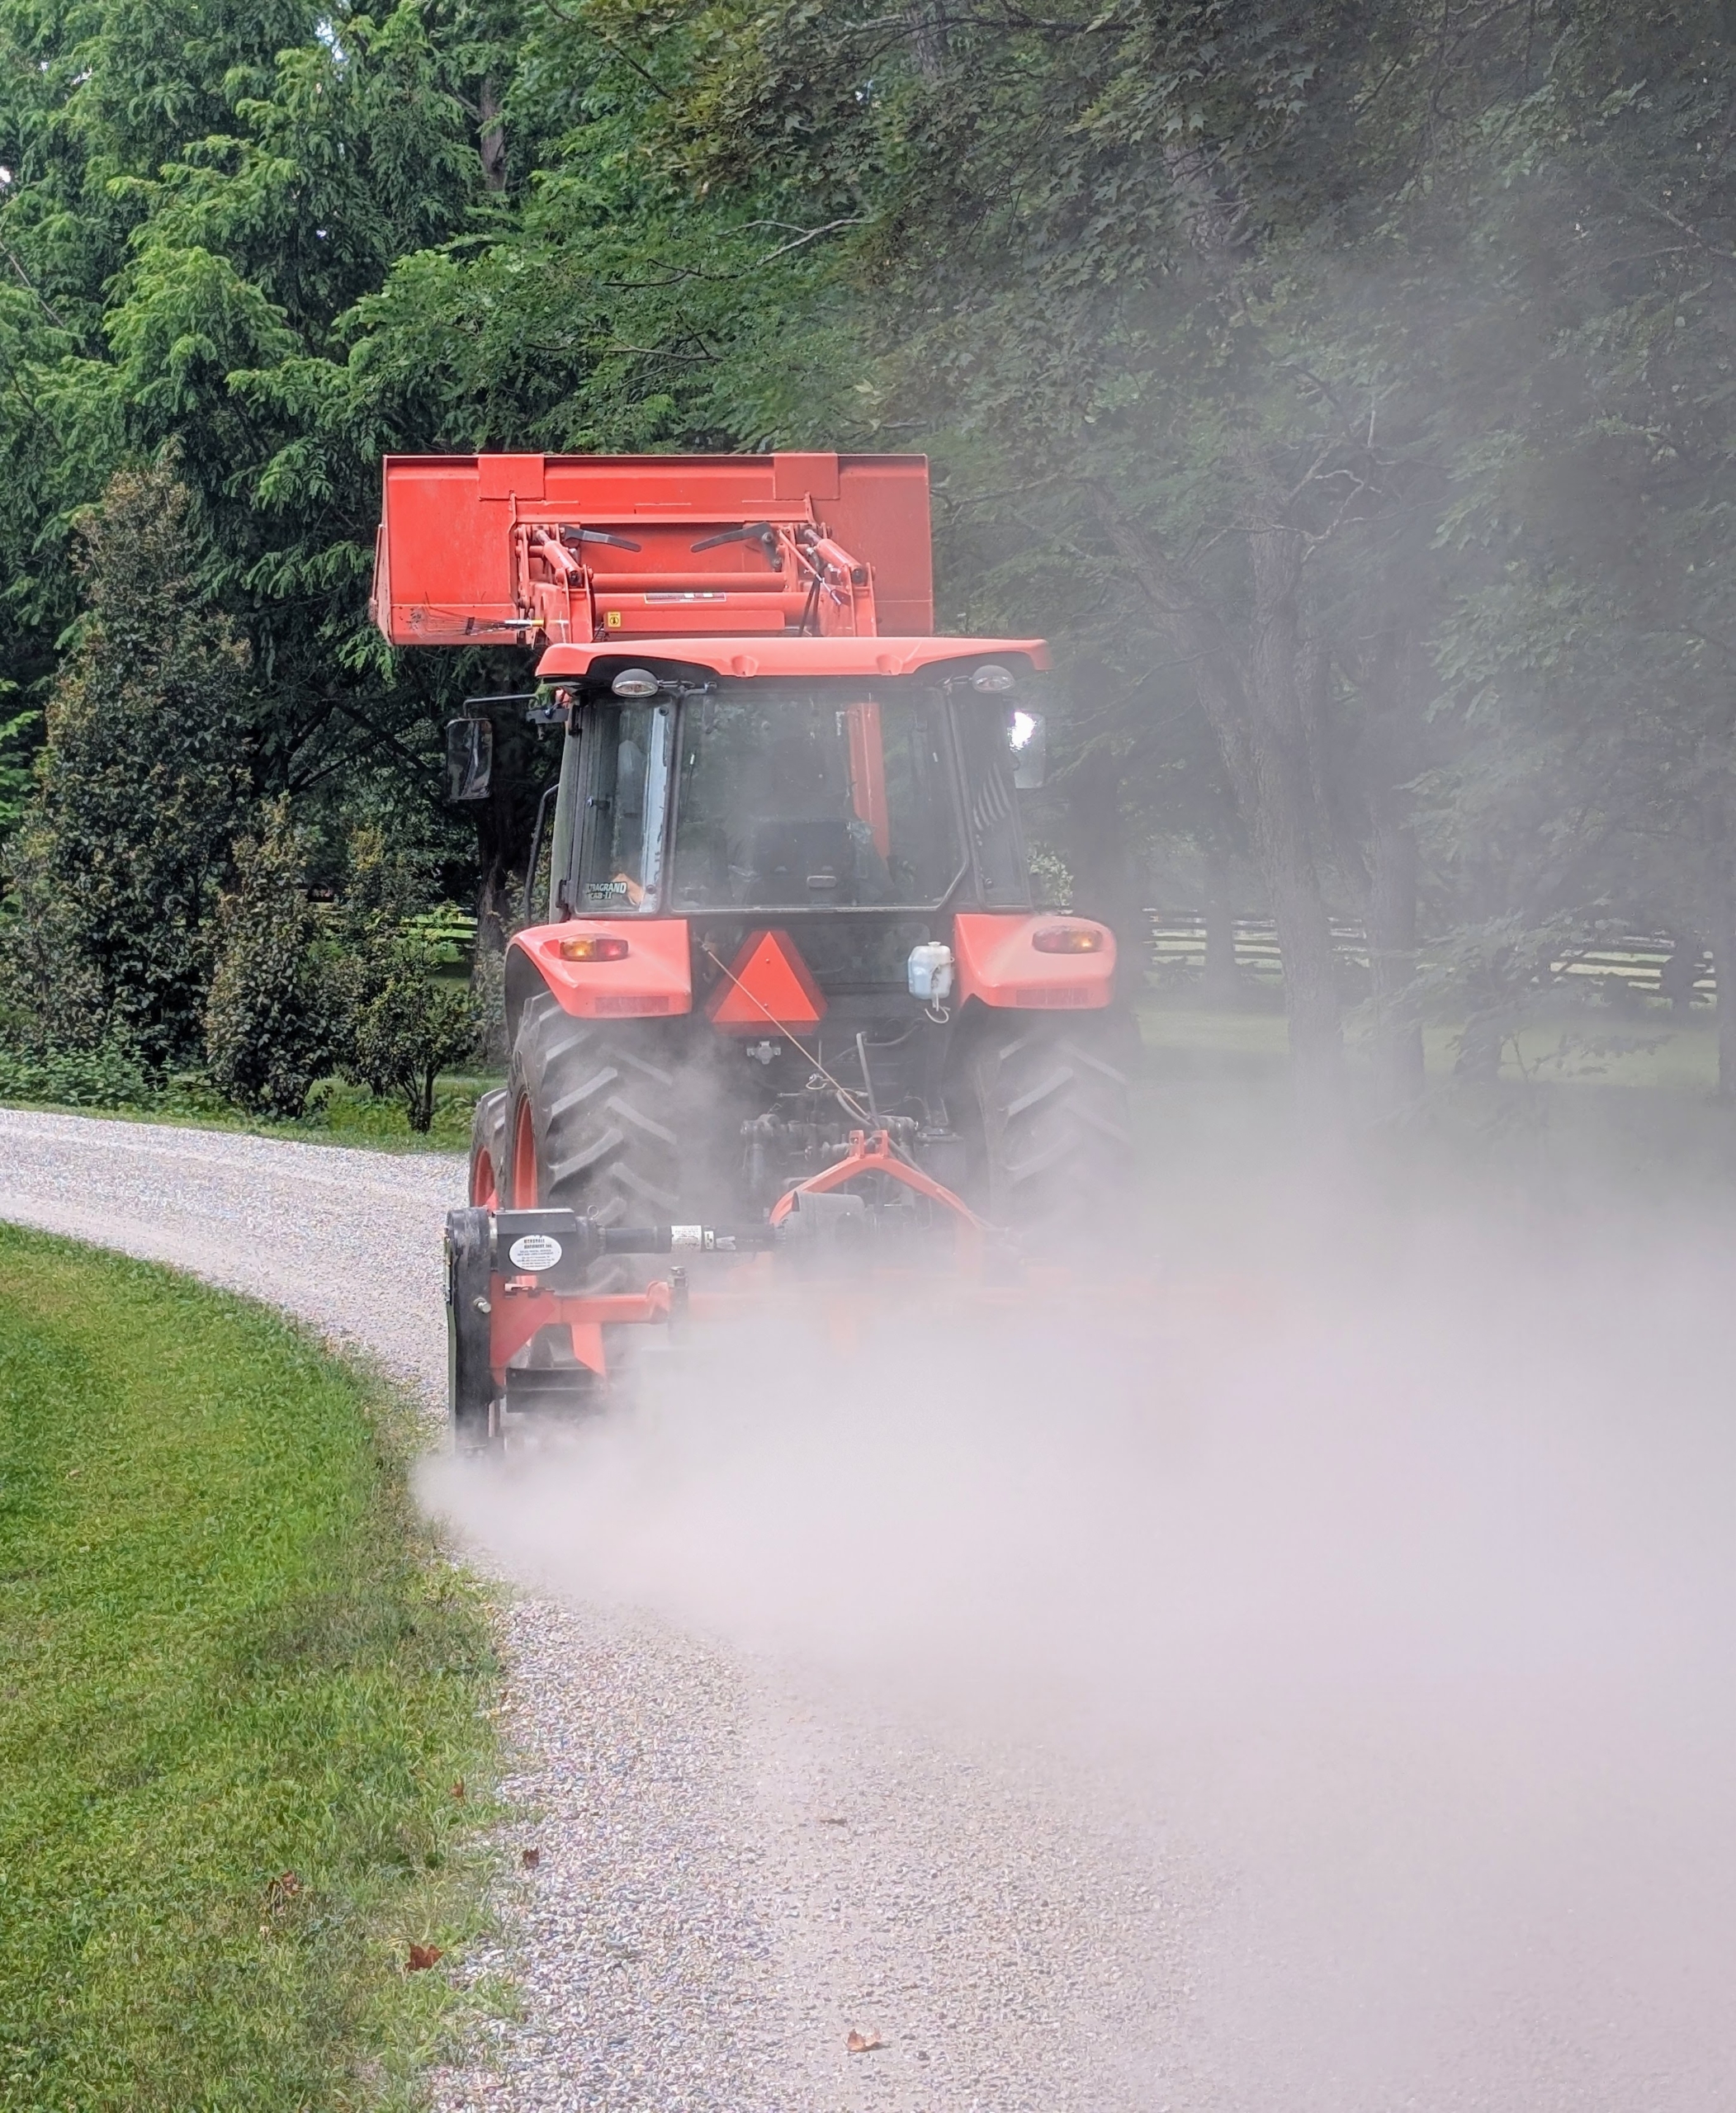
This week, my outdoor grounds crew is also giving the four miles of carriage road around my farm some attention. The Land Pride PR1690 Power Rake is secured to the back of our tractor in order to rake and grade the carriage roads.
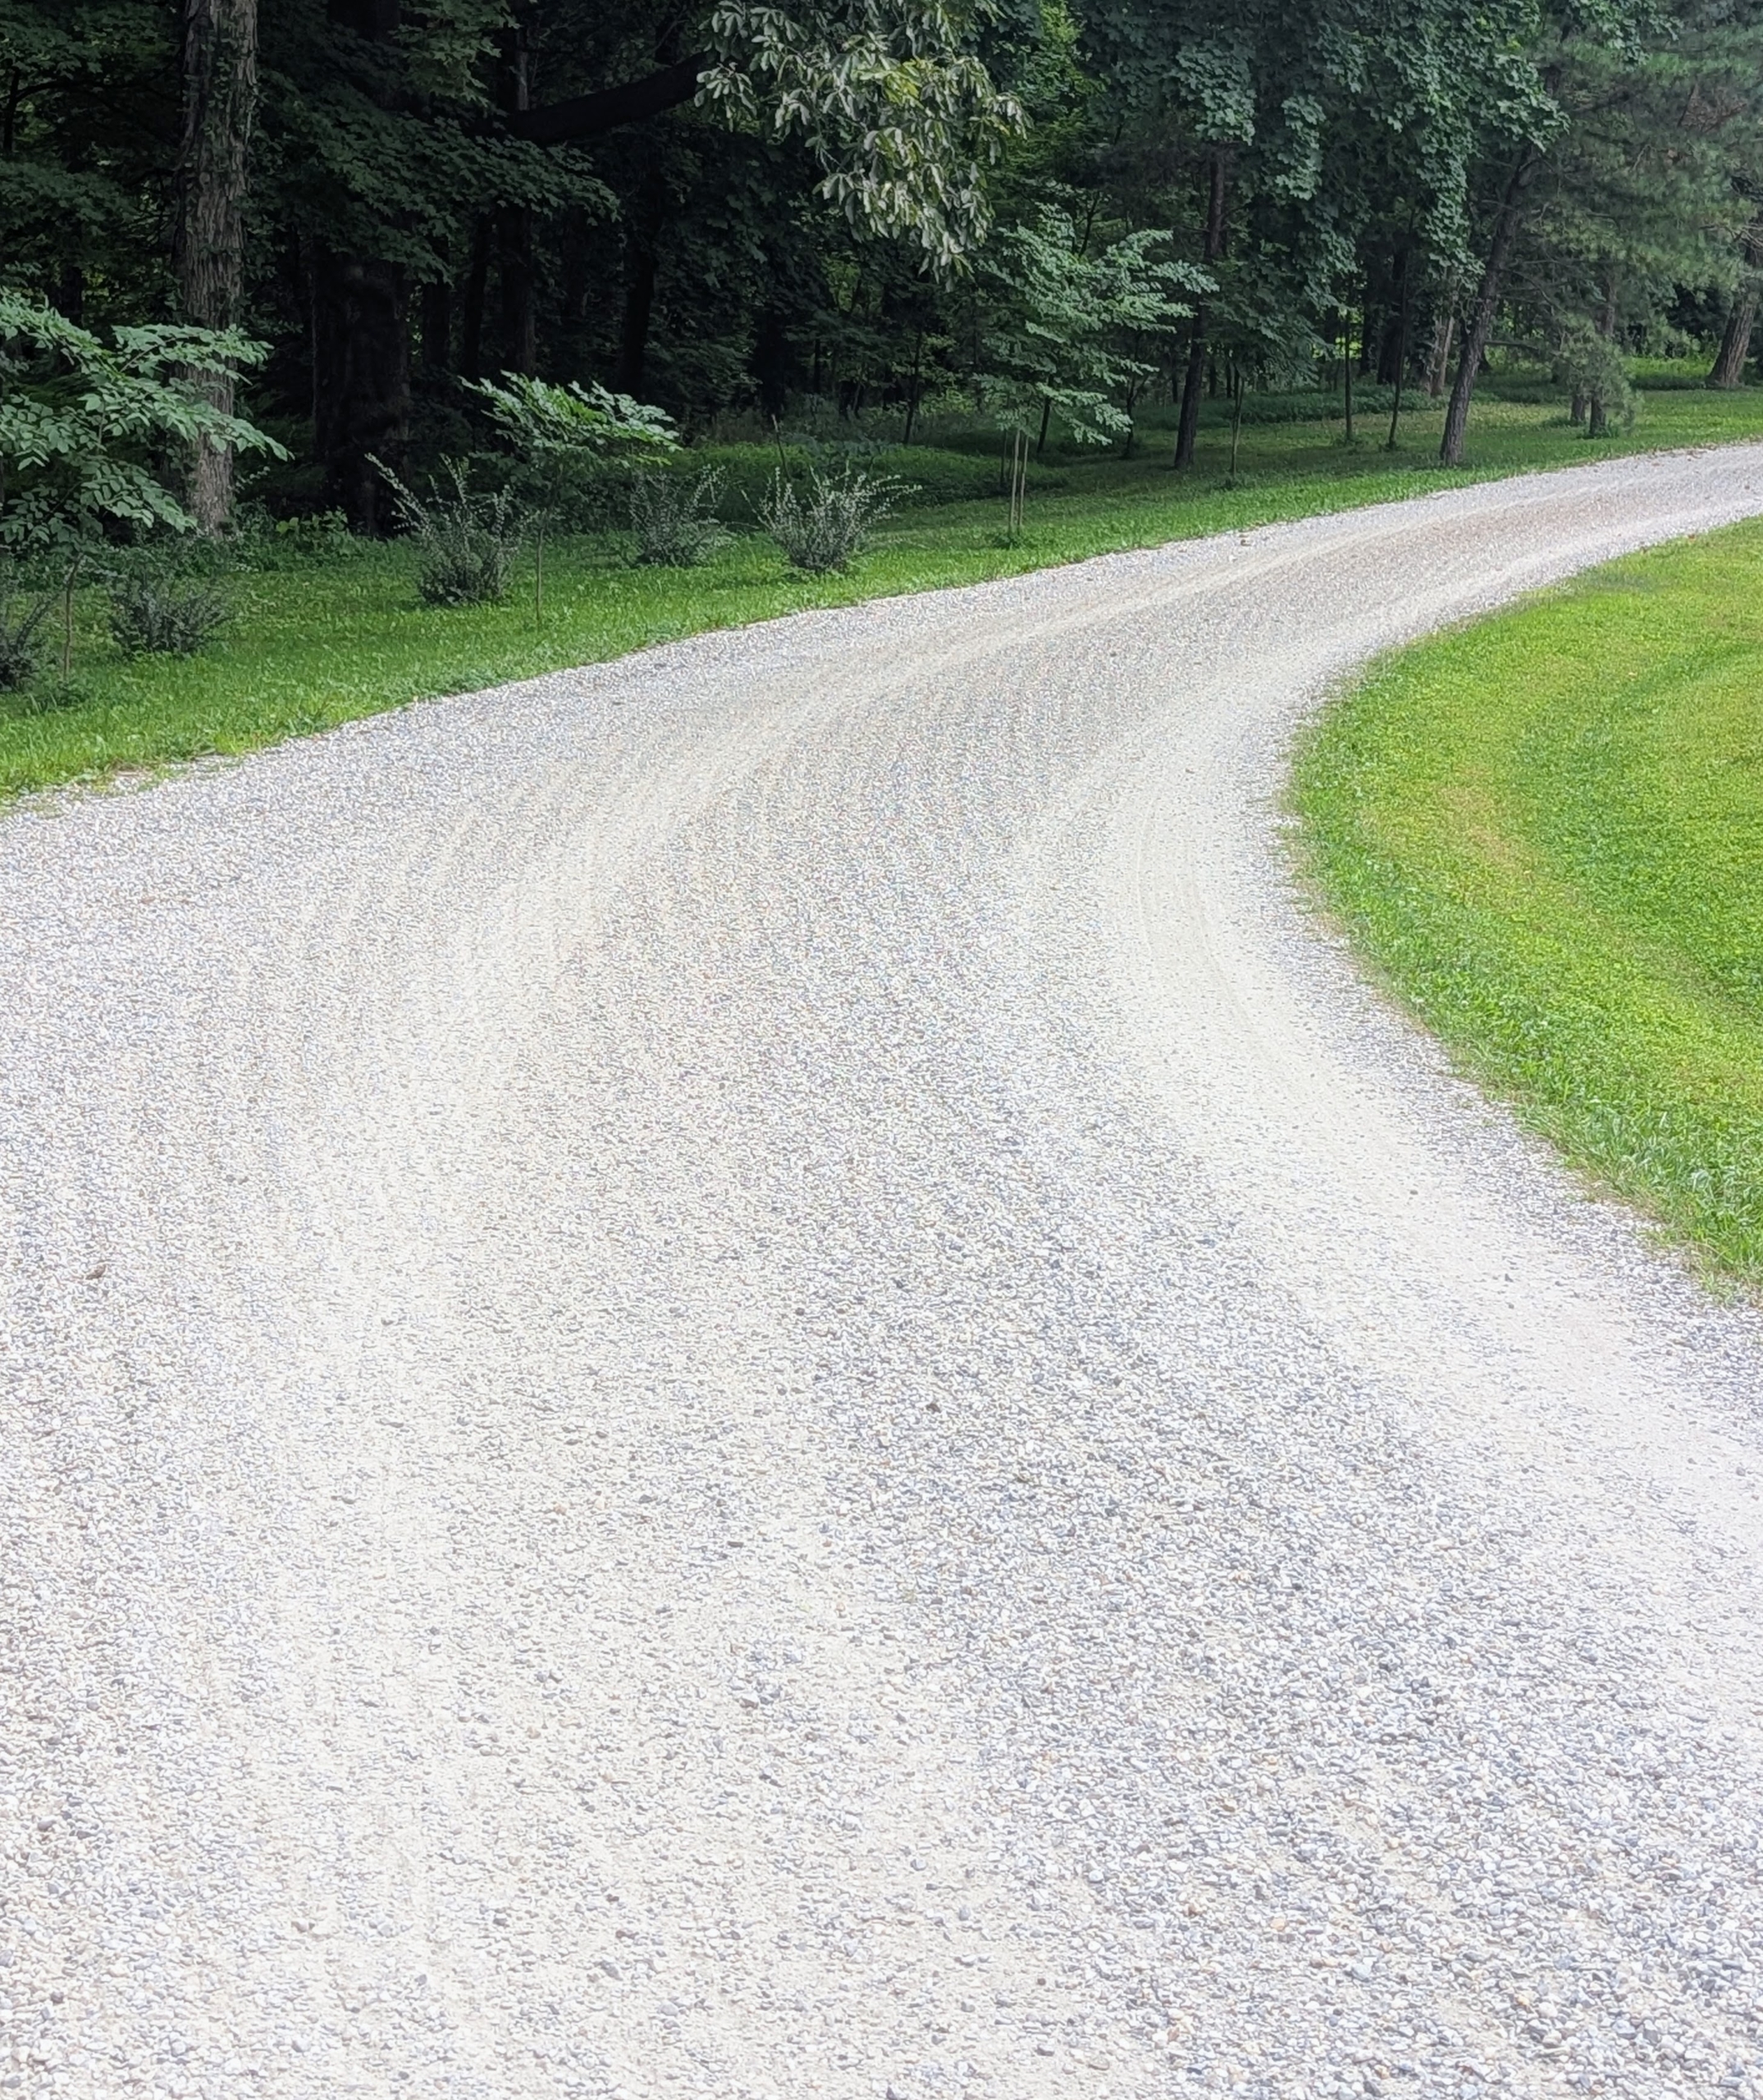
When the rake is lowered onto the road surface and tilted to the proper angle, the attachment moves the gravel and road dust to the center, creating a crown. On less used roads, the power rake freshens up the existing gravel as it turns and brings any compacted gravel to the surface. Pete just finished this section of road leading to my pastures.
It’s always busy at my farm. My crew works hard to get all the chores checked off the list every day. I hope you’re getting lots of your summer tasks checked off too!