The 194-seat dining destination was inspired by my own 1925 farmhouse in Westchester, New York. The menu features French-inspired cuisine along with some of my own favorite recipes. Recently, longtime Martha Stewart Brand devotee and contributor to the blog and content archive "Martha Moments," Brian Utz, visited Las Vegas with his mother and dined at my restaurant twice to celebrate his birthday. Brian shares his experience and photos below.
Enjoy this guest blog.
From the moment I began perusing the menu at The Bedford by Martha Stewart in Las Vegas, I felt transported back through decades of watching Martha teaching the masses how to live well. Each dish read like a page from memory. I could vividly recall watching Martha demonstrate many of these recipes on television, or stumbling upon them while flipping through one of her many cookbooks, including her milestone 100th book, where several of the restaurant’s dishes appear as mainstays. Seeing them brought to life at the table felt surreal.
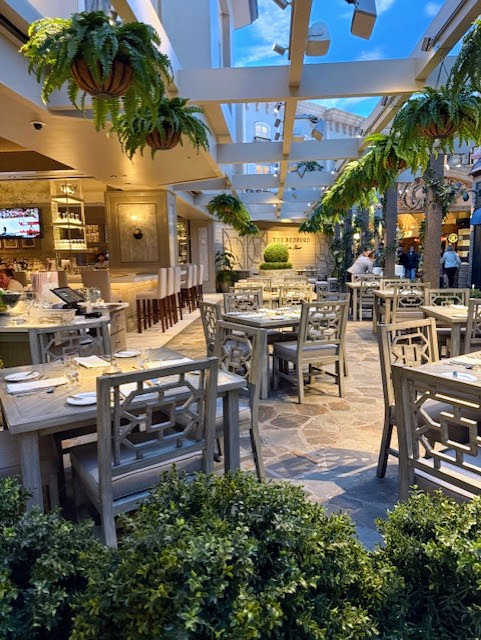
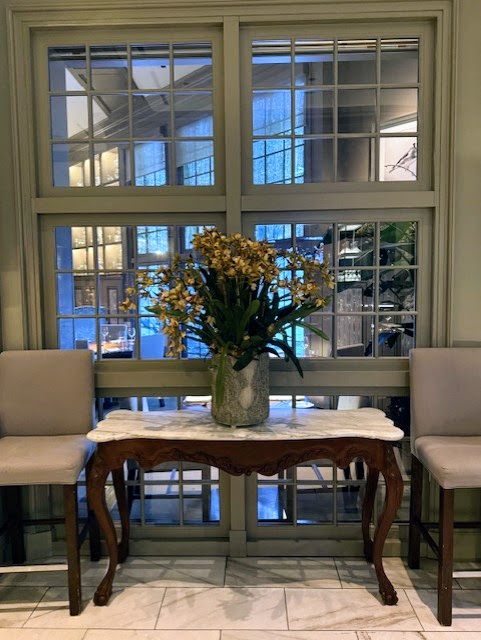
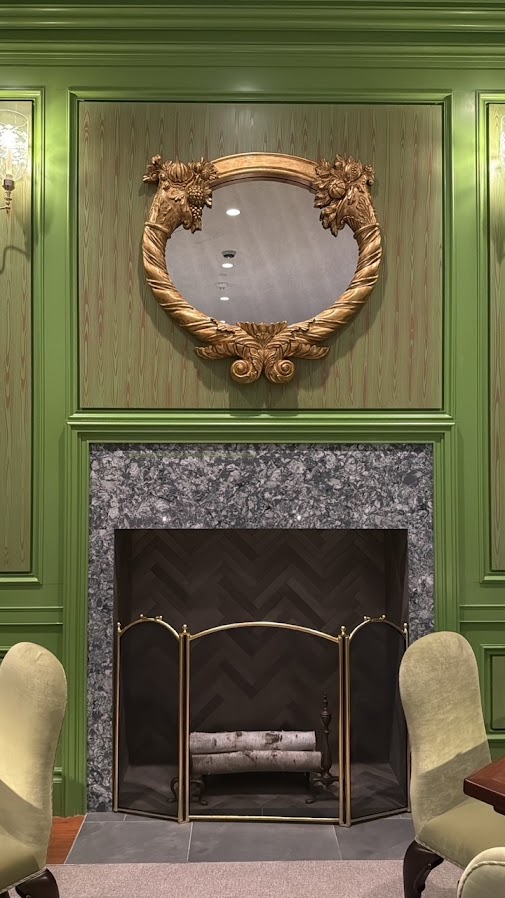
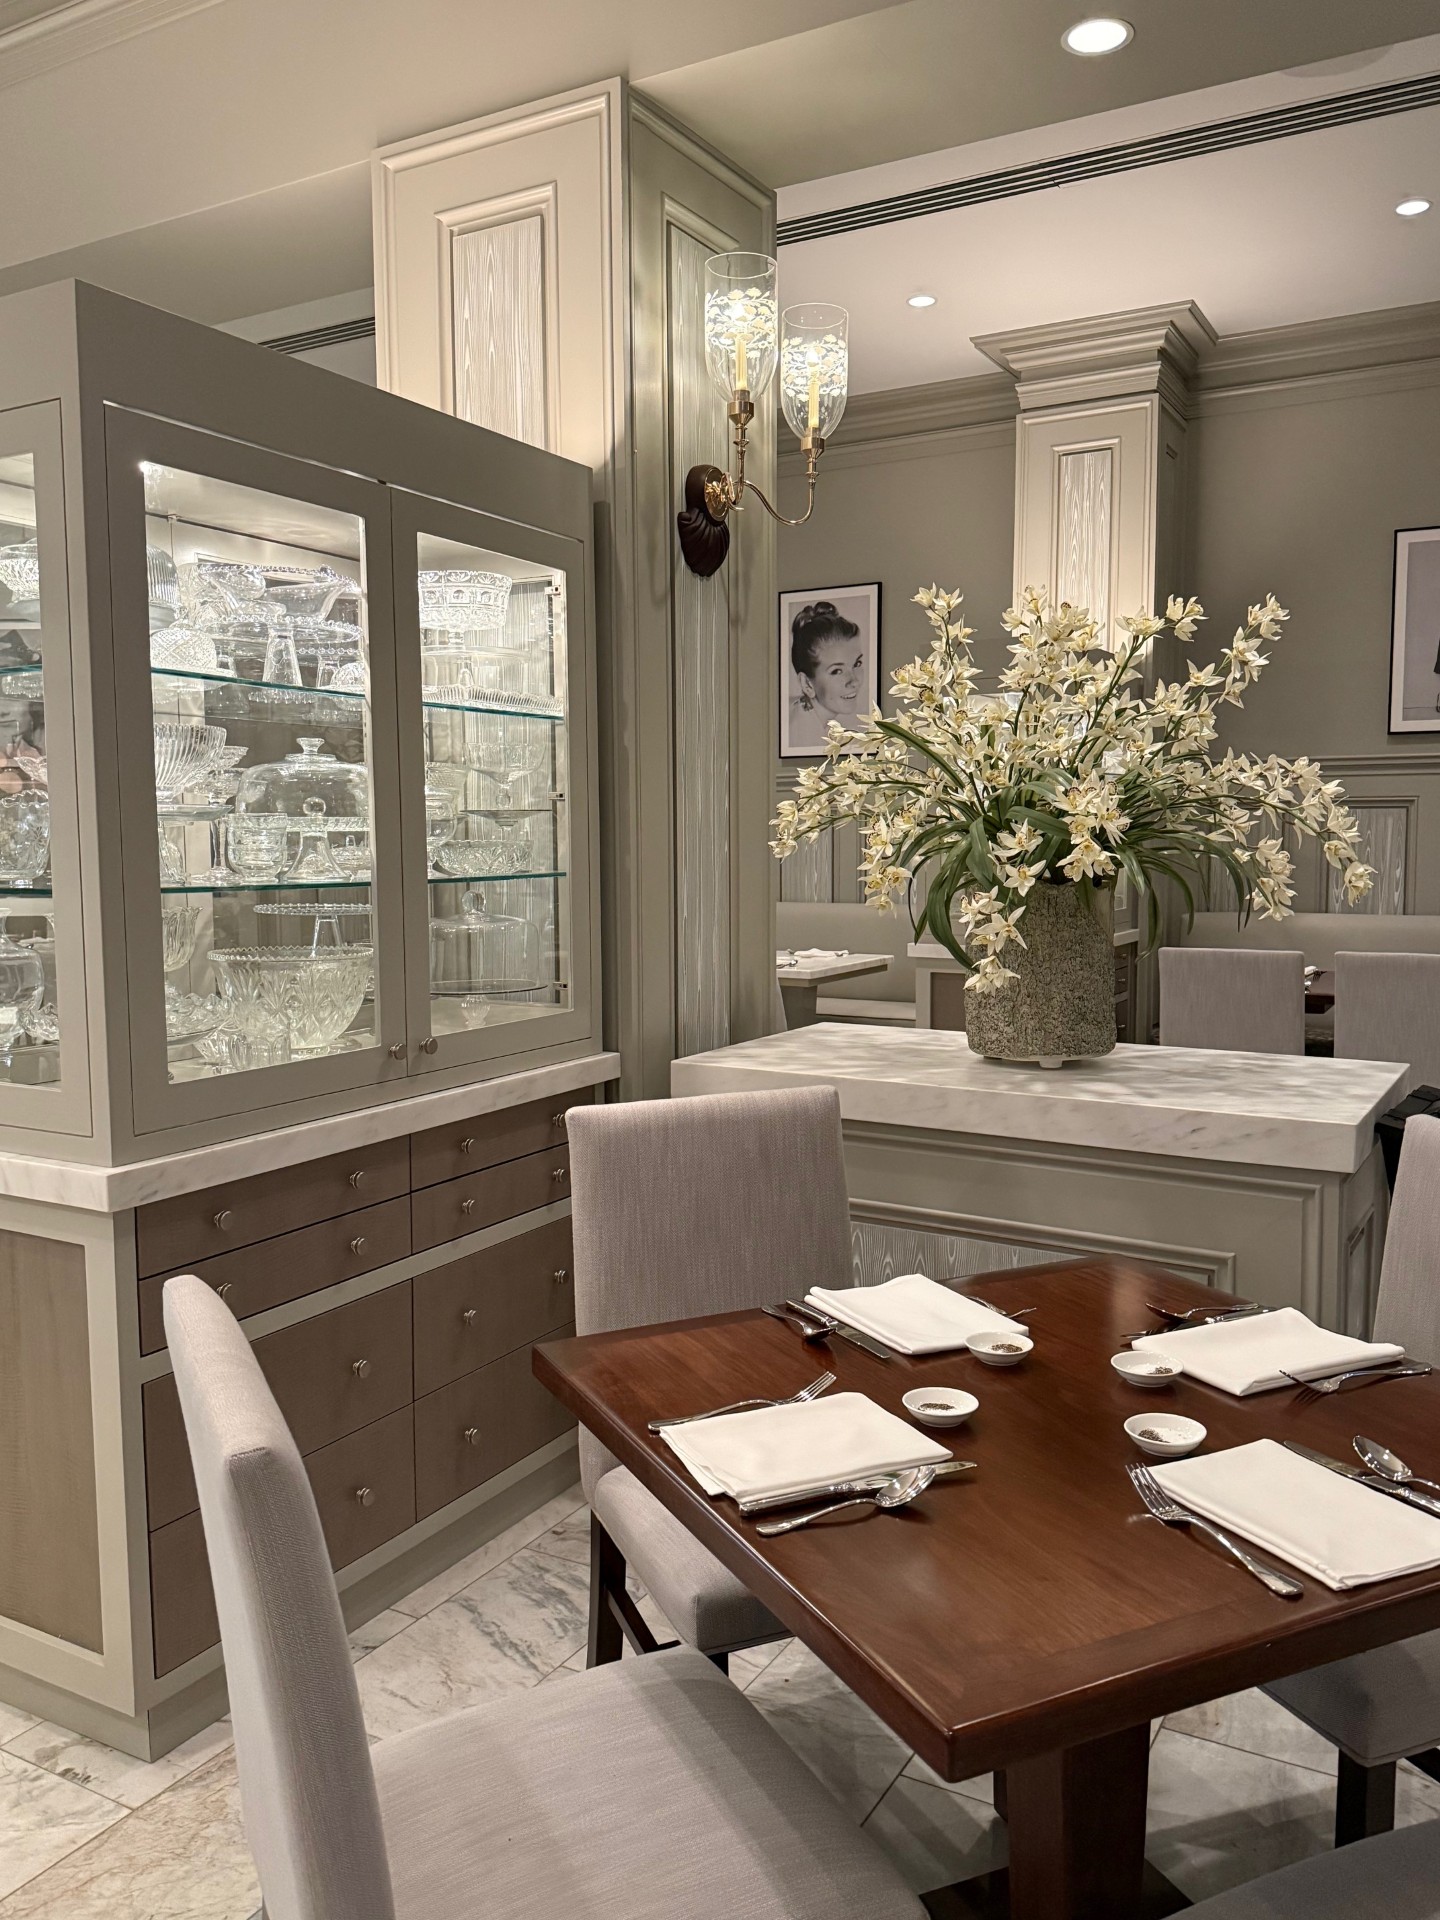
Walking into The Bedford itself is an immersive experience. The restaurant is modeled after Martha’s own Bedford, New York home, and the attention to detail is meticulous. At the entrance, trailing wisteria climbs up onto replicas of the Chinese granite posts from her property.
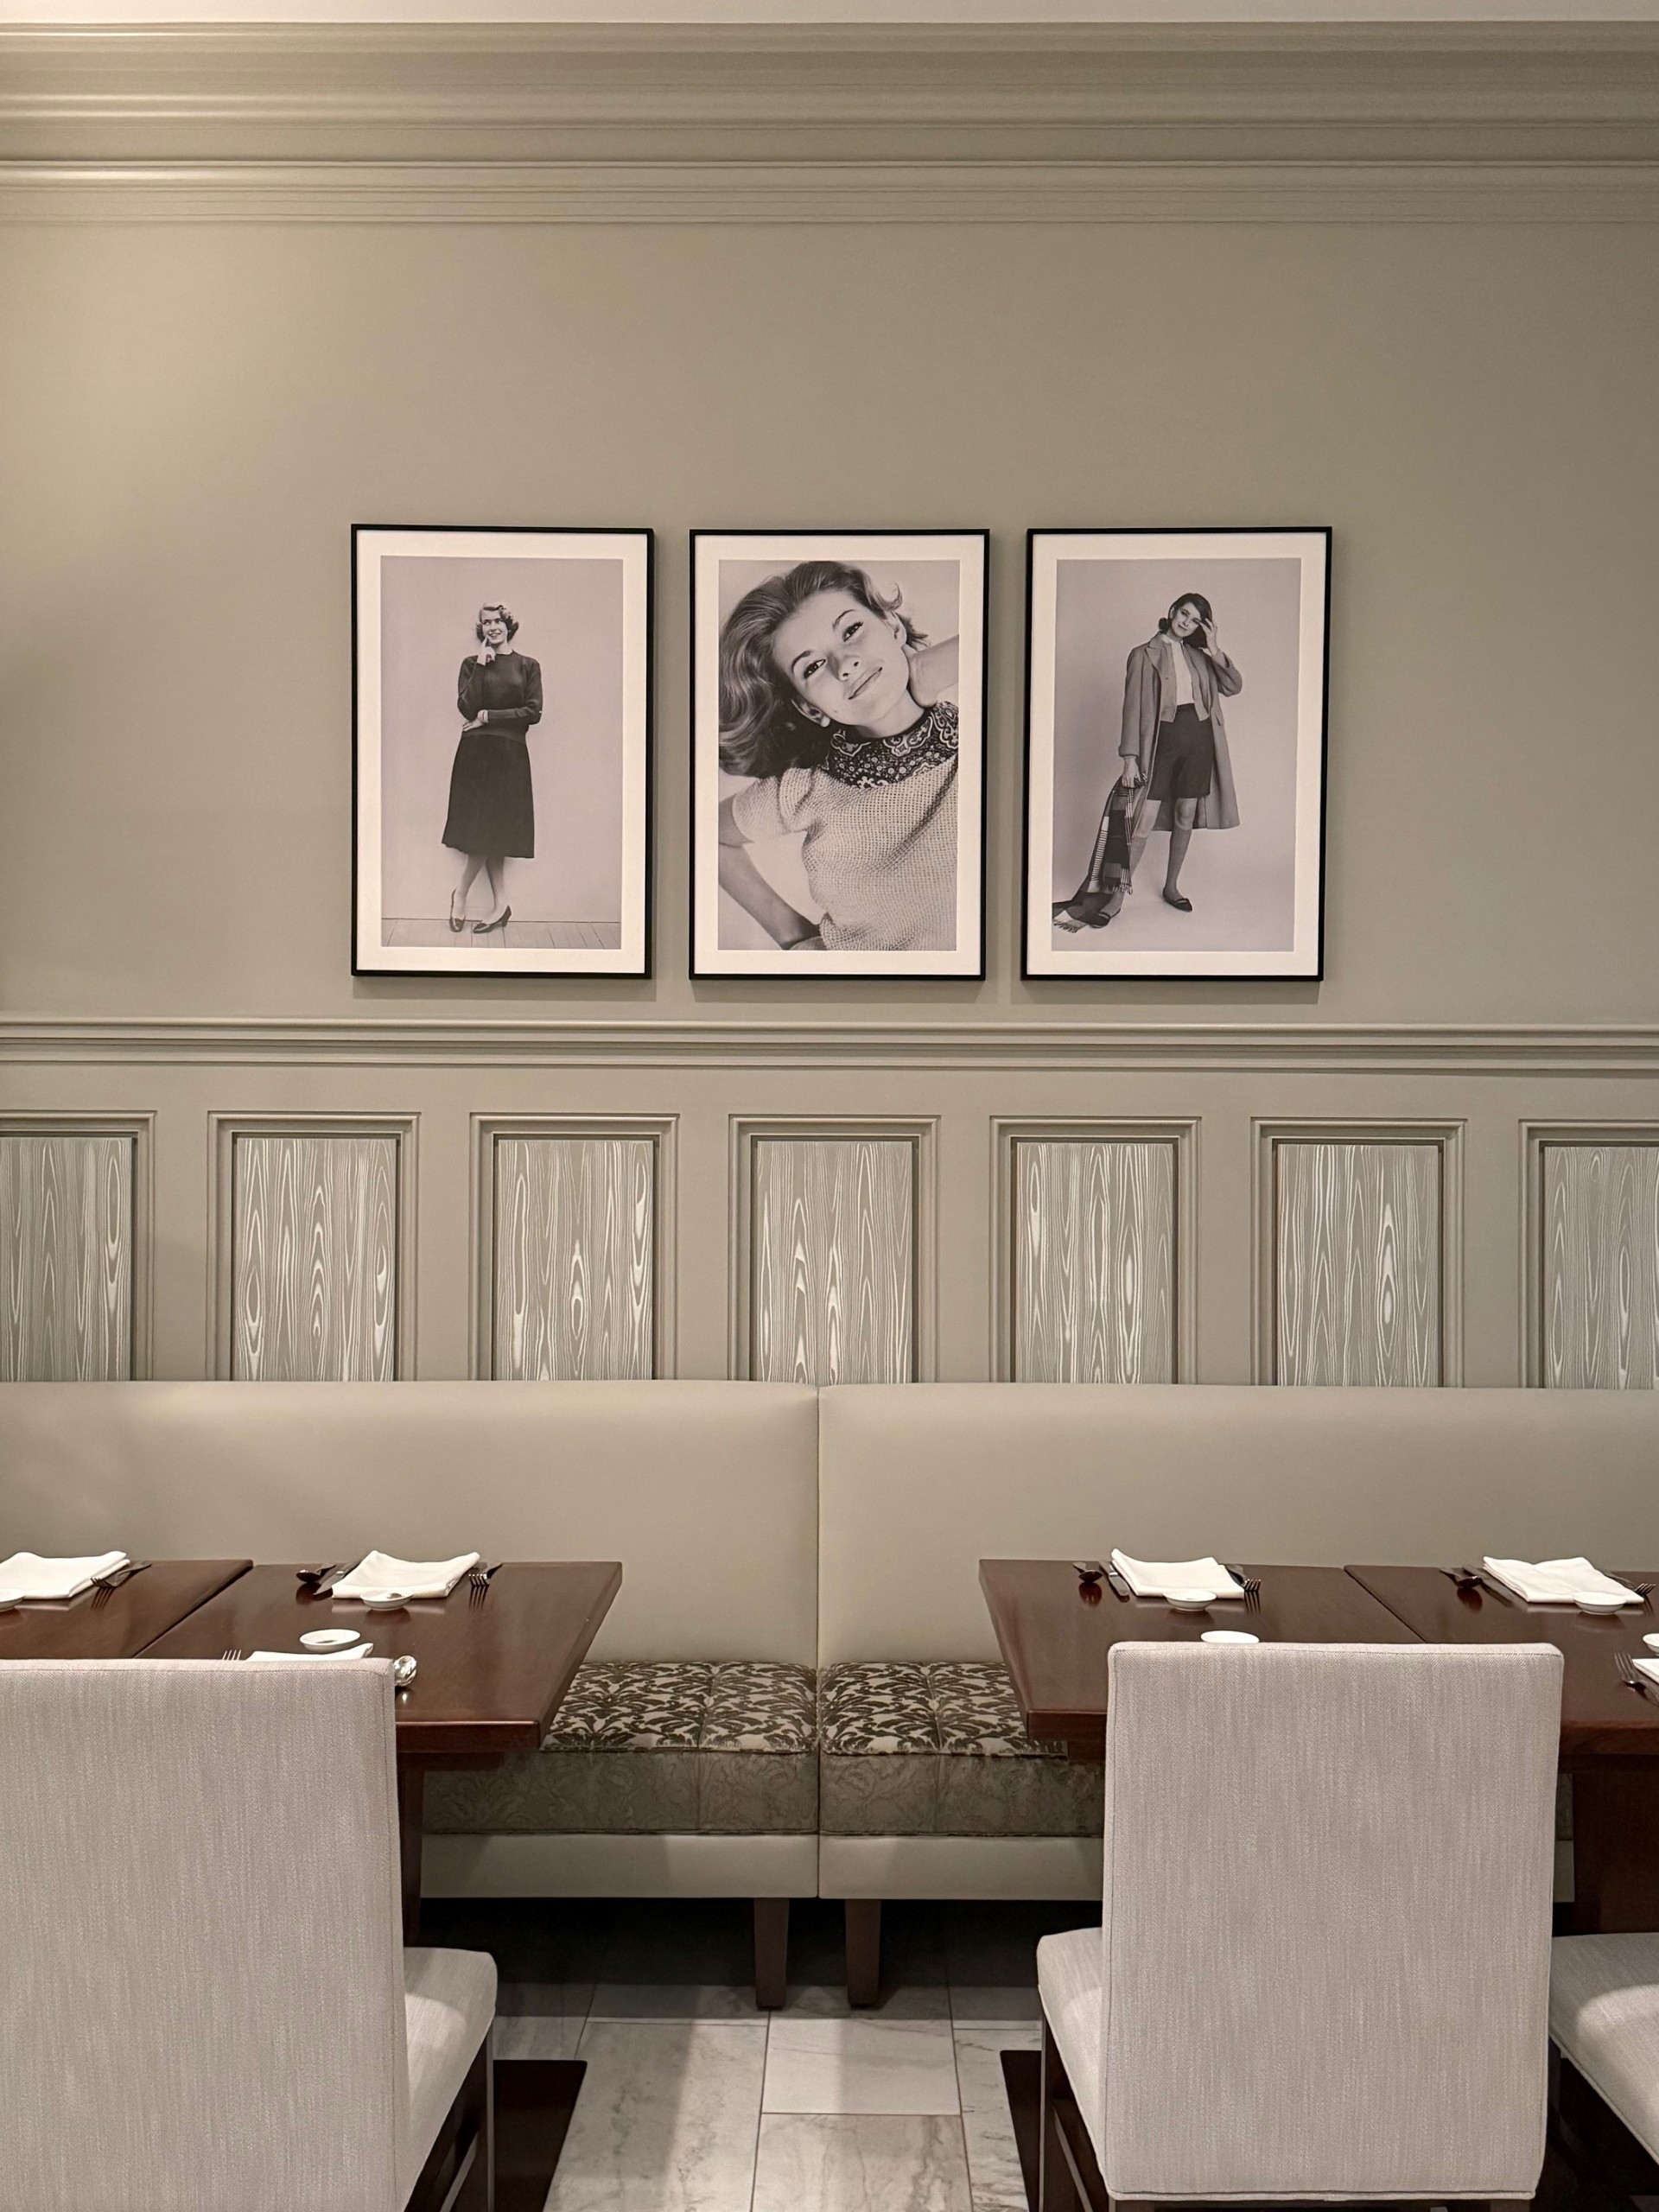
Inside, photographs from her early modeling and stockbroker days, and shelves filled with the books that helped shape her empire. Faux-bois inlays, mirrored sconces, and elegant design touches create the sense that you’ve stepped inside Martha’s perfectly curated world. The details reveal themselves slowly.
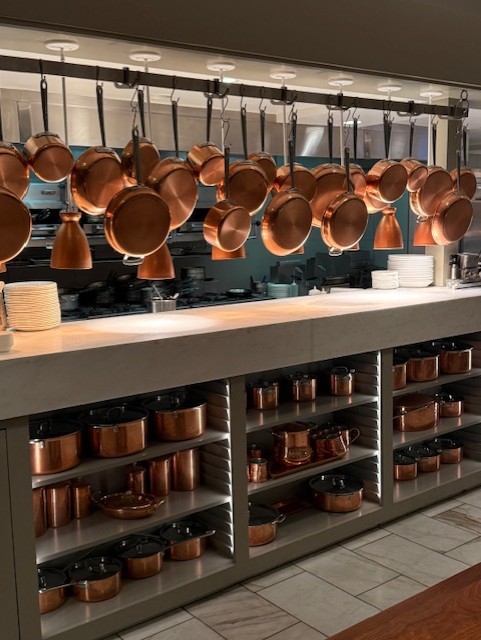
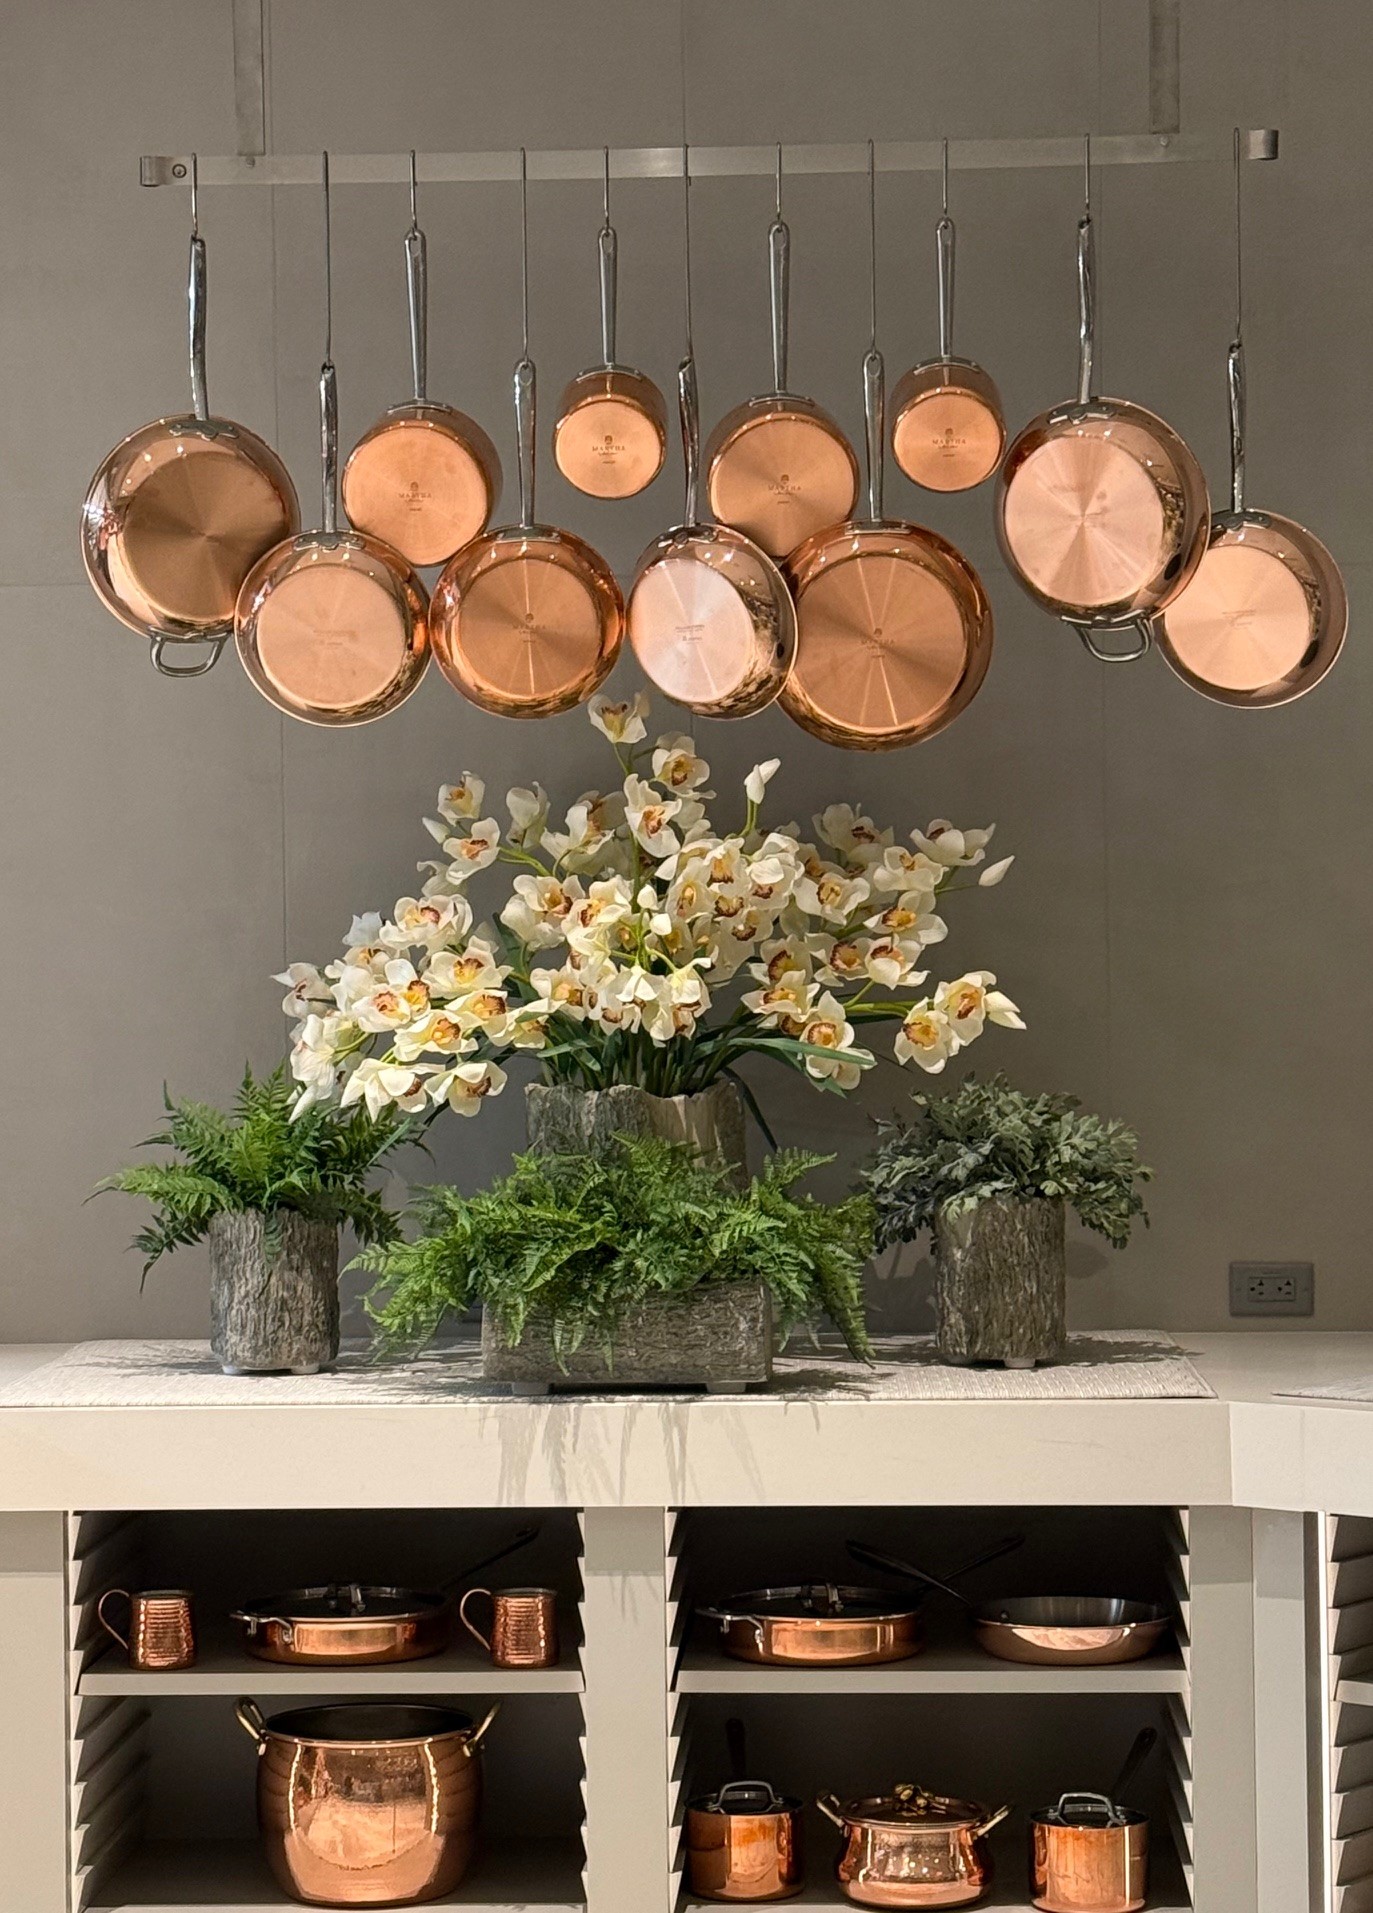
Everywhere you look are subtle nods to Martha’s extraordinary career such as the copper pots lining the kitchen. The Bedford feels both like a love letter to longtime fans and a reminder to newcomers of exactly who Martha Stewart is: a cultural force.
No detail is overlooked. Even the music reflects her personality. The playlist — curated by Martha herself — blends timeless classics with songs from guests who have appeared on her show. At precisely 6:20 p.m., the unmistakable opening beats of “Still D.R.E.” filled the room. Martha’s a gangster. Well, not exactly — but she does famously work out to hip-hop. The service matched the polish of the environment.
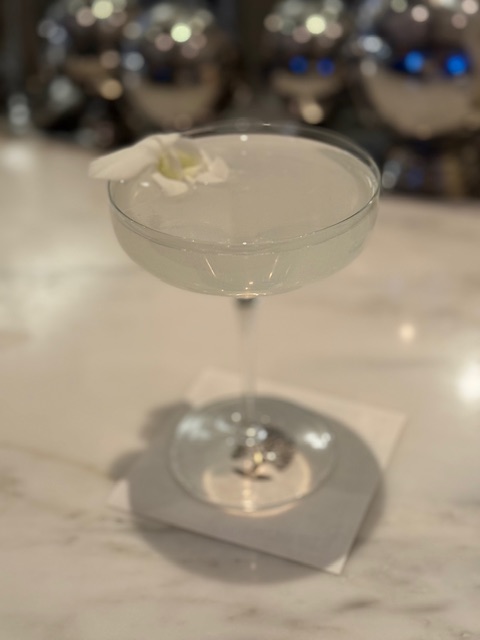
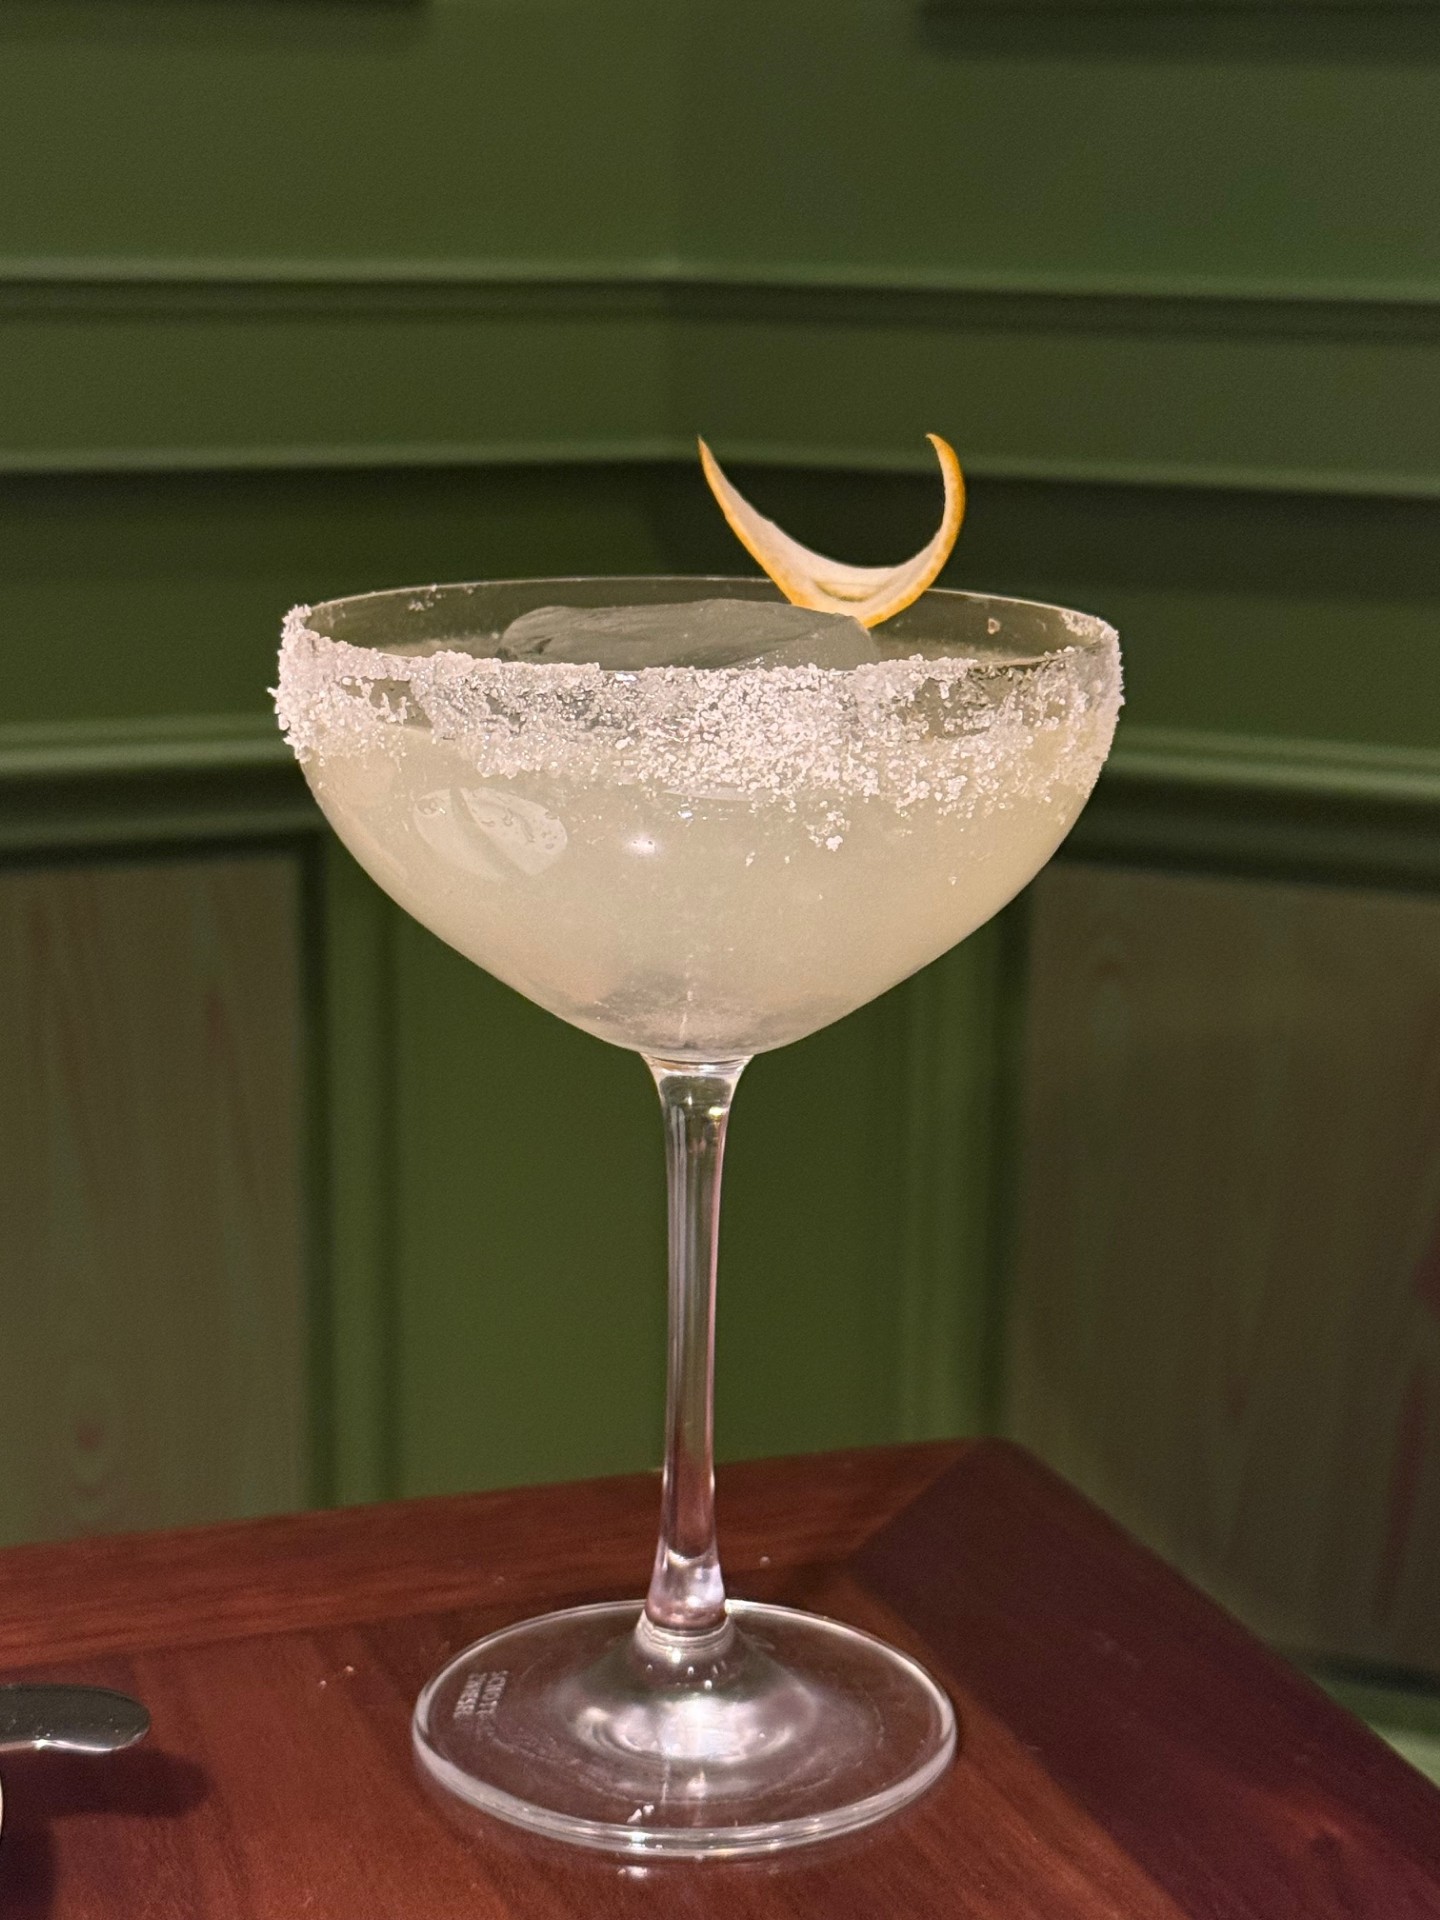
Our bartender, George, was exceptional, serving cocktails that felt like they belonged on the set of Martha’s television kitchen. The first party I ever hosted was a New Year’s Eve gathering inspired by the recipes I found on a Martha Stewart DVD, where I served White Cosmopolitans to my guests. Seeing that very cocktail on the menu felt like a full-circle moment.
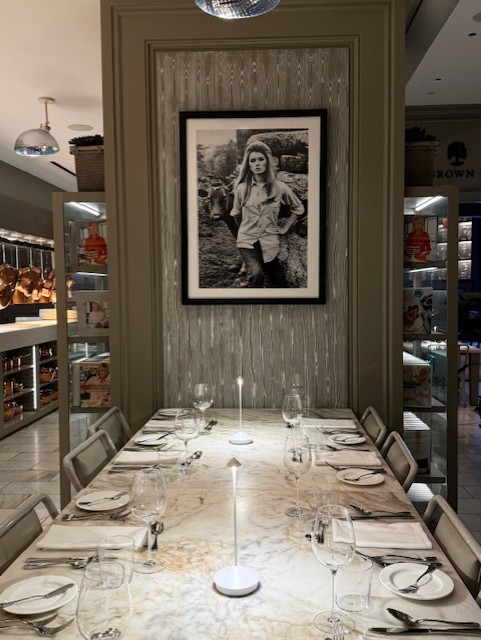
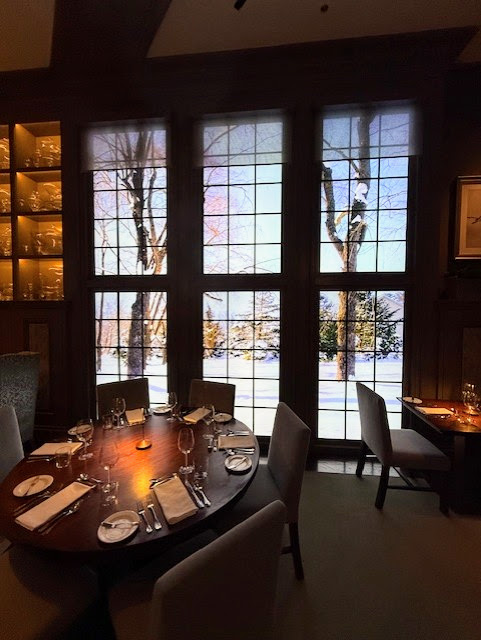
After drinks, we were escorted into the restaurant’s Brown Room, where LED panels display sweeping panoramic views of Martha’s Bedford farm.
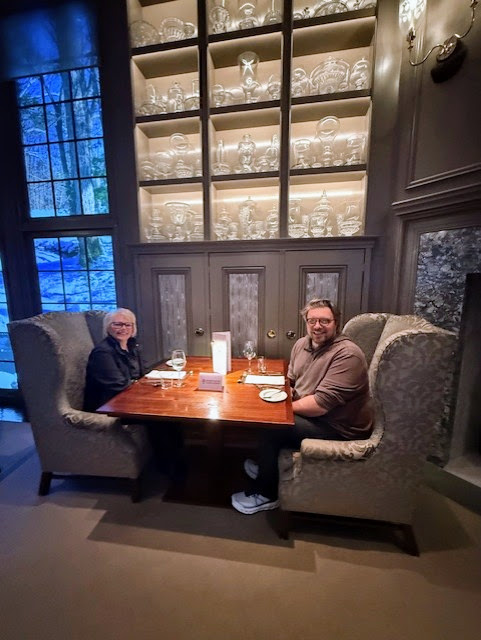
Here I am with my mother. Our waiter, TJ, explained that this is the space where Martha personally entertains guests when she visits the restaurant. Diners can reserve Martha’s personal table, available for parties of two or four, and enjoy the evening from the same vantage point. The wingback chairs were so comfortable. They immediately reminded me of pieces from Martha’s Bernhardt furniture collection, upholstered here in an elegant green damask. Immersive experiences are often attempted but rarely executed well. The Bedford is a rare exception.
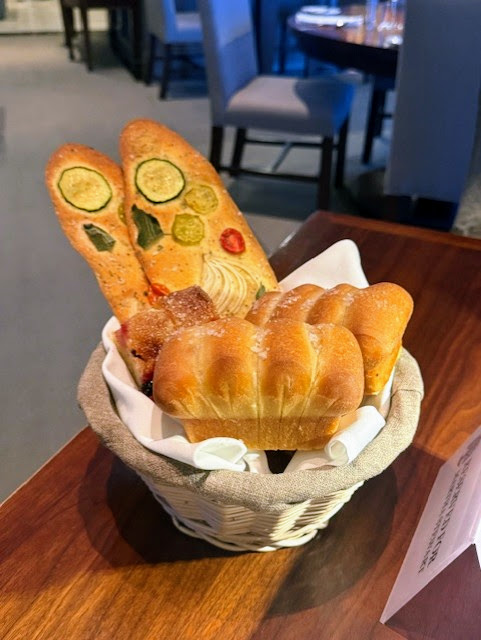
The restaurant truly feels like stepping into a space Martha herself curated for guests spending an evening on her farm, transported to Las Vegas. For this meal we opted for the prix fixe menu, beginning with a generous bread basket featuring herbed cherry focaccia, Parker House rolls finished with flaky sea salt, and the celebrated garden flatbread — a stunning arrangement of onions, sage leaves, tomatillos, and tomatoes designed to resemble a blooming garden.
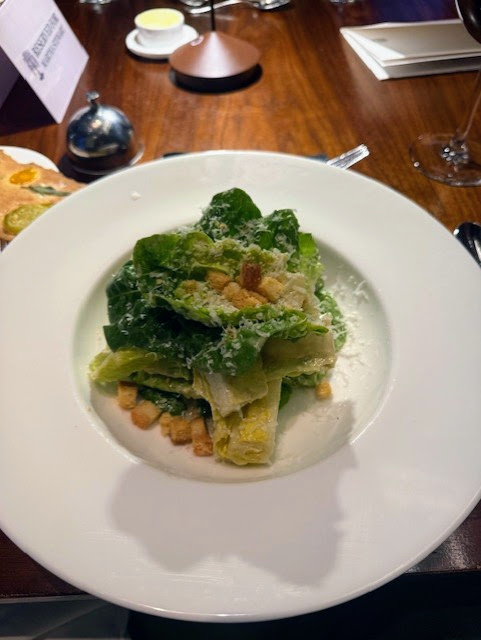
The second course, a Caesar salad, was presented like sculpture with each leaf of lettuce meticulously stacked and dressed.
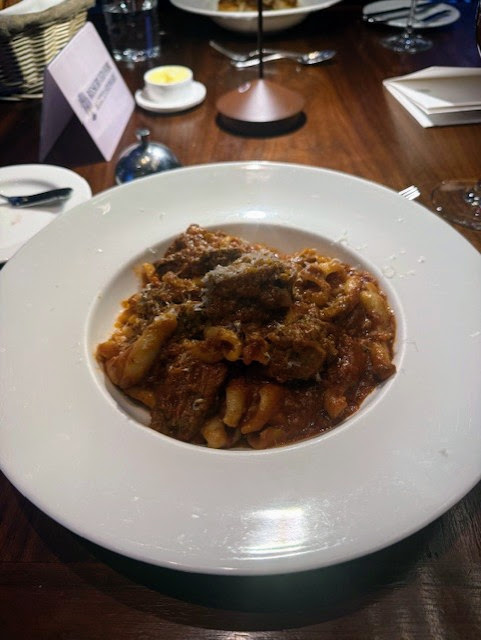
My main course was the short rib ragù, deeply comforting and rich featuring homemade trecce pasta and grana Padano.
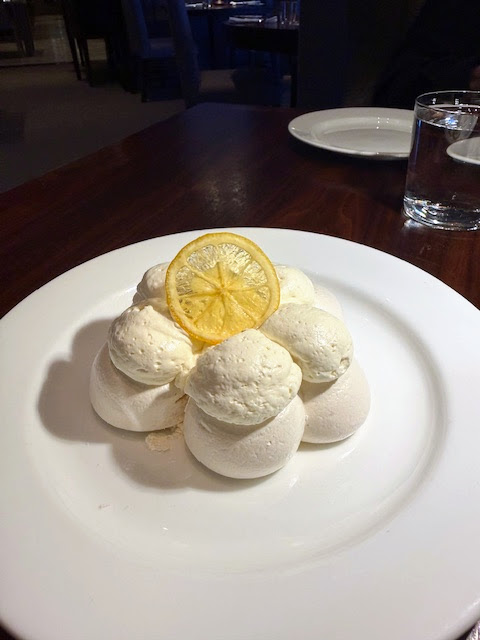
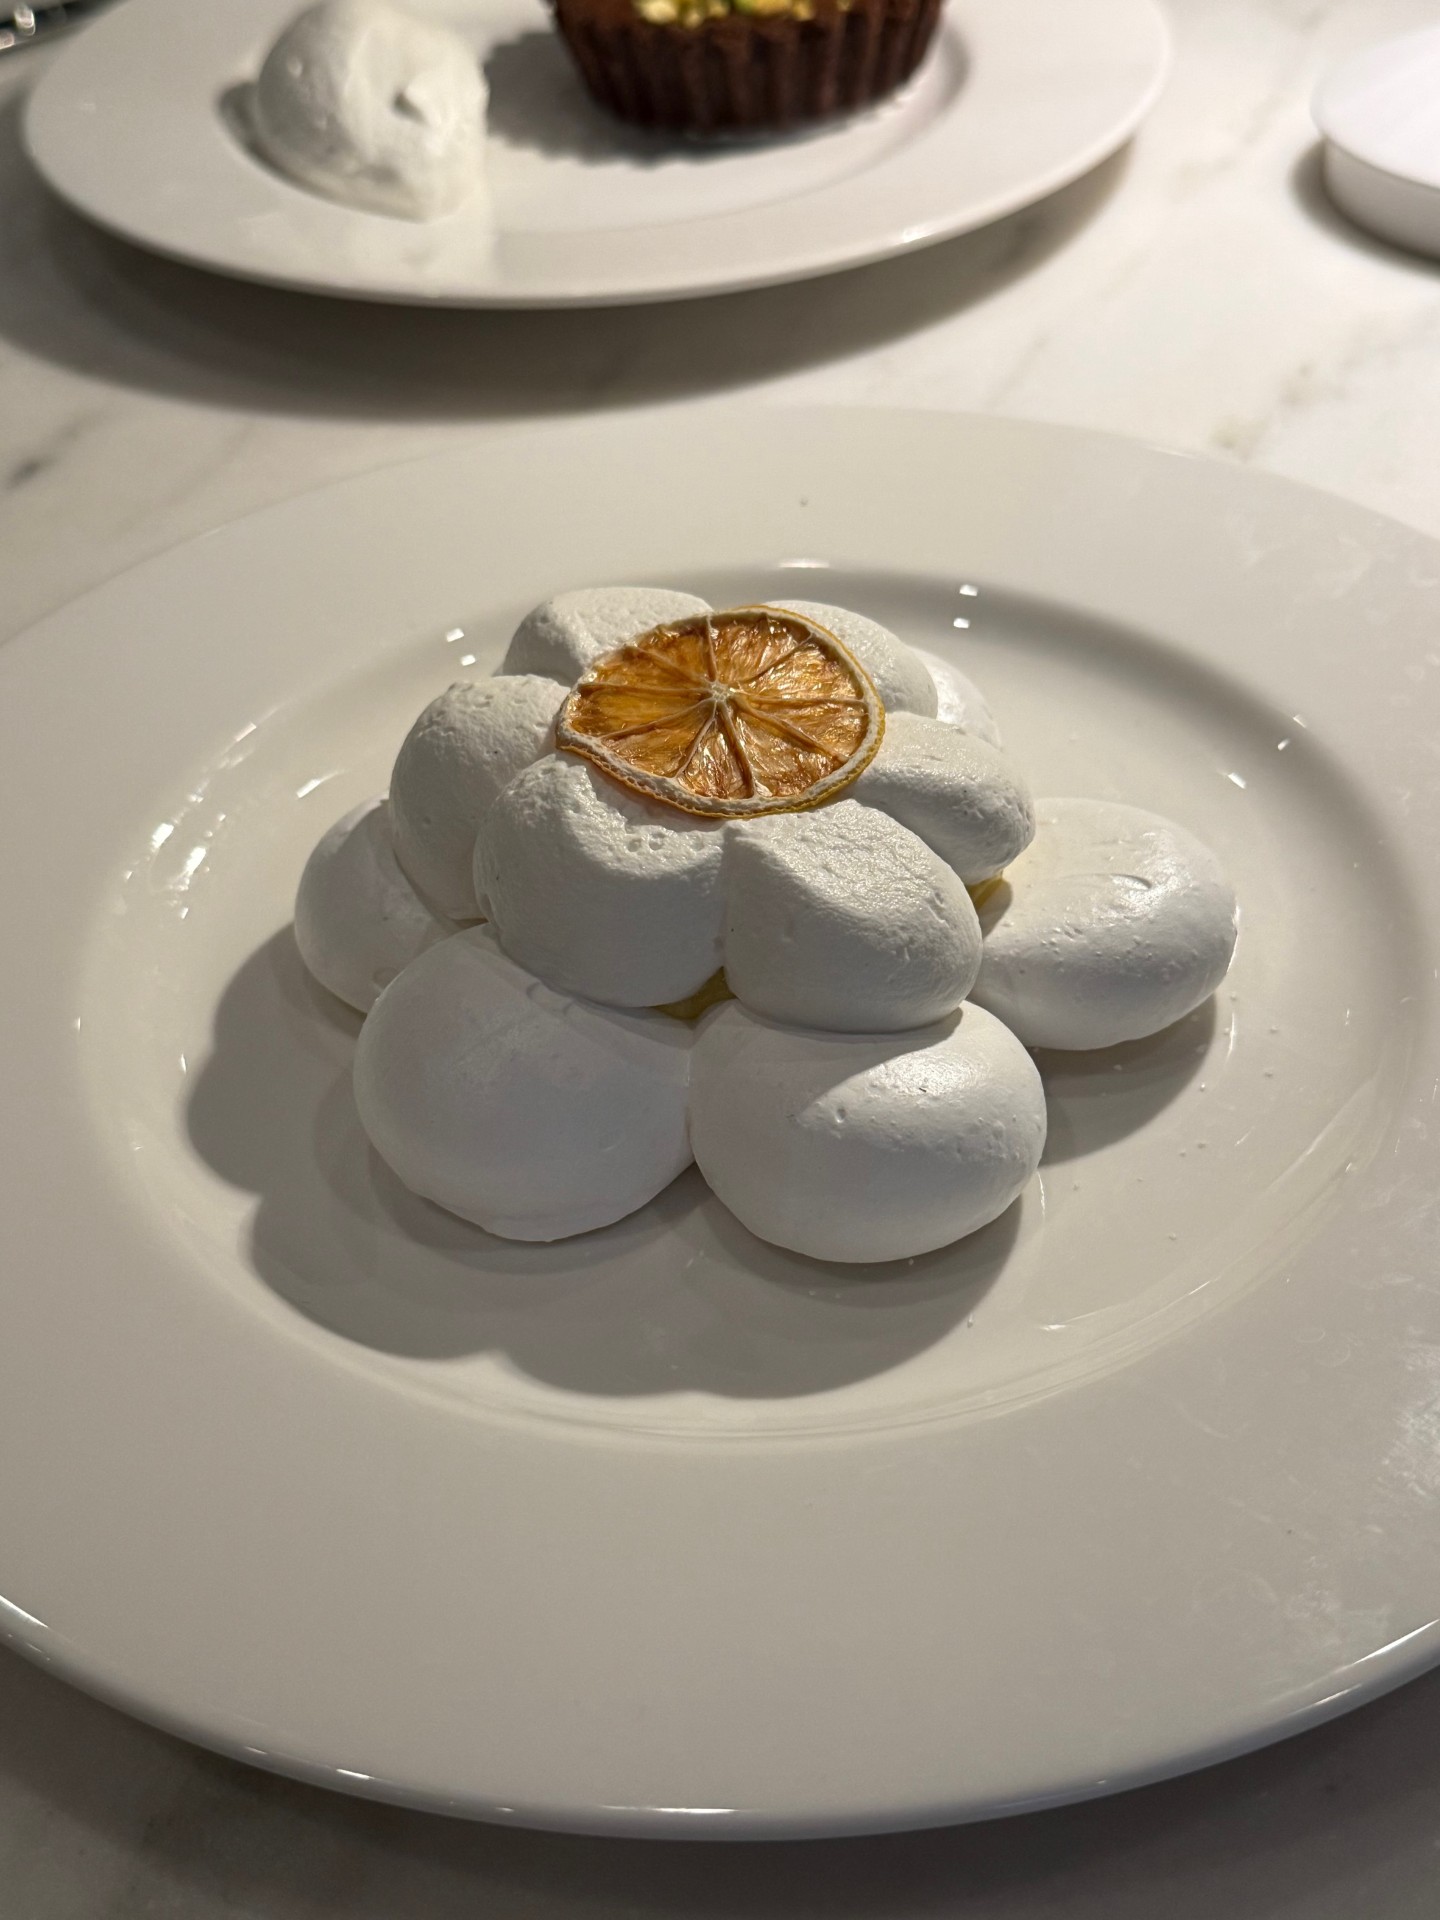
For dessert, we enjoyed the Upside-Down Lemon Meringue Pie, another recipe featured in Martha’s 100th book. Beneath the meringue crust was a vibrant Meyer lemon curd, hidden under whipped cream, a delightful surprise revealed with the first bite. That moment reminded me of the first Martha recipe I ever made from the October 2005 Martha Stewart Living Magazine: her “Surprise Pasta,” a dish where roasted butternut squash and ricotta are hidden beneath buttery herbed bucatini. Martha has always loved an element of surprise in her cooking, and this dessert felt like a playful nod to tradition.
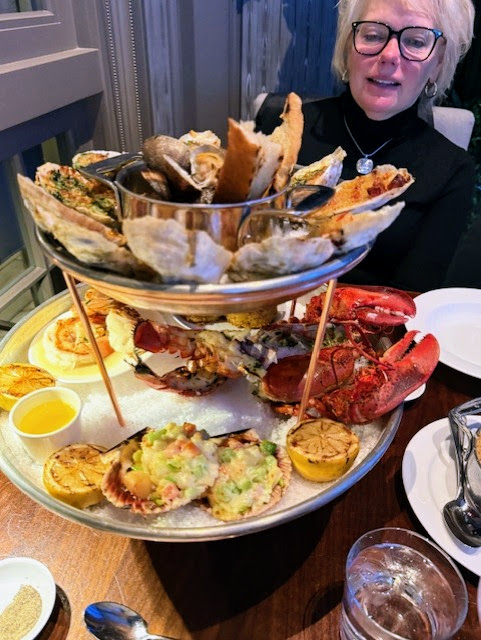
On the final evening of our trip, and just one day before my 40th birthday, we returned once more and ordered the seafood tower with Maine lobster, oysters, clams, scallops, shrimp and Martha’s signature peekytoe crab cakes.
For dessert we experienced Snow in the Dessert, presented tableside: a towering mount of delicate cotton cady dusted with gold leaf is hollowed out before a vibrant raspberry purée is poured into the center, cascading over a scoop of raspberry sorbet hidden inside. The dessert may not have appeared on Martha’s television show or any of her books, but its theatricality evokes the whimsical spirit of grand New York dining rooms like The Four Seasons, the kind of place that undoubtedly helped inspire Martha’s own hospitality philosophy.
Whimsy and ambition have always been central to Martha’s brand. Whether it’s constructing a five-foot replica of her Turkey Hill estate out of gingerbread, building a haunted mansion with caramel windows, or spinning croquembouche towers taller than cars, Martha approaches the impossible with calm authority, and then invites viewers to follow along. That’s part of the magic. While her projects can seem intimidating, Martha always reminds us that every masterpiece starts with the basics, and a willingness to try. My advice? The next time Martha begins one of her iconic projects, join in. And the next time you’re in Las Vegas, make a reservation at The Bedford. It’s a Good Thing!
We've already had such a wonderful response to my second-ever restaurant, The Bedford by Martha Stewart at the Foxwoods Casino Resort in Mashantucket, Connecticut.
The Bedford by Martha Stewart at Foxwoods officially opened to the public on Saturday, March 14. Among the guests that evening was Anthony Picozzi, one of my longtime devotees of the Martha Stewart Brand and a contributor of "Martha Moments," a blog and content archive created in 2006 by another devotee, Andrew Ritchie. Earlier this week, Andrew asked Anthony to write about his dinner experience at the restaurant.
Enjoy Anthony's photos and review.
If you follow Martha Stewart at all, you know her world is built around beautiful homes, thoughtful details, and food that feels special but still comforting. Her new restaurant, The Bedford, which just opened at Foxwoods Resort Casino in Connecticut, is basically that idea brought to life.
In keeping with the theme of her first restaurant in Las Vegas, the concept is that it’s modeled after Martha’s own 1925 farmhouse in Bedford, New York. The rooms are meant to feel like spaces in her home, with vintage décor, marble tables, cabinets filled with glassware, and little design details that feel very “Martha.” Instead of a typical restaurant layout, it really does feel more like walking into someone’s beautifully designed house.
As a longtime student of Martha, I jumped at the chance to experience The Bedford on opening night with my partner and our friends Tim and Matt, who are fellow members of the Martha Moments online community. Our reservation was at 9:00 PM, and what we thought would be dinner turned into a full three-hour experience. We didn’t leave until midnight, and by that point we were the last table still there!
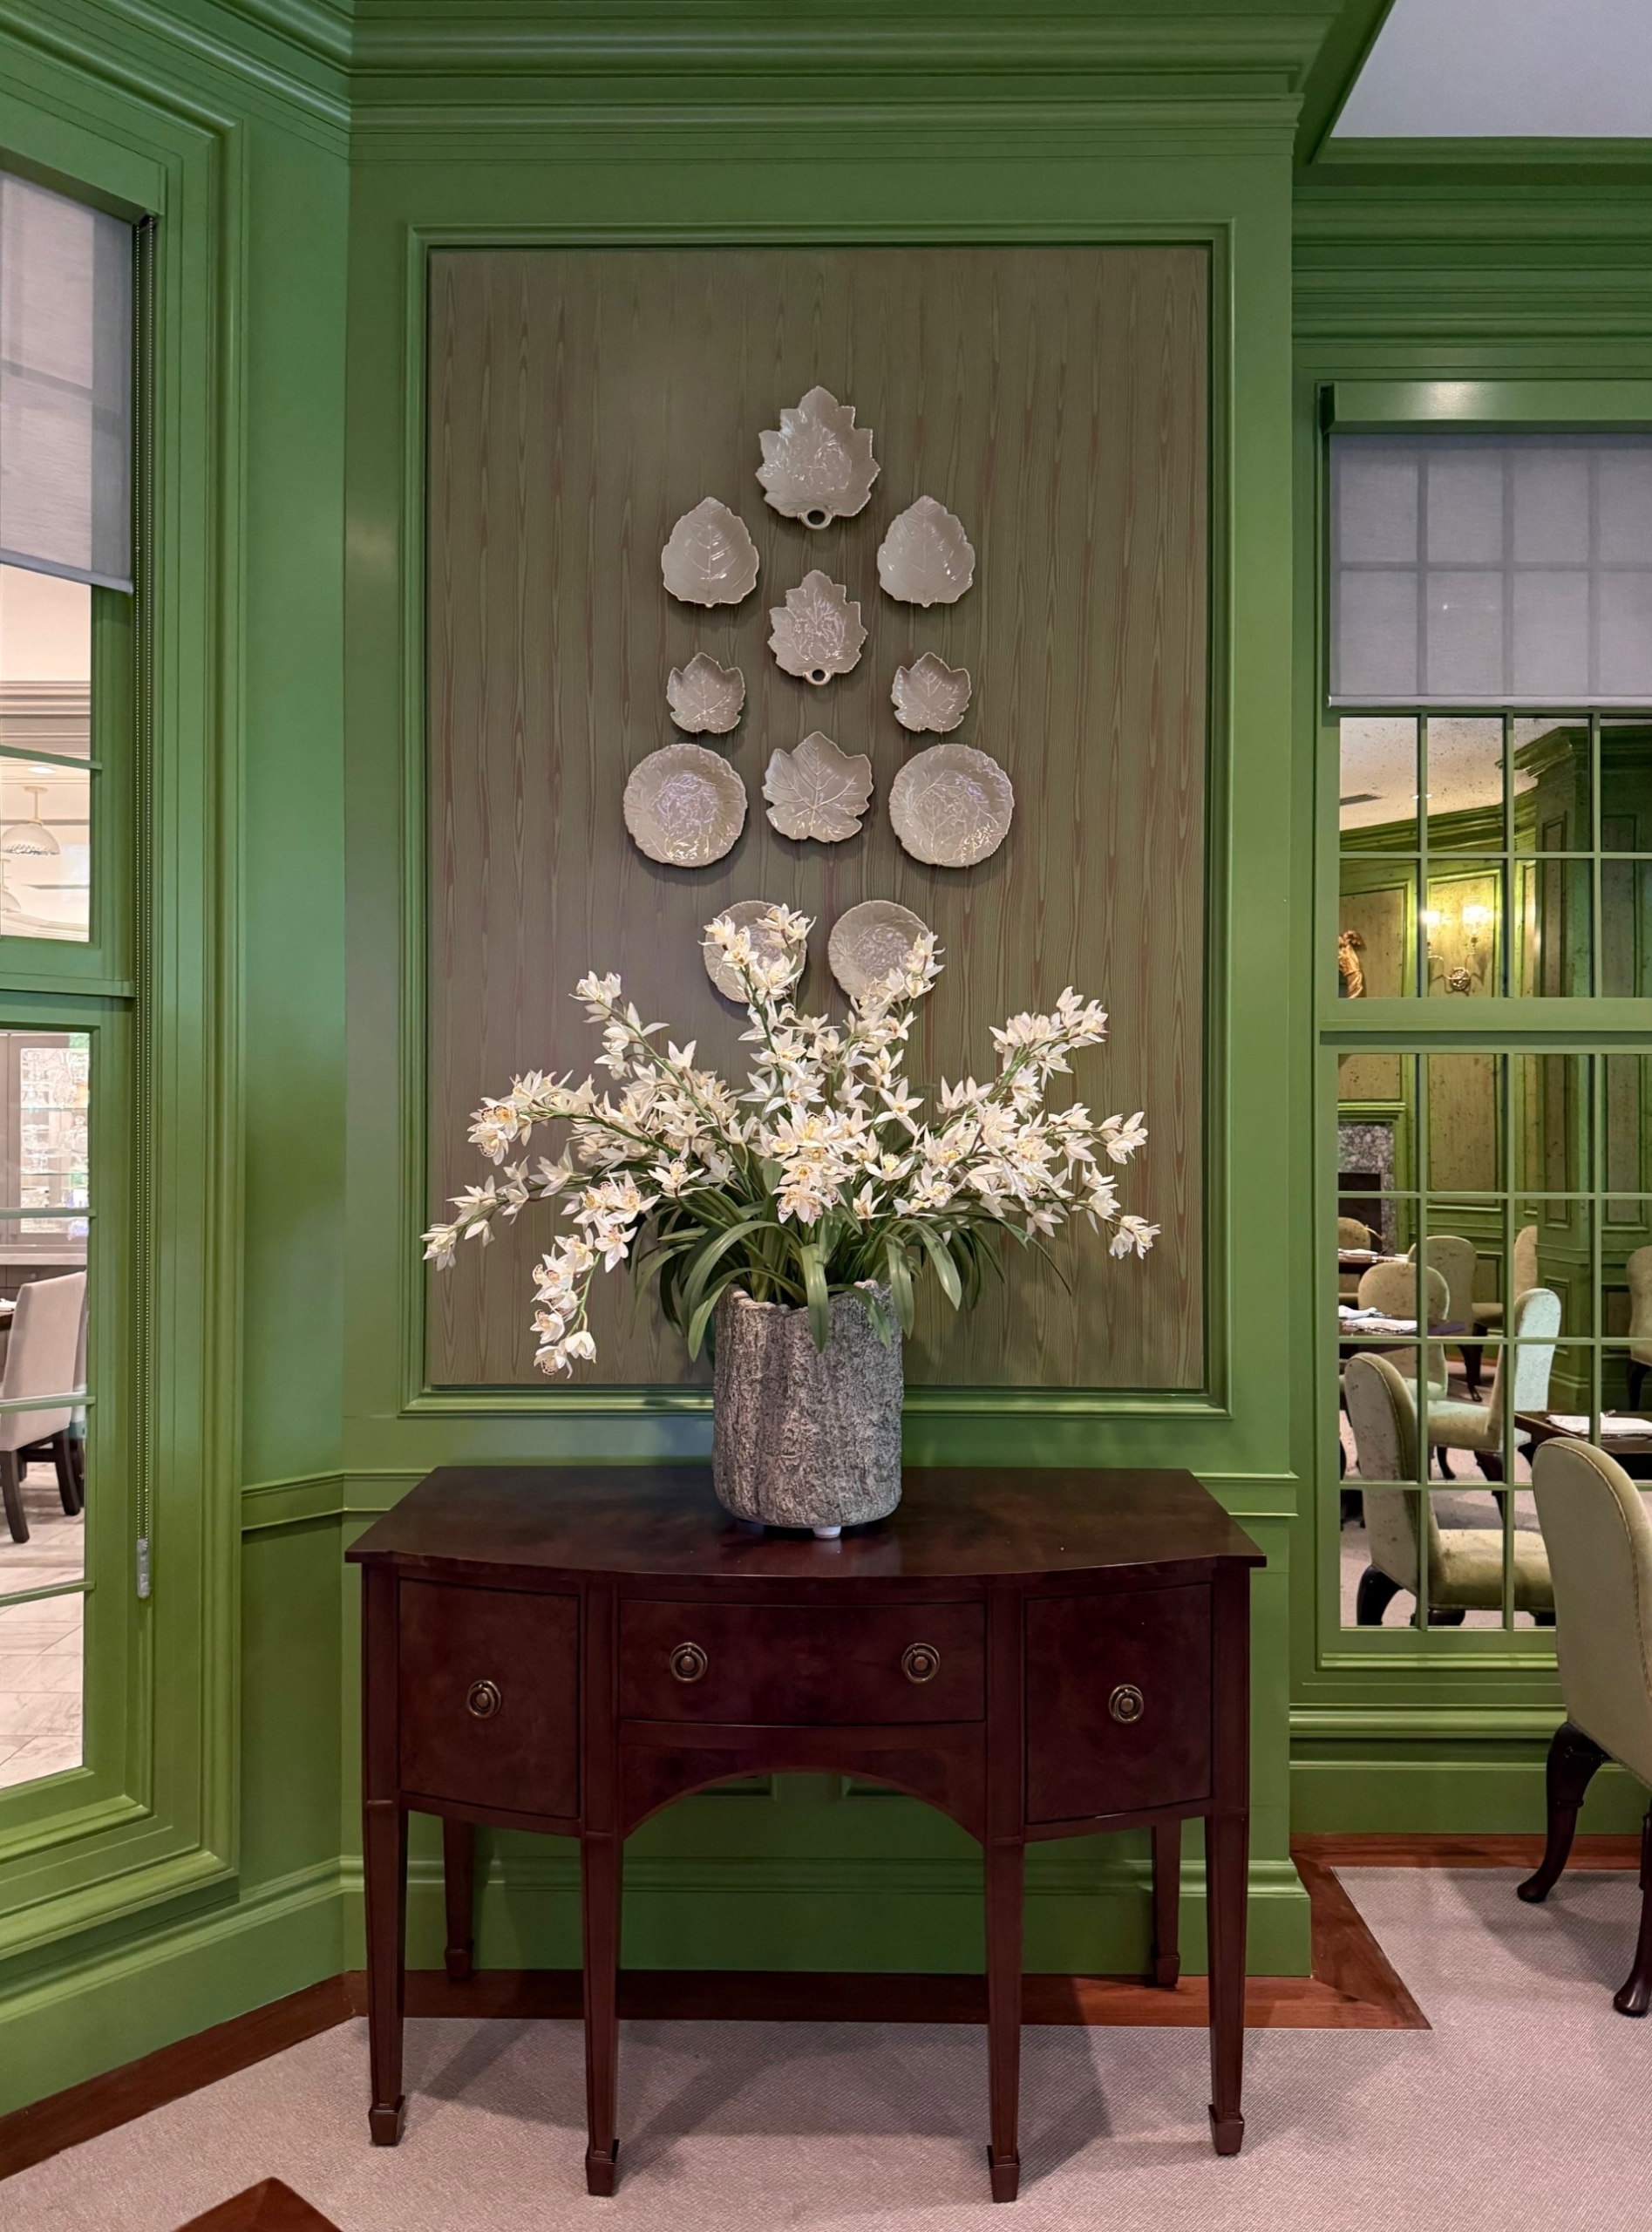
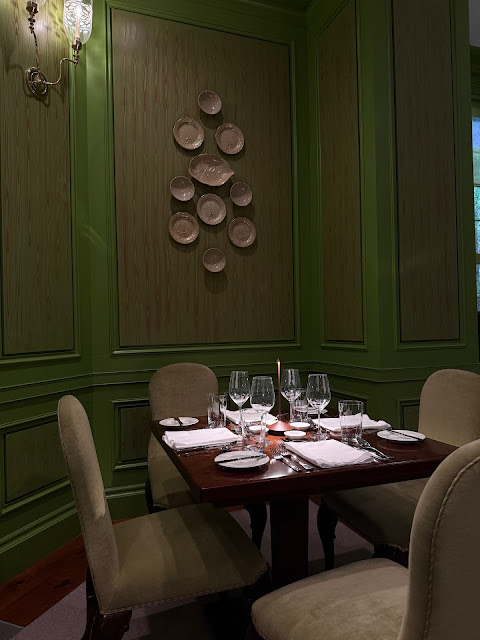
One of the highlights of the night was where we were seated. We were first seated at a small table in the Green Room, which is designed to resemble Martha’s living room at her Bedford home, but later moved to the long marble table in the center of the room (because our appetizers wouldn’t fit at our original table lol).
The room itself is done in beautiful green tones with faux bois detailing and includes “windows” showing scenes from Martha’s property, her gardens, and even footage of her riding her Friesian horse. Sitting at that long marble table with friends felt more like being invited to a dinner party than being in a casino restaurant.
Since there were four of us, we decided the best approach was to share everything so we could try as much of the menu as possible.
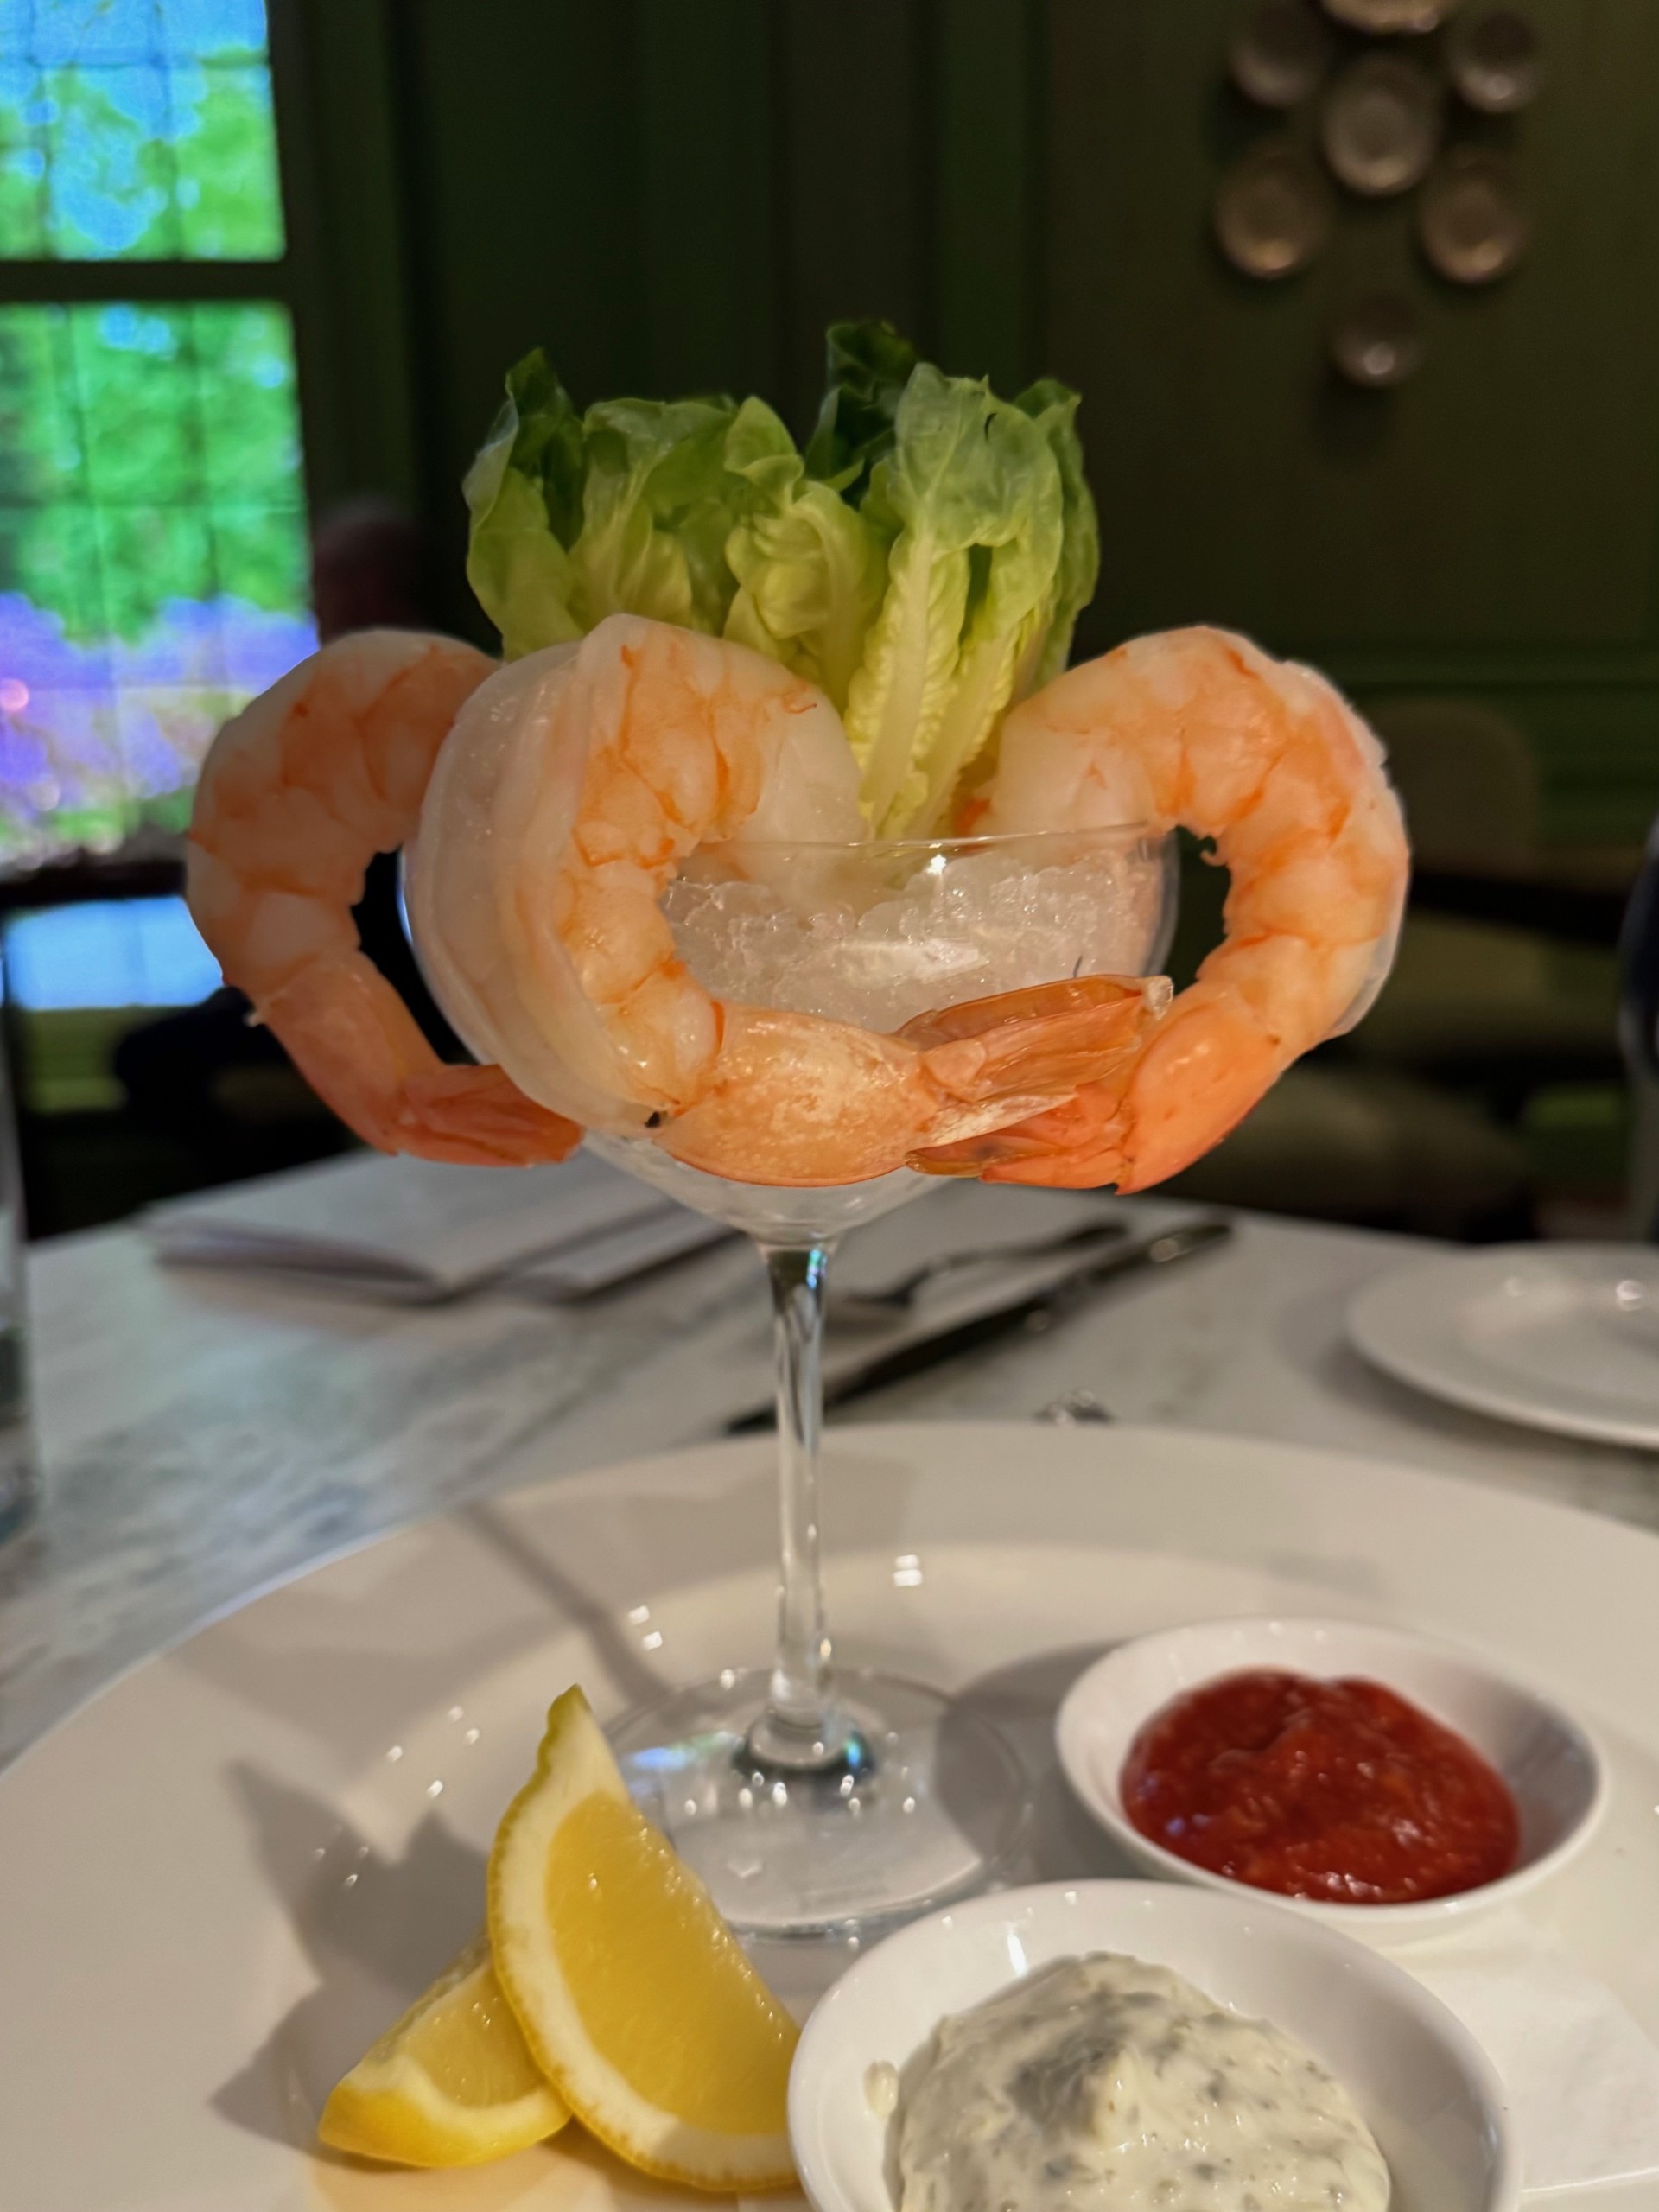
We started with several appetizers. Here is the Jumbo Shrimp Cocktail.
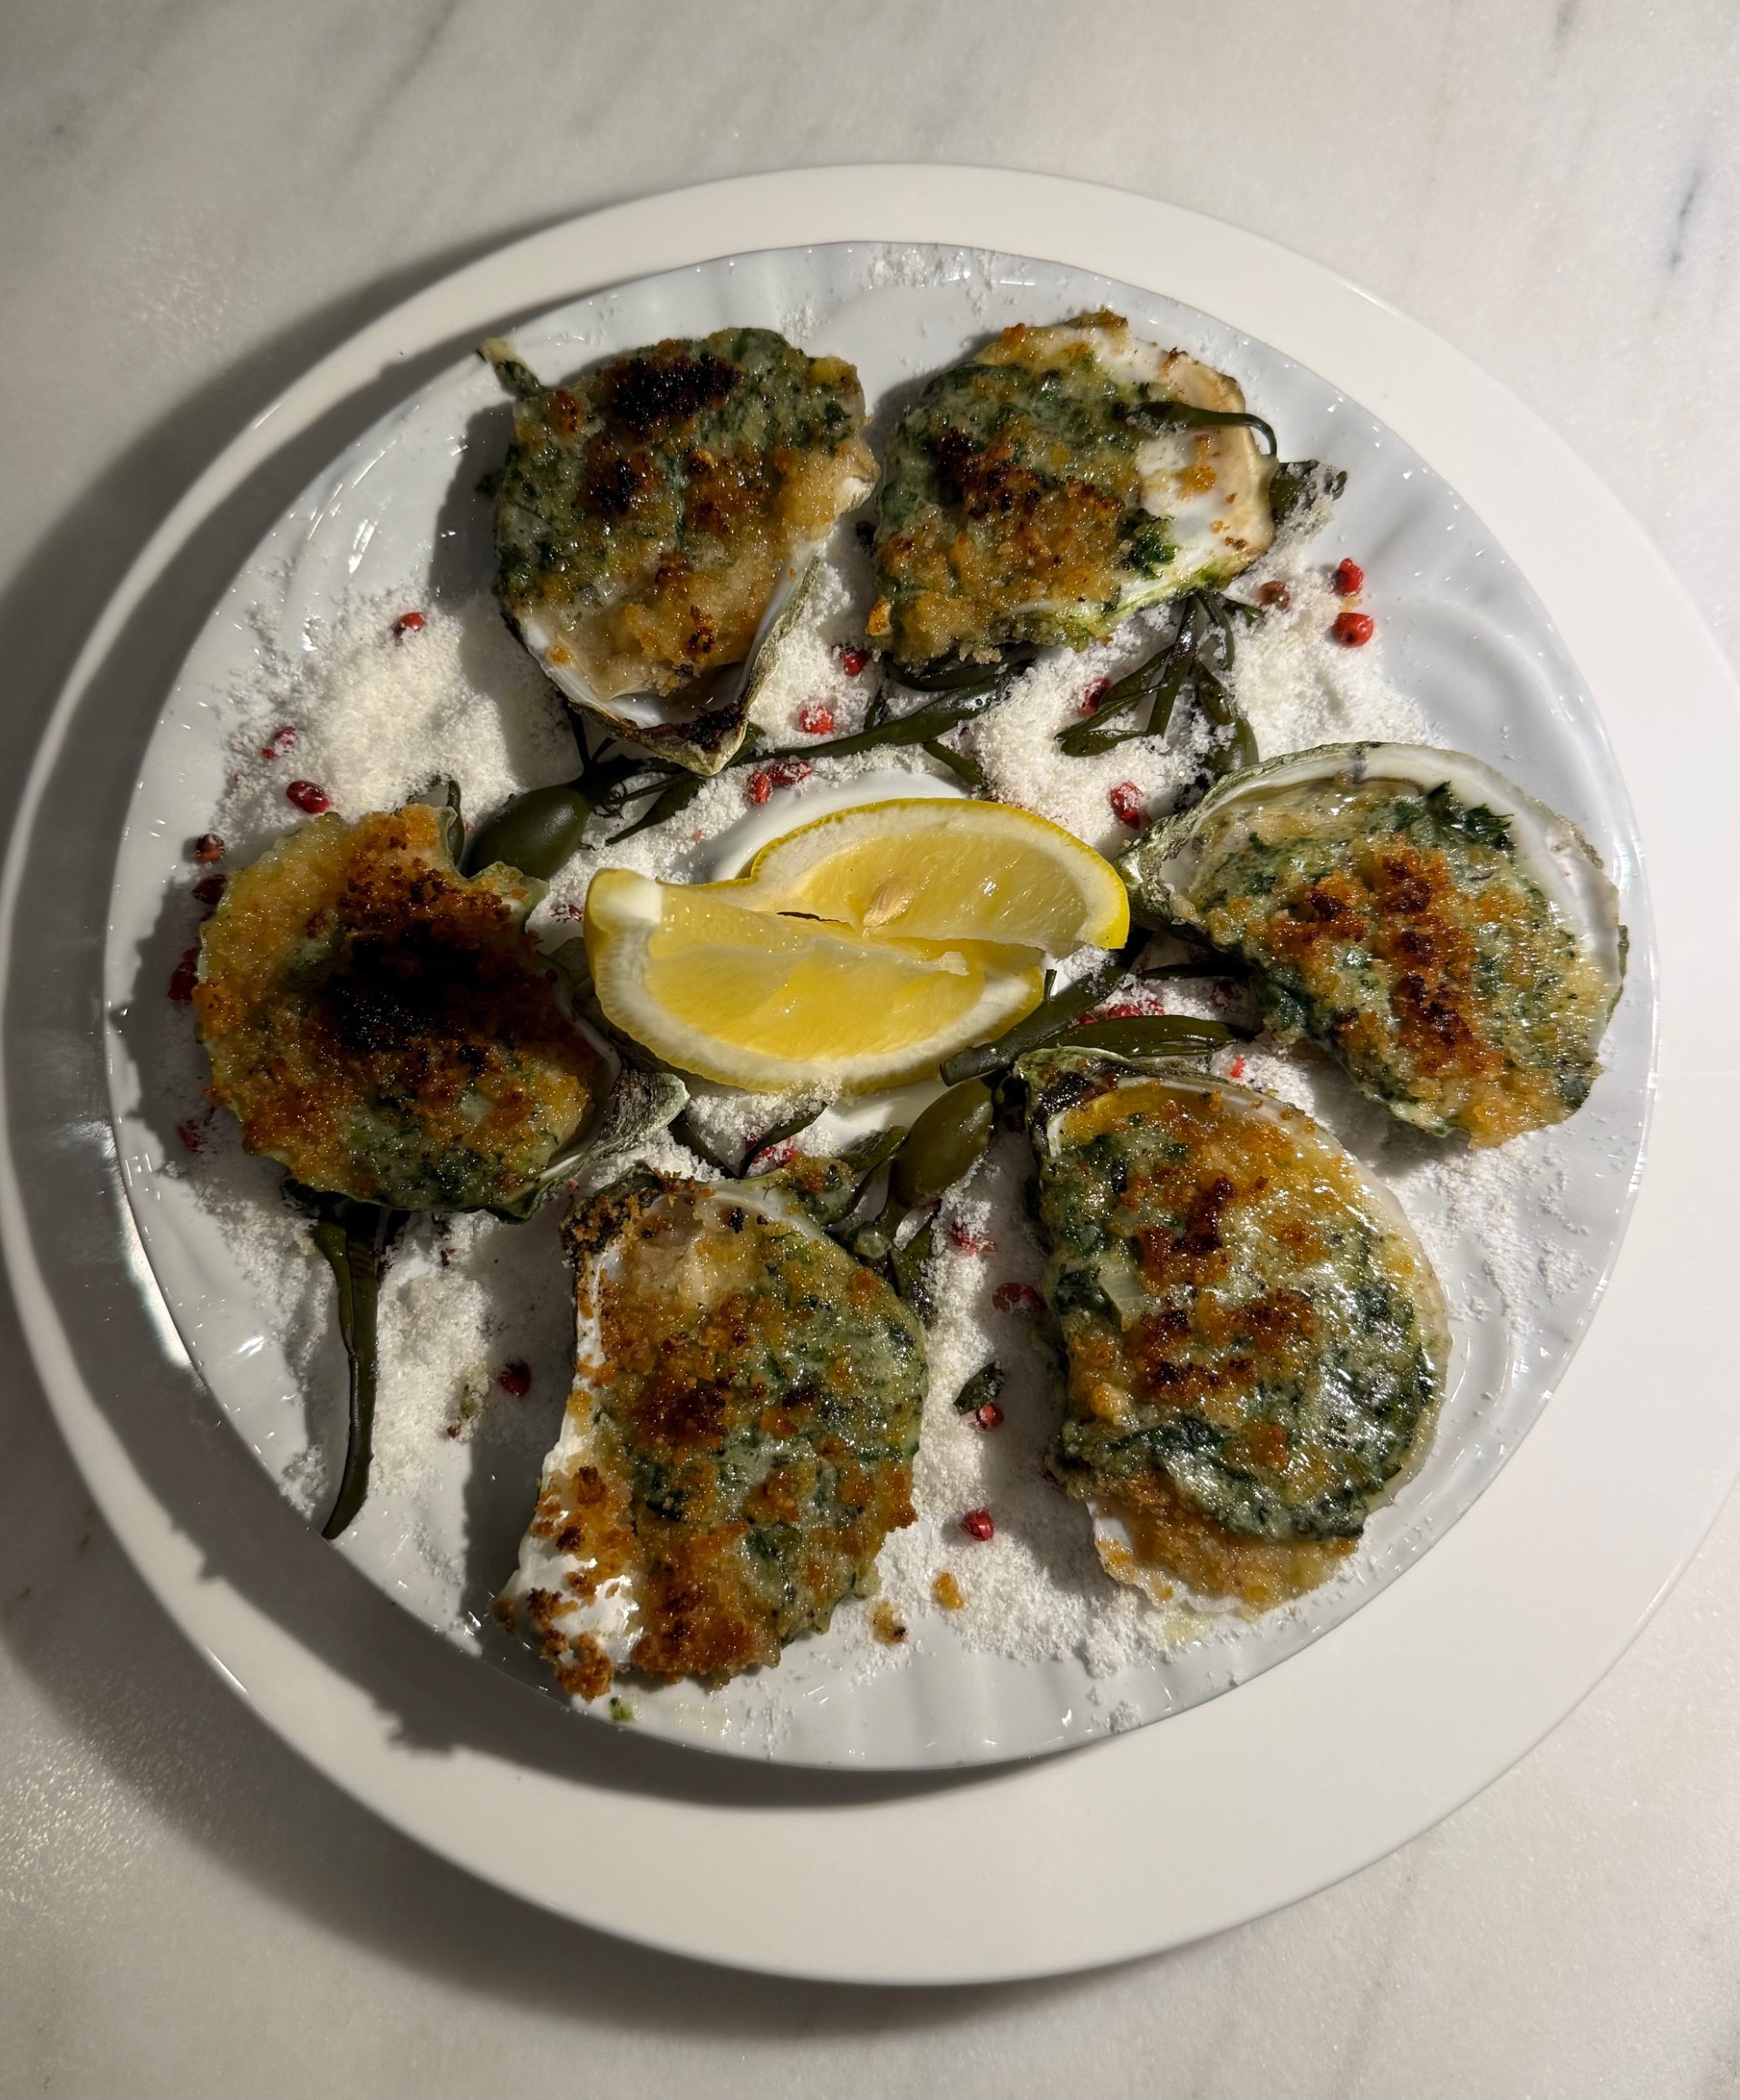
We also had Oysters Rockefeller, Big Martha’s Pierogies (inspired by Martha’s mother’s recipe), and Martha’s Big Turkey Meatball. One thing we were really hoping to try, the house-made bread basket (which includes JuneBug’s flatbread), was unfortunately unavailable by the time we were seated. That just gives us a reason to go back!
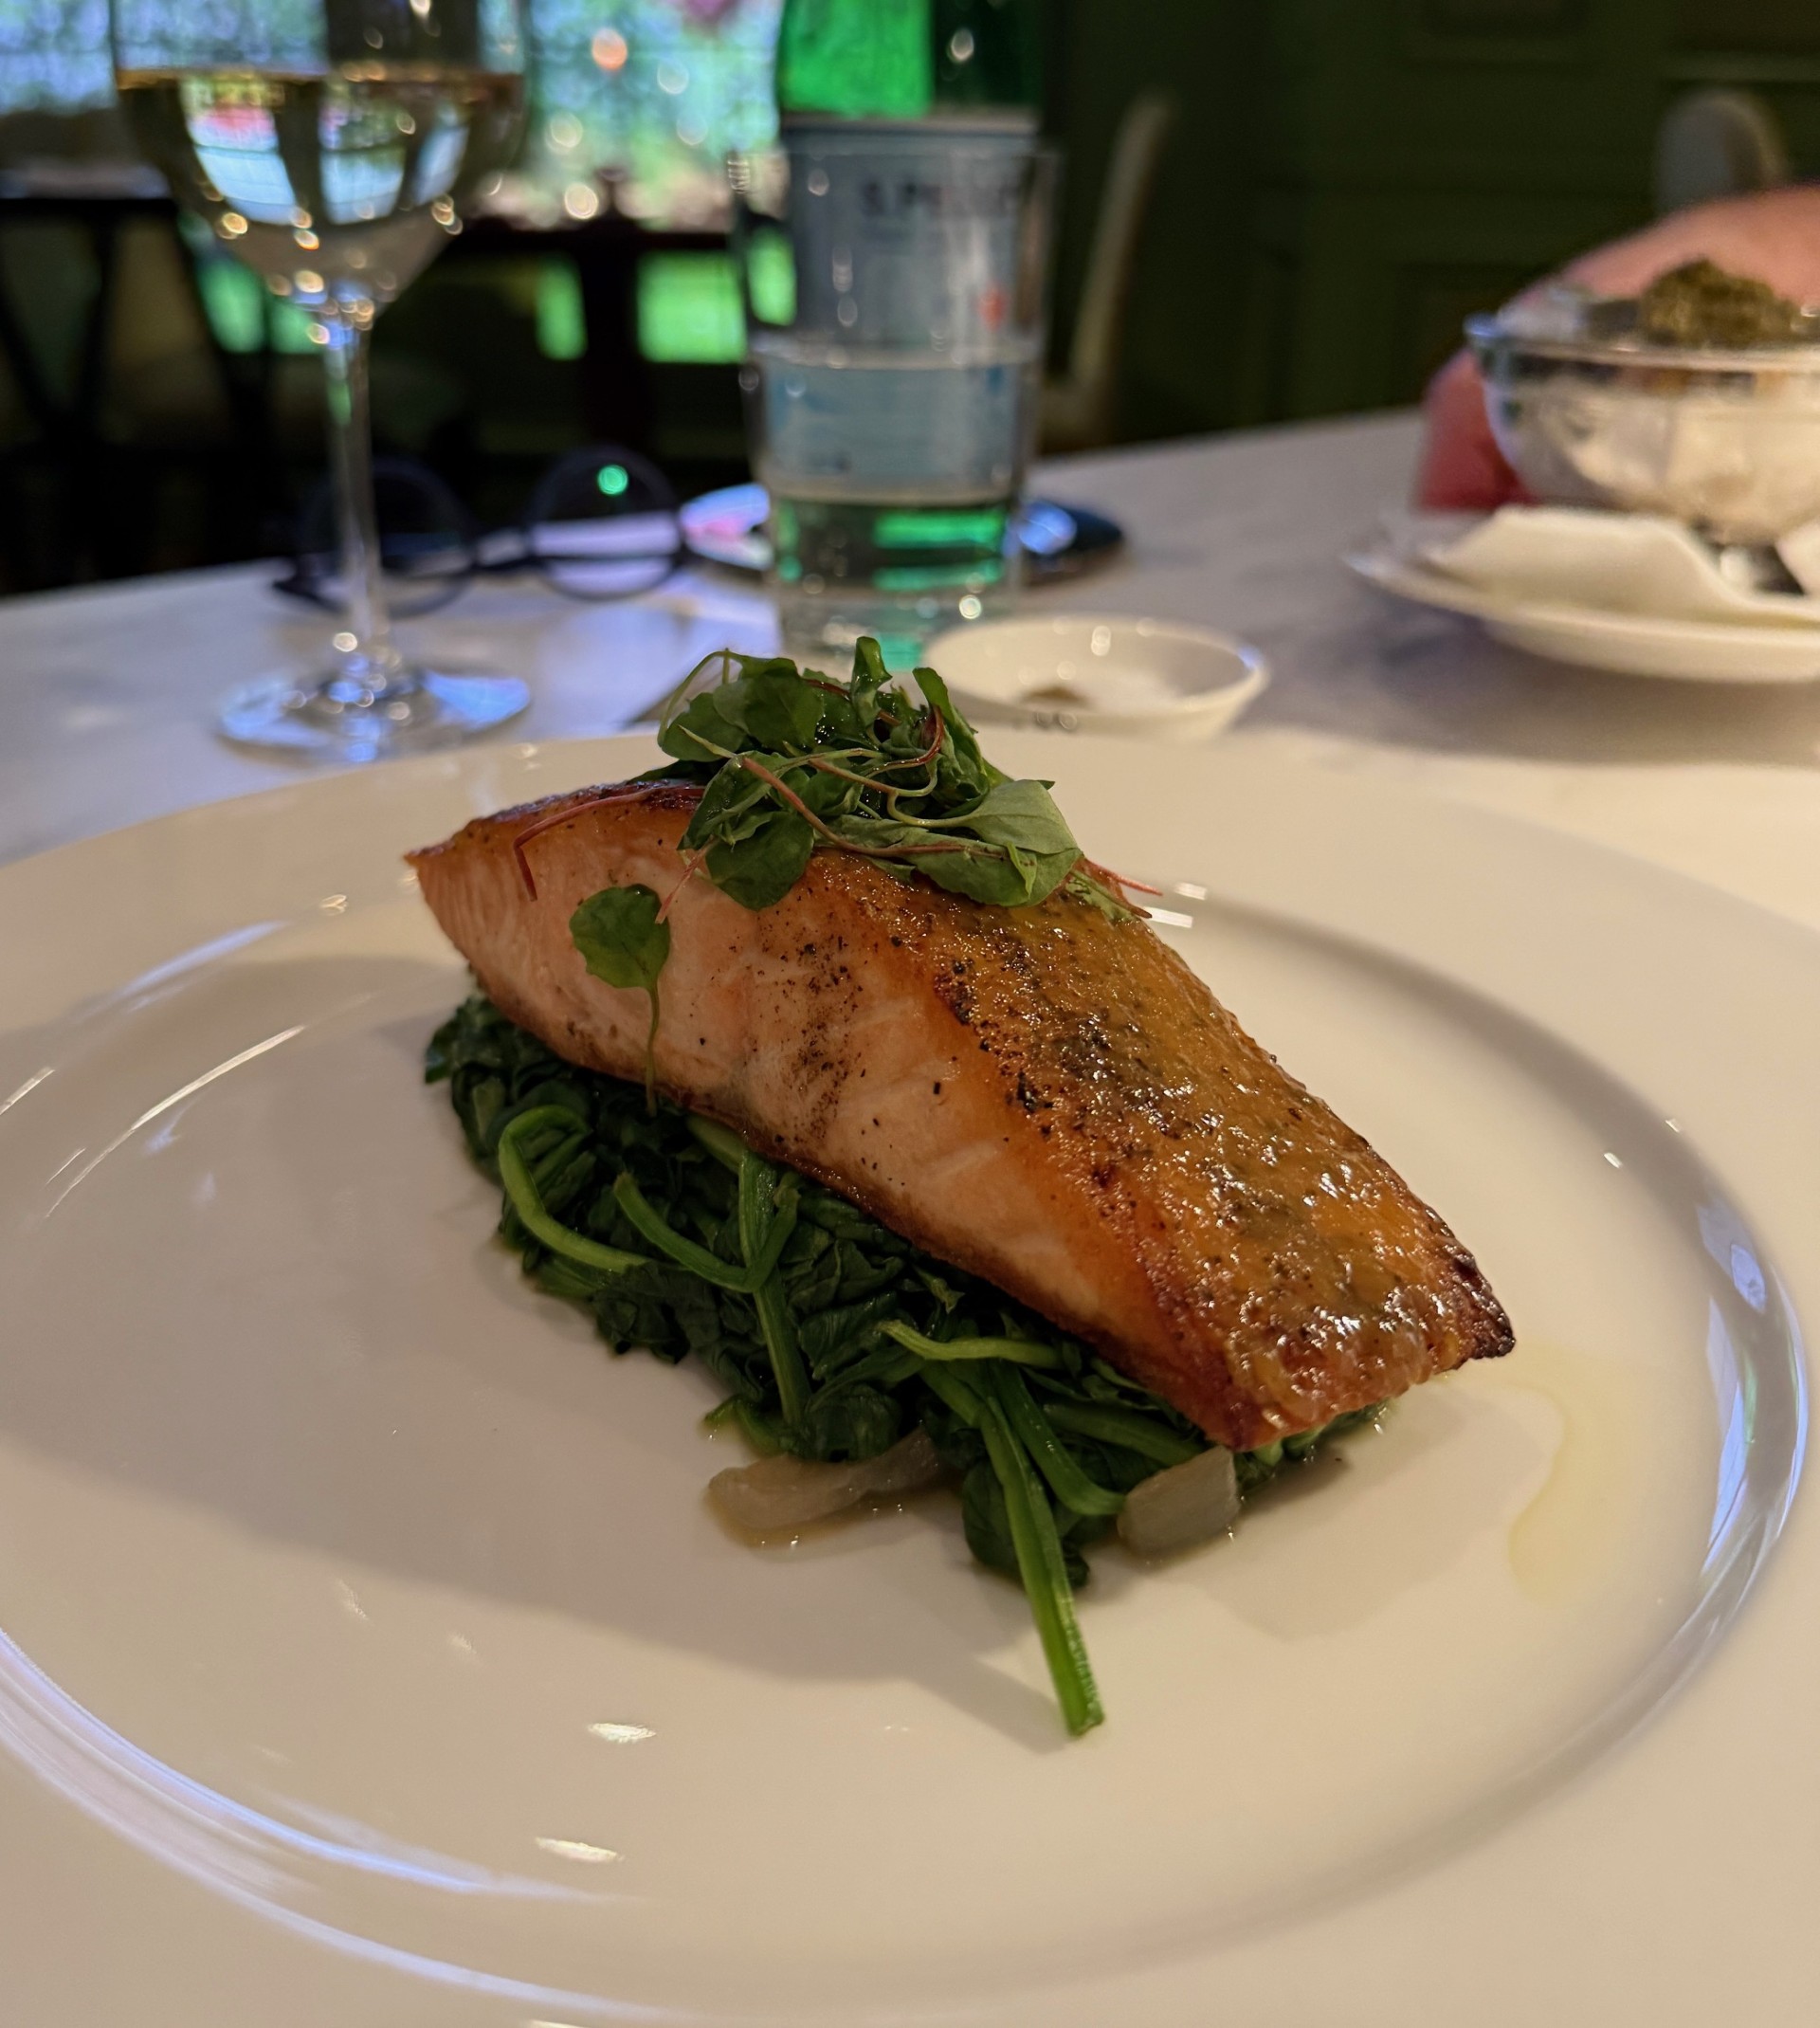
For the main dishes, we continued sharing and ordered this Honey Mustard Salmon.
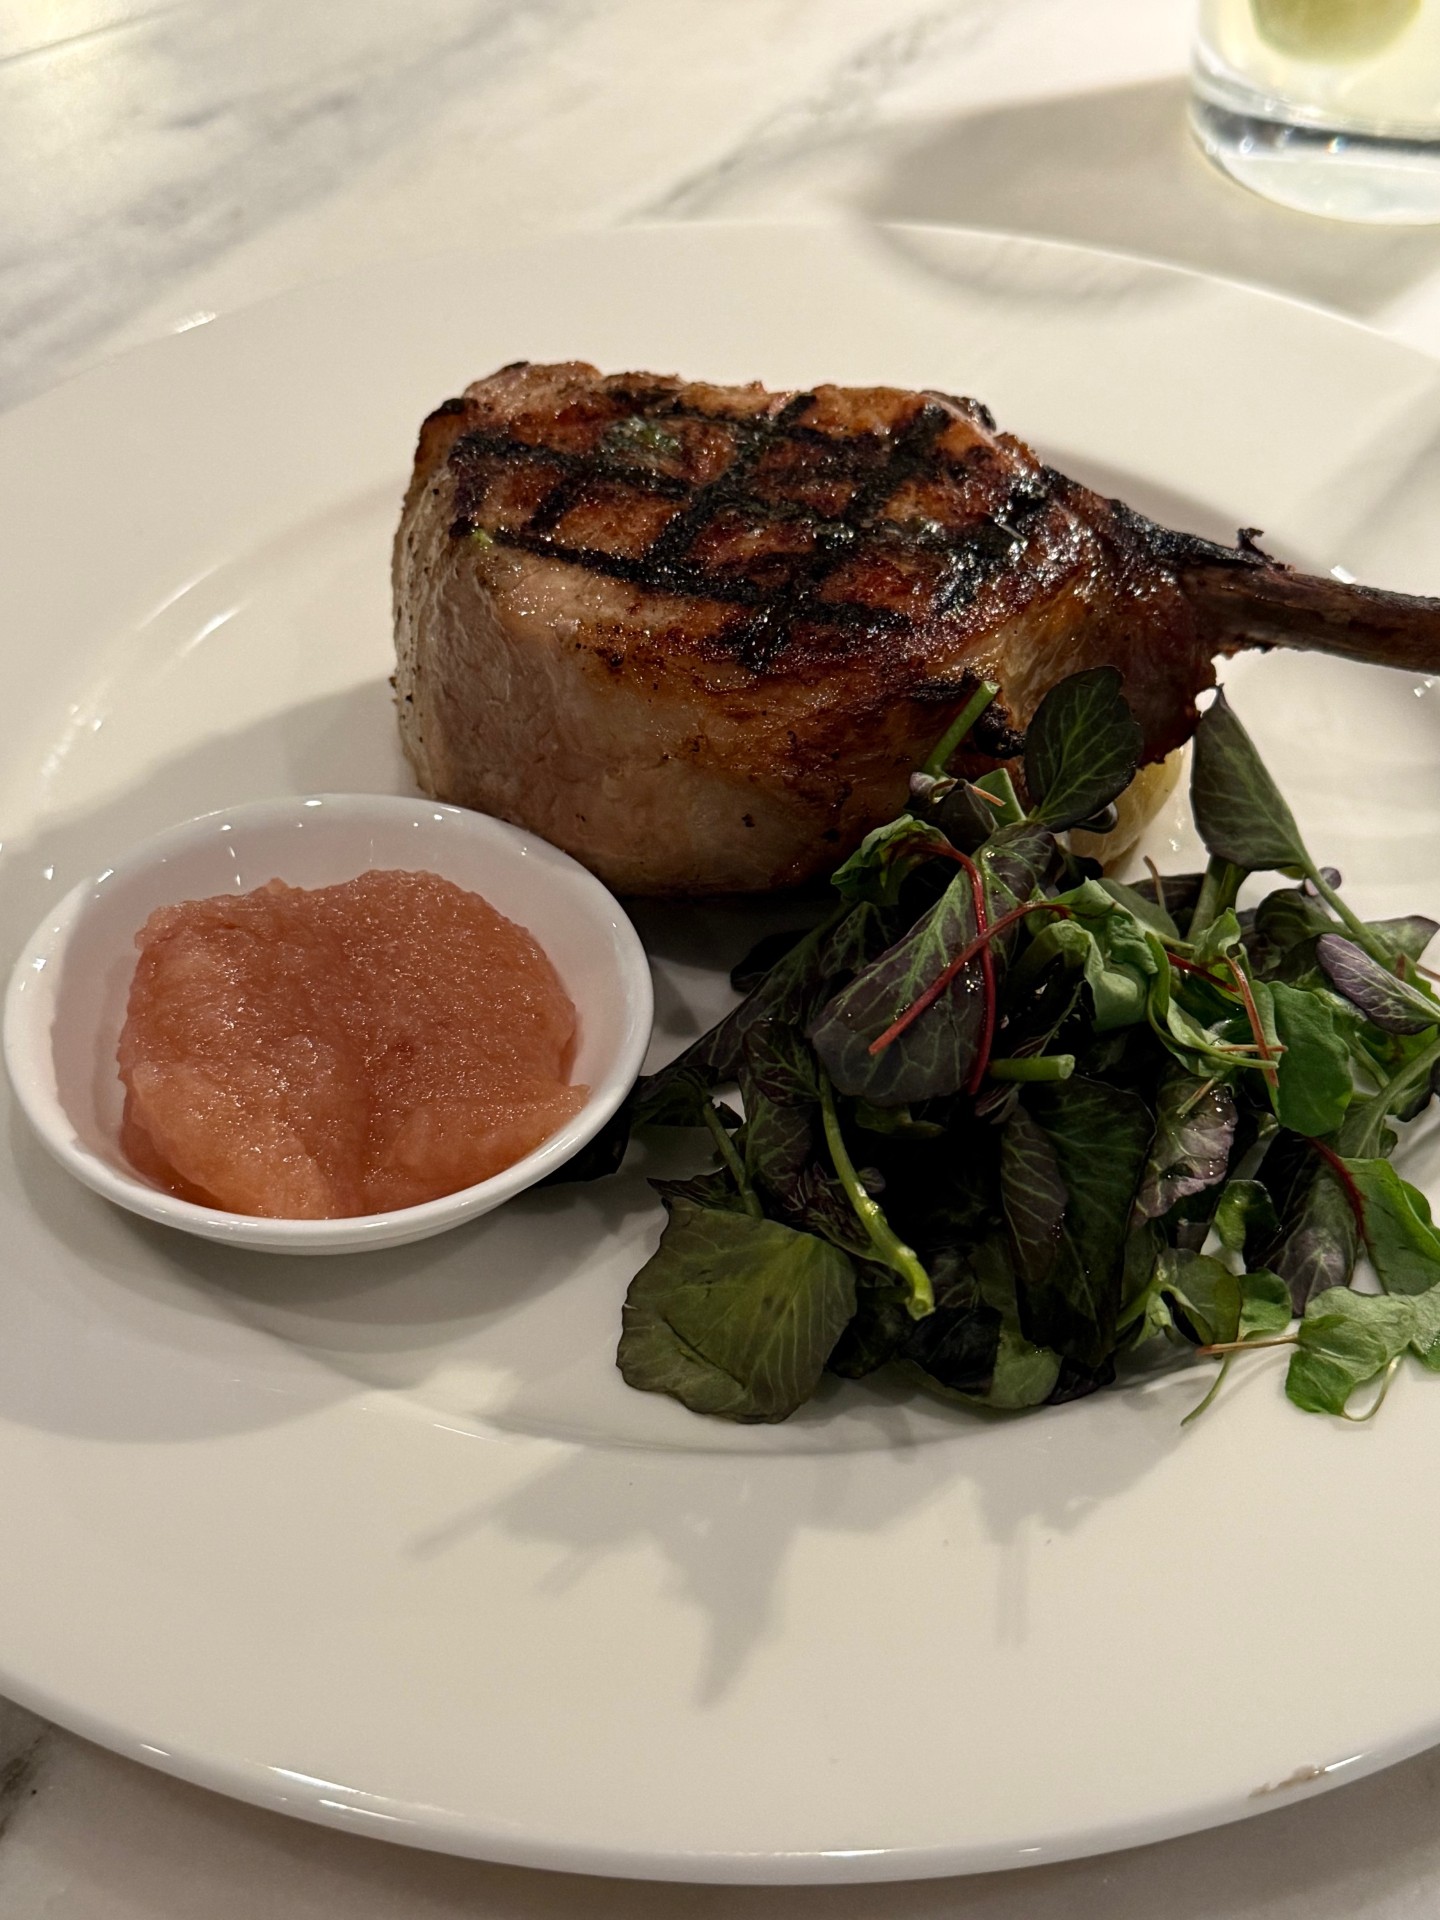
This is the Kurobuto Pork Chop. We also enjoyed the Scallop Risotto and the Filet Mignon. Everything felt very “Martha” in the best way. Classic dishes done well, comforting but elevated.
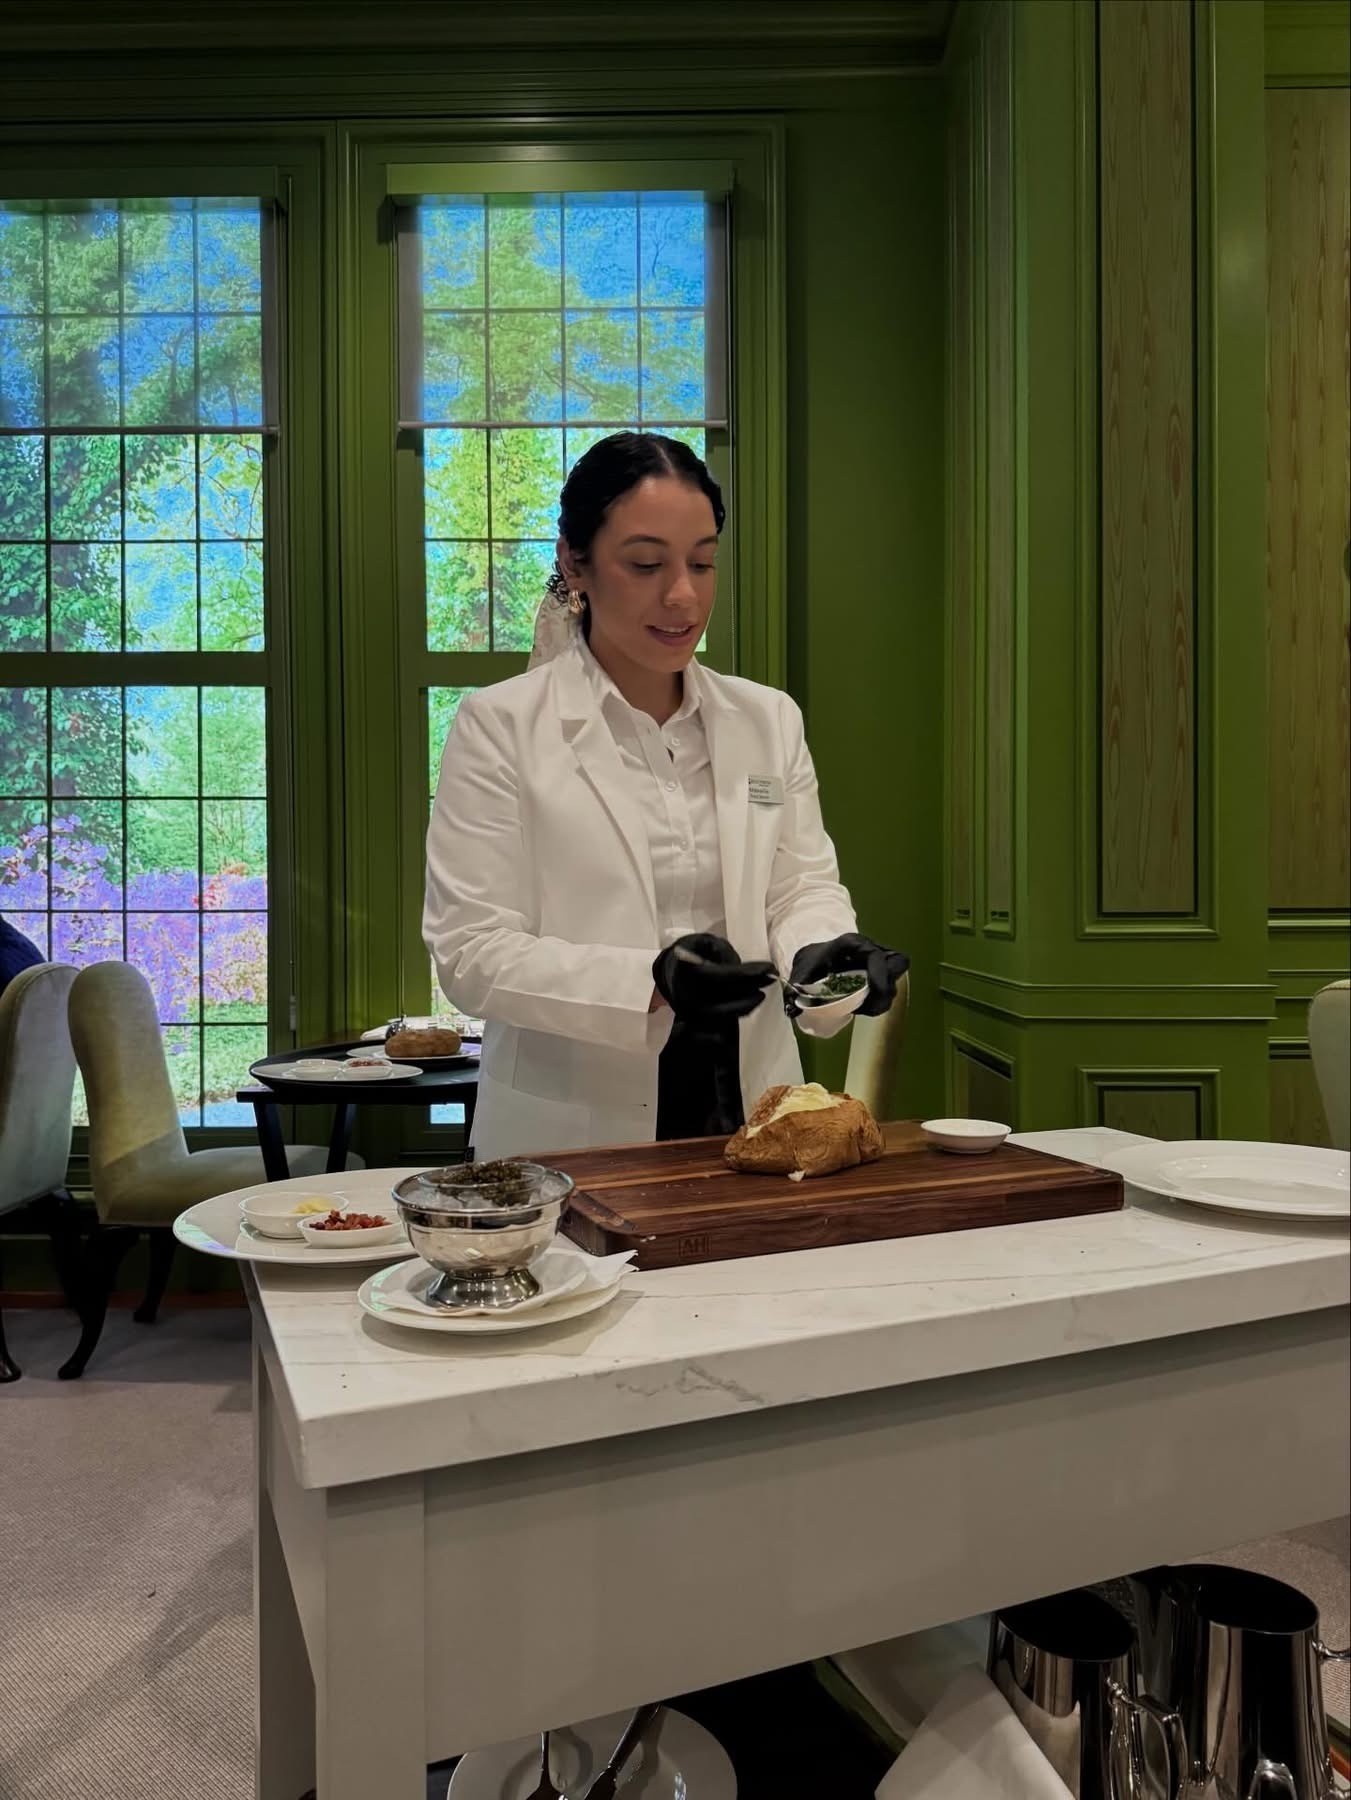
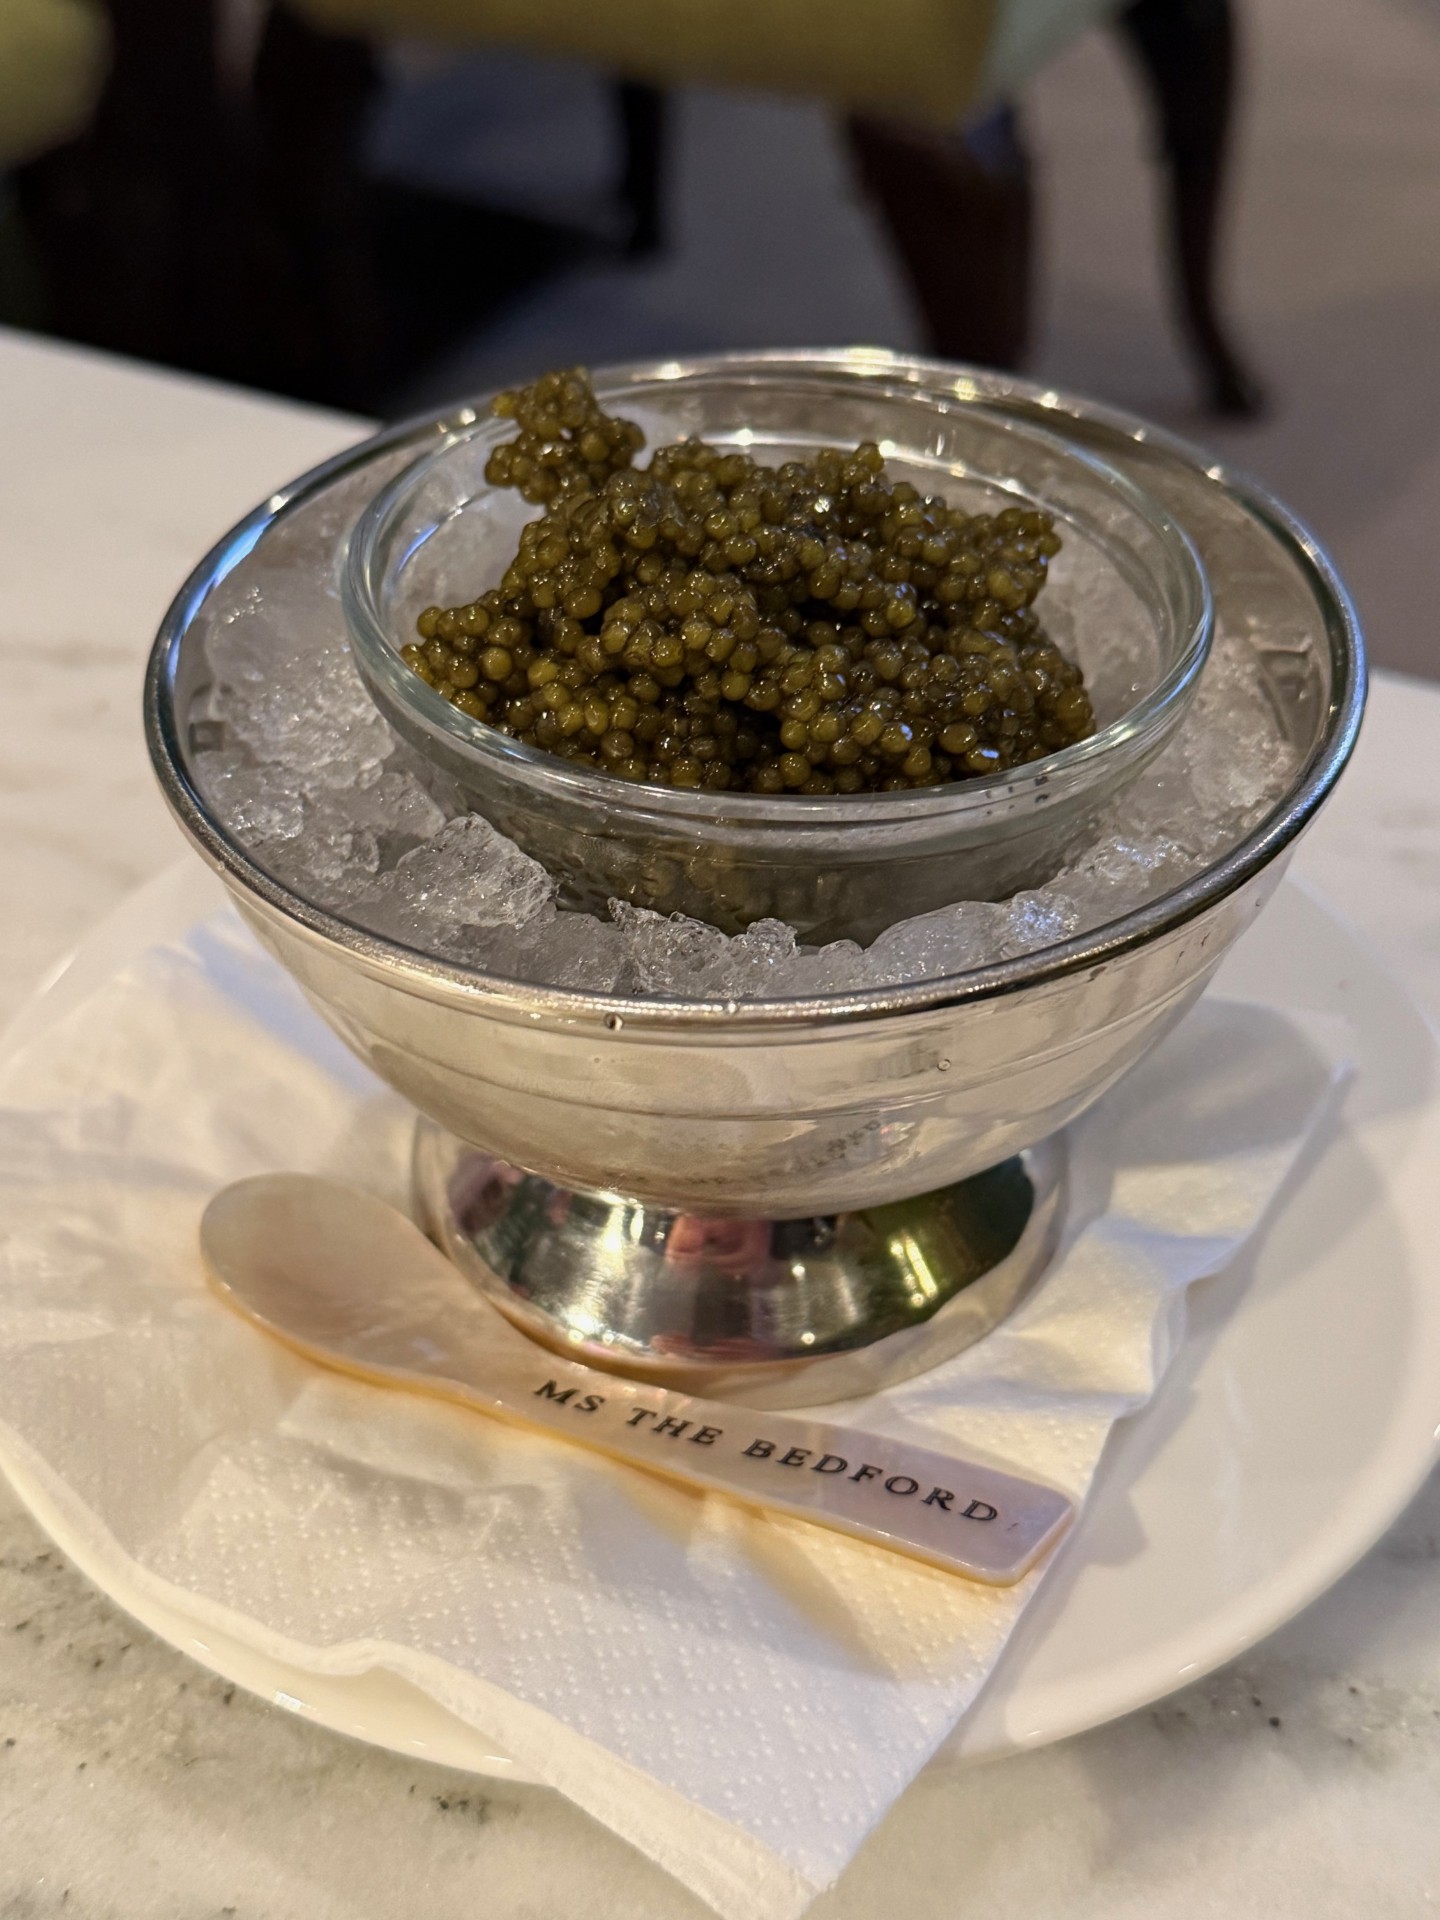
One of the most memorable moments of the night actually came as a side dish. We ordered two of Martha’s smashed baked potatoes, one with caviar and one without. They’re finished tableside, which makes the whole thing feel like a bit of dinner theater.
The server brings out a perfectly baked potato and smashes it open at the table before loading it up with crème fraîche, chives, butter, and bacon.
One of ours was finished with caviar, which made it feel extra indulgent. It’s simple, but somehow also over-the-top in the best Martha way.
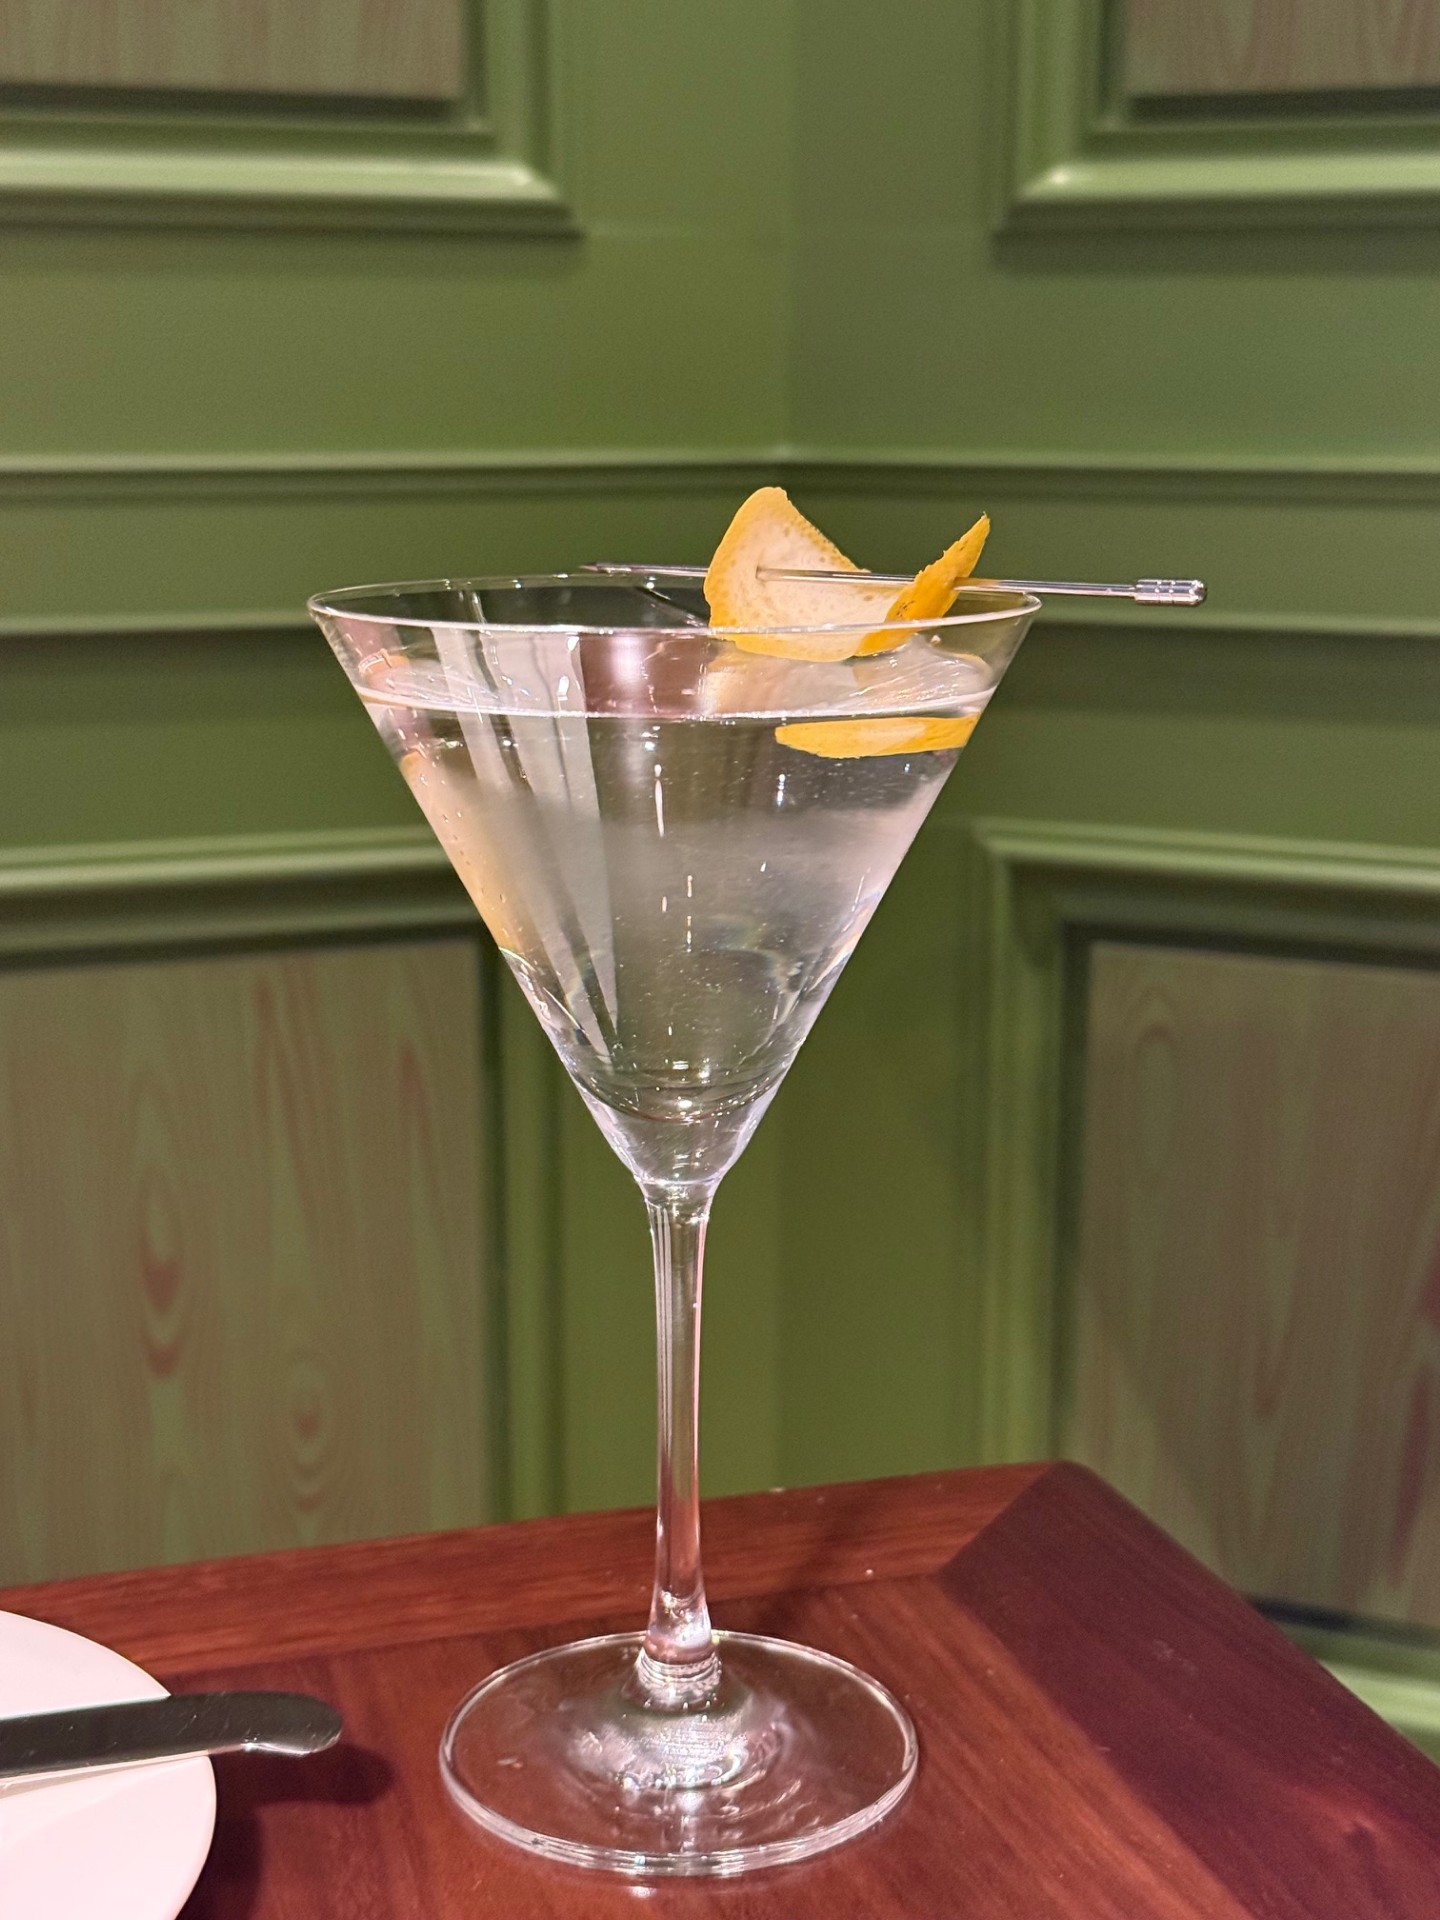
Naturally, we had to explore the cocktail menu as well. Between the four of us we tried several including The Martha-tini.
We also tried a Meyer Lemon Drop, a Frozen Pomegranate Martha-rita, a Classic Martha-rita, and an Espresso Martini. The lemon drop is one of Martha’s favorites, and it’s easy to see why. It might have been my personal favorite of the night.
Even after all of that, we couldn’t leave without dessert. We shared this Upside-Down Lemon Meringue Pie.
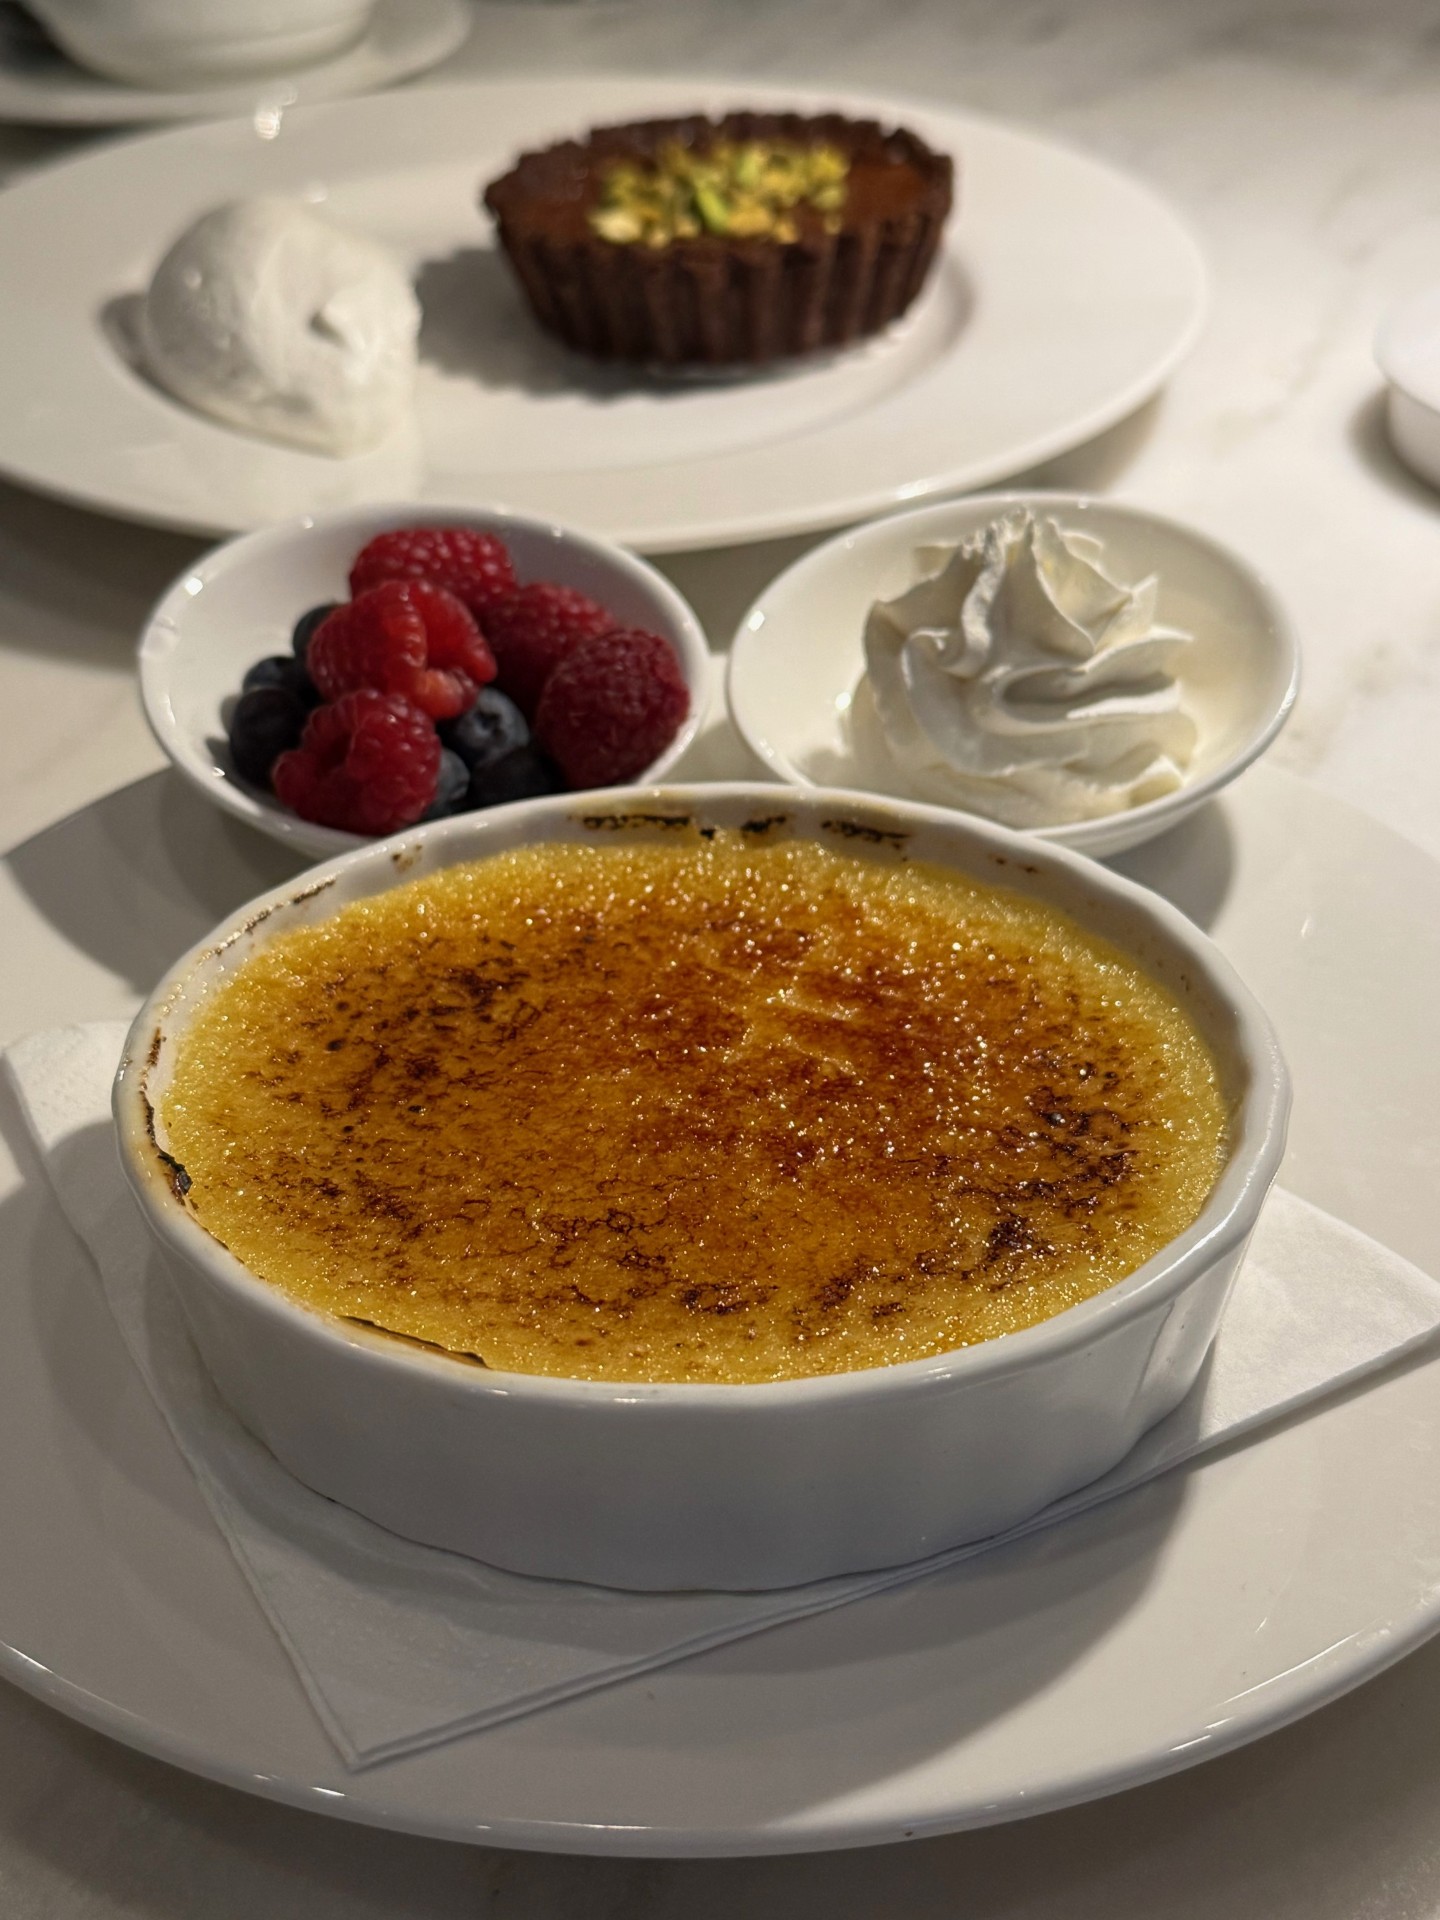
We also shared this Classic Crème Brûlée and a Chocolate Pistachio Tart. The lemon meringue pie was probably the standout for me, but honestly everything was good.
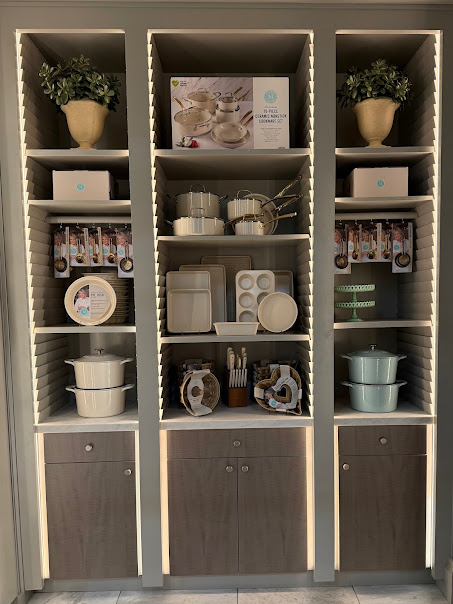
By the time we finished dinner, it was midnight and we were the only four left in the restaurant. Before heading out, we were able to walk around the restaurant to take photos and made one last stop at the Bedford gift shop. The waitstaff was very friendly; they loved pointing out details and were excited by our excitement!
I couldn’t resist picking up a few things: a Bedford hooded sweatshirt, a reusable water bottle, and a tote bag that says “In My Martha Era,” which felt pretty appropriate after the evening.
After three hours at the table, it was easy to see what Martha was trying to create here. The Bedford isn’t just a restaurant; it’s meant to feel like stepping into her world, where thoughtful design, classic recipes, and good company all come together around the table. Whether you’re a longtime Martha fan or just someone who appreciates a beautifully prepared meal, it’s the kind of place that invites you to slow down, share dishes with friends, and enjoy the evening a little longer than you planned. If opening night was any indication, The Bedford may quickly become one of my go-to restaurants.
Whether you’re a longtime Martha fan or just someone who appreciates a beautifully prepared meal, it’s the kind of place that invites you to slow down, share dishes with friends, and enjoy the evening a little longer than you planned. If opening night was any indication, The Bedford may quickly become one of my go-to restaurants. If you can, visit The Bedford by Martha Stewart at Foxwoods.
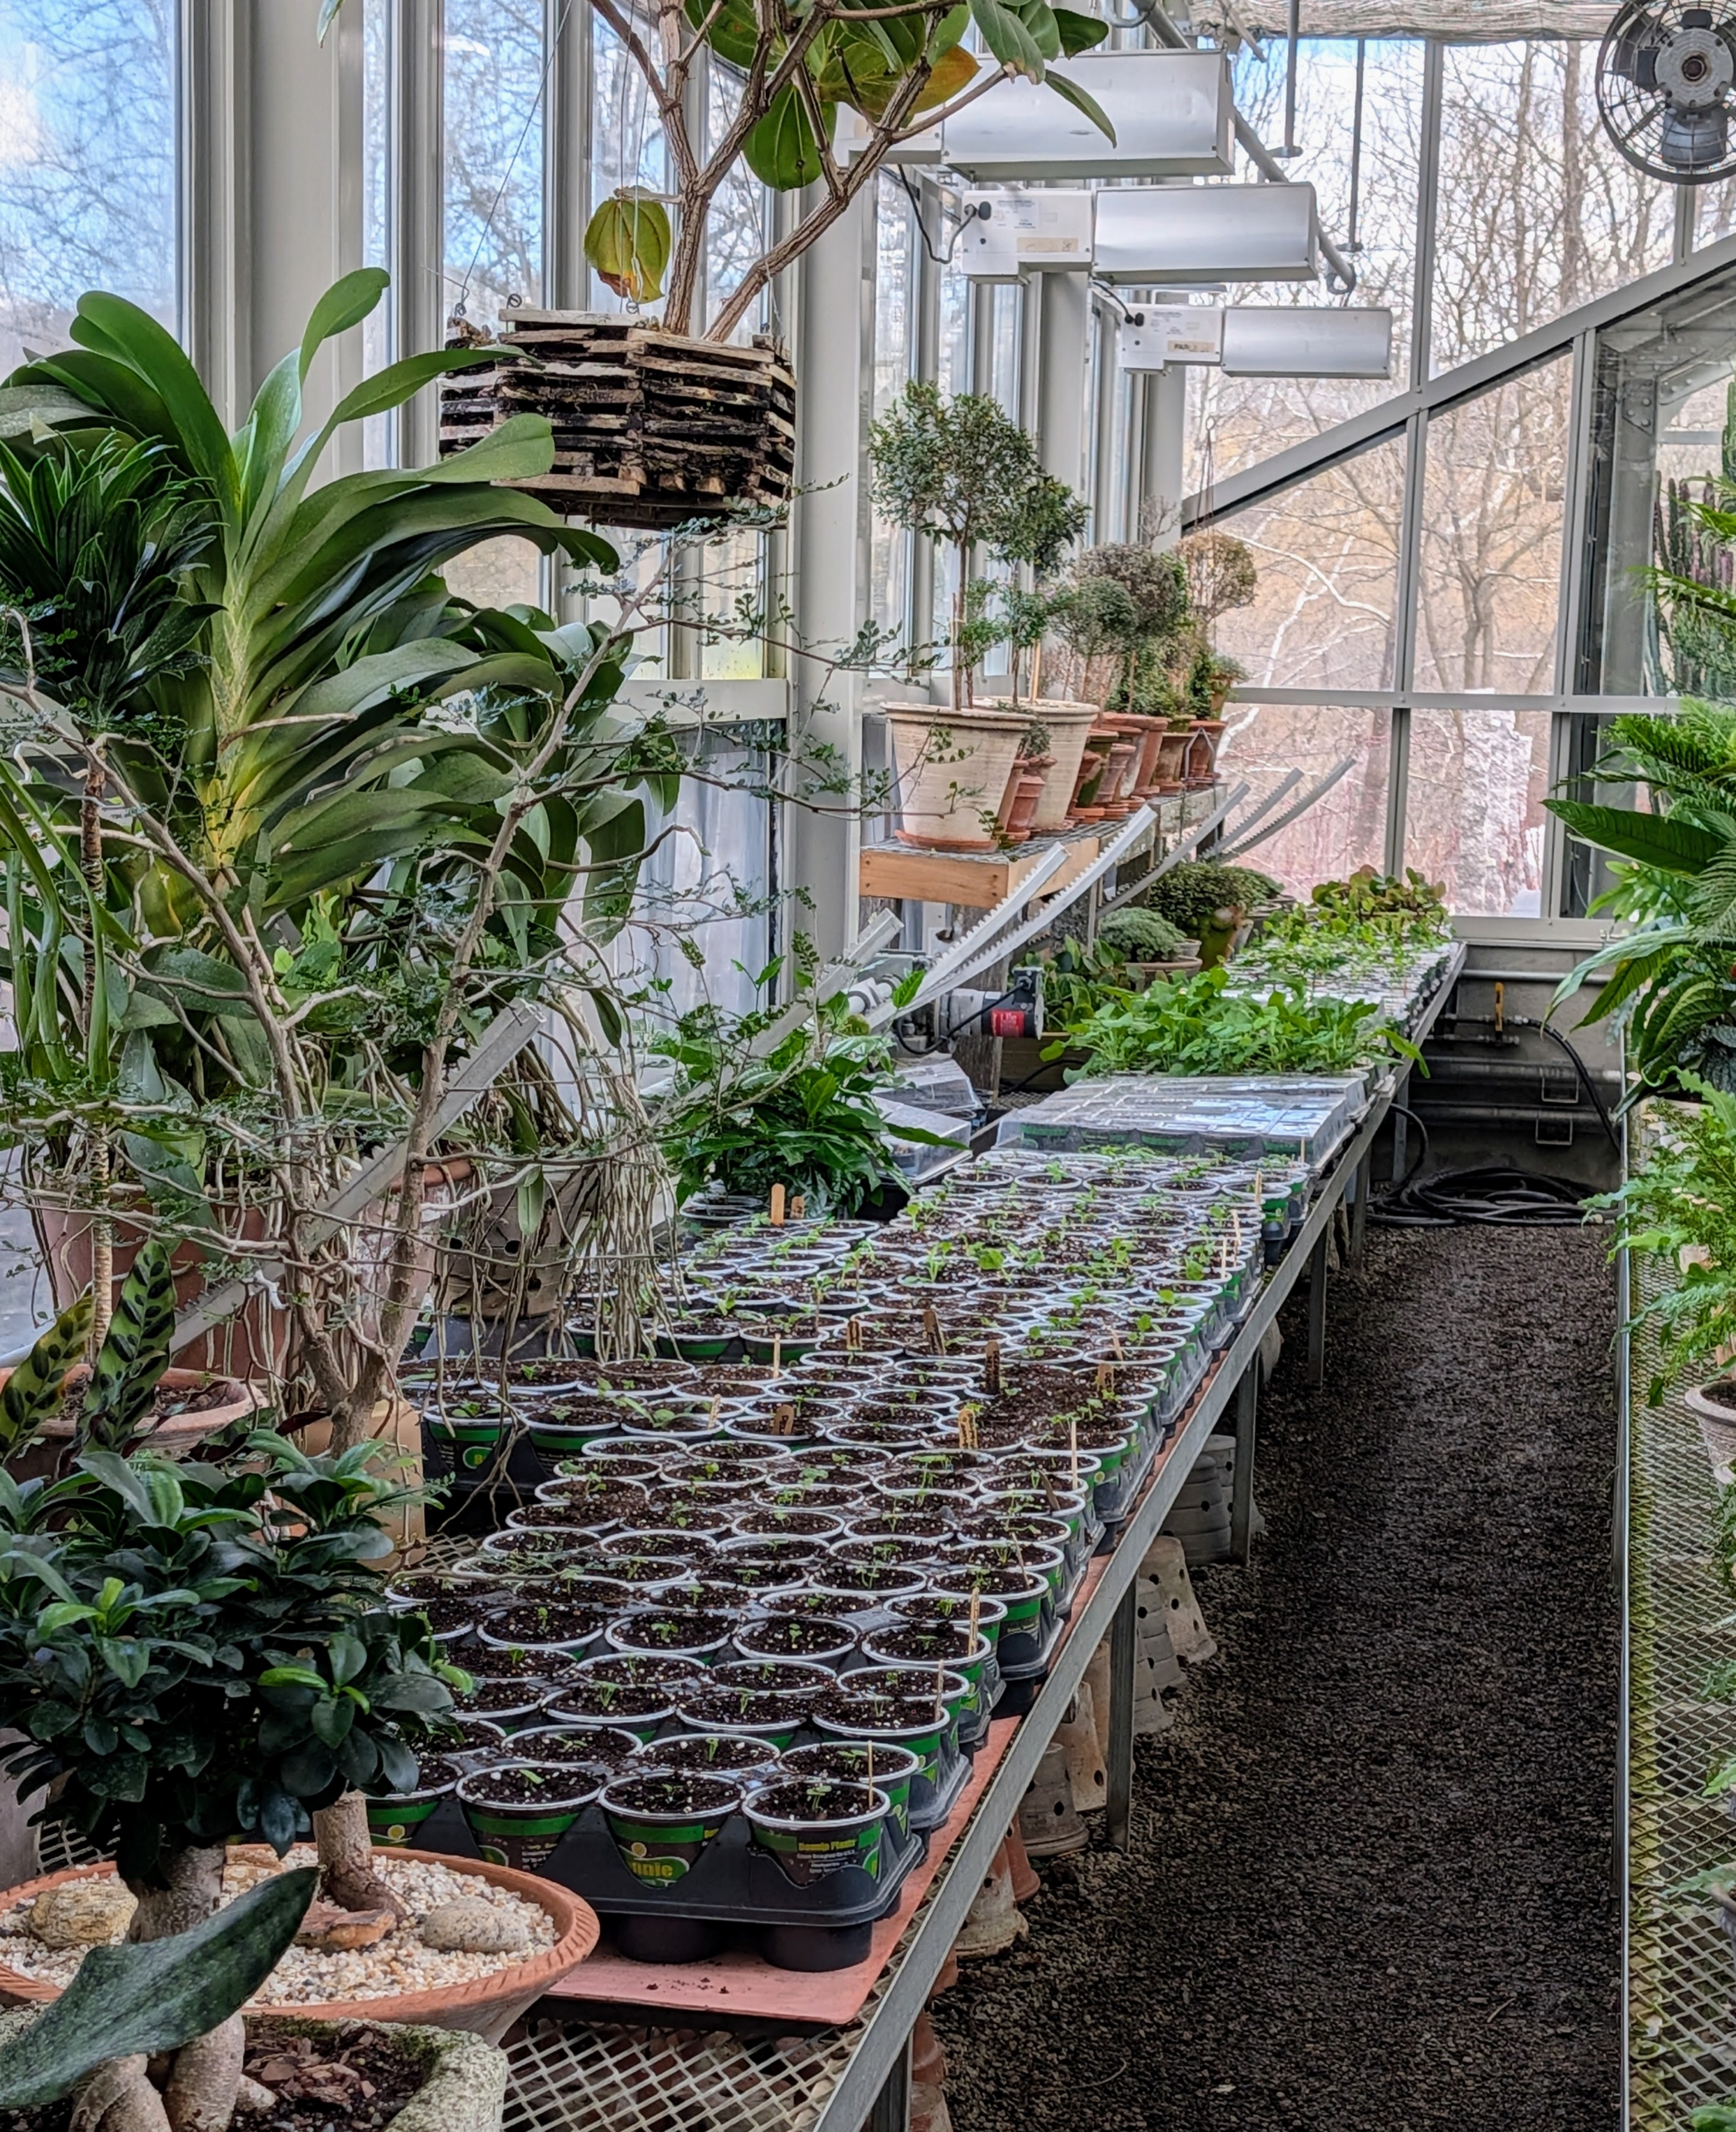
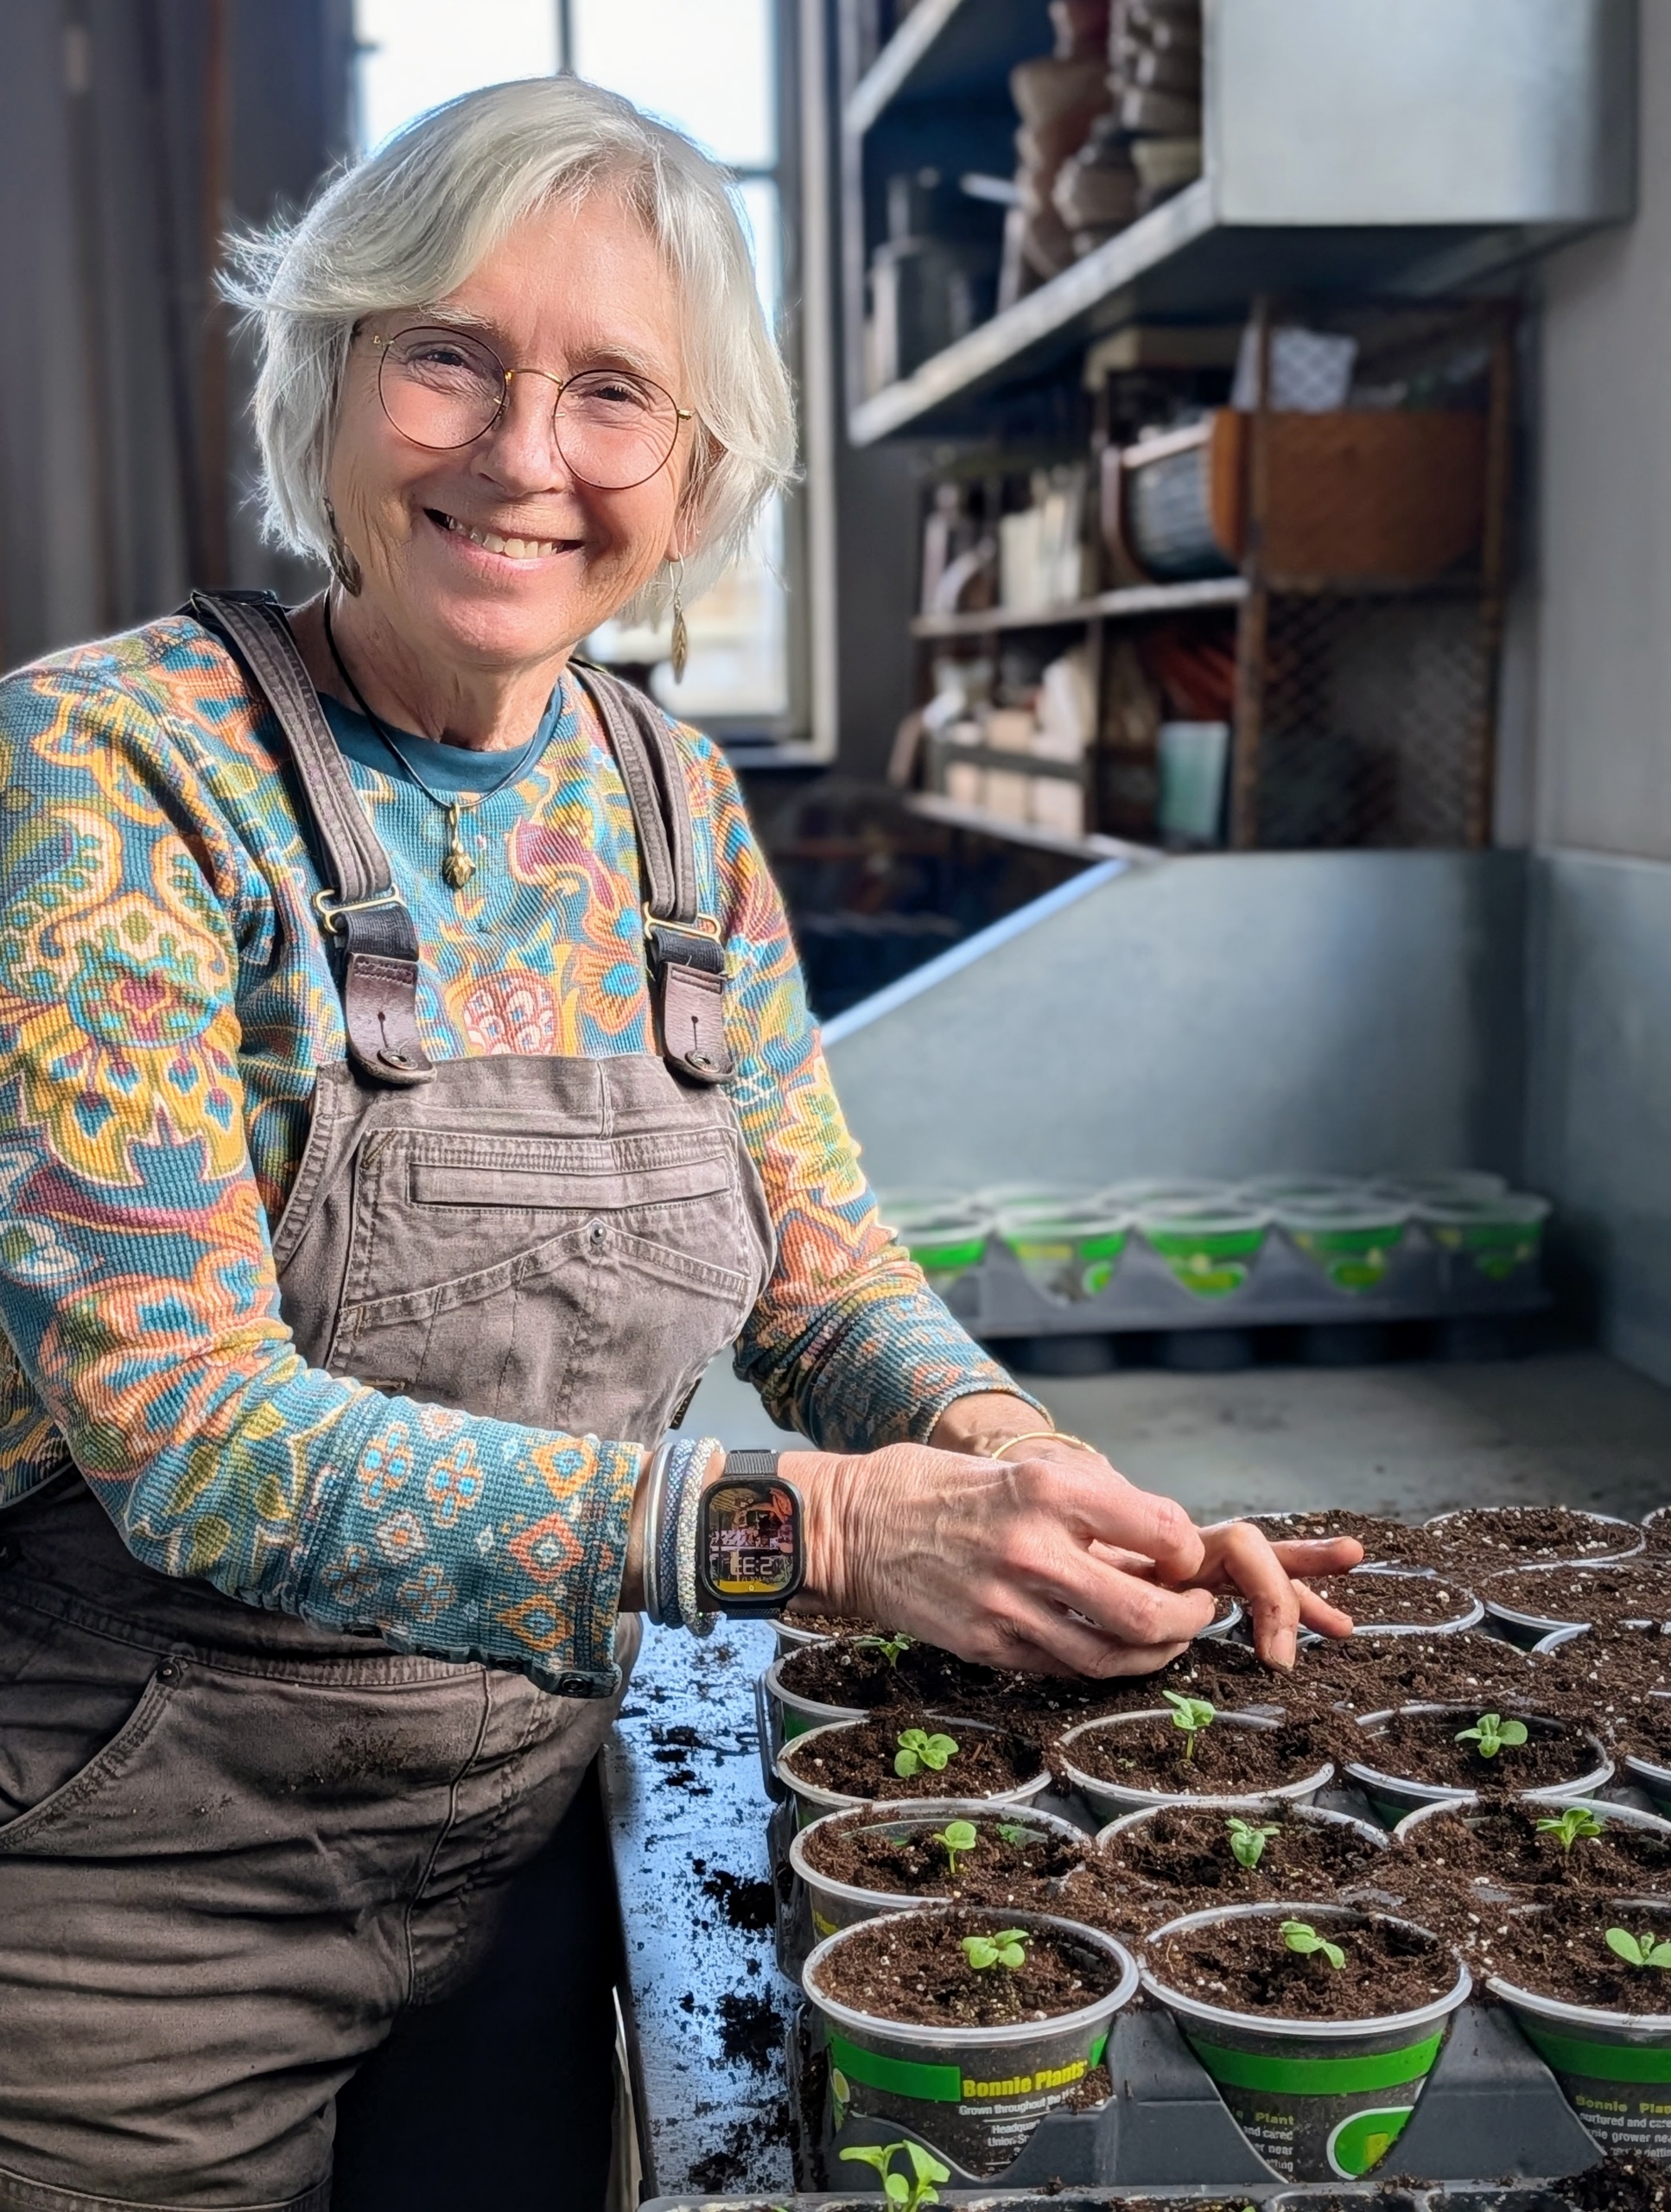
The outdoor gardens at my farm are still pretty bare, but there’s lots of work getting done in the greenhouses to prepare for the growing season ahead. And my Skylands gardener, Wendy Norling, is here to lend a helping hand.
While here, Wendy is helping to groom all the indoor plants in my main greenhouse. She is also tending all the young seedlings that were started over the last few weeks. She is going through each tray, thinning out those that are weak, pricking out those that are growing too big, and then transplanting them into larger pots.
Here are some photos, enjoy.
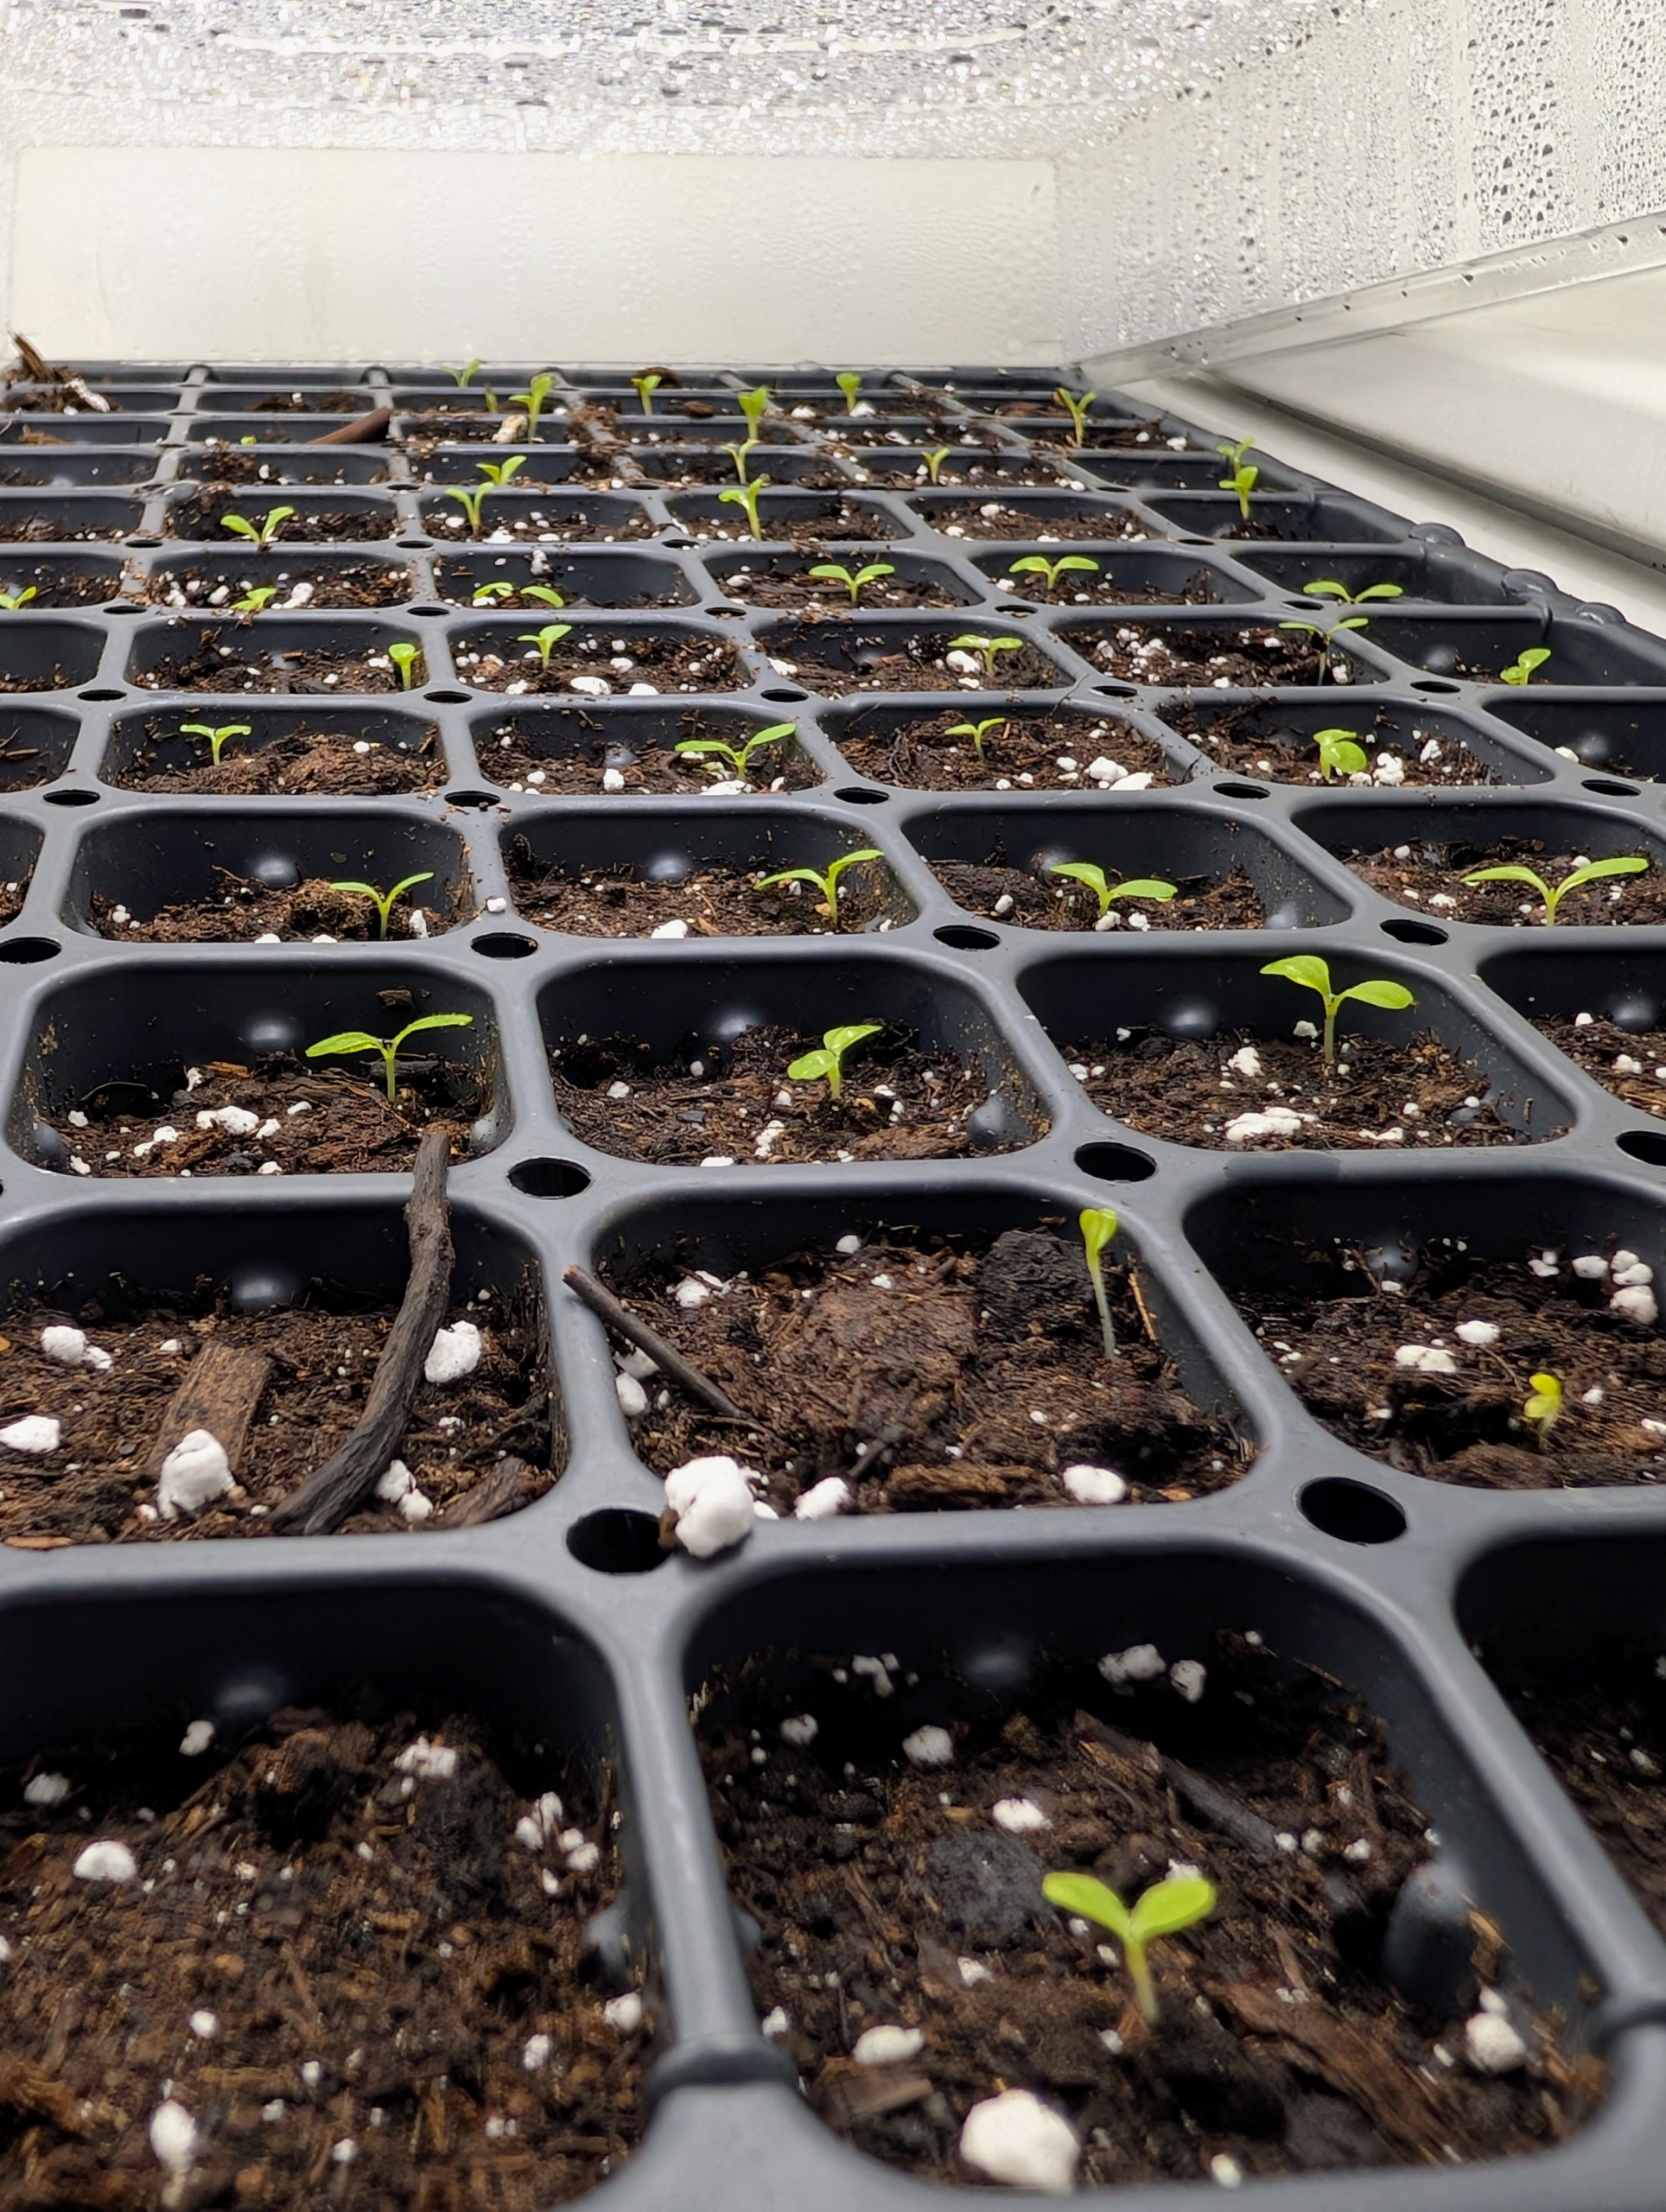
Here at my farm, many of the seedlings start off on heated pads in the greenhouse, where they can be monitored carefully and maintained.
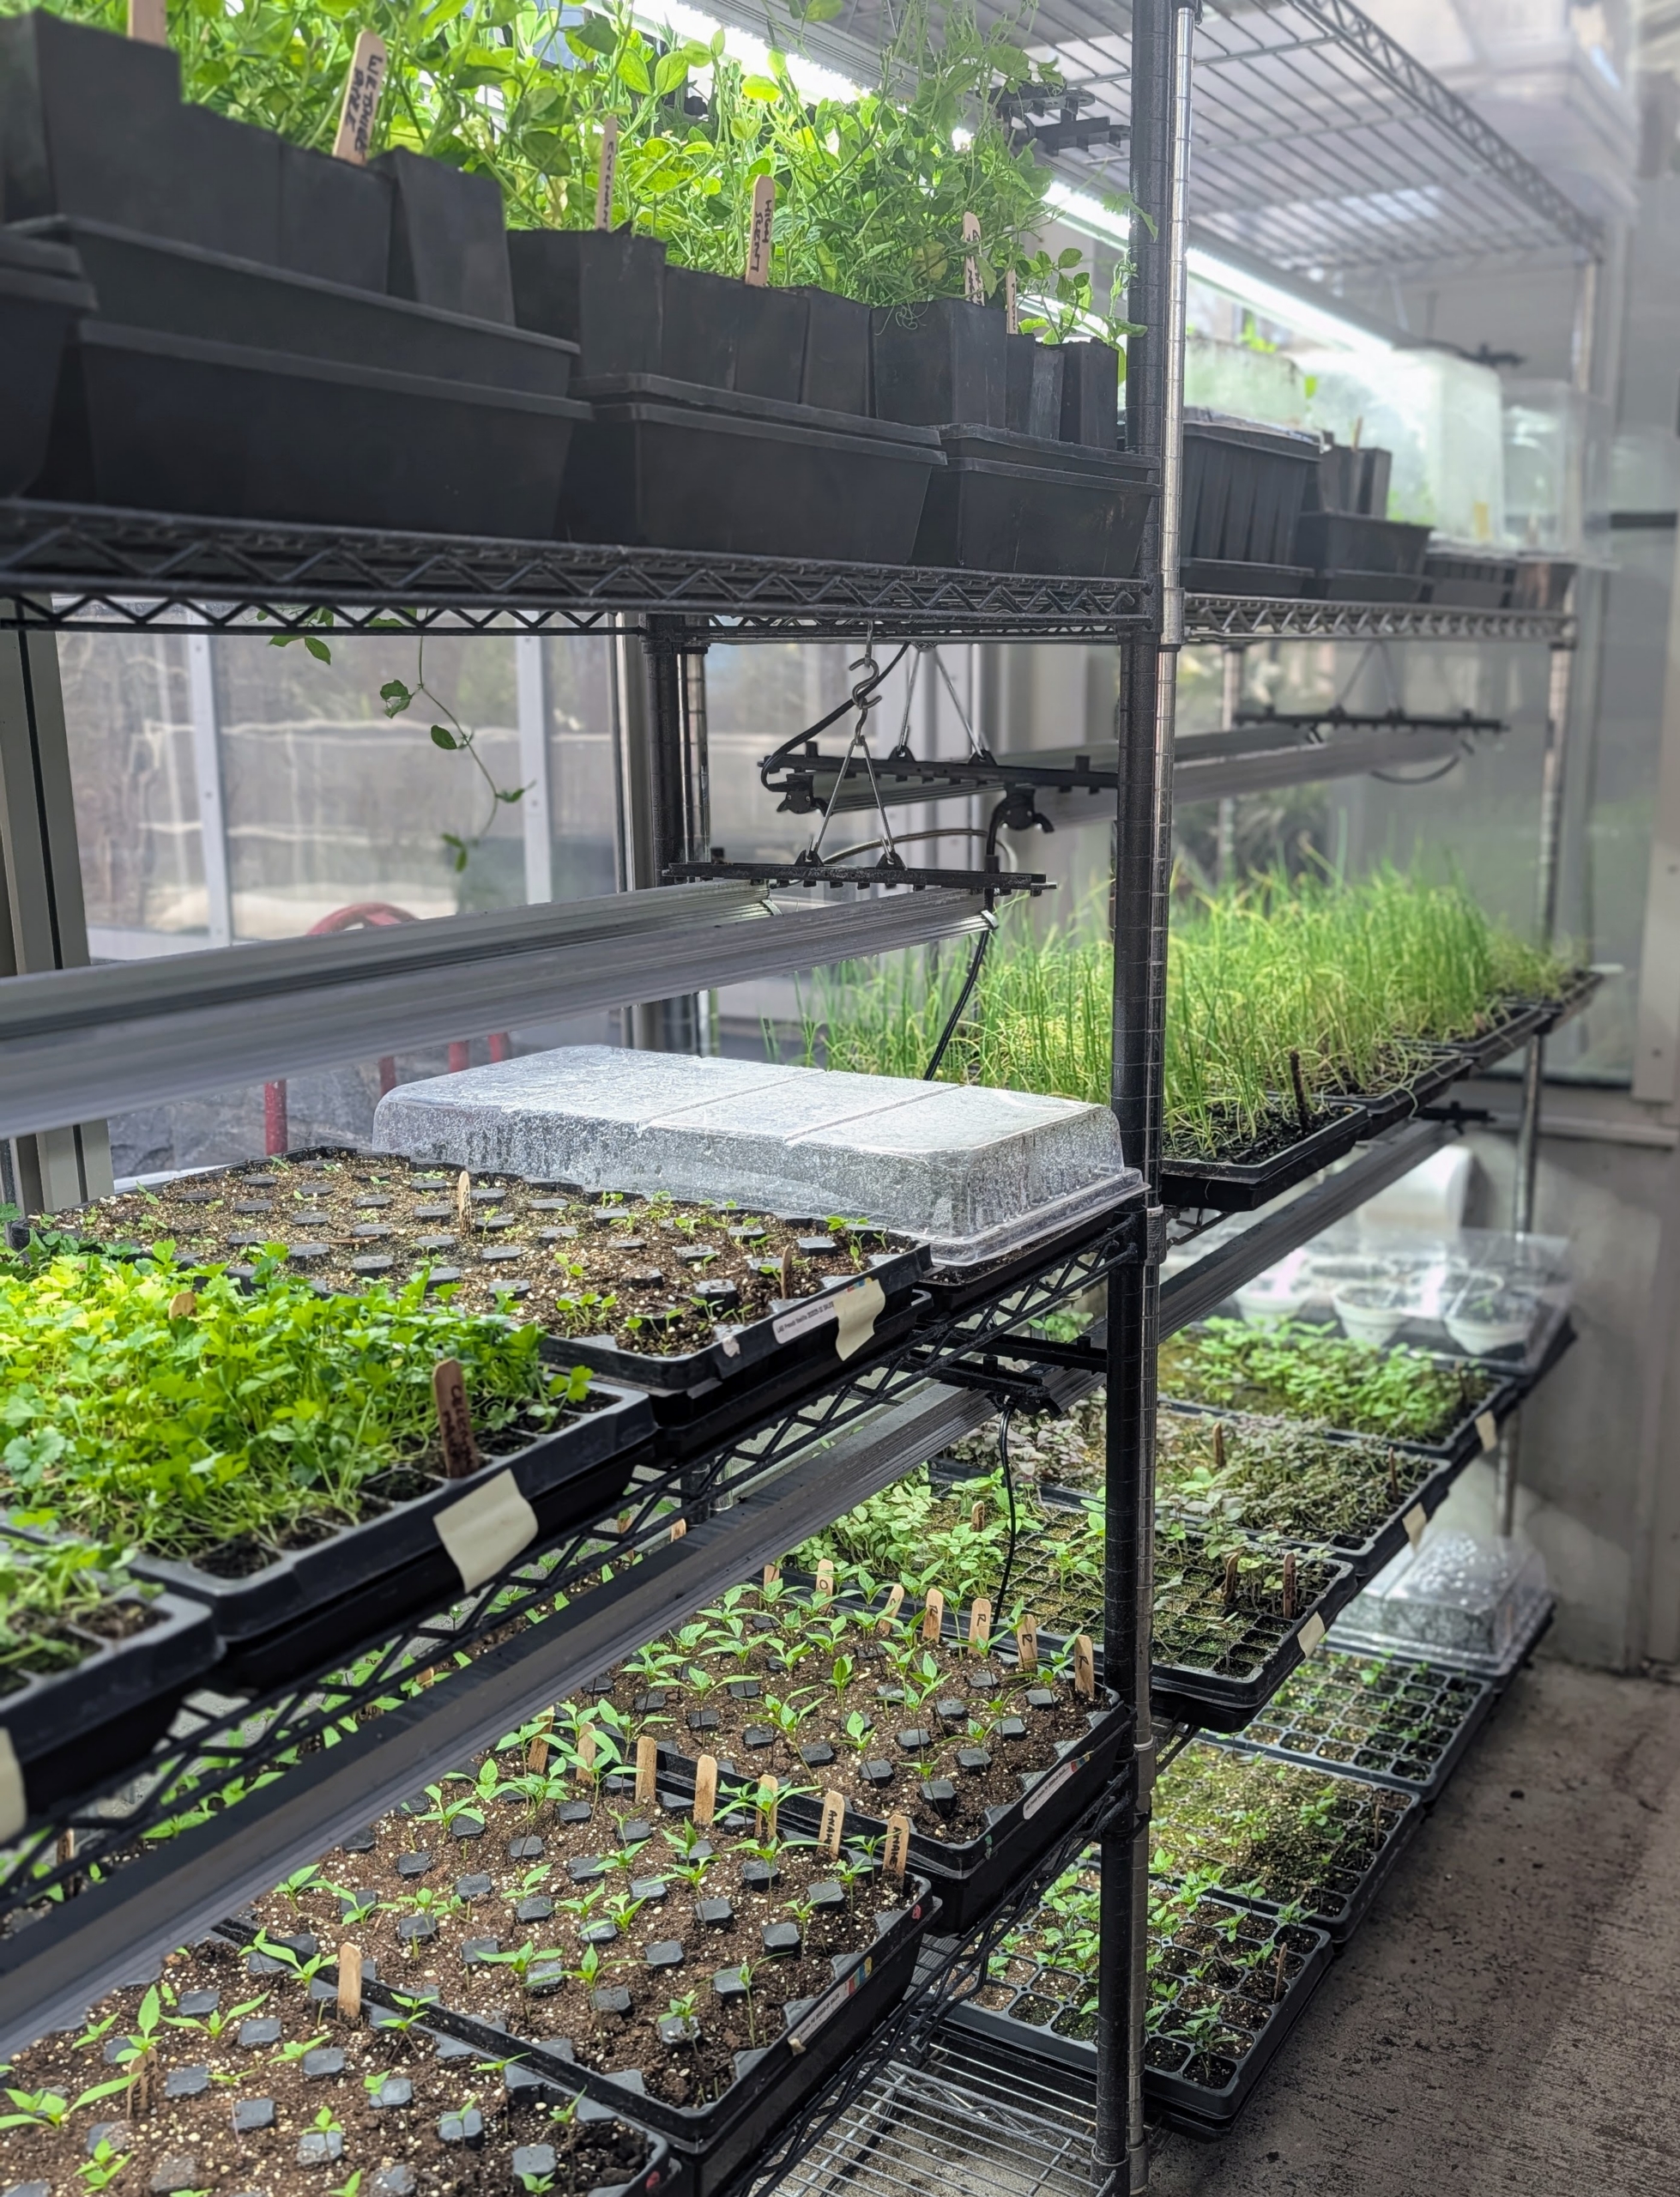
Some of the newly started seeds are also placed in our commercial-sized Urban Cultivator, an automated system that provides a self-contained growing environment with everything the plants need to thrive.
And still more seedlings are here on shelves under proper growing lights. We start so many flowers and vegetables from seed – every possible bit of space is used to nurture them before they are planted outdoors.
Every winter my Skylands gardener, Wendy Norling, comes down to help at the farm. She comes just in time to transplant hundreds of growing flower seedlings. It’s a great way to learn about my farm and how its growing season differs from the one up in Maine.
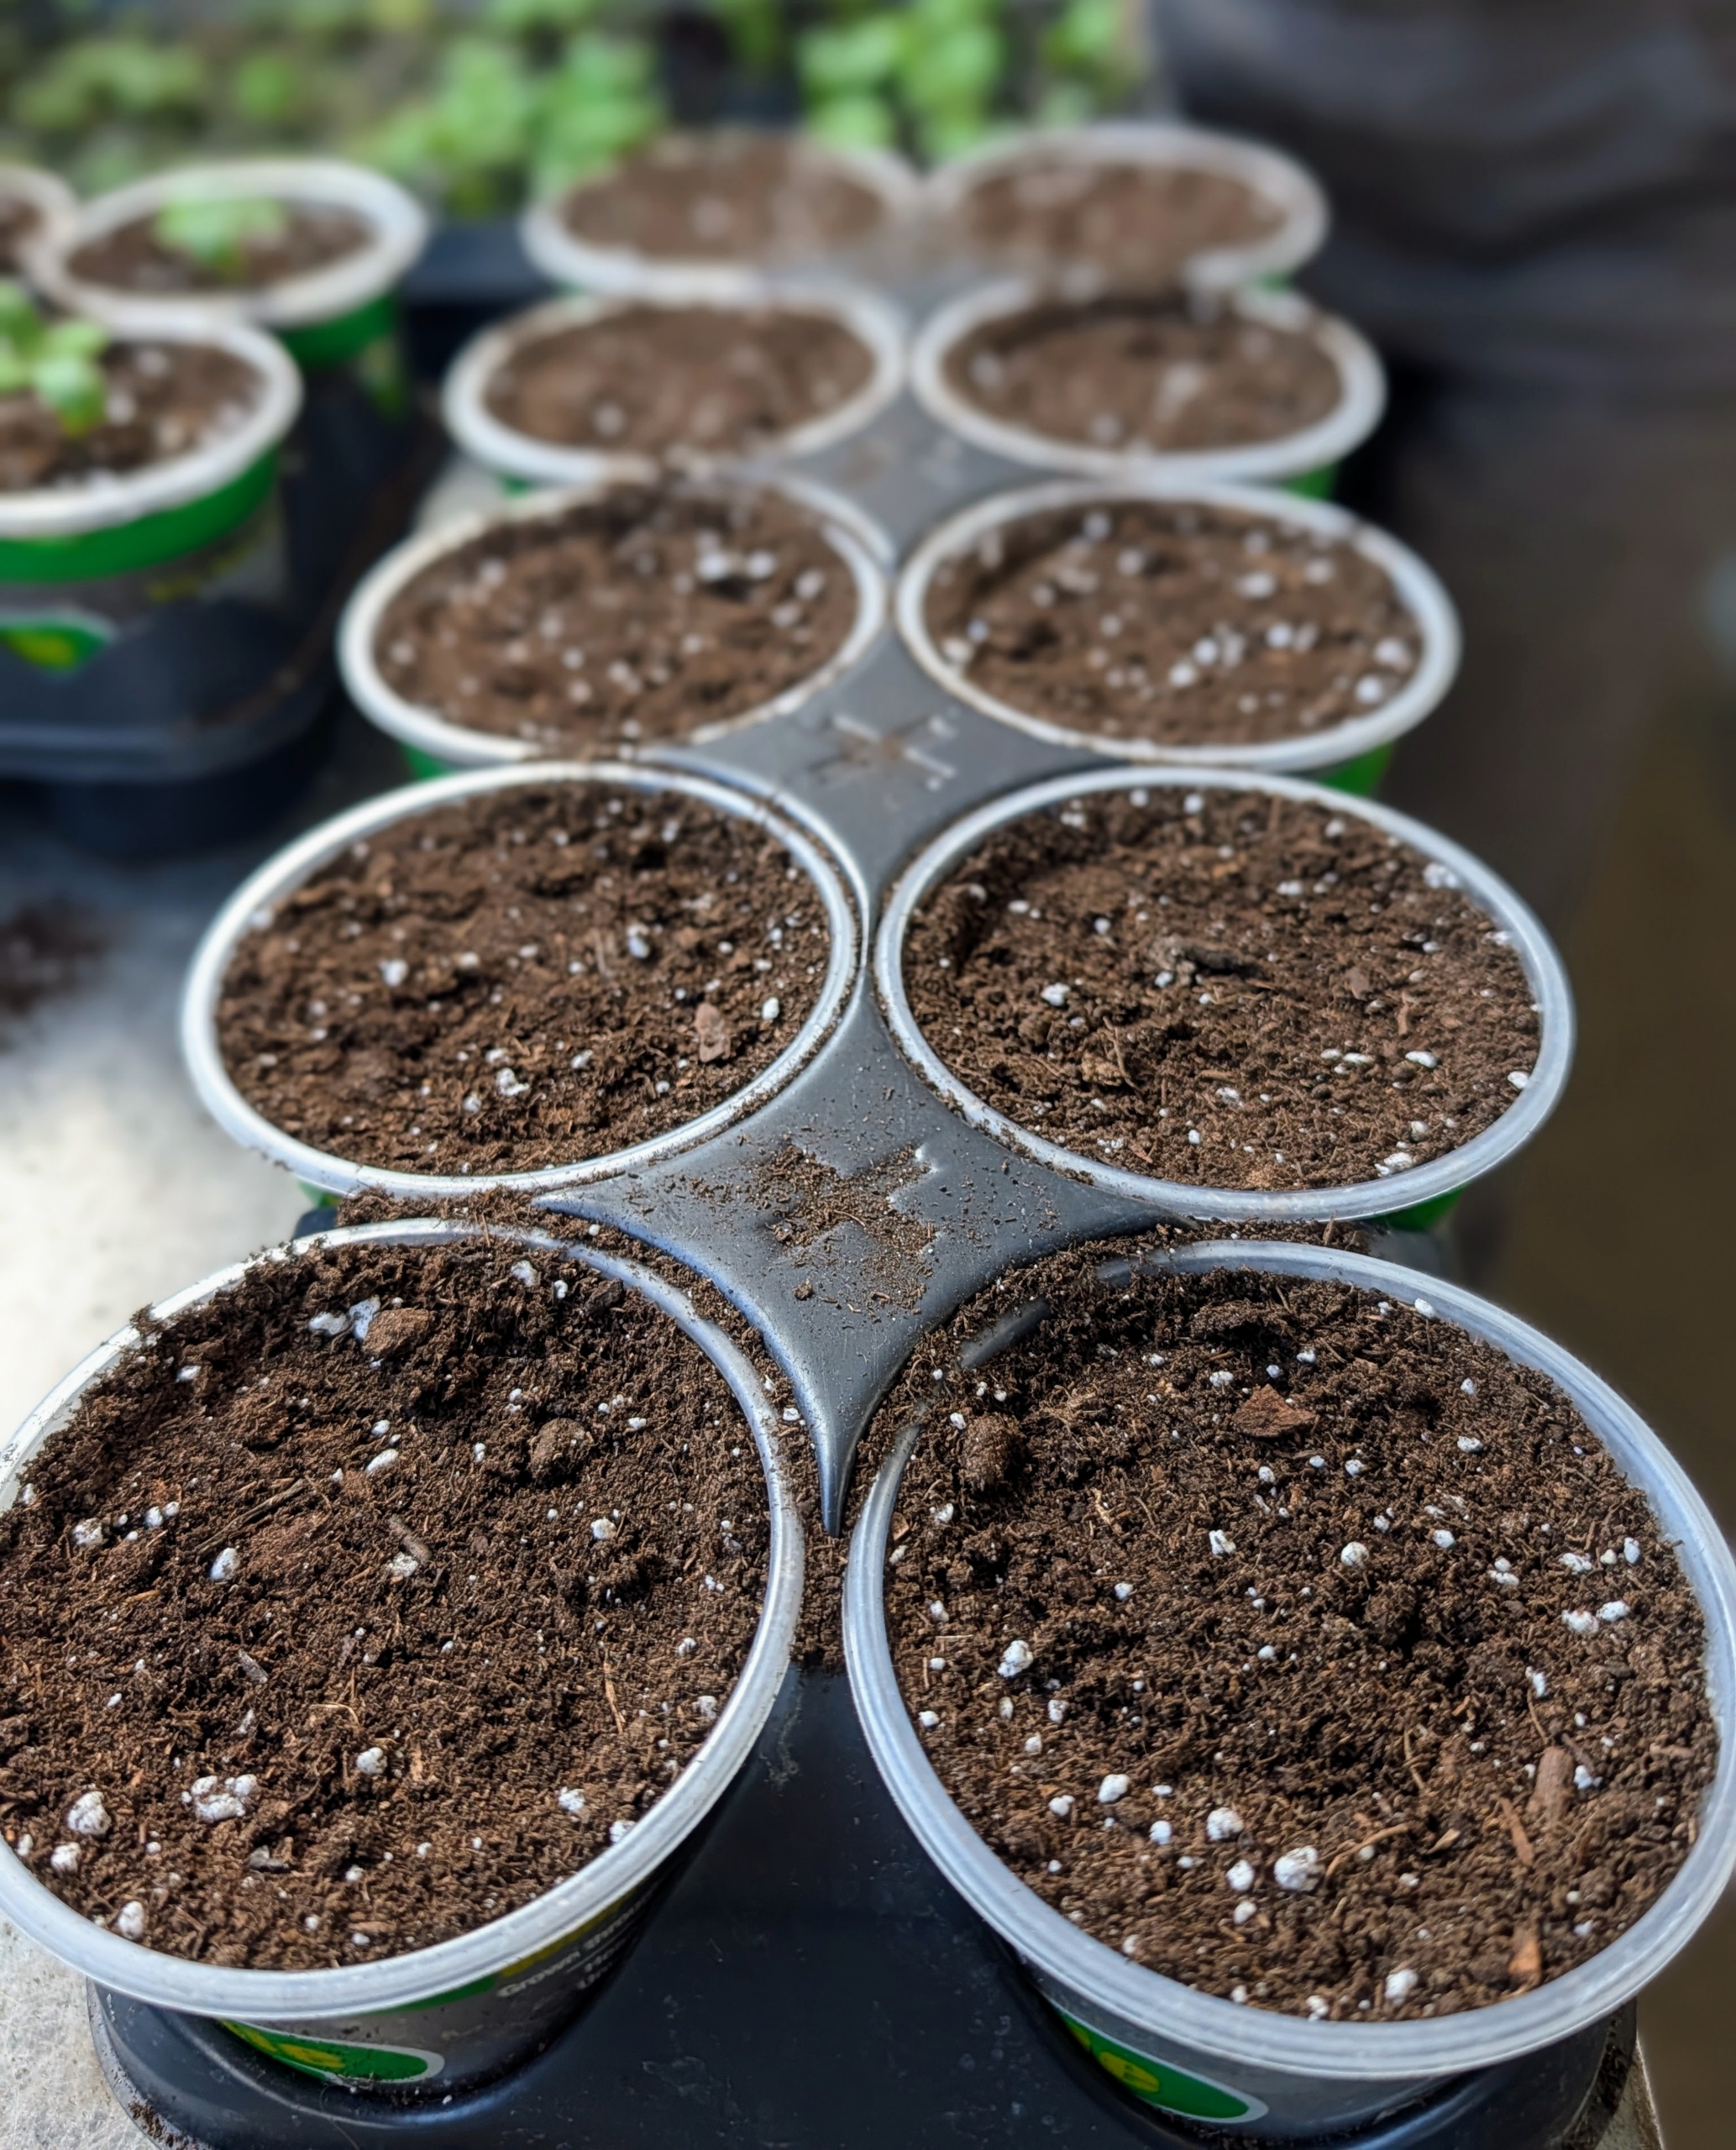
Wendy fills slightly larger pots that fit in trays for the growing seedlings to be transplanted. Experiment with pots to see which ones work best for what plants. And always choose containers or trays that have proper drainage holes at the bottom.
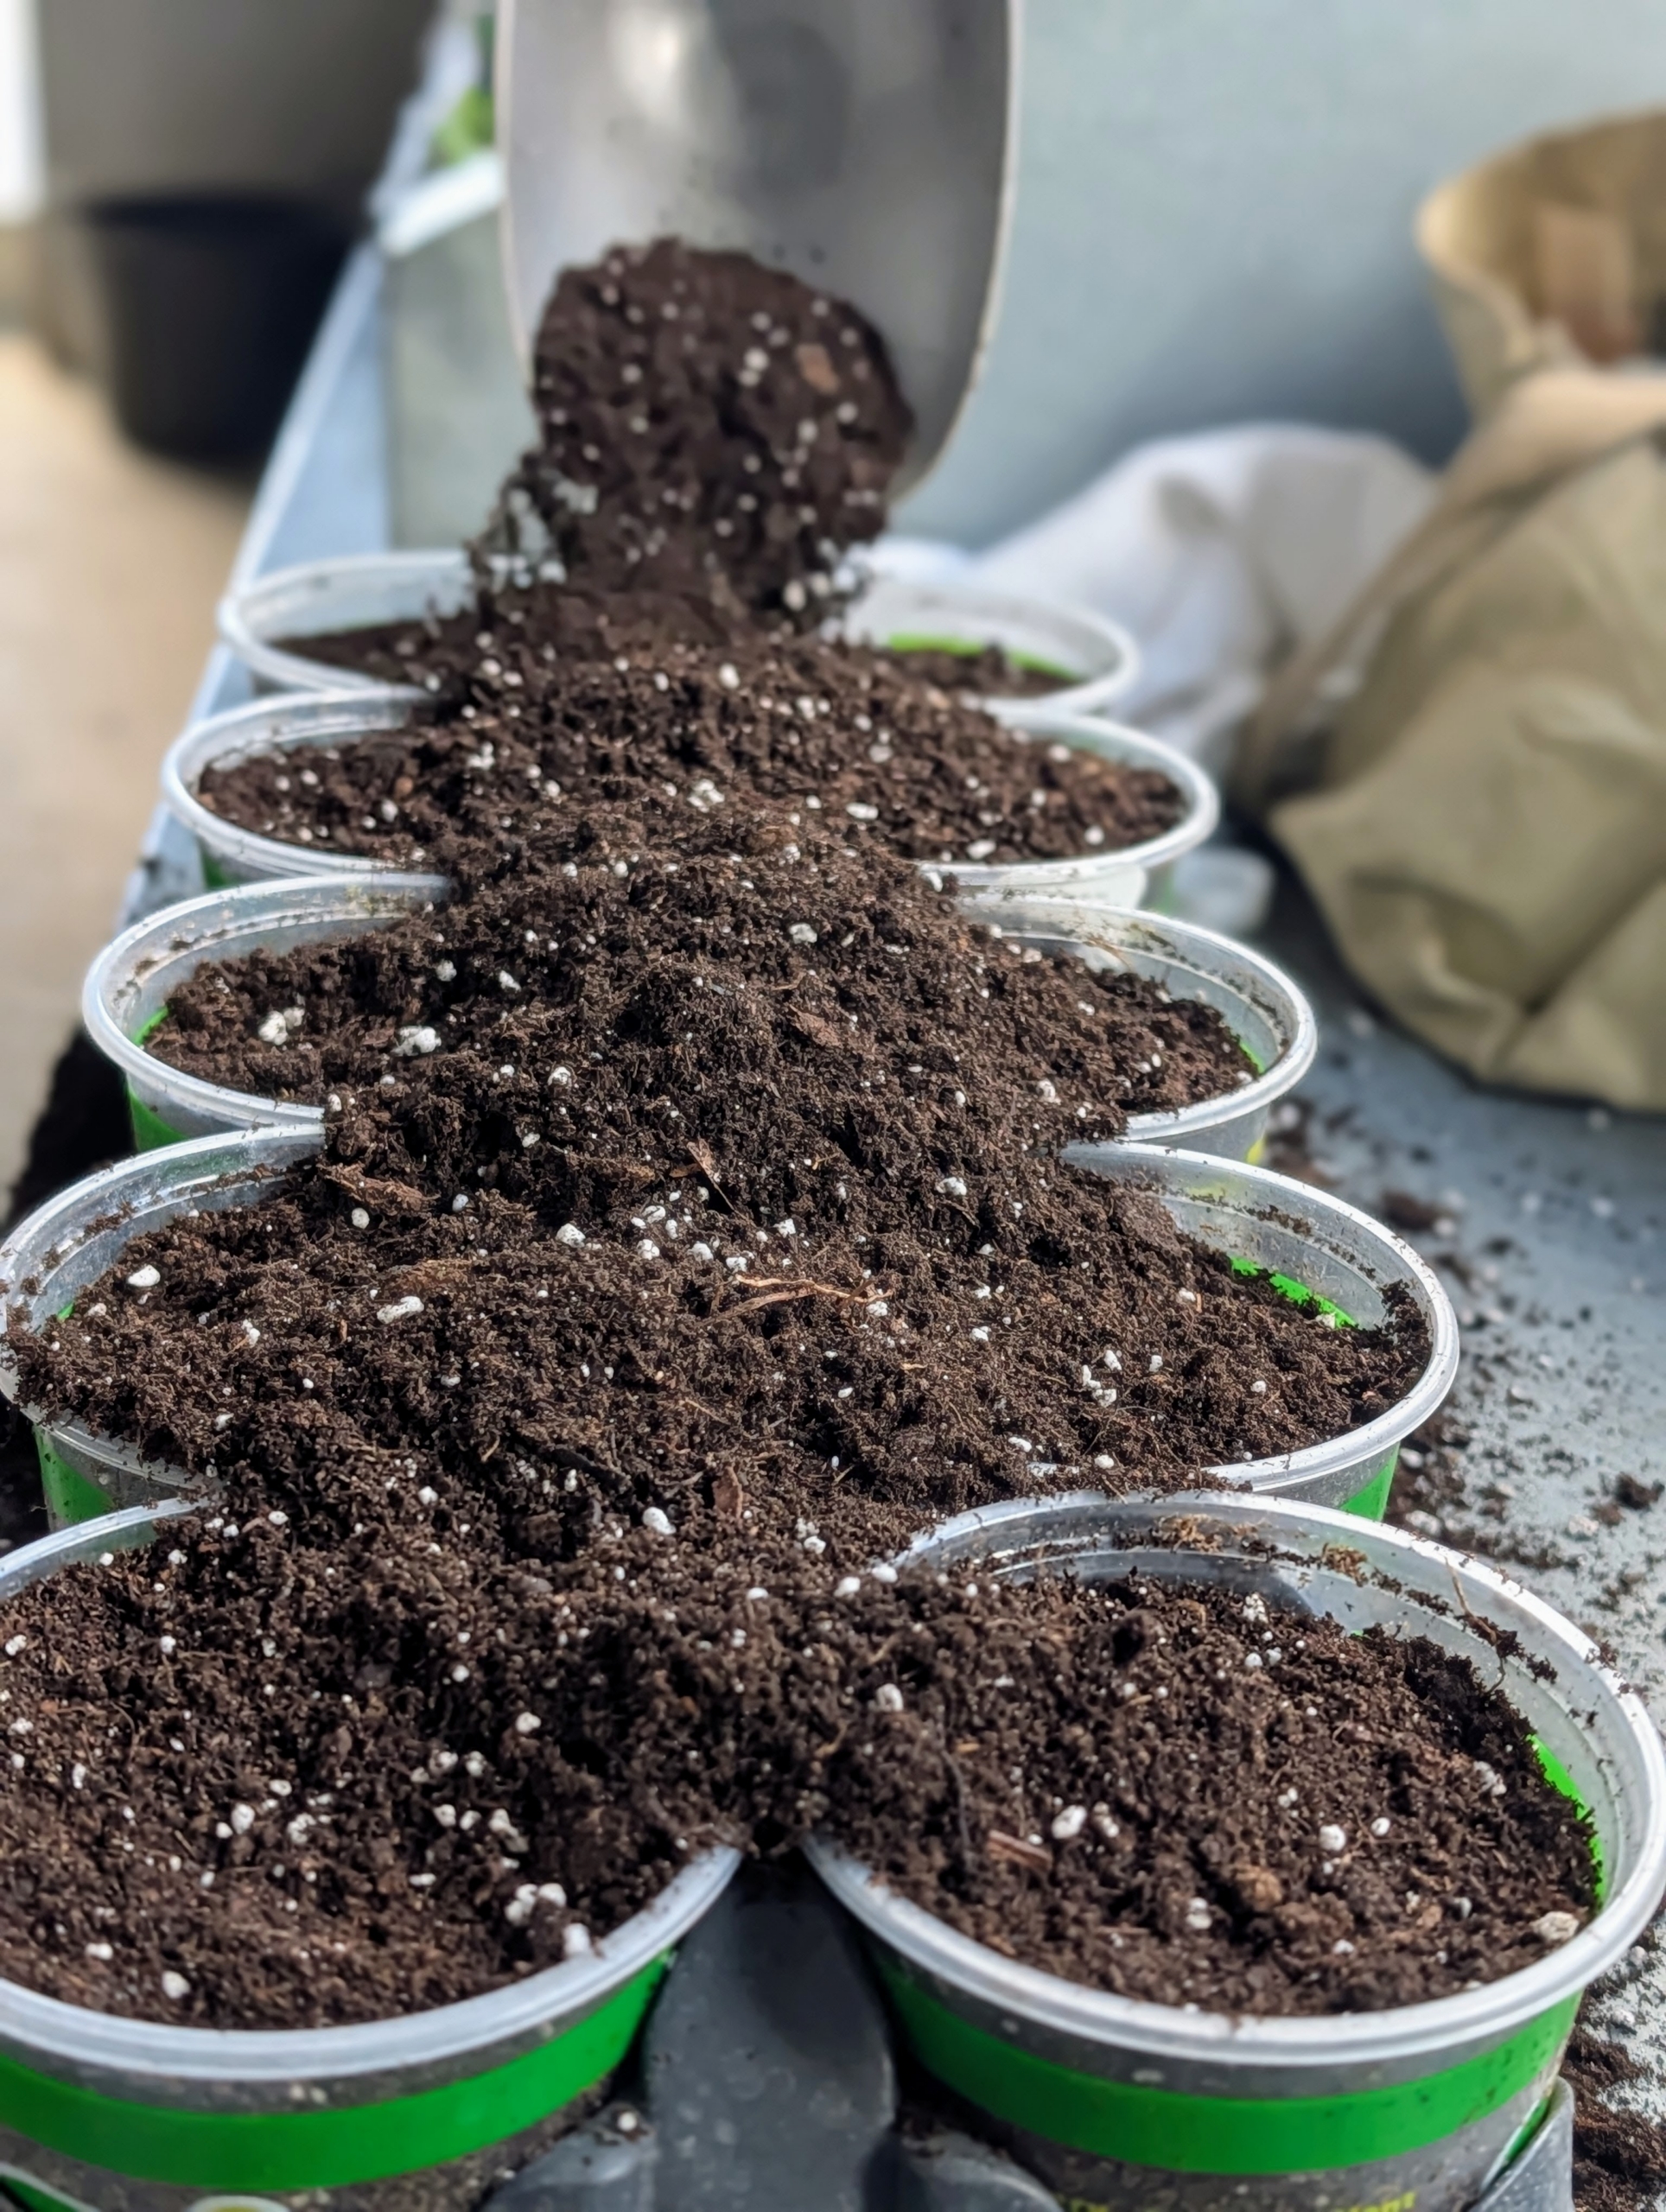
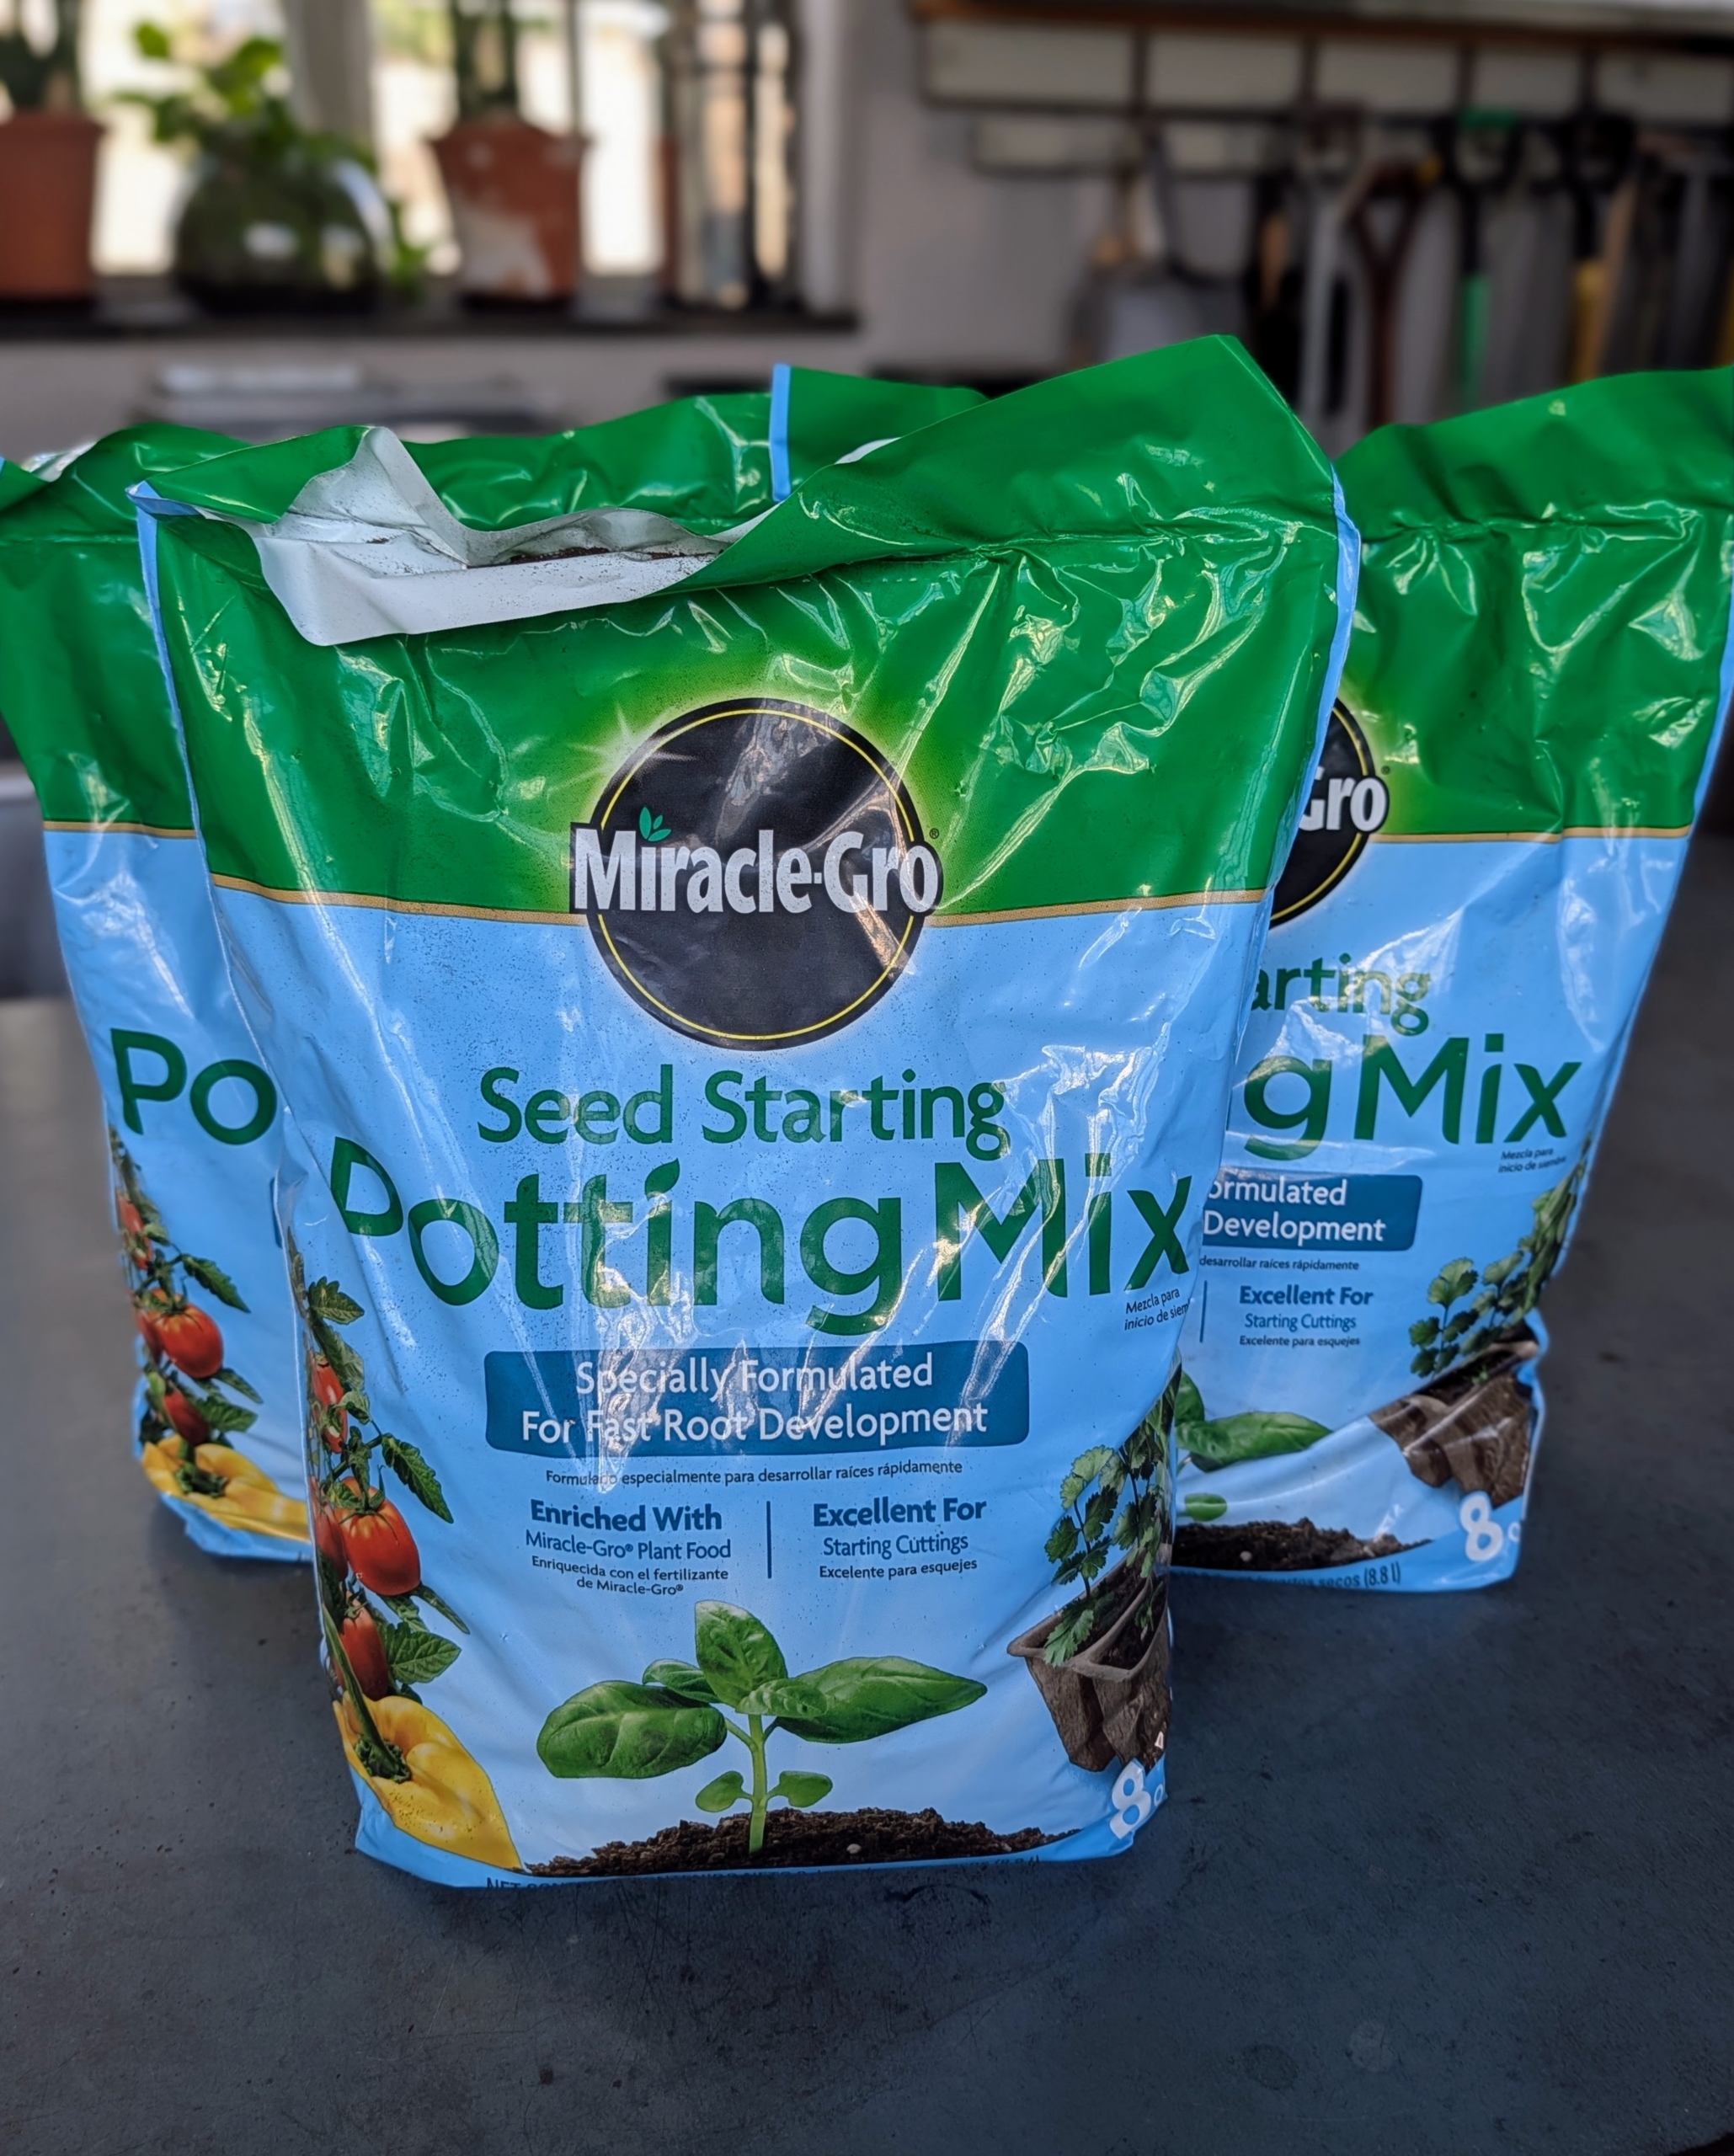
I use Miracle-Gro Potting Mix. A good quality organic mix designed for seedlings will be fast draining and light. These mixes are formulated to encourage strong, healthy growth in new plants.
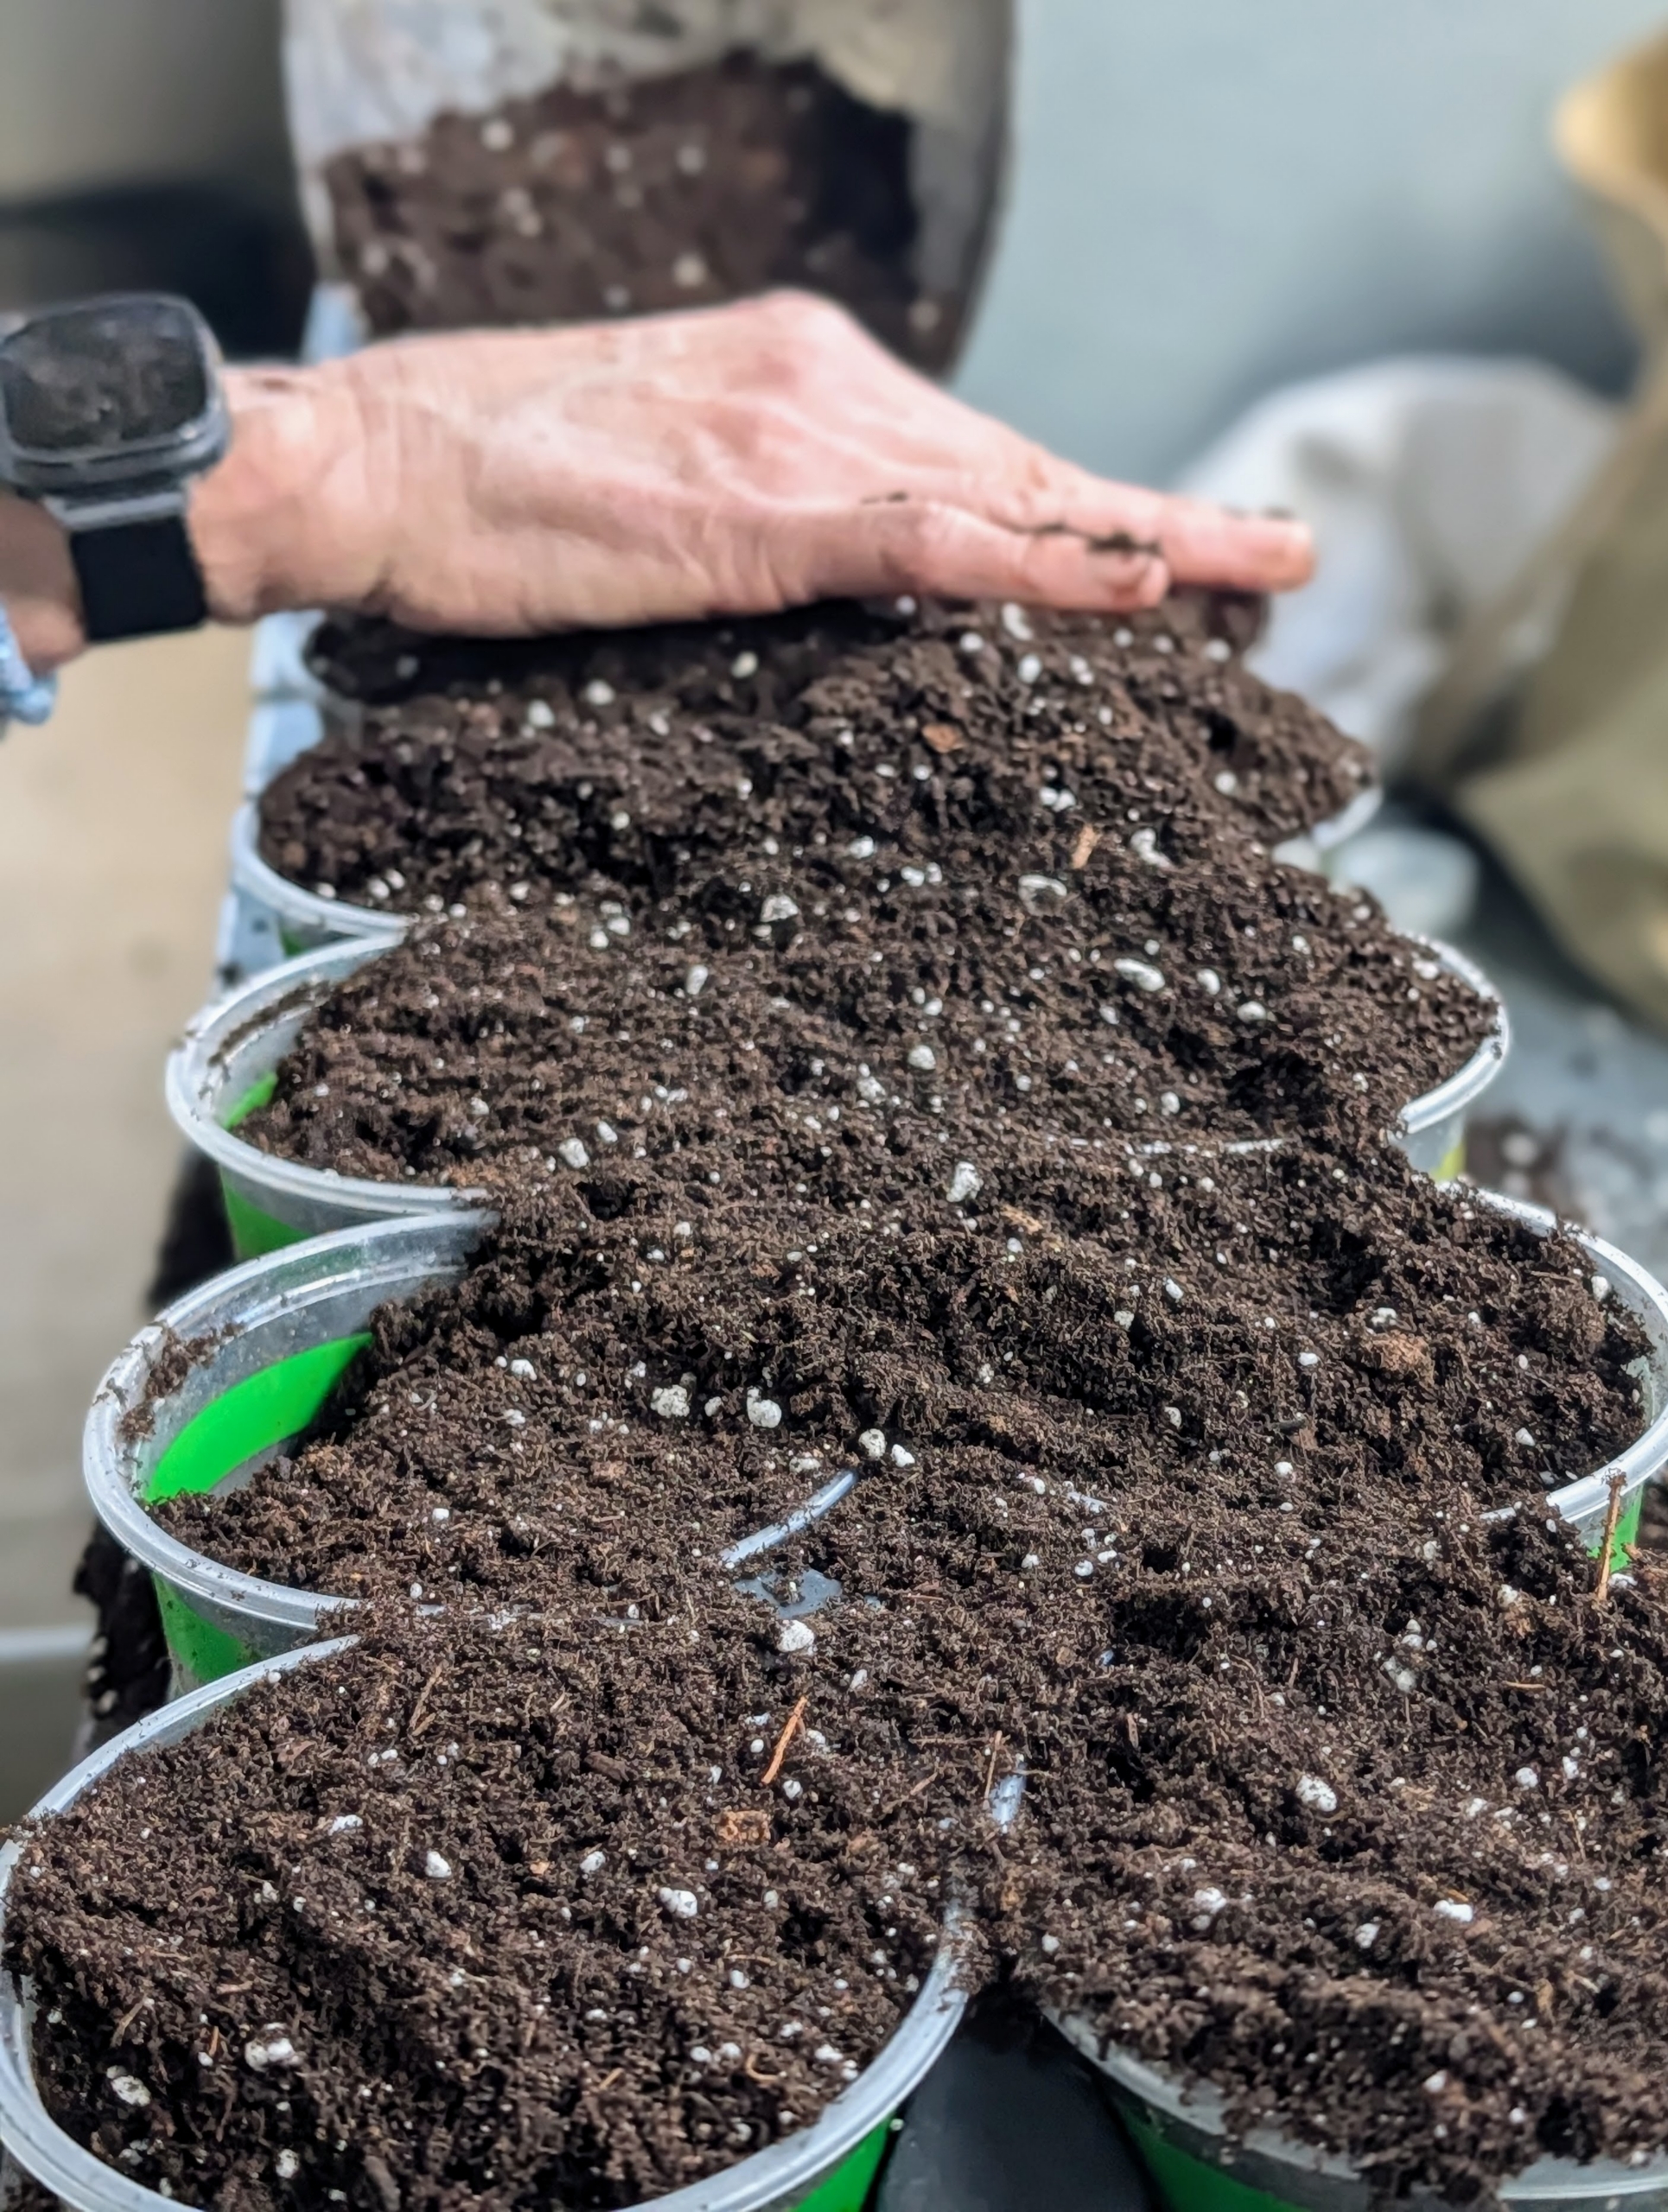
Wendy fills the pots with mix and then levels off the soil to the rim.
It’s important not to overfill, so soil does not spill out when watering.
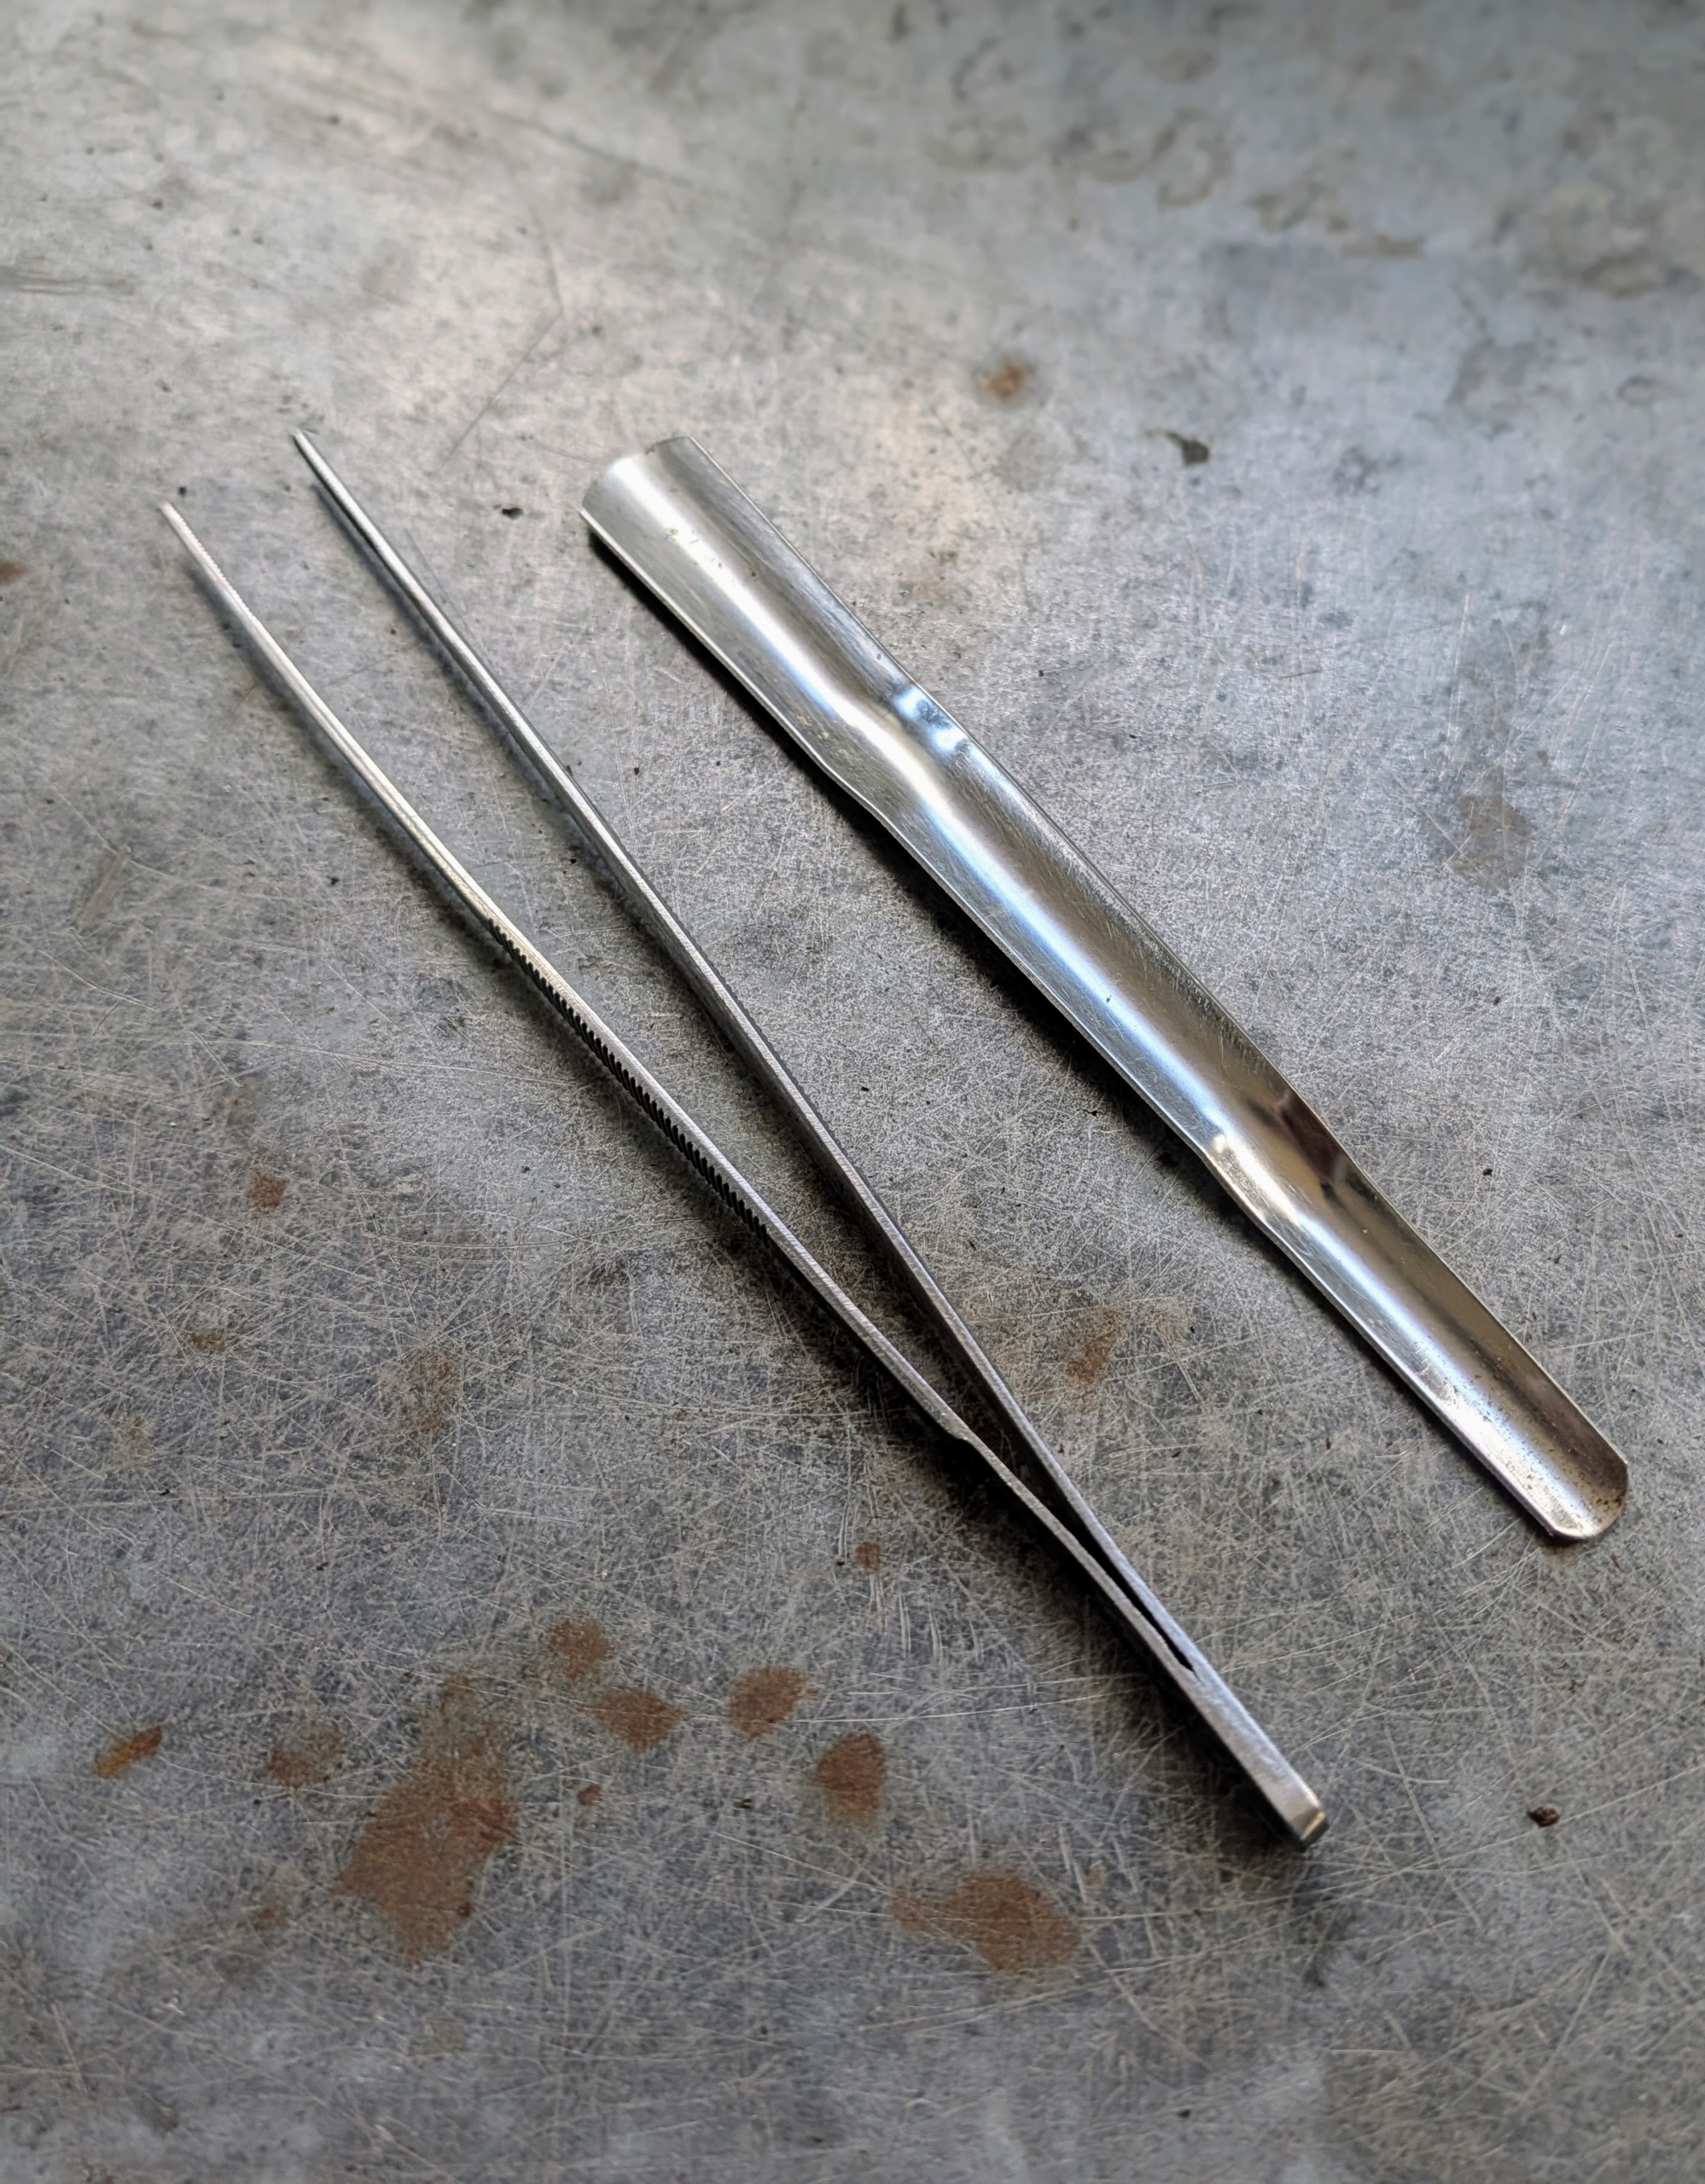
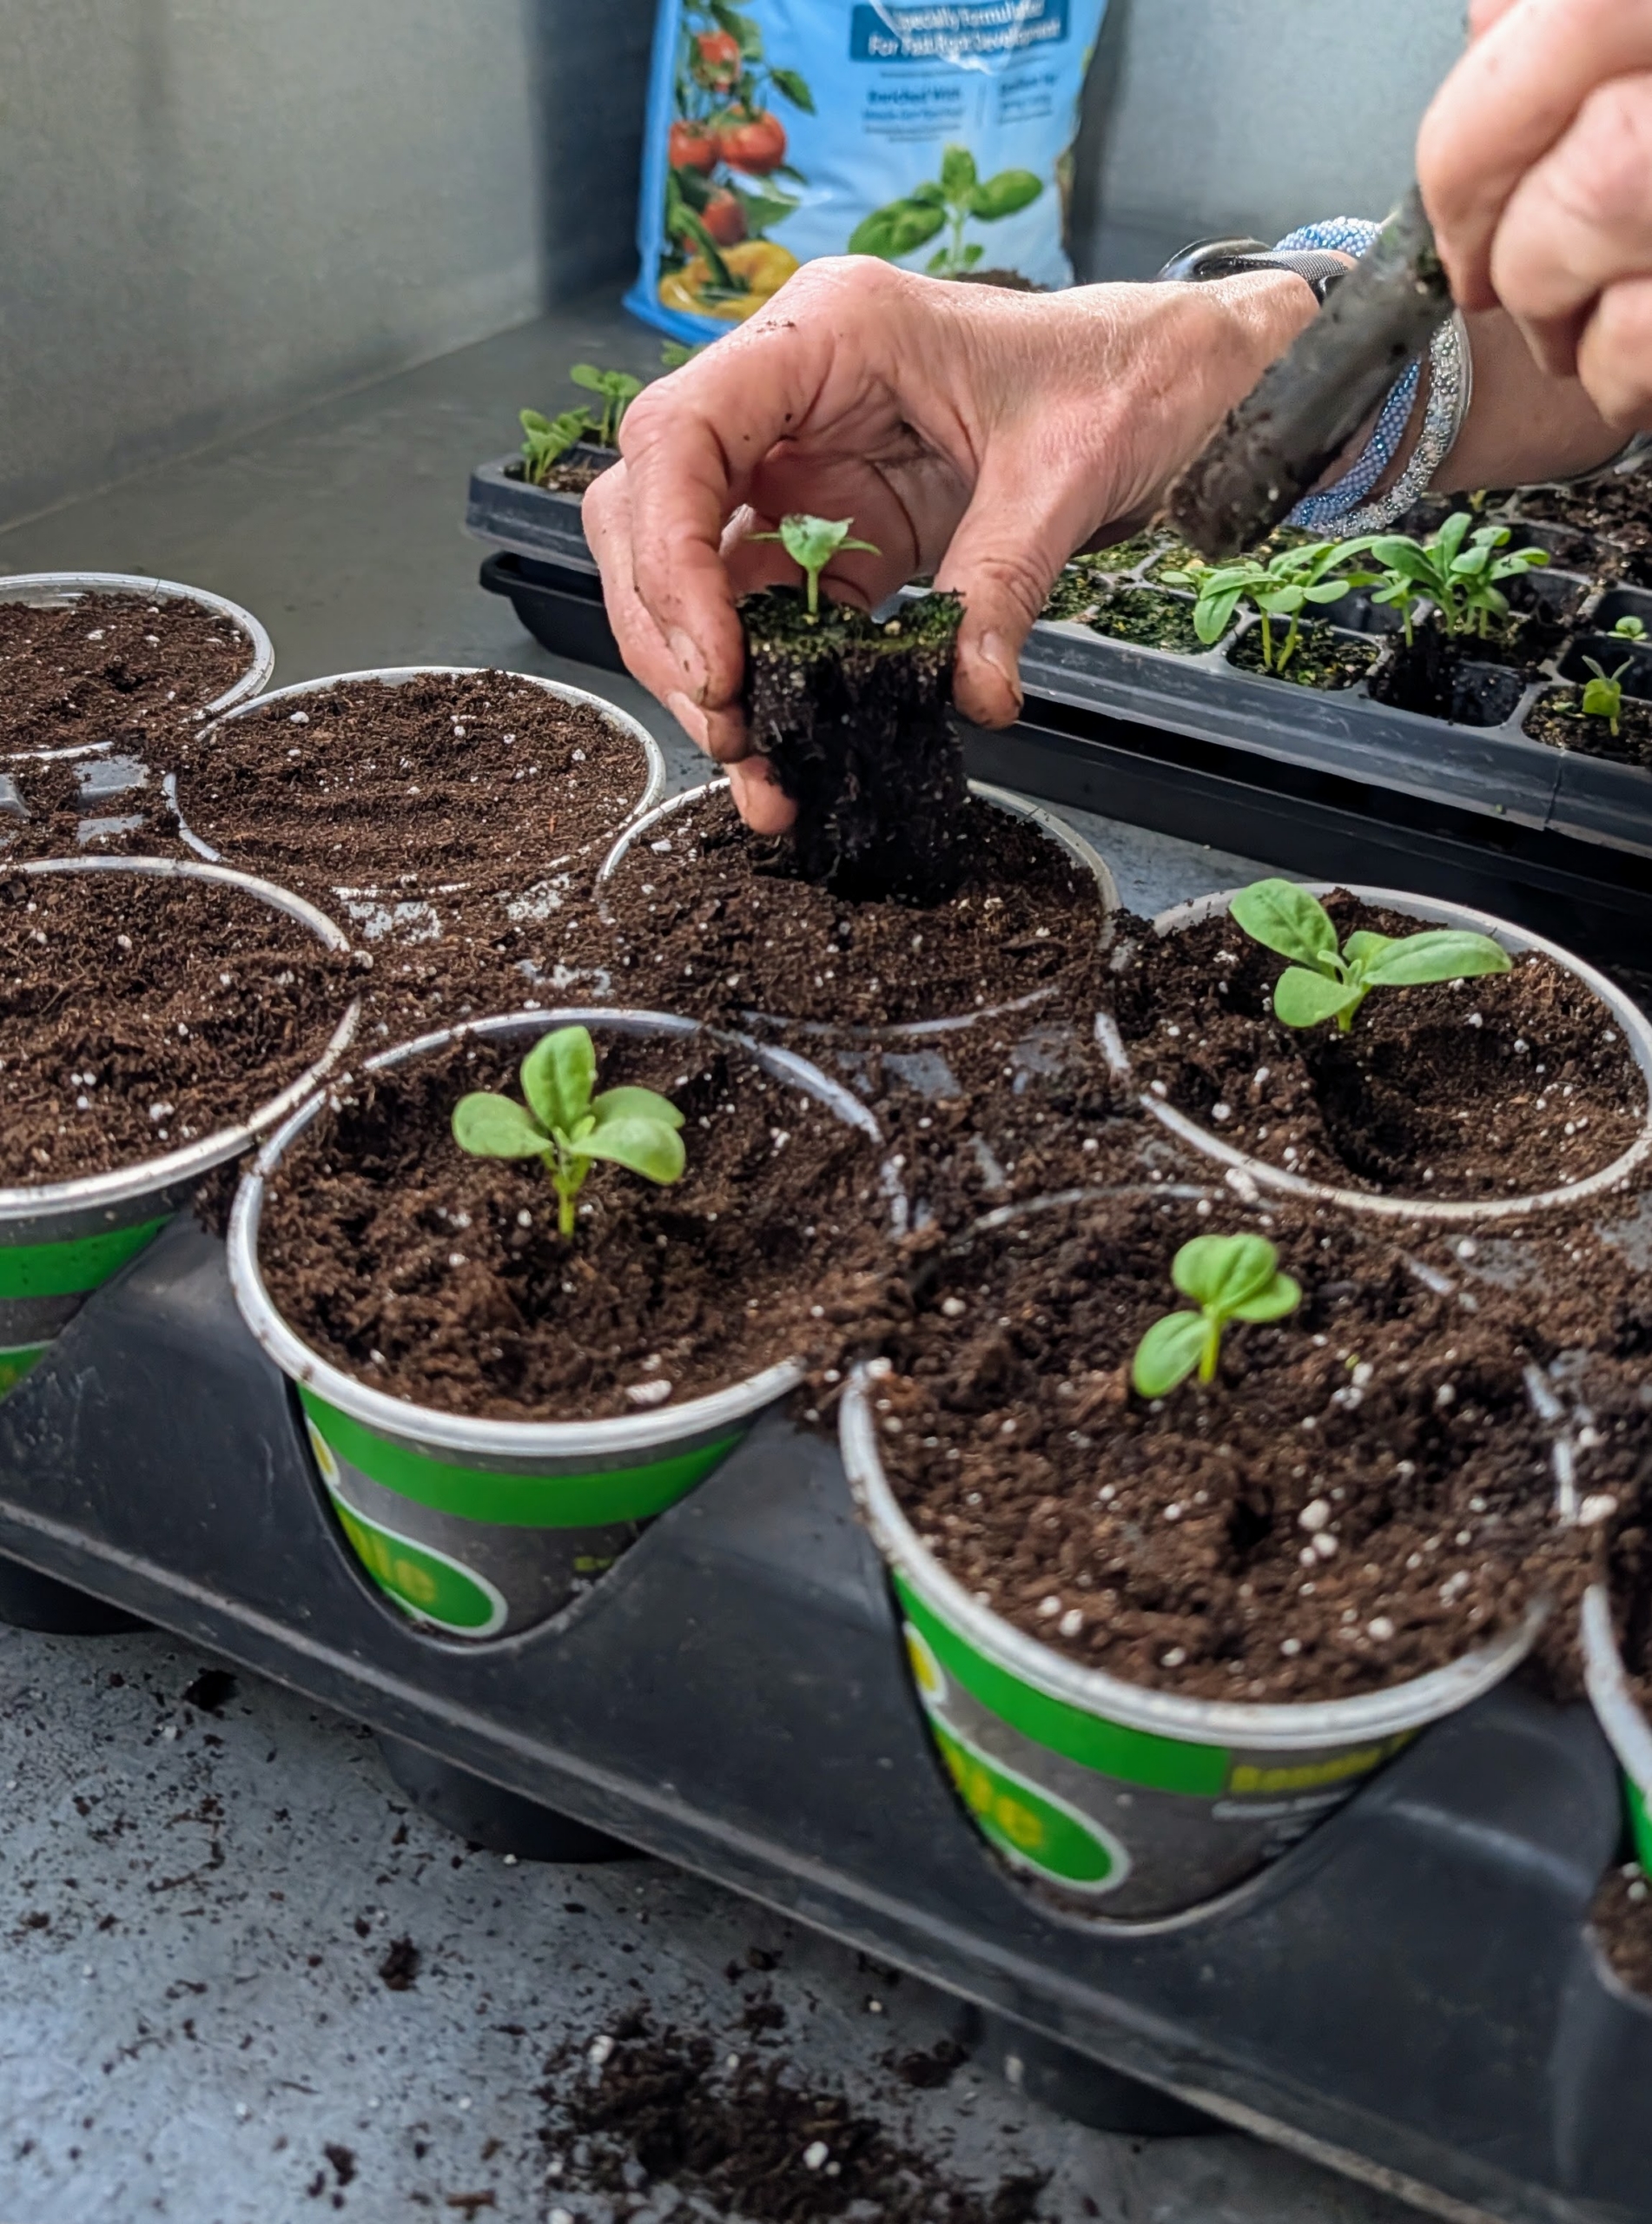
These tools are great for transplanting seedlings. The tool on the left is an extra large tweezer. The one on the right is from Johnny’s Selected Seeds. It’s called a widger, a great multipurpose tool for seed starting. It has a convex stainless steel blade that delicately separates the tiny plants and helps to lift up the root balls.
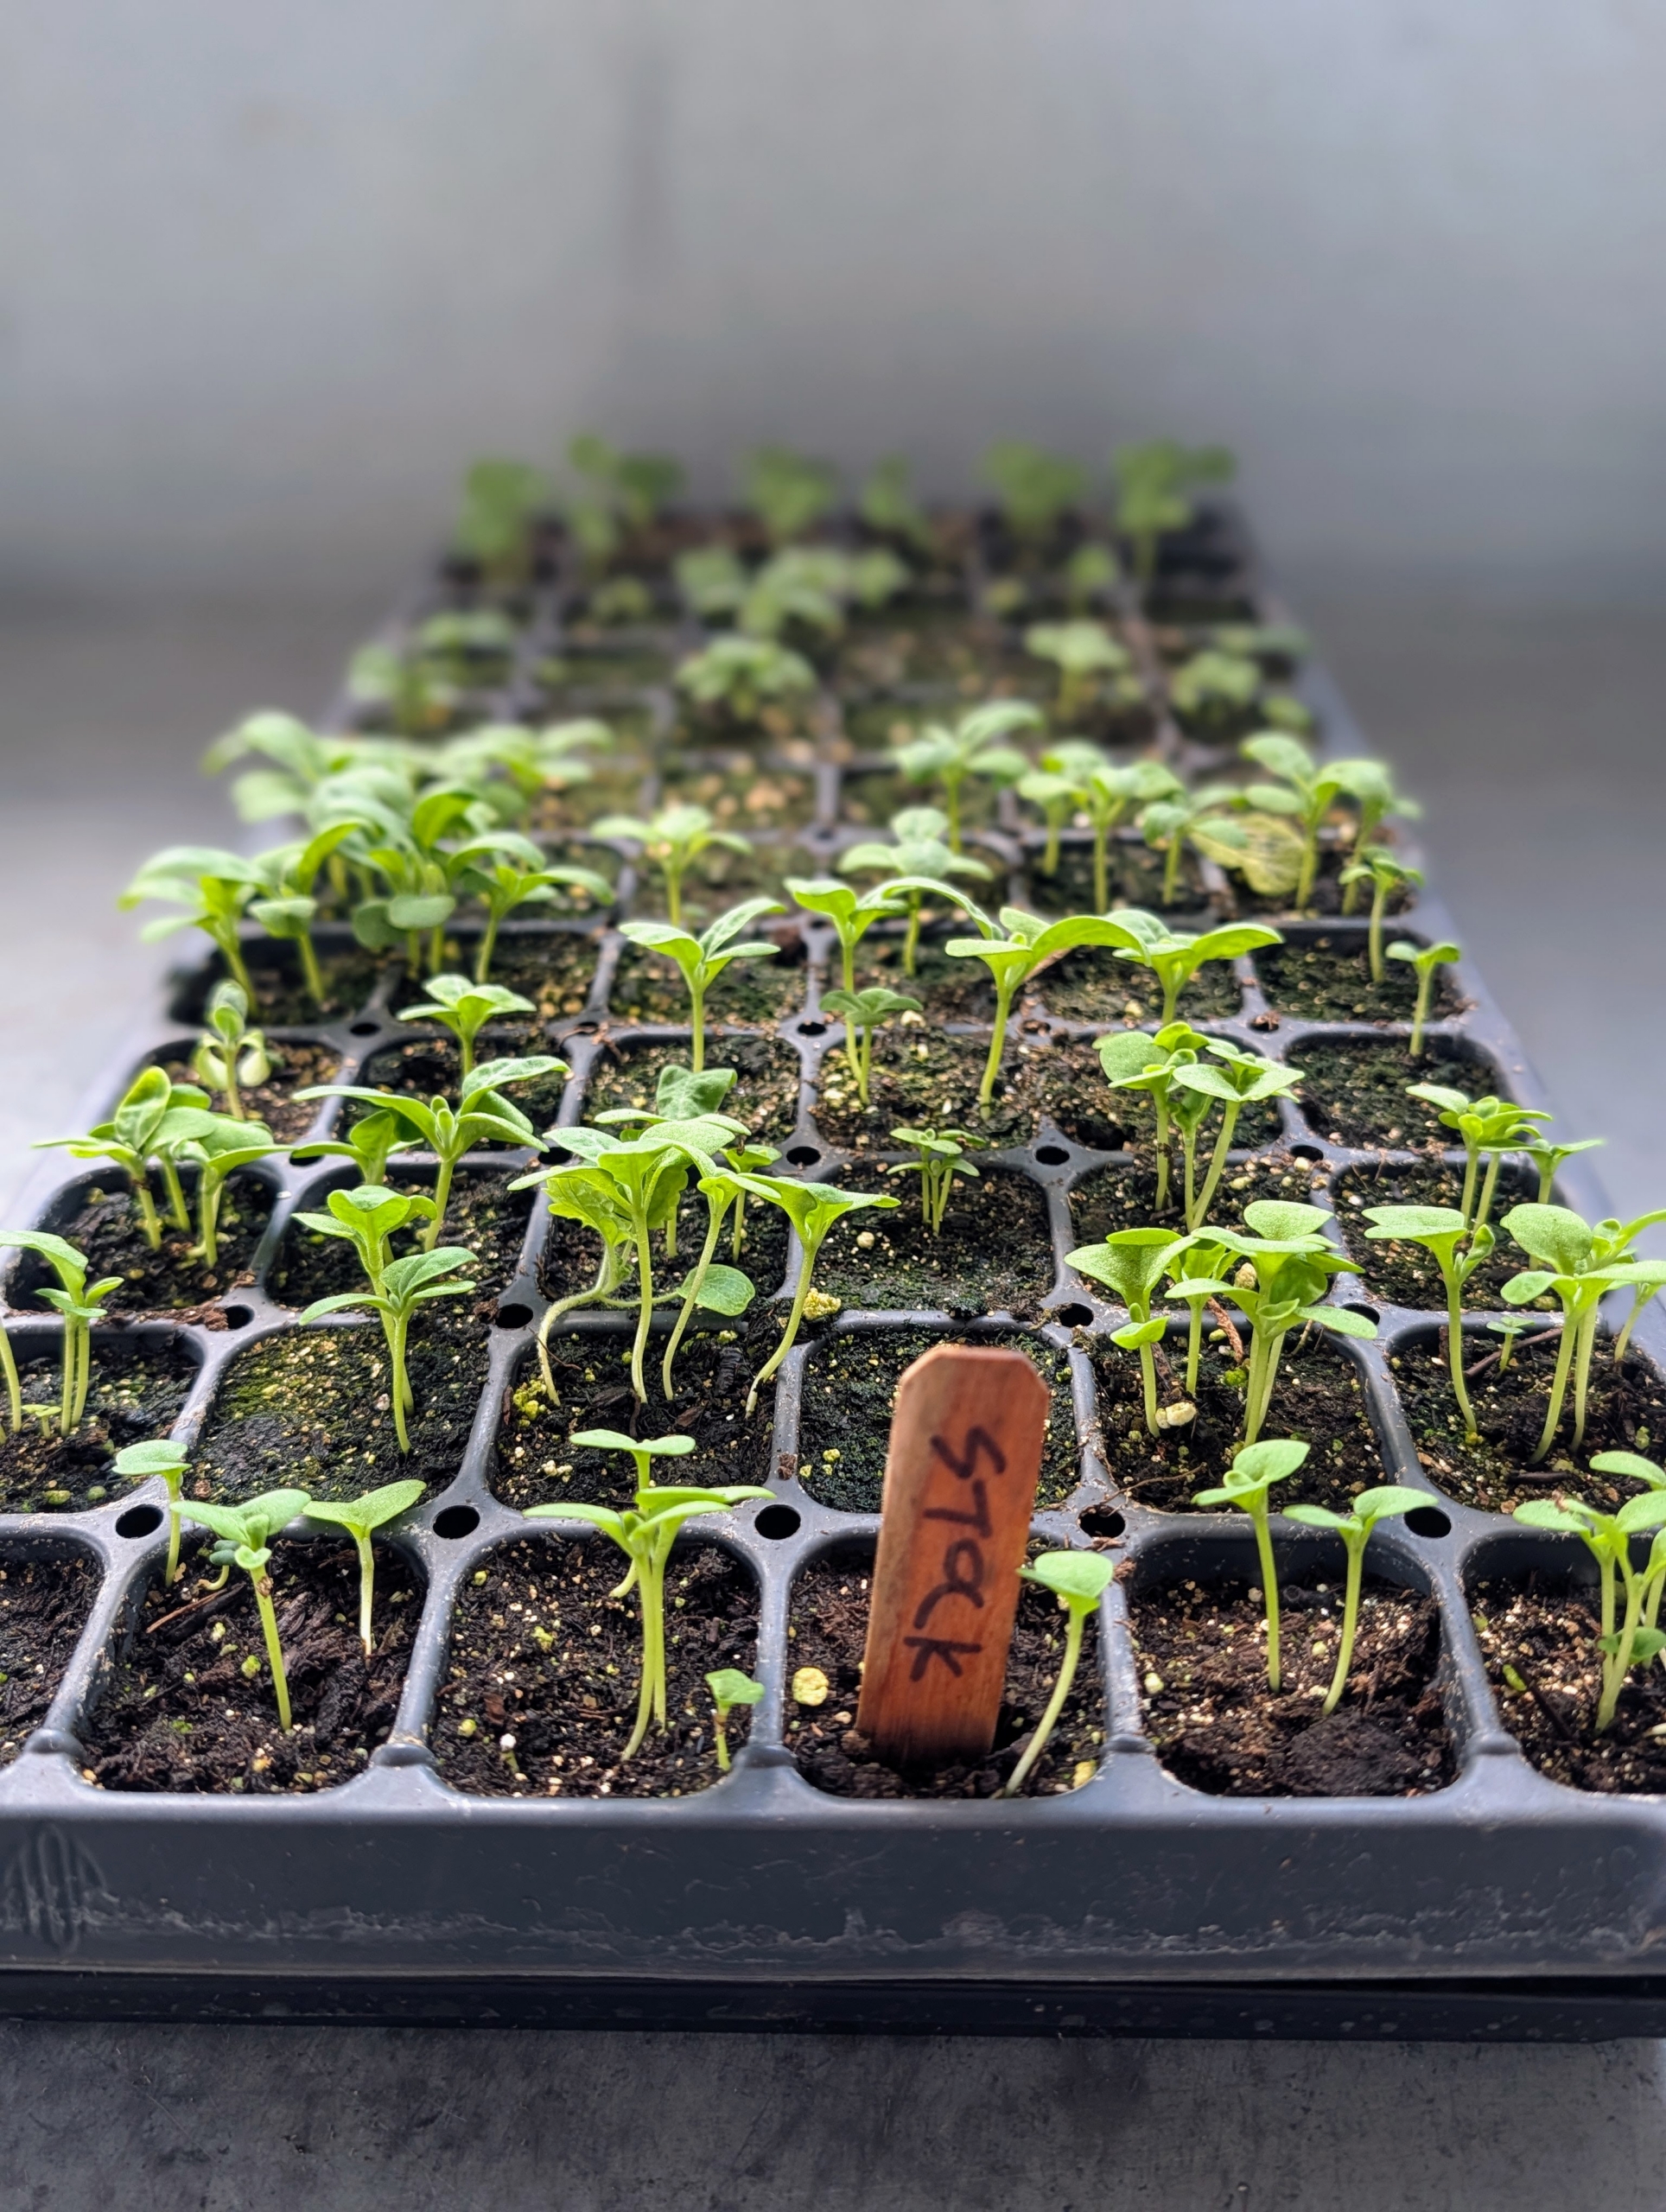
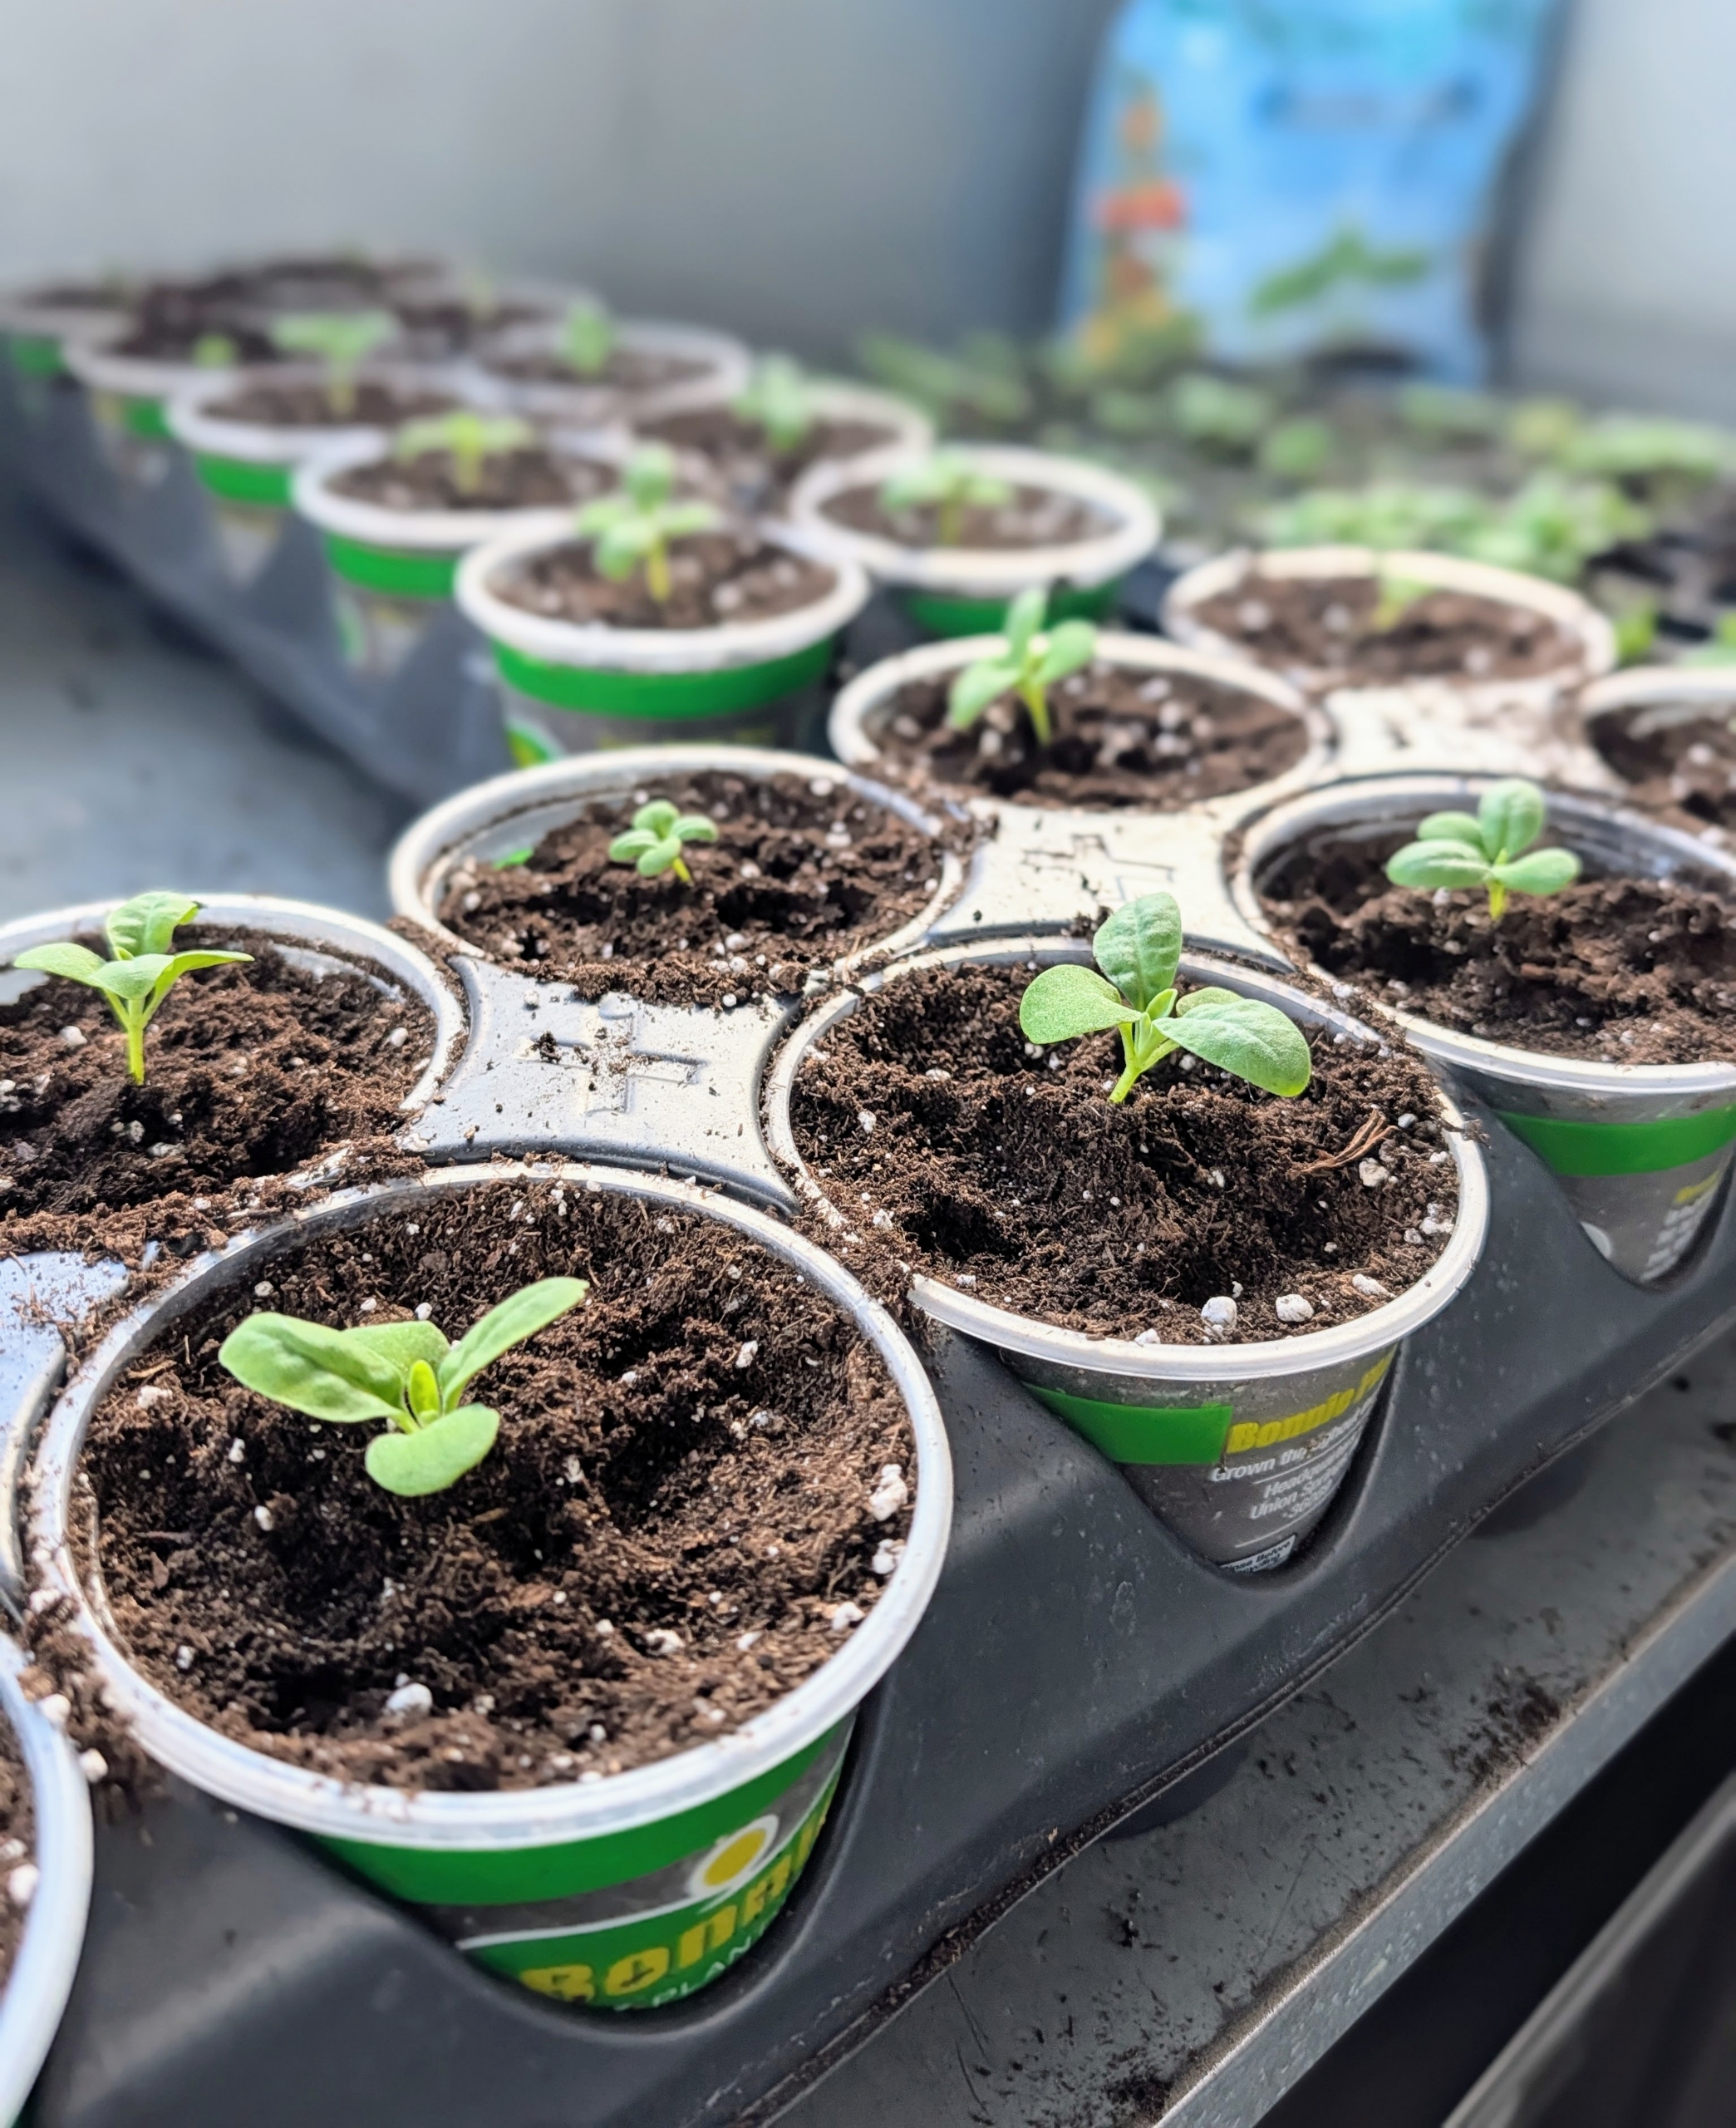
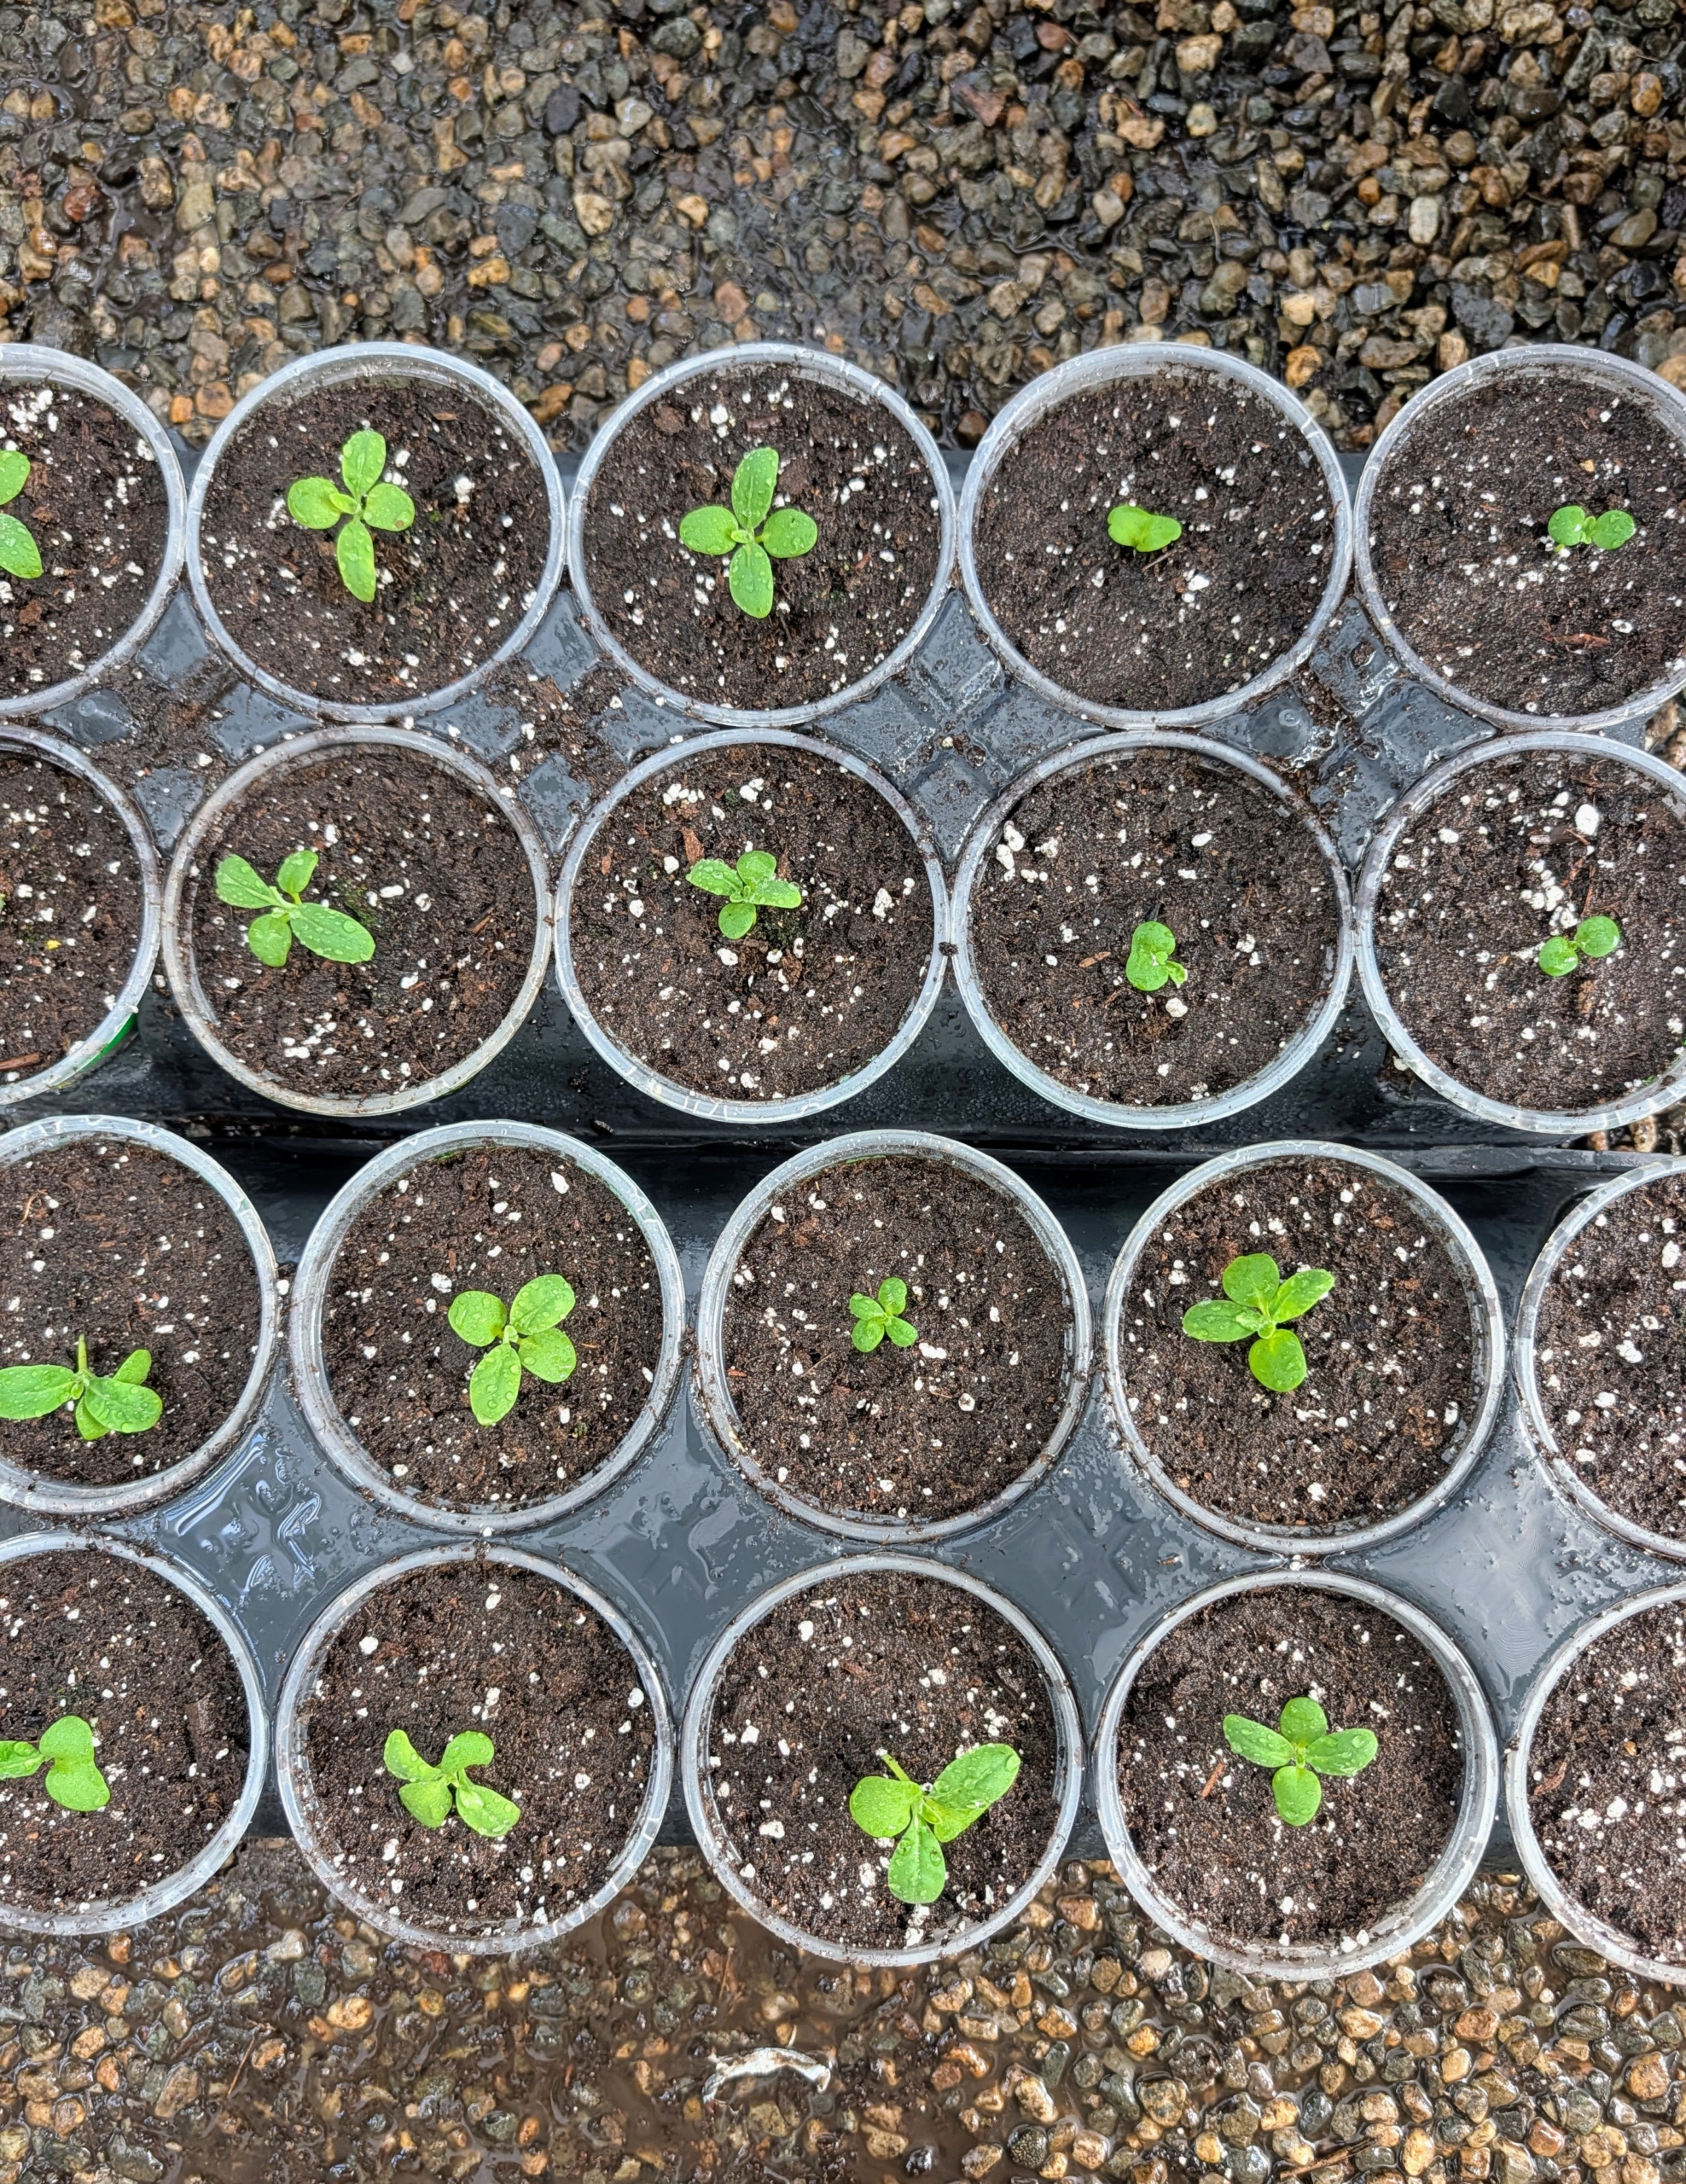
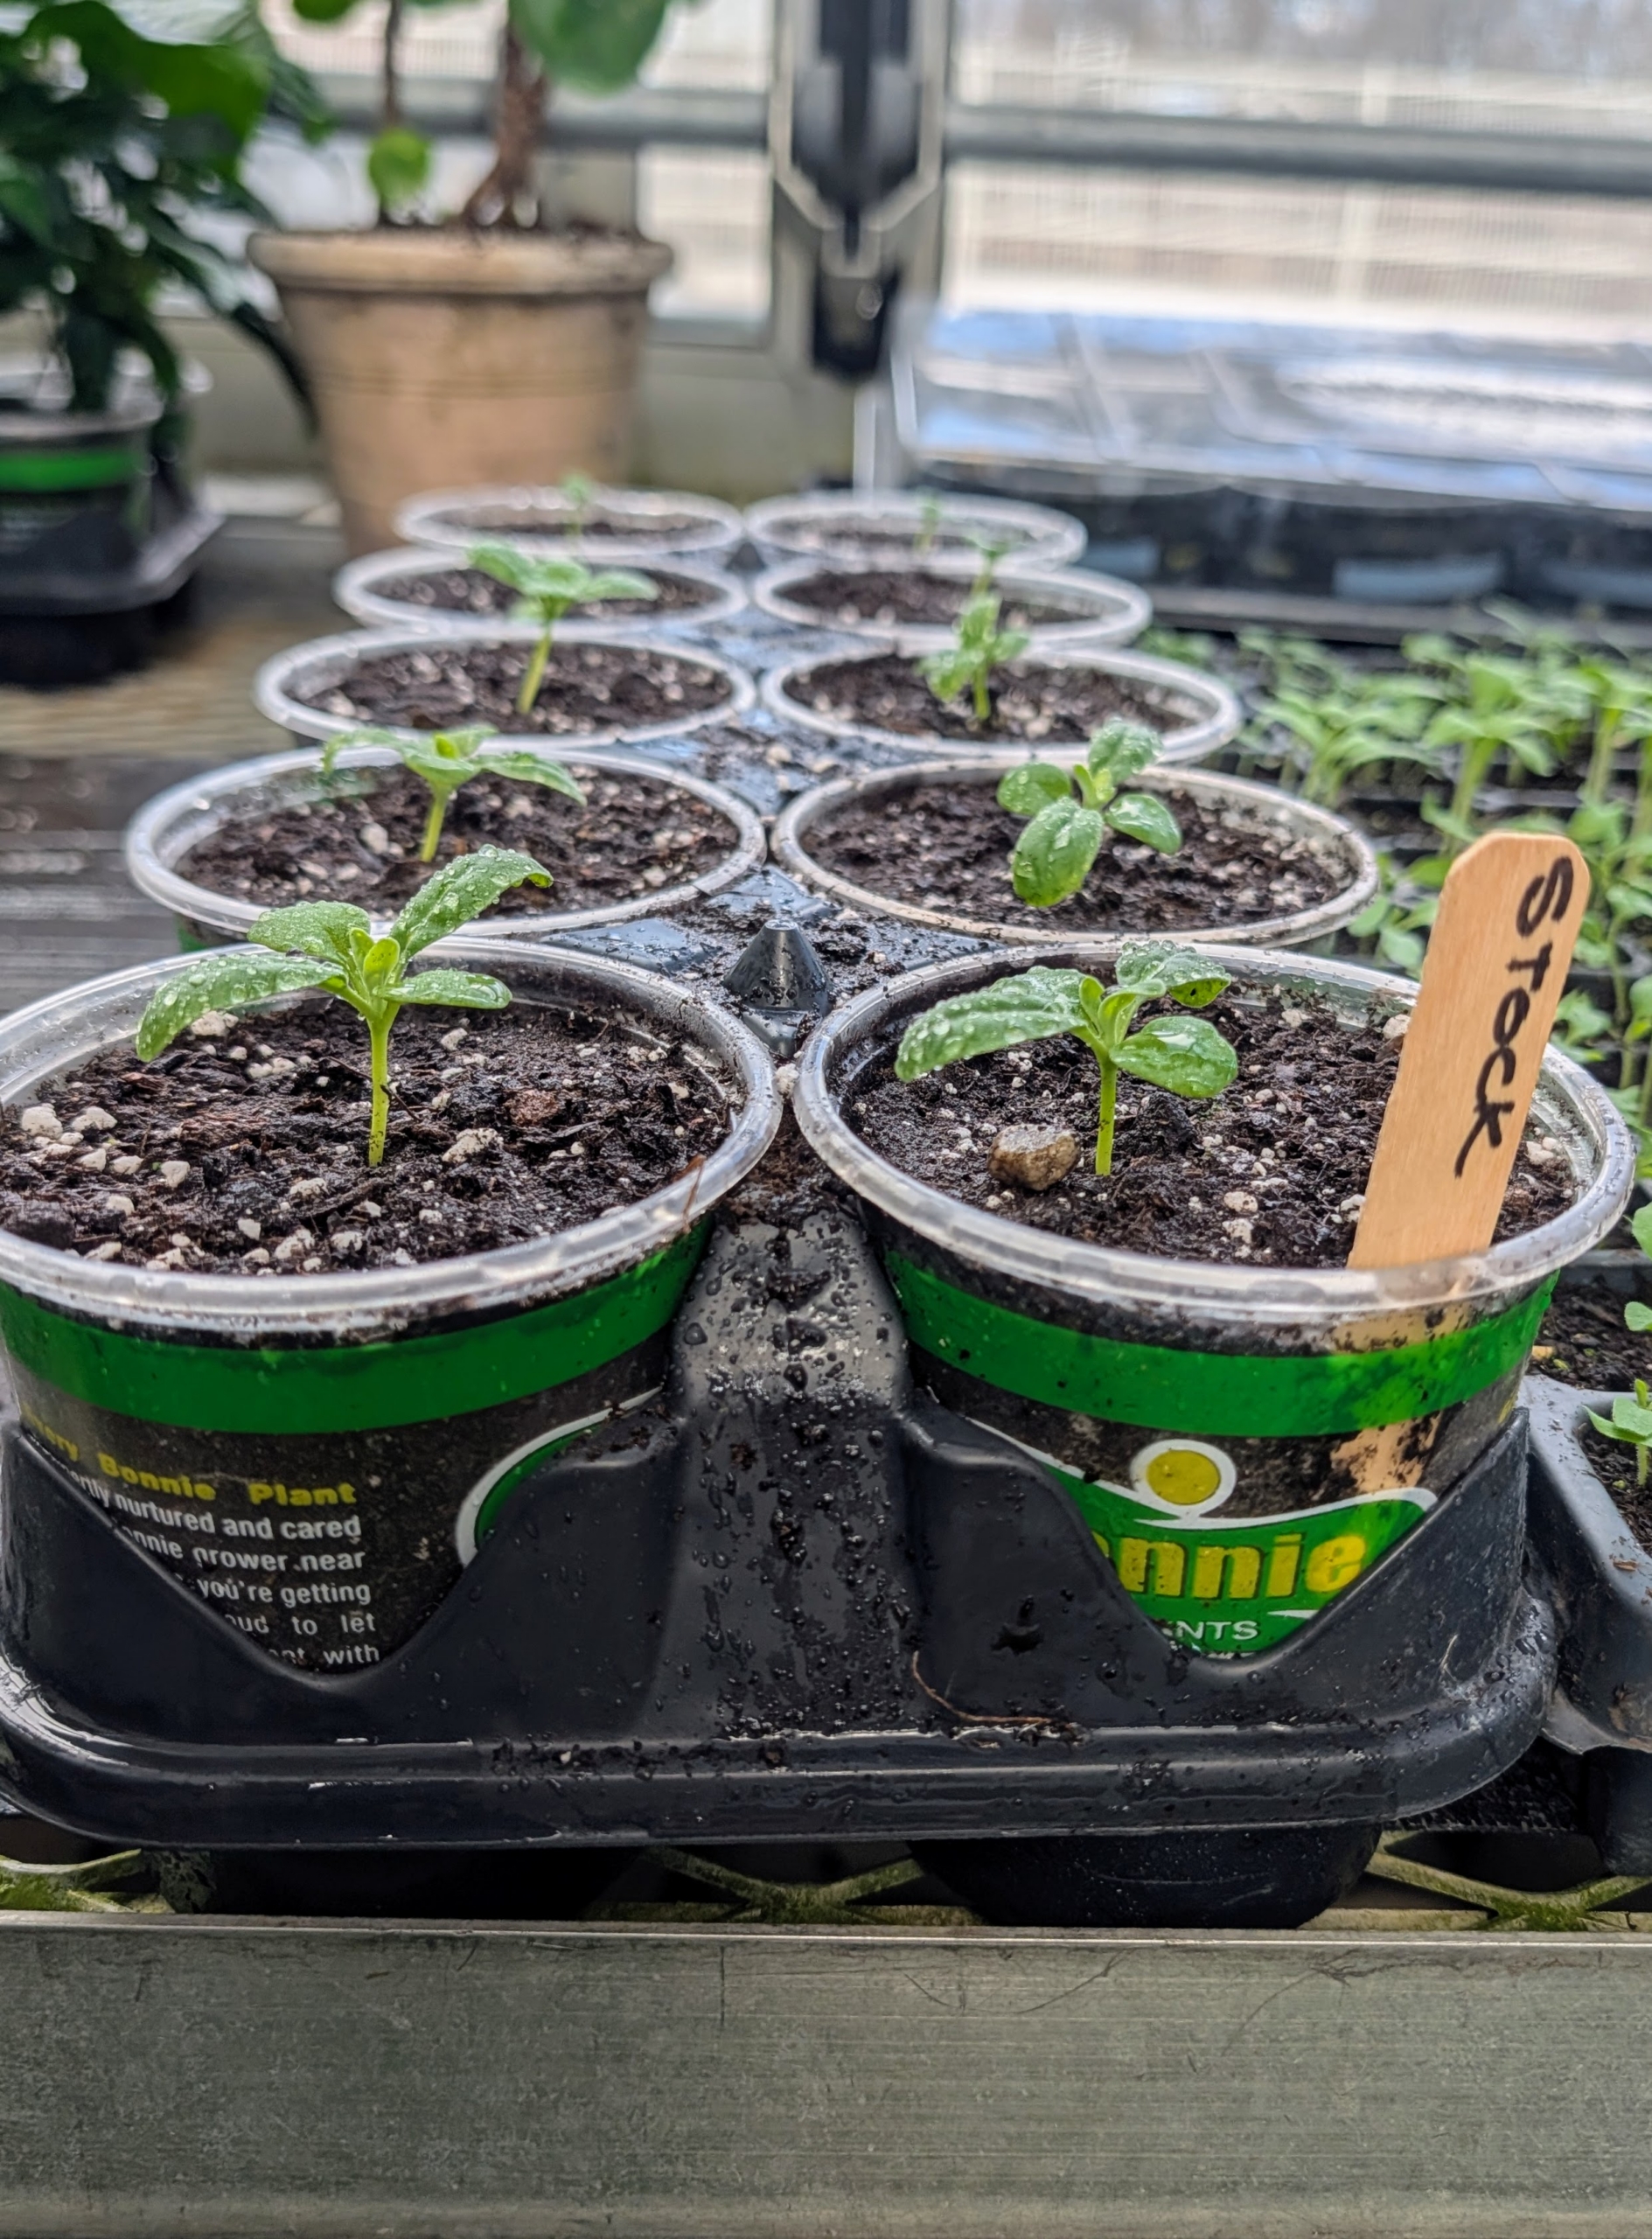
The tiny seeds we planted just a few weeks ago are already sprouting and ready to move. These seedlings are Stock, Matthiola incana. Stock flowers grow with either single or double blooms in clusters on tall, spiky stems. The colorful flowers are great for attracting pollinators to the garden, such as bees and butterflies.
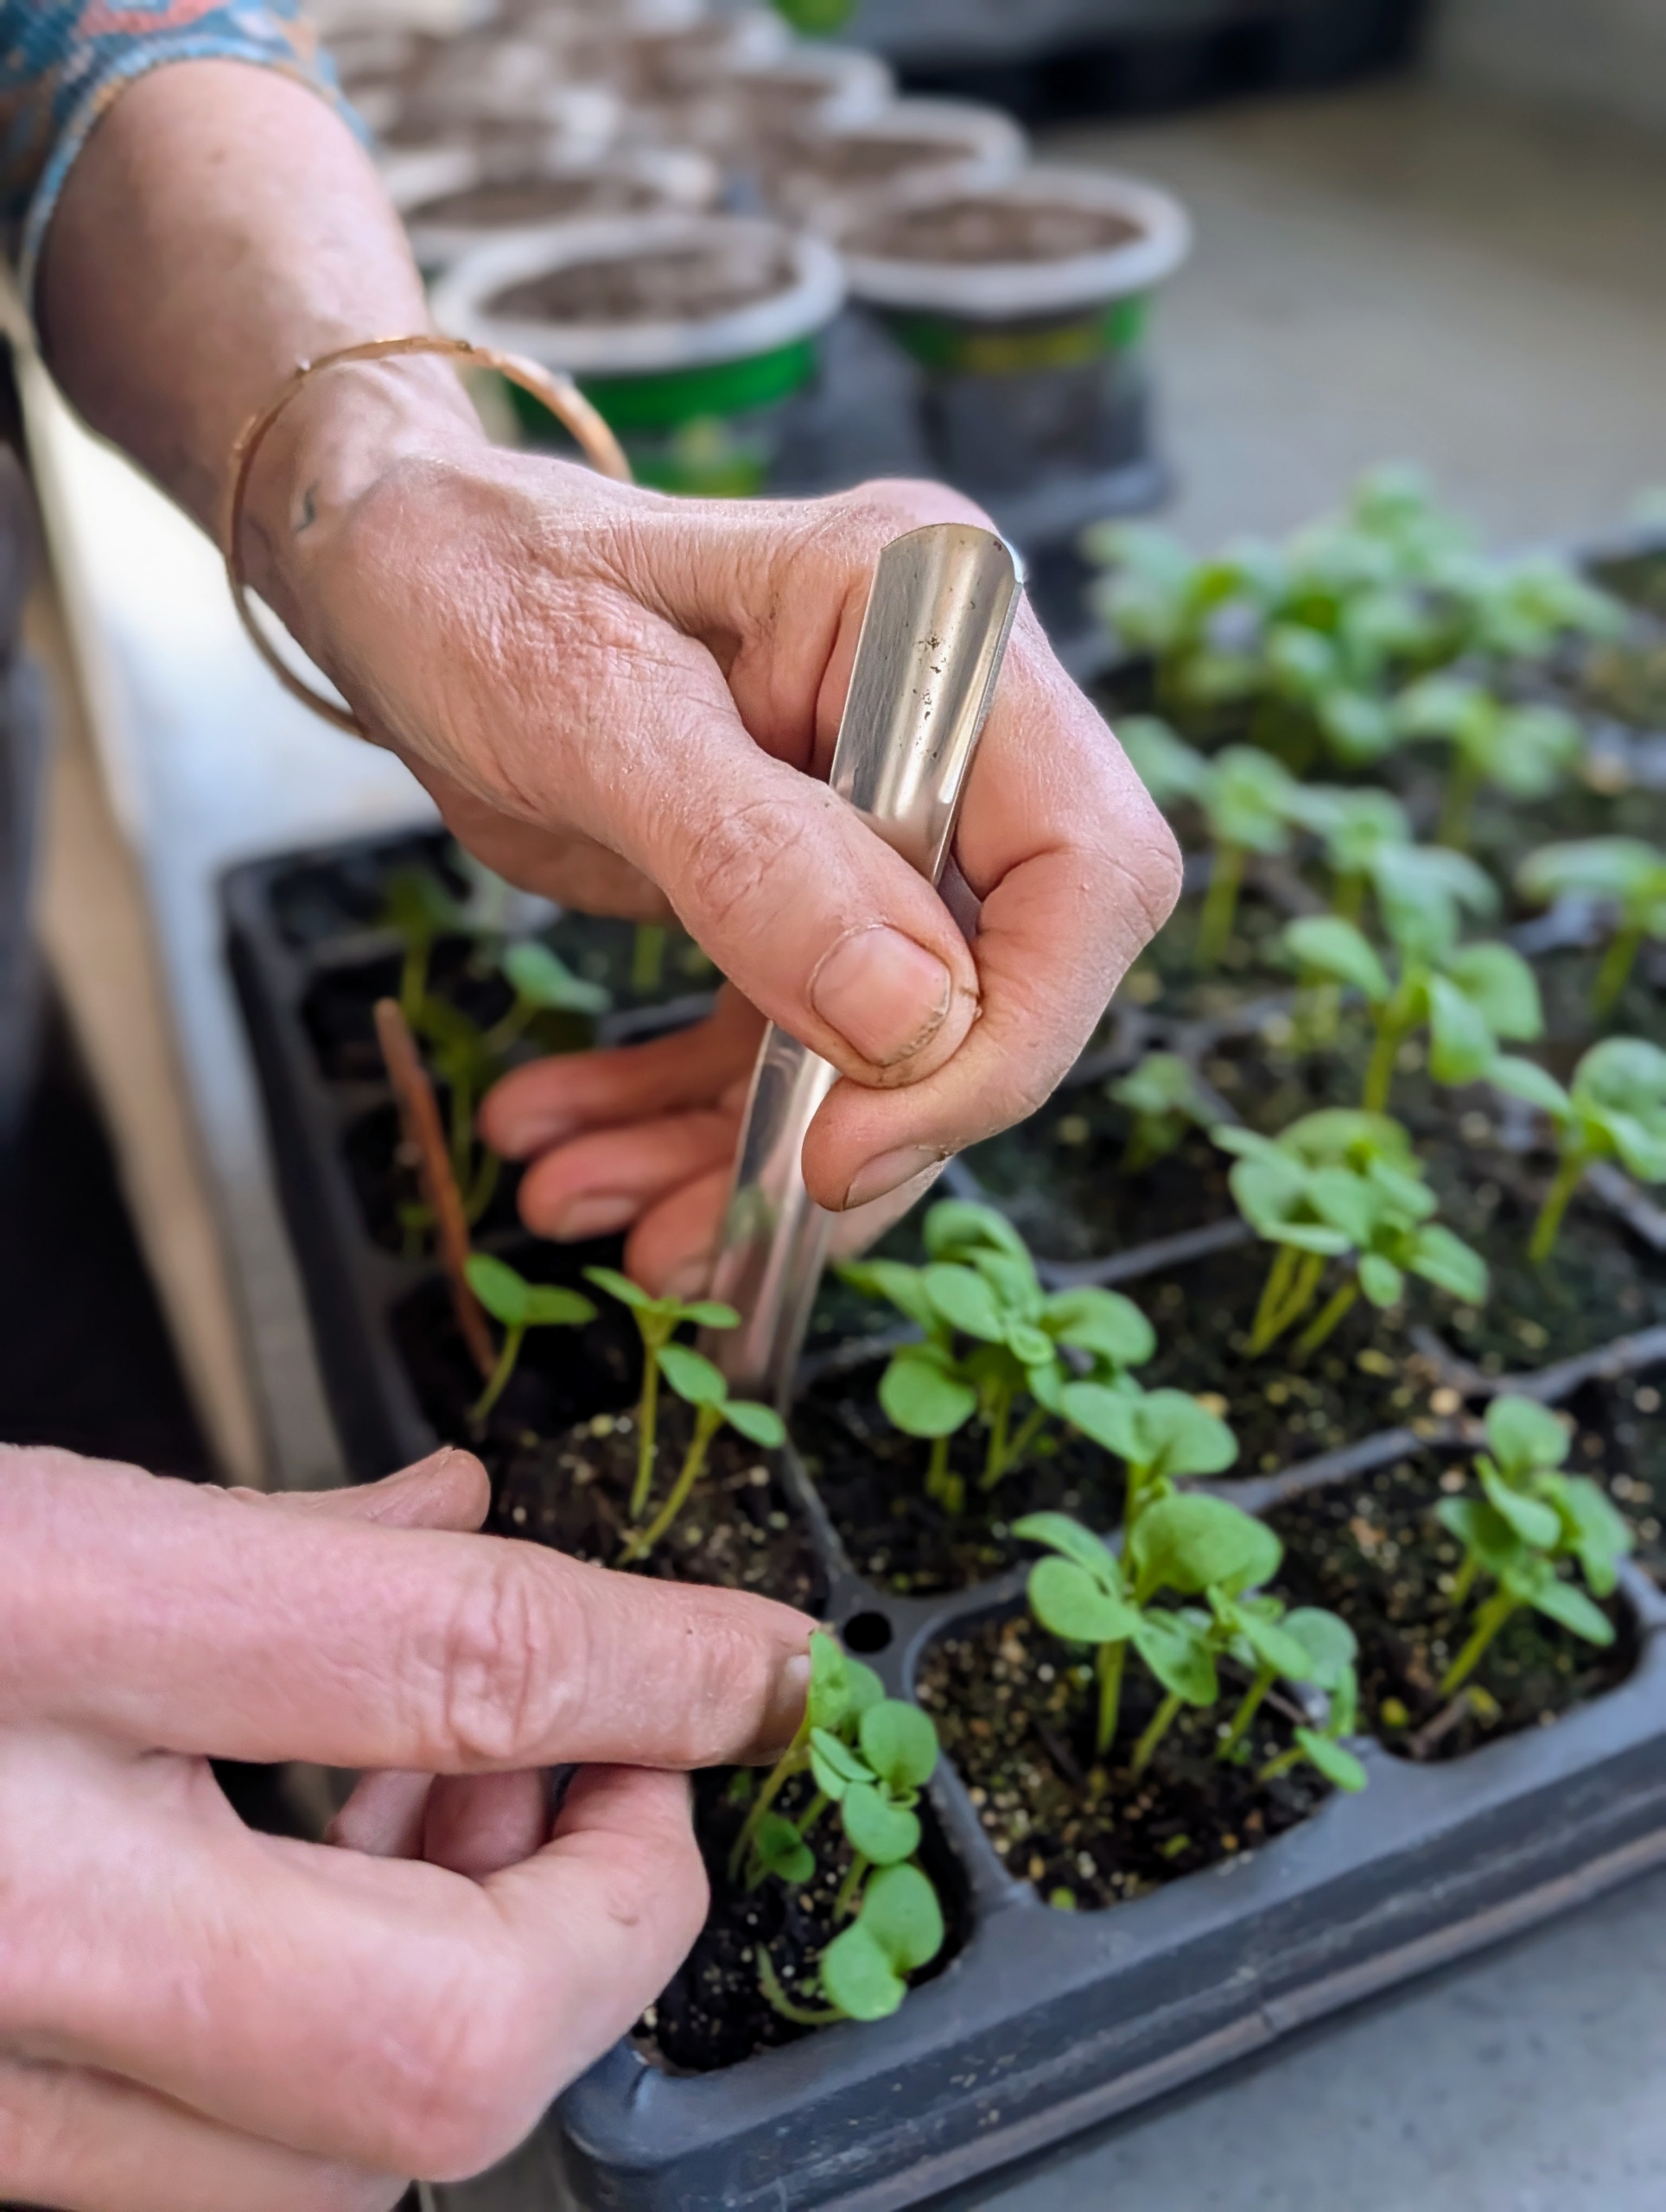
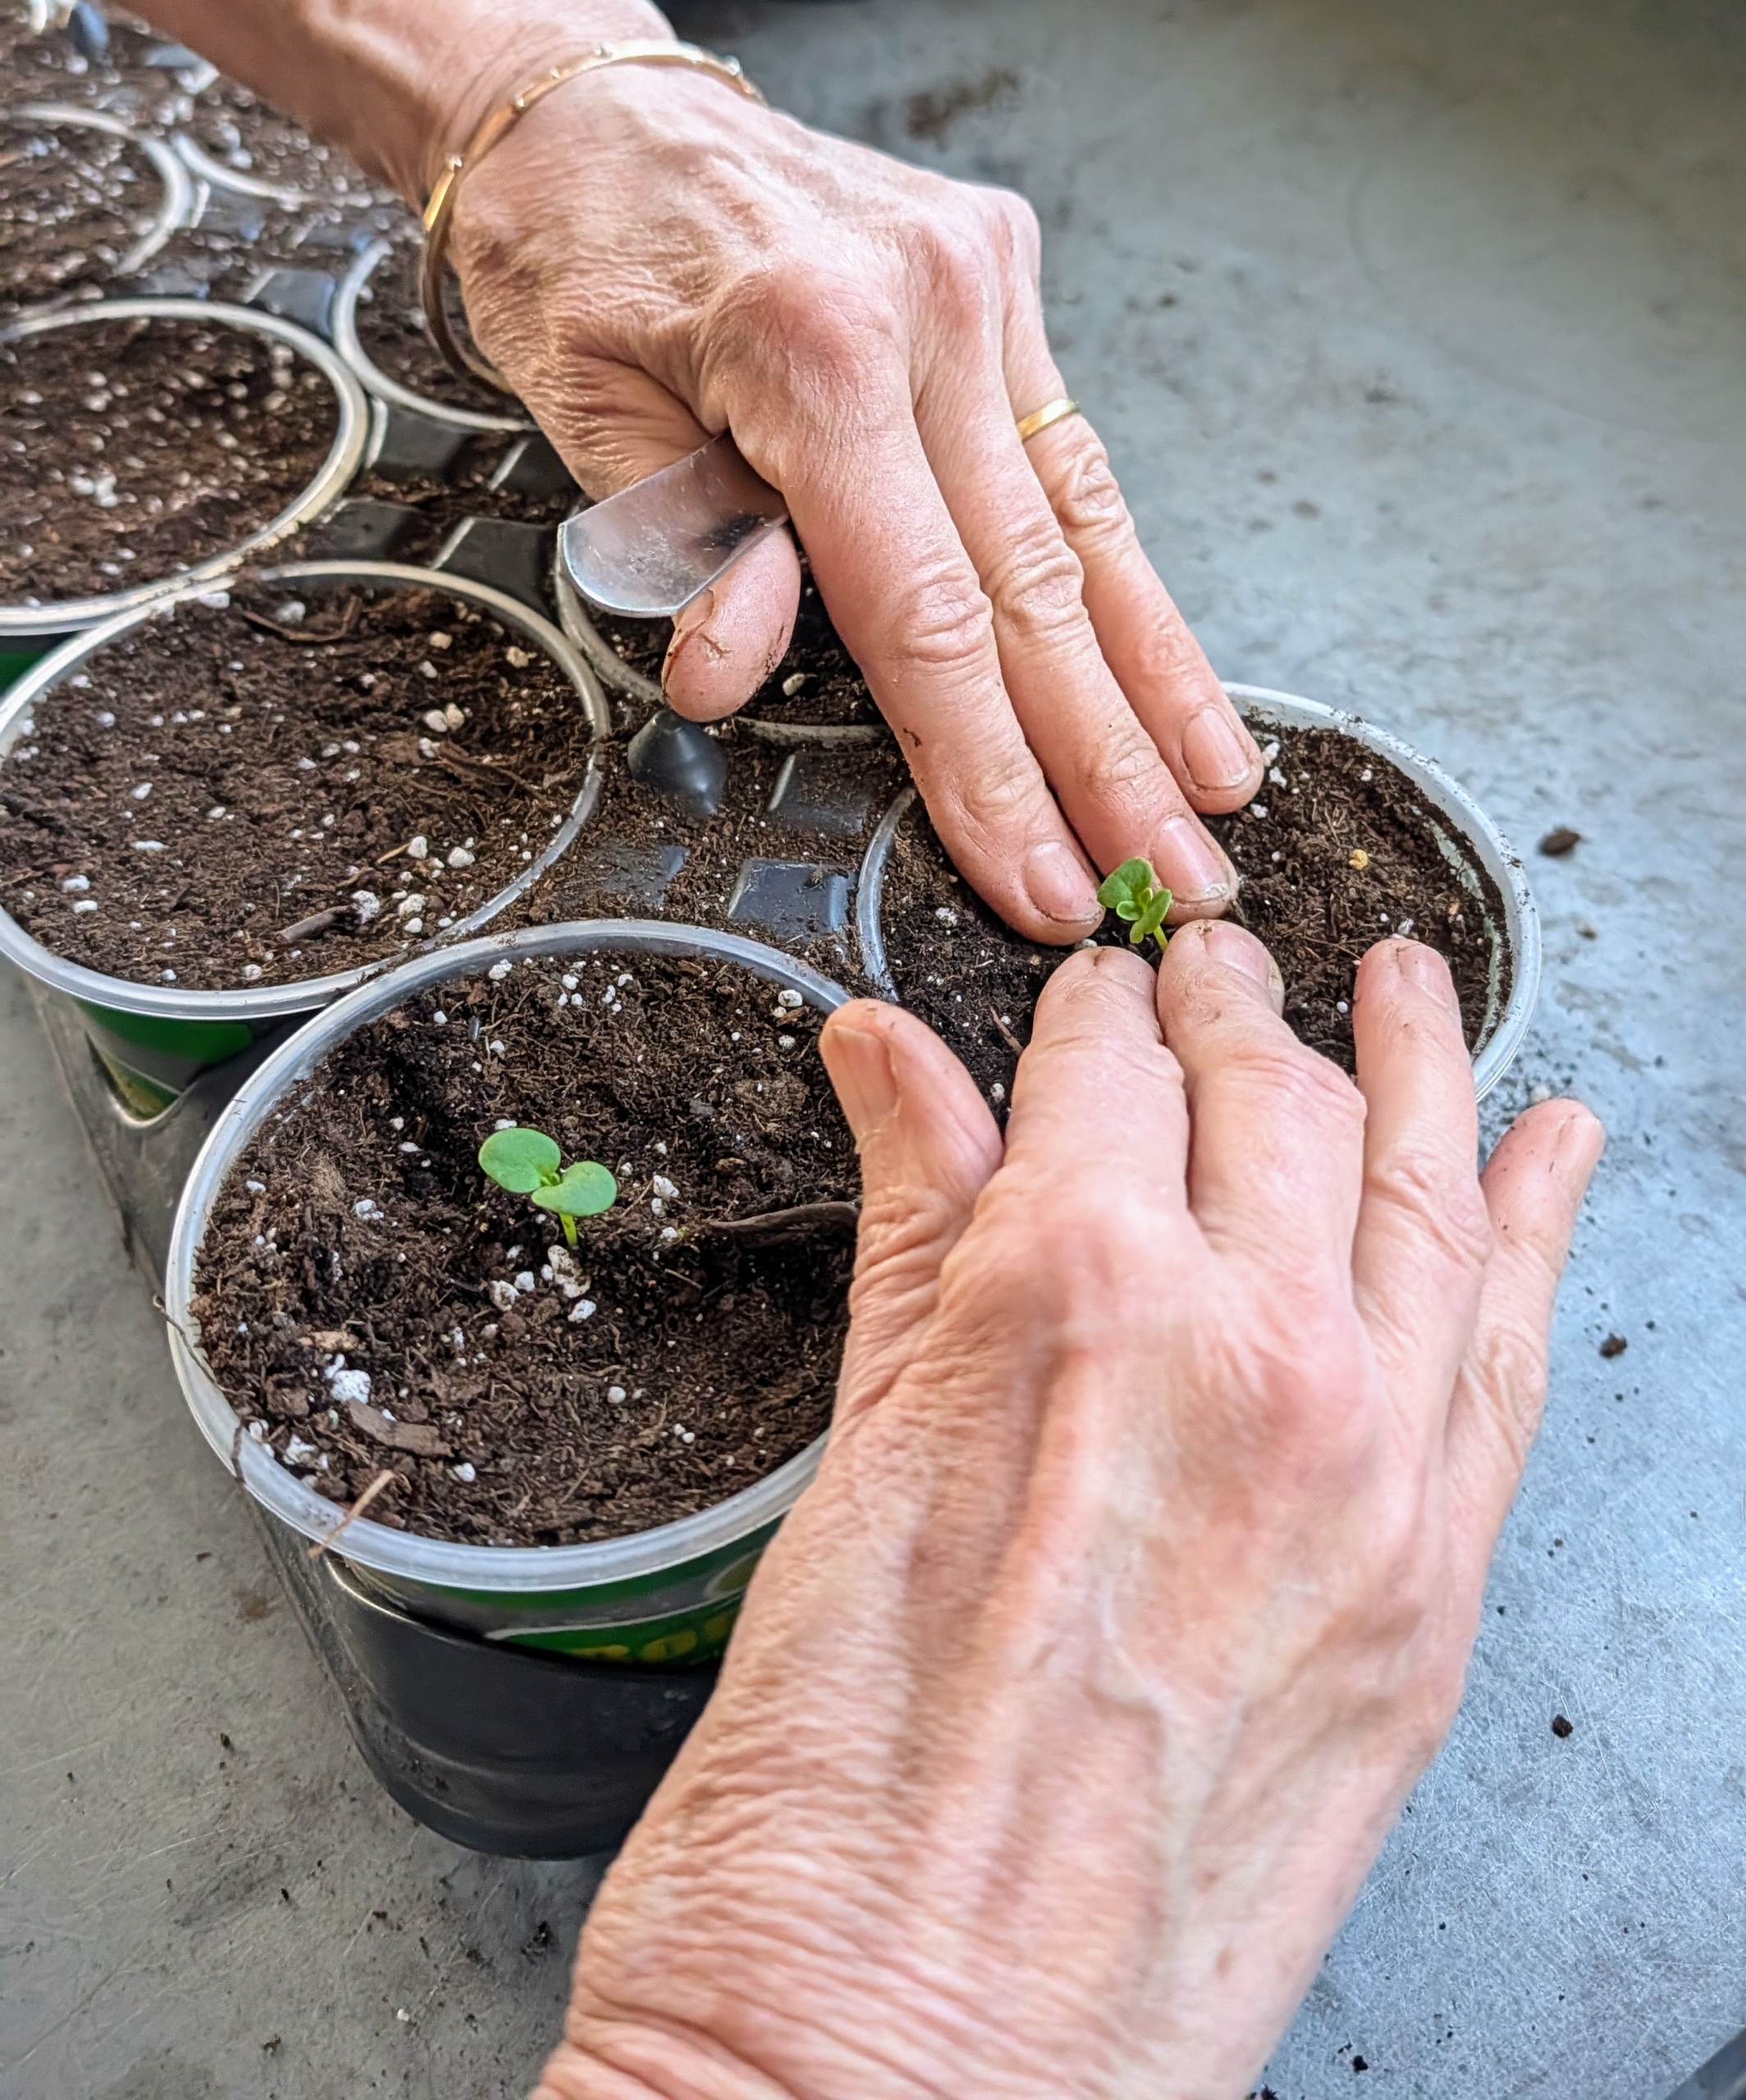
When the seedlings are a couple inches tall and have reached their “true leaf” stage, which is when each seedling has sprouted a second set of leaves, it’s time for a process called selective thinning. Selective thinning prevents overcrowding, so seedlings don’t have competition for soil nutrients or room to grow. Wendy carefully loosens the soil around the seedling with the widger so it can be lifted.
In this cell, Wendy is removing a weaker seedling. She carefully inspects the seedlings and determines the strongest ones. She looks for fleshy leaves, upright stems, and center positioning in the space. The smaller, weaker, more spindly looking seedlings are removed, leaving only the stronger ones to mature. The stronger specimens will be transplanted into larger cells or pots.
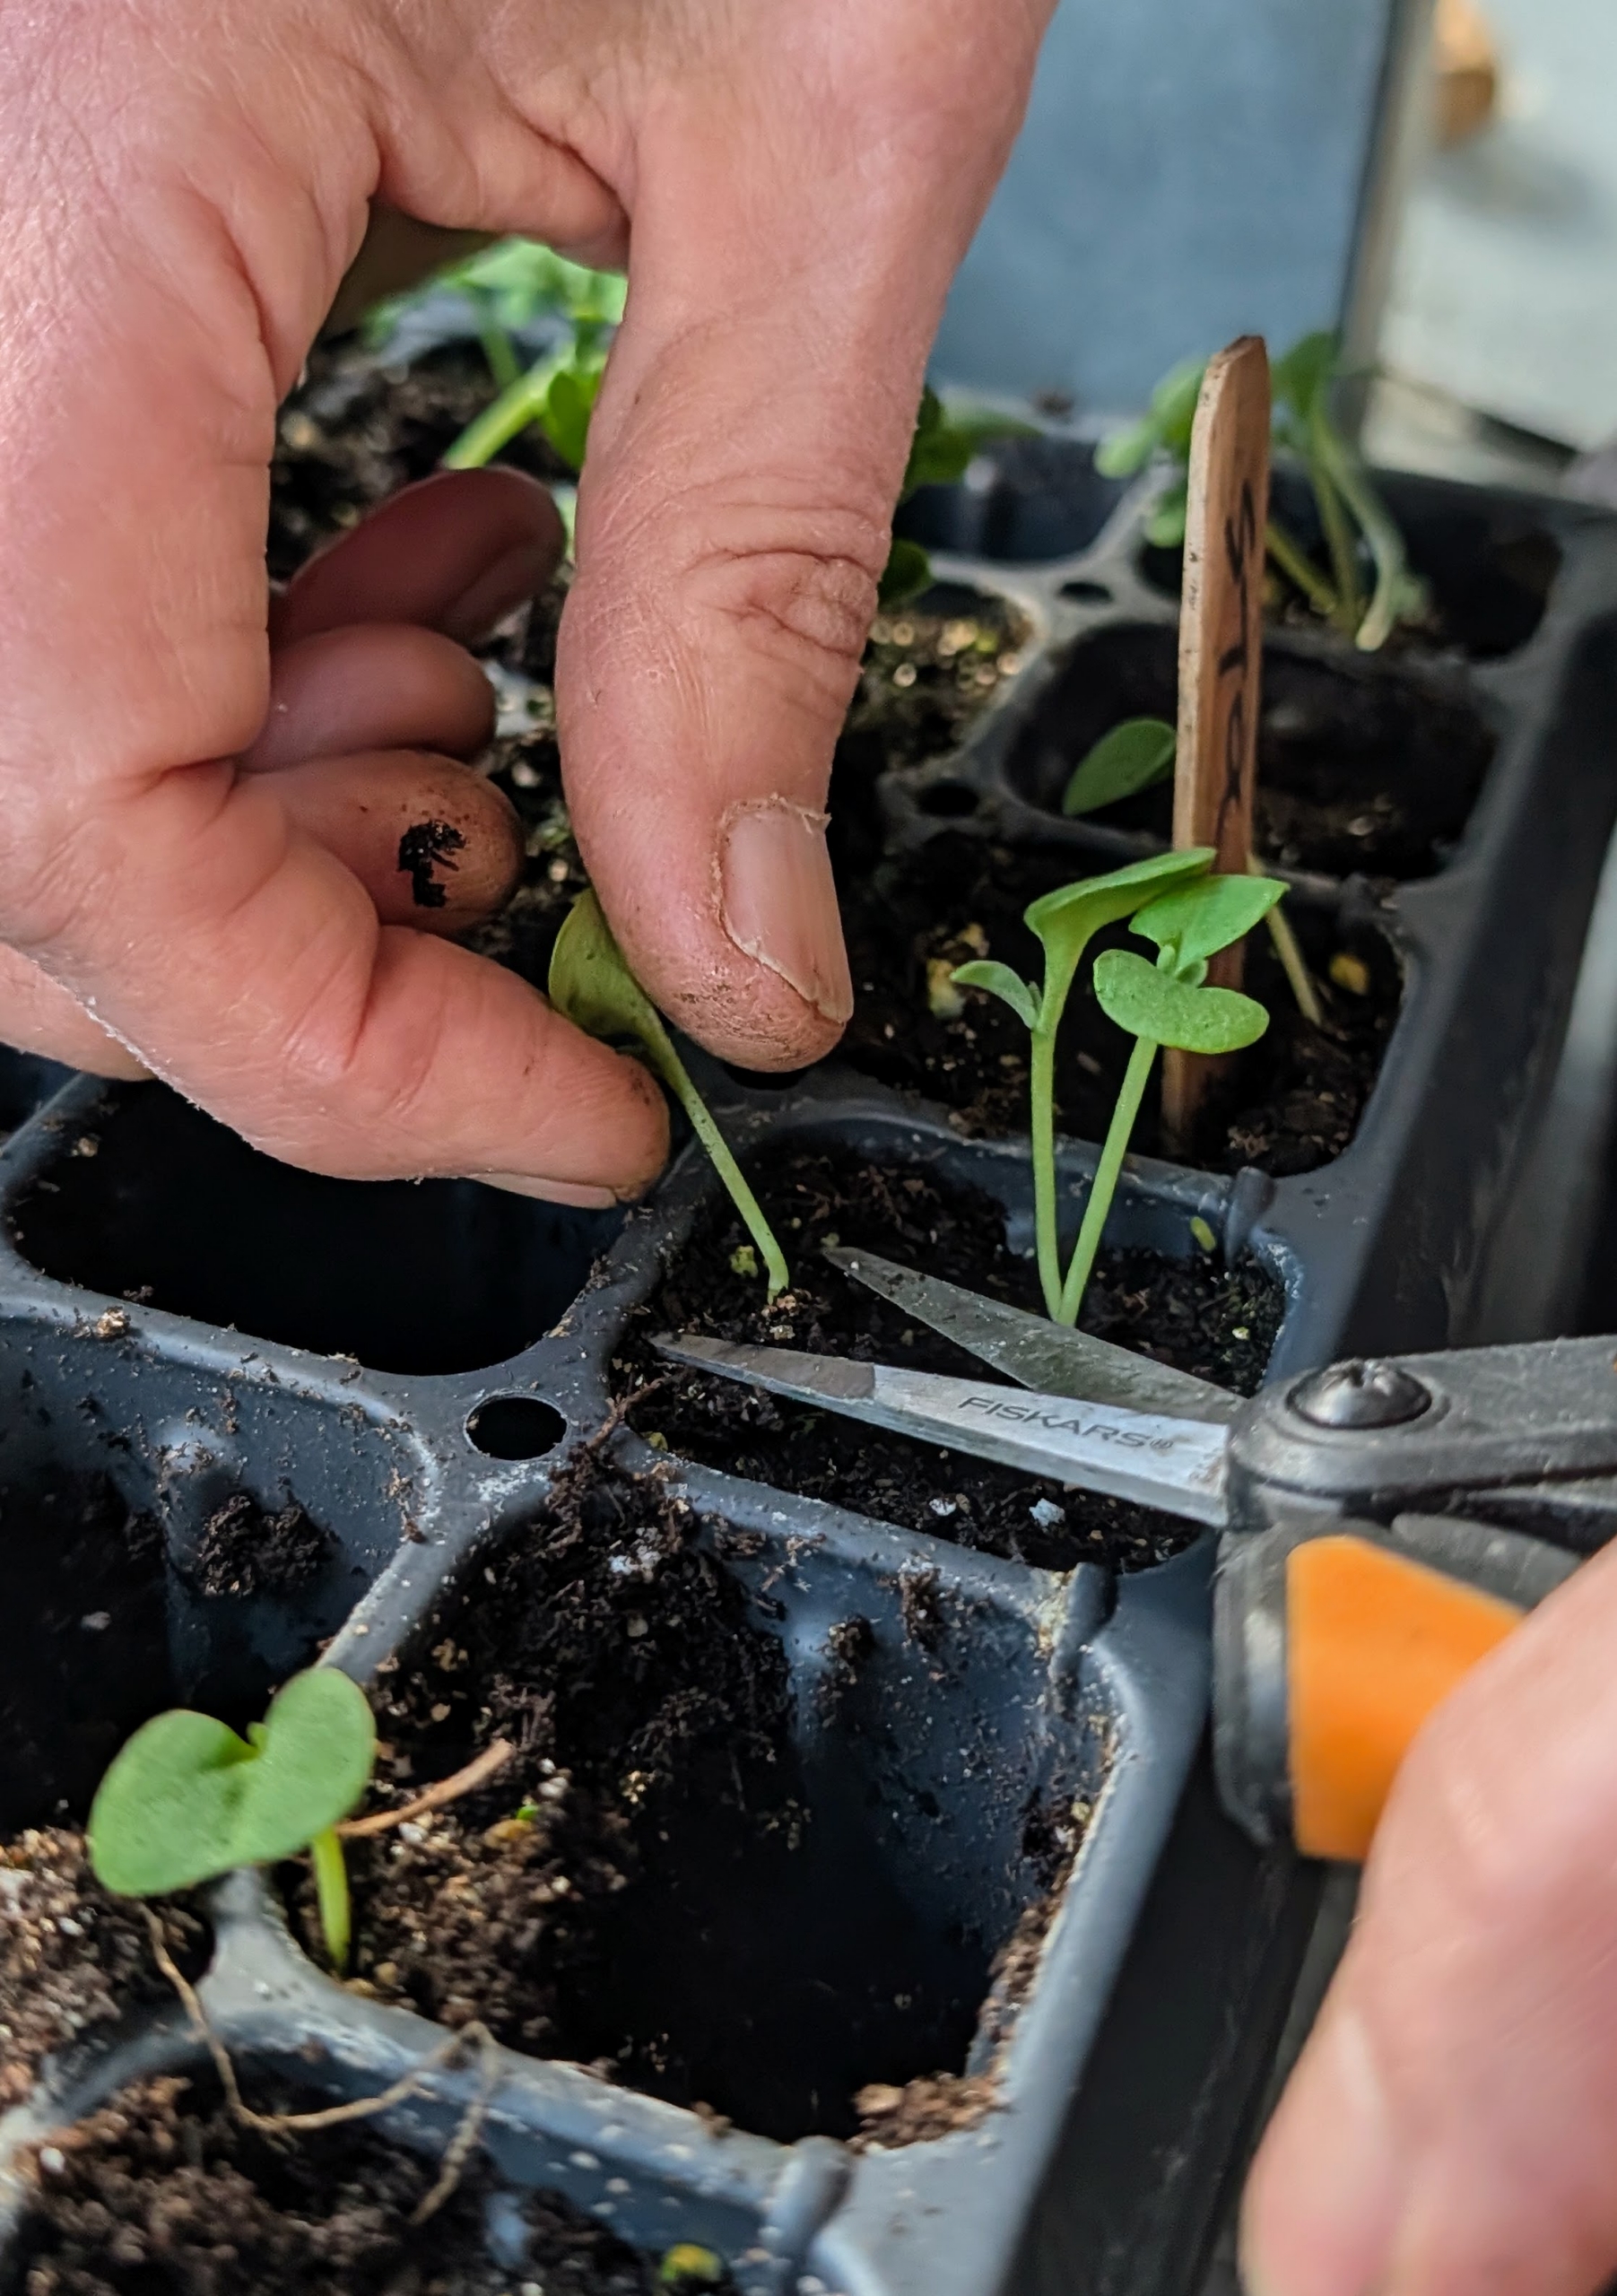
Using the widger, Wendy carefully moves the seedling from the tray to its new and larger pot. The widger also helps to avoid damage to the plant’s leaves or roots.
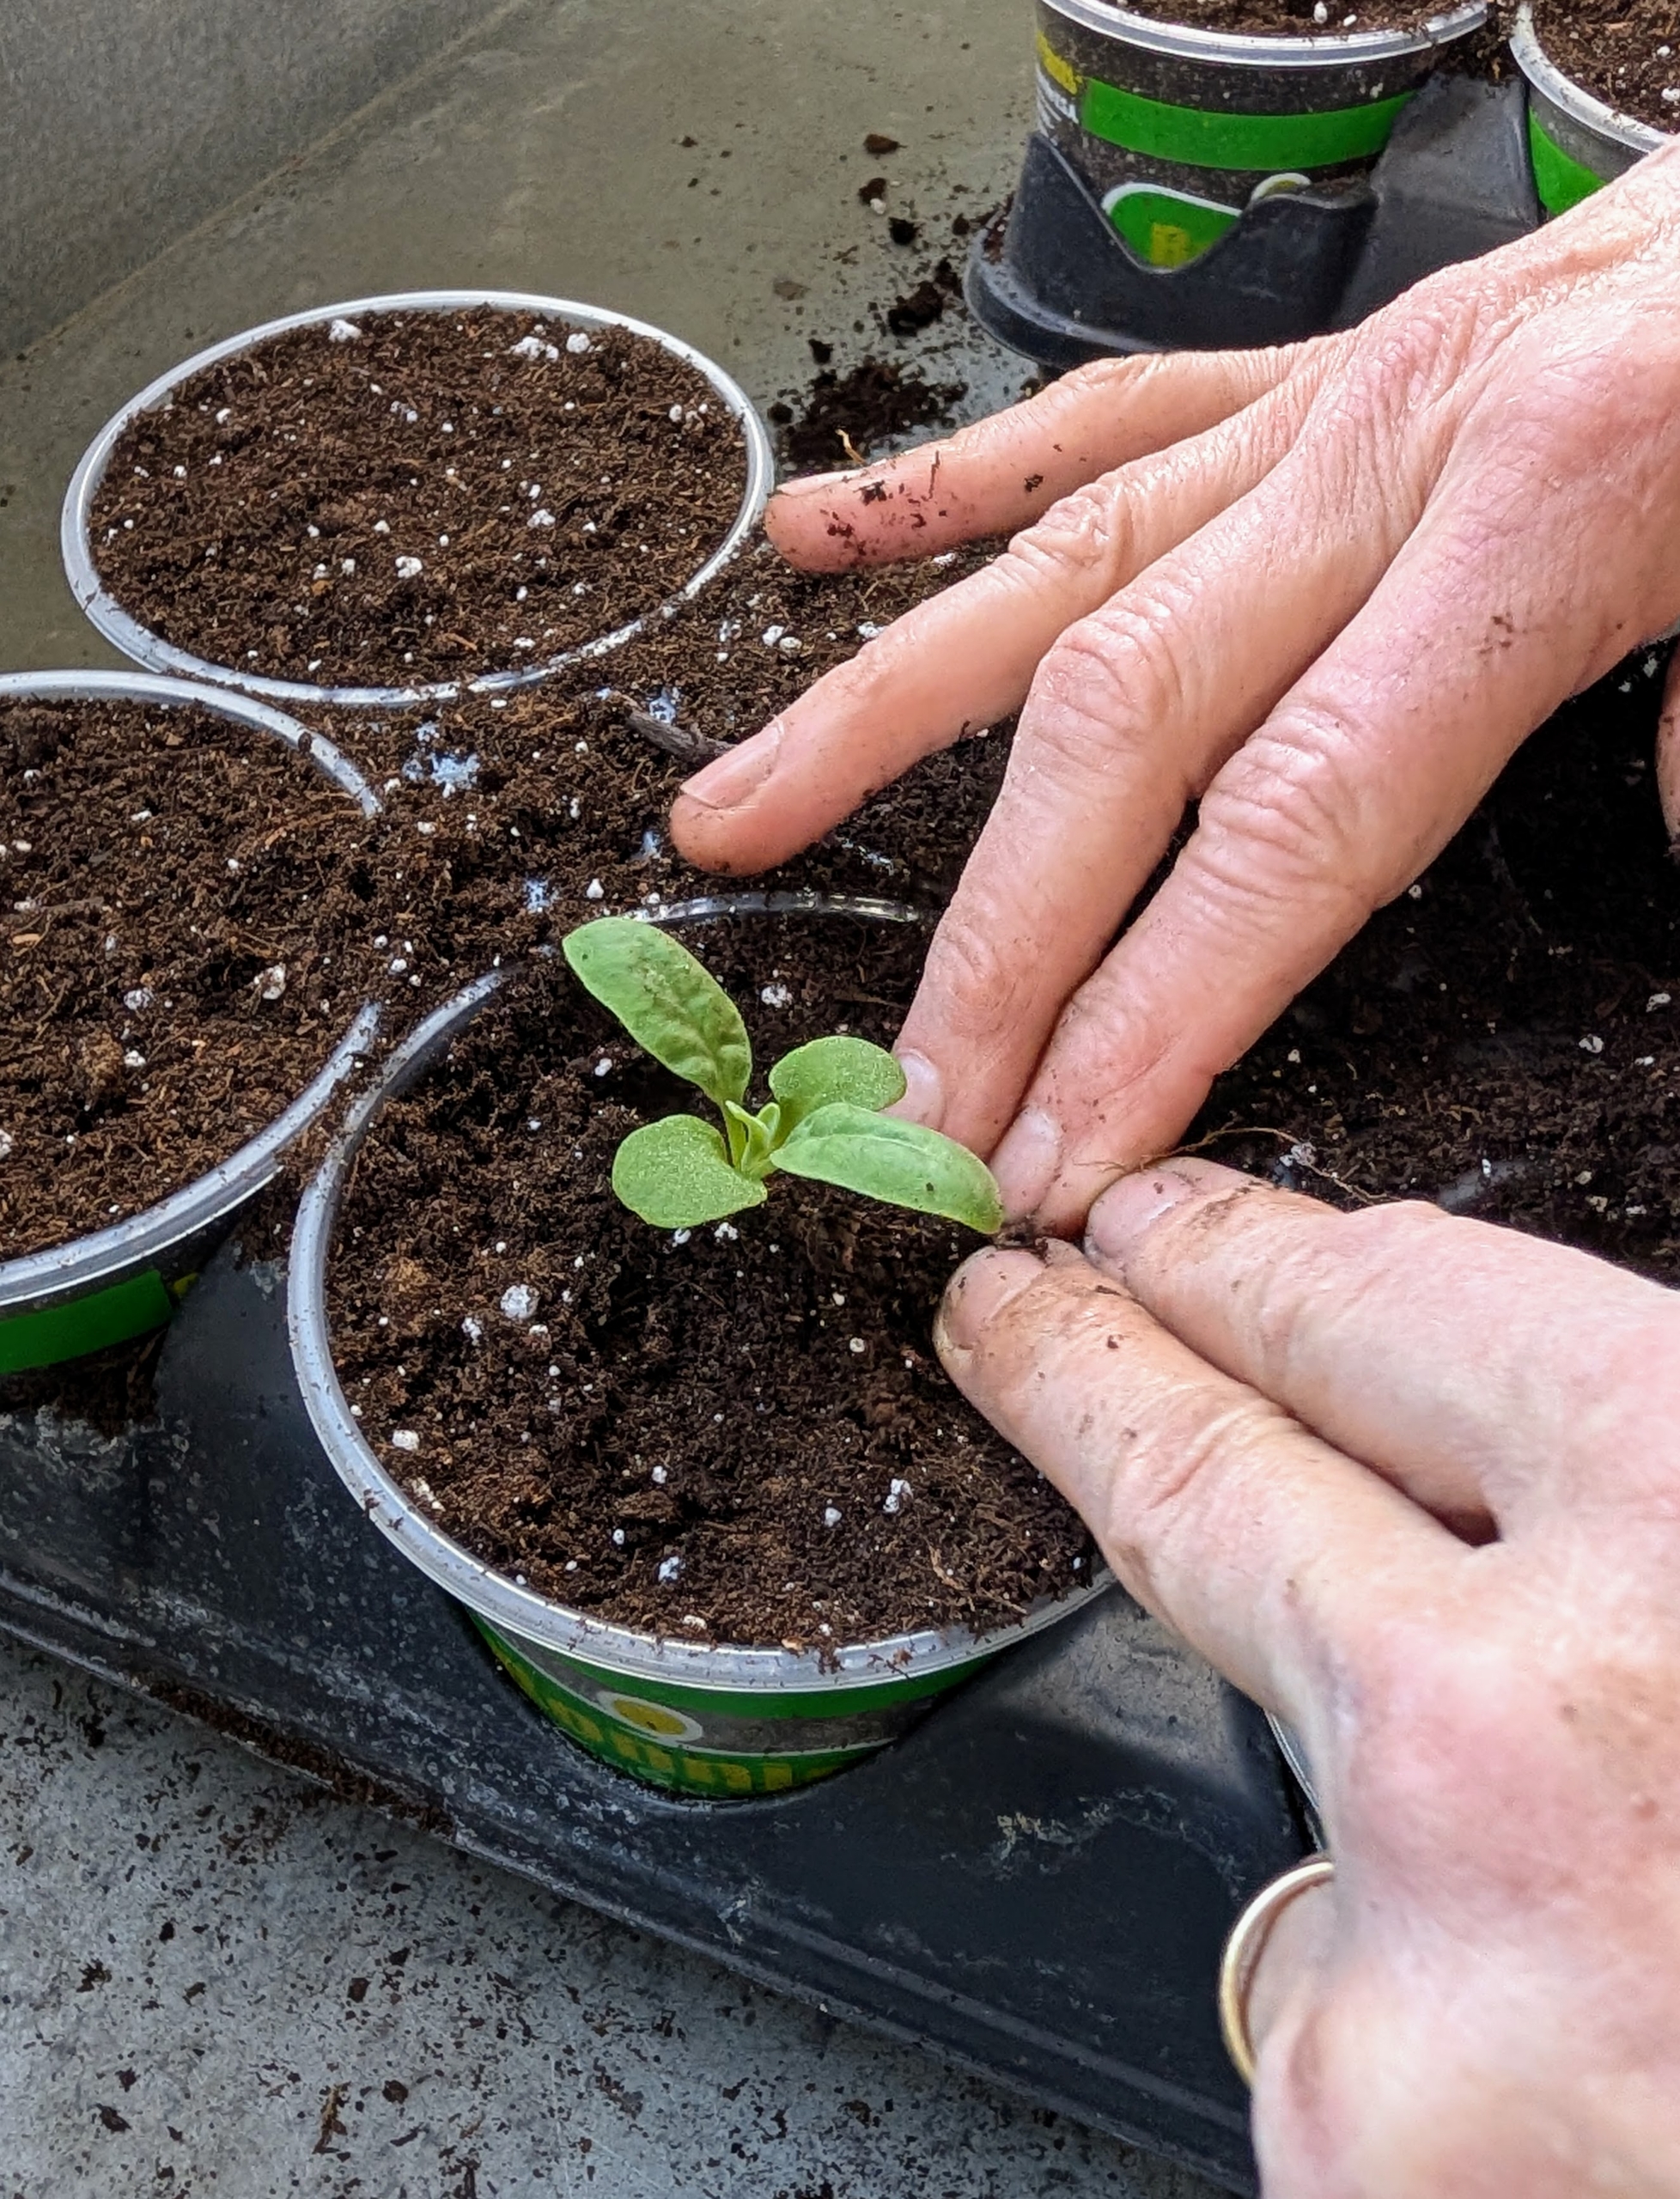
The seedling is planted as deep as it was in its previous tray cell. Wendy gently firms up the surrounding soil, so the seedling is supported and standing straight in the center of the pot.
Wendy avoids handling the seedling by its tender stems, which can bruise easily. The stronger plant now has more room to grow before getting transplanted into the ground.
The purpose of transplanting is to provide enough room – overcrowding can stress the sprouts.
Wendy fills out the appropriate identifying plant markers, also from Johnny’s Selected Seeds – a source I have used a long time for seeds and gardening supplies.
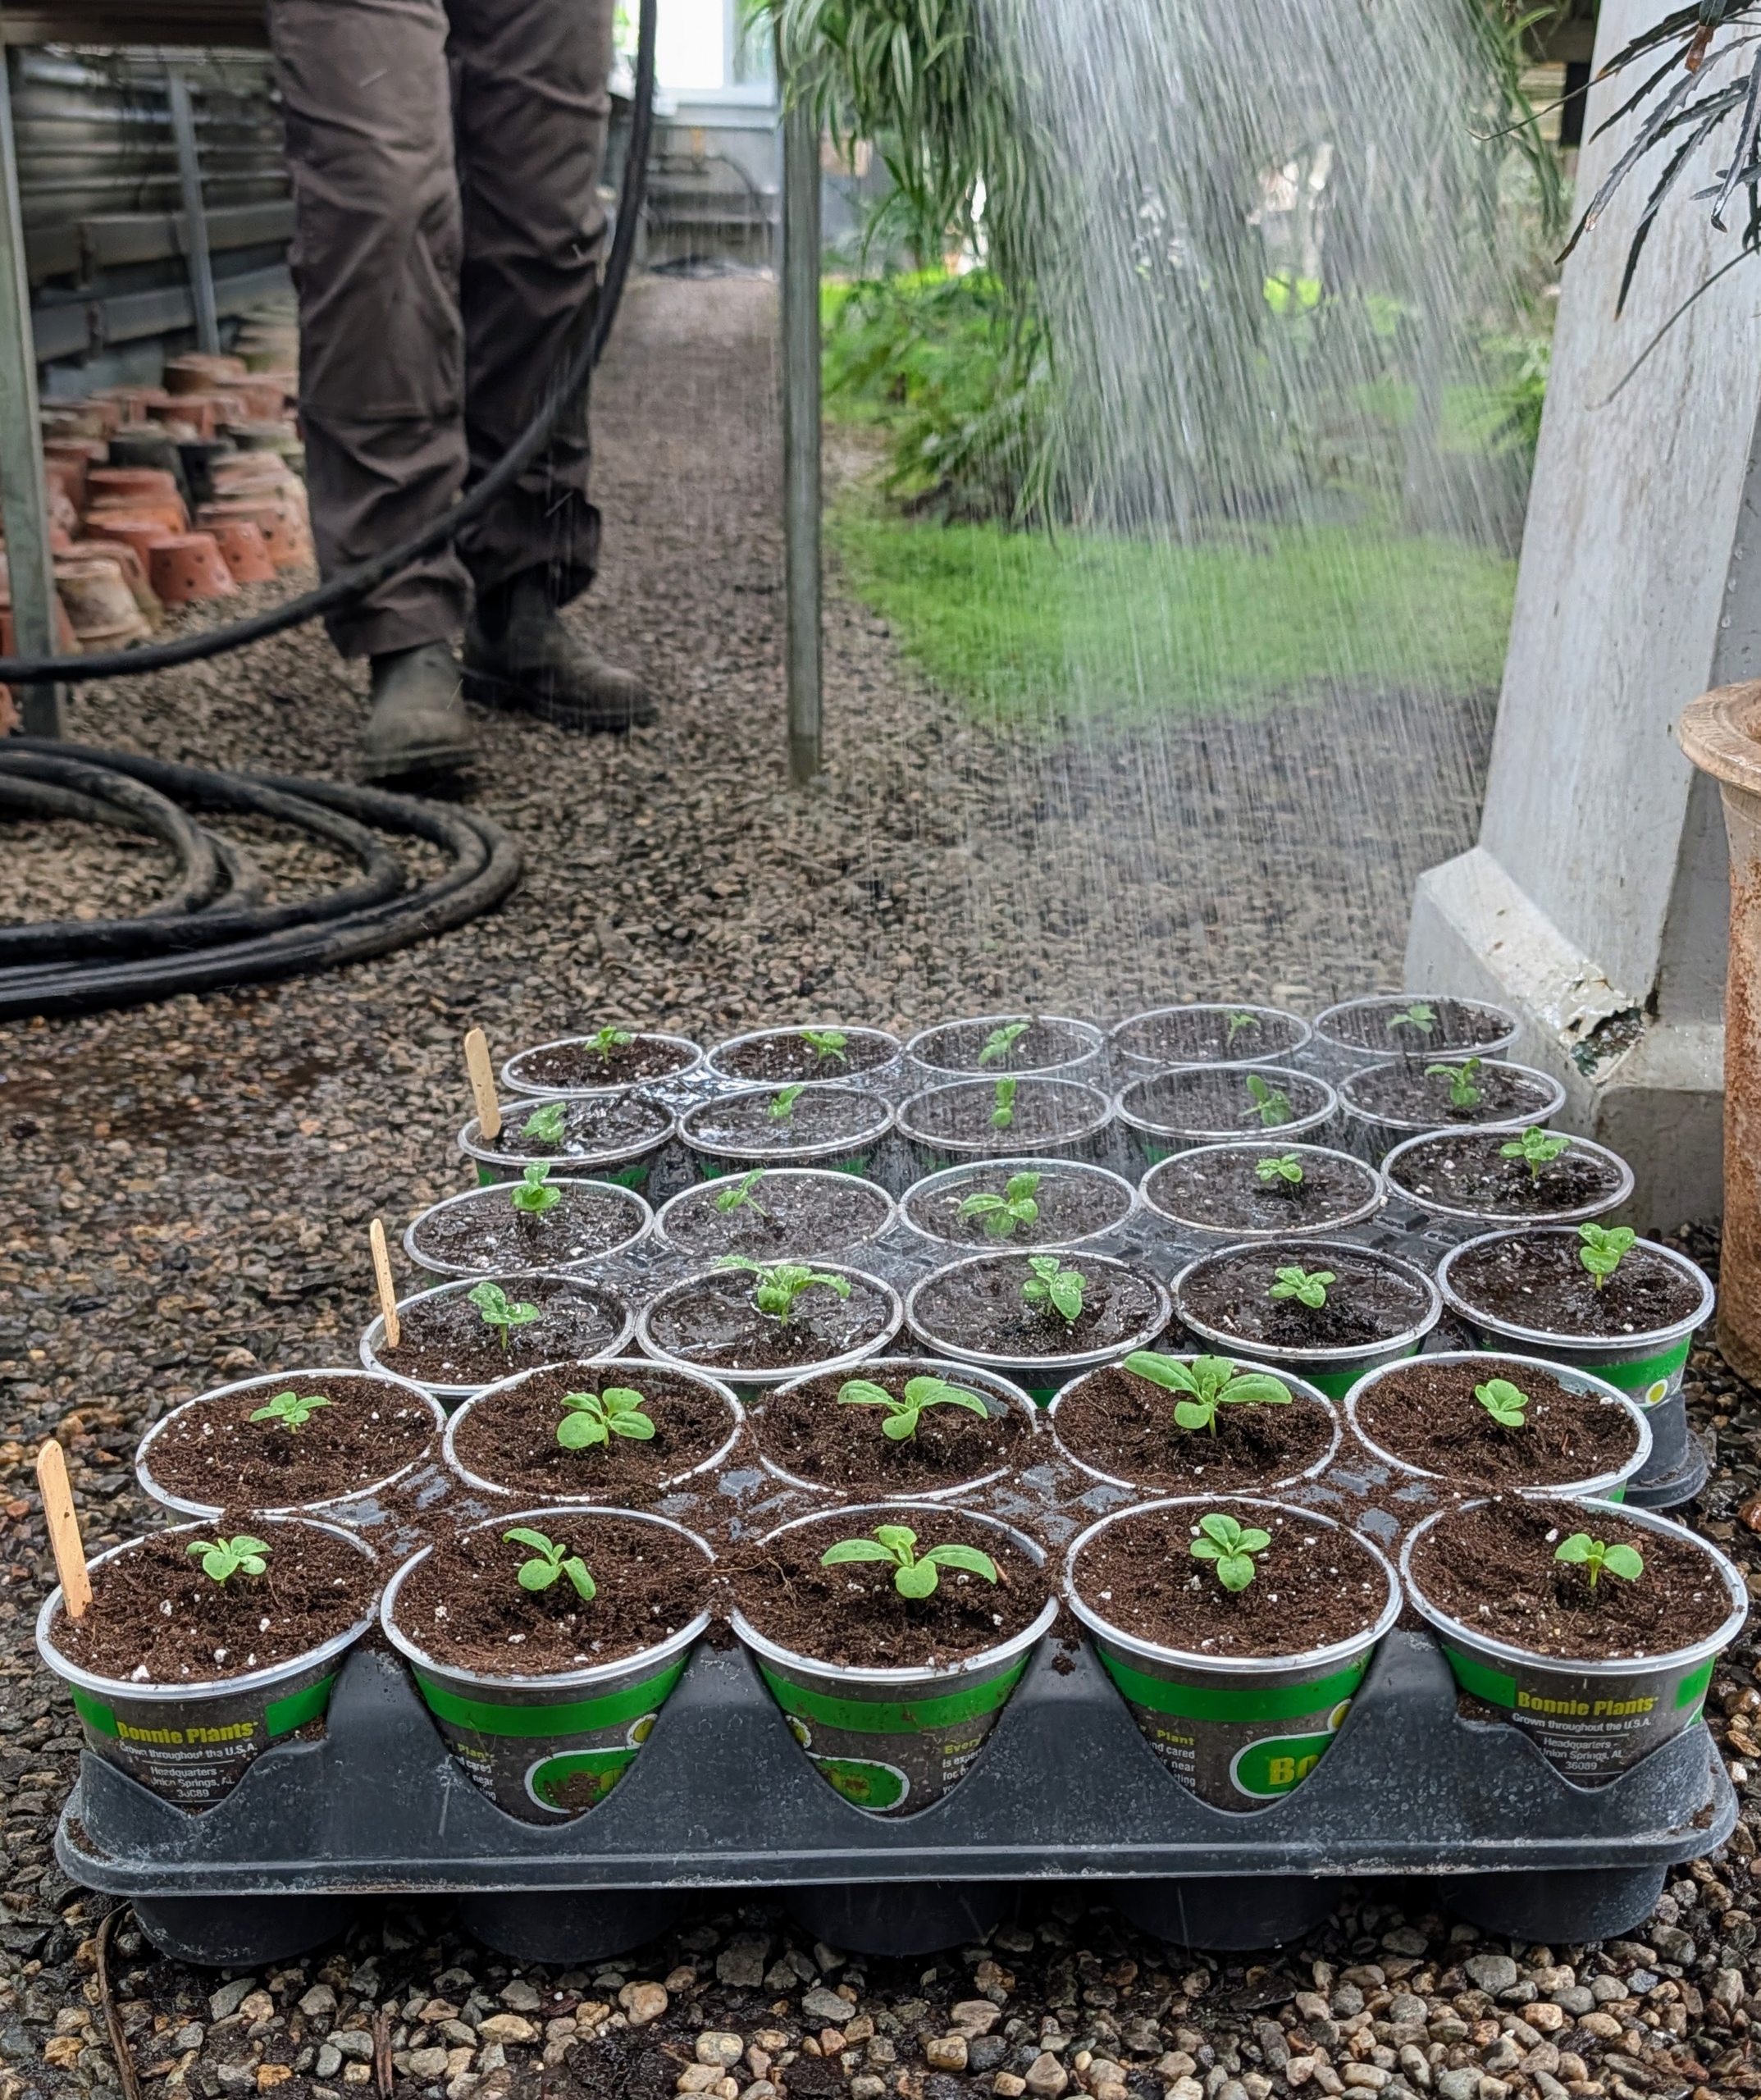
The seedlings are then brought into the main greenhouse for a drink.
These tender young seedlings should be watered lightly ensuring the roots have access to moisture. And don’t water too frequently – only when the top inch or so of soil is dry.
Wendy places the markers identifying the seedlings in the containers – seedlings must be labeled throughout the growing process until they are planted outdoors. This allows us to know what they are, how various varieties grow, and which ones we should plant again next season.
Next, these growing seedlings will return to one of our seedling areas where they can continue to develop. It’s so nice to be able to grow vegetables and flowers from seed during these winter months. It won’t be long before they are all ready to move outdoors and get planted in the gardens.