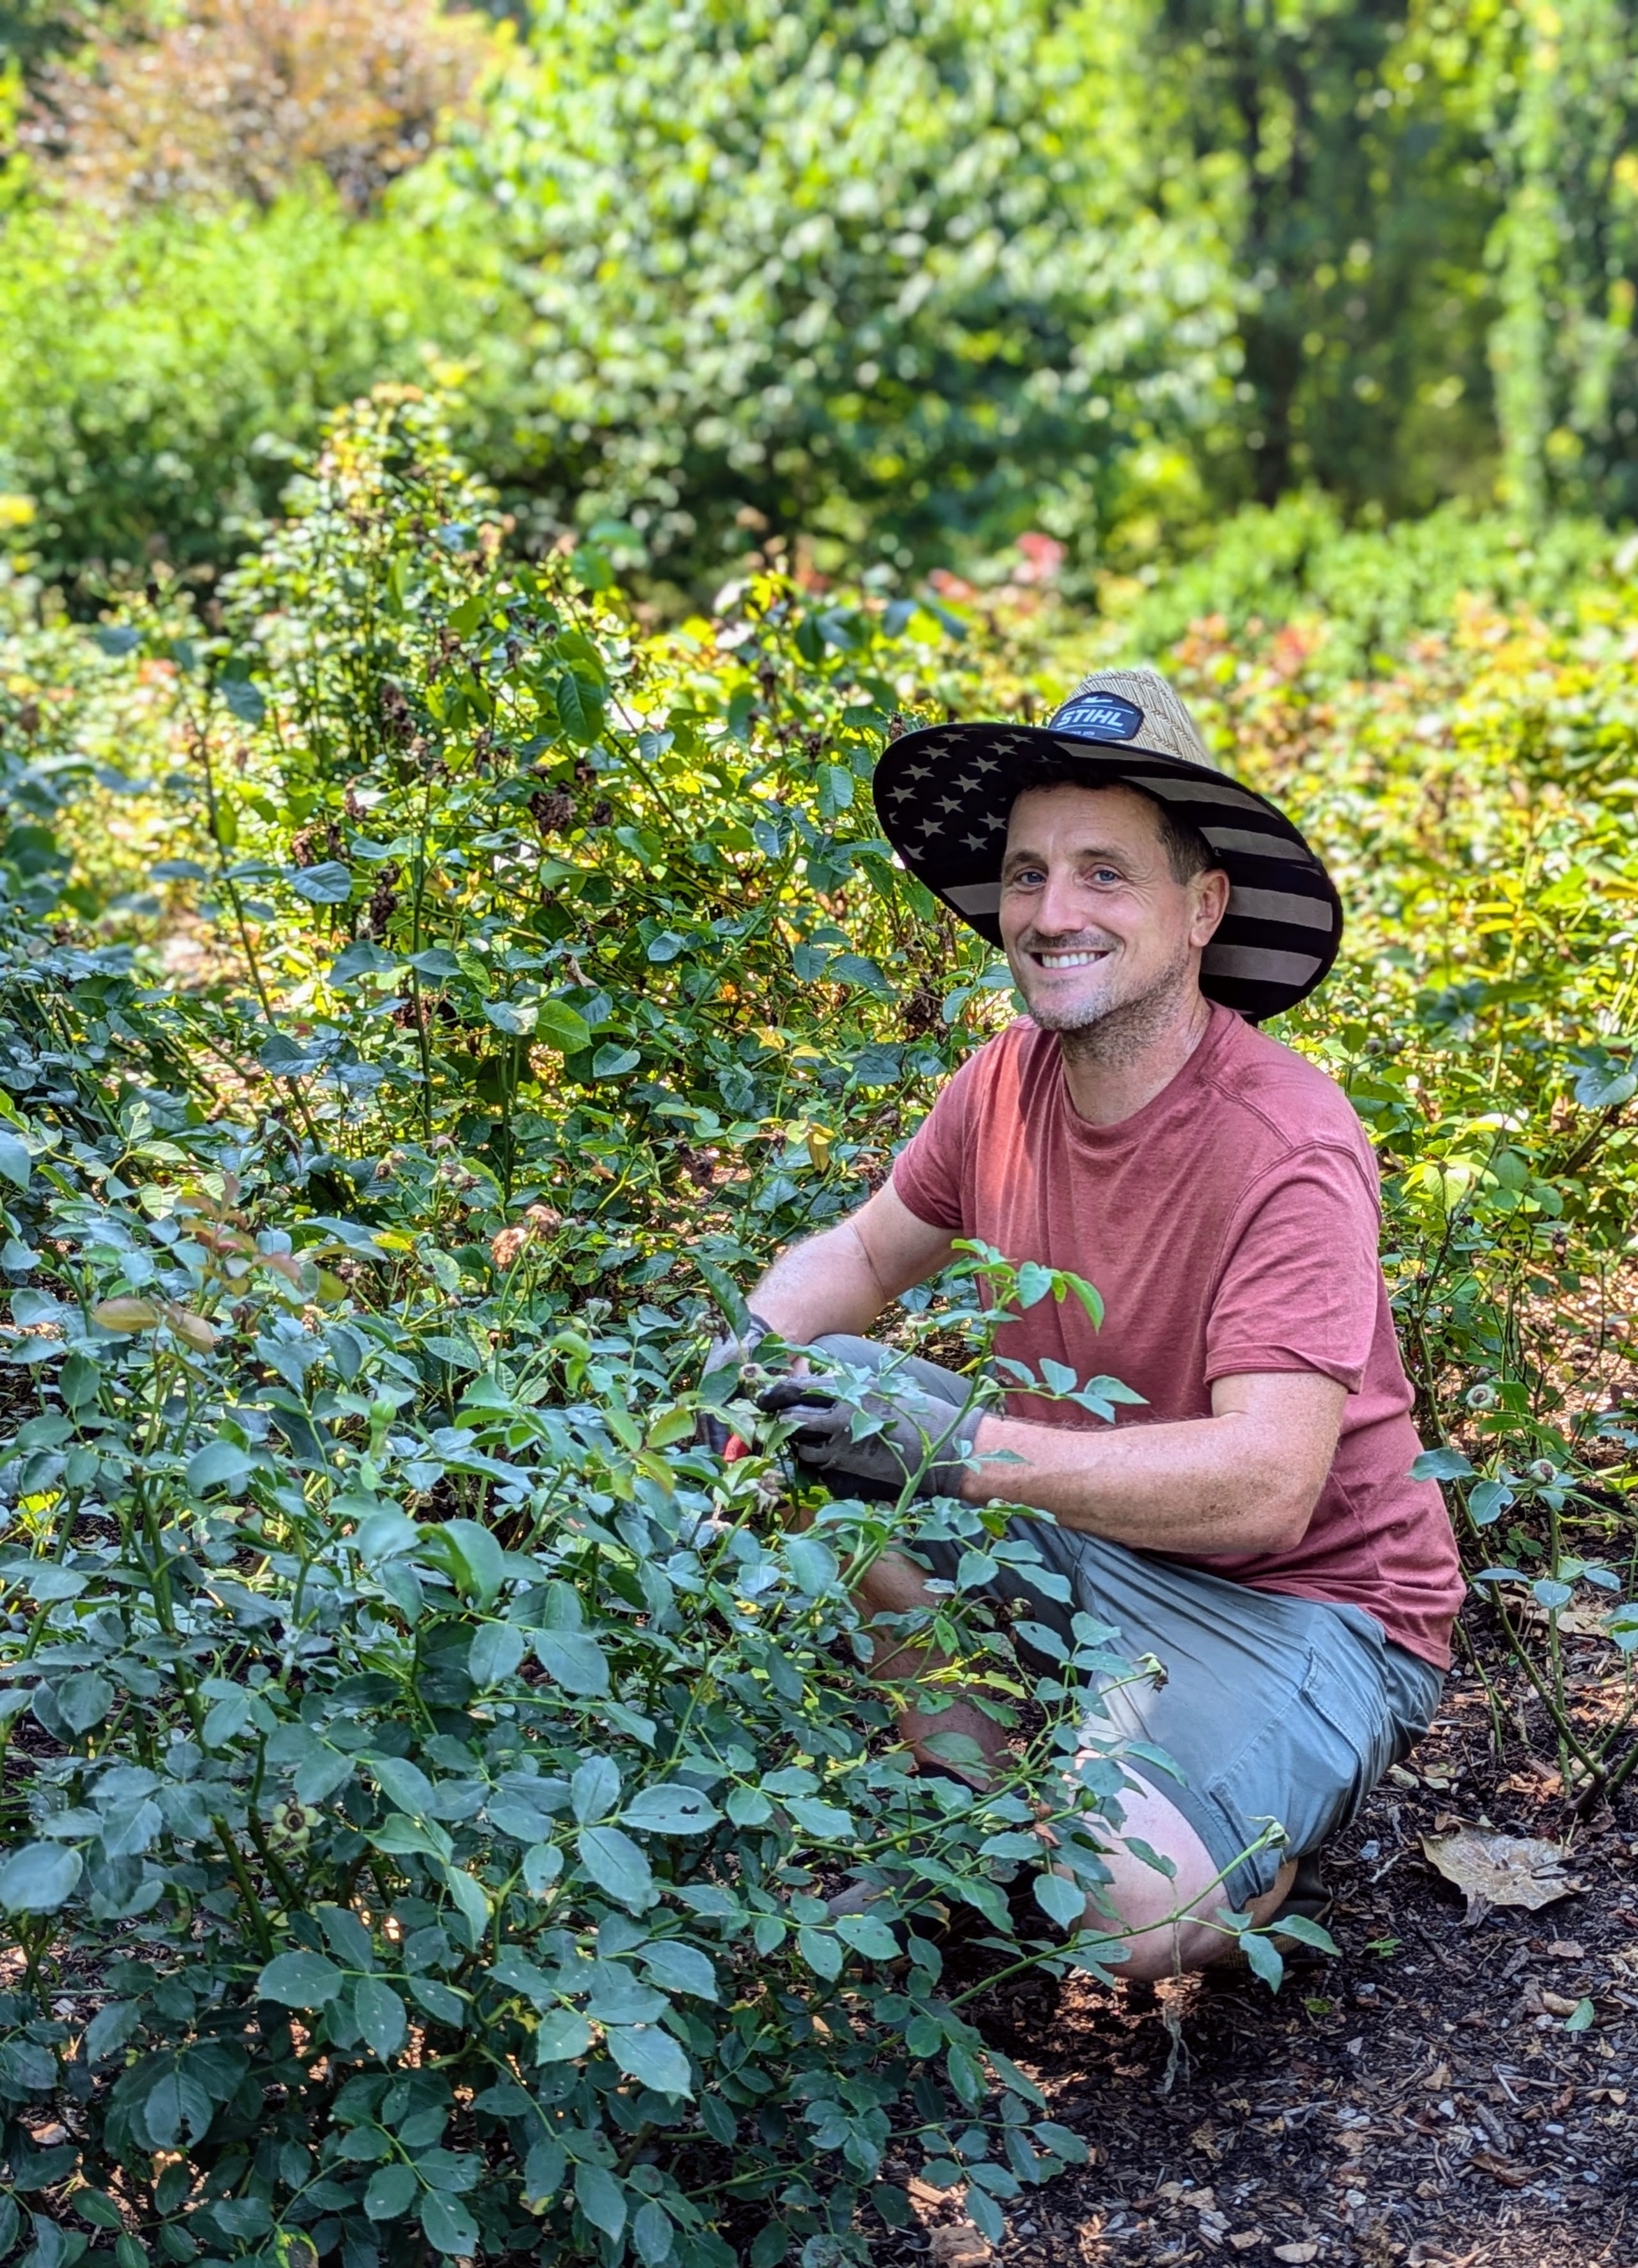
Here at my Bedford, New York farm, it's time to "prune after bloom" the roses - meaning deadhead and trim all the faded flowers.
There are different pruning strategies for different times of the year, but overall the goals are the same - to keep the plants looking fresh and open, promote new growth and re-flowering, and to improve the overall health of the plant. Deadheading is one of the easiest forms of pruning - as blooms fade, just cut off the flower stems below the spent blossoms and above the first set of full, healthy leaves. Yesterday, my head gardener, Ryan McCallister, and our NYBG intern, Matthew Orego, pruned, groomed, fed, and watered the rose garden behind my greenhouse.
Enjoy these photos.
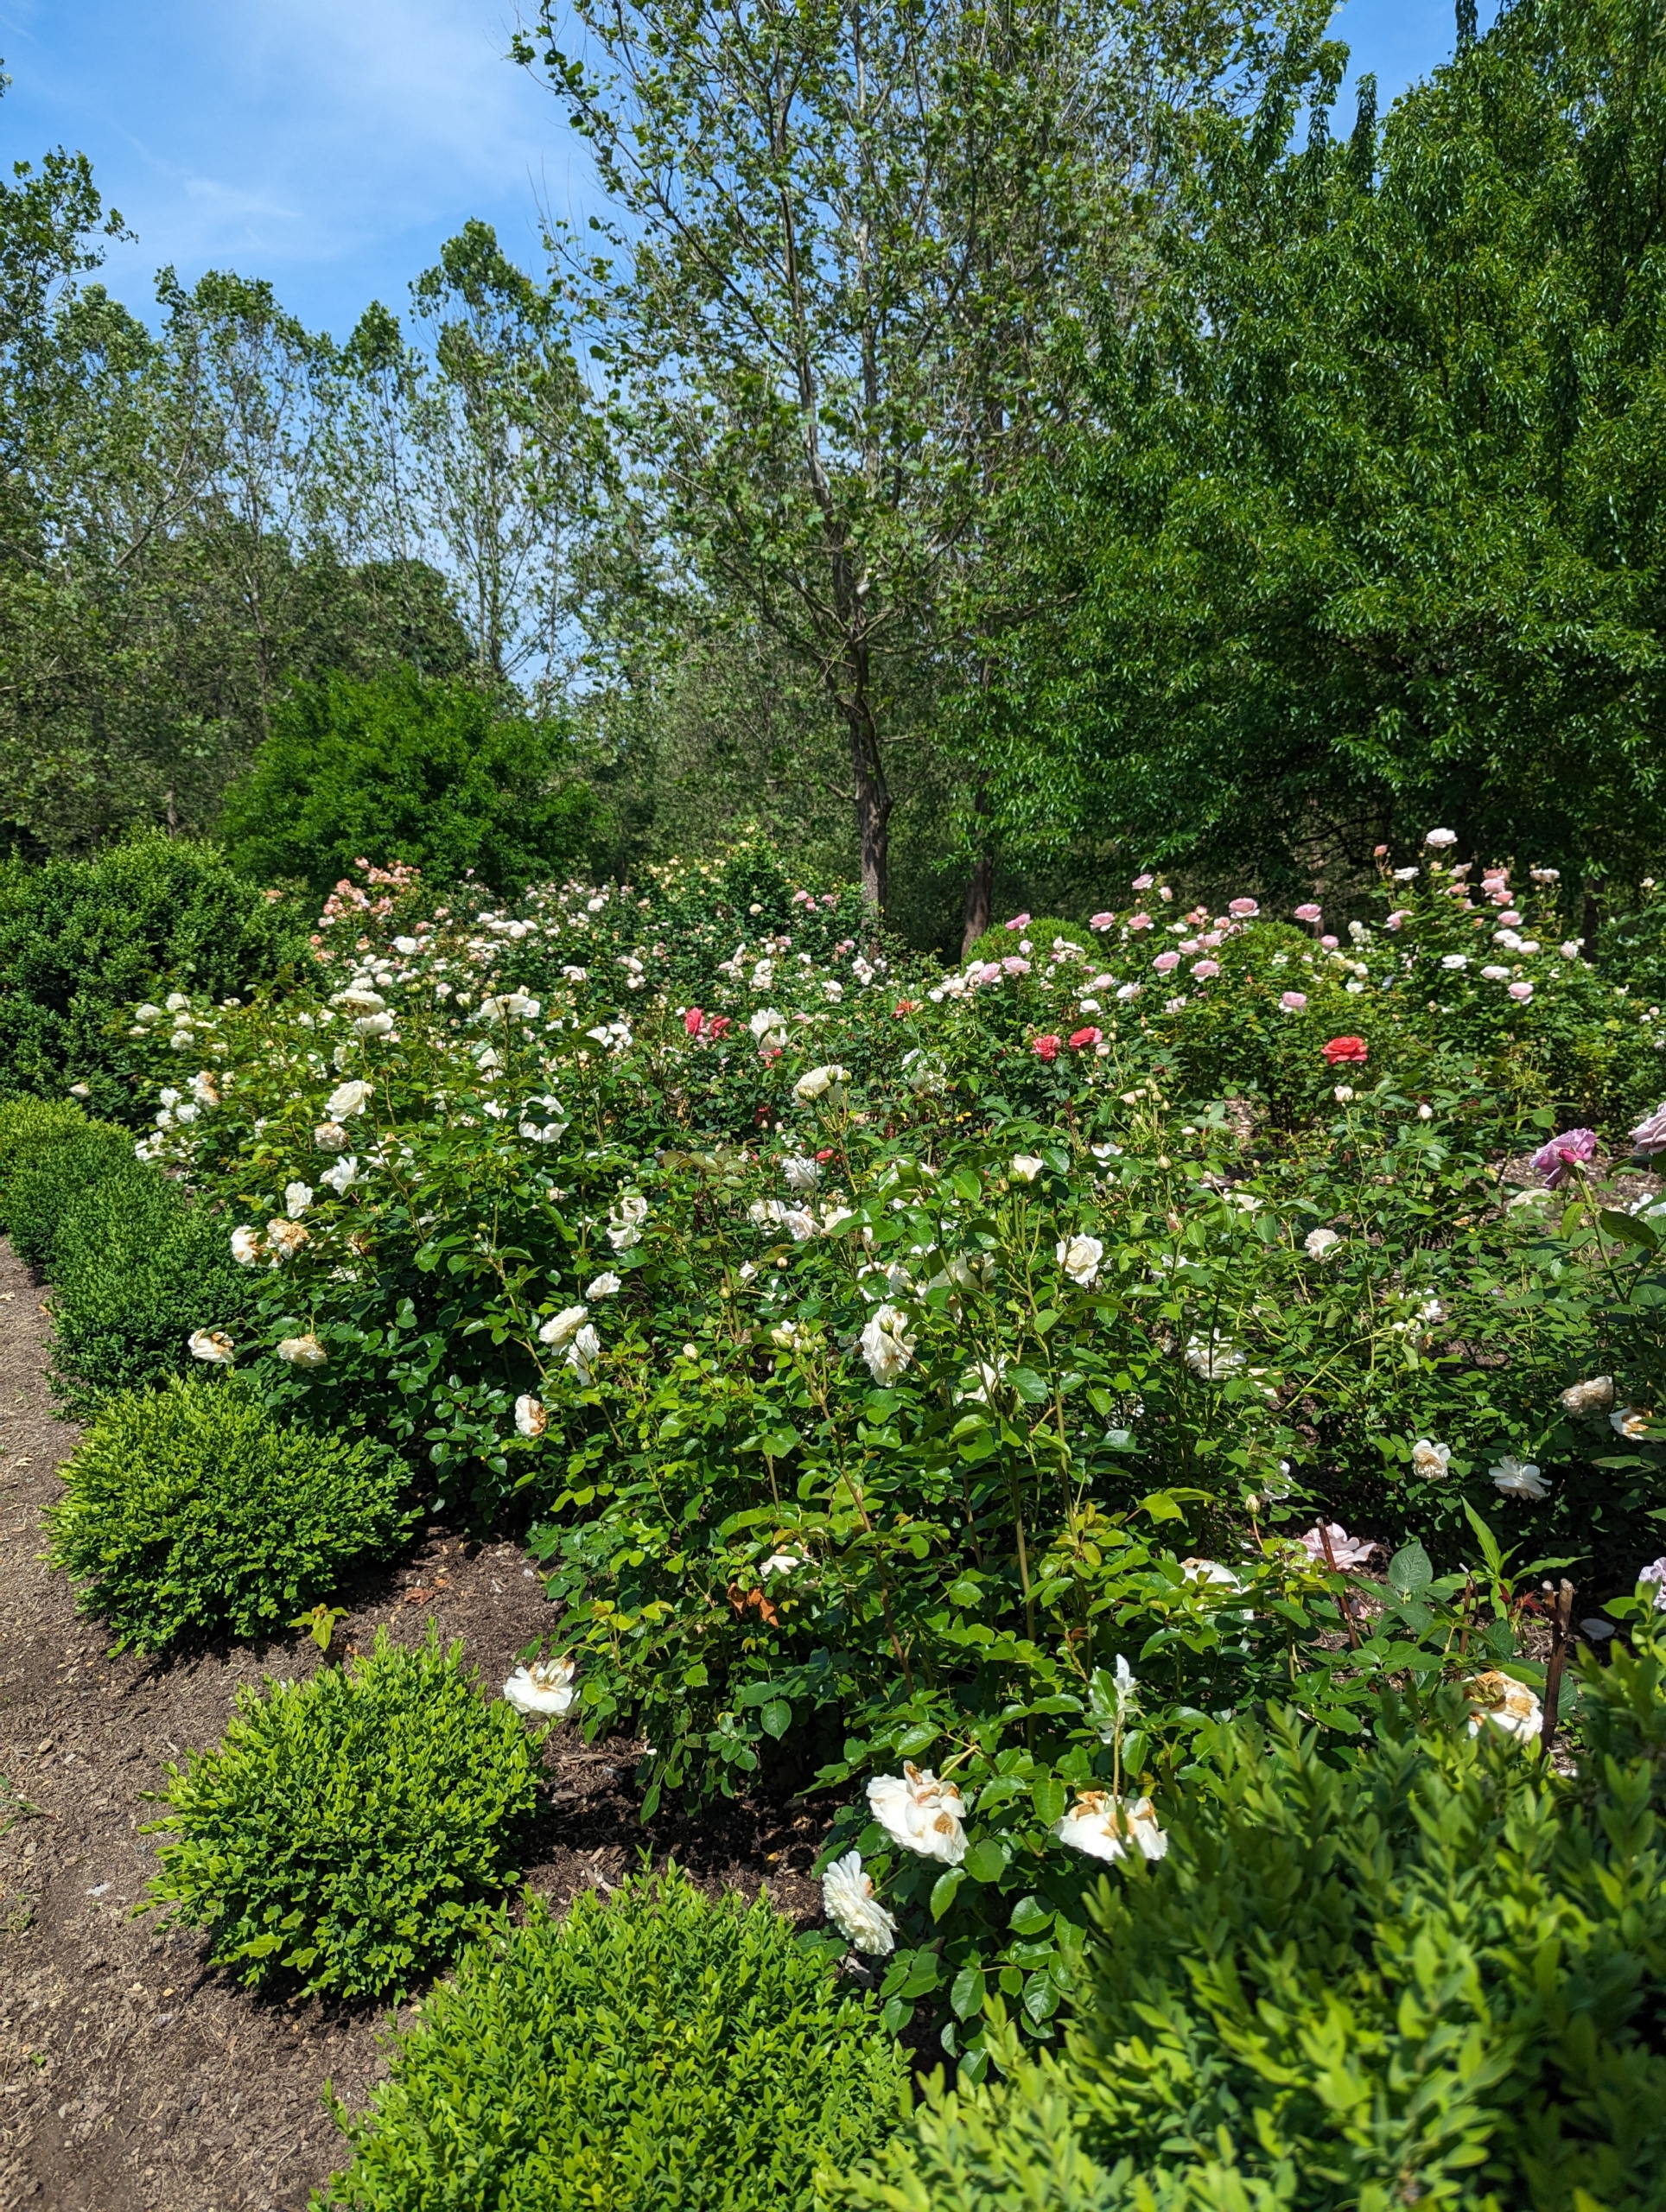
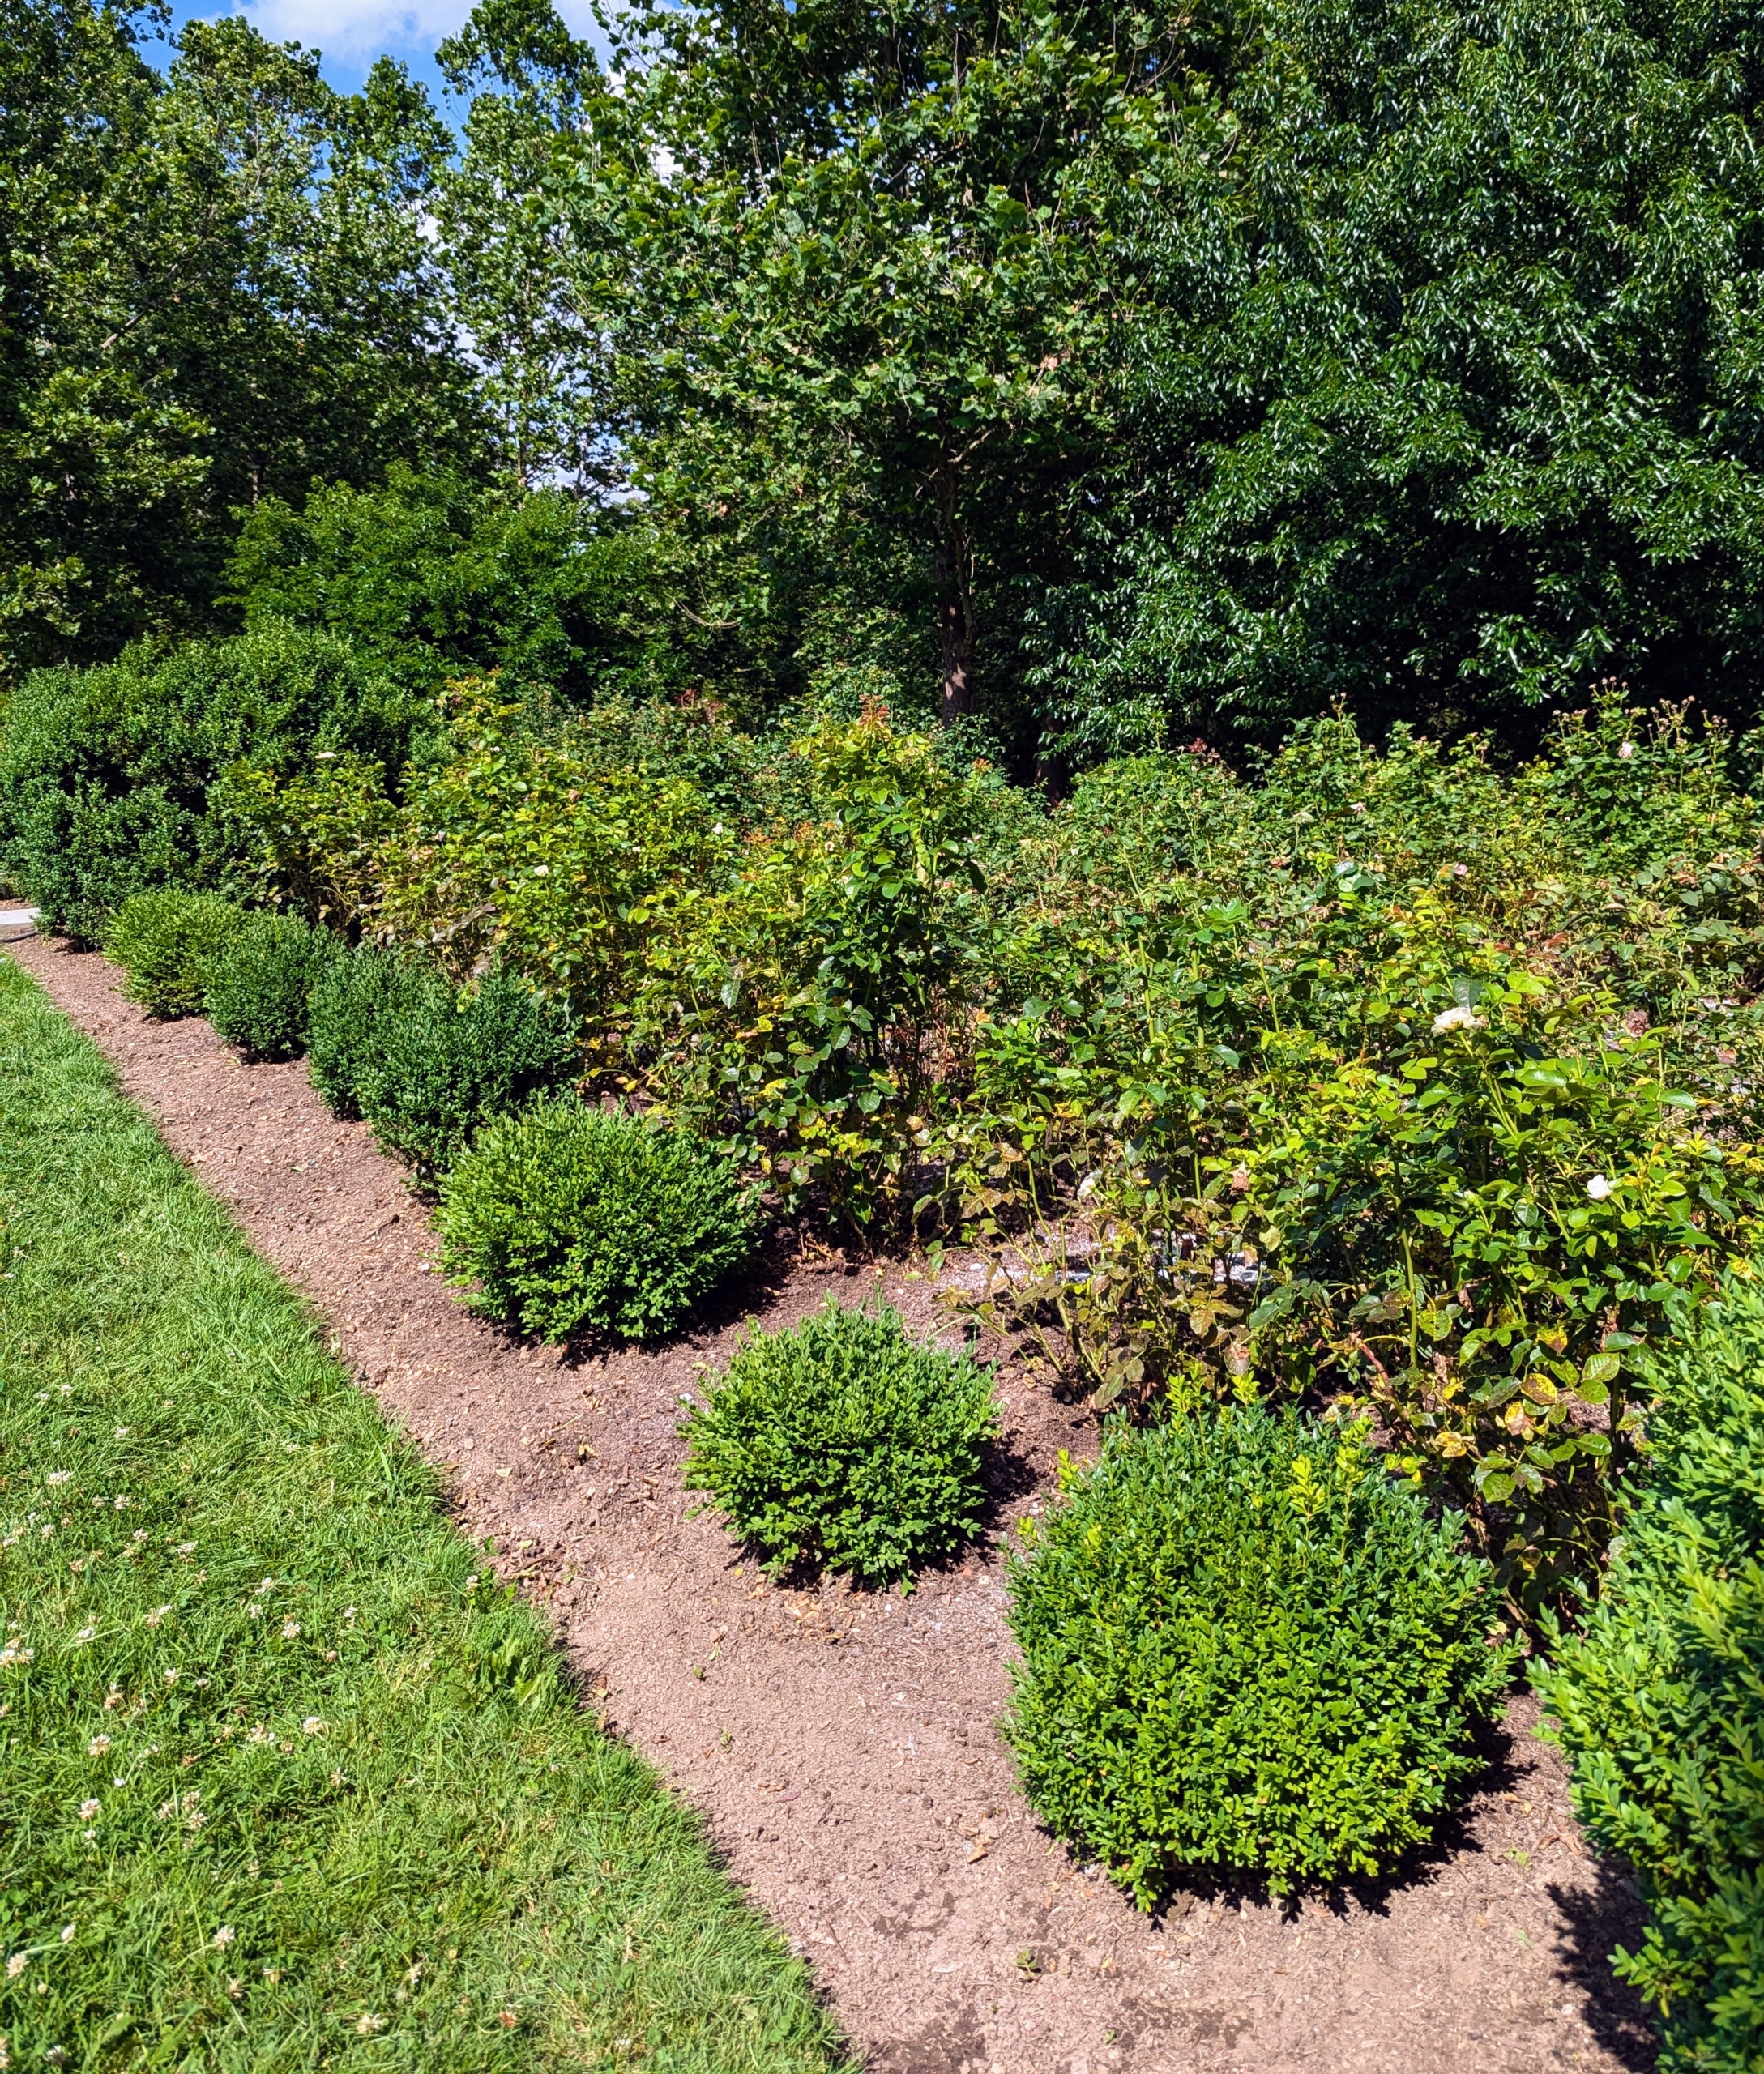
Just a few weeks ago, this garden looked like this – full of fragrant blooms. I planted more than 120 roses in this space and they’re all doing very well because of the nutritious soil and diligent maintenance.
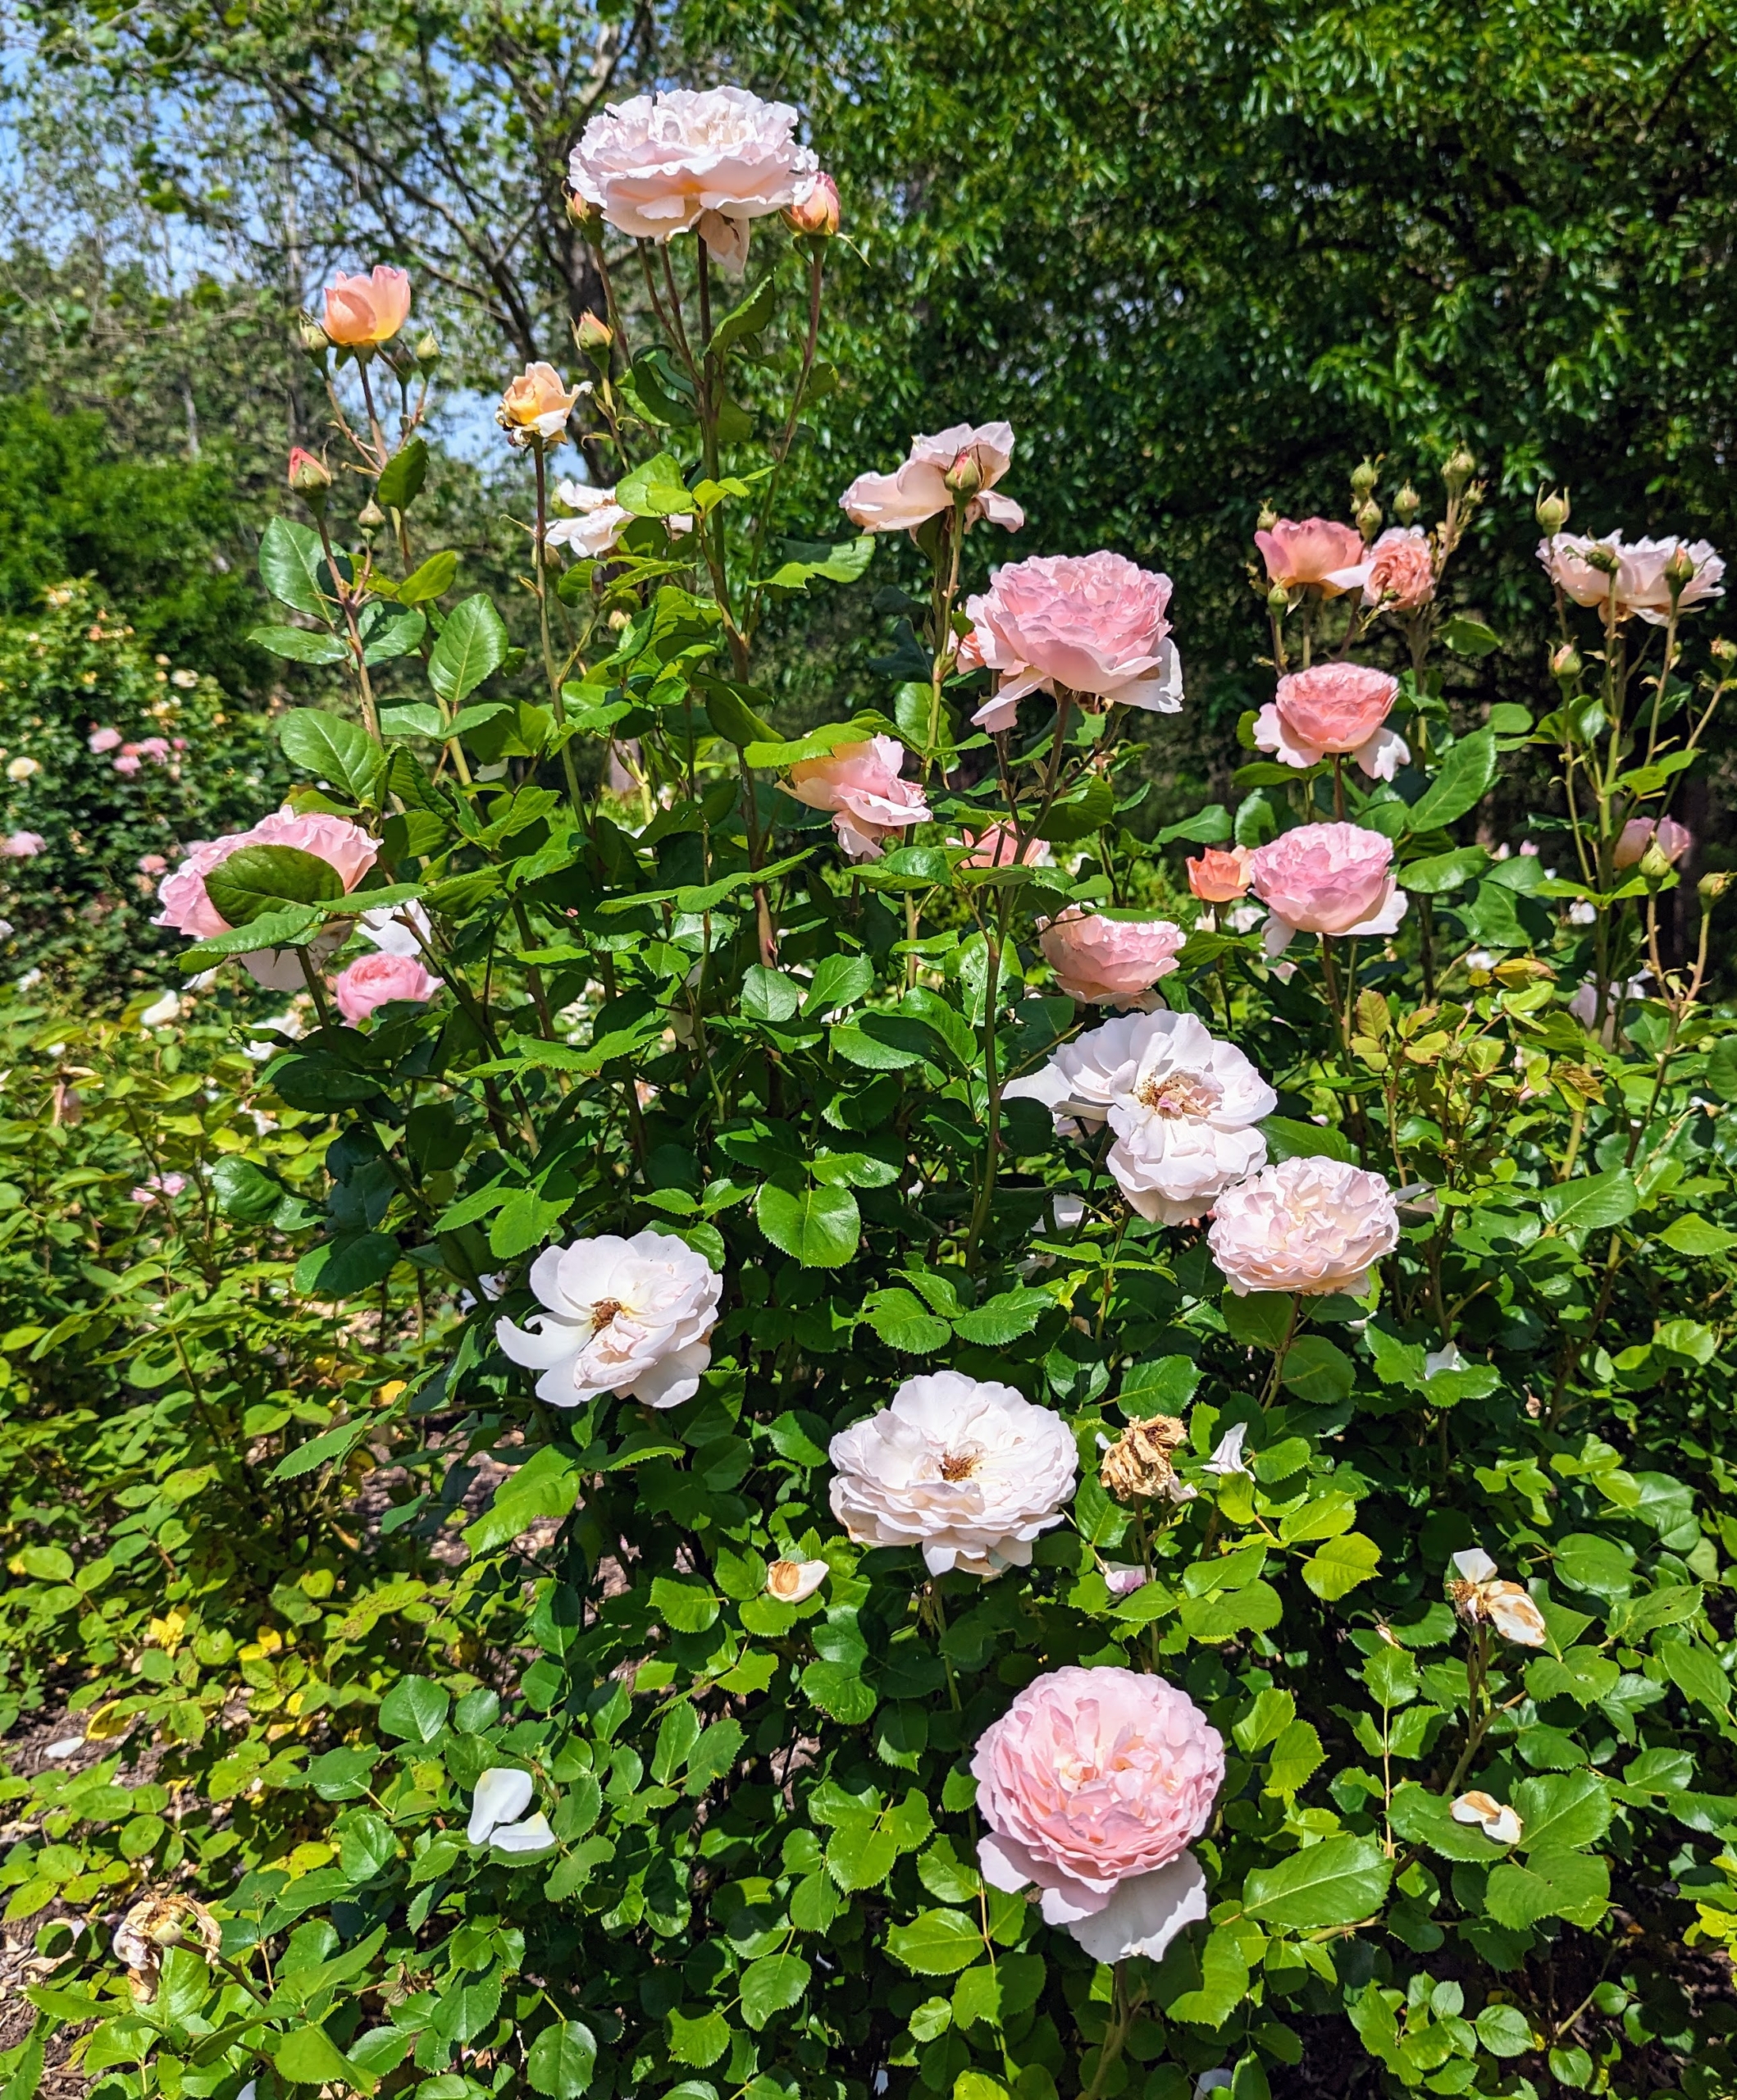
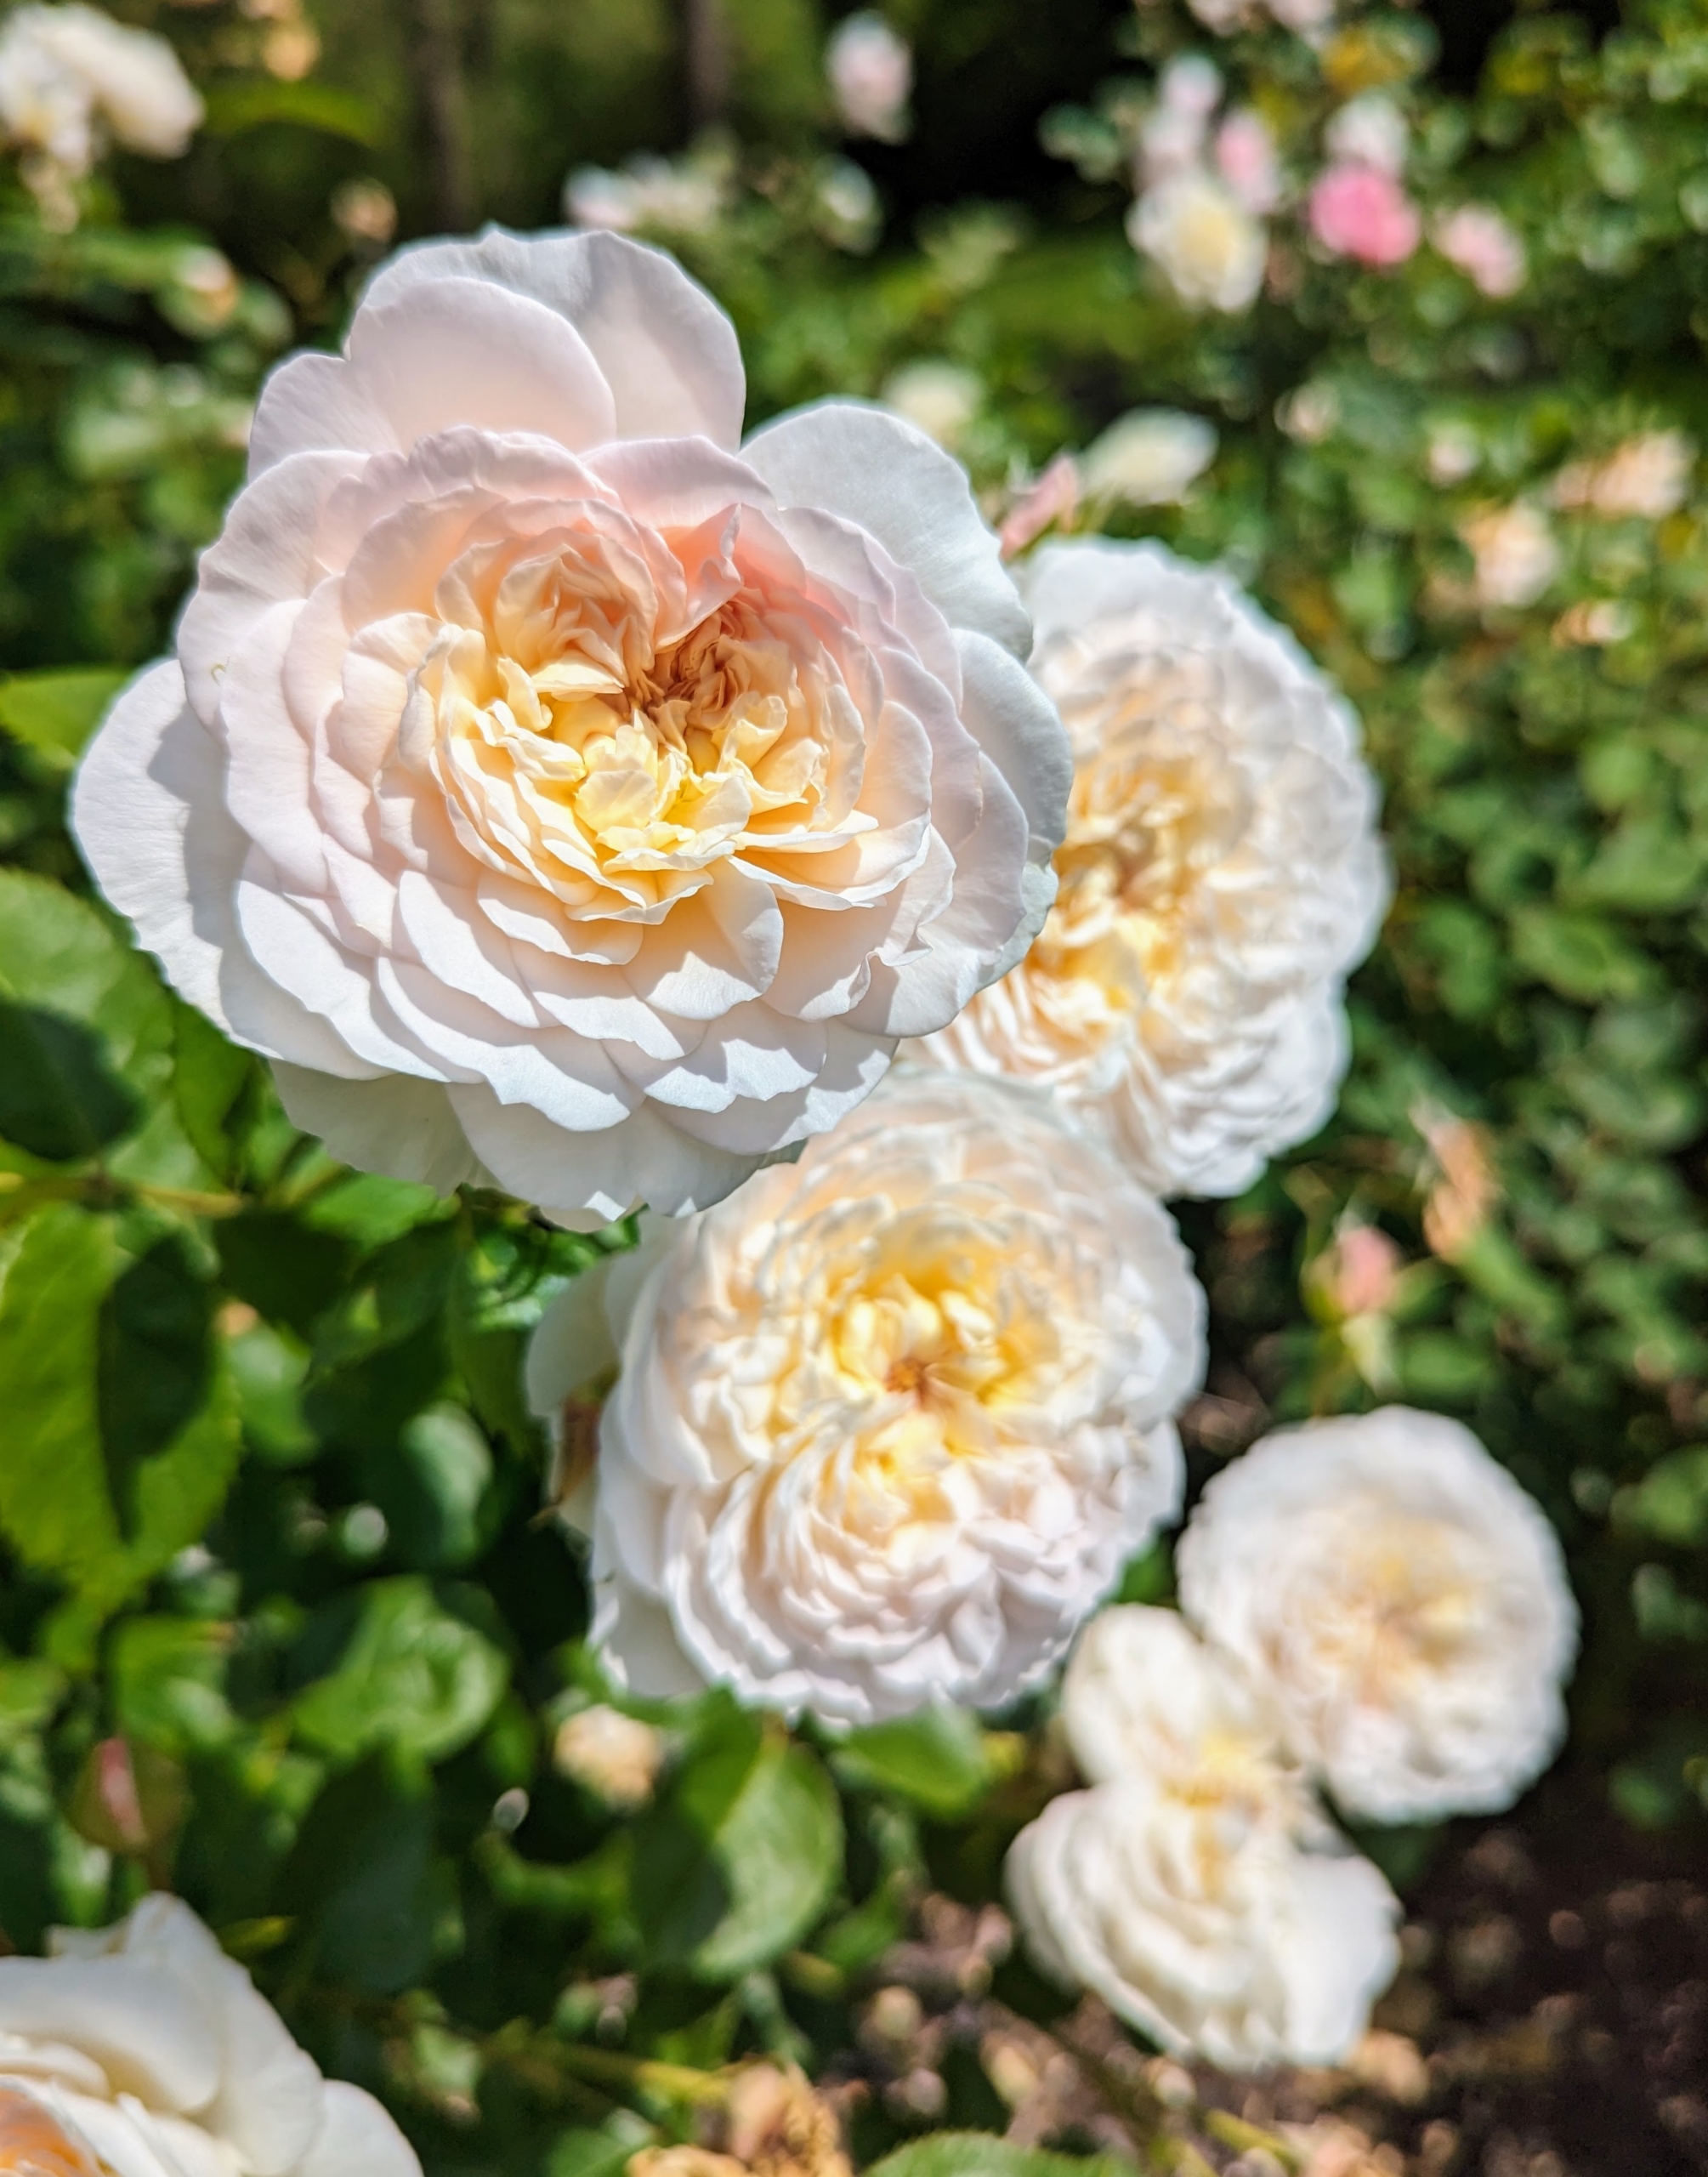
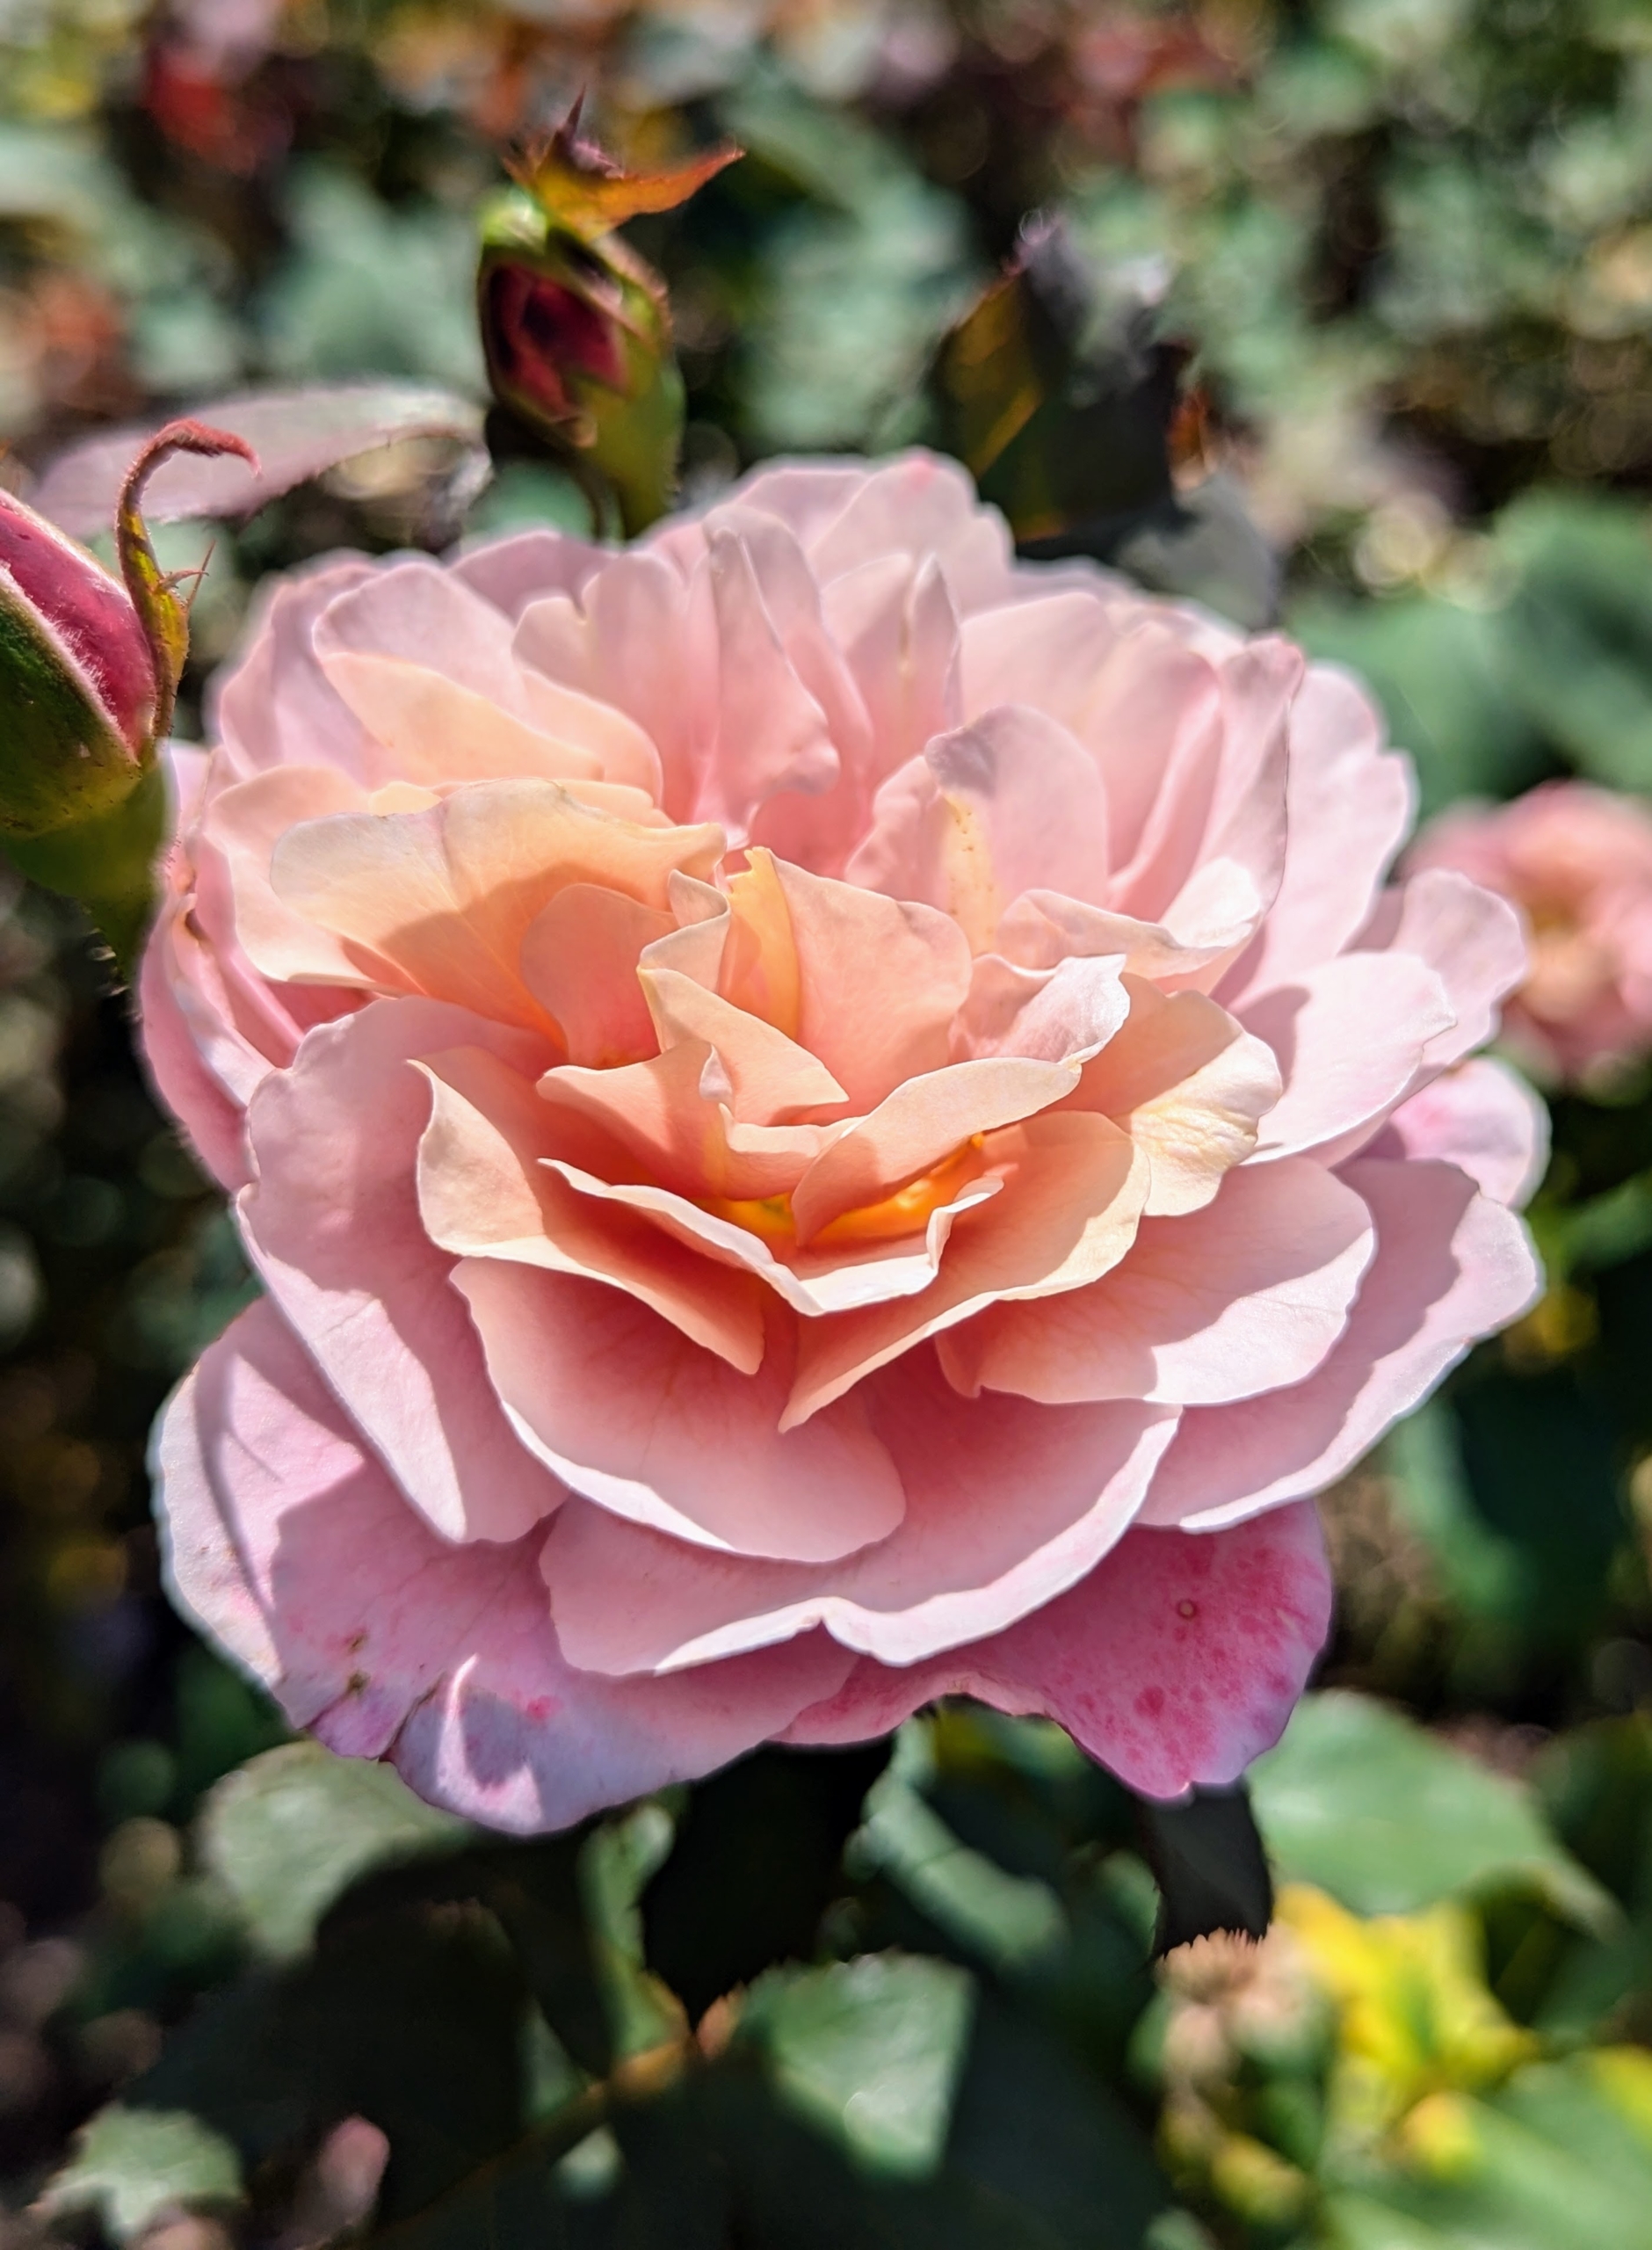
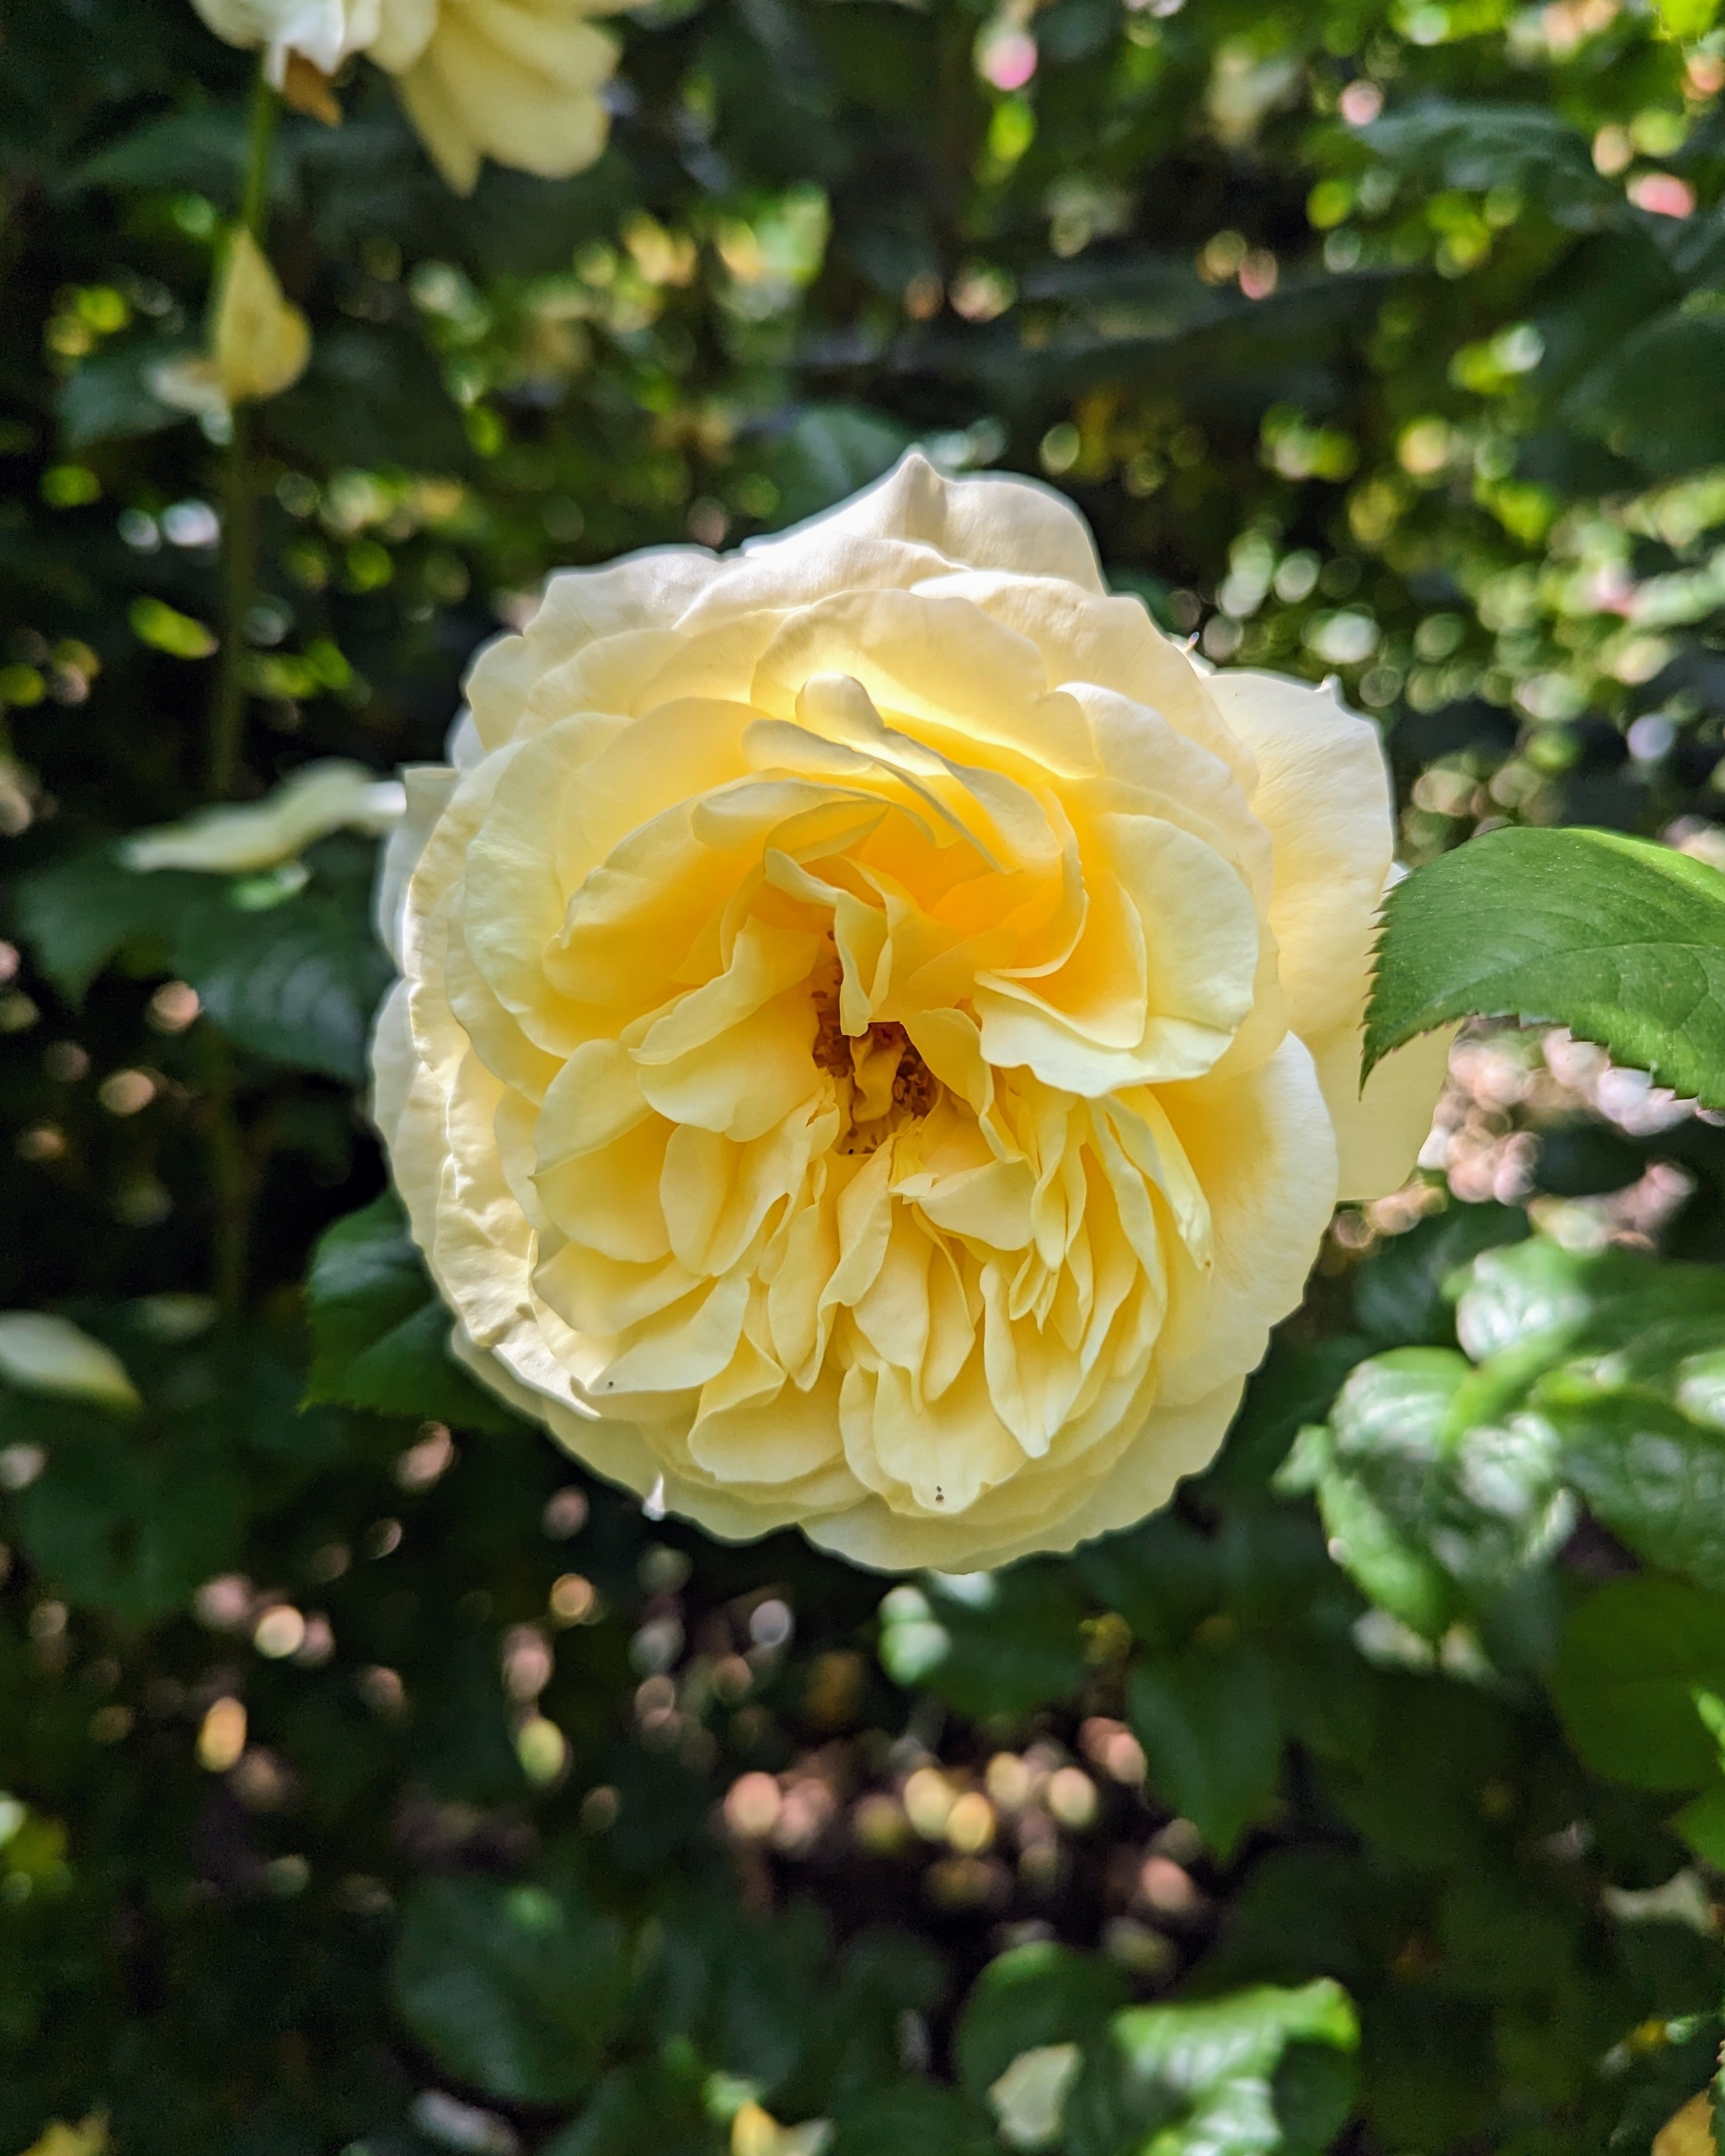
Here, I have floribunda roses, hybrid tea roses, and shrub roses – mostly all soft creamy pink to lavender and yellow colors.
Look at the gorgeous, fragrant blooms – some were as big as the palm of one’s hand.
Hybrid tea roses, also called large-flowered roses, usually have only one flower per stem and tend to flower in three flushes from summer to late autumn. Floribundas or cluster-flowered roses have many flowers per stem and tend to repeat-flower continuously from summer to late autumn.
A rose is a woody perennial flowering plant of the genus Rosa, in the family Rosaceae. There are more than a hundred species and thousands of cultivars.
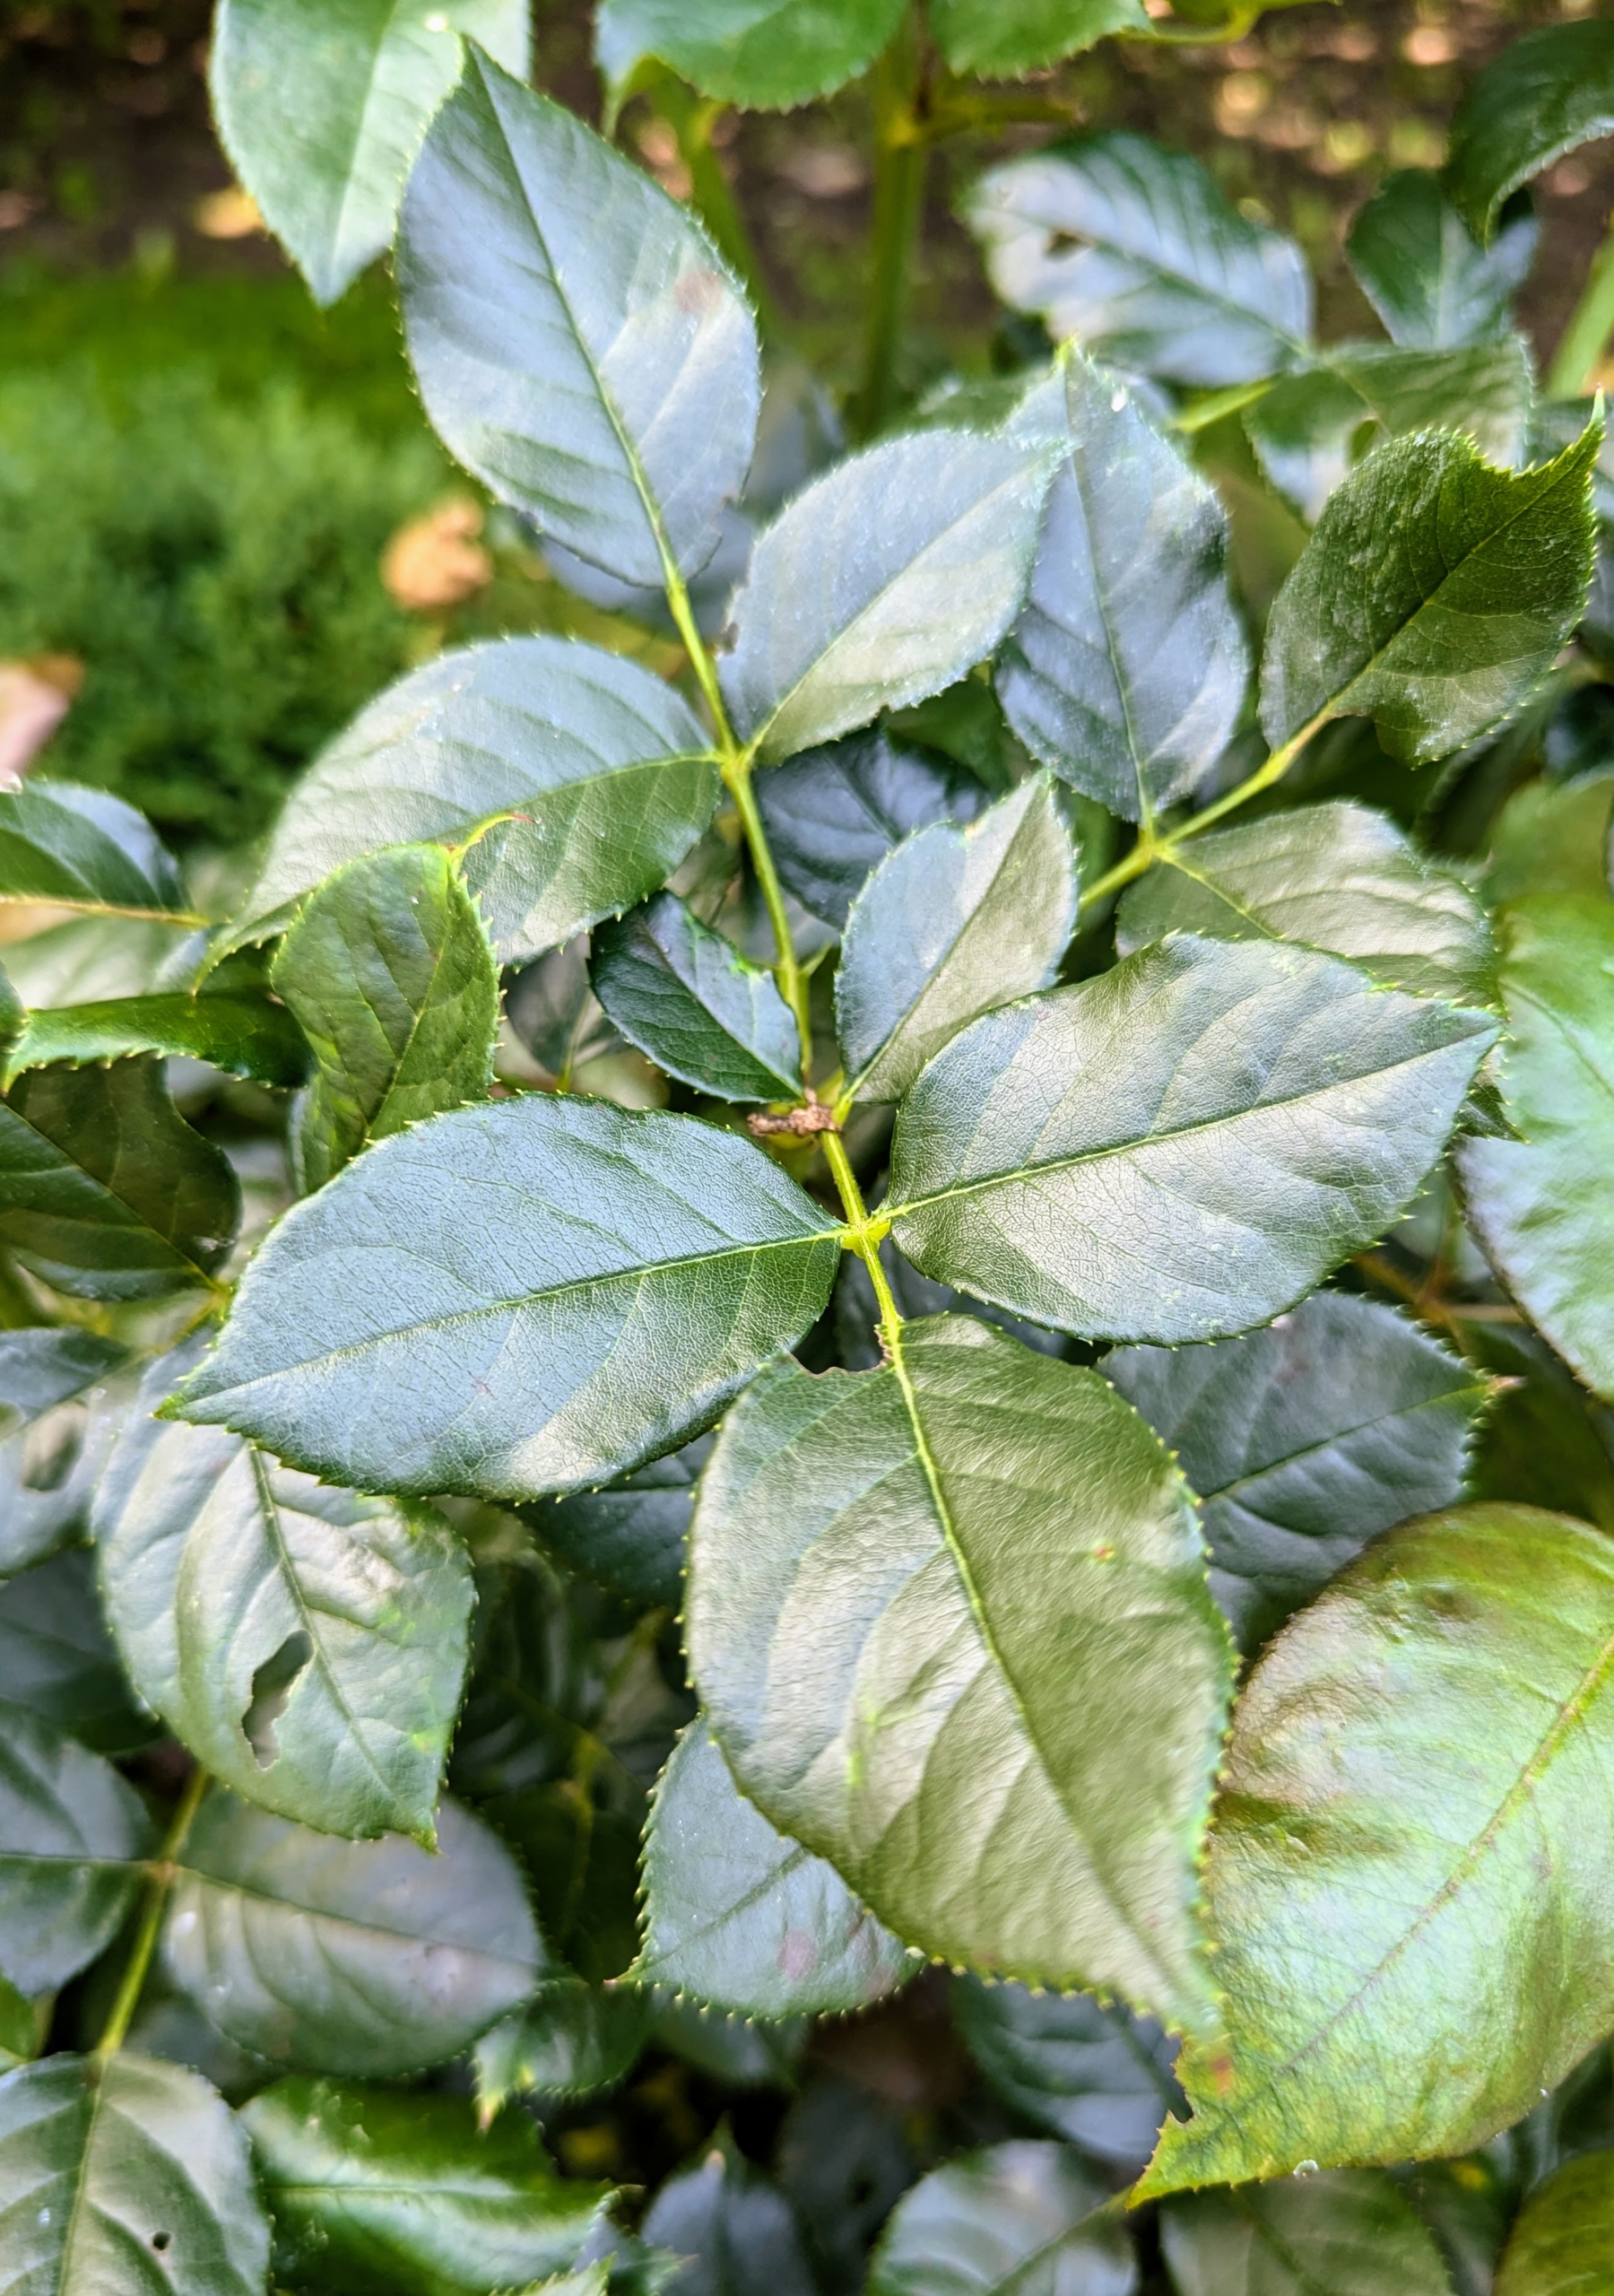
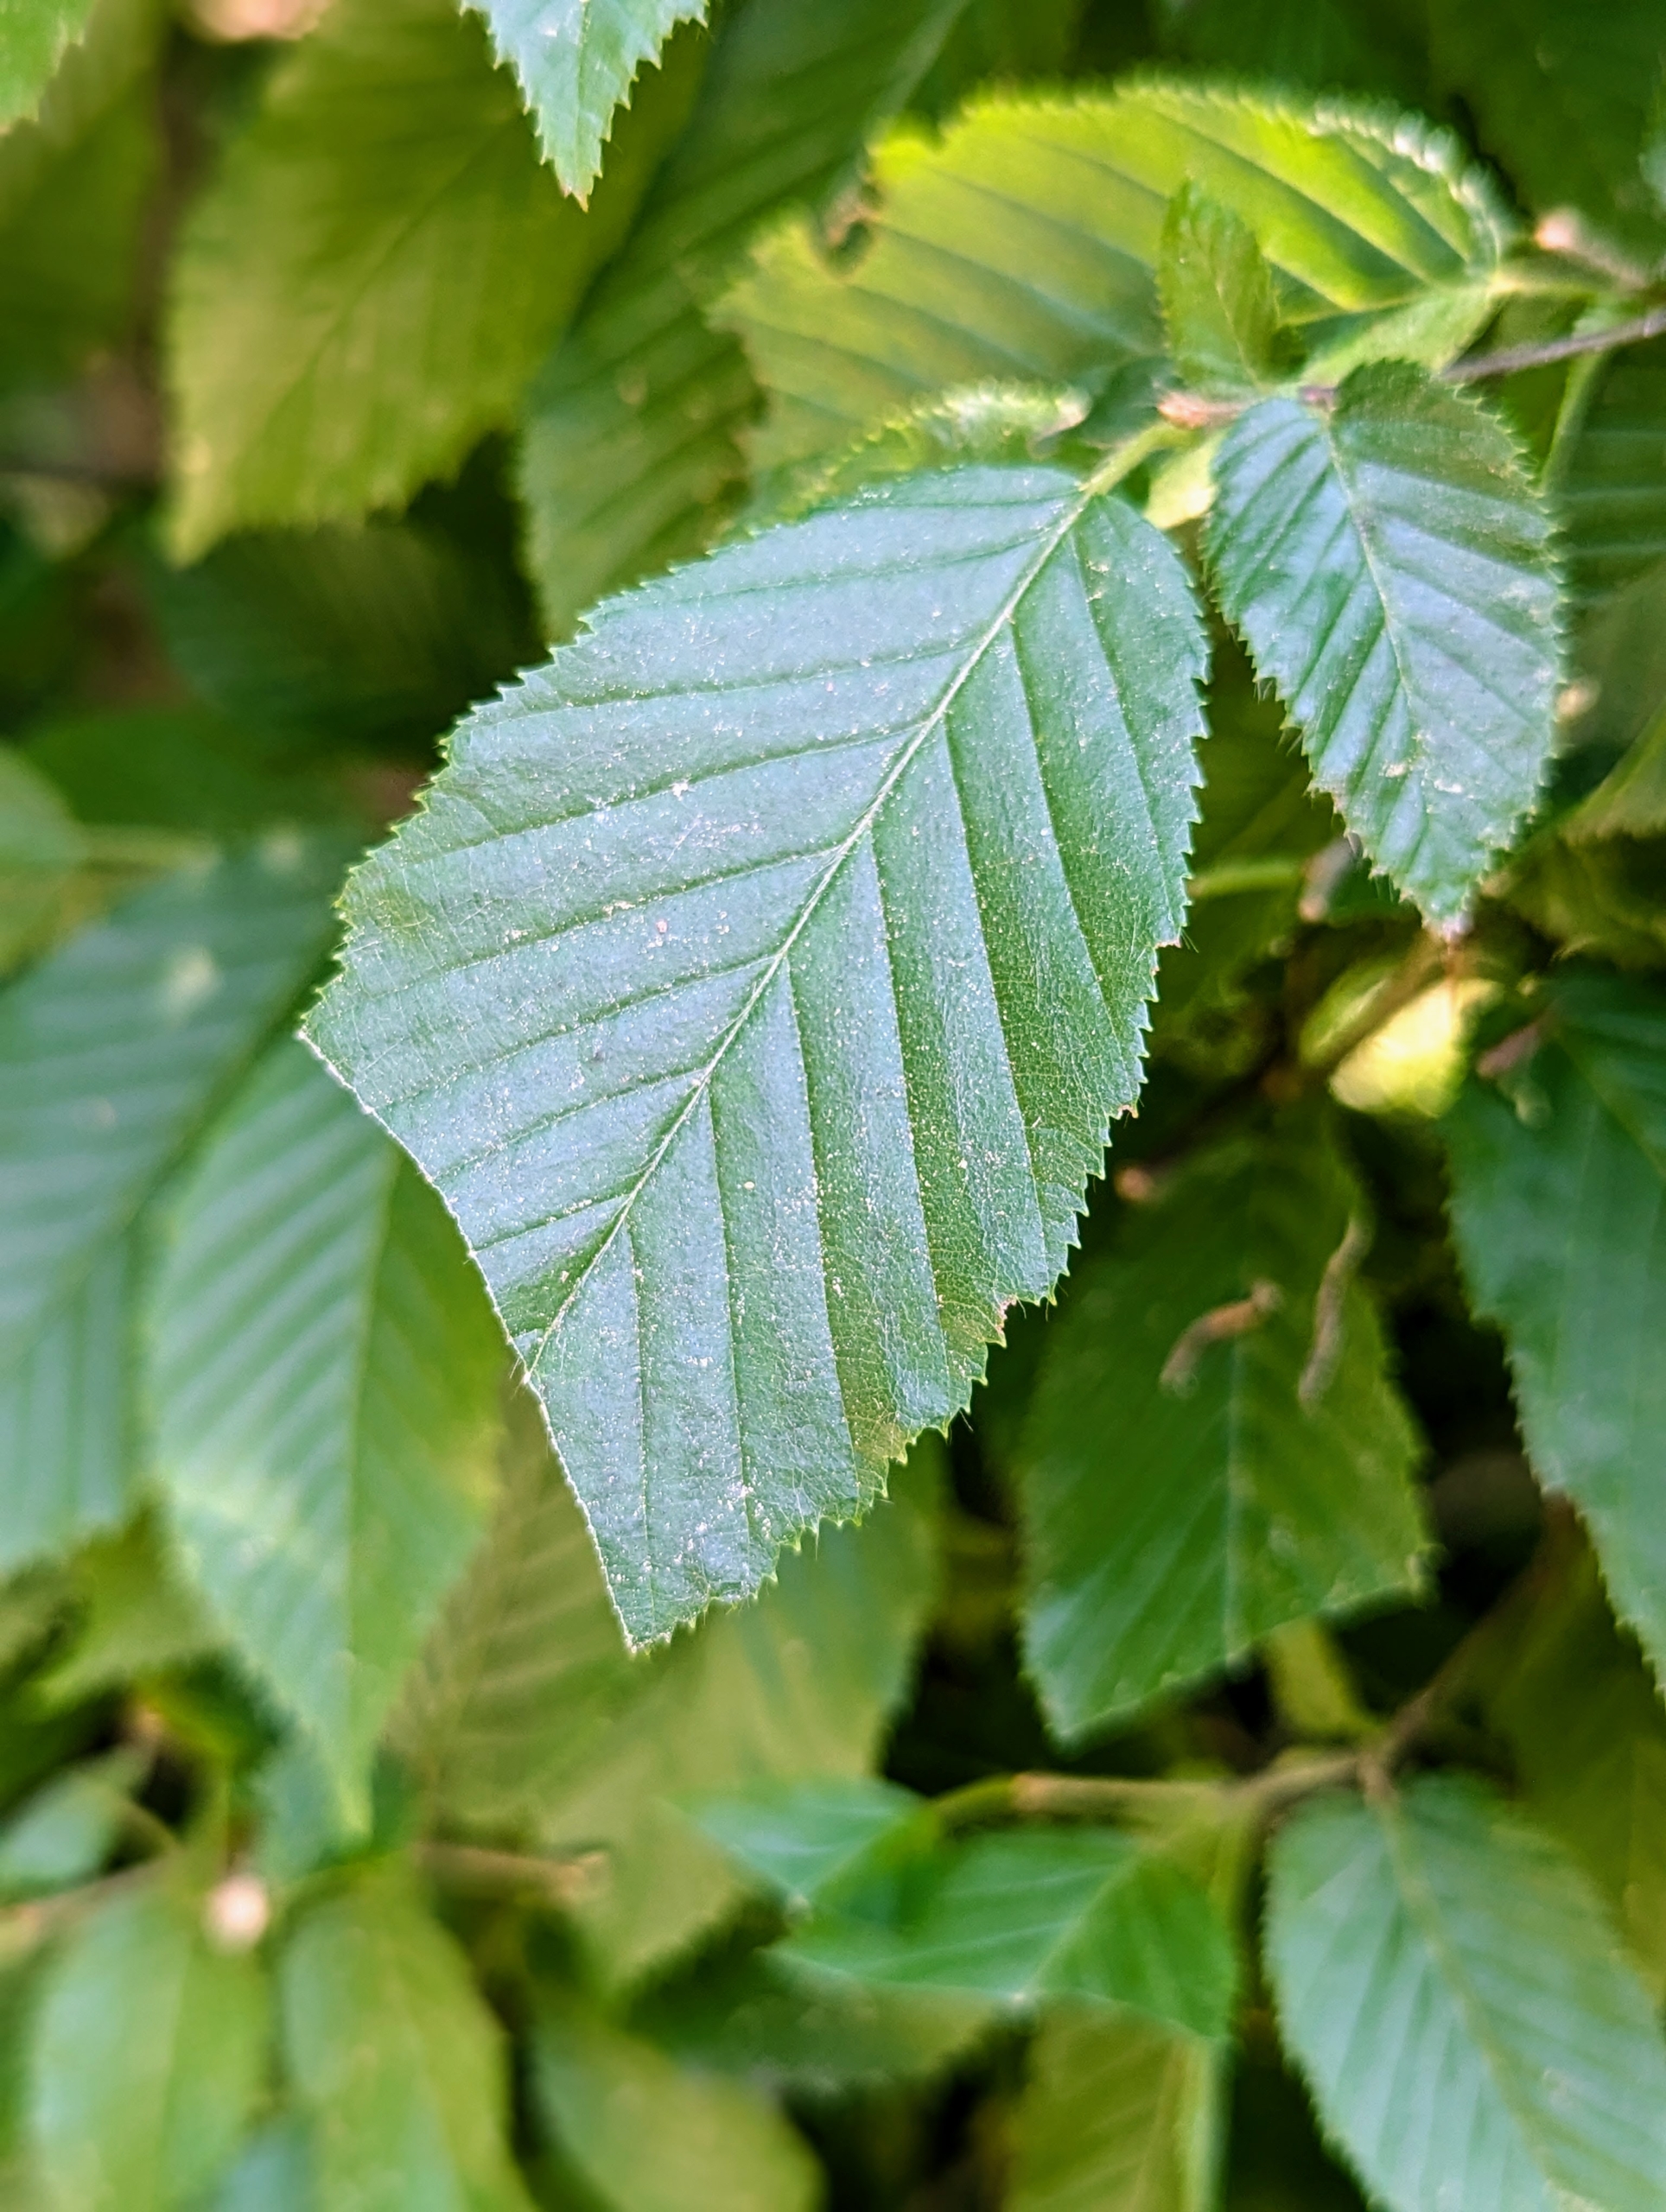
The leaves of the rose are described as “pinnate” – meaning there is a central rib and then leaflets off to each side, with one terminal leaflet. Rose leaves can have anywhere from two to 13 leaflets.
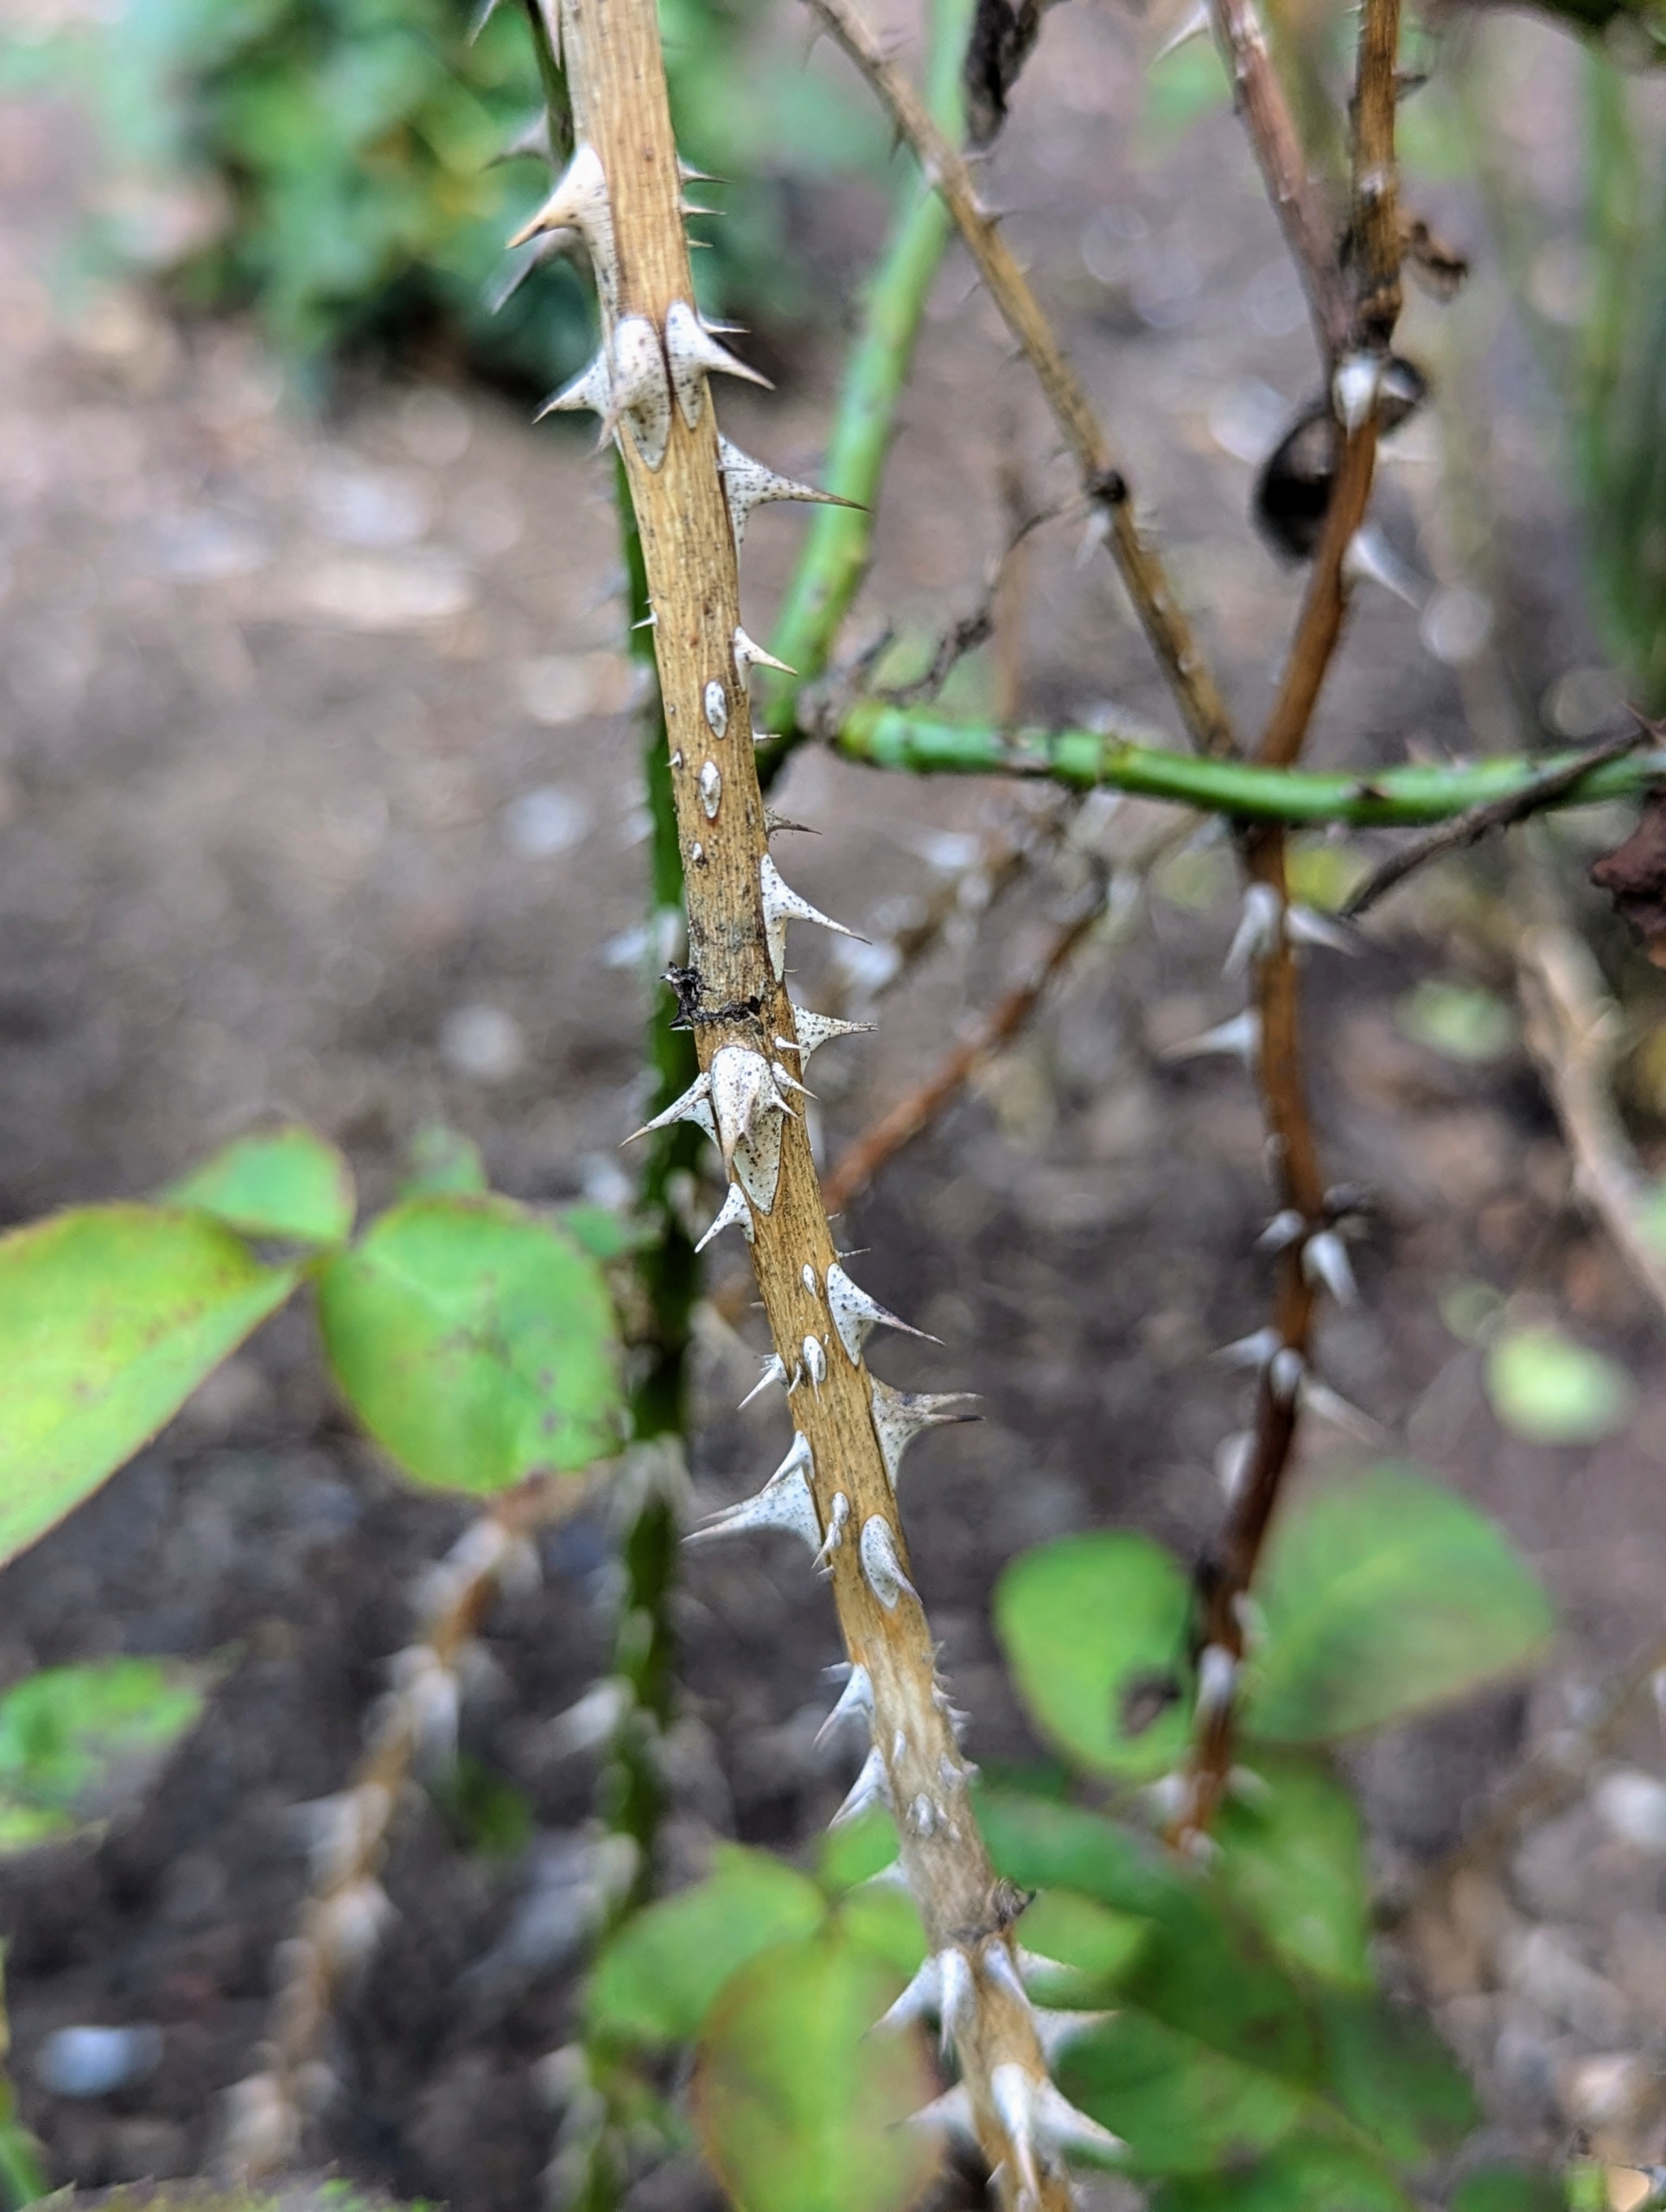
And rose stems are often armed with sharp prickles – they aren’t thorns at all. Unlike a thorn, a prickle can be easily broken off the plant because it is really a feature of the outer layers rather than part of the wood, like a thorn.
And depending on the variety, some can have more prickles than others.
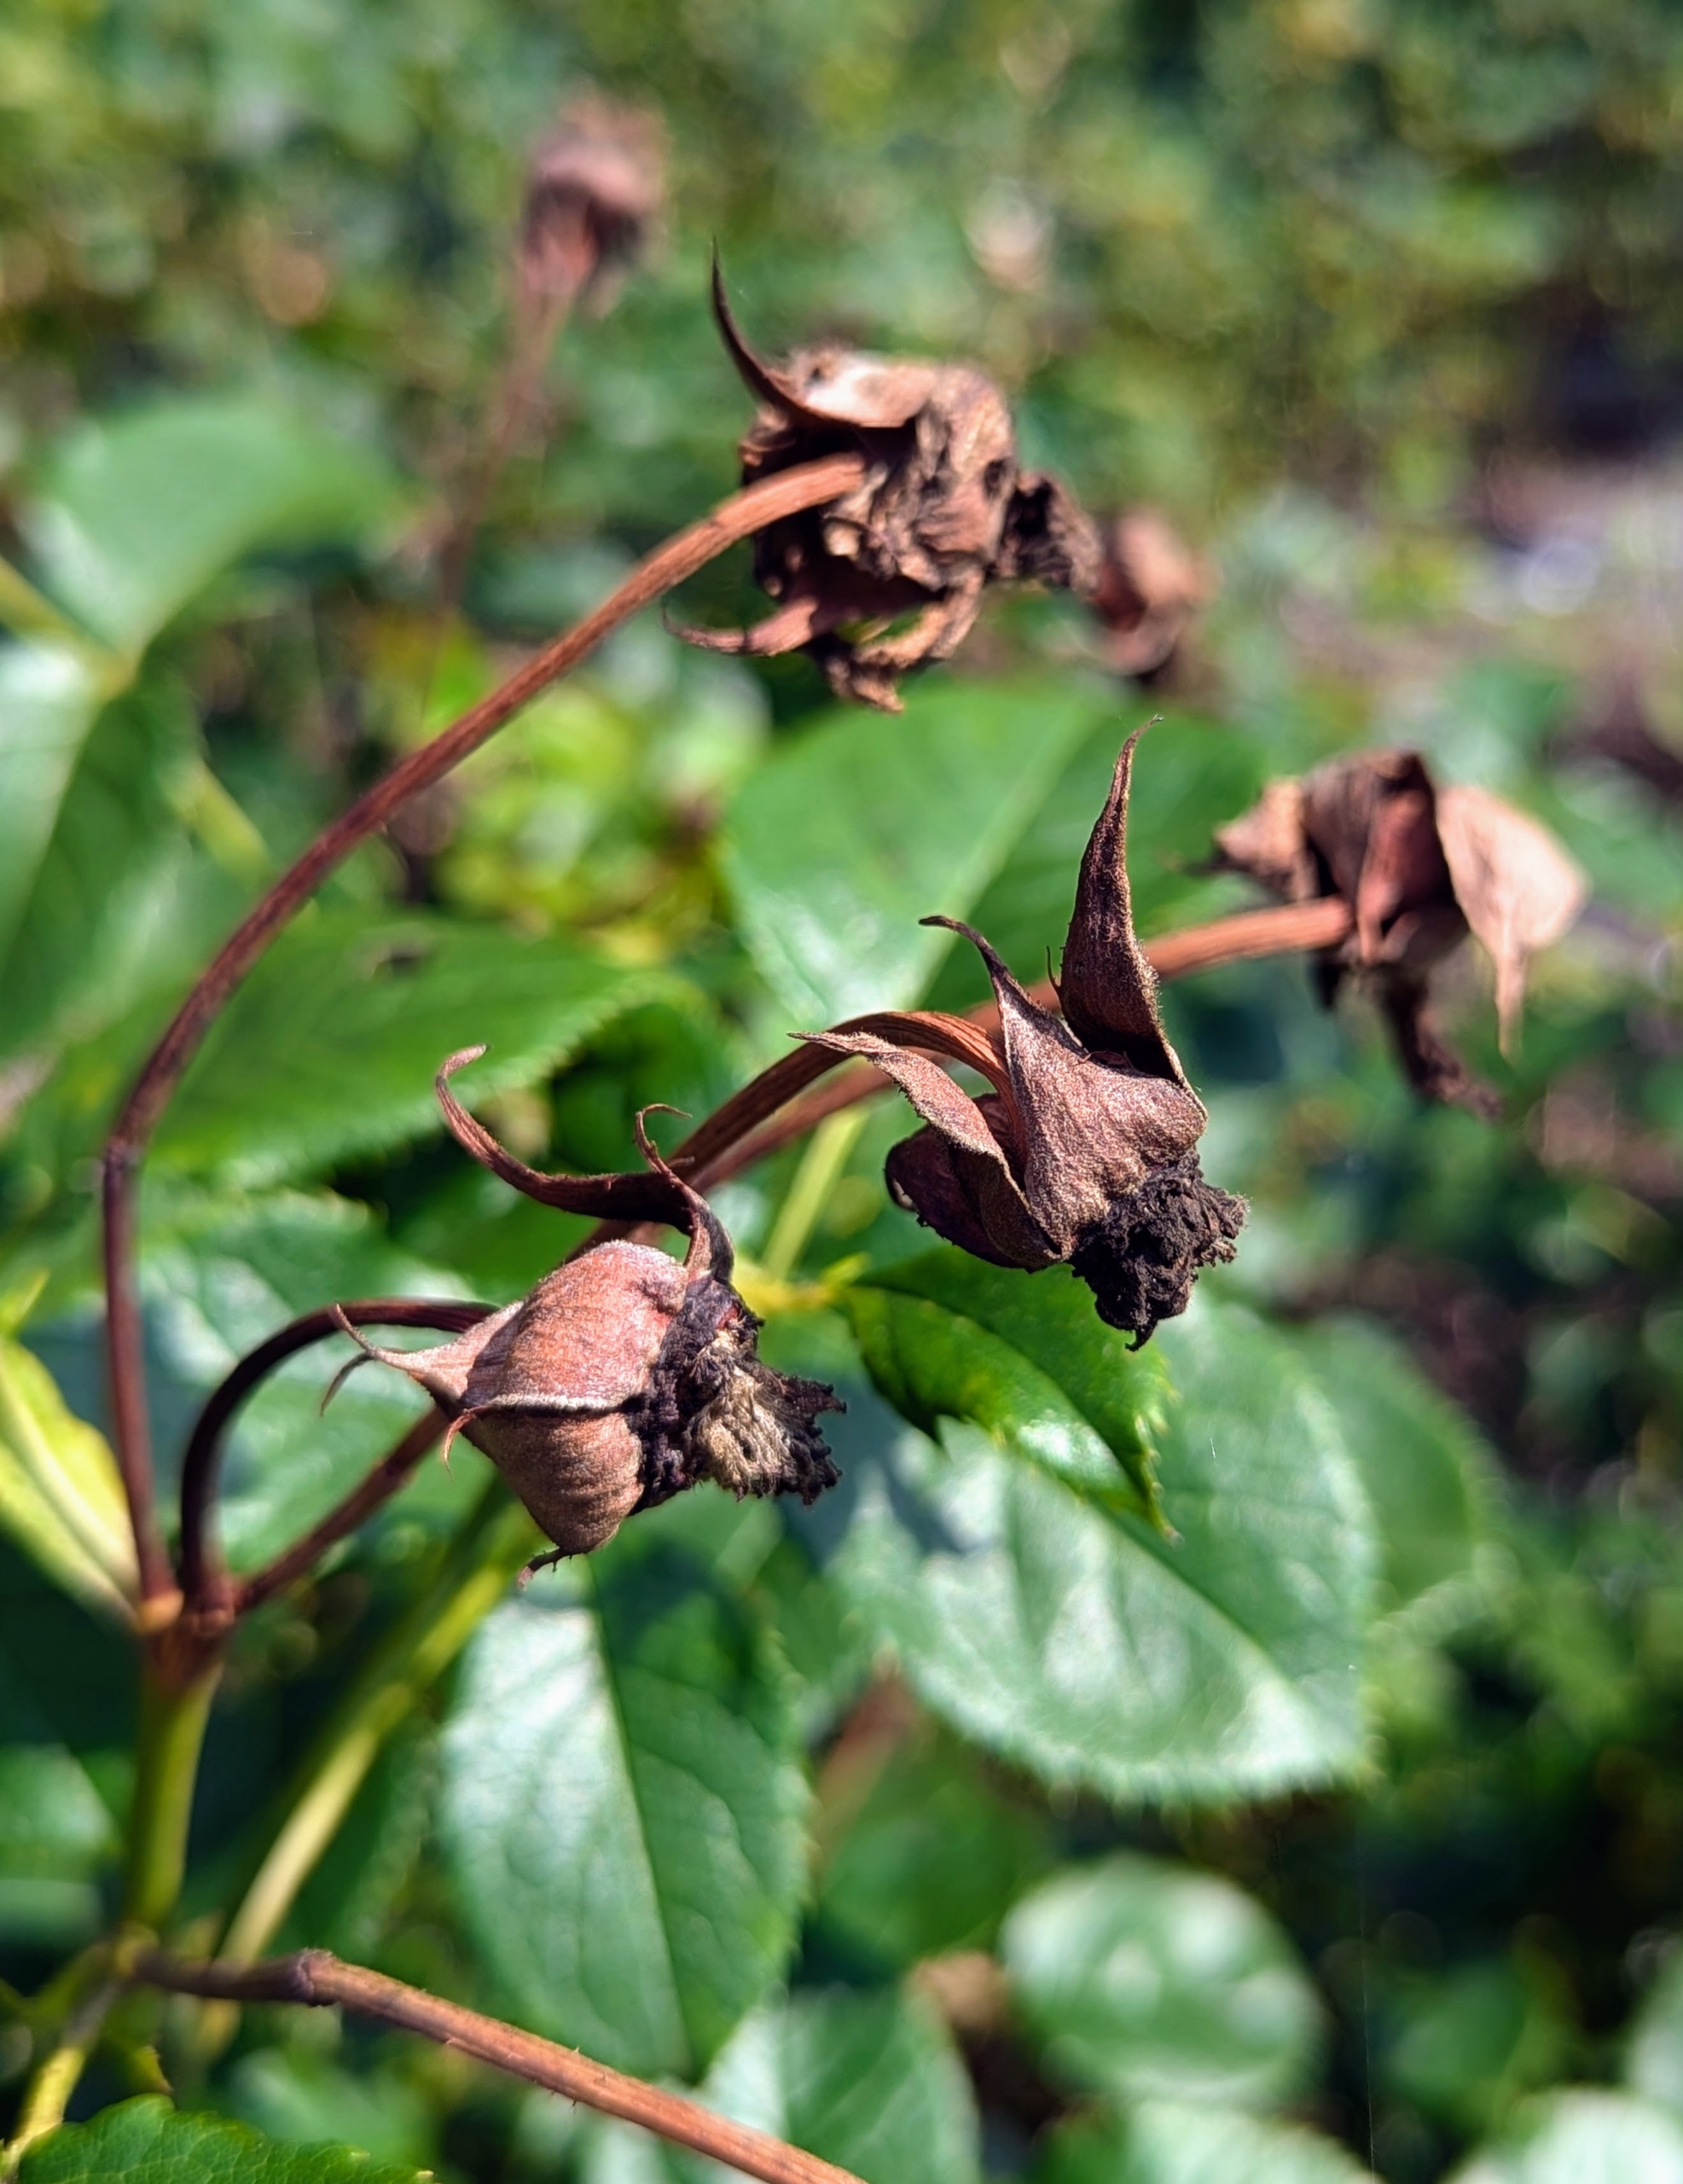
Now, most of the blooms are faded, leaving plants looking more like this – a clear sign it is time to “prune after bloom.”
It’s time to prune them lightly and selectively to shape the bushes and control any unwanted growth. Ryan removes old and dying flowers from the plant, which encourages the shrub to flower again sooner by diverting the plant’s energy from seed head to more development.
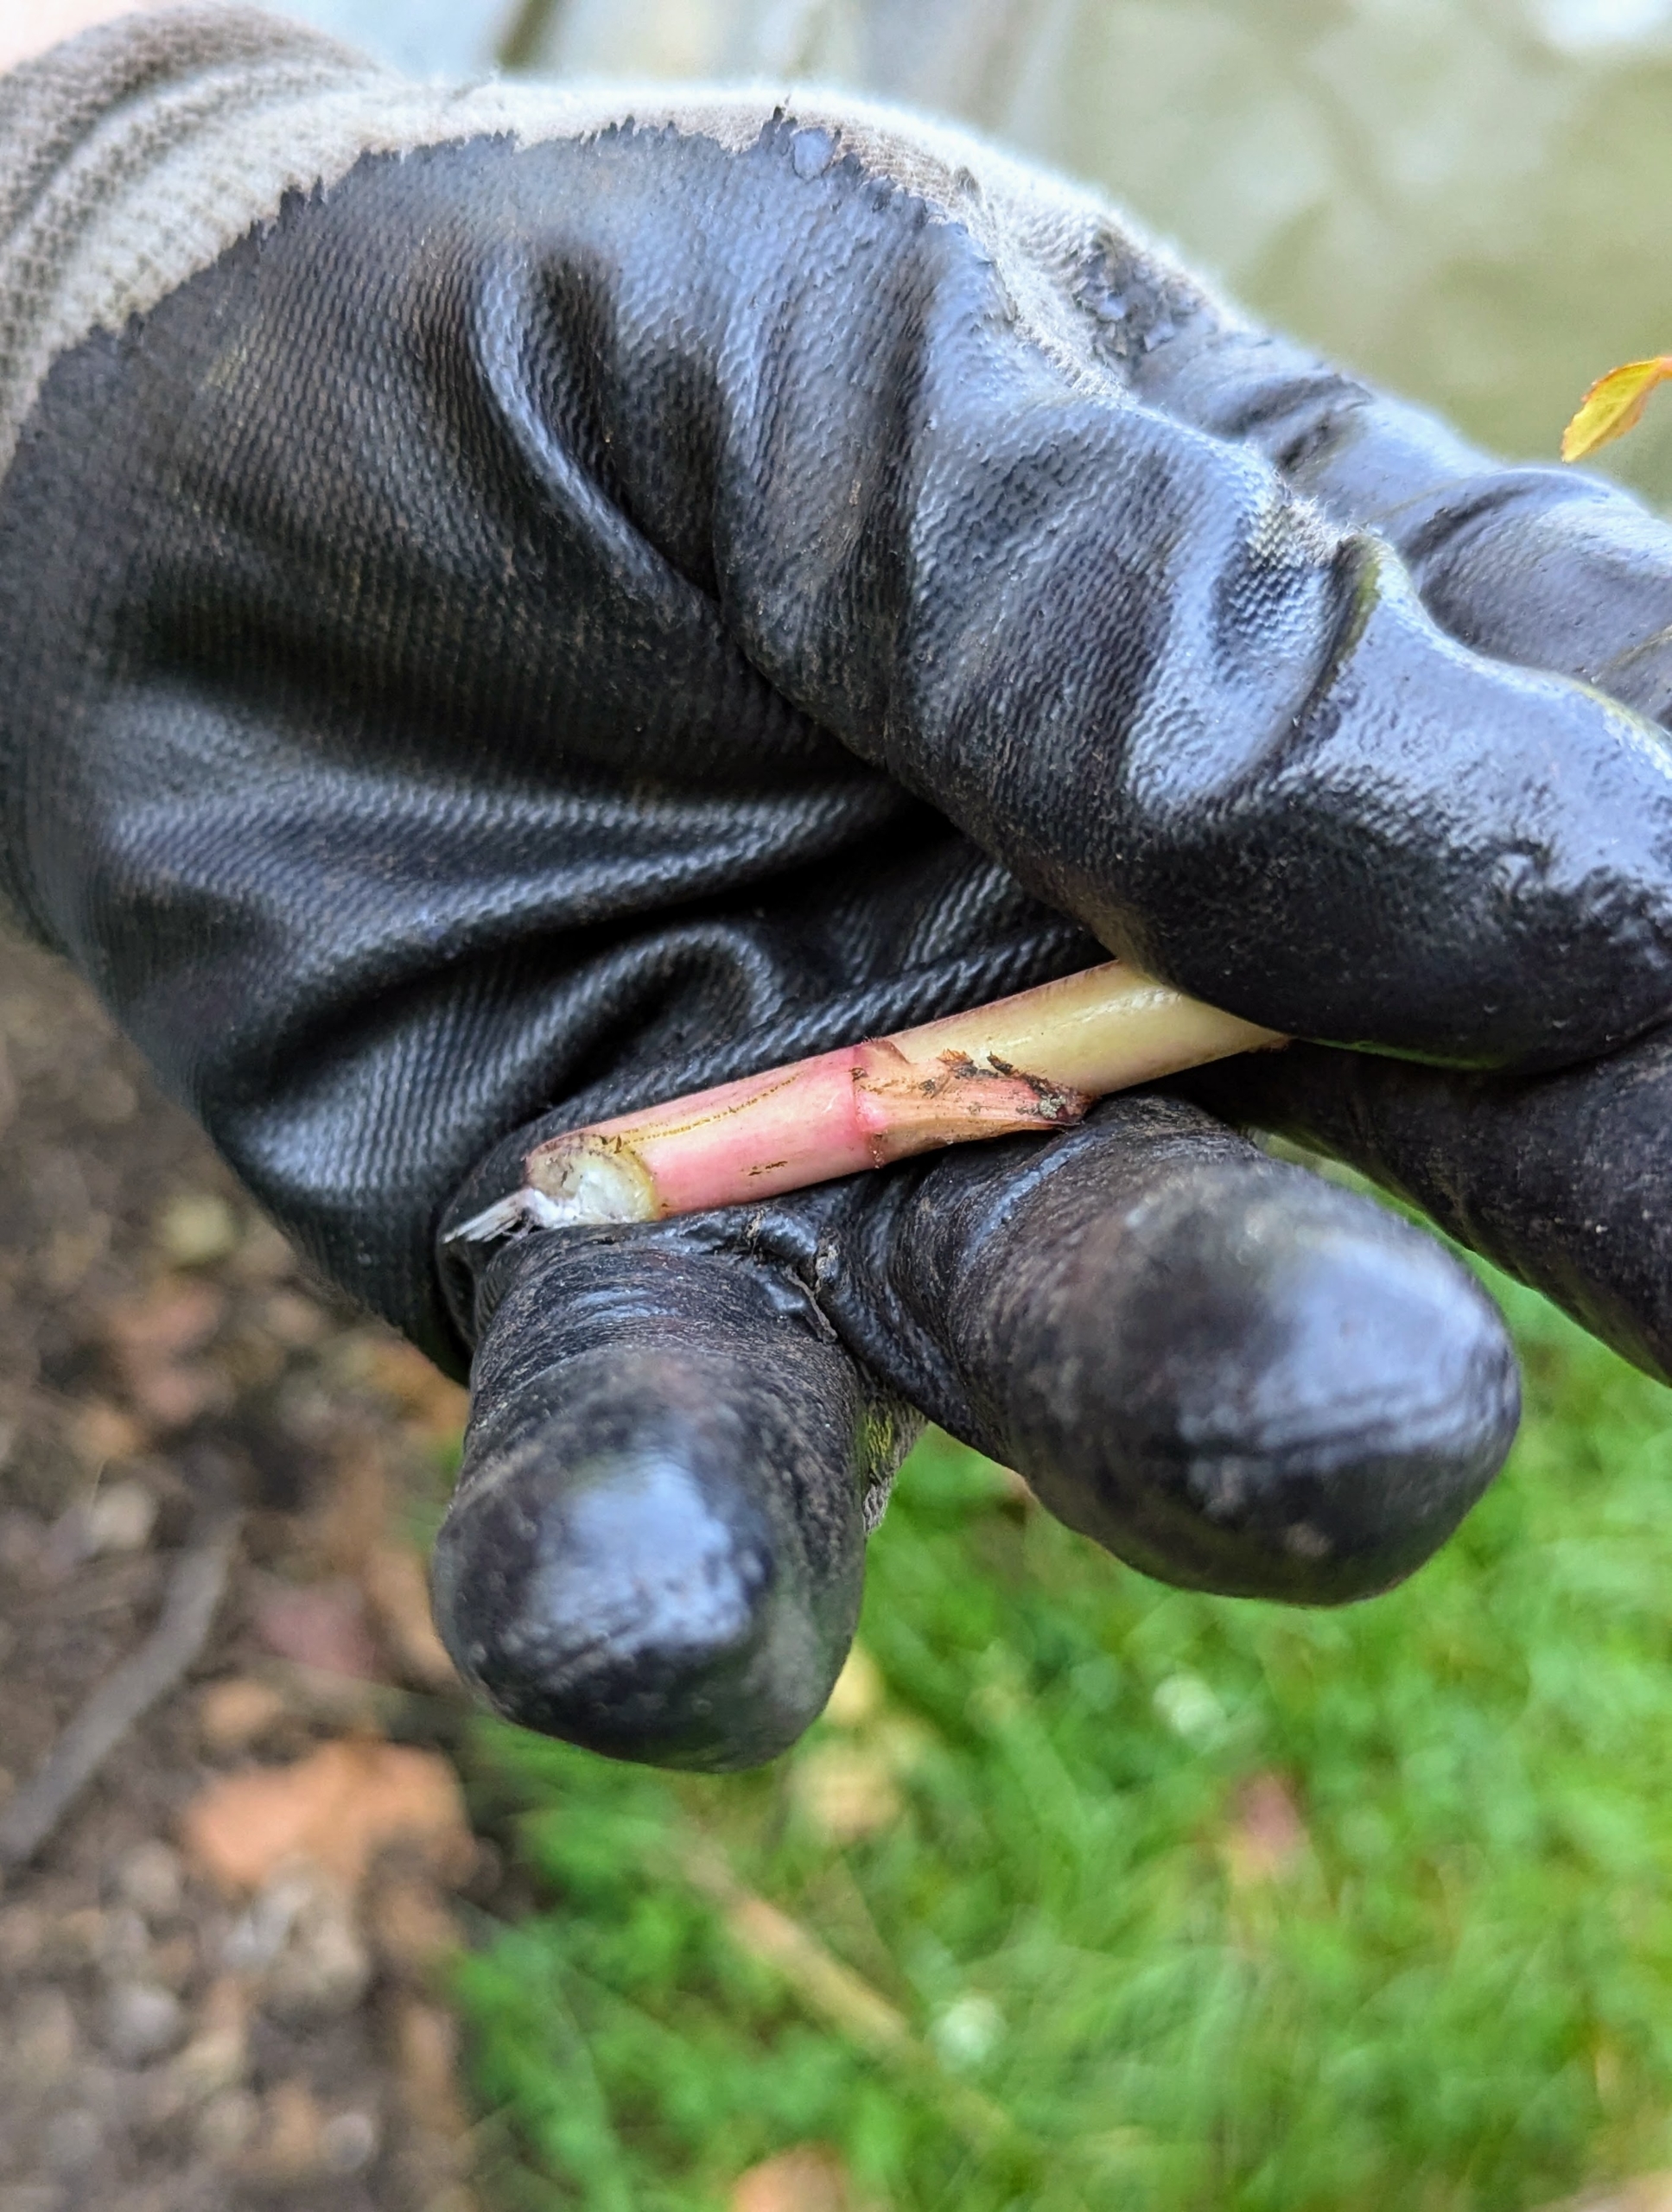
Ryan also removes any suckers which have grown. Rose suckers are unauthorized branches that grow from the rootstock of a rose plant, rather than the flowering part. Ryan snips the sucker from the base.
Rose suckers can have different colored stems and less prickles than the main plants. Notice the reddish tint to this branch.
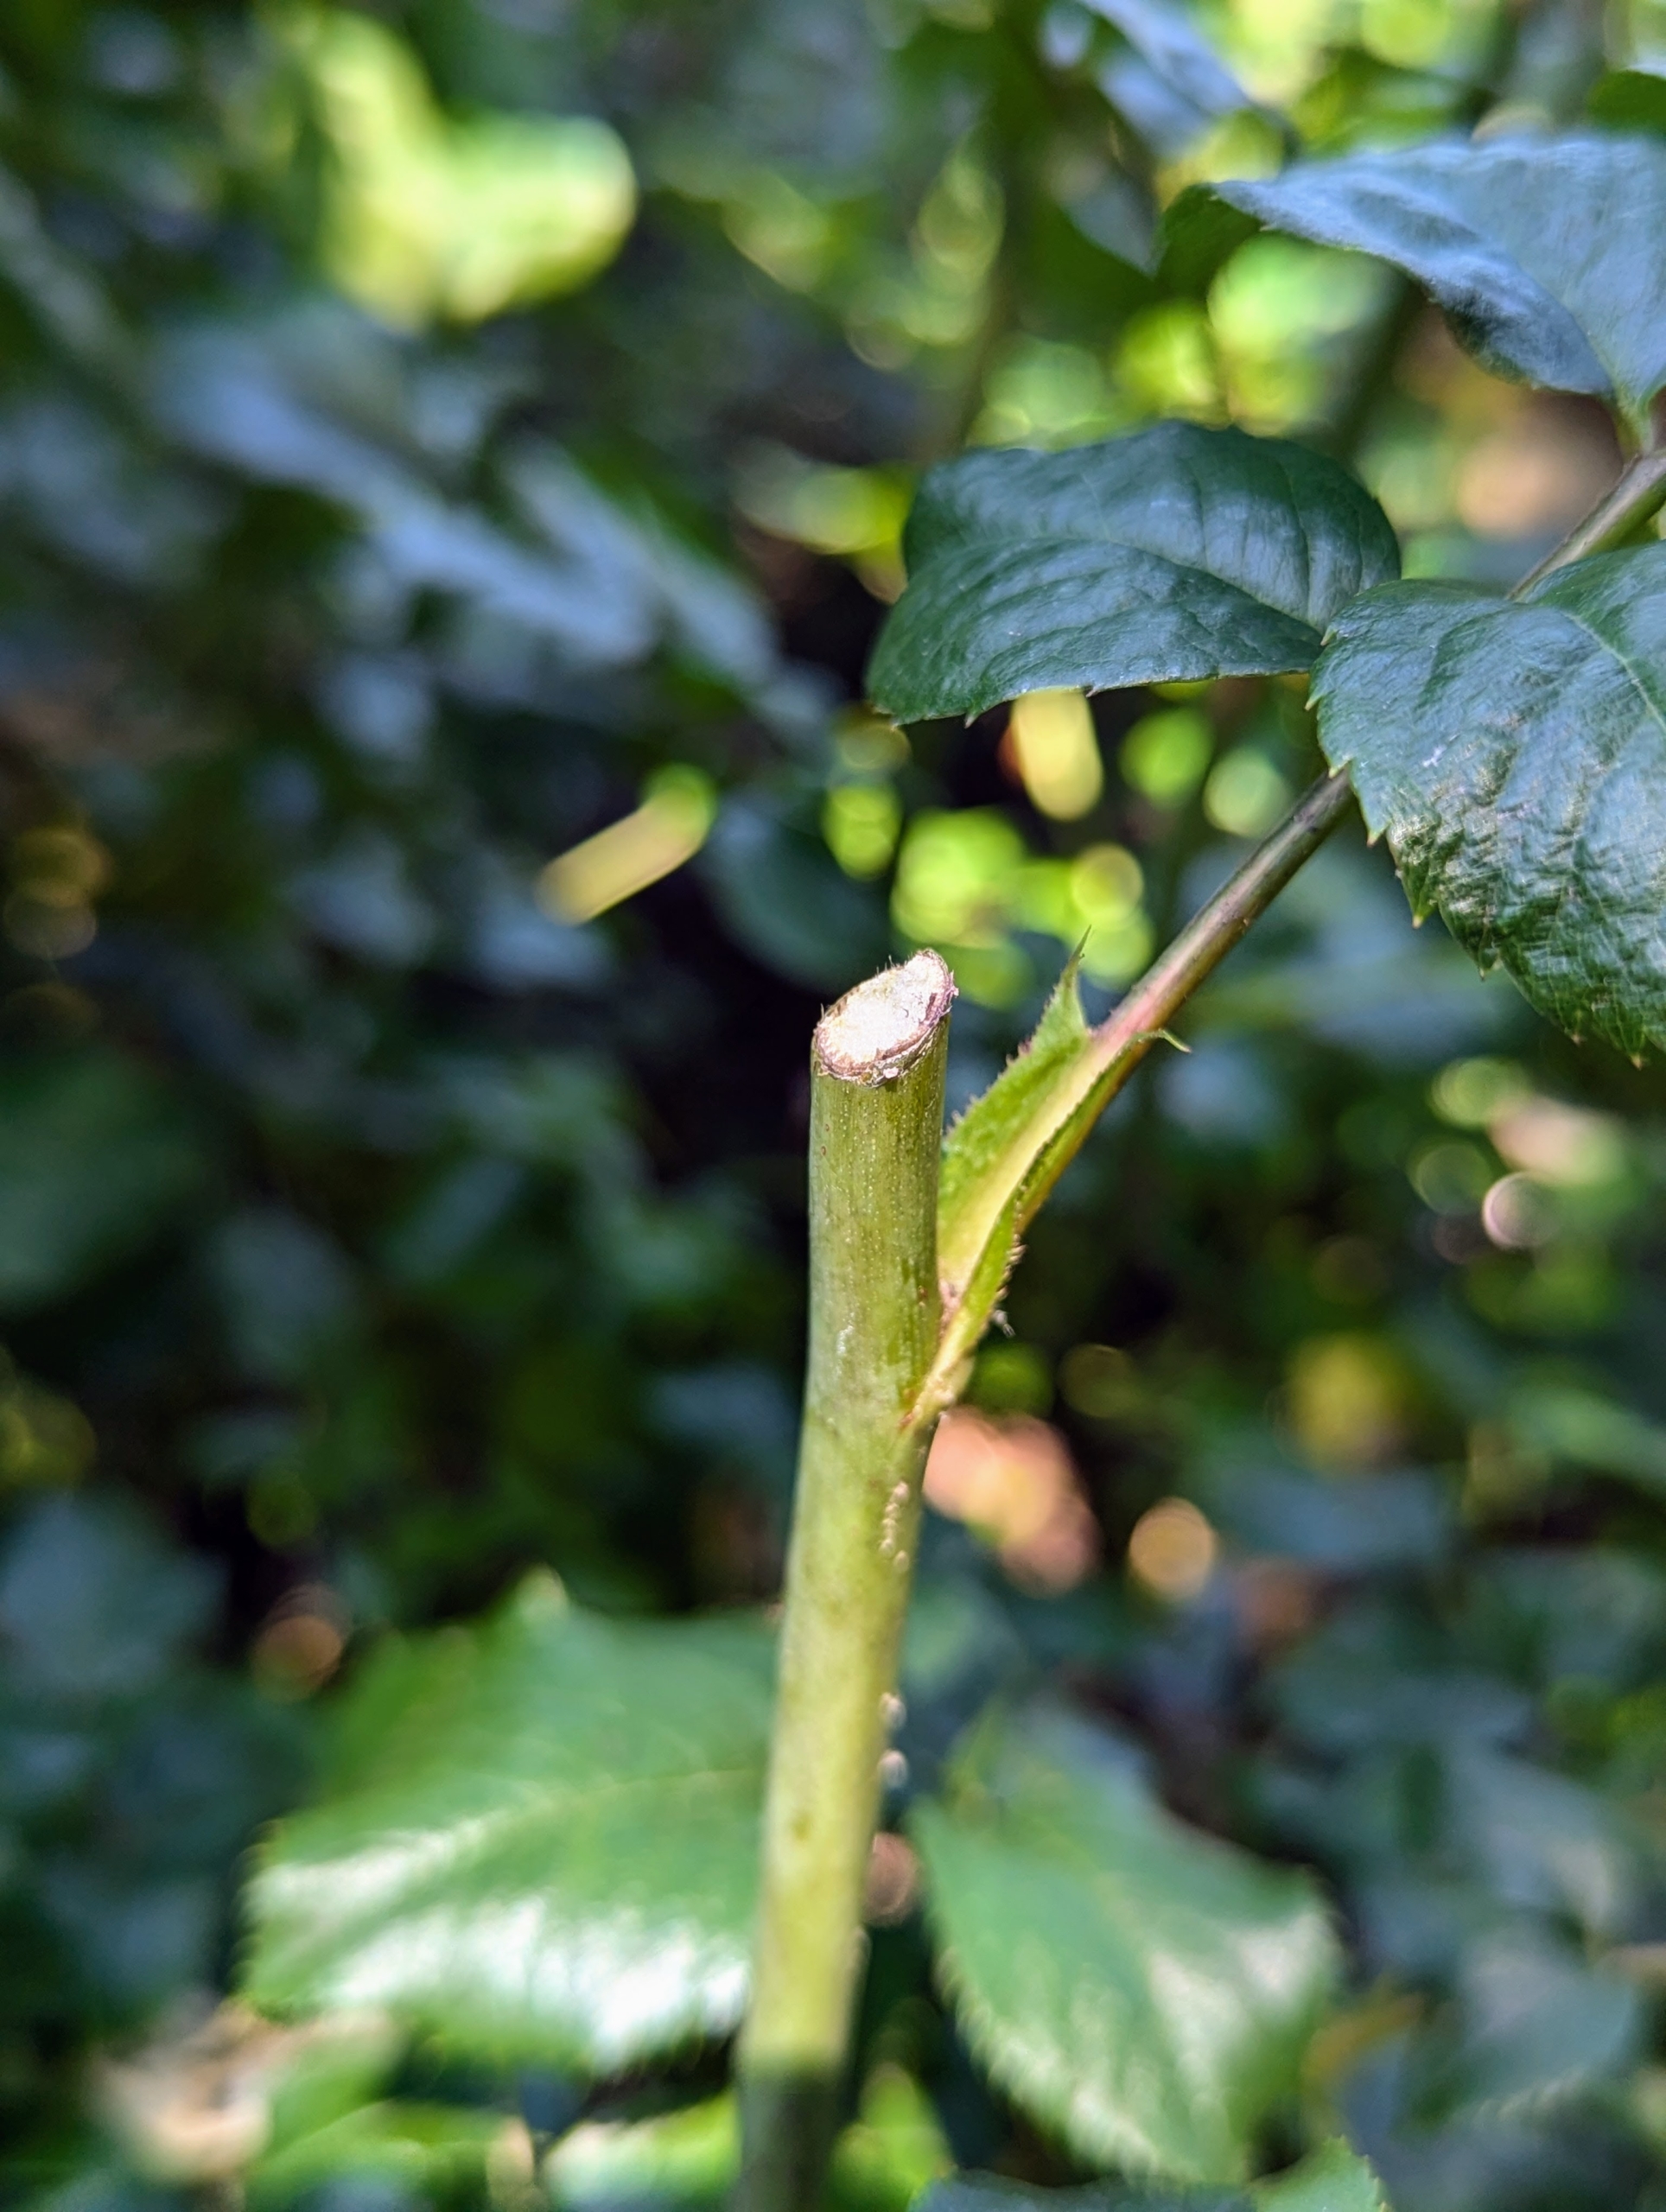
And when pruning, always cut at a 45-degree angle to help water from sprinklers or rain to run off of the shoot and avoid bacteria or fungi from growing.
As Ryan prunes, Matthew follows, raking the cut rose stems from each row.
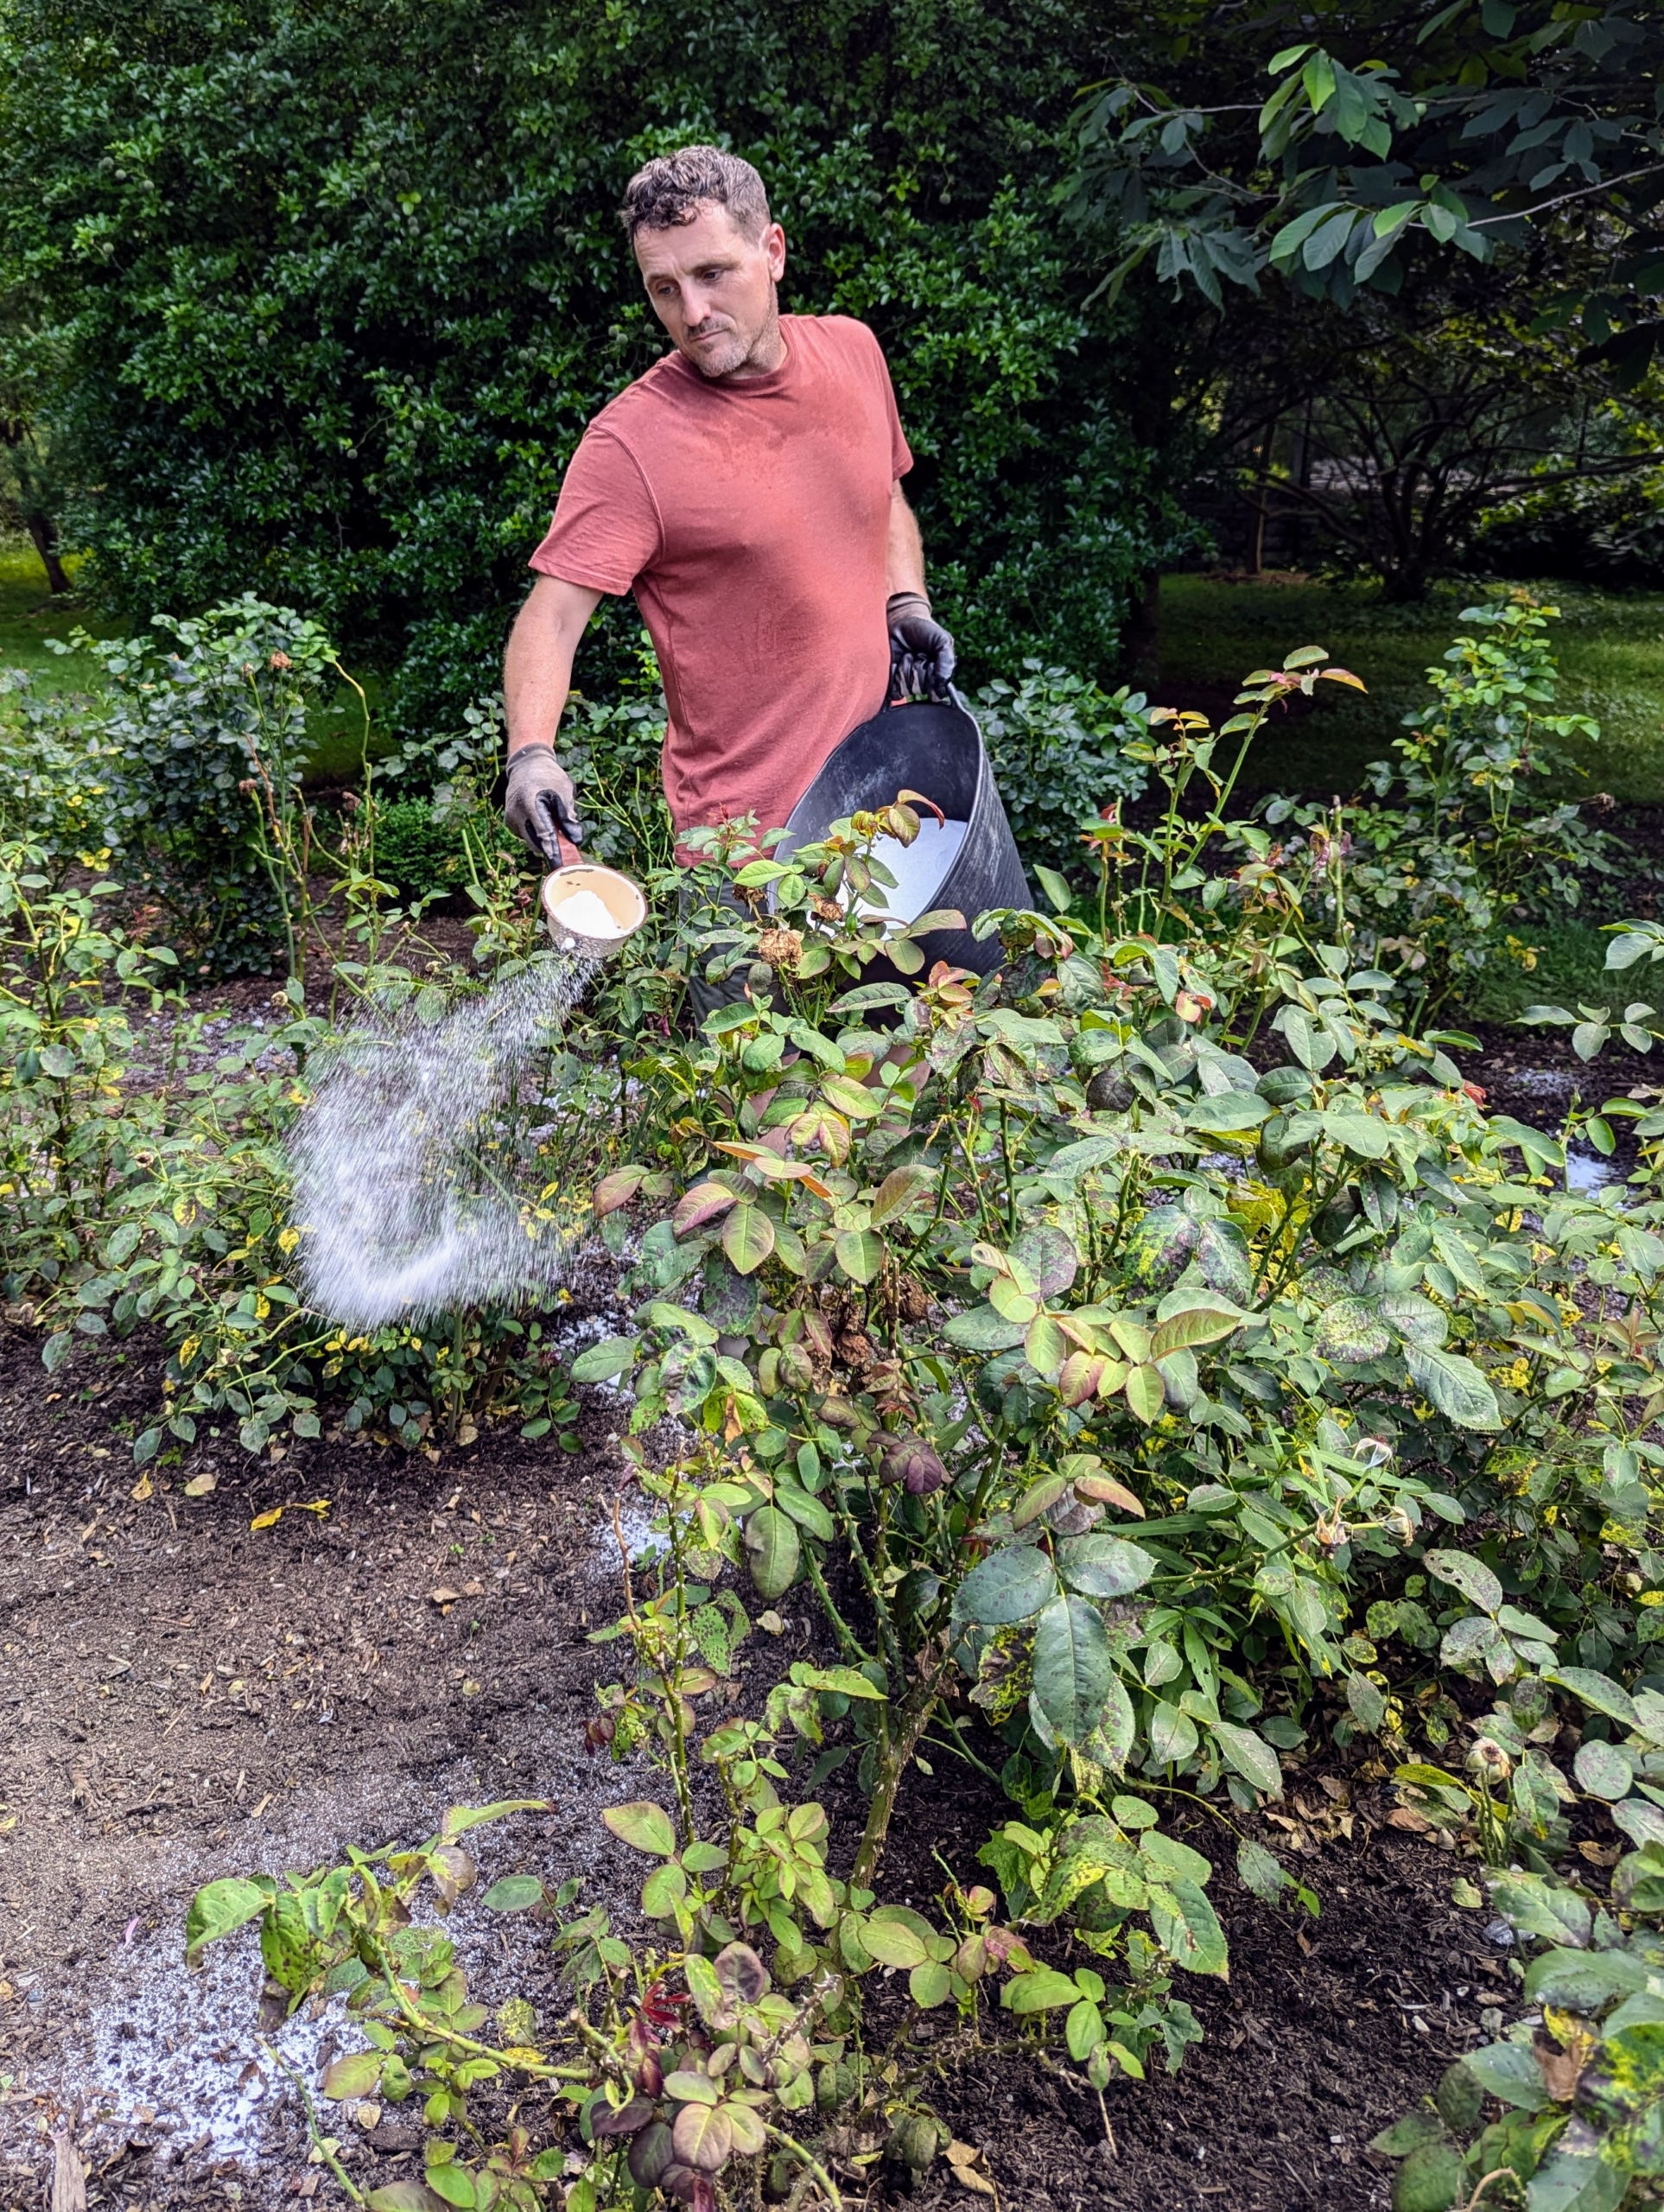
Next, Ryan feeds the roses. On this day, Ryan sprinkles cup fulls of Epsom salt, a mineral compound of magnesium sulfate, which helps to improve nutrient uptake, bloom quality, and disease resistance. It also helps produce more lush, green leaves and more roses.
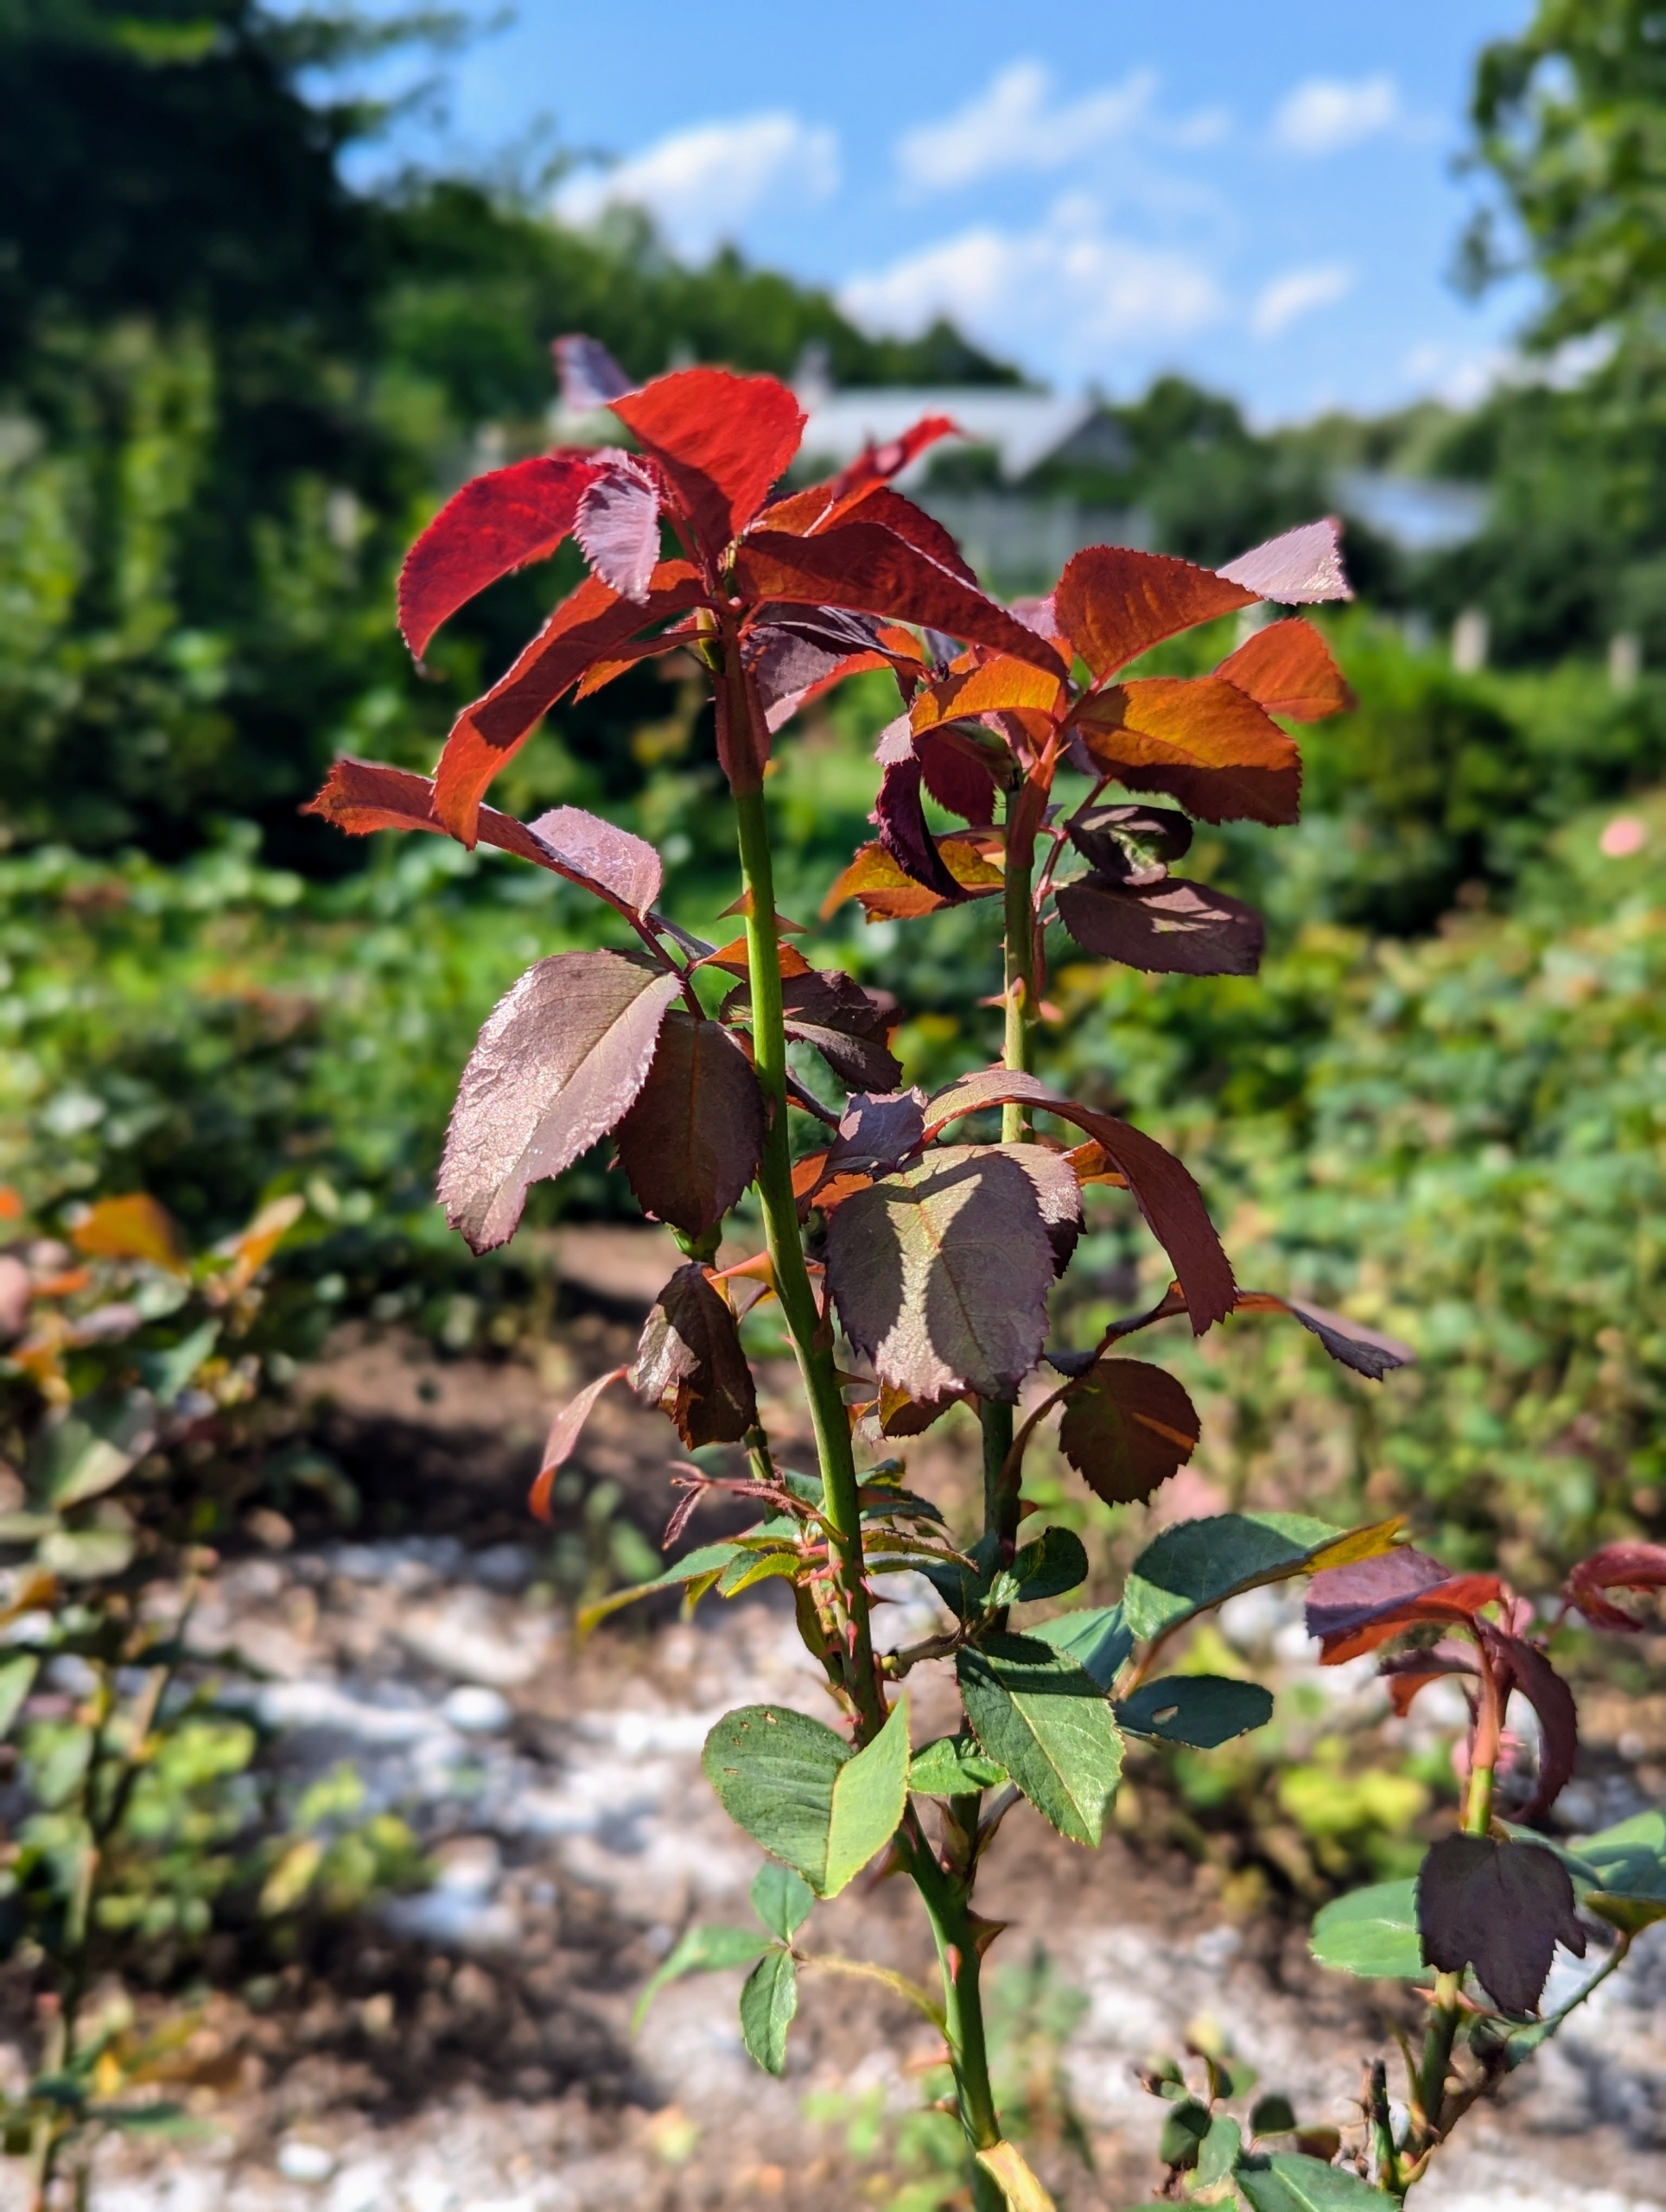
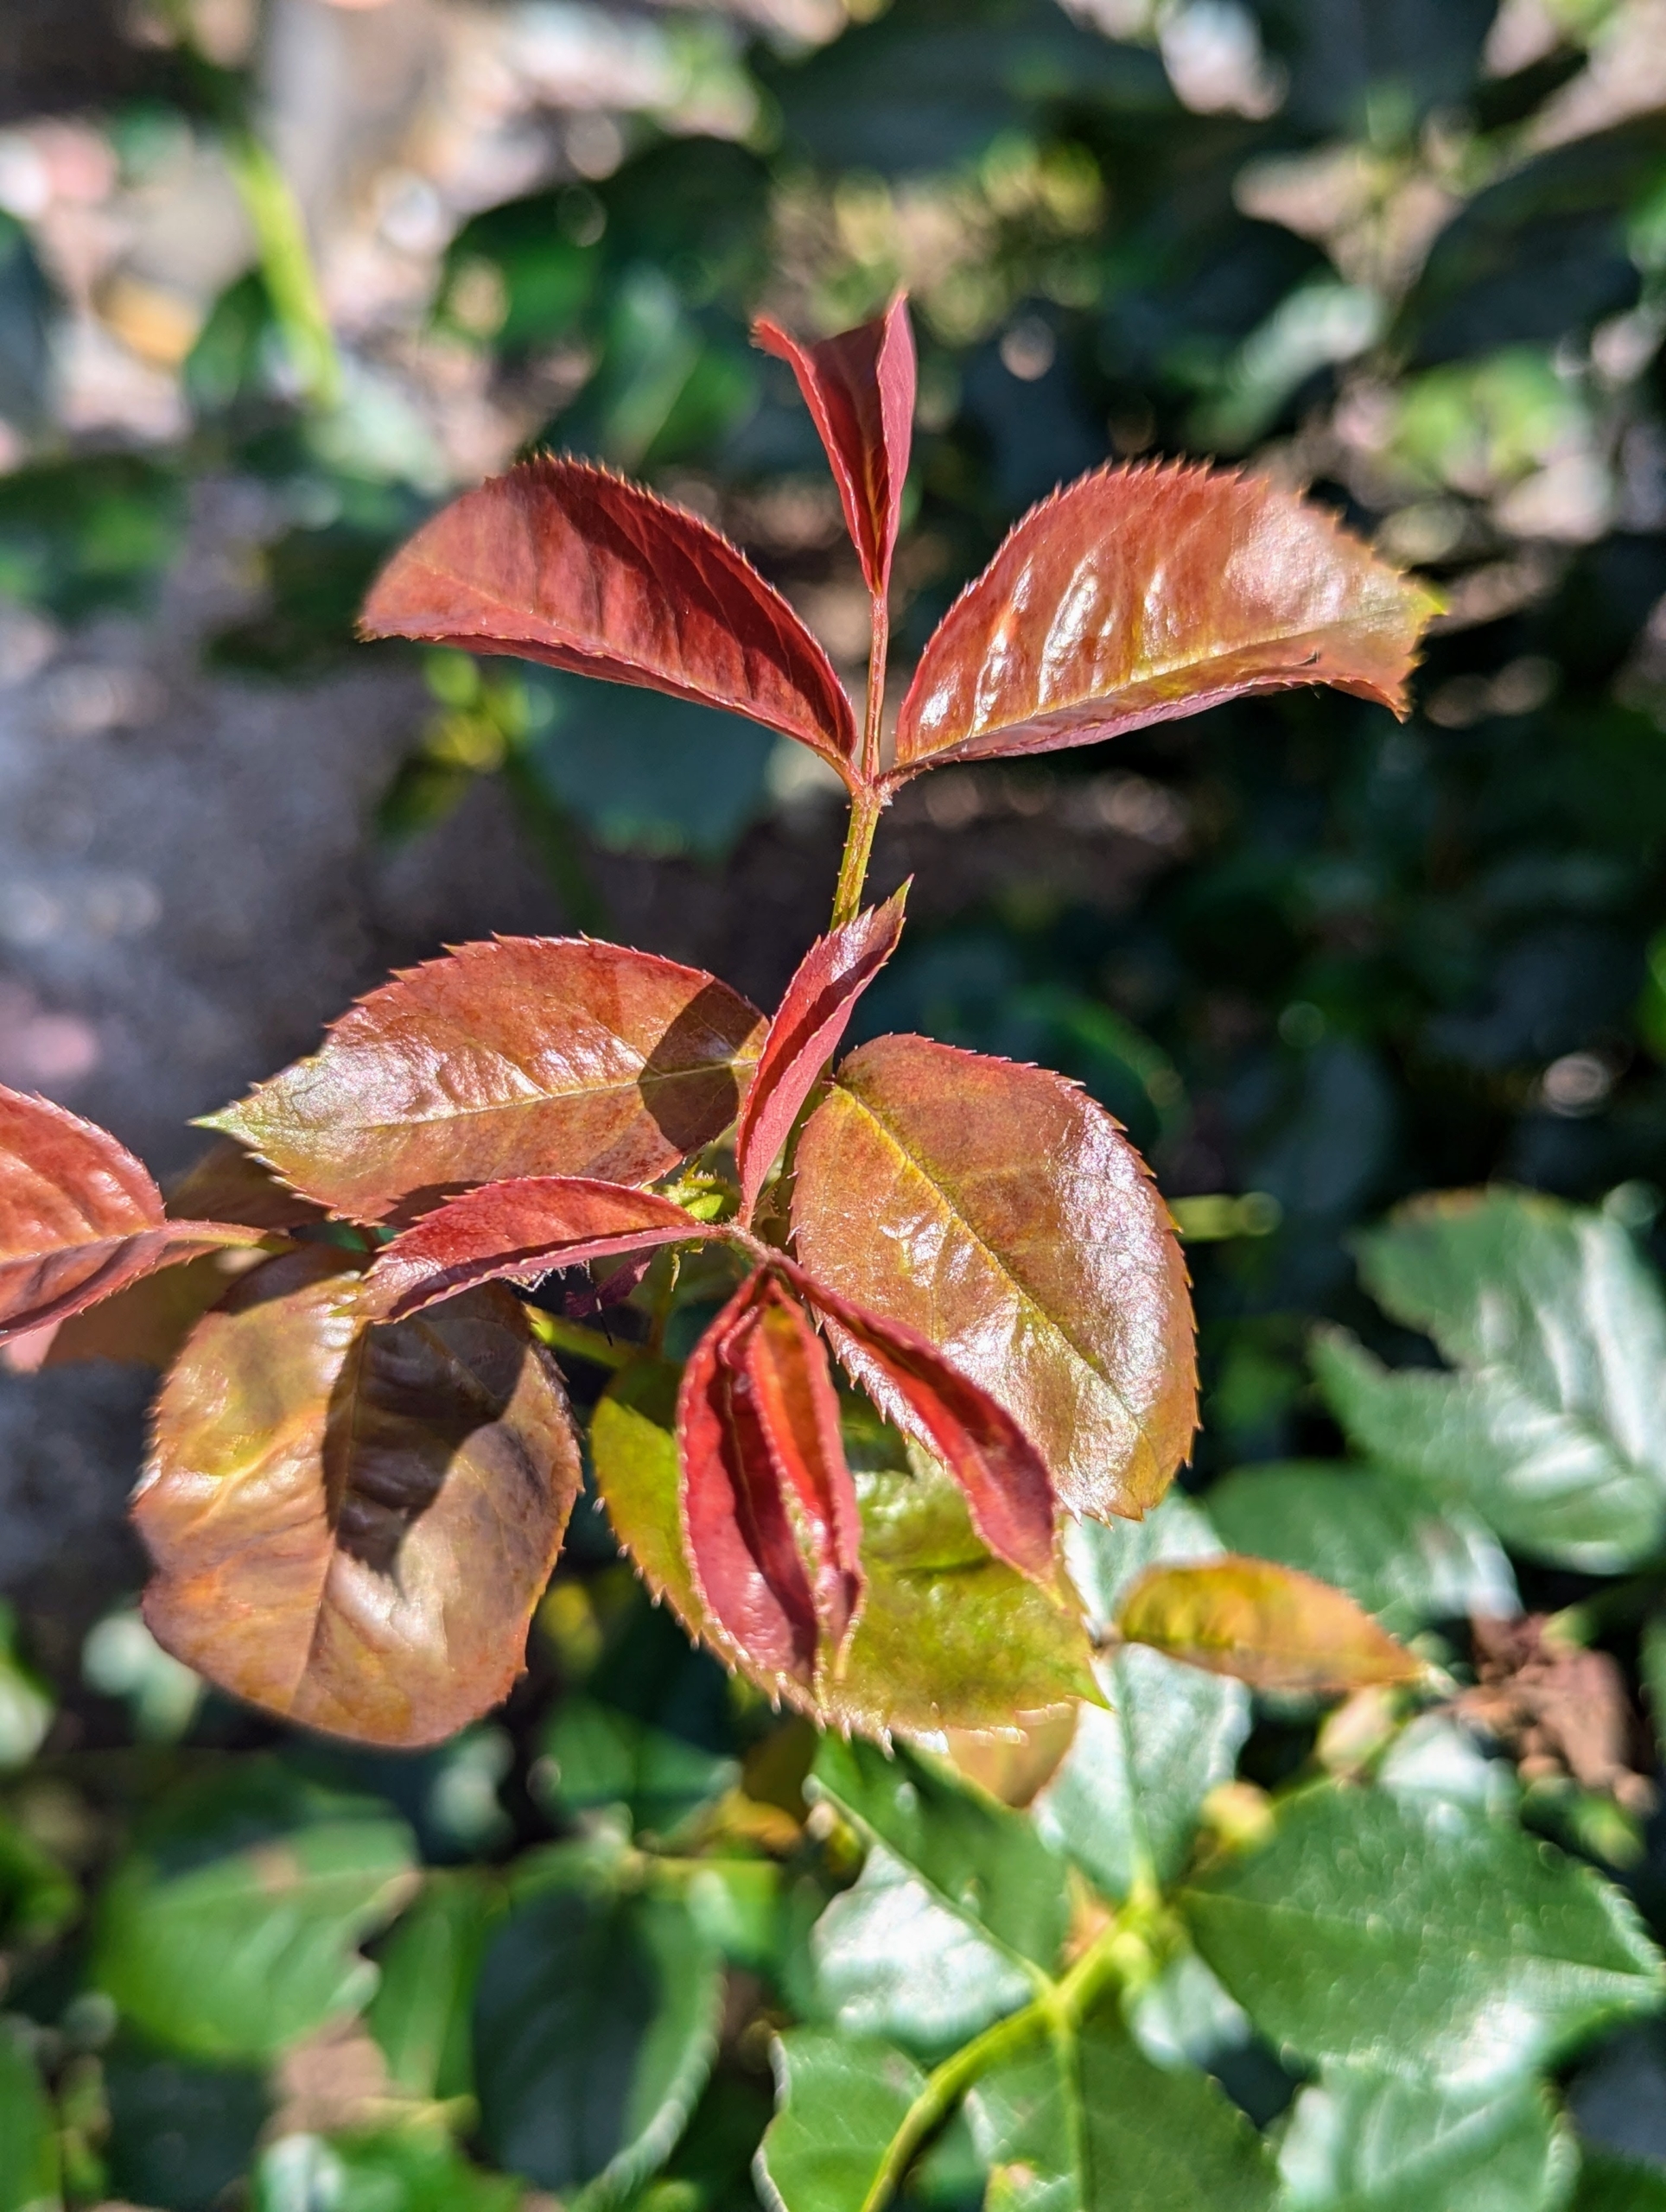
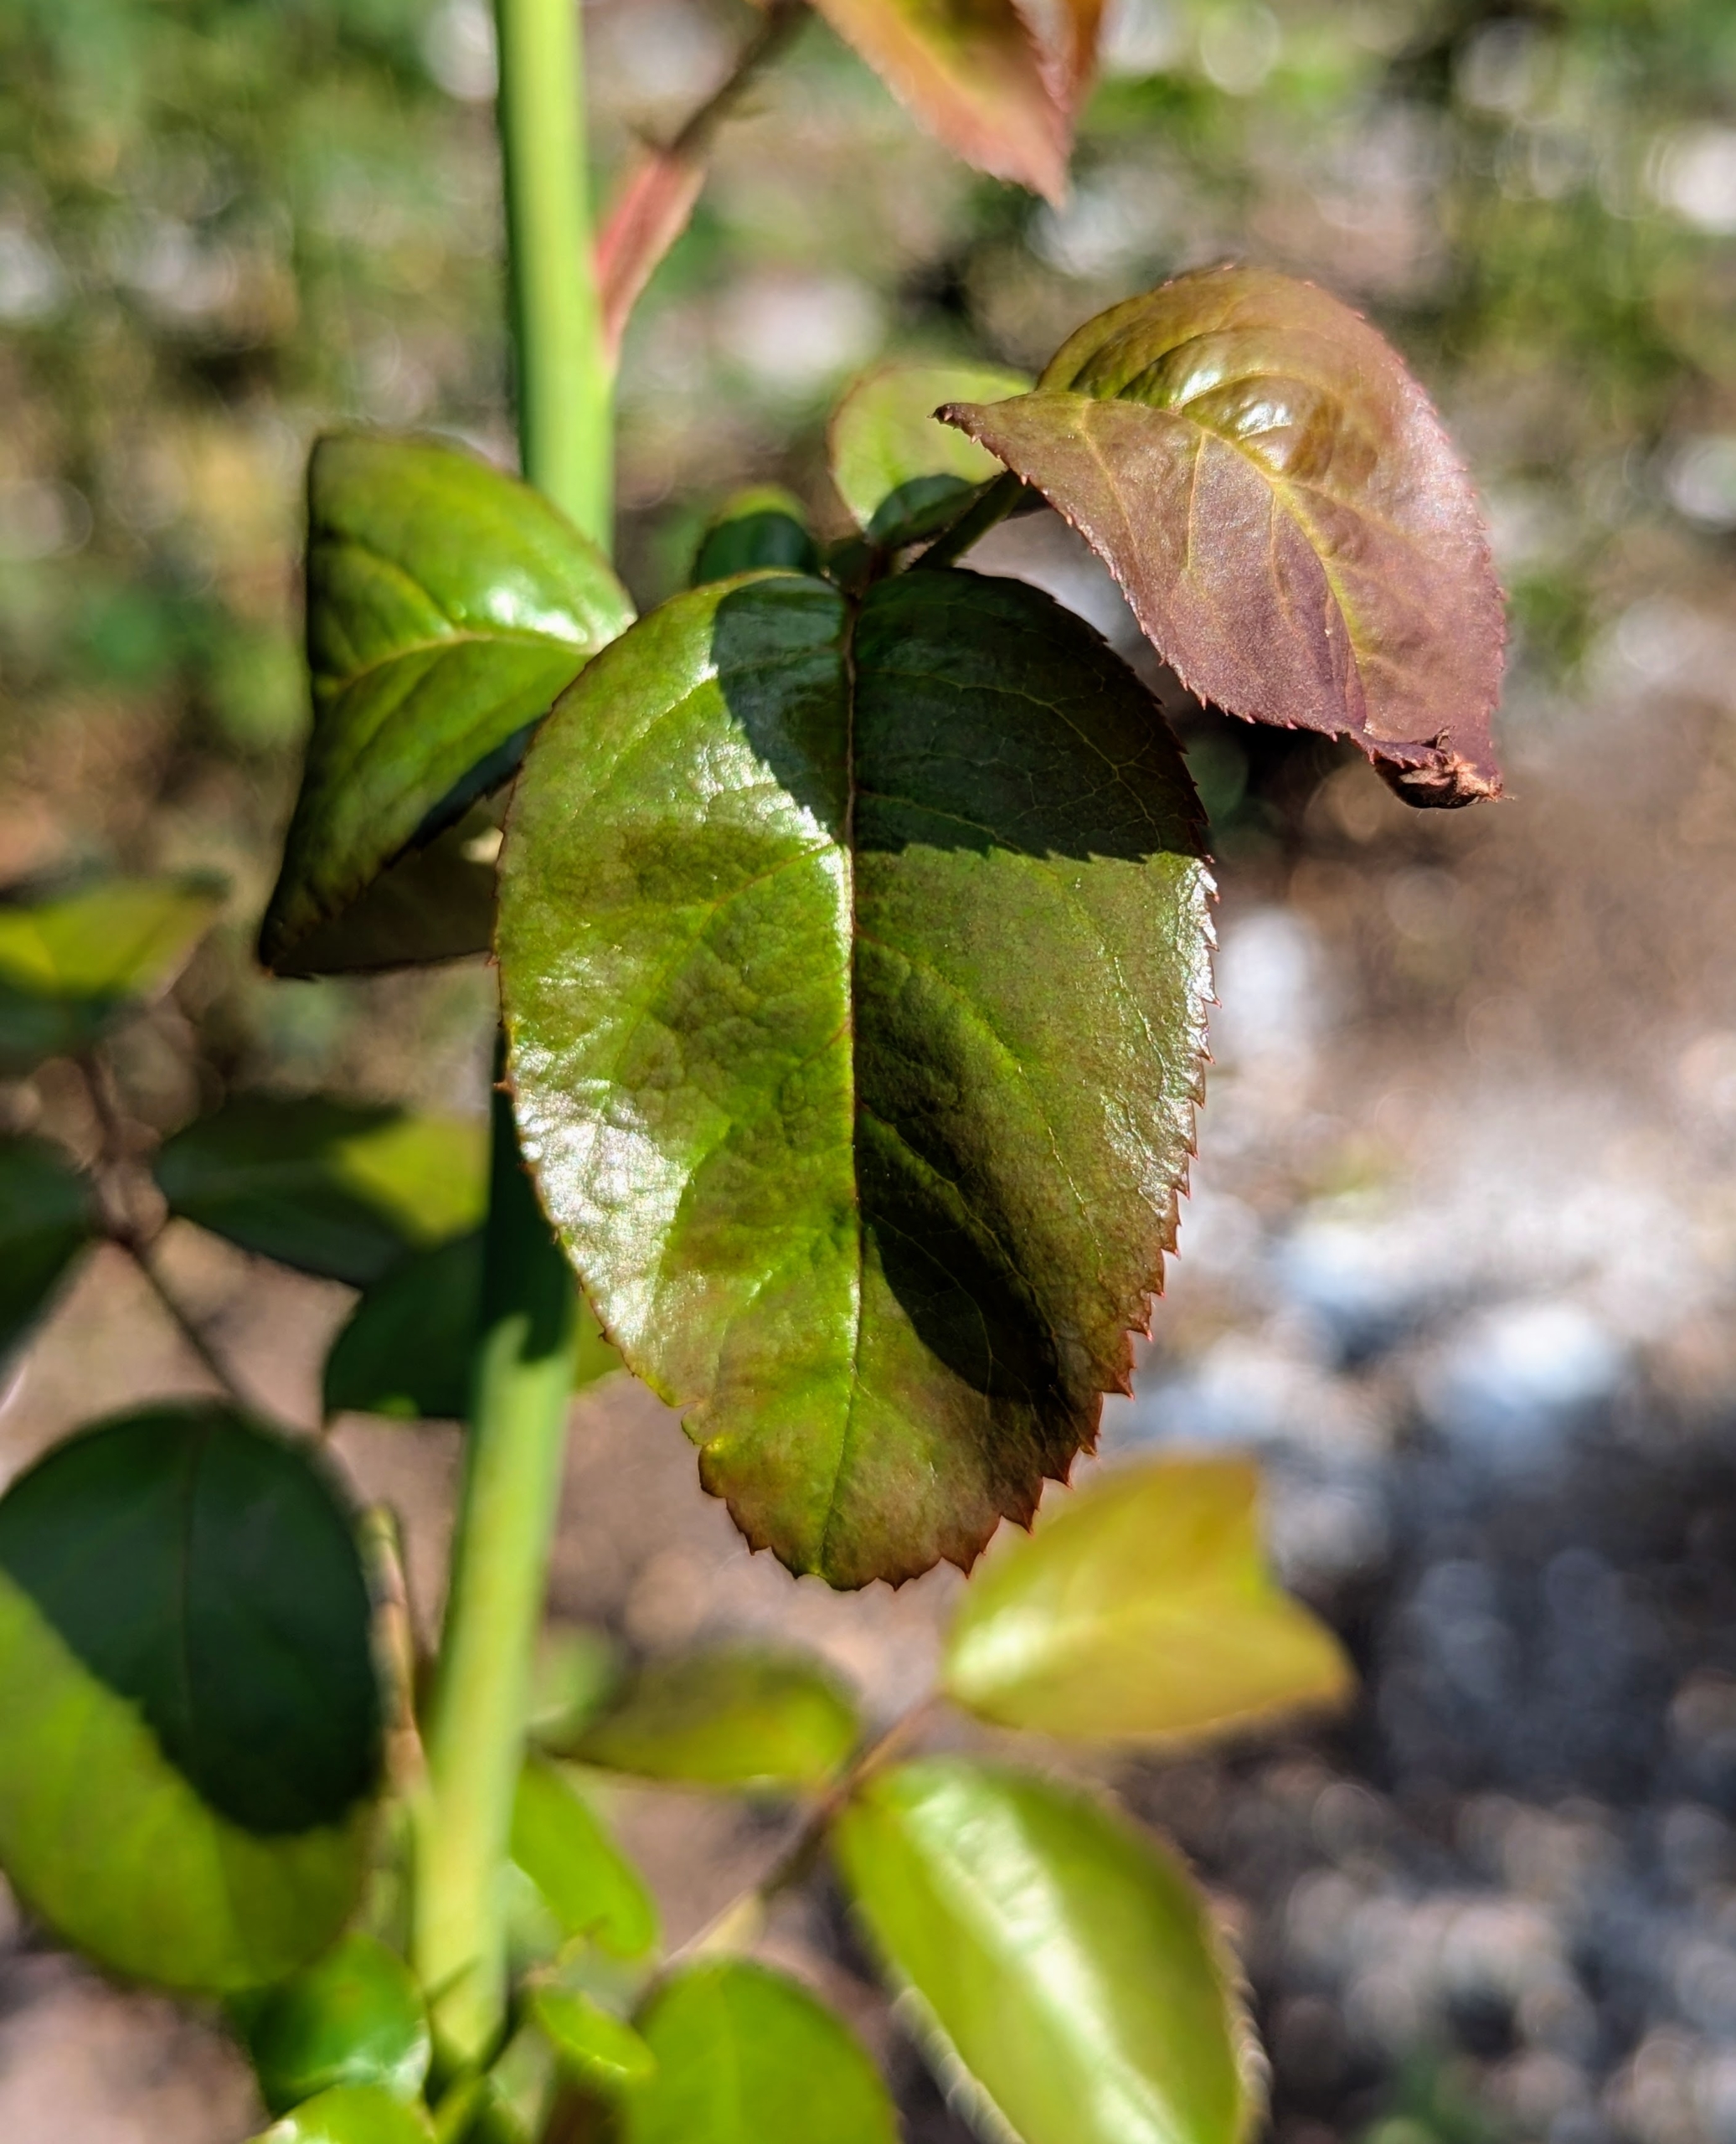
Reddish new growth on roses is normal for many varieties, including hybrid tea roses. The leaves have high levels of anthocyanins, a pigment molecule that causes red foliage in developing plants.
When the leaves are young, chlorophyll levels are lower. They increase as the leaves grow and develop under sunlight.
As the plant continues to grow, the leaves change color and become more green.
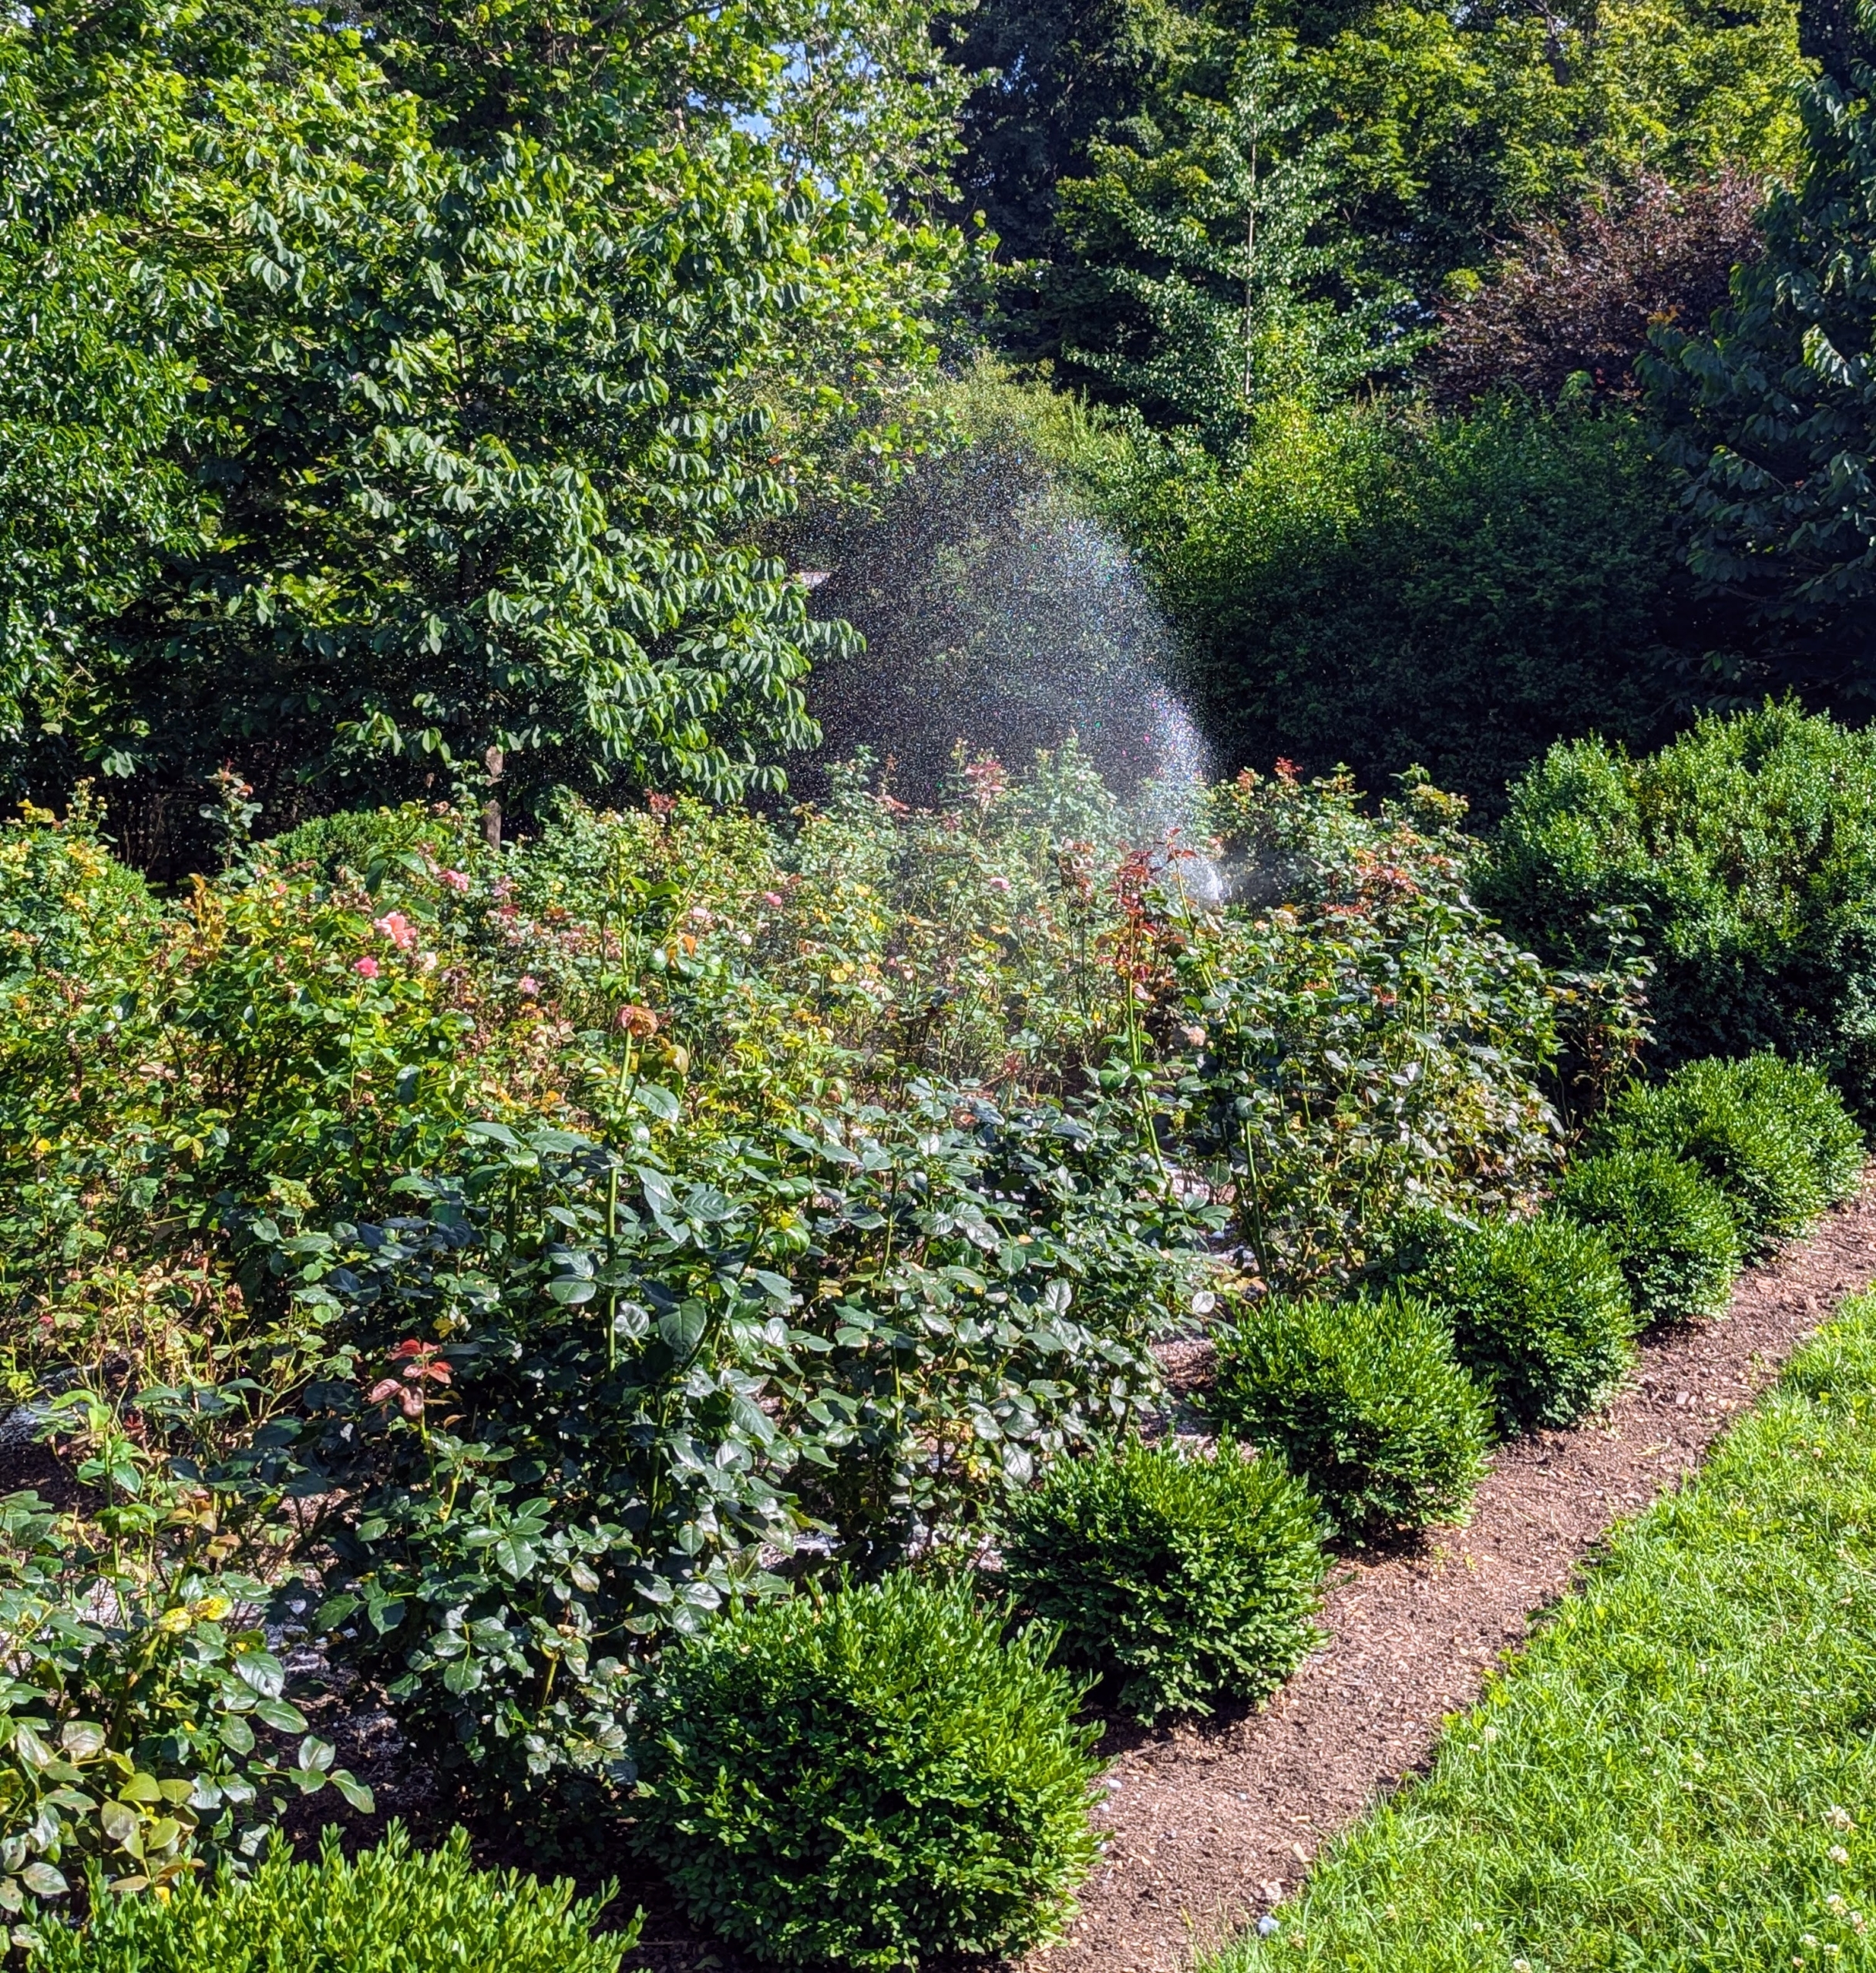
Finally, the entire garden gets a good watering. It is important to give roses one to two inches of water each week from early spring through fall and more when it is very hot and dry.
Around the perimeter, I planted boxwood I nurtured from bare-root cuttings. This rose garden looks great – pruned and groomed. Keeping up with plant maintenance will keep them healthy, prevent disease, and encourage beautiful, abundant flowering.
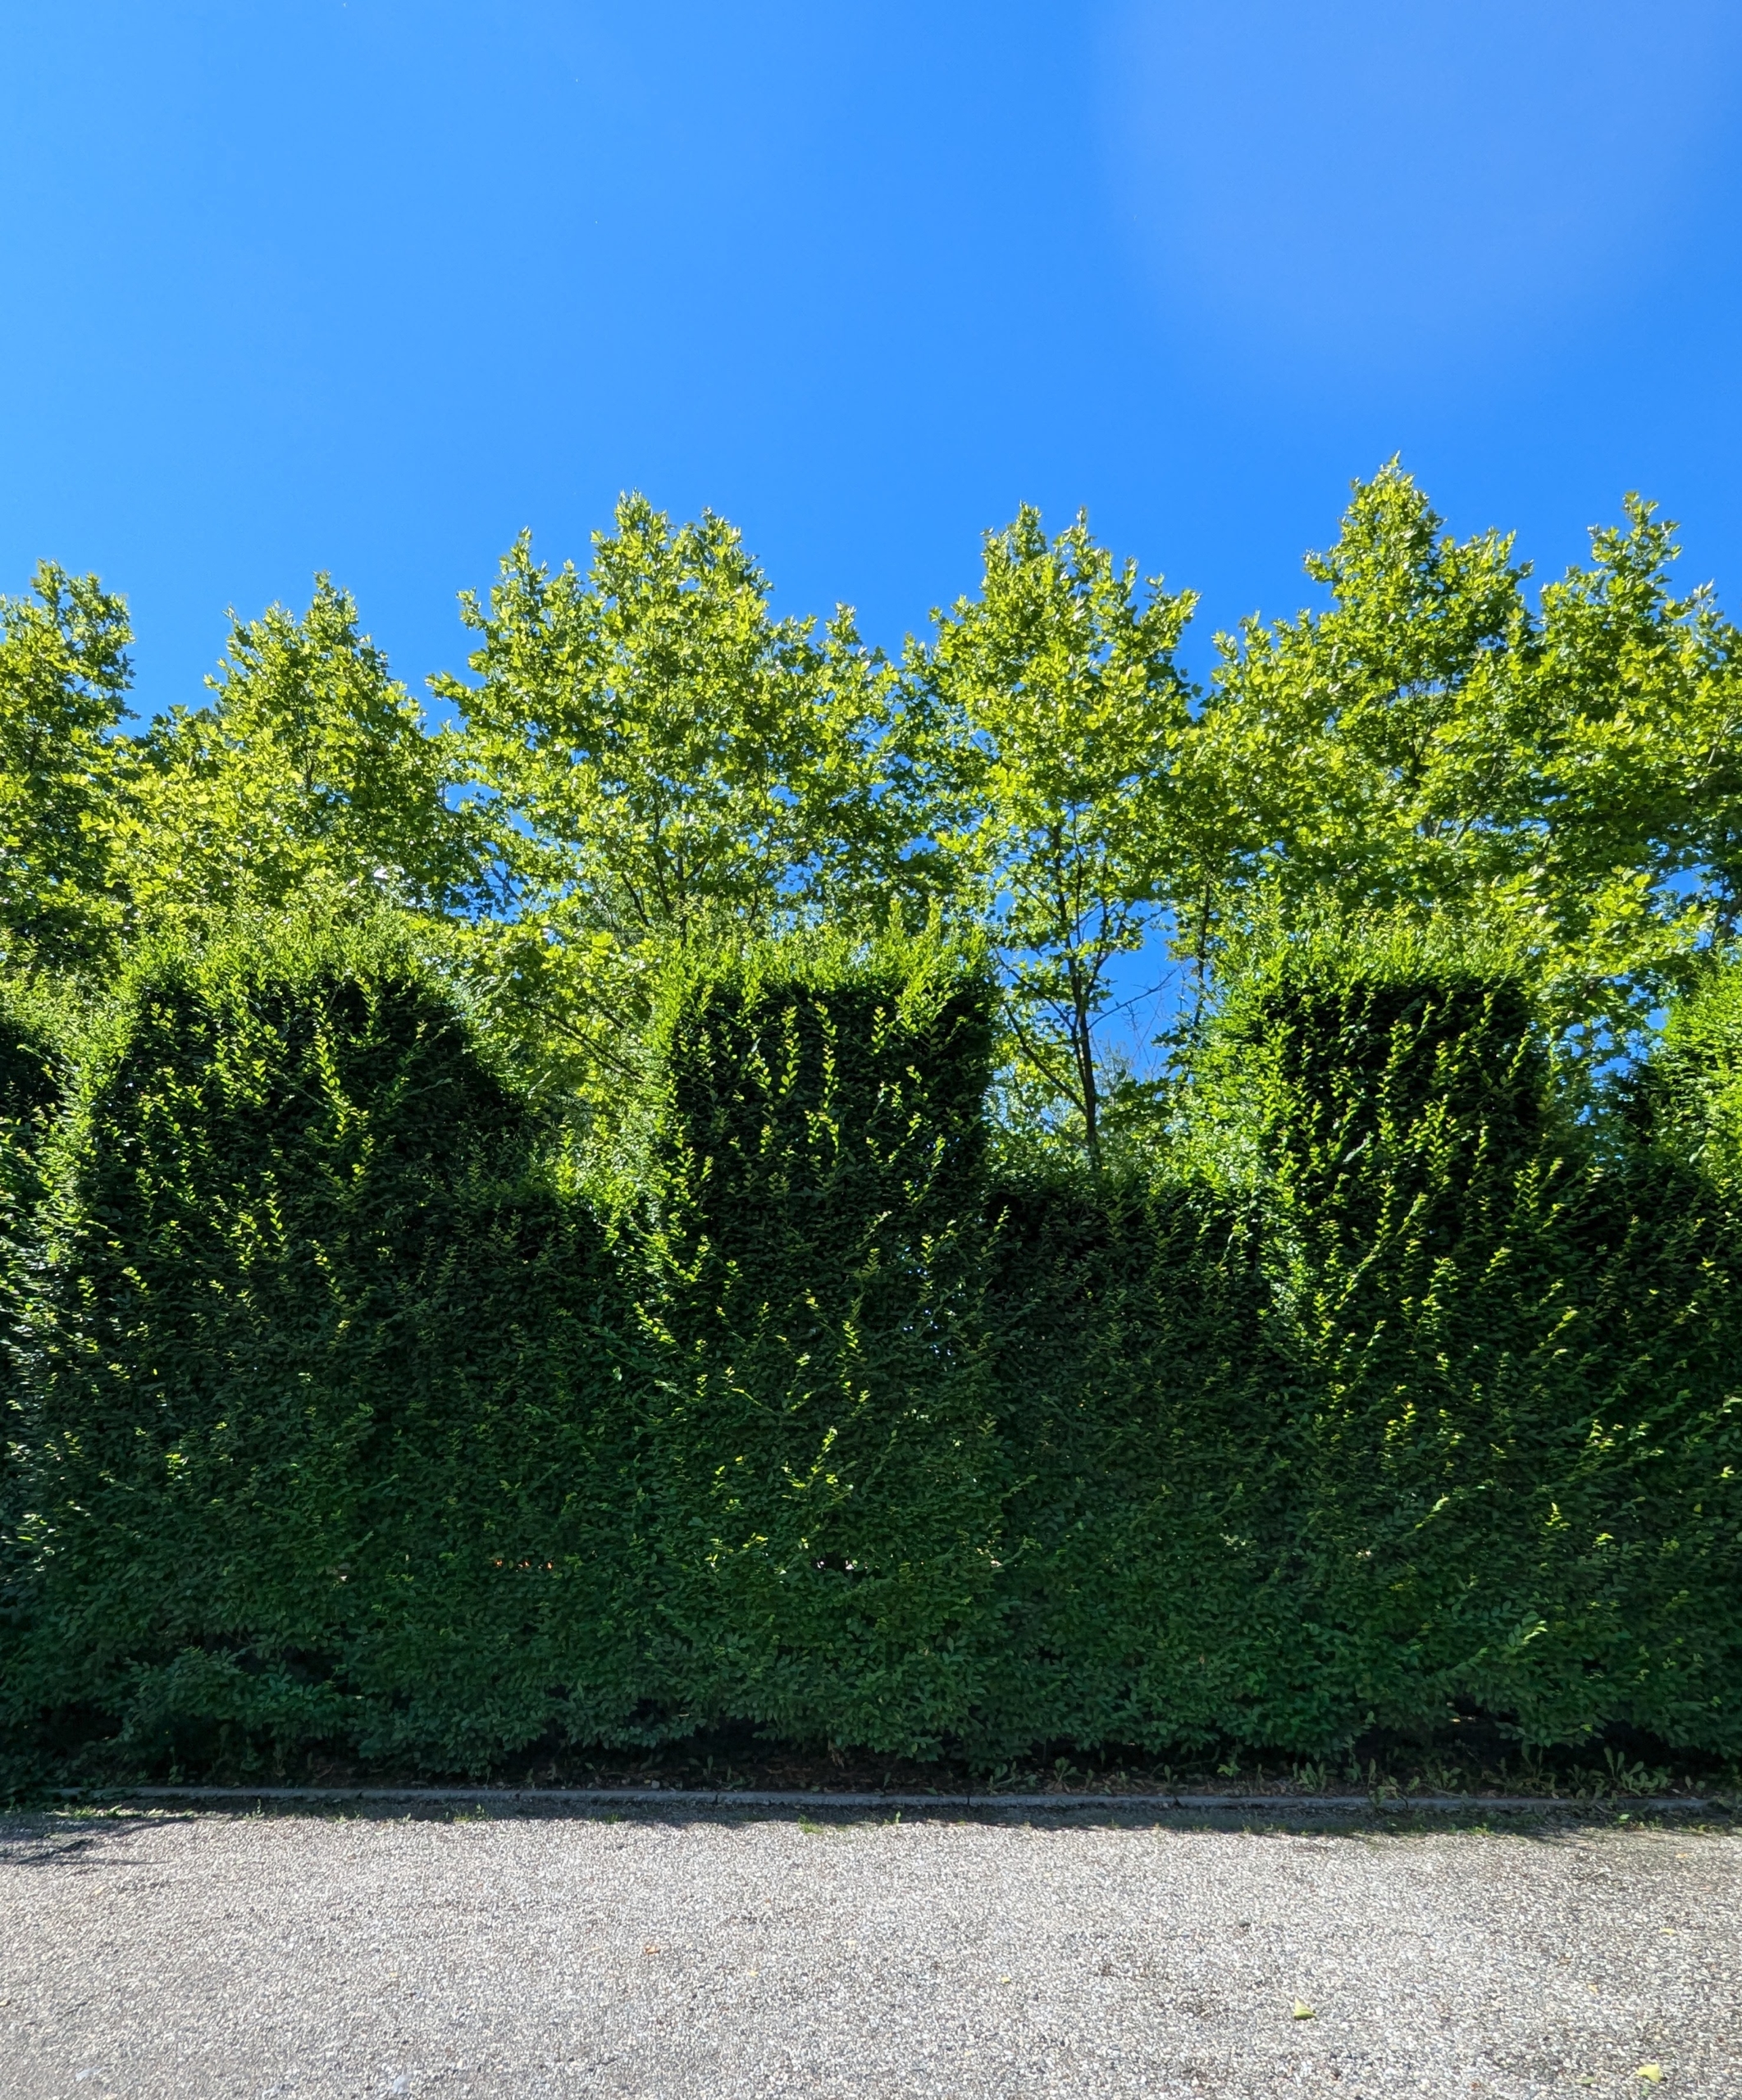
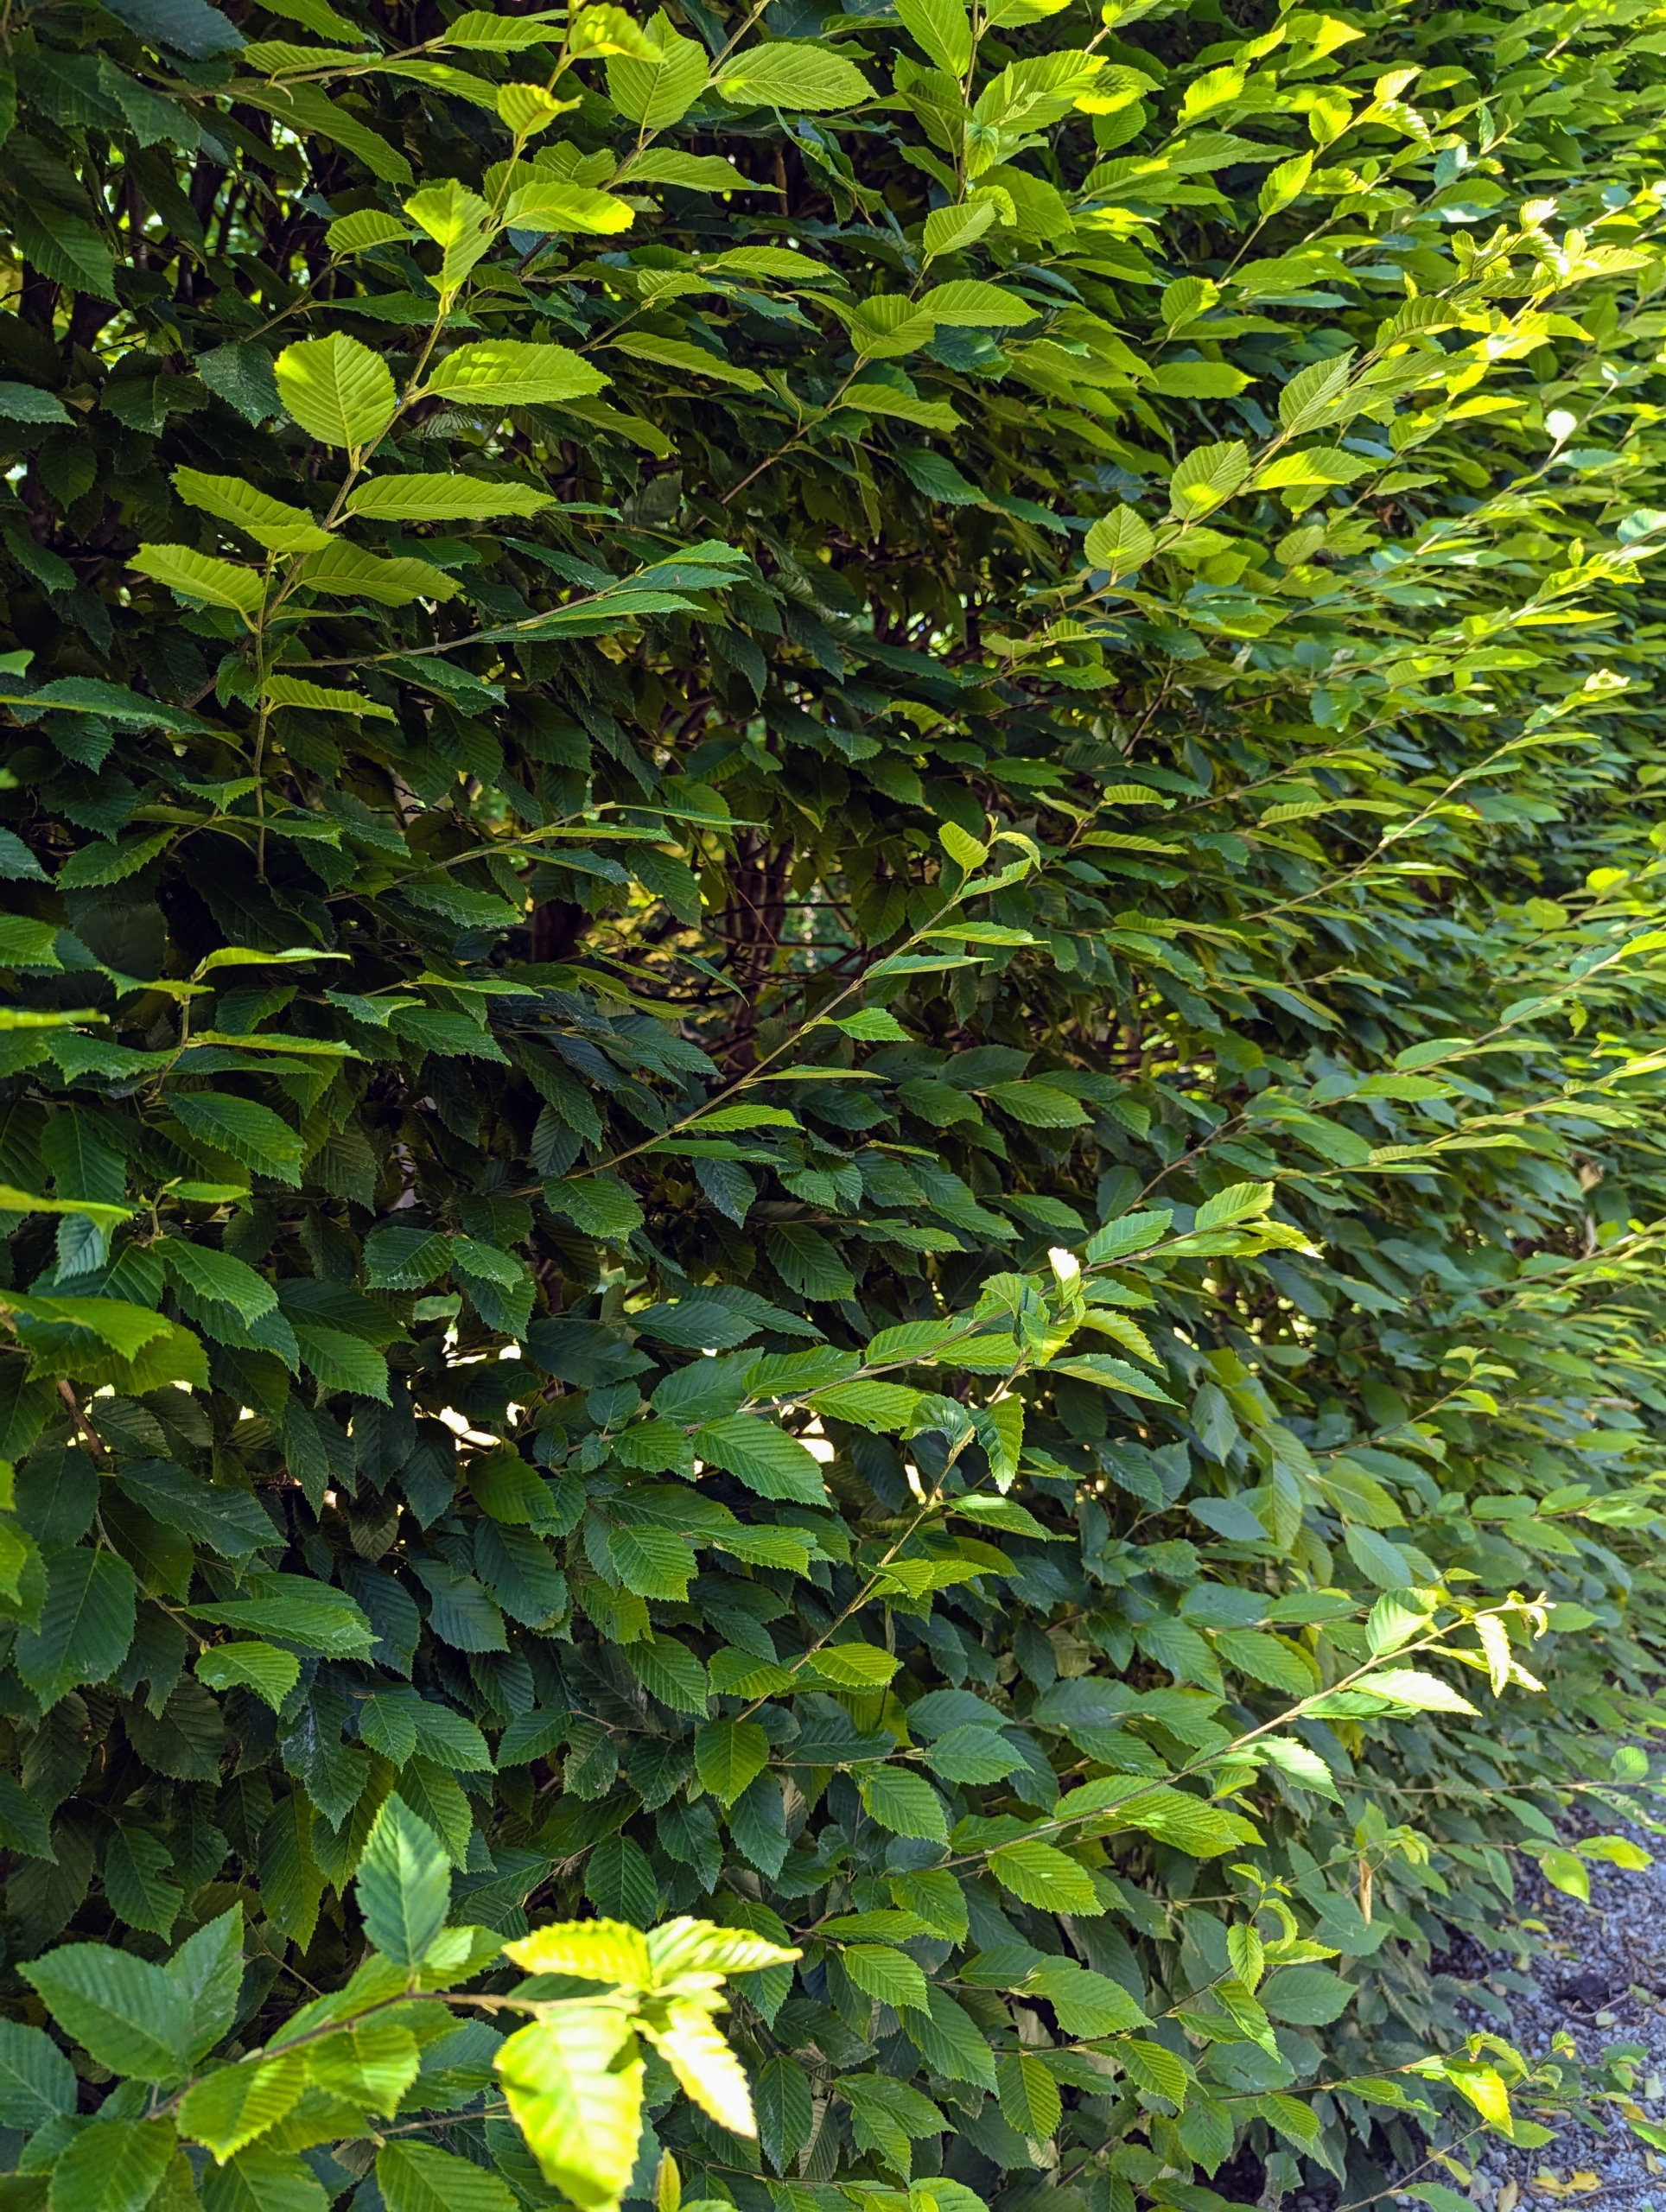
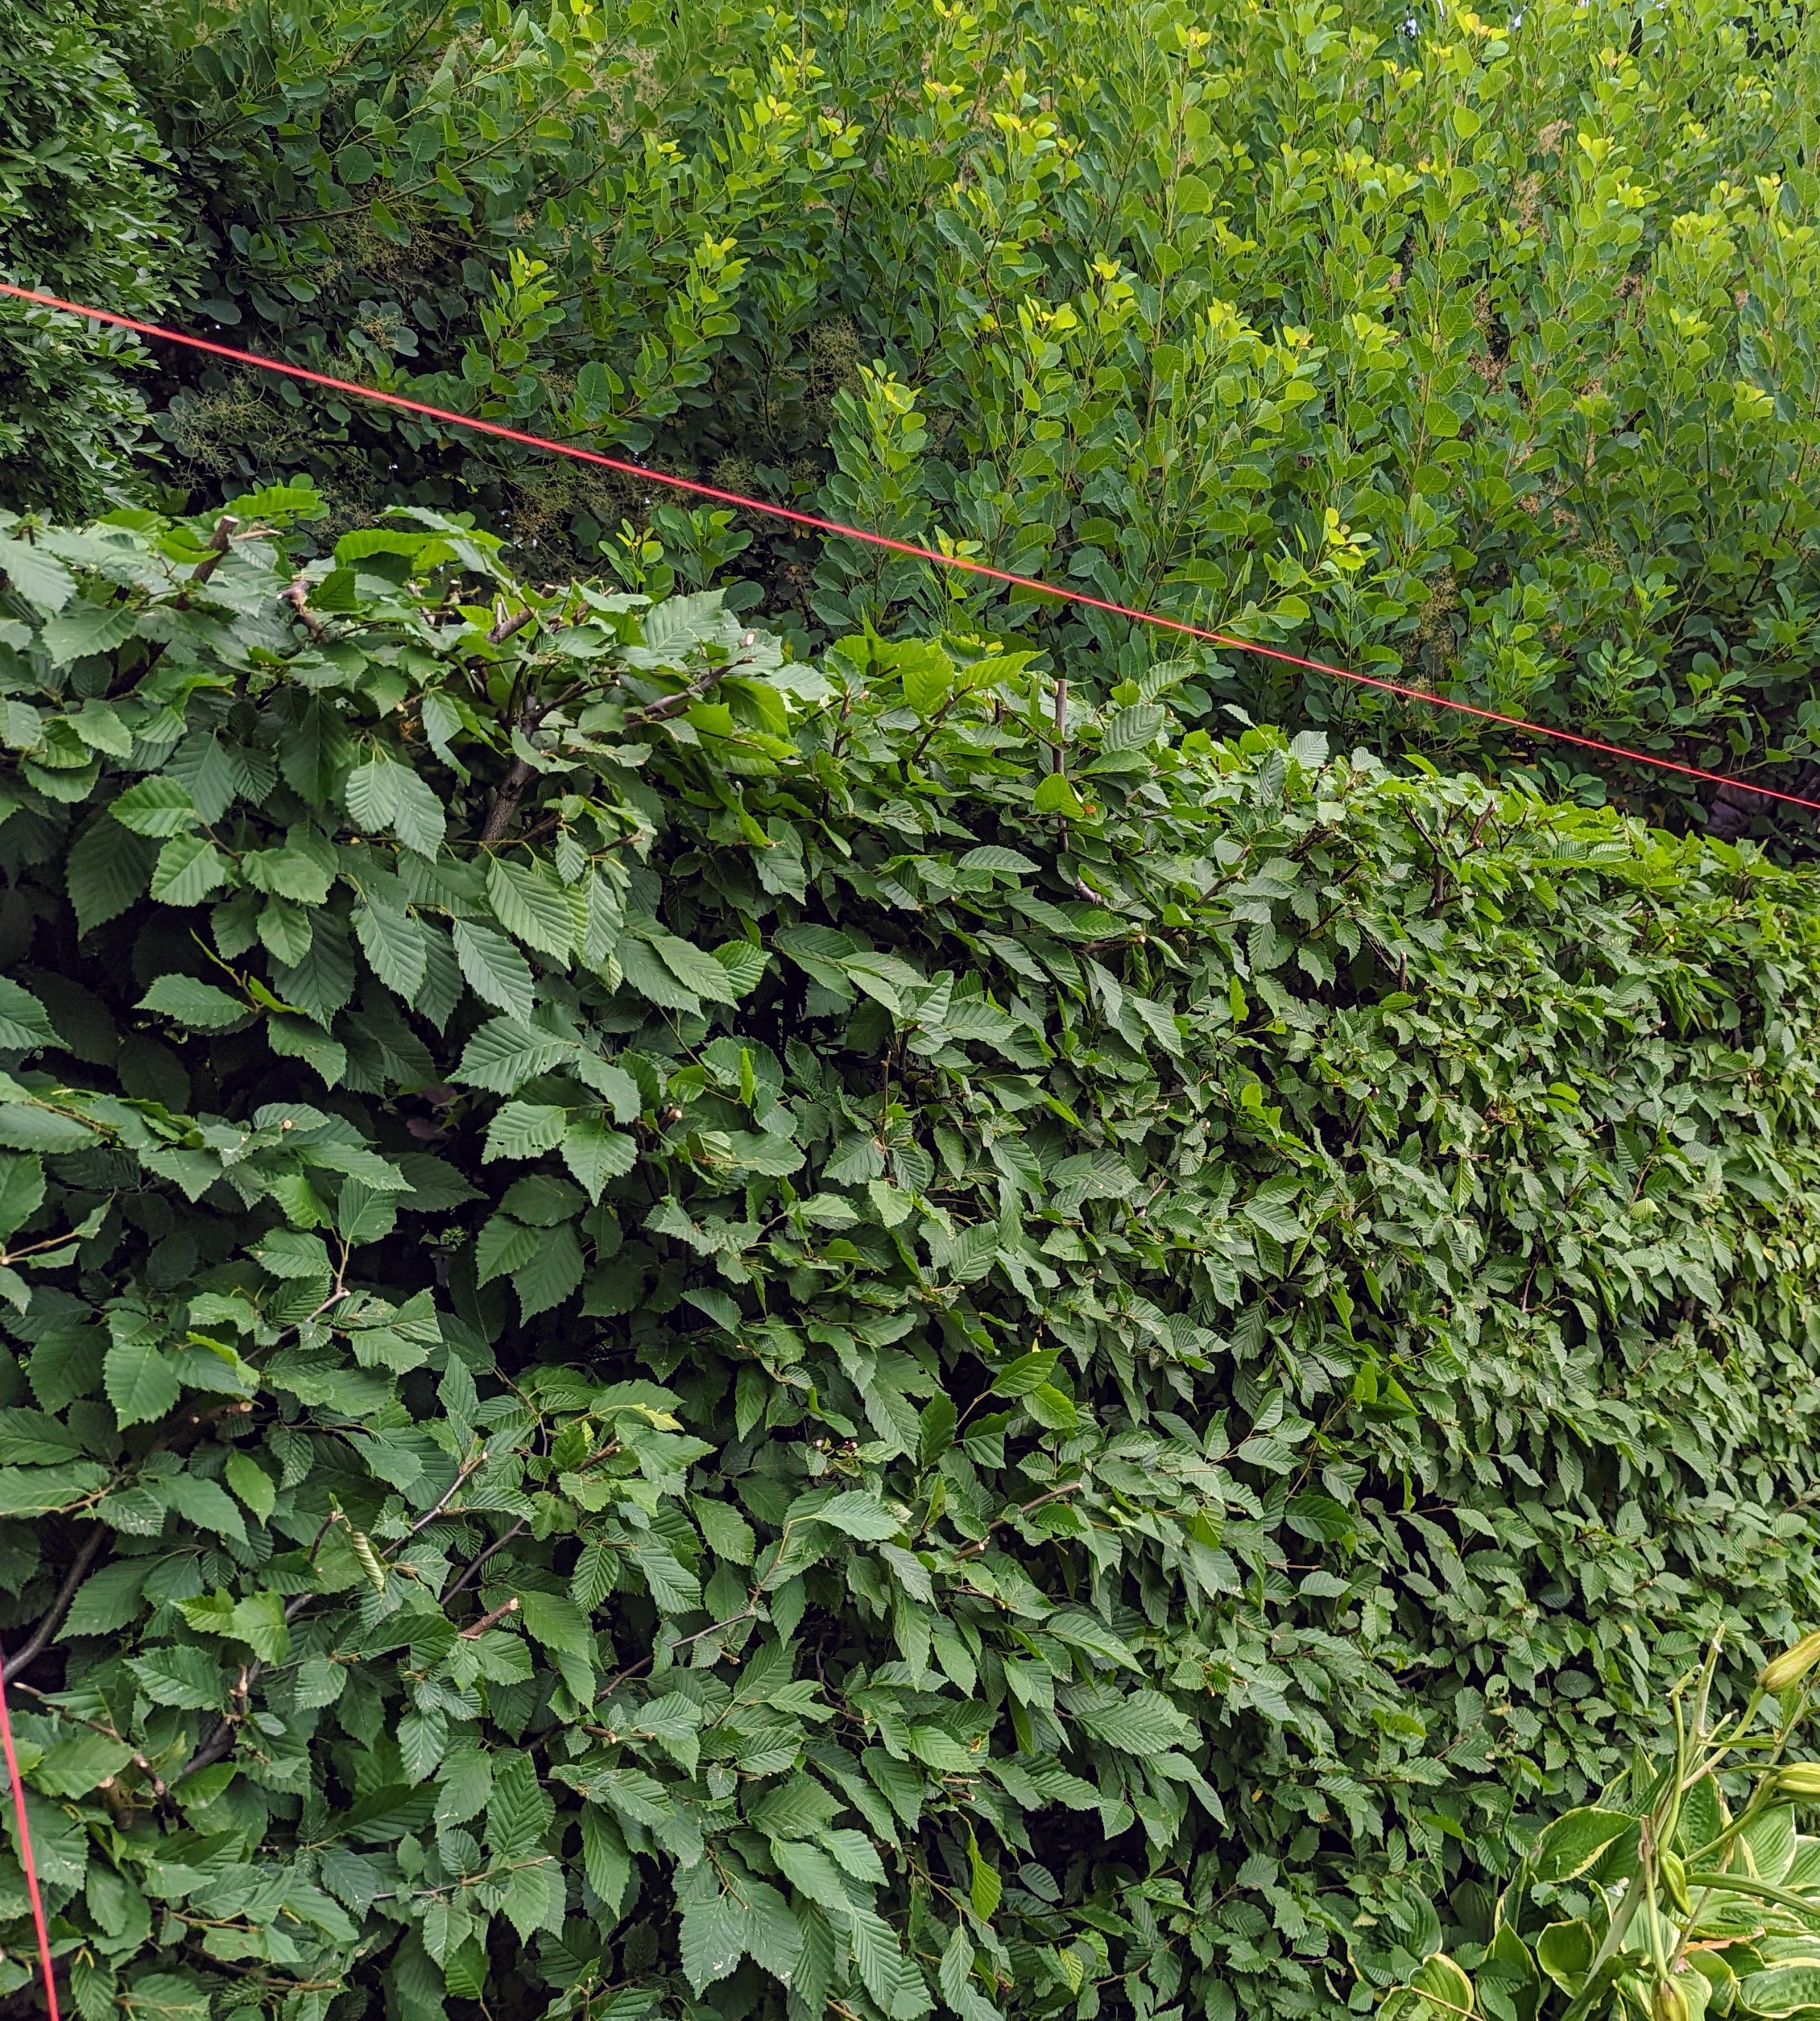
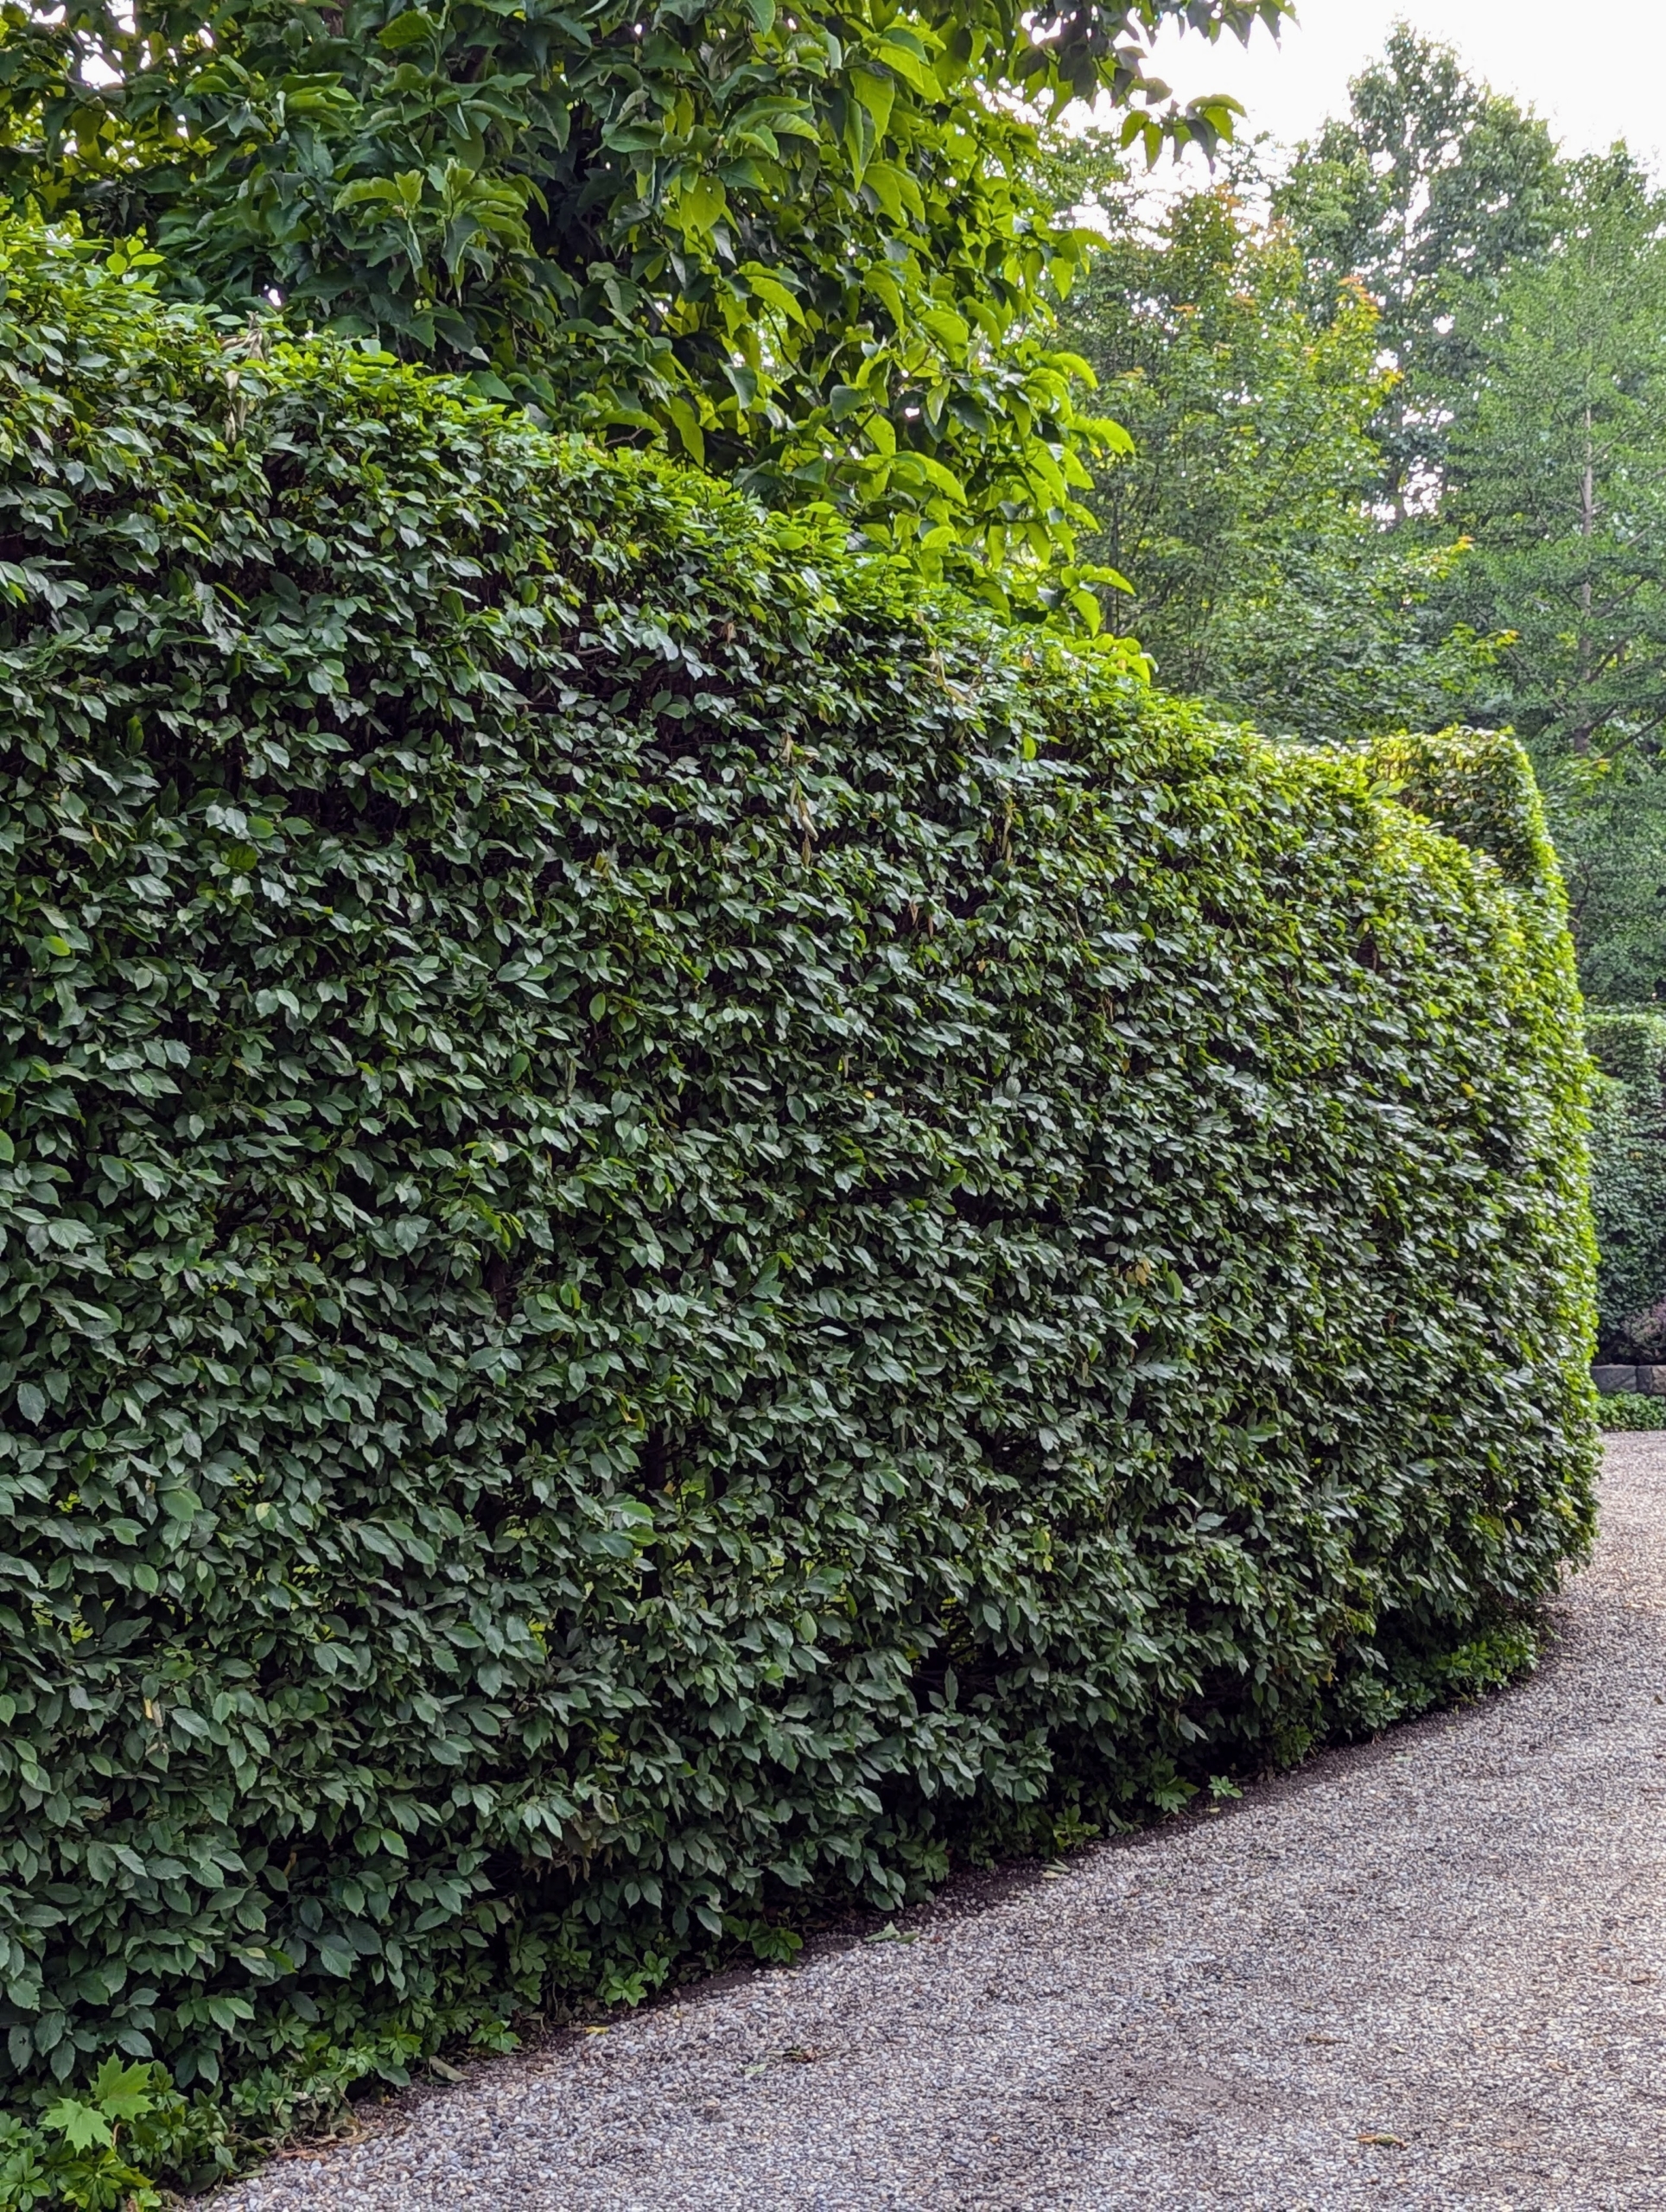
It's that time of year again, when the fast growing hornbeam hedges around my farm need to be pruned and groomed.
Over the last couple of weeks my outdoor grounds crew trimmed the tall hornbeam hedge in front of my main greenhouse. They also tackled the long hornbeam hedge that runs from my Summer House and along the road behind my Winter House as well as the hornbeam shrubs. Botanically known as Carpinus betulus, the hornbeam is a fast-growing deciduous tree. In fact, it can grow about four to five feet per year. I keep a close eye on all the hornbeams - it’s crucial to prune them regularly, so they never look too overgrown and unruly.
Enjoy these photos.
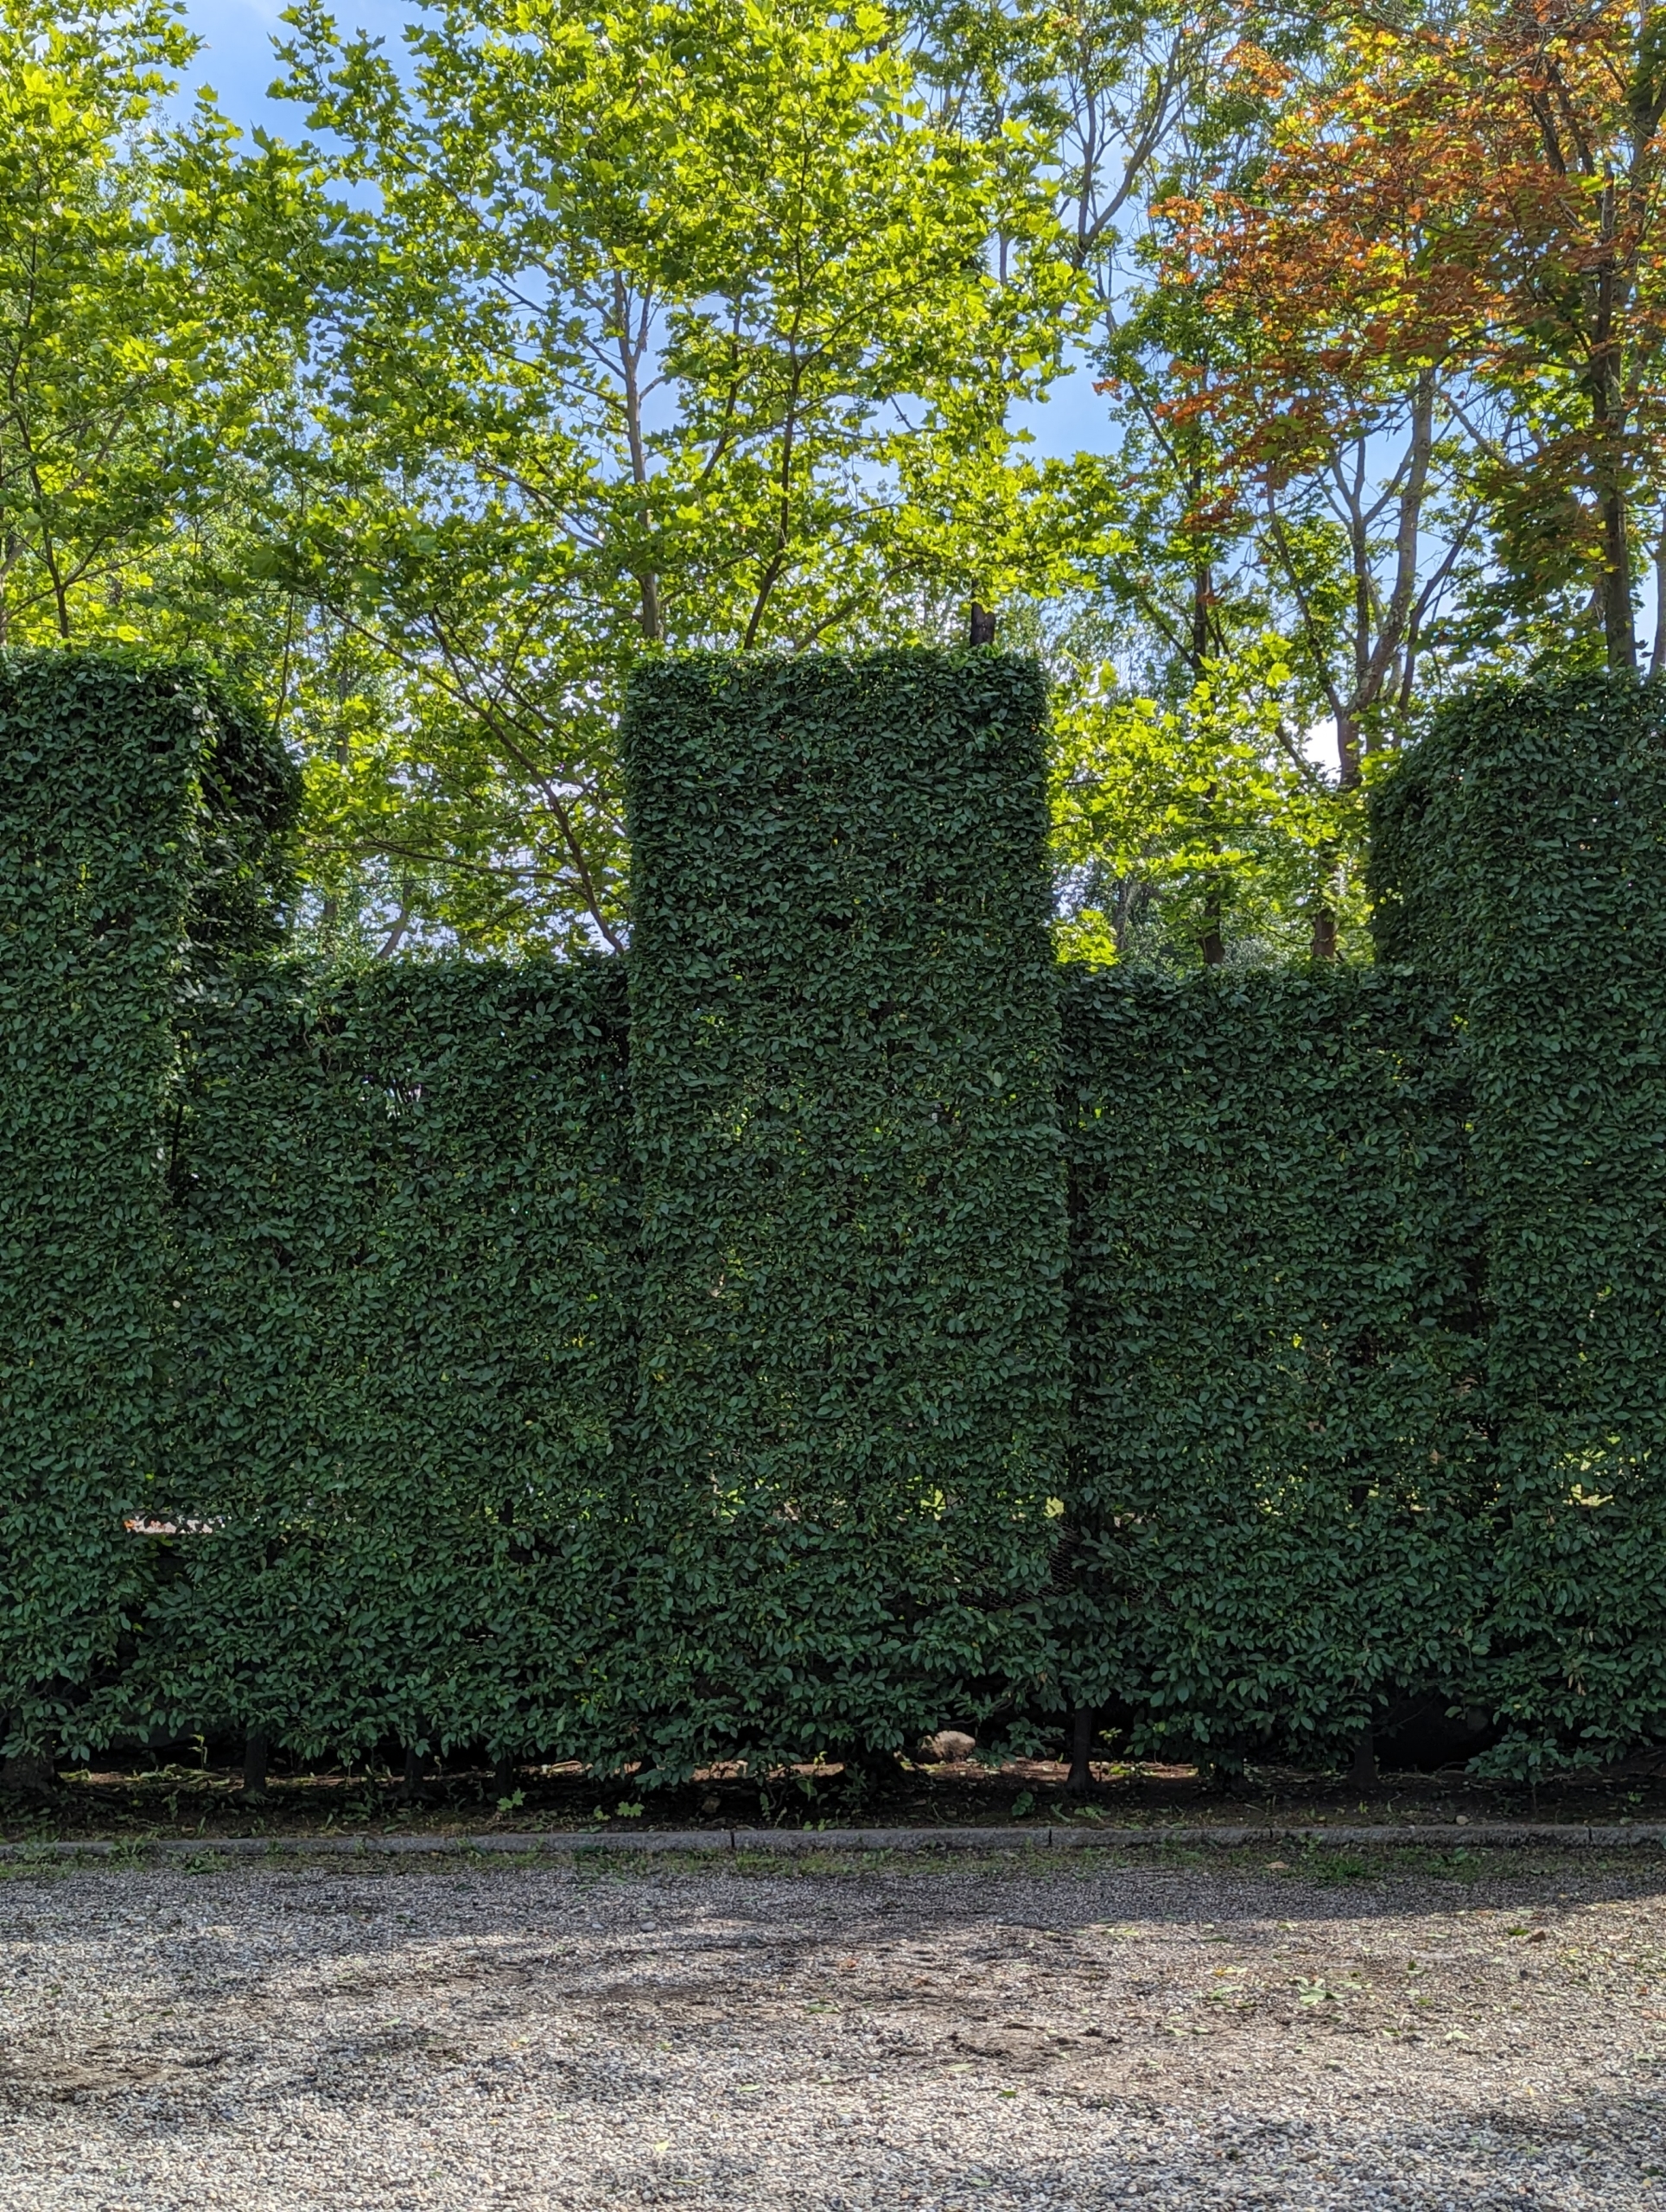
This tall hornbeam hedge grows along one side of the parking lot directly in front of my main greenhouse. It is quite pretty here but serves primarily as a privacy and noise barrier from the road. It is ready for its pruning. Carpinus betulus is a hornbeam native to Western Asia and central, eastern and southern Europe, including southern England.
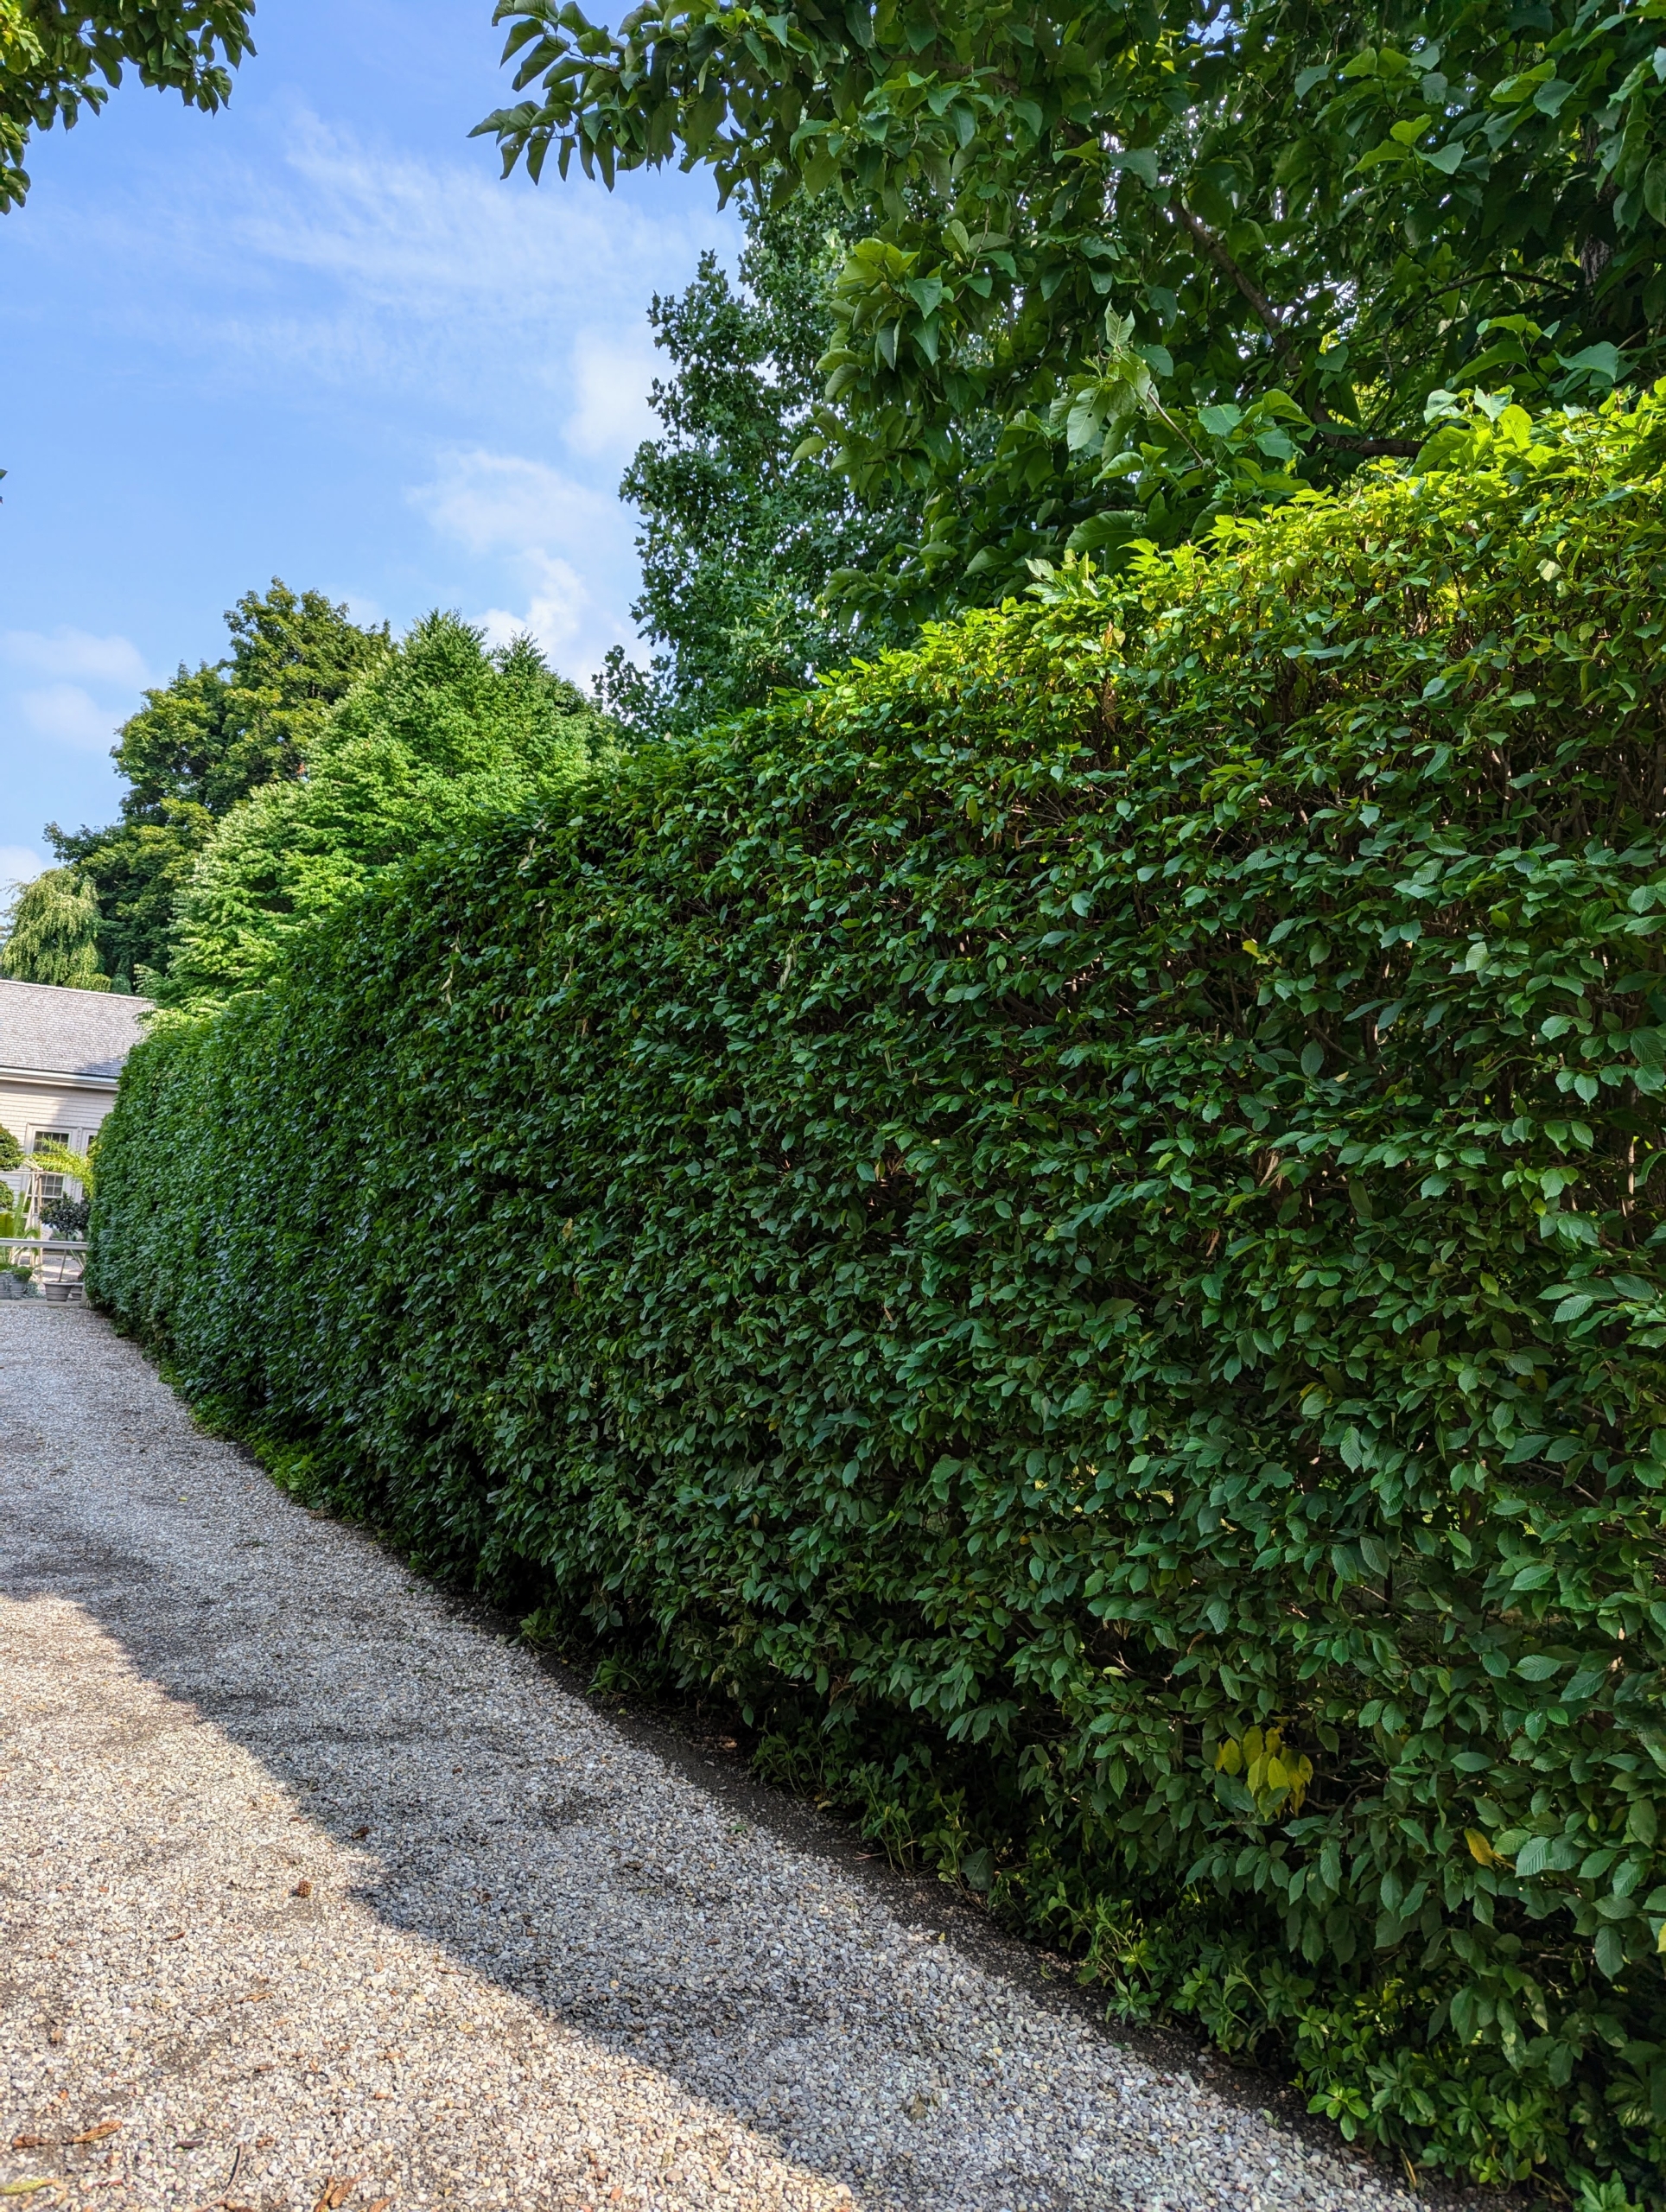
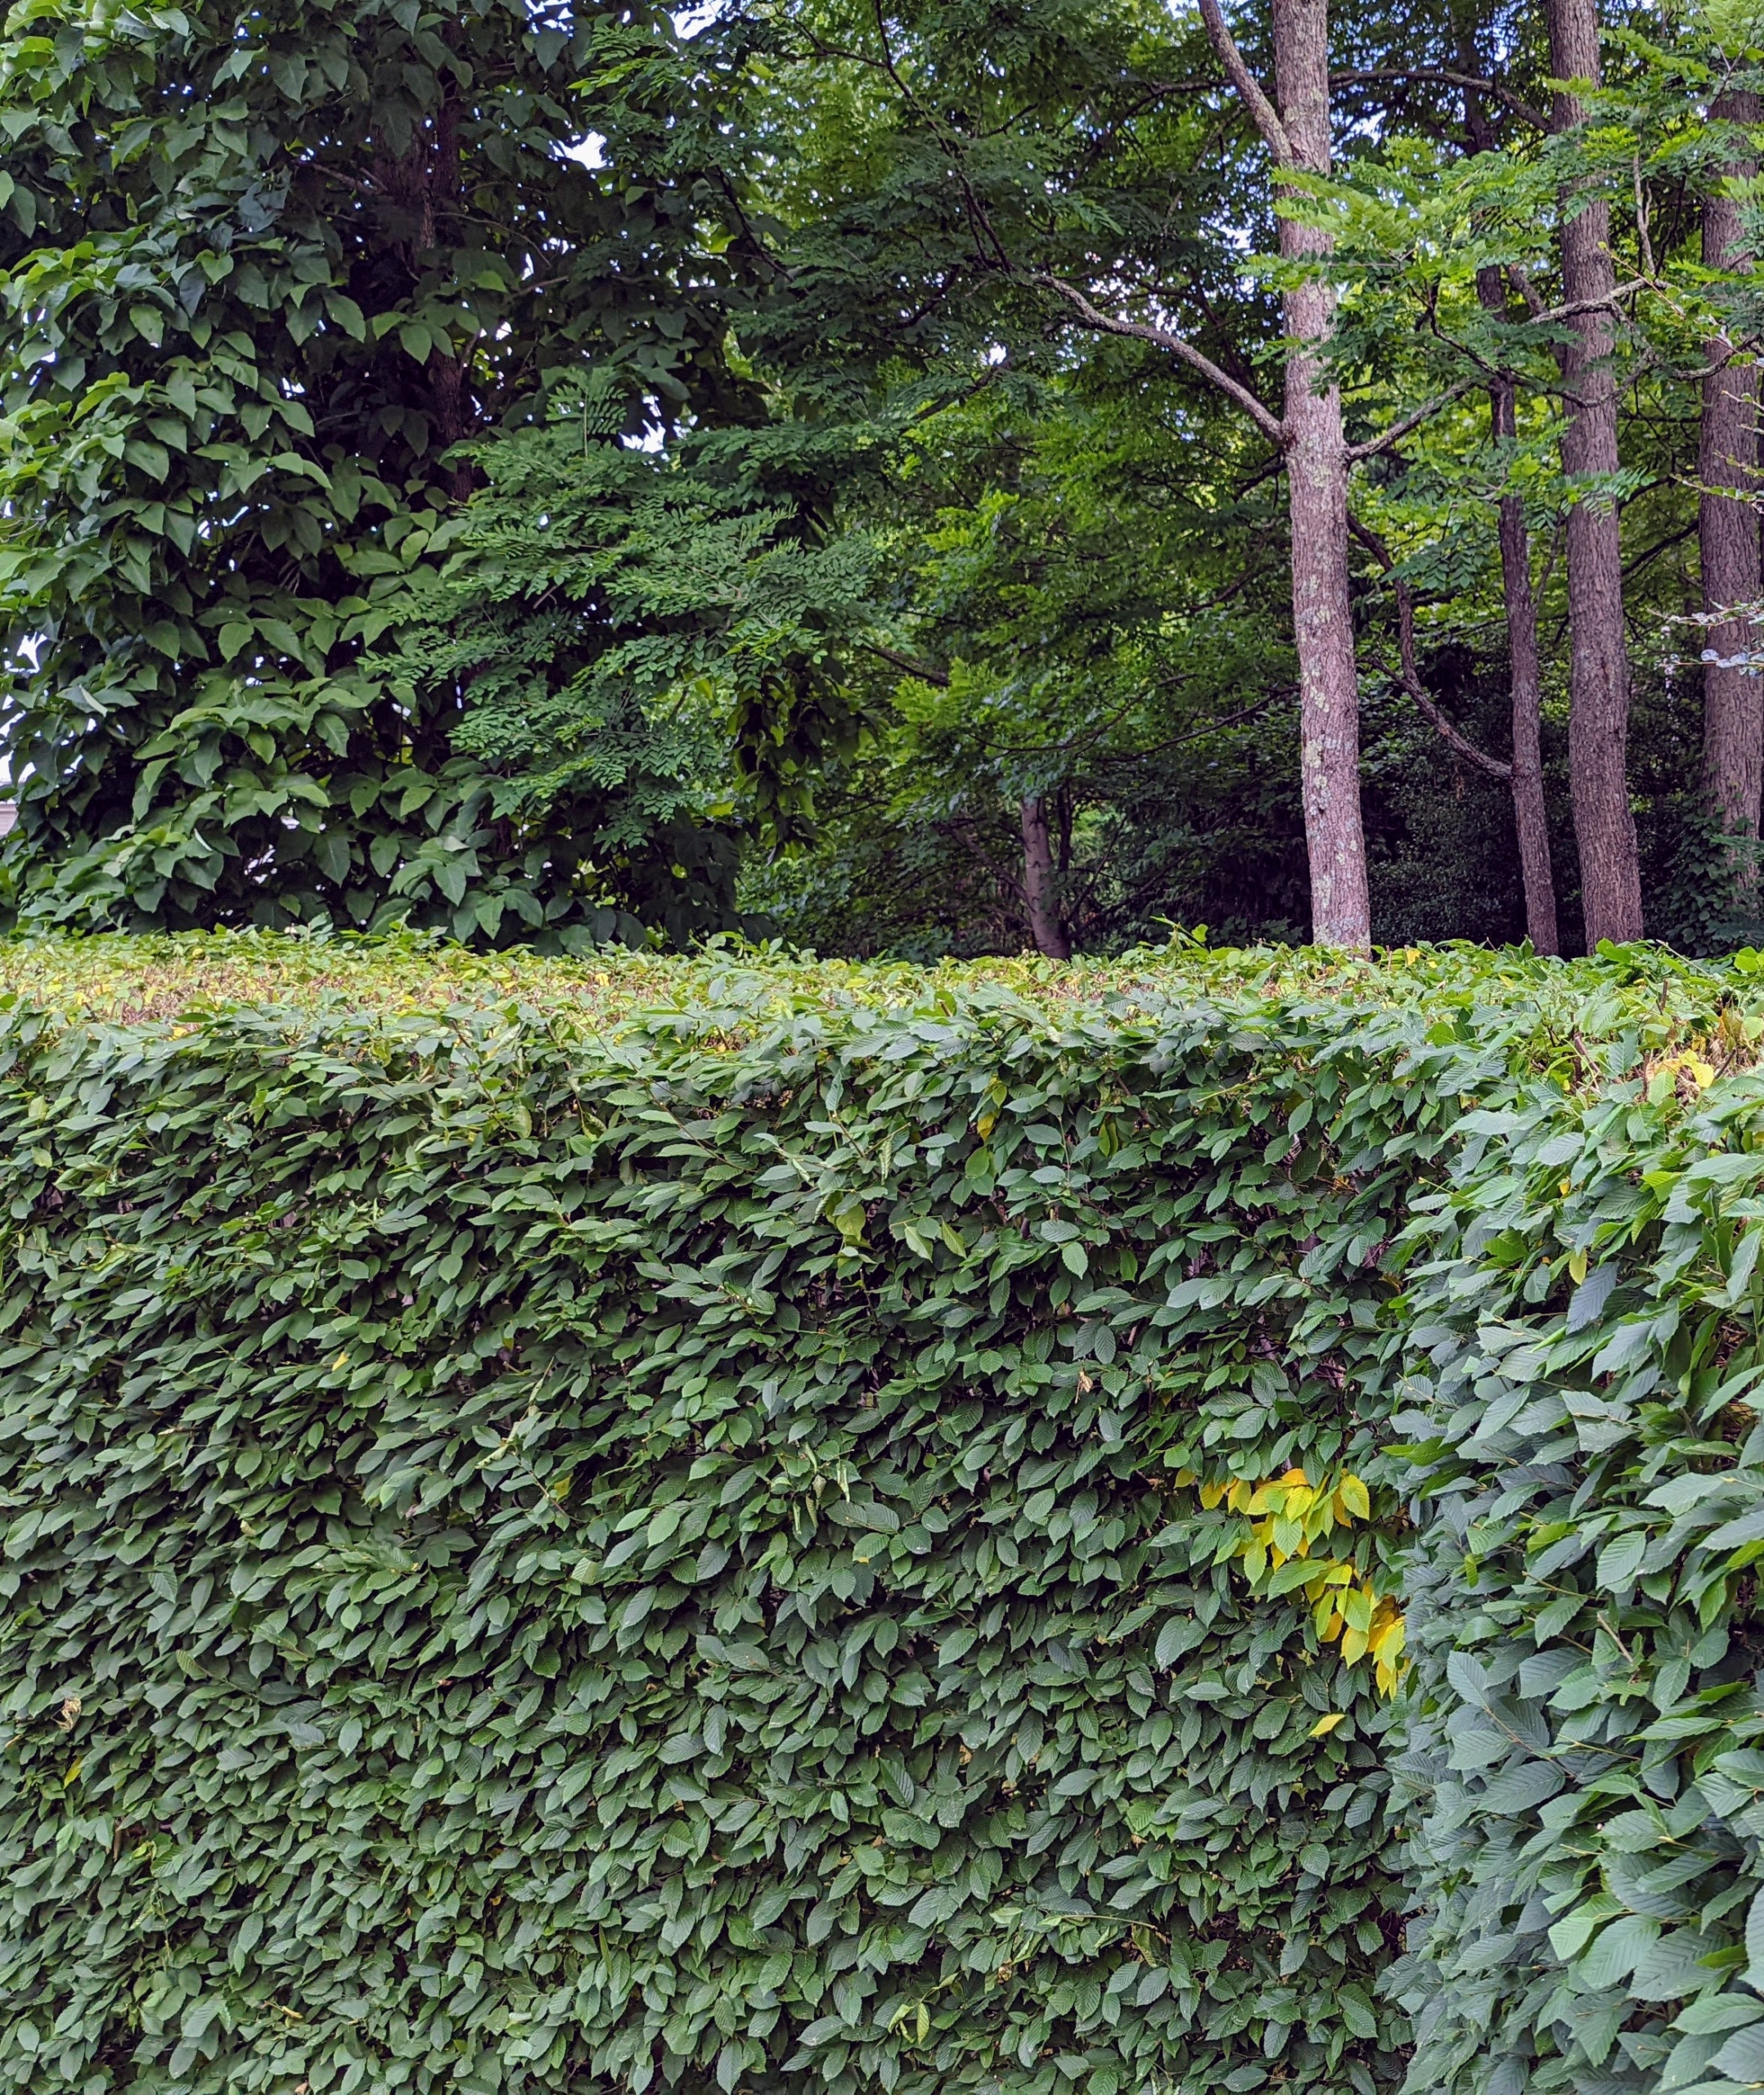
This hedge is behind my Winter House and Summer House. It, too, has grown quite a bit over the months. Because hornbeams grow so quickly, it is important to trim and sculpt them regularly. We do this task every year around this time.
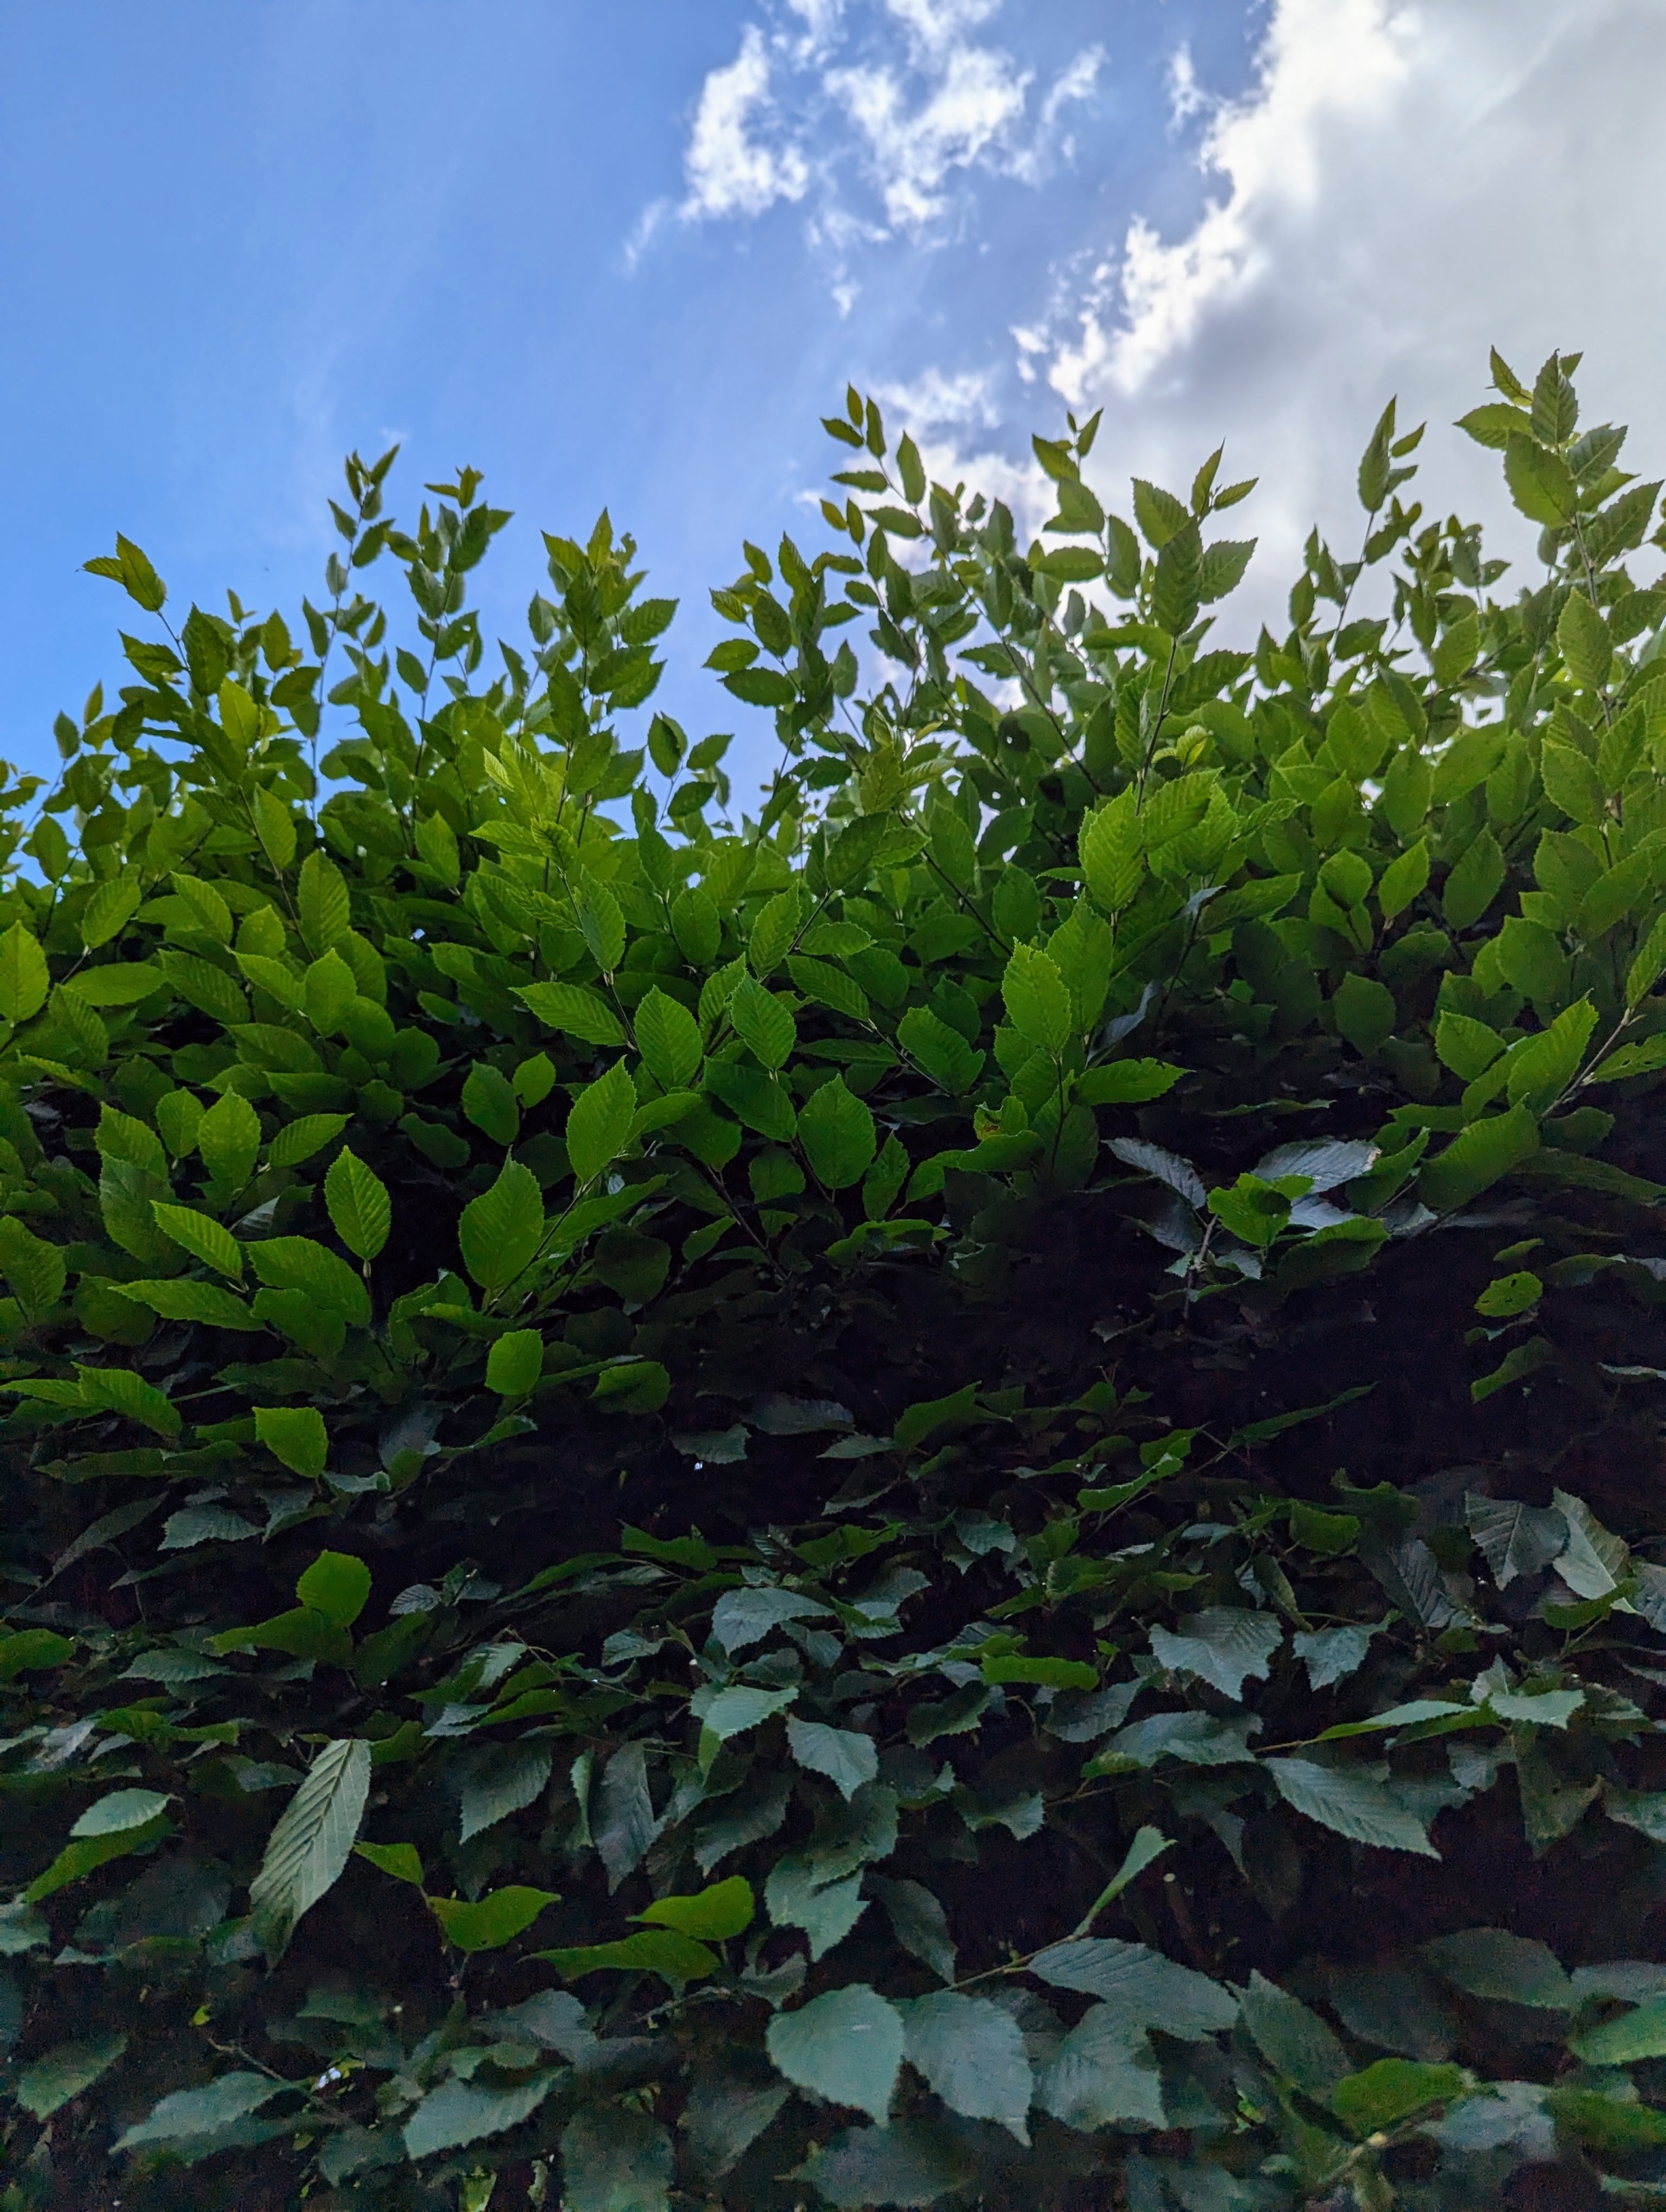
Another view of the same long hedge behind my home shows the new growth on top.
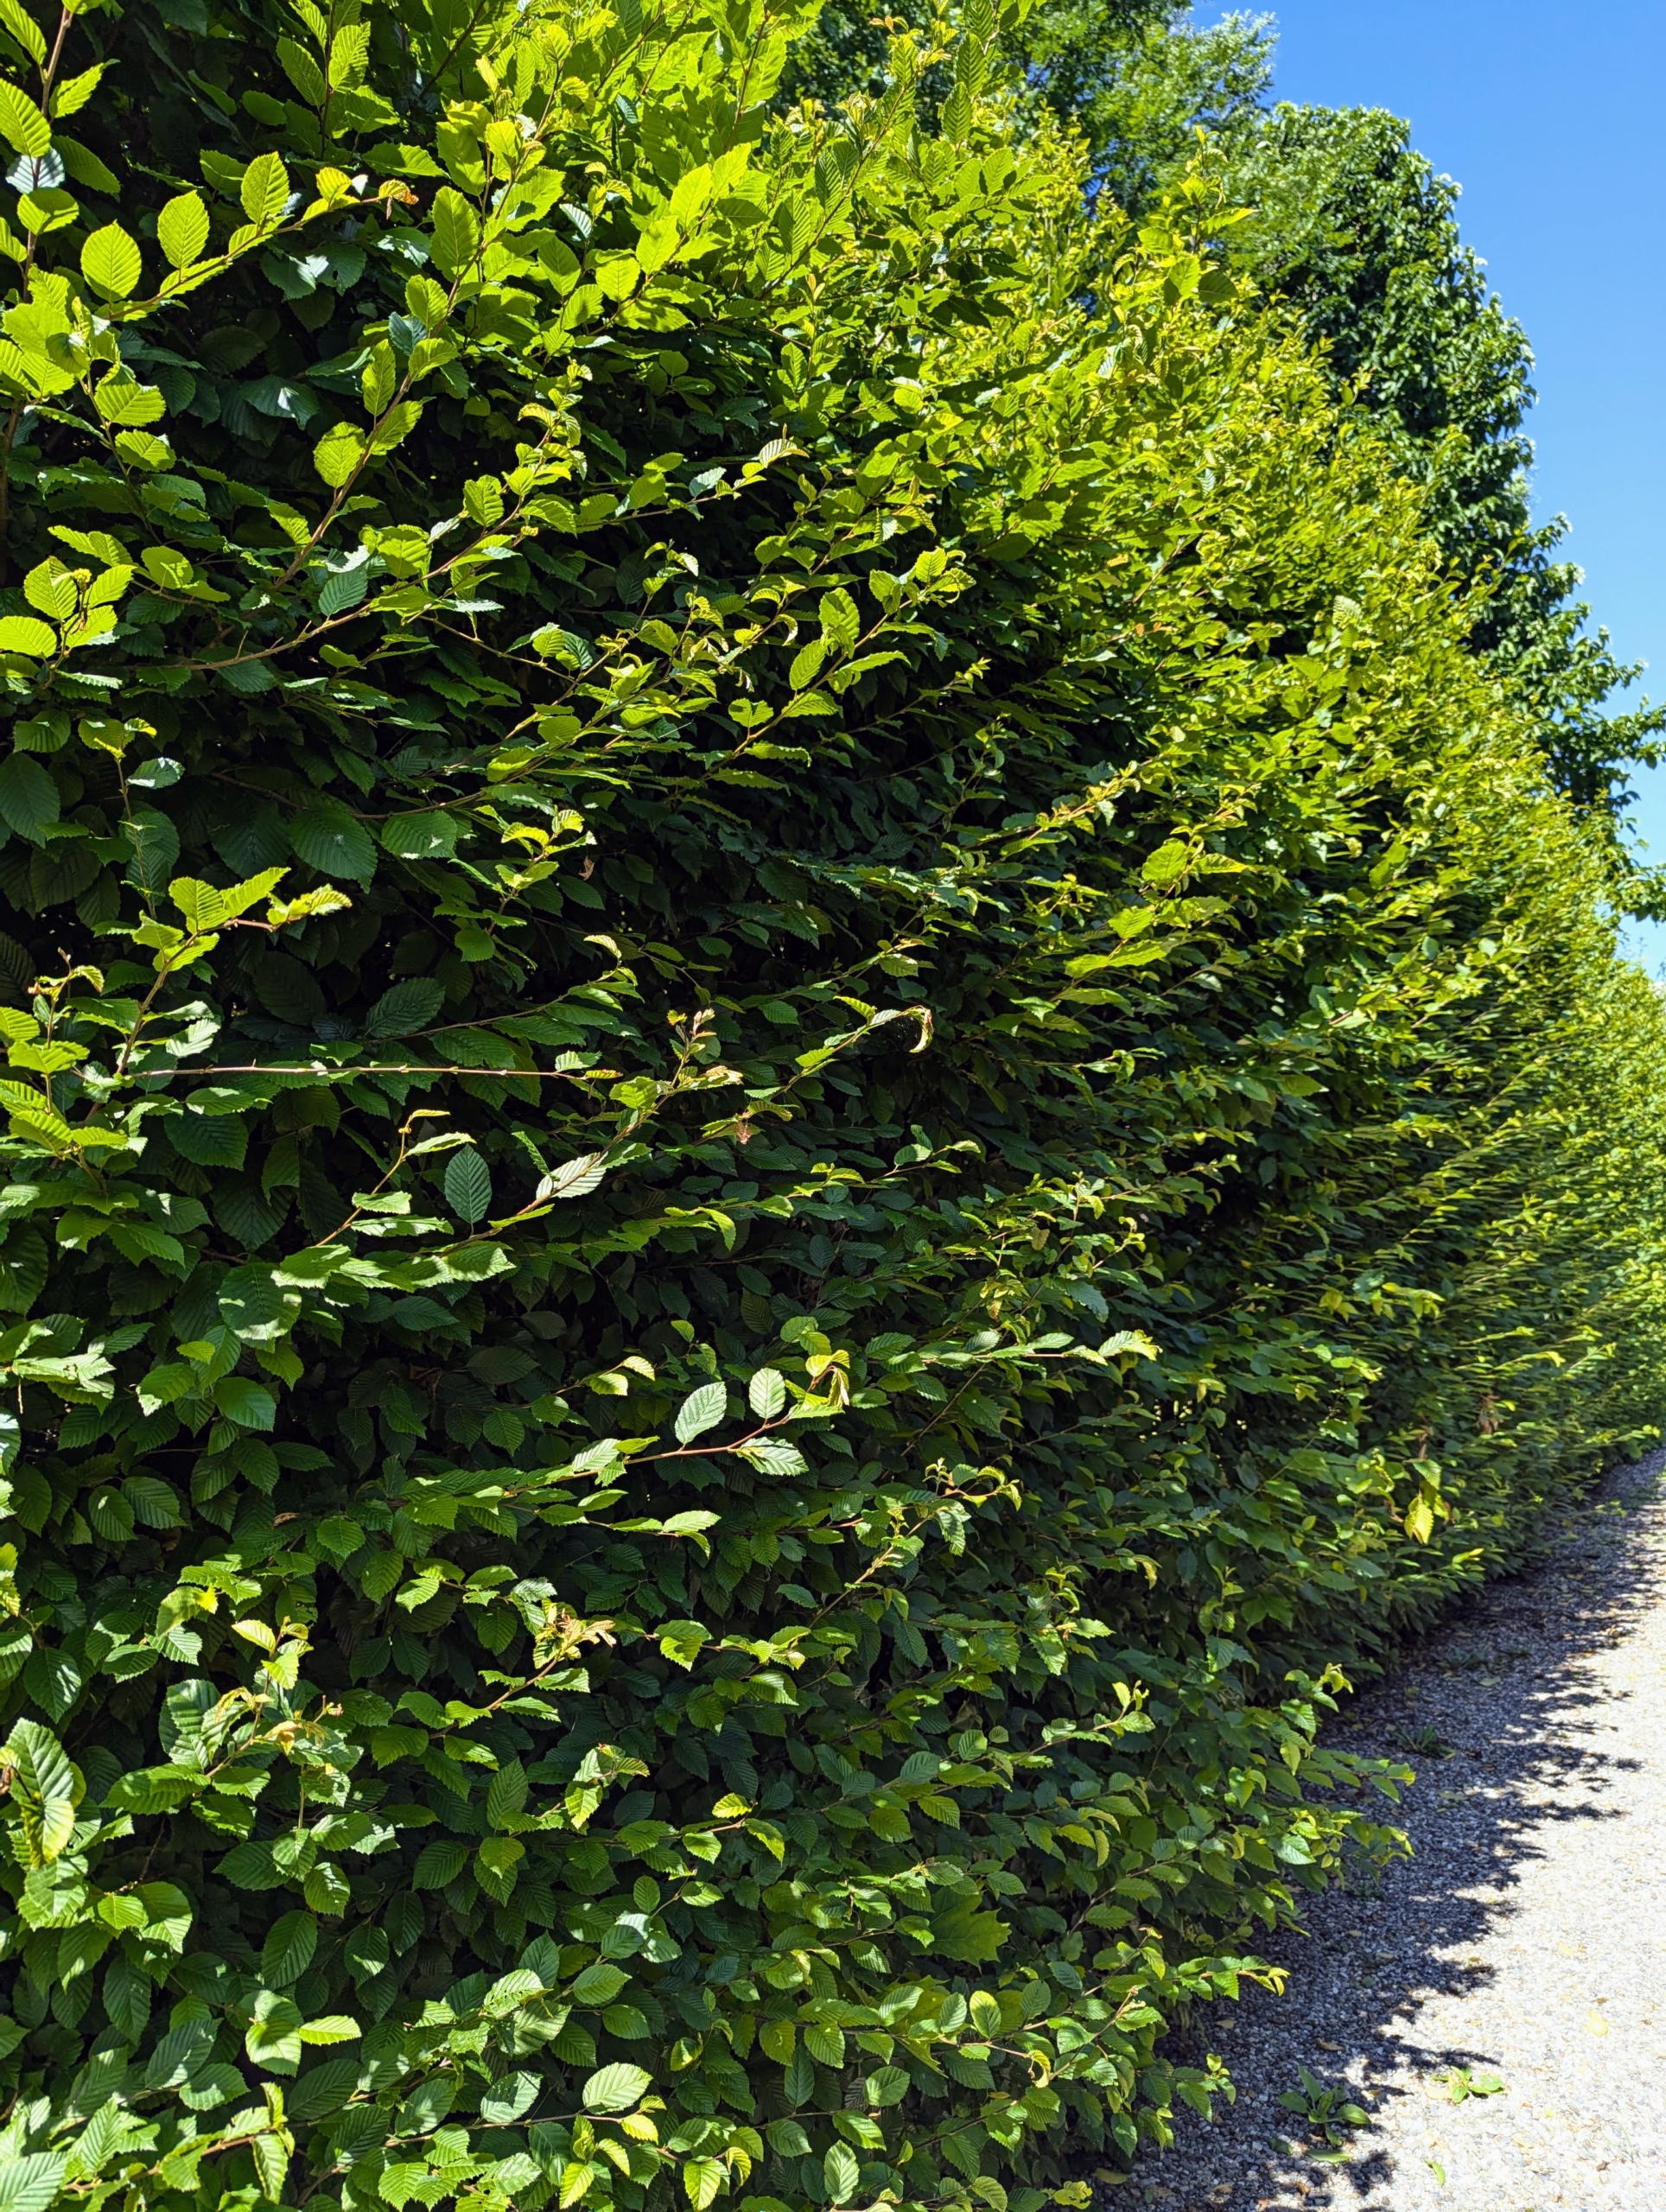
All of the hornbeams are planted in a very straight line just a couple feet apart. The sturdy branches grow outward and slightly upward.
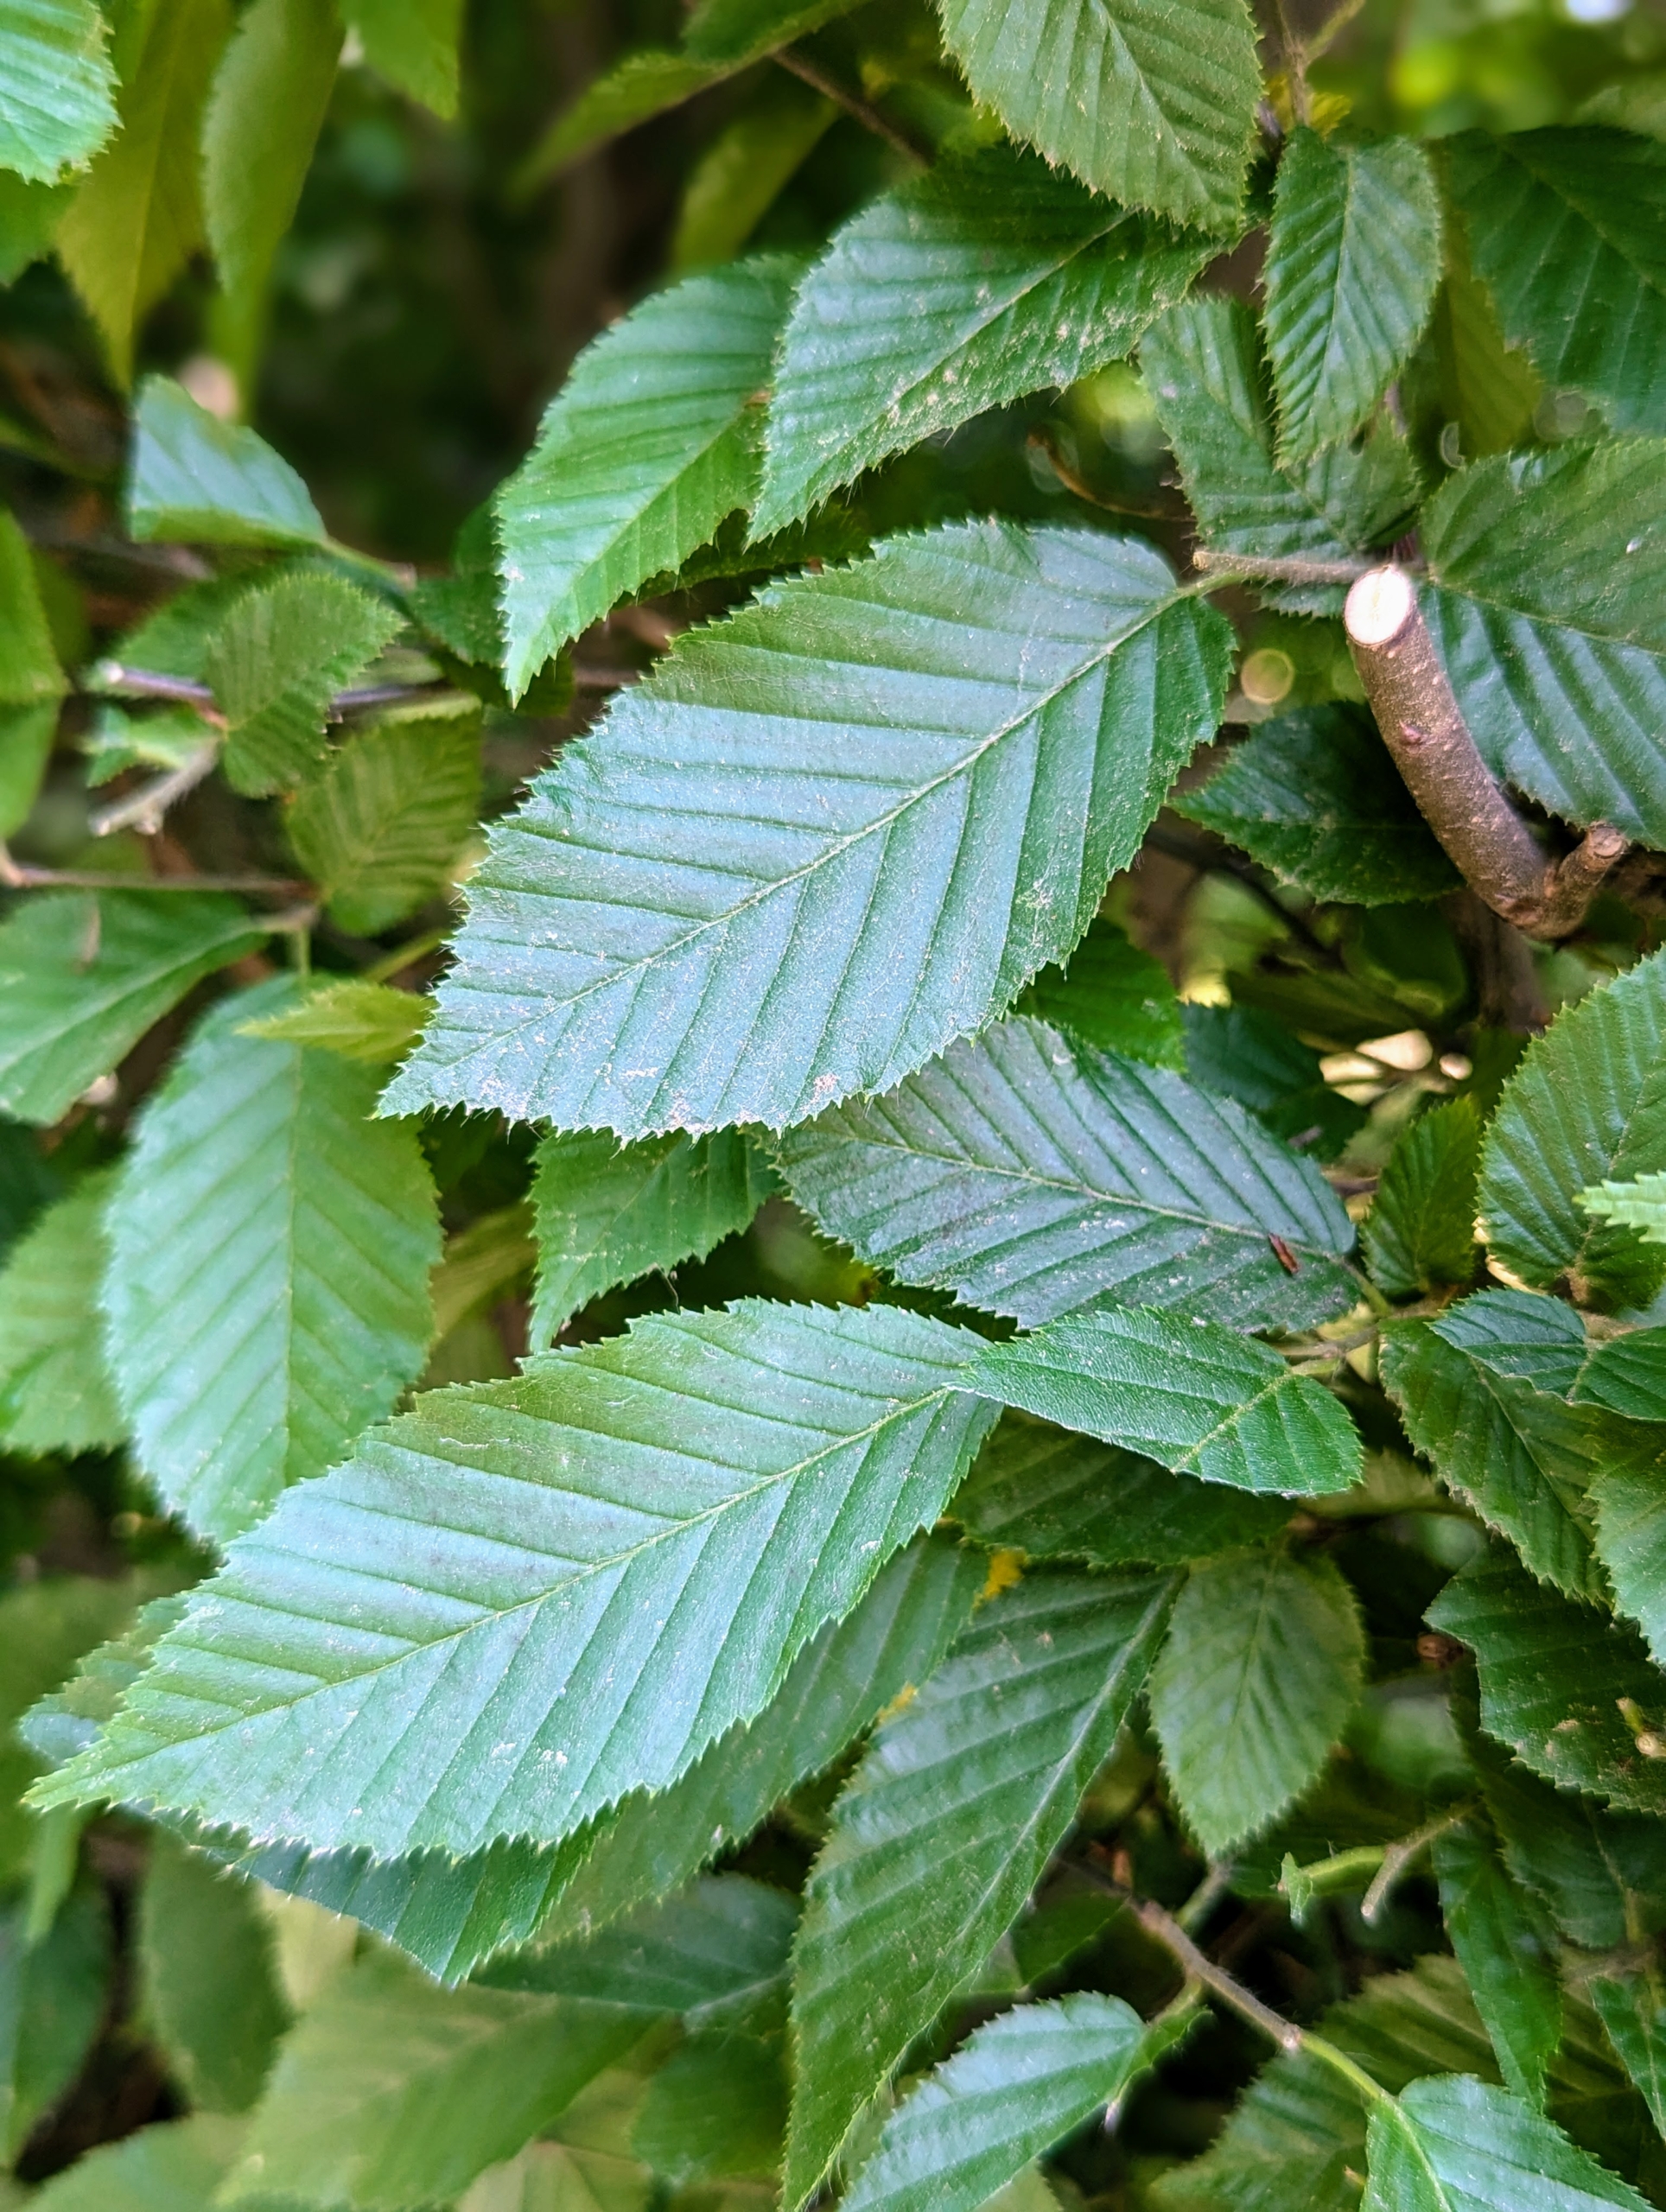
The English hornbeam is related to the beech tree, with a similar leaf shape. On the hornbeam, the leaves are actually smaller and more deeply furrowed than beech leaves. They become golden yellow to orange before falling in autumn.
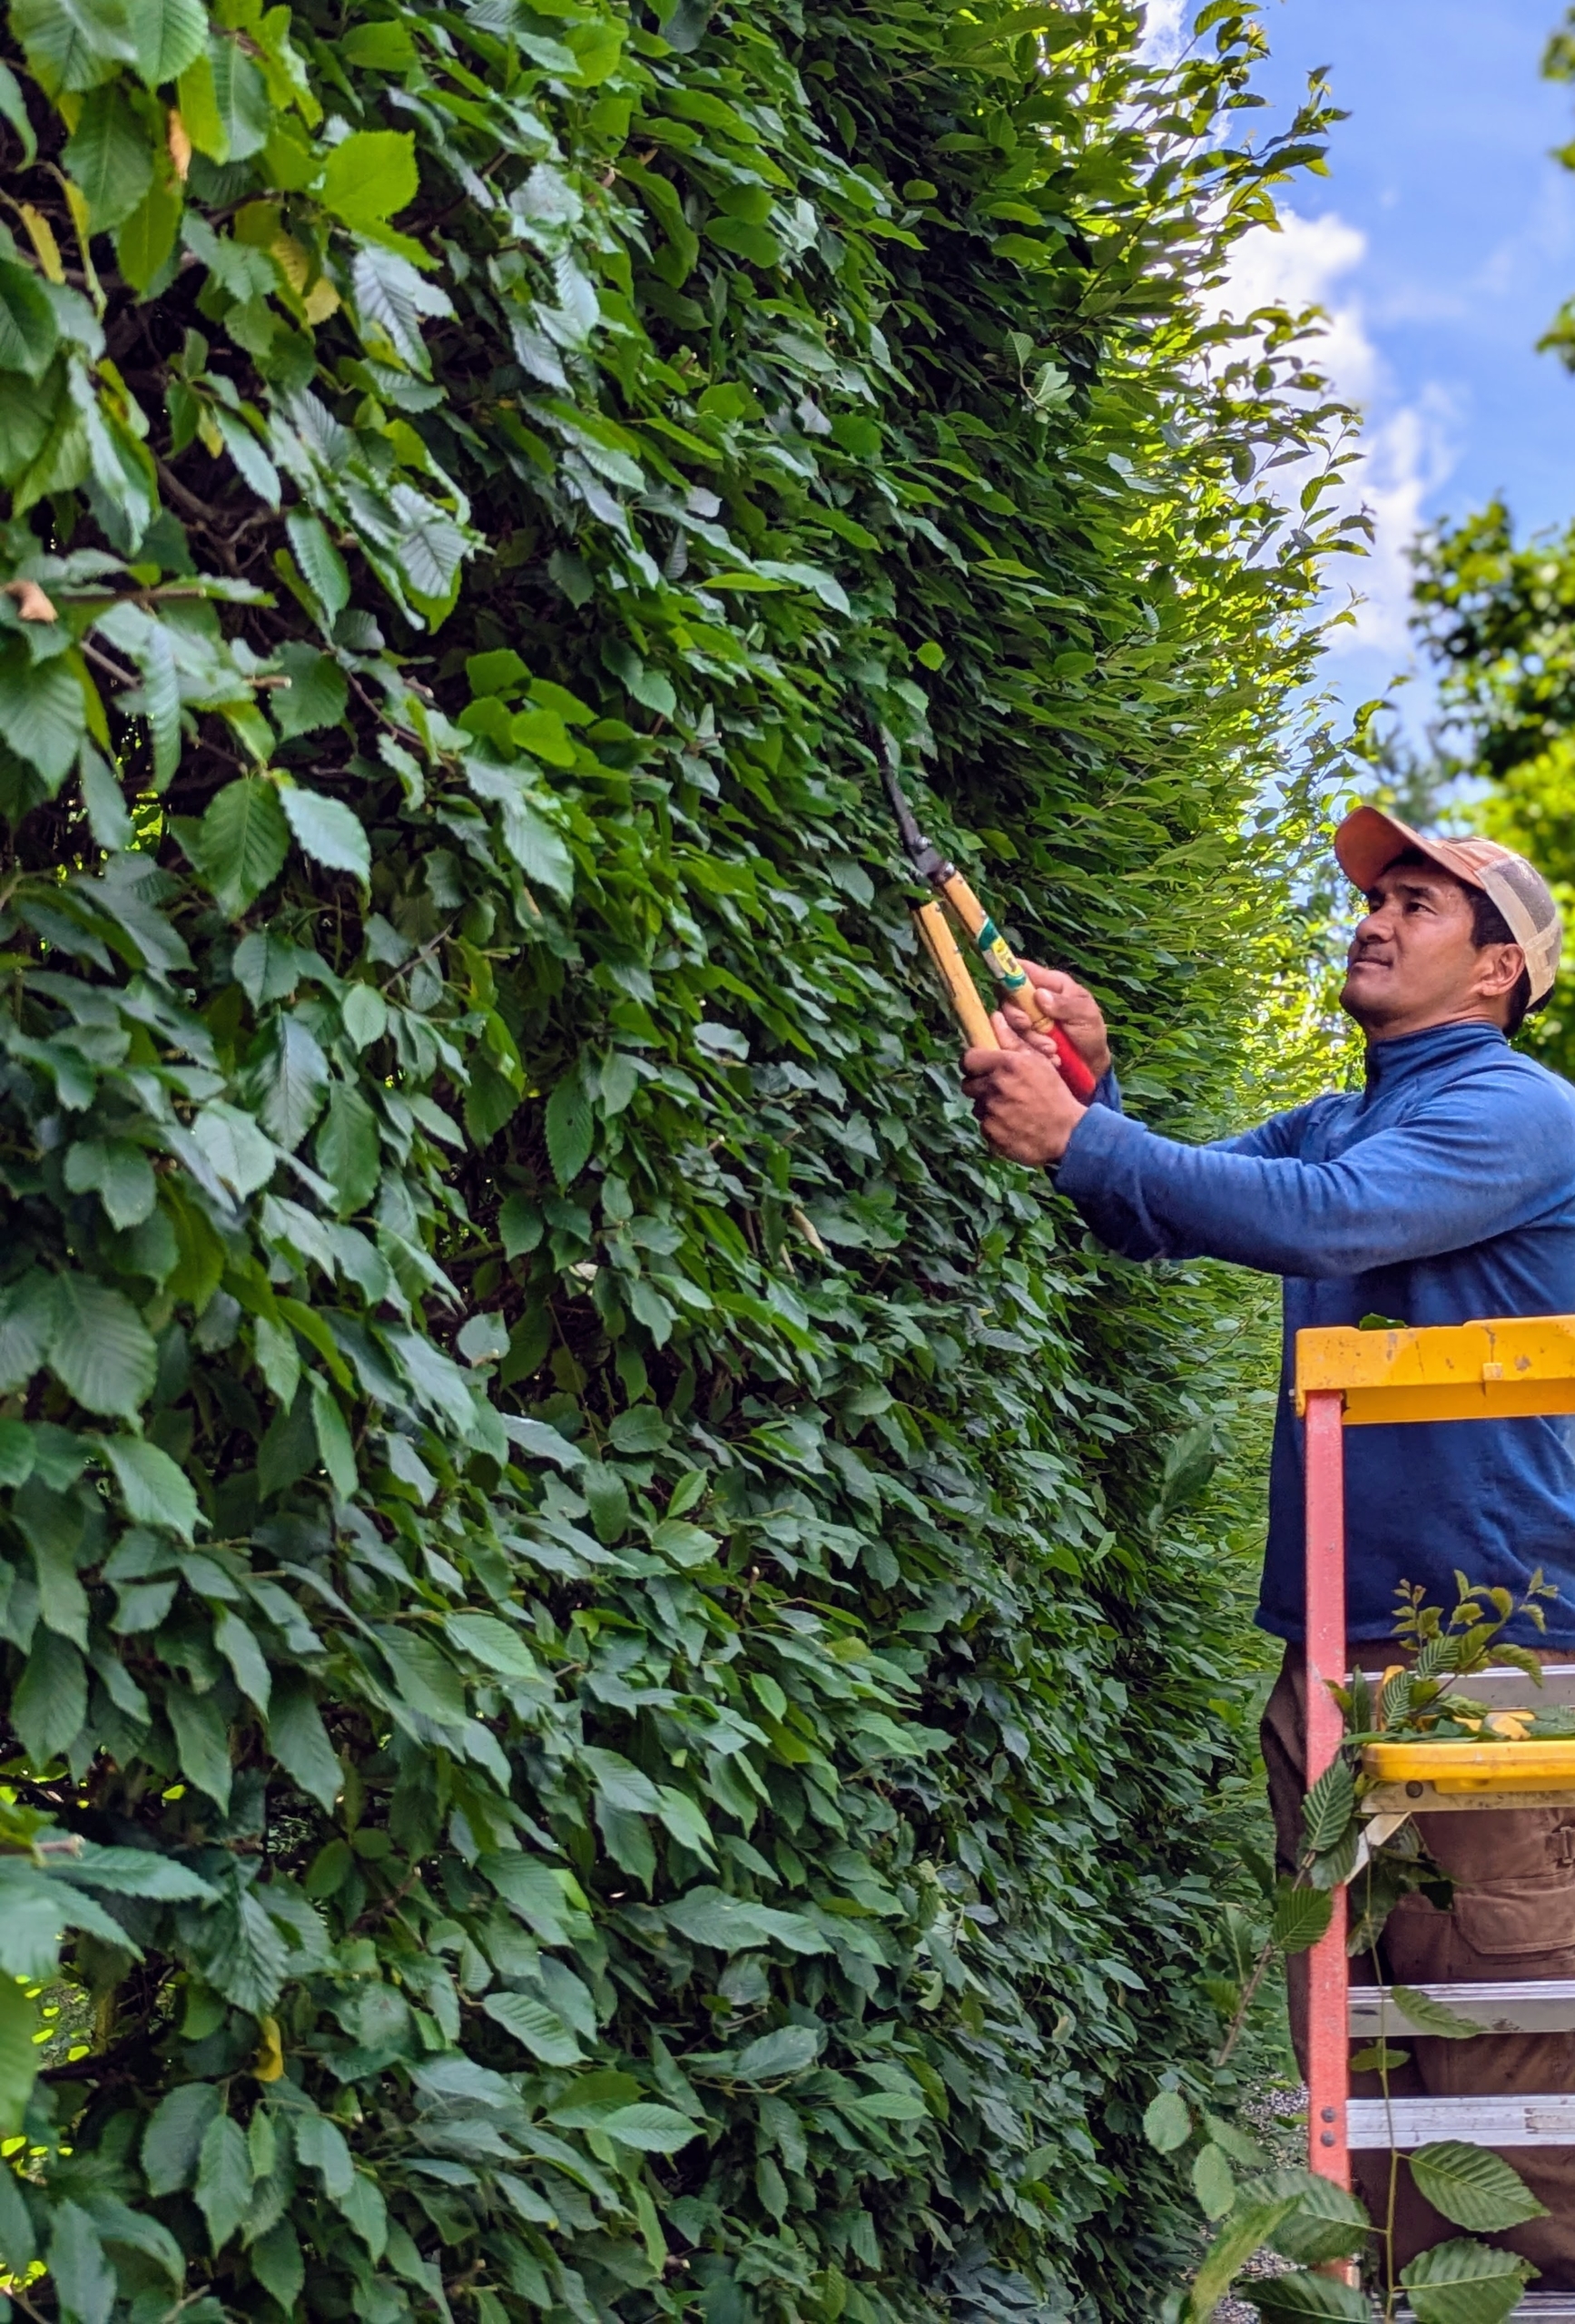
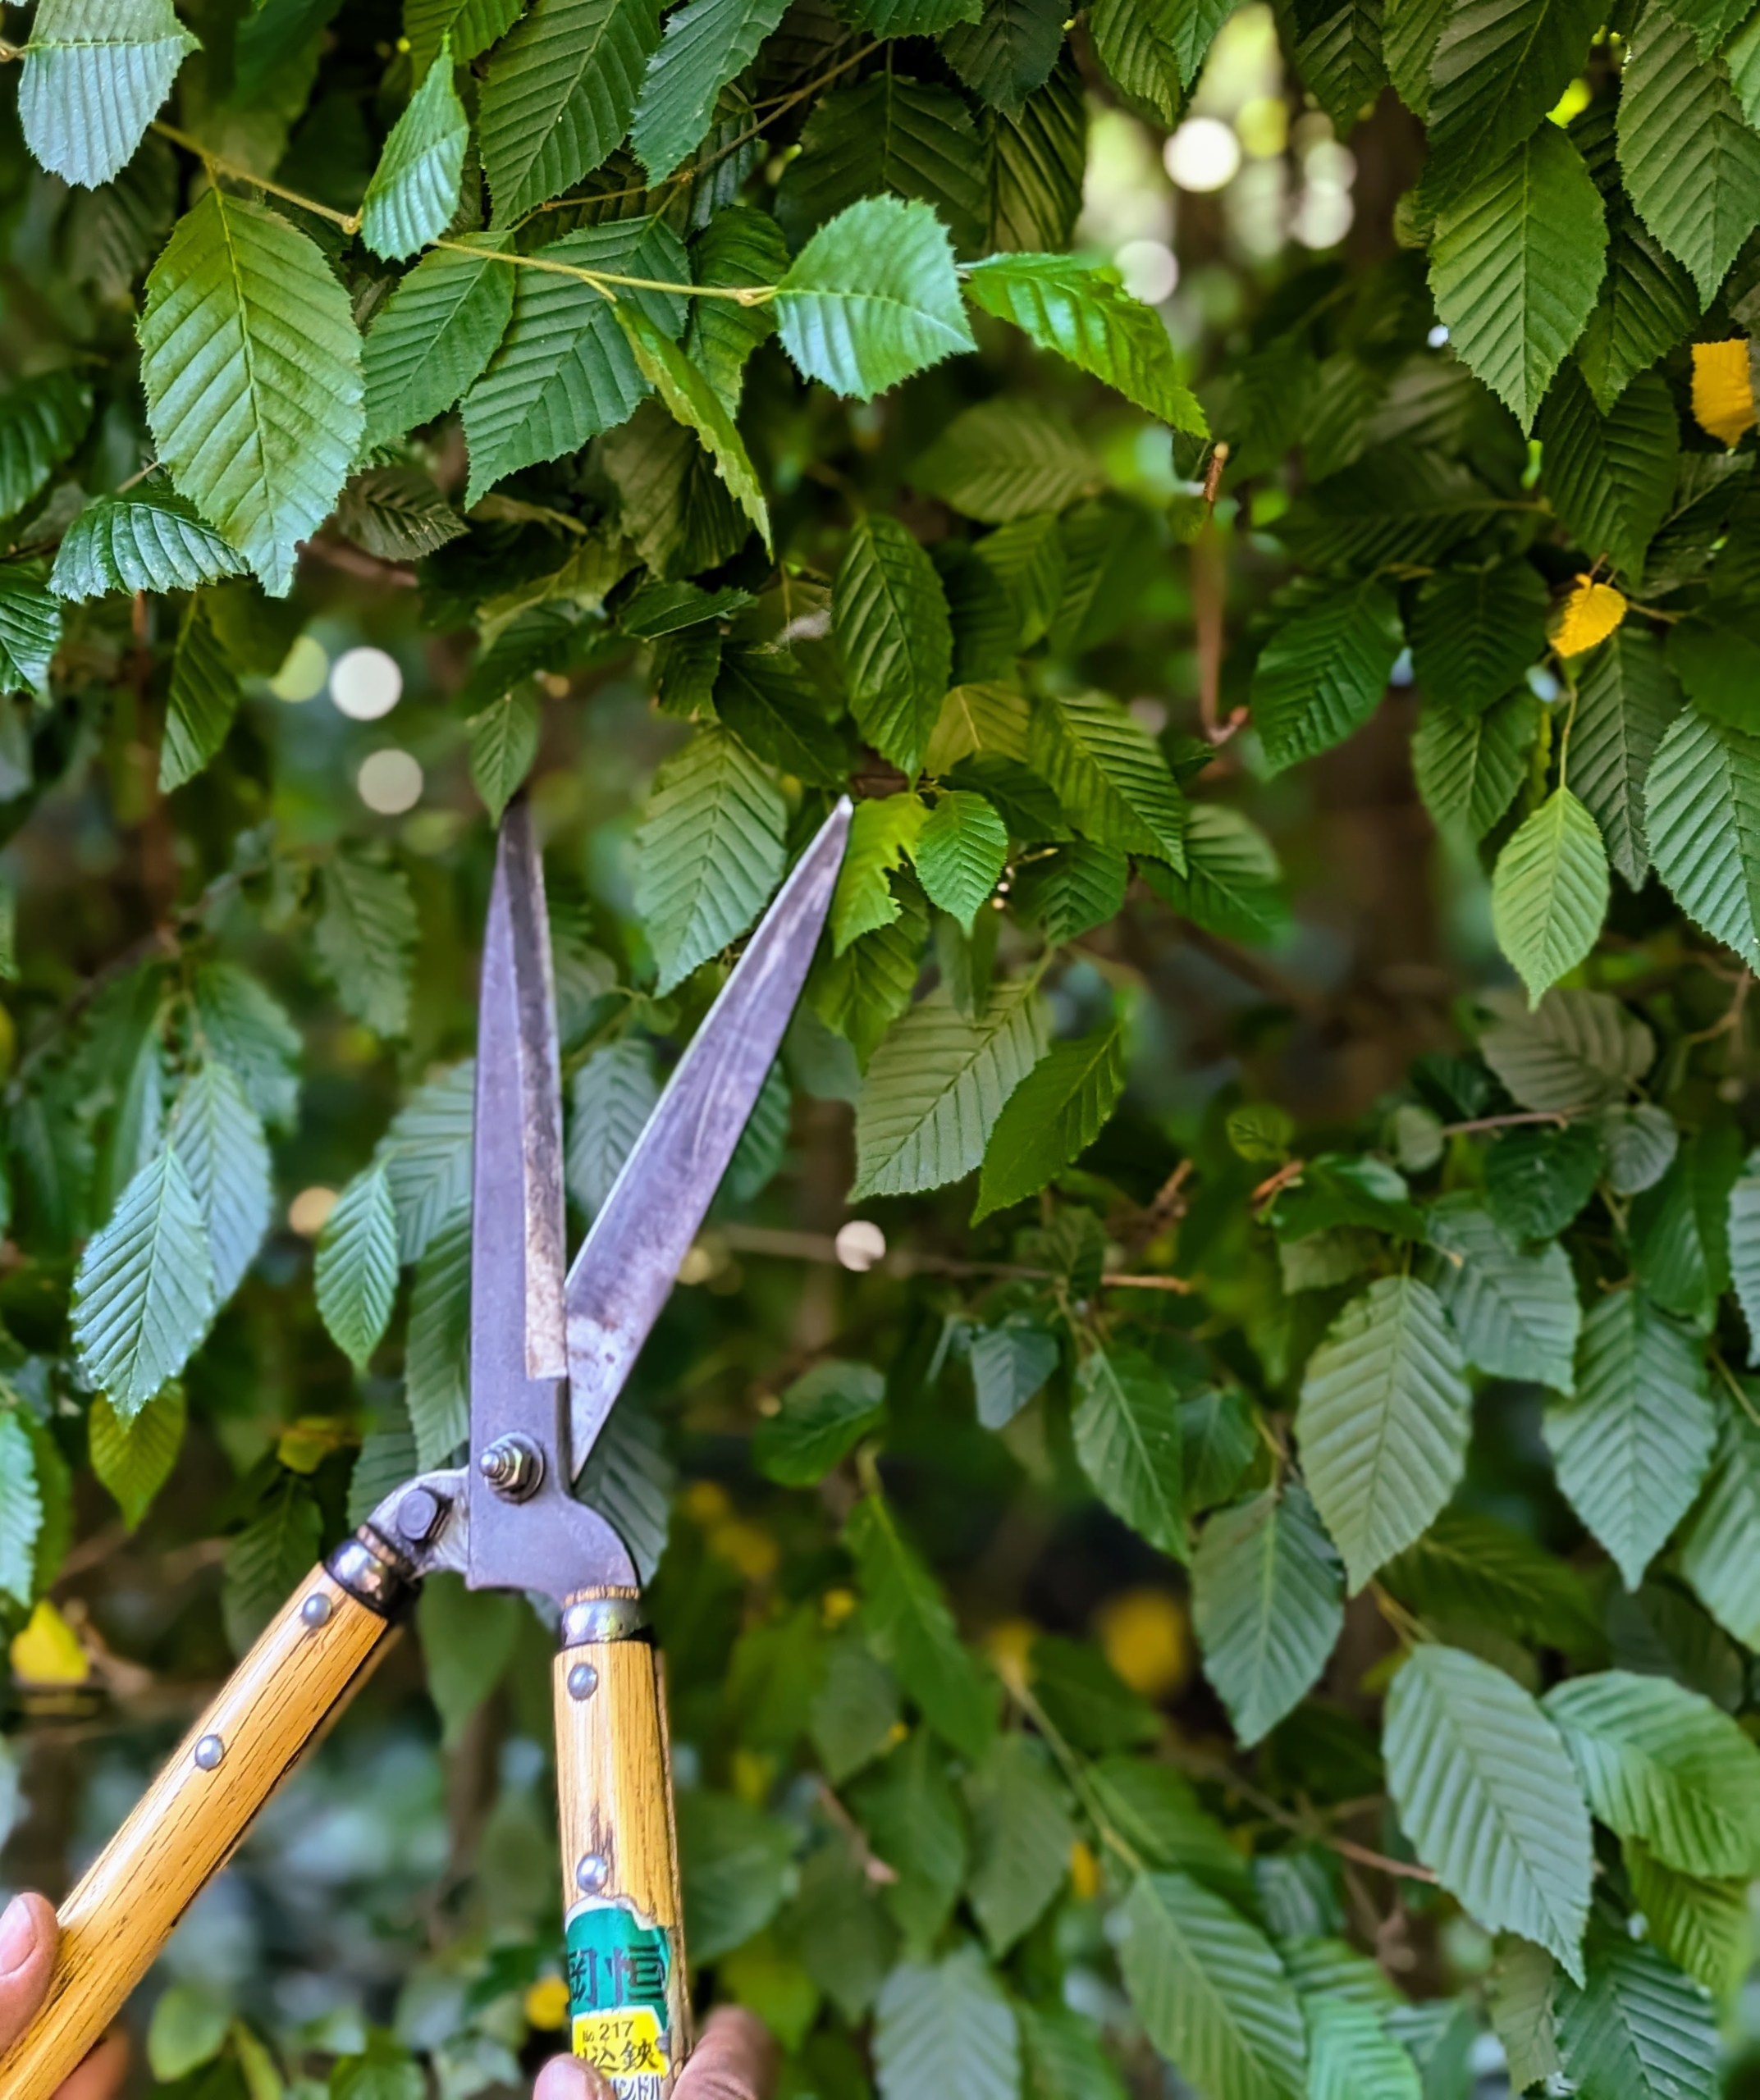
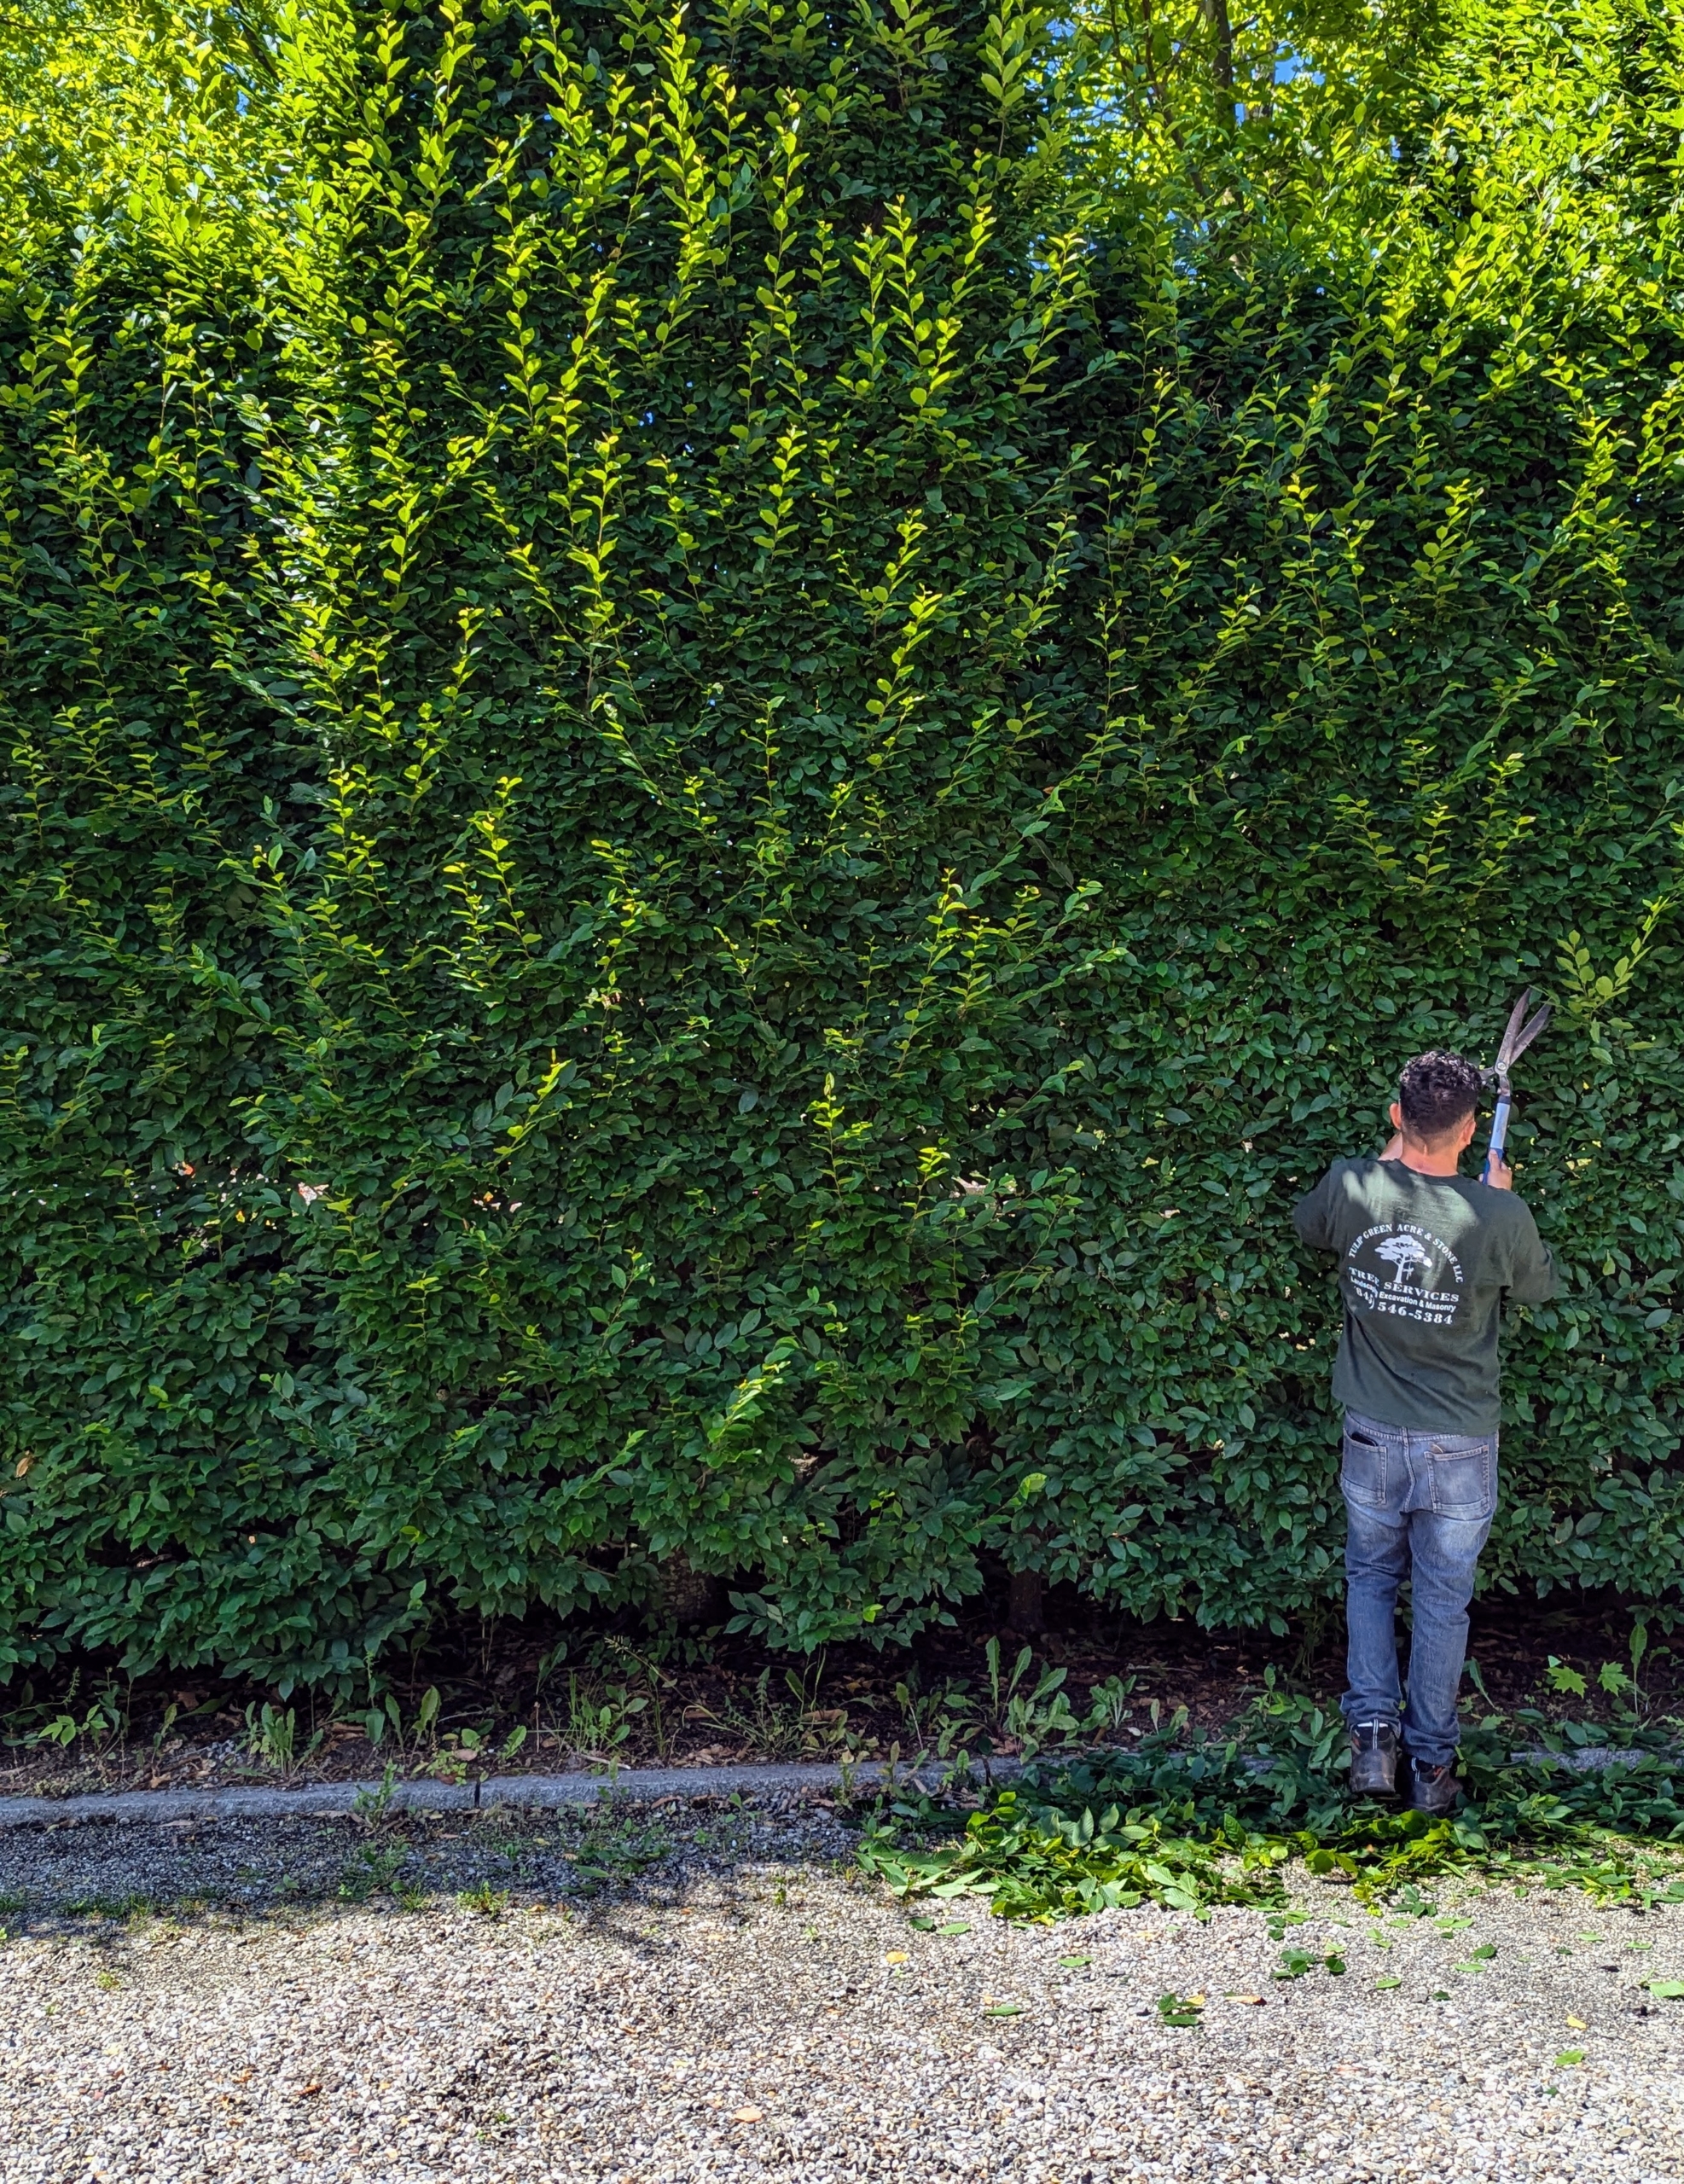
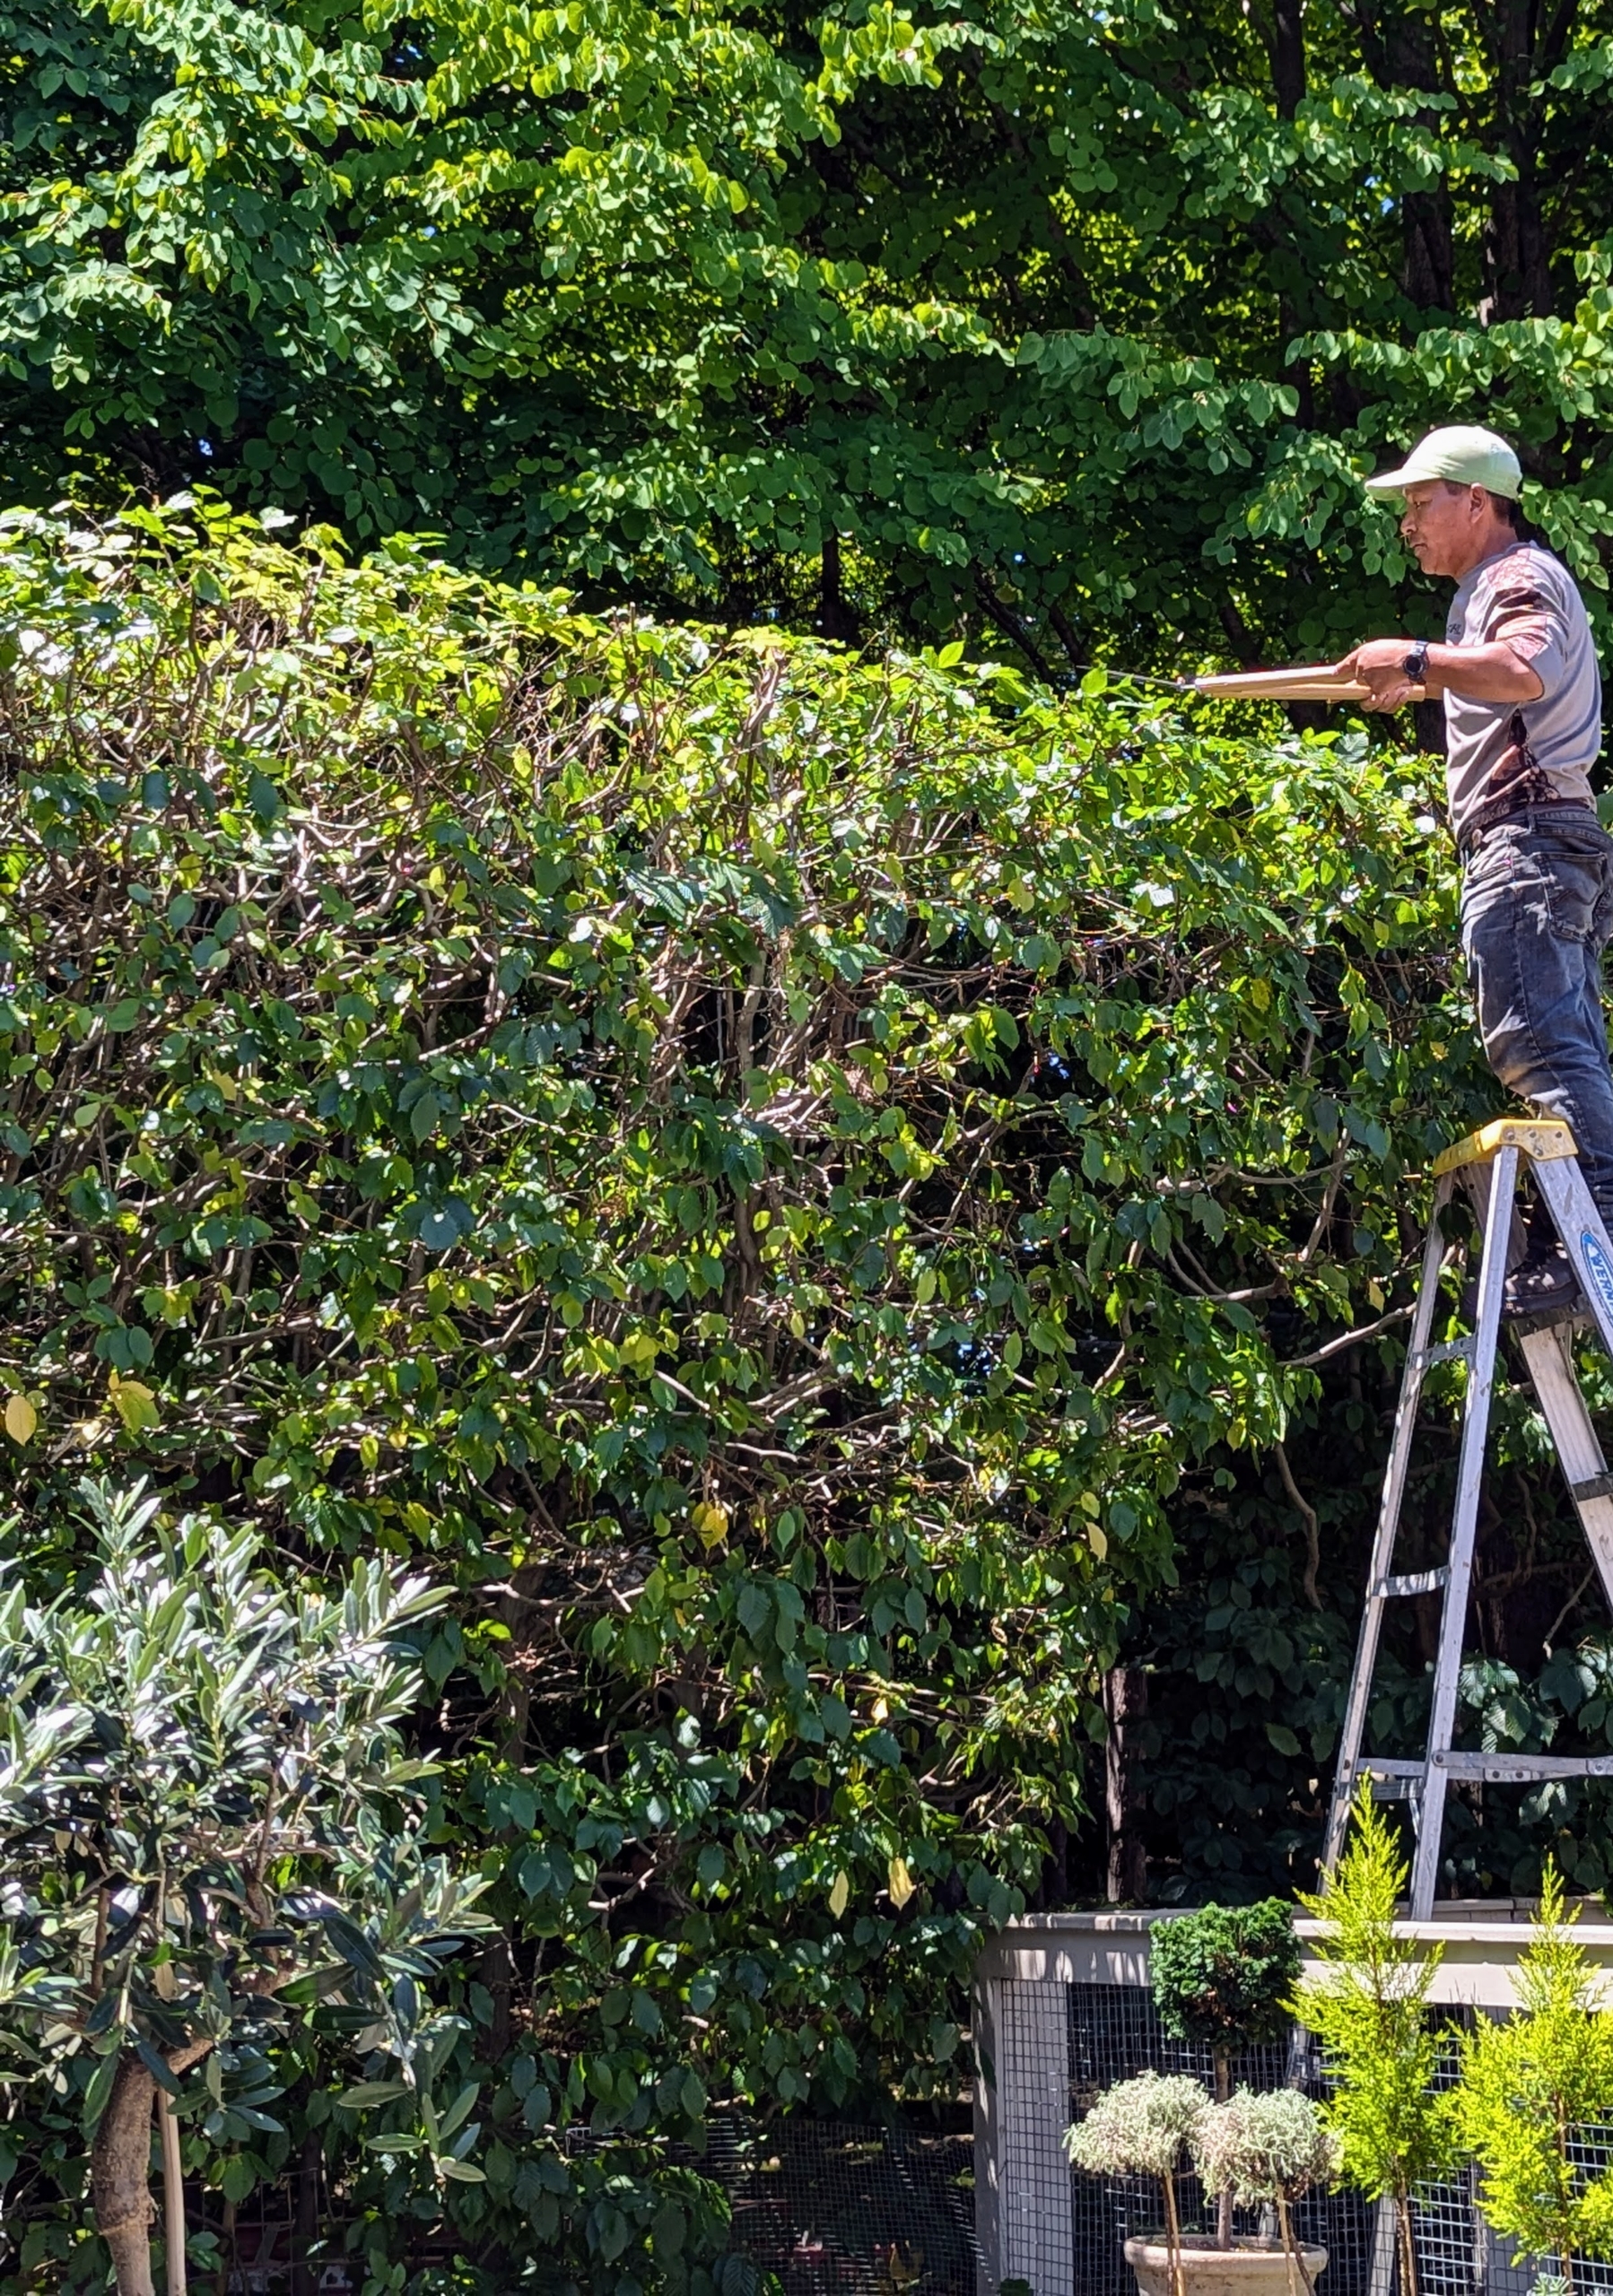
The crew does most of the hornbeam pruning by hand. Here is Pasang pruning the front face of the hedge behind my Winter House. Everyone uses Japanese Okatsune shears specially made for trimming hedges. The shears are user friendly, and come in a range of sizes. Notice the handles – they are short to allow access to tight areas.
The shears allow the crew to sculpt and groom as well as prune the foliage. I like to use a traditional English style of pruning, which includes a lot of straight, clean edges. A well-manicured hedge can be stunning in any garden but left unchecked, it could look unruly.
Although slower, this method of trimming by hand ensures careful precise, clean cuts.
It is also more exact, and that’s important when sculpting formal hedges.
Looking up, one can see what has been pruned and what has not yet been cut.
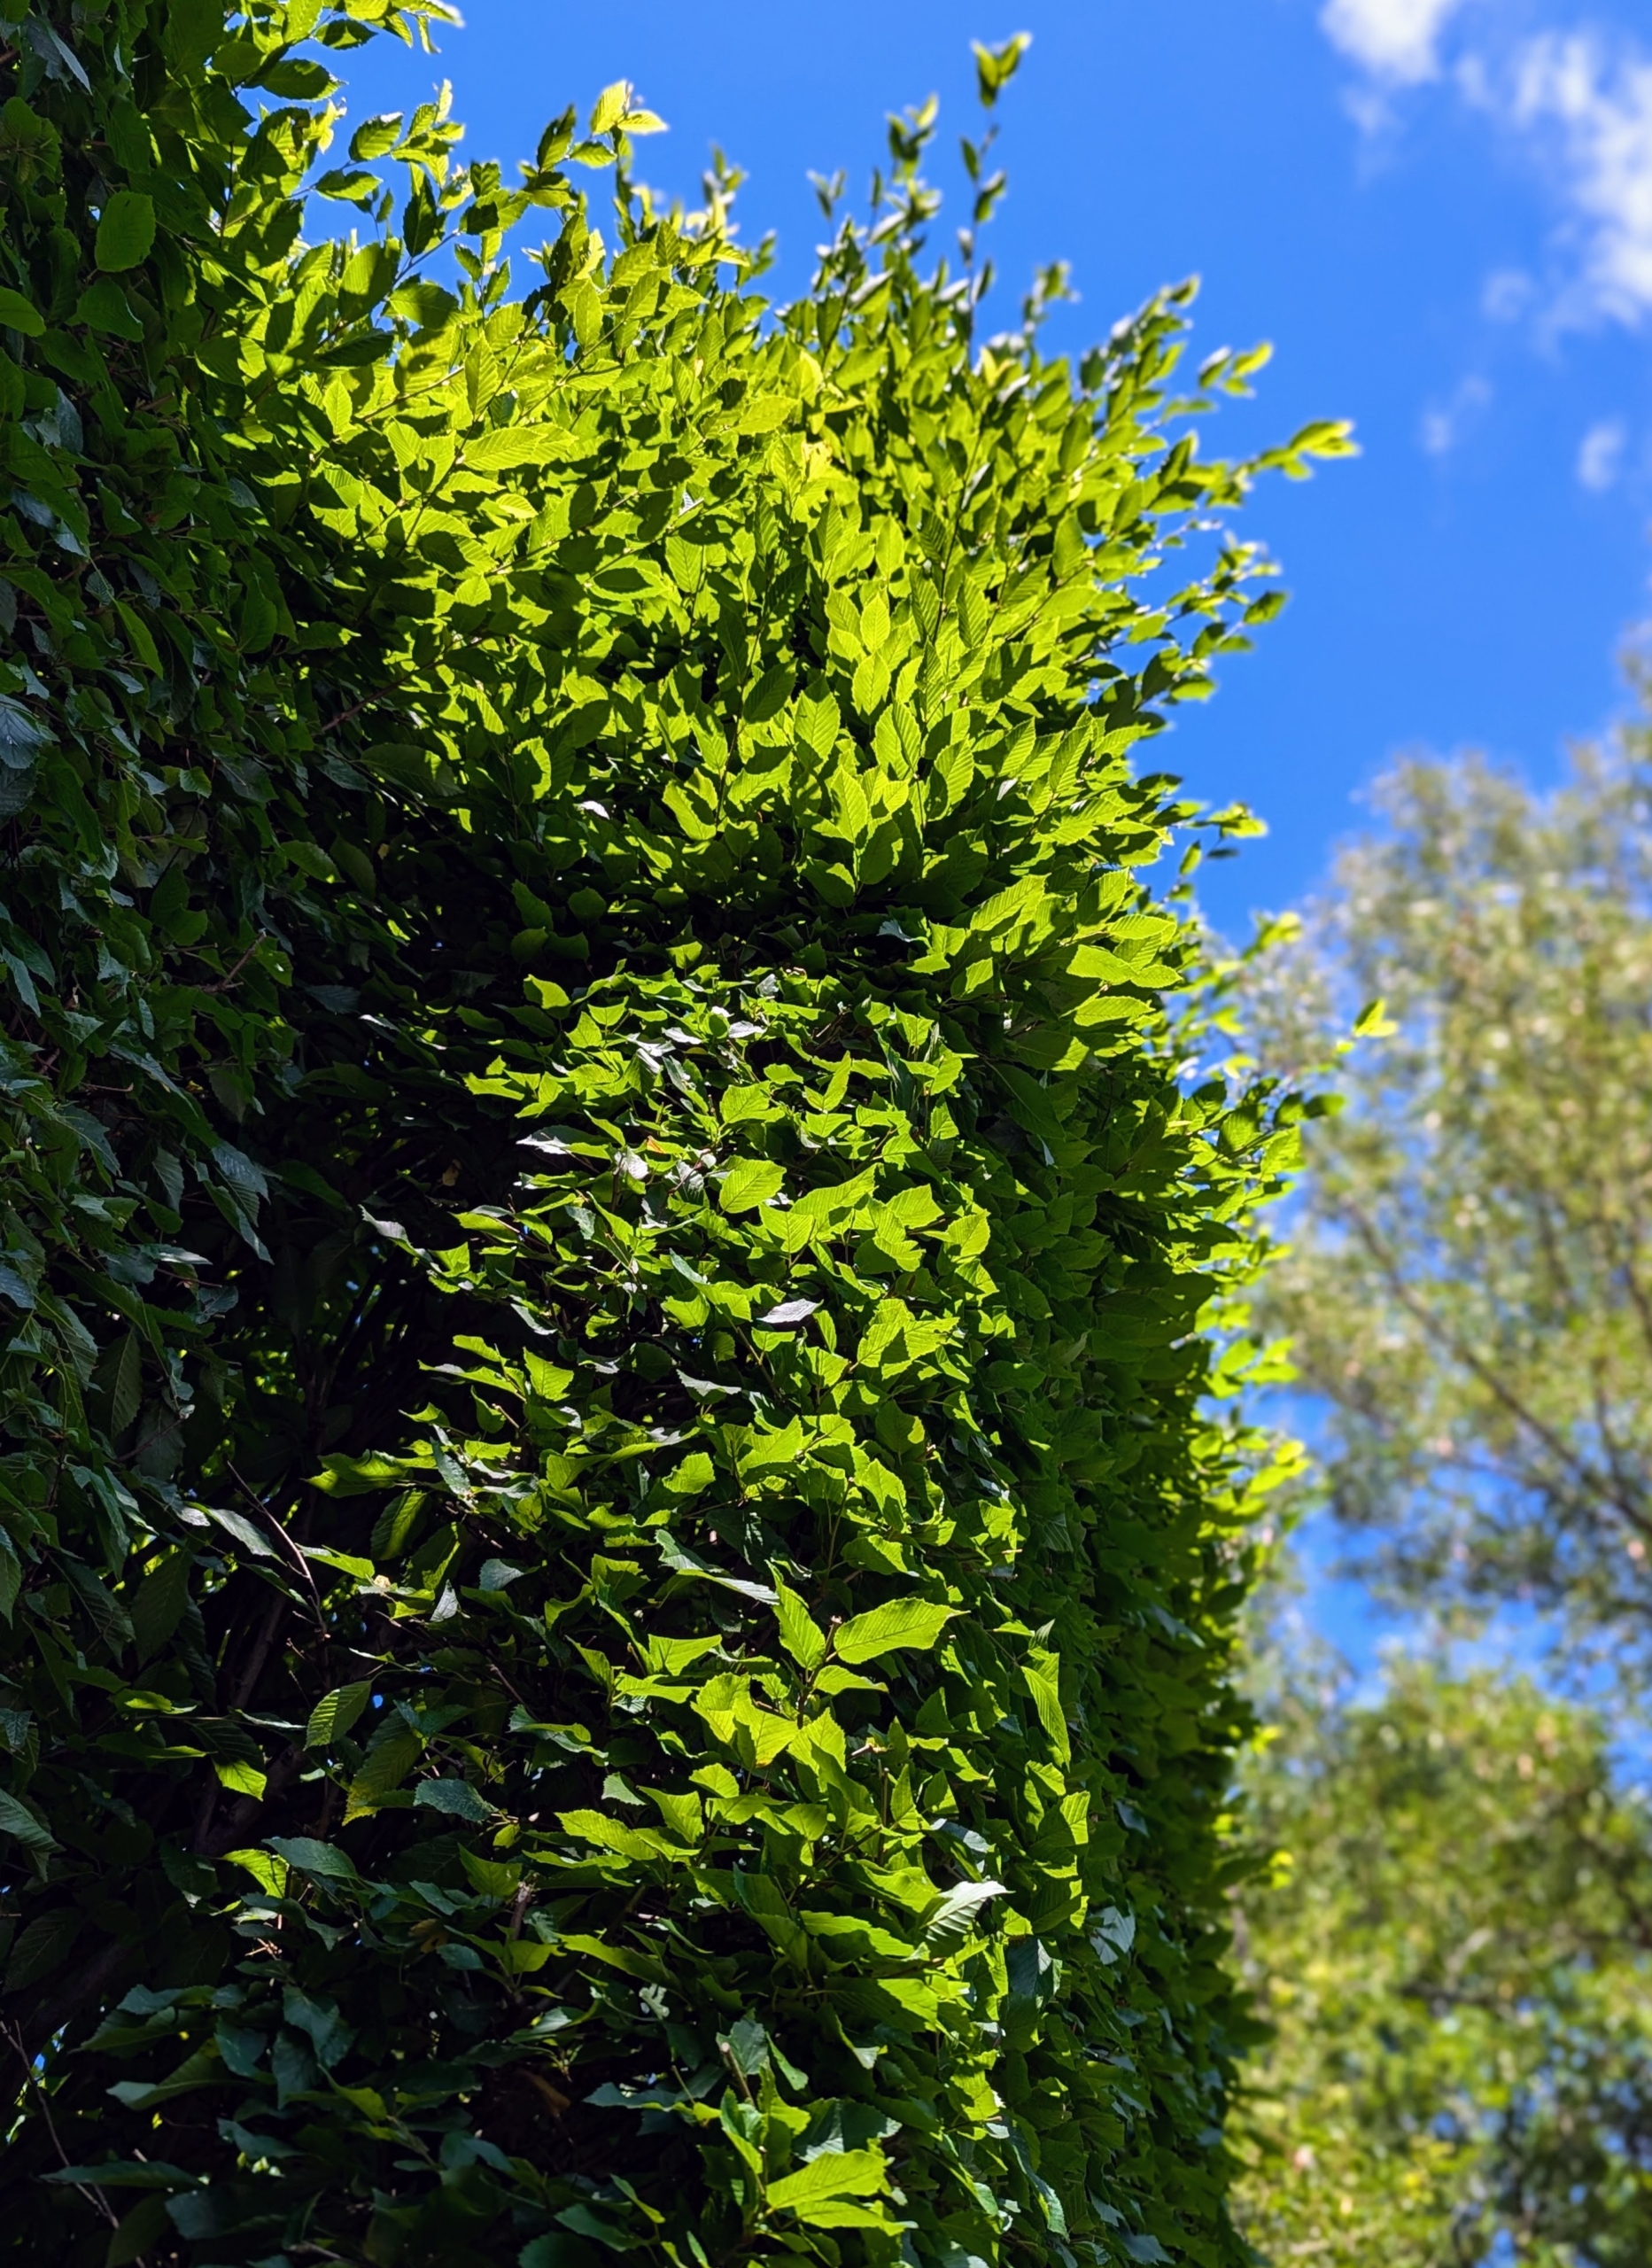
Here’s a view from the side. It’s a big difference, but this shows the growth from the past year. These hornbeams are so healthy and lush.
Fernando sits in the Hi-Lo ready to move teammates safely from place to place.
To keep the hedges straight on top, I instruct everyone to use landscaper’s twine to create a guide. It’s an easy way to make sure everything is cut properly.
Here’s Phurba trimming the top of the hedge behind my Winter House.
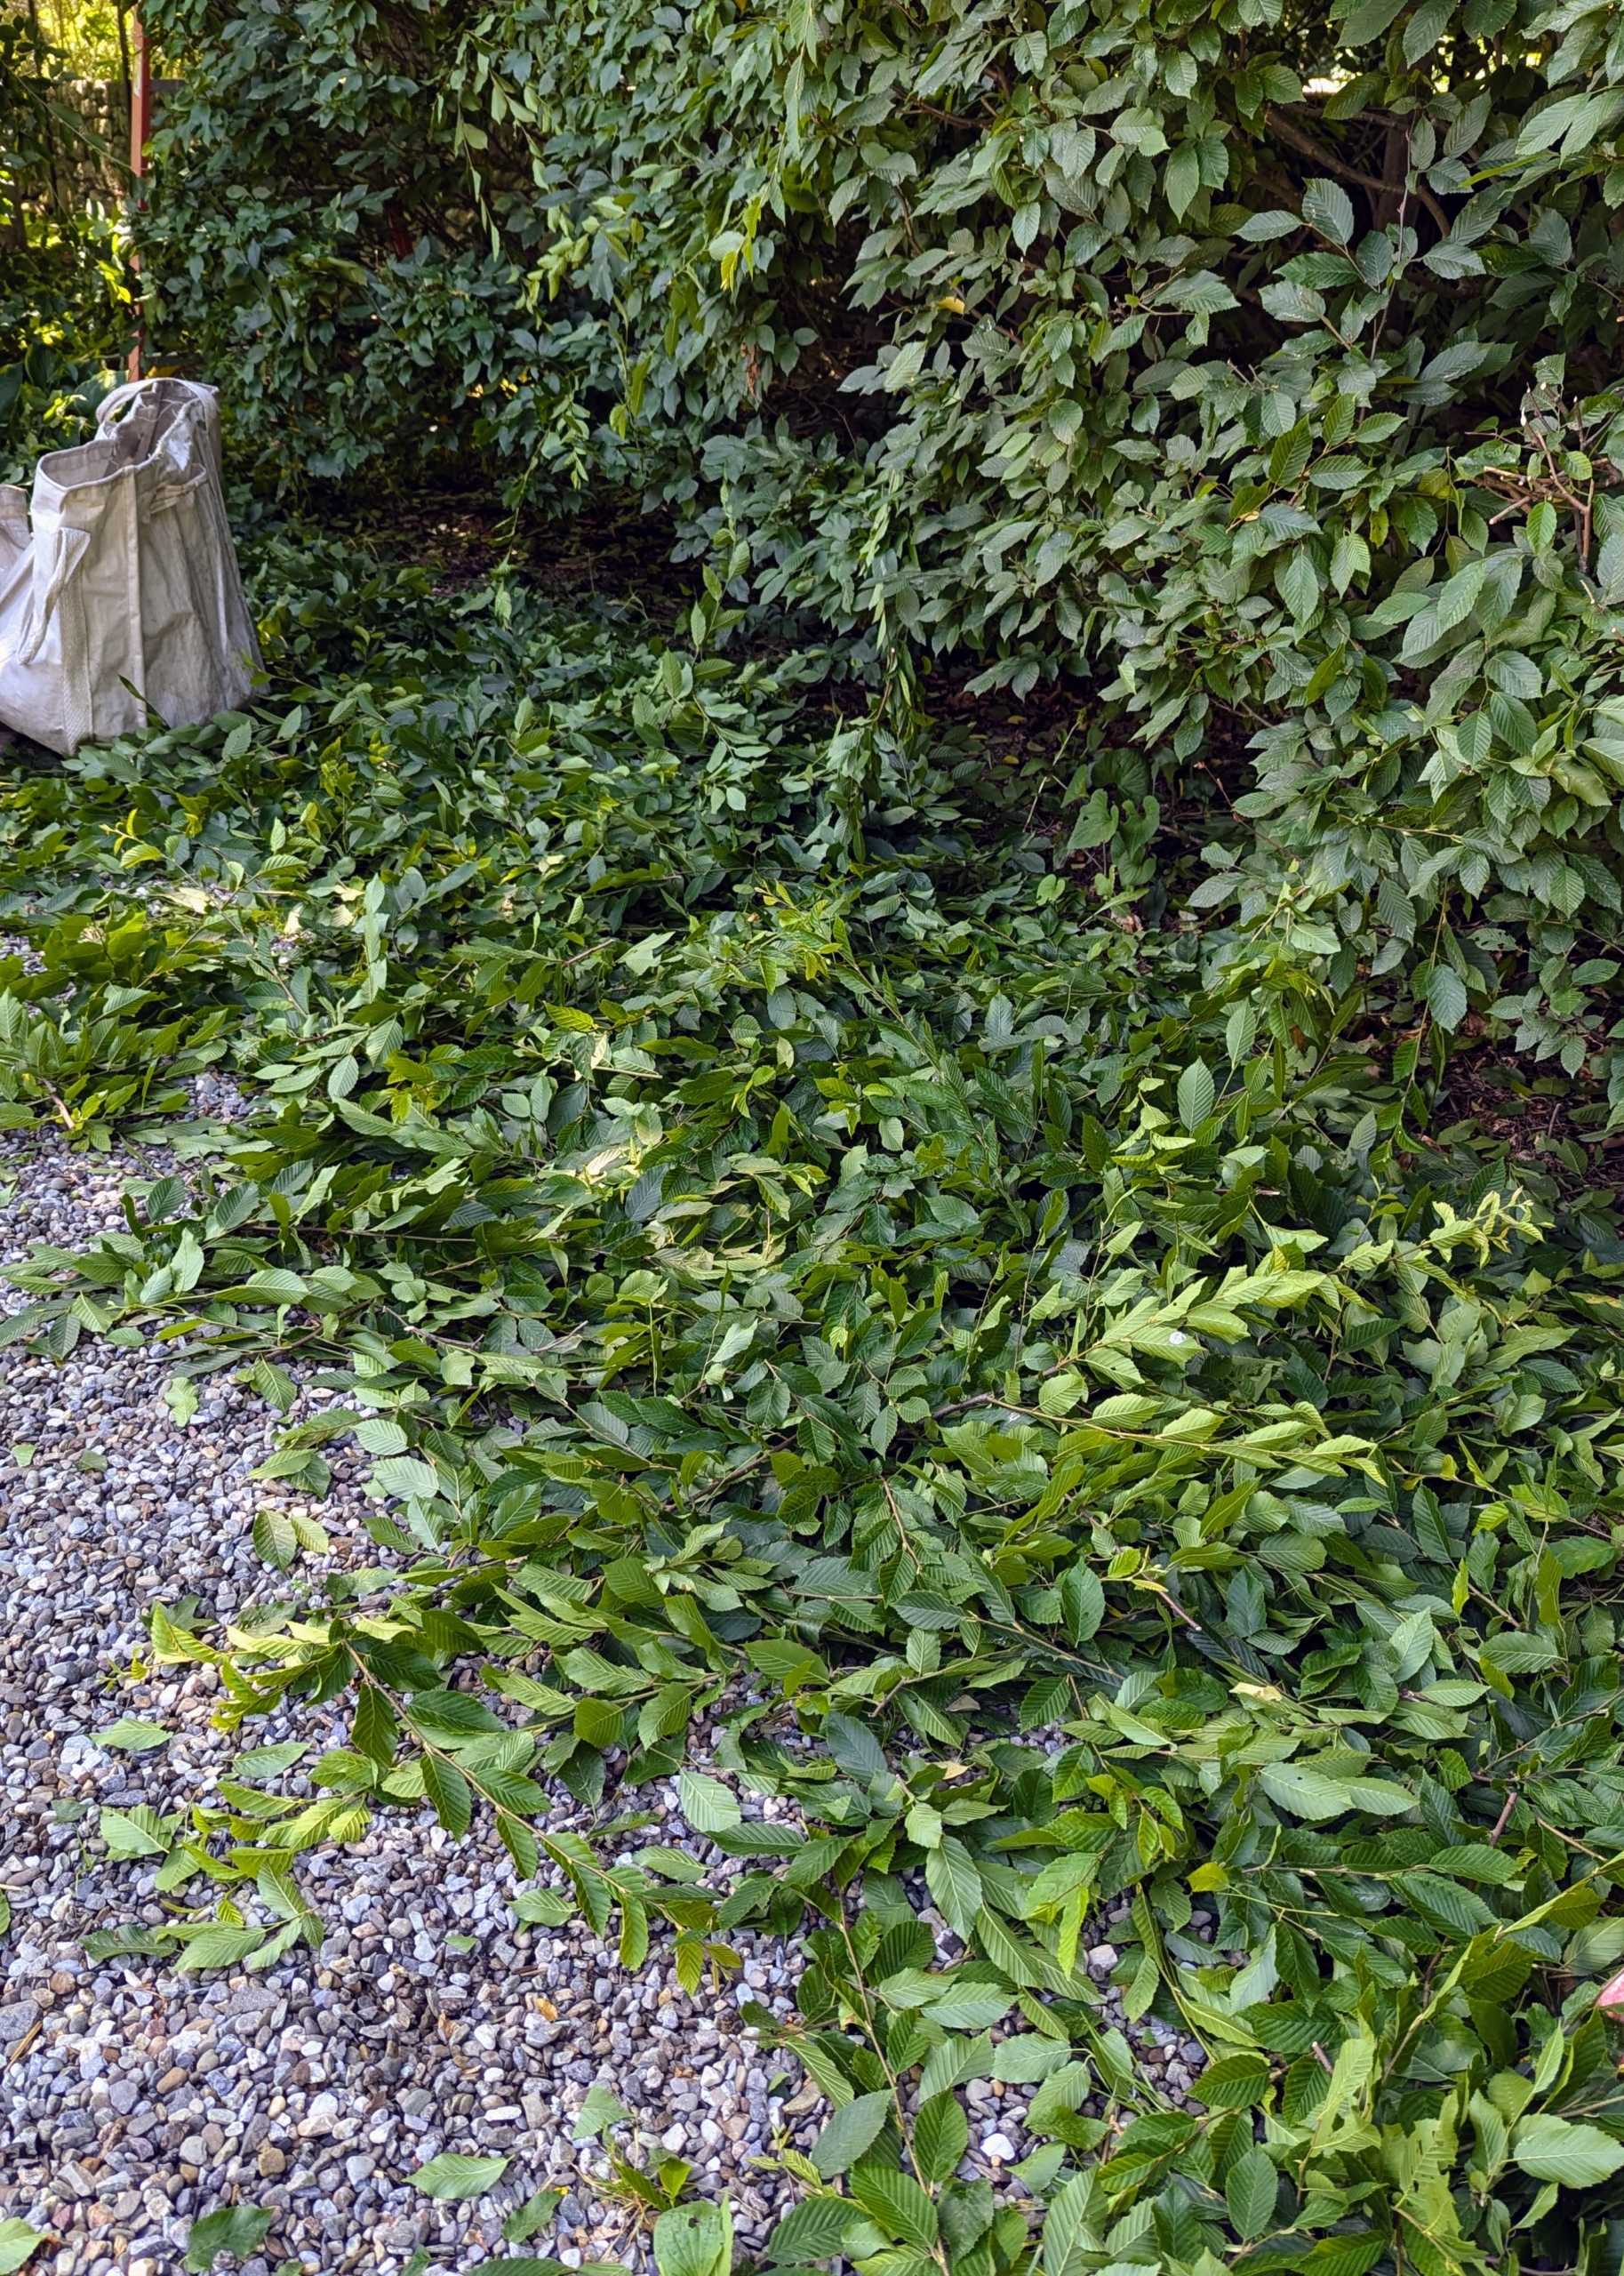
And look at all the cut leaves – these are raked up as they work, so cleanup is easier at the very end.
And here is a finished hedge – trimmed beautifully.
Here it is from the other side. Because this one is planted on a gradual slope, it needs to be pruned using a step method.
And everything is perfectly straight from this angle also.
Here are the shrubs in front of the Summer House. Deer do eat hornbeams, but since the entire property is completely fenced, it isn’t a problem here at the farm.
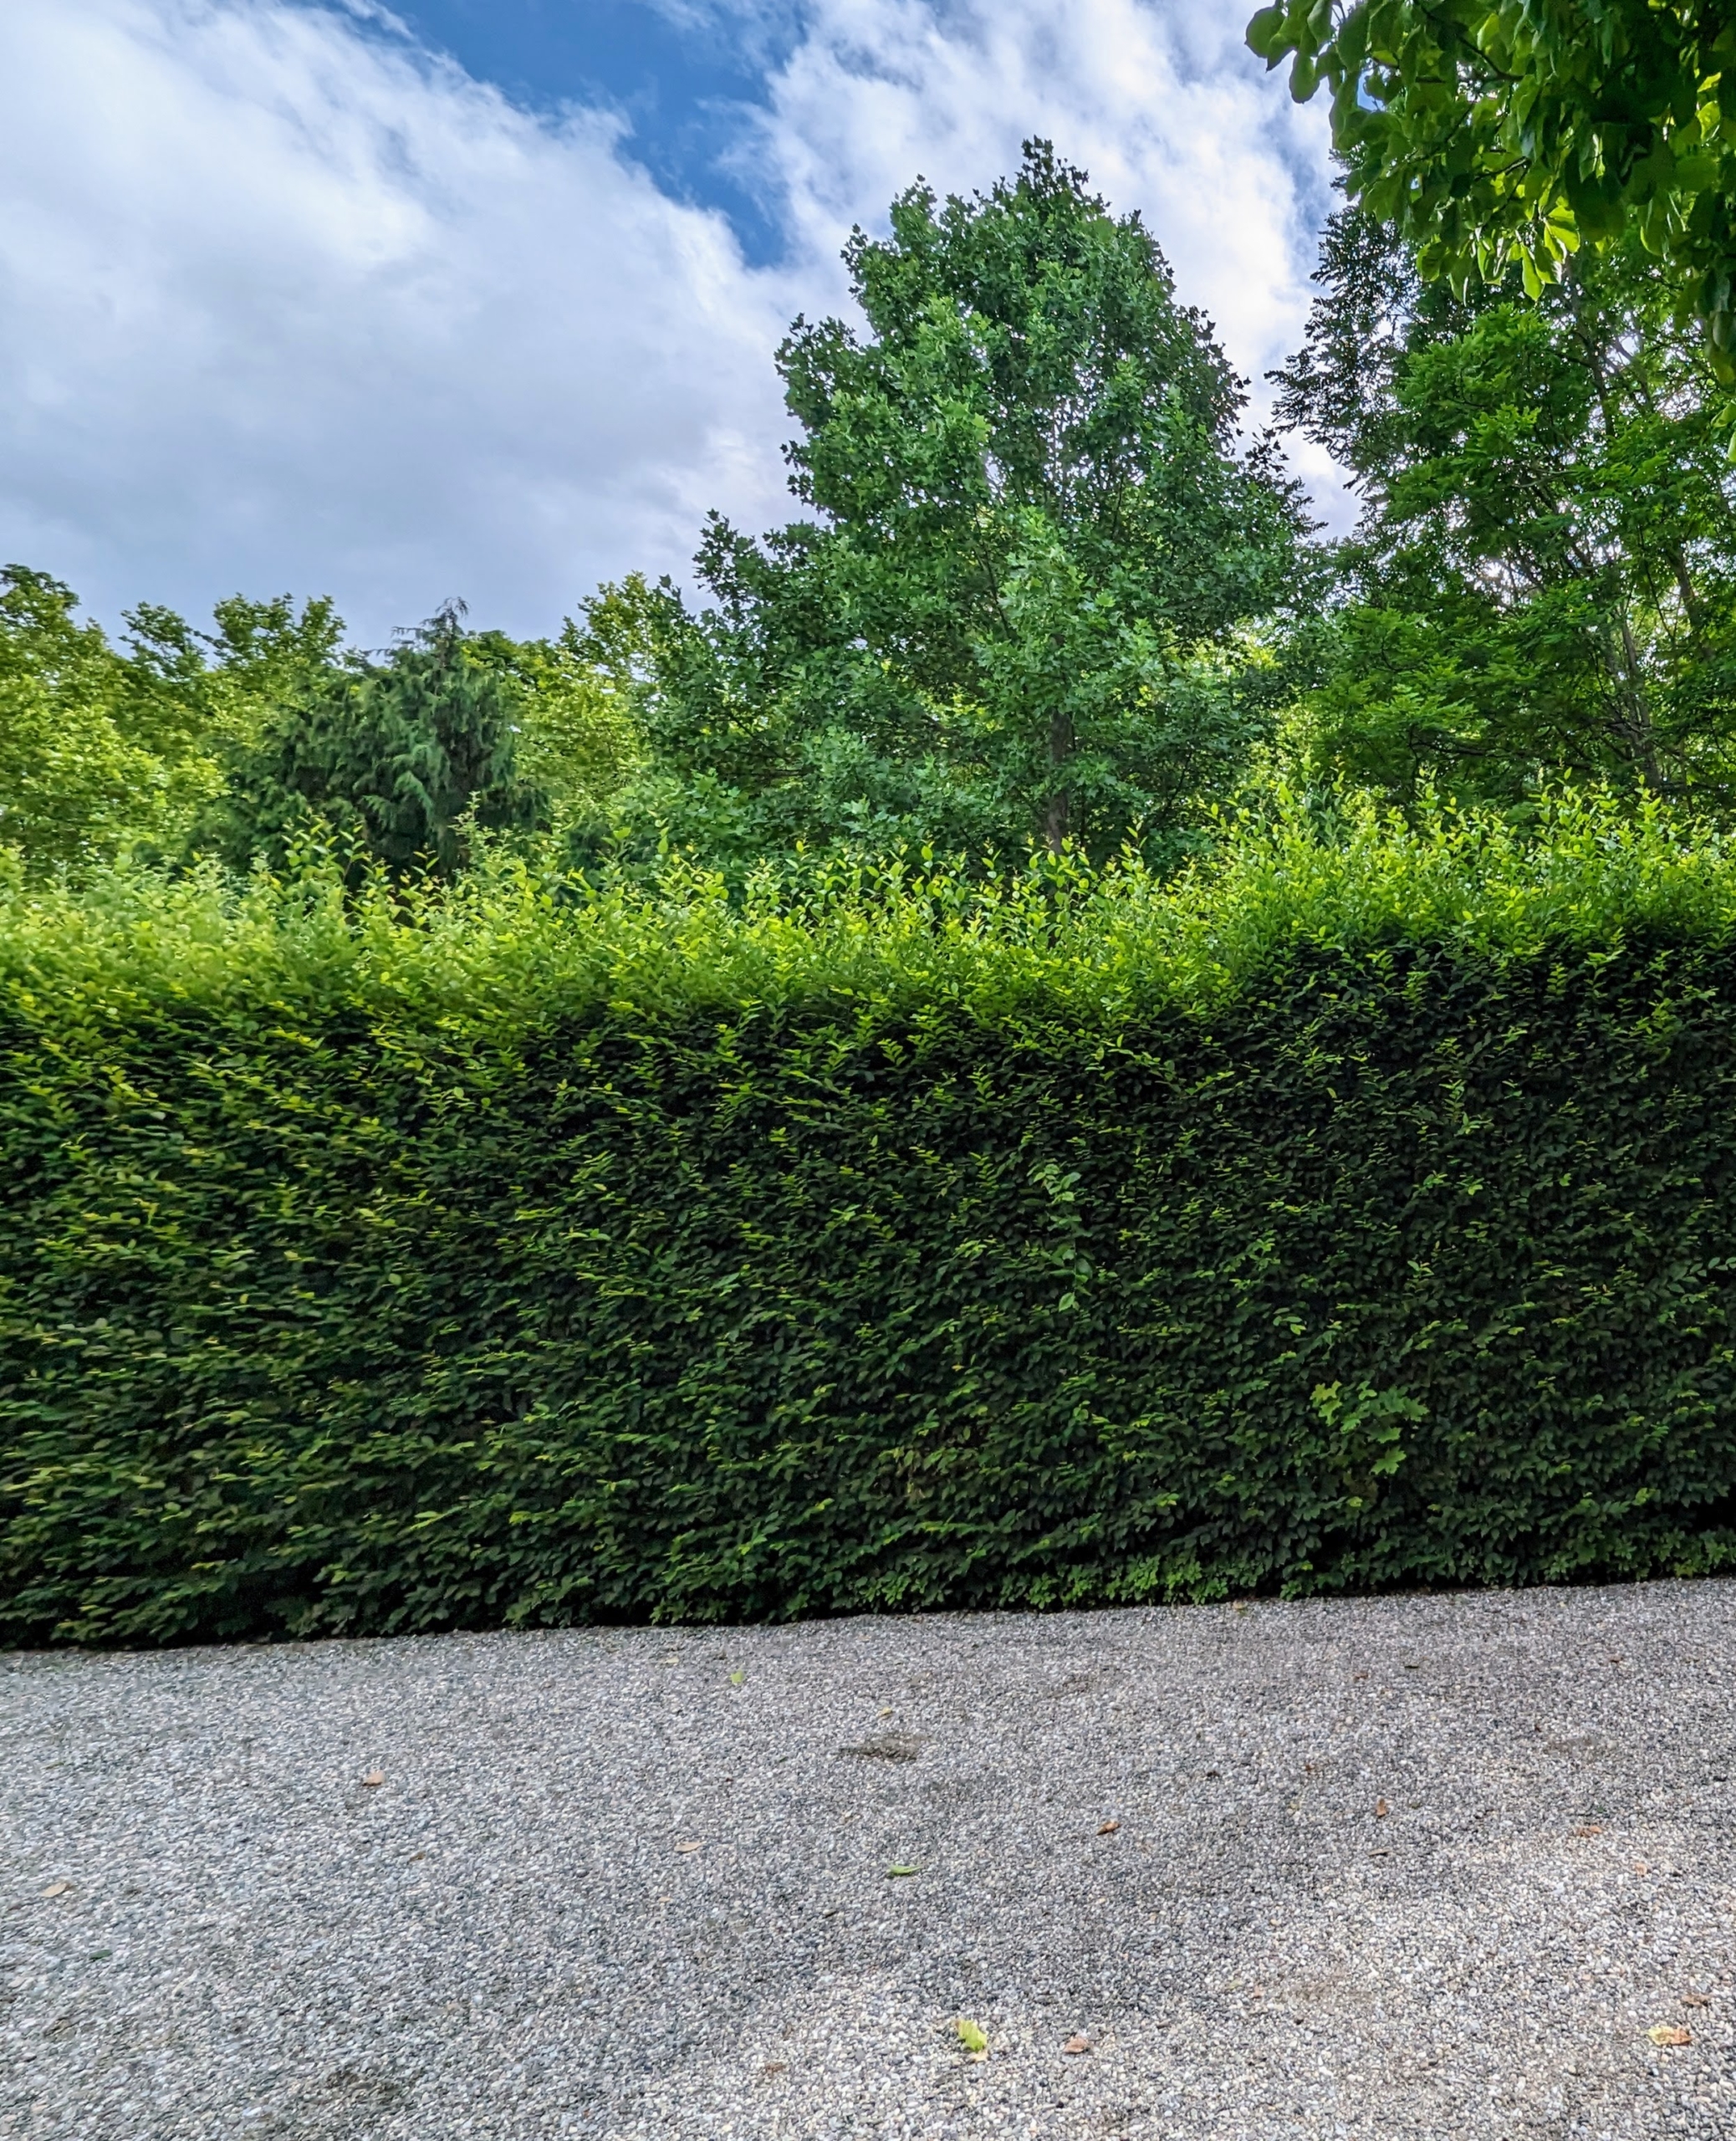
A younger hedge is also groomed across the parking lot right in front of my glass greenhouse. We planted this hedge in the spring of 2019 – it has grown quite a bit. An identical one is on the other side of the greenhouse entrance.
Pruning and grooming the hornbeams is a big task – it takes about two weeks to get all of them done around the farm, but once they’re finished they look so terrific – thanks to my hardworking crew!
My vegetable garden is producing so many wonderful and nutritious foods.
It's fun to plant a vegetable garden at the beginning of the season, but to keep it thriving, it must also be carefully maintained. My head gardener, Ryan McCallister, visits my large half-acre patch every single day to check on what's growing, harvest what is ready, pull any weeds that emerge, add support stakes or ties where necessary, and water, water, water.
Here is the latest update. Enjoy these photos.
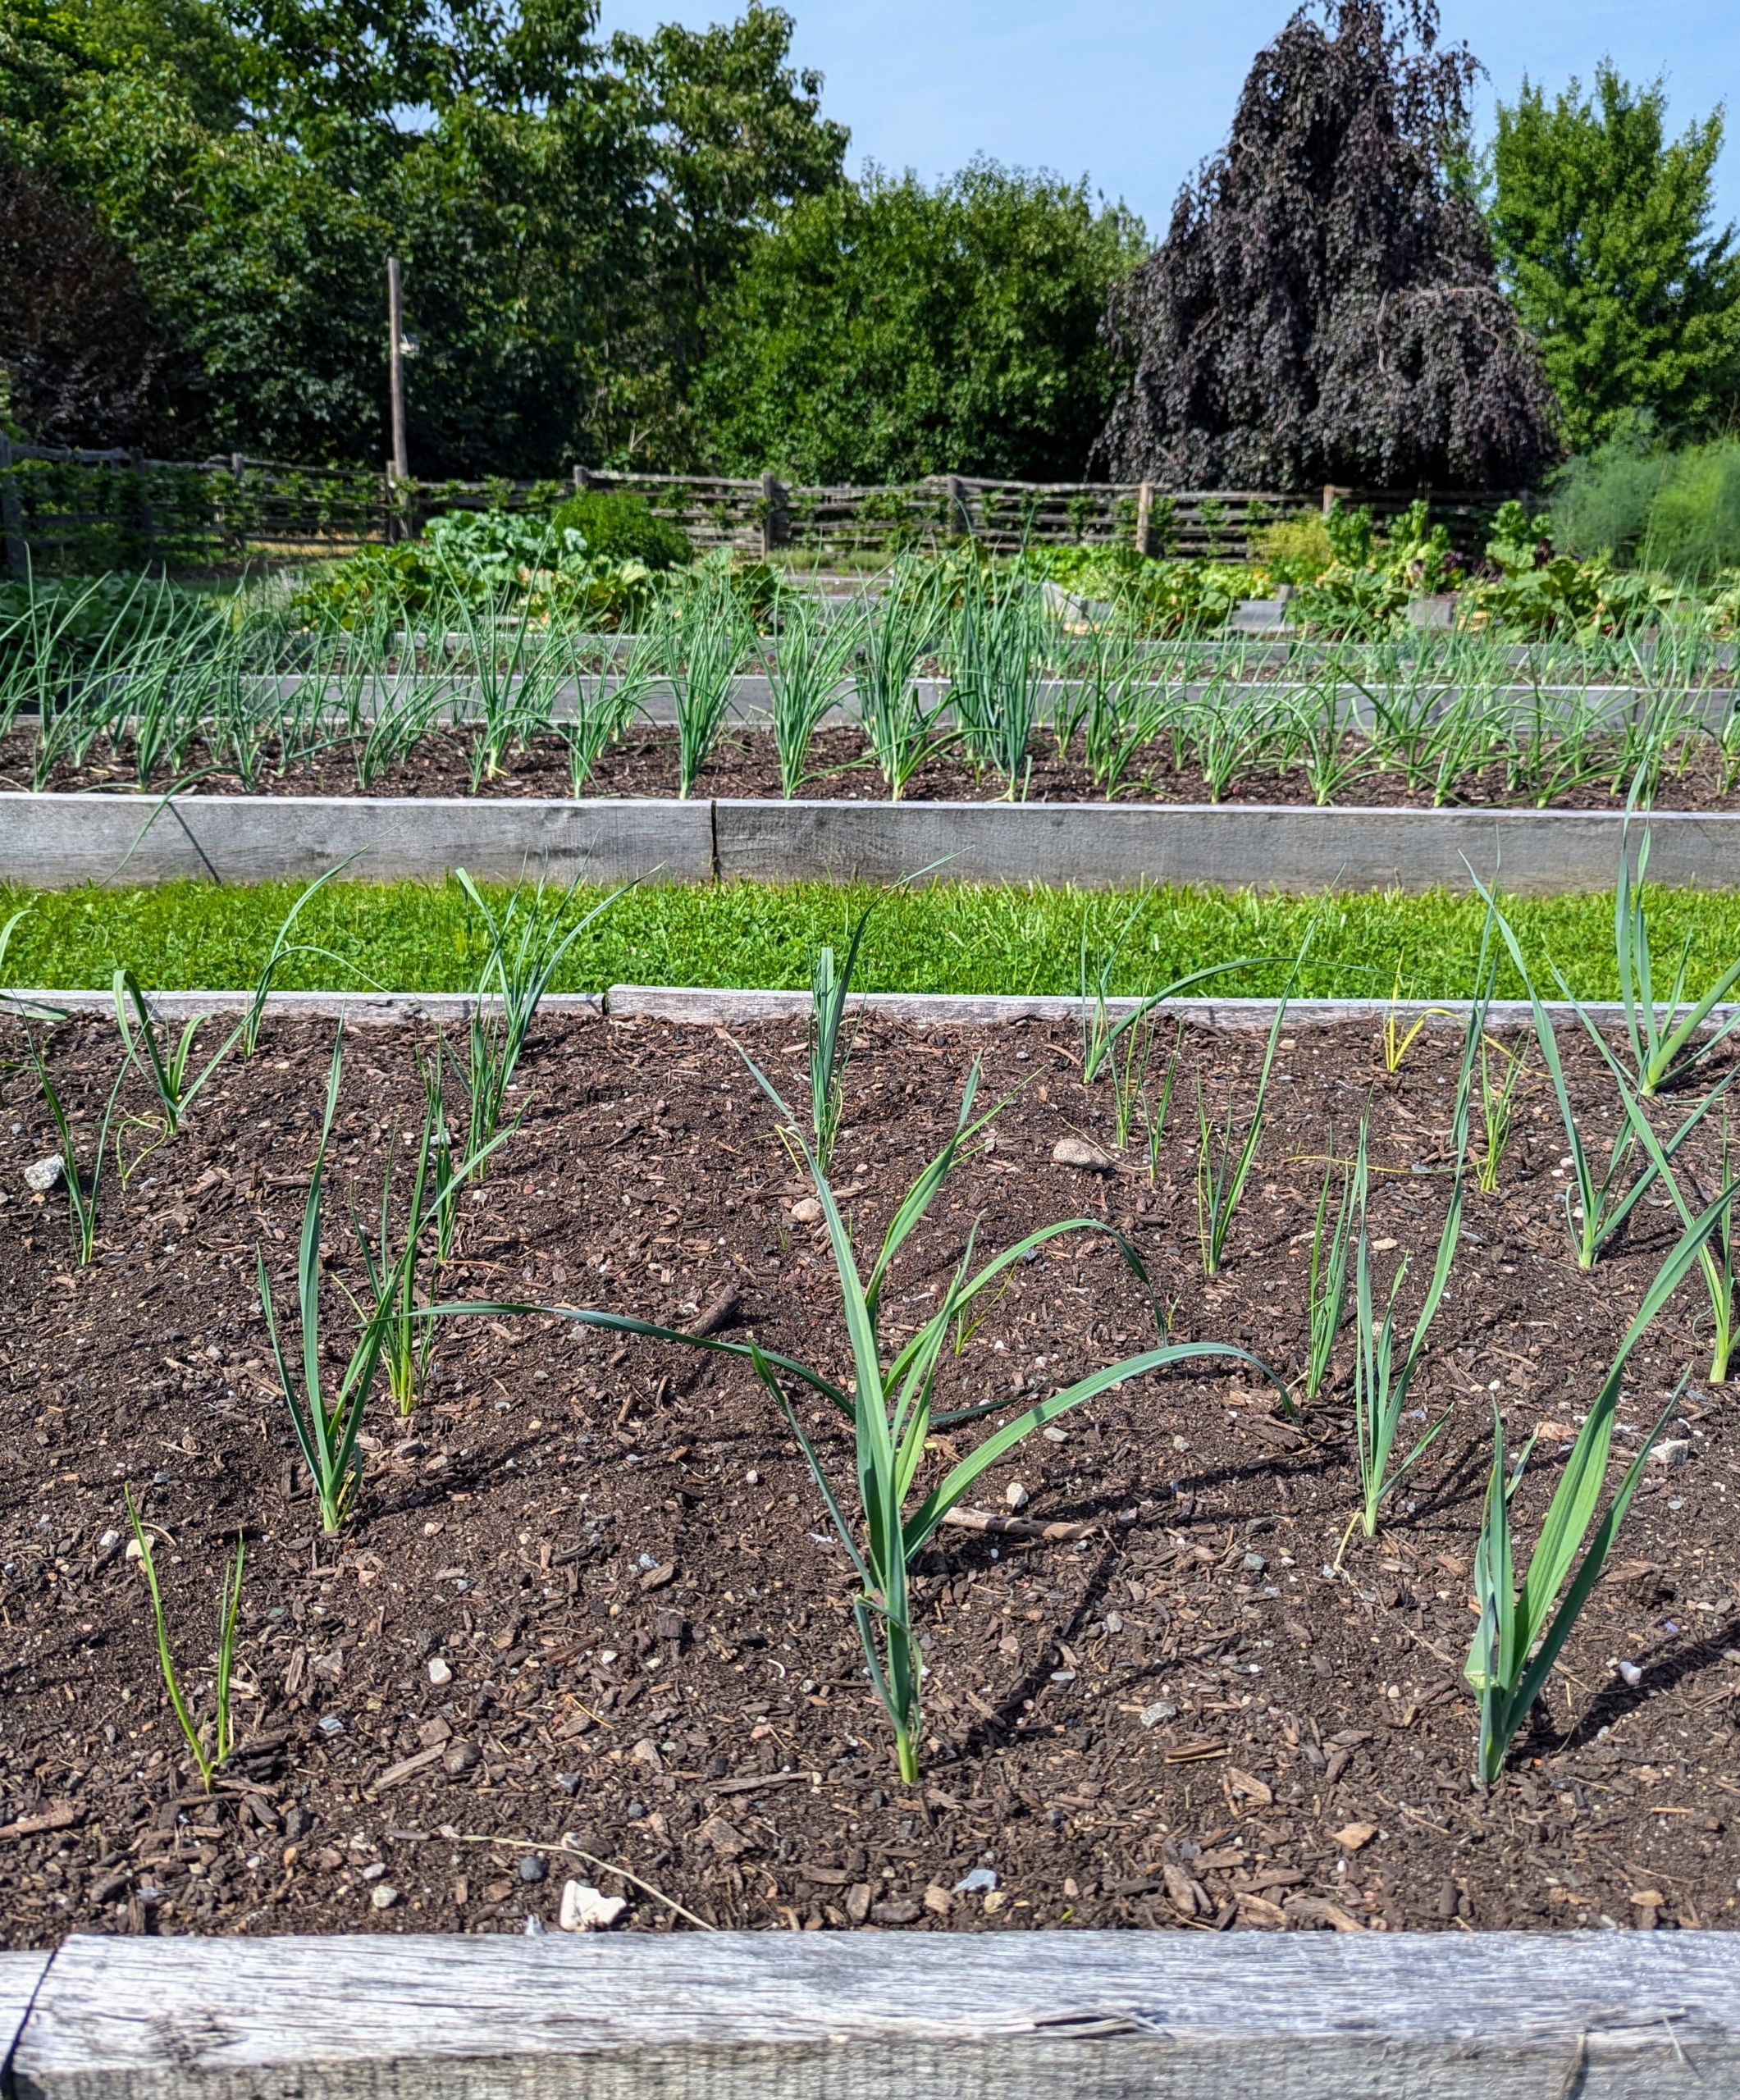
What a difference a month makes. Every crop in this garden is developing so well. I planted onions, shallots, and leeks a few weeks ago. These will be harvested later in the summer when the underground bulbs are mature and flavorful.
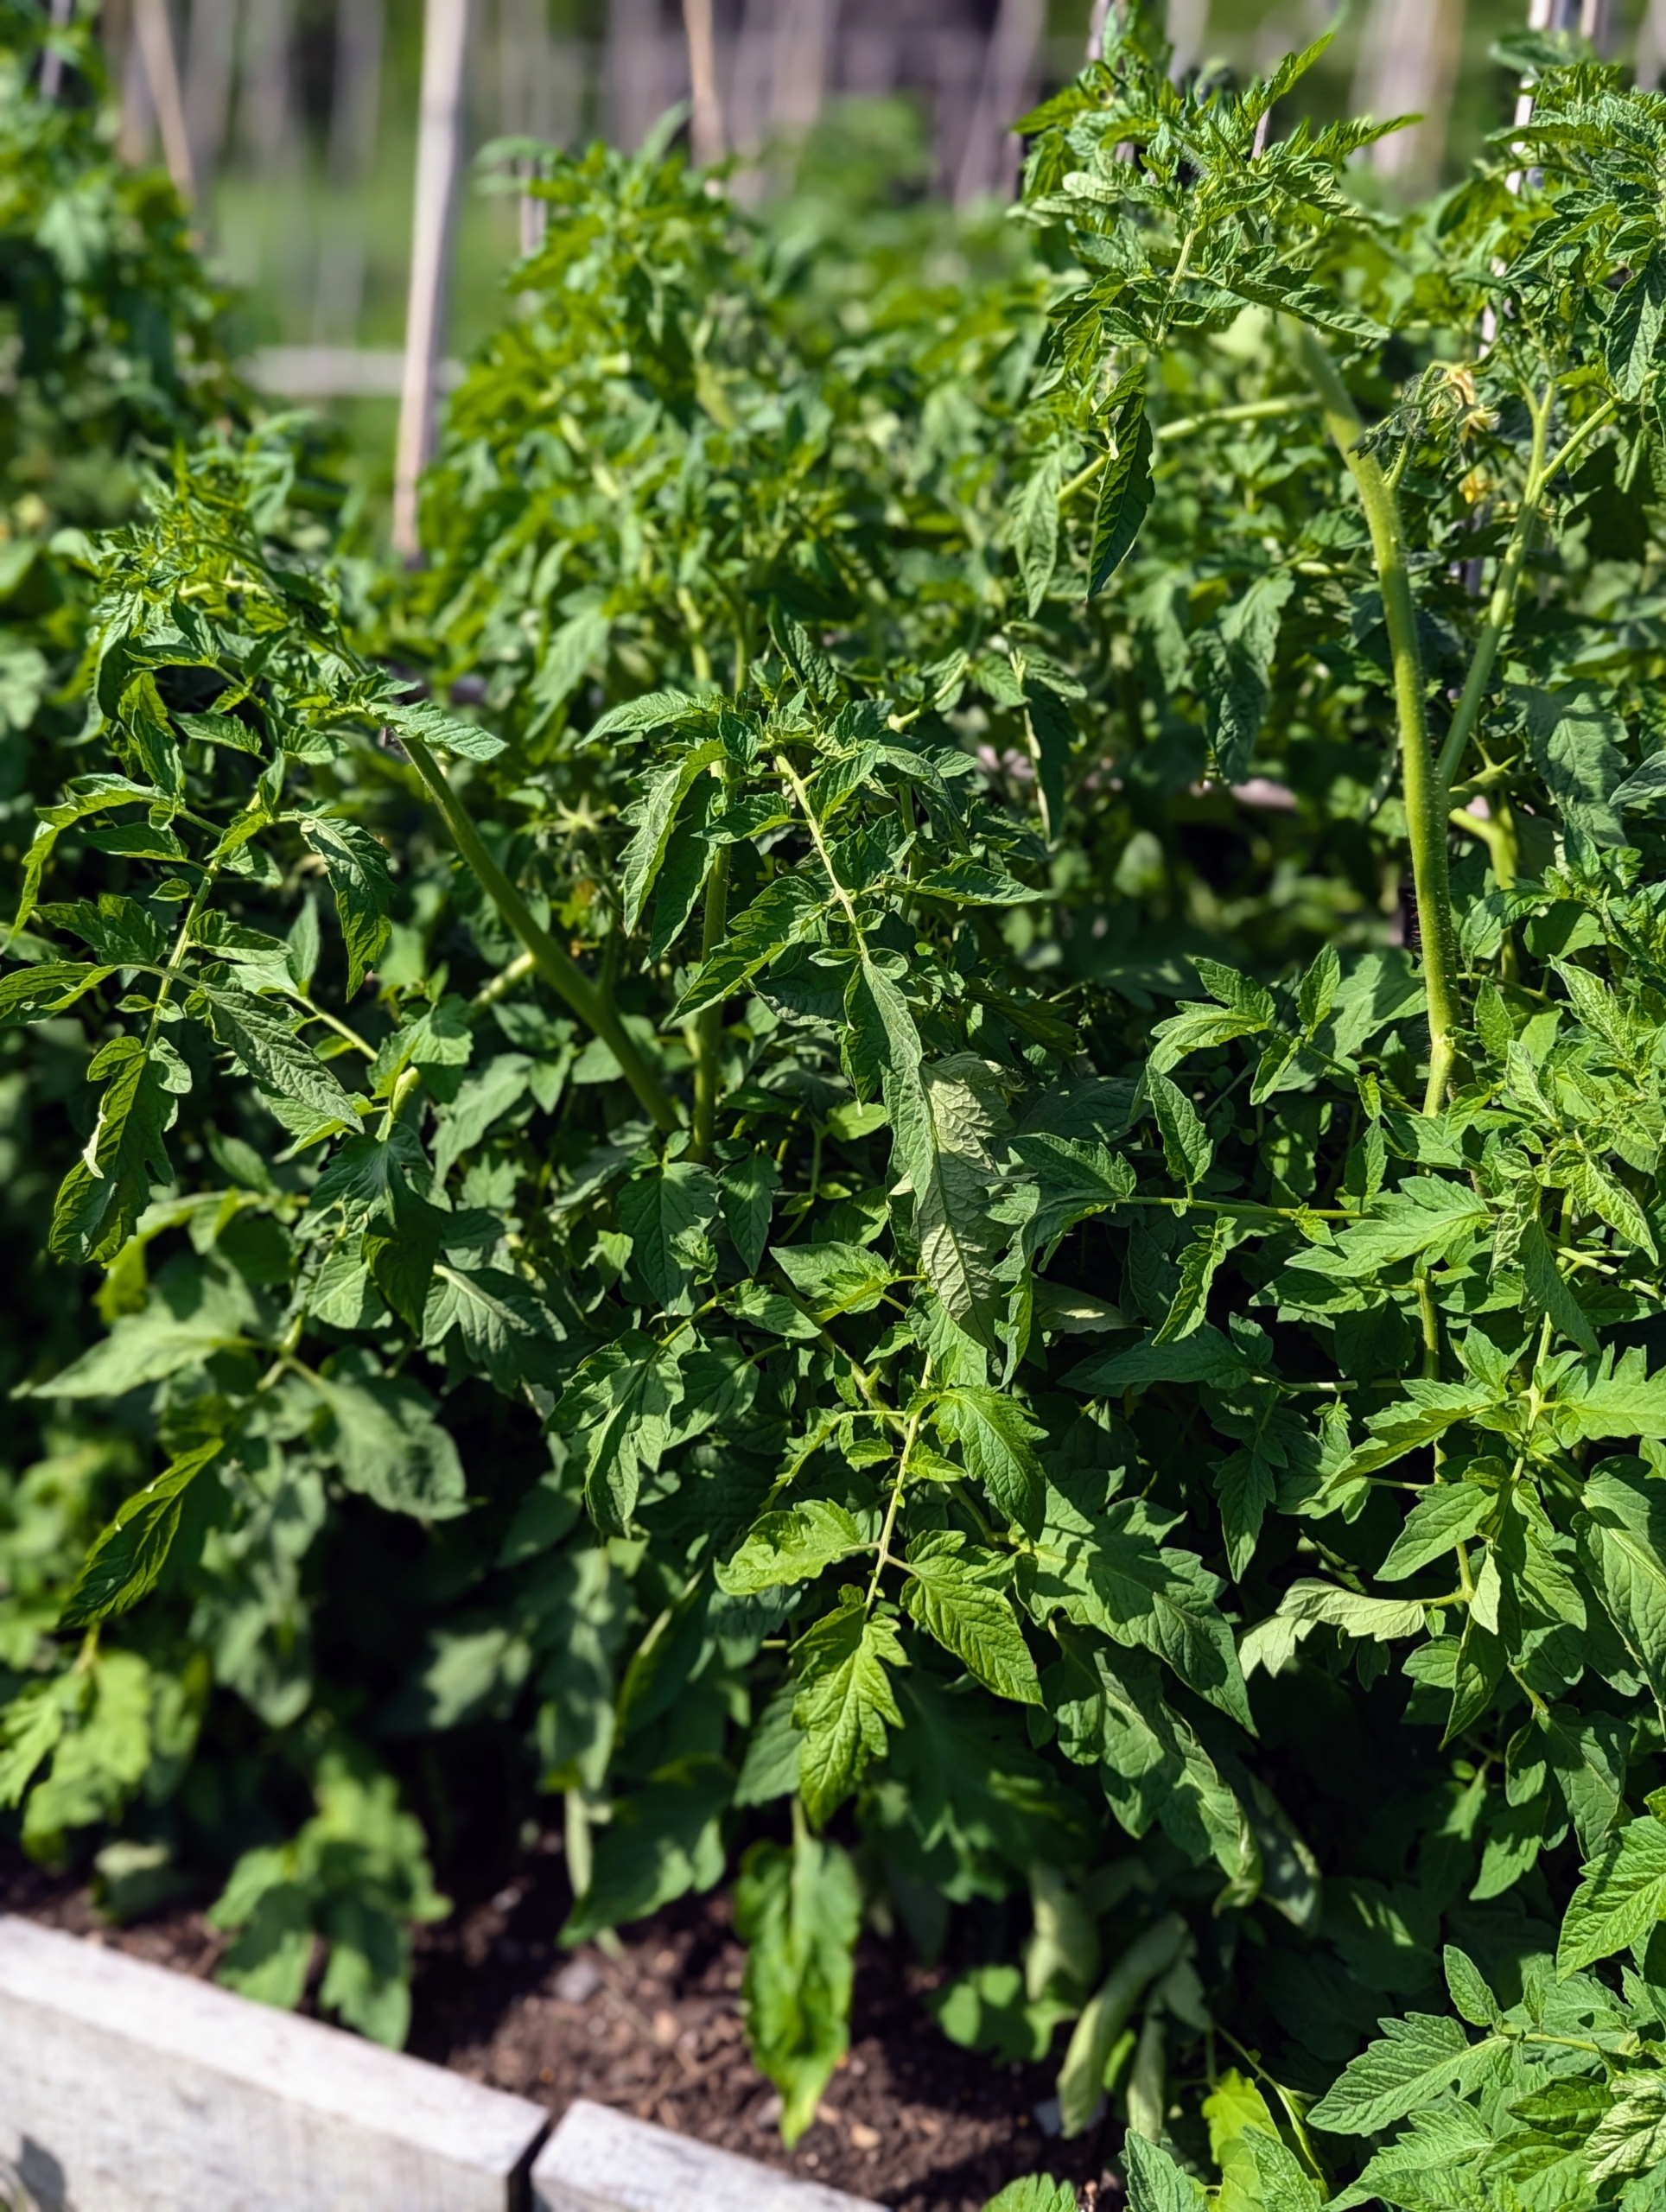
All 120 tomato plants are also growing fast. I always grow an abundance of tomatoes to share and to make all the delicious tomato sauce I enjoy through the year. Most tomato plant varieties need between 50 and 90 days to mature. Planting can also be staggered to produce early, mid and late season tomato harvests.
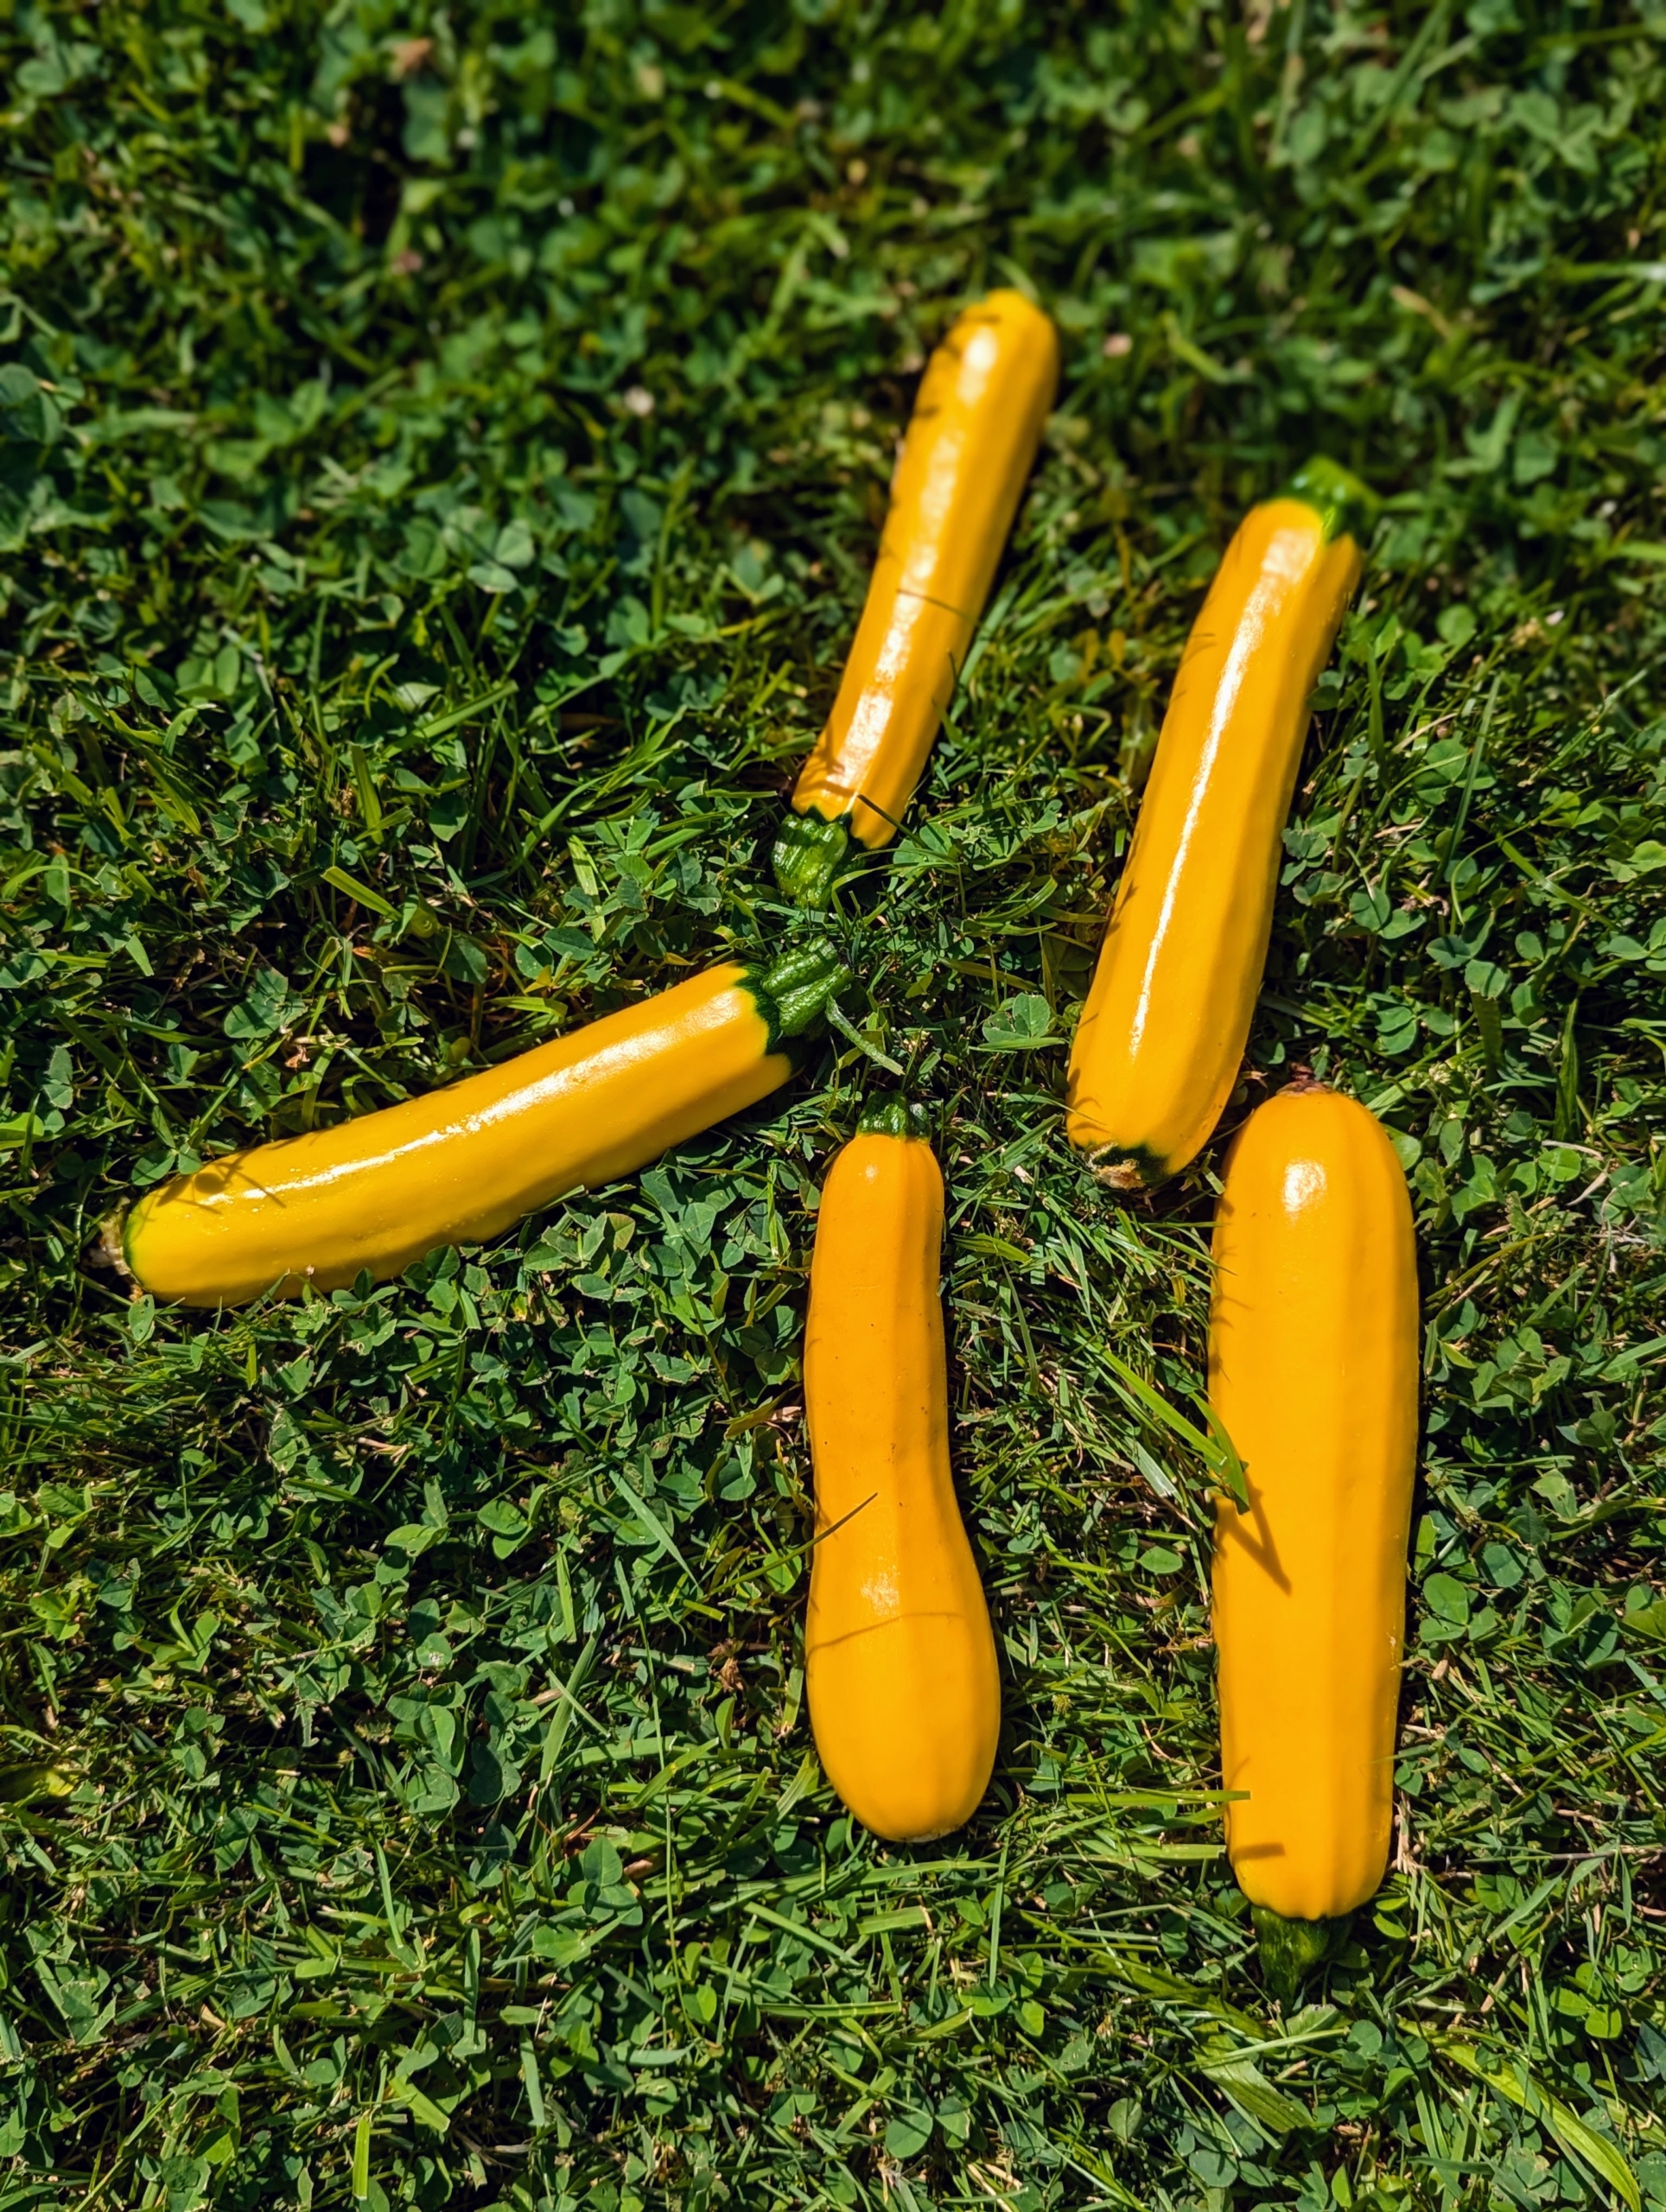
Here are five of our first summer squash. It’s important to check a vegetable garden every day – there’s always something ready to pick.
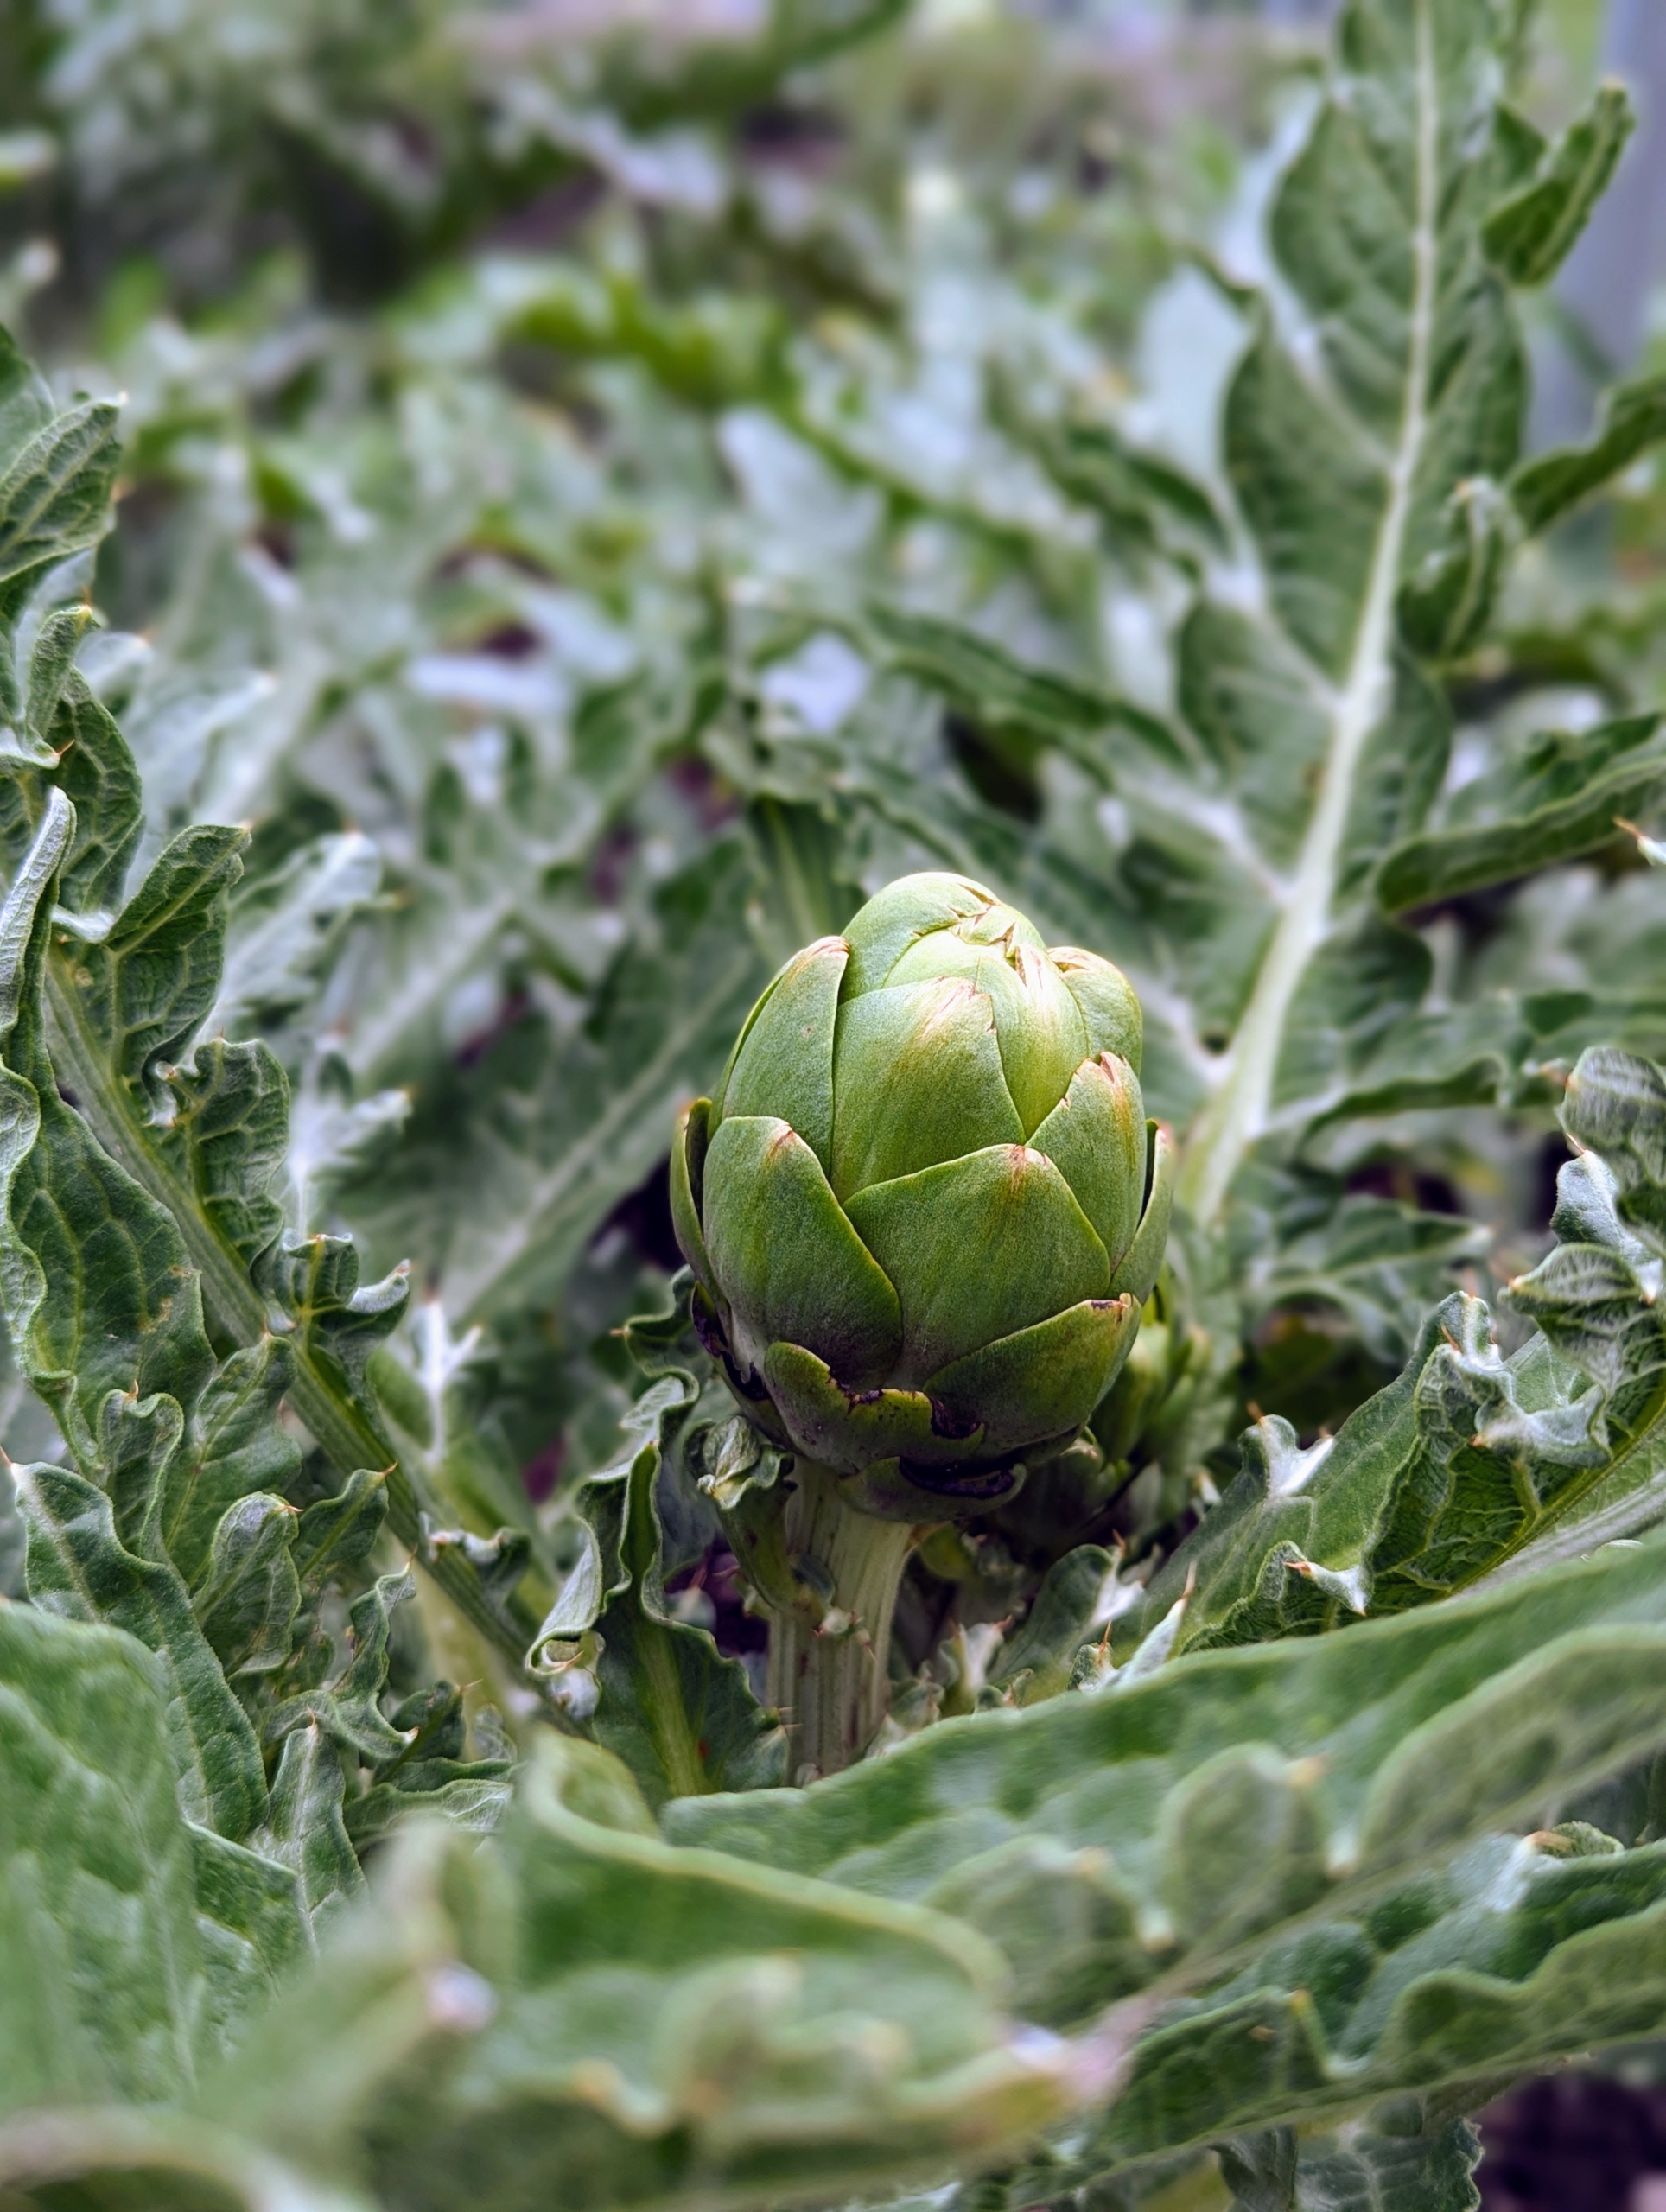
The artichokes are also growing. The globe artichoke, Cynara scolymus, is actually a flower bud, which is eaten when tender. Buds are generally harvested once they reach full size, just before the bracts begin to spread open. I like to harvest them when they are still small, but these need a little more time.
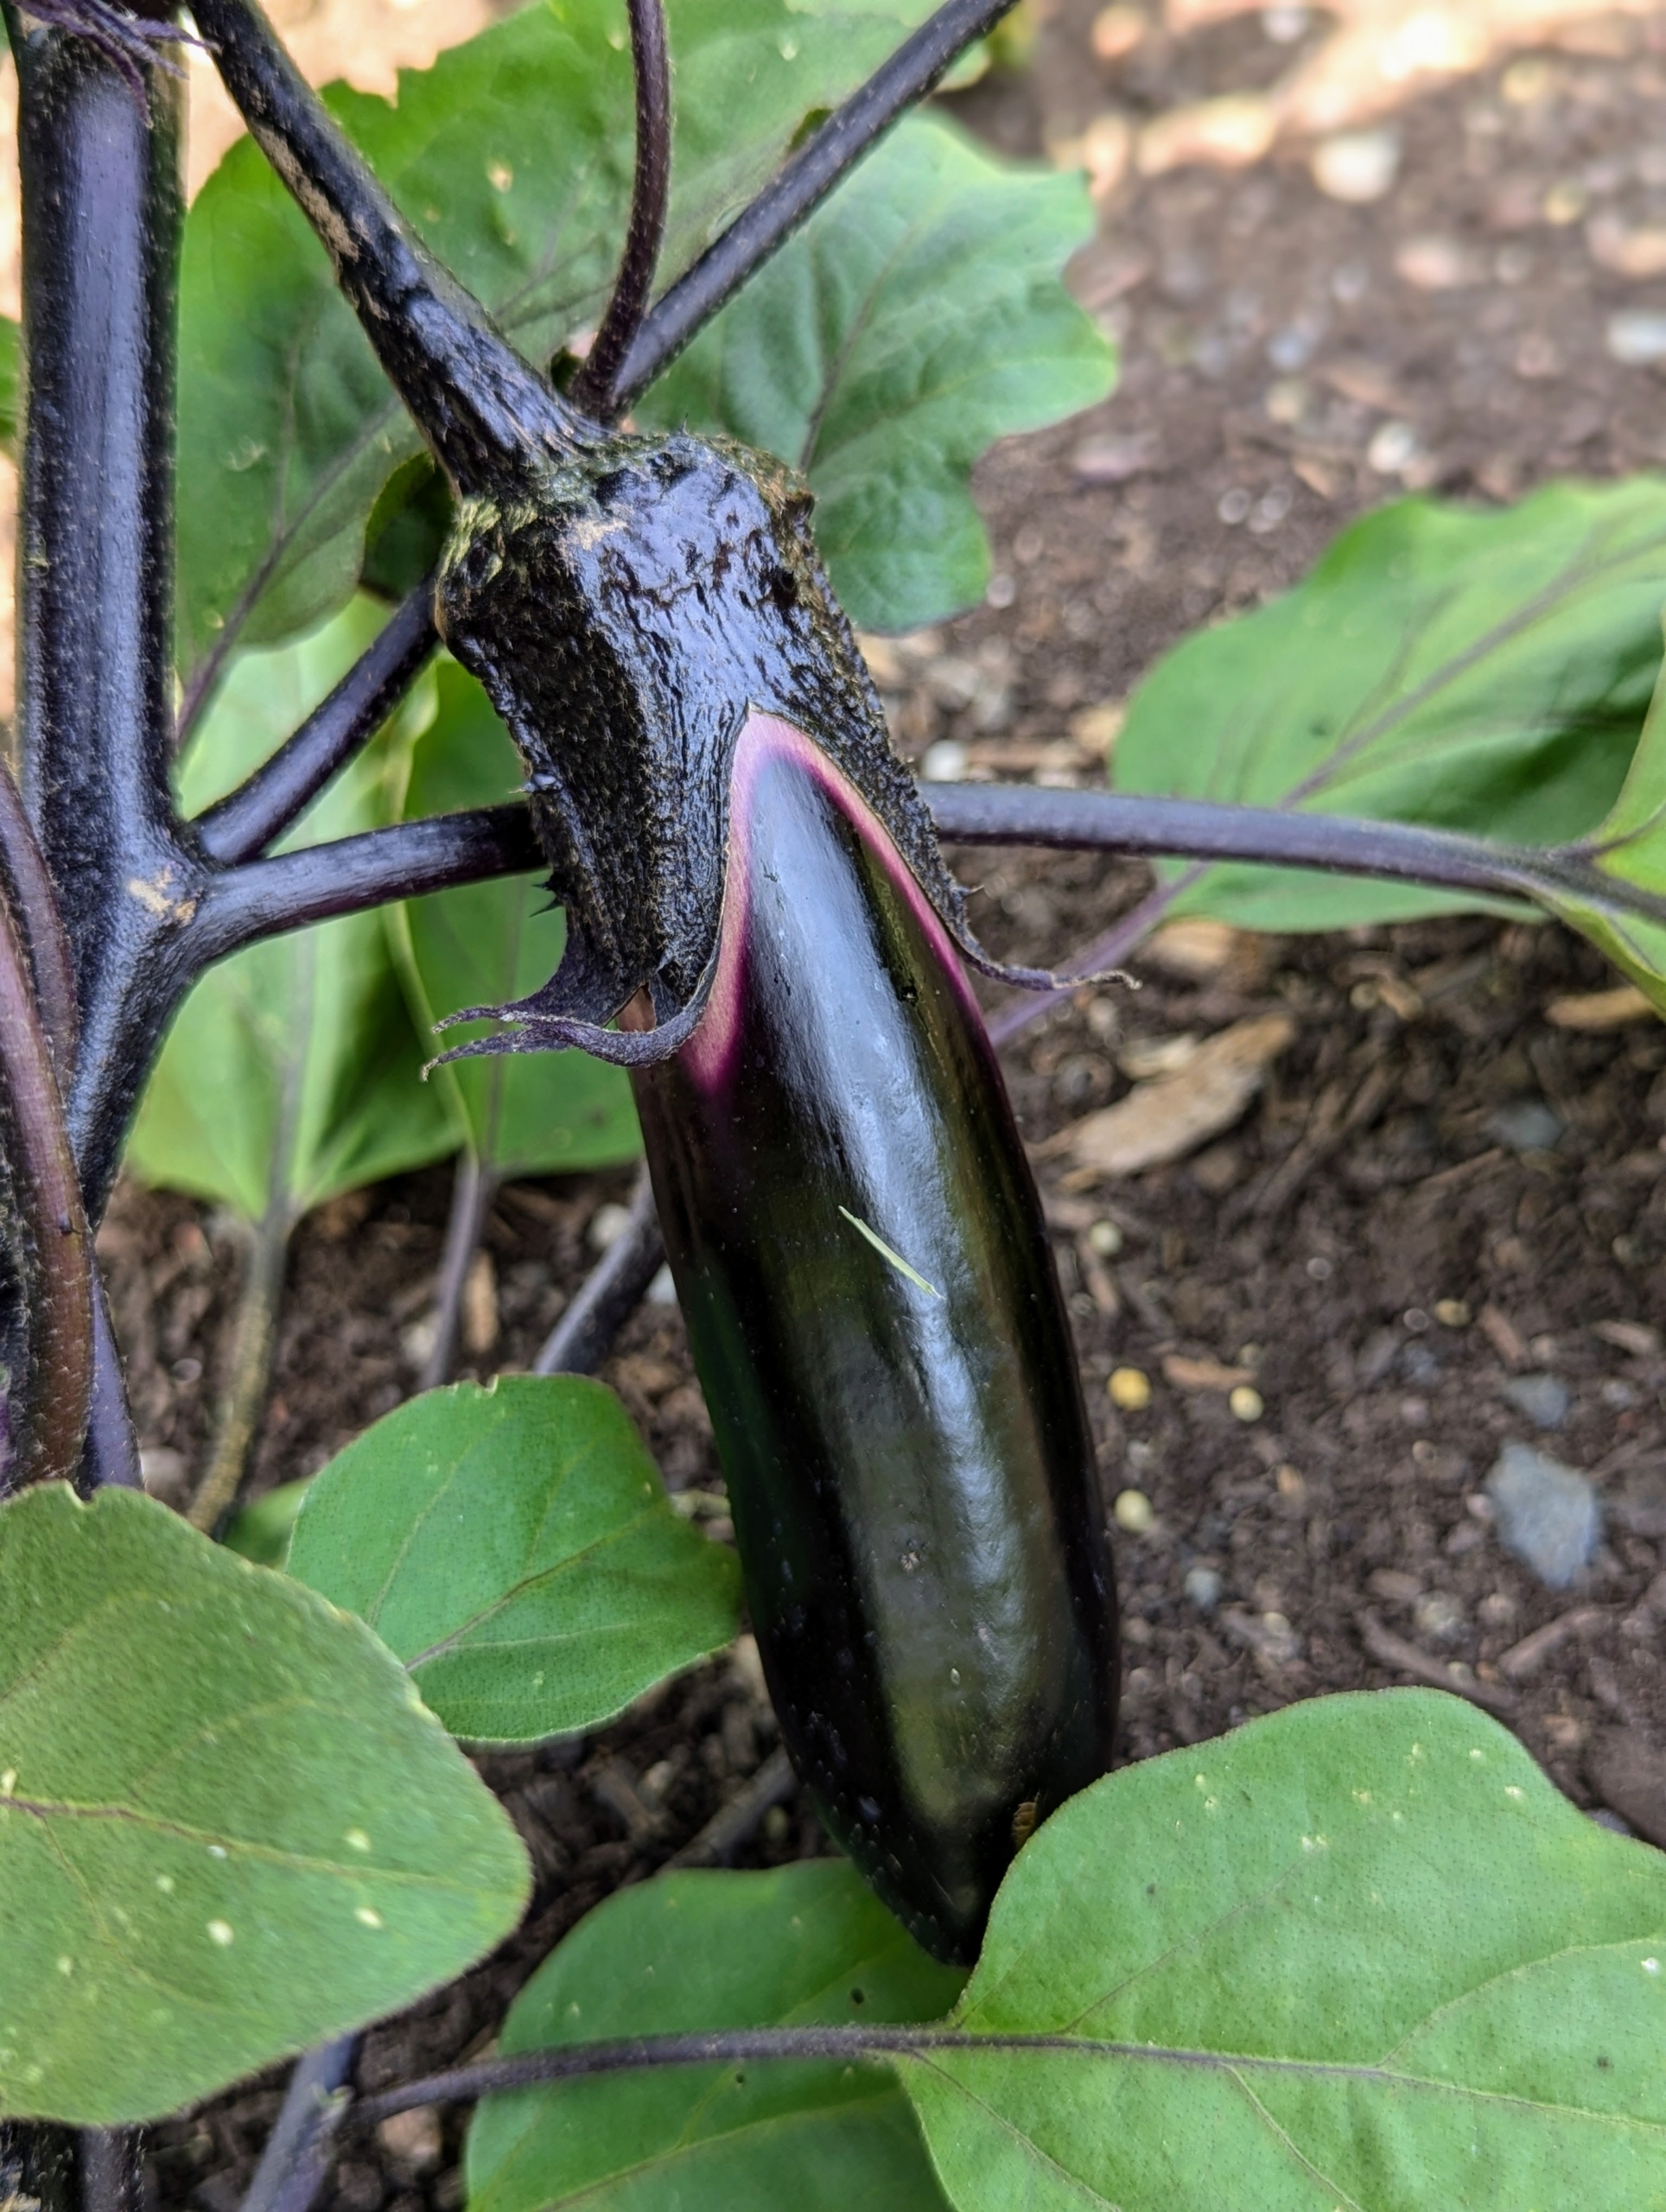
It is good to pick eggplants when they are young and tender. Try to pick a little early, which will encourage the plant to grow more, and will help to extend the growing season.
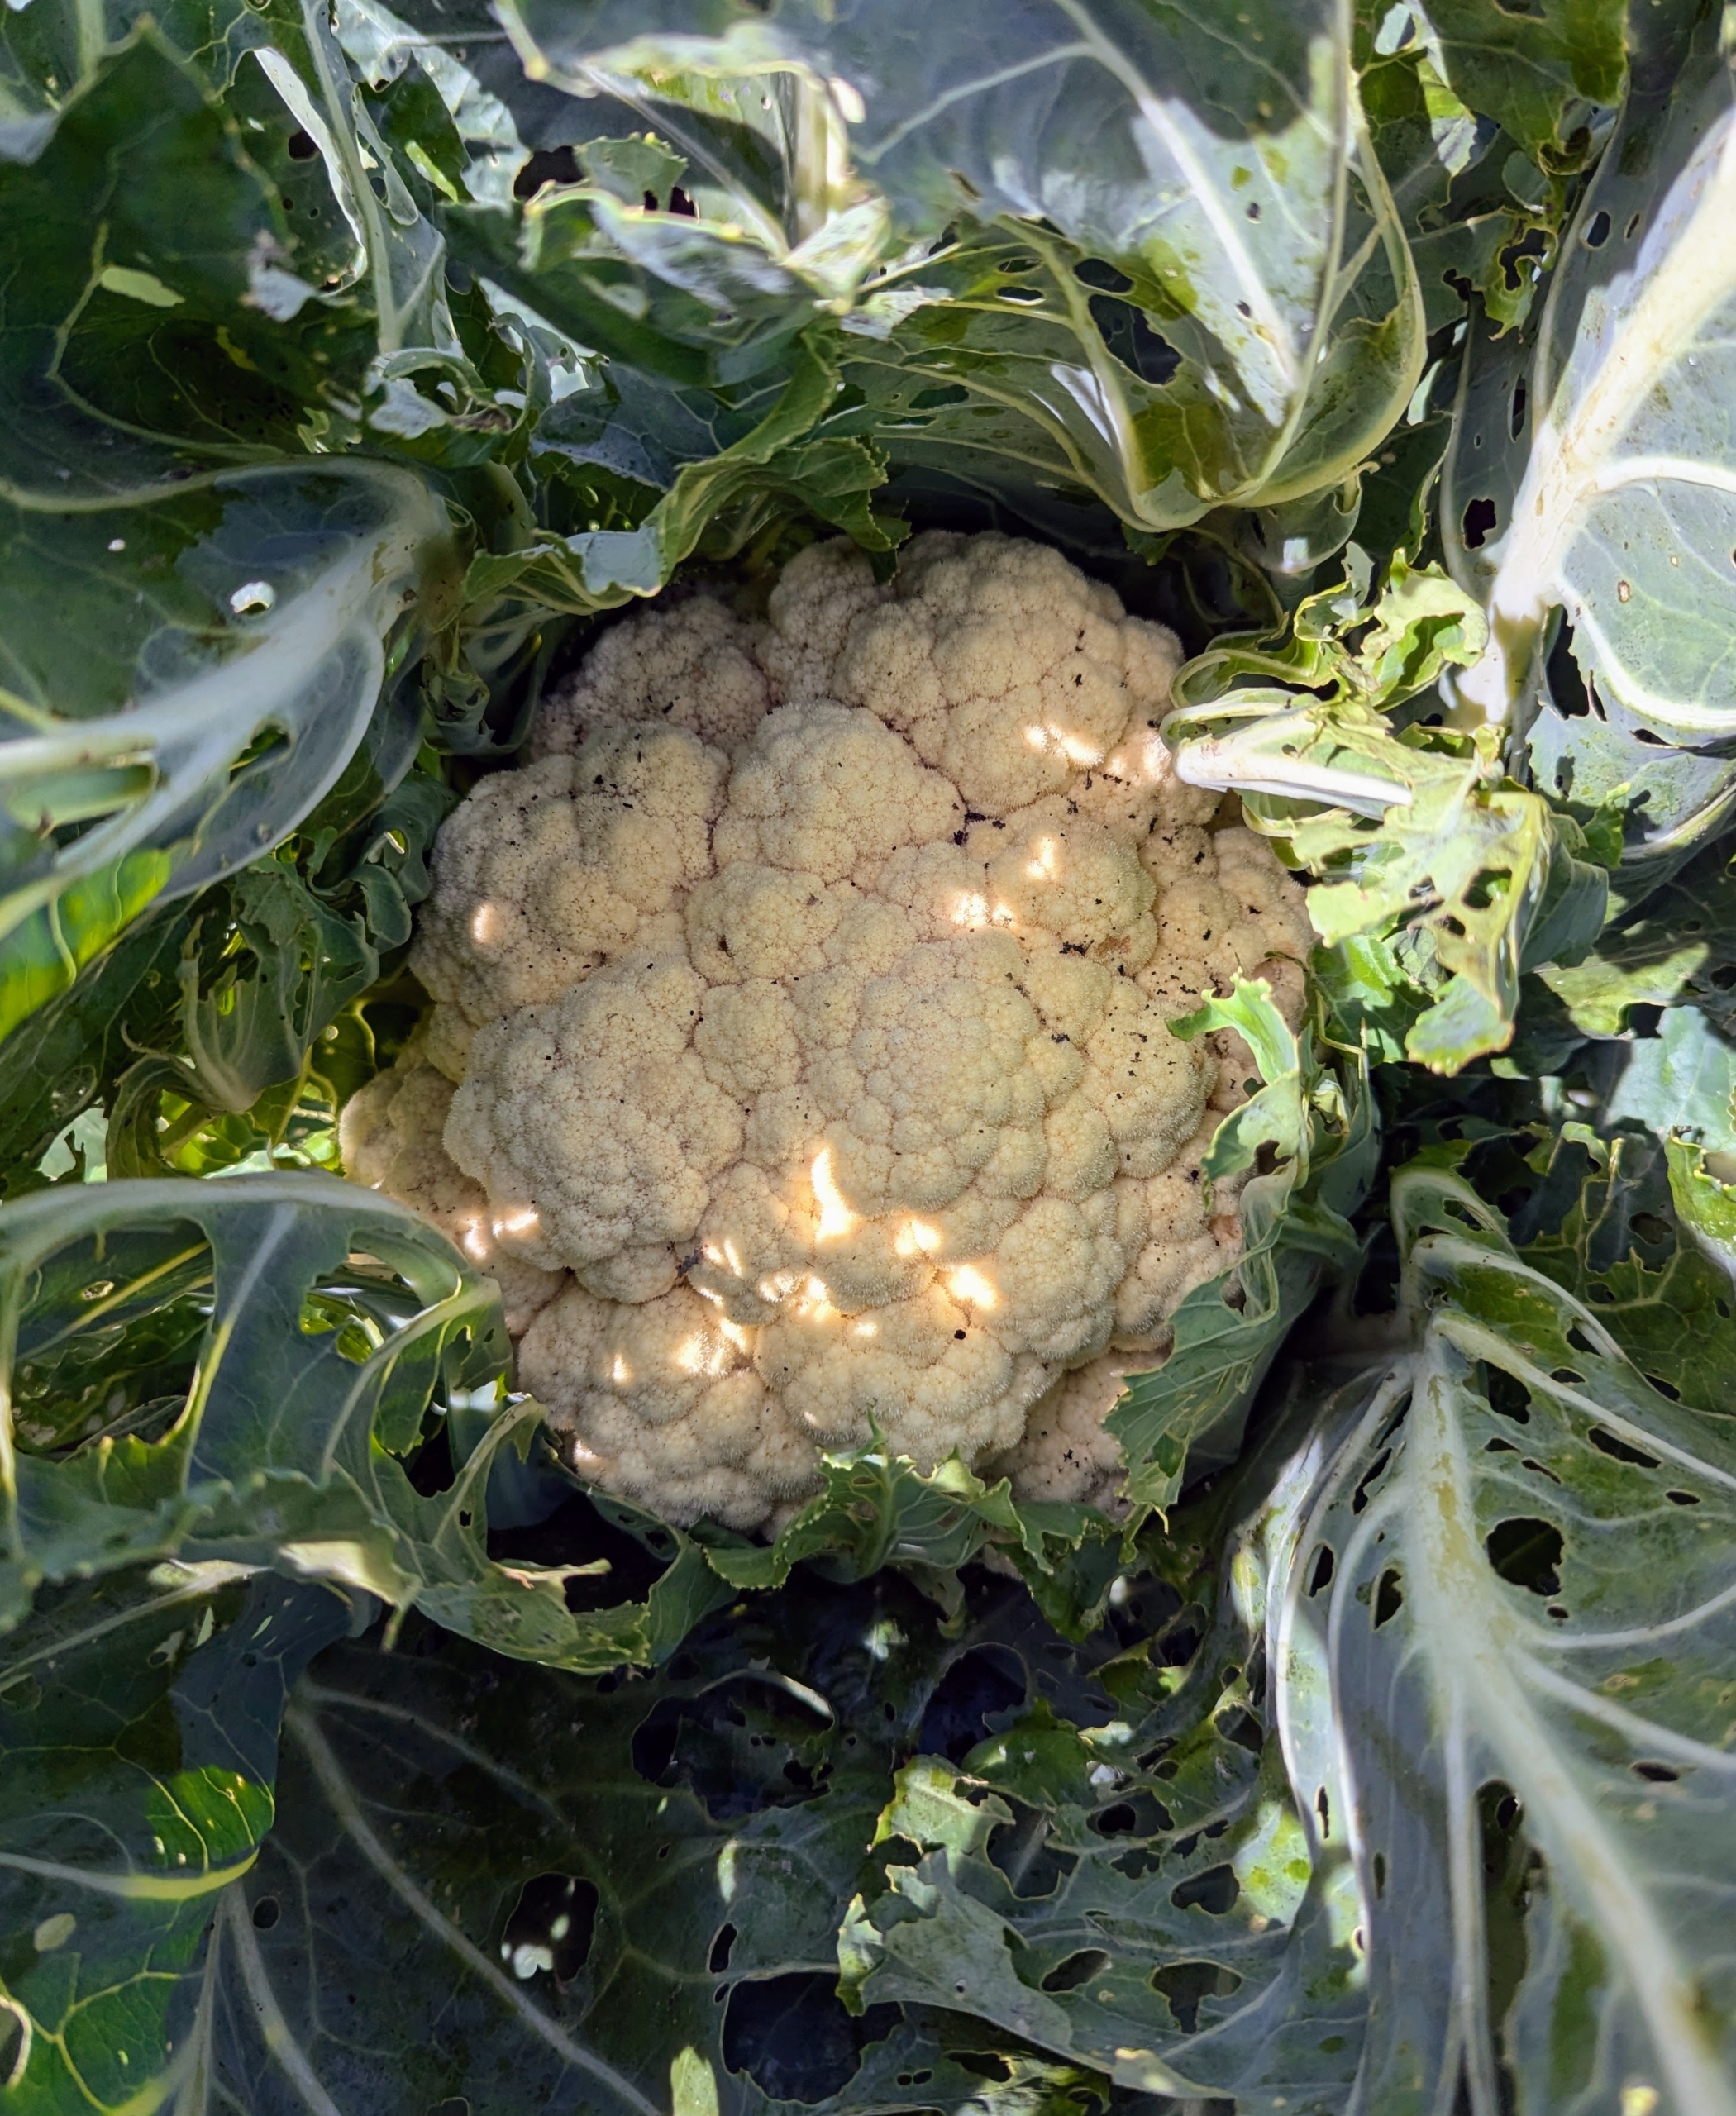
All my brassicas are so terrific this season – big and flavorful. Cauliflower is filled with nutrients. They hold plenty of vitamins, such as C, B, and K. Cauliflower is ready to harvest when the heads are six to eight inches in diameter – this one is ready.
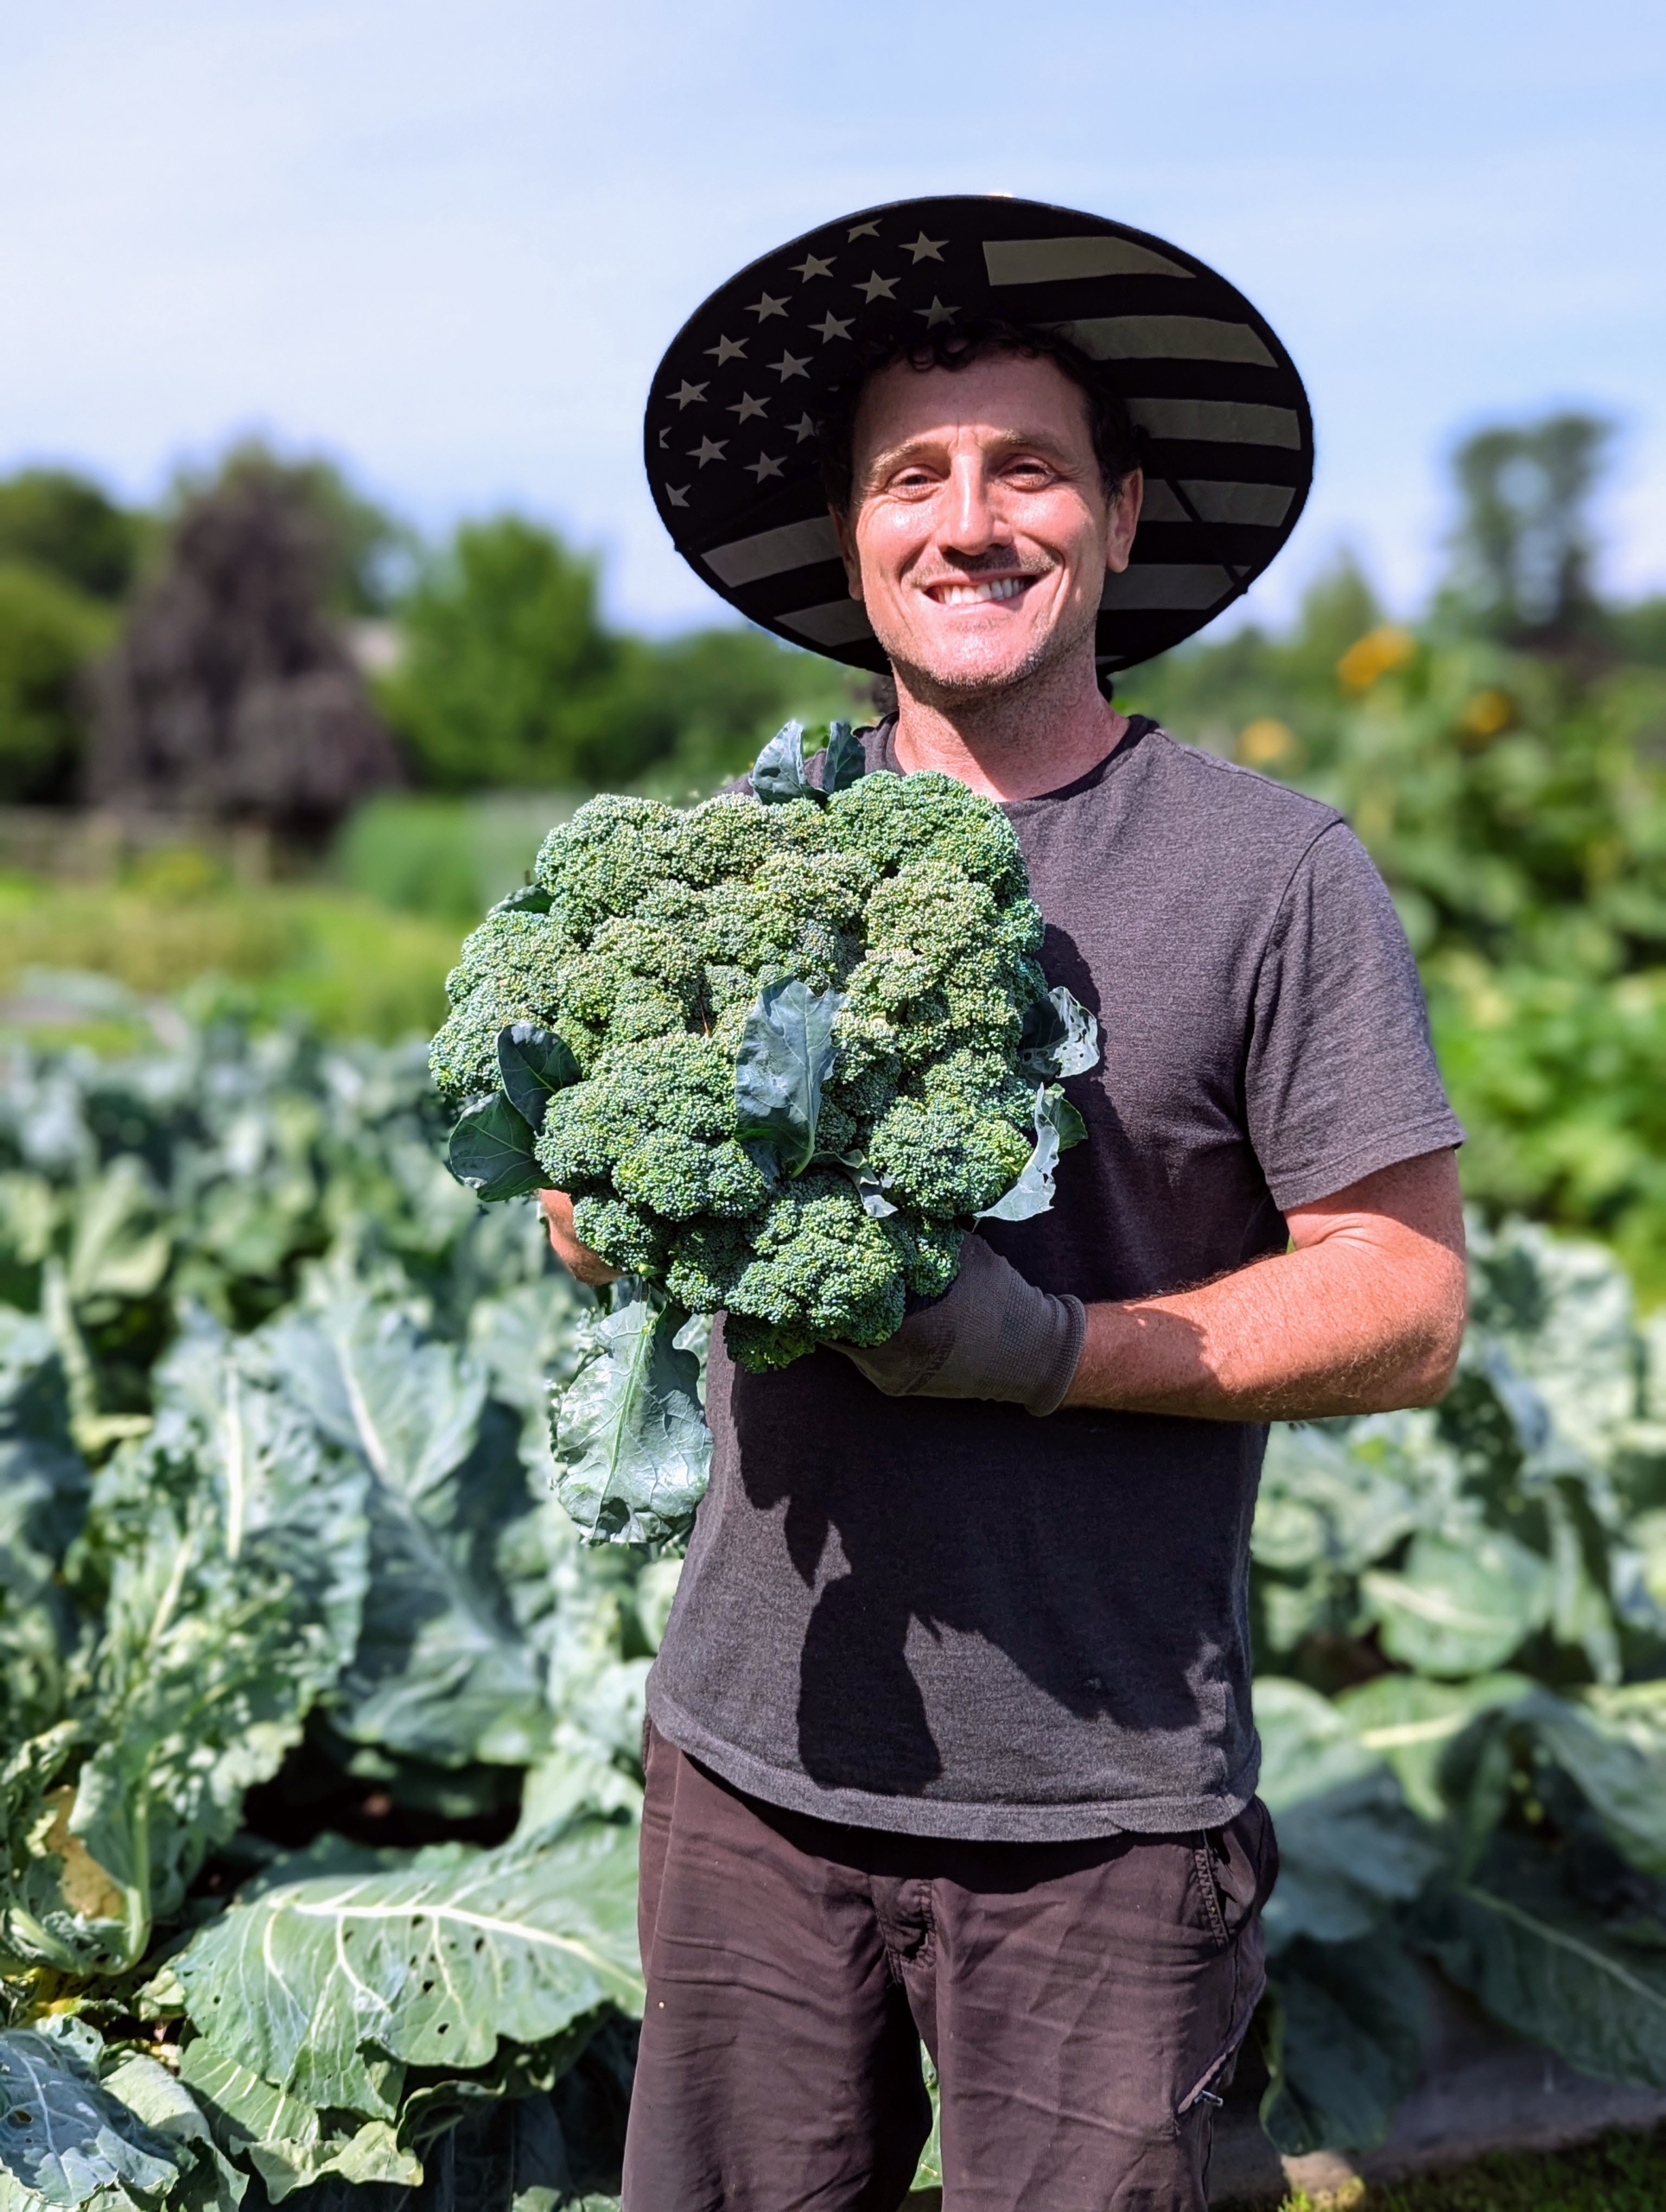
Ryan holds up one of the broccoli heads – it’s huge, and weighs a good 10-pounds. Broccoli is a hardy vegetable that is high in vitamins A and D.
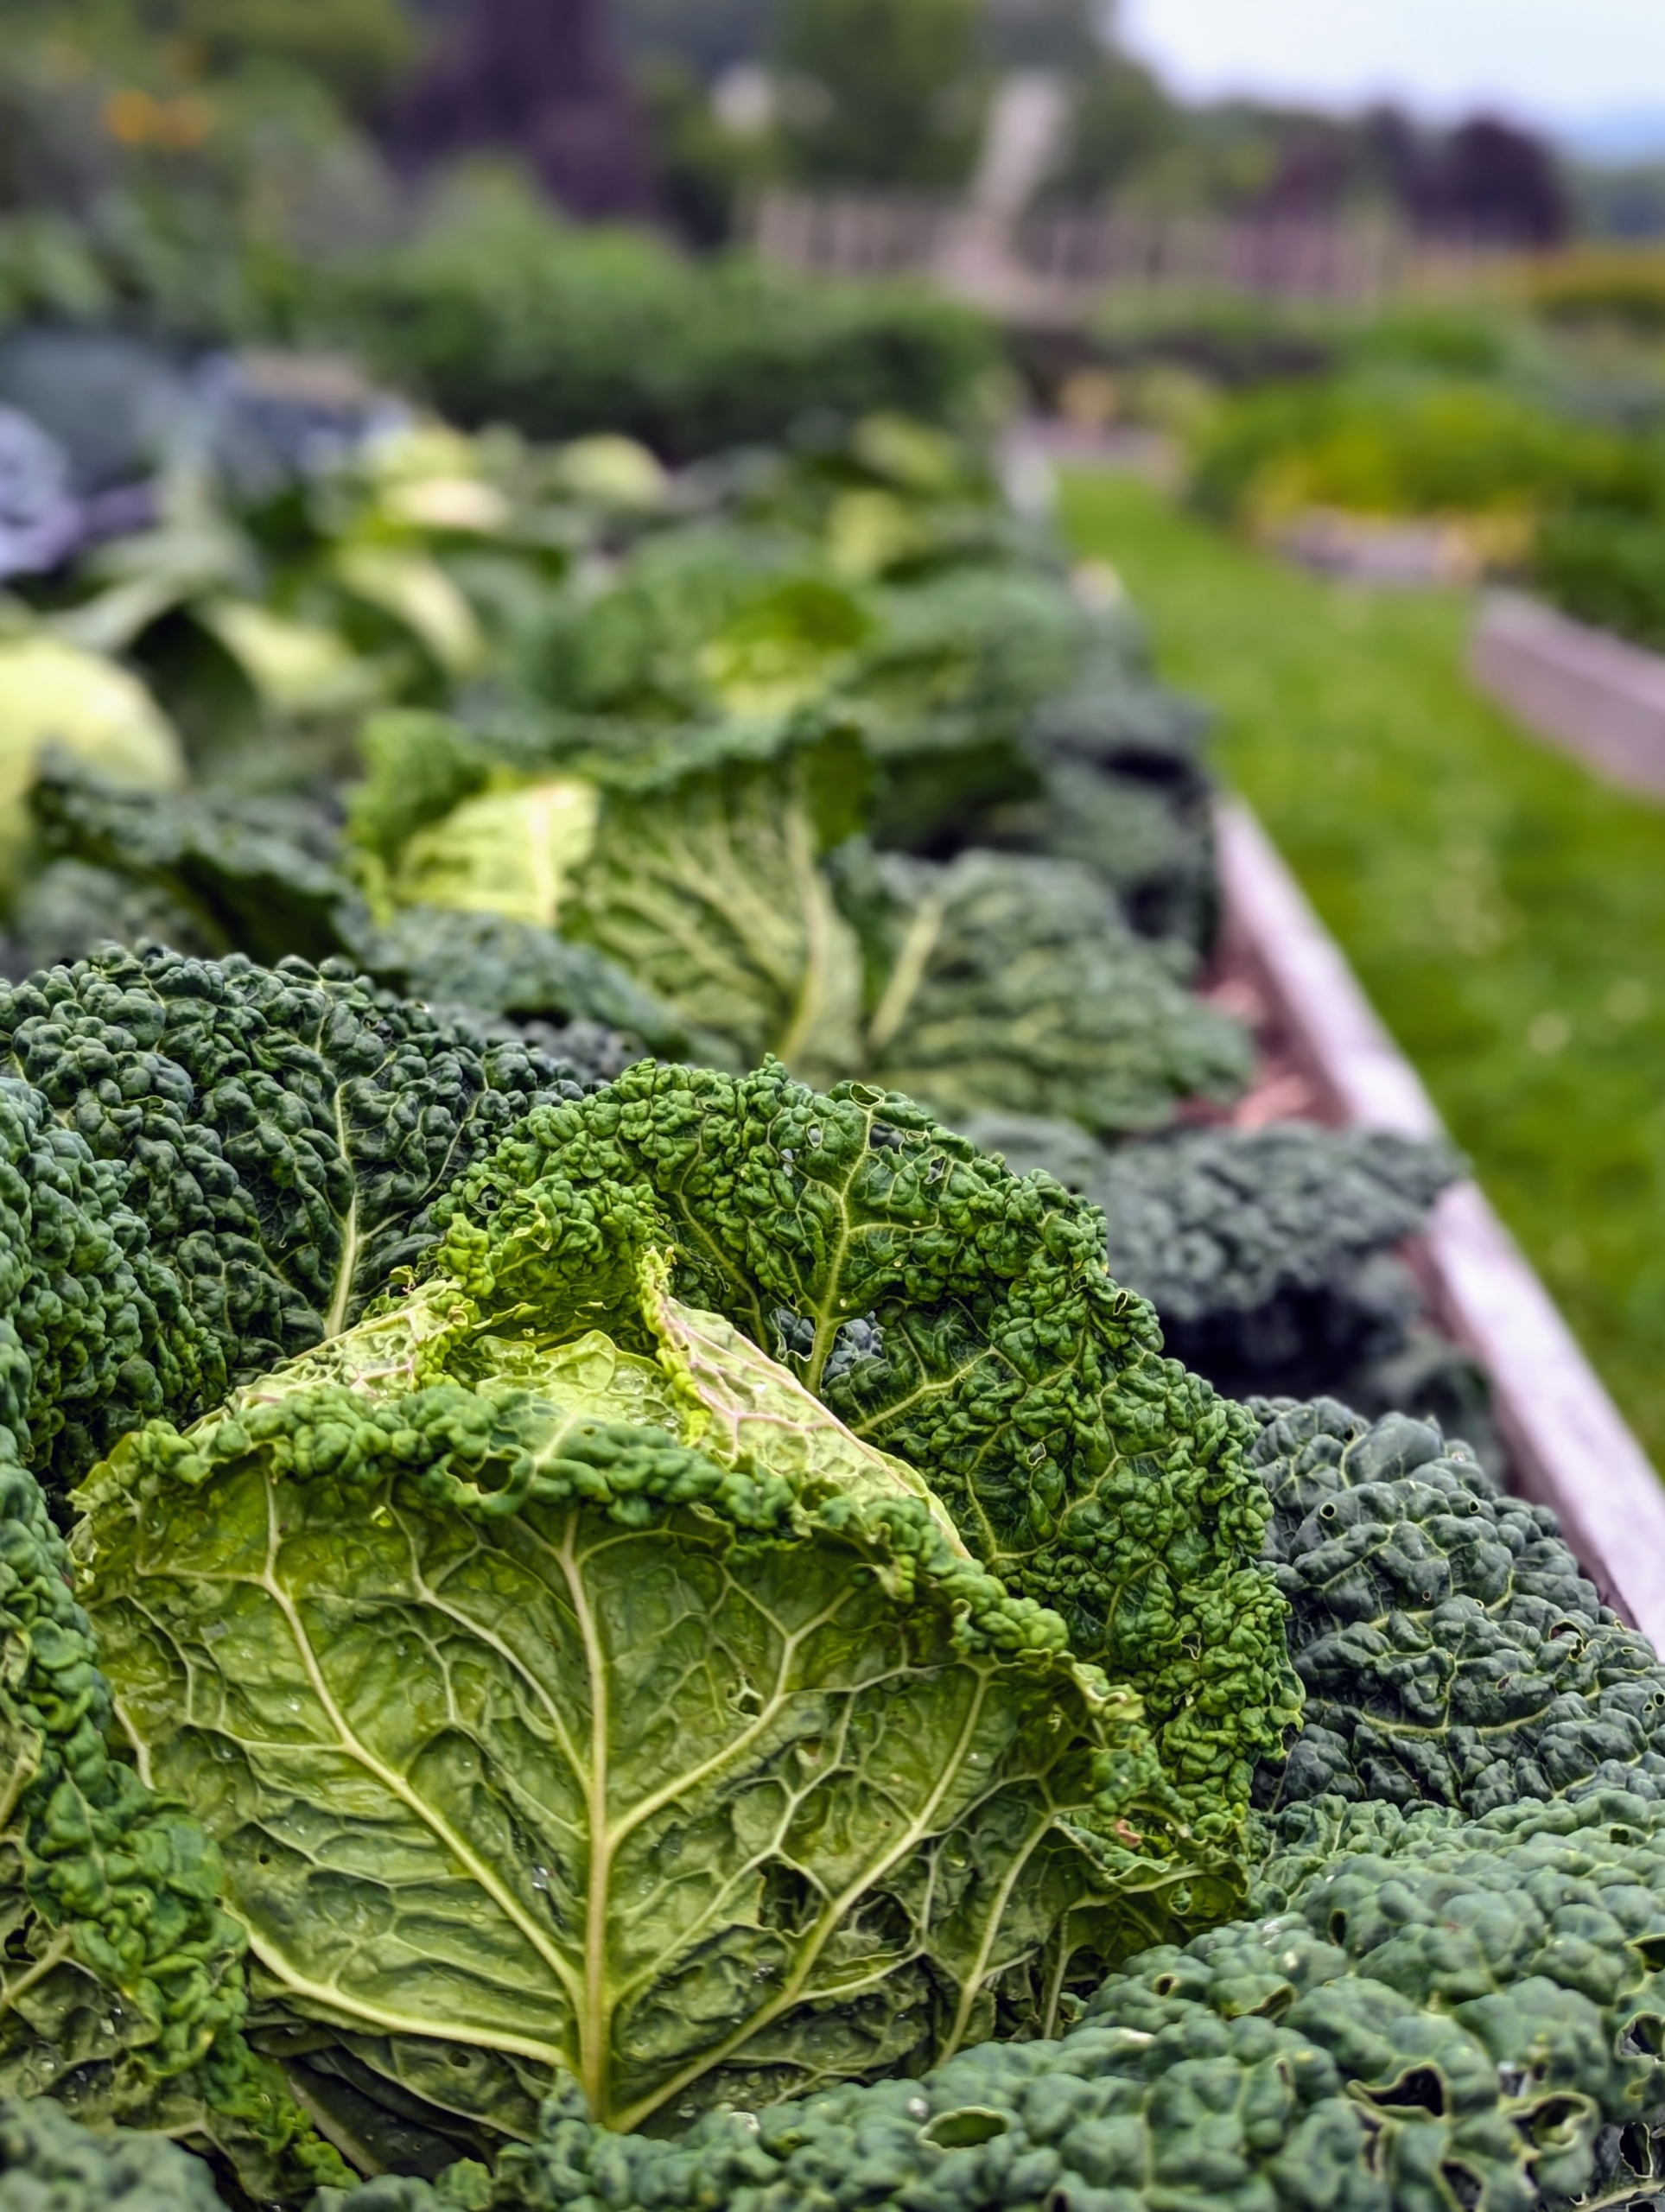
To get the best health benefits from cabbage, it’s good to include all three varieties into the diet – Savoy, red, and green. I have so much cabbage to share with family and friends.
The radish is an edible root vegetable of the Brassicaceae family. Radishes are grown and consumed throughout the world, and mostly eaten raw as a crunchy salad vegetable. Long scarlet radishes like this one have a straight, tapered shape, similar in appearance to a carrot with curved shoulders and a distinct point.
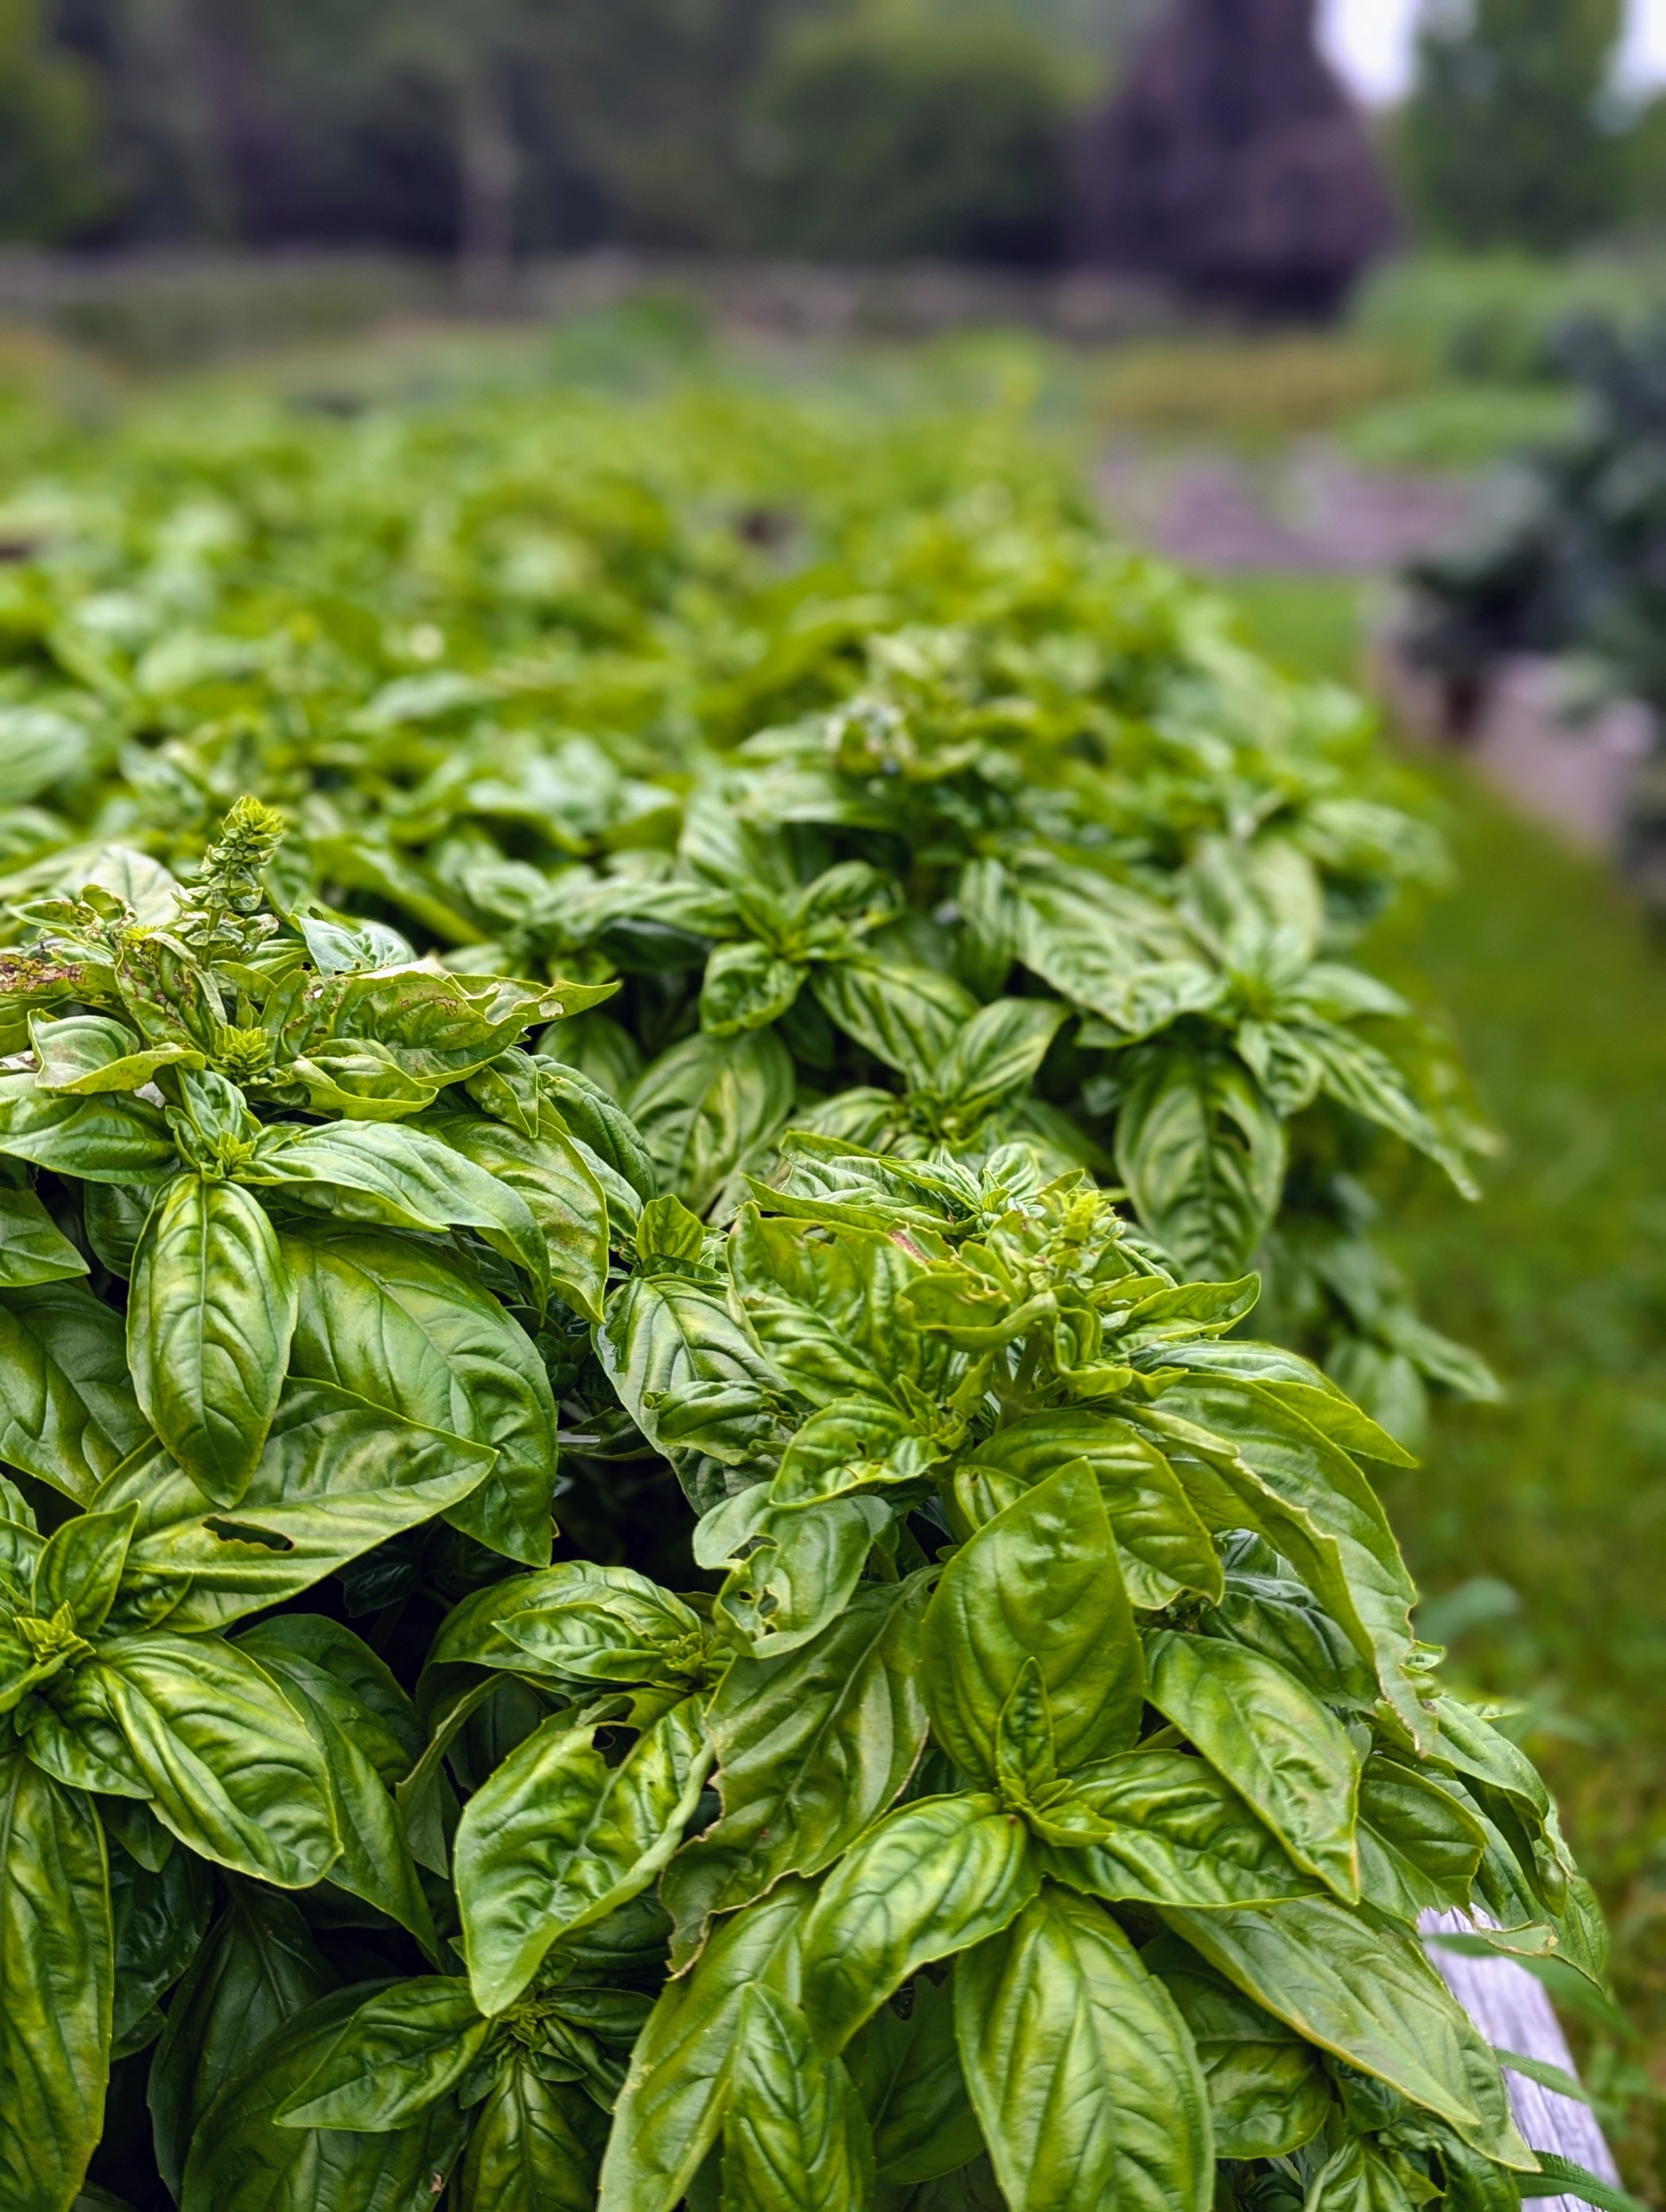
I need lots of basil. It’s great for many dishes, such as salads, soups, pasta sauces, and pizza. Its leaves can be used whole or blended into sauces, puréed into soups, or chopped up for salads. Here is my bed of basil.
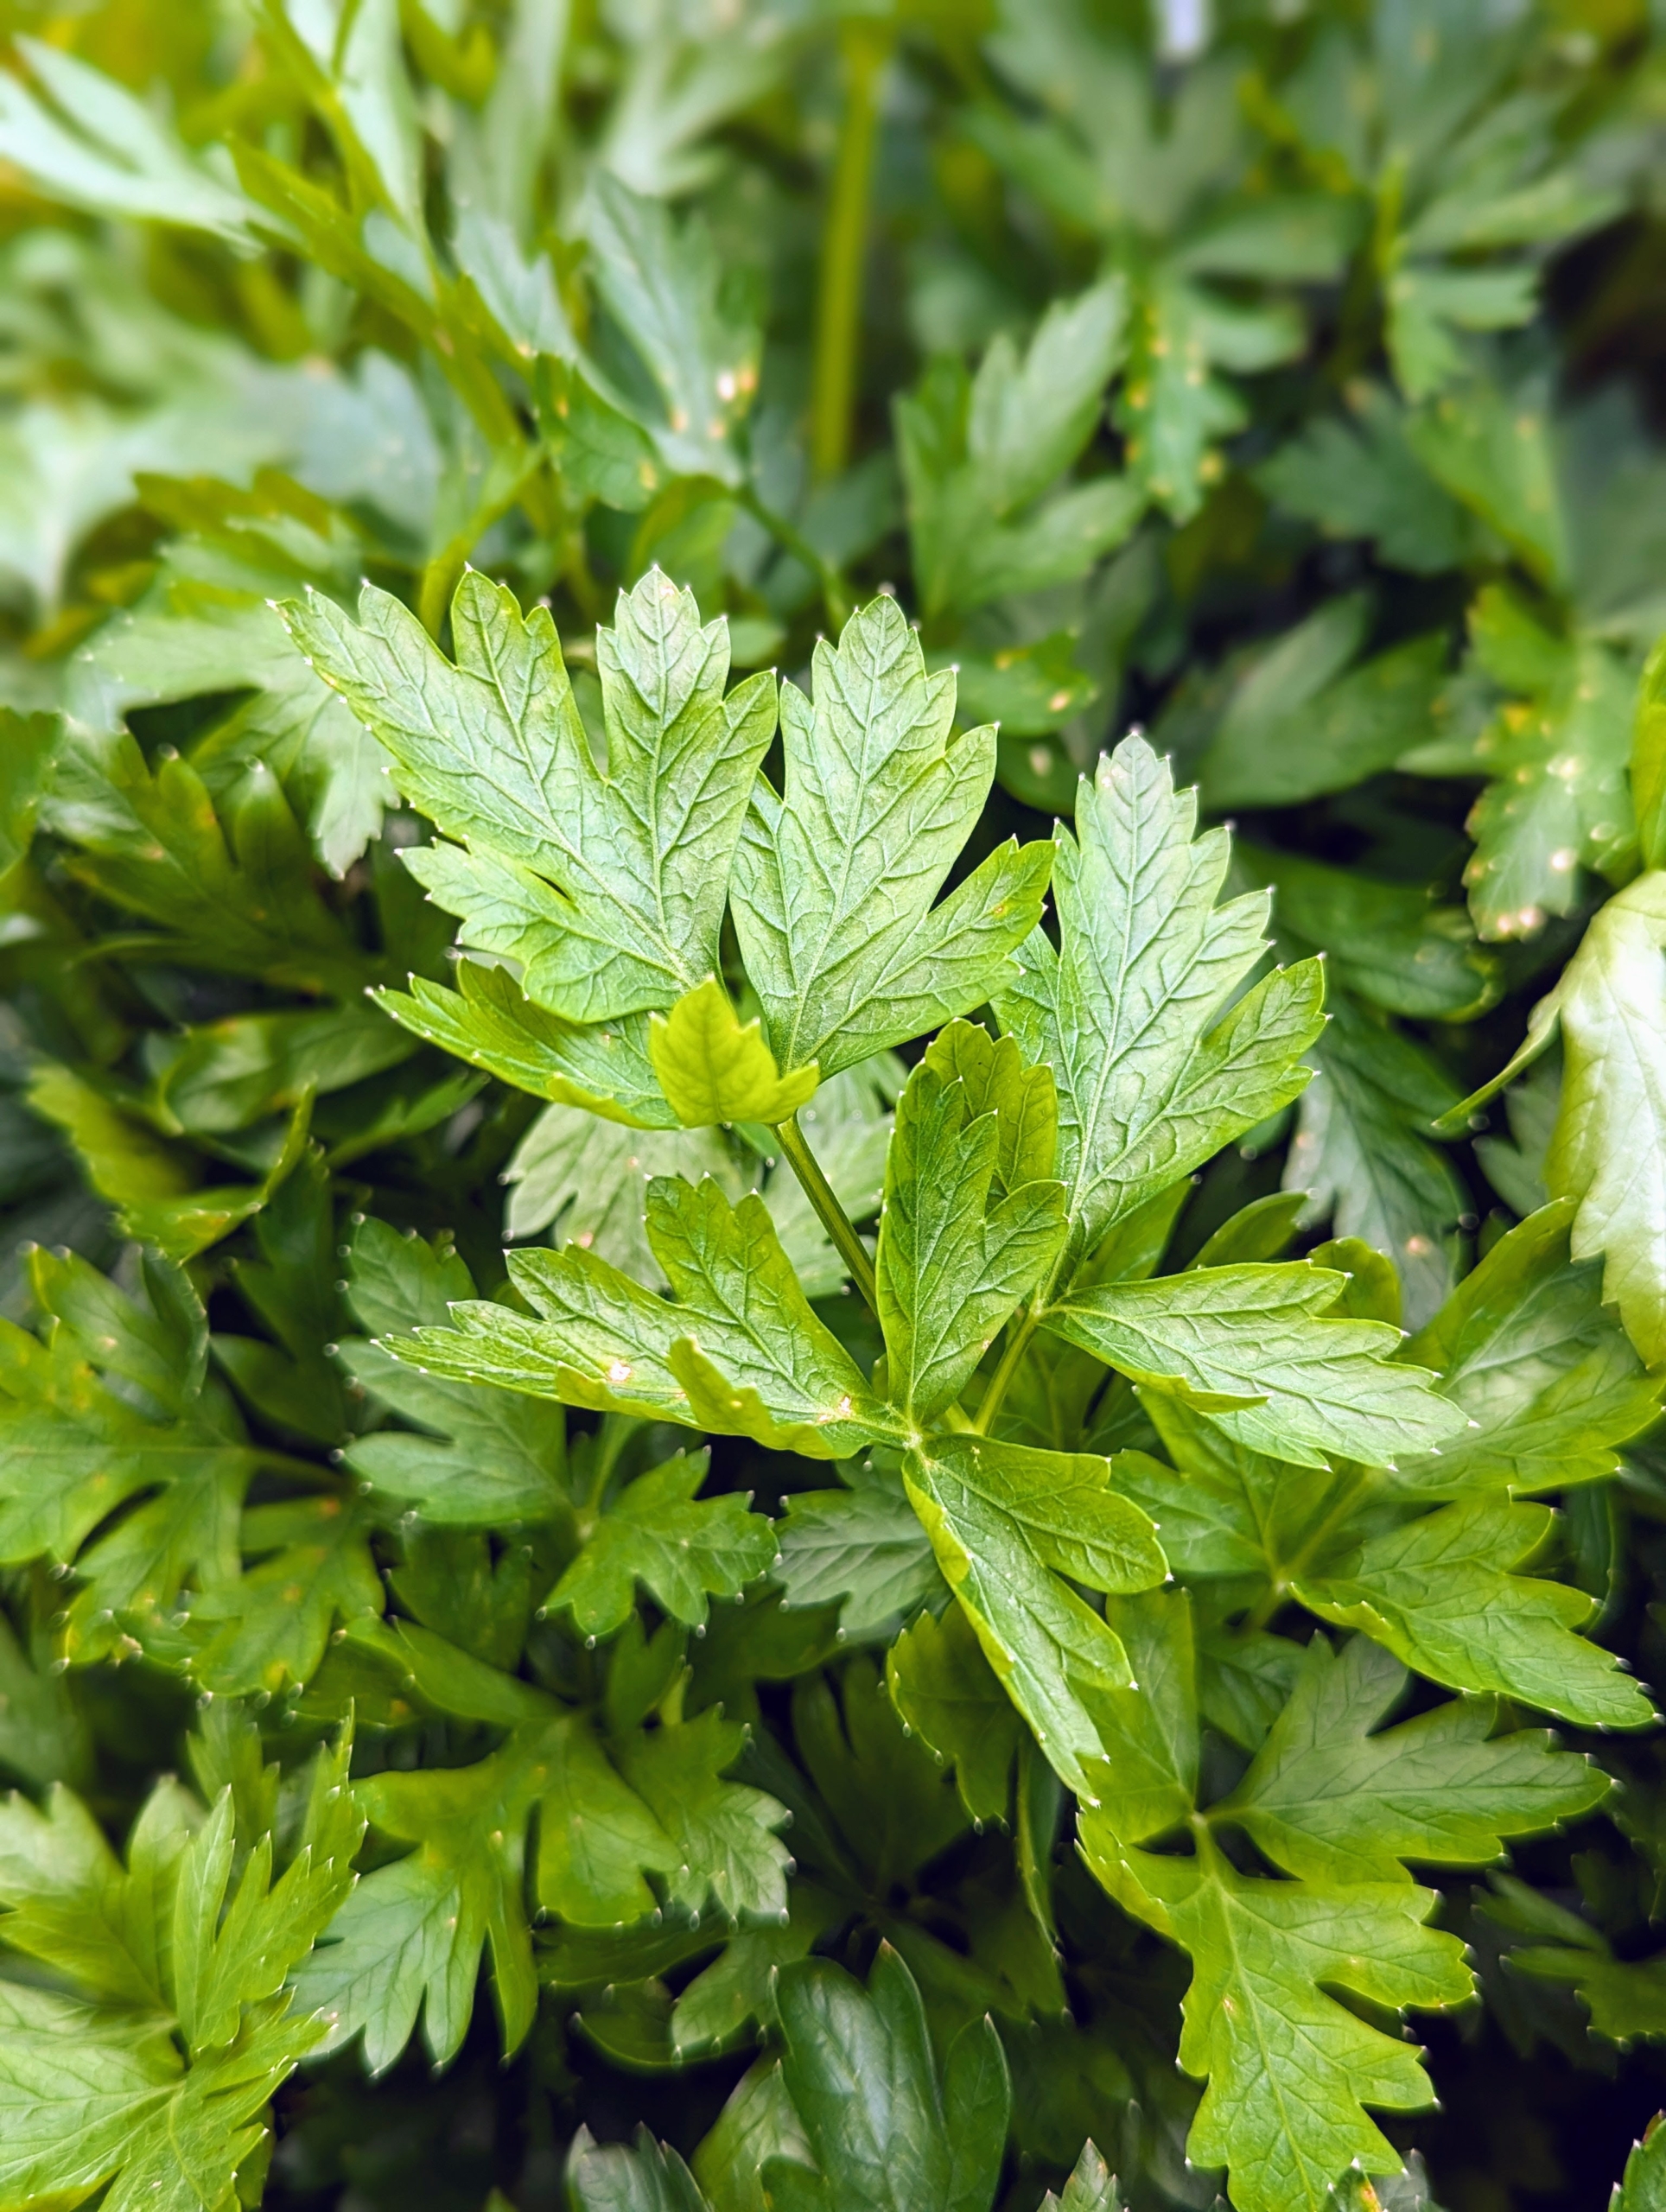
Also always growing here at the farm is parsley. This will find its way into my morning green juice. Parsley is rich in vitamins K, C, and other antioxidants. It has a bright, herbaceous, and slightly bitter taste.
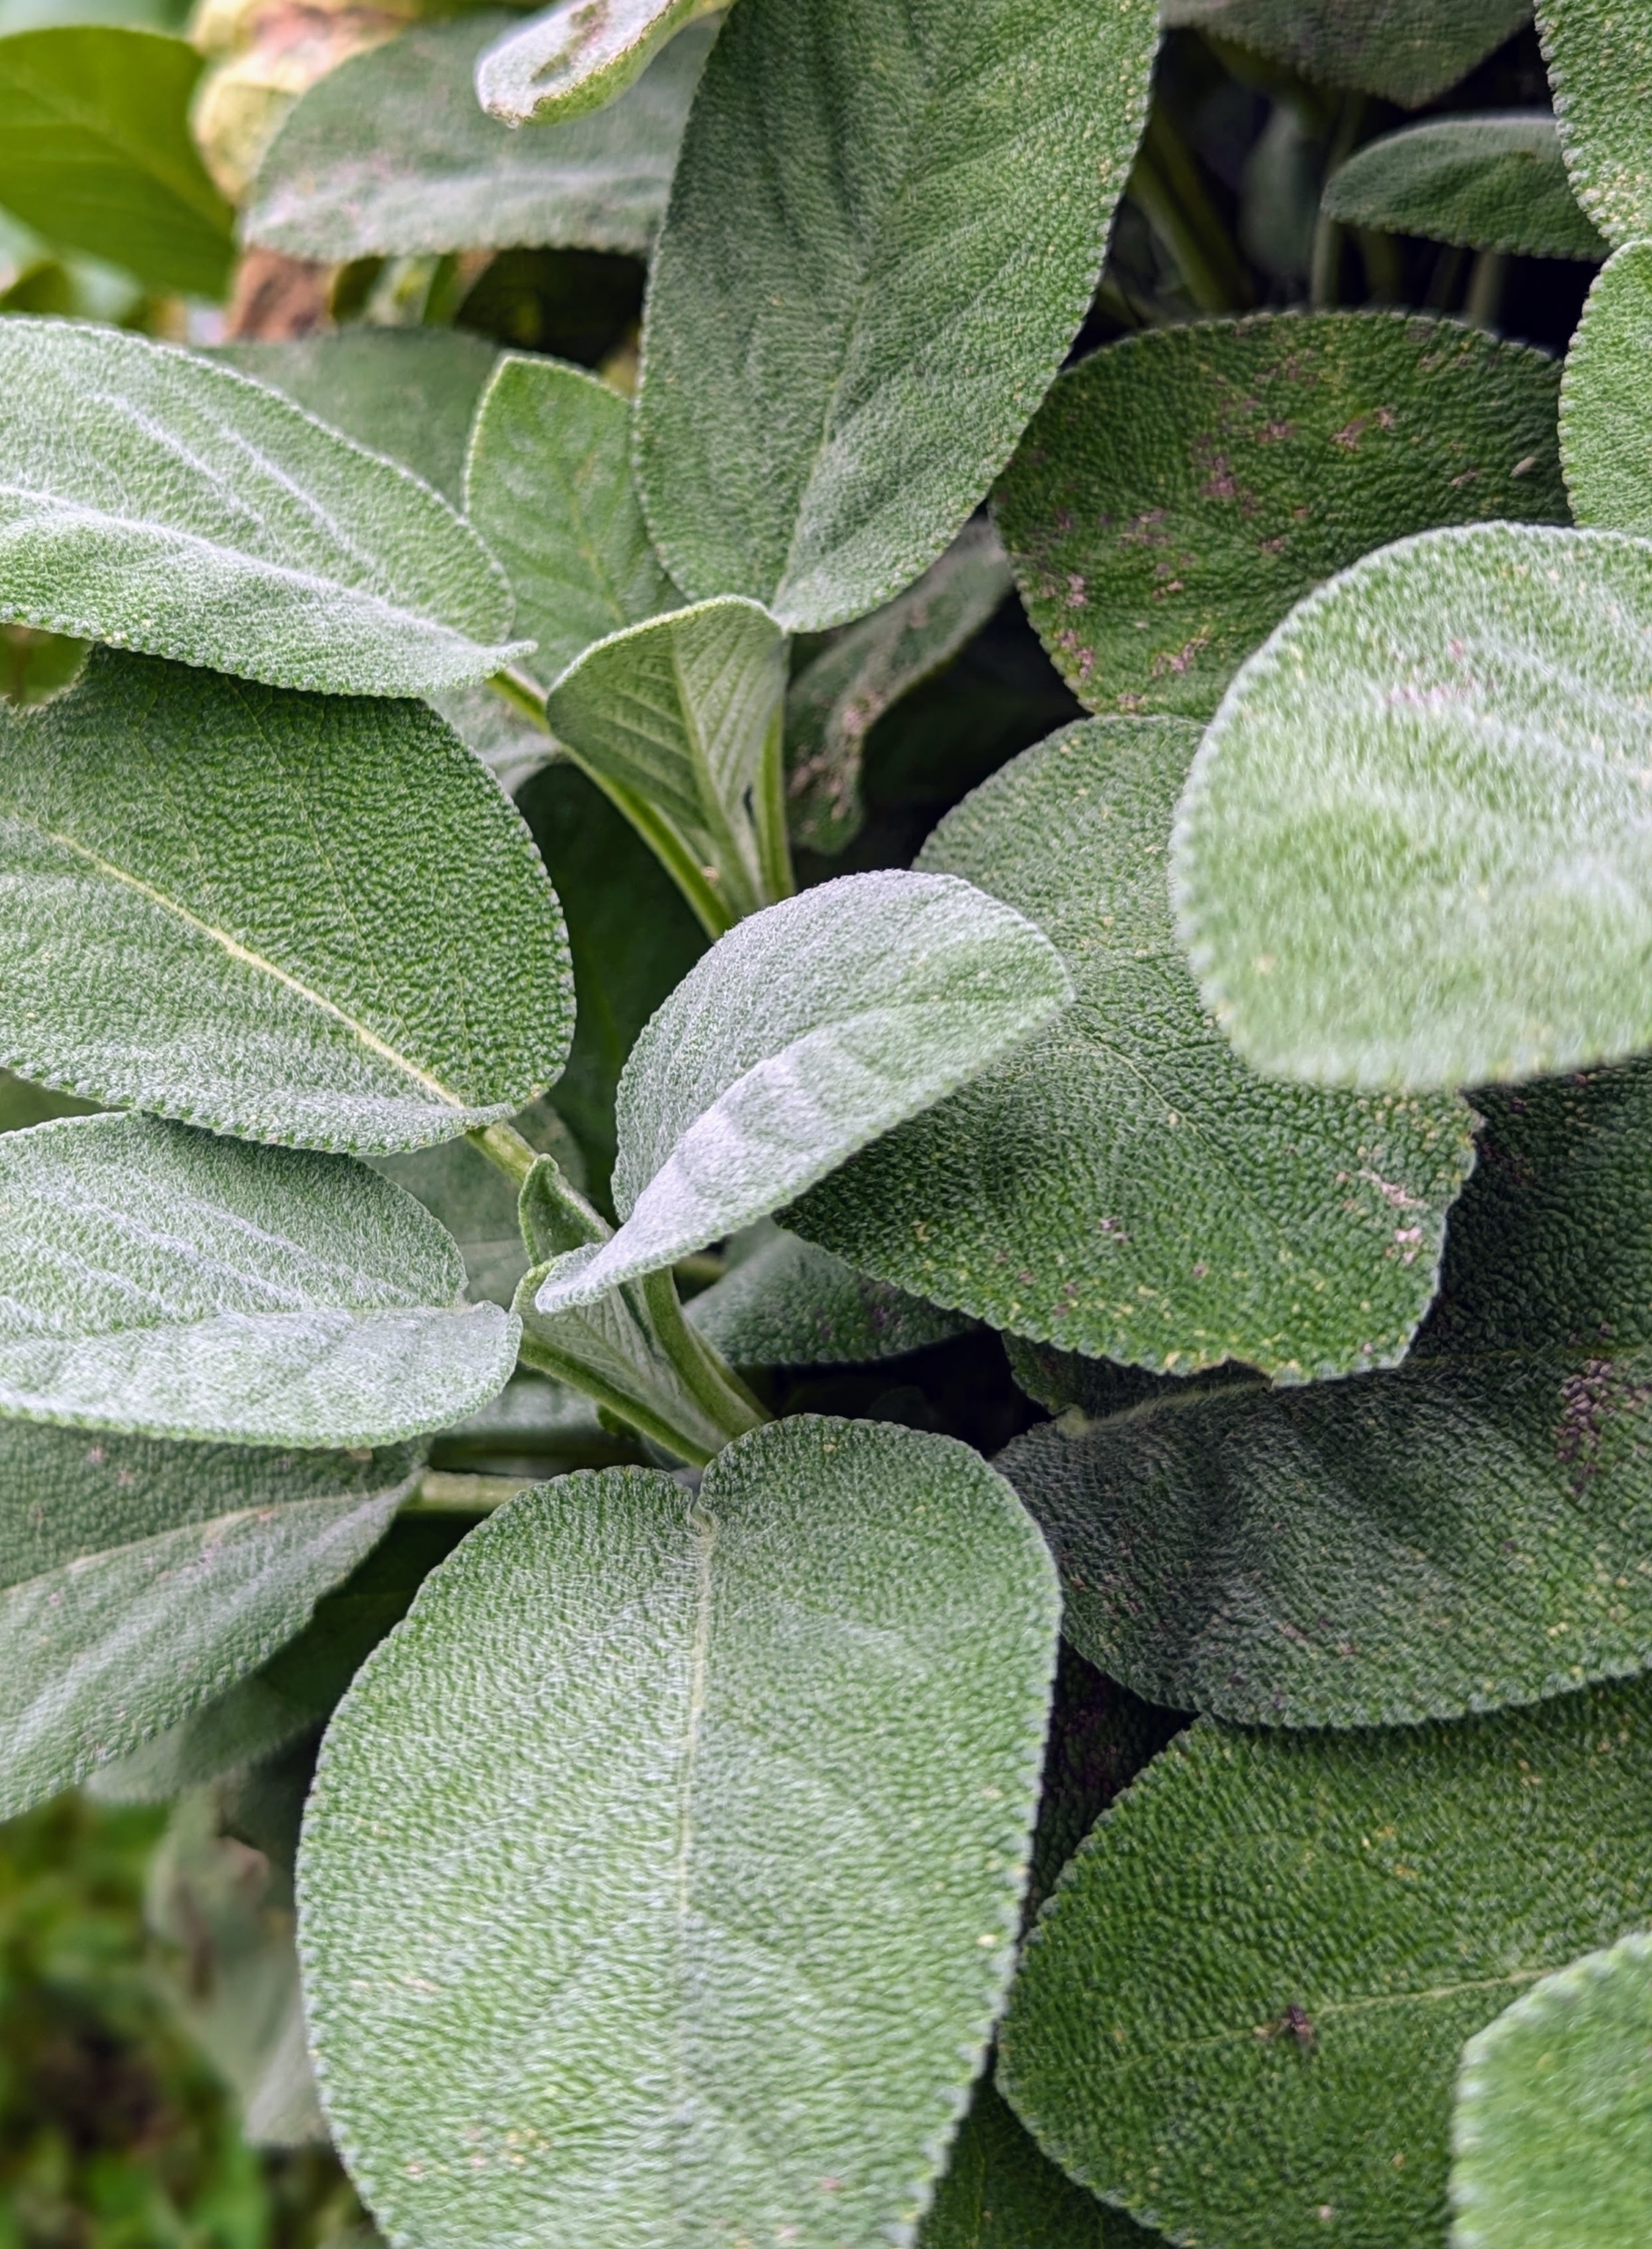
And many will recognize the leaves of sage. Common sage, Salvia officinalis, leaves are often grayish-green, but can also be purple, silver, or variegated. They are pebbly, slightly fuzzy, and can grow up to five inches long.
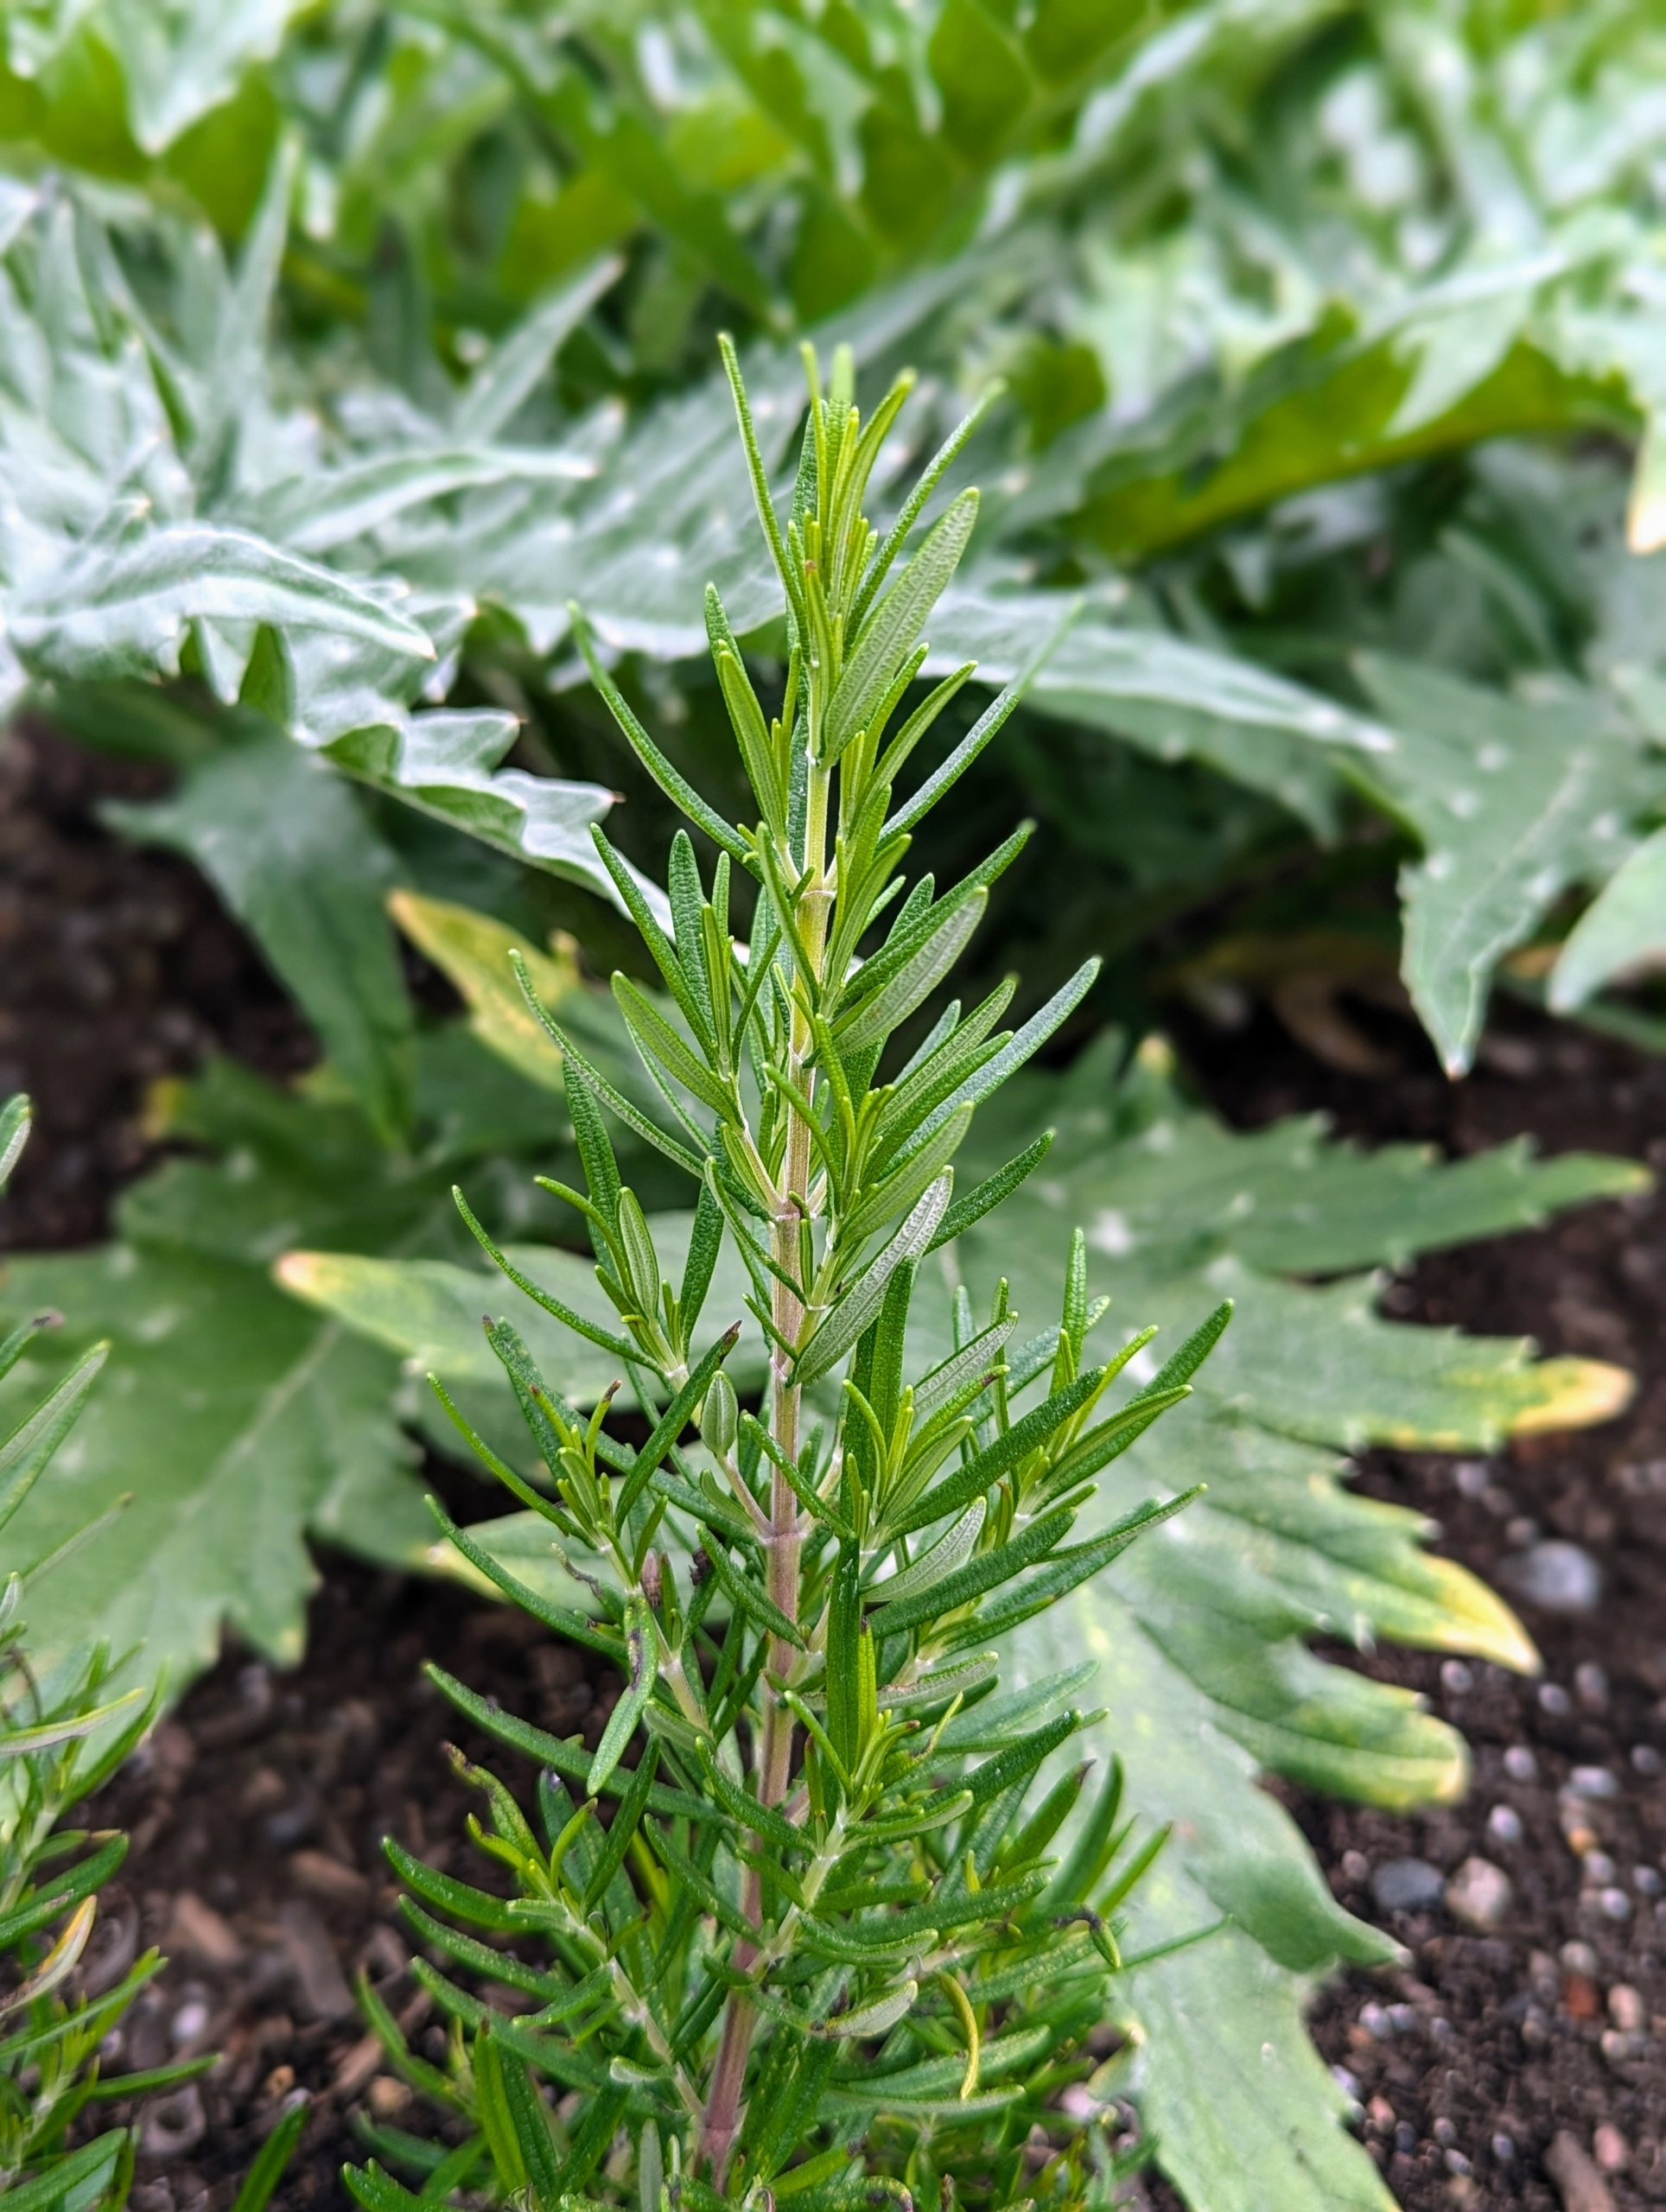
Another attractive herb is rosemary. Rosemary is a member of the mint family Lamiaceae and is often used as a culinary condiment.
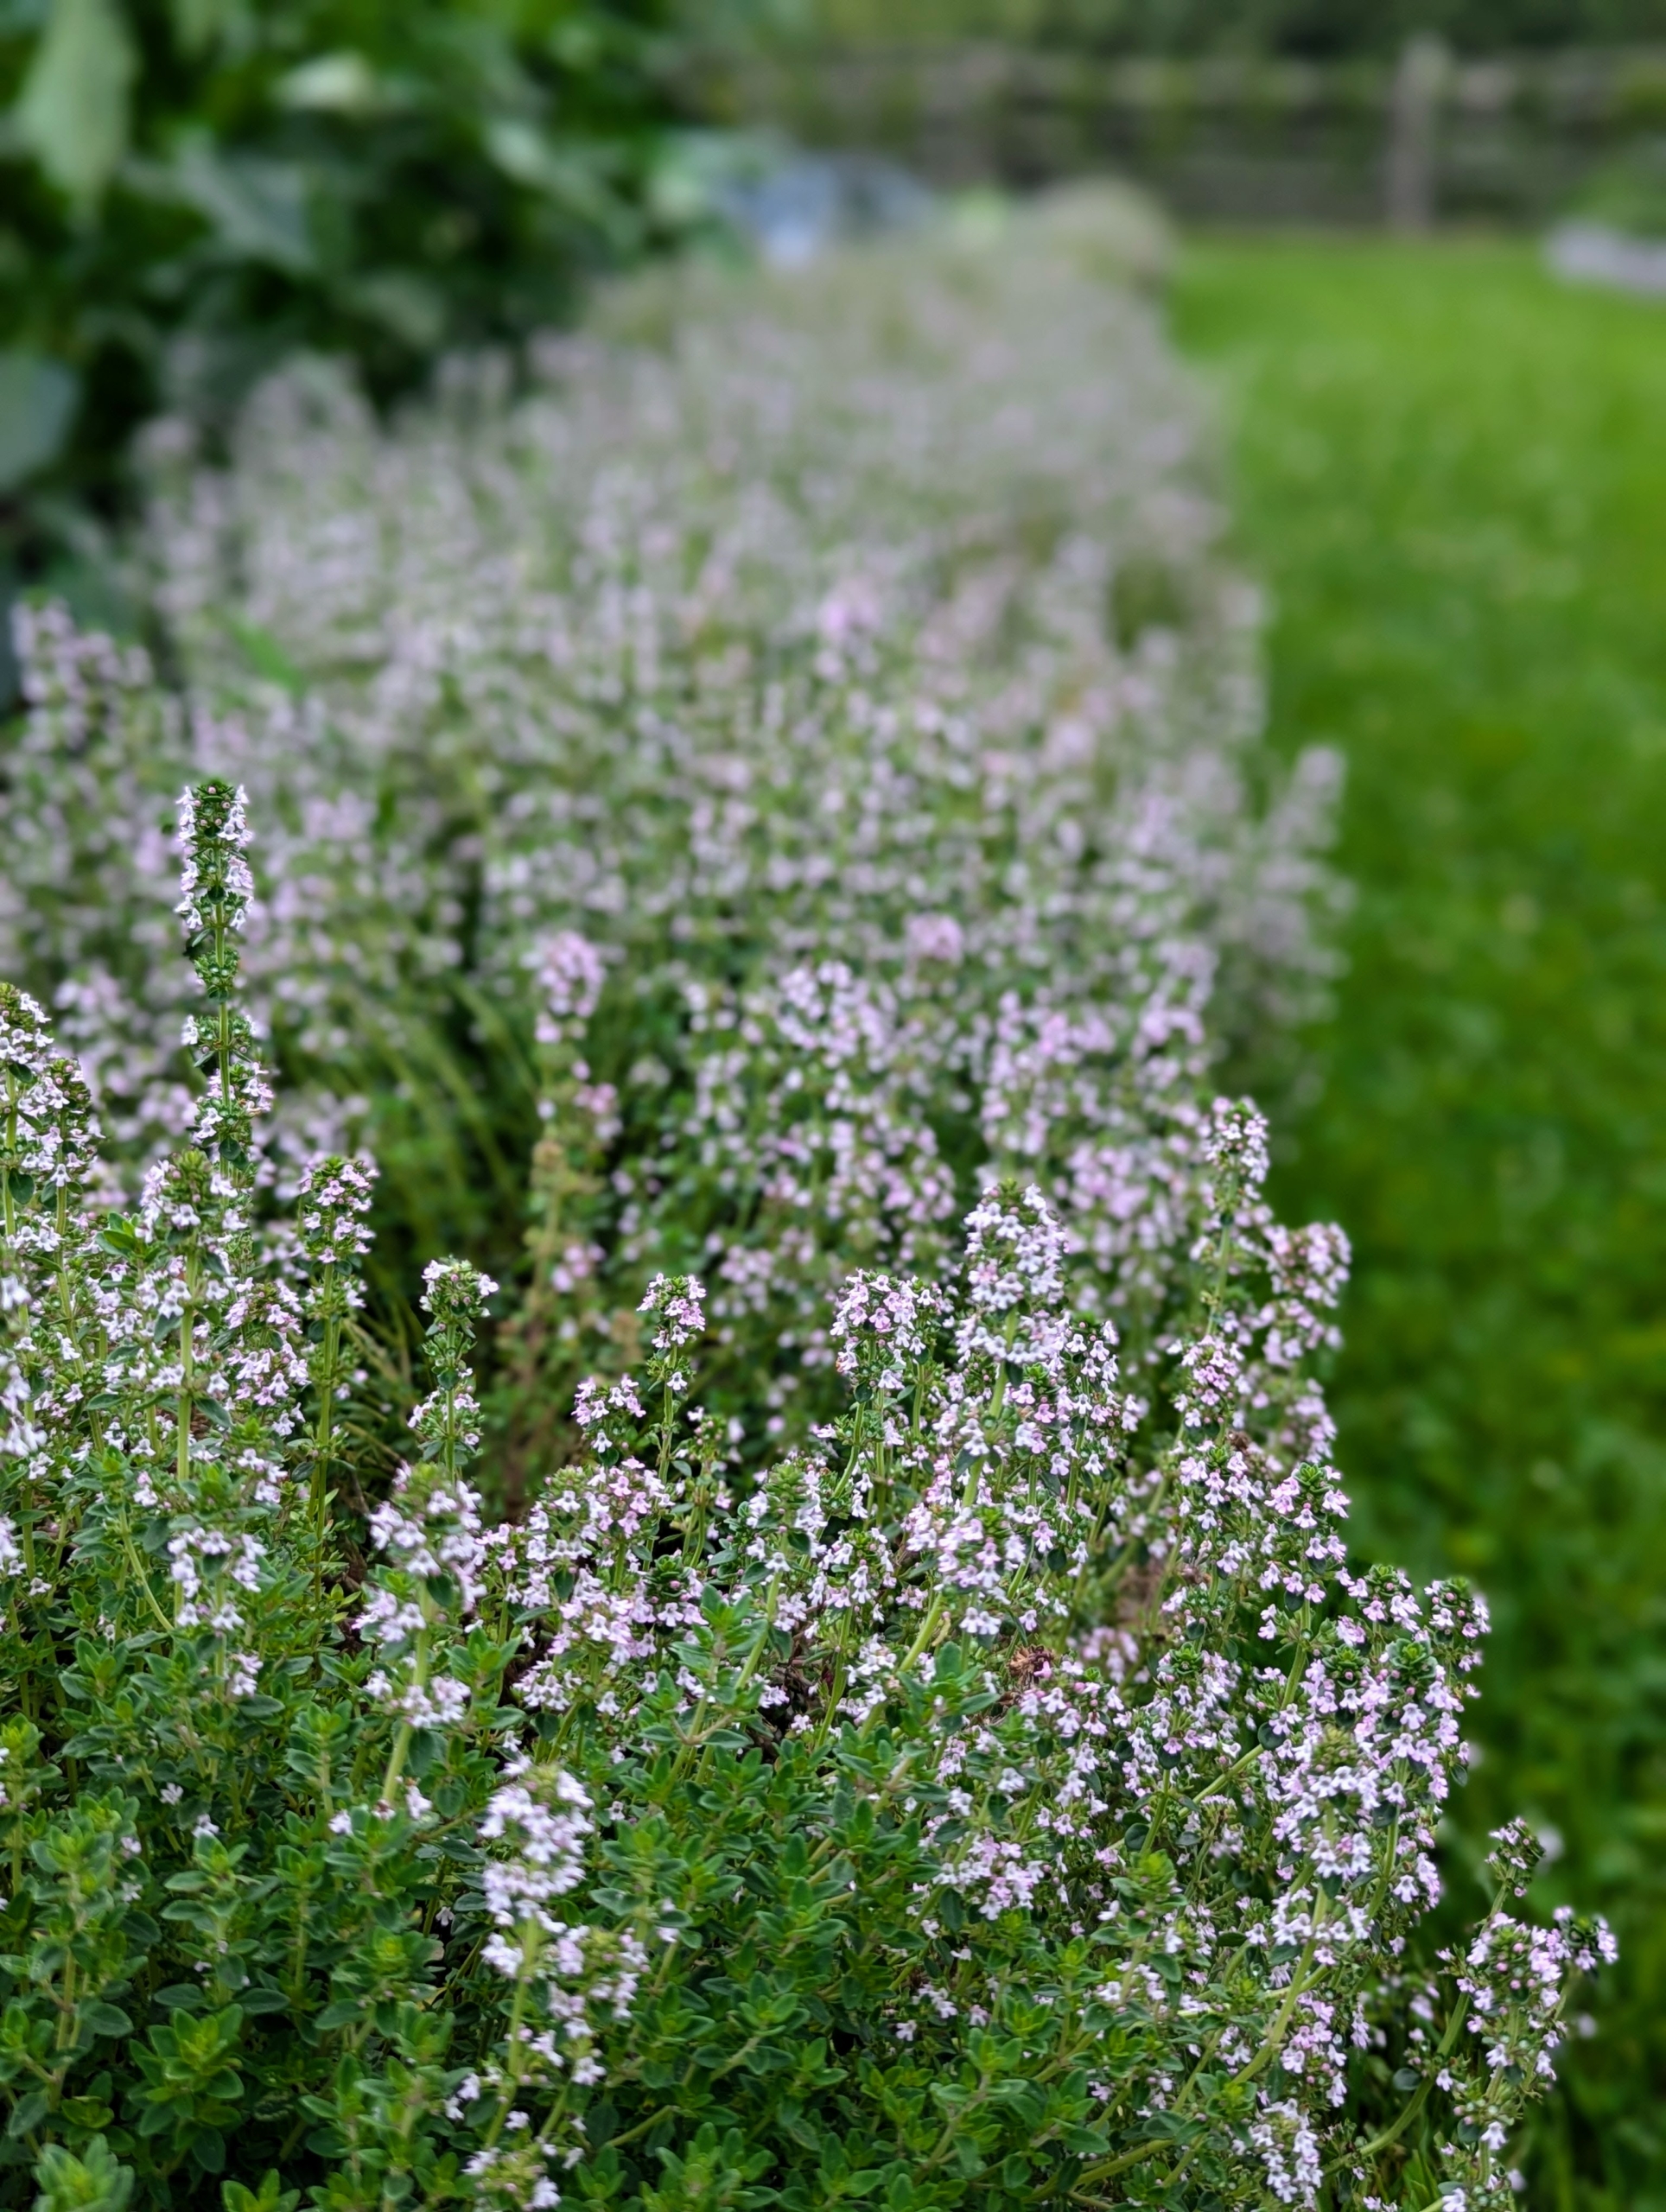
Thyme is an herb whose small leaves grow on clusters of thin stems. It is delicious with fish or poultry and imparts a lemony flavor.
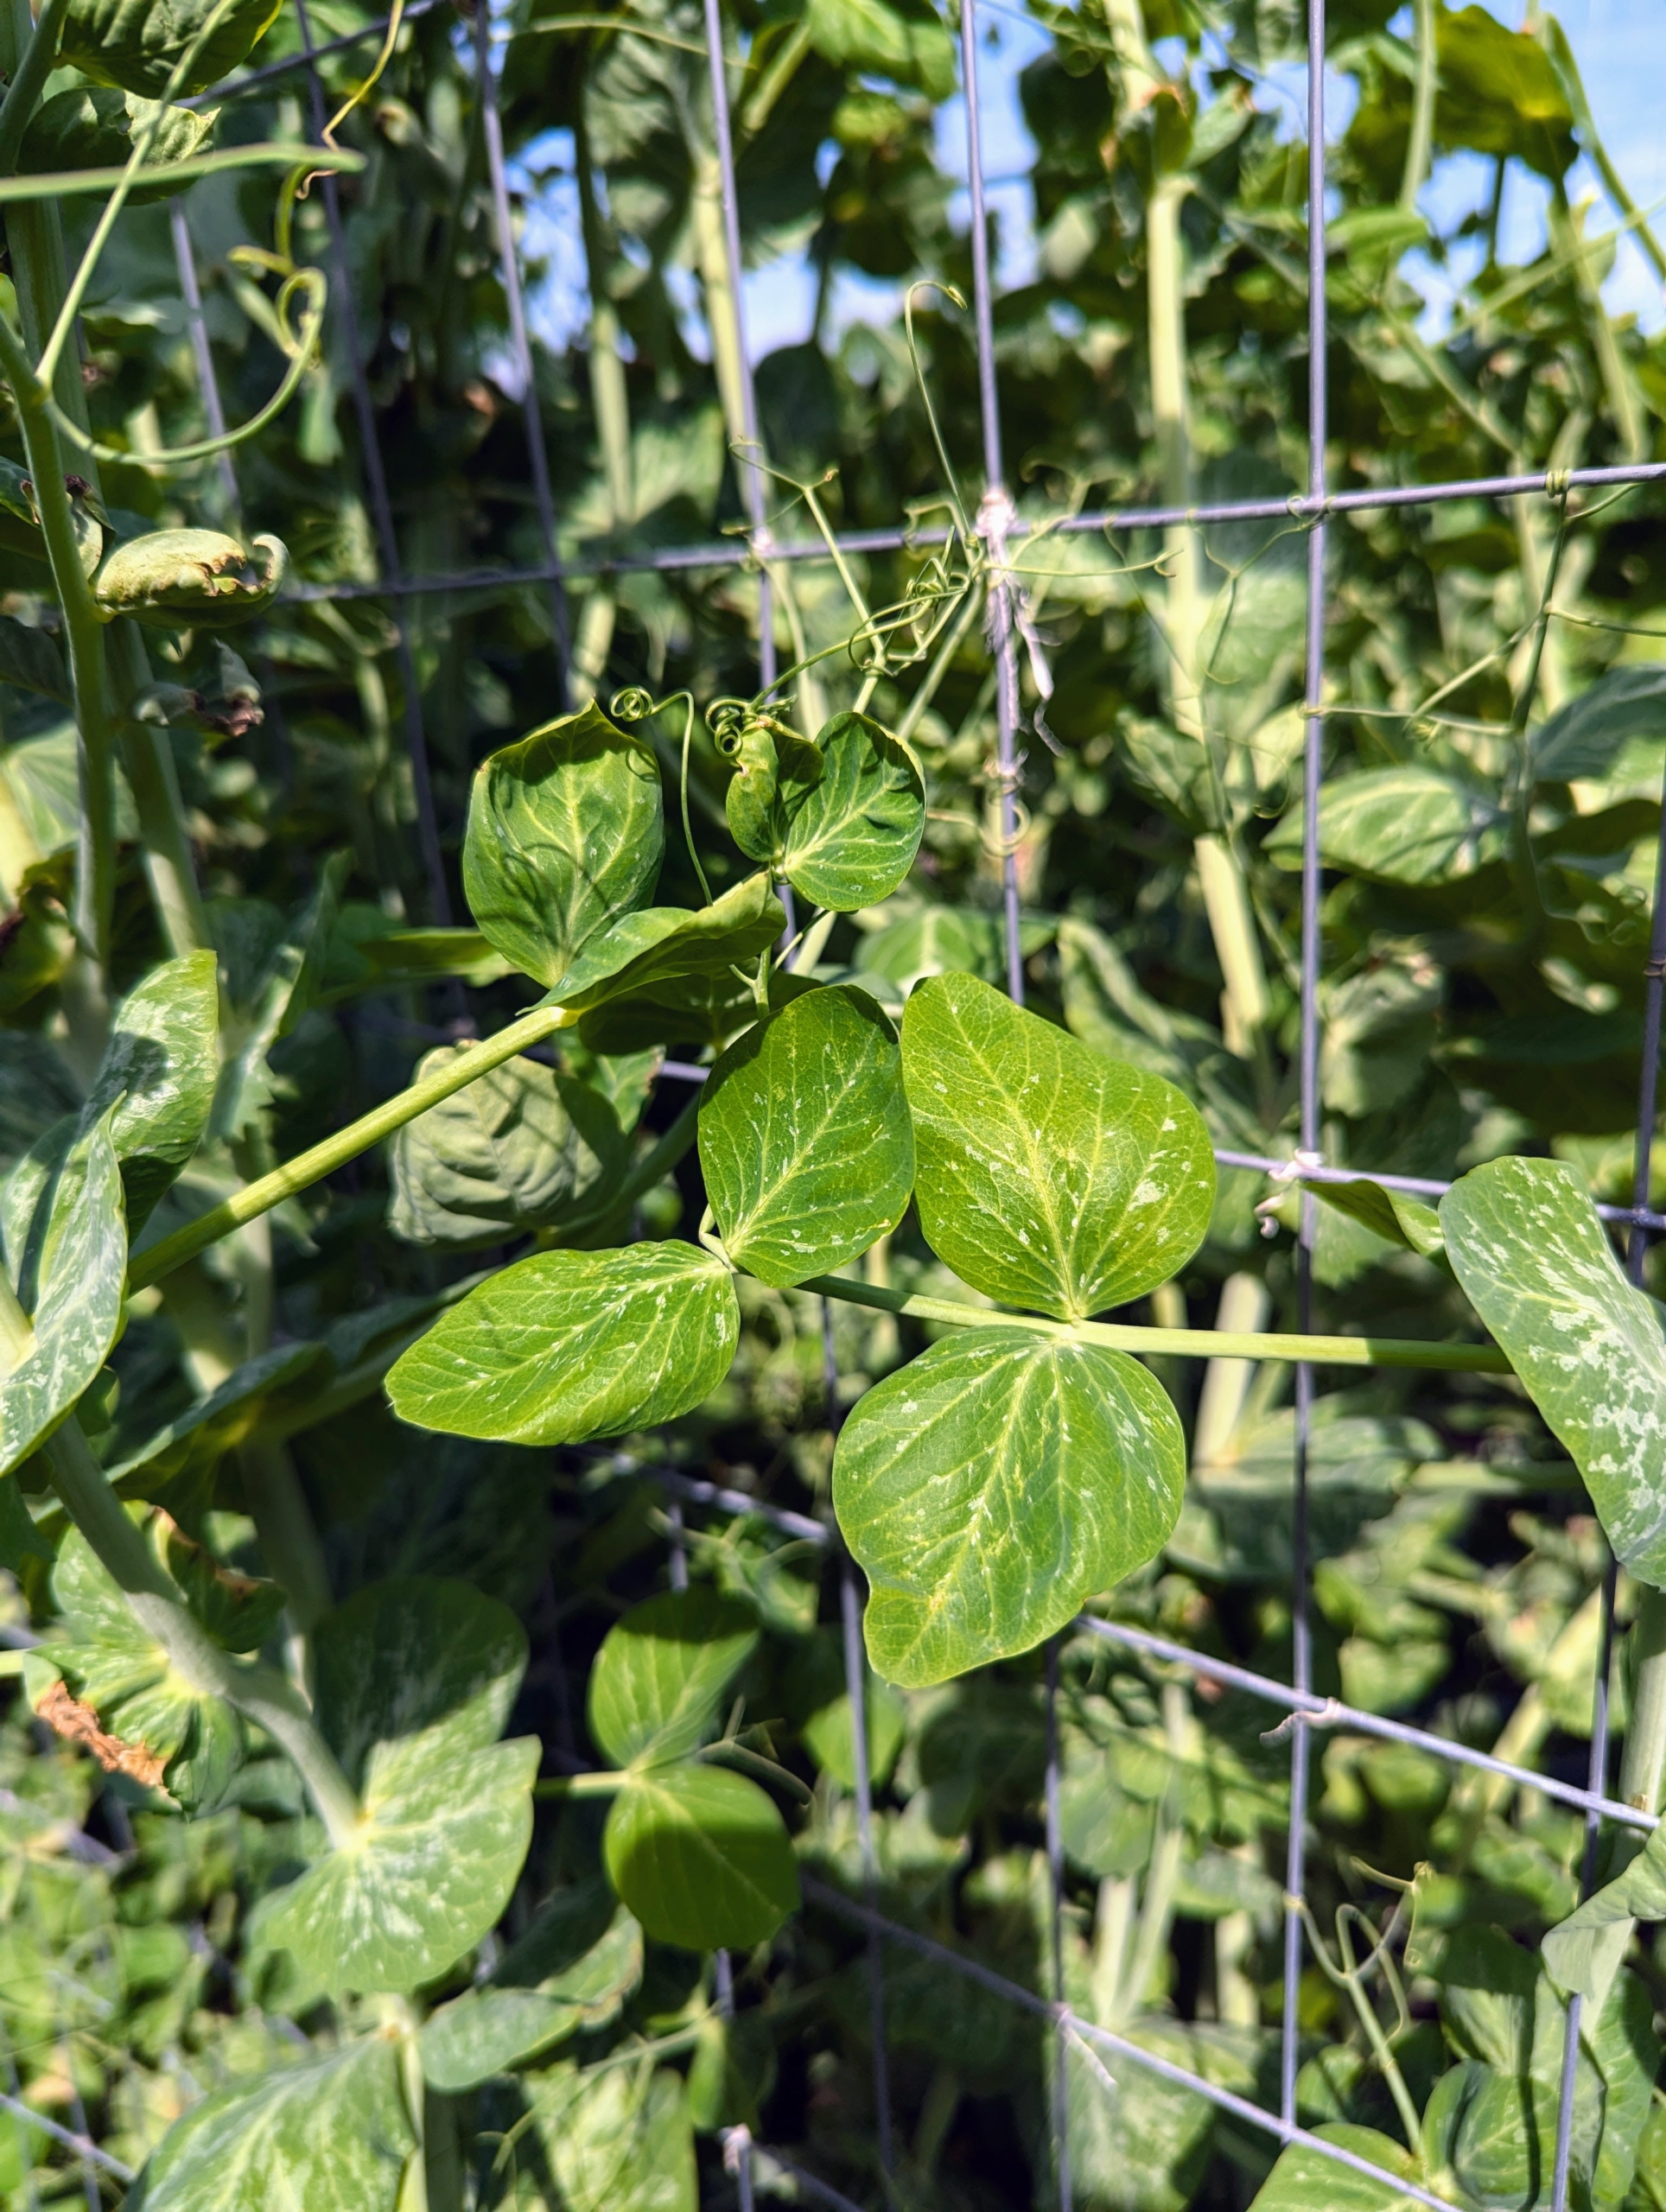
In a center bed, along this trellis we put up, are lots of peas – one section for shelling peas, which need to be removed from their pods before eating, and another for edible pods, which can be eaten whole, such as our snap peas. They are best grown on supports to keep them off the ground and away from pests and diseases.
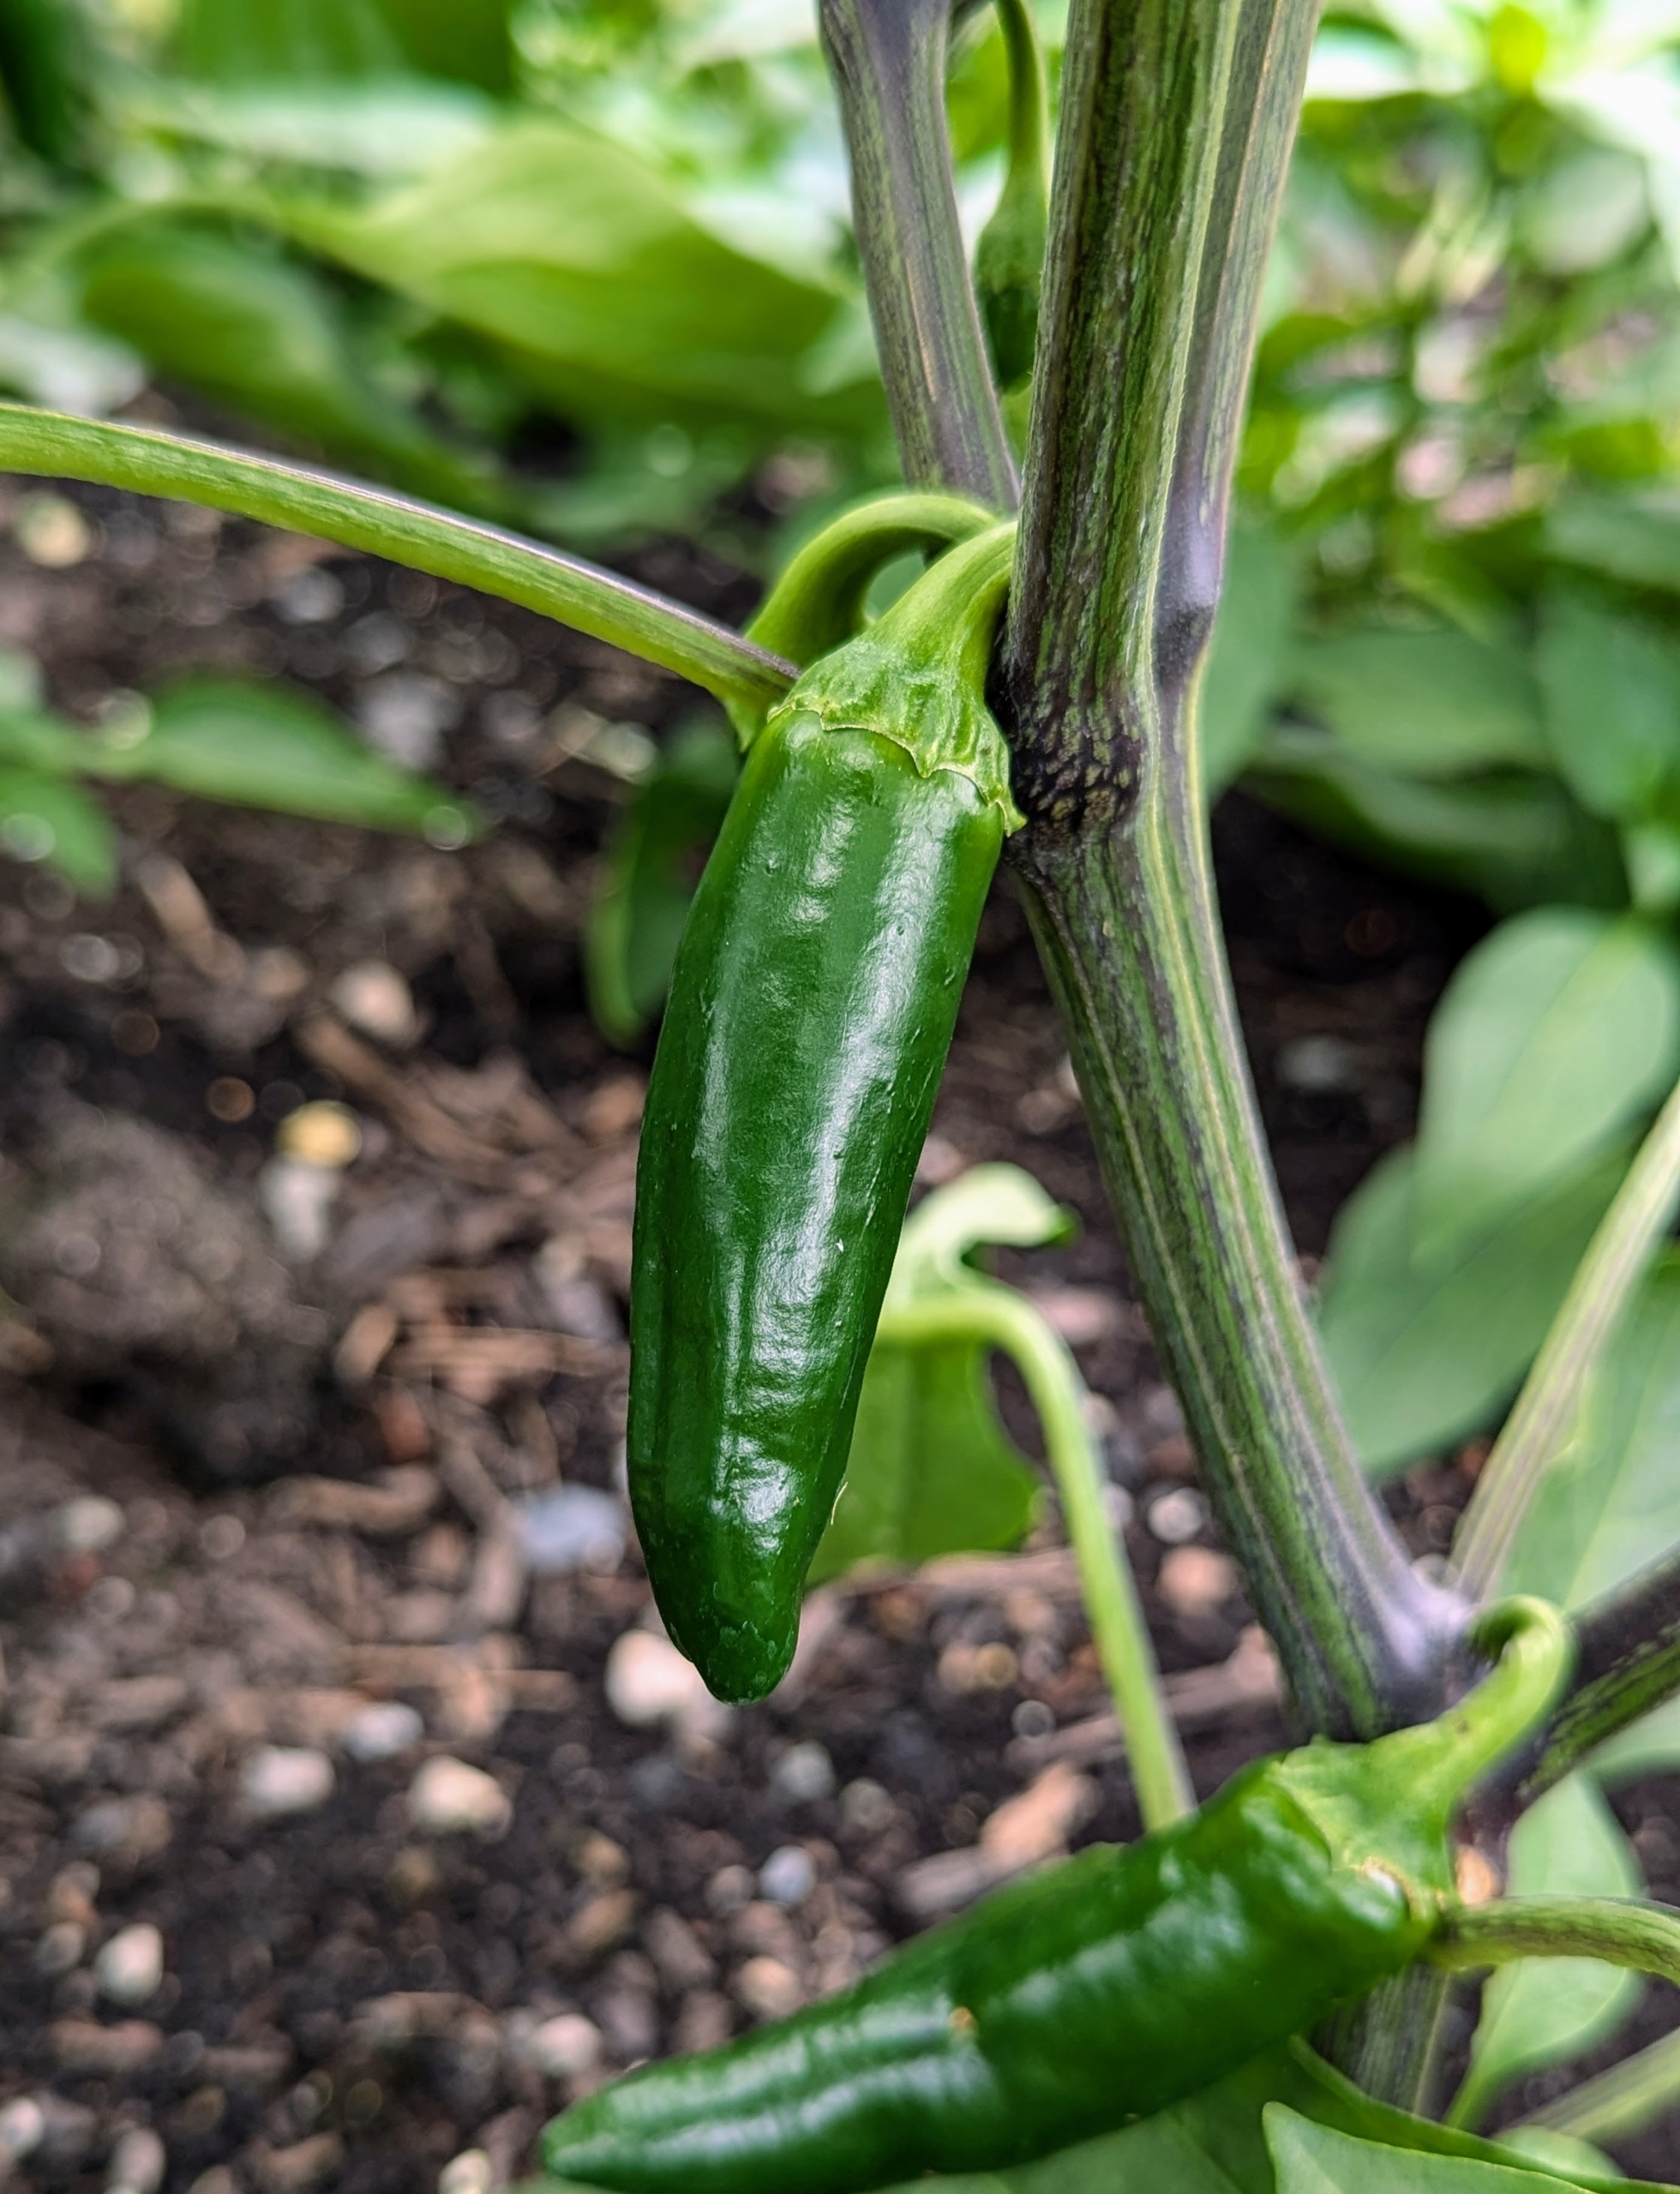
There are lots of hot peppers too. The jalapeño is a medium-sized chili pepper of the species Capsicum annuum. It is mild to medium in pungency depending on the cultivar.
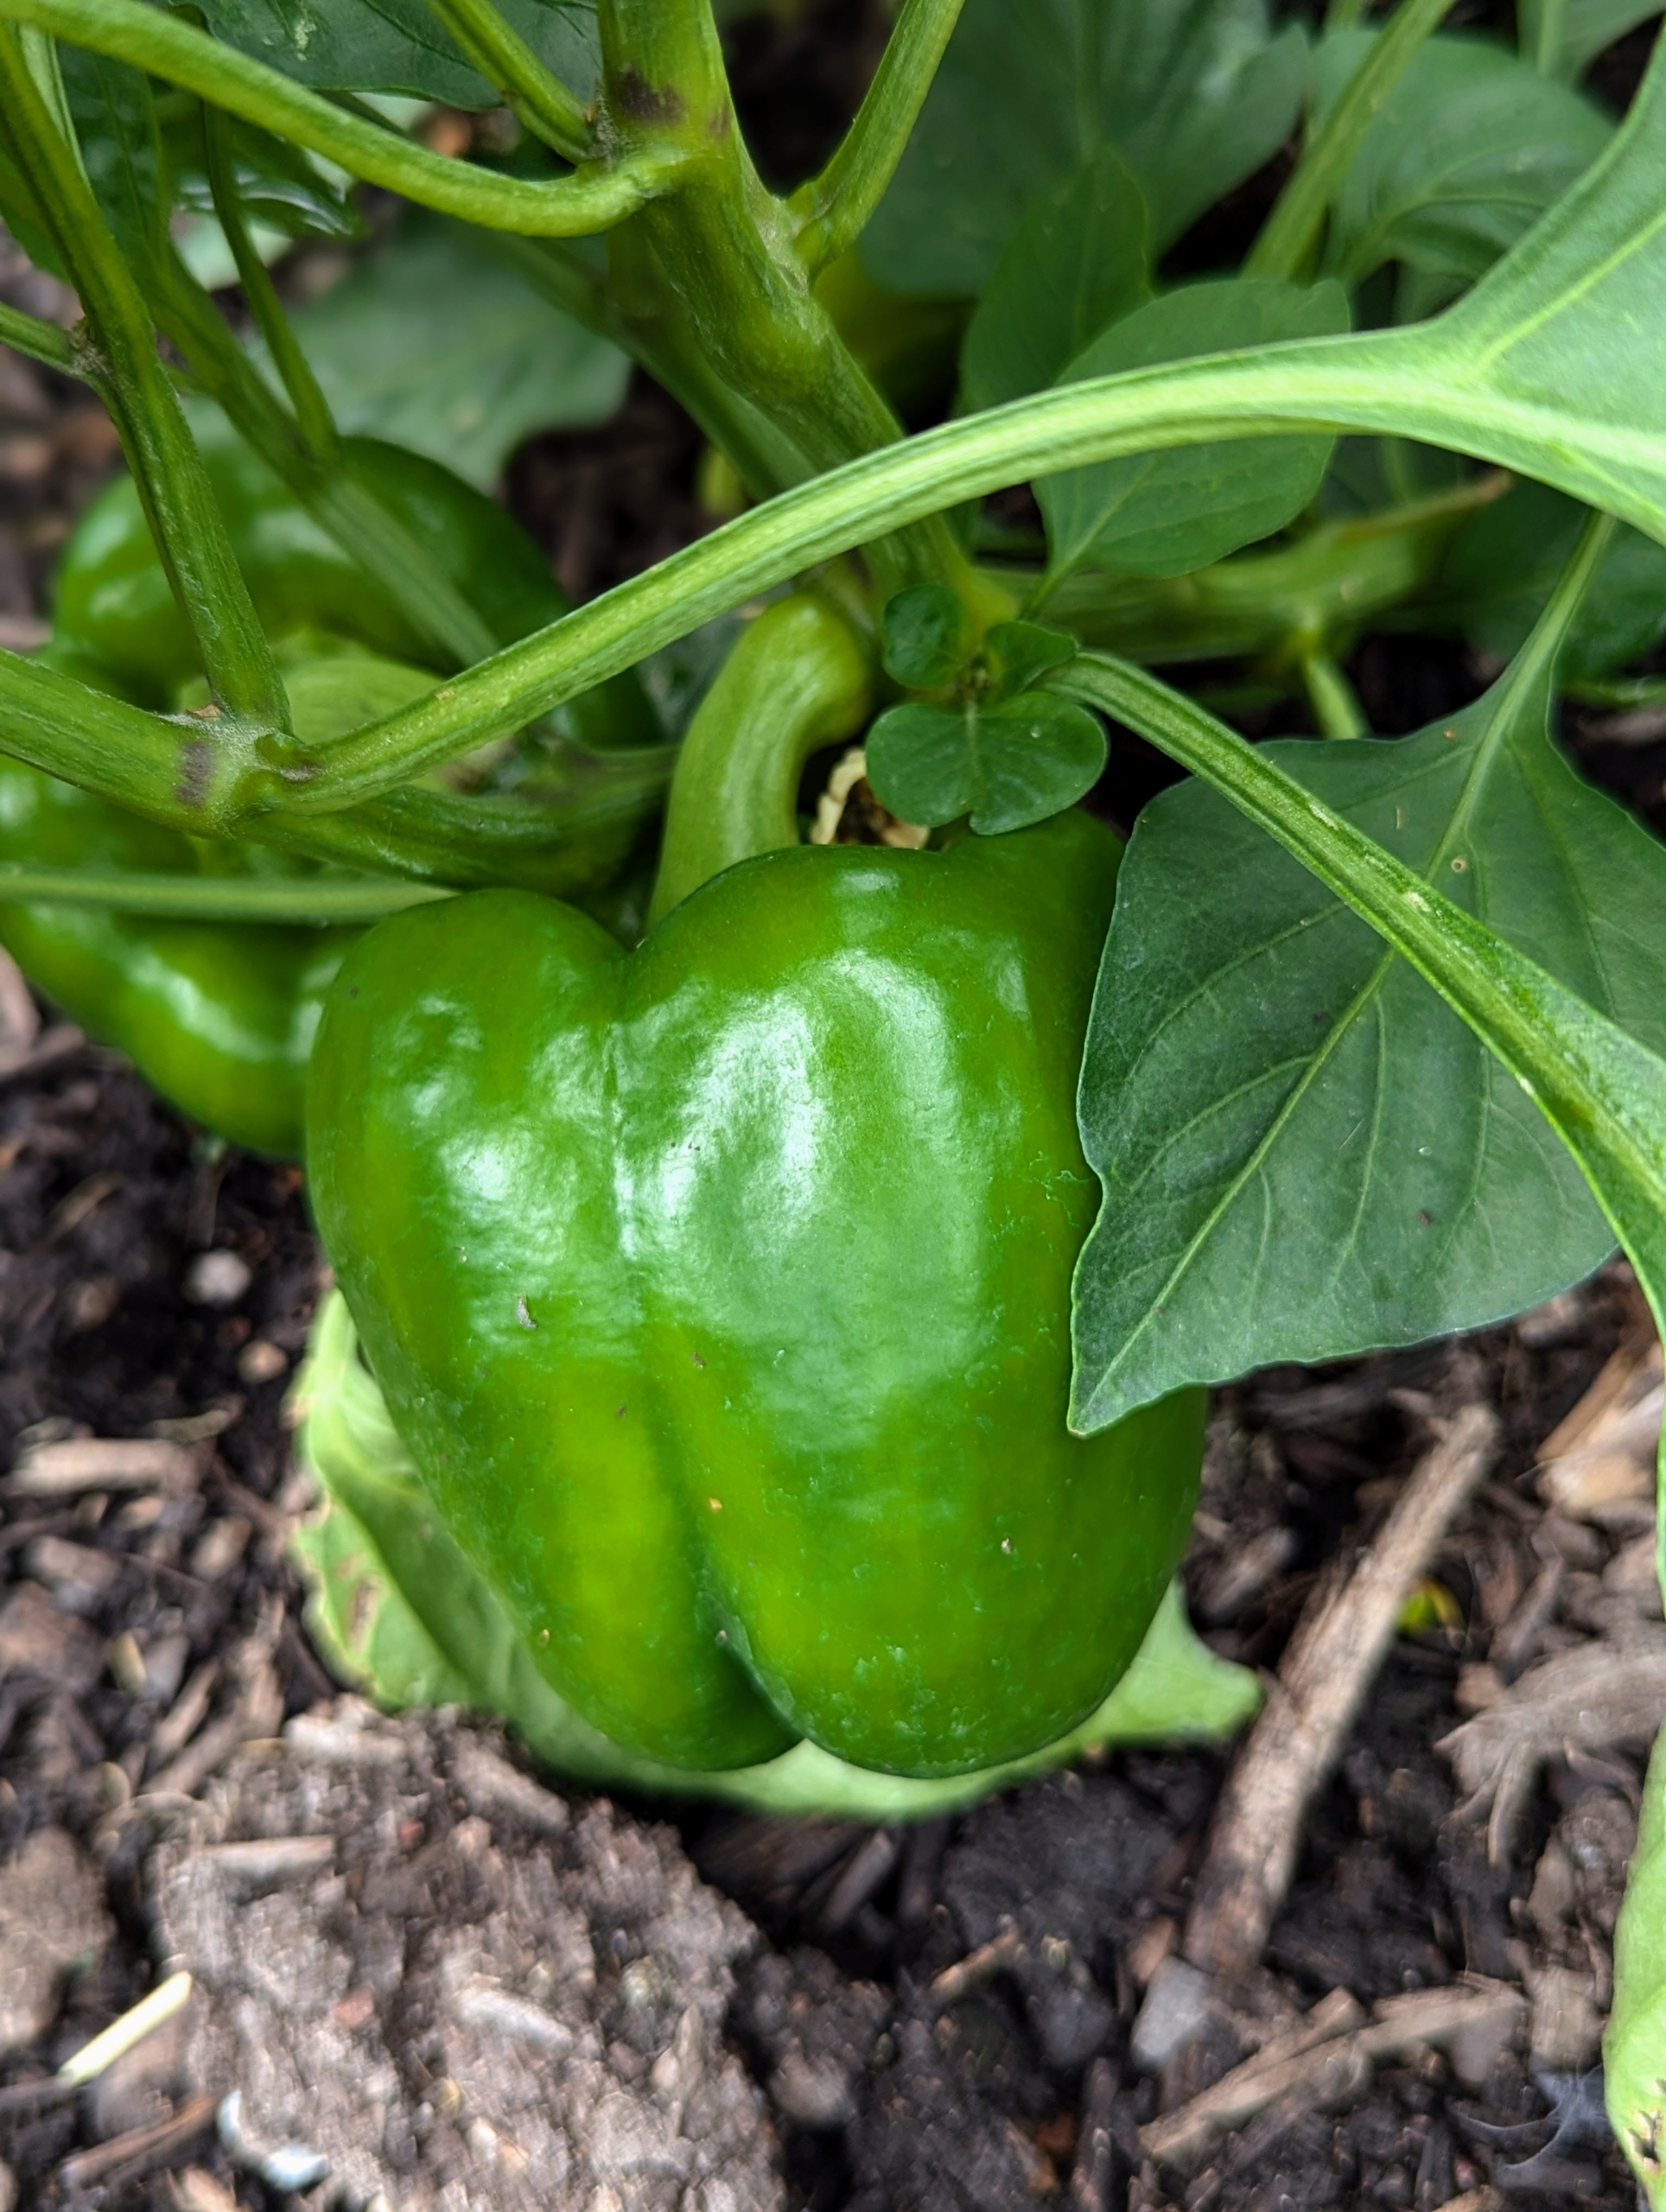
Many of the green bell peppers are ready to pick. I am also growing red and yellow bell peppers.
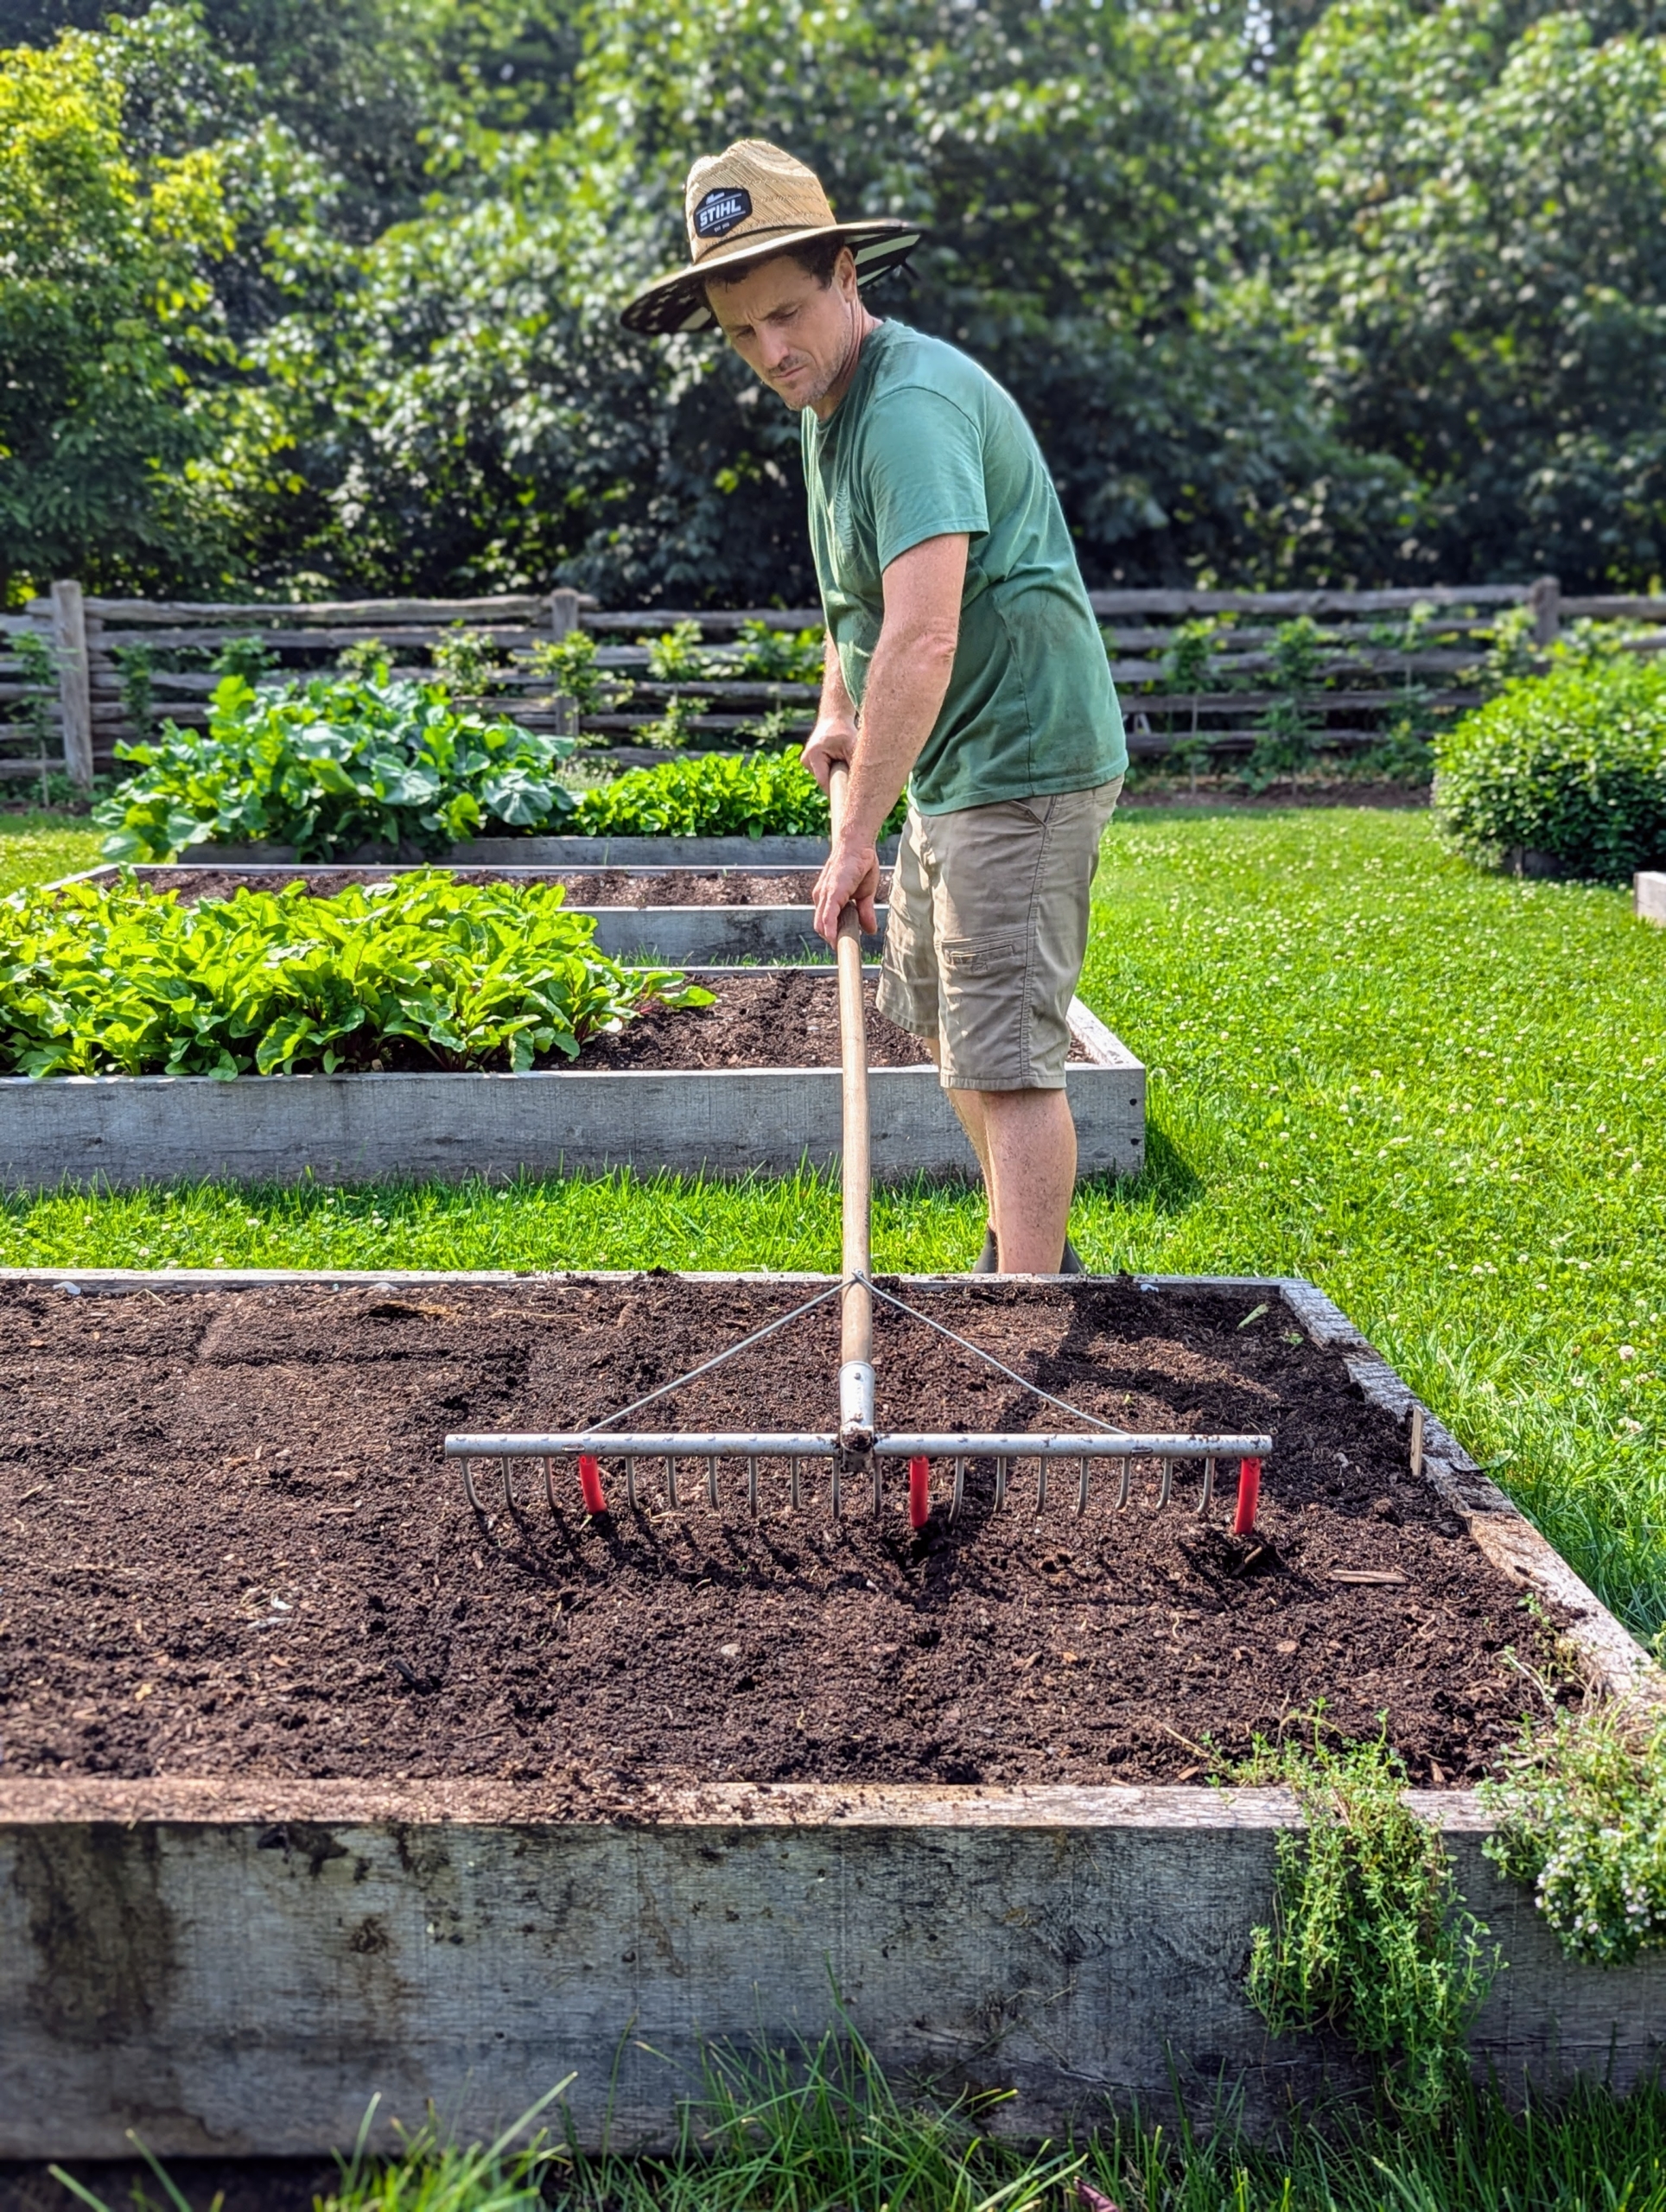
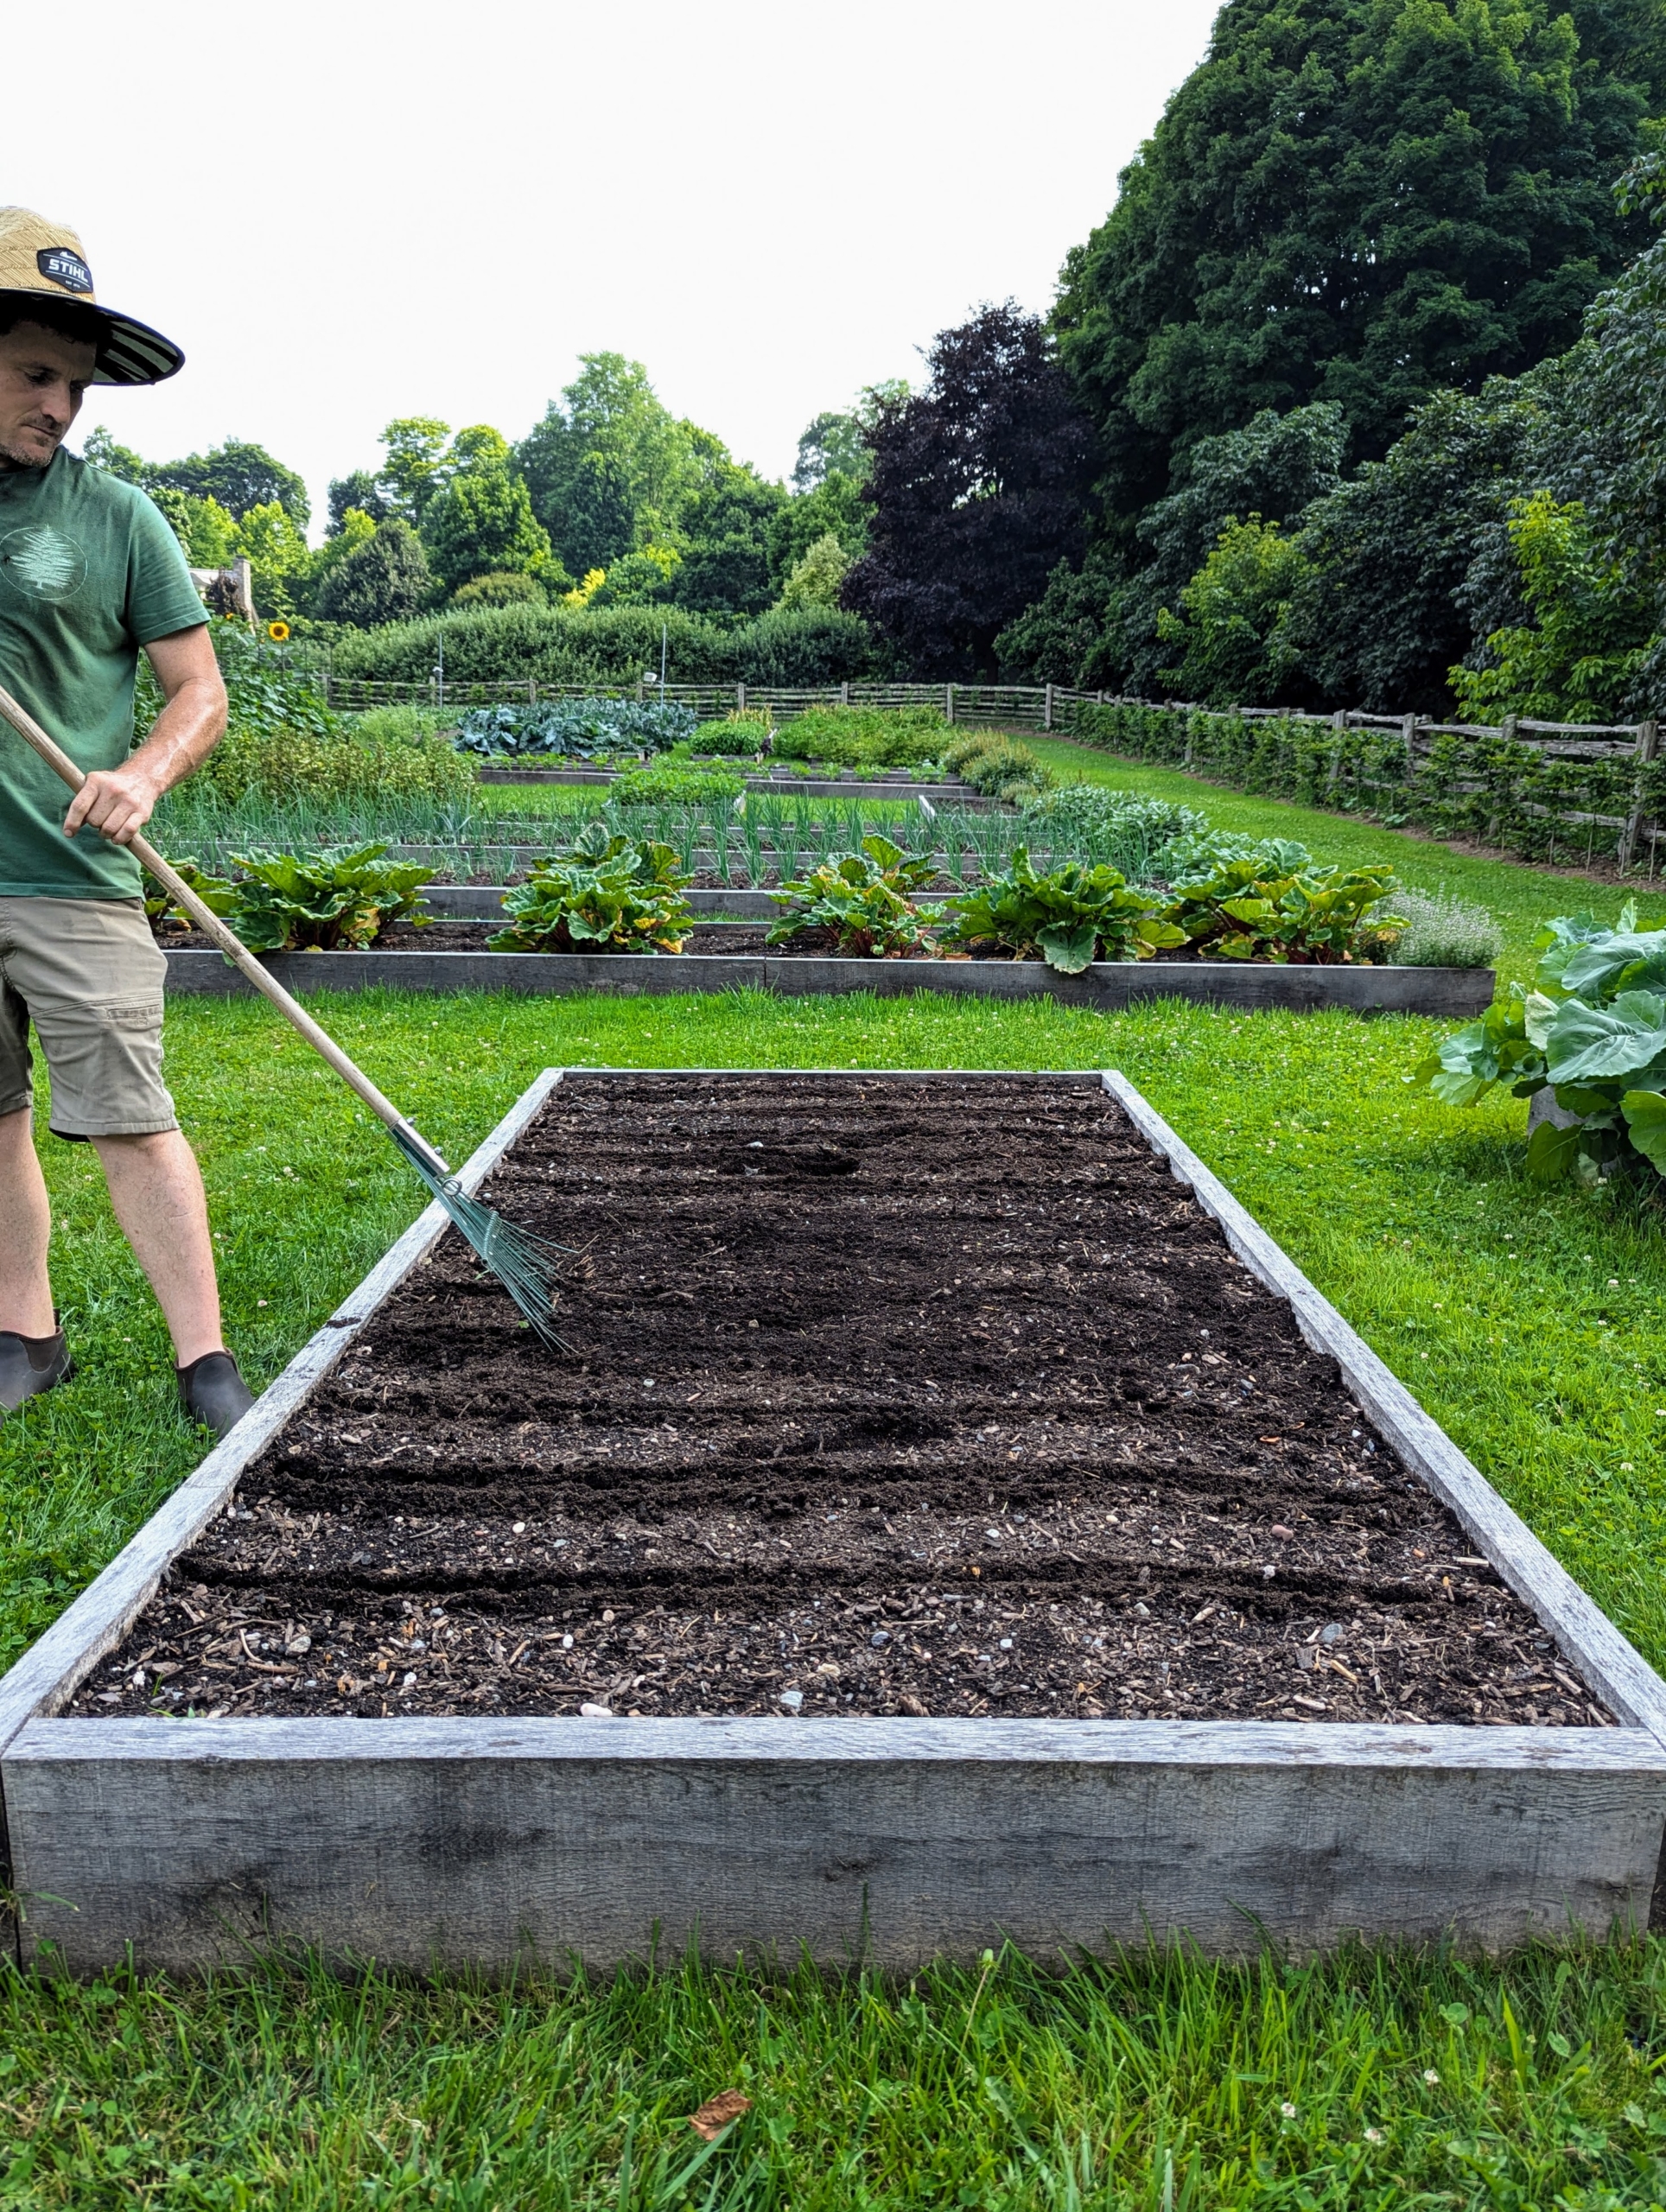
In a couple of the smaller beds, Ryan plants more vegetables as part of a process called succession planting, meaning planting at different times, so there is a consistent supply of harvestable produce throughout the season.
Here, Ryan plants more radishes. Ryan plants the seeds in rows that are about a foot apart. All the beds are raised slightly and all surrounded by wood frames – more than 40 beds in this half-acre garden. Raised bed gardening allows good drainage, prevents soil compaction, and provides protection for those plants that may otherwise get trampled.
Many of our seeds are from Johnny’s Selected Seeds in central Maine – a company I’ve been using for quite some time. Johnny’s Selected Seeds is a privately held, employee-owned organic seed producer. Johnny’s offers hundreds of varieties of organic vegetable, herb, flower, fruit and farm seeds that are known to be strong, dependable growers.
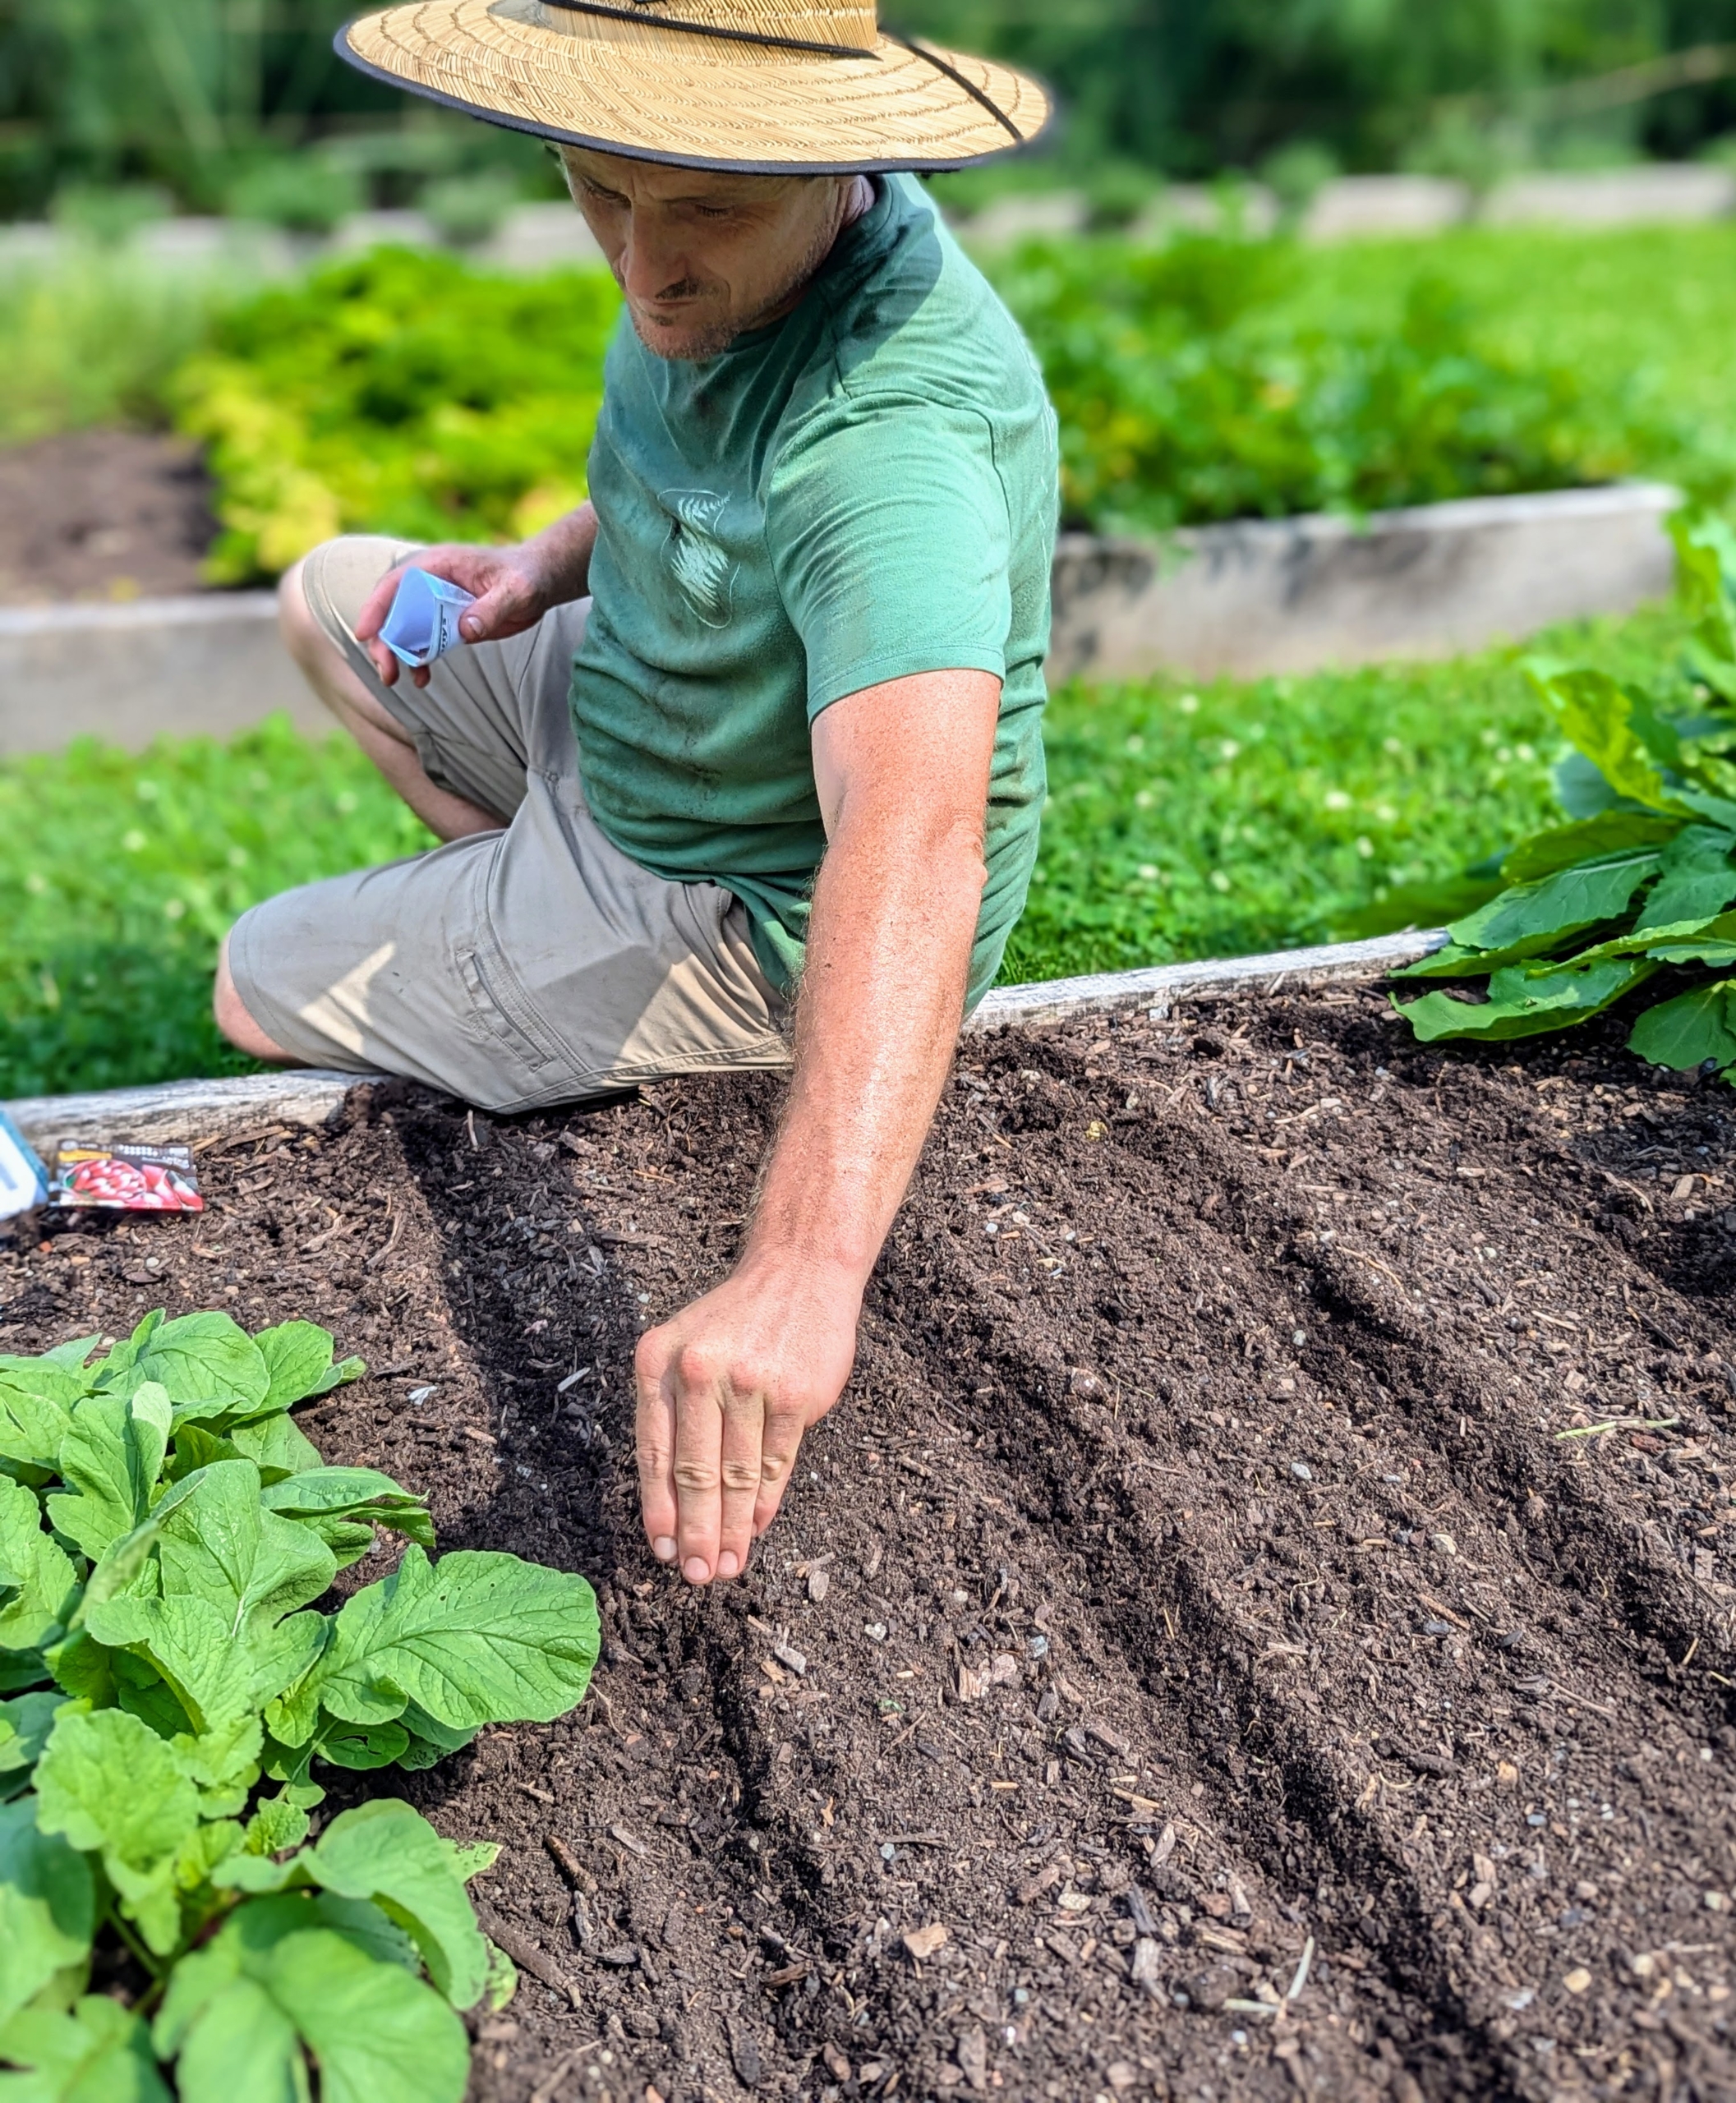
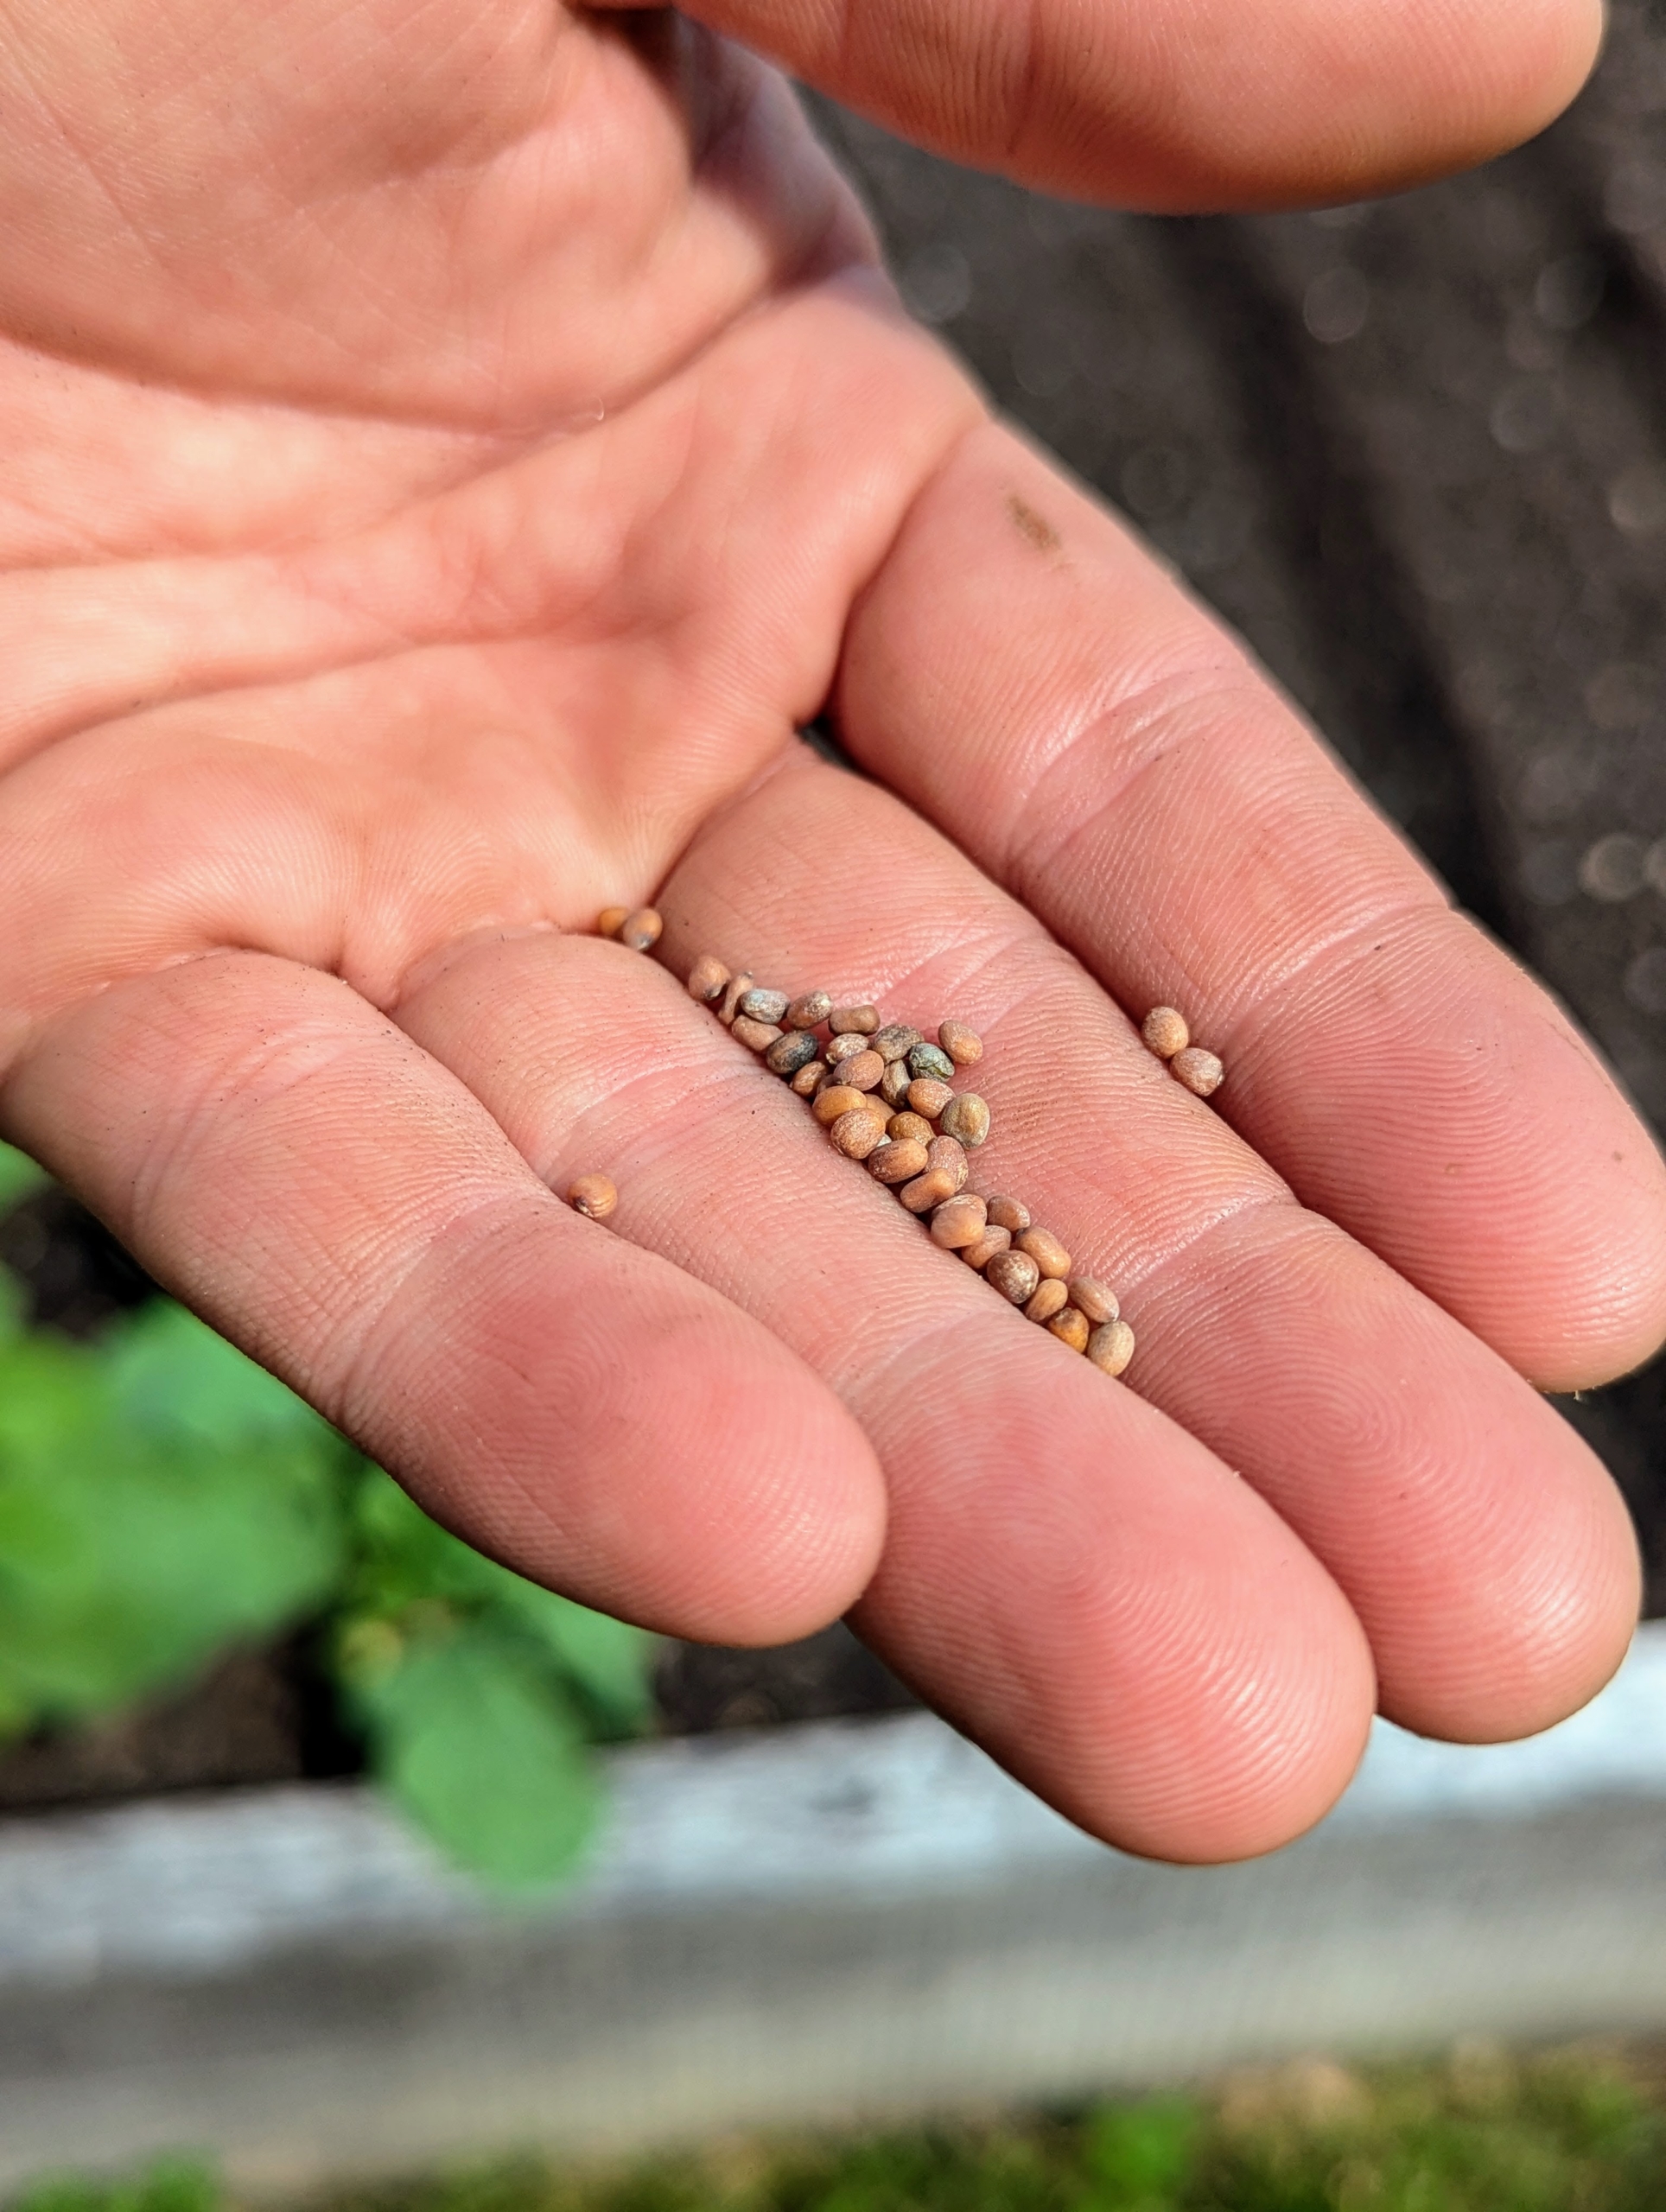
Here, Ryan planted more lettuce. After the seeds are dropped, he uses a soft rake to cover the seeds and carefully backfill the rows with soil. Lettuce, Lactuca sativa, is a cultivated plant of the daisy family, Asteraceae. Lettuce is a fairly hardy, cool-weather vegetable that thrives when the average daily temperature is between 60 and 70-degrees Fahrenheit. We always grow several varieties.
And here is just one of my sunflowers. I have many growing so beautifully in the center of the garden. Typically, sunflowers stay in bloom for about three weeks, but one may get a full month if lucky. This garden is so amazing. I hope your garden is growing as well as mine is this year.