It's just nine days away - what are you doing for the Big Game?
If you’re gathering with friends and family to watch the biggest football event of the year, I hope you'll also prepare some fun and delicious Game Day dishes. Among some of my go-to favorites - finger-licking oven baked wings, such as Sriracha Buffalo, Sweet 'n Sour Orange, and Maple-Dijon, Chili Con Carne, Skillet Cornbread, Macaroni & Cheese, and for those sweet cravings, giant-sized cookies. All these can be enjoyed while watching the Big Game on a massive 85-inch Samsung Neo QLED 8K television - it will feel like you're right on the sidelines.
Here are some photos, enjoy.
Hard to resist watching the biggest game in football, even if one is not a huge fan of the sport. But, if you’re like me and love to watch the nation’s top teams battle it out for the year’s biggest football honor, now is a good time to start planning the party.
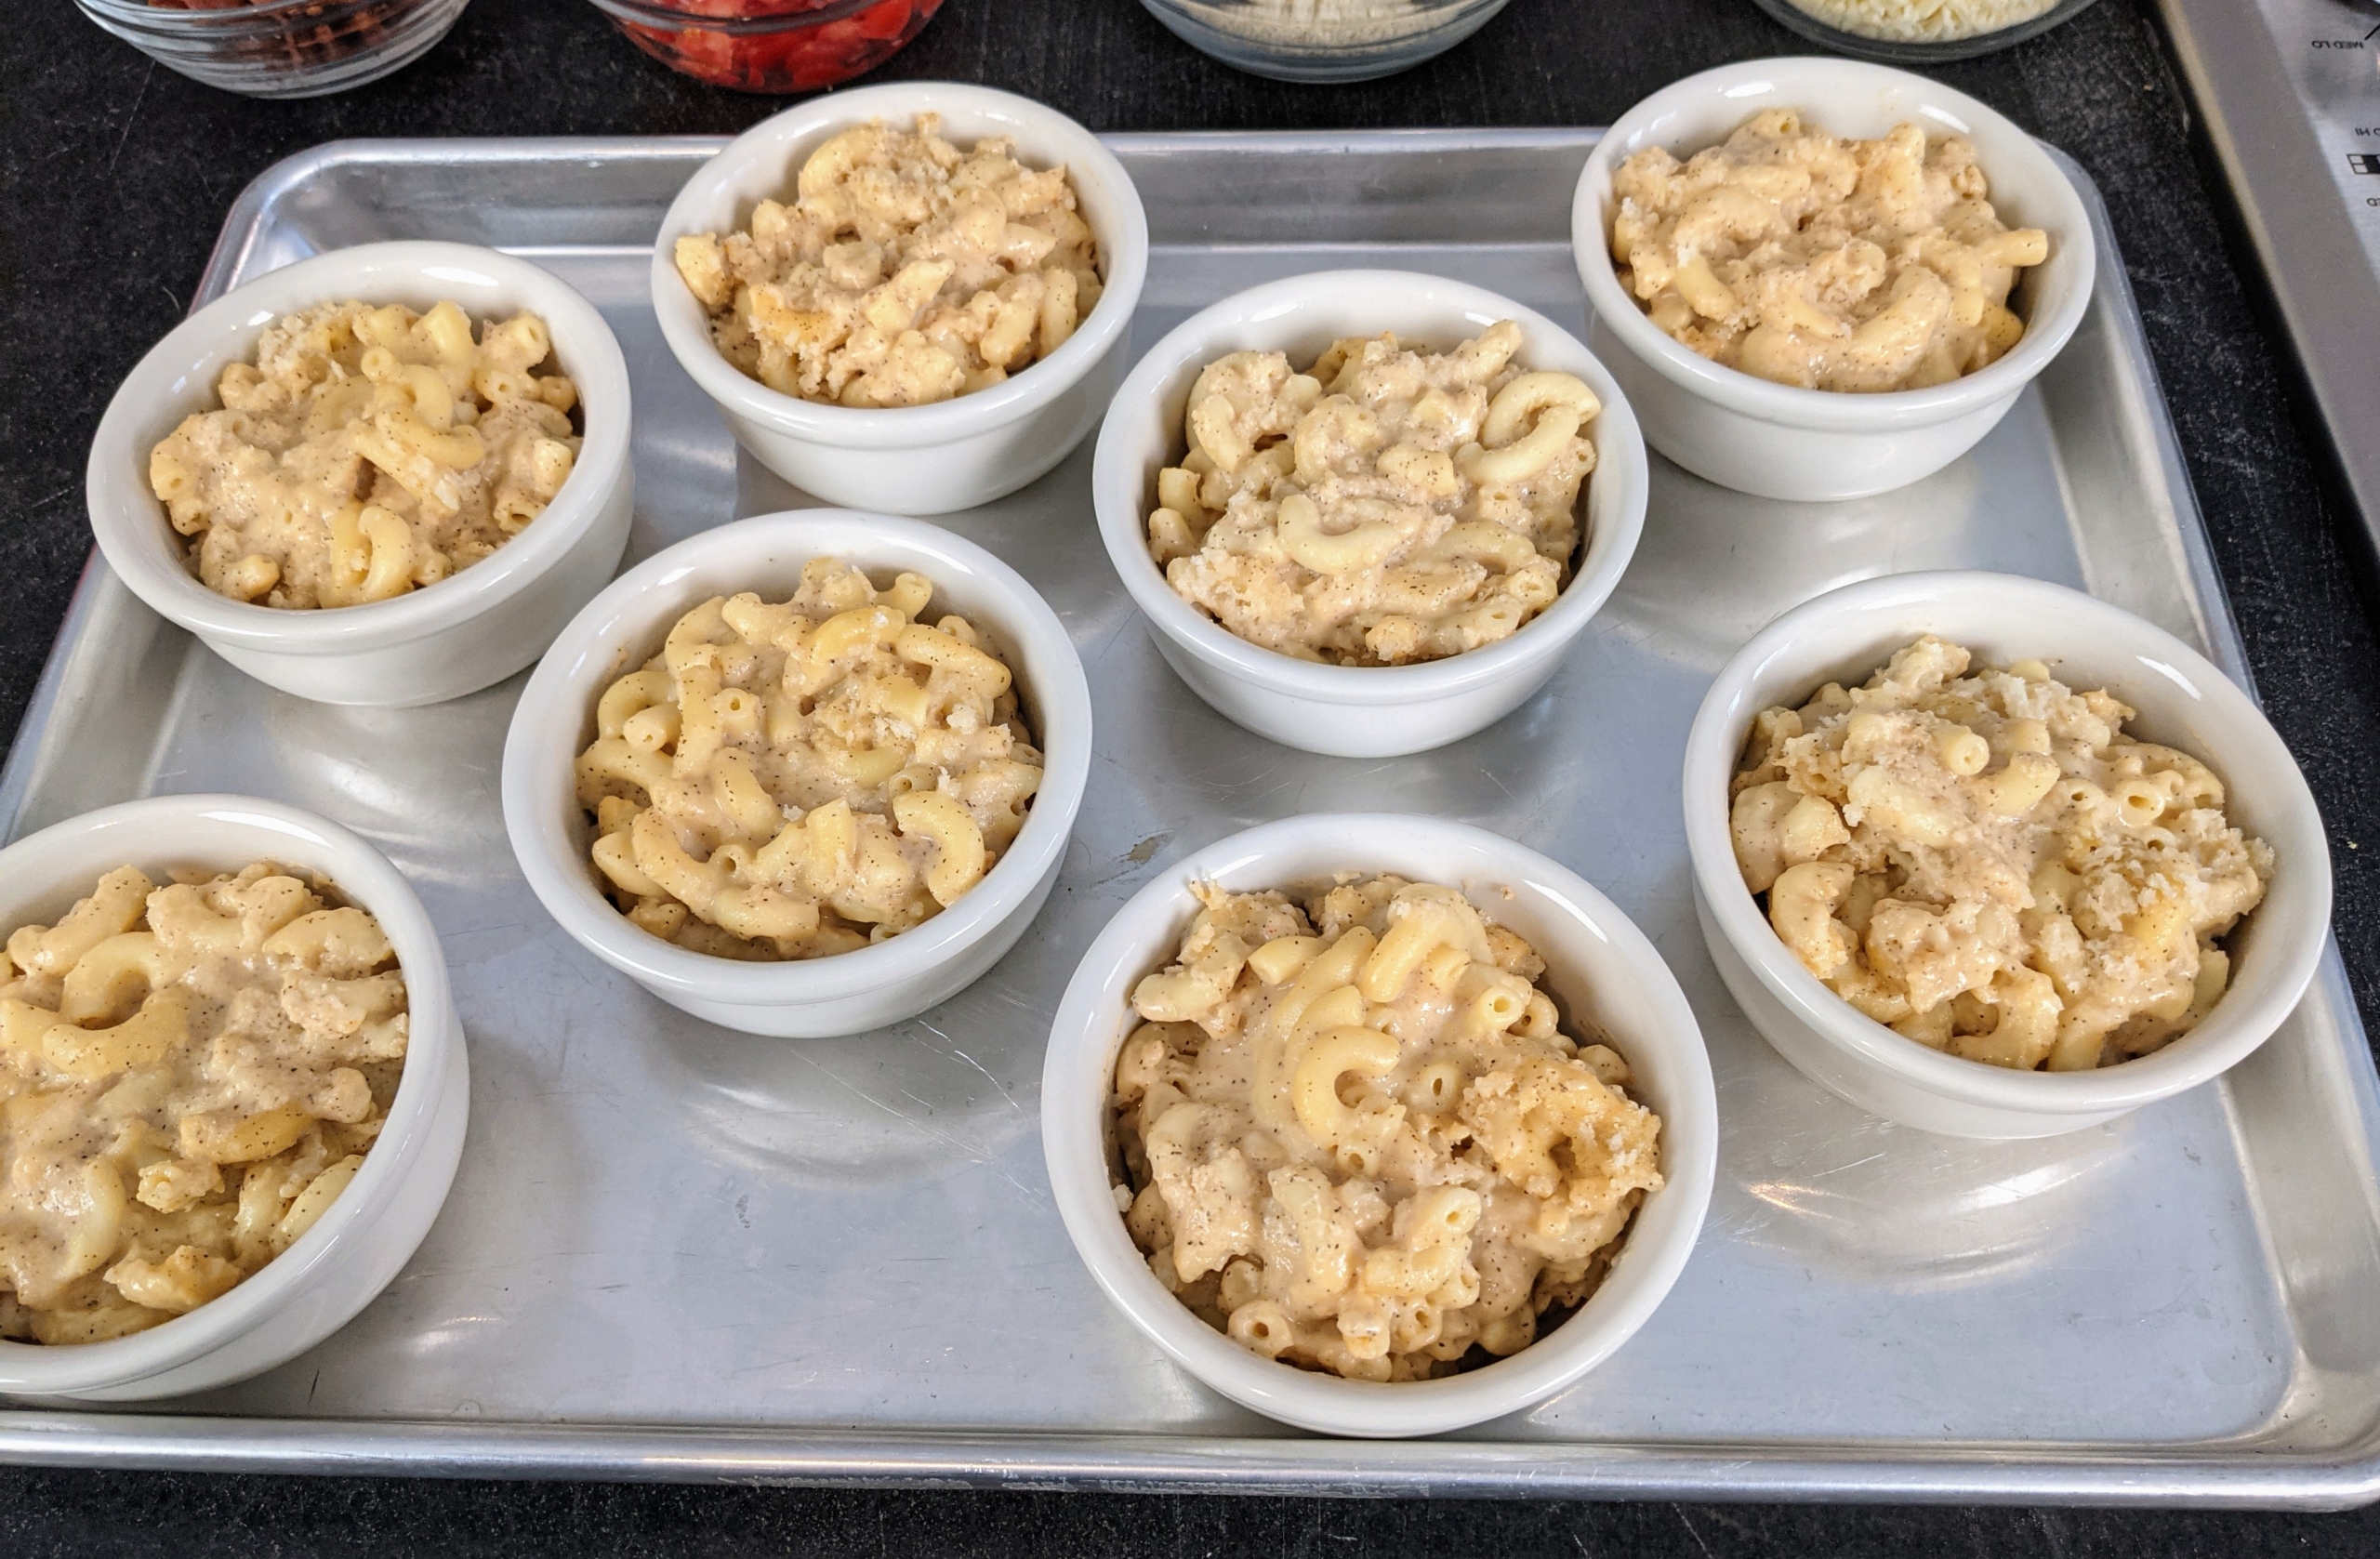
You may remember, a couple years back I did a video shoot at my Bedford, New York farm, preparing some of our well-loved meals and snack ideas for the Big Game. One suggestion was to make individual bowls of macaroni and cheese.
This one is also topped with bacon, tomatoes, grated white cheddar cheese, and panko breadcrumbs. If you’re not familiar, panko breadcrumbs are made from a crustless white bread that is processed into flakes and then dried. These breadcrumbs have a dryer and flakier consistency than regular breadcrumbs, and as a result absorb less oil.
Then the ramekins filled with macaroni and cheese are baked for about 30-minutes until bubbly and lightly golden brown on top.
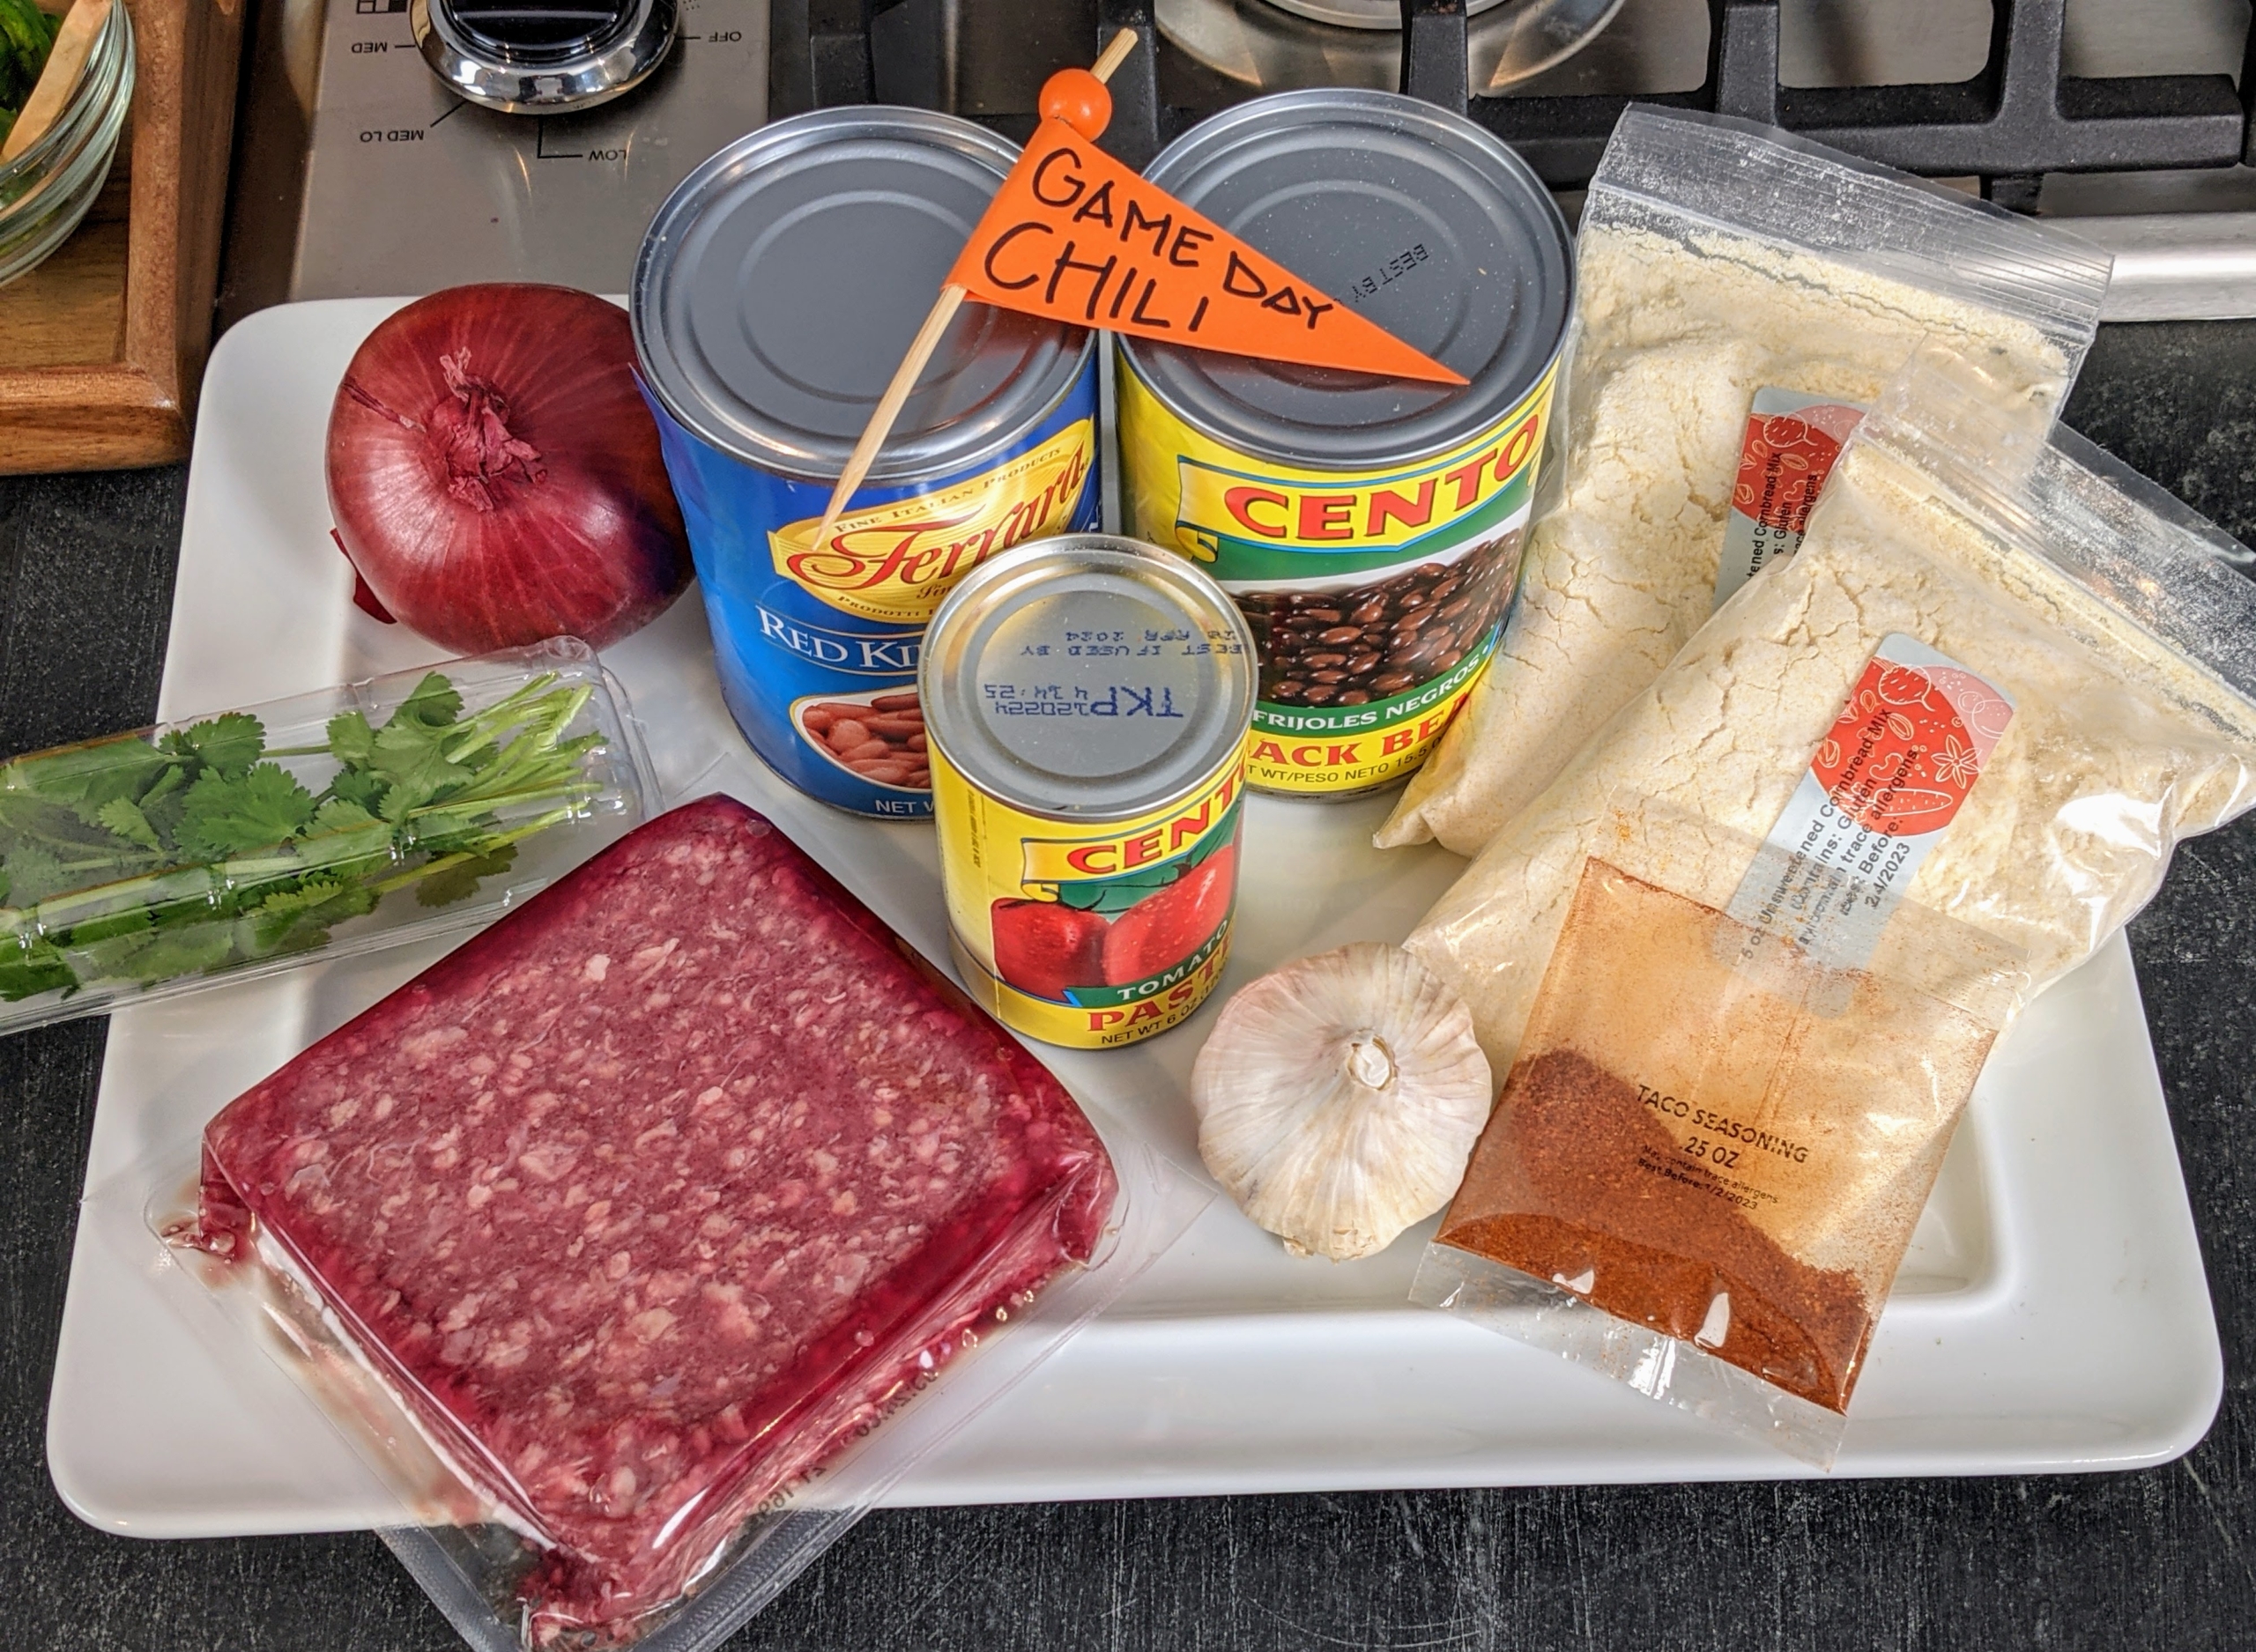
Game Day would seem incomplete without a warm bowl of Chili con Carne. When making any recipe, don’t forget the “mis en place.” Mise en place is a French culinary phrase meaning “putting in place” or “gather”. It refers to the setup required before cooking a specific dish. I like to gather all my ingredients on a tray. This chili recipe comes with flour, kidney beans, black beans, tomato paste, taco seasoning, ground beef, fresh cilantro, garlic, and a large red onion.
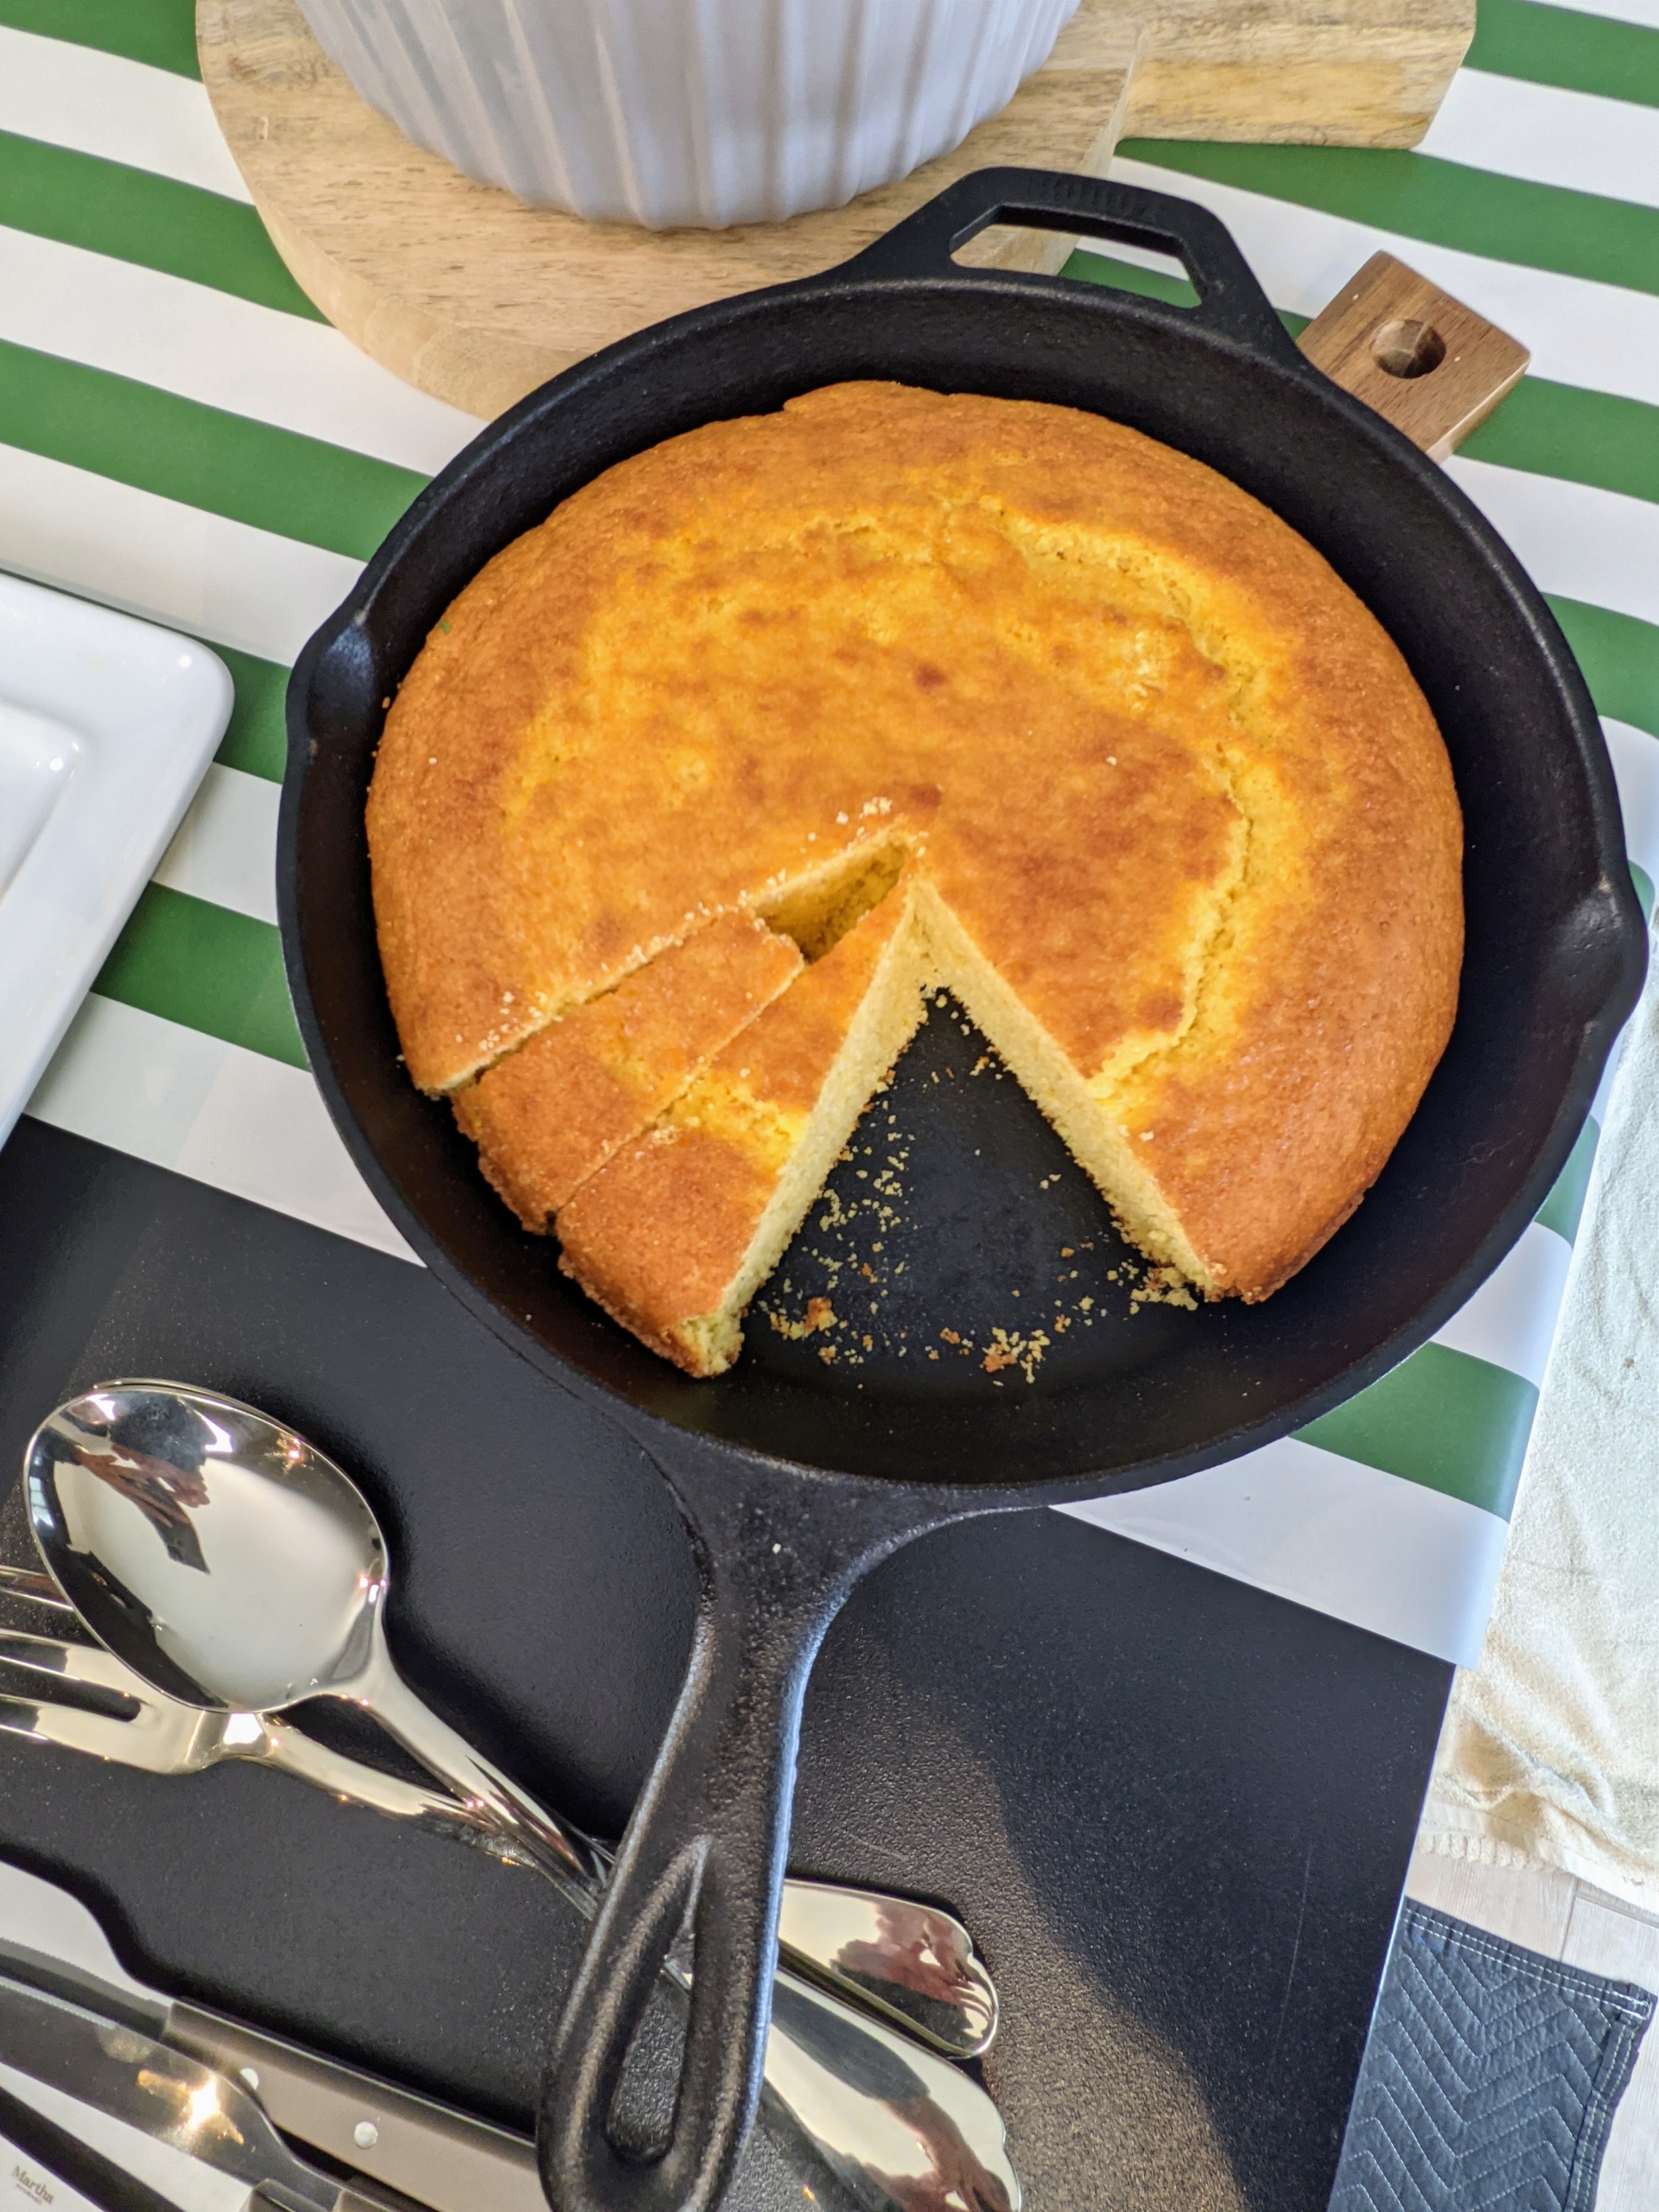
While the chili is cooking, make the cornbread in a cast iron skillet and bake until golden and risen.
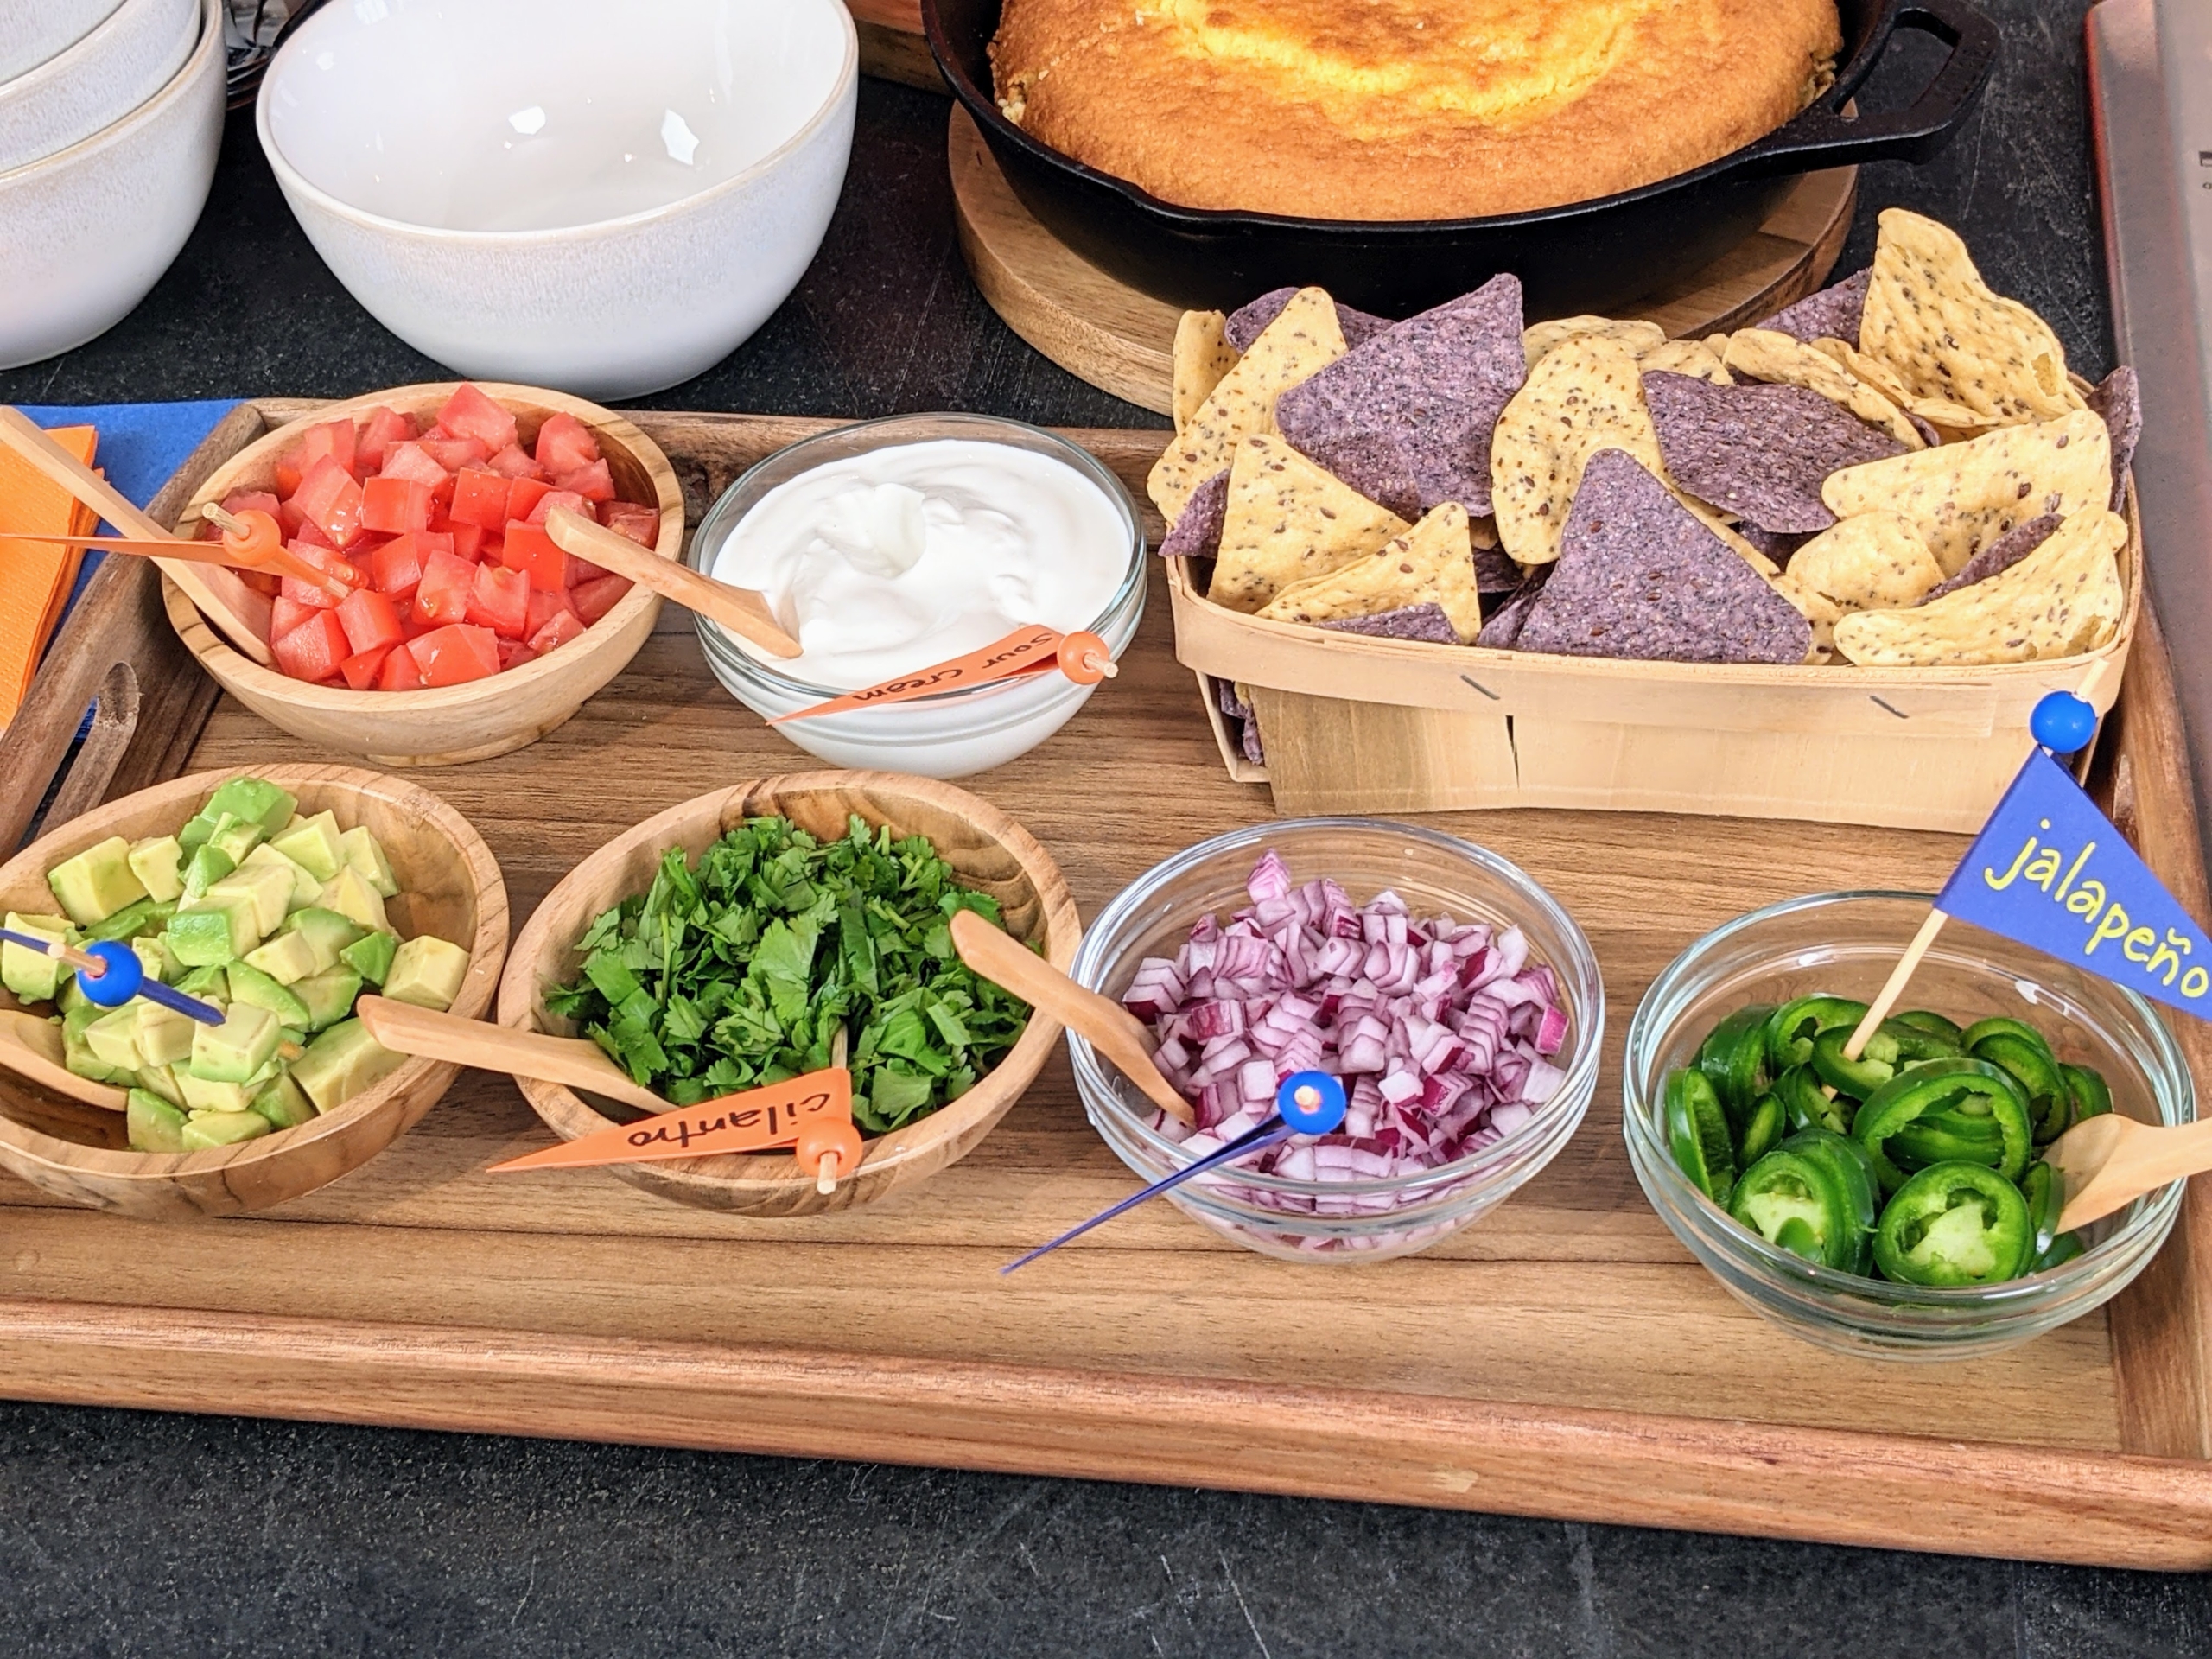
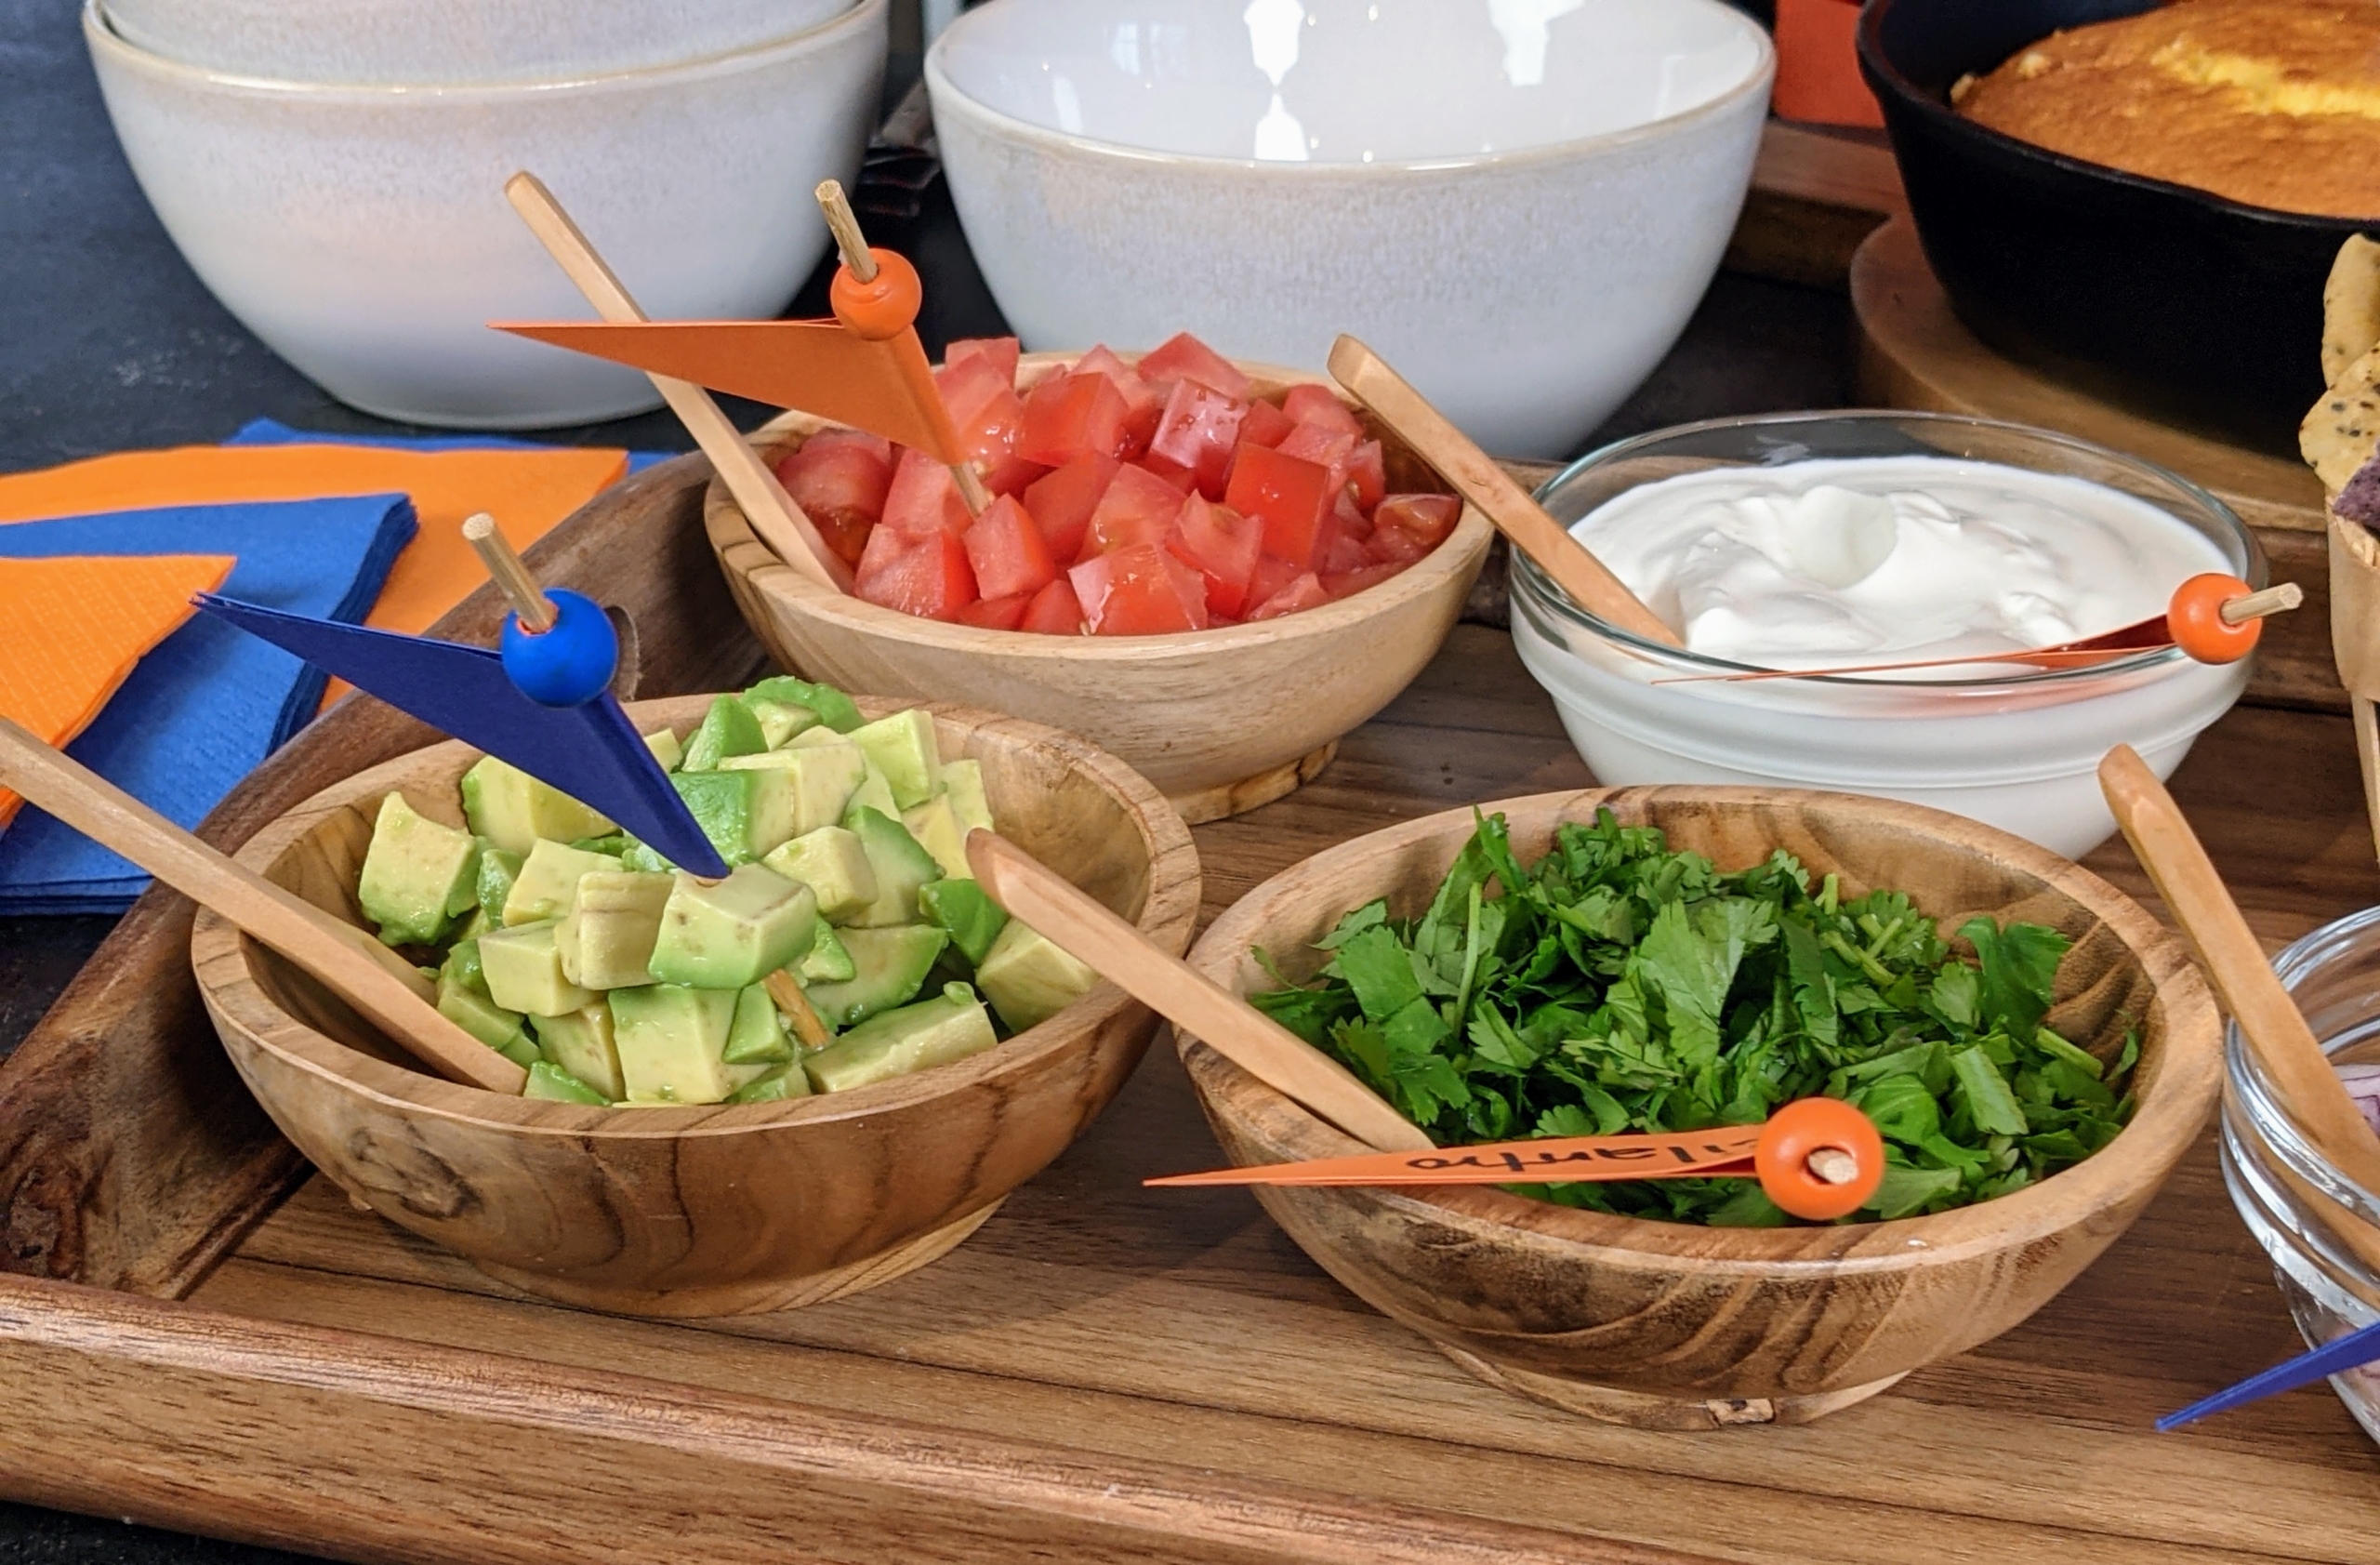
Another idea is to serve it with a toppings bar – include avocado, diced tomatoes, sour cream, cilantro, onion, jalapeno peppers, and of course, tortilla chips.
It’s always fun to make one’s own combination of flavorful dish toppings.
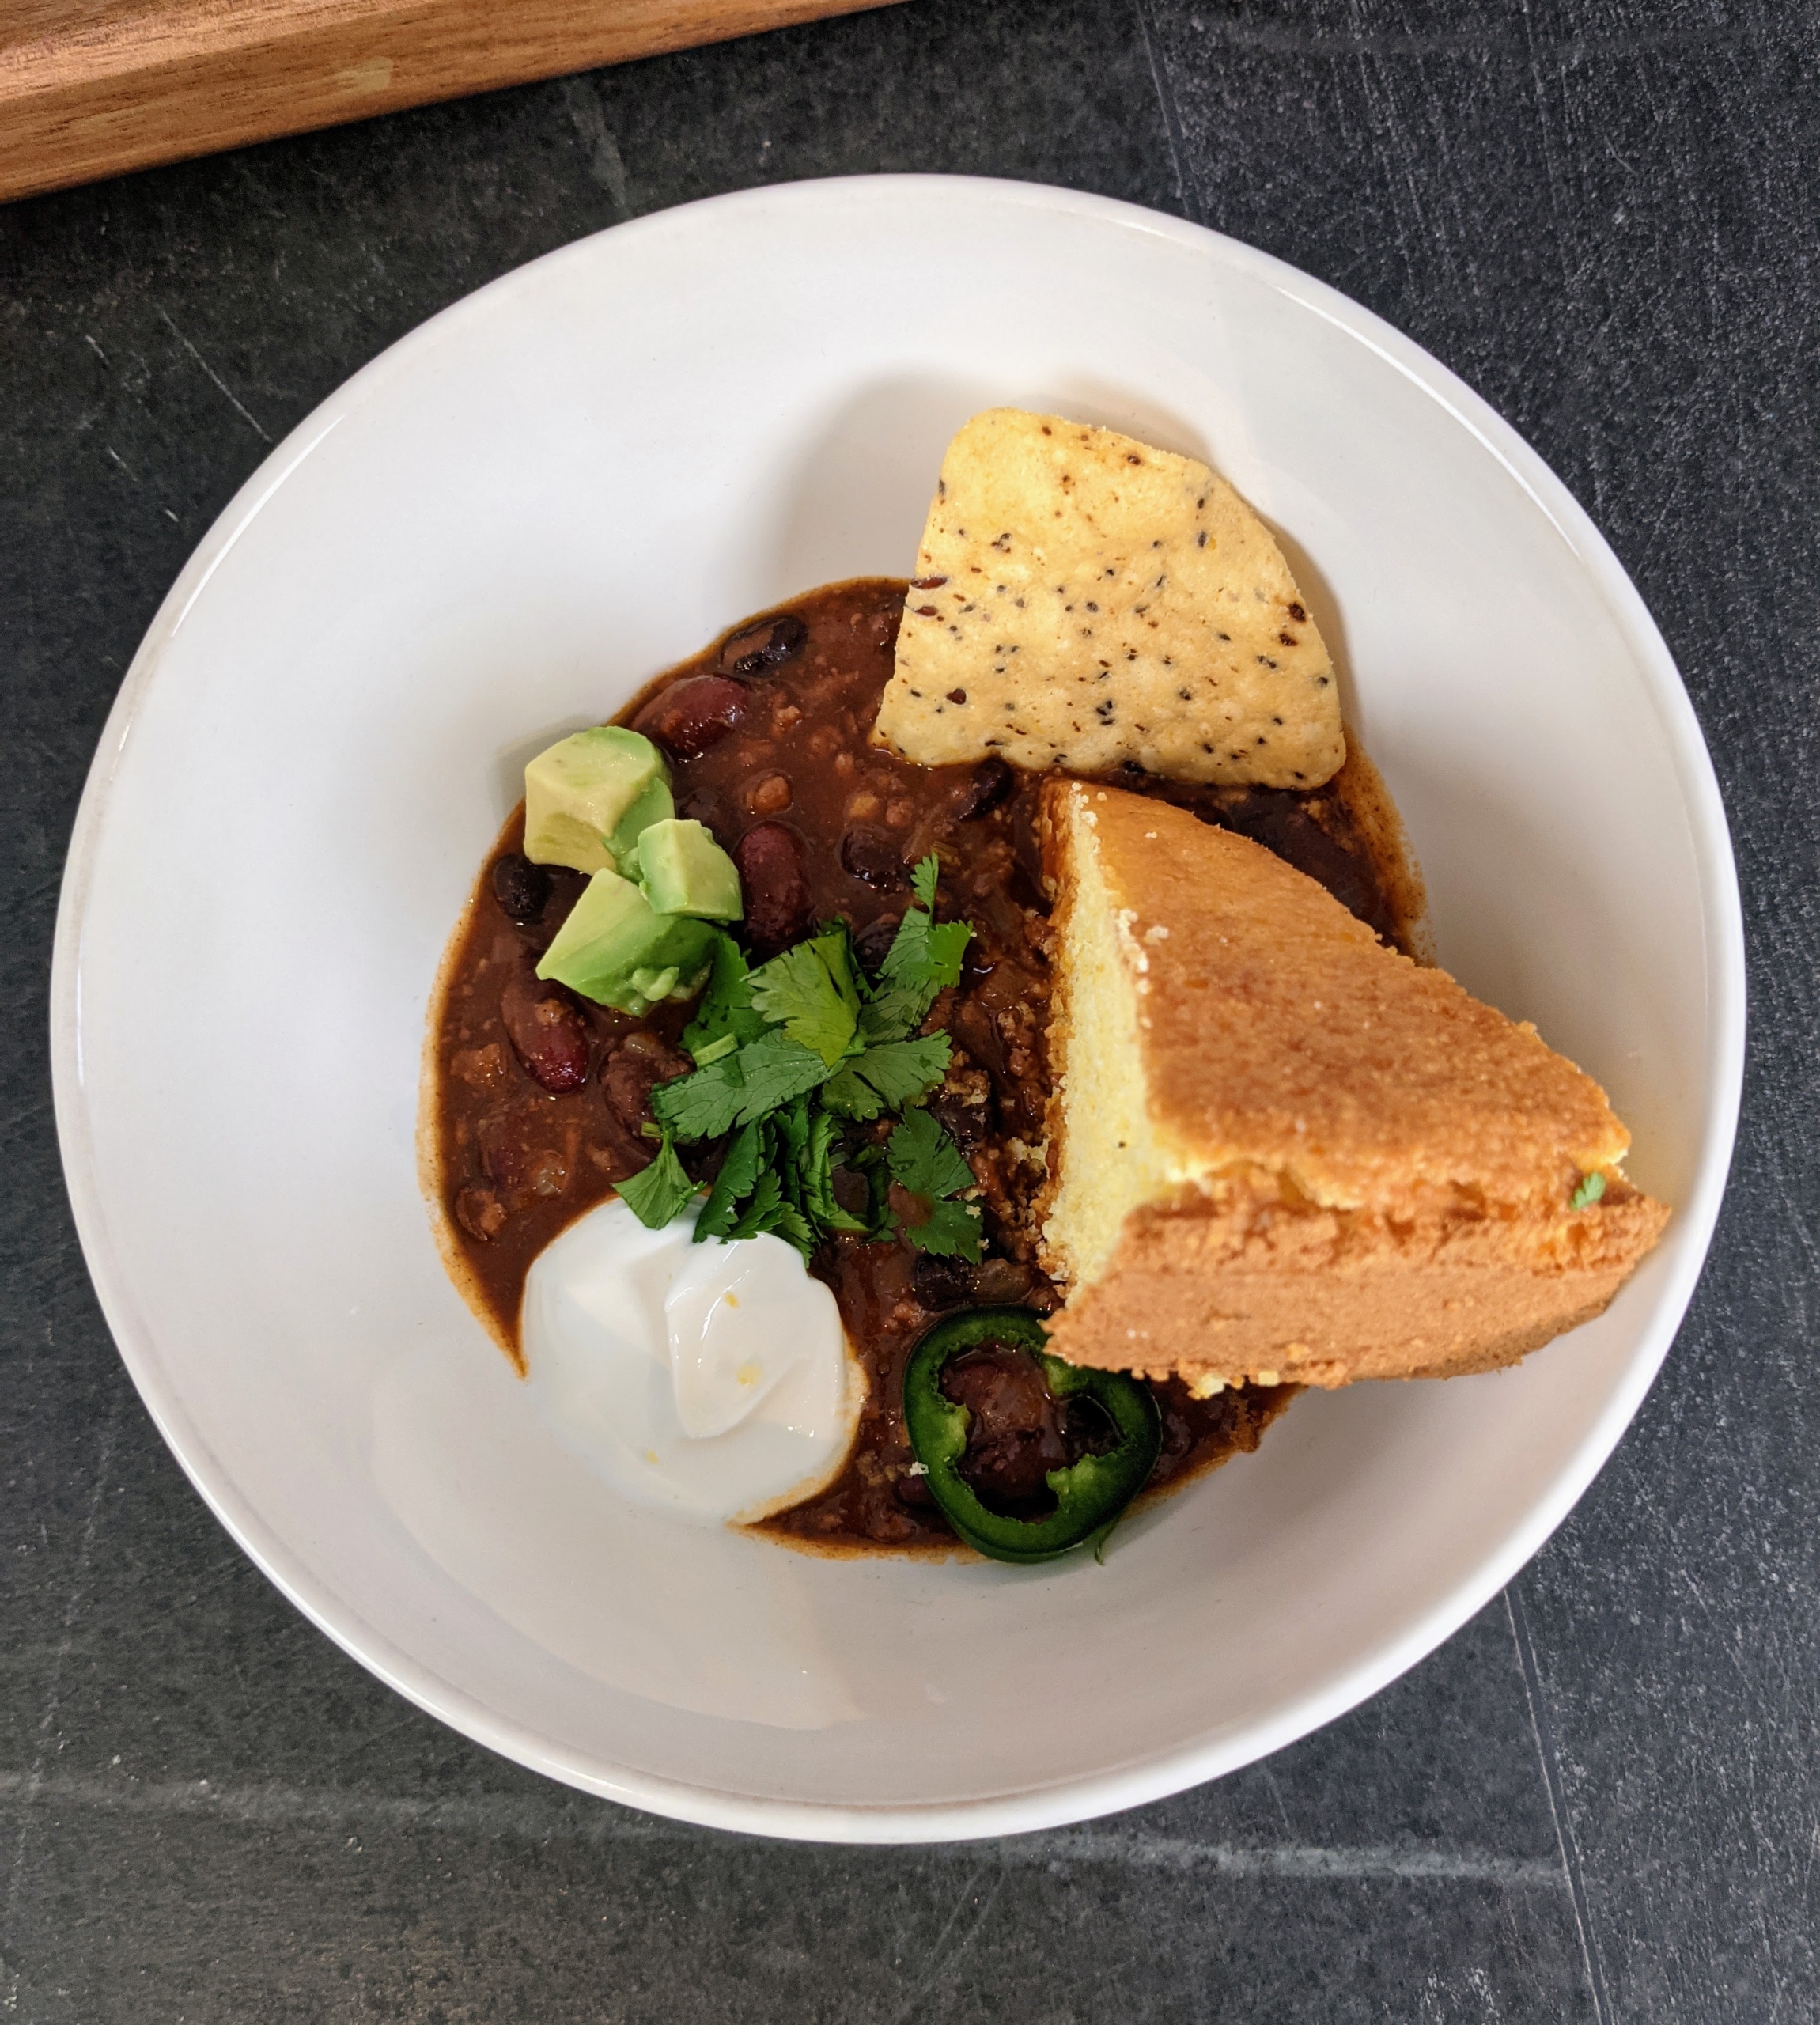
And here’s the finished bowl – mine with avocado, sour cream, cilantro, chips, and a piece of cornbread – ready to eat while still piping hot.
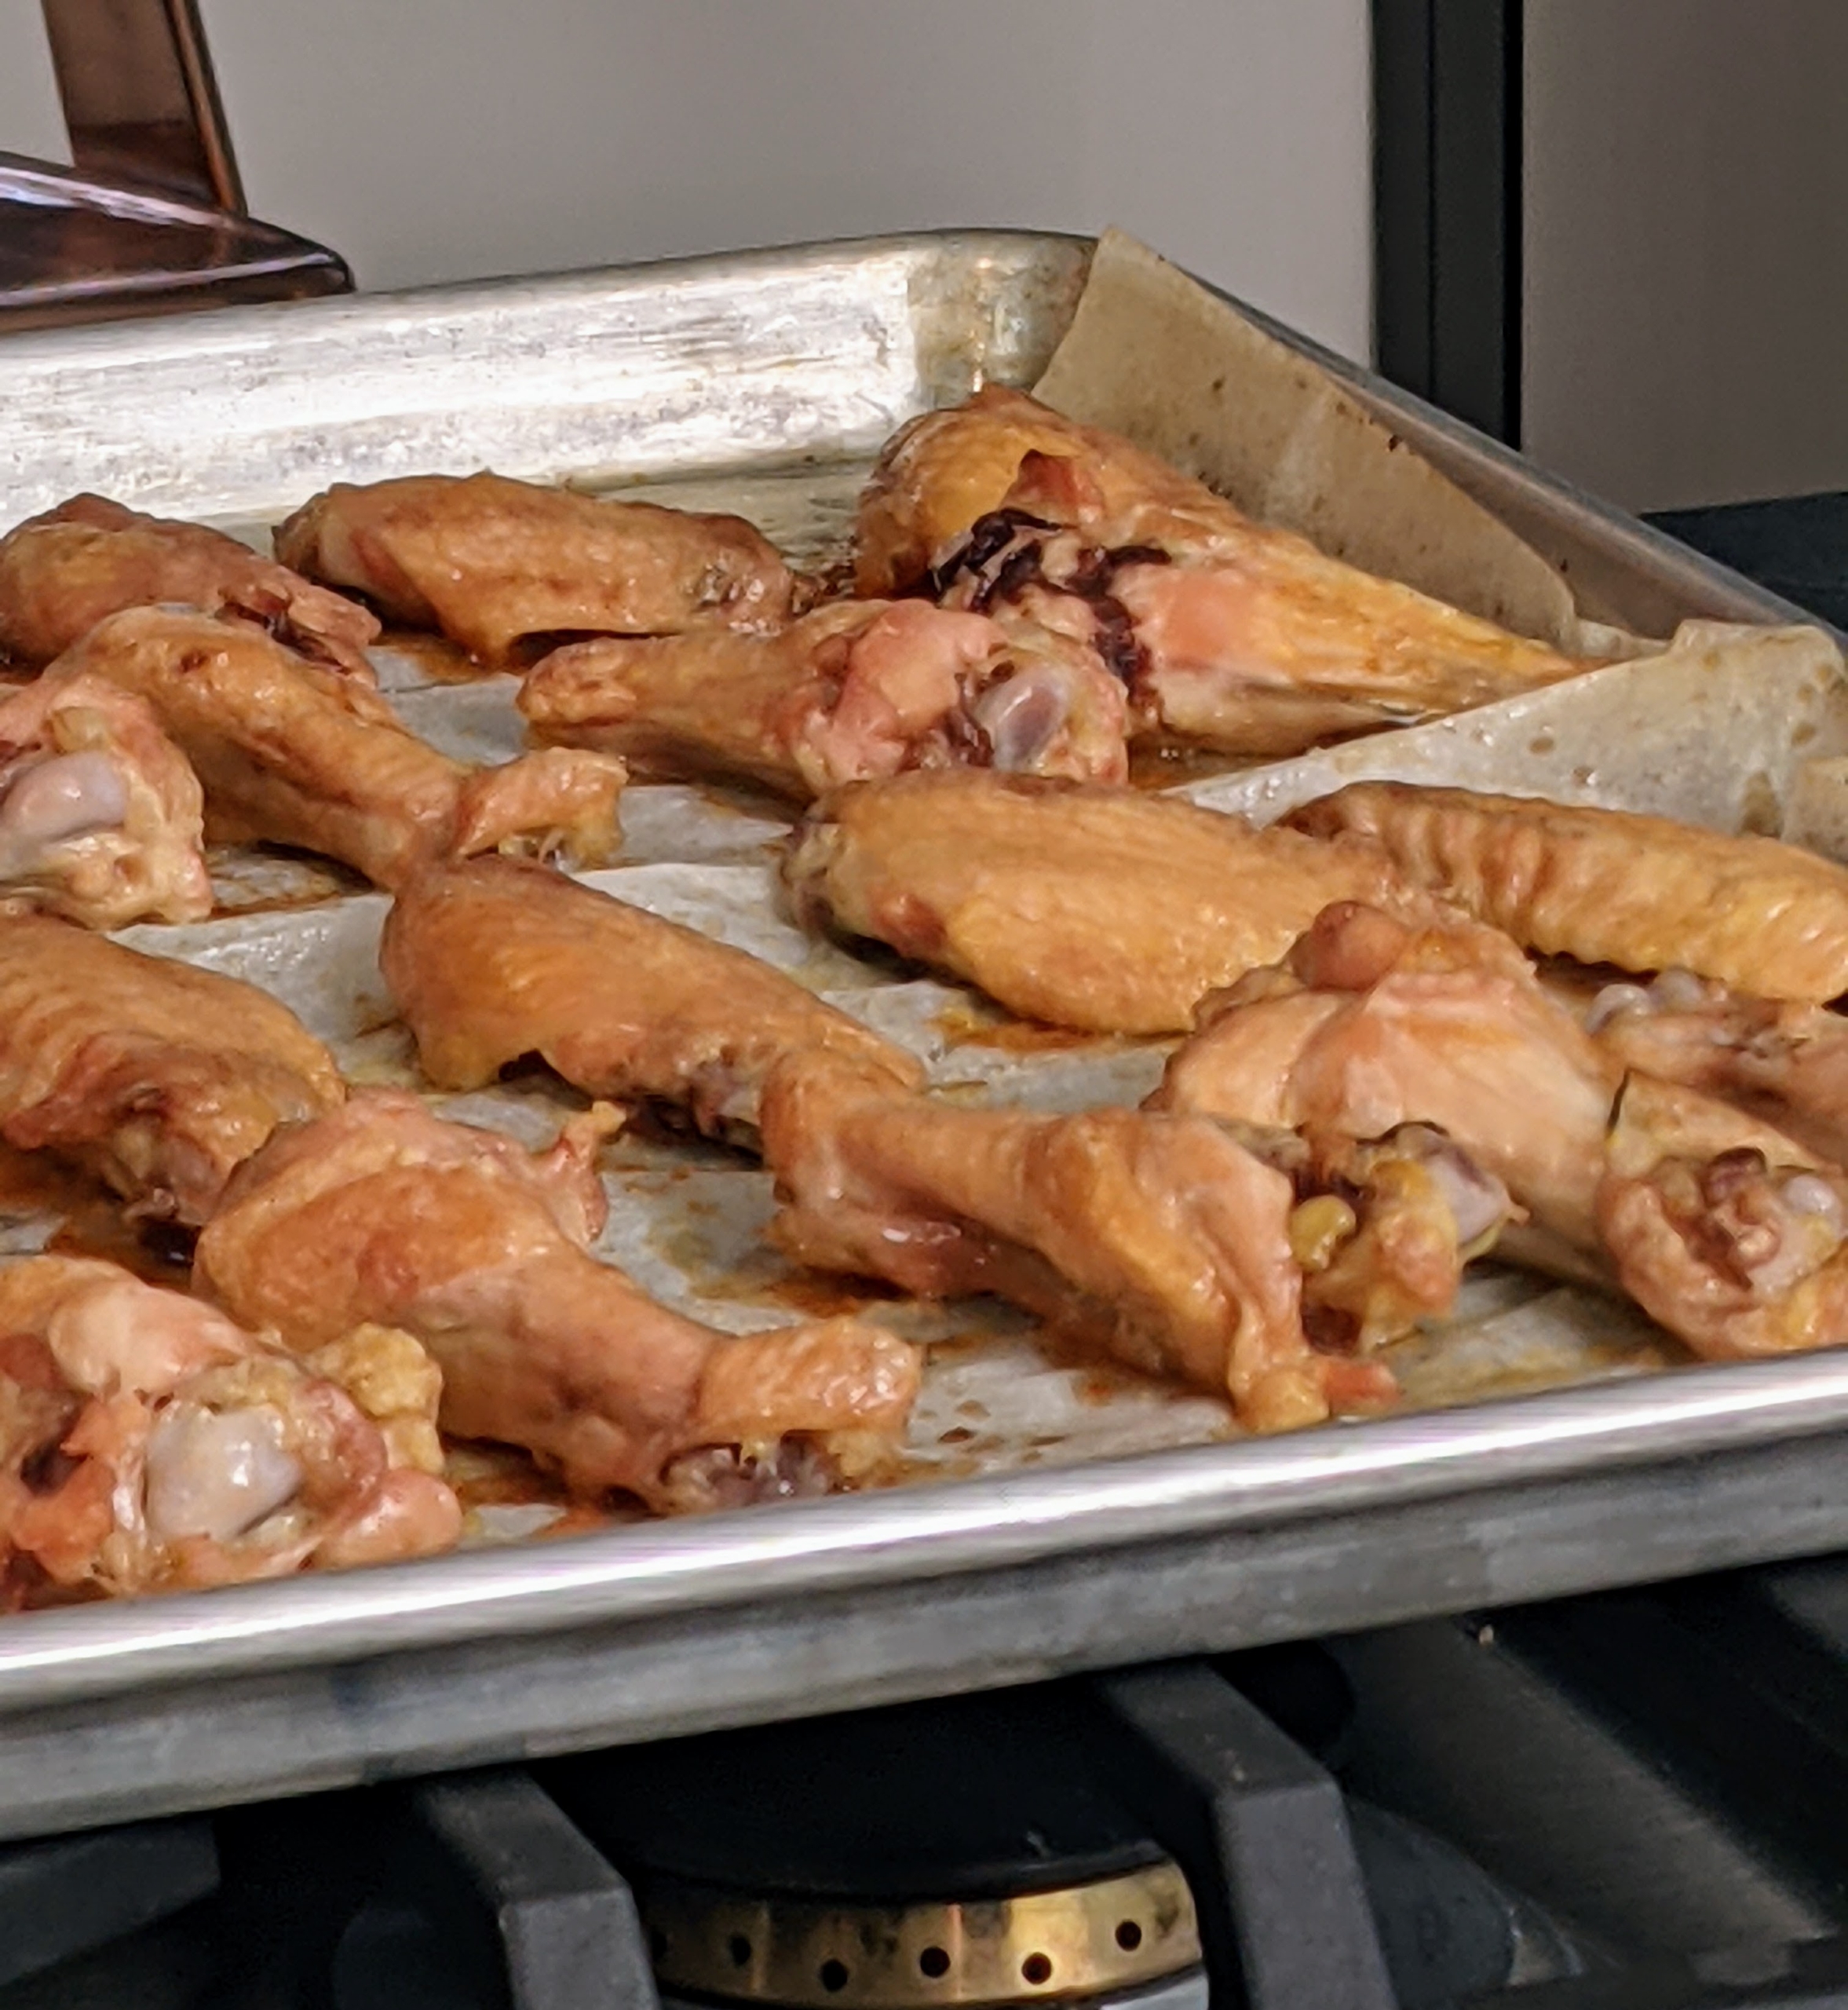
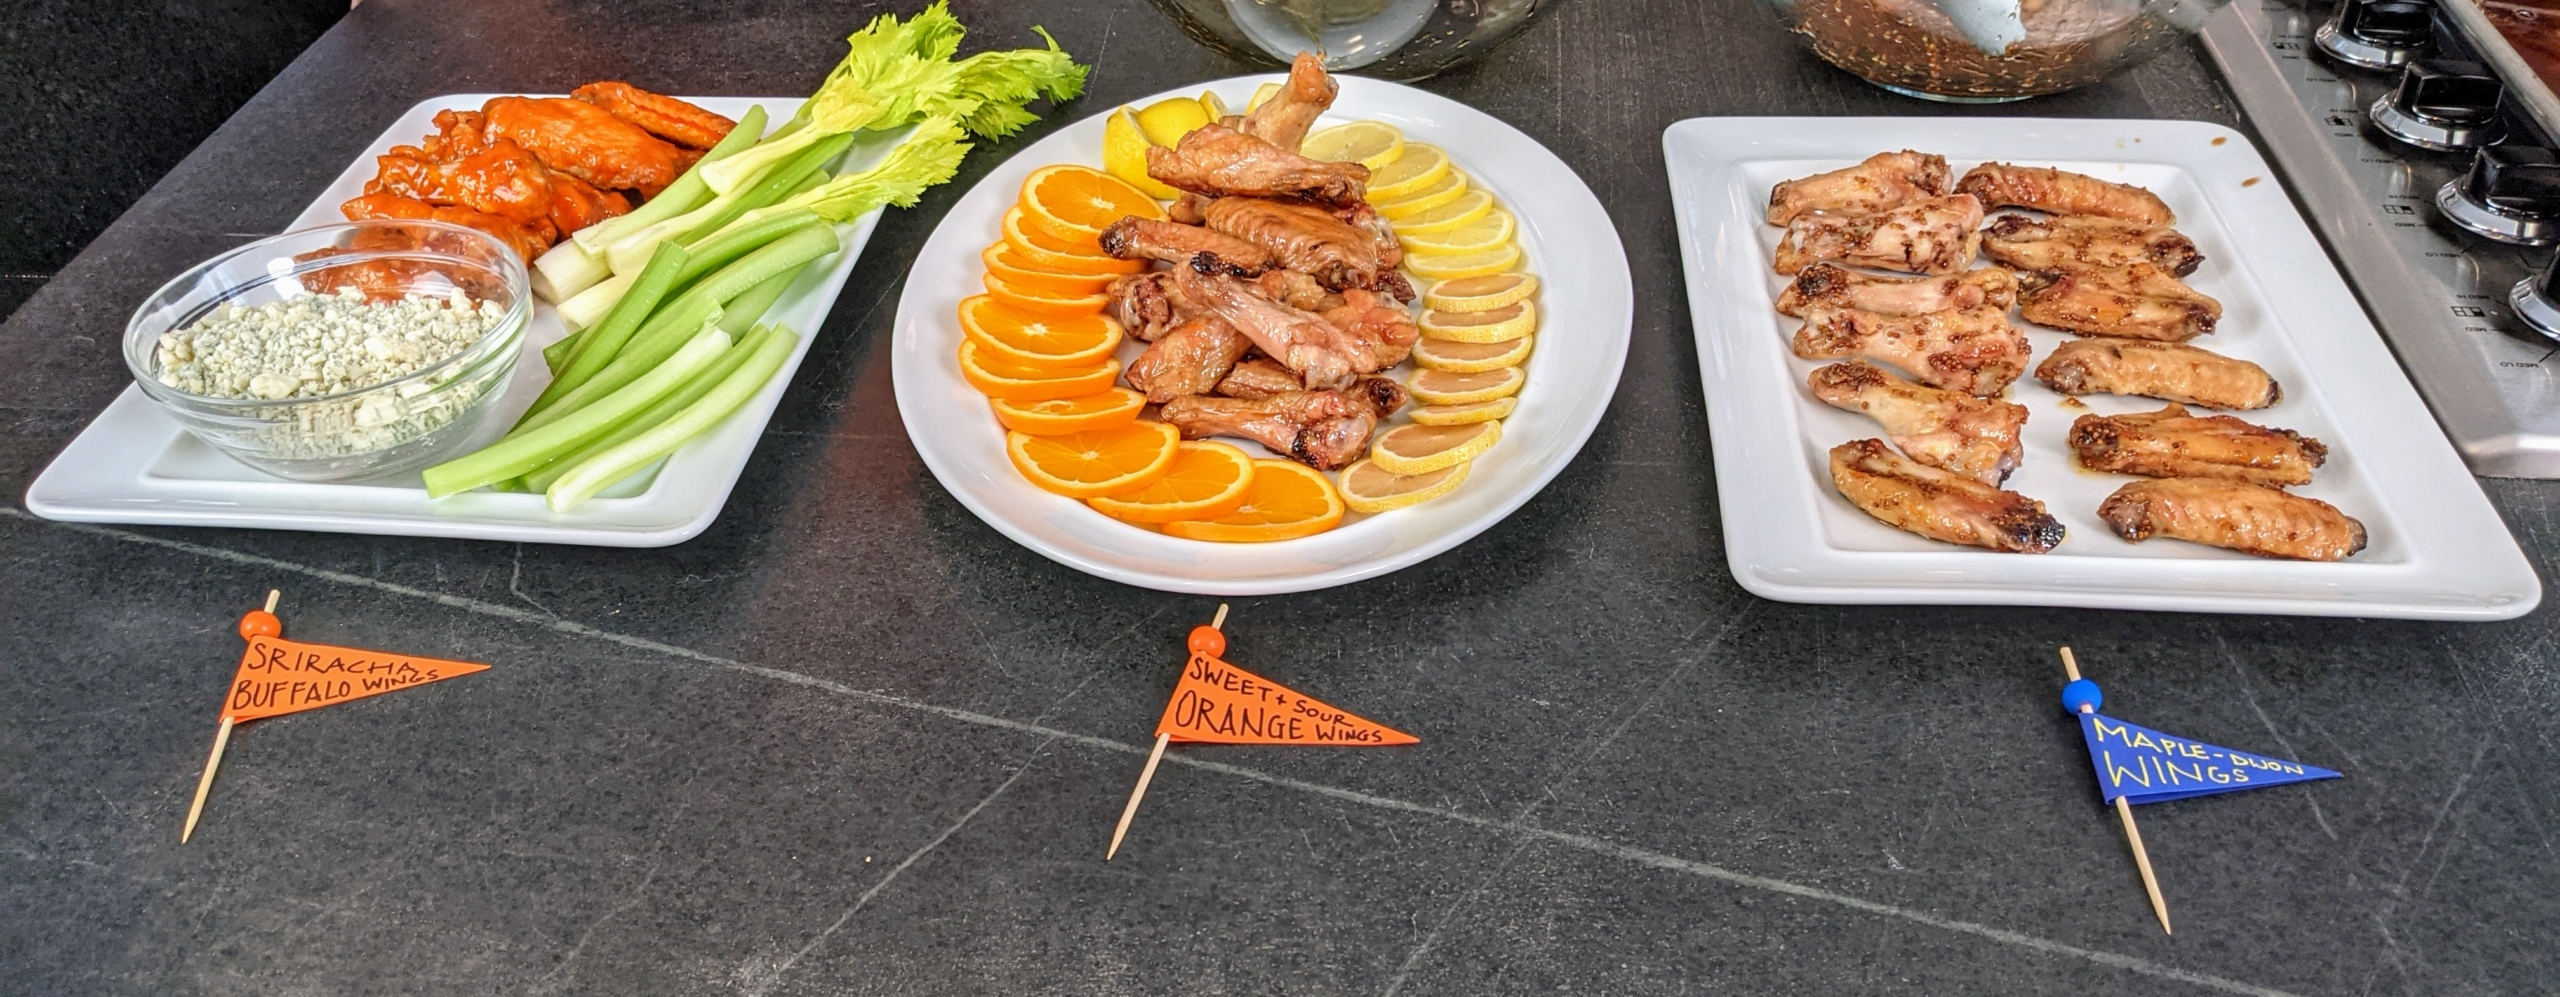
If you’re making wings, be sure there’s enough for everyone. As a general rule, allot for about six wings per person, and up to 12 per person if it’s a main dish.
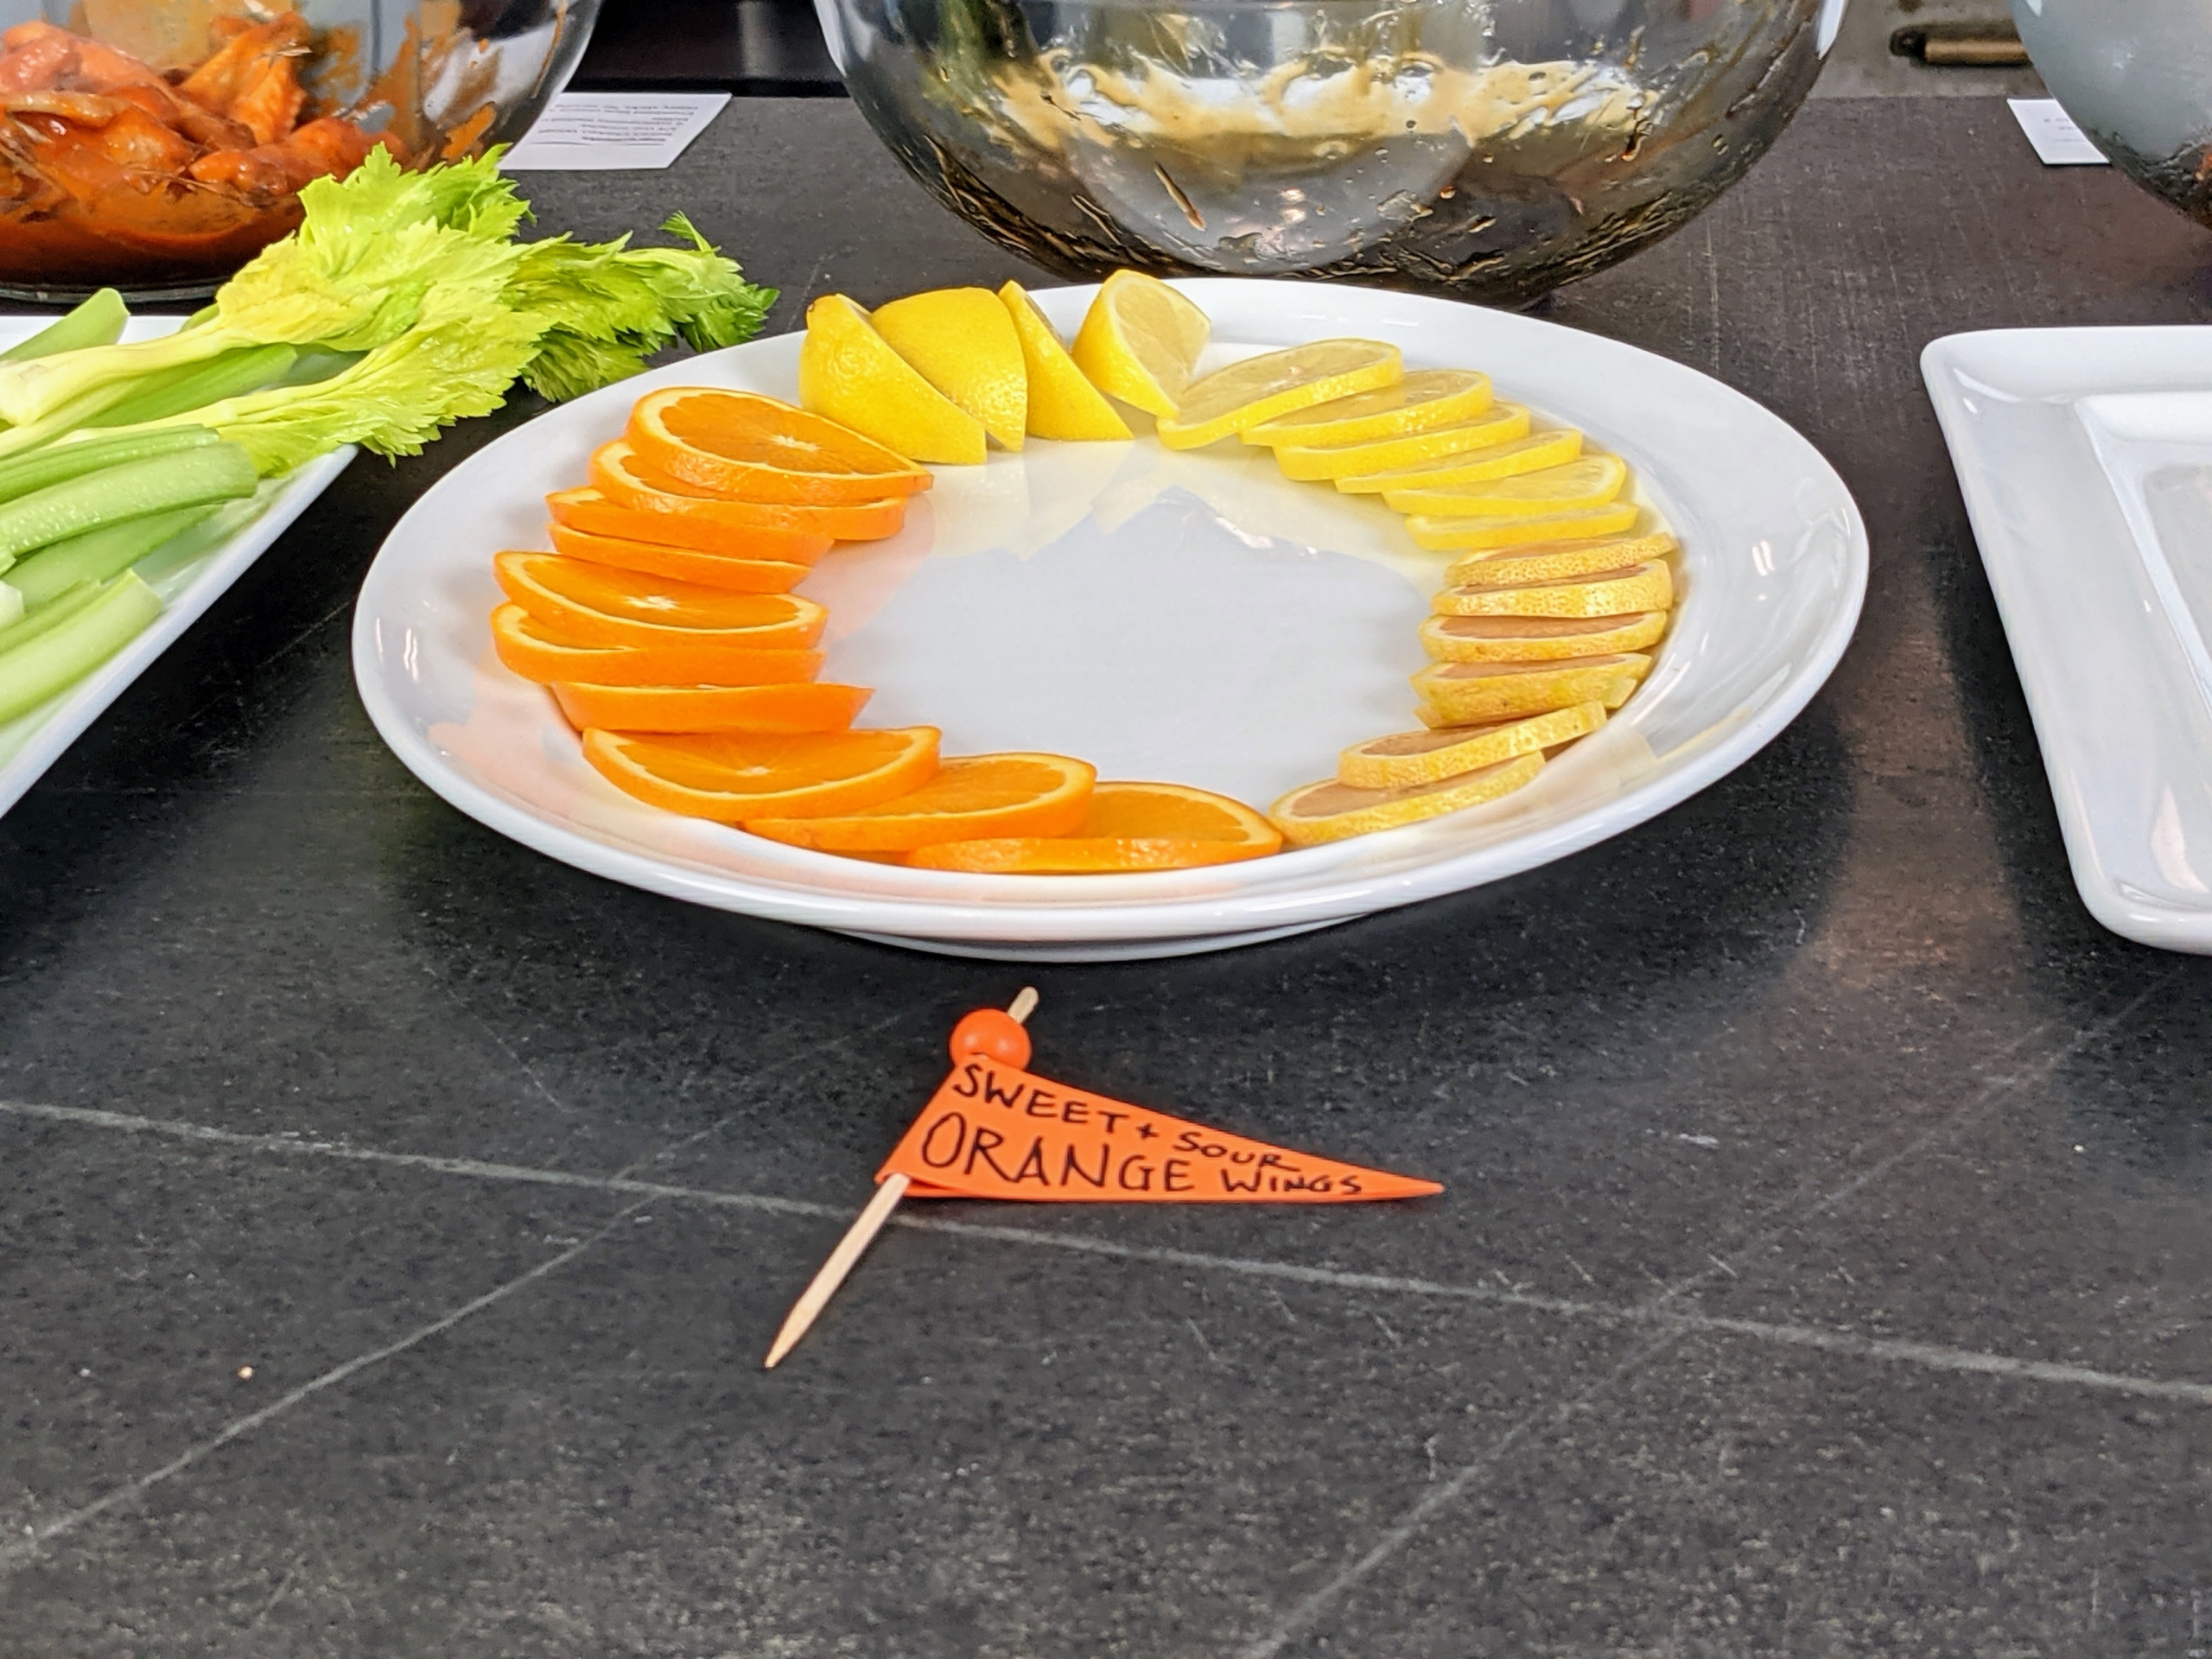
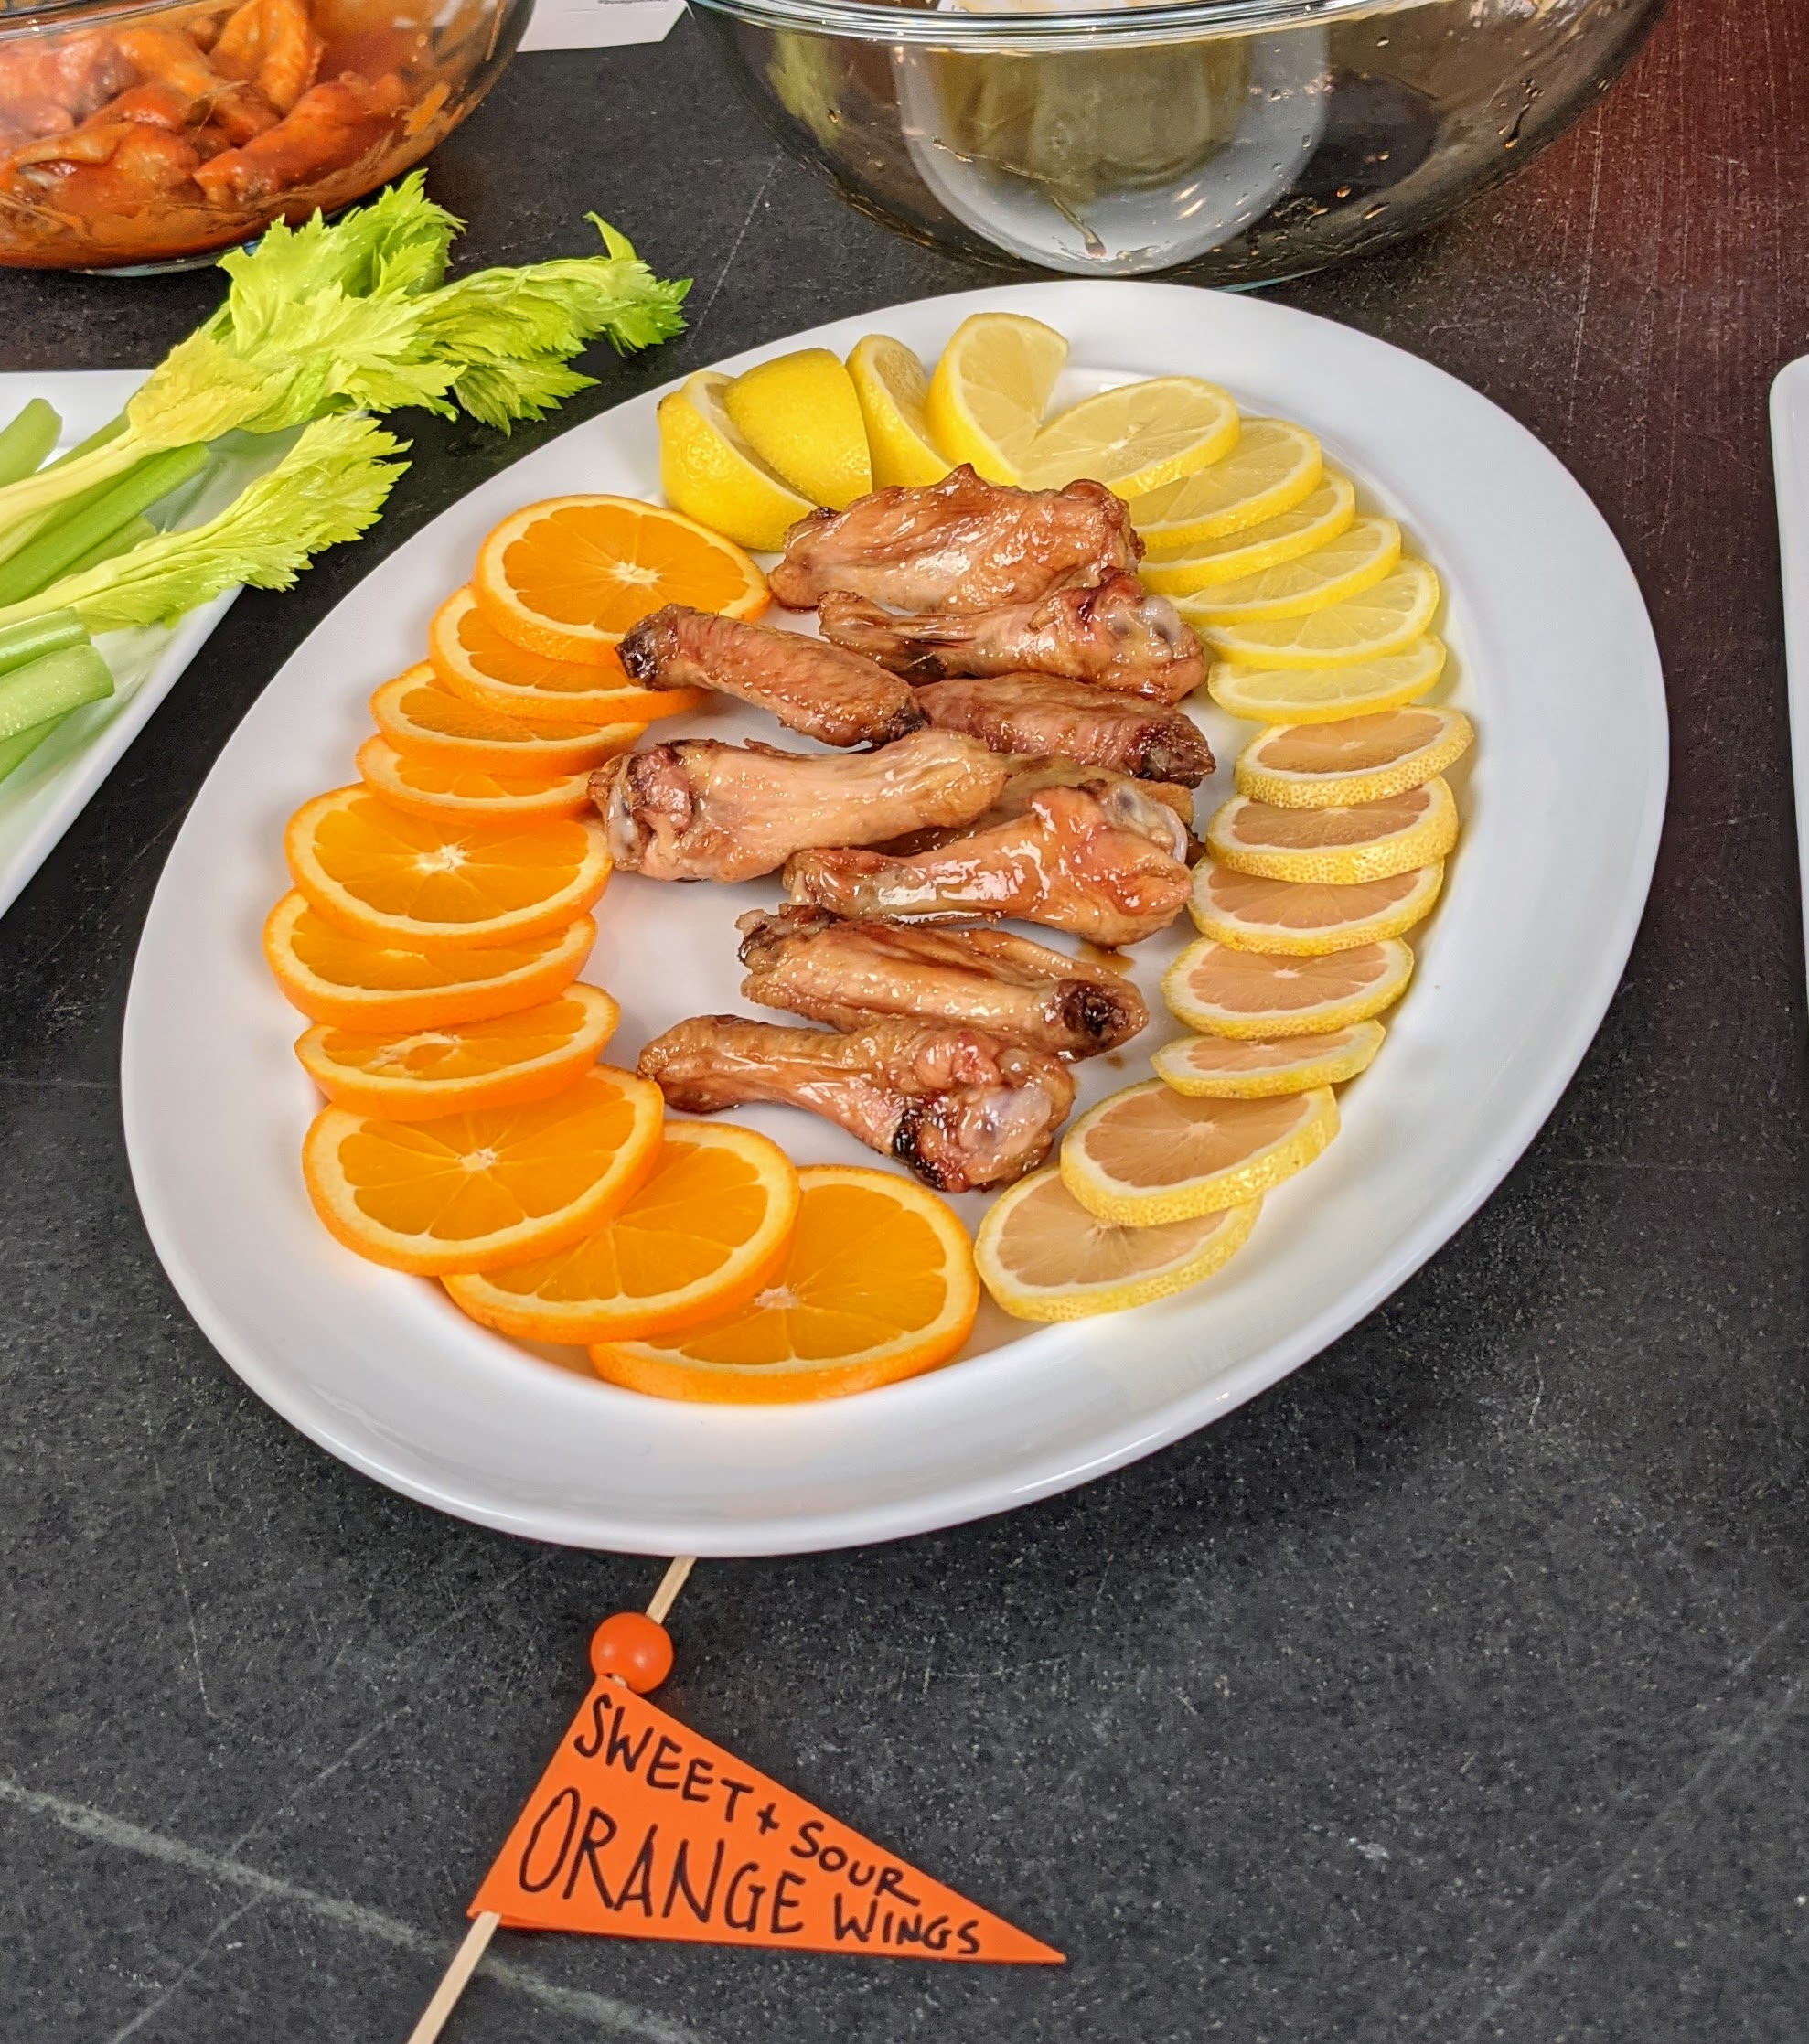
Use fruits or greens as a garnish to decorate the platter.
These Sweet-and-Sour Orange Chicken Wings recipe uses sherry vinegar for a wonderful kick of flavor.
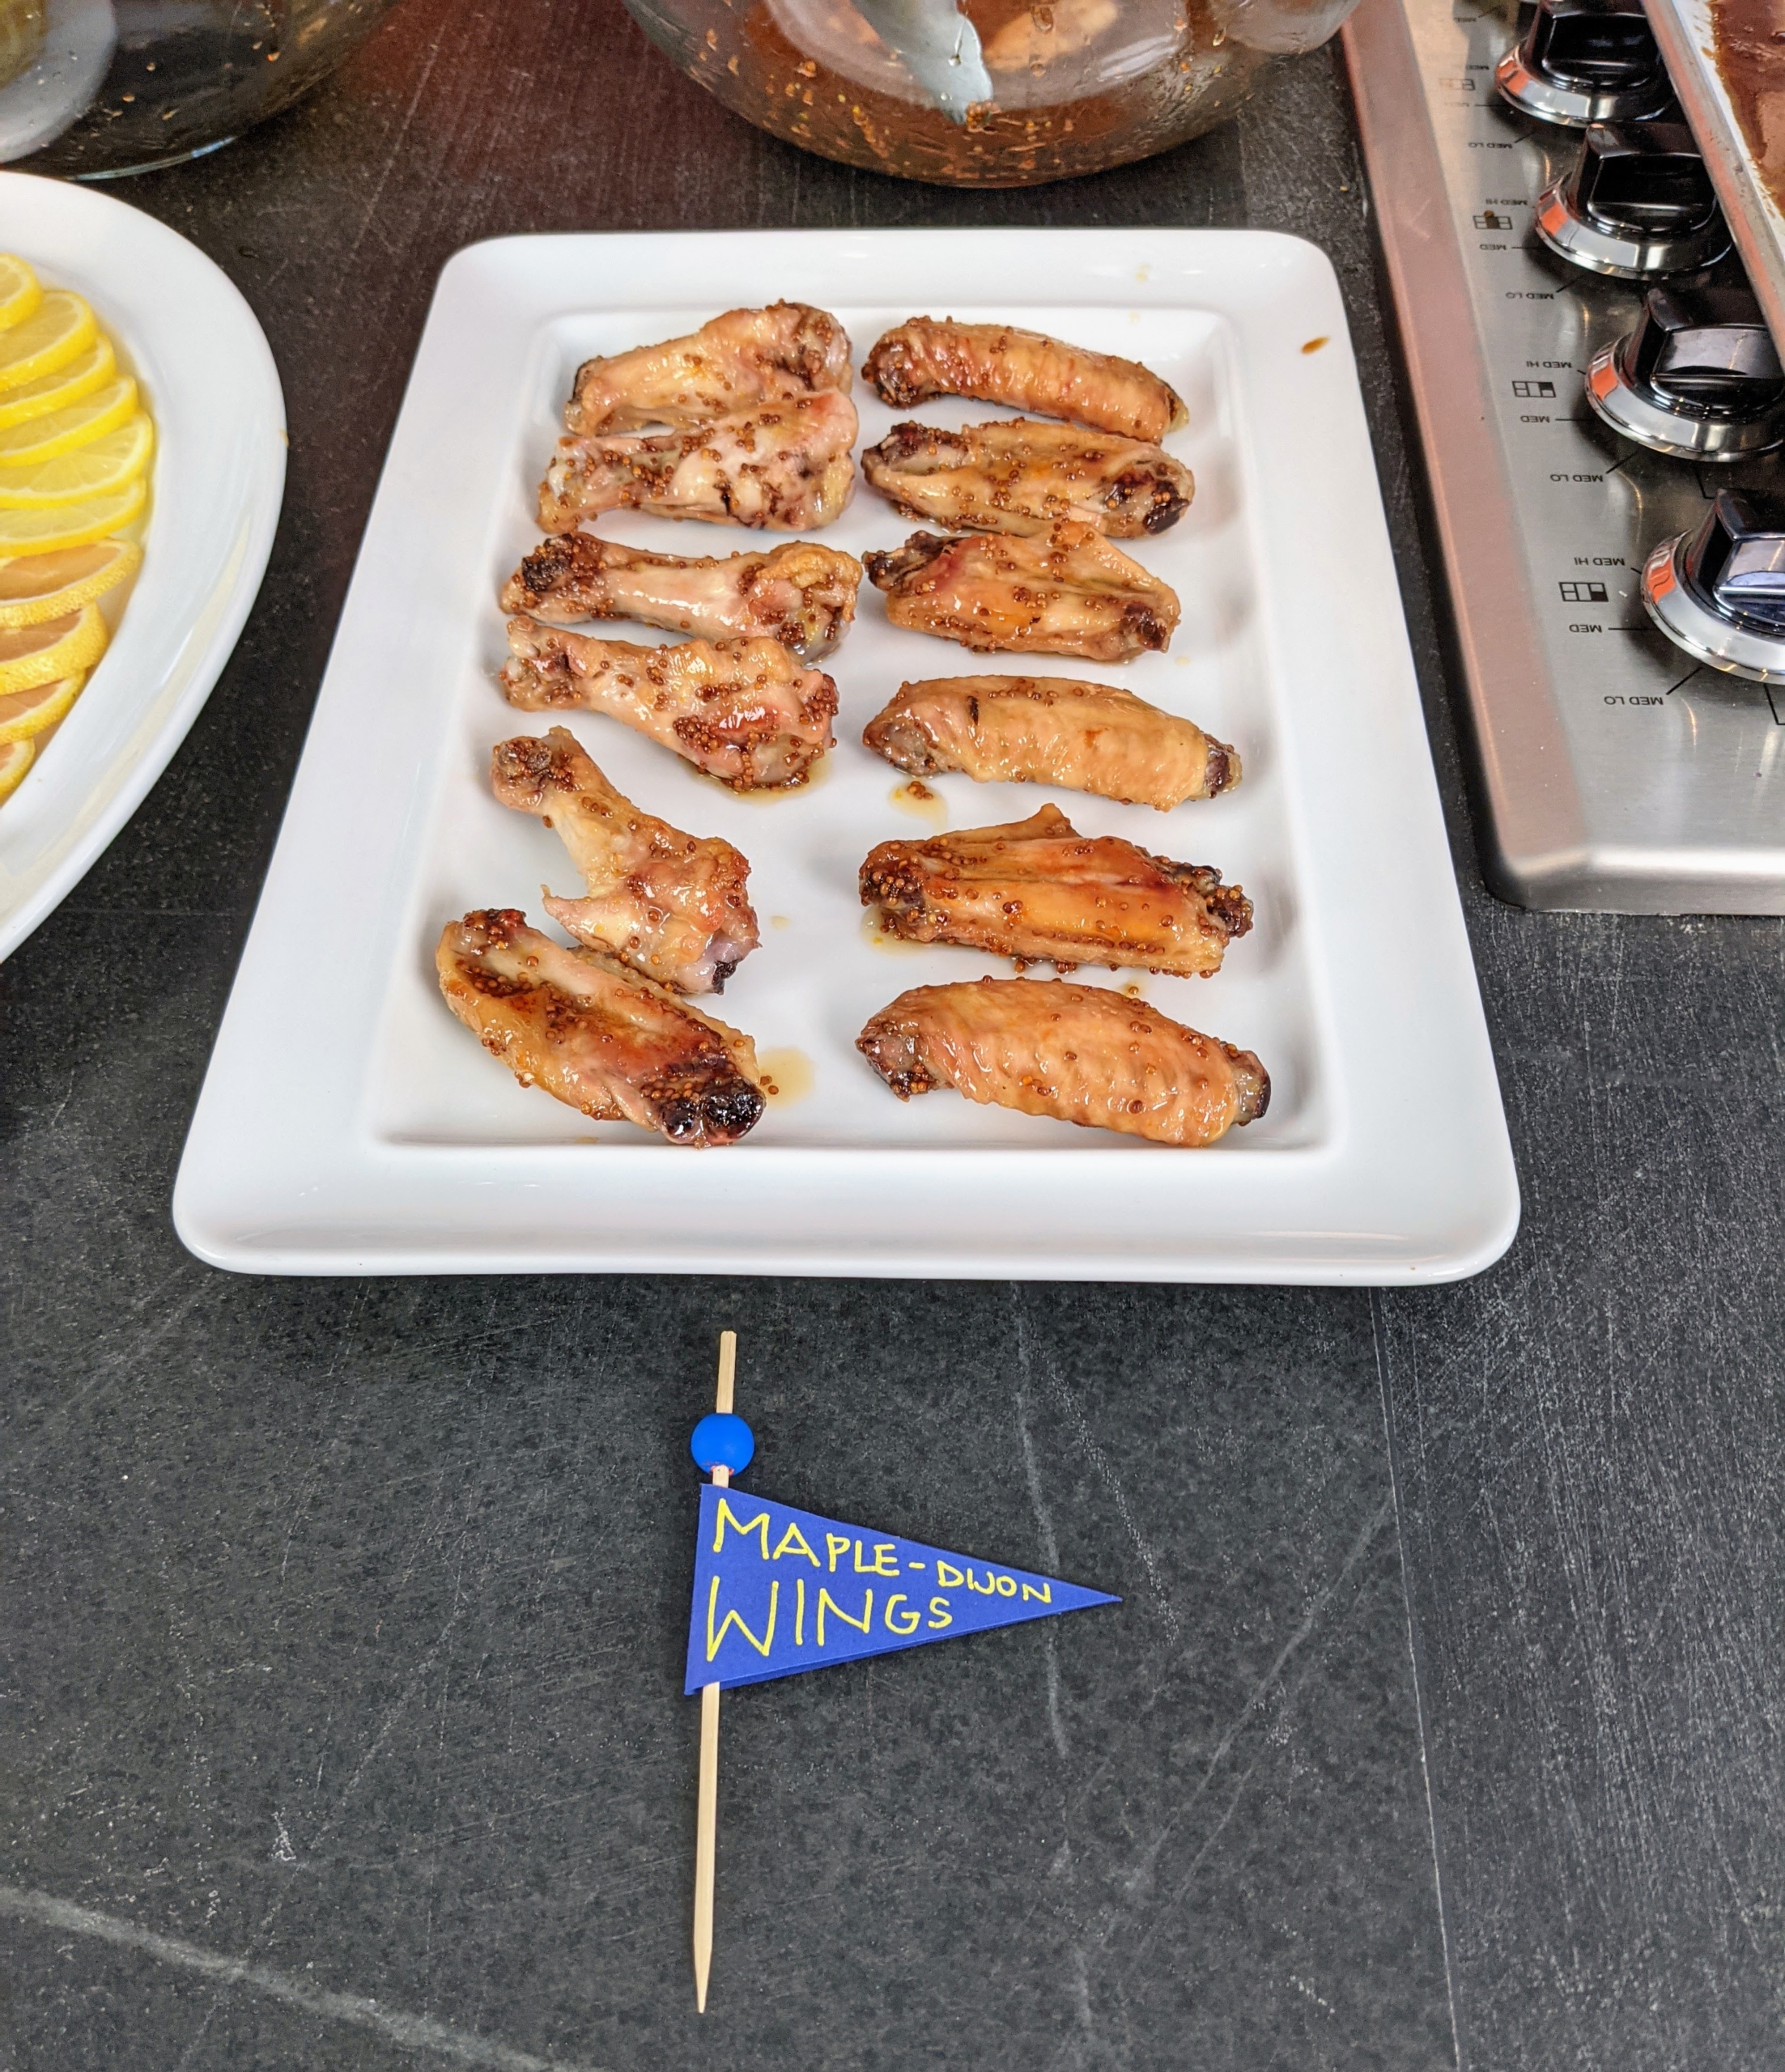
These Maple-Dijon Chicken Wings are so easy to make. All you need are dijon mustard, maple syrup, and chicken.
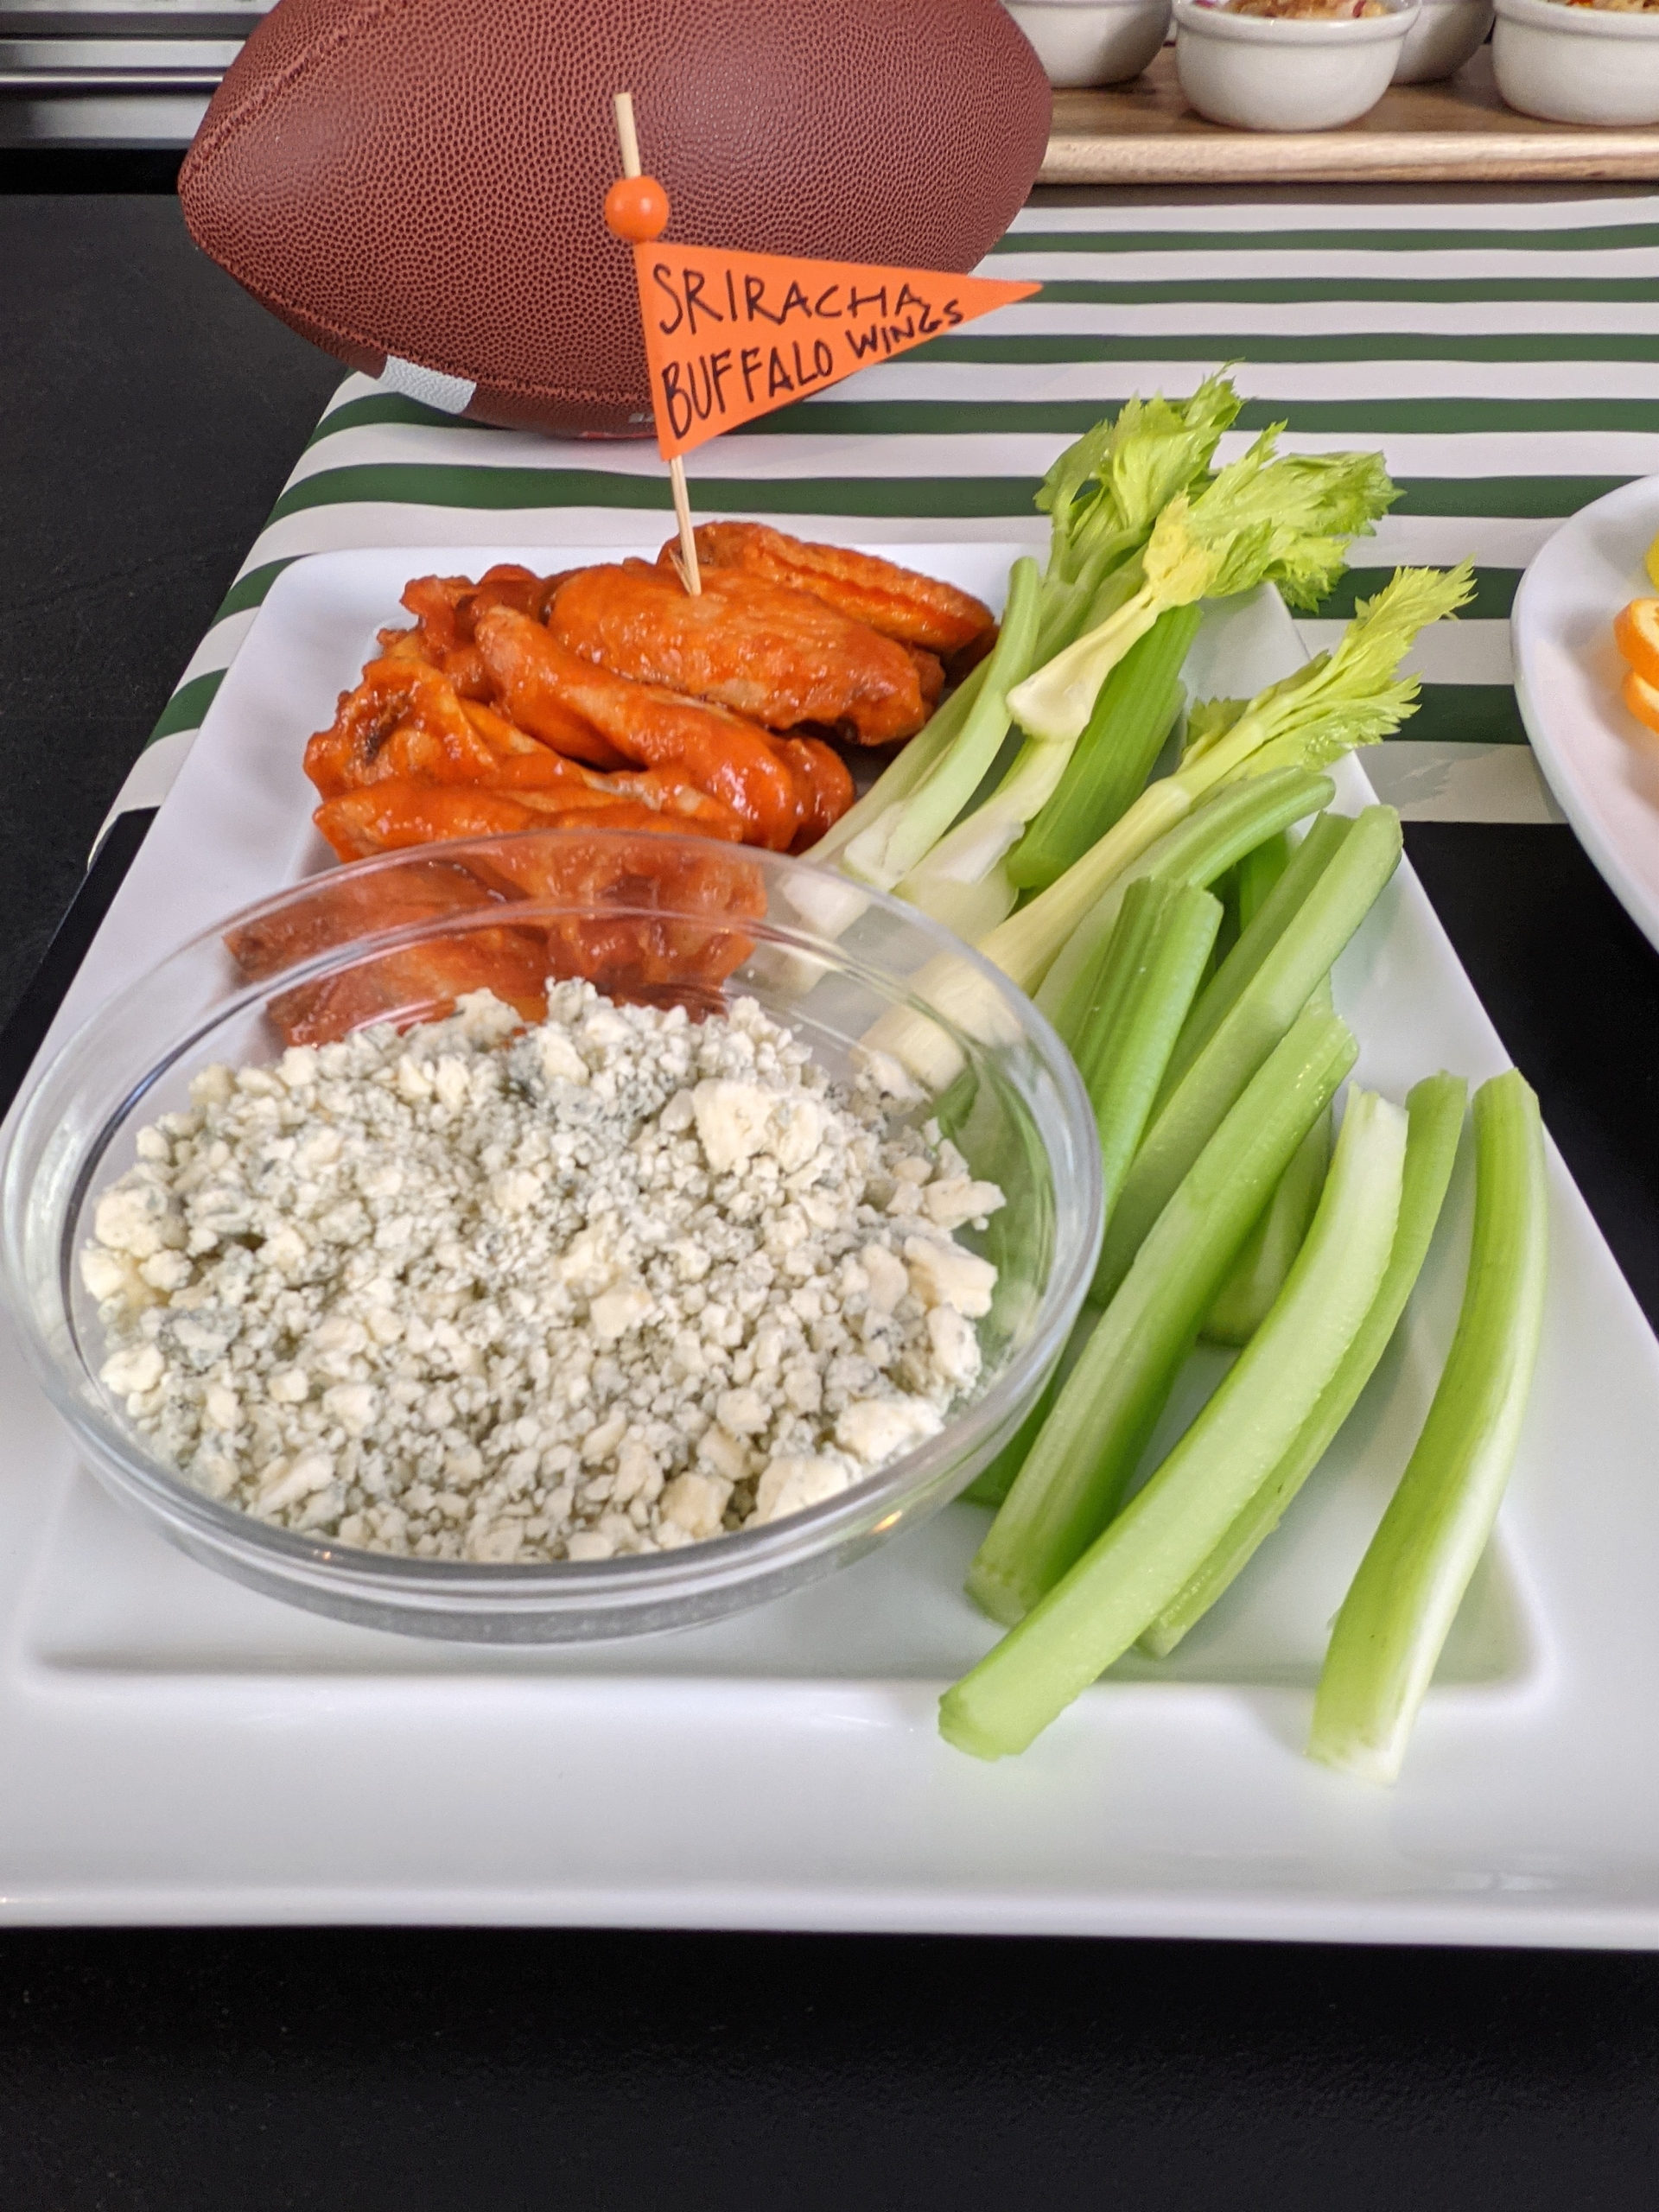
And my Sriracha-Buffalo Chicken Wings are classic hot wings with the addition of sriracha, a Thai-style hot sauce. Serve them with lots of crumbled blue cheese and celery sticks.
All three can be served at a buffet, so guests can try some of each. Go to MarthaStewart.com for the recipes.
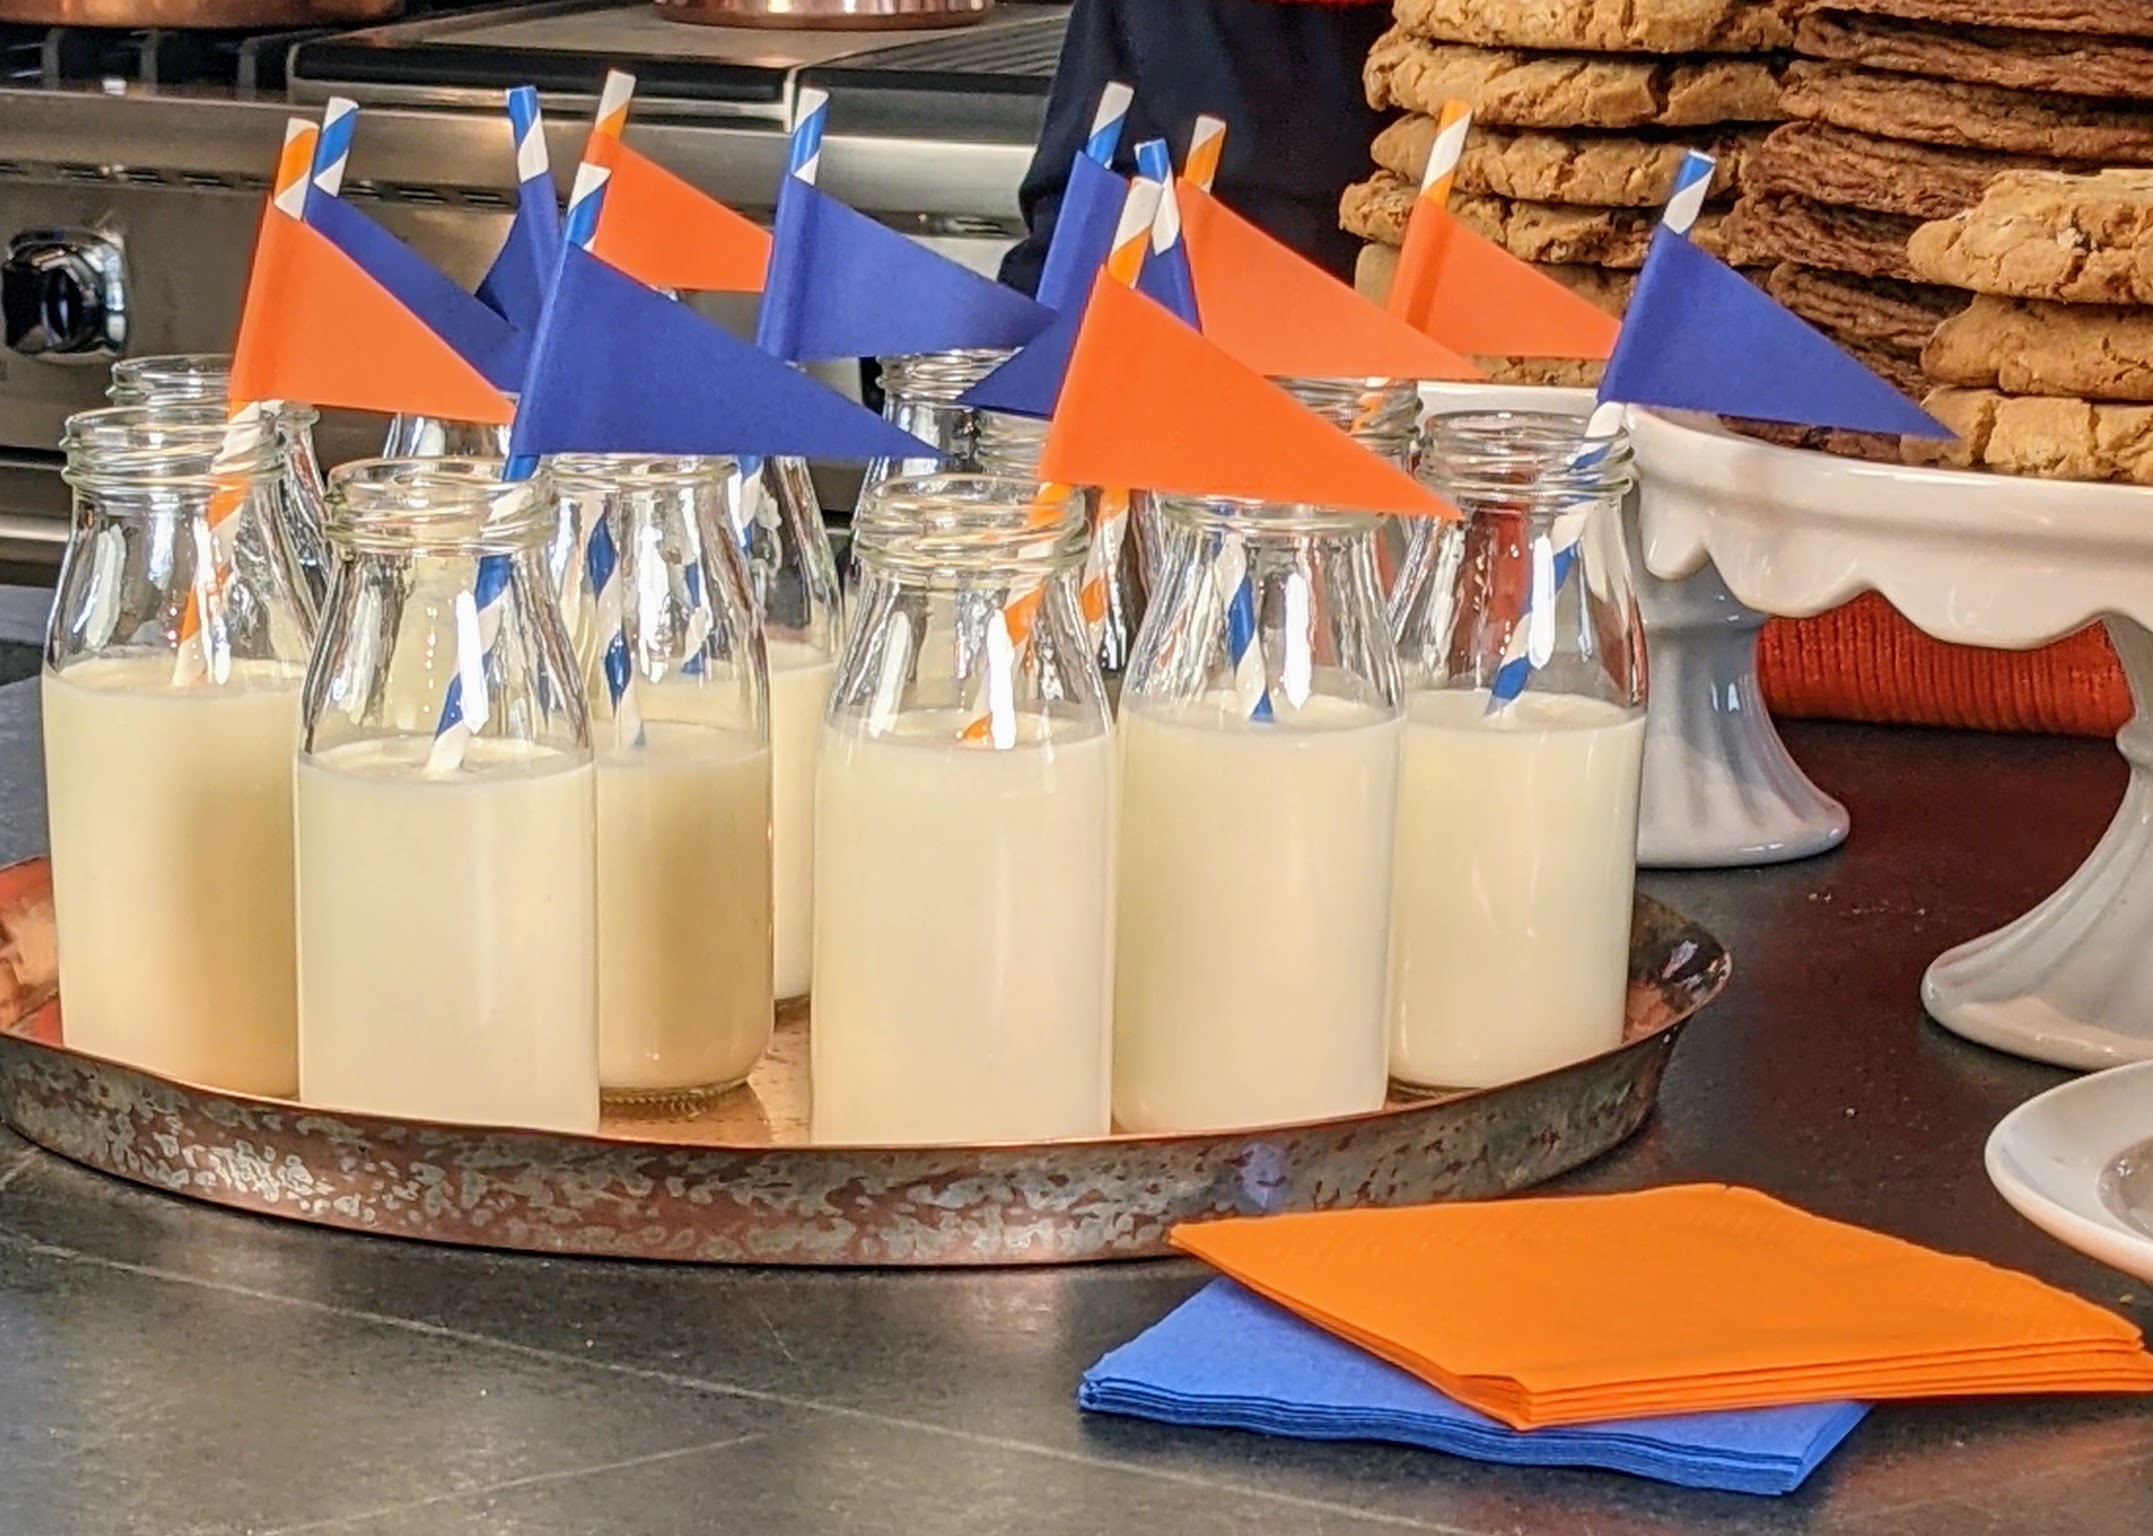
Cookies must be paired with milk, of course. One can serve it in fun glass bottles like these.
And there’s no better way to watch the Big Game than on one of these giant 85” Neo QLED 8K televisions from Samsung. If you don’t have one, there’s still time to order and get it on the wall in time – they’re so easy to install.
This monitor has an Ultra Viewing Angle – every seat in the room is the best seat. It also features Auto Motion Plus, which offers crisp, clear action shots even for the fastest plays. Its One Connect Box keeps cables out of sight. And, this television is equipped with Anti-Glare – a must for watching any suspenseful game. Viewing on the Big Screen for the Big Game and enjoying delicious game day bites – they’re all good things.
The beginning of a new year is always a nice time to get everything in good order.
Here at my busy Bedford, New York farm, we try very hard to keep things clean and well-organized - in my kitchen, my office, my large Equipment Barn, my greenhouses, my hayloft, etc. Staying organized saves time, boosts productivity, and helps minimize stress. I am always looking for useful and attractive storage solutions that optimize space and control the clutter. From neat and tidy desk accessories to repurposed containers found at tag sales to commercial sized wheeled units, there are so many ways to keep "a place for everything and everything in its place."
Enjoy these photos.
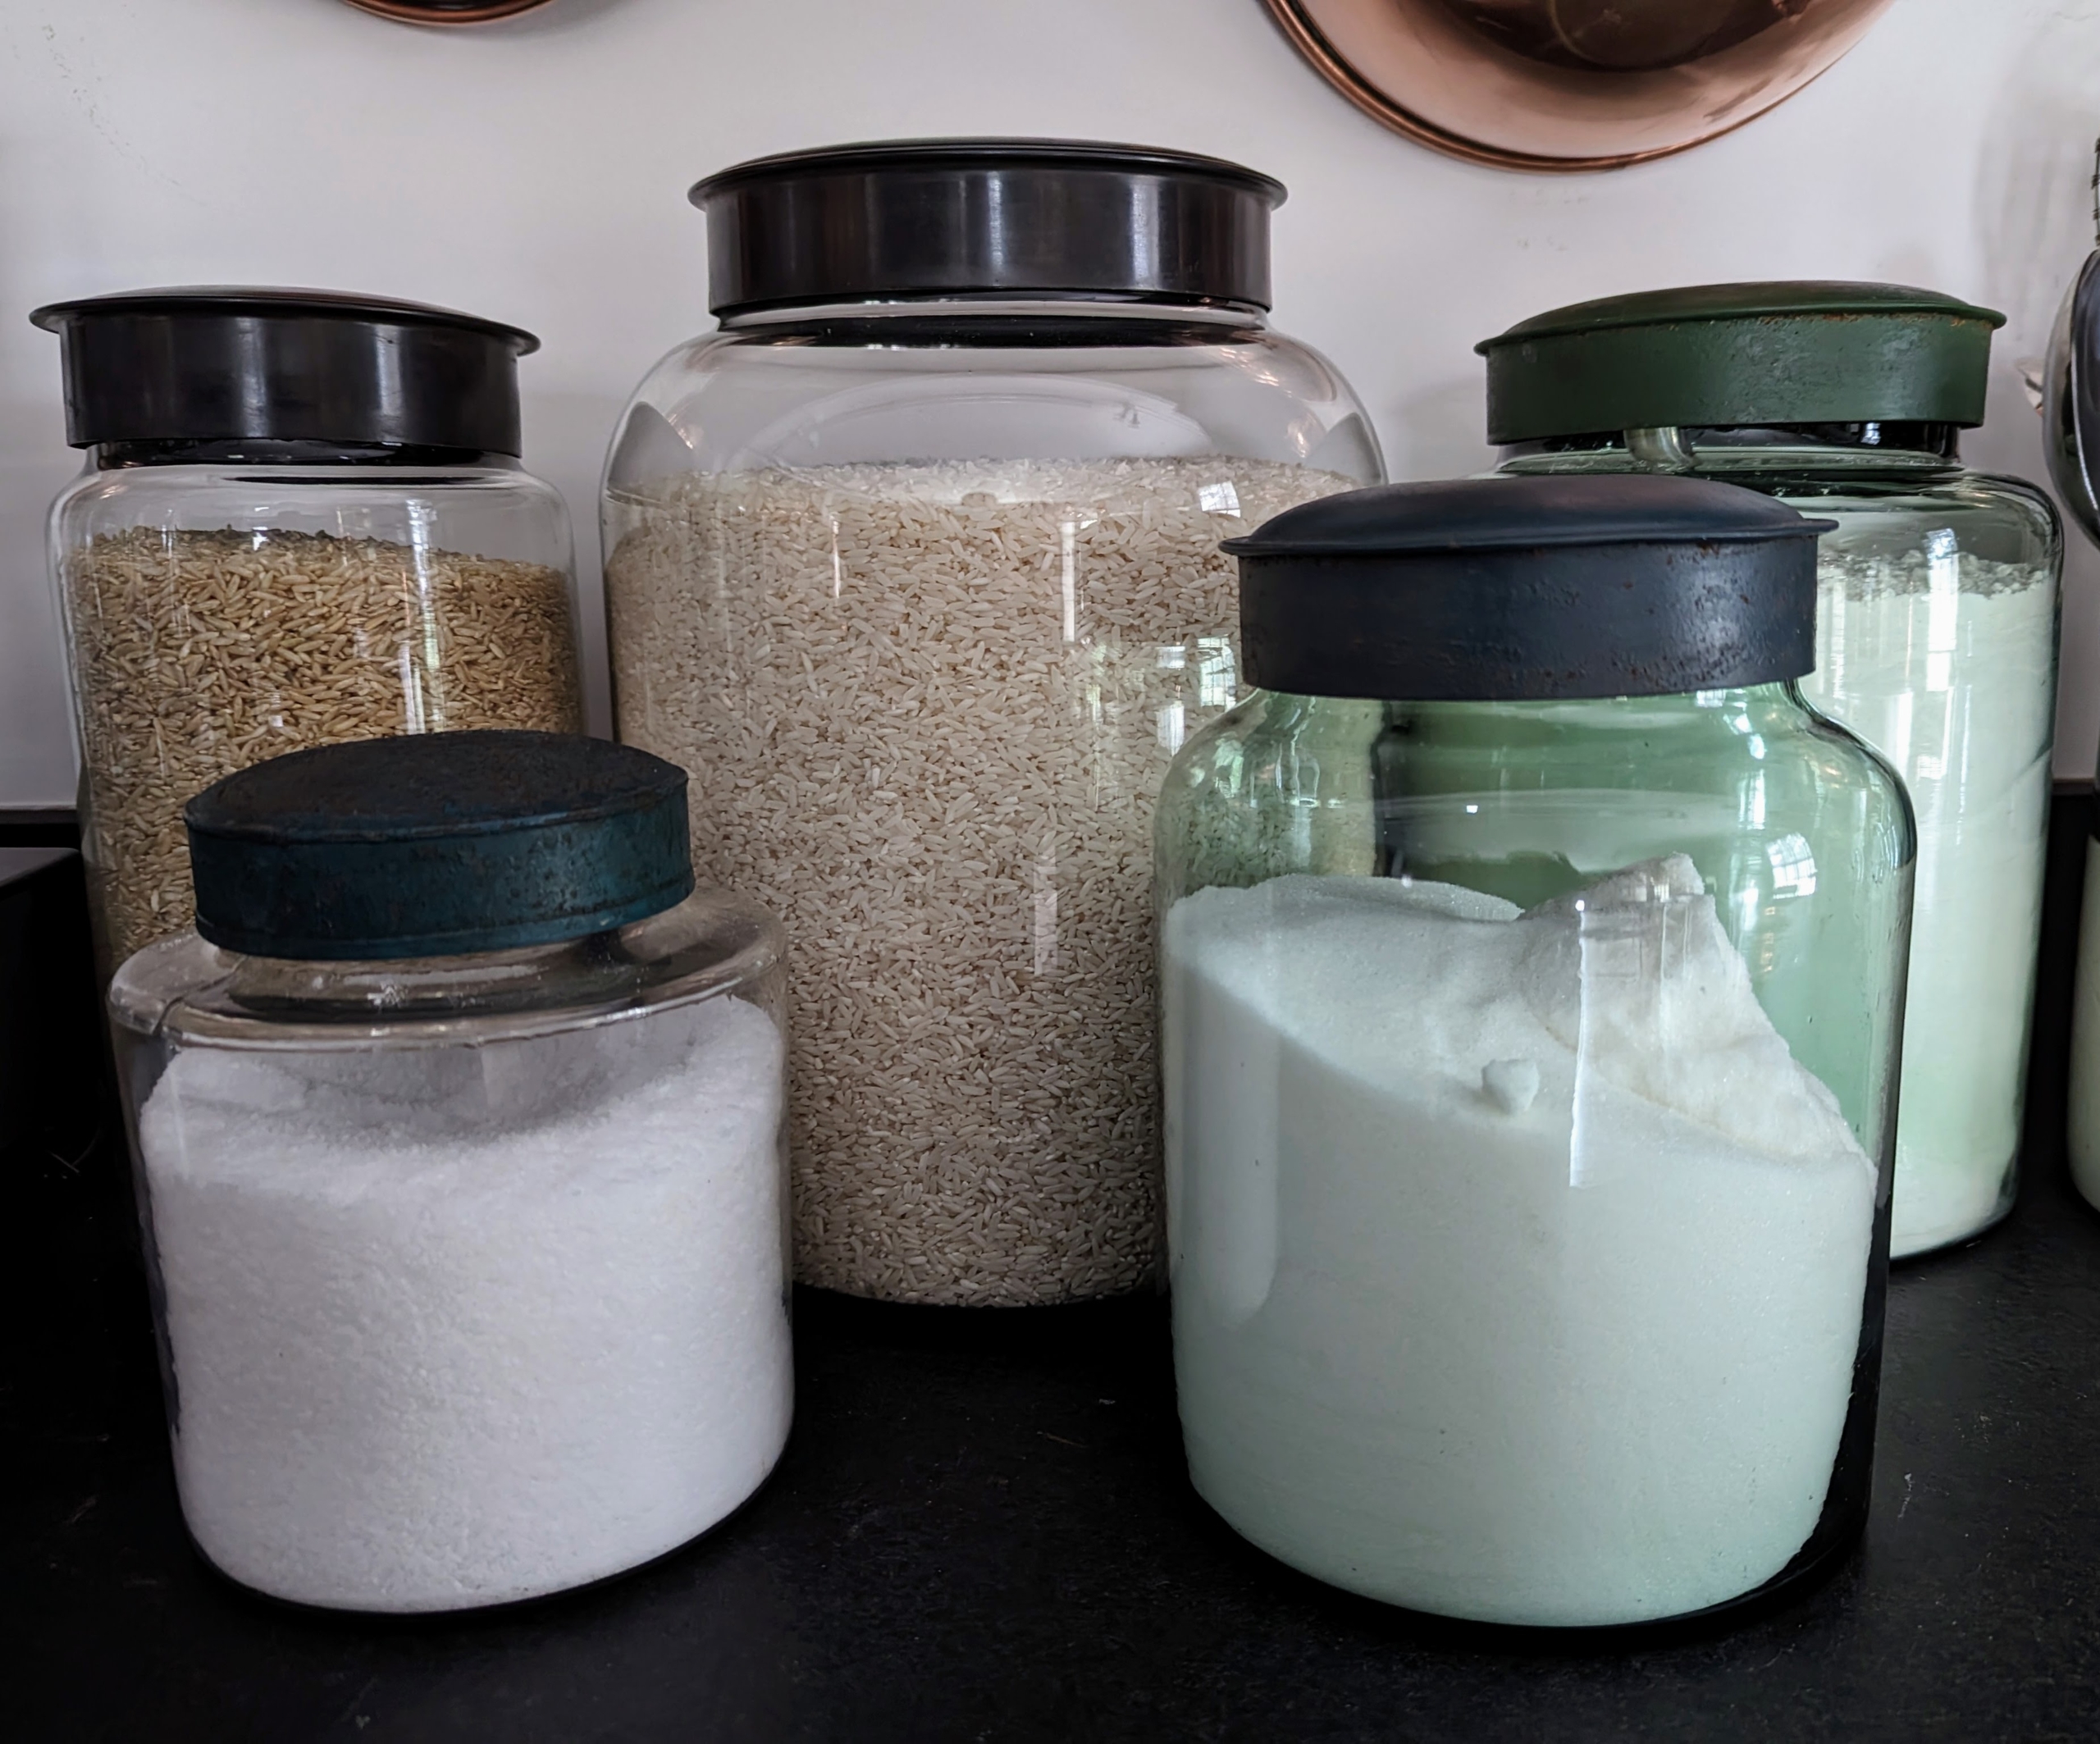
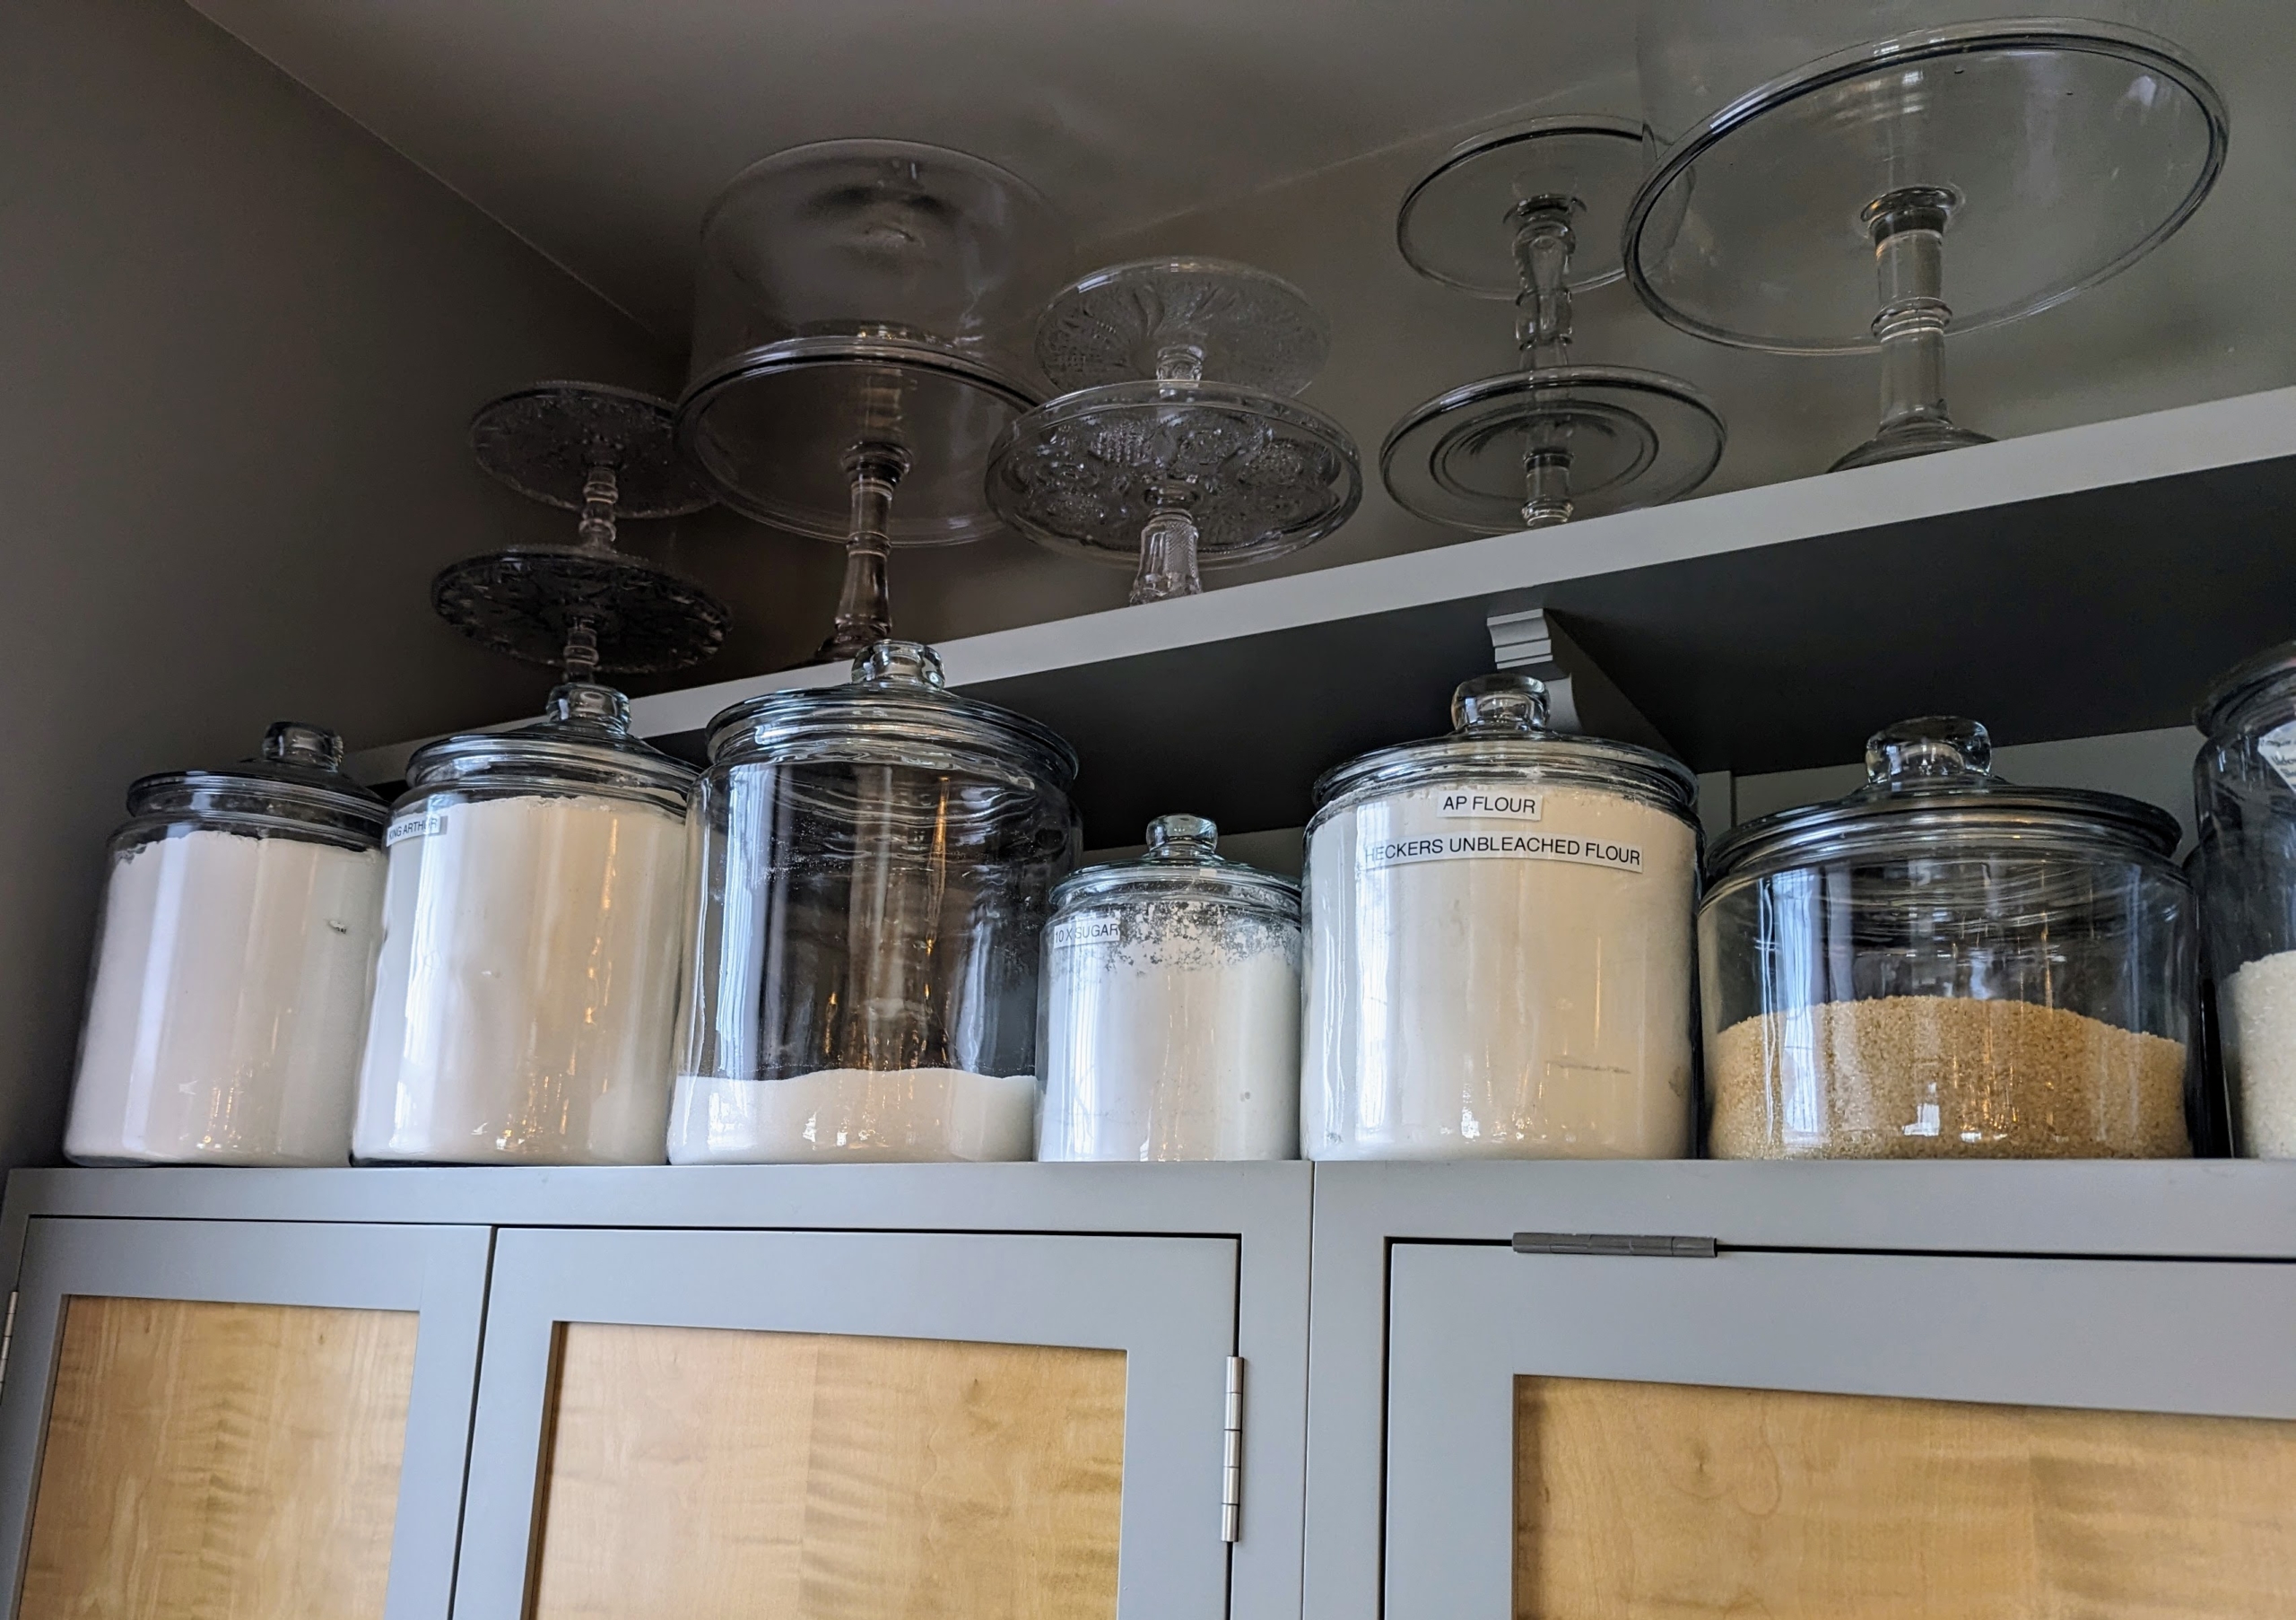
Storage solutions can be both functional and pretty. Here in my studio kitchen, we keep lots of flour, sugar, and grain in these large glass containers. Pantry vessels like these are so useful for so many items and can be kept on the countertop for easy access.
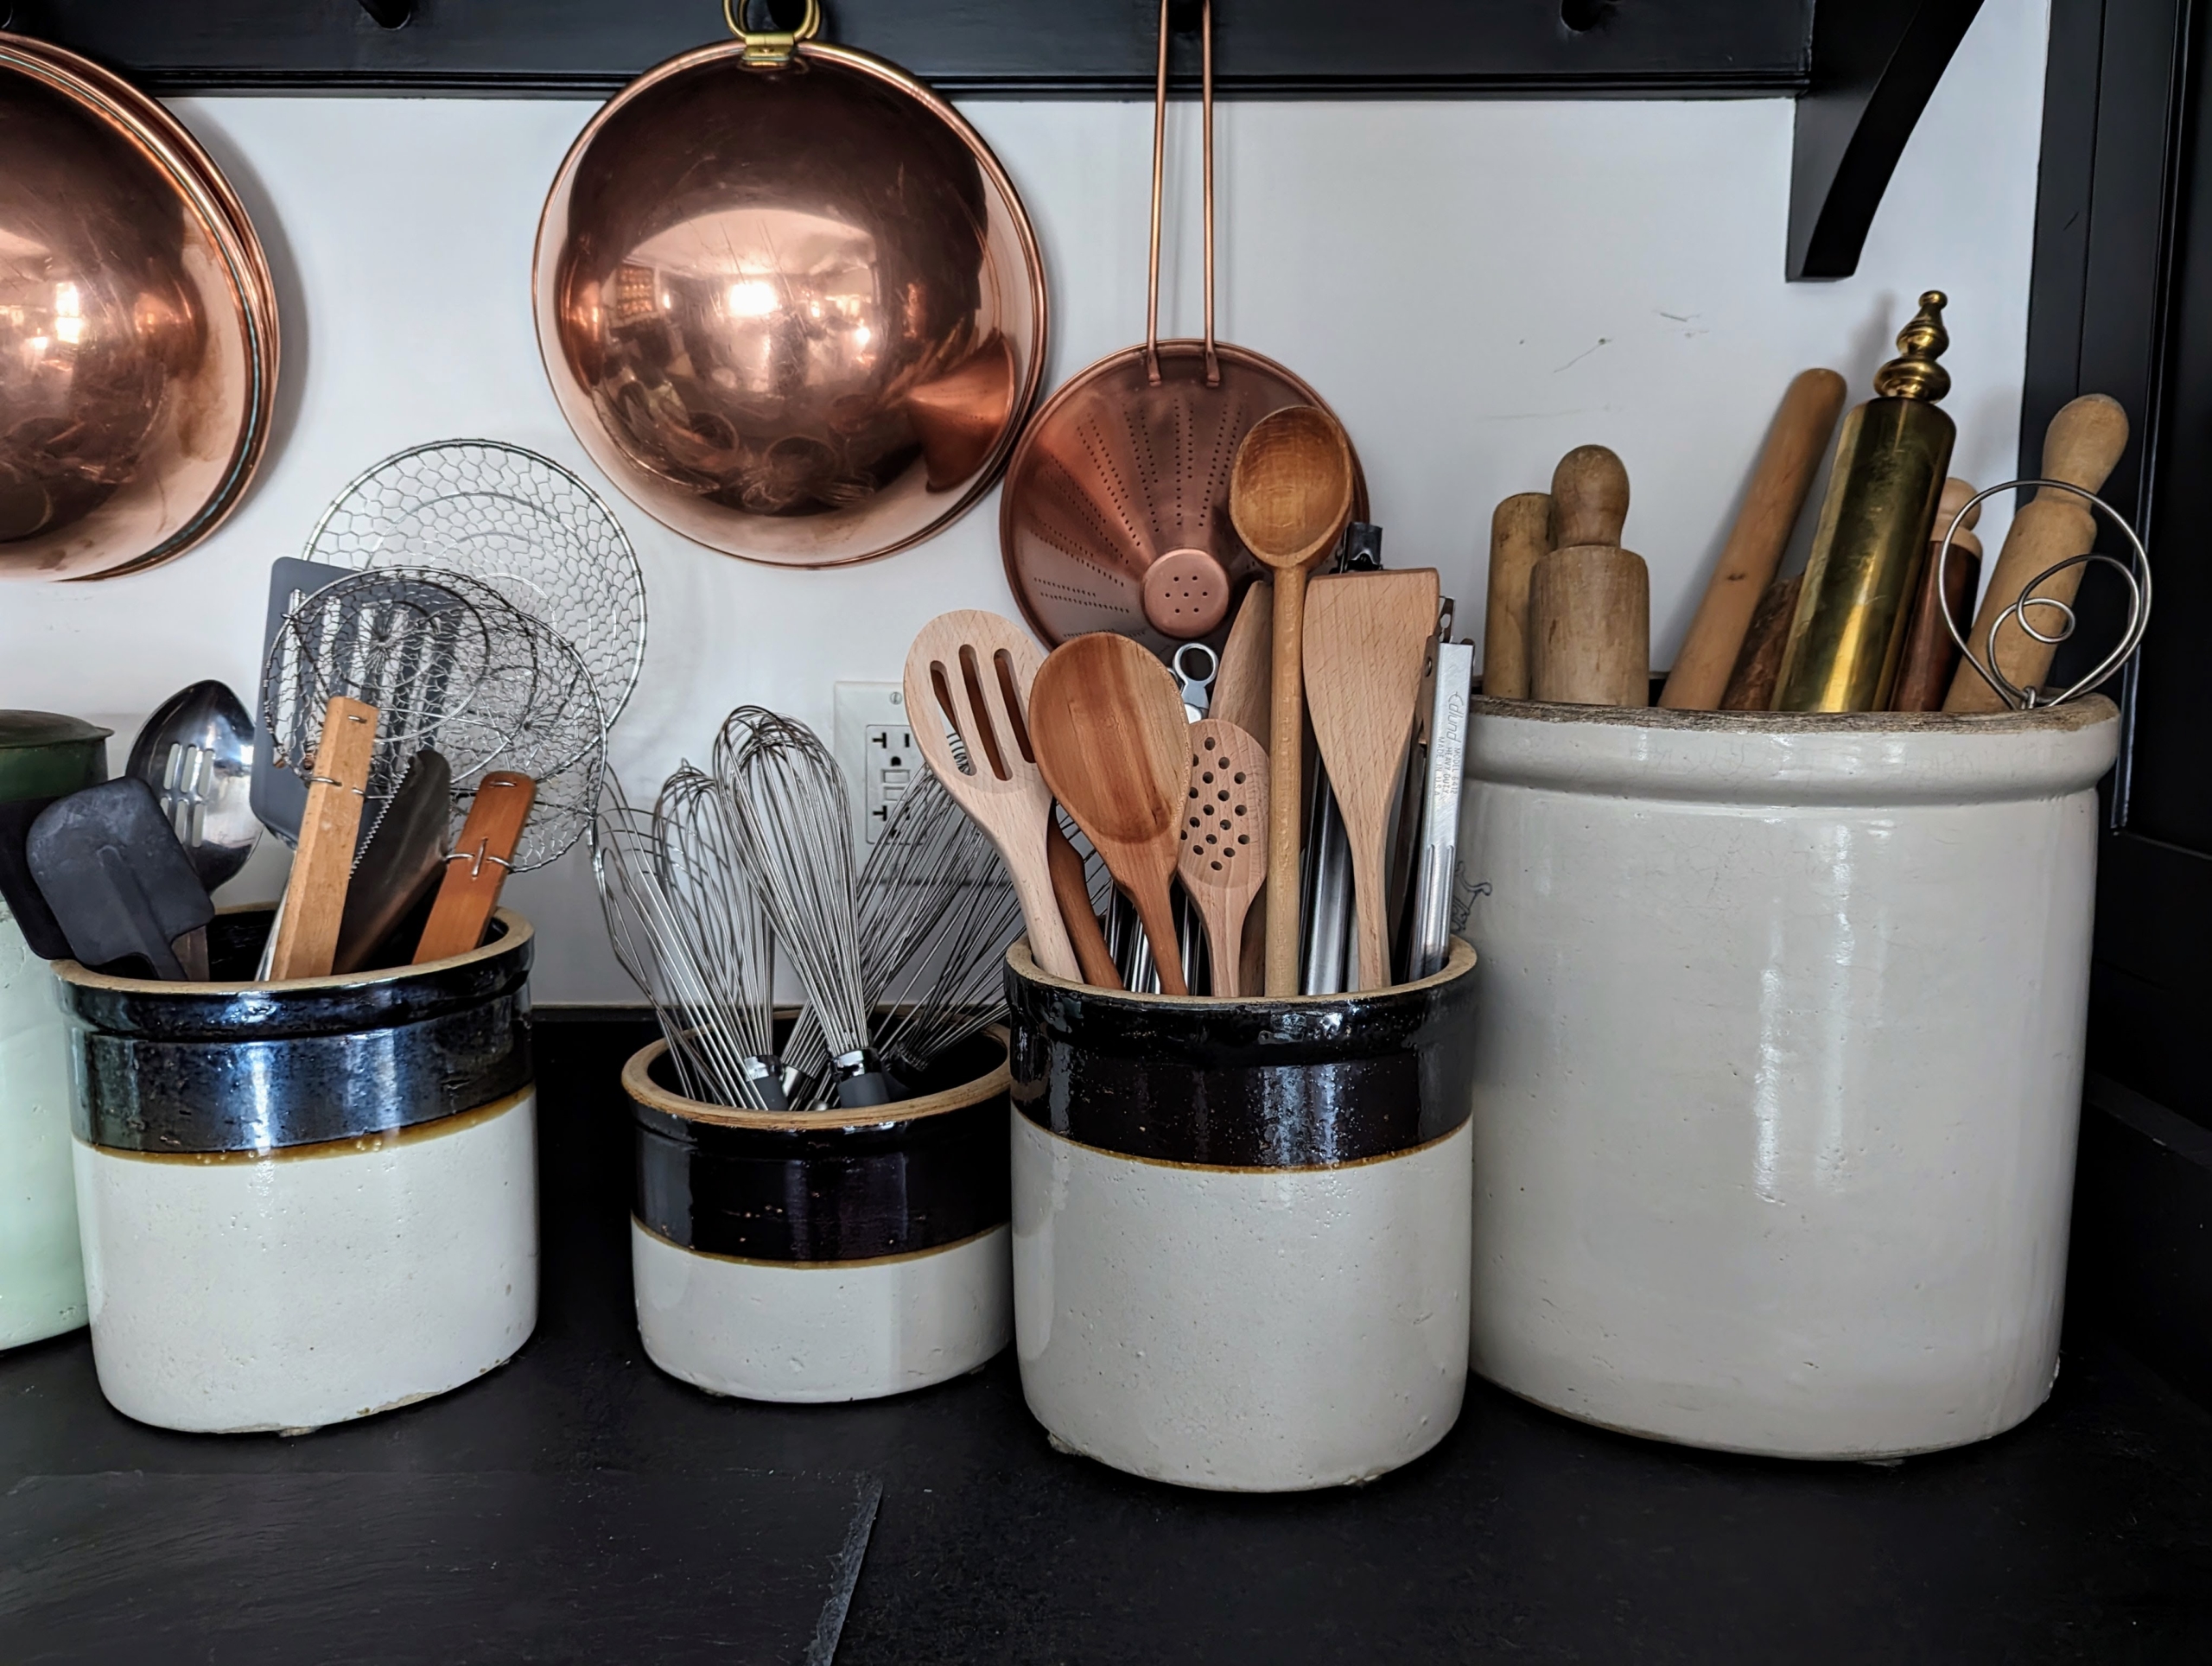
Vintage and antique crocks can be used to hold utensils on the counter. These strong, large jars are durable and easy to keep clean.
In my own Winter House kitchen, I keep flour and rice in these glass jars with wide mouths, so measuring cups and scoops can fit inside.
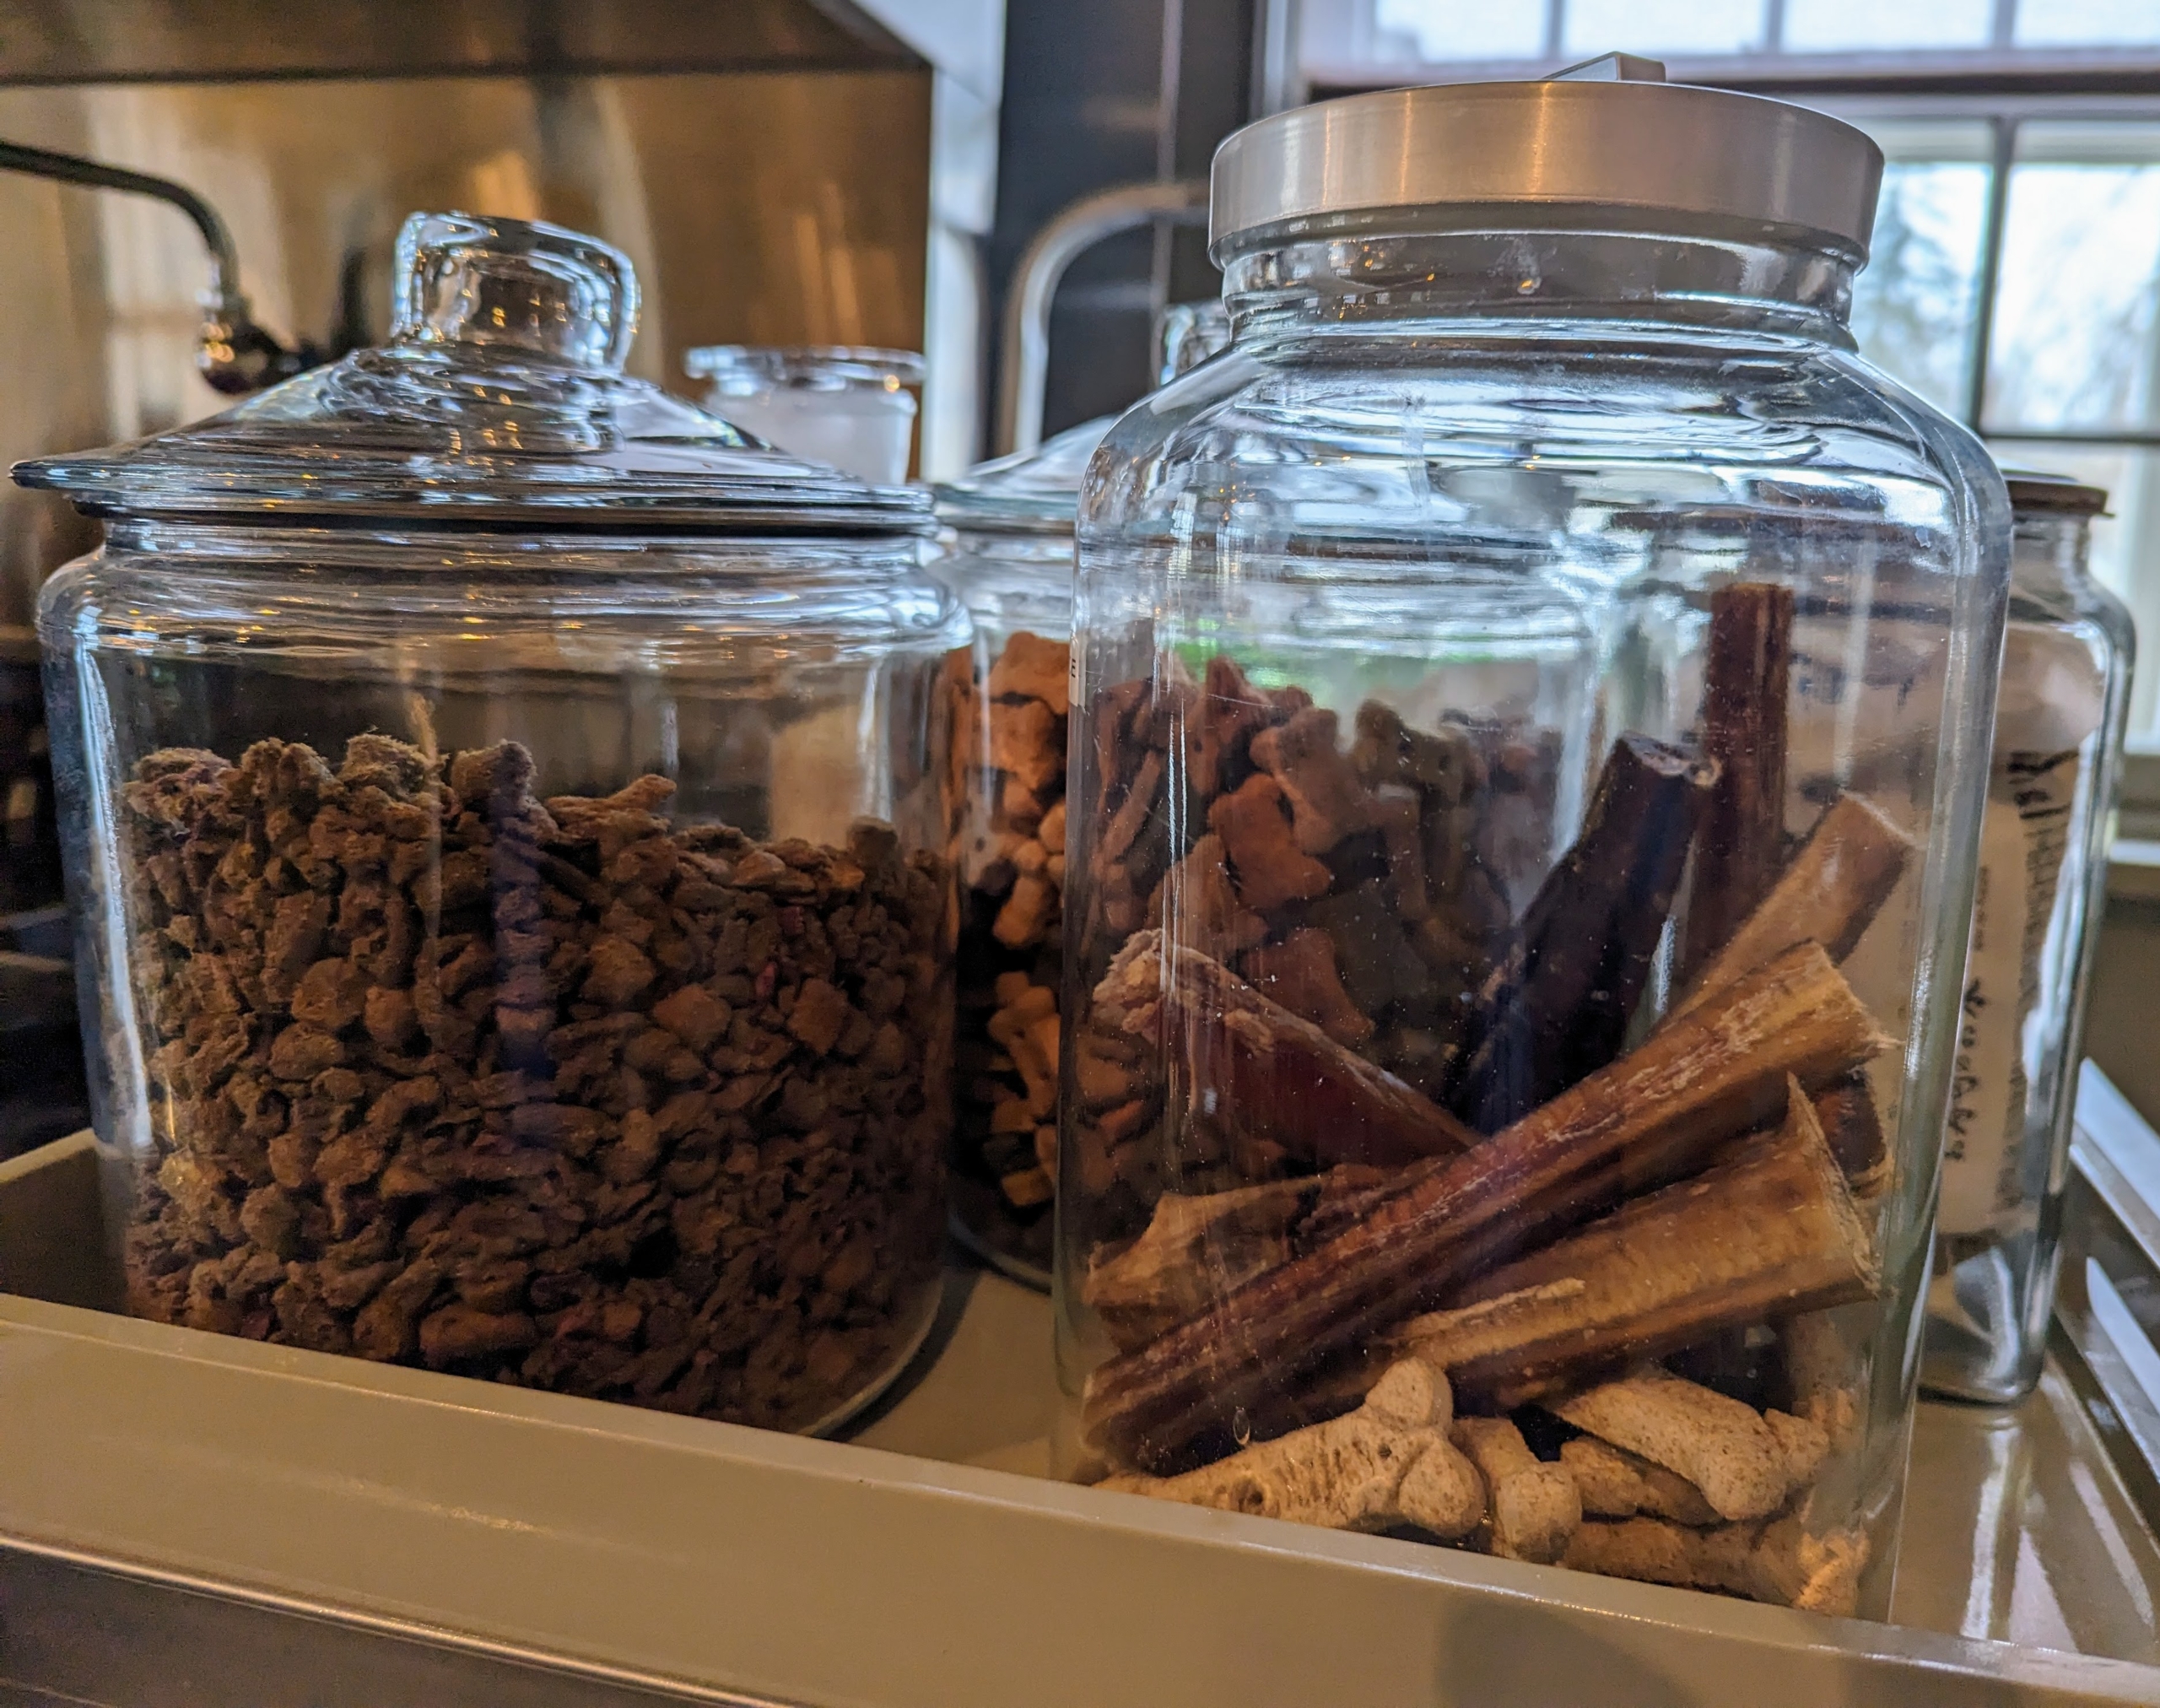
Dog treats are also good to keep in these glass canisters. They can be bought in multiples and used all around the home.
I also use and reuse these plastic containers for salts, peppers, and items that come in smaller amounts.
If you follow this blog regularly, you know I use the bigger quart sized containers for storing my homemade dog food. These can be used over and over and kept neatly stacked in the freezer.
I use a variety of small dipping bowls and salt cellars to store different types of salt where I can reach them easily.
On another counter, giant ironstone bowls for storing my eggs that are collected every afternoon.
On my kitchen desk, old silver plated julep cups serve as pen and pencil holders – so pretty in any office space.
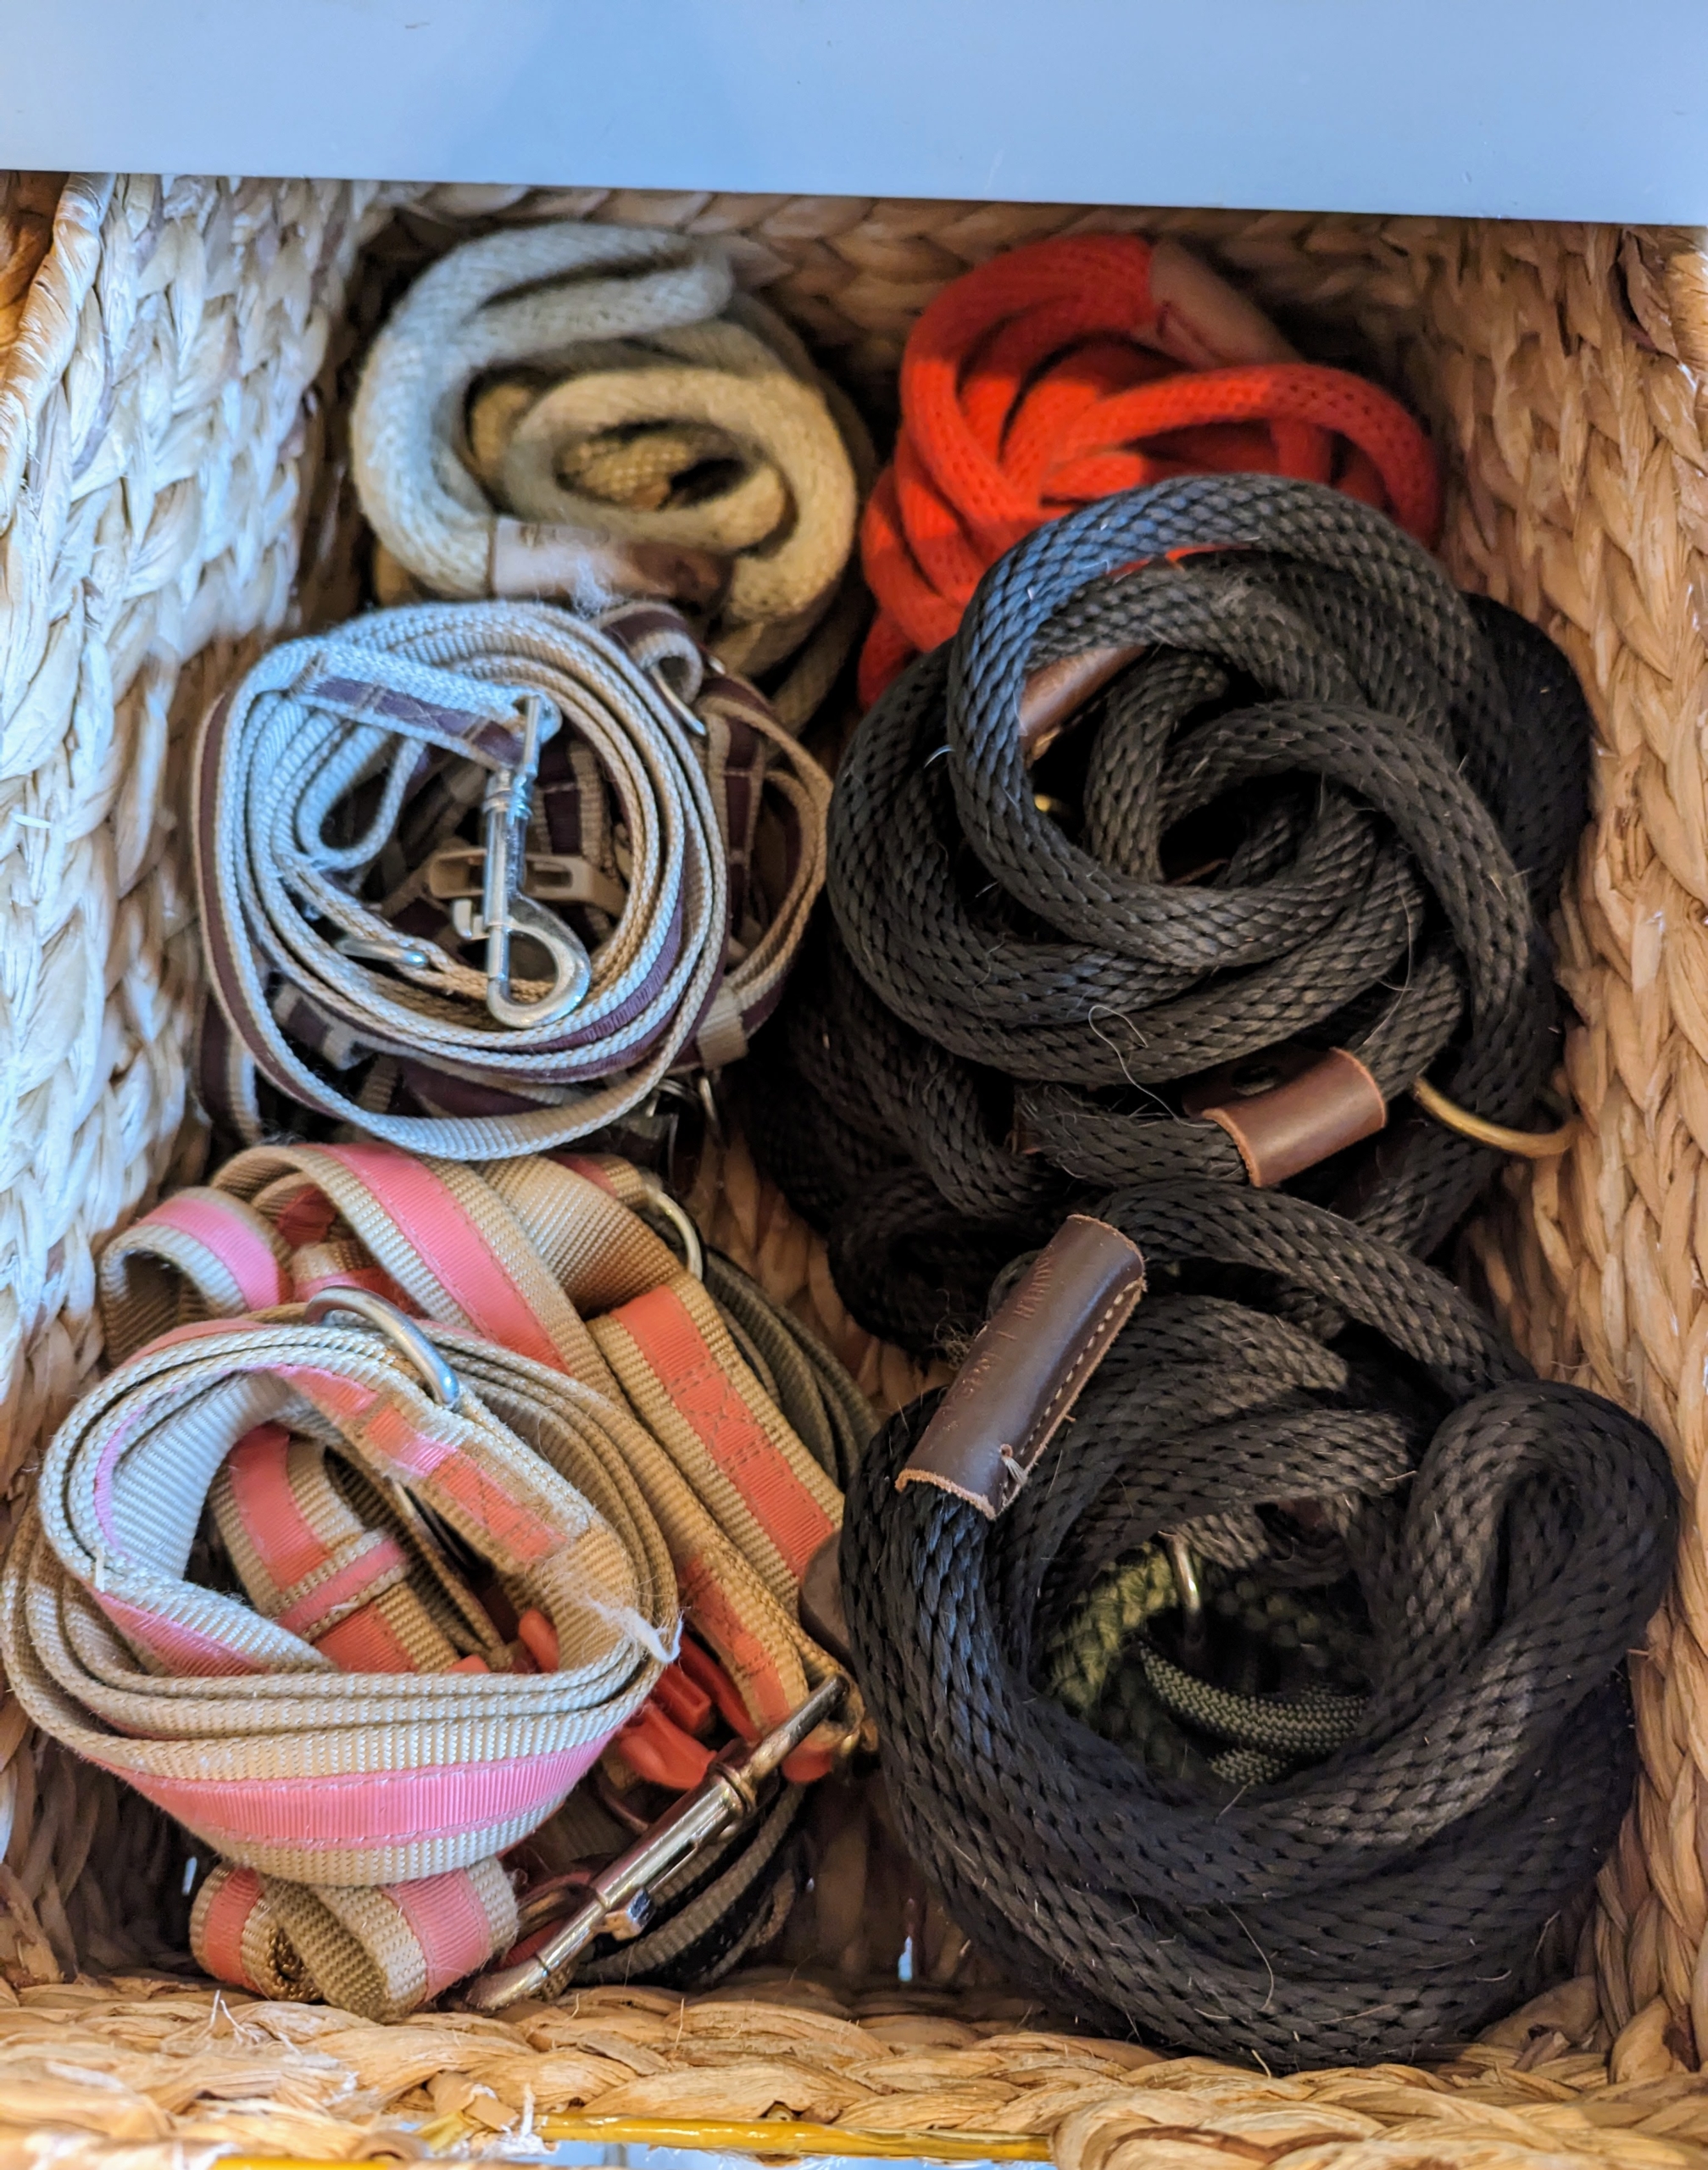
Underneath a counter, I house often-used pet supplies in these woven rattan boxes. Items inside are hidden from view, but can be accessed quickly when needed.
Inside one – leashes, harnesses, and slip leads for everyday use.
In my servery, which is a service room from which meals are served, I use these lucite airtight containers for cat food. I always offer my cats a “buffet” of foods, so clear containers allow me to see what is in what vessel.
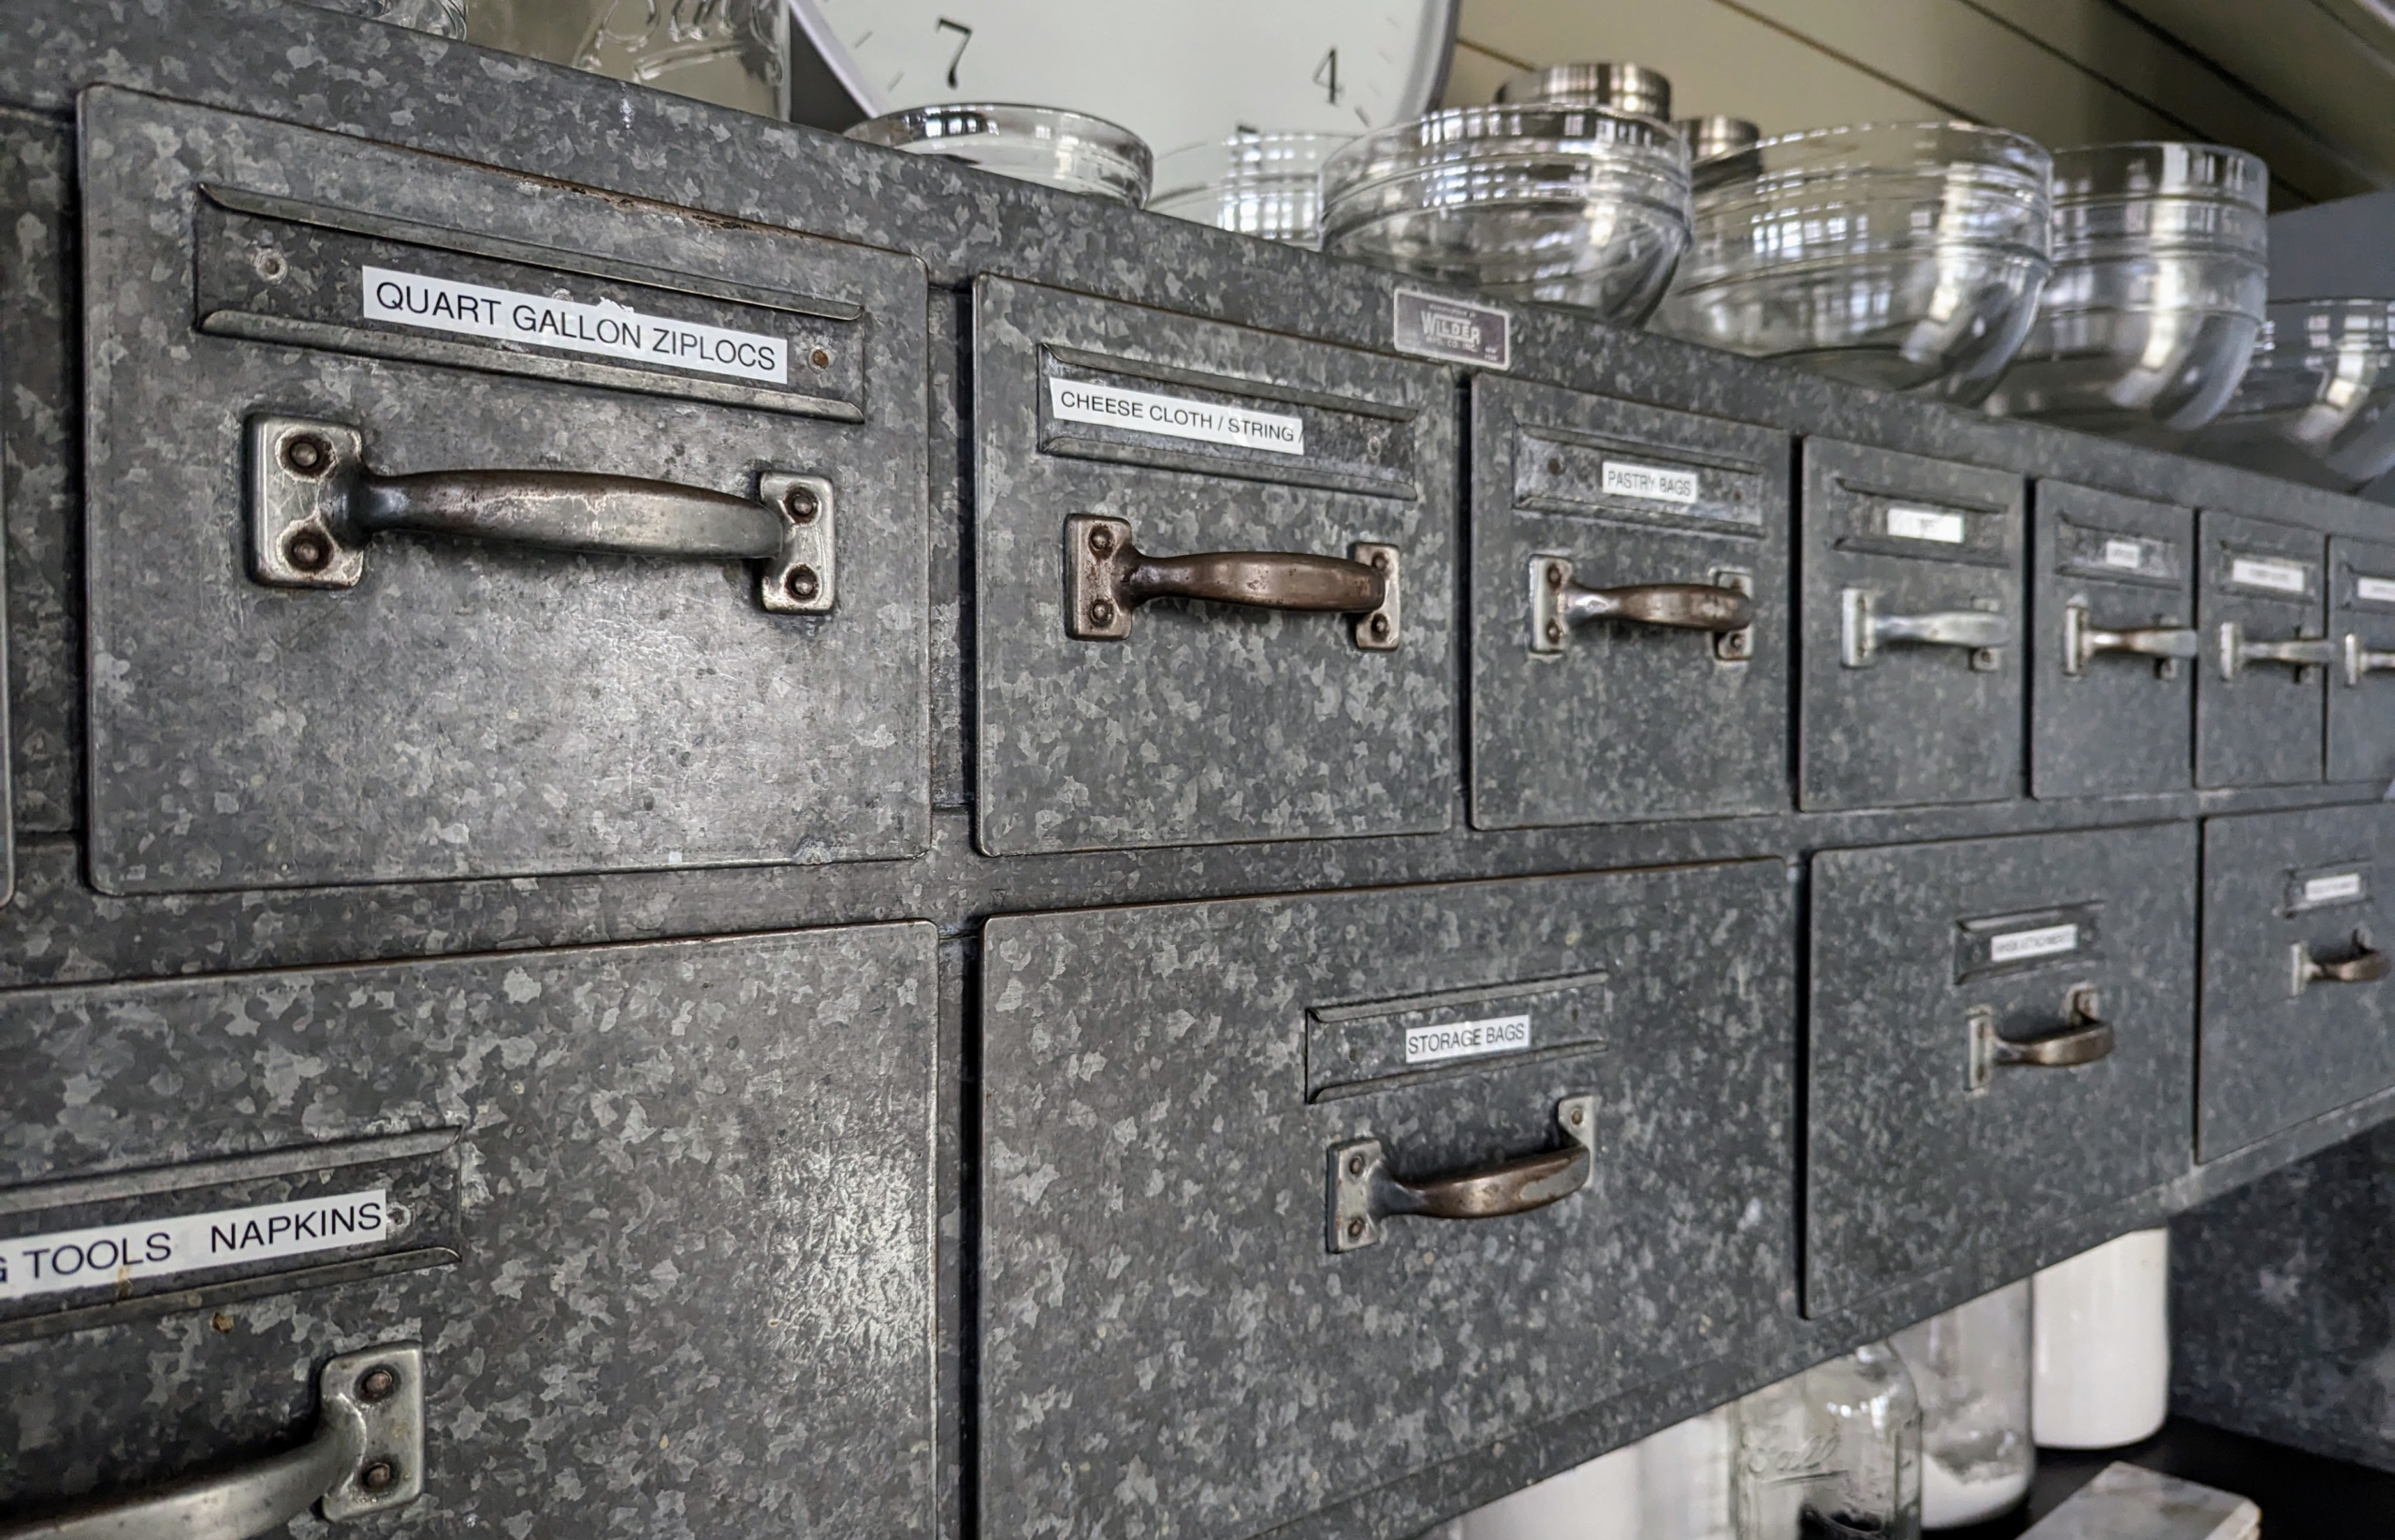
This metal cabinet in my Flower Room was from an old bakery in Maine. It fits perfectly in the space and is used to store various kitchen supplies.
Every drawer is well labeled and always stocked.
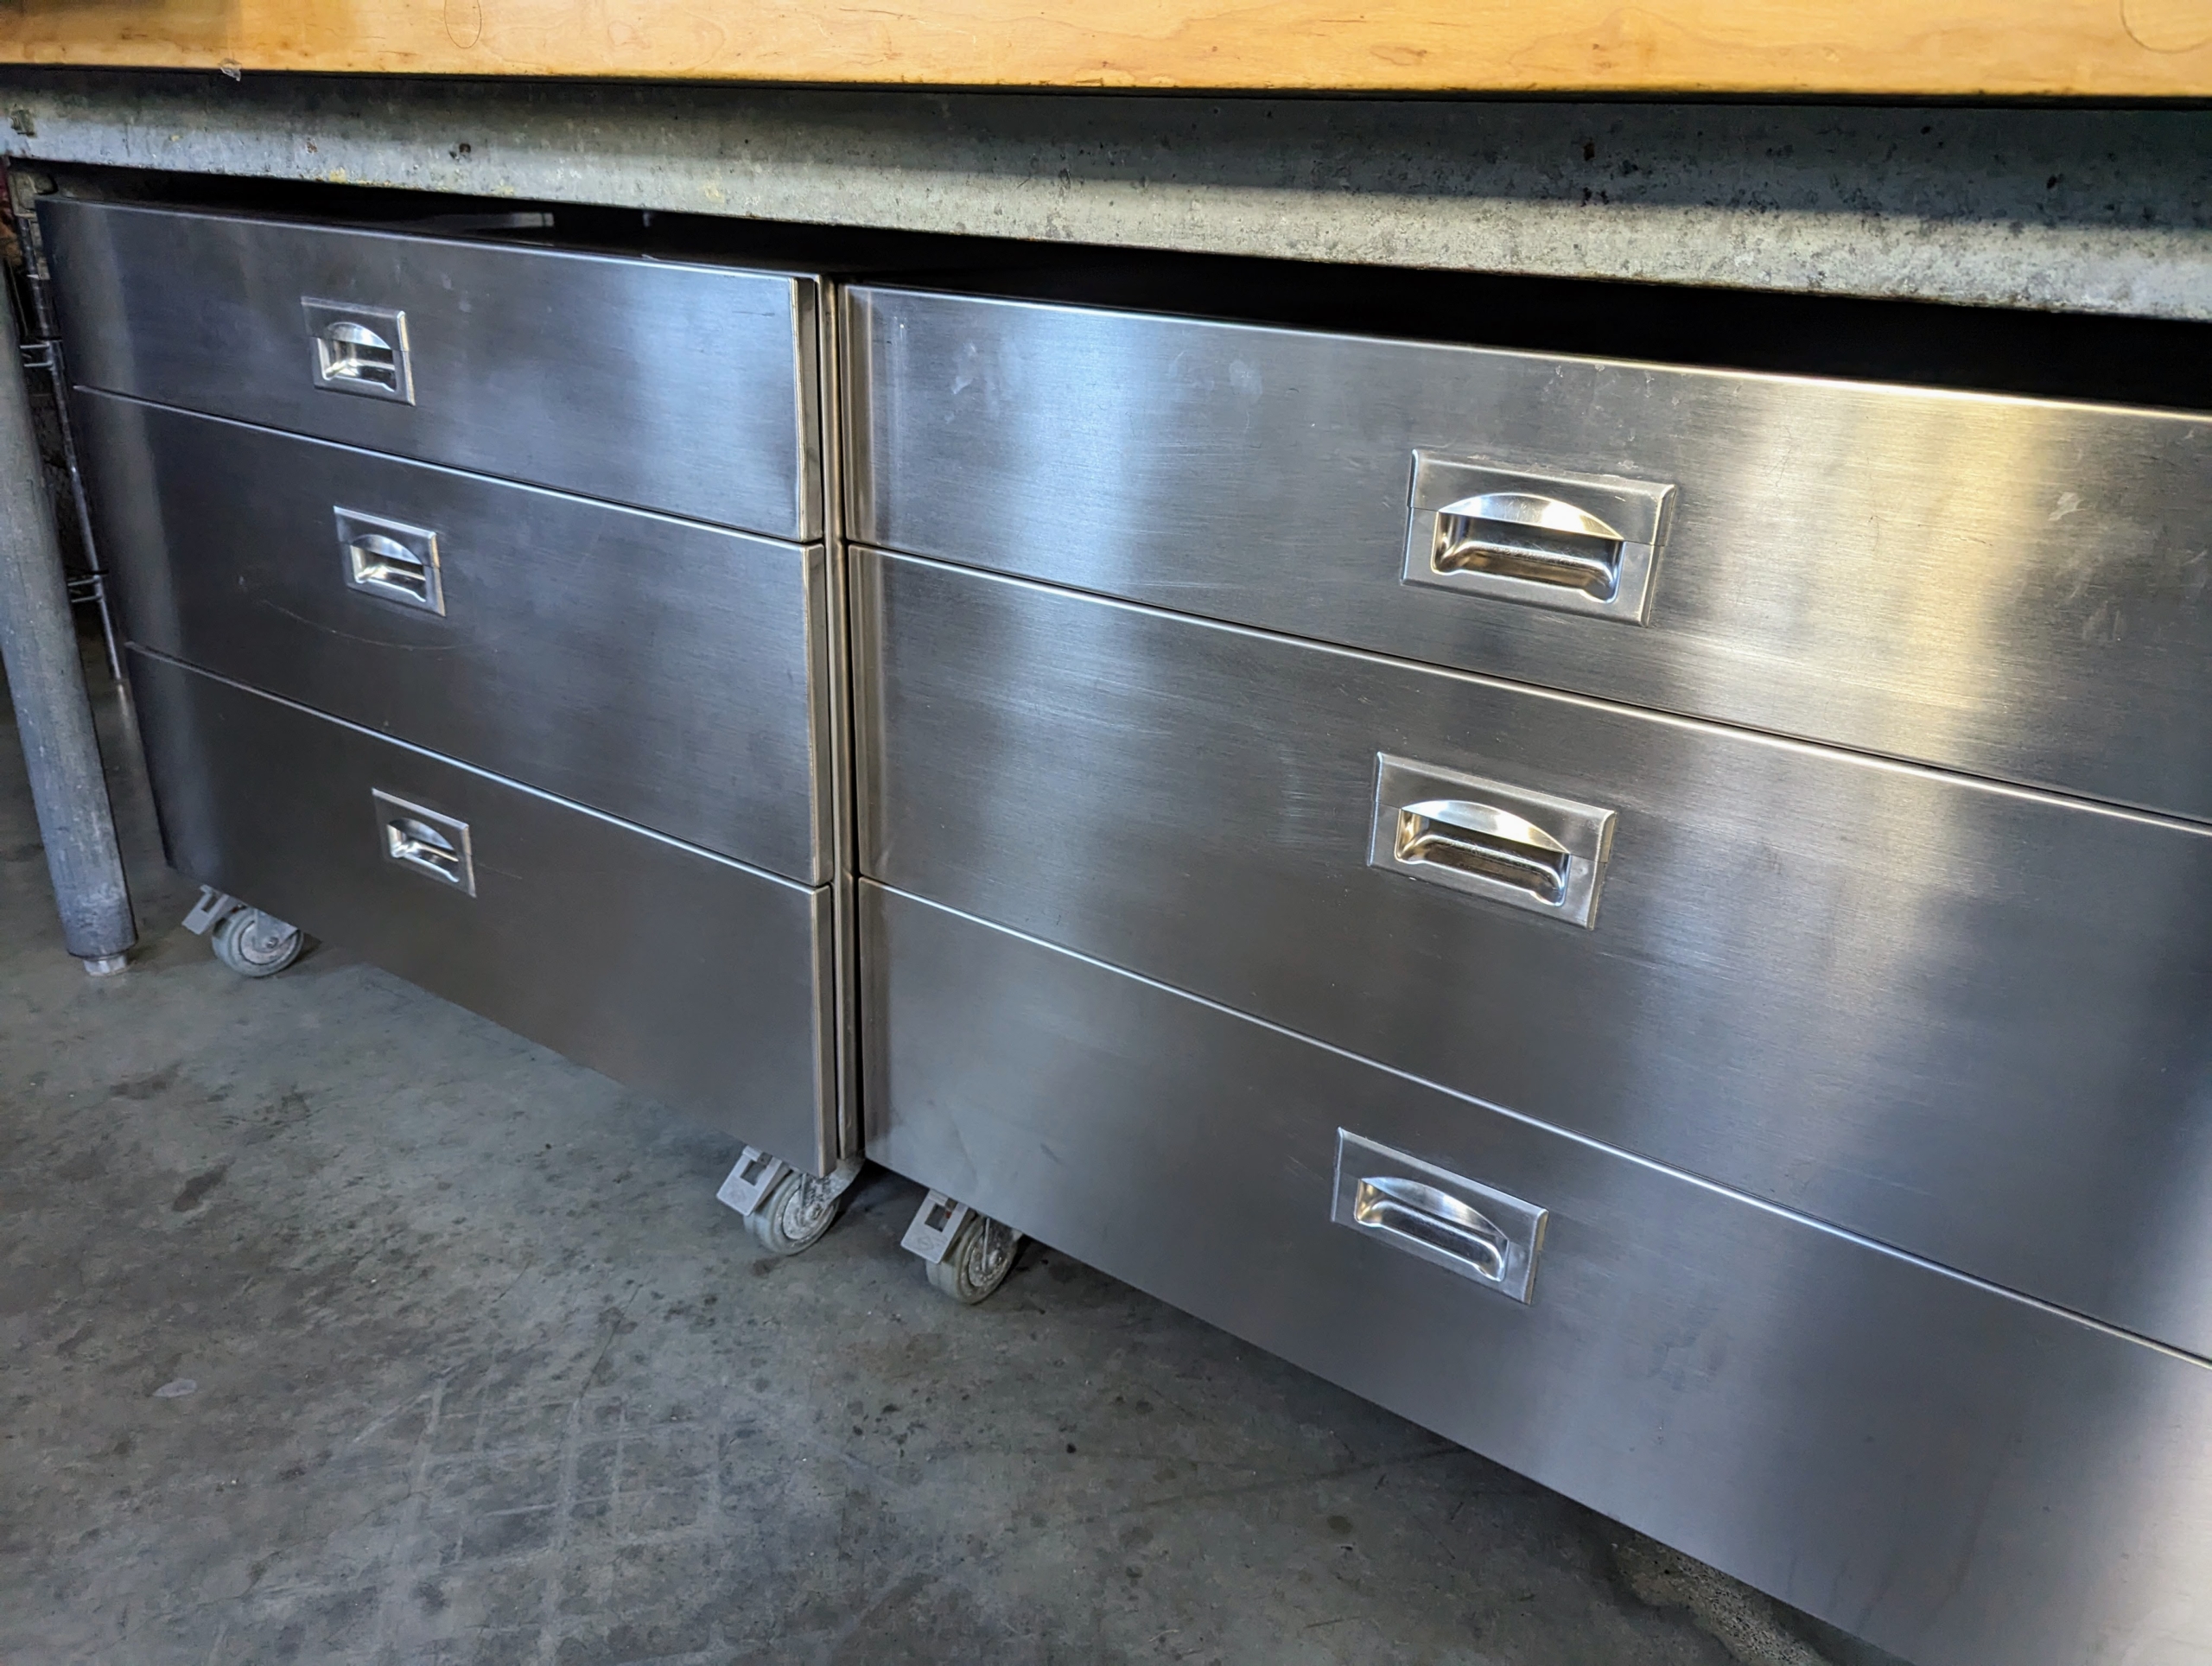
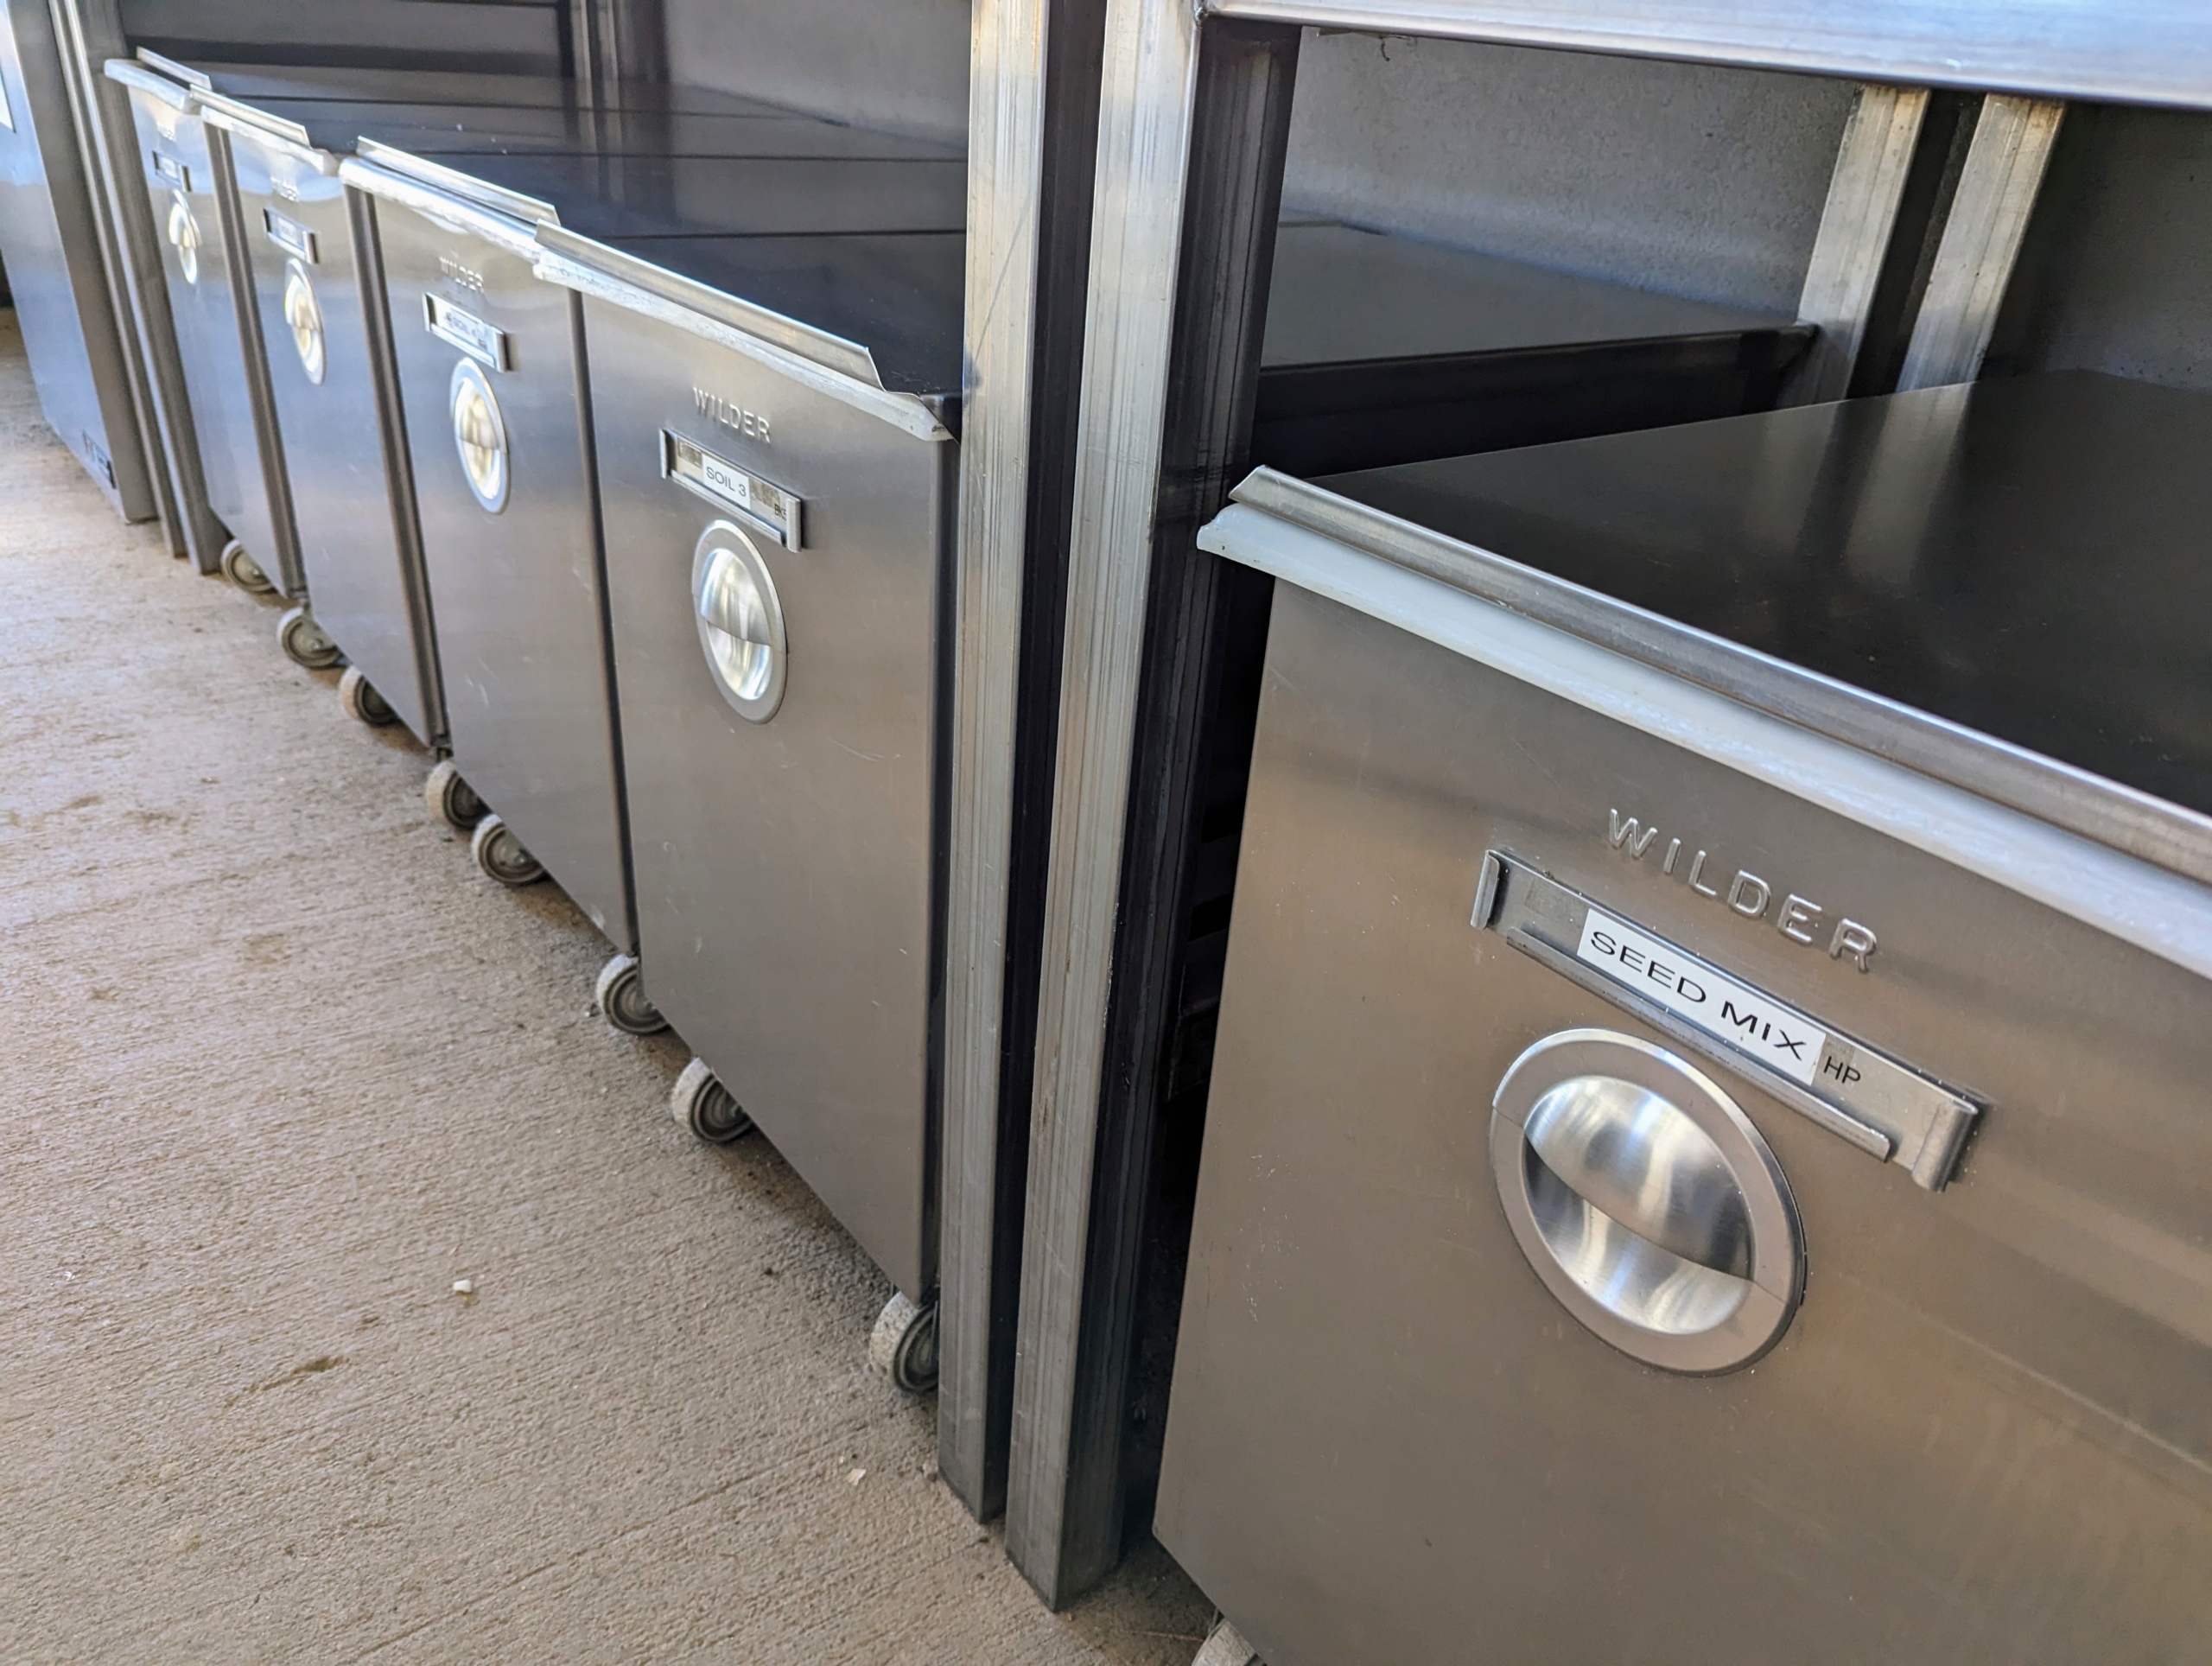
Industrial rolling restaurant storage units made in stainless steel are easy to keep clean. The Flower Room is also an outdoor kitchen which we often use for cooking when I entertain. These drawers store utensils and other tools, so the counters can be used for food preparation.
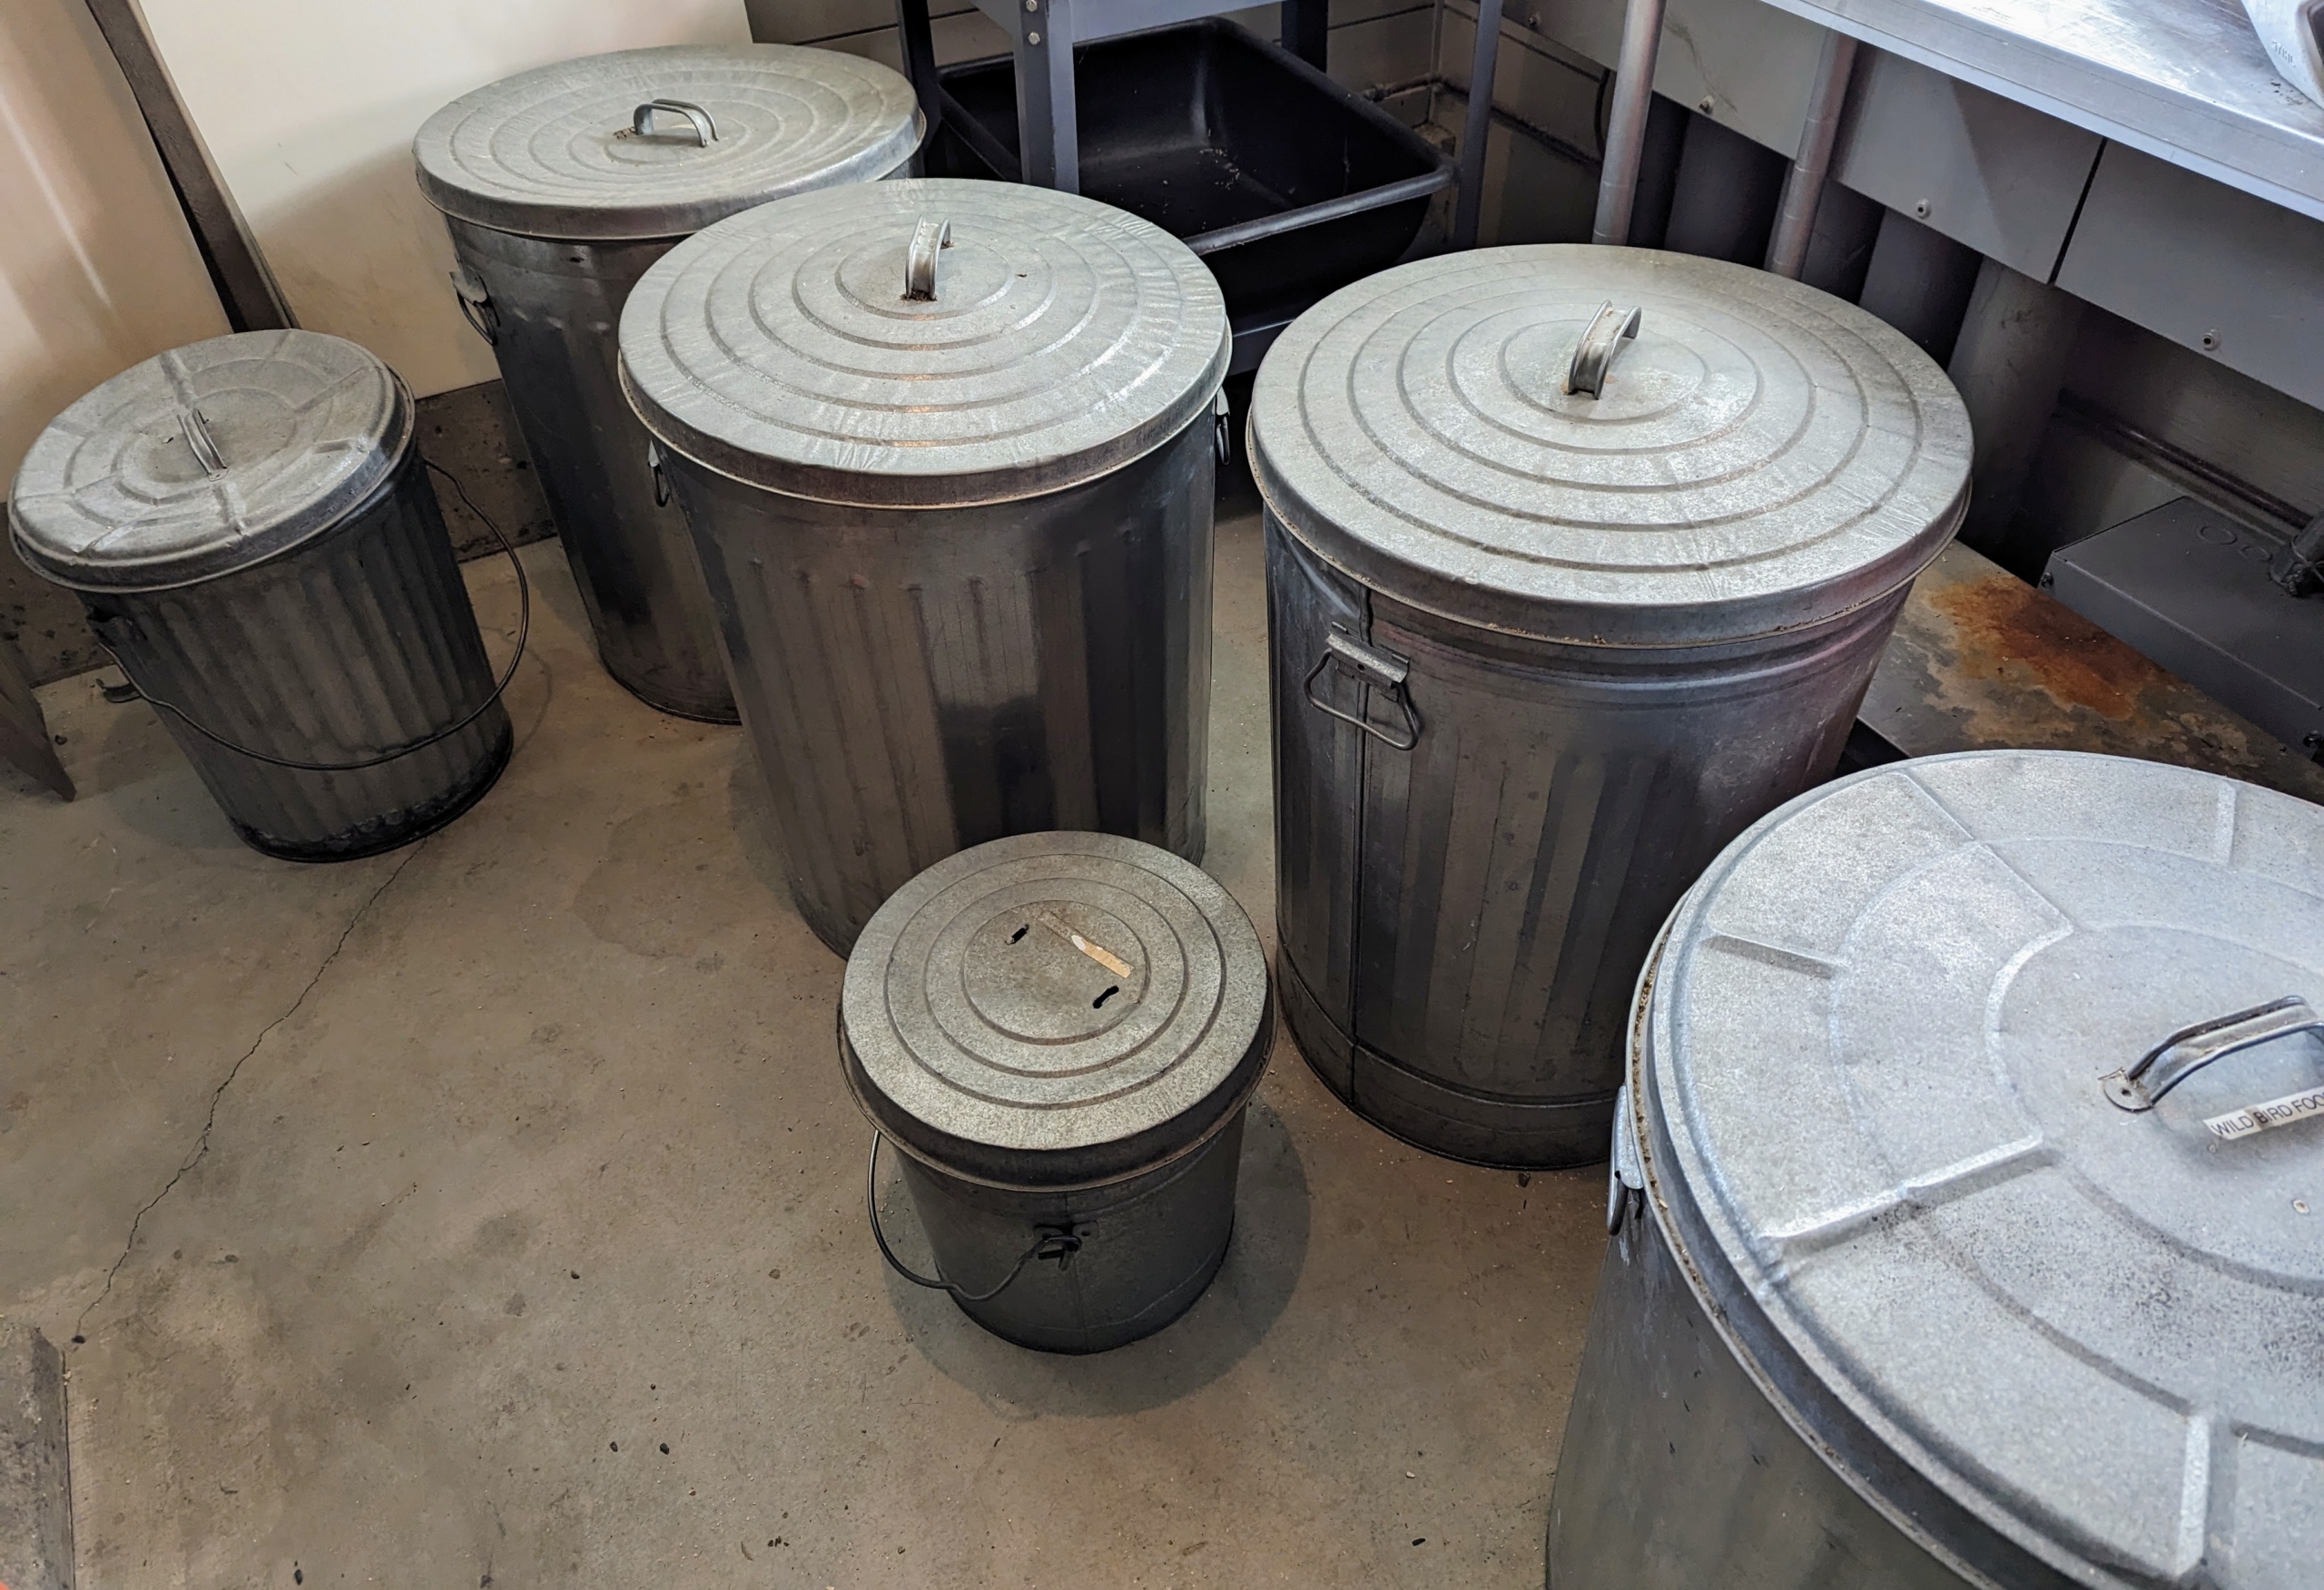
In my generator room, I use these metal garbage bins to store the wild birdseed. Look for storage solutions that are durable and long-lasting. These receptacles are inexpensive and easy to find at hardware stores and home improvement shops.
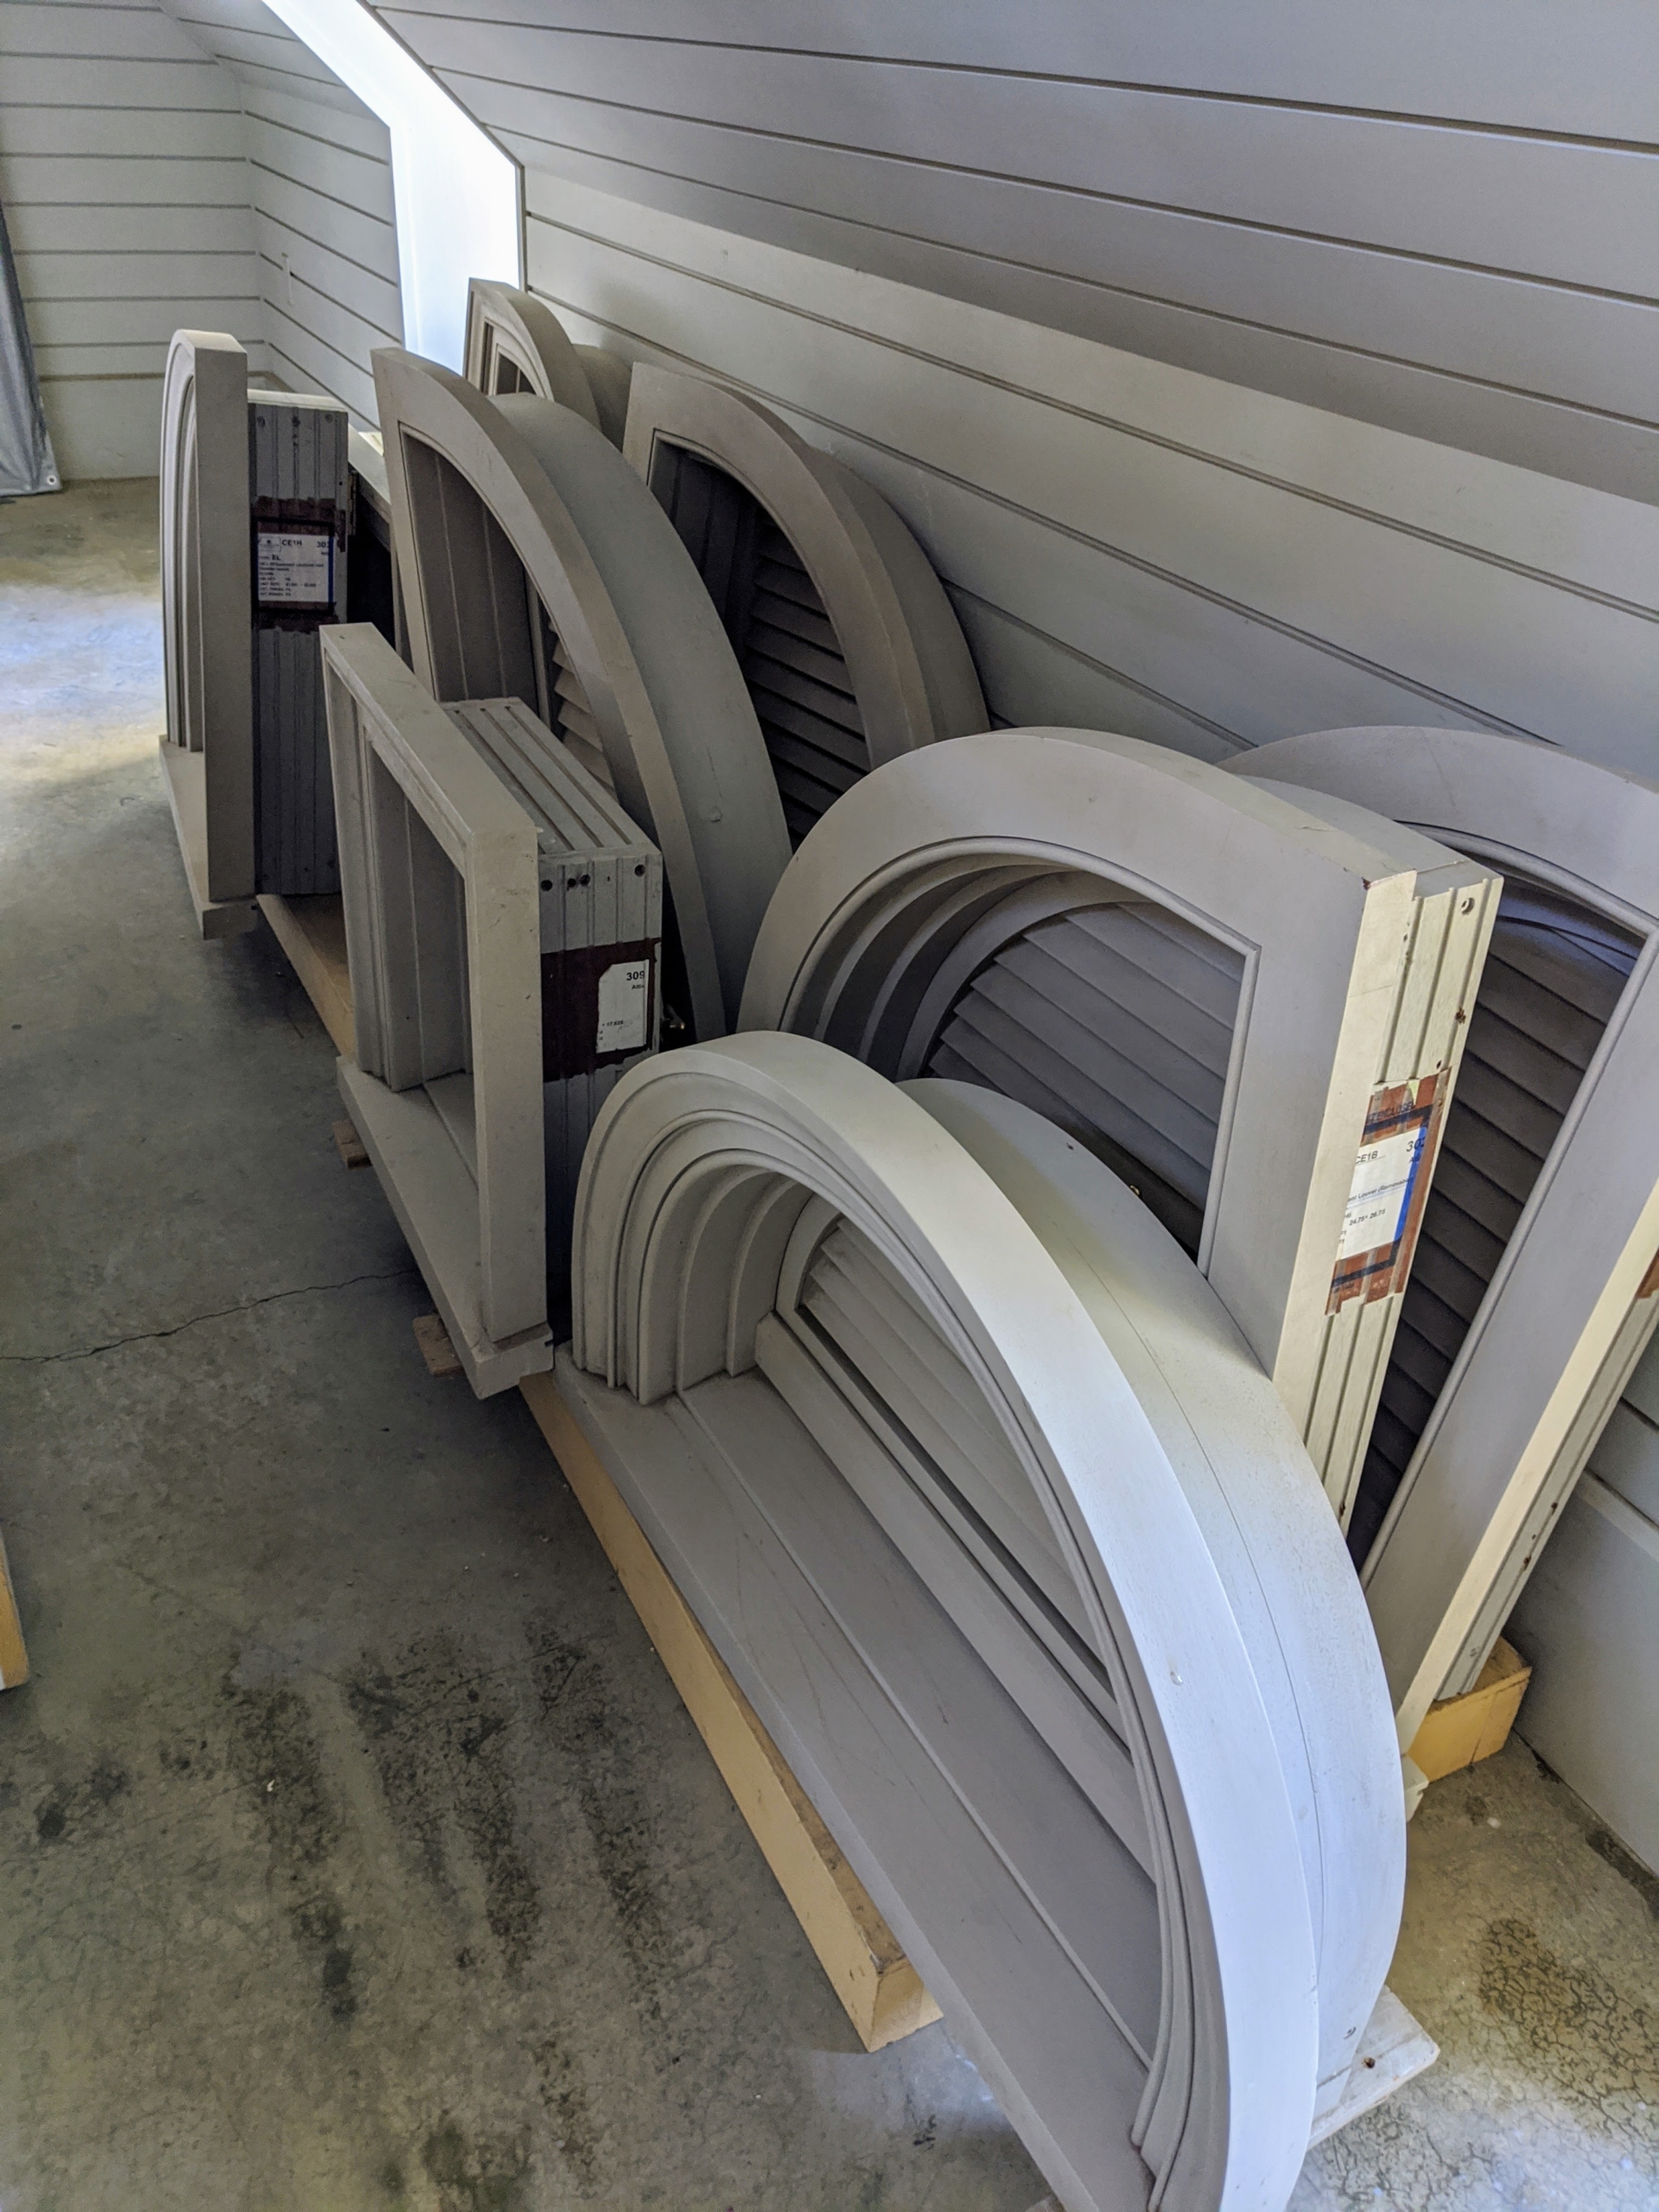
Do you know what this is? I had these cases specially made to store screen doors and windows so they are well protected during the off-season. Screens should be stored either by laying flat or standing upright, in a dry area where the temperature is kept fairly constant.
A big favorite for storage in my greenhouse and stable are these commercial food ingredient bins – also very common in bakeries to hold flour. Here in the head house, we use several, each one storing a different soil mix.
Inside, the bin can hold a good amount of mix that’s easy to reach when seeding trays and repotting plants.
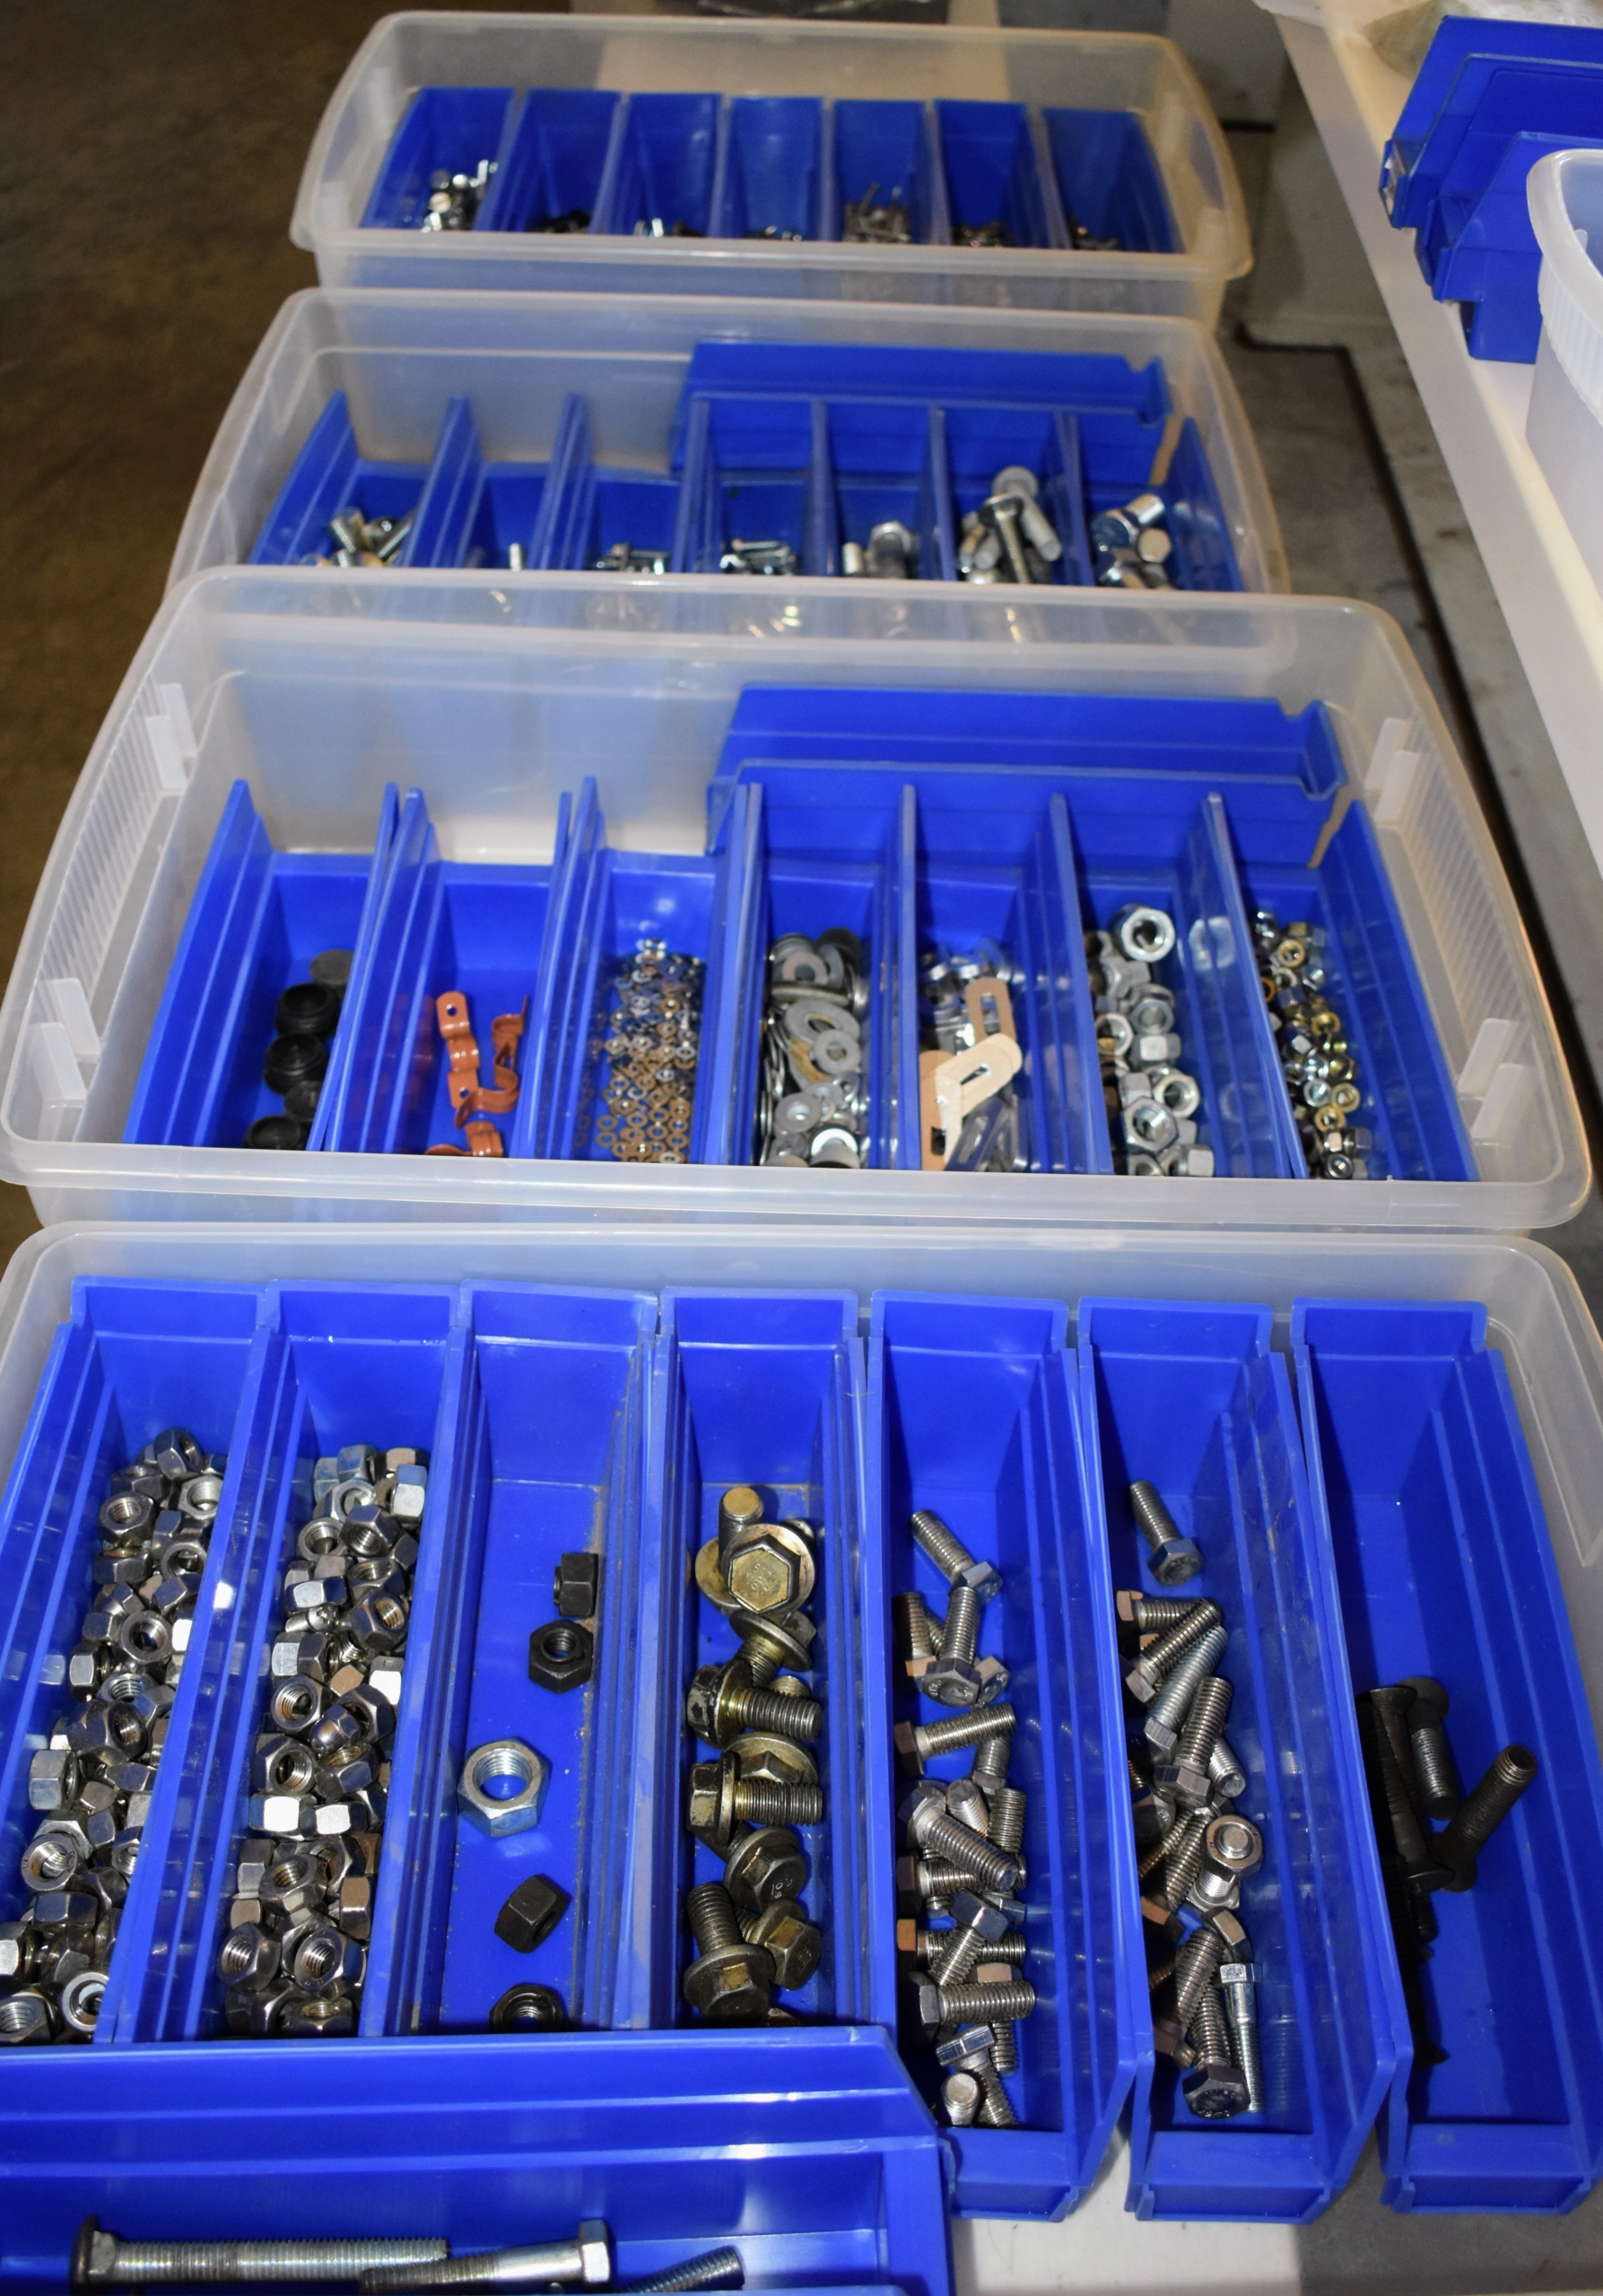
In my Equipment Barn closet, we keep washers, nuts, and bolts carefully stored in these trays and then in large plastic bins – always organized by type.
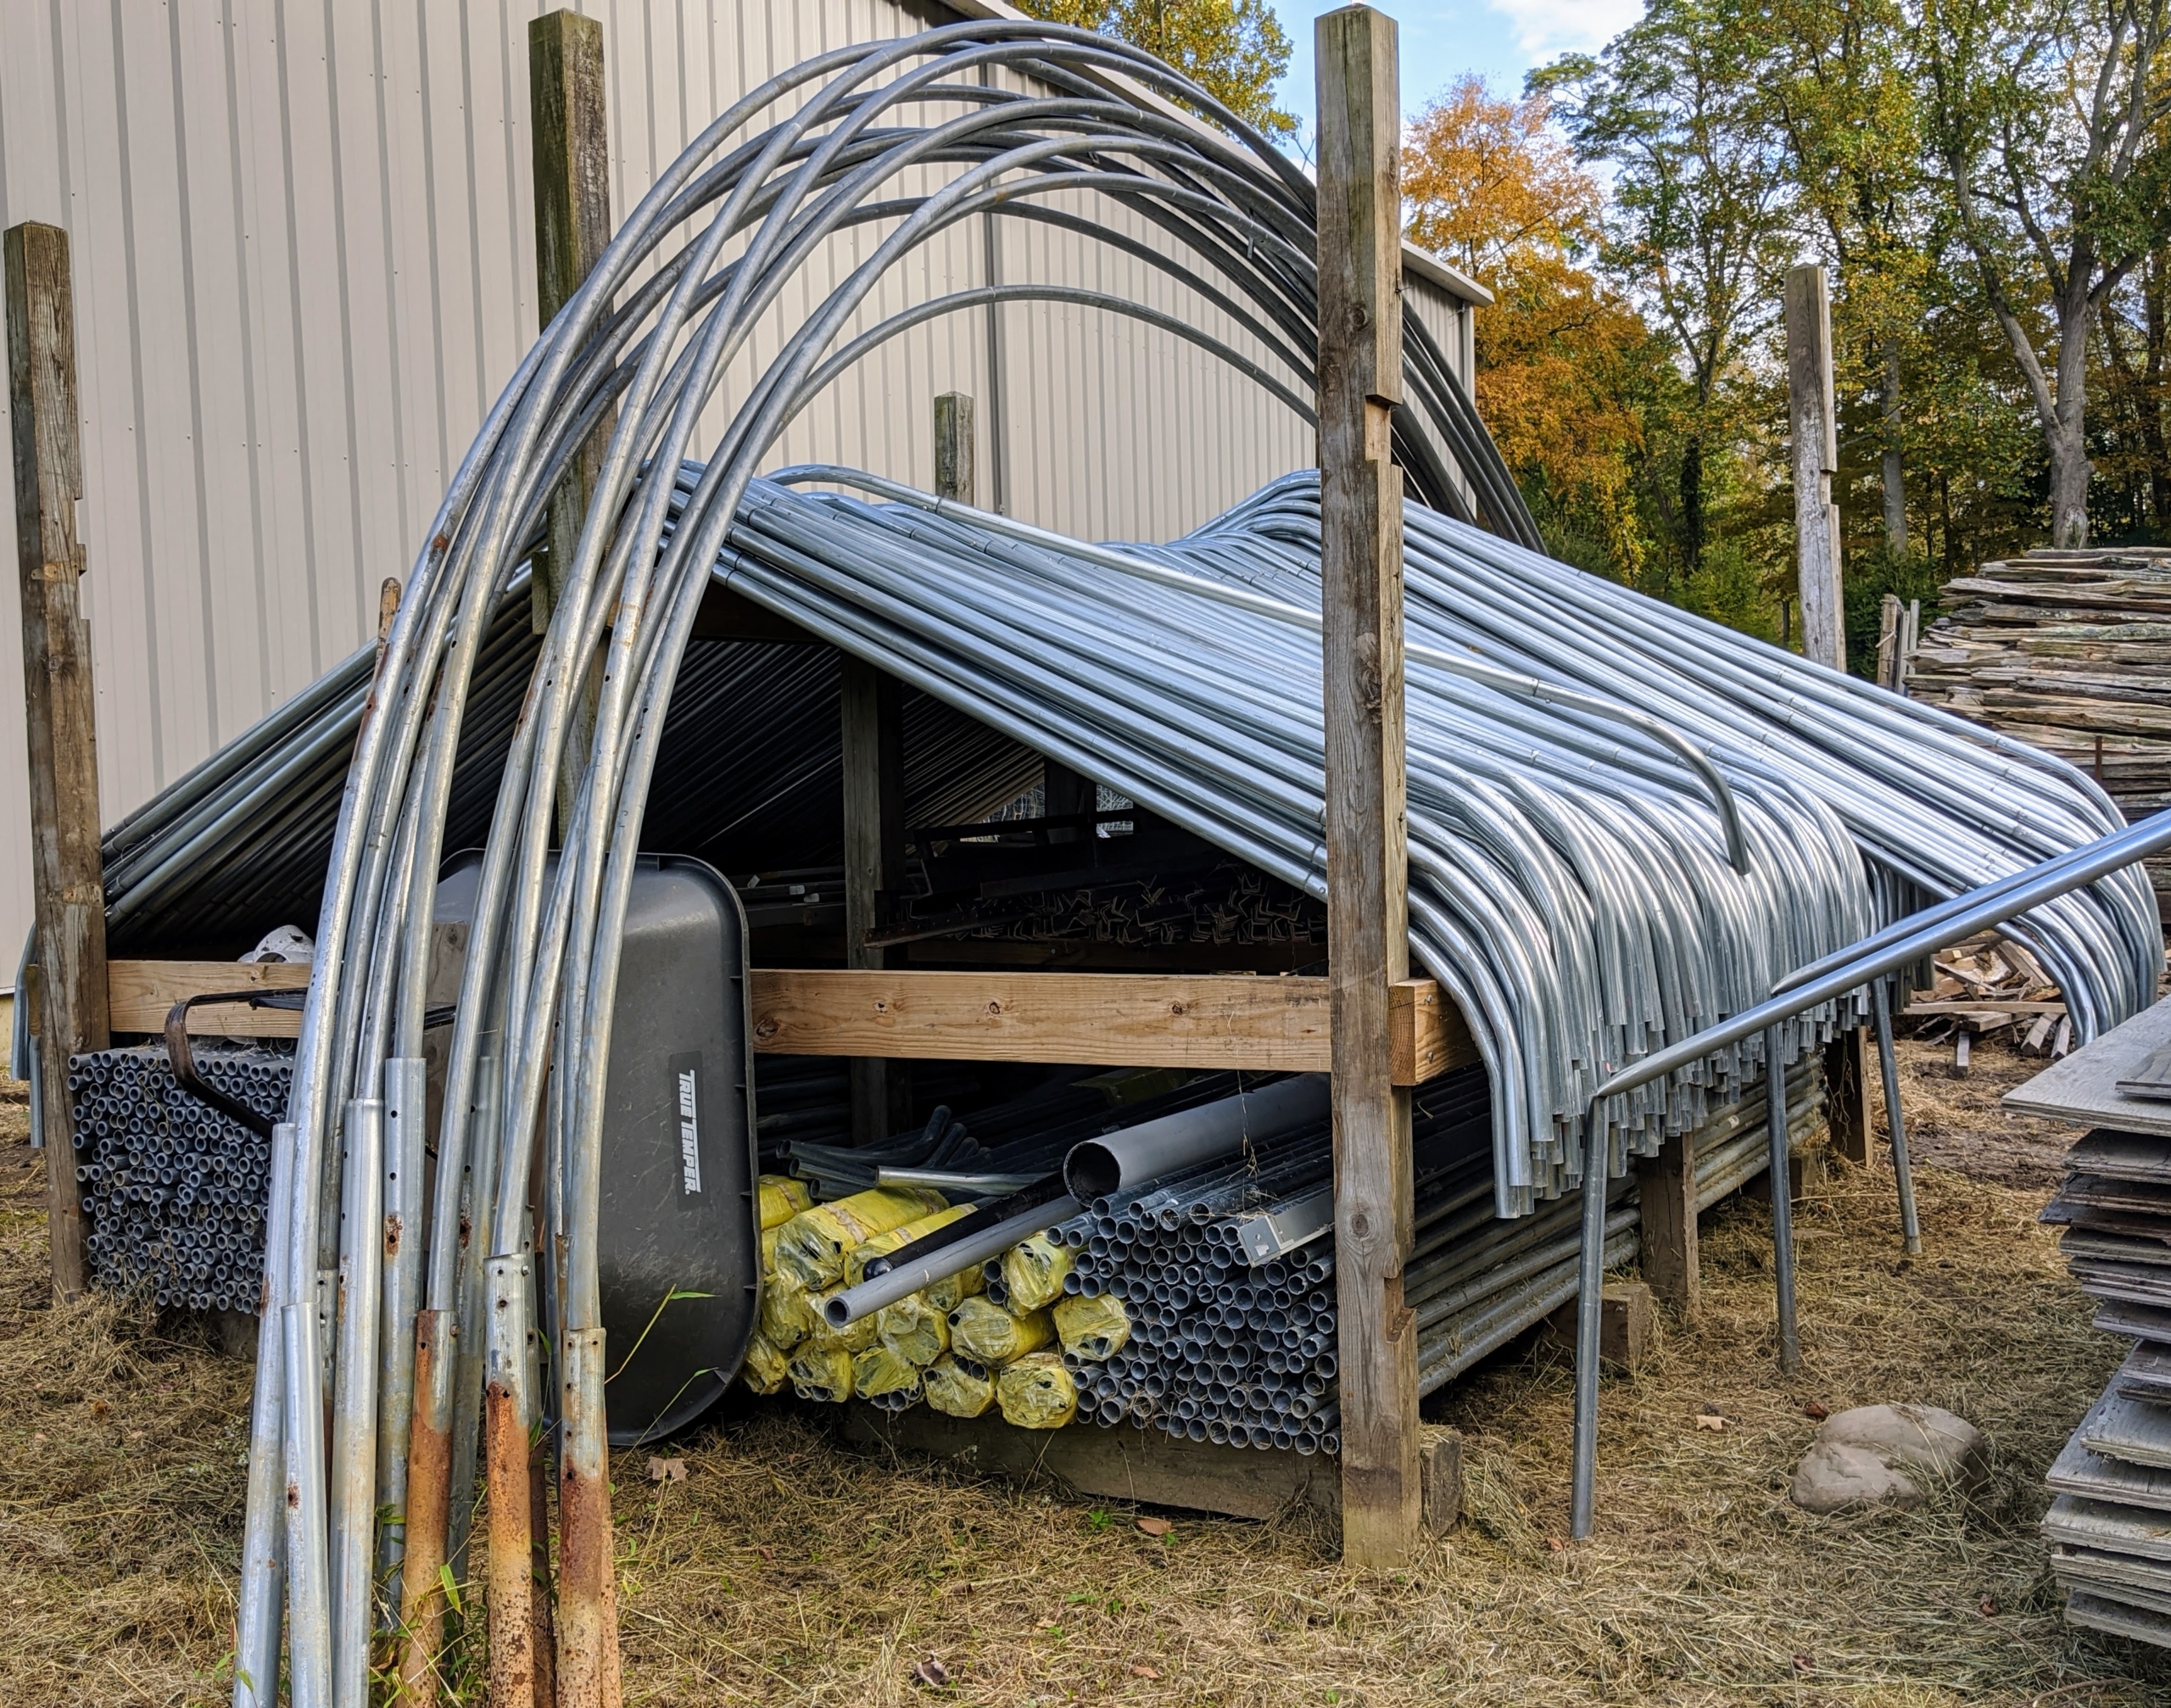
A custom made rack holds the hoop house piping we use as frames for the burlap that covers all my boxwood in winter. Storing items properly keeps valuable supplies and items in good condition.
In my stable hayloft, I store various moldings, window casings, etc. All the moldings are kept on these shelves and stacked according to length and type. I keep the moldings stacked horizontally to keep them from bowing.
Everything is kept off the floor. These window casings, already painted in my signature Bedford Gray, are sitting on a wood base. It is crucial that any stored wood be kept free from dampness.
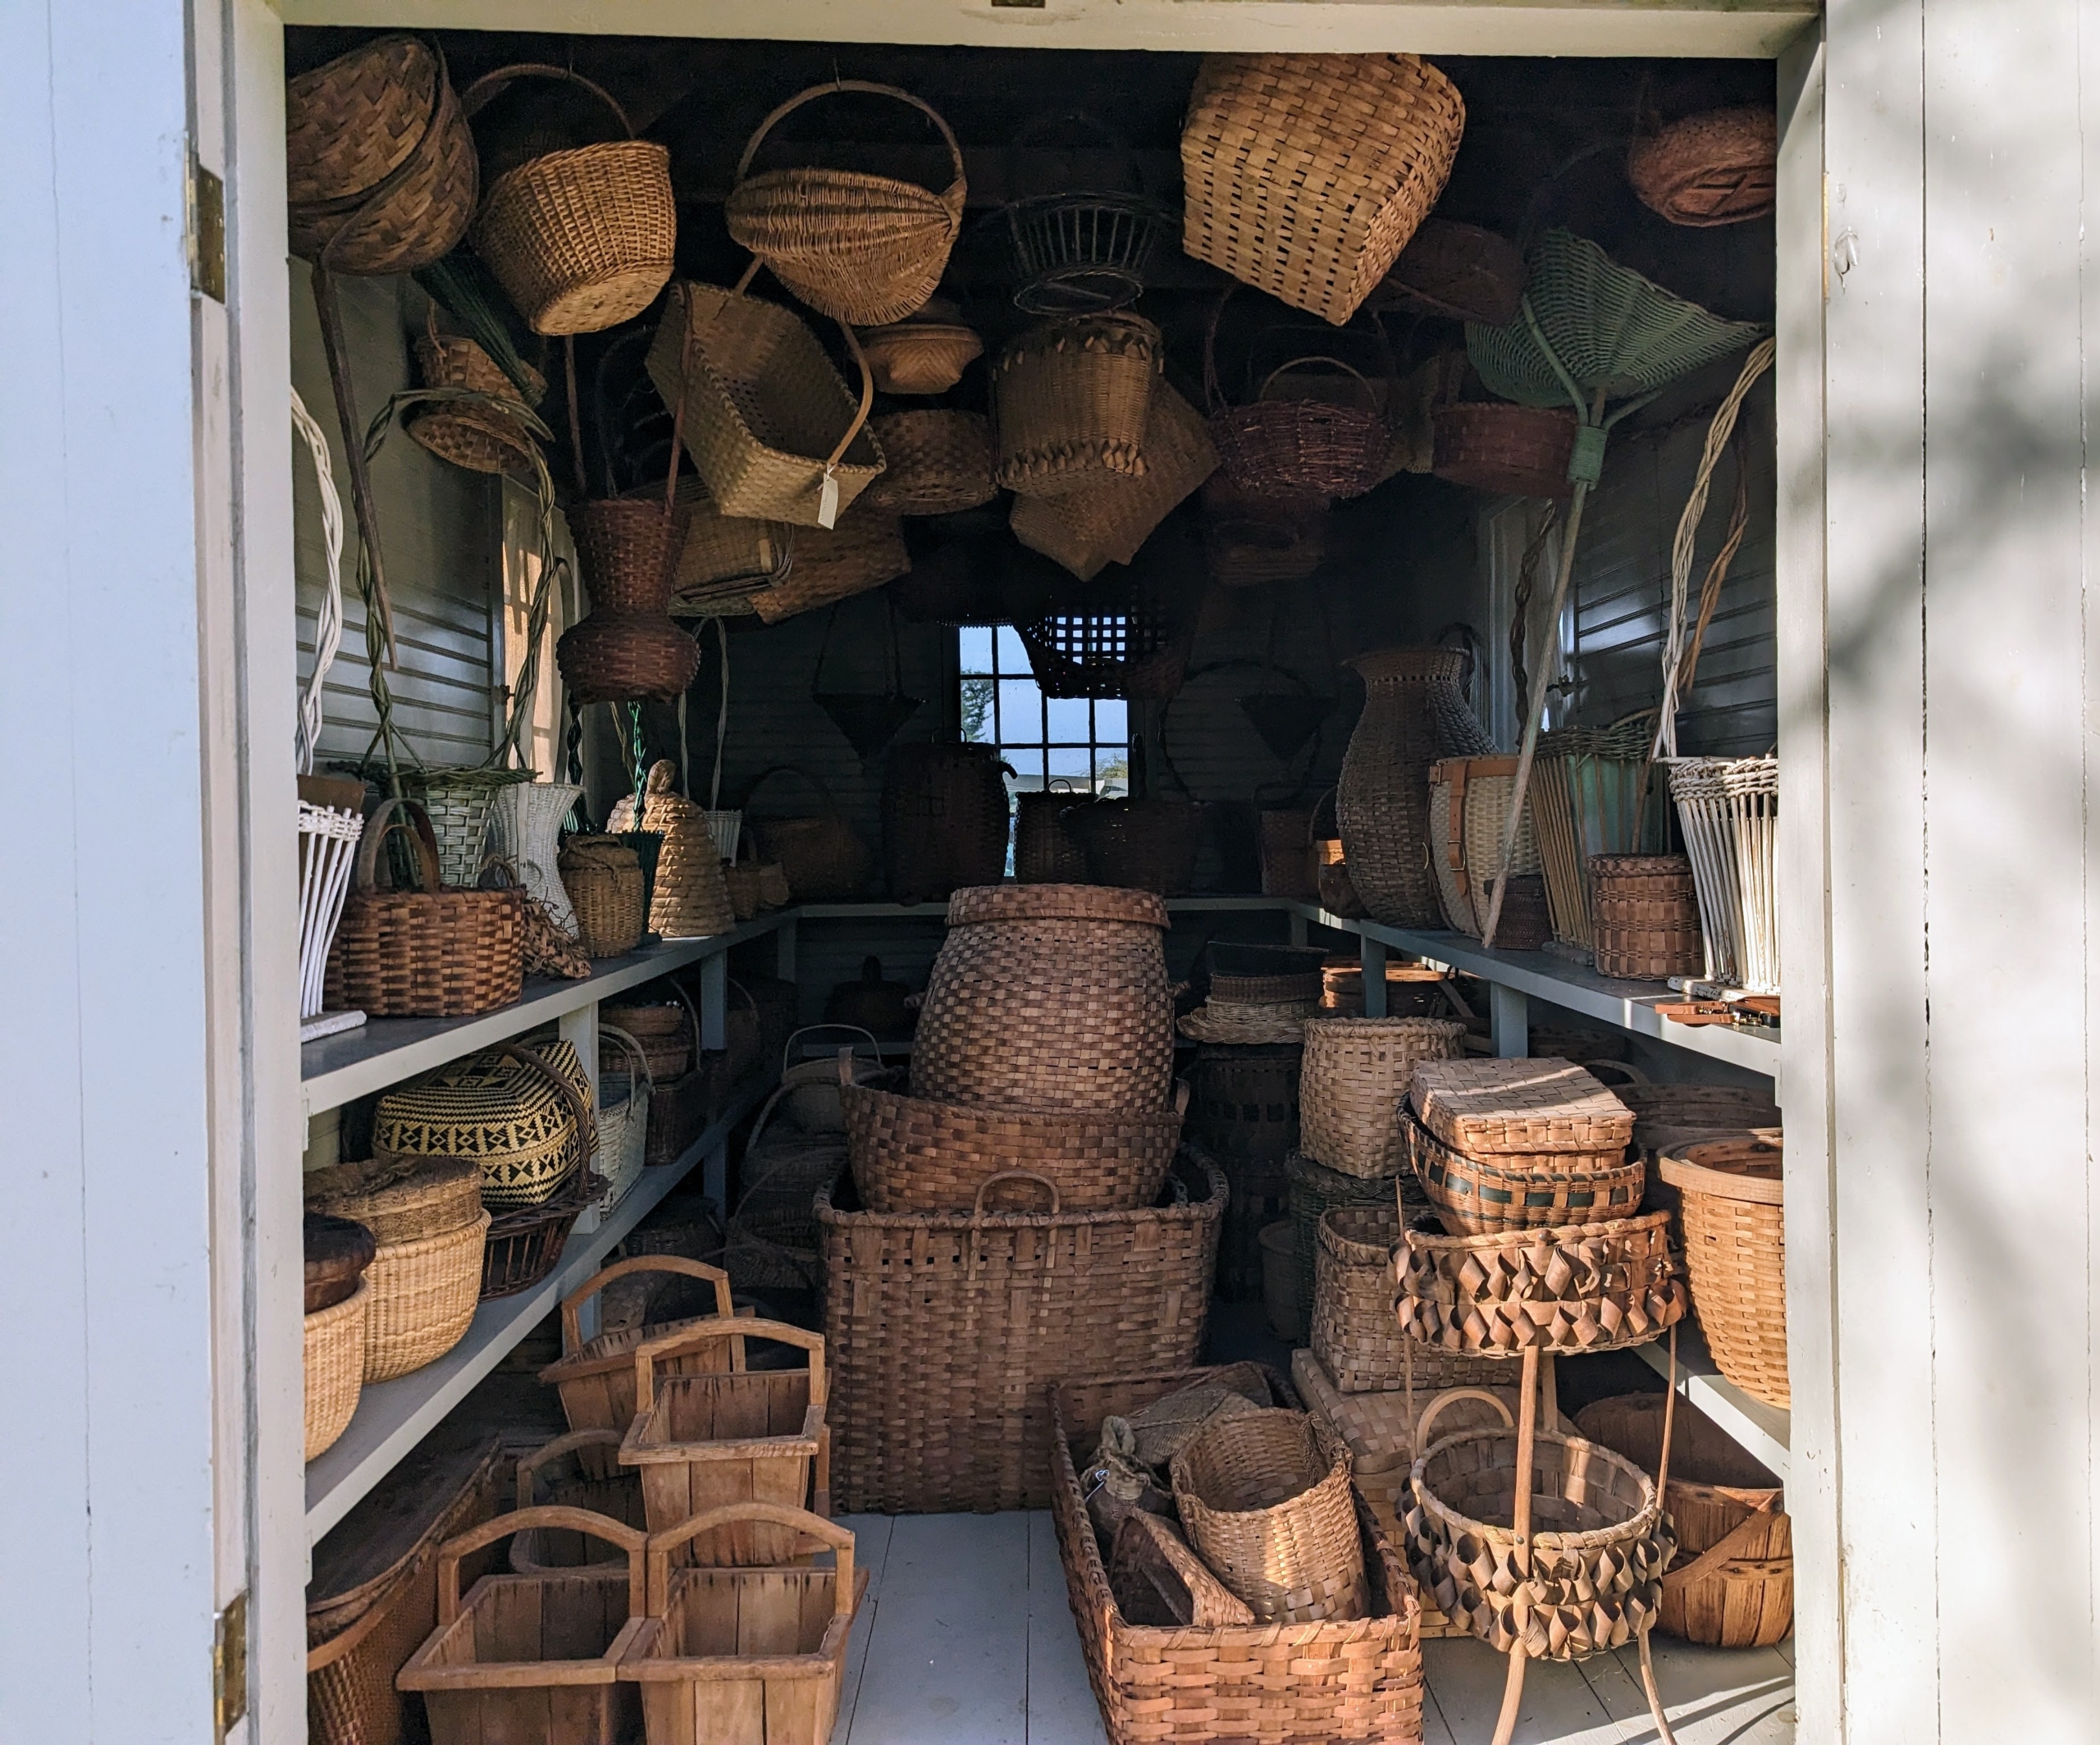
And many of you will recognize this storage unit where I keep all my beautiful baskets. I have hundreds of baskets in my collection – some are rare and antique, some are vintage, and some are more contemporary. A good number of these baskets were used during my catering days.
My Basket House is located near my grove of bald cypress trees across from my clematis pergola. I will share more of my storage solutions in future blogs. What are your favorite organizing strategies at home? Share yours with me.
Maintaining a healthy landscape sometimes means cutting down trees.
I love trees and always feel bad when trees are cut down. Trees are crucial to our environment - they provide breathable oxygen, they absorb carbon dioxide and potentially harmful gasses, and they help create an ecosystem of food for birds and other animals. However, occasionally trees need to be removed. In the back hayfield just off the carriage road is a grove of spruce trees. At some point, we had planted a few crabapple trees in the same area, but after years of growth, they began to block out light, killing various branches from the neighboring spruce. Yesterday, I instructed my crew to take the crabapple trees down. The cut tree wood will be added to the pile for the tub grinder, and be turned into usable nutrient-rich mulch.
Here are some photos, enjoy.
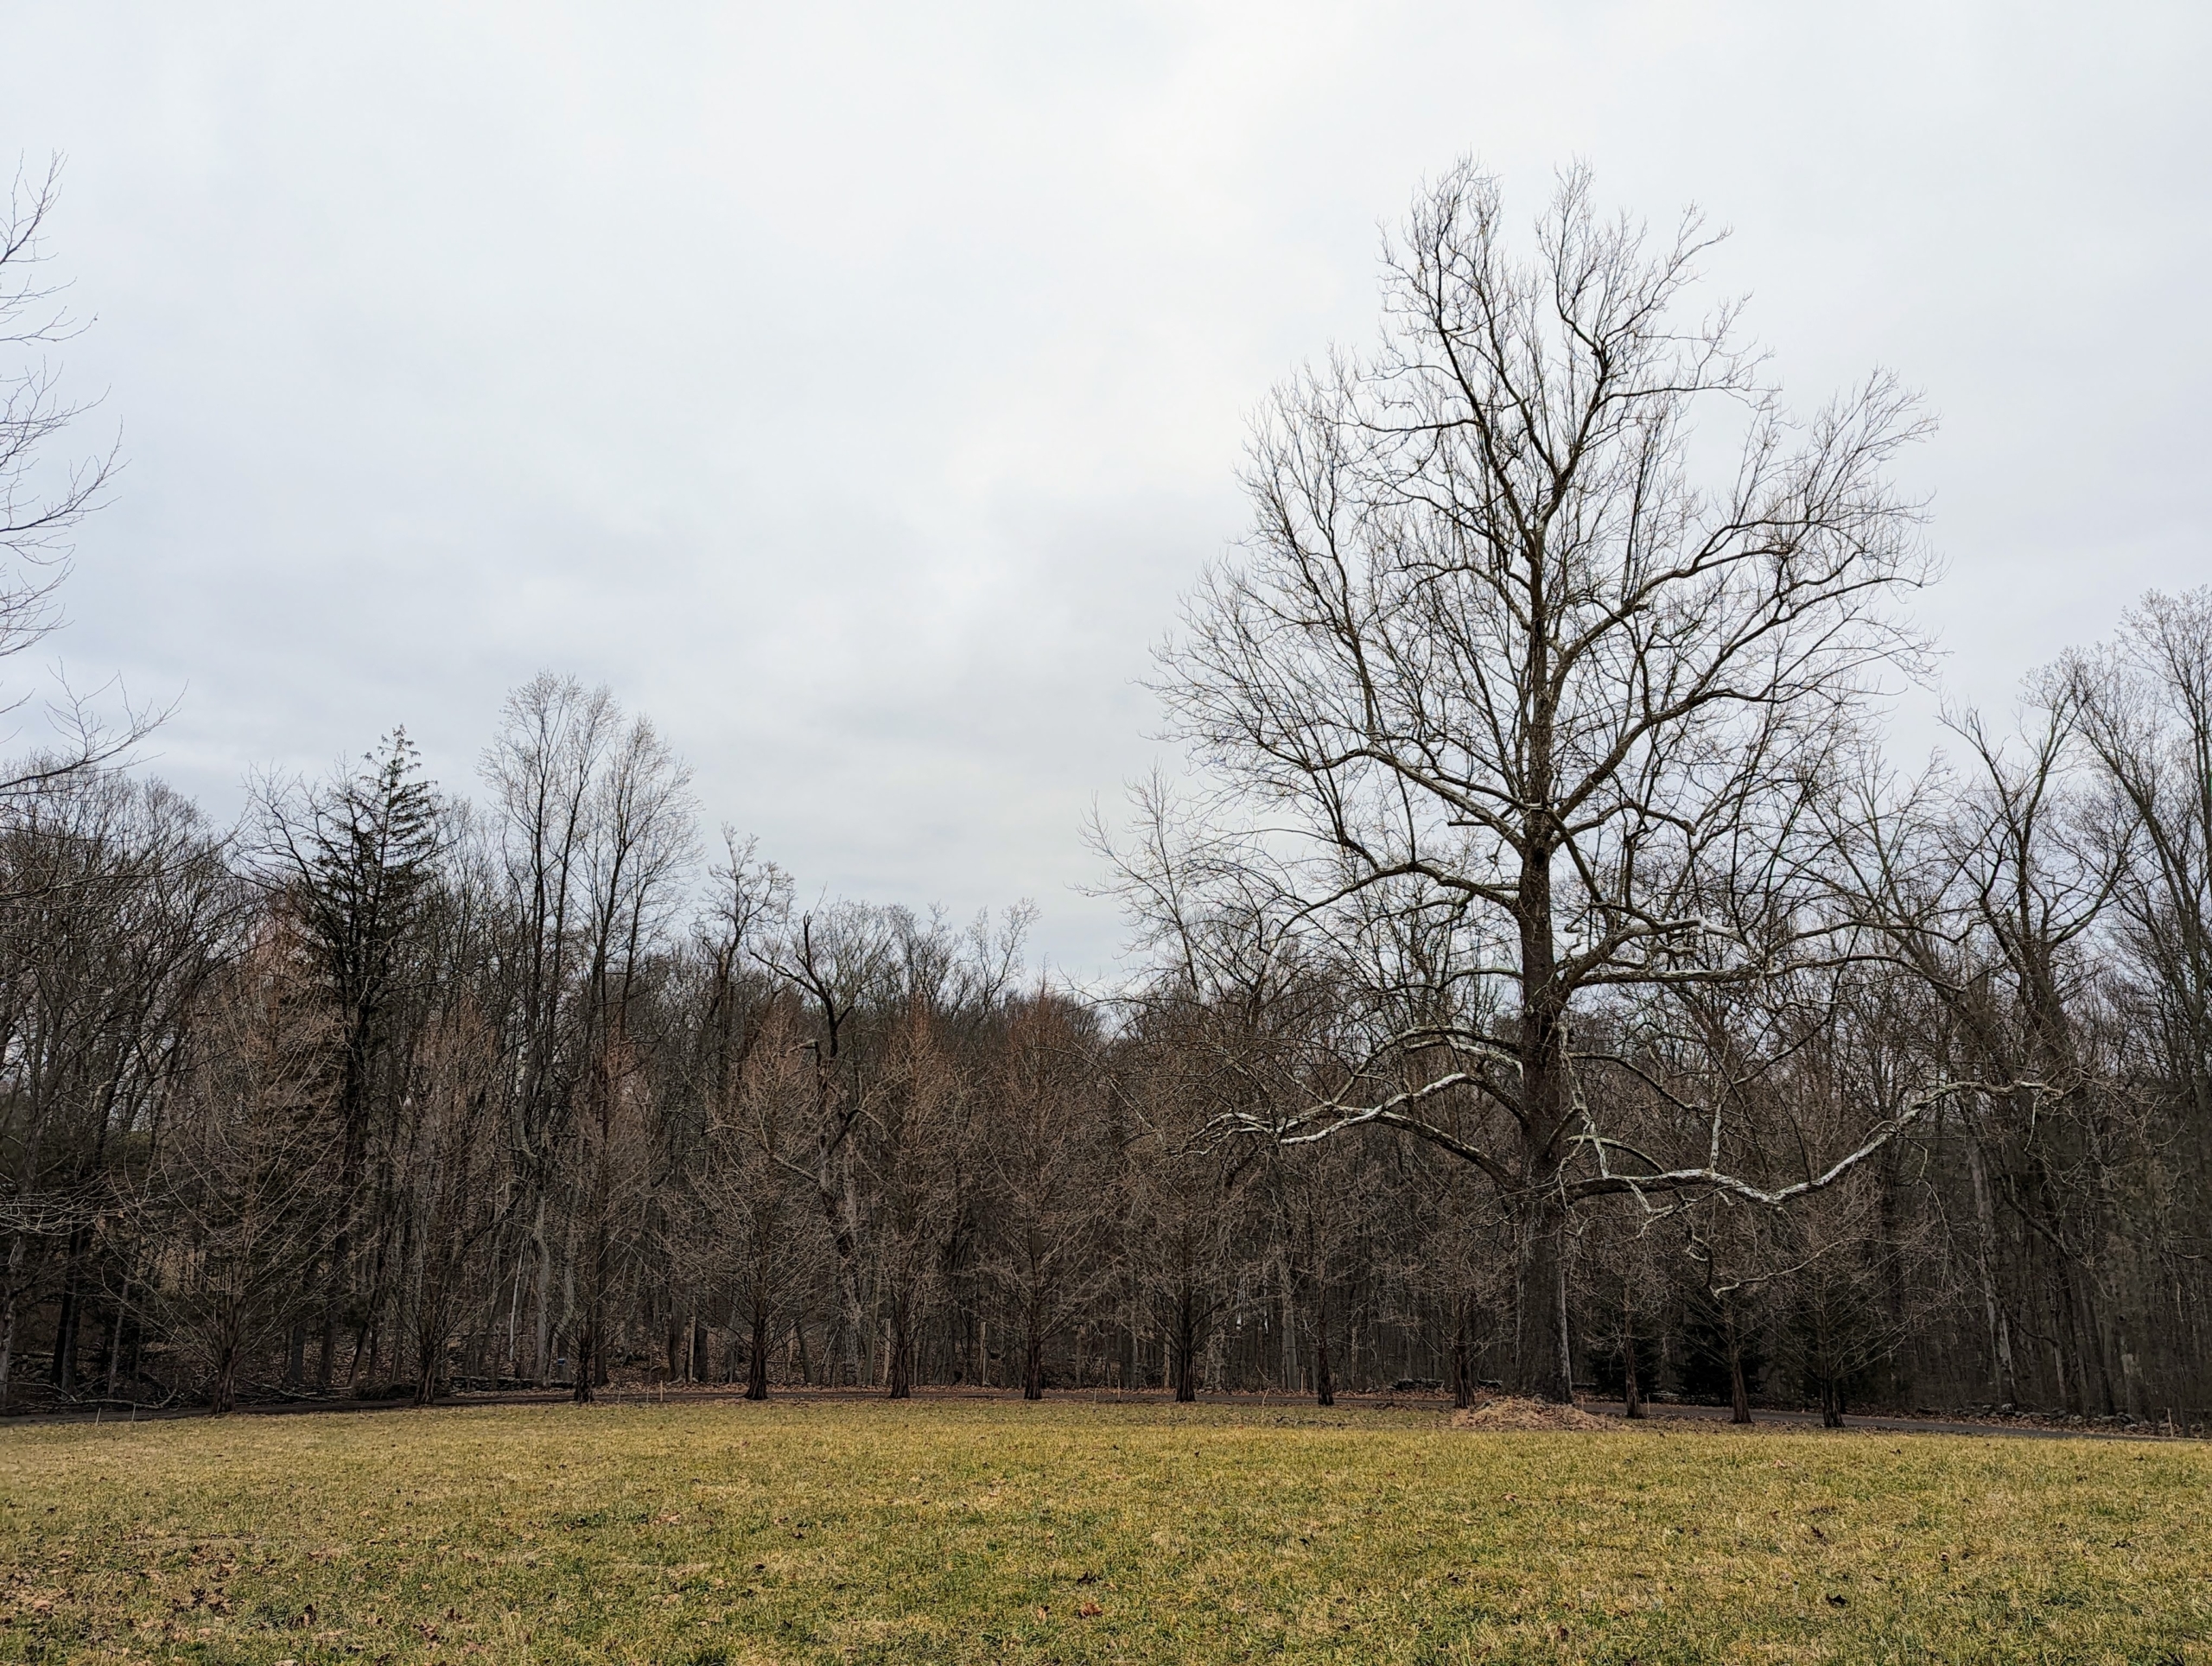
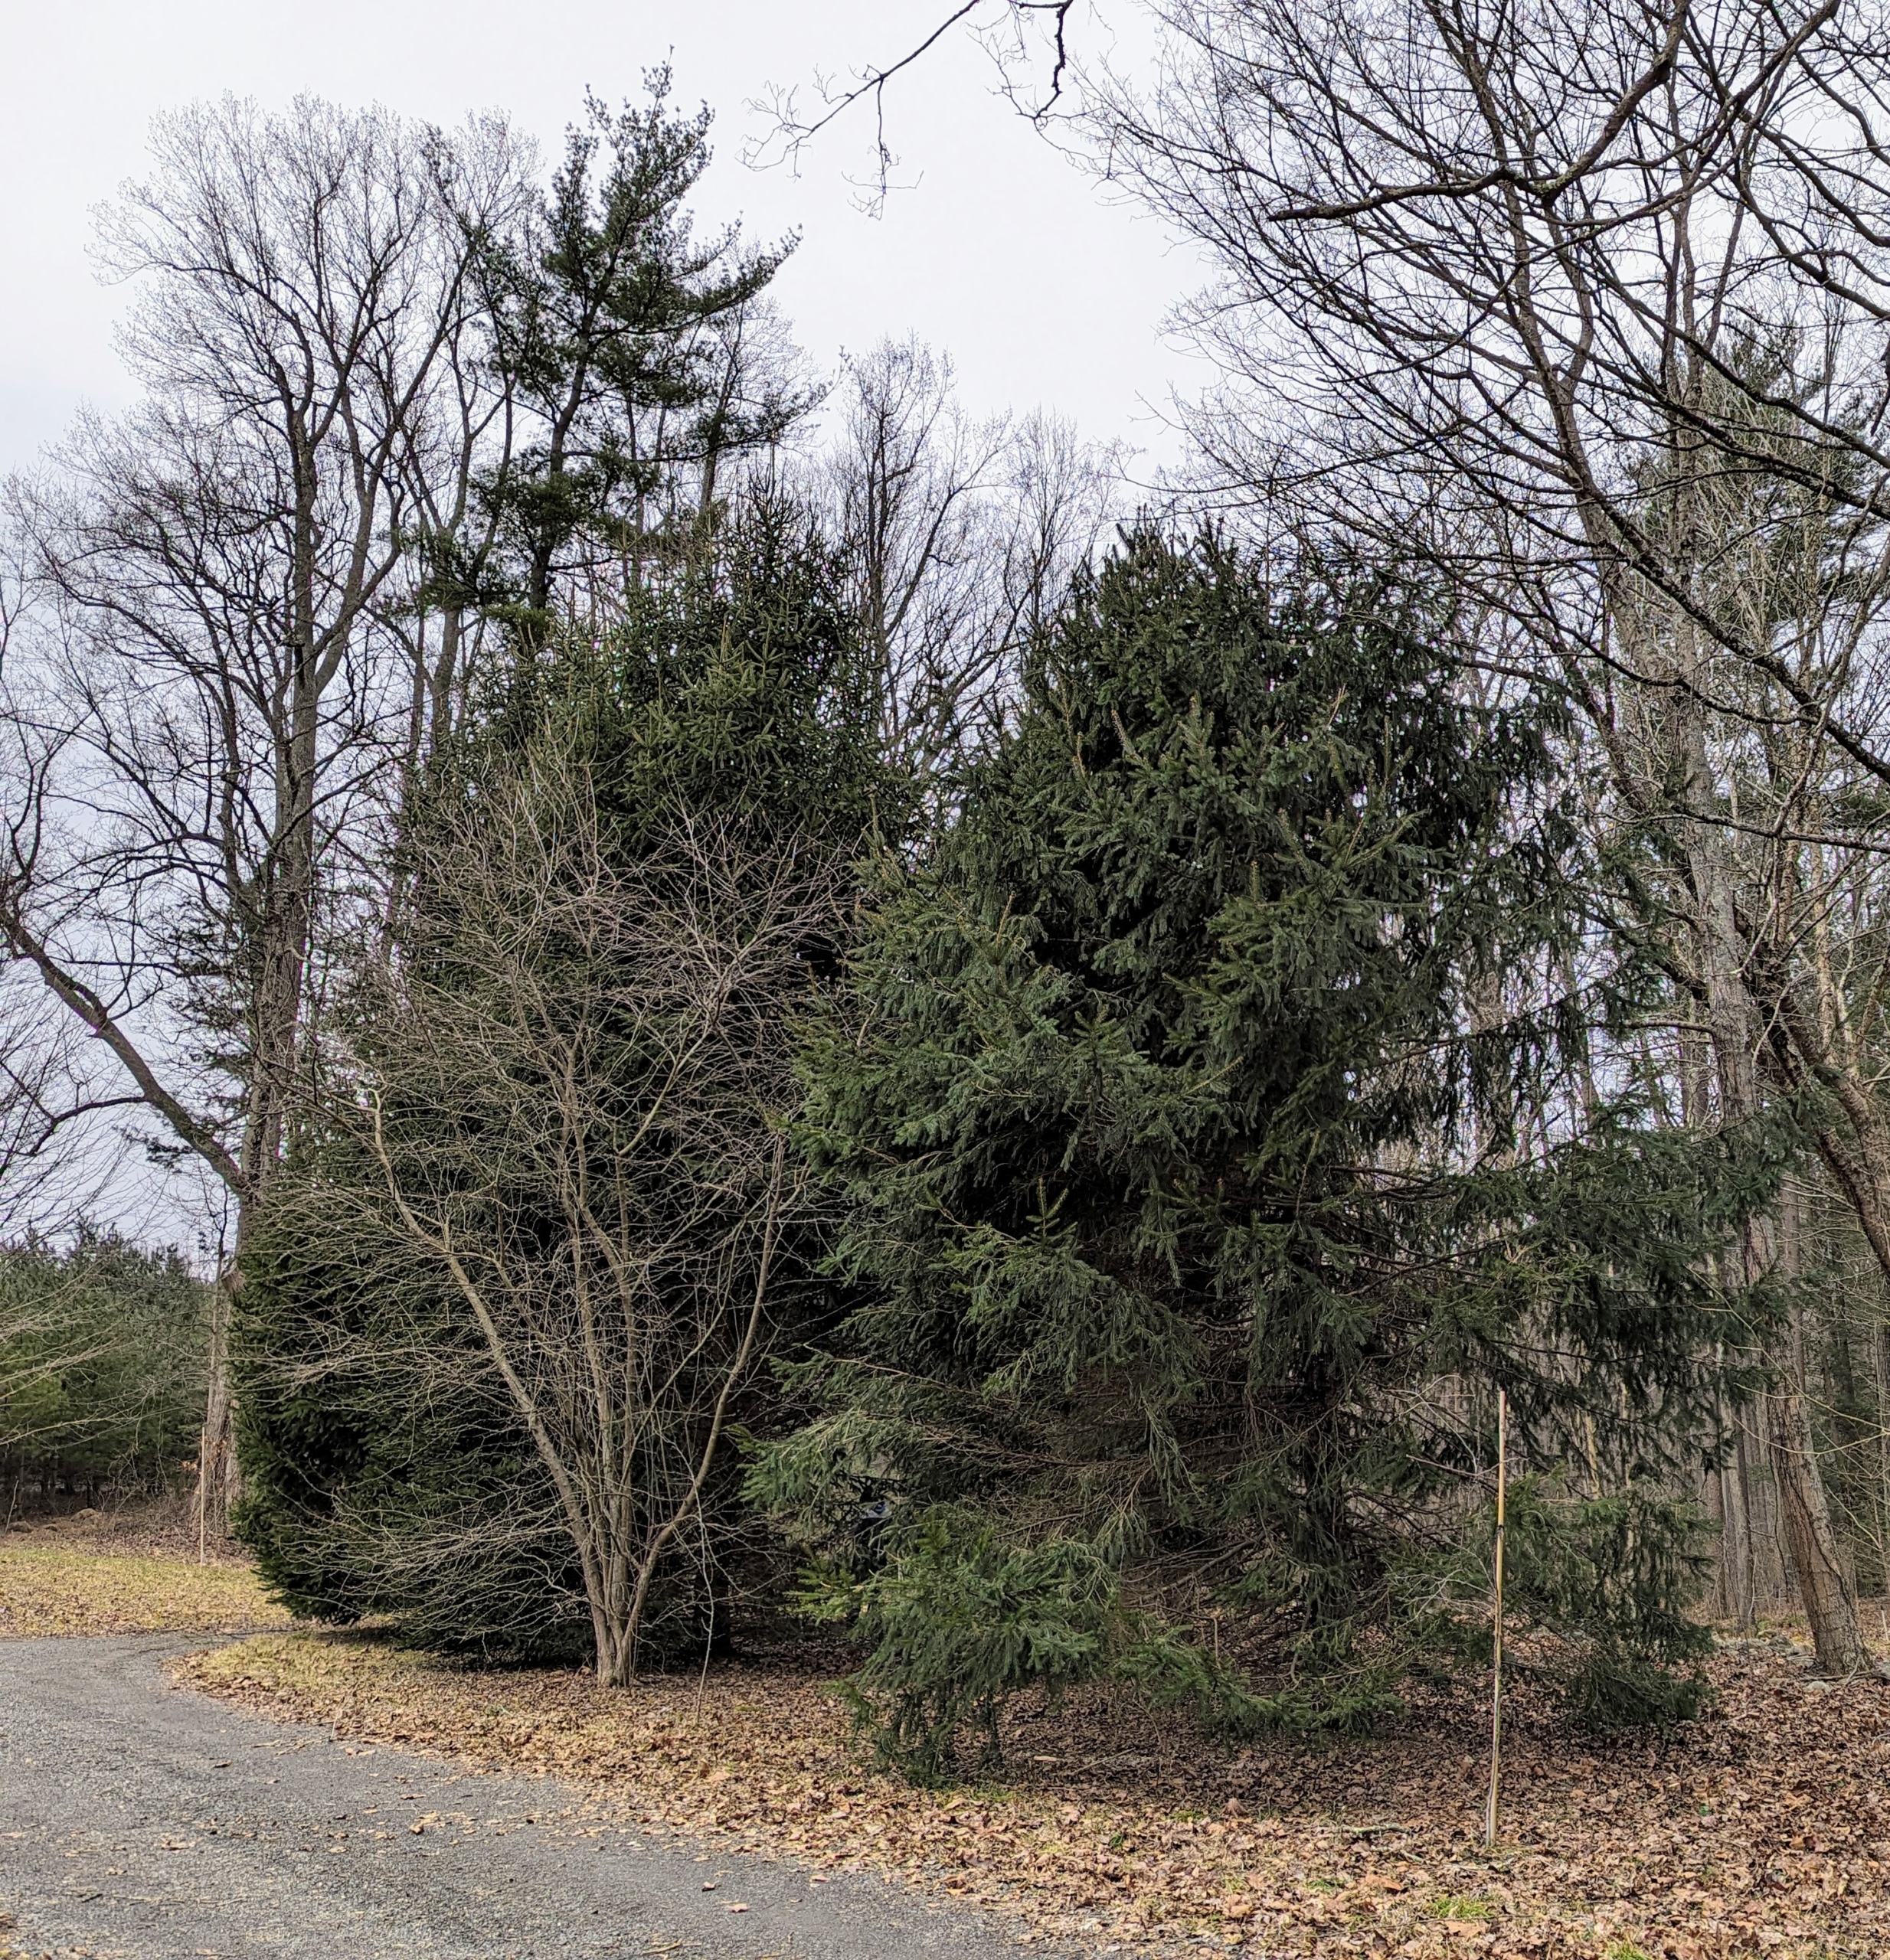
This is the back hayfield at my Bedford, NewYork farm. On the right is the giant sycamore tree – the symbol of Cantitoe Corners. this tree is the biggest tree on the property and one of my favorites.
The sycamore sits on one end of this large field, where we grow lots of hay every year for my horses, Fell pony and donkeys. It is surrounded by a carriage road and many beautiful trees – some I planted and others that are original to the farm.
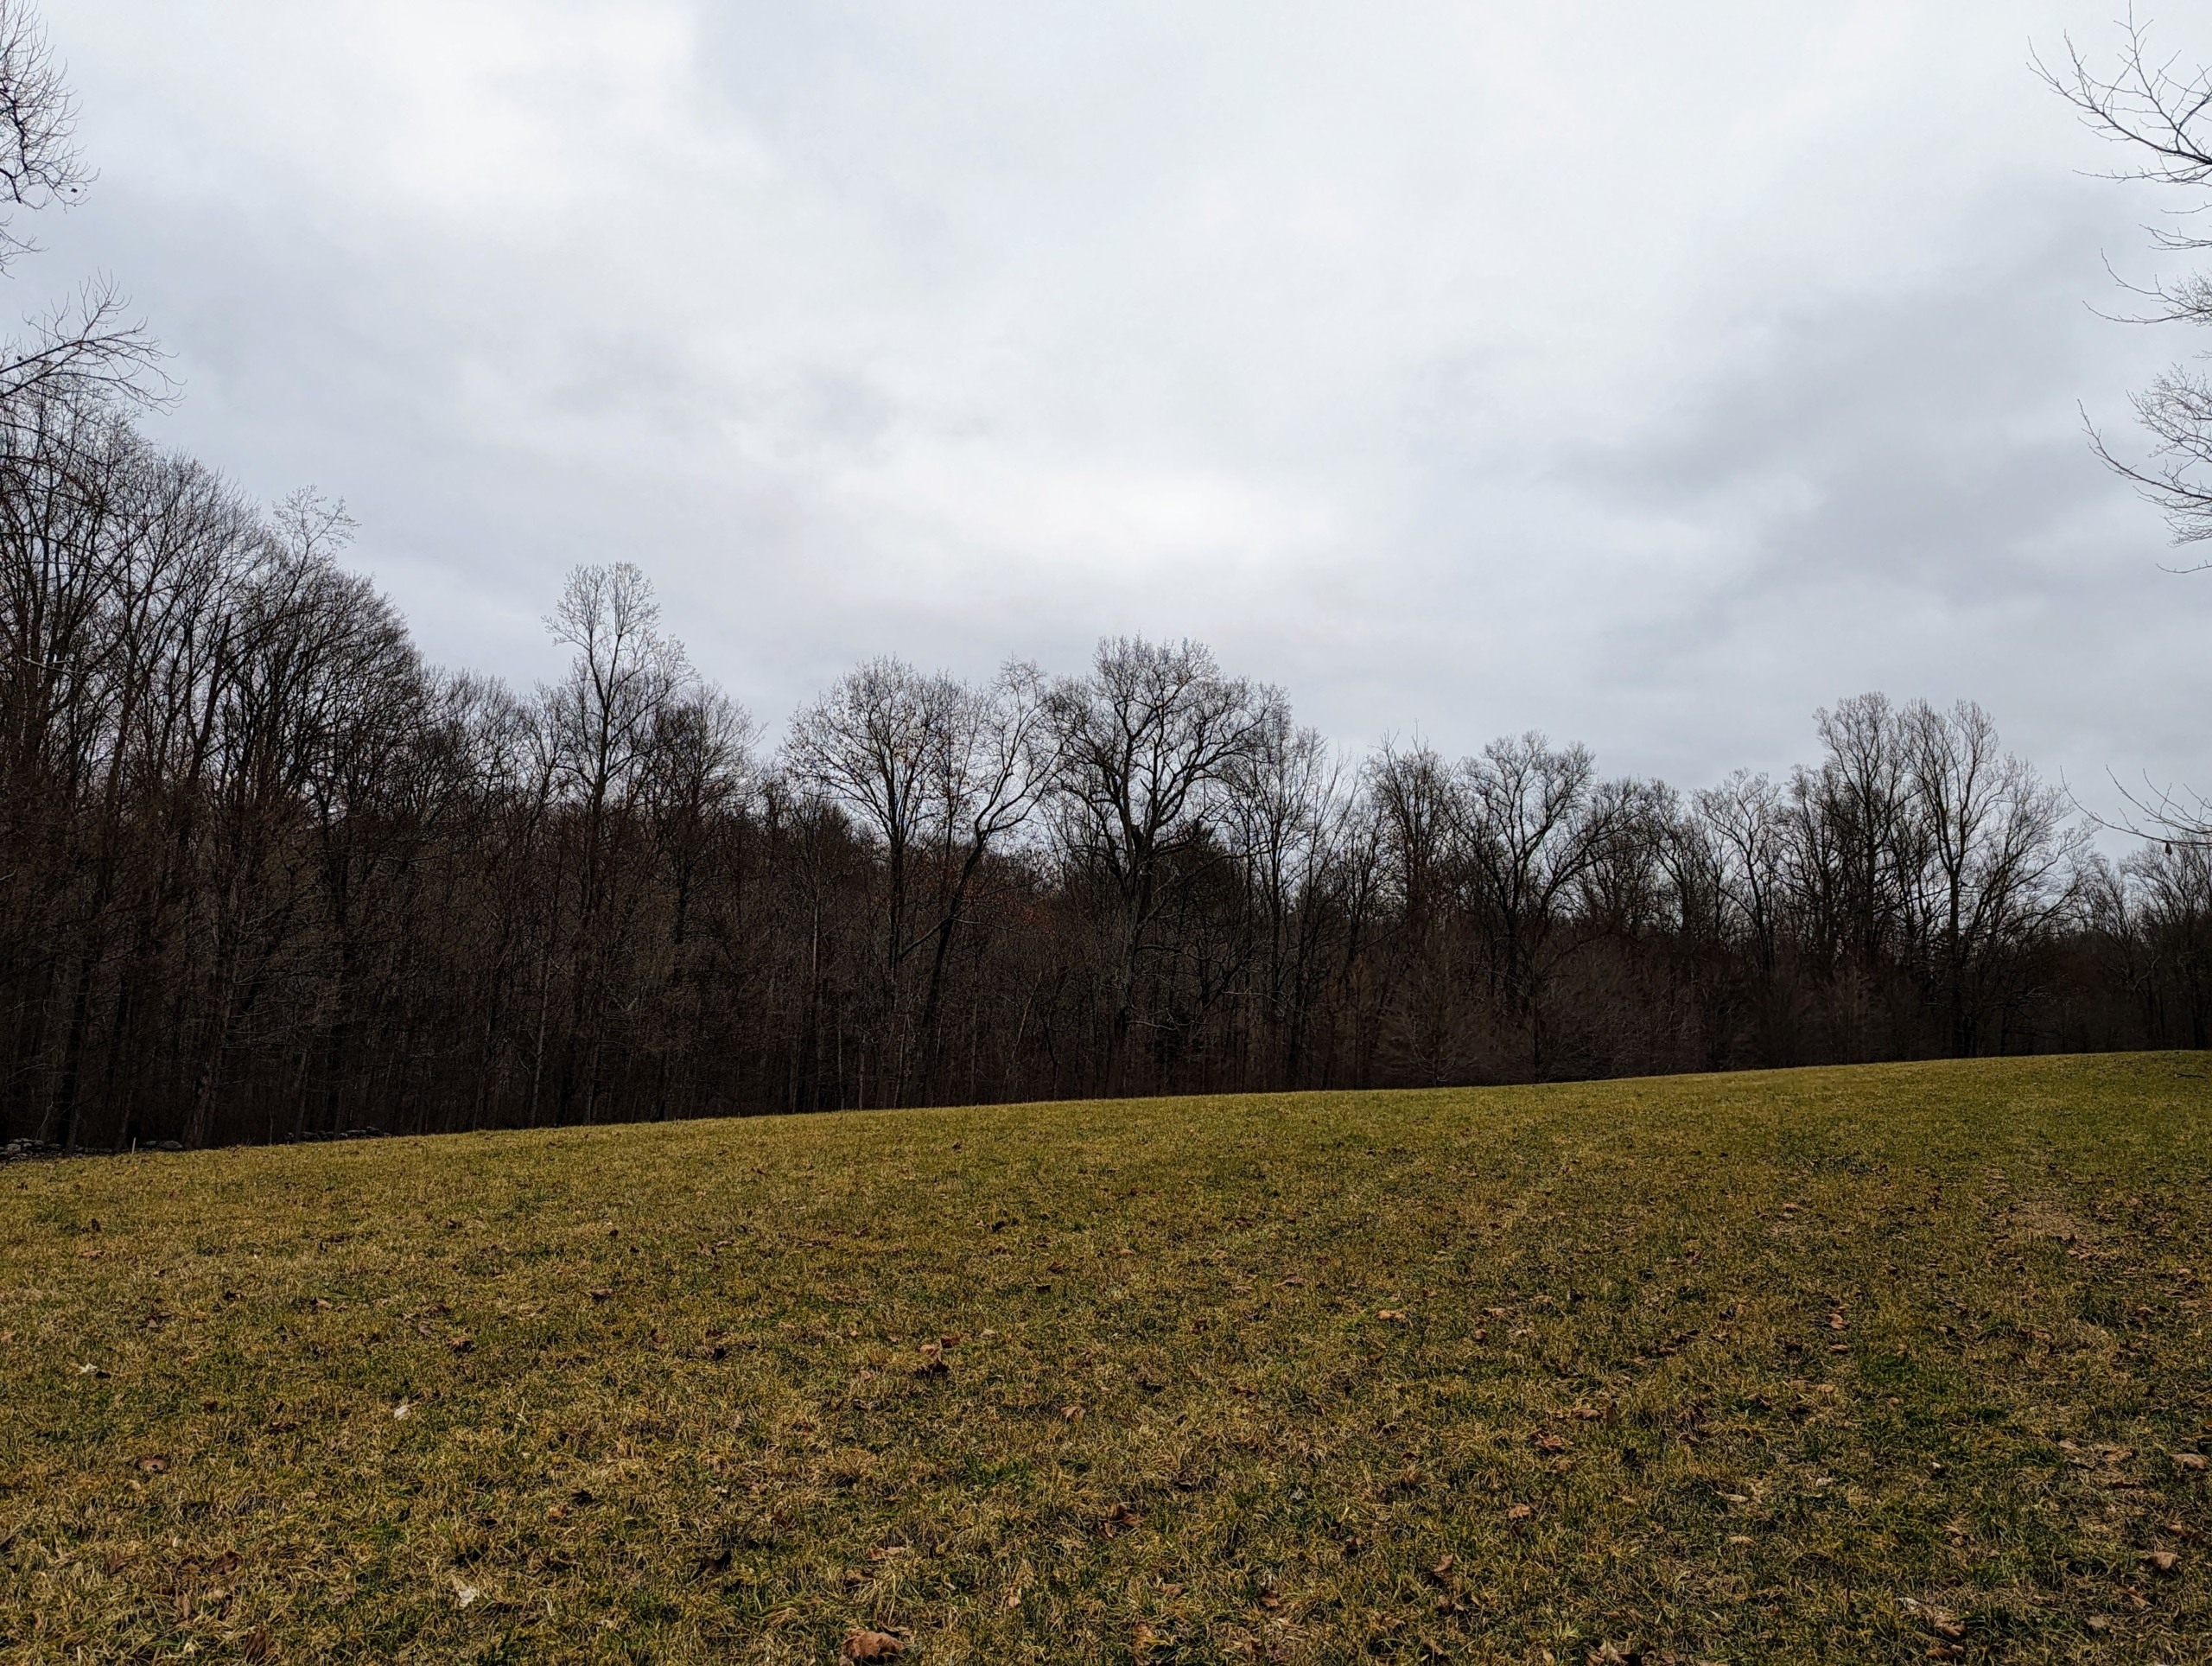
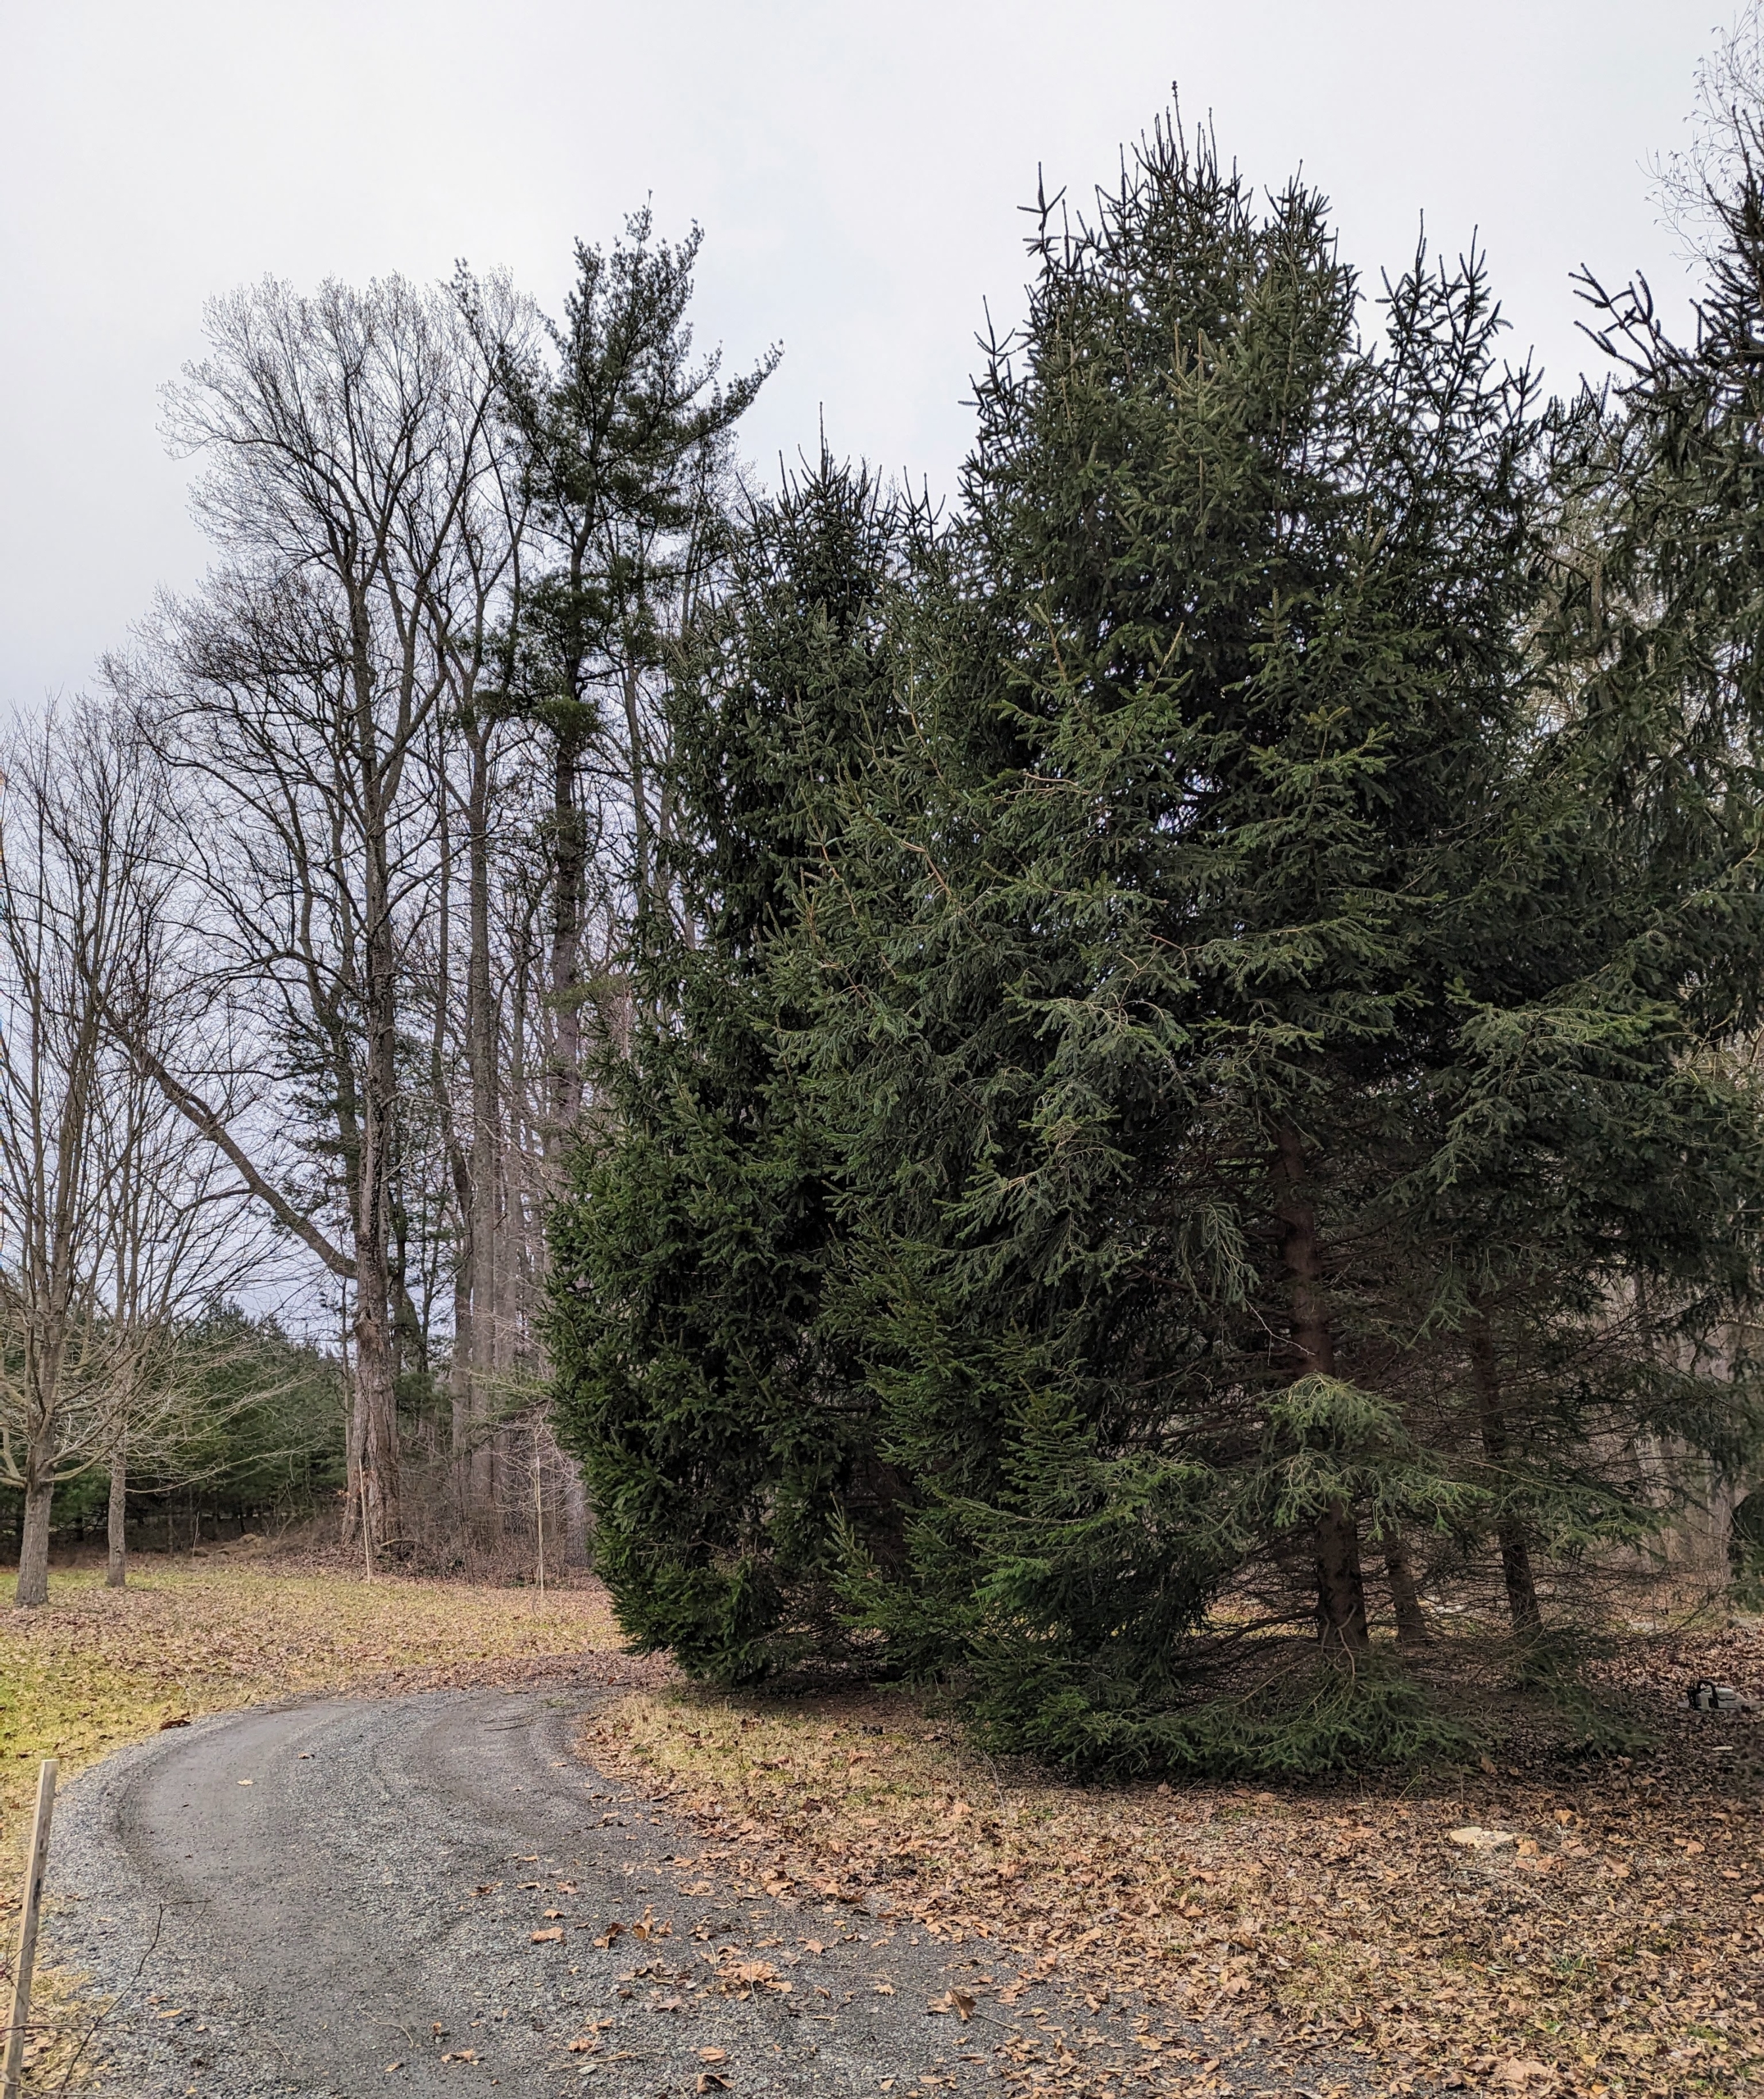
At this curve in the road not far from what I call my run-in paddock is this grove of evergreen spruce and deciduous crabapple trees.
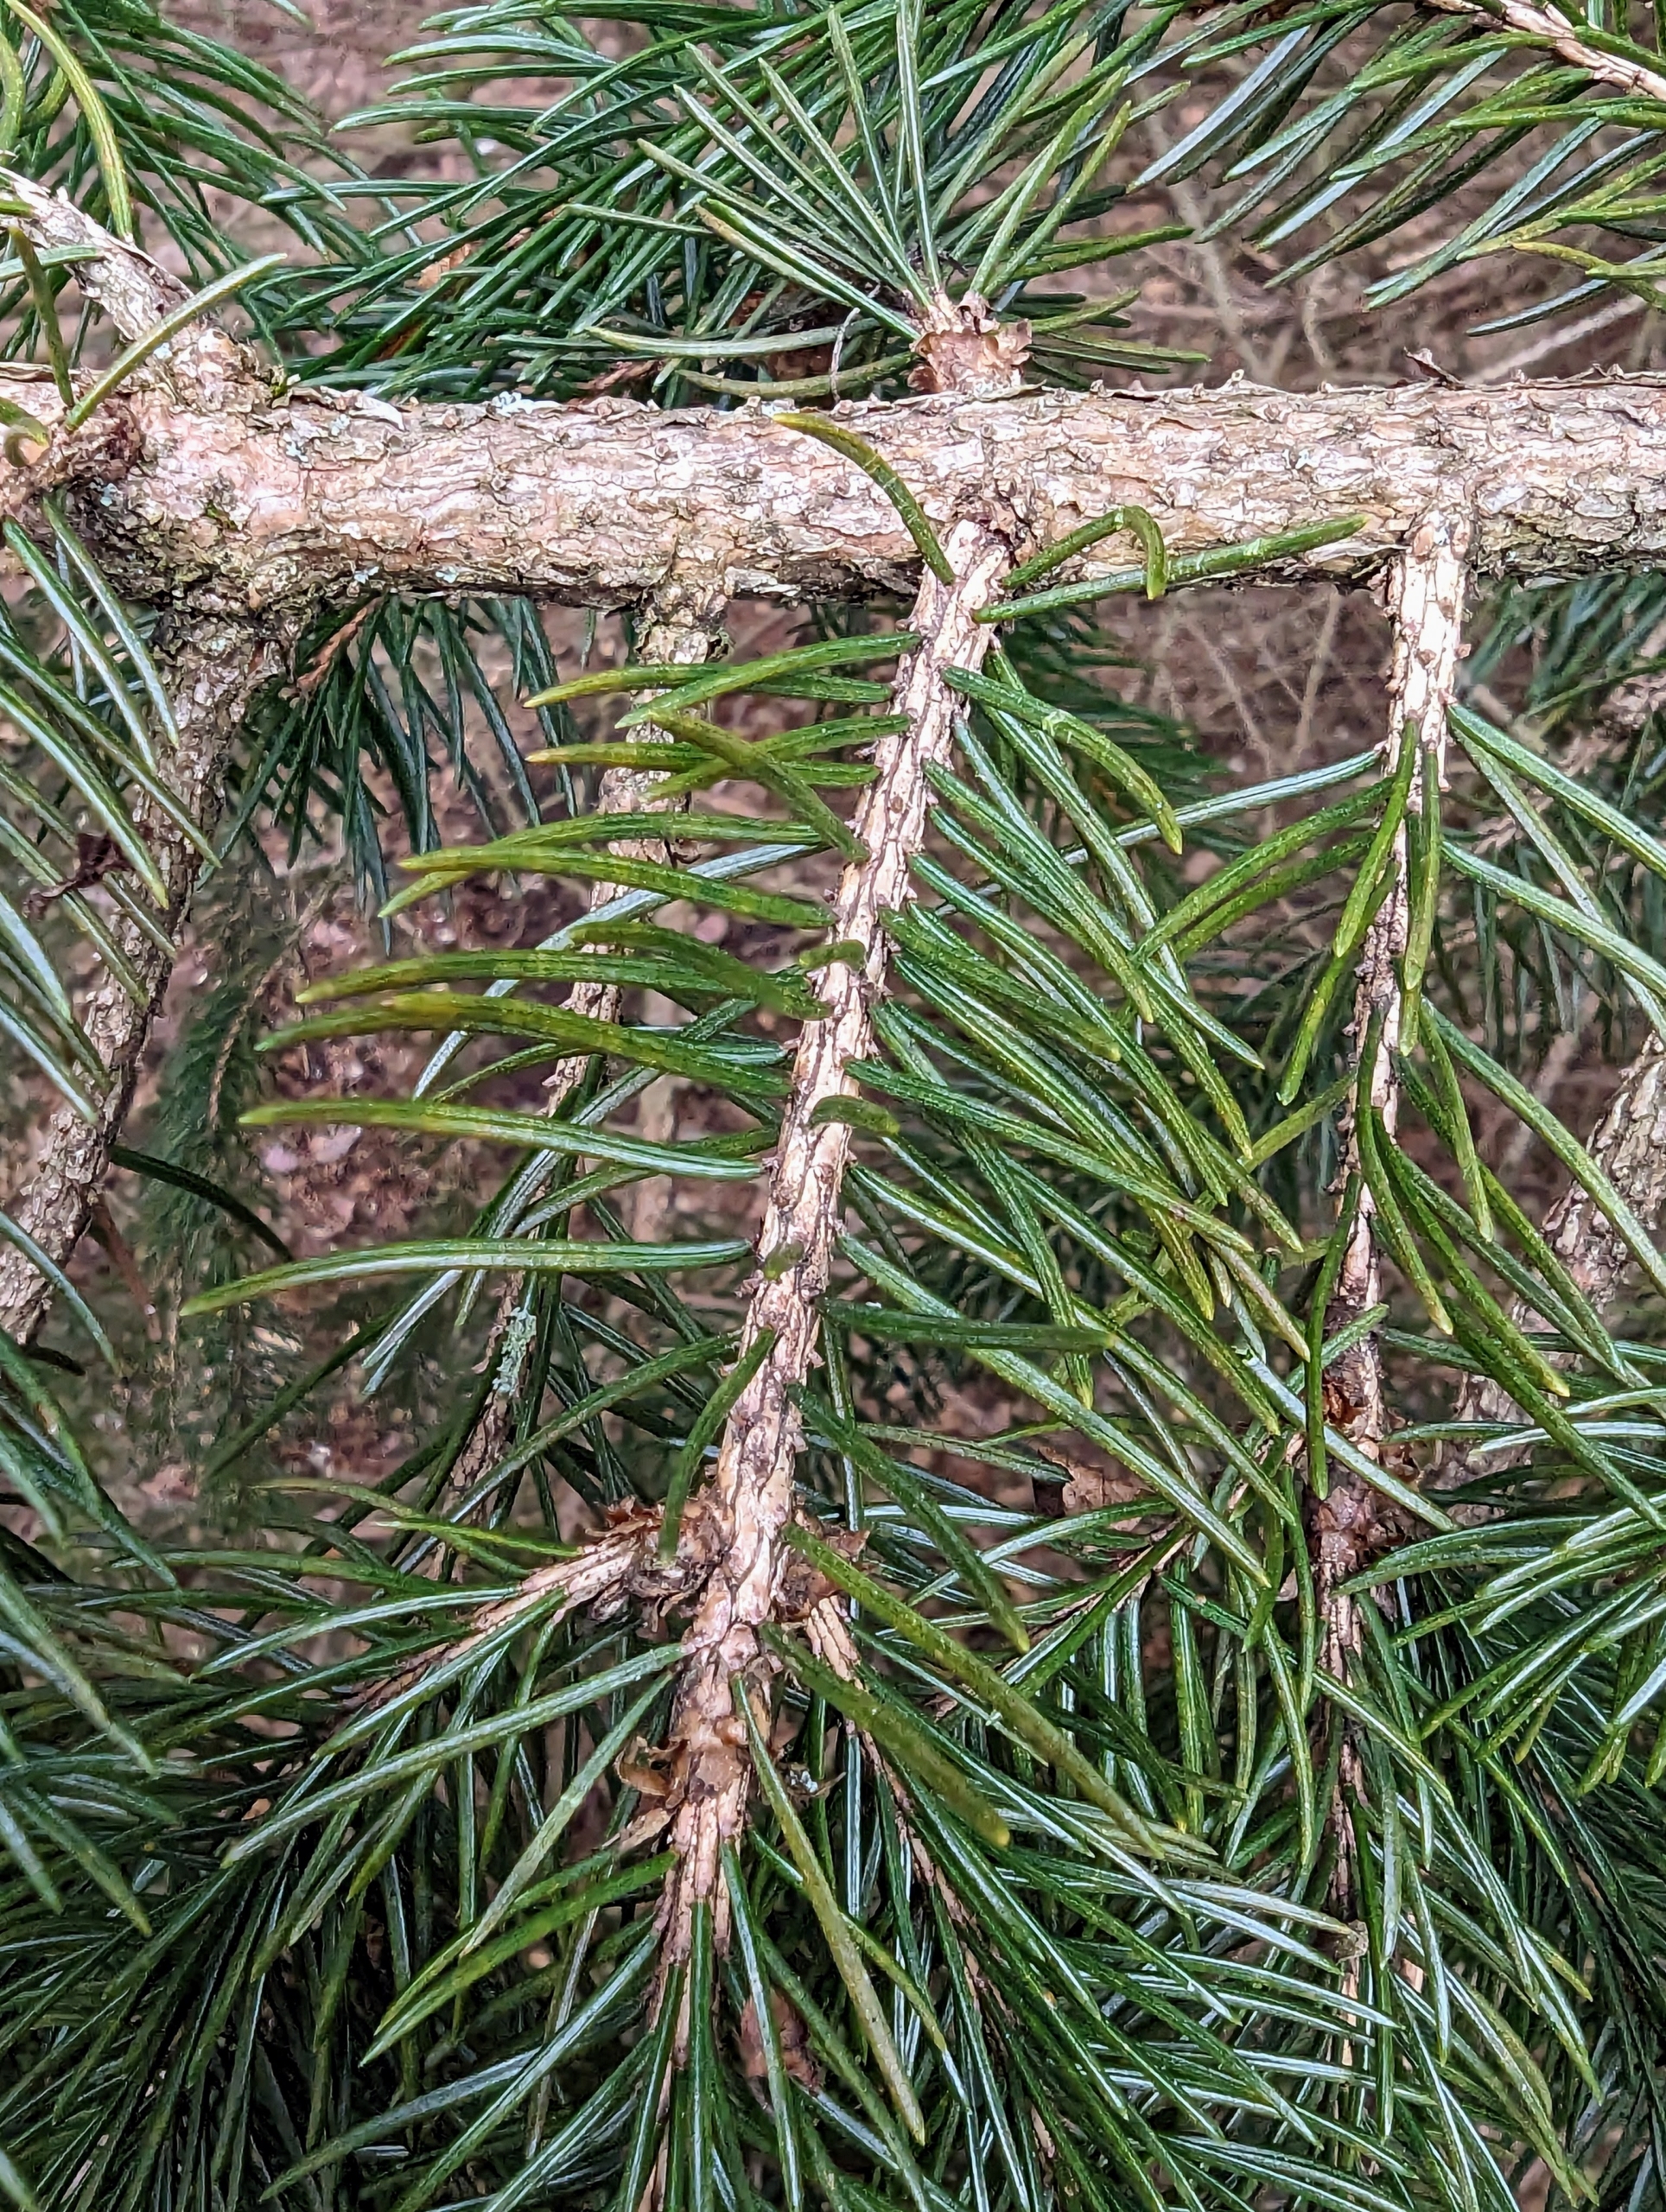
Do you know how to tell a spruce from a pine? One easy tip to remember: on pine trees, needles are attached to the branches in clusters; however, on spruce trees such as this one, needles are attached individually to the branch.
Over the years as the crabapples grew, they also blocked important light from reaching the spruce trees. They also crowded them and blocked good air circulation, so I decided they should be felled. Here is one of the crabapples planned for removal.
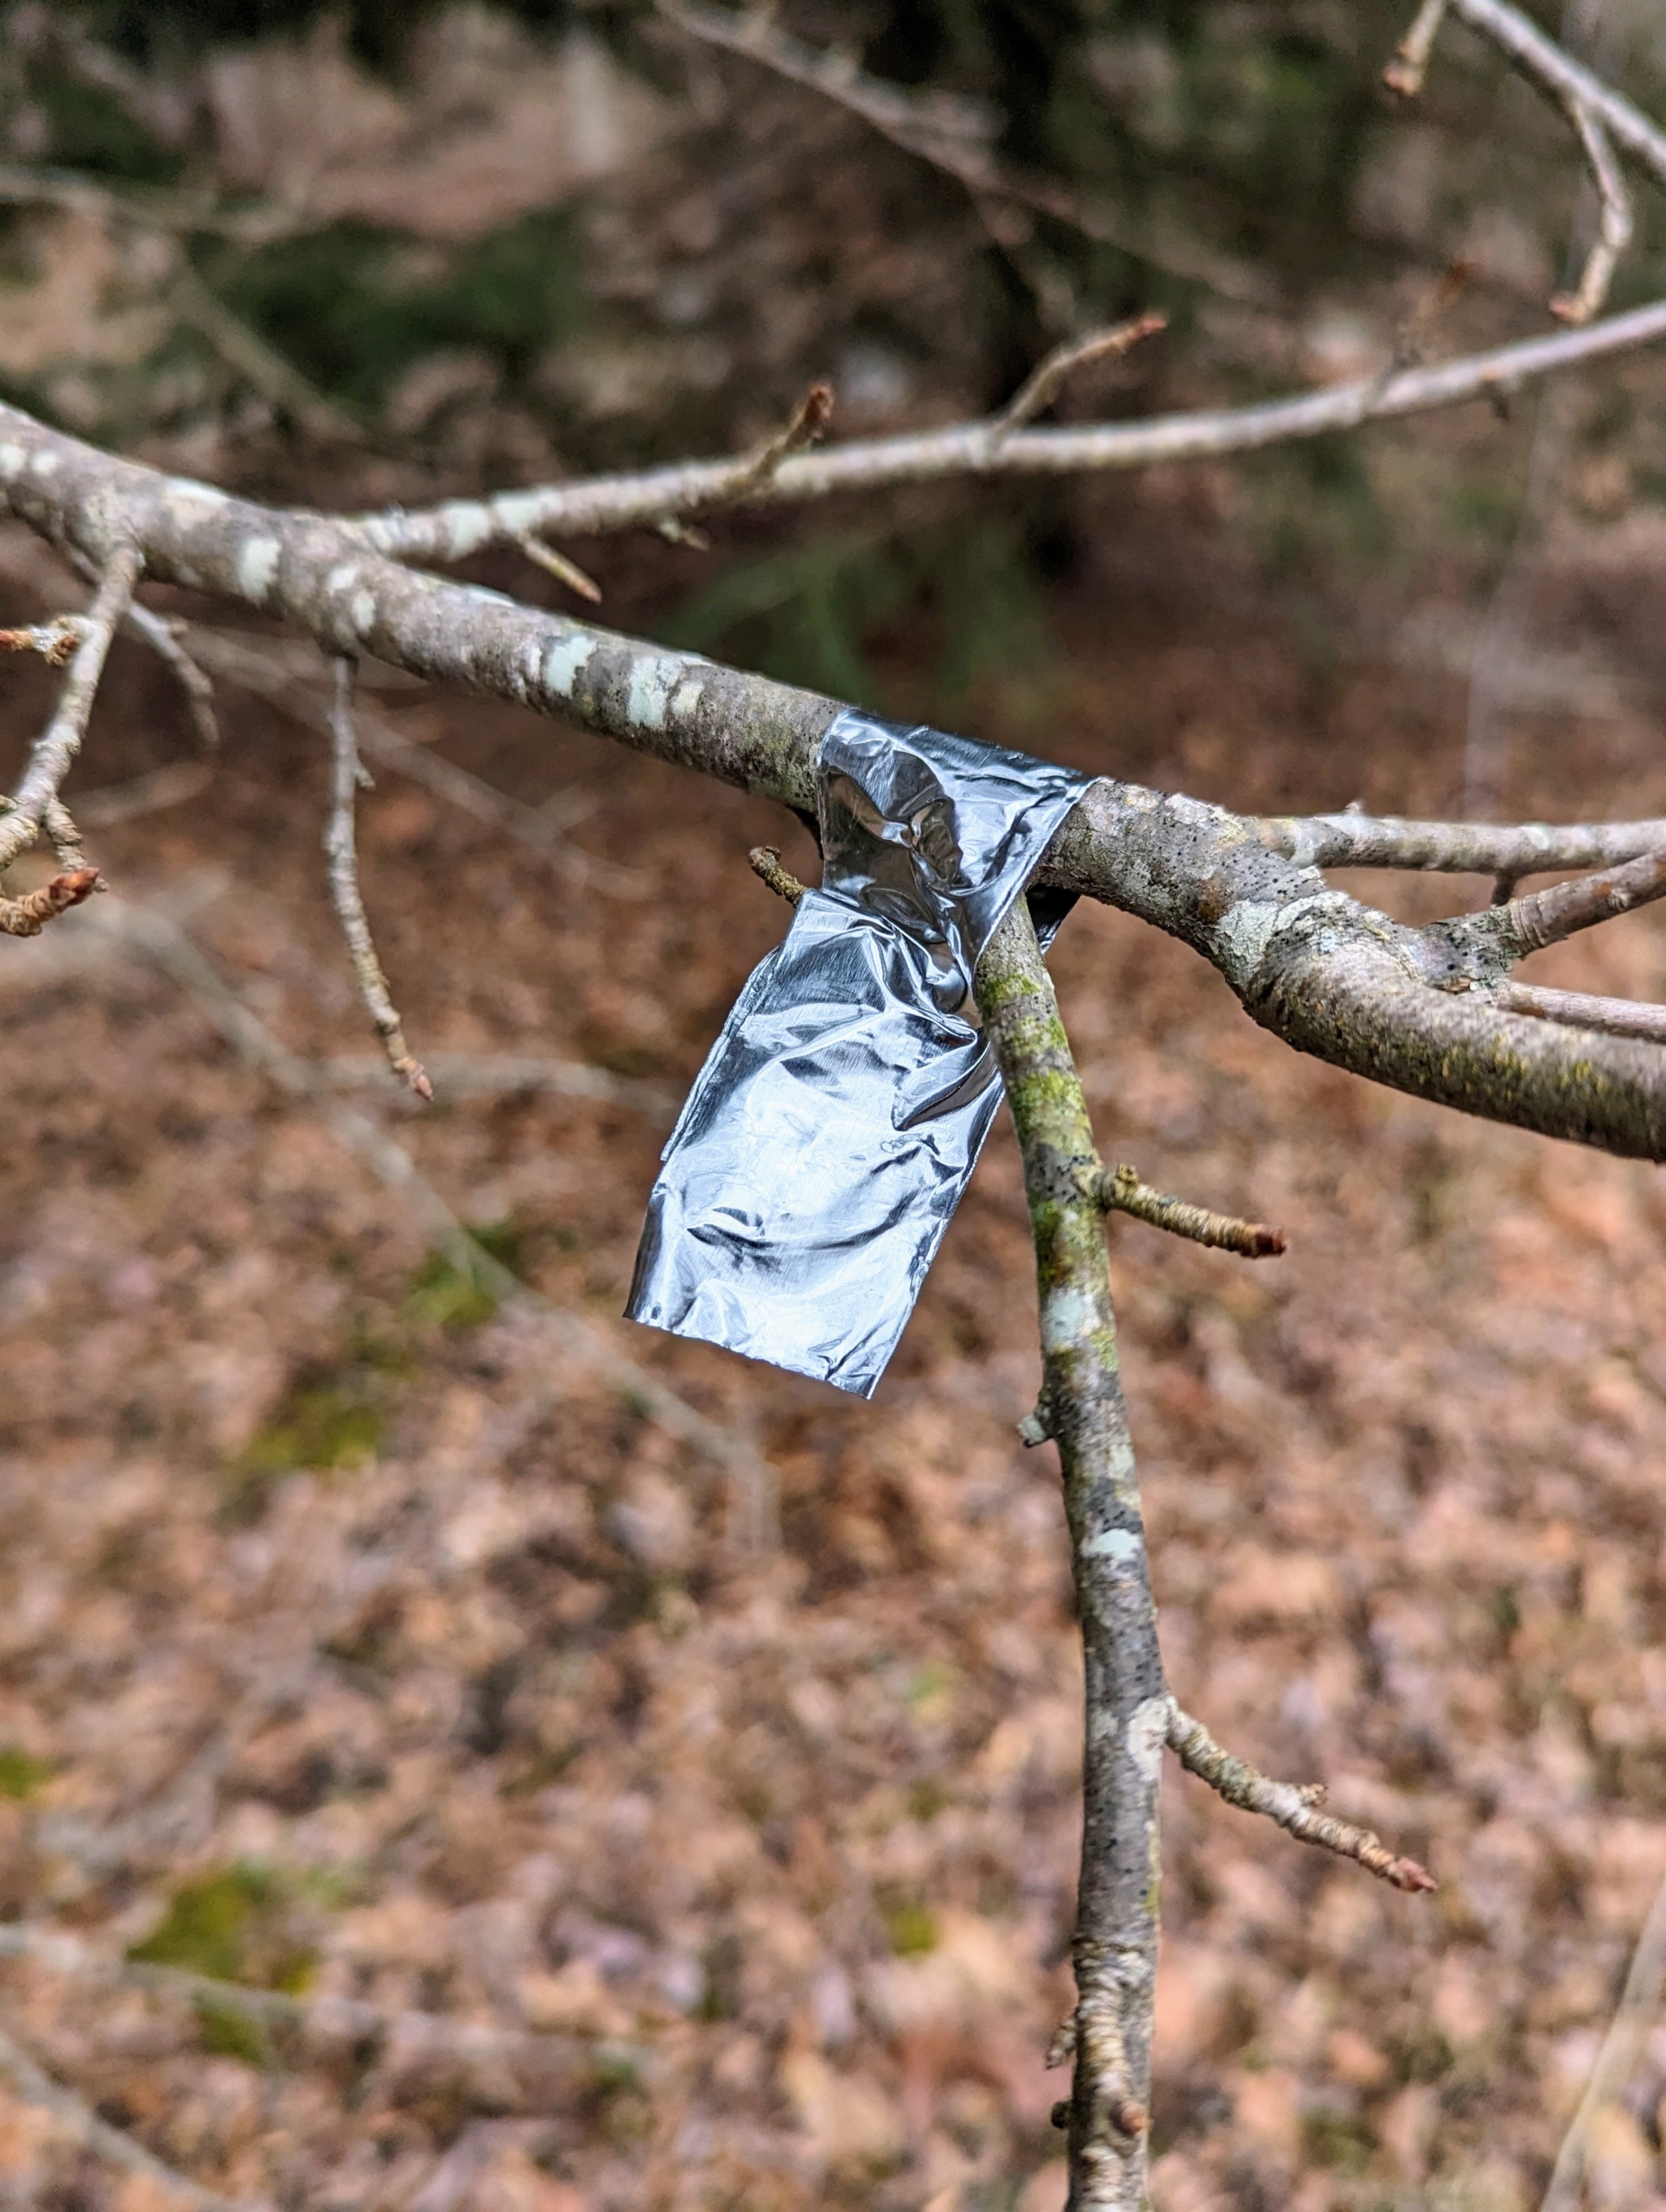
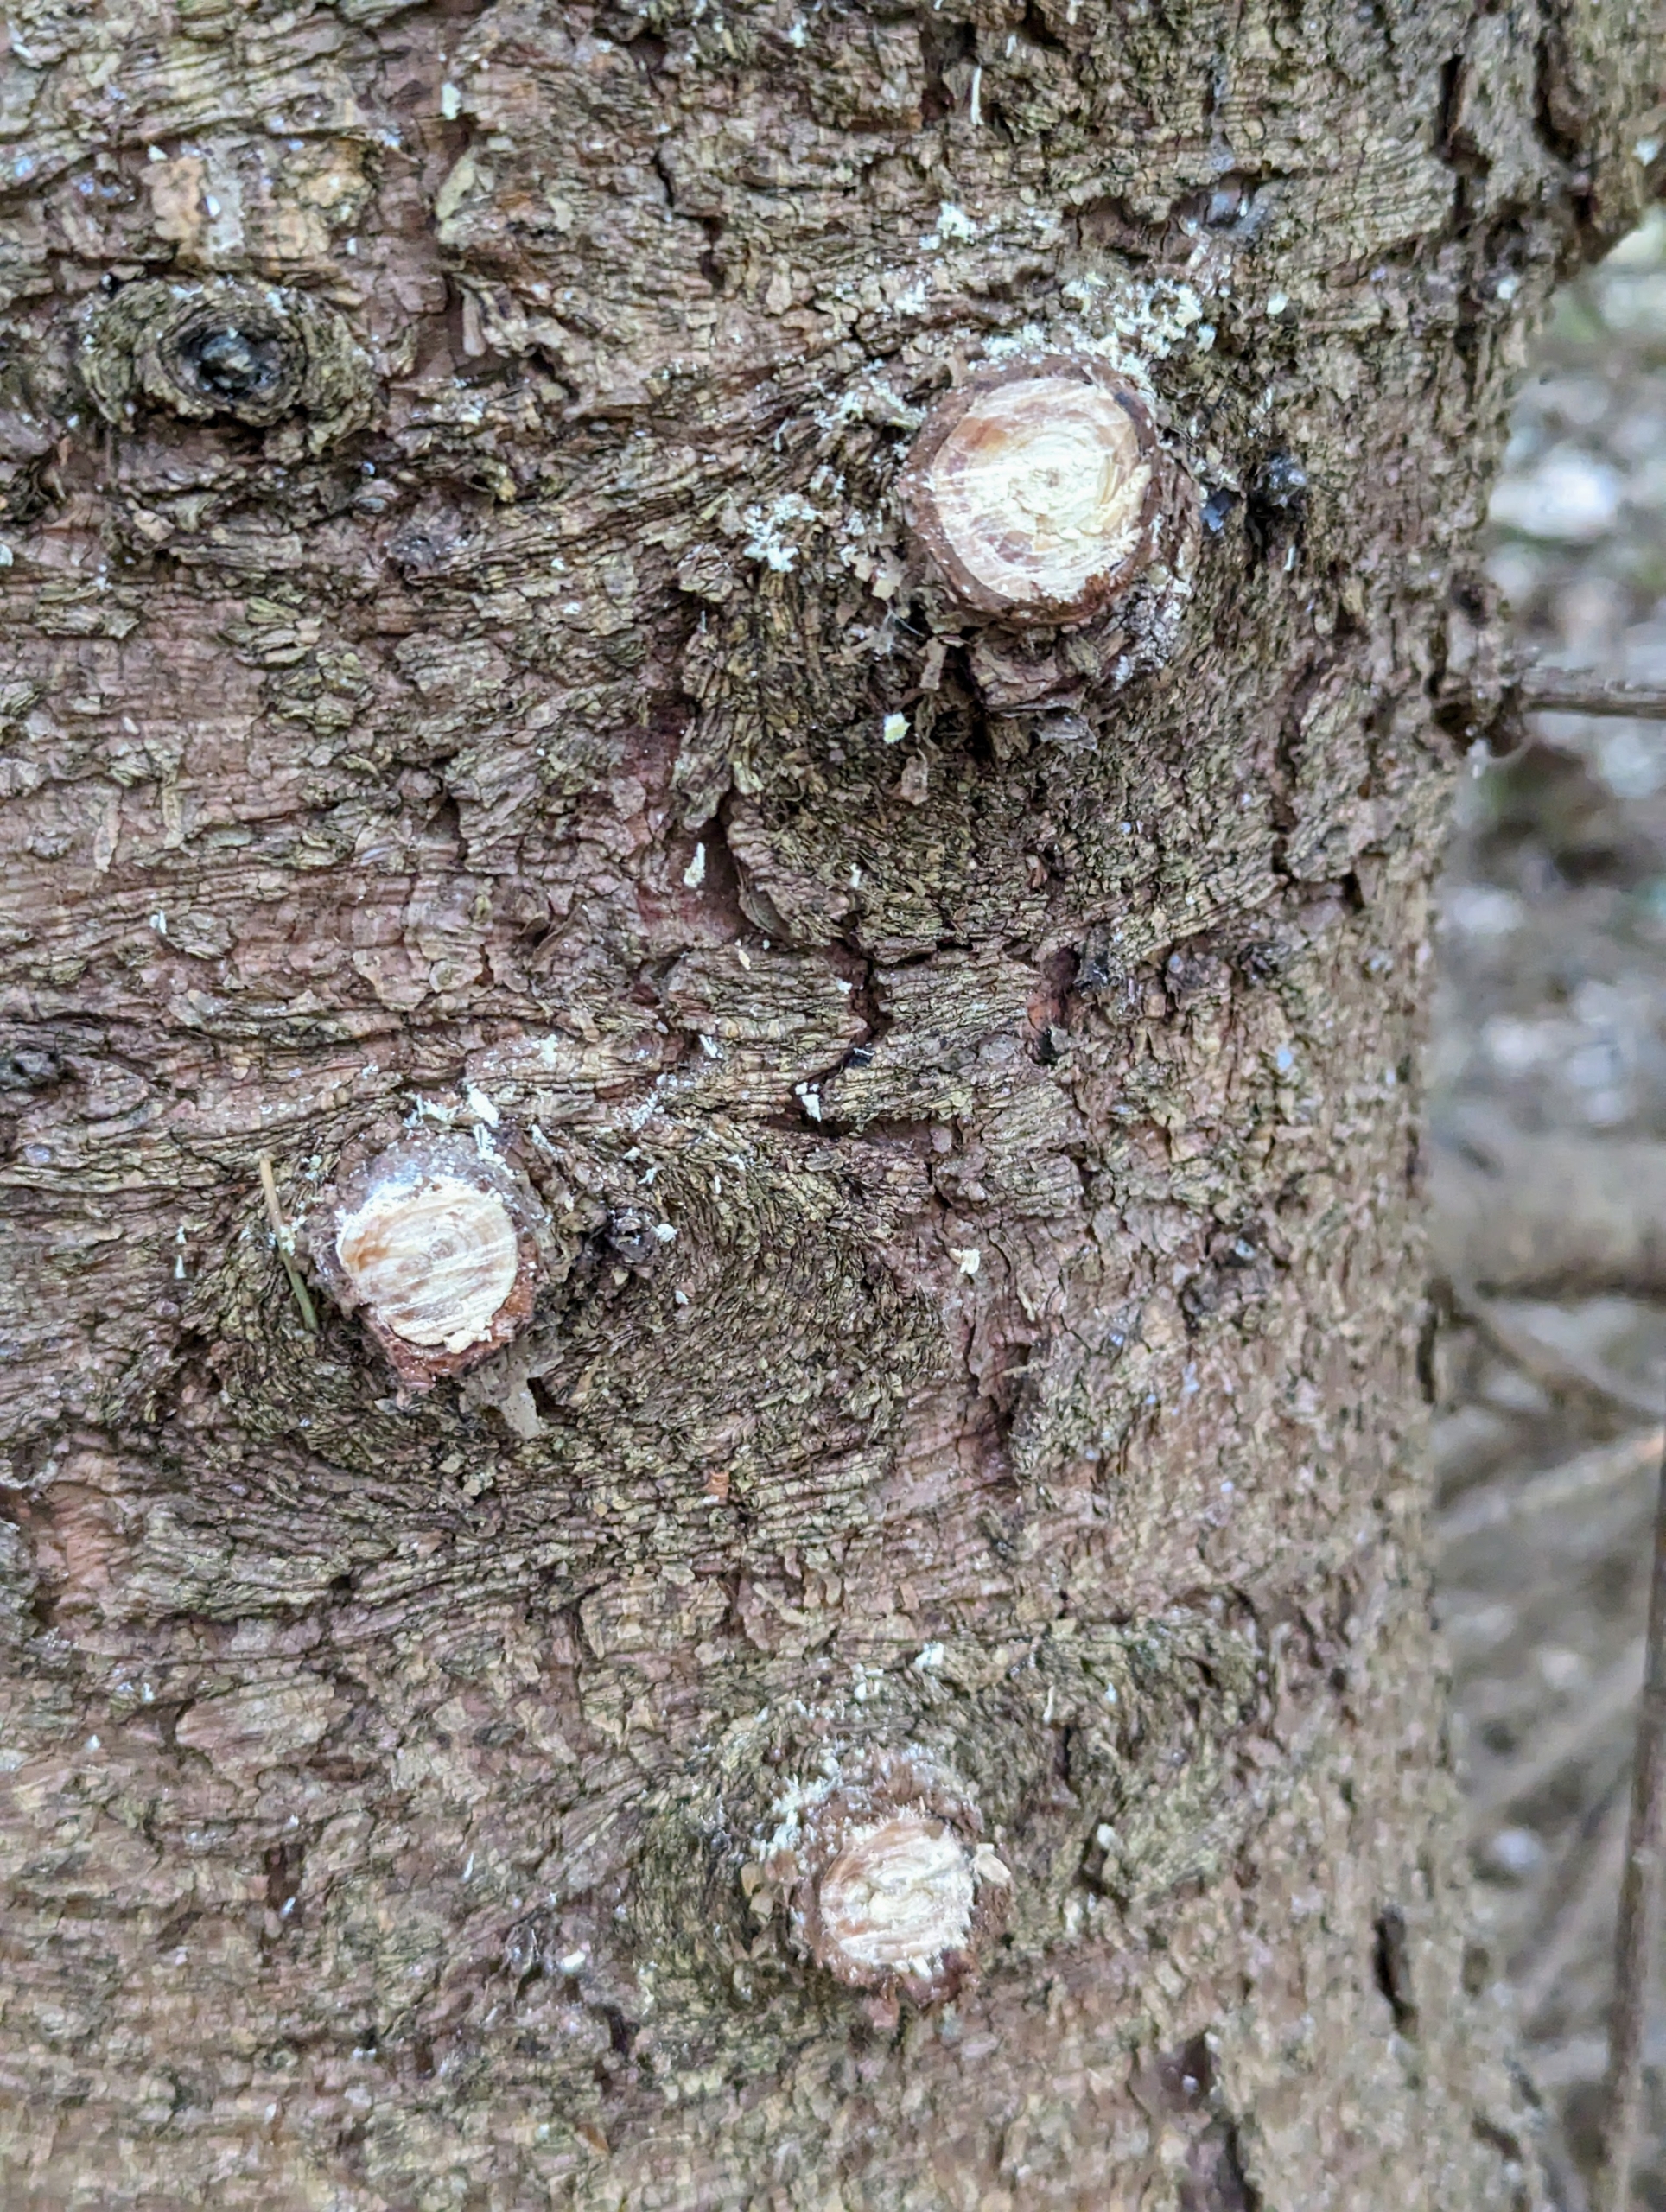
Not long ago, I tagged the trees with metal tape to indicate which specimens should be cut down. There was absolutely no confusion.
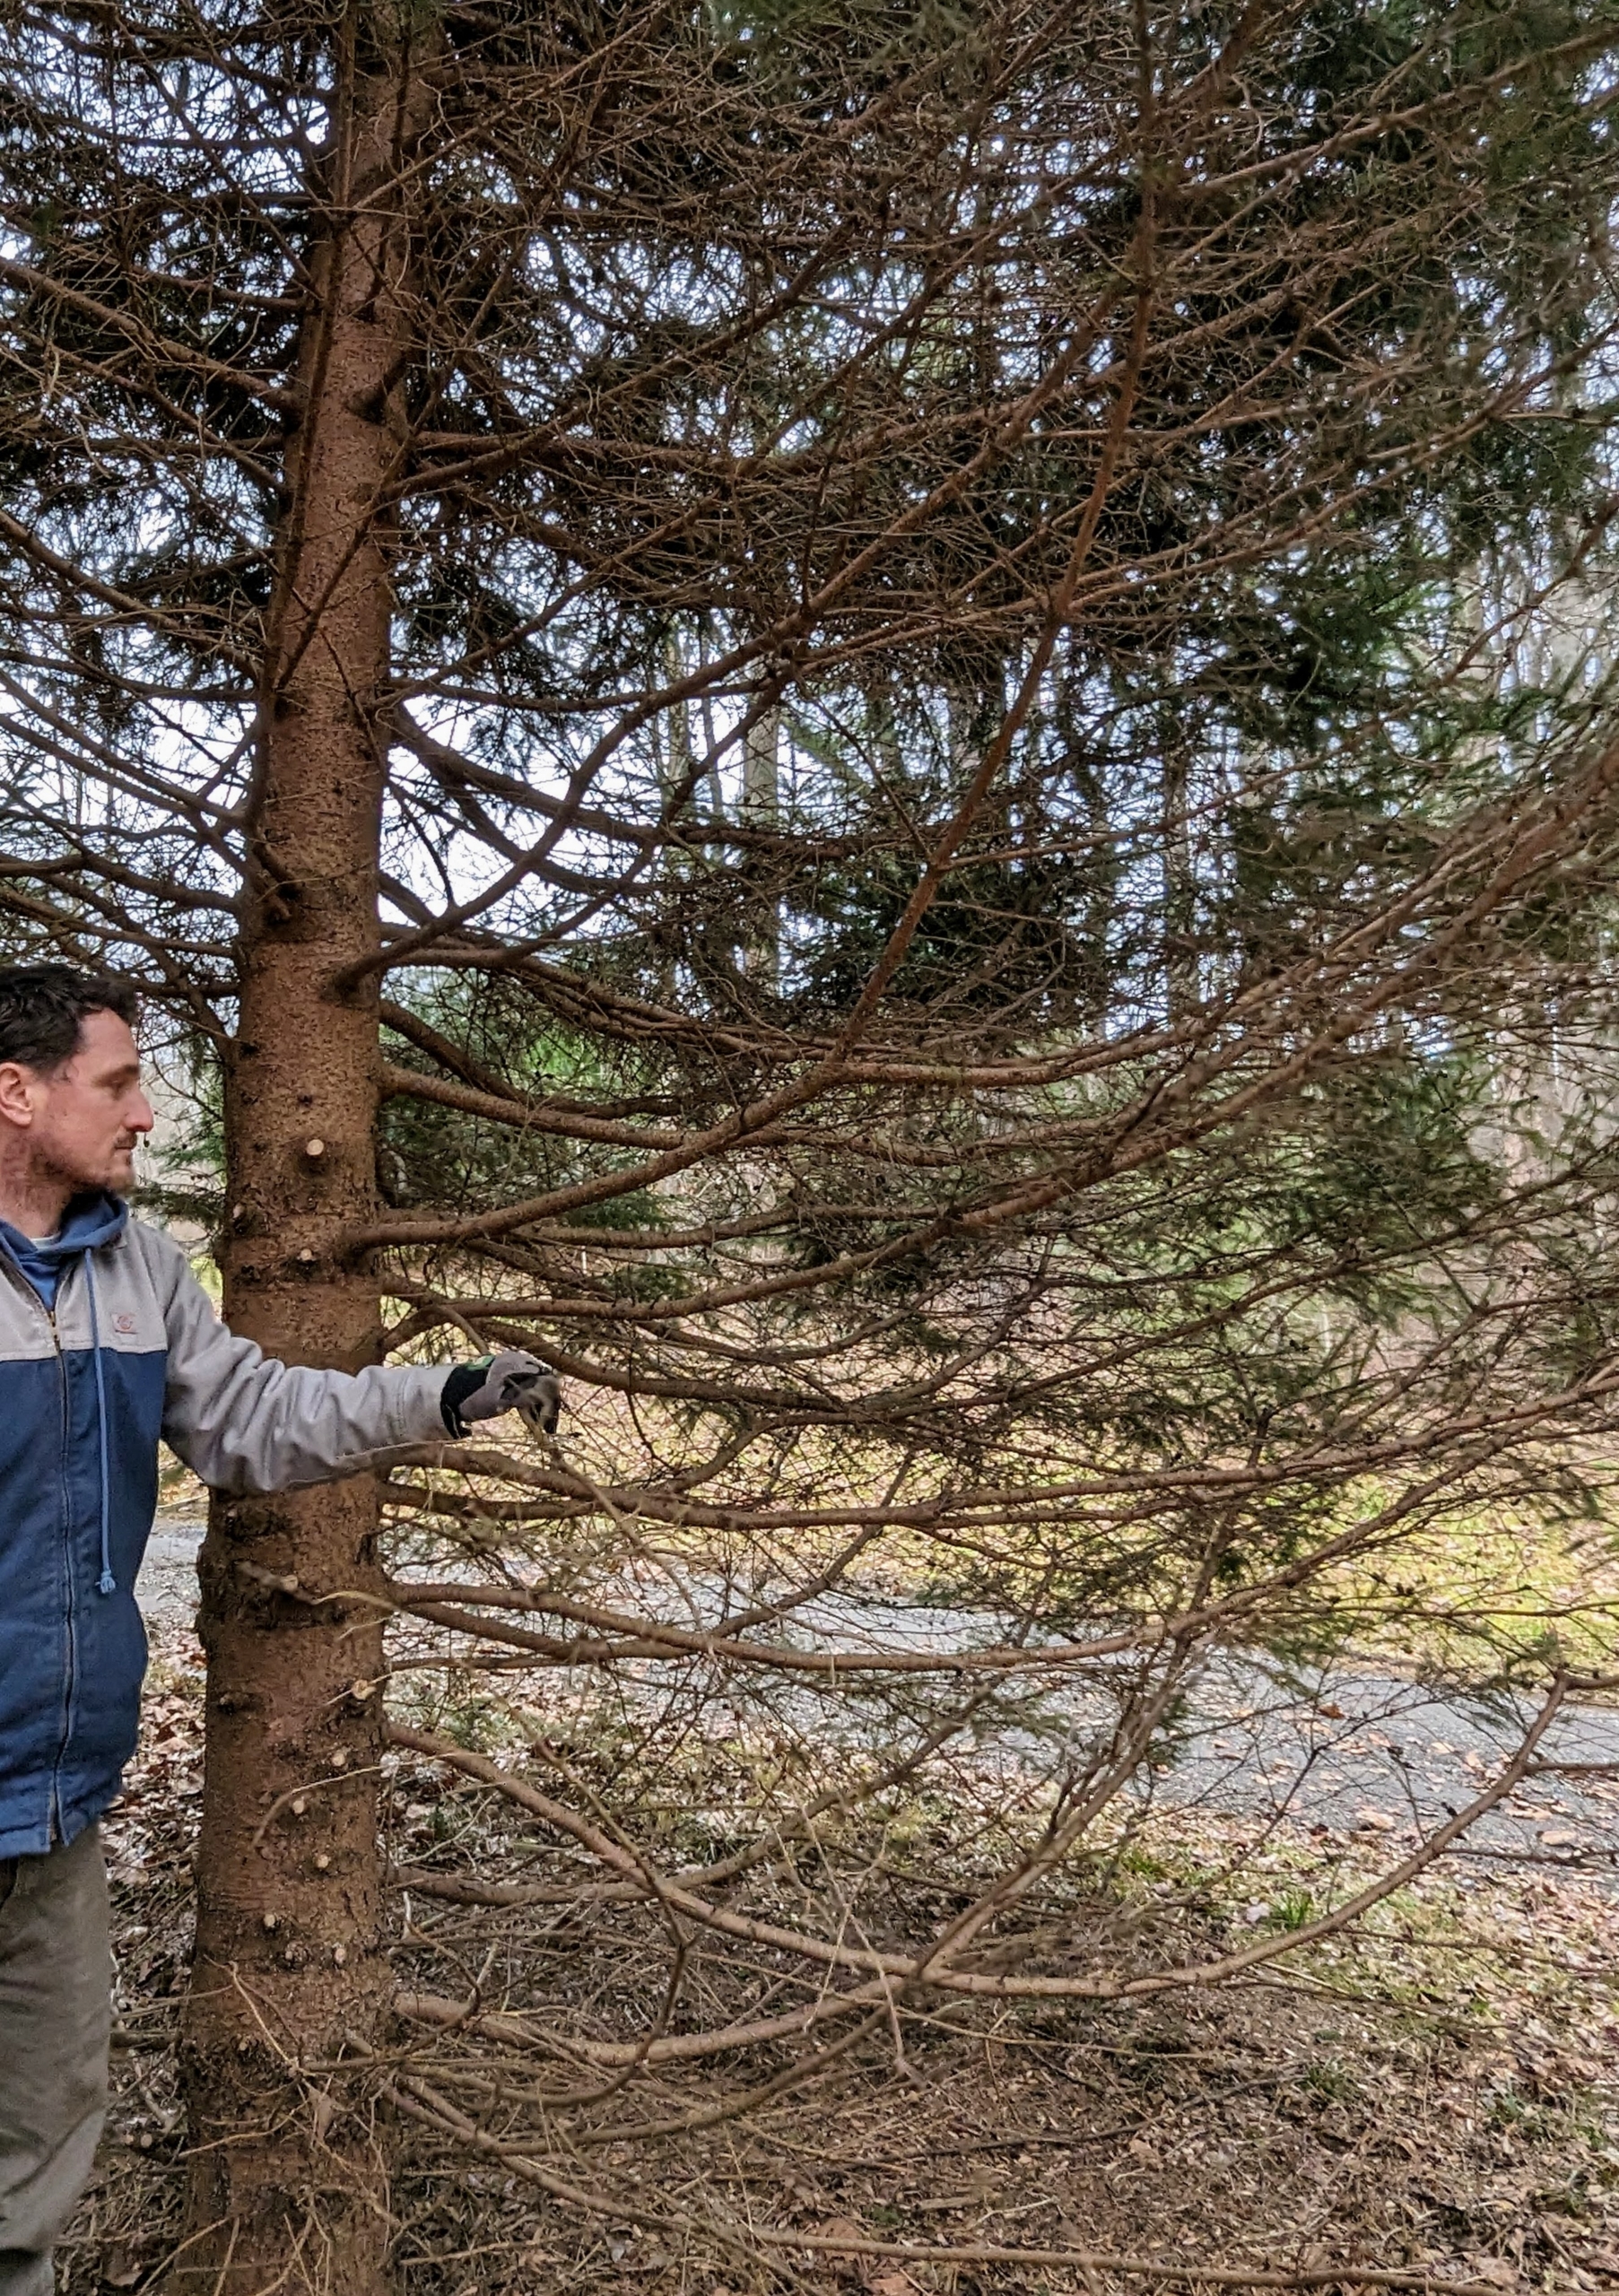
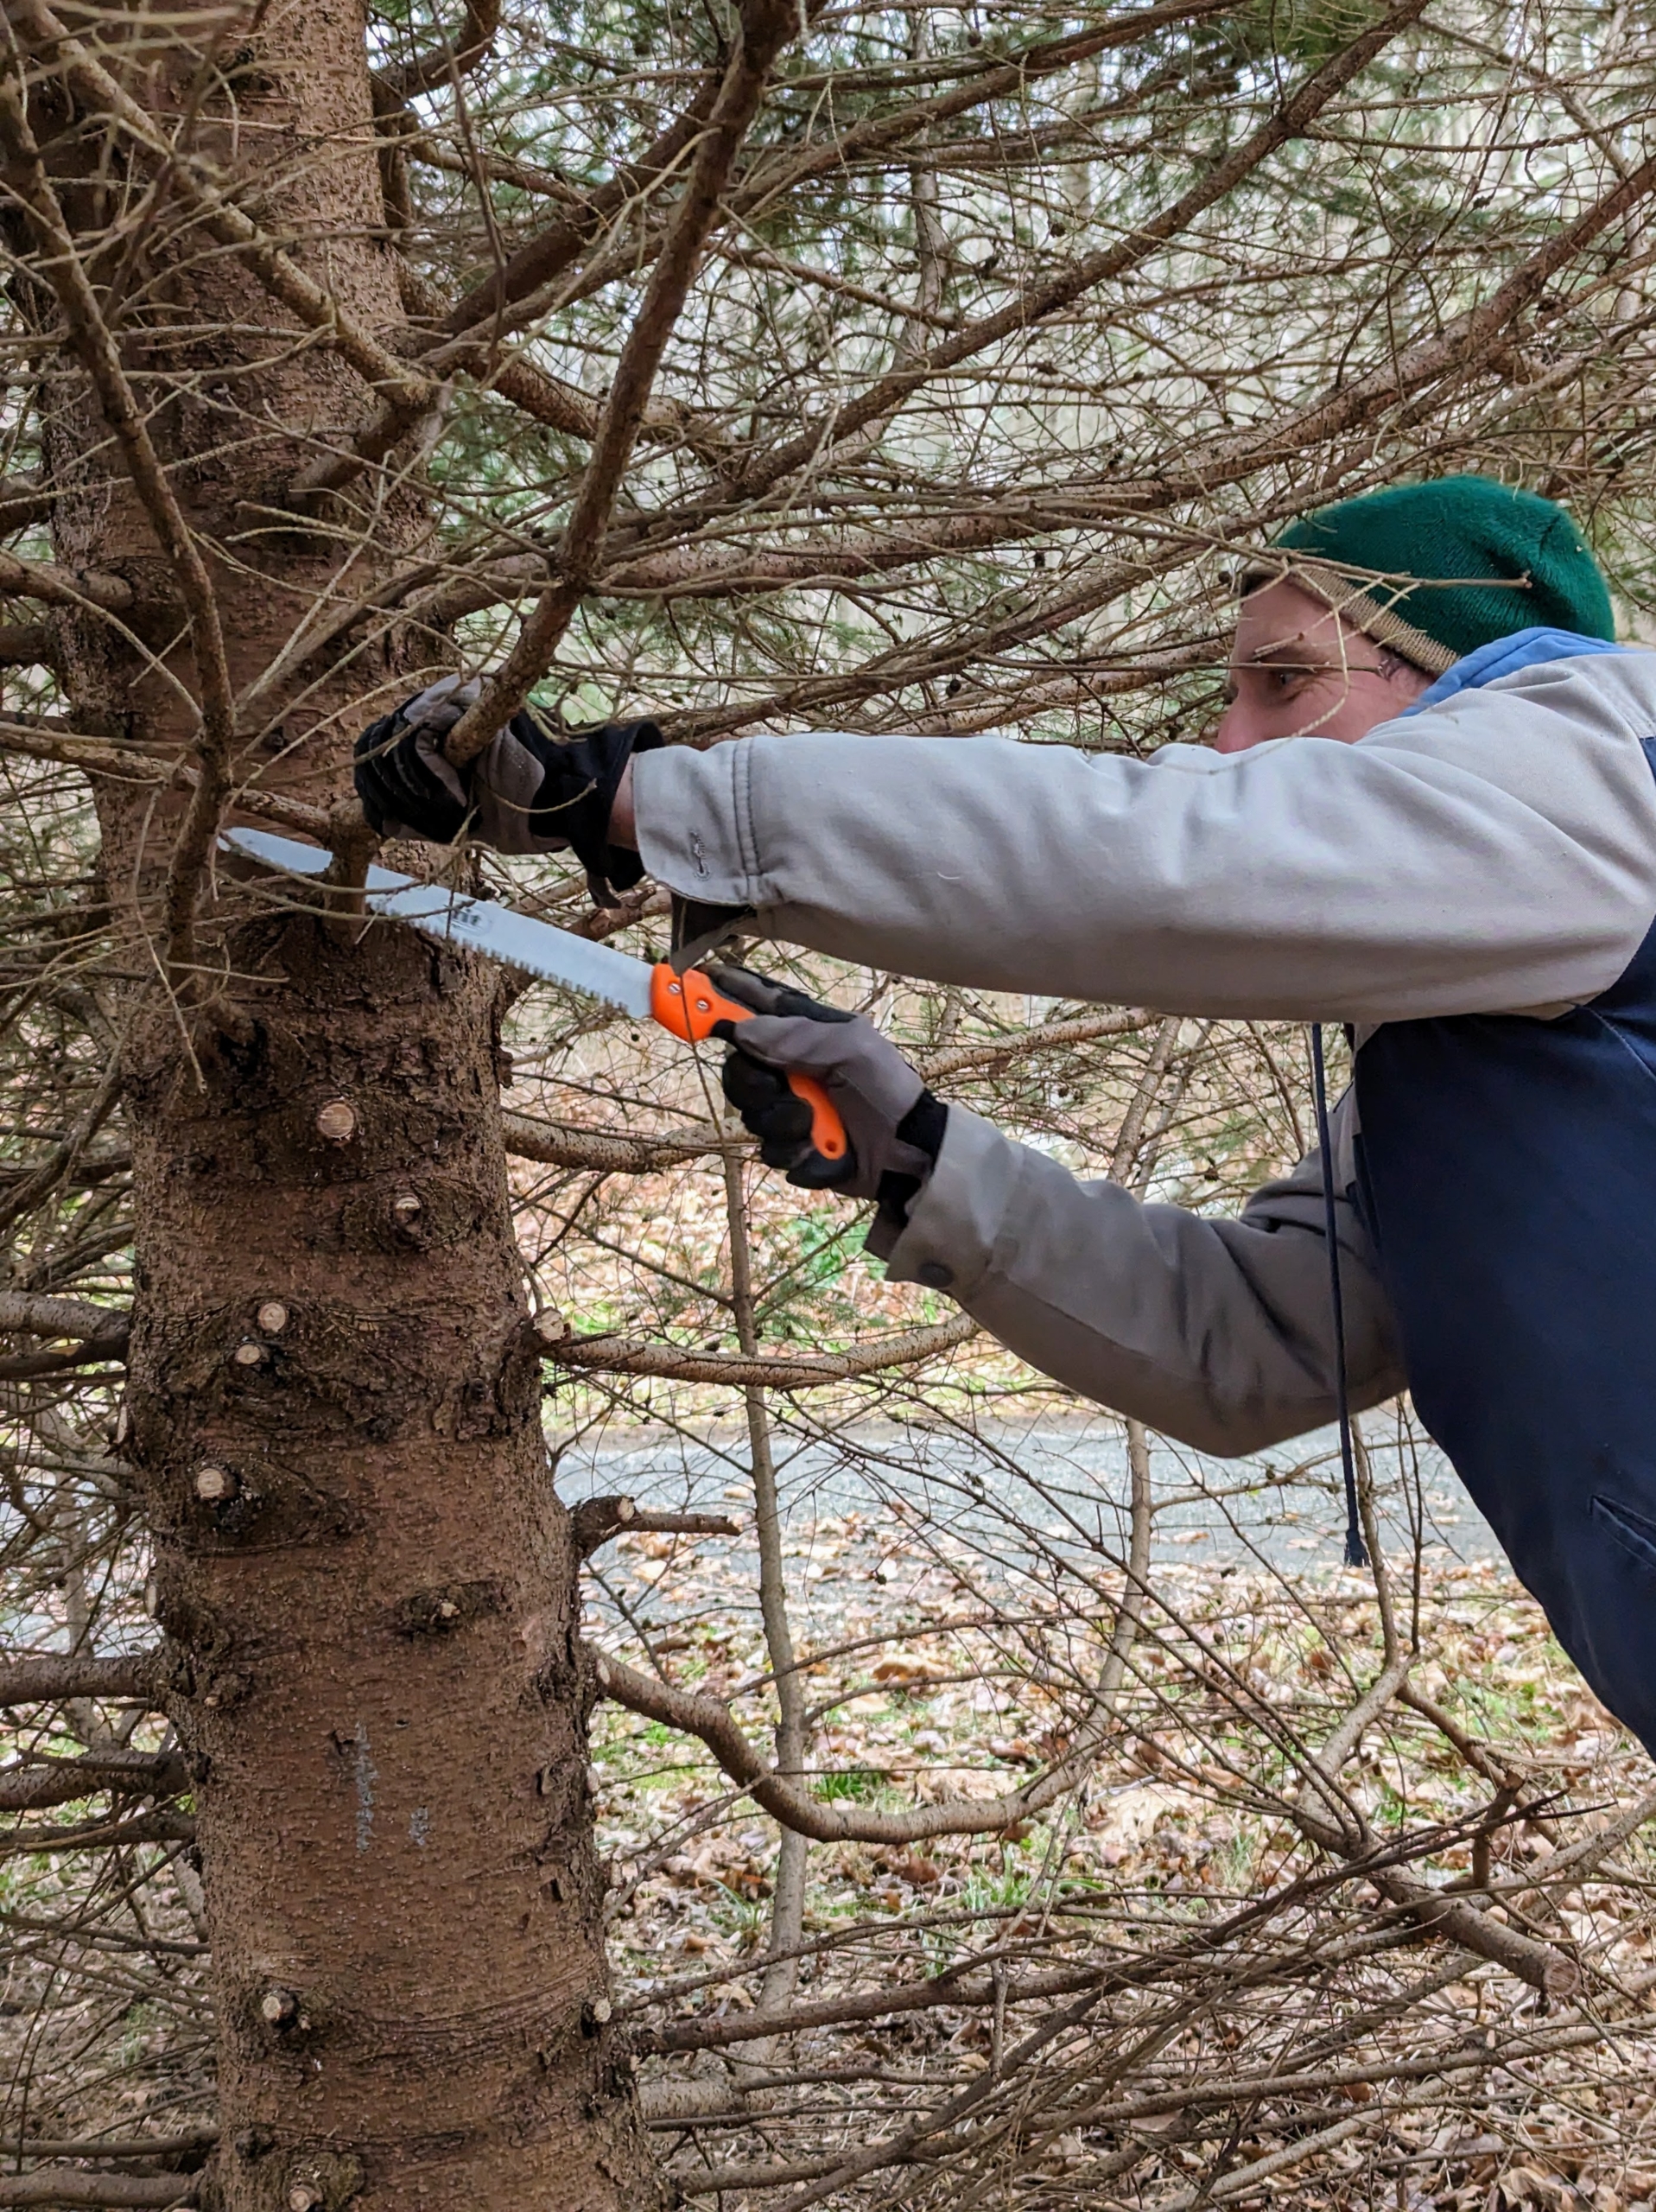
Here, Ryan assesses the back side of one of the spruce trees – many of the branches died because they were blocked from the light.
Ryan prunes the dead branches. Dead limbs won’t regrow, so they should be cut off. This can be done at any time of year.
Ryan’s cuts begin just outside the branch bark ridge and angles down away from the stem of the tree, avoiding injury to the branch collar.
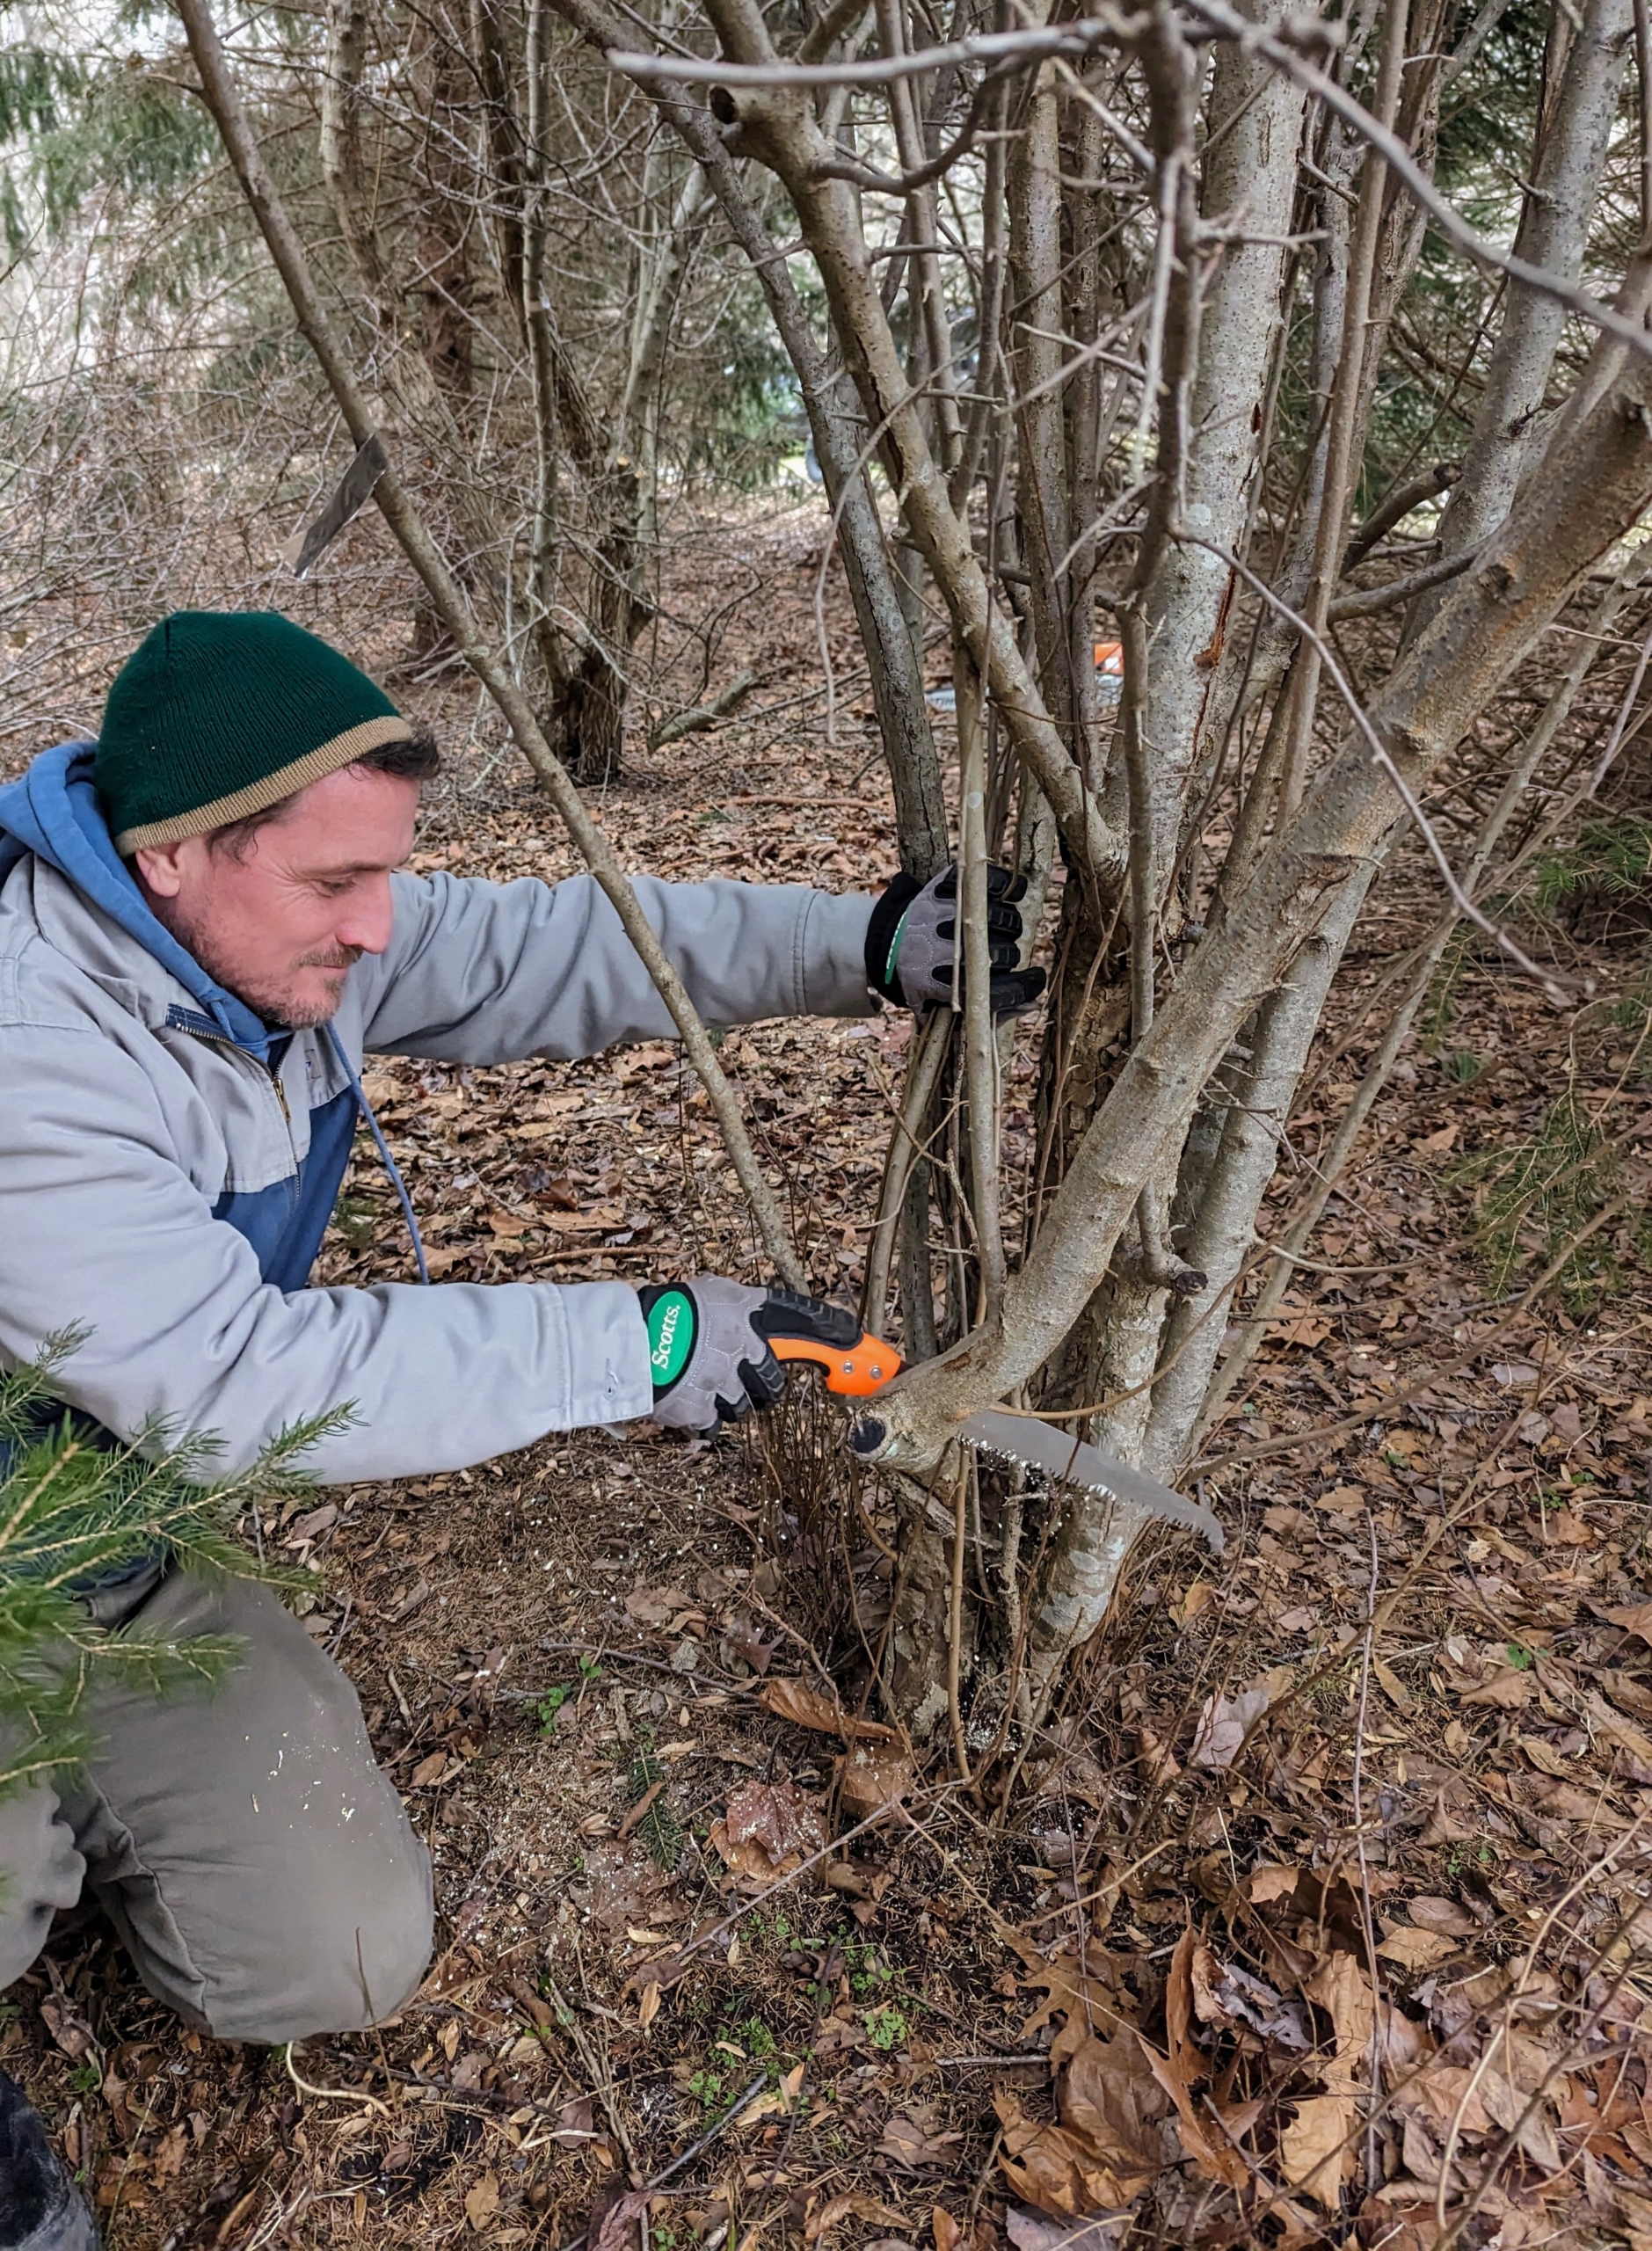
Here, Ryan also cuts some of the crabapple branches, so it is easier for the main tree stem to be cut down.
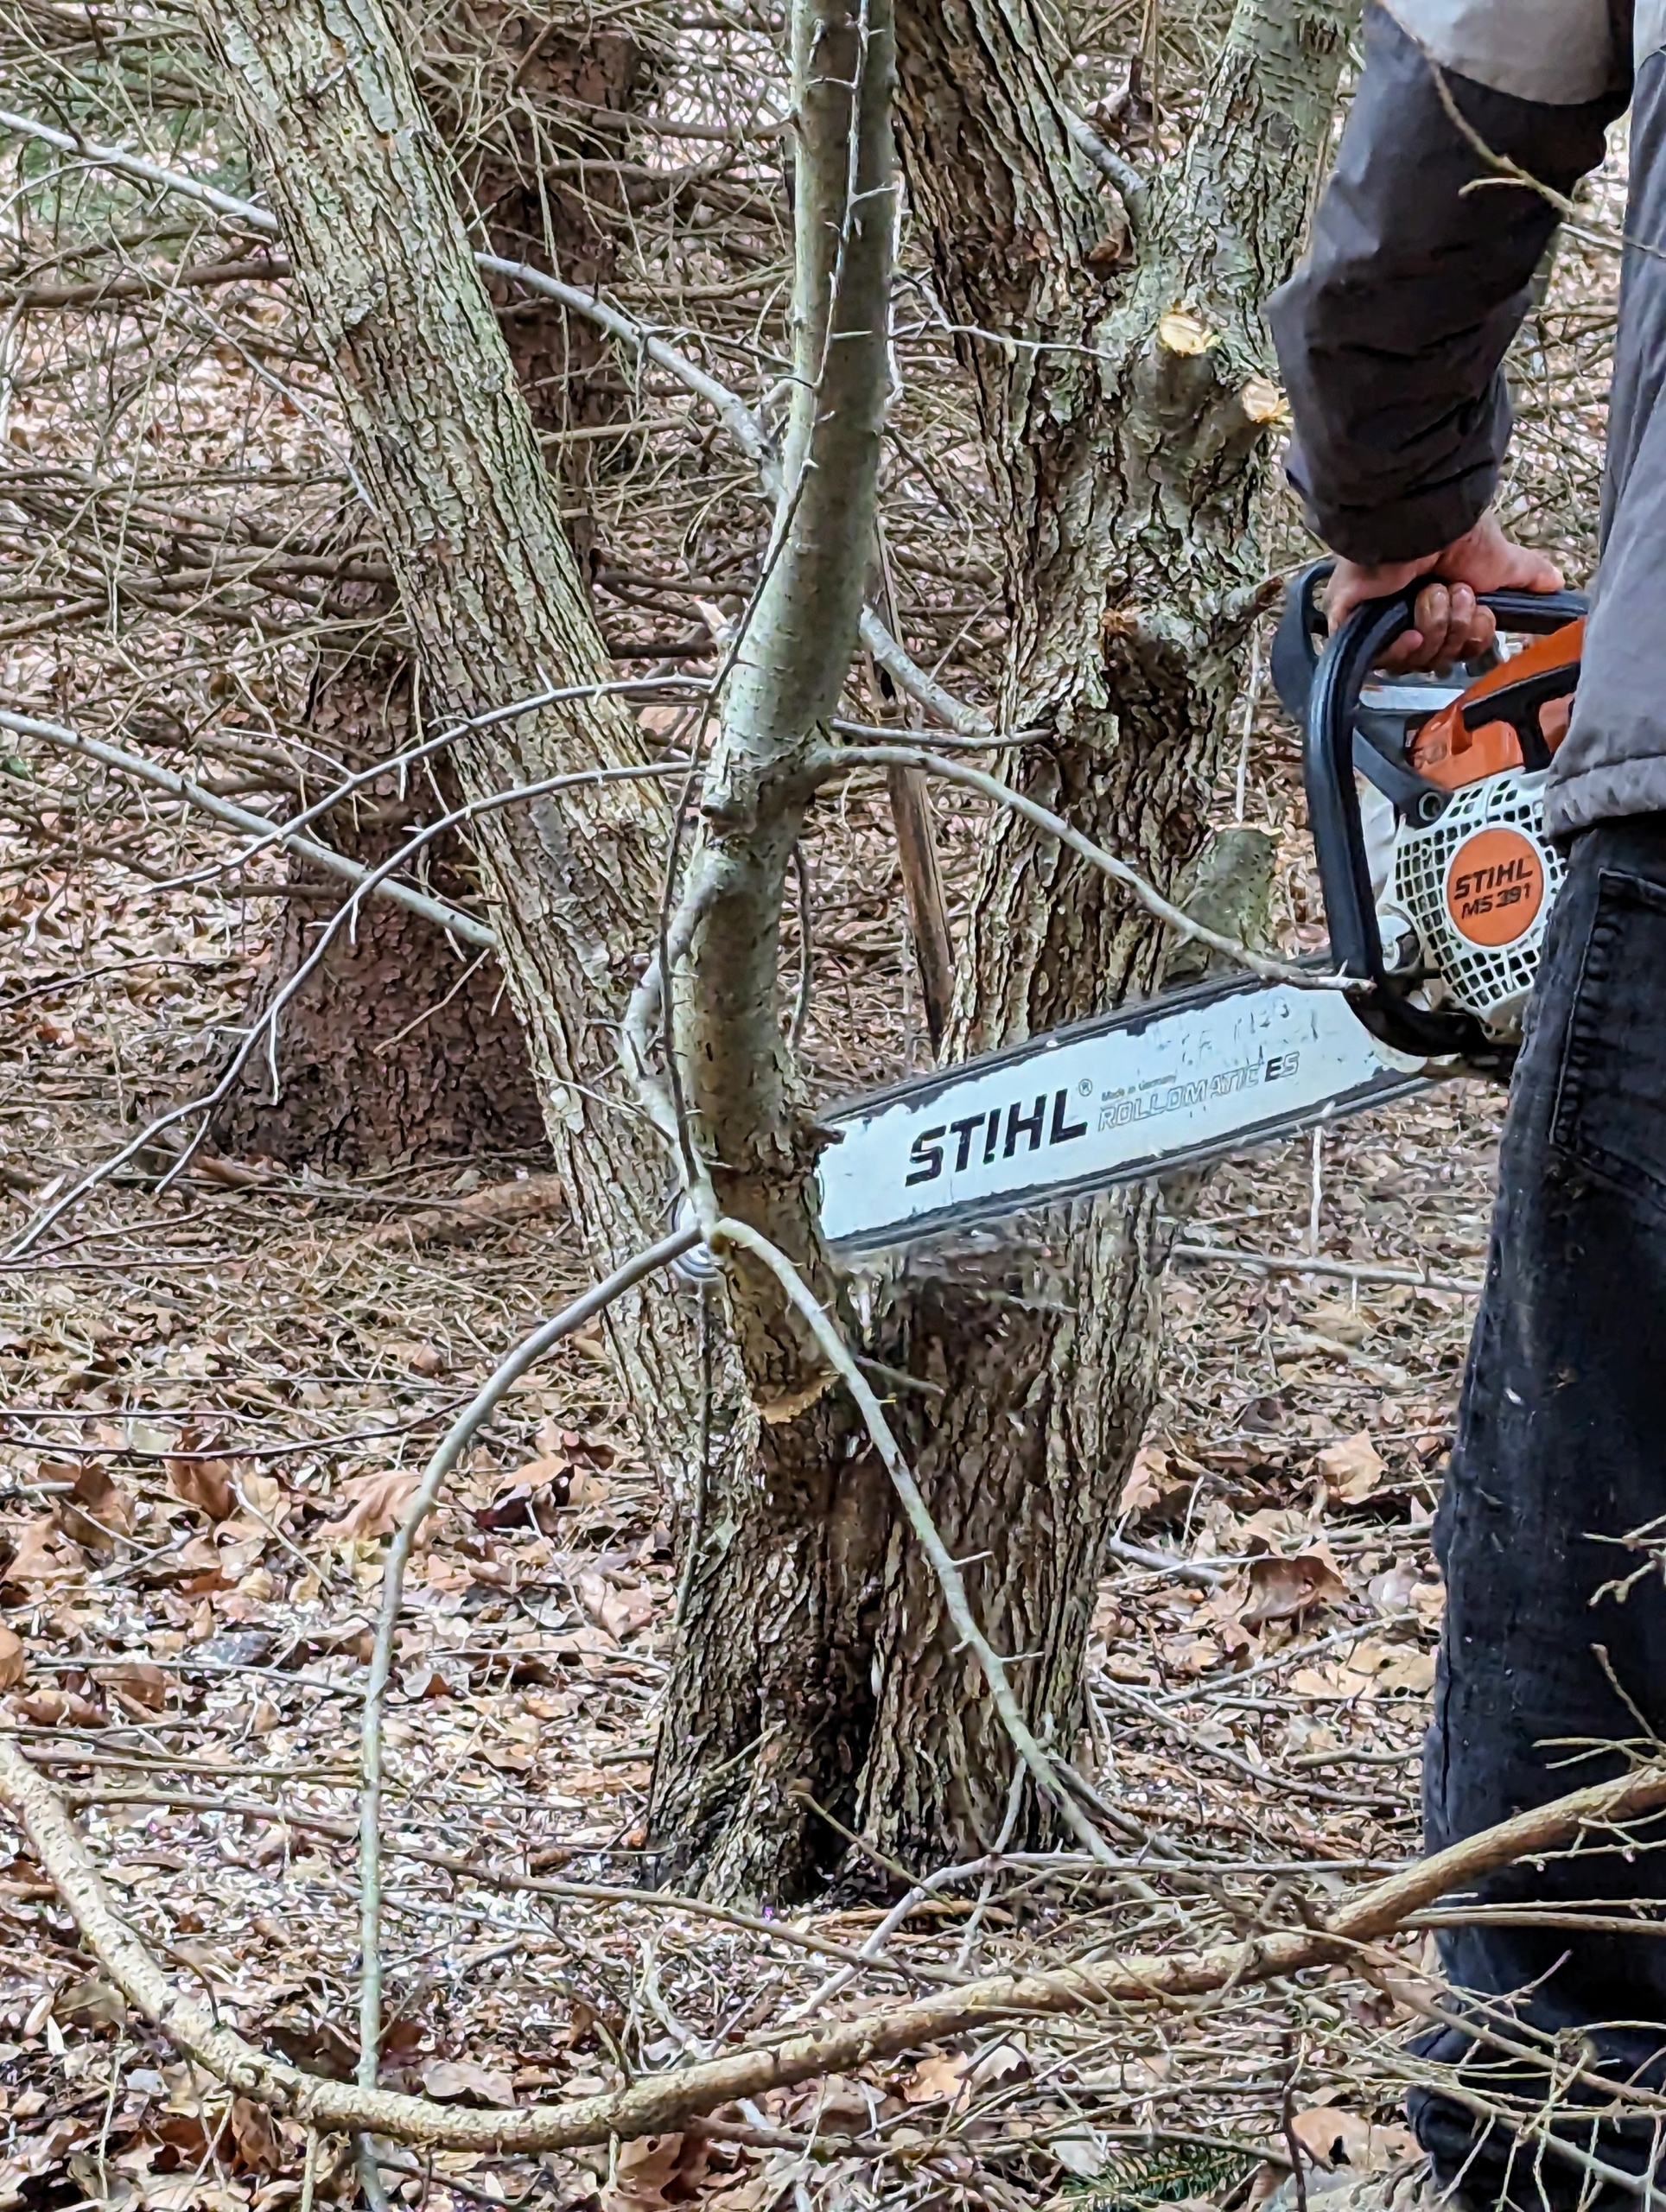
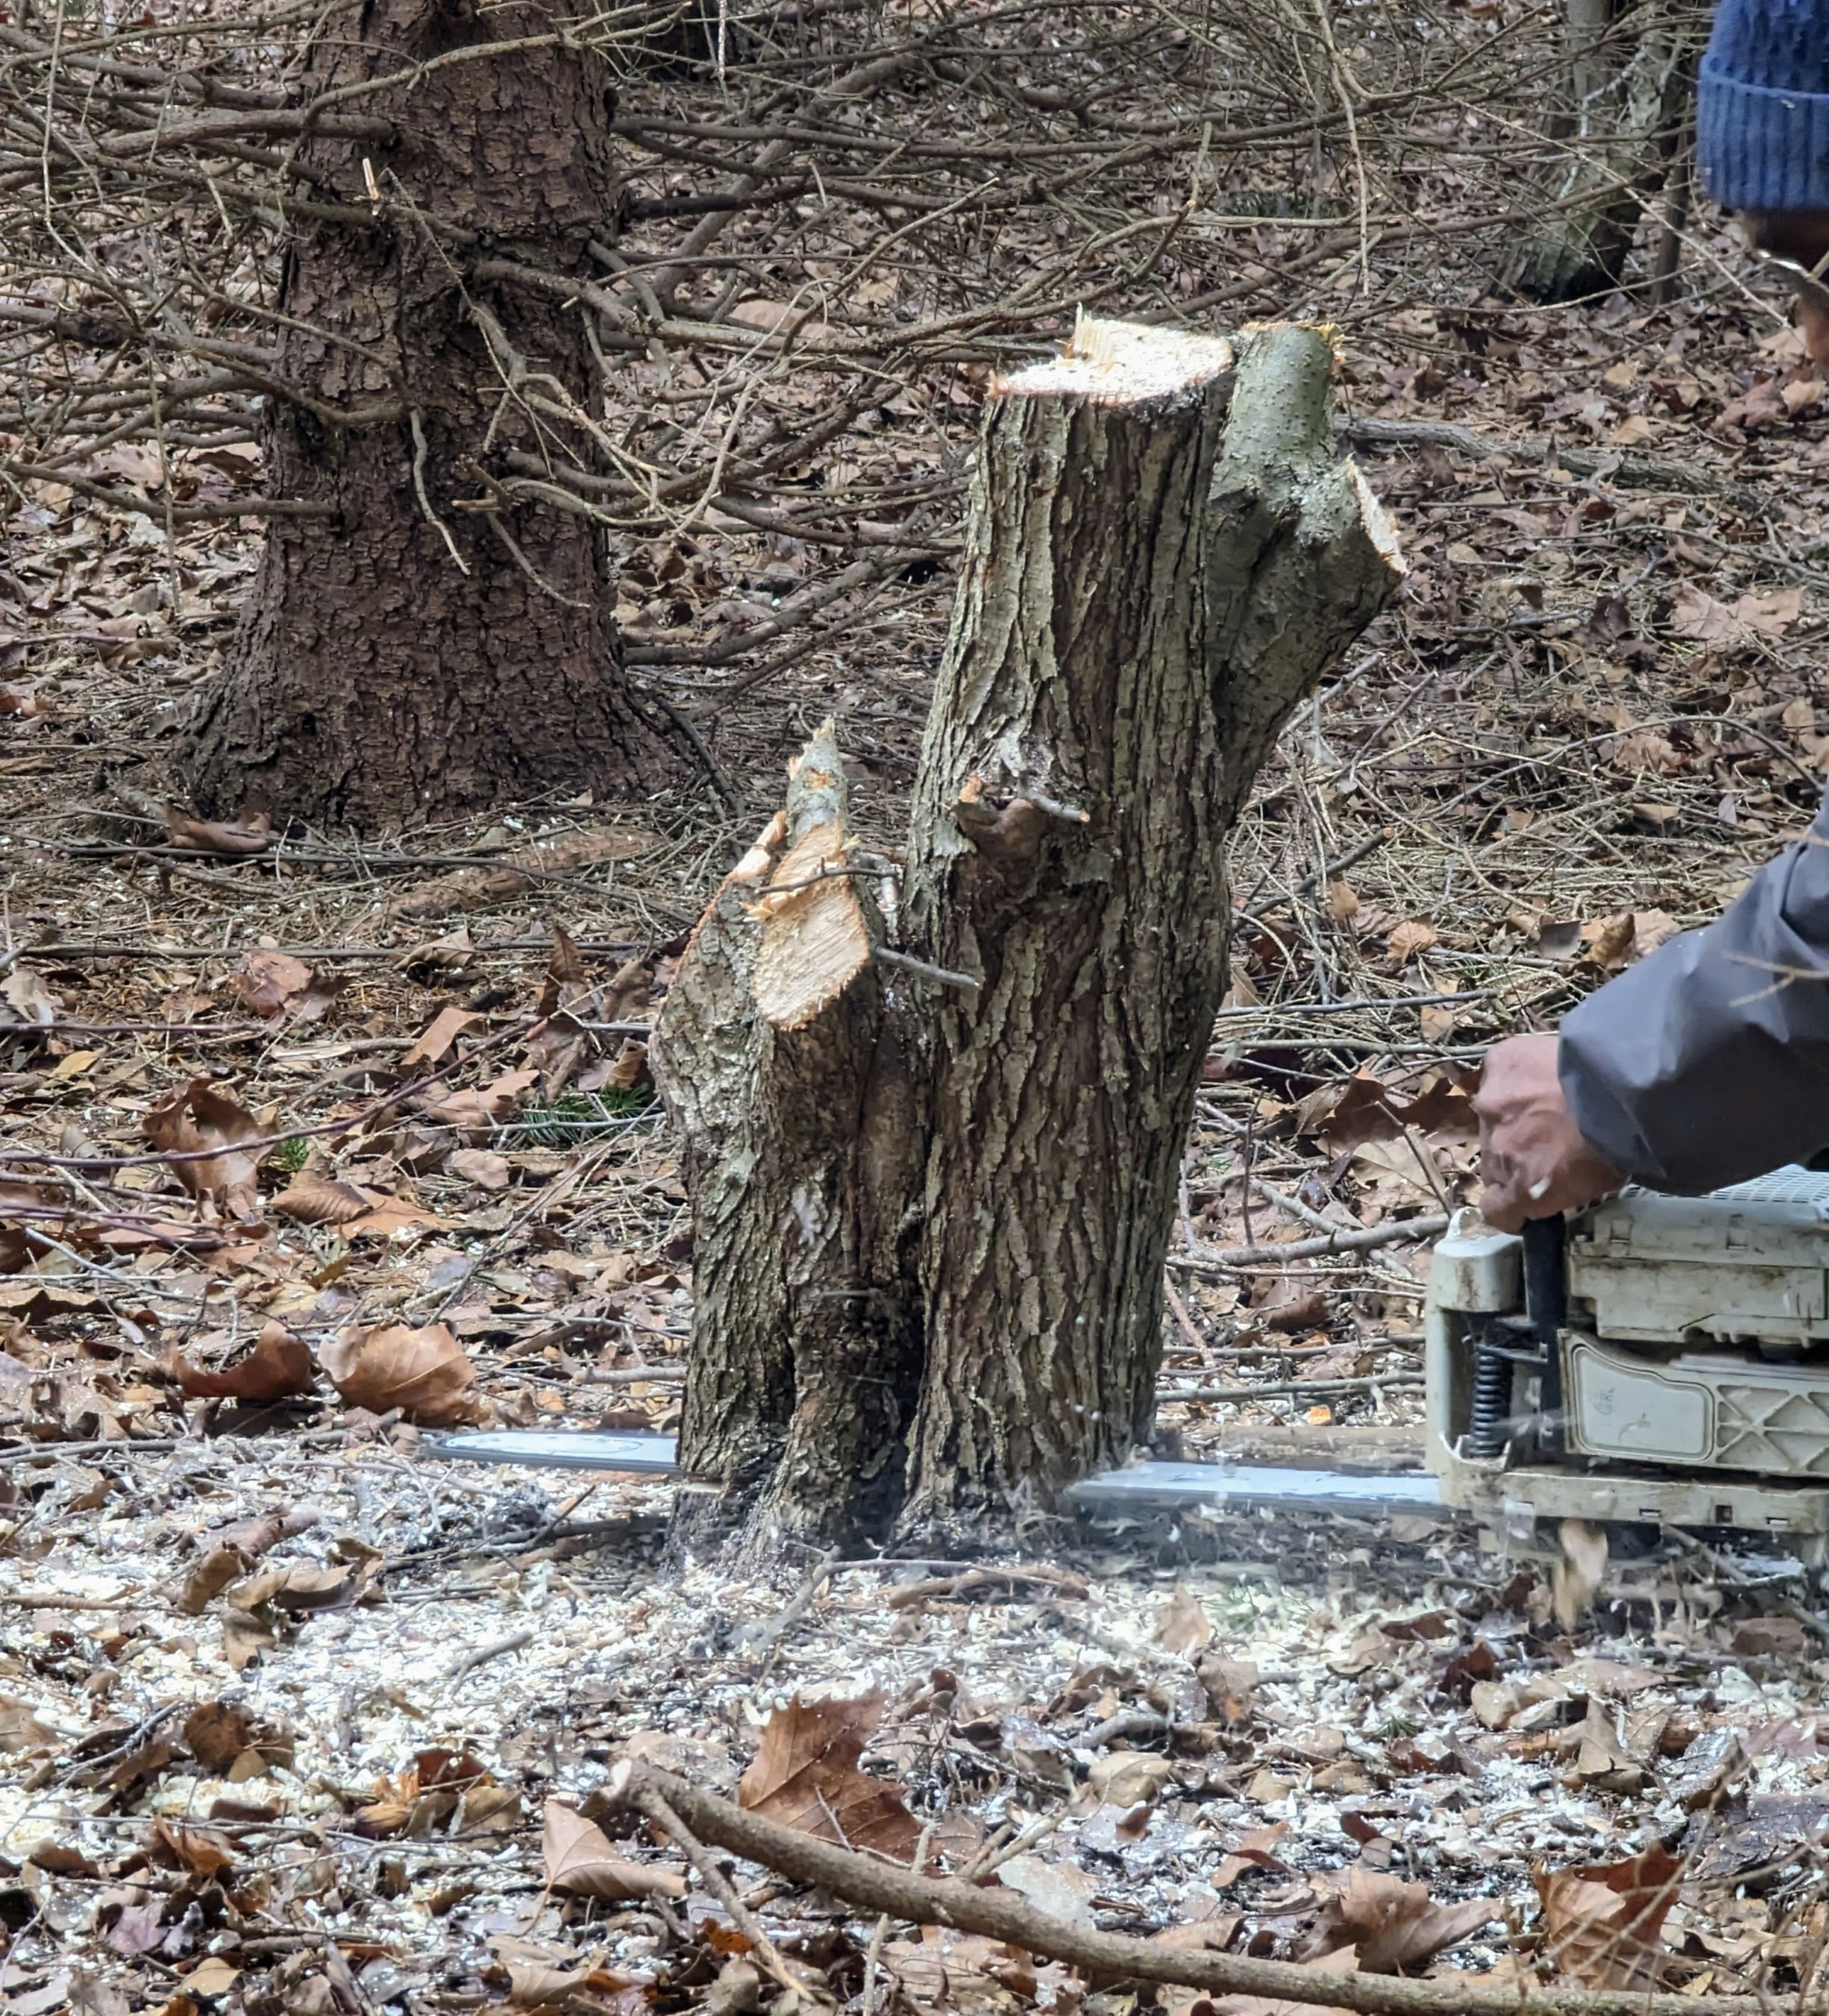
Pete is next. He removes the rest of the tree using one of our trusted STIHL chainsaws.
Our crew is very skilled at operating these tools. We’ve been using STIHL equipment for many years. A chainsaw can substantially reduce the time and effort required to chop, shape, and cut wood.
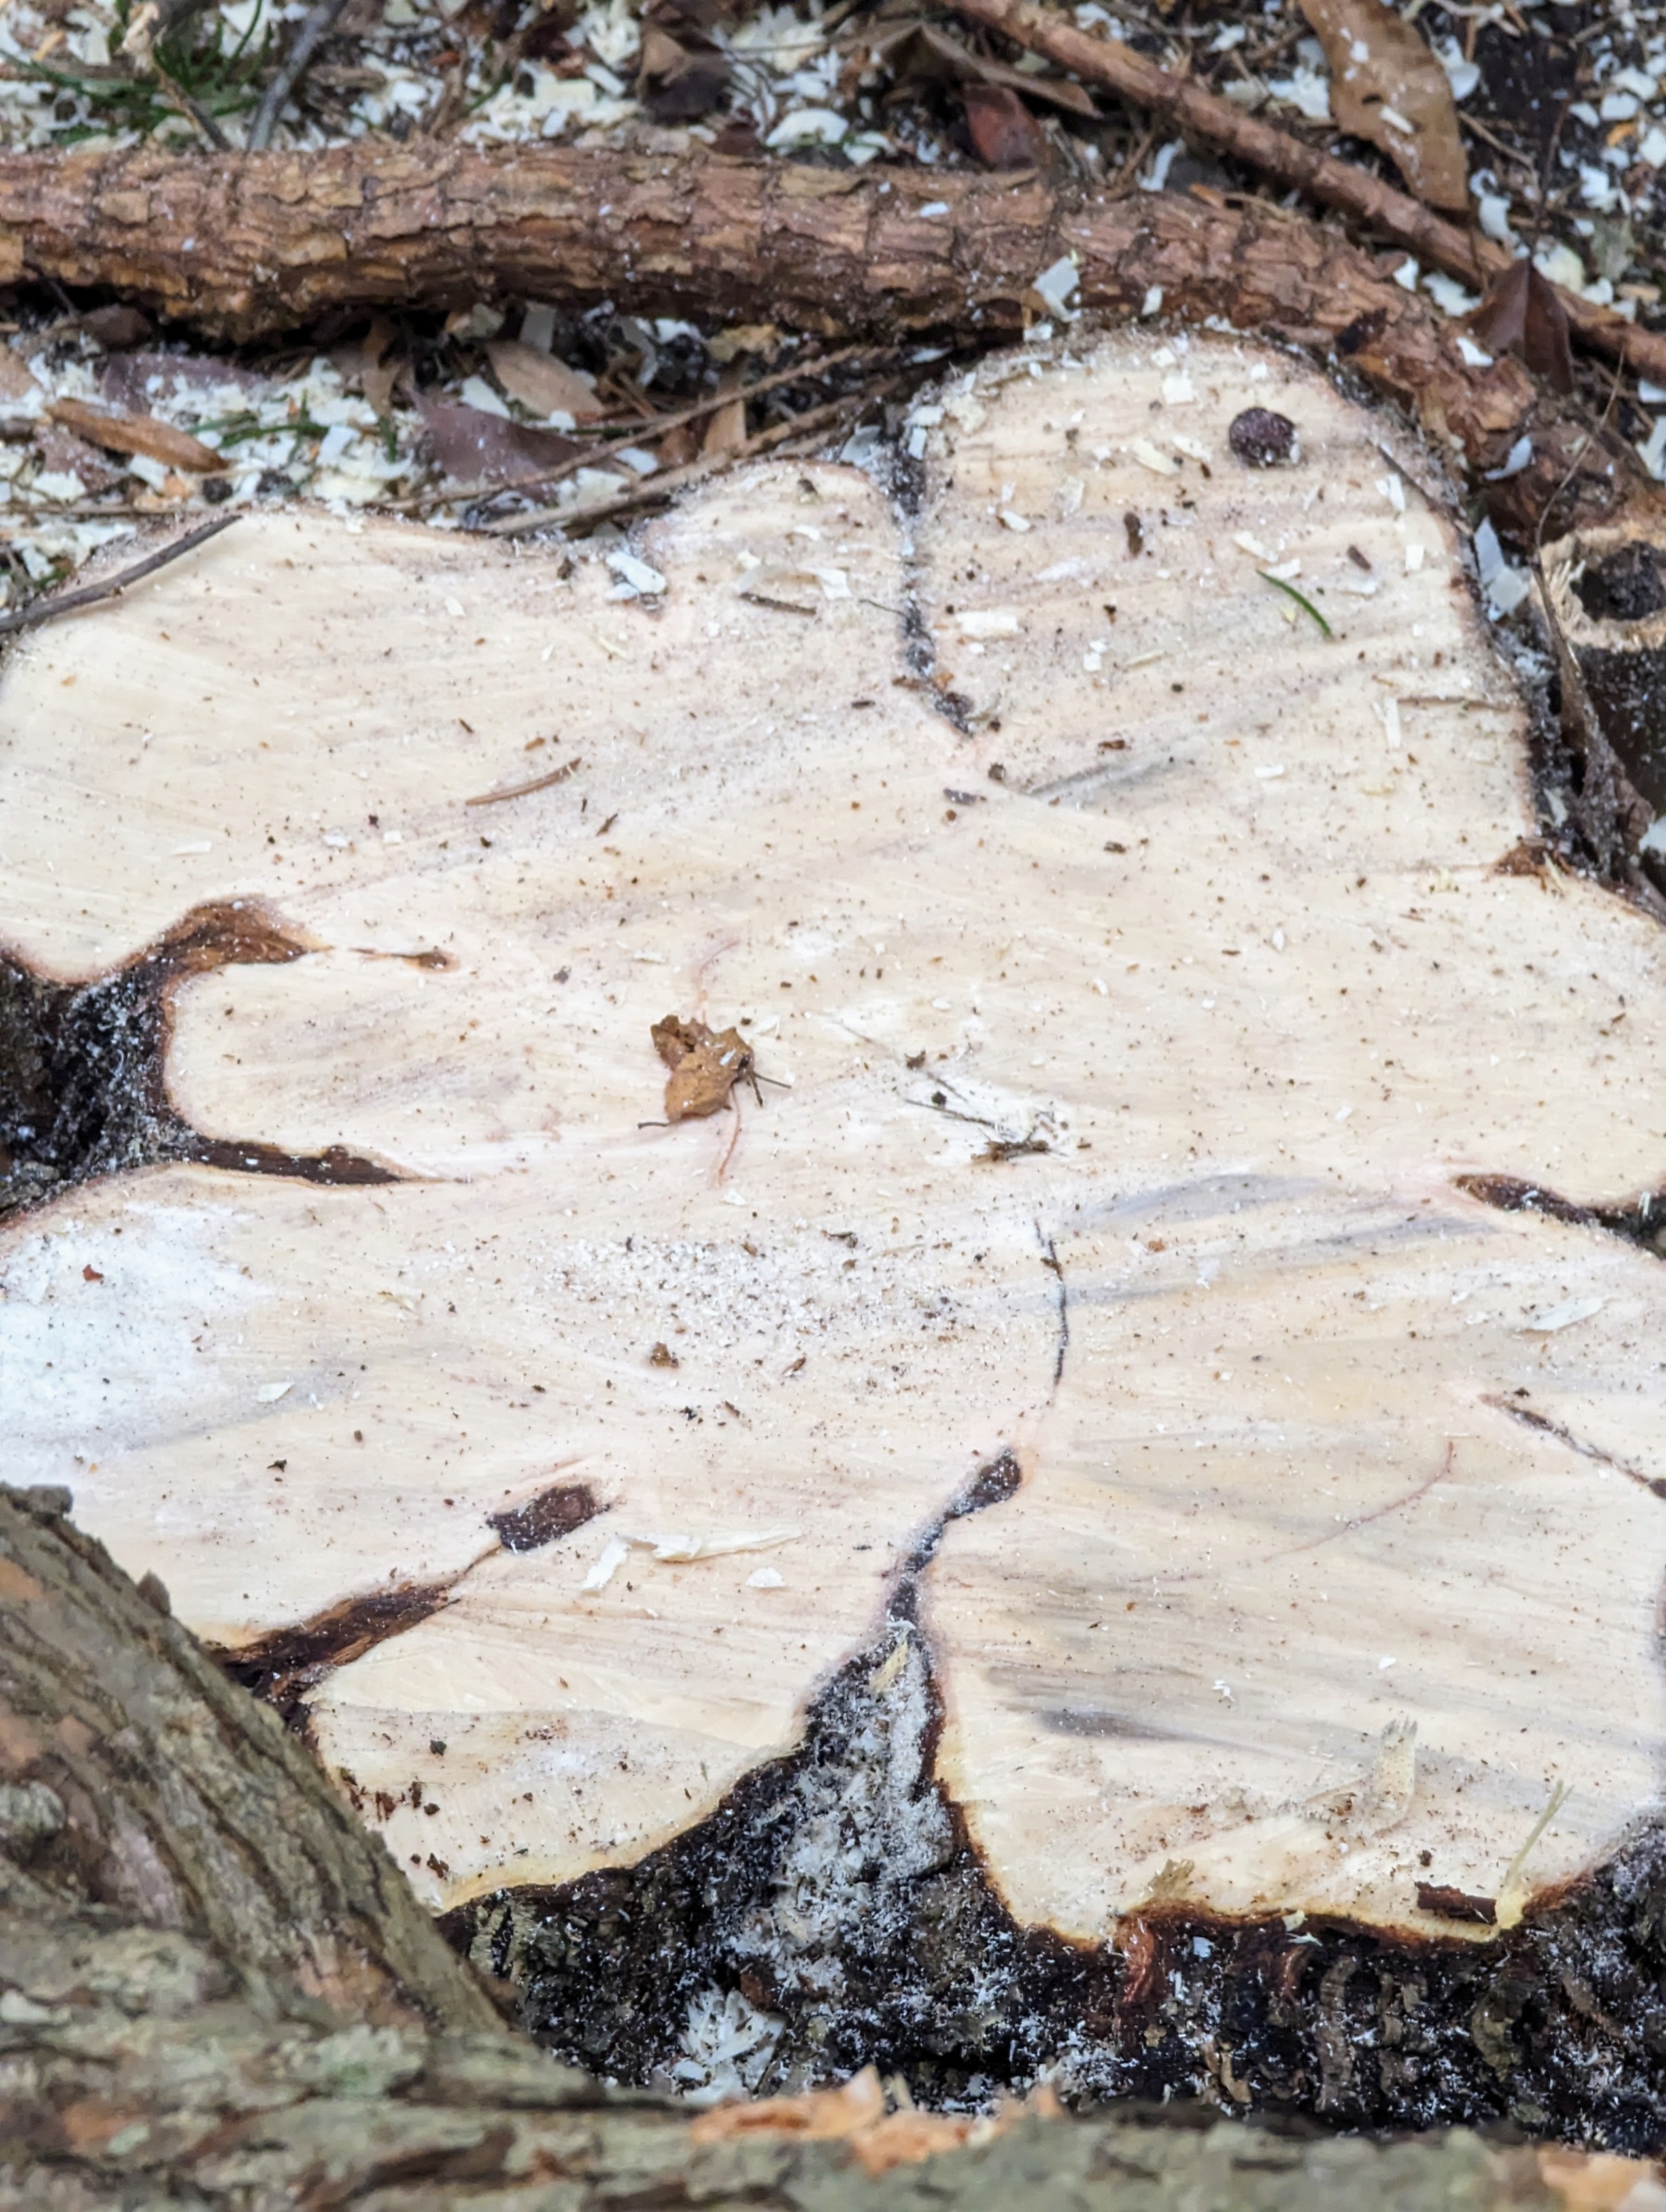
Slowly, the tree is smaller and more manageable. Pete cuts it in sections, so it is easier to carry pieces away.
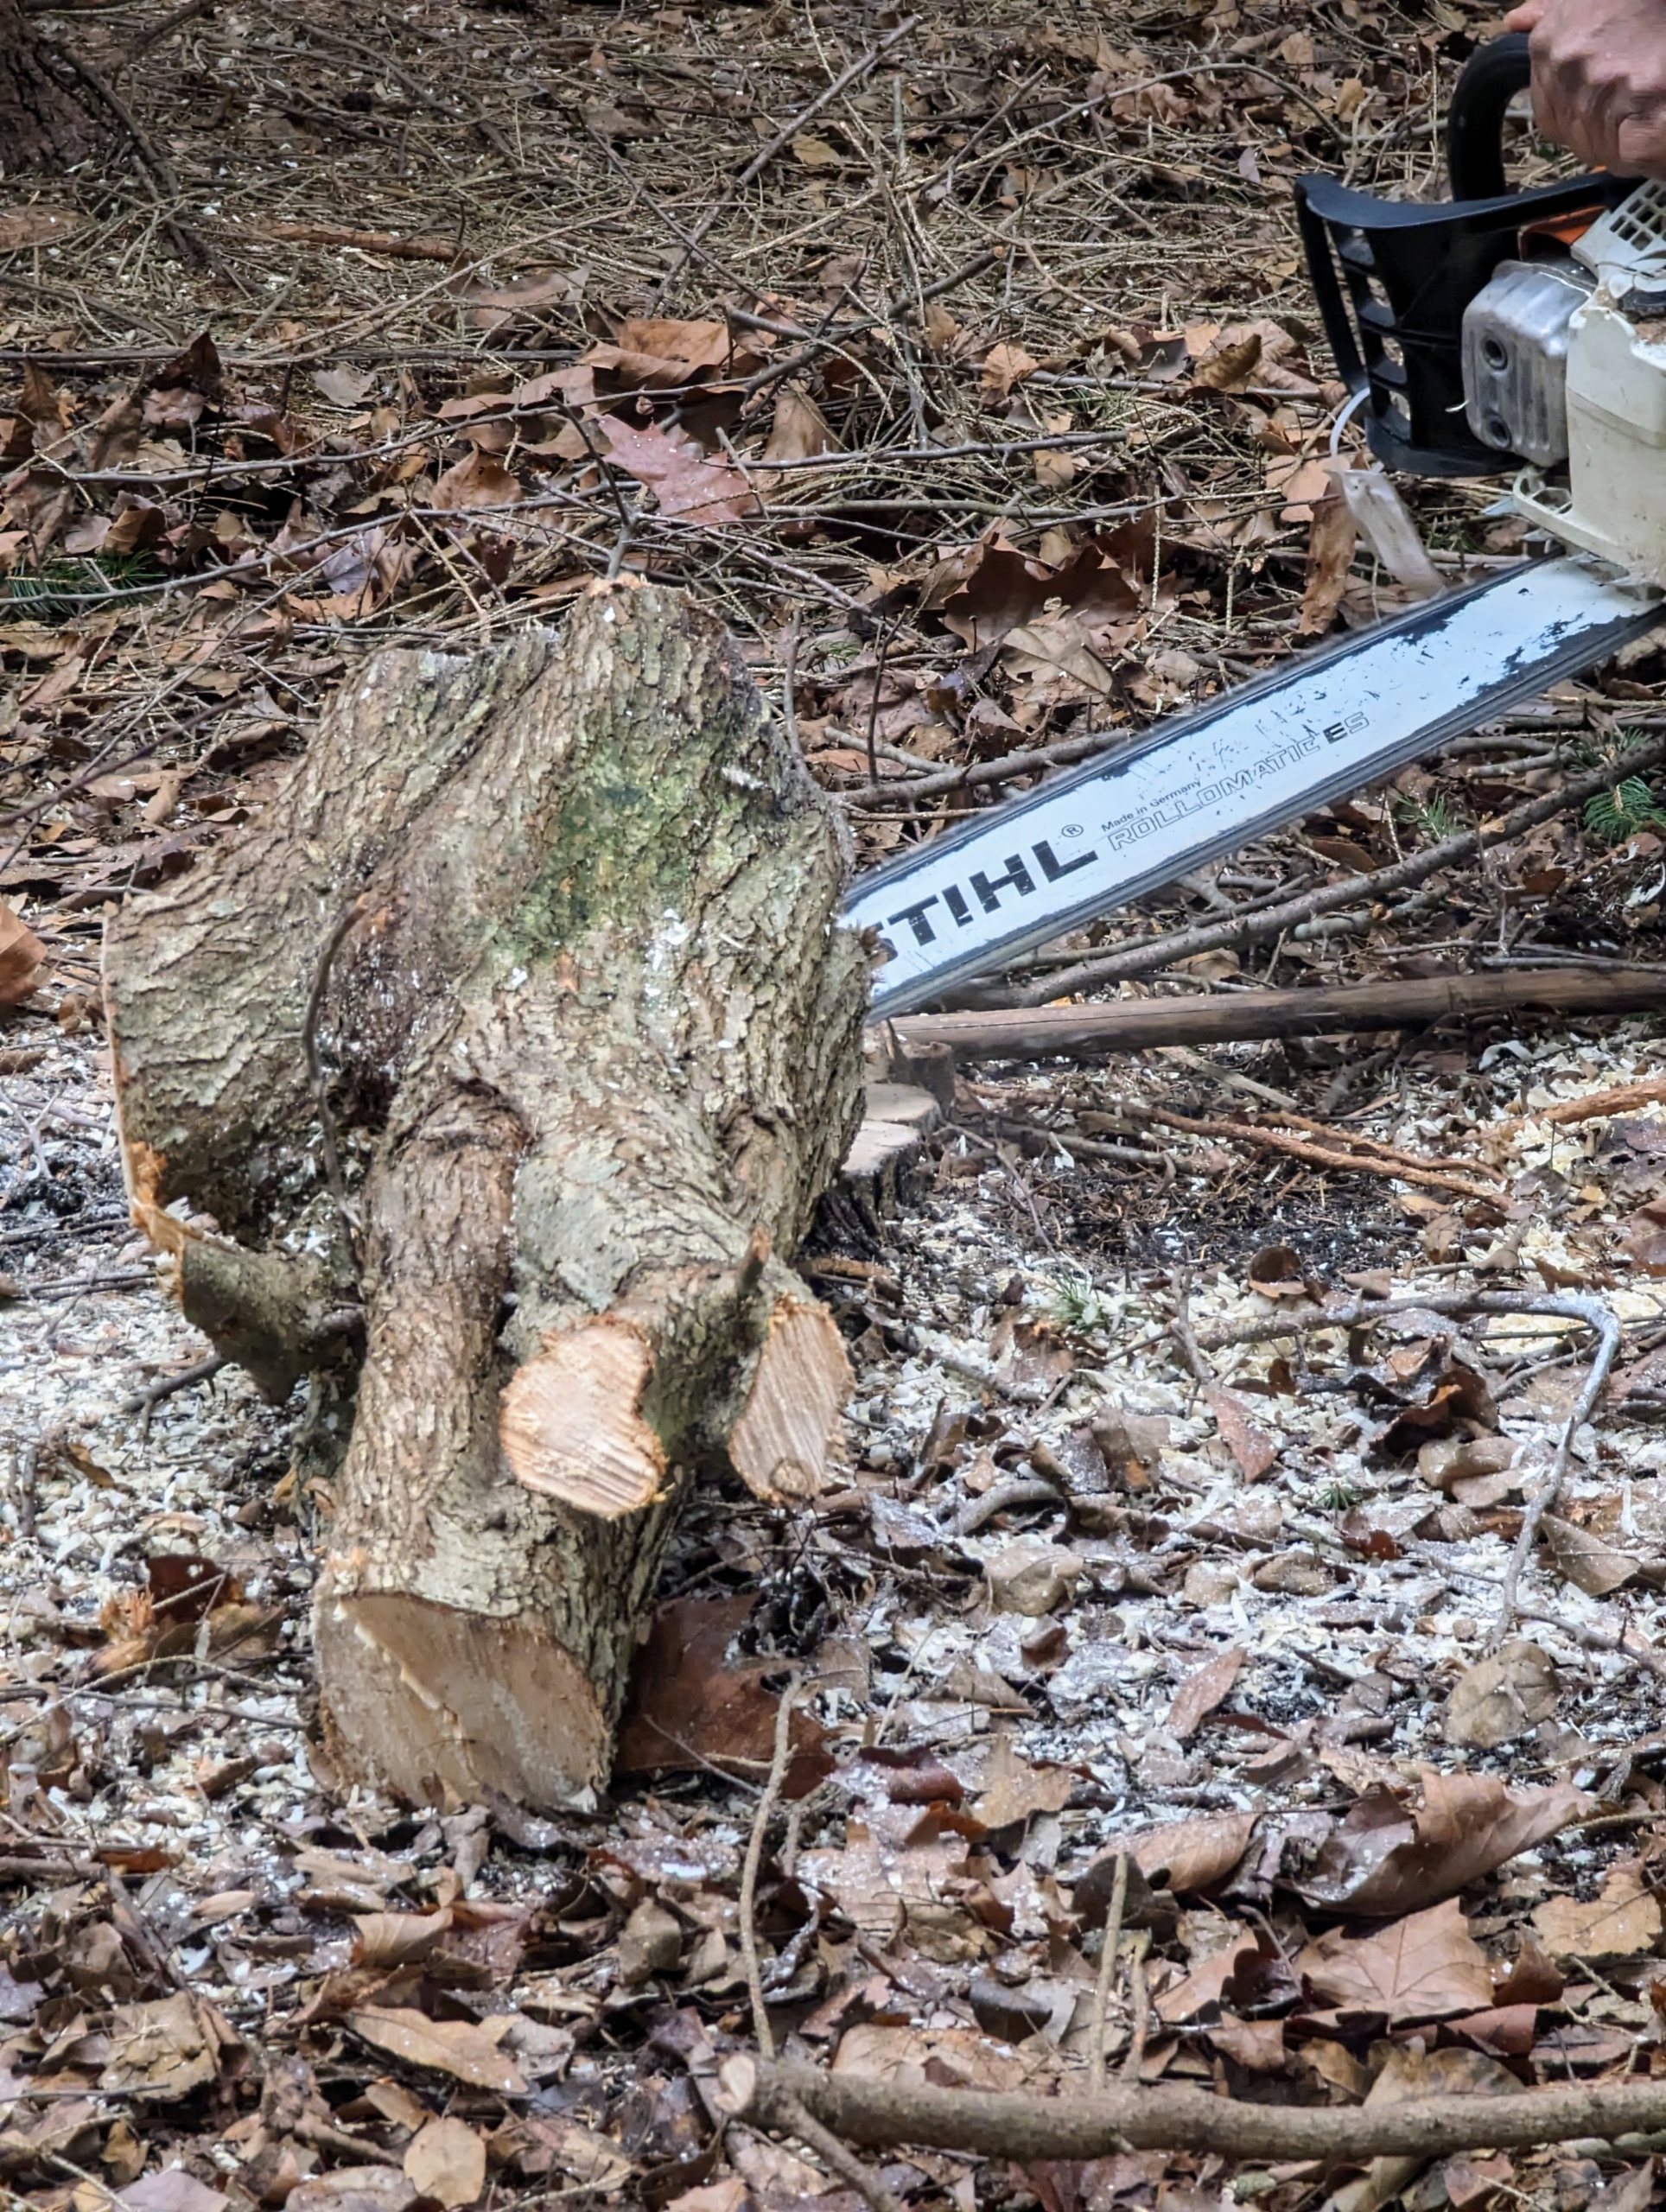
Here he makes the final cut, leaving only a stump in its place.
I am fortunate to be able to reuse, recycle, and repurpose trees here at the farm. Once trees are cut down, they are either repurposed as milled lumber, wood chips, or ground and left to decay and made into garden dressings, such as mulch and compost.
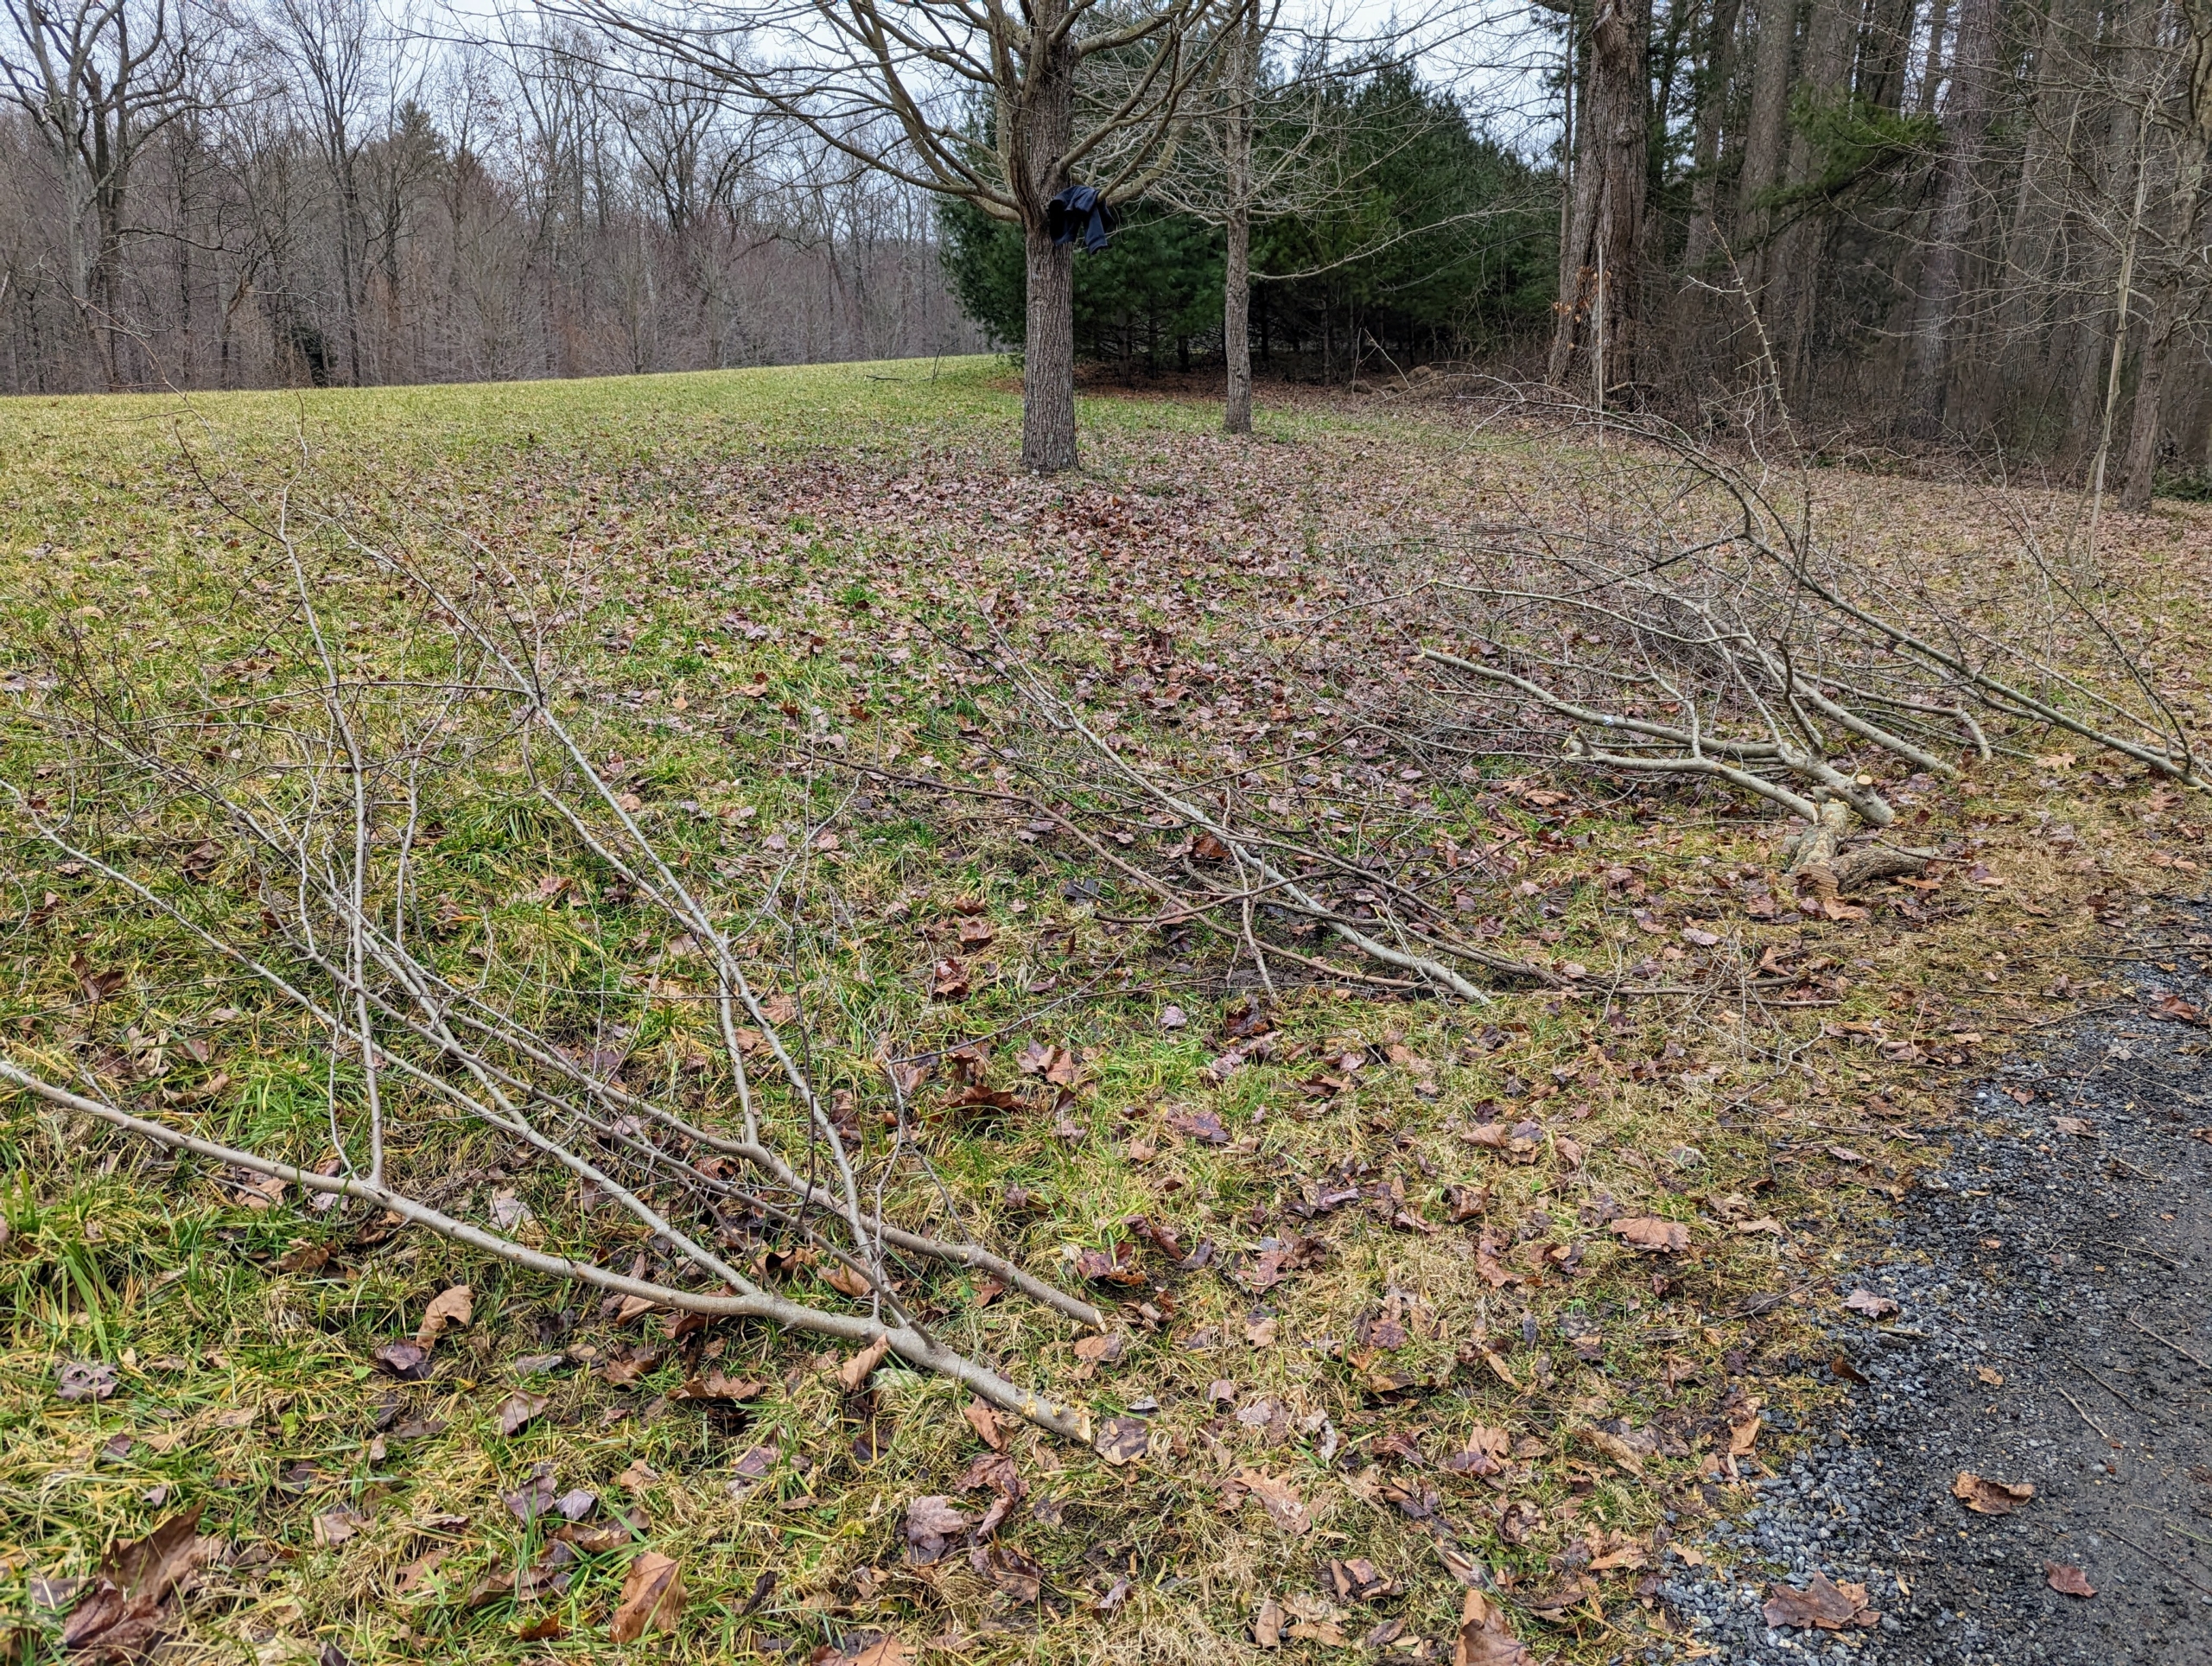
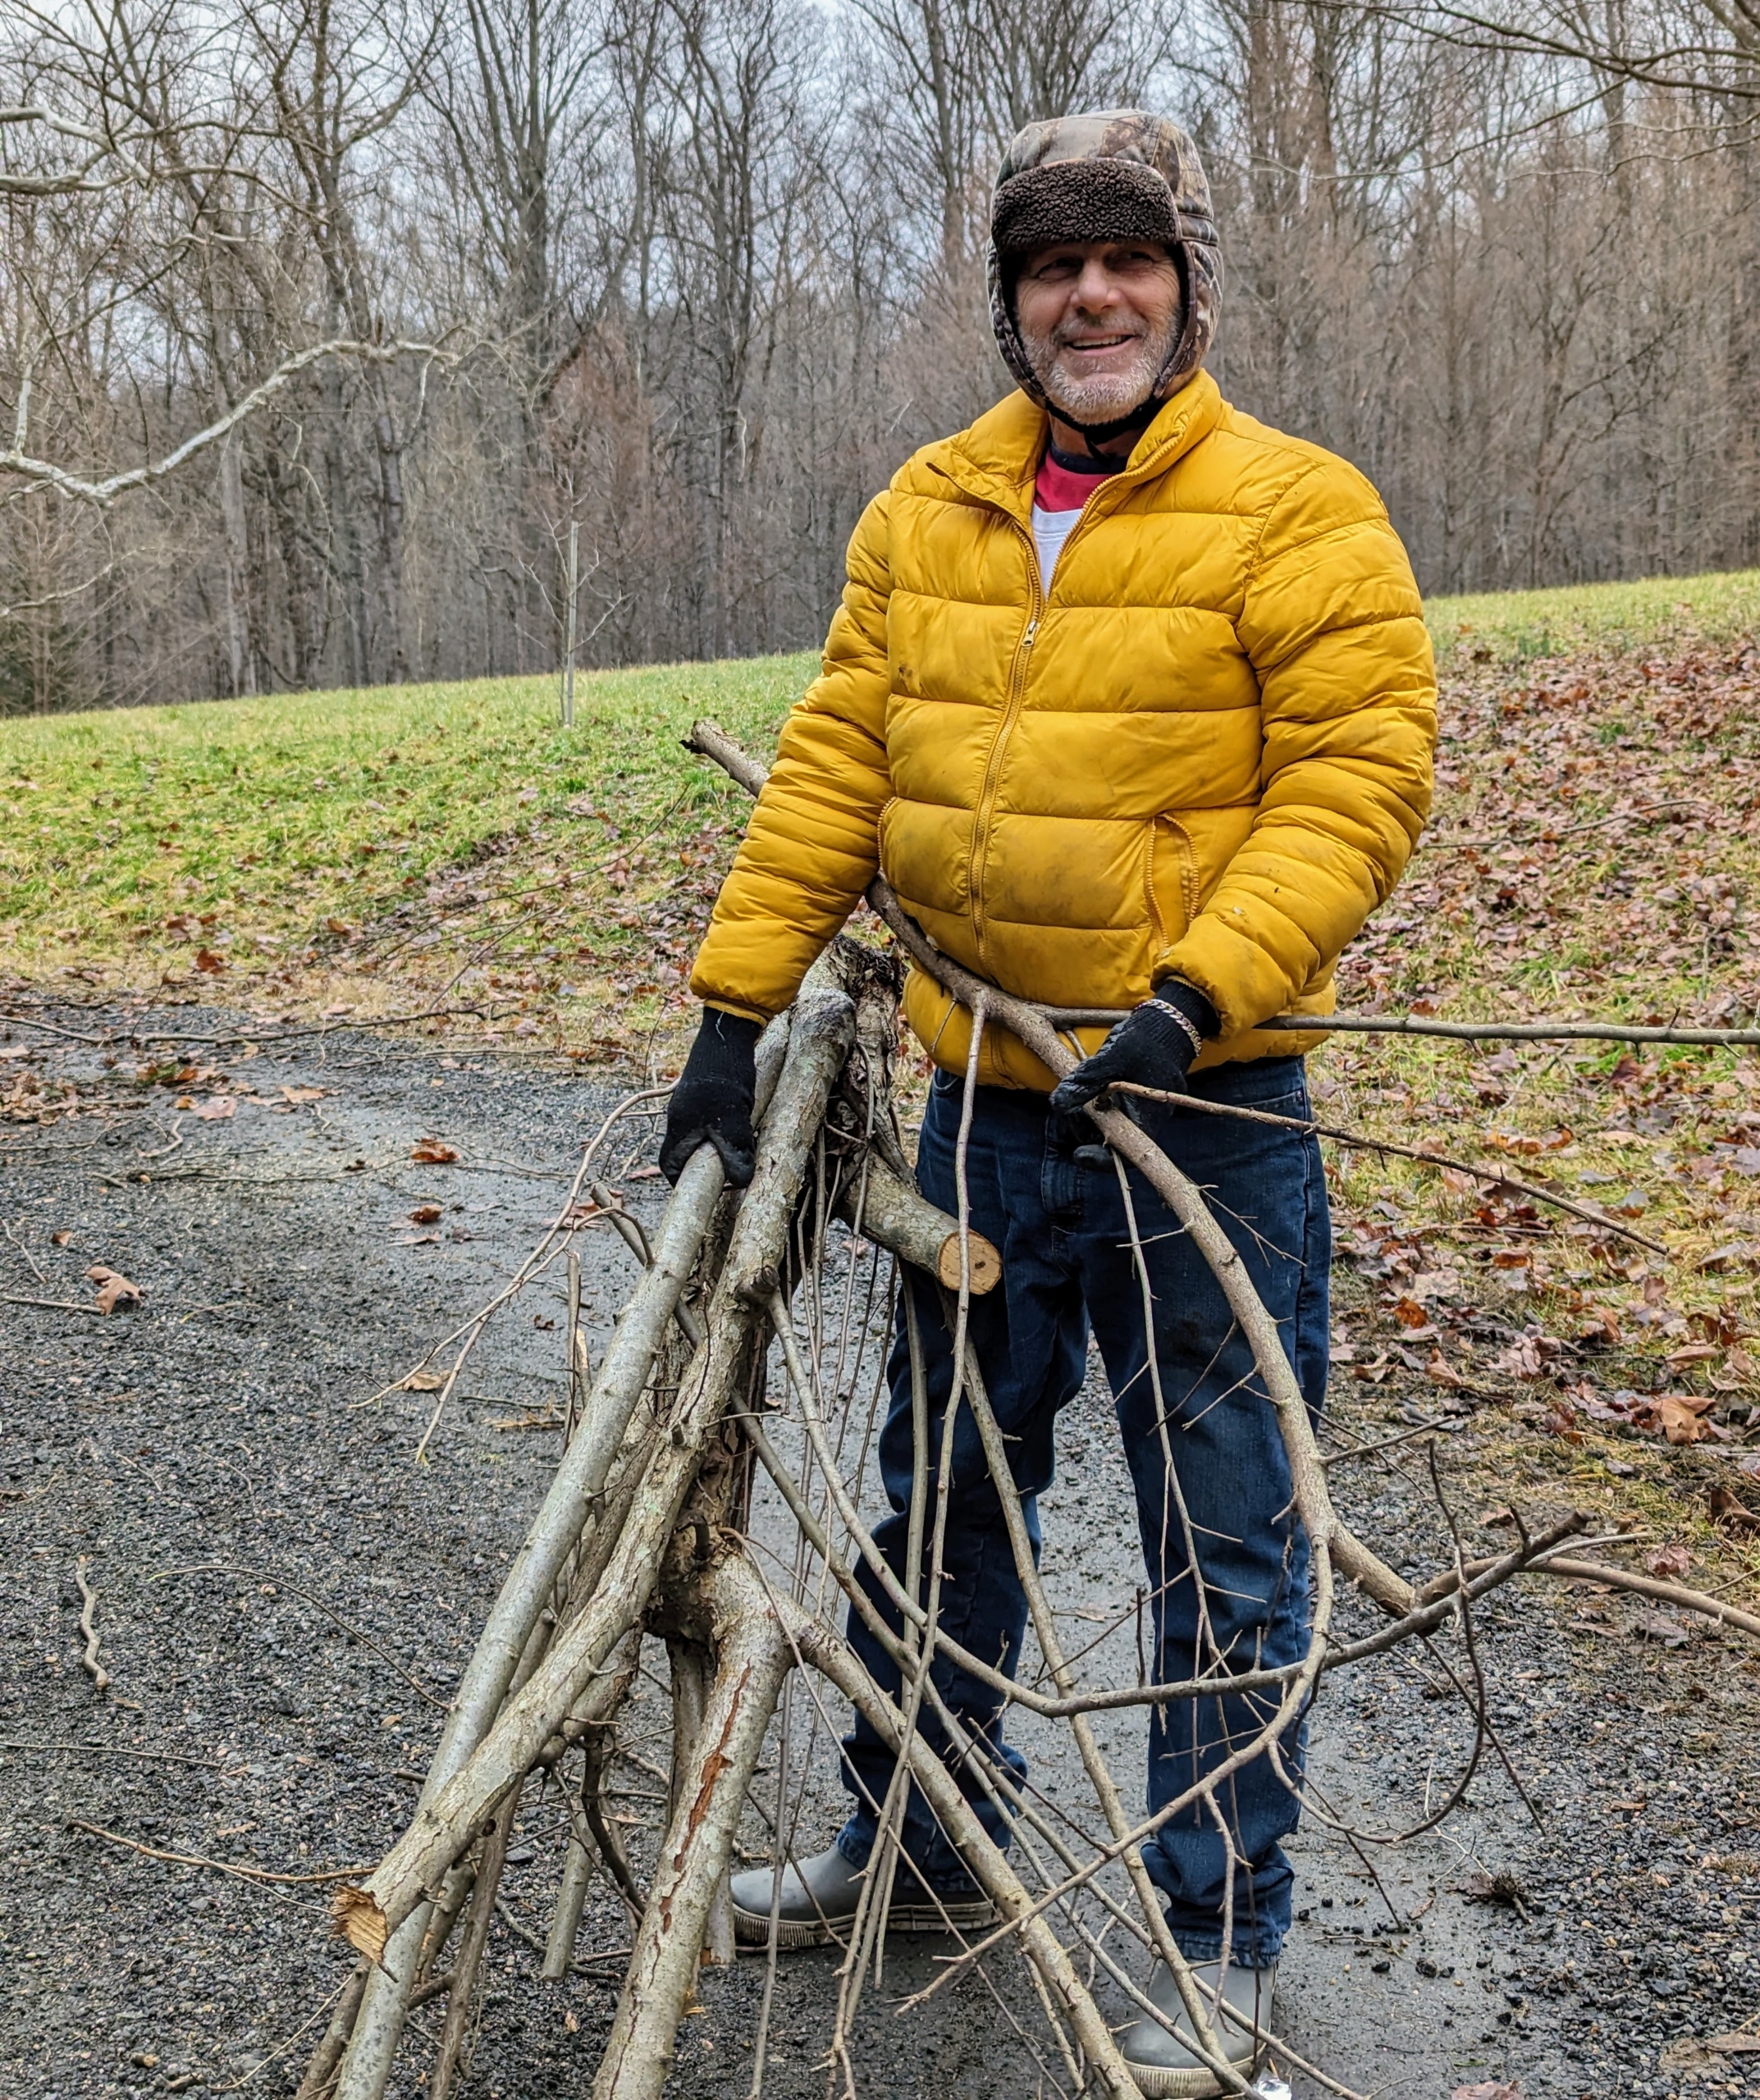
This is a very busy time of year for my outdoor grounds crew. As the trees are cut and the woods “cleaned,” branches are piled neatly to one side so they are easy to collect and take to the compost yard.
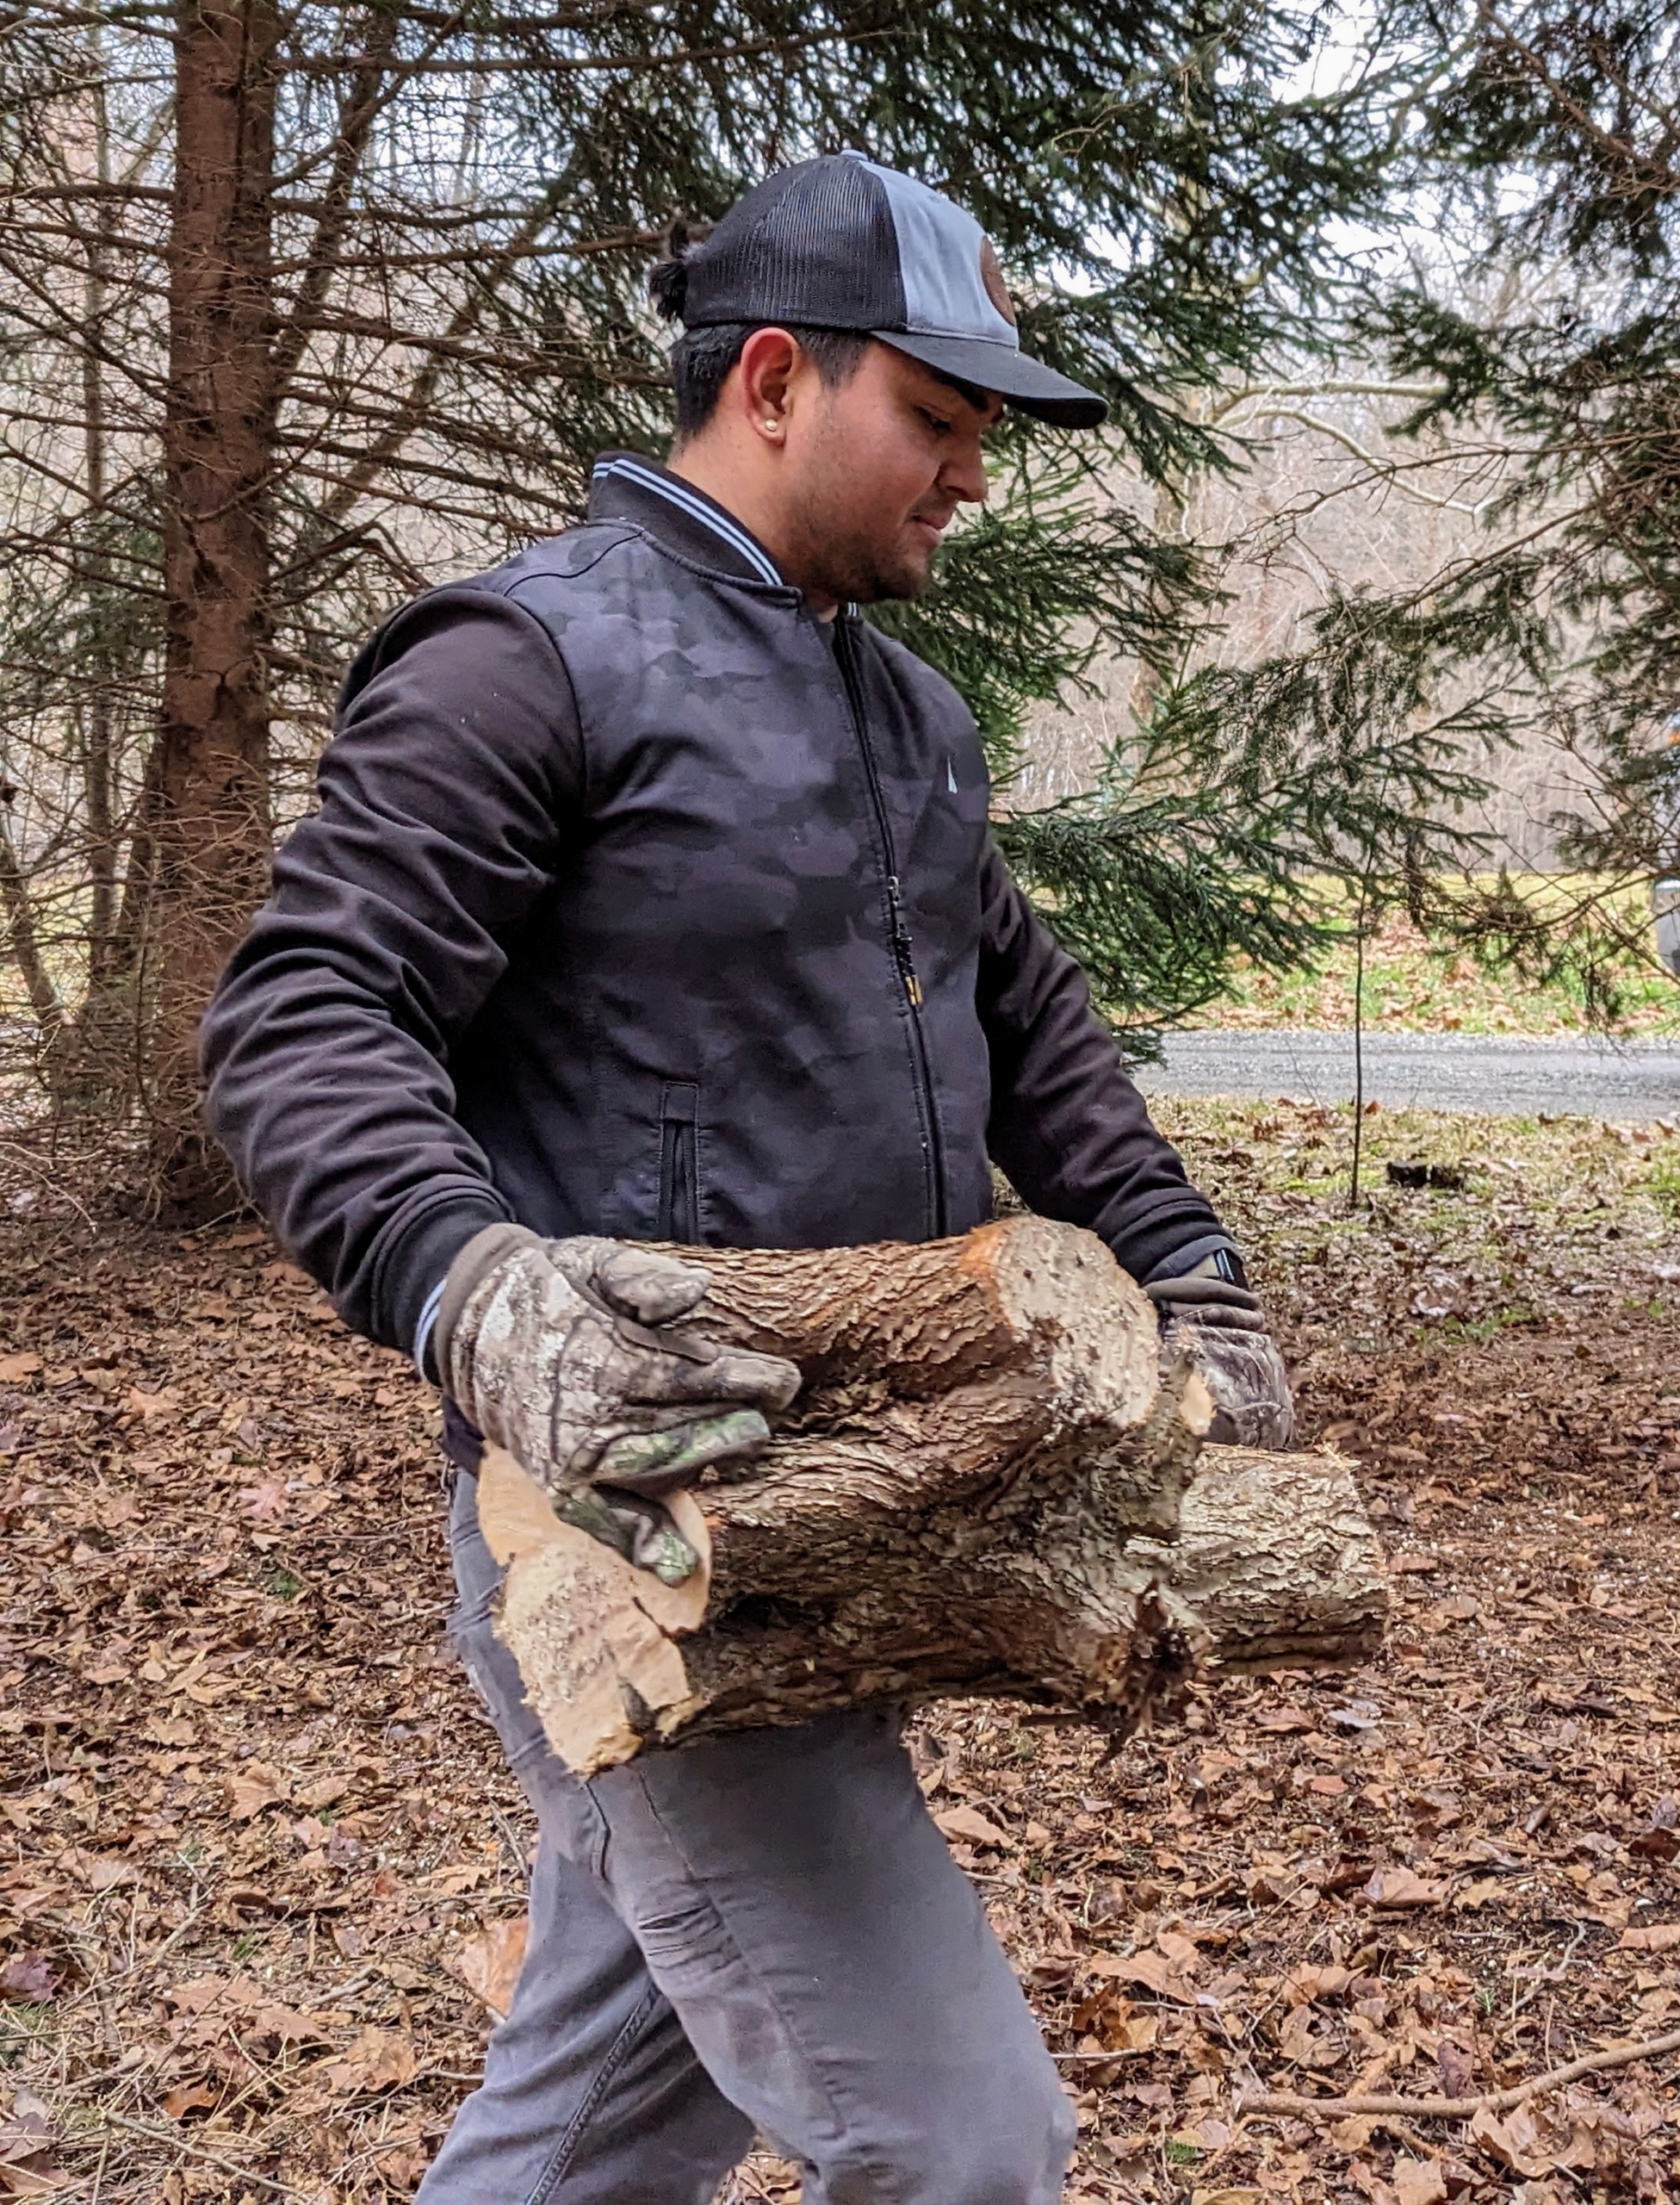
Here is Jimmy retrieving a section of the just-cut crabapple.
And here is Fernando hauling away some of the branches. Fernando has been working with me for 30-years and helps in so many different ways here at the farm.
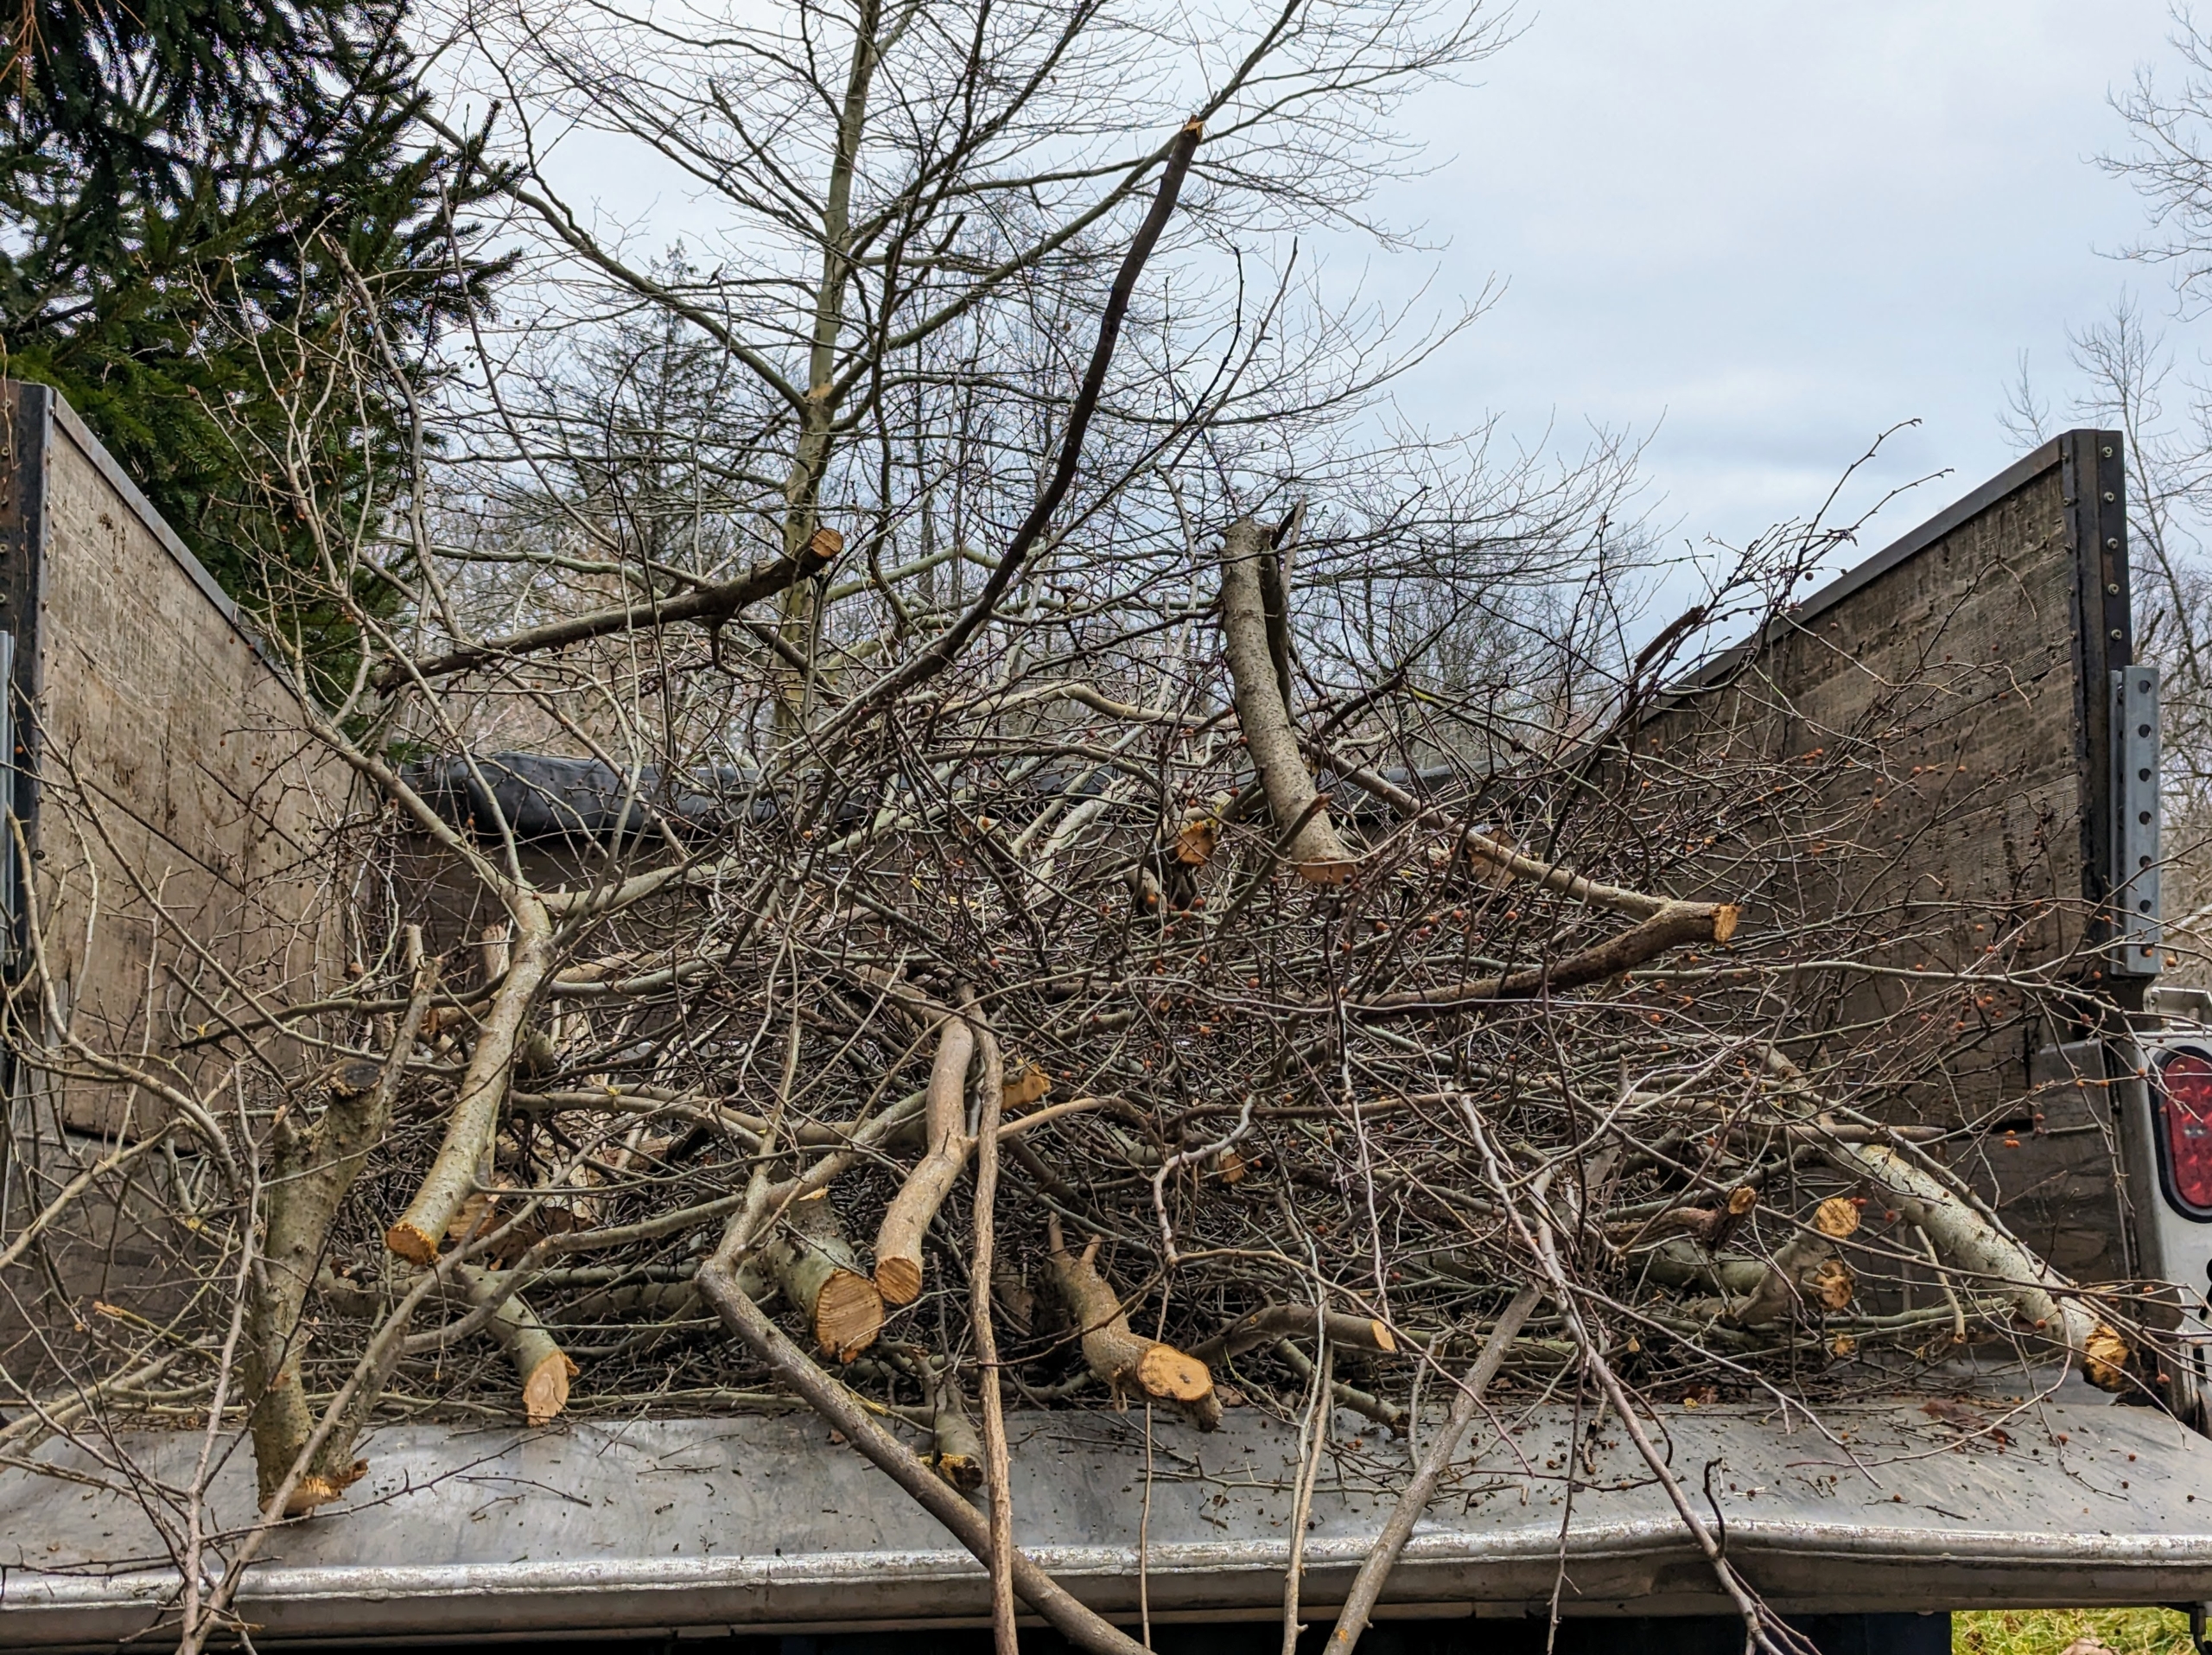
And here is just one load of many ready to be taken to the compost yard and tub grinder.
Here is the grove – it looks so much better. It’s not hard to tell when an area is overcrowded. When the branches of adjoining trees touch, the trees need some thinning to ensure good air movement and necessary light. I am glad these evergreens now have more room to grow and thrive. They will soon look much better and be much healthier. We’re getting so much woodland “cleaning” done, but there is still so much more to do.