If you’re planning your next vacation and want to visit an exotic island full of natural splendor and a stunning mix of wildlife and plant species, consider Madagascar.
The Republic of Madagascar is in the Indian Ocean, approximately 250-miles off the coast of East Africa across the Mozambique Channel. After Indonesia, Madagascar is the world's second-largest island country and the fourth biggest island on earth. If you follow my Instagram page @MarthaStewart48, you may know my family and I recently spent 10-days in Madagascar. We stayed at Miavana, a resort on a remote private island off the mainland, and took daily excursions by helicopter. We saw a host of animals - lemurs, chameleons, turtles, non-poisonous snakes, and colorful insects. We enjoyed delicious seafood including a yellowfin tuna caught, cleaned, and dressed by my grandson, Truman; and, we flew over interesting and diverse terrain. During the trip, our photographer and guide, Marlon Du Toit of Tanda Africa Safari Co., captured the most stunning photographs using the latest in Sony equipment, including the 70-200mm F2.8 G Master Lens. This new lens is light, fast, and takes optically superior images. My granddaughter, Jude, and I loved using it. If you also enjoy photography, try it out - you'll love it too.
Enjoy these photos.
Here is a view from our plane as we neared the island nation of Madagascar. The coastline was very sharp, the clear sea waters choppy, but the lush green landscapes were so beautiful.
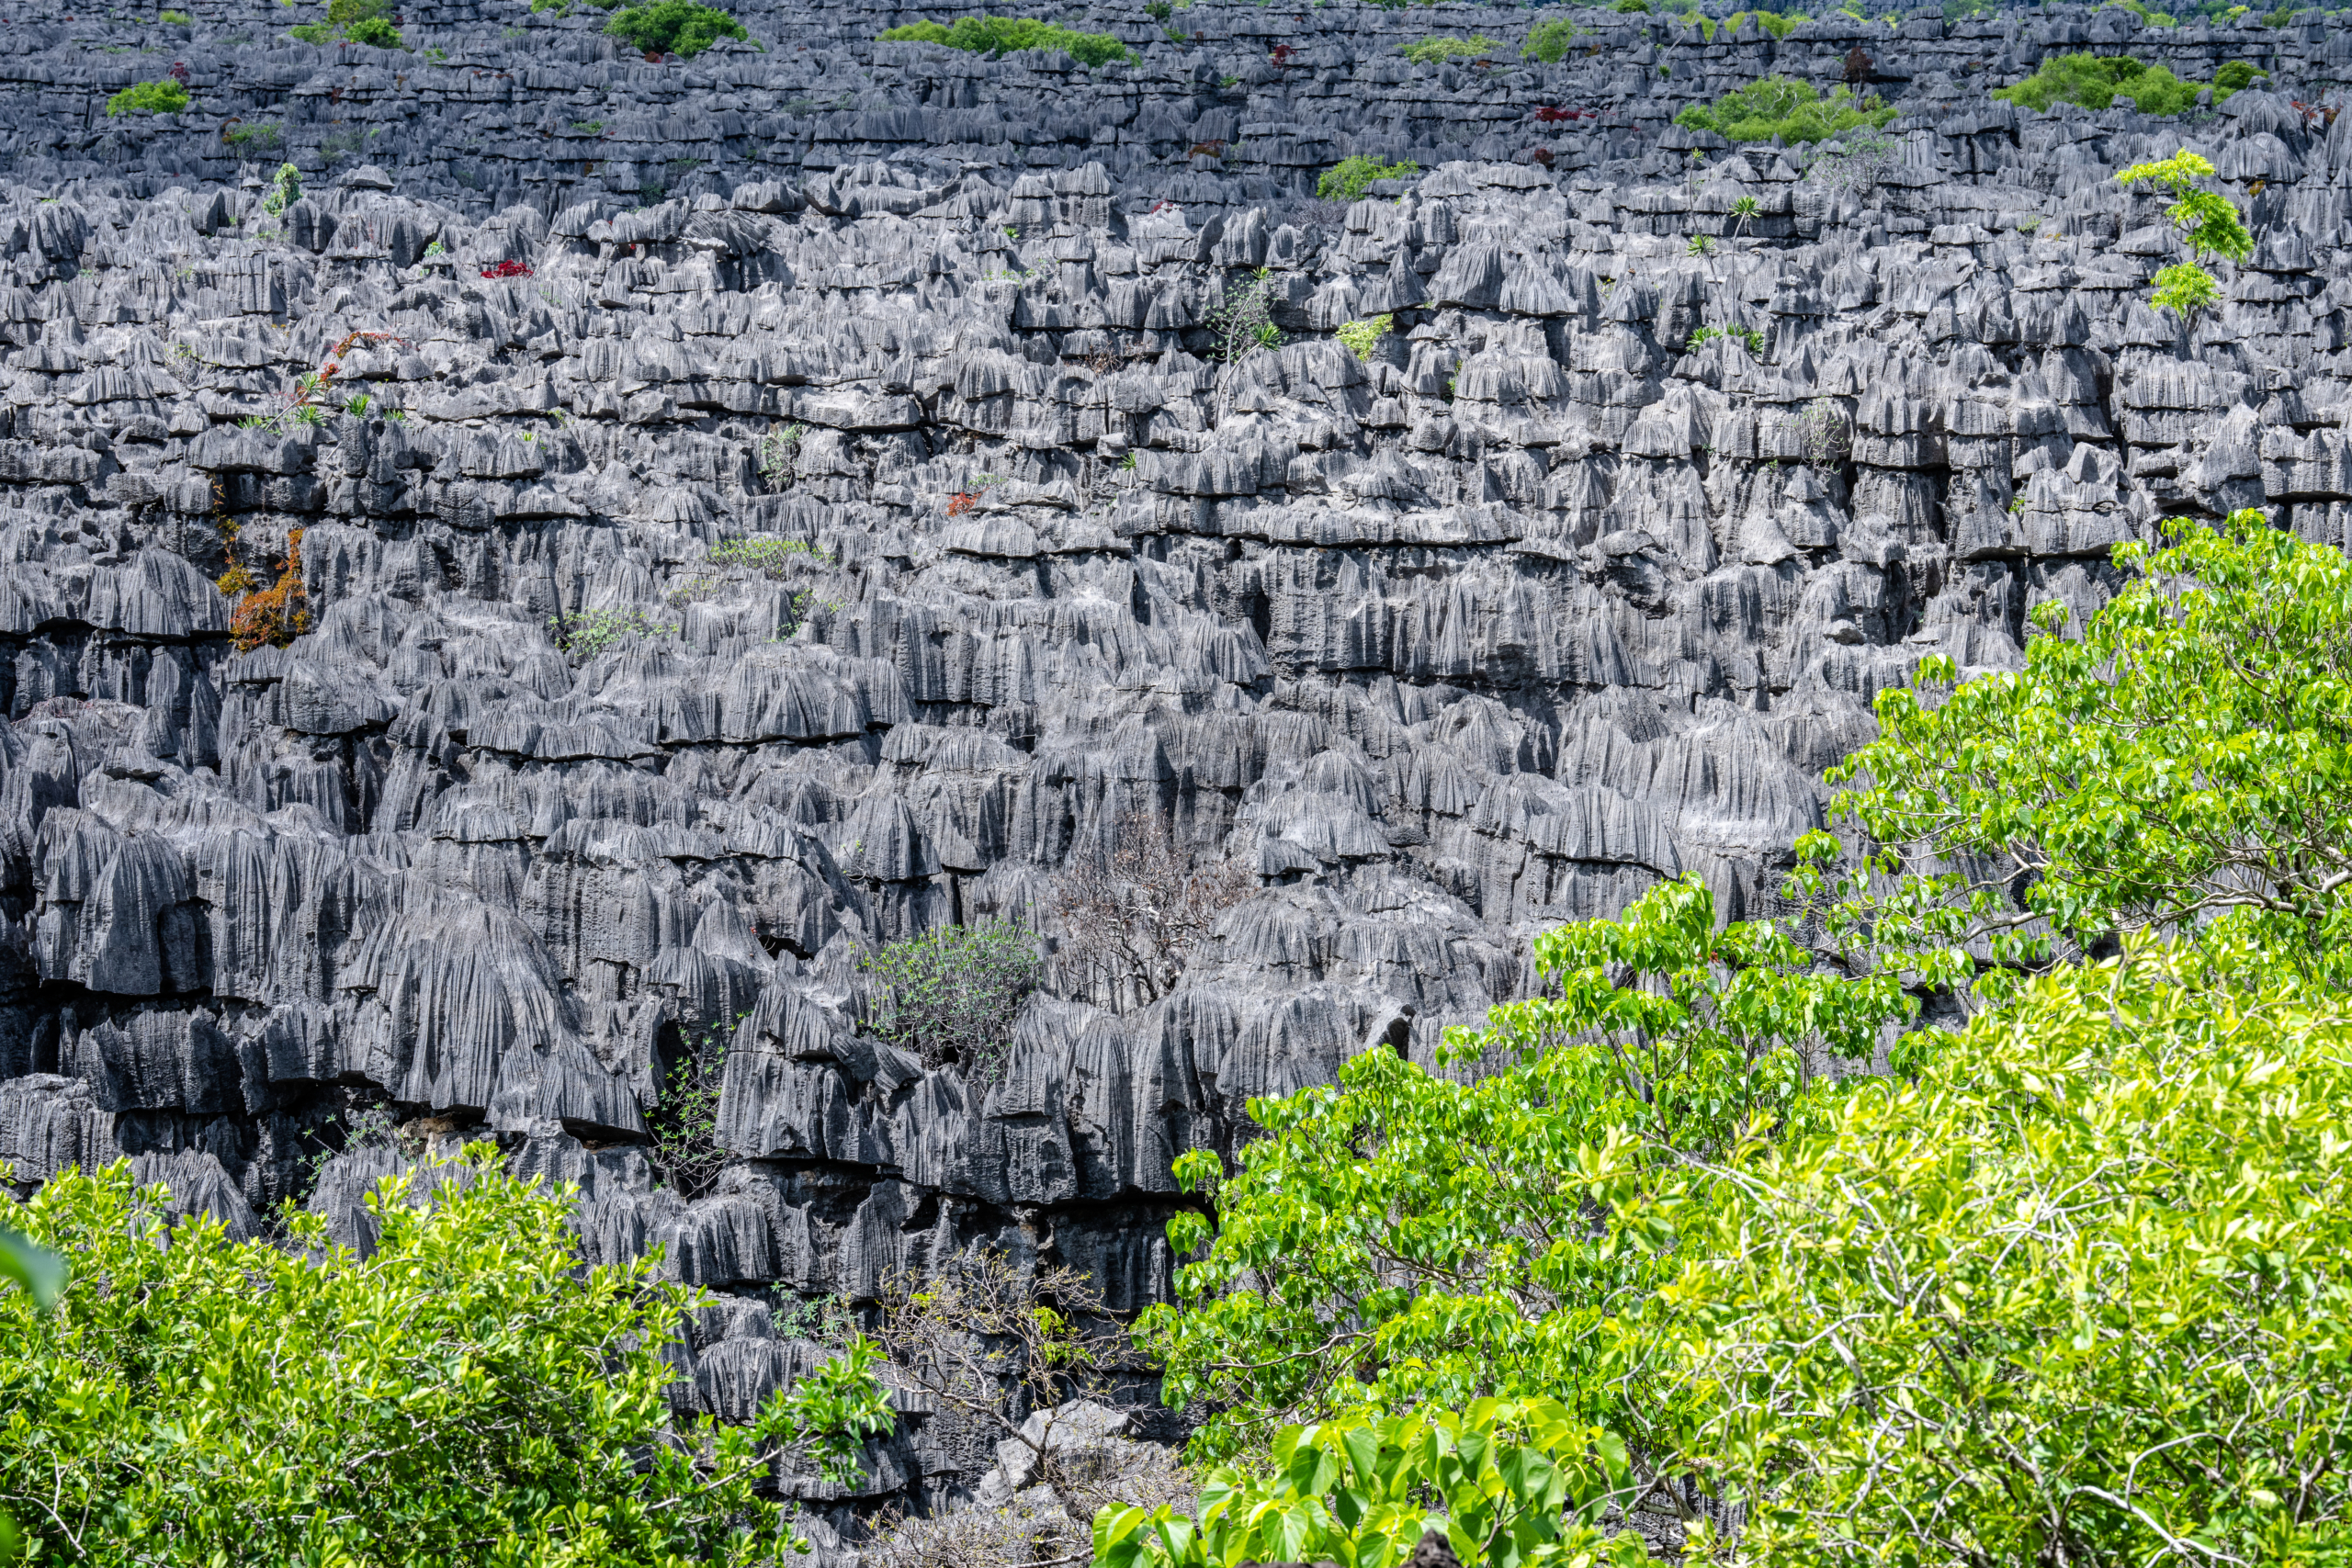
We all took many photos. Marlon Du Toit, who guided our excursions, is an excellent photographer. He uses a Sony camera and a Sony 70-200mm F2.8 G Master Lens. The images are so crisp and clear. Here is one of the Tsingys. Tsingys are plateaus in which groundwater has undercut the elevated uplands, creating caverns and fissures into the limestone. These Tsingys are grey in color and the edges, incredibly sharp. They are said to have formed more than 150-million years ago – an incredible sight to see!
We explored several northern areas by helicopter and came across sights like this magnificent waterfall. Marlon says, “it almost makes one want to stop for a swim, but one has to remember that Madagascar is home to almost 20,000 Nile crocodiles.” (Photo by Marlon Dutoit)
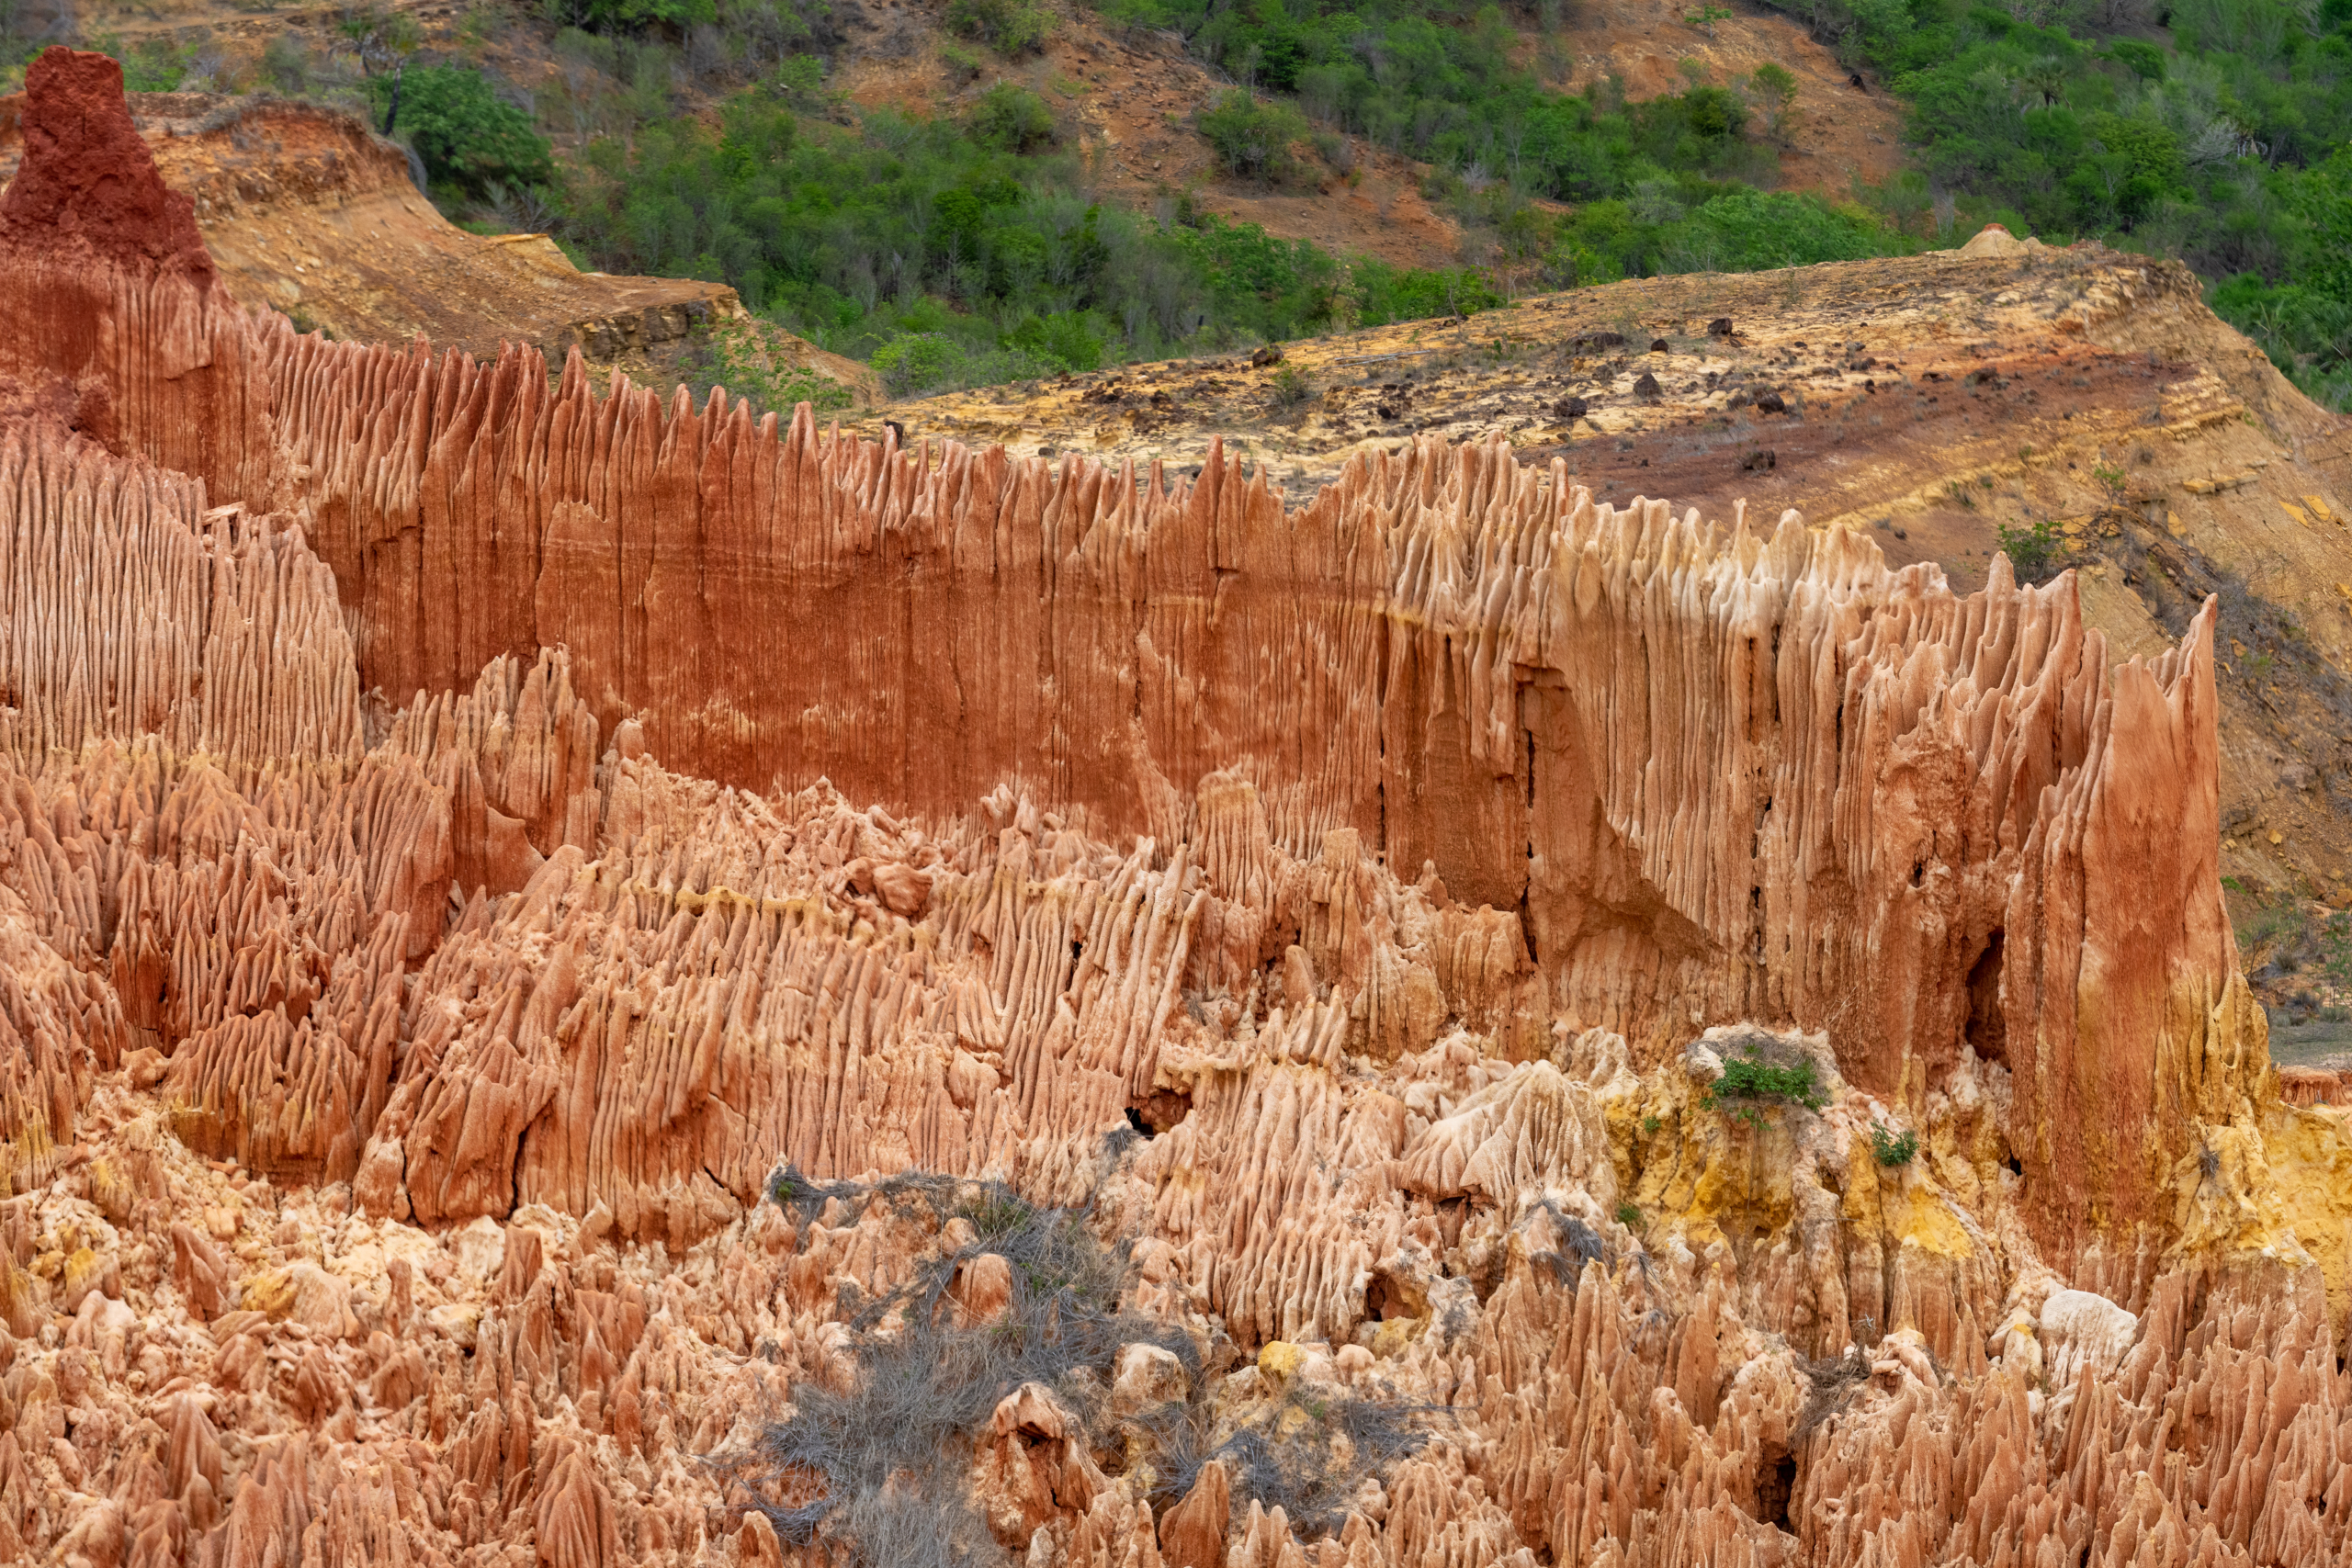
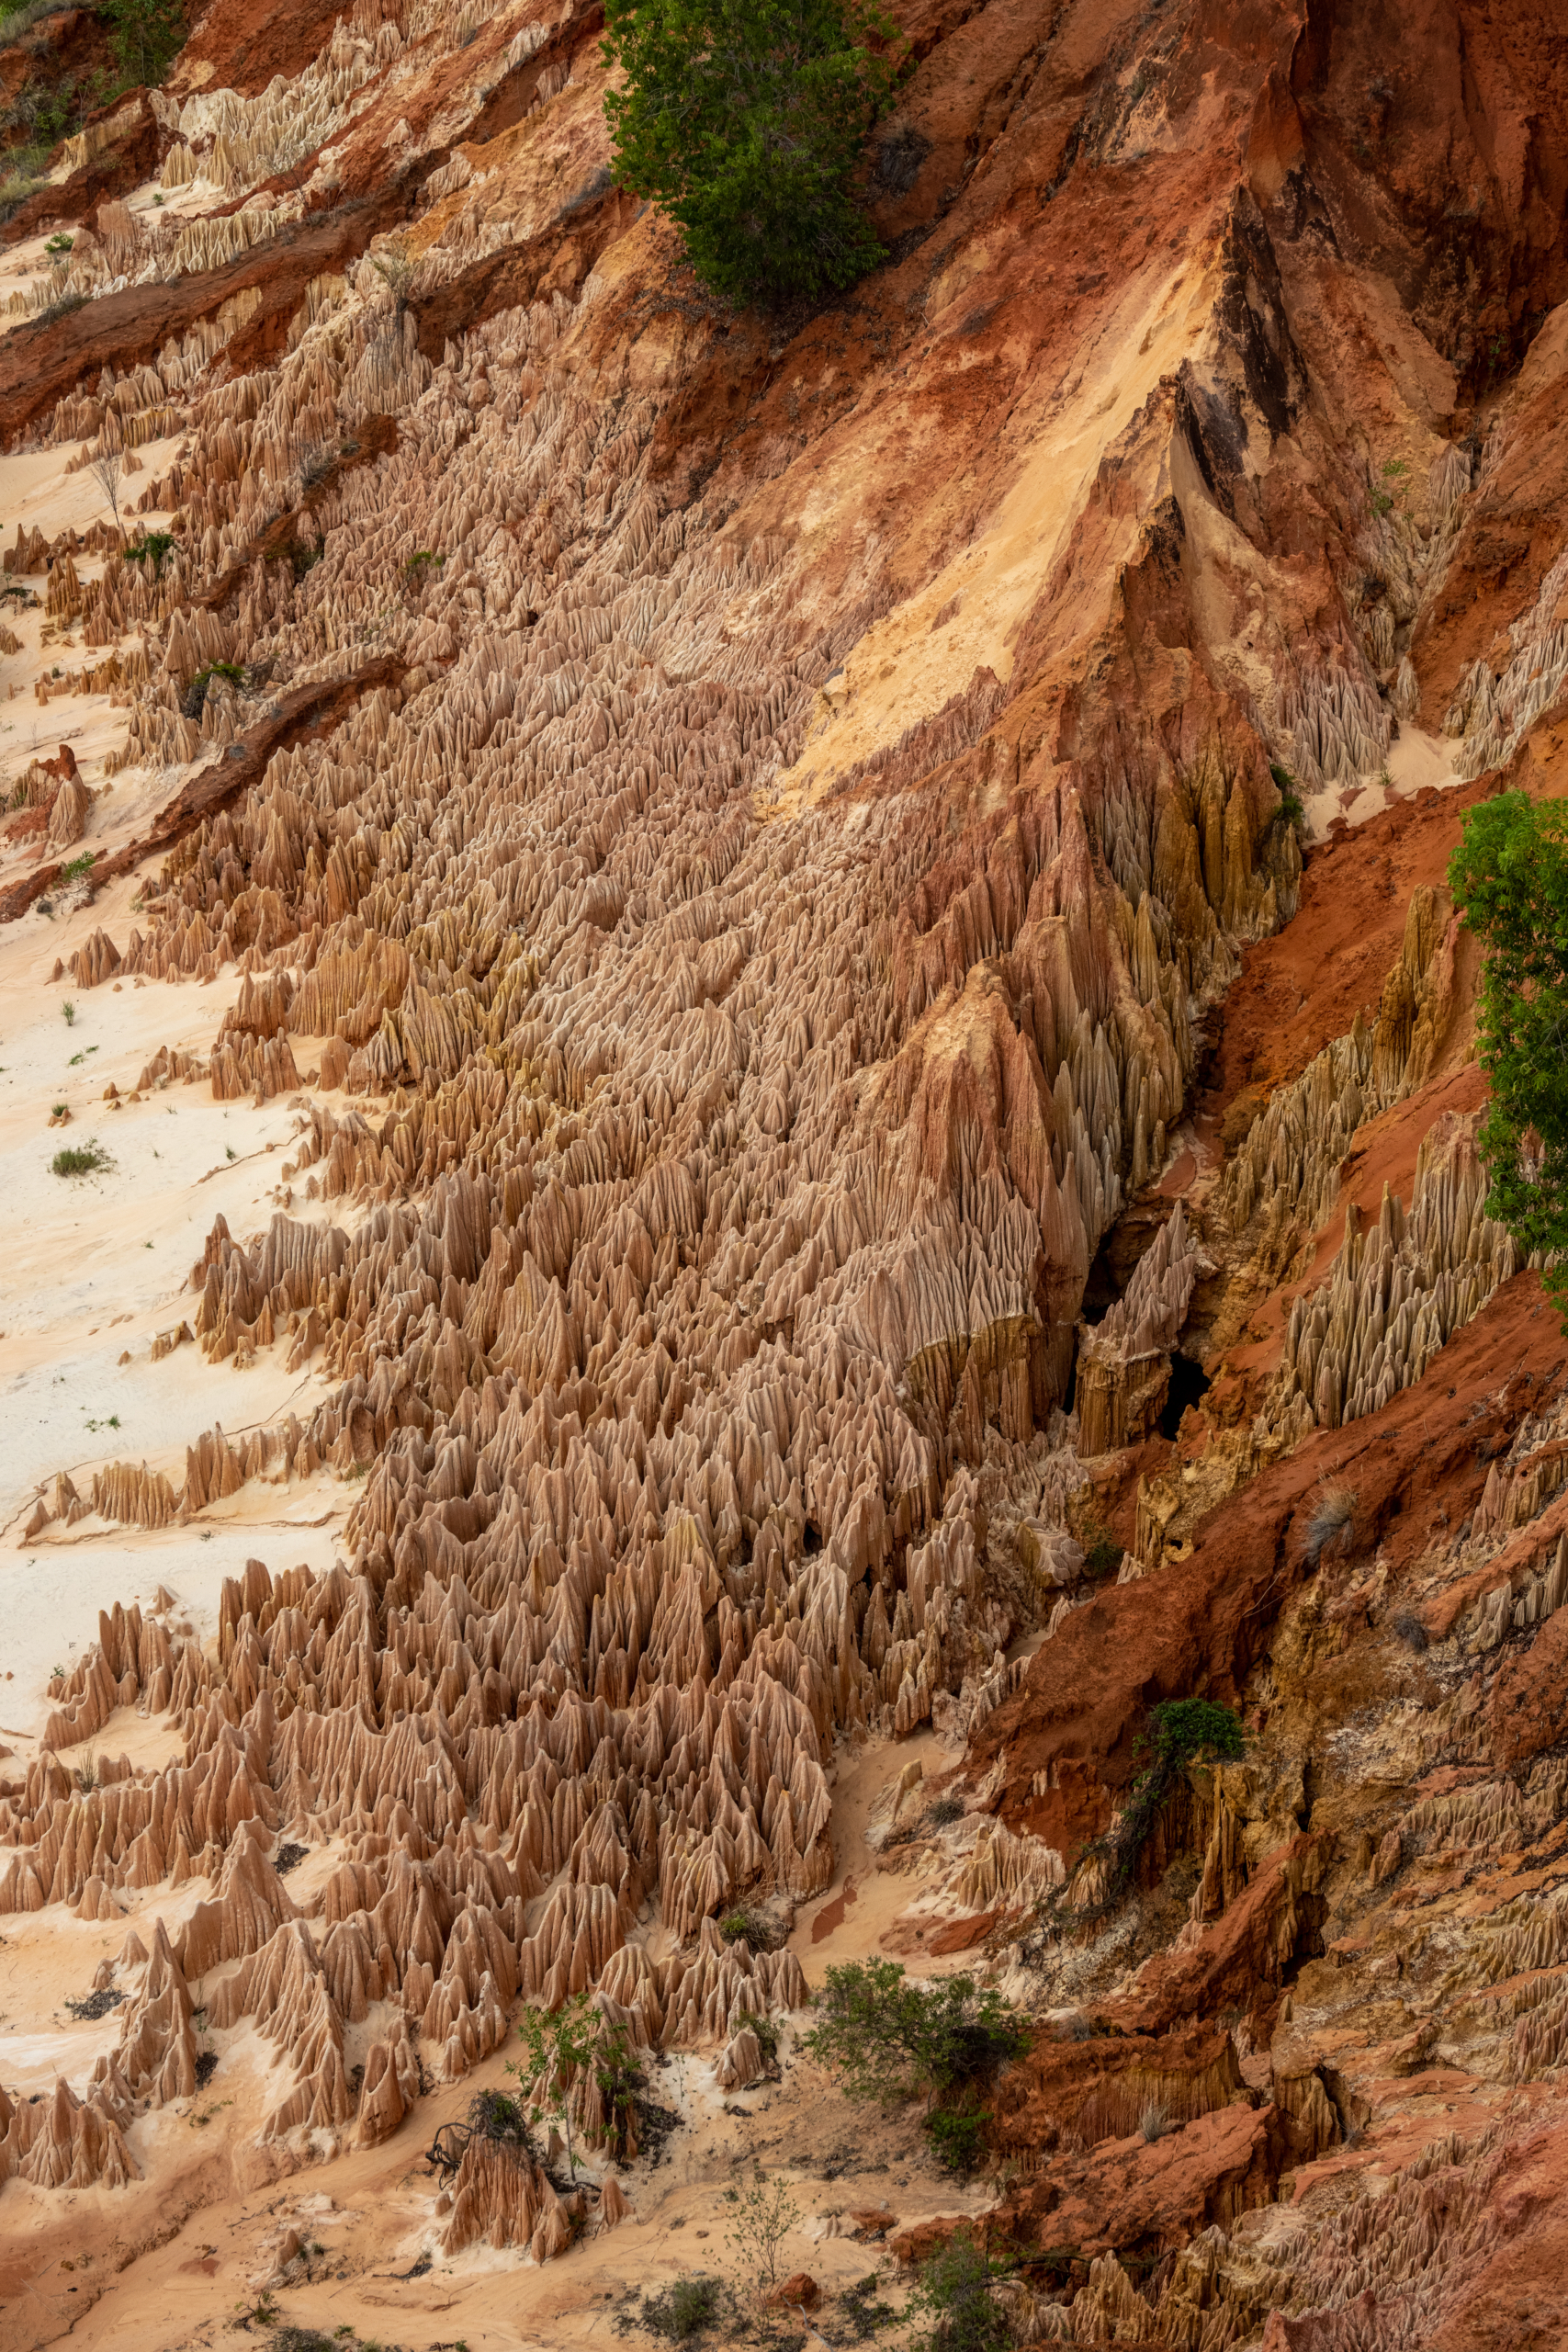
The Tsingy Rouge, the red rocks of Northern Madagascar, is among the most stunning formations of “rocks” on the planet. What looks like rock is actually the erosion of soil. (Photo by Marlon Dutoit)
In Malagasy, which is the principal language spoken in Madagascar, the word tsingy means “walking on tip toes” or “the place where one cannot walk barefoot.” (Photo by Marlon Dutoit)
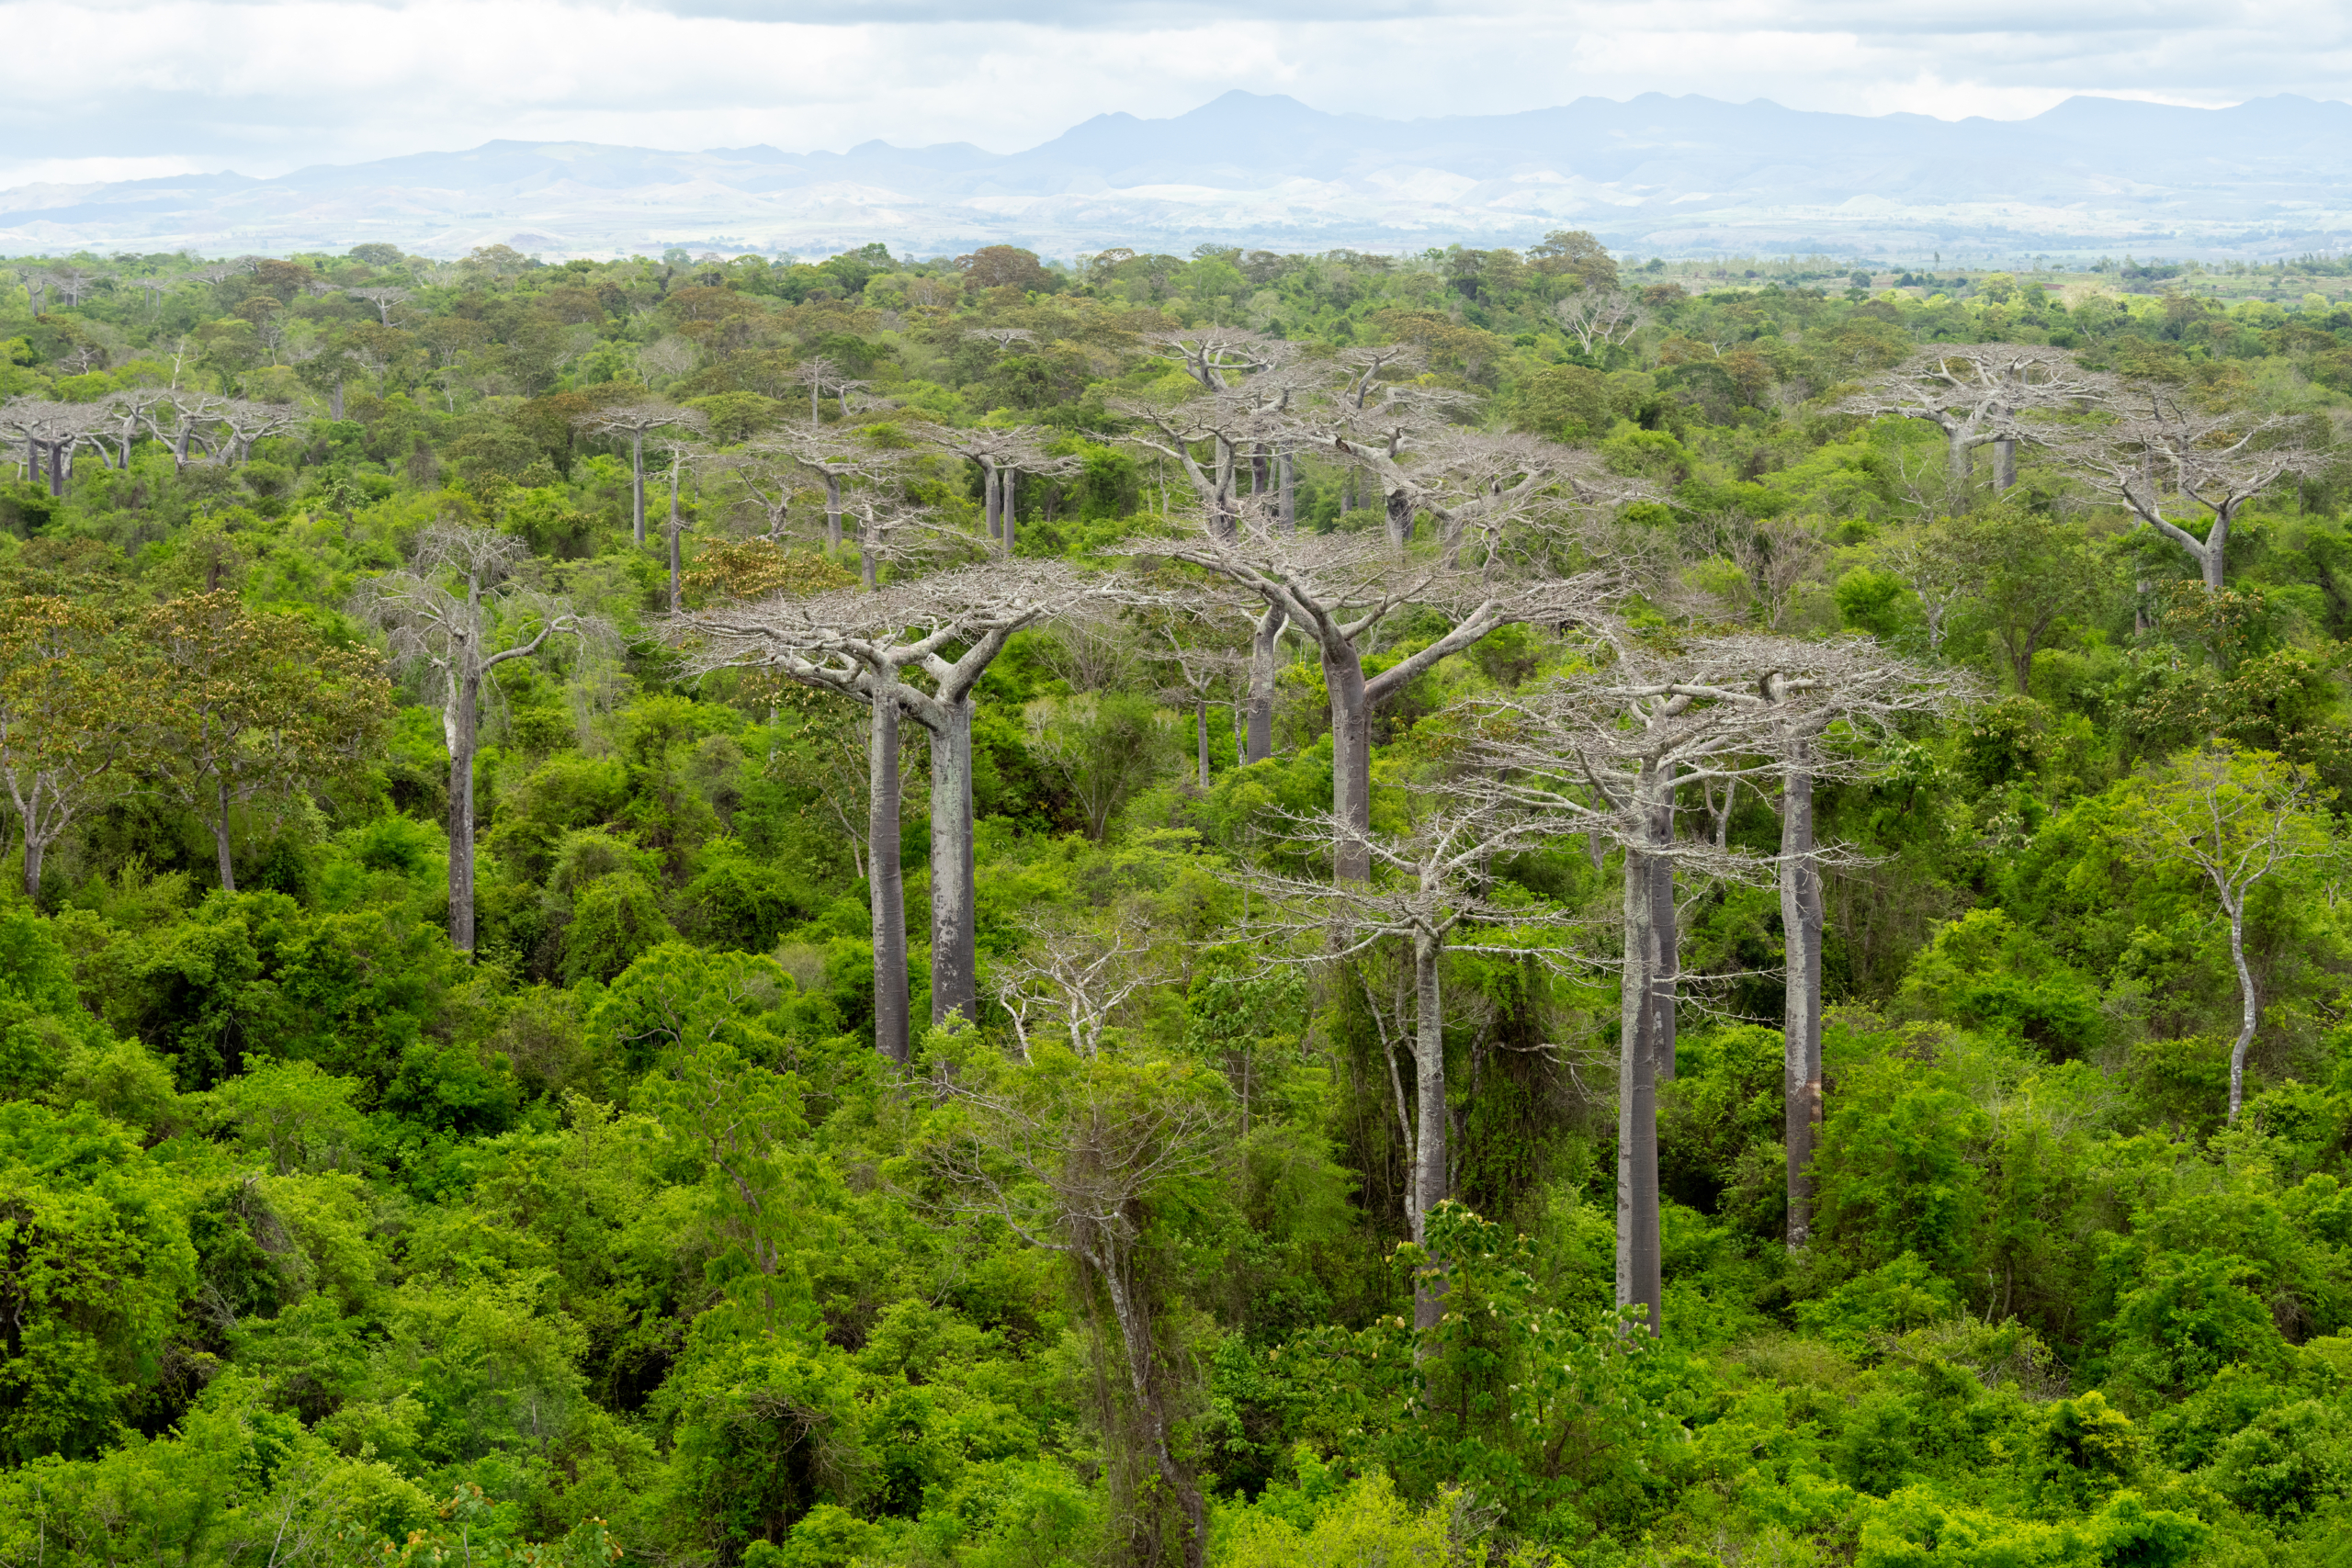
Madagascar has nine species of Baobab, medium-to-large deciduous trees. Six of them grow only in Madagascar. These trees are instantly recognizable, especially from a helicopter. (Photo by Marlon Dutoit)
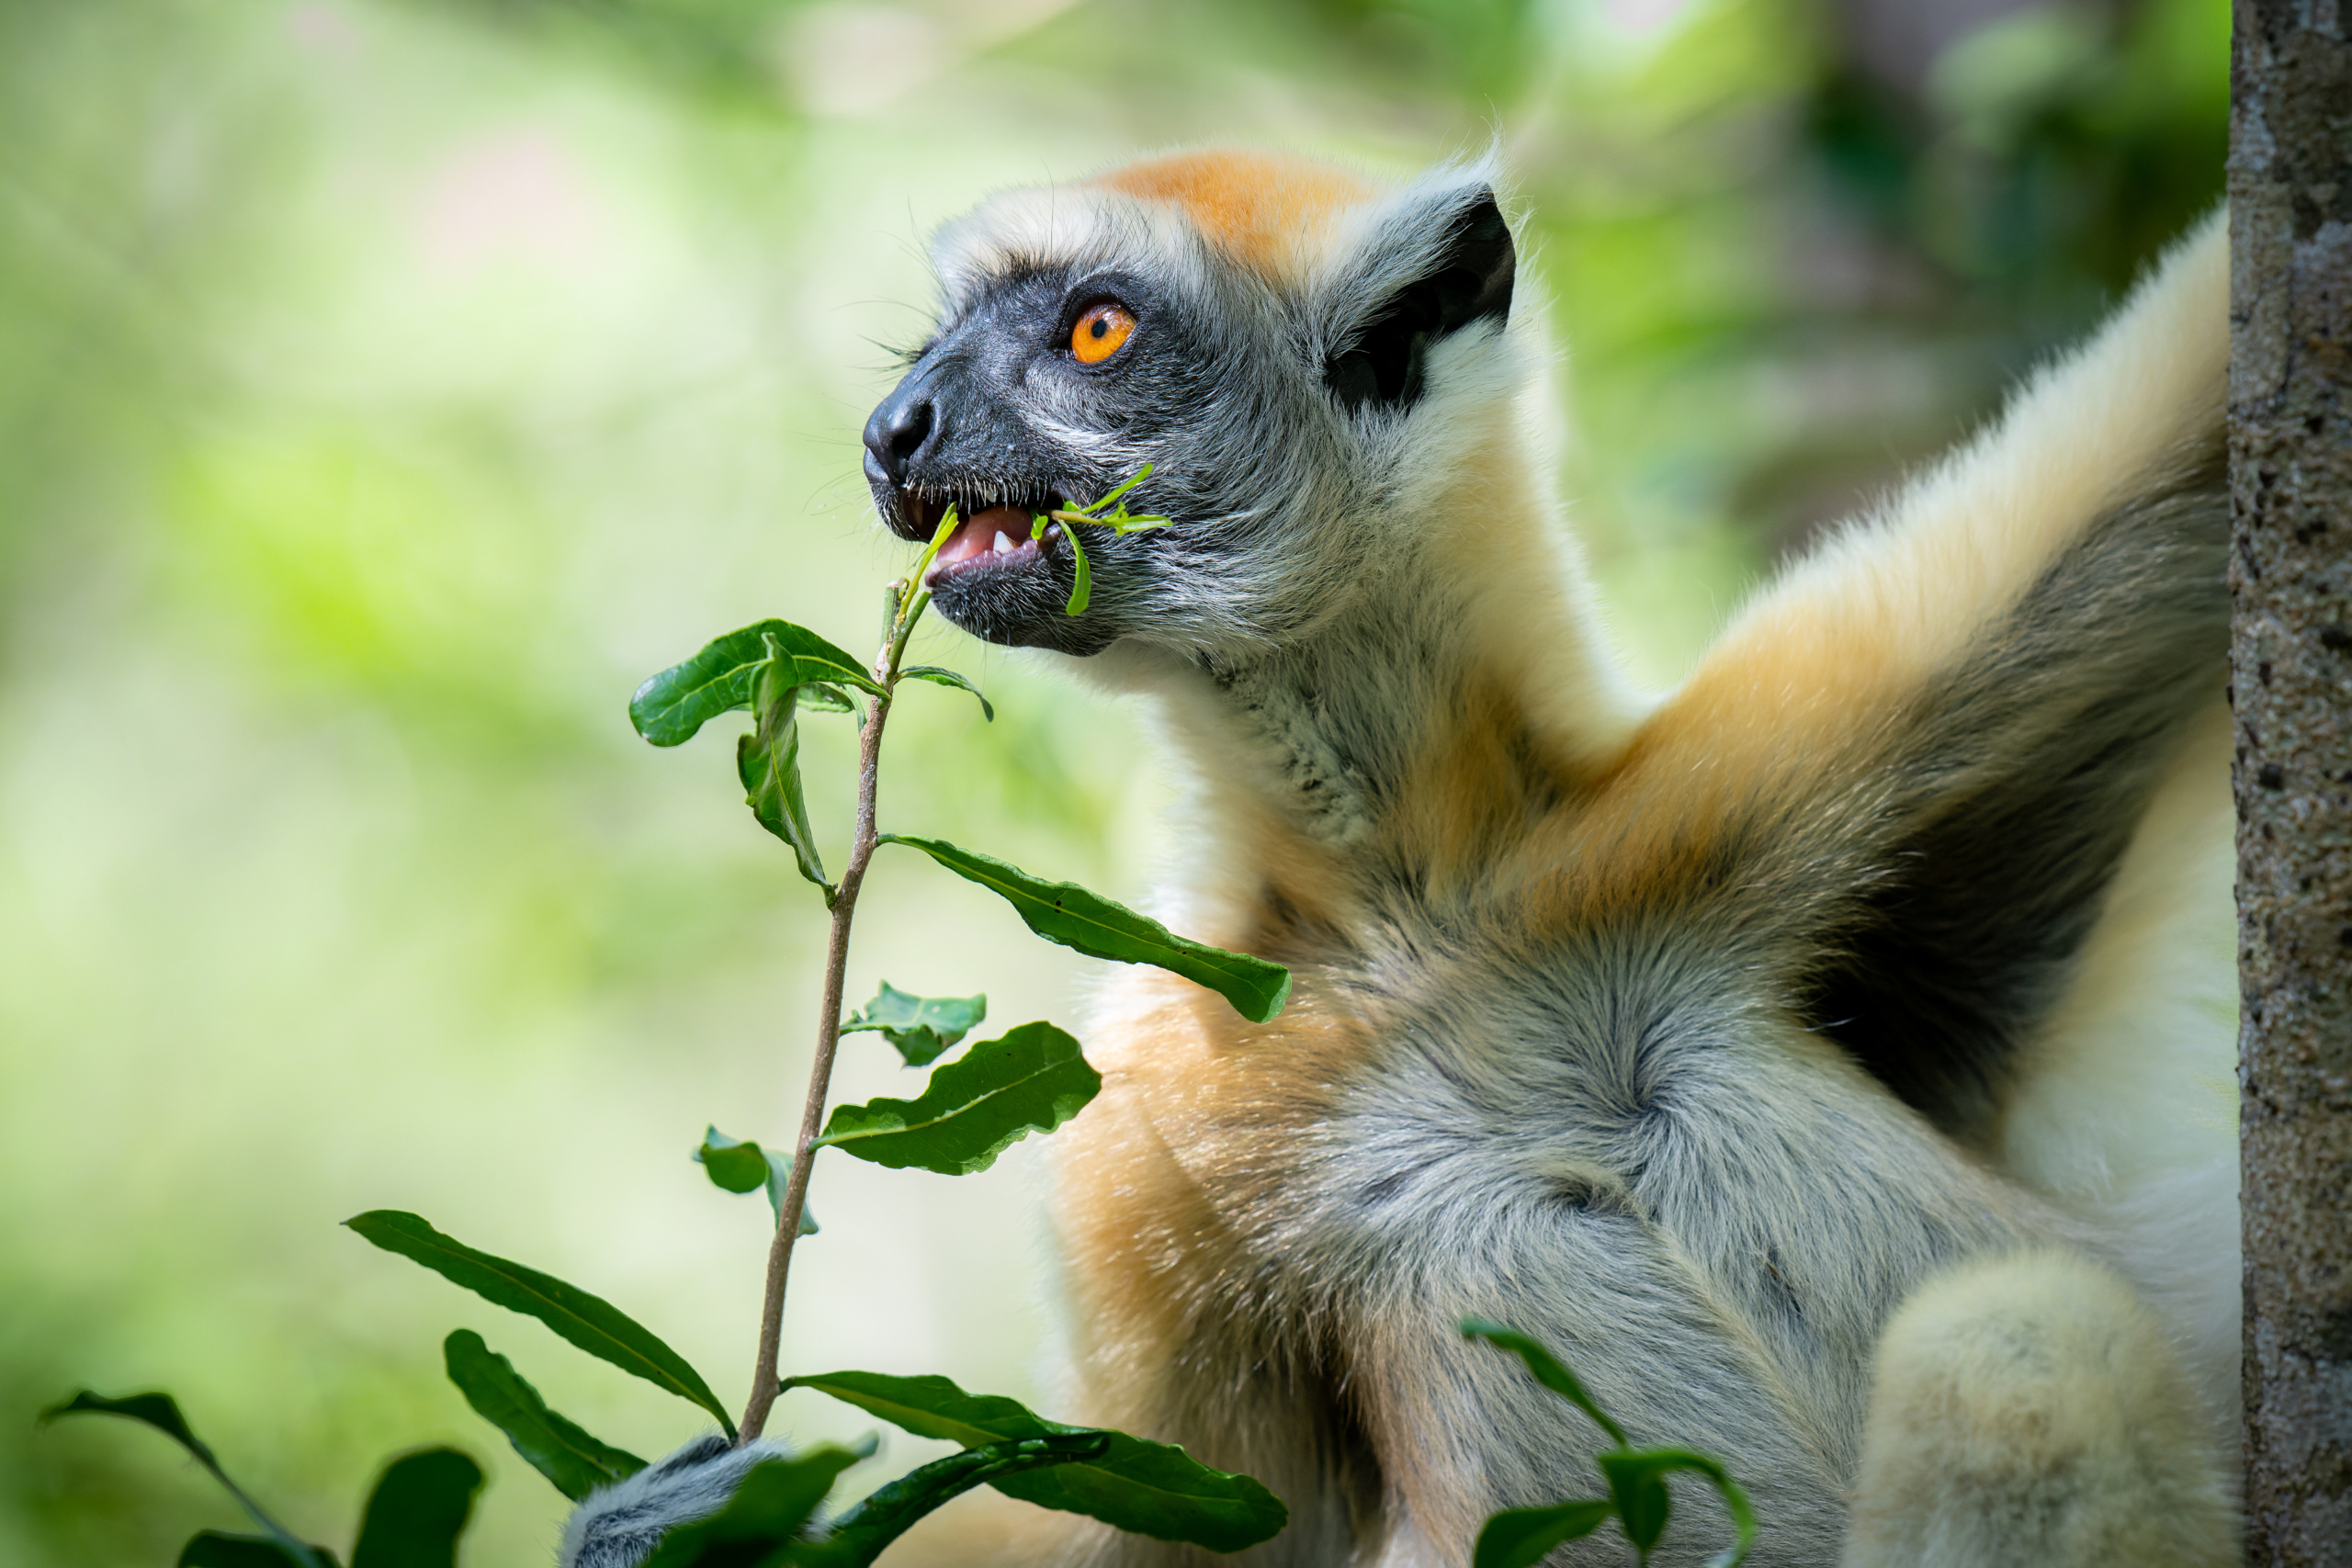
This is a Golden-Crowned Sifaka lemur. These lemurs are known to be some of the rarest primates. We were able to get pretty close, but Marlon’s camera captured stunning details. (Photo by Marlon Dutoit)
Here’s another Golden-Crowned Sifaka we saw feeding. They will feed actively during the midday hours, before returning in the evening to their roost. (Photo by Marlon Dutoit)
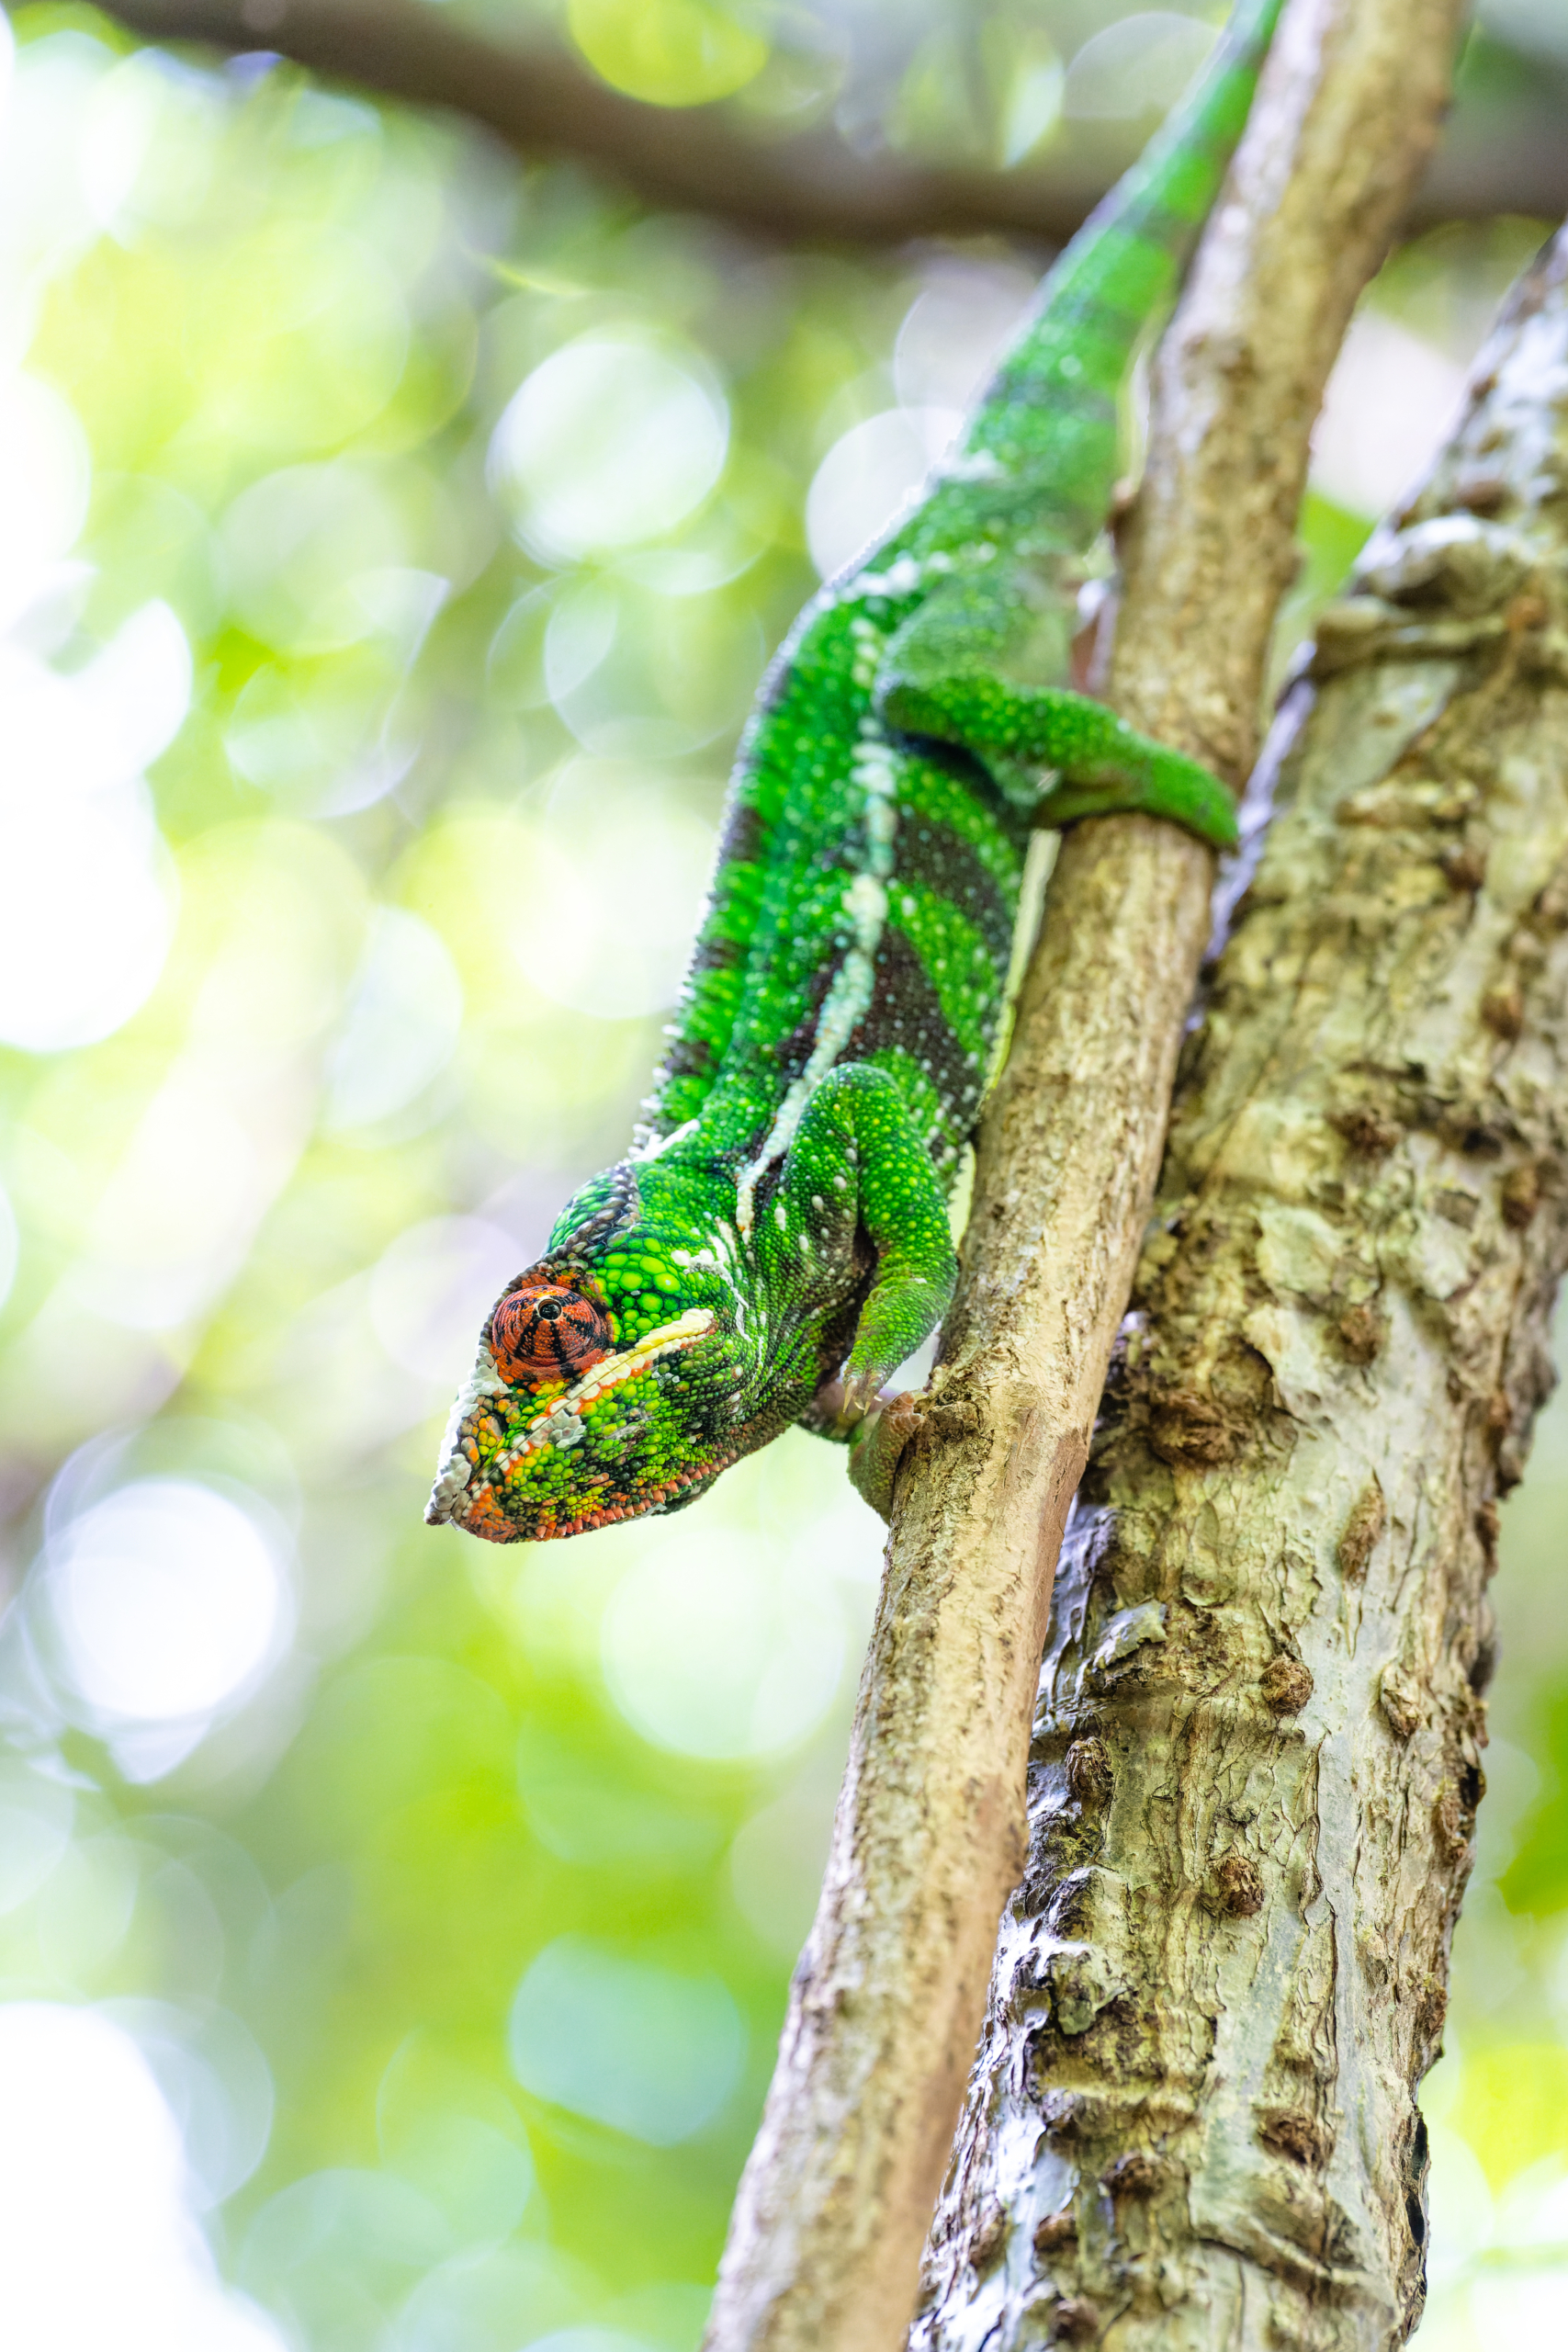
This is a beautiful male panther chameleon, brilliantly colored in bold green and dark brown, Males also have a broken white stripe that goes down the length of its body. The panther chameleon is a species of chameleon found in the eastern and northern parts of Madagascar in a tropical forest biome. (Photo by Marlon Dutoit)
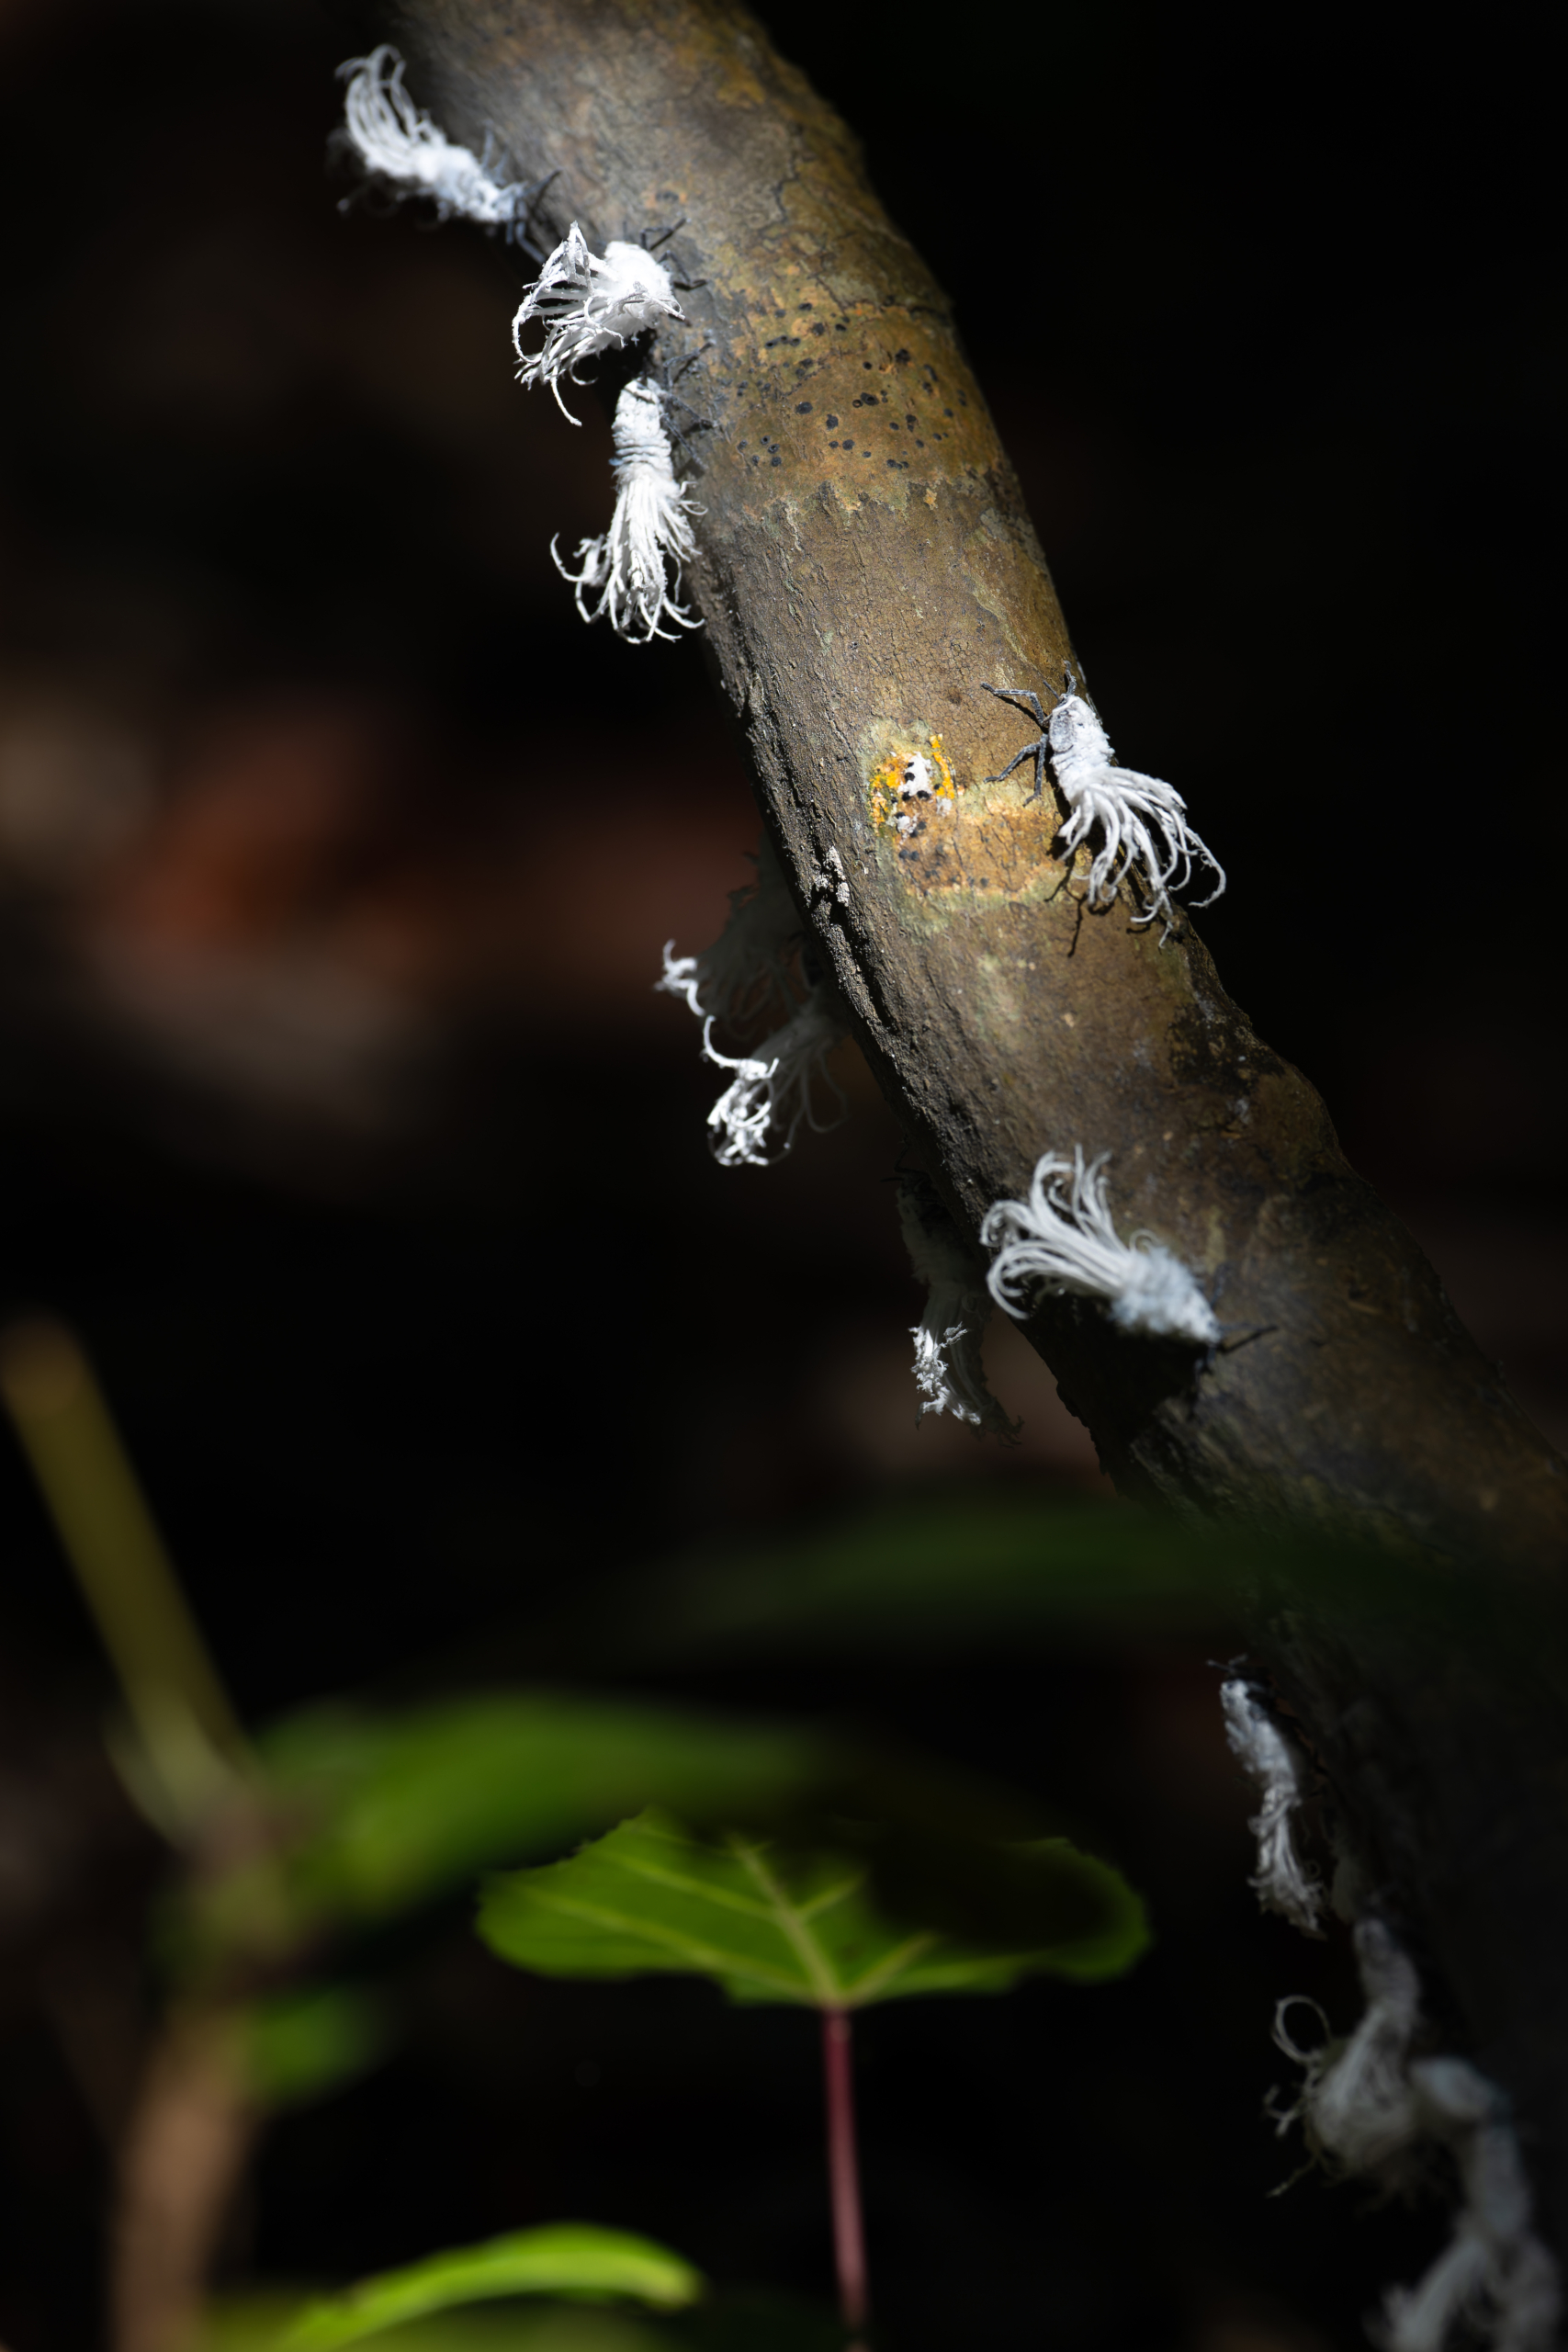
Flatidae is a family of fulgoroid planthoppers. These crawling creatures will soon turn into beautifully colored moths clinging to the branches of many forest trees in Northern Madagascar. The Sony lens excels in difficult lighting conditions – these creatures are so clear, even while moving. (Photo by Marlon Dutoit)
These are adult Flatidae, commonly known as Flat-lid Leaf Bugs. These have brightly colored forewings, which are tougher and known as tegmina. The membranous hindwings are used for flight. (Photo by Marlon Dutoit)
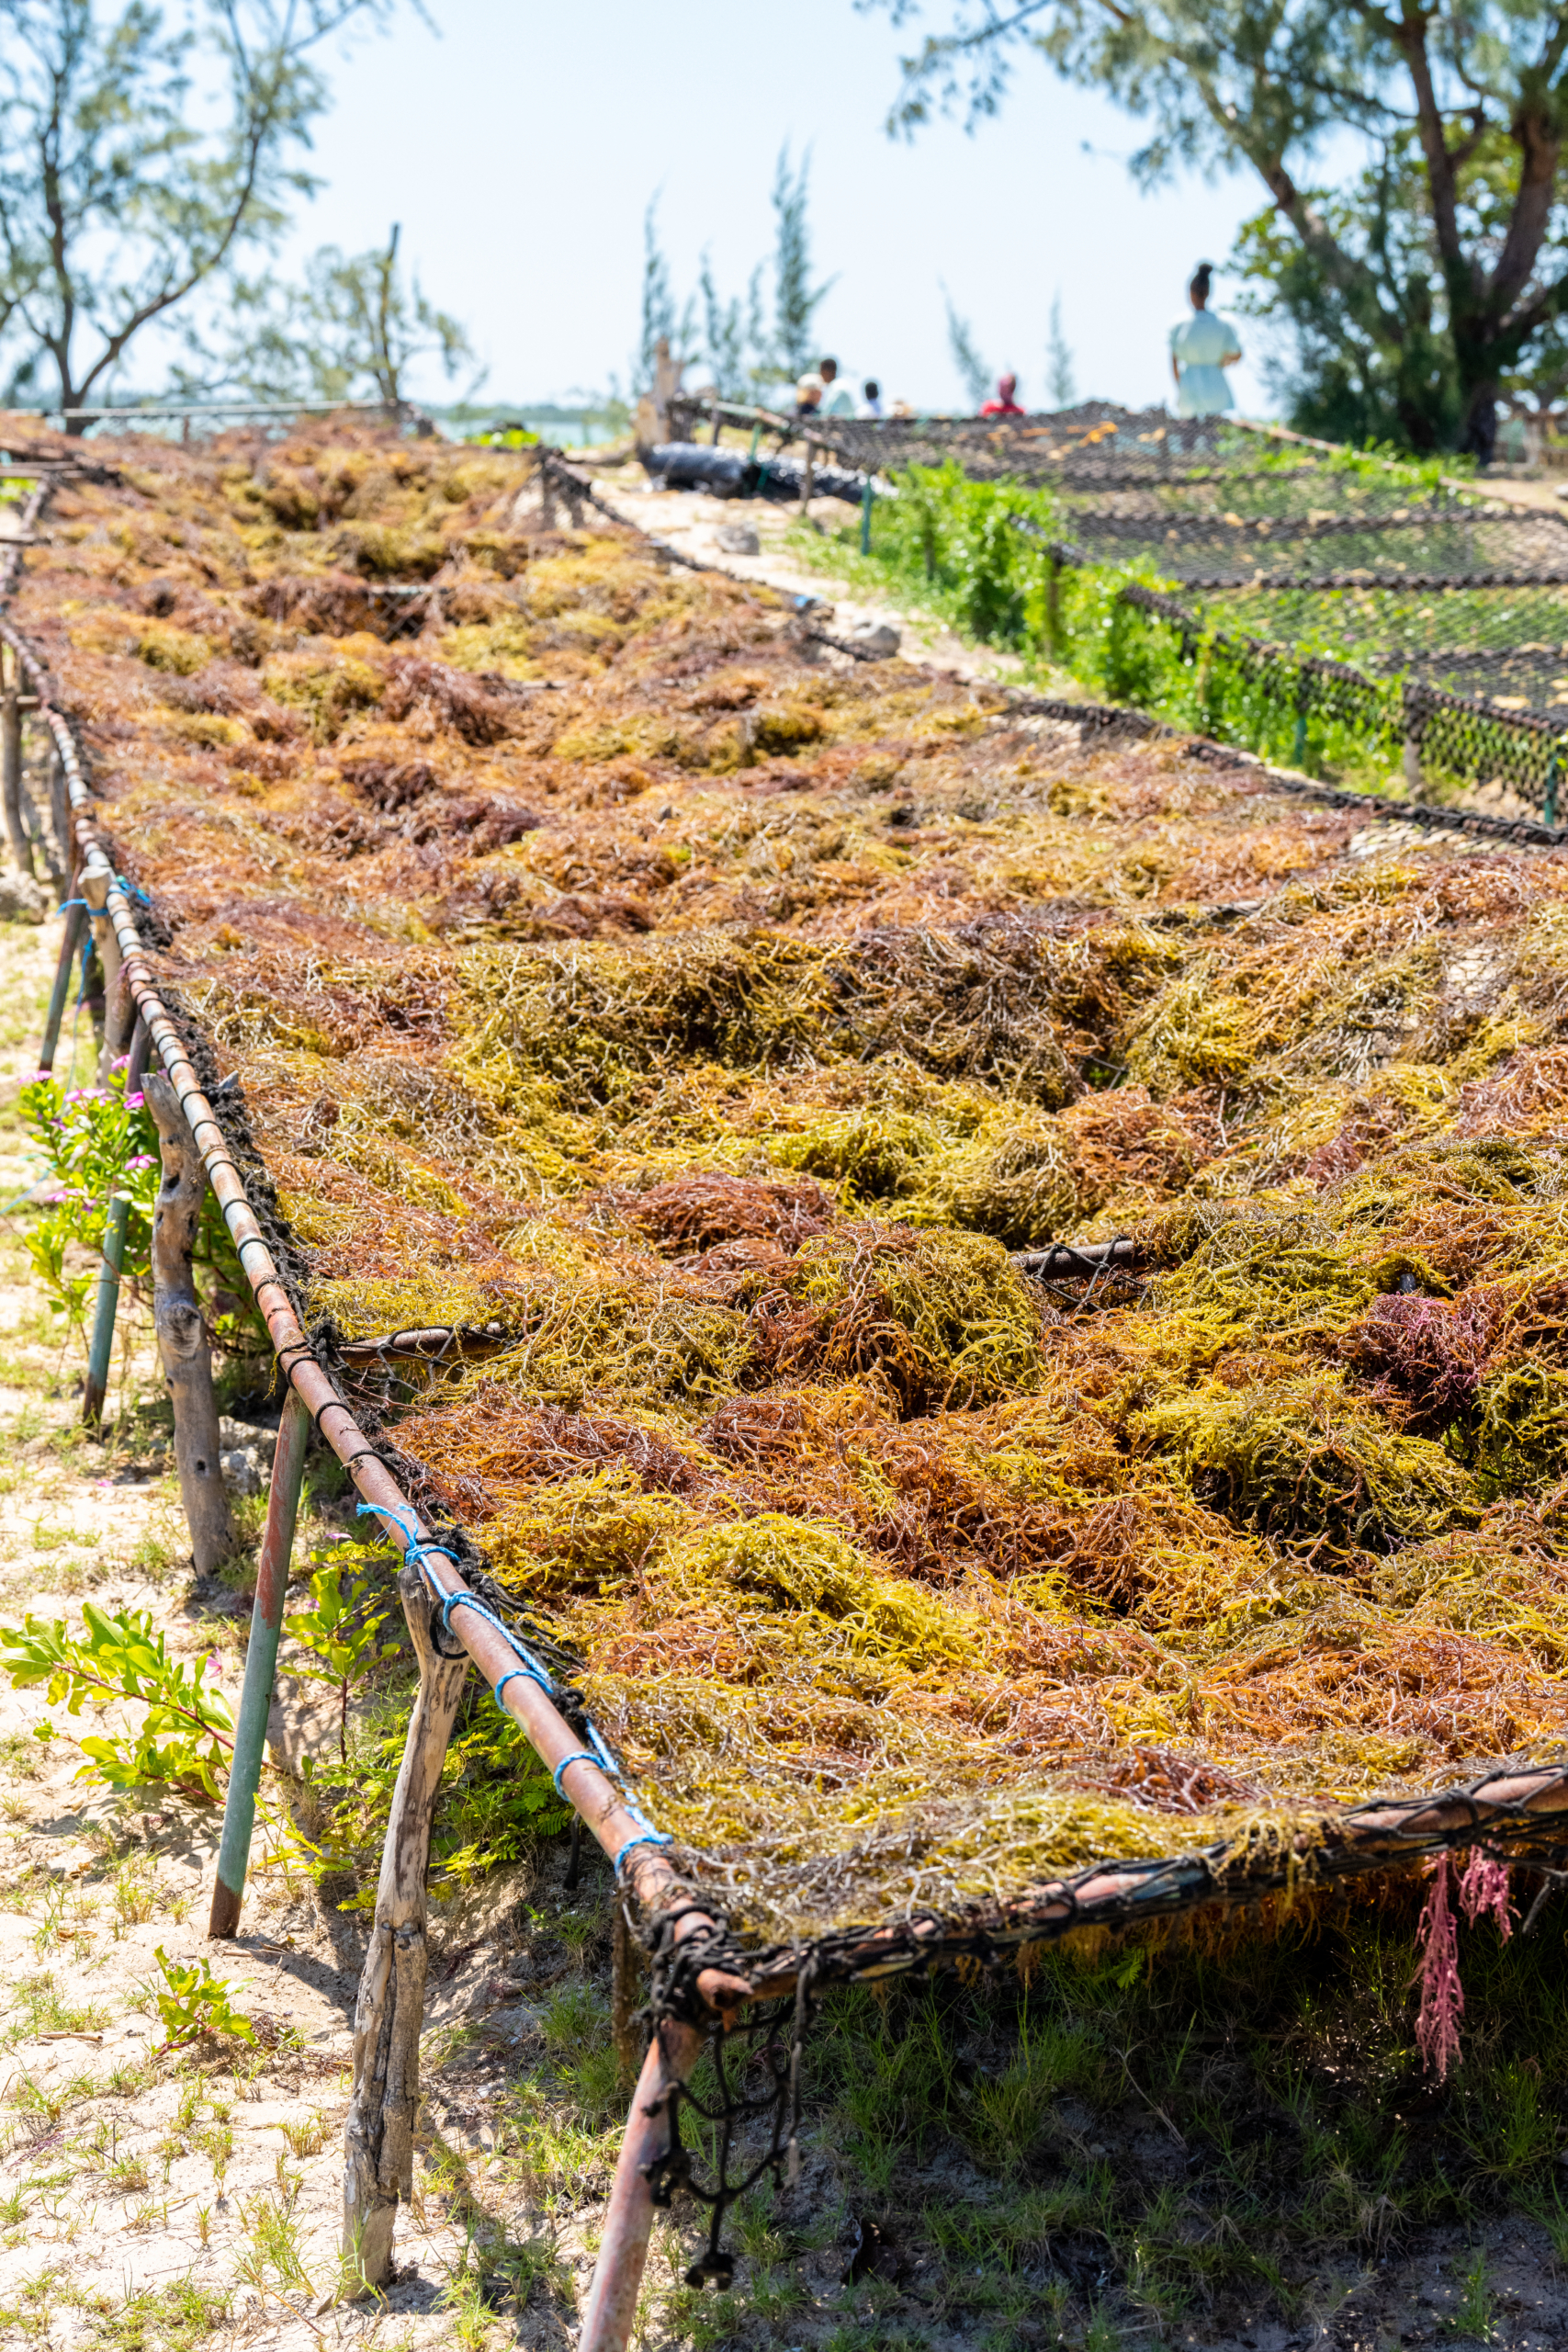
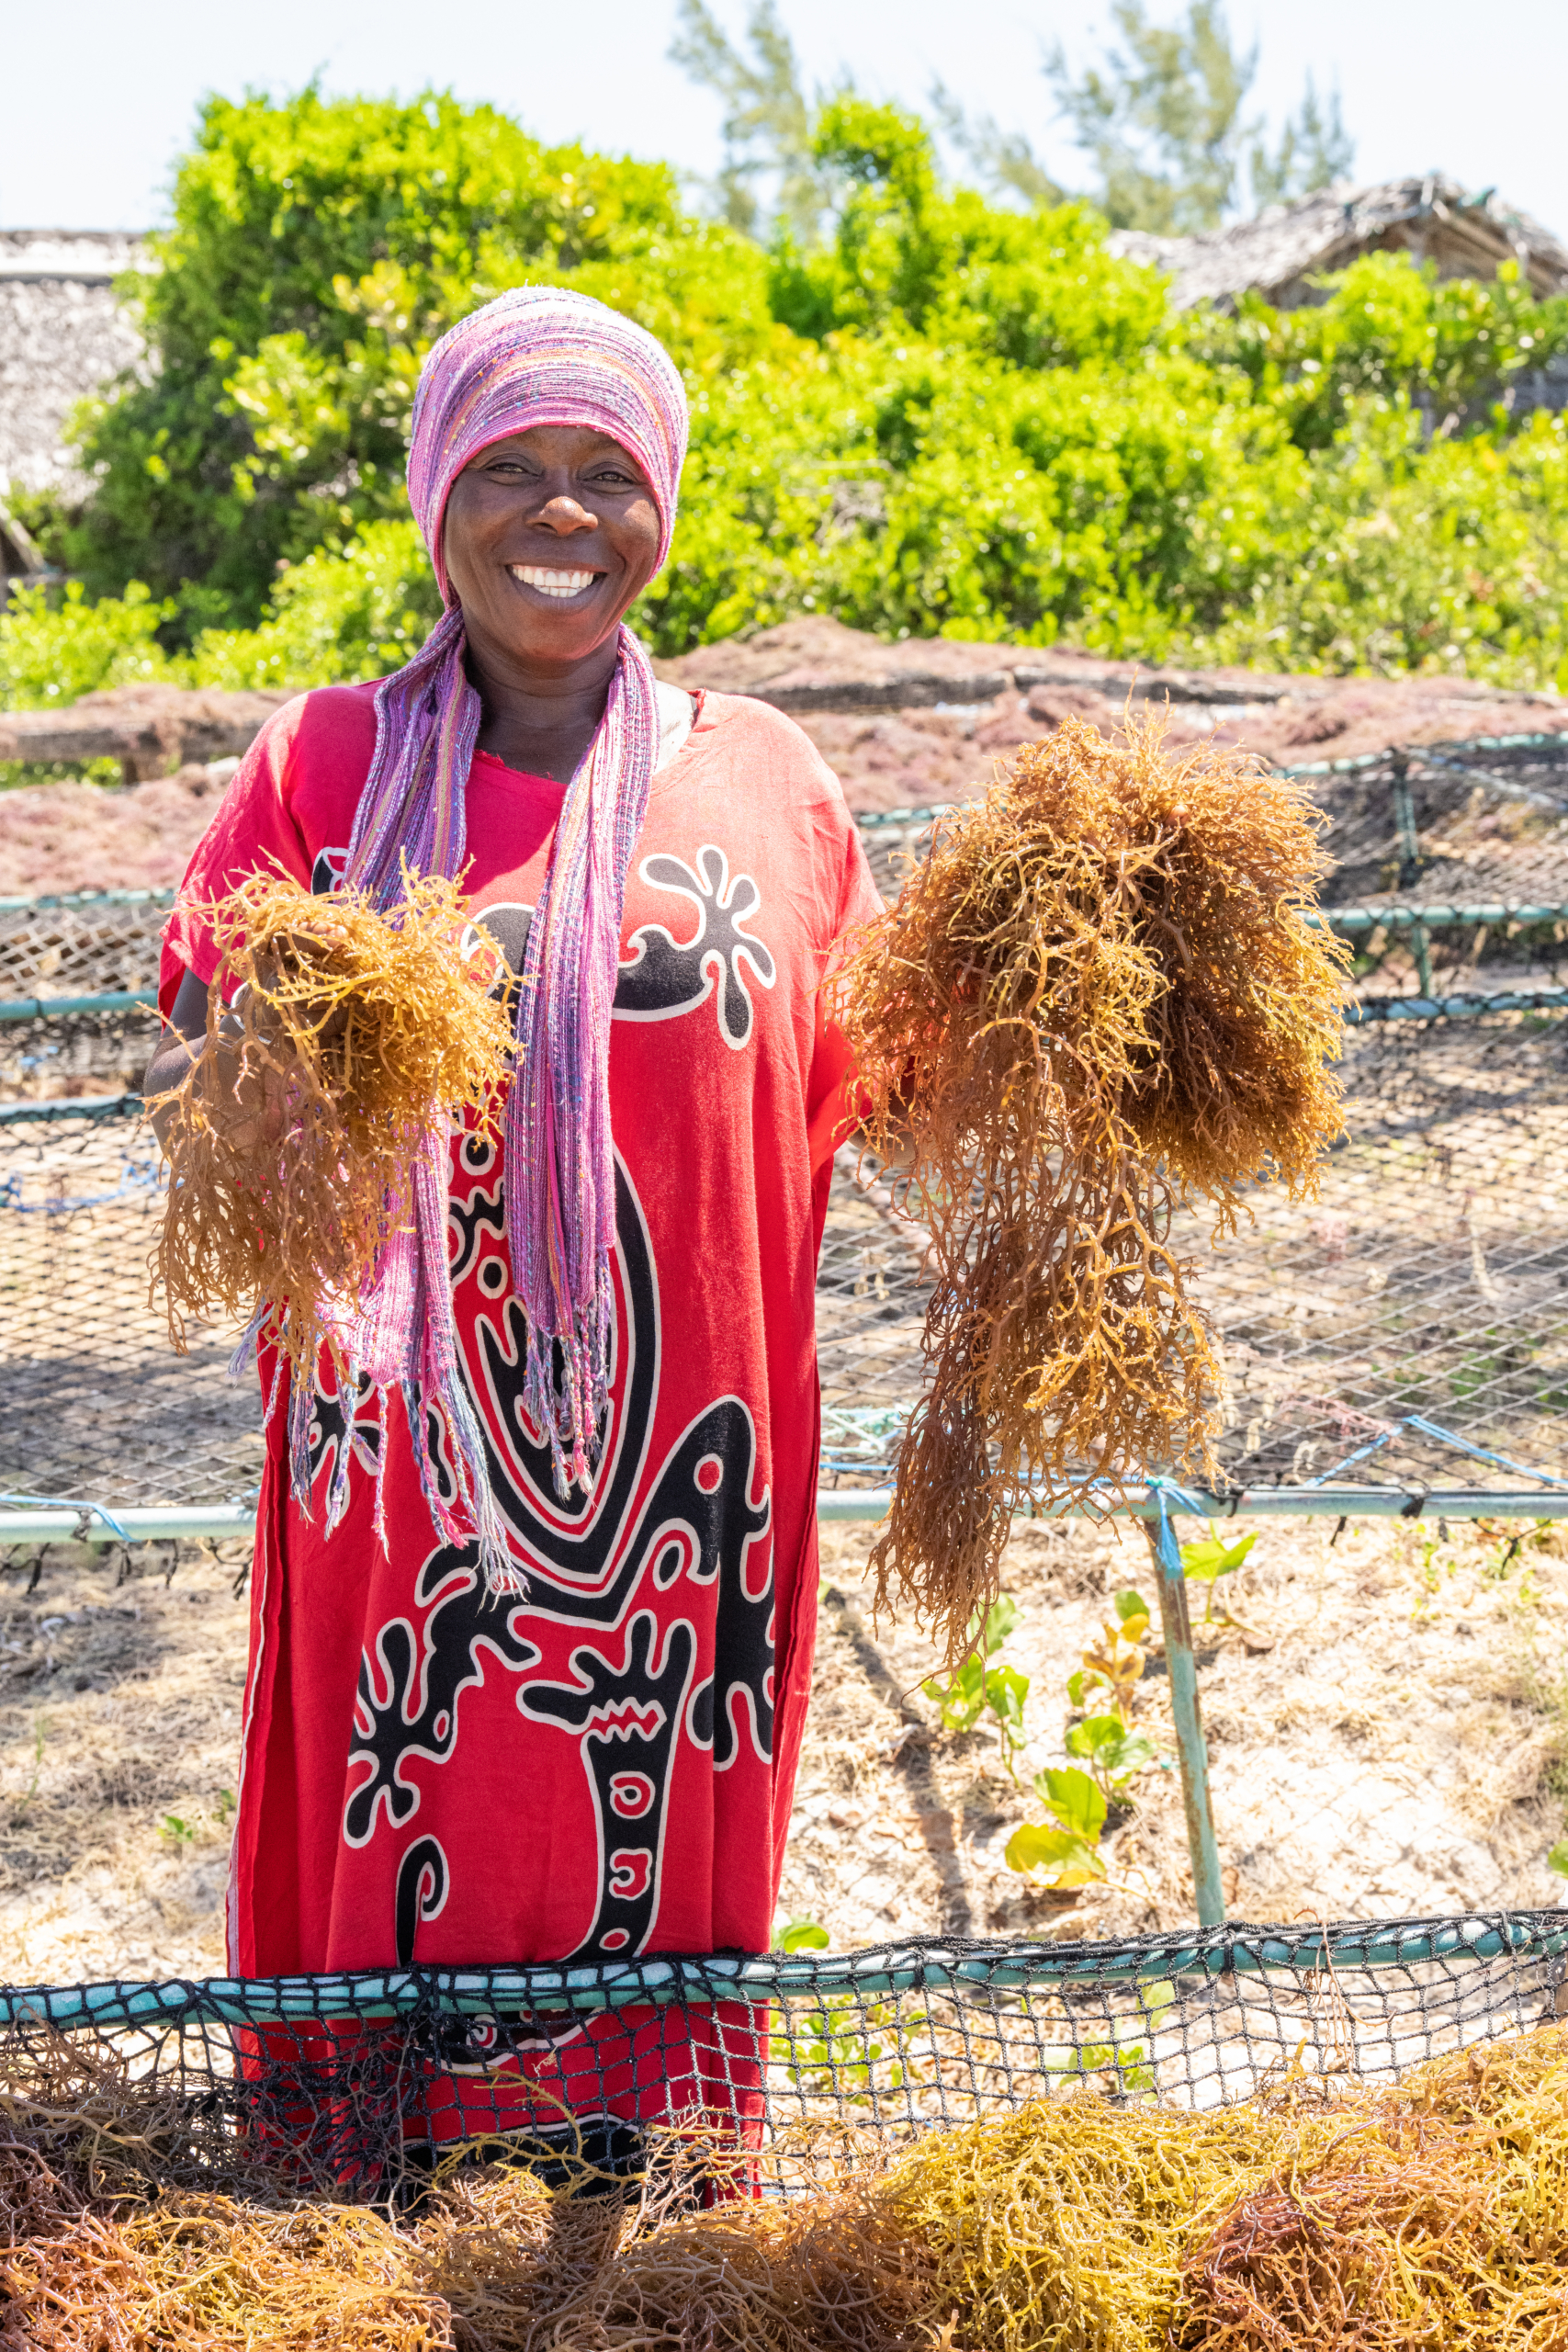
This is seaweed drying on top of specially made nets. This village, which is about 10-minutes away from Miavana by helicopter, grows seaweed as a form of revenue. (Photo by Marlon Dutoit)
This woman proudly displays the labors of her work. Her seaweed will ultimately leave her village and be sold to the cosmetic industry. (Photo by Marlon Dutoit)
Here is a common sight across parts of Africa – women balancing all sorts of objects, from buckets to firewood, on top of their heads. (Photo by Marlon Dutoit)
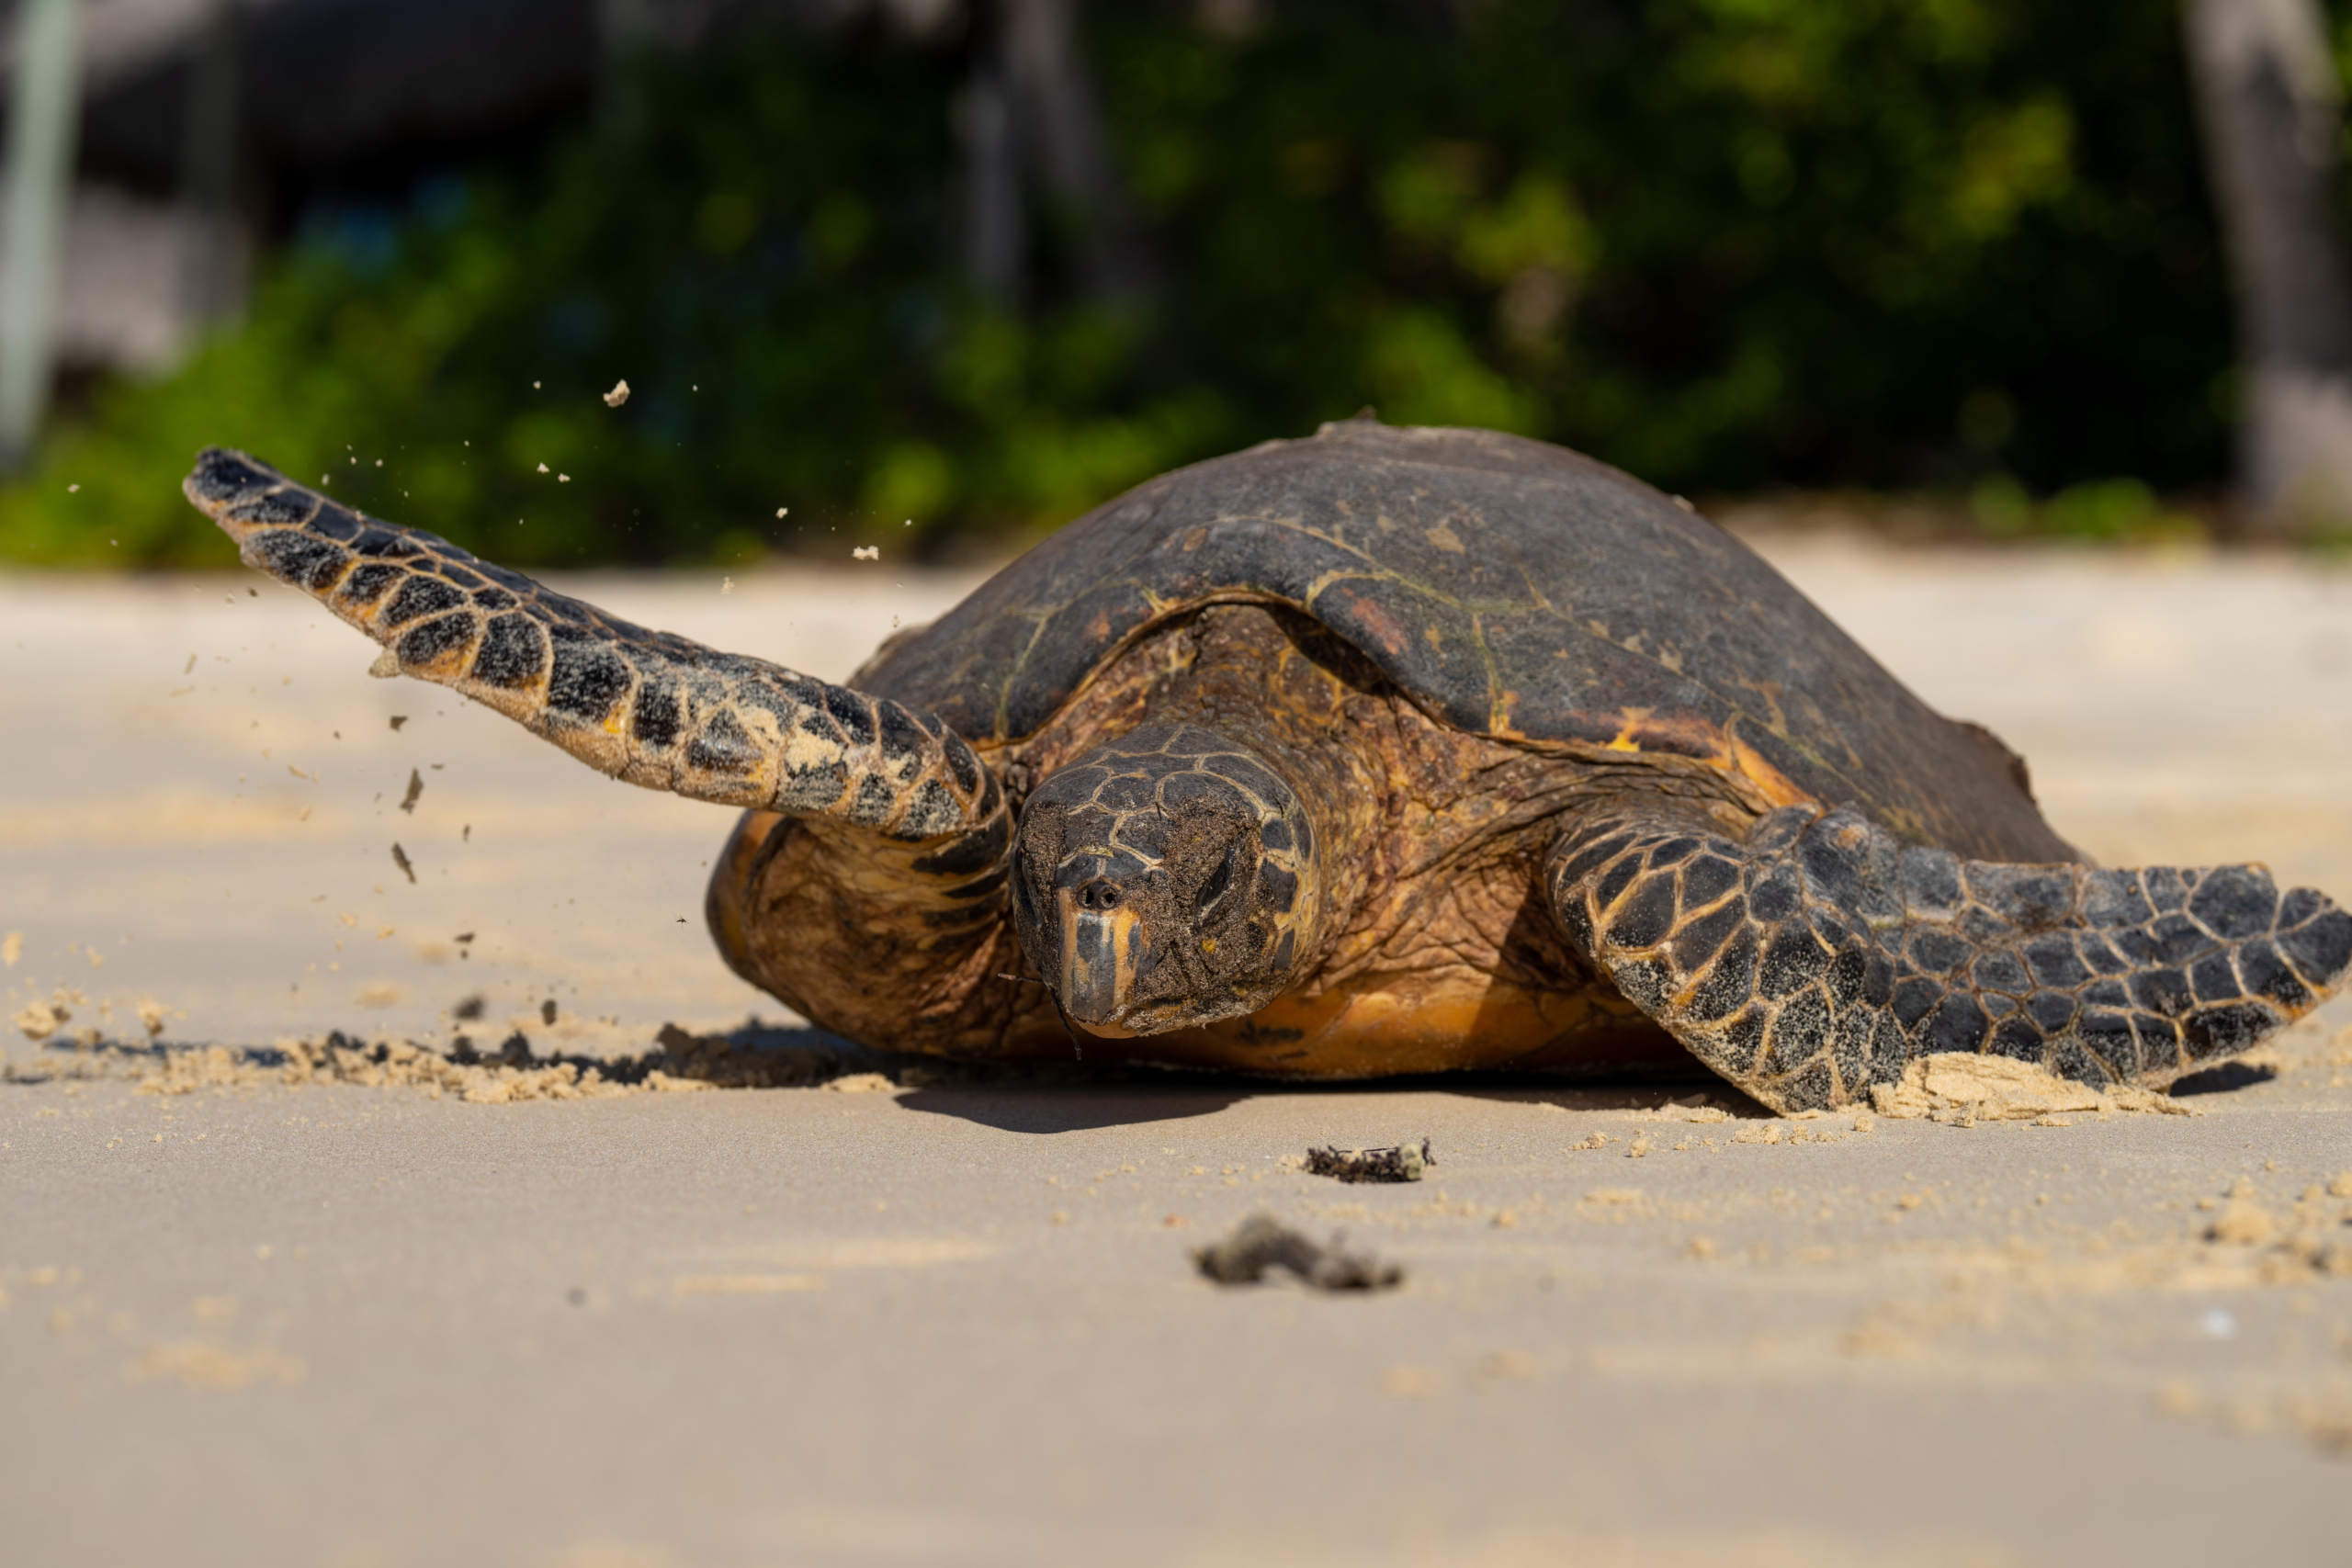
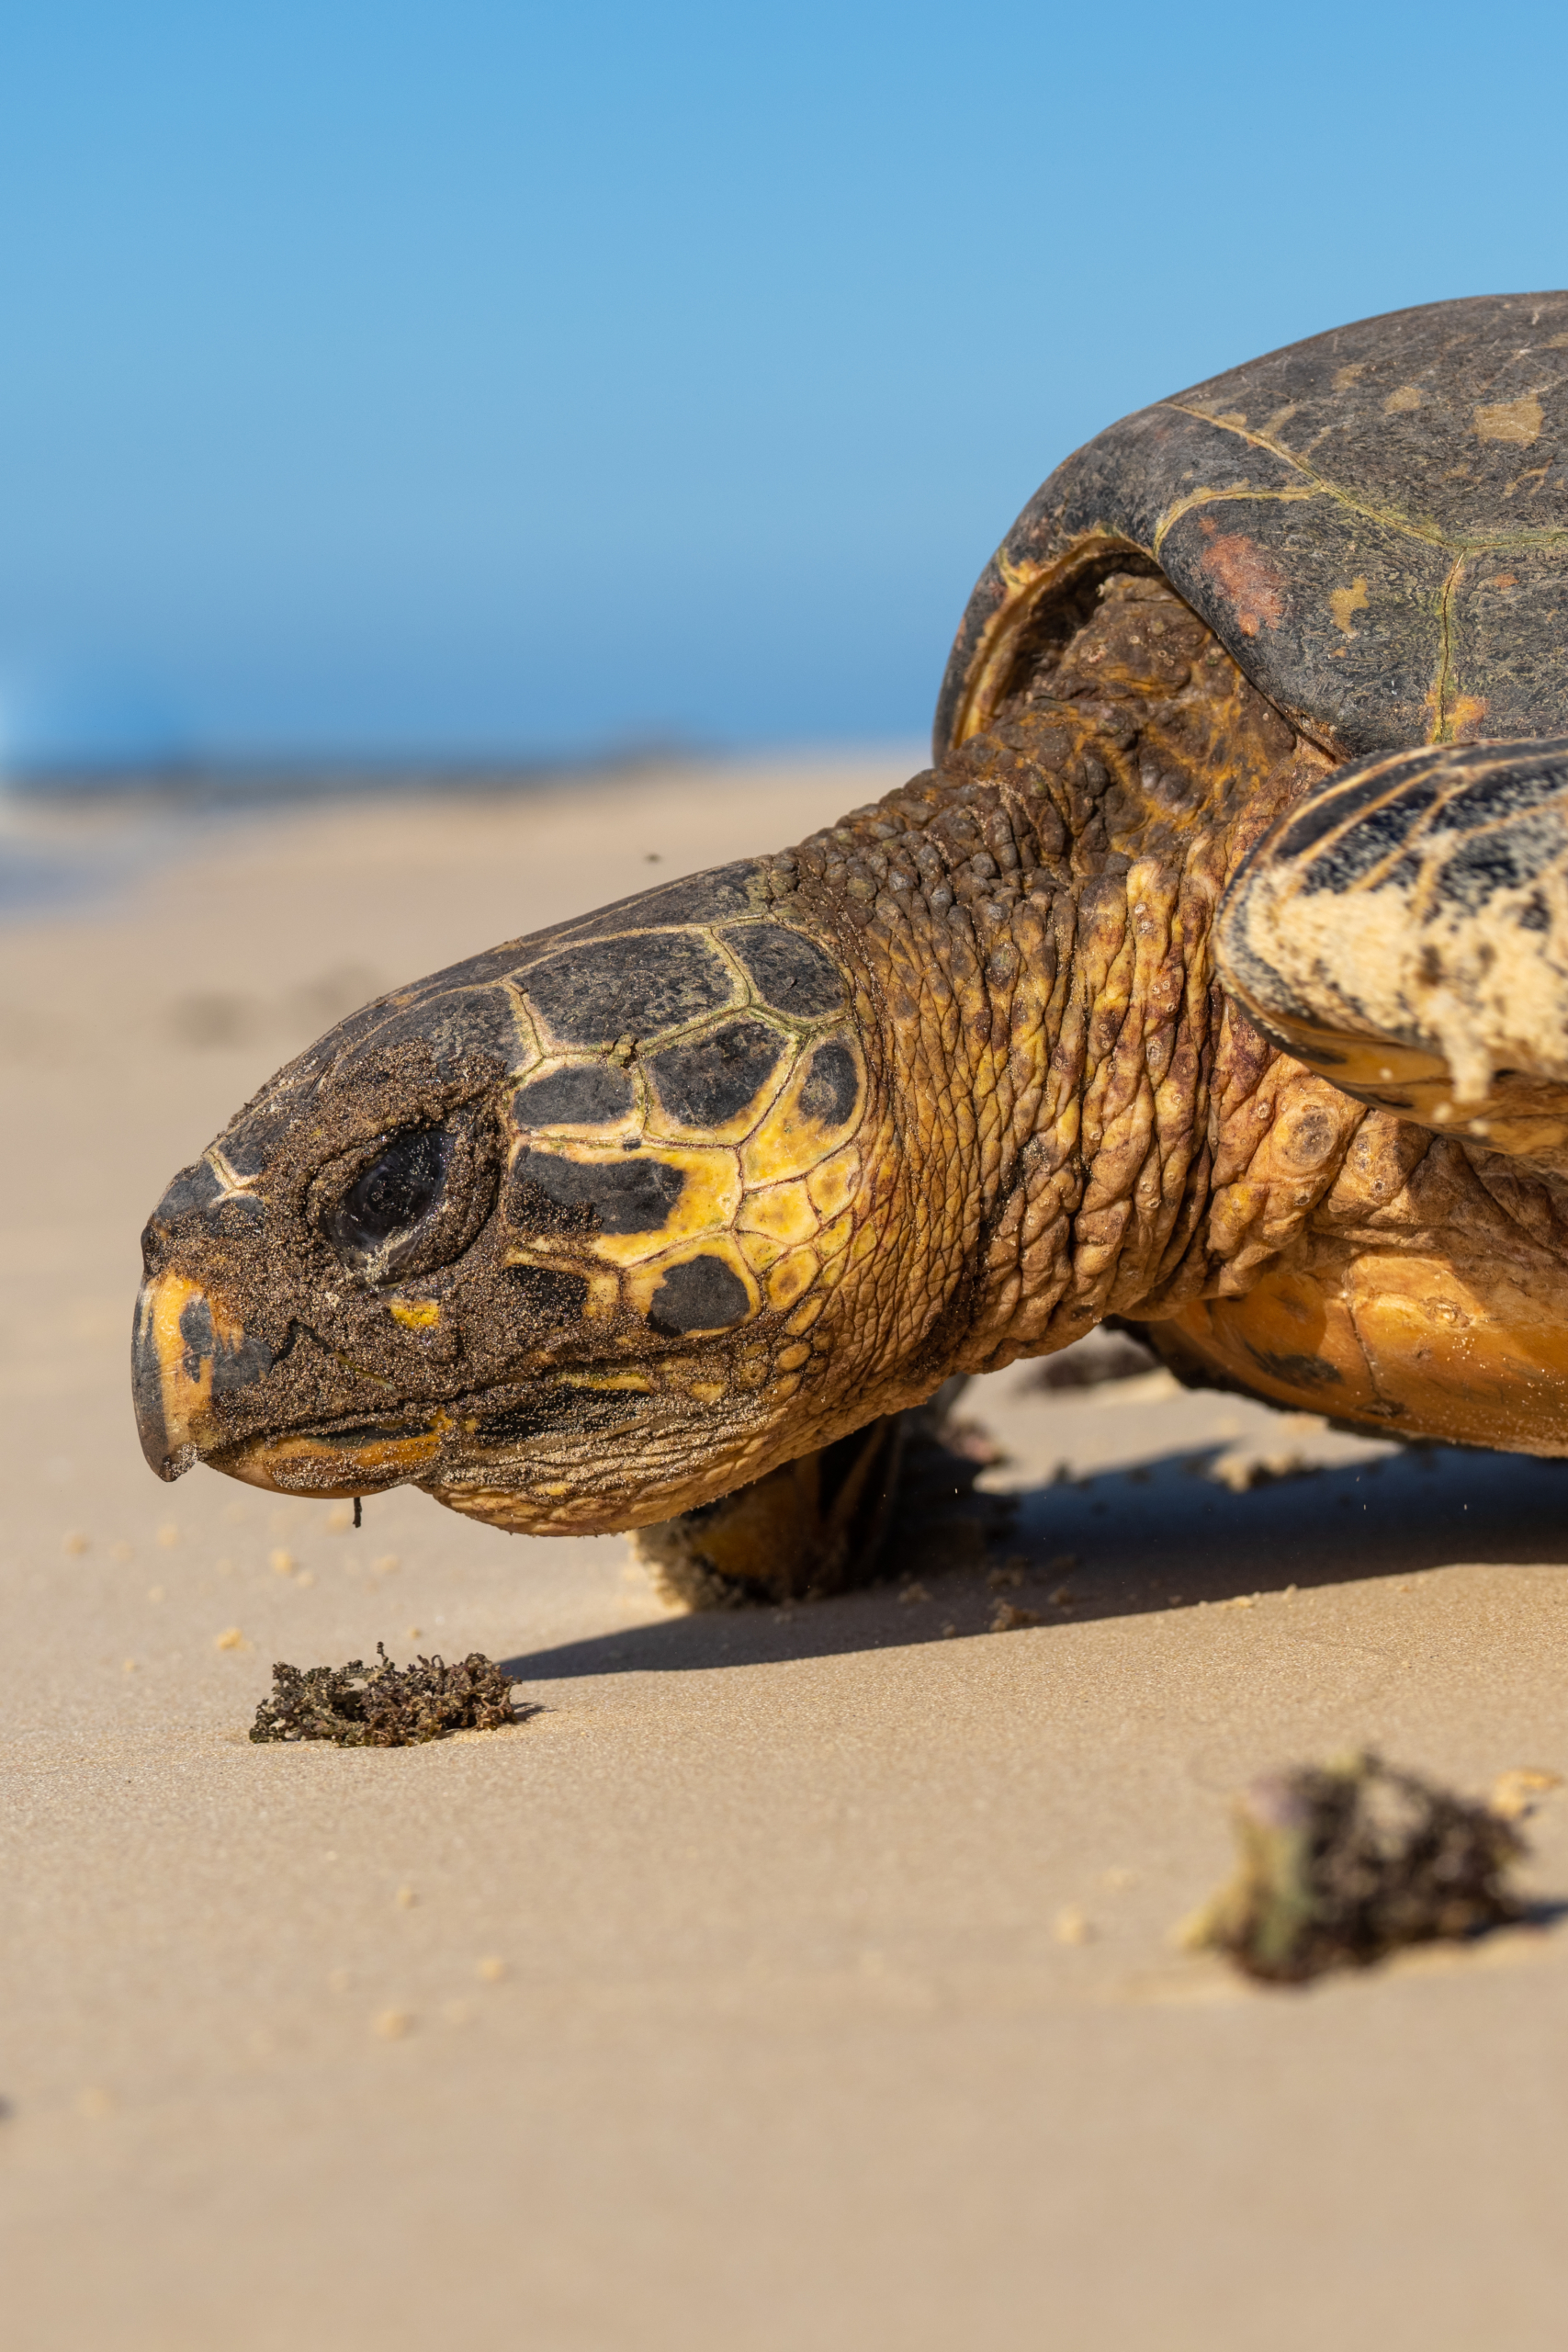
A green turtle came up in the late afternoon to lay her eggs in the vegetation in front of a villa at Miavana. Here is her head popping up from the foliage. (Photo by Marlon Dutoit)
Once she is done laying, she rests for a few moments to recover and then immediately heads back down the beach and into the ocean. (Photo by Marlon Dutoit)
This Sony lens is also excellent in zoom. The turtle was actually several feet away. Green turtles nest every two years, with wide year-to-year fluctuations in numbers of nesting females. They also nest between three to five times per season and each time laying an average of 115-eggs. The eggs then incubate for about 60-days. (Photo by Marlon Dutoit)
And here I am back home in front of my Winter House with my own new Sony Alpha 7R V Camera and Sony 70-200mm F2.8 G Master Lens. It’s so nice, sharp, and fast-working. My 12-year old granddaughter, Jude, and I both share a passion for photography and love to try the latest models. We’ll both get a lot of use out of this terrific camera – I can’t wait. Thanks, Sony. On Instagram @sonyalpha. #sonyalpha, #giftfromSony
Another pruning task can be checked off the list - my raspberry bushes are done.
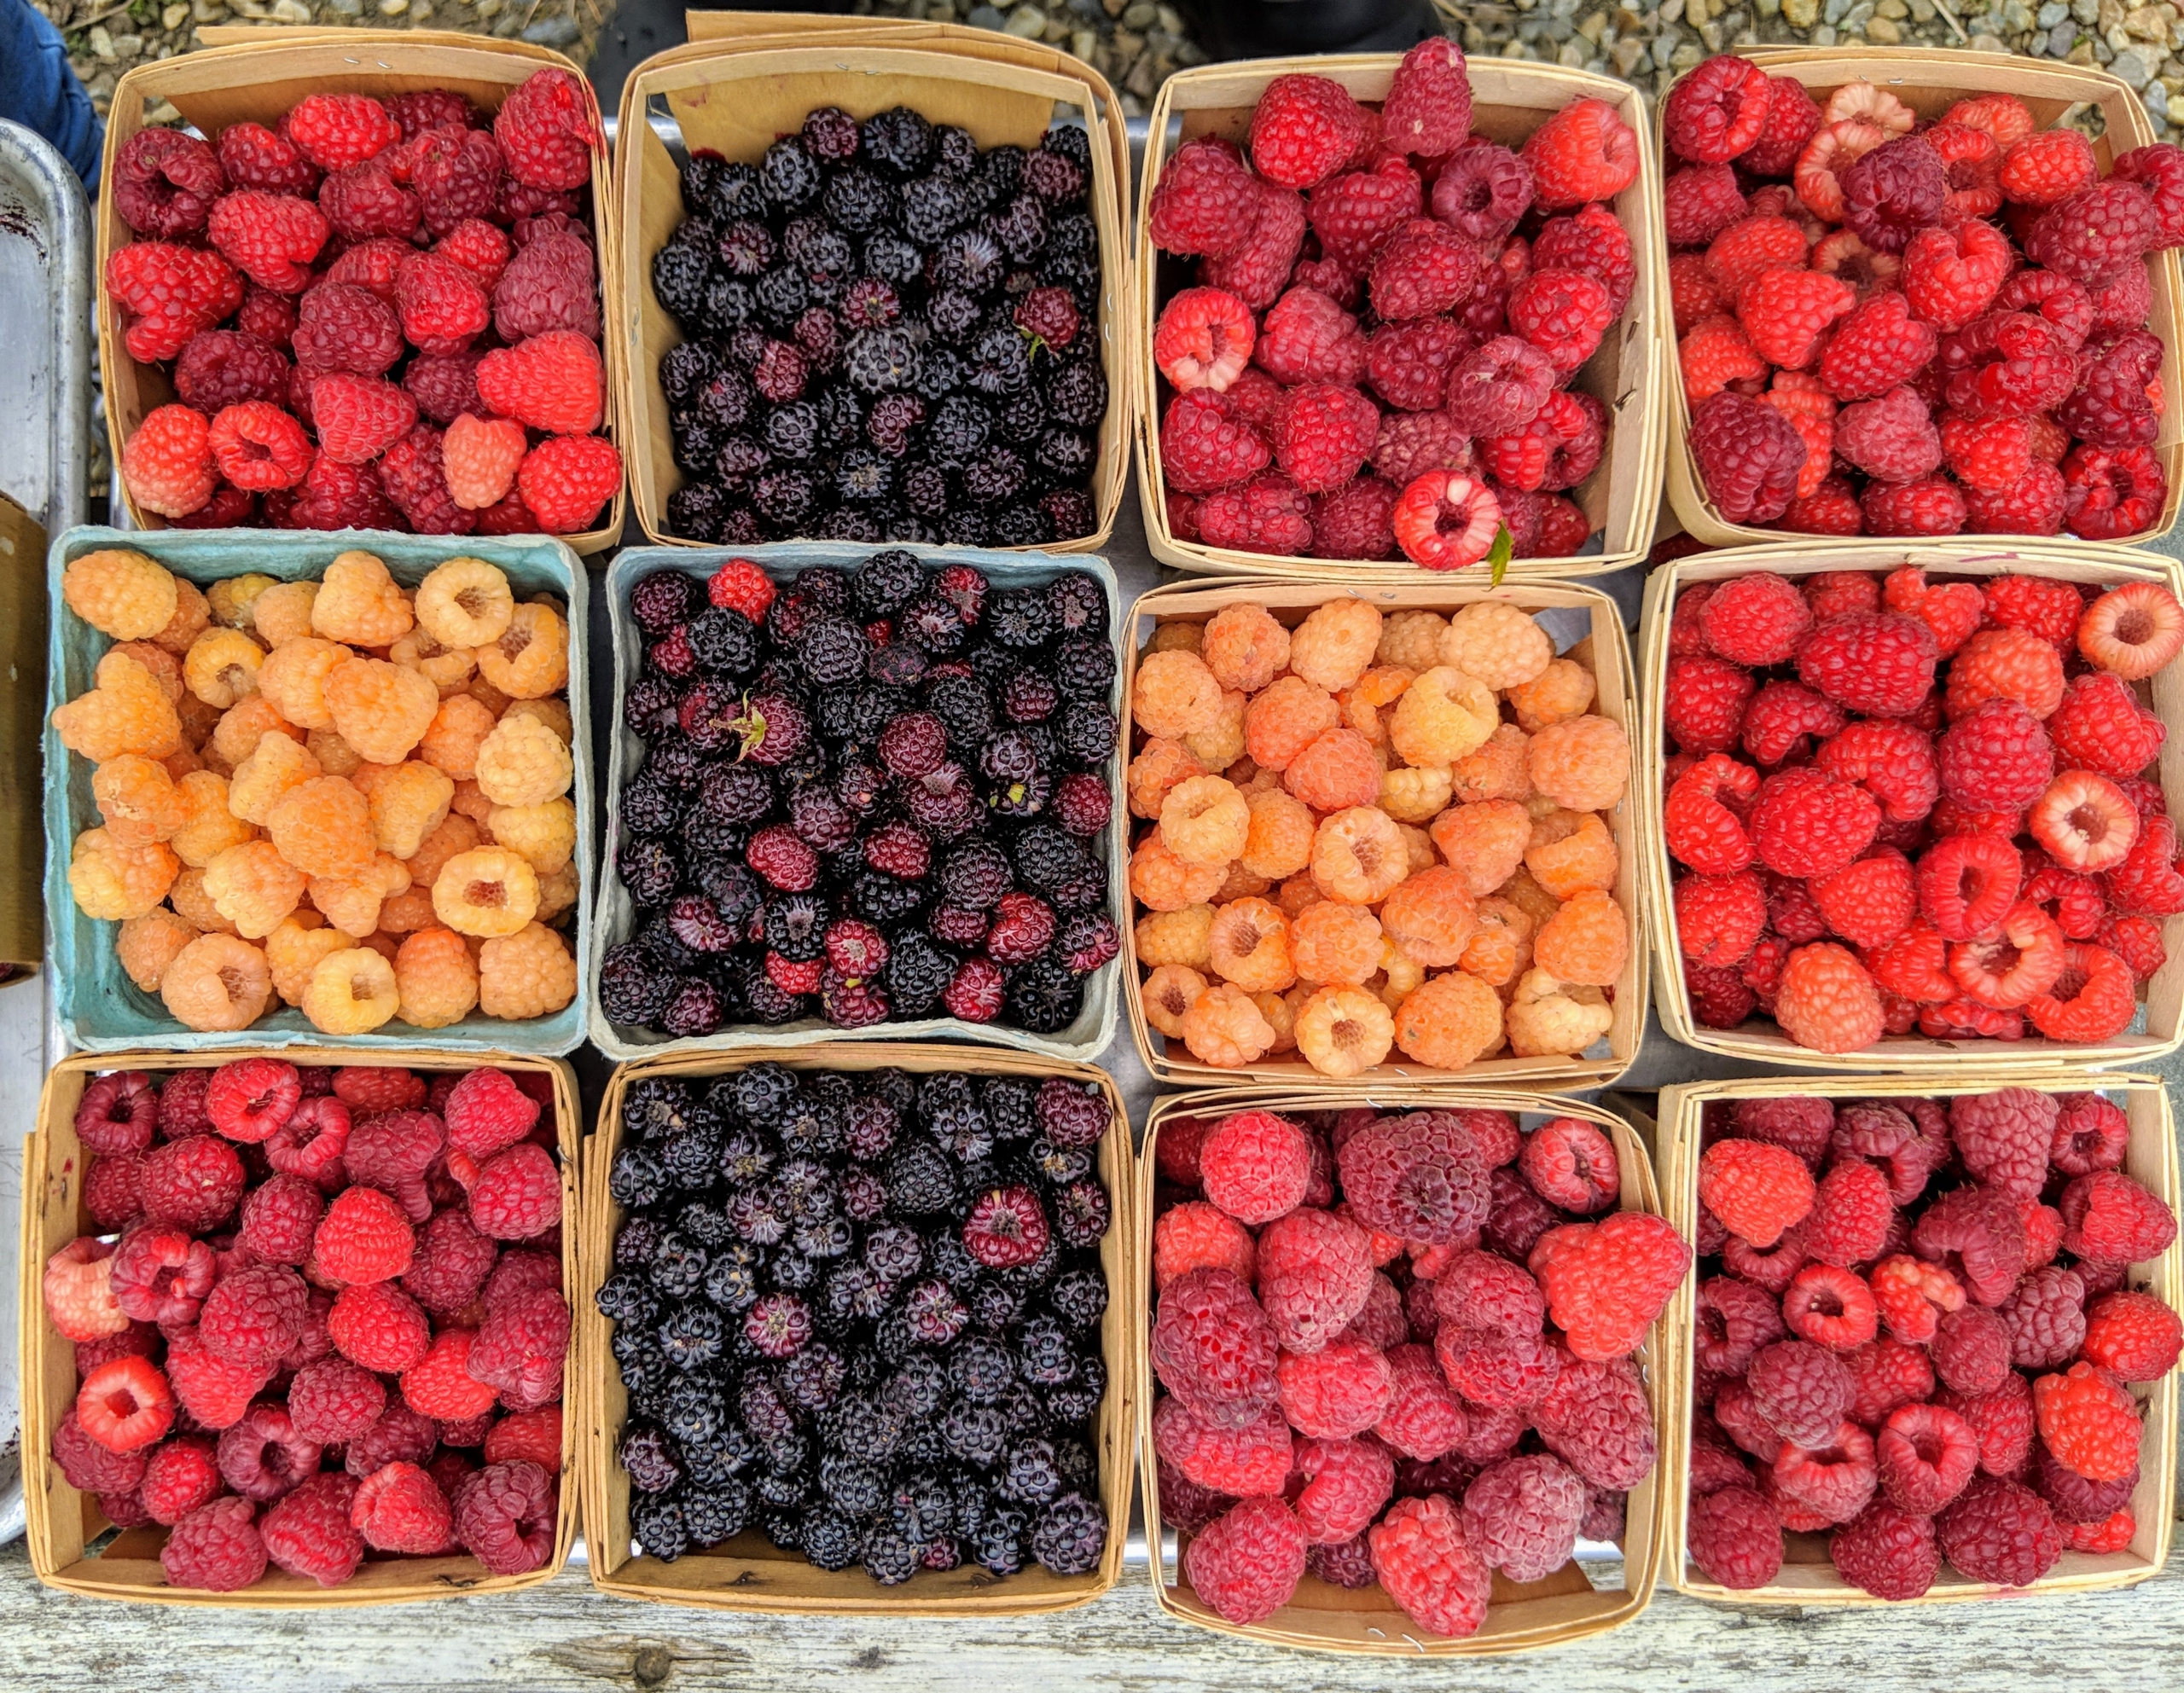
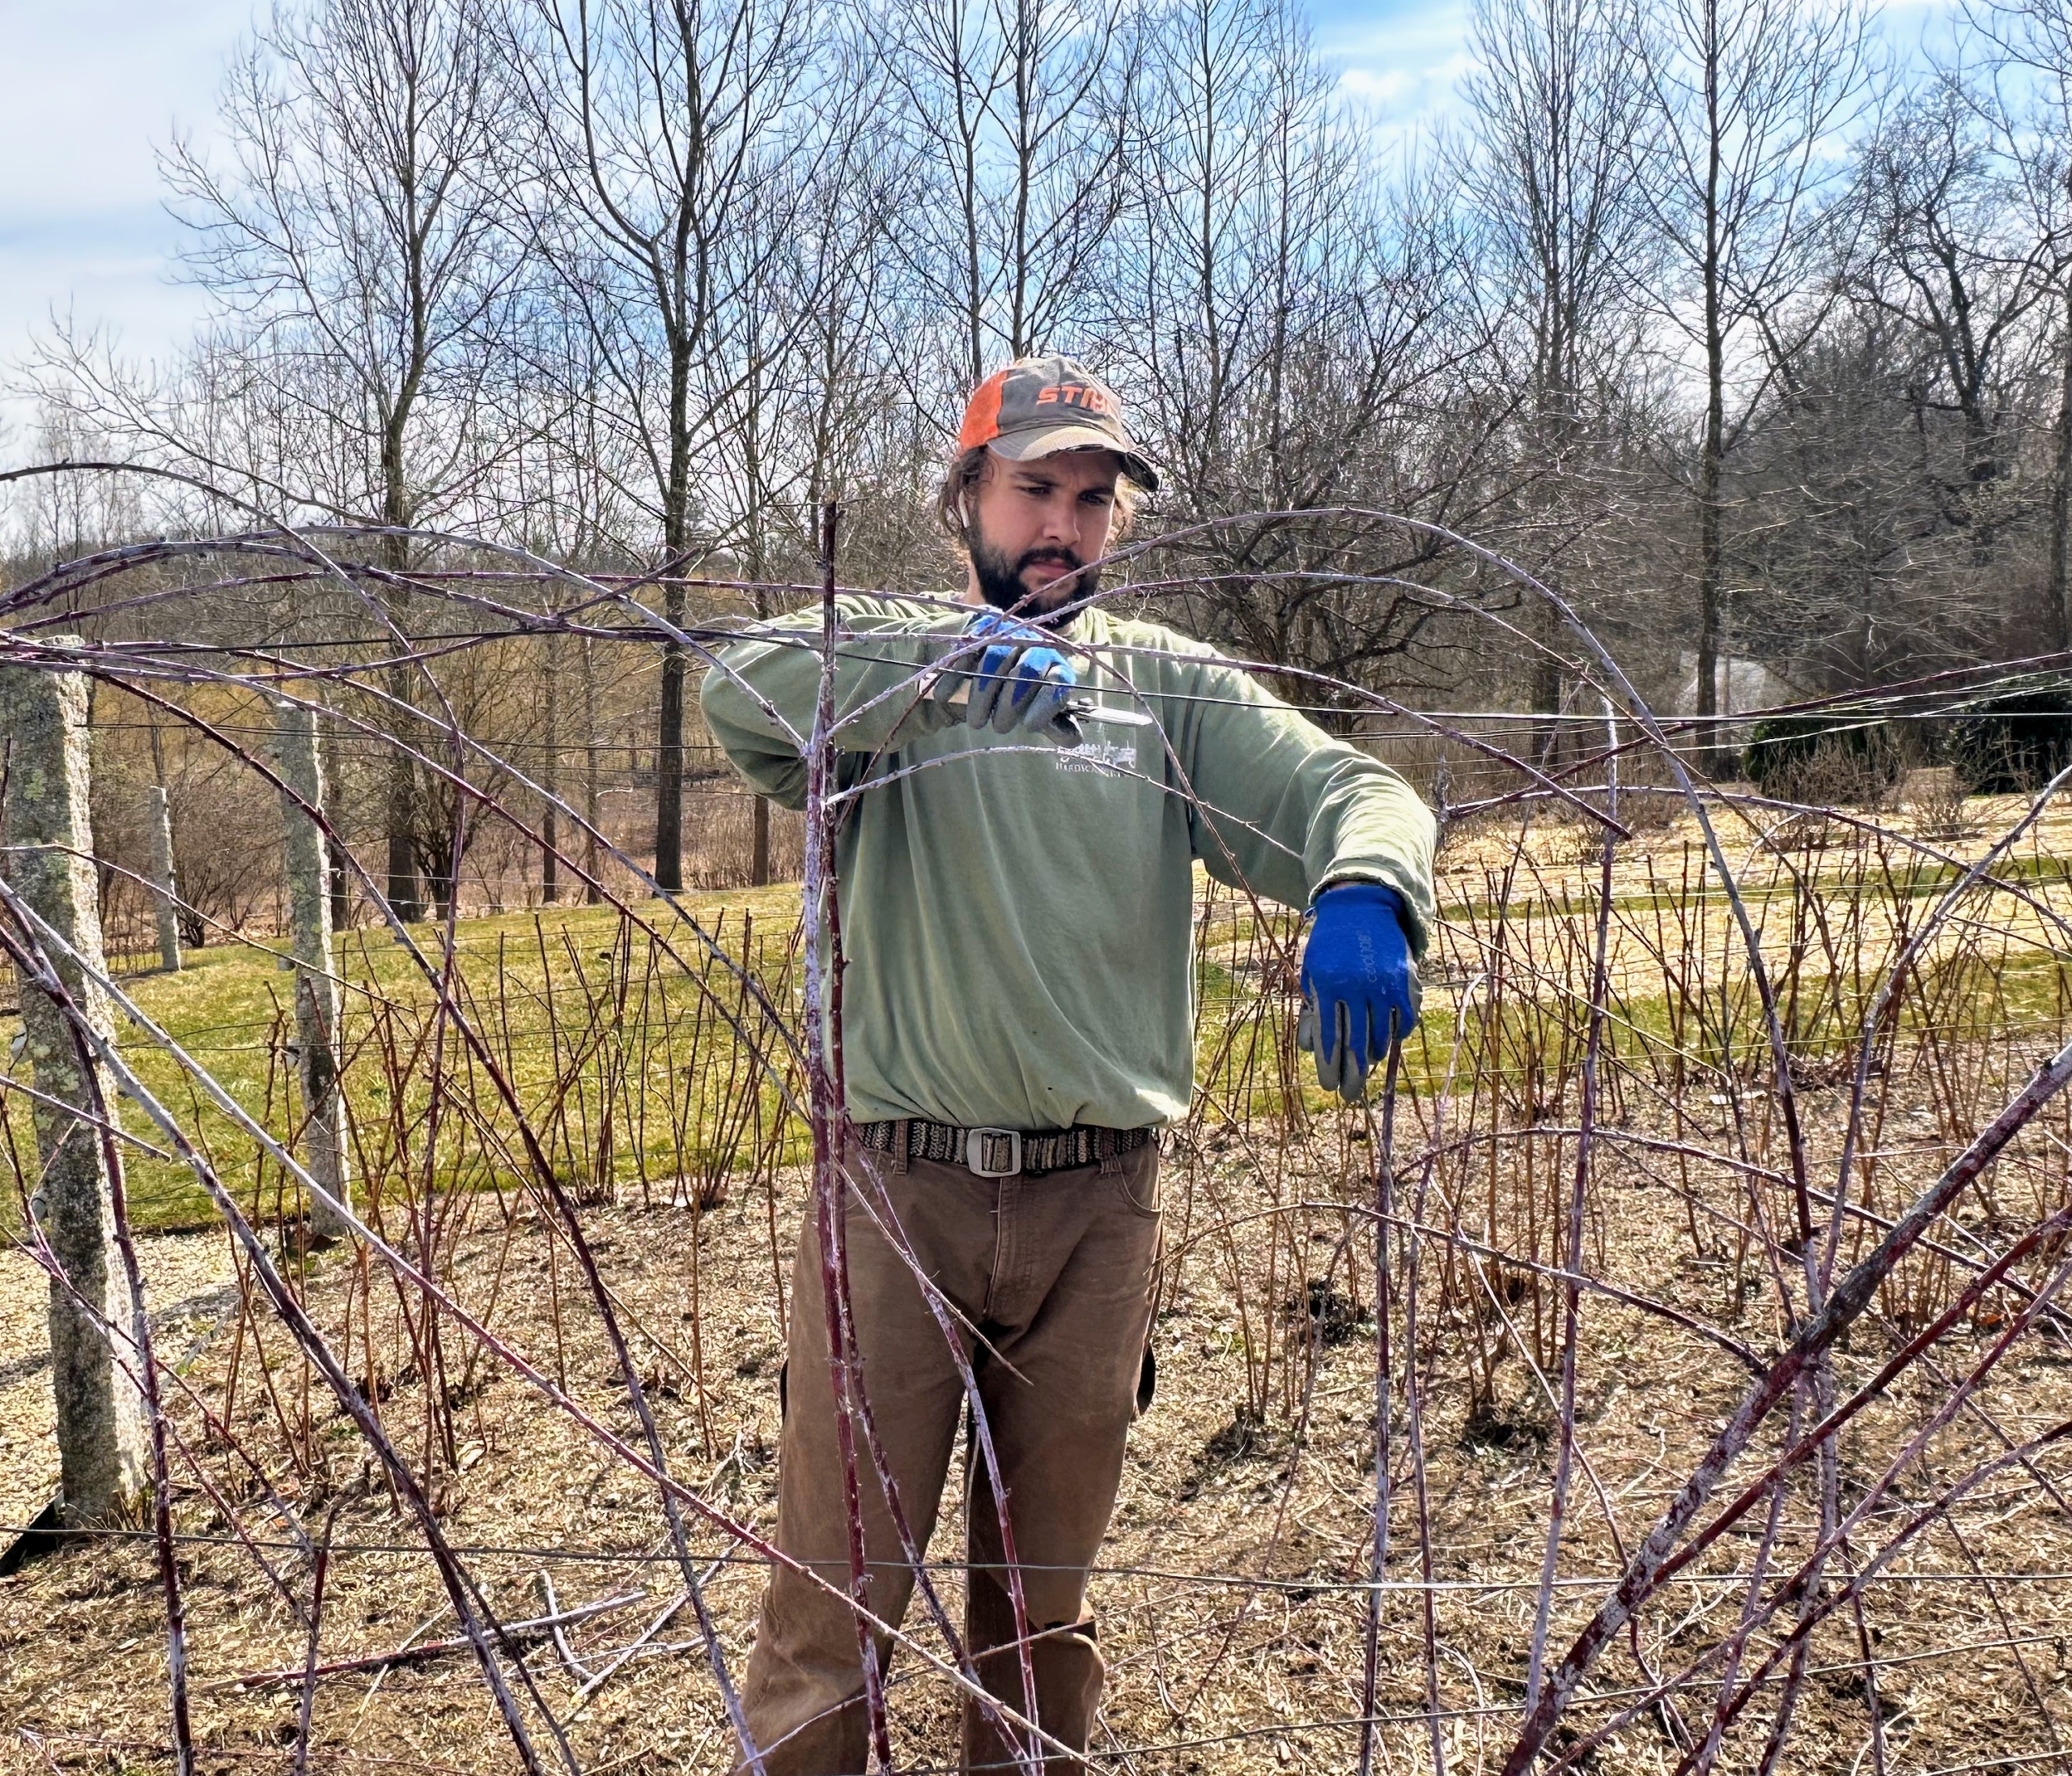
I love growing all kinds of berries and have been growing them for many years. I currently have large patches of red raspberries, golden raspberries, black raspberries, currants, gooseberries, blueberries, blackberries, and strawberries. Many berries are best eaten raw, but they can be used in a variety of ways - as ingredients in jams and jellies, pies and tarts, and delicious summer juices. For the best yields from these plants it's crucial that berry bushes be pruned properly and regularly. Pruning produces larger berries in greater volumes and it helps to control diseases that might otherwise spread. My gardener, Brian O'Kelly, took on the task of pruning the raspberries this week - trimming the old canes and branches back to get the bushes ready for next season.
Here are some photos - enjoy.
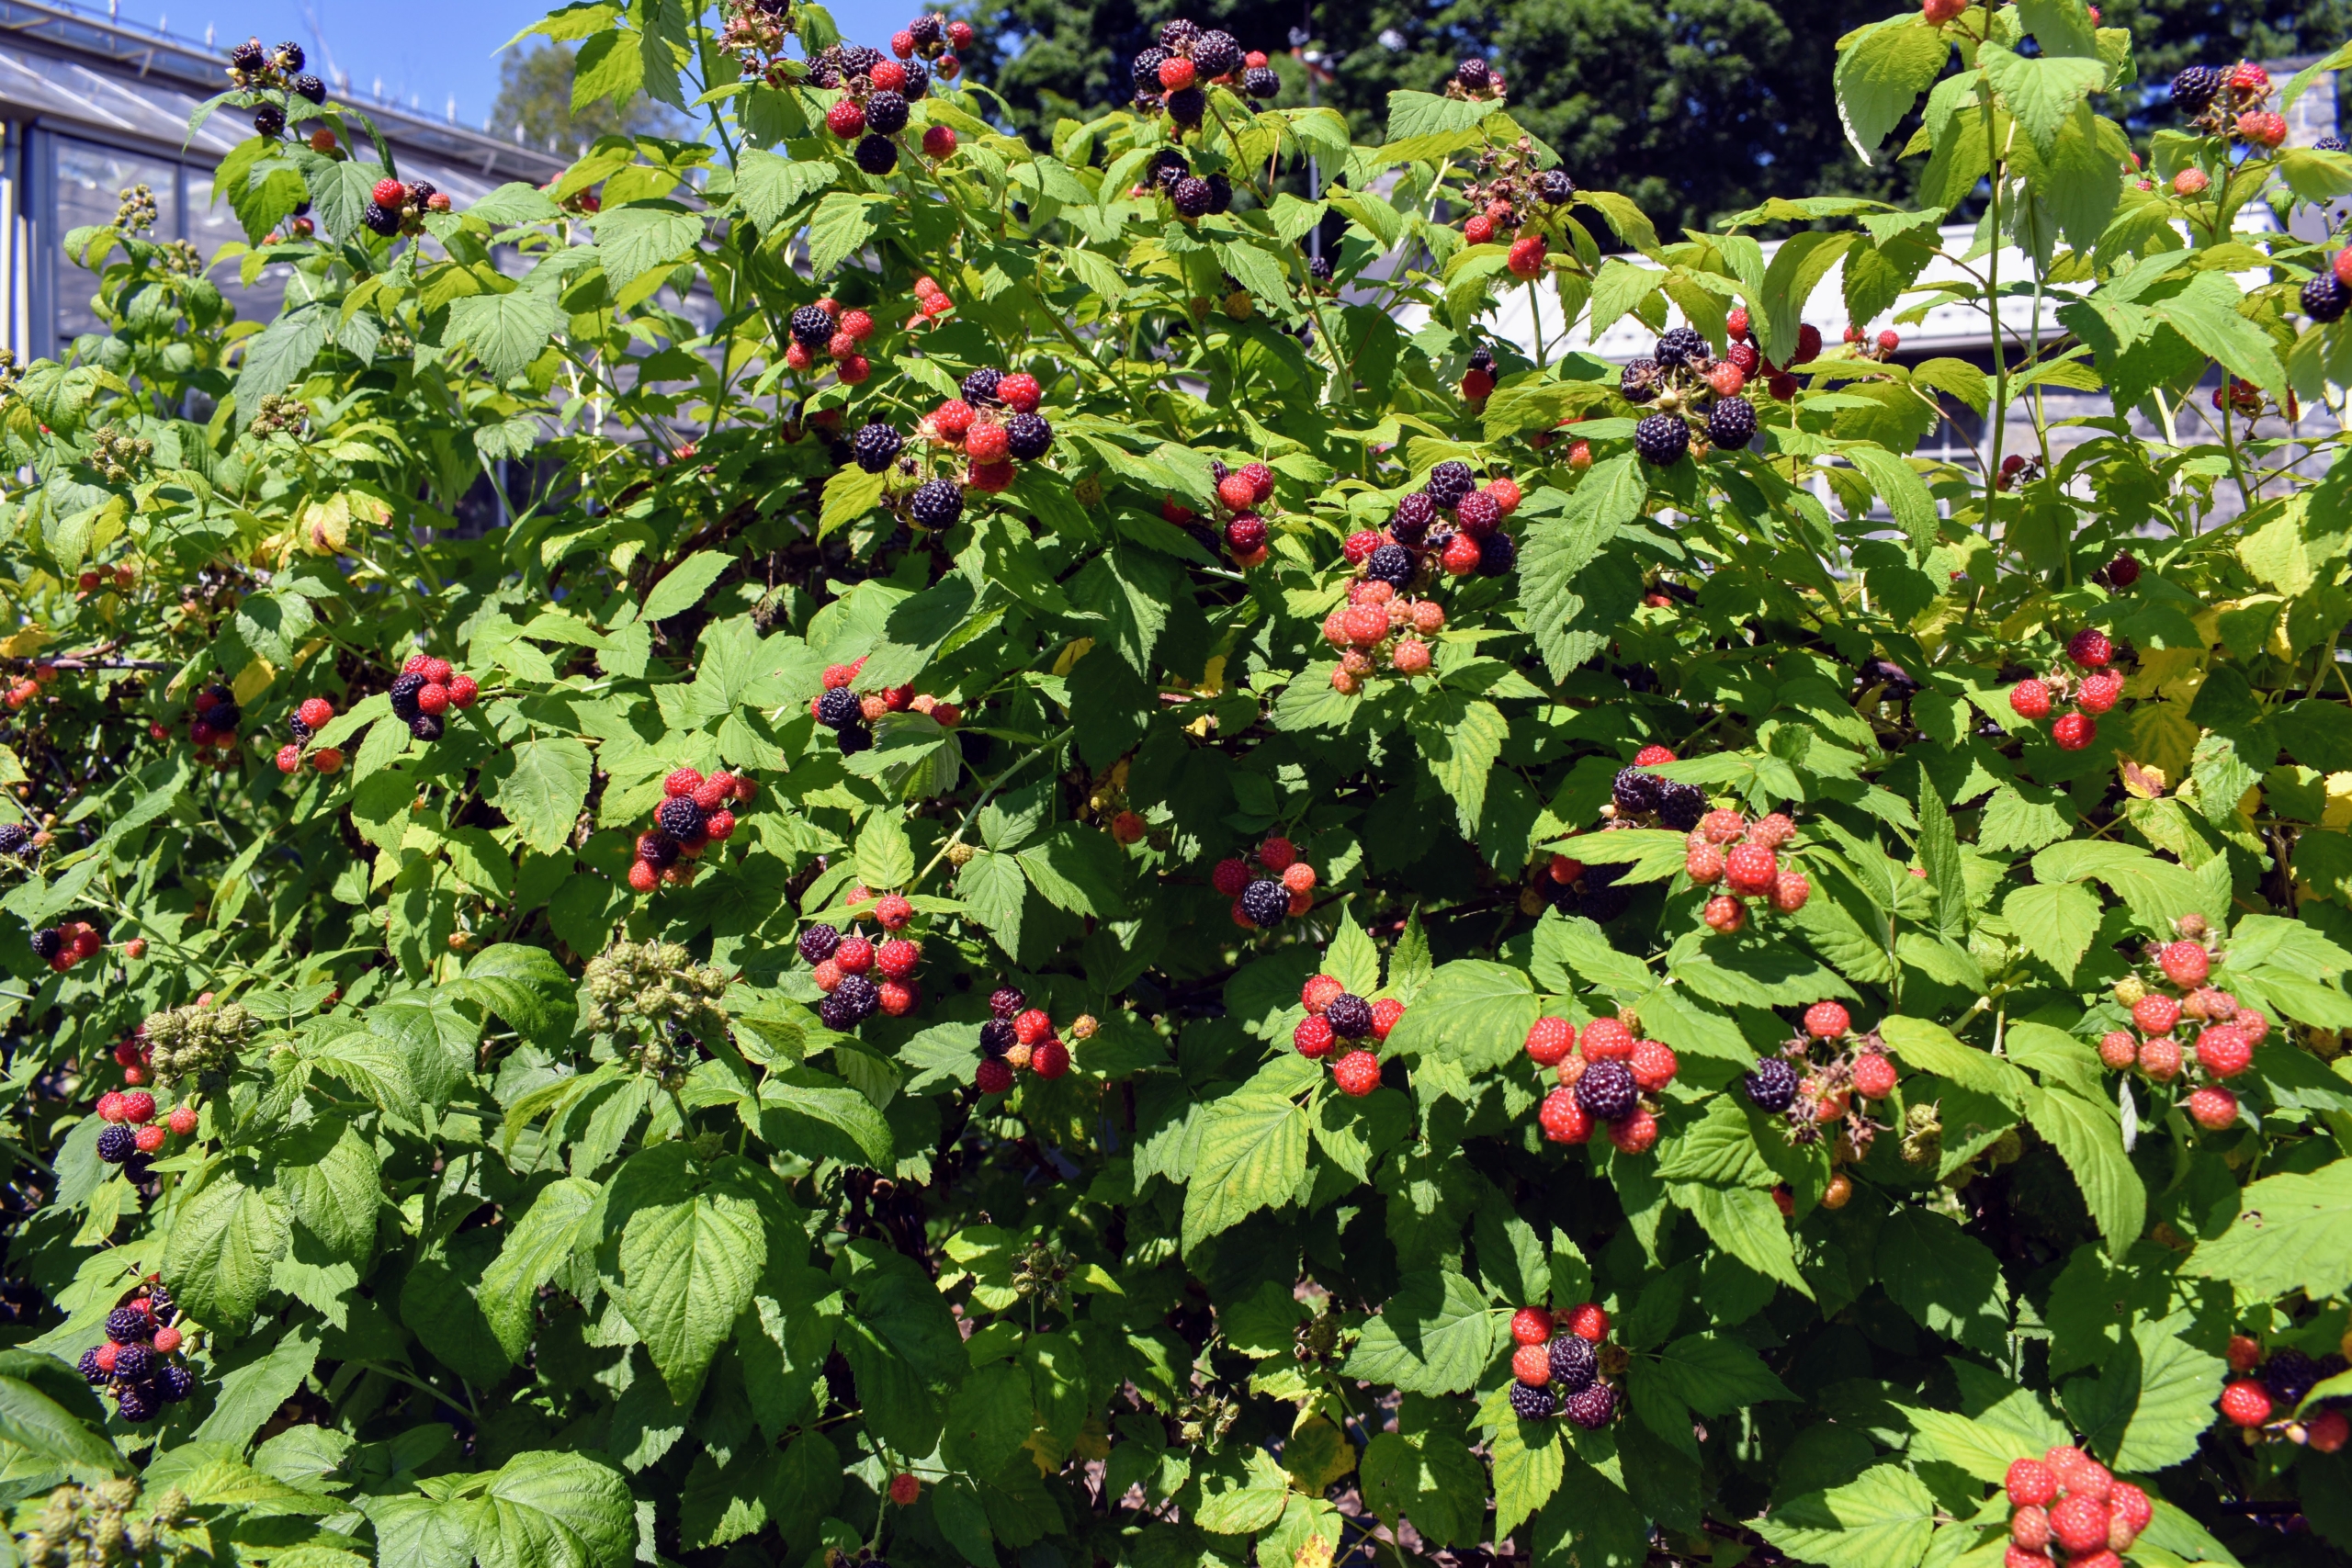
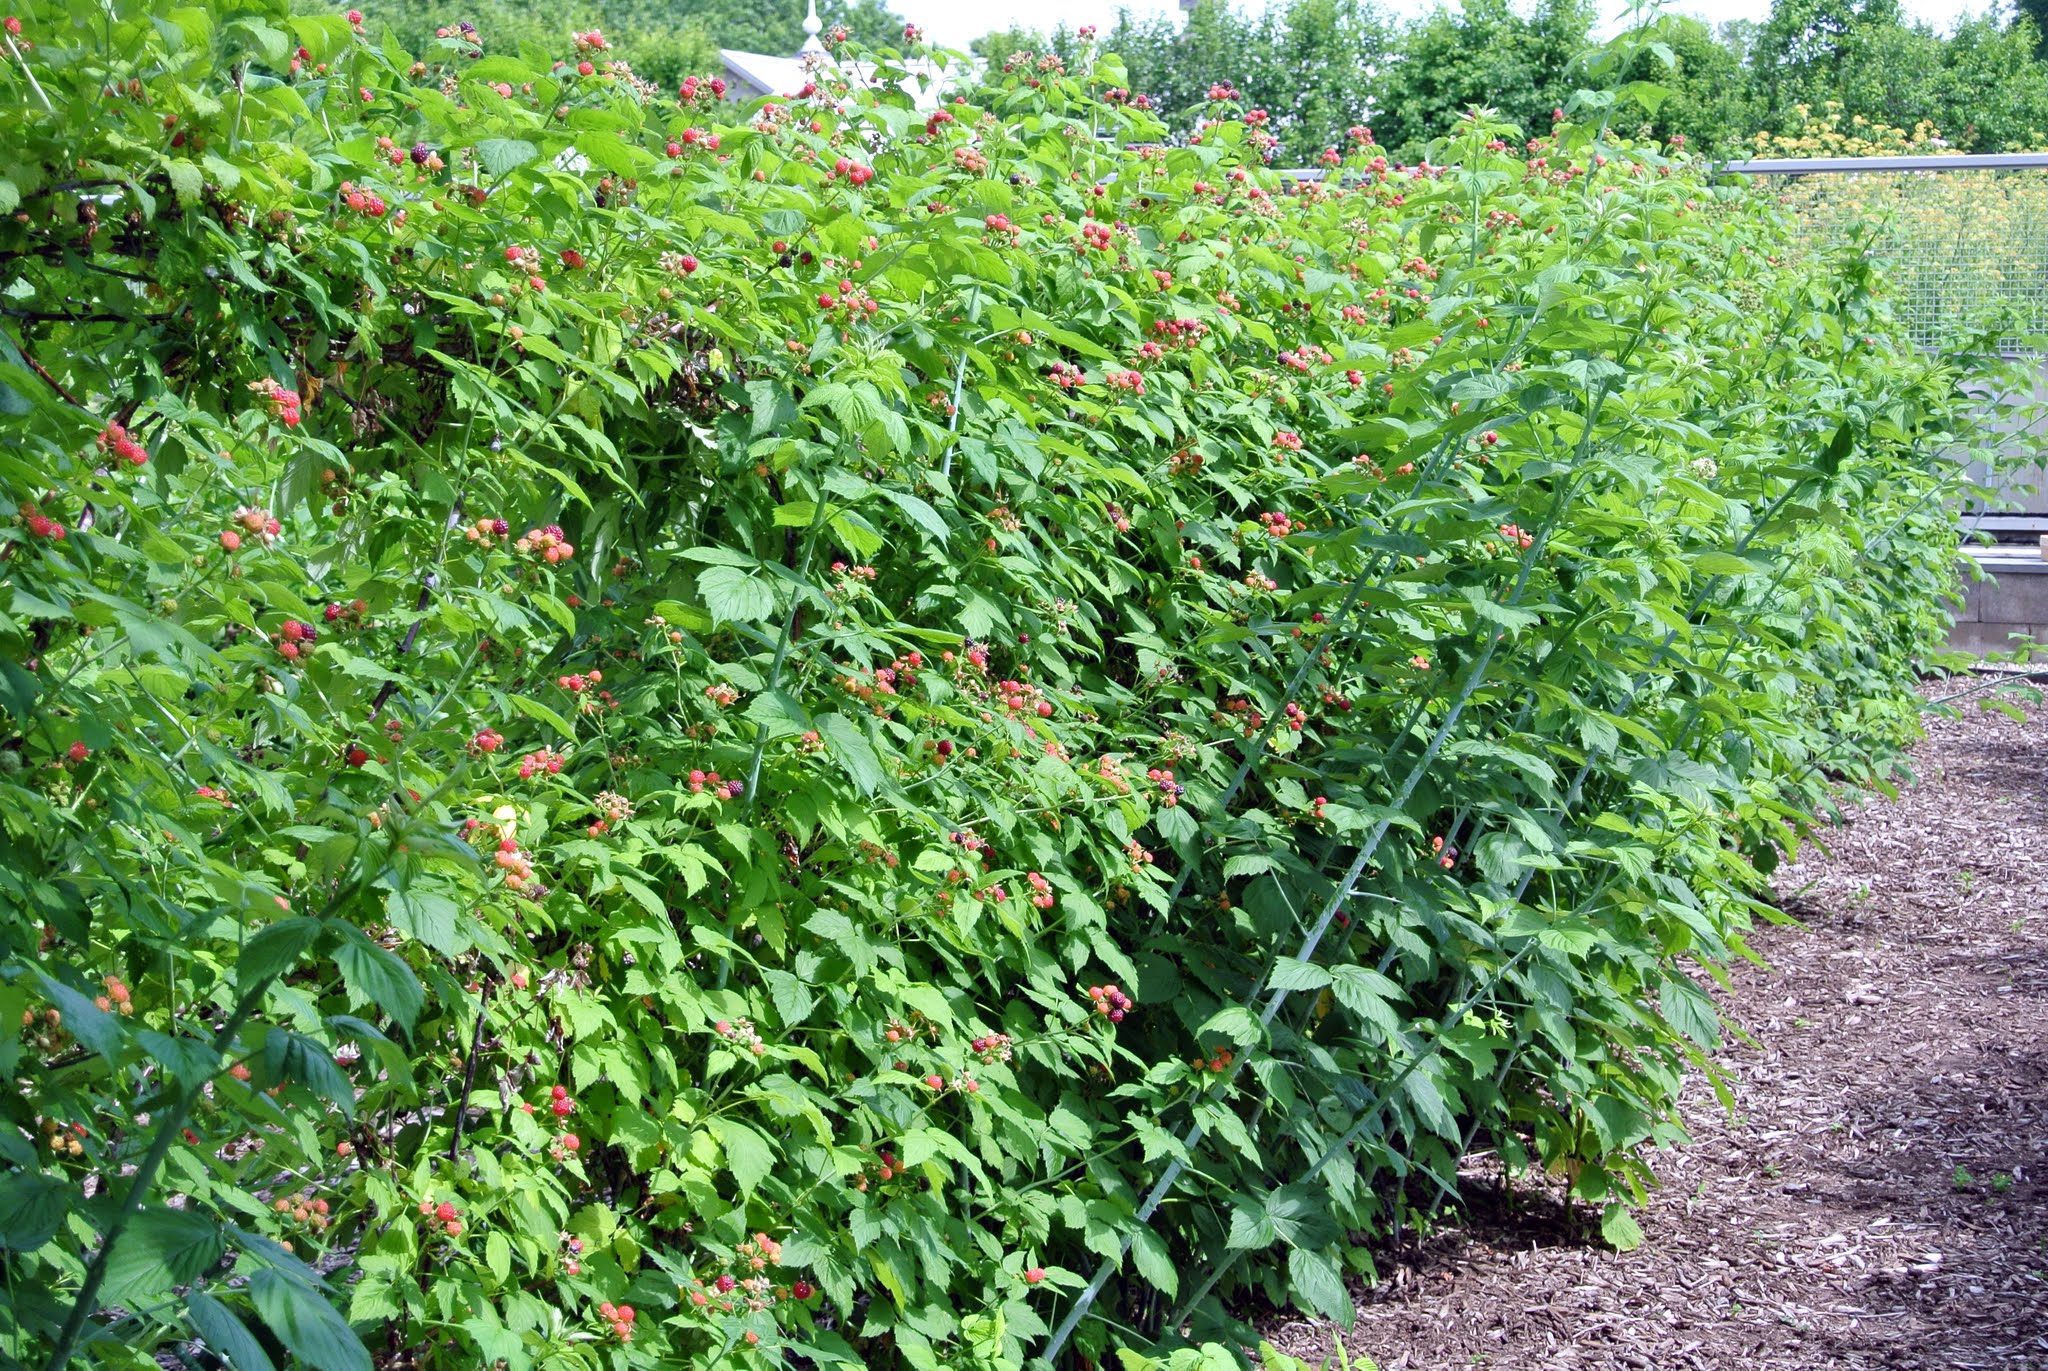
Fresh, homegrown berries are so delicious. I’ve been growing my own berries for years and am fortunate that all my bushes are so prolific. We harvest boxes and boxes of berries every summer.
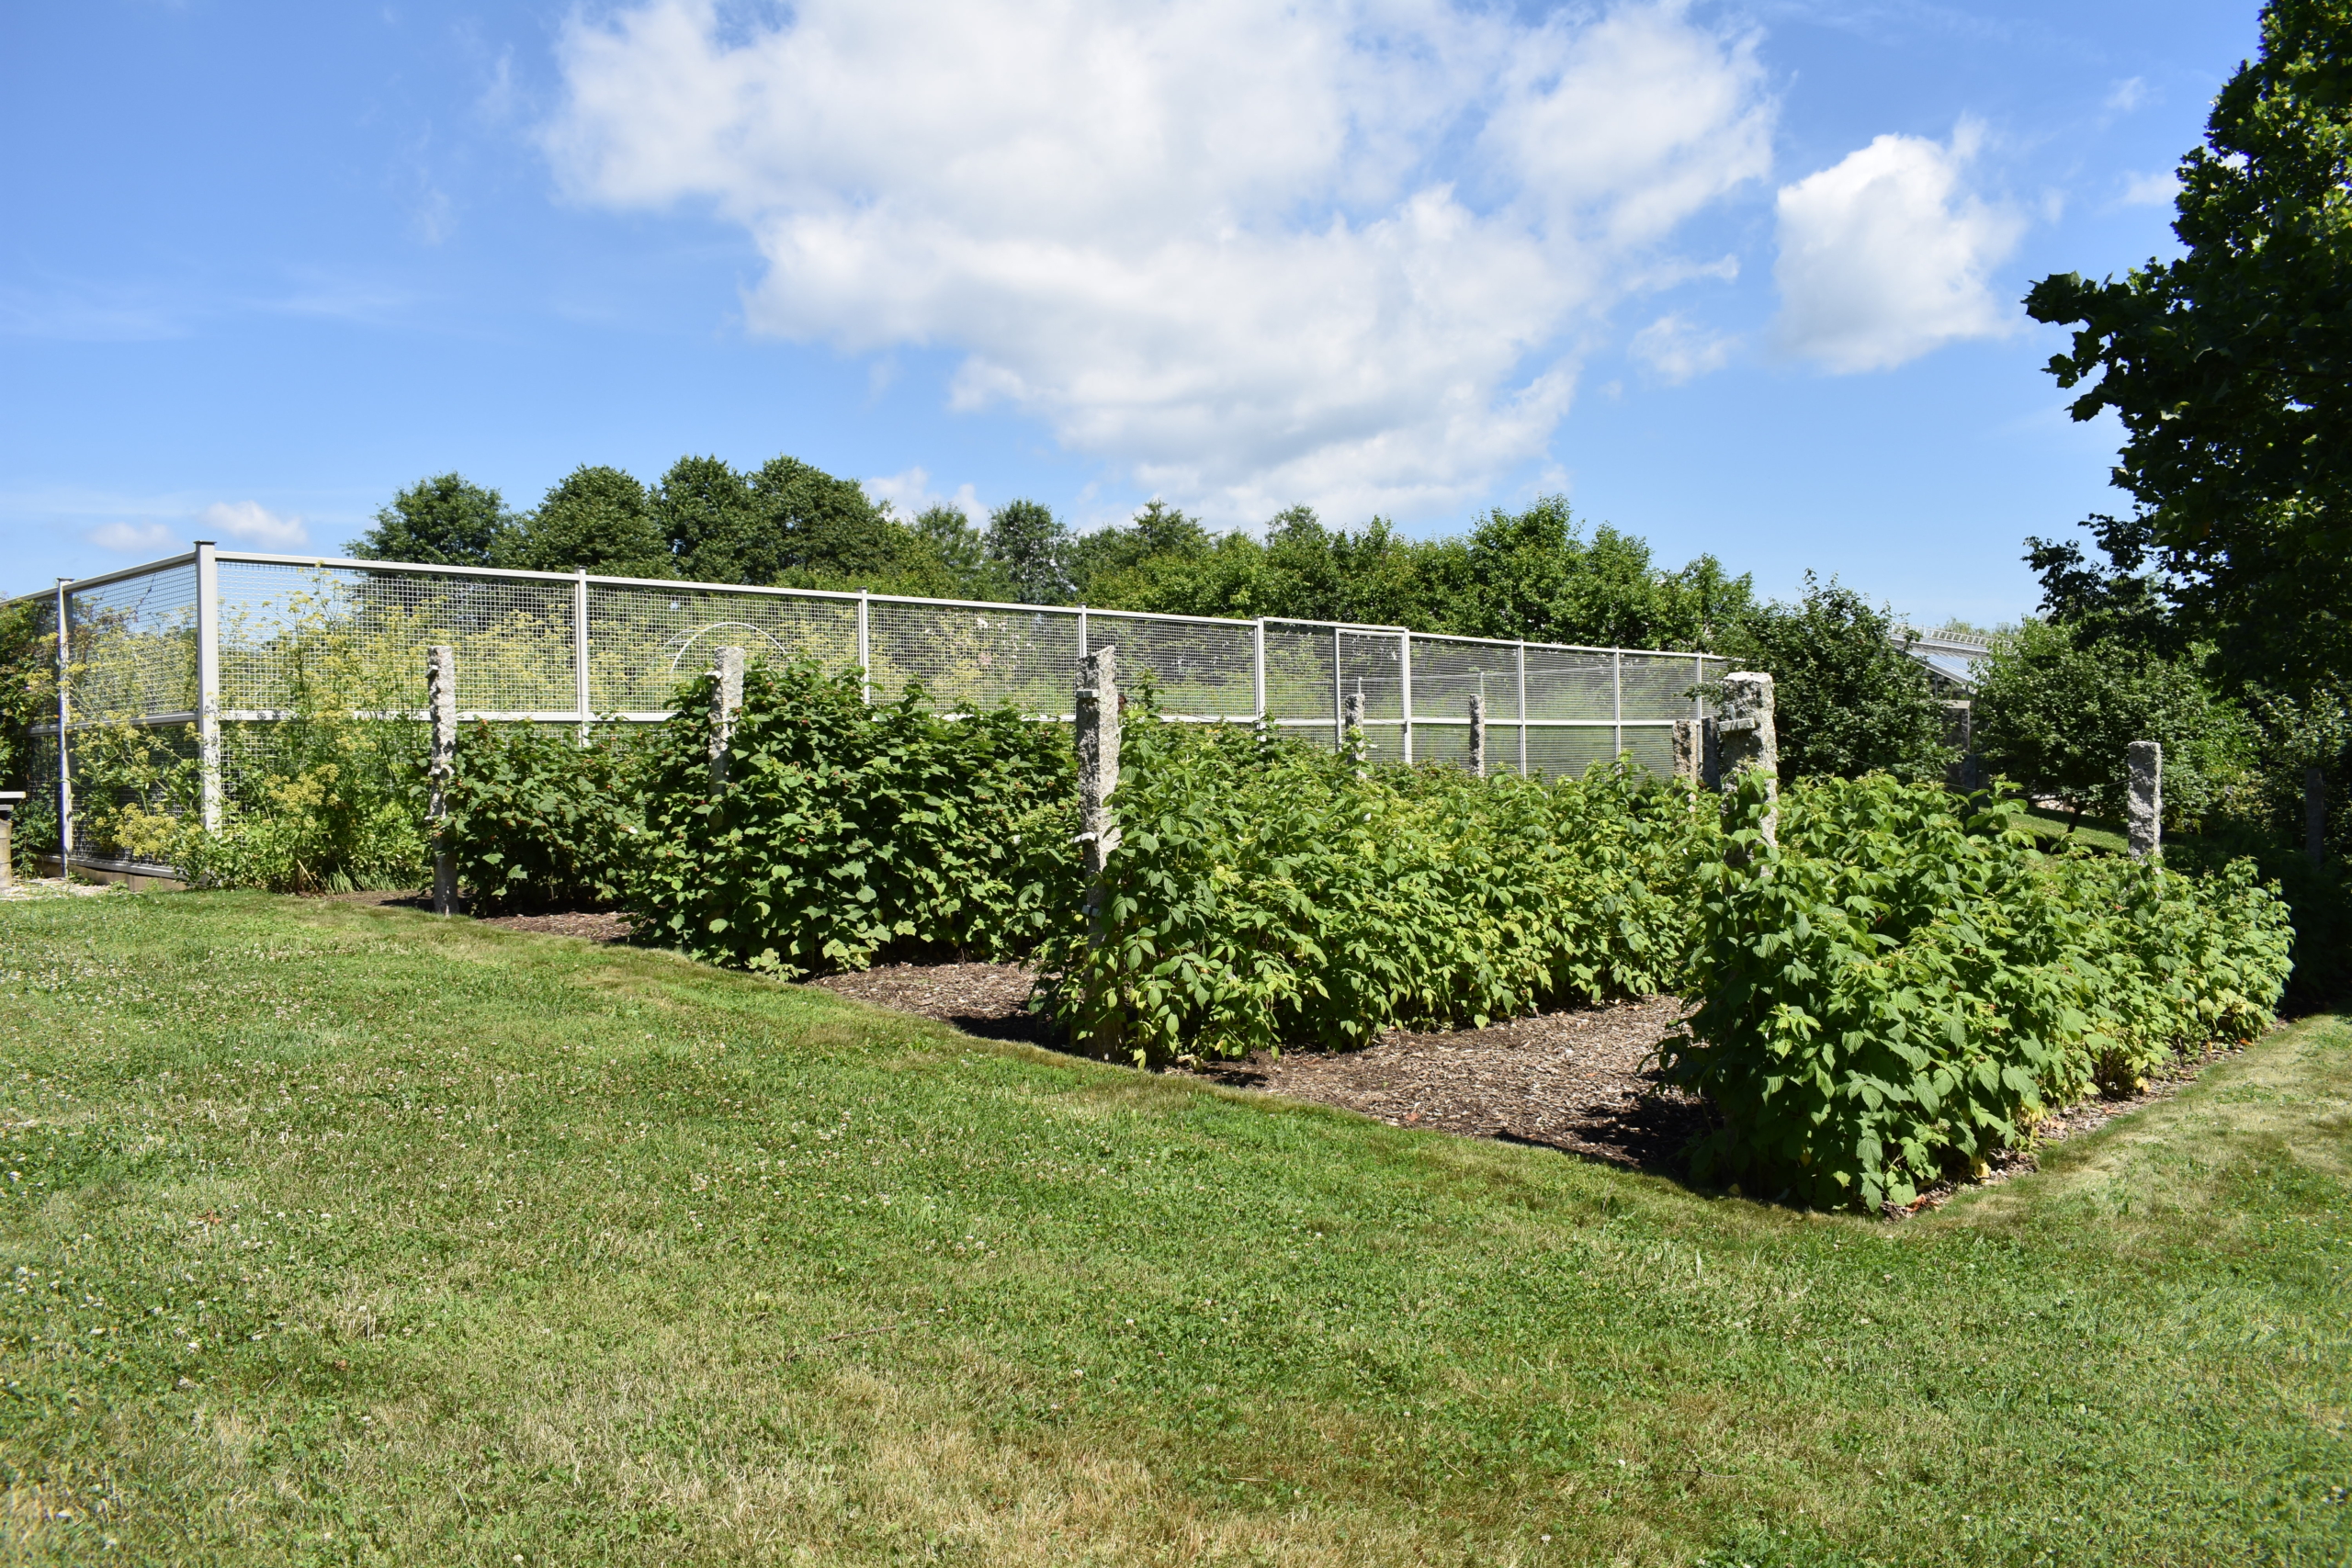
My raspberry bushes – red, golden, and black – are located outside my main greenhouse where there is lots of room. This section is also right behind my flower cutting garden, where they can be accessed easily. This photo was taken in early July…
… when the bushes were all lush and exploding with delicious berries.
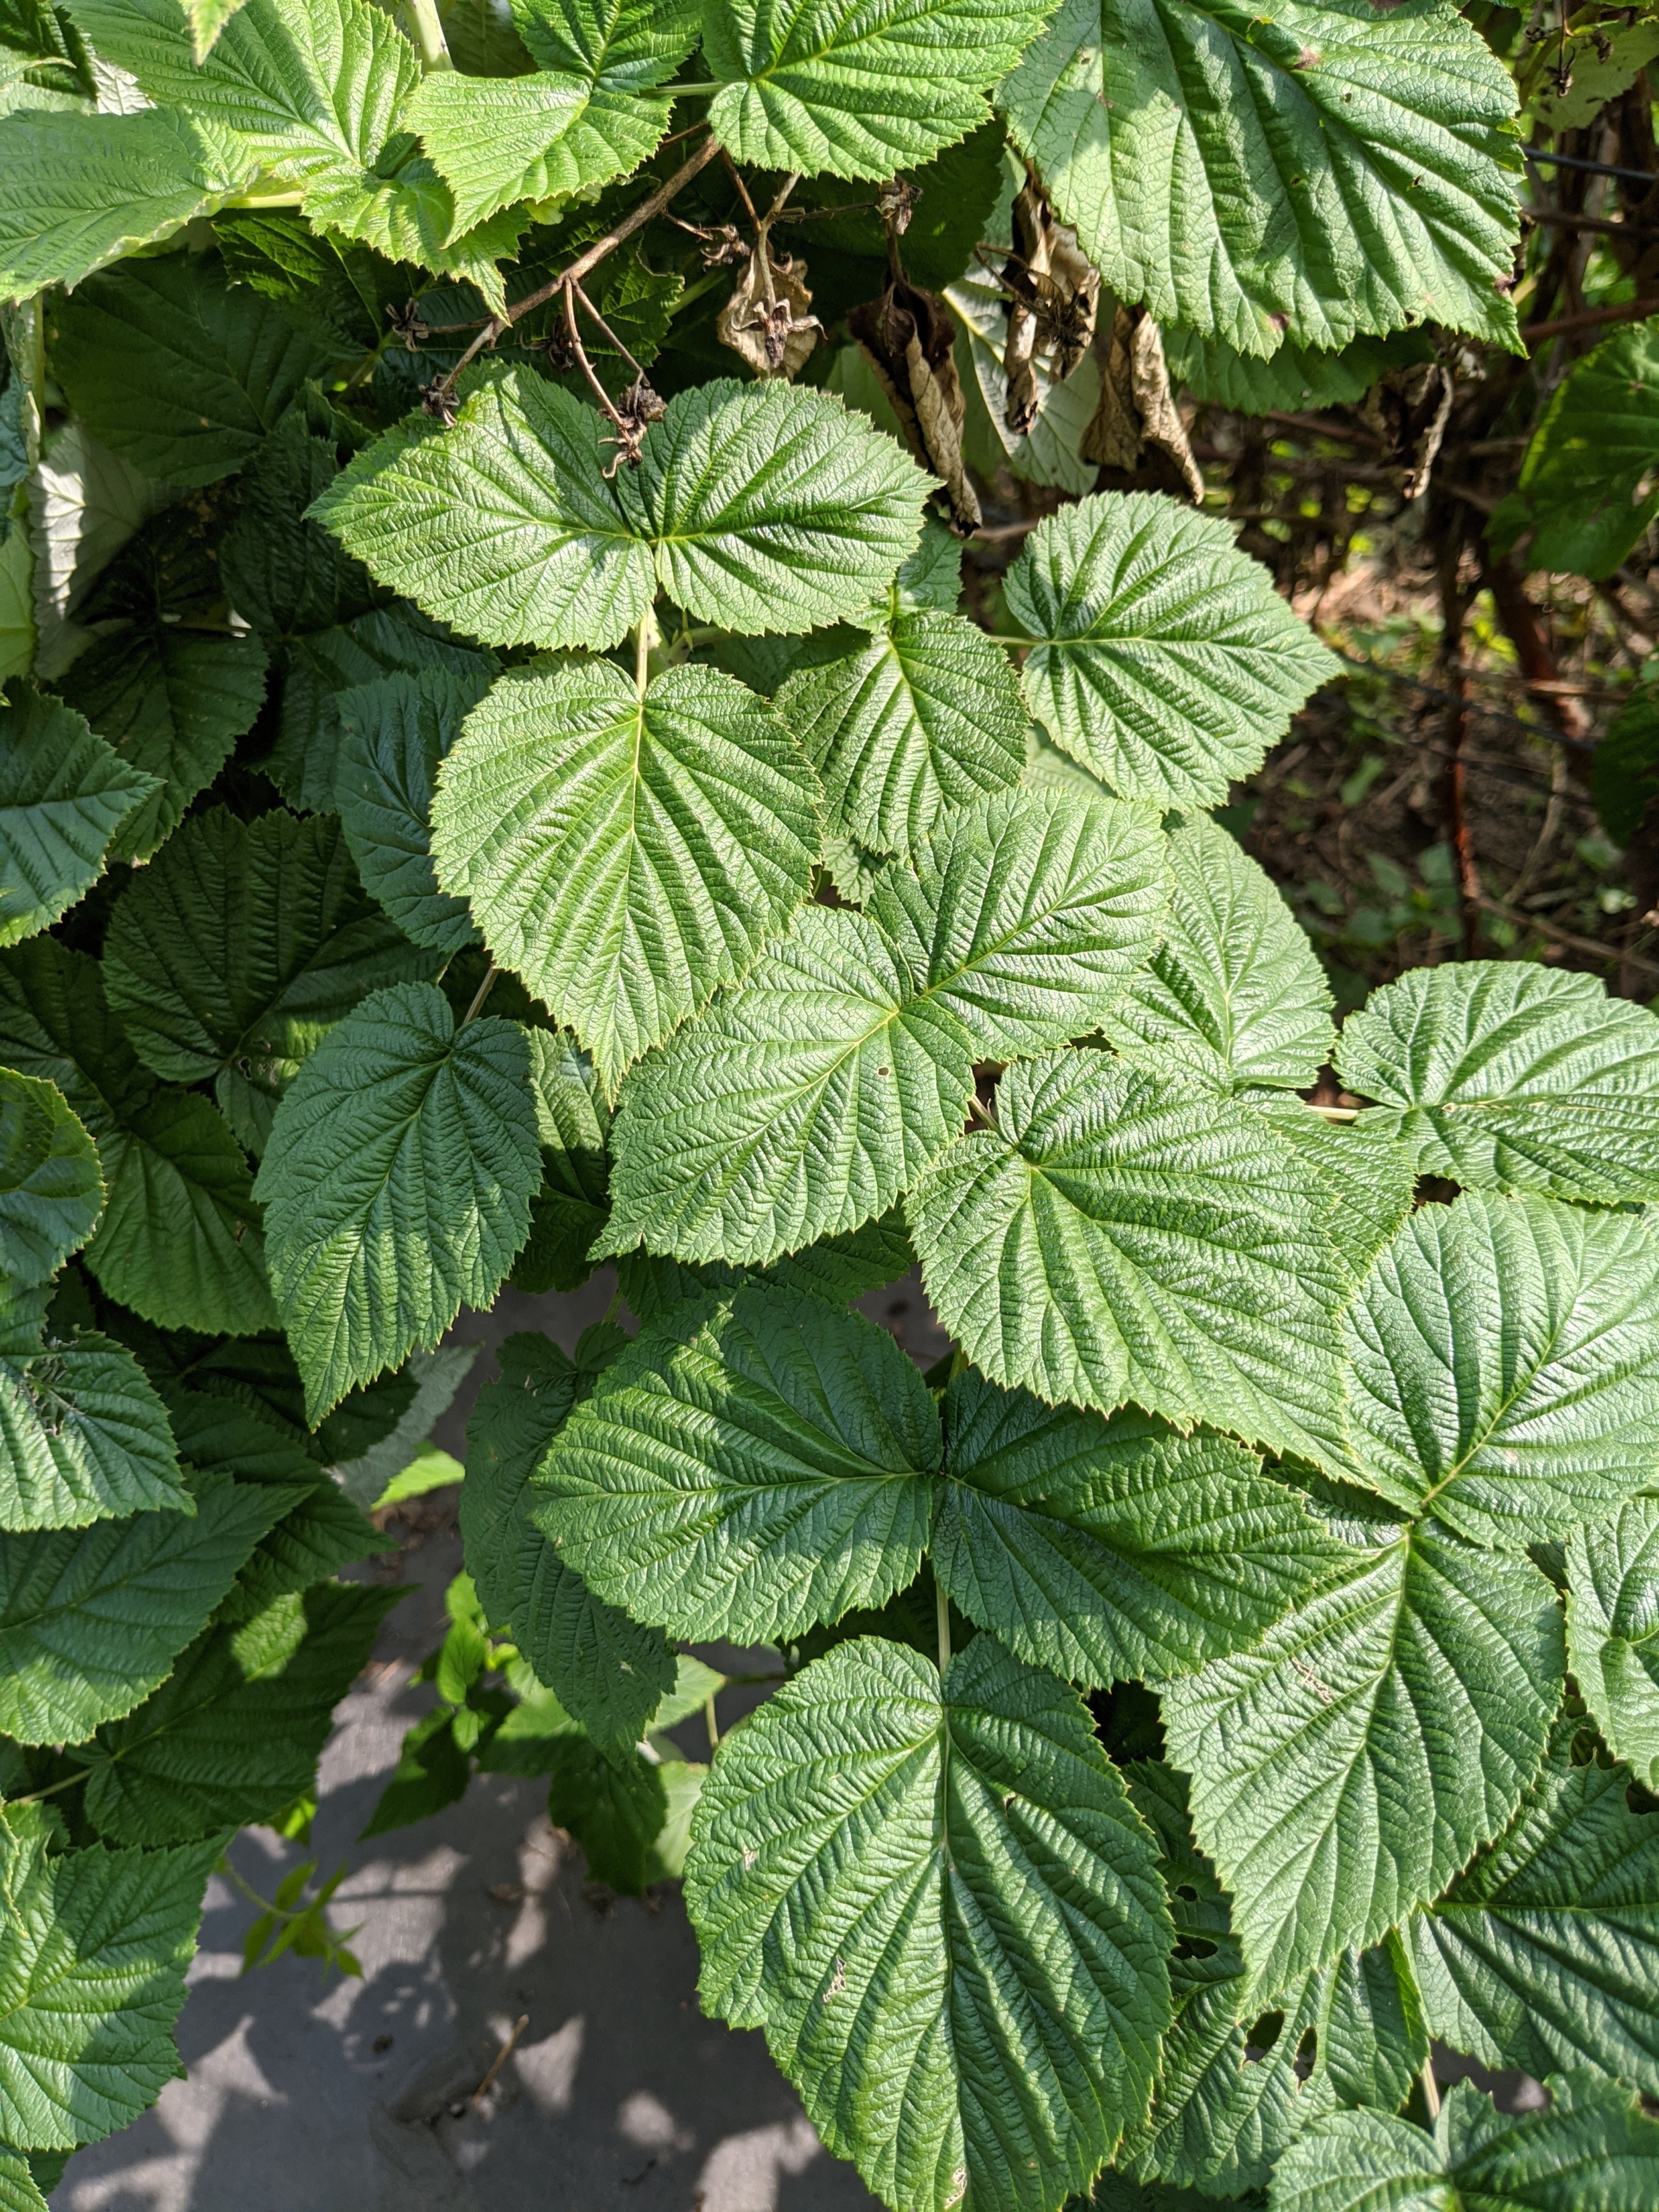
Summer-bearing raspberry bushes produce one crop each season. The fruits typically start ripening in late June into July with a crop that lasts about one month. Botanically, the raspberry is a shrub belonging to the Rosaceae family, in the genus Rubus.
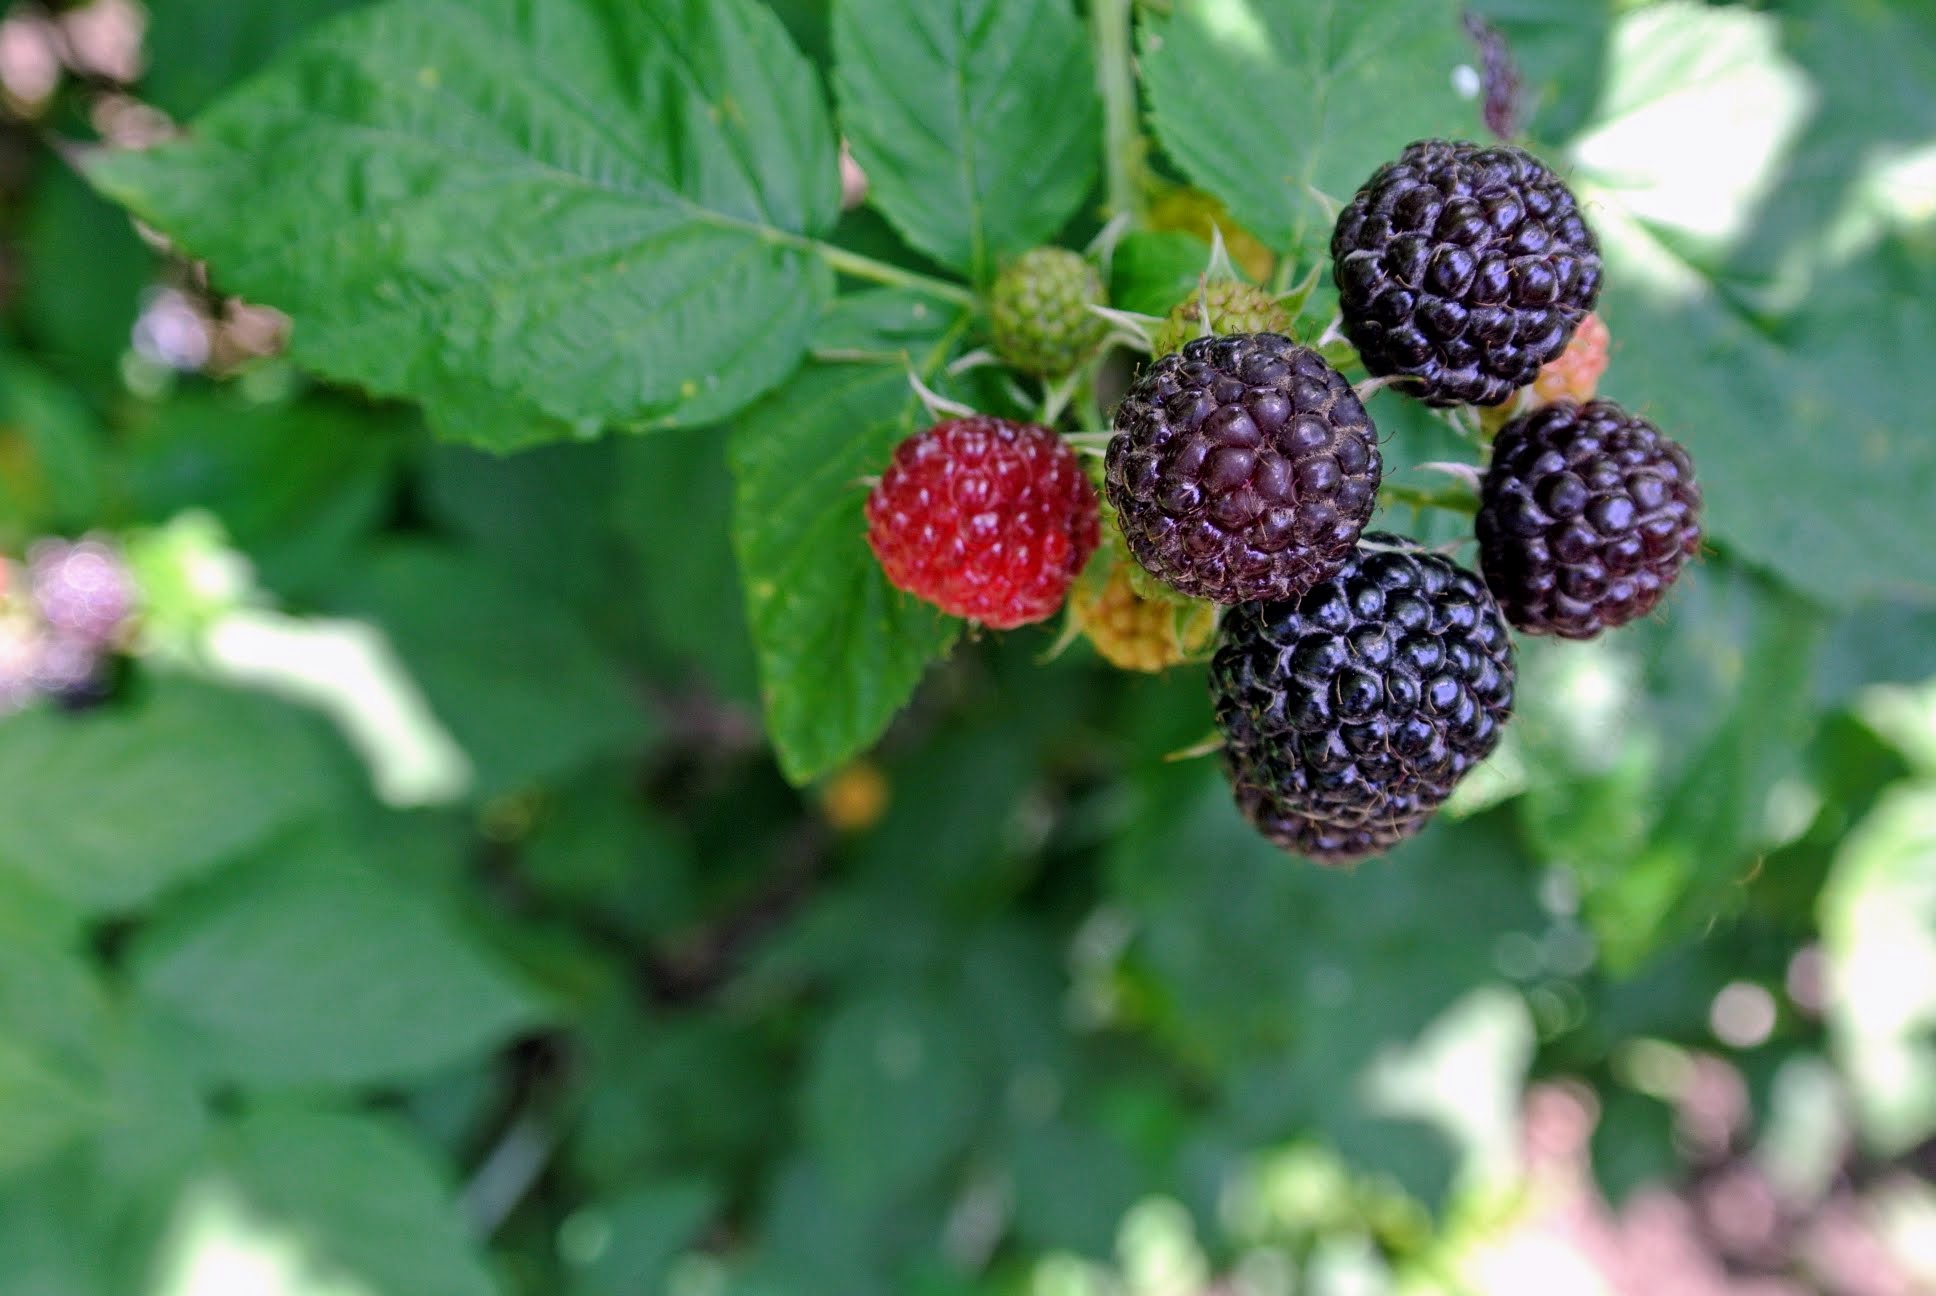
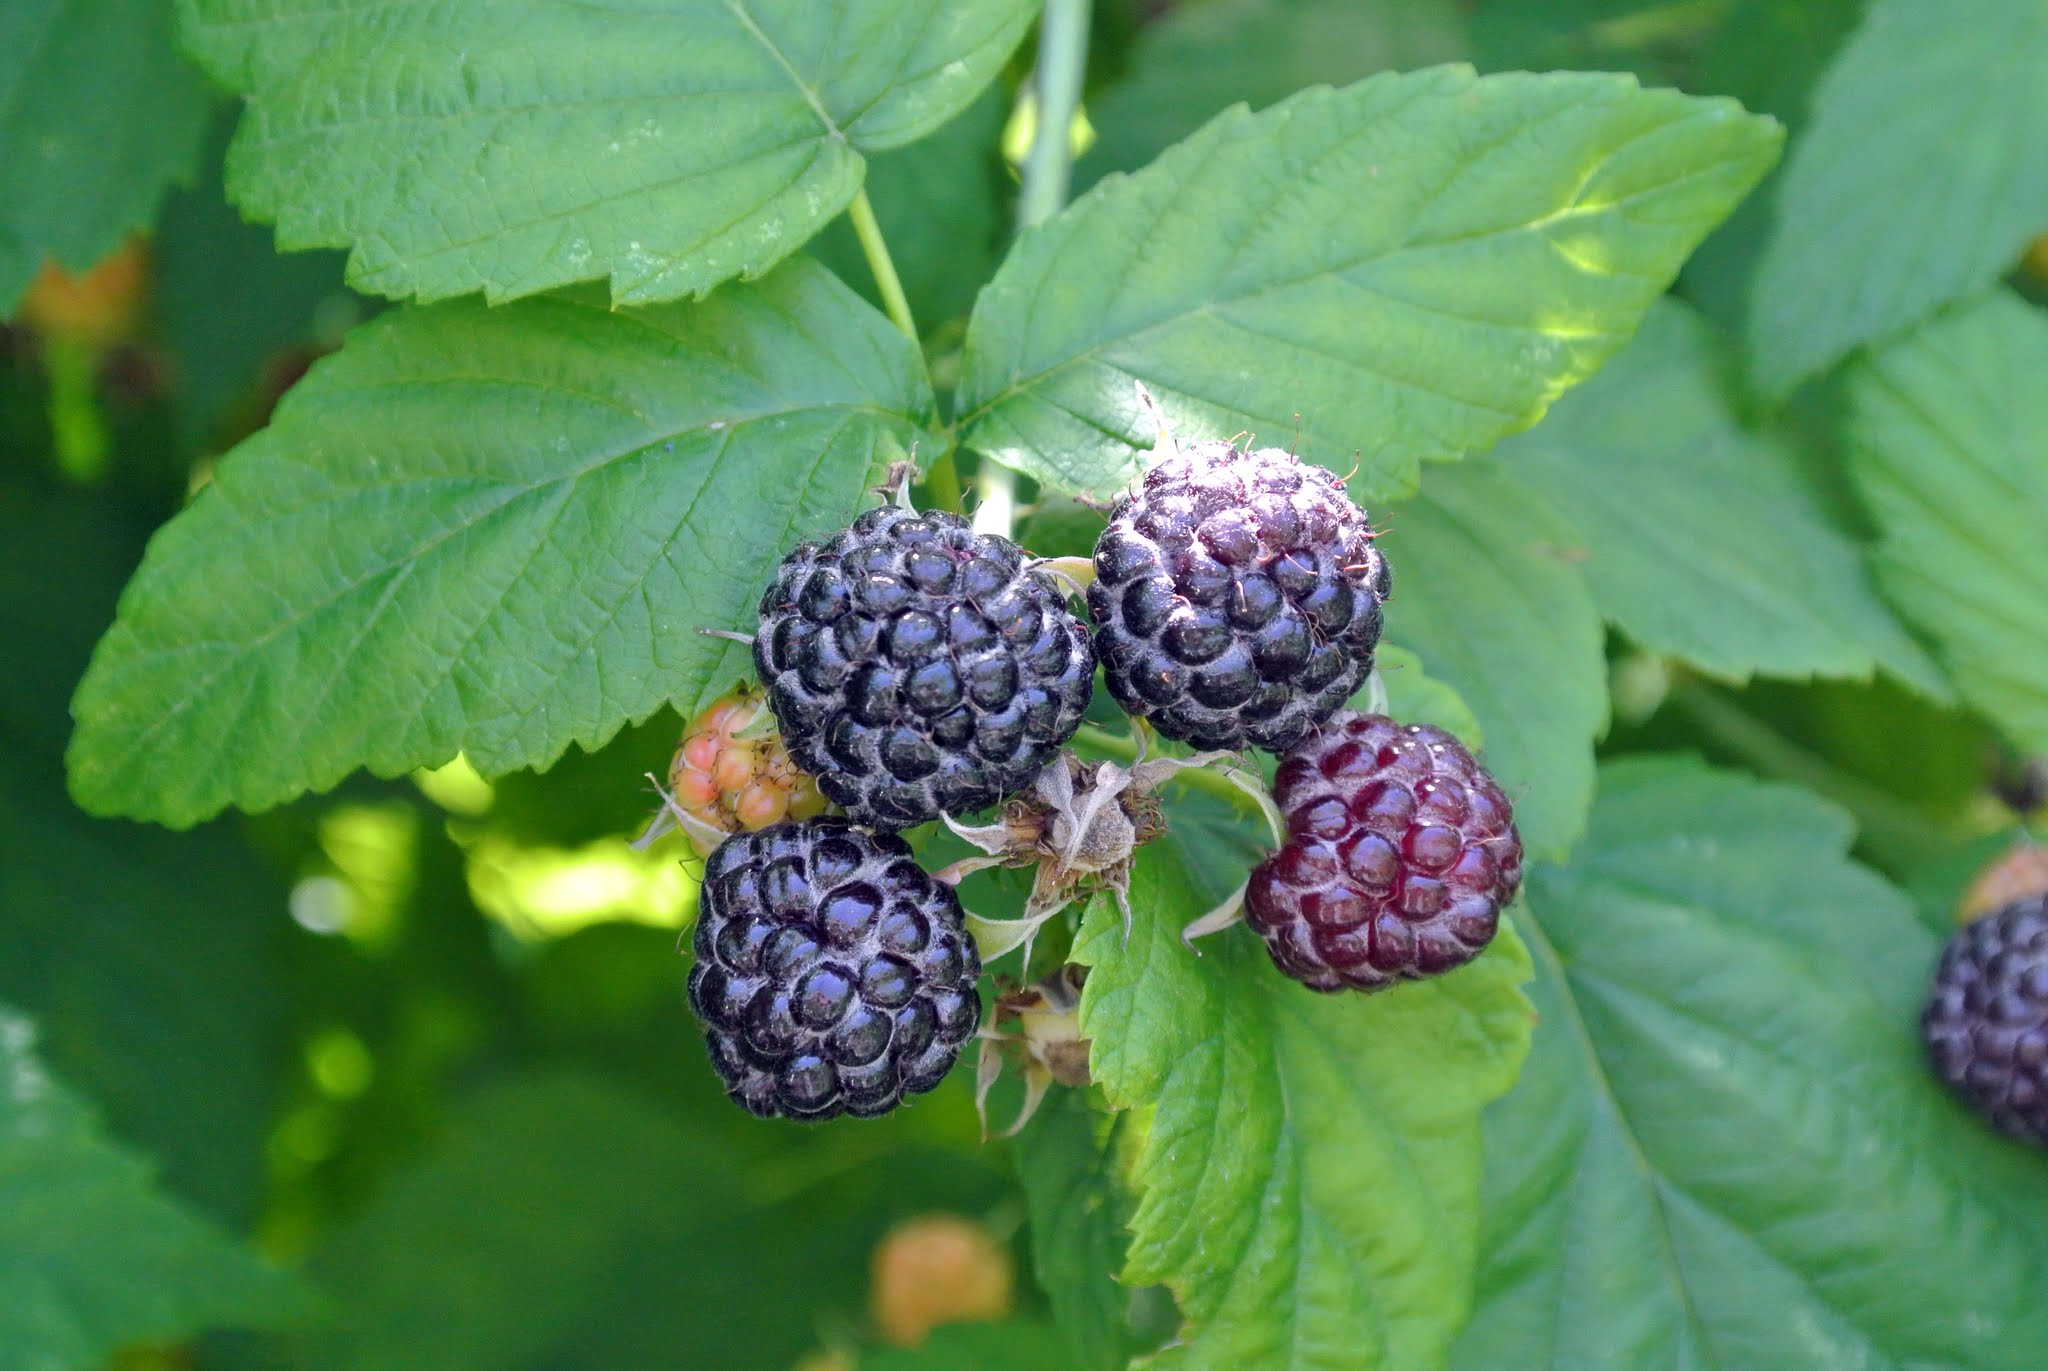
The raspberry is made up of small “drupe” fruits which are arranged in a circular fashion around a hollow central cavity. Each drupelet features a juicy pulp with a single seed.
Raspberry leaves are alternate, compound with three to five leaflets and serrate margins. They are usually broader than other berry leaves and light greenish white in color.
But in order to have beautiful and productive berry bushes like these, one must maintain them and prune them regularly.
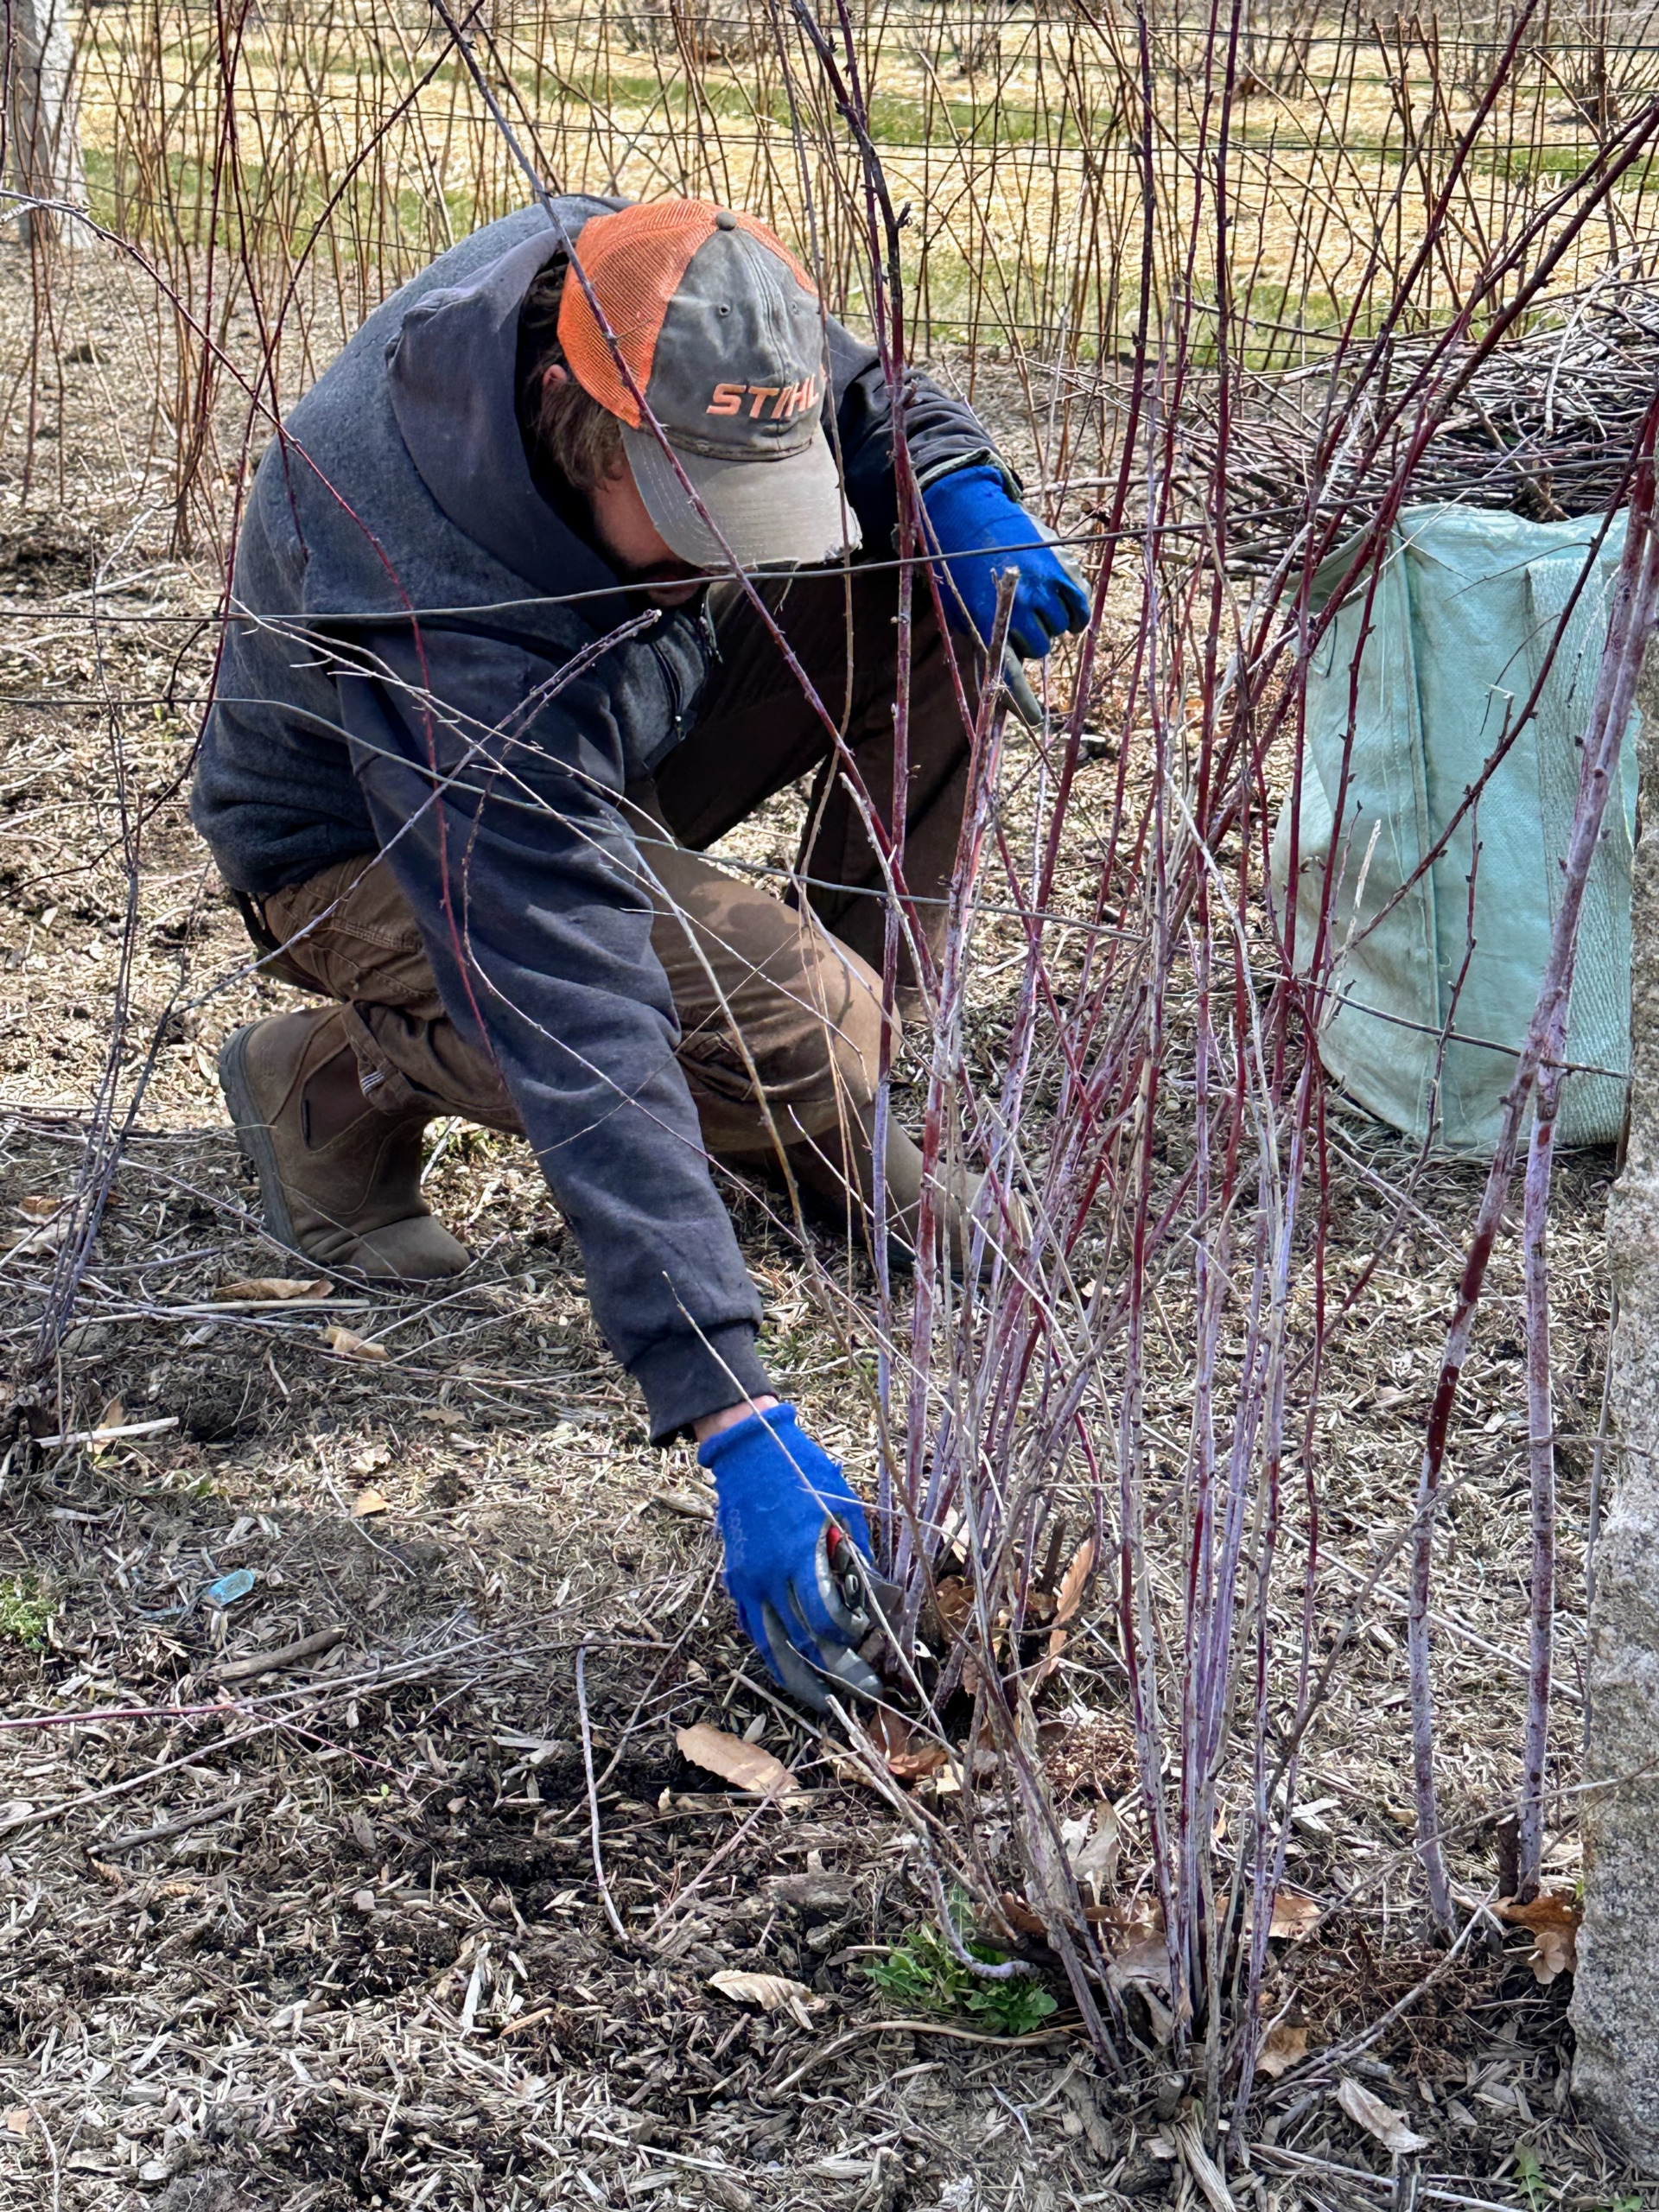
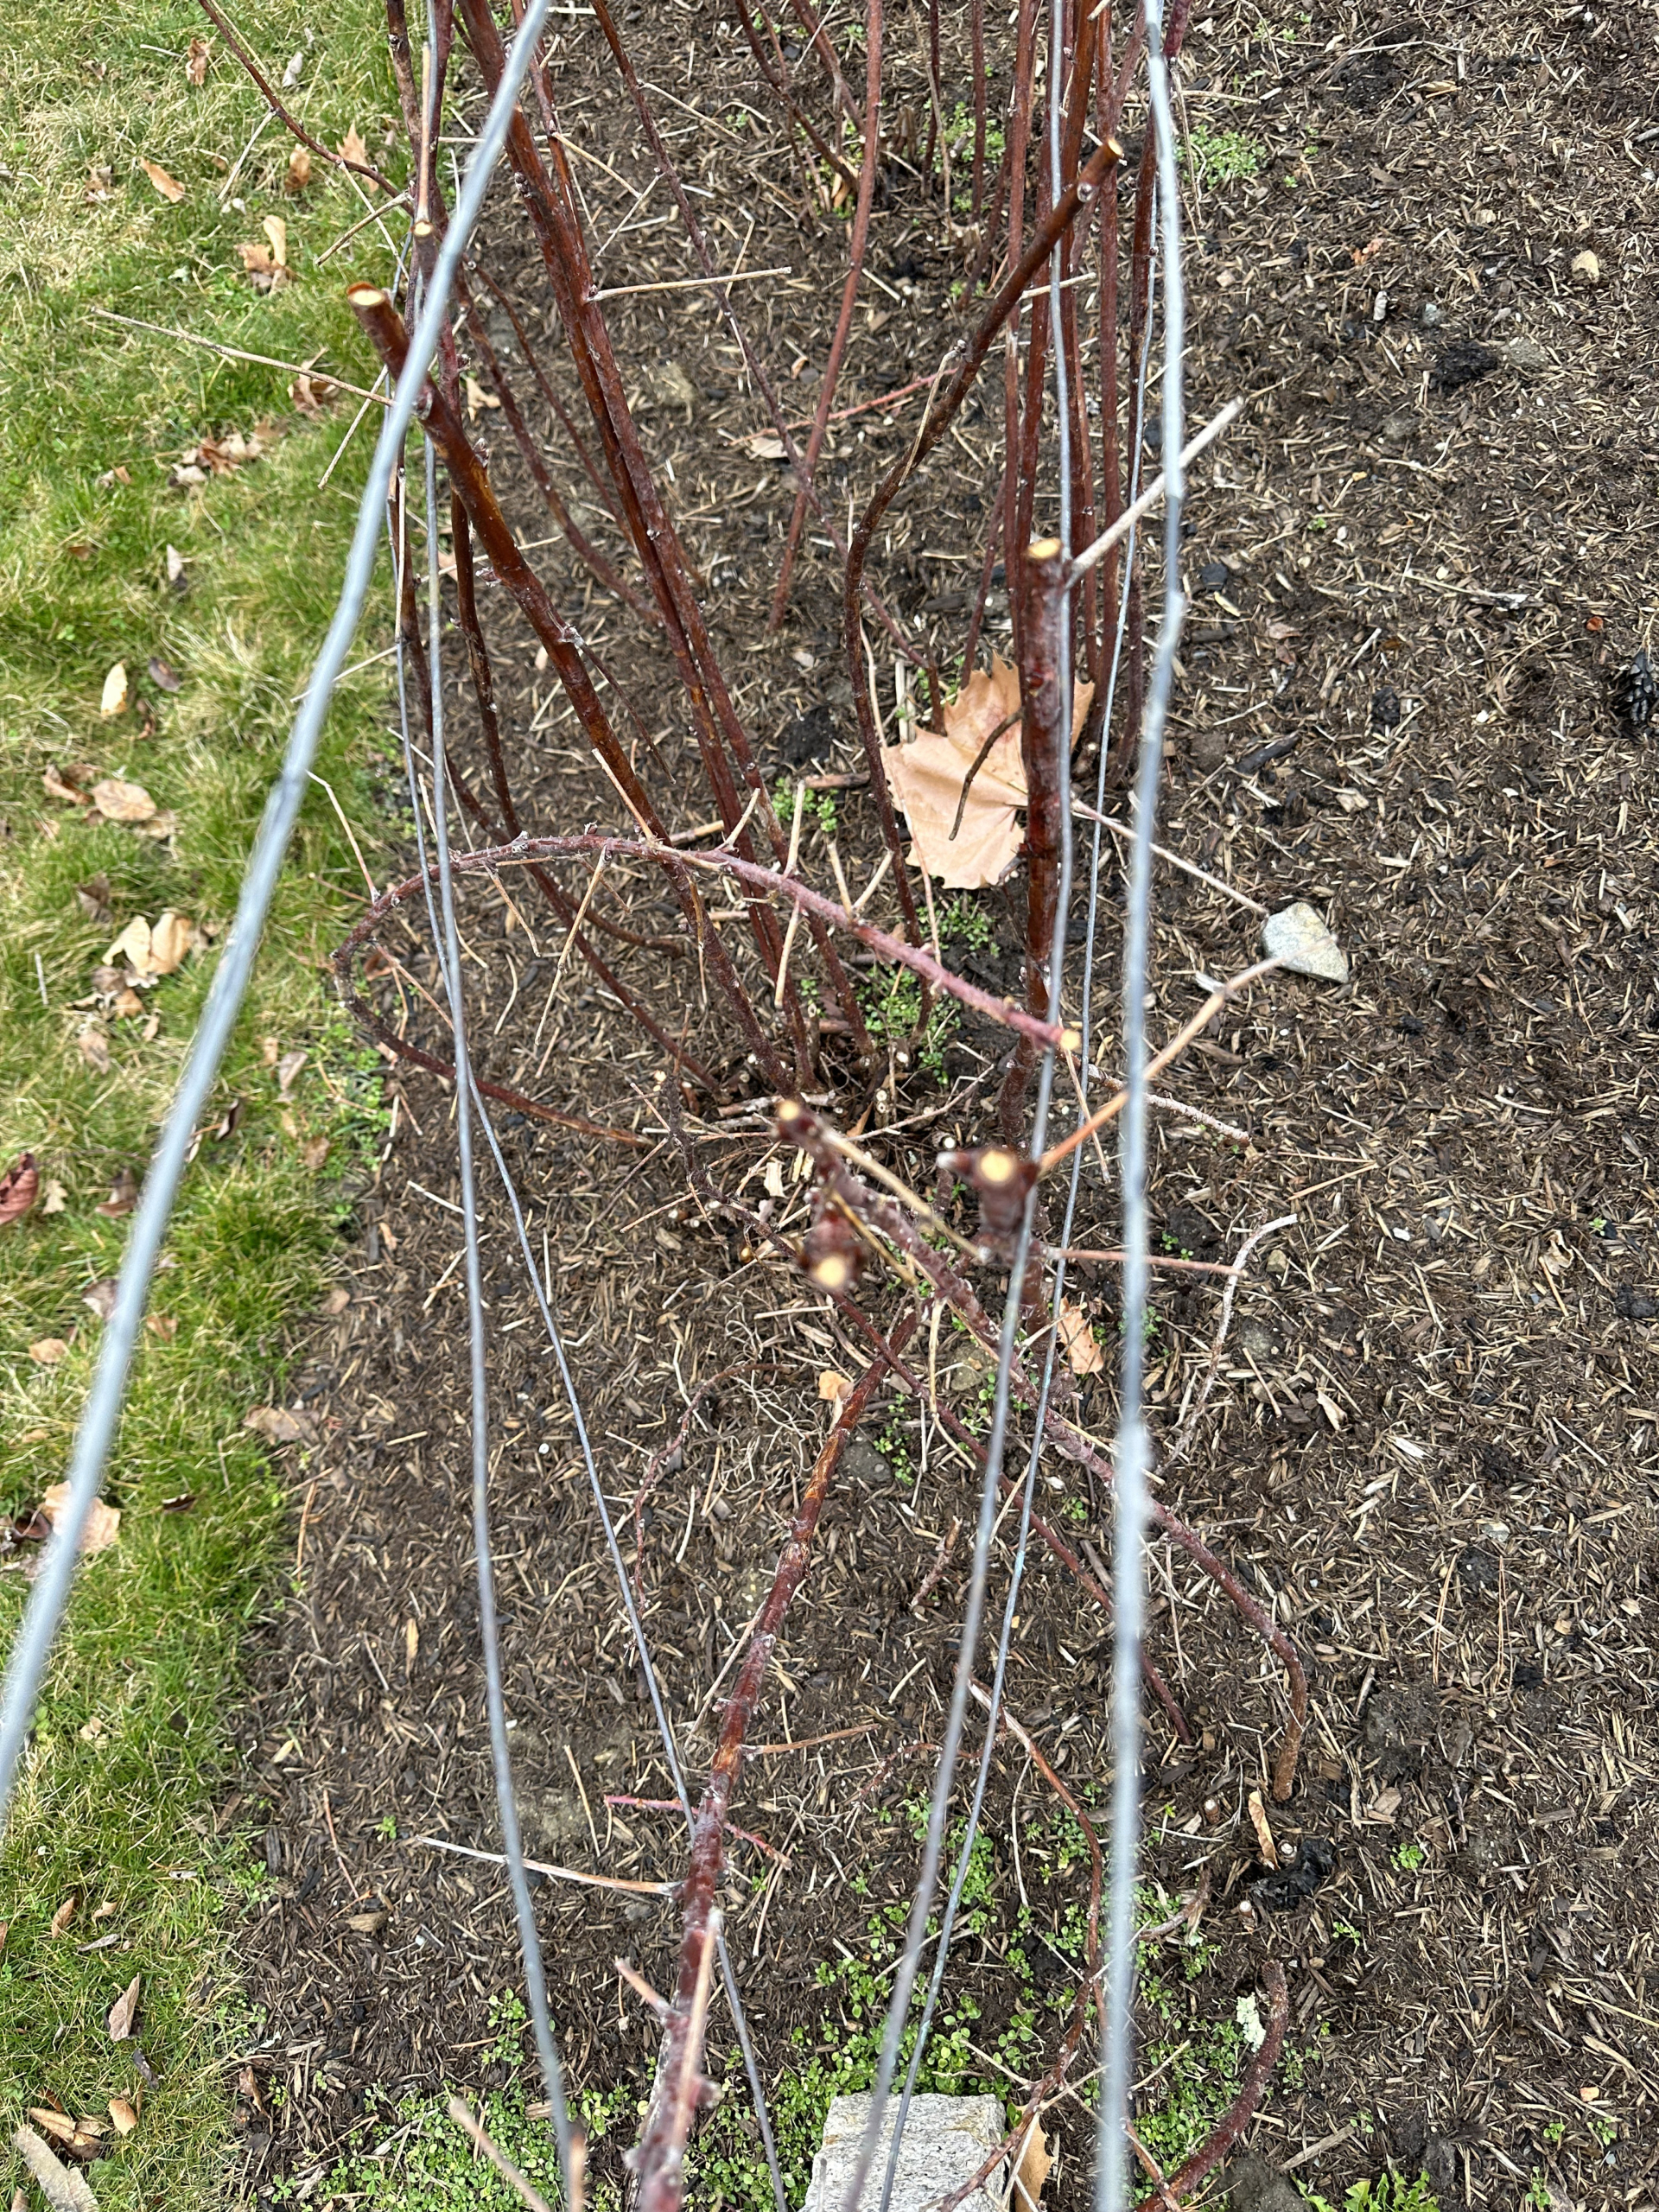
One big chore we always do during these colder months, oftentimes in between other farm projects, is prune all of the berry bushes that grow in the gardens around my main greenhouse. Here’s Brian pruning the black raspberries, cutting down the dead wood from the base. He also keeps the base of the bushes within a 12 to 18-inch footprint by pruning out any suckers that poke up outside those parameters.
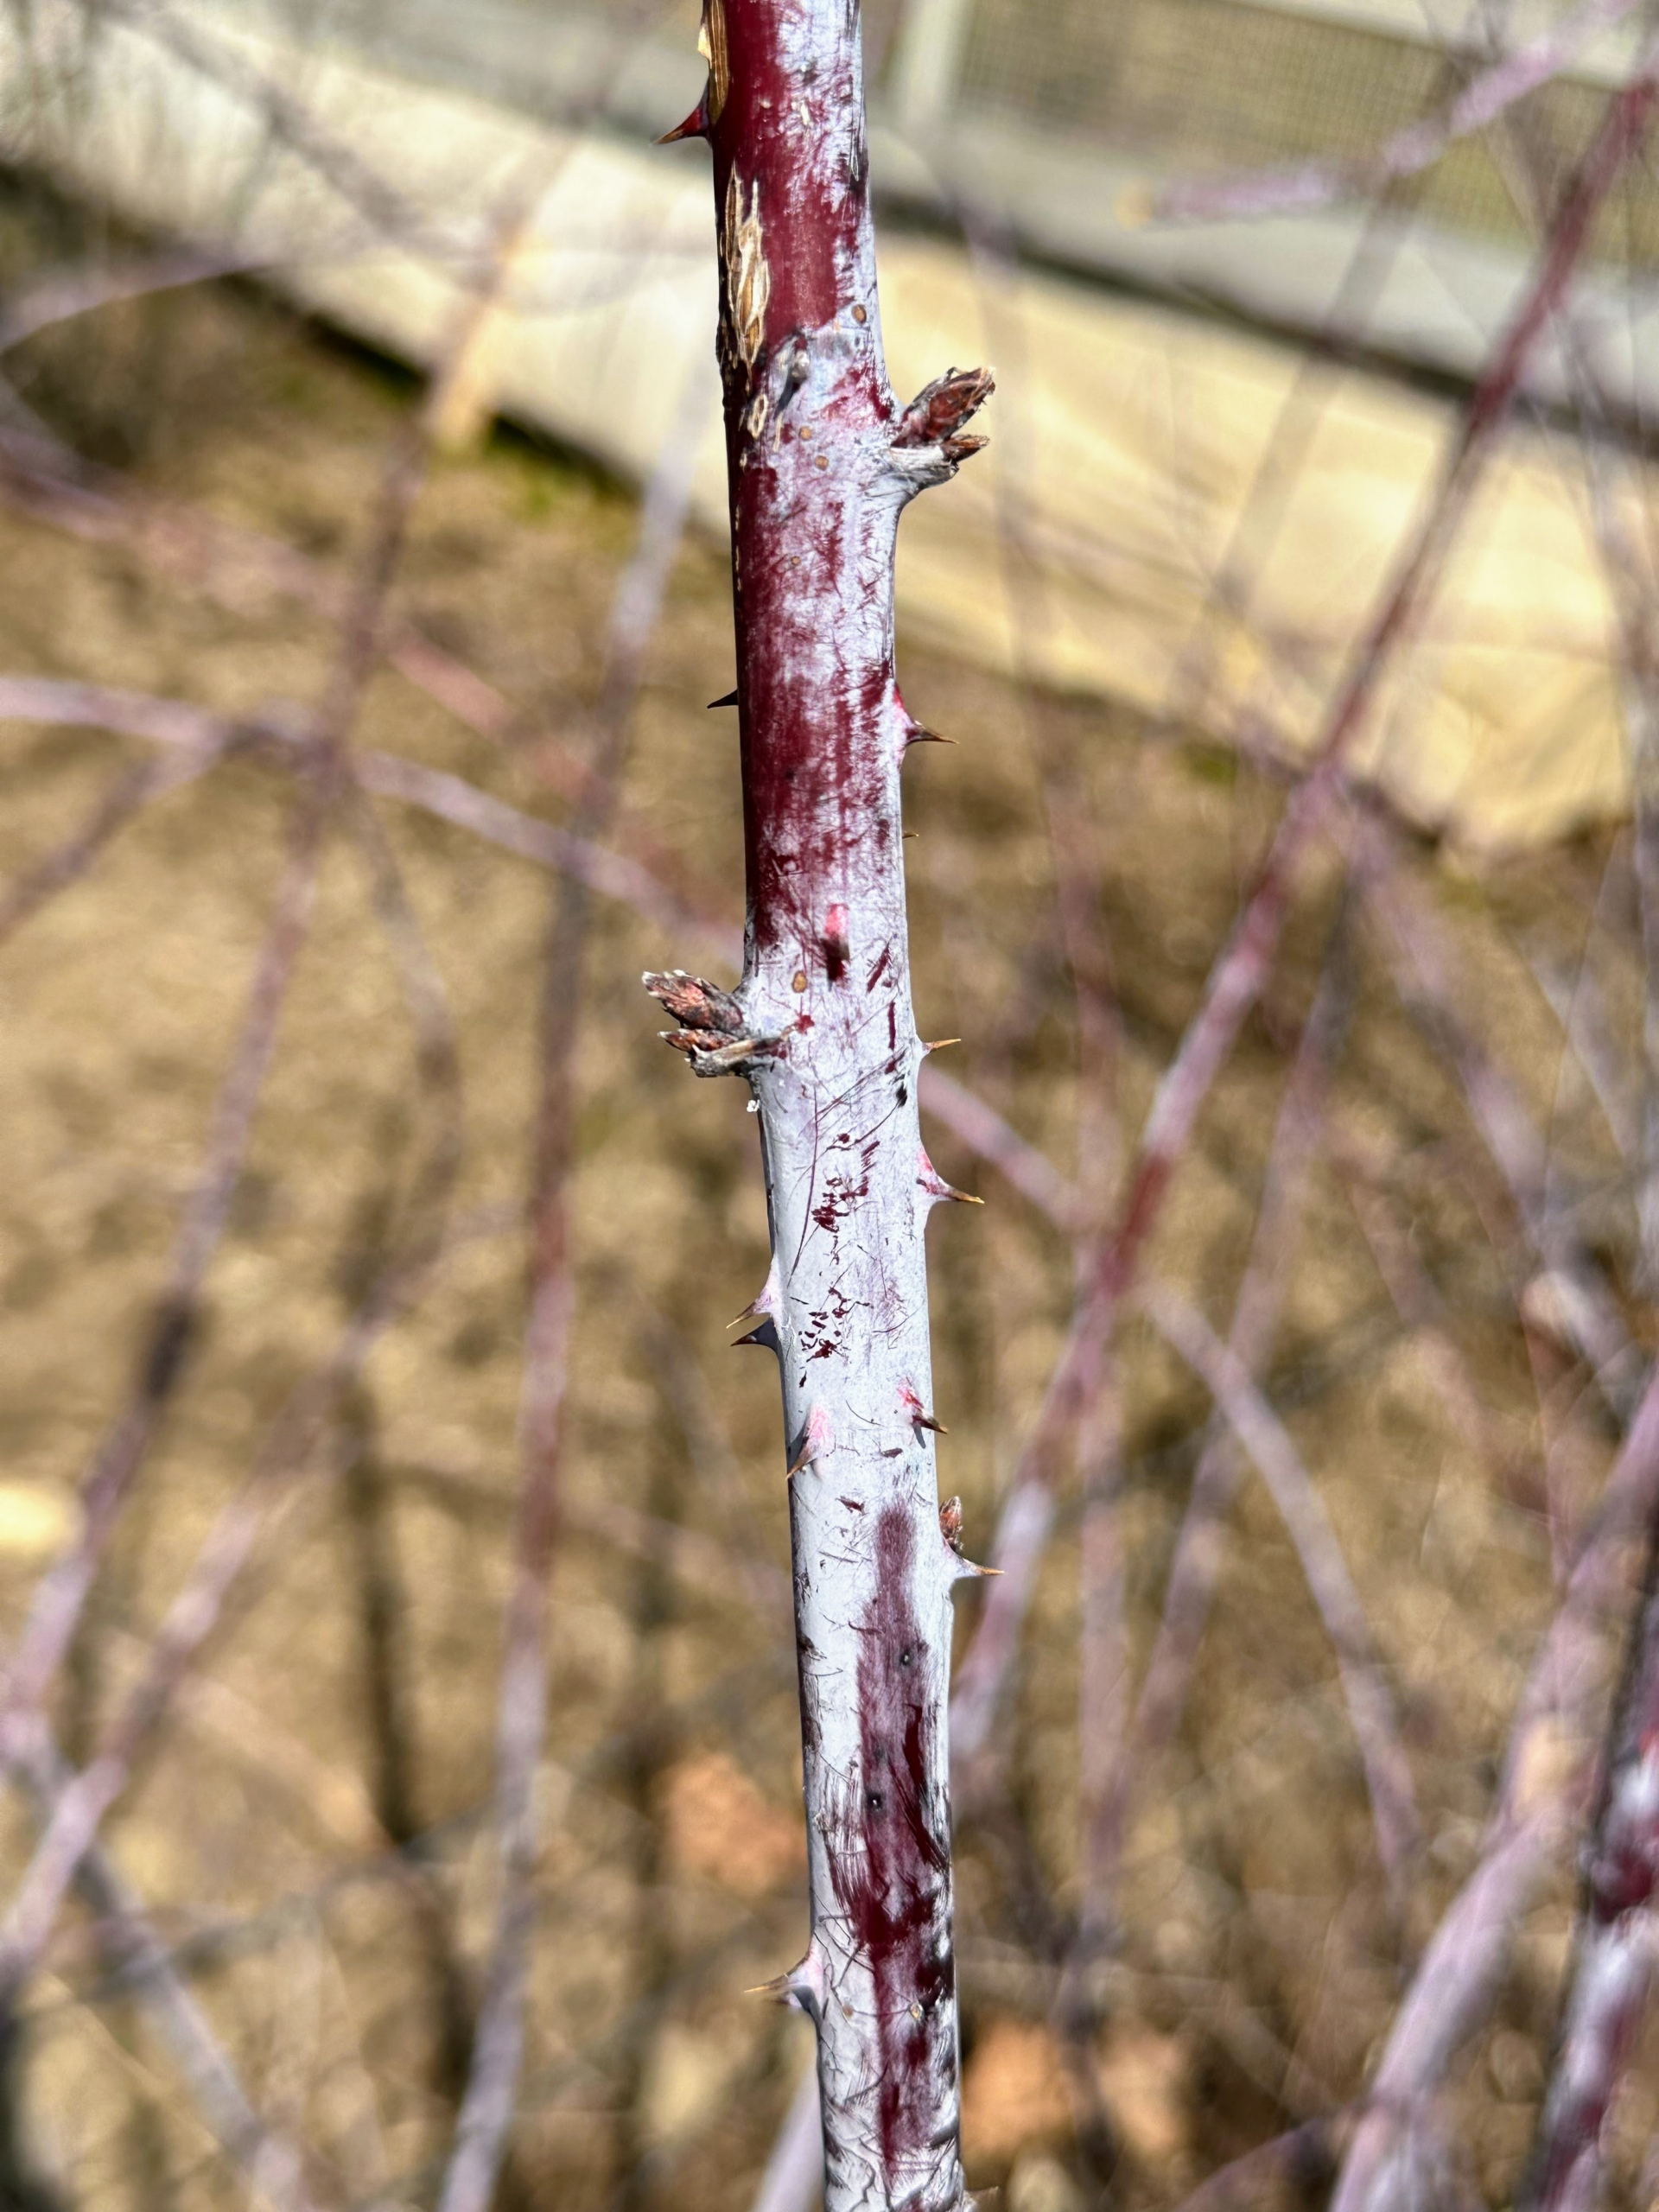
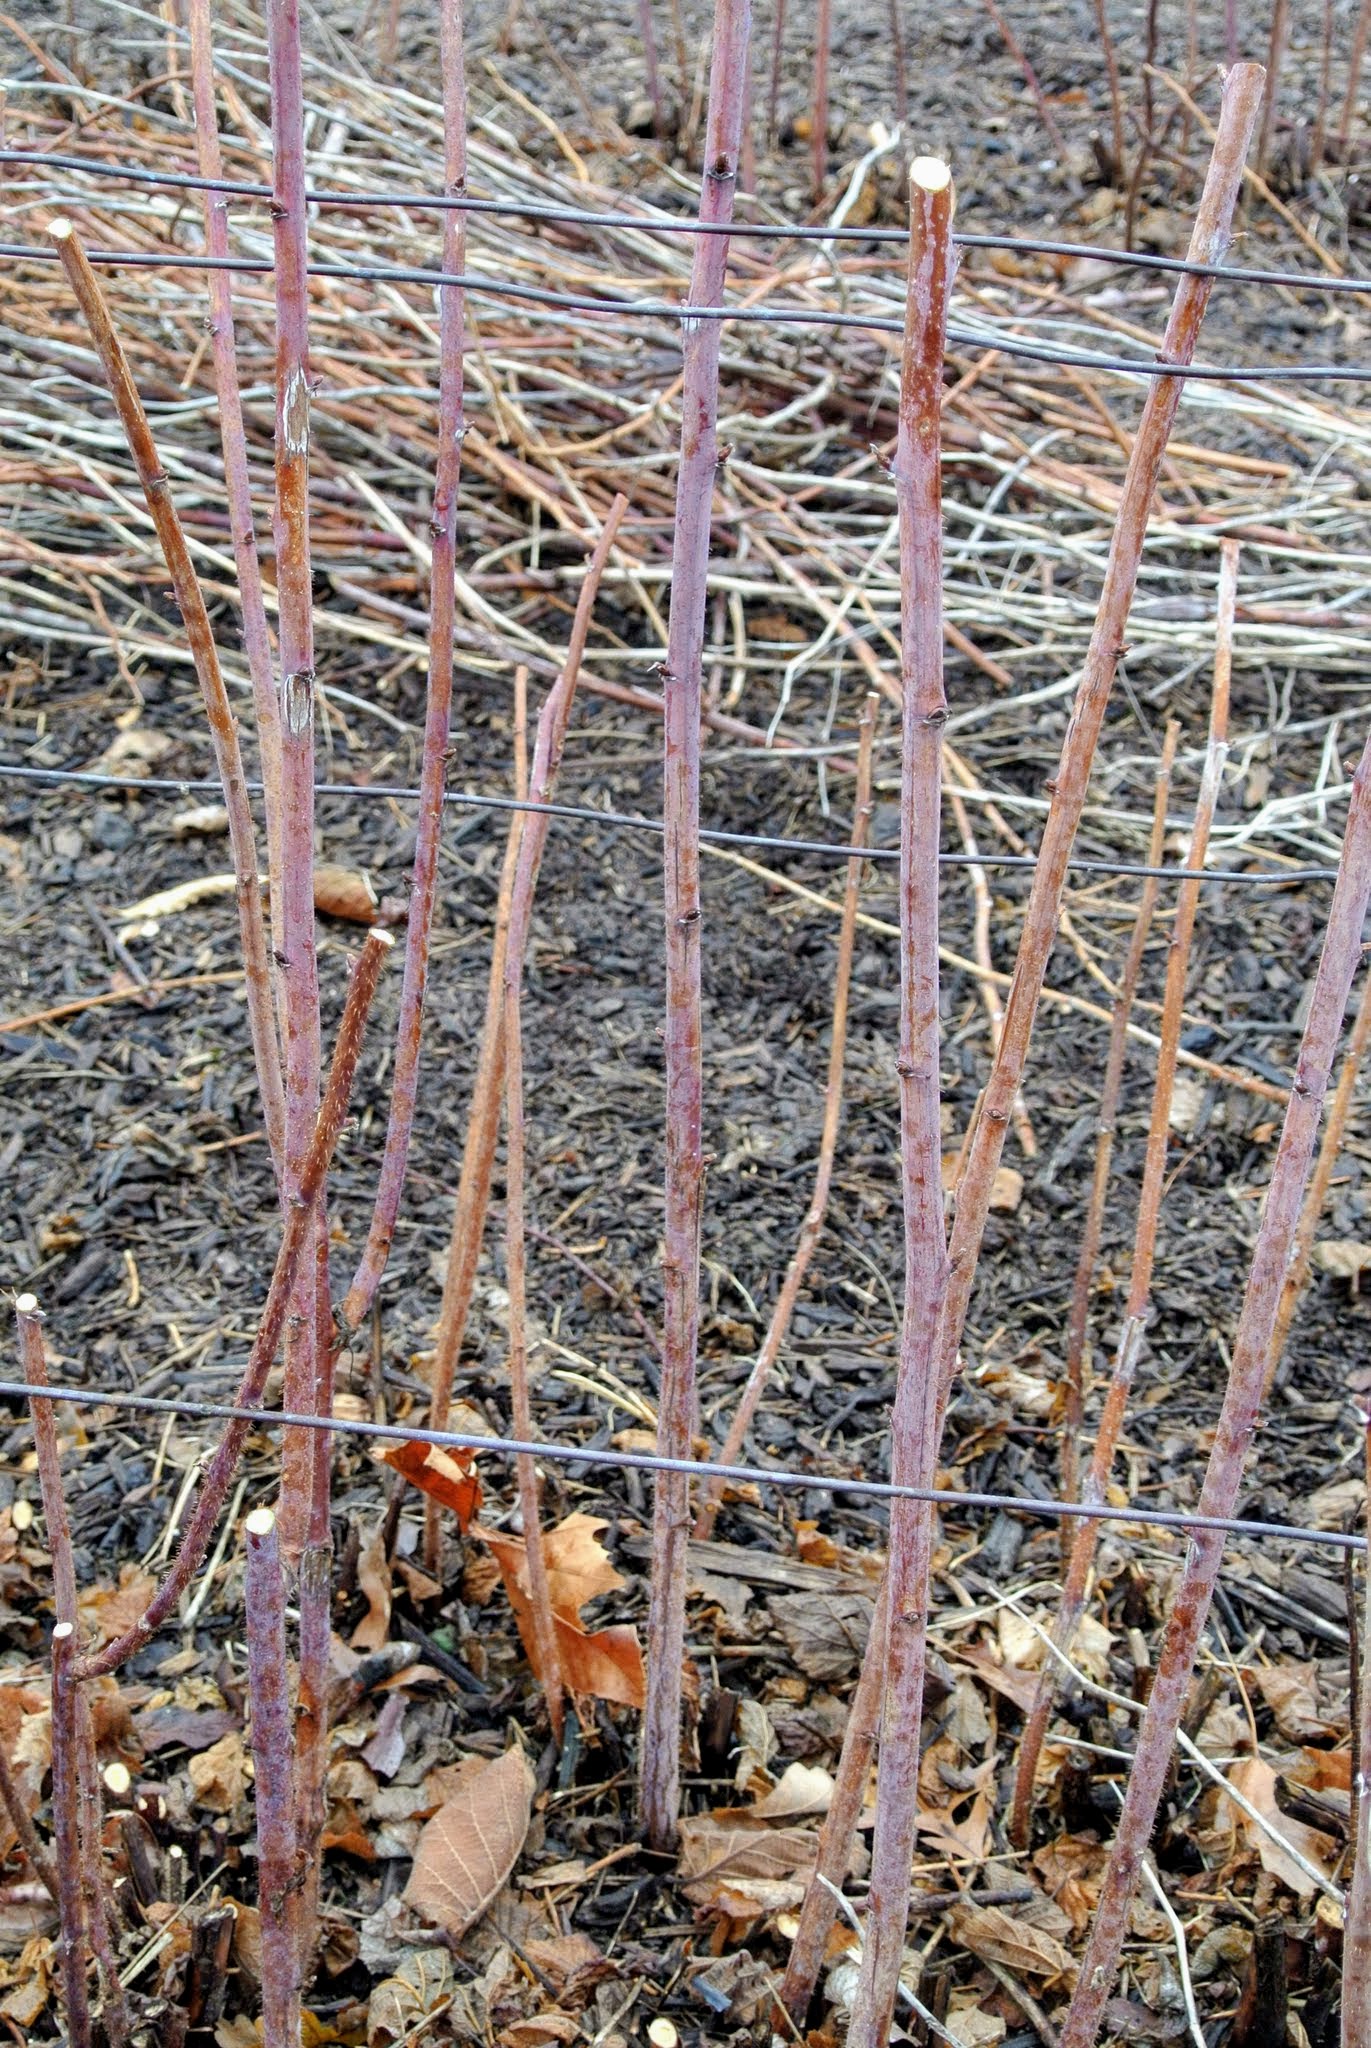
Black raspberries are identifiable by their purple canes. Raspberries are unique because their roots and crowns are perennial, while their stems or canes are biennial. A raspberry bush can produce fruit for many years.
Black raspberries are more challenging to prune because their canes are quite long.
Here, Brian lines up the long canes along the wire to train them where to grow. Raspberry plants spread by suckers and will spread out far and wide if allowed. Unpruned raspberry bushes will still grow, but won’t yield more berries. Leaving them unpruned also makes them more prone to disease.
Raspberries bear fruit on two-year old canes, the canes that sprouted last season. Here, they look much better.
Brian also pruned the red raspberry and golden raspberry bushes. He pruned all the dead, old, weak, diseased, and damaged canes at ground level first.
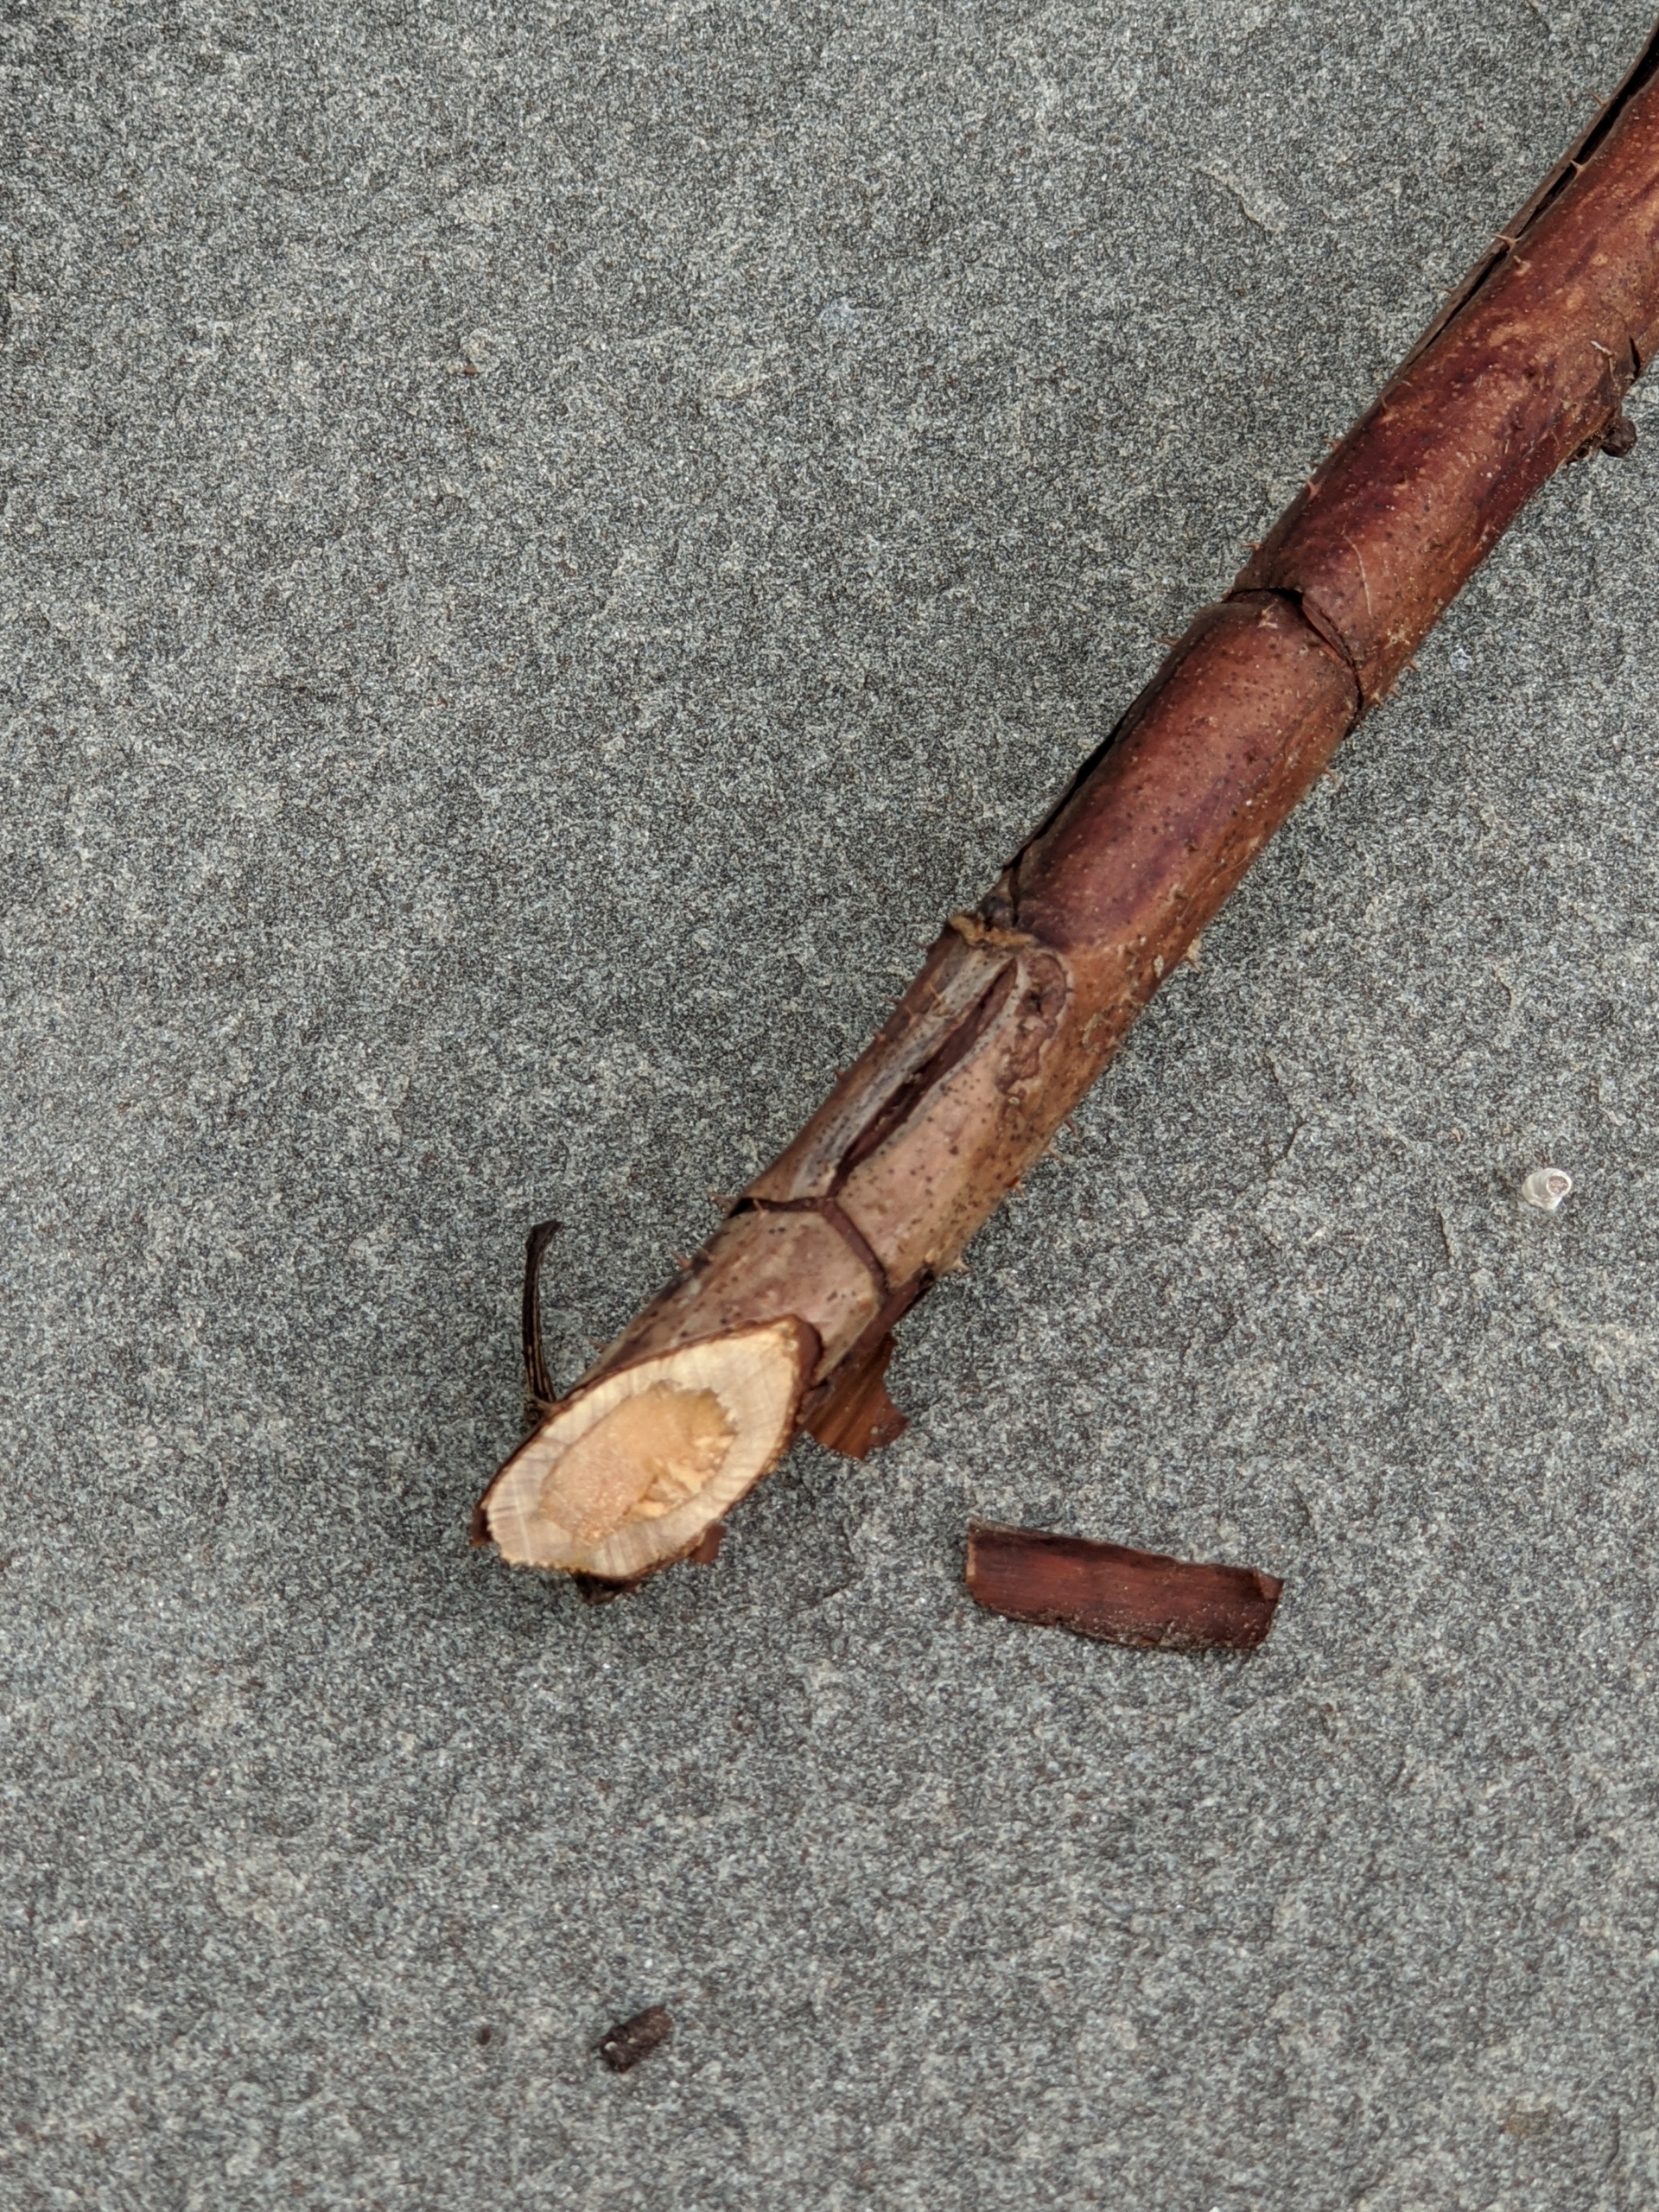
This is a dead cane – brown and woody.
Most of the canes were trimmed just to the wire, so they grow properly and can be supported as they mature.
What’s left is the vigorous second year growth now about two feet up from the ground.
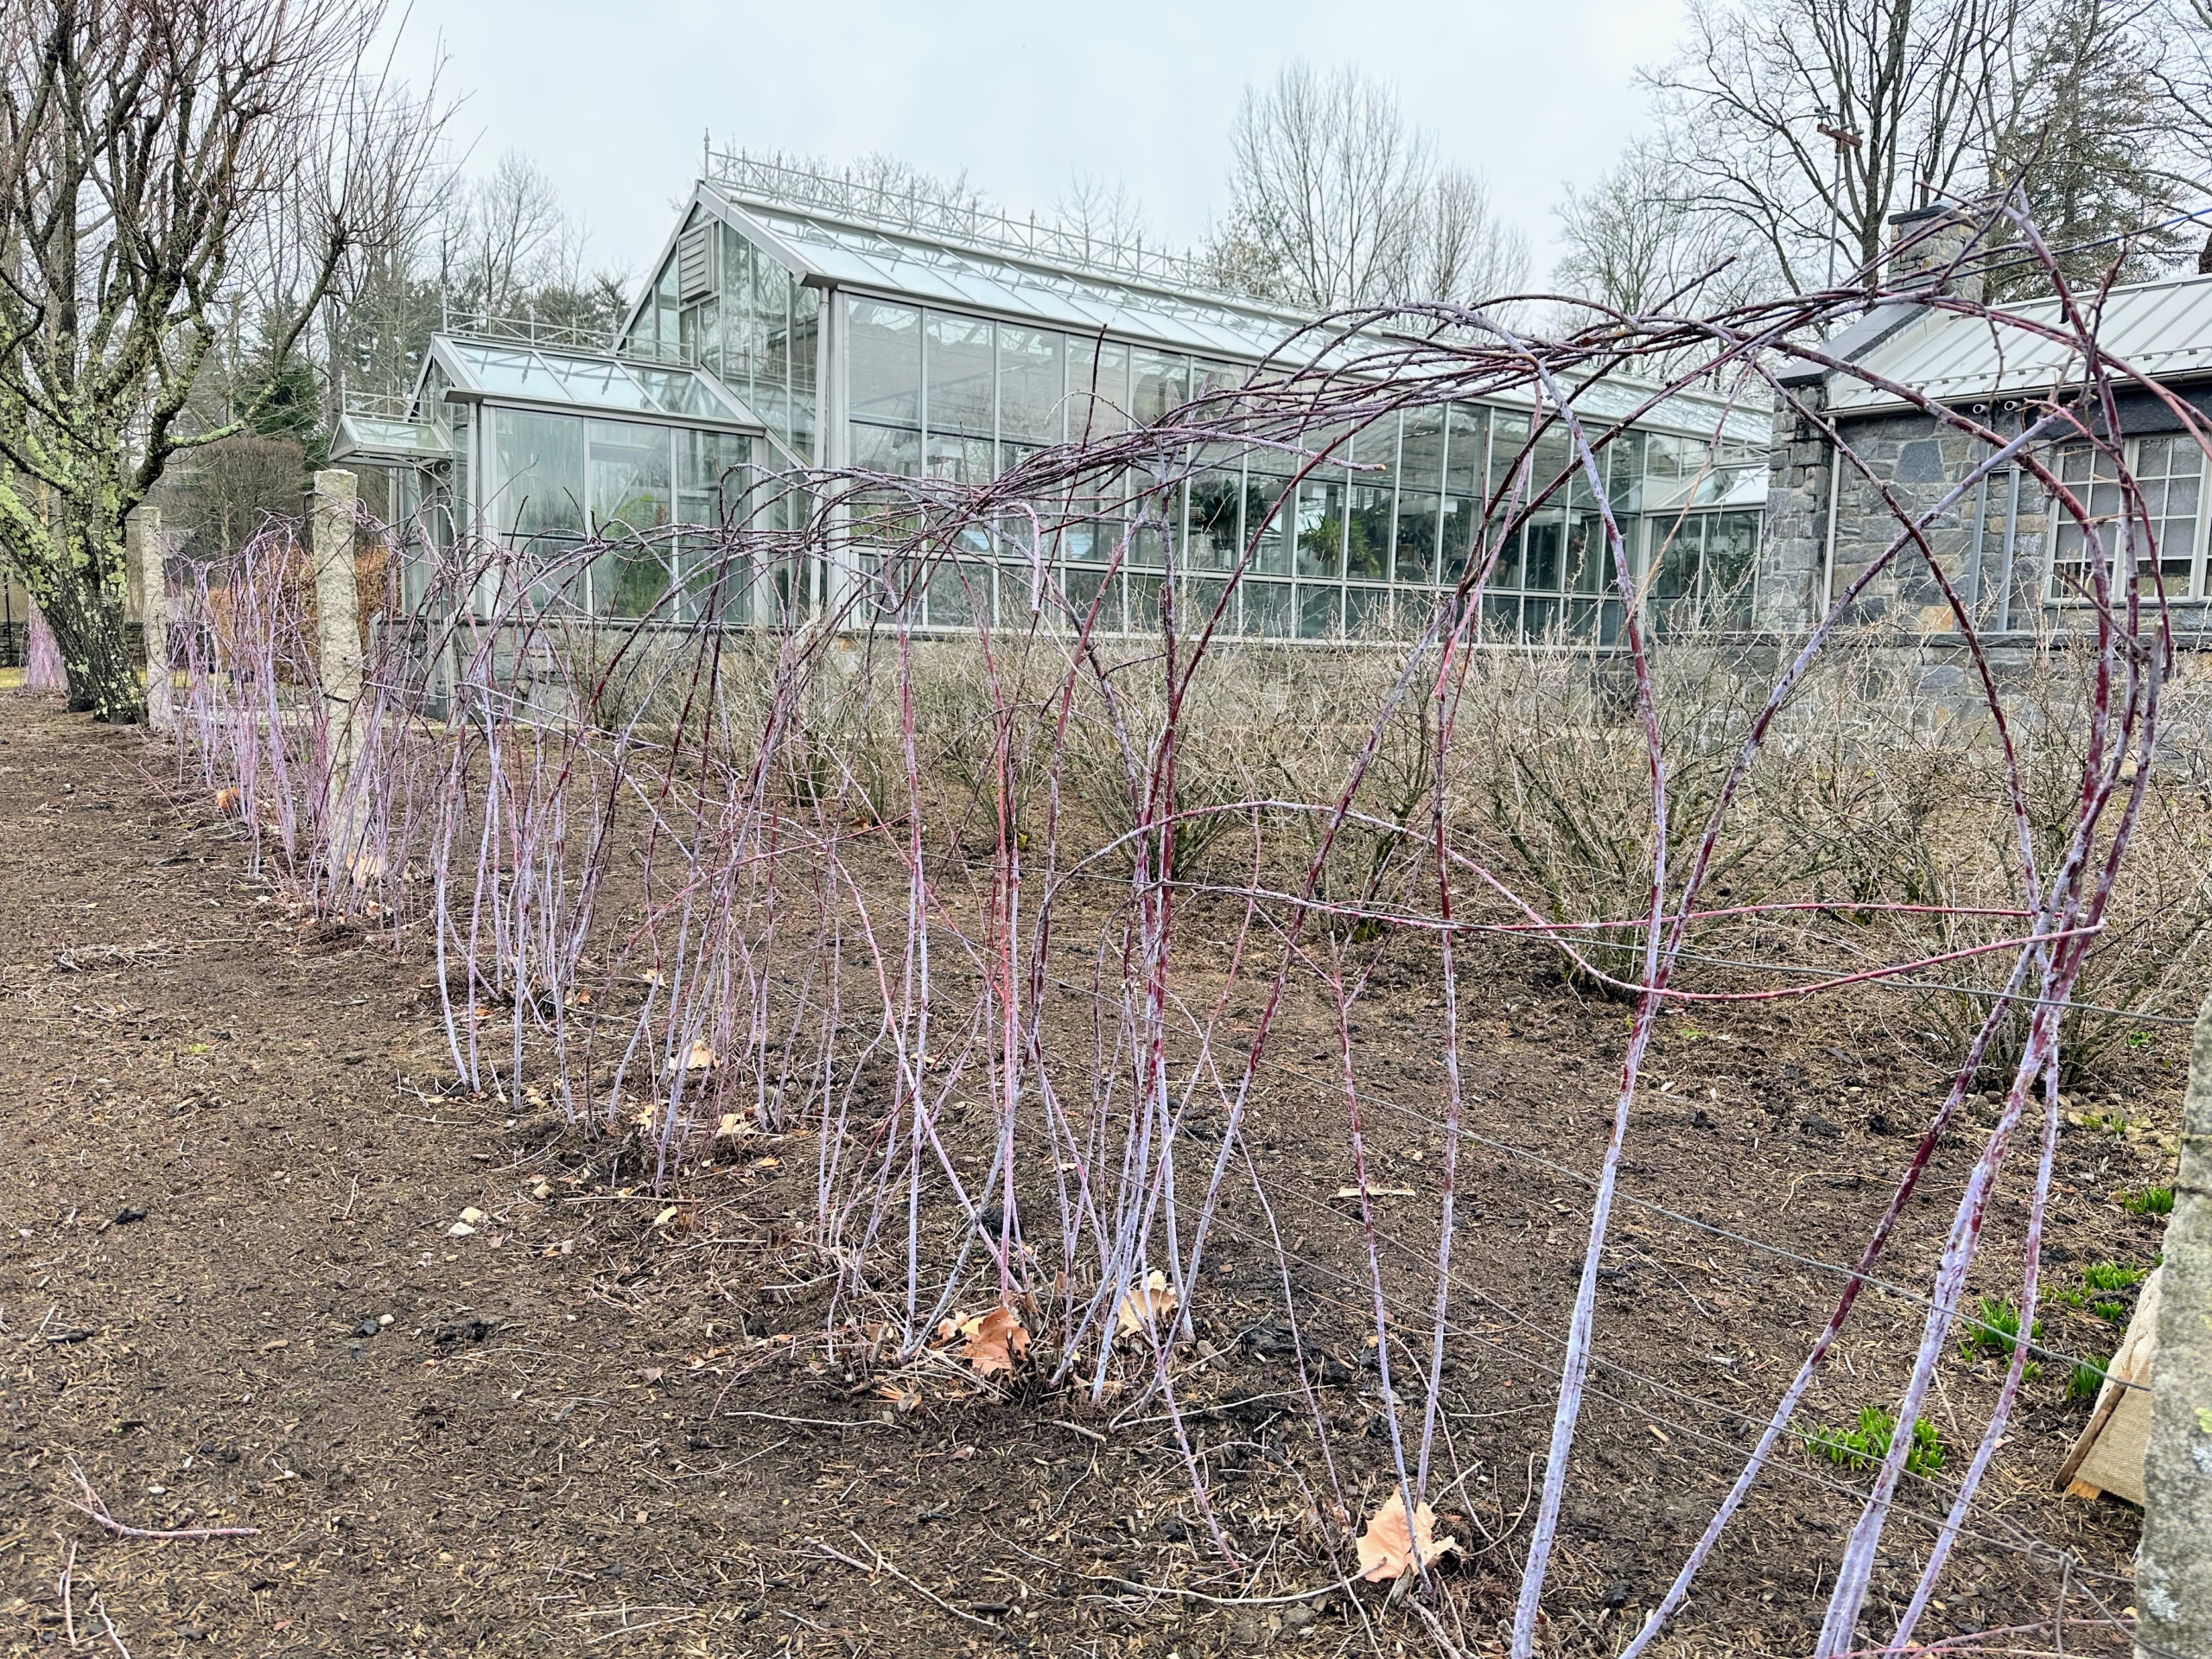
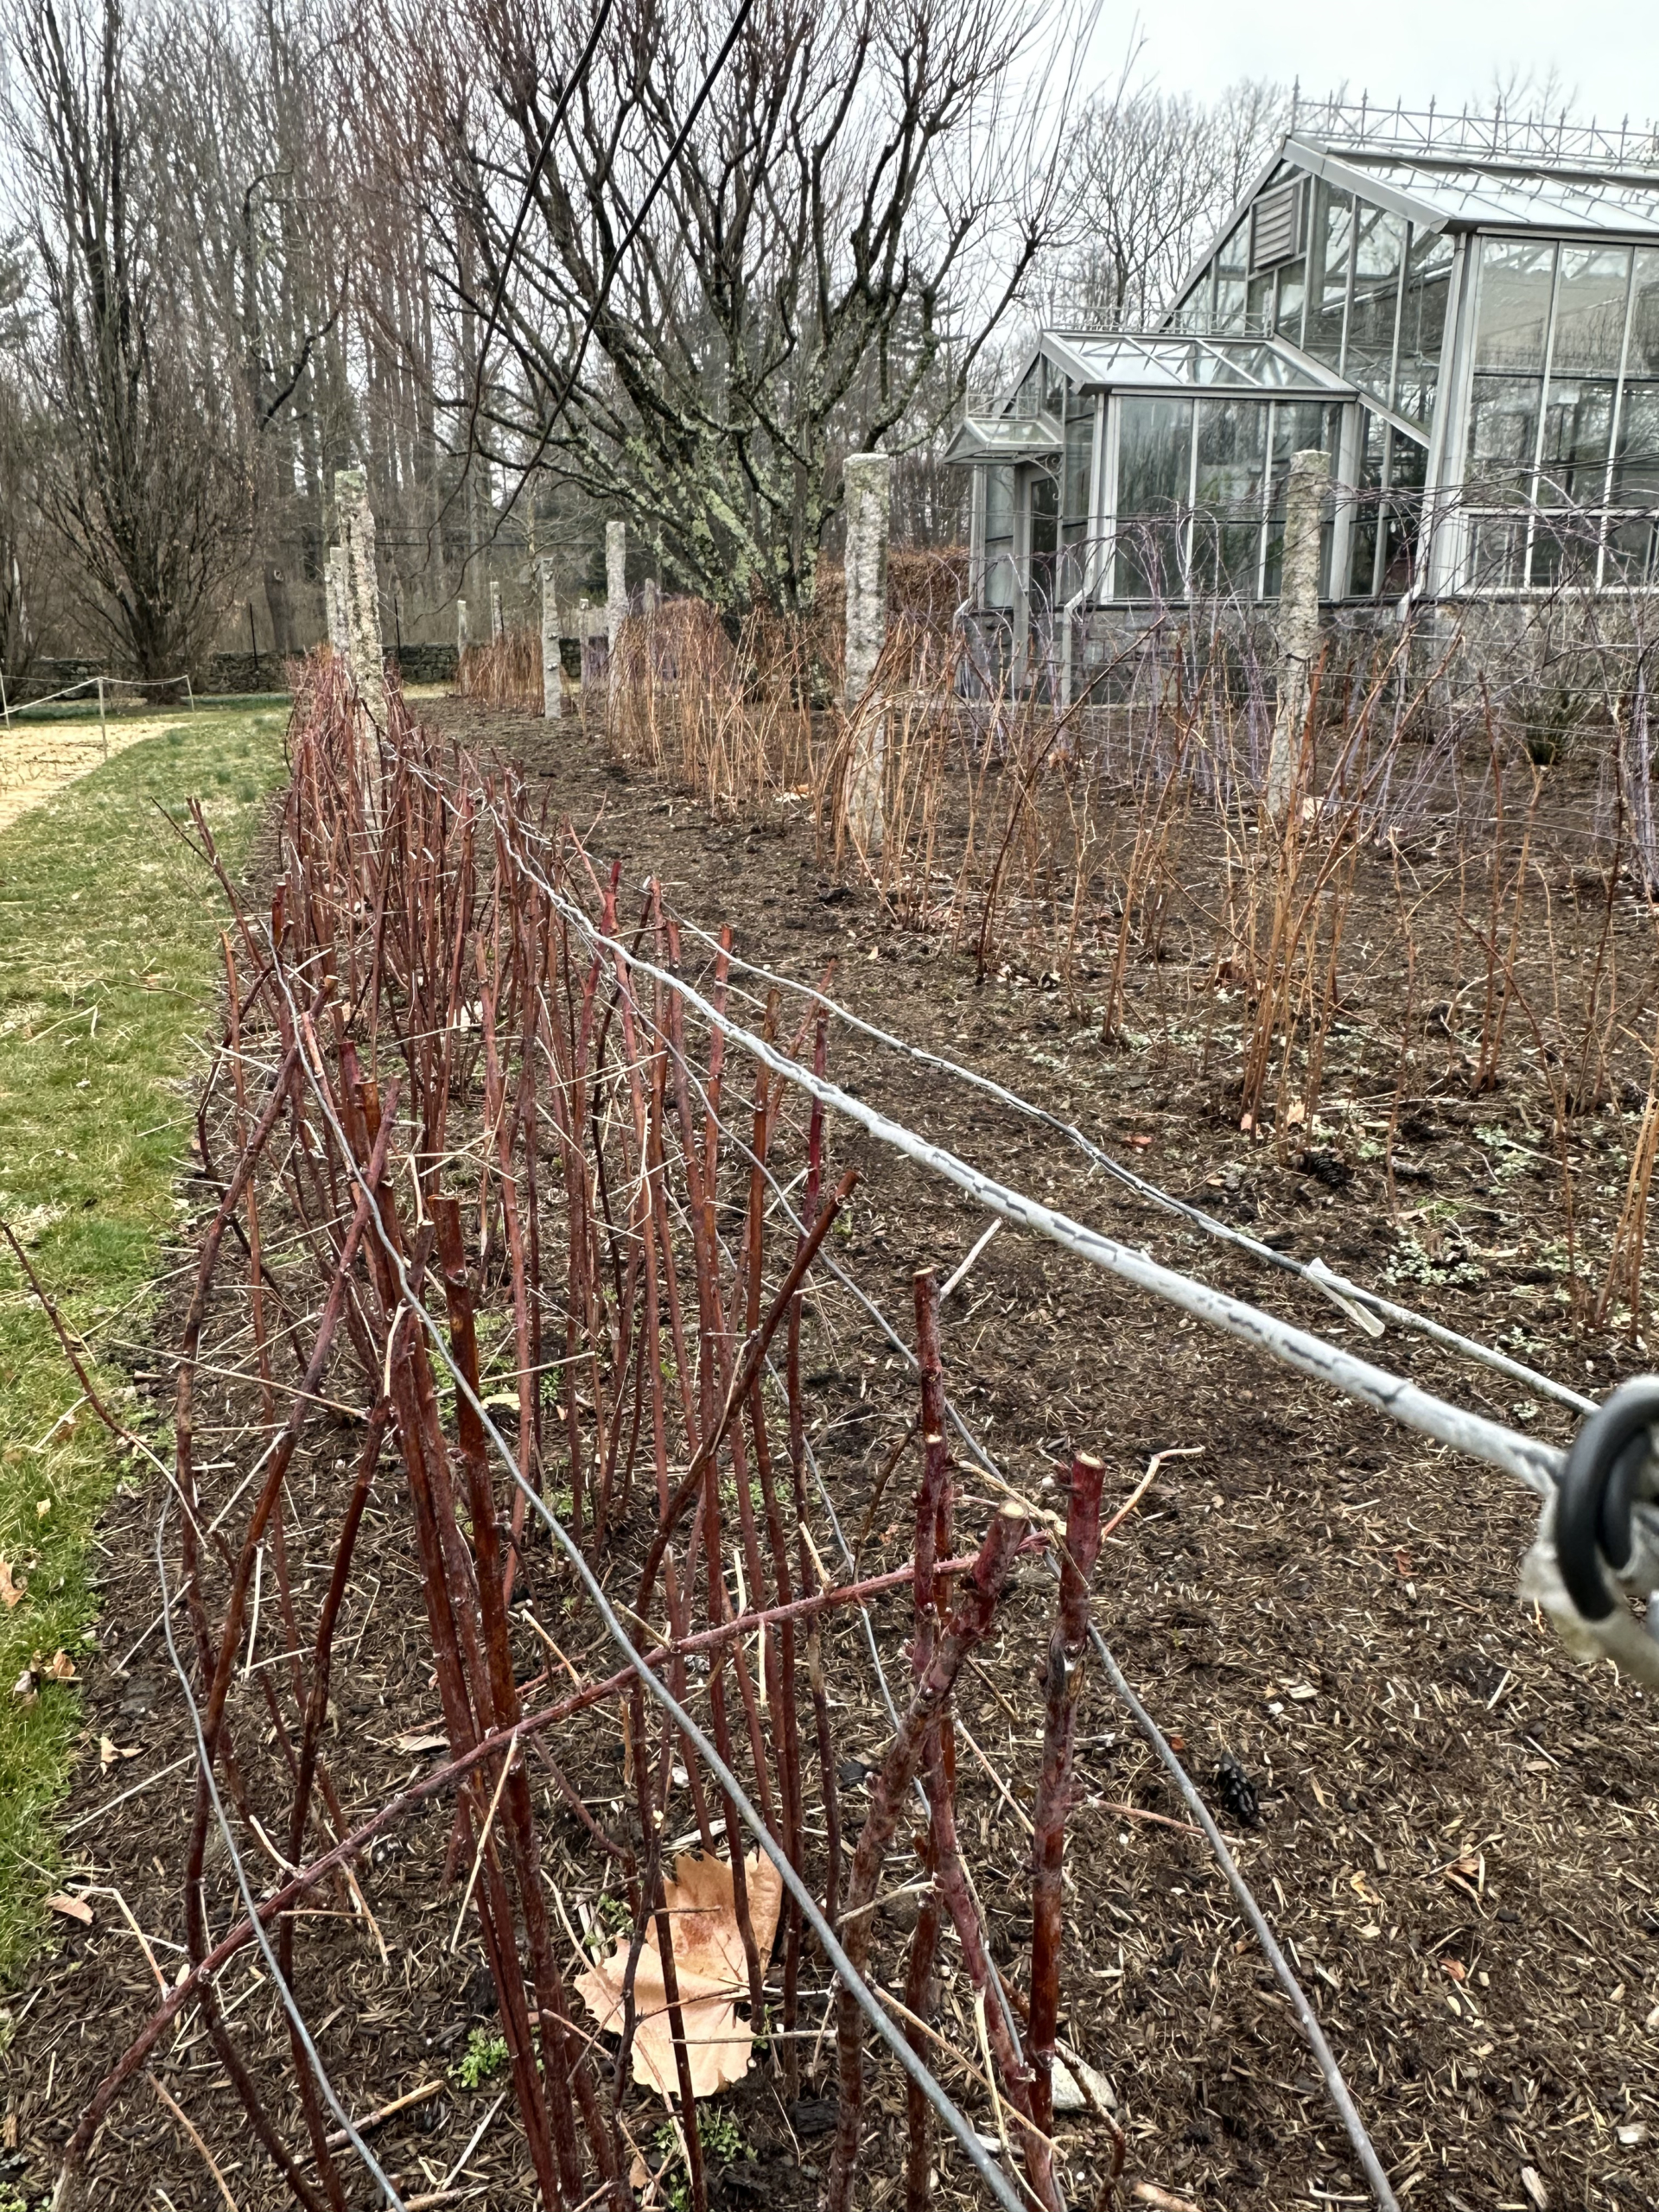
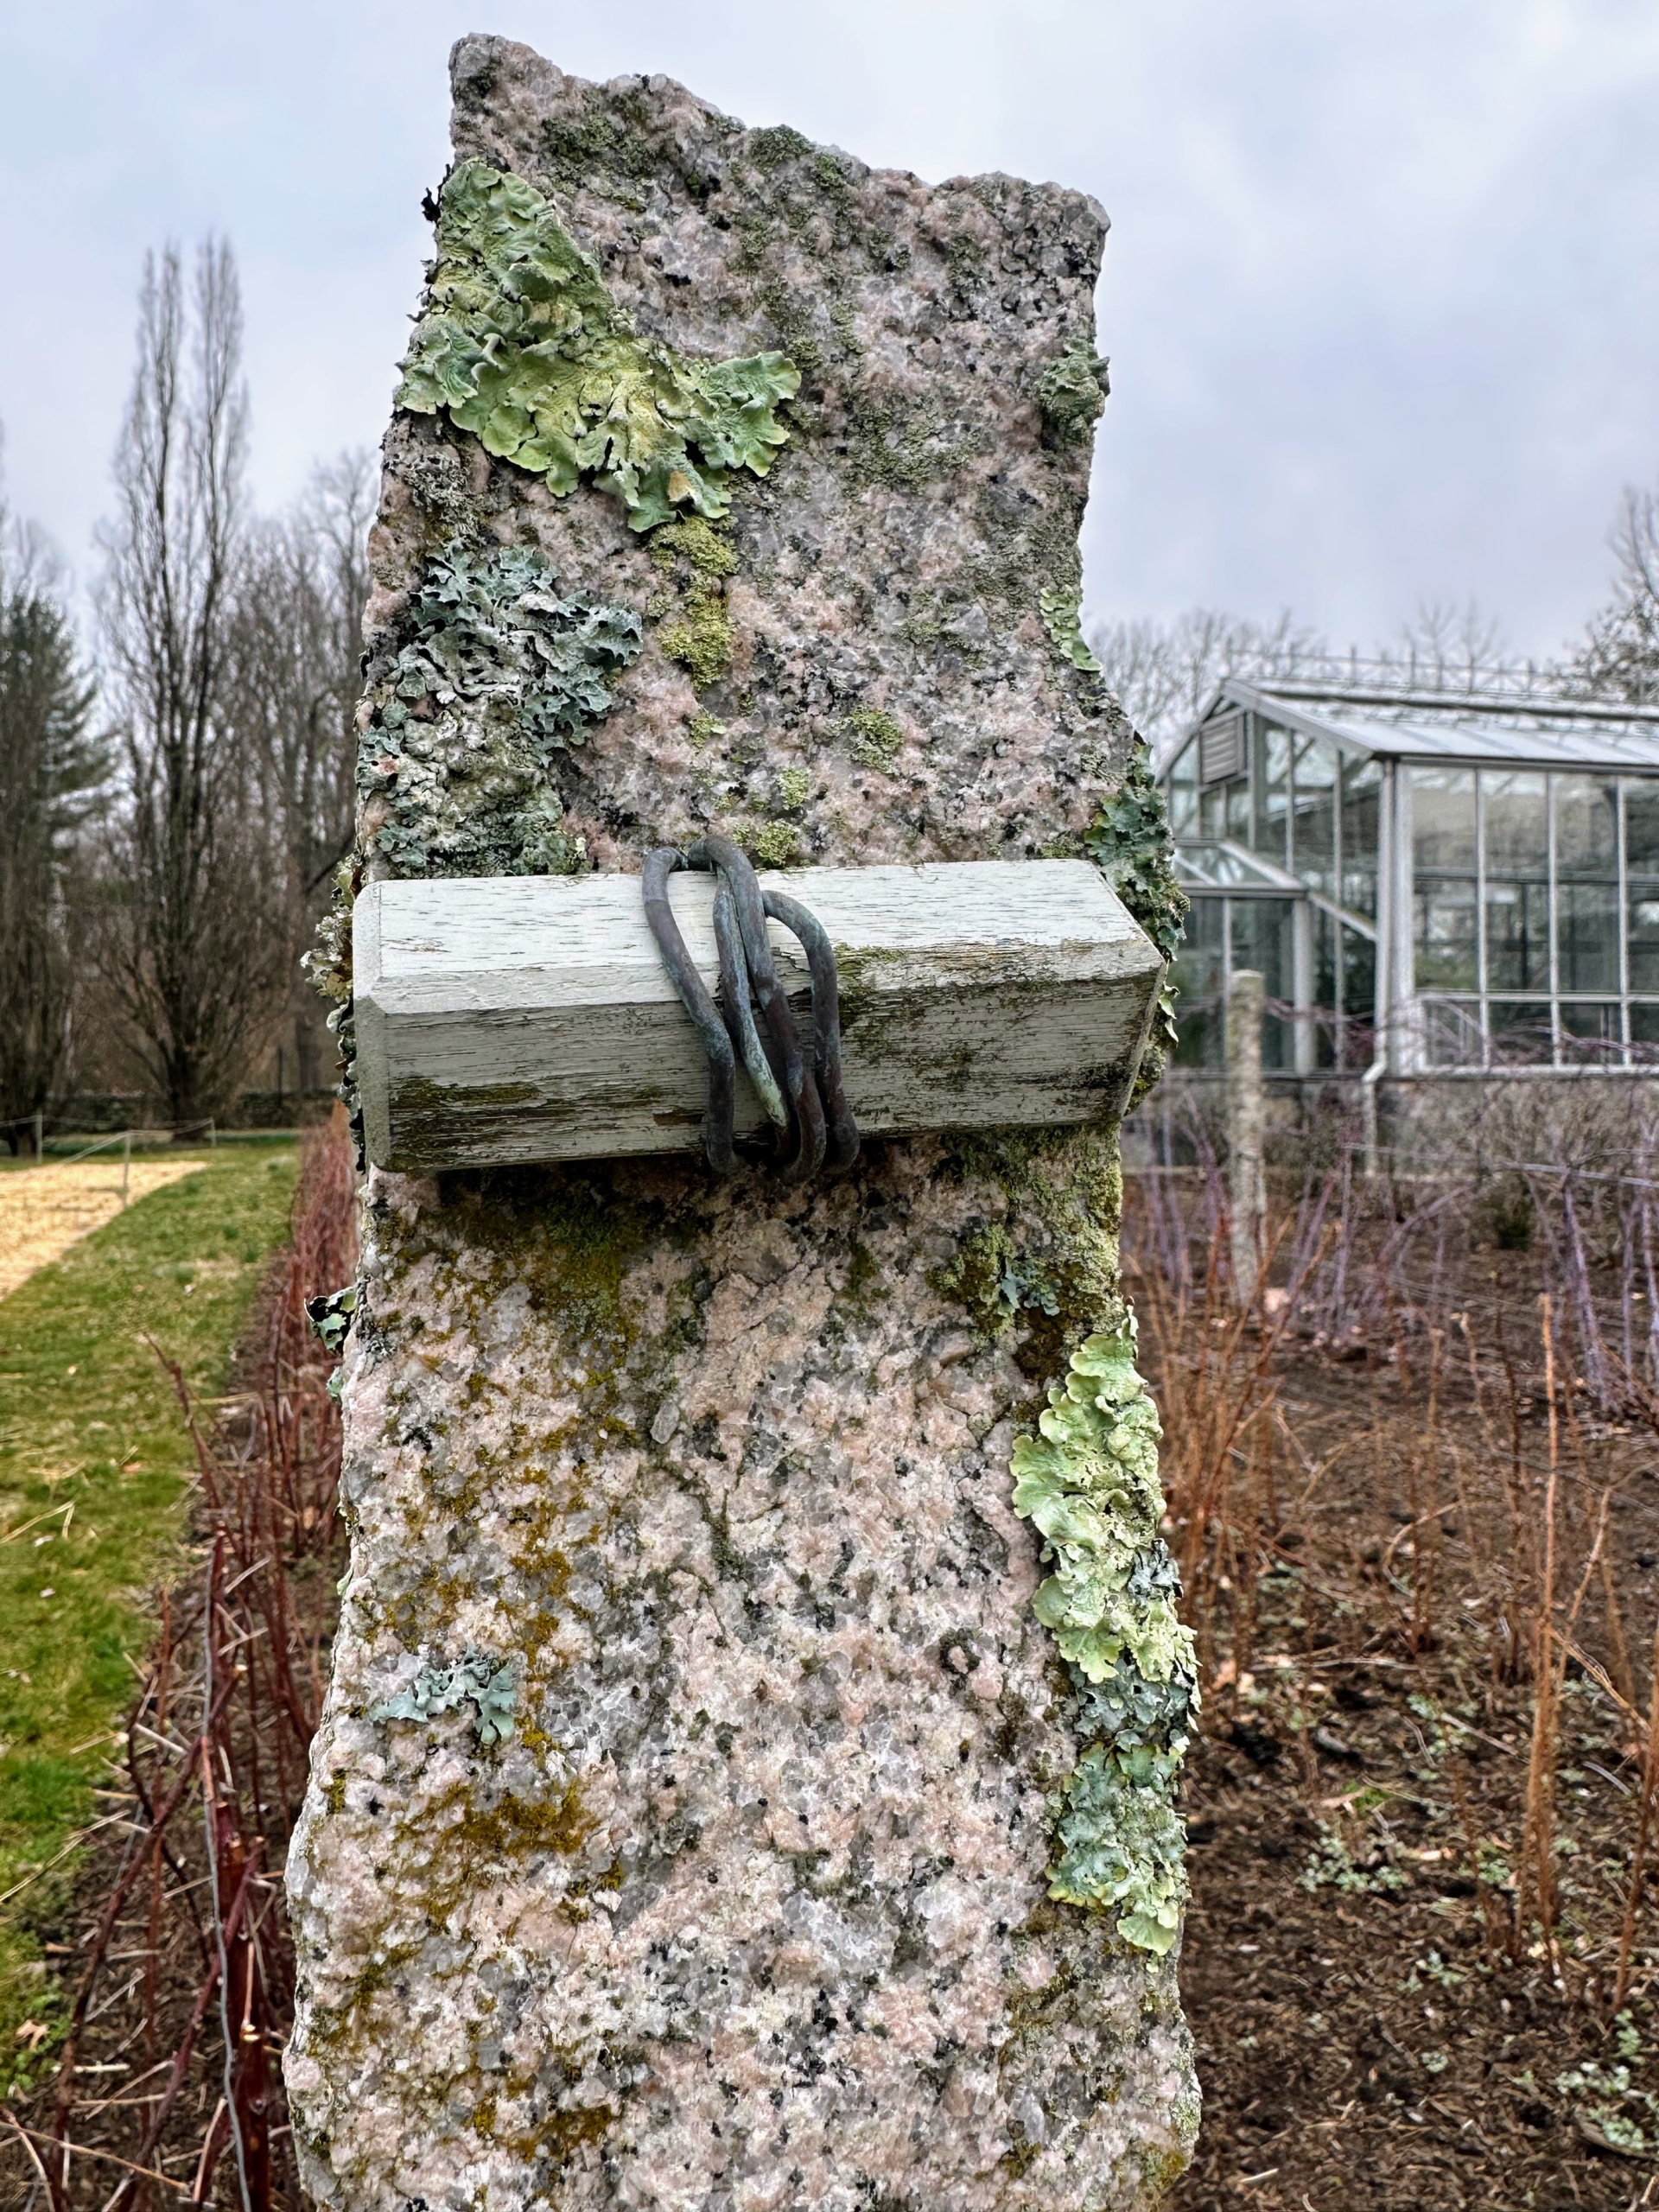
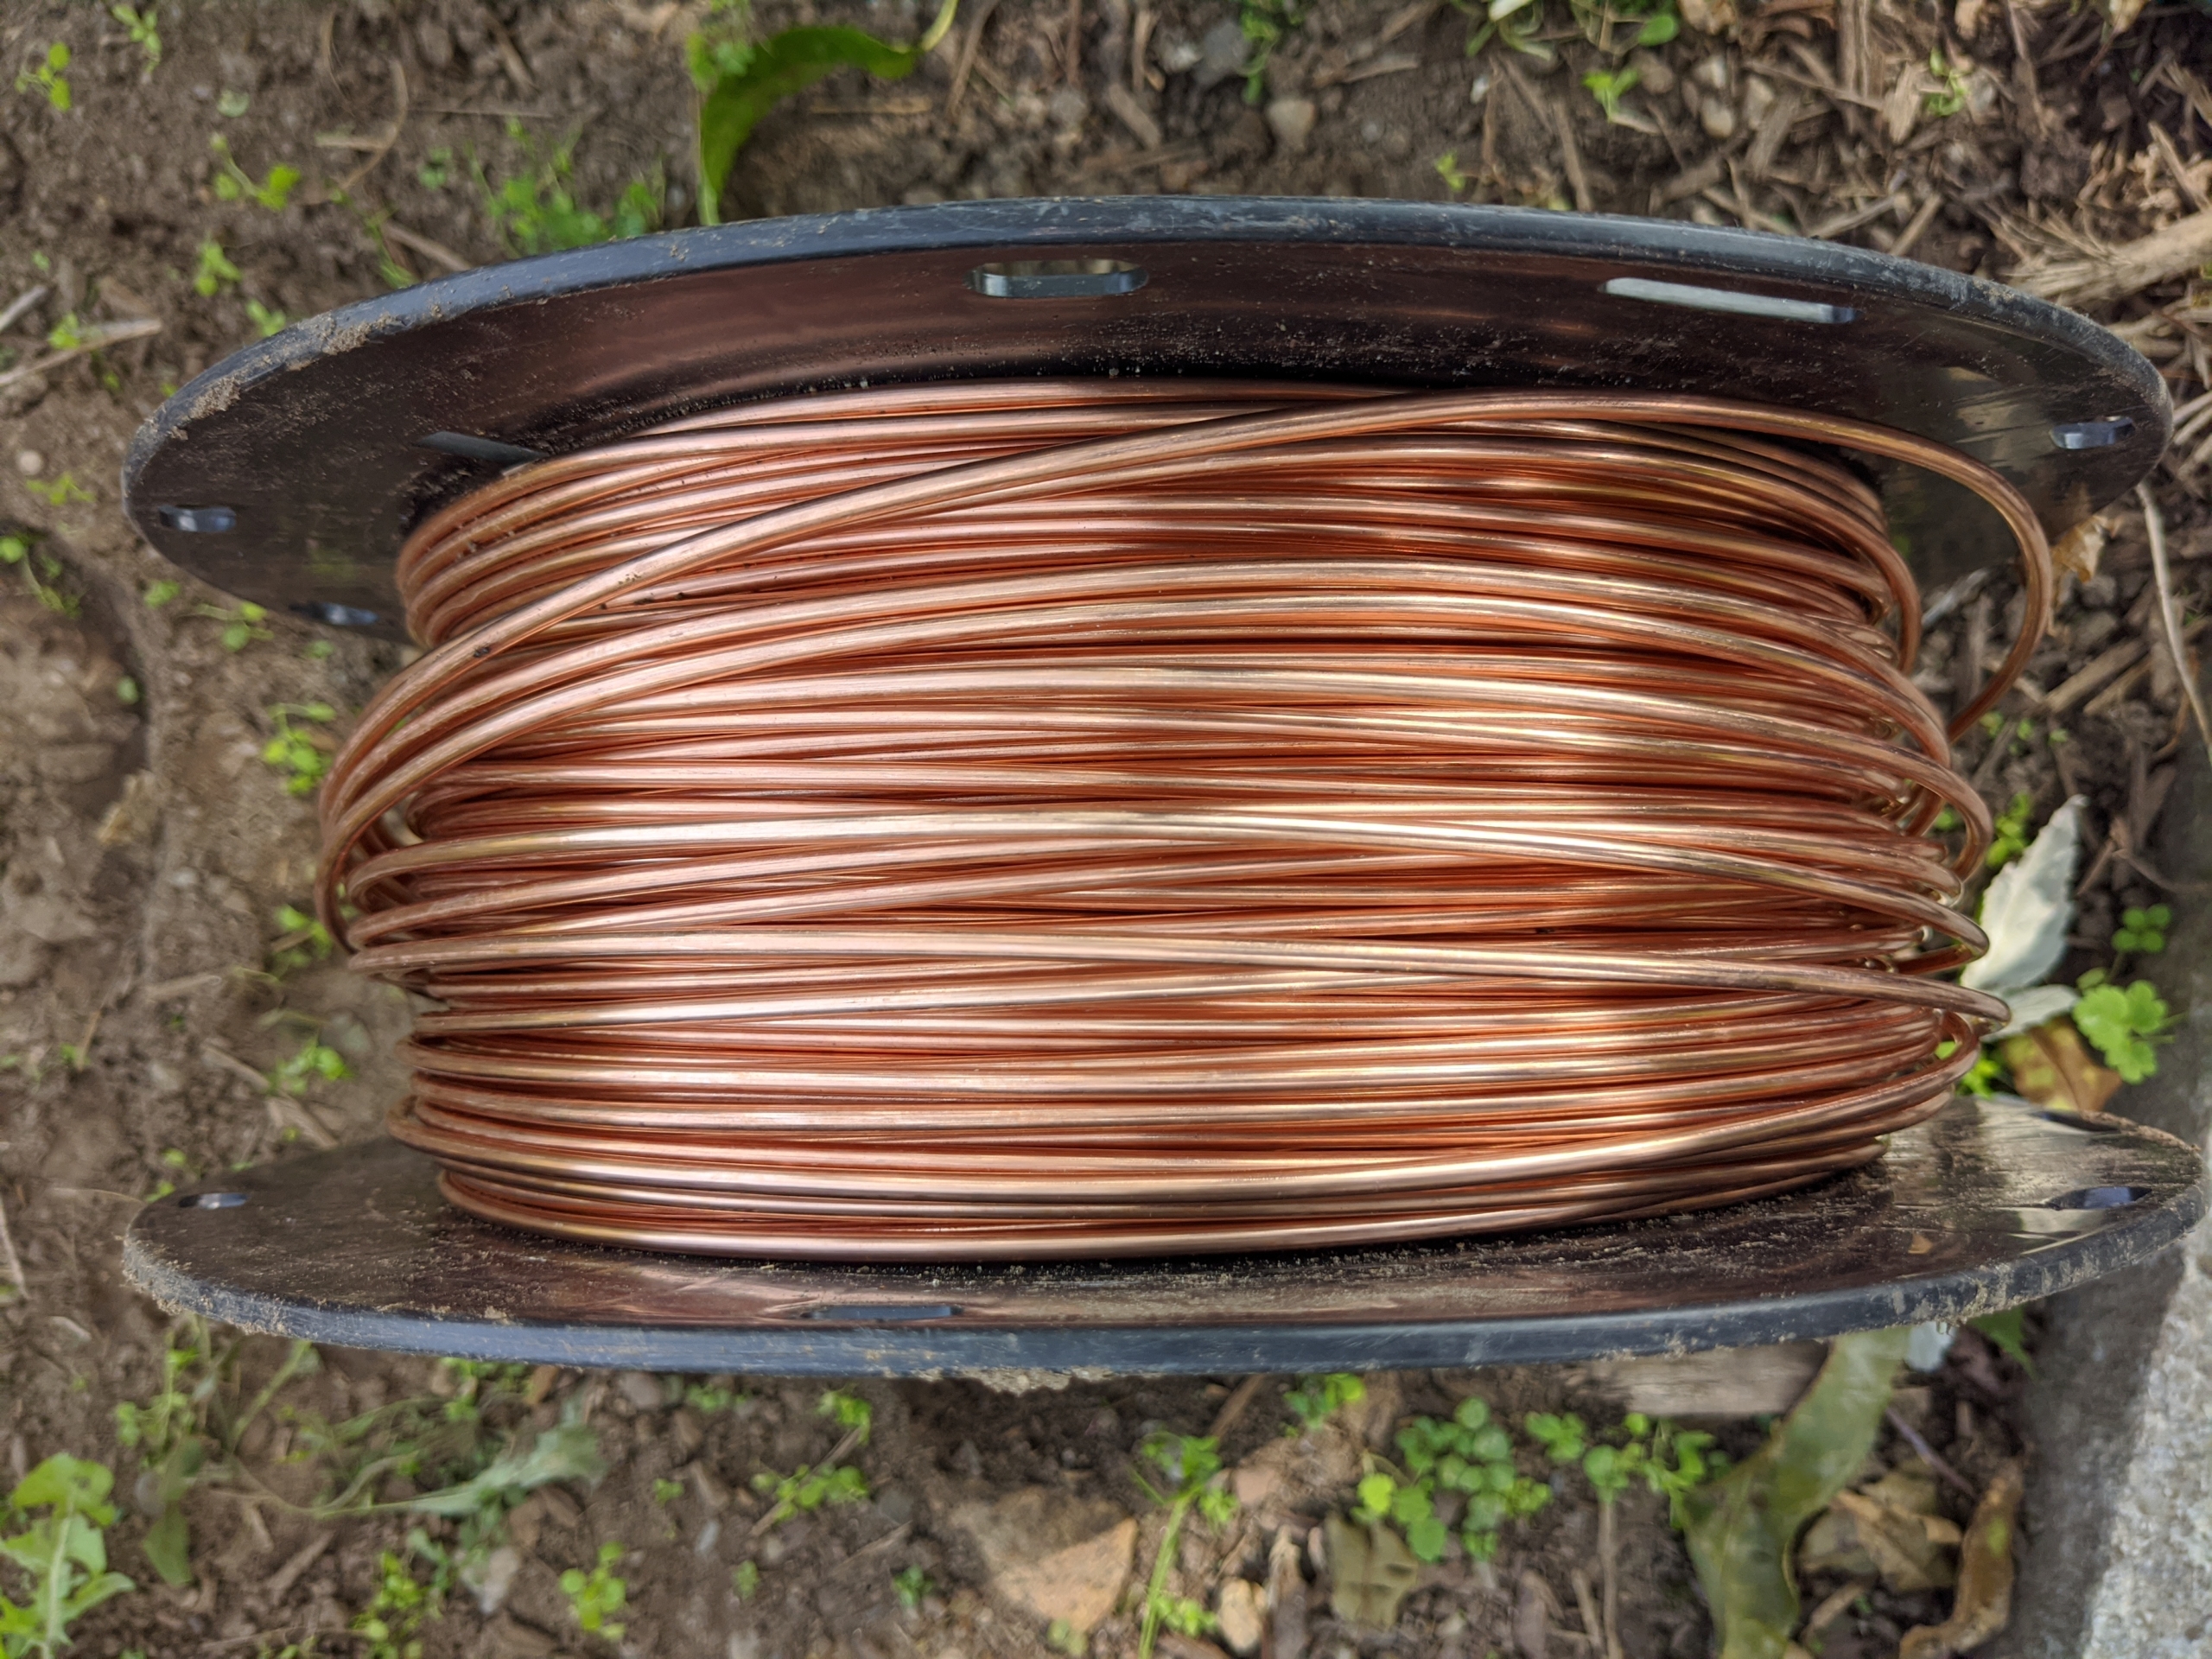
At the ends of each row of berries are these upright posts made of granite. They have heavy gauge copper wire laced through them to support the berry bushes. The wire can be tightened or loosened depending on the need.
I like to use copper wiring. The copper looks much prettier than other metal wire, but the advantage of using wire at all is that it will not loosen or wear out over time in the way that twine does.
This aisle just outside my main greenhouse looks great. Once they are trimmed, everything looks uniform and level. We should have a good berry season this summer.
These bushes were also pruned – they look very different without all their leaves. There’s lots of work to do around this busy farm, but one by one the tasks are getting done.
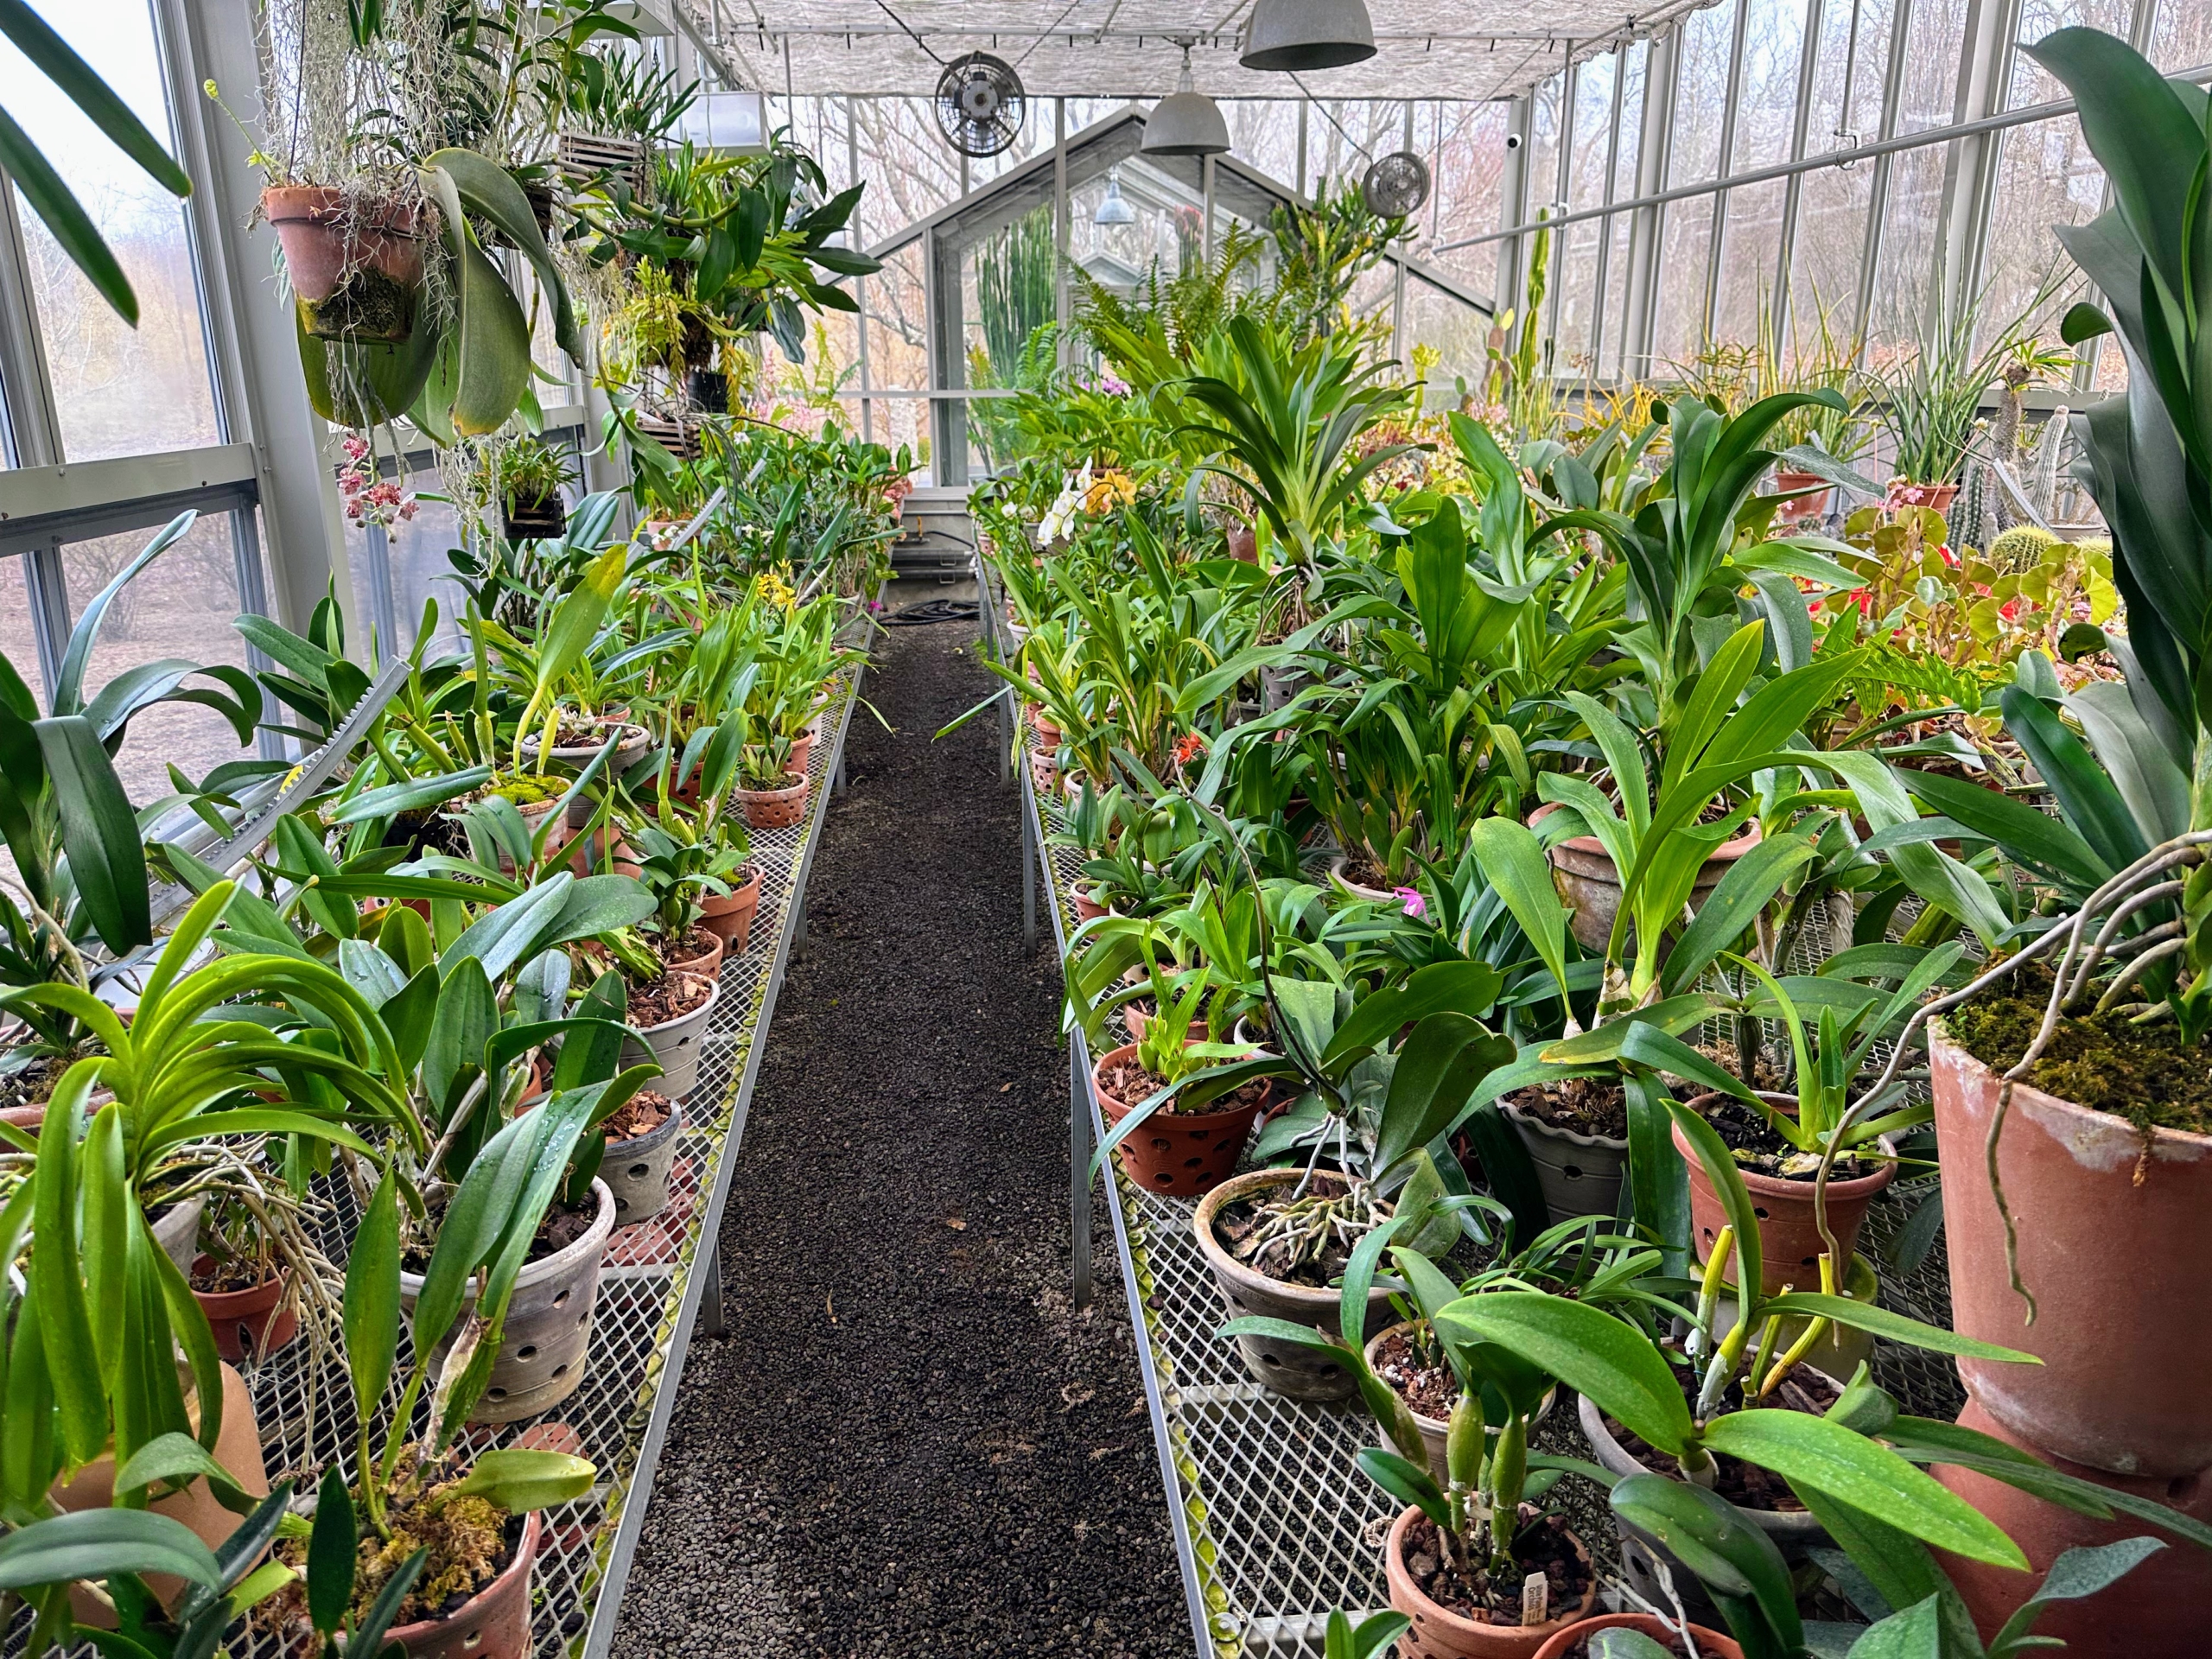
I am fortunate to have several greenhouses here at my Bedford, New York farm where I can maintain a large collection of beautiful potted plants. Among them, a growing group of orchids - those epiphytic flowering plants that bloom in a vibrant array of colors, shapes, and sizes.
Caring for orchids is a daunting process for many, but if you take the time to understand their basic needs, there is no reason why they couldn't bloom and thrive in your home.
Here are some photos of mine. And please watch my episode of "Martha Gardens," a Roku Original, when I walk through an exquisite display of orchids at the New York Botanical Garden.
This is one side of my large glass main greenhouse here at my farm. My growing orchid collection takes up space on long tables that slide for good access on both sides. This structure is also temperature and humidity controlled for the best growing conditions. When in bloom, I like to display some of my orchids in my home, but most of the time, they are kept here where they can be monitored and maintained more closely.
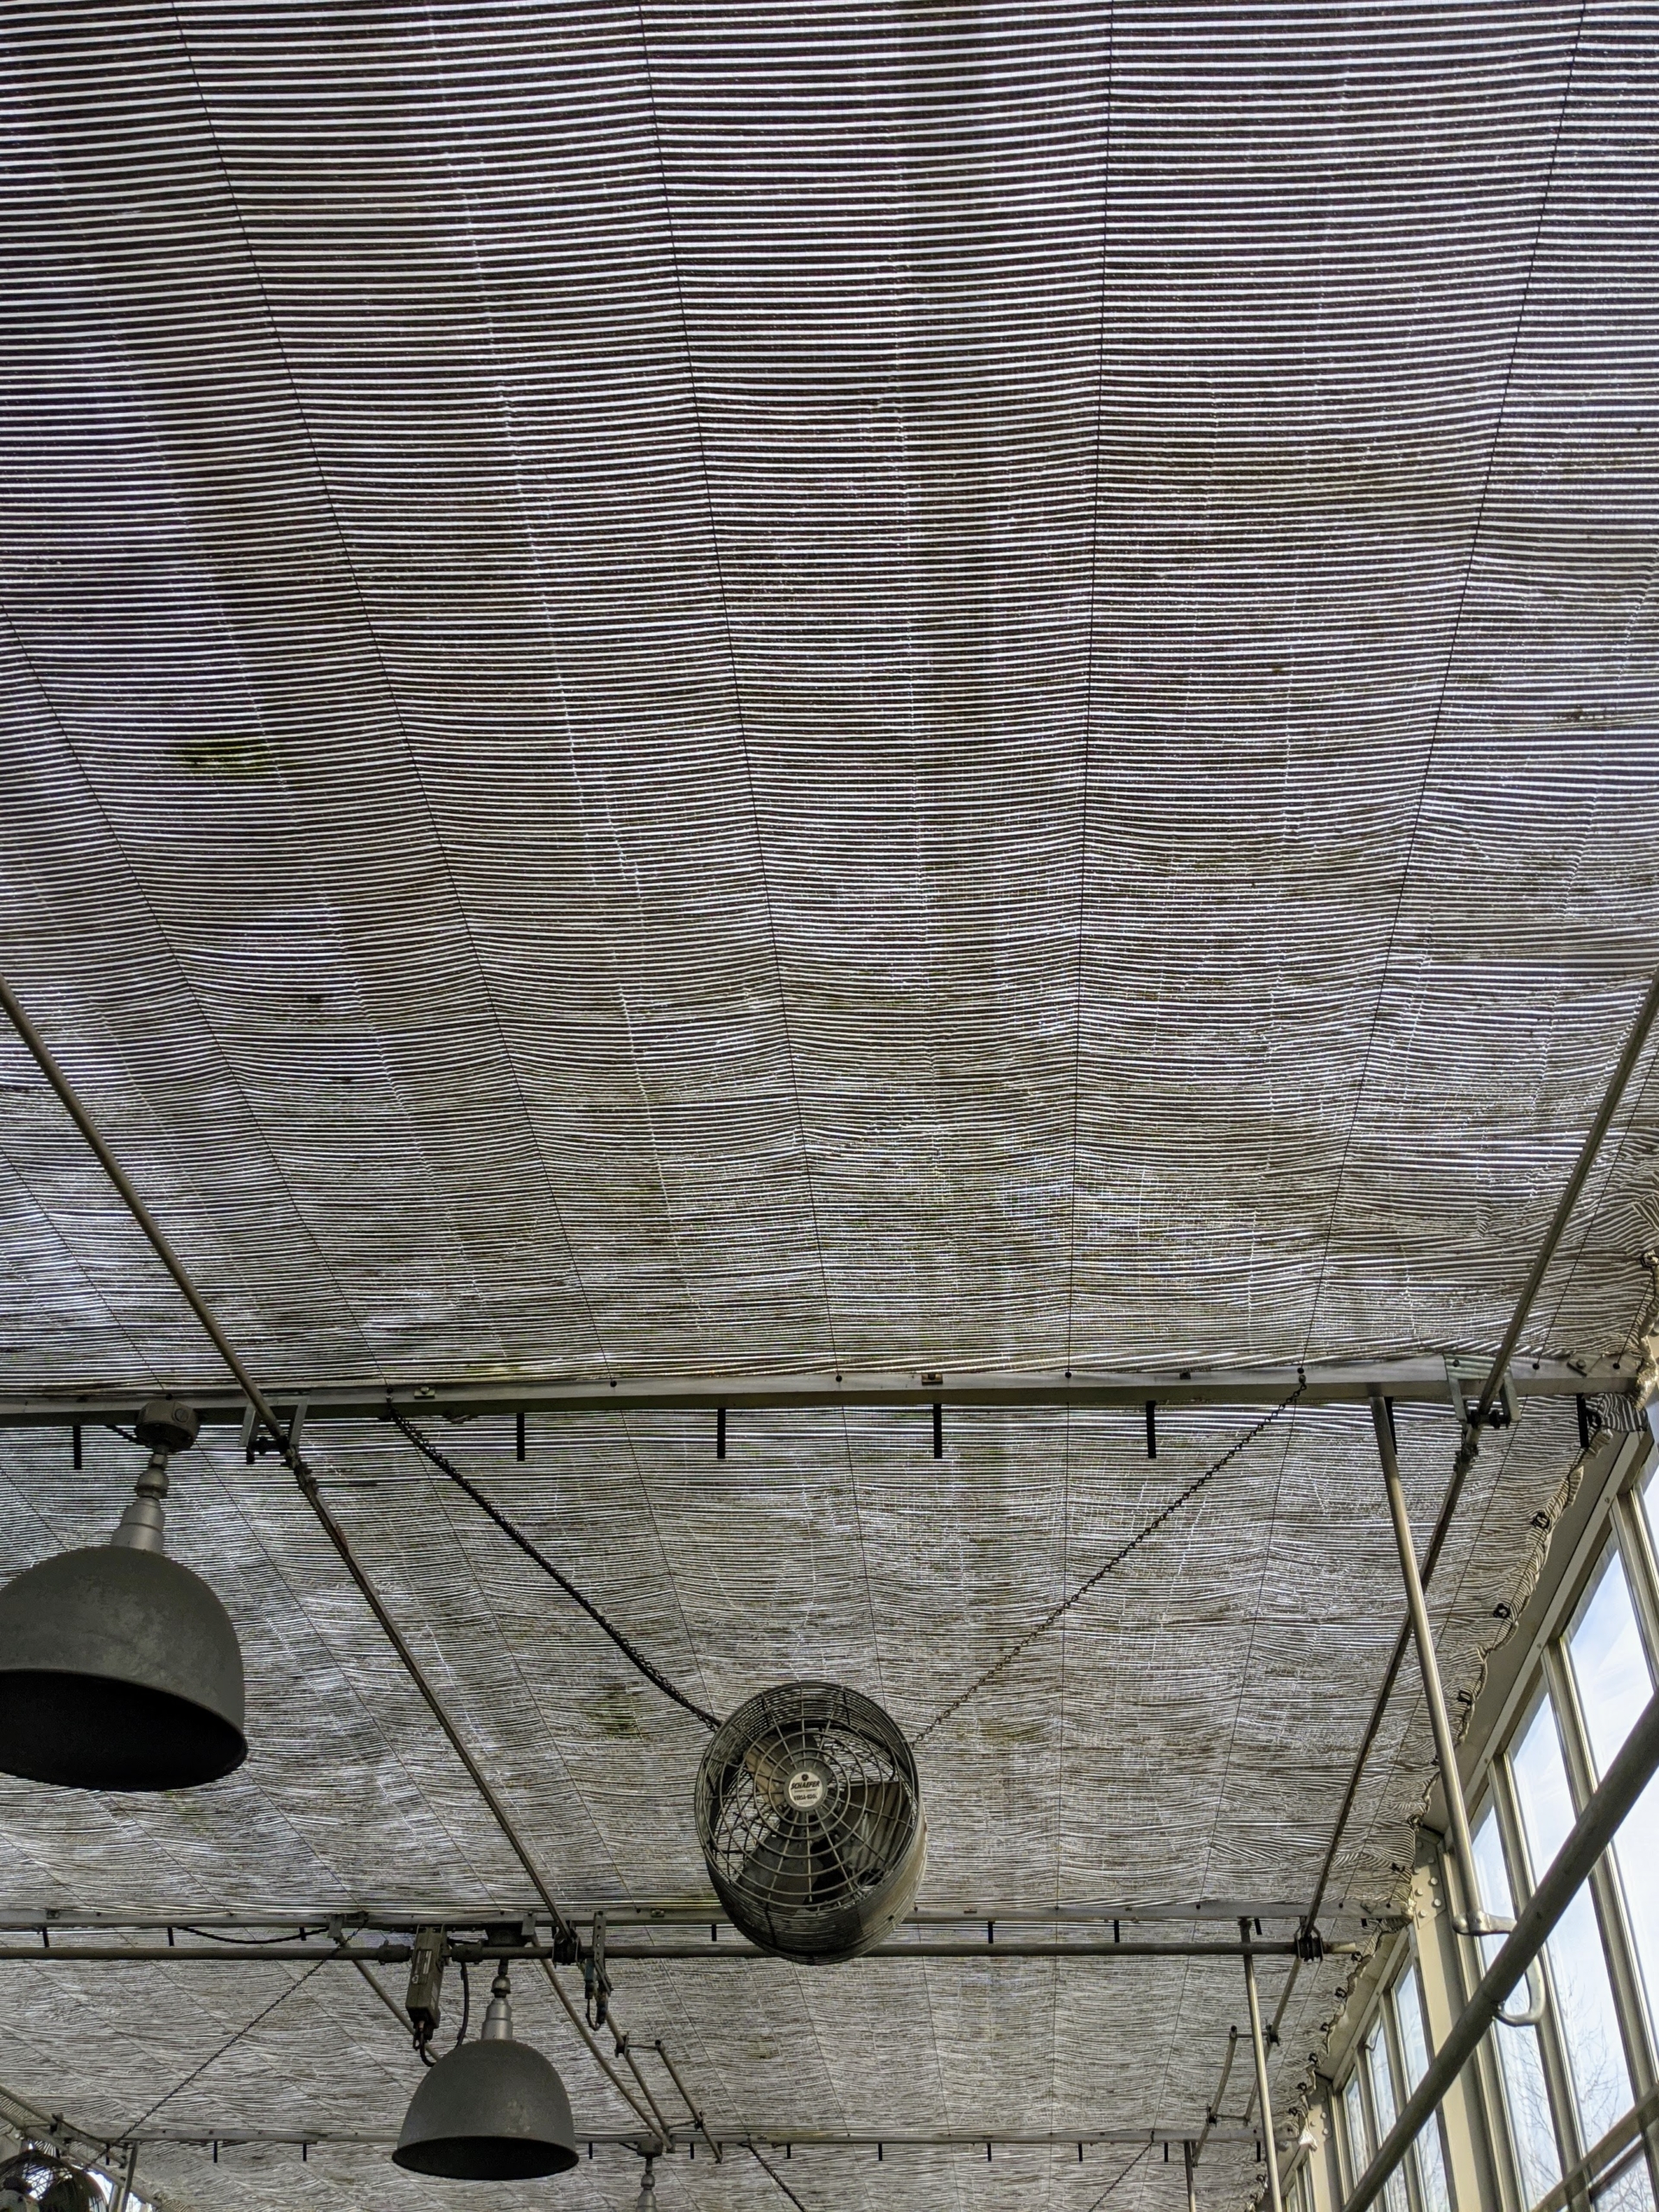
Above are these large shades across the entire glass ceiling that can be moved depending on lighting needs. The windows in this greenhouse are also mechanical and can open and close when necessary.
Orchids grow on every continent except Antarctica. They are native to the tropical regions of Asia, Australia, the Himalayas, and the Philippines. The orchid forms one of the largest families in the plant kingdom, with more than 25,000 species worldwide.
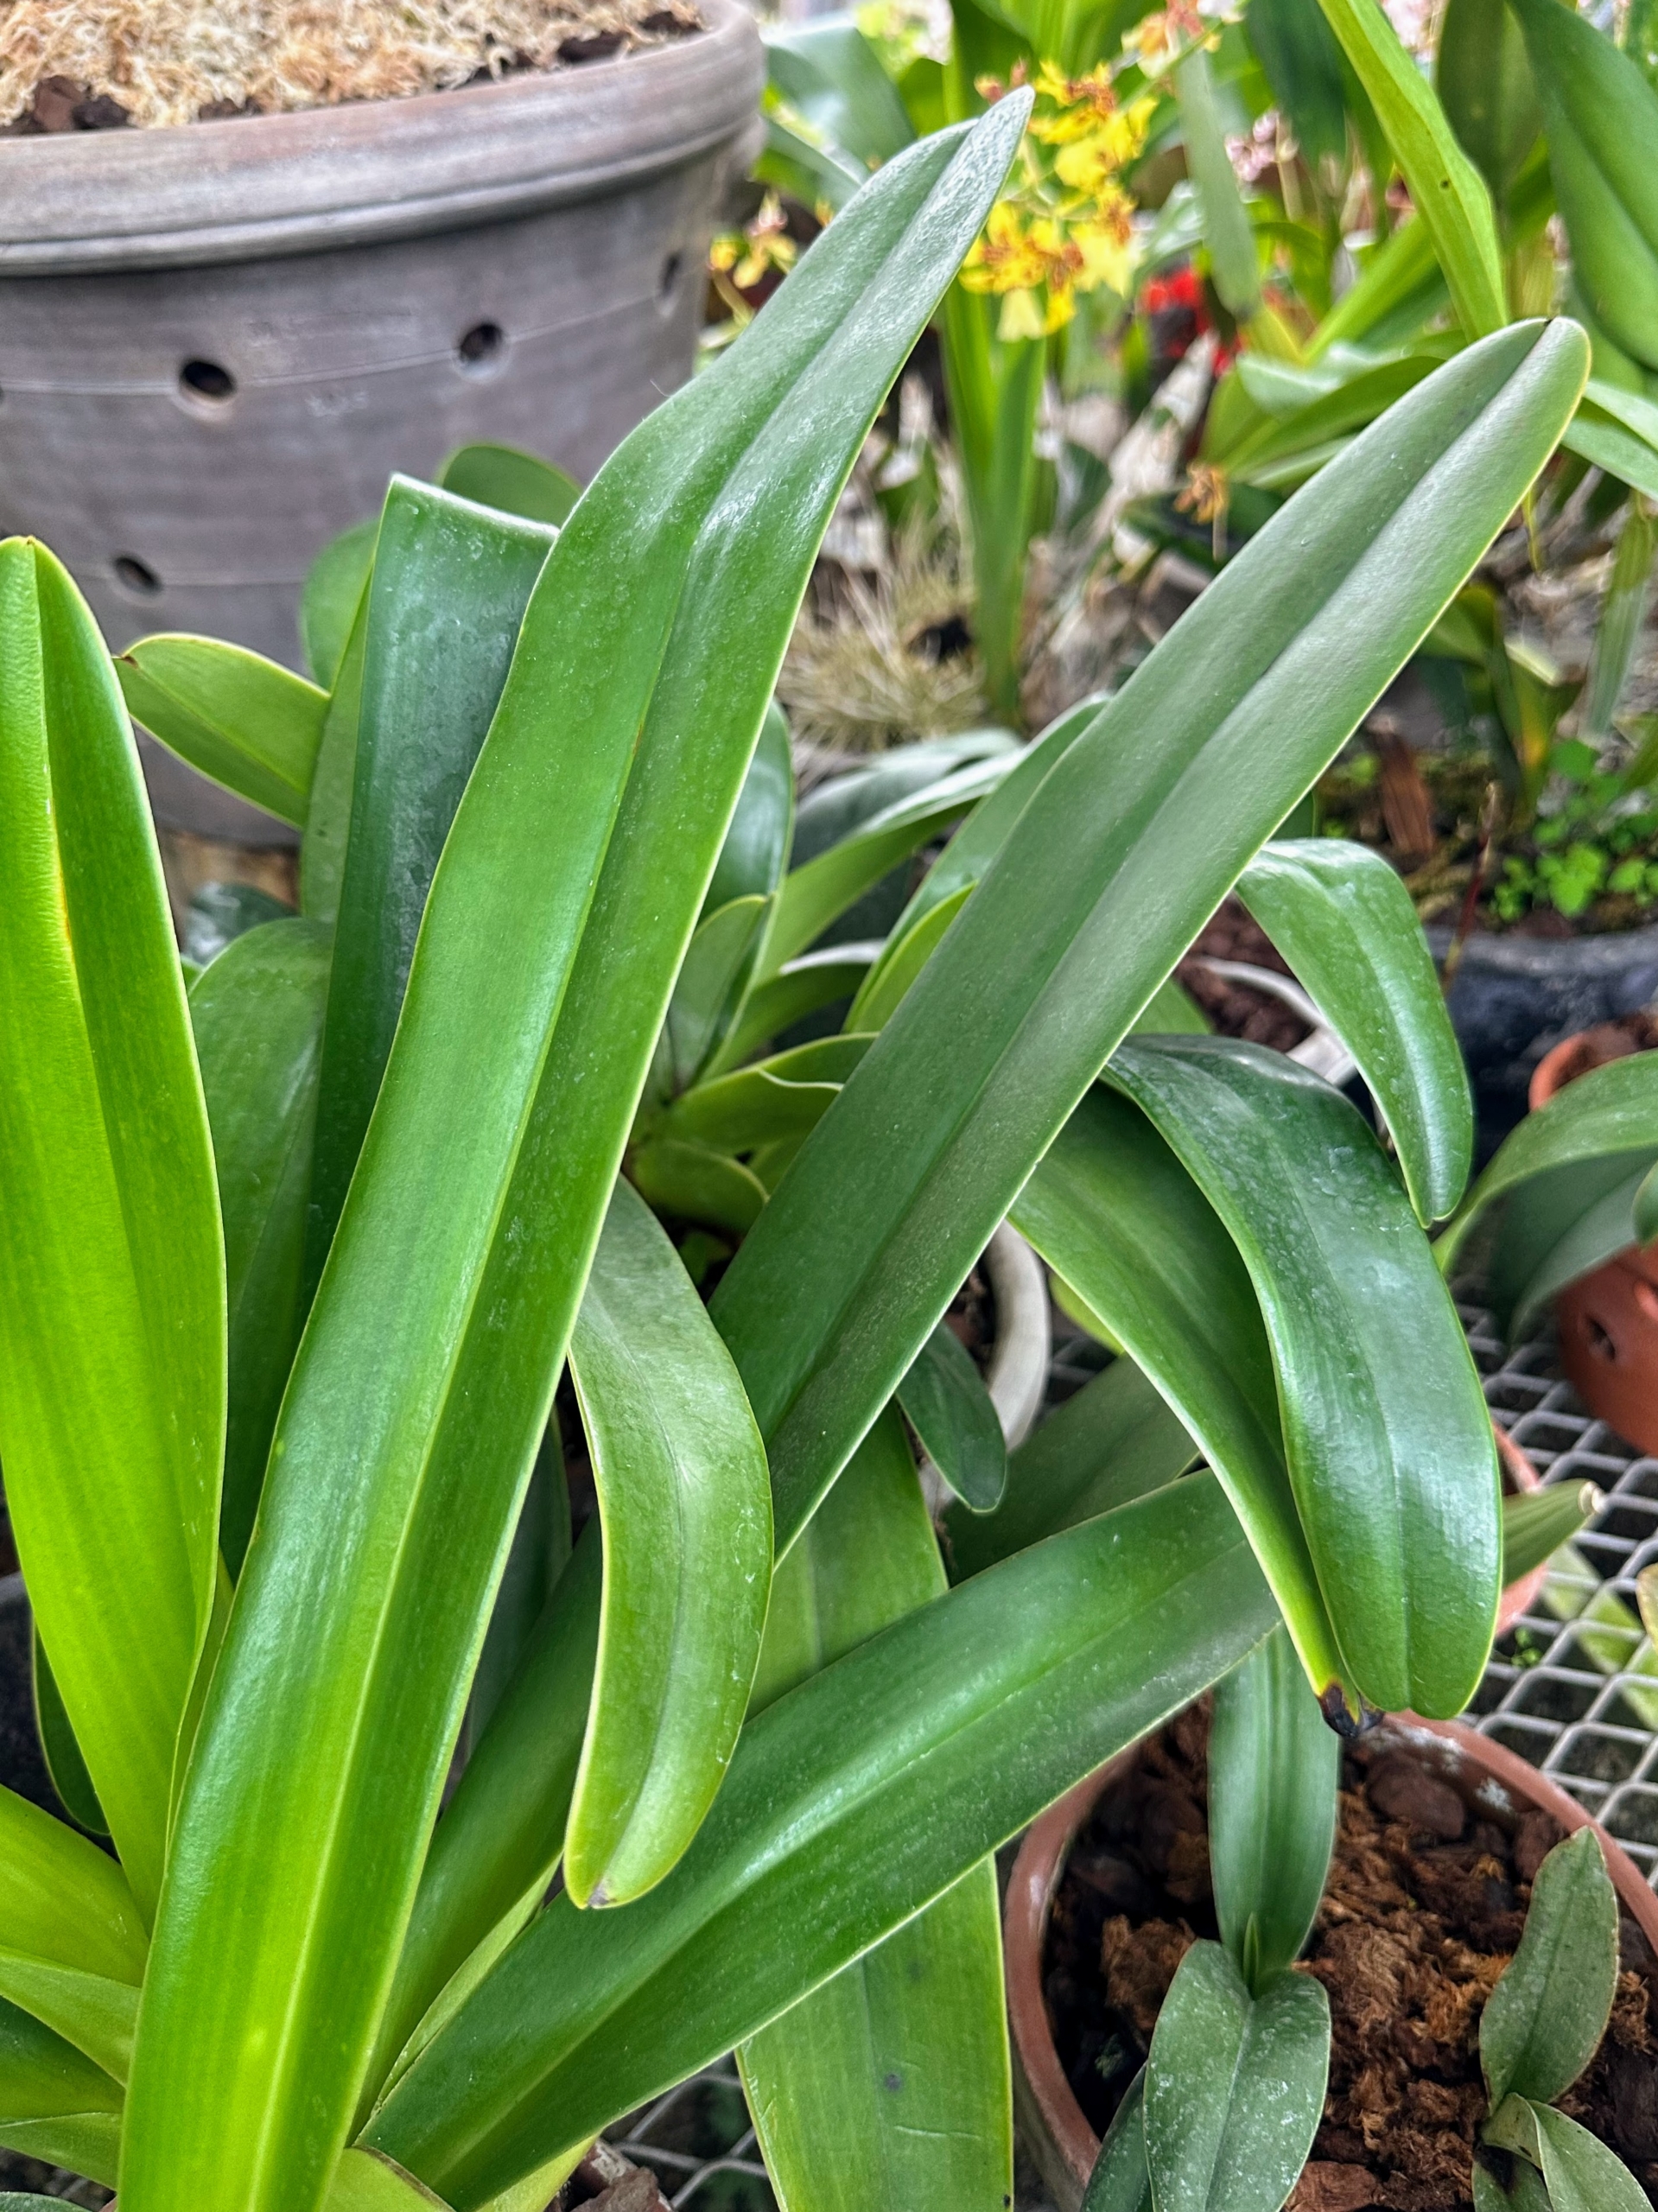
The size of orchids depends on the species. They can be quite small or very large. However, every orchid flower is bilaterally symmetrical, which means it can be divided into two equal parts.
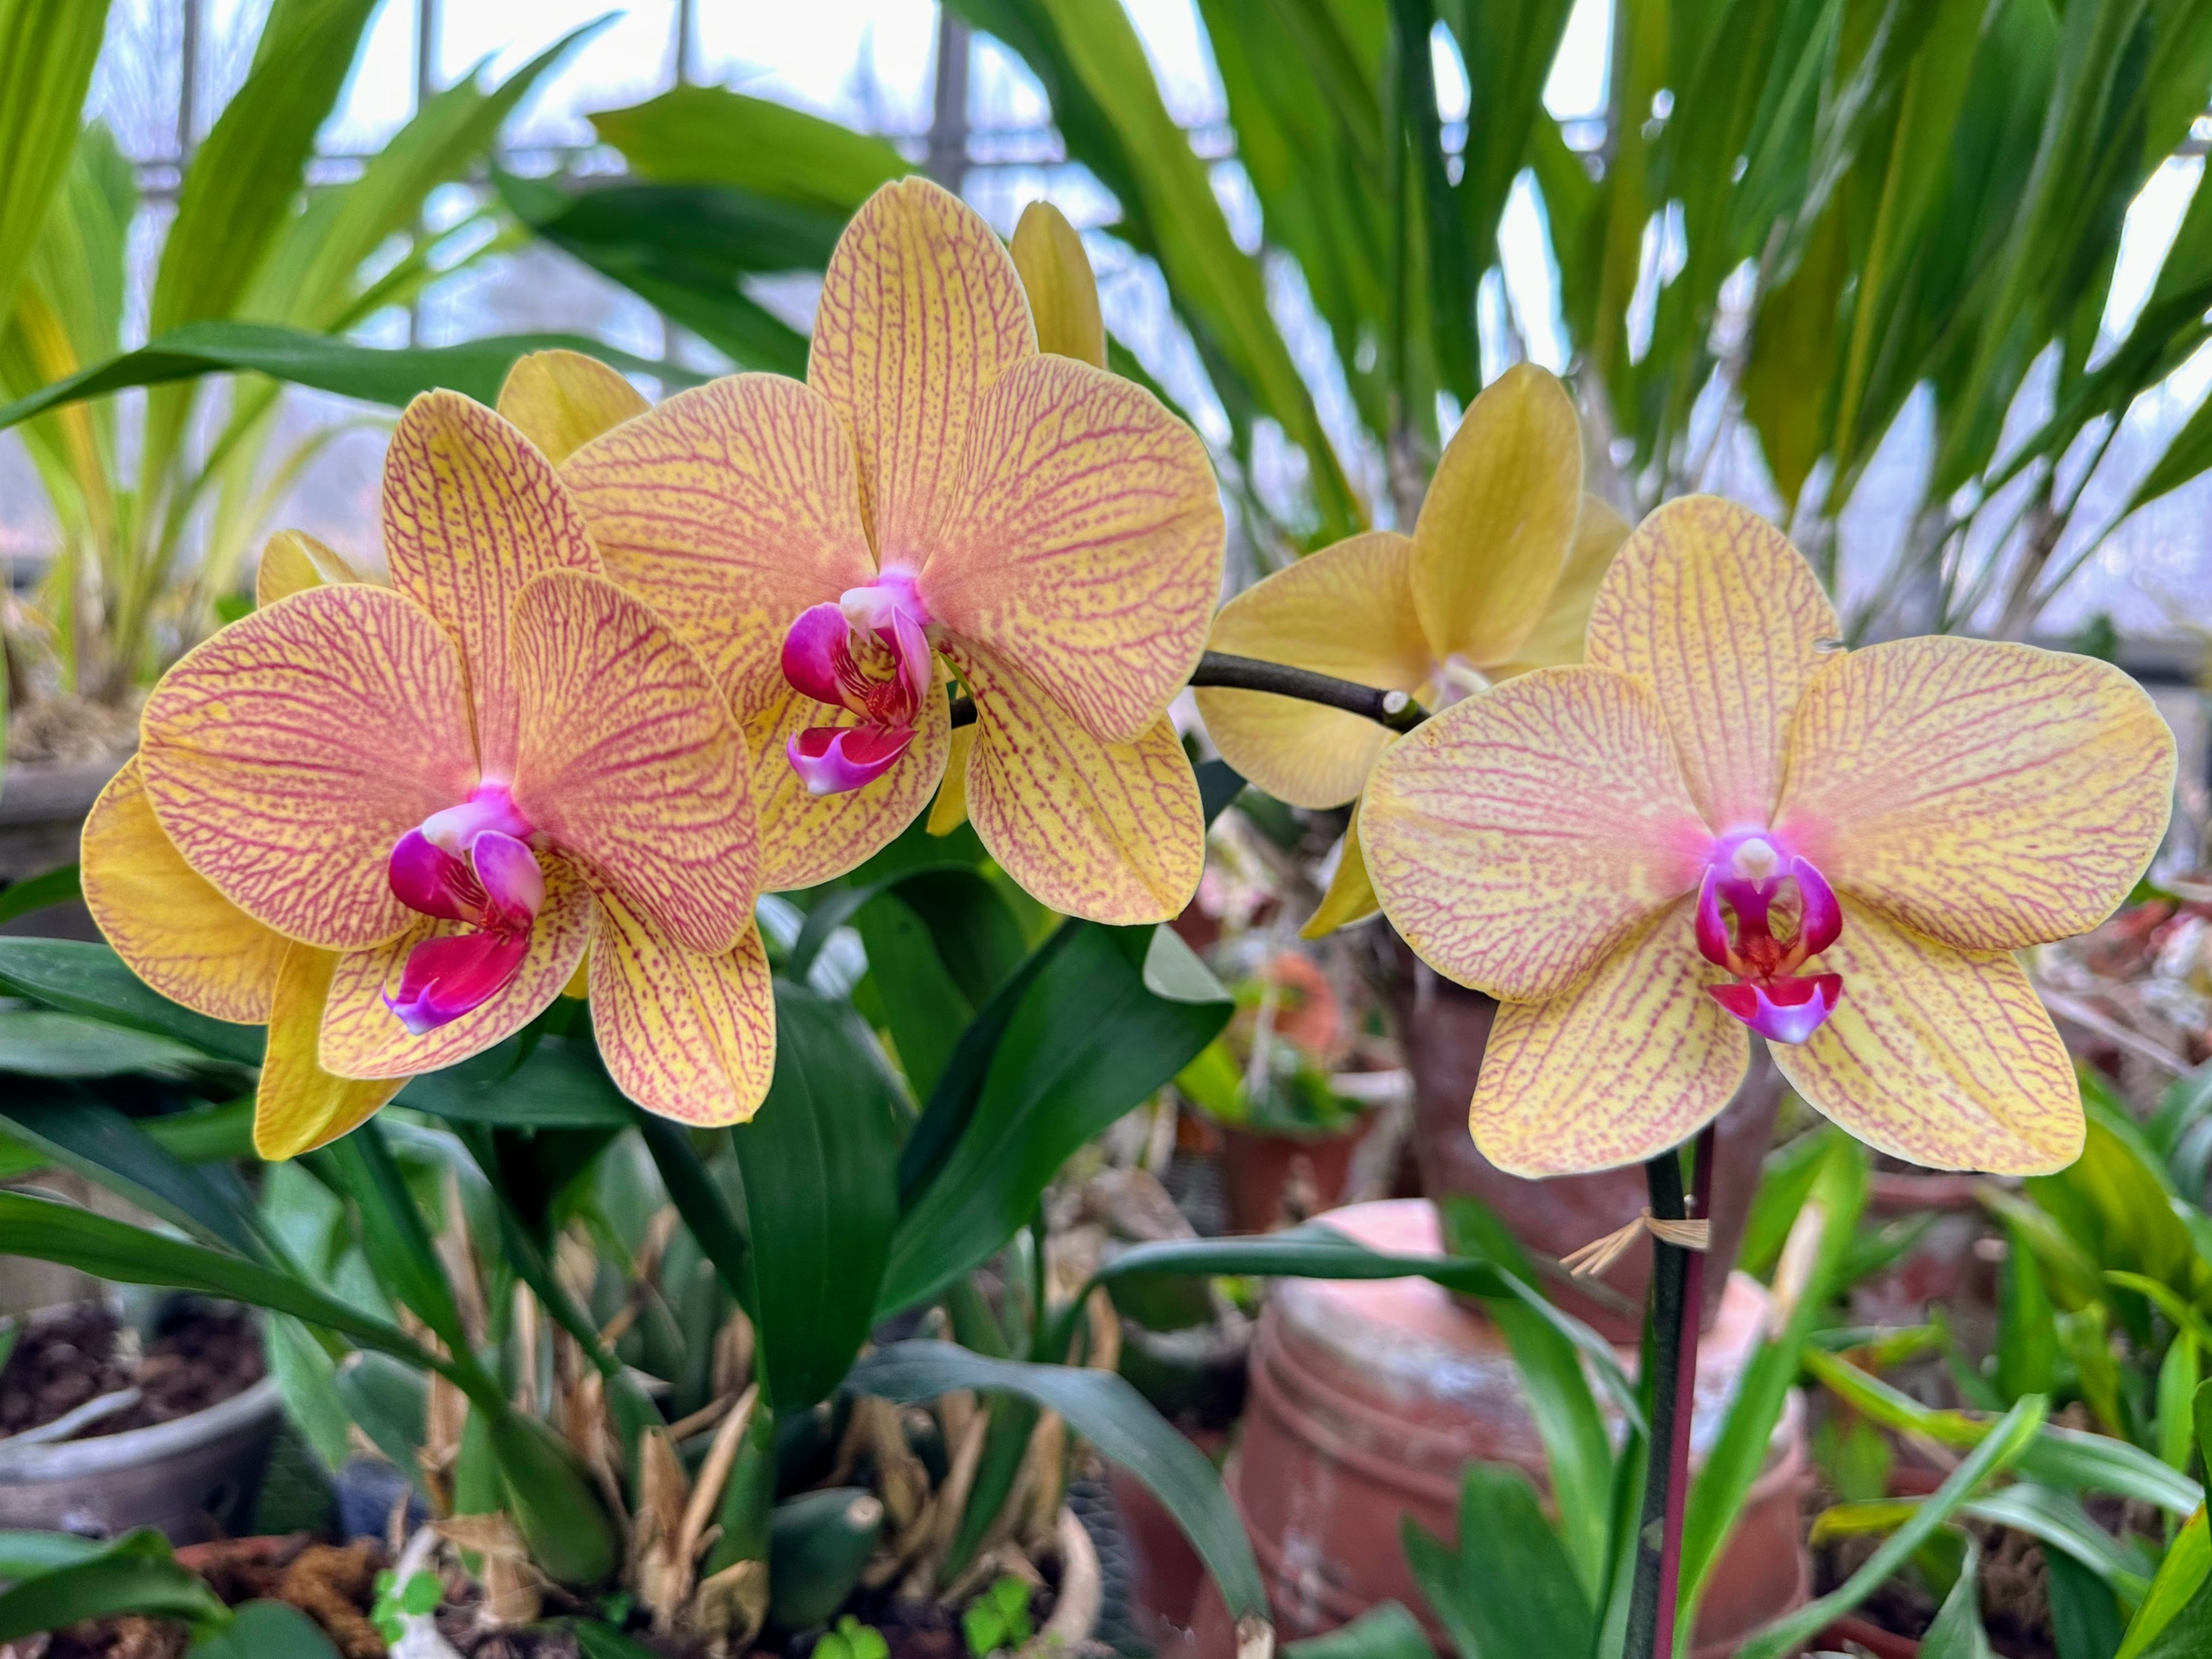
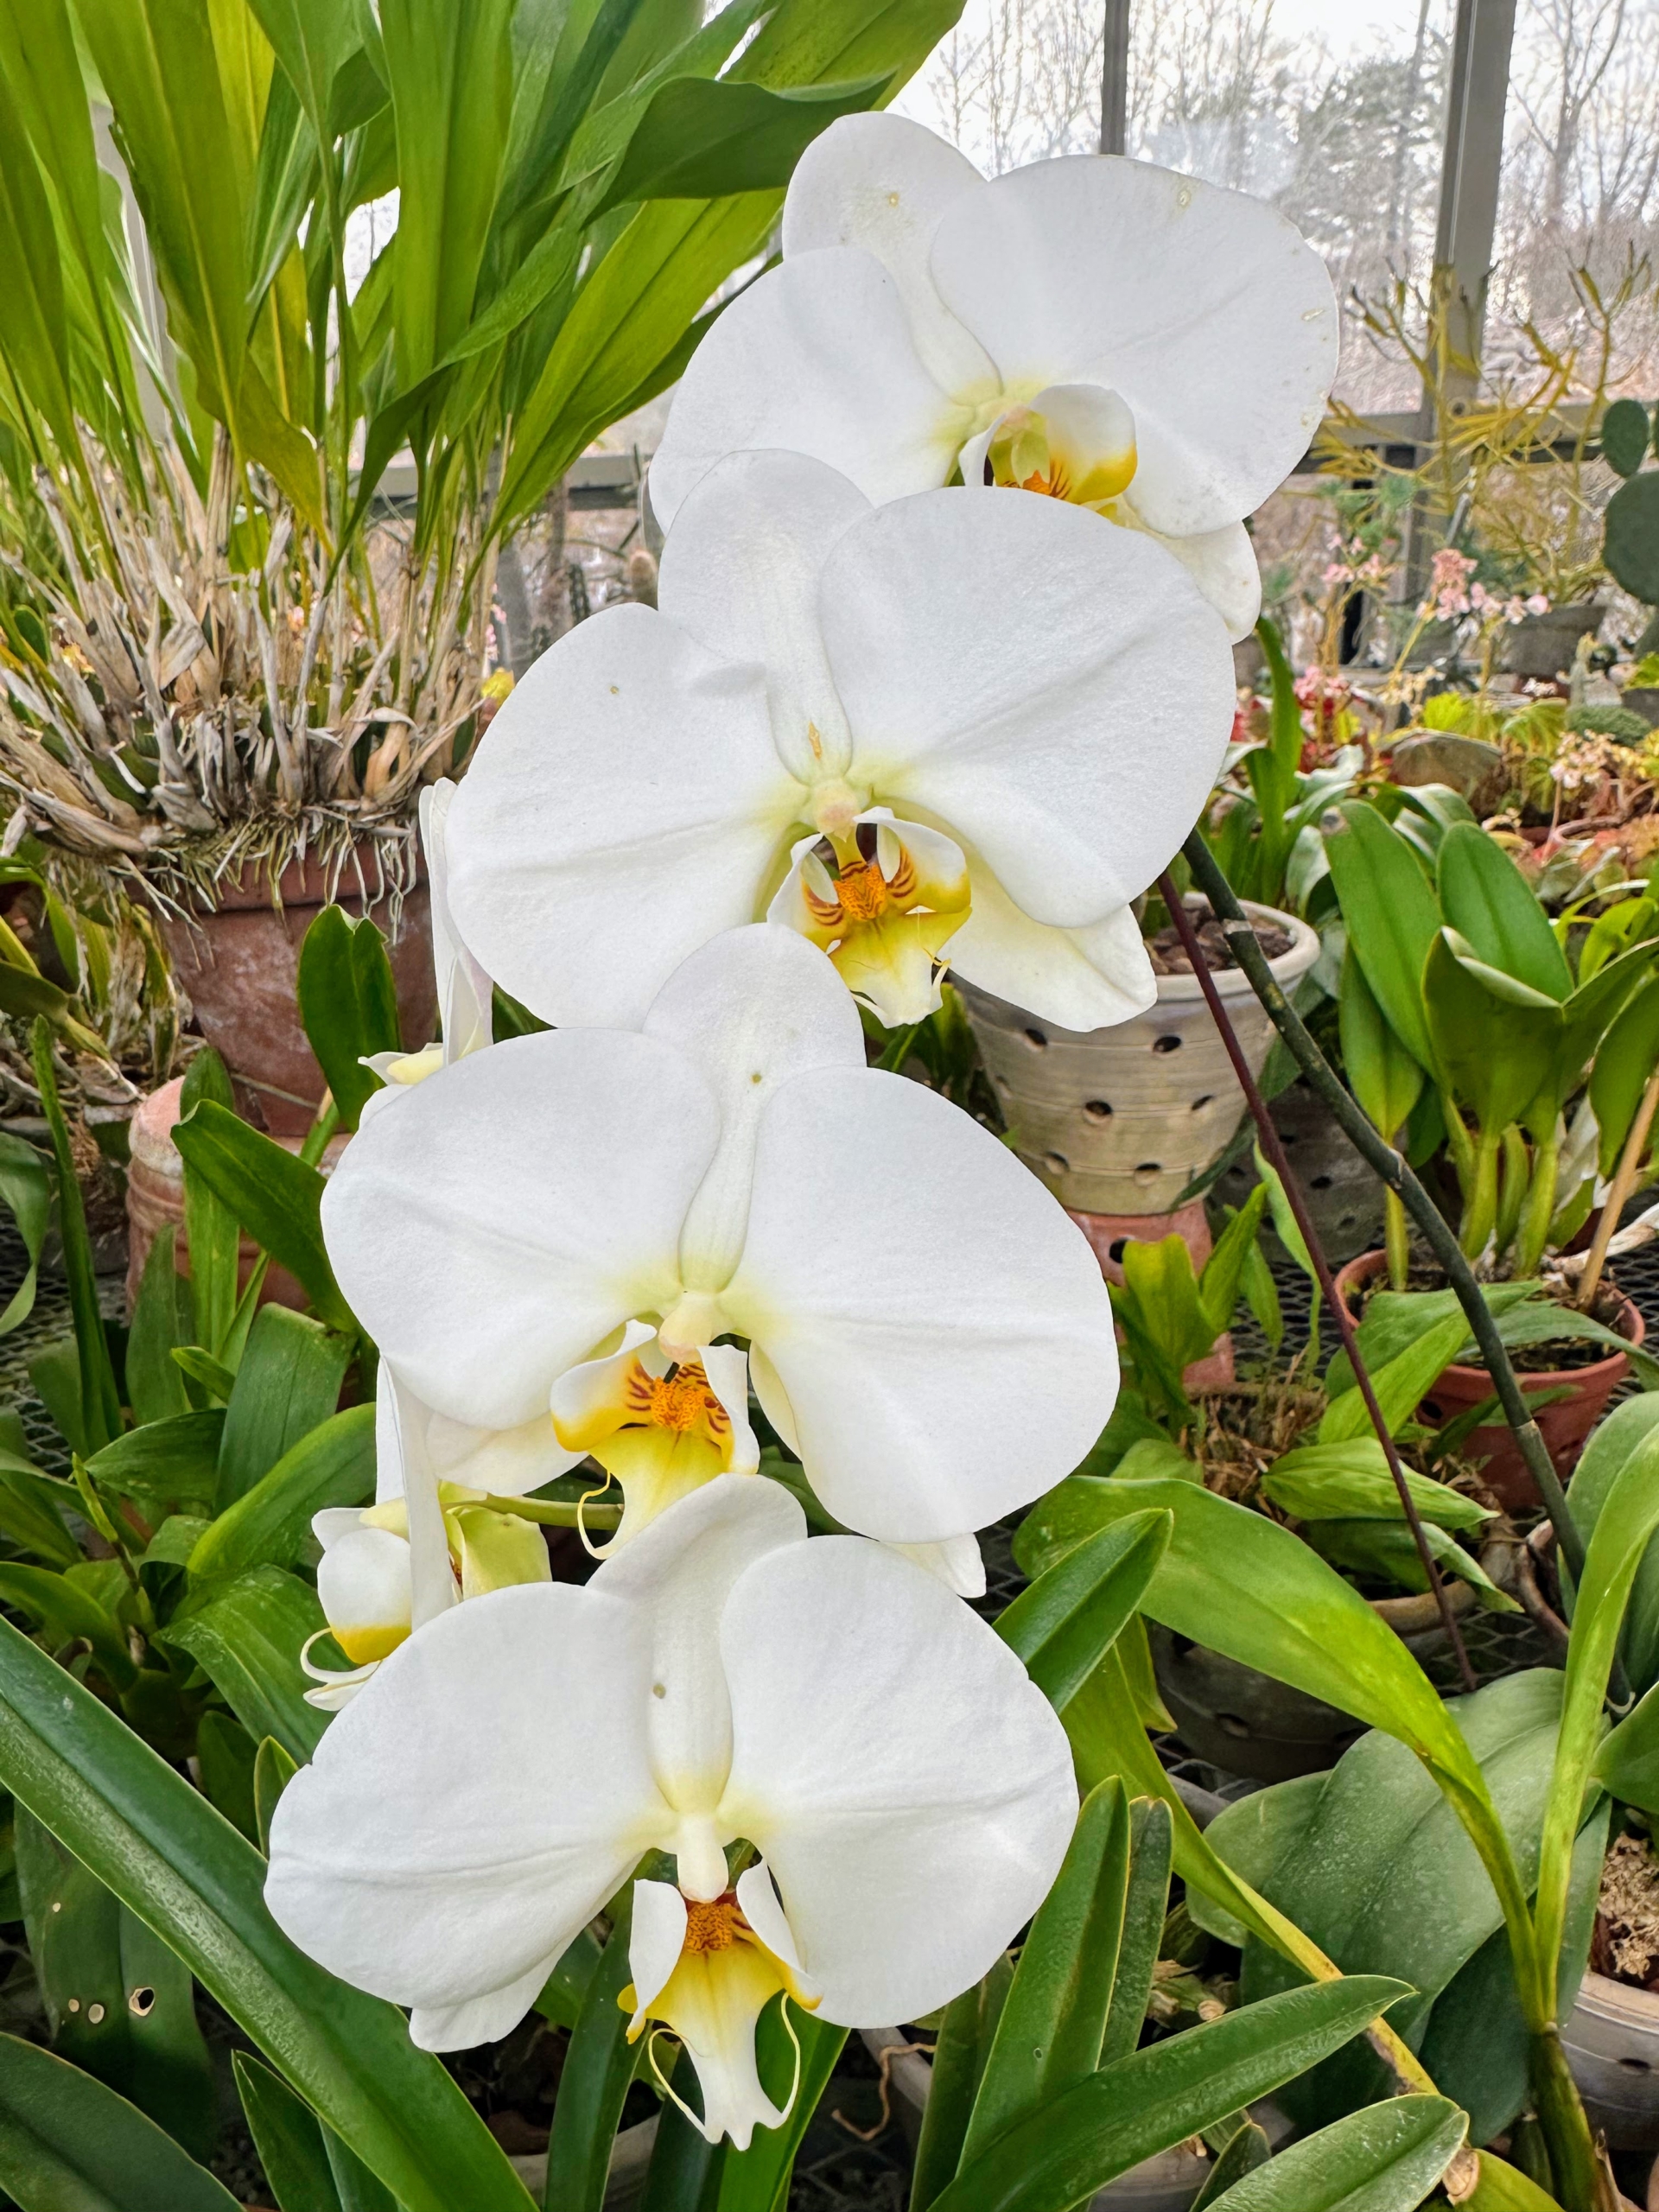
Phalaenopsis, the moth orchid, is perhaps the best orchid for growing in the home and is also a favorite with greenhouse growers. Well-grown plants can flower often, sometimes with a few flowers throughout the year, though the main season is late winter into spring.
Here is another Phalaenopsis blooming right now. It is a light pink to yellow in color. Phalaenopsis orchids do well under normal room temperatures with indirect light from an east or west facing window.
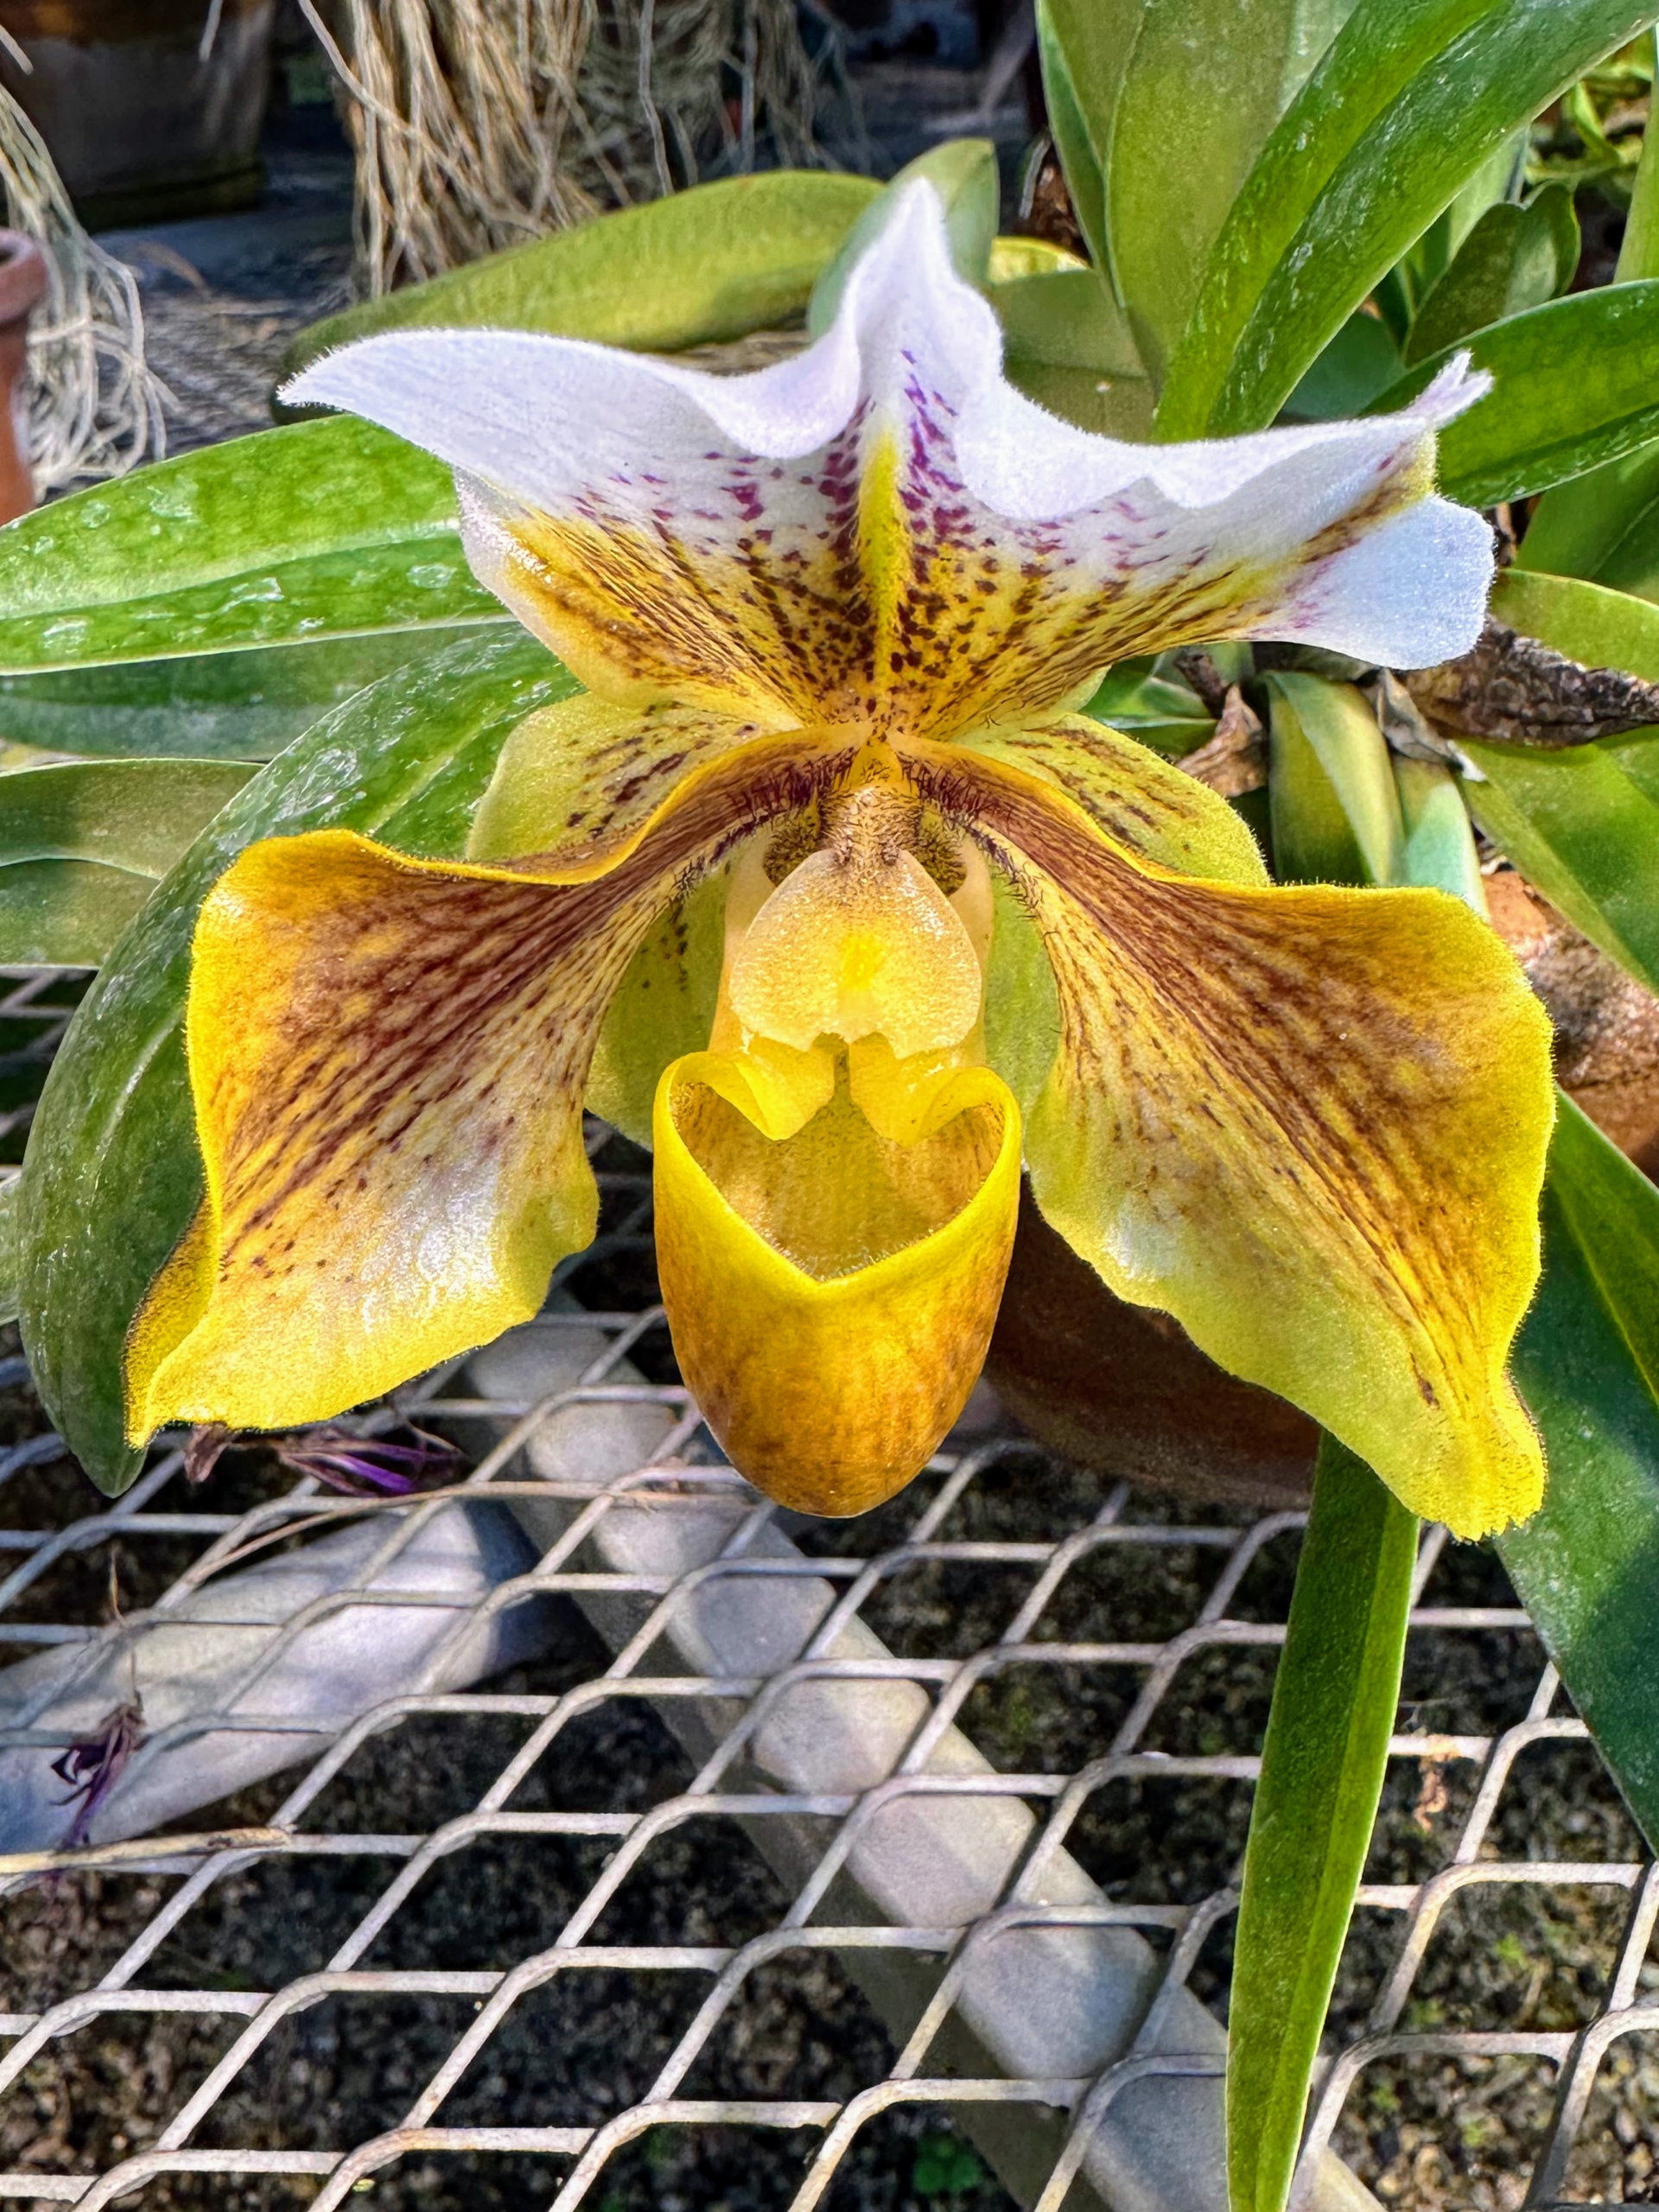
Paphiopedilum orchids are often called ‘lady slippers’ or ‘slipper orchids’ because of their unique pouch-like flowers. The pouch of a slipper orchid traps insects so they are forced to climb up, collect or deposit pollen, and fertilize the flower. Slipper orchids have two fertile anthers — meaning they are diandrous.
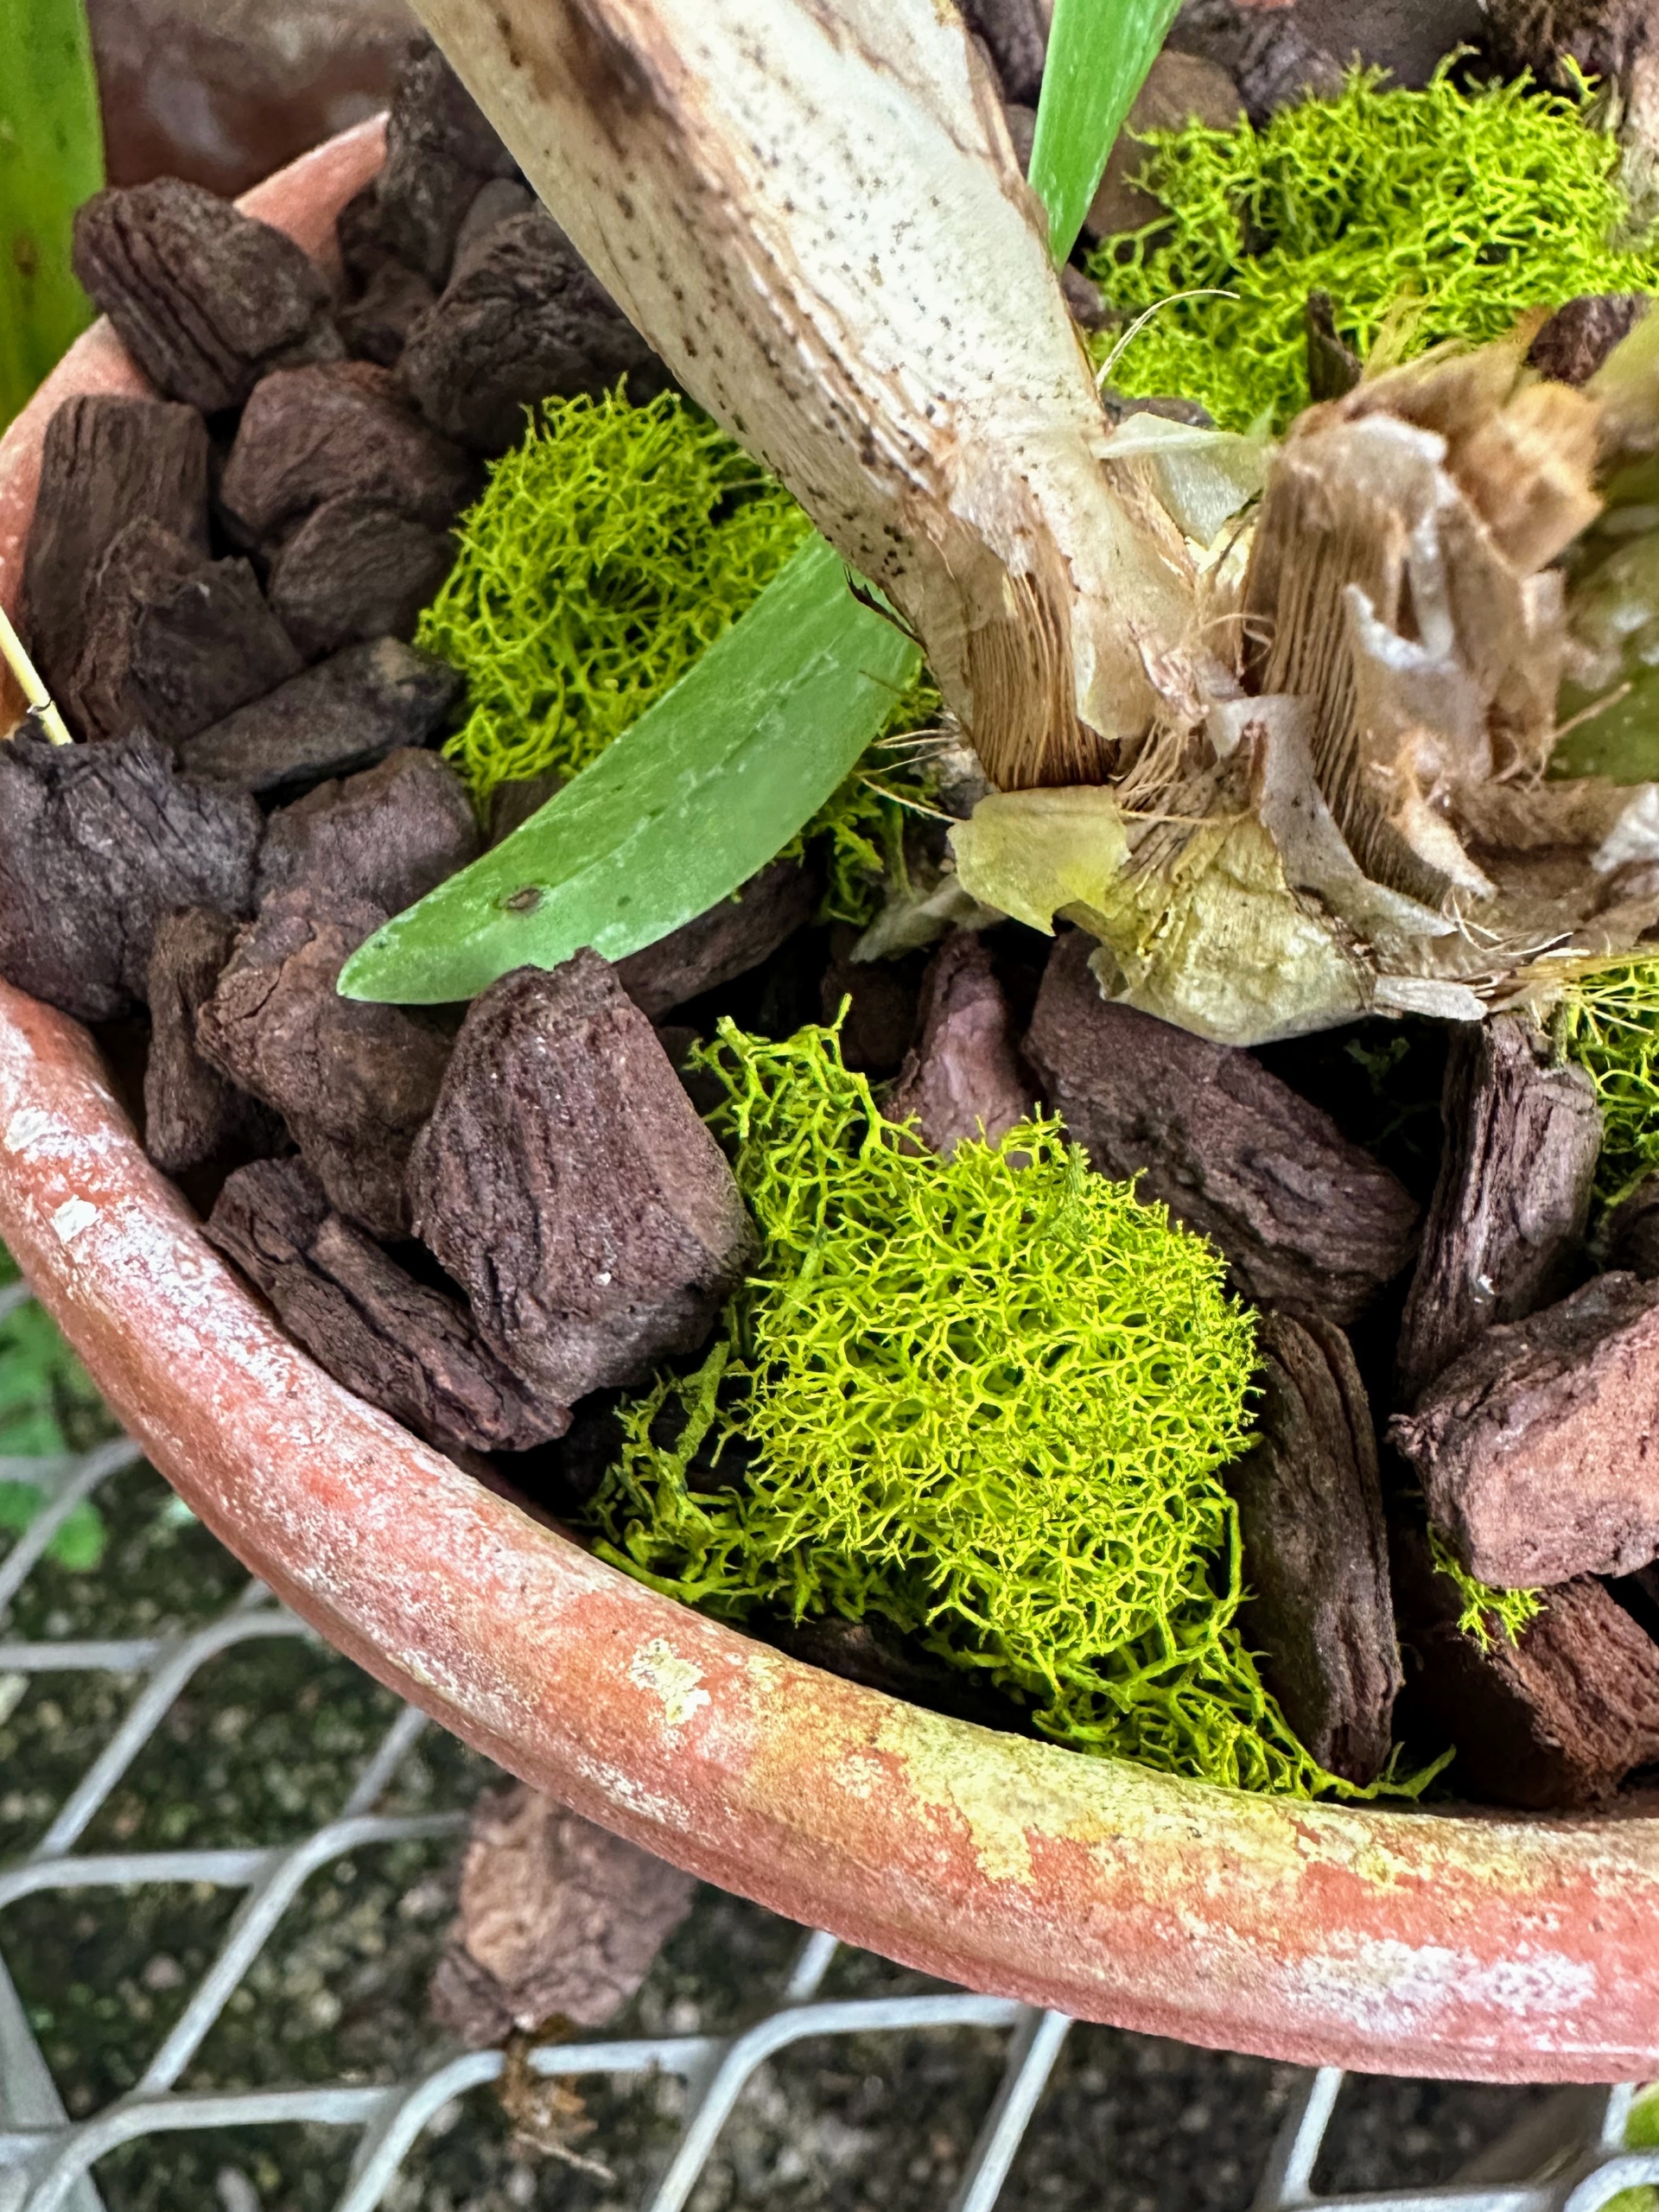
Orchids are epiphytic, meaning they derive moisture and nutrients from the air, rain, or from debris accumulating around it. Special orchid mixes are available at garden supply stores. The mixes are blended specifically for epiphyte orchids, including Phalaenopsis, Cattleya, Epidendrum, and Dendrobium. These mediums usually include Canadian sphagnum moss, moss chunks, charcoal orchid bark, and lava rock mix.
A rule of thumb for potted orchids is the leaf color. When receiving a proper balance of light, humidity, and temperature the leaves will be healthy bright green. Too little light would make the leaves very dark.
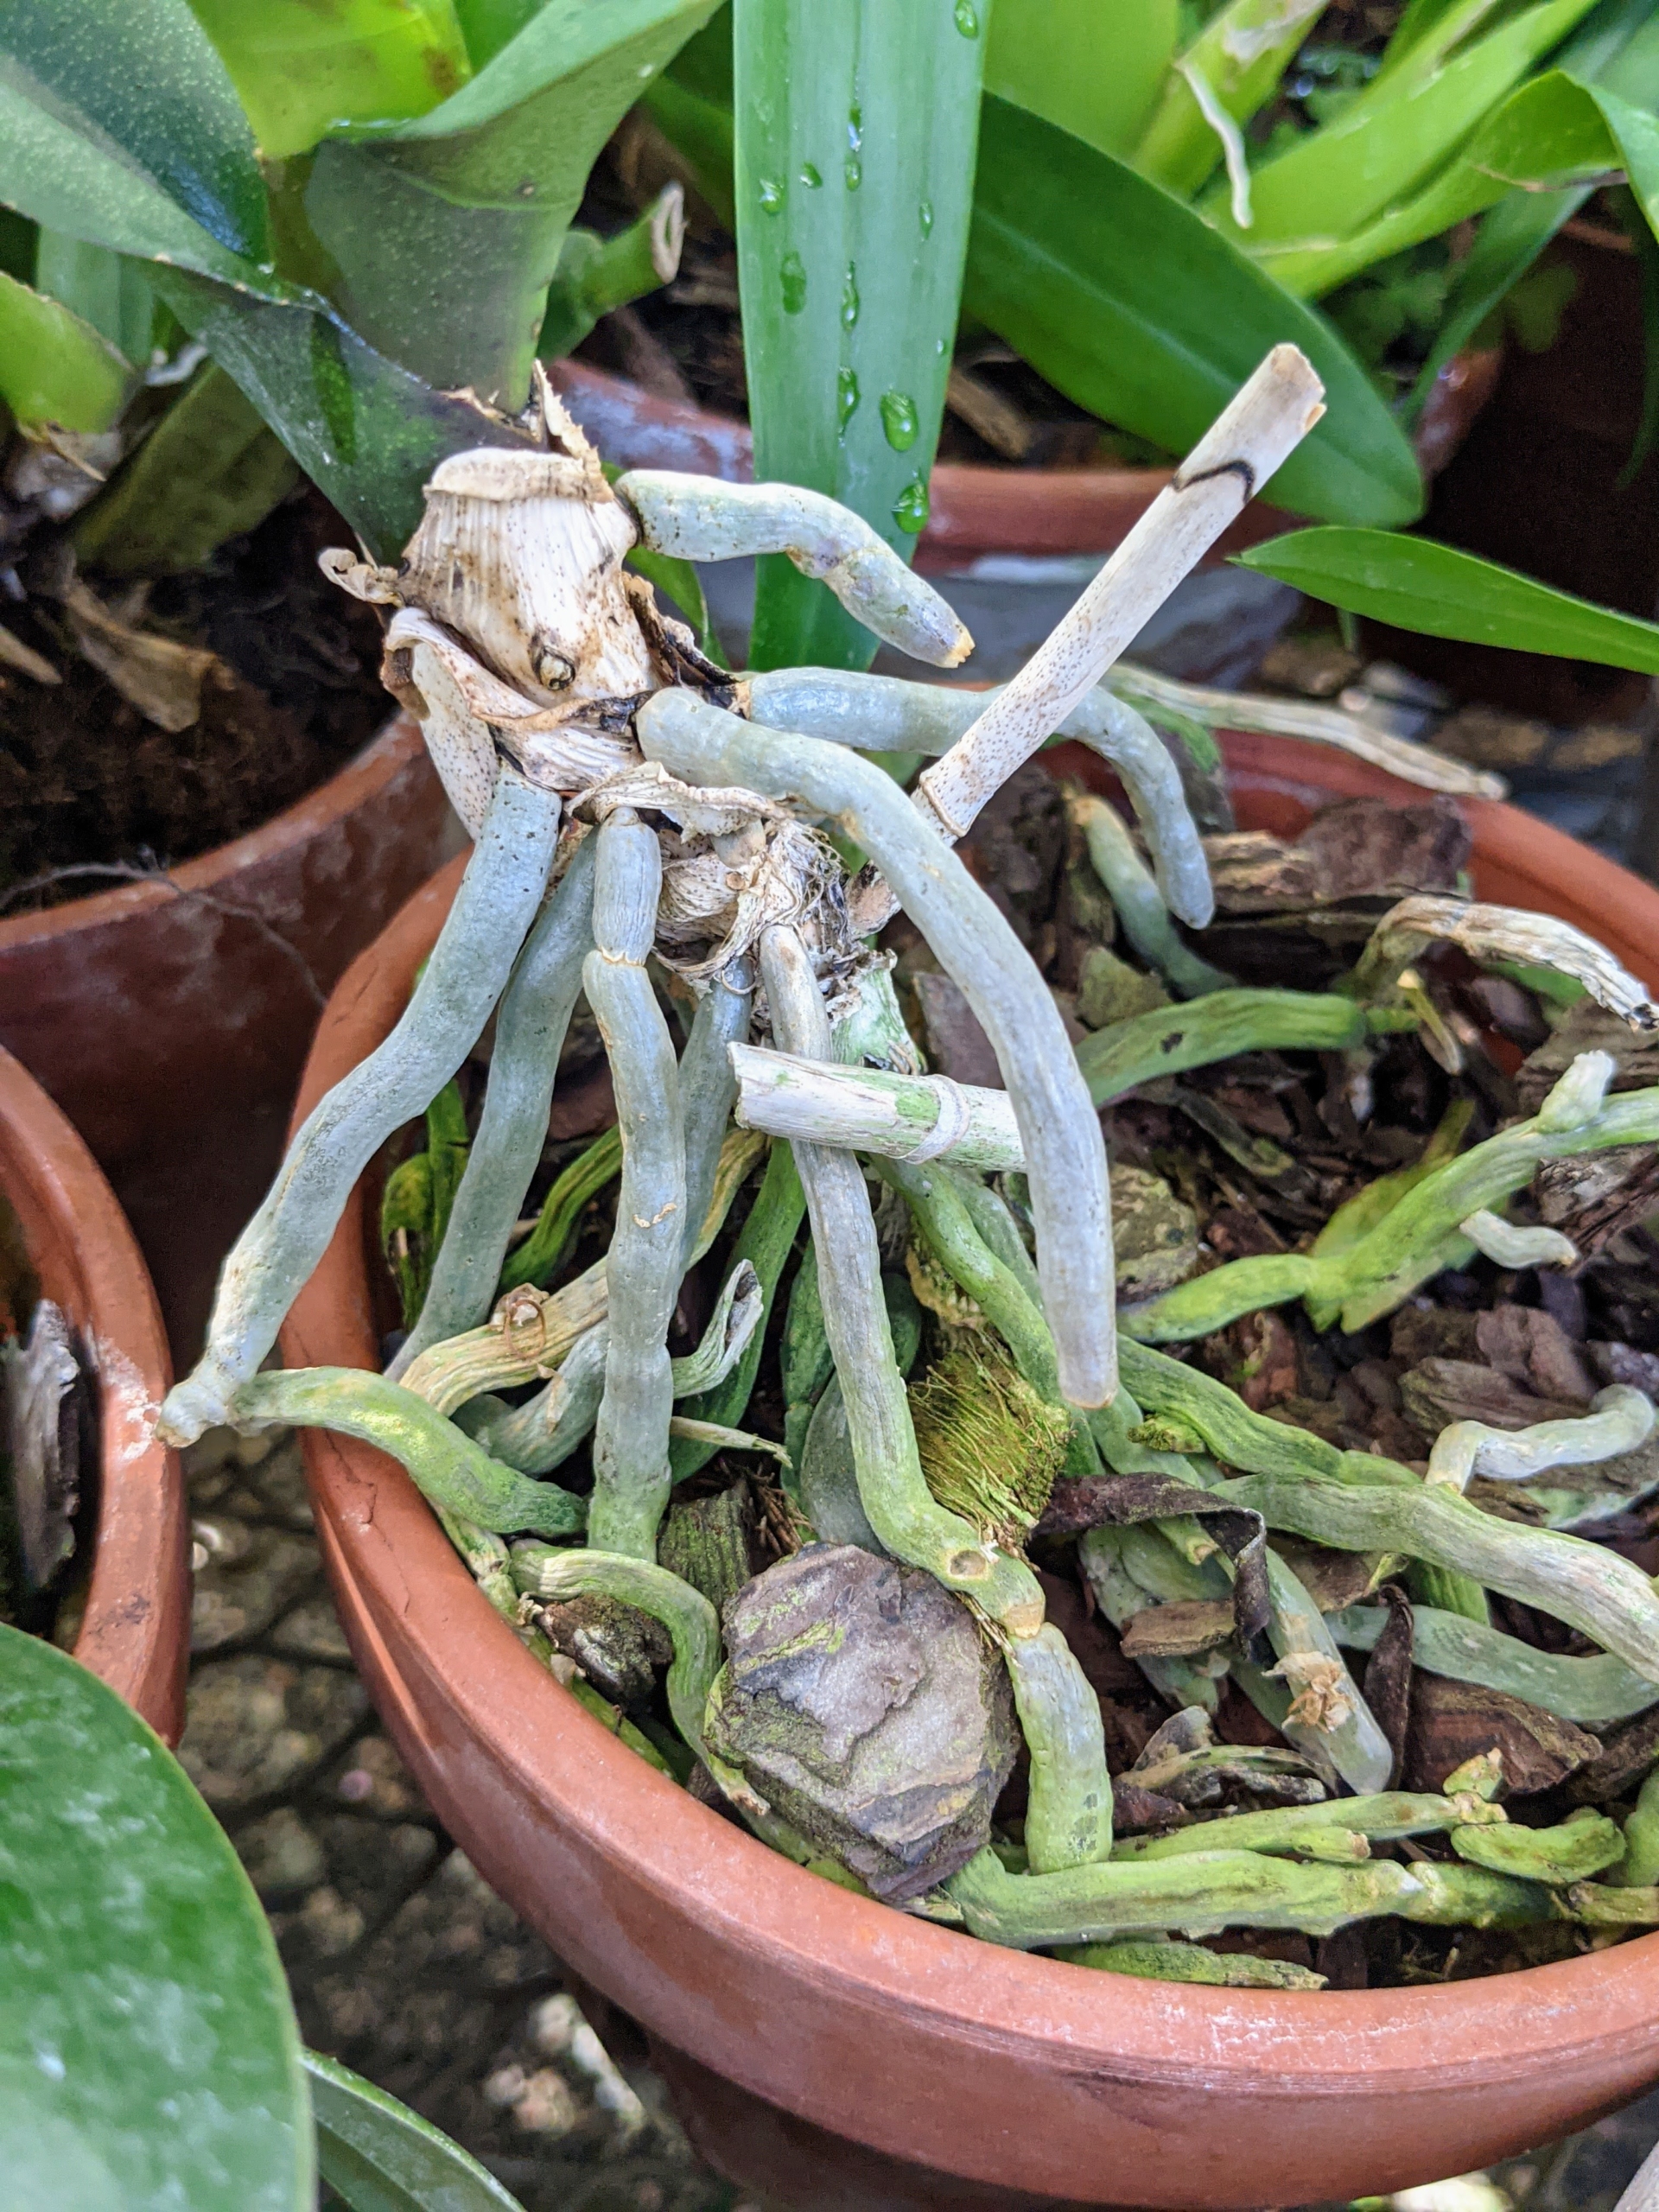
Orchids also have aerial roots. They act as anchors and supports as they wrap around branches and trunks in nature, stabilizing the plant as it grows.
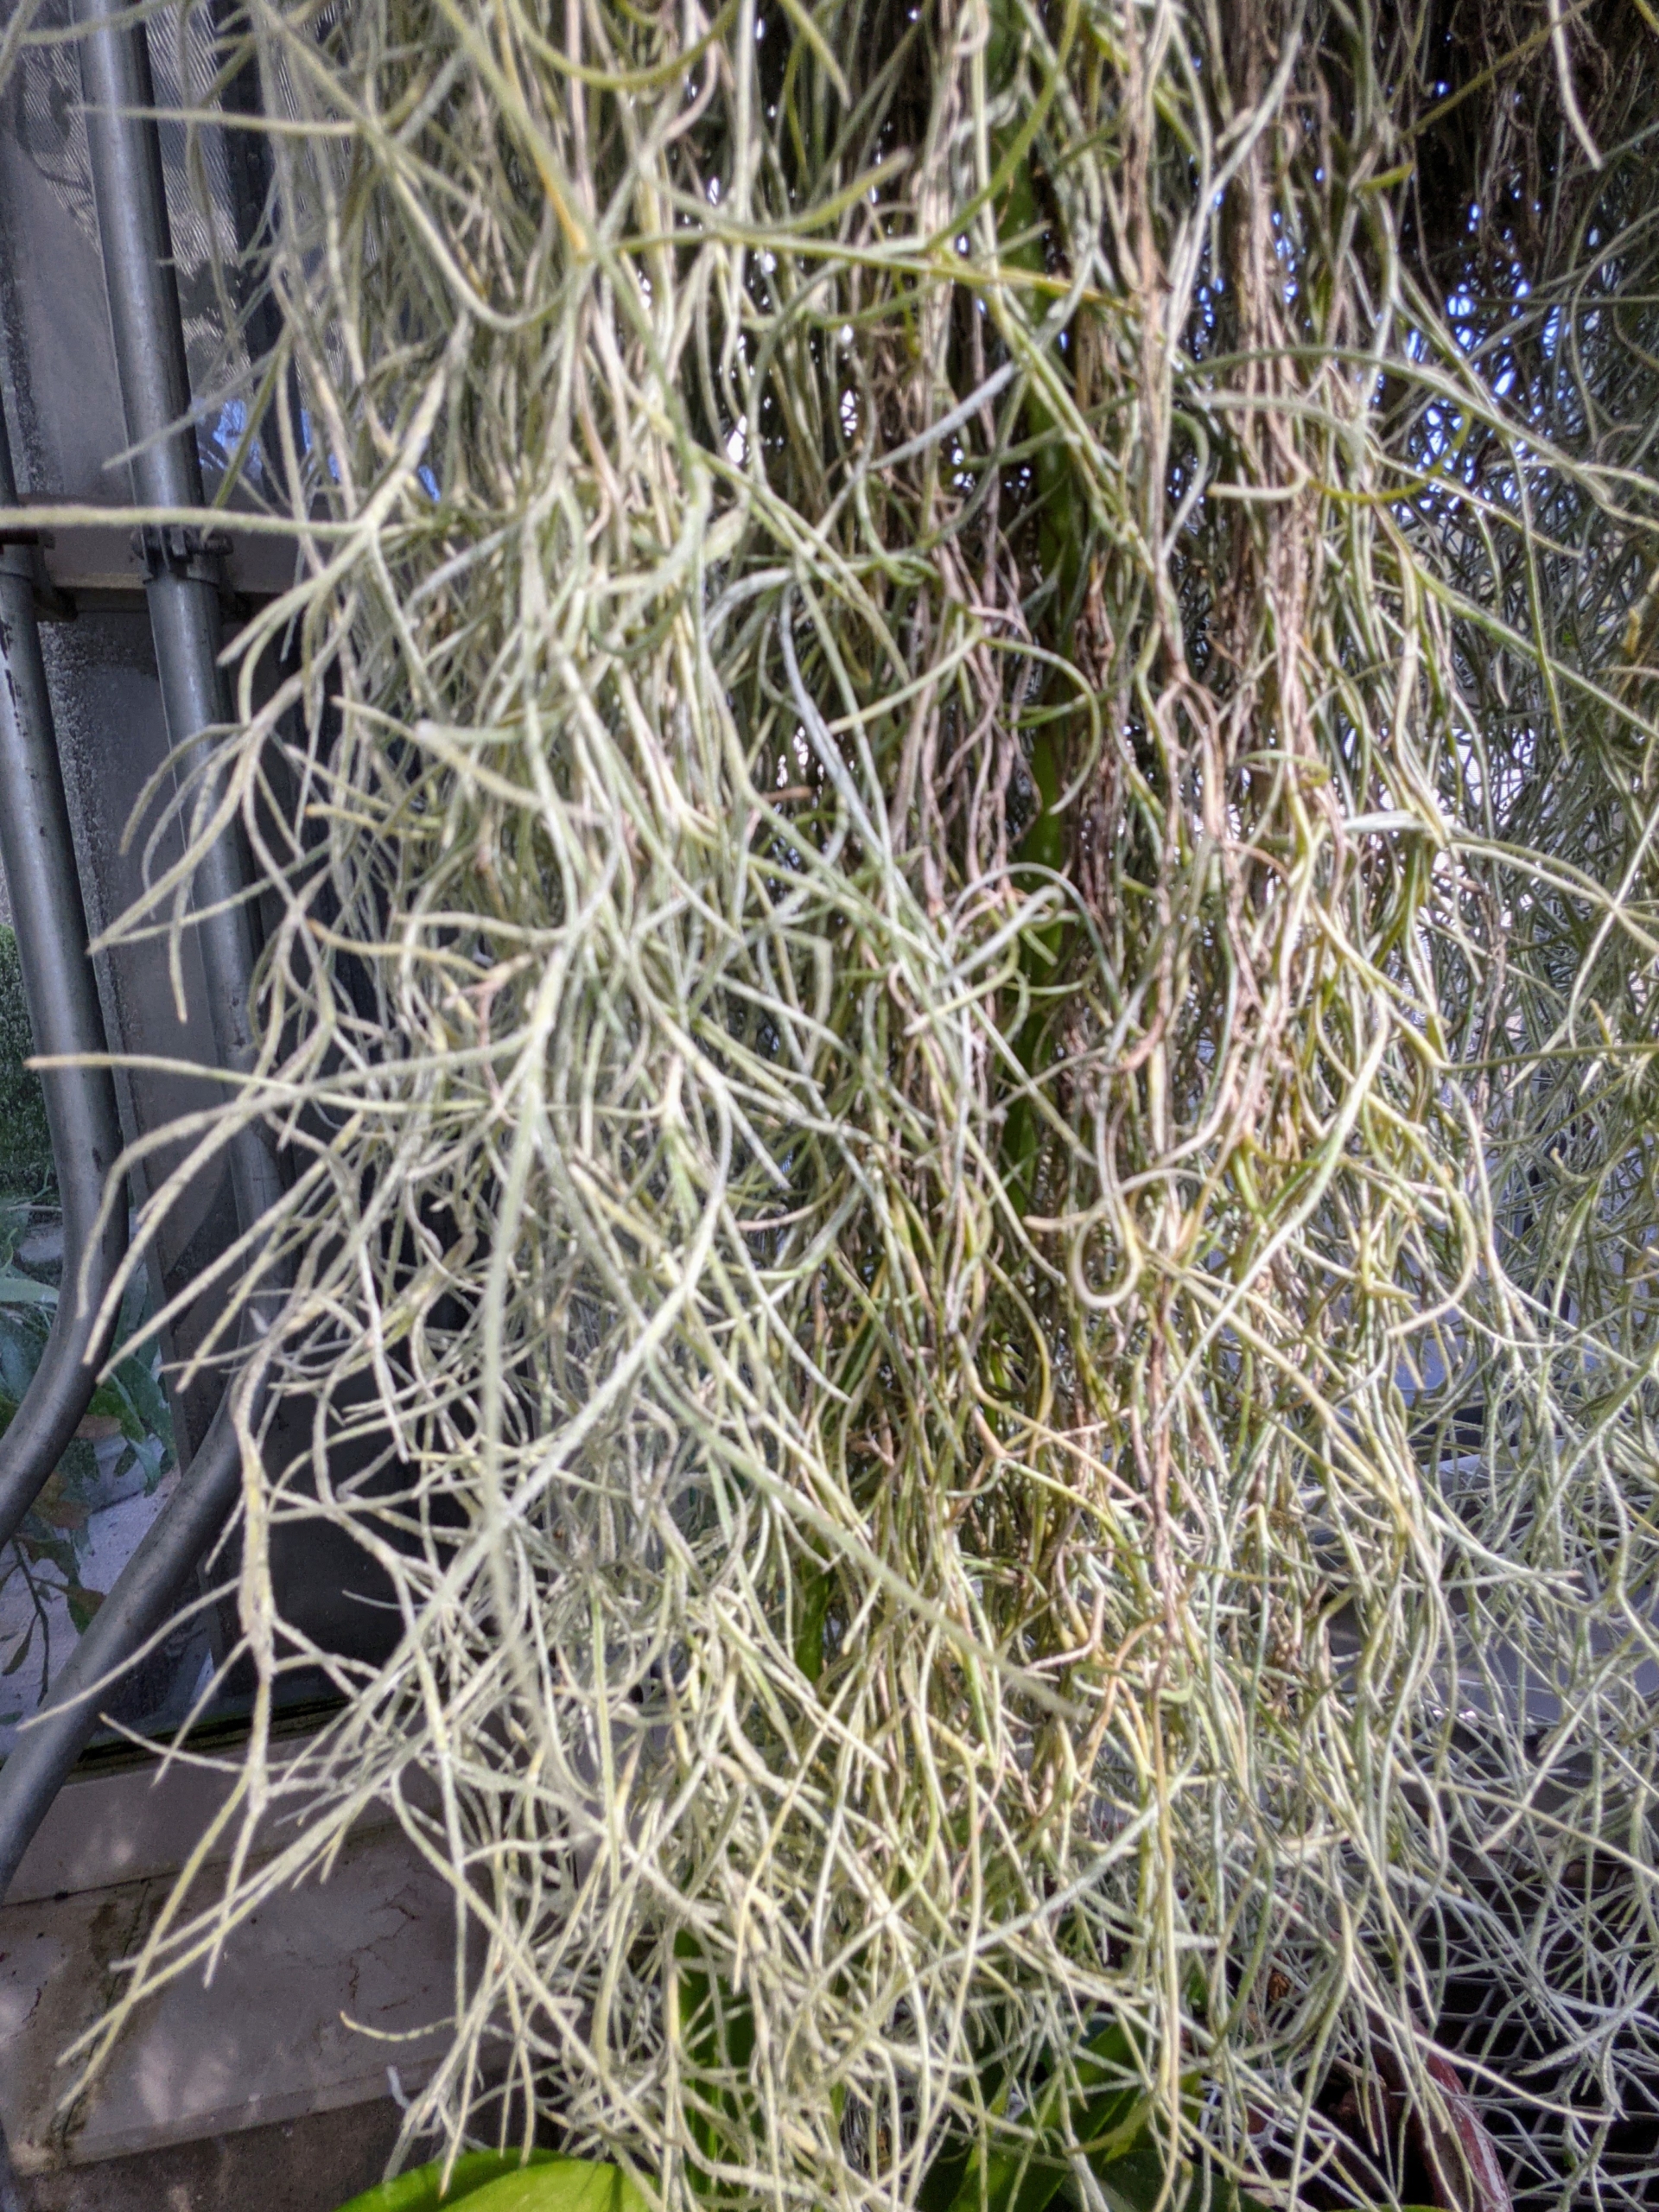
These are the long hanging roots of the Vanda orchid.
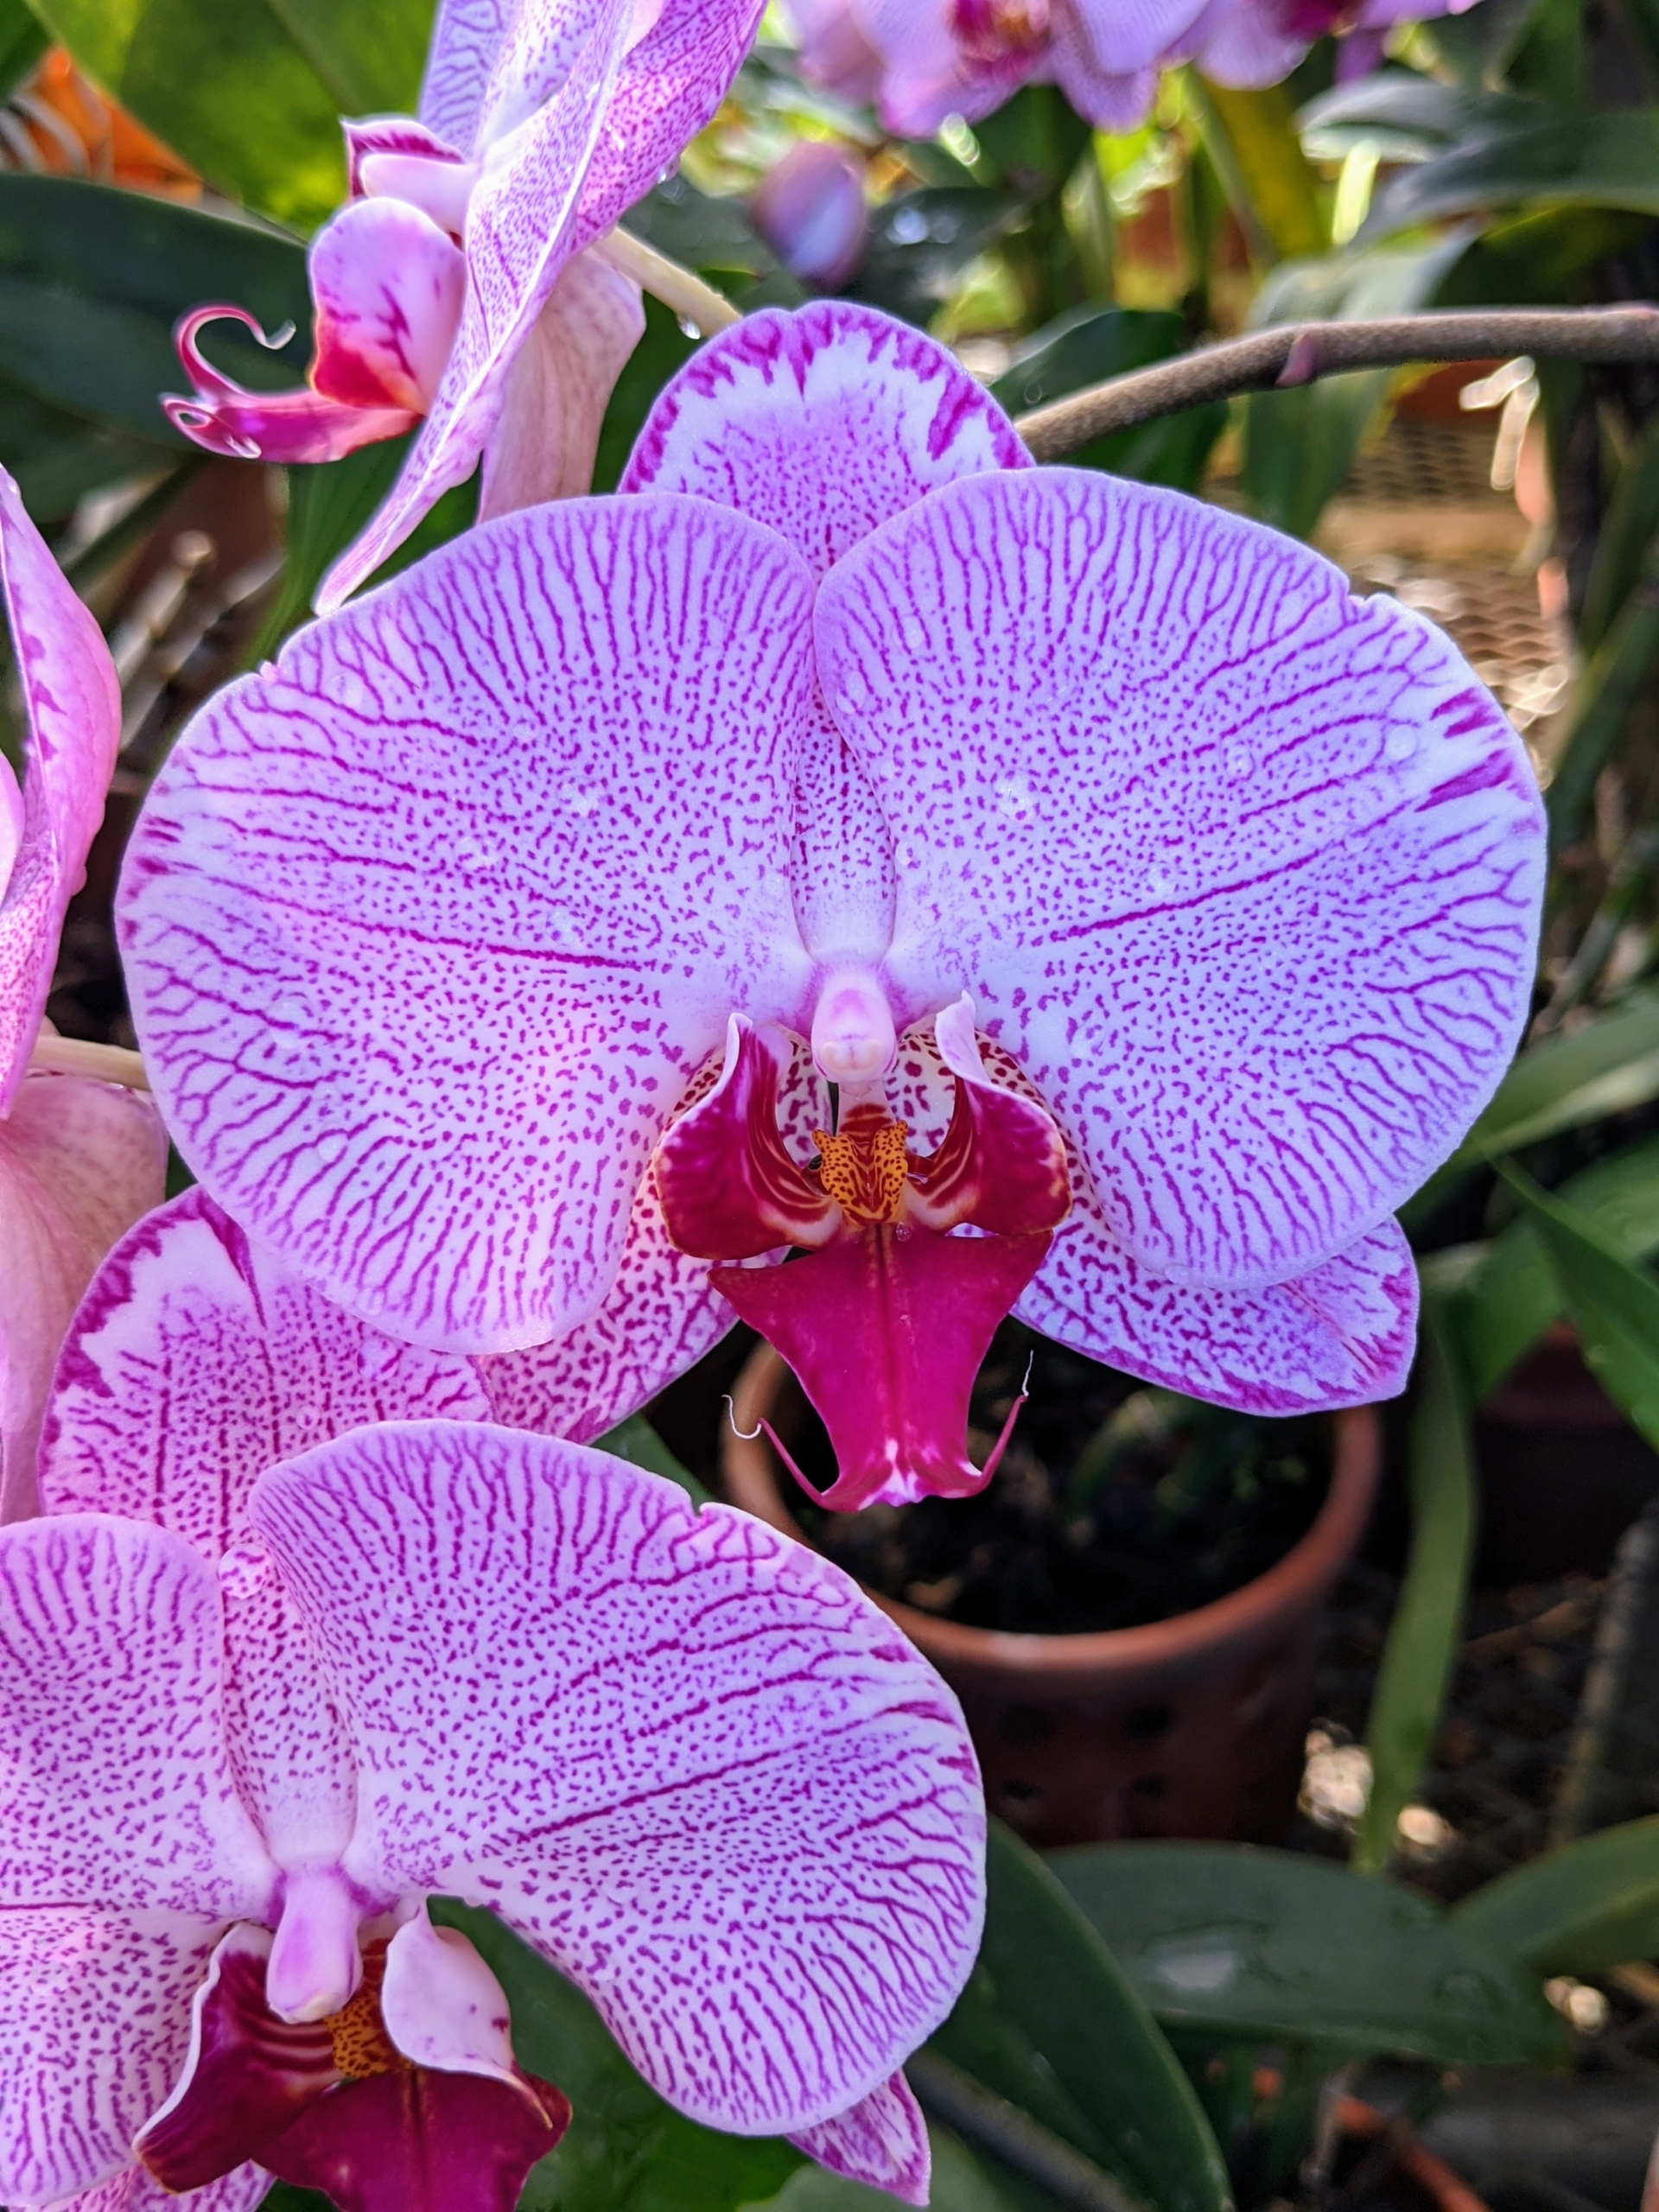
The orchid has three sepals, one dorsal sepal at the top and two lateral sepals one on each side. It also has three petals, one on each side and the lower lip, also called the labellum. The column and anther cap are the reproductive area of the flower.
I love getting rare and unusual orchids. This one came from the New York Botanical Garden some years back. This year’s NYBG Orchid Show runs through April 23rd. I love attending this show every year. Held inside the magnificent Enid A. Haupt Conservatory, it is known as the nation’s largest exhibit of its kind.
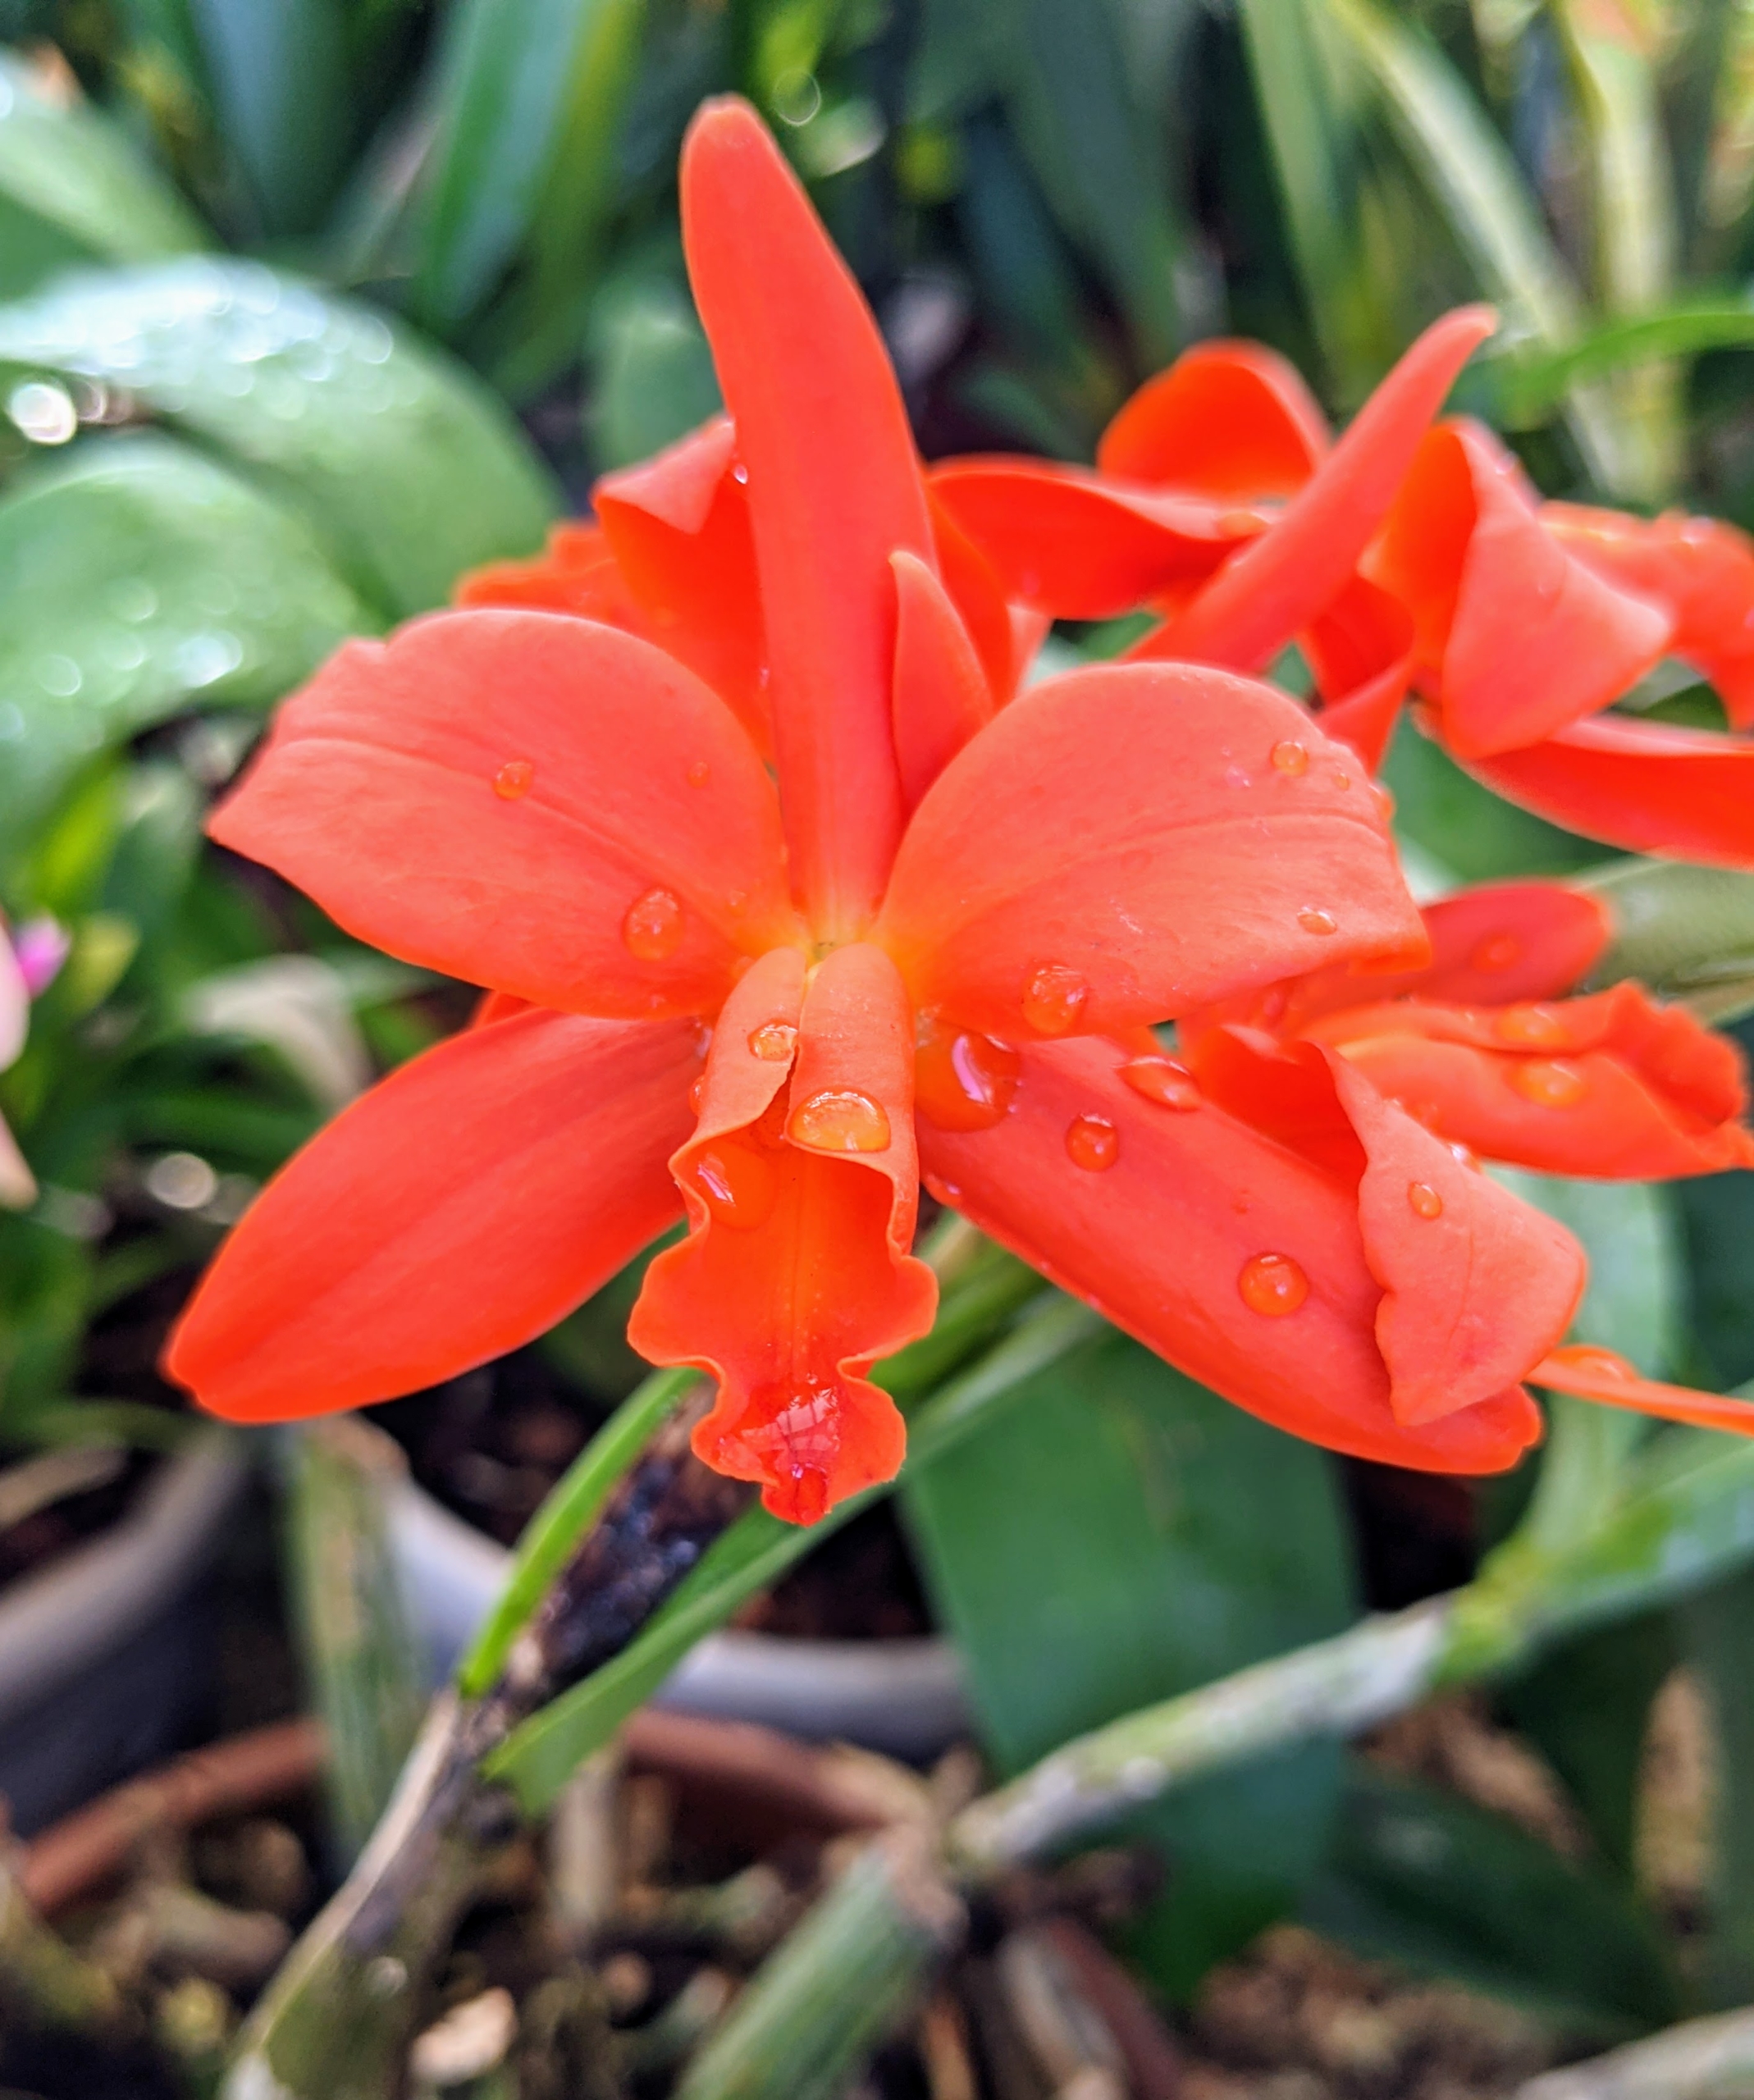
Some of my orchids which also bloomed wonderfully this year include this Rhyncholaeiocattleya My Orange ‘NN’ – a Cattleya hybrid. It has fantastic orange flowers. It is an easy growing plant that likes filtered light, especially if kept outside during summer. When watering, keep it slightly more evenly moist at the roots when in bud or bloom.
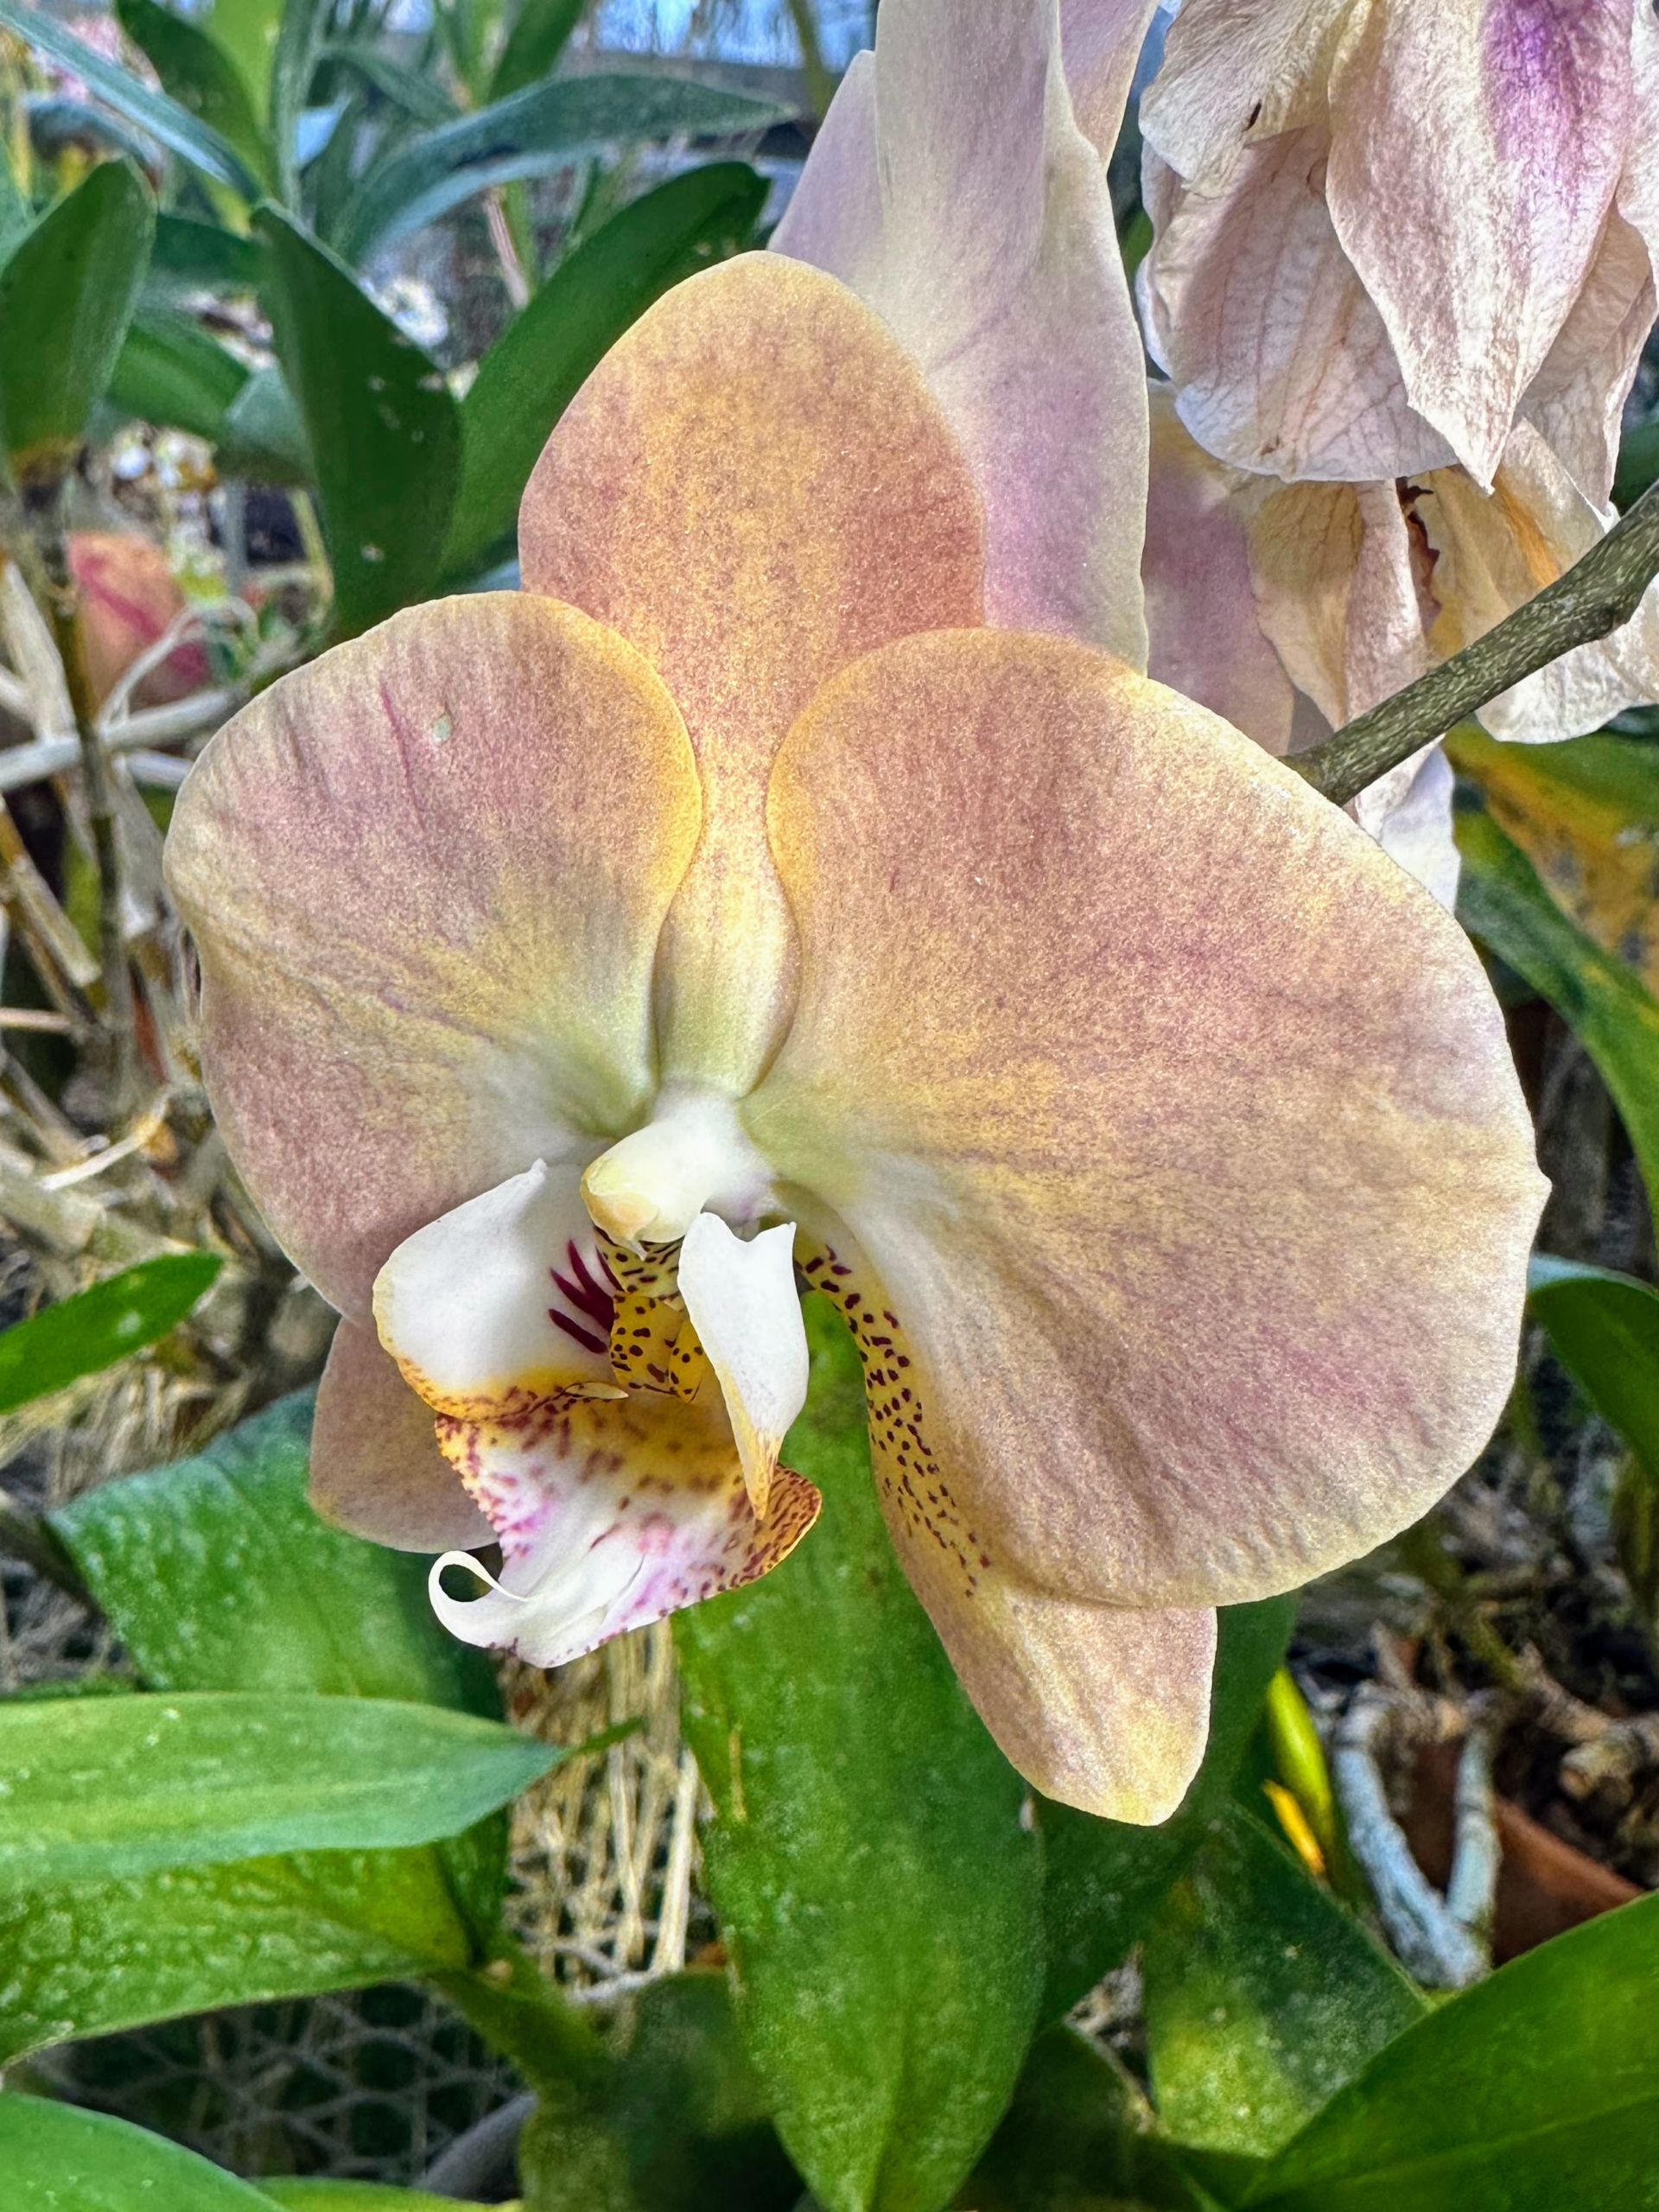
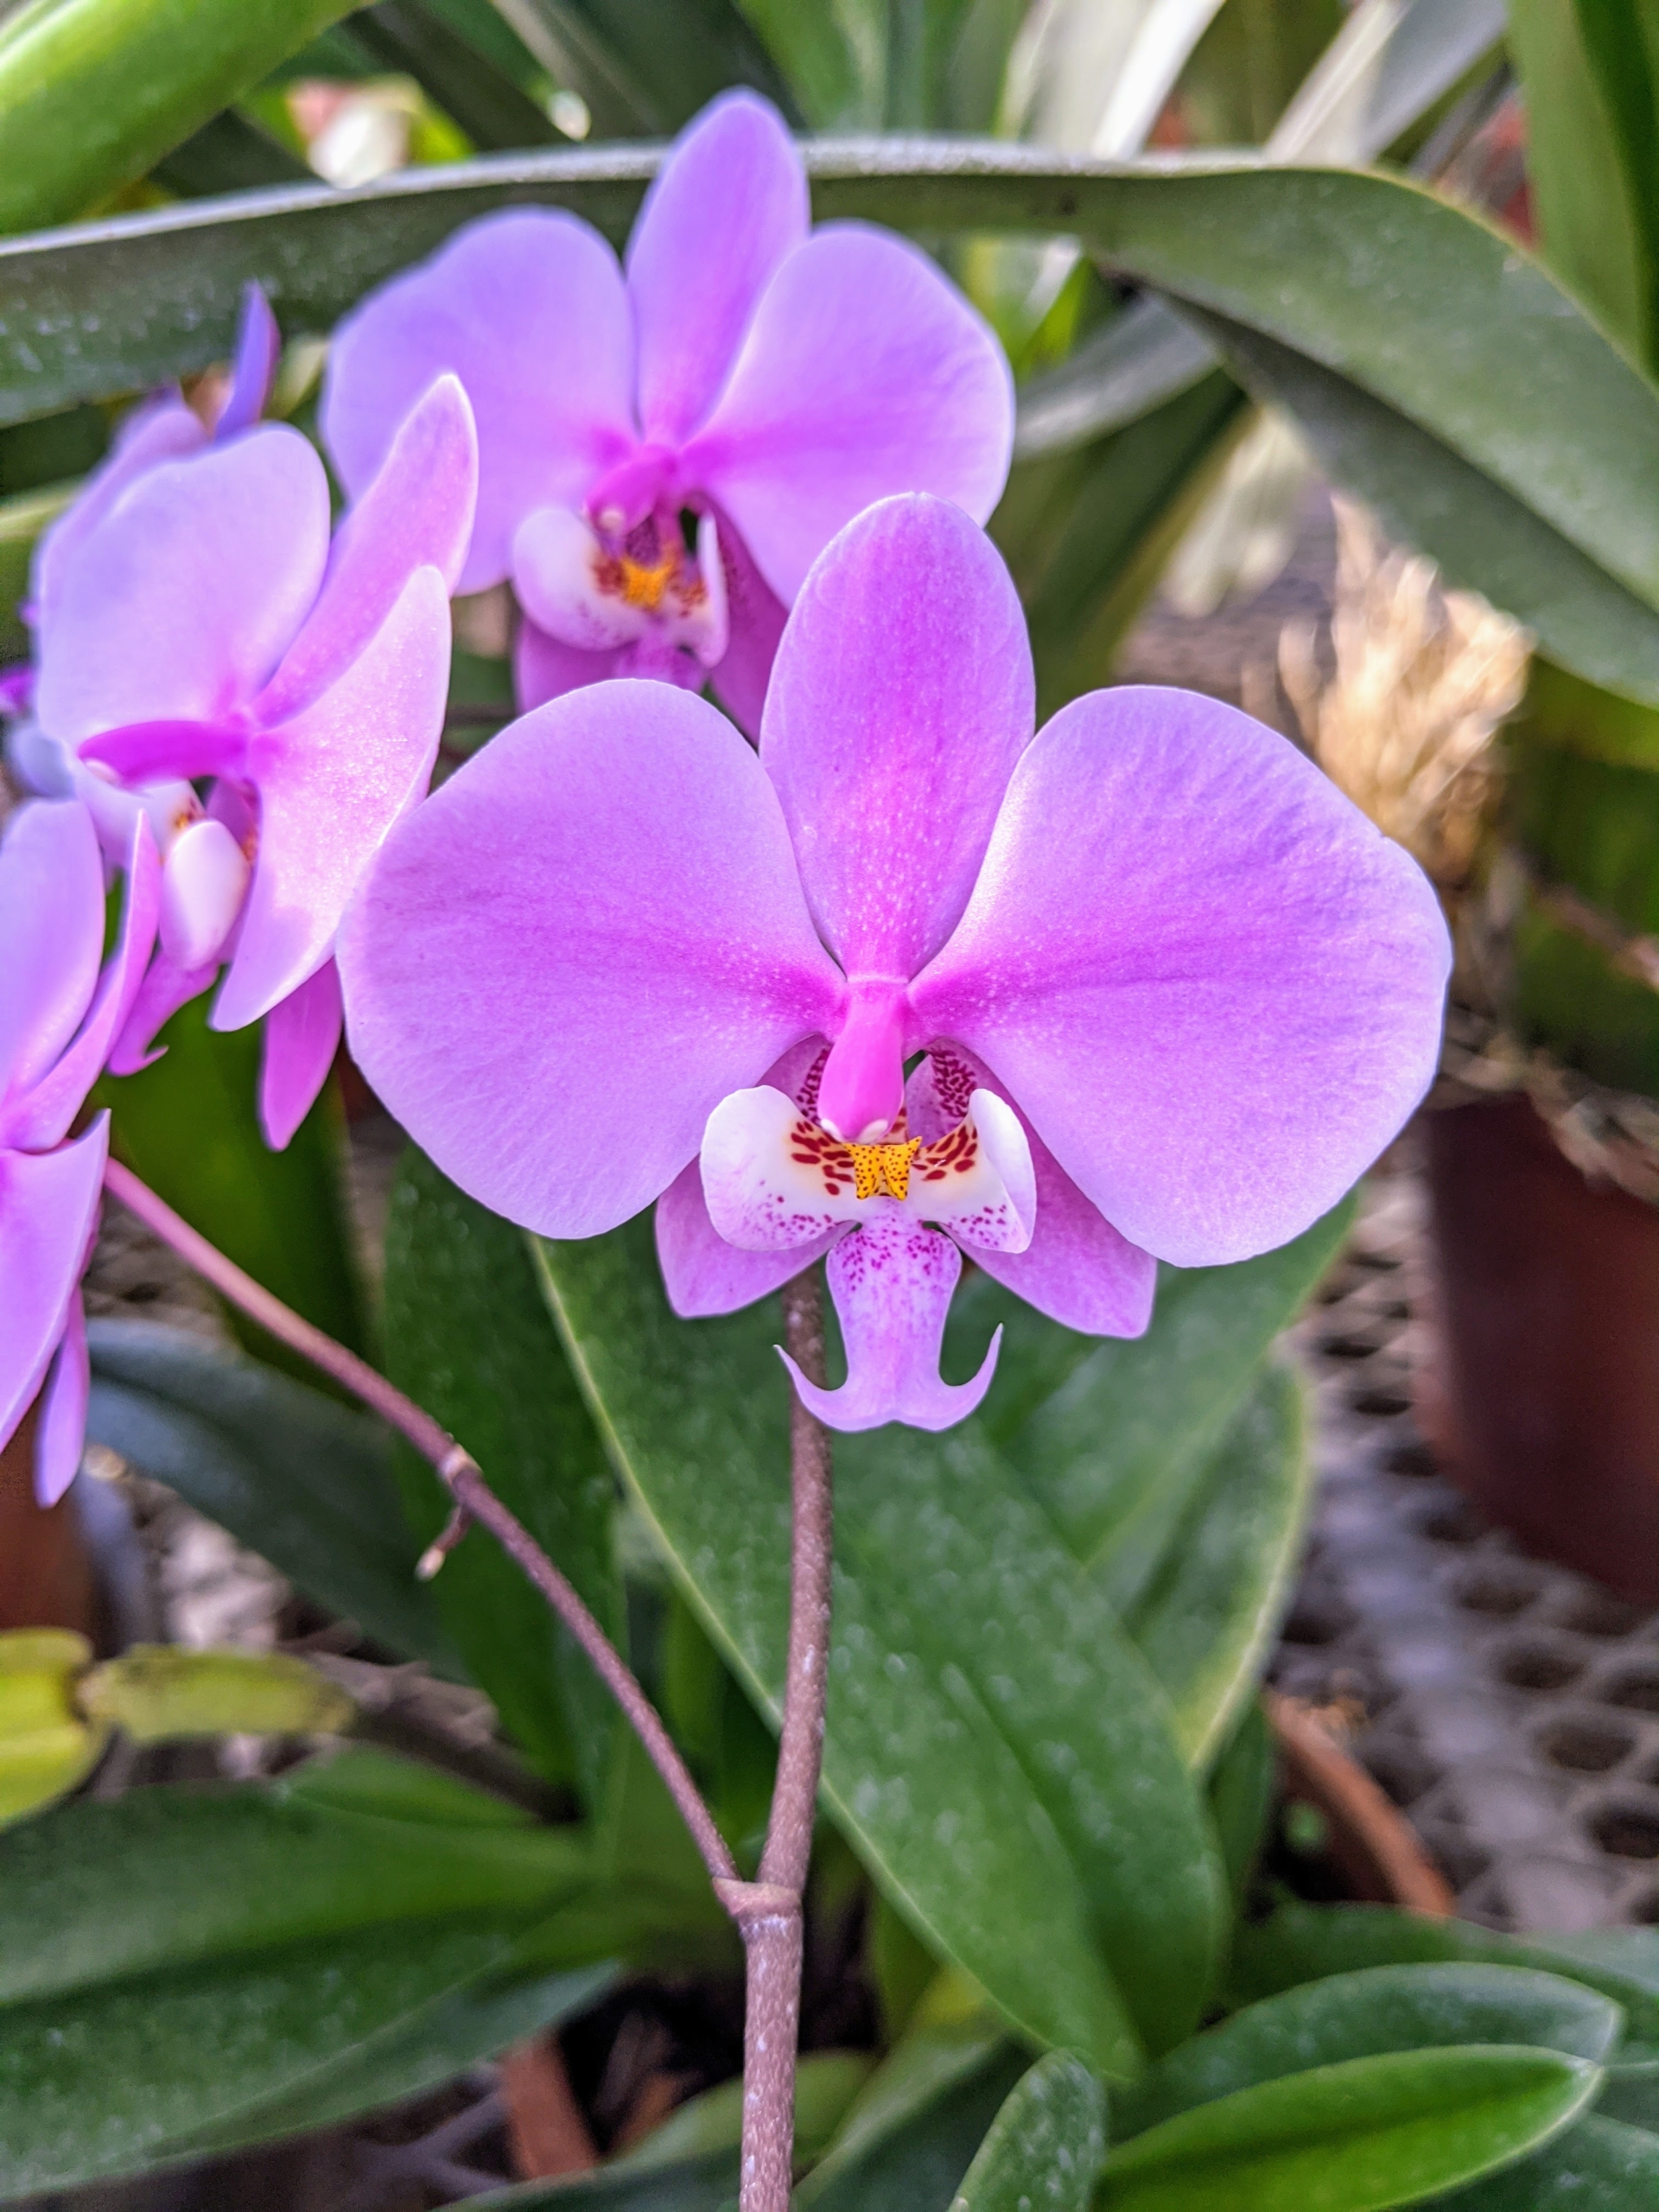
This is Phalaenopsis schilleriana ‘Wilson’ – it has beautiful pink to lavender flowers.
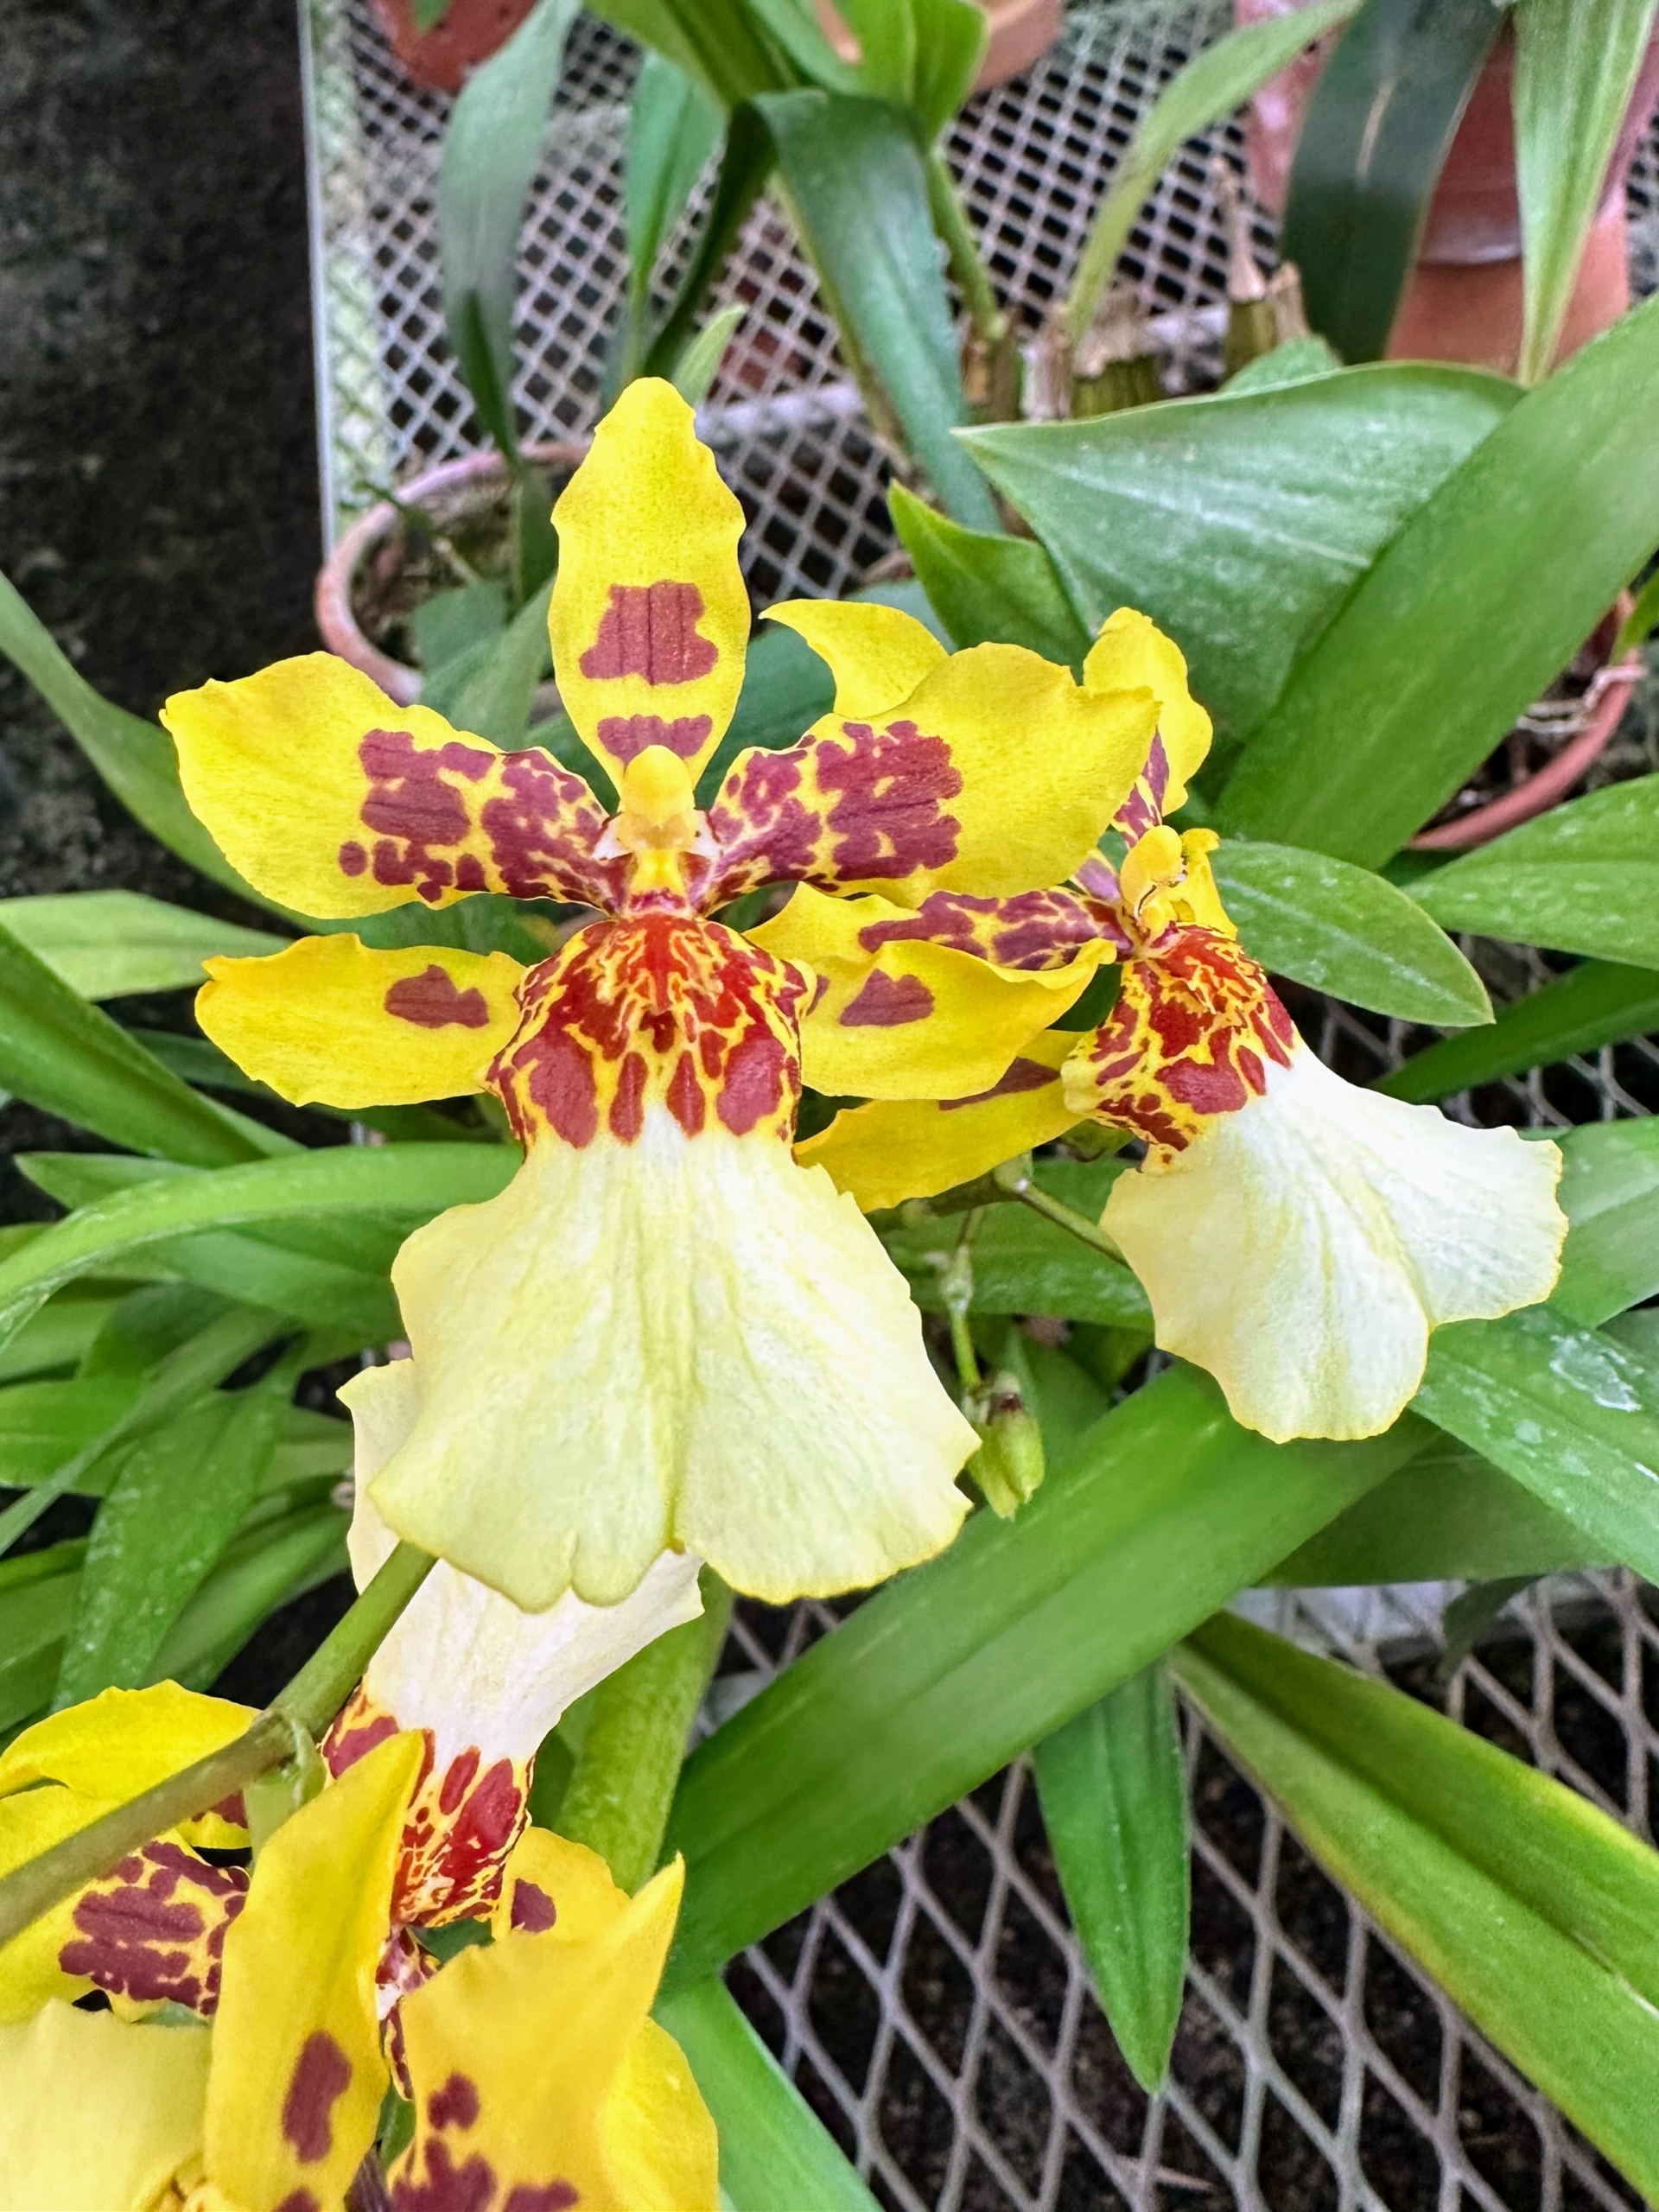
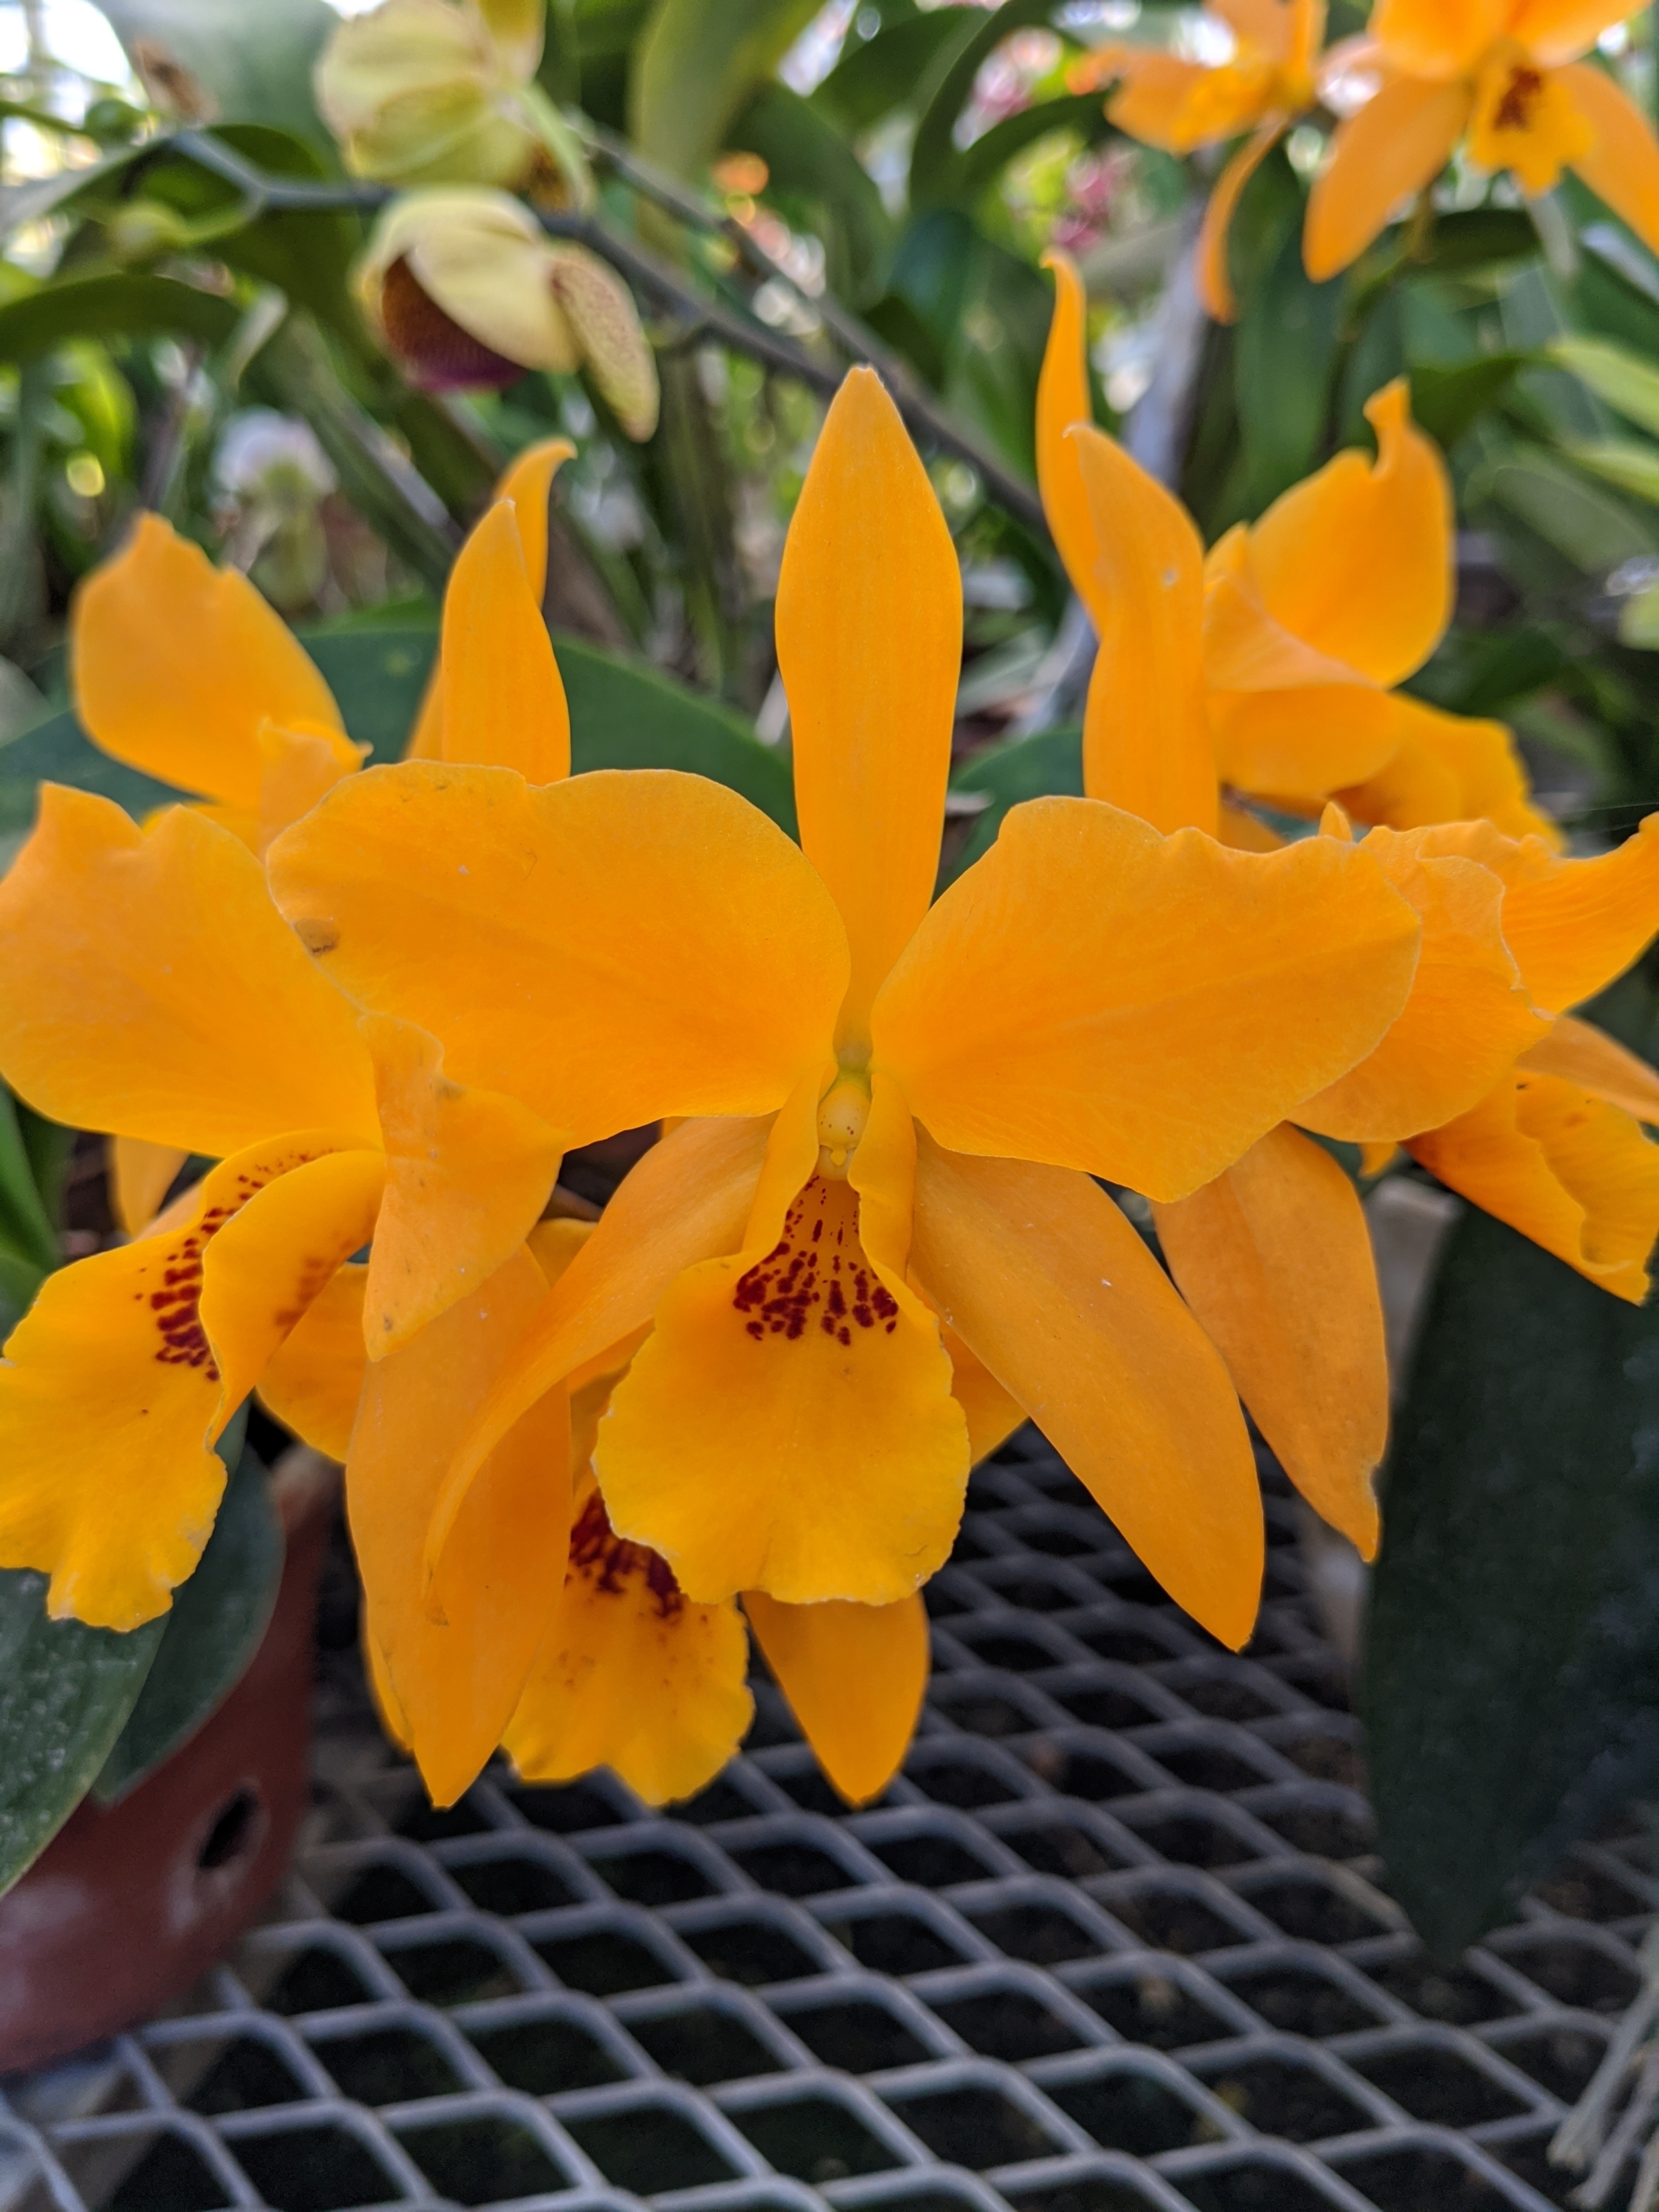
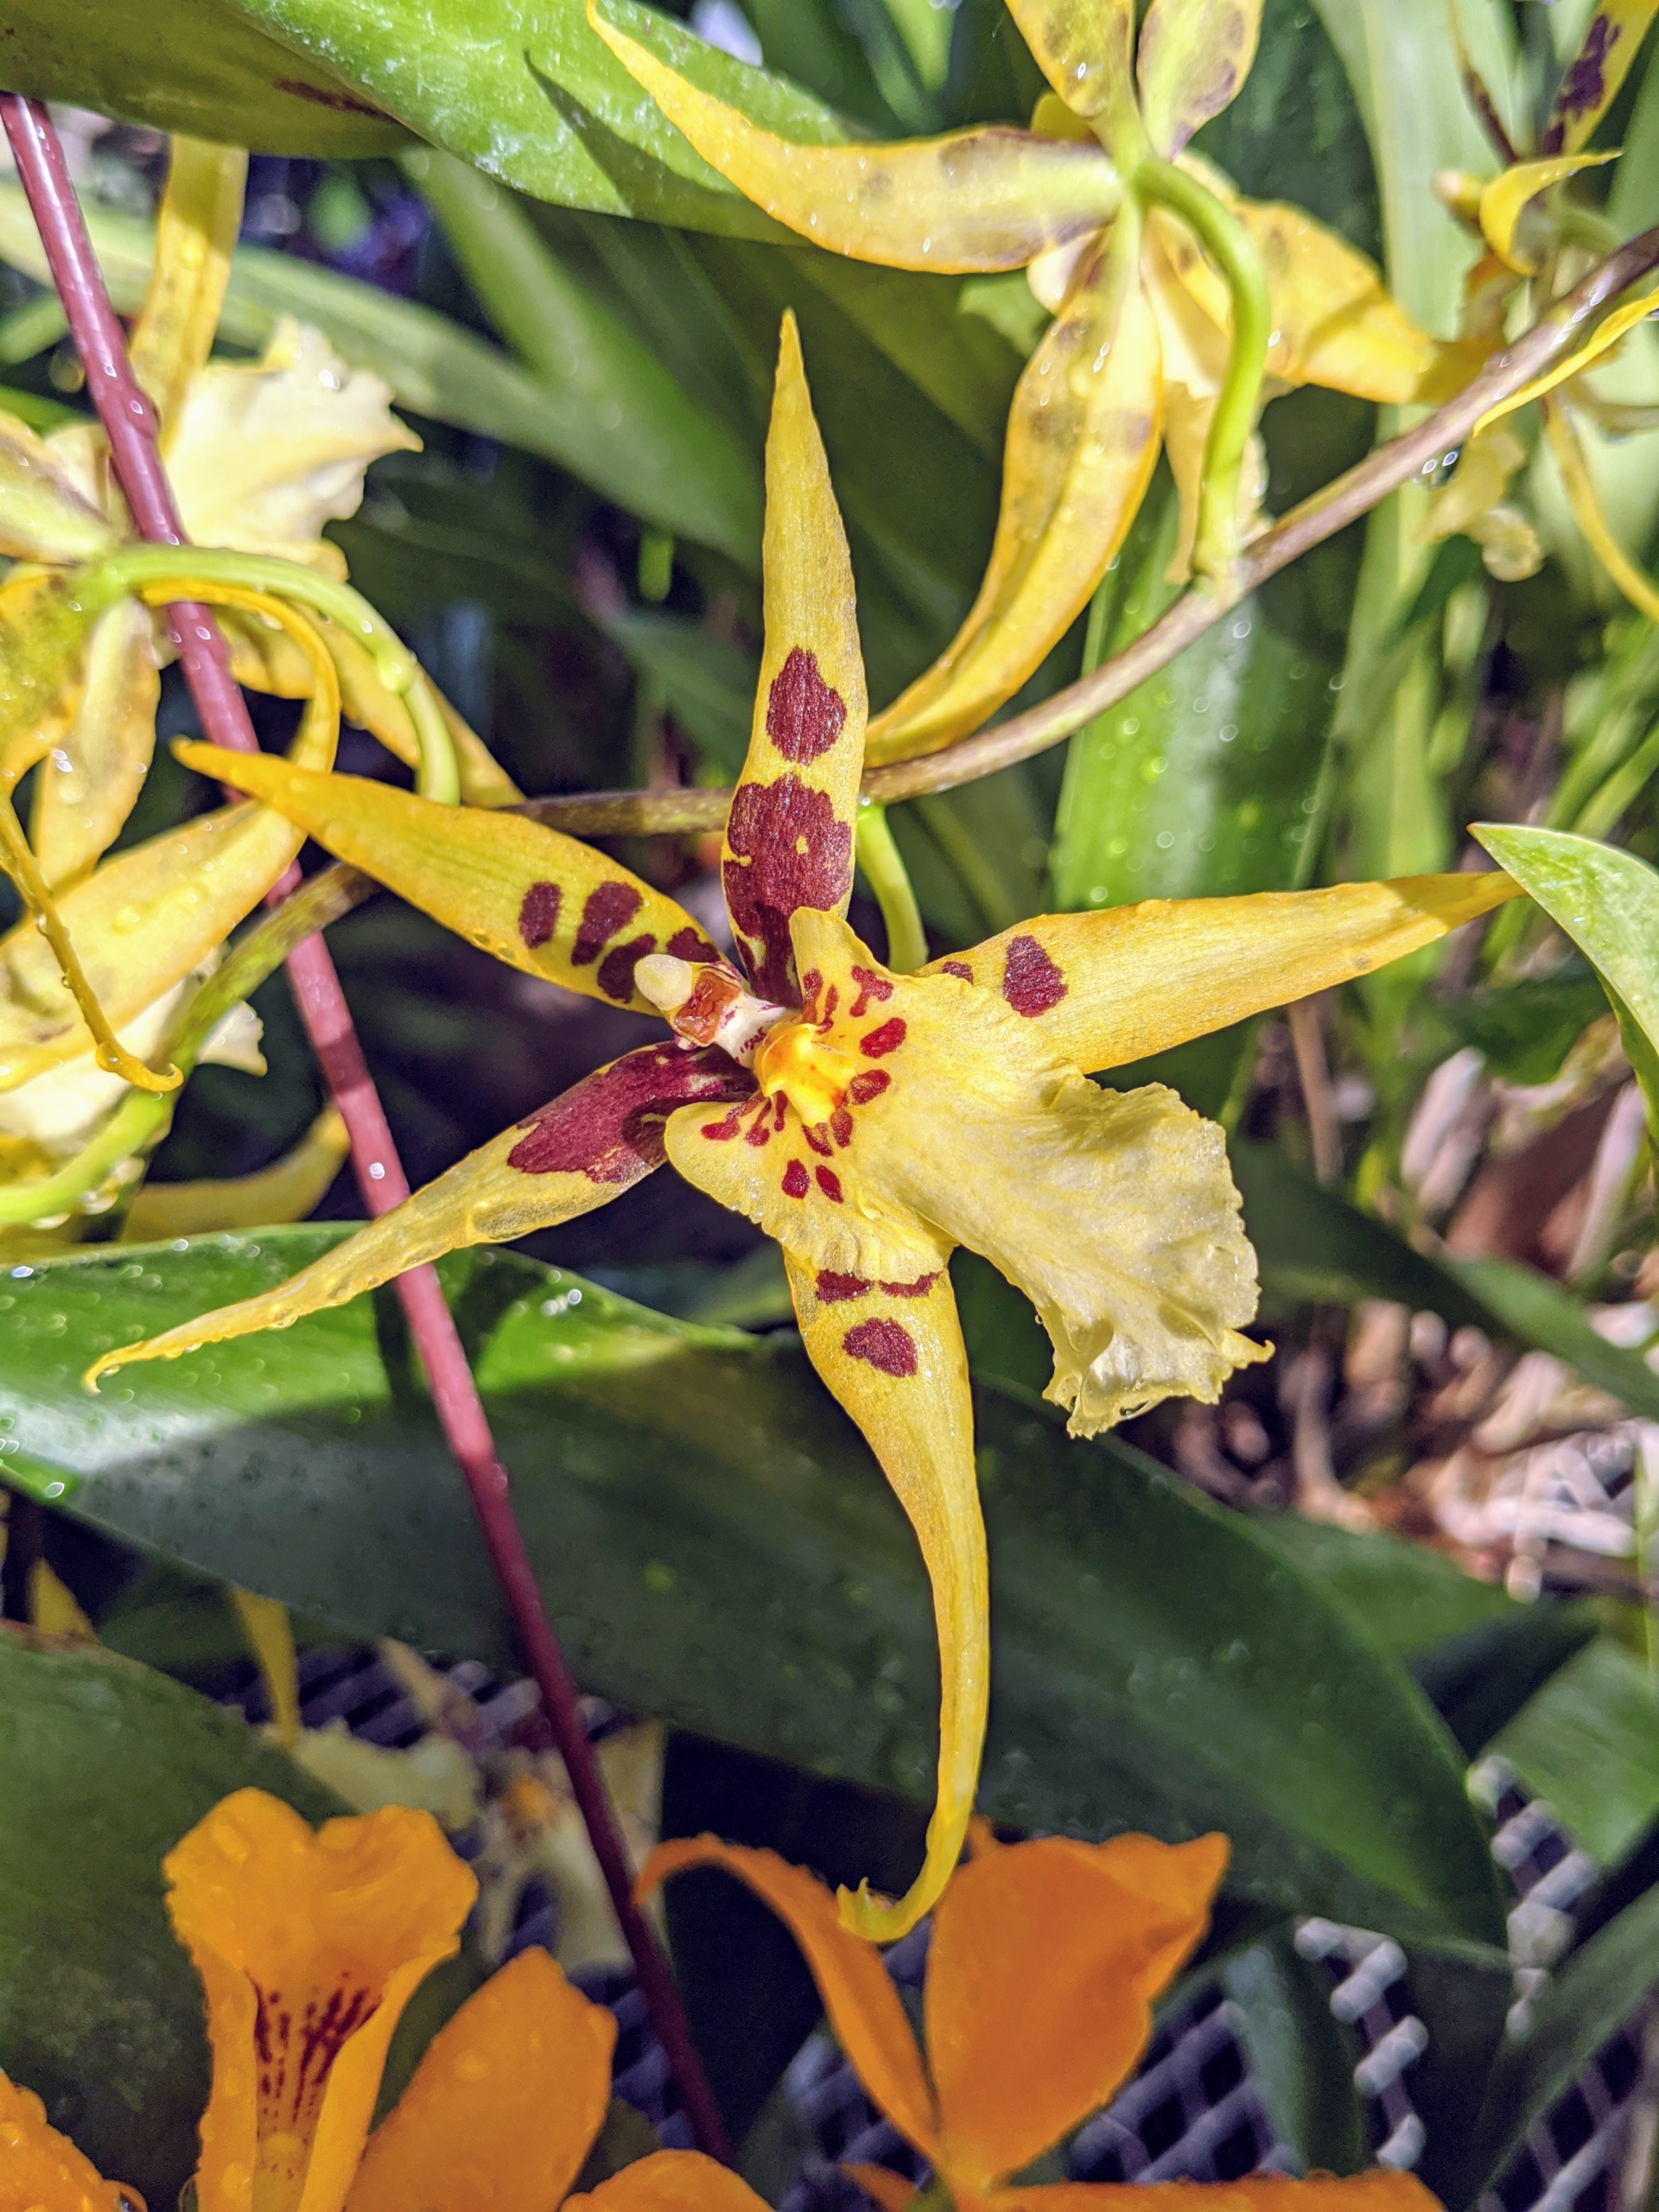
Oncidium orchids are popular indoor orchids because of their sprays of flowers. A large, well-grown Oncidium will have several branched sprays of beautiful, colorful blooms.
This is Oncidium hybrid Mclna. Yellow Star ‘Okika’. Its pretty pointed two-and-a-half-inch blooms can last up to one month.
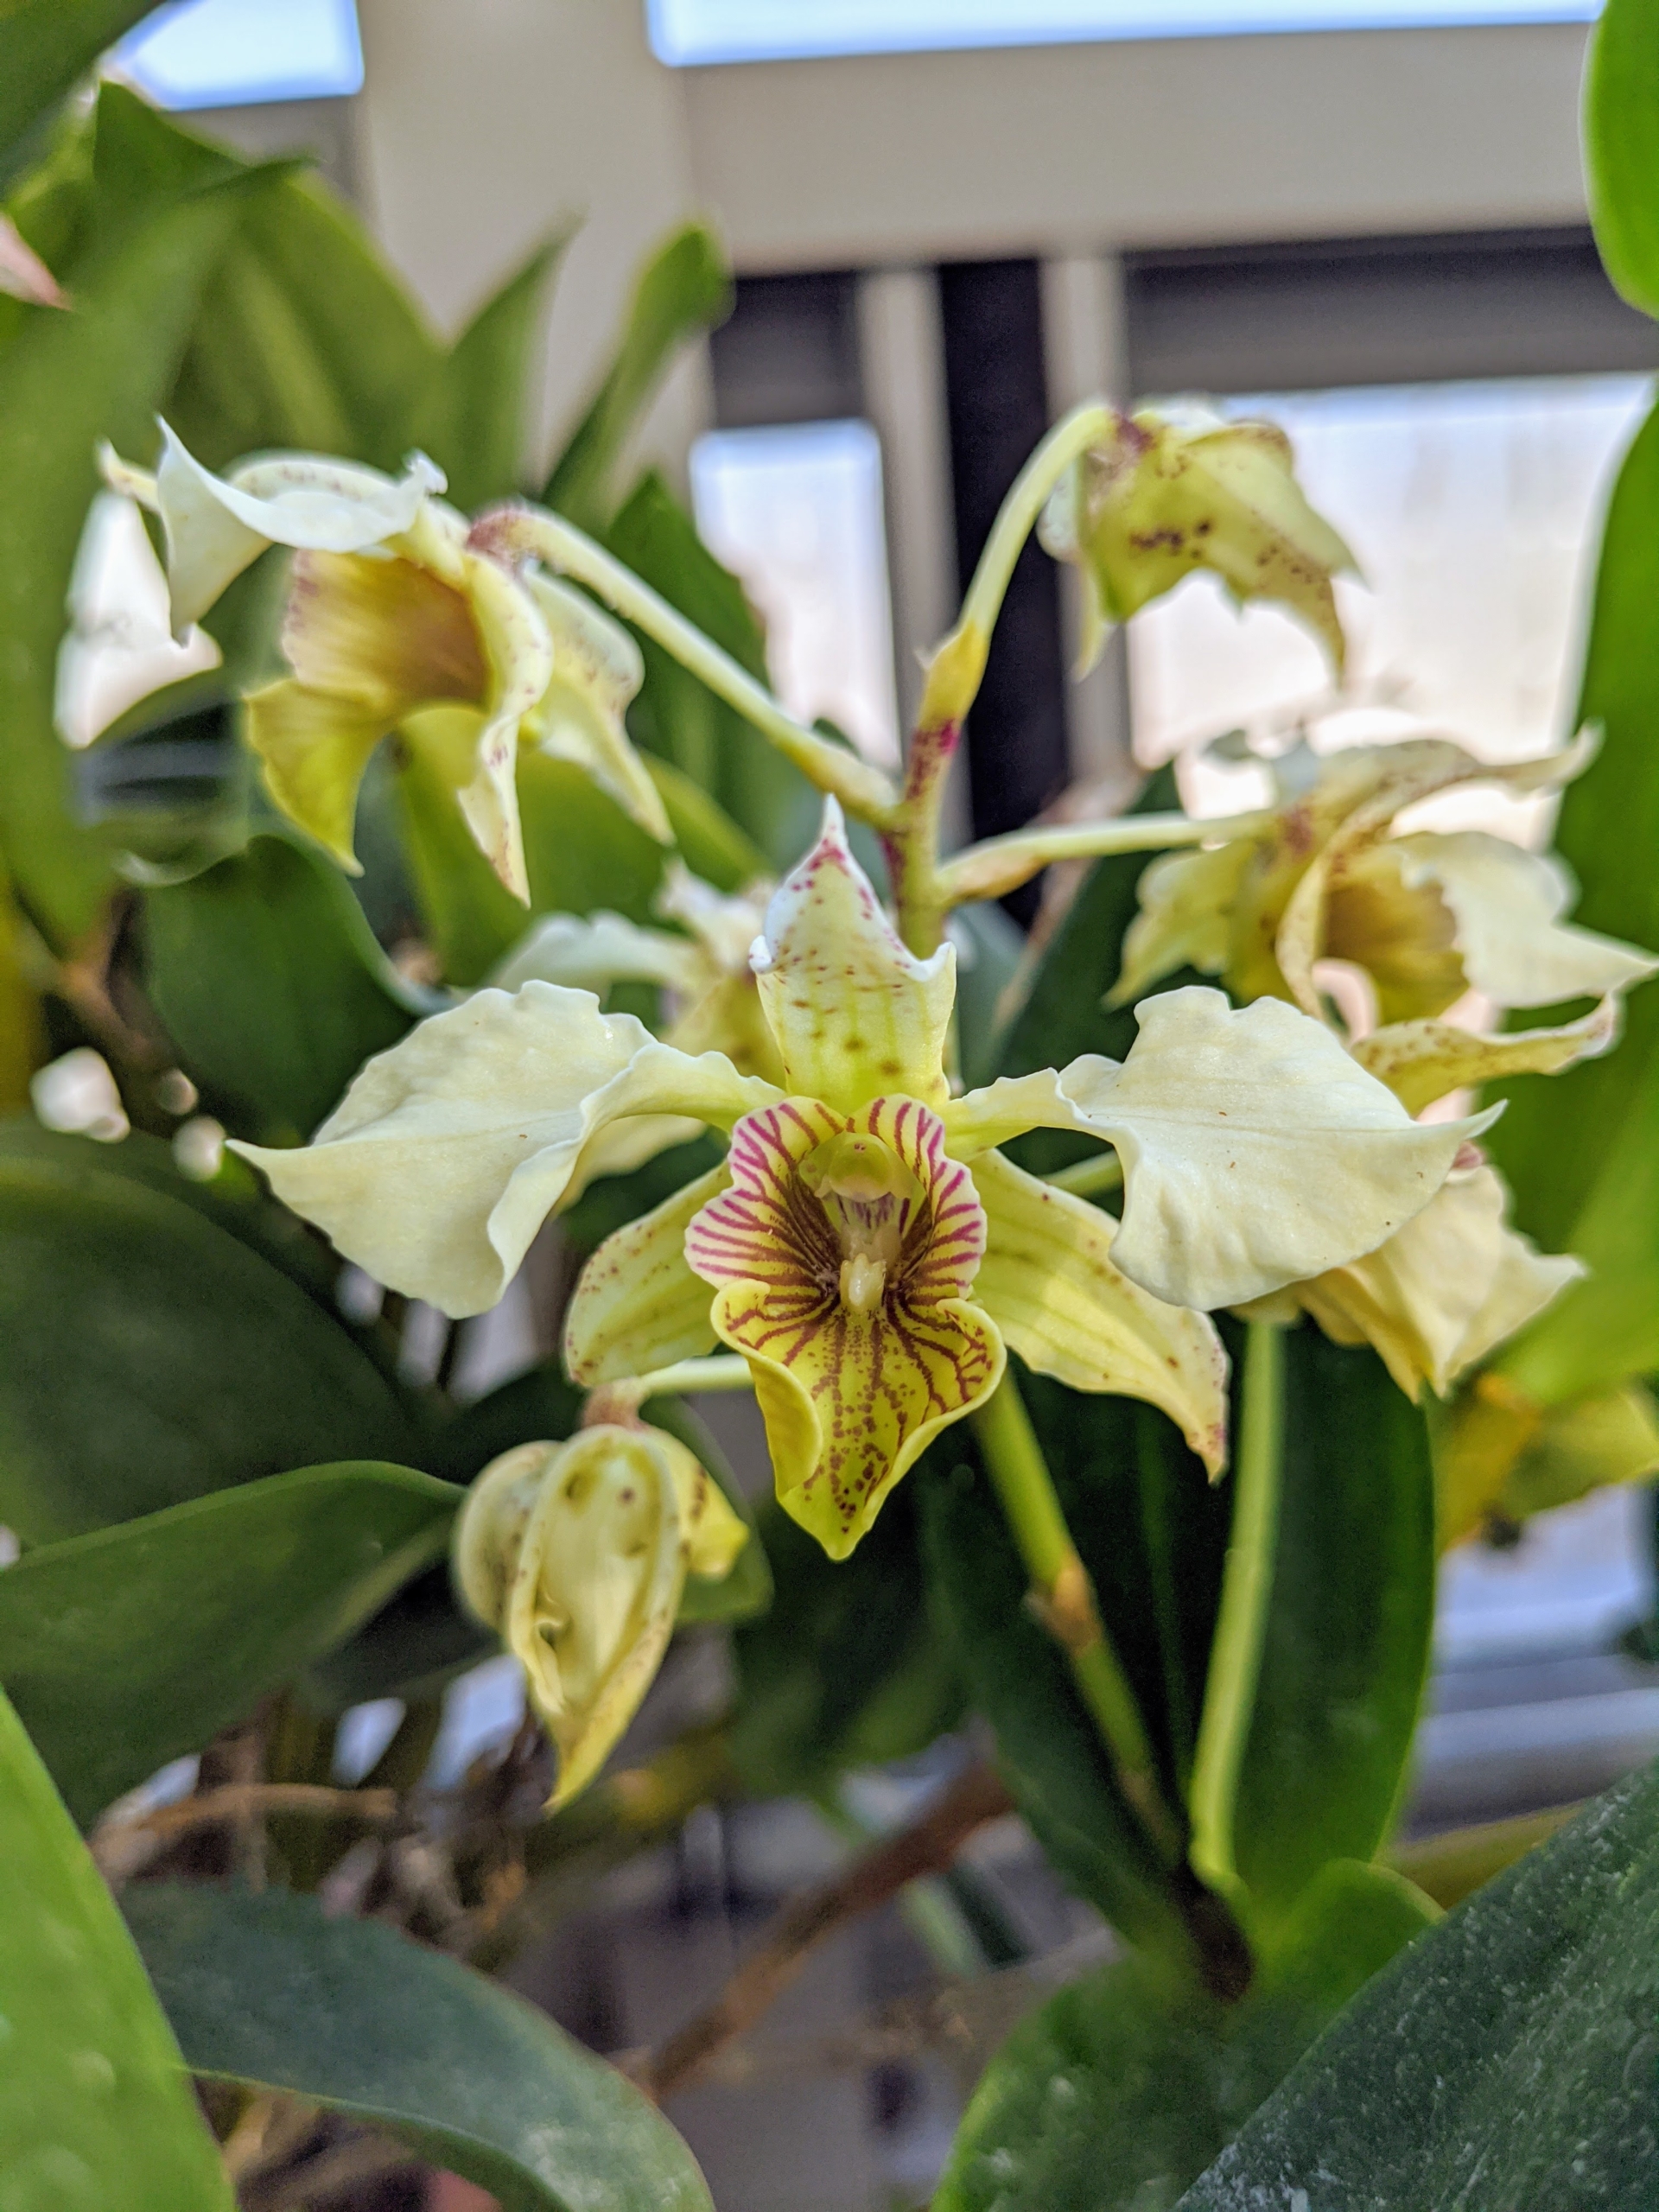
This is Dendrobium ‘Aussie chip’ x. Dendrobium atroviolaceum ‘Pygmy’ x. Dendrobium atroviolacrum ‘H&R’. Dendrobiums need lots of light, but not direct sun. A lightly shaded south window is best.
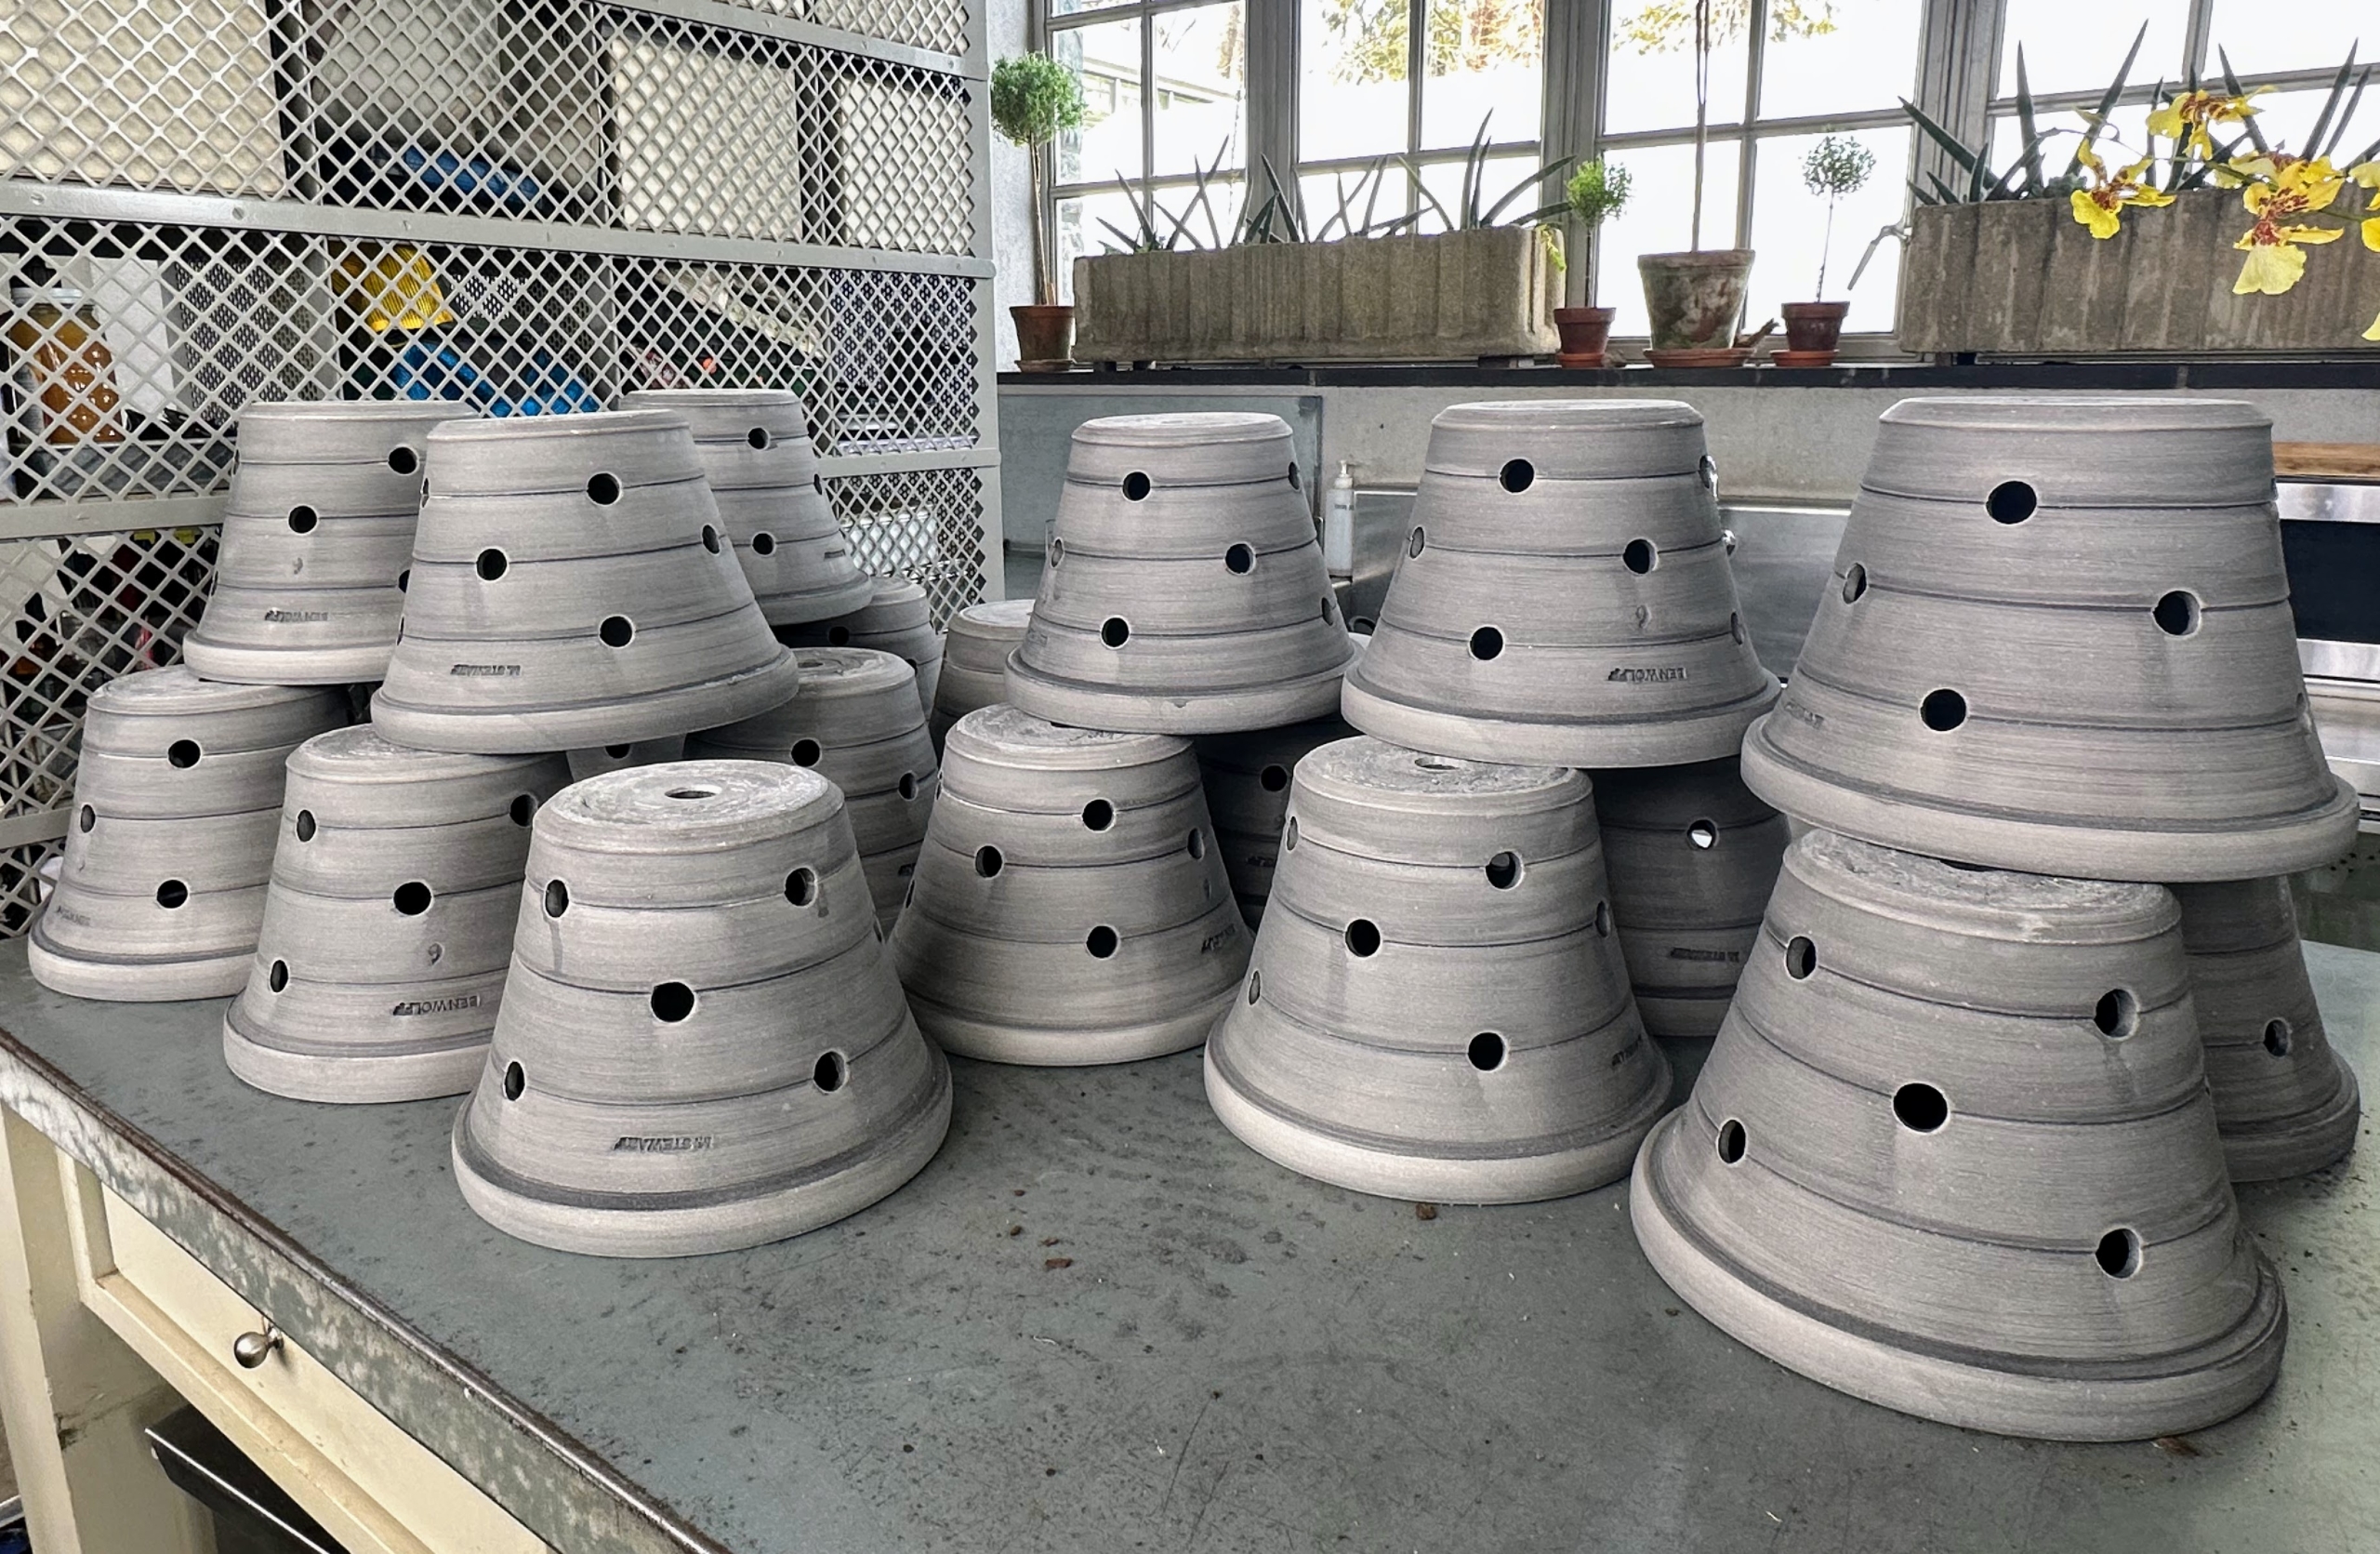
And next door in my head house is our latest delivery of Ben Wolff pots. These are perforated orchid pots – you may have seen them on my Instagram page @MarthaStewart48. We’ll be potting up some orchids in these beautiful pots soon.