Here's the continuation of my family's holiday excursion to Costa Rica. This encore blog was originally posted on December 17, 2019 - enjoy.
There is so much to see in Costa Rica.
Costa Rica is a Central American country with coastlines on the Caribbean and the Pacific. It is bordered by Nicaragua to the north, the Caribbean Sea to the northeast, Panama to the southeast, the Pacific Ocean to the southwest, and Ecuador to the south. Costa Rica is known for its beaches, its volcanoes, and its biodiversity - roughly a quarter of its area is made up of protected jungle, rich with wildlife, plants, and trees.
Here are more photos from my trip, enjoy.
Costa Rica is not very large. The land area measures at about 20-thousand square miles – a little smaller than the US state of West Virginia. But the views over the water are vast and amazing. We took many photos of these spectacular views.
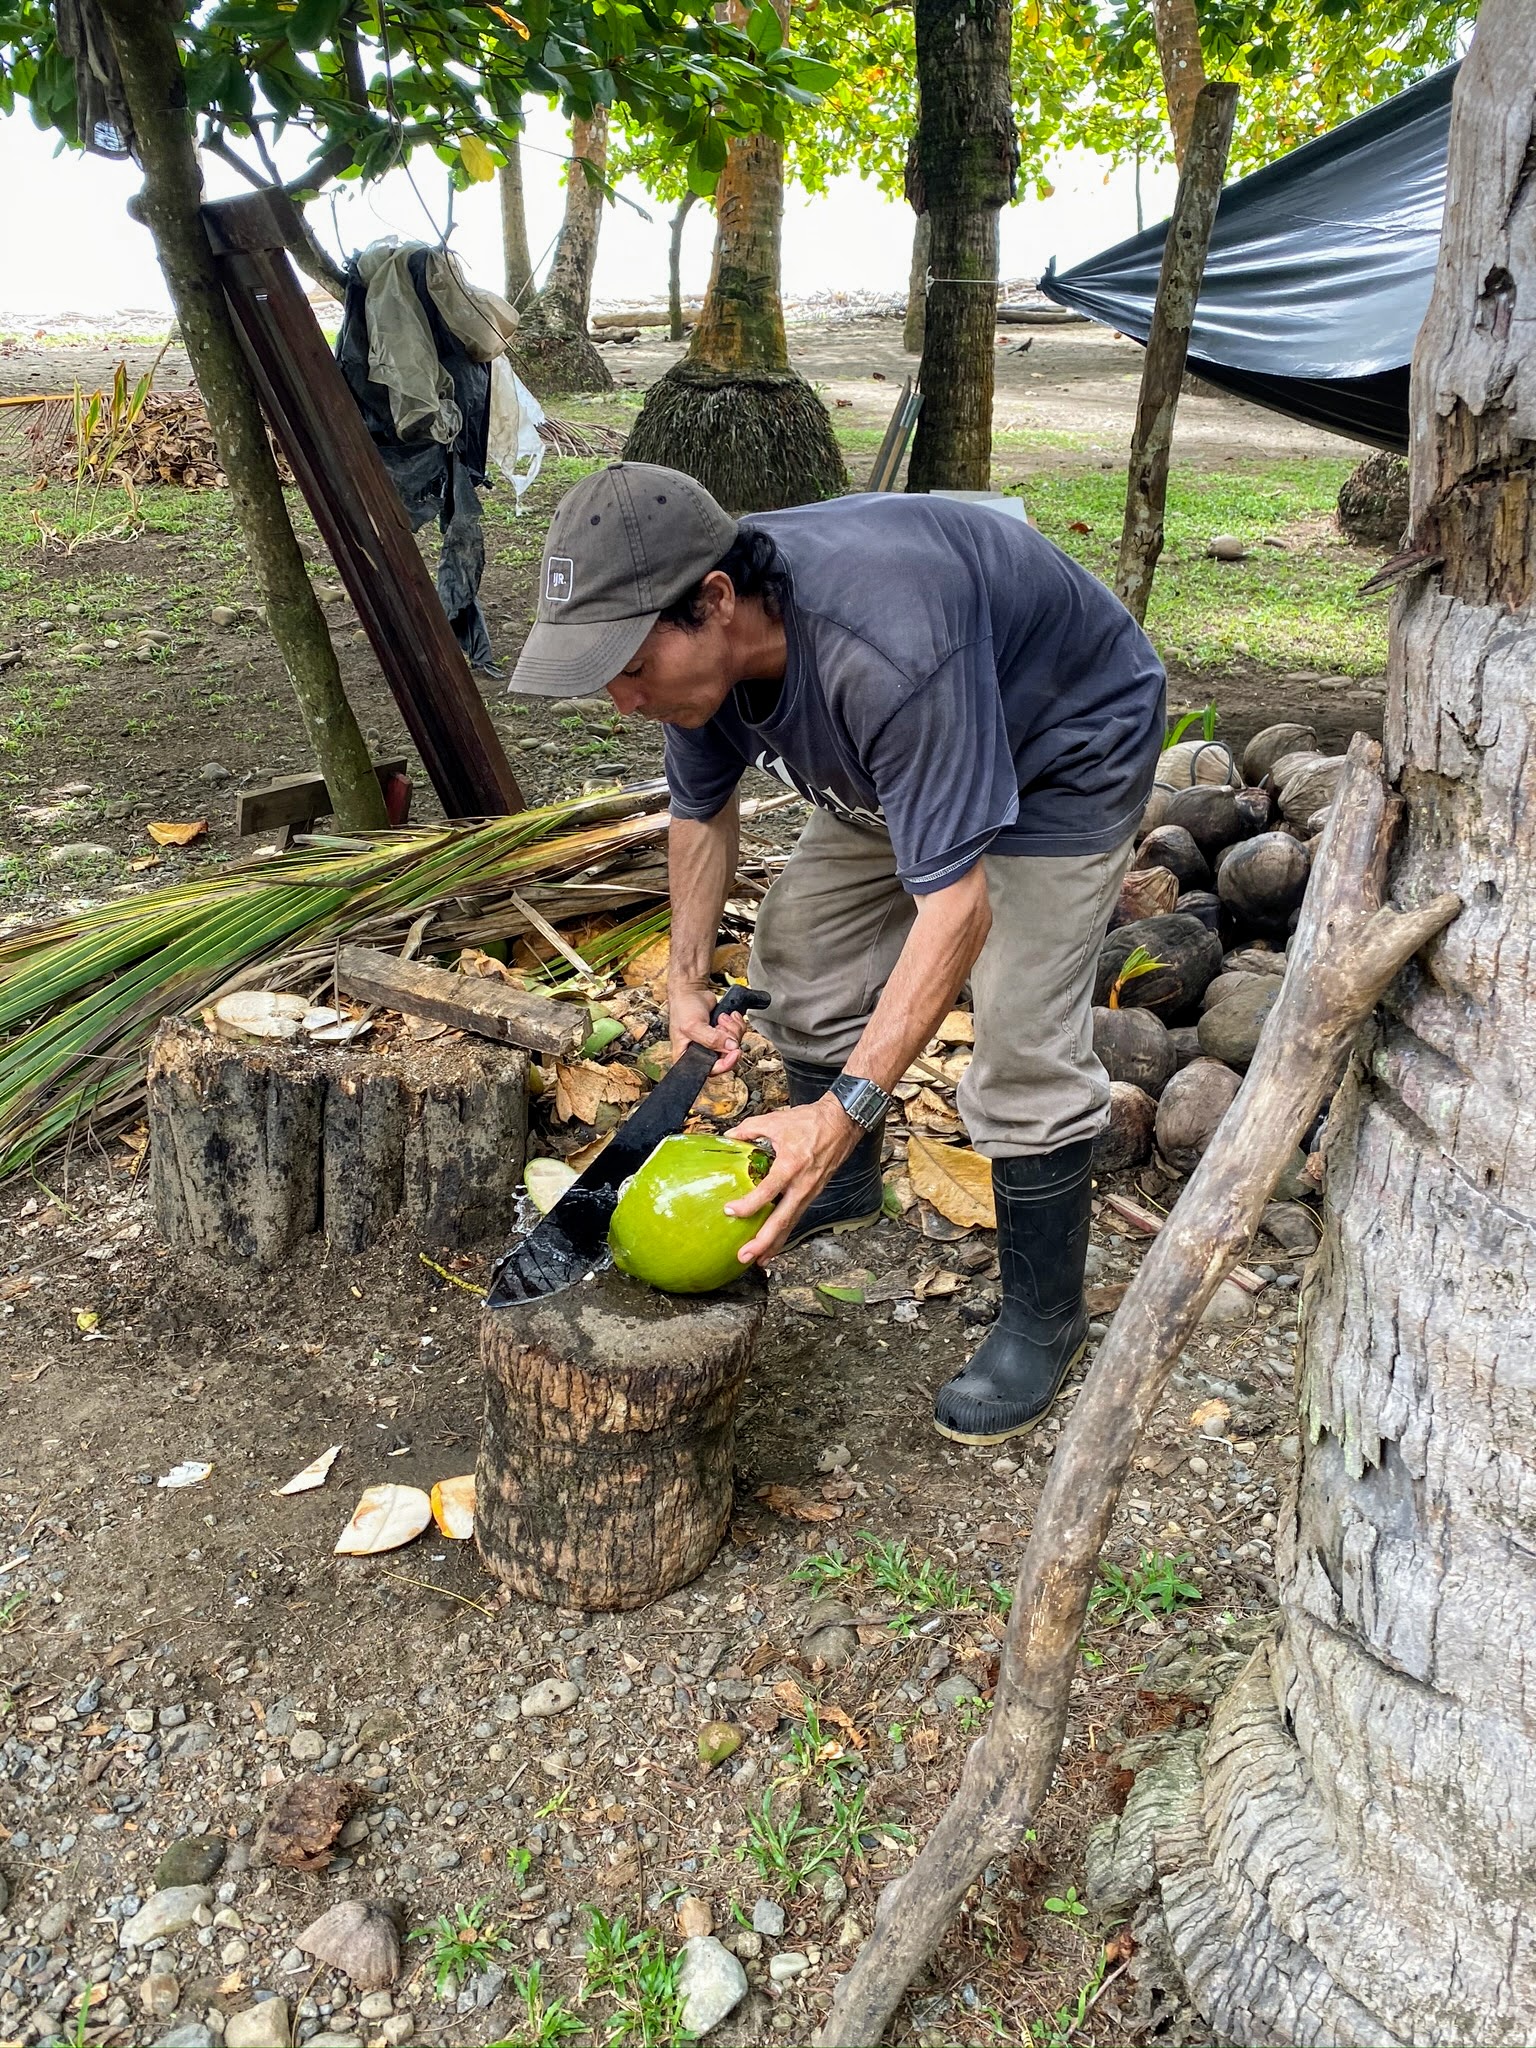
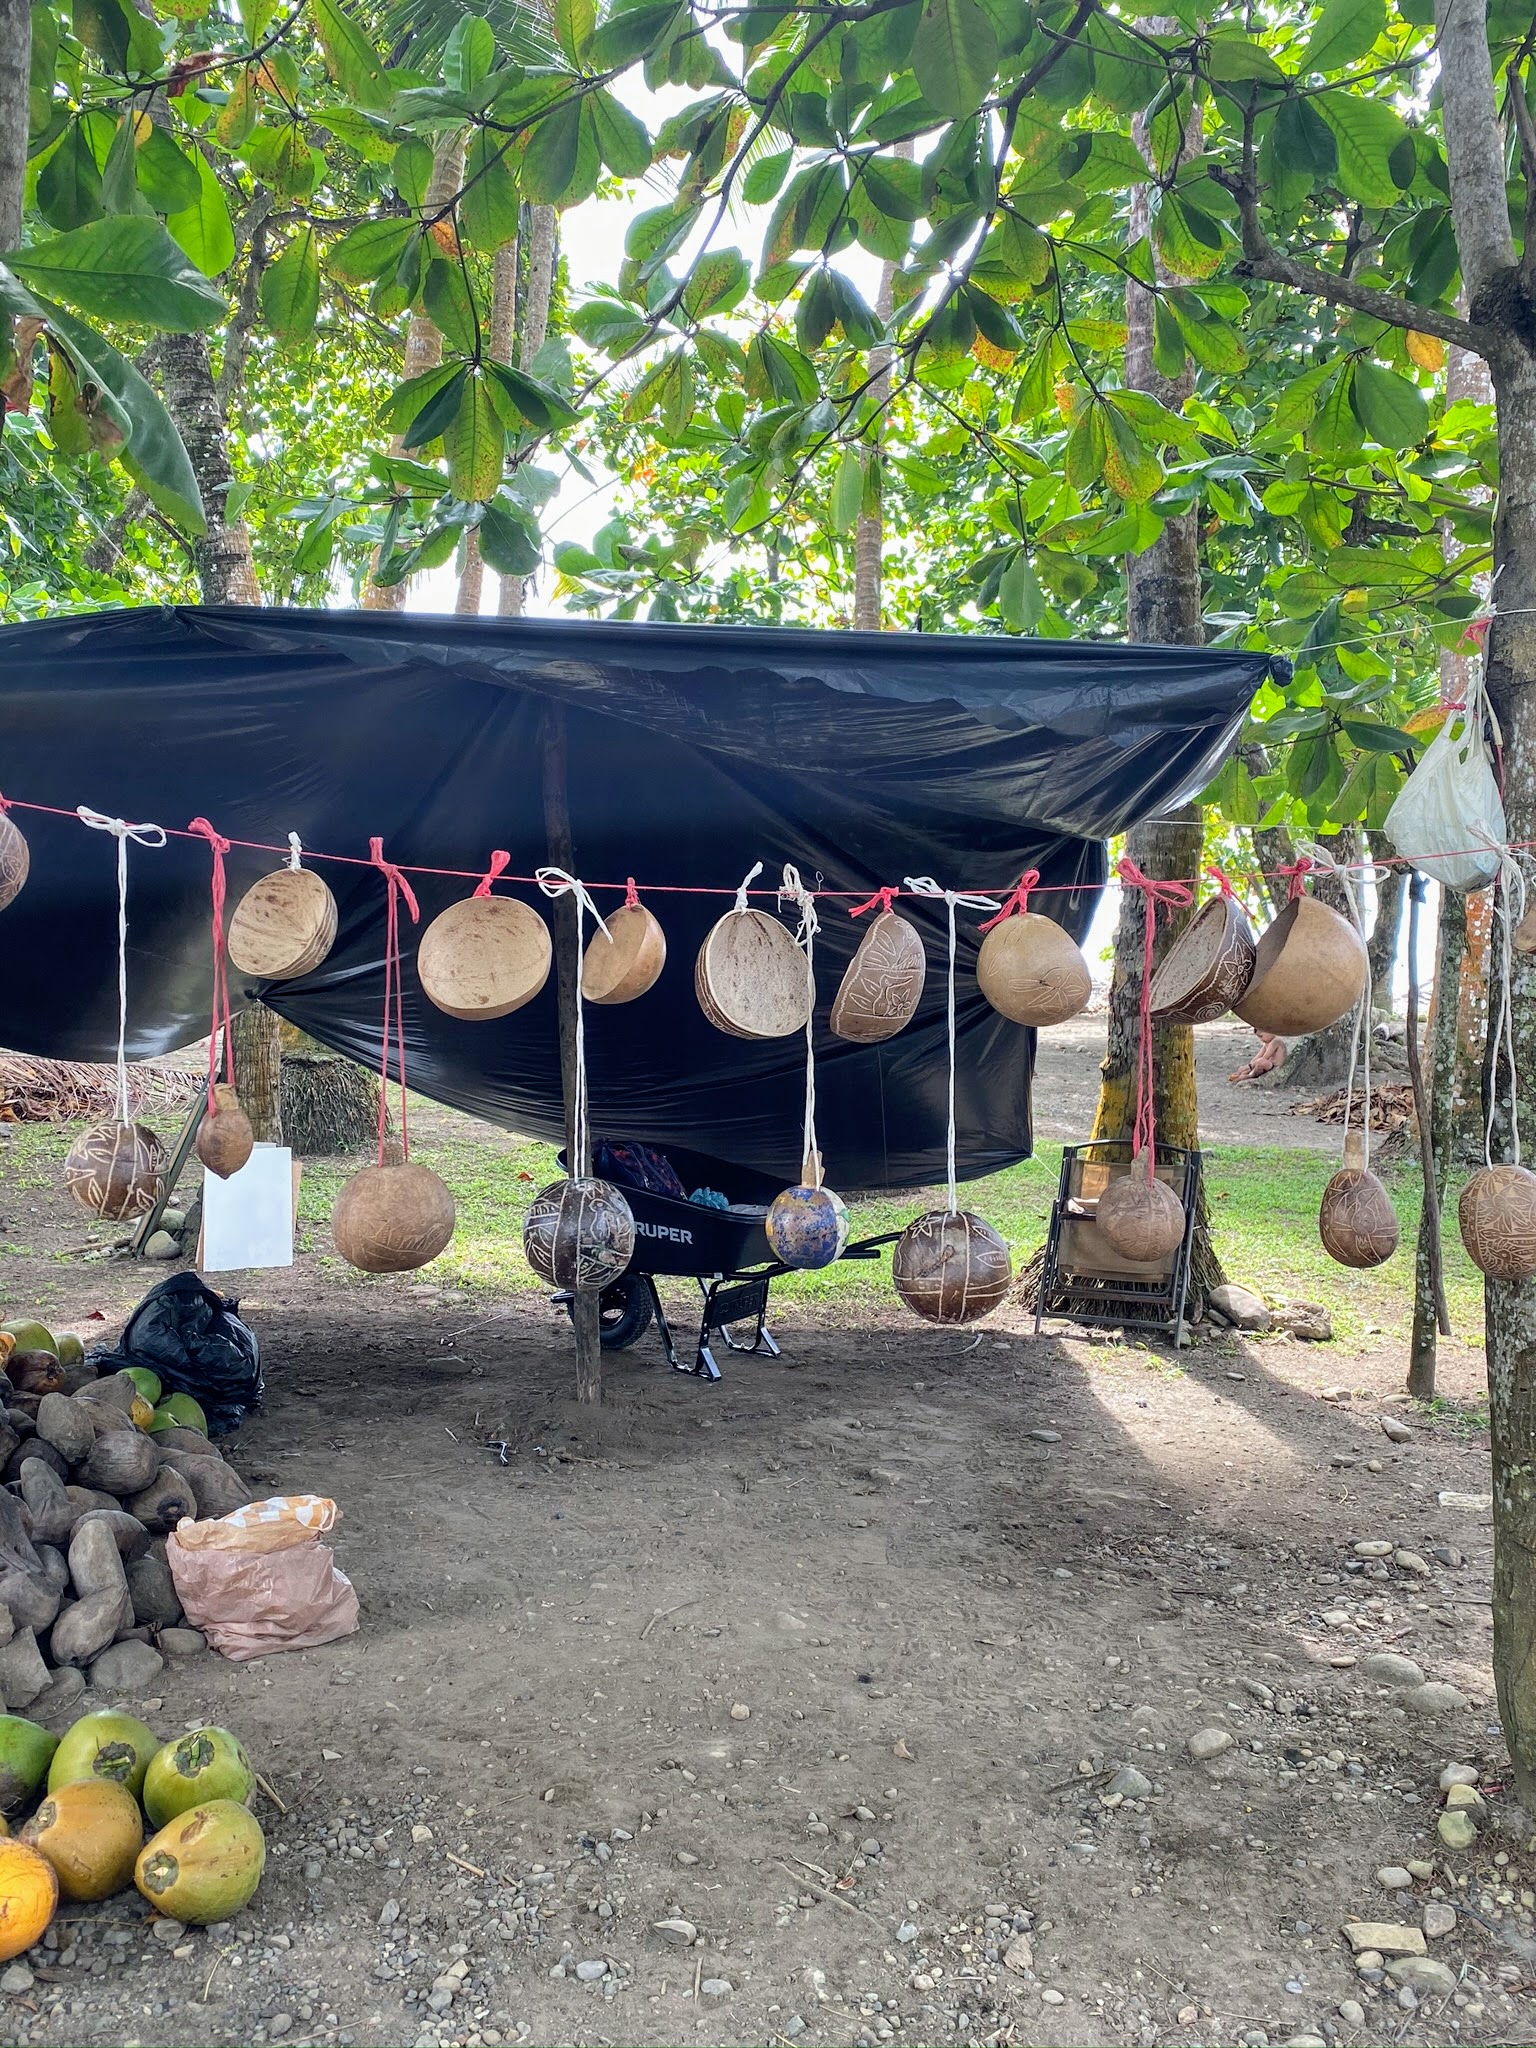
While driving in Costa Rica, one will see numerous fruit stands – many with pipa fría, or fresh chilled green coconut. Coconut water is full of electrolytes and packed with calcium, magnesium, and potassium – it is so good and so good for you.
Discarded coconut shells are made into beautiful bowls and other natural products and sold at these roadside stands.
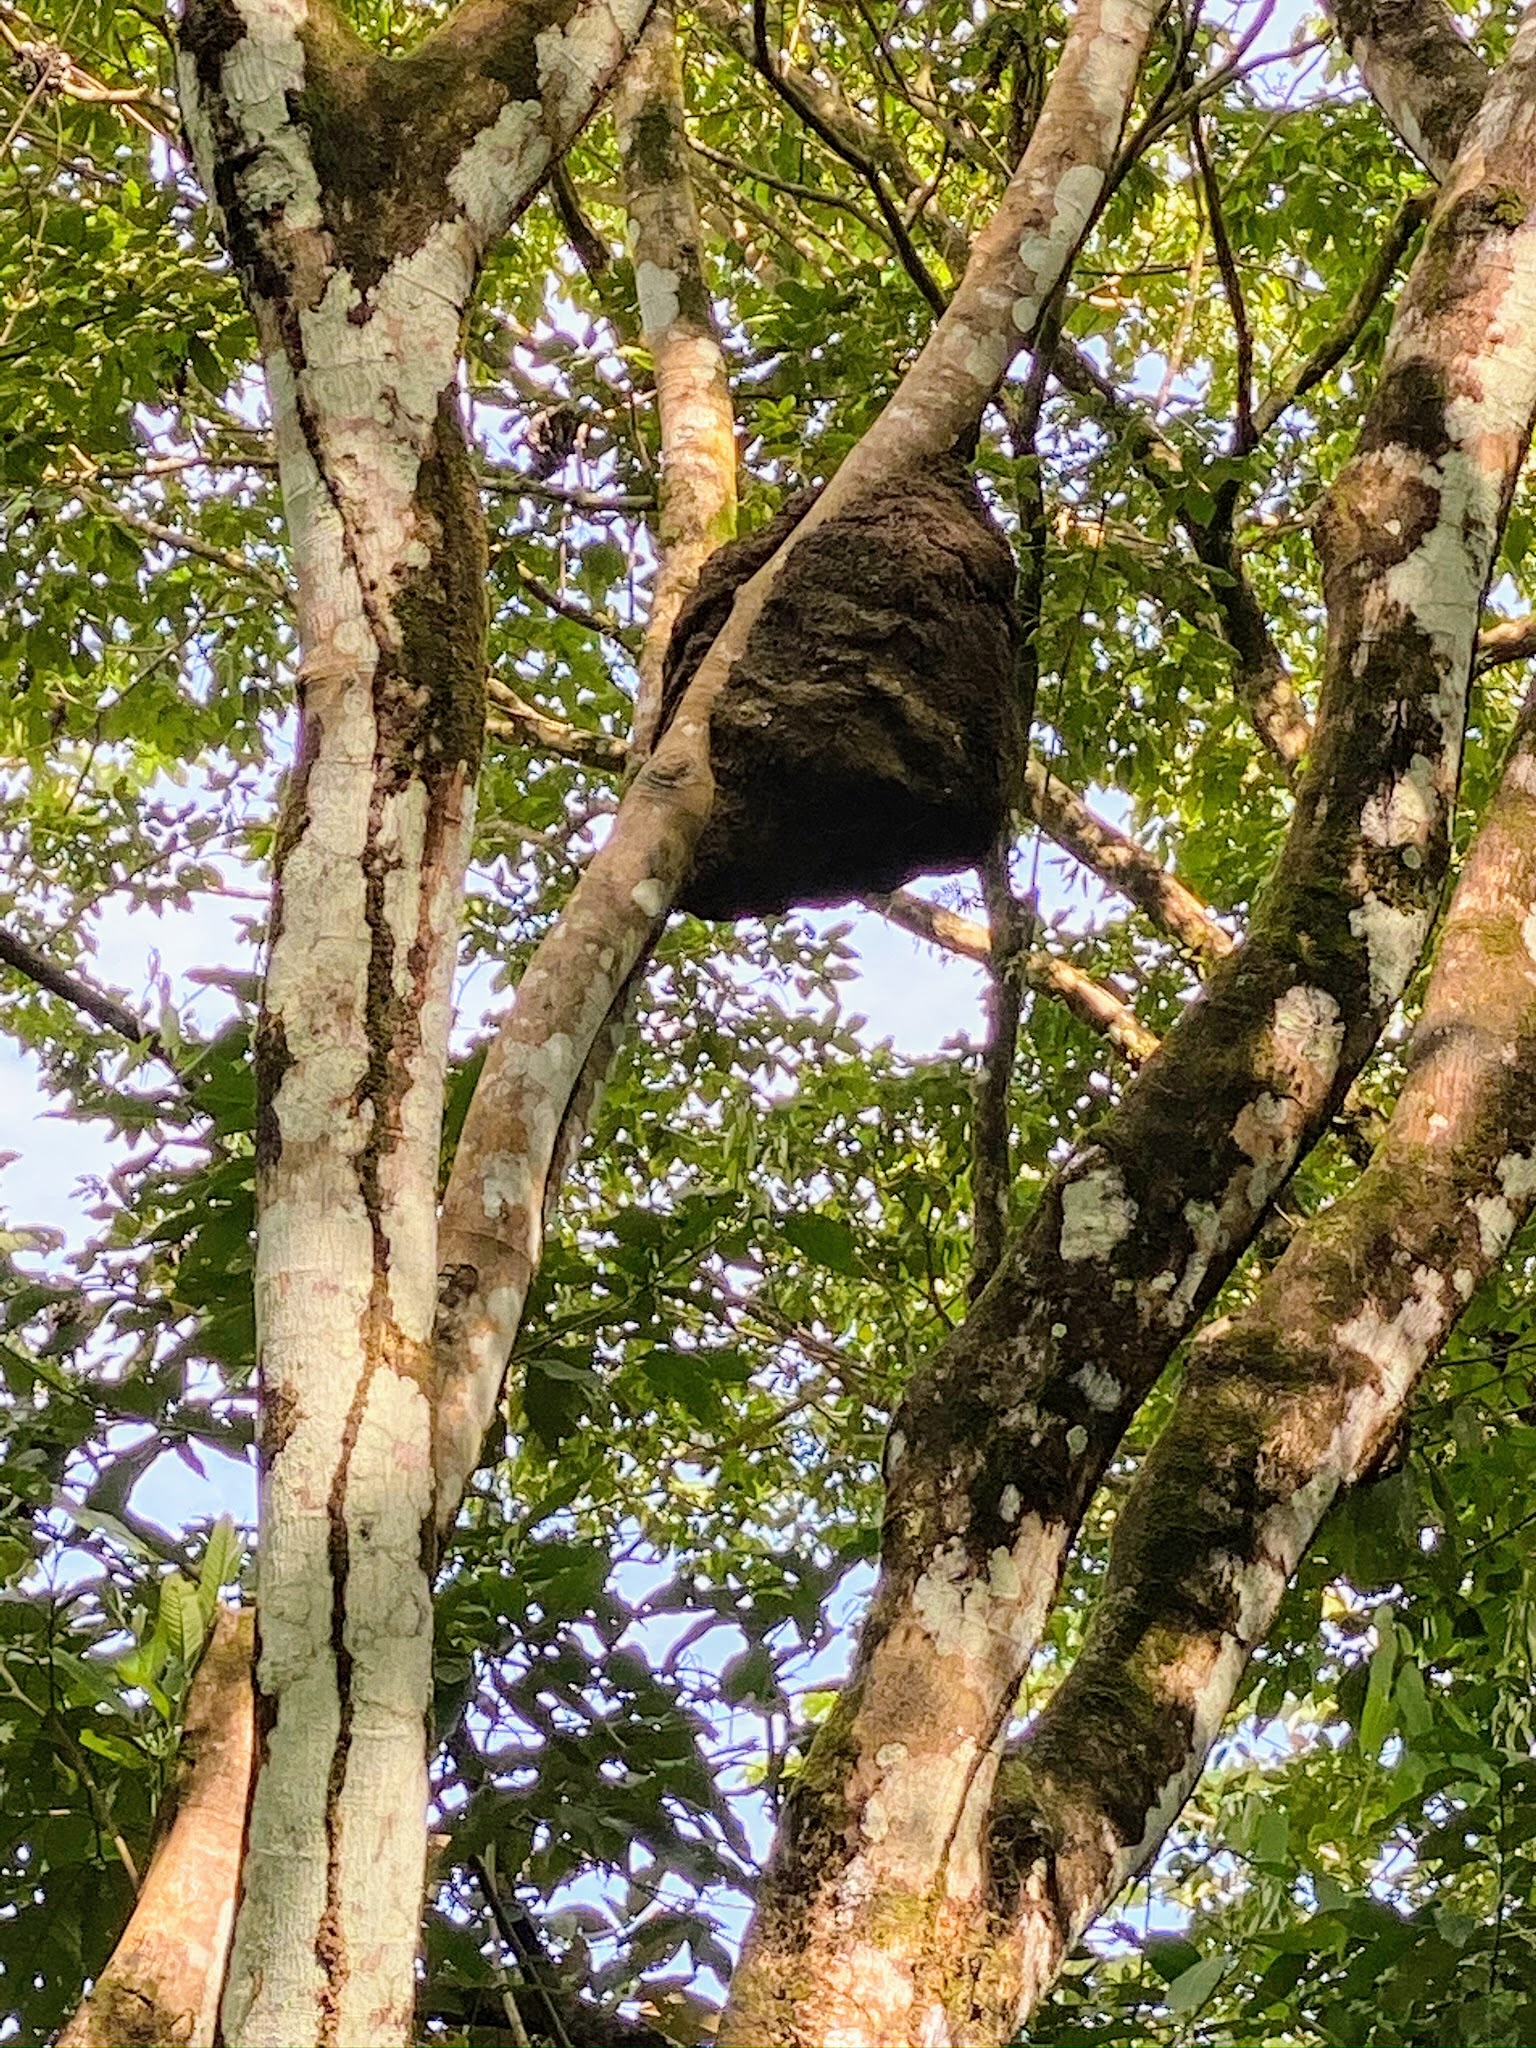
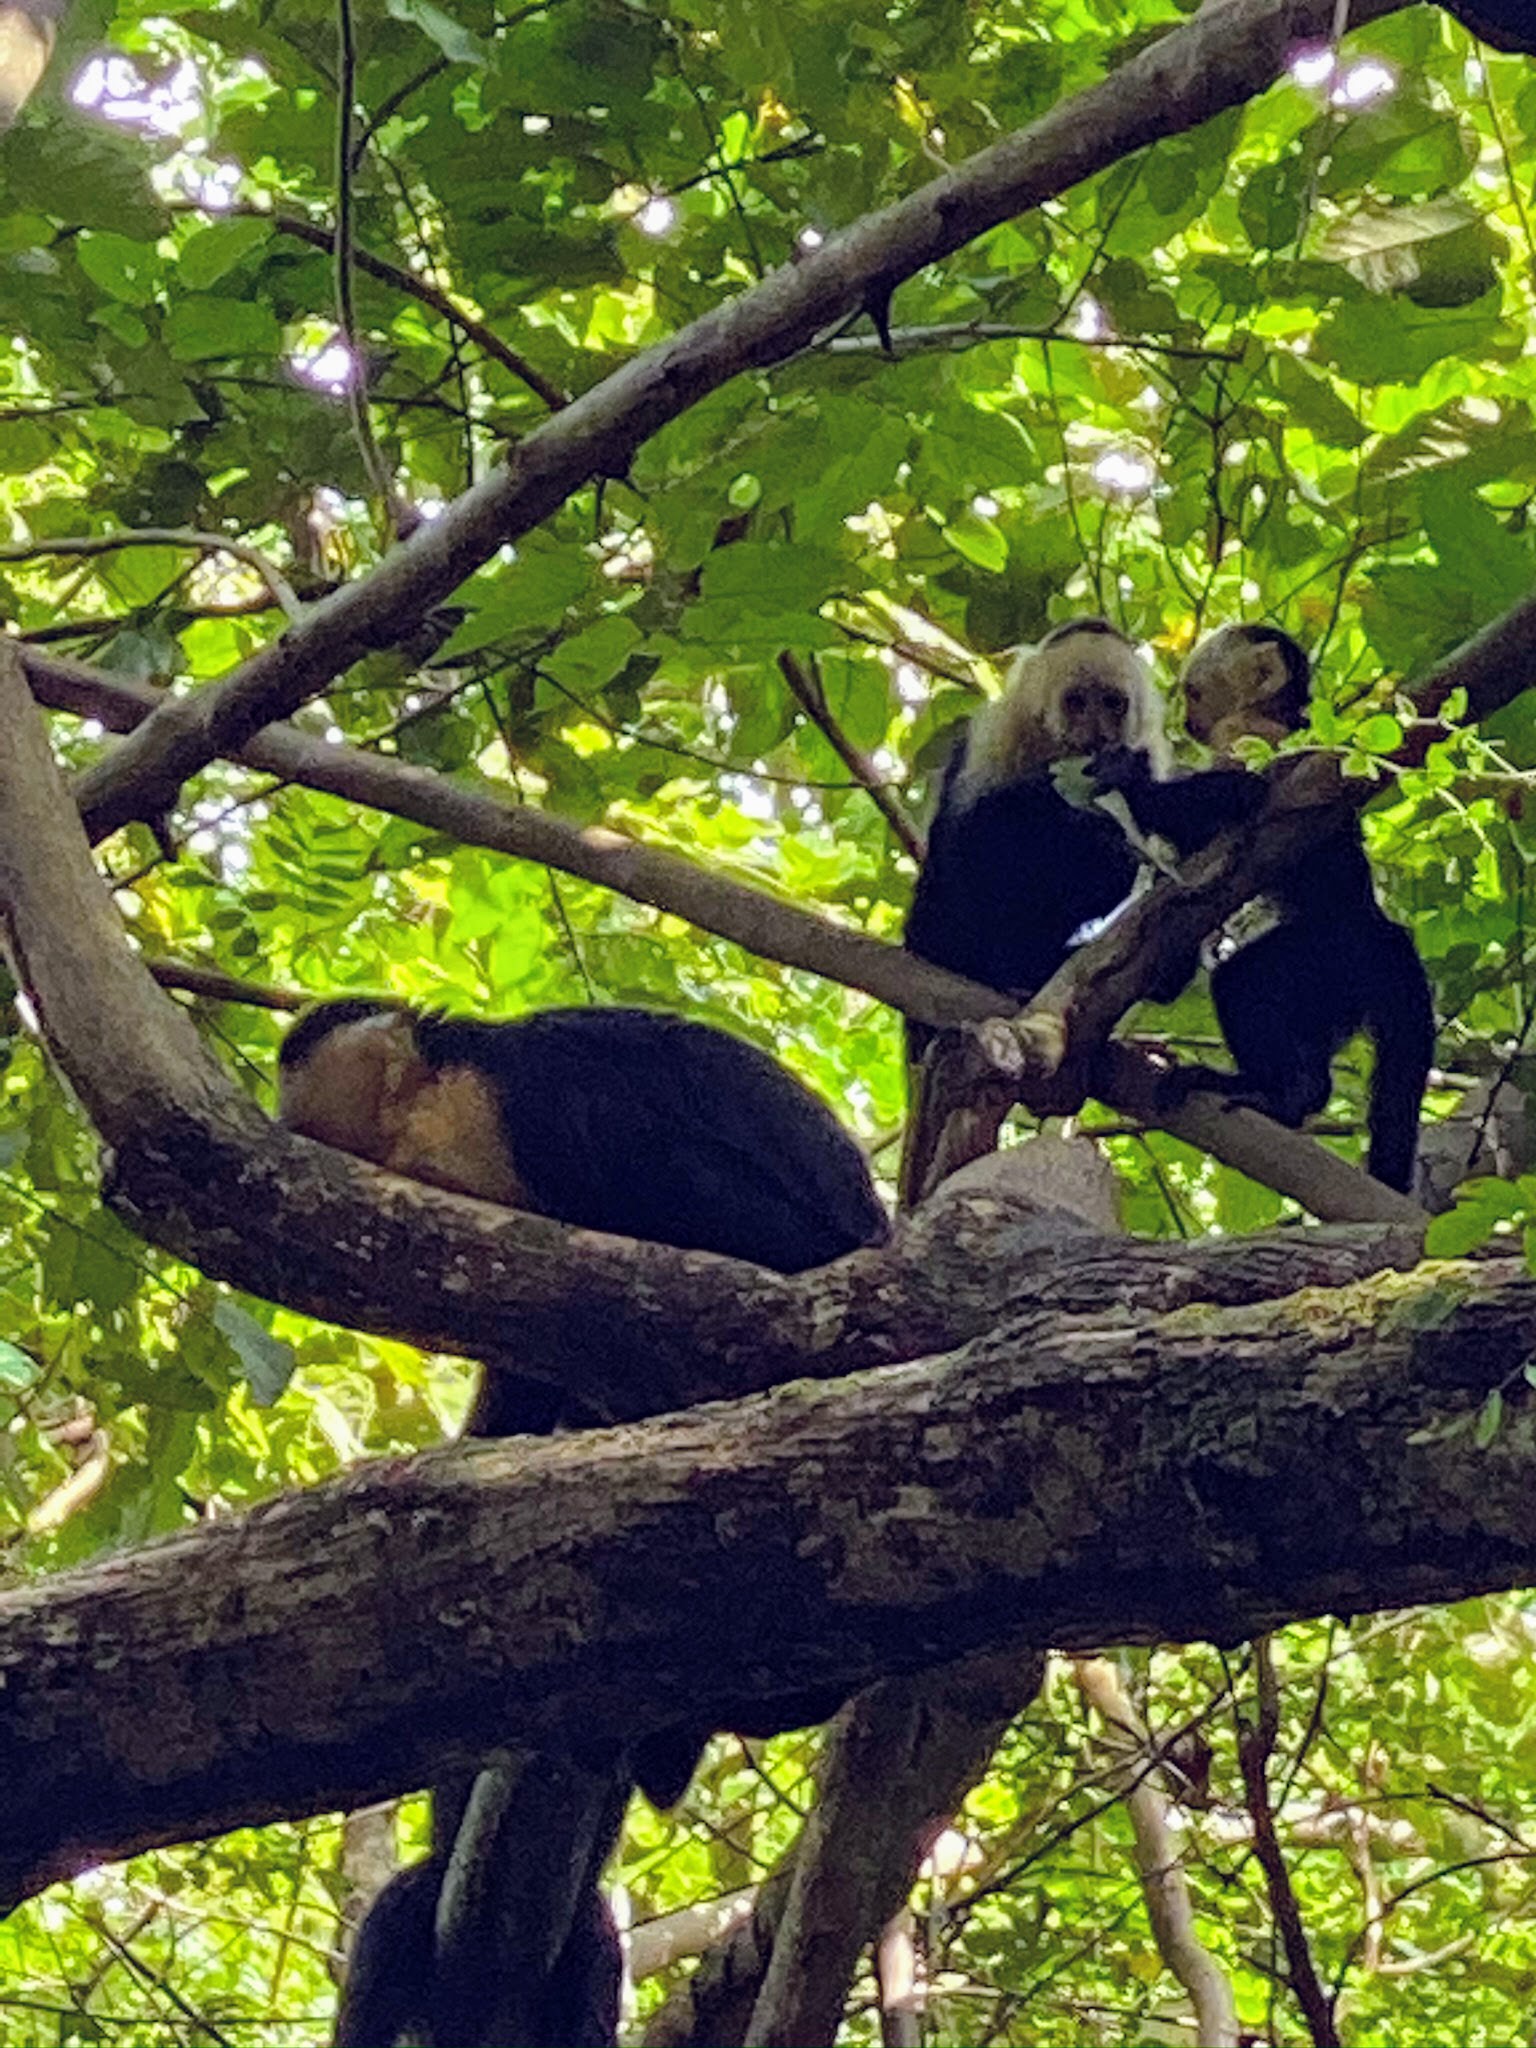
We visited the Baru National Wildlife Refuge, which encompasses more than 800-acres of land along the Pacific, offering spectacular bird and wildlife viewing. There are many trails through primary and secondary forests, mangroves, grasslands, and even a beach. There are hundreds of types of birds and animals, including sloths, monkeys, peccaries, and toucans. Looking up, we saw this huge ant colony in the tree.
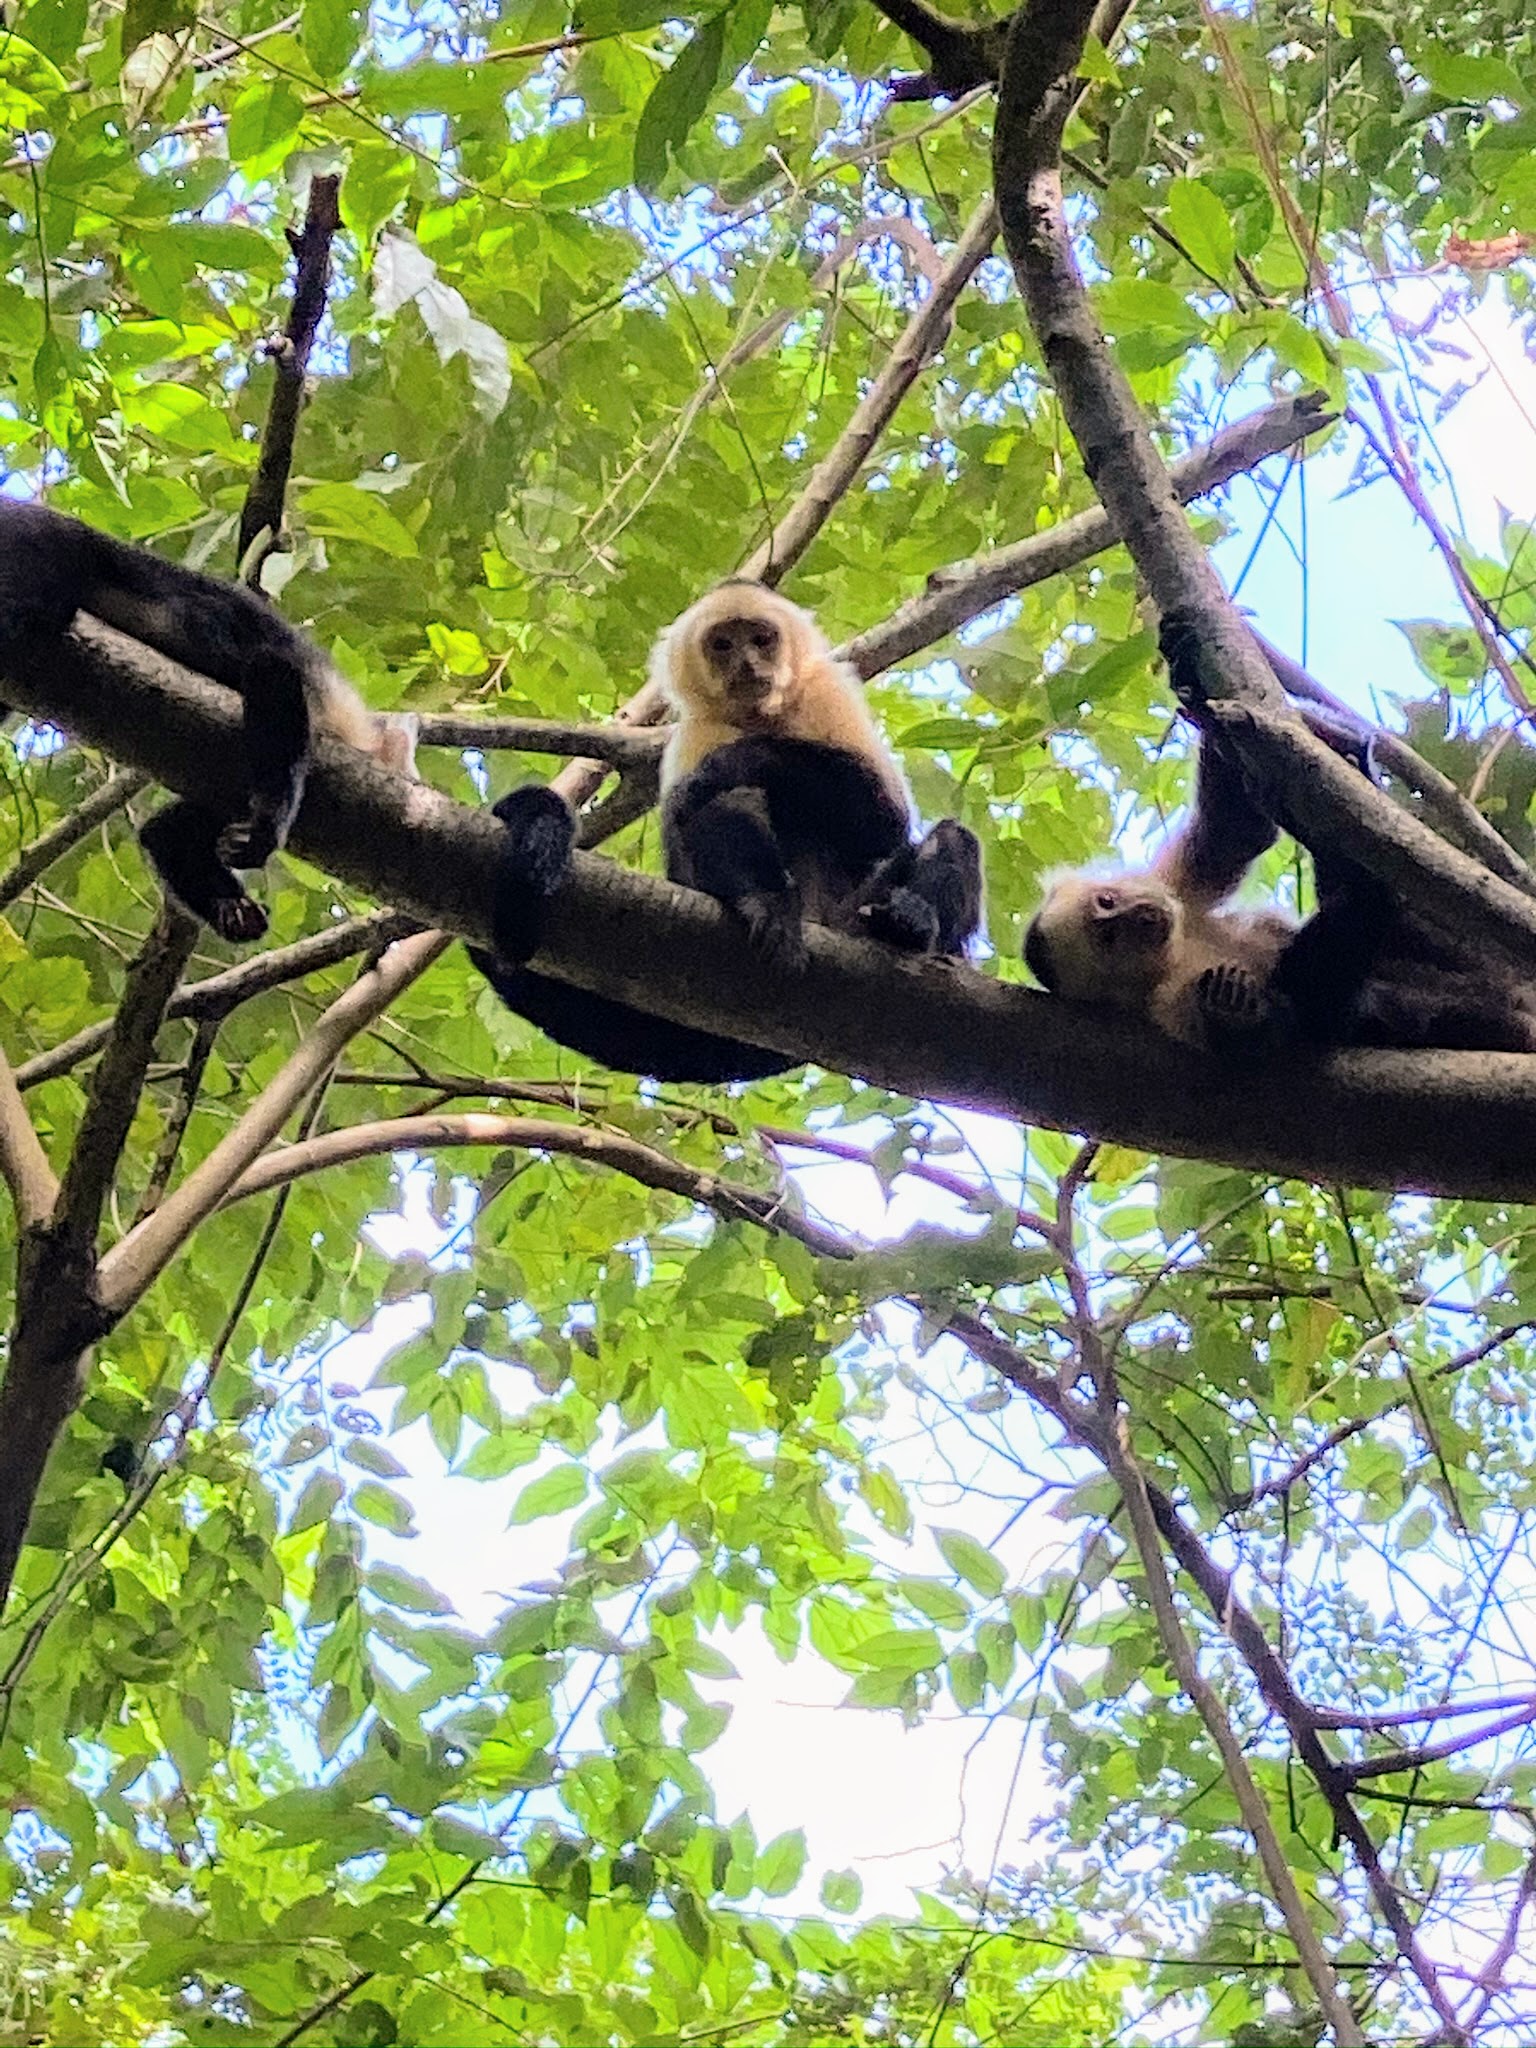
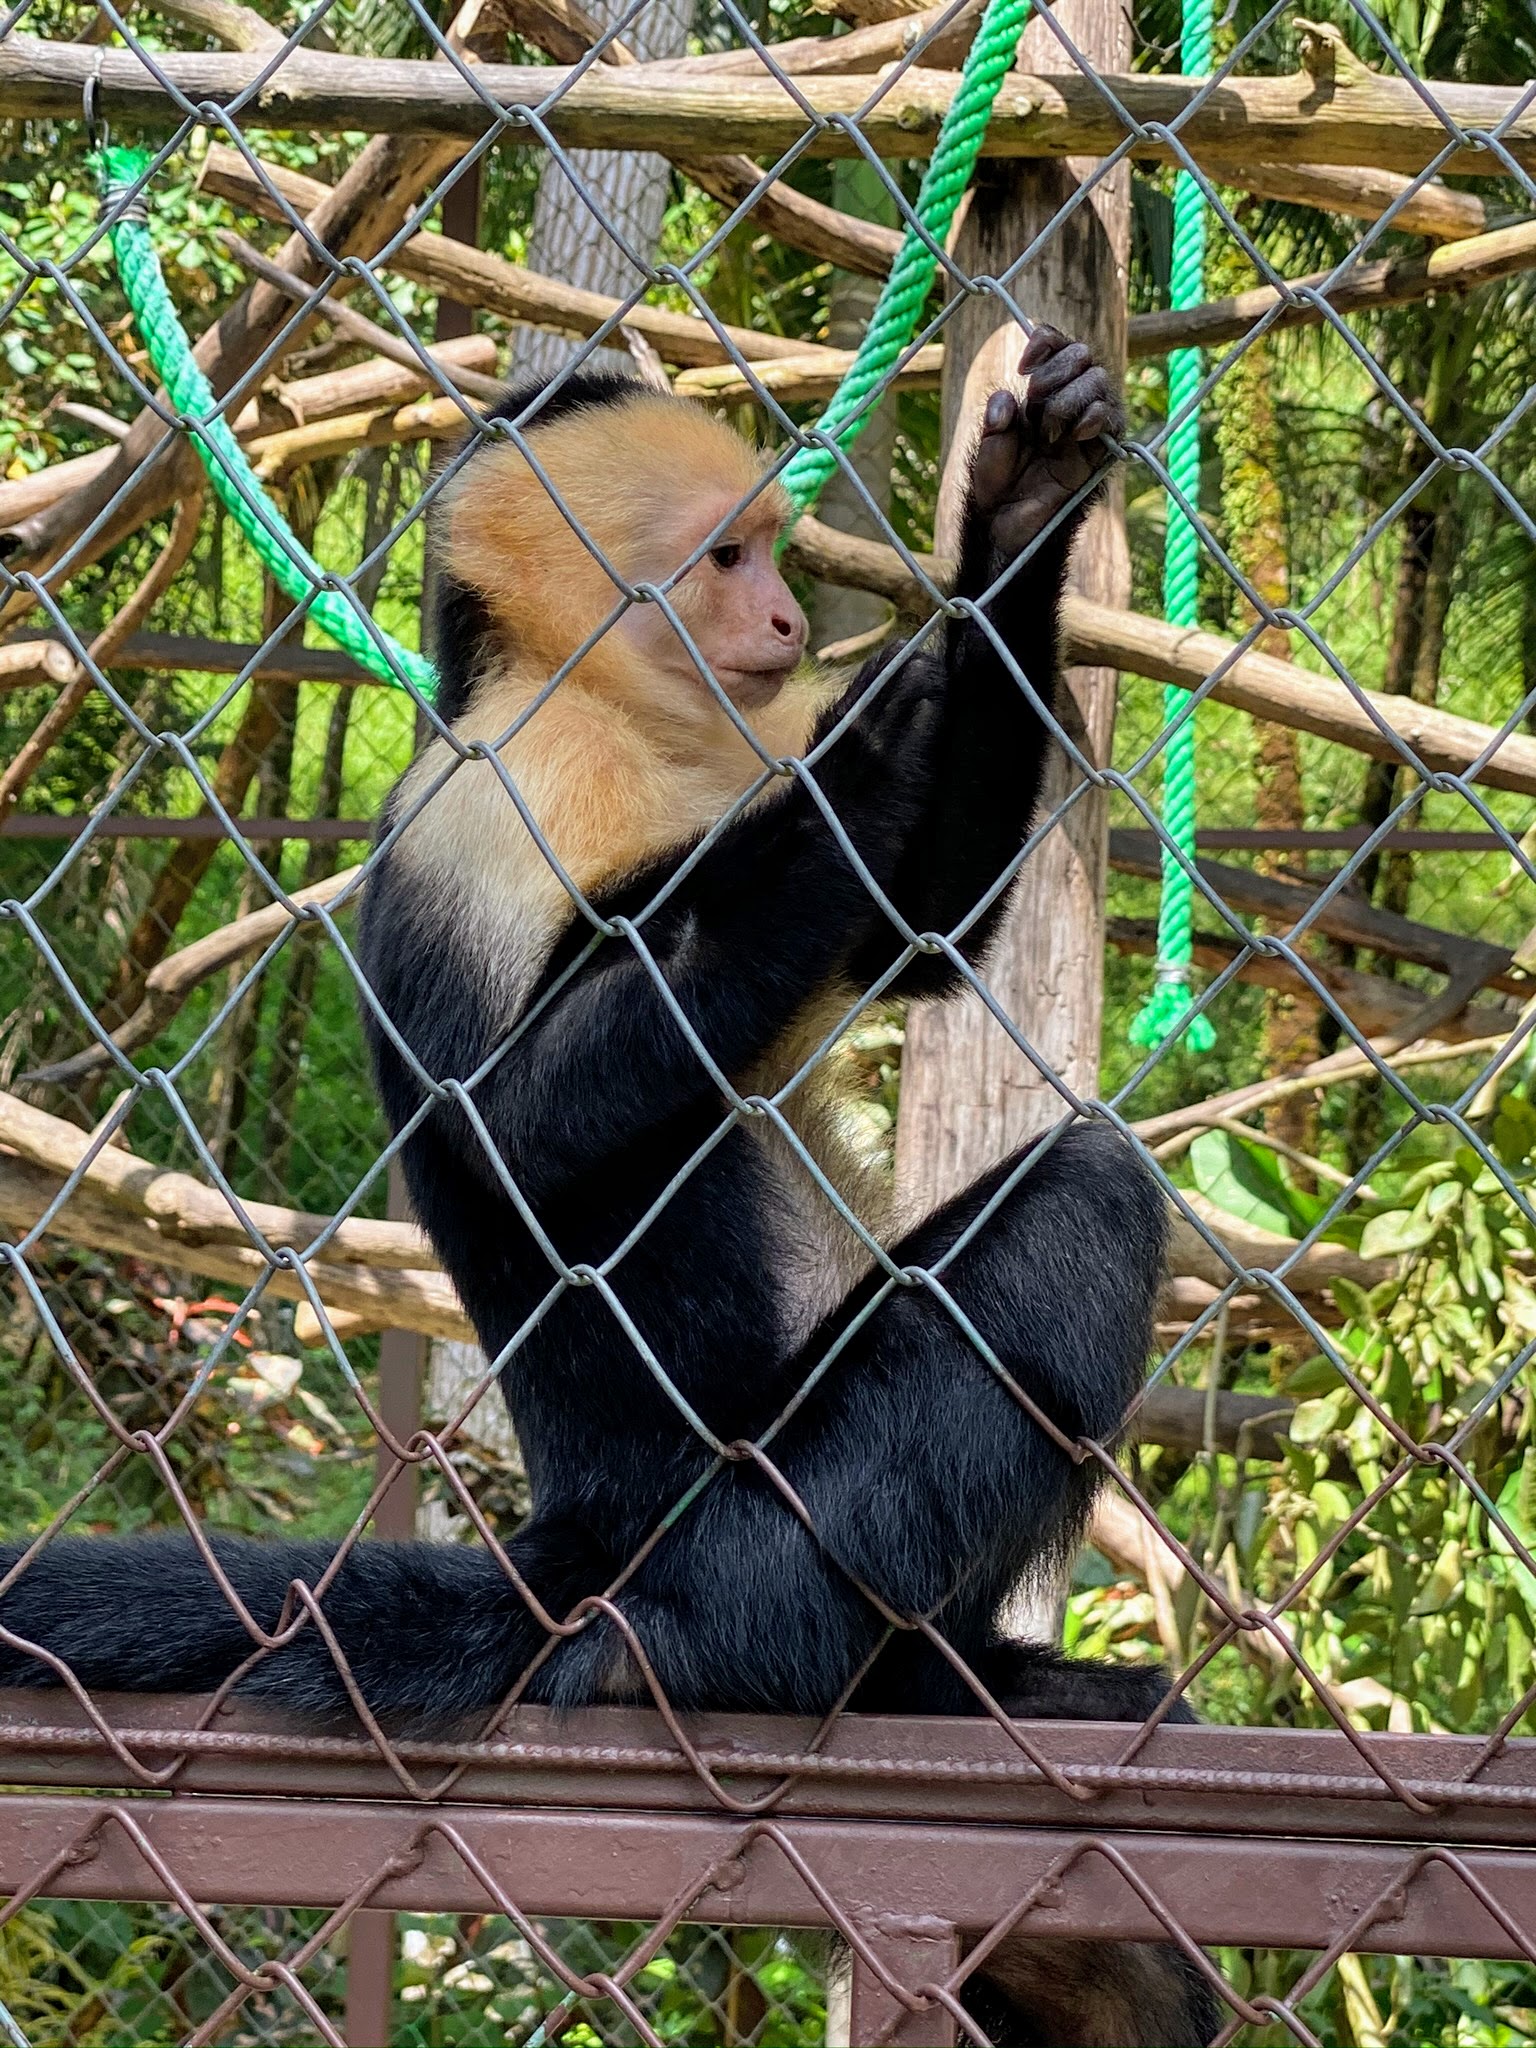
Up in another tree, we saw several capuchin monkeys. They were all swinging through the trees playing with each other. This duo stopped to look at all the activity below.
There are four monkey species that are native to the forests of Costa Rica. They include the Central American squirrel monkey, this Panamanian white-faced capuchin, the mantled howler monkey, and the spider monkey.
Capuchin monkeys, also called white-faced monkeys, occupy the wet lowland forests on the Caribbean coast of Costa Rica and Panama and in the deciduous dry forests on the Pacific coast. These animals are very curious.
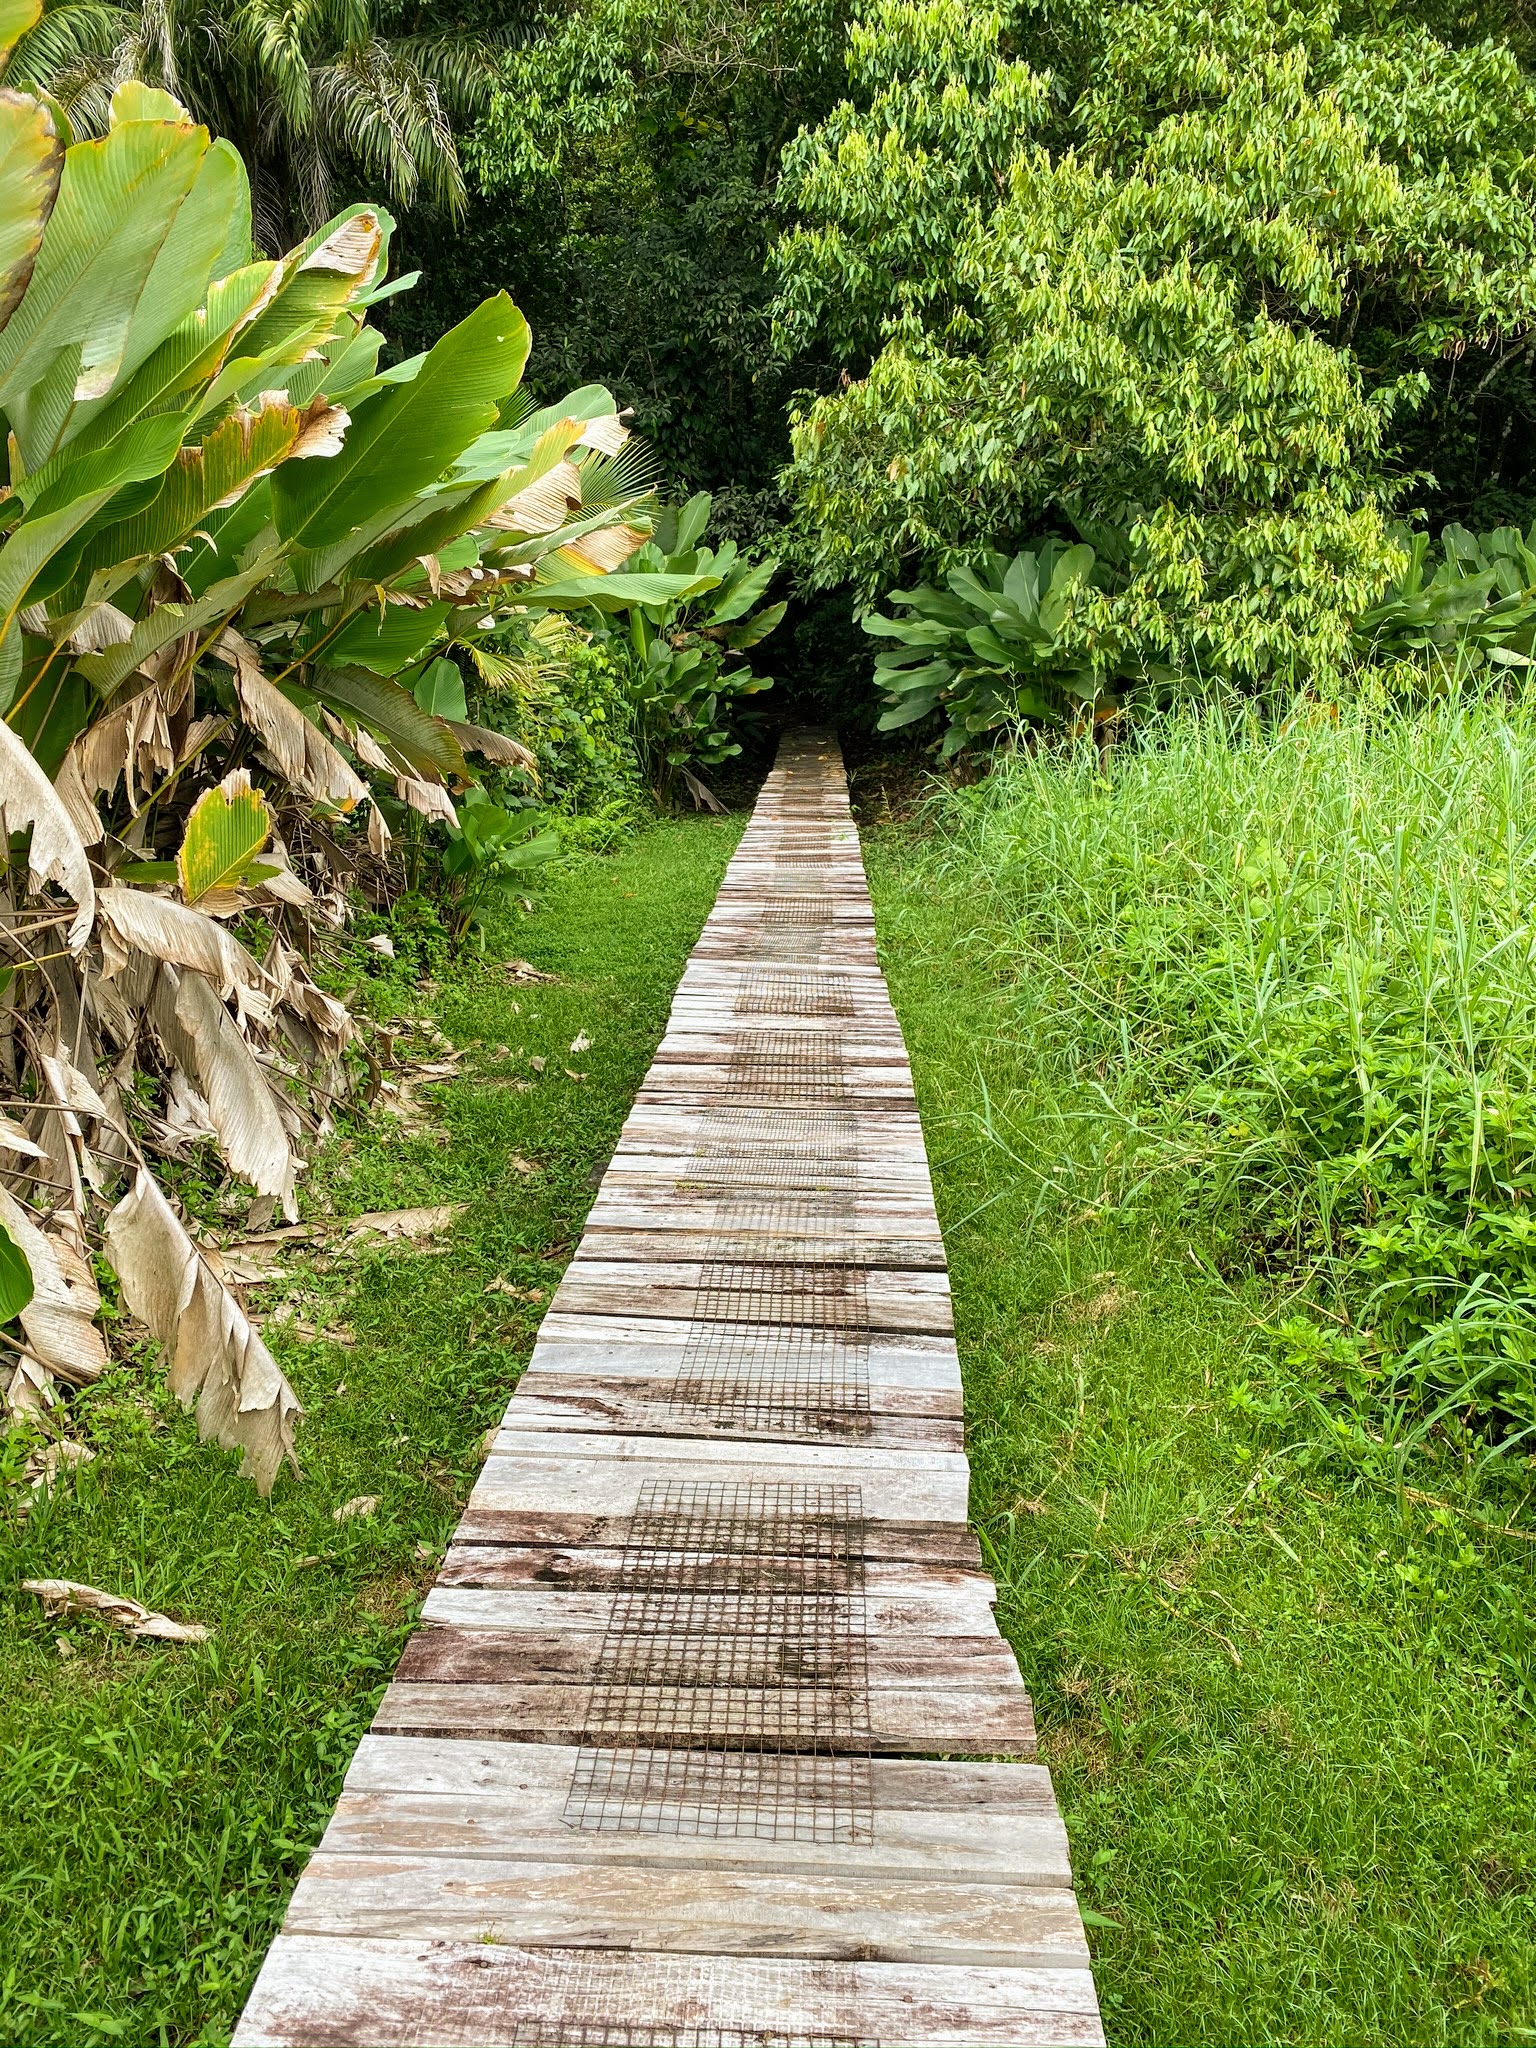
The boardwalks have wire netting along the top to make them more non-slip when wet. This is a great idea.
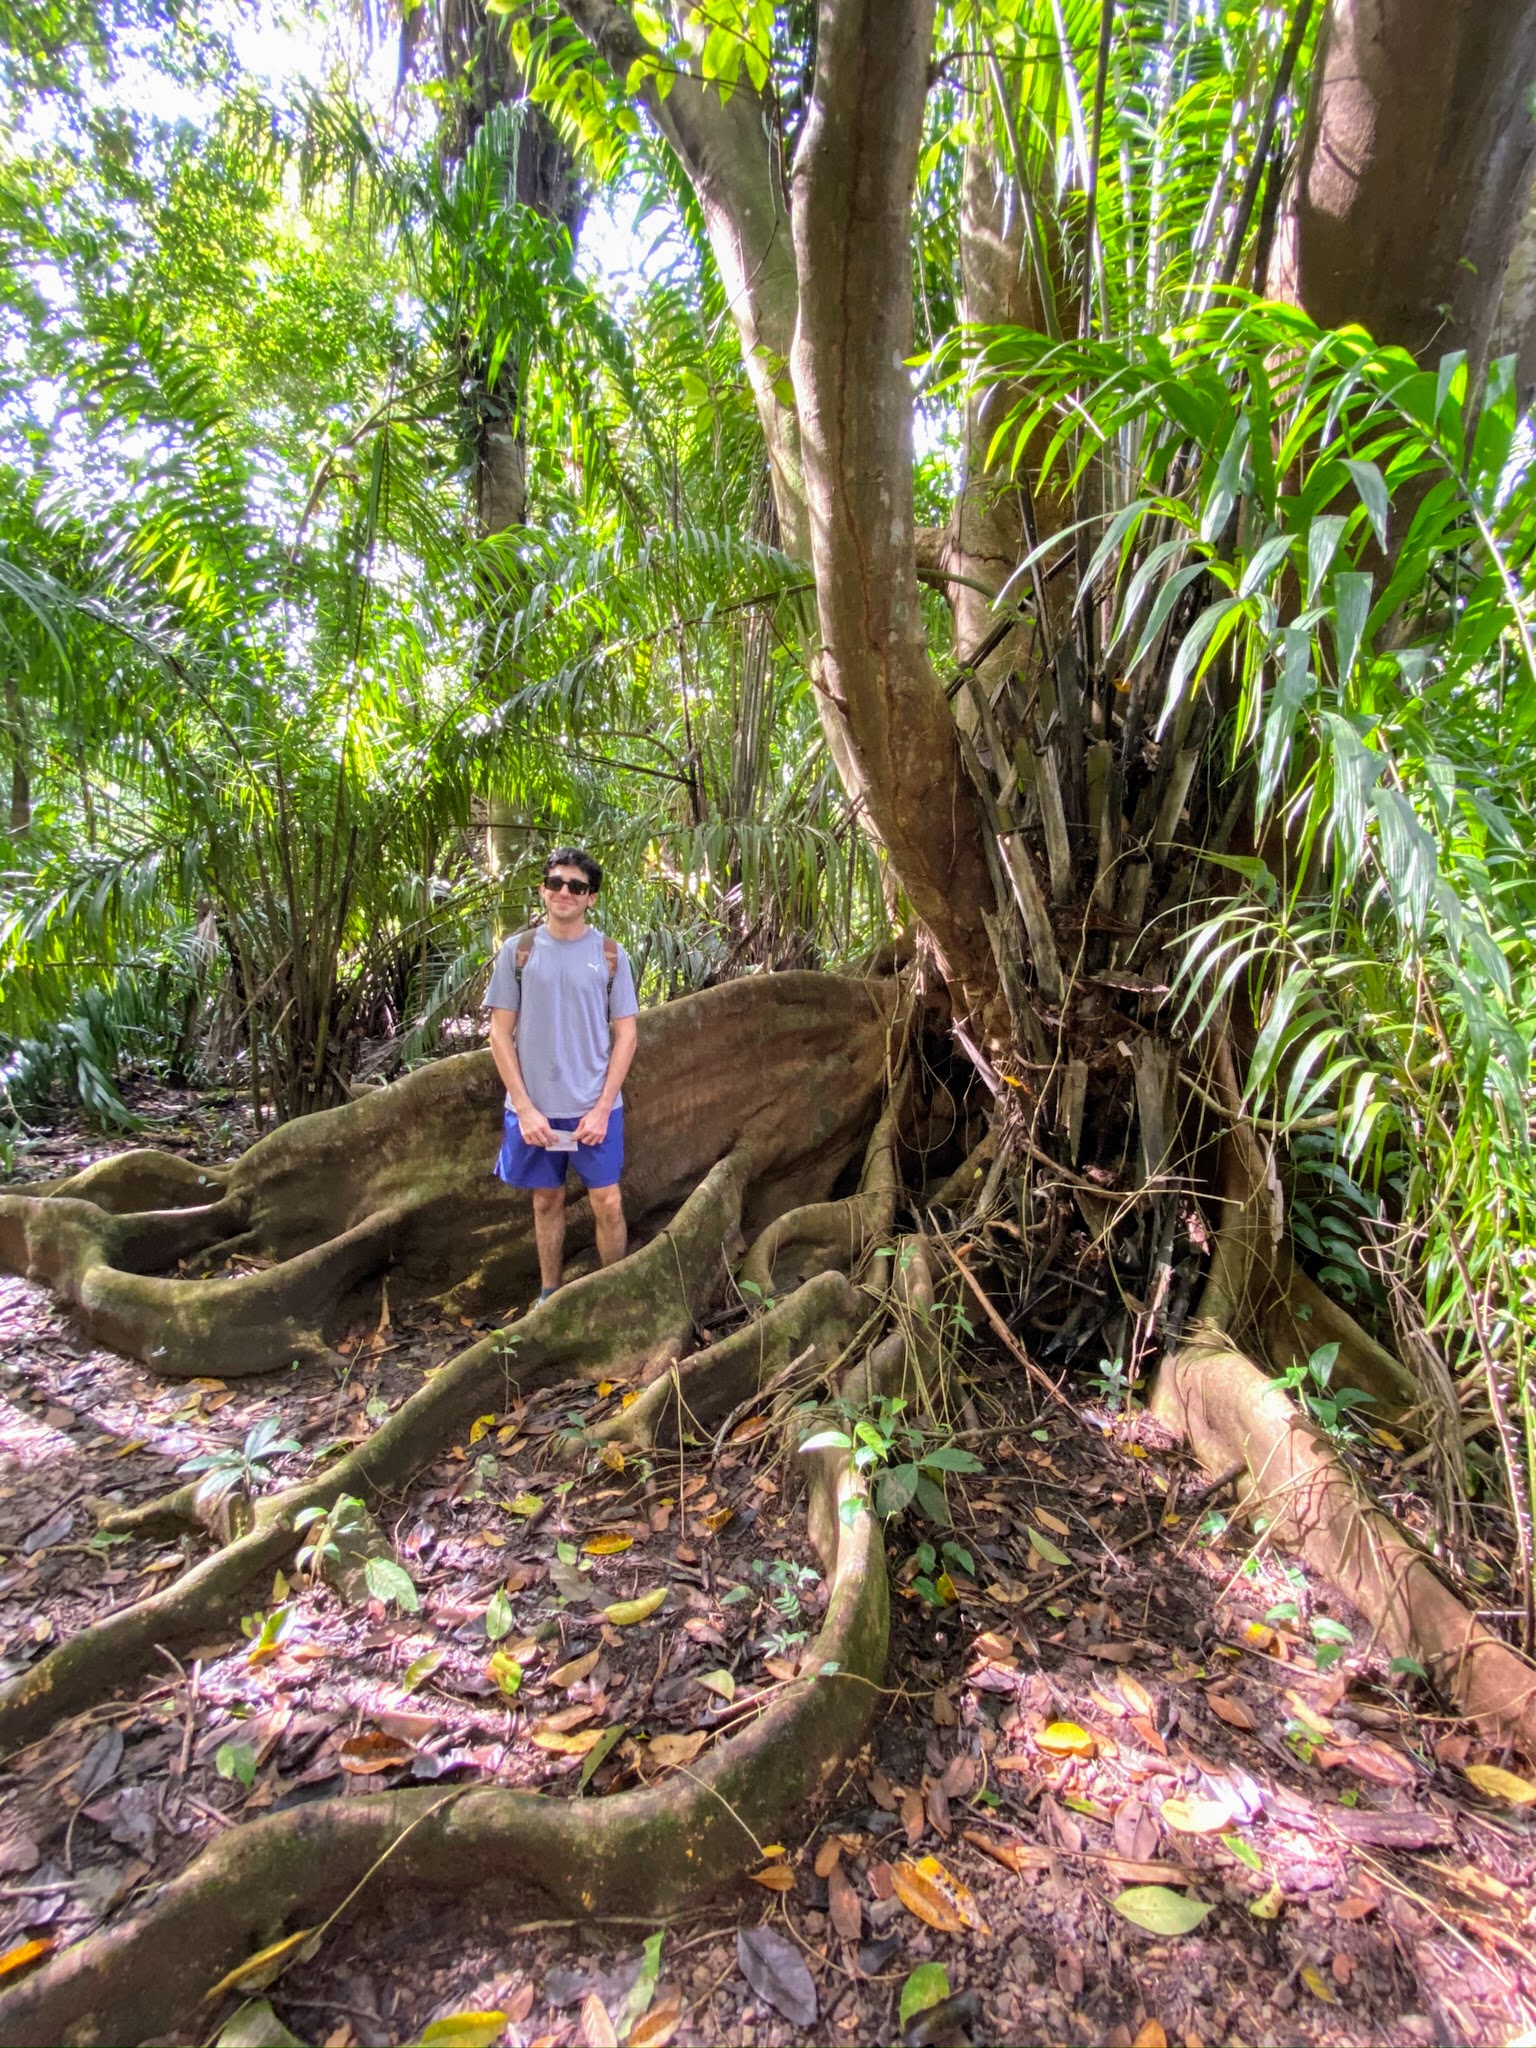
Here’s Ari next to the buttress roots of this huge tree. In Costa Rica, these roots line the forest floor.
Here are the roots of another large tree. Like the name suggests, these roots buttress or keep the tree from falling down.
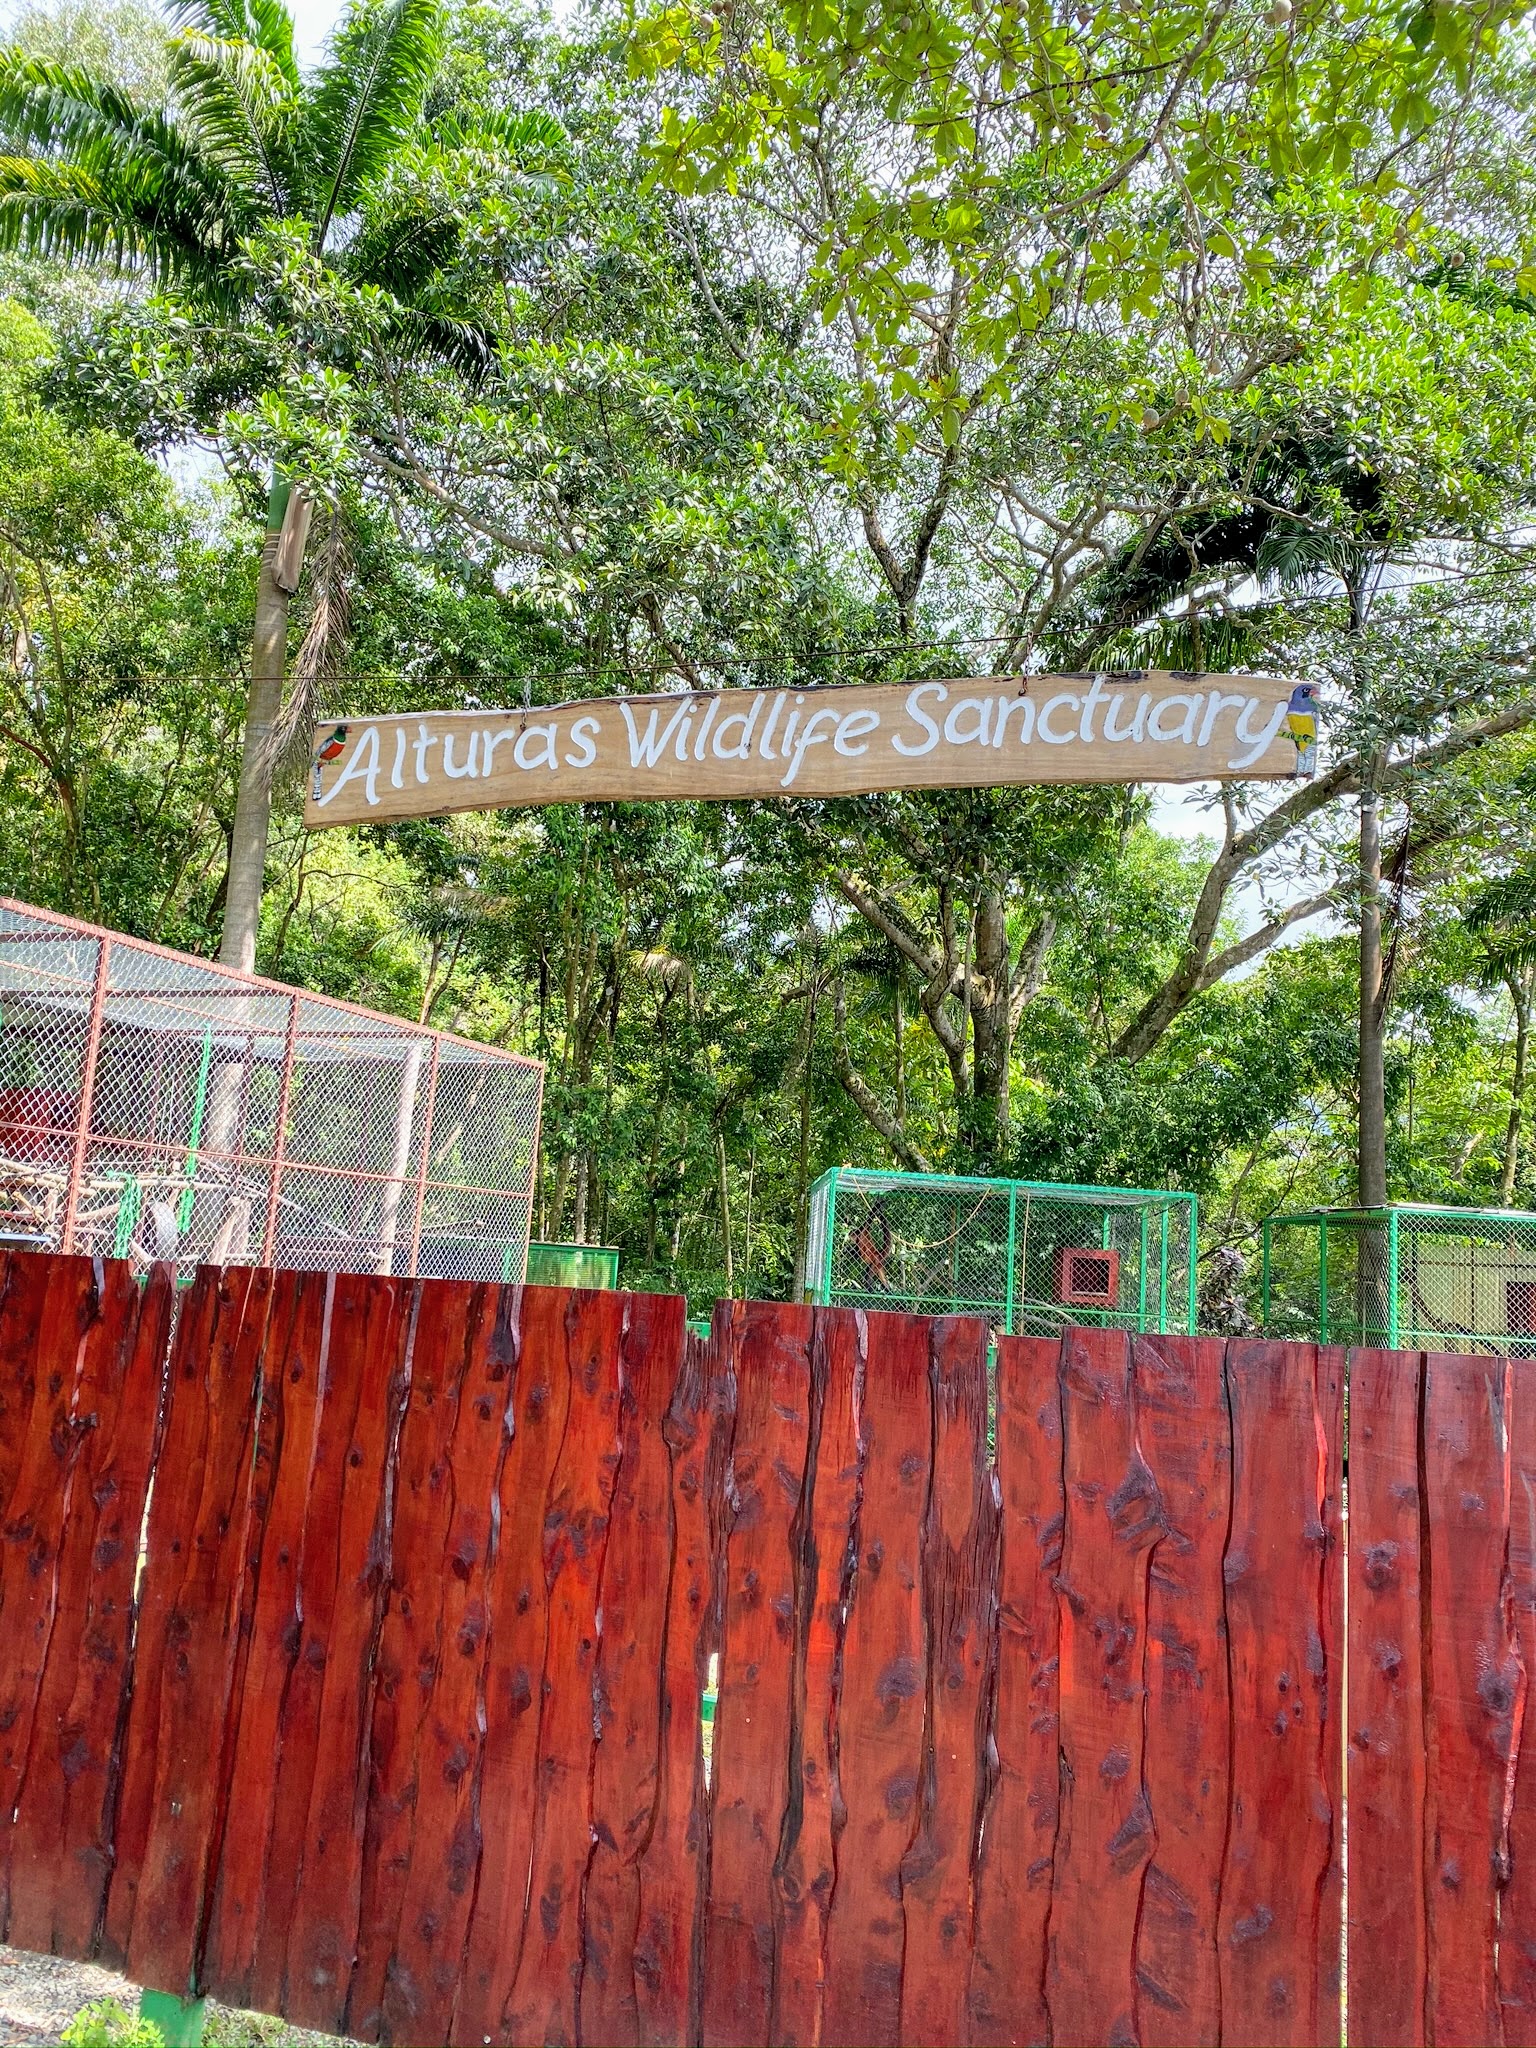
We also visited another mountain top animal facility, the Alturas Wildlife Sanctuary – dedicated to the protection and conservation of Costa Rica’s wildlife. the facility provides wildlife rehabilitation and environmental education and research.
Peccaries are adorable little wild pigs found in the deciduous dry forest, tropical rainforests, low-lying shrub forests, and agricultural areas in Costa Rica. They are quite resourceful and adaptable and live in herds of between three and 30 other peccaries, maintaining a hierarchical structure within their herd.
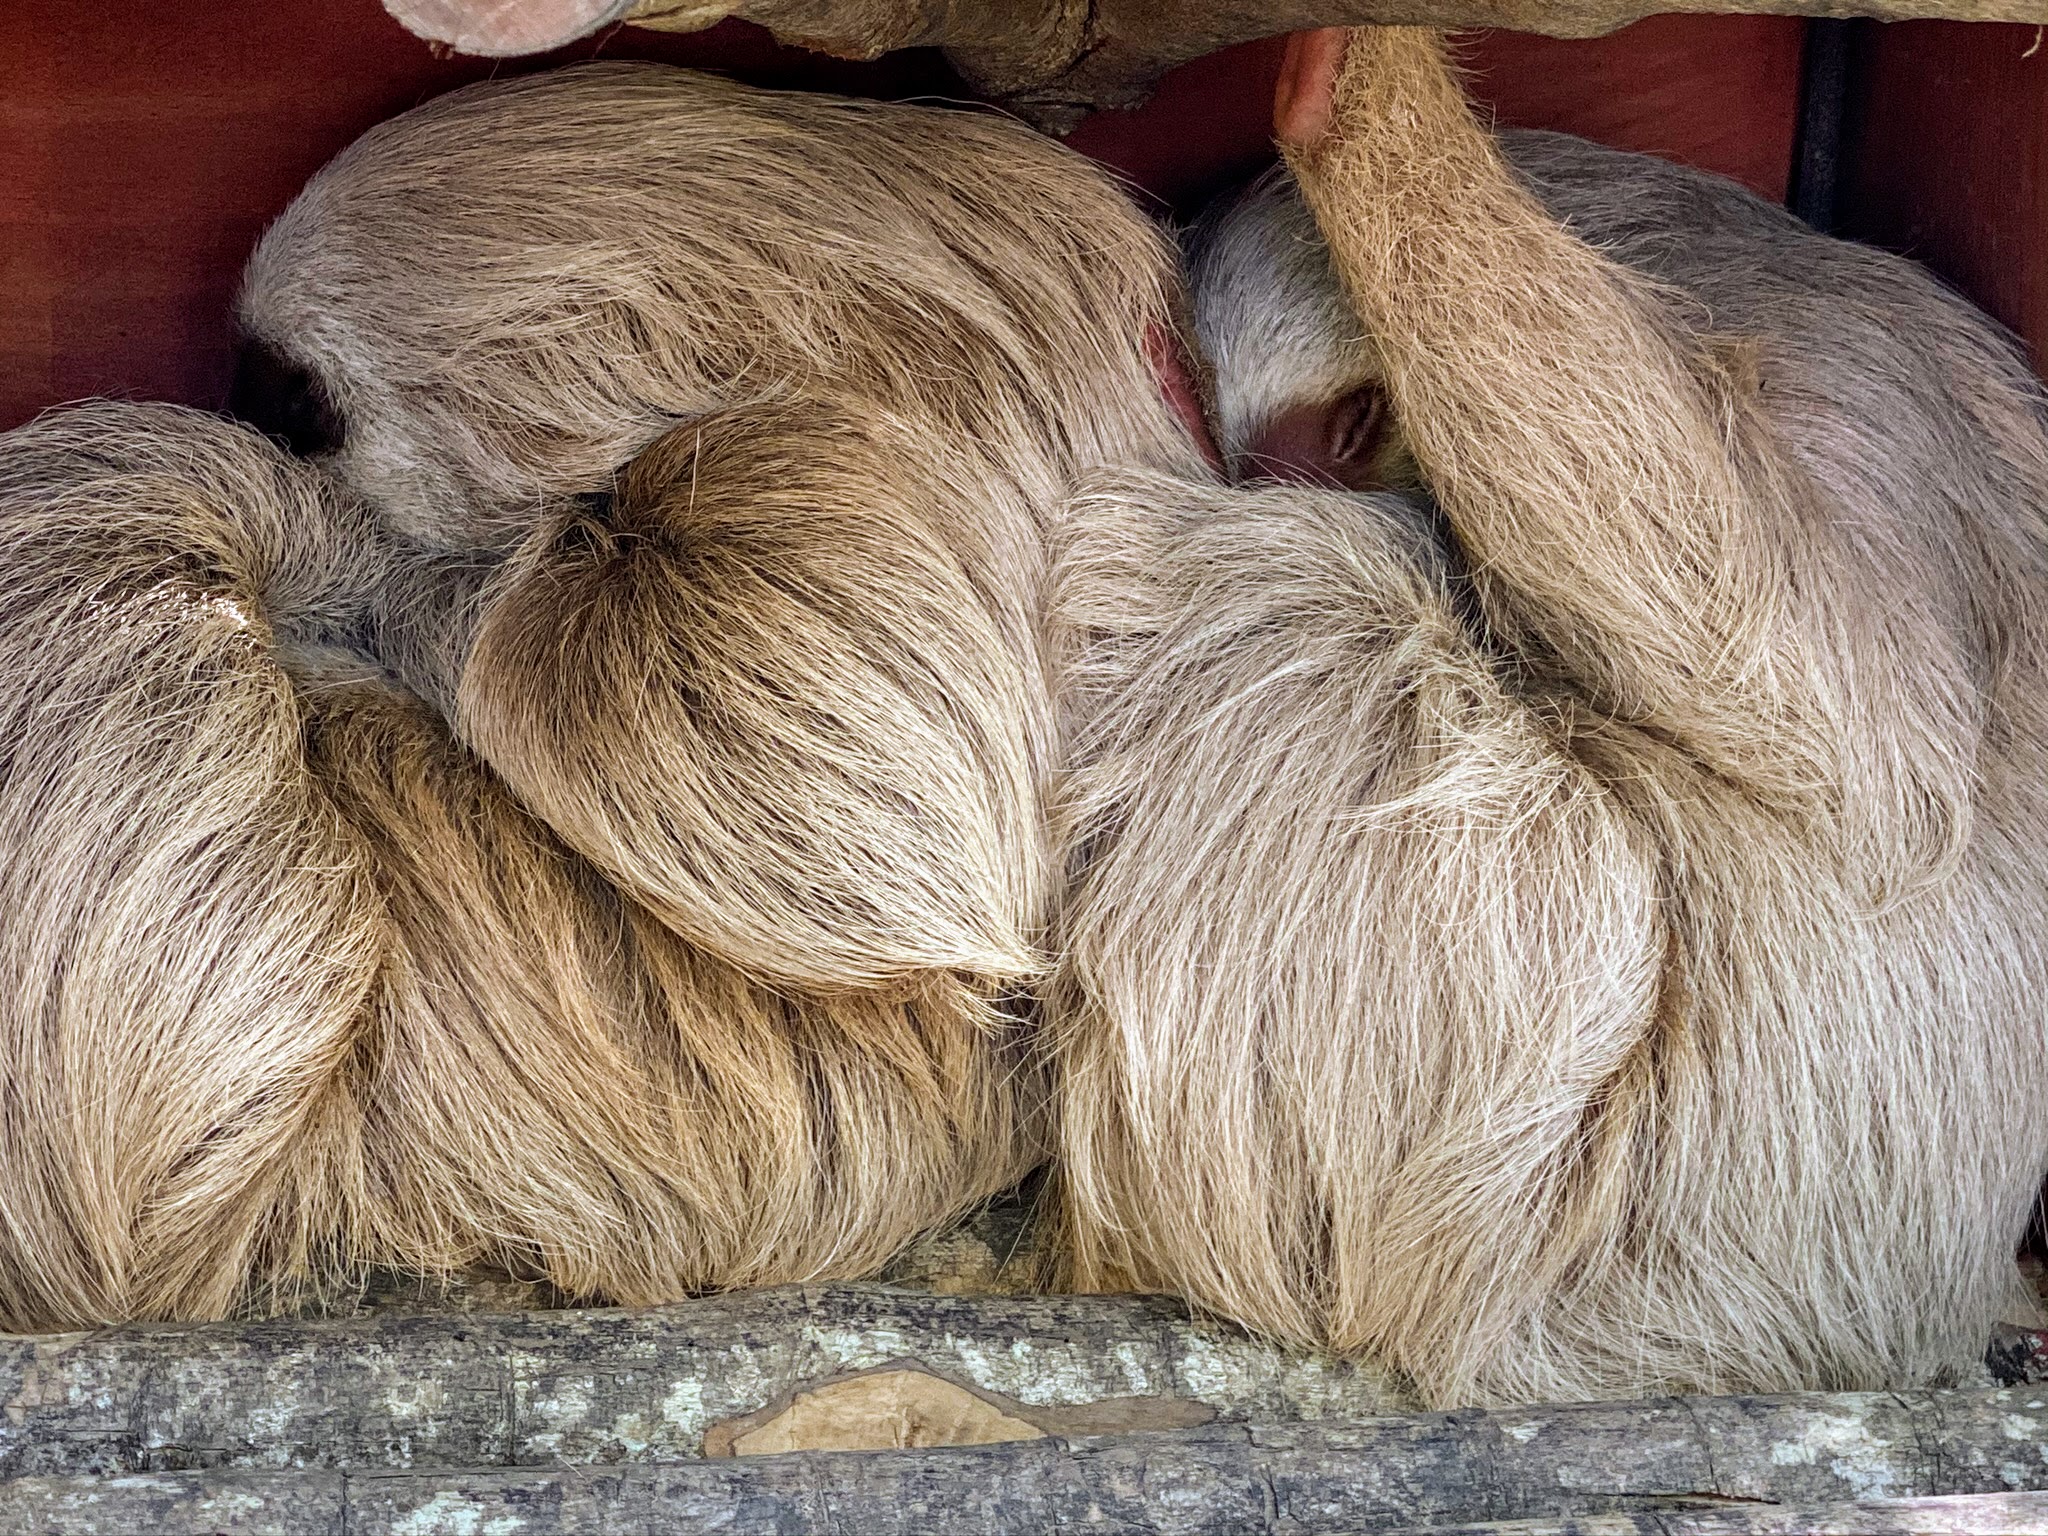
There are six sloth species in the world, and two of the six live in Costa Rica. Sloths sleep about 20 hours a day. Here is a pair napping in their enclosure – they didn’t mind our visit one bit.
Here’s another capuchin monkey at the sanctuary. The sanctuary has a more private area for wounded animals that need special care during rehabilitation.
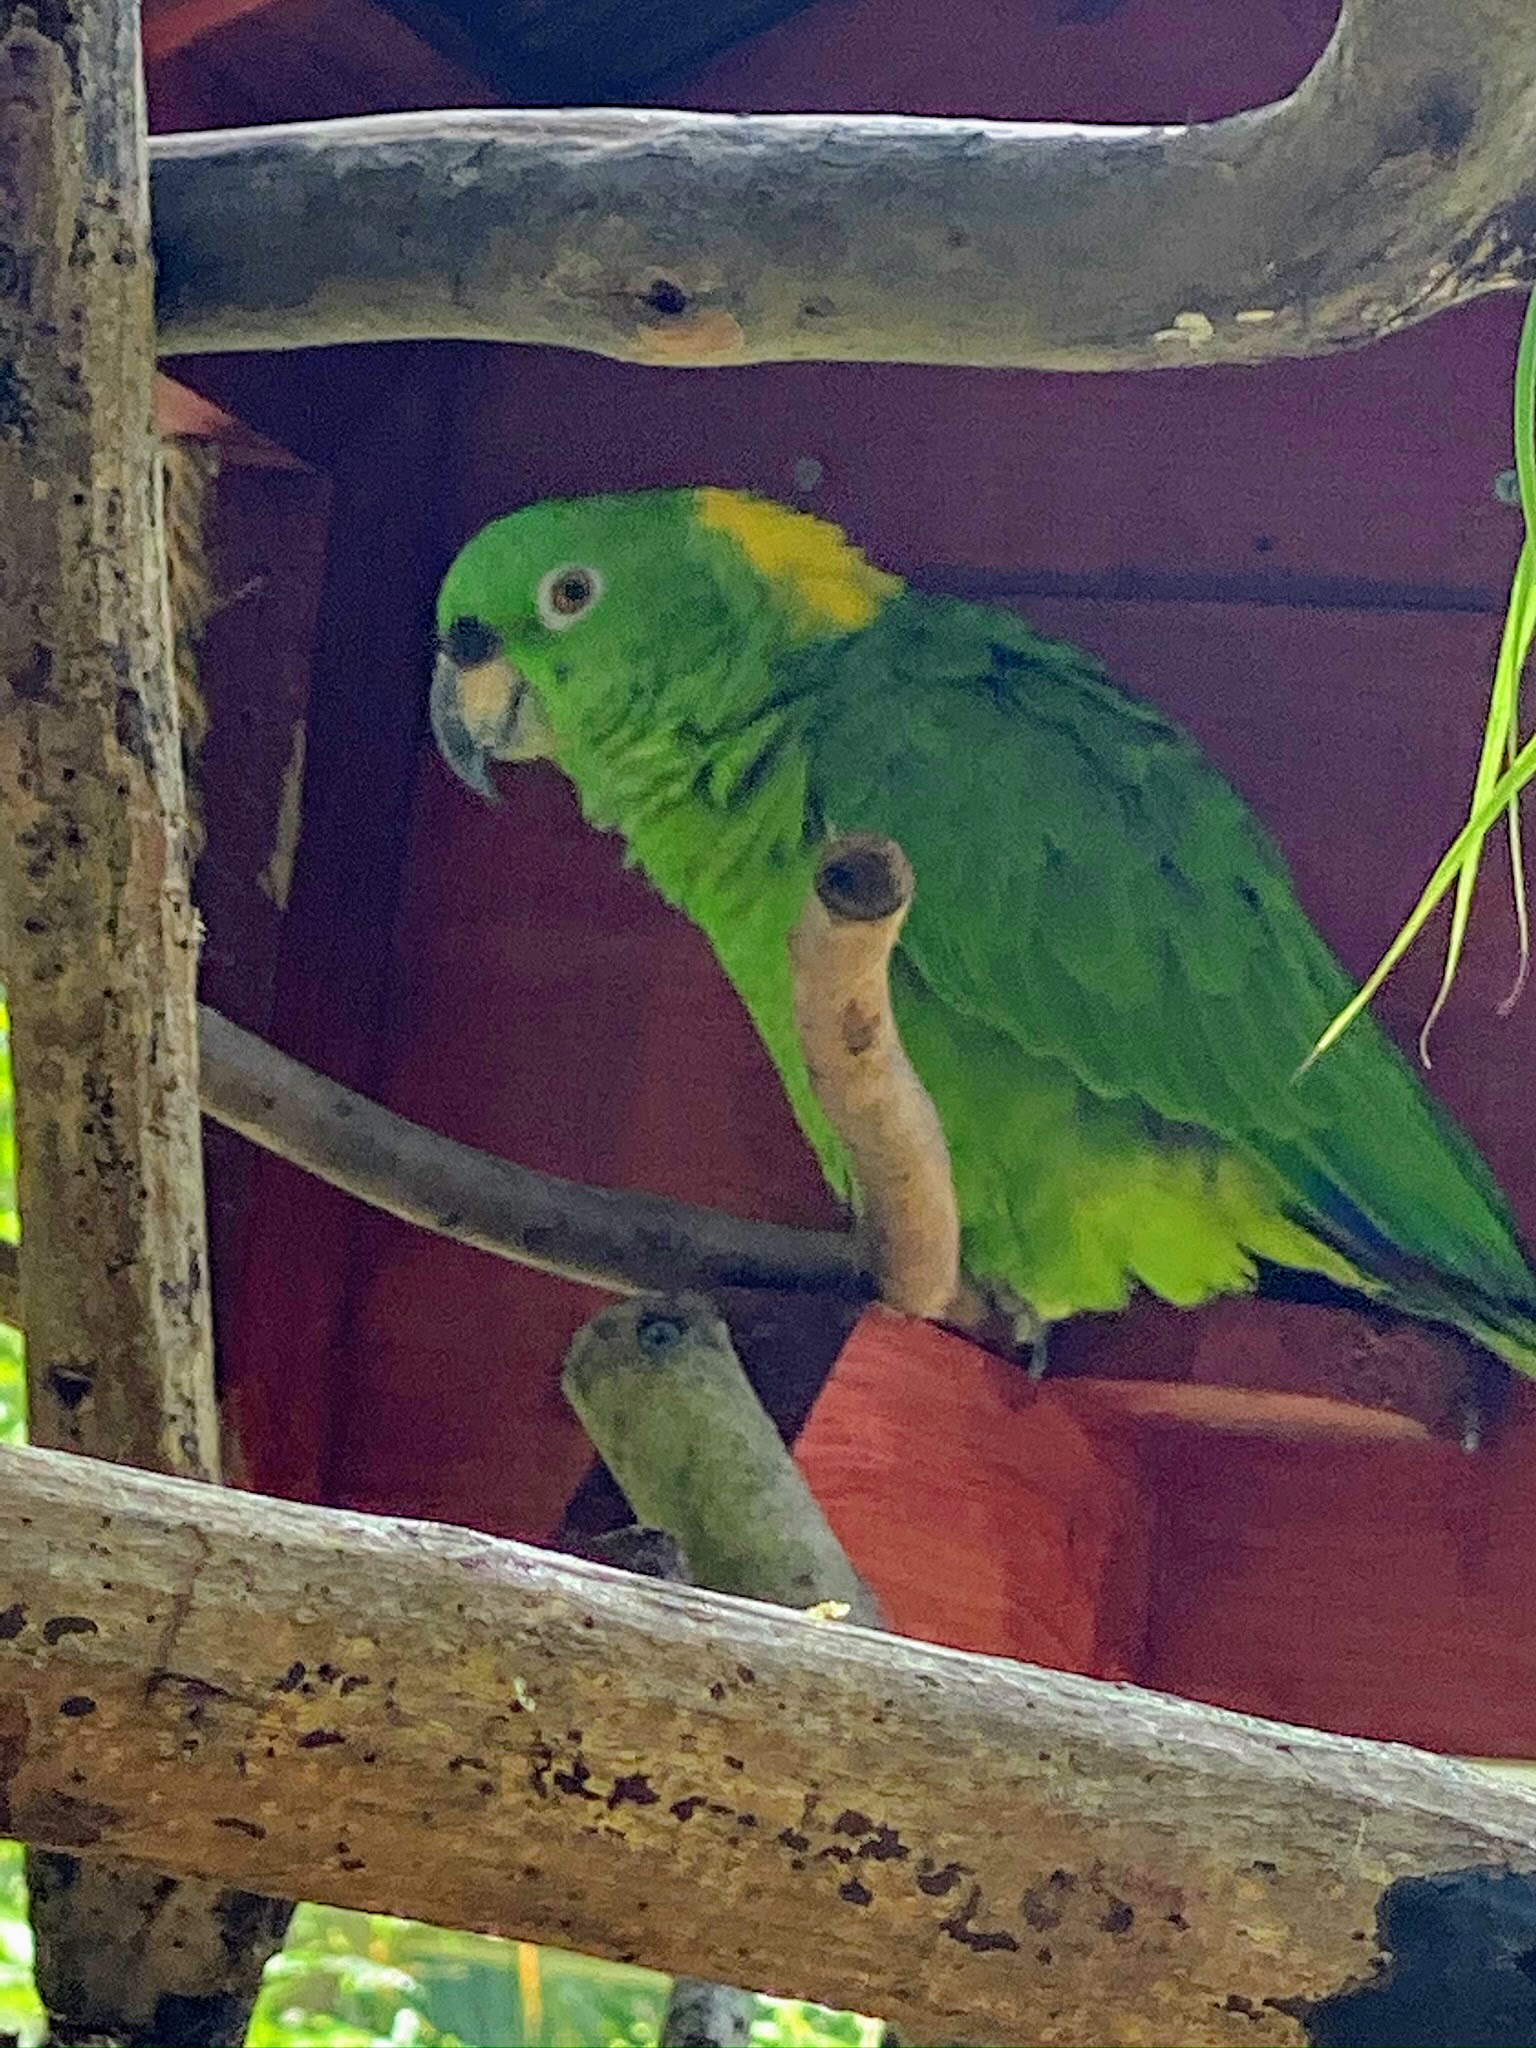
This is a yellow-naped Parrot, Amazona a. auropalliata. It is almost entirely green, with a large patch of yellow on its nape.
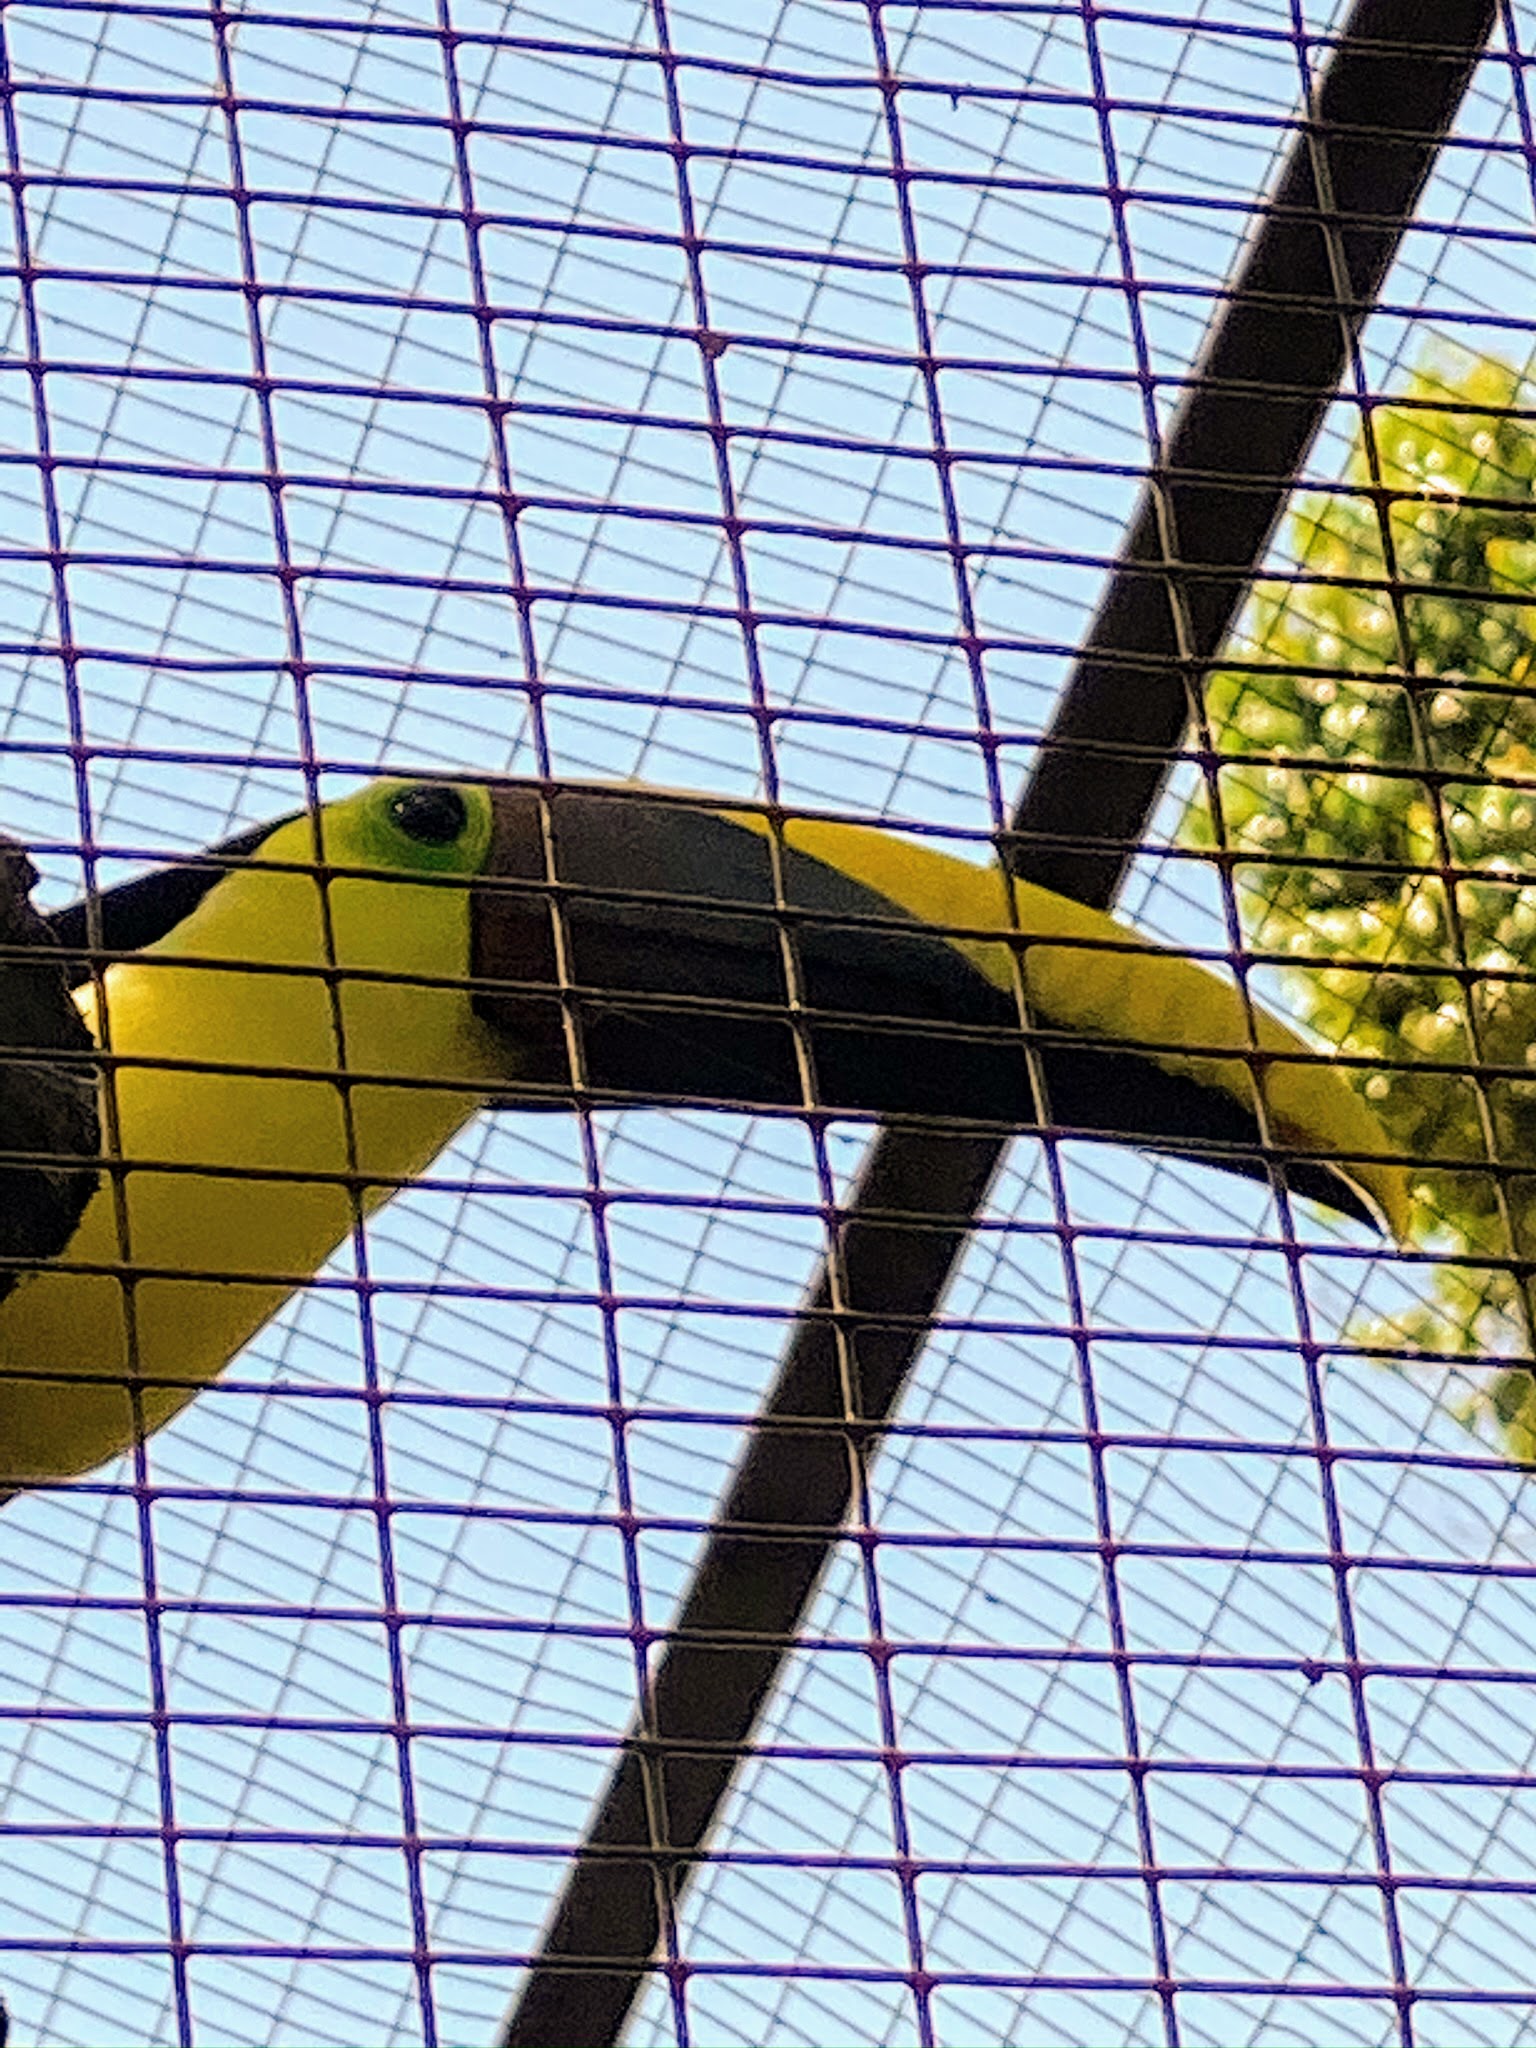
This is the Chestnut-mandibled Toucan or Swainson’s Toucan, a brightly marked bird with a large bill. The male can reach up to two feet in length, while the smaller female reaches about 20-inches long at maturity. This toucan eats a variety of fruit, including different seeds, berries, drupes, and fruit fleshes. They also like insects or small snakes and hunt for birds’ eggs, nestlings, and lizards.
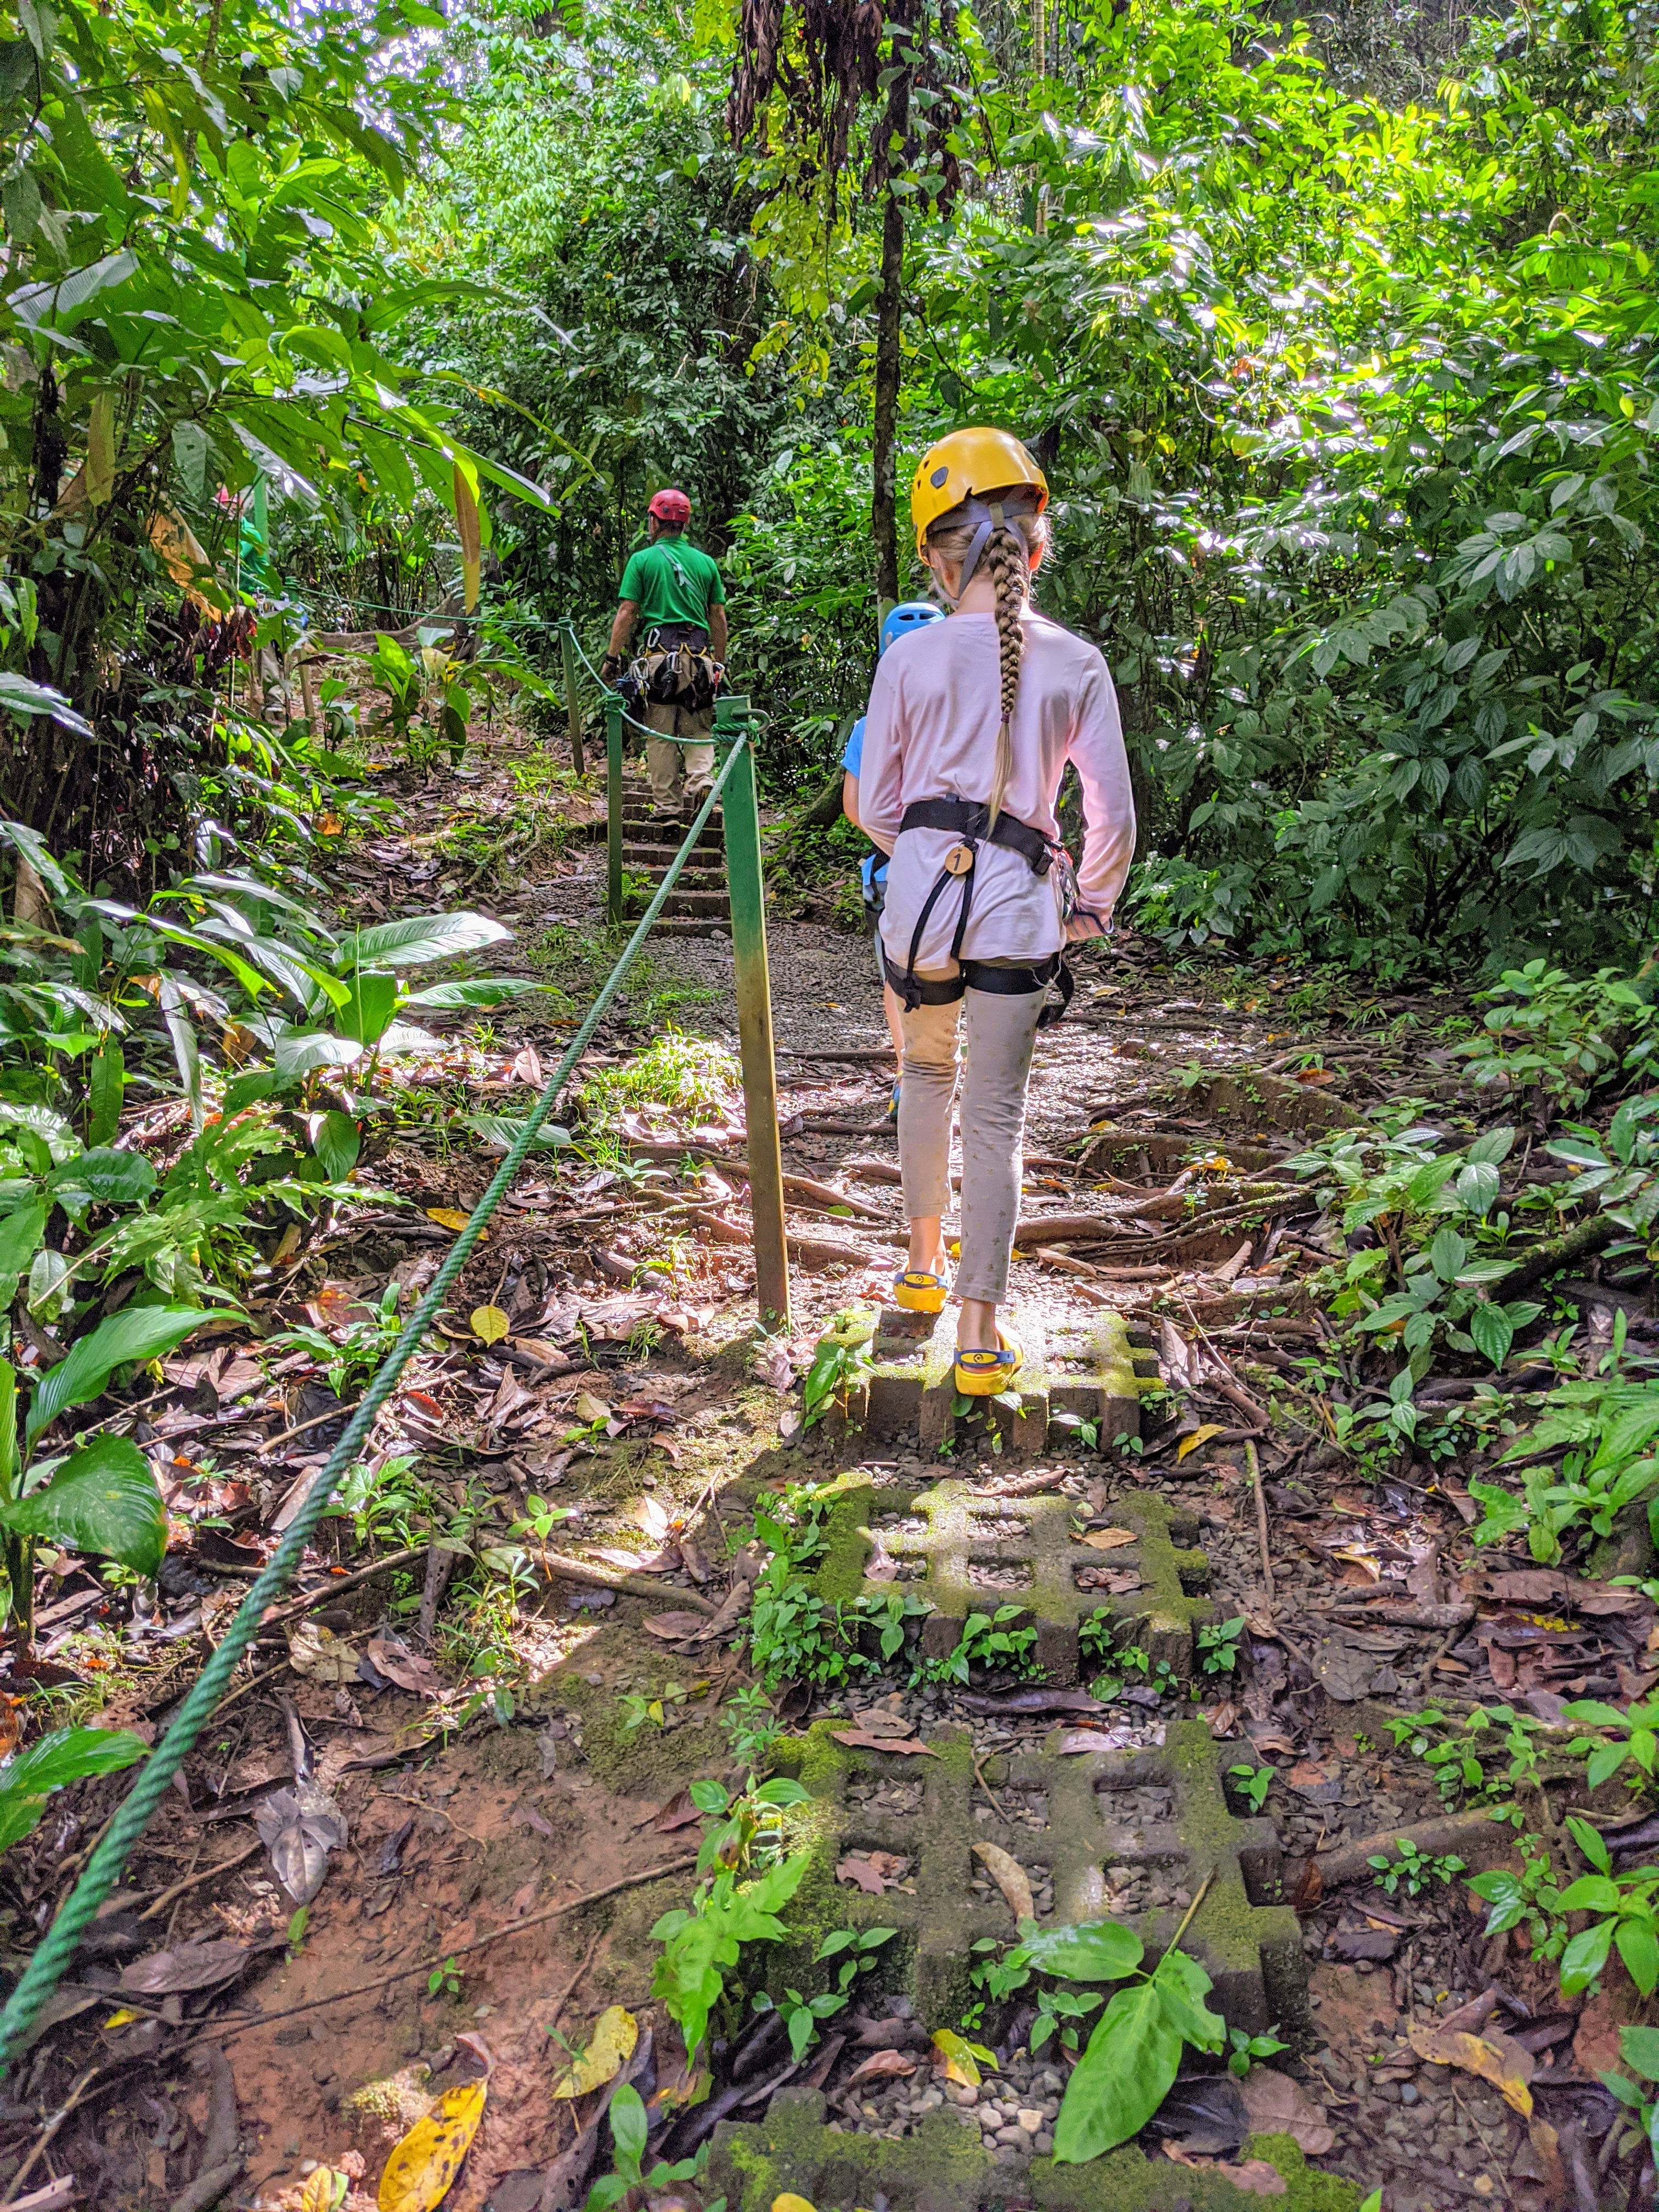
We also went on a Titi Canopy Tour – ziplining through the rainforests. Titi Canopy is the only zipline tour located close to Manuel Antonio. The company runs 12 lines, 22 platforms, one rappel, one Tarzan swing and a treetop suspension bridge. It was a great way to see nature.
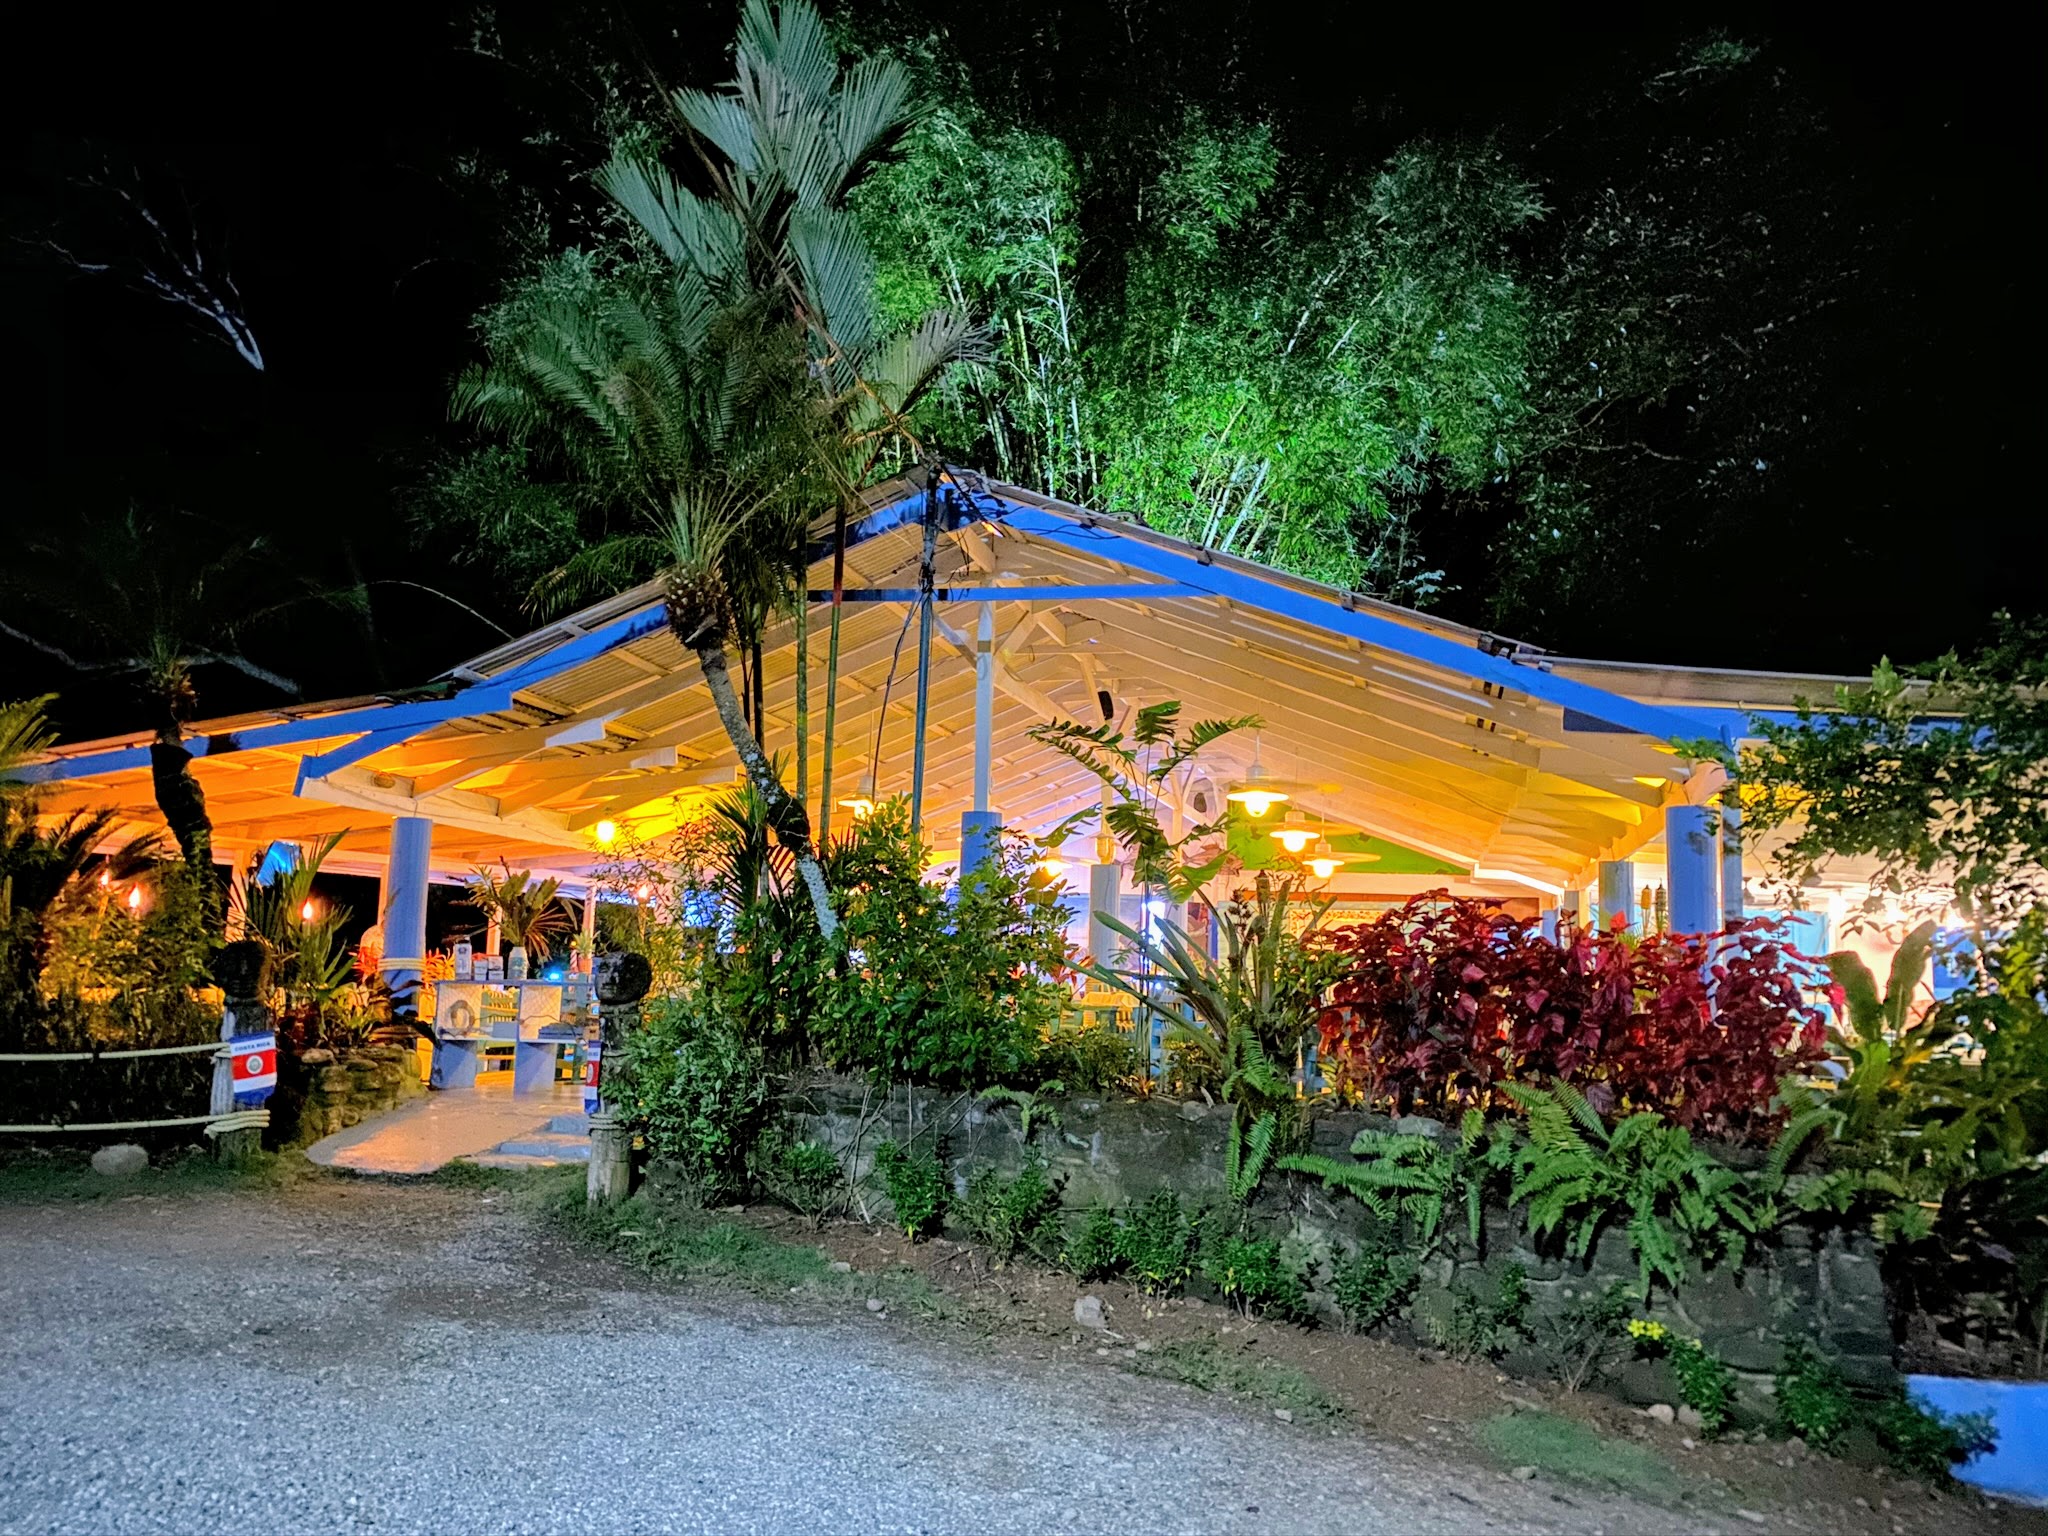
We ate at my friend’s restaurant, Restaurante La Parcela, specializing in local cuisine, and seafood, as well as more beautiful views.
On another day, we looked at some of the fruits of Costa Rica. Breadfruit, native to Southeast Asia, arrived in Costa Rica with sailors in the early 1800s. In Costa Rica, breadfruit trees grow up to 50-feet tall and have smooth, brown trunks. This flowering tree, which is part of the mulberry family, can produce up to 200 fruits each year.
And do you know what this is? Theobroma cacao also called the cacao tree and the cocoa tree. It is a small evergreen tree in the family Malvaceae. After four years, the mature cacao tree produces fruit in the form of elongated pods; it may yield up to 70 such fruits annually.
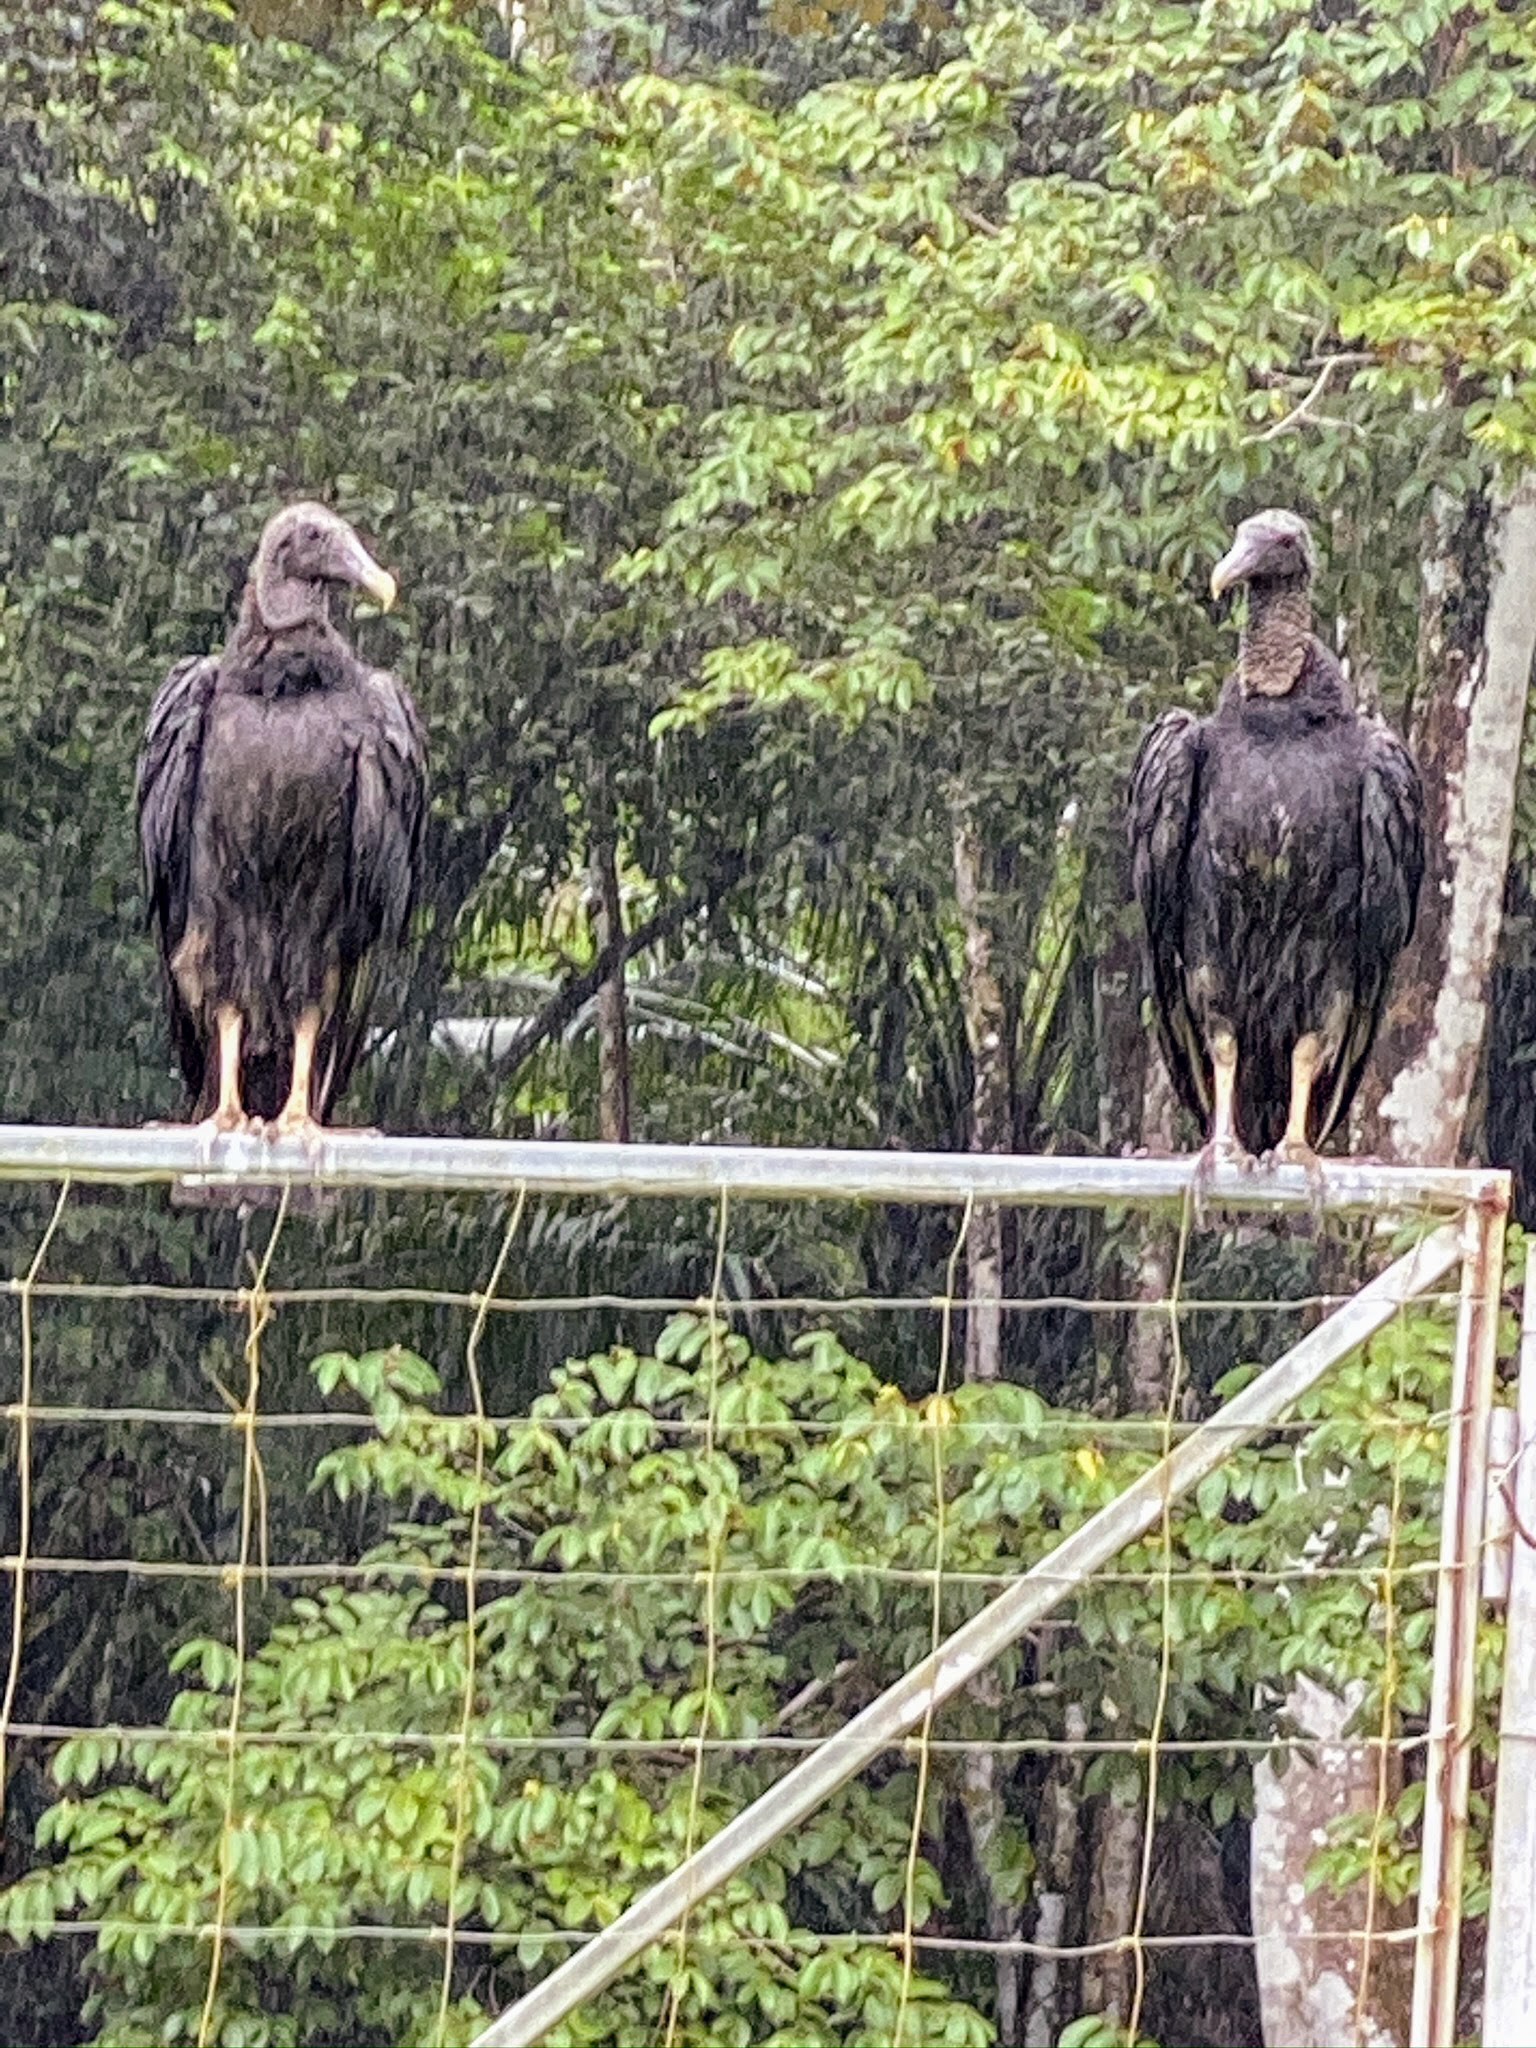
If you saw my photos on my Instagram page @MarthaStewart48, you may have seen these two black vultures, Coragyps atratus. We saw vultures everywhere – these large, mostly black birds with bald, wrinkled, charcoal-black heads and wingspans up to five feet. With keen eyesight, they can spot carcass from far distances, but these scavengers have a poor sense of smell.
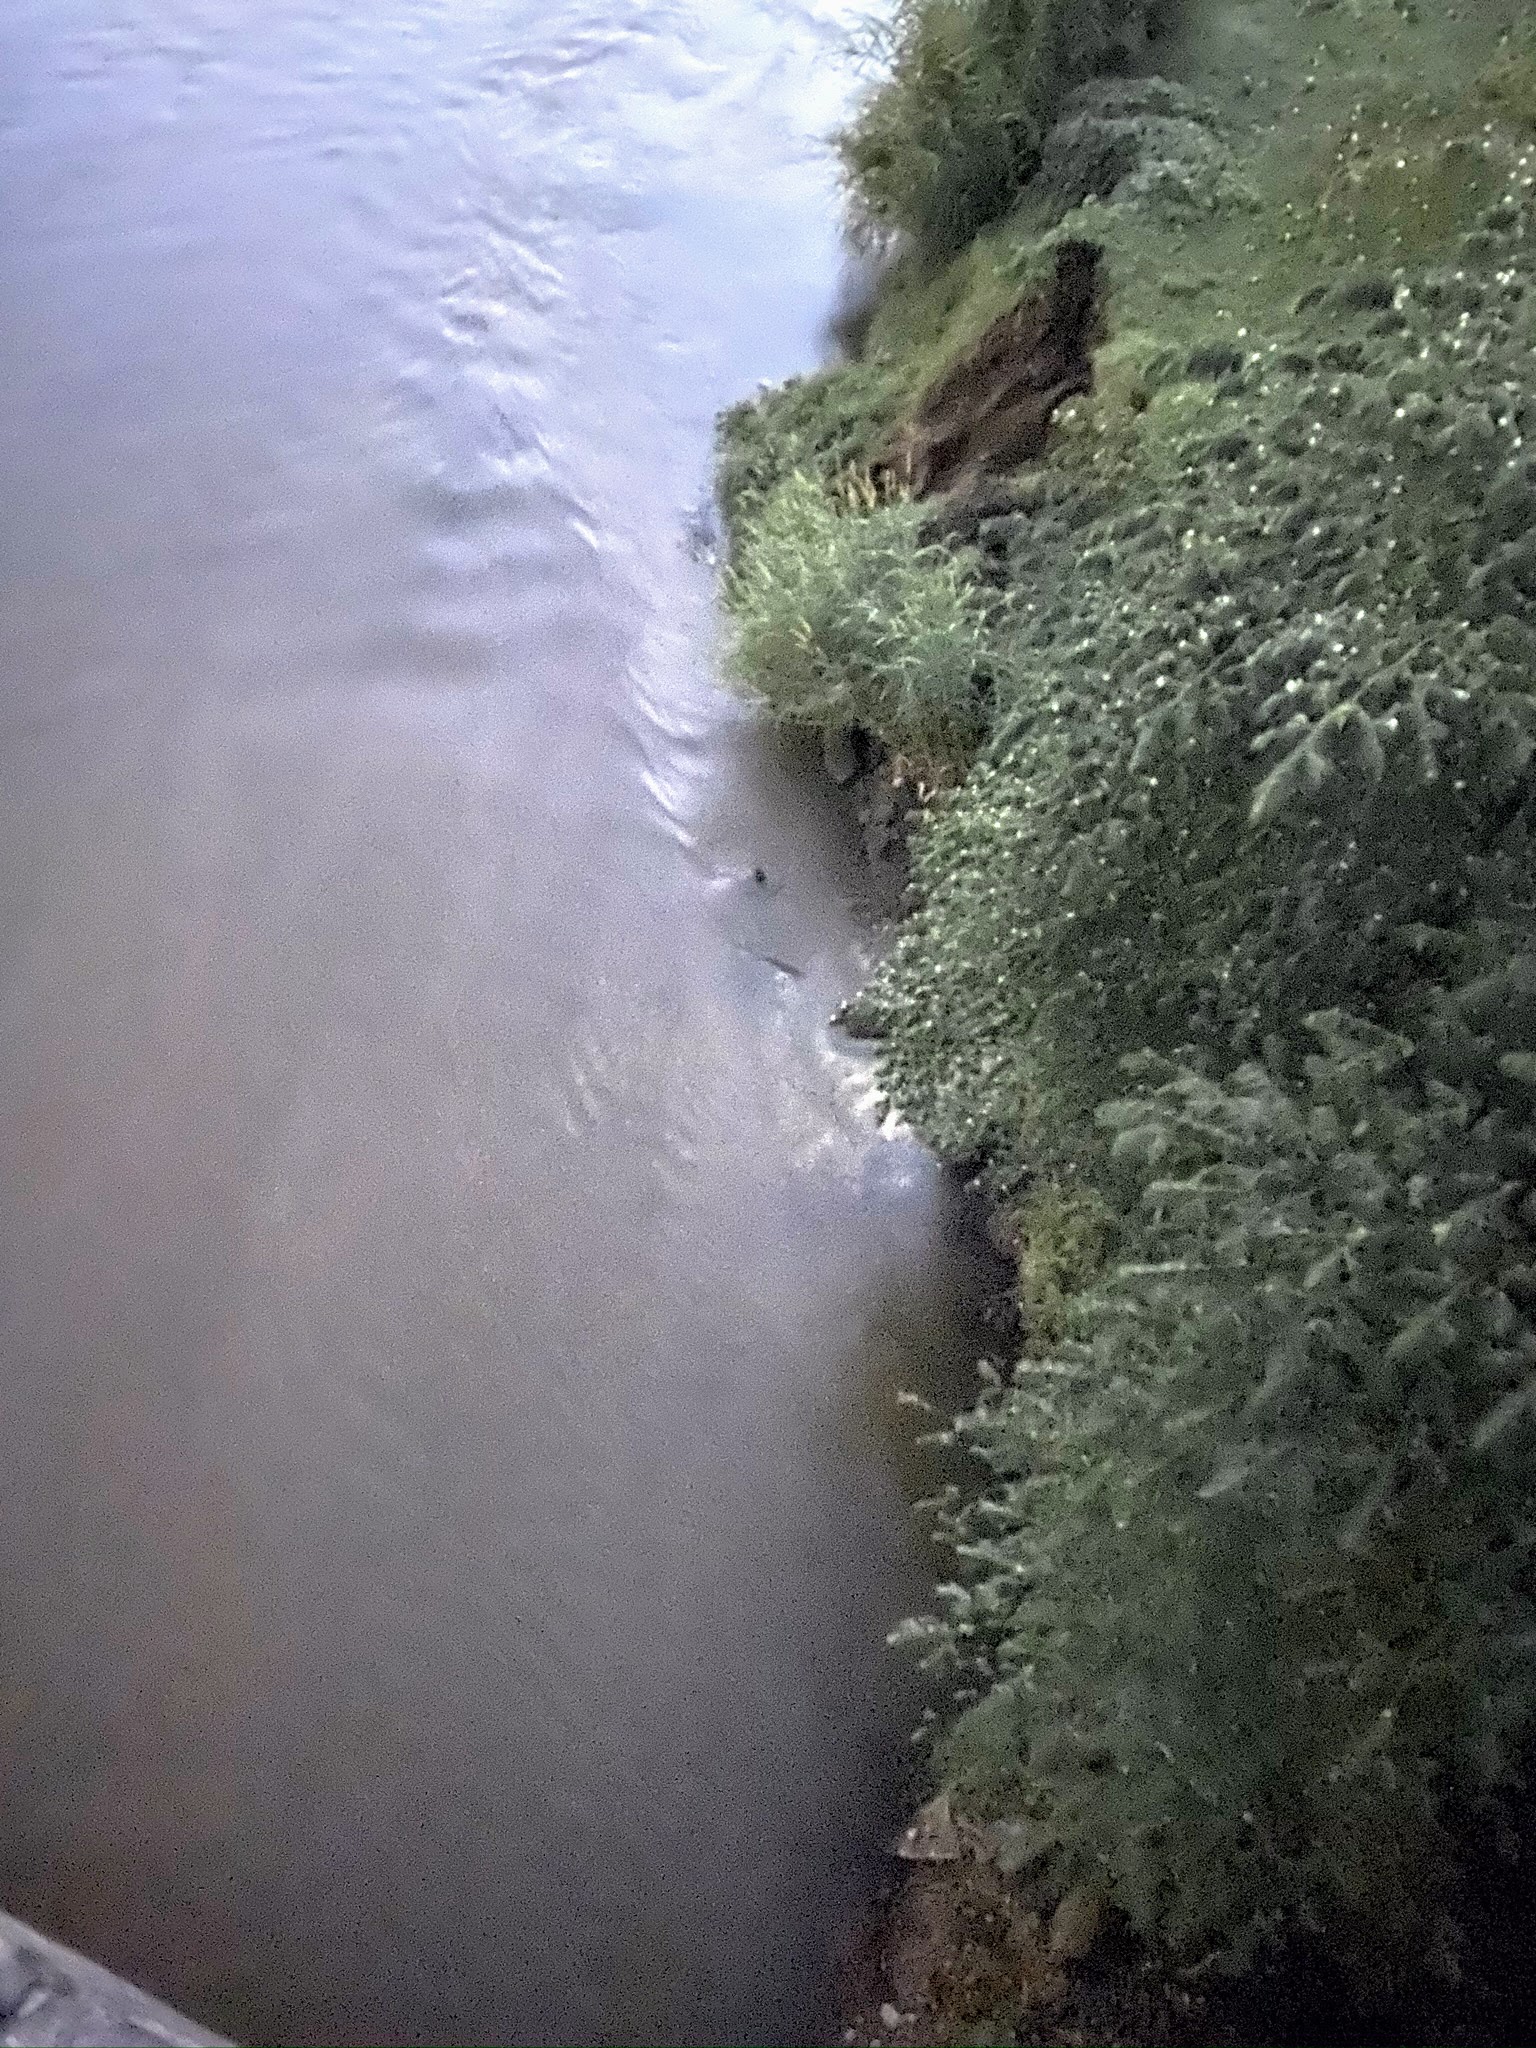
And, on our way back to the airport, we went over the famous Tarcoles River. Driving over the Tarcoles Bridge, you might see dozens of crocodiles. We saw glimpses of some just under the water.
And look at the gorgeous view beyond. If you get the chance, visit Costa Rica – you’ll have a great time. We certainly did.
As we continue the holiday week, I hope you enjoy this encore blog from my vacation in Costa Rica. It was originally posted on December 16, 2019.
I hope you are all enjoying this holiday season.
Some of you have asked for photos of my Thanksgiving. This year, my family and I went away. It felt odd at first - no turkey, no cranberry sauce, and no pie, but once we got to Costa Rica, near Dominical, a beach-front town in the province of Puntarenas, I started to relax and loved every minute of the five days we spent there. We enjoyed the beaches, the wildlife, and of course the many spectacular views from our villa.
Enjoy these photos.
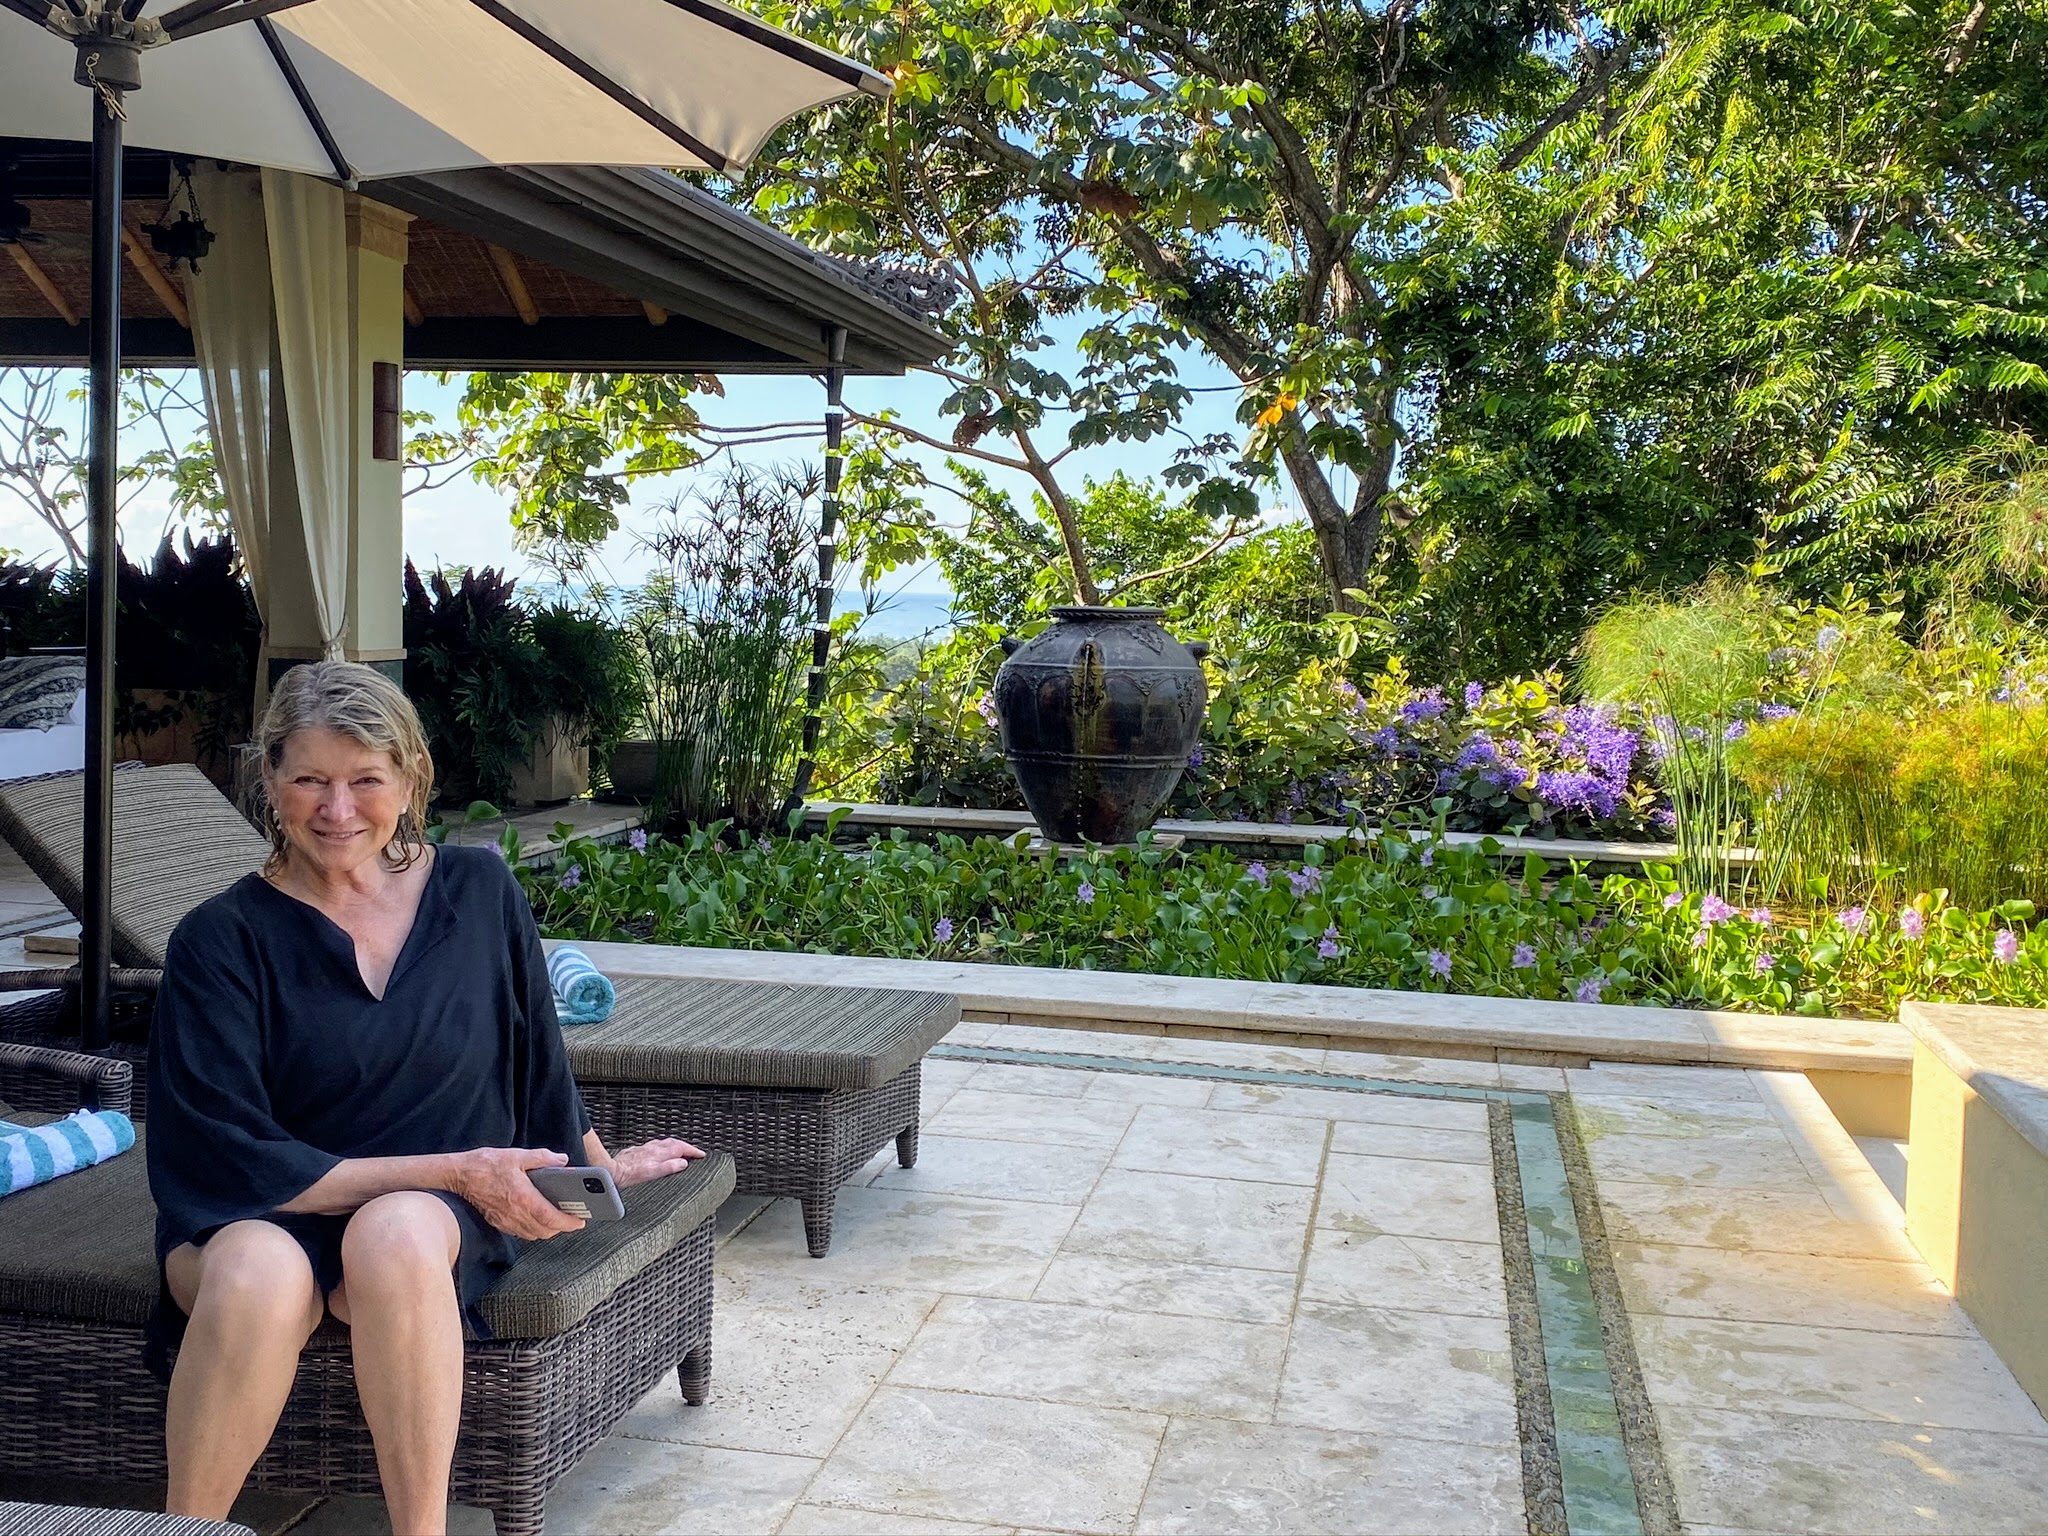
Here I am at Los Elementos, an extraordinary villa built on a hillside overlooking the Pacific Ocean.
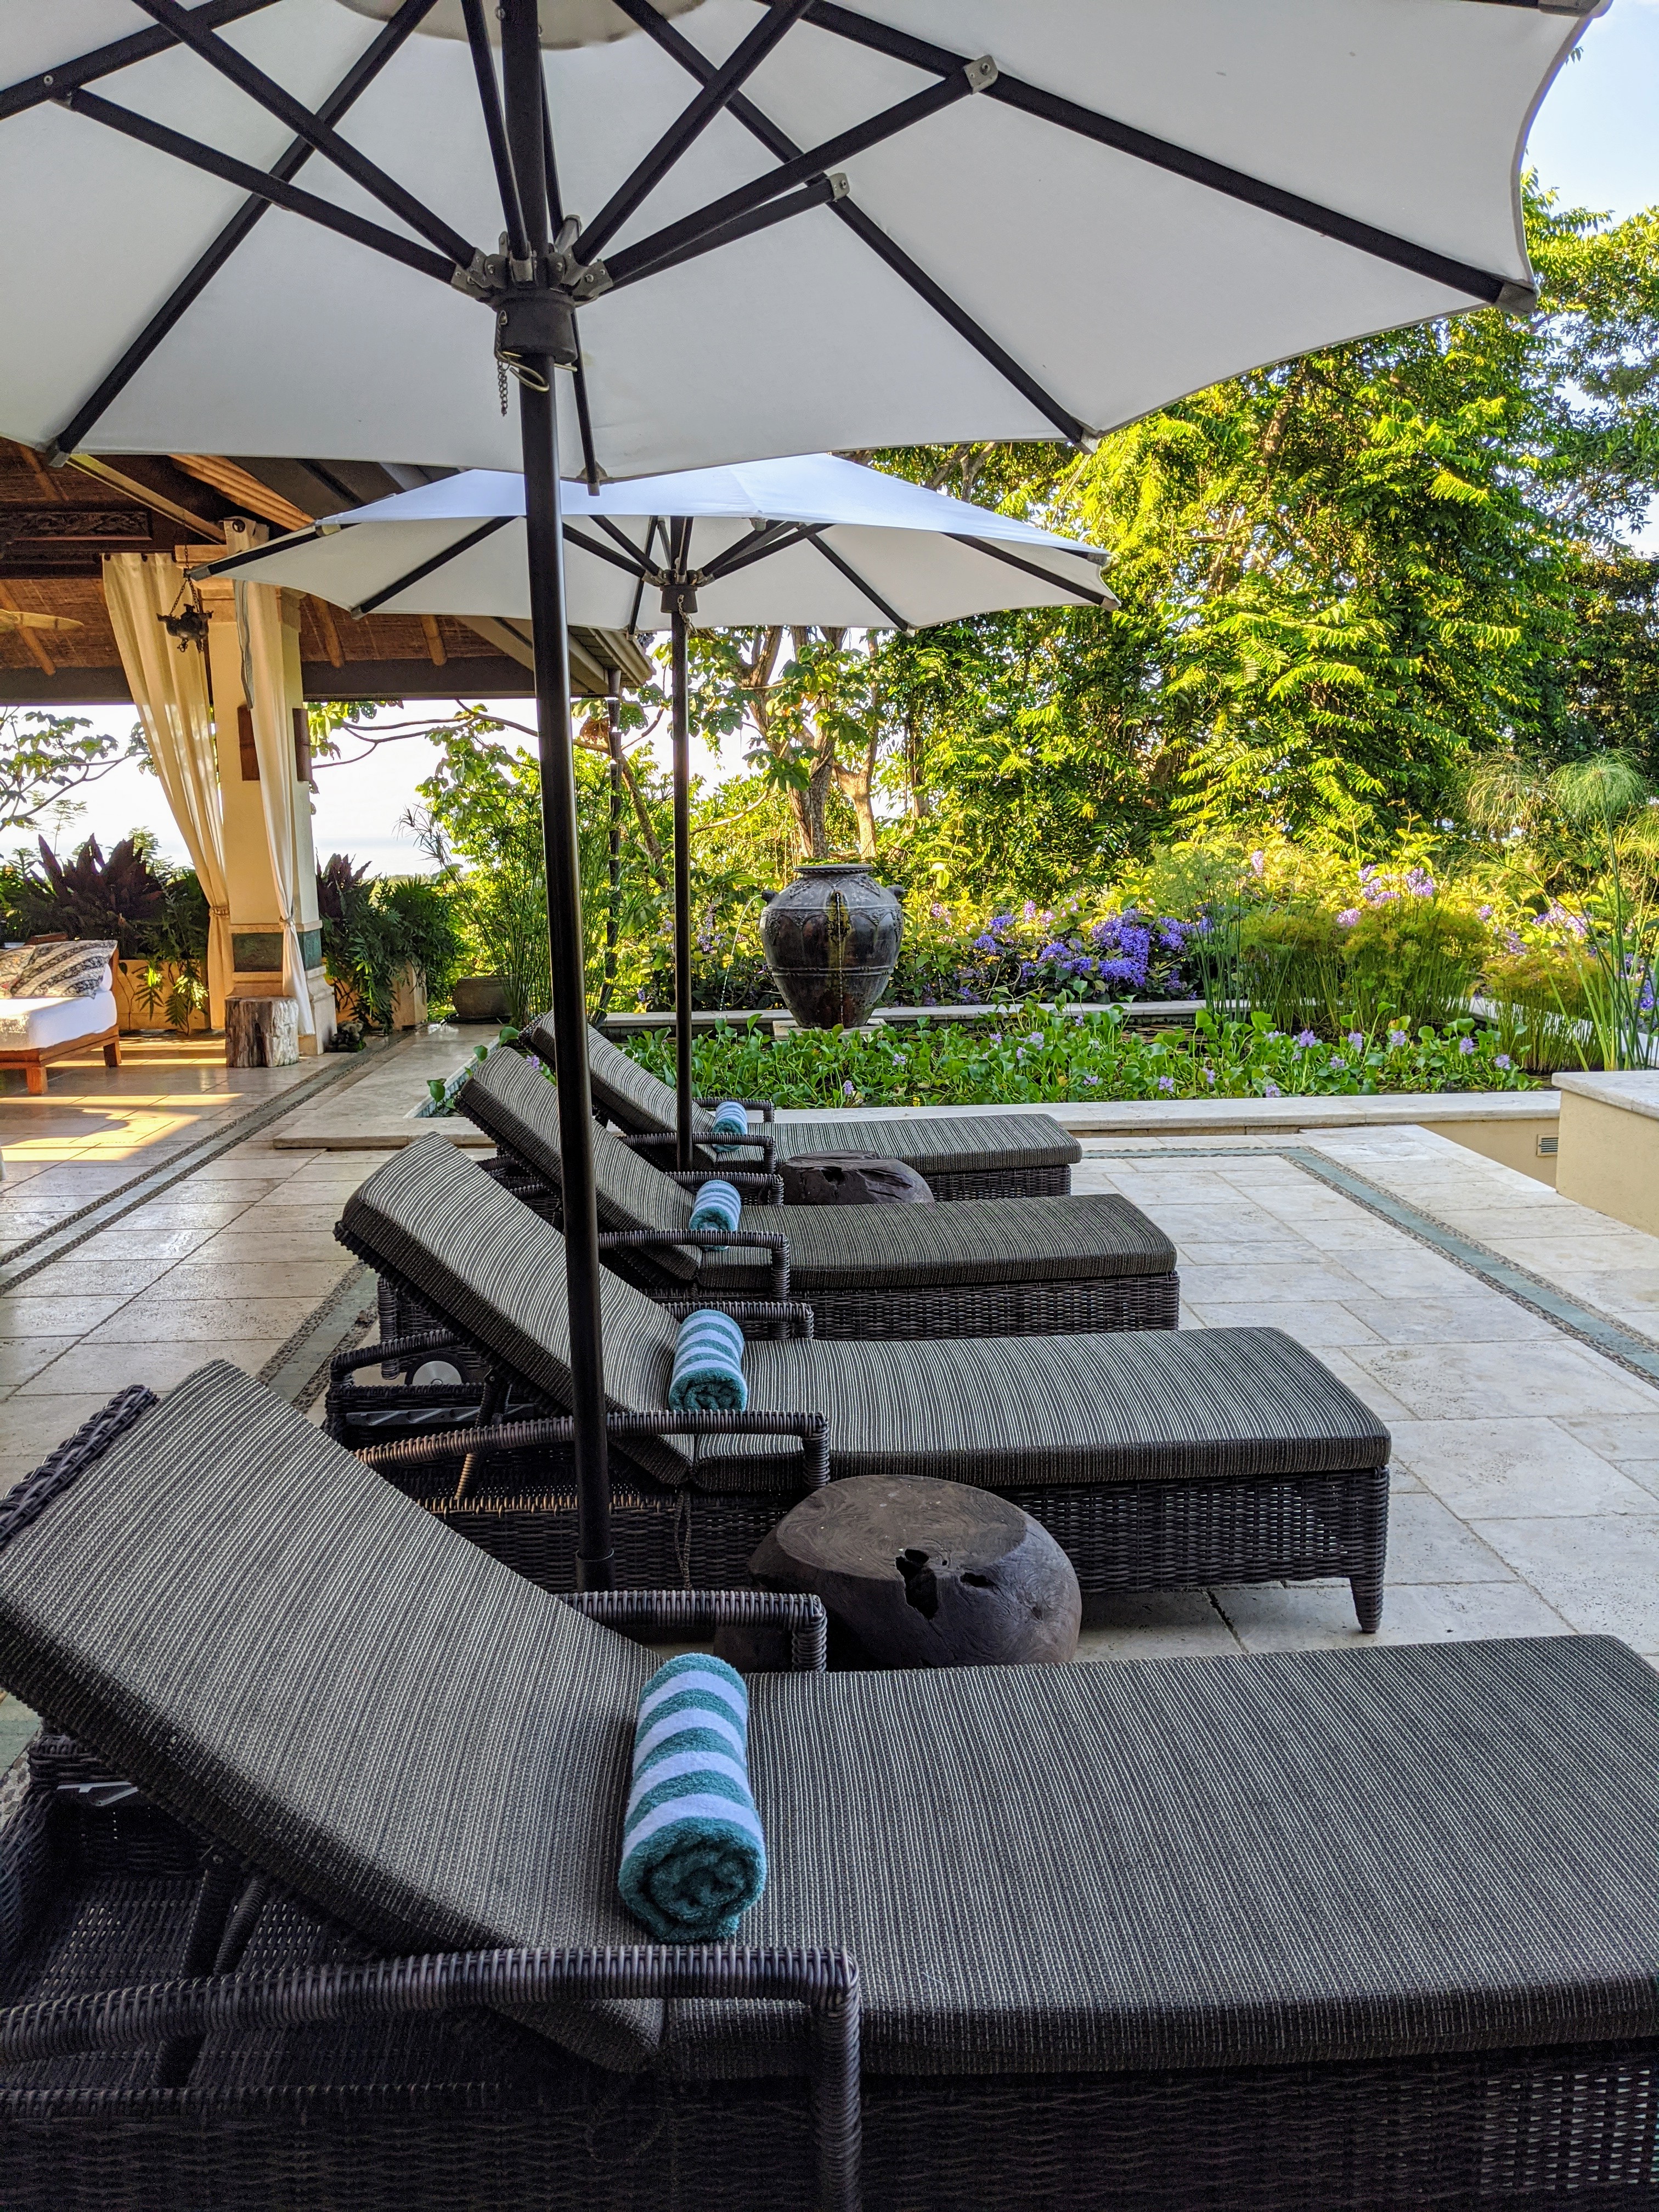
The house is superb – a large, secluded home built by two very talented garden designers. The pool area was one of our favorite spots.
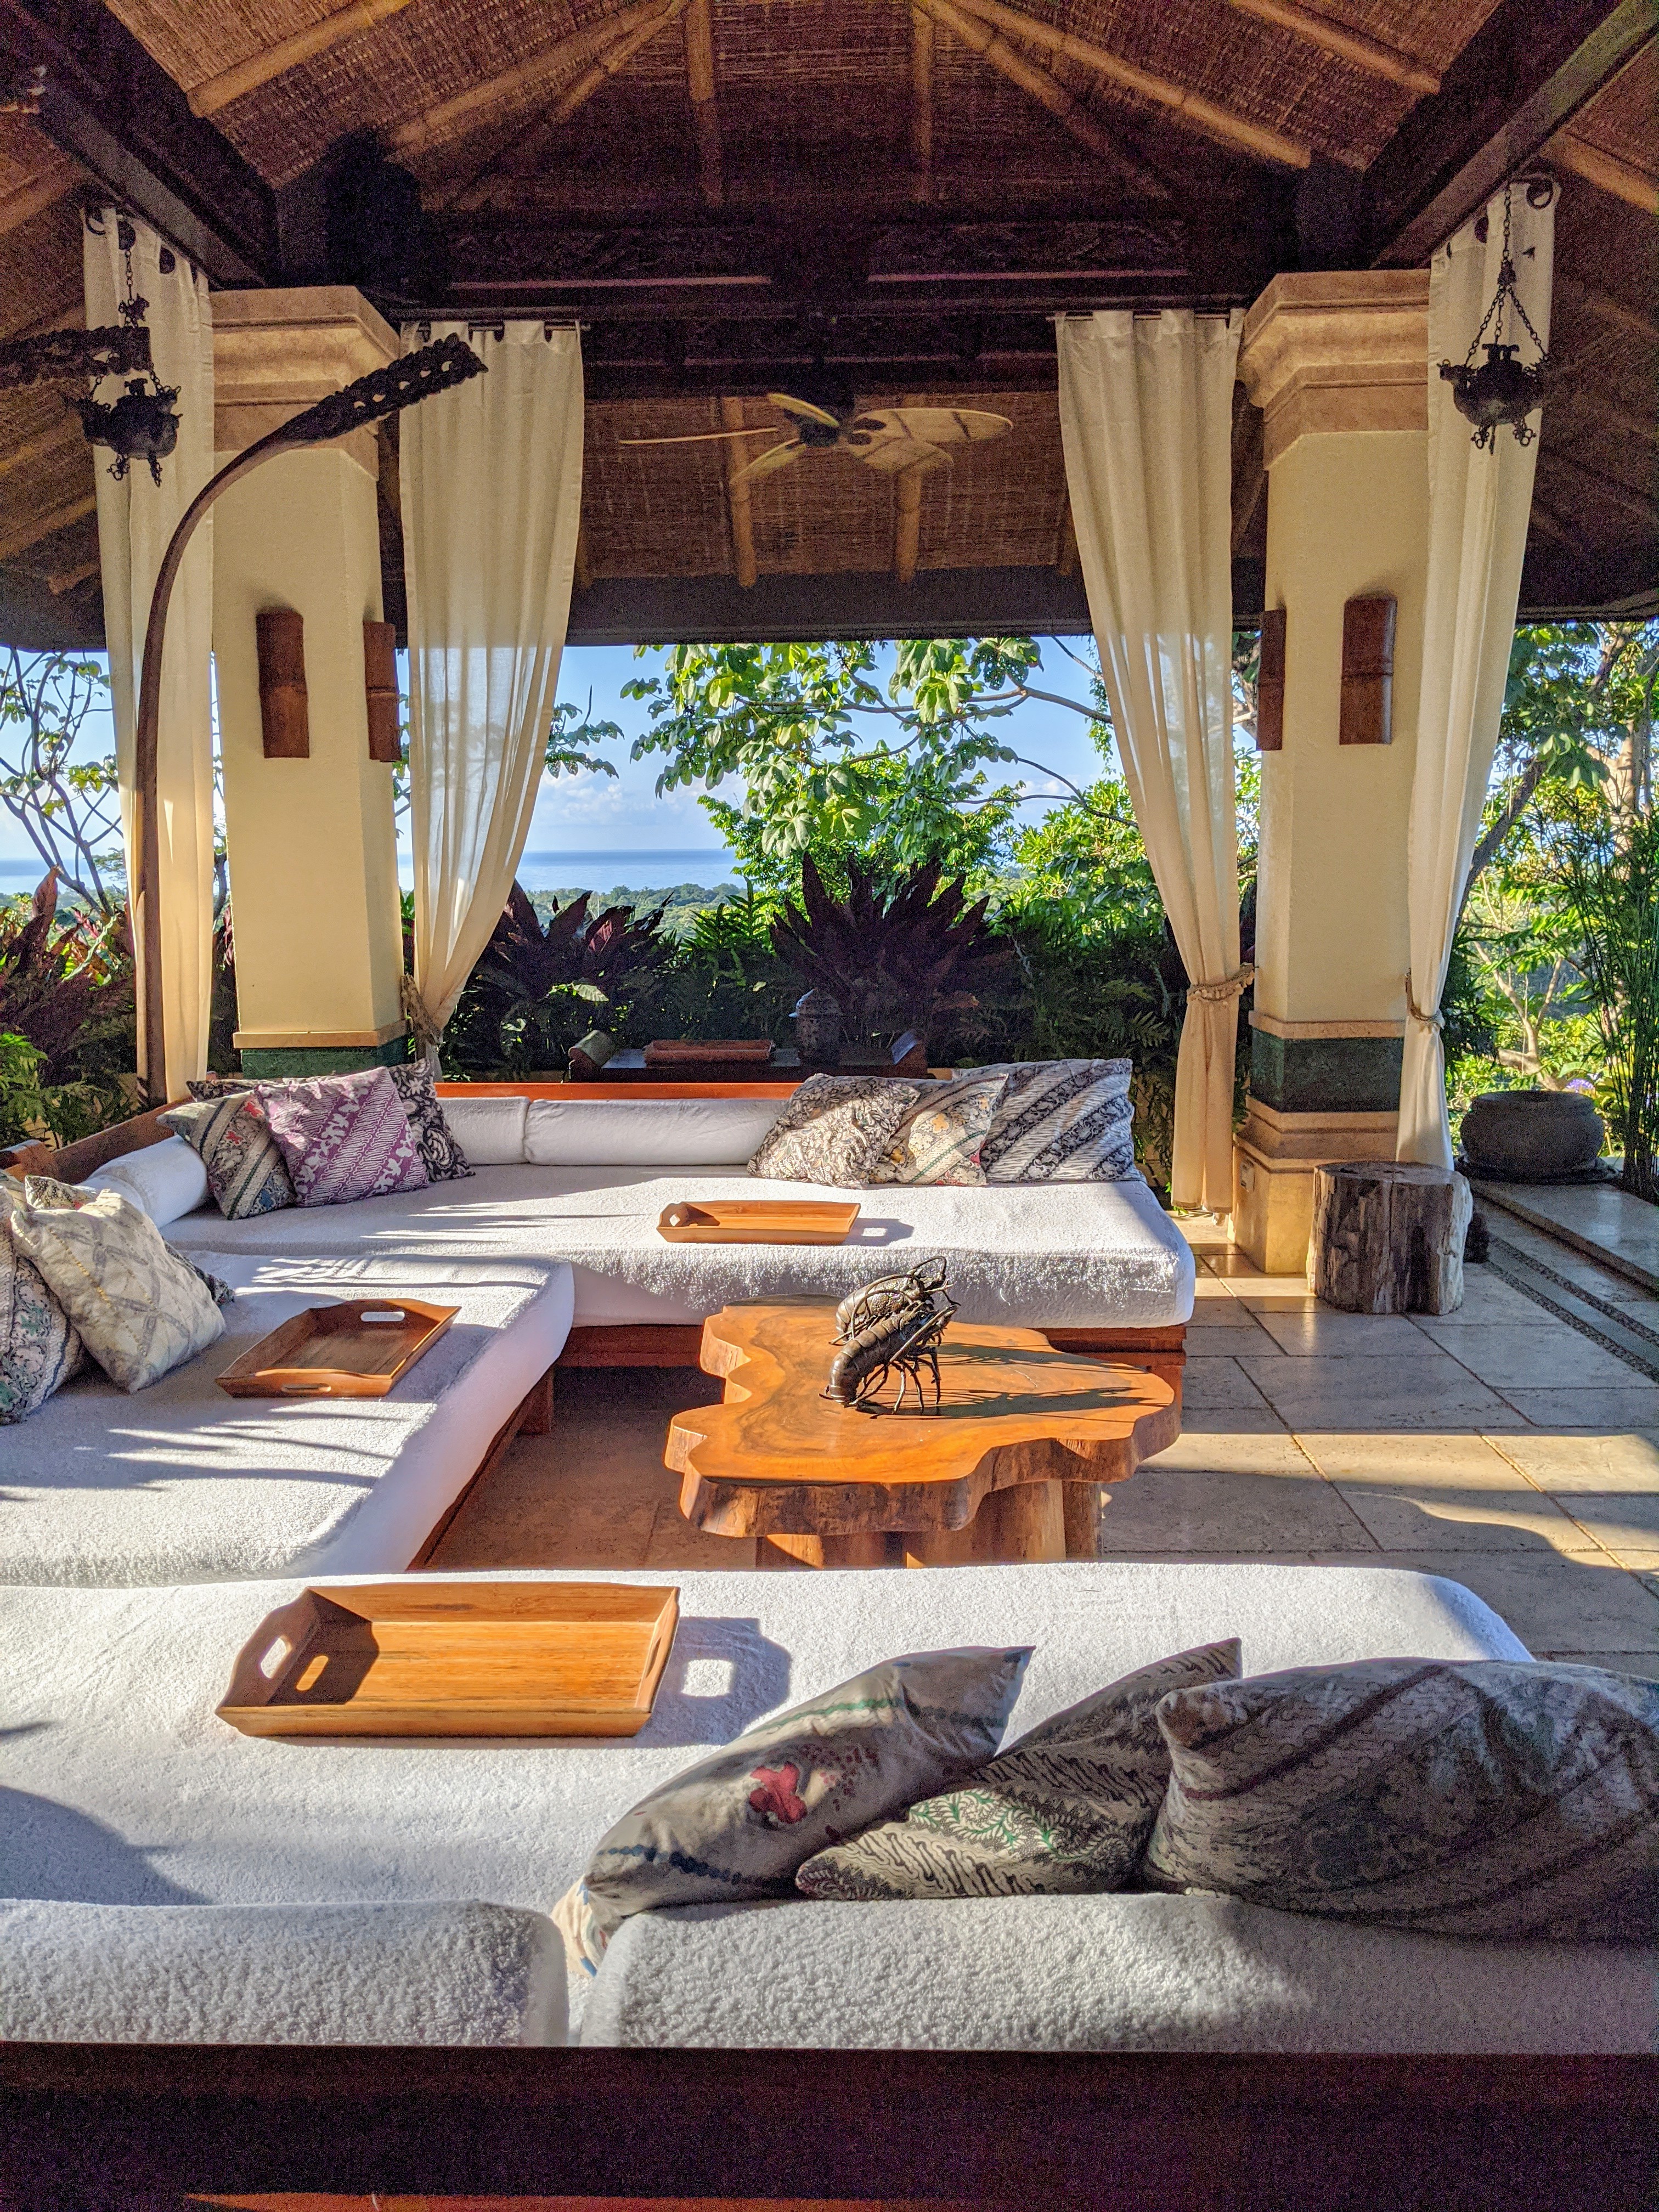
Los Elementos has four levels and is reminiscent of an open-air house in Bali. In fact, the house was inspired by five Balinese elements – water, earth, fire, air and ether. All the couches were so beautiful and generously sized.
The entire space was so tranquil – look closely at the hammock at the back. There were many spaces in which to lounge.
There were also some resident pets – this cat was so friendly and loved entertaining my grandchildren.
Here is my gorgeous daughter Alexis. She did her yoga exercises every morning by the pool.
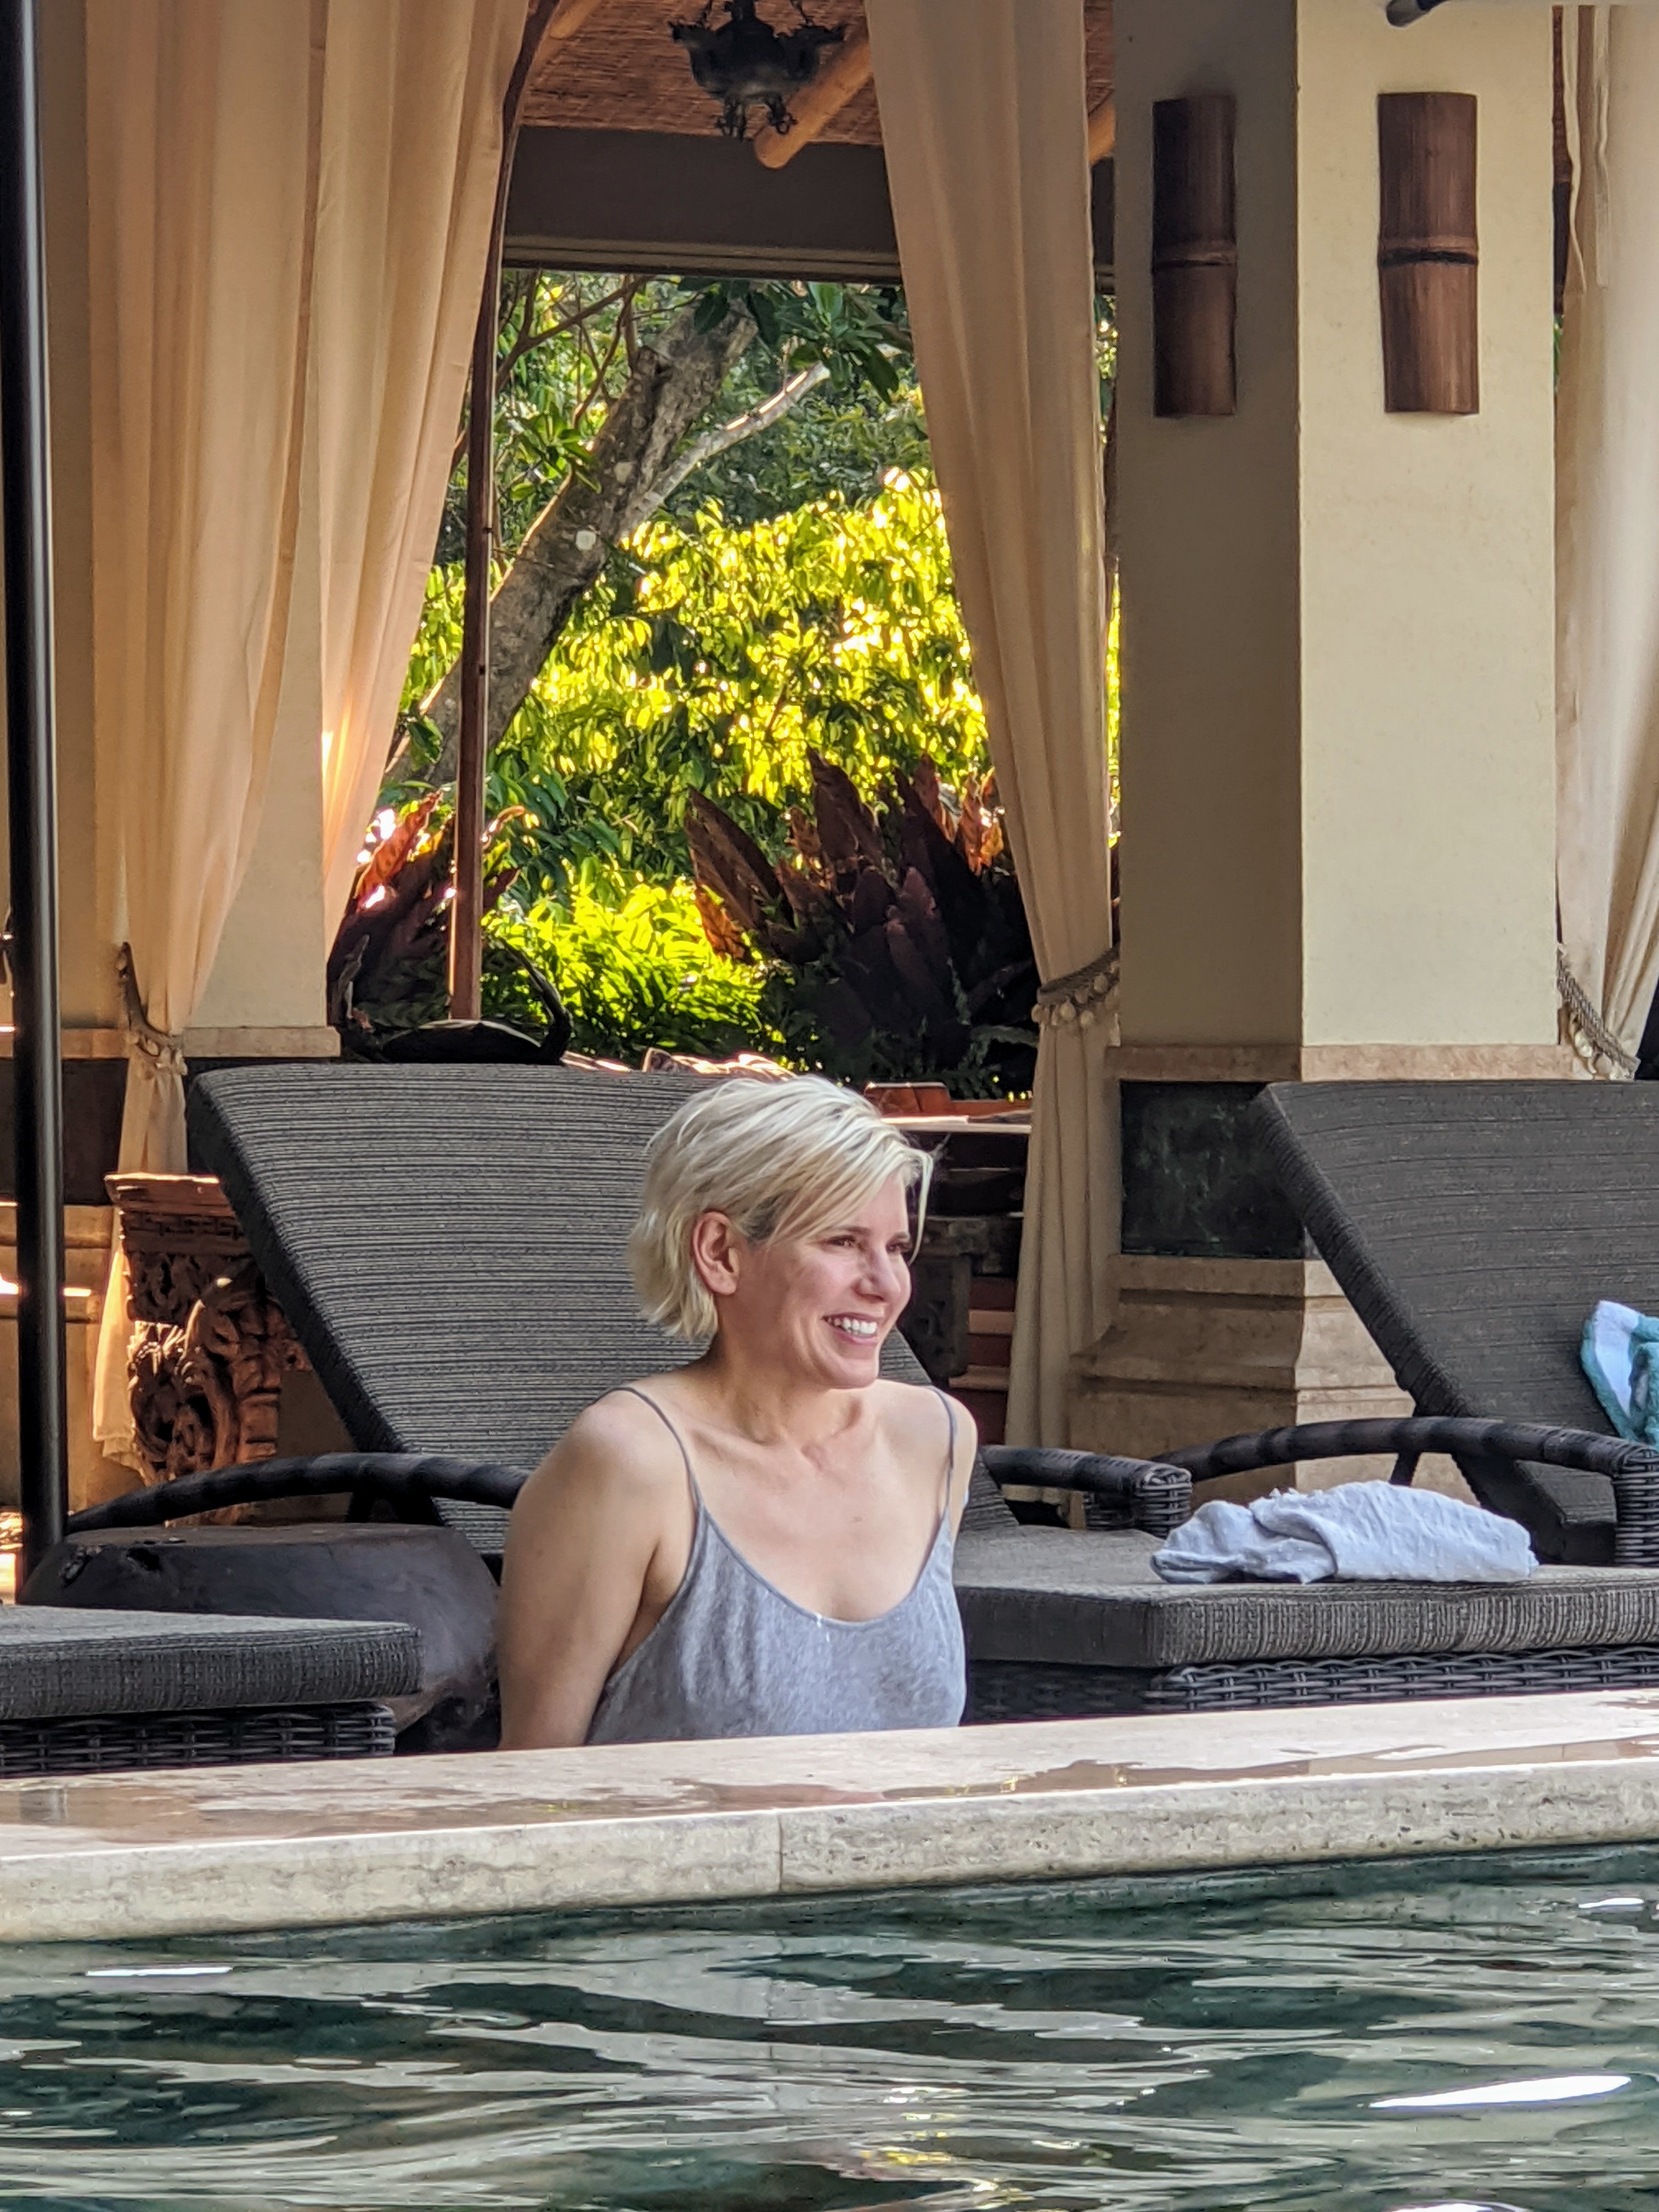
Los Elementos has a wonderful infinity-edge swimming pool. Jude and Truman, who love the water and are excellent swimmers, swam nonstop.
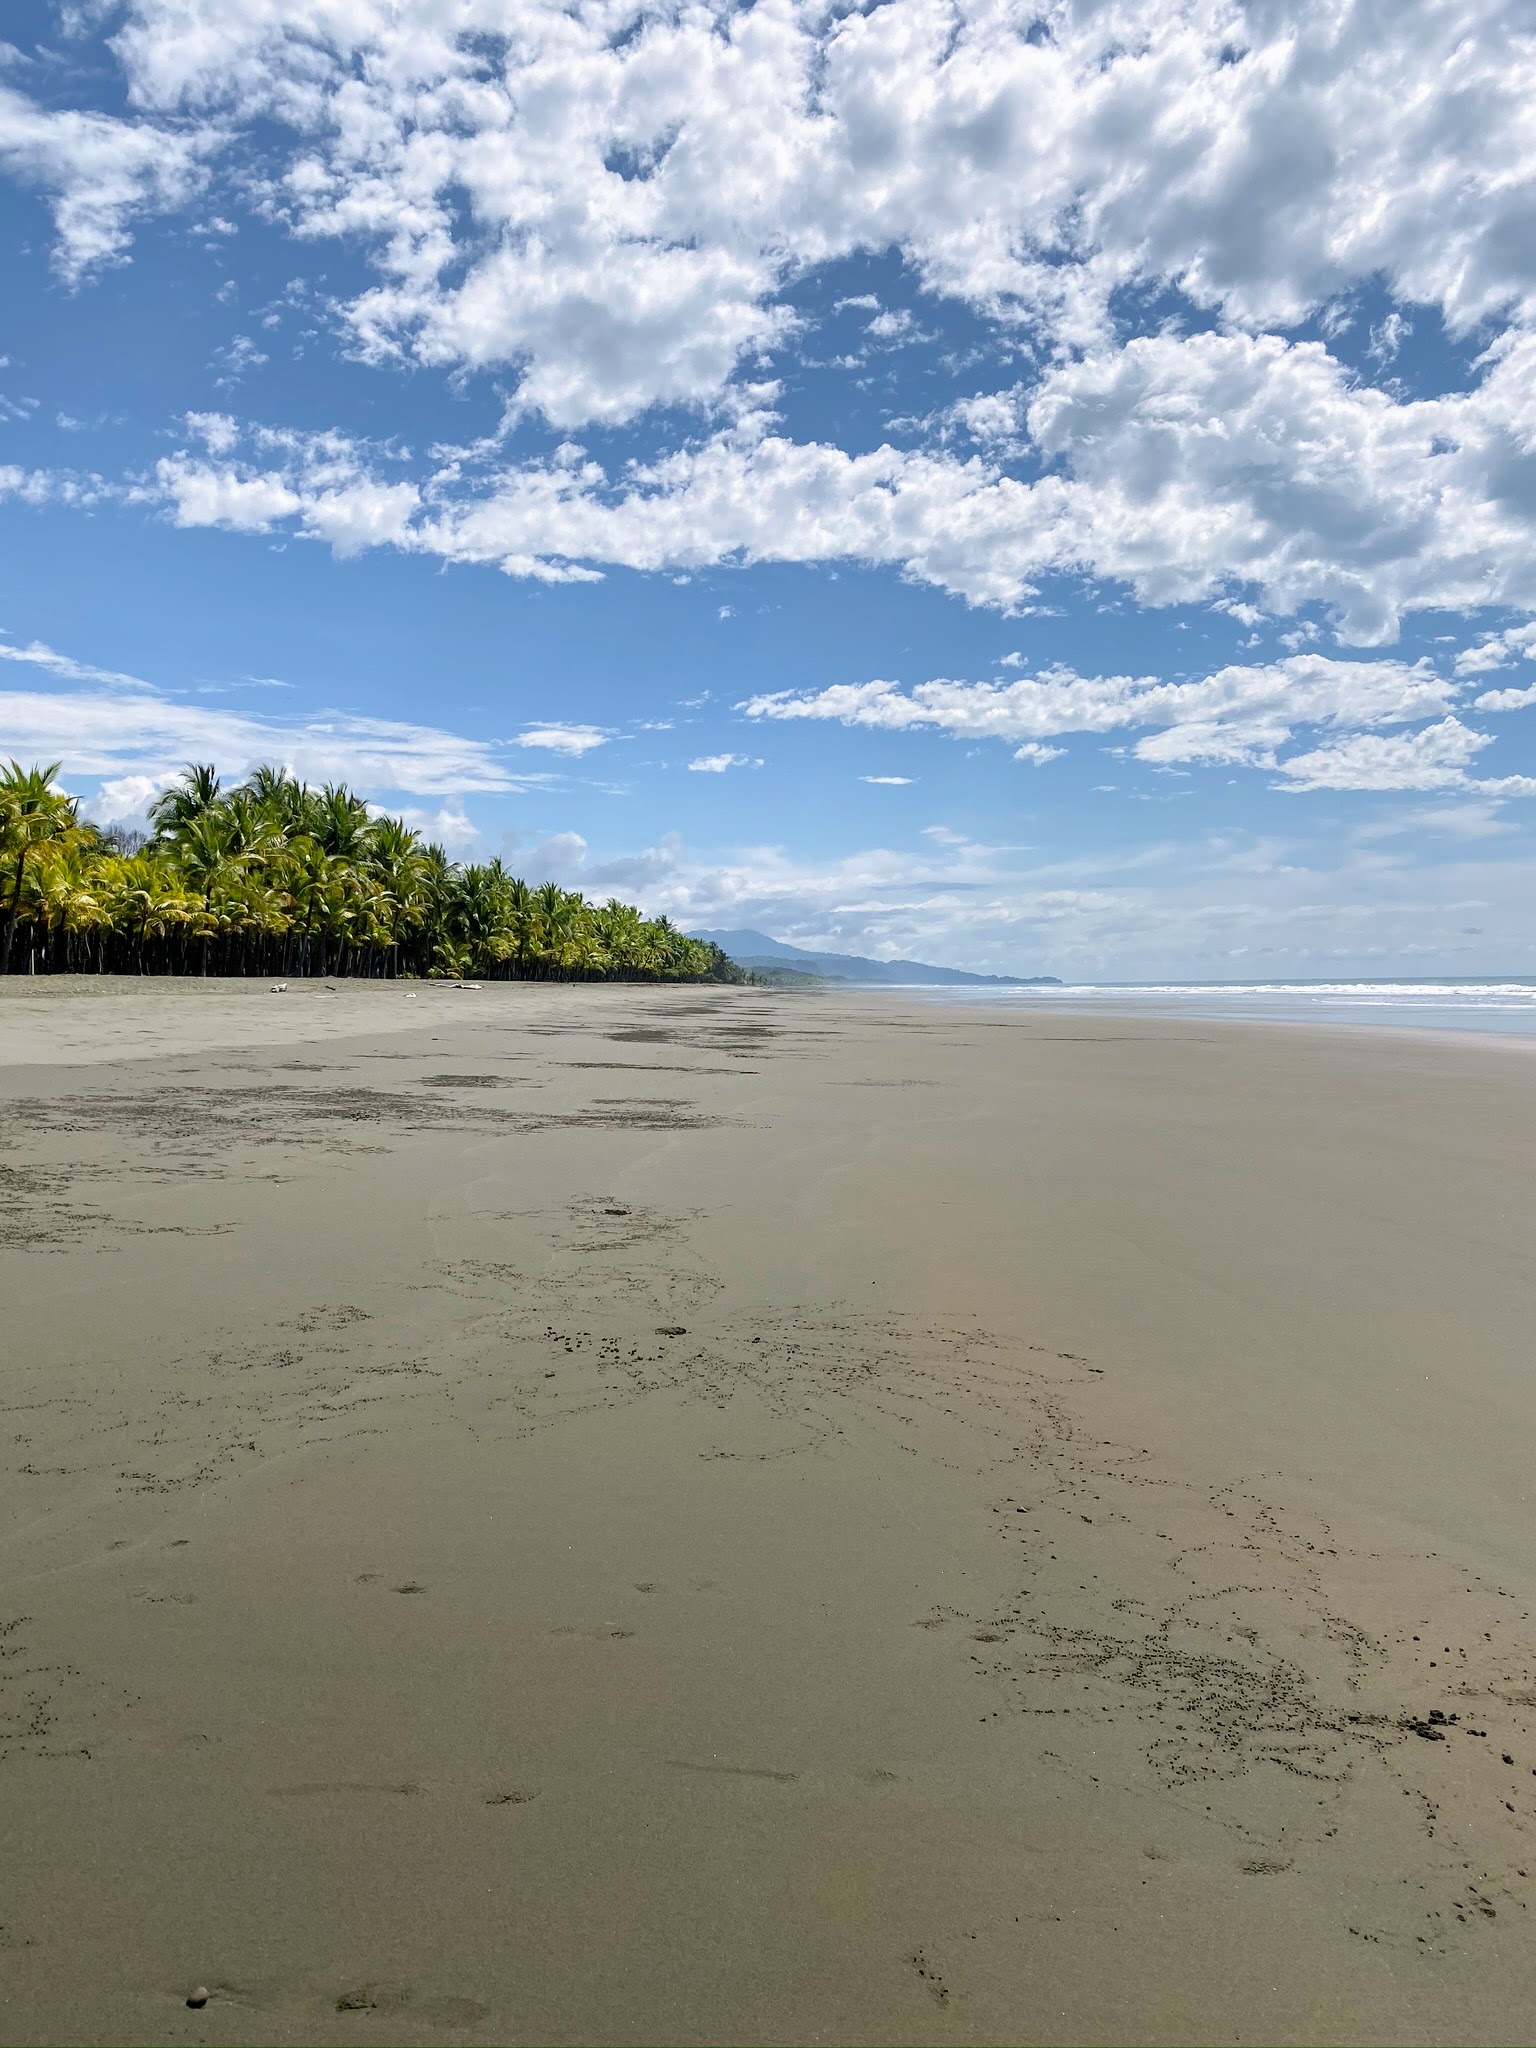
Los Elementos is just a short walk to some of the area’s most beautiful and secluded beaches. Here I am with our friend, Milena. She loves the beach.
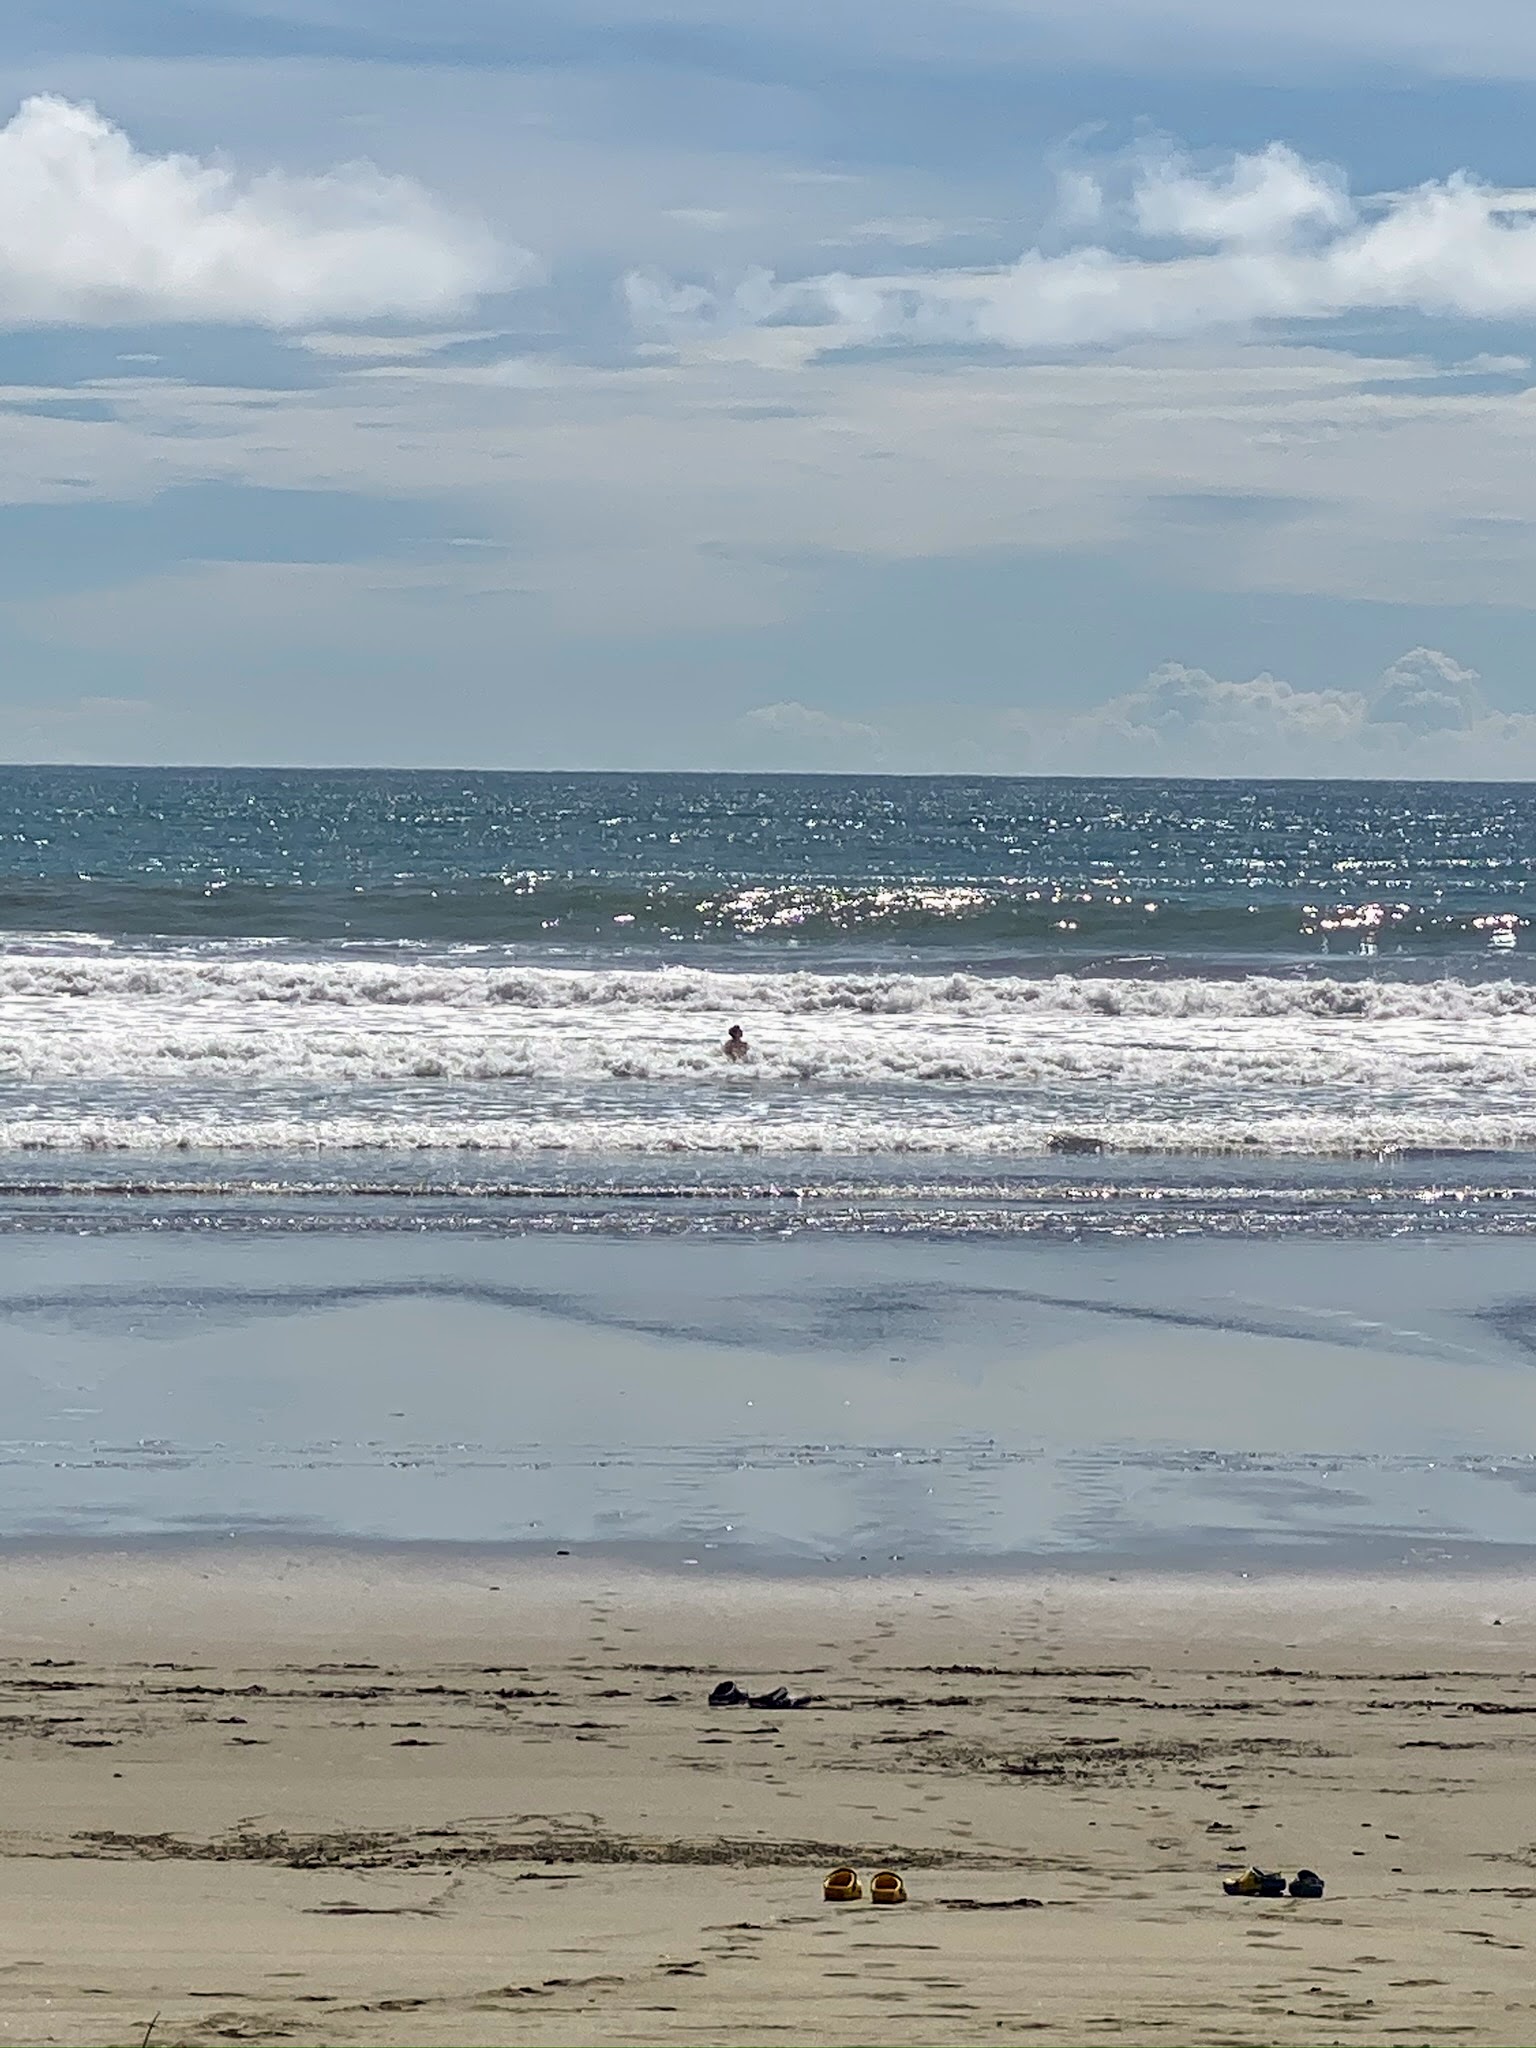
The views from the beach were endless. Dominical Beach is well known around the world as one of the best places for surfing.
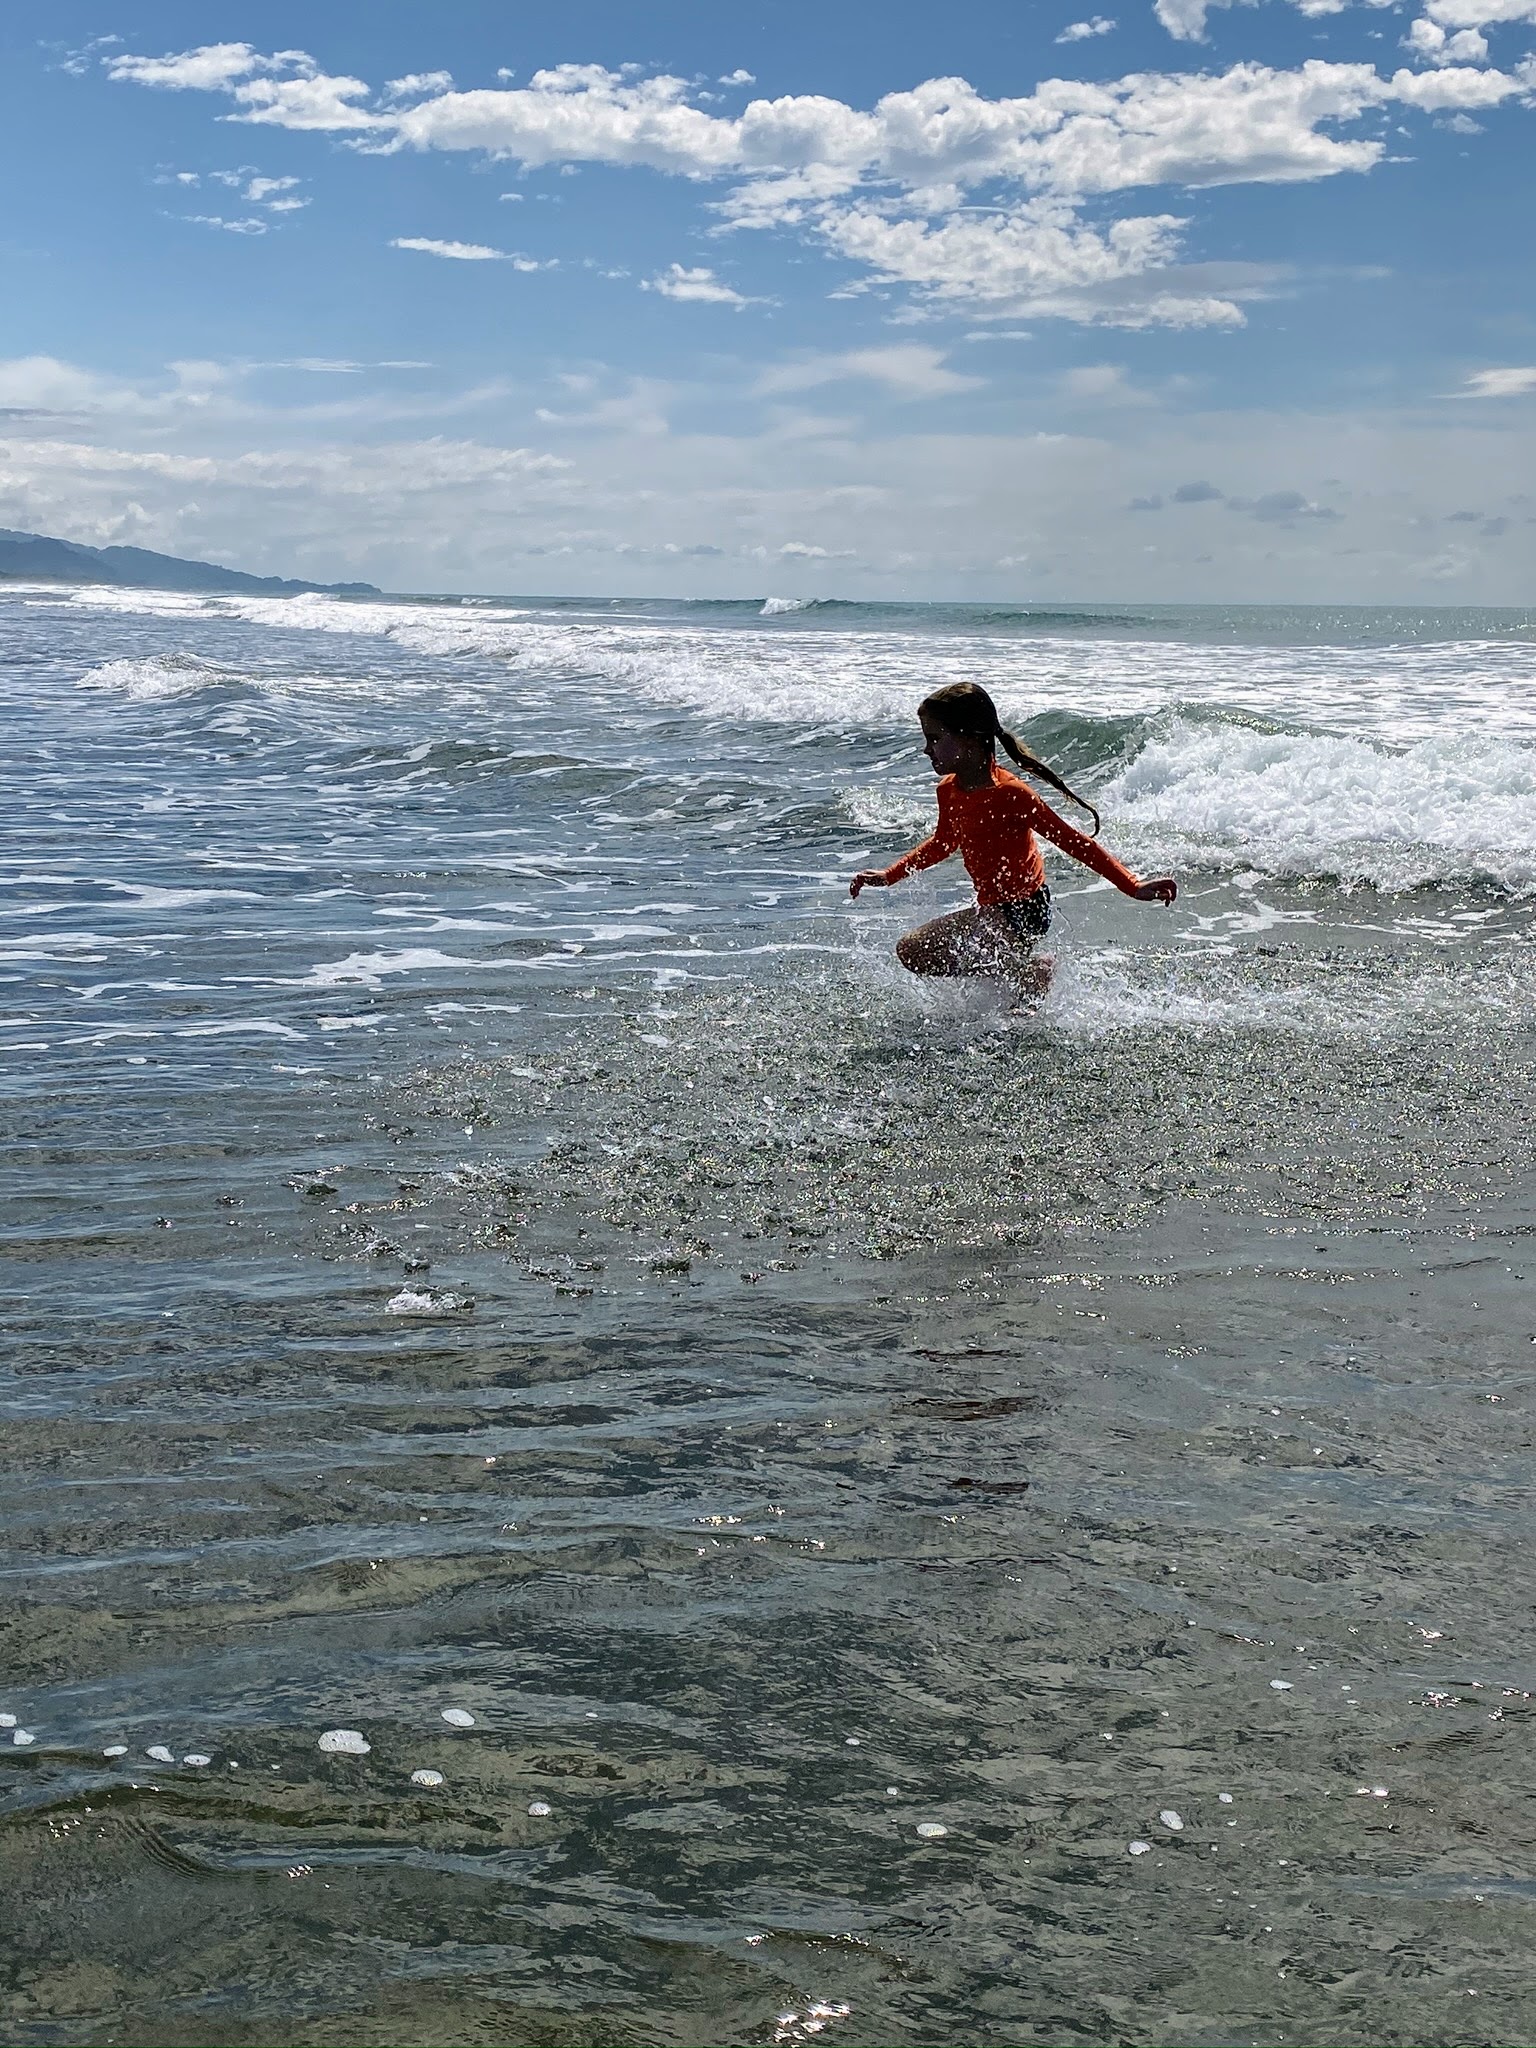
My grandchildren played and played and played – they adore the water.
We were there for the end of the “green season” or wet season, which runs from May to mid-November. The weather was excellent – mid to high 80s during the day with lows in the 70s – perfect beach weather.
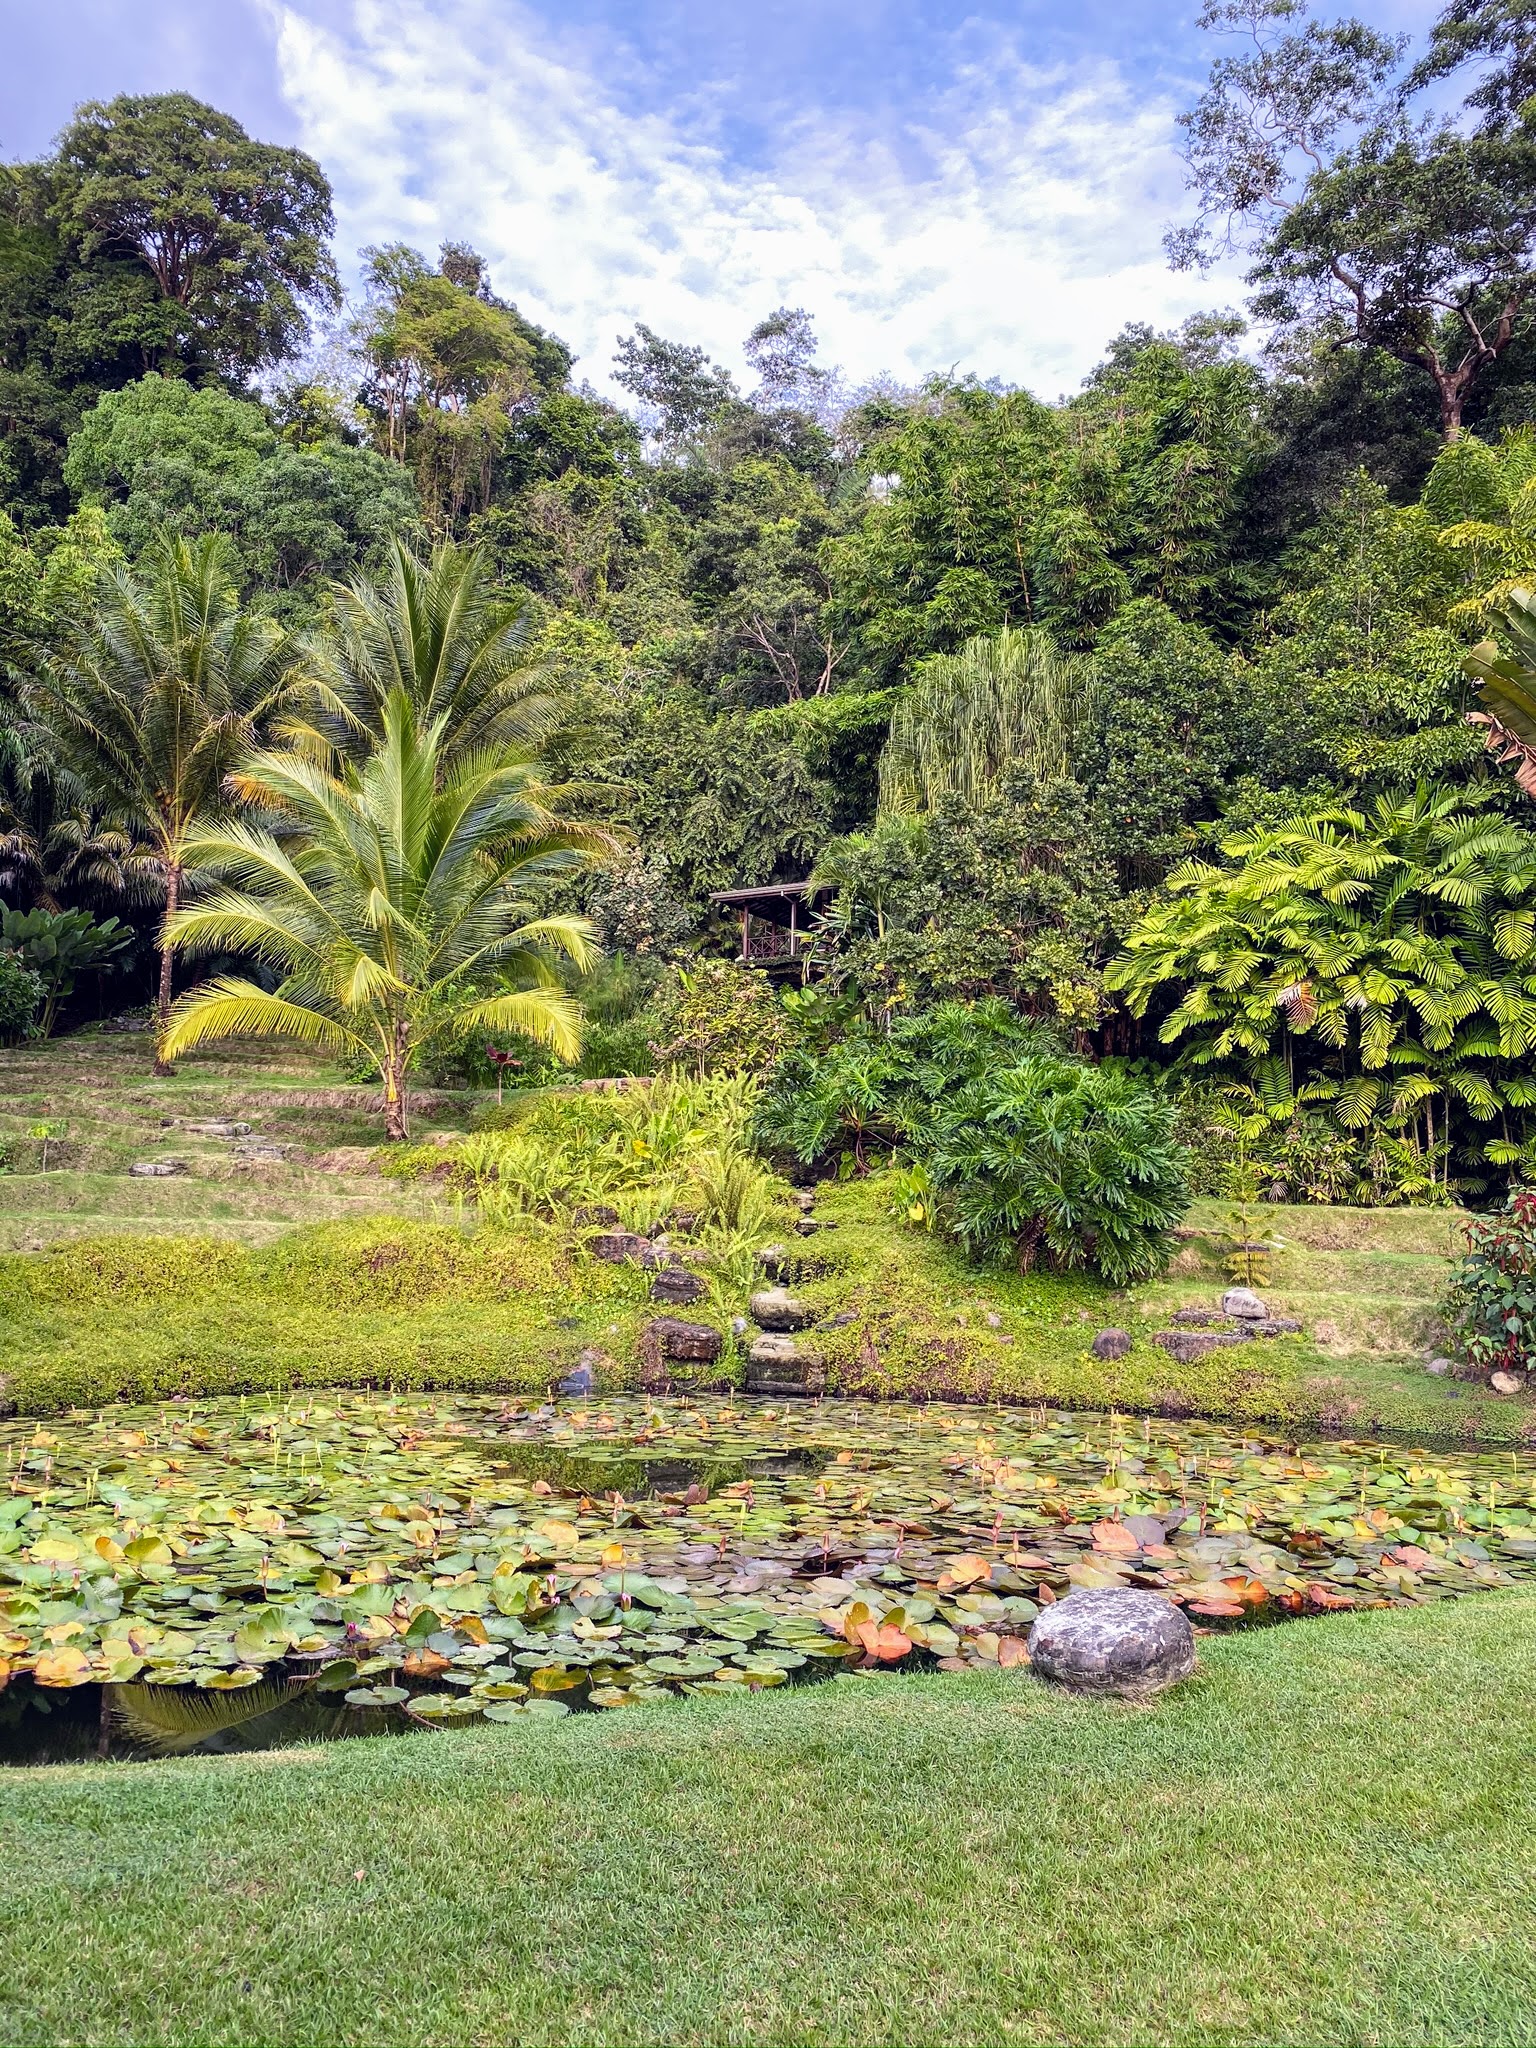
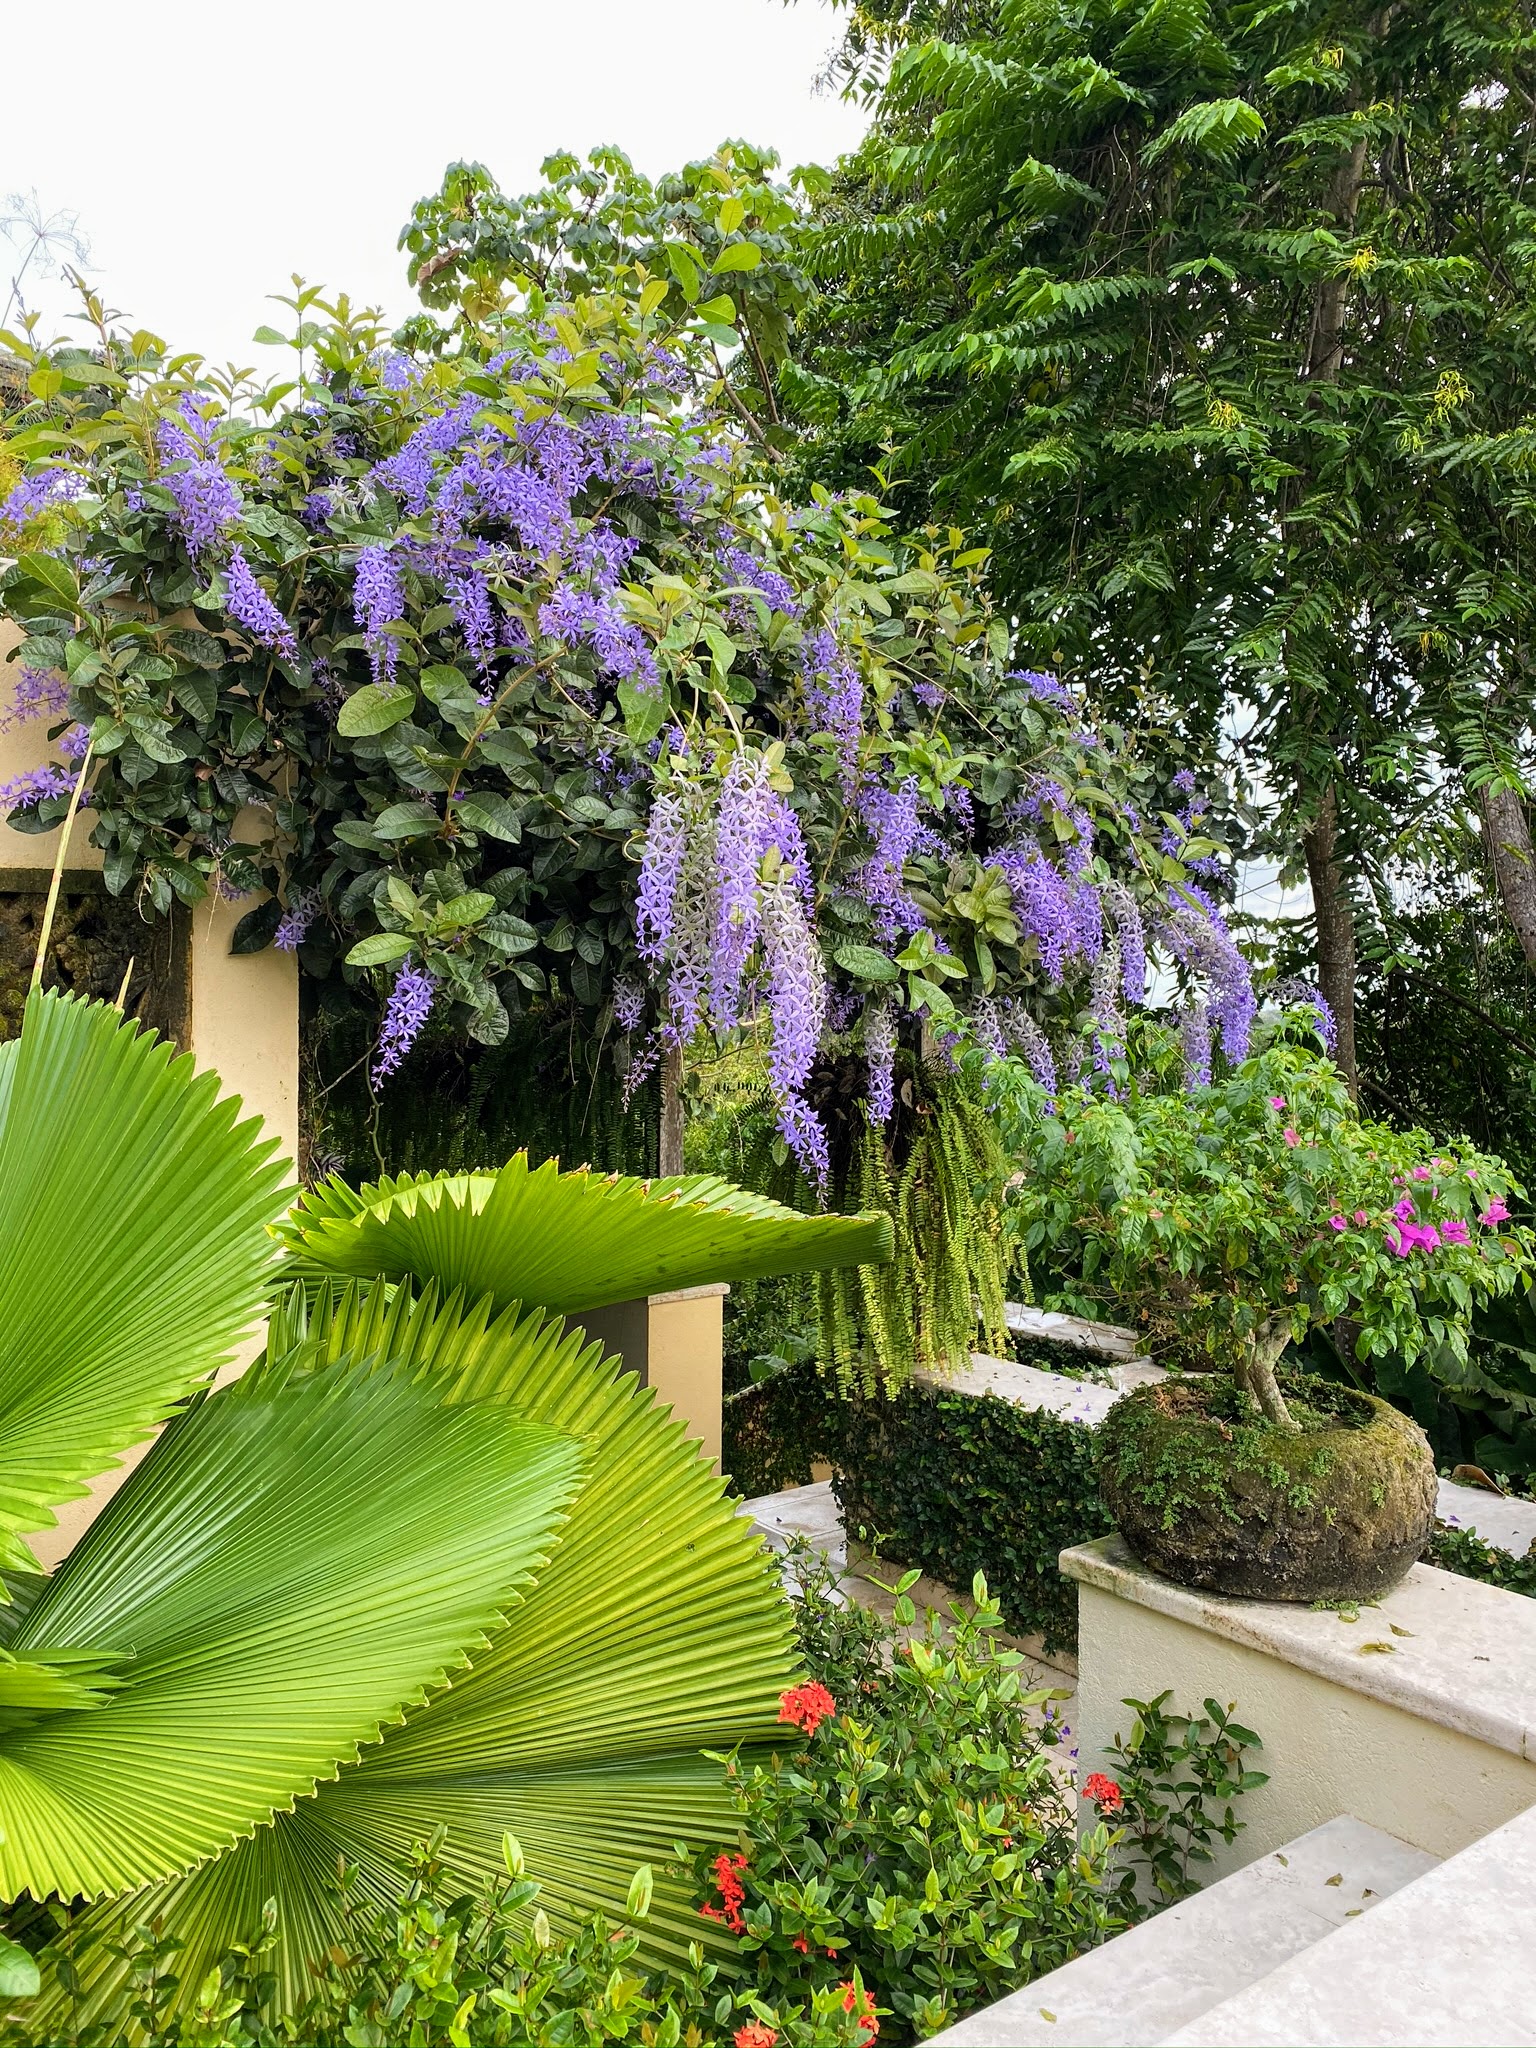
The modern garden at Los Elementos was designed by Dennis Schrader, owner of Landcraft Environments, Ltd., a pre-eminent wholesaler of tropical, tender perennials, and exotic annuals, in Mattituck, New York. This garden showcases tropical plants, including water lilies, Calathea, palms, and Heliconia.
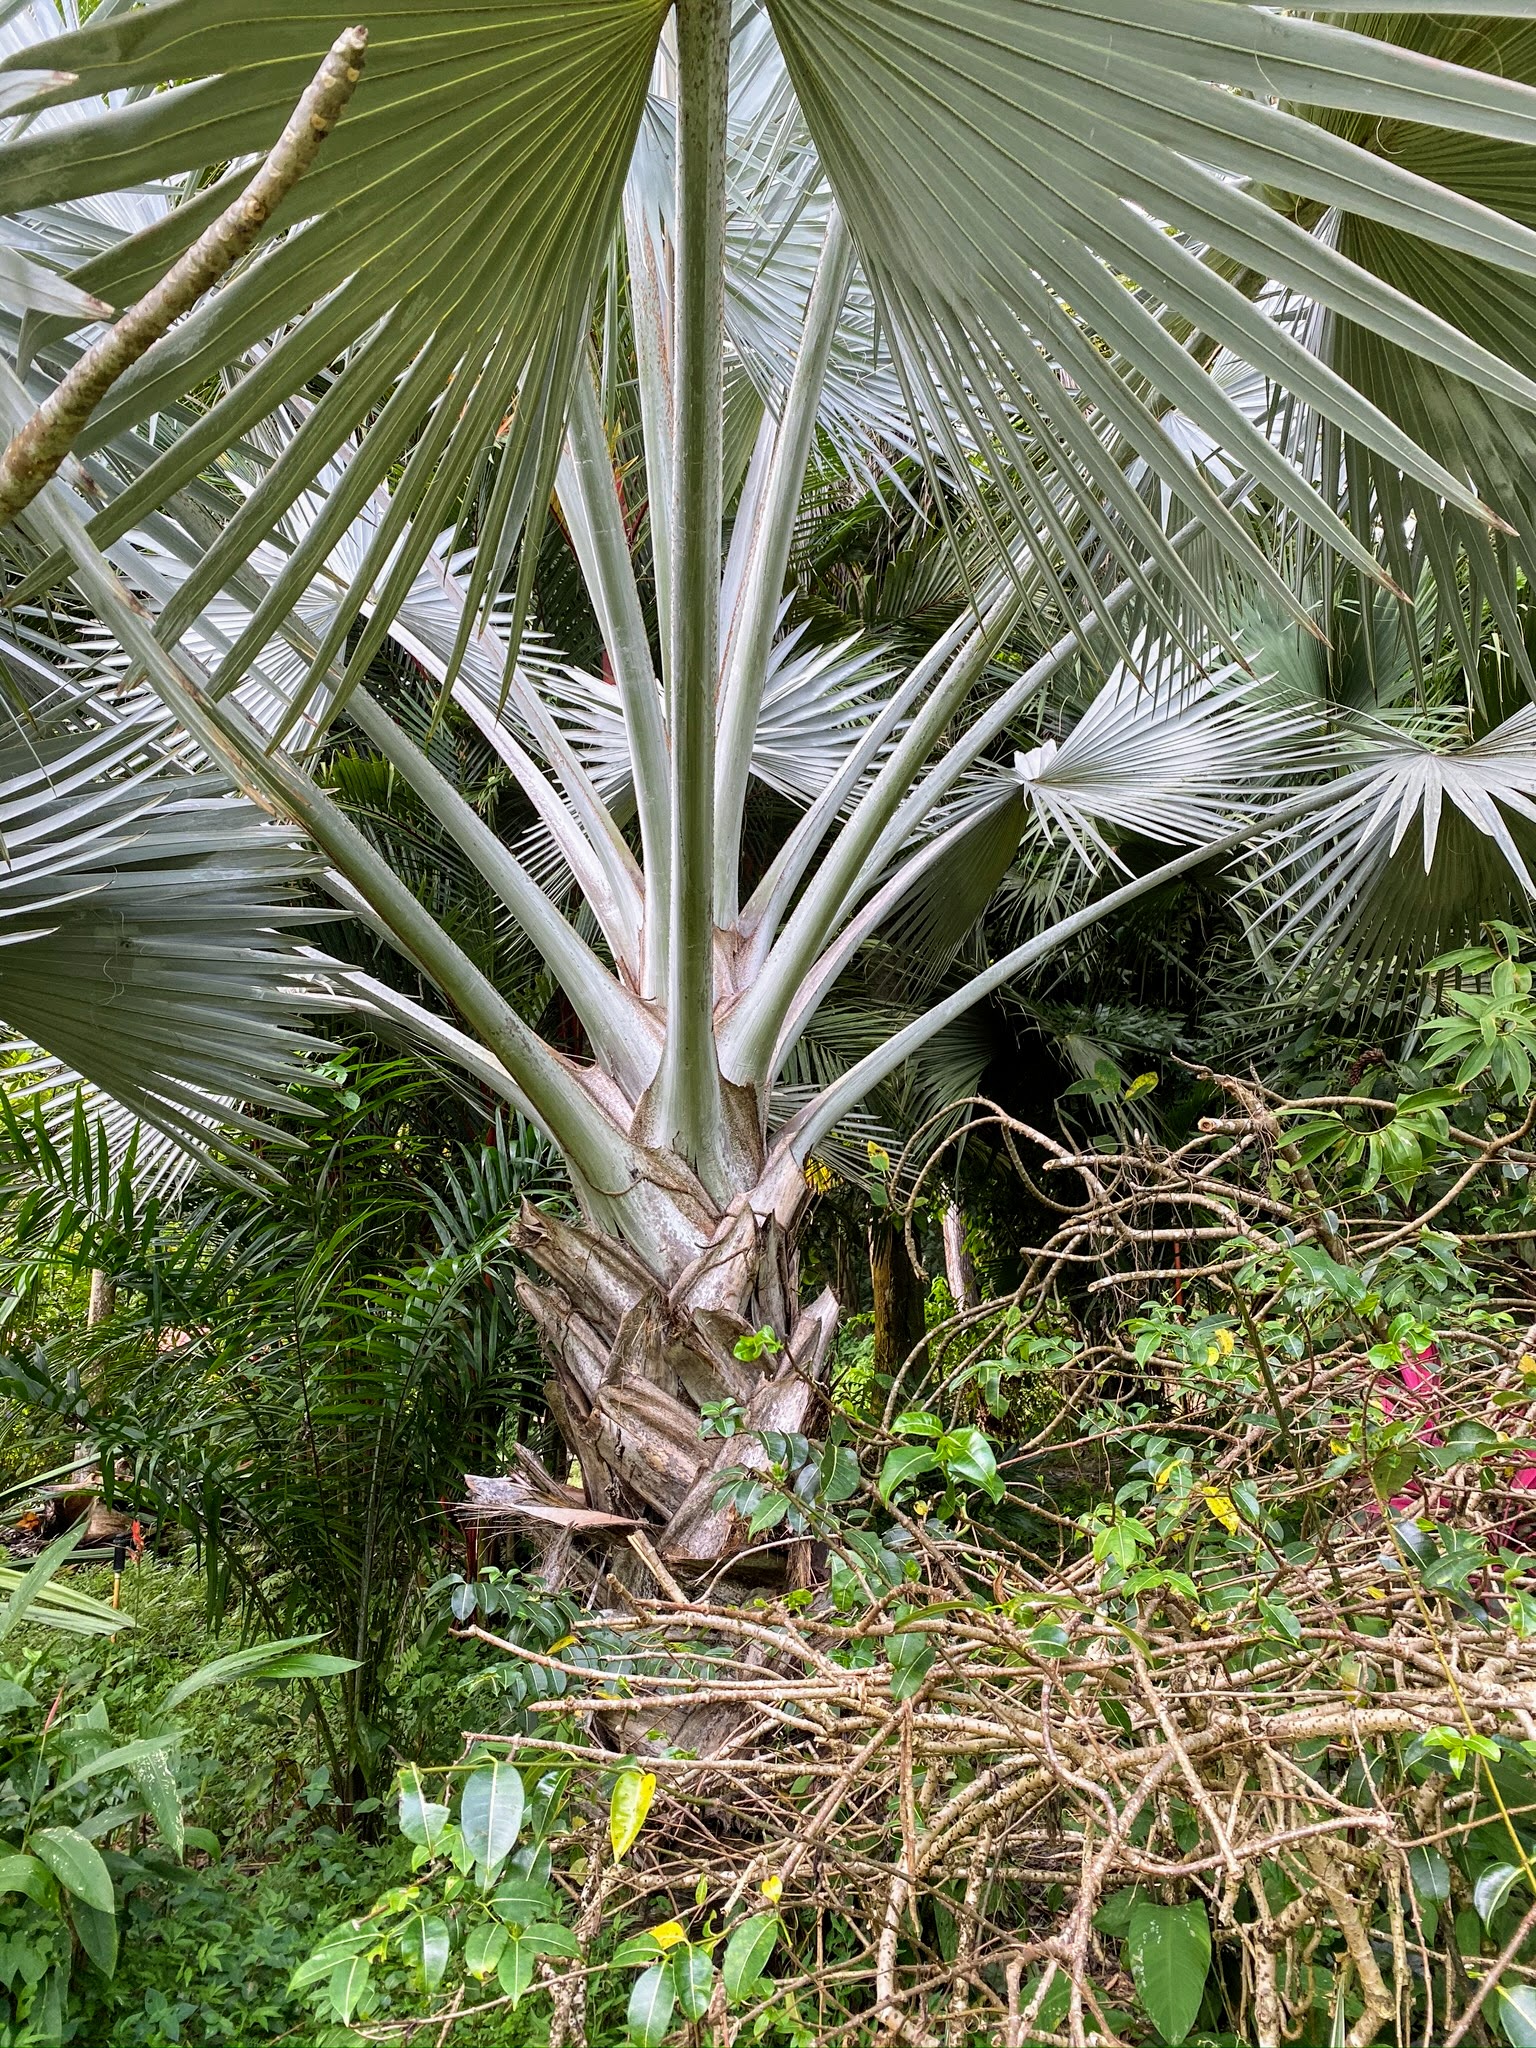
Bismarckia palms, my favorite fan palm, abound in Costa Rica.
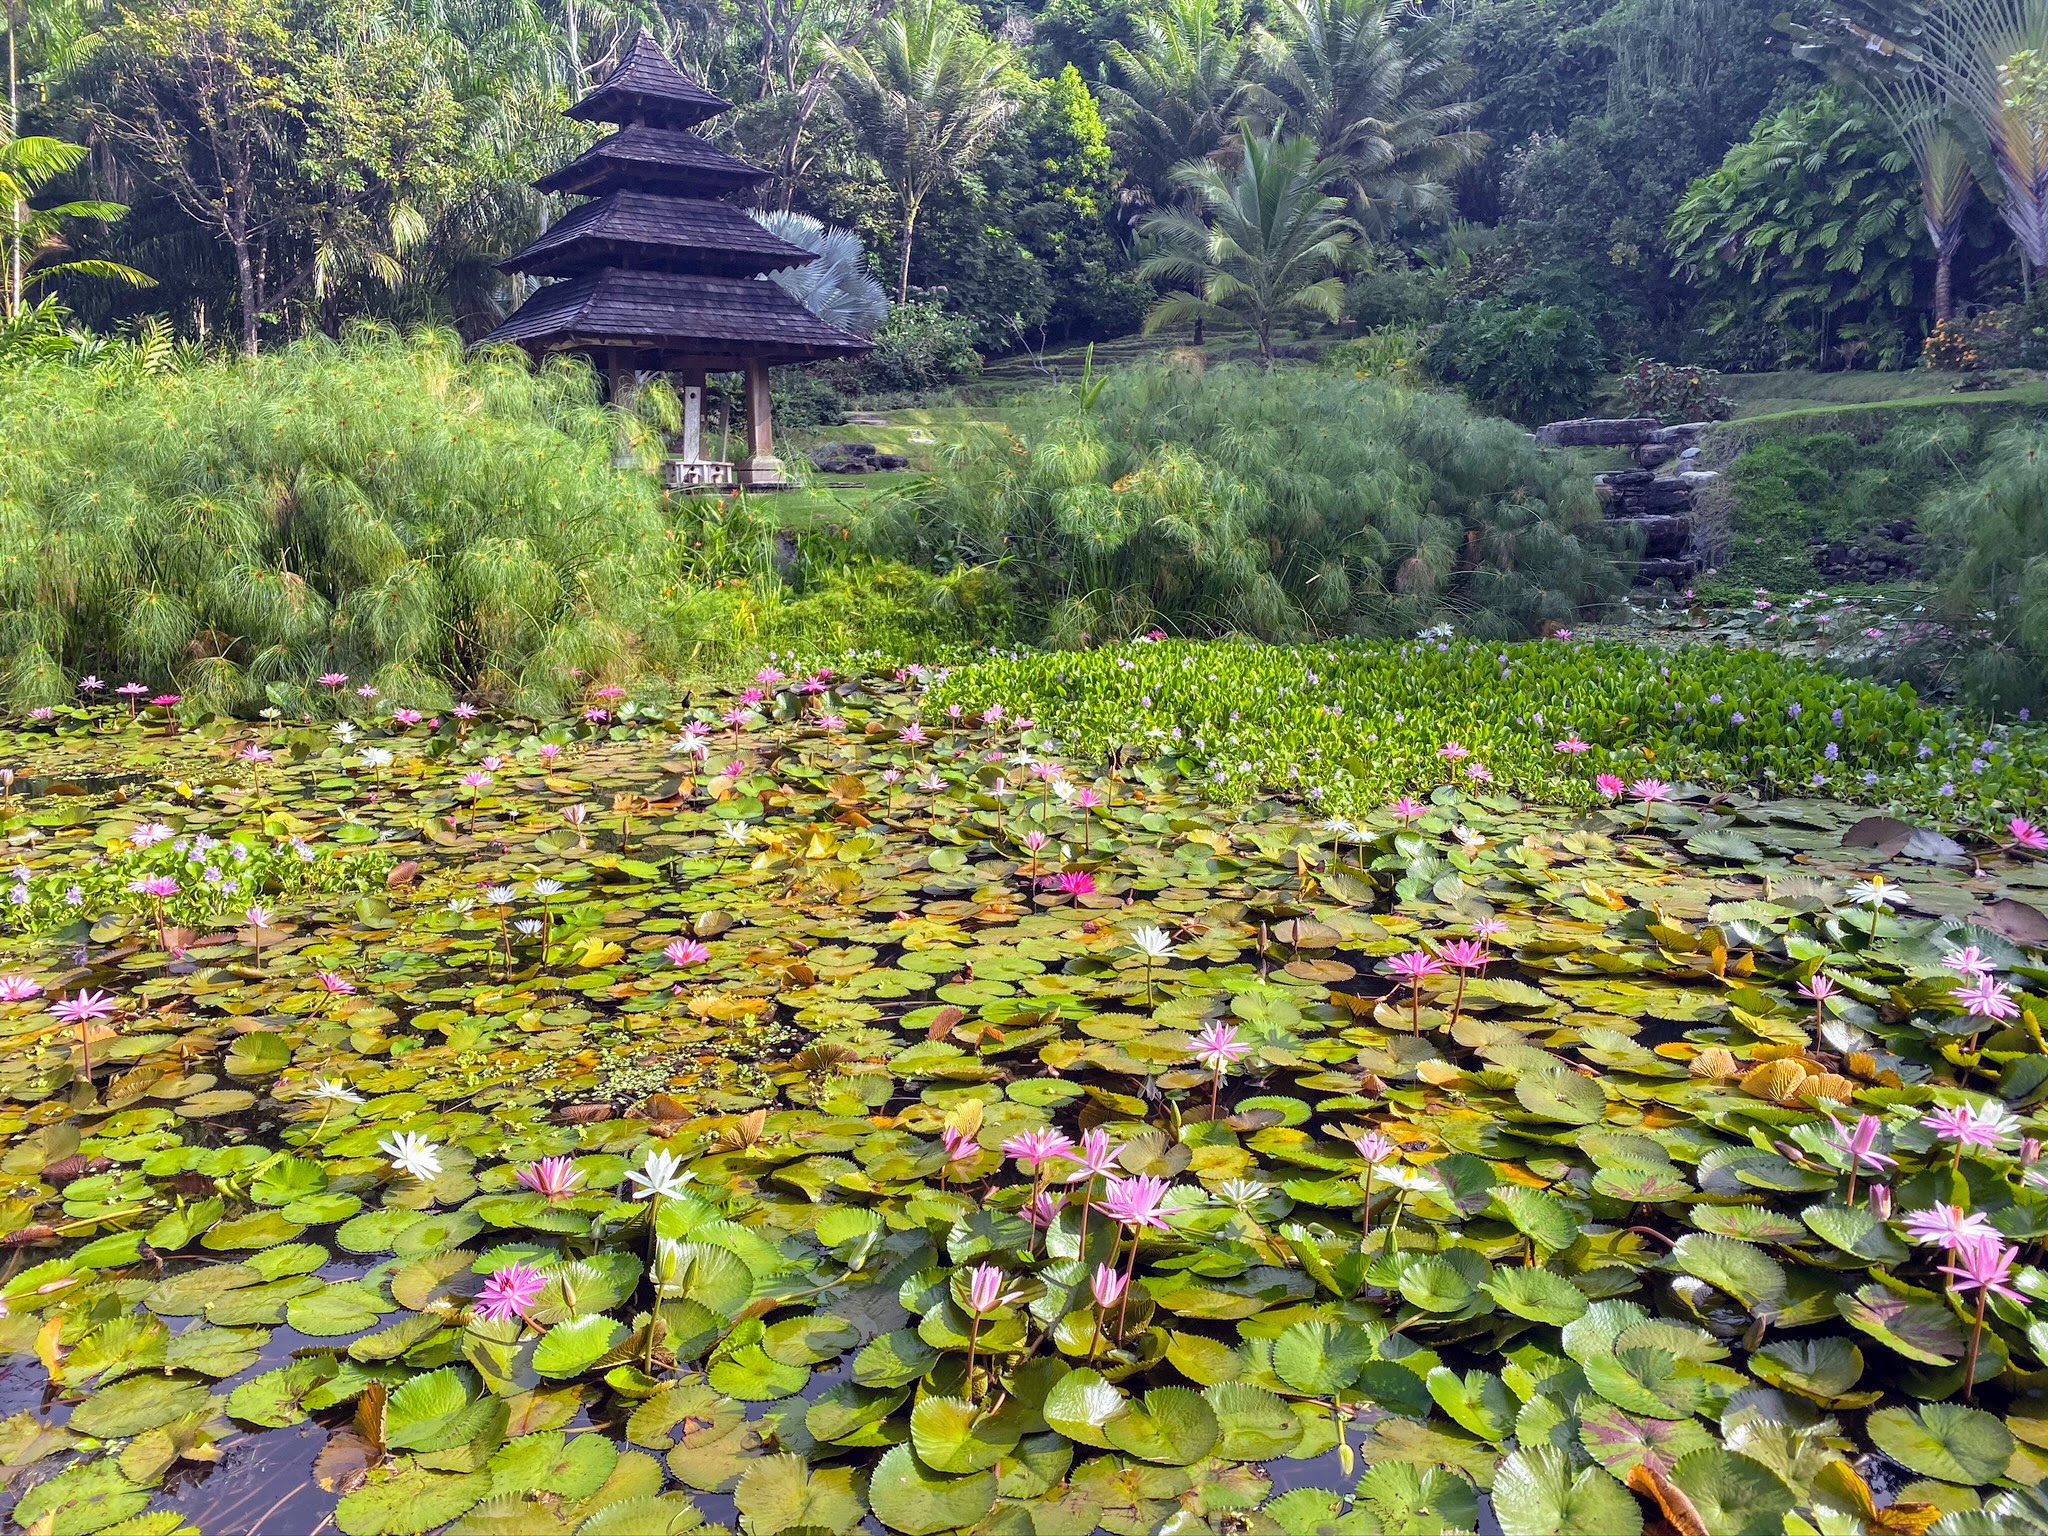
The water lilies are so beautiful – they are in full bloom every morning.
Here’s a closer look at the water lilies, Nymphaea. These are hardy pond plants that live as rhizomatous aquatic herbs in temperate and tropical climates. The family contains five genera with about 70 known species.
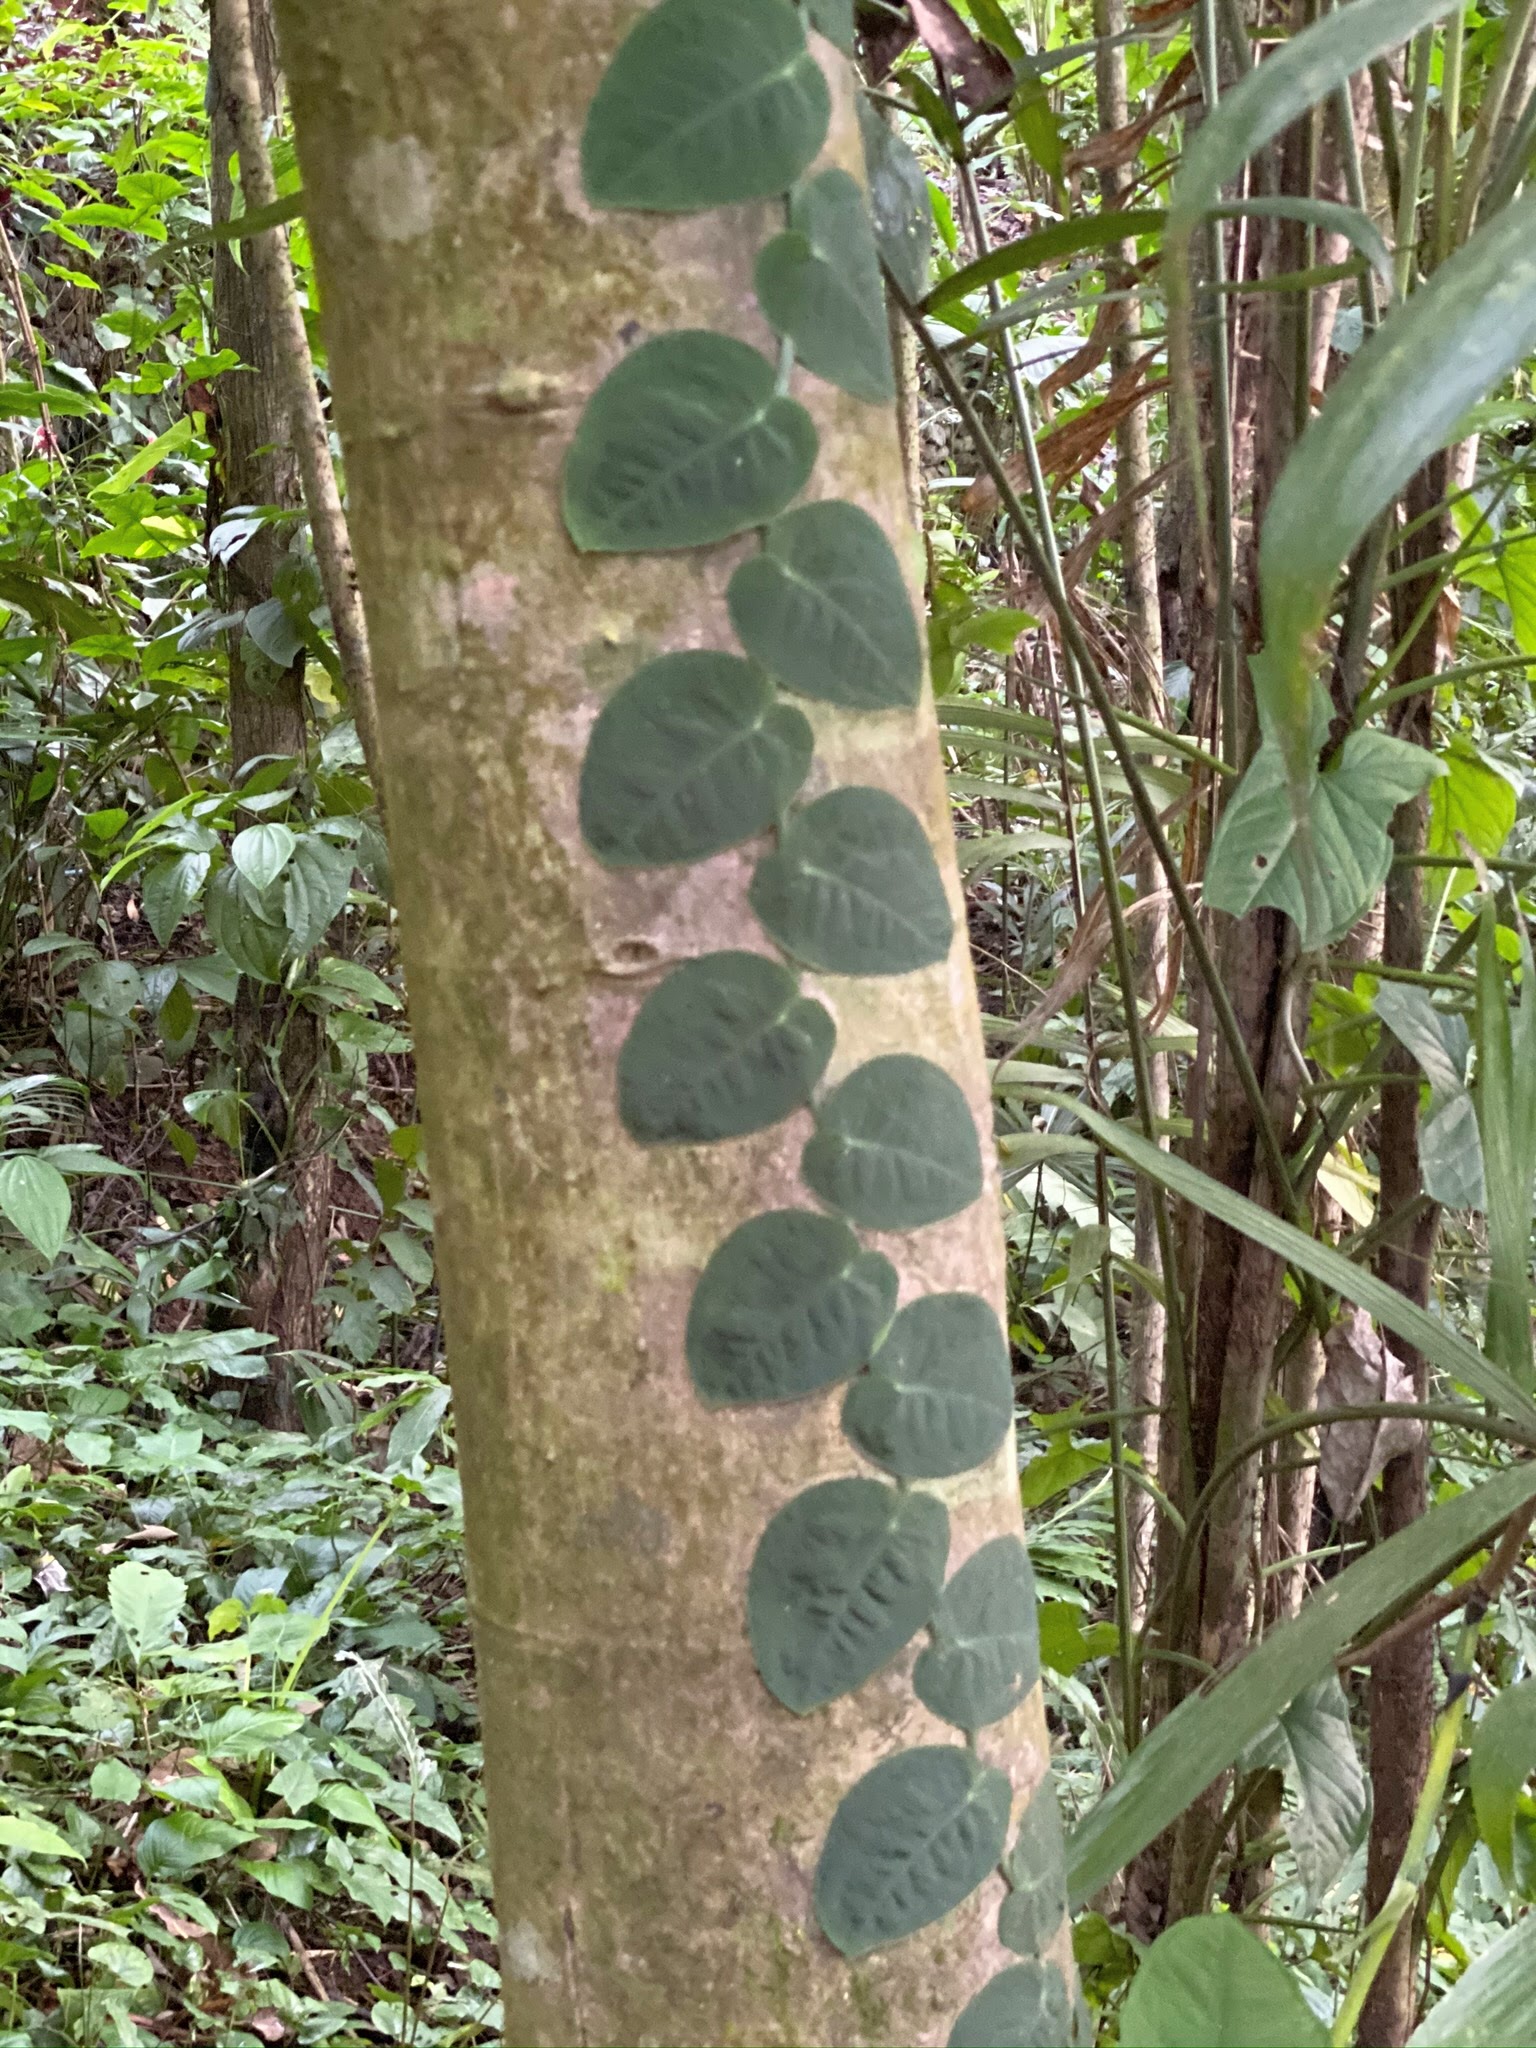
I was so intrigued by this extraordinary vine. Its leaves cling to the tree trunk, all separated and exposed to the light.
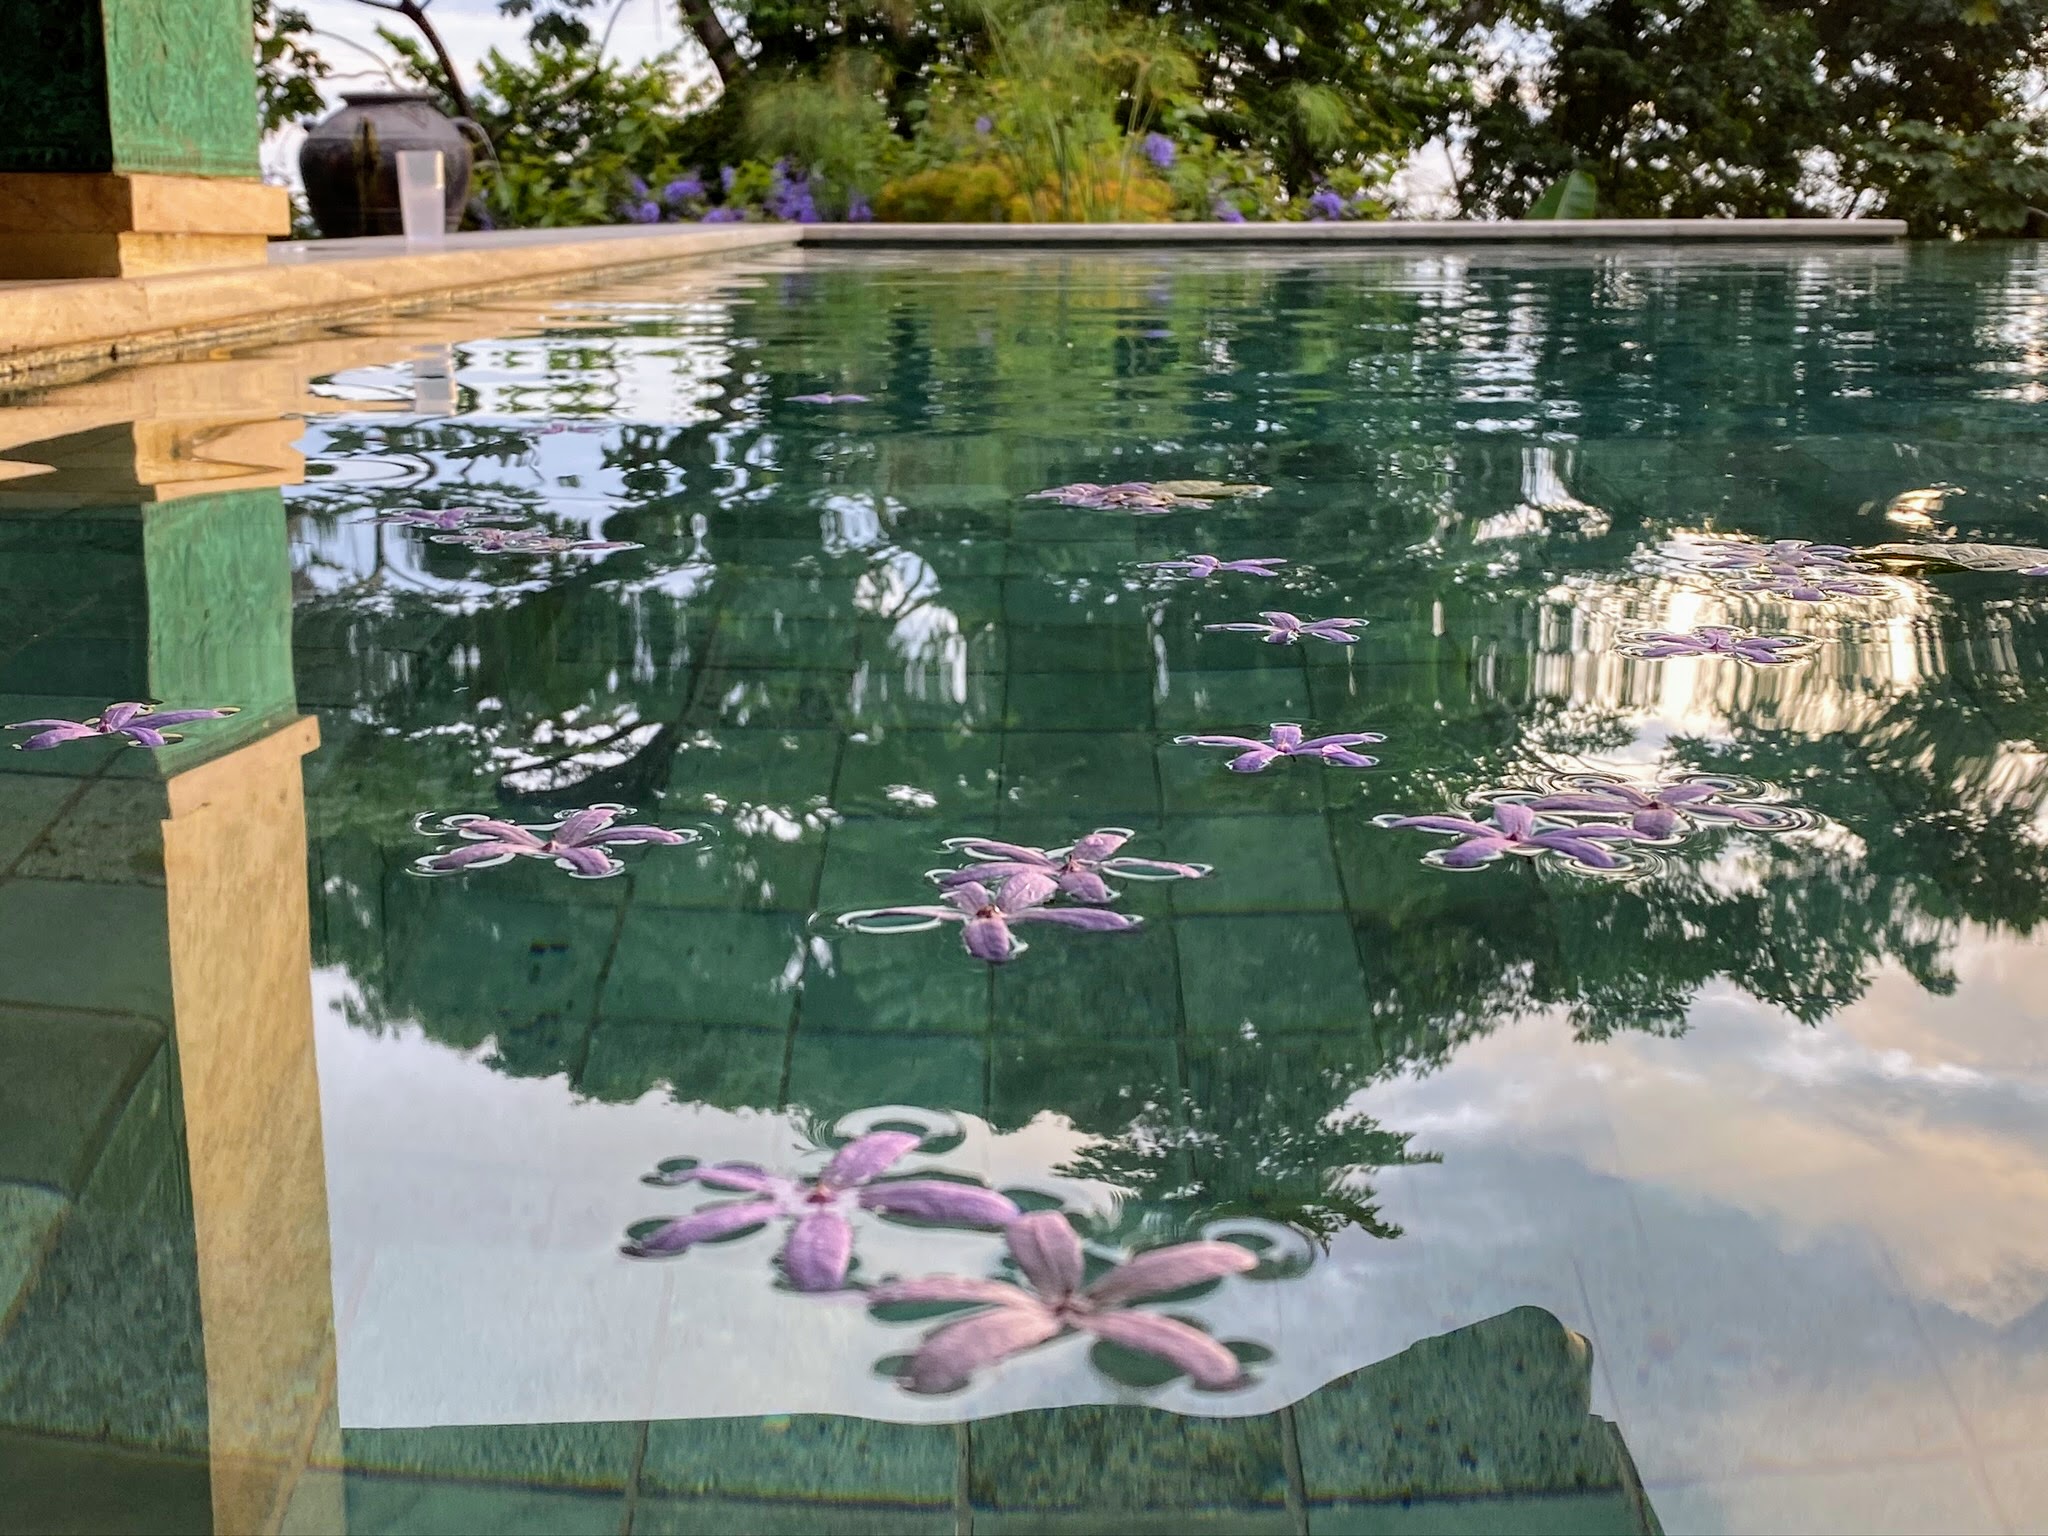
Jude floated purple flowers in the pool. She also loves photography and took this picture herself.
And here is another photo by Jude.
The flowers are picked off this pergola – the gardens were so well-maintained – everything was groomed and swept every day.
Here is a beautiful sunset seen from the infinity-edge pool. The sunsets were so stunning.
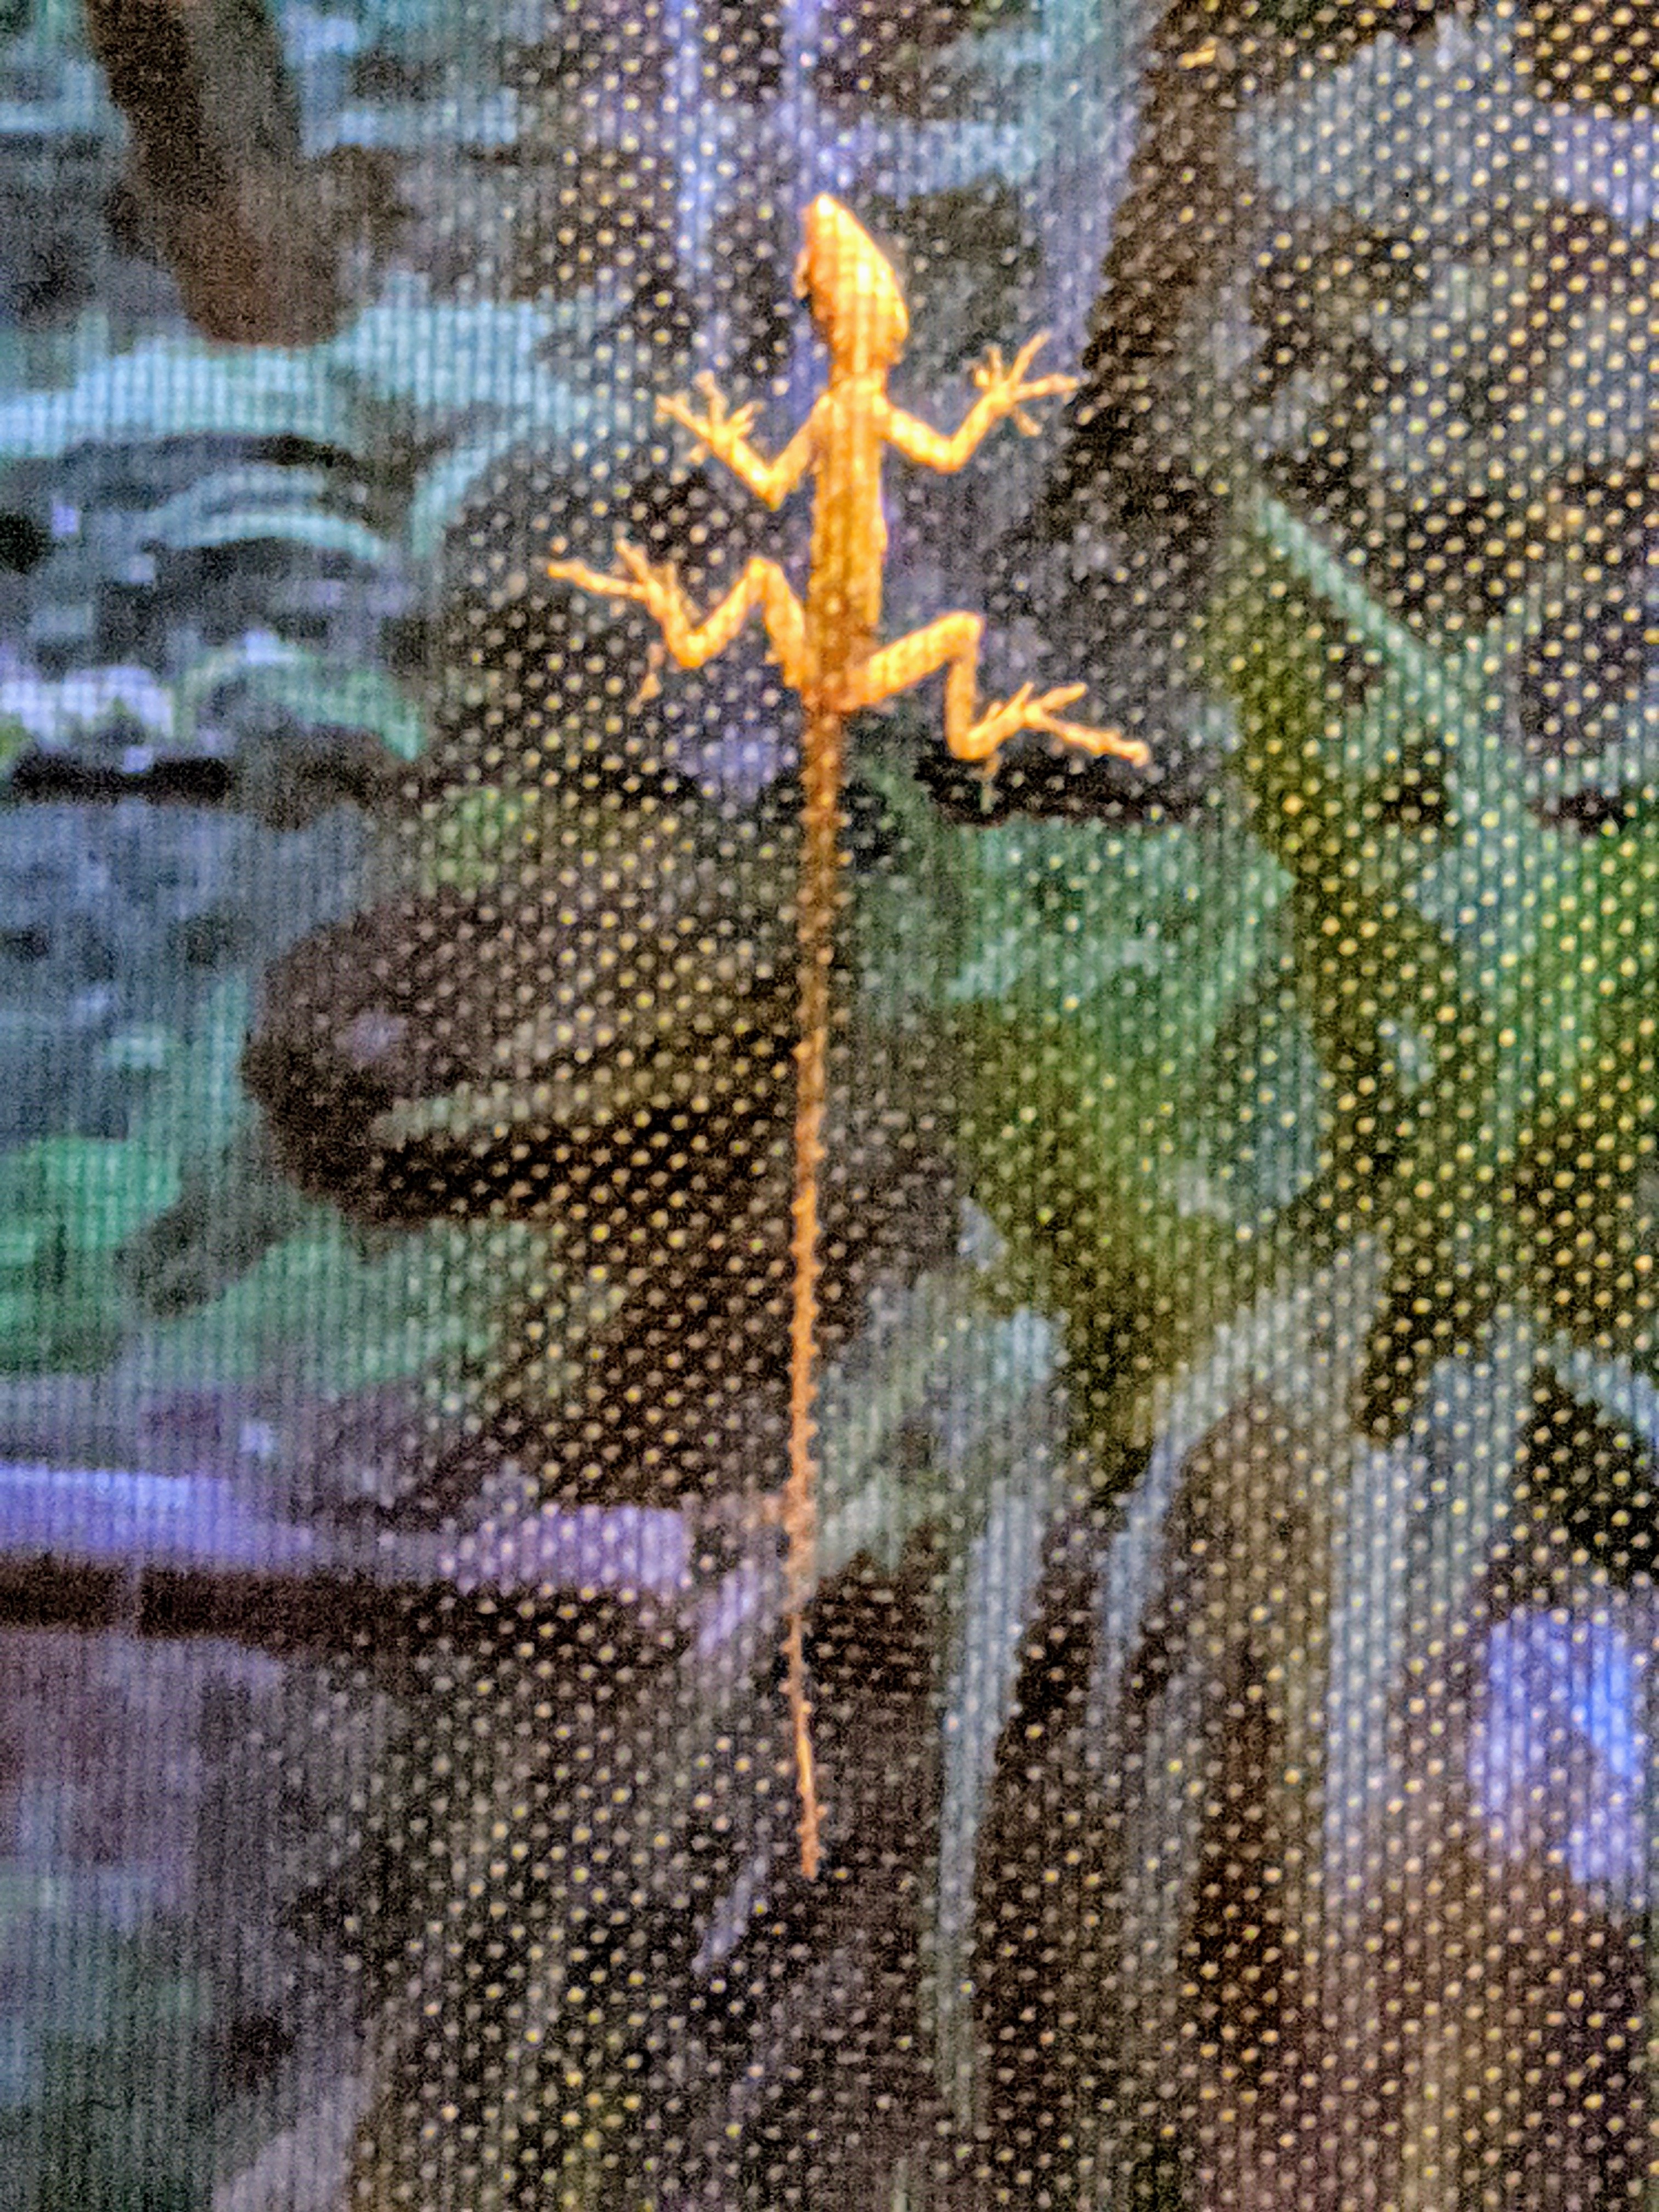
Here is a photo I took one early morning of a gecko on the screen. It reminded me of an Aztec lizard print.
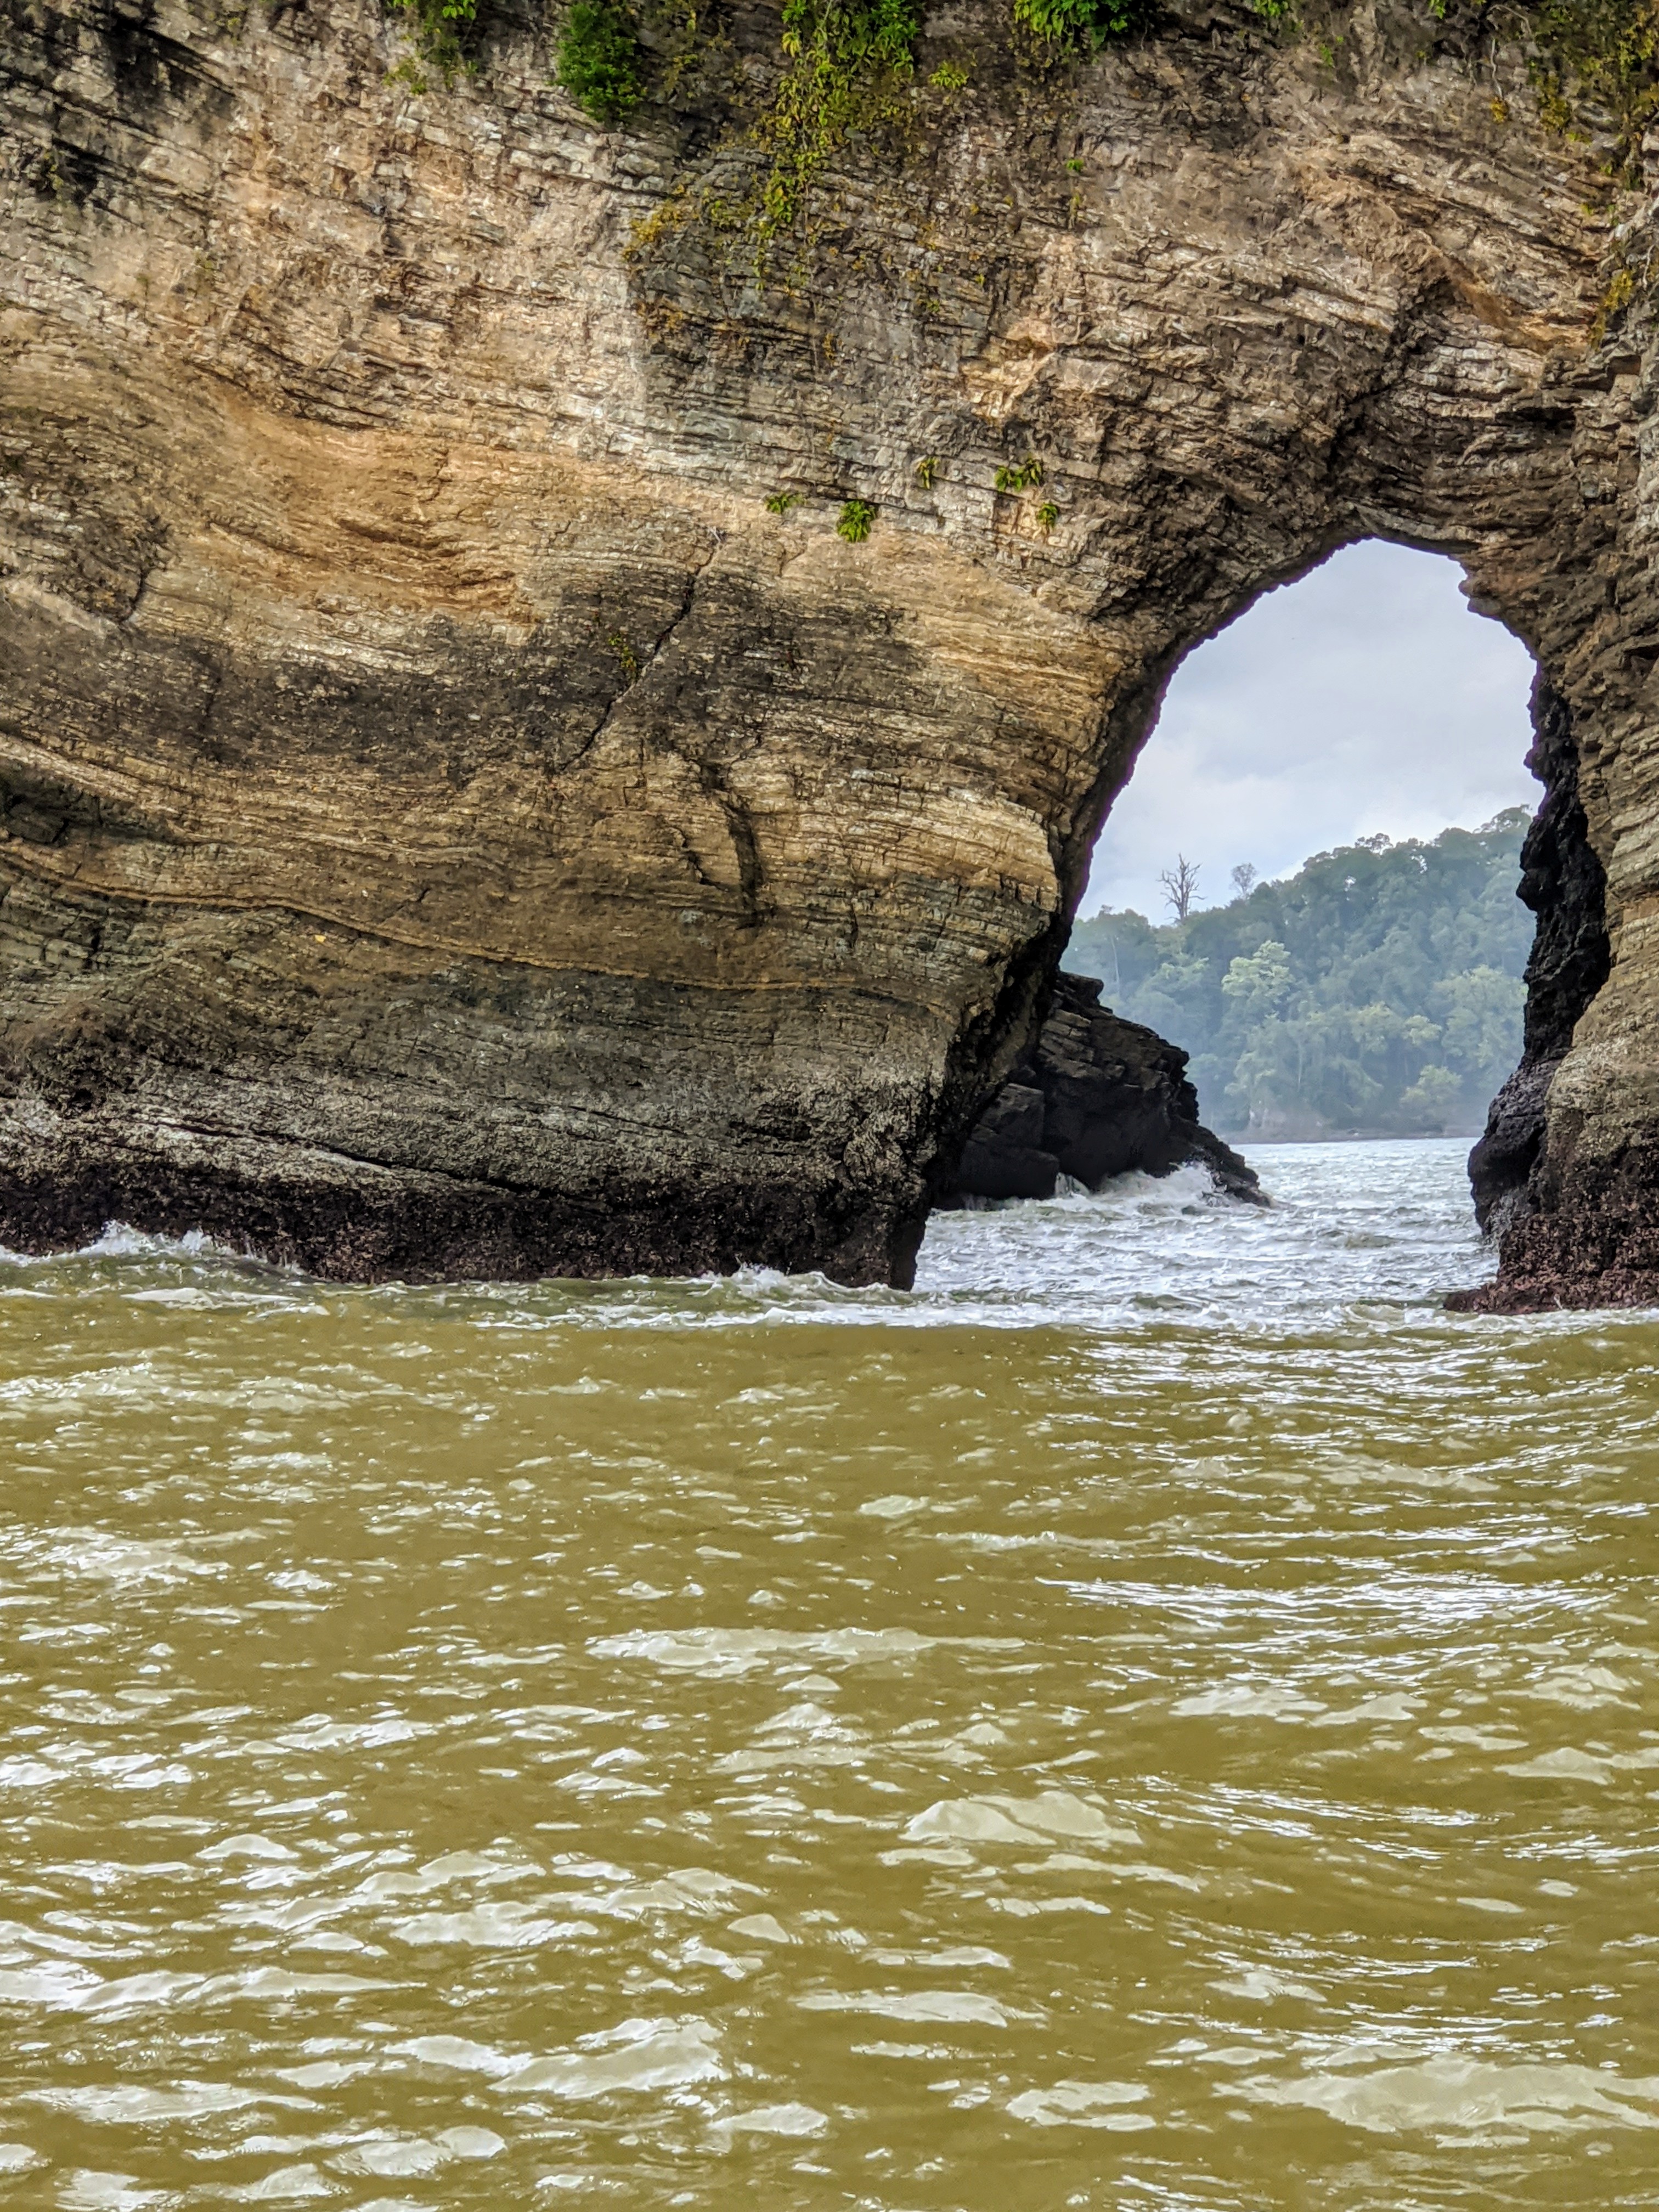
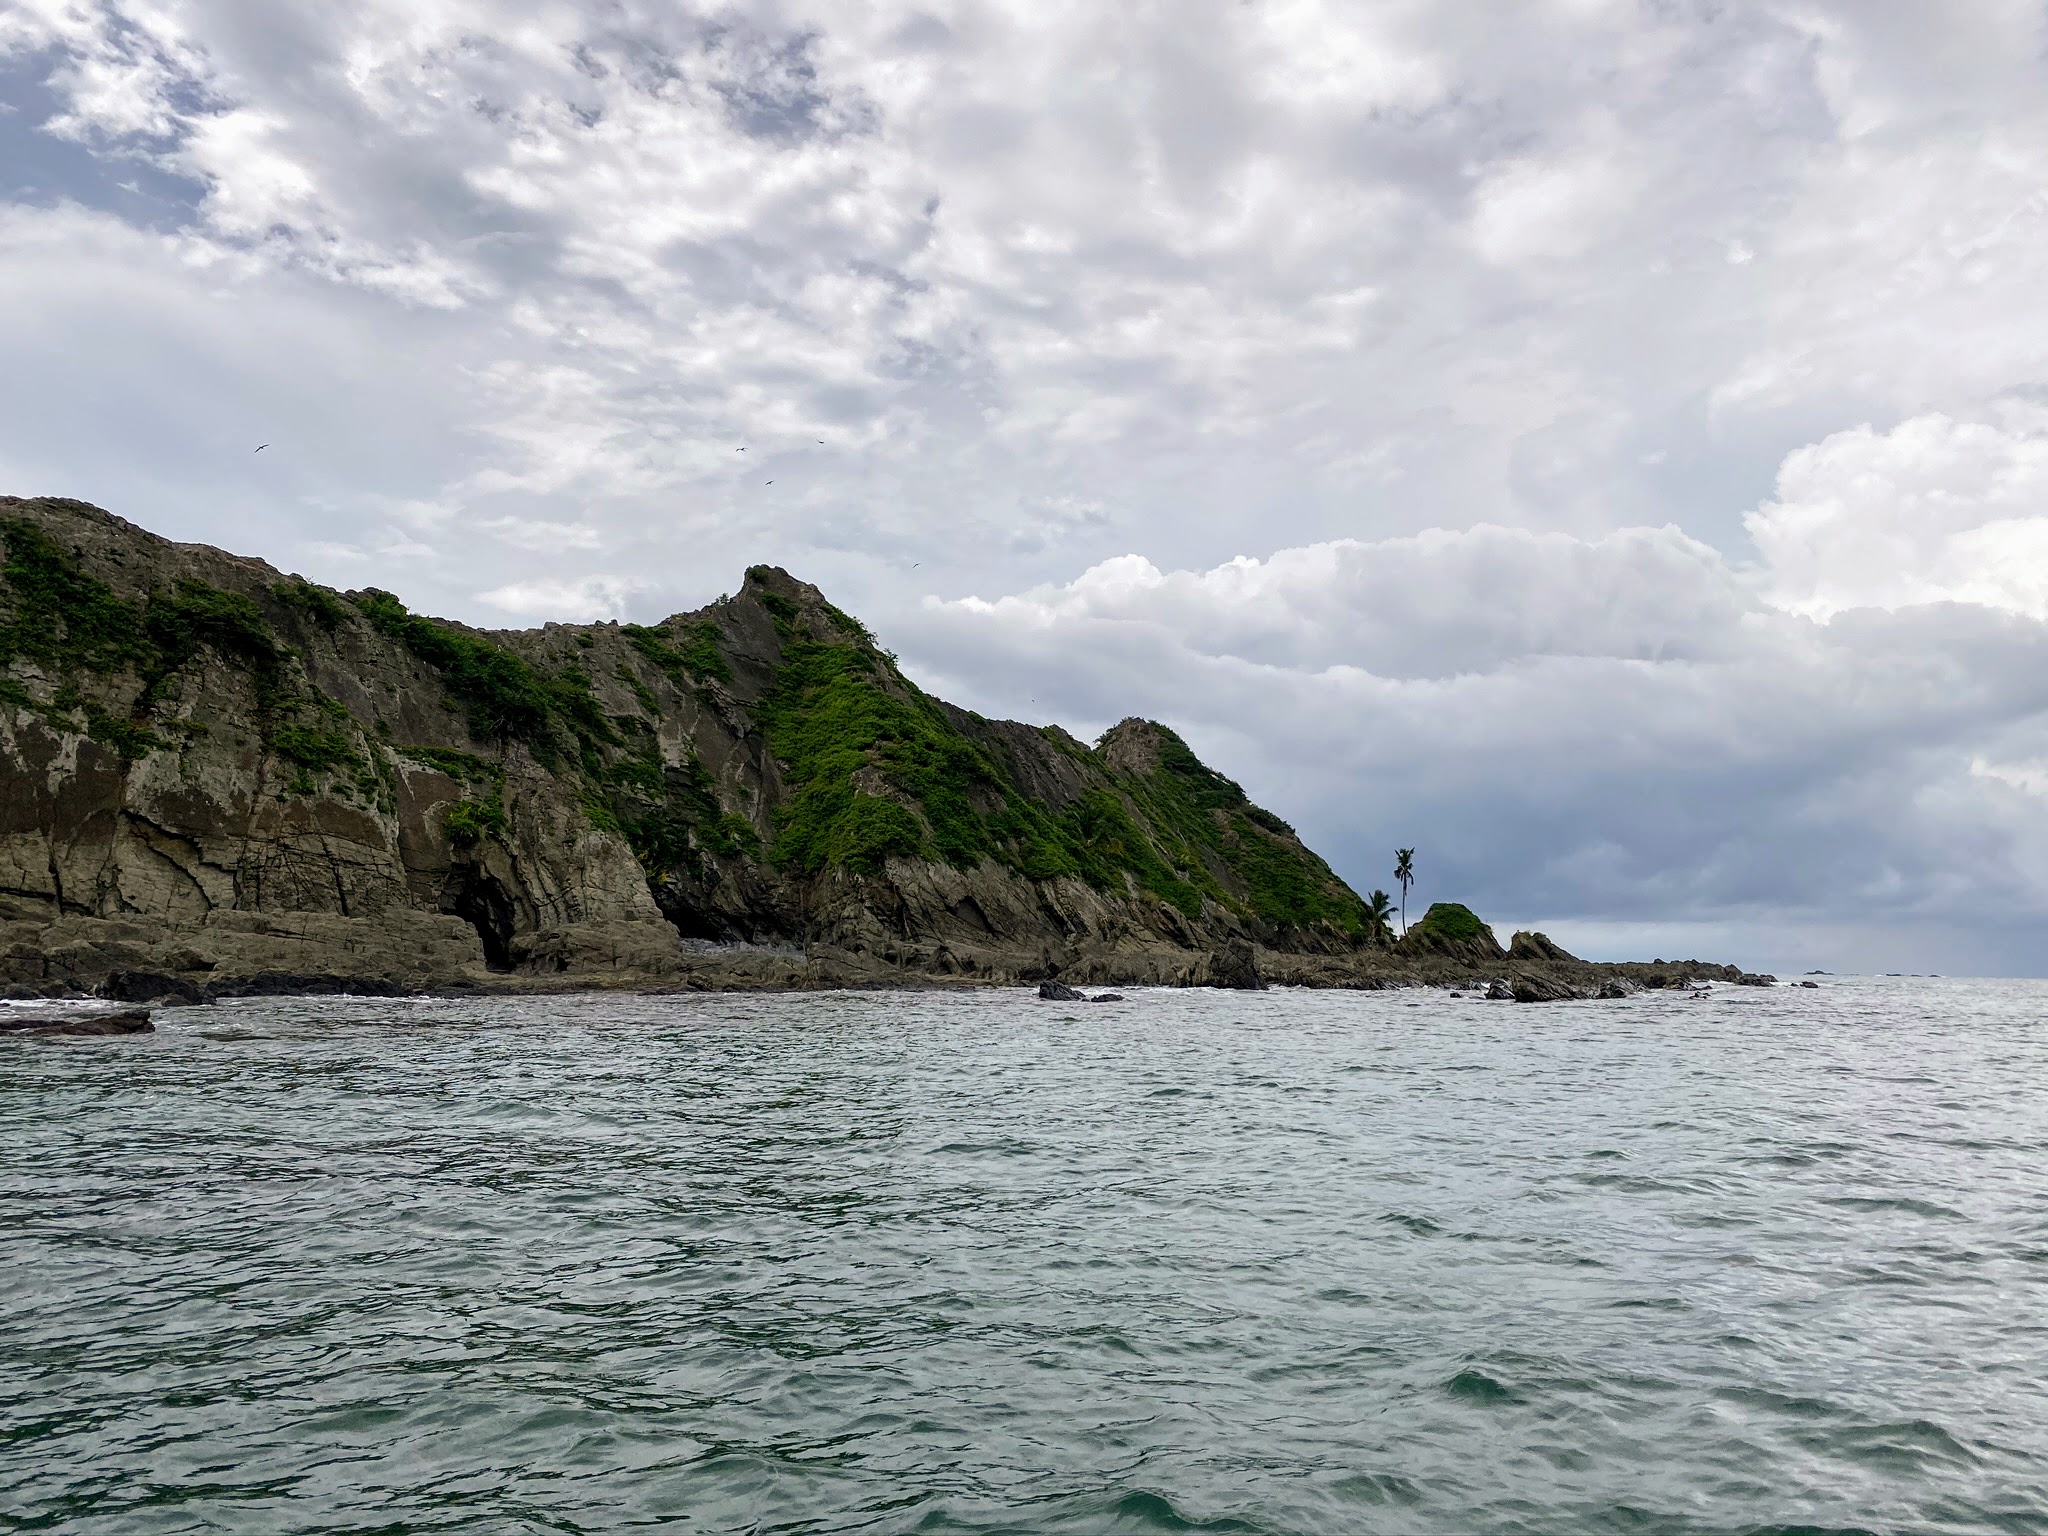
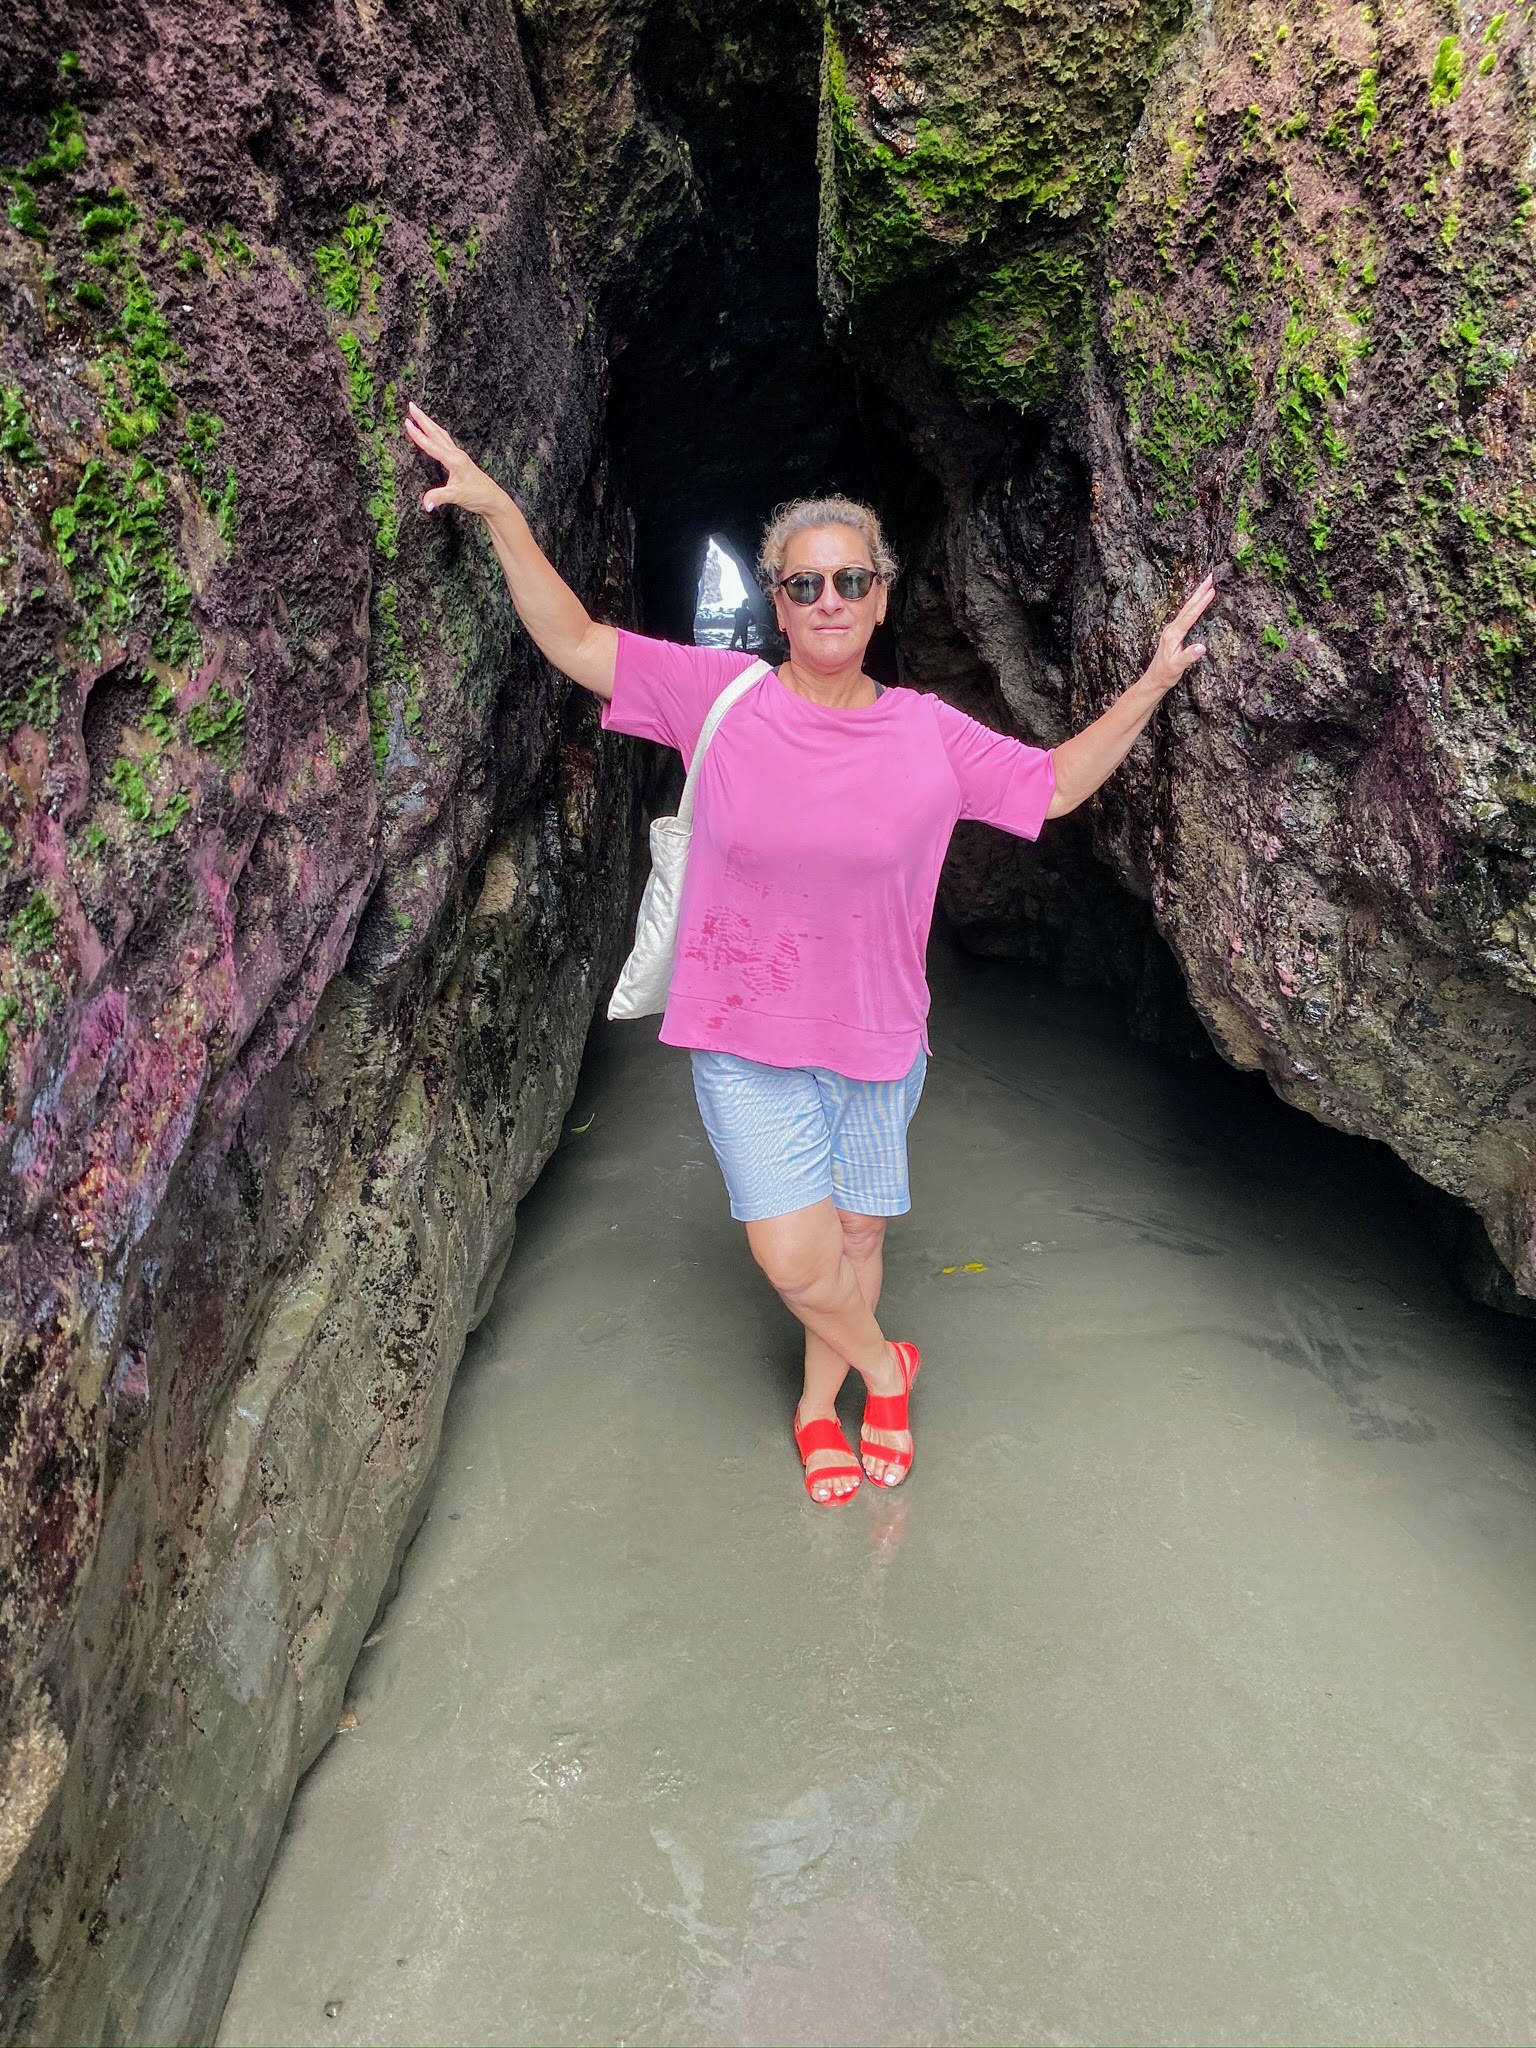
We also visited Playa Ventanas. The name comes from the caves that look like little windows – ventanas means windows in Spanish. The caves of Playa Ventanas are natural formations.
Our boat was able to go through some of the them – this can only be done at low tide.
Playa Ventanas is located south of Dominical and Uvita and north of Ojochal and San Buenas.
At both ends of the beach are huge boulders covered with lush vegetation that extends to the sea.
Here is another view of one of the “windows.”
Here is Milena standing at the entrance of one of the caves. During the low tide, one can walk through and see the waves breaking inside.
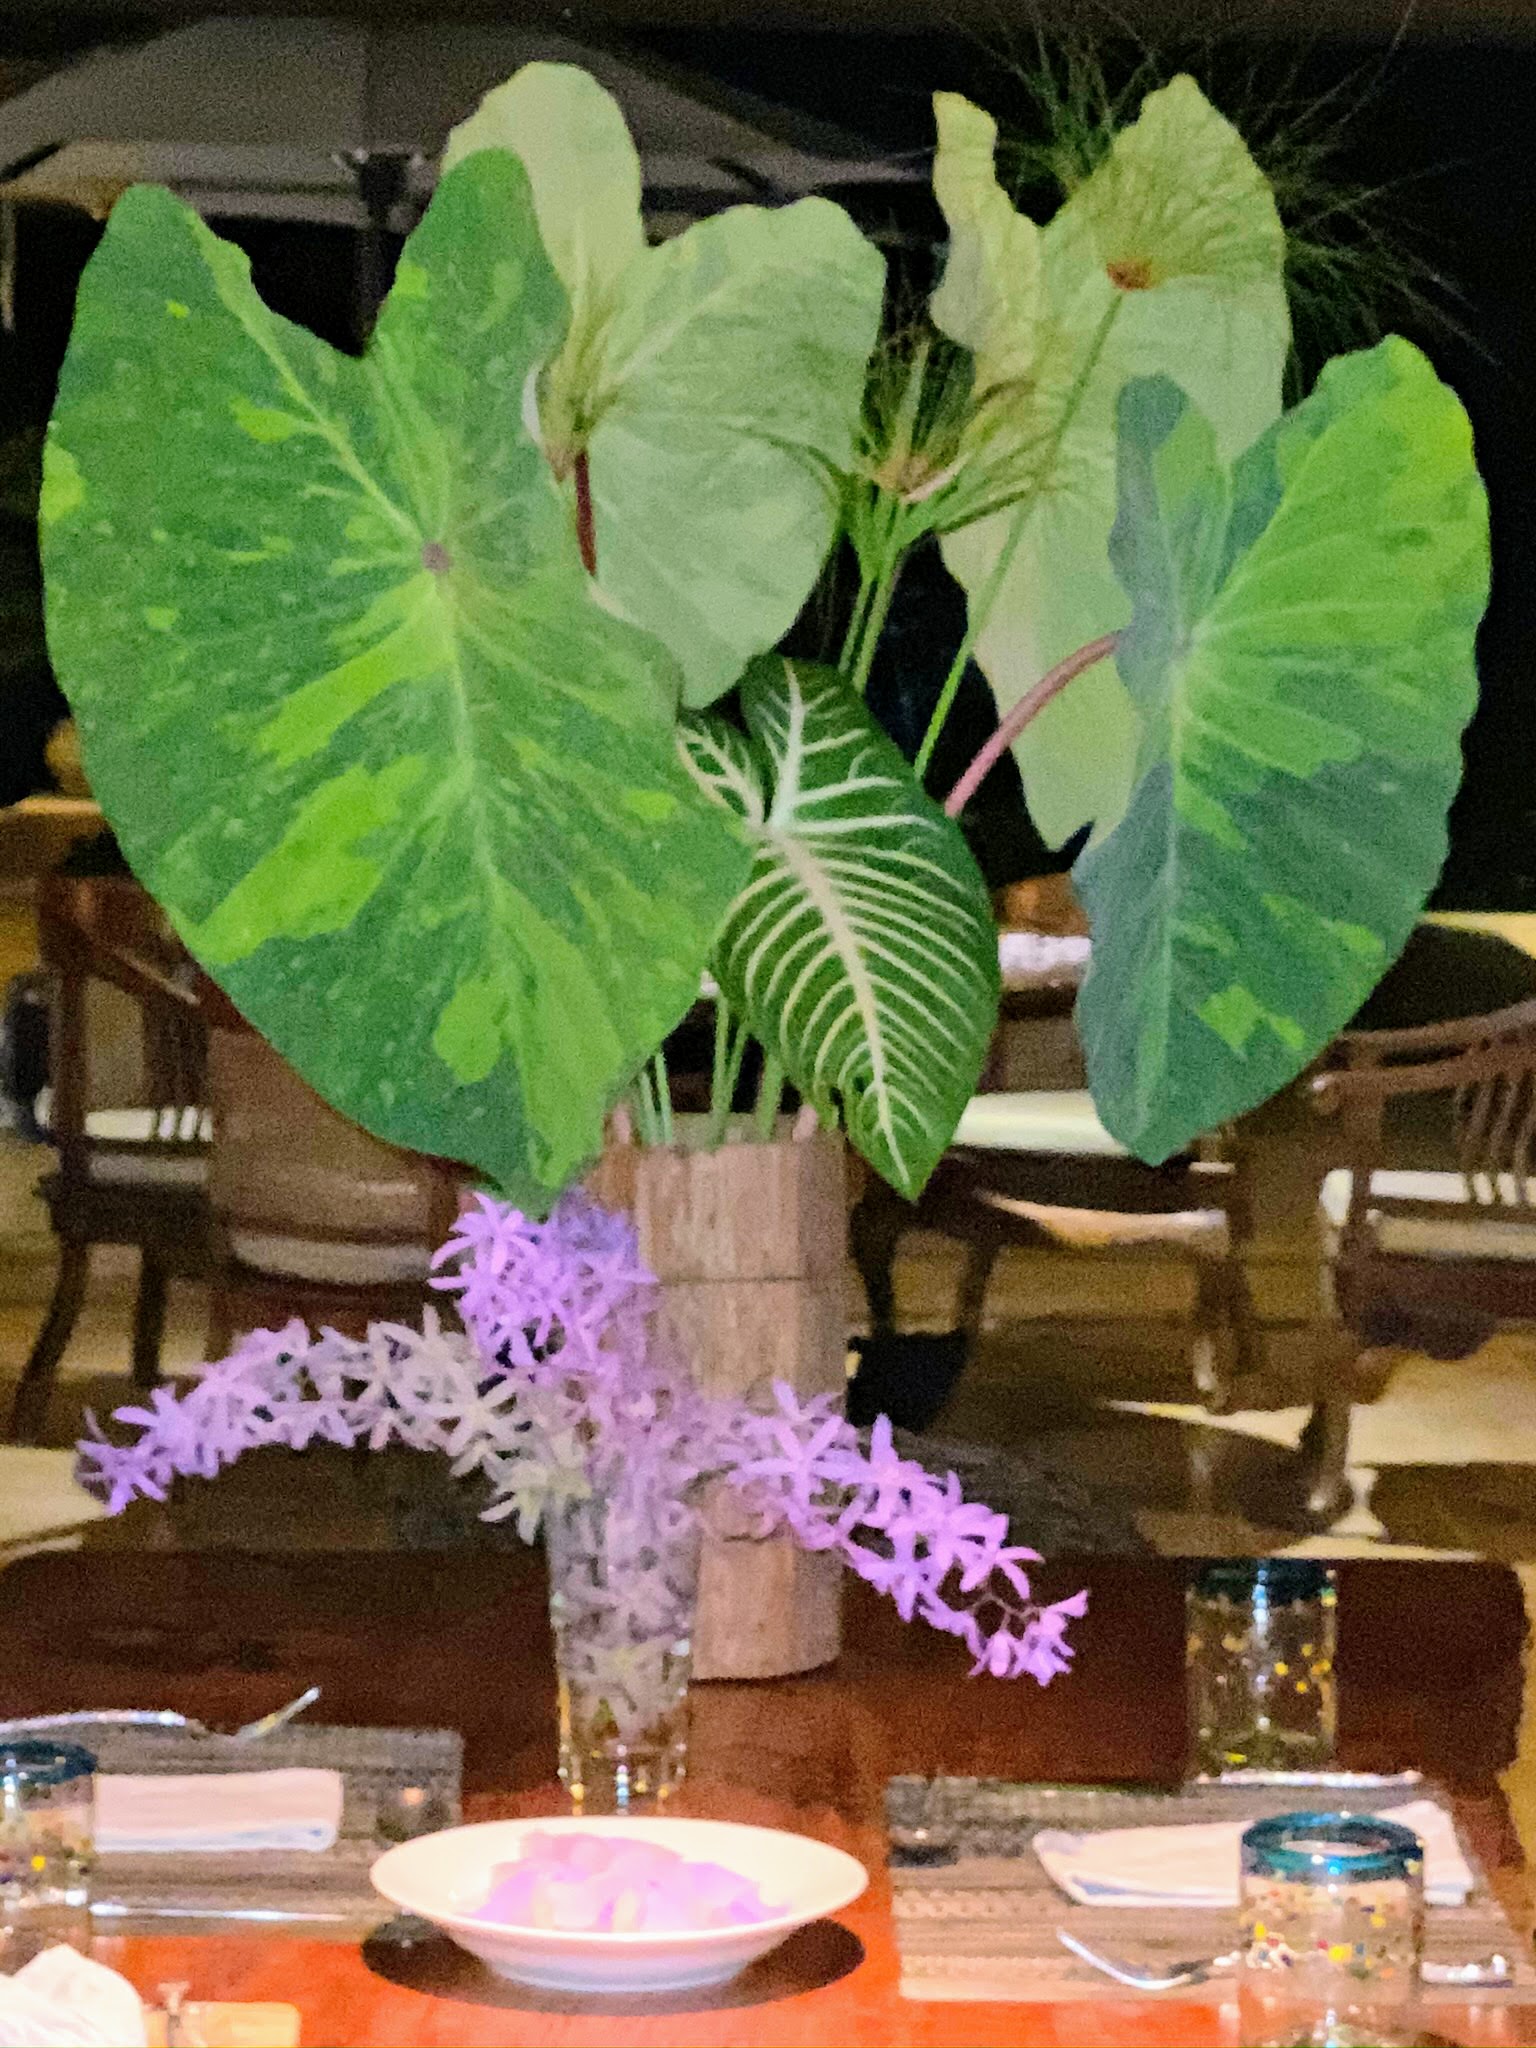
At night, we enjoyed dinner back at Los Elementos. Jude and our friend, Ari, who also accompanied us on the trip, made these arrangements for the table. In my next blog, I will share more photos of our holiday in Costa Rica.
If you're traveling to see loved ones today, please be careful and safe. Here's another fun holiday memory. This blog was originally posted on Dec. 21, 2019. Enjoy!
The annual holiday party at my farm is always memorable and fun.
At this gathering, I invited more than 200 guests to wander in and out of three buildings, each with a festive theme. My Winter House was filled with delicious and savory dishes. Fancy sweets and eggnog were served in my Summer House, and the little Tenant House offered an array of beautiful and whimsical holiday cookies. Friends, family, and neighbors also enjoyed music from a jazz guitarist and photos with Santa! It was a cold day, but everyone had a most wonderful time!
Enjoy these photos.
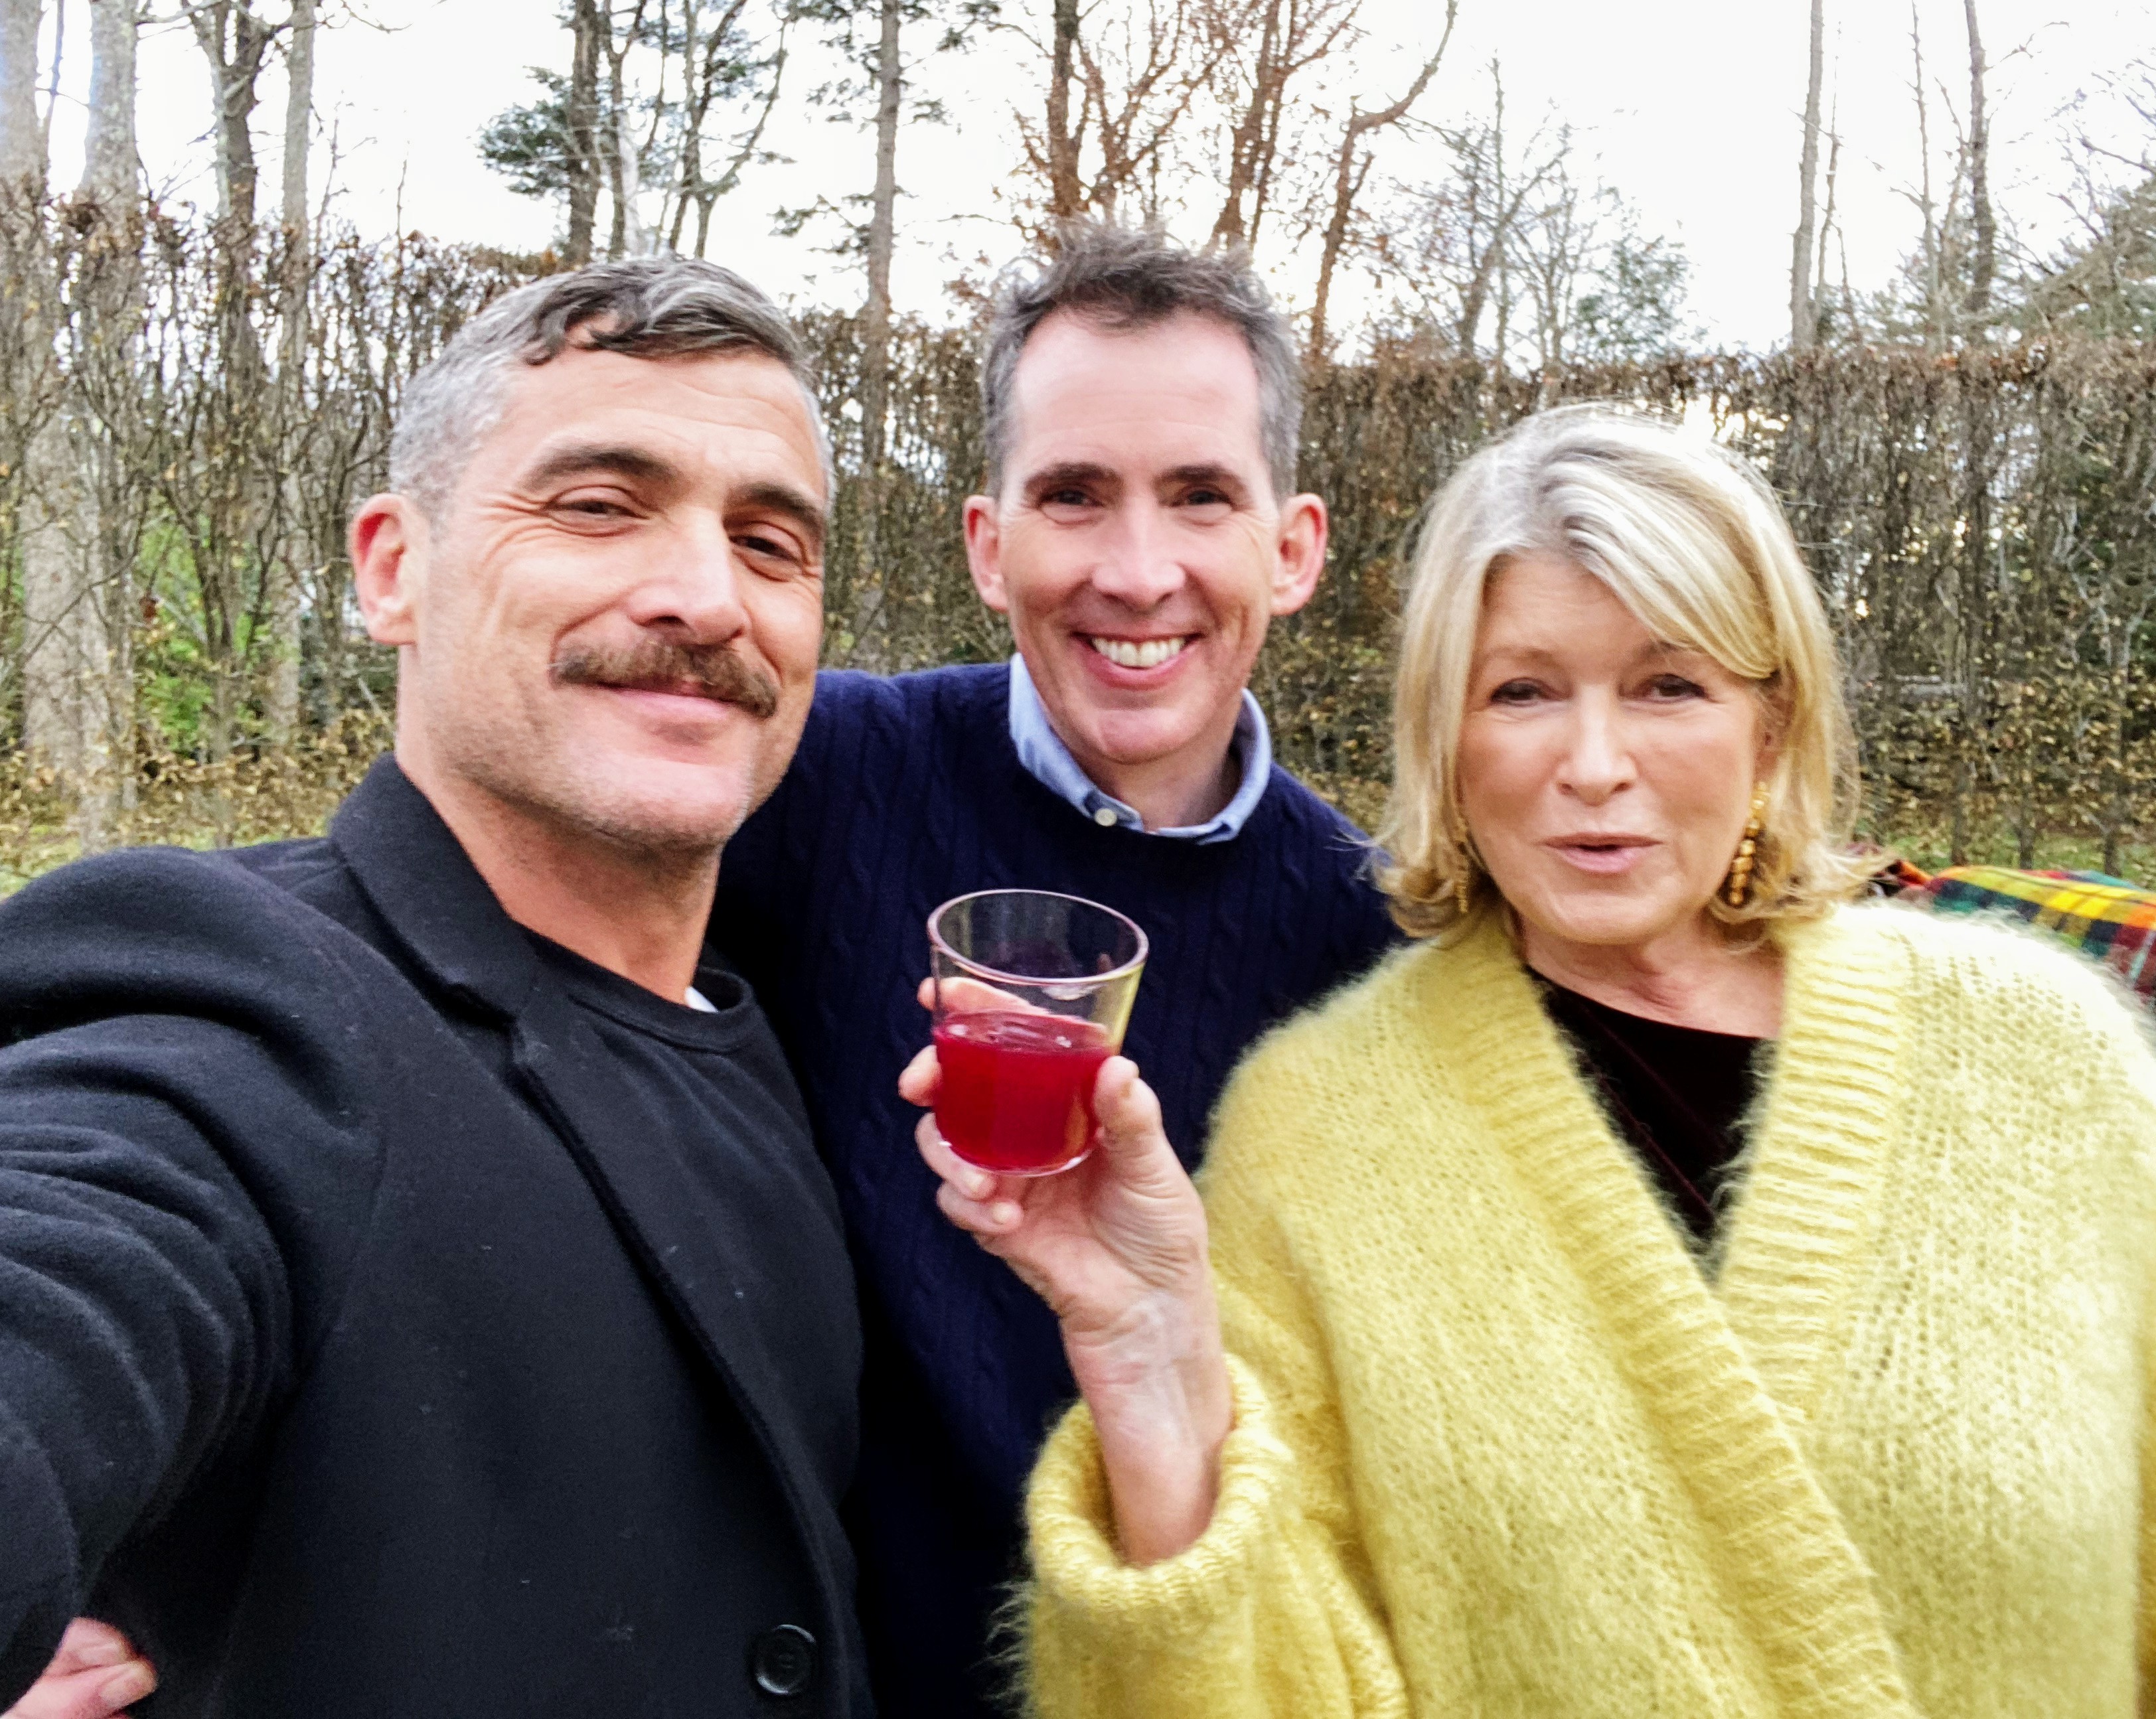
Here I am with Douglas Friedman and Kevin Sharkey on this day of merriment and good cheer. See more fun selfies of the three of us by @DouglasFriedman on my Instagram page @MarthaStewart48. And you can always find fun photos on Kevin’s Instagram page @seenbysharkey.
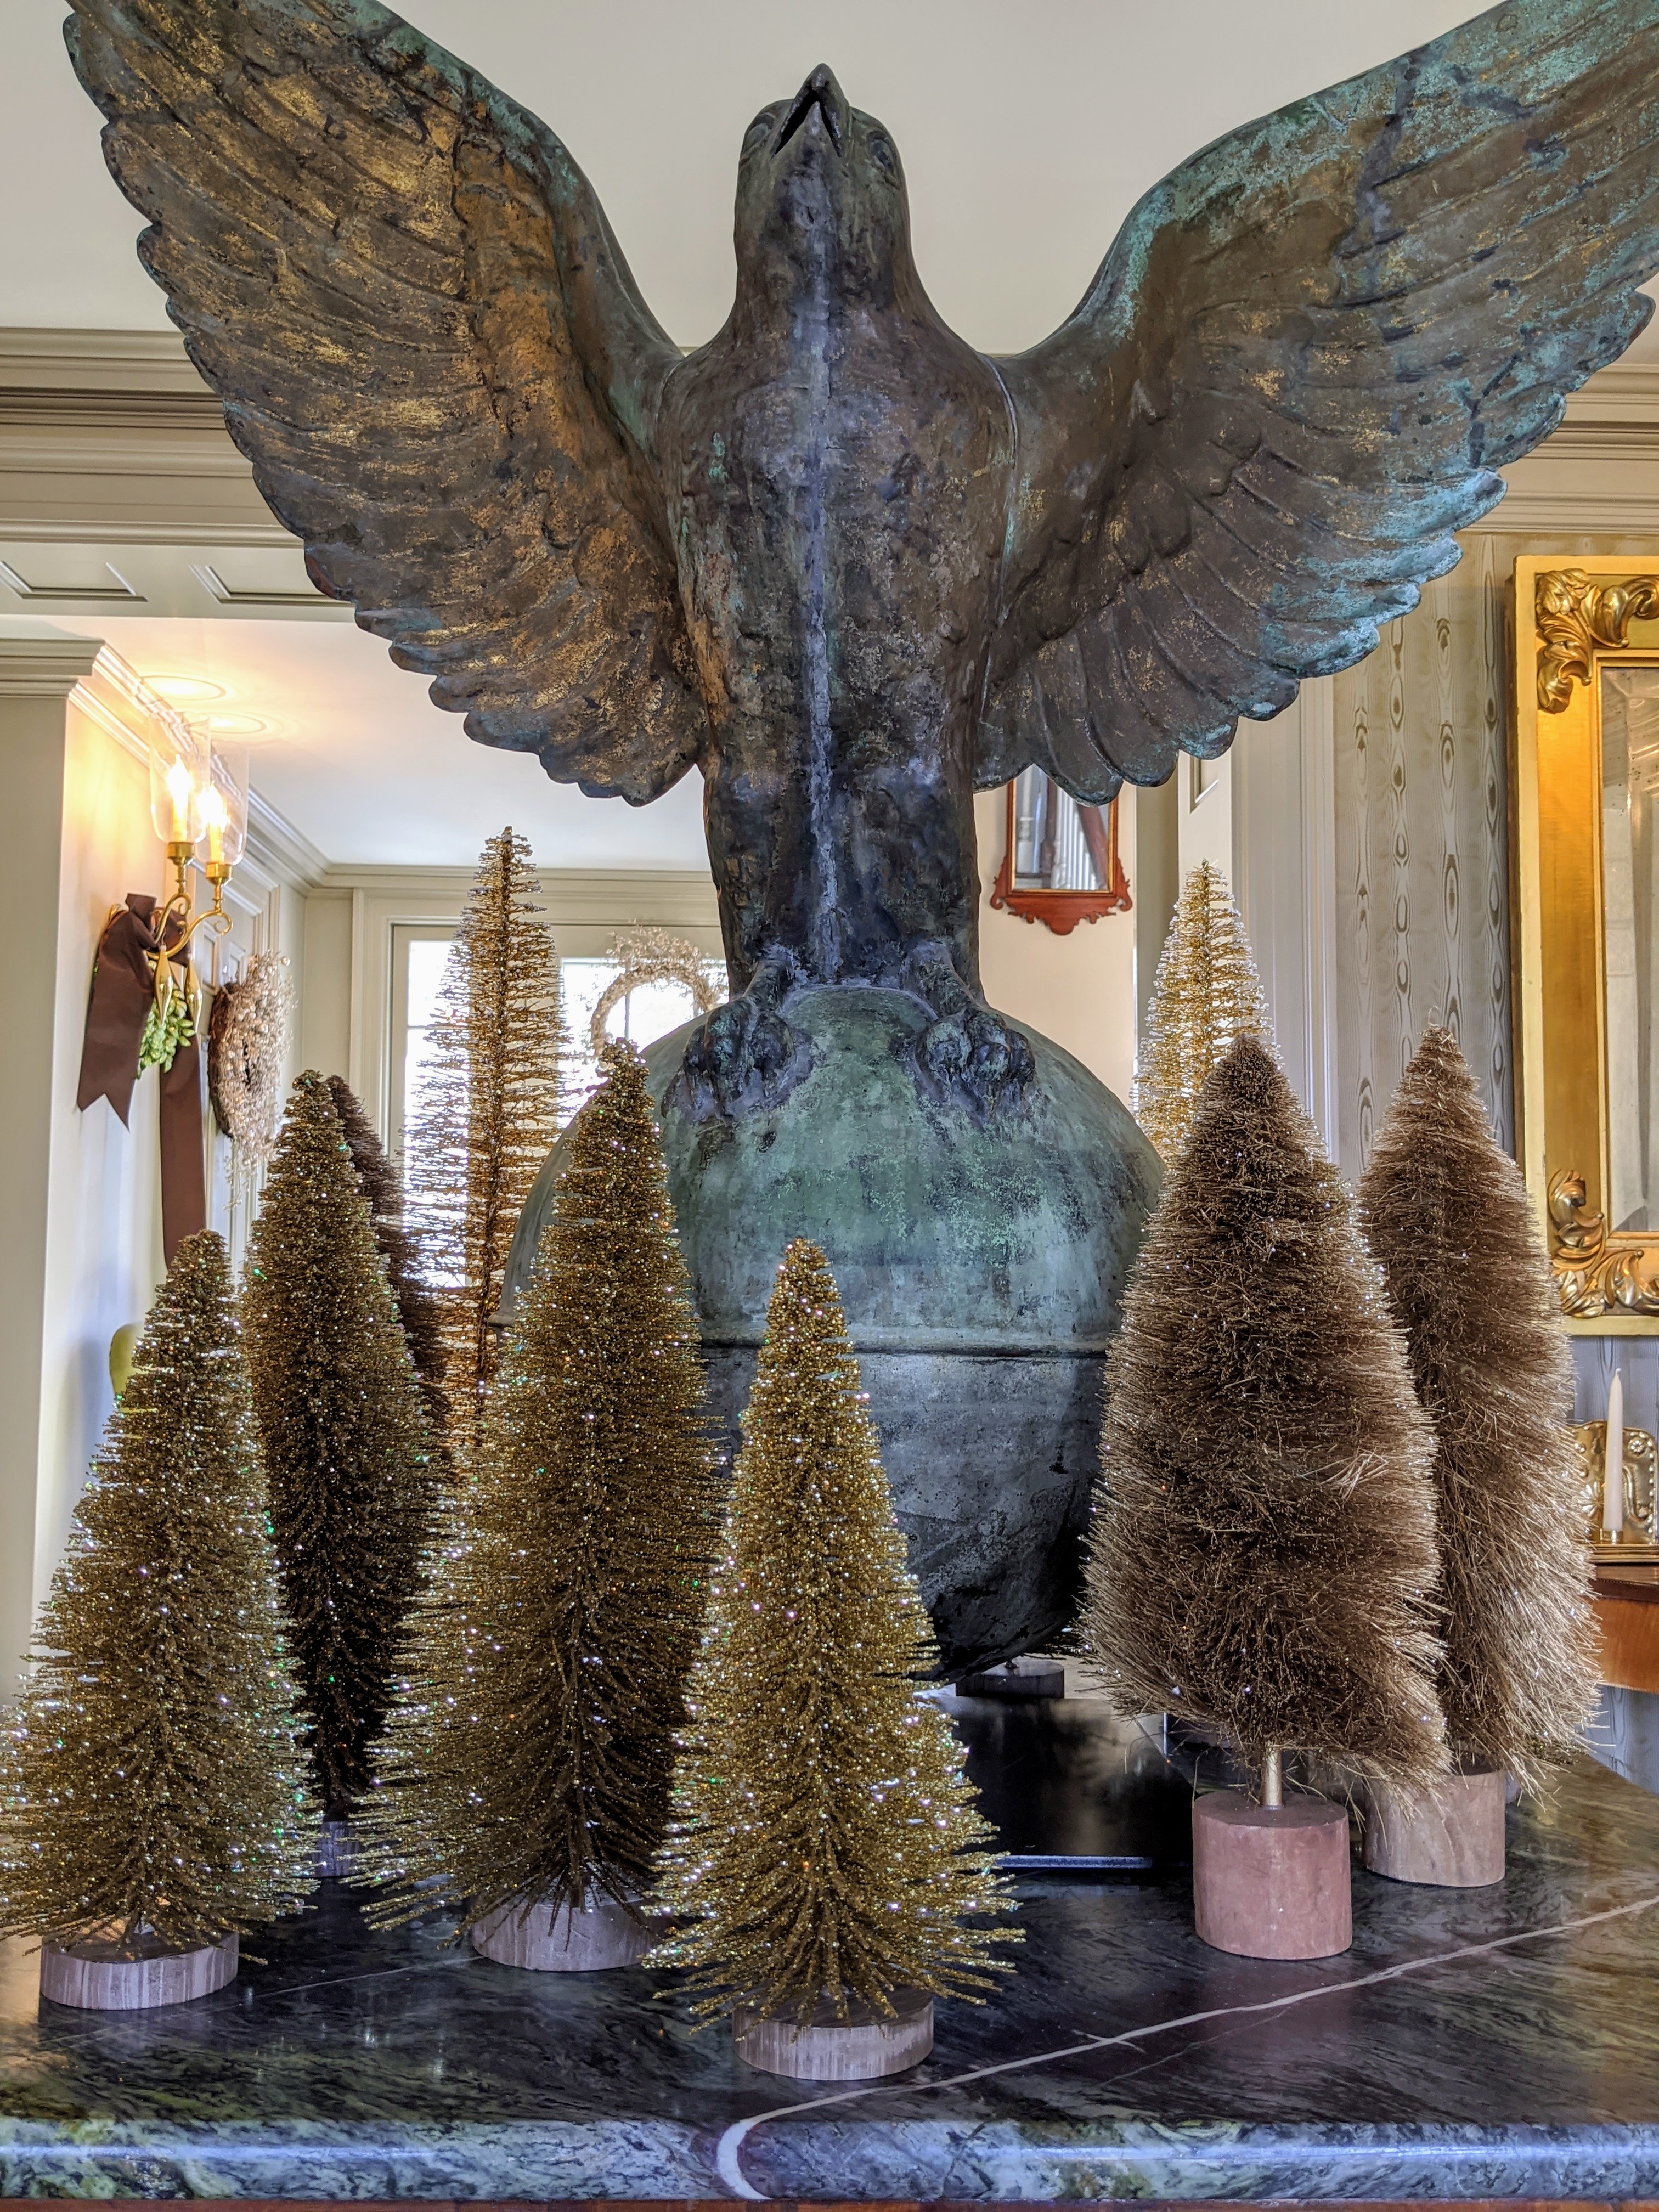
My home was filled with all kinds of trees. Here is a collection of bottle brush trees on the green marble table in my foyer – a woodland scene under my great falcon weathervane.
I love how the sun came through the window in this photo taken by @seenbysharkey.
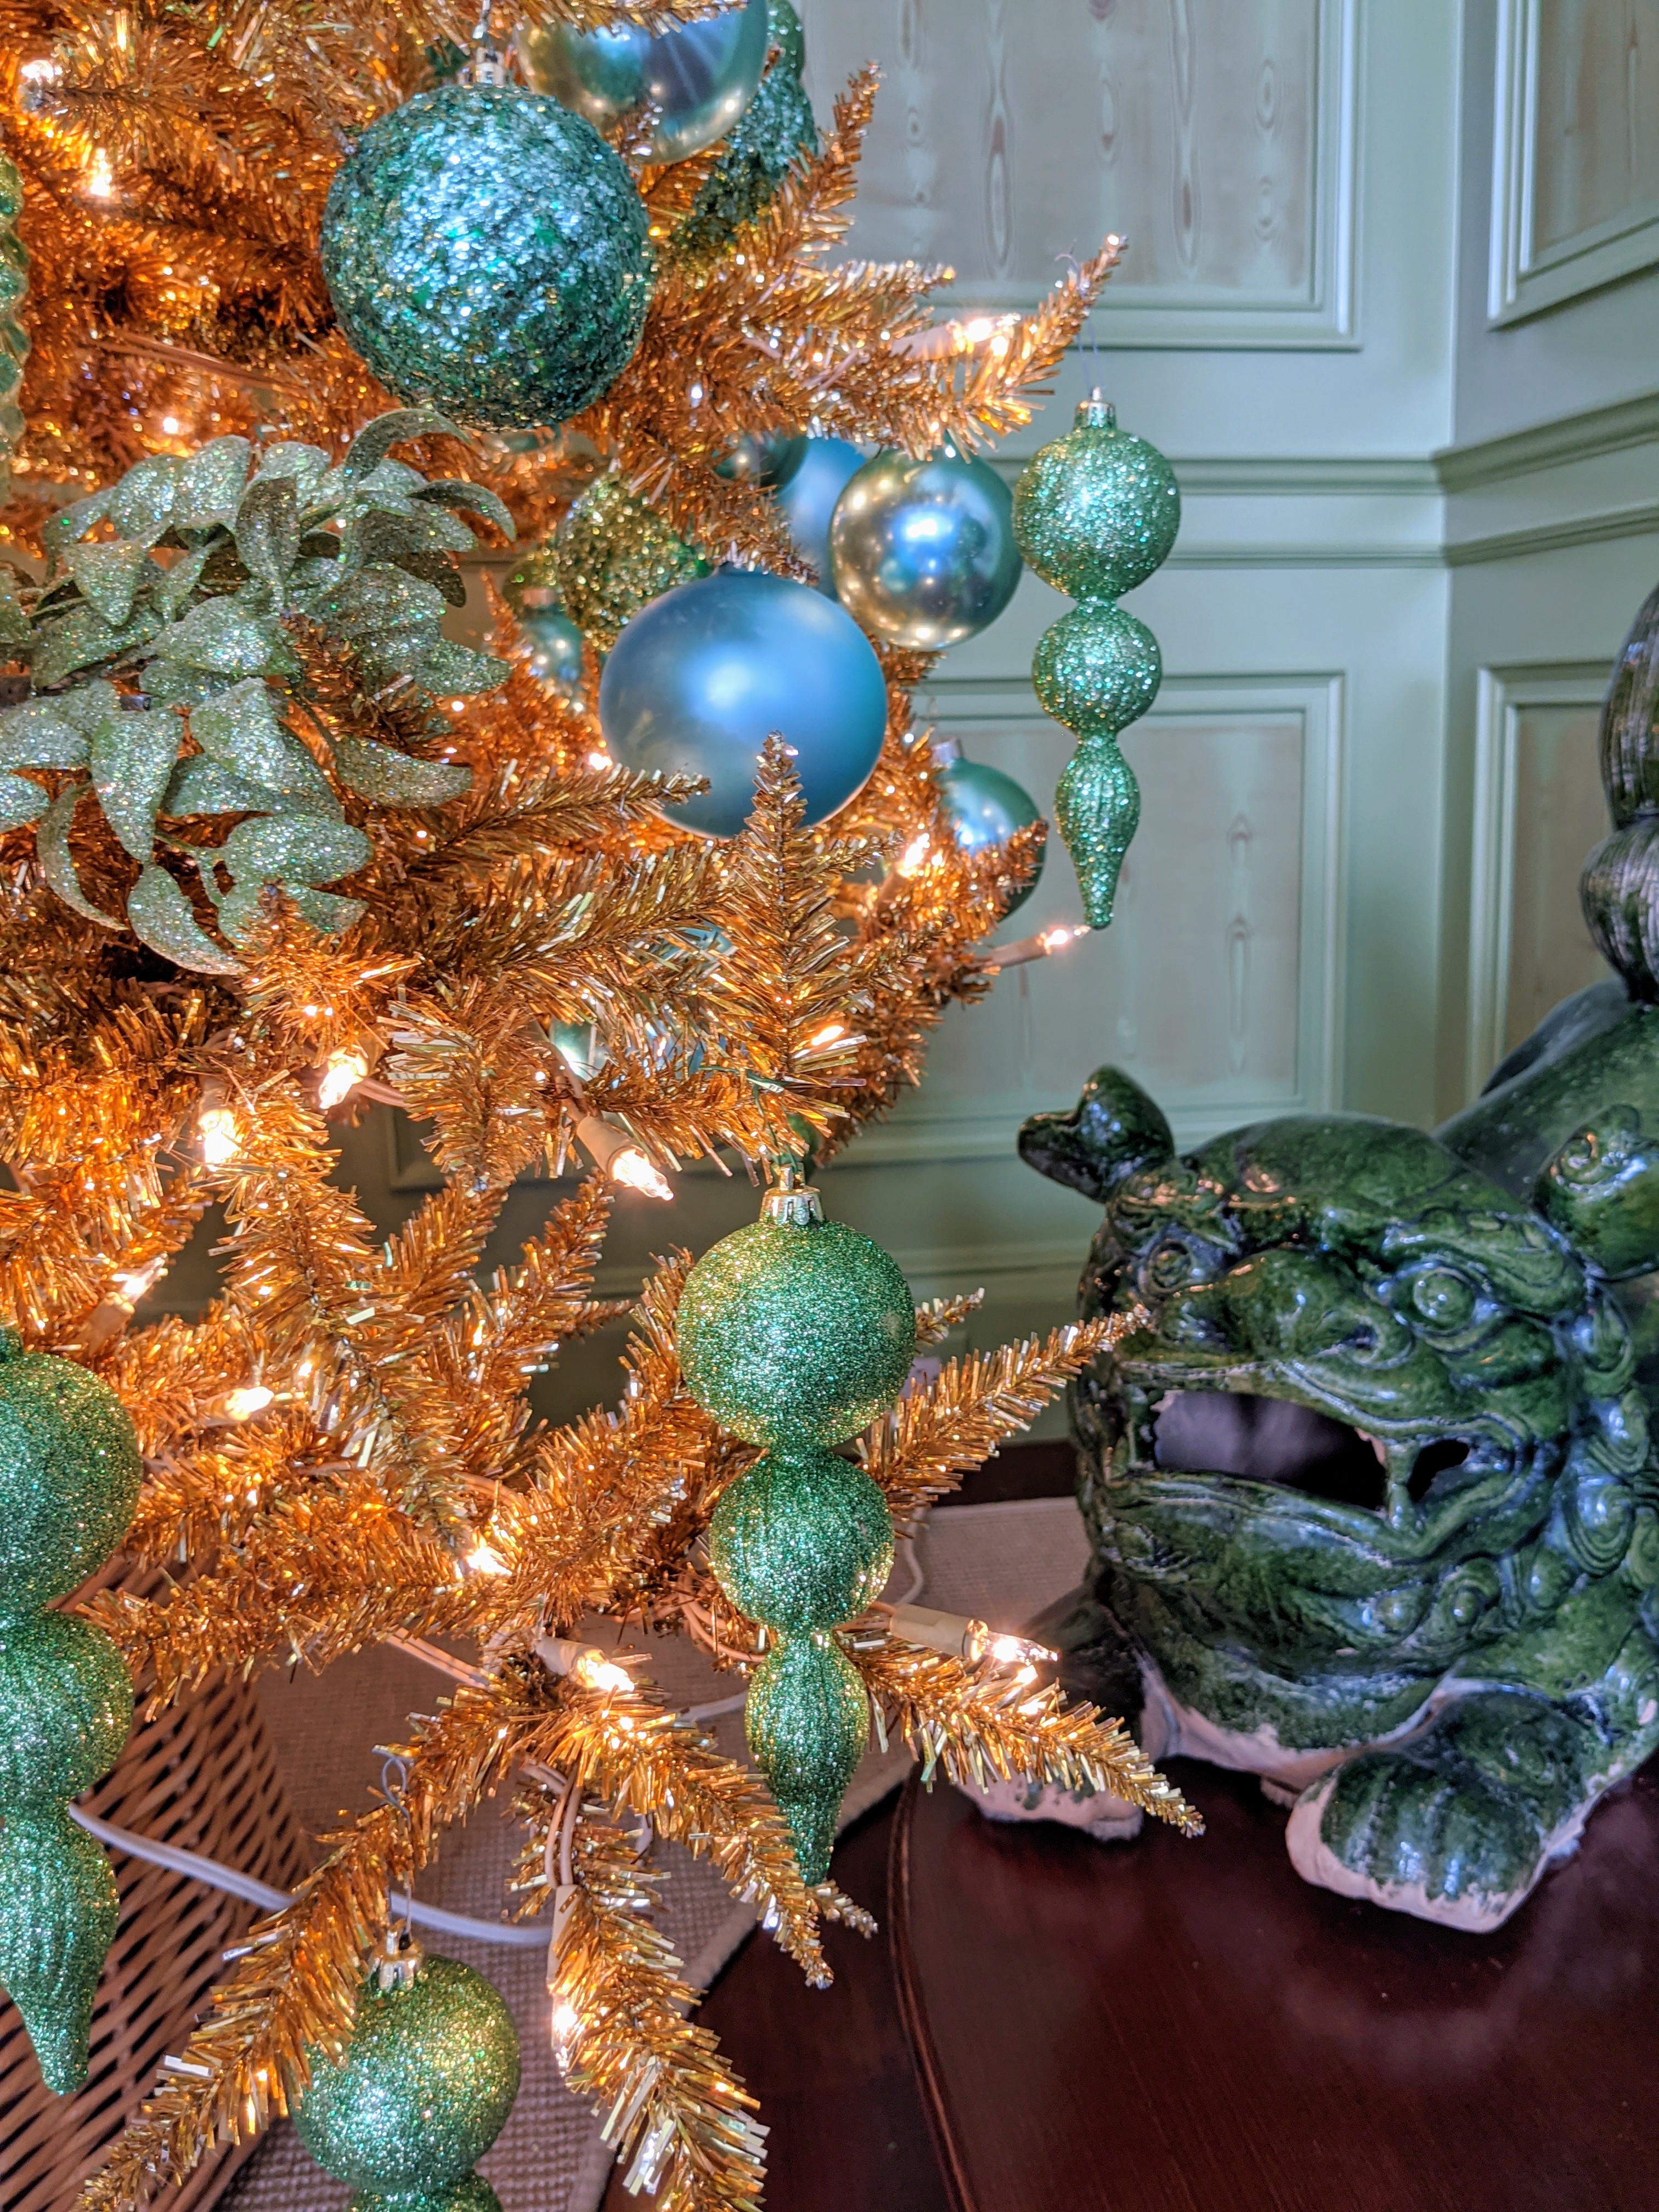
My Green Room was decorated with gold and shades of green. On the right is one of two Chinese foo dogs given to me by Kevin. They’re perfect for this parlor.
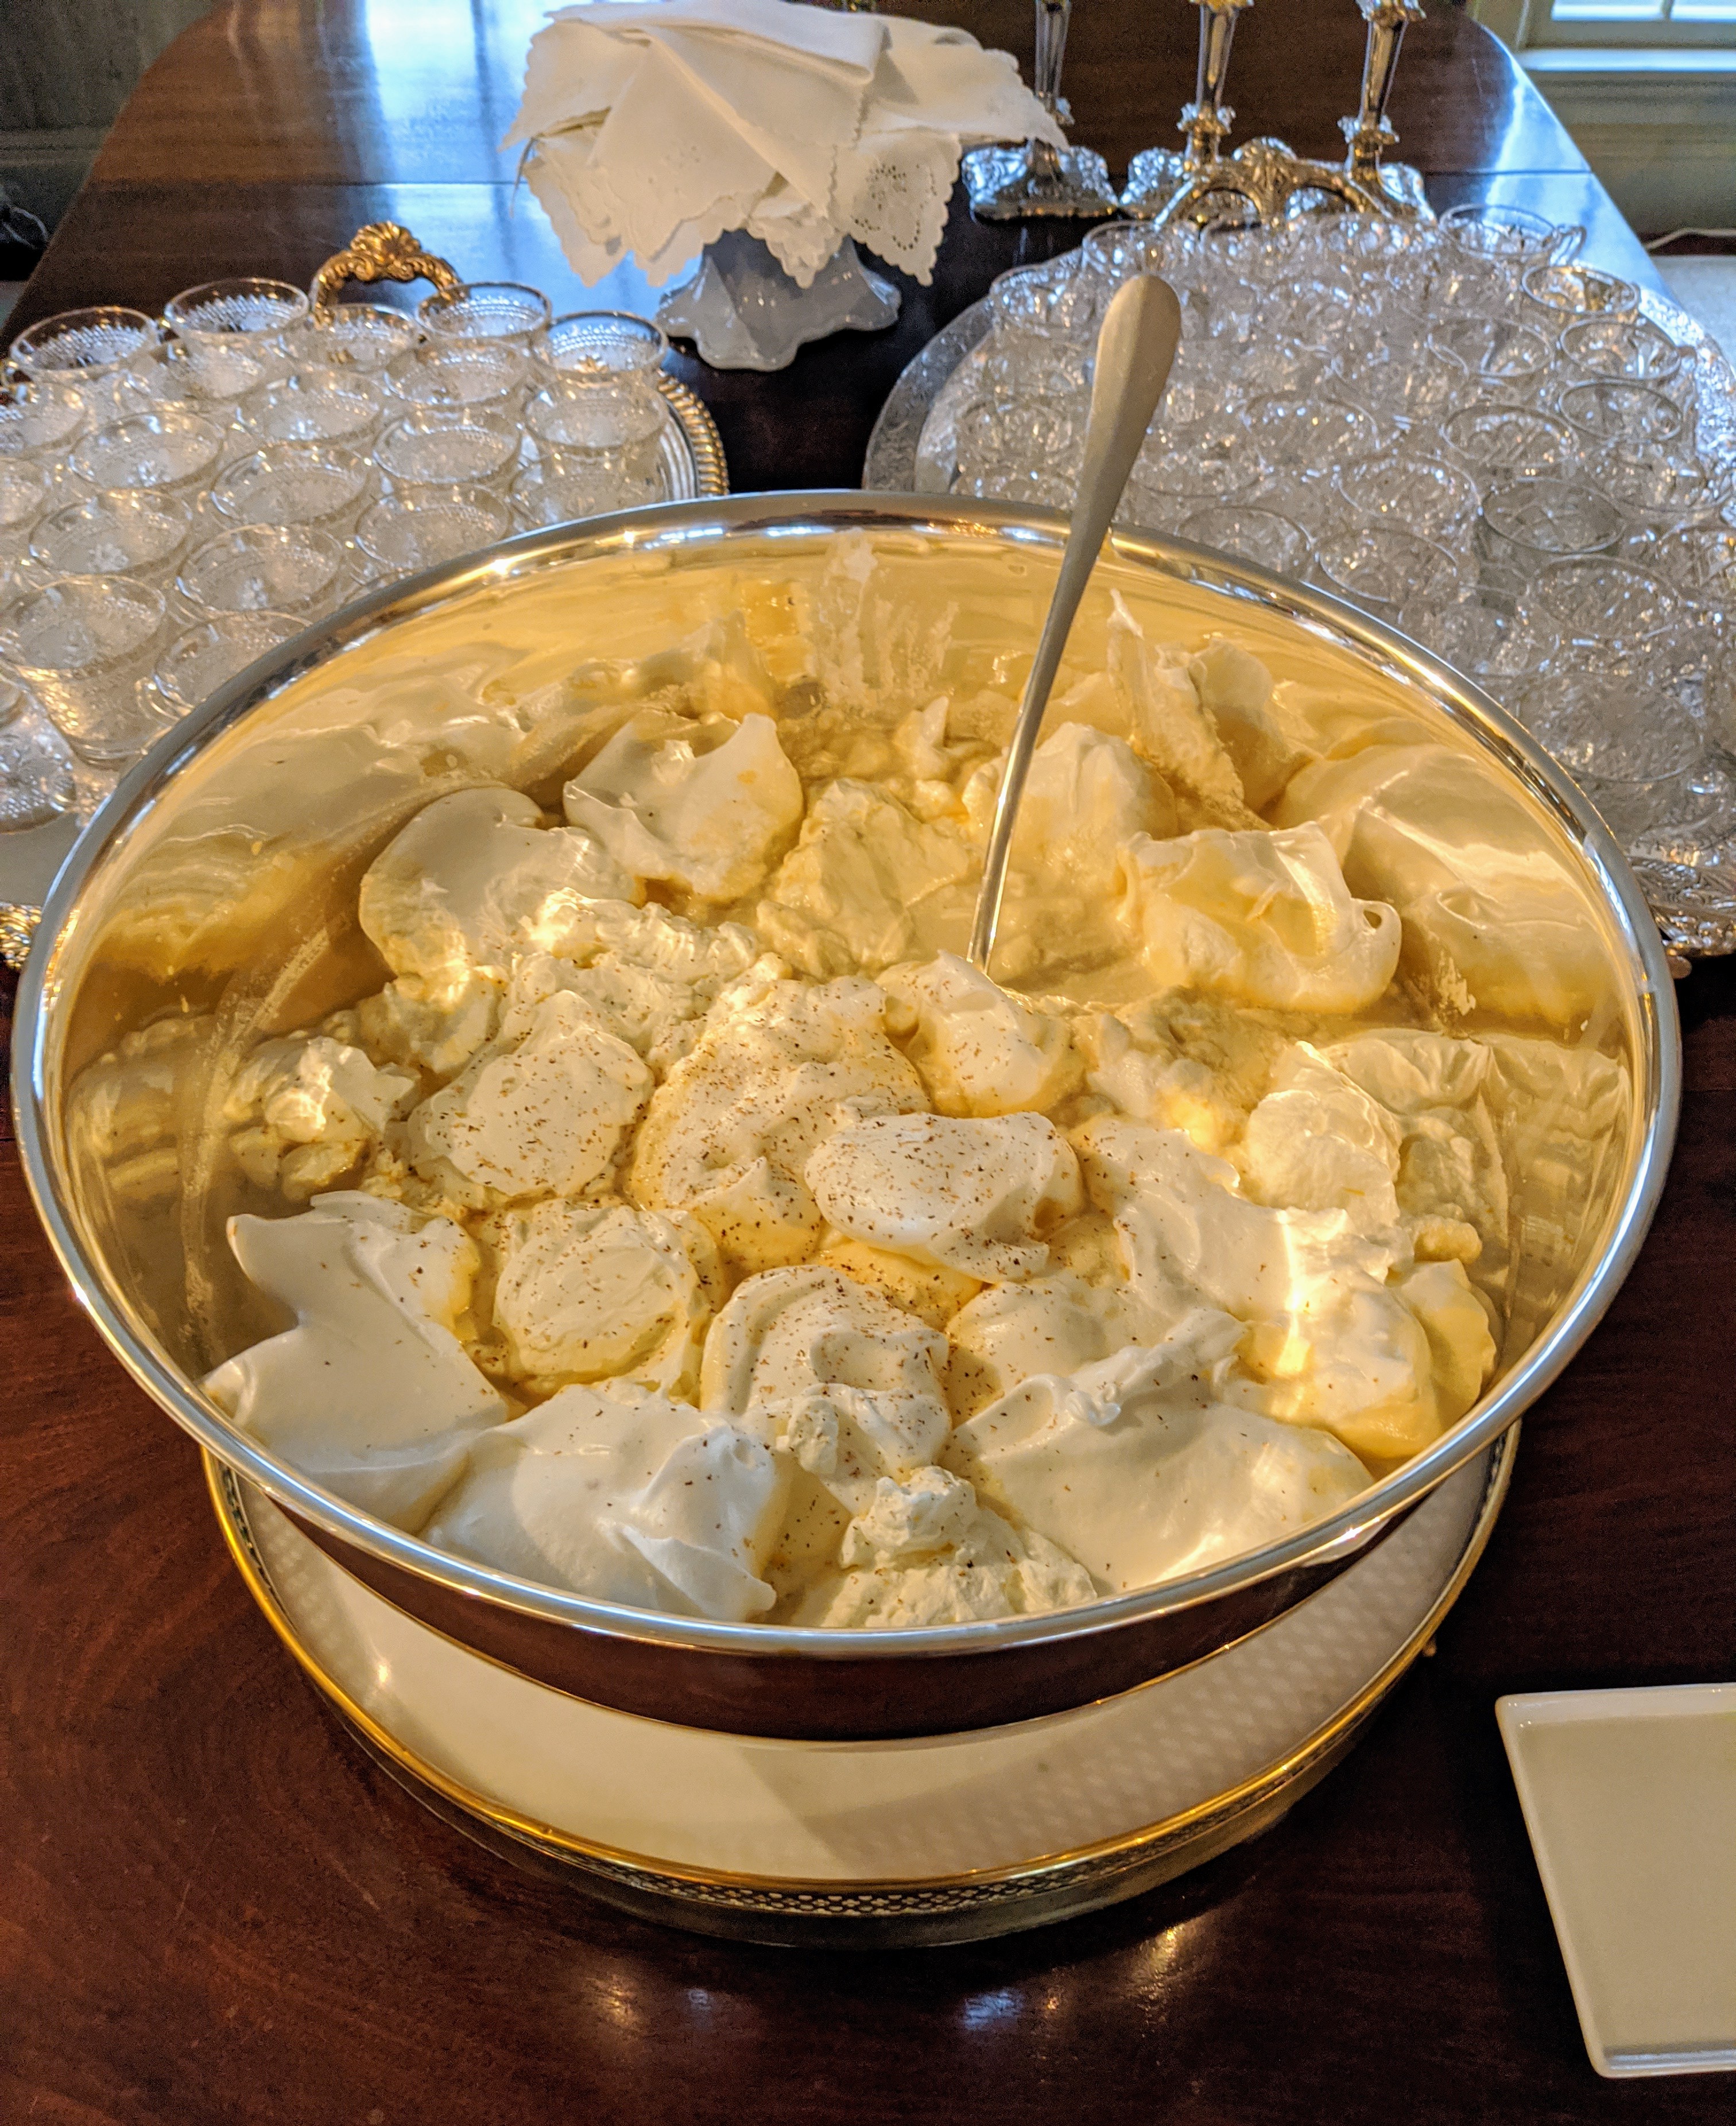
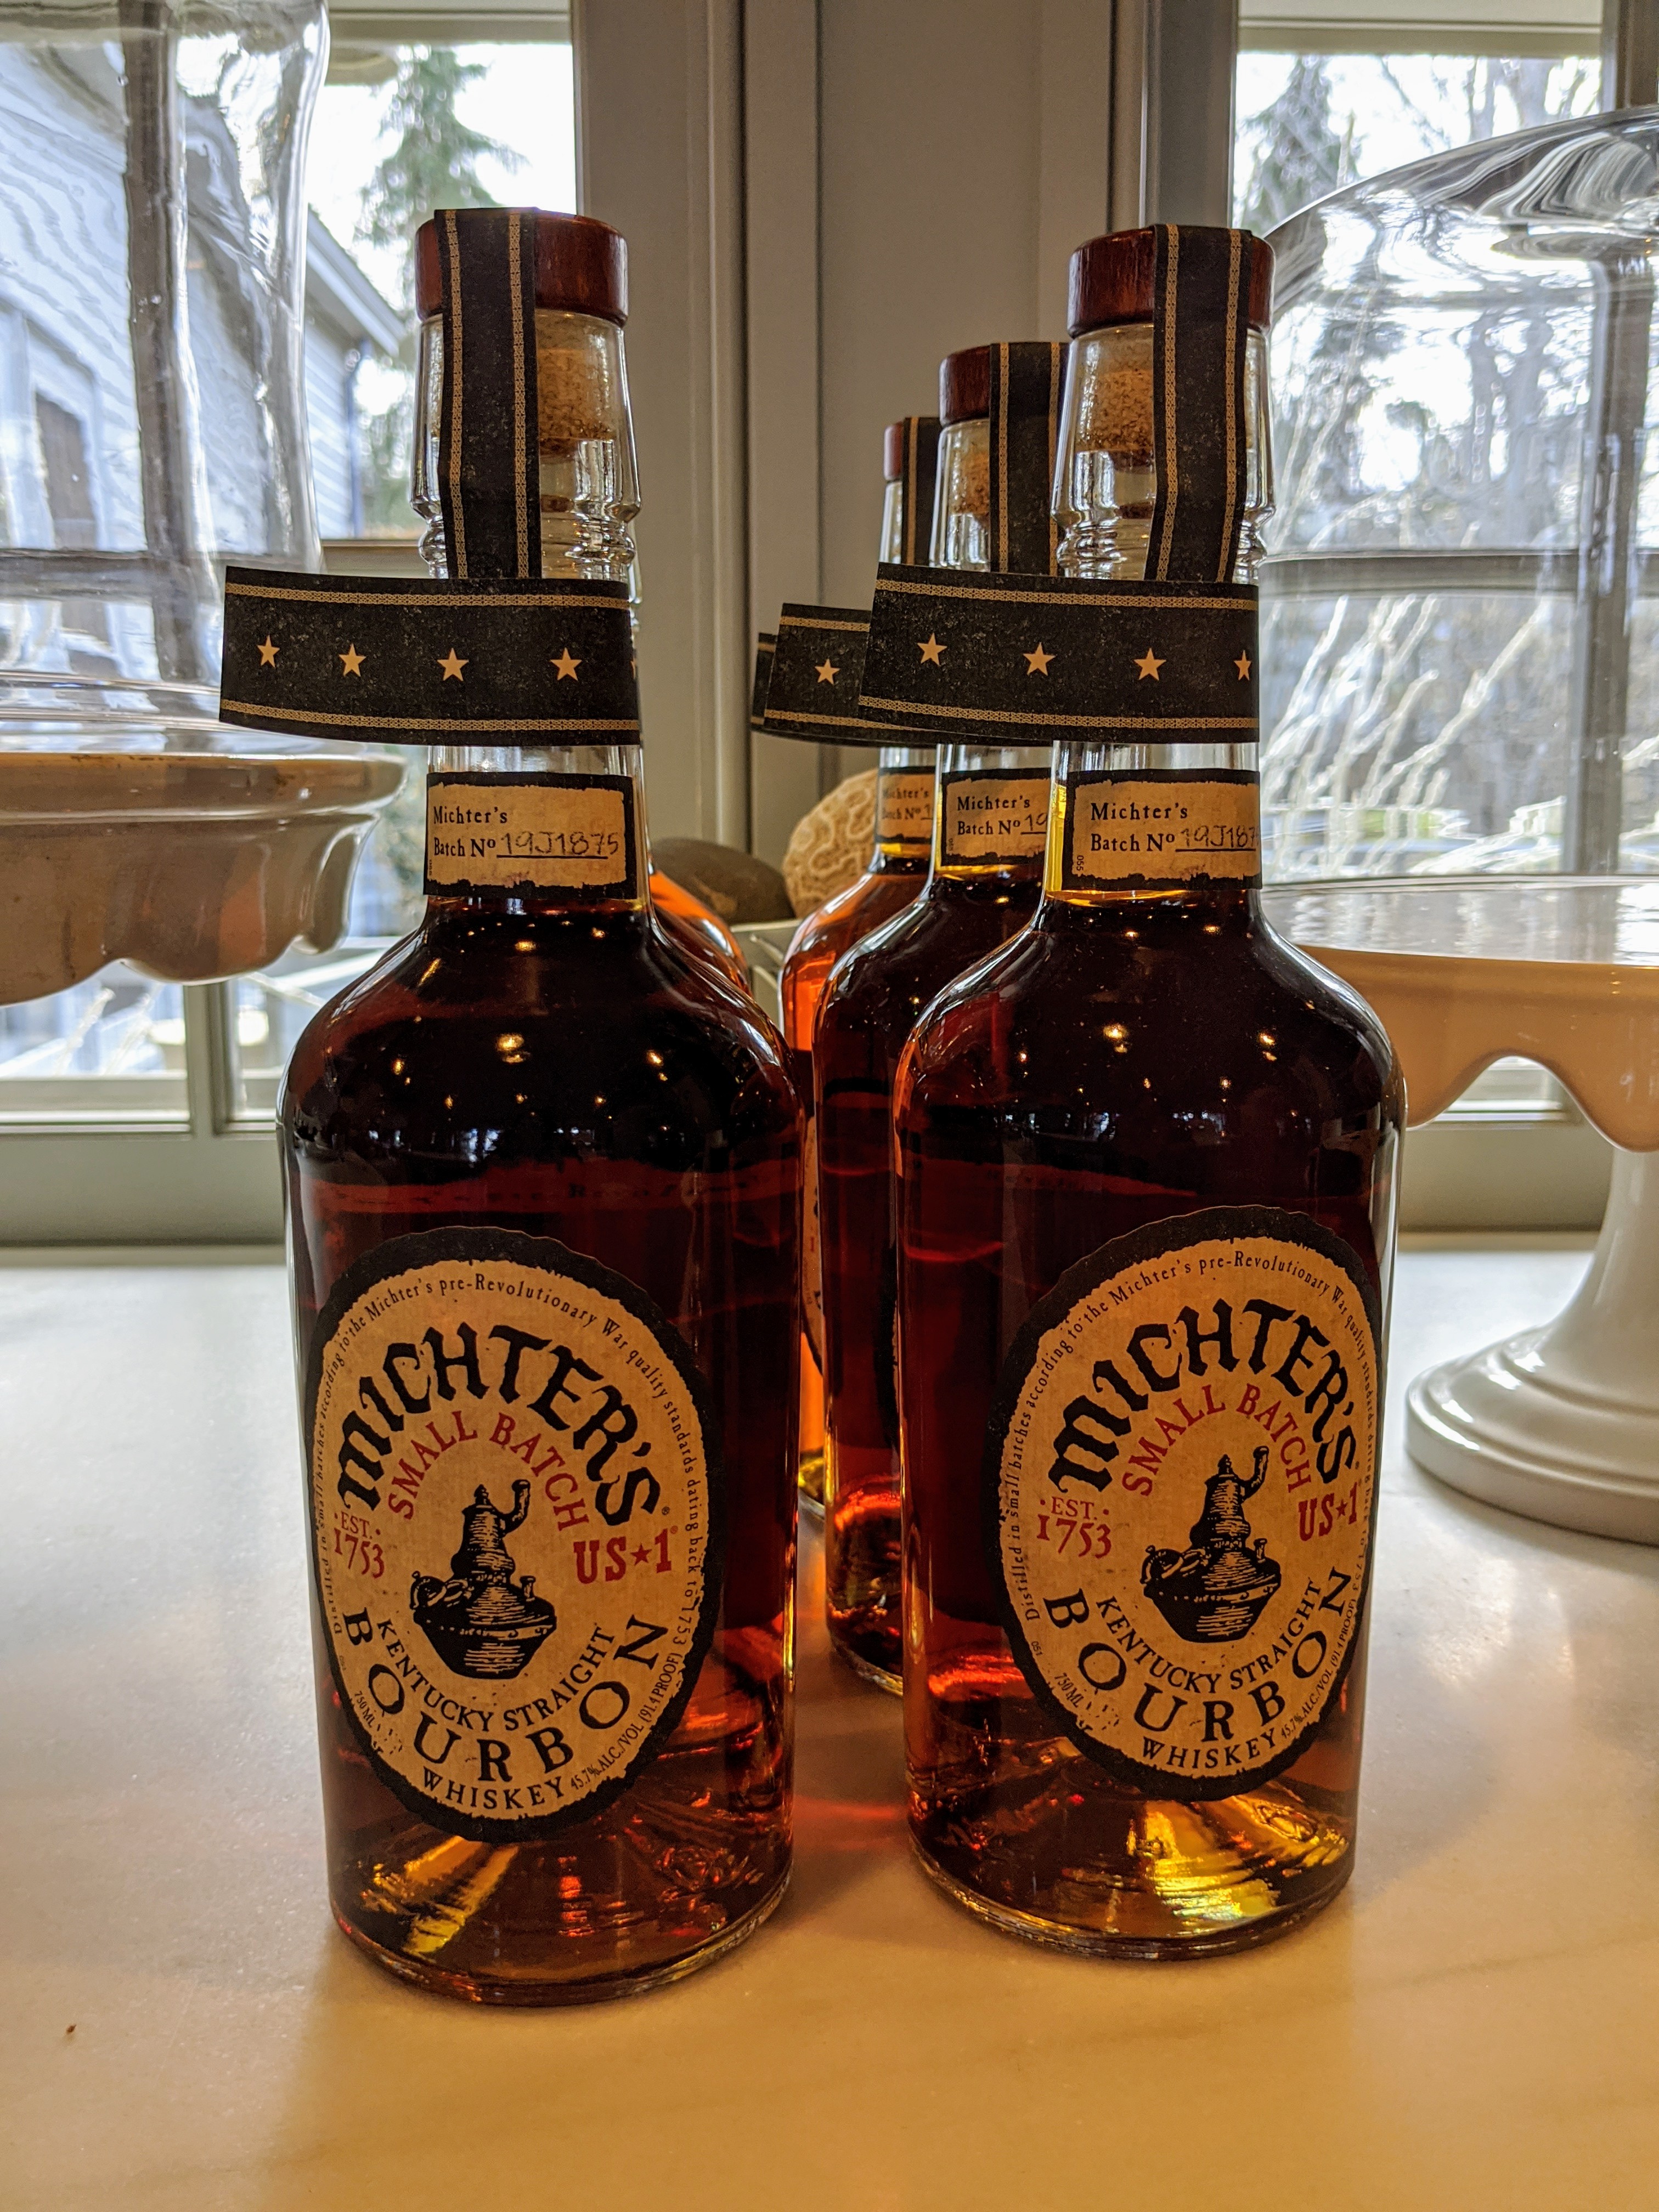
I published this recipe for my special eggnog in my first book, “Entertaining” in 1982. It’s made with plenty of bourbon, cognac, dark rum, heavy cream – and this year, 96 eggs for 200 people.
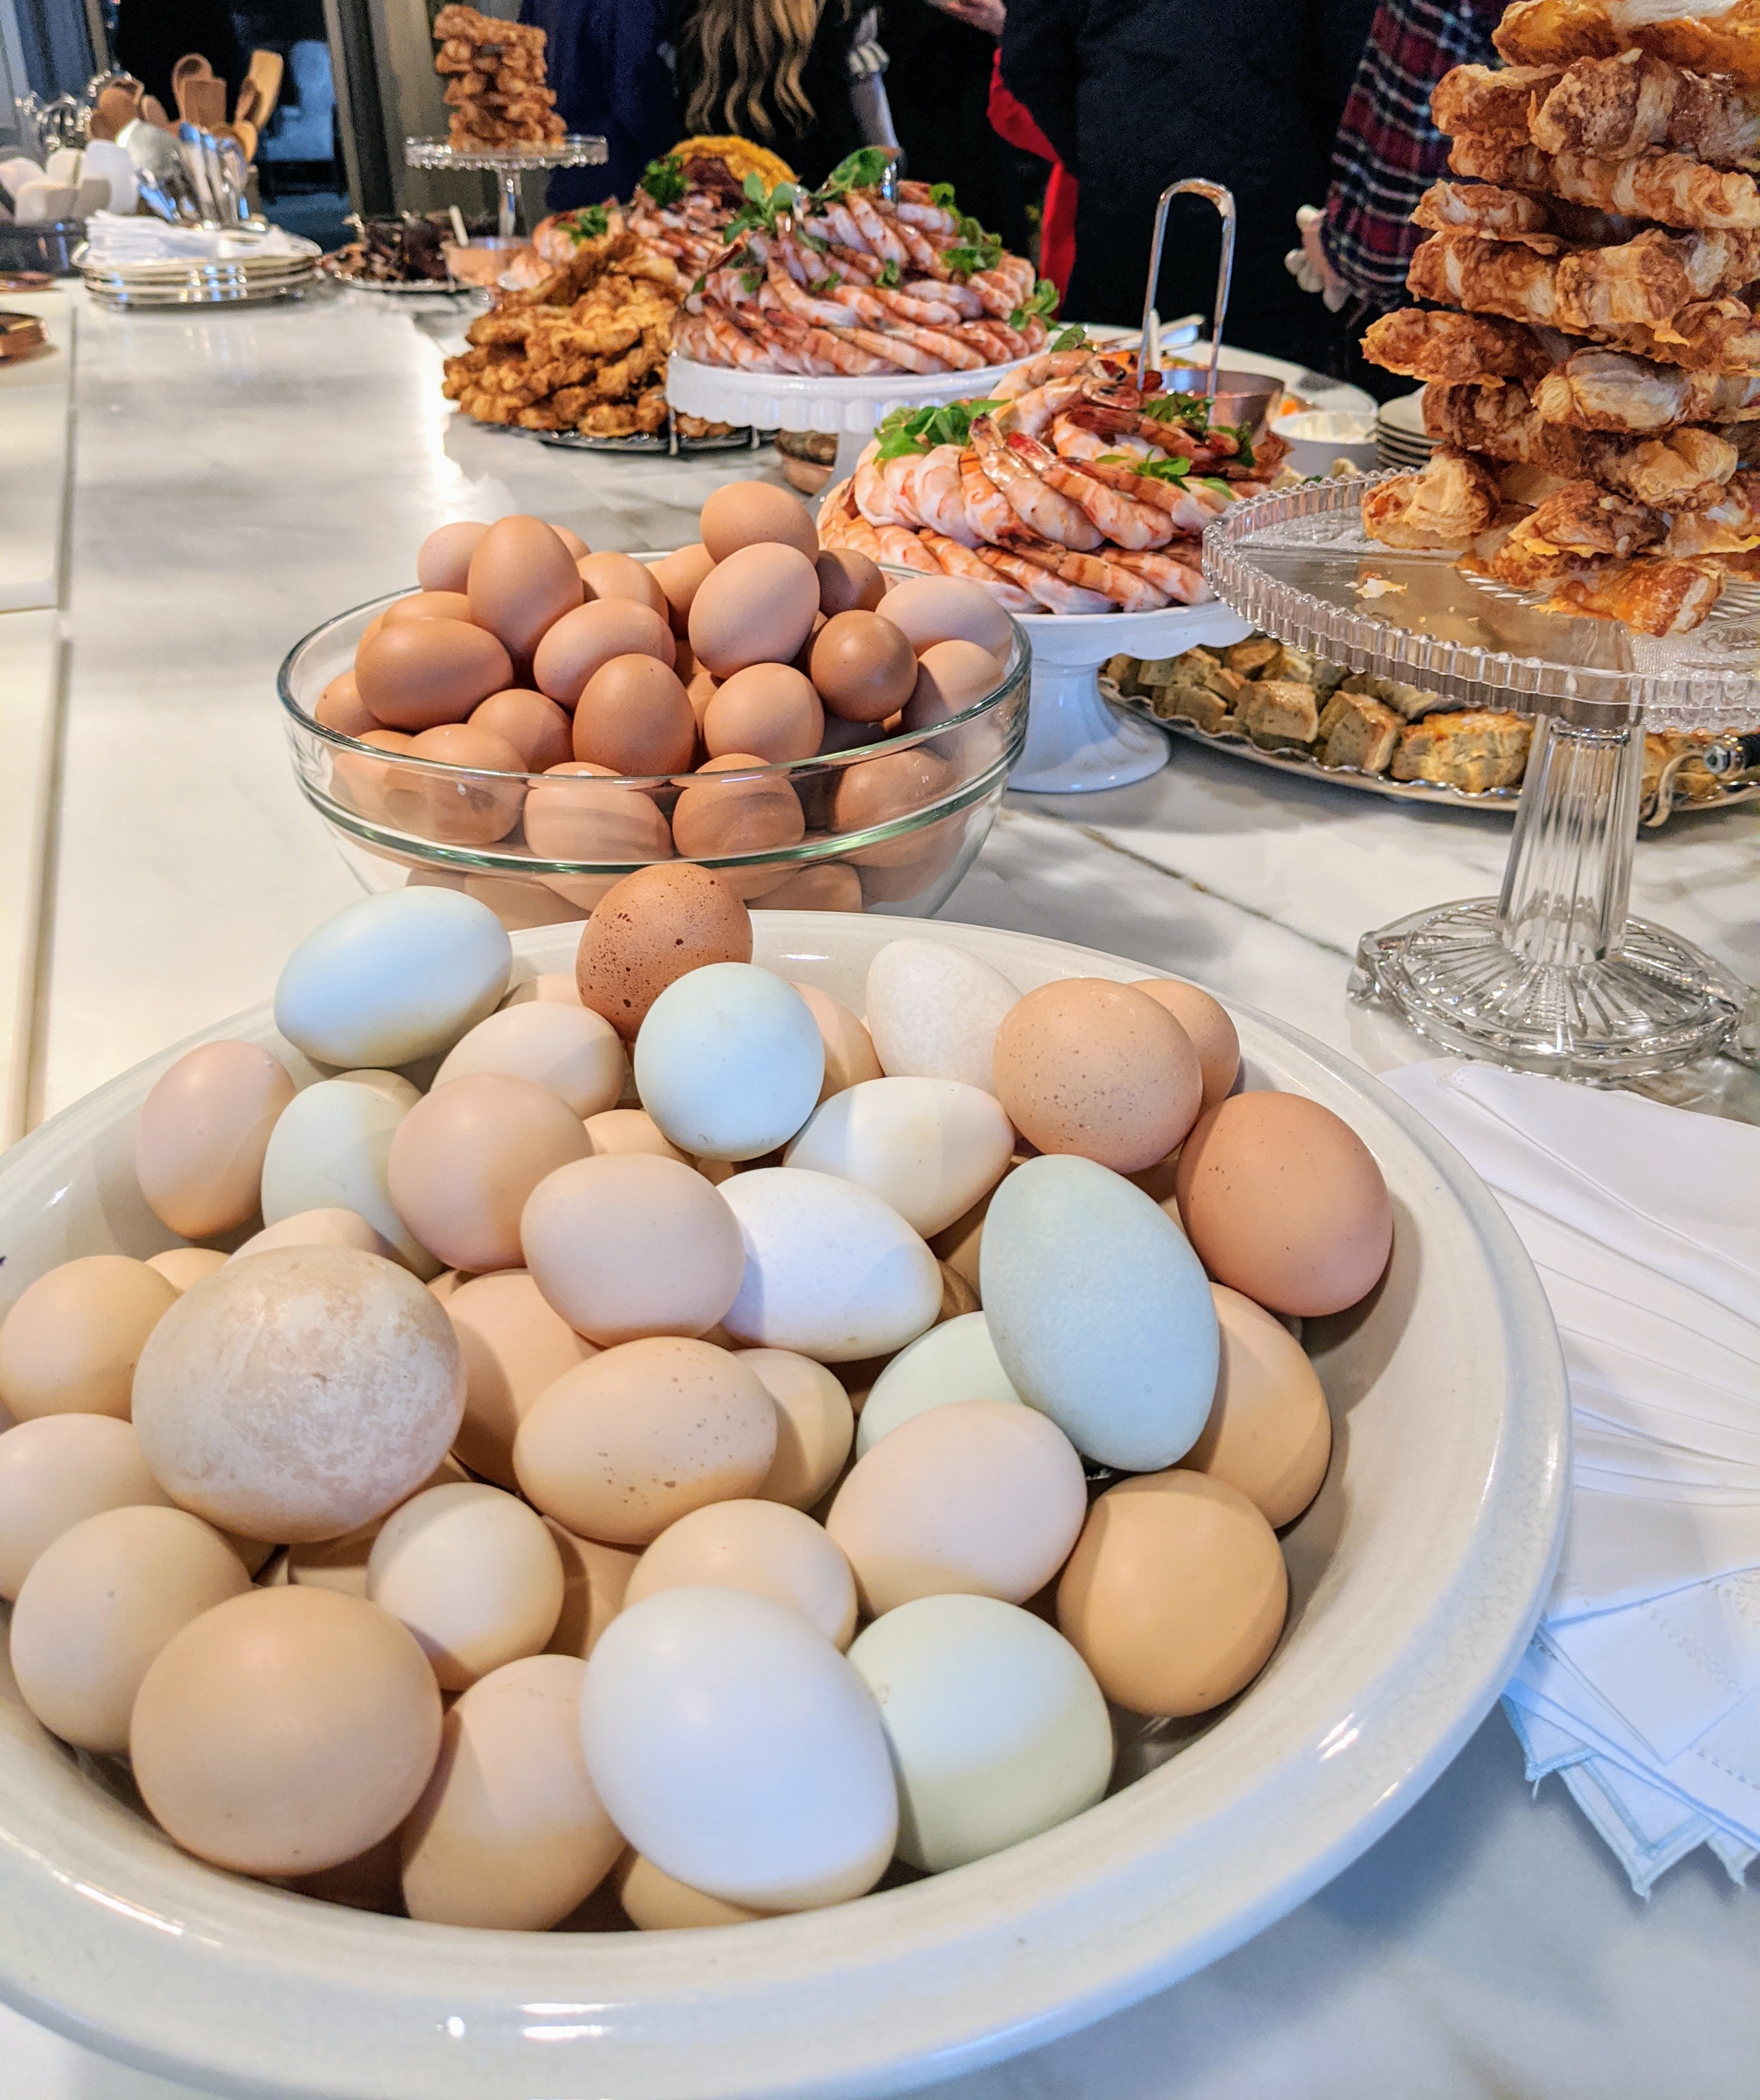
All the eggs used for my eggnog came right from my hens here at the farm. A single eggnog recipe, by the way, calls for a dozen eggs, which can serve about 26-guests. My eggnog is always so popular – it is so rich it needs no accompaniment.
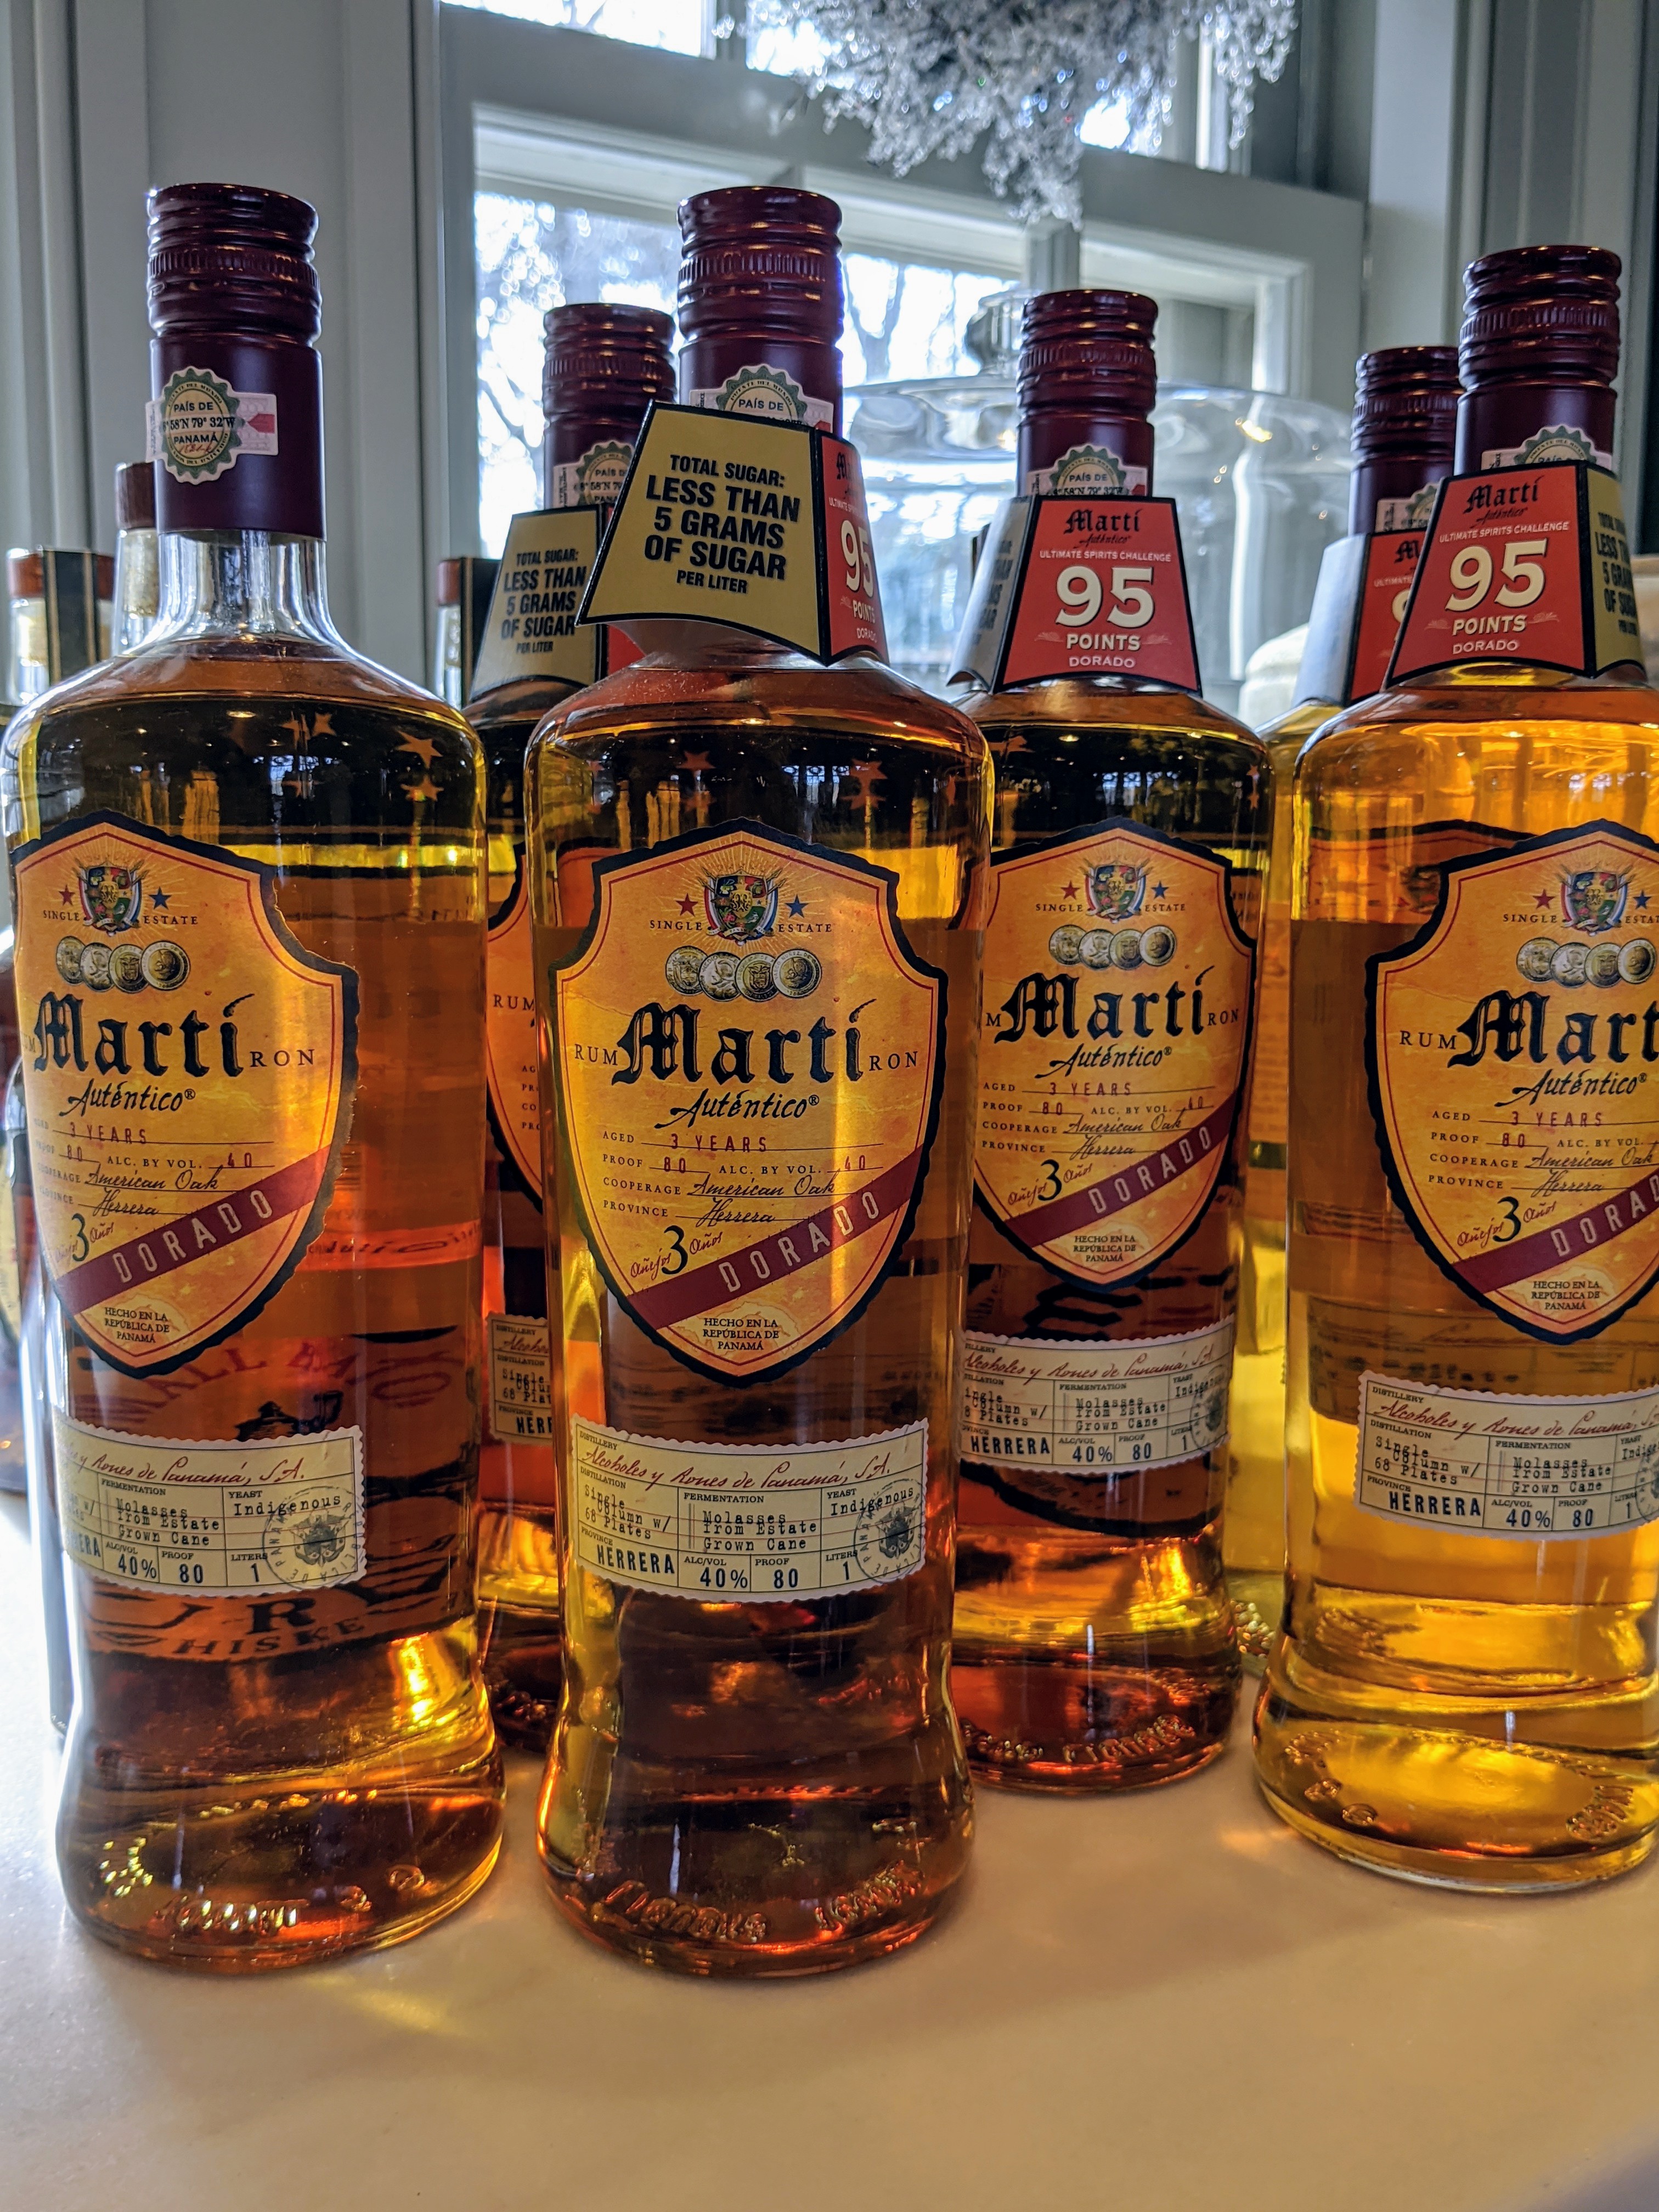
I used Marti Autentico Rum “Dorado” – a delicious quality rum with a lovely rich taste. https://www.martirum.com/
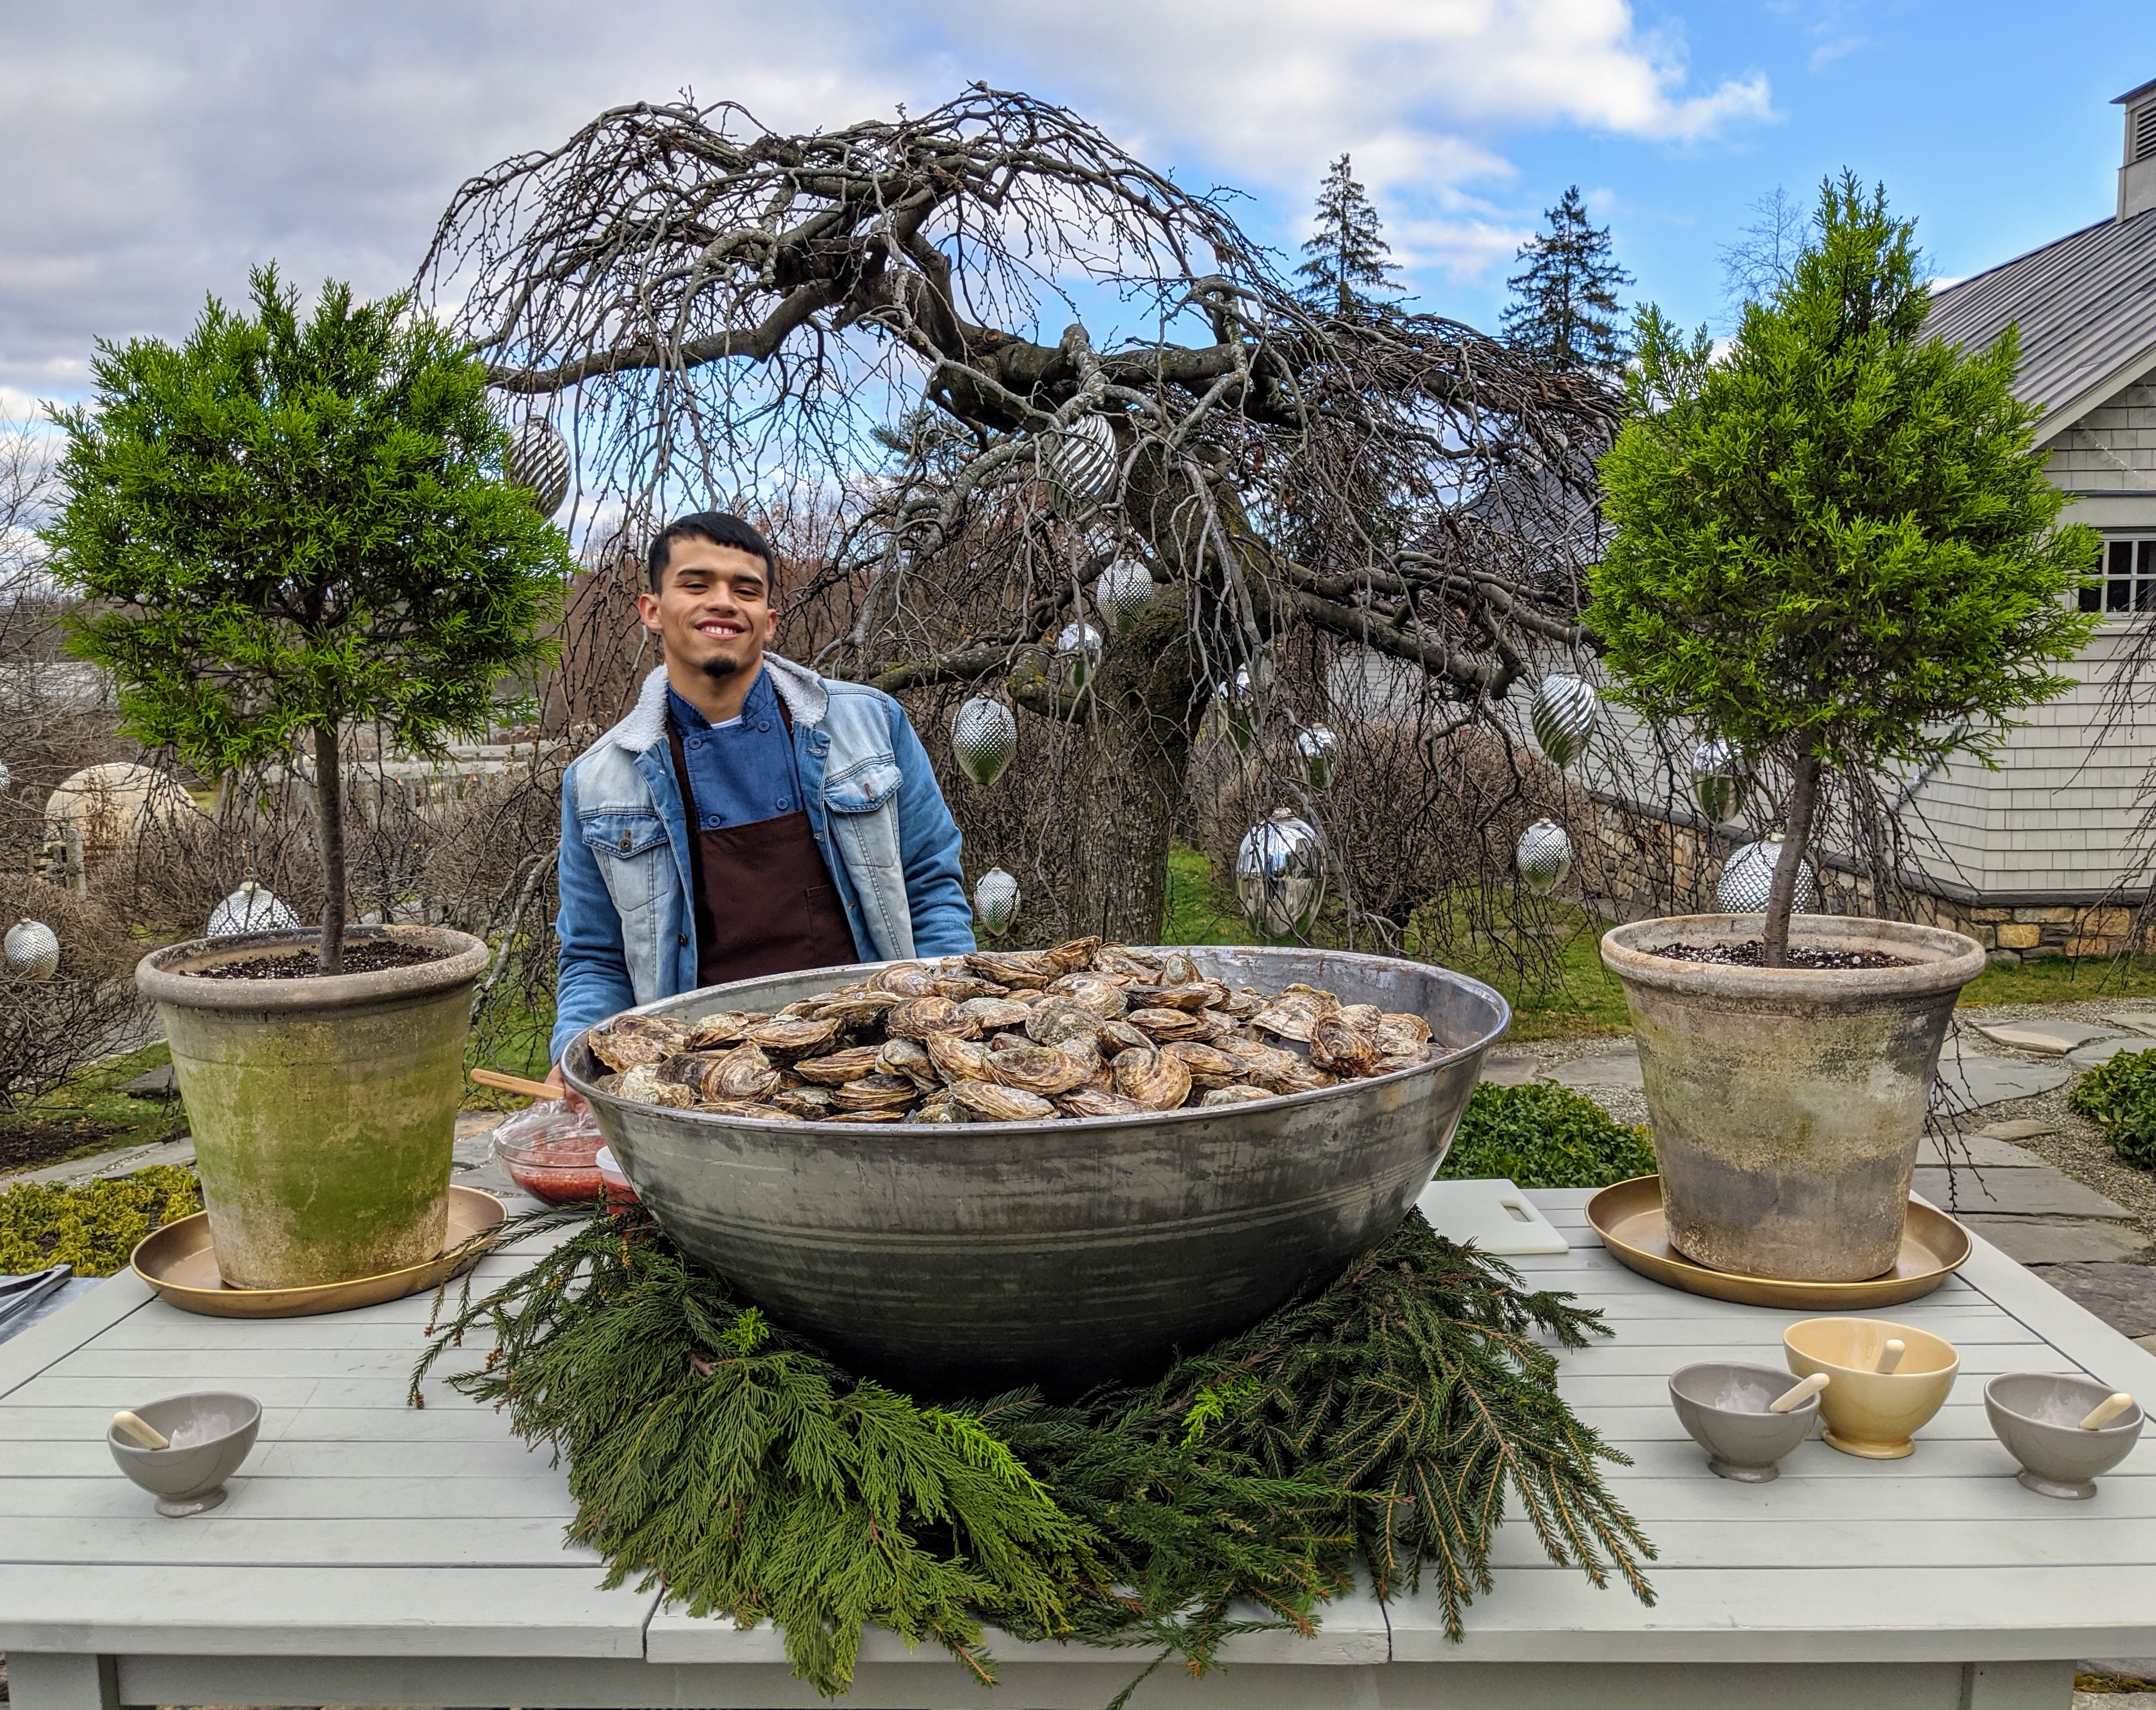
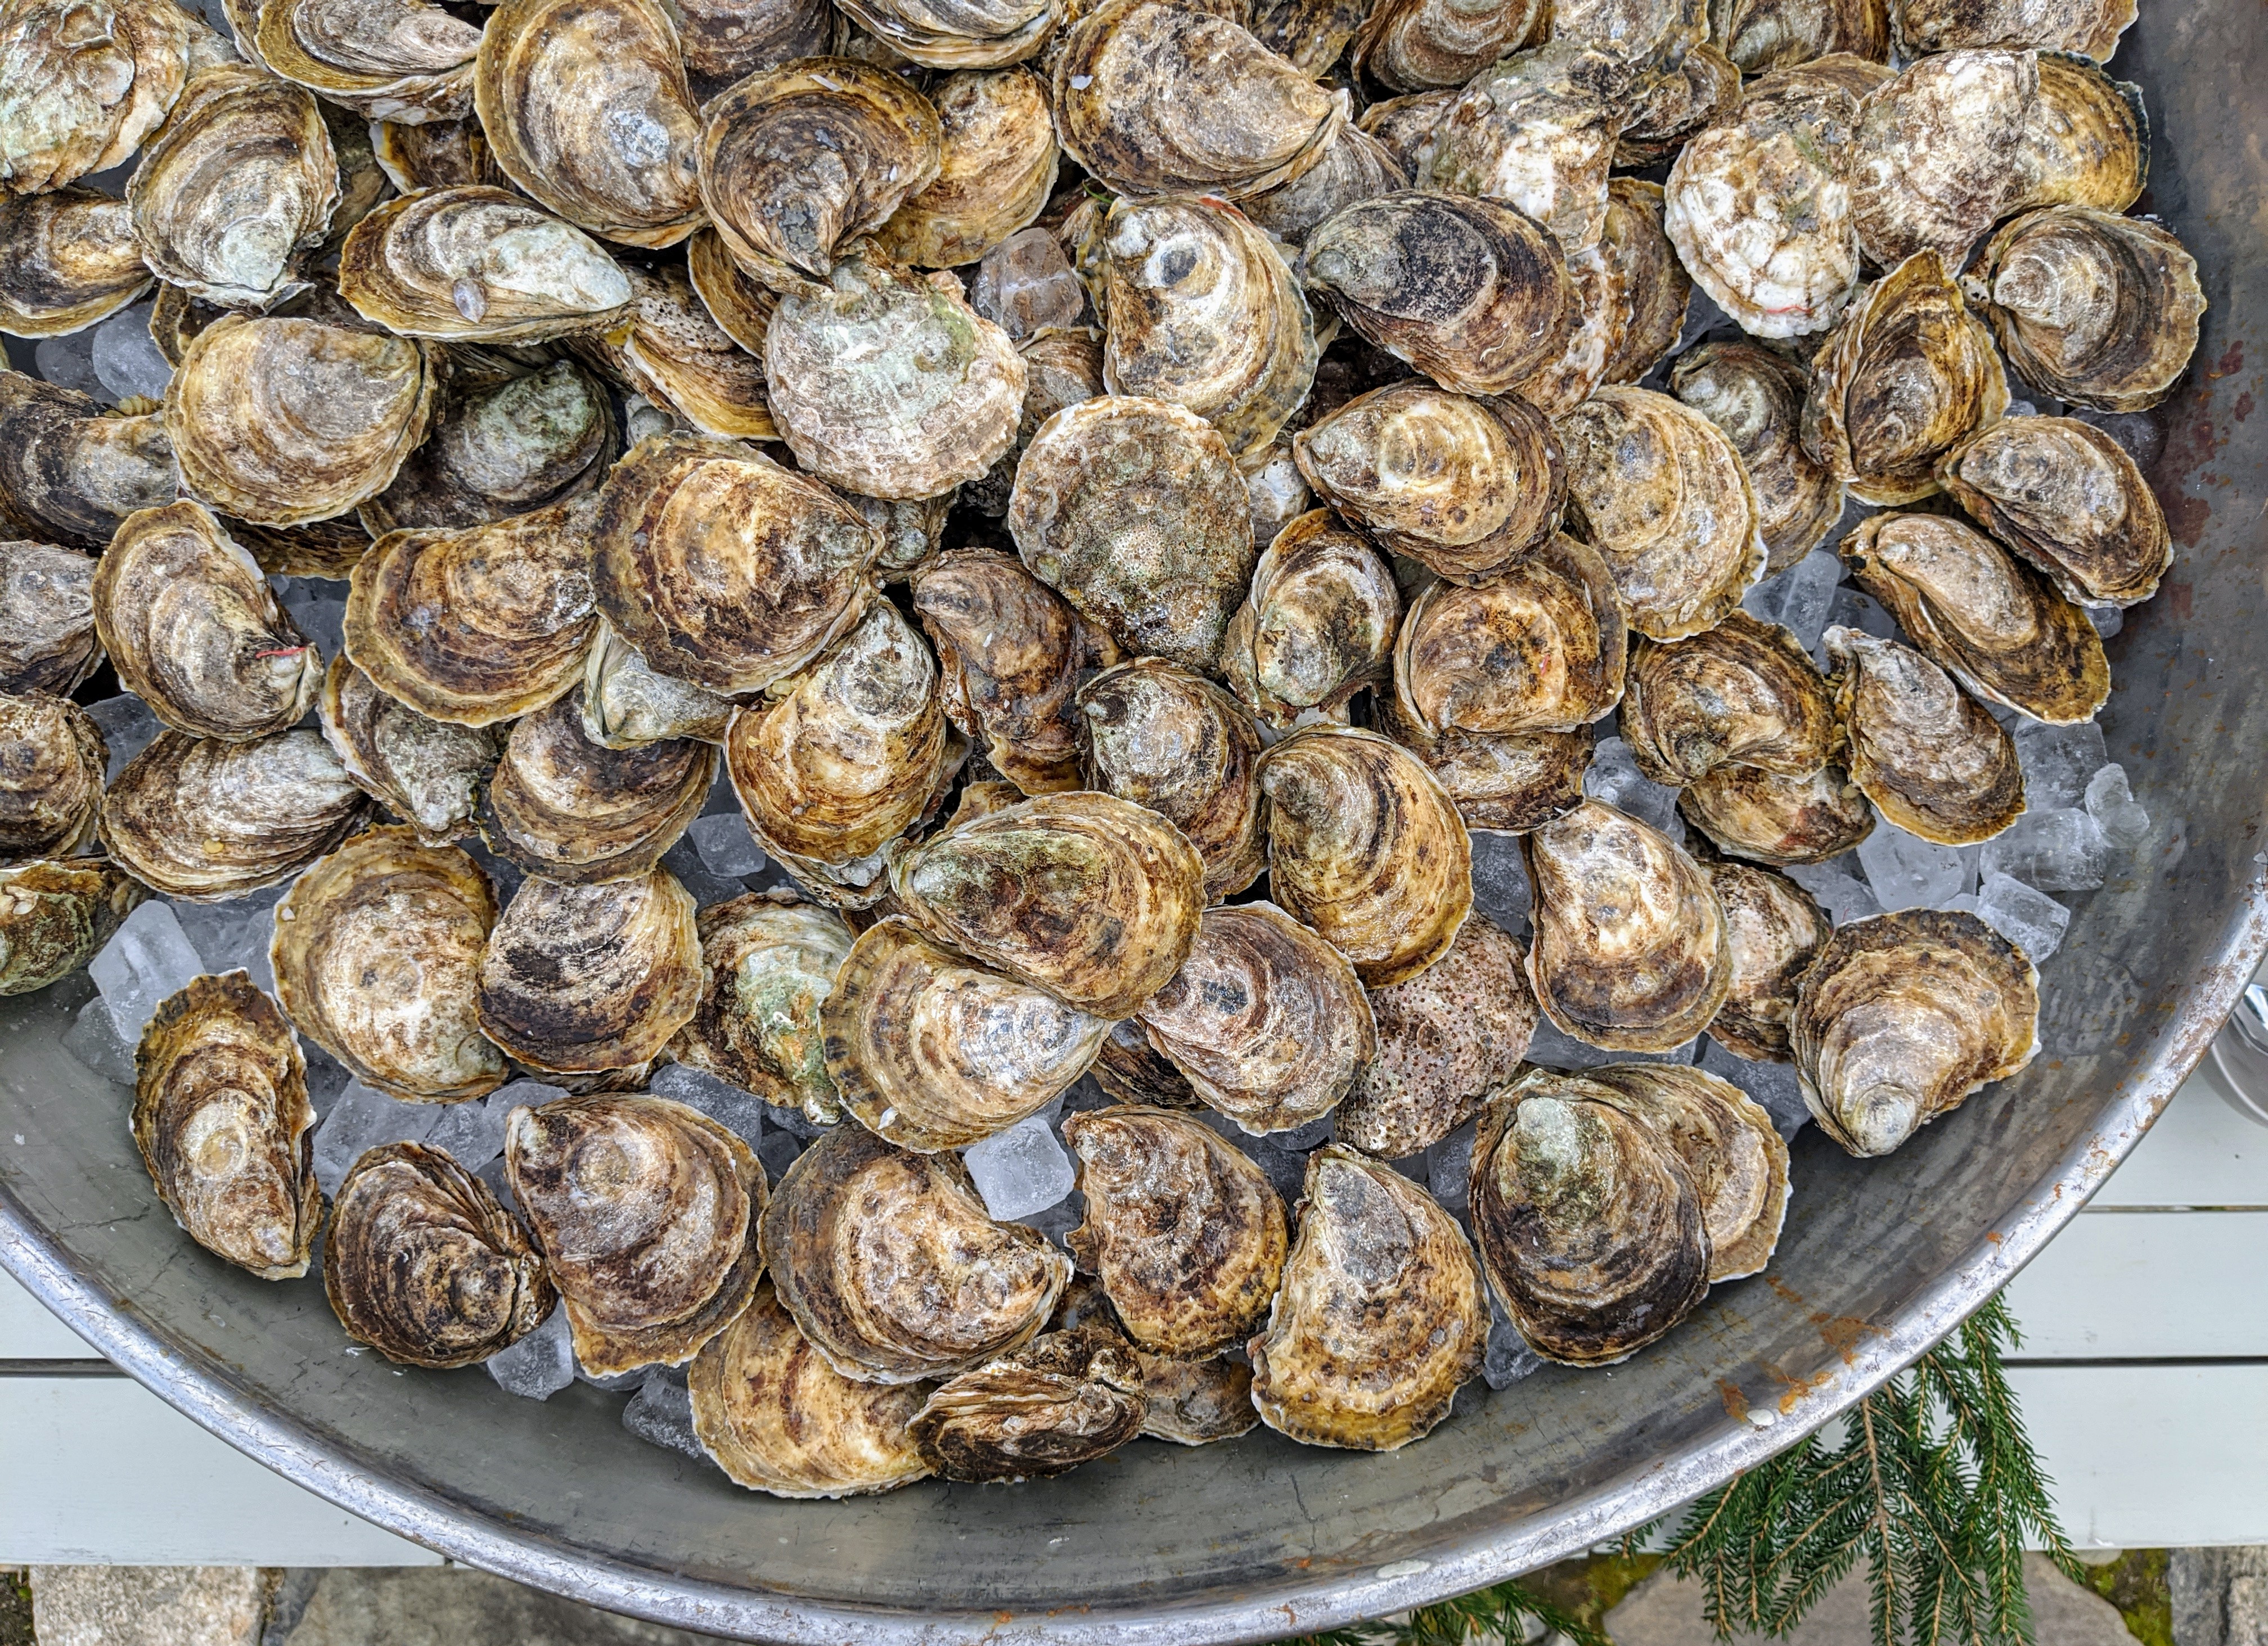
Guests arriving at my Winter House saw Moises, from PS Tailored Events, and these delicious fresh oysters on the terrace parterre – a perfect first stop at the party.
The oysters are from Norm Bloom – we ordered hundreds of delicious oysters, served on the half shell with cocktail sauce and mignonette. http://www.coppsislandoysters.com
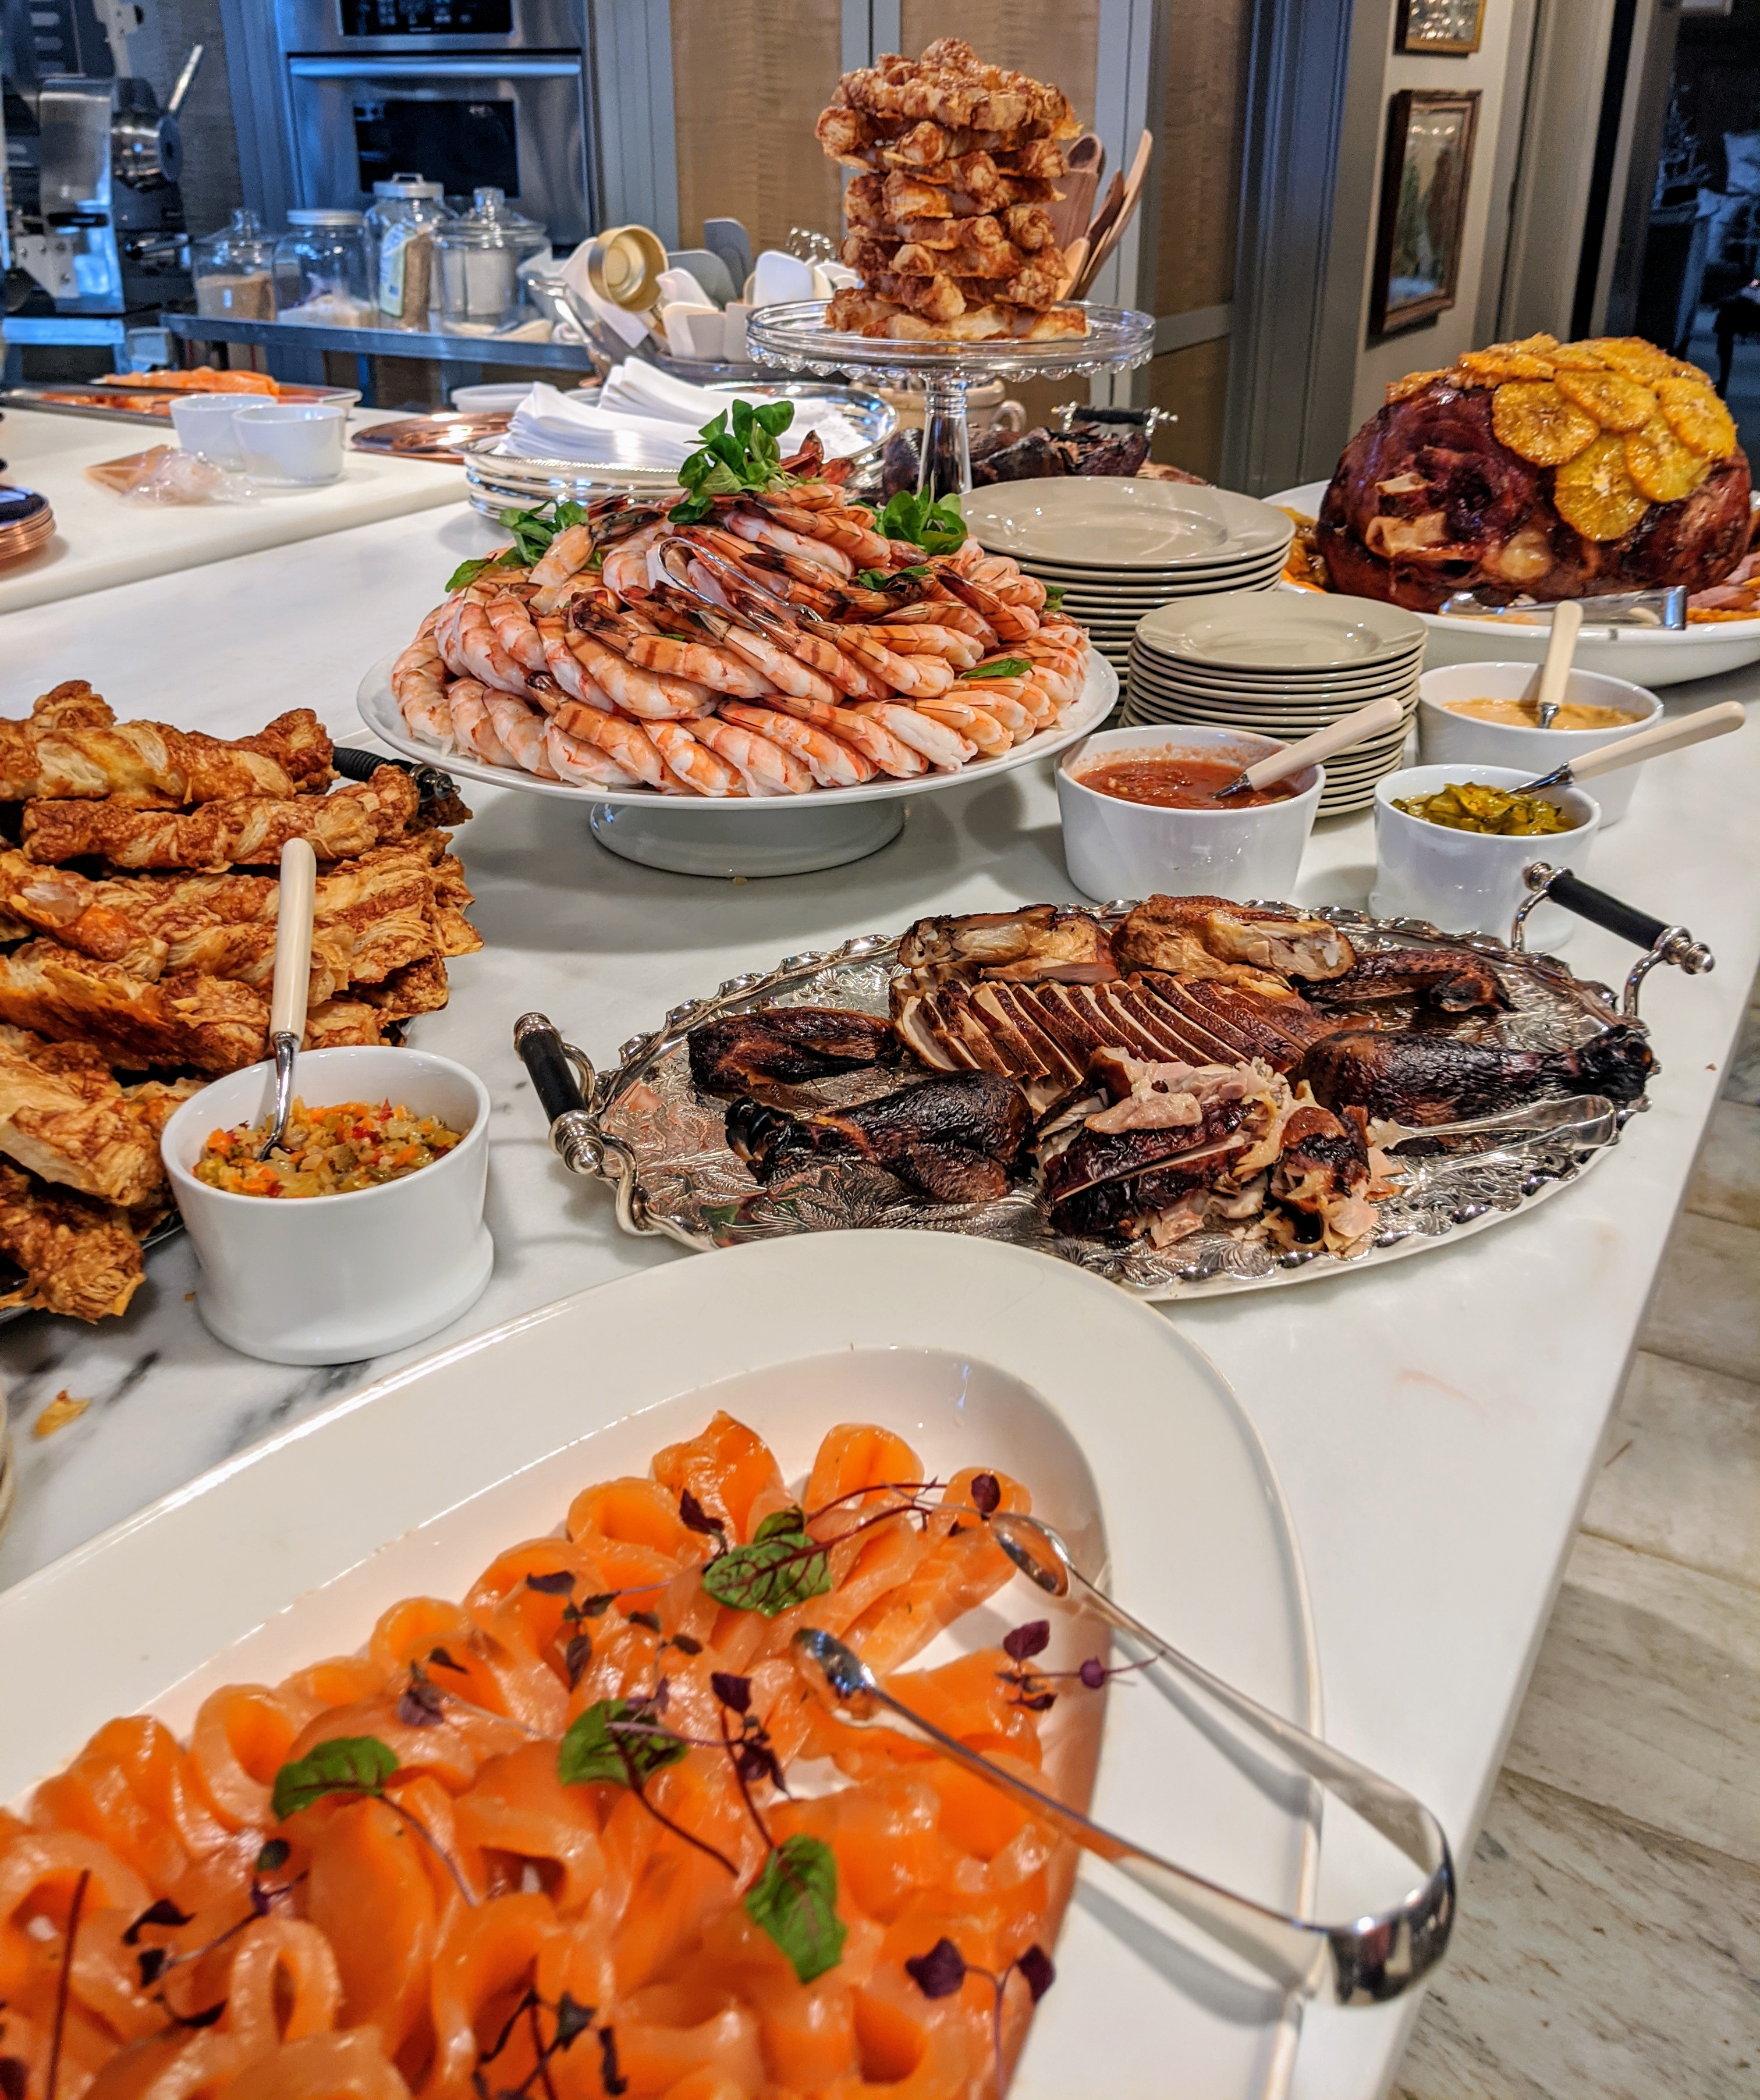
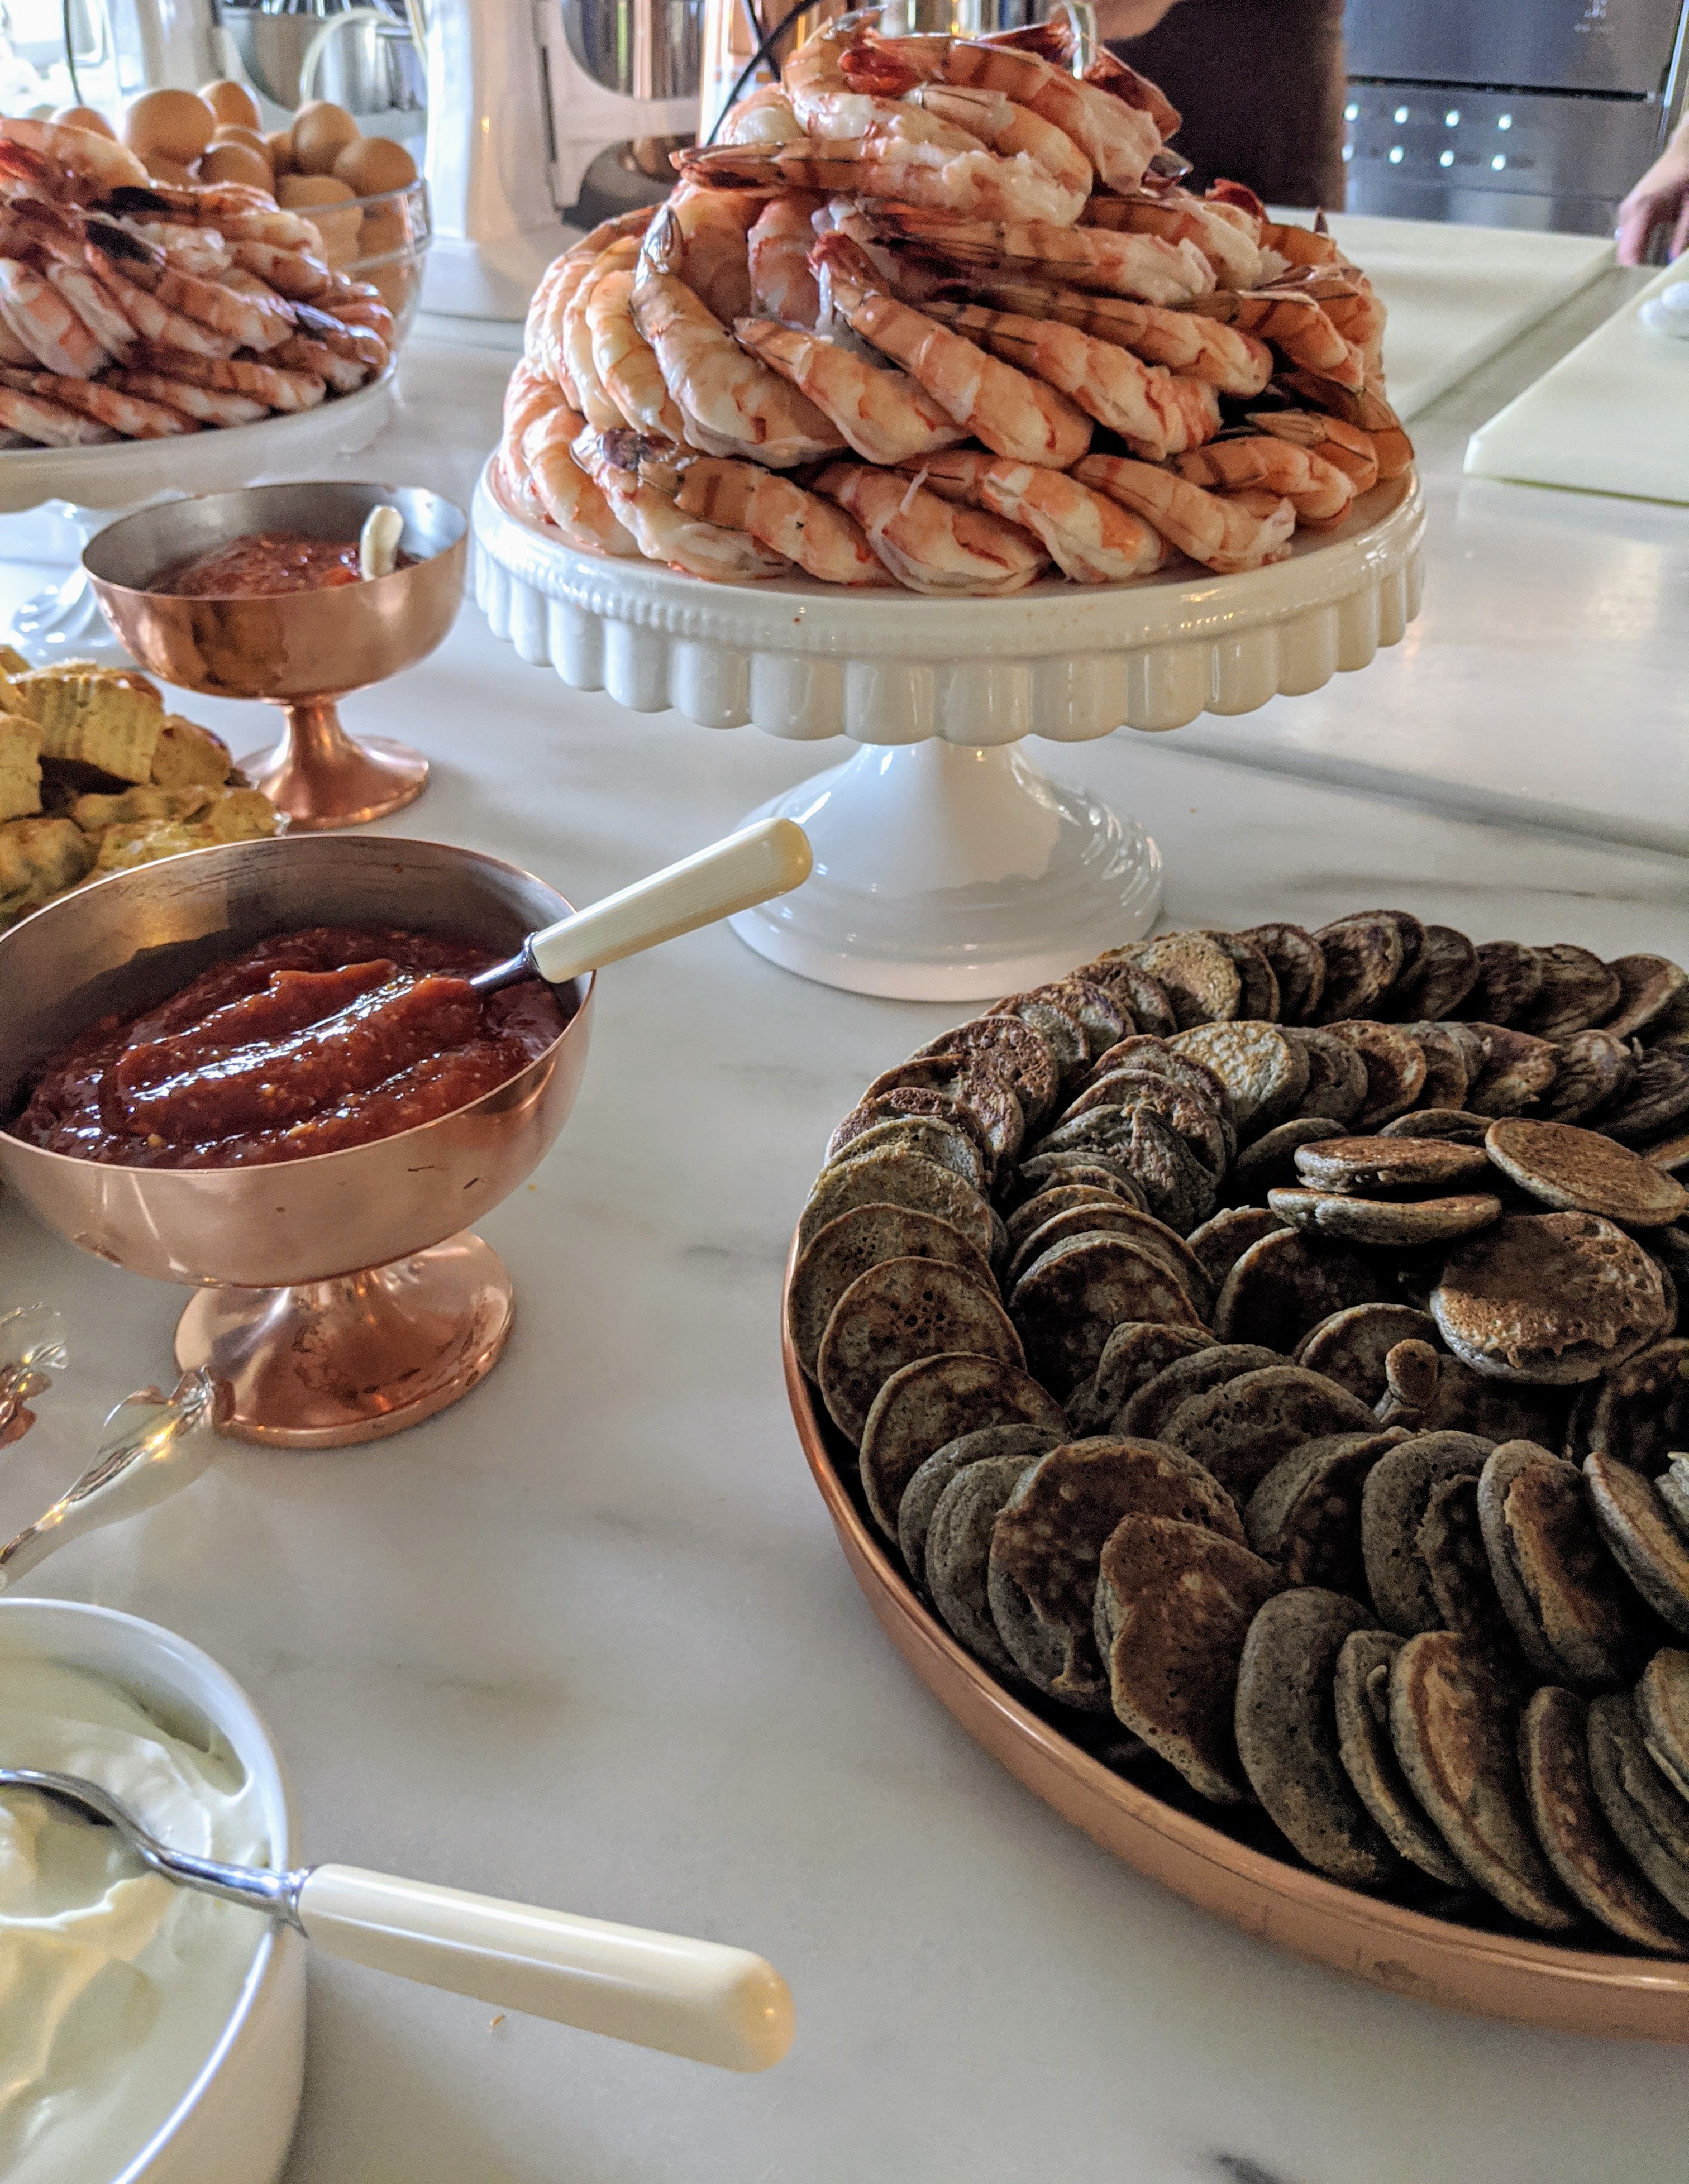
My Winter House is where Chef Pierre Schaedelin @pstailoredevents and I prepared and served all our glorious savory foods. We pushed my kitchen counters together on one side, so we could serve the food buffet-style – it’s a wonderful solution for large gatherings.
Our shrimp and salmon came from True North, @truenorthseafood. We served the shrimp on cake stands in circular layers. http://www.truenorthseafood.com
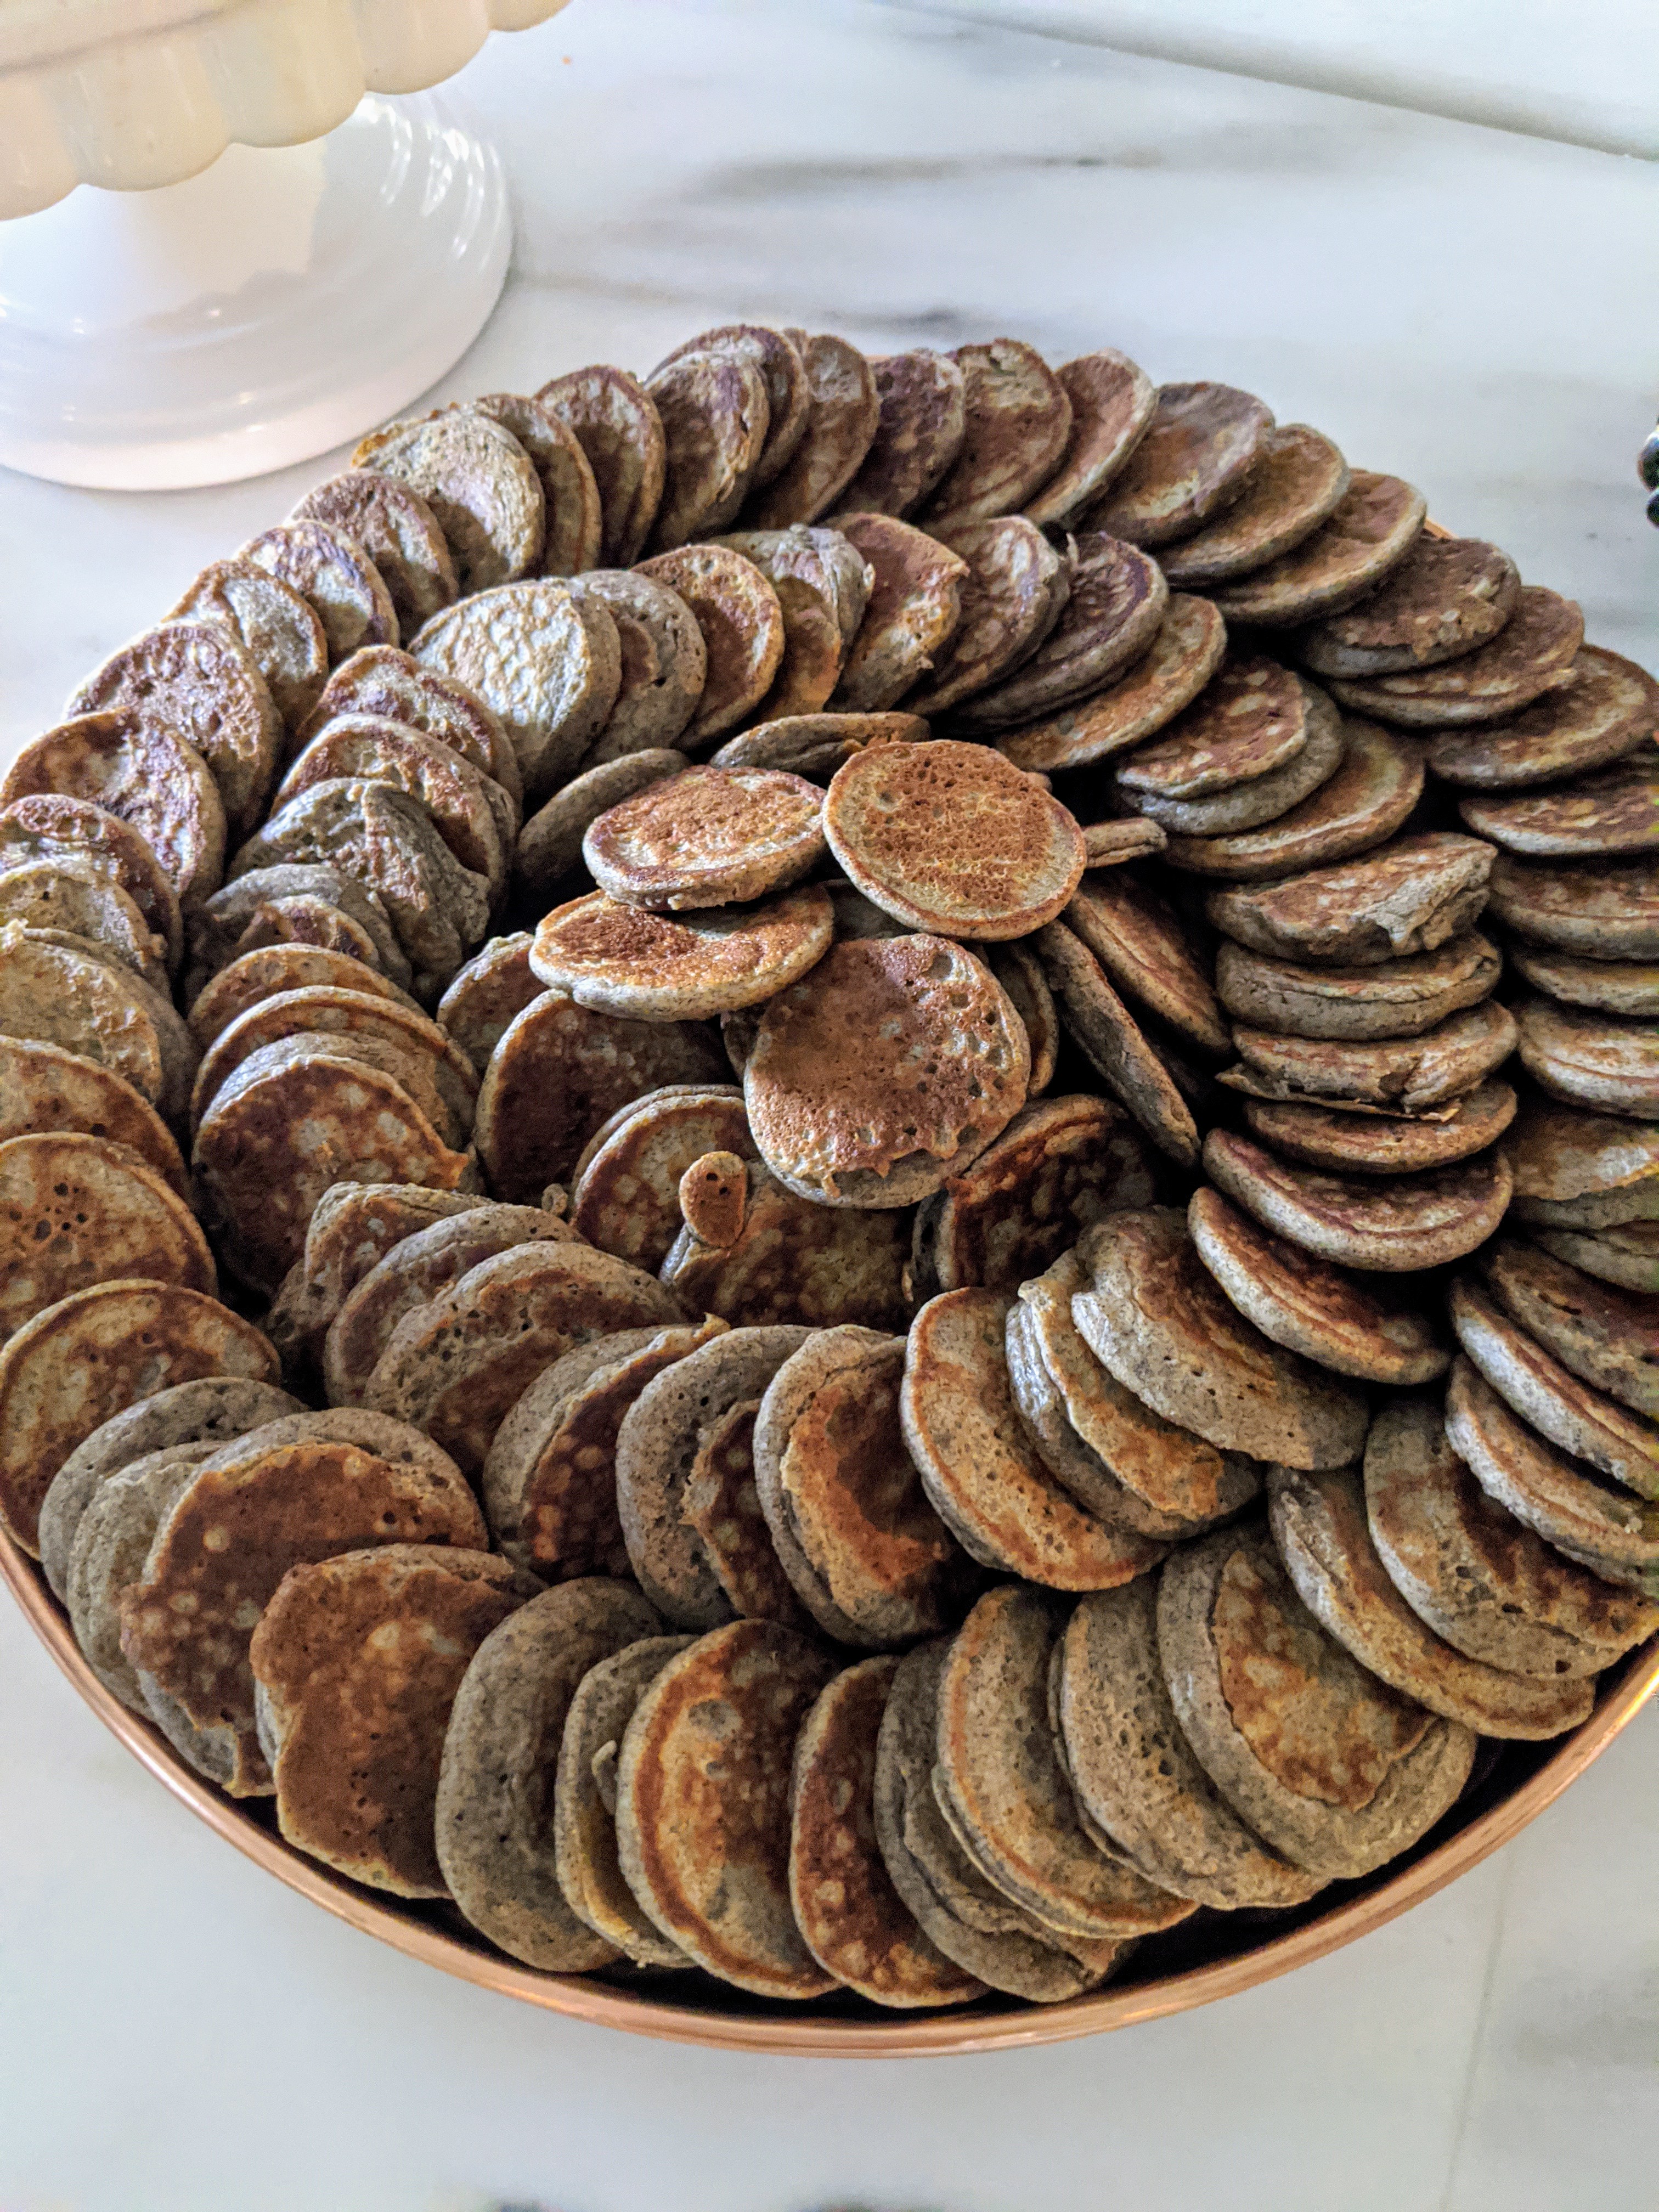
These are mini blinis – traditional Russian pancakes, which are best served with a dab of creme fraiche and a spoonful of caviar. I published the recipe in “Martha Stewart’s Hors D’oeuvres: The Creation and Presentation of Fabulous Finger Food” in 1984.
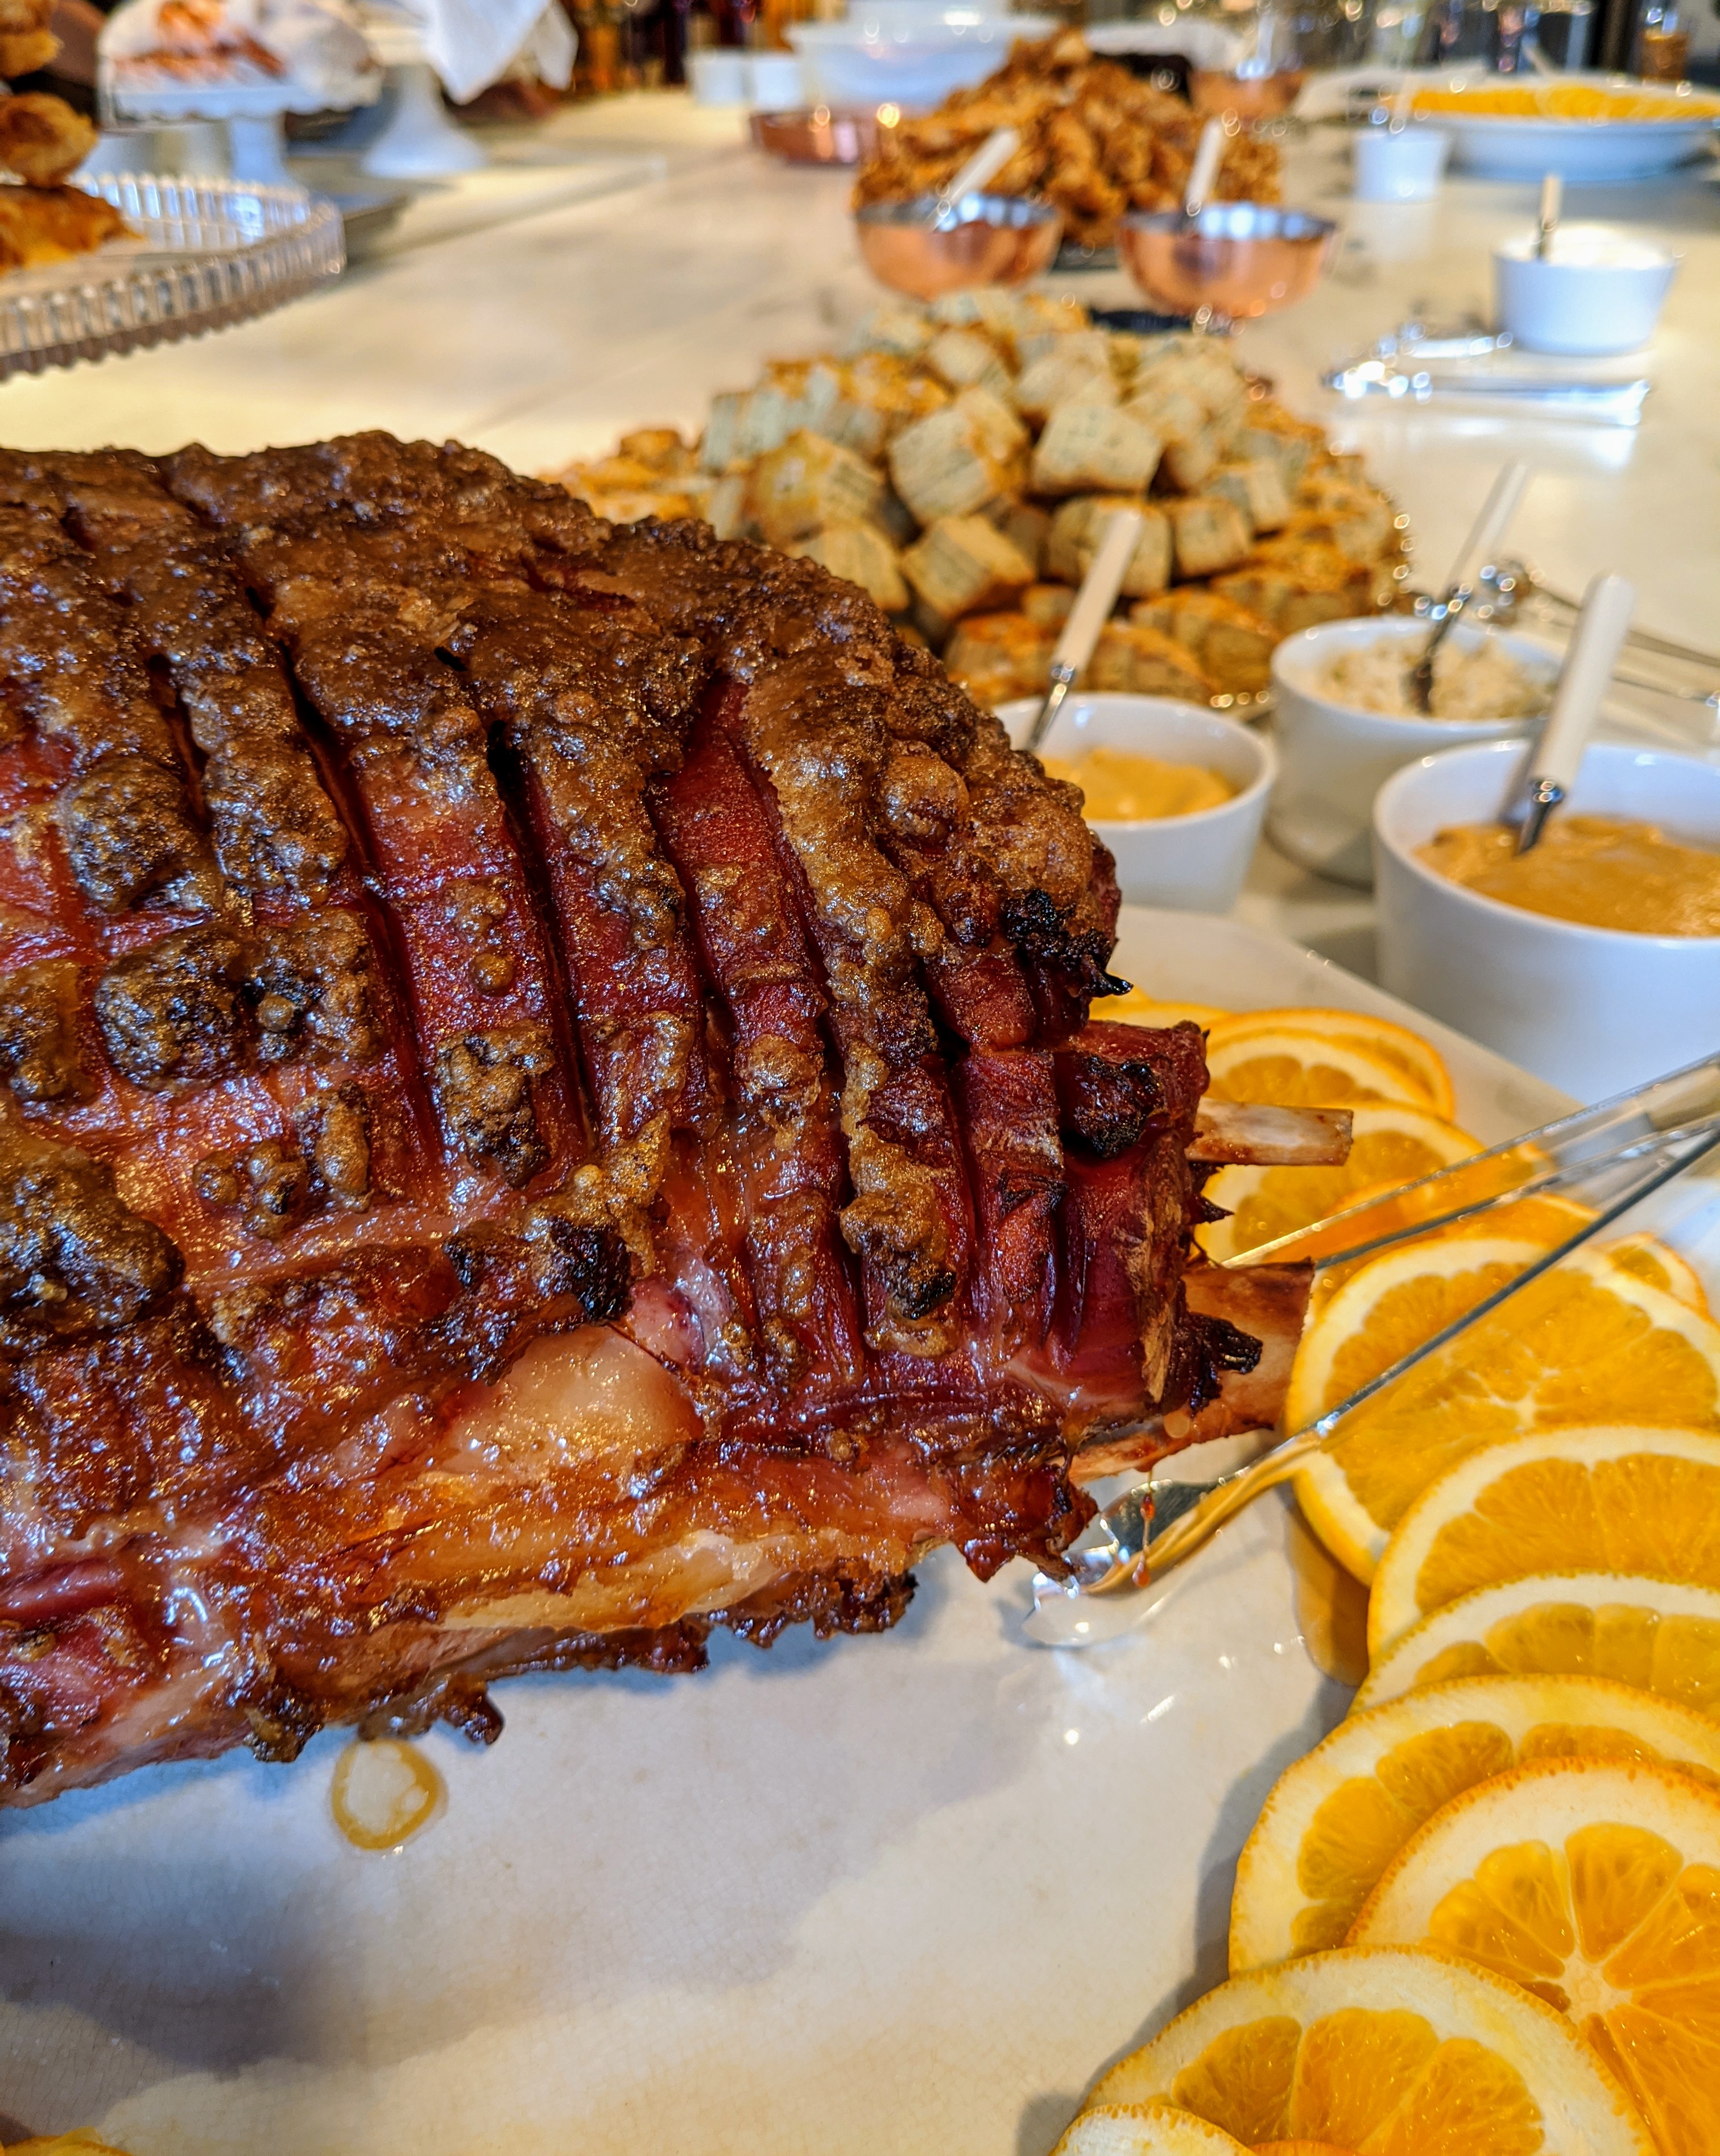
We also had two hams from my friend, Pat LaFrieda. This is a 20-pound smoked ham. http://www.lafrieda.com
The ham was served with homemade biscuits, scones, horseradish sauce I made from horseradish grown here at the farm, and homemade mustard sauces.
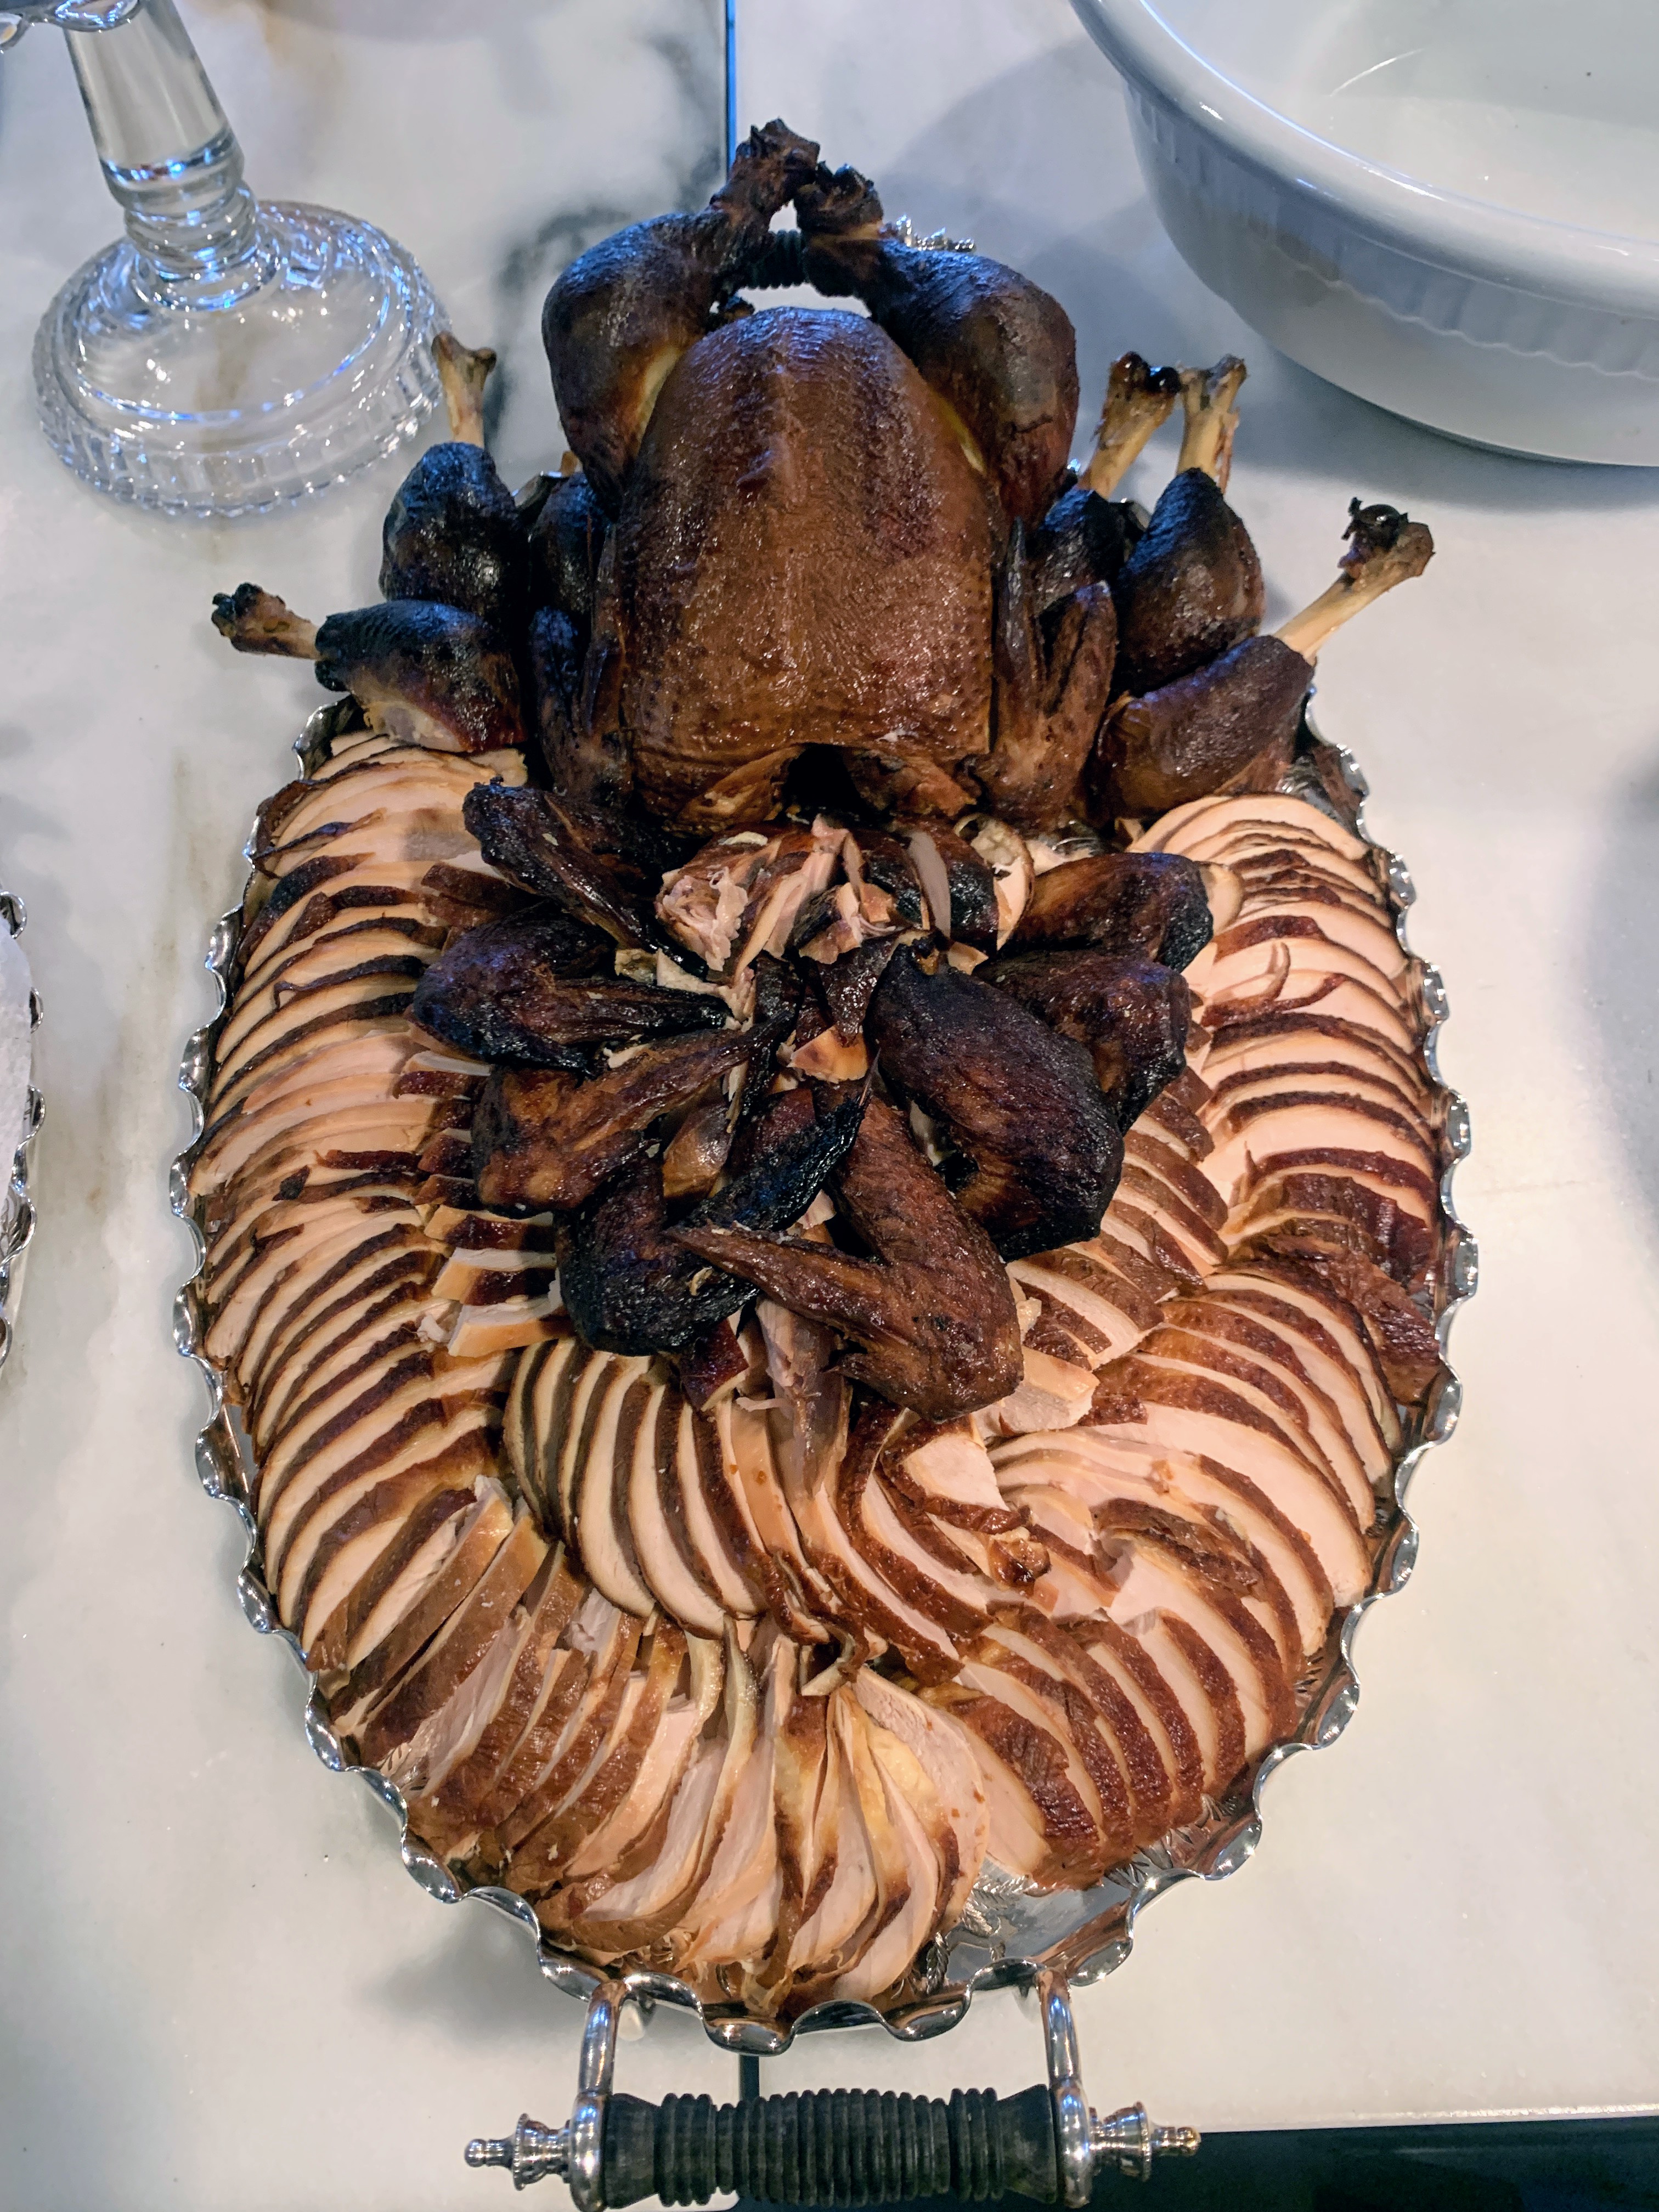
The smoked chicken was displayed so nicely on this large platter. I smoked four four-pound chickens using my delicious smoked chicken recipe from my first hors d’oeuvres book. Everyone thought it was duck and every tidbit disappeared. This photo was taken just before the guests started eating.
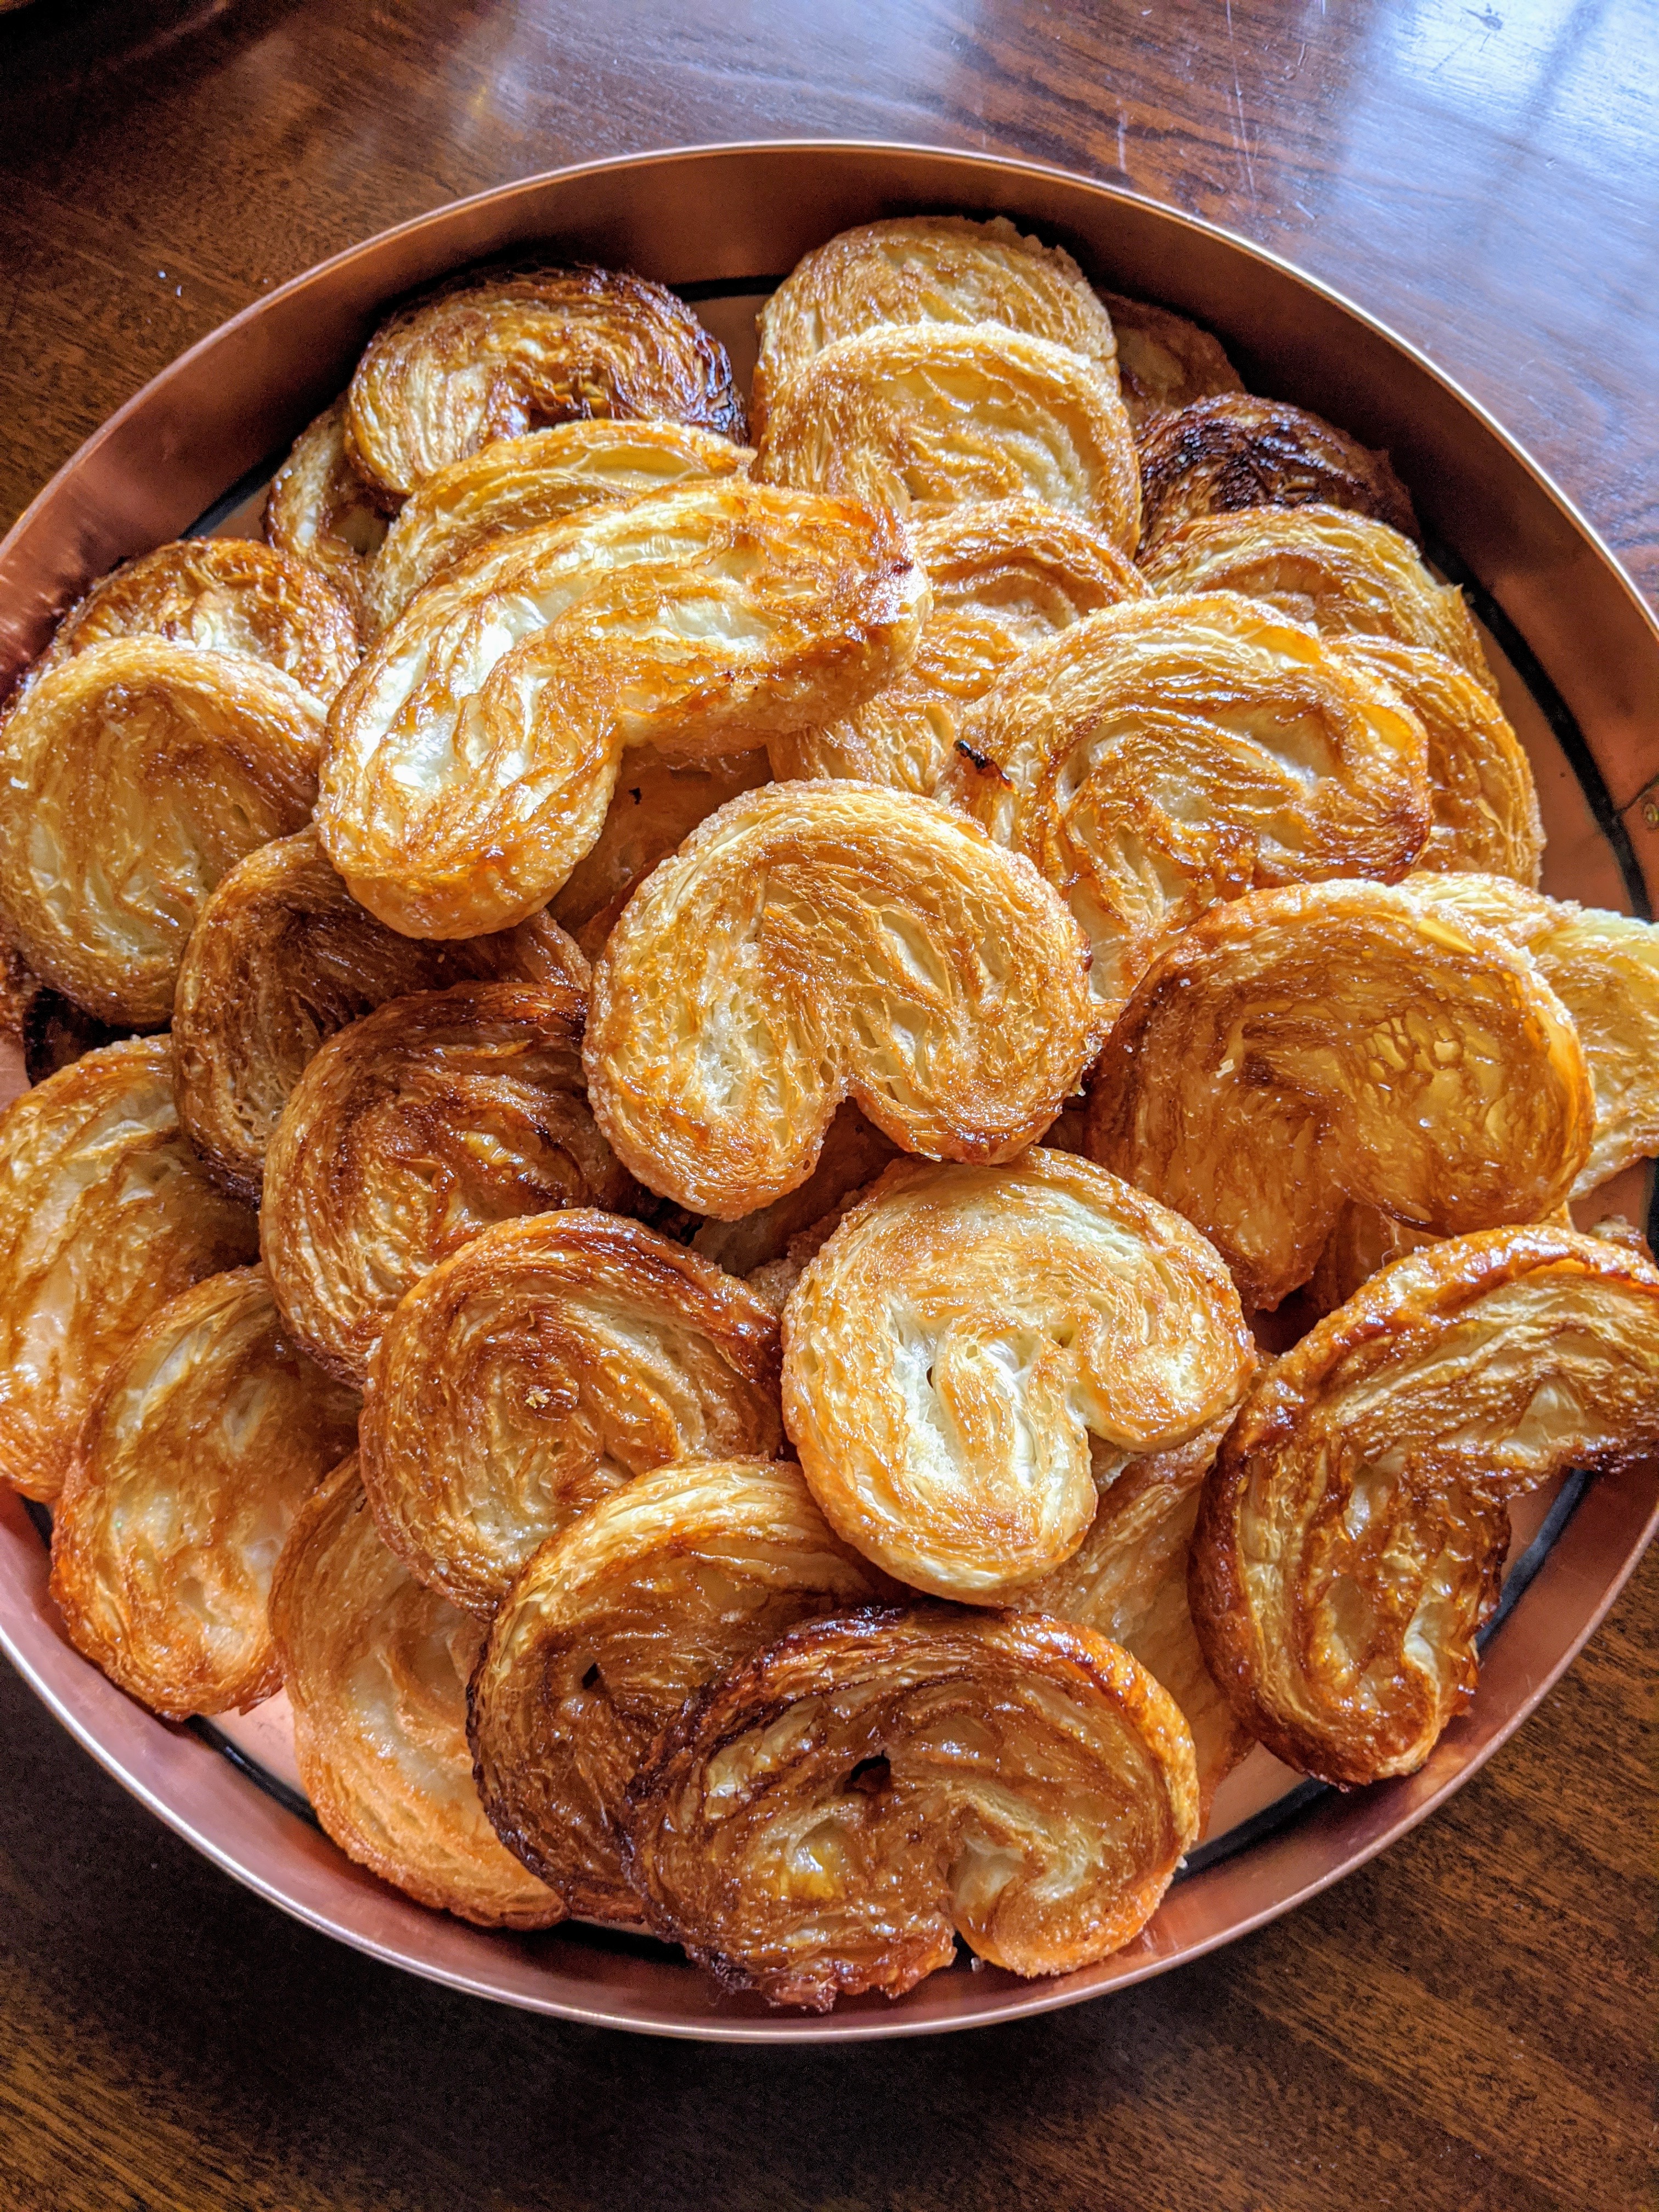
For sweets, I made these gorgeous palmiers, also known as pig’s ears, palm hearts, or elephant ears. These are French pastries made in a palm leaf shape or a butterfly shape. My guests loved these so much, they were gone before I got to even taste one myself.
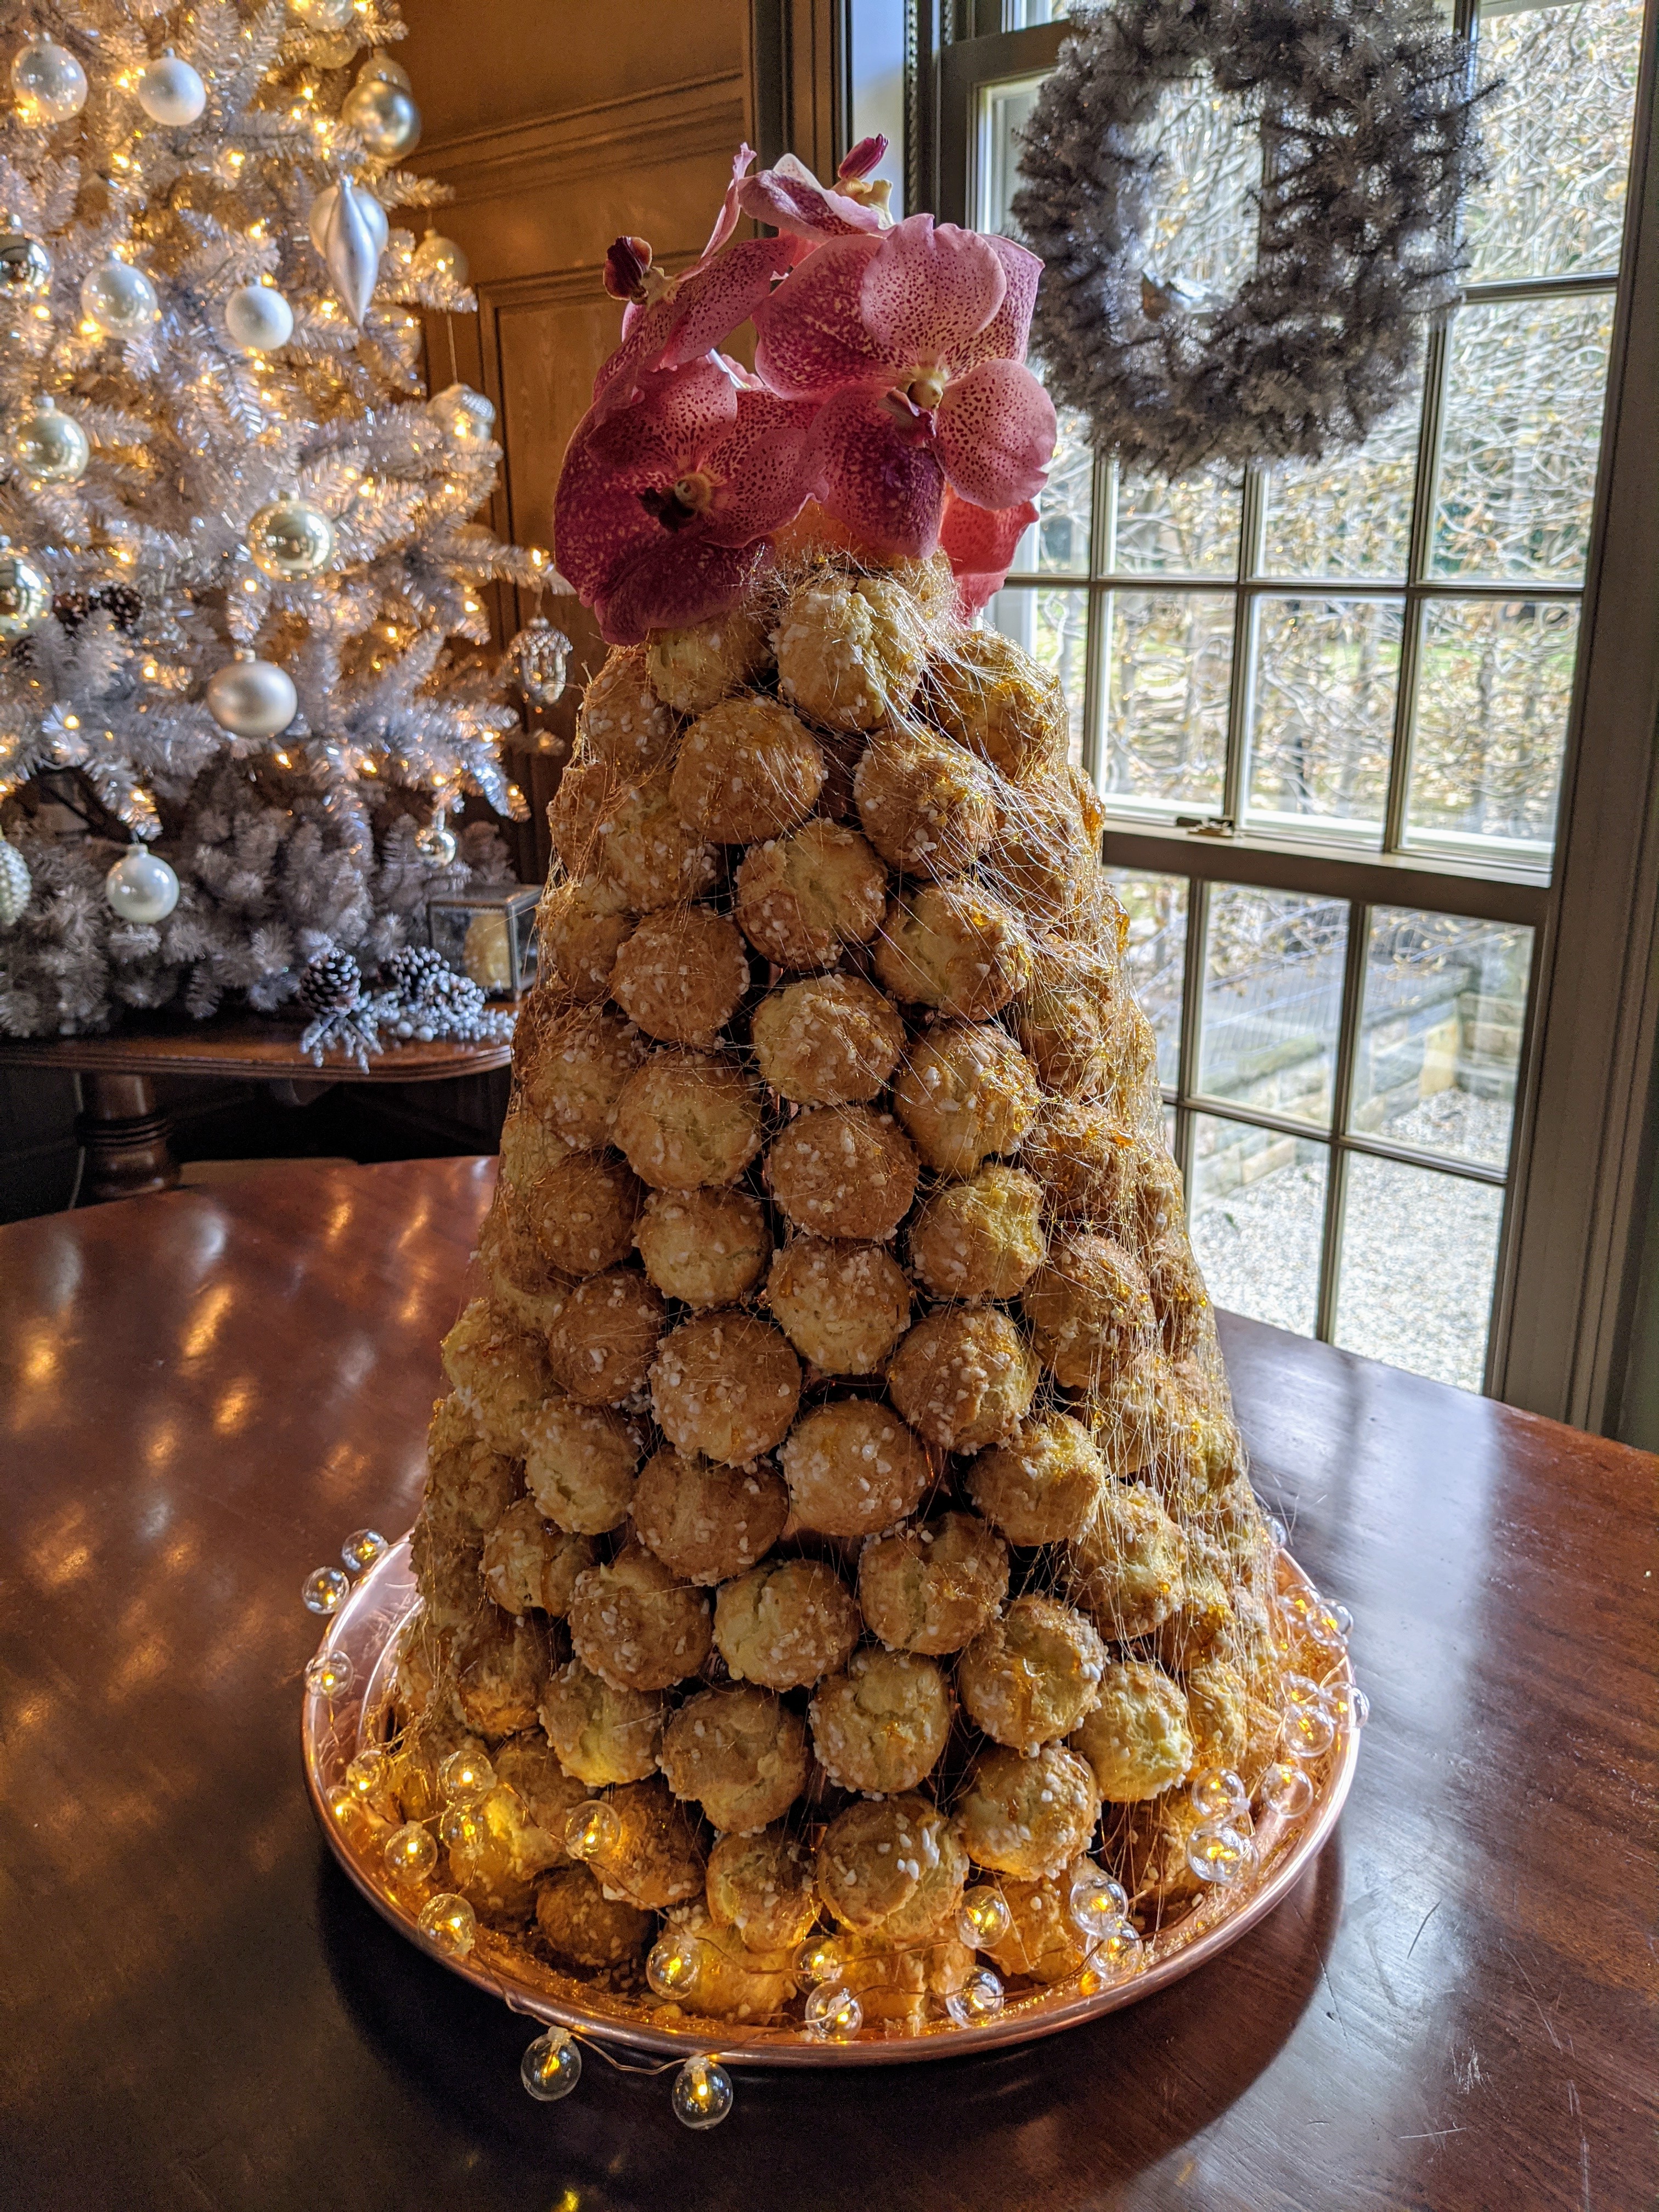
We also made a beautiful croquembouche – a French dessert consisting of choux pastry puffs filled with creme patissiere piled into a cone and bound with threads and threads of caramel. We topped ours with orchid flowers because we didn’t make enough puffs.
Also in my Brown Room – my precious Drabware manger set, which I made years ago. While Drabware tones vary from light coffee to dark olive, it took me a while to get this perfect hue – I love it. I fired and glazed all the pieces myself and then embellished it with palm trees imported from Germany.
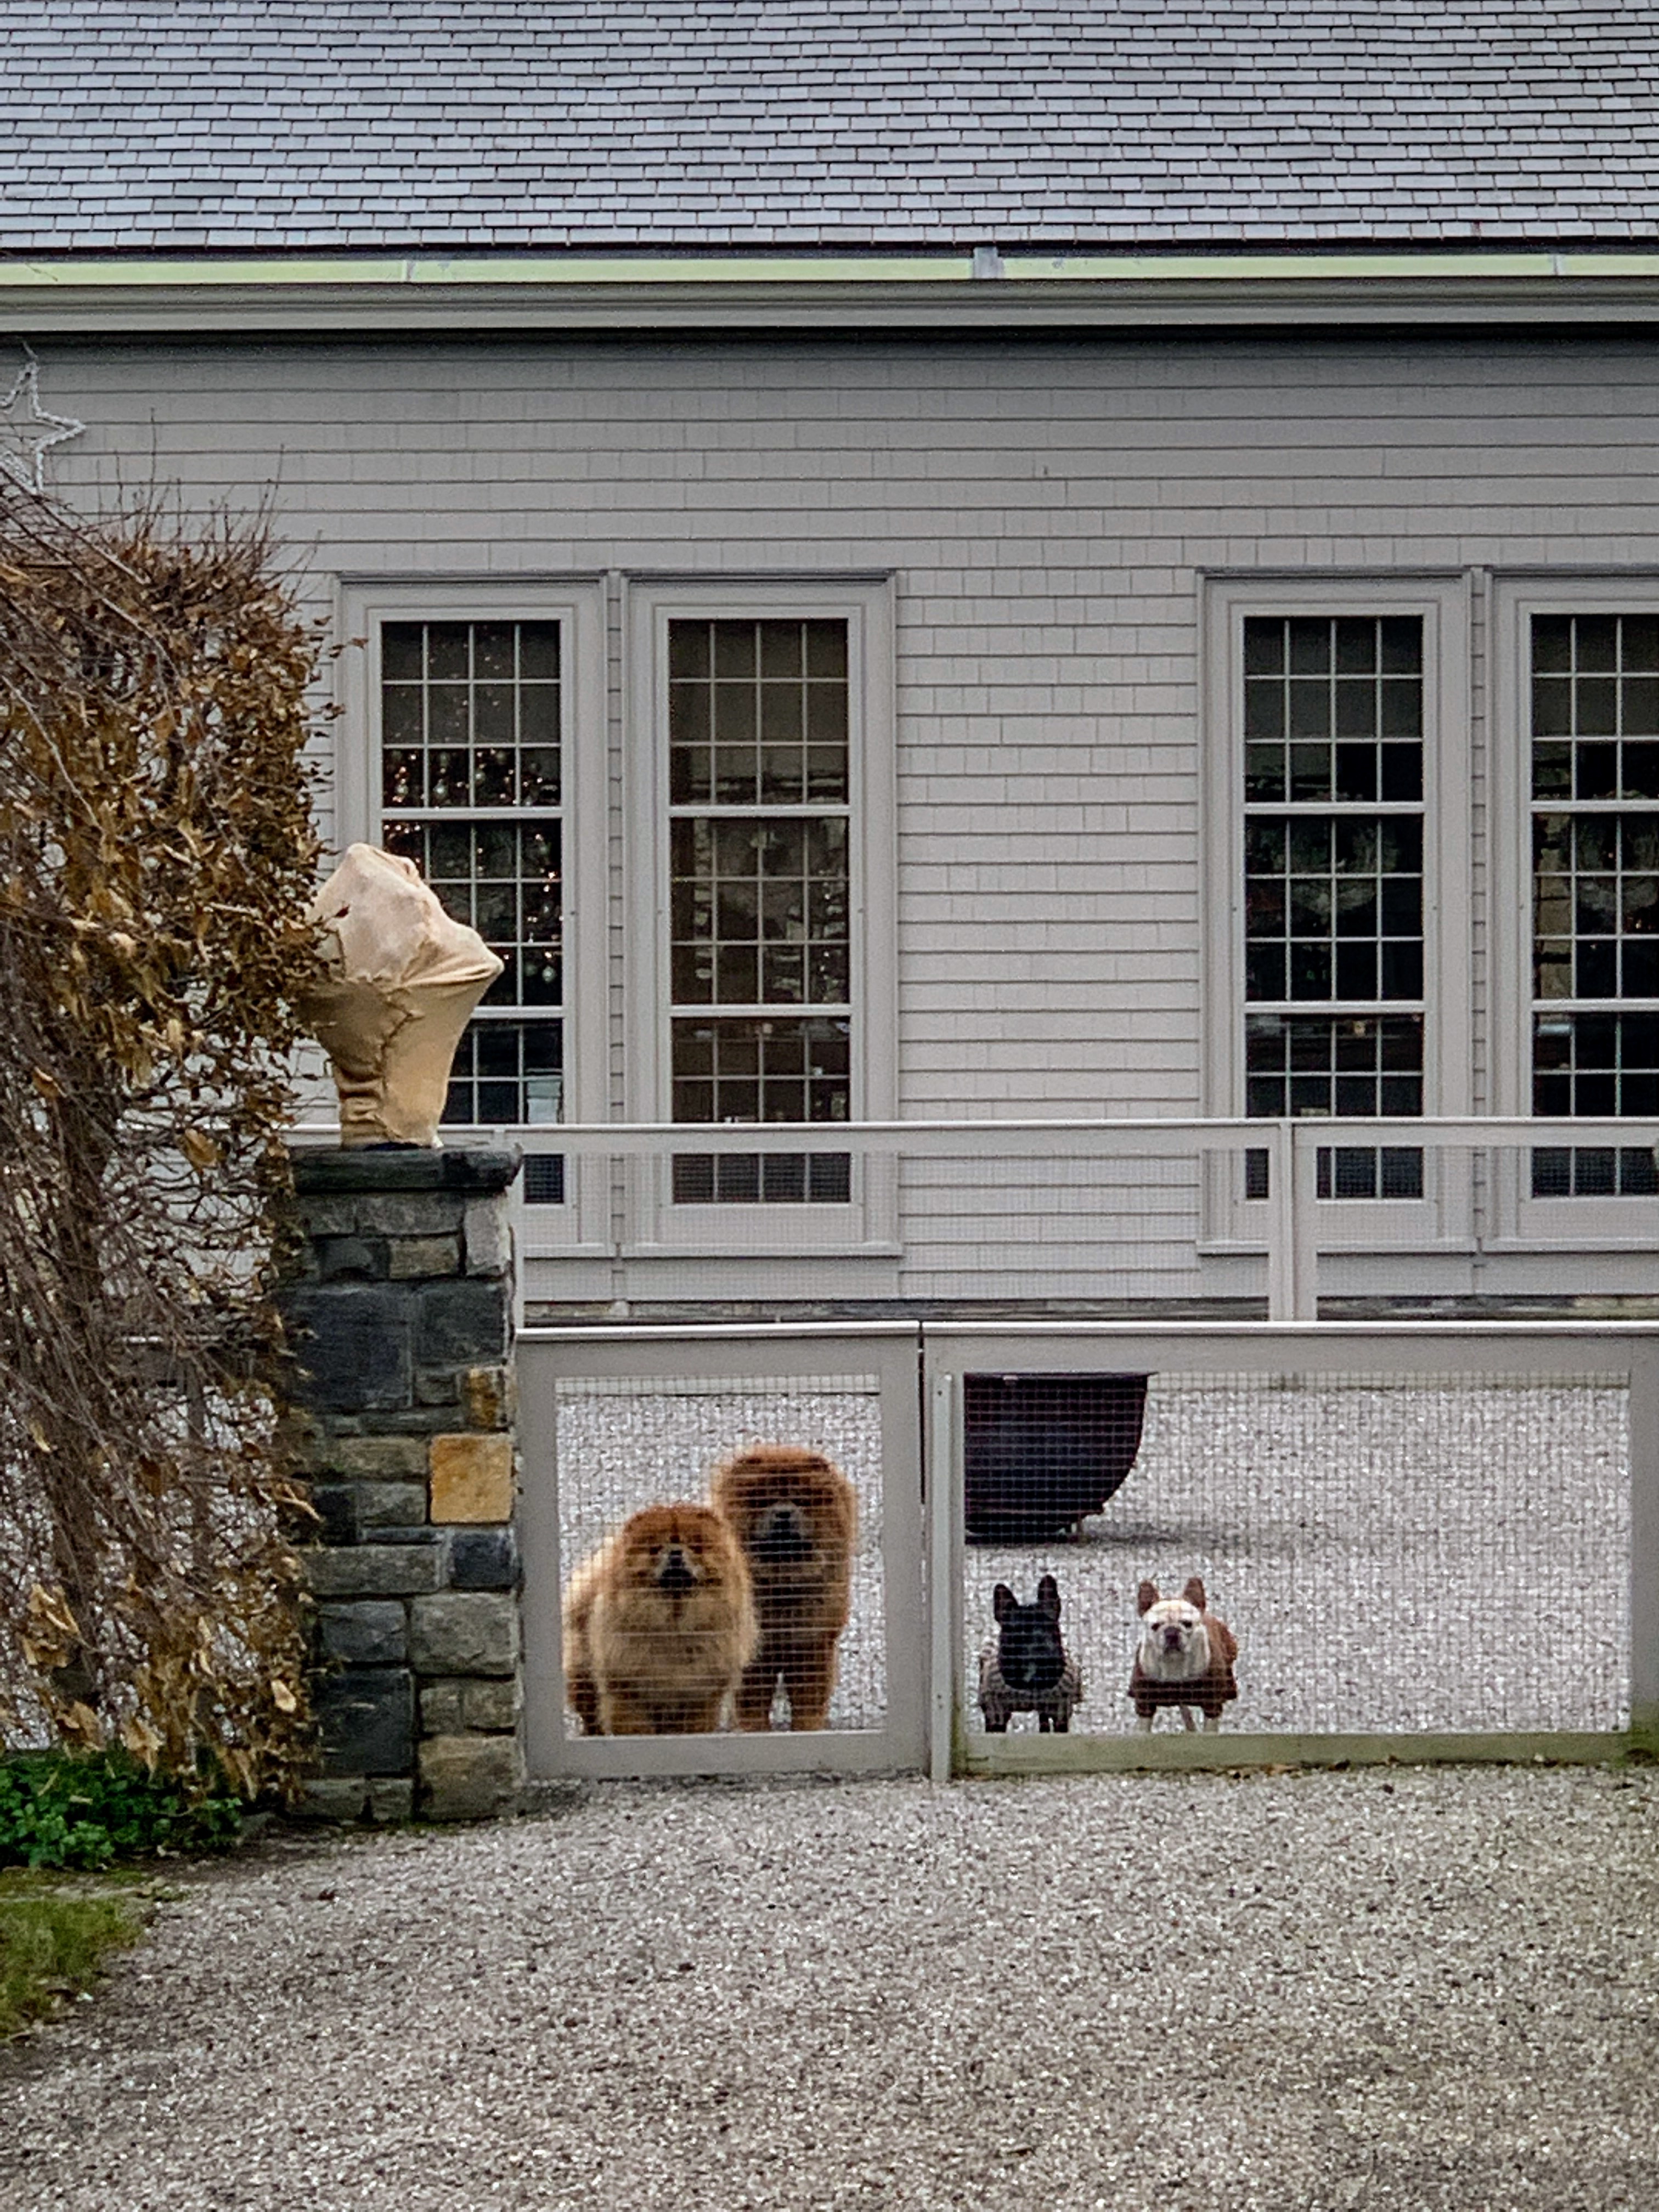
Outside, Empress Qin, Emperor Han, Bete Noire, and Creme Brulee stand guard – picture perfect.
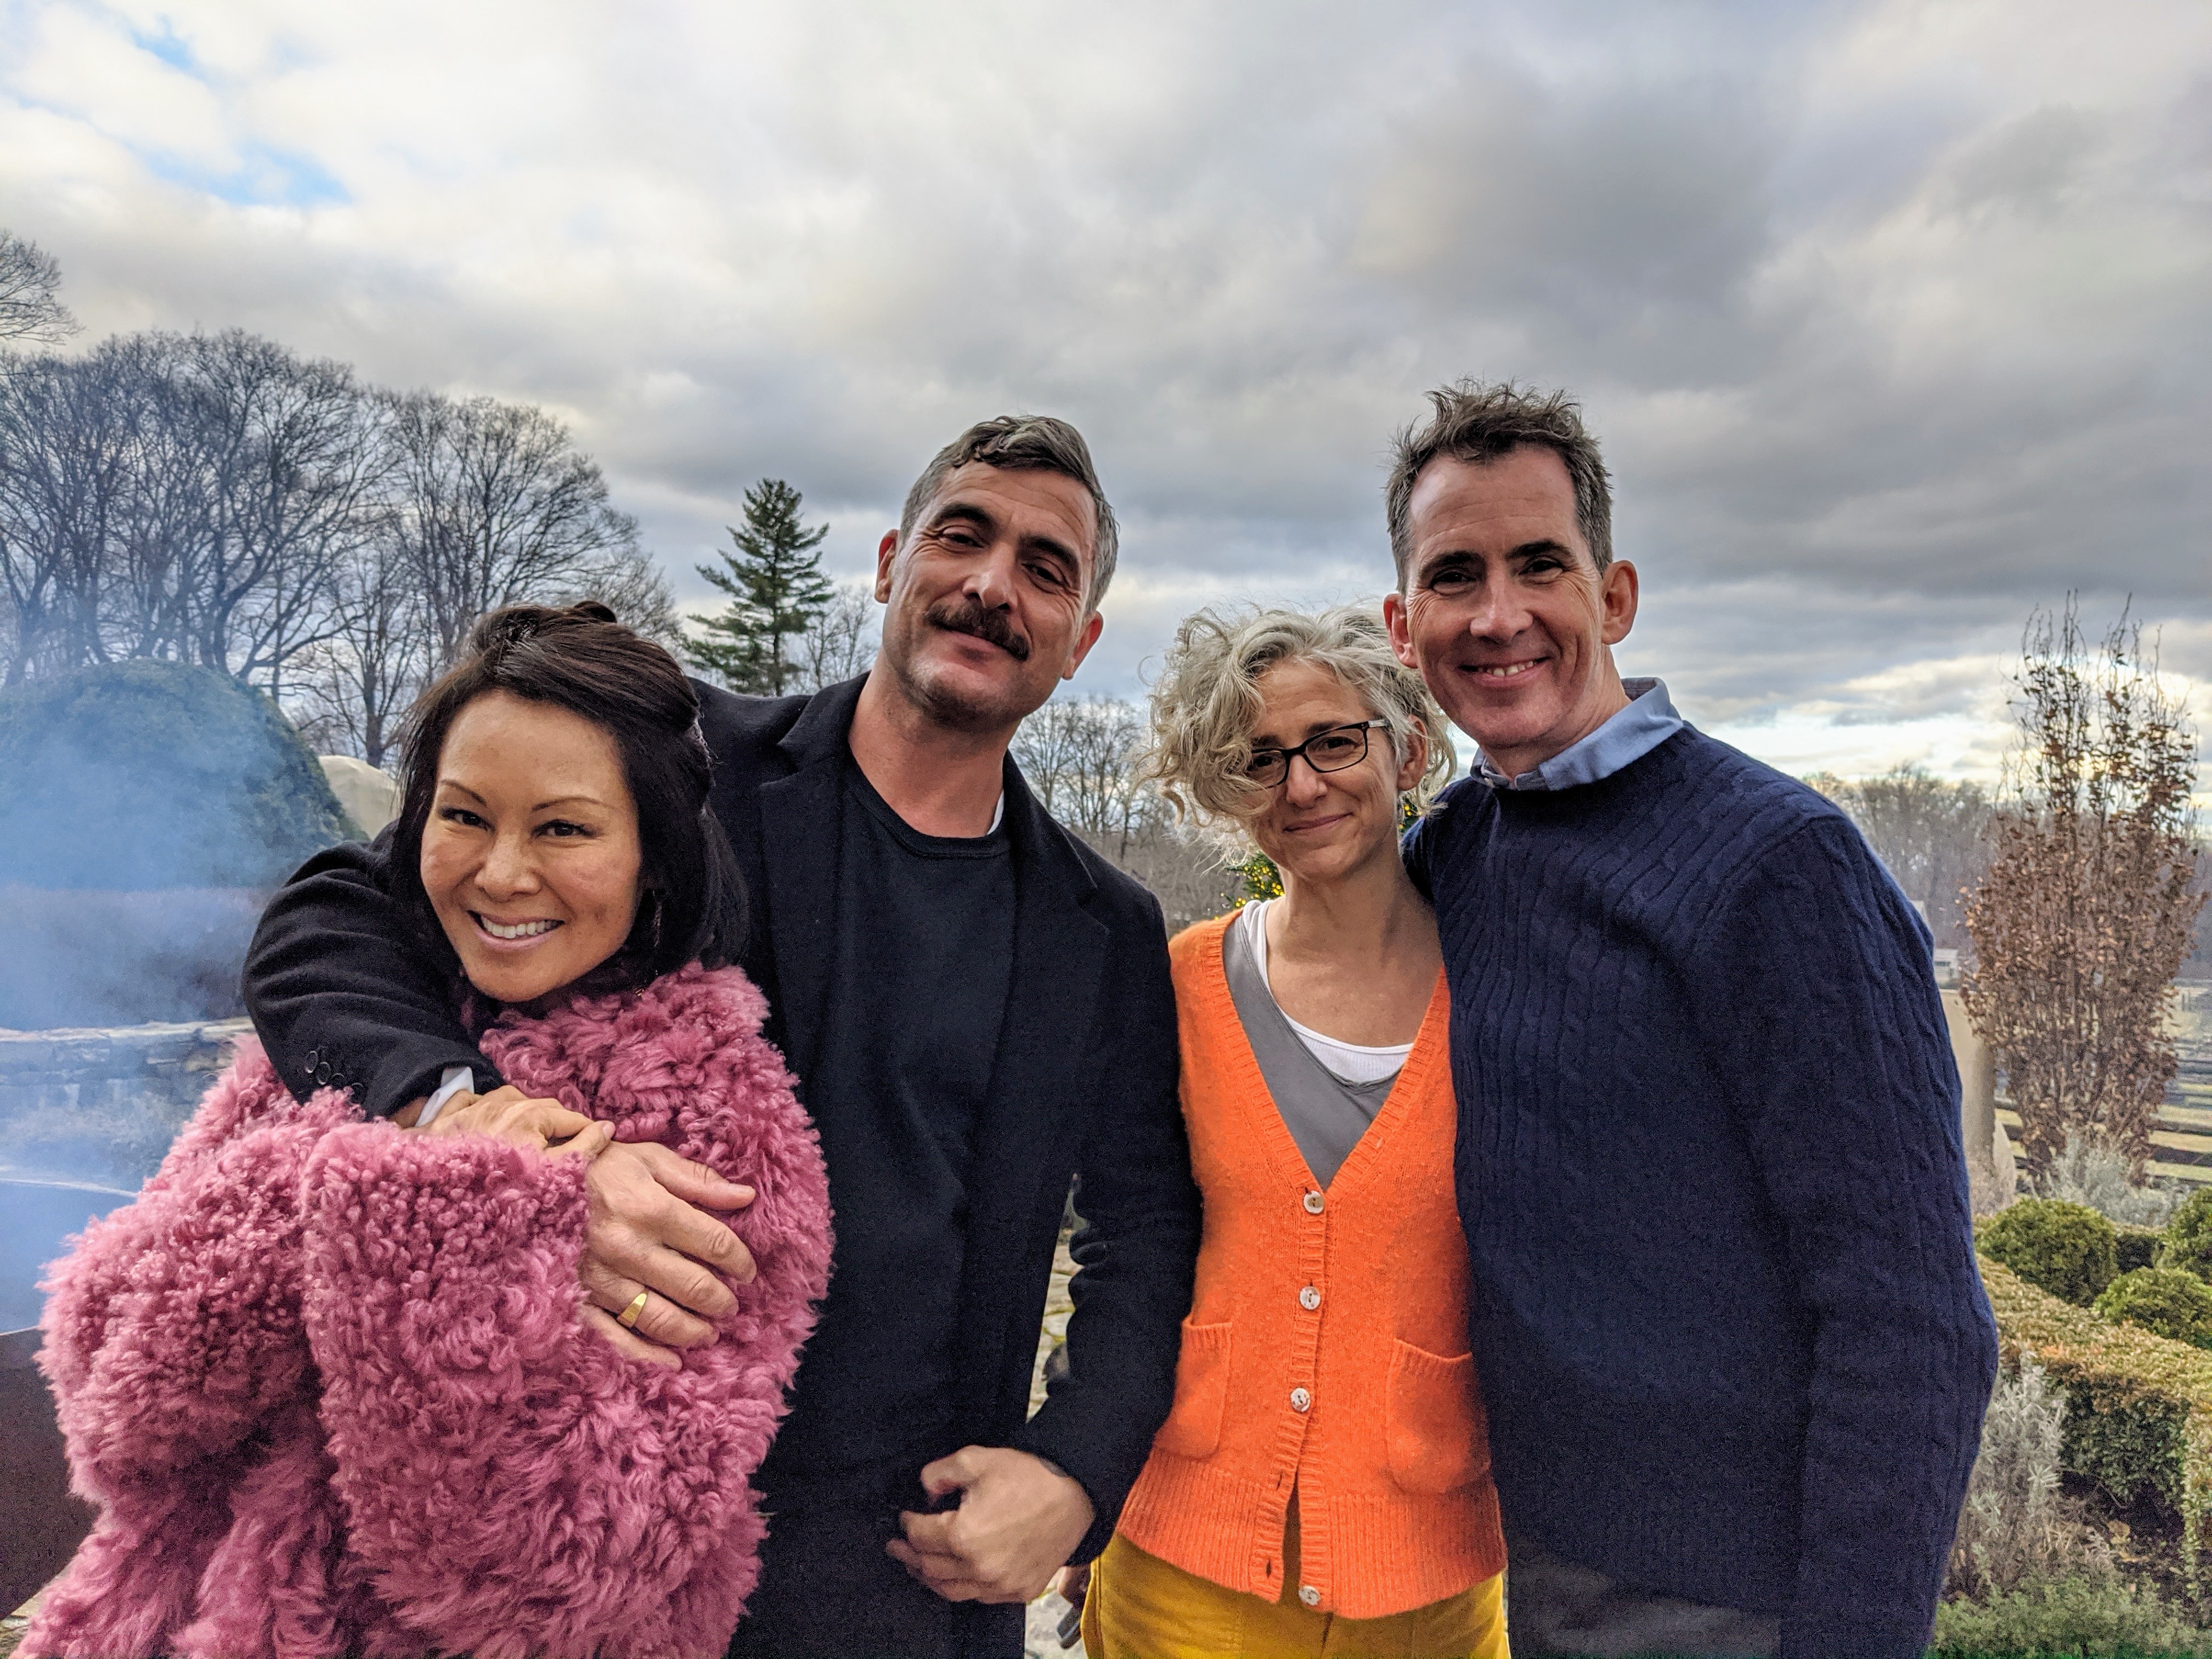
Here is a fun snapshot of television correspondent and Editor-at-Large at Ballantine Bantam Dell, Alina Cho @thealinacho, Douglas @DouglasFriedman, Sarah Carey @sarahcarey1, and Kevin @seenbysharkey outside on my terrace parterre.
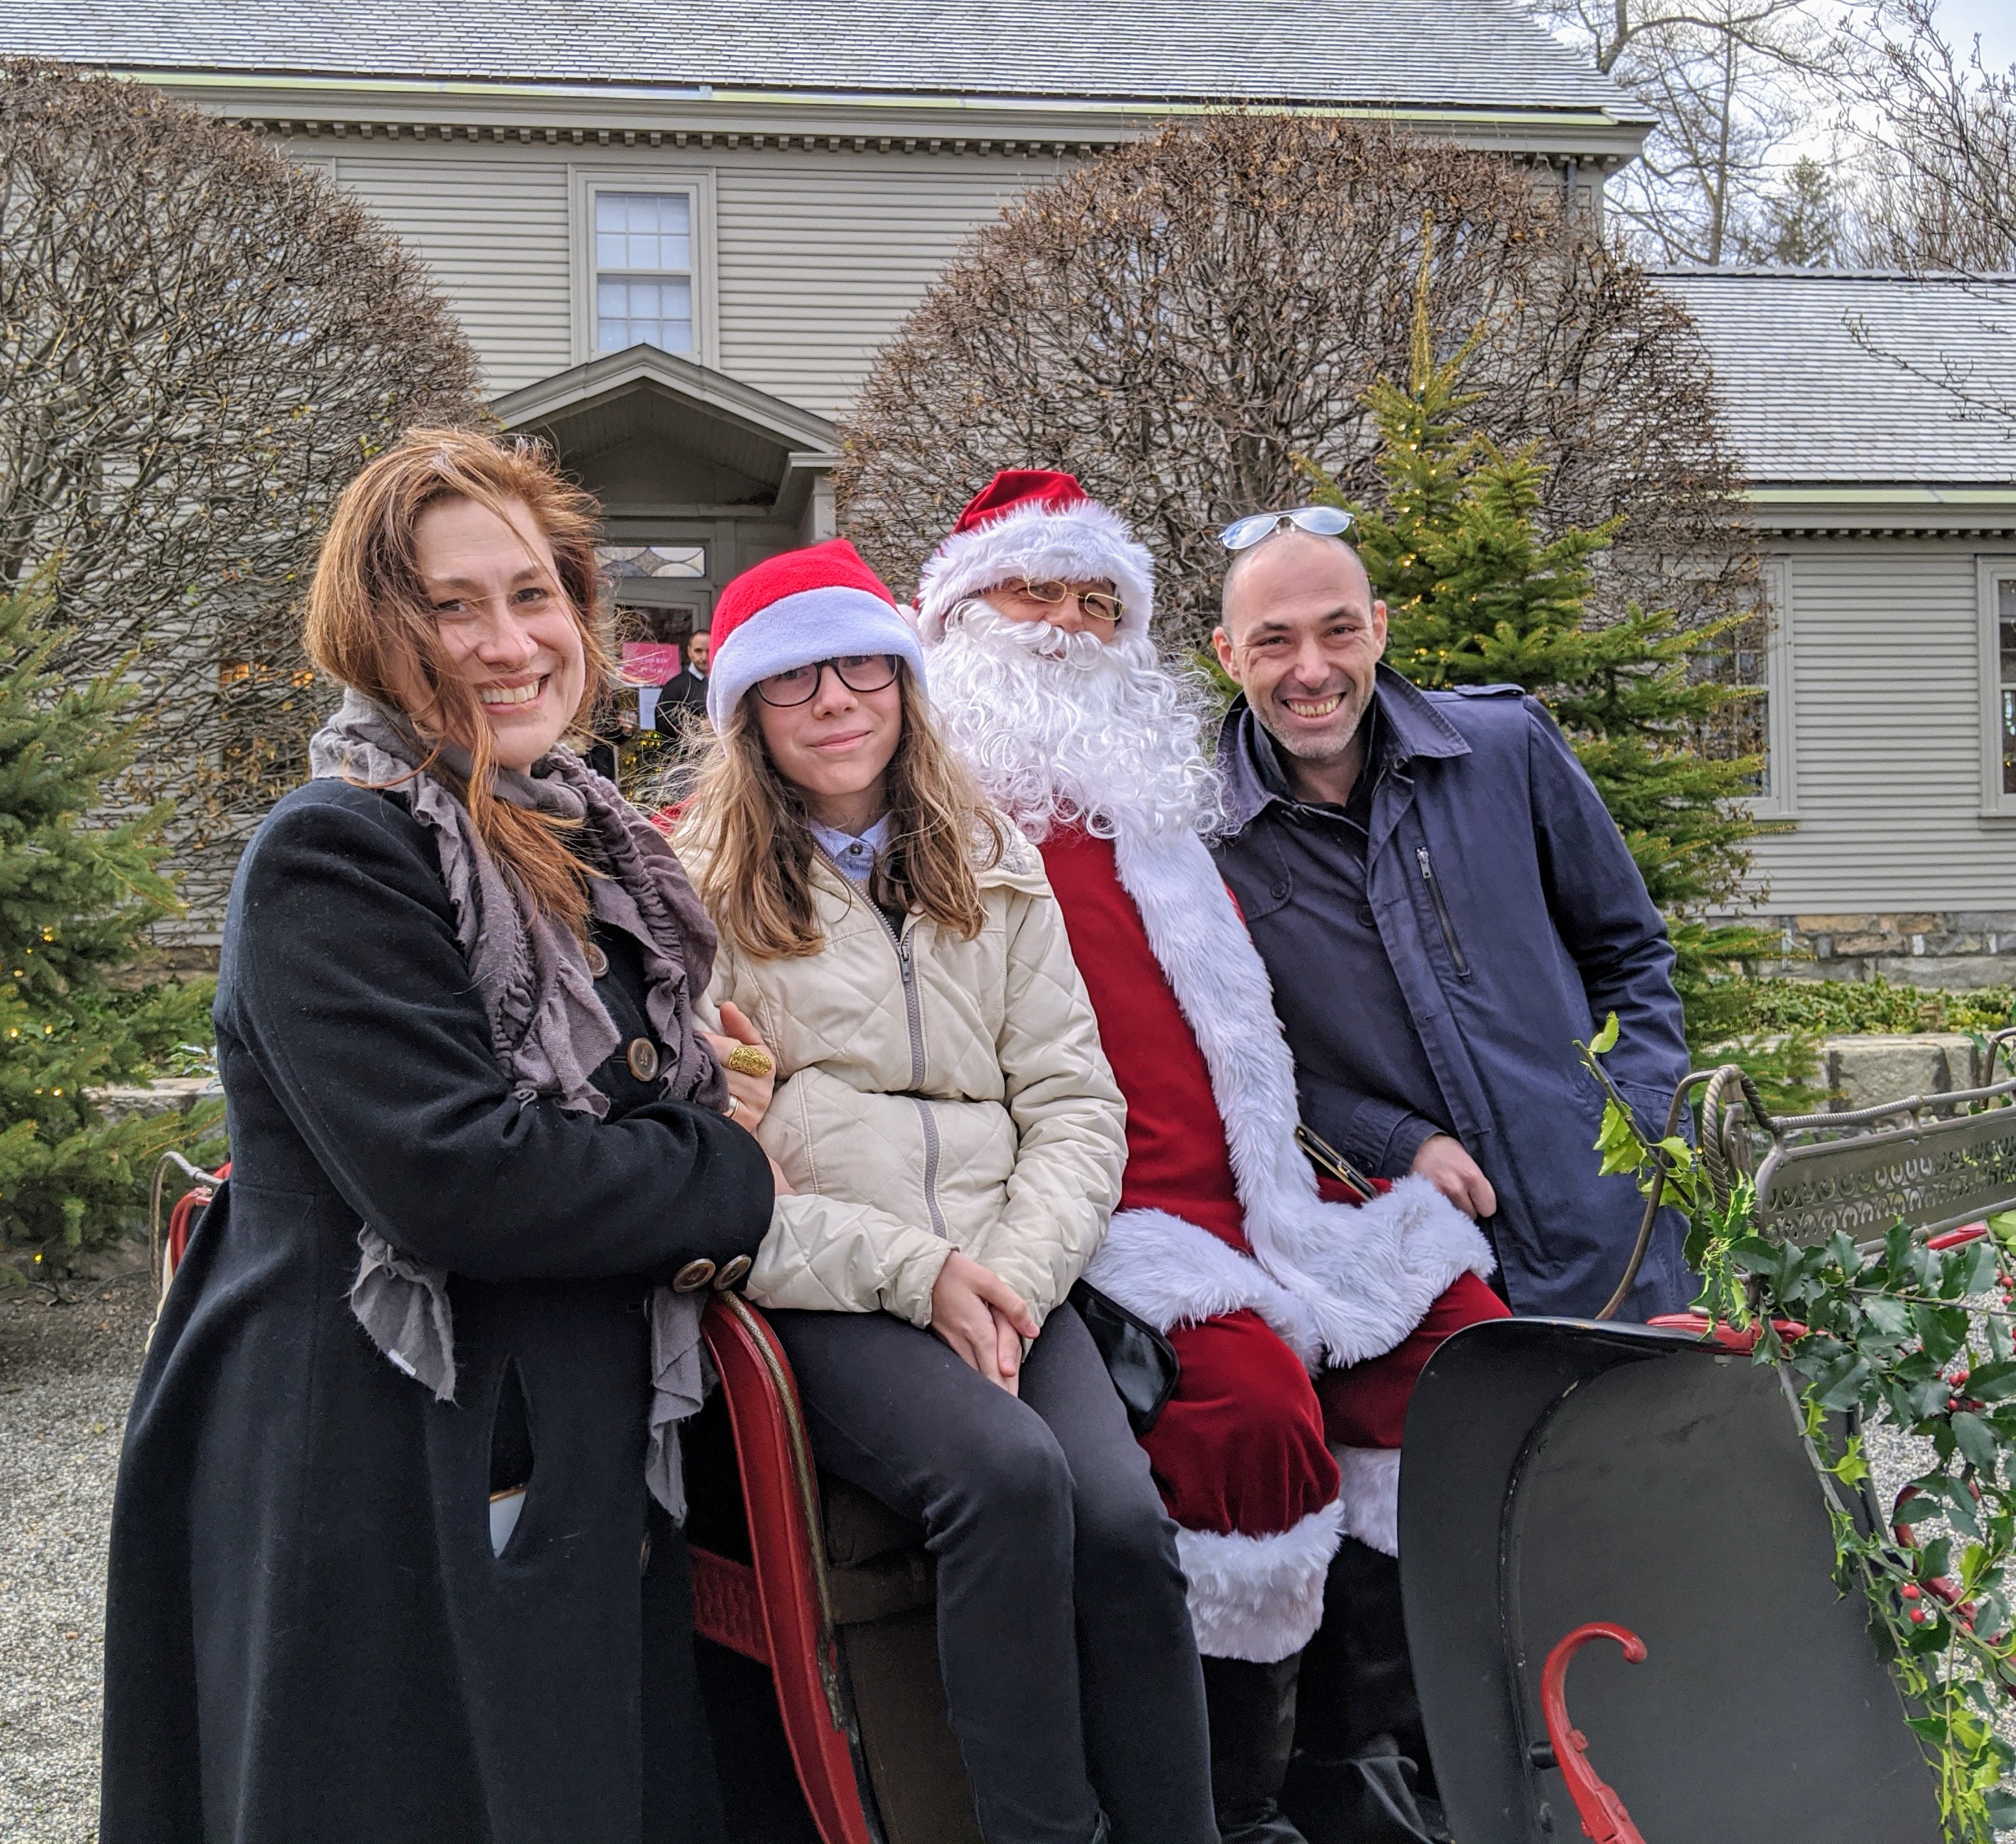
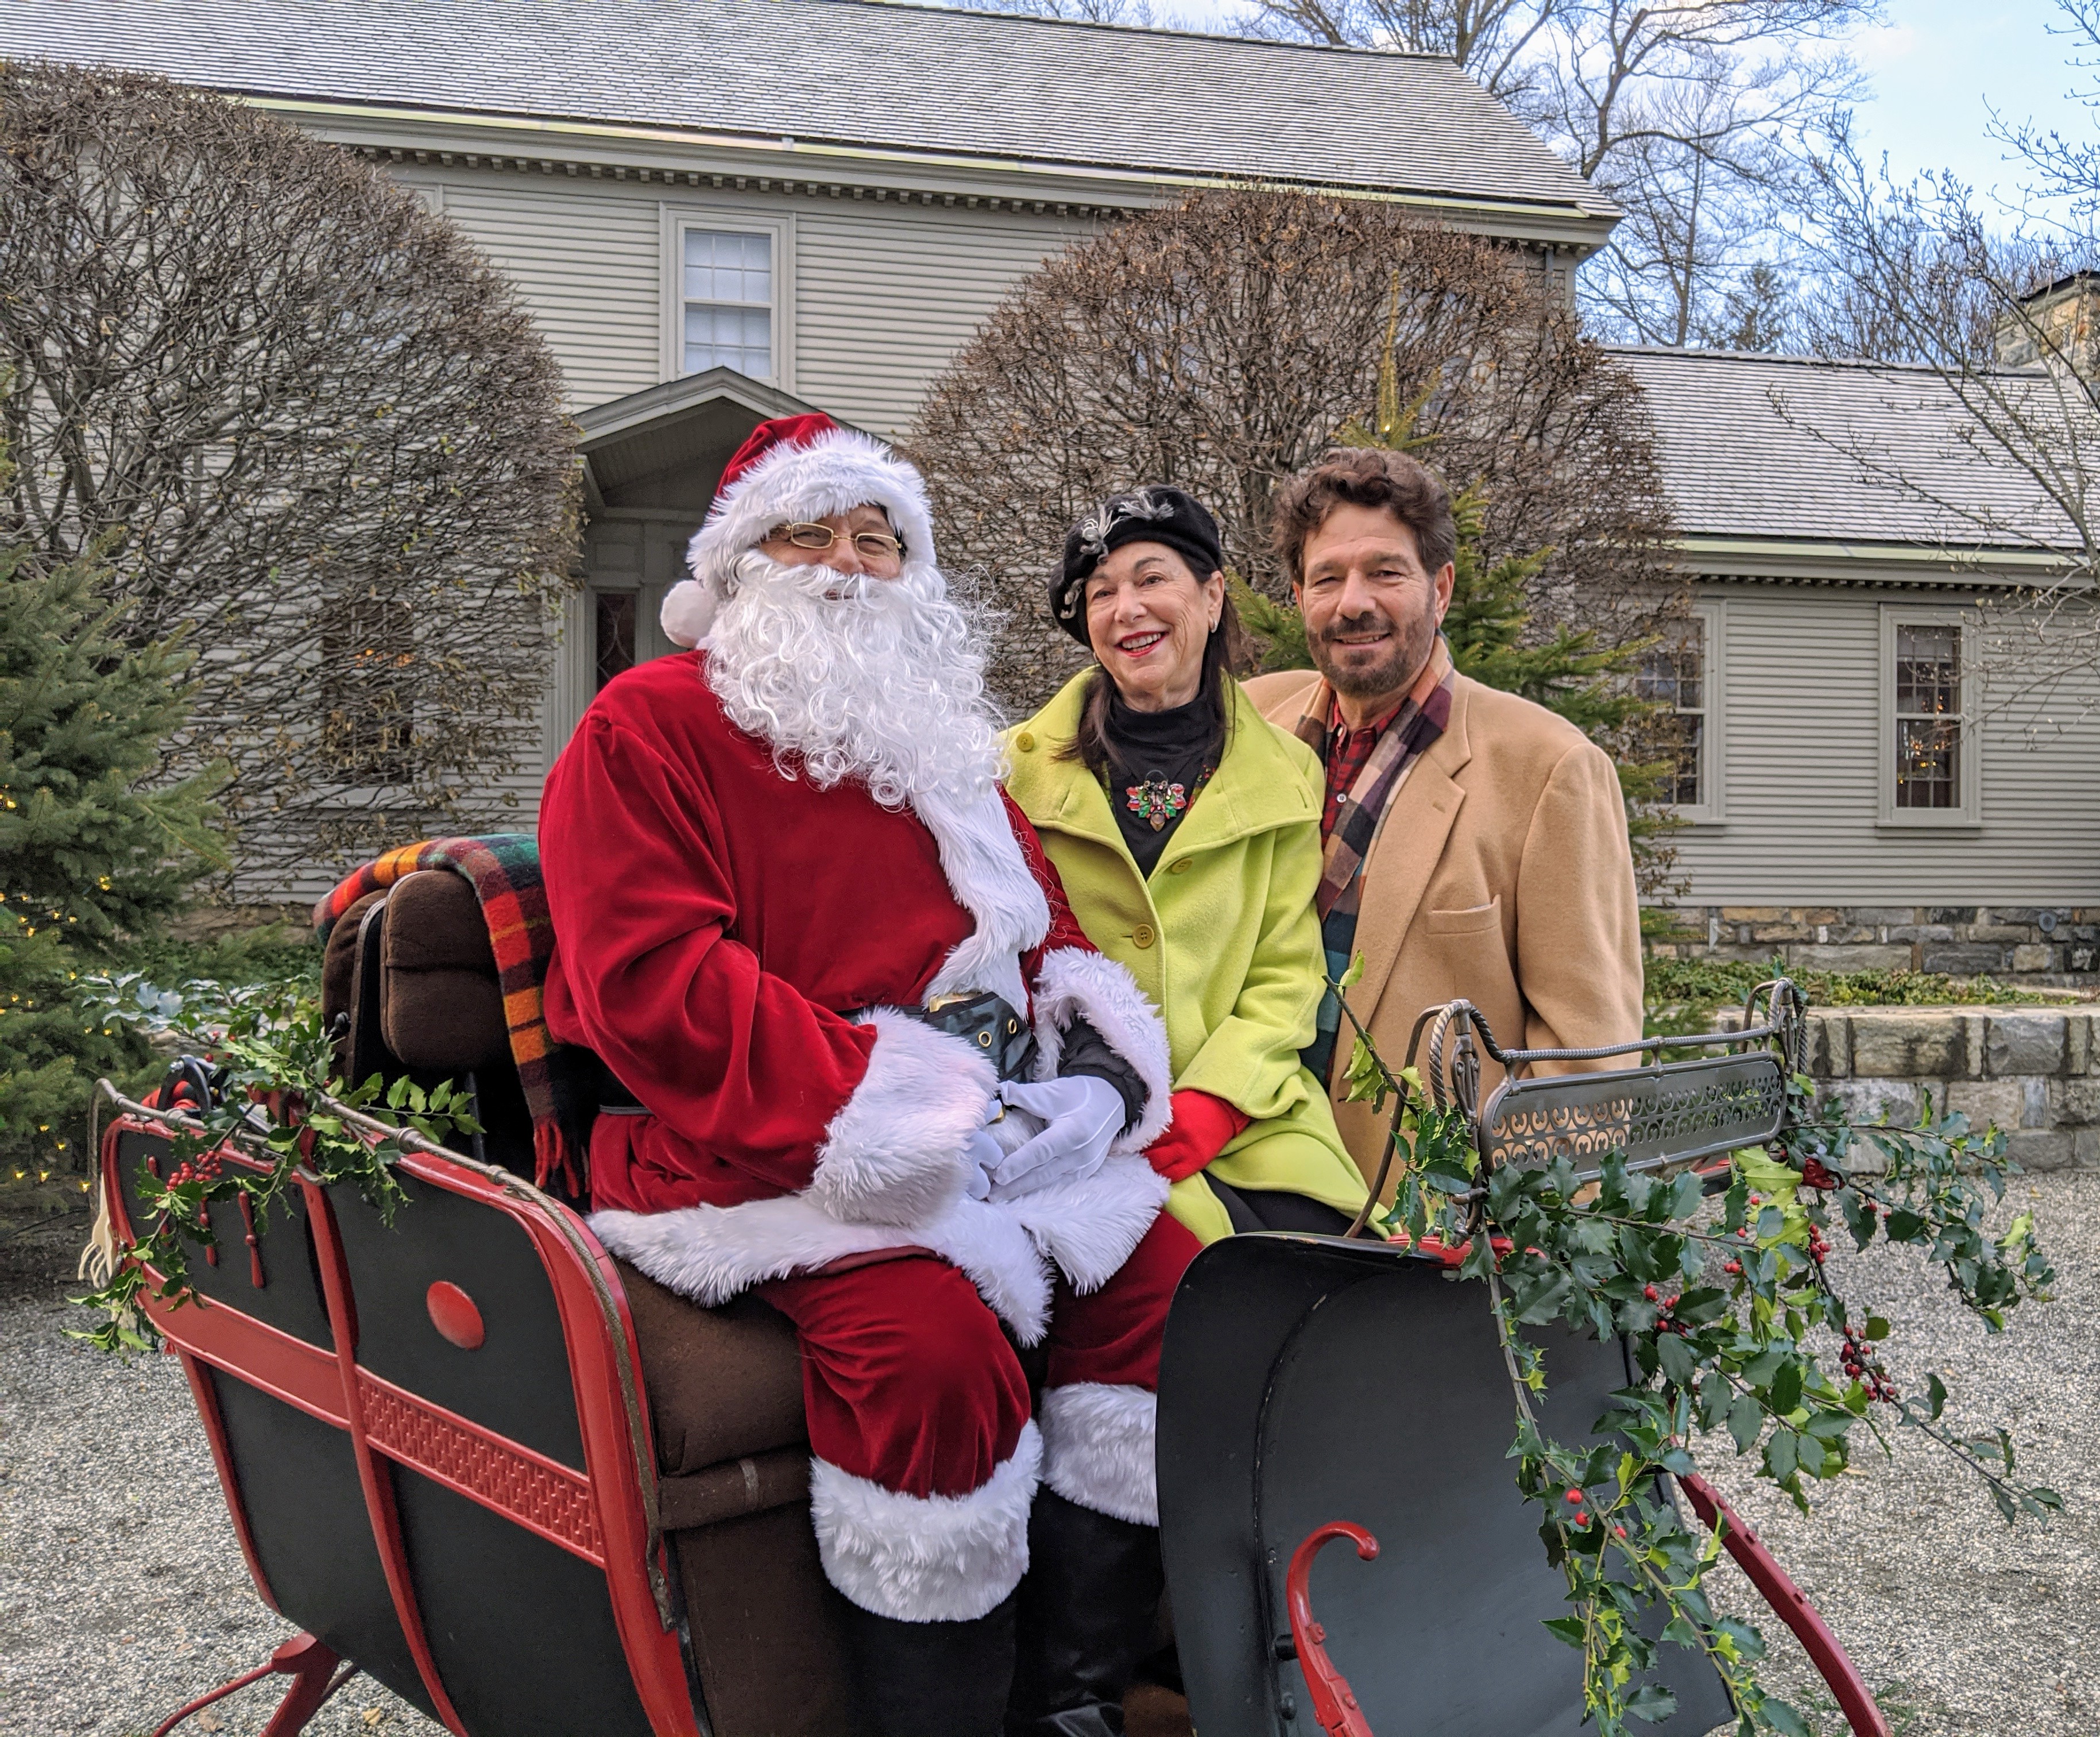
And here he is, the jolly ol’ man himself – Santa Claus. Santa, played by Fernando Ferrari, wished everyone a Merry Christmas as they walked from house to house.
My Summer House was where guests could sit and share holiday stories and plans while eating sweets and sipping eggnog. It was decorated in lots of pink and silver.
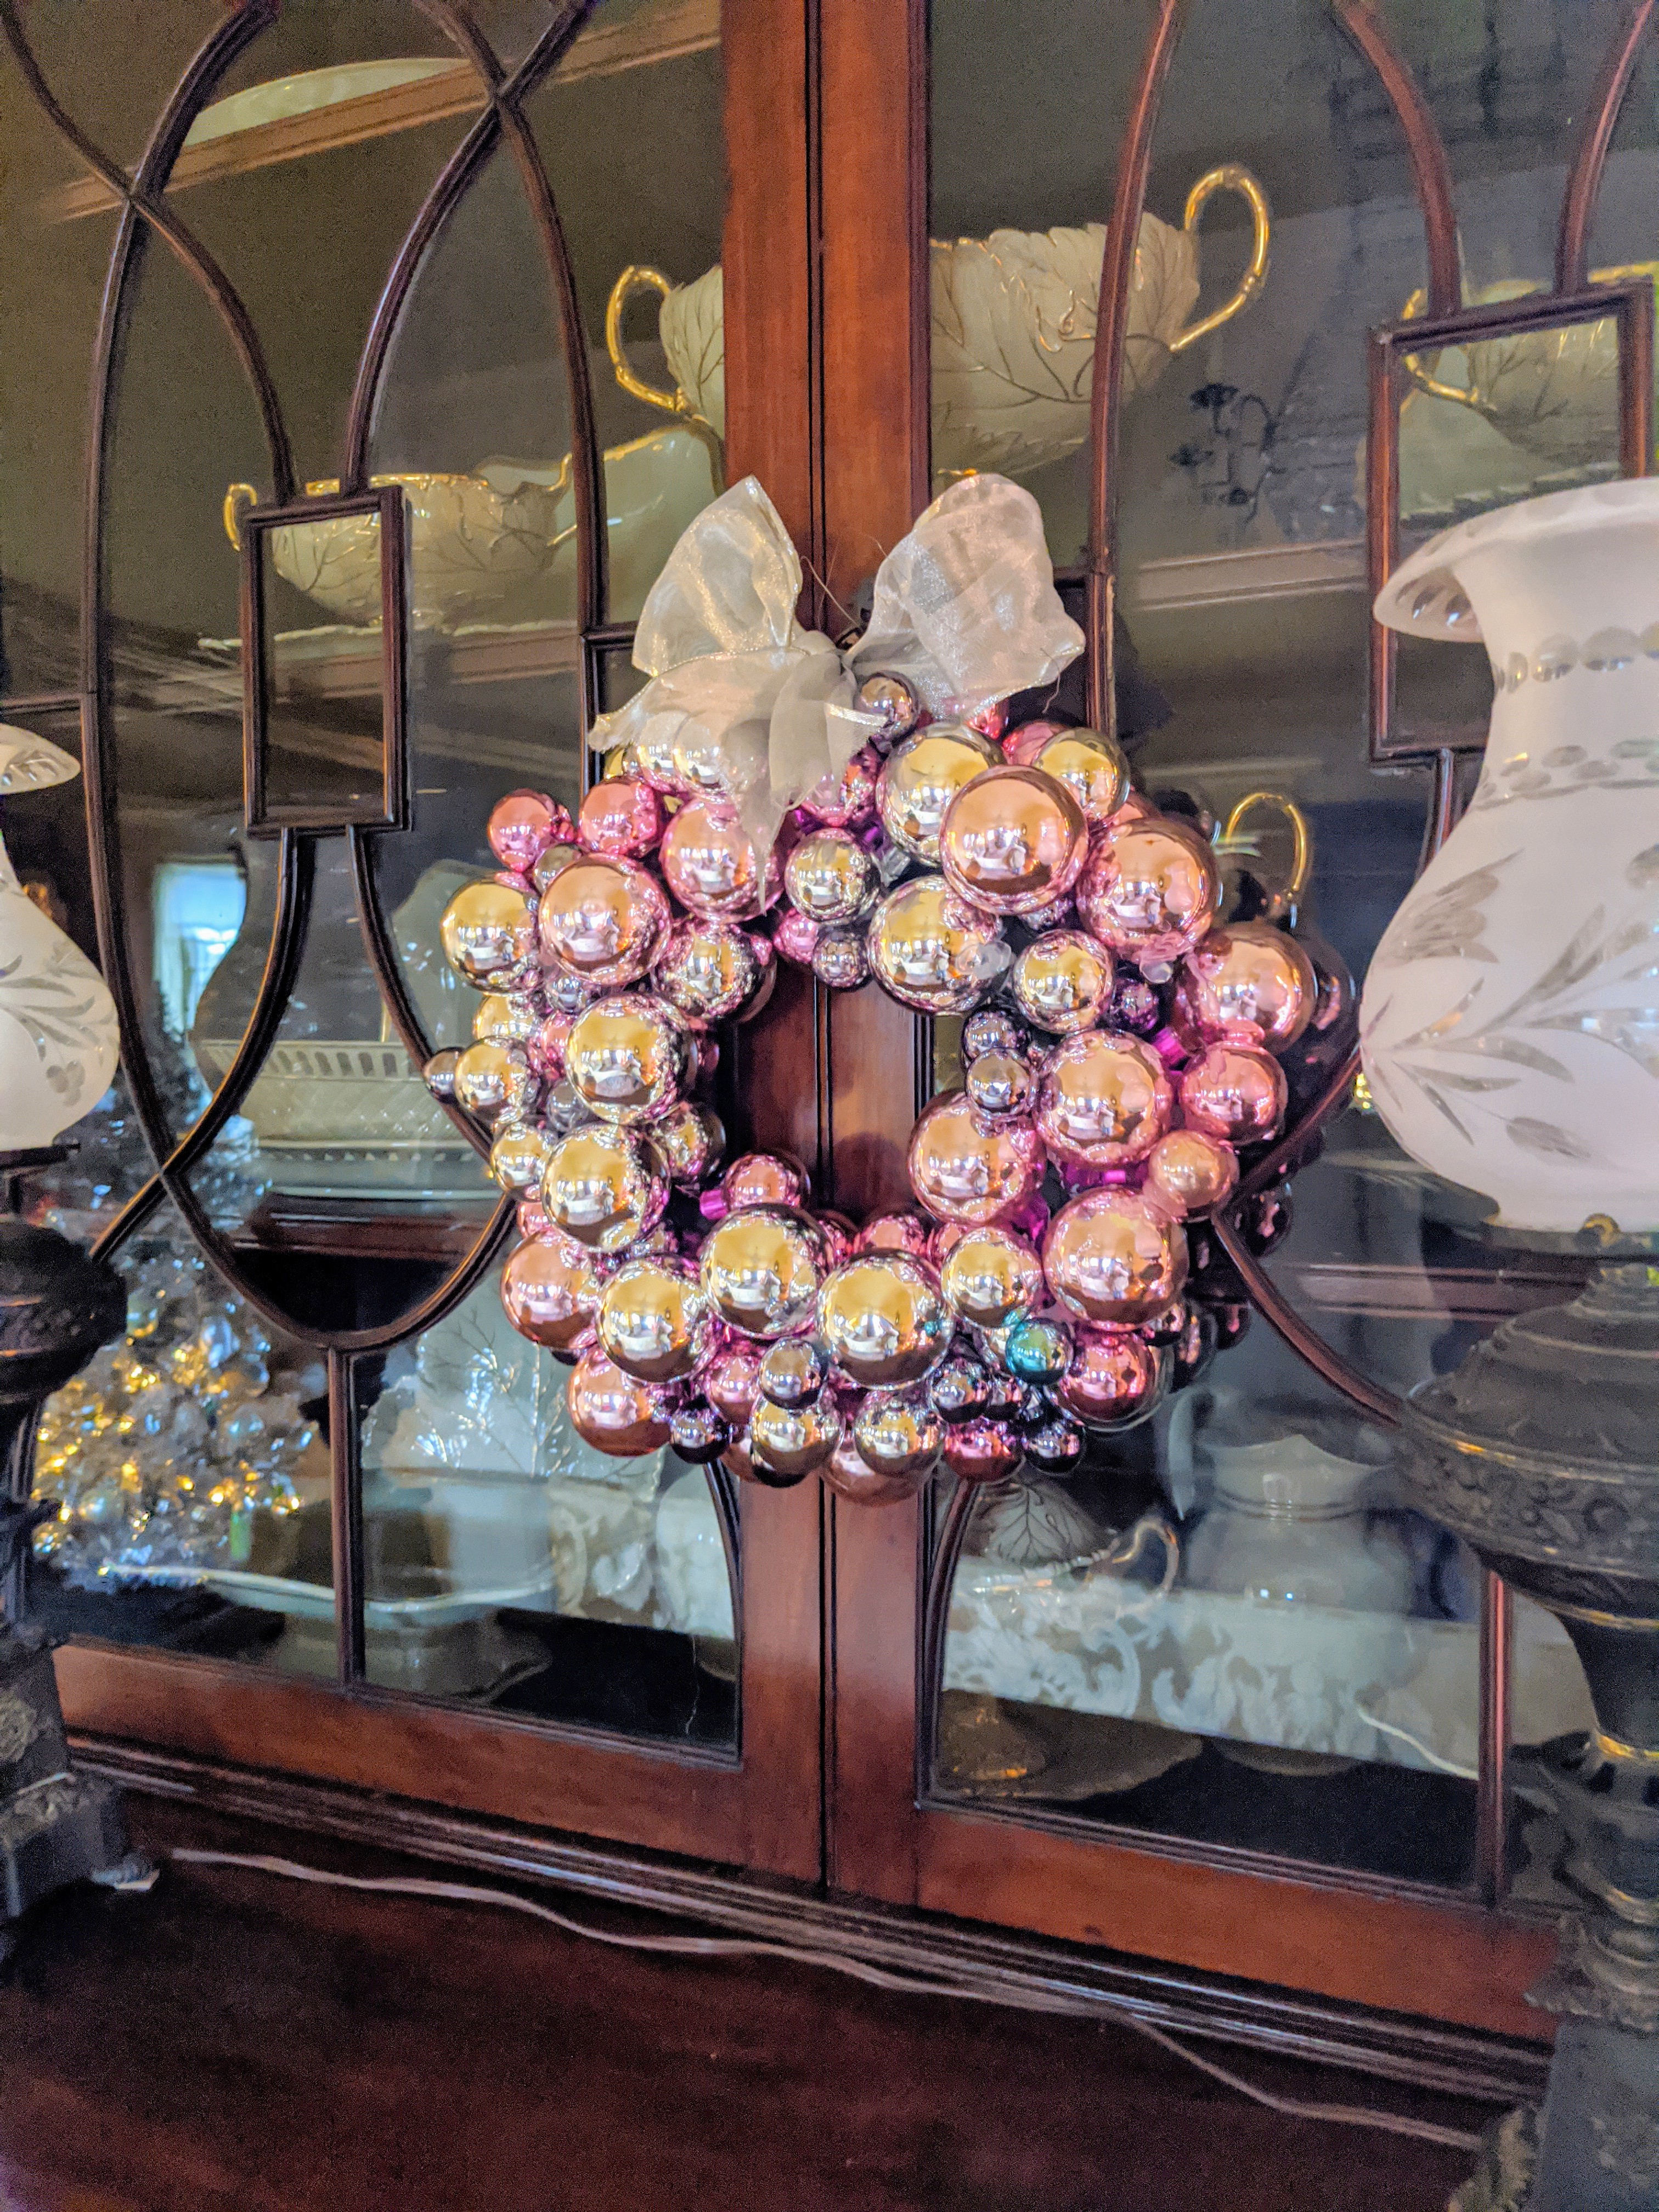
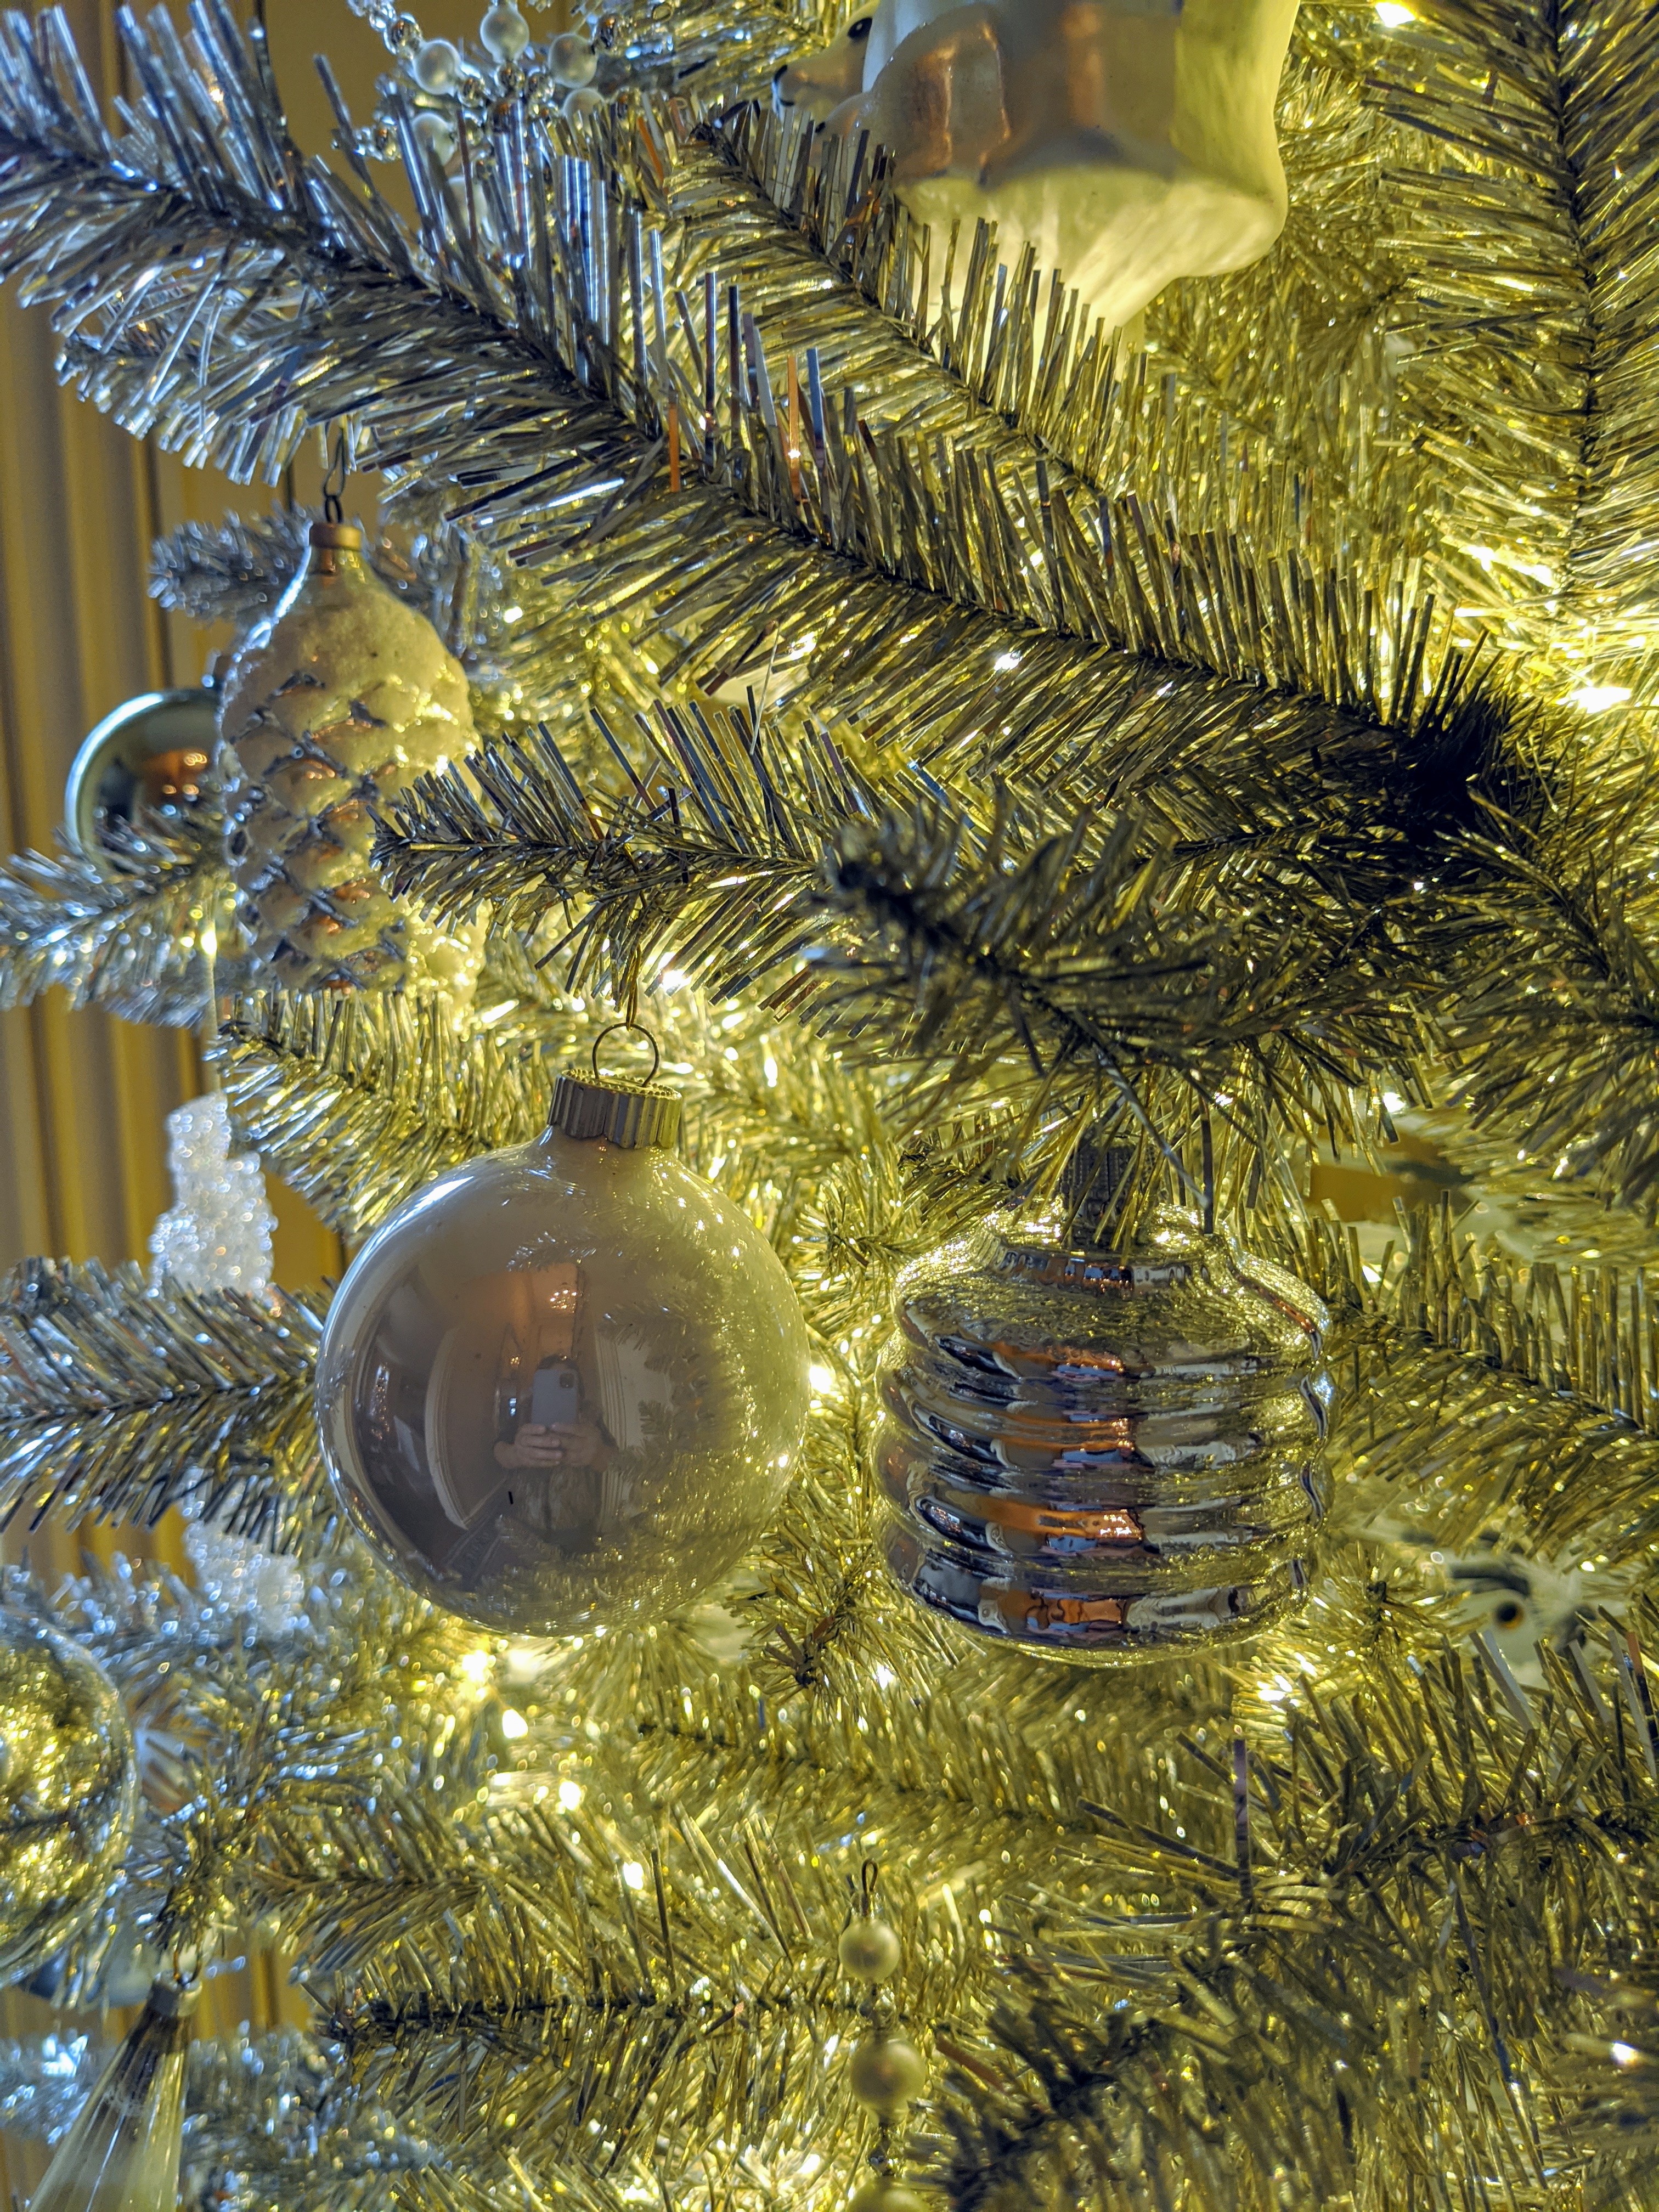
The trees were decked in silver with silver ornaments – I love how everything glistens.
Alexis’s famous Brown Sugar Chocolate Chip Cookies went so fast. Her recipe is in my book, “Entertaining.” Unlike traditional recipes, this batter produces flat and crisp cookies. They are my all-time favorite chocolate chip cookies.
Another lit nativity scene sits on a side table in my Summer House. I got this one from Brazil.
Anduin Havens, her daughter, Harper, and her husband Cedric, stopped for this photo with Santa.
And here are my neighbors, Laura Blau, and her husband, Michael Citro.
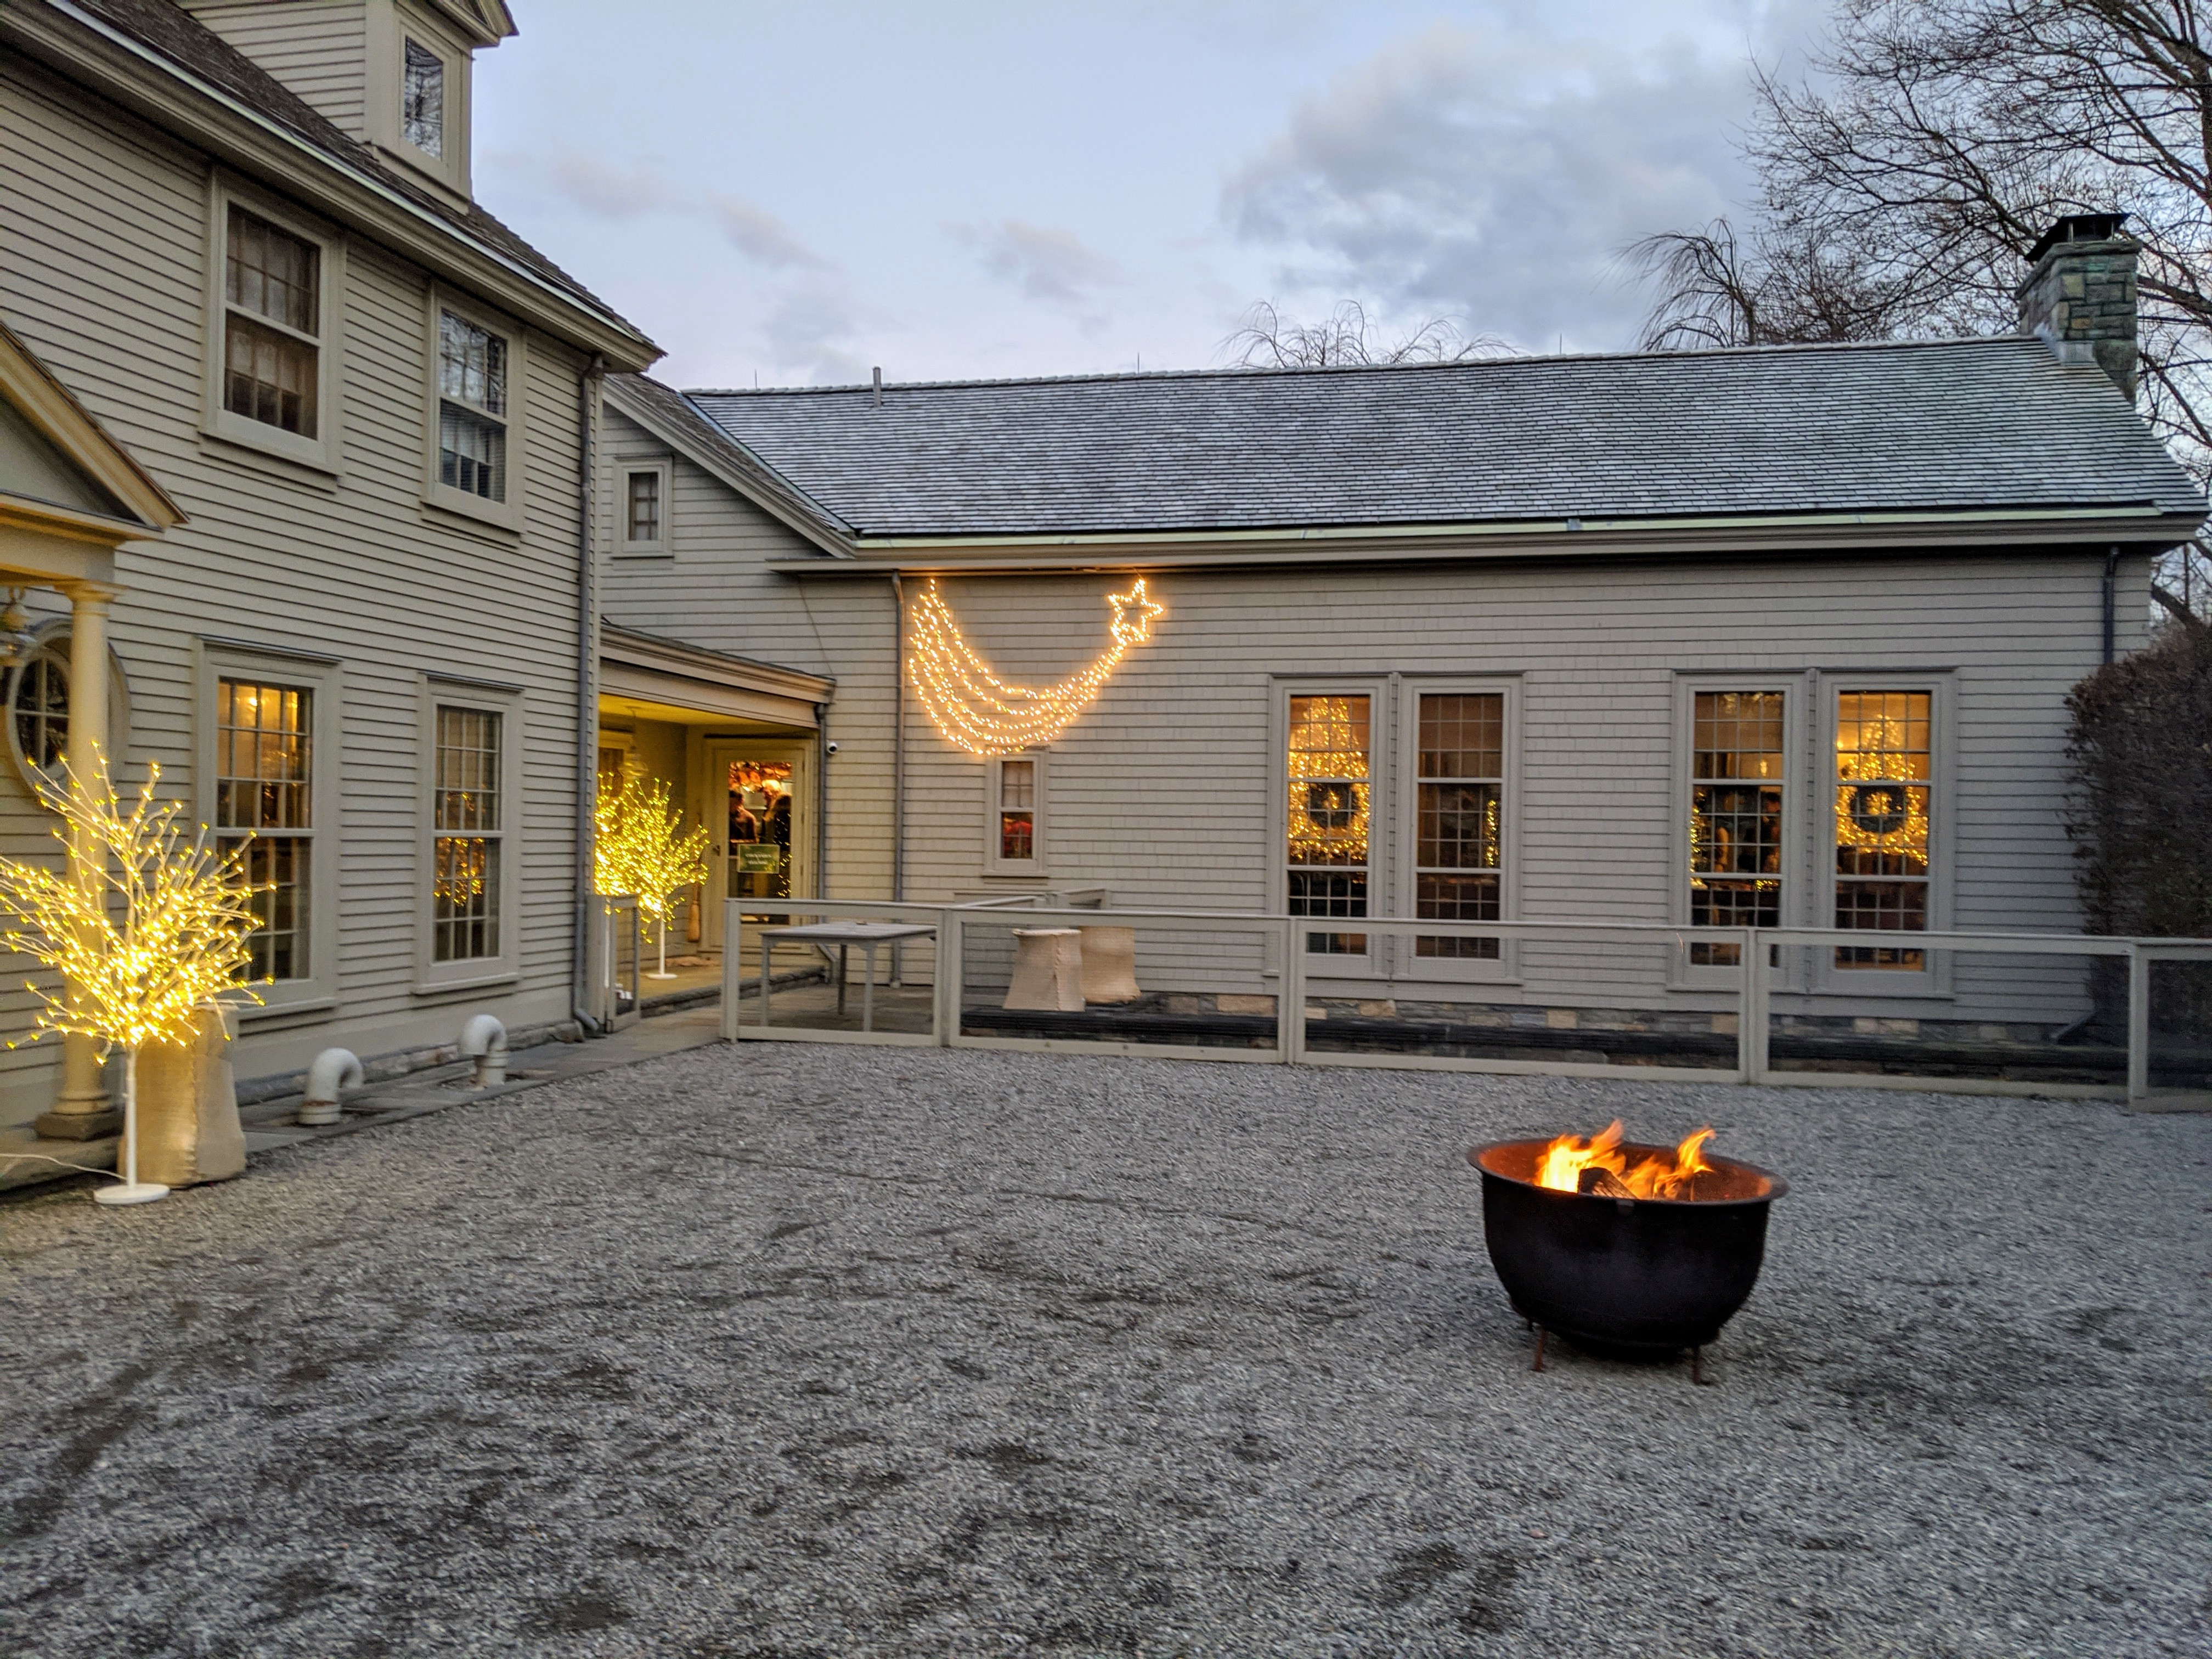
All the outdoor decorations glimmered in the early evening light. My holiday party was from 3pm to 6pm, so everyone could enjoy the farm’s festive lights.
Guests were told not to miss the “Cookie House” – Alexis’s little Tenant House was filled with more sweet treats. We made about 2500-cookies in all. Molly Wenk @moll_doll23 and Jessie Damuck @jessdamuck baked cookies for four days. Many of the recipes are from my books and my web site at MarthaStewart.com. In this house, they were surrounded by whimsical woodland animals and miniature figurines – the children loved this house the best.
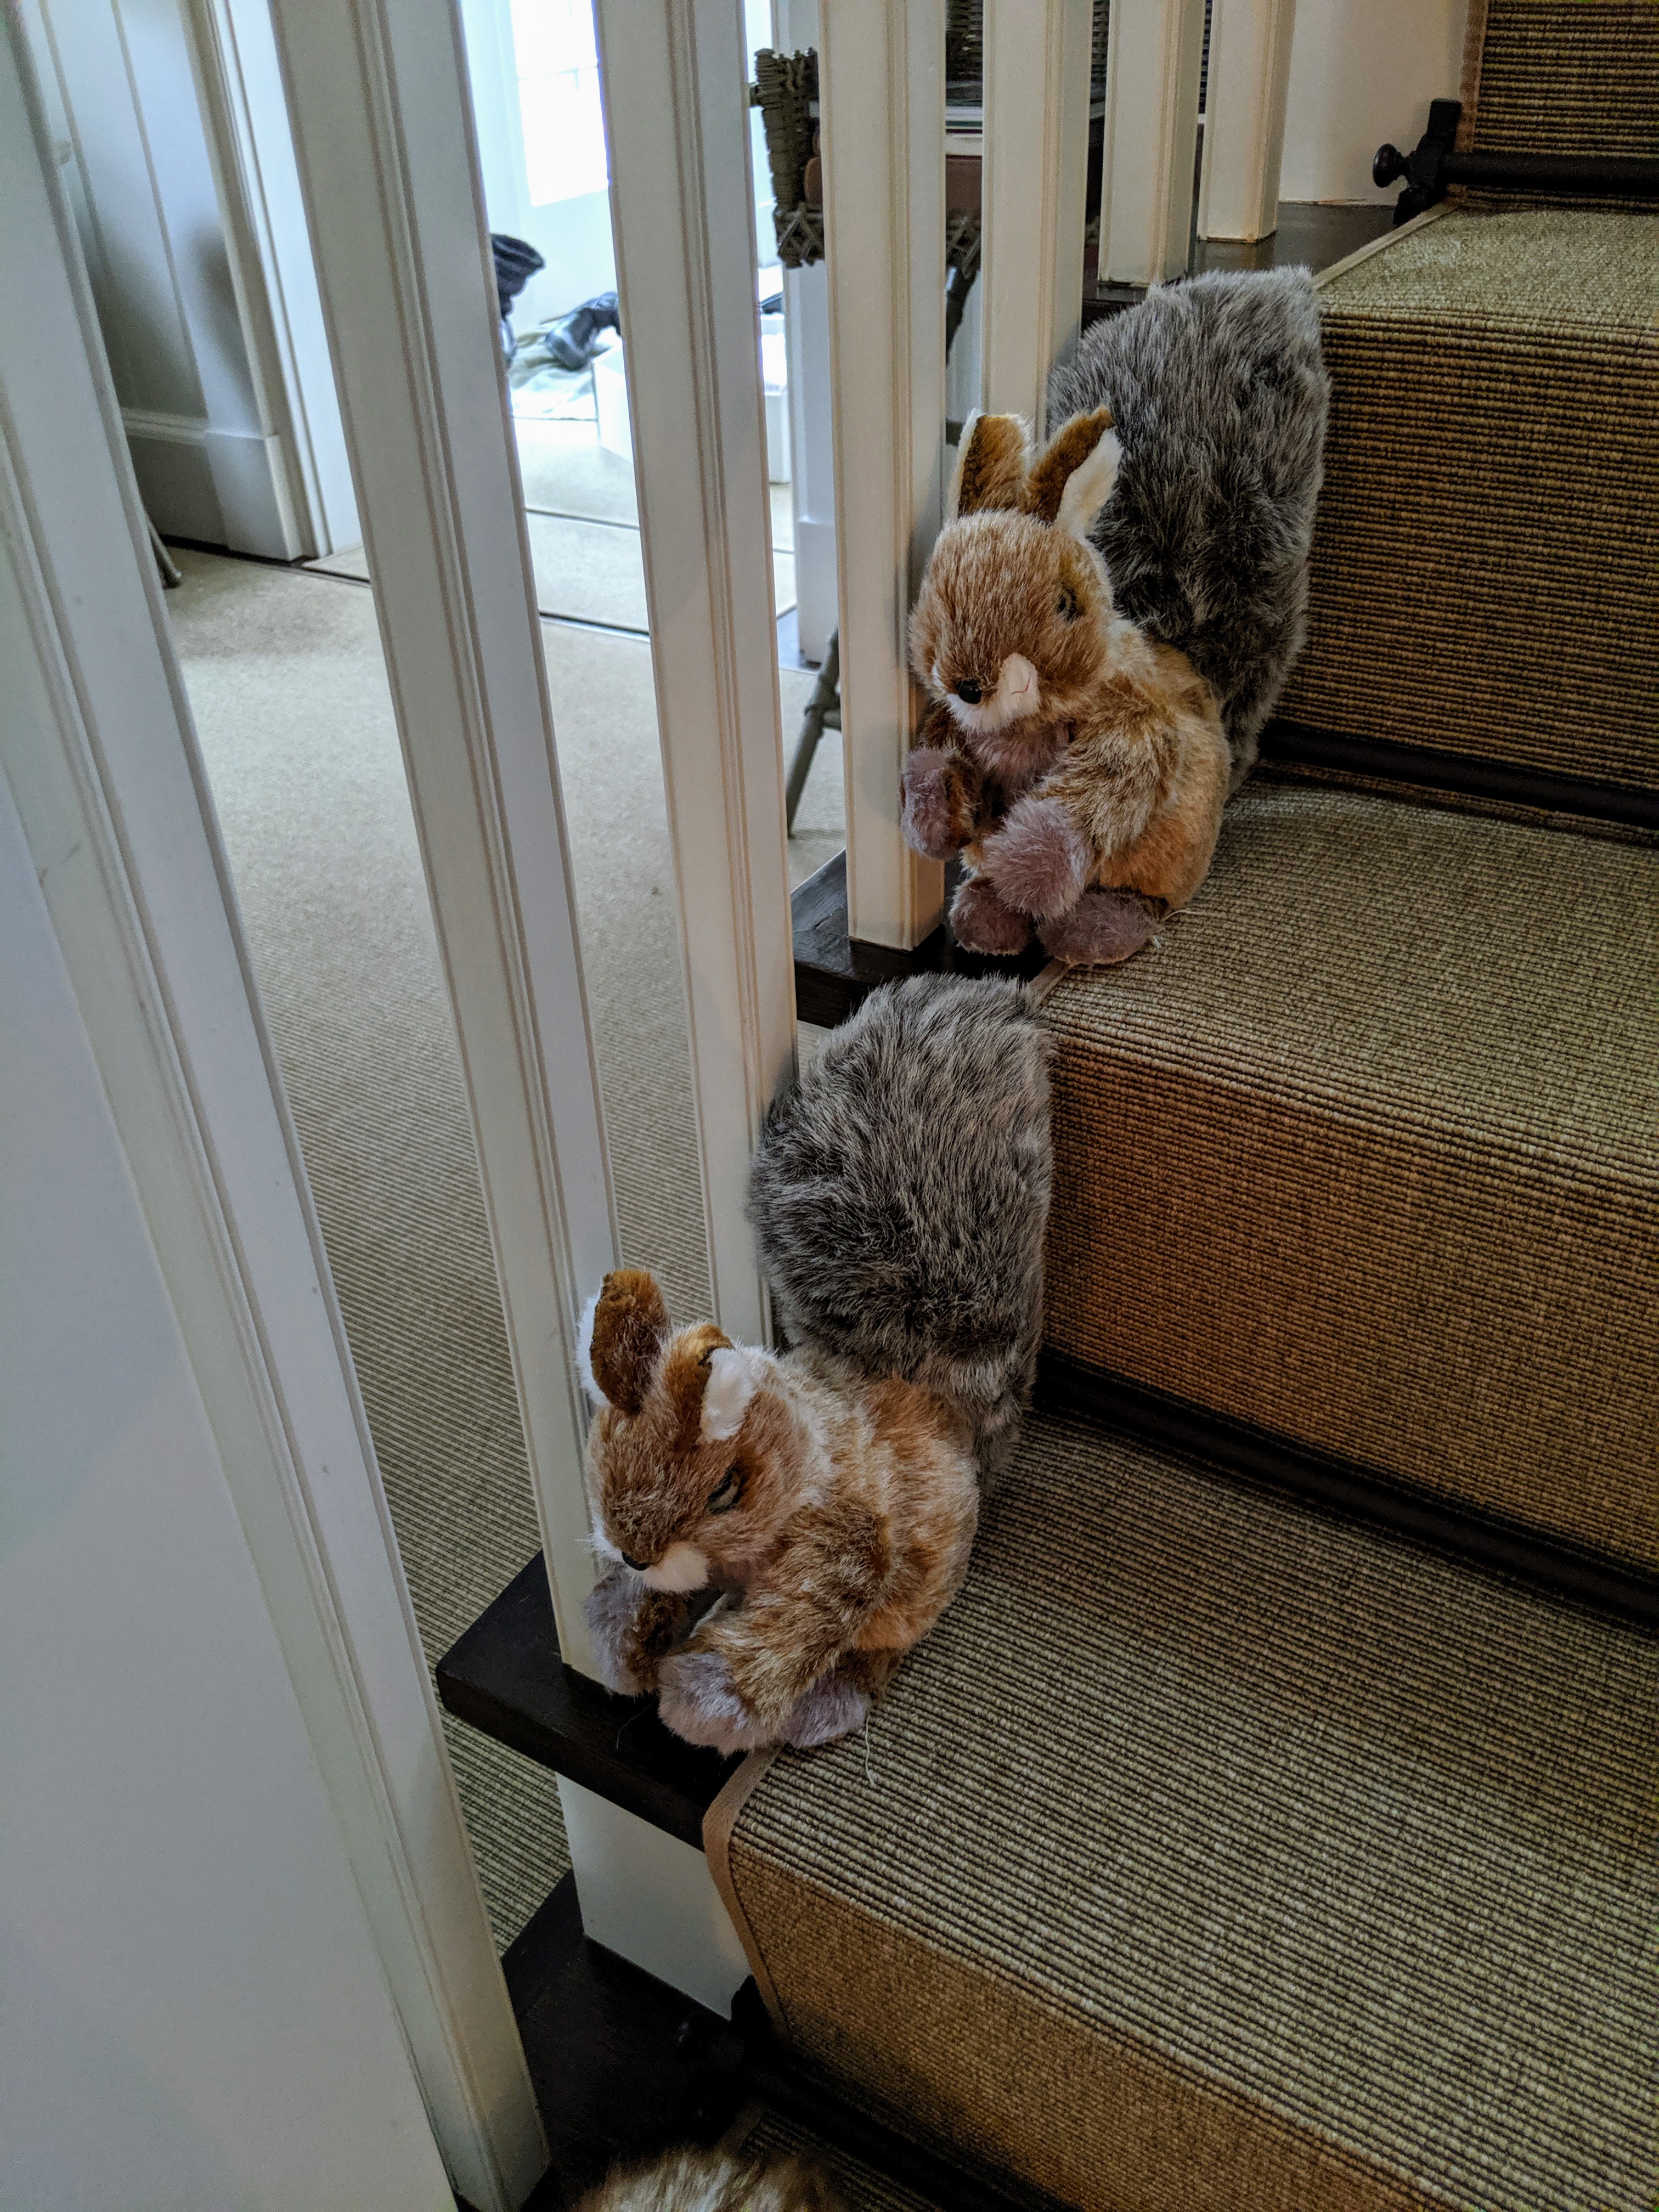
Because my grandchildren stay here when they visit, I love decorating the space for them with lots of stuffed toys.
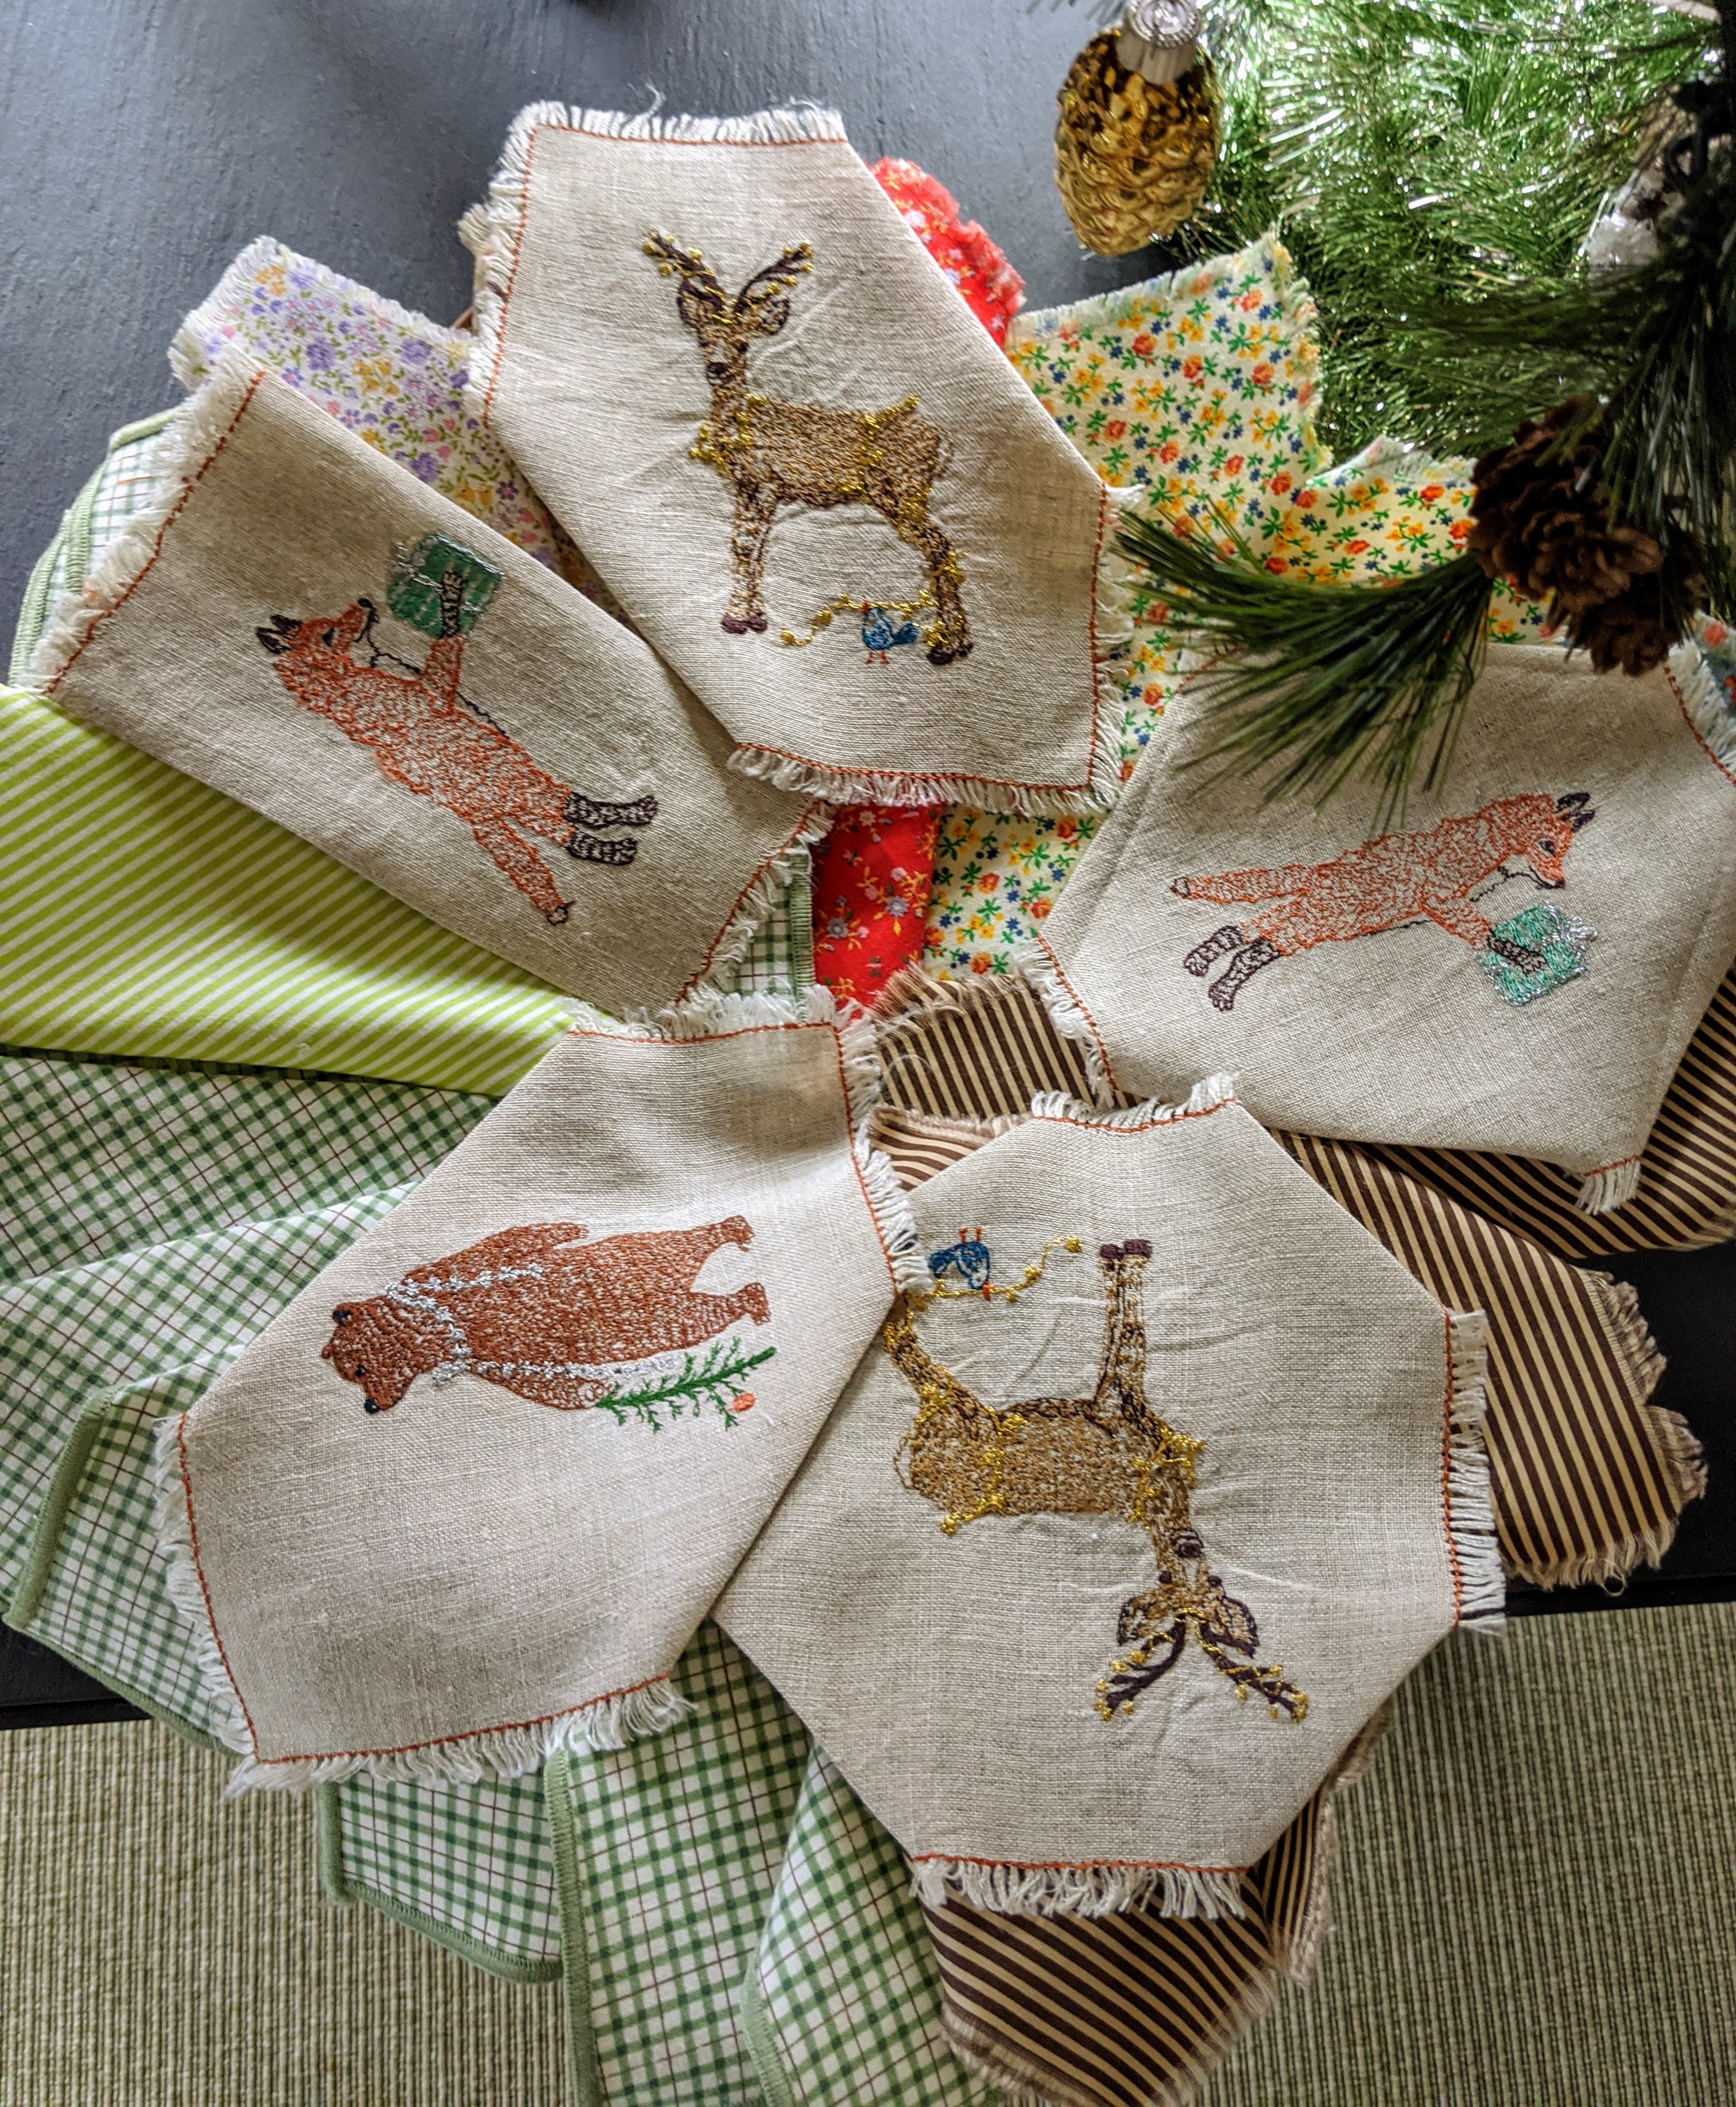
Even the napkins had a woodland theme. The delicate machine embroidered napkins are from Coral & Tusk @coralandtusk in Brooklyn, New York.
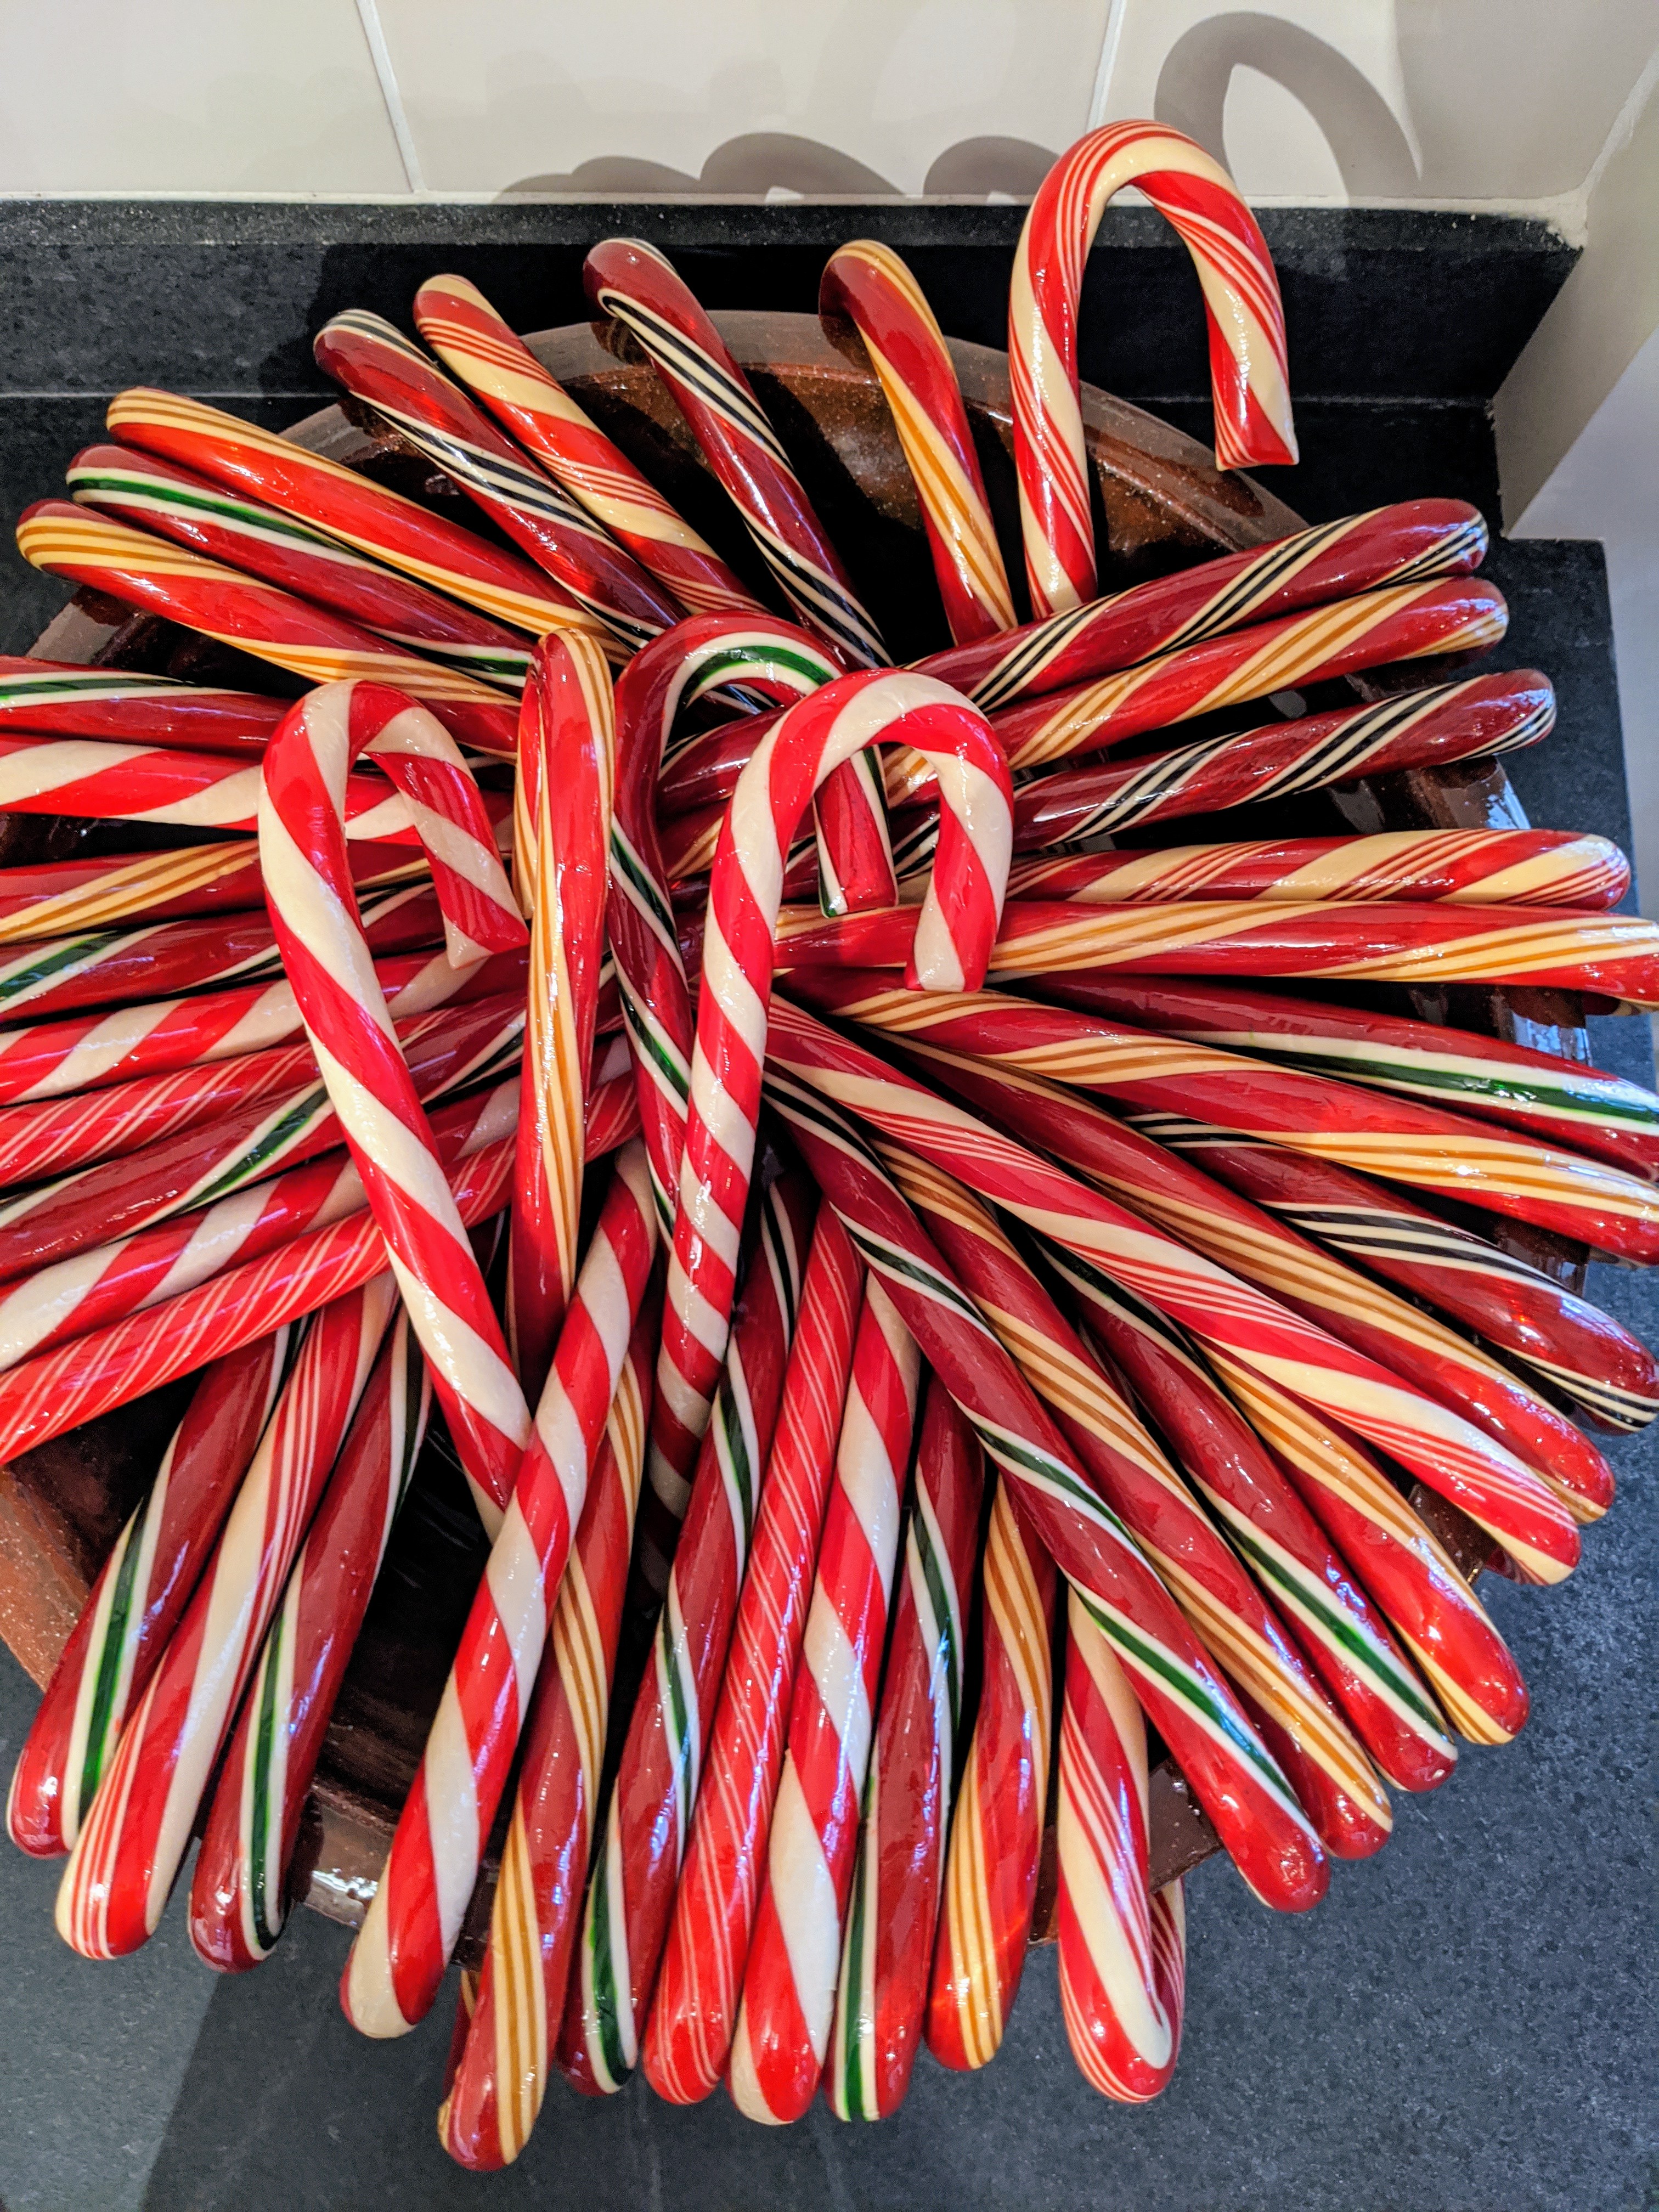
And of course, there were candy canes – all our hard candies came from Hammond’s. http://www.hammondscandies.com/
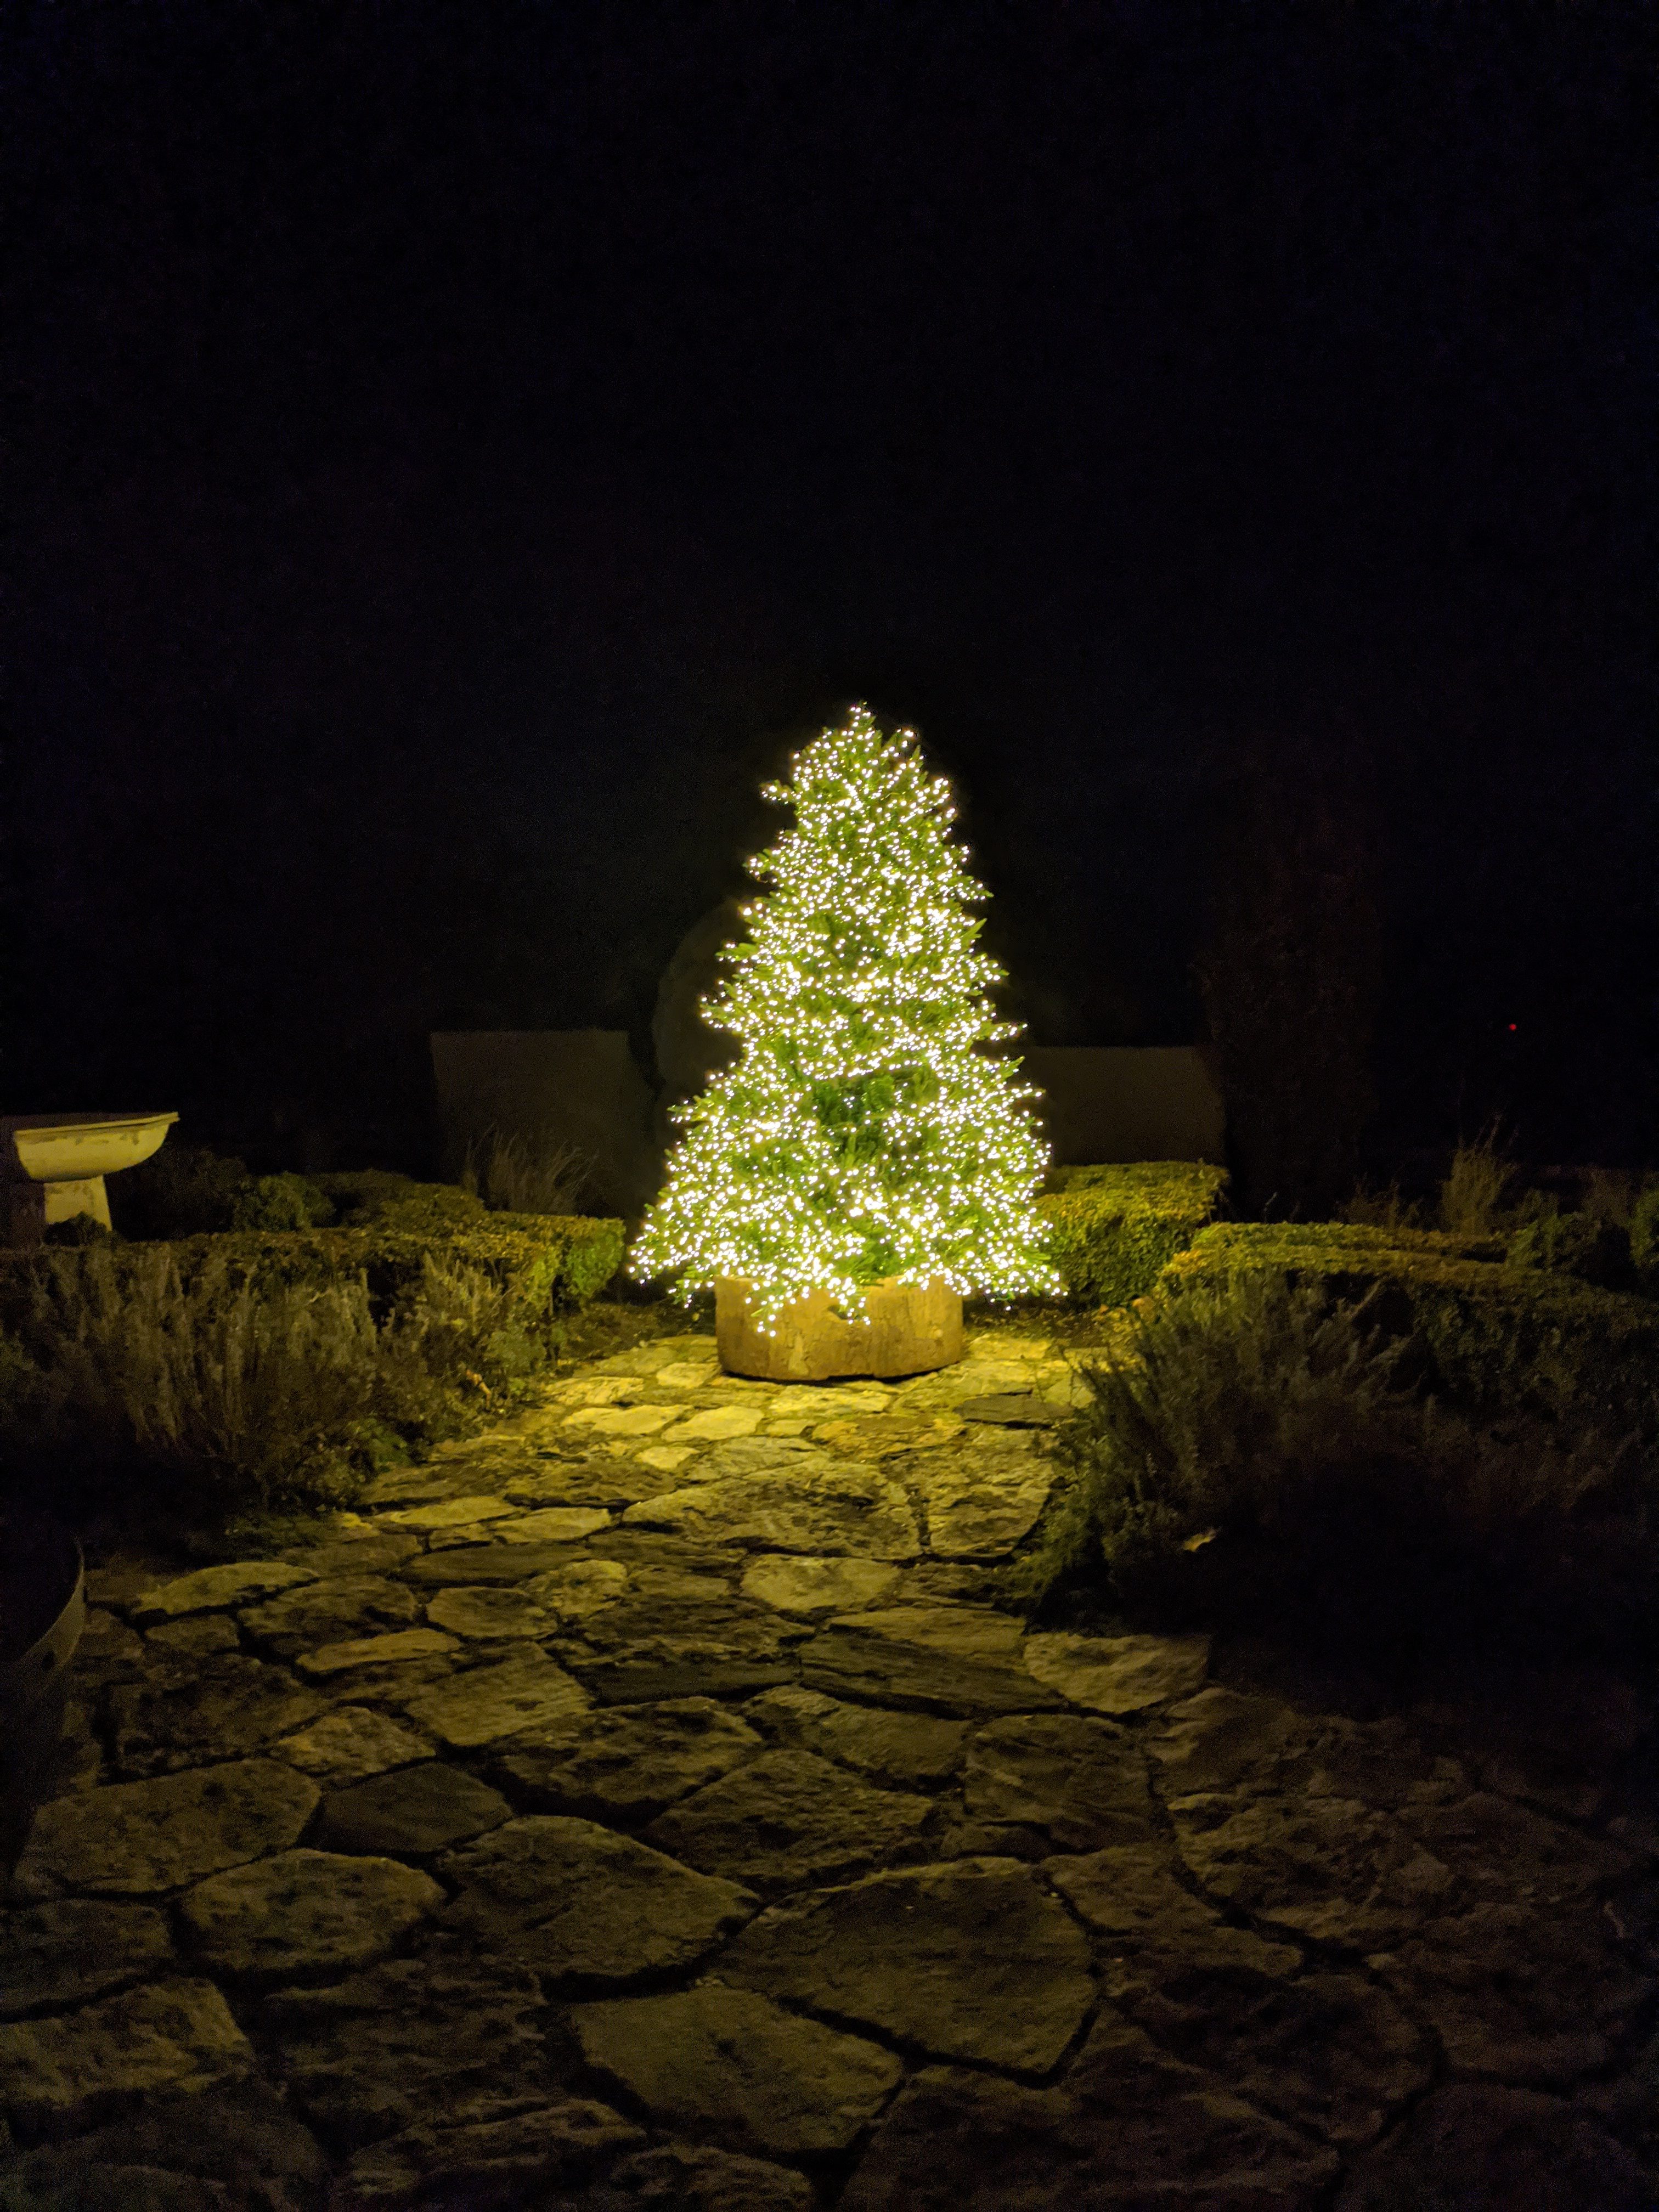
And outside, my beautiful Christmas tree with 1000 lights. Everyone had such a great time at the party. Happy holidays to all of you.