Business gatherings are always so much more enjoyable when accompanied by a delicious homemade meal.
Yesterday, I hosted a small luncheon at my home for a group of partners. I, along with food editor and chef Sarah Carey, planned a wonderful early summer menu for nine guests that started with chilled corn soup - so refreshing and delicious. It was followed by an endive and radicchio salad, roasted carrots just picked from my garden, pasta salad with peas and fava beans also from my garden, and tomato tart. For dessert, everyone enjoyed homemade Meyer lemon cookies, brown butter shortbread cookies, and grapefruit granitas with berries and crème fraîche. It was an excellent lunch and a most productive and interesting meeting.
Here are some photos, enjoy.
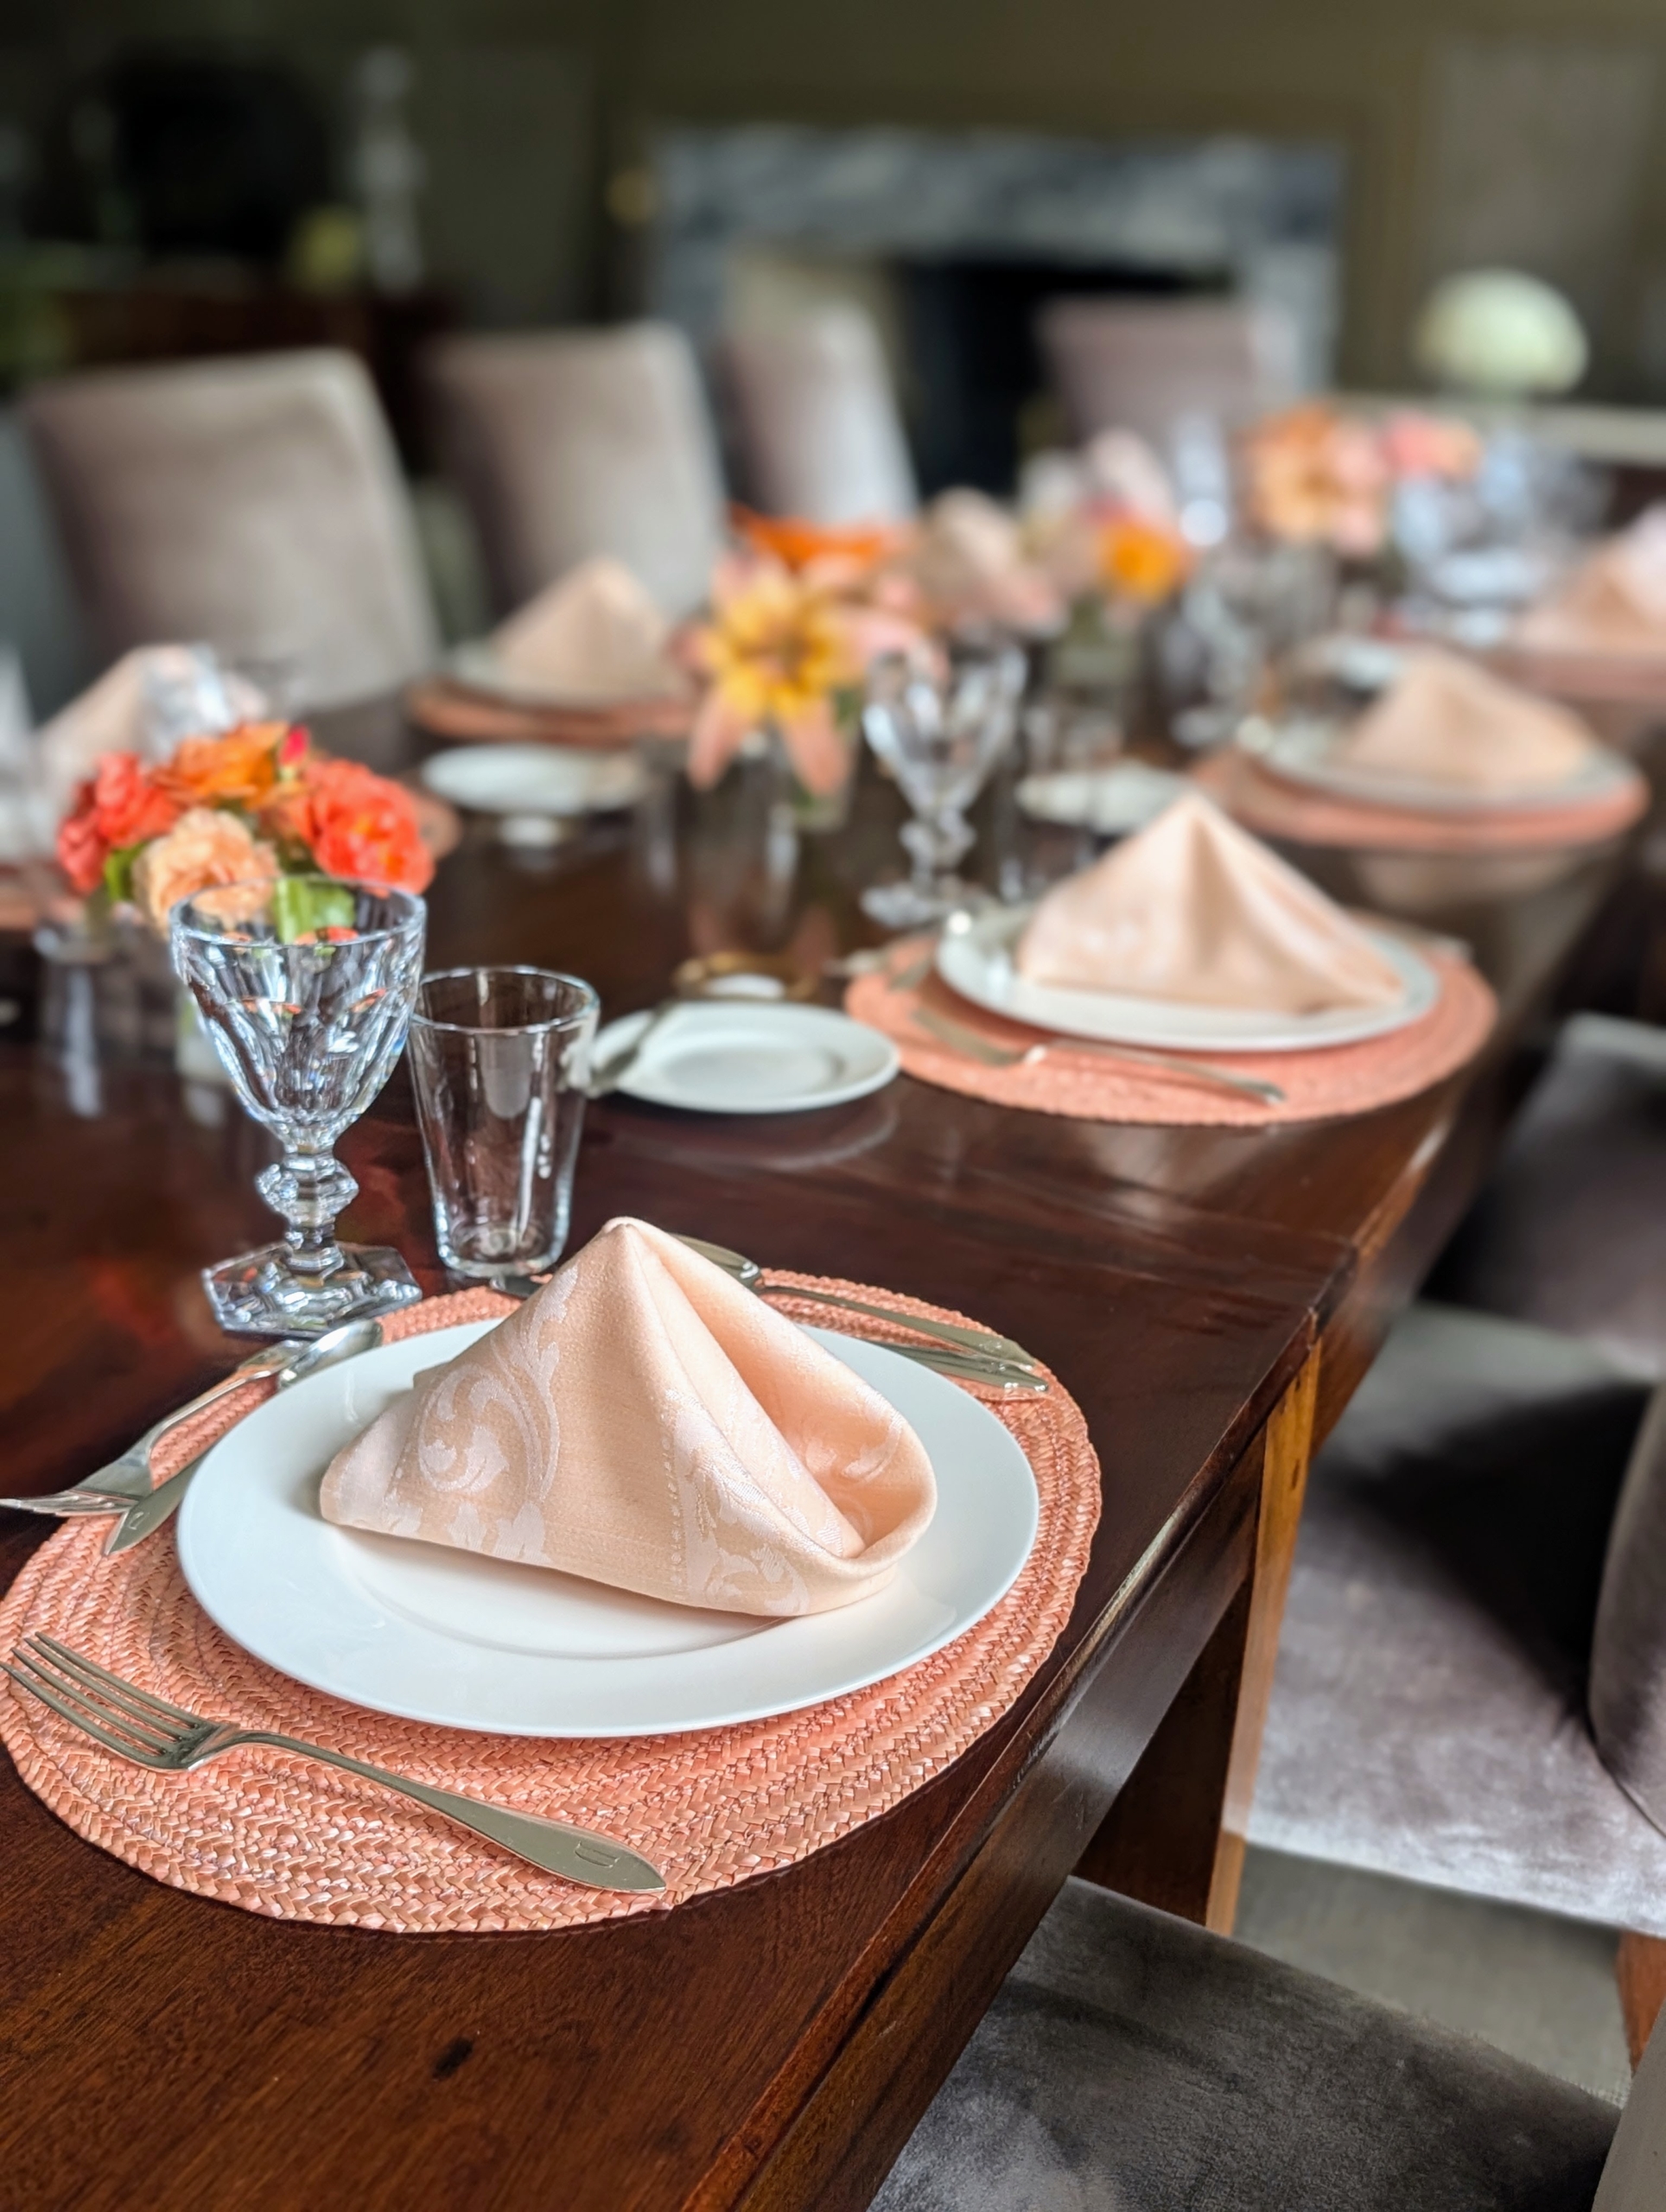
My housekeepers and I always work on the table settings together. We try to make each one different and beautiful.
And if we can, we always try to incorporate some freshly cut flowers from my gardens.
All the flowers coordinate nicely with the table settings. And small glasses of cut flowers are quick and easy to prepare and add just the perfect touch.
Look who it is – do you recognize him? This is my driver, Andres. He often helps with my lunches and dinners – serving and tending bar.
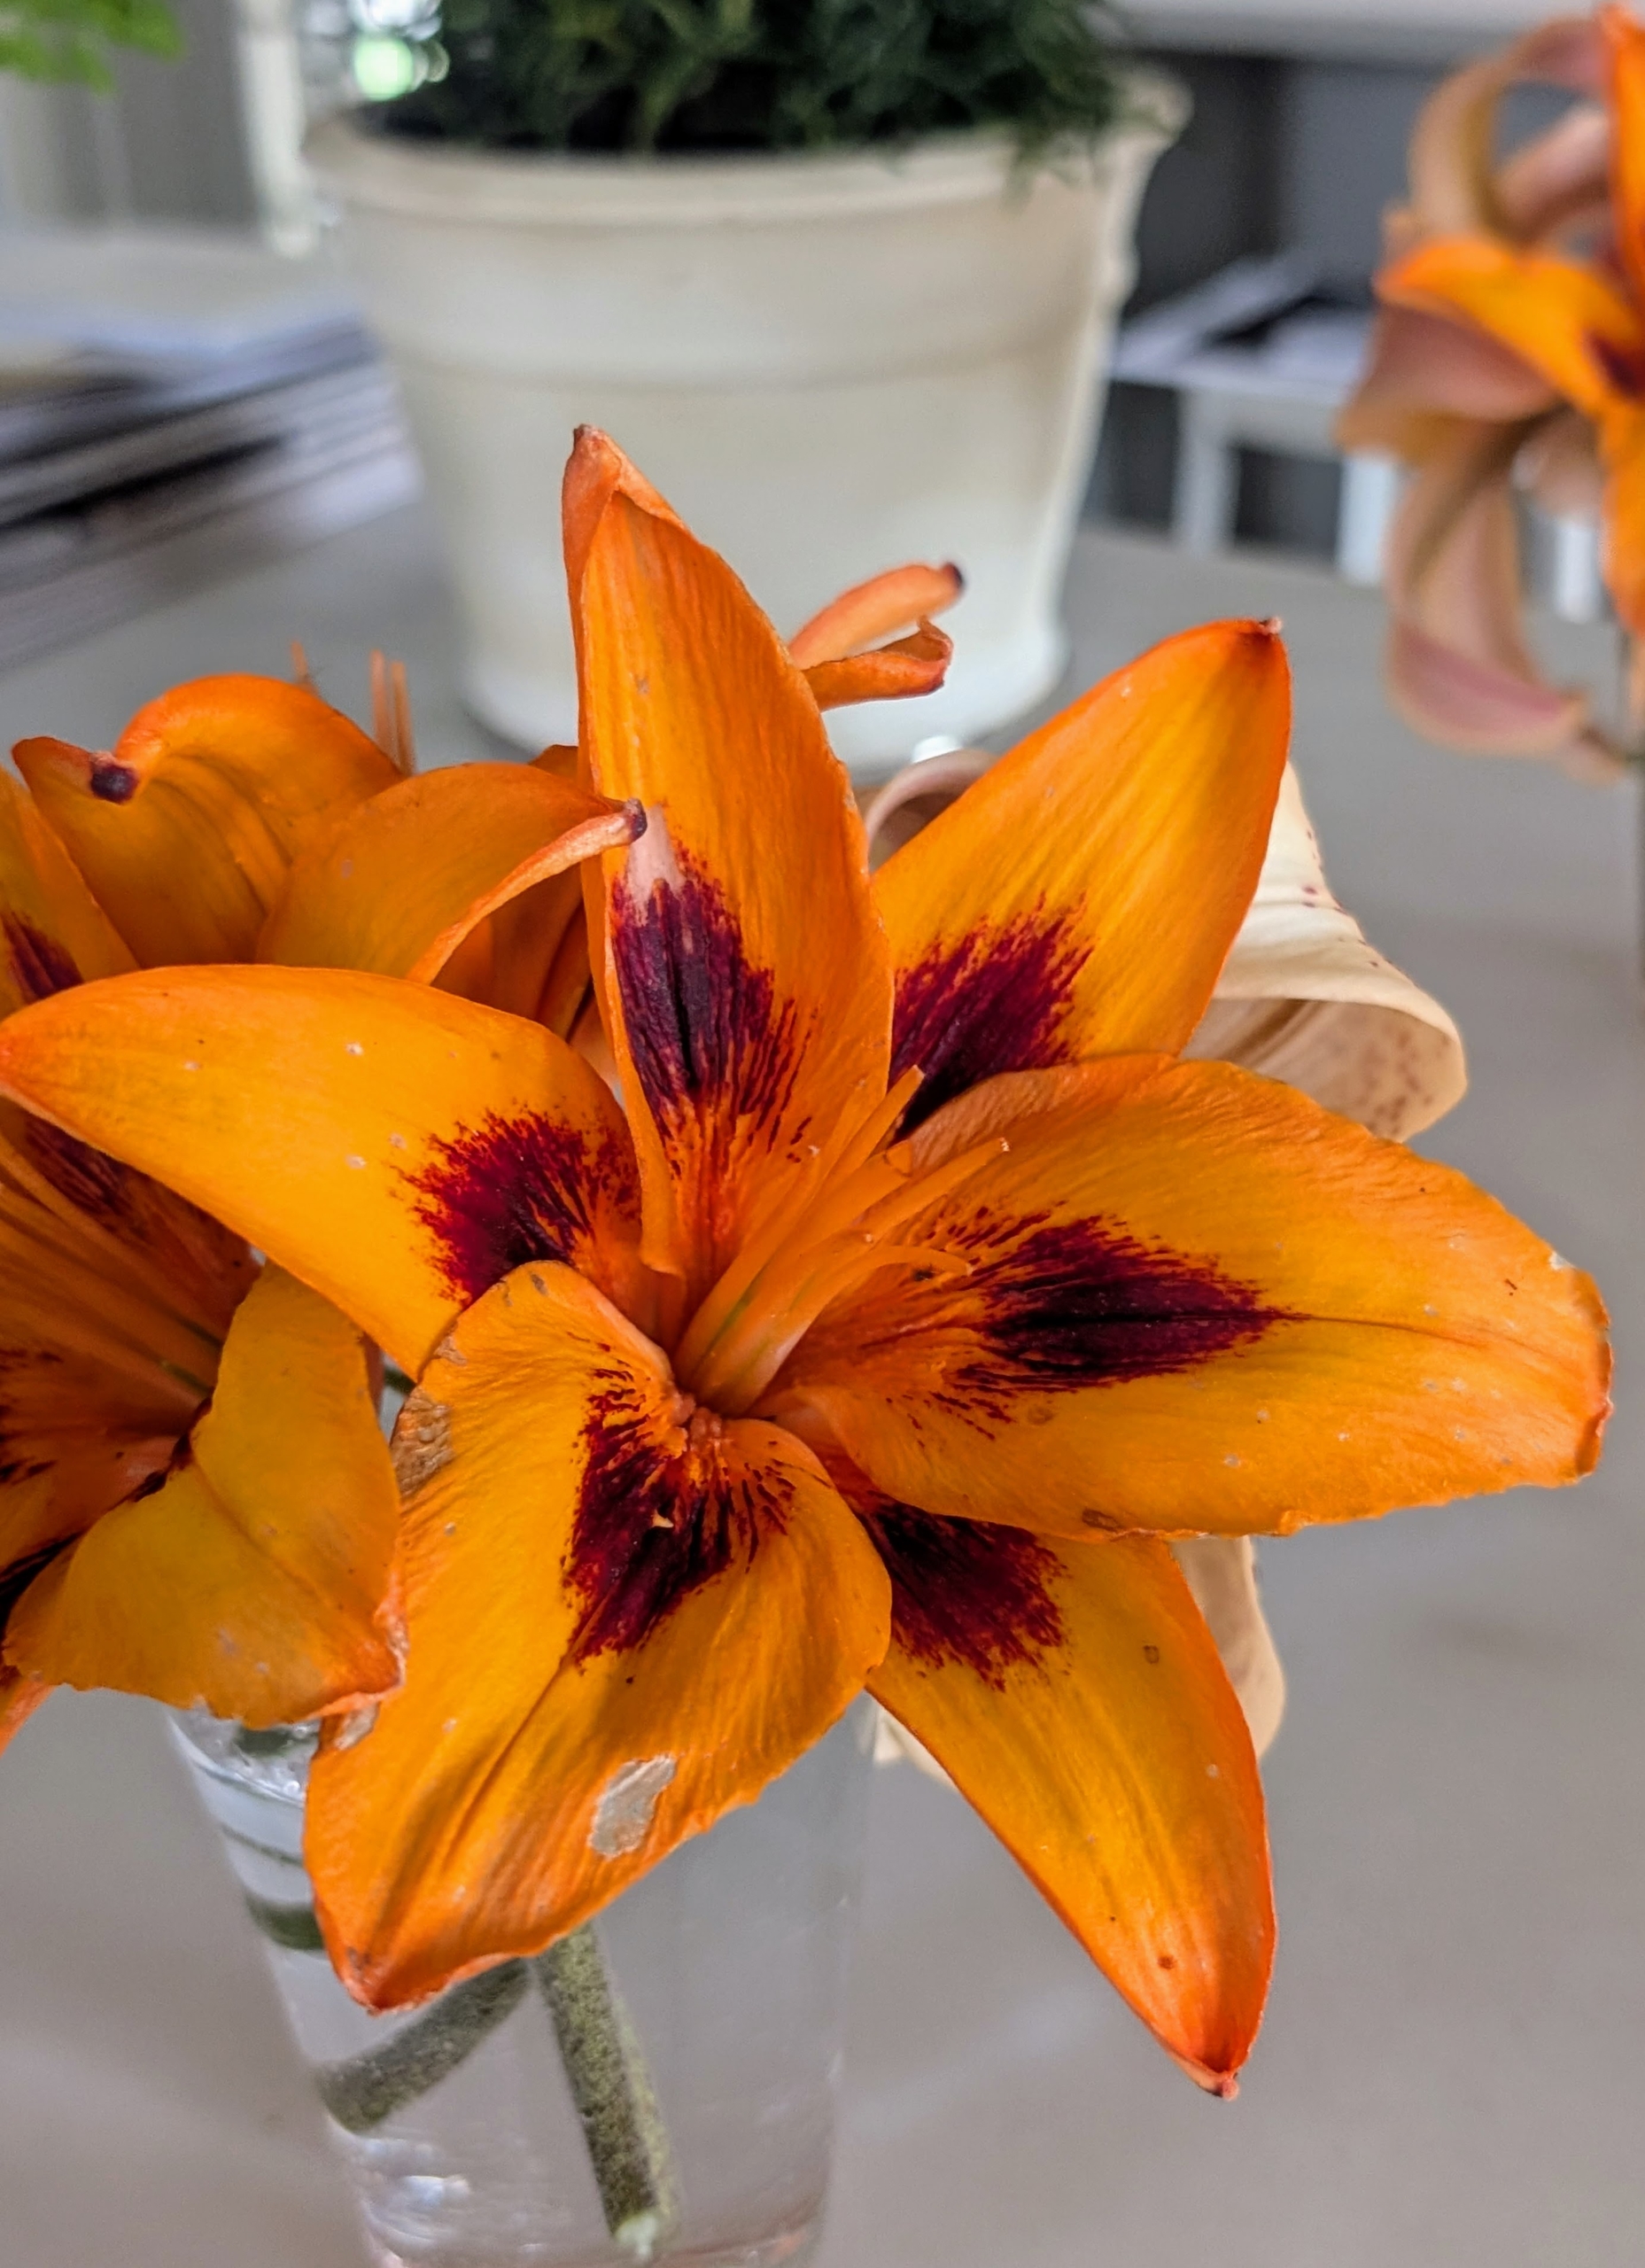
My kitchen counter is also decorated with flowers. These are some of the season’s first tiger lilies that are blooming under my long pergola.
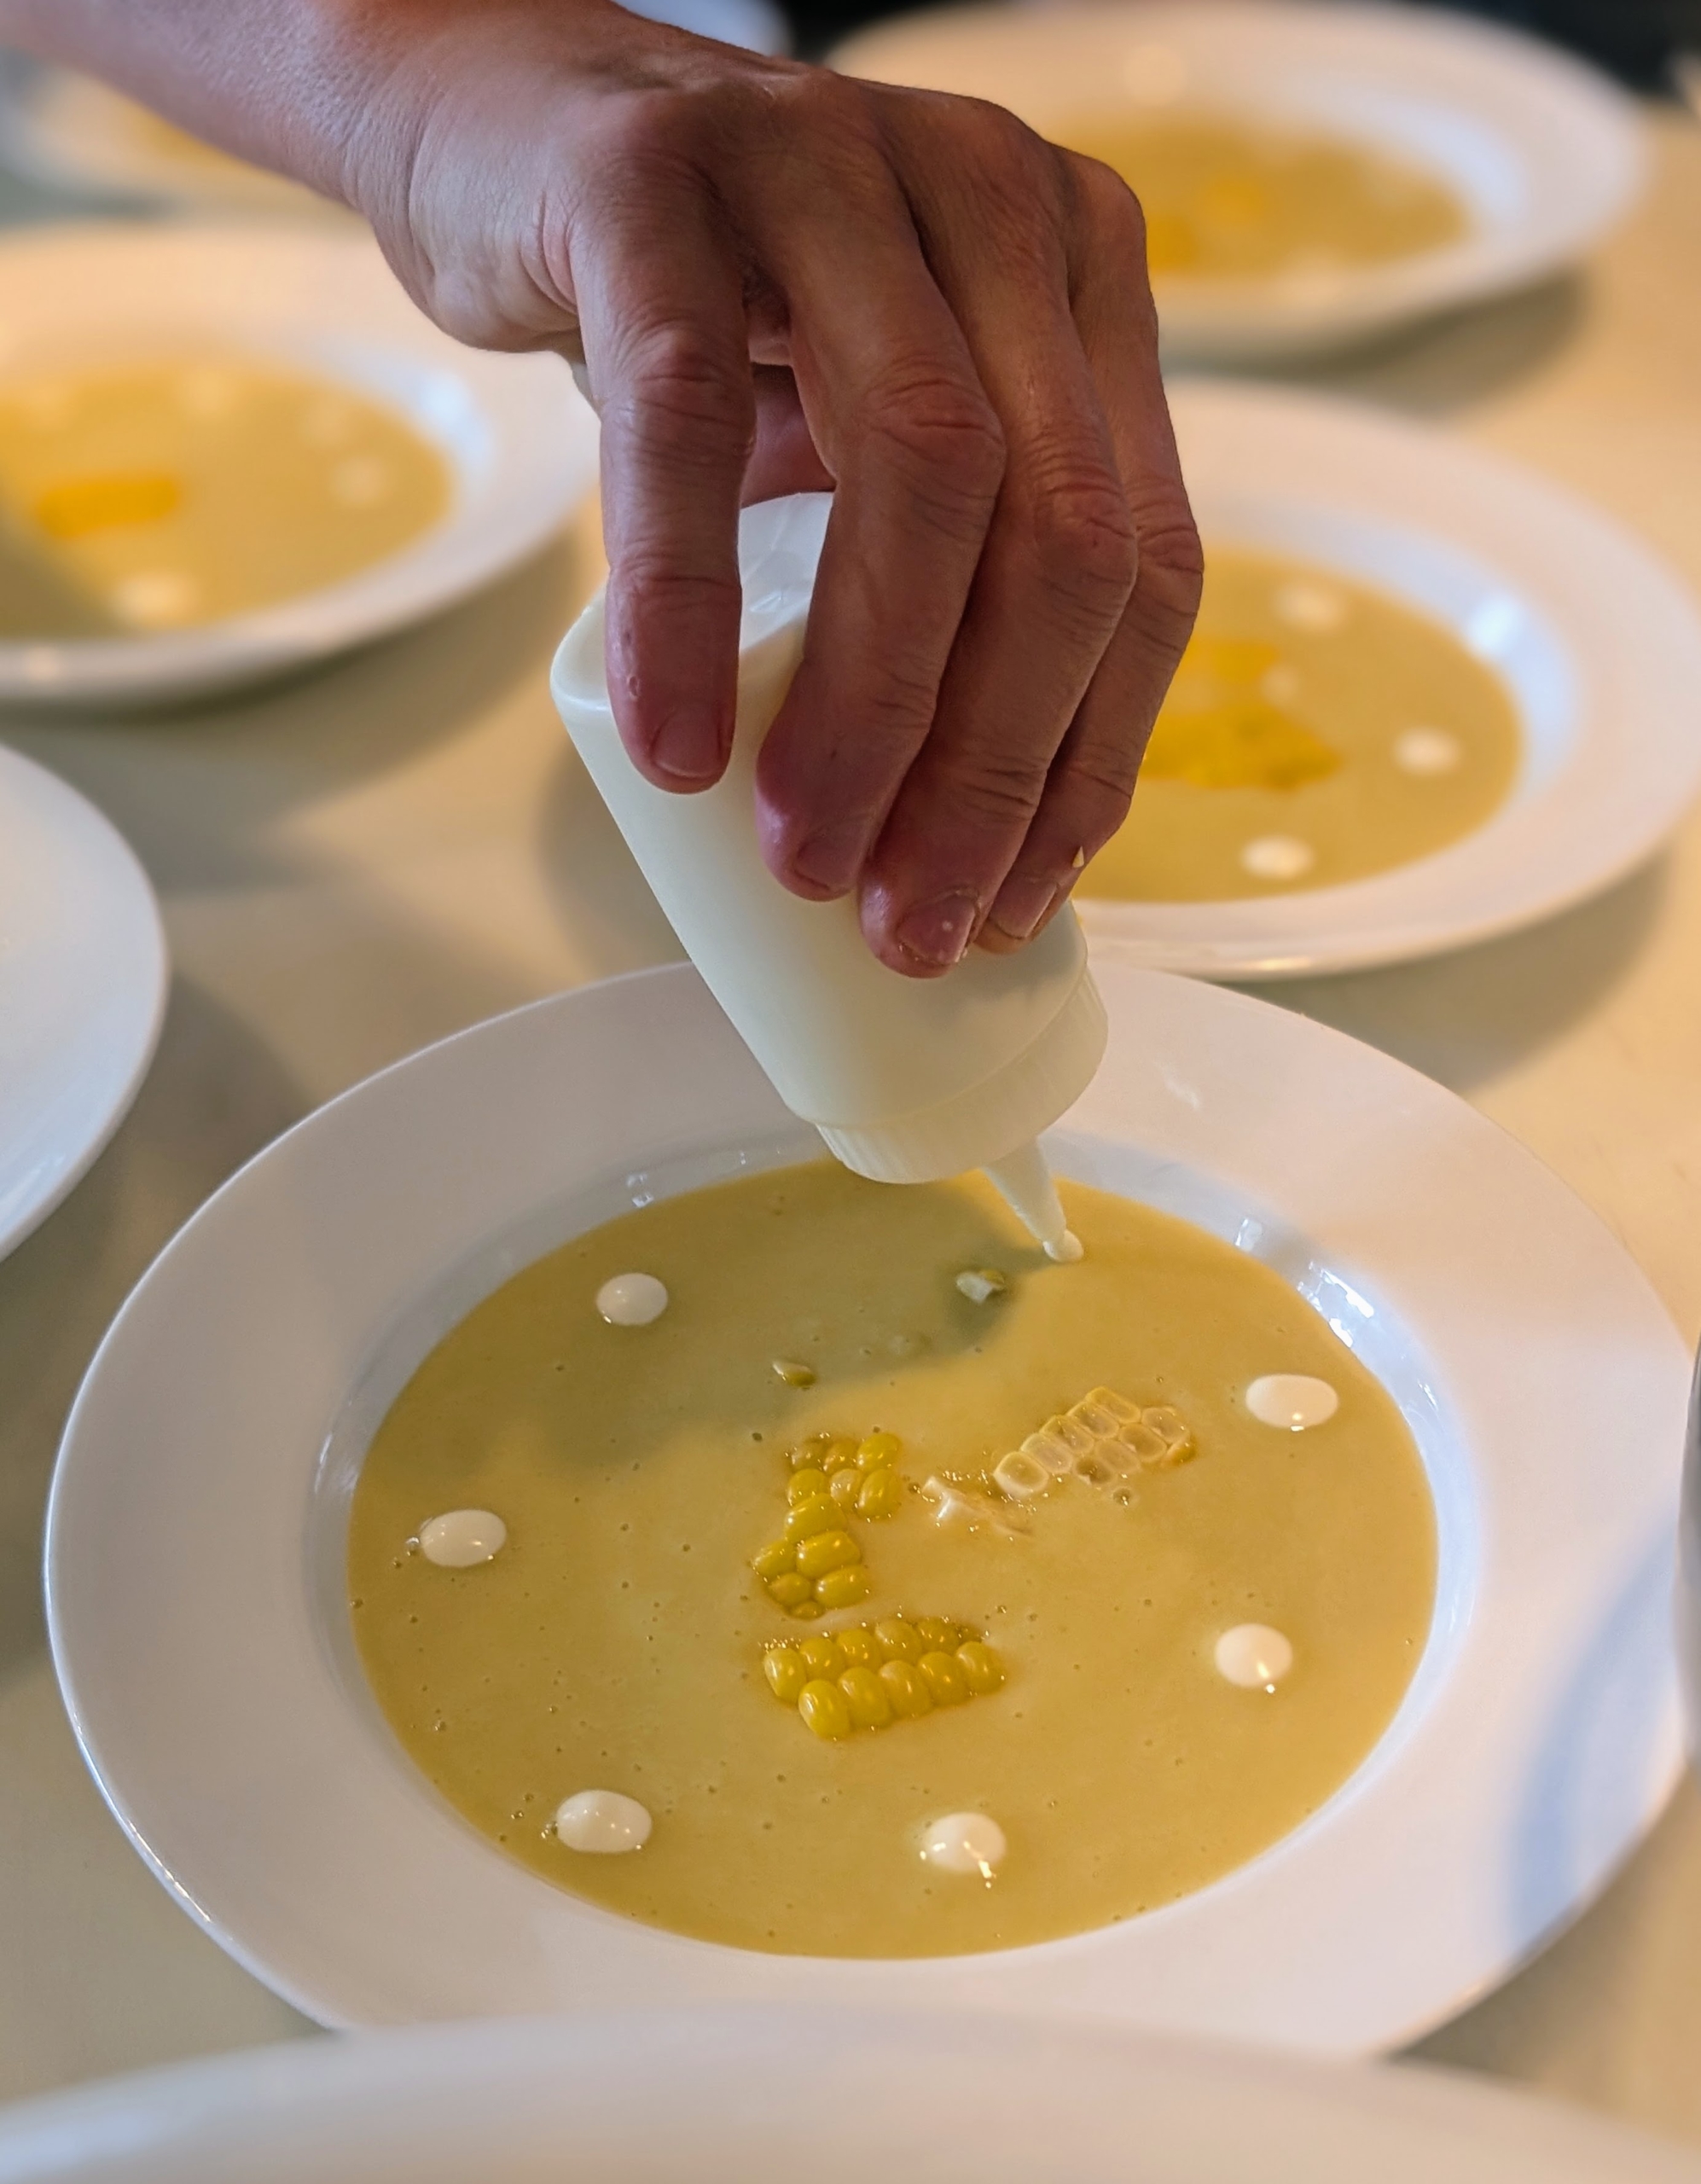
Sarah plated the chilled corn soup and added just a touch of crème fraîche.
Every bowl was so beautifully prepared.
Guests loved this first course – every one wanted more.
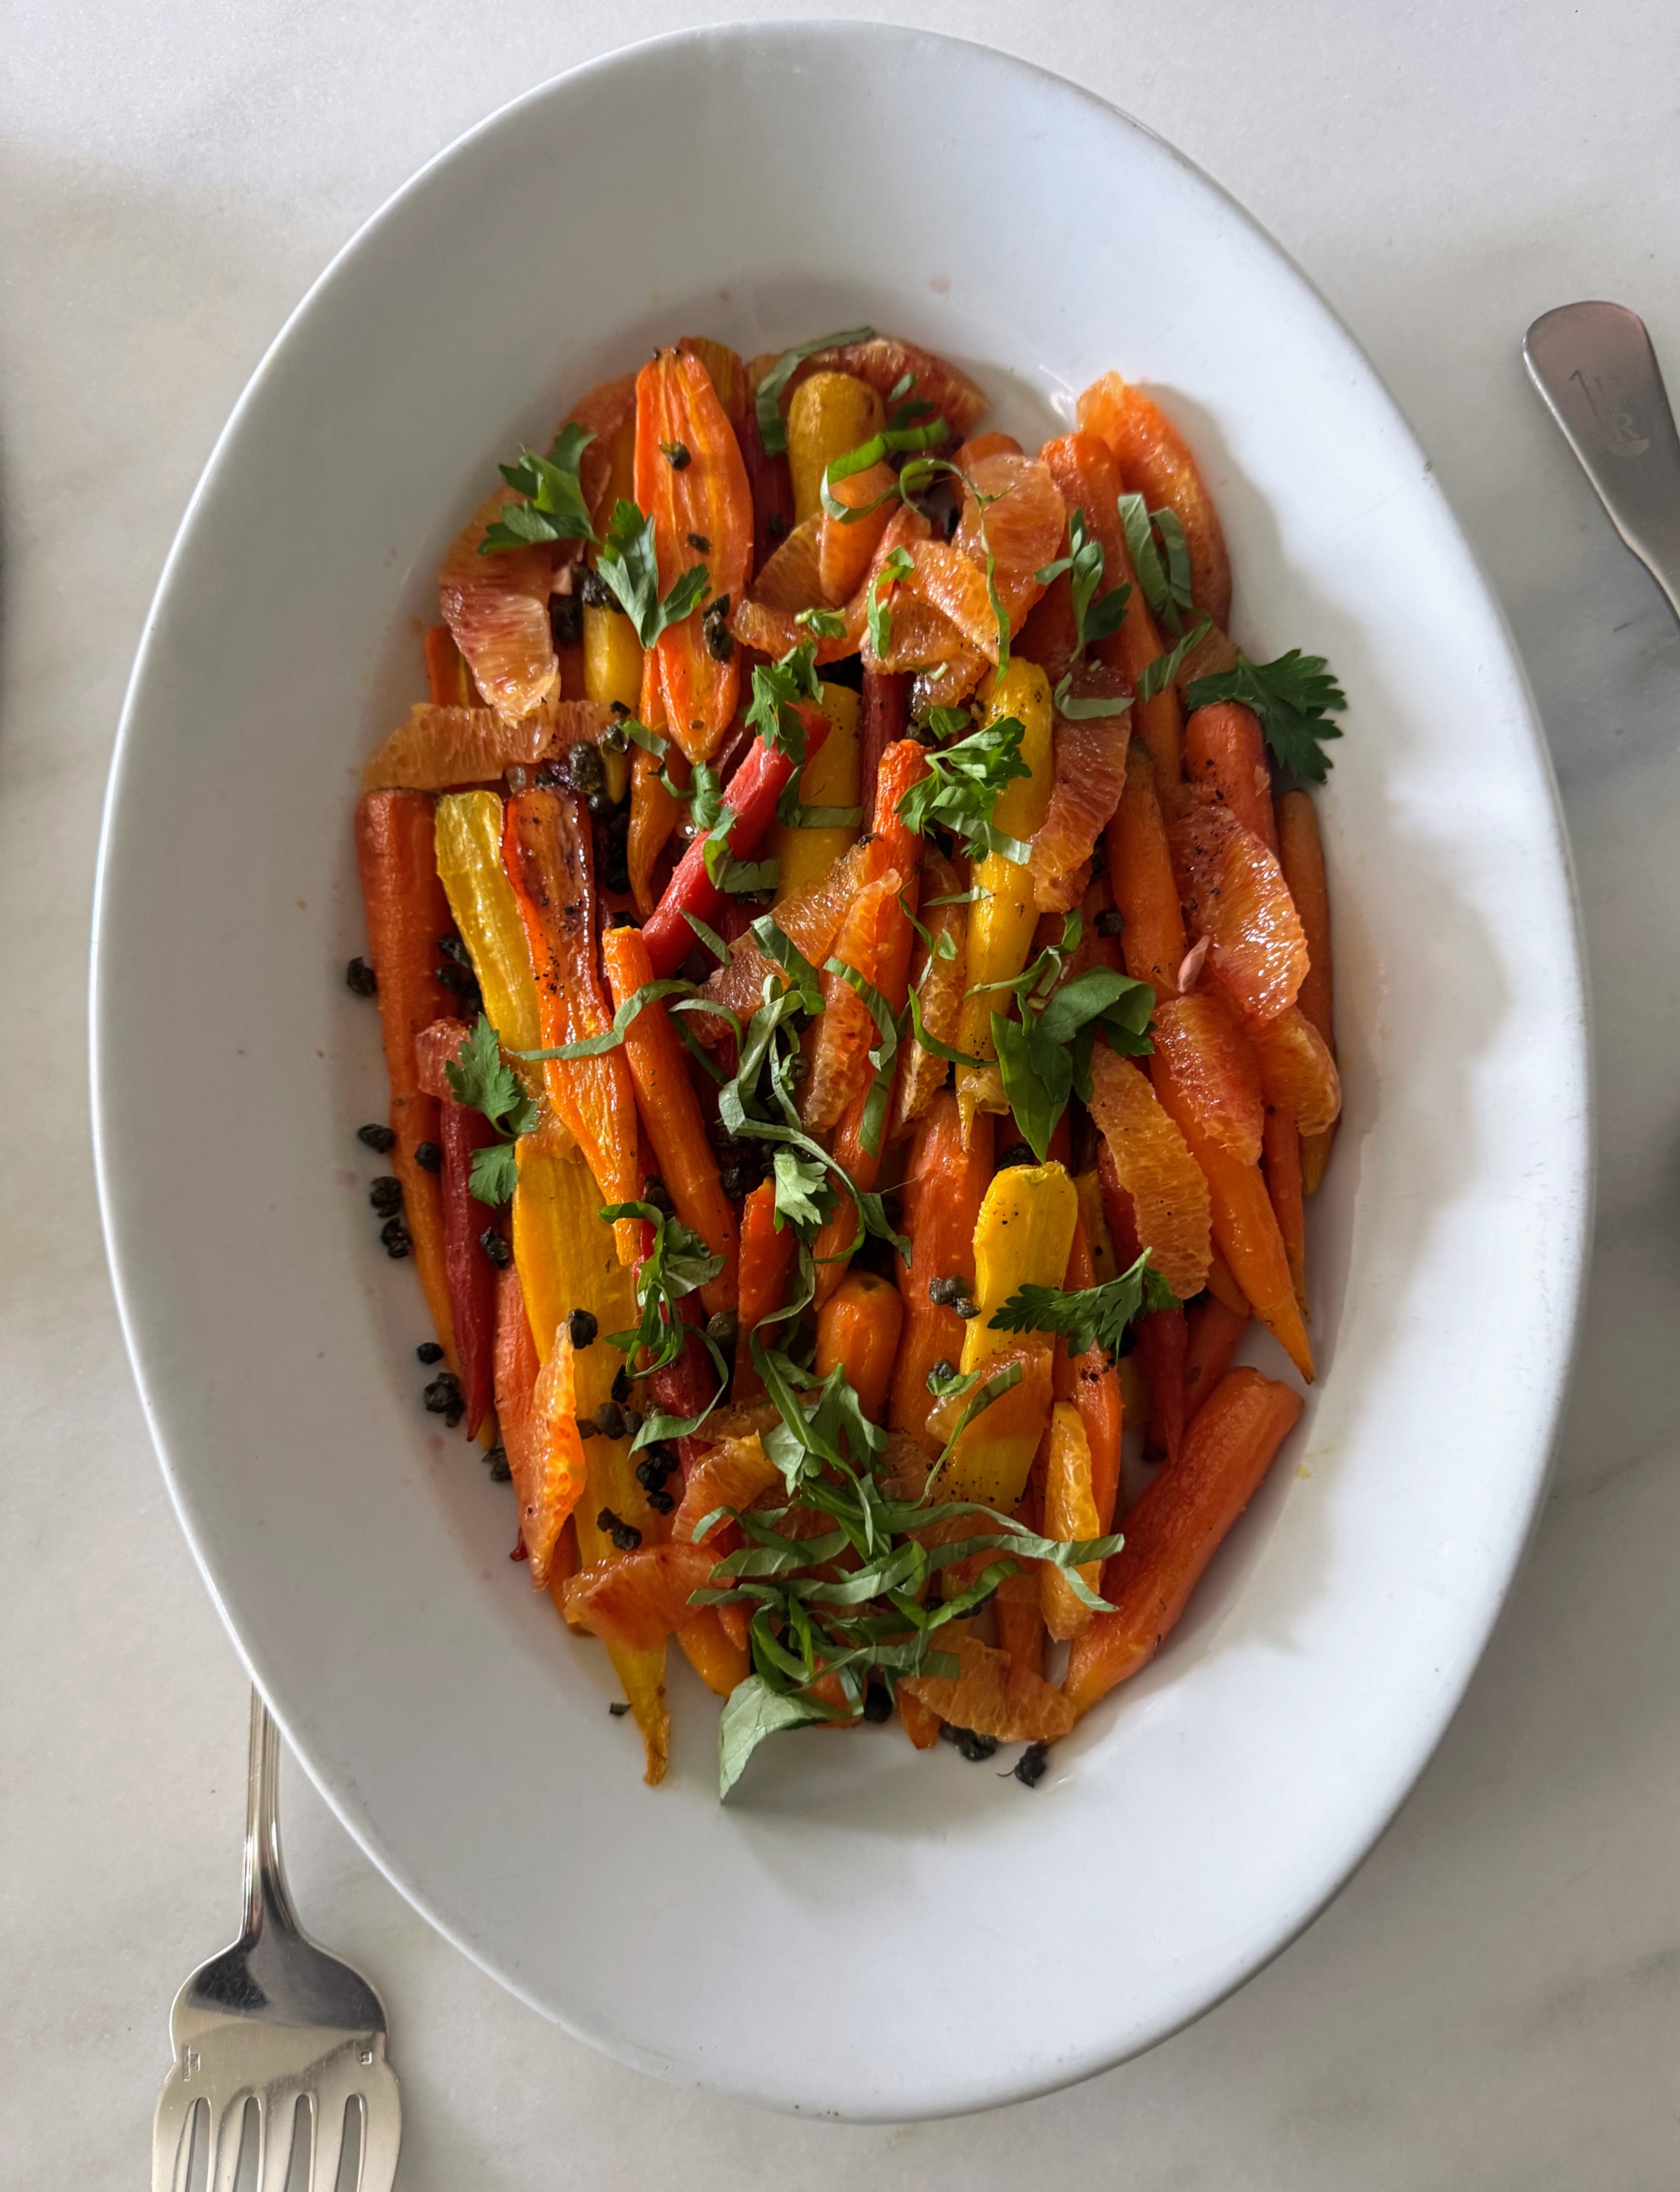
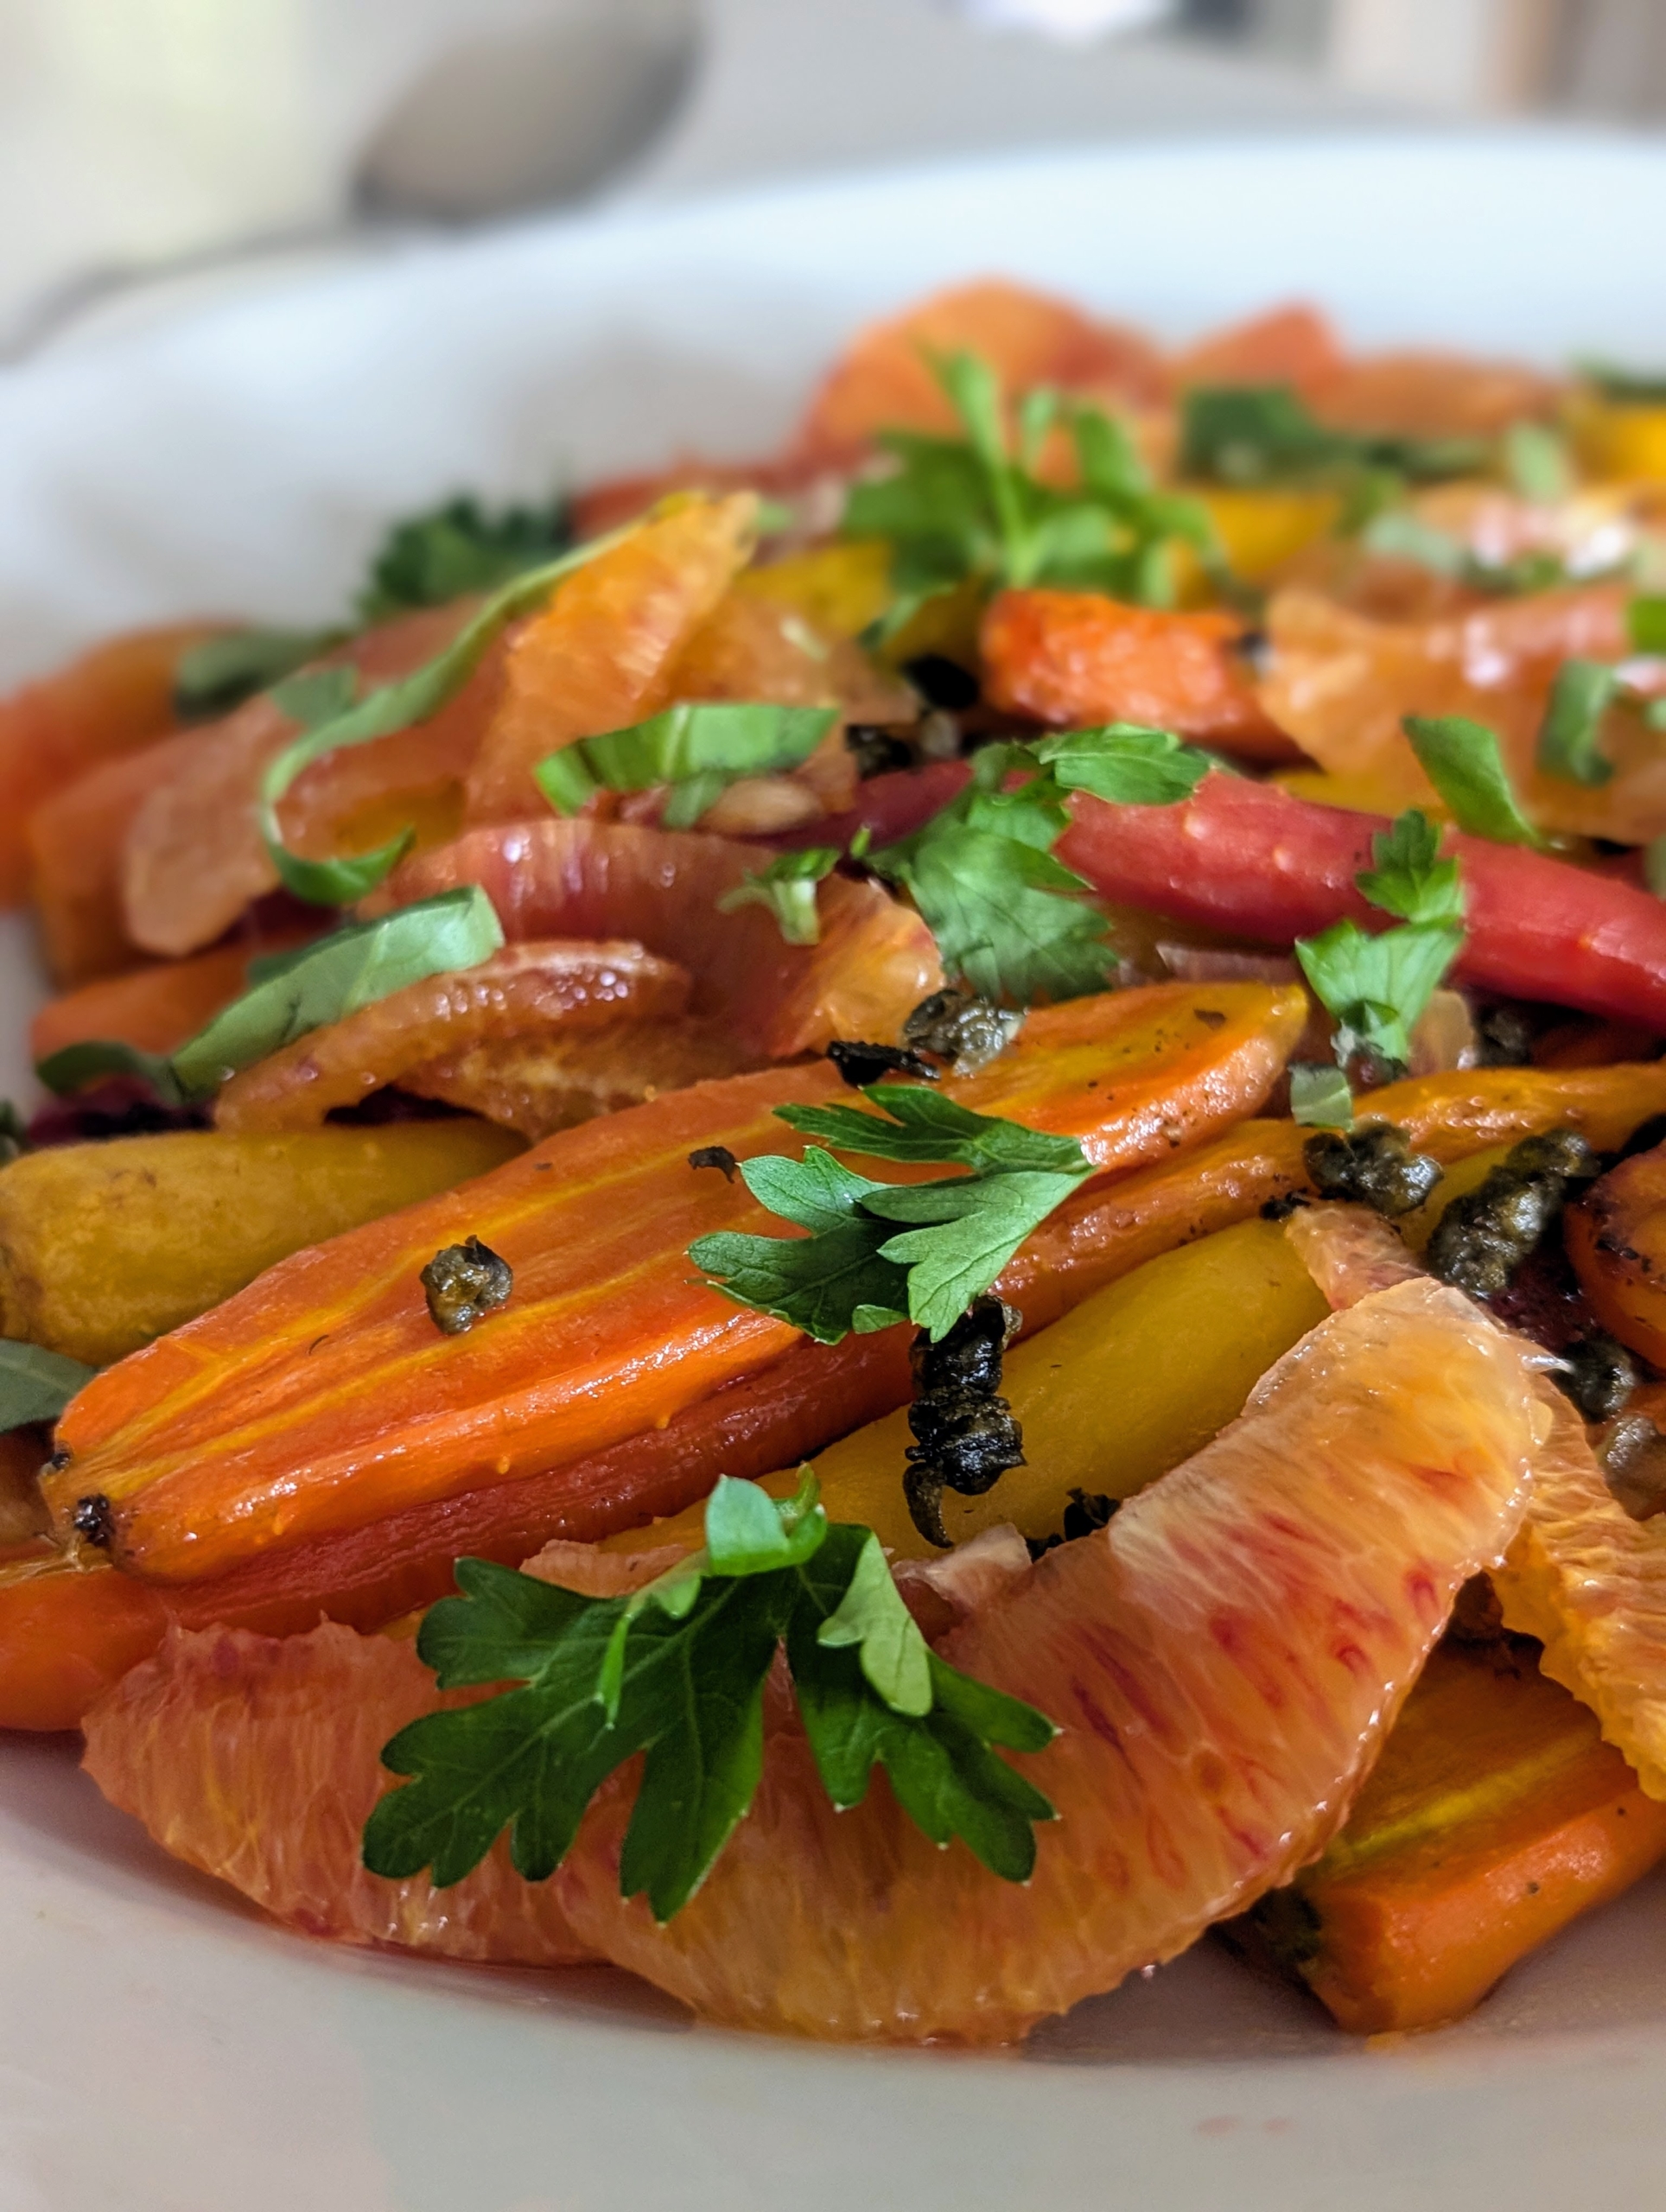
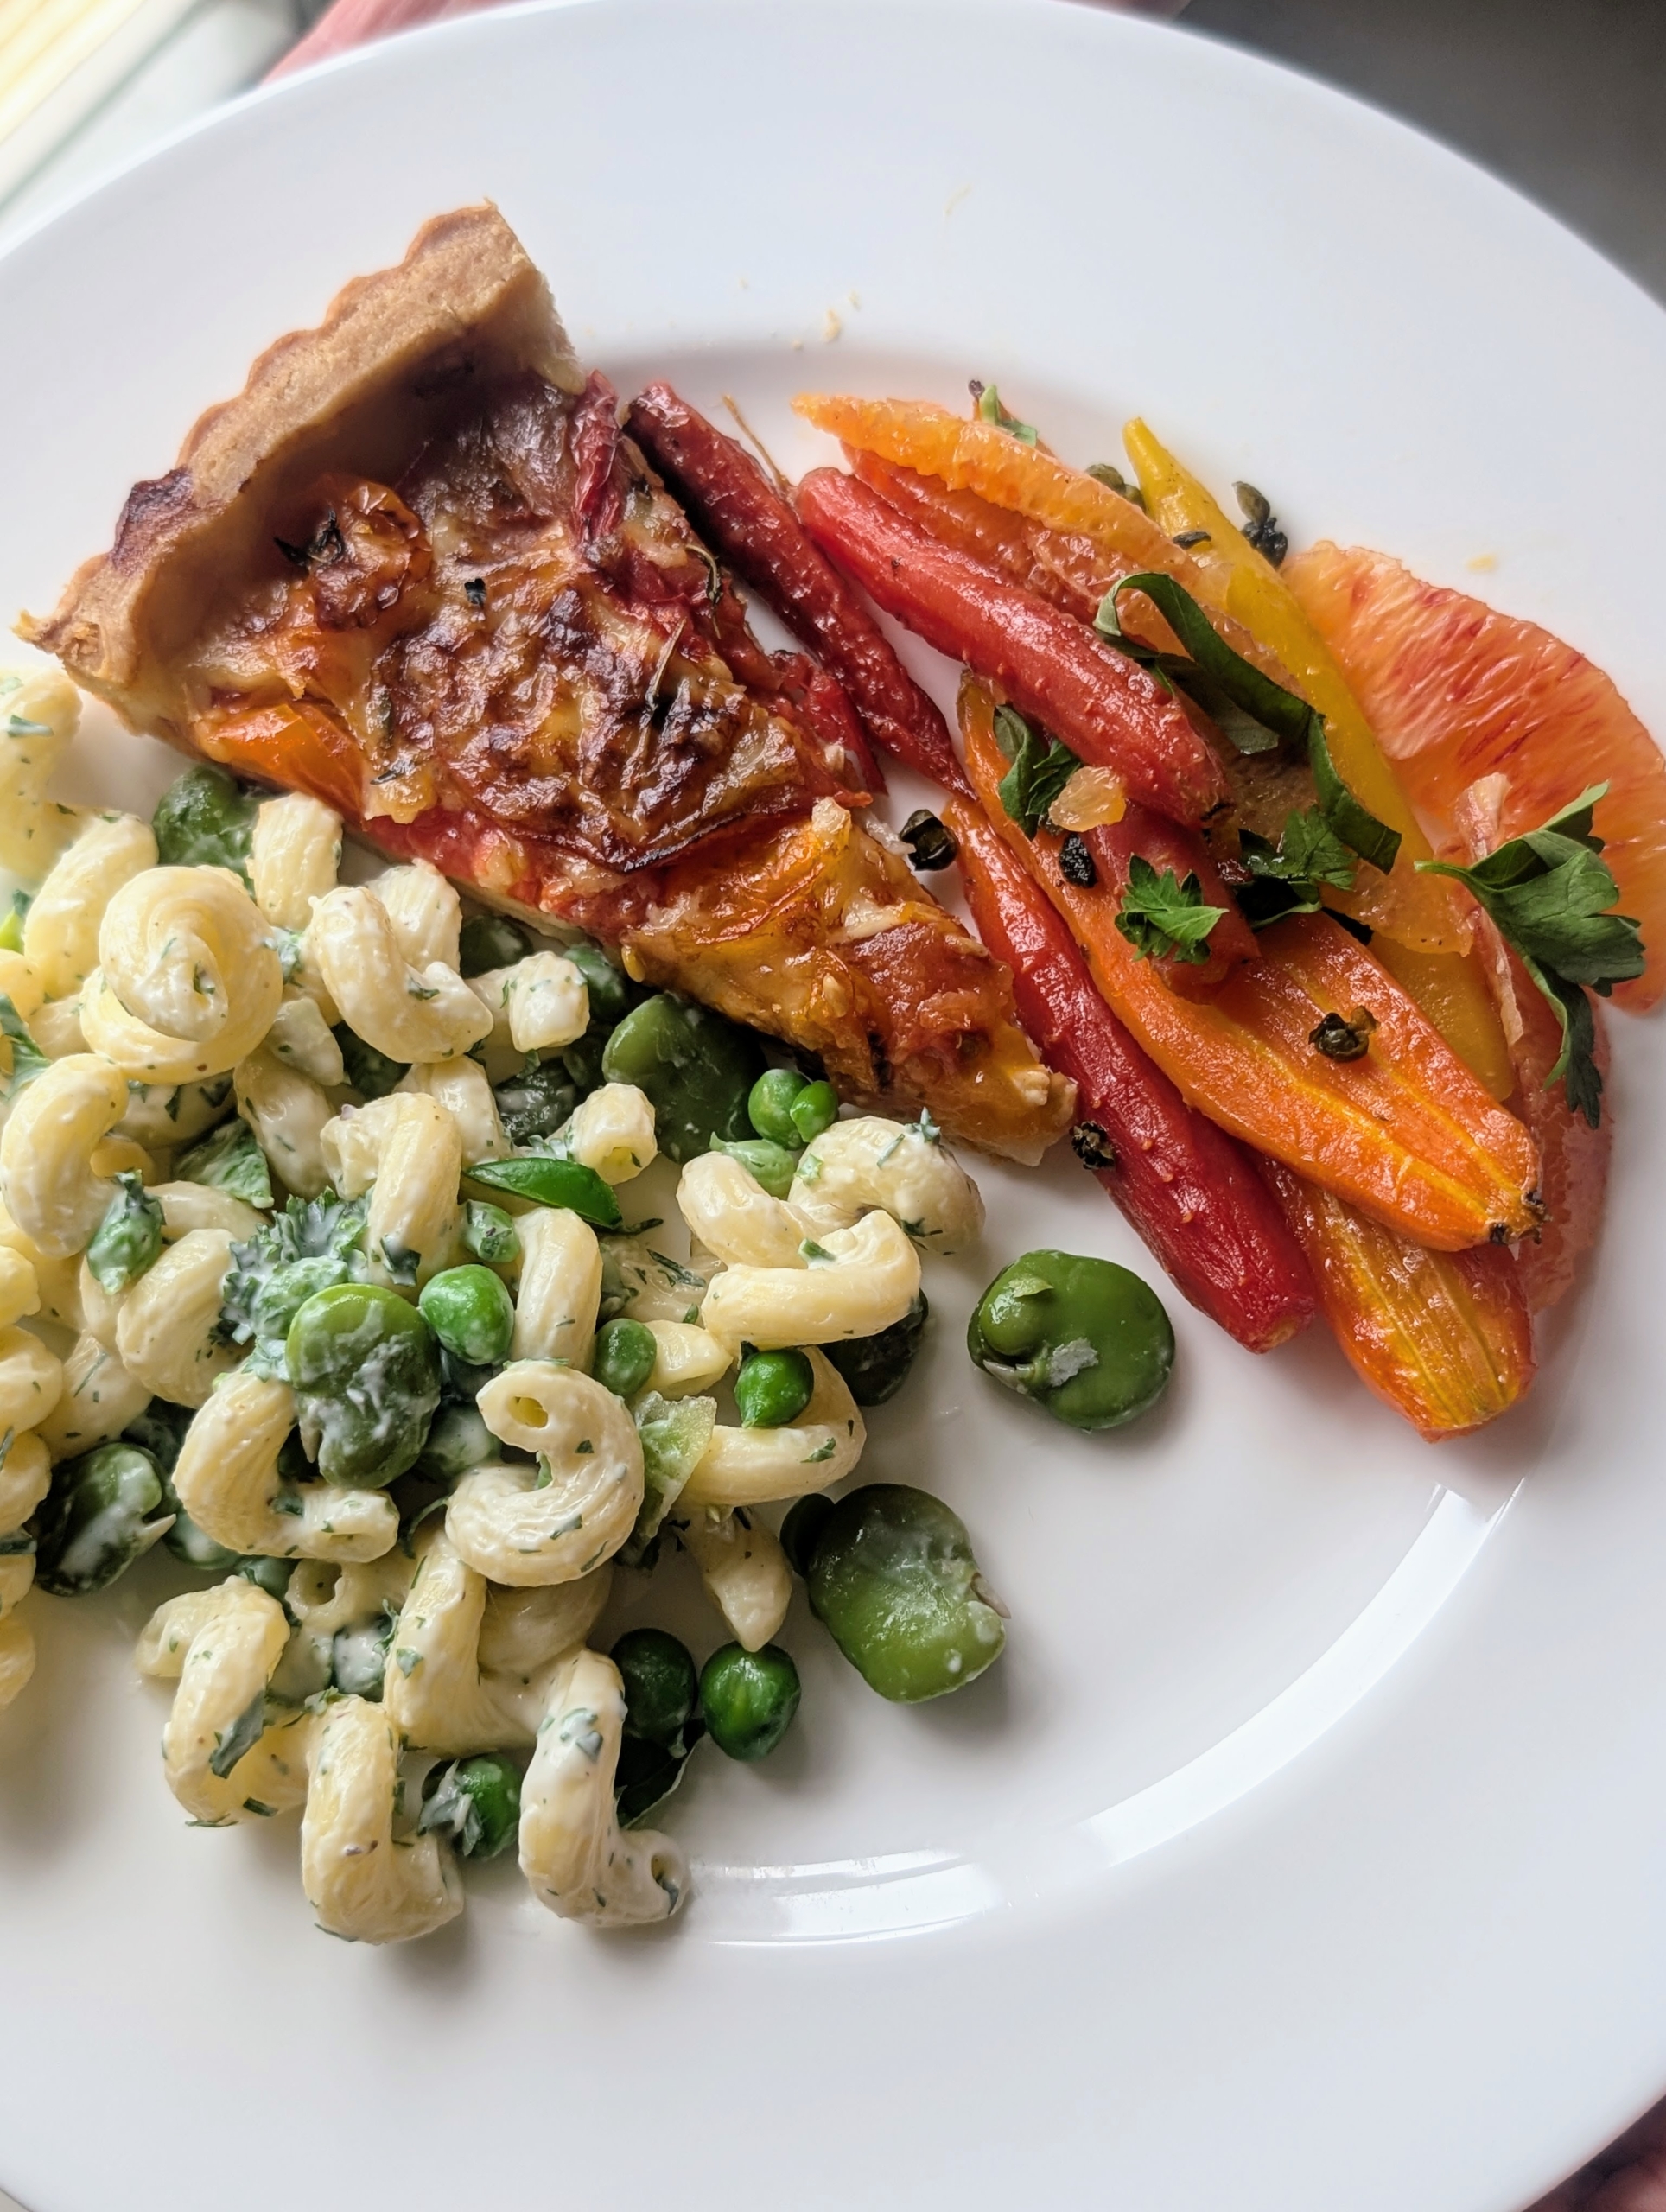
The rest of the dishes were served buffet style in my kitchen. This platter is filled with a variety of different carrots roasted to perfection and then dressed with herbs, capers, and slices of blood orange.
This is such a great and easy-to-make side dish for any meal.
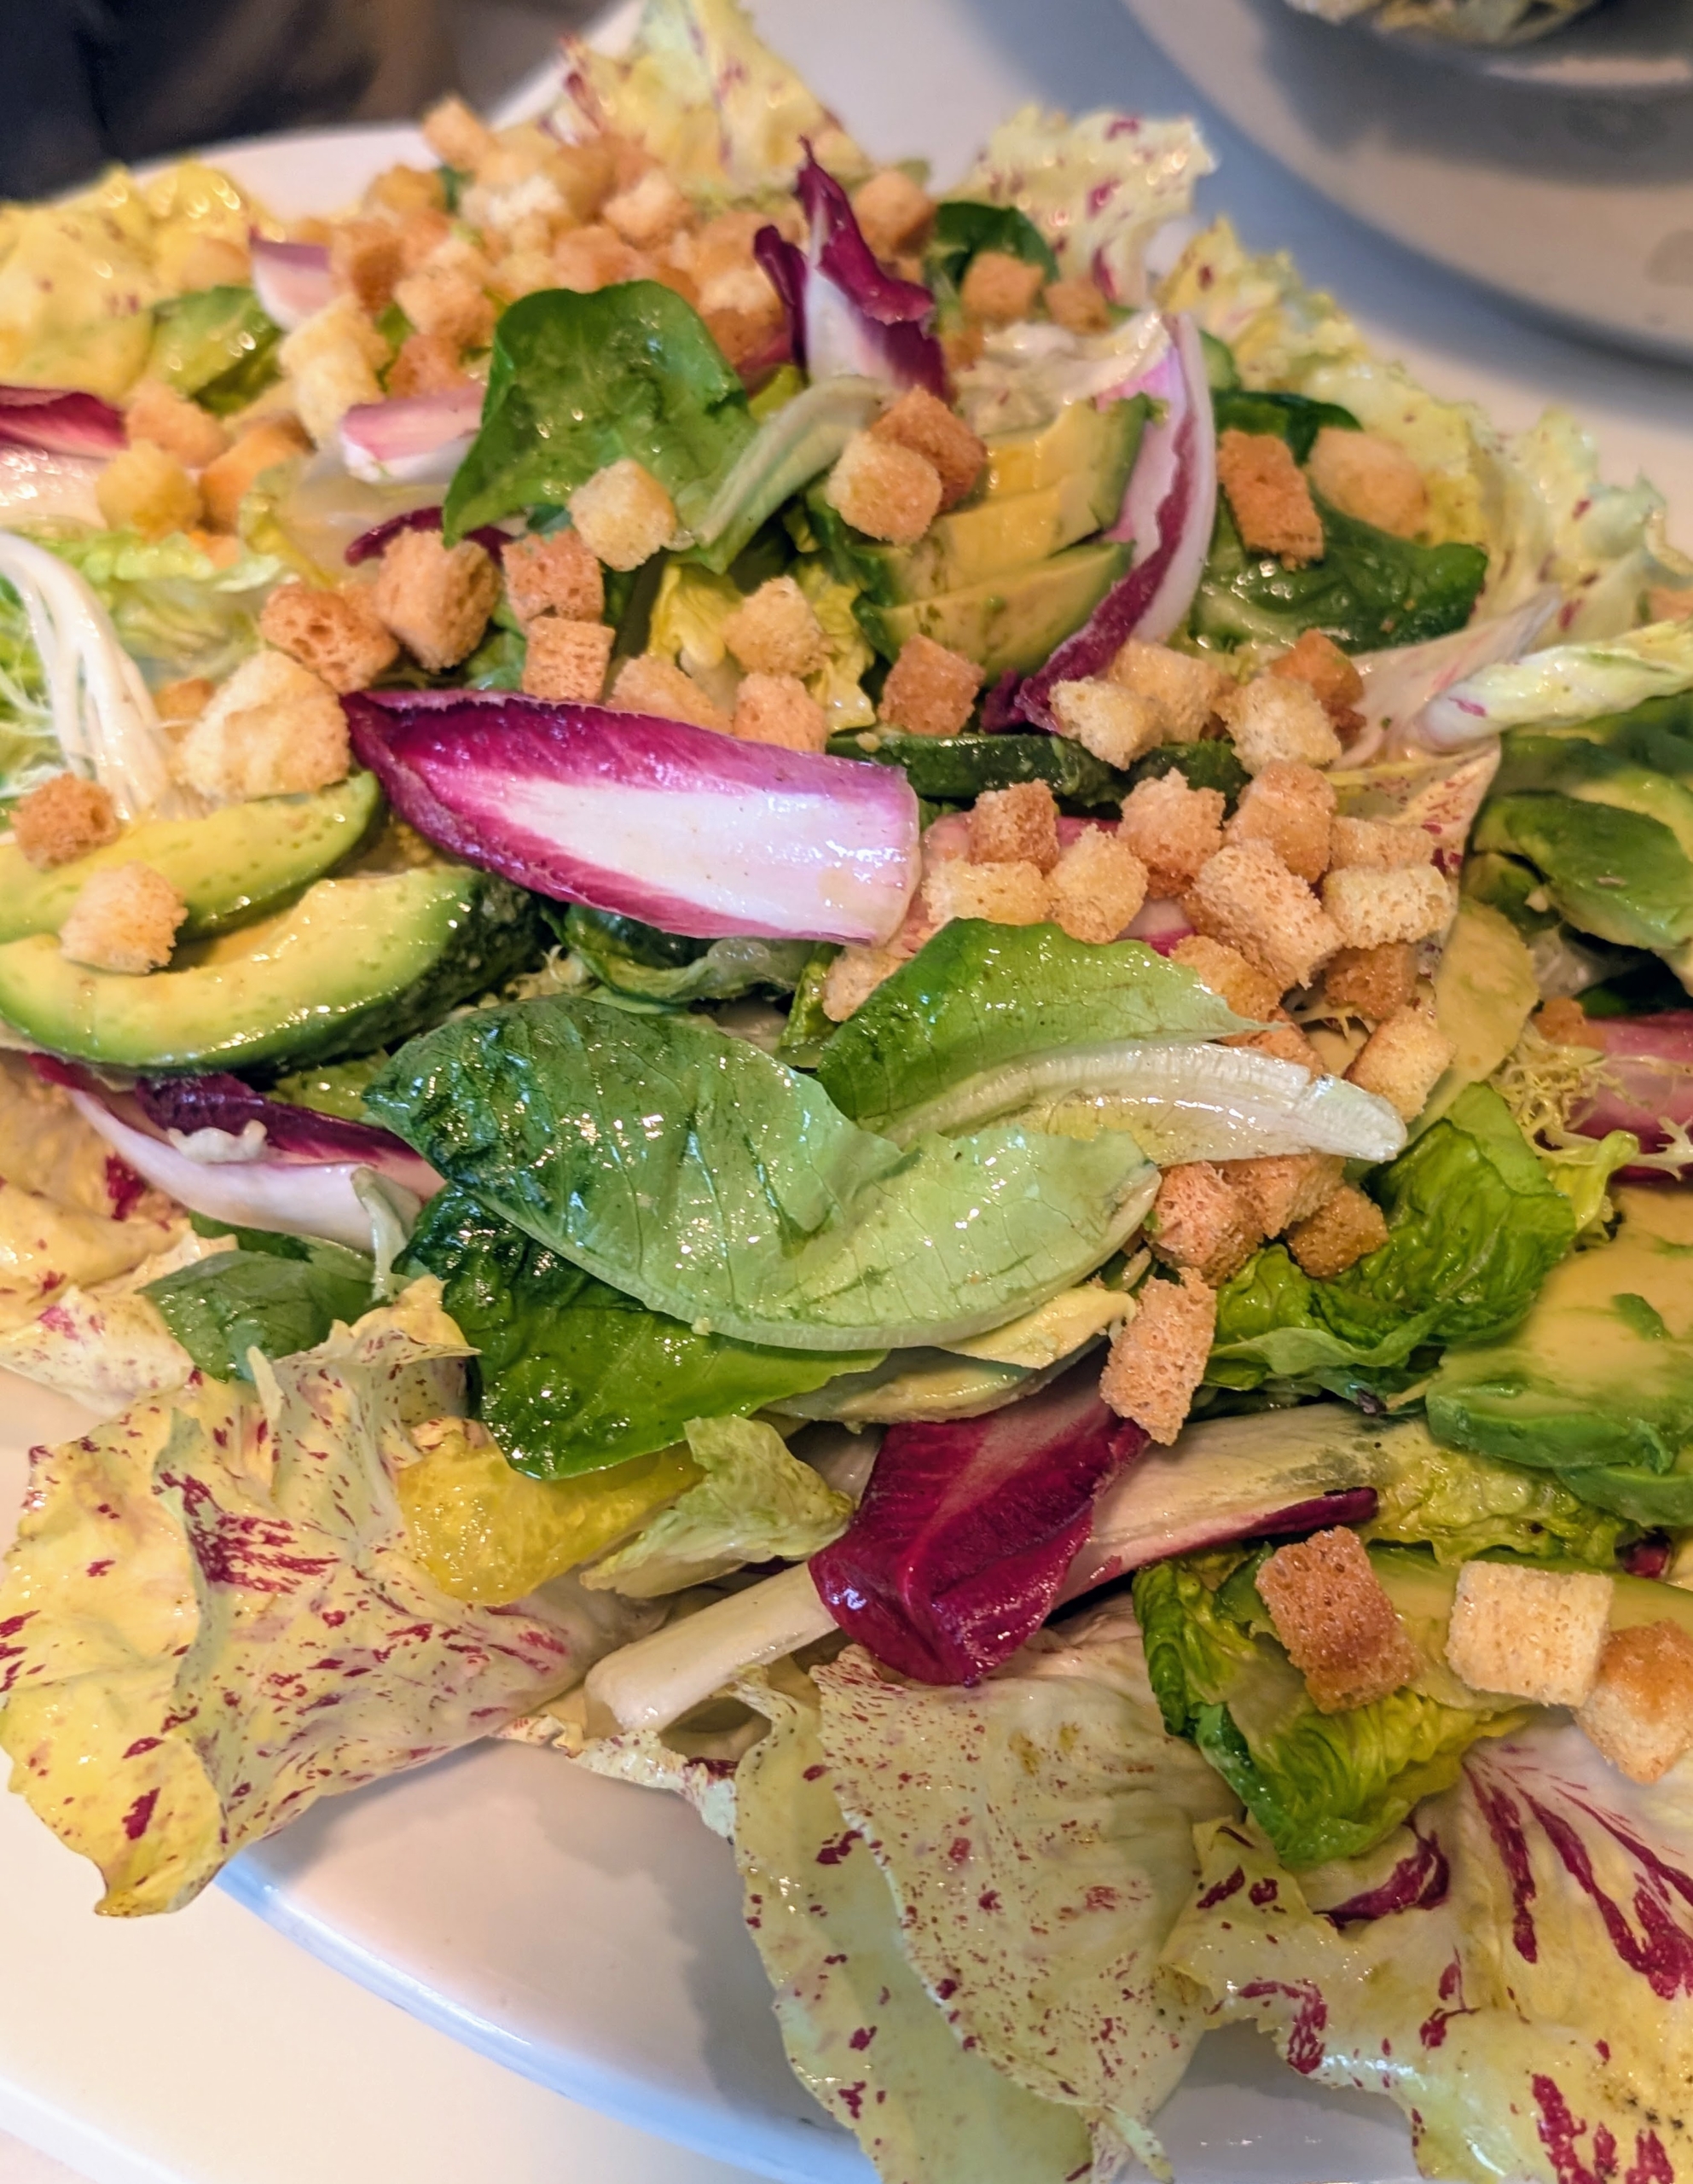
I also served a healthy, fresh salad with radicchio and endives, avocado, homemade croutons and a light vinaigrette dressing.
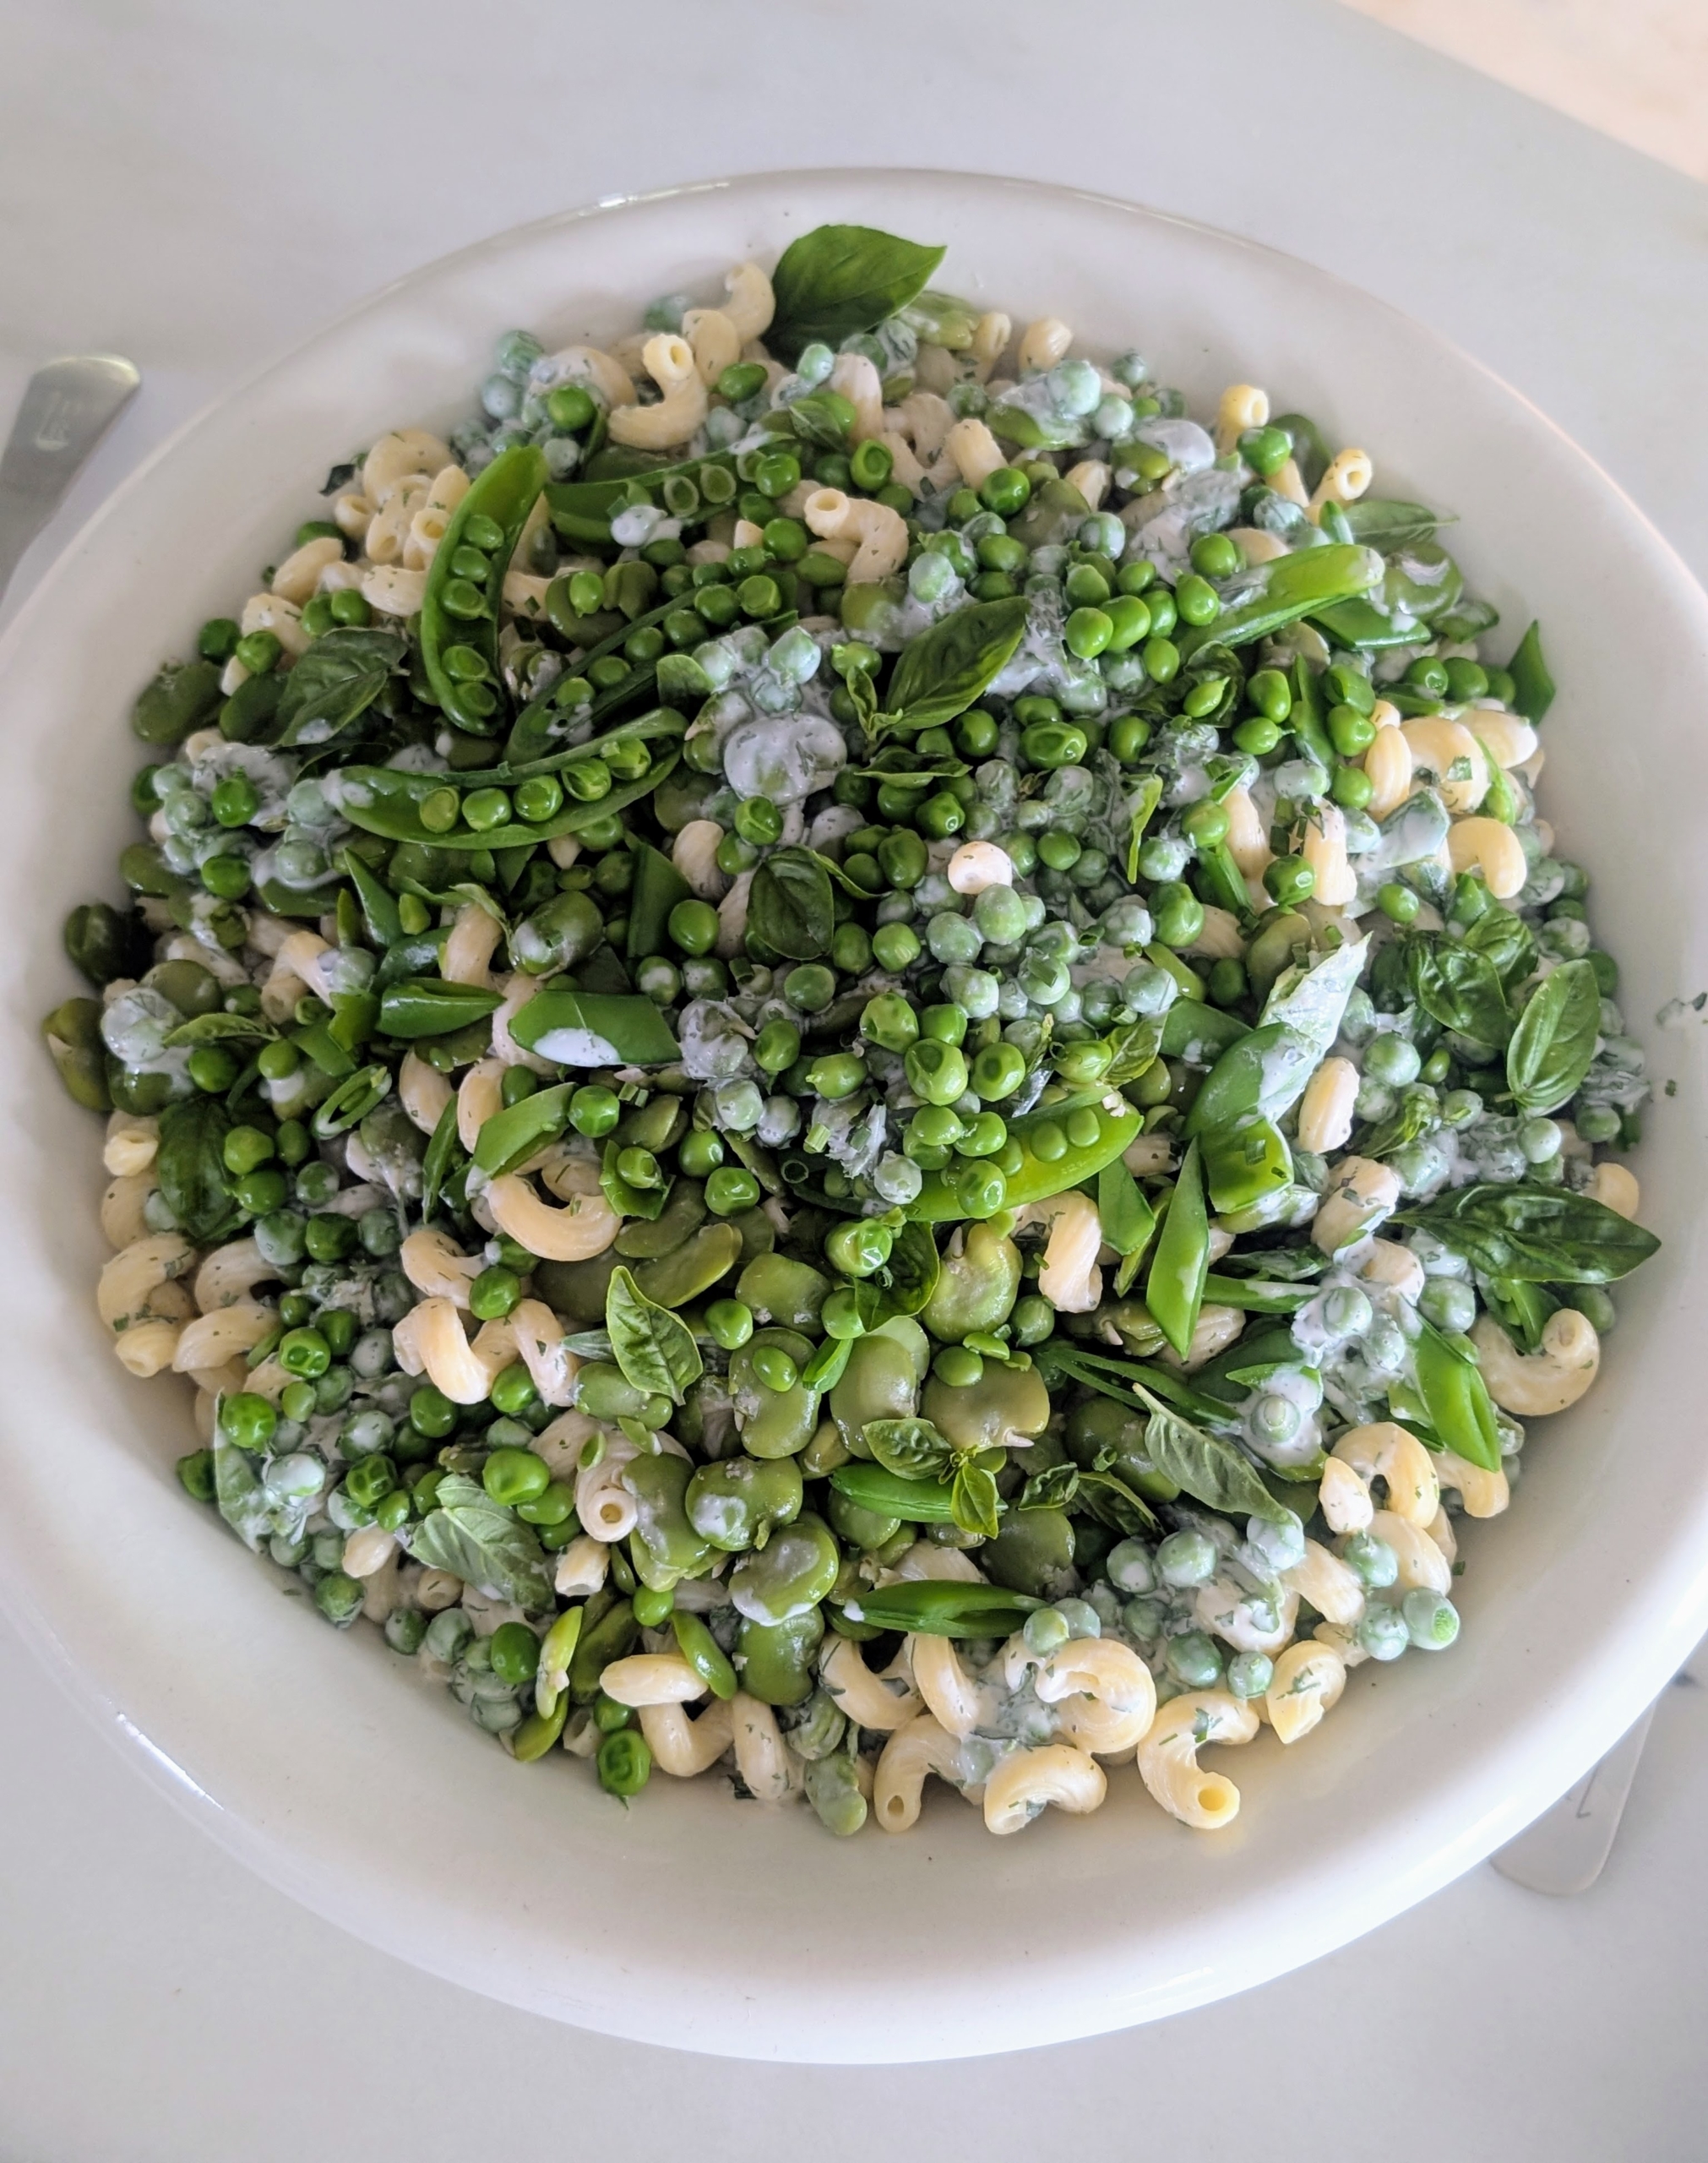
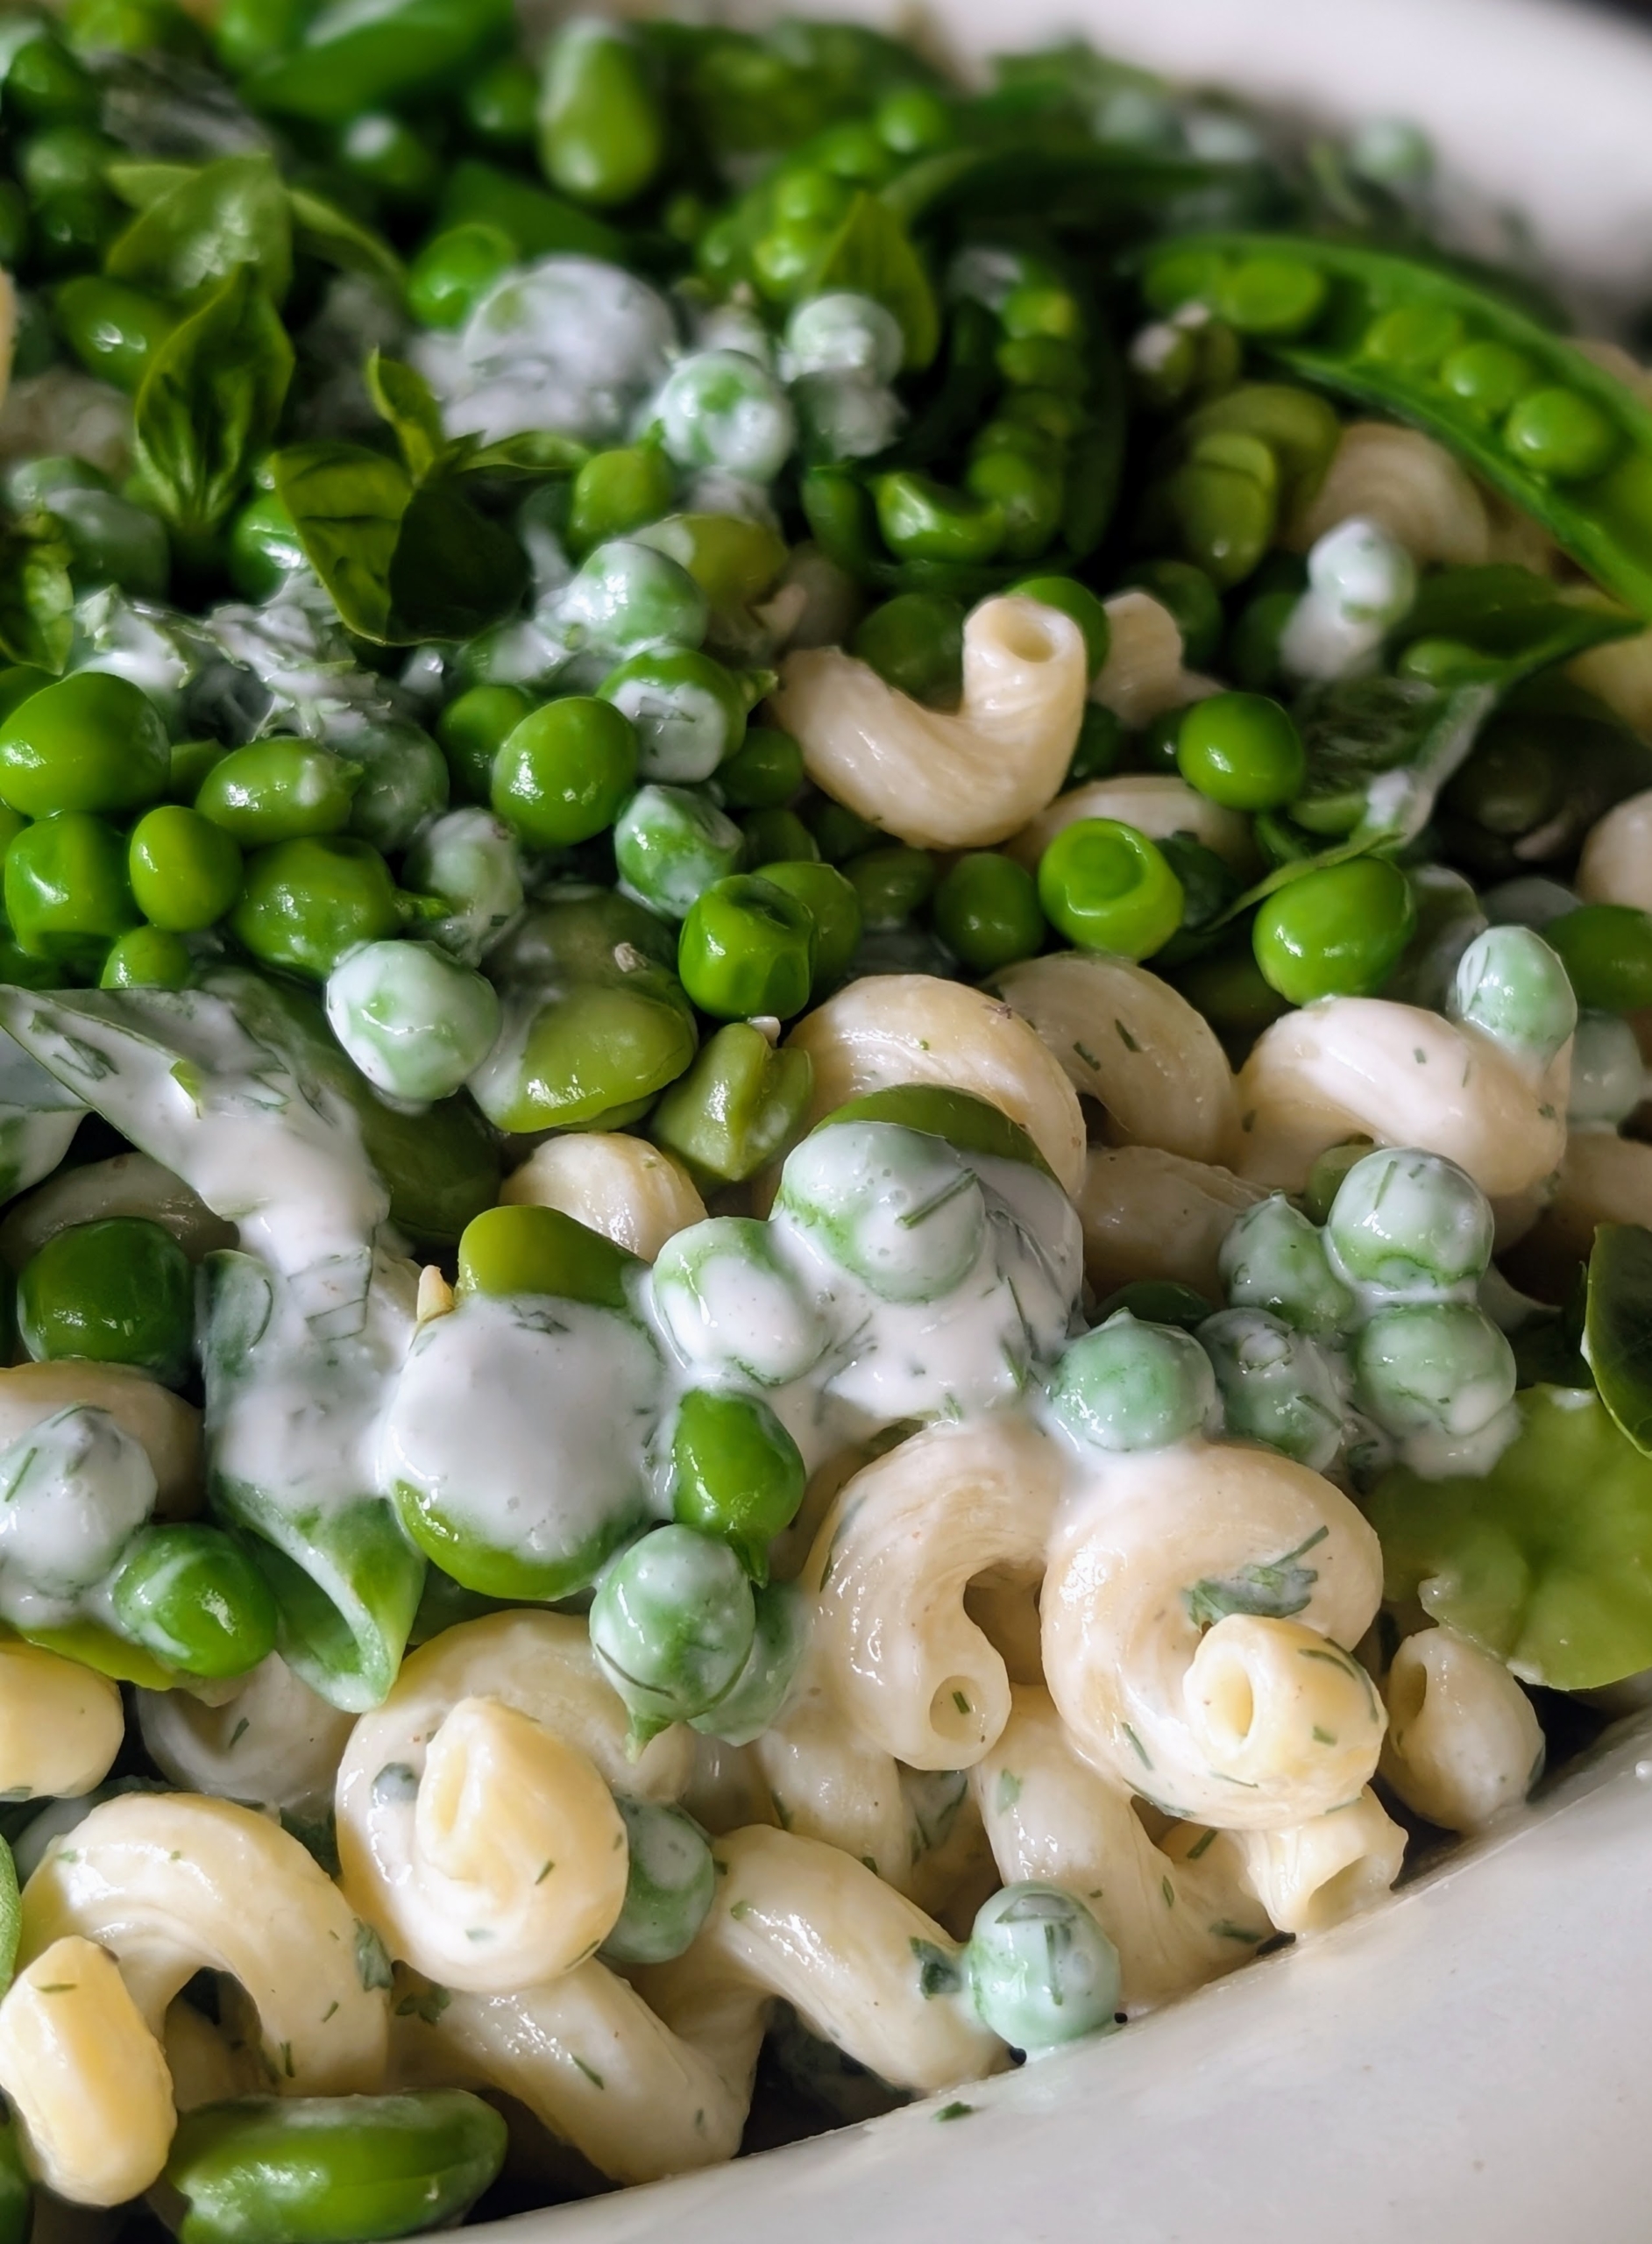
And, look at the wonderful green colors of this pasta salad – filled with peas and fava beans from my garden – just picked hours before. The pasta salad is mixed with a light dressing of buttermilk, herbs, lemon, a bit of mayonnaise and crème fraîche, salt, and pepper.
This salad was also such a big hit. I am always so happy to serve dishes made with the fresh vegetables I grow in the gardens. If you’re unfamiliar with them, fava beans, also called broad beans, are legumes with a buttery and nutty tase. I grow them every year.
This vegetarian entrée is a rich and savory tomato tart.
Sarah made two – both using juicy slices of tomato layered with grated cheese in a pâte brisée pastry crust. Tomato tart is easier to make than quiche, and some say, even more delicious.
Each guest filled their plates – this one is mine. Many went back for seconds!
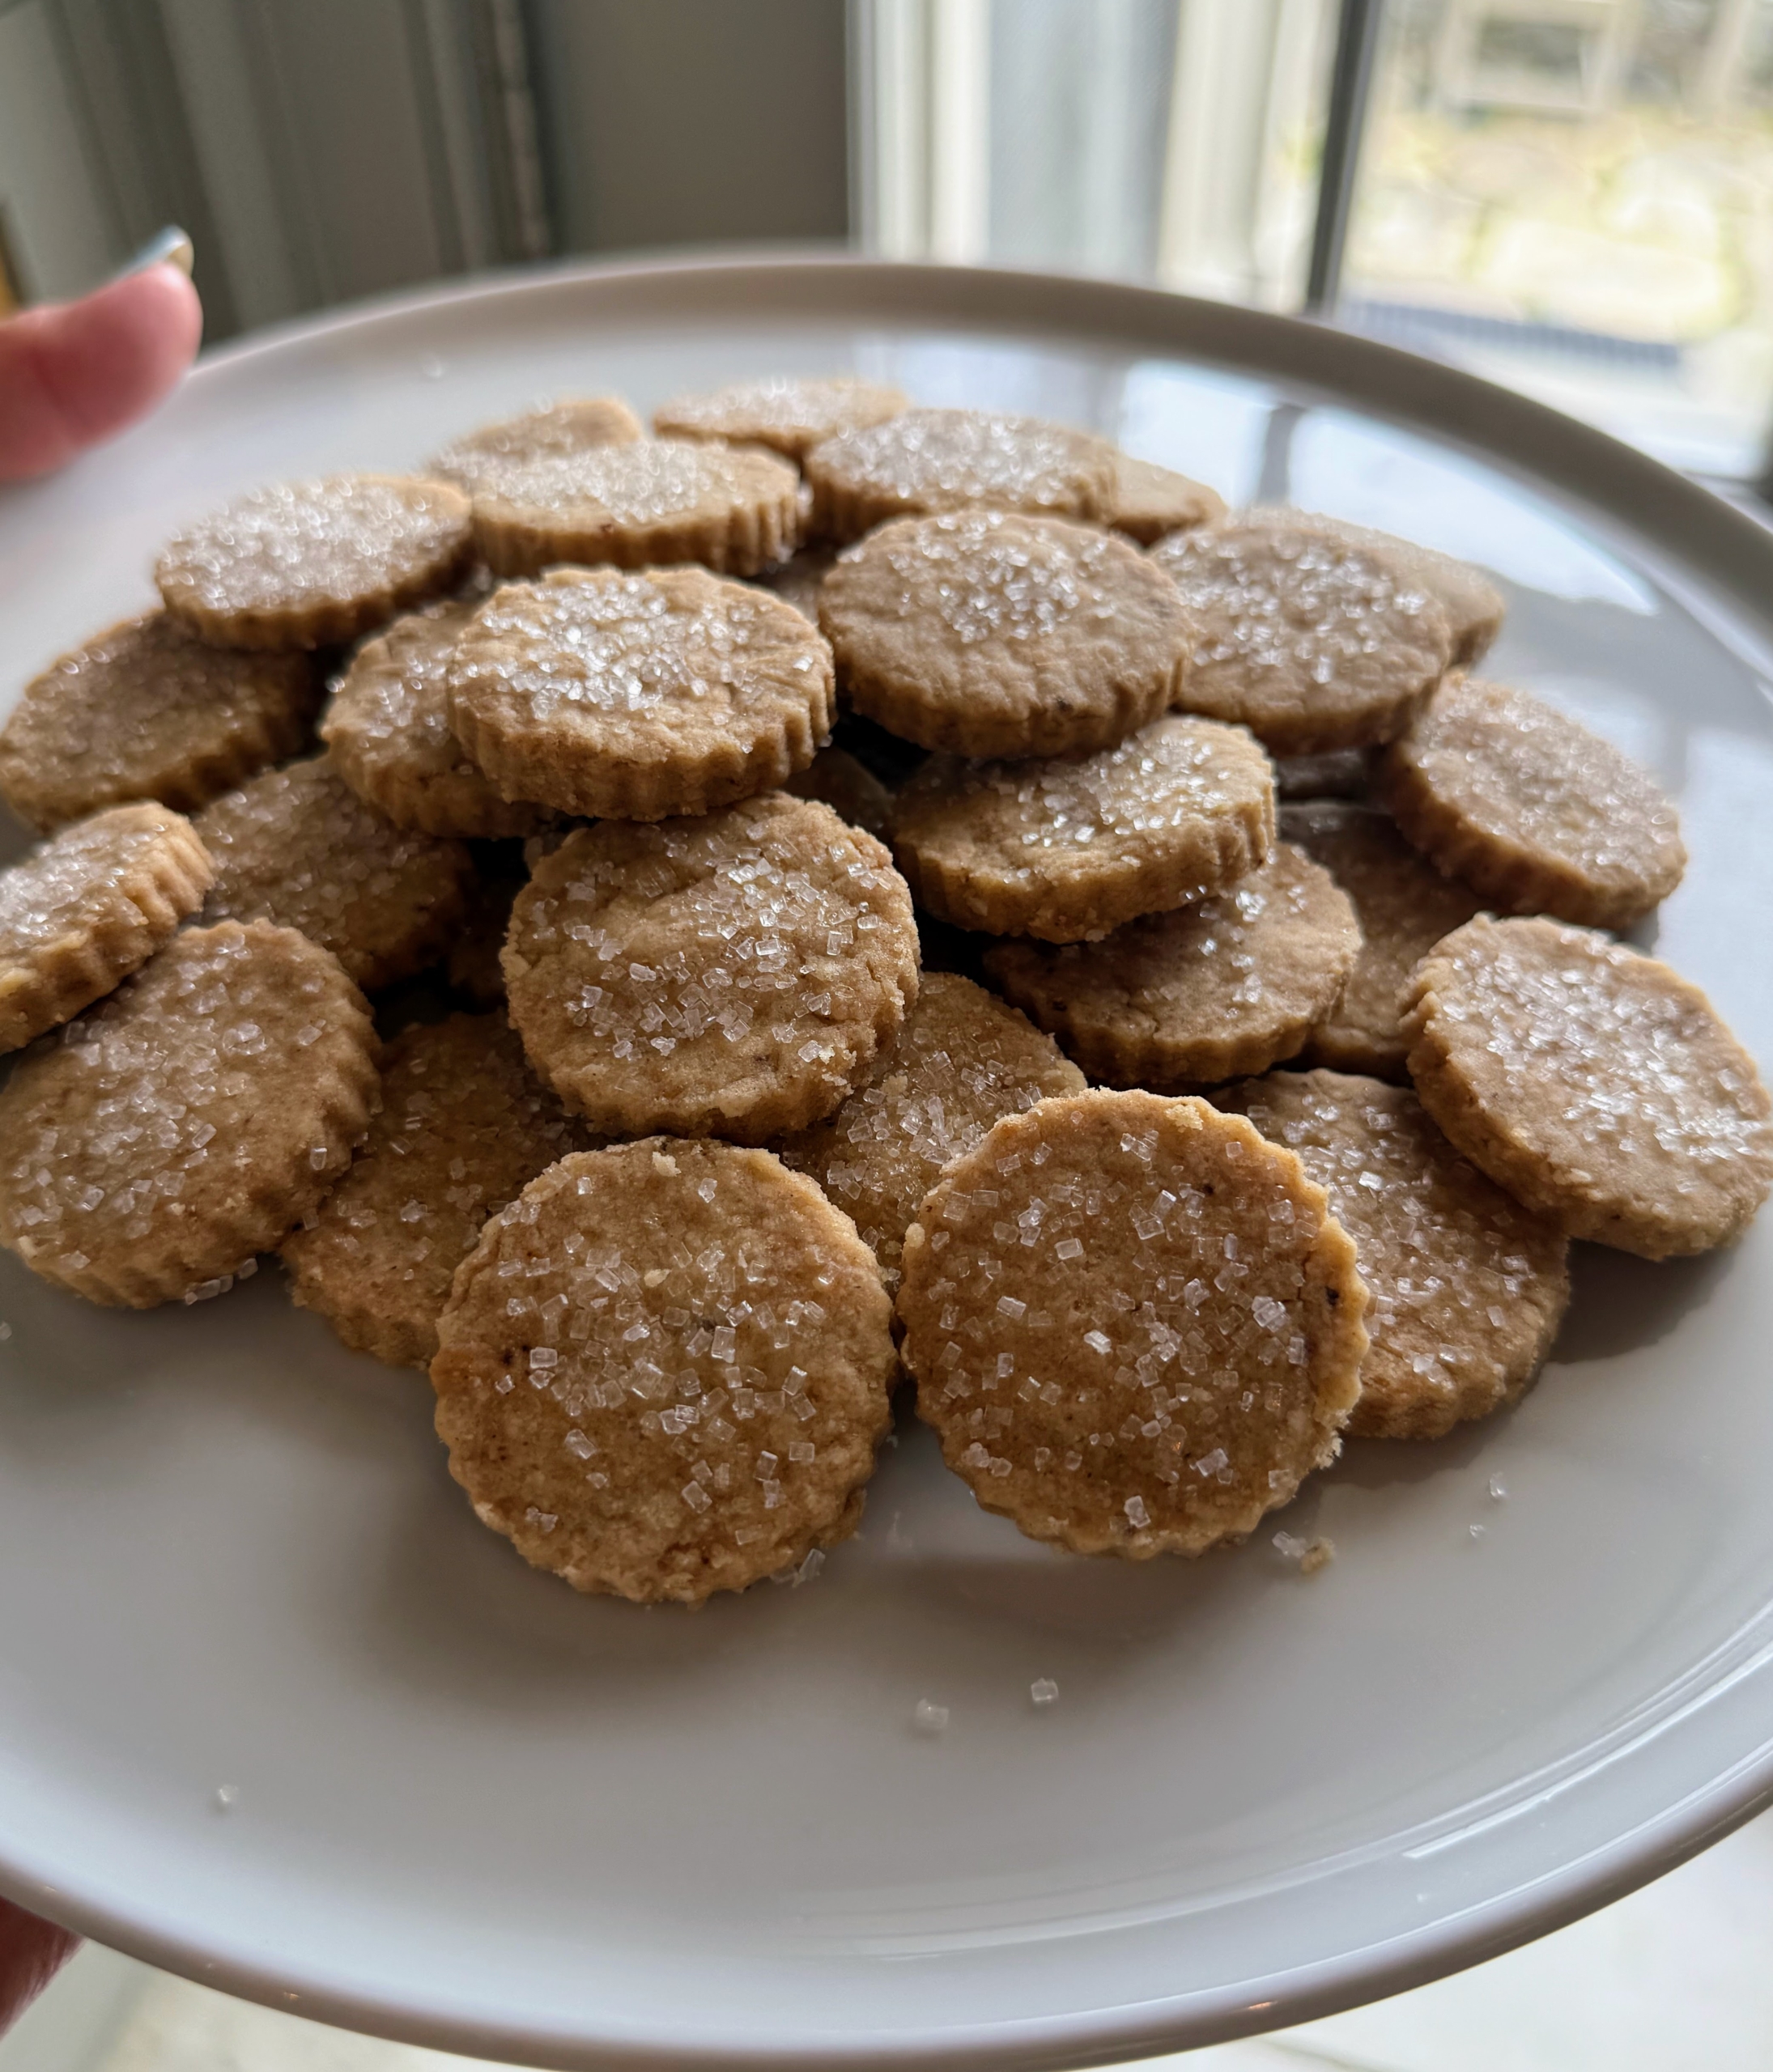
Dessert included two different cookies – served on cake stands and brought to the table – free for the taking.
These are Meyer Lemon Meltaways – light and tender, sweet and citrusy.
And these are a big favorite – my Brown Butter Shortbread cookies. Brown butter enhances the texture and flavor of these cookies. Topping them with sanding sugar gives them a nice finish.
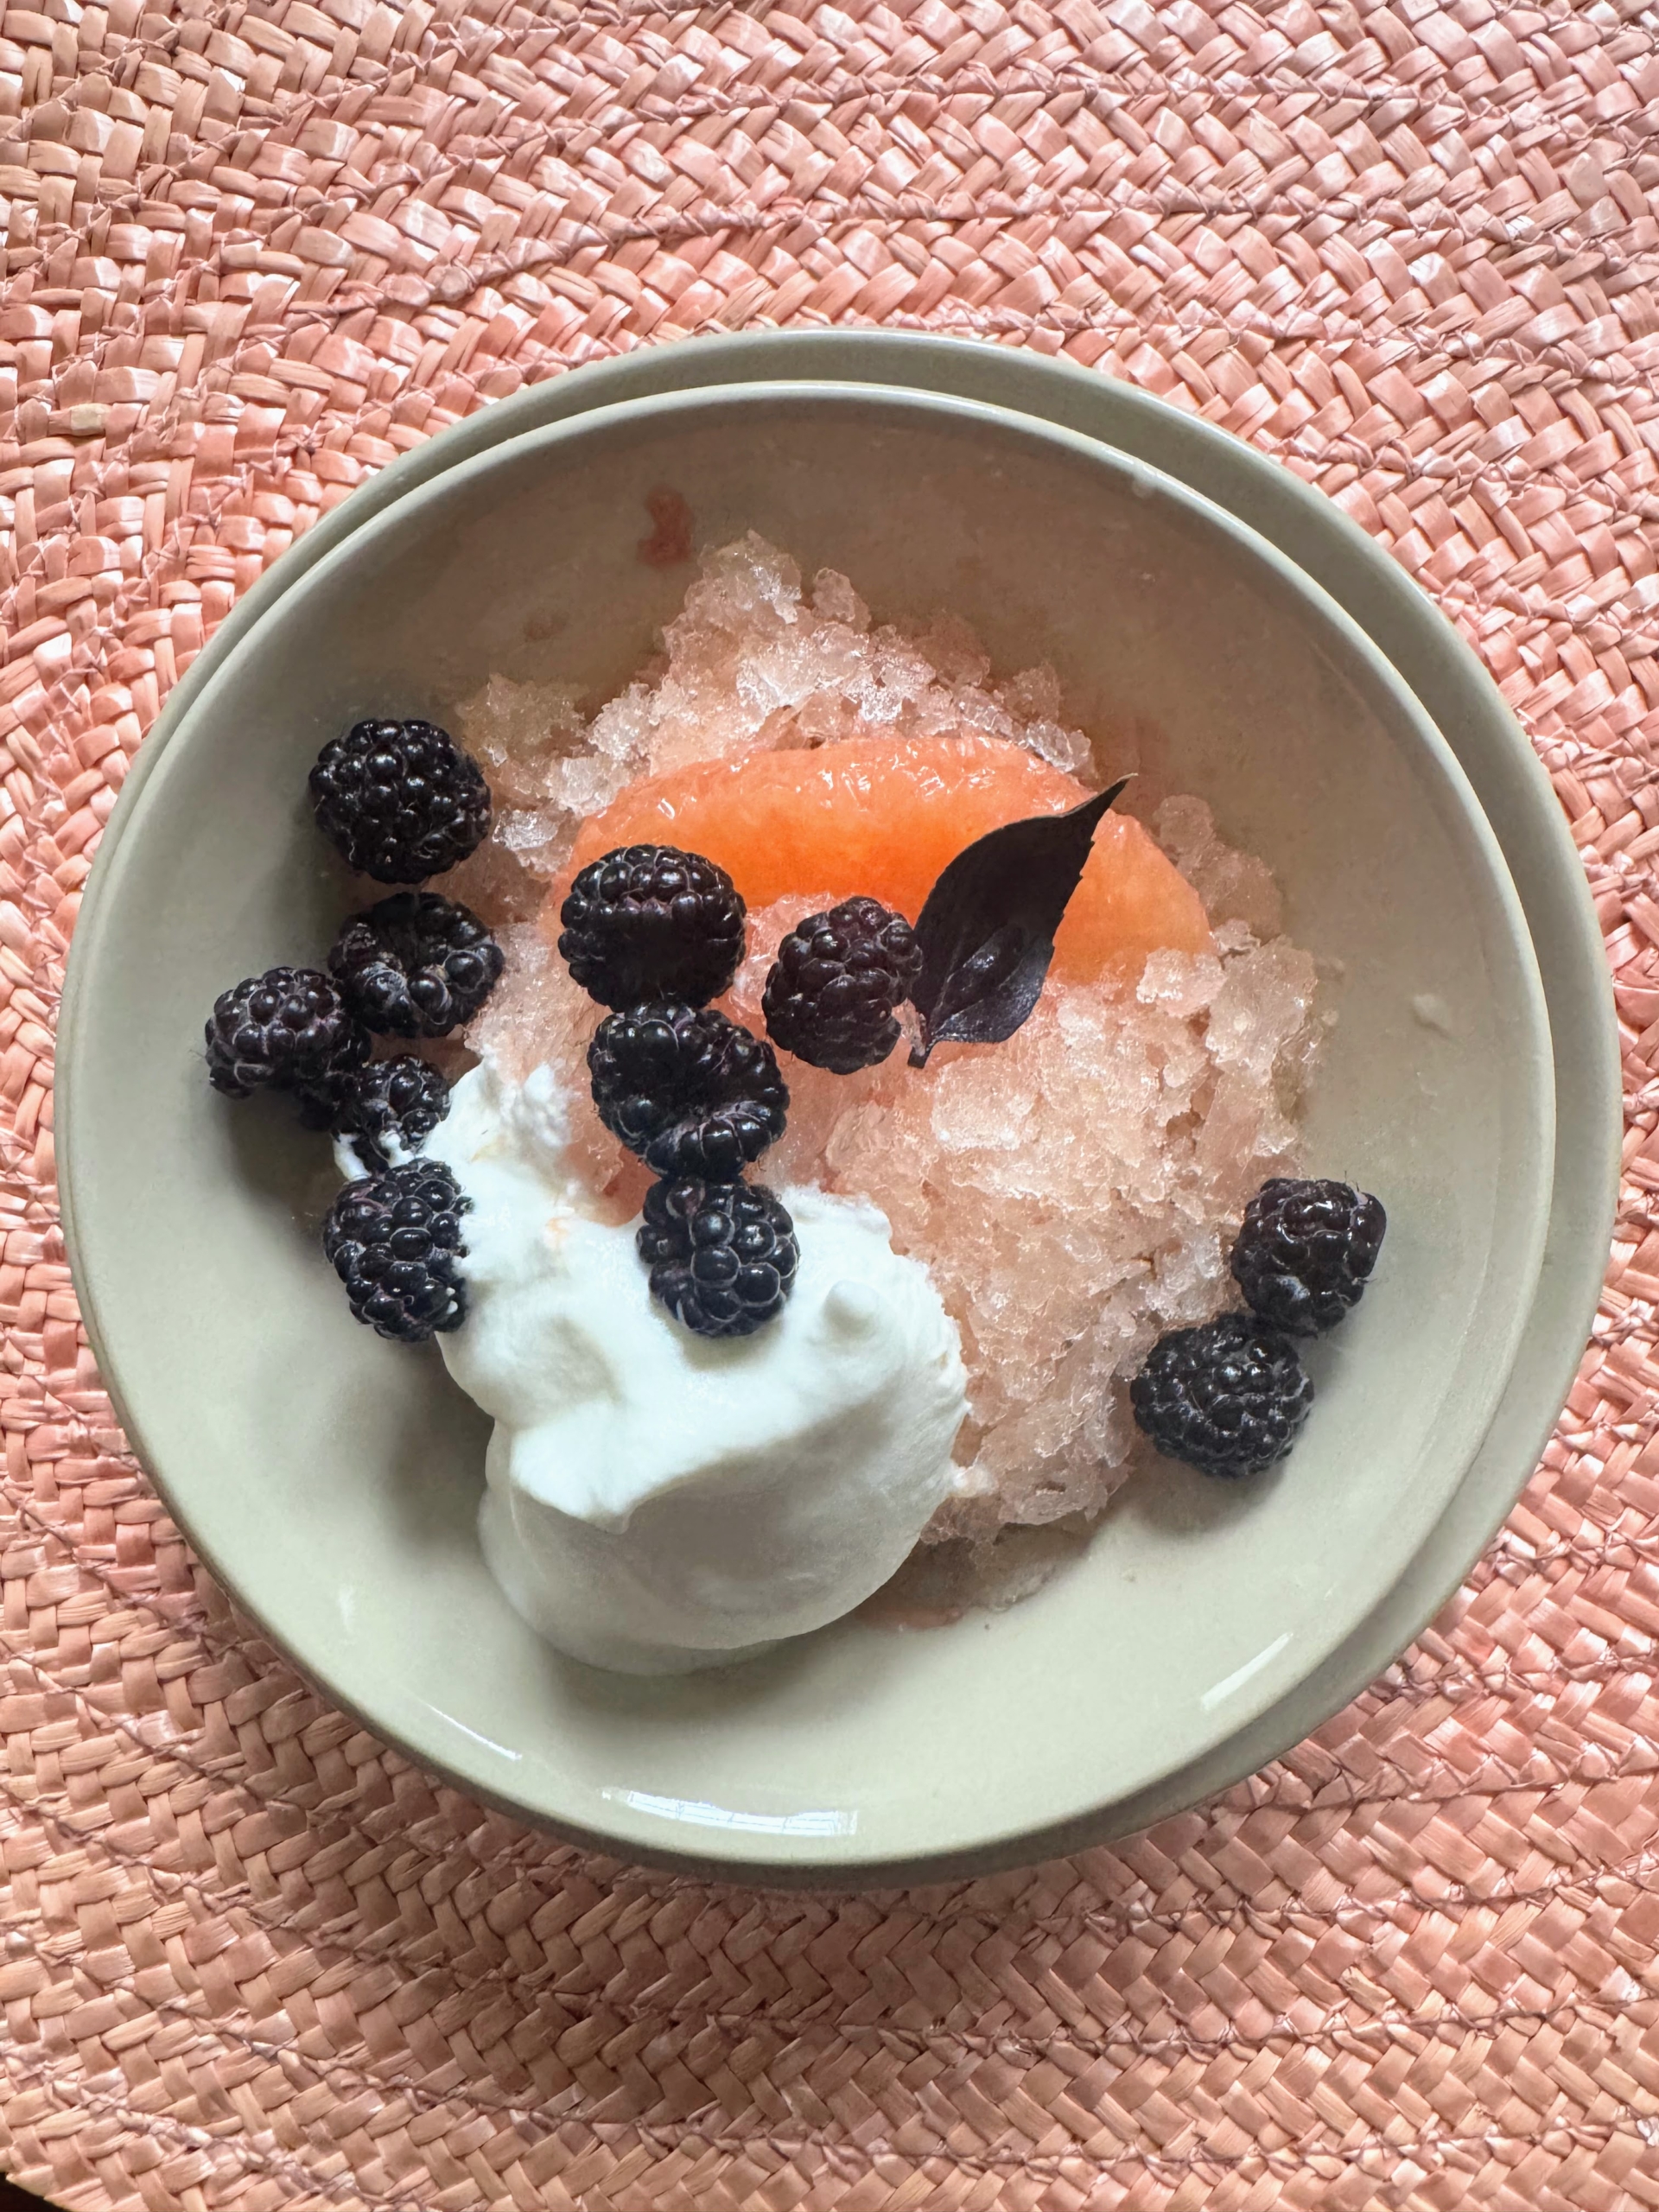
And just perfect for summer – grapefruit granita, made with just the fruit juice, and served with grapefruit segments, berries, and a dollop of crème fraîche. A wonderful lunch gathering and “meeting of the minds” – it’s a good thing.
We're expecting a much cooler day here in the Northeast after the first extreme heat wave of the year - temperatures this week soared into the high 90s.
When it's very hot and humid, it's crucial my animals have access to cool water and lots of shade. I also make sure my outdoor grounds crew works safely - wearing protective clothing and staying well-hydrated. And, it's also important to monitor the gardens. Here at my farm we've had some showers, but the hoses and sprinklers are very busy. One of my favorite sources for watering equipment is Gilmour, a Madison, Wisconsin-based company that’s been manufacturing hoses and other watering solutions since 1949. I use several of their products at my home in New York and at Skylands in Maine - they're durable, long-lasting, and easy to use.
Enjoy these photos.
It’s only the first official week of summer and already we’ve had a heat wave. In New York, a heat wave occurs when there has been at least three consecutive days with temperatures 90-degrees Fahrenheit or higher. We’ve had temperatures in the high 90s with feel like temperatures above 100.
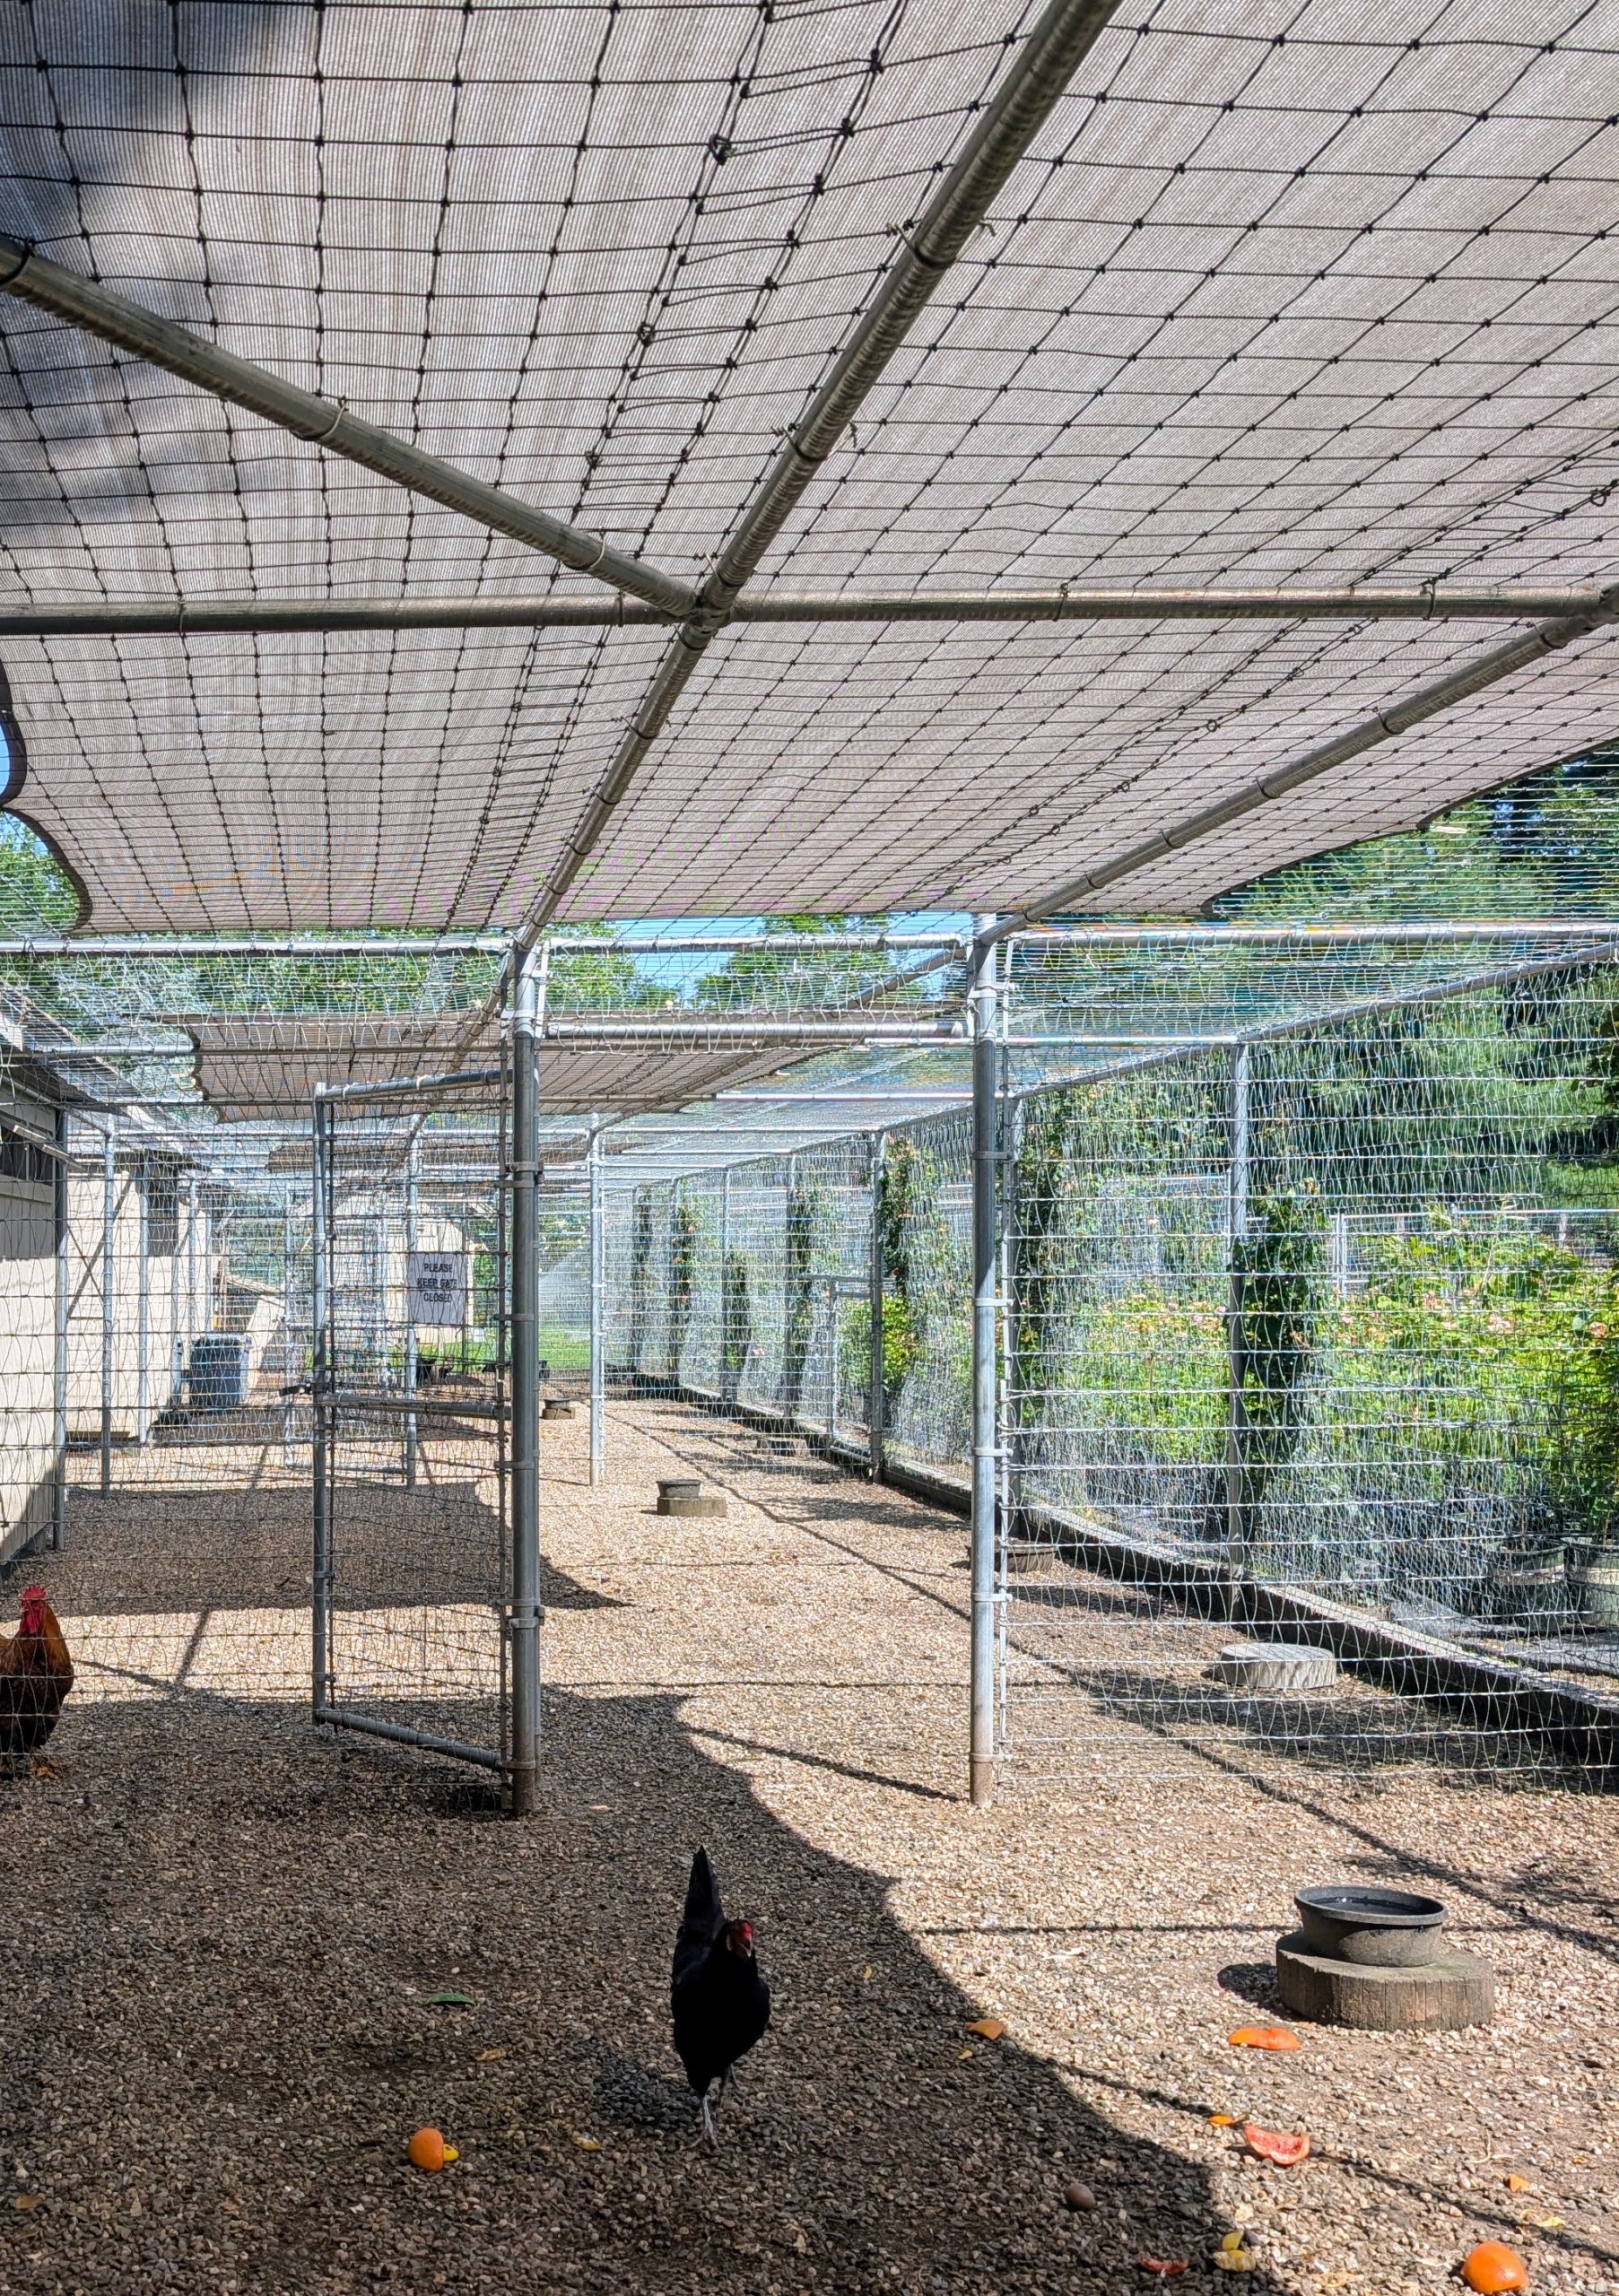
Around my farm, I’ve made sure to check on all the animals. My chicken coops are covered to provide ample shade.
The geese outside my stable also have shady areas…
… and multiple pools to keep them cool. These pools are checked often and refilled with clean water.
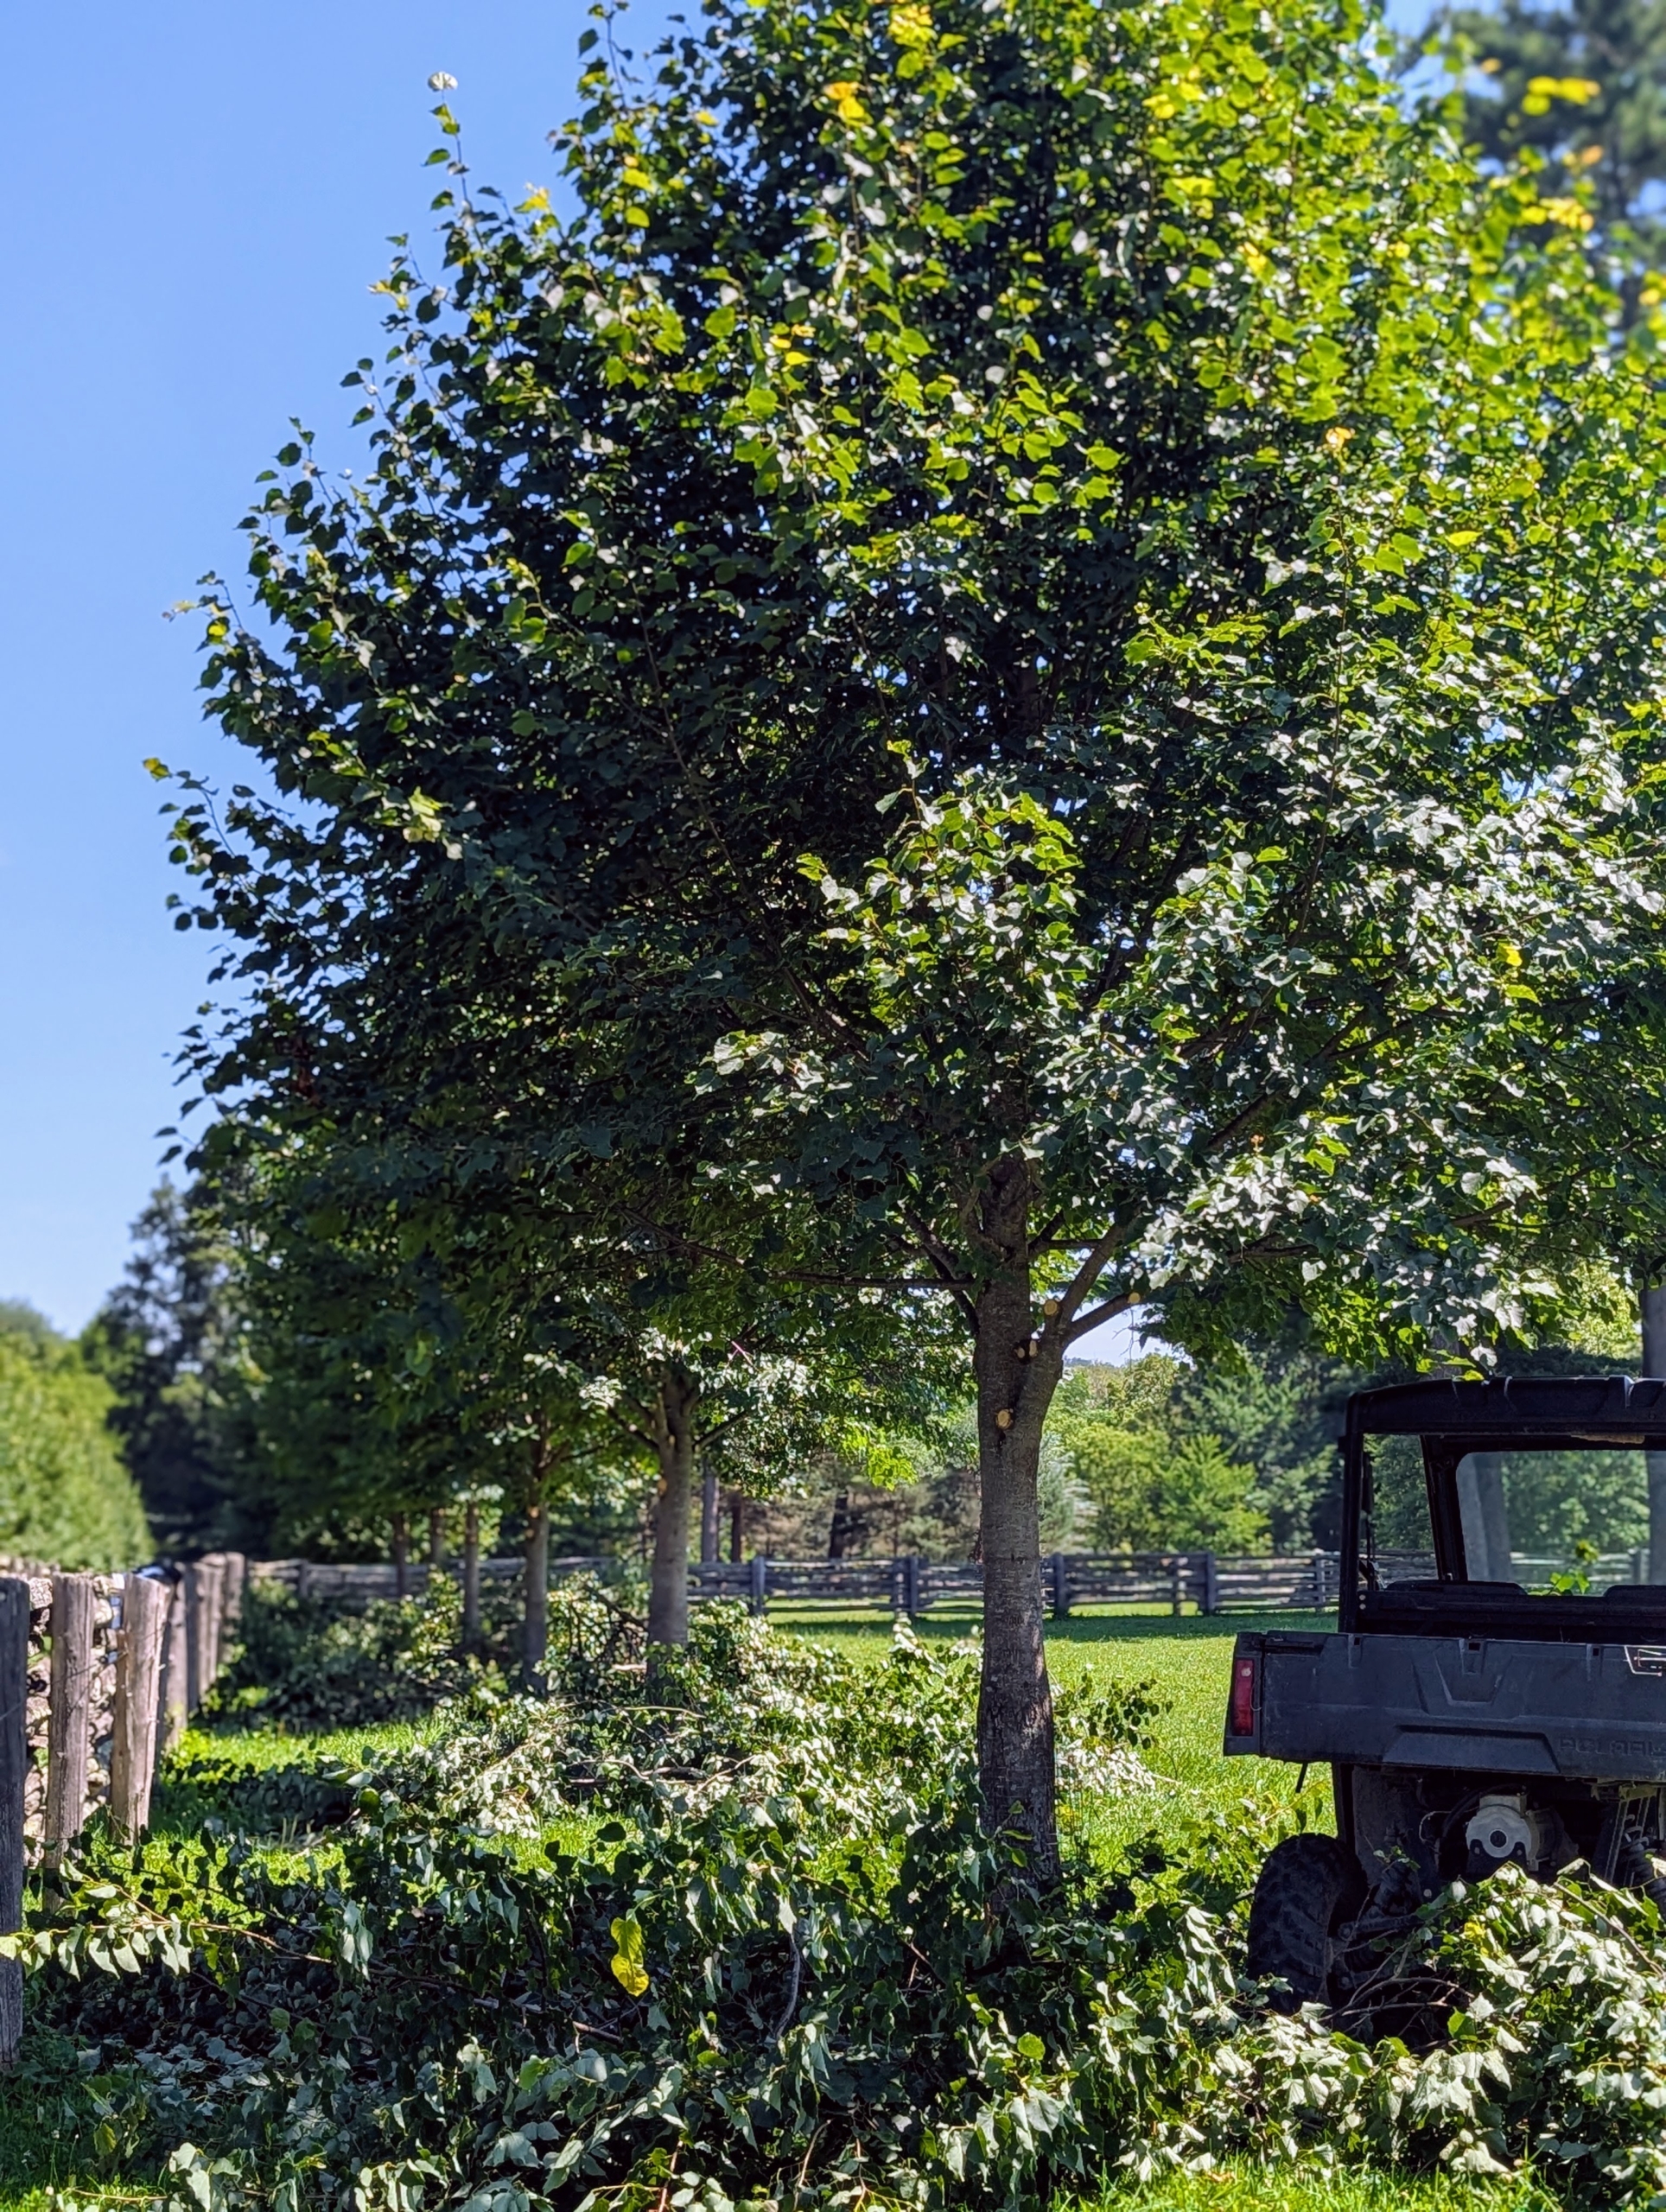
Out in my horse paddocks, the trees are all checked and limbed up if necessary, so my horses can safely stand under the shade.
The gardens are also closely monitored. Fortunately, we’ve had a lot of rain over the last month, but beds dry quickly in this extreme heat.
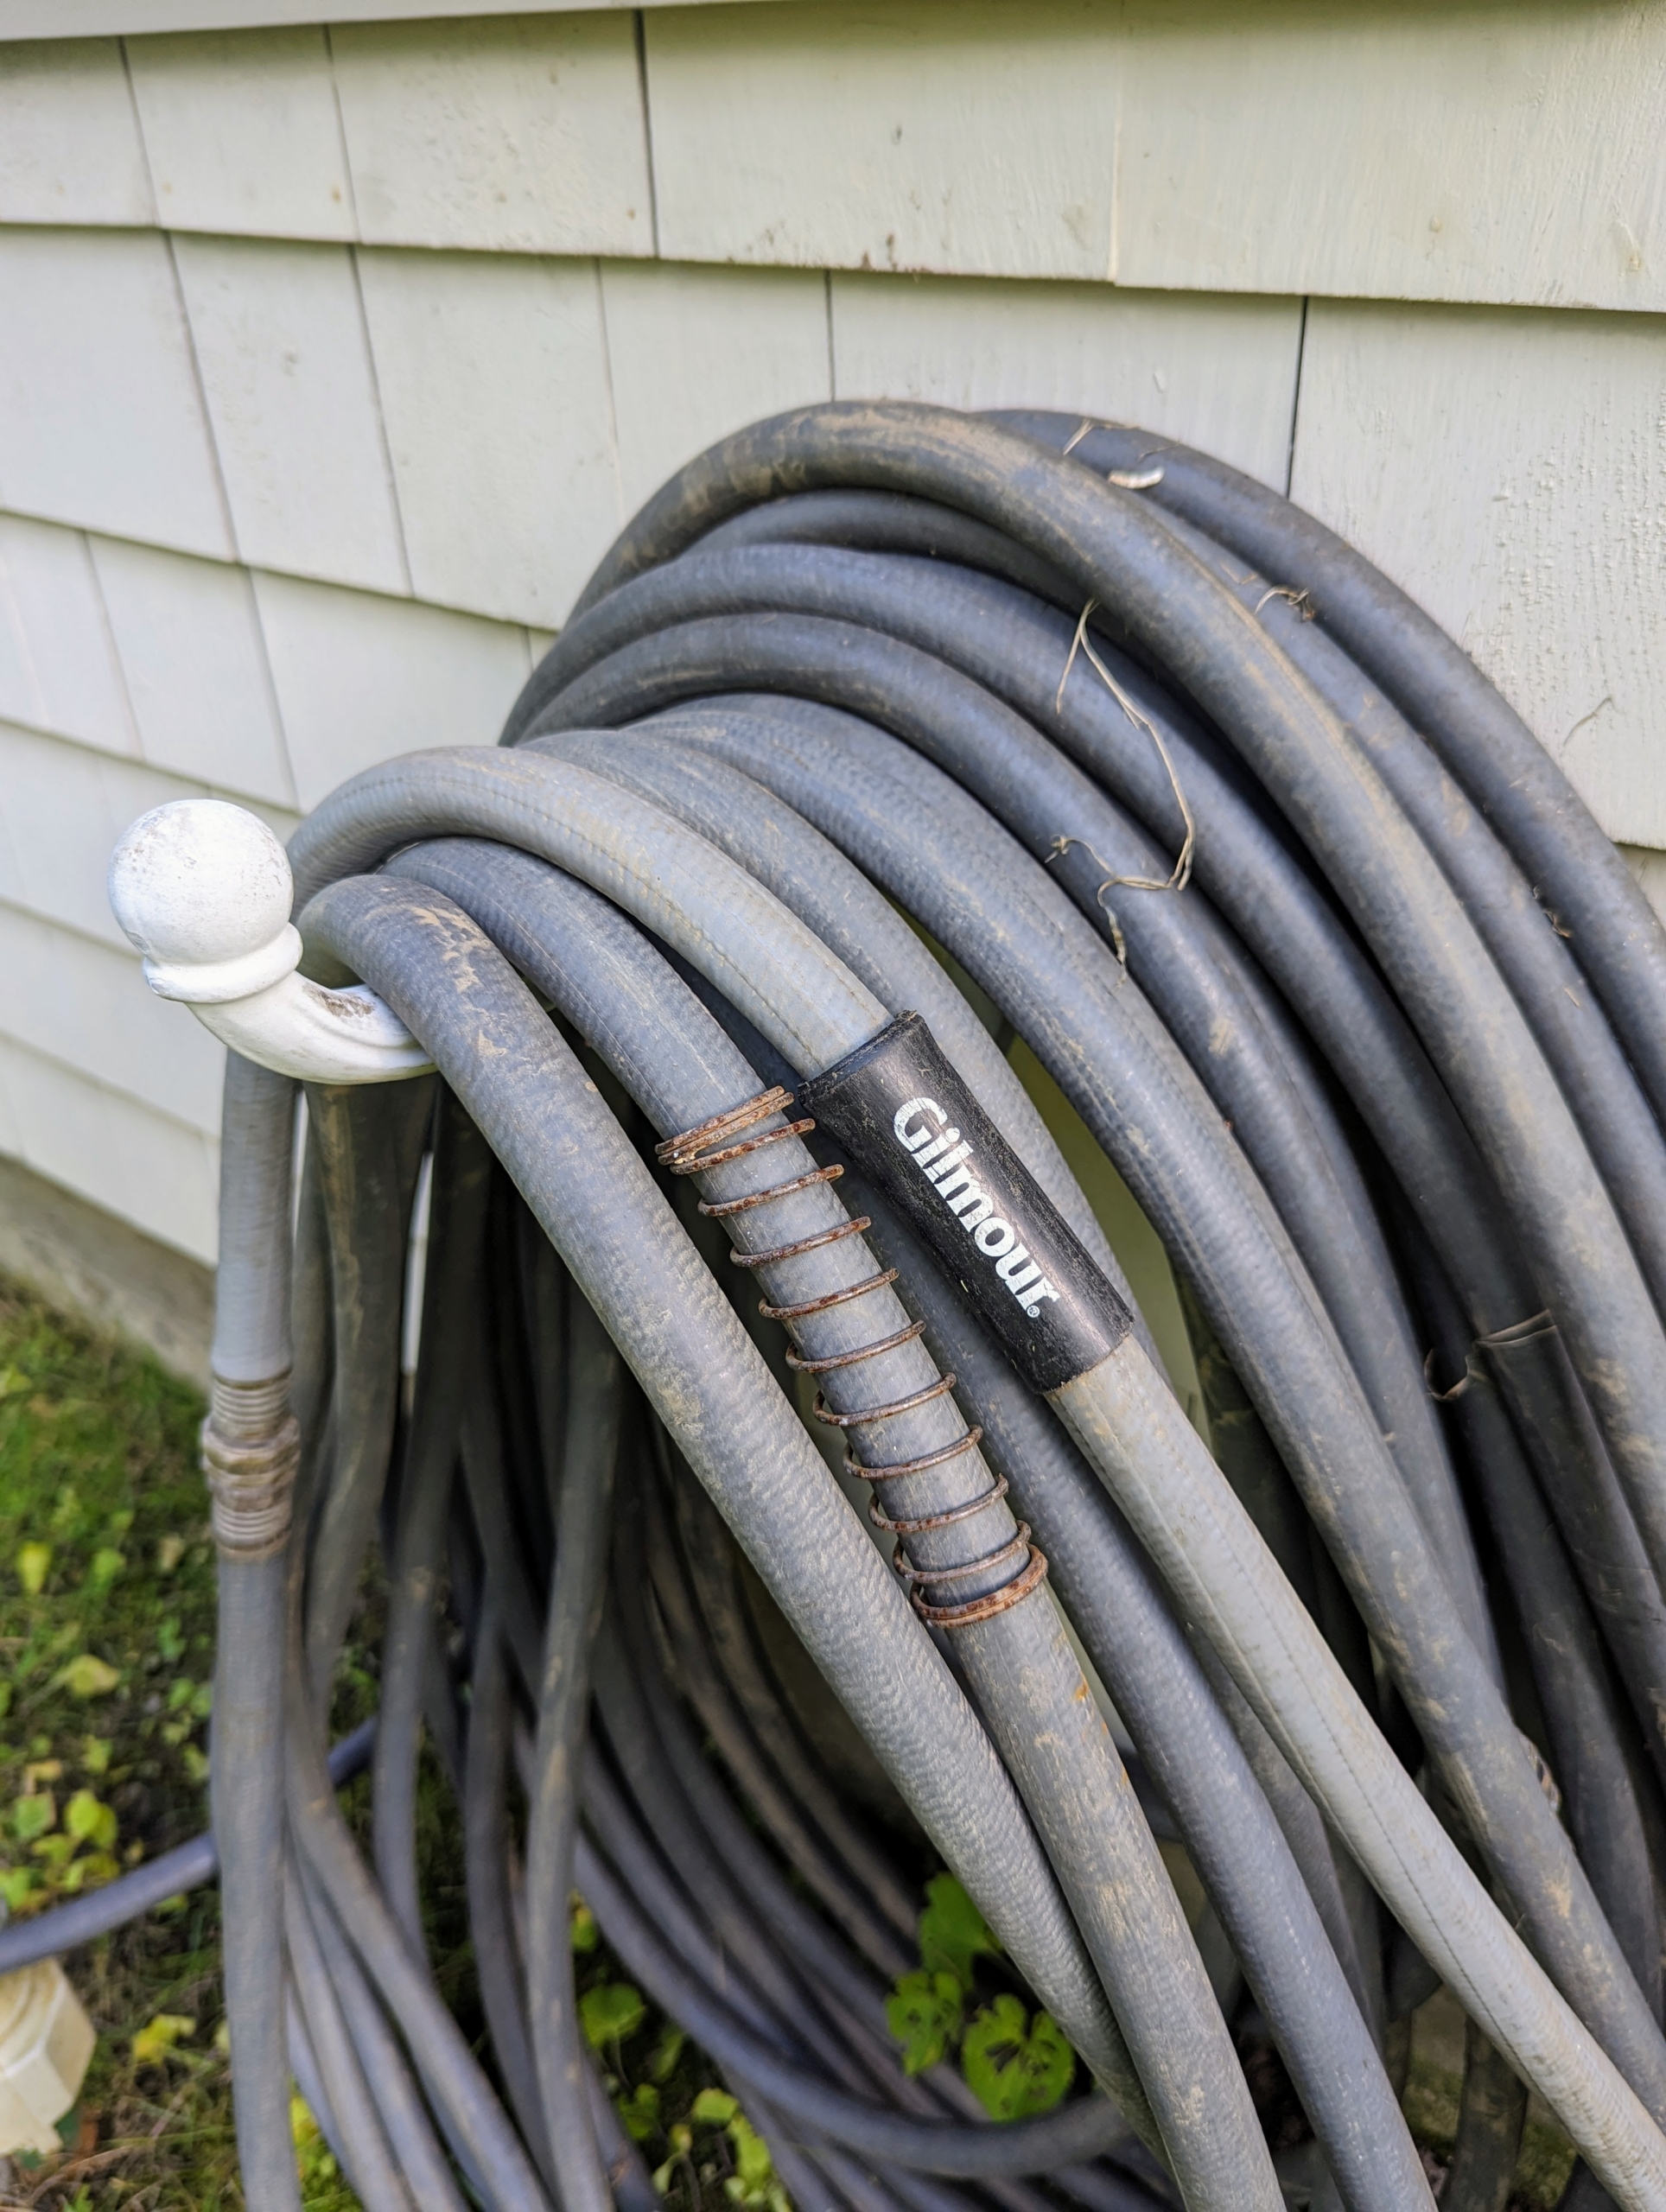
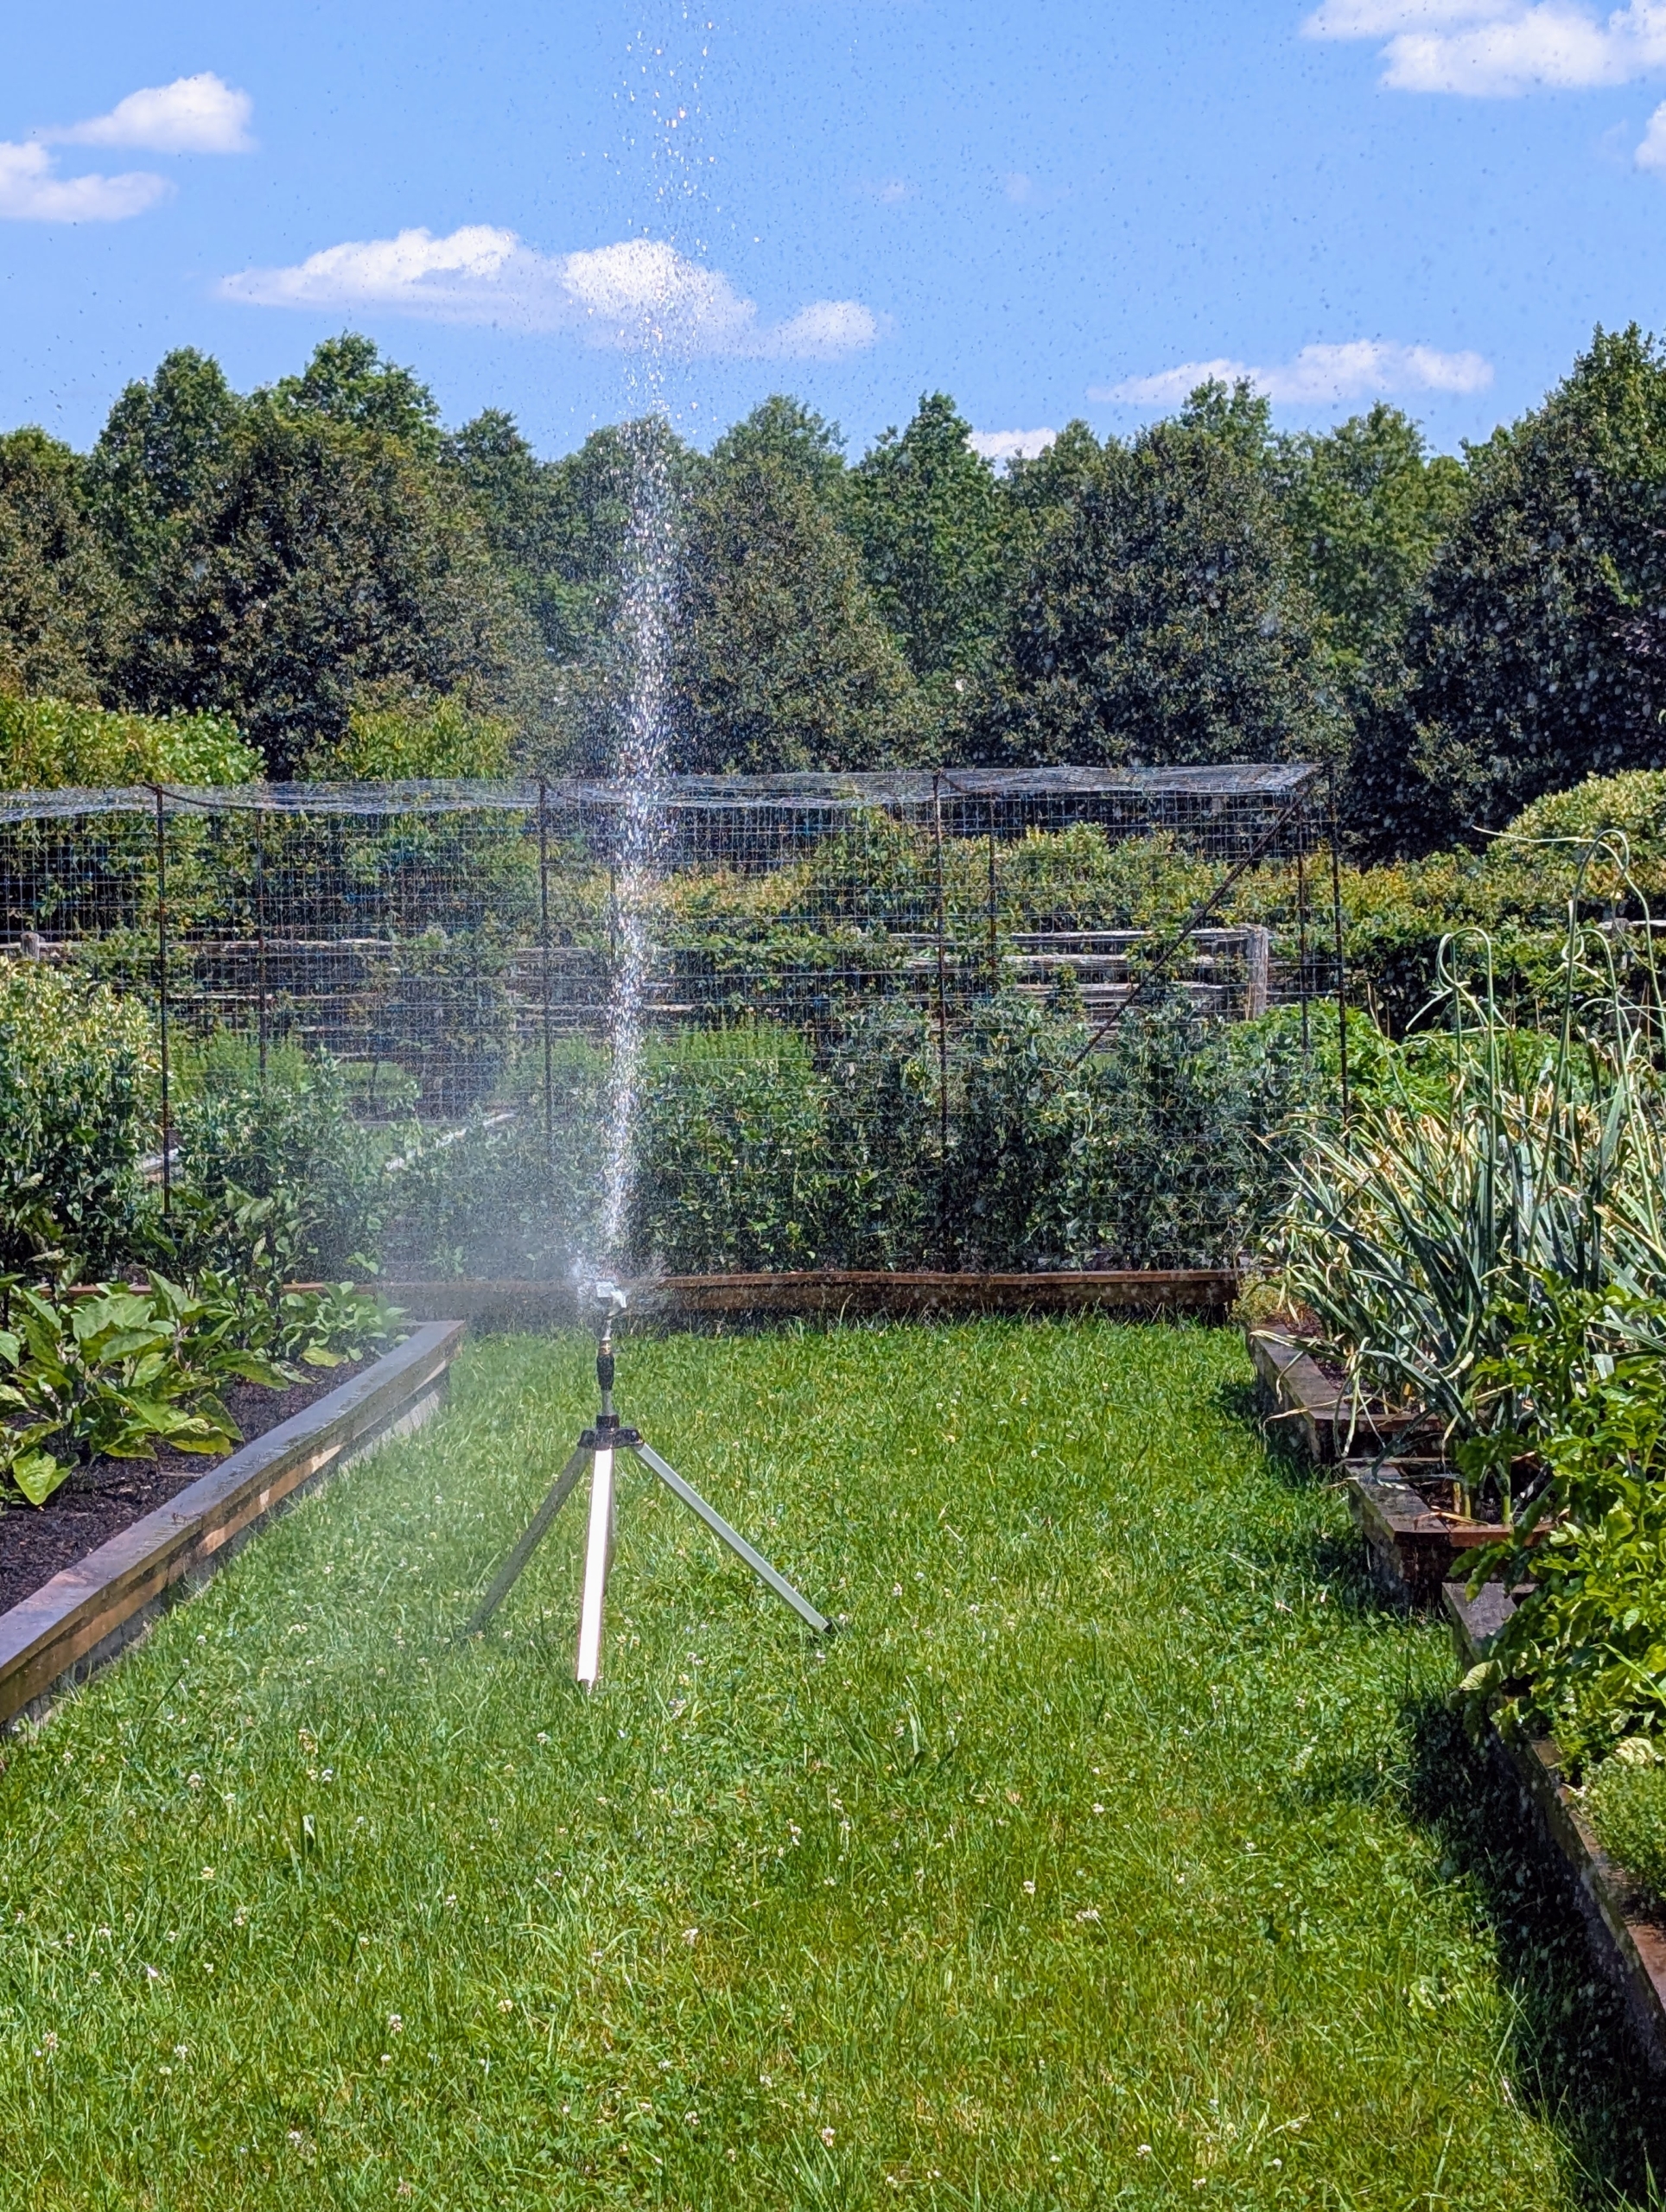
A Gilmour hose and at least one sprinkler are placed at every bibb or faucet.
I’ve used Gilmour for years. They’re so durable and come in a variety of lengths. Plus, they curve without kinking, connect without leaking, and are easy to store.
And here’s a tip… to keep it from kinking, when it’s new stretch it along a path or the edge of the lawn and then loop the business end back to the tap.
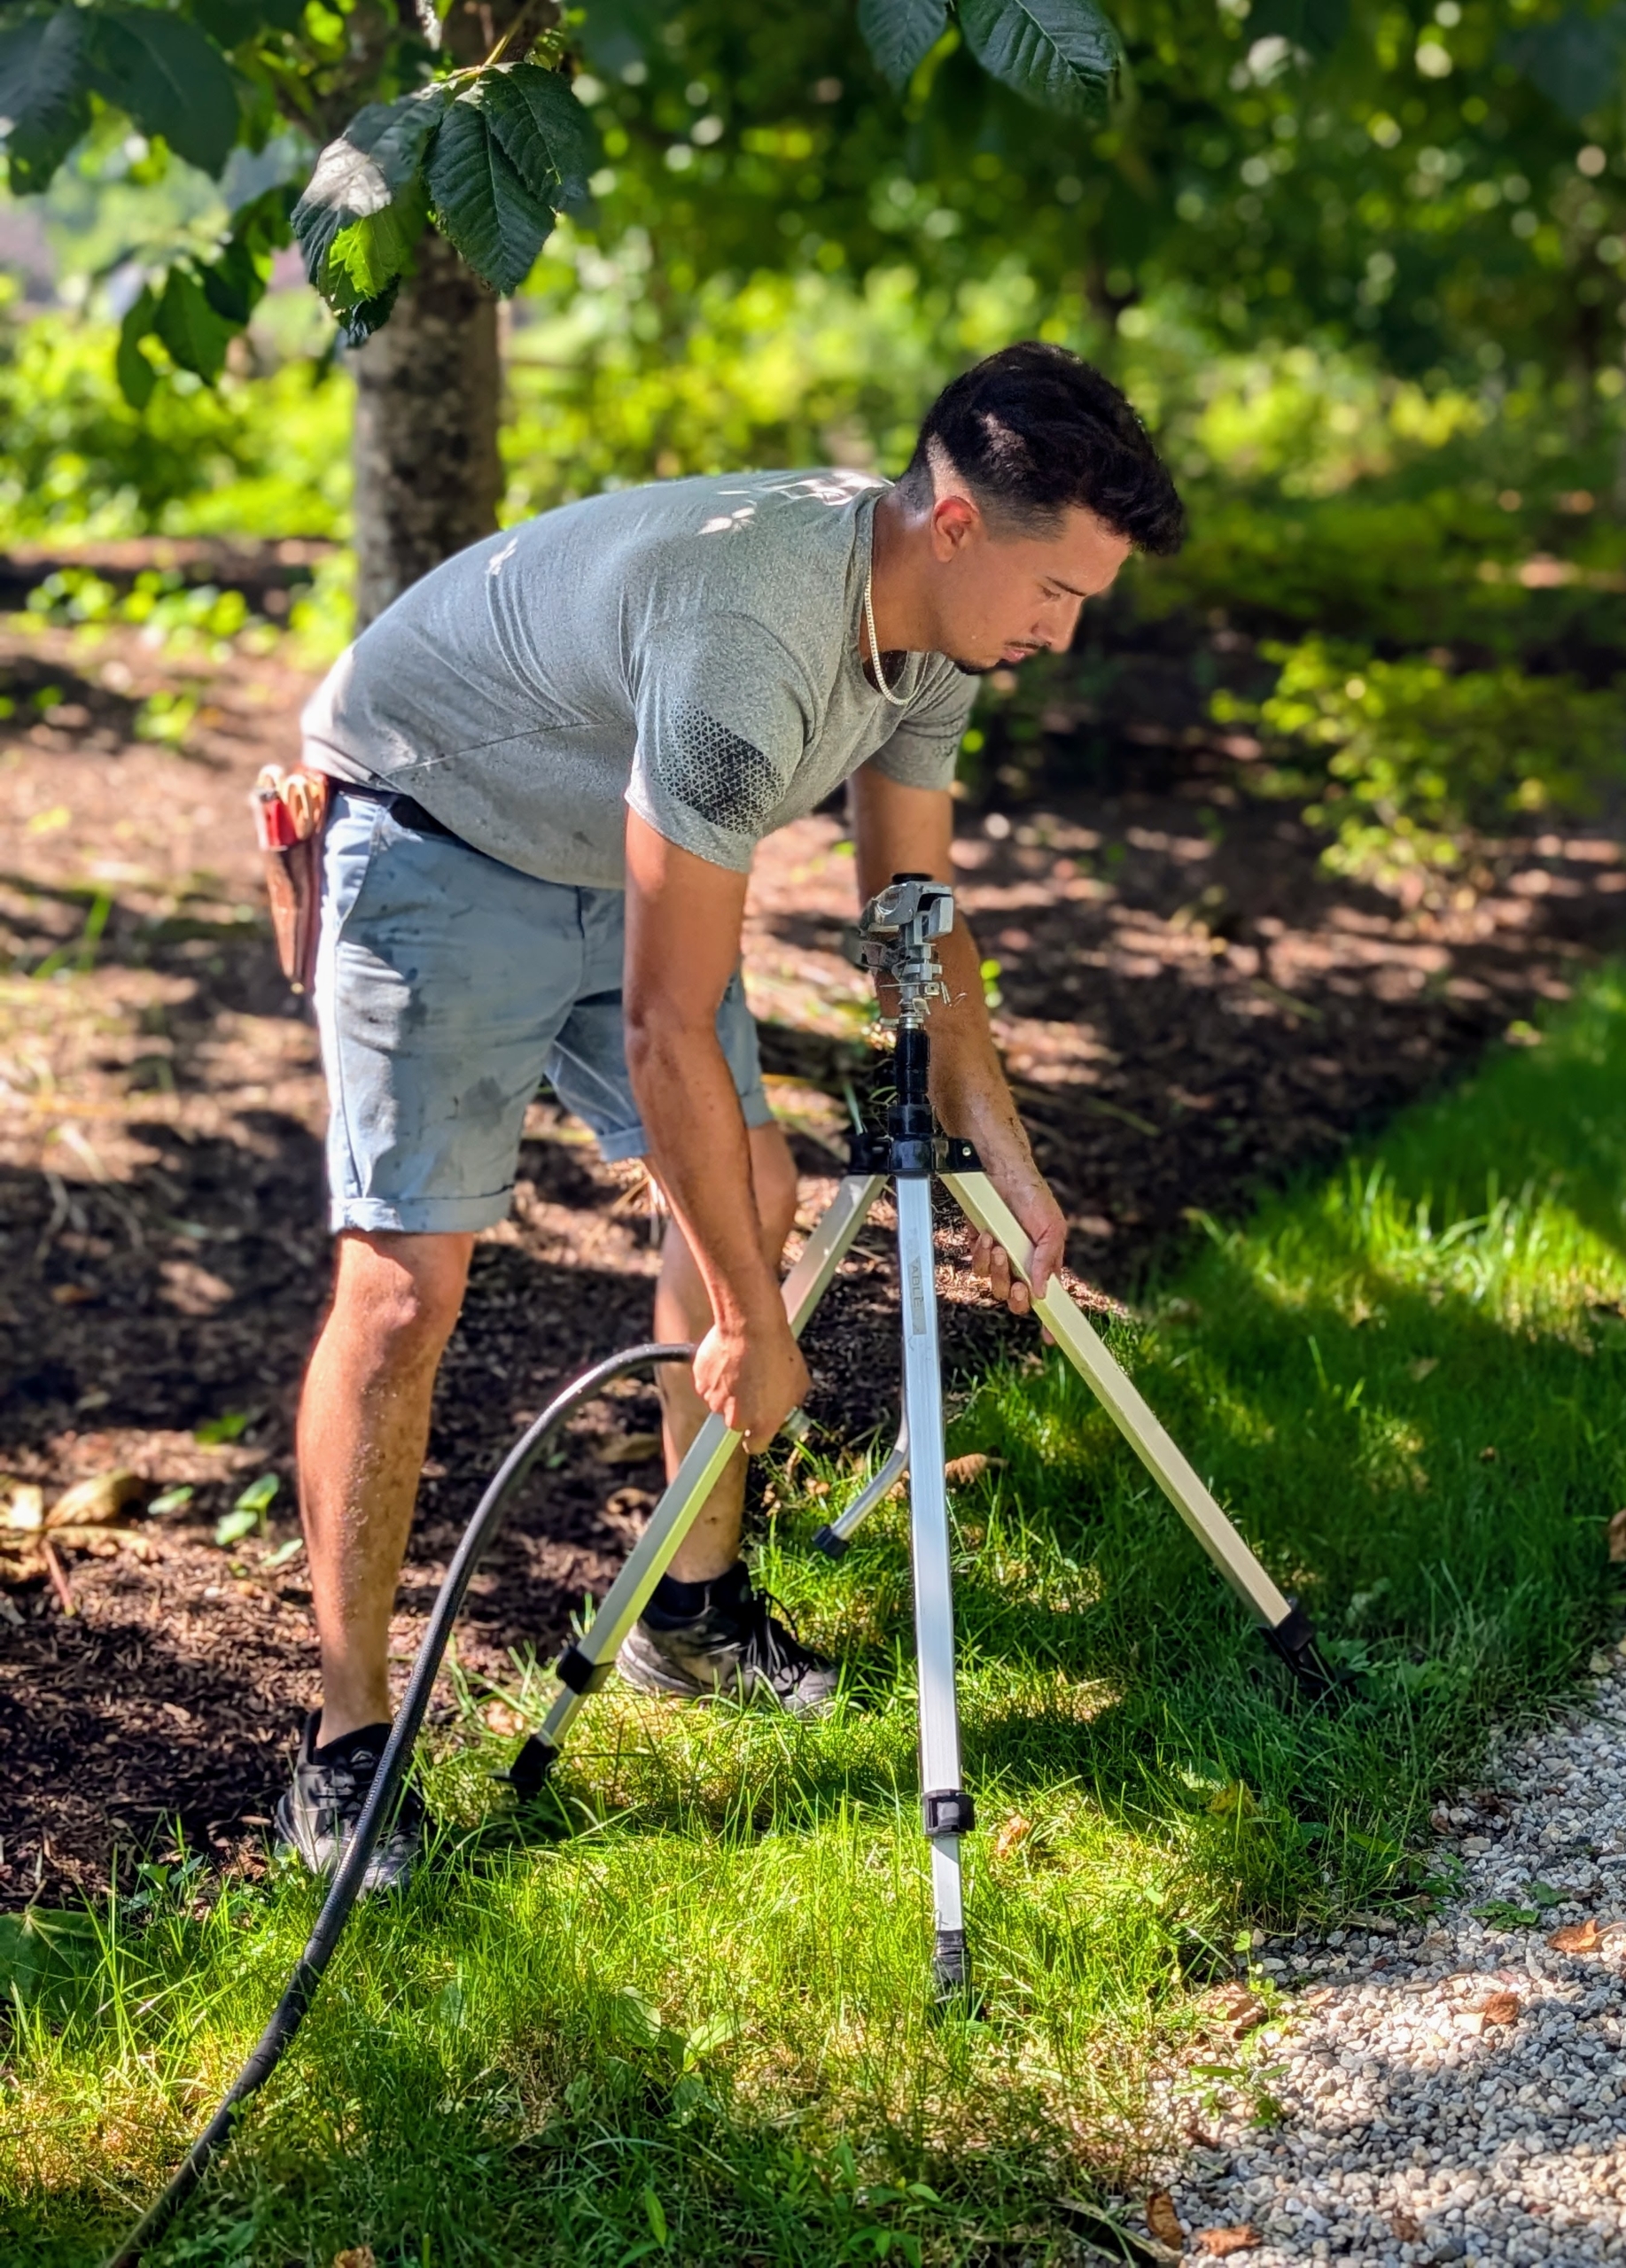
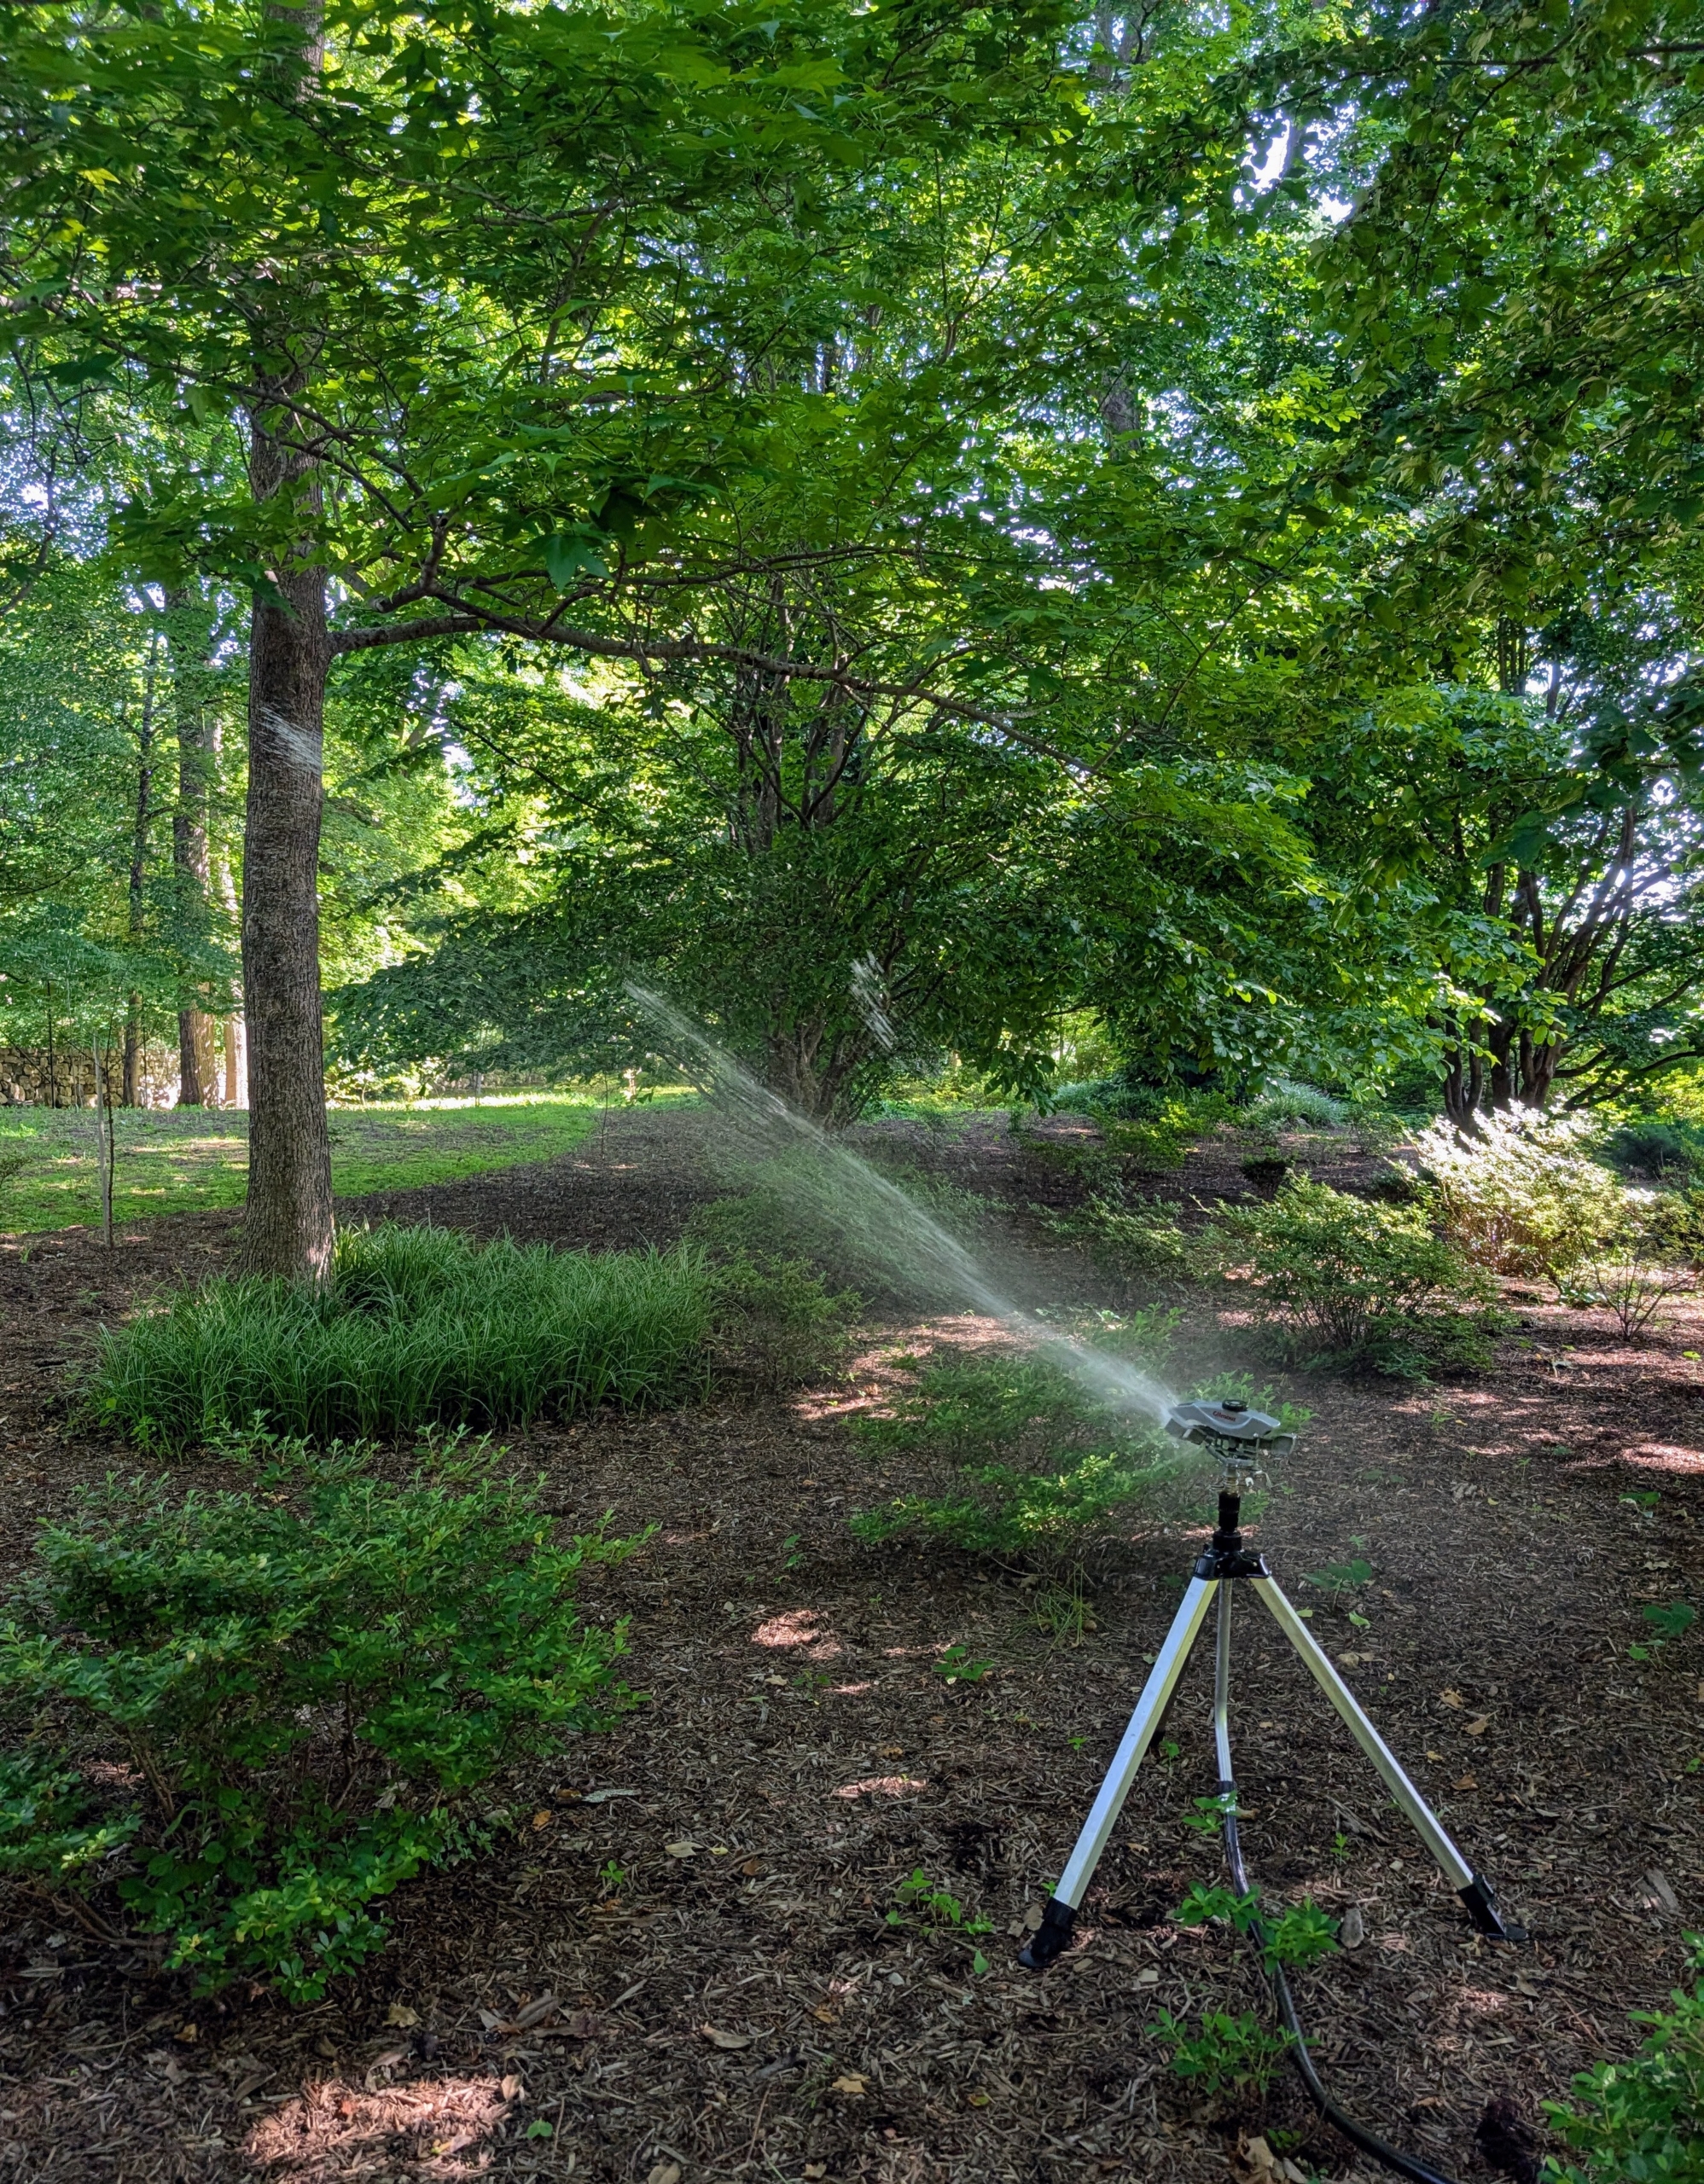
The hose connects easily to the Gilmour sprinkler directly under the sprinkler head so it is well-balanced and won’t tip over when in use.
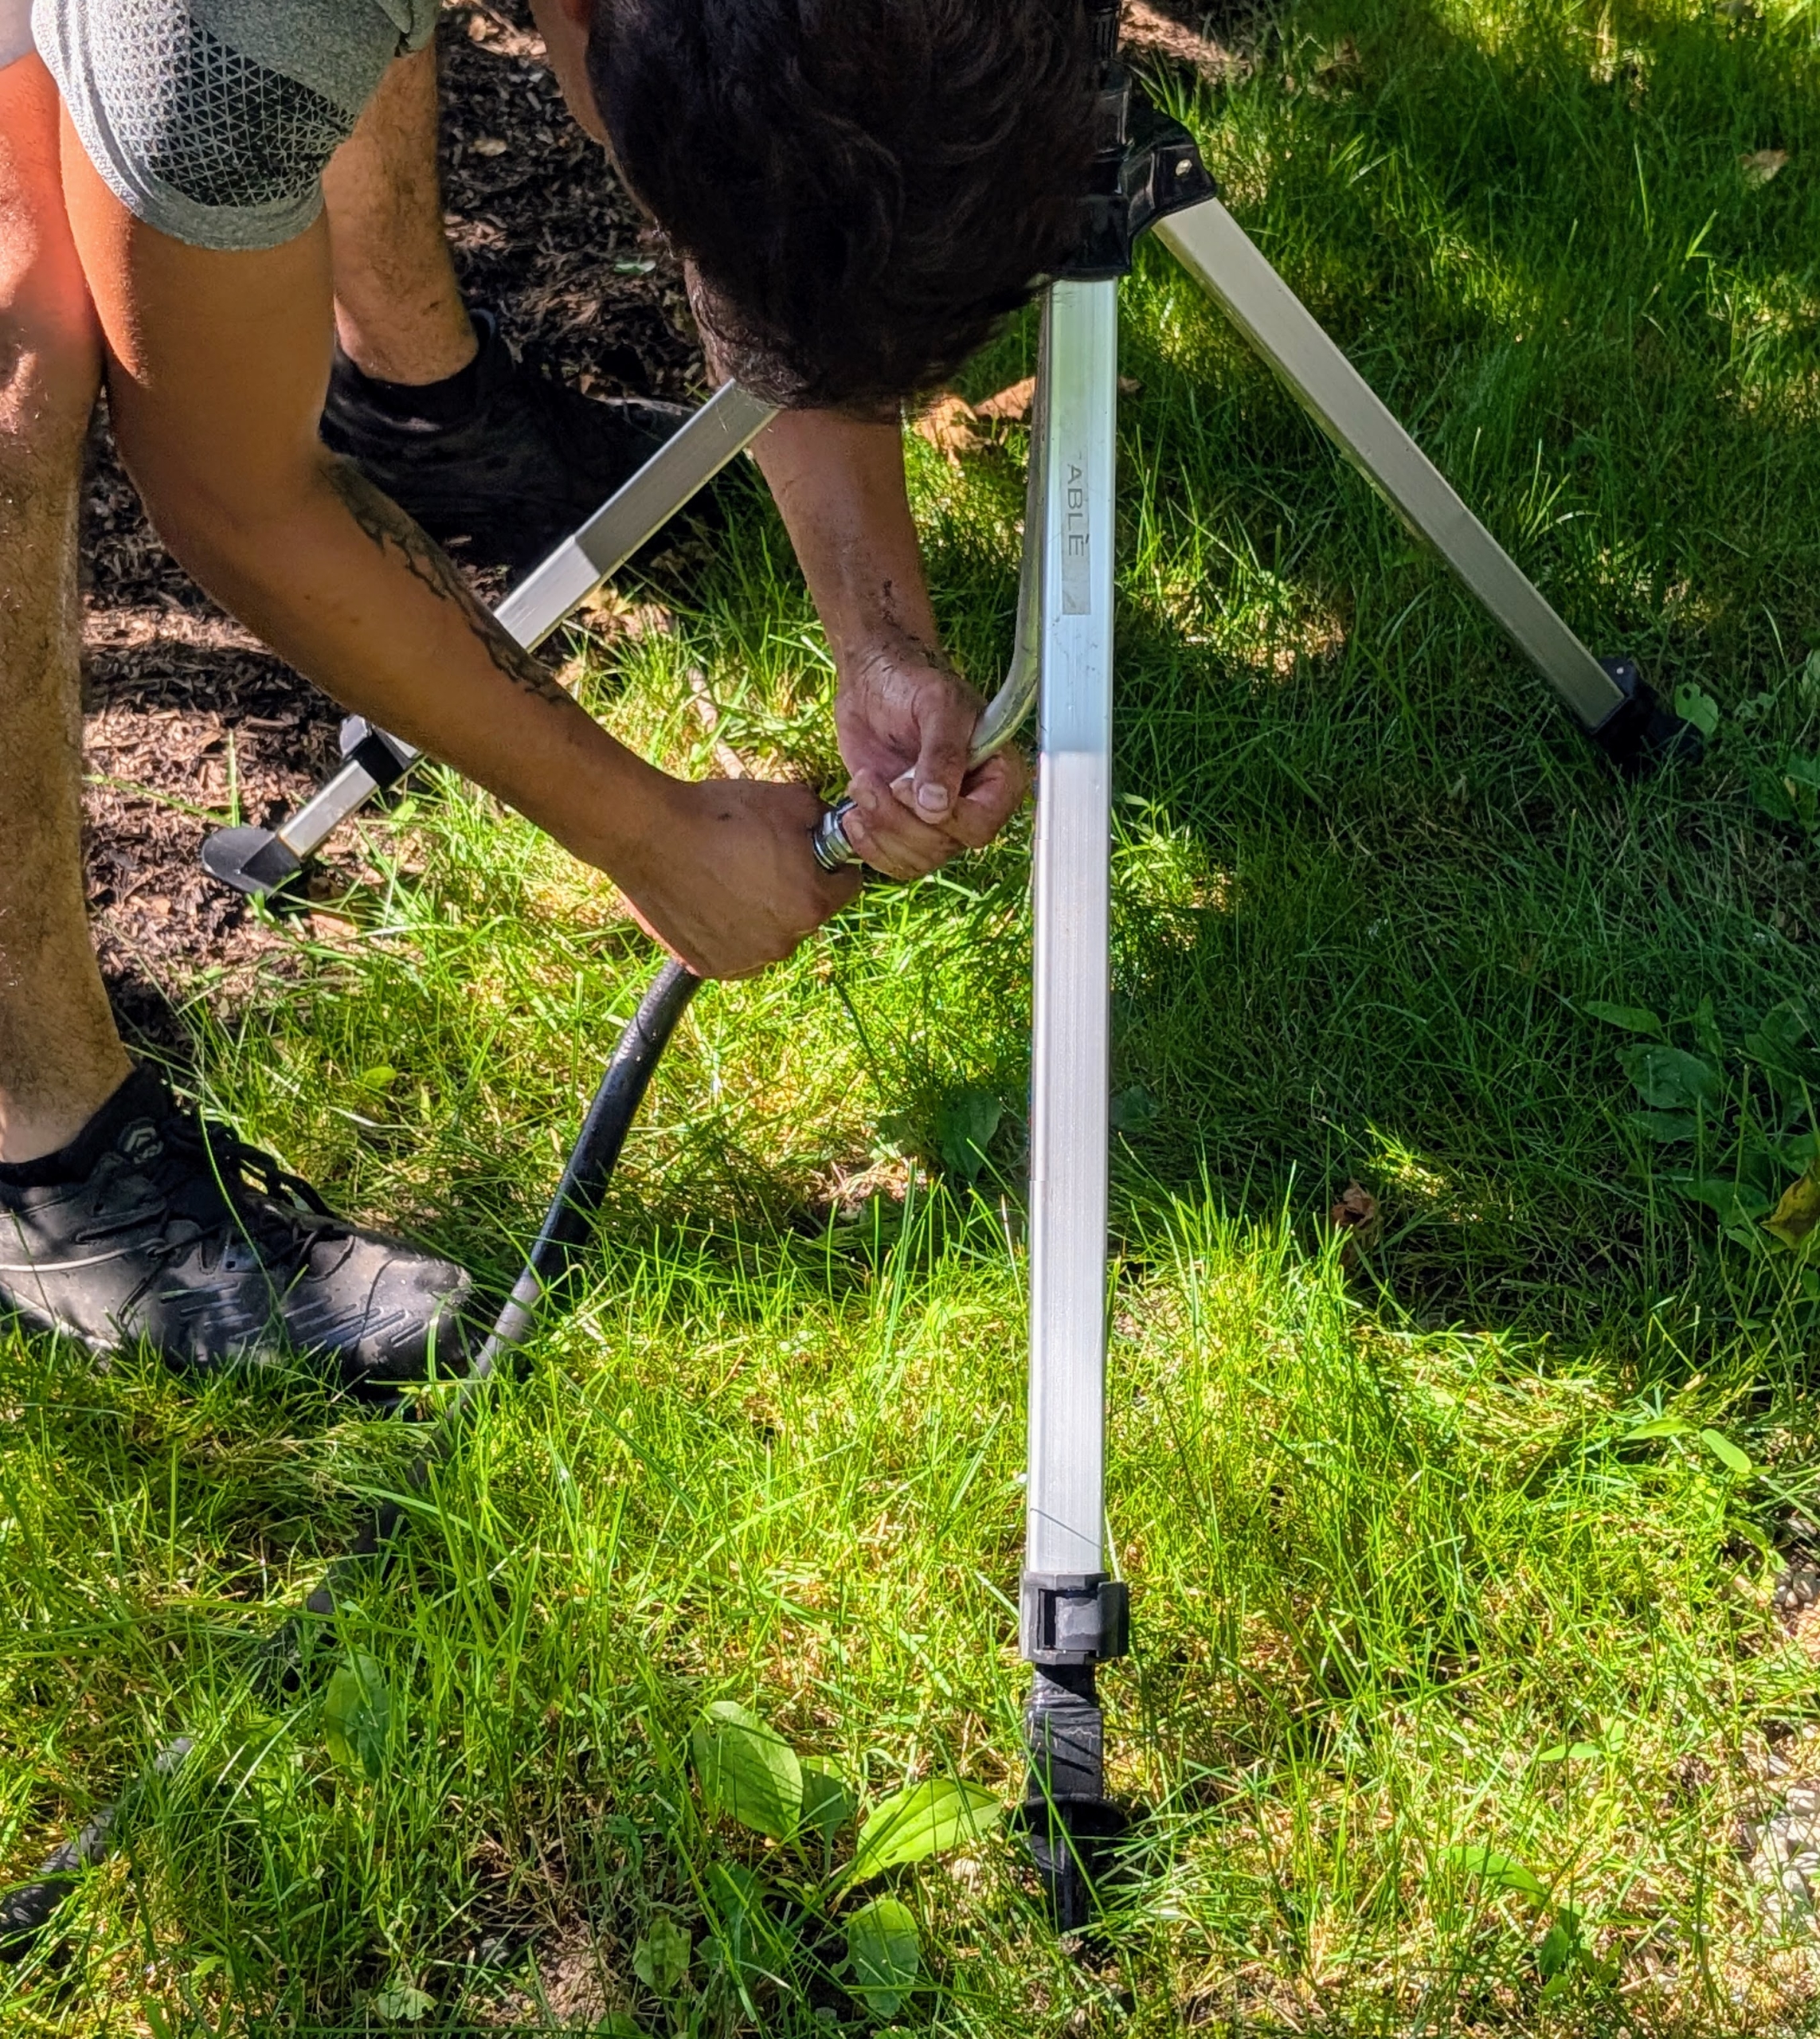
The legs can be adjusted for high or low watering.
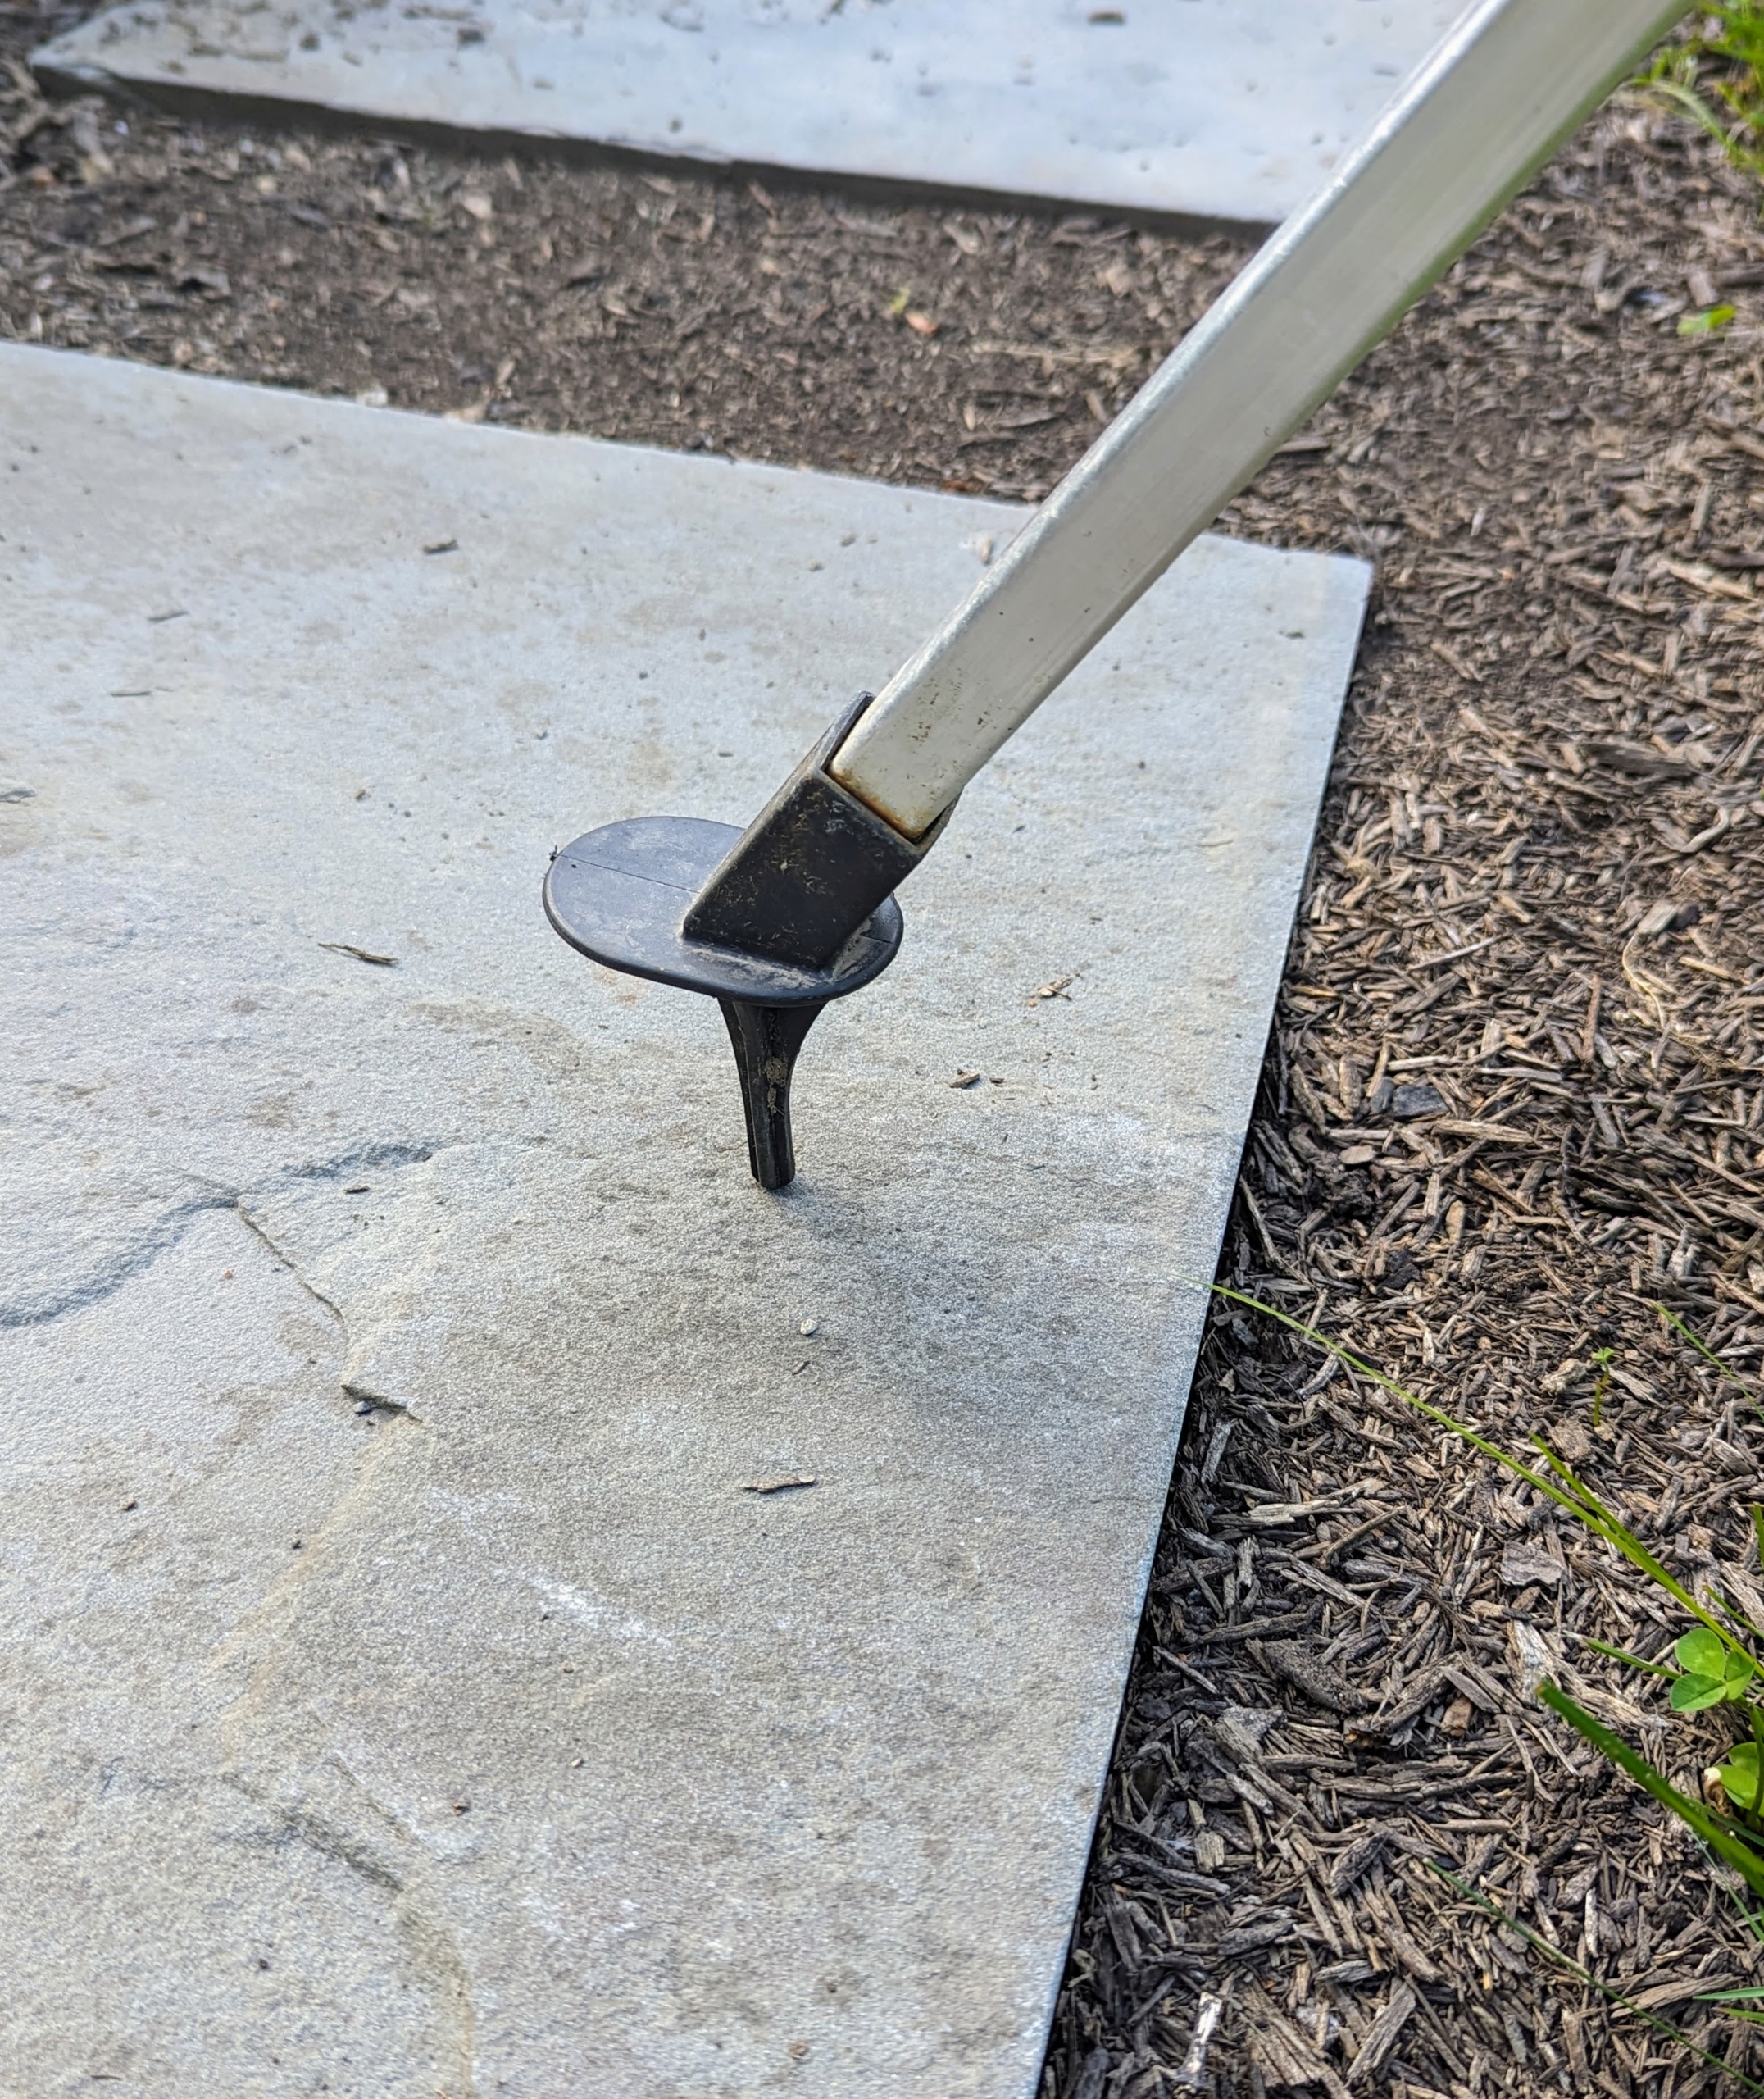
… And, each of the legs has a spiked foot which provides lots of stability on varied surfaces.
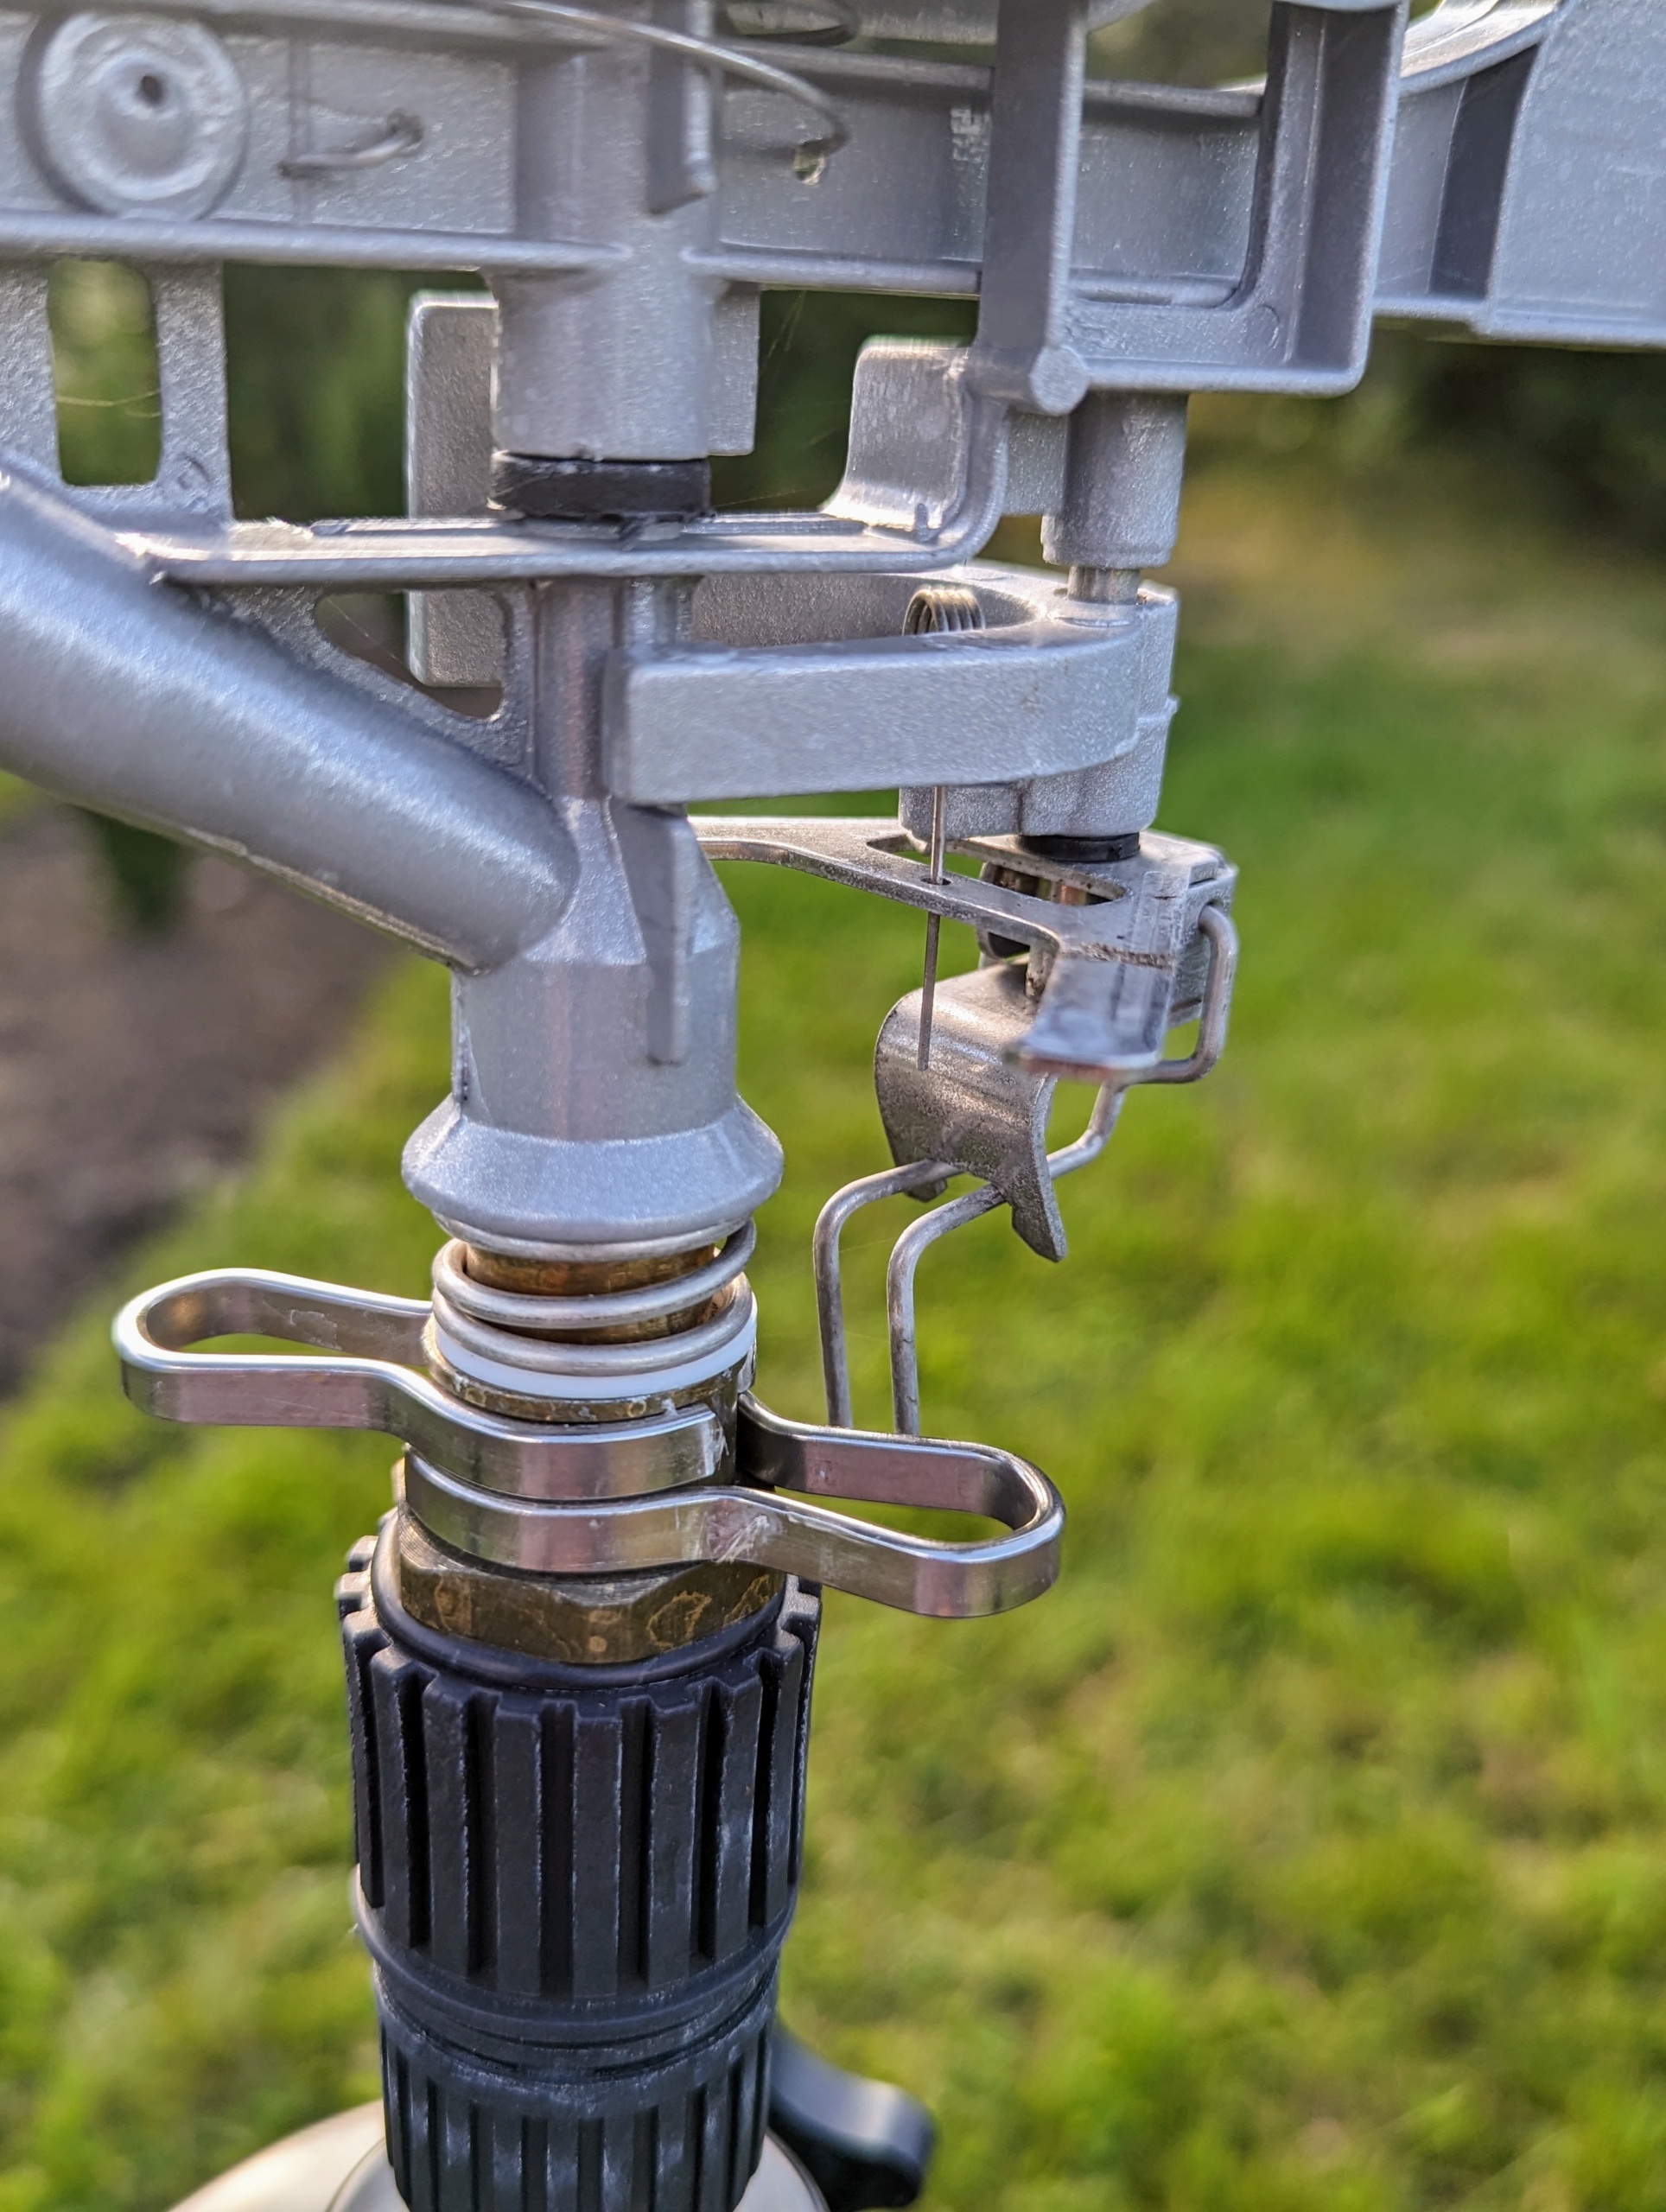
When ready to use, the collar of these tripod sprinklers can be adjusted for partial to full circle coverage. The controls are just under the sprinkler head.
A pin diffuser allows for a customized spray from powerful jet to gentle mist. I show every member of my crew how to use the sprinkler, so they can water properly and efficiently.
The round dial on top makes it easy to set the direction and length of the spray.
Here’s a tripod in my vegetable garden. Look how far the sprinkler can reach – and the spray is very consistent.
Mornings are the best times to water – when water pressure is high, evaporation is low, and the soil can absorb the water before the sun heats up the ground. The distance and spray patterns of these tripod sprinklers can also be adjusted to suit so many garden needs.
Well-established plants with strong, deep root systems will be more drought tolerant.
I designate one crew member to keep track of the watering, so sprinklers are rotated appropriately and water is never wasted.
Once the watering in one area is done, it’s extremely important to turn off the water at the source. Just turning off at the sprinkler puts a lot of pressure on the hoses and pipes.
And at the end of the day, always take the time to properly roll up the hose, so it is neat, tidy, and out of the way. It’s nice to know I have the “right tools for the right jobs,” so all my gardens, groves, and allées can be well maintained.
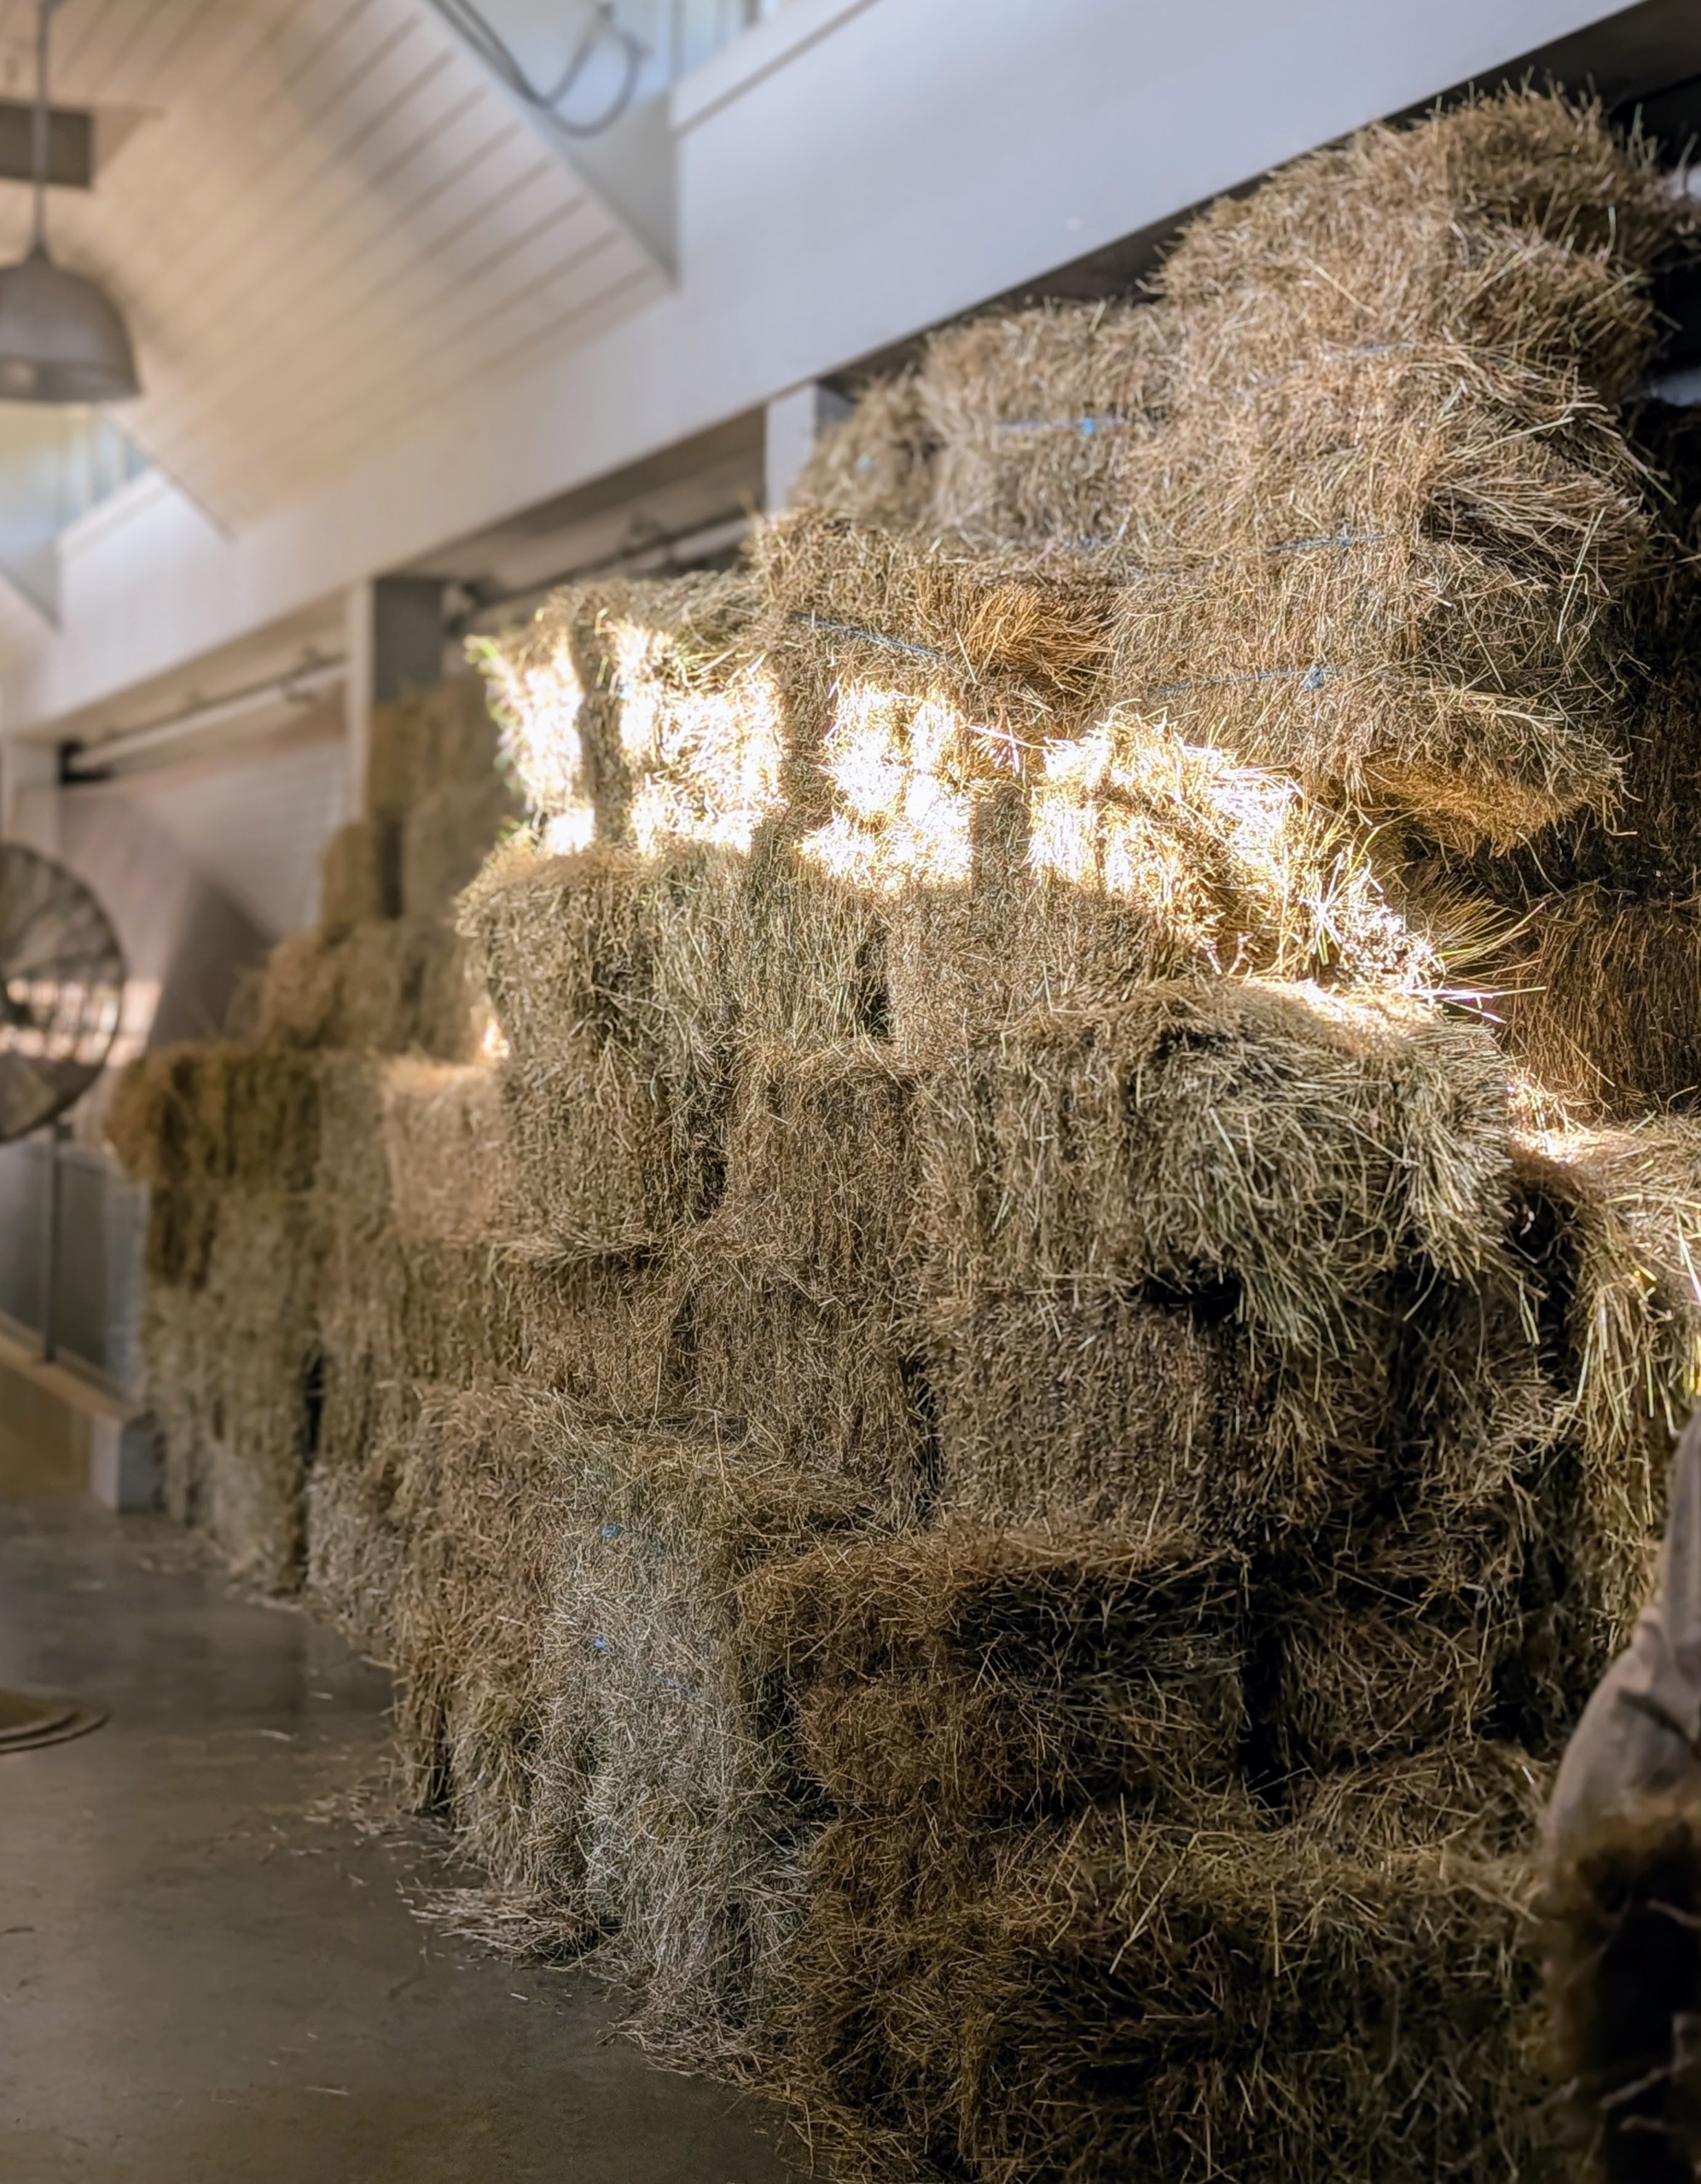
I now have lots of newly baled hay here at my farm. This first cut of the season is higher in fiber and lower in protein and fat - my horses will love it.
One of my objectives at my farm has always been to practice self-sufficiency. When I moved here, I designated three separate areas as hayfields, so I could grow lots of delicious, nutritious hay for my horses and donkeys. I plant the fields with a quality custom seed blend and when it's ready, my outdoor grounds crew works hard to cut, fluff, rake, and then bale the hay.
Enjoy these photos.
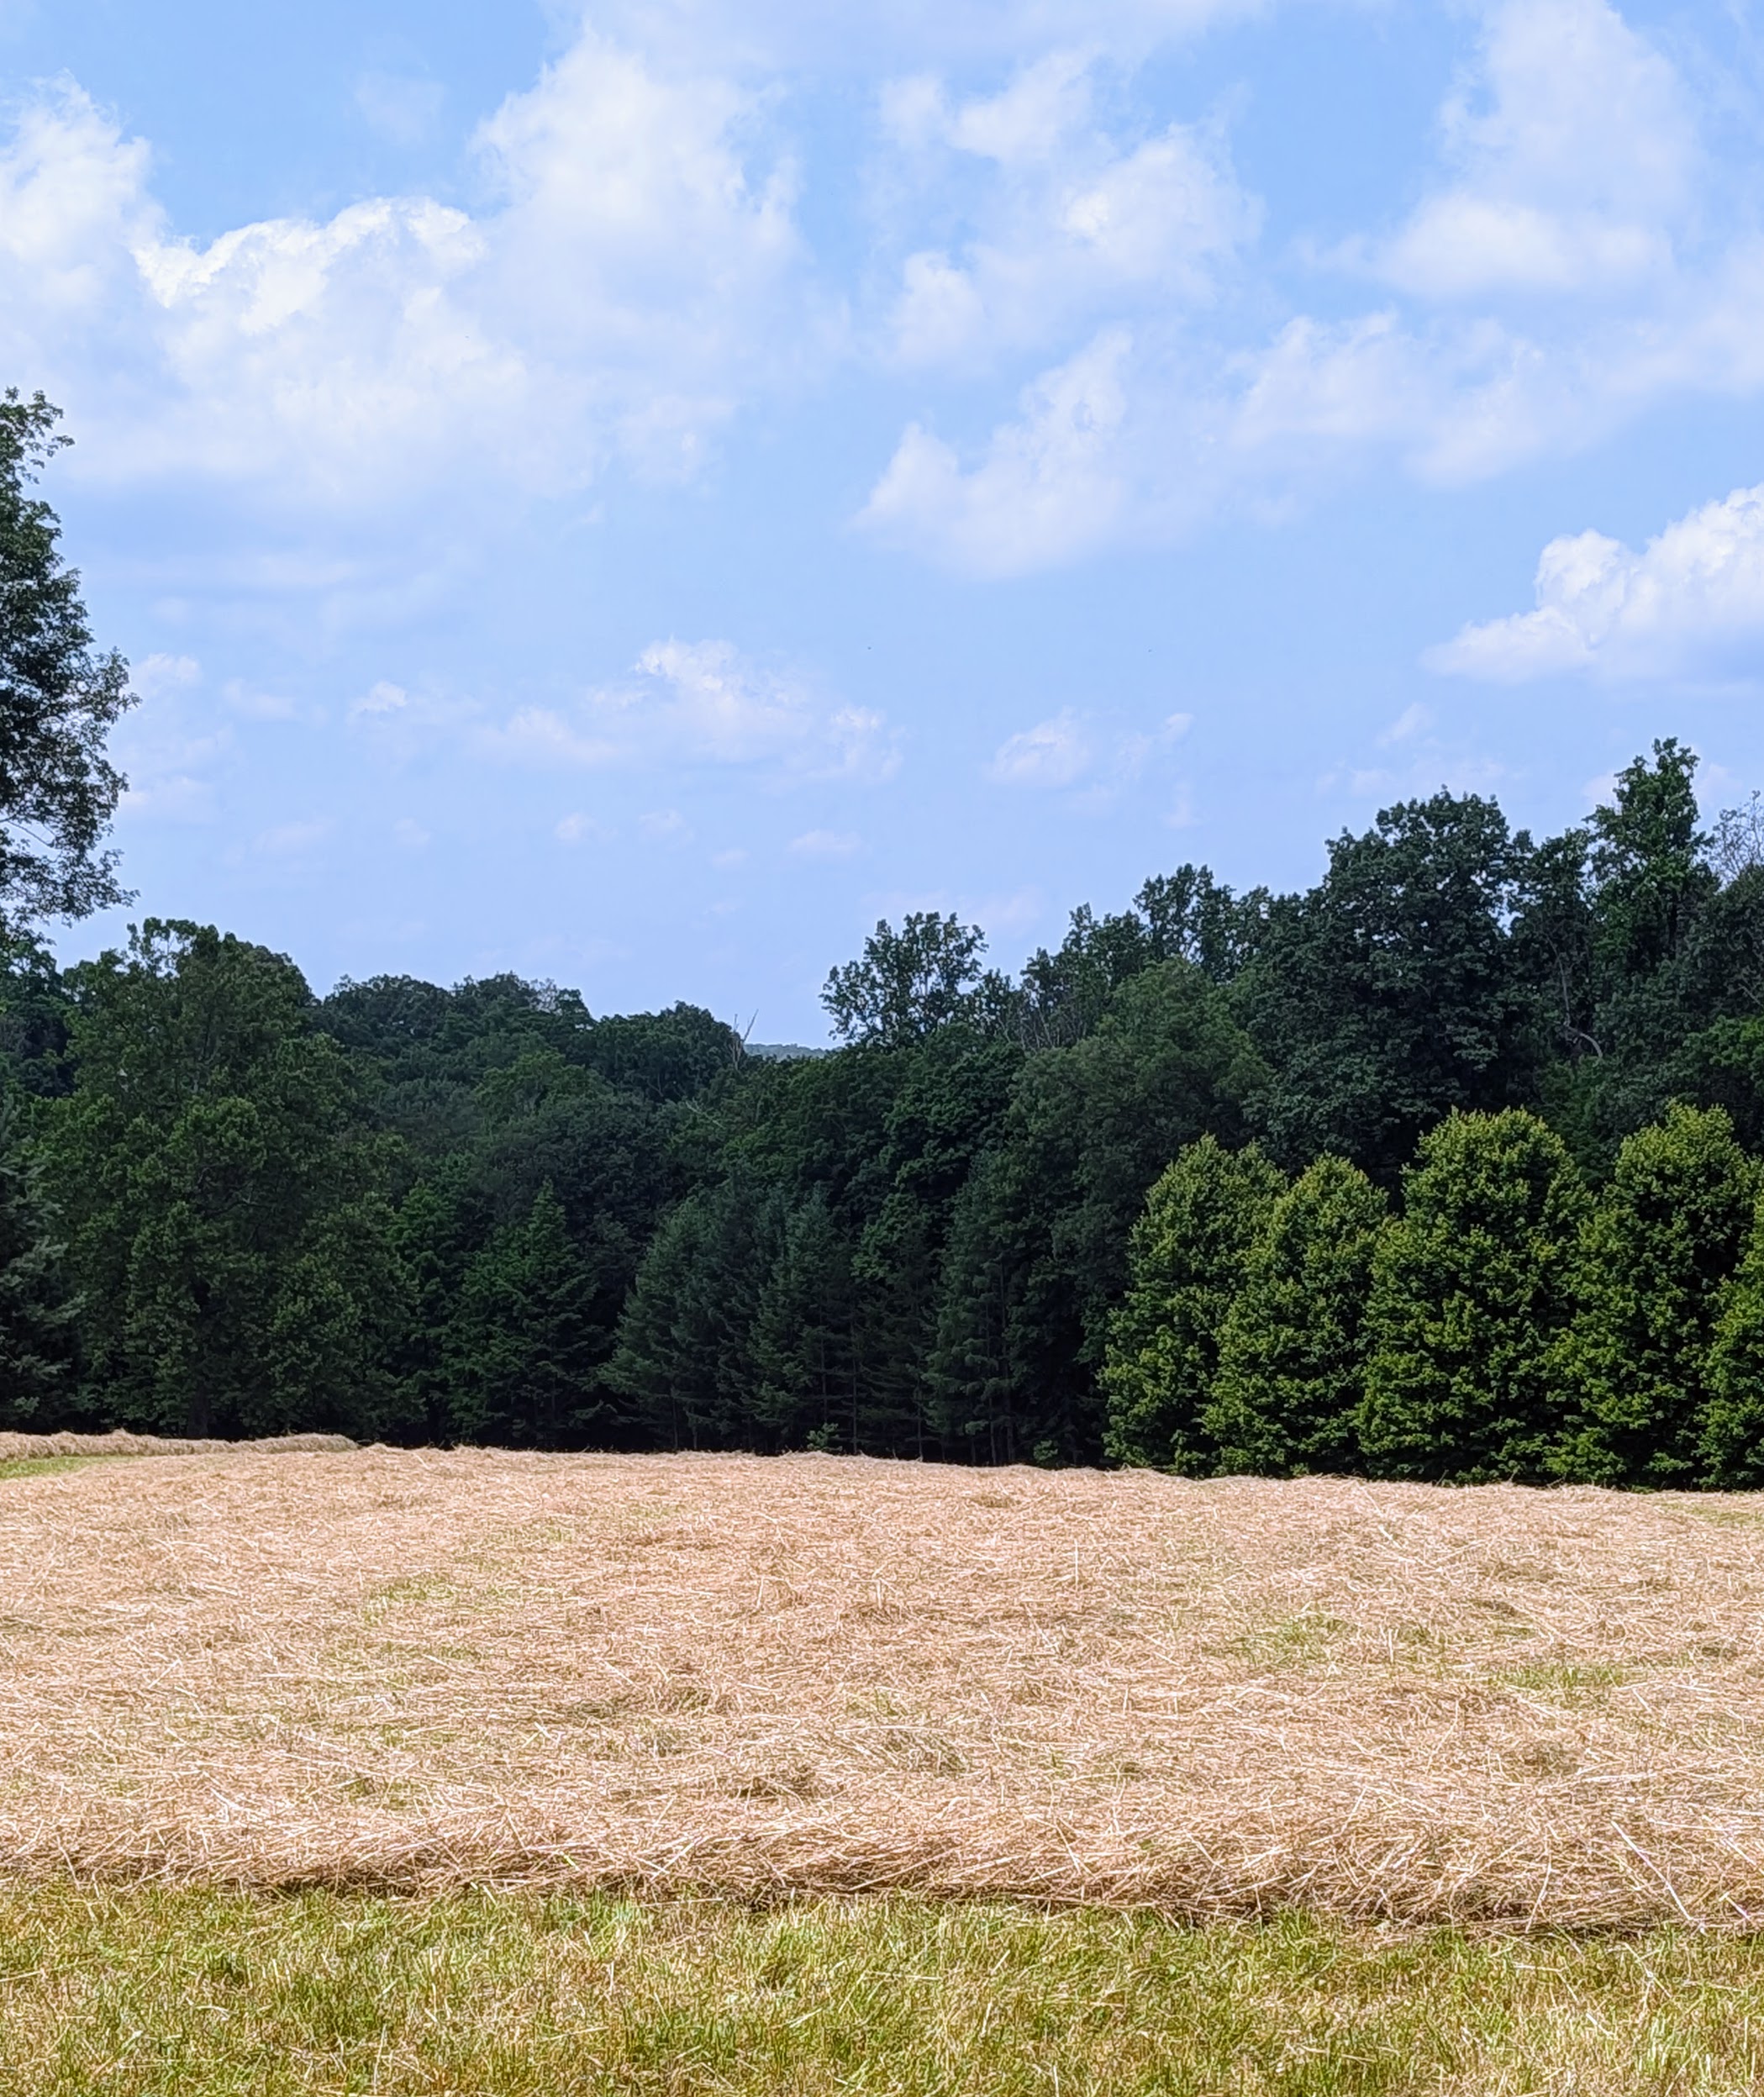
This time every year, I cross my fingers for a stretch of good, dry weather, so I can get the first cut of hay from the fields. Timing is everything when cutting the hay crop. This week’s heat wave has been uncomfortable, but perfect for drying and baling hay. Here’s one field of freshly cut hay.
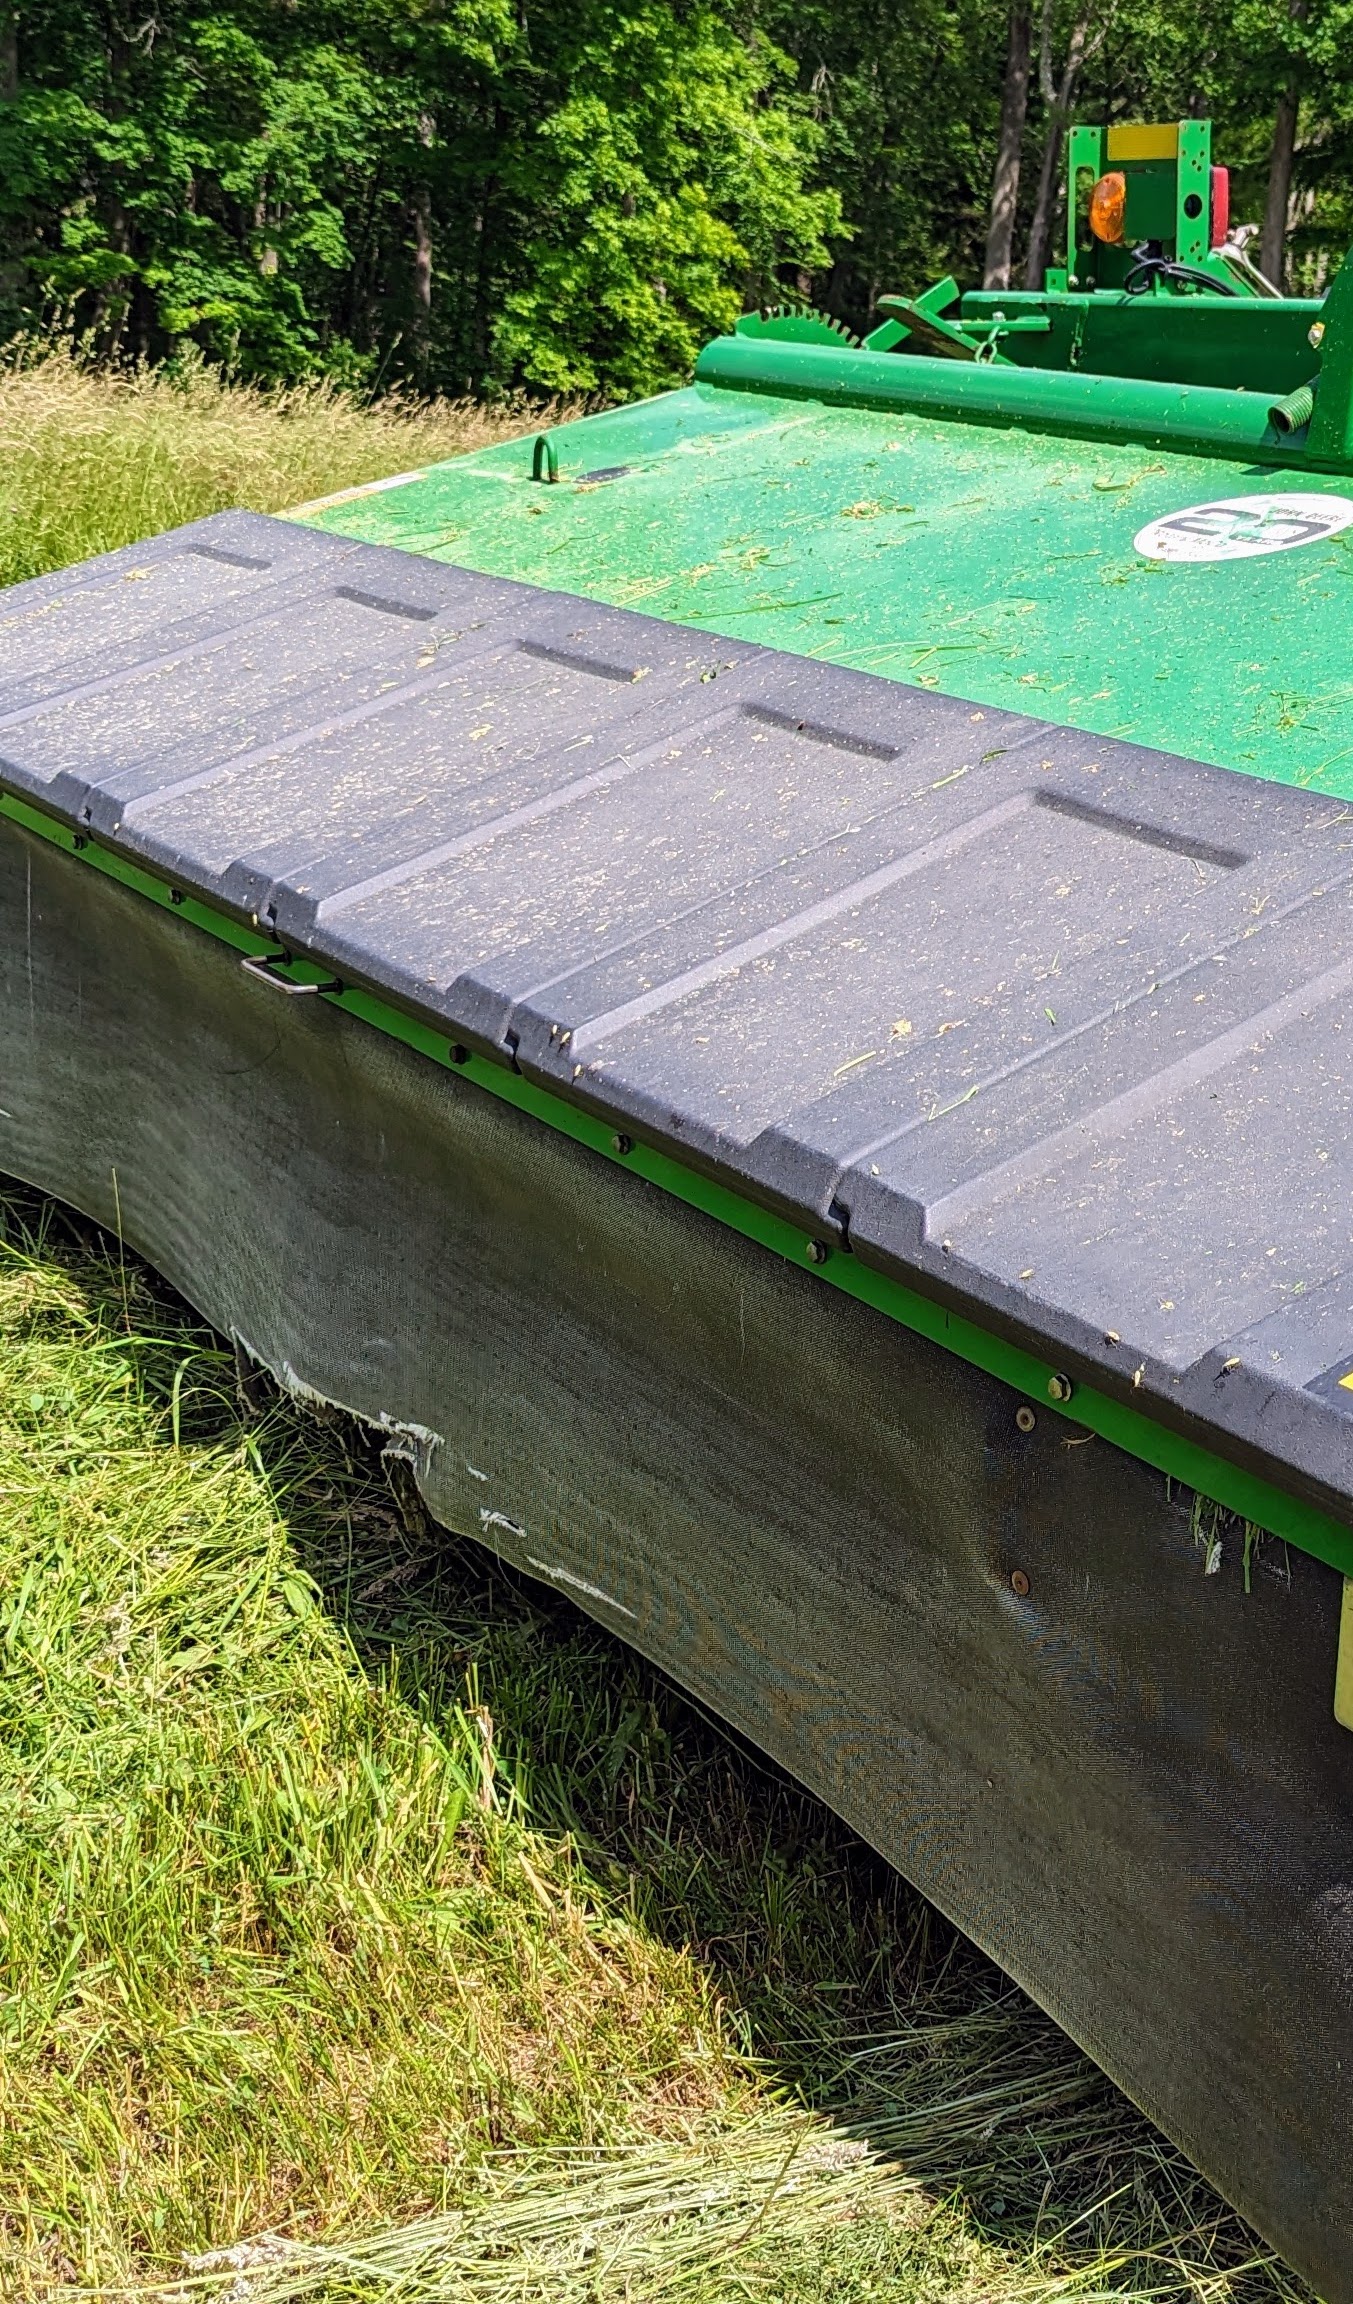
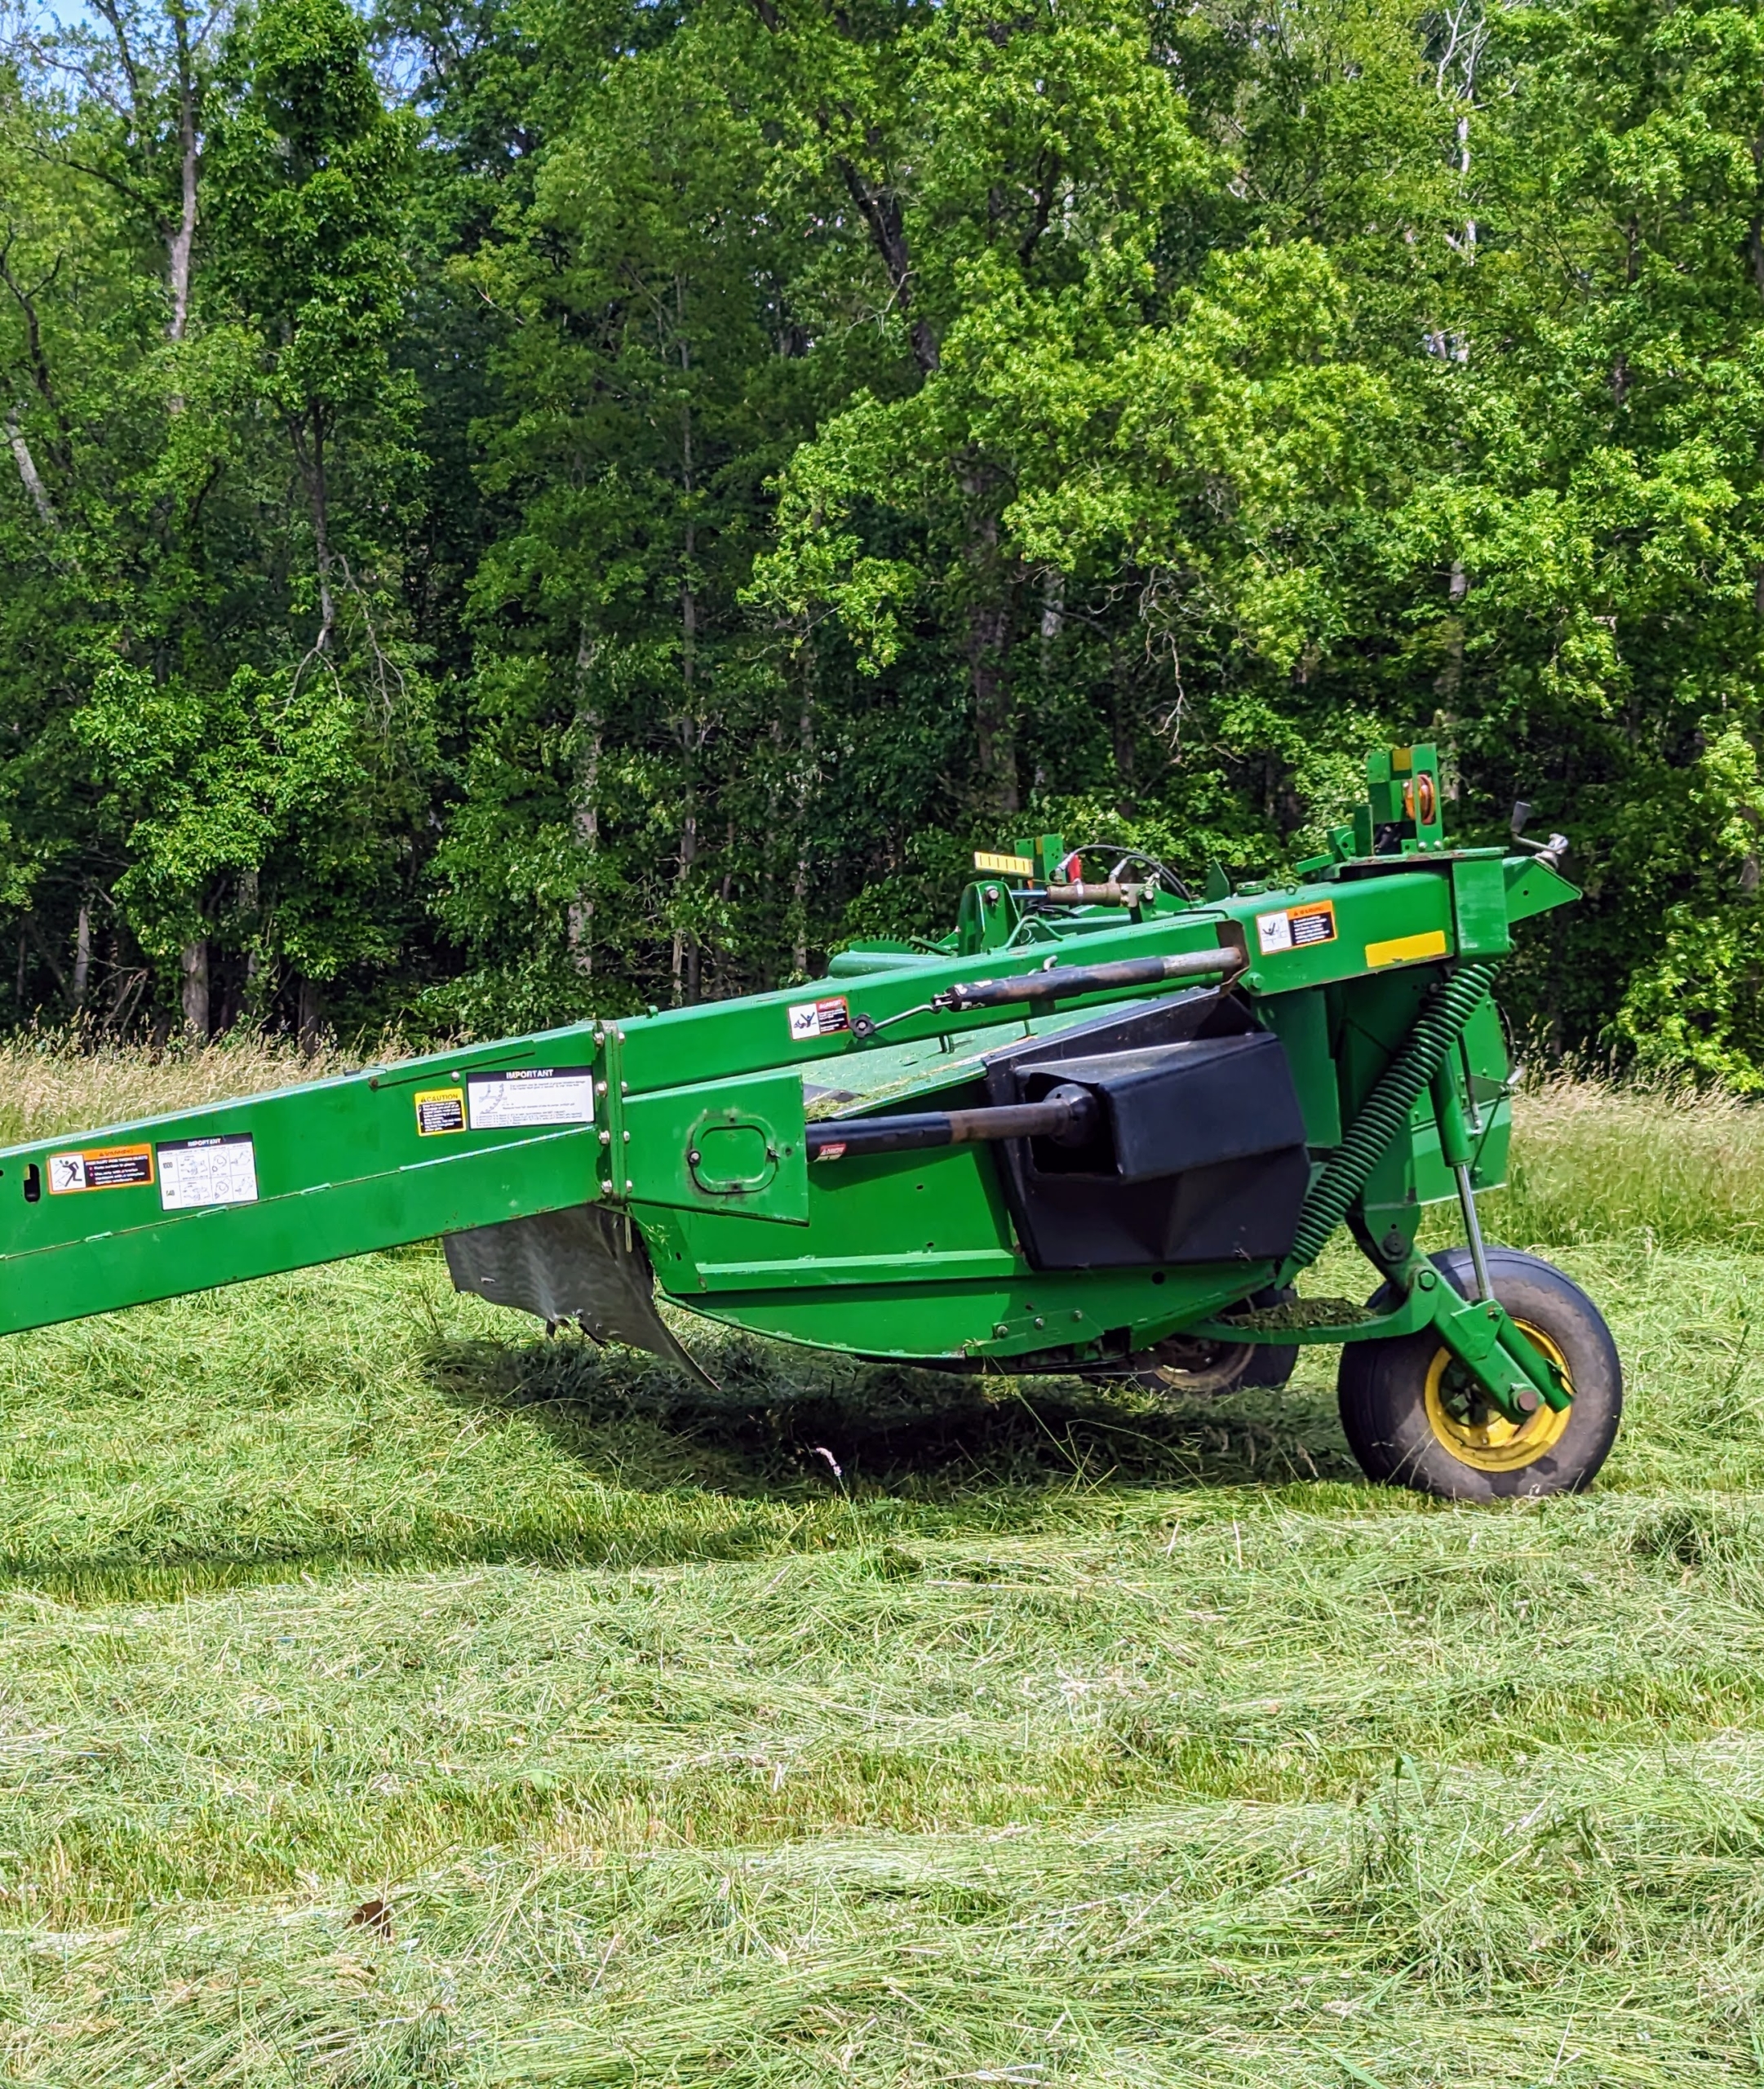
This is our mower-conditioner. Mower-conditioners are a staple of large-scale haymaking. It cuts, crimps, and crushes the hay to promote faster and more even drying. It is the first step in the hay baling process.
This equipment also works to remove the waxy coat on the crop as it conditions, making the hay dry faster – this means less waiting time and less chance for poor weather to negatively impact the hay quality. When weather conditions are ideal, these machines allow farmers to cut wide and fast – the best formula for quality field productivity. As the mower-conditioner goes over the grass, it cuts it and then conditions it – all under the protective hood of the machine.
The best time is to start as soon as dew is off in the morning, which will maximize drying time. After it is cut, it is left to dry for several hours.
Next, the cut hay is ready for tedding, also known as fluffing. This is our hay tedder. A tedder spreads and fluffs the hay in a uniform swath. It uses a rotary motion to grab the hay with spinning tines and then cast it out the back of the machine. The tedder moves up and down the field taking all the greener hay from the bottom and turning it over to dry.
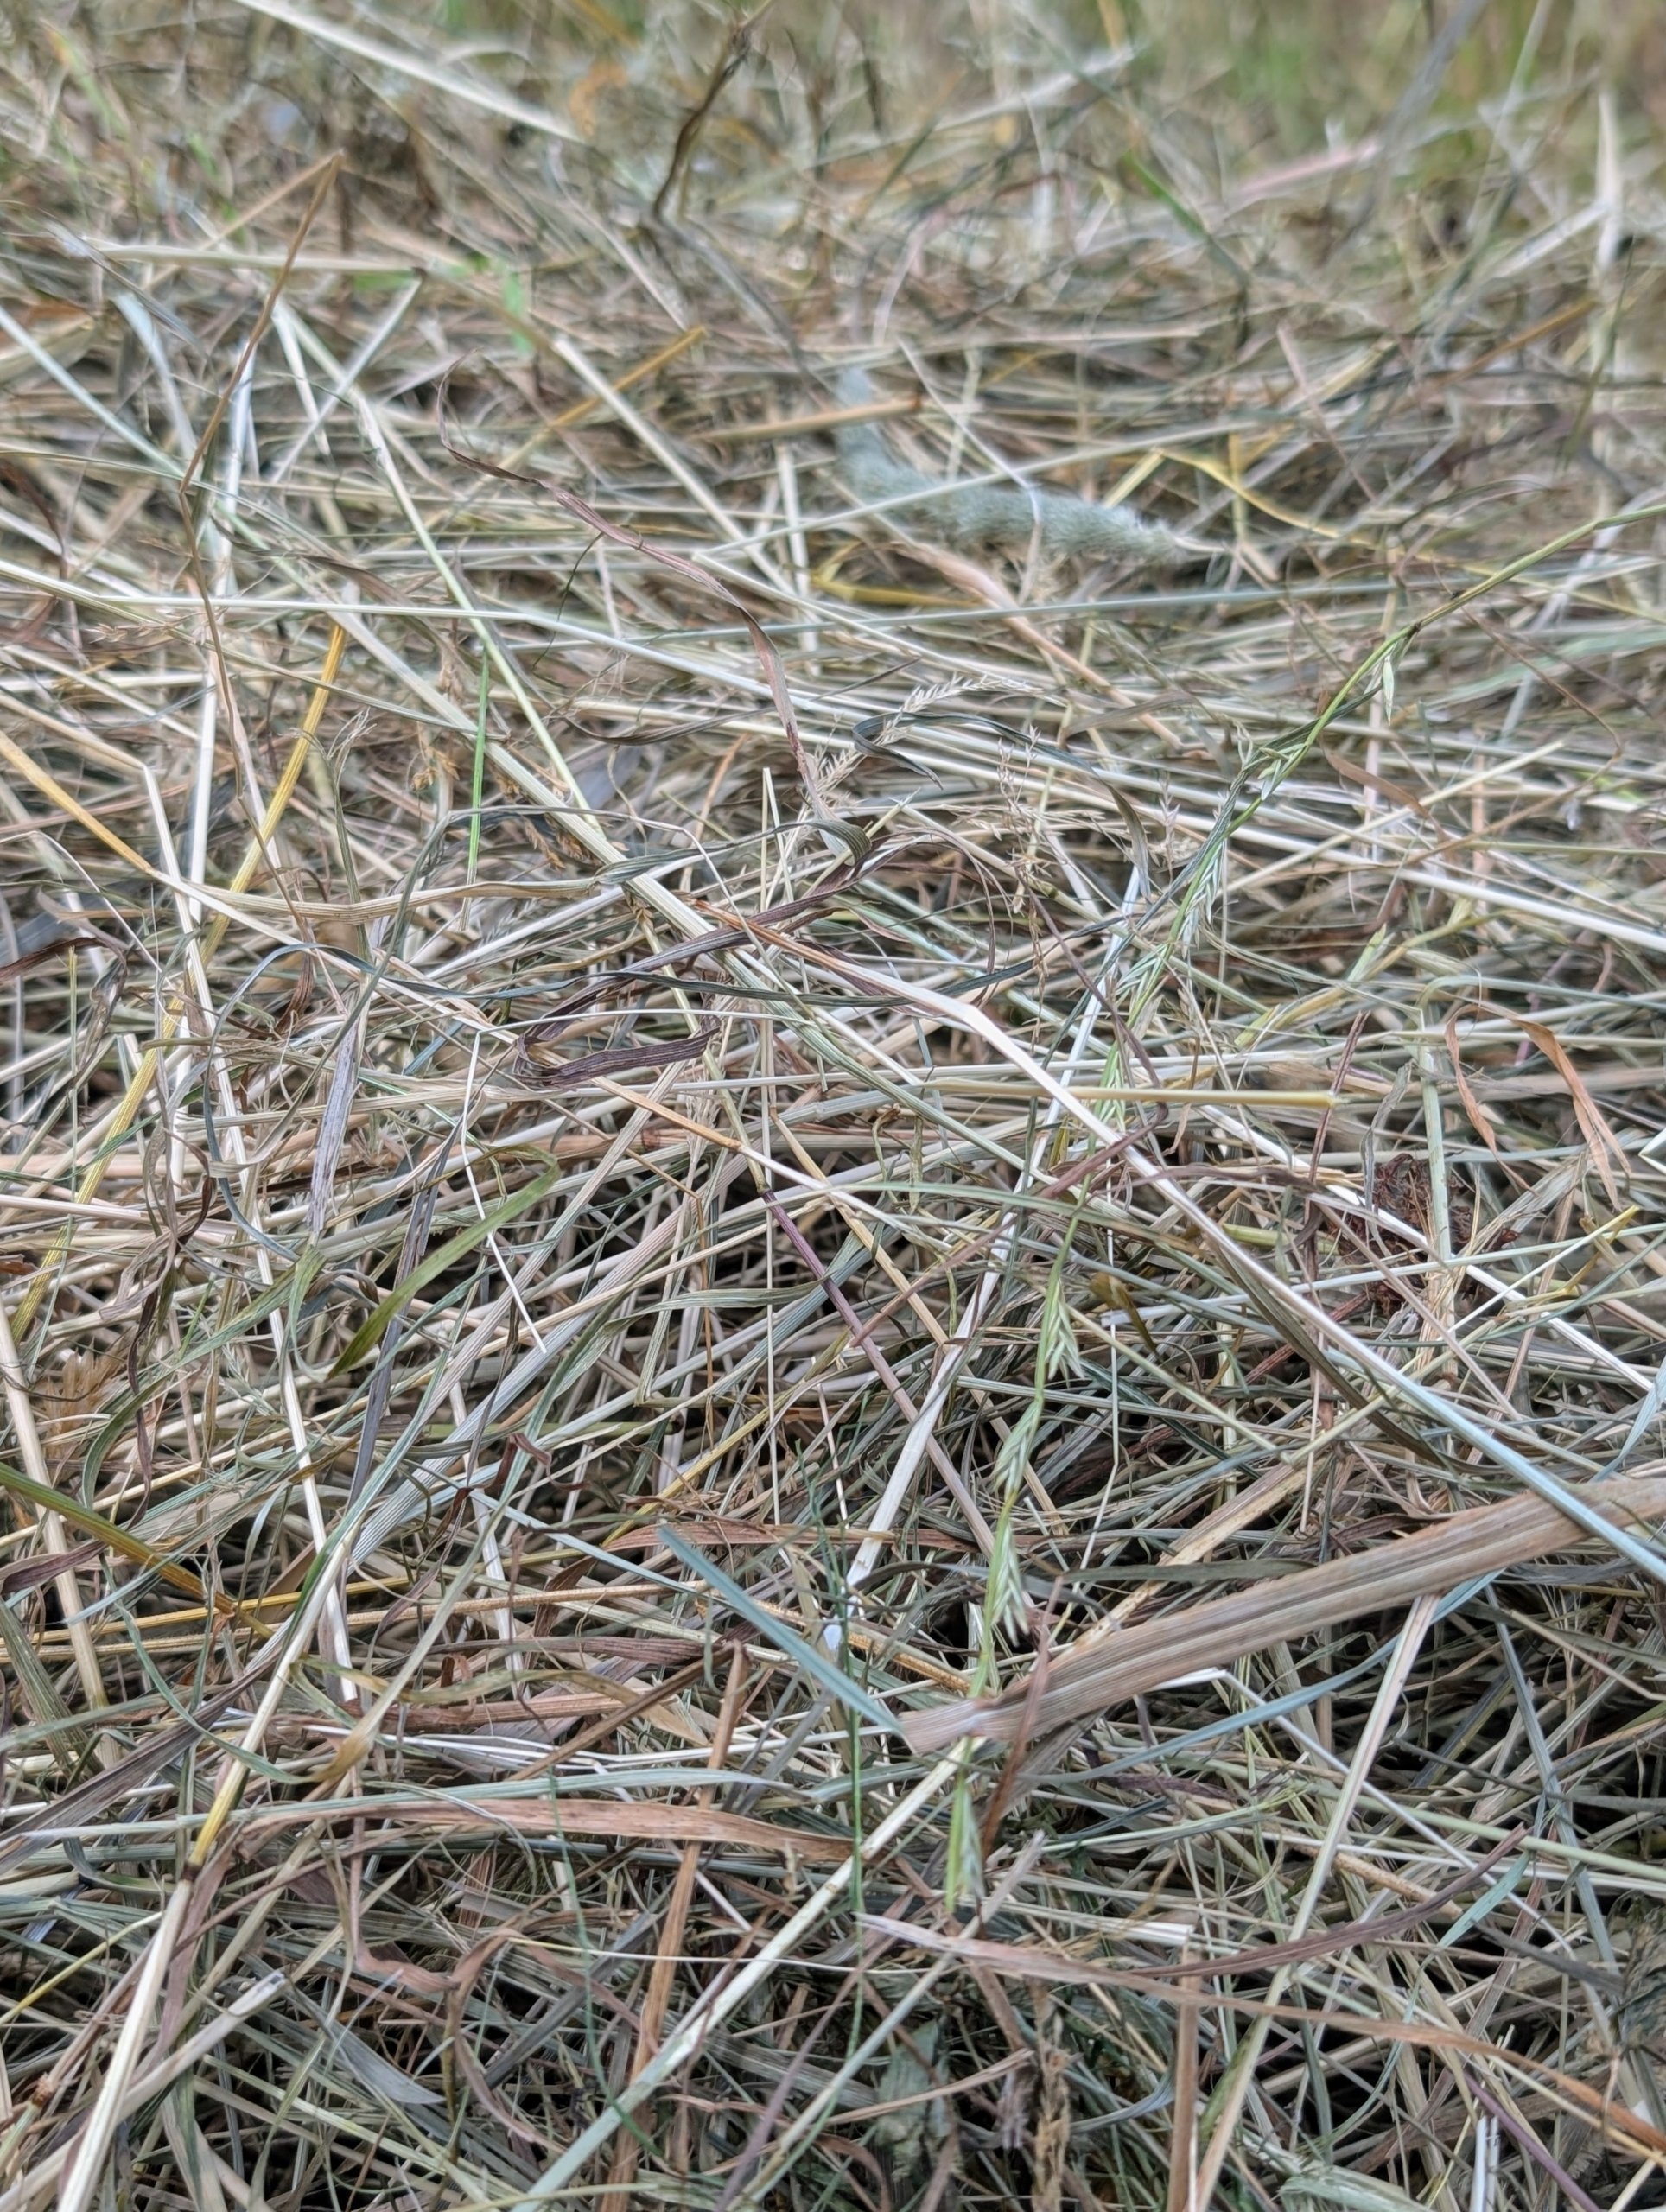
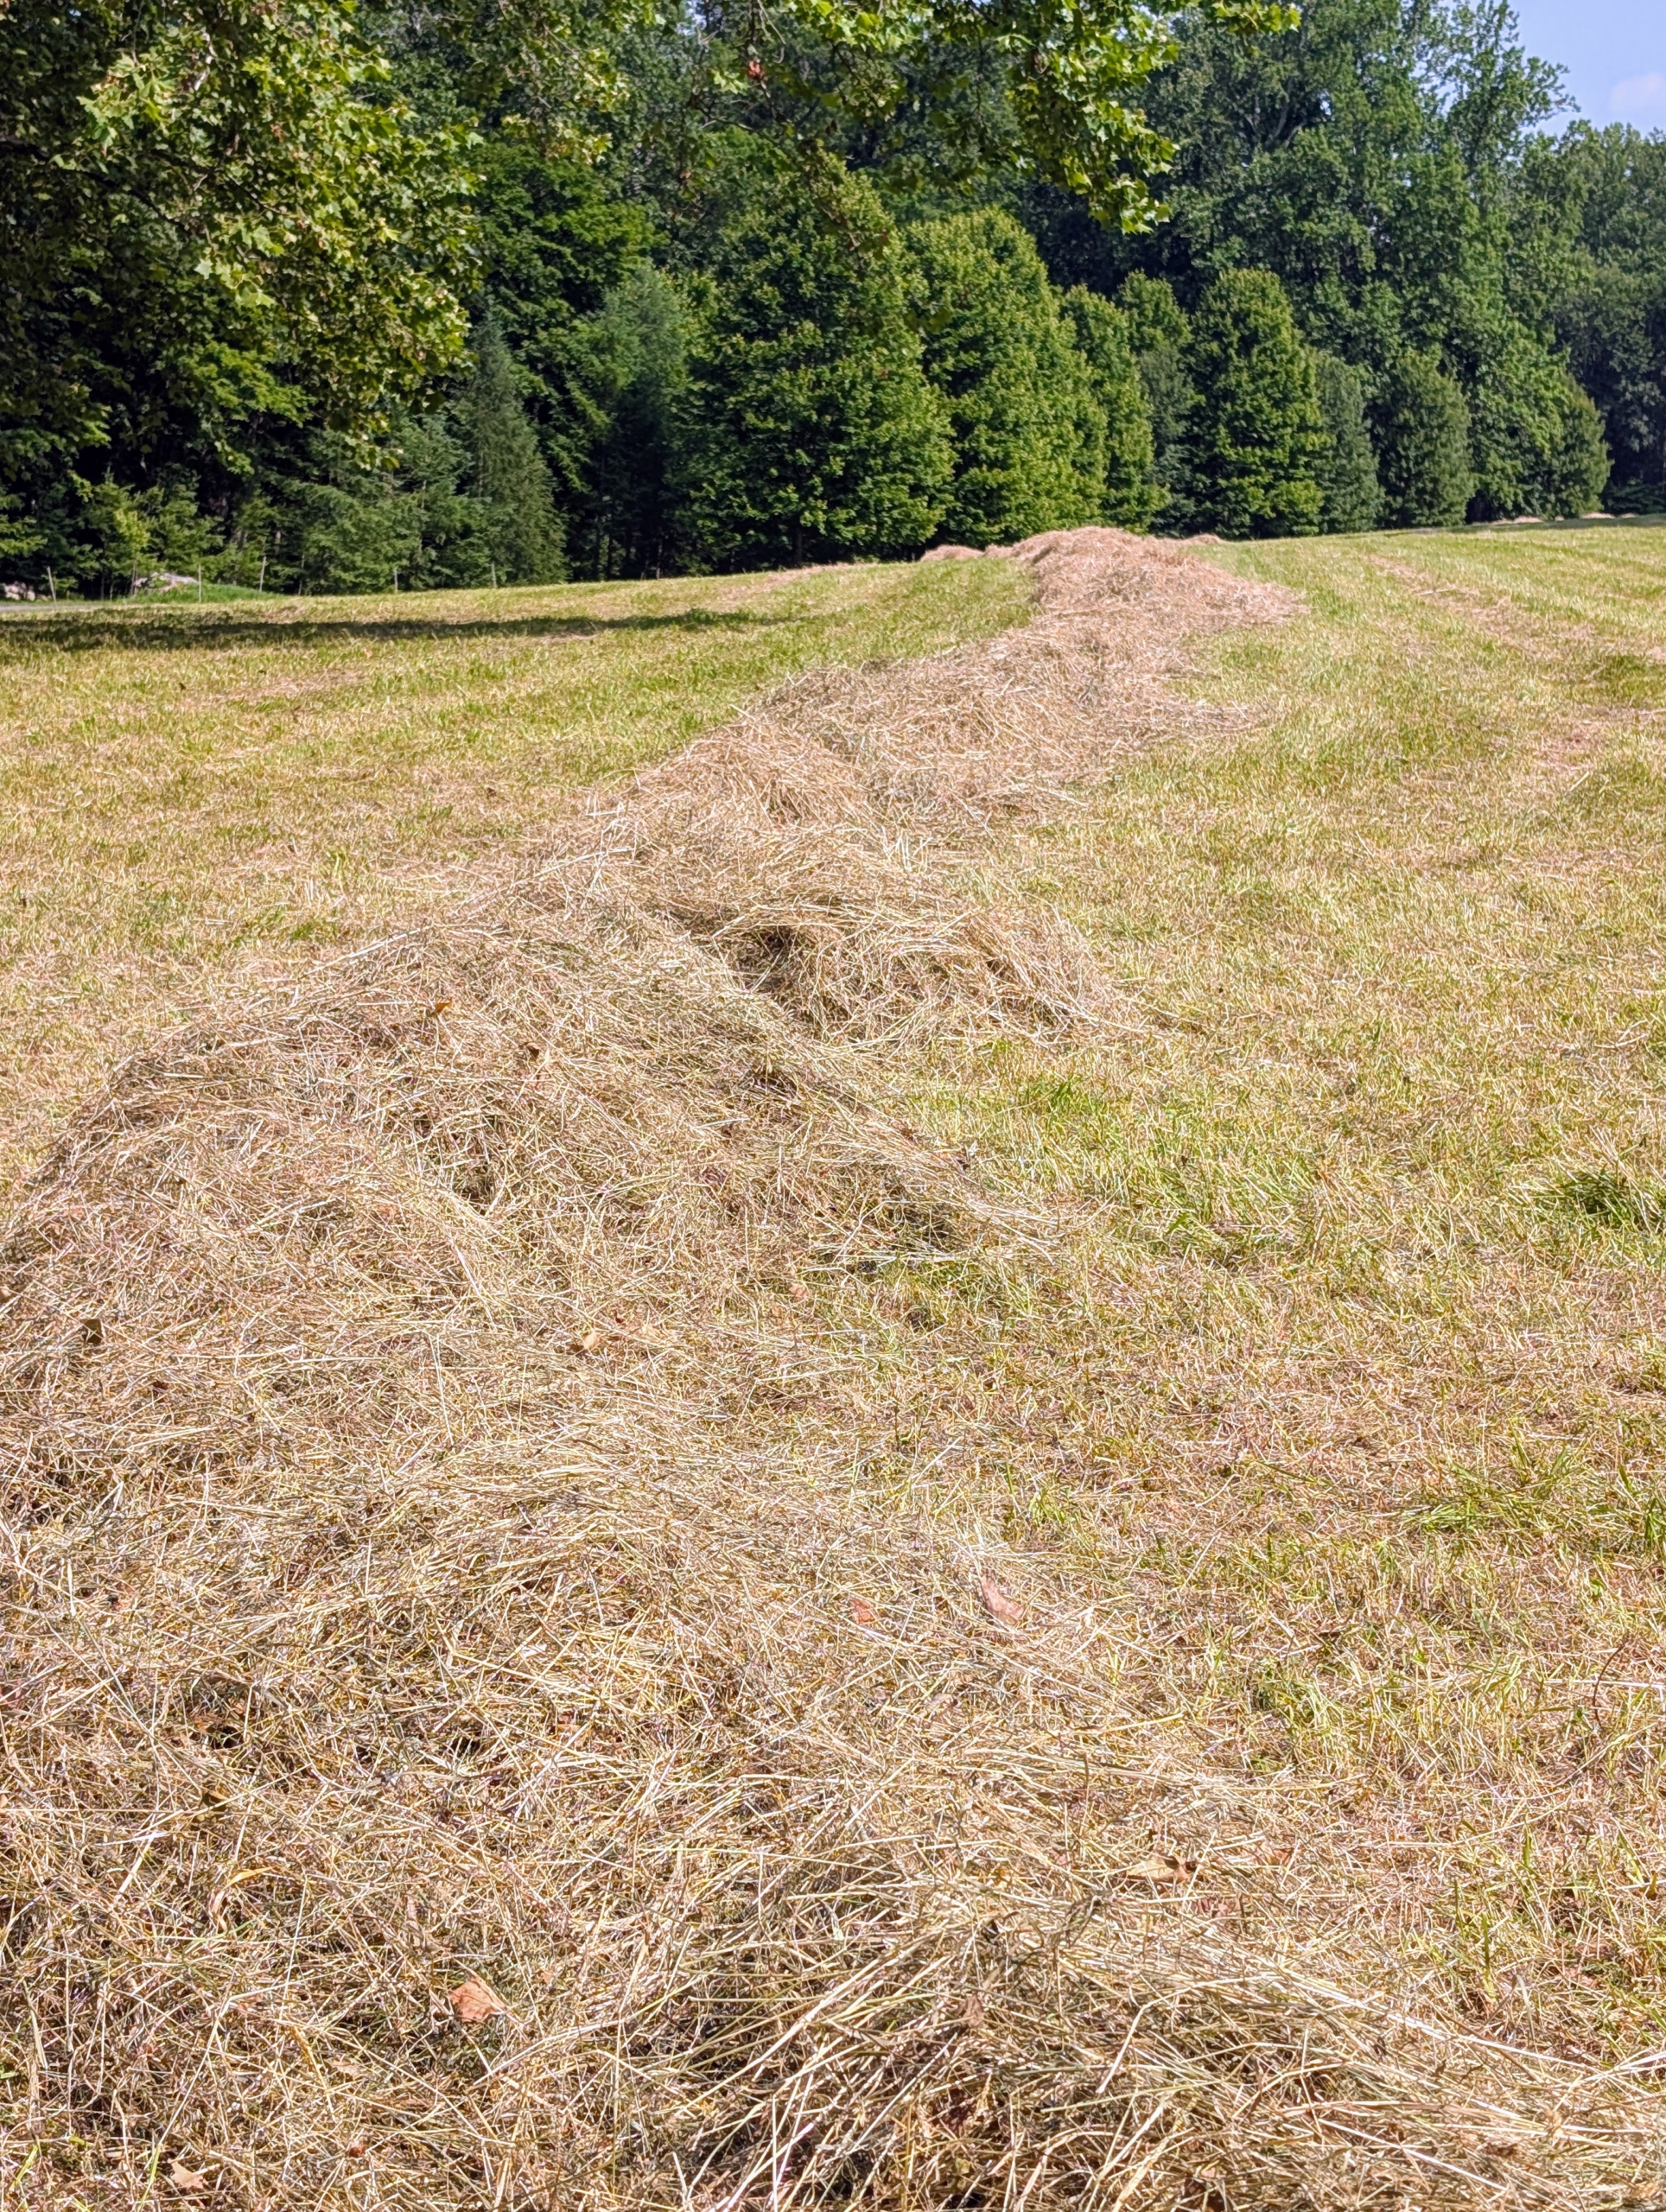
The hay turn colors from green to tan. On average, it takes about three days per field, depending on the size of the field and the weather, to complete the entire process of mowing, raking, and baling hay.
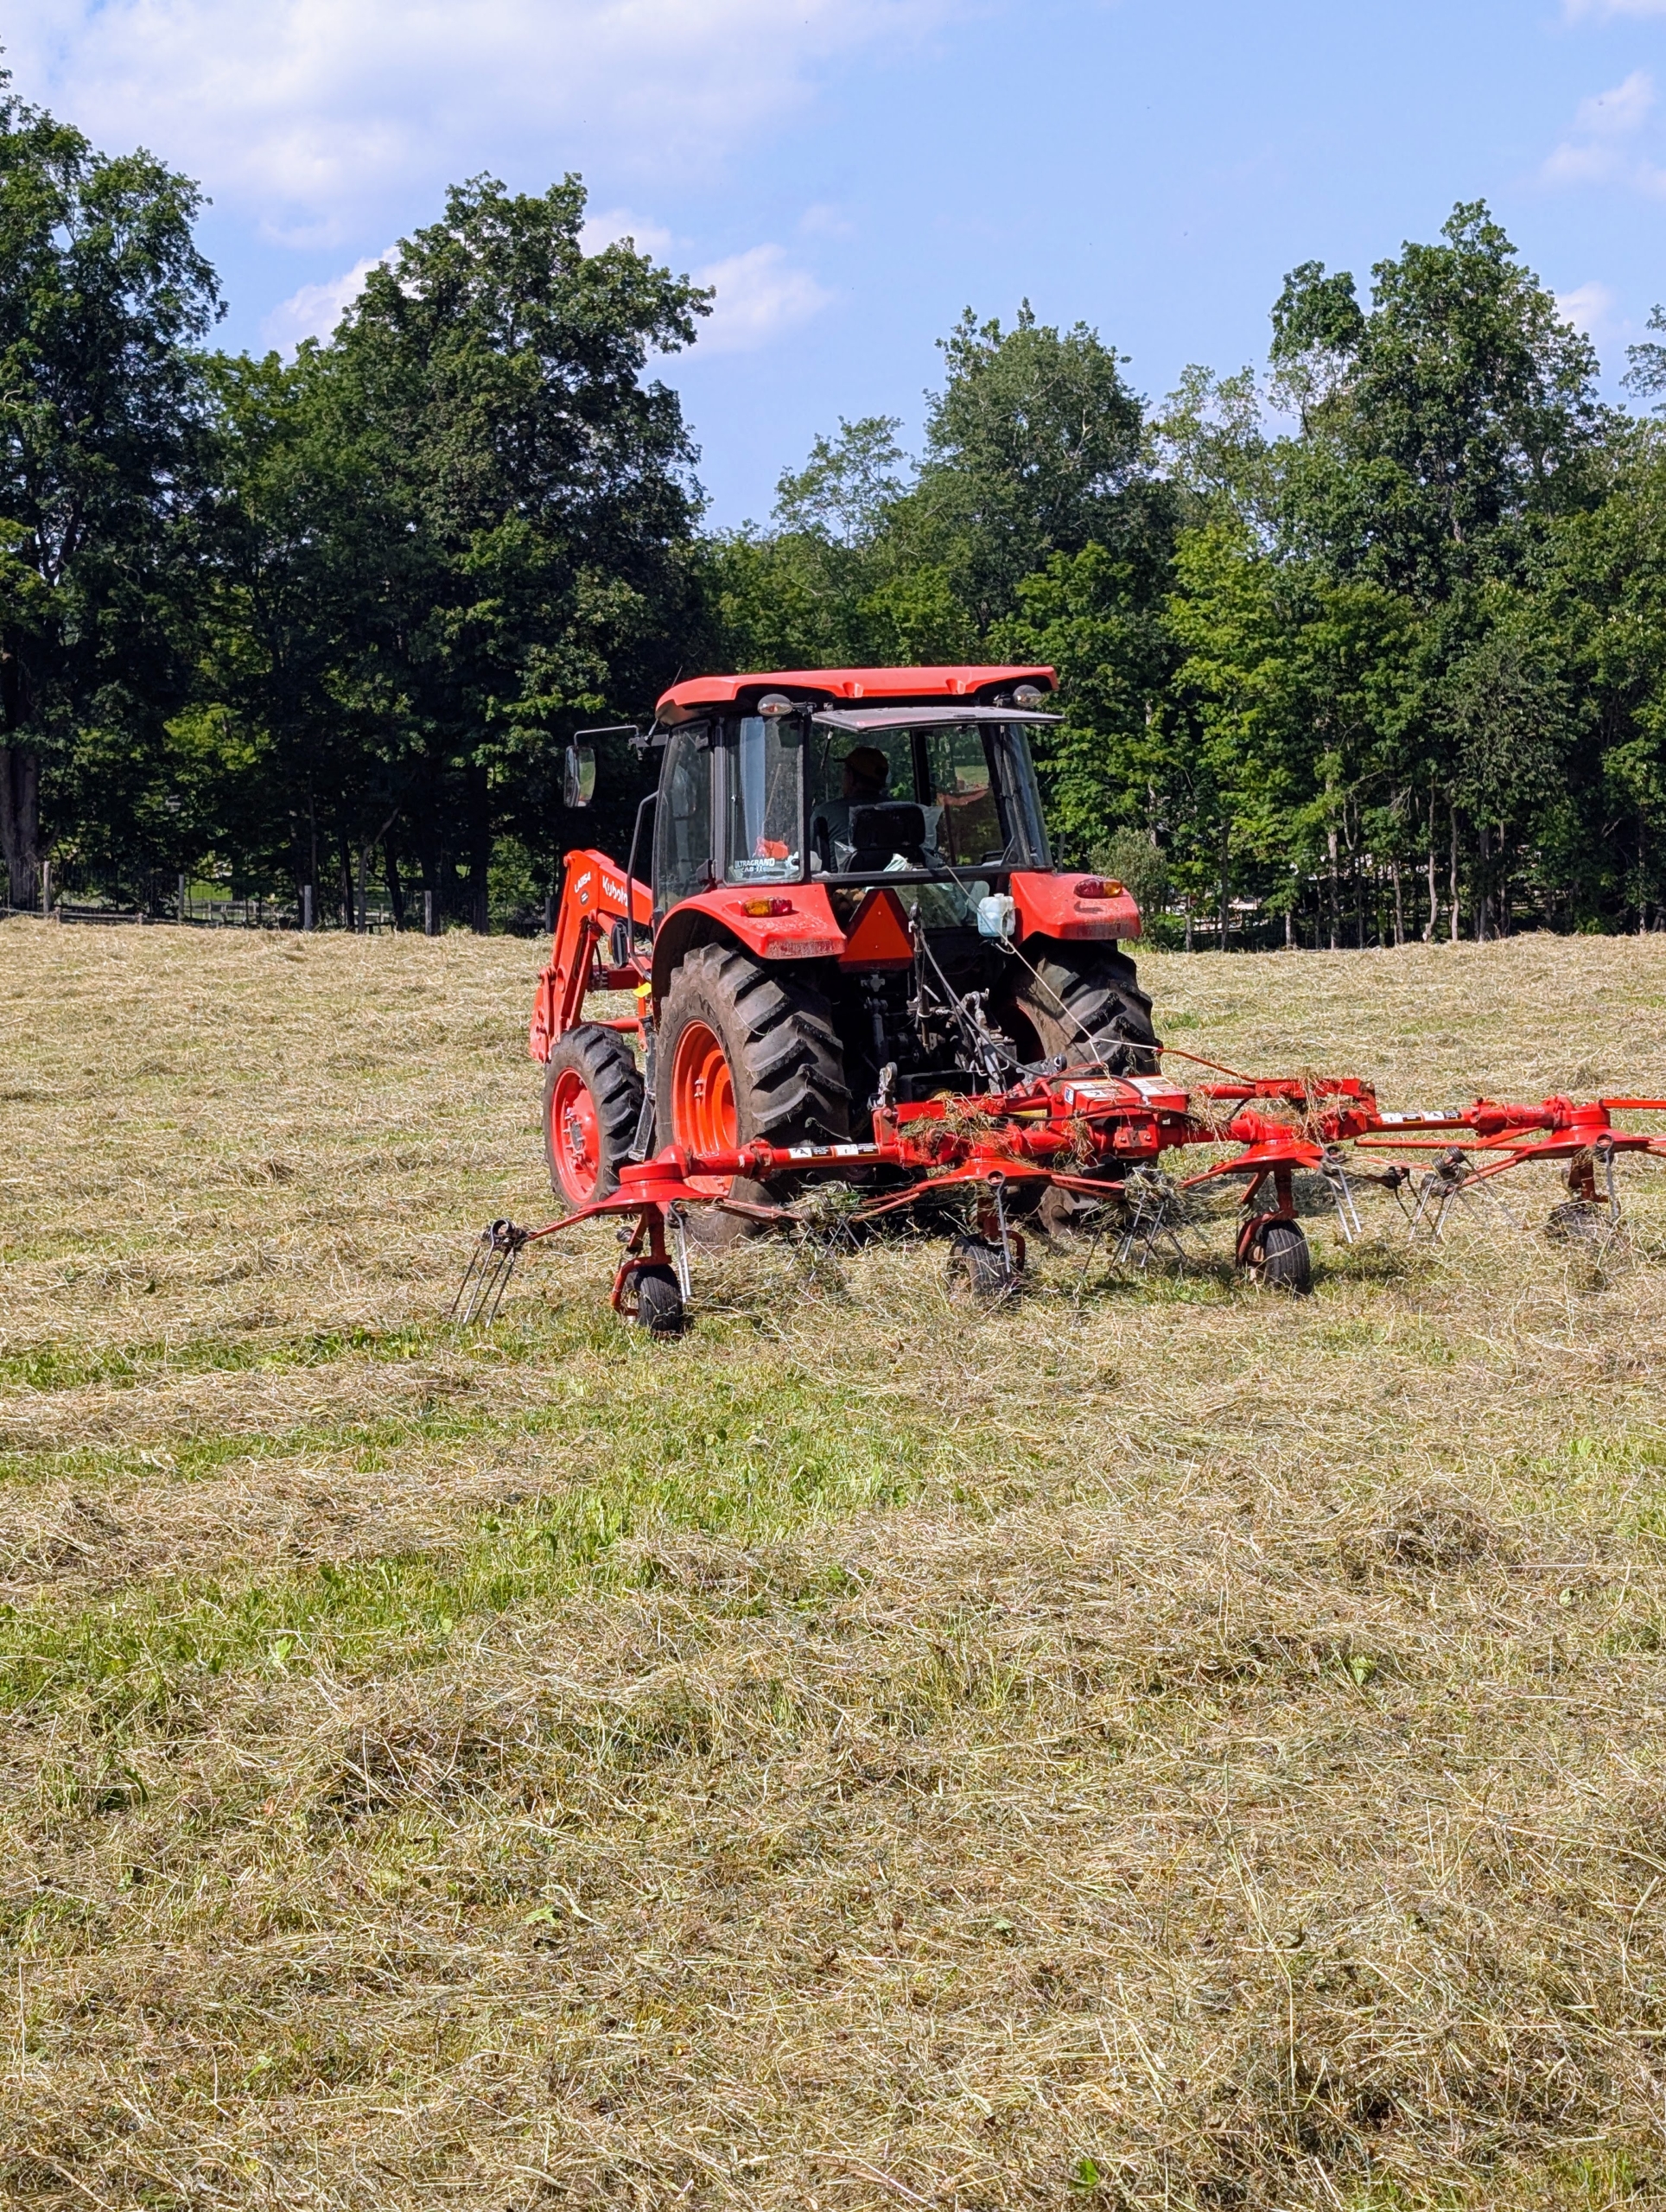
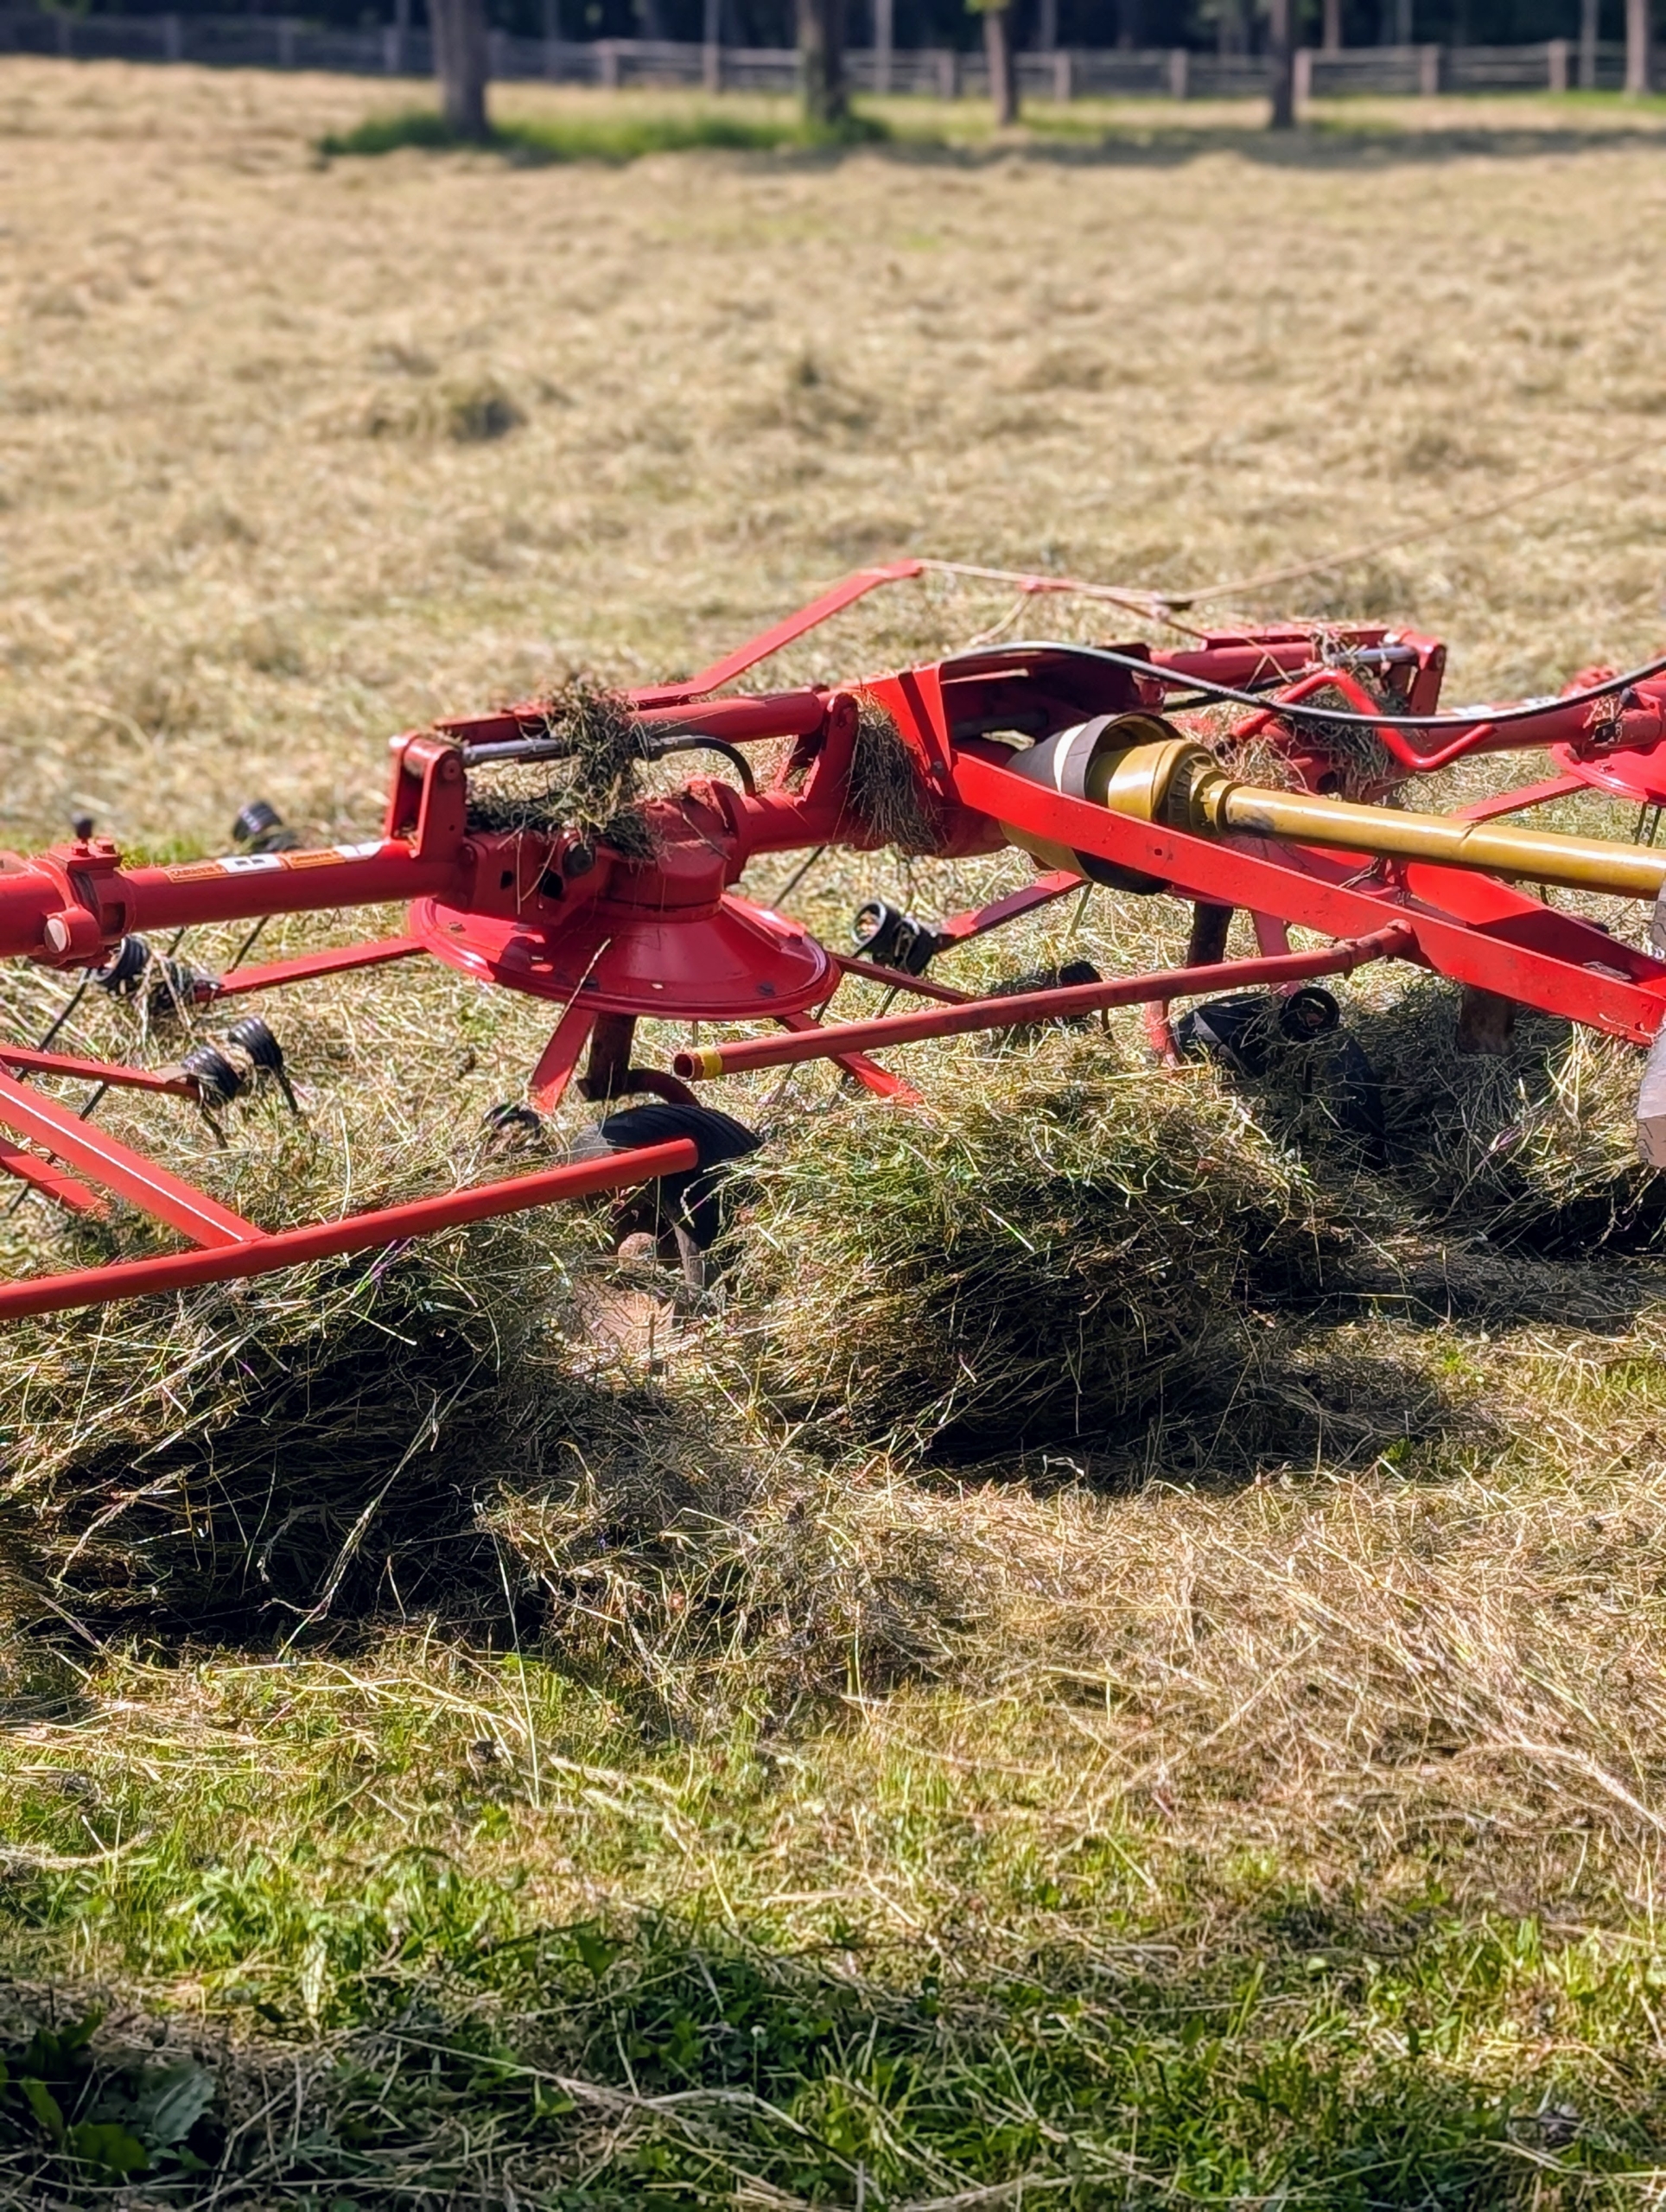
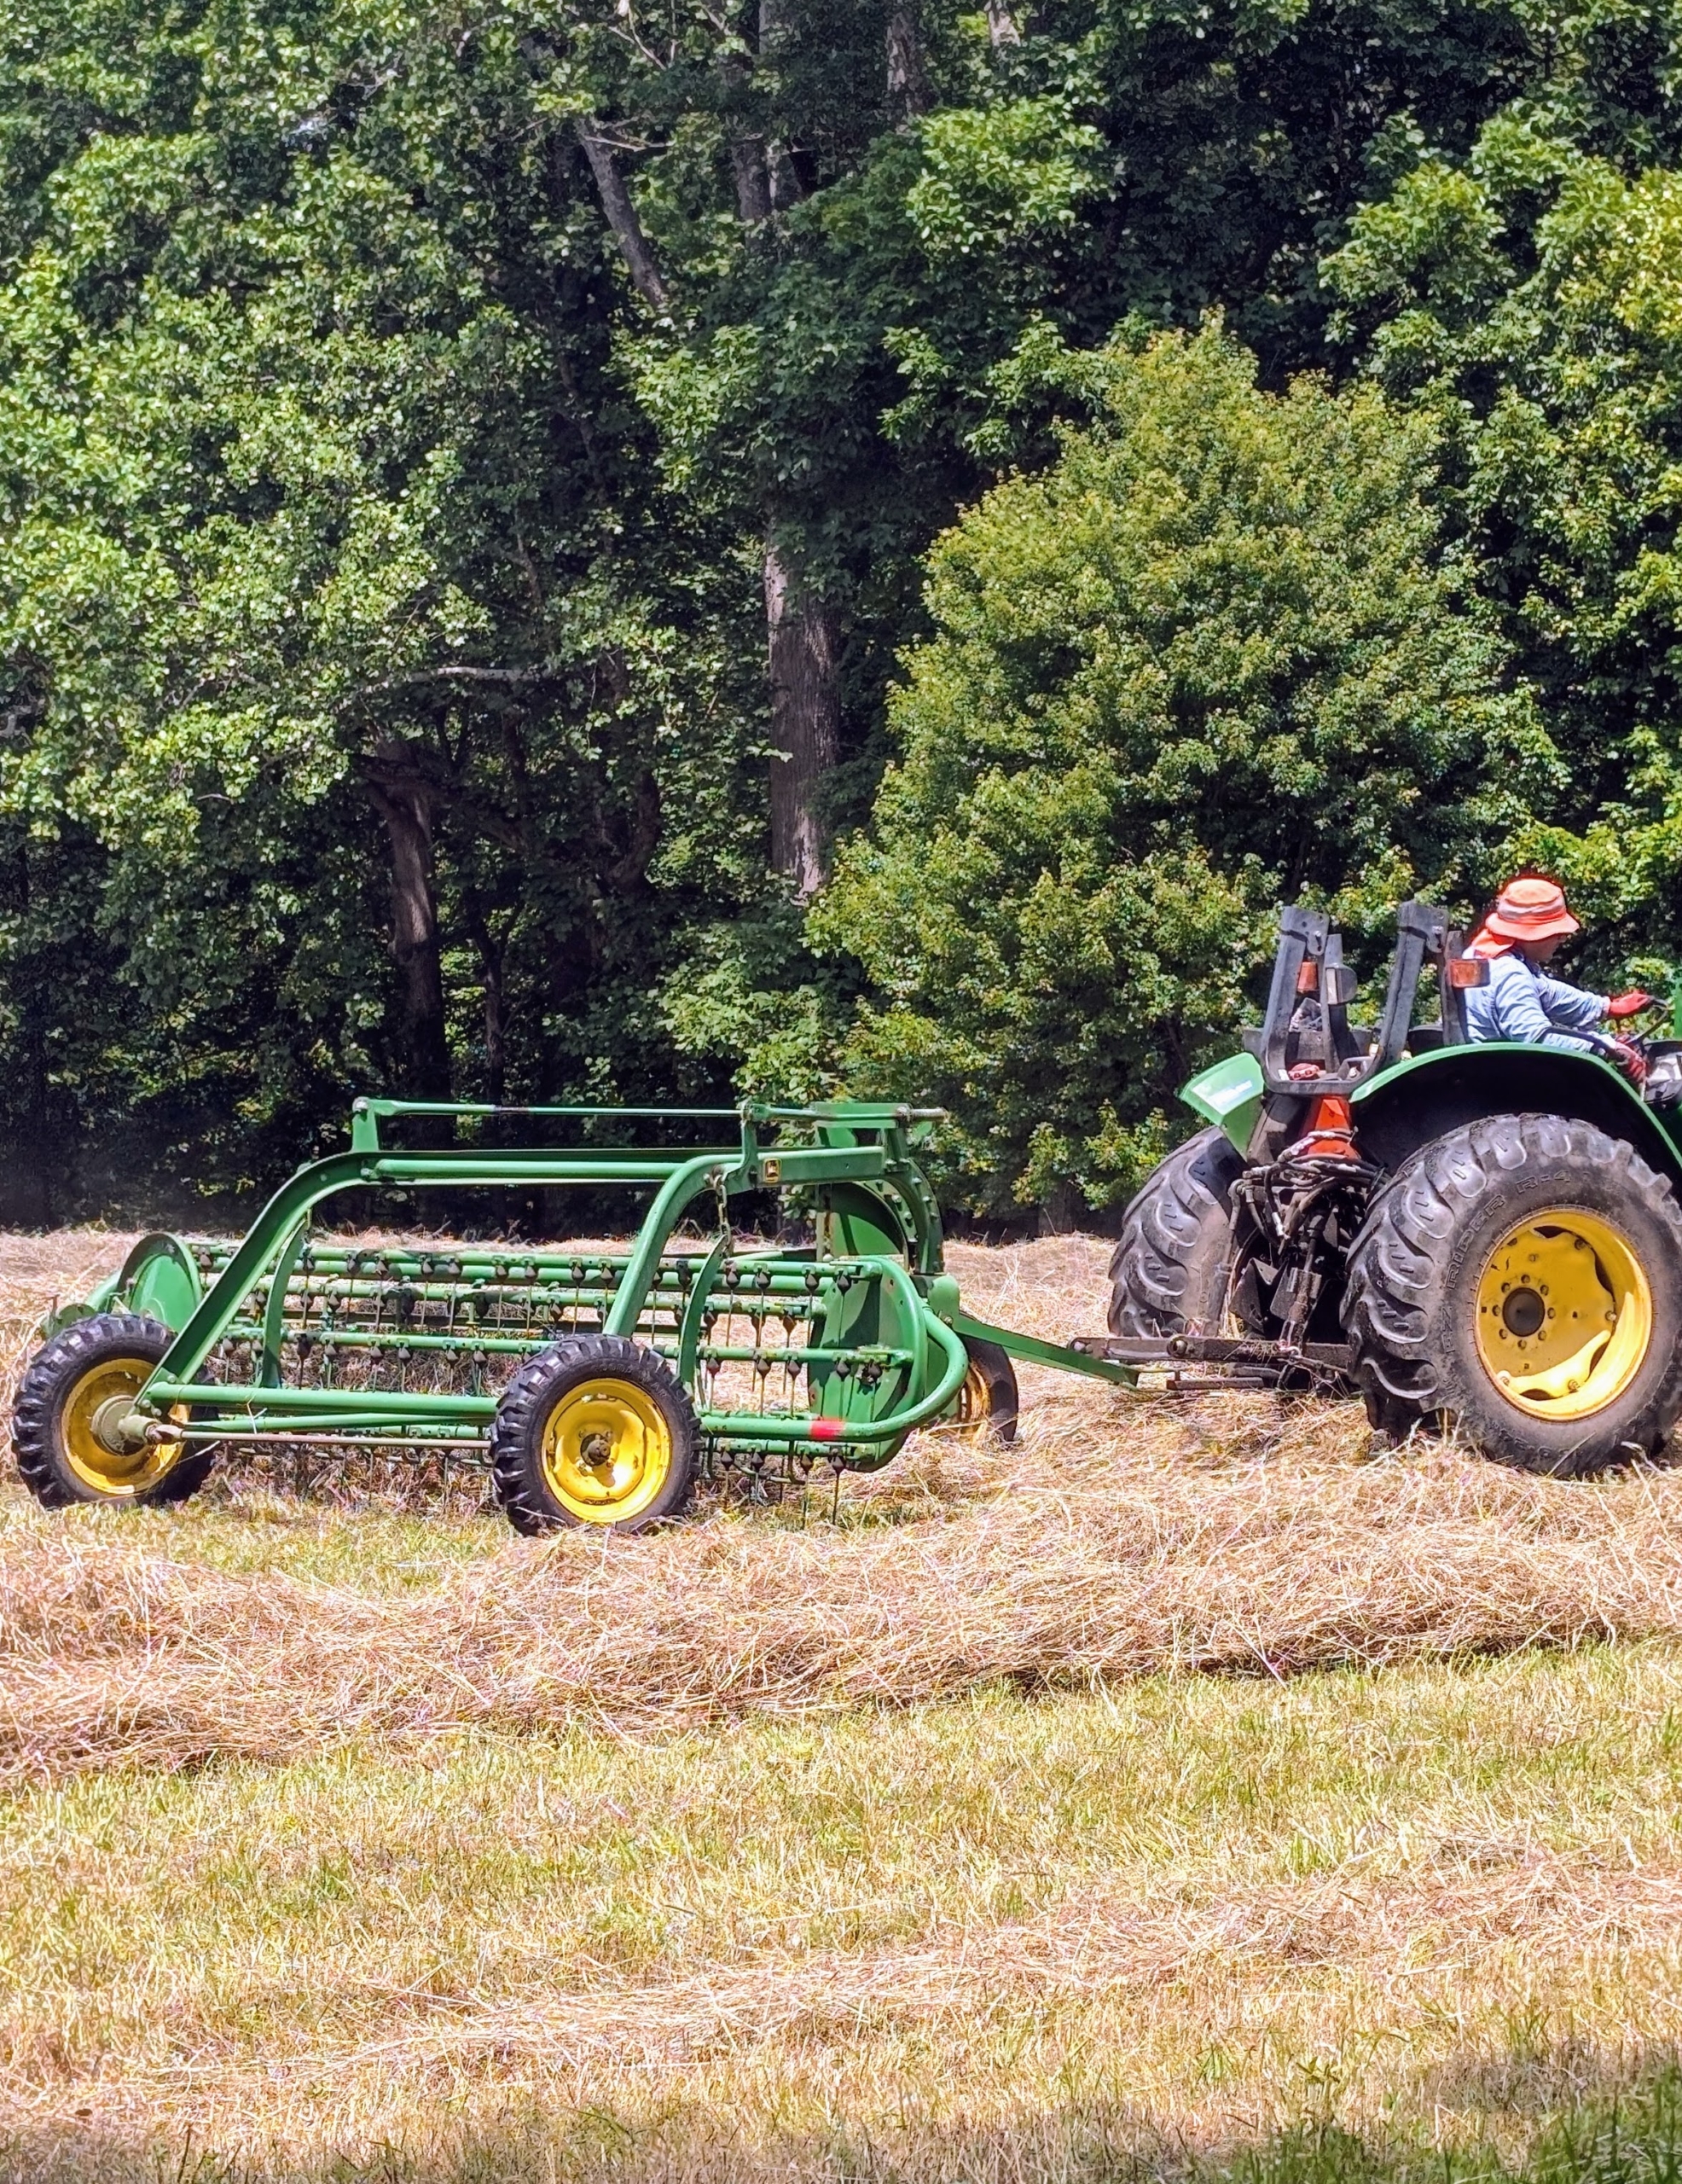
Then it is time to make the windrows, which are rows of hay raked up and shaped before being baled. The bar rake is pulled behind a tractor to make windrows from the tedded hay. The bar rake, also known as a basket rake is hydraulically driven. This rake allows for consistent movement across the fields making well-shaped windrows.
Here is a windrow ready to bale. All the windrows are lined up straight next to each other with enough room in between for the baler to maneuver properly around the field.
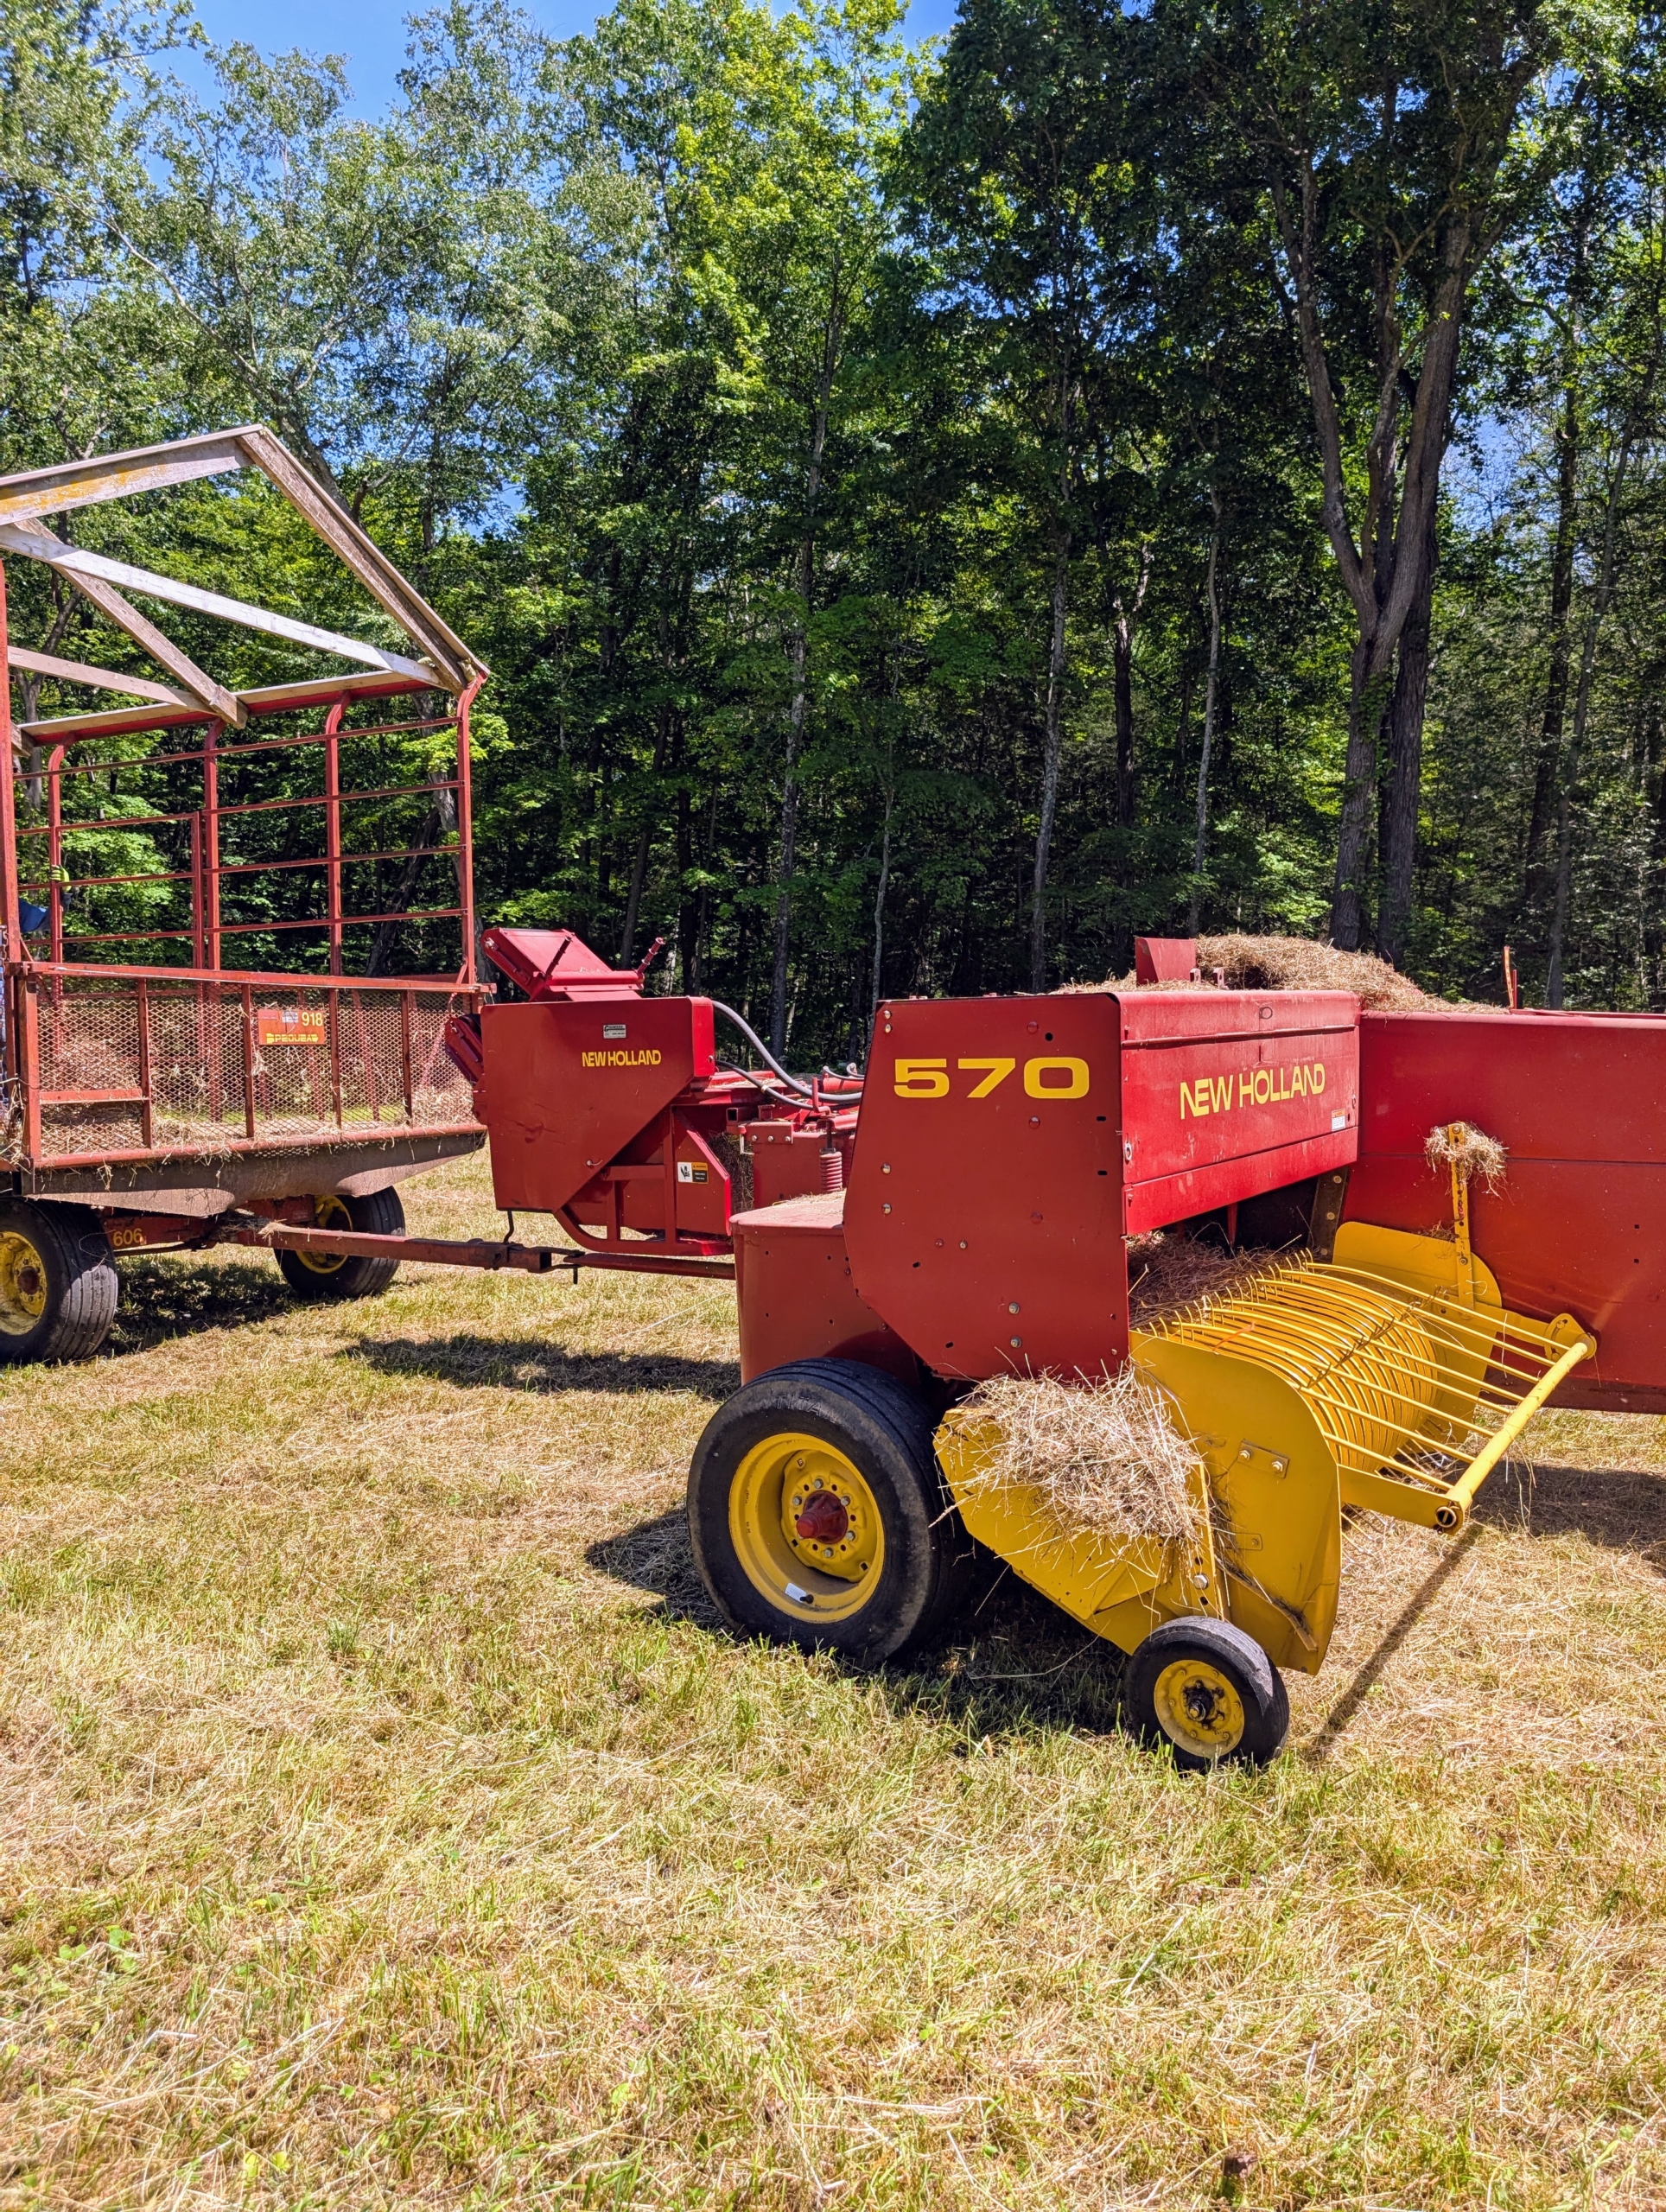
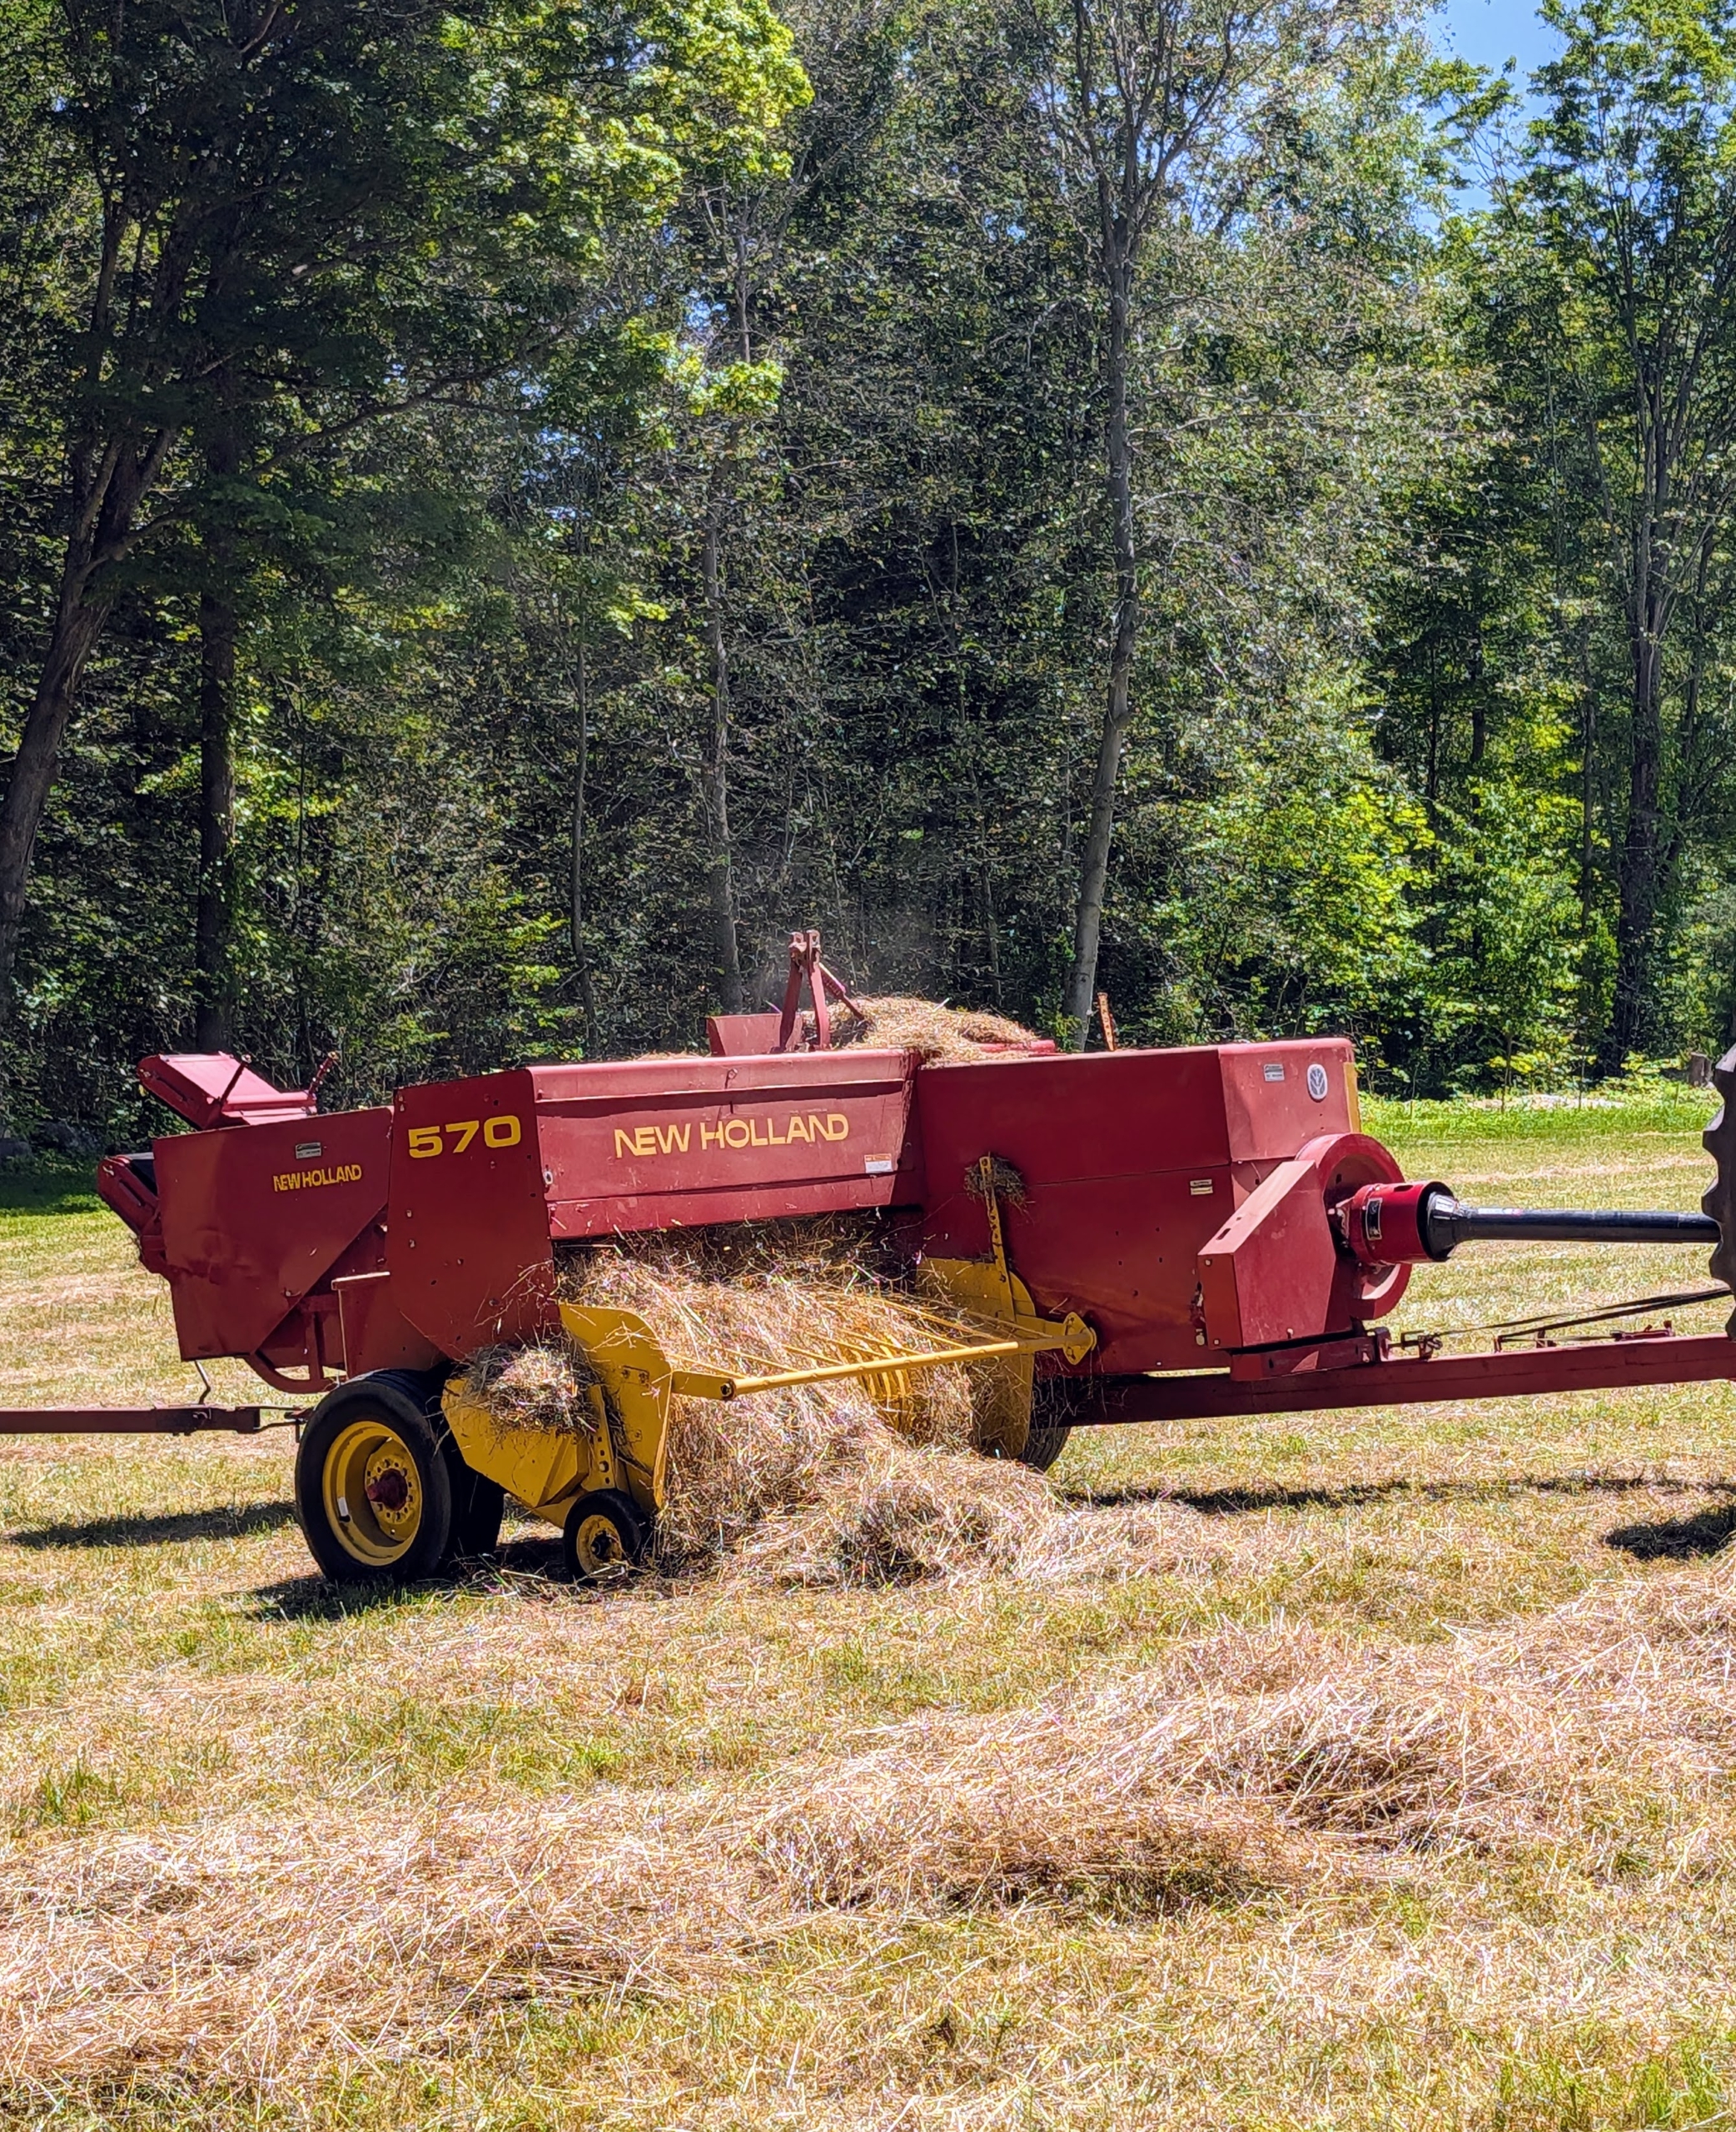
A hay baler is a piece of farm machinery used to compress a cut and raked crop into compact bales that are easy to handle, transport, and store. I am fortunate to have all the necessary equipment to process the hay in my fields.
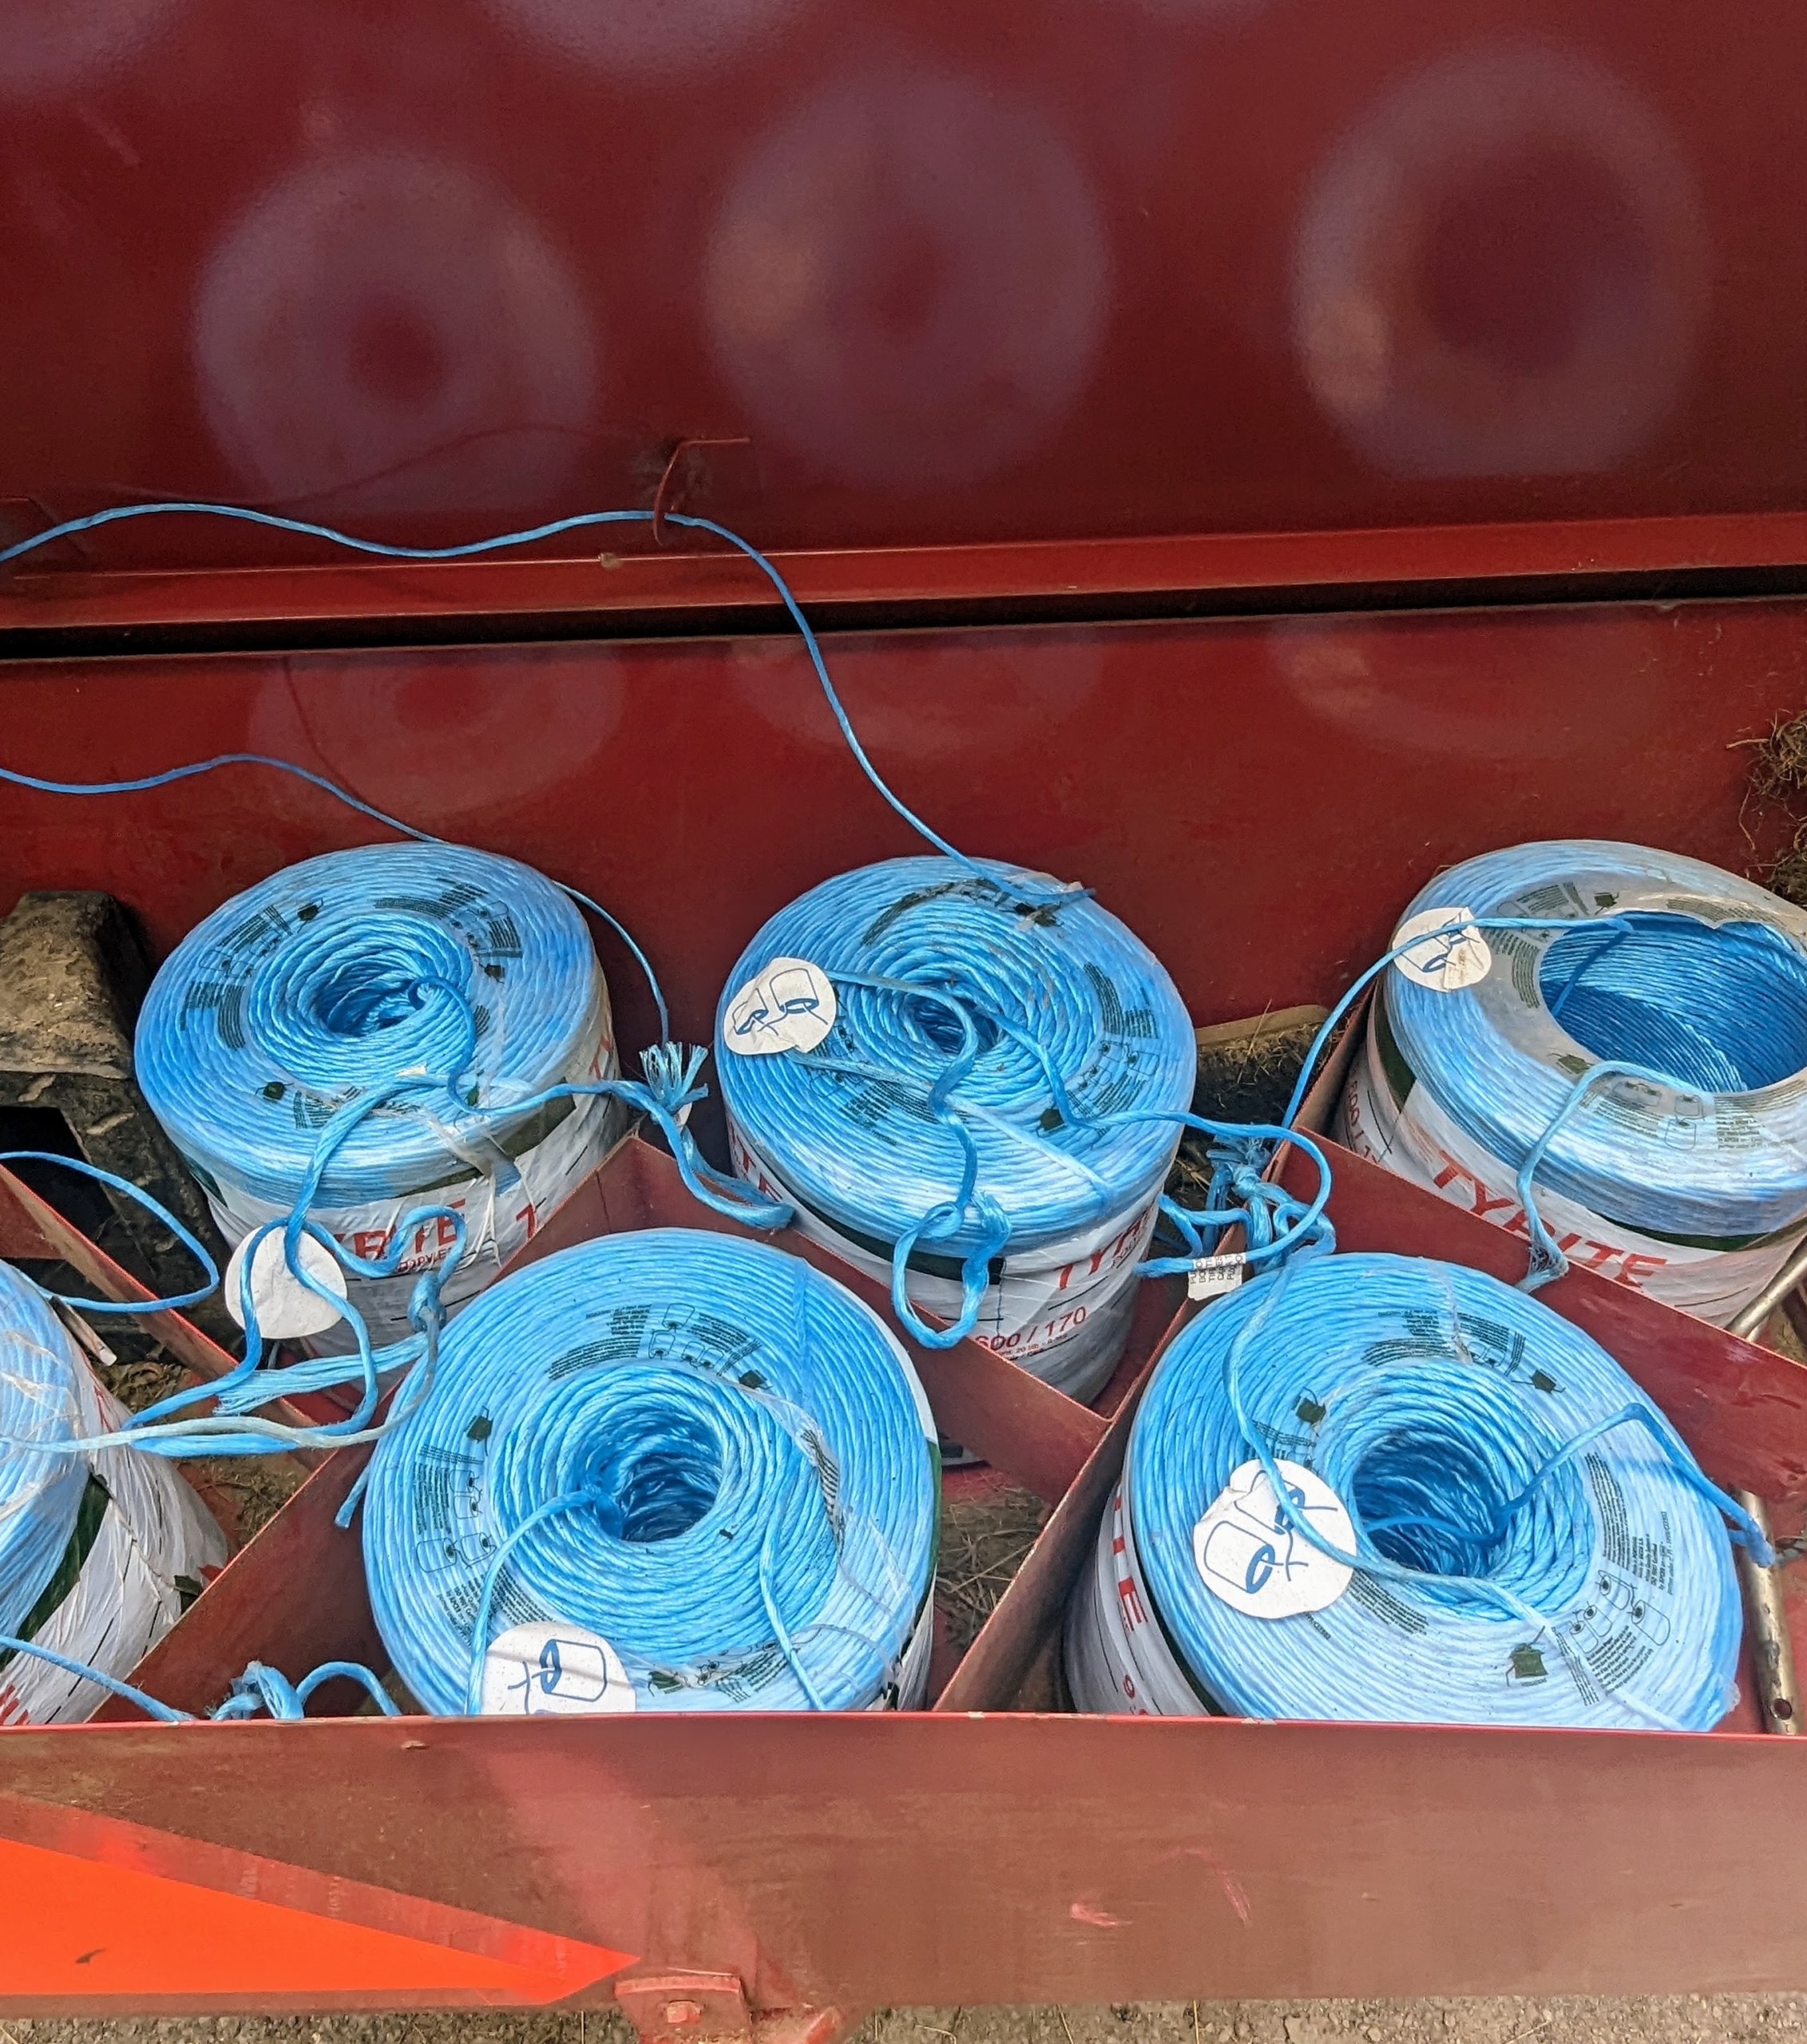
Inside a box behind the baler is where large rolls of twine are positioned and tied to each other, so they can feed into the baler and secure the hay just before it shoots out into the trailer.
The process starts midday when there is the least amount of moisture. The wagon fills up pretty quickly. Each one can hold about 150-bales. Chhiring drives up and down the windrows of all the hayfields which takes a good portion of the afternoon.
The tractor rides to one side of the windrow while the baler passes directly over it to collect the hay. All the hay is dry and passing through the machine smoothly. If the hay is properly dried, the baler will work continuously down each row. Hay that is too damp tends to clog up the baler.
As hay is collected, a baled “square” travels up the conveyor belt. A measuring device, normally a spiked wheel that is turned by the emerging bales, measures the amount of material that is being compressed and then knotters wrap the twine around the bale and tie it off.
The hay is lifted by tines in the baler’s reel. Here one can see the bale moving upward.
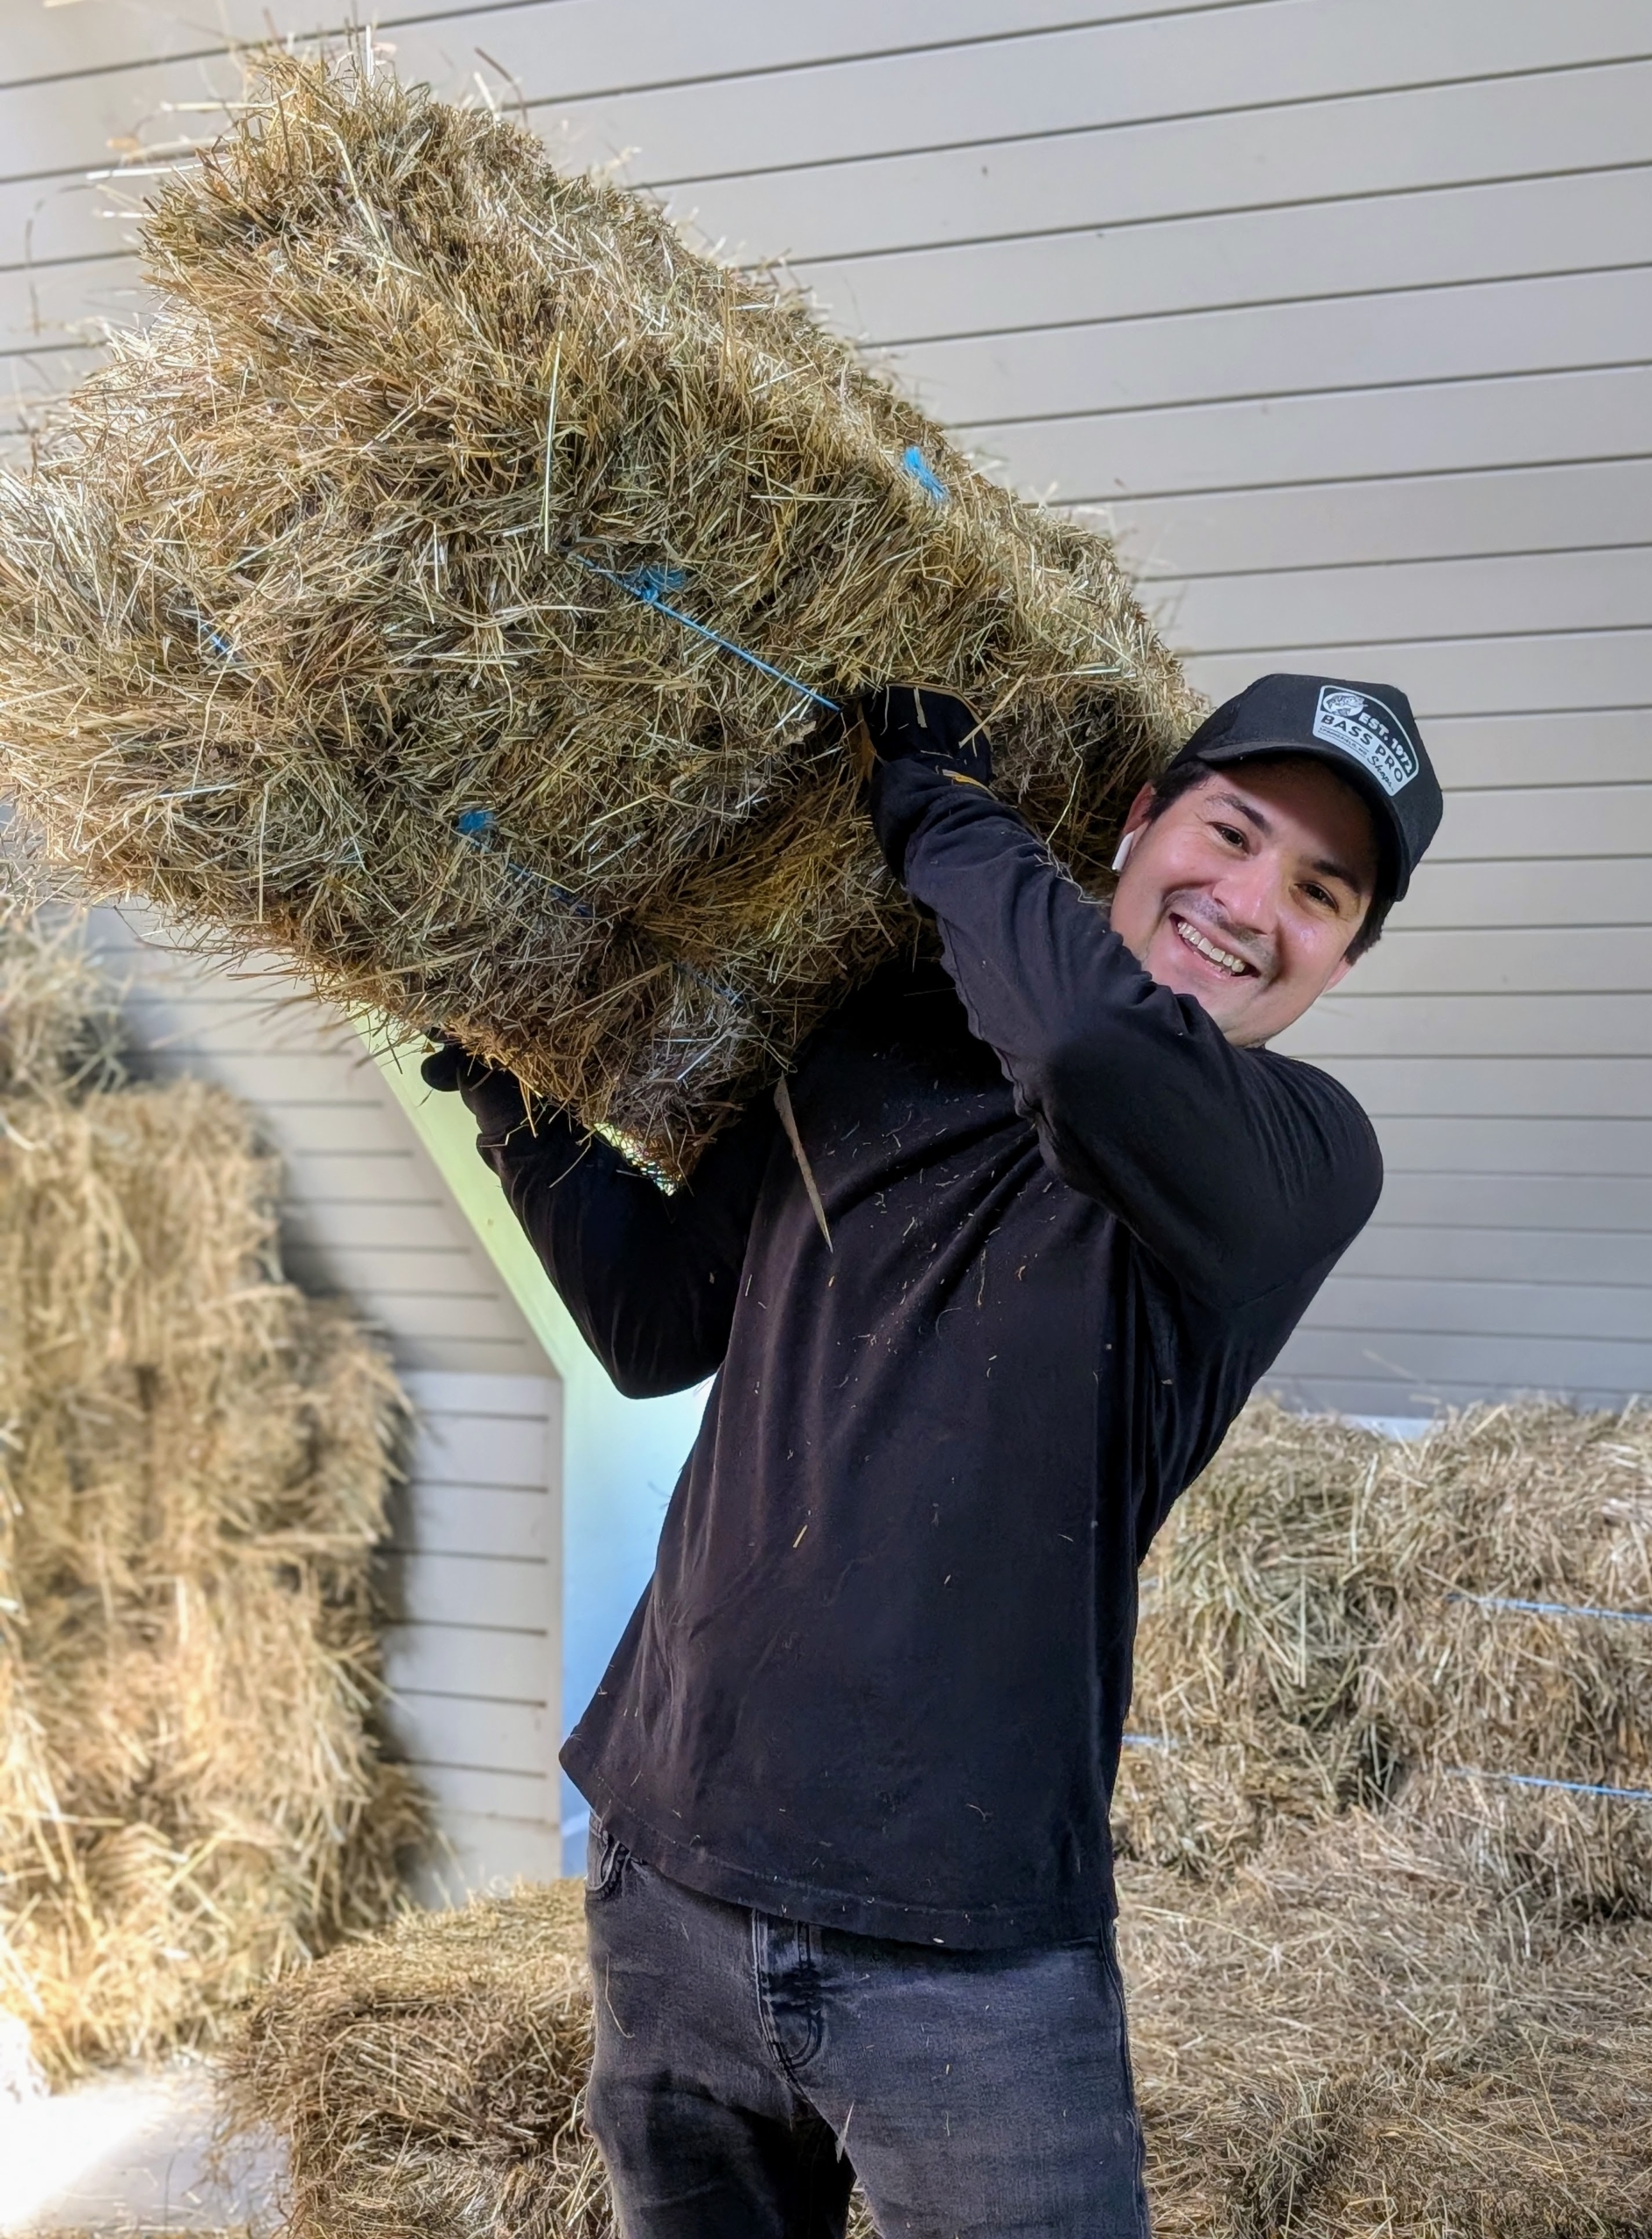
And then it is propelled into the wagon by a mechanical arm called a thrower or a kicker. The bales are manageable for one person to handle, about 45 to 60 pounds each.
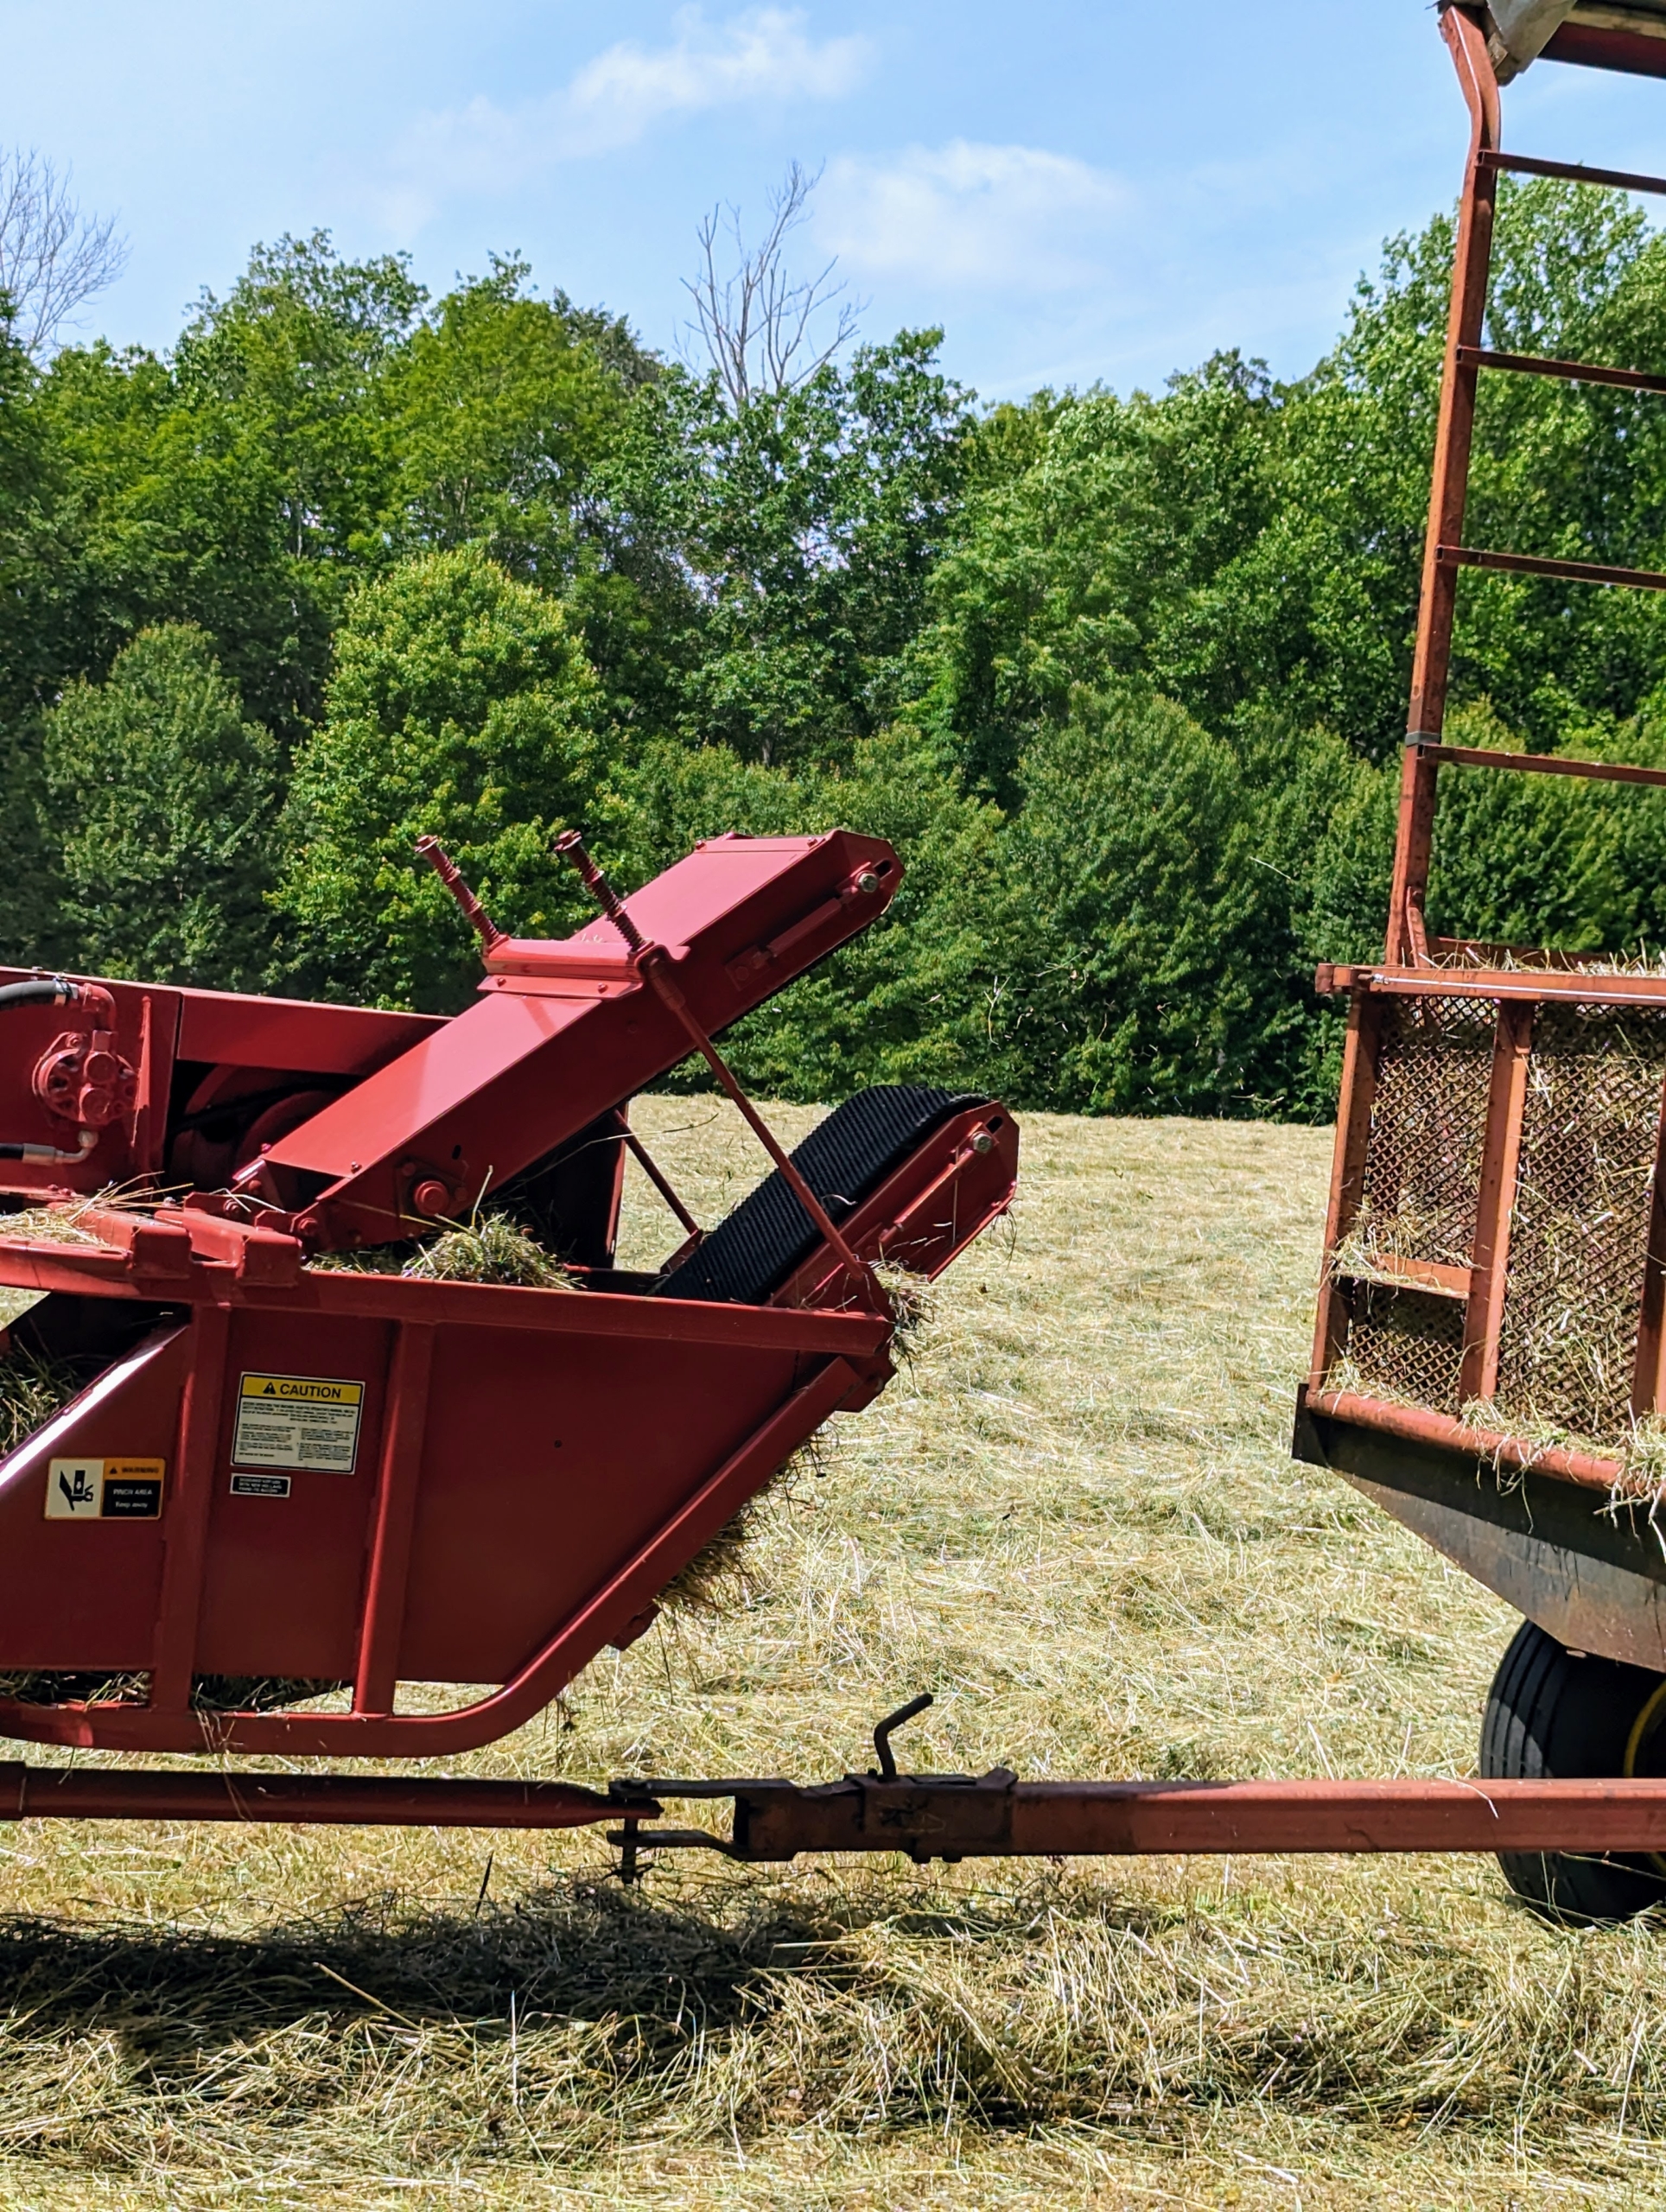
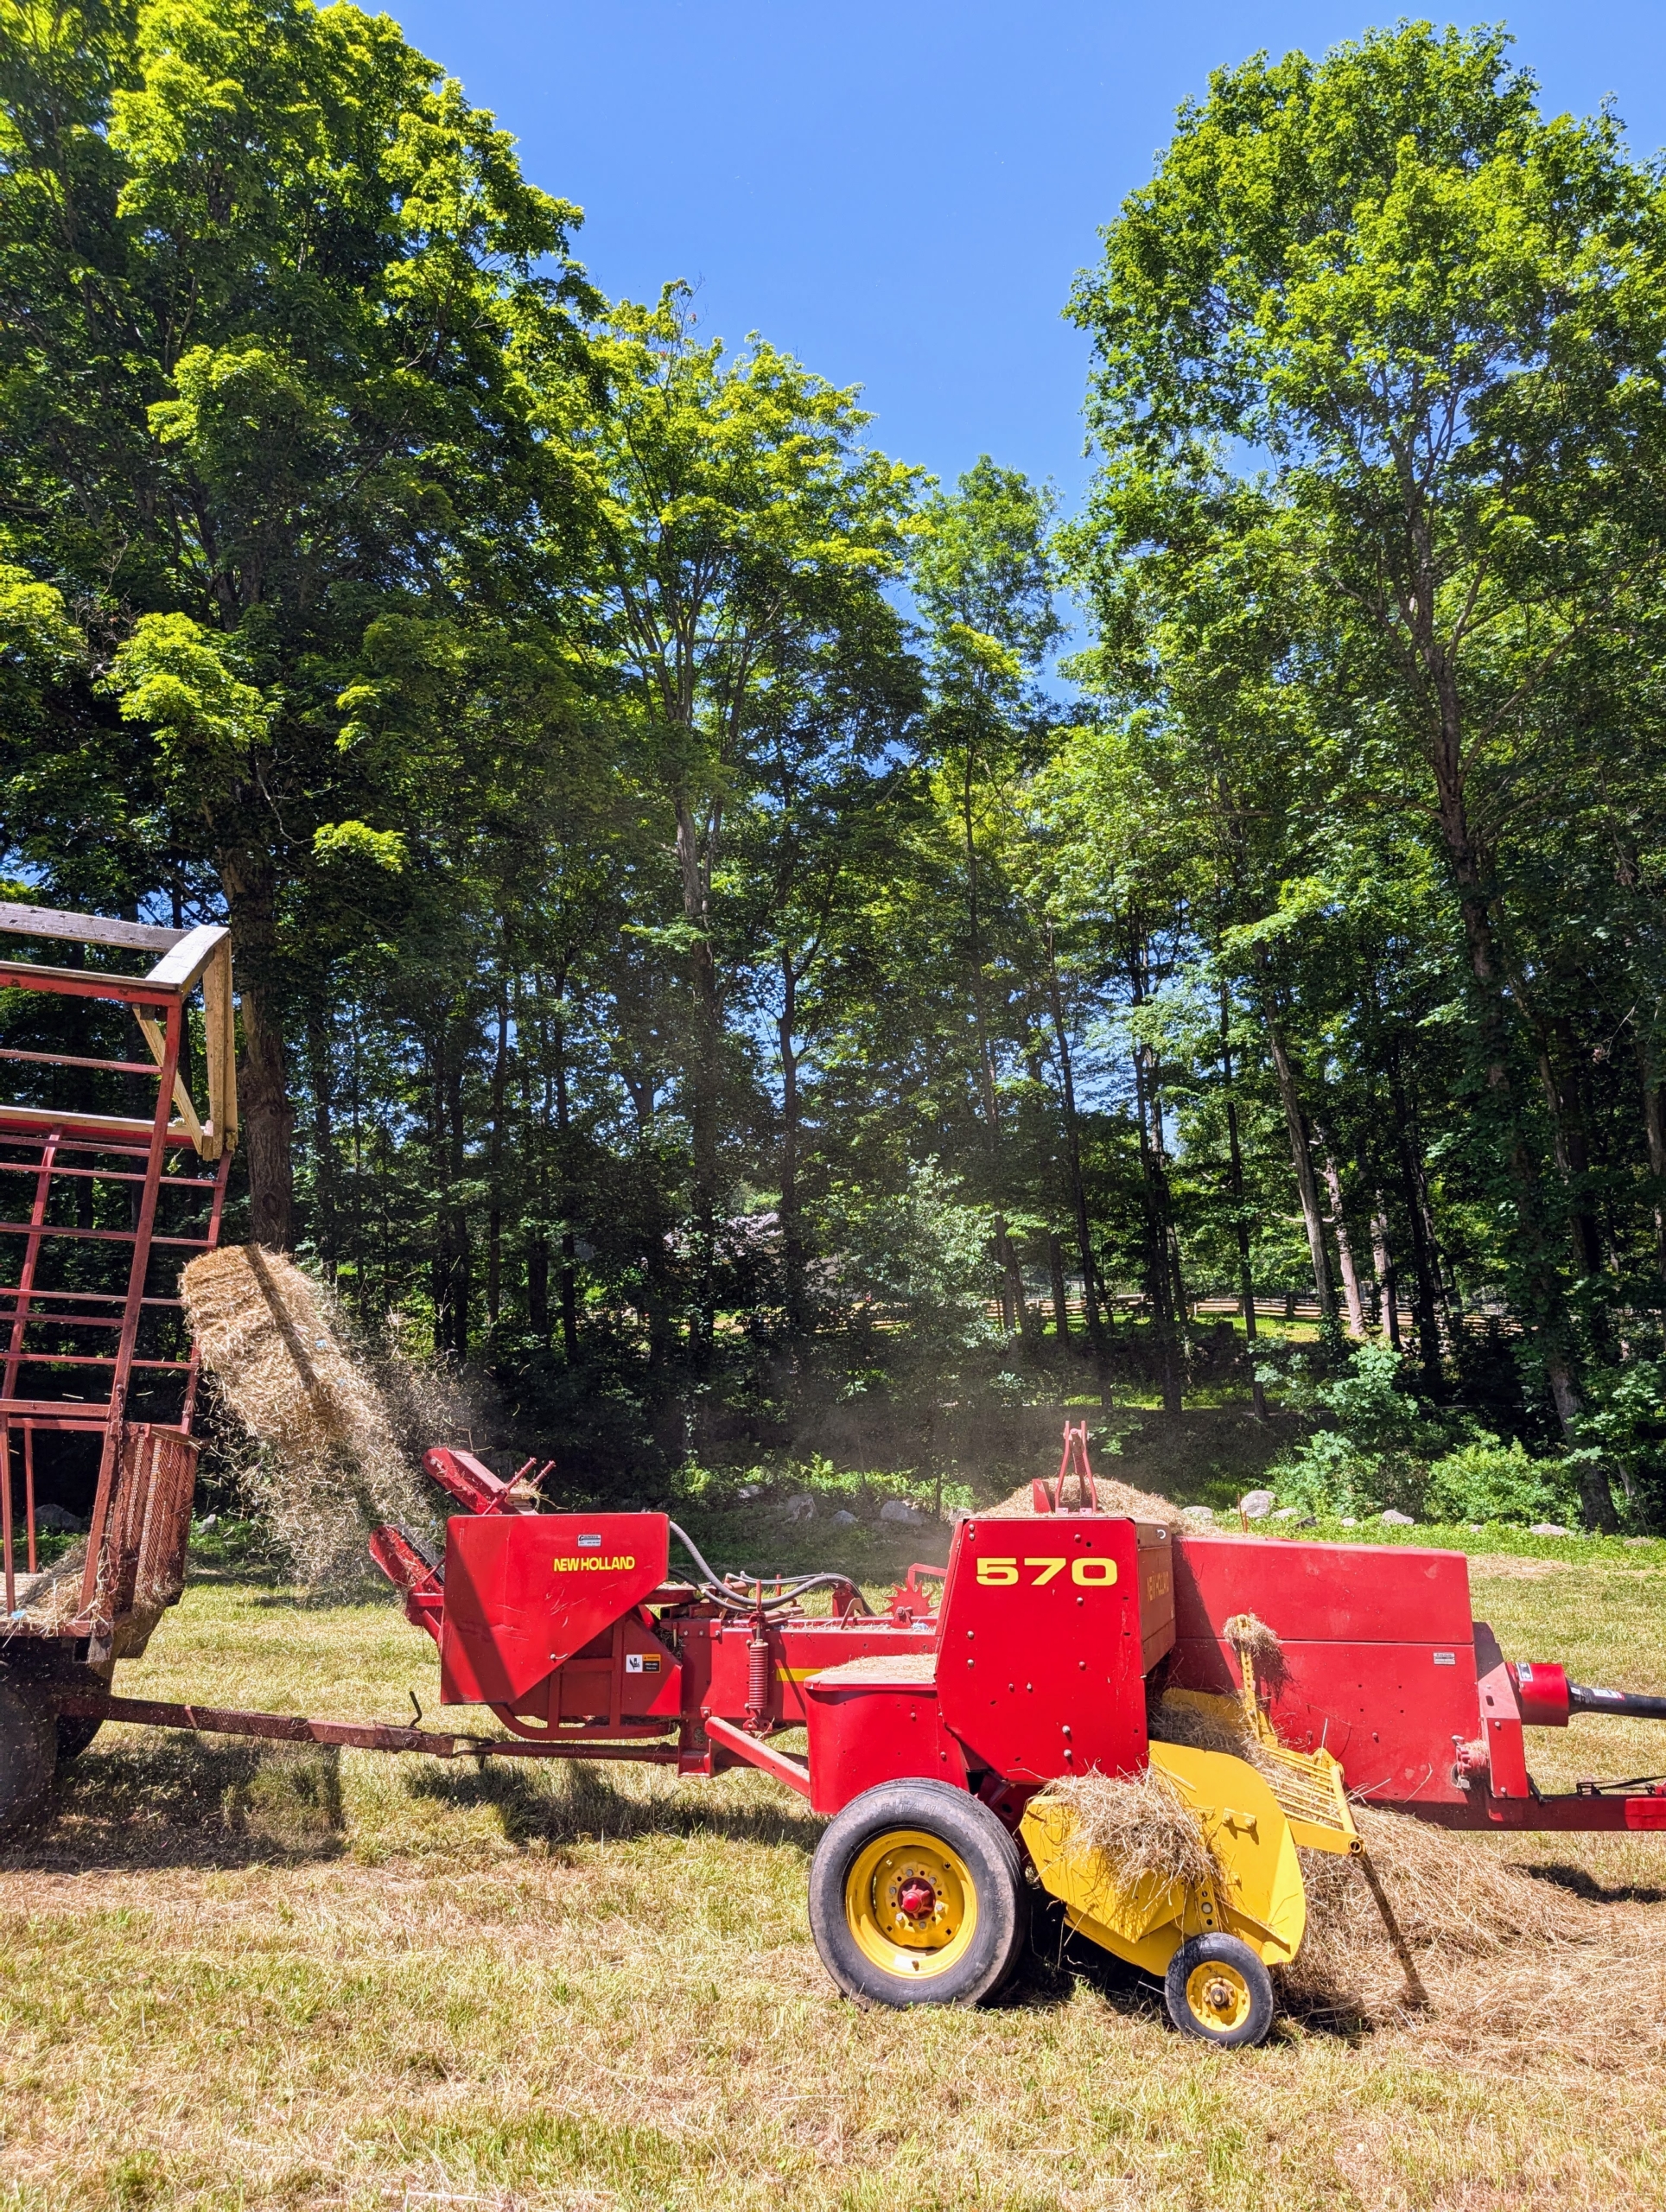
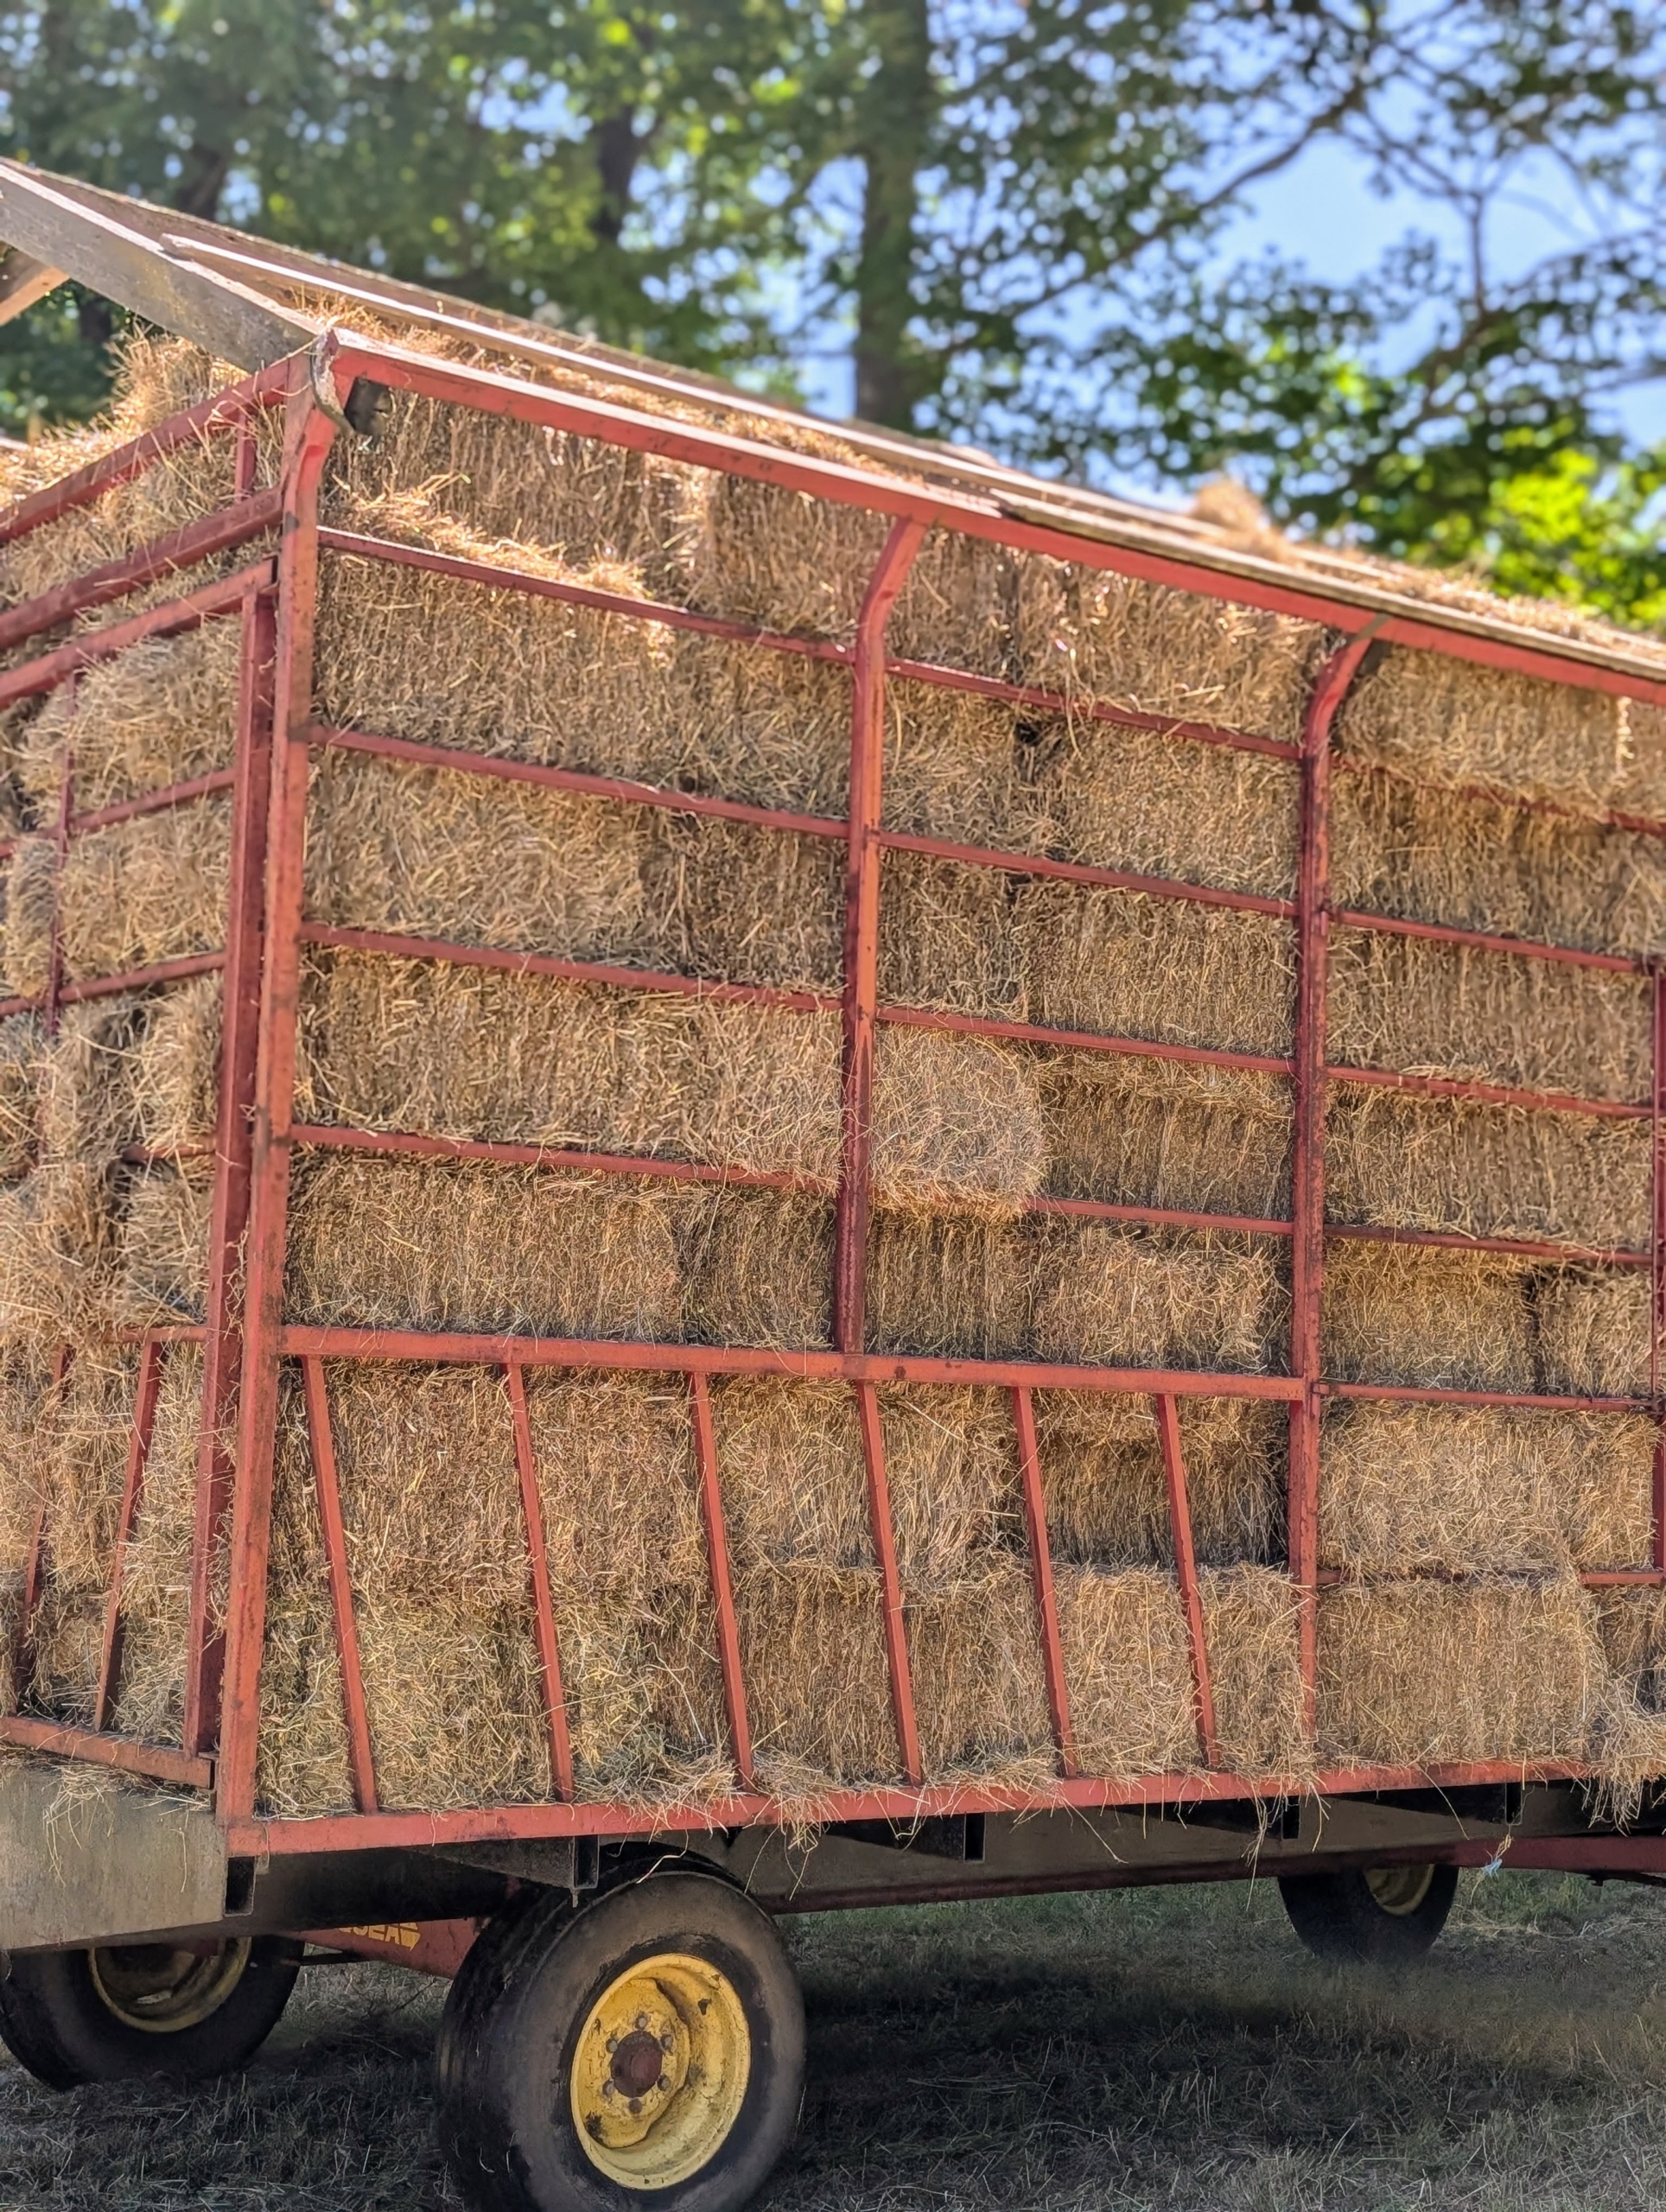
I have two hay wagons. Here is one completely filled and ready to stack.
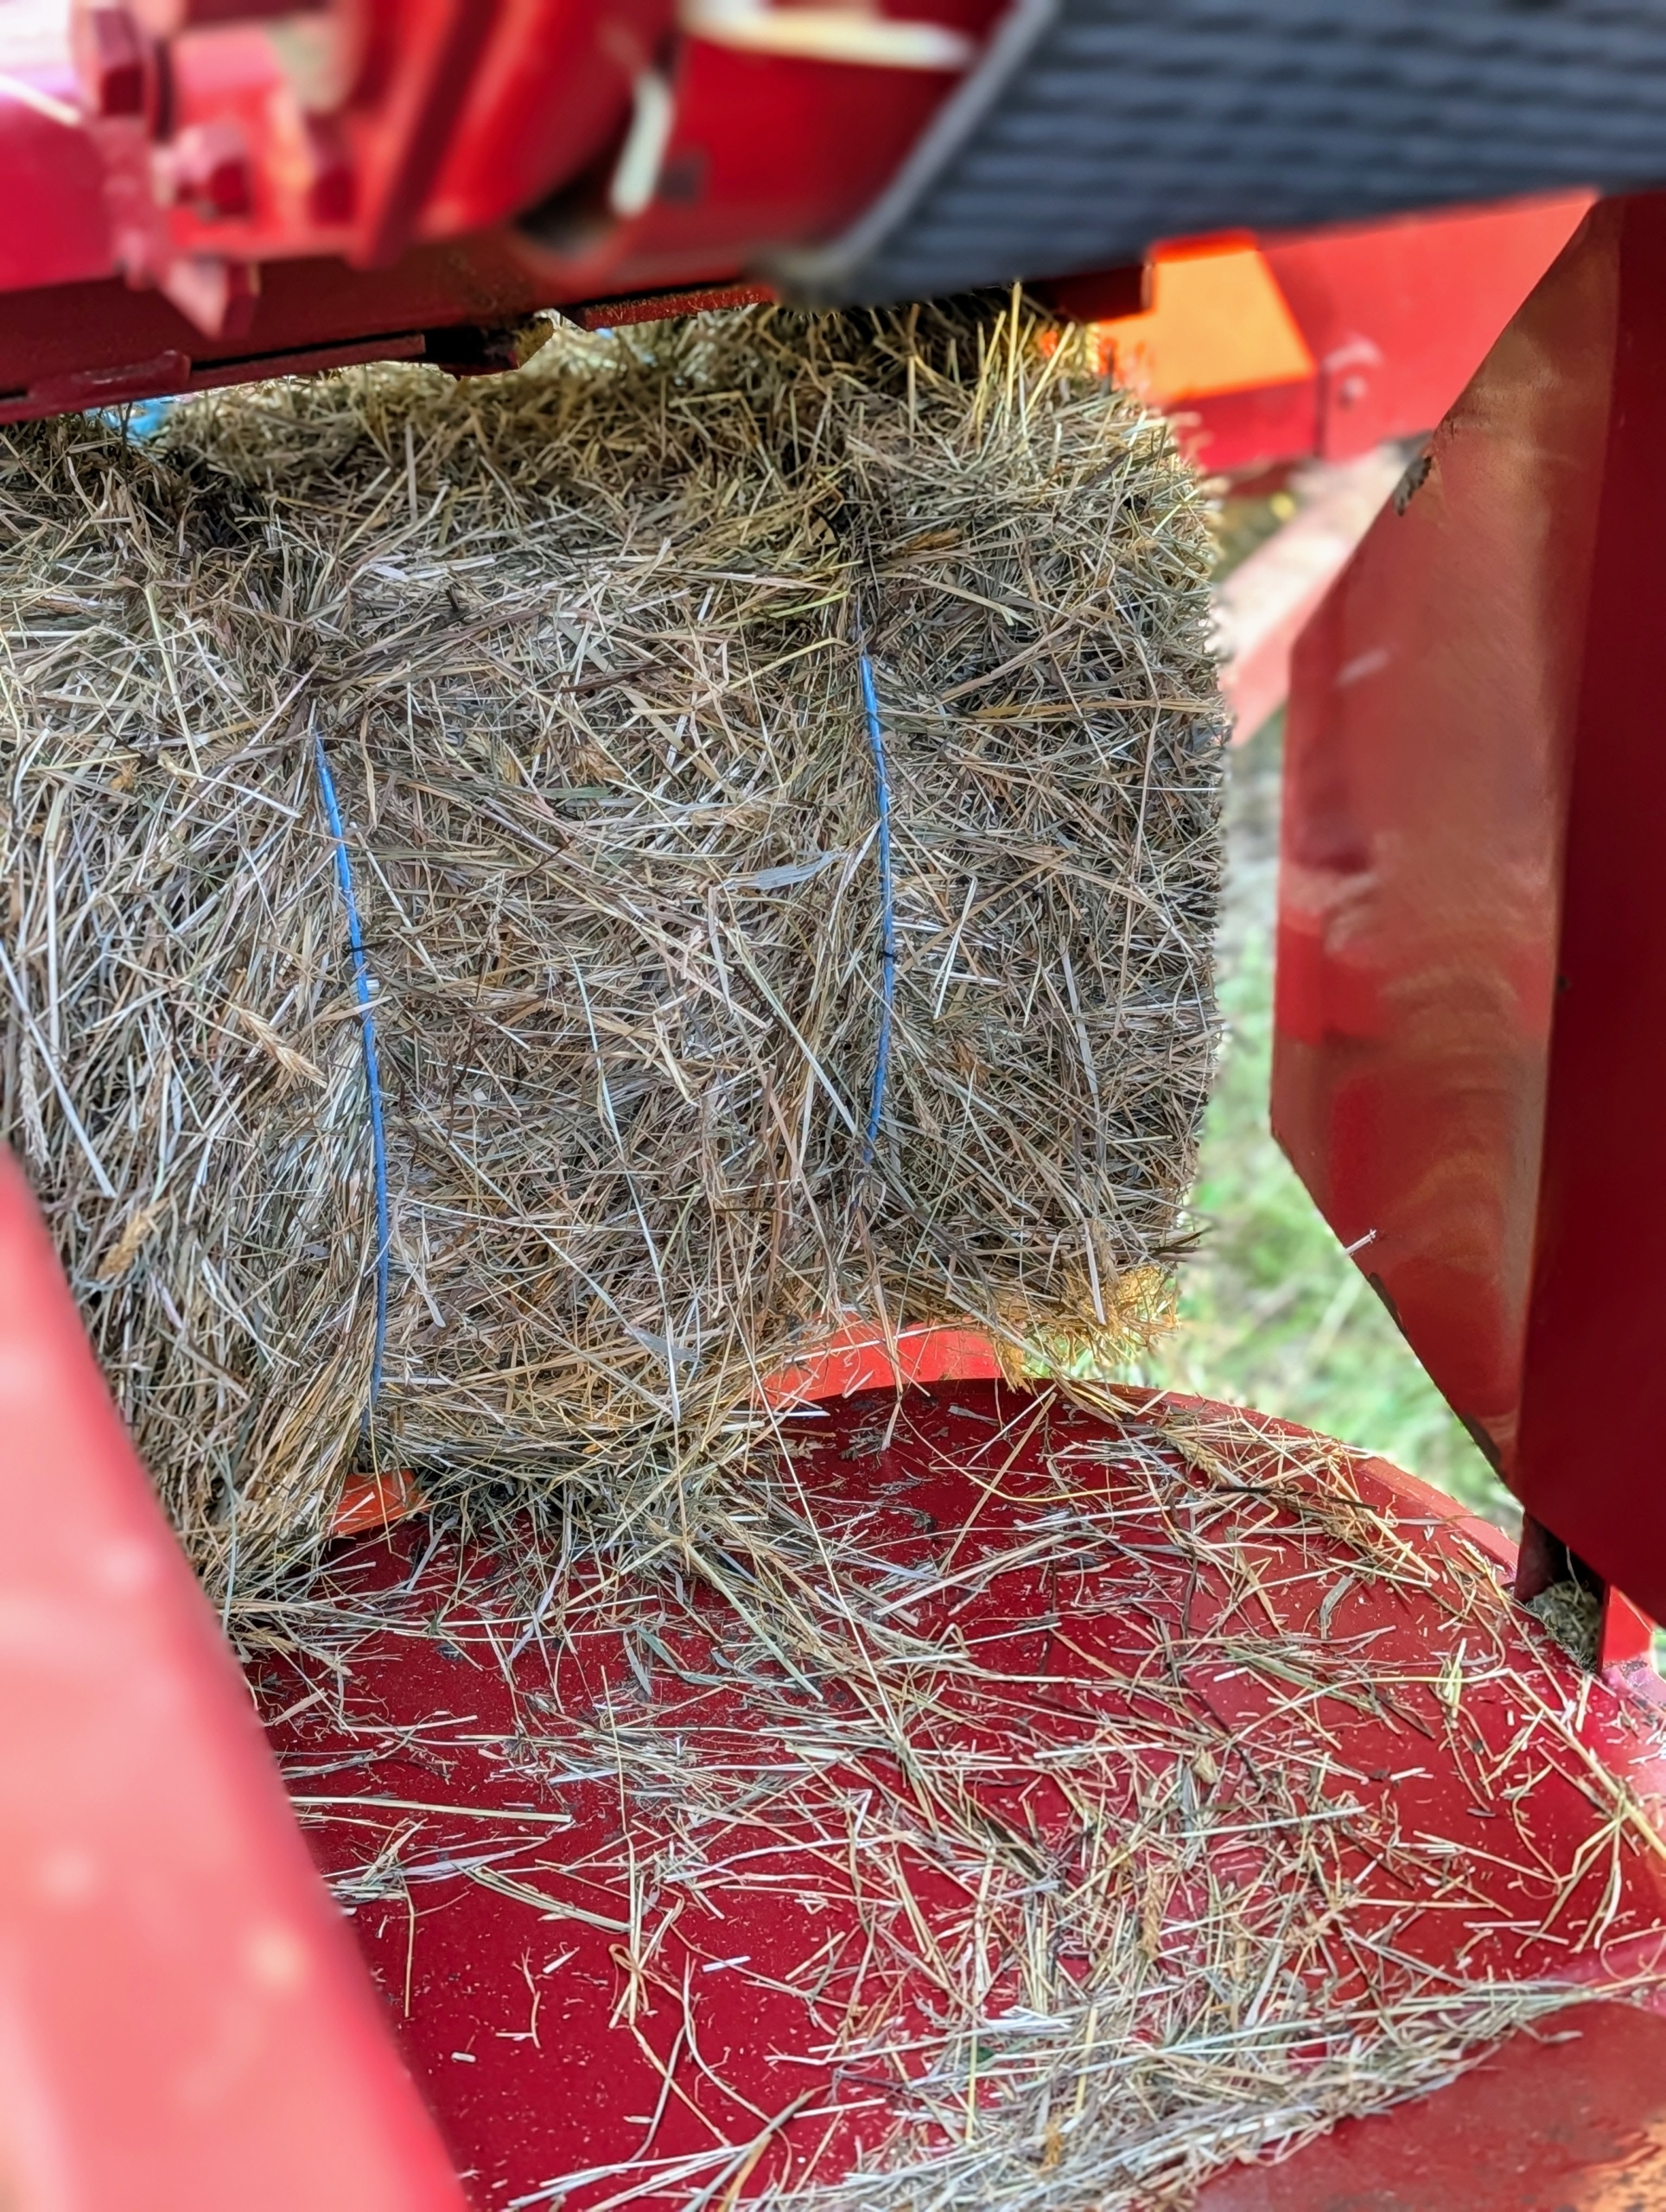
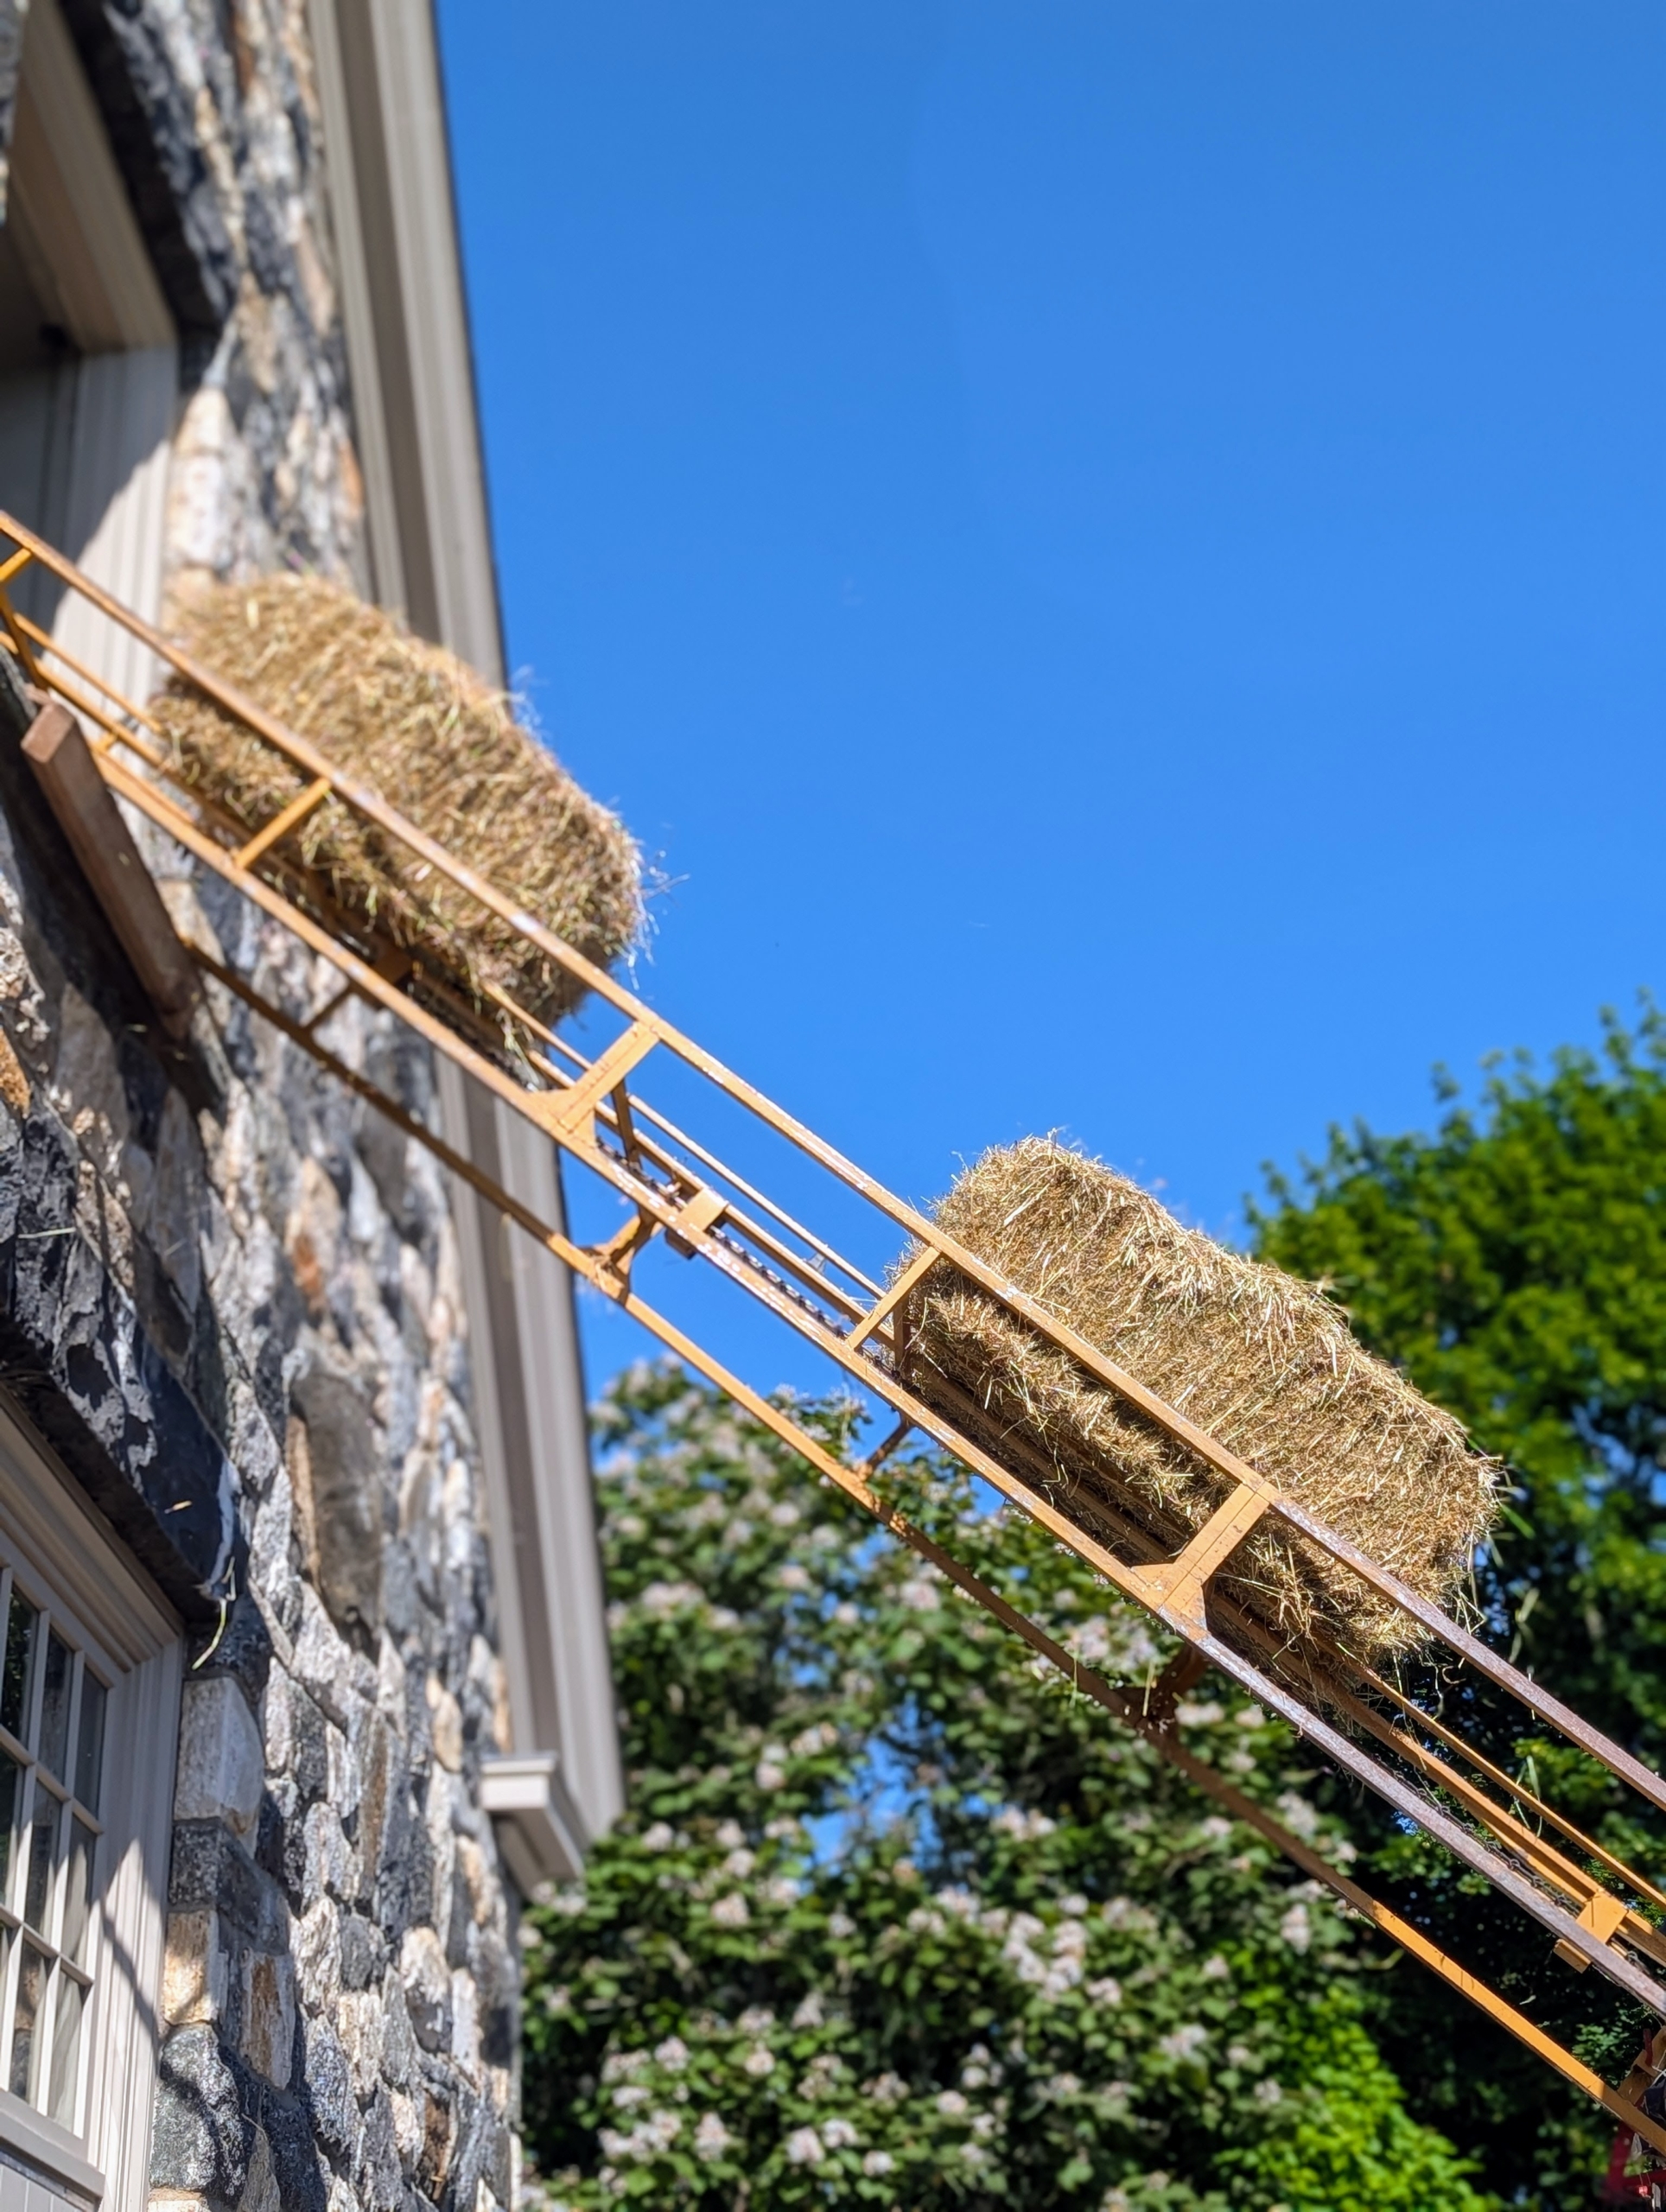
The crew sets up the hay elevator to the hay loft. Then each bale is placed on the hay elevator which sends it up to waiting hands. Baling hay is a team effort. Each bale is about 15 by 18 by 40 inches large. The number of flakes in the bale is determined by a setting in the baler. Many balers are set for 10 to 12 flakes per bale.
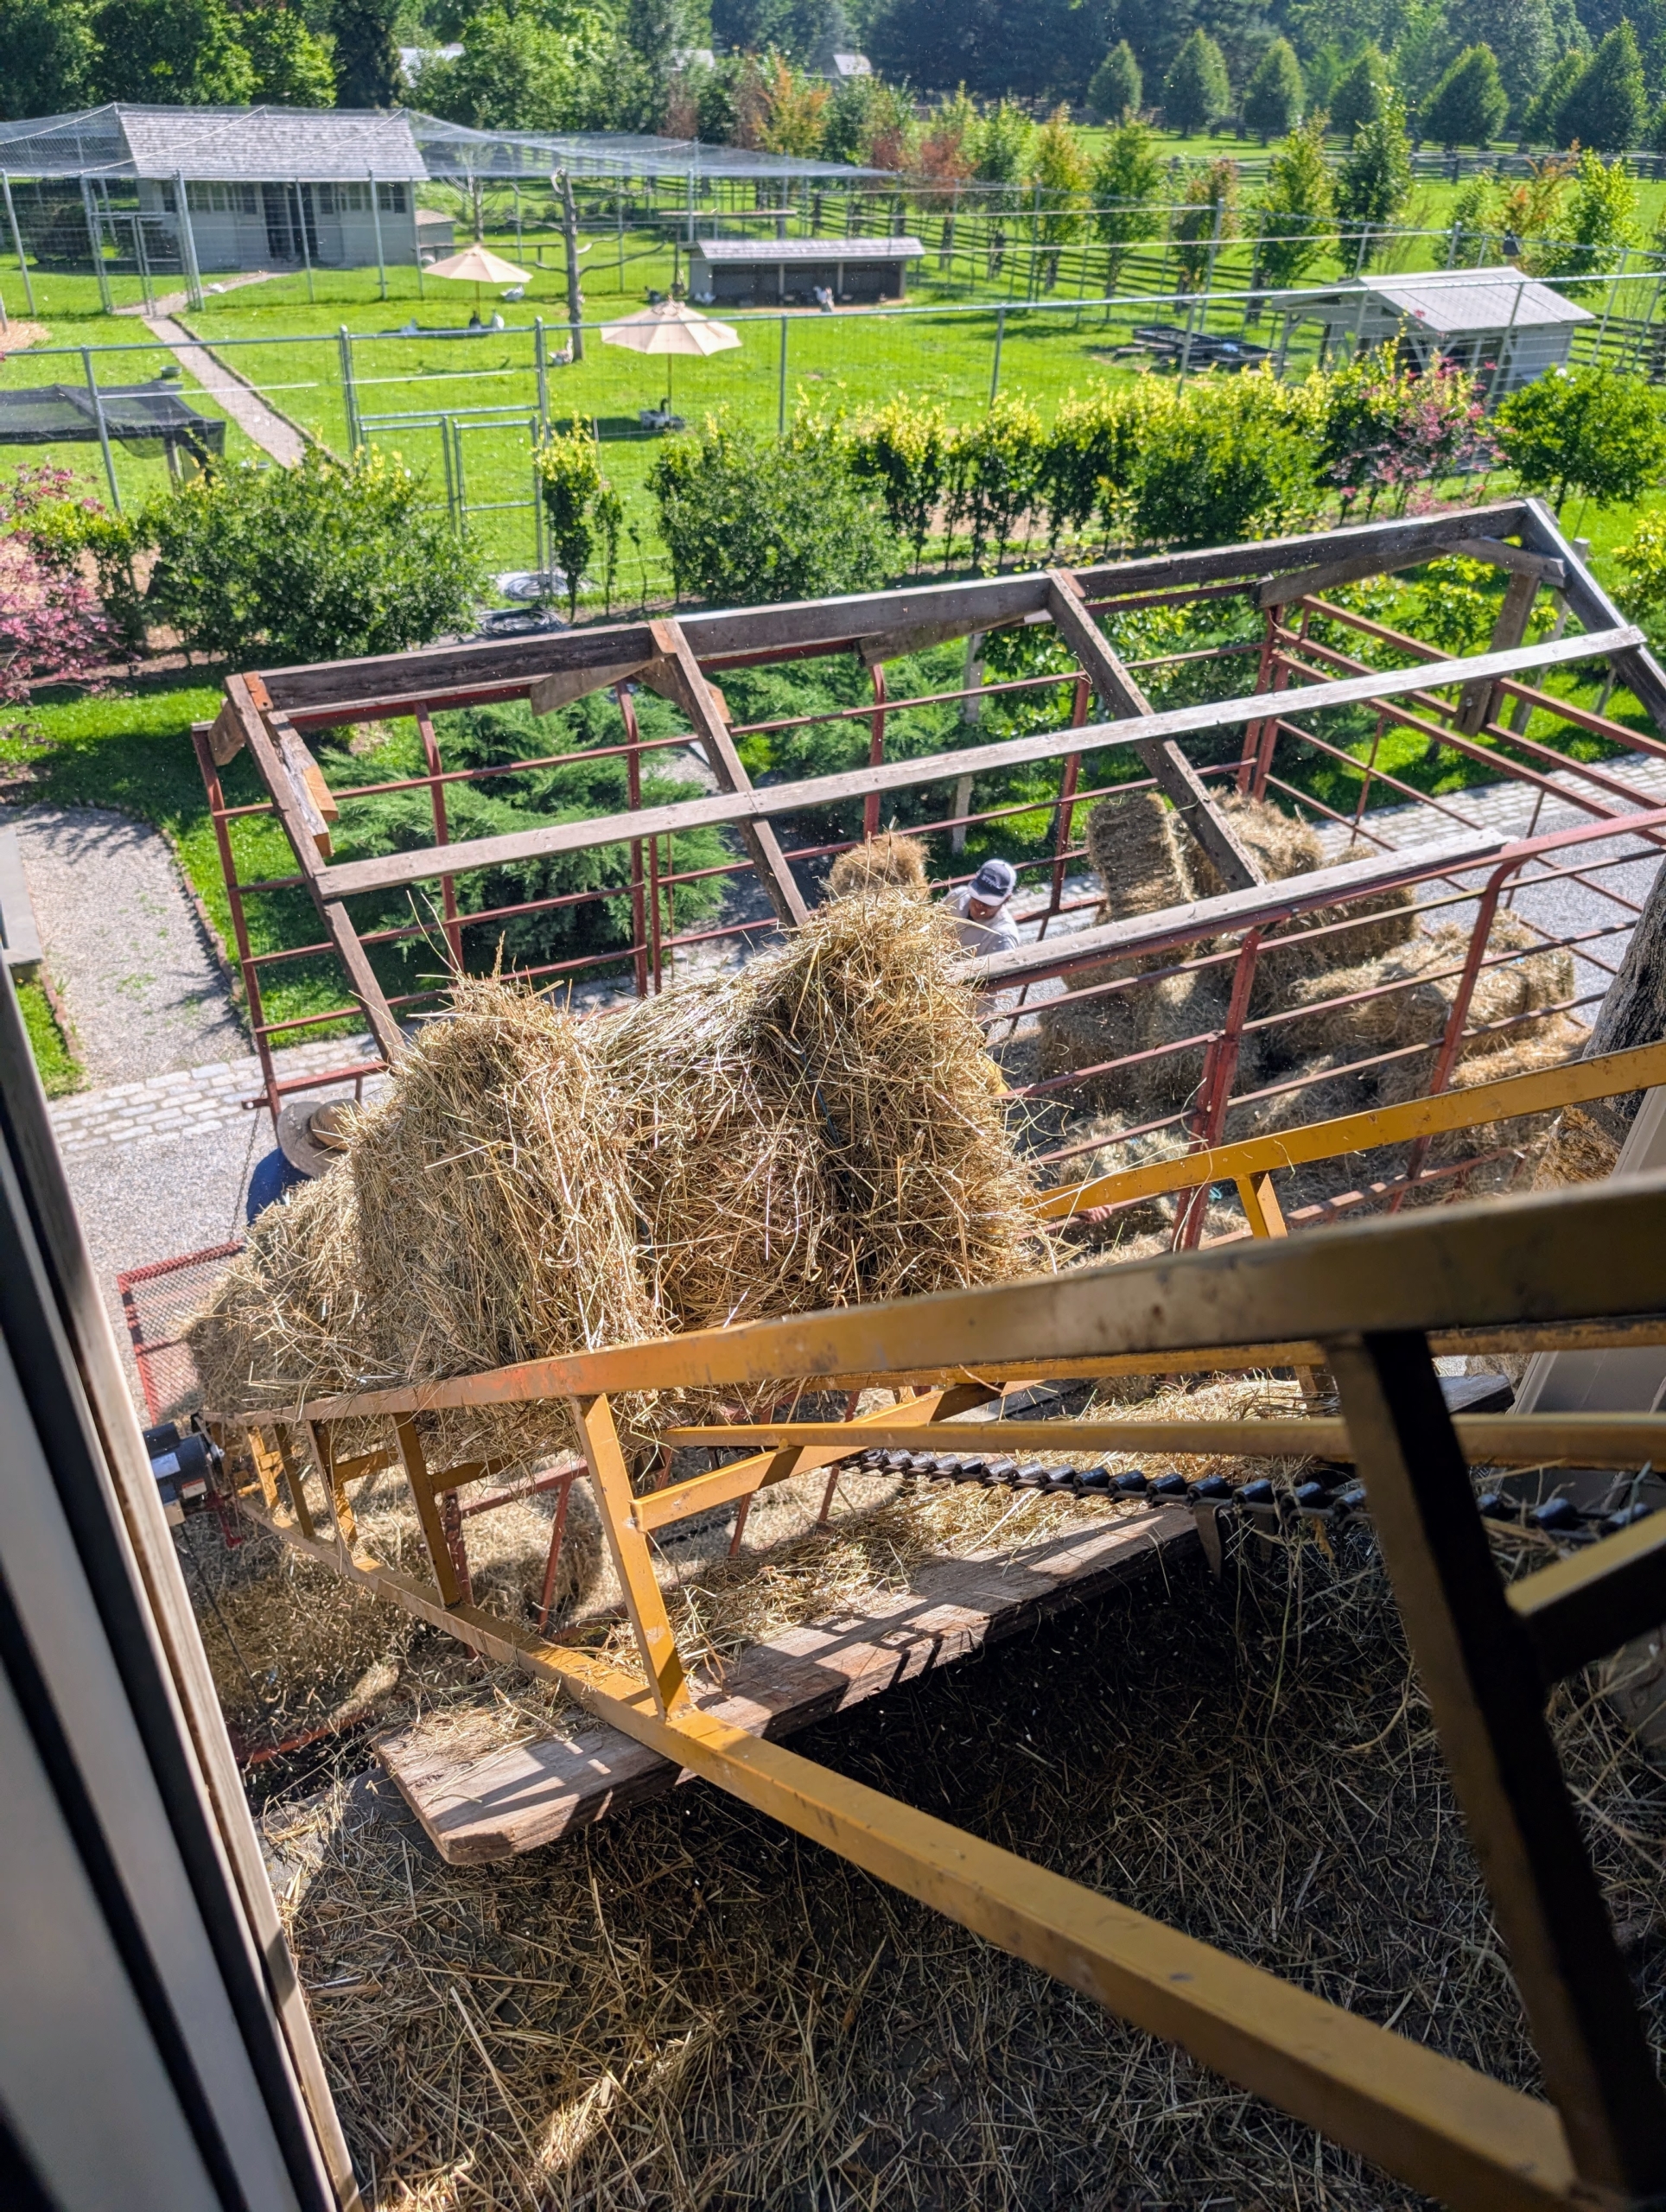
Here is the view from the top end of the loft as bales are sent up.
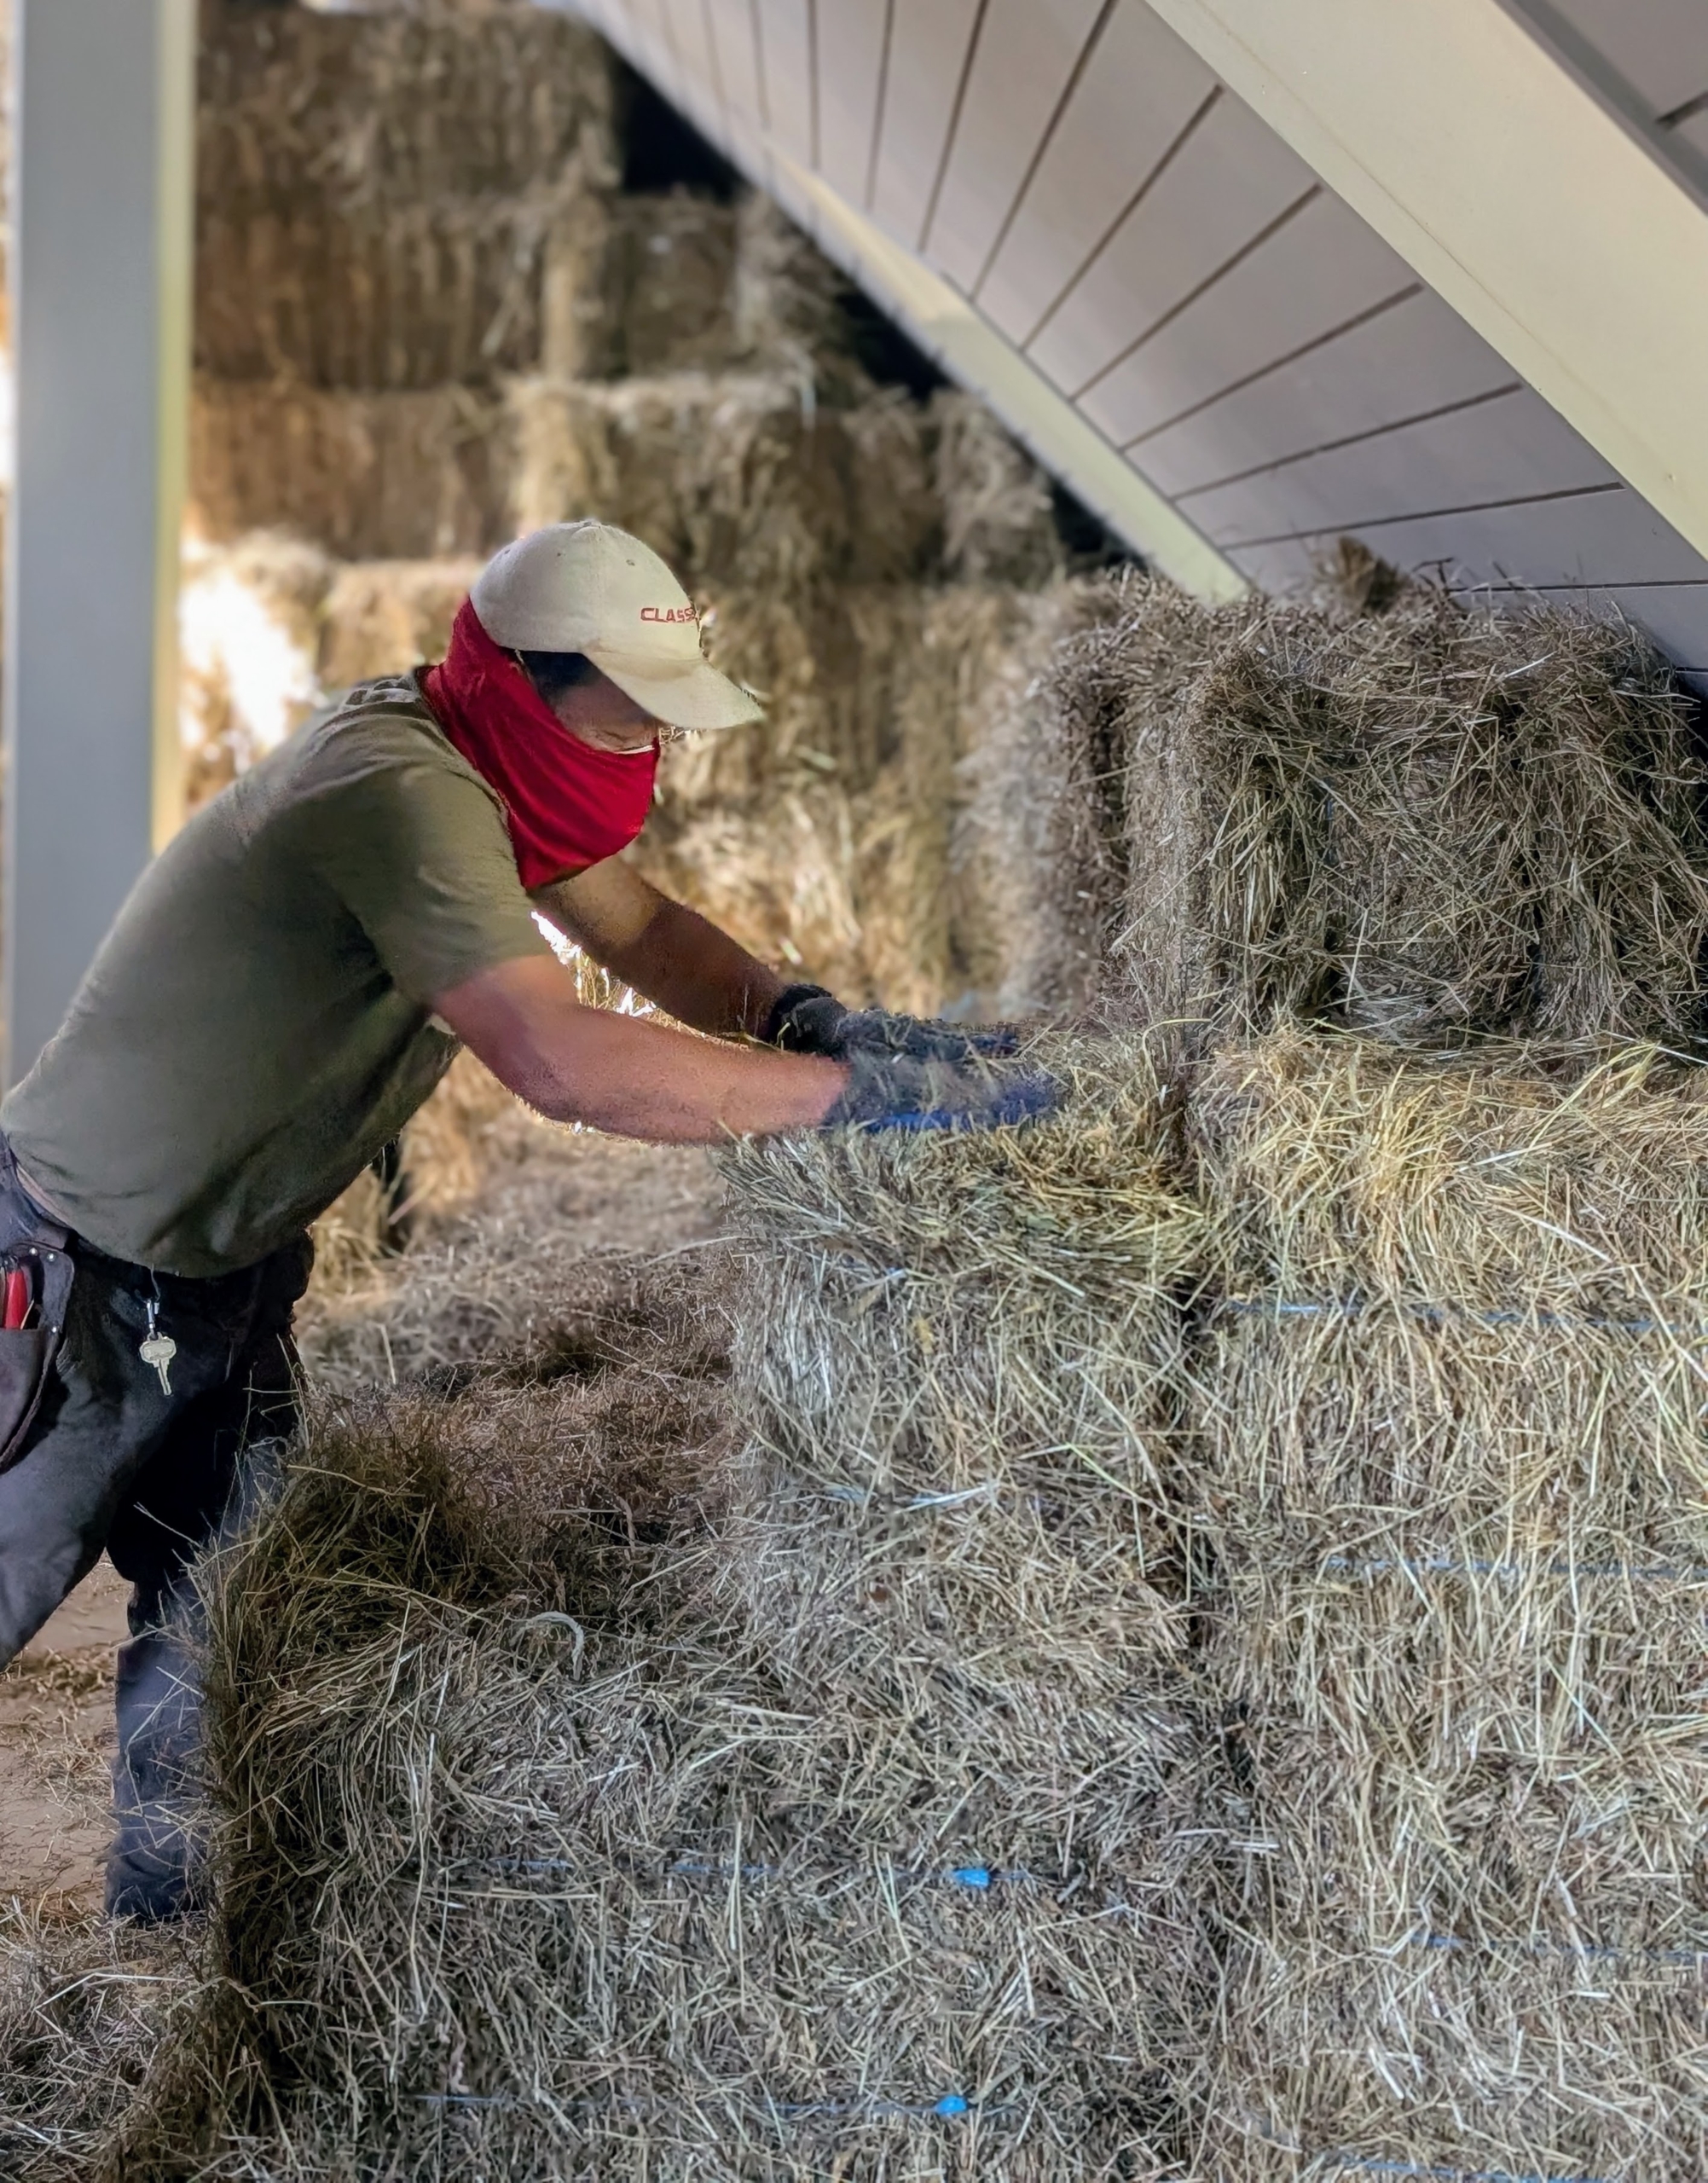
Juan is in the hayloft stacking the bales as they come up the hay elevator.
Phurba makes nice, neat piles.
In all, I got 1037 bales of hay this time around – a good number that will last us through the season. And then come September, I’ll be harvesting a second cut of good quality, nutritious hay for my horses. I’m so glad to be able to make my own hay right here at my farm.