Here's a fun blog post originally published on May 12, 2025 - my visit to Ladew Topiary Gardens.
I always try to make the most of business trips by visiting beautiful and interesting places in between scheduled commitments.
During a recent visit to Maryland I had the opportunity to visit Ladew Topiary Gardens in Monkton, just north of Baltimore. Ladew features more than 100 larger than life topiary forms across 22 acres and surrounding an historic Manor House designed and developed by topiary enthusiast, Harvey S. Ladew. As luck would have it, I not only toured the exquisite gardens, but also attended its 17th annual Garden Festival - a specialty plant, garden ornament, and antiques sale with more than 40 vendors from around the region.
Here are some photos, enjoy.
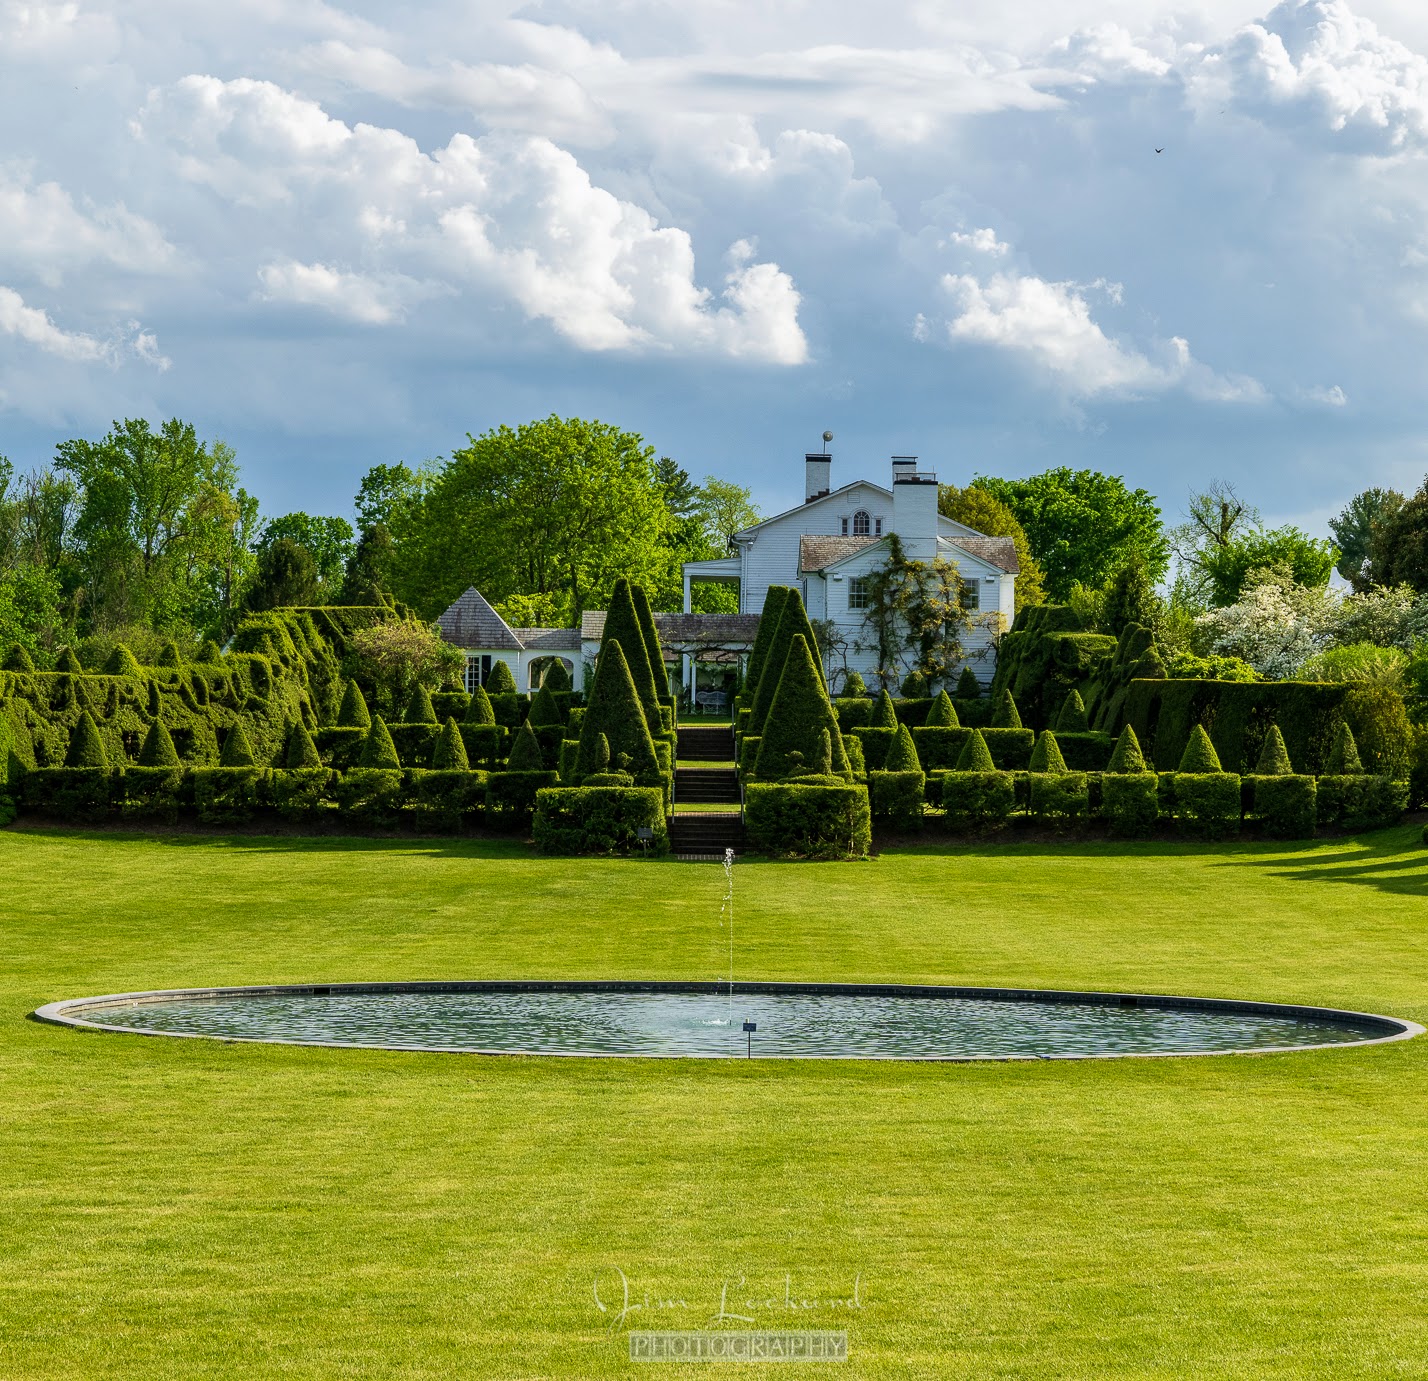
When Harvey Ladew first purchased his Maryland property, he decided he would take on the task of planning and landscaping the gardens himself. I am sure he would be proud of what it looks like today. This is a view across the Great Bowl to the Terraces of the Ladew Manor House. (Photo by Jim Lockard Photography)
The 18th century historic Manor House was completed over three centuries and houses Harvey’s collection of English antiques and equestrian-themed art. The Manor House was a great inspiration for the gardens. (Photo by Helen Norman)
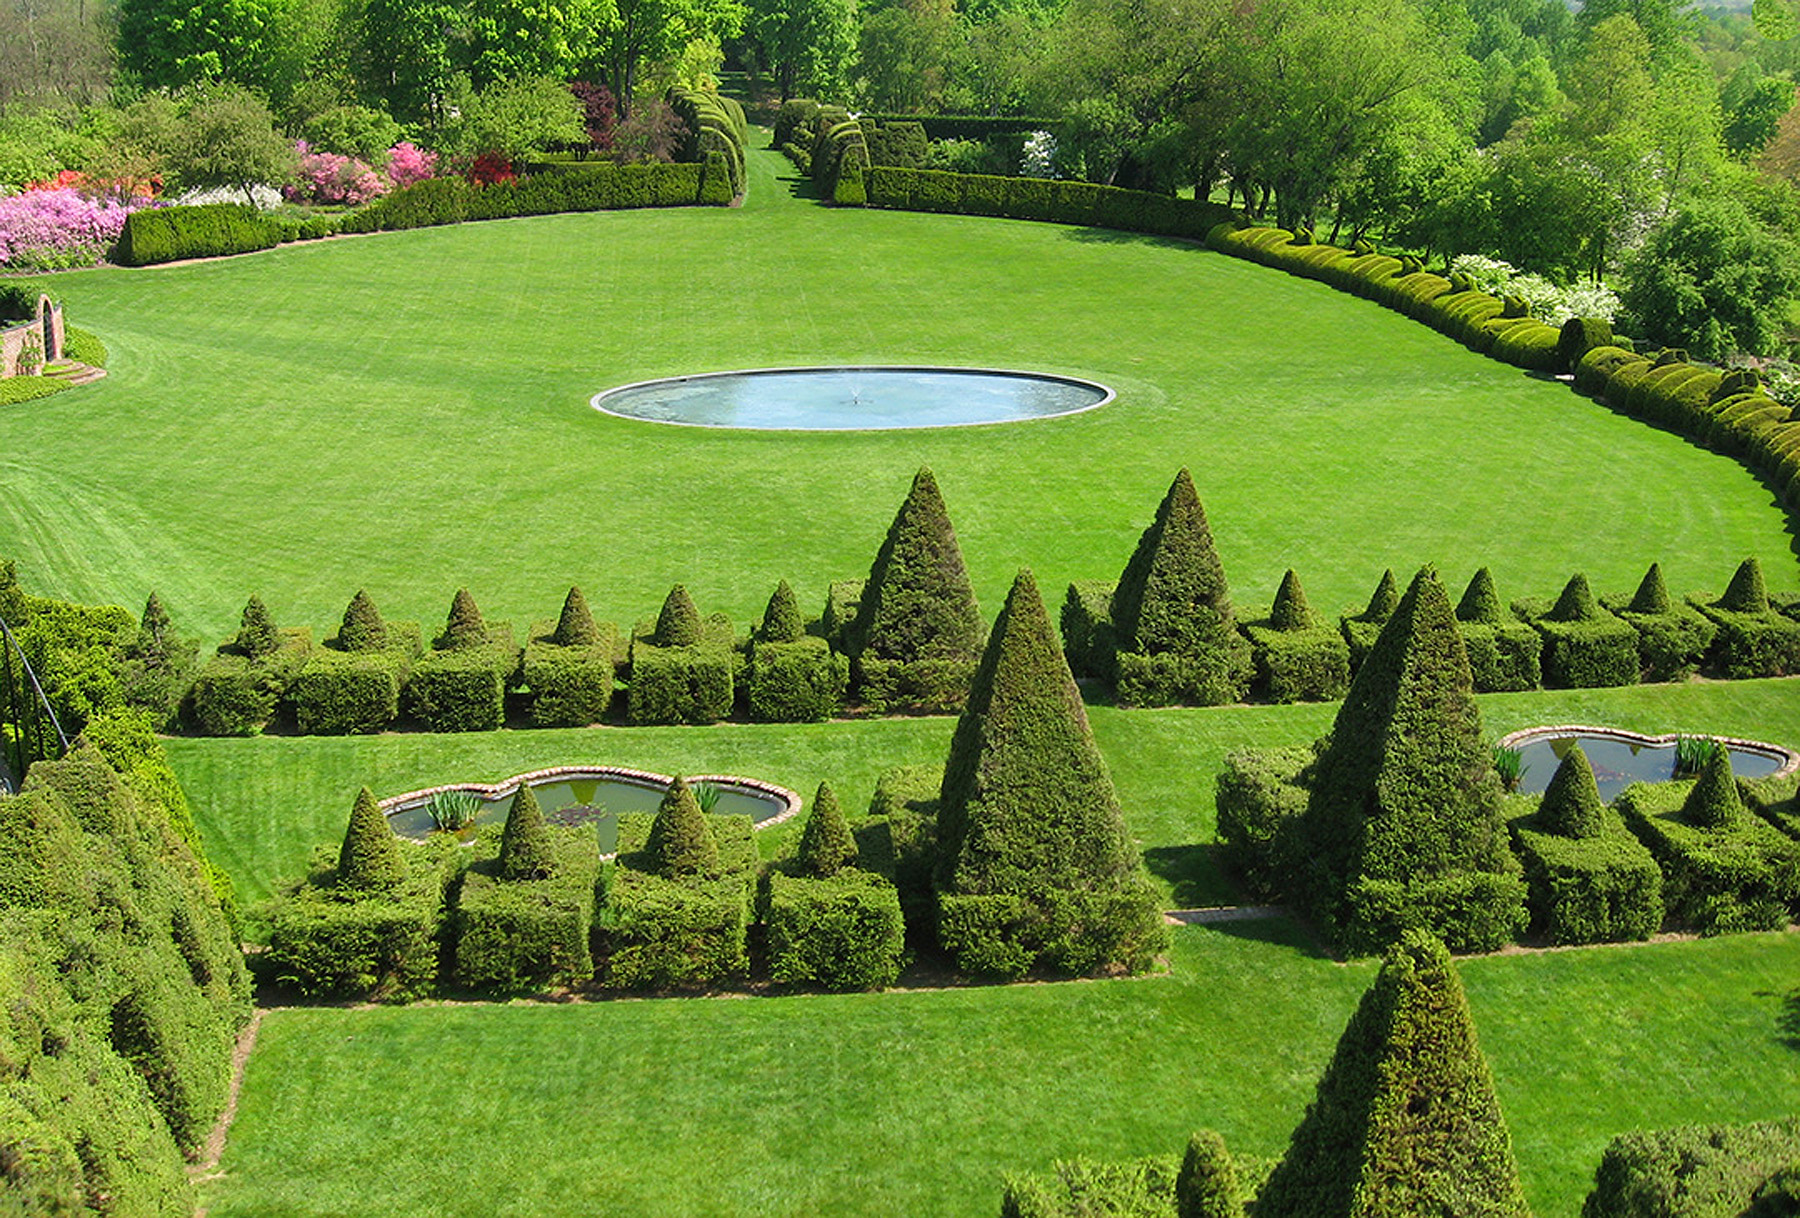
Harvey Ladew began developing his gardens in 1937. After seeing many European gardens, he decided his would have two cross axes to allow for long vistas. The axes would intersect at a swimming pool placed in the center of what is called the Great Bowl. (Photo courtesy of Ladew)
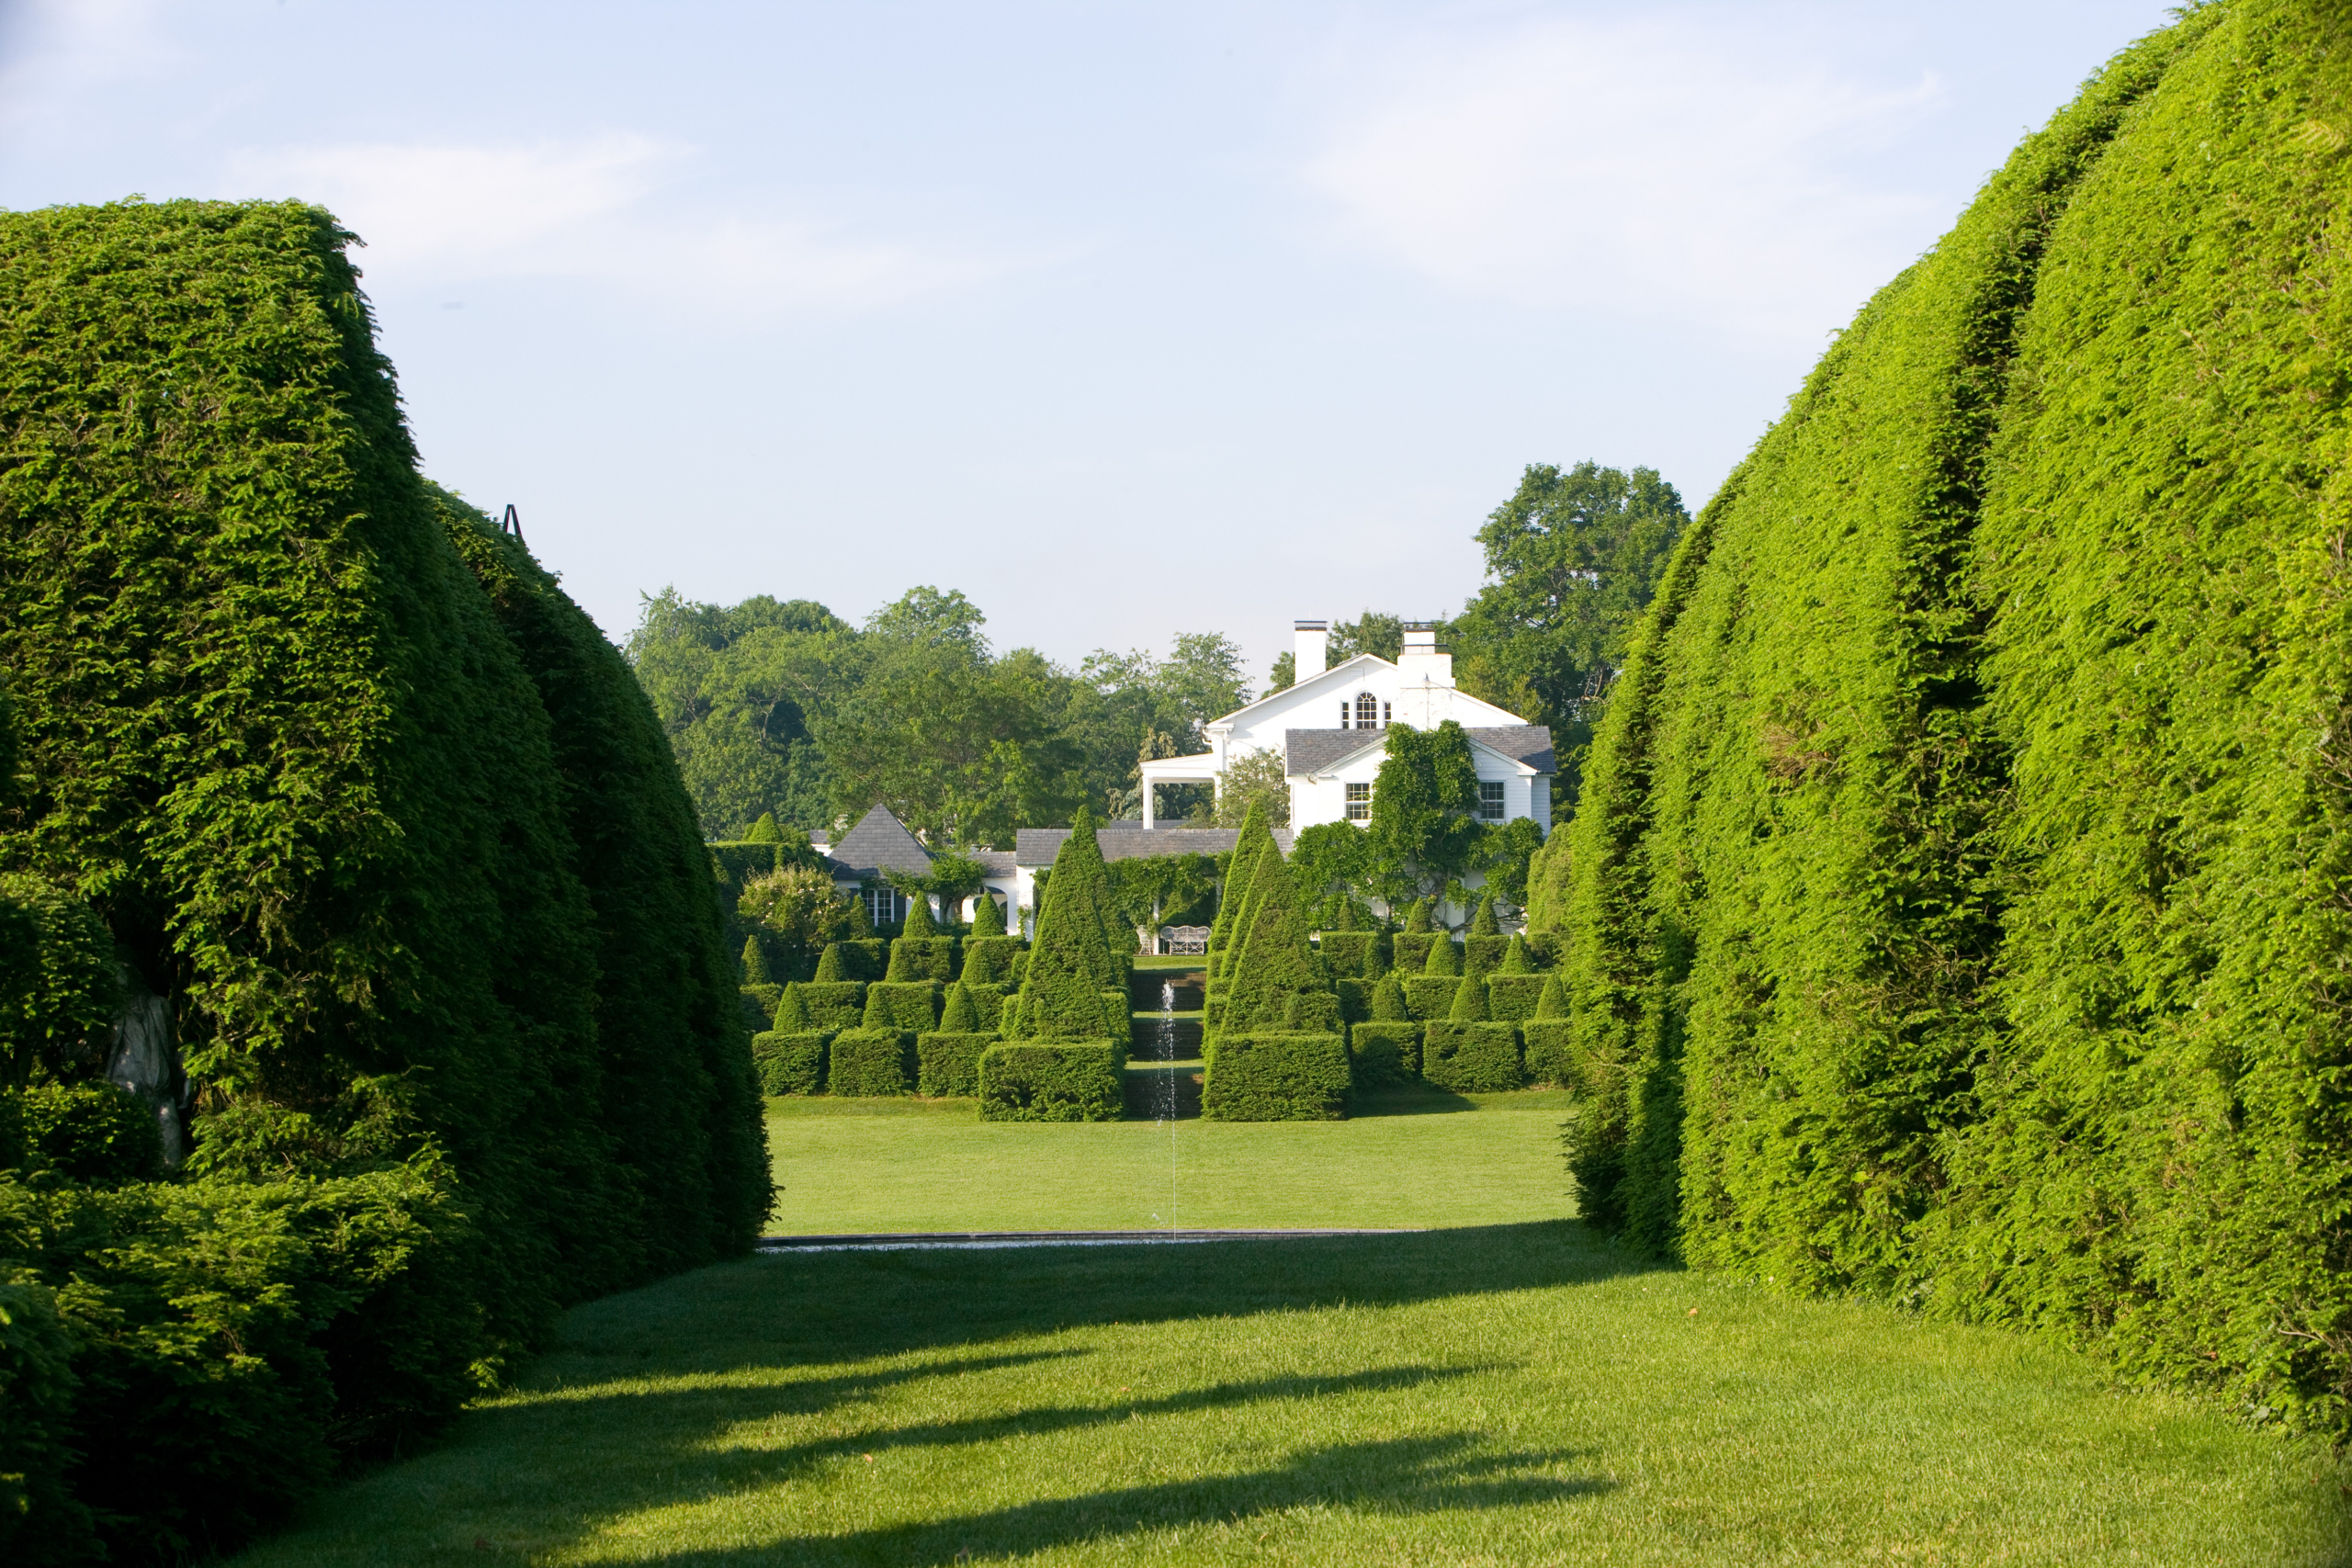
These topiaries are yews, Taxus, and create the wall of the Great Bowl.
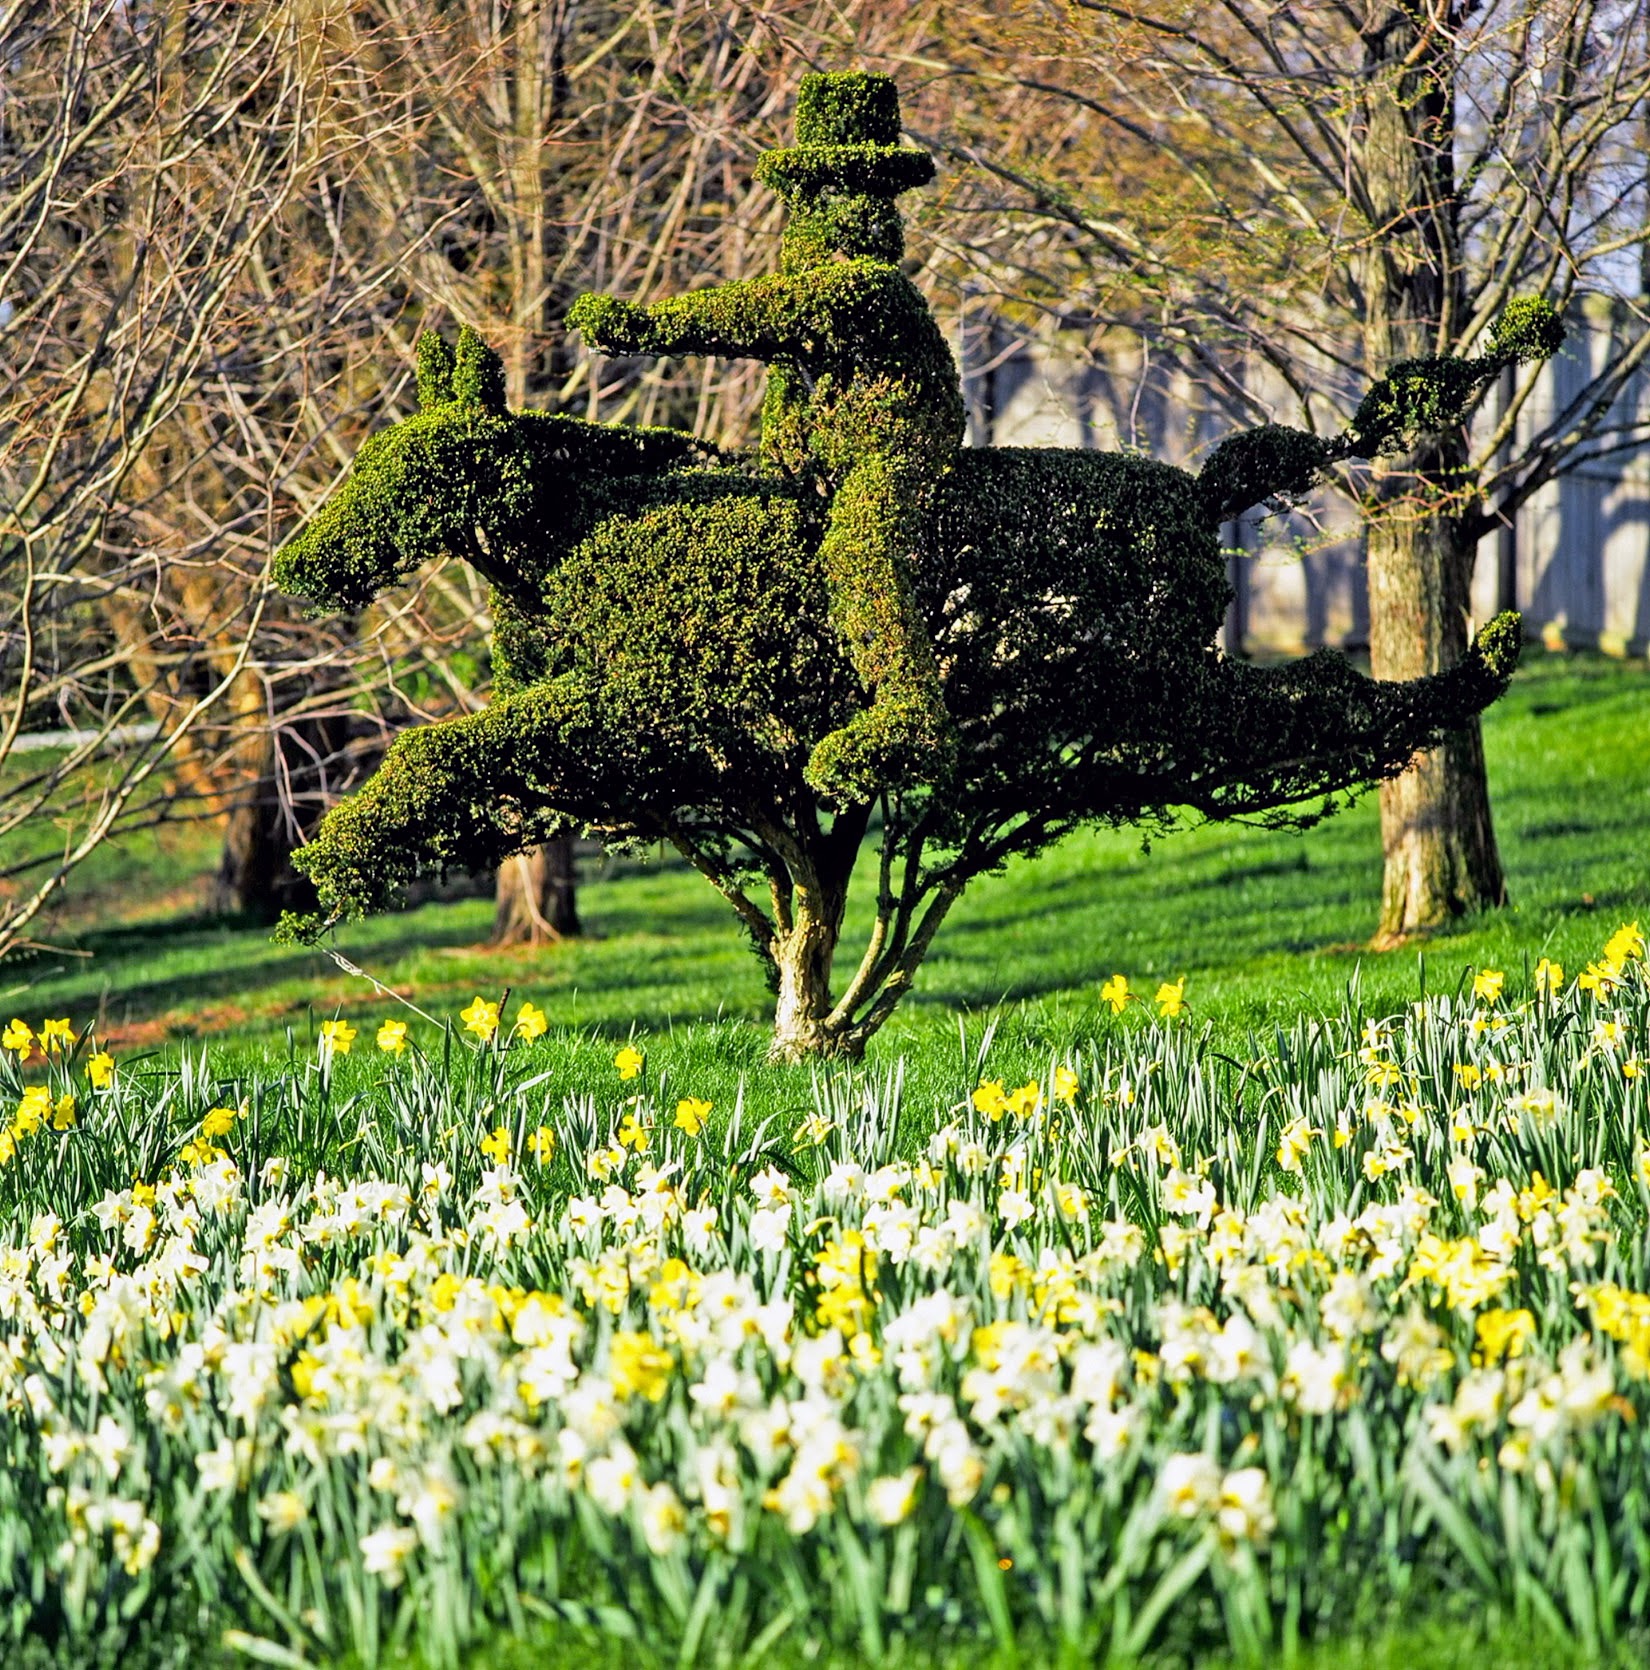
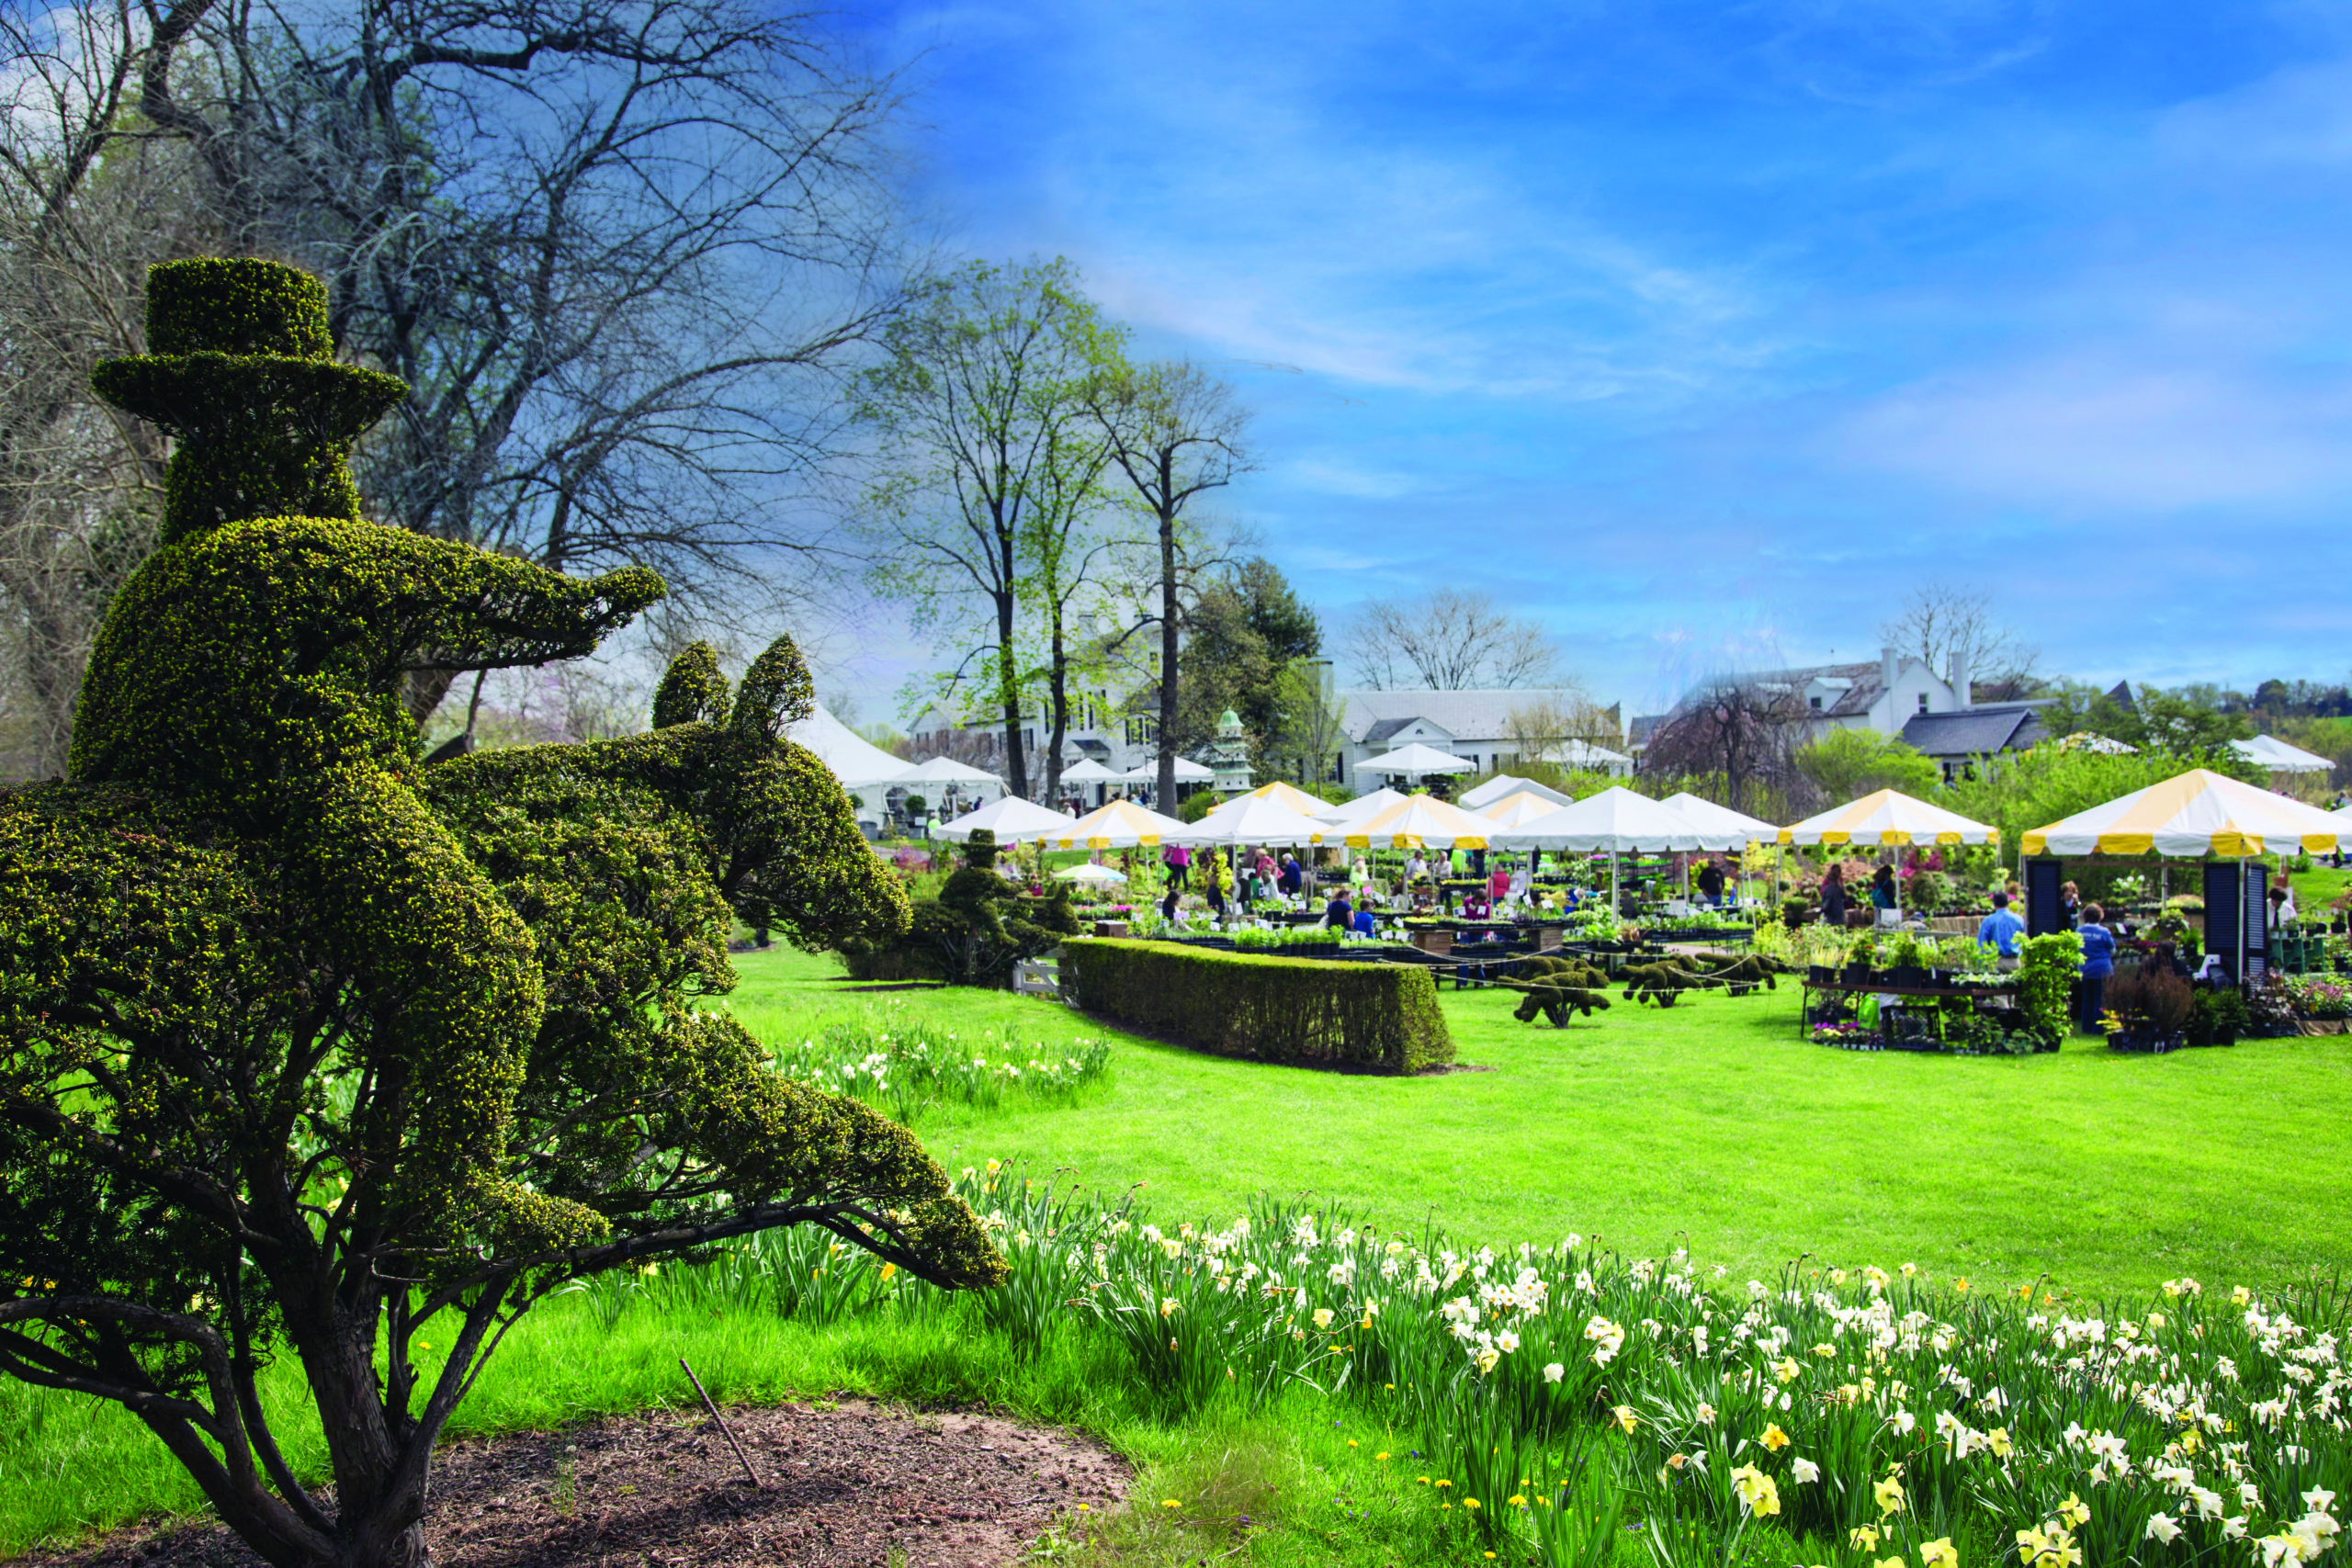
Here is a reproduction of what inspired Harvey’s love for topiaries. He had passed a similar sculpted scene during a hunt in England – topiary hounds chasing a fox. In his rendition, he also added riders on their trusted mounts.
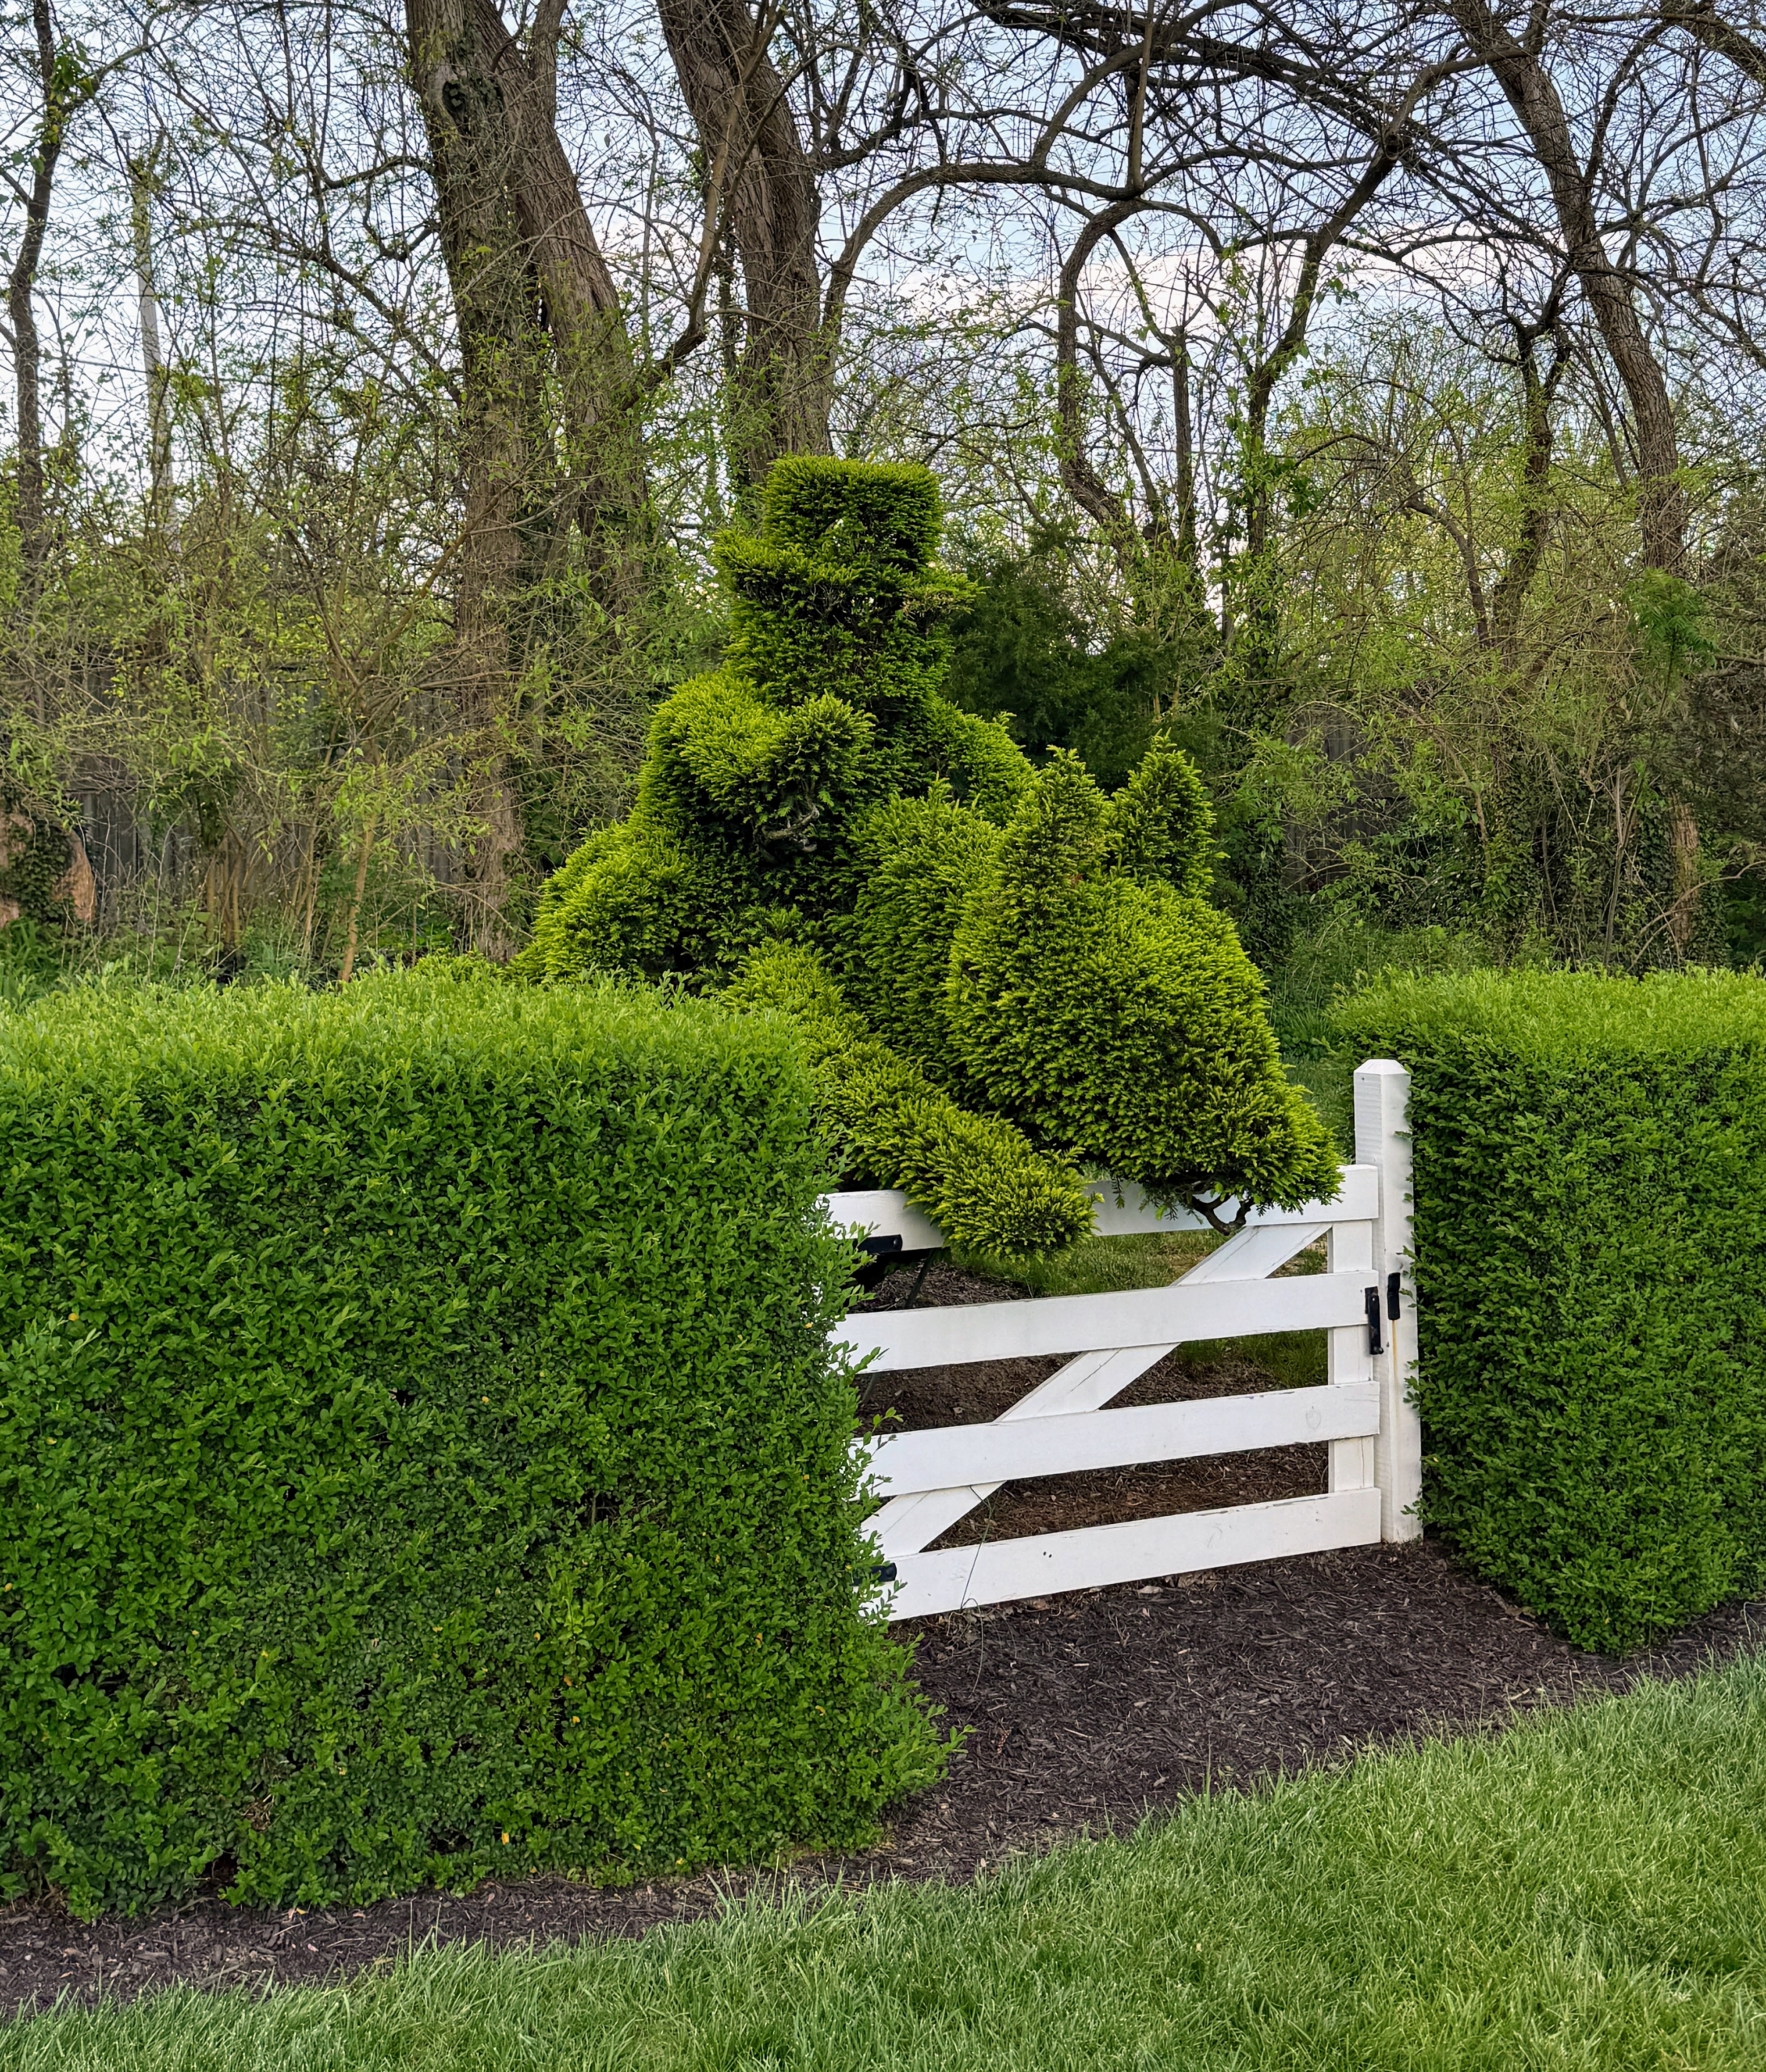
Here is one planted over a fence. It is one of the most well-loved topiaries in the garden.
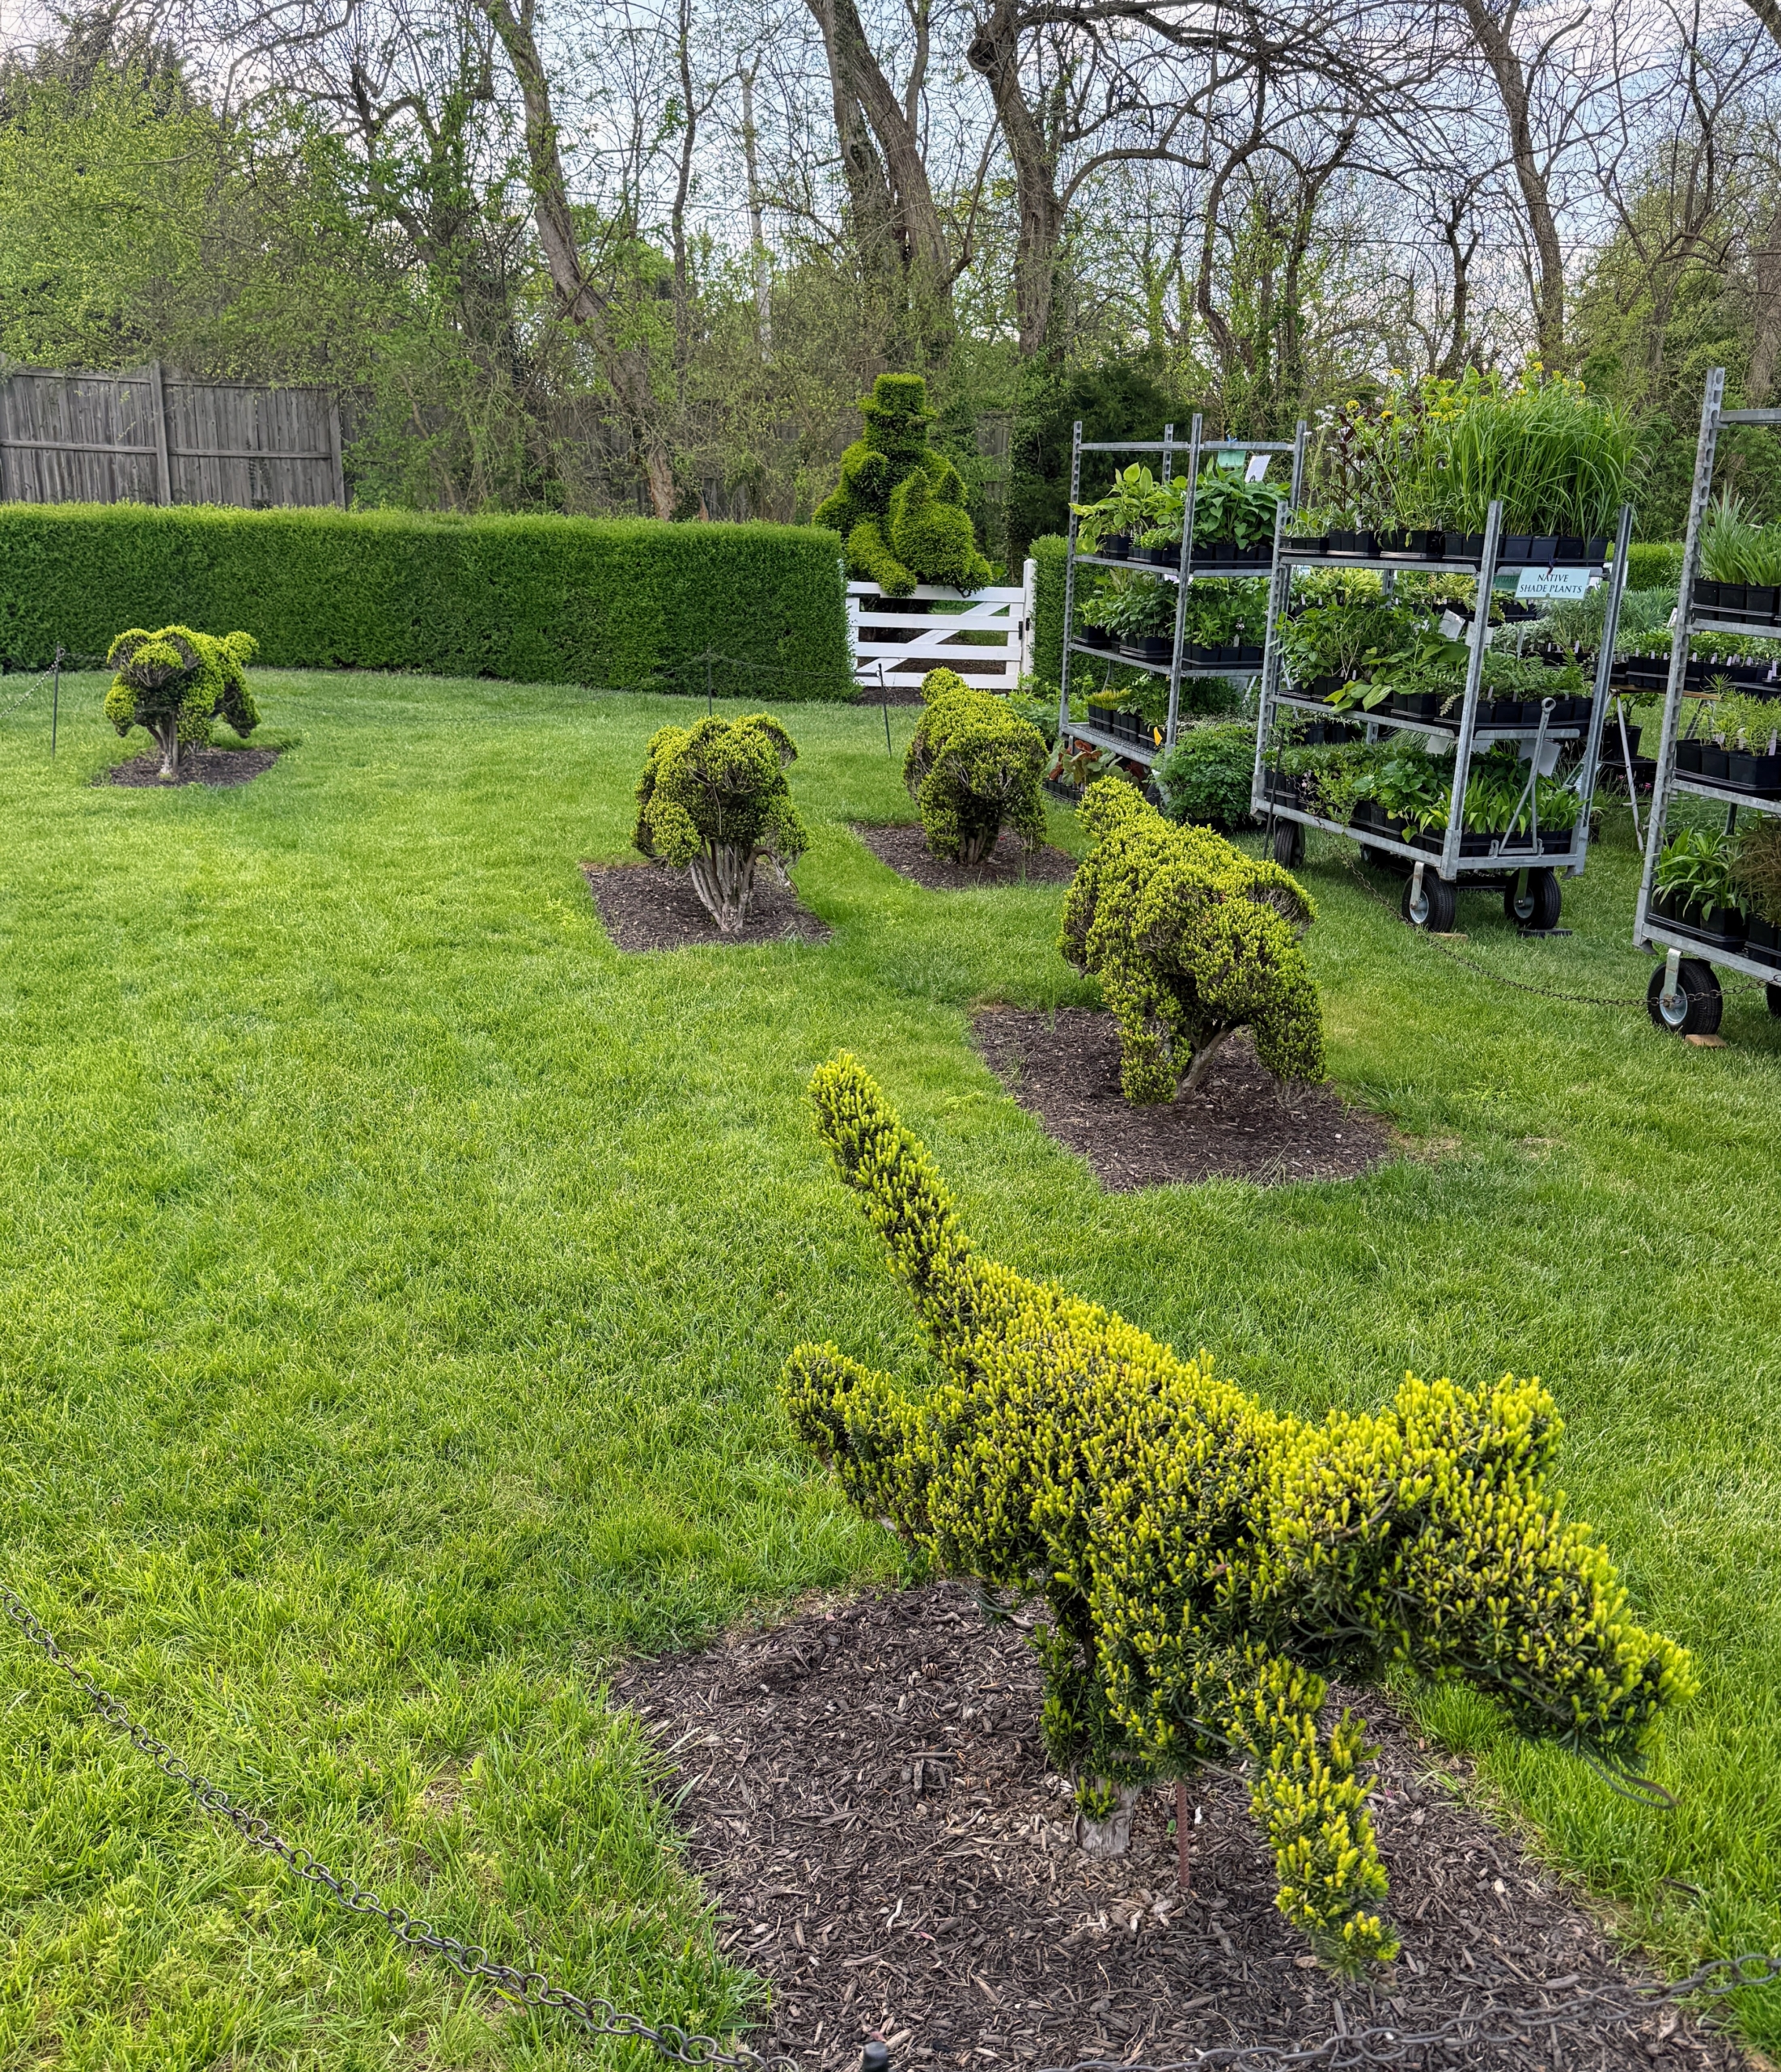
In all, there are more than 100 larger than life topiary forms at Ladew. (Photo courtesy of Ladew)
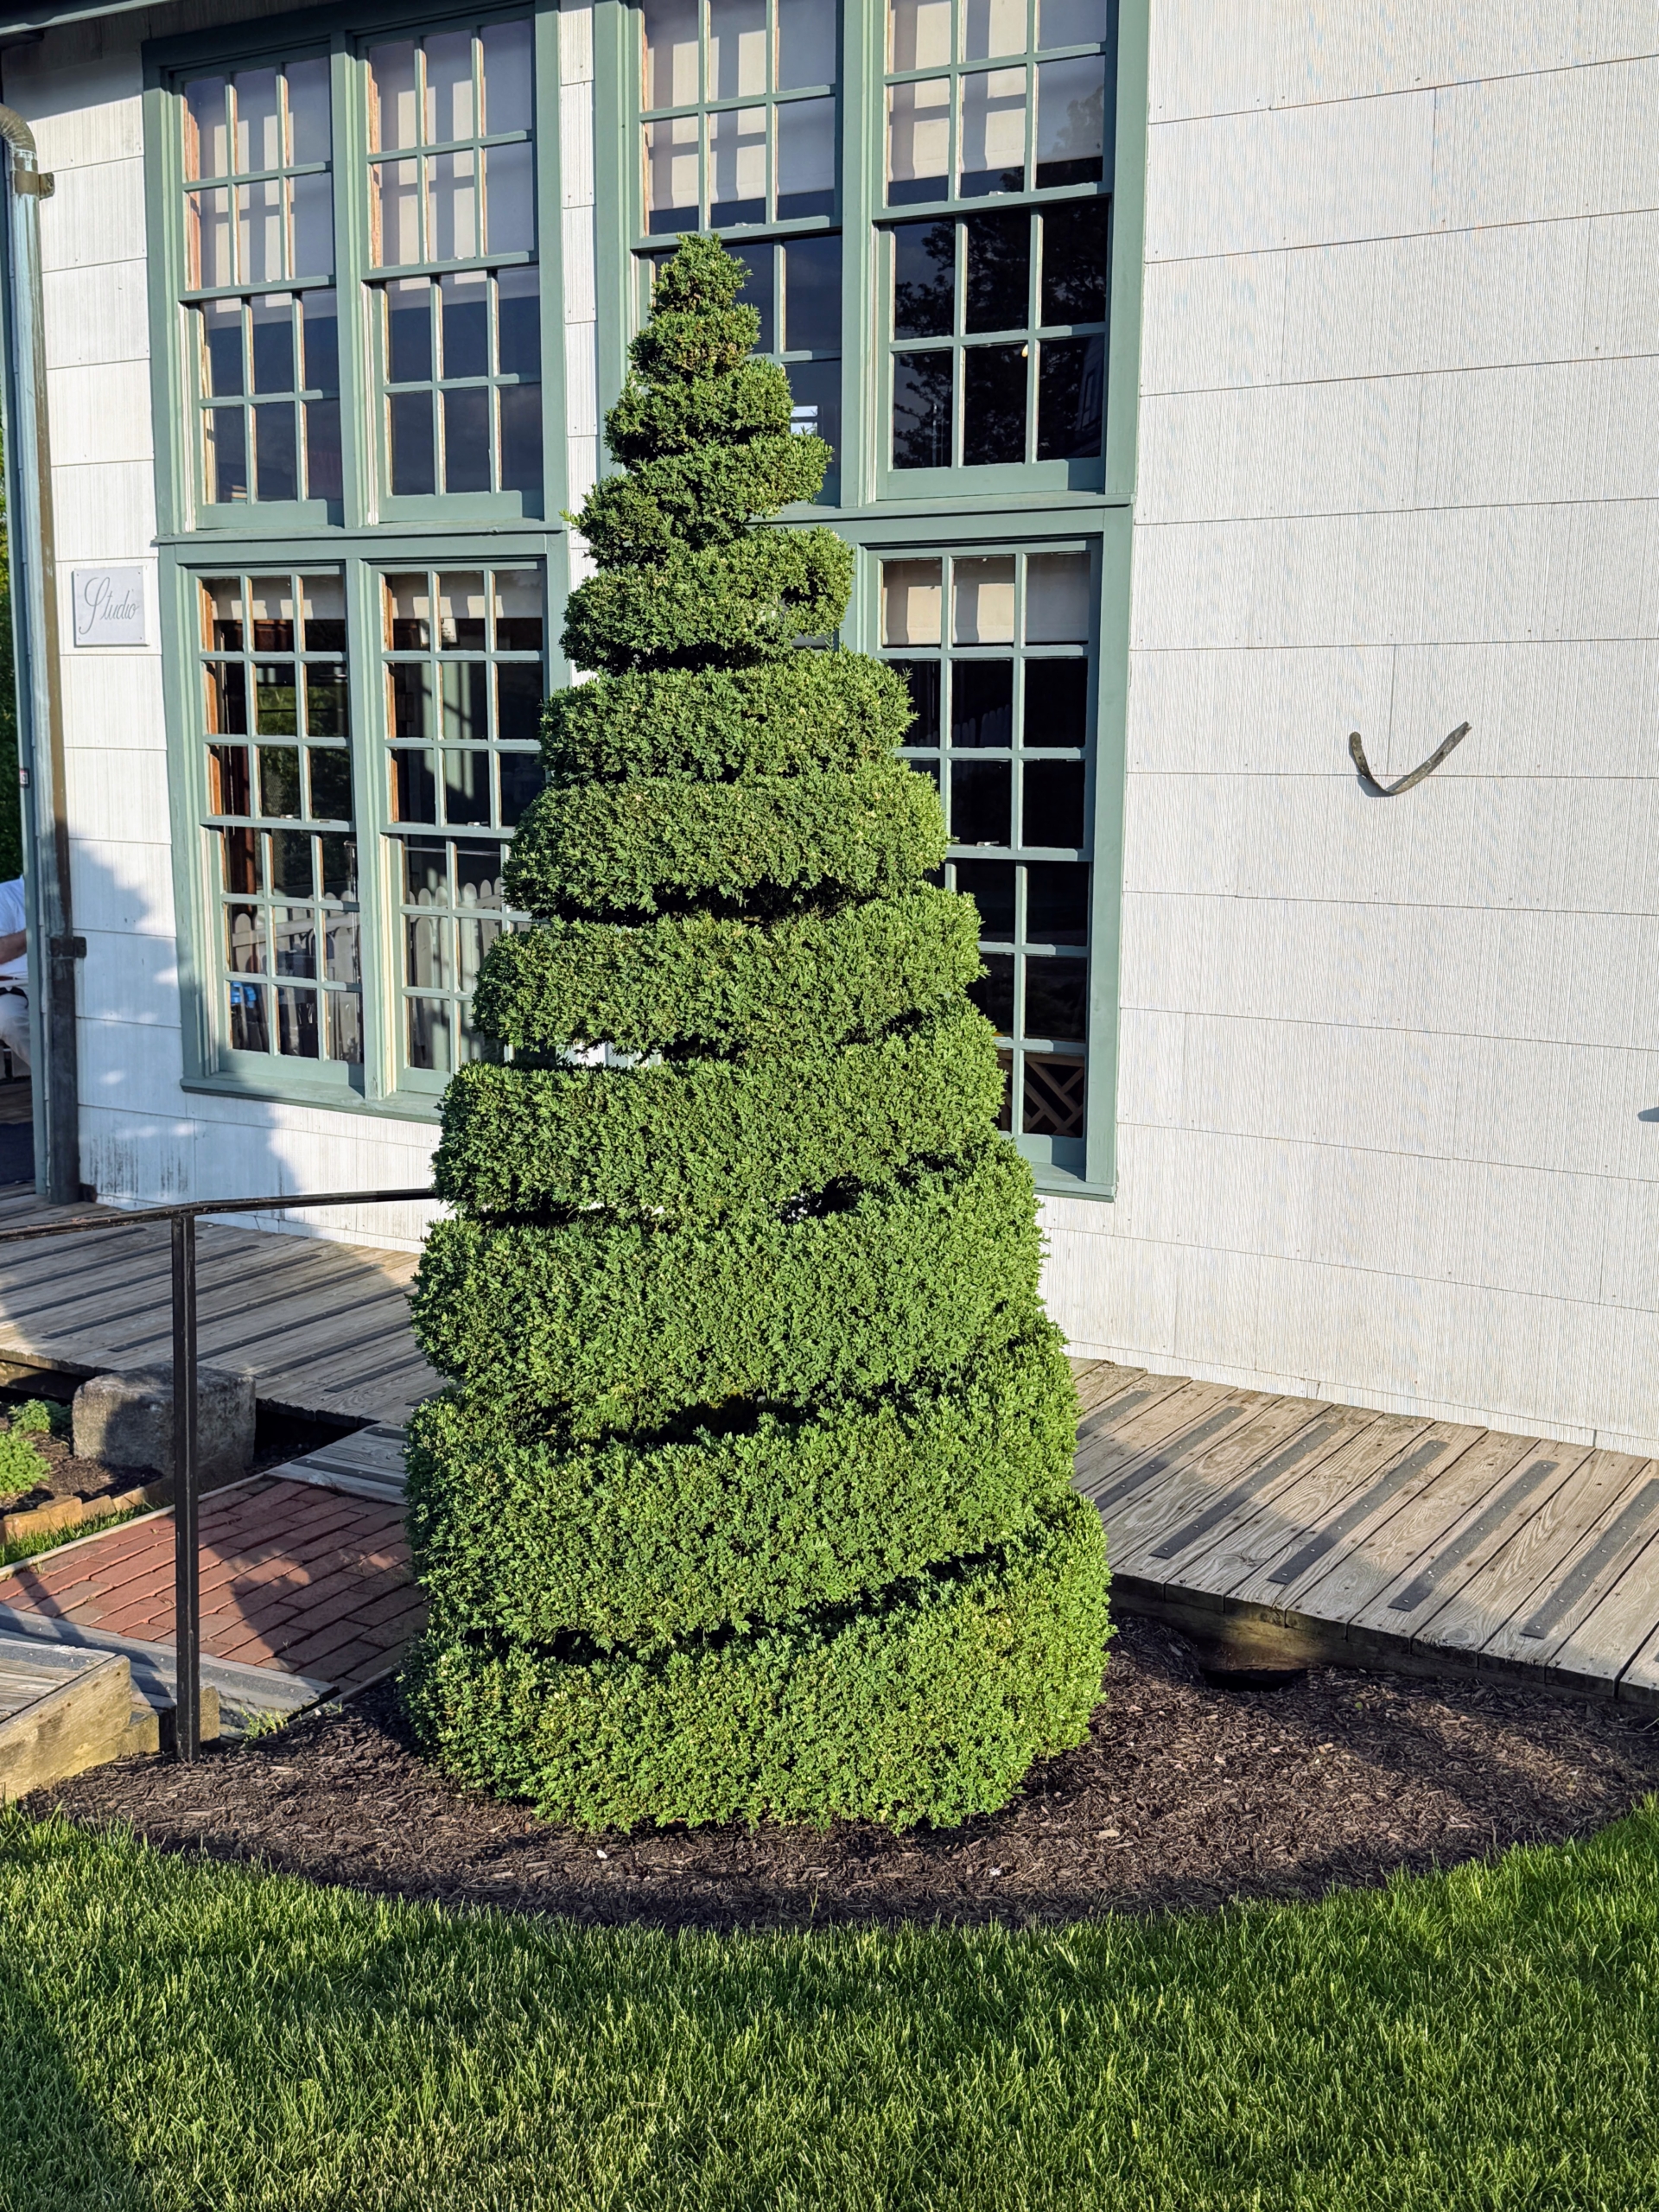
Here is another topiary on the terrace – simple in design, but wonderfully sculpted.
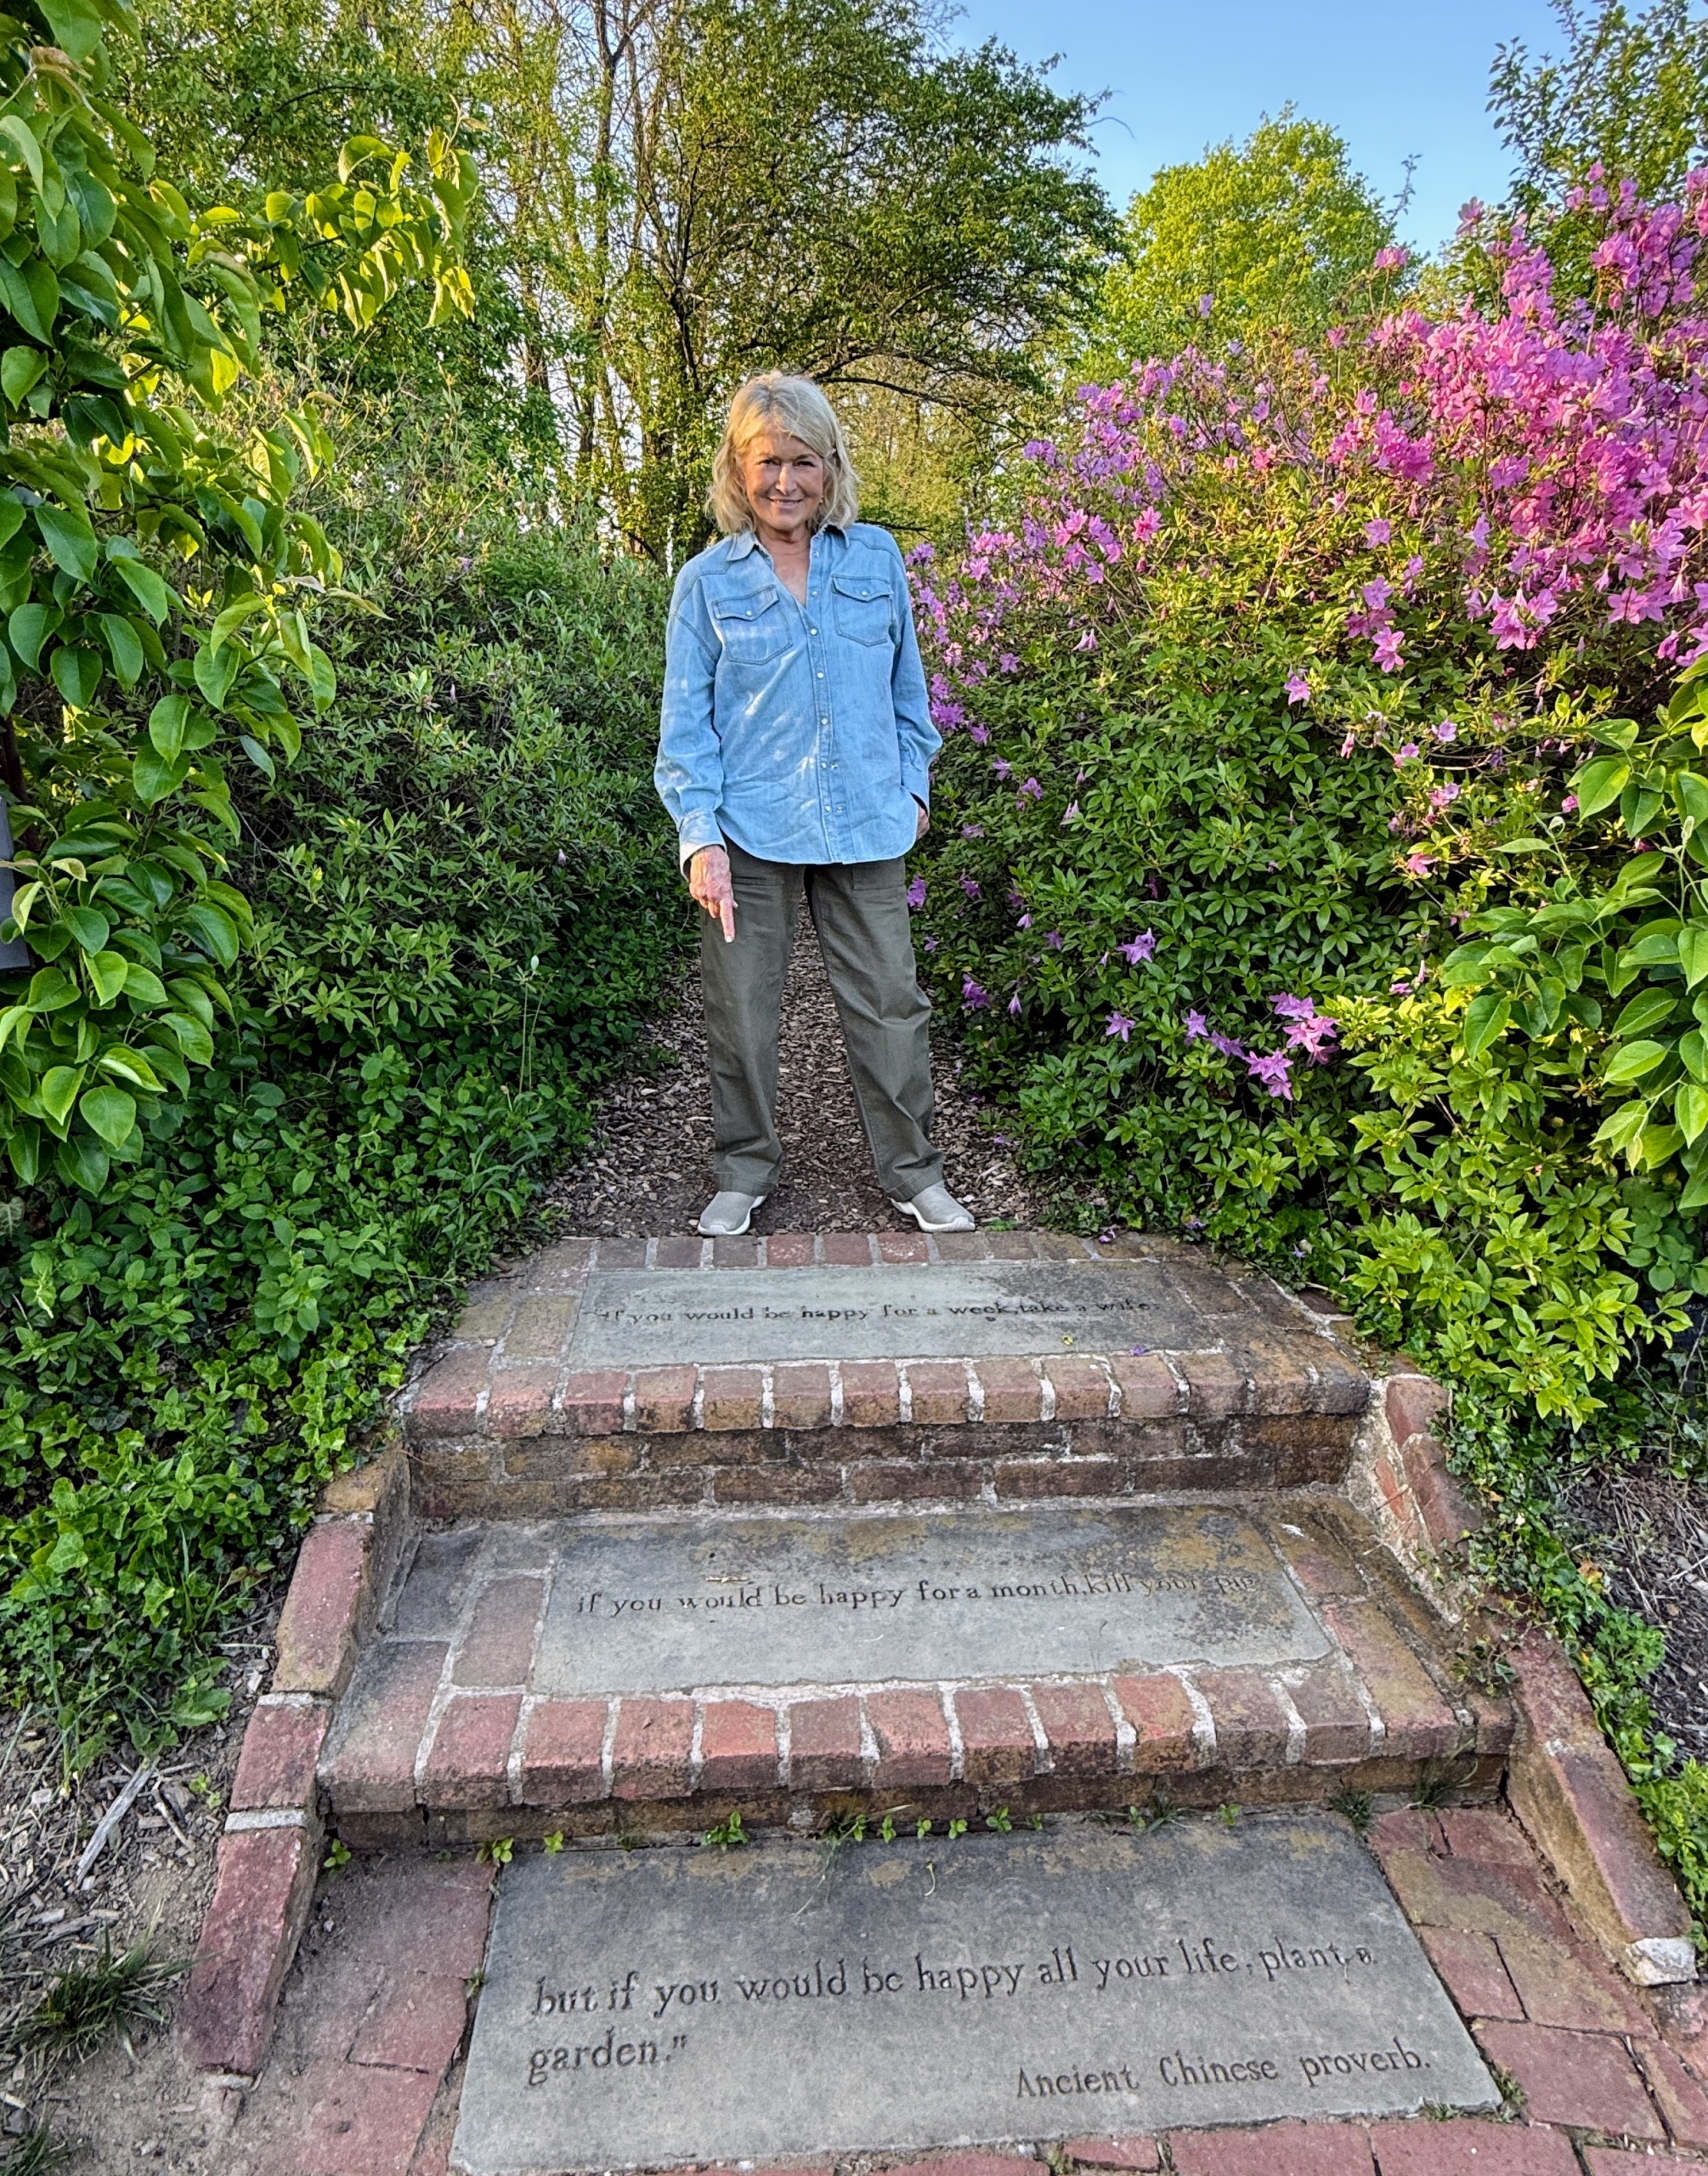
Here I am at the top of the steps into Harvey’s Garden of Eden. The steps are inscribed with one of his favorite Chinese proverbs – and one of mine, too. It says, “If you want to be happy for a week, take a wife, if you want to be happy for a month kill your pig, but if you would be happy all your life, plant a garden.”
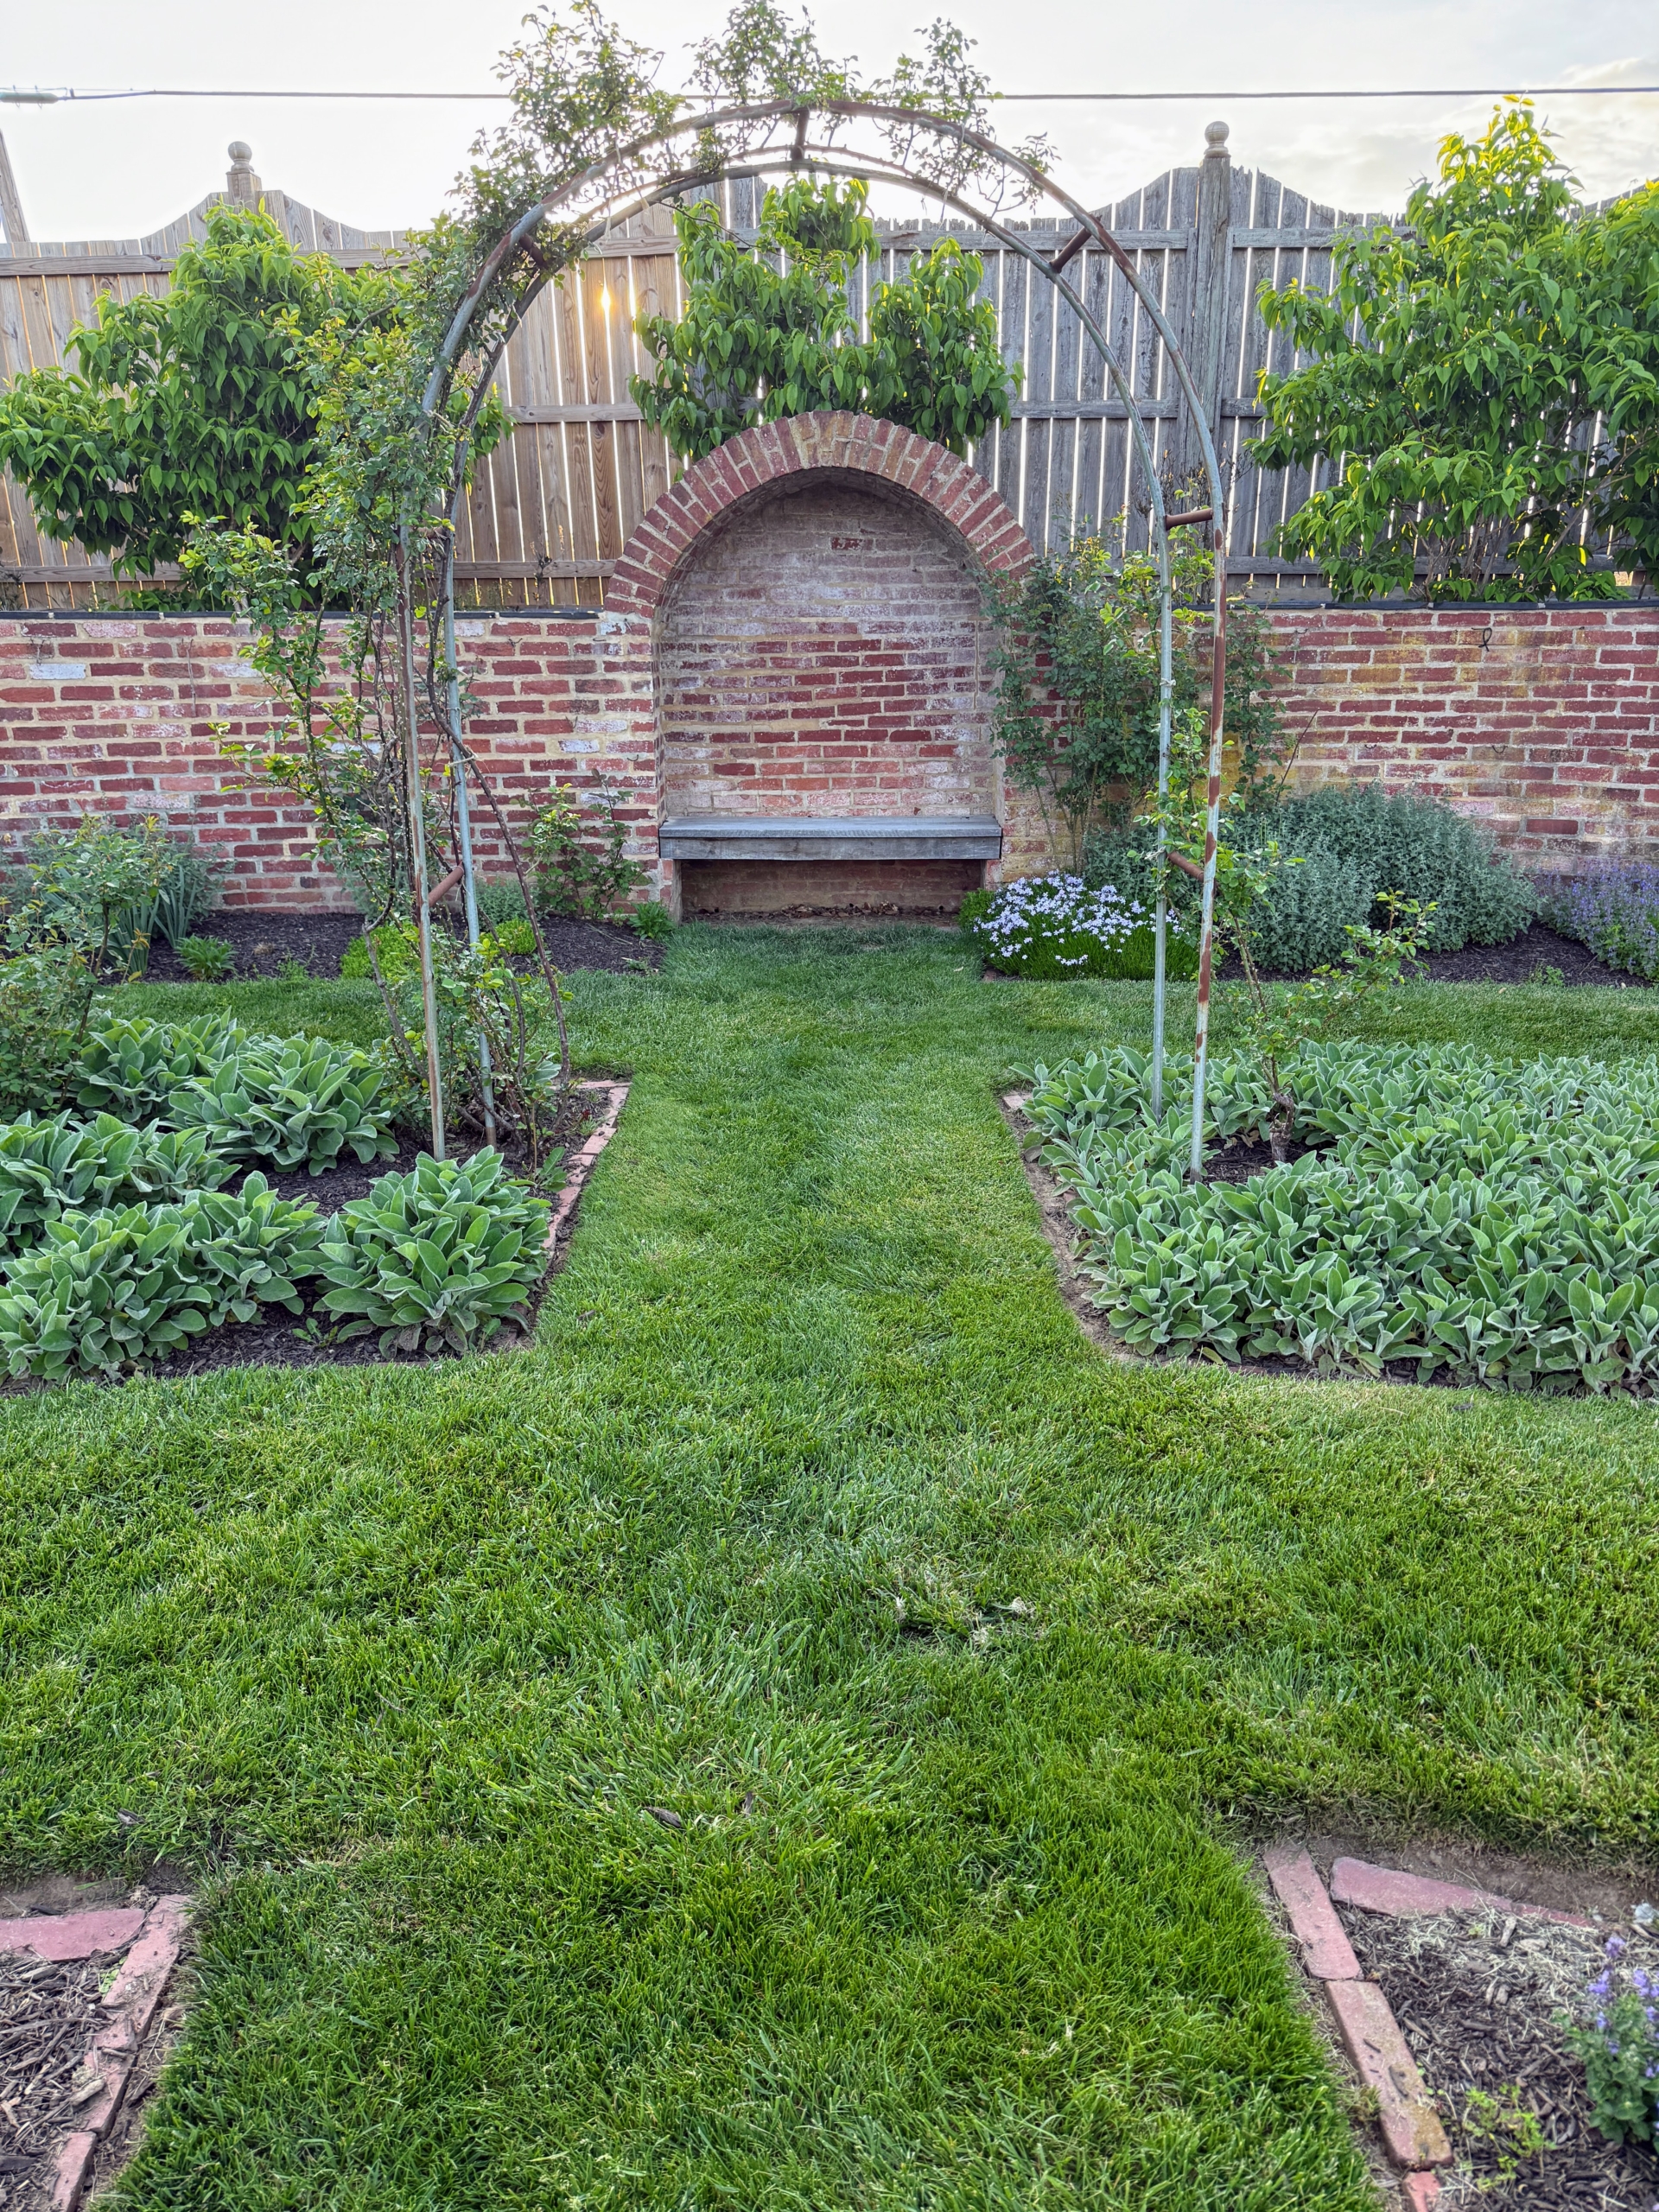
In this corner is a bench in a nook built into the wall of the Rose Garden. The arch features Rosa ‘New Dawn’.
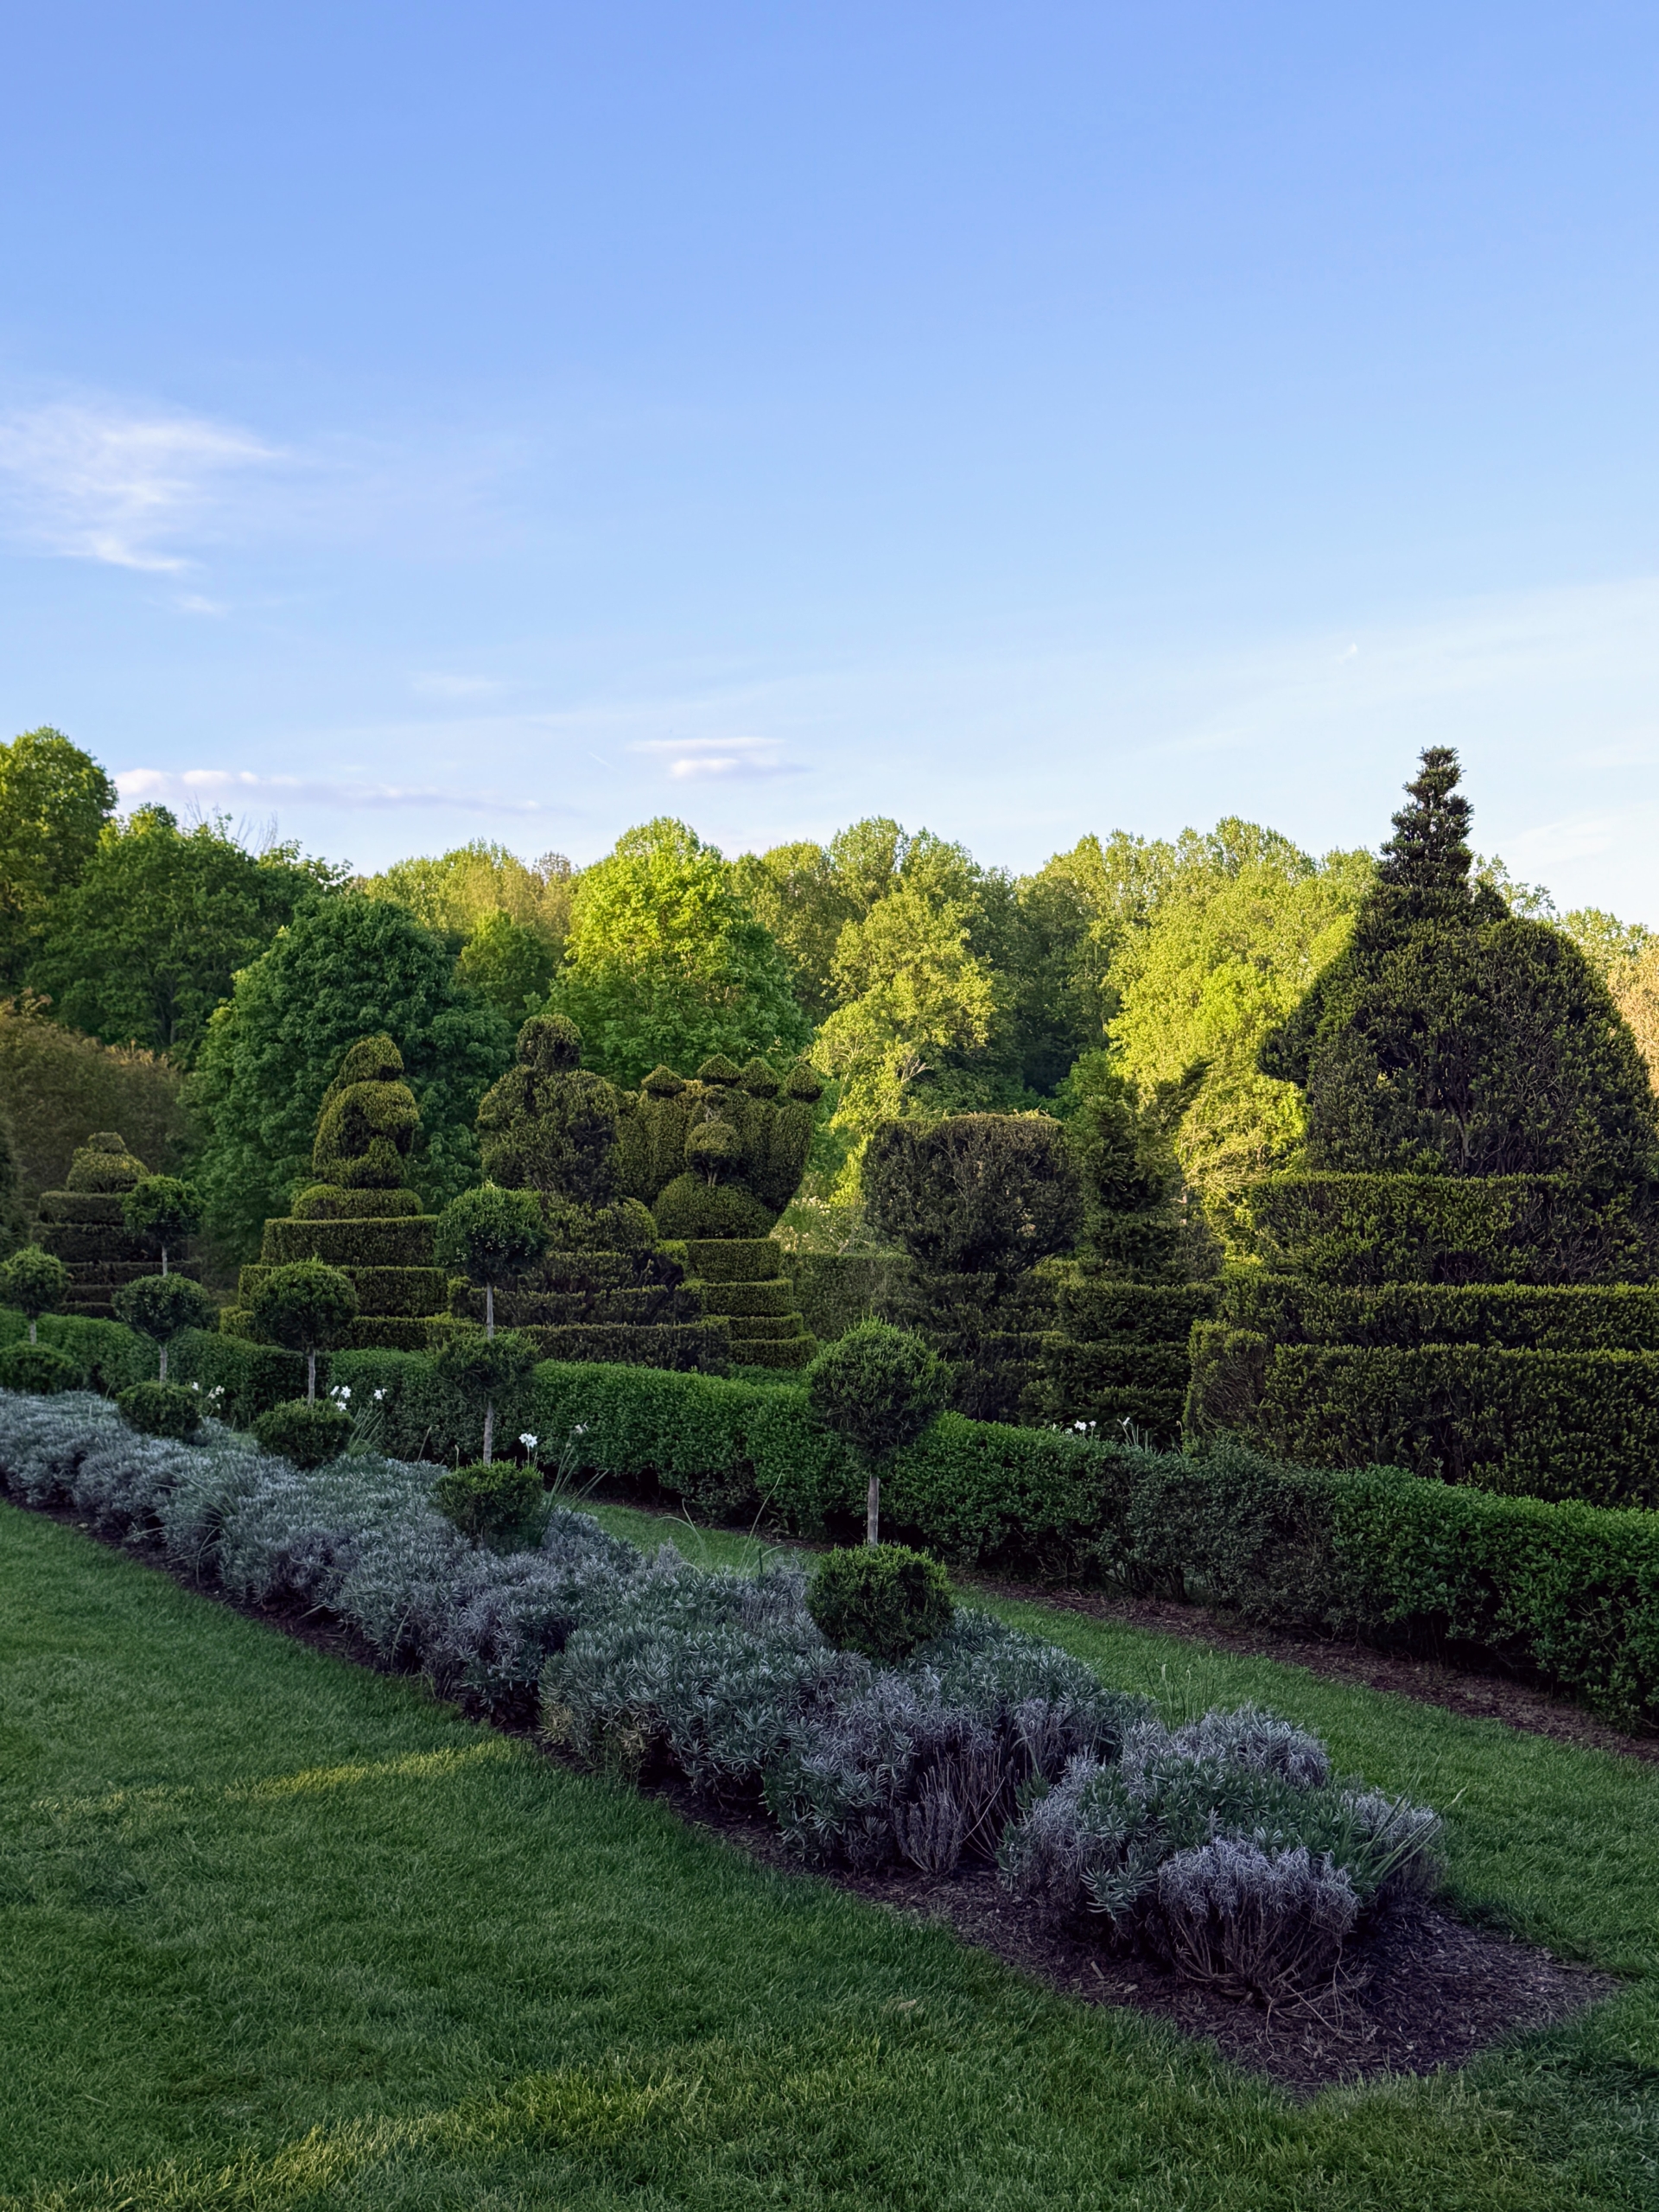
In almost every view around the Manor, one sees mature and meticulously groomed topiary forms.
In the foreground is Nepeta, also known as catmint. In the background is Stachys byzantina ‘Helene von Stein’ with underplanting emerging roses.
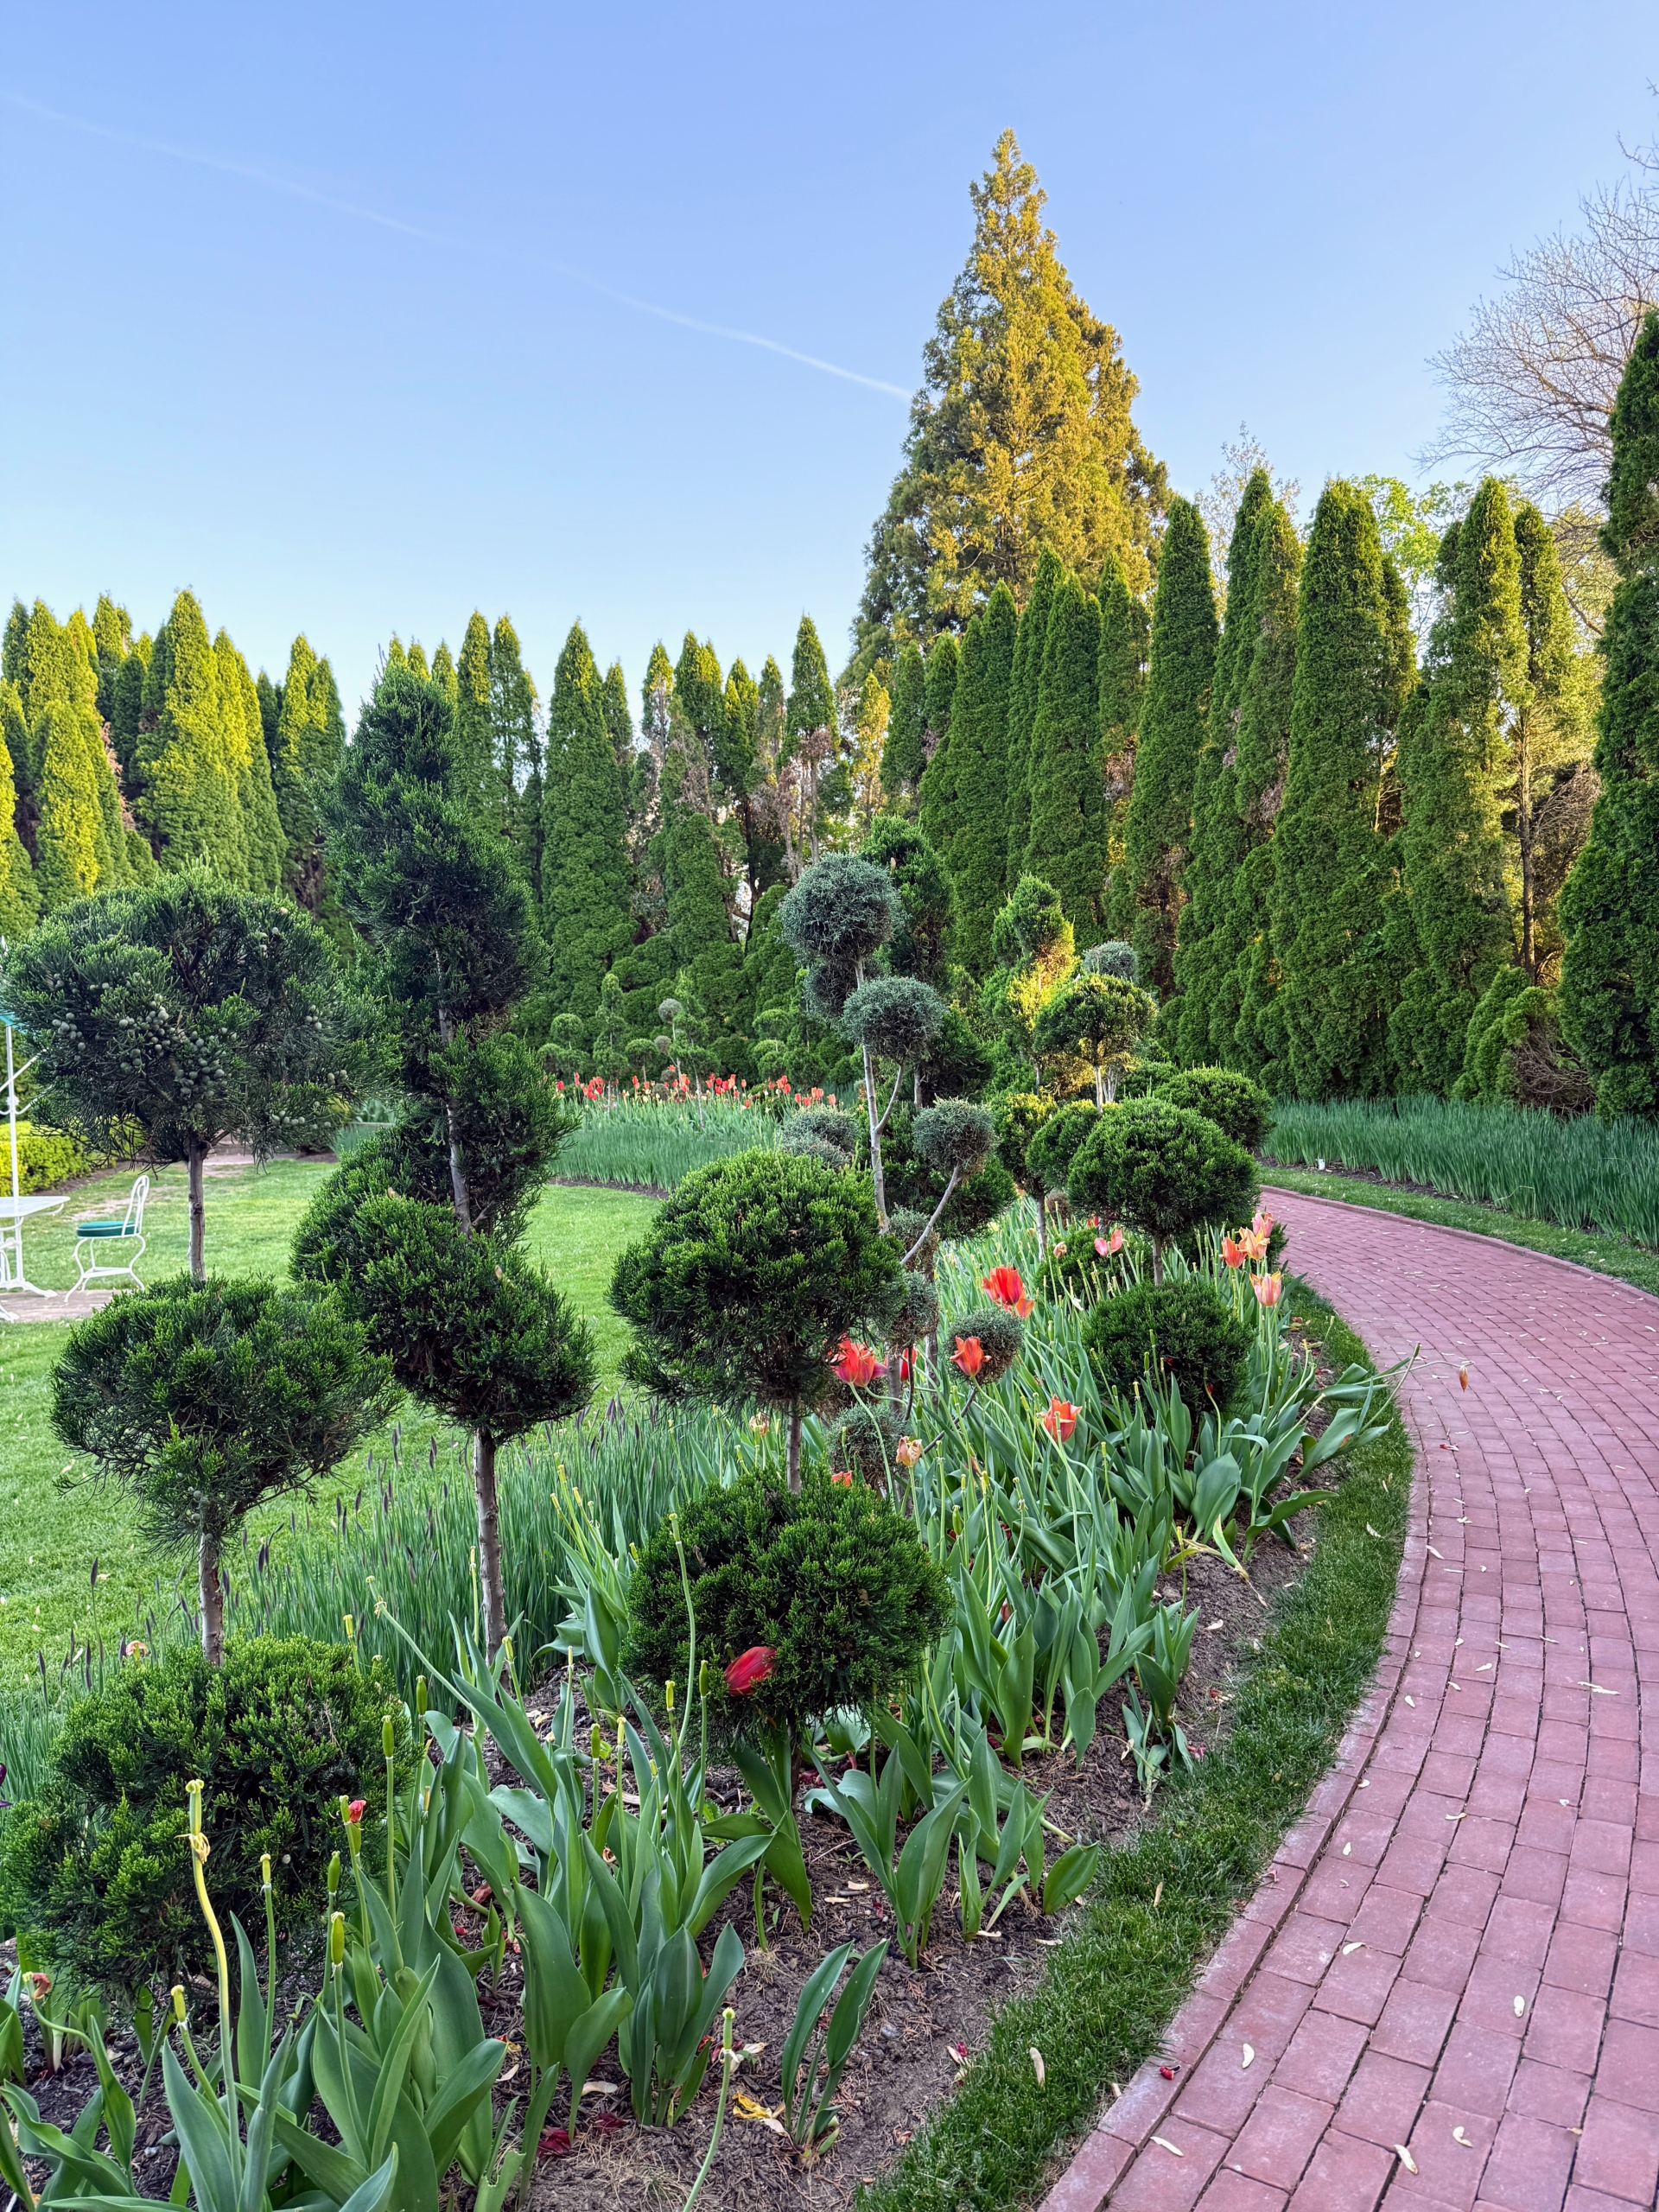
Here, topiaries also accent the tulip beds in the Croquet Court.
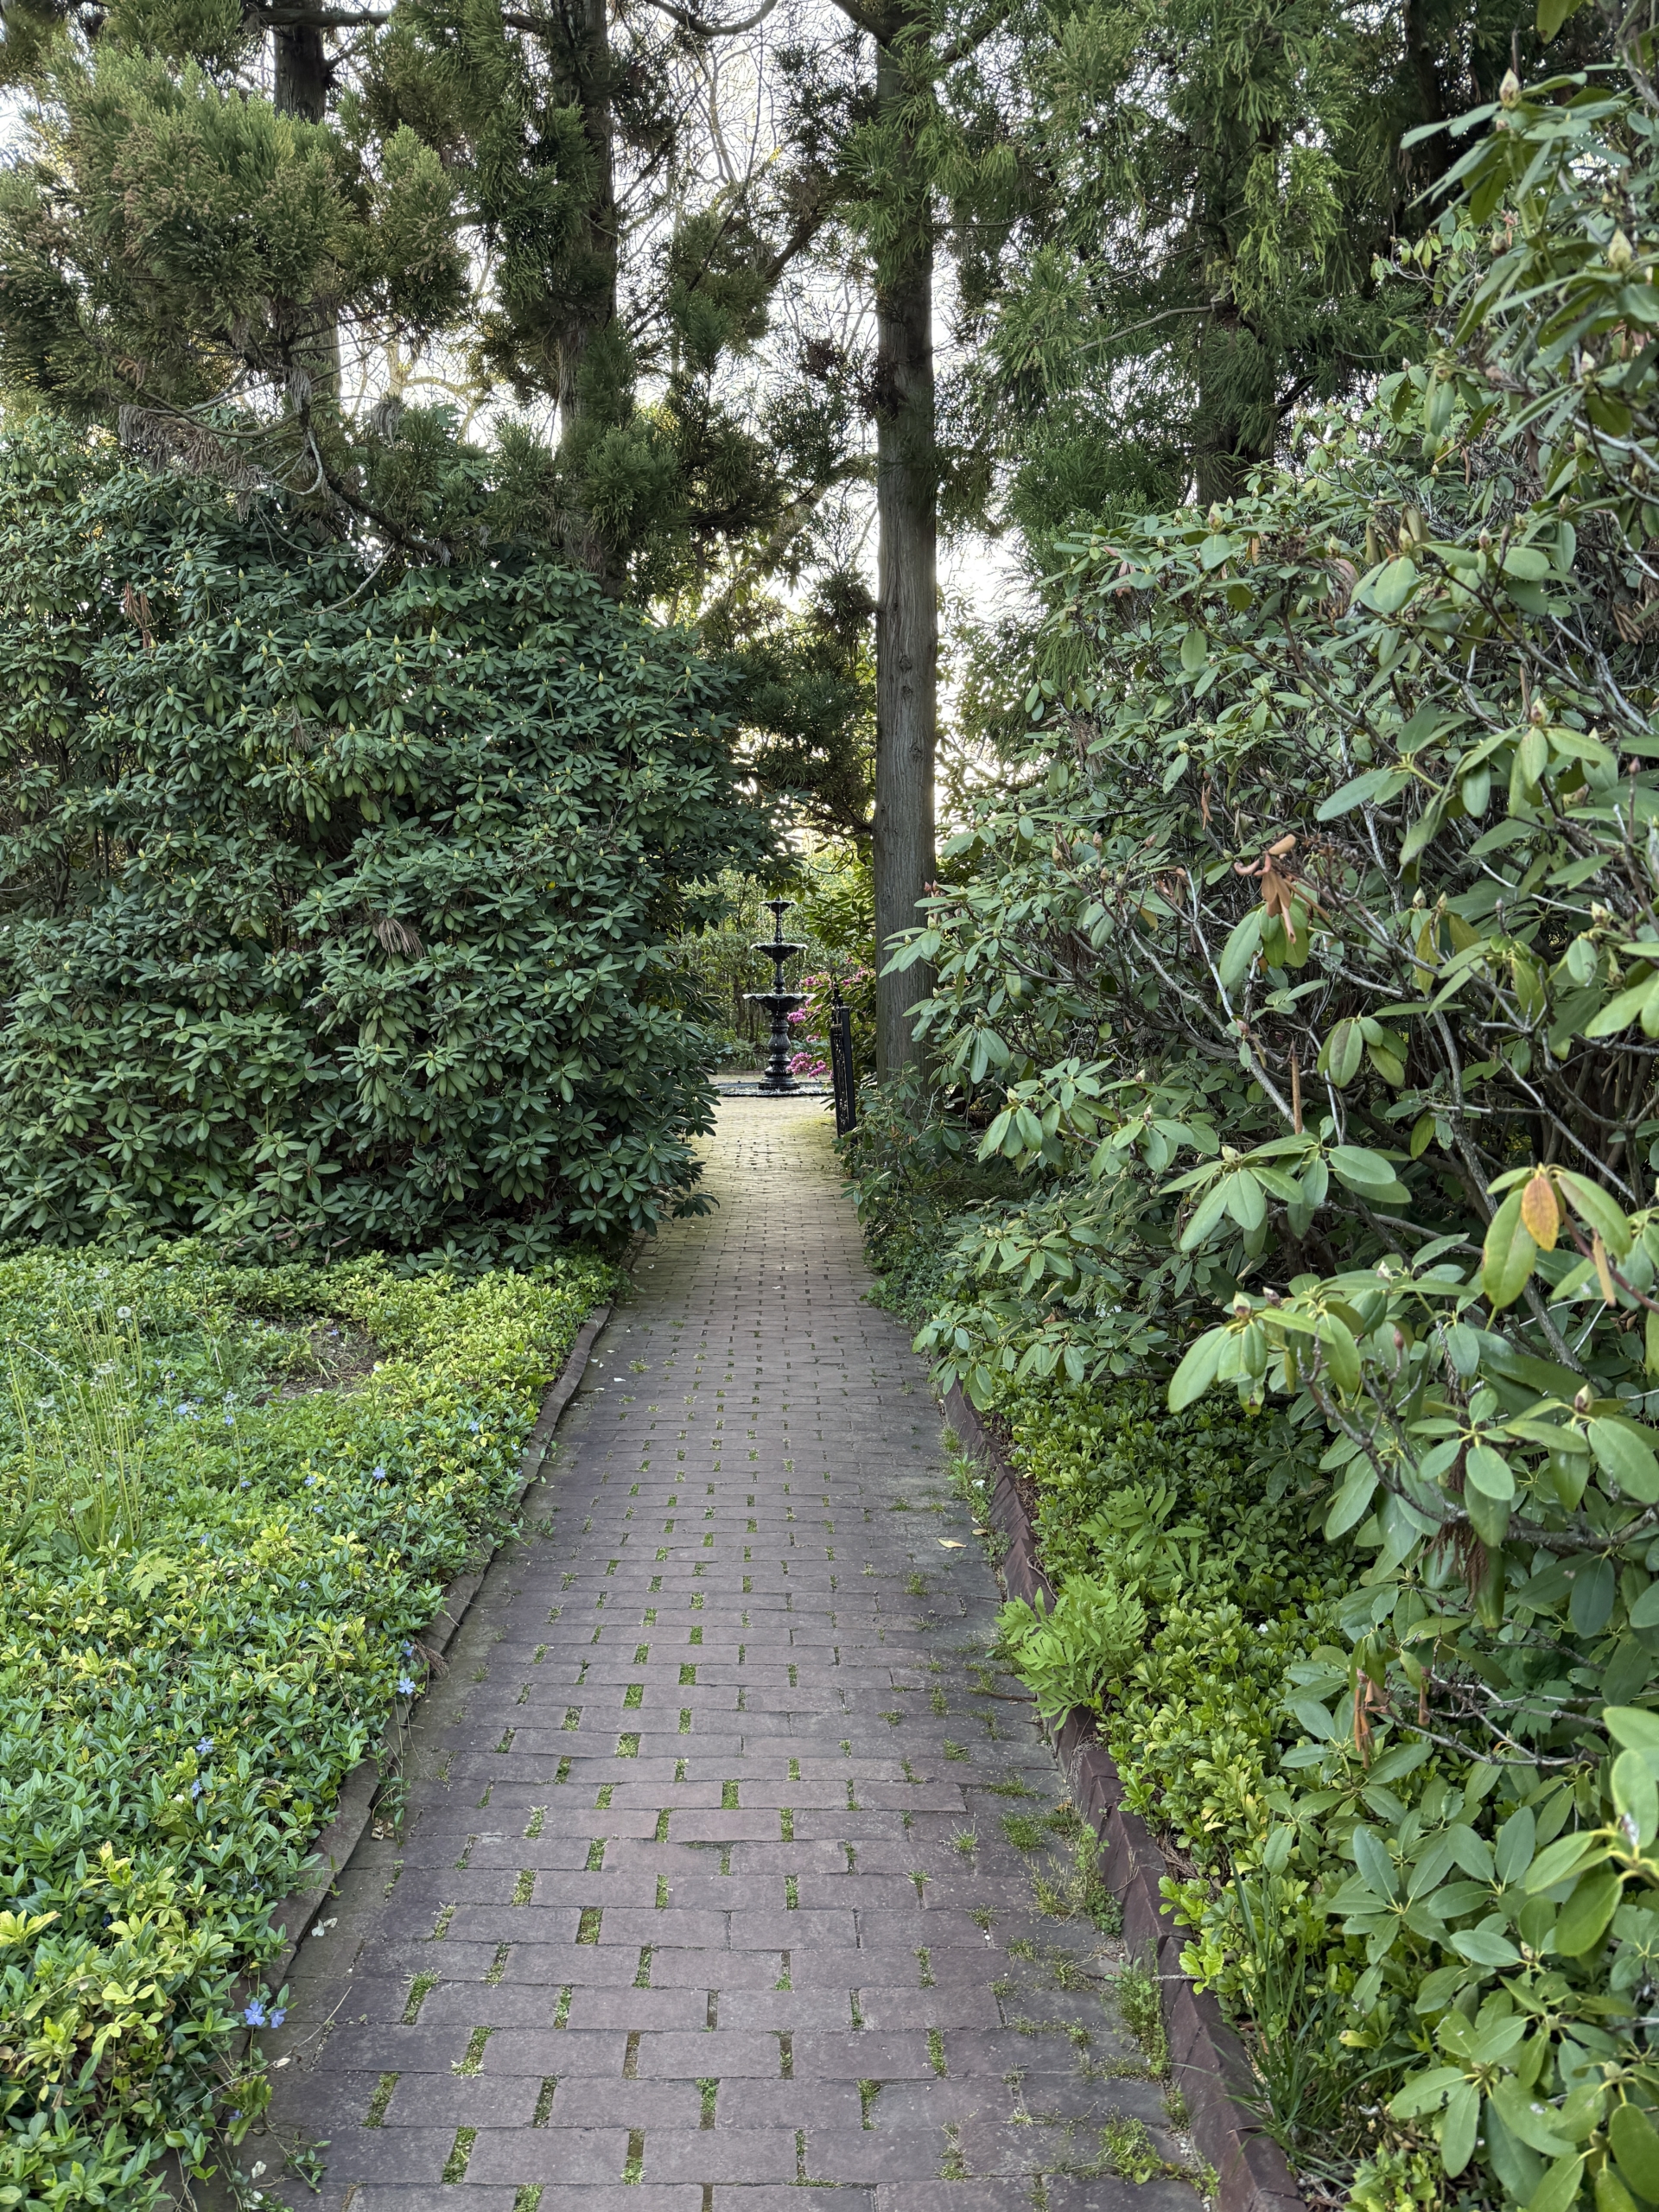
And this is a view of the Victorian Garden fountain through a bed of rhododendrons and towering Cryptomeria.
On this day, I was lucky to also attend Ladew’s 17th annual Garden Festival.
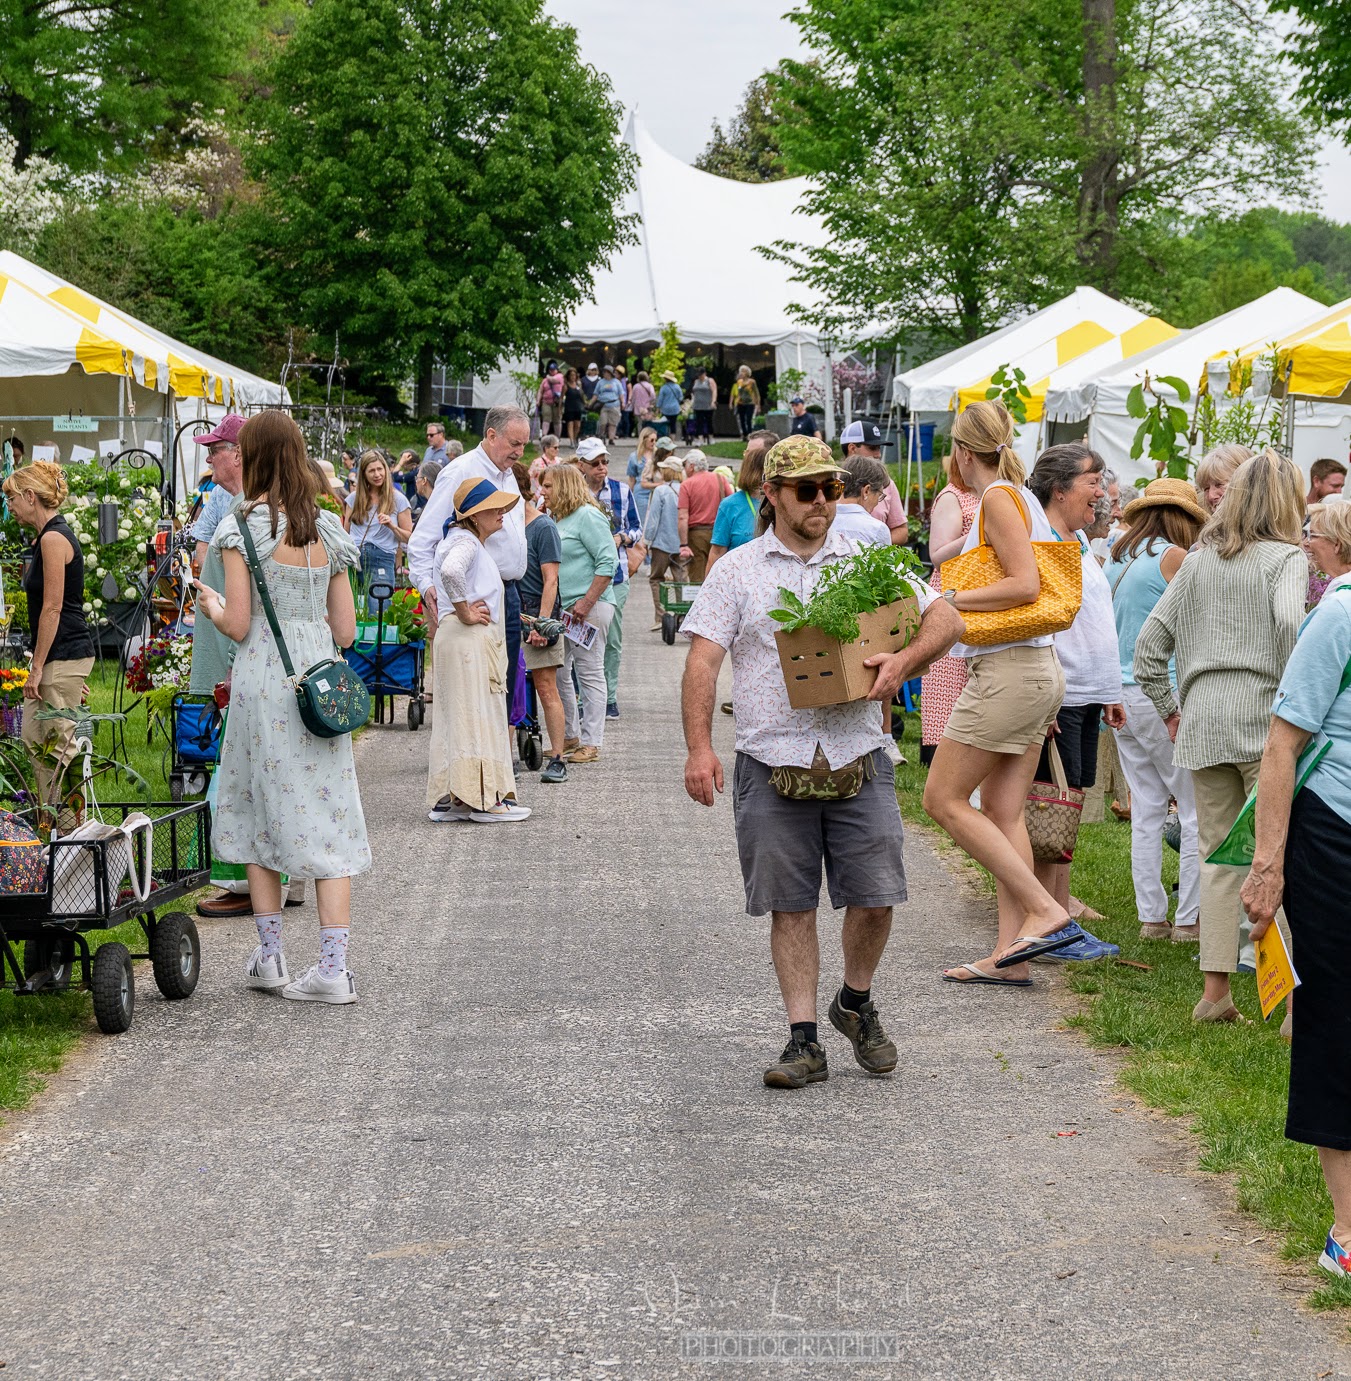
Hundreds attend this event every year to browse the more than 40 vendor tents. (Photo by Jim Lockard Photography)
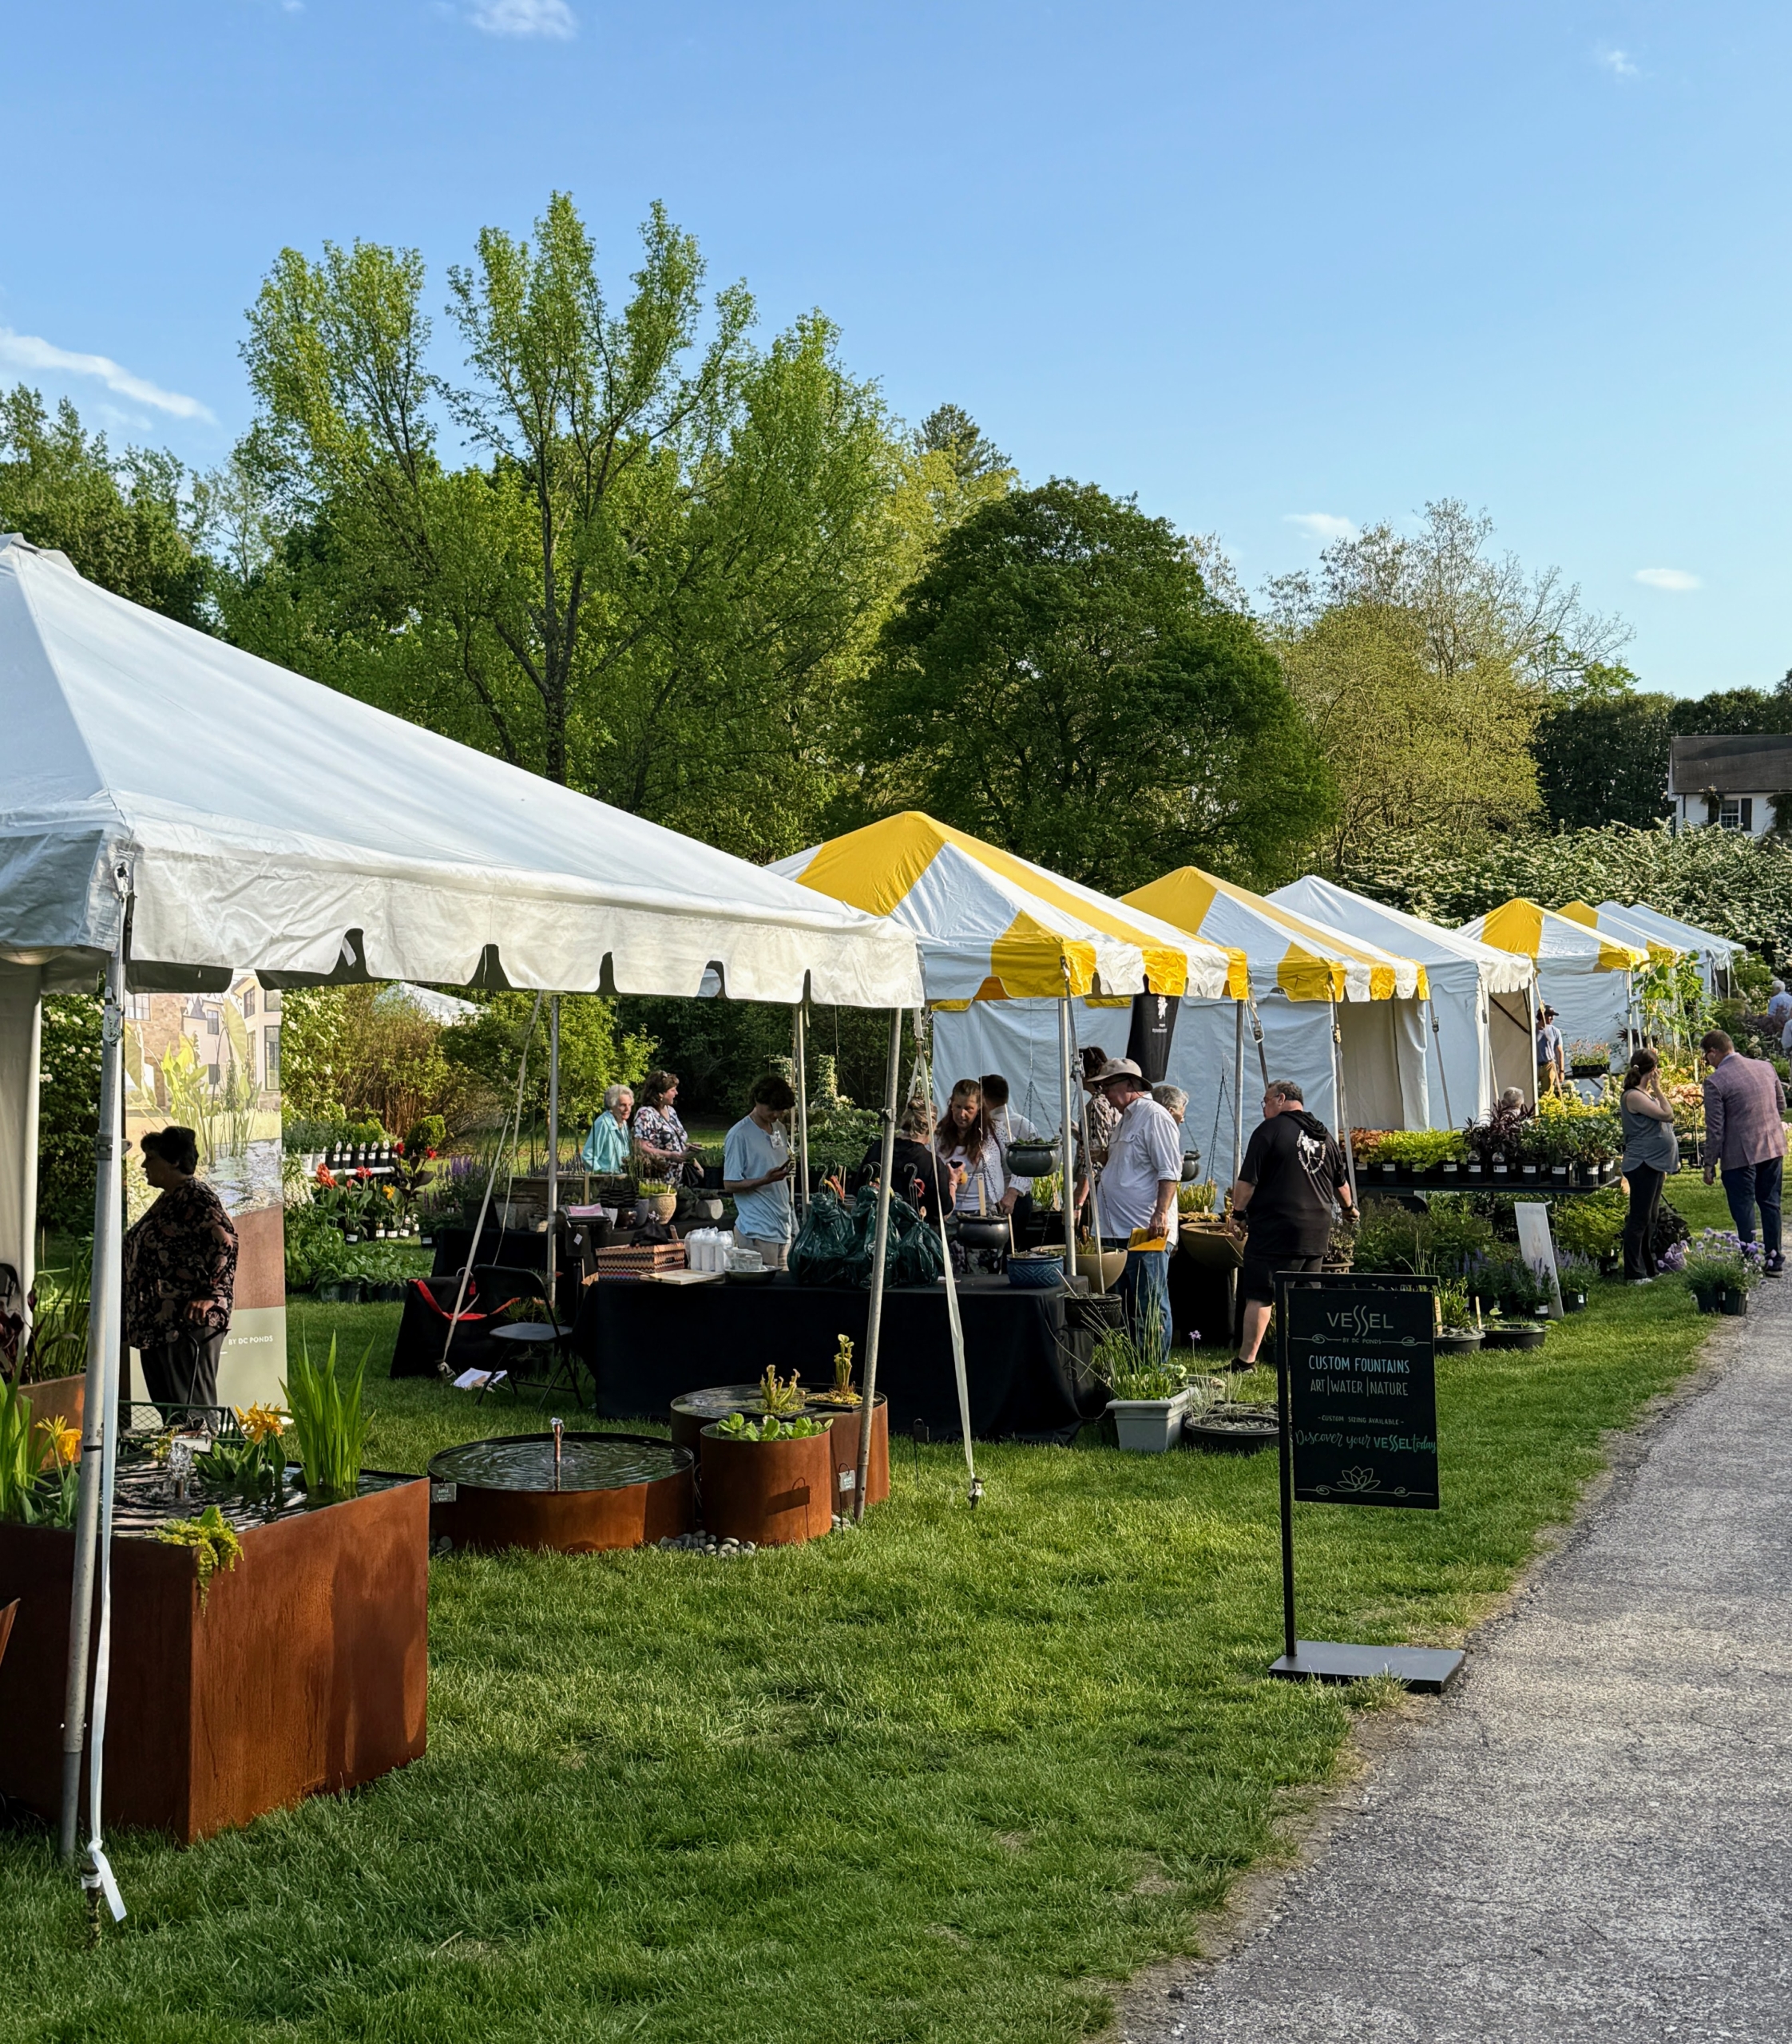
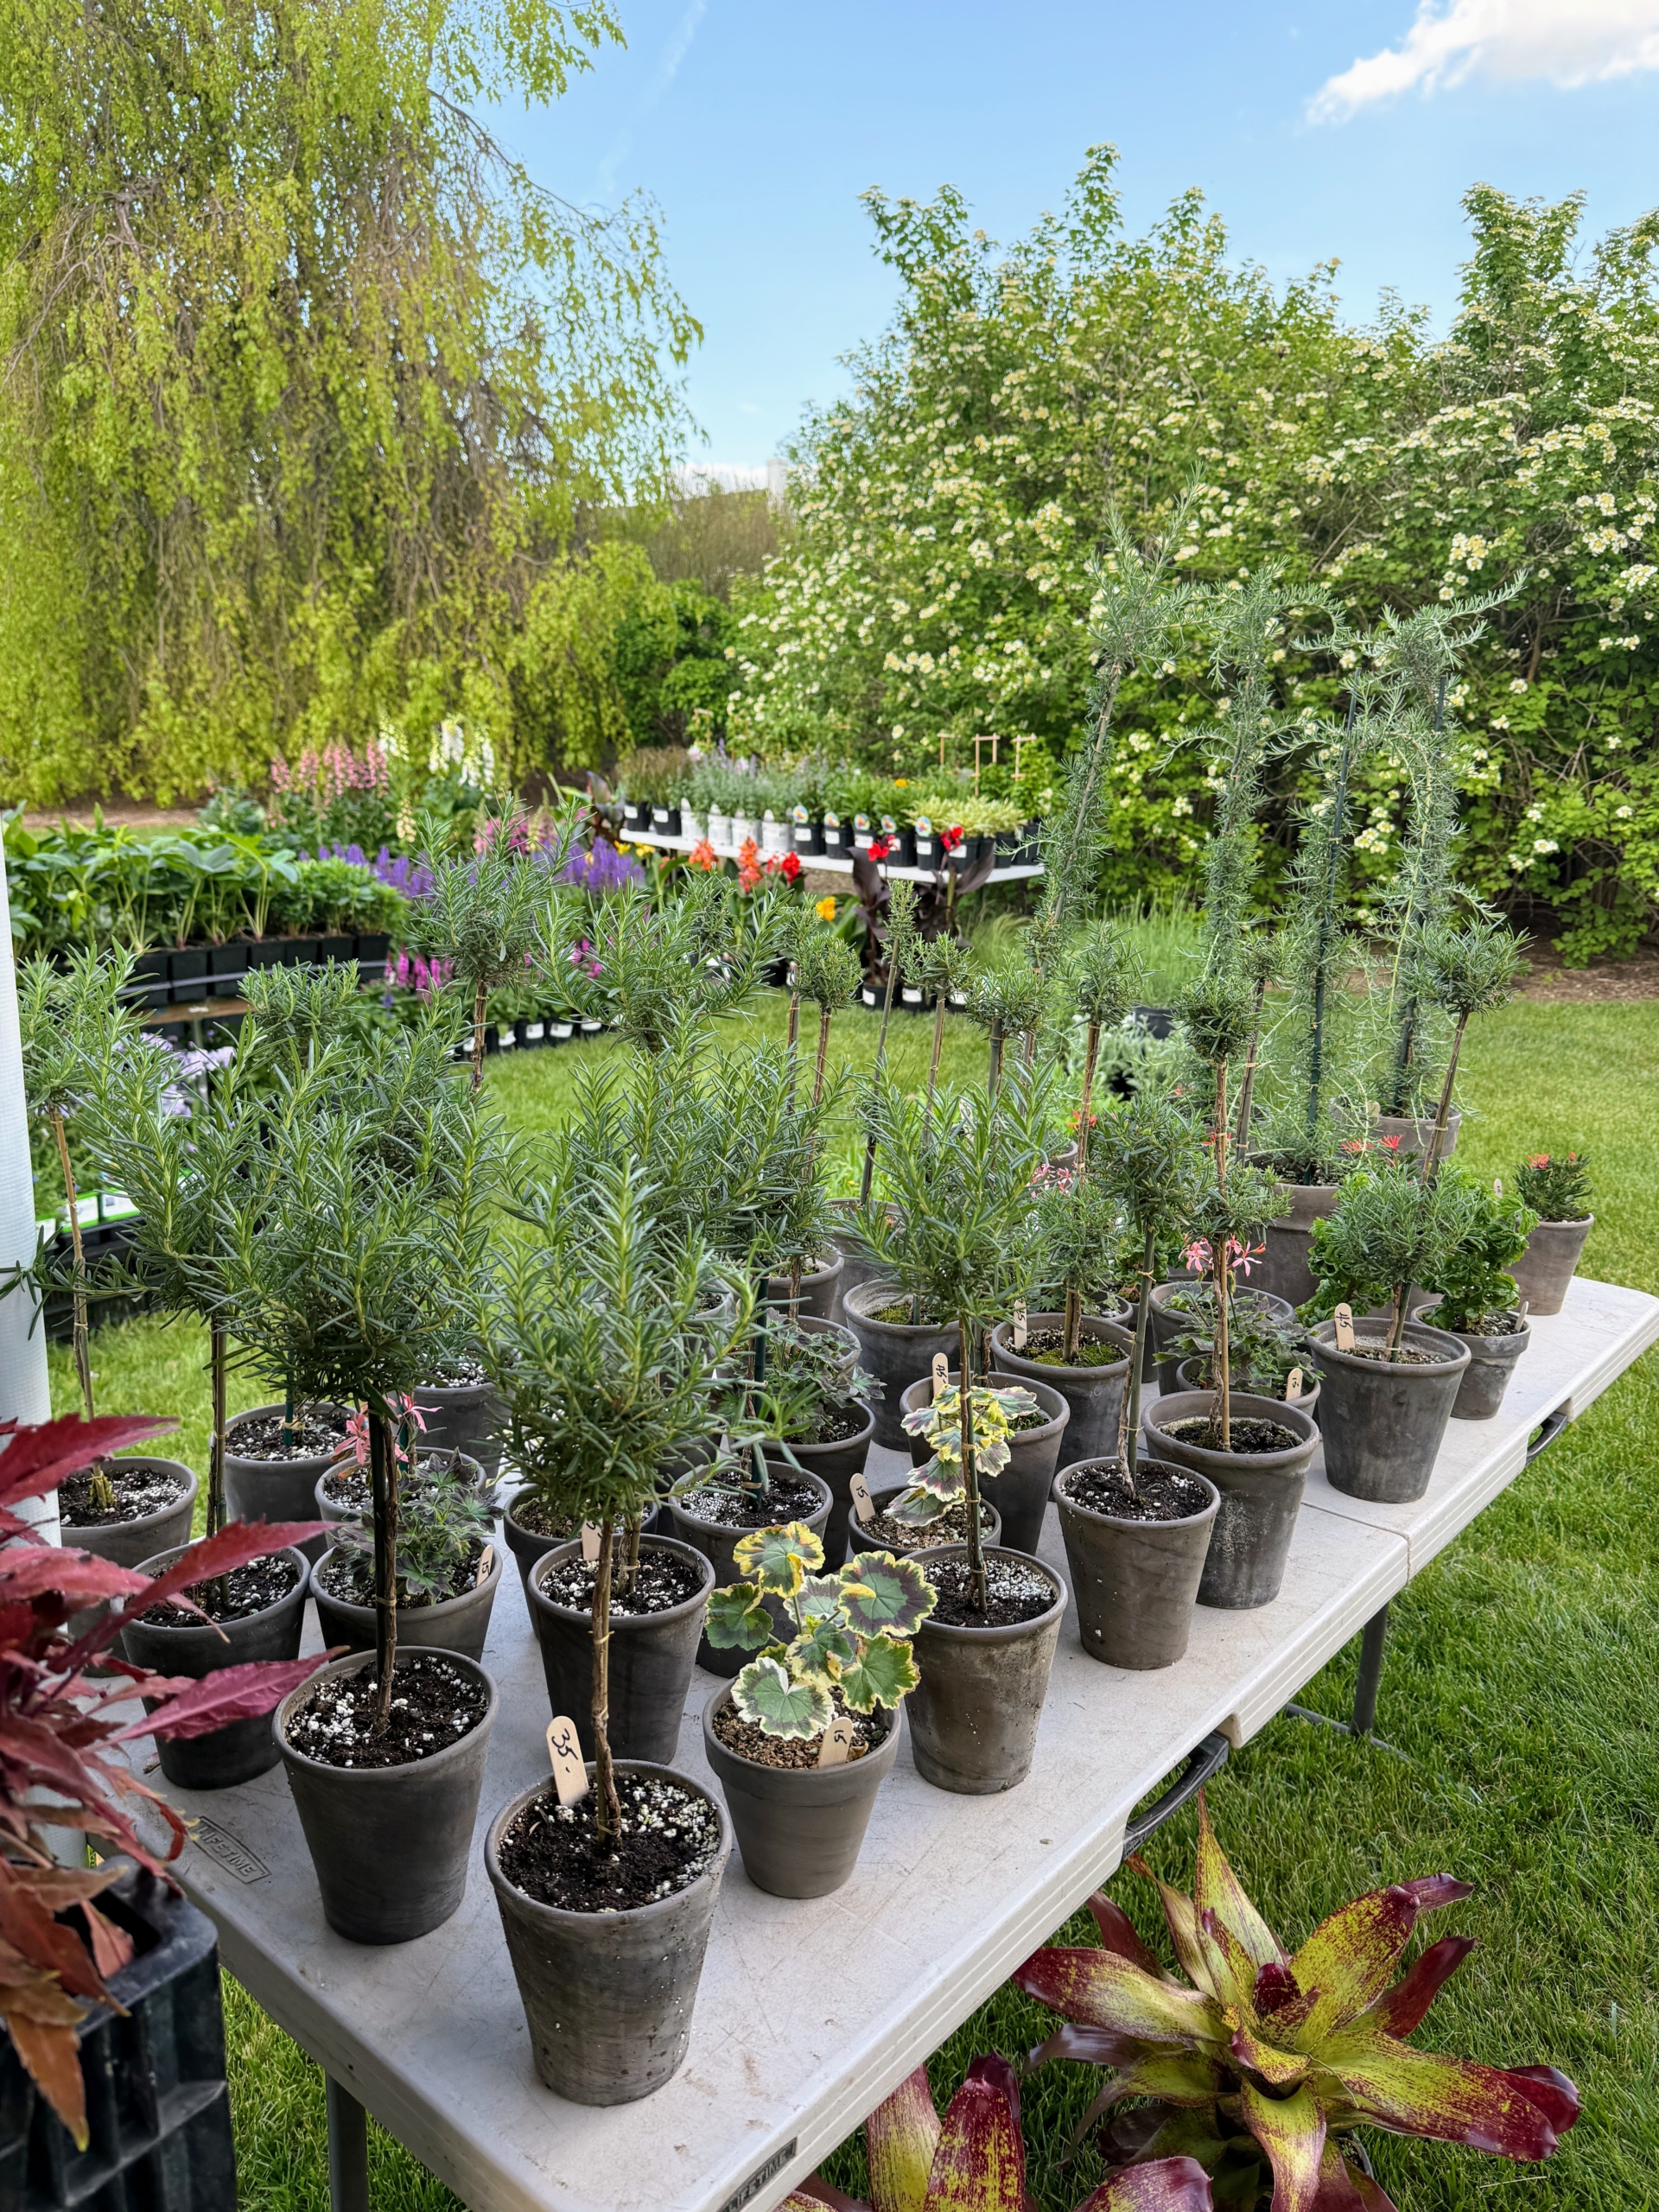
Ornamental garden fountains, urns, and furniture can be found at the Festival…
… along with many rare and interesting perennials and annuals, and small trees. Some of the proceeds of the event go to the maintenance and preservation of Ladew.
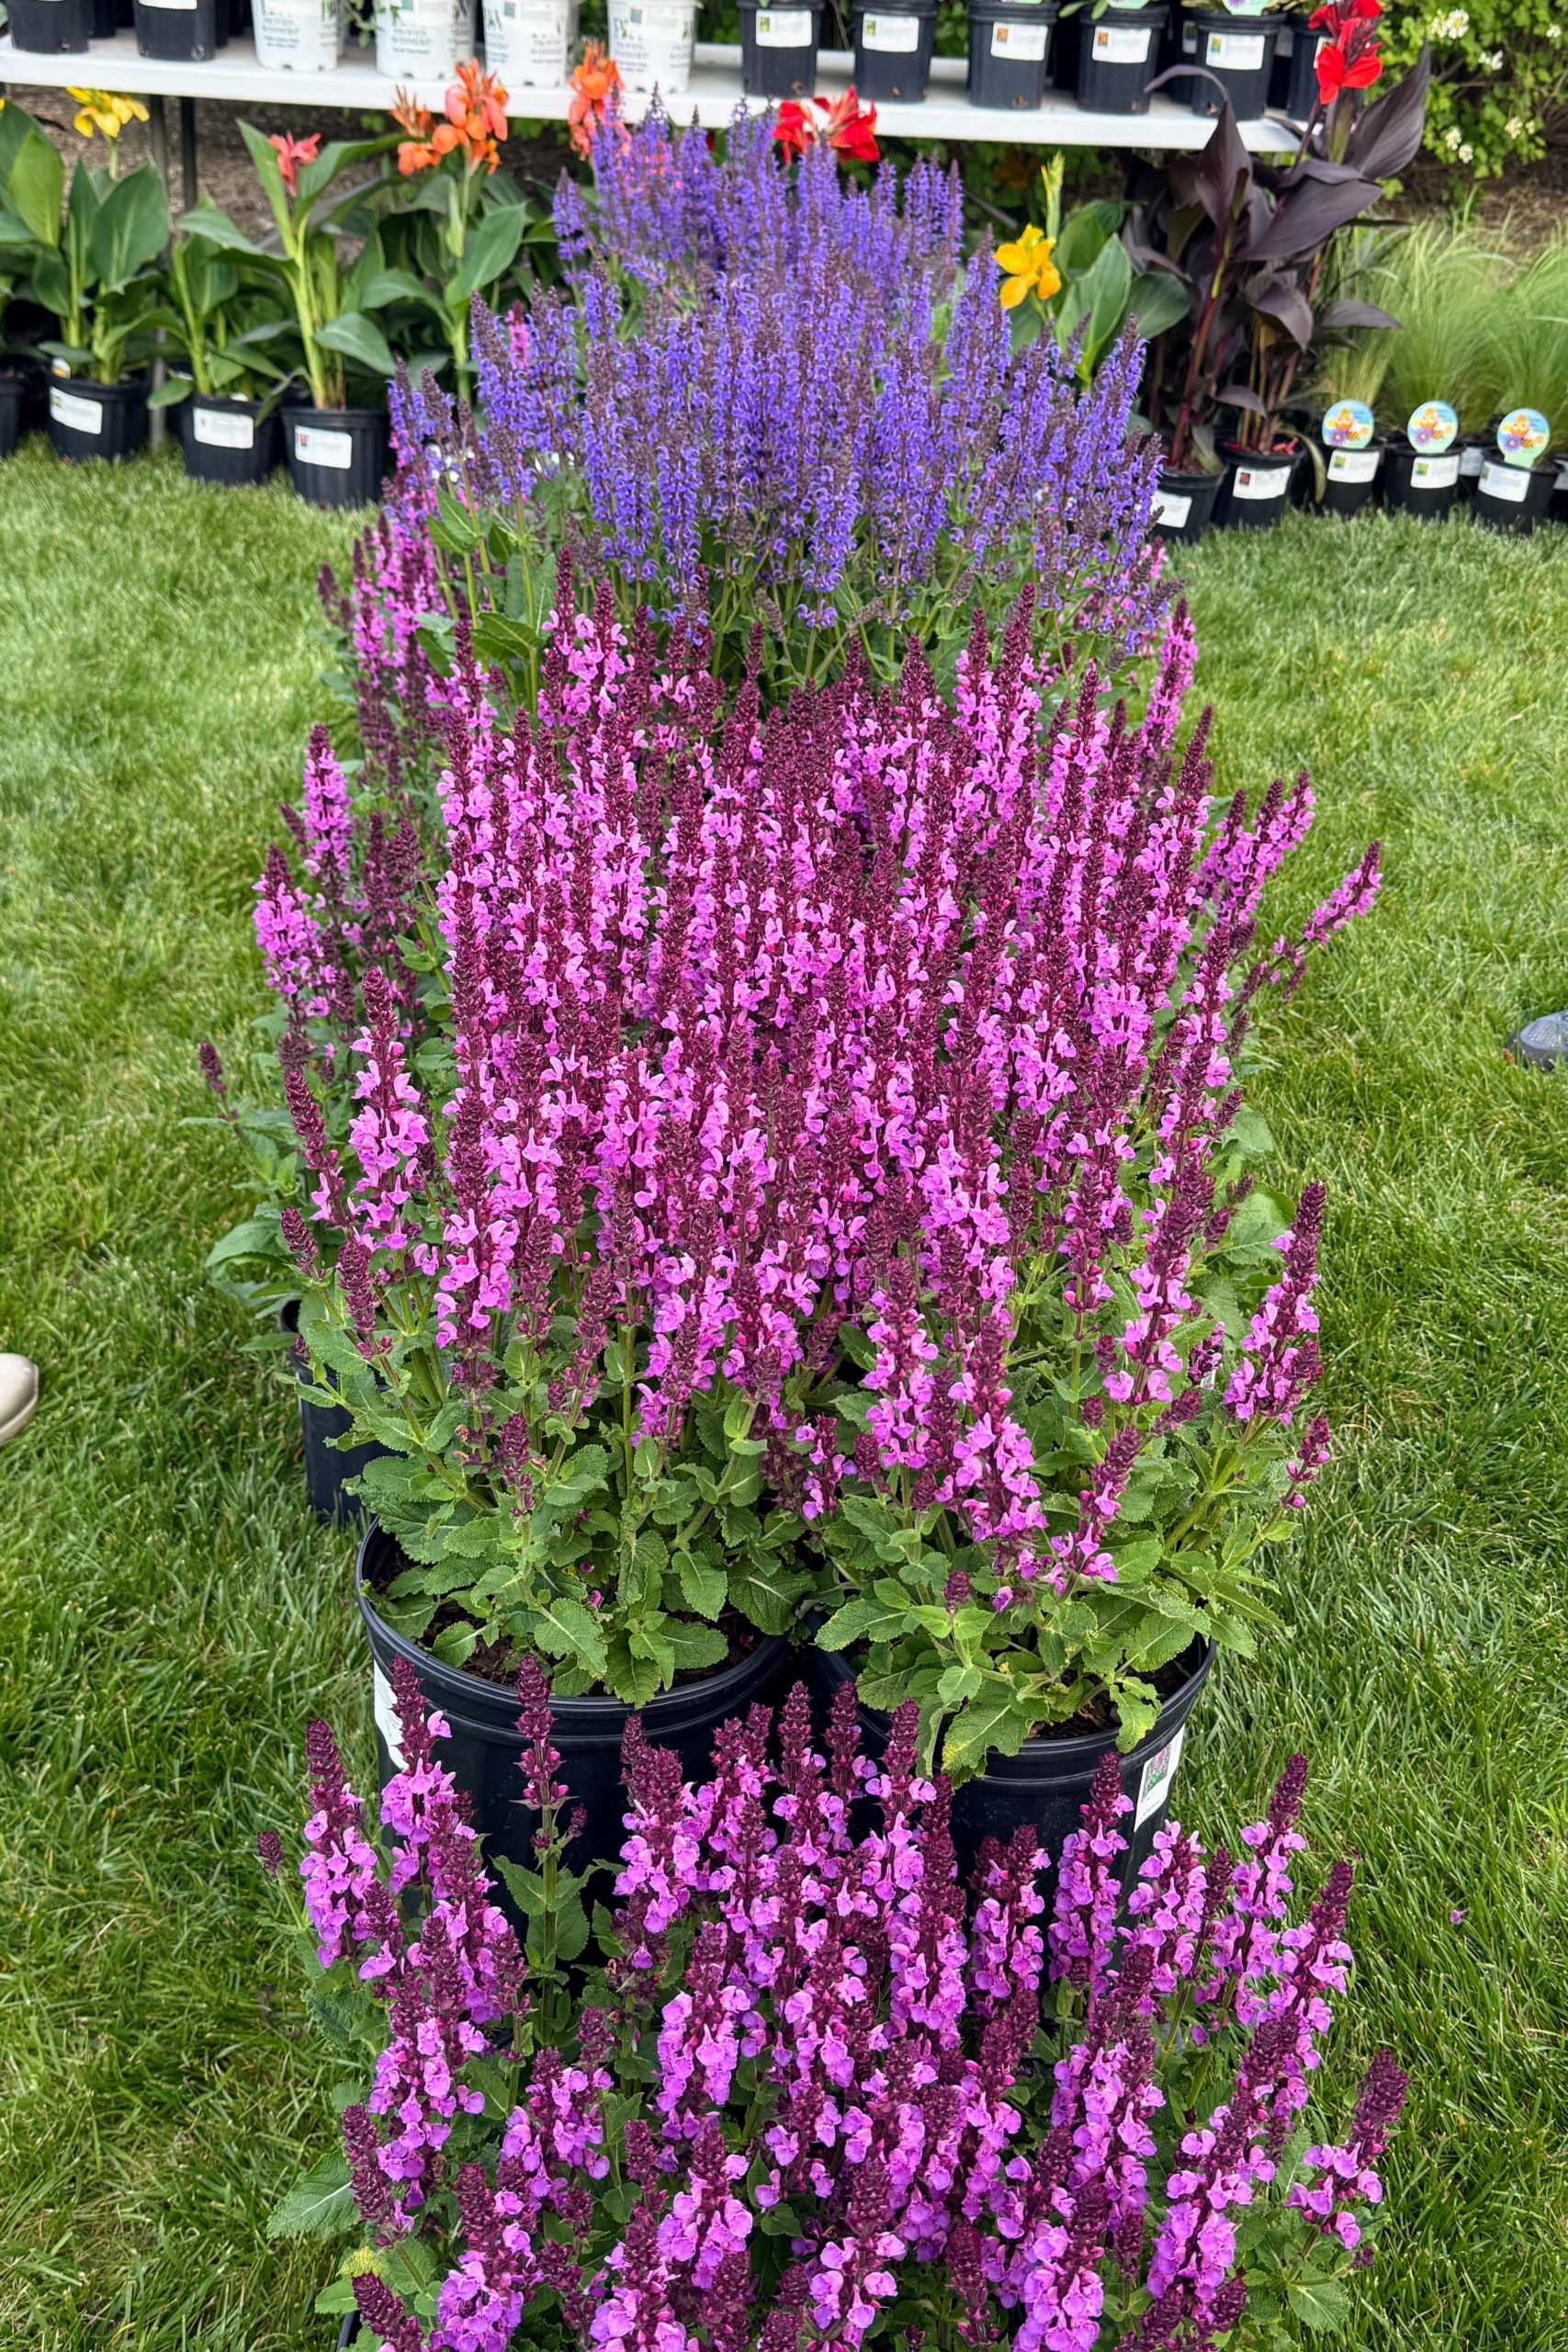
Here is a colorful selection of Salvia nemerosa, also known as meadow sage.
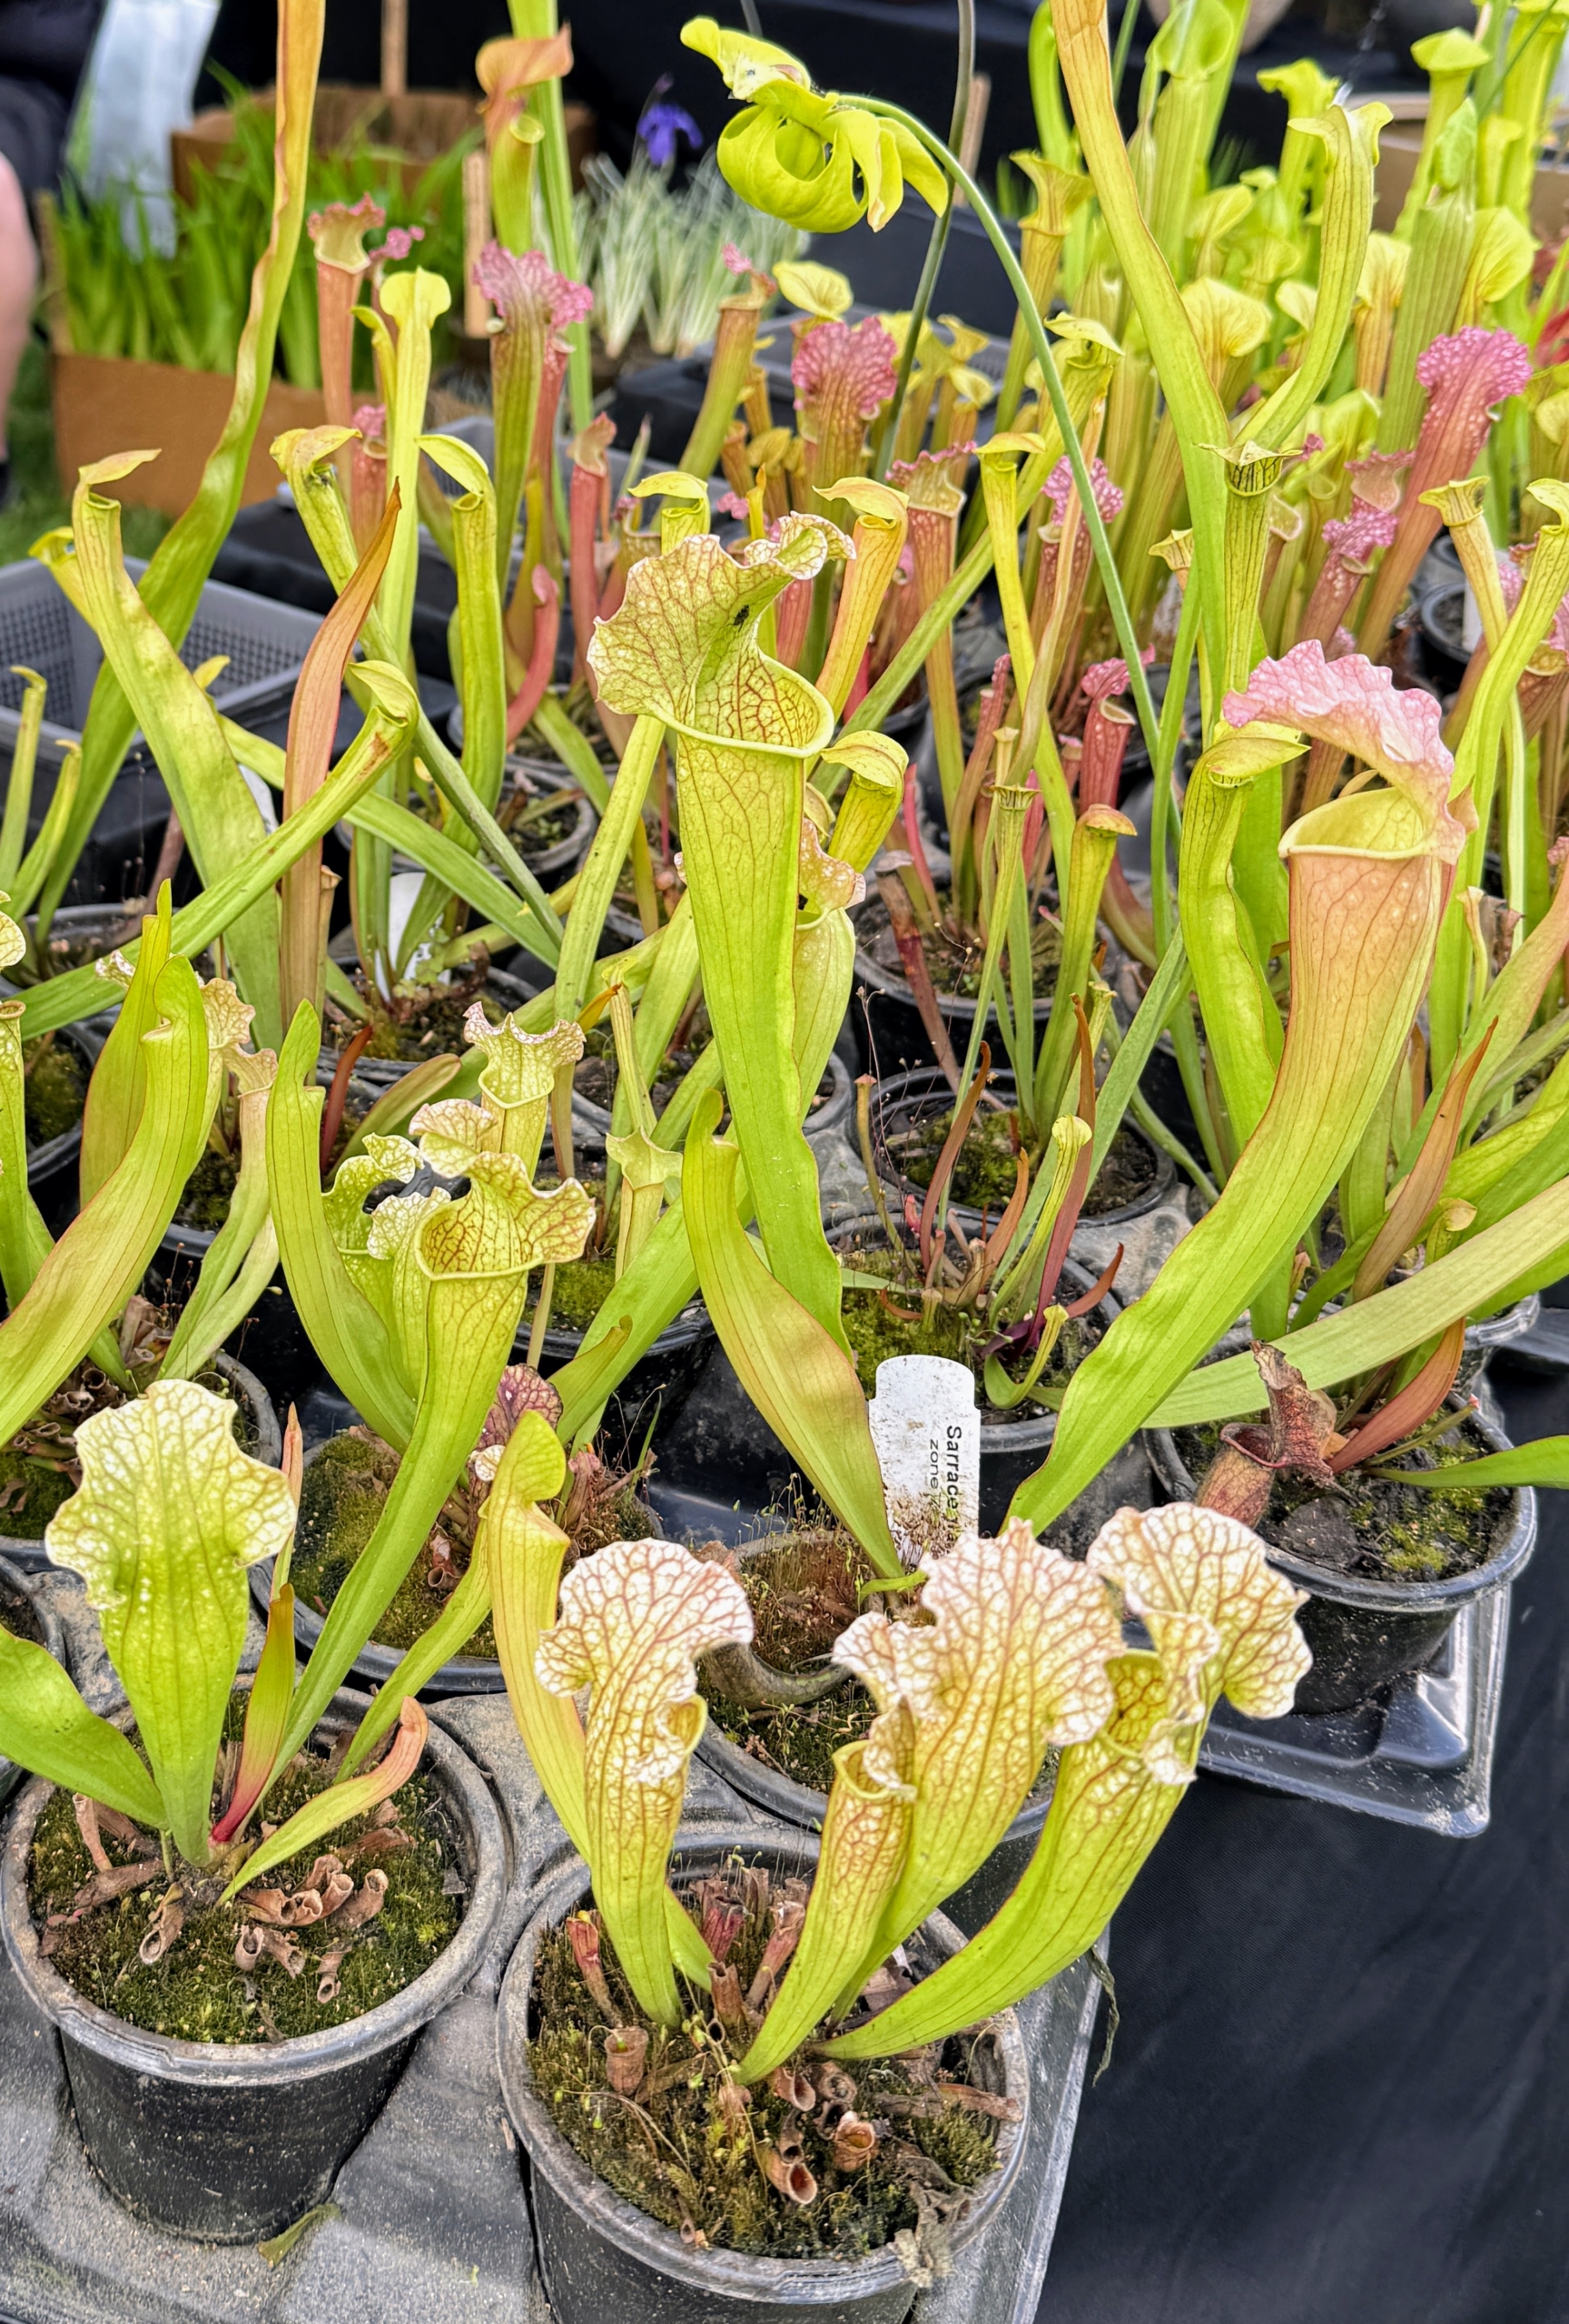
And this is Sarracenia or pitcher plants – they’re carnivorous.
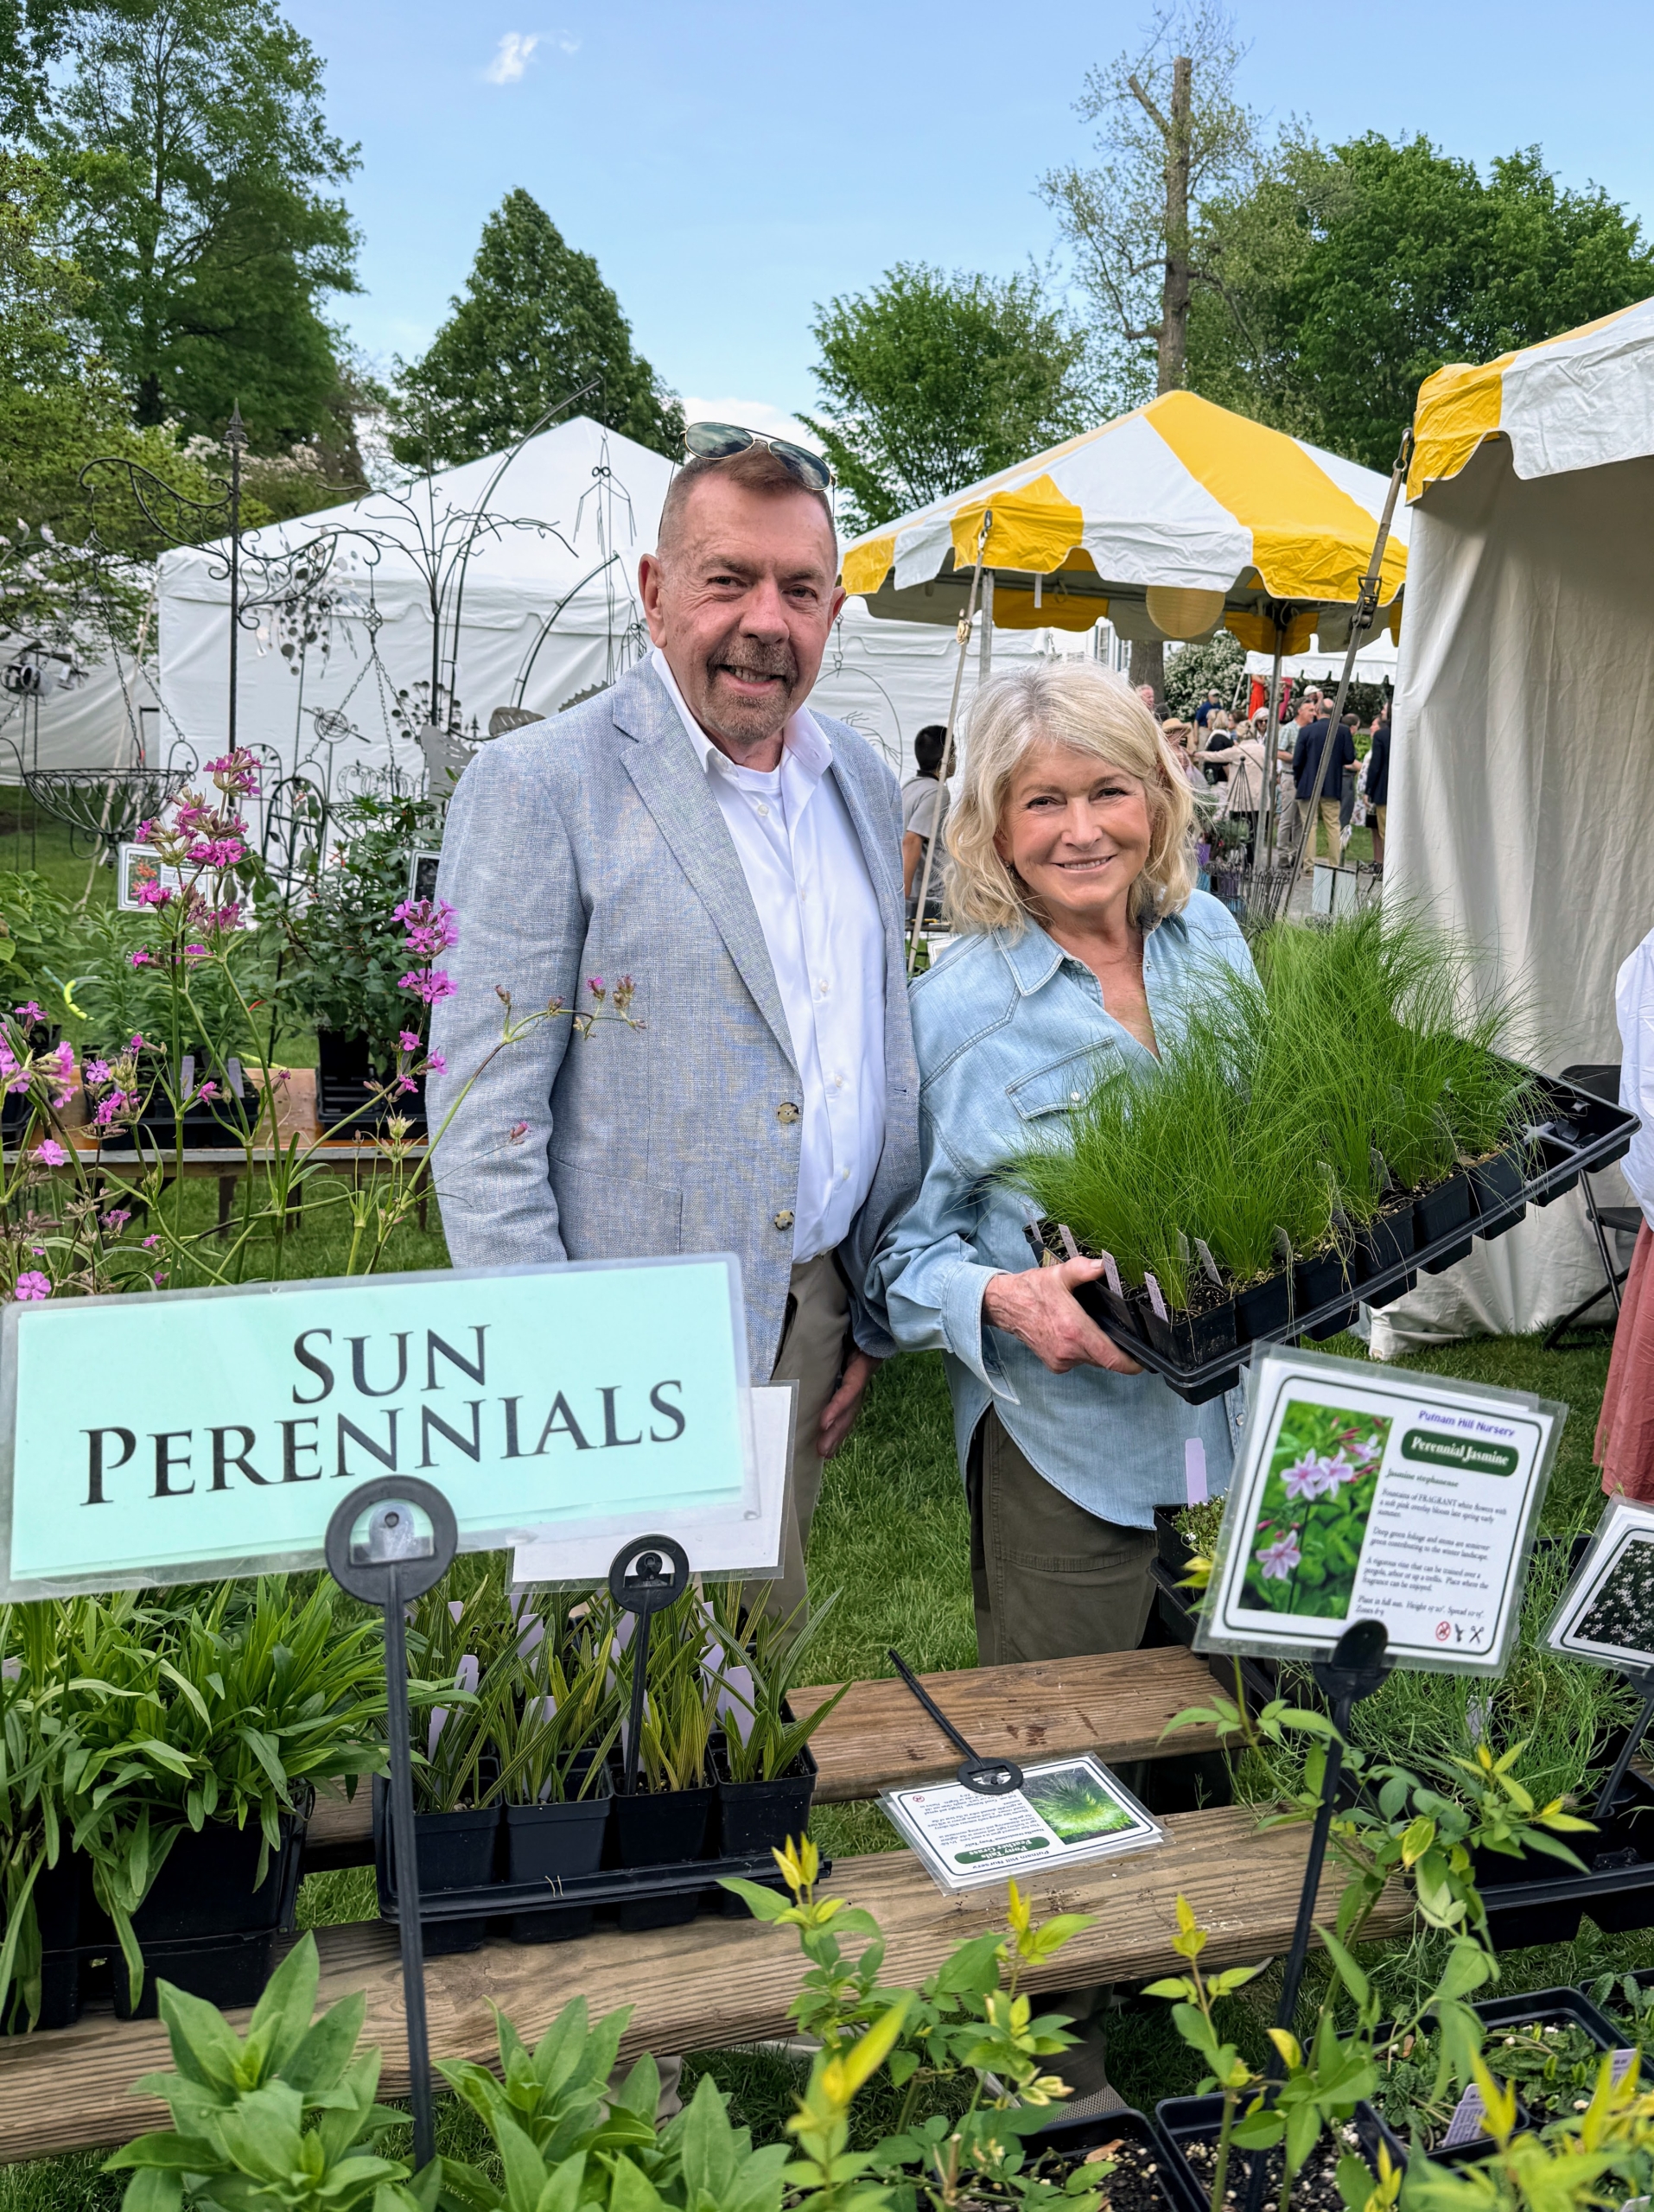
Here I am with renowned hellebores expert, David Culp. I’ve known him for may years. You may have seen him on my television shows. It was good to catch up with him at Ladew.
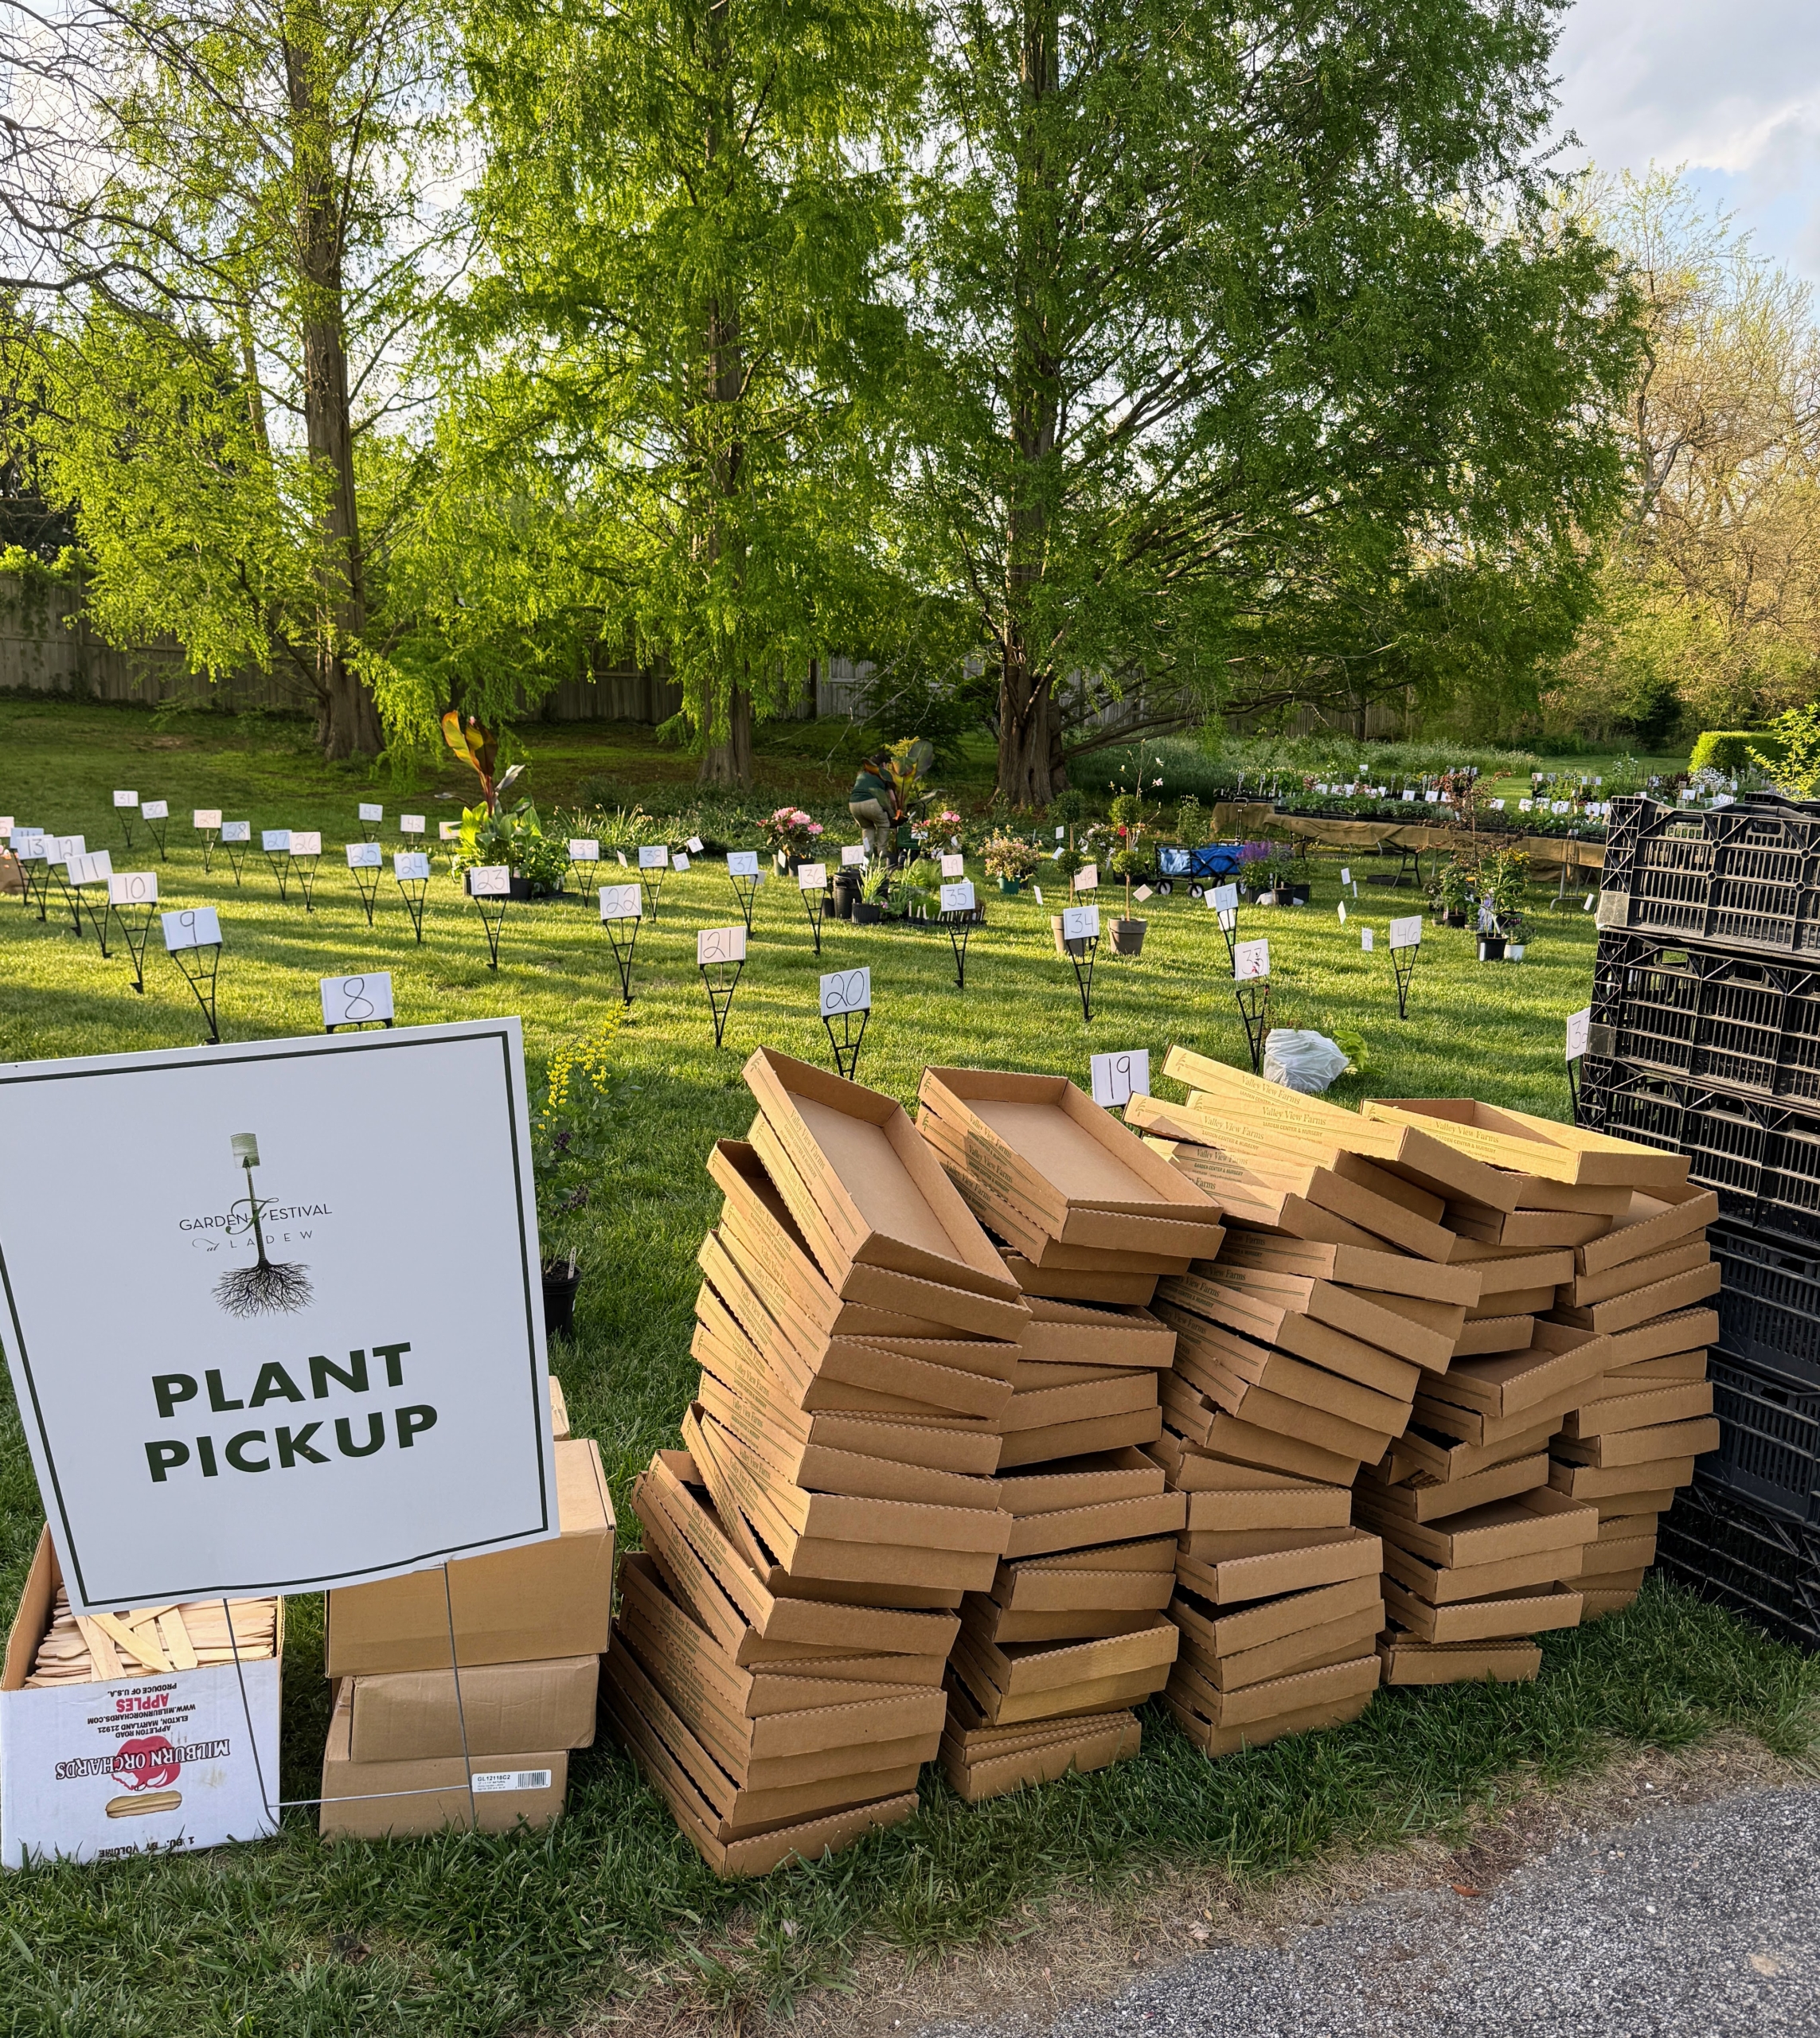
Visitors can pick up their purchases at a designated spot. It is very well organized and managed.
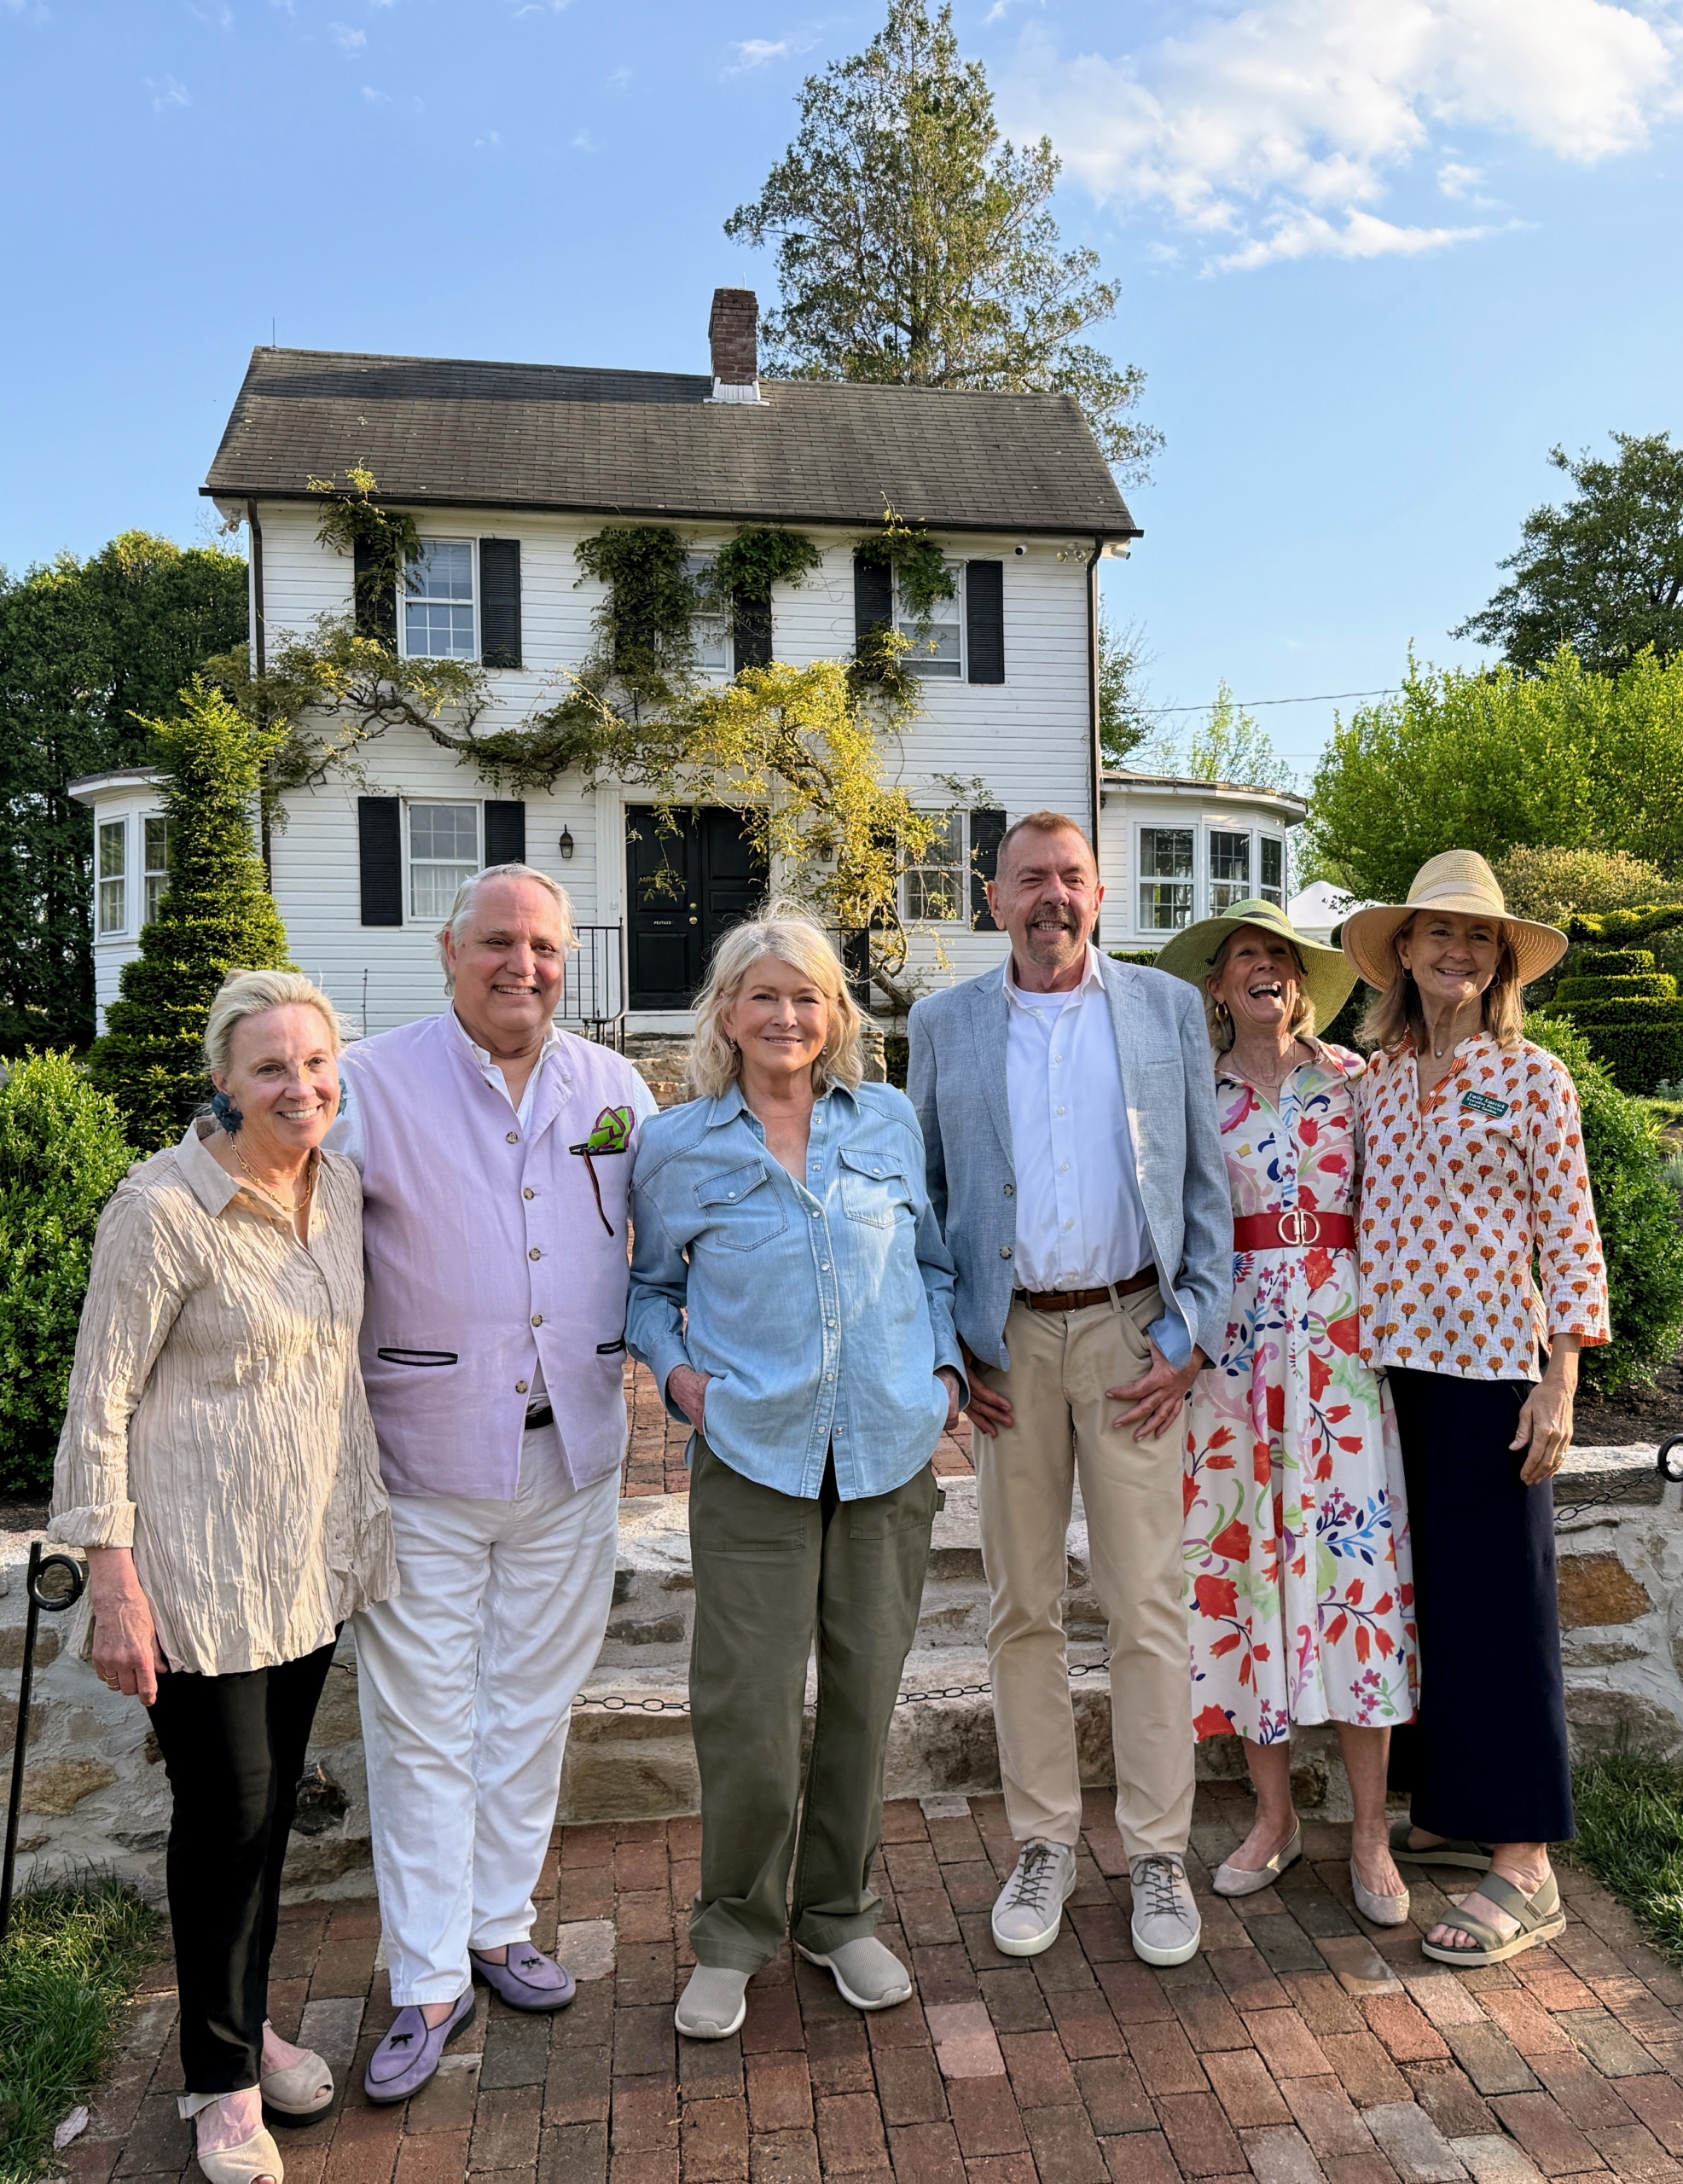
And here I am with David, the Garden Festival co-chairs Lynn Janney, Stiles Colwill, Dudley Mason, and Ladew Director, Emily Emerick. If you’re ever in the area, I encourage you to visit Ladew Topiary Gardens.
While my blog team is away this week, enjoy this encore blog originally posted on May 16, 2025.
There's no better place to find gardening ideas and inspirations than at a botanical garden, especially the New York Botanical Garden - a national historic landmark and major educational institution.
If you haven't yet been to the NYBG, I encourage you to visit. There’s always something beautiful to see - right now, its perennial plants collection, herbaceous peonies, and many of its mature trees, shrubs, and hedges are lush with spring growth. The gardening season is just beginning - stop by and get inspired.
Here are some photos, enjoy.
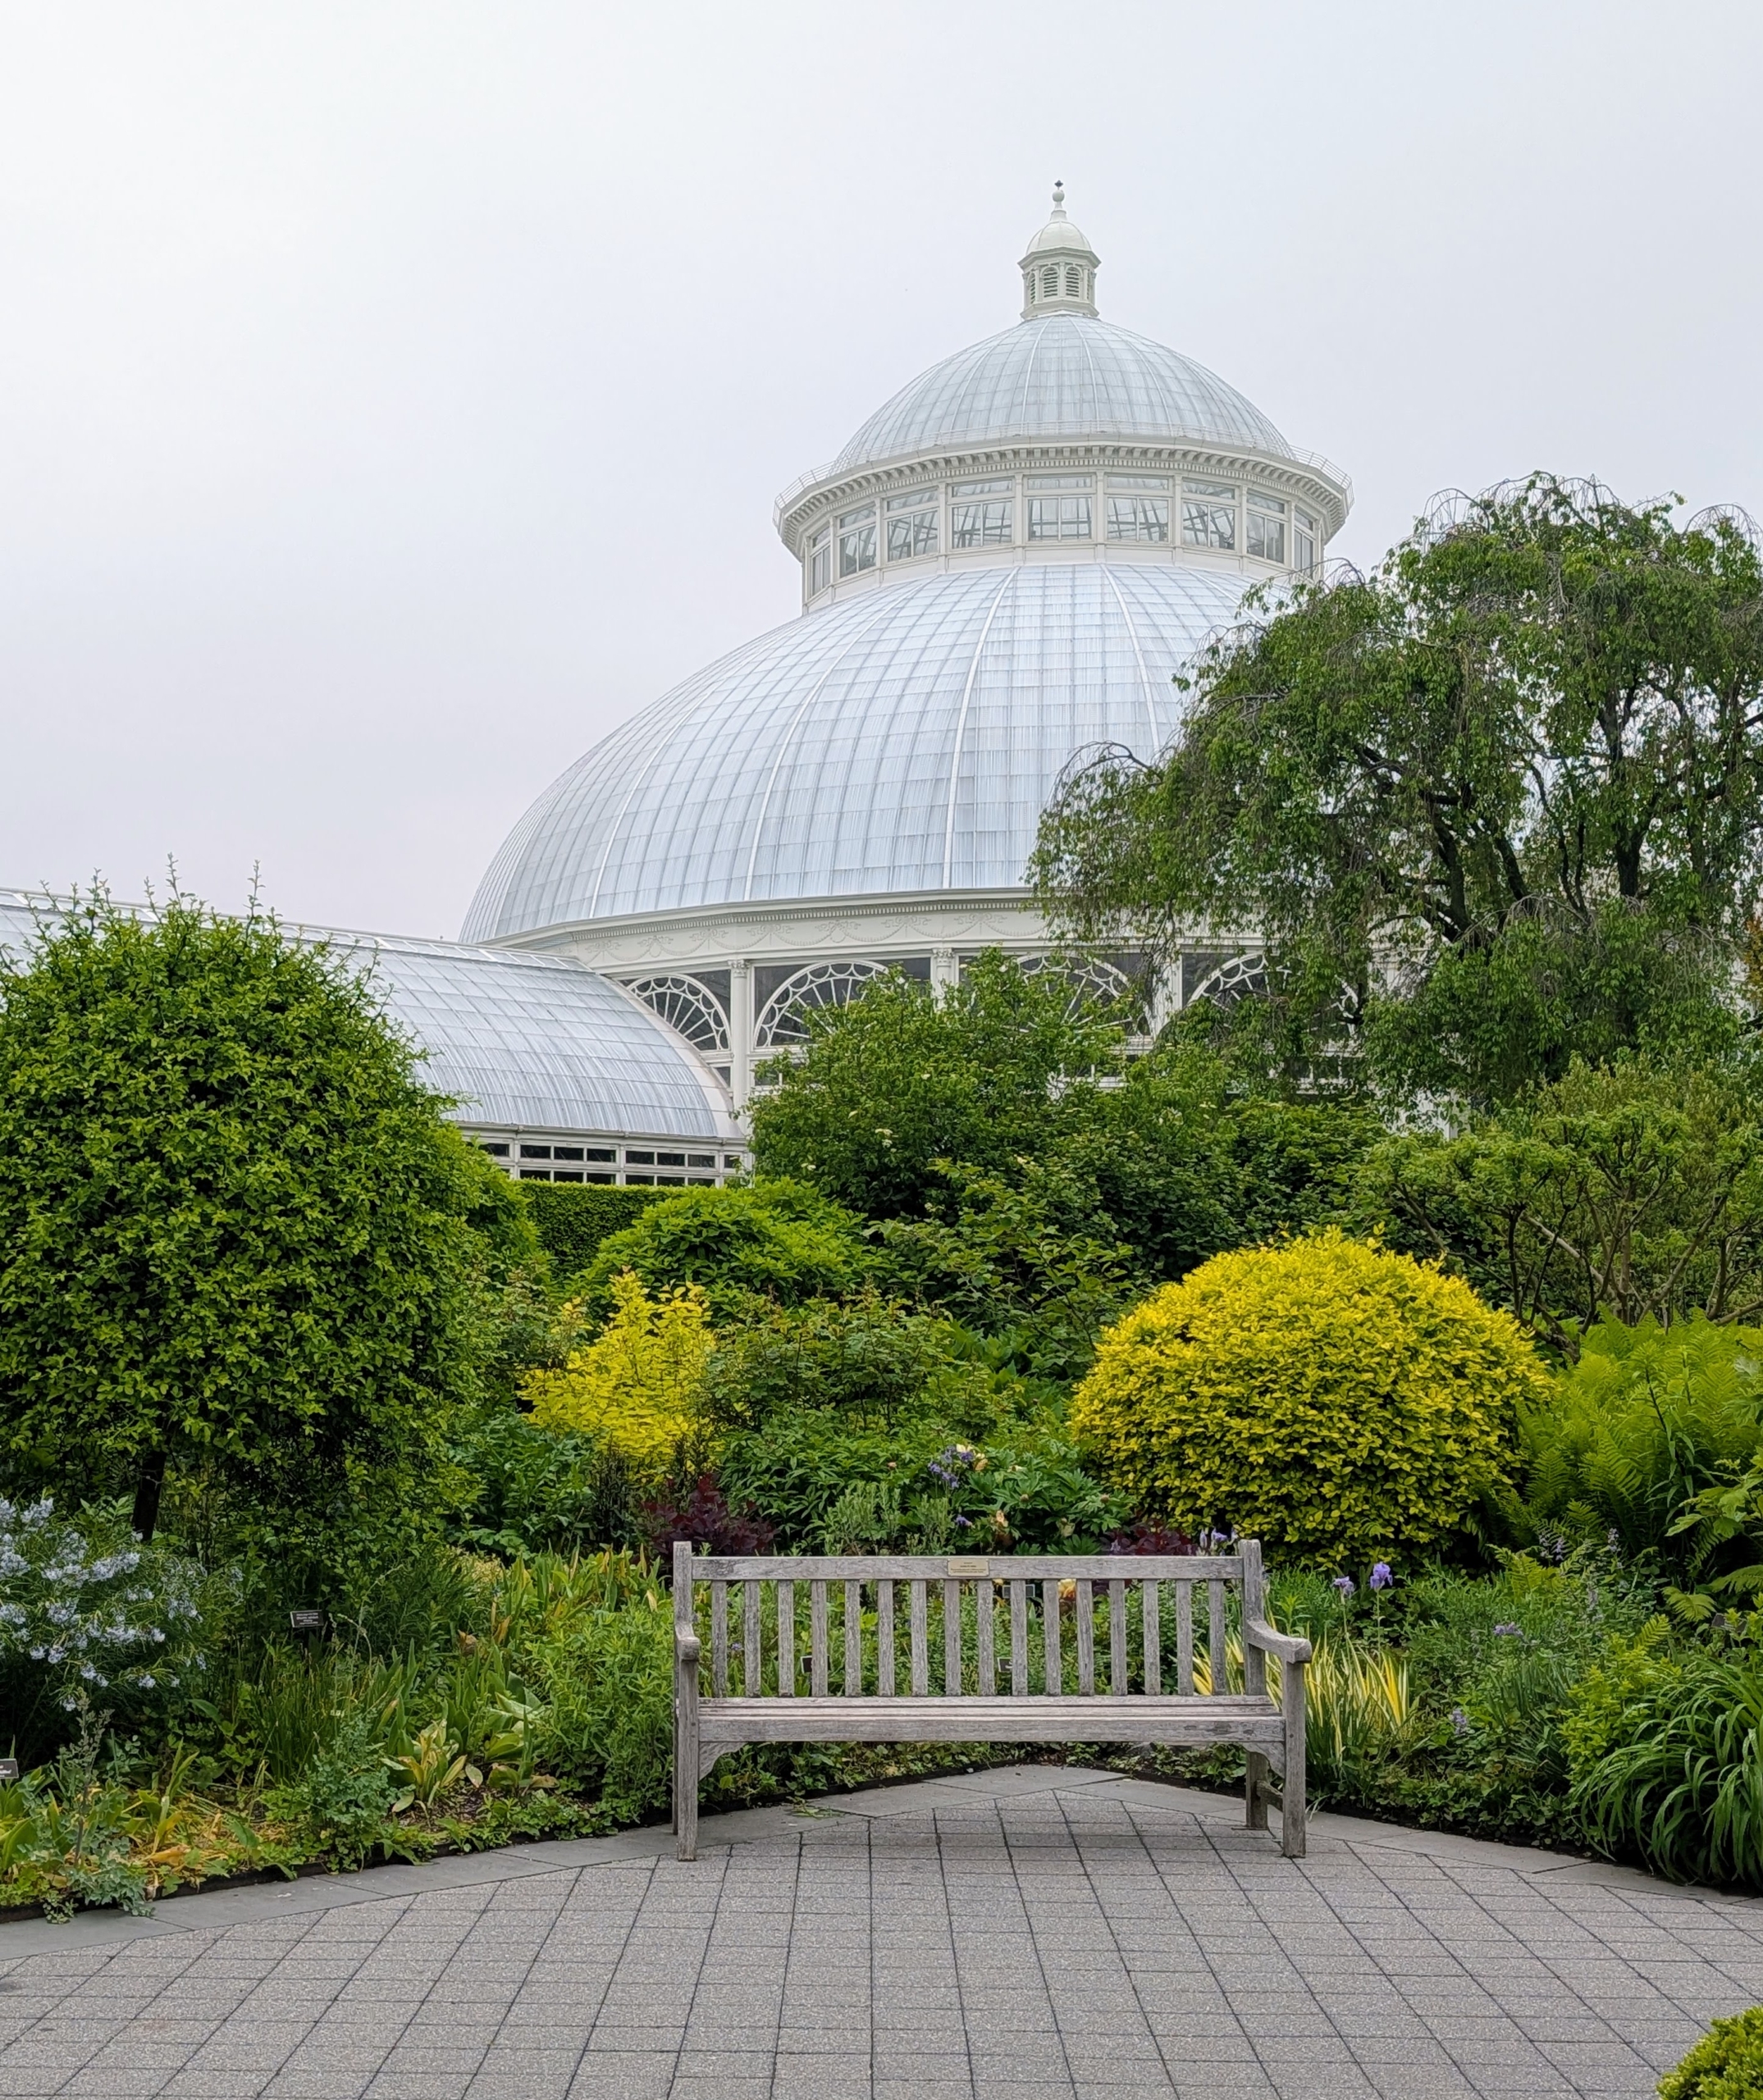
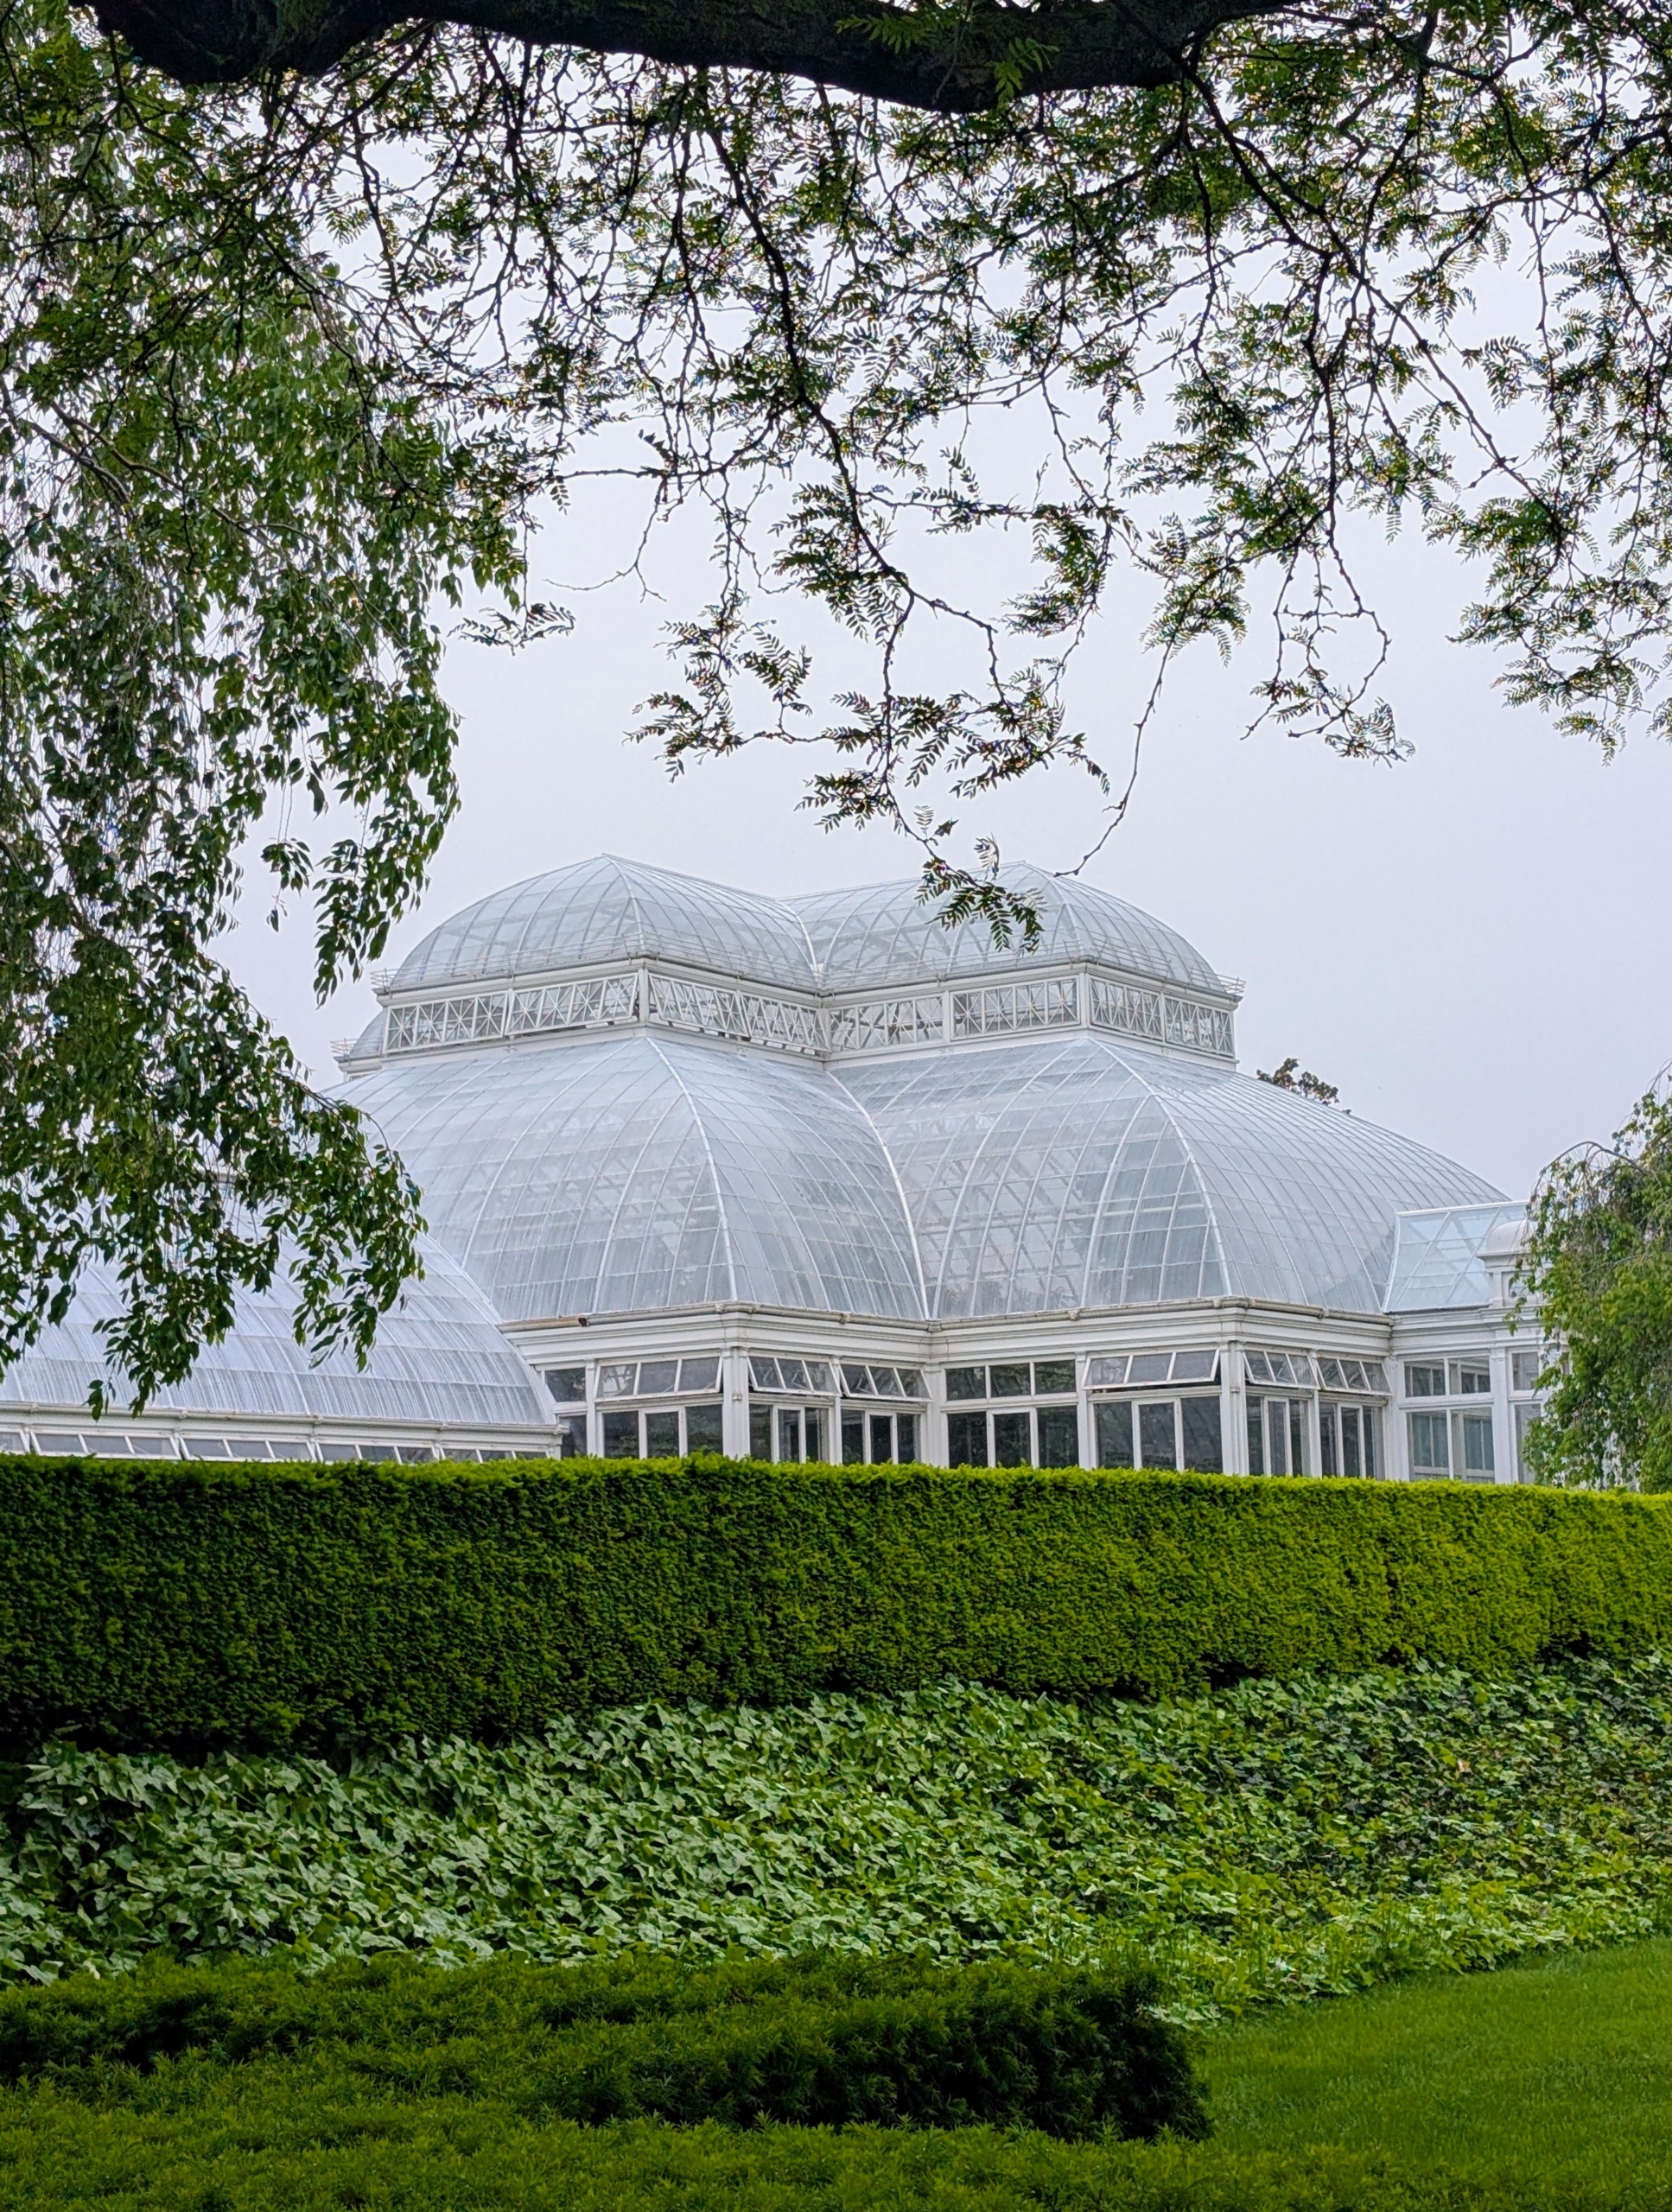
This is the magnificent Enid A. Haupt Conservatory, where many of the indoor plant exhibitions are held. As the nation’s largest Victorian glasshouse, it is among the grandest indoor spaces in the world.
Originally constructed in 1902, the steel and glass Conservatory includes a 90-foot tall domed Palm Gallery and 10 attached glasshouse galleries.
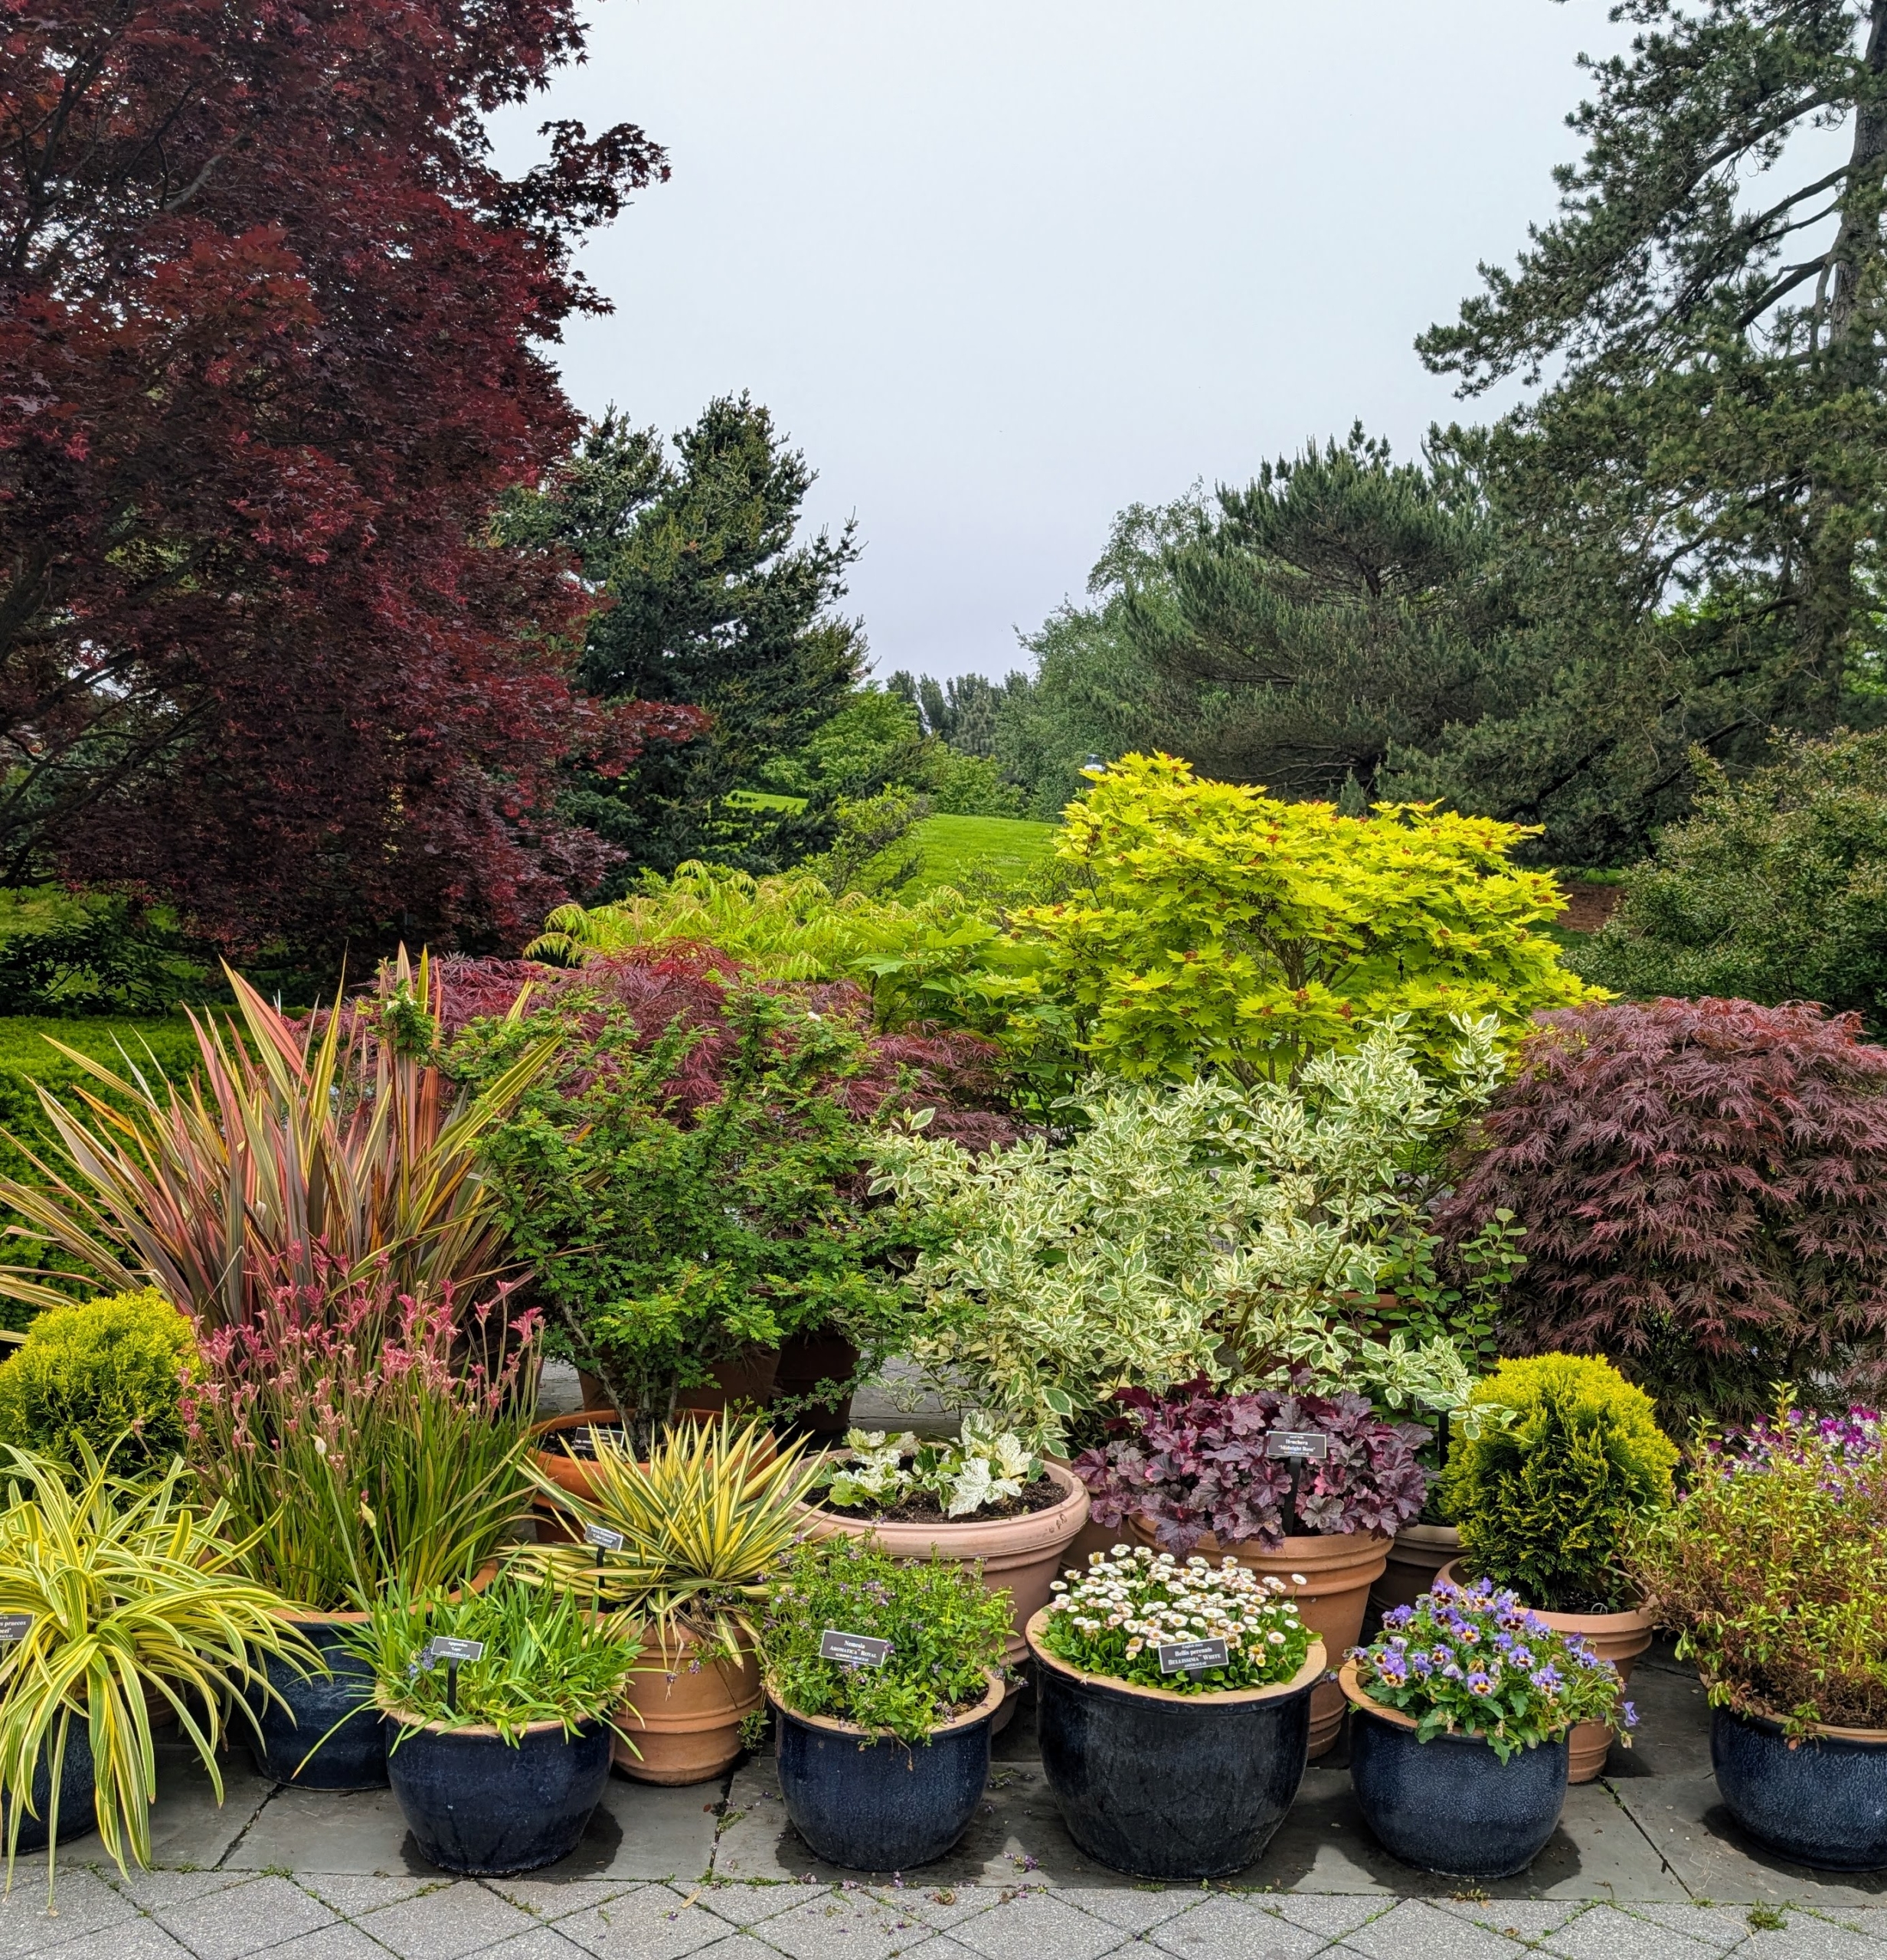
Just outside the Conservatory is a perennial garden featuring a series of themed areas of plants, planted in pots and in the ground. It is a blend of perennials, grasses, bulbs, shrubs, and trees that flower through the year.
This is a variegated yellow-twig dogwood, Cornus sercea ‘Silver and Gold’ – a dogwood variety that is grown for its bold variegated foliage and its yellow winter stems.
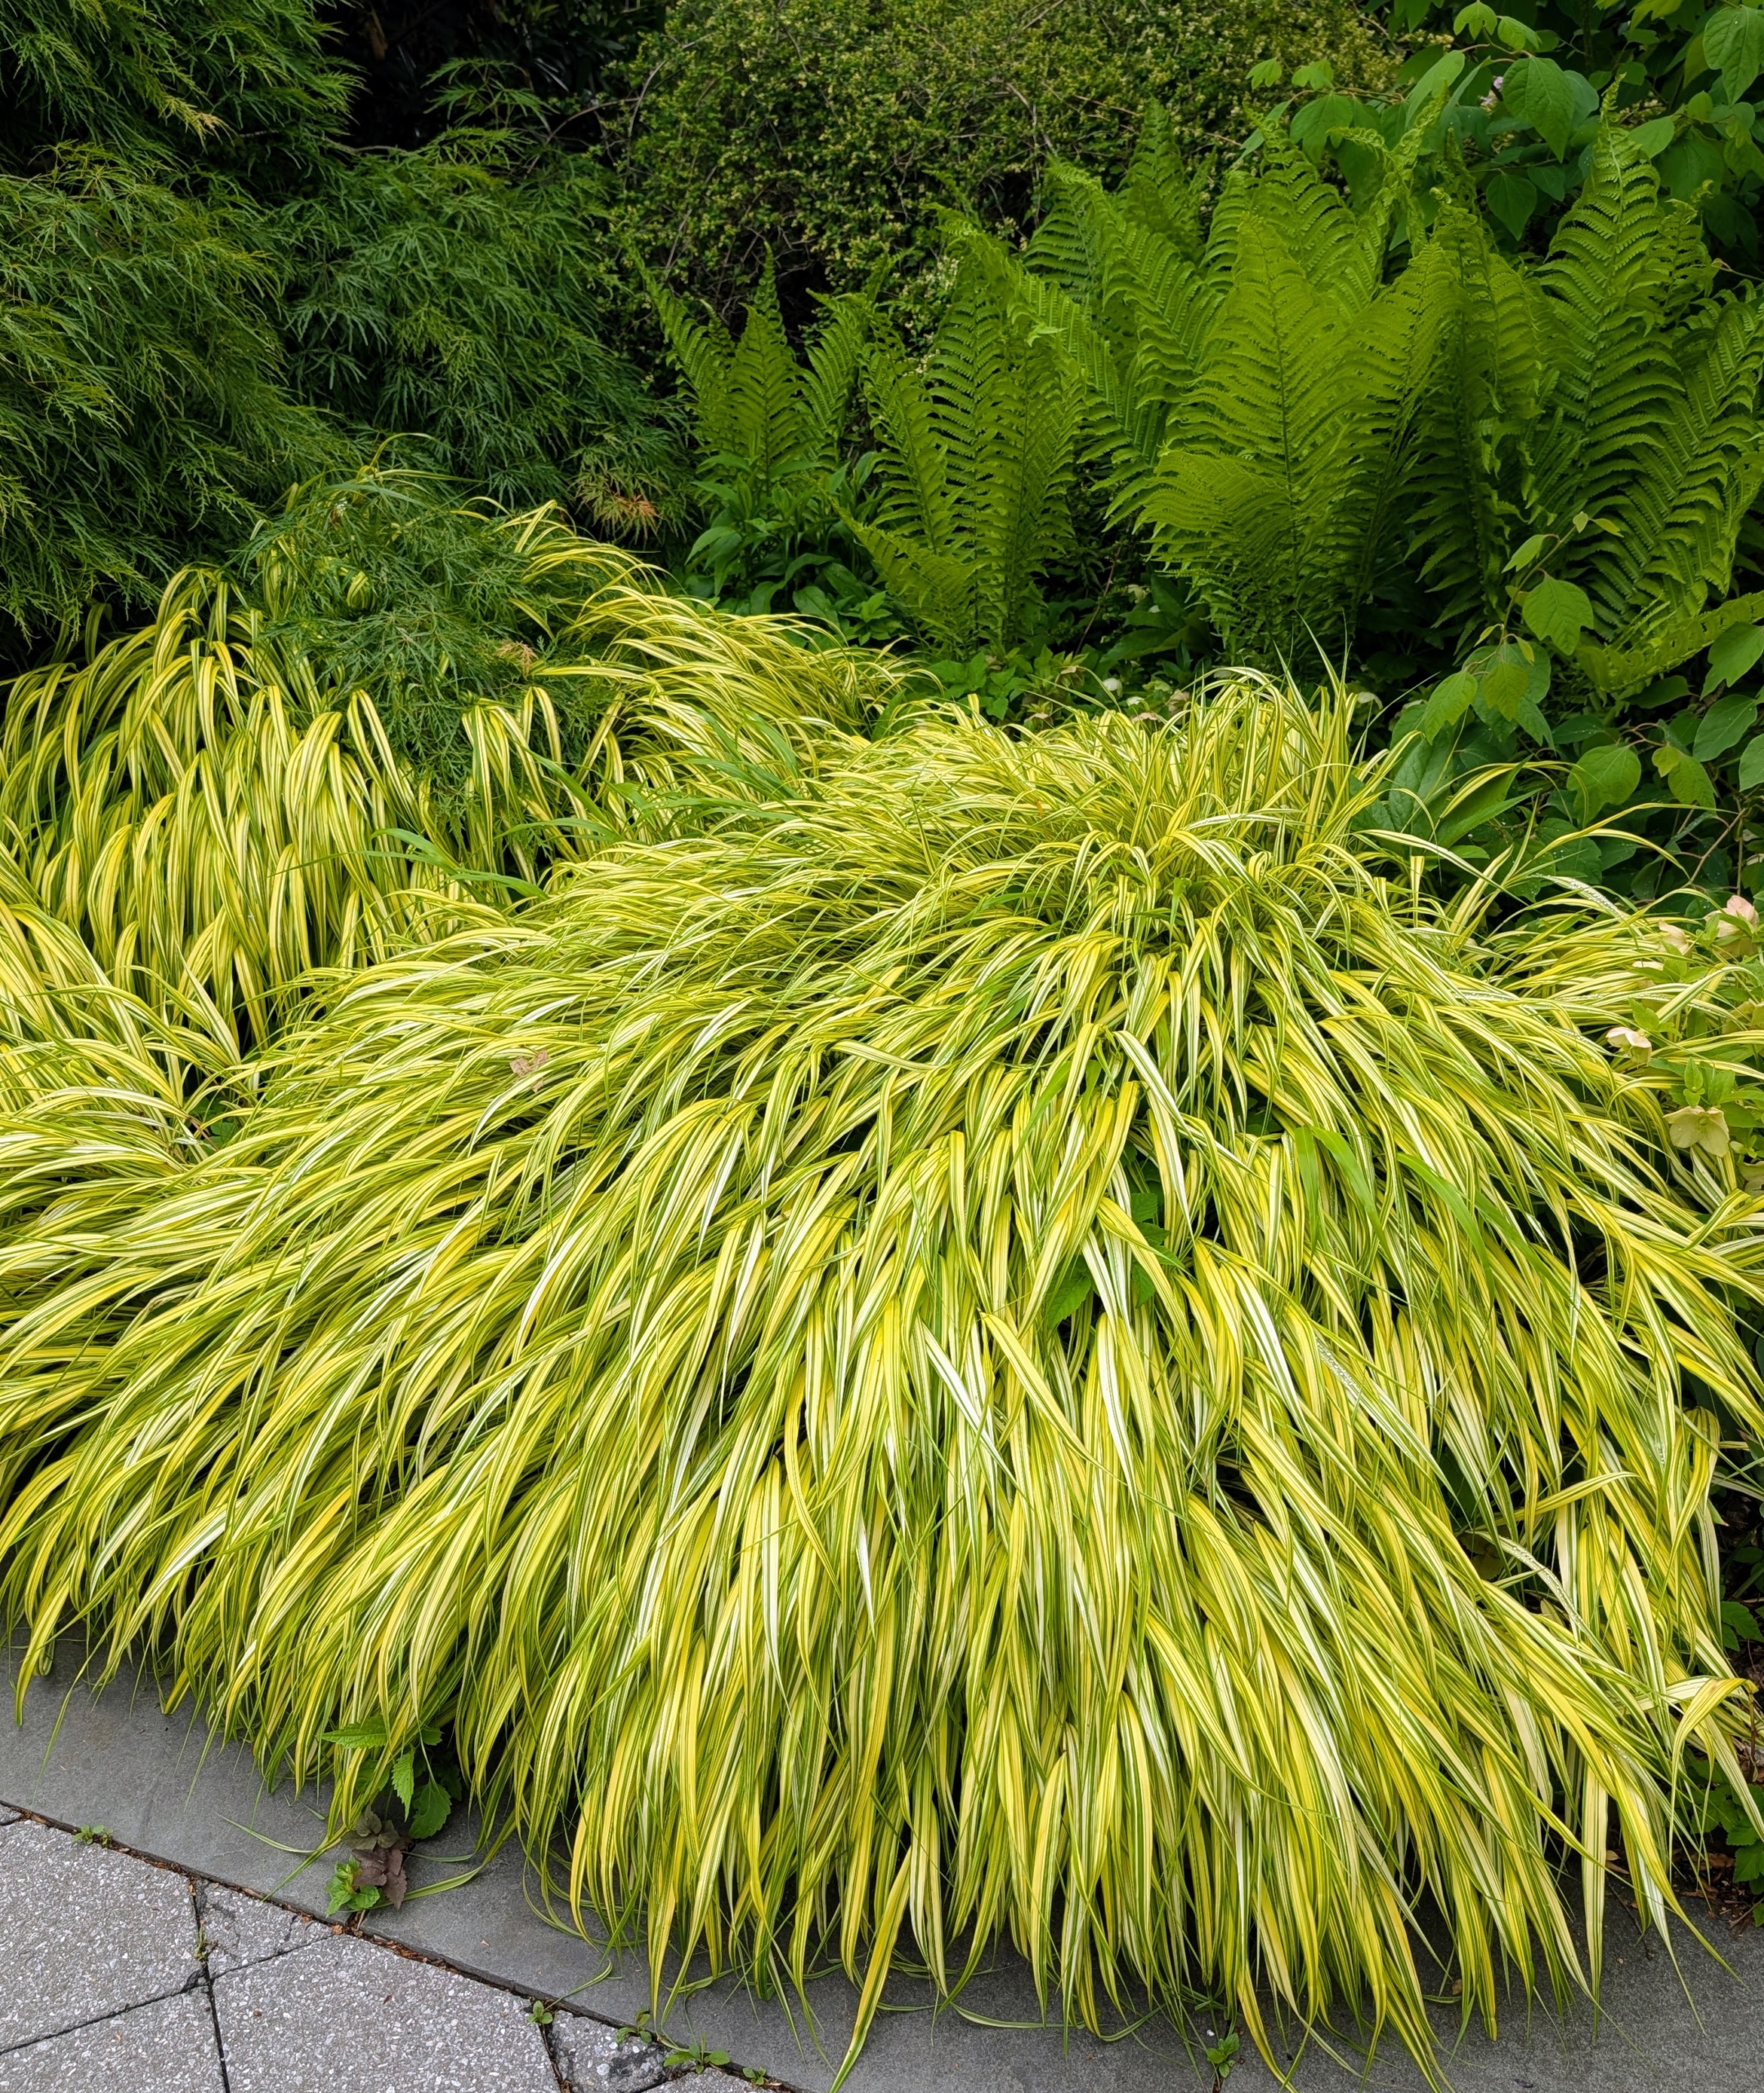
If you’re looking for interesting grasses, this is a golden-variegated Hakone grass, Hakonechloa macra ‘Aureola.’ Ornamental grasses require little maintenance. It thrives best in a location with partial shade and moist, well-drained soil rich in organic matter.
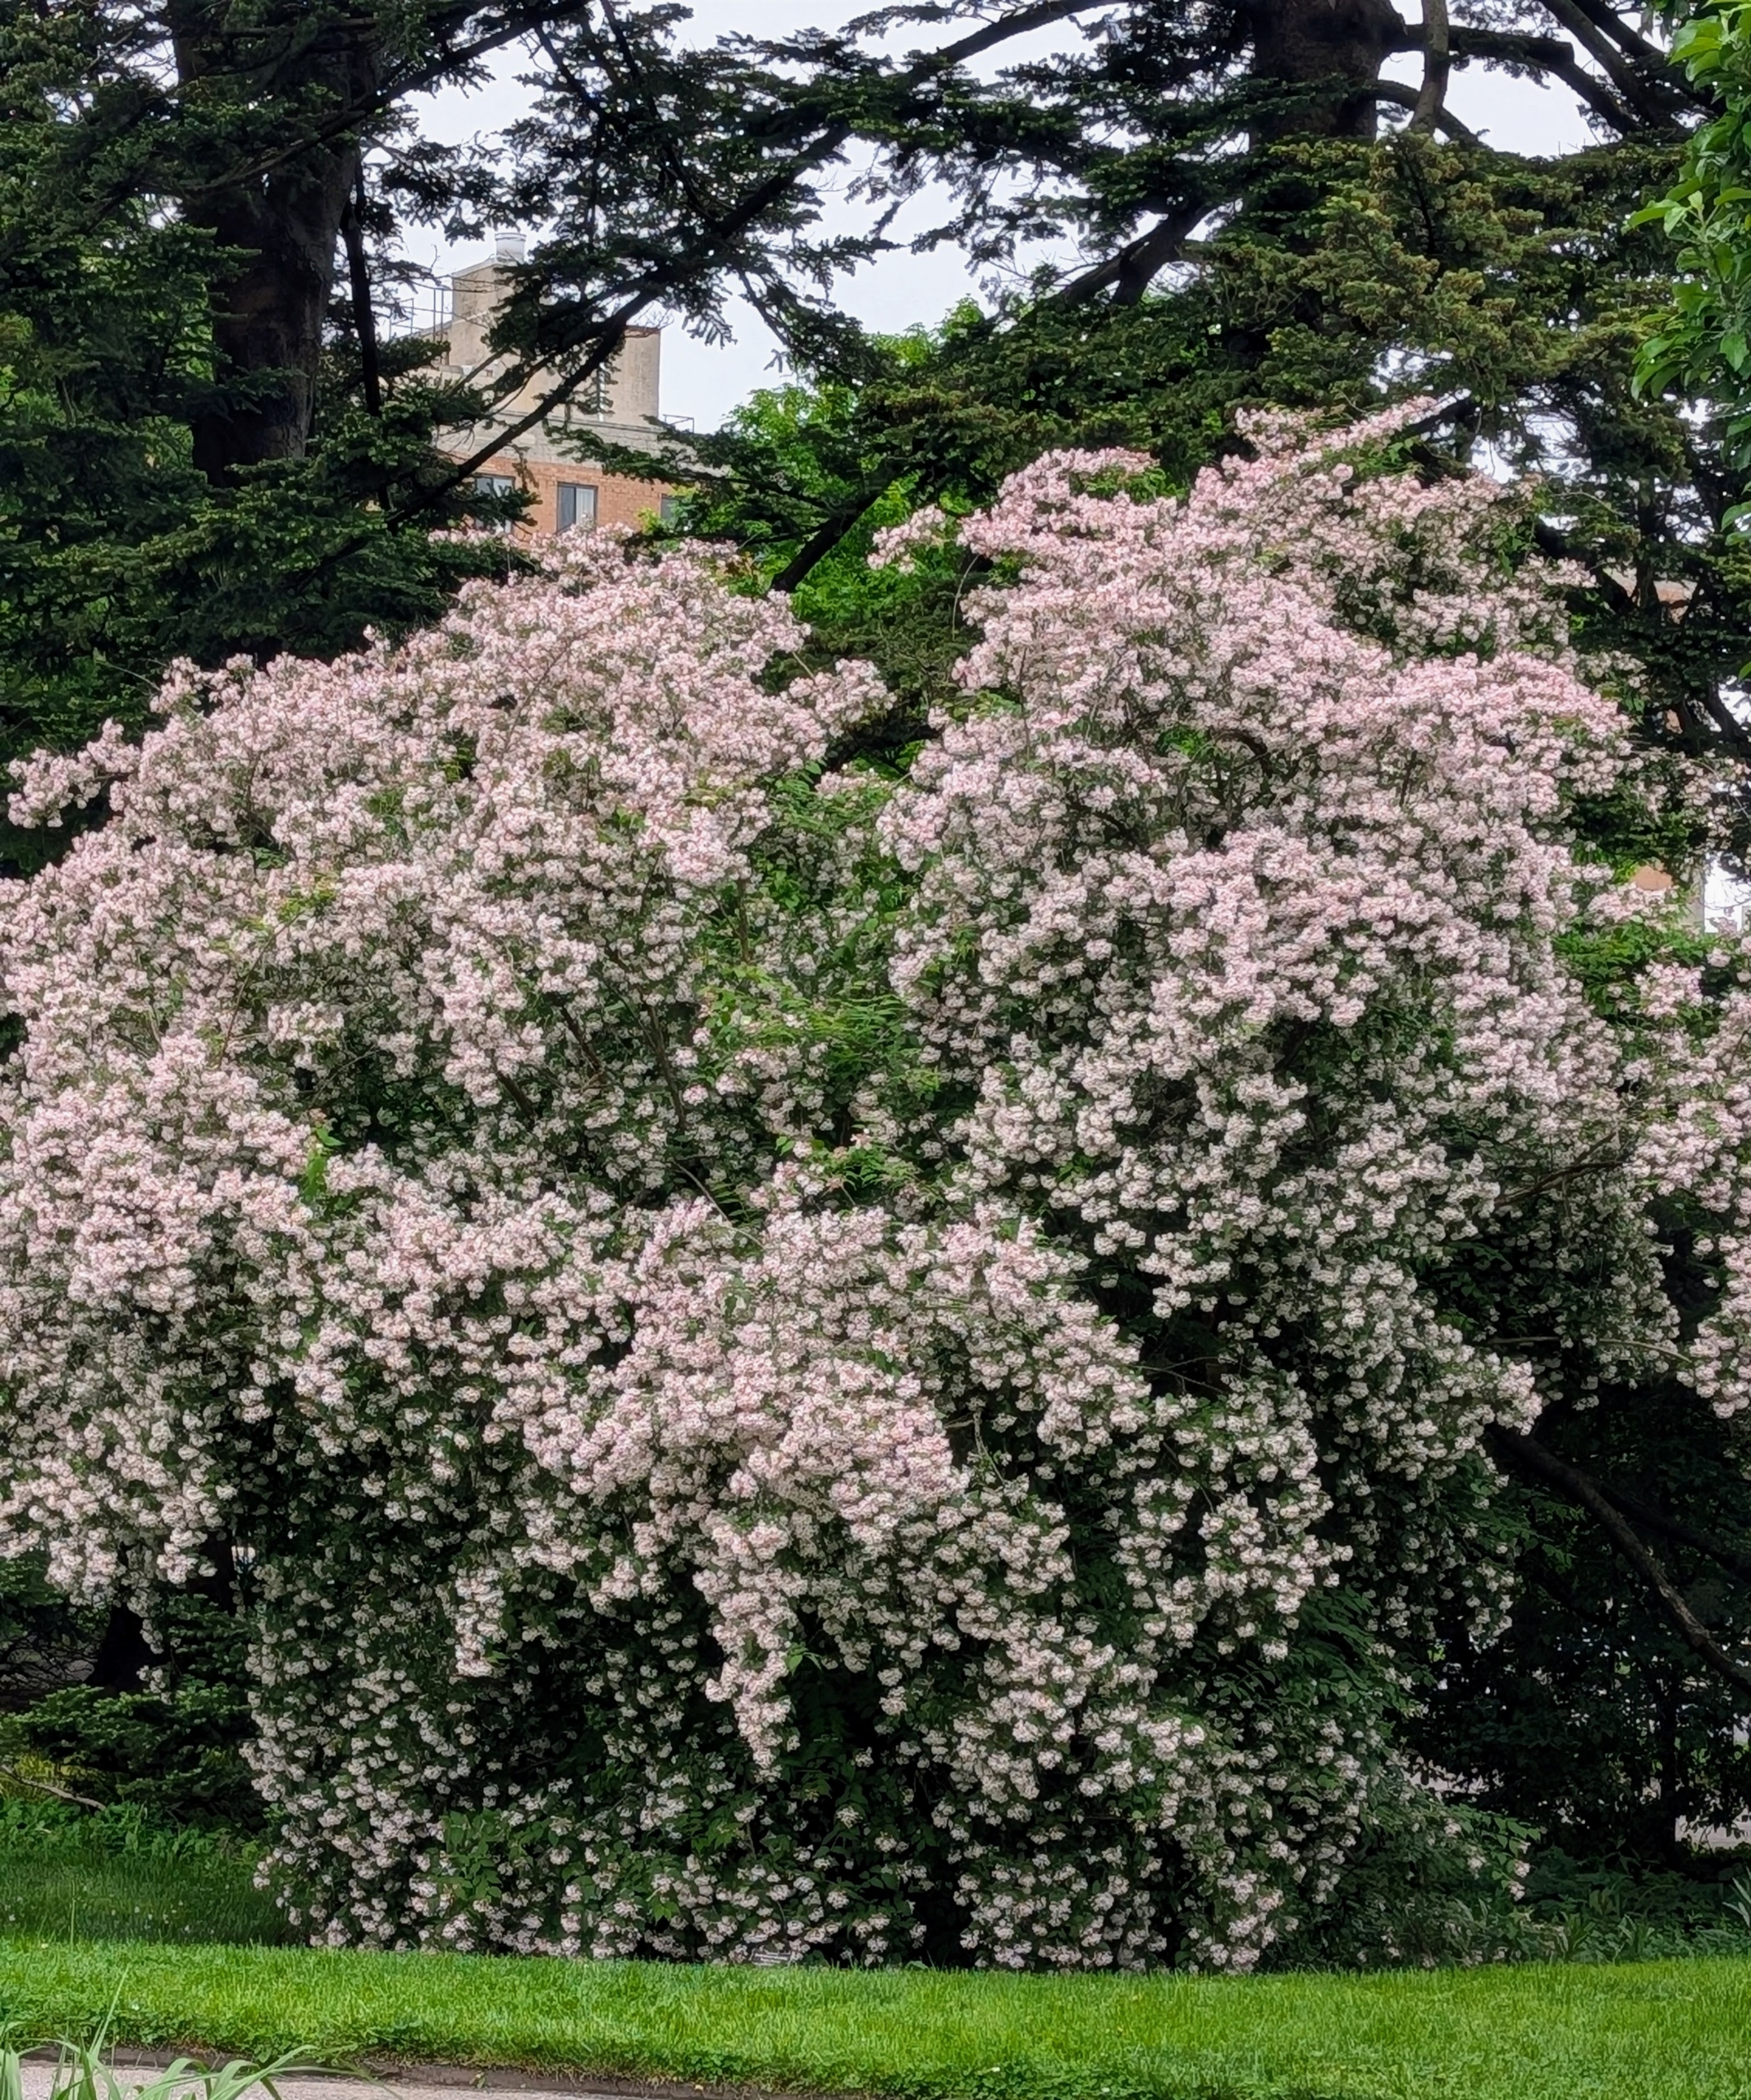
This is a beautybush, Kolkwitzia amabilis ‘Pink Cloud’ in full bloom. This tree is a member of the honeysuckle family and boasts clusters of bell-shaped, pink flowers with yellow throats in mid-spring.
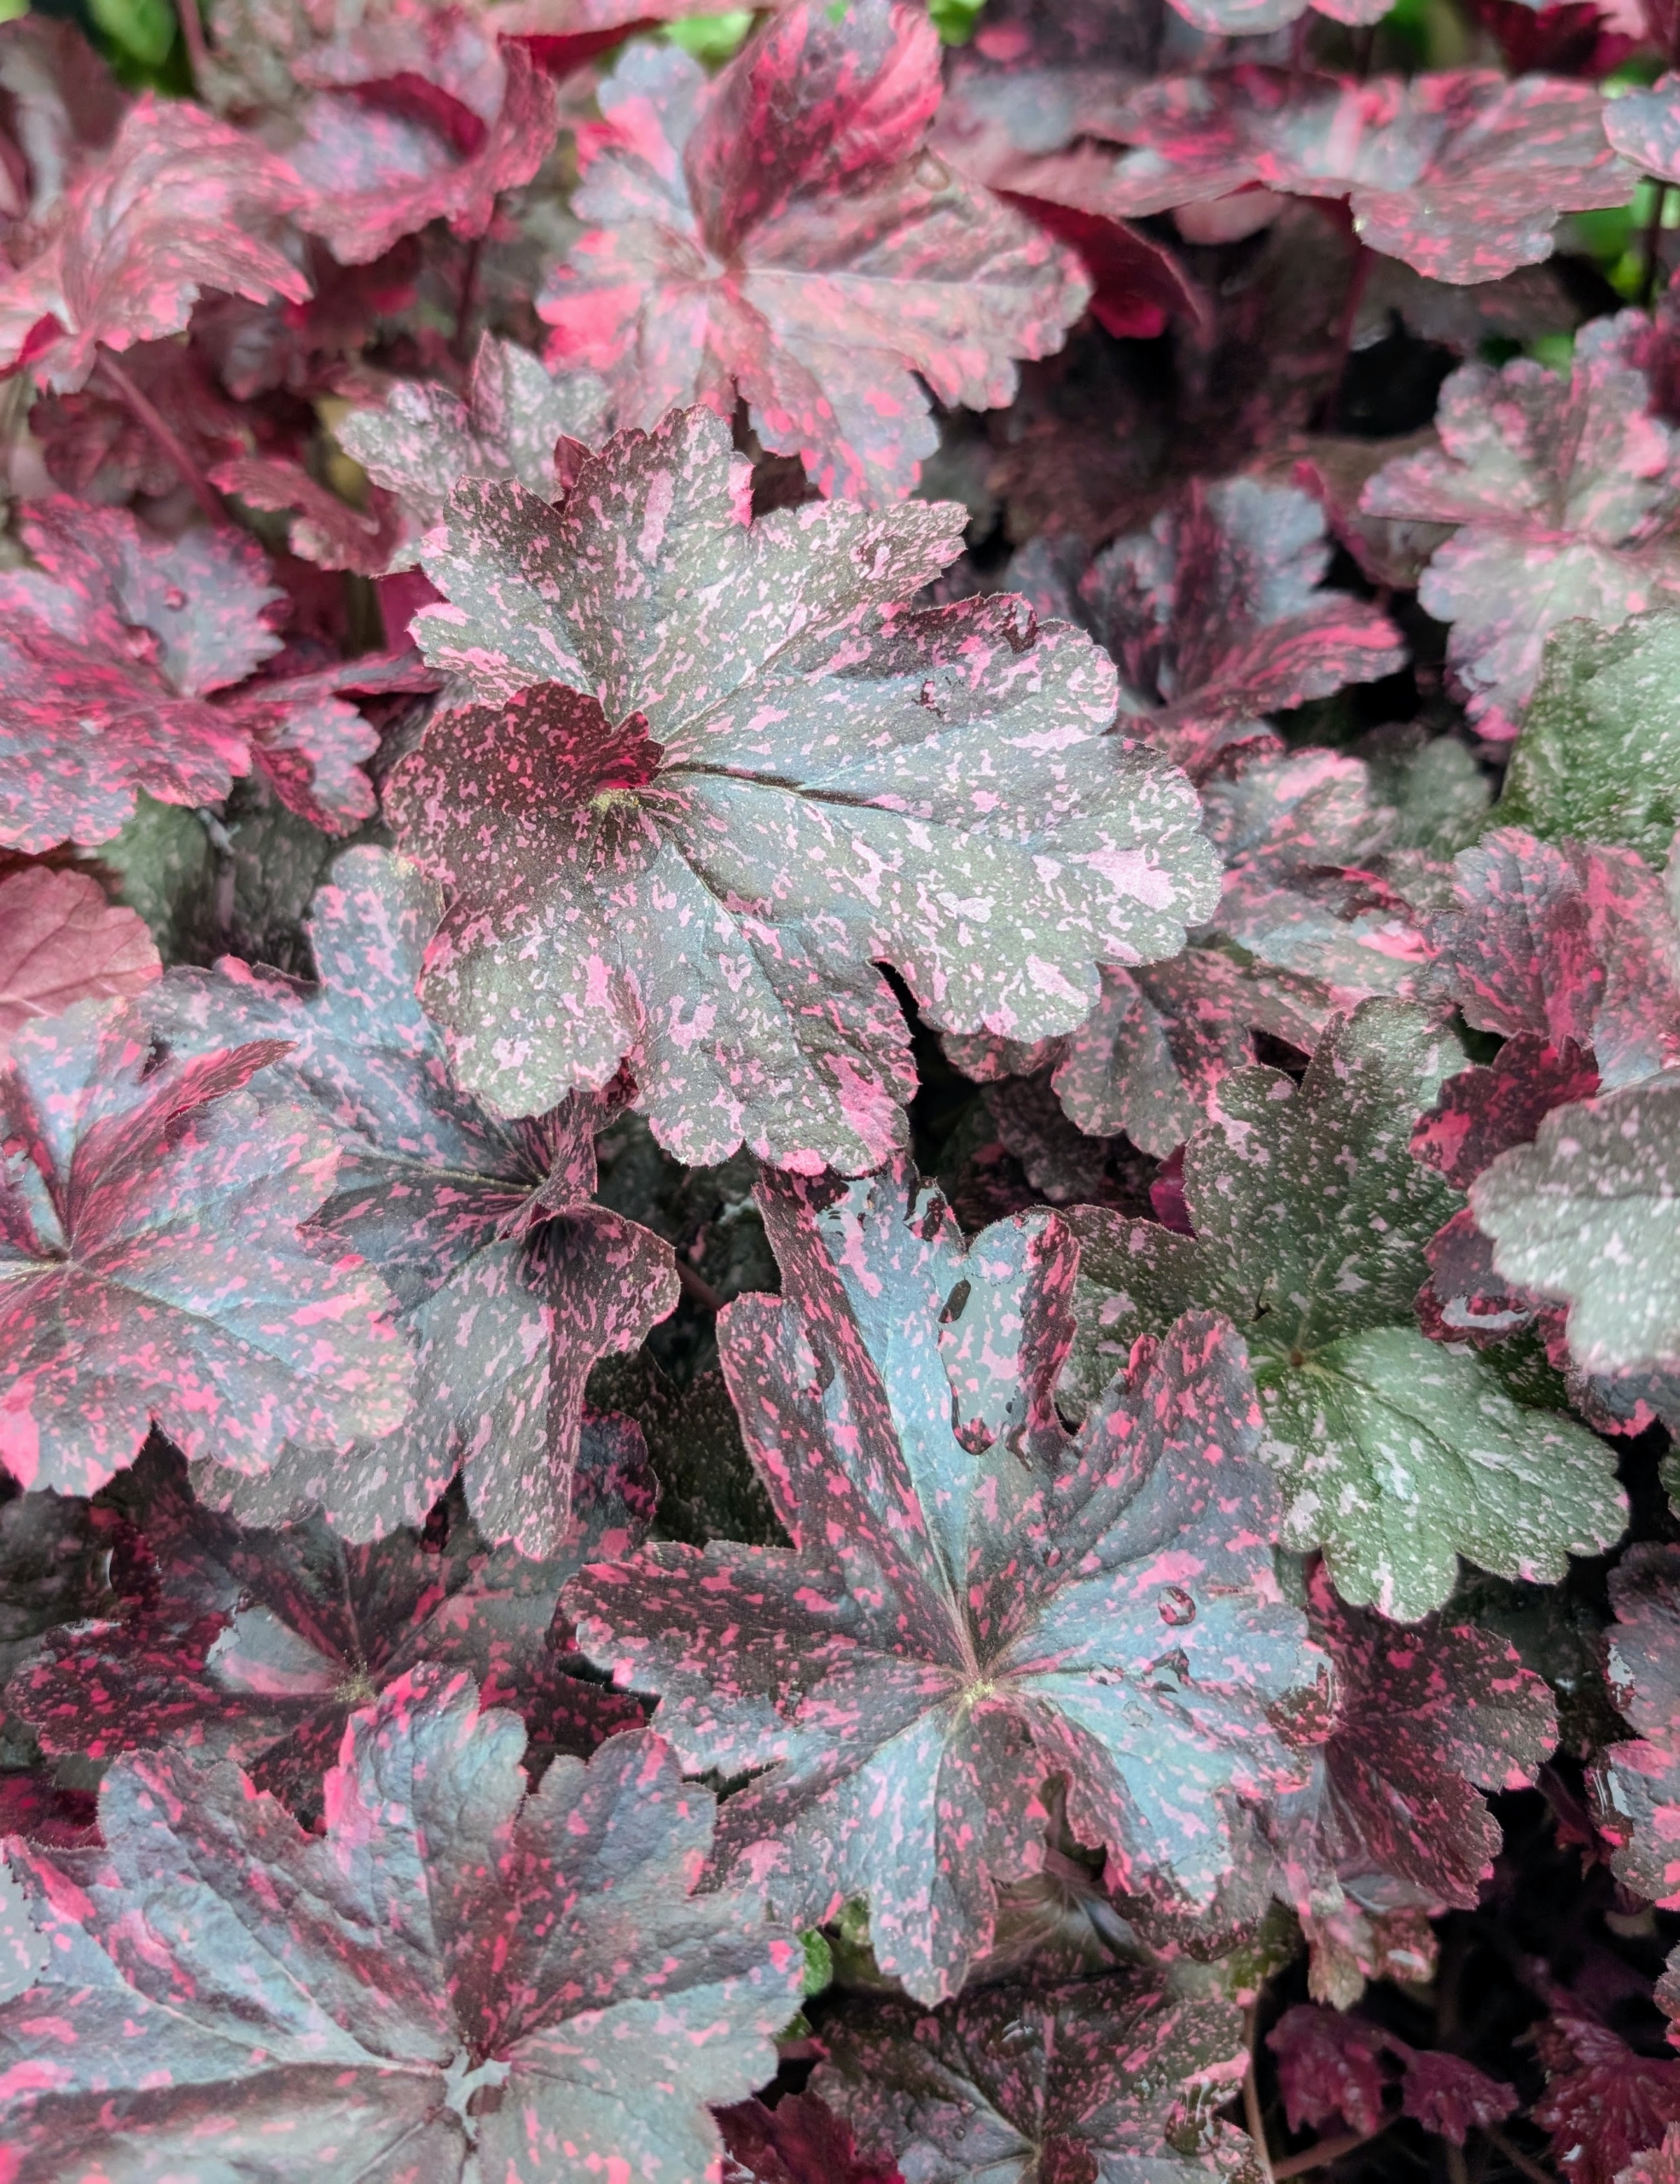
Recognize this perennial? I have these plants growing at my farm. It’s Heuchera, also known as coral bells. This variety is ‘Midnight Rose” with dark purple to almost black leaves and pink spots that change color in summer.
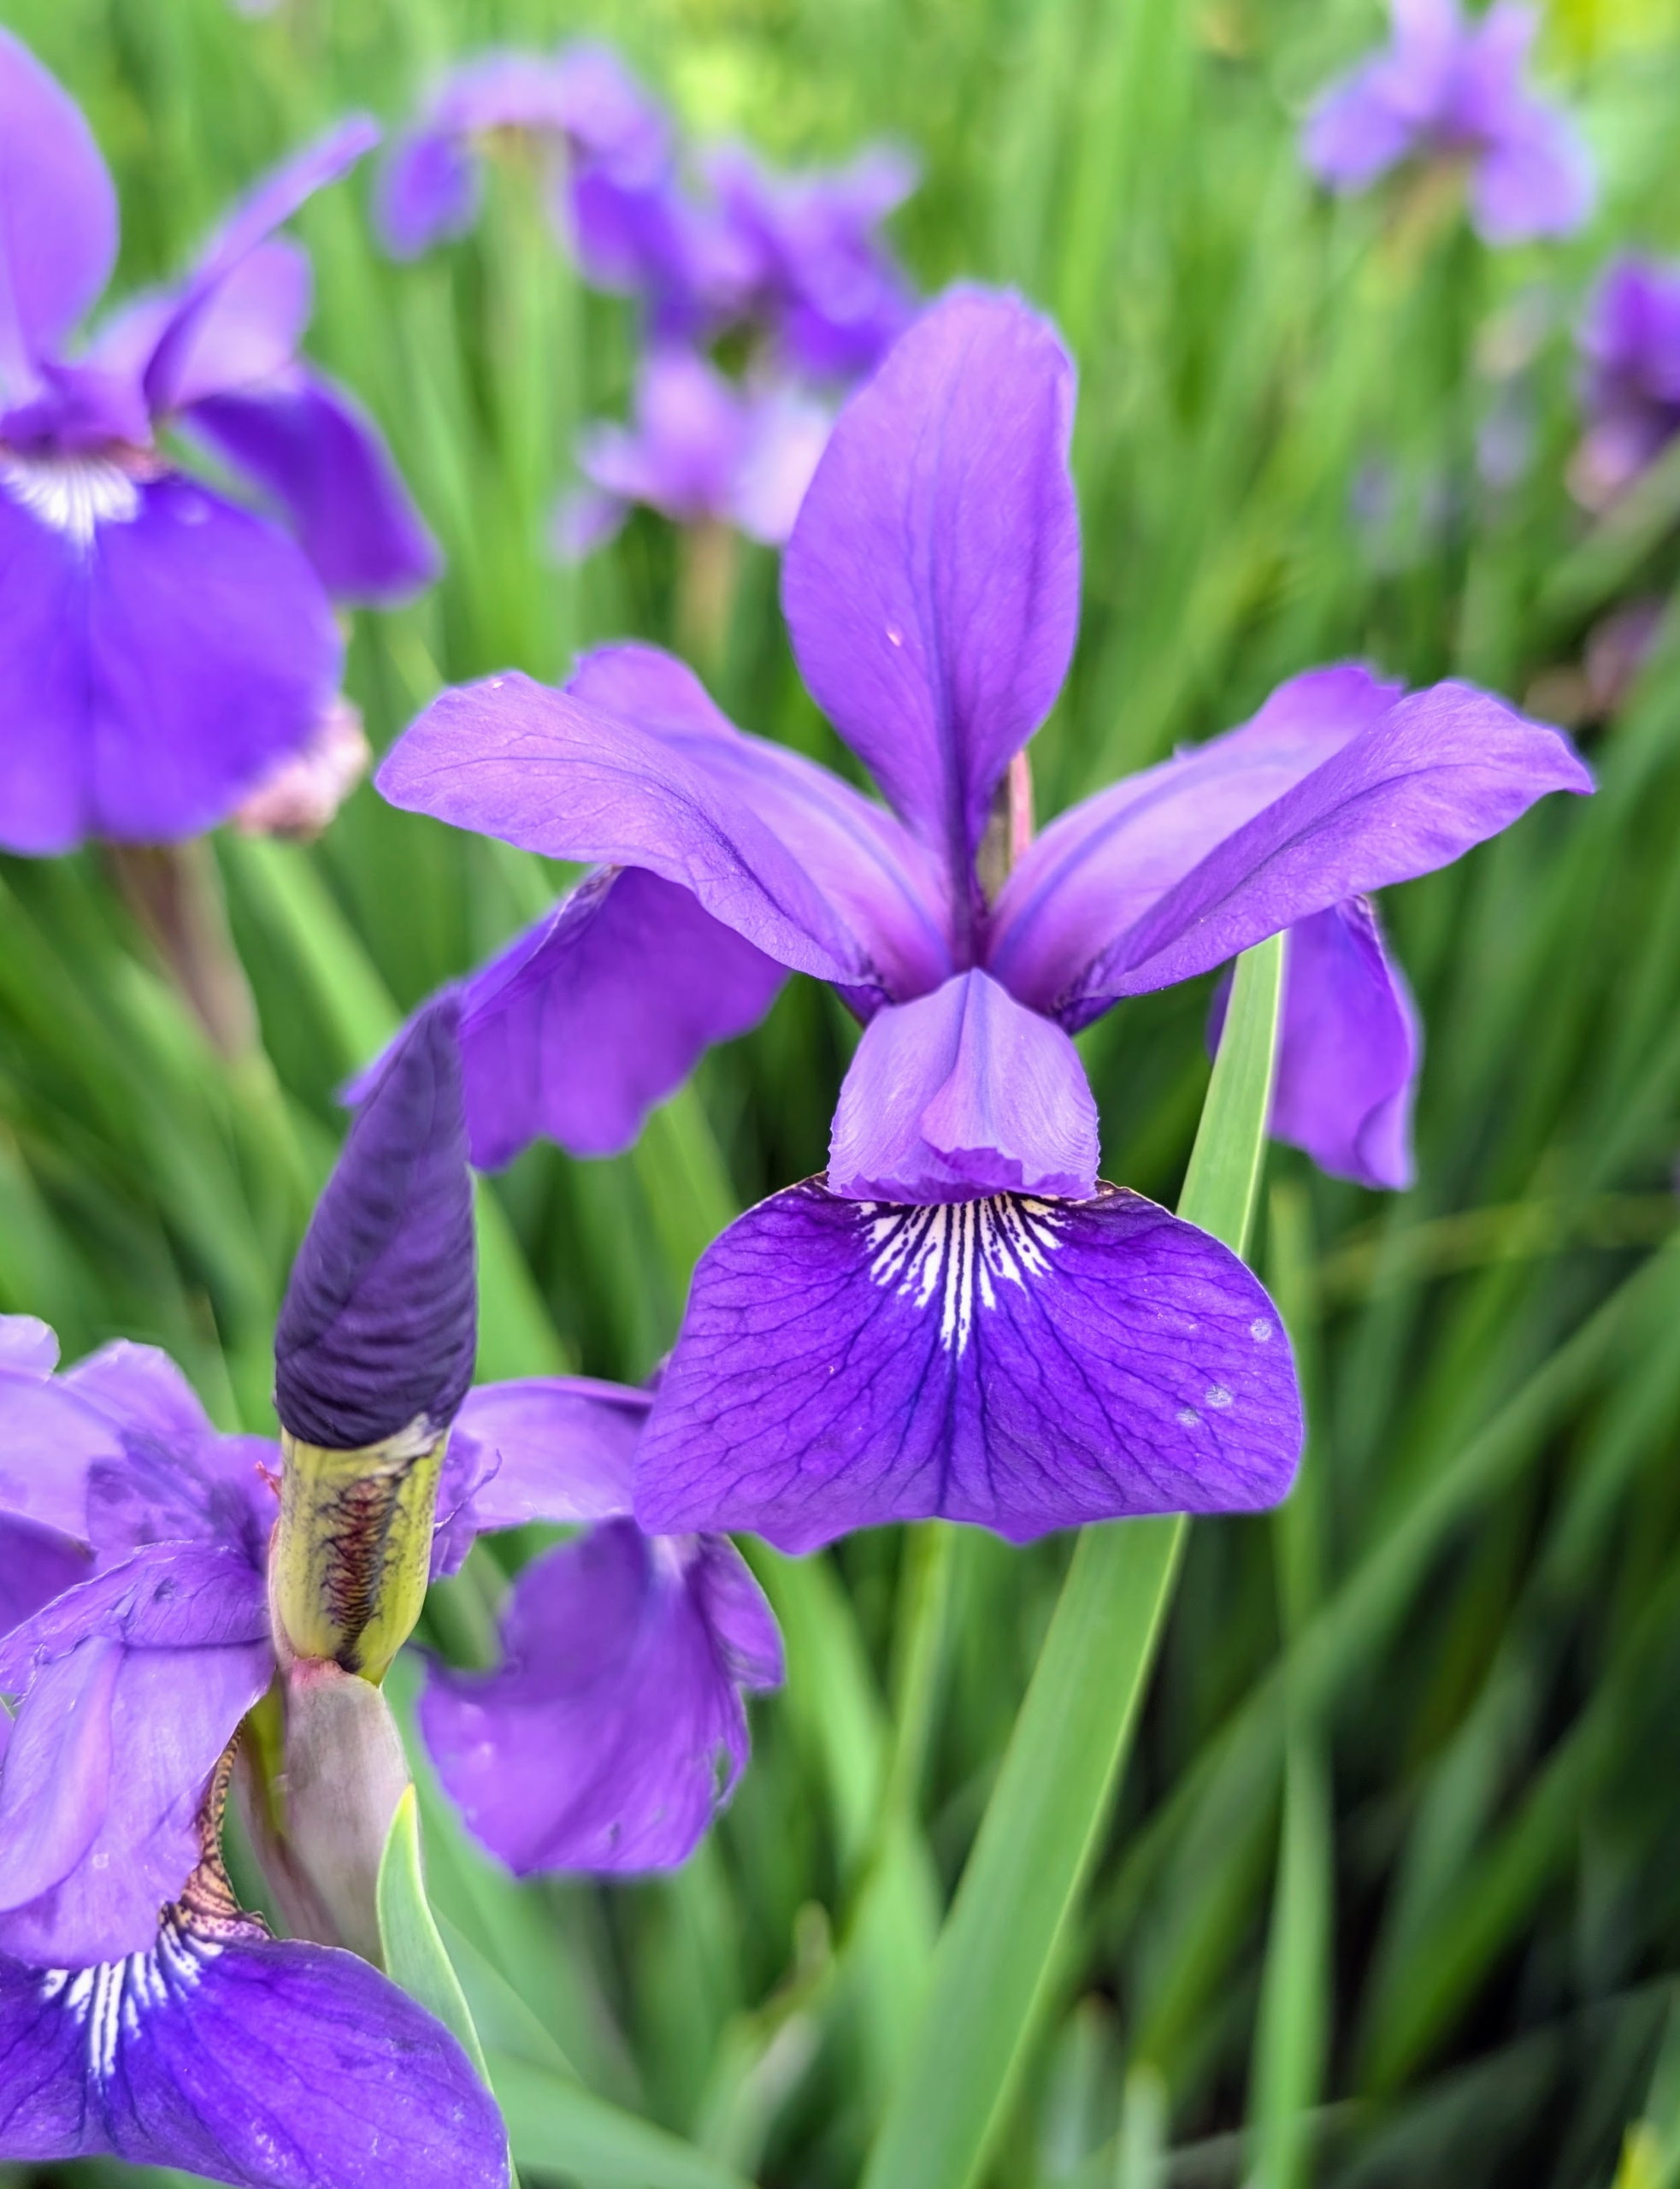
Blooming now is the Siberian iris. This is Iris sibirica ‘Christmas Wish.’ These dainty irises with their smaller, beardless flowers are easy-to-grow and drought-tolerant.
Here is one of the NYBG’s well-manicured parterres. A parterre is an area usually seen with boxwood hedging surrounding perennials, herbs, and other flowers.
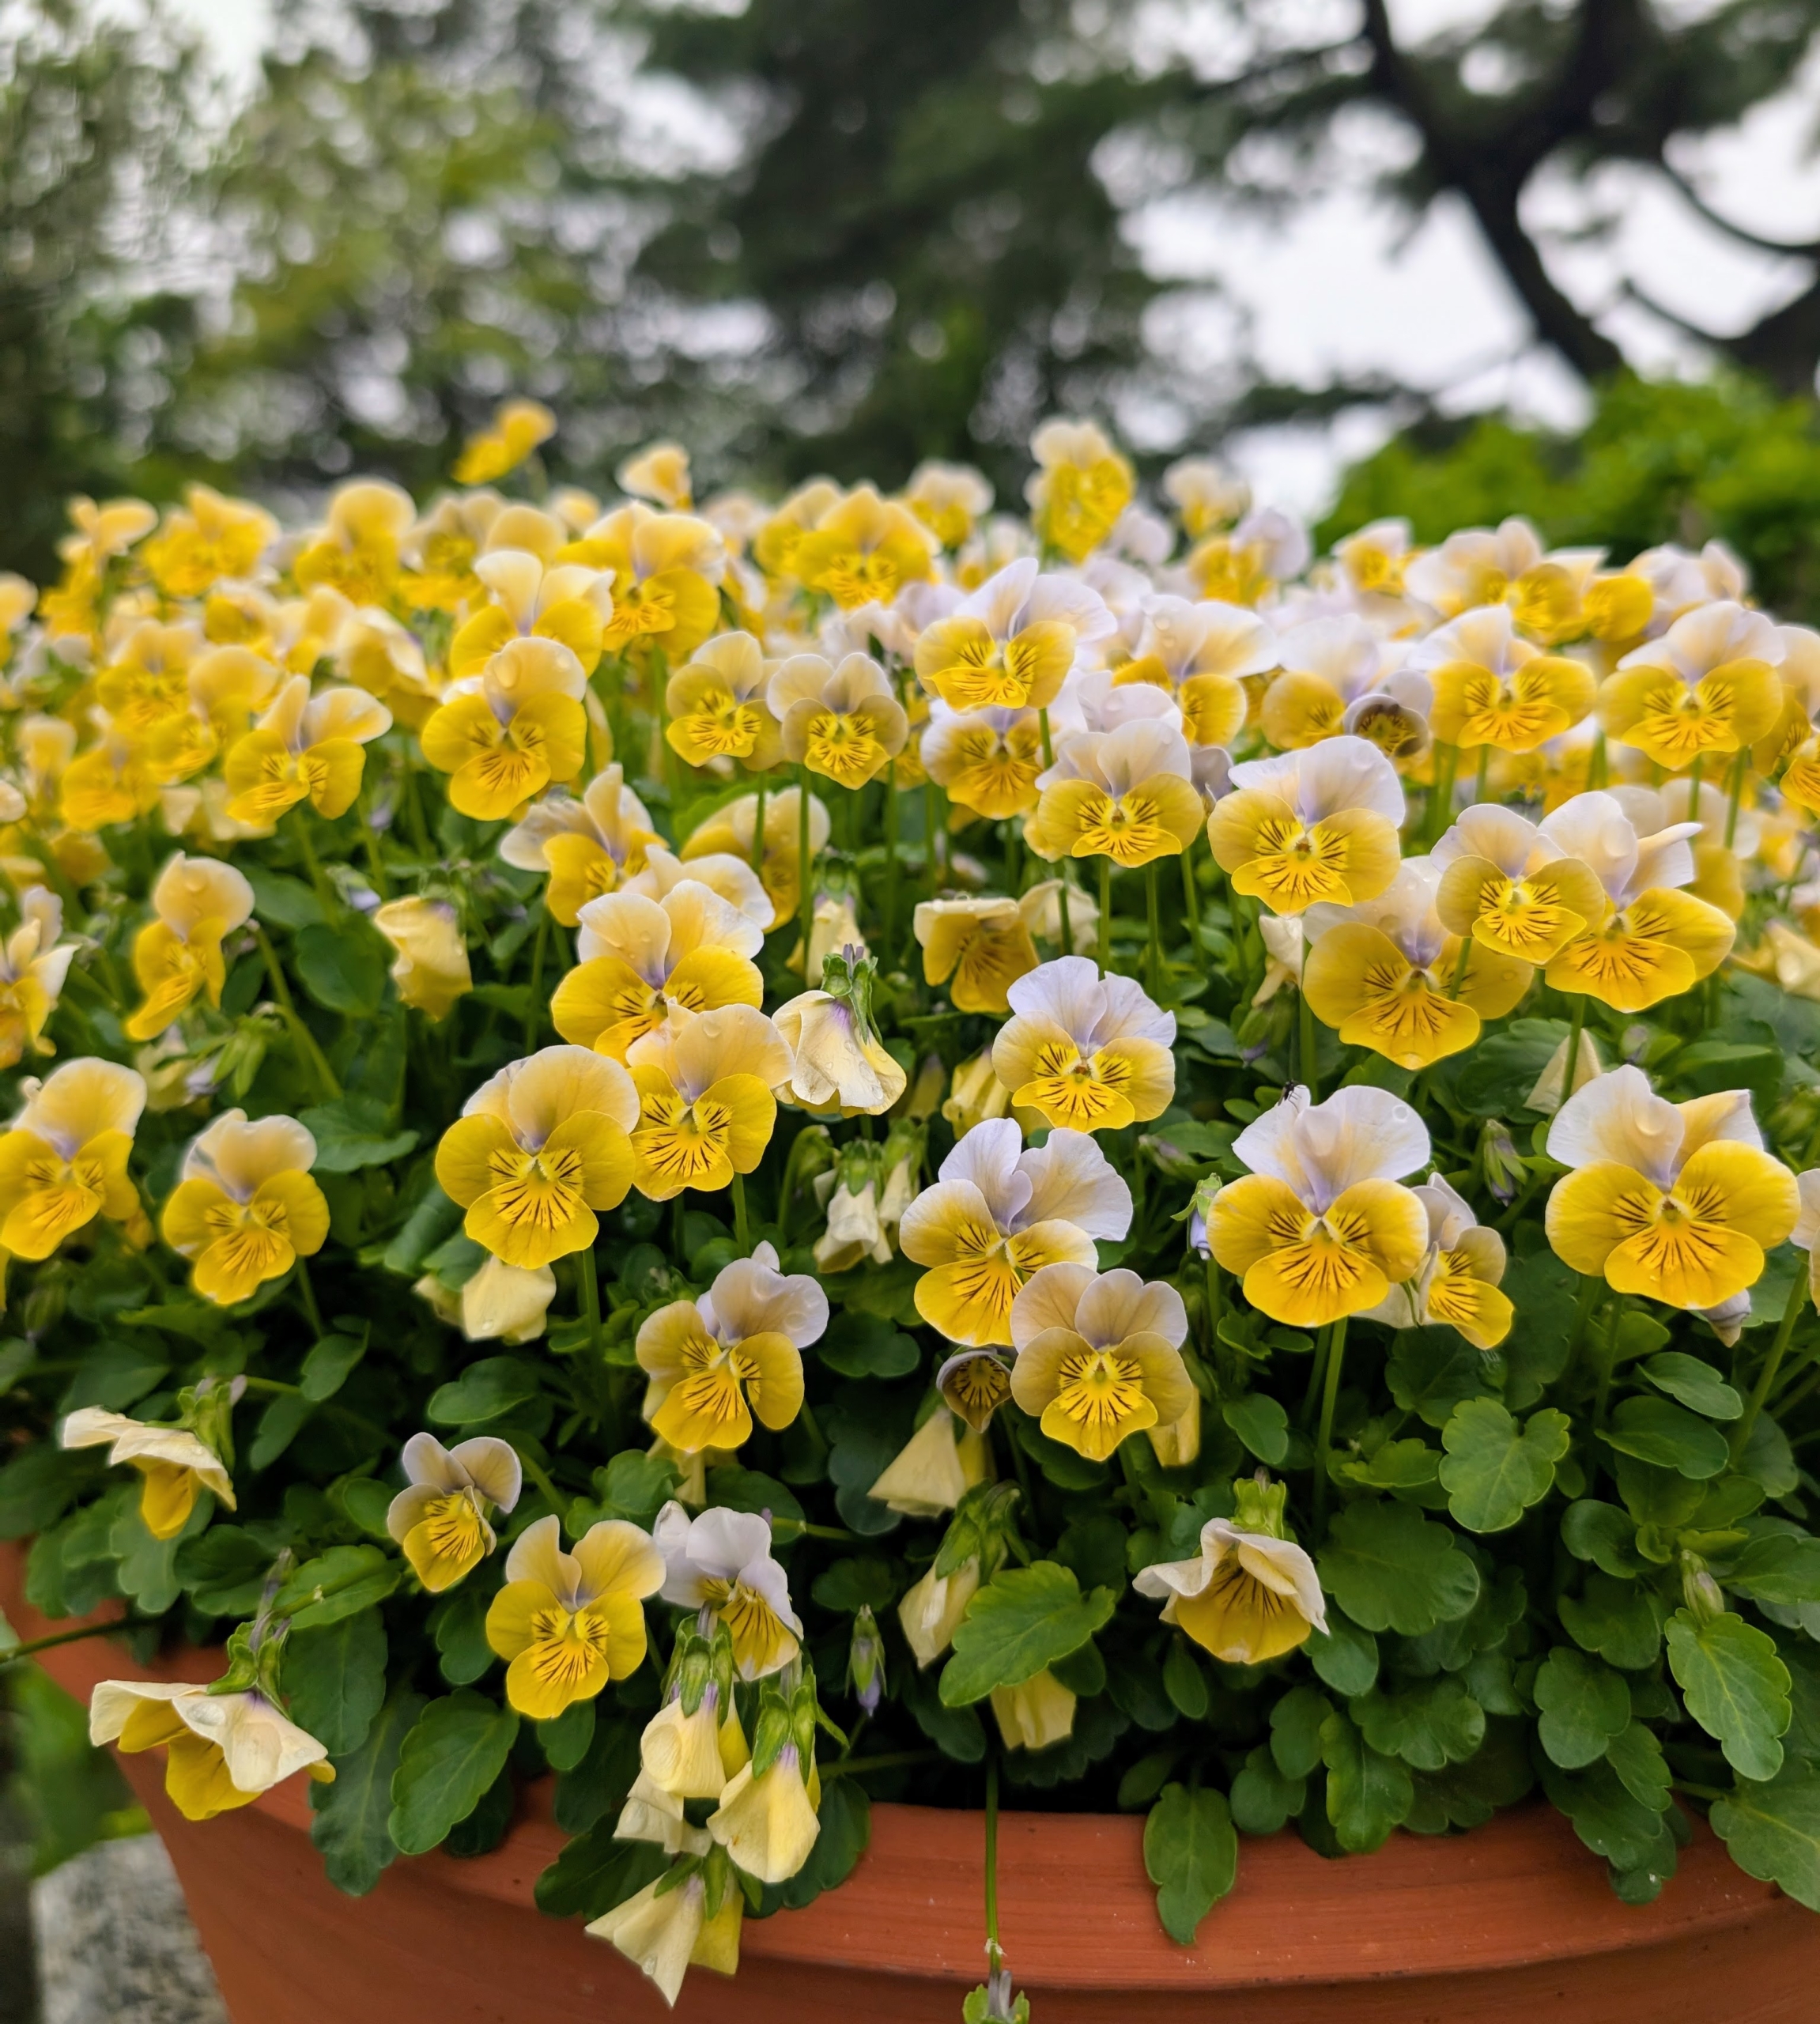
Potted up on a wall of an edible garden are these charming Johnny Jump-Ups – small, sweet, whimsical flowers that come in shades of yellow, purple, and white. It’s also known as Wild Pansy, Heart’s Ease, or Viola tricolor. And yes, these flowers can be eaten.
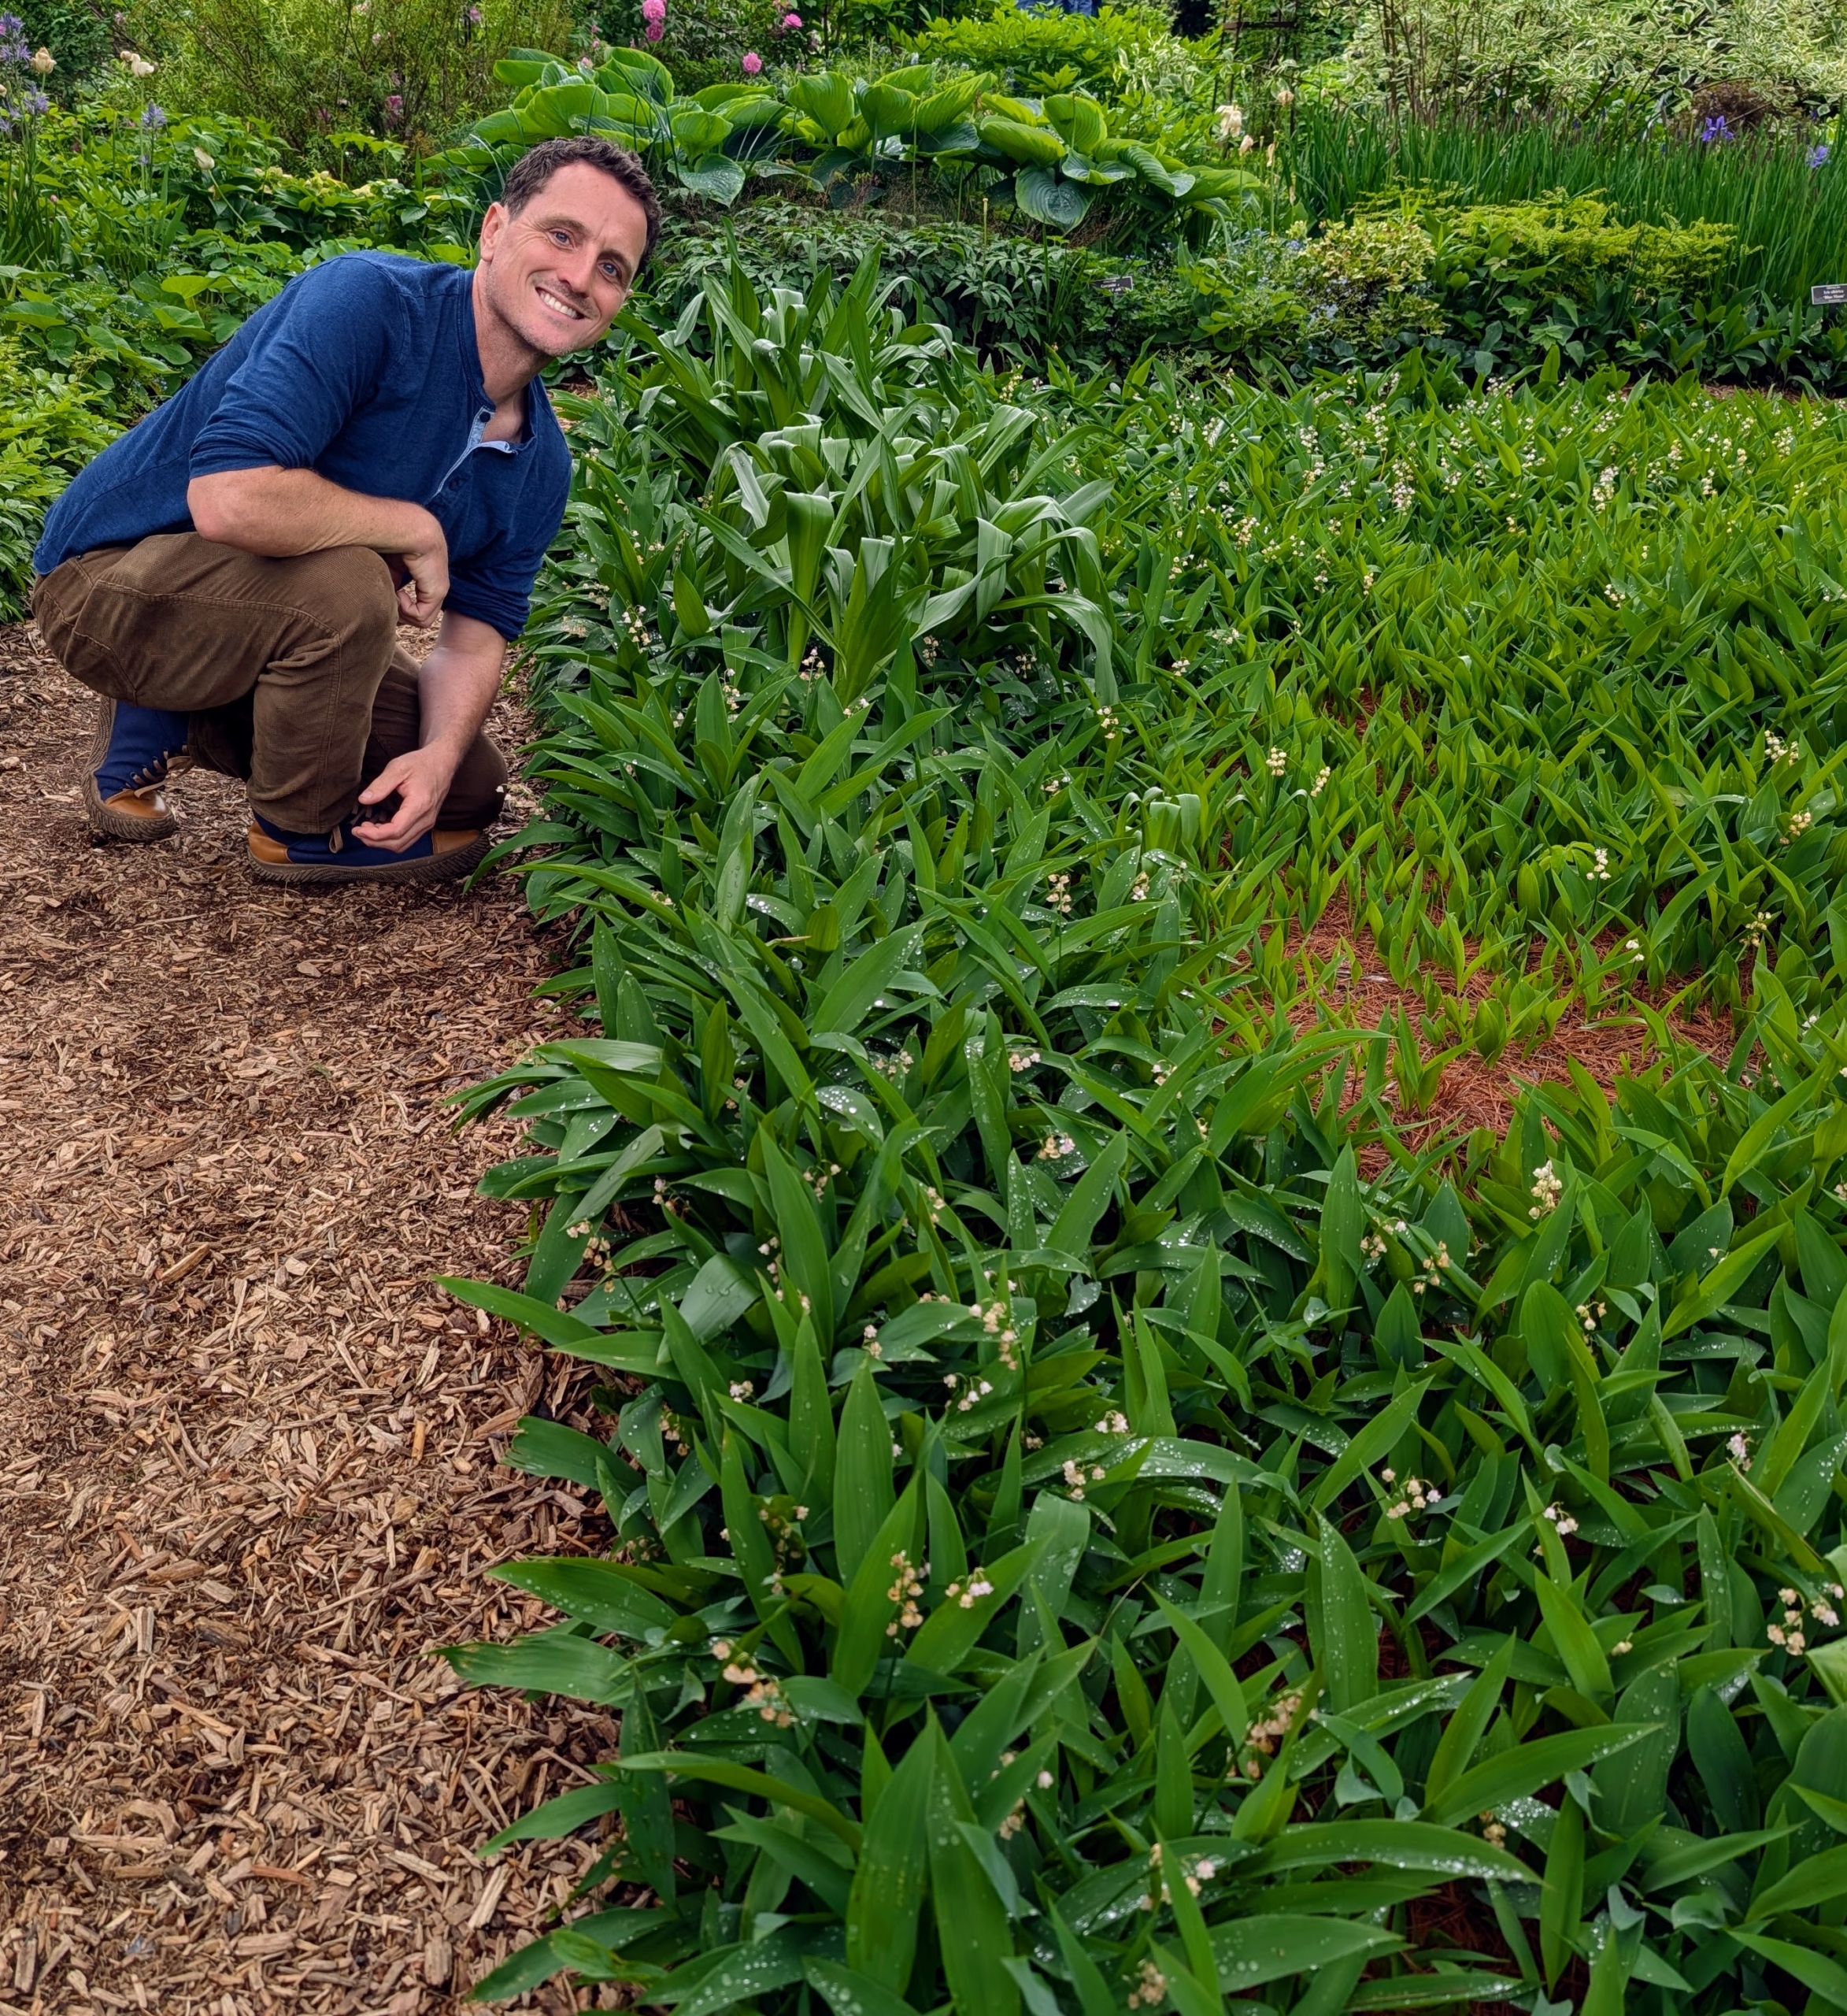
Here’s my head gardener kneeling next to a hedge of Lily of the valley, Convallaria majalis – a wild flowering plant with sweetly scented, pendent, bell-shaped white flowers. It is native to cool regions of Europe, North America, and Asia.
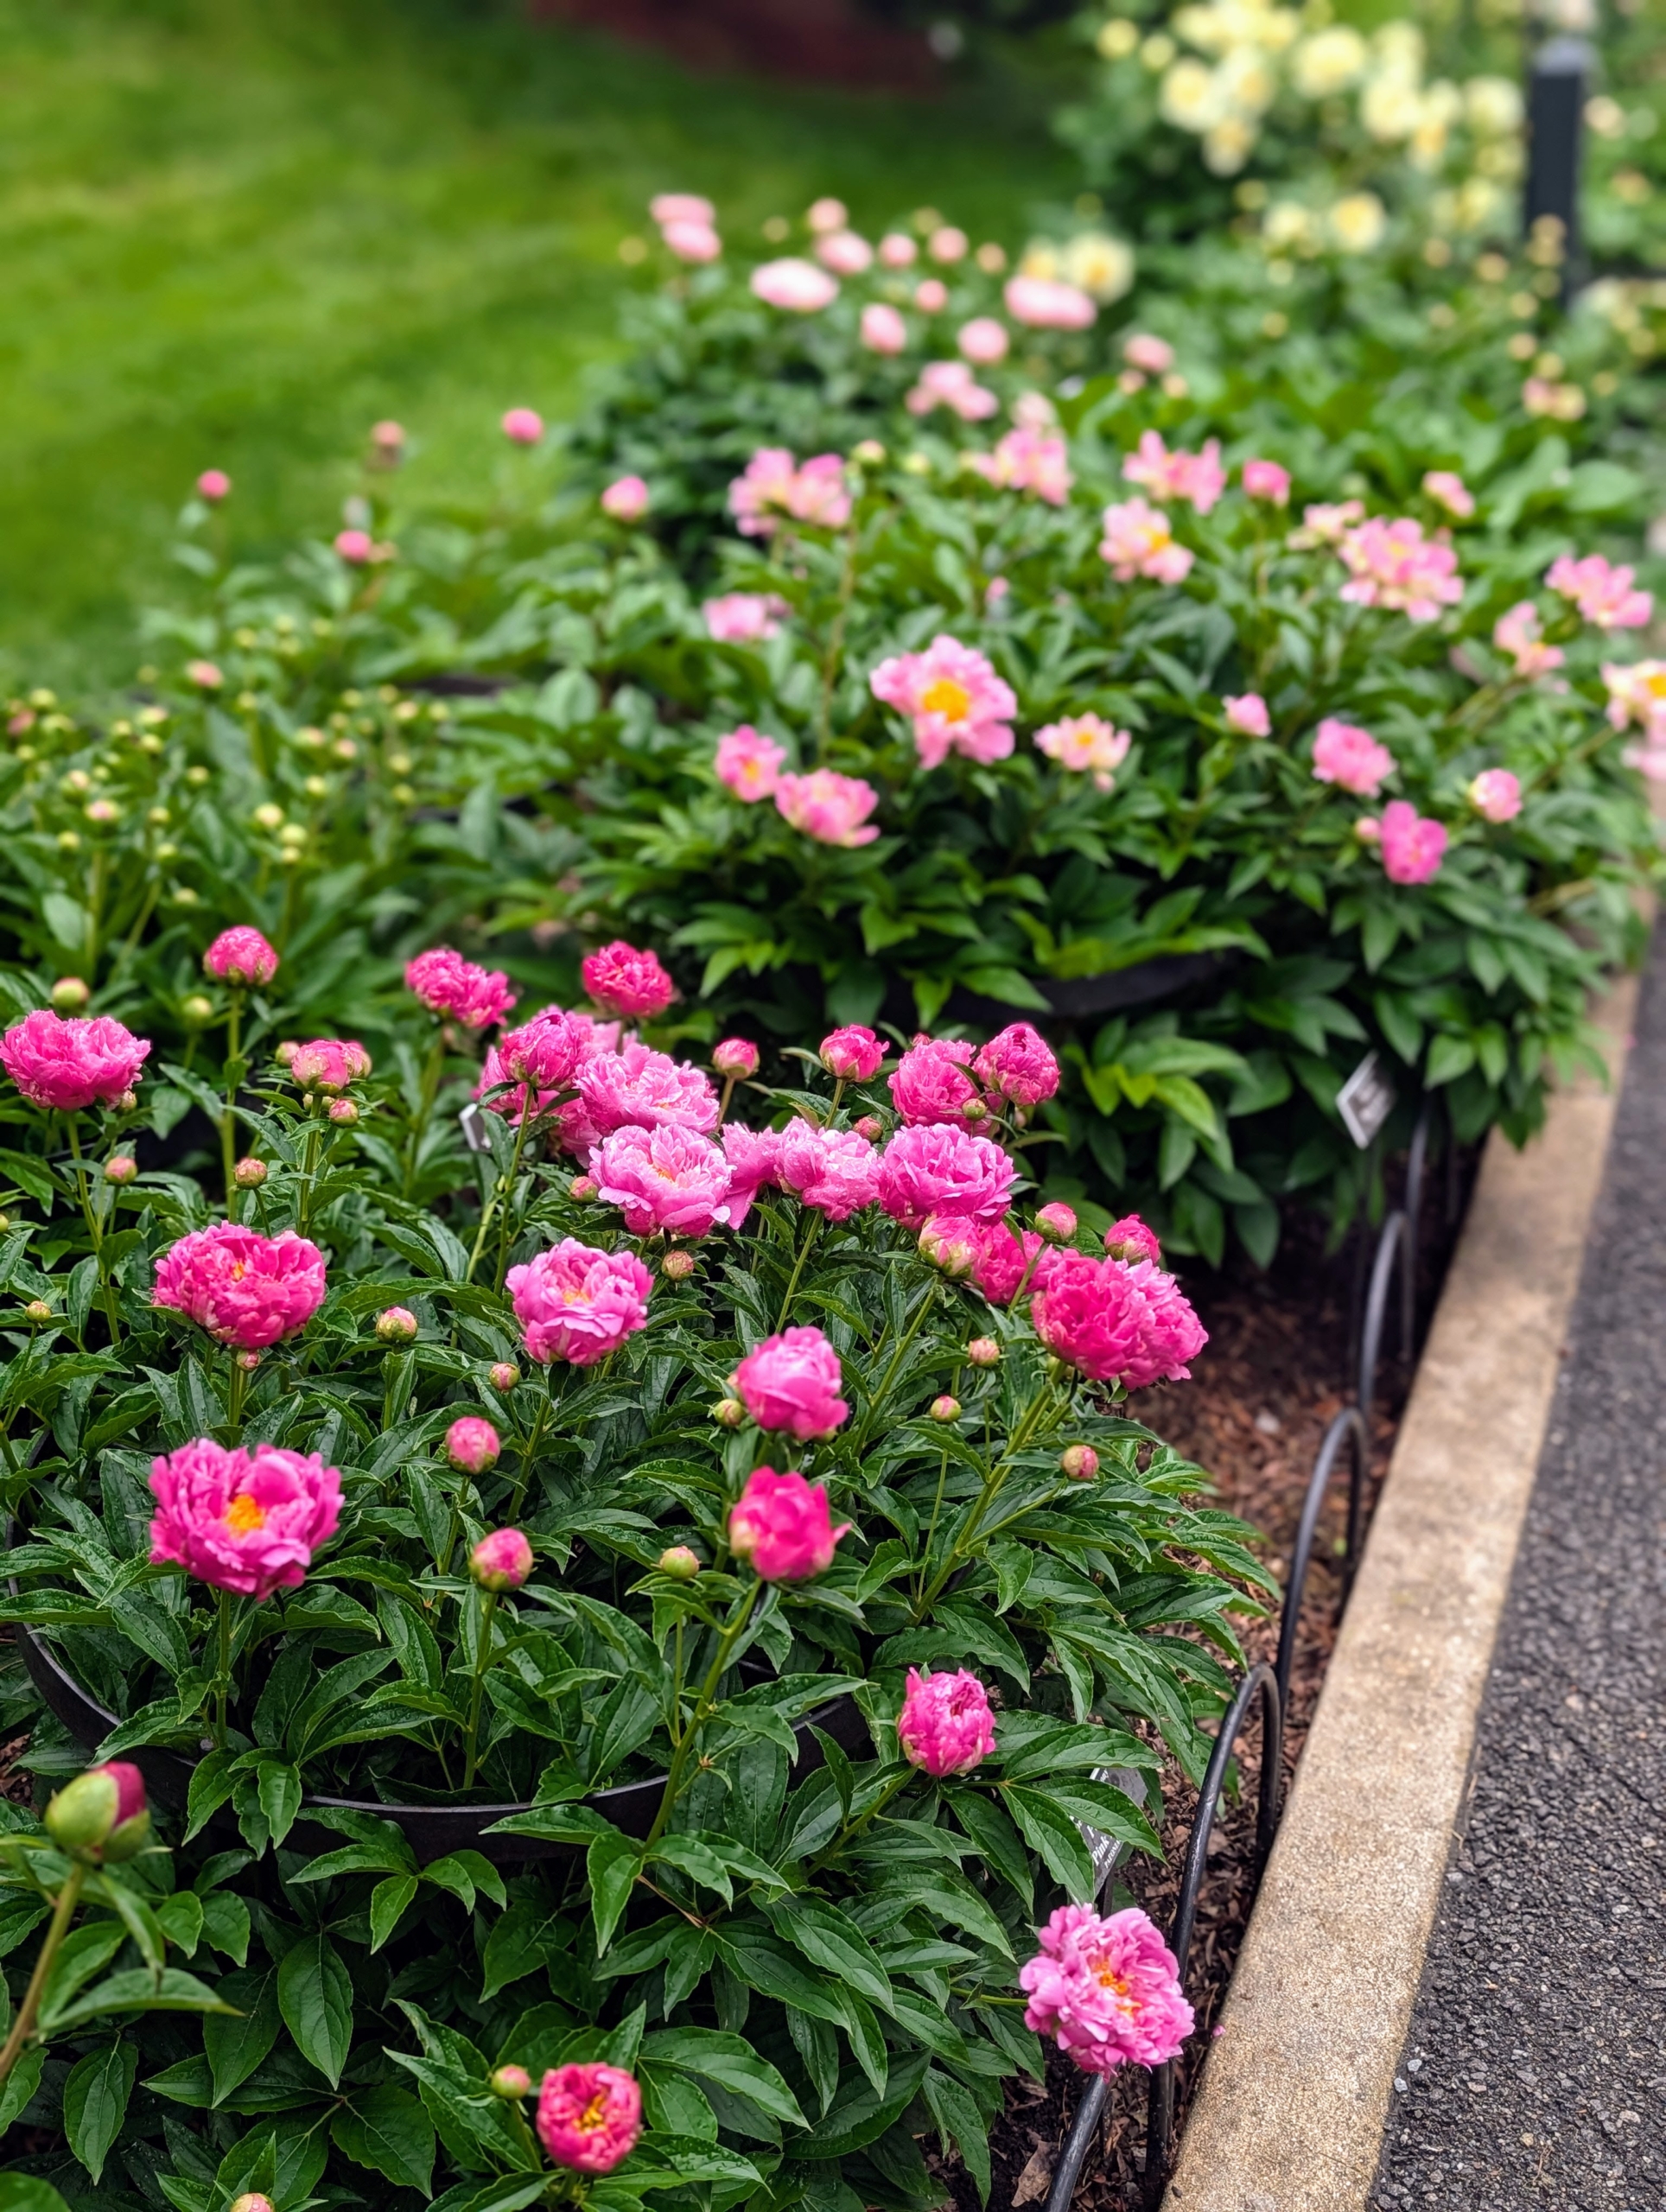
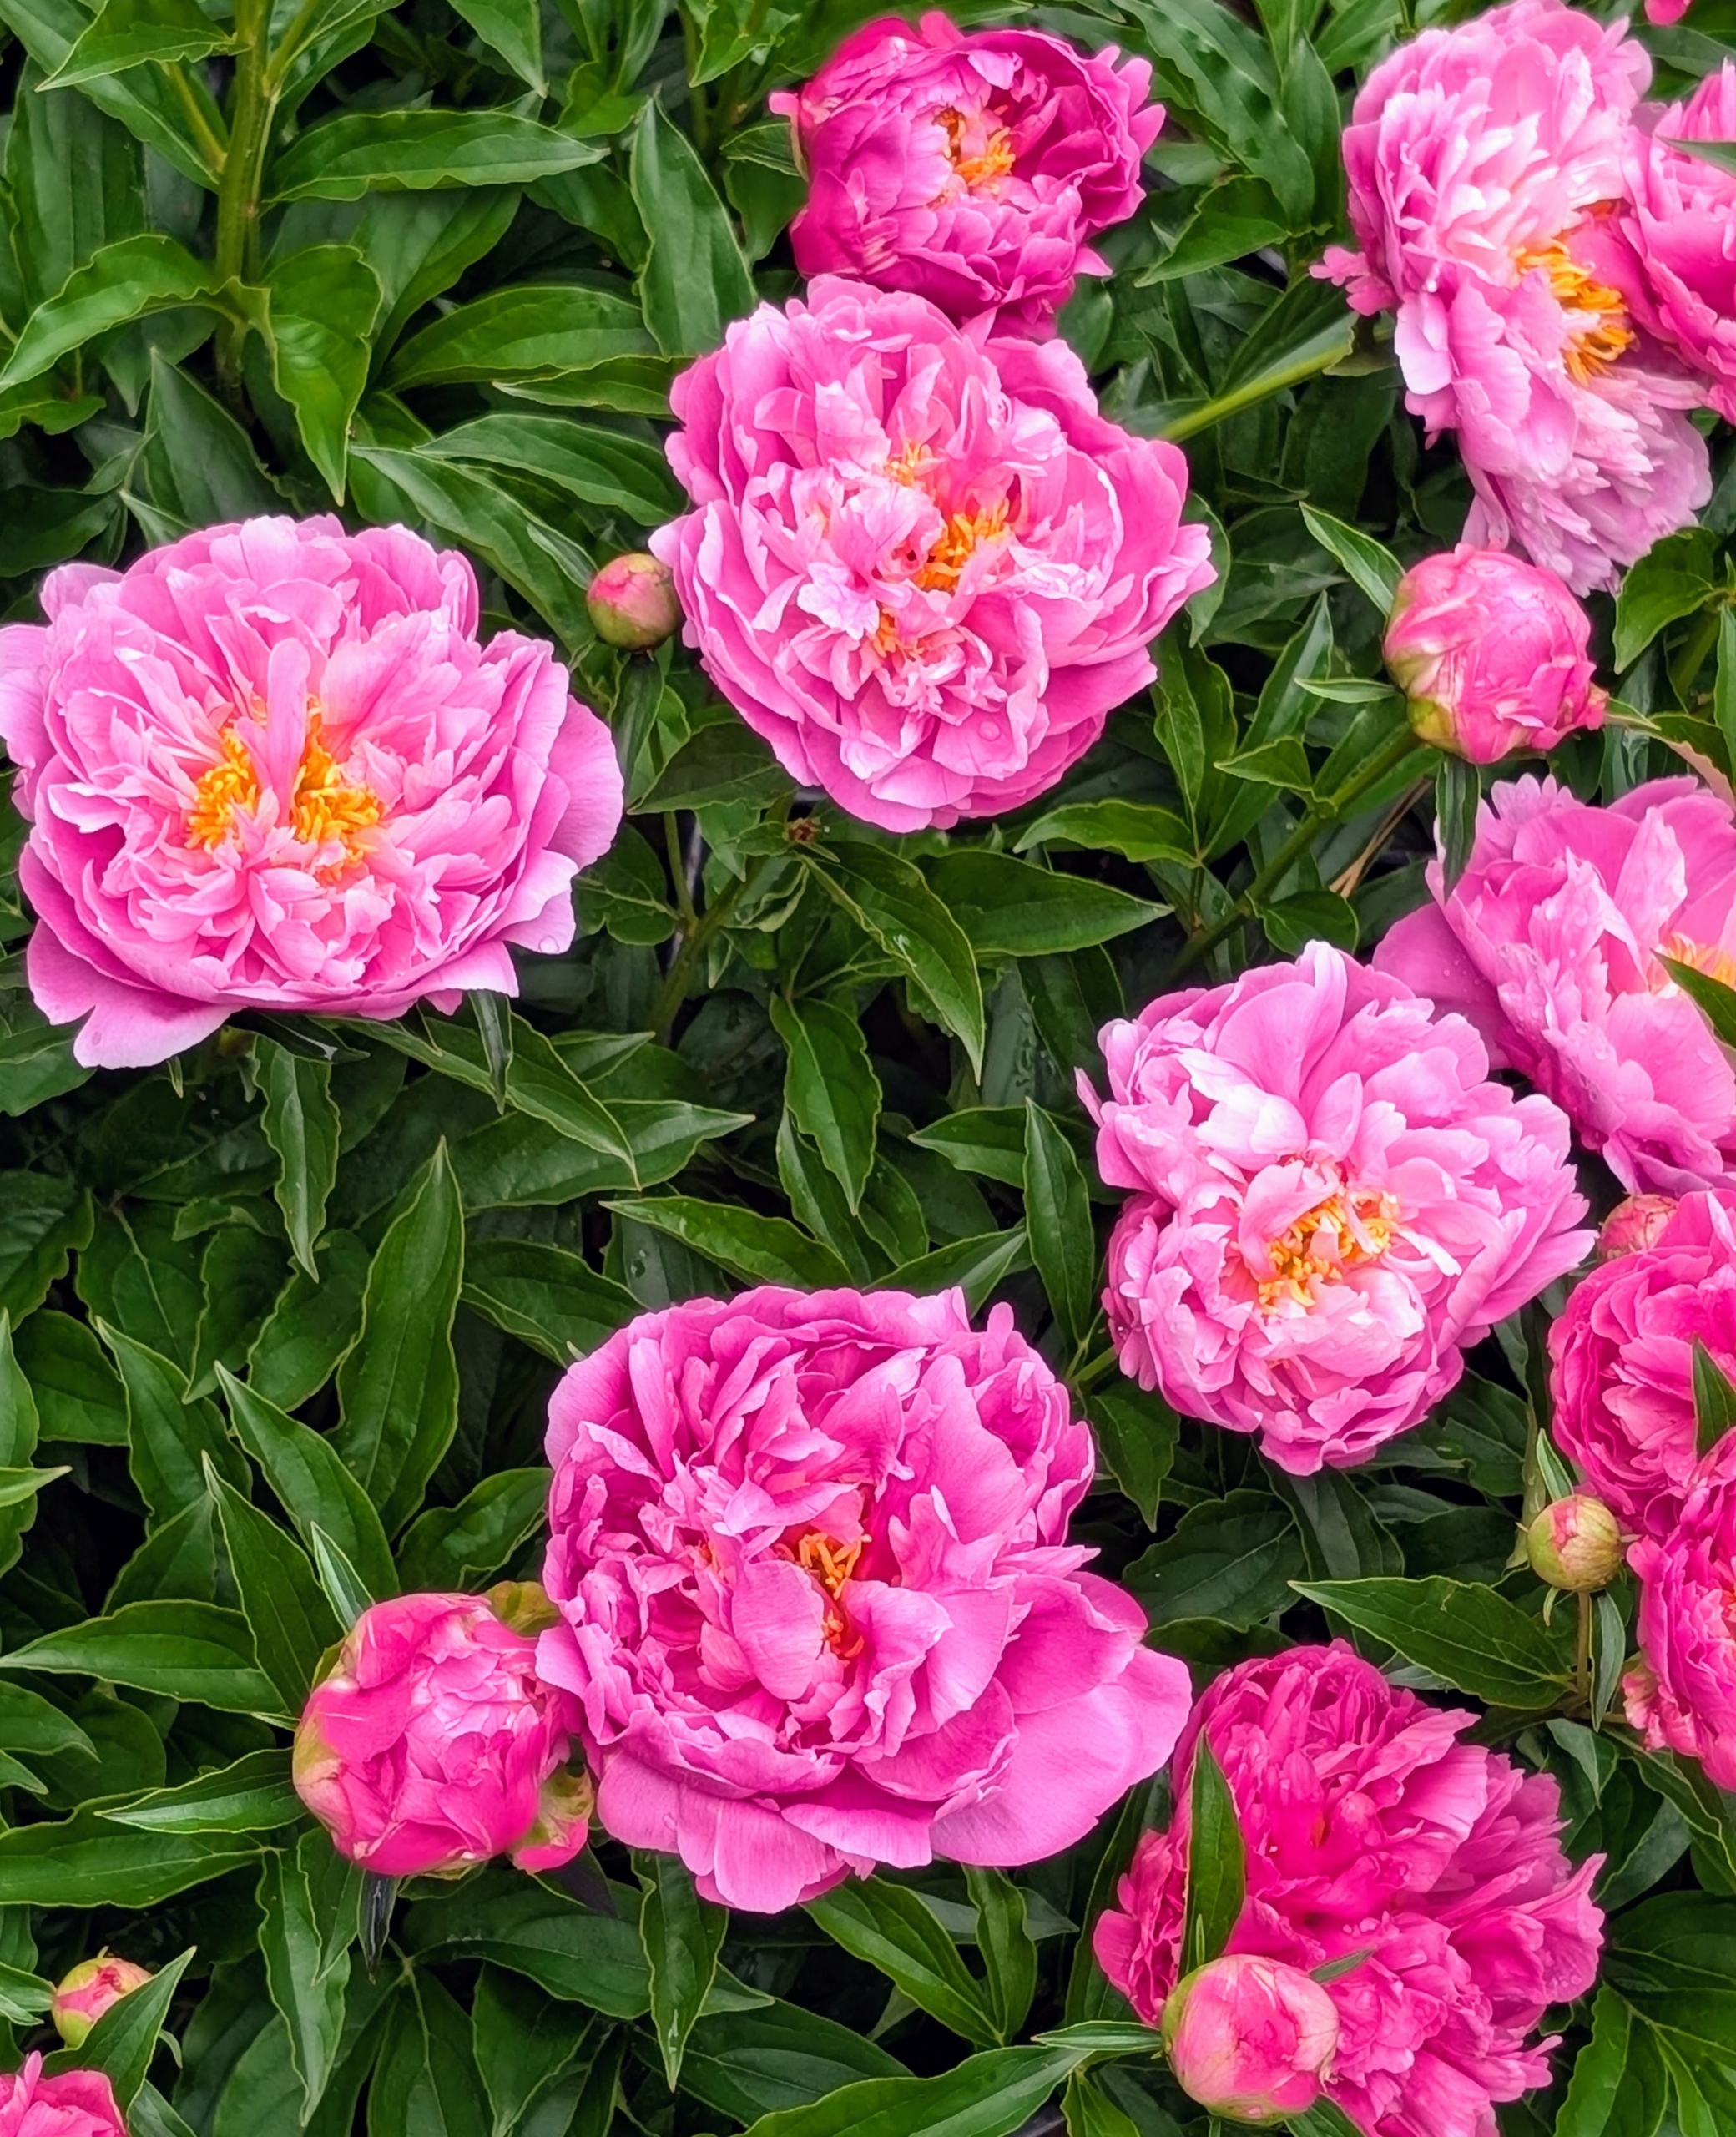
It’s peony time! Visiting the NYBG now, one will see the row of beautiful, sweet-smelling herbaceous peonies. Even after several days of rain, these blooms are still so eye-catching.
These peonies are called ‘Pink Kisses.’ They are smaller, deep pink flowers that grow abundantly with about two or three buds per stem. The blooms grow up to 26-inches tall and are quite fragrant.
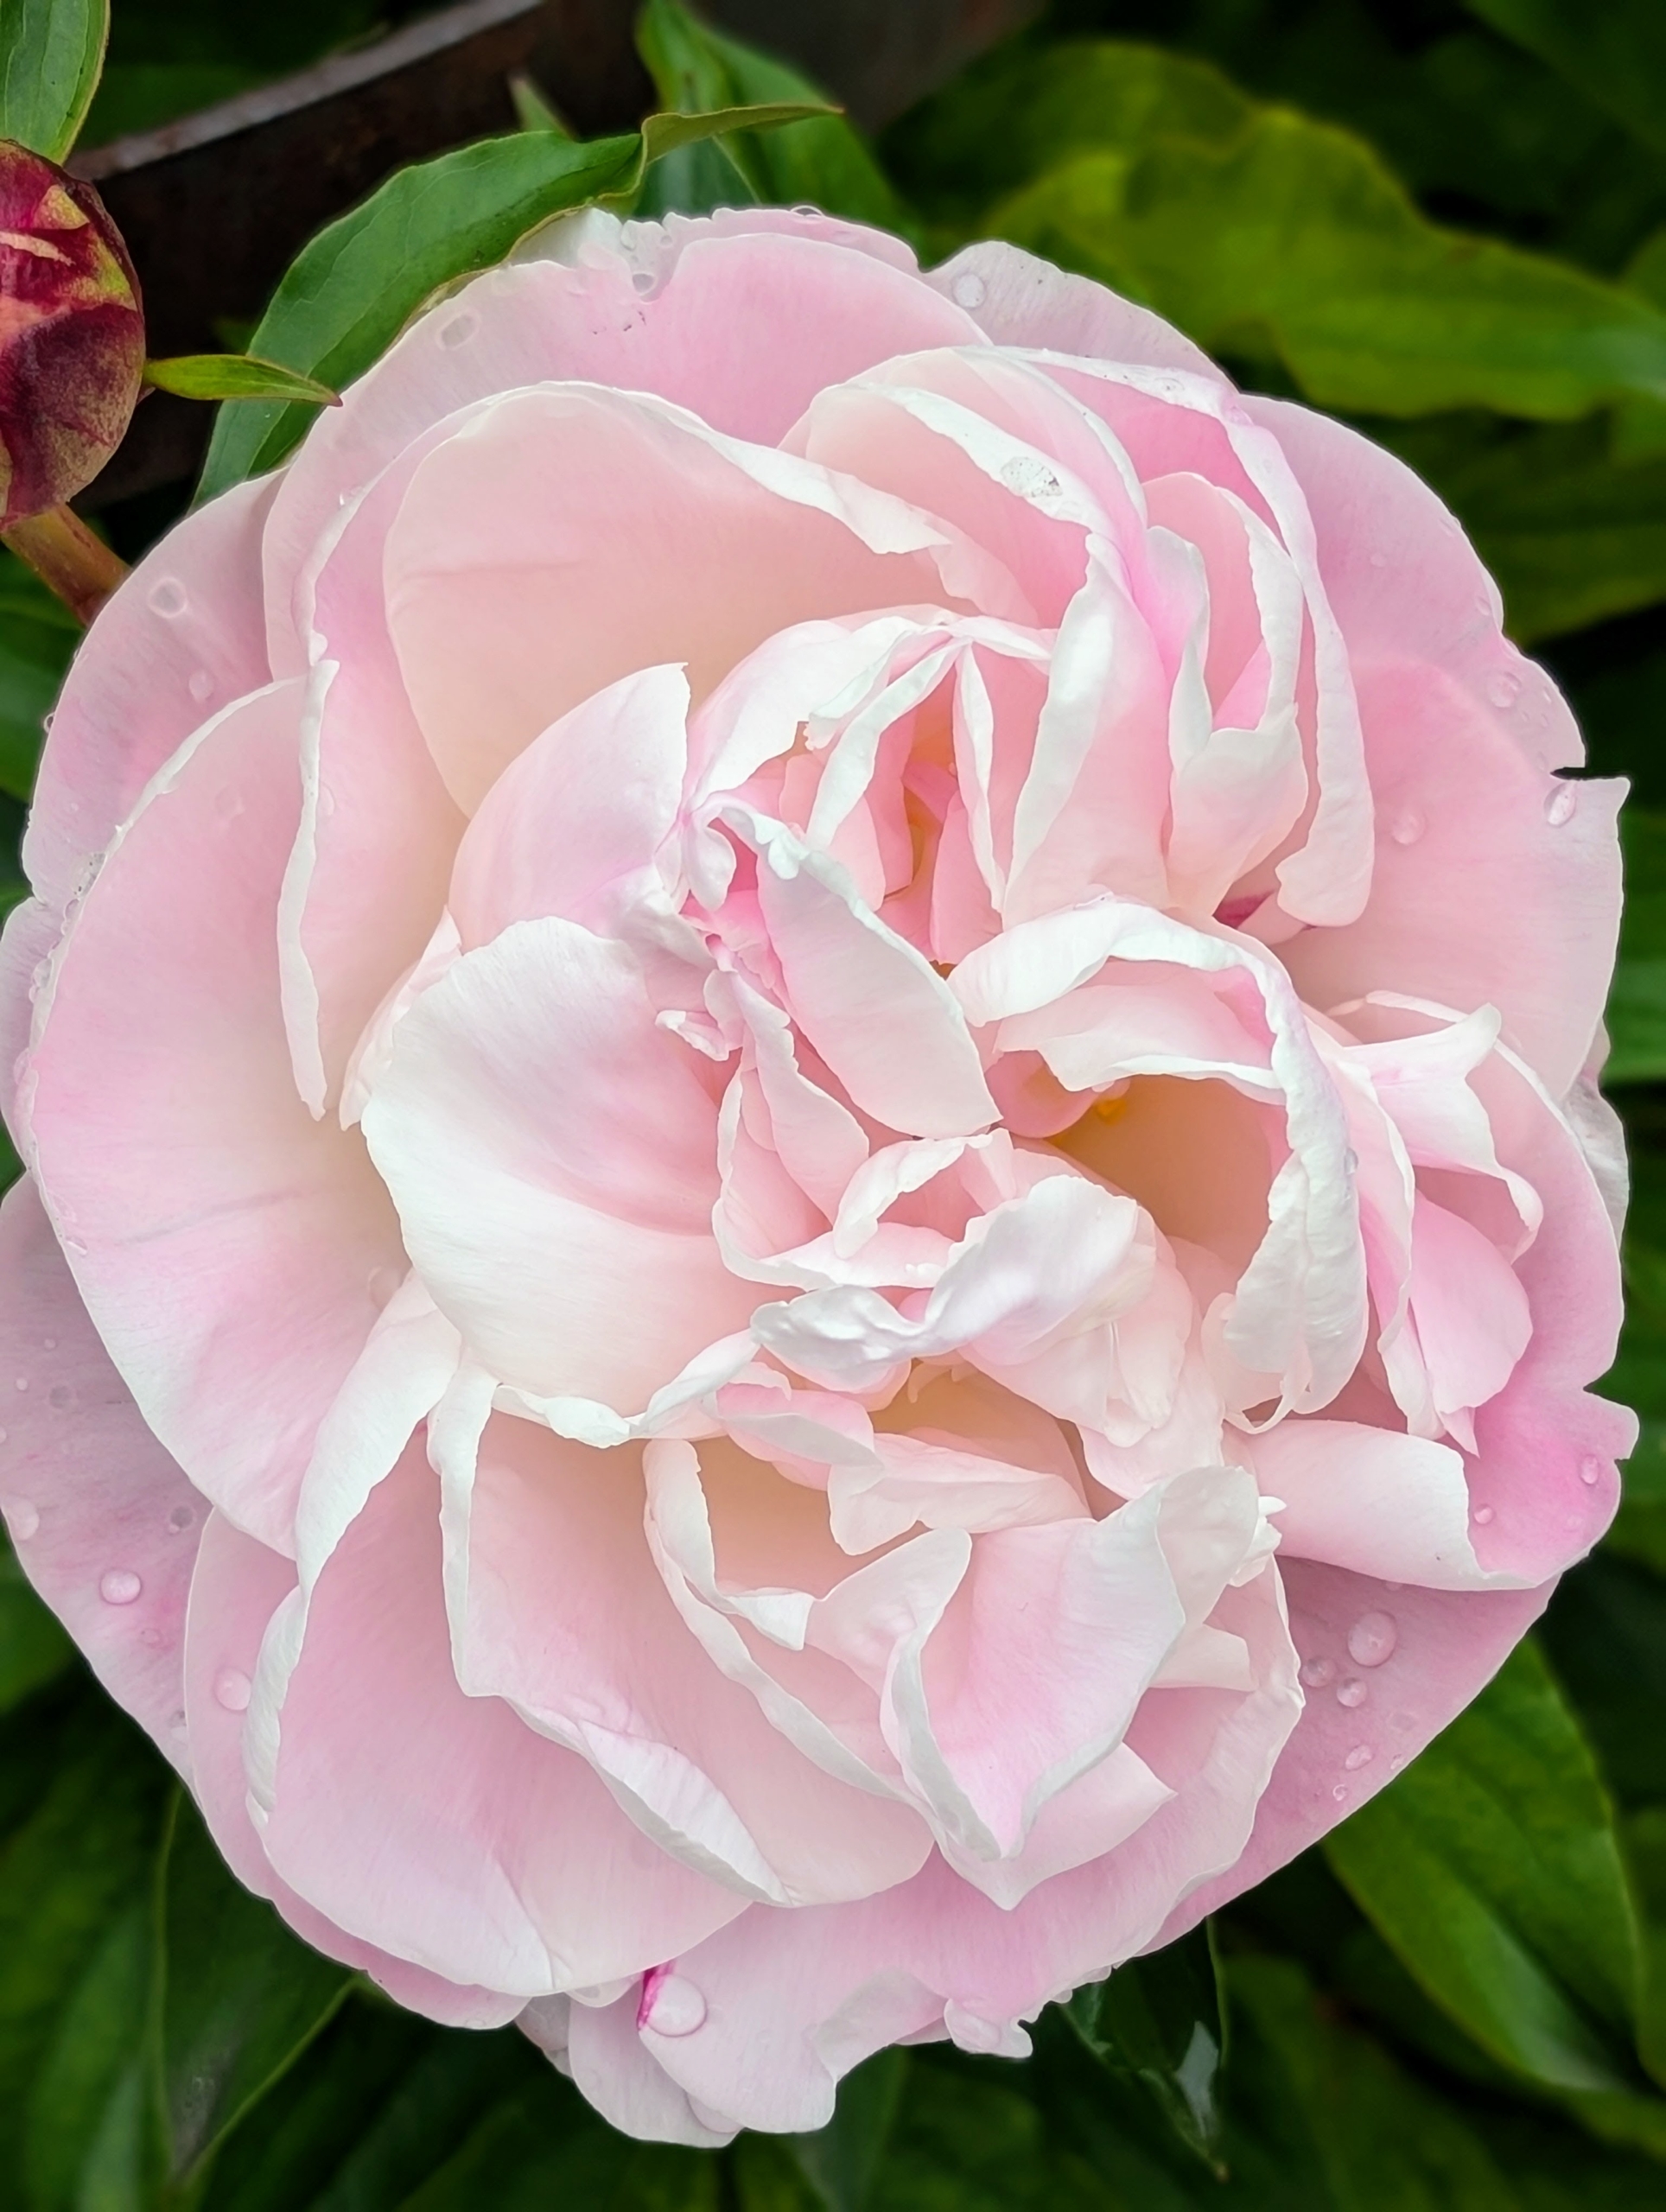
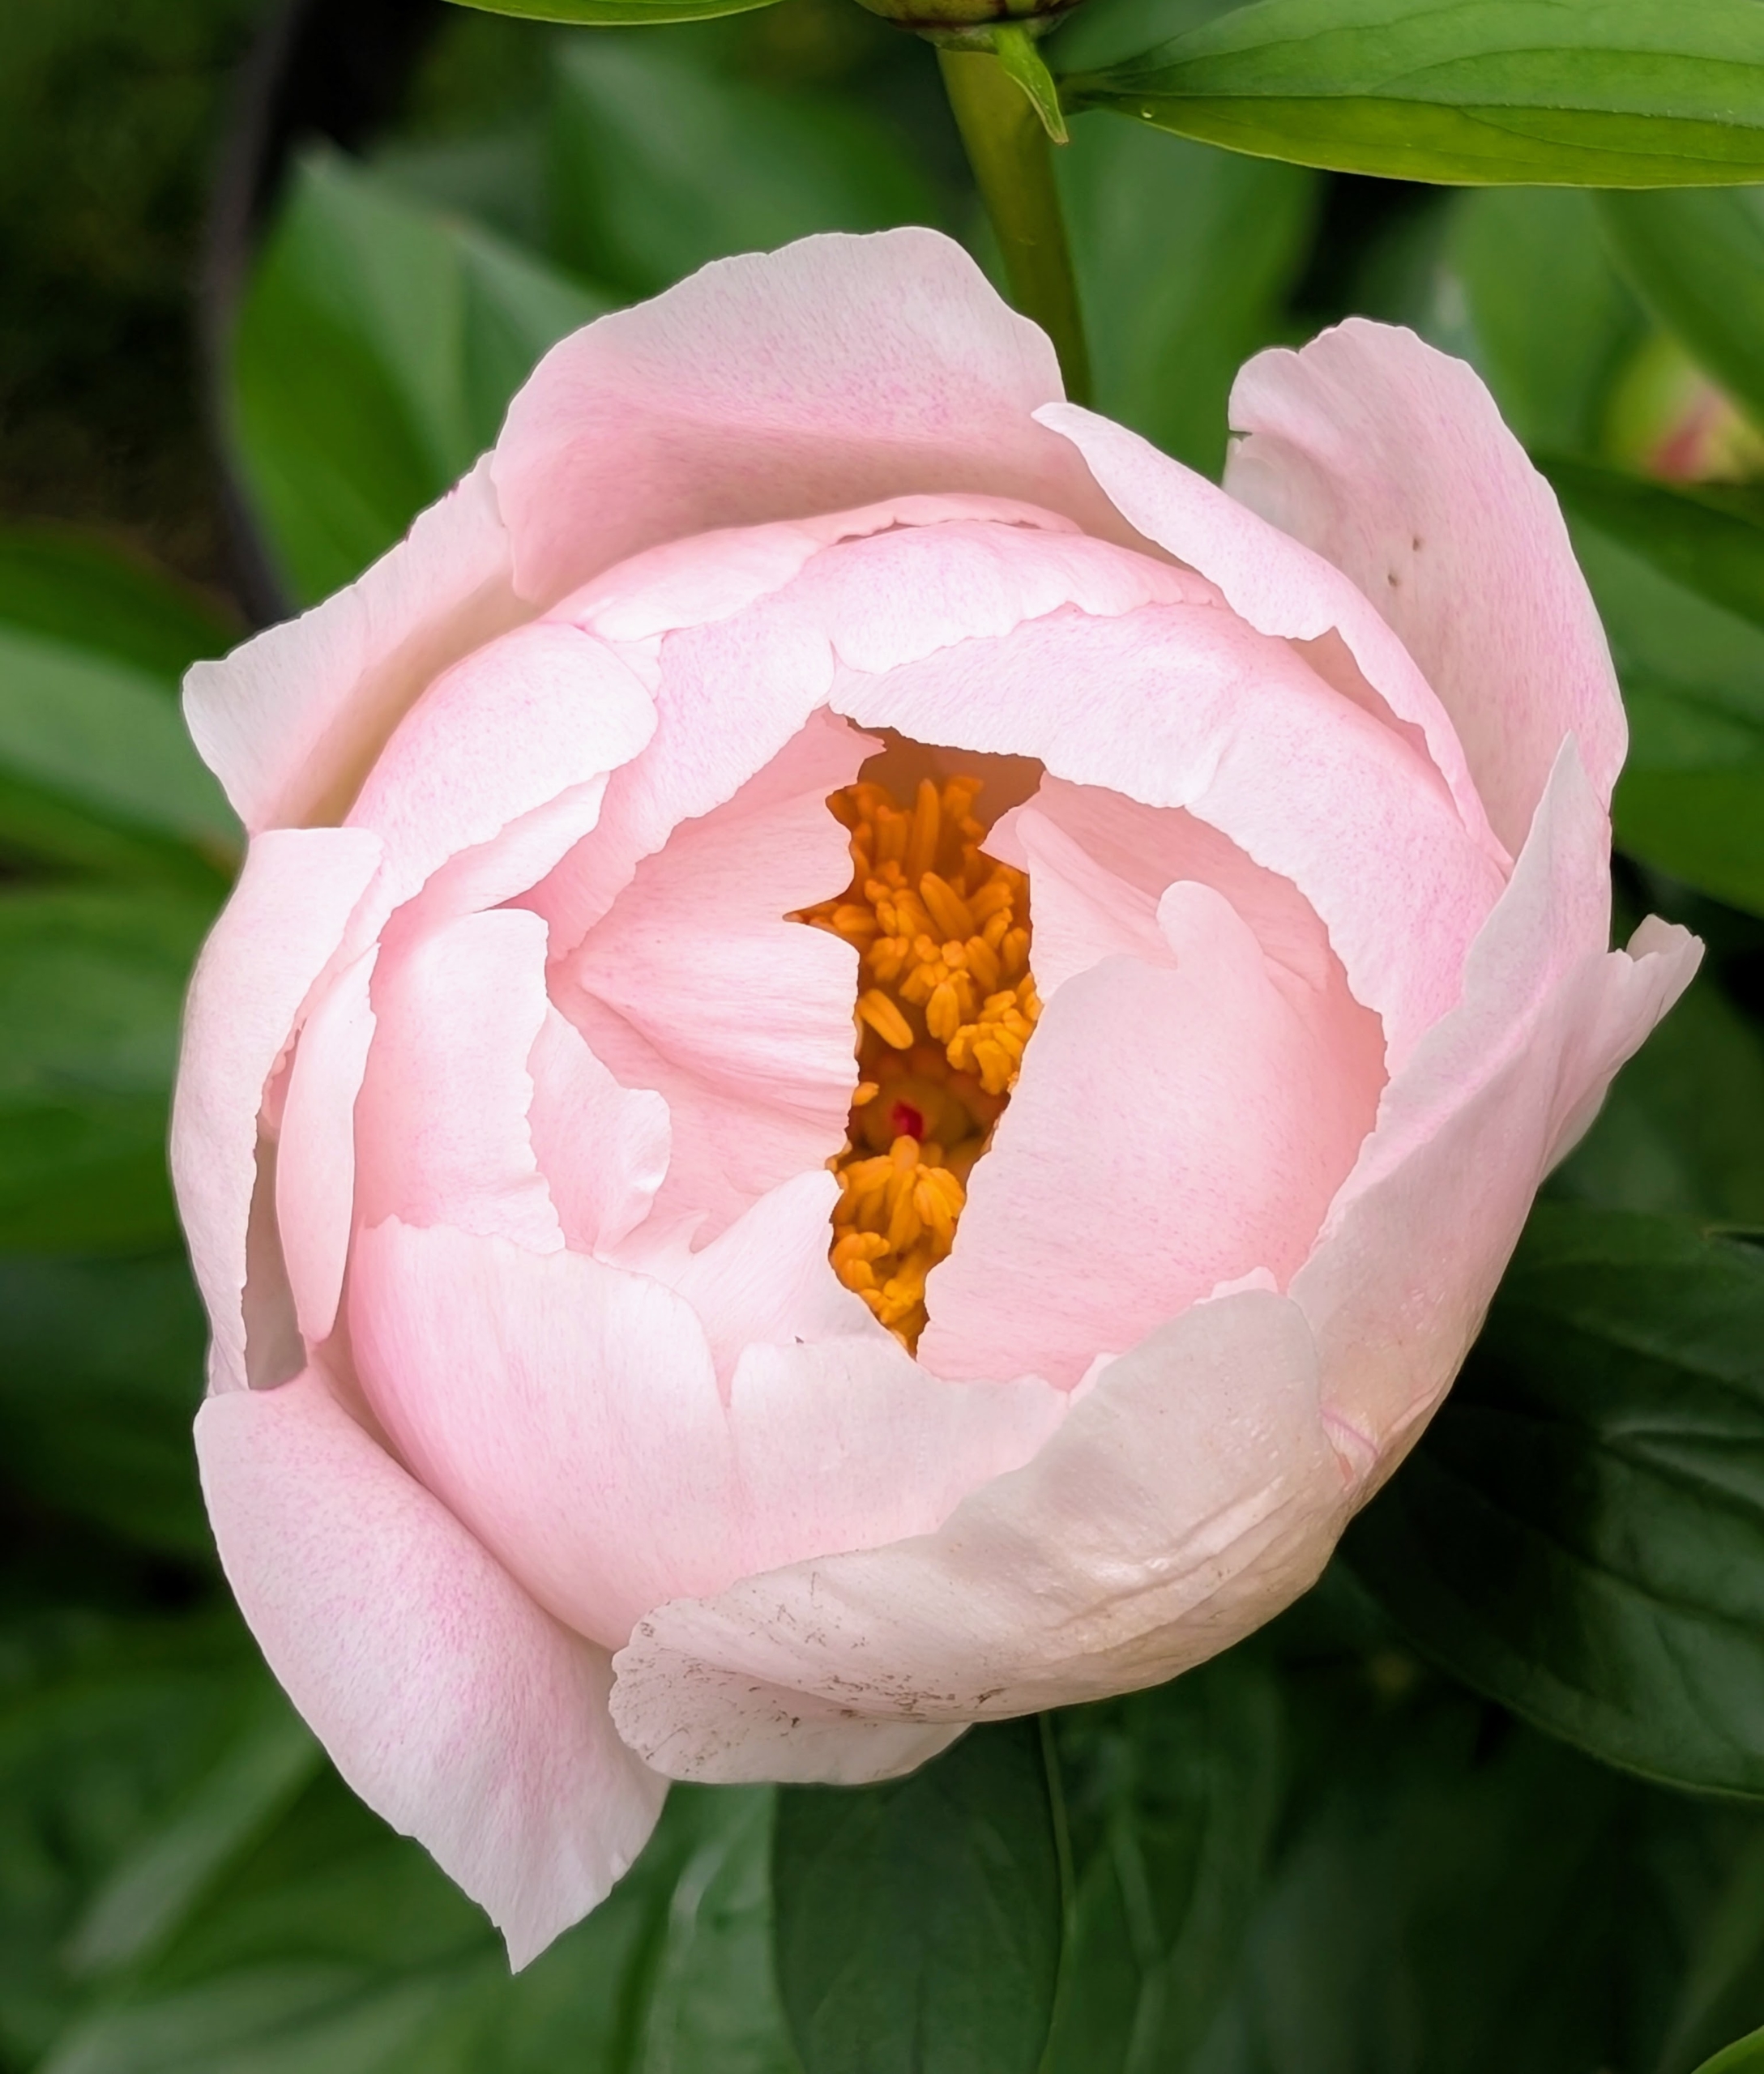
This light pink Chinese peony is ‘Pink Venus.’ It is a semi-double peony in soft cameo pink. It’s blooms grow up to six-and-a-half inches wide with red tipped stigmas and good stem strength.
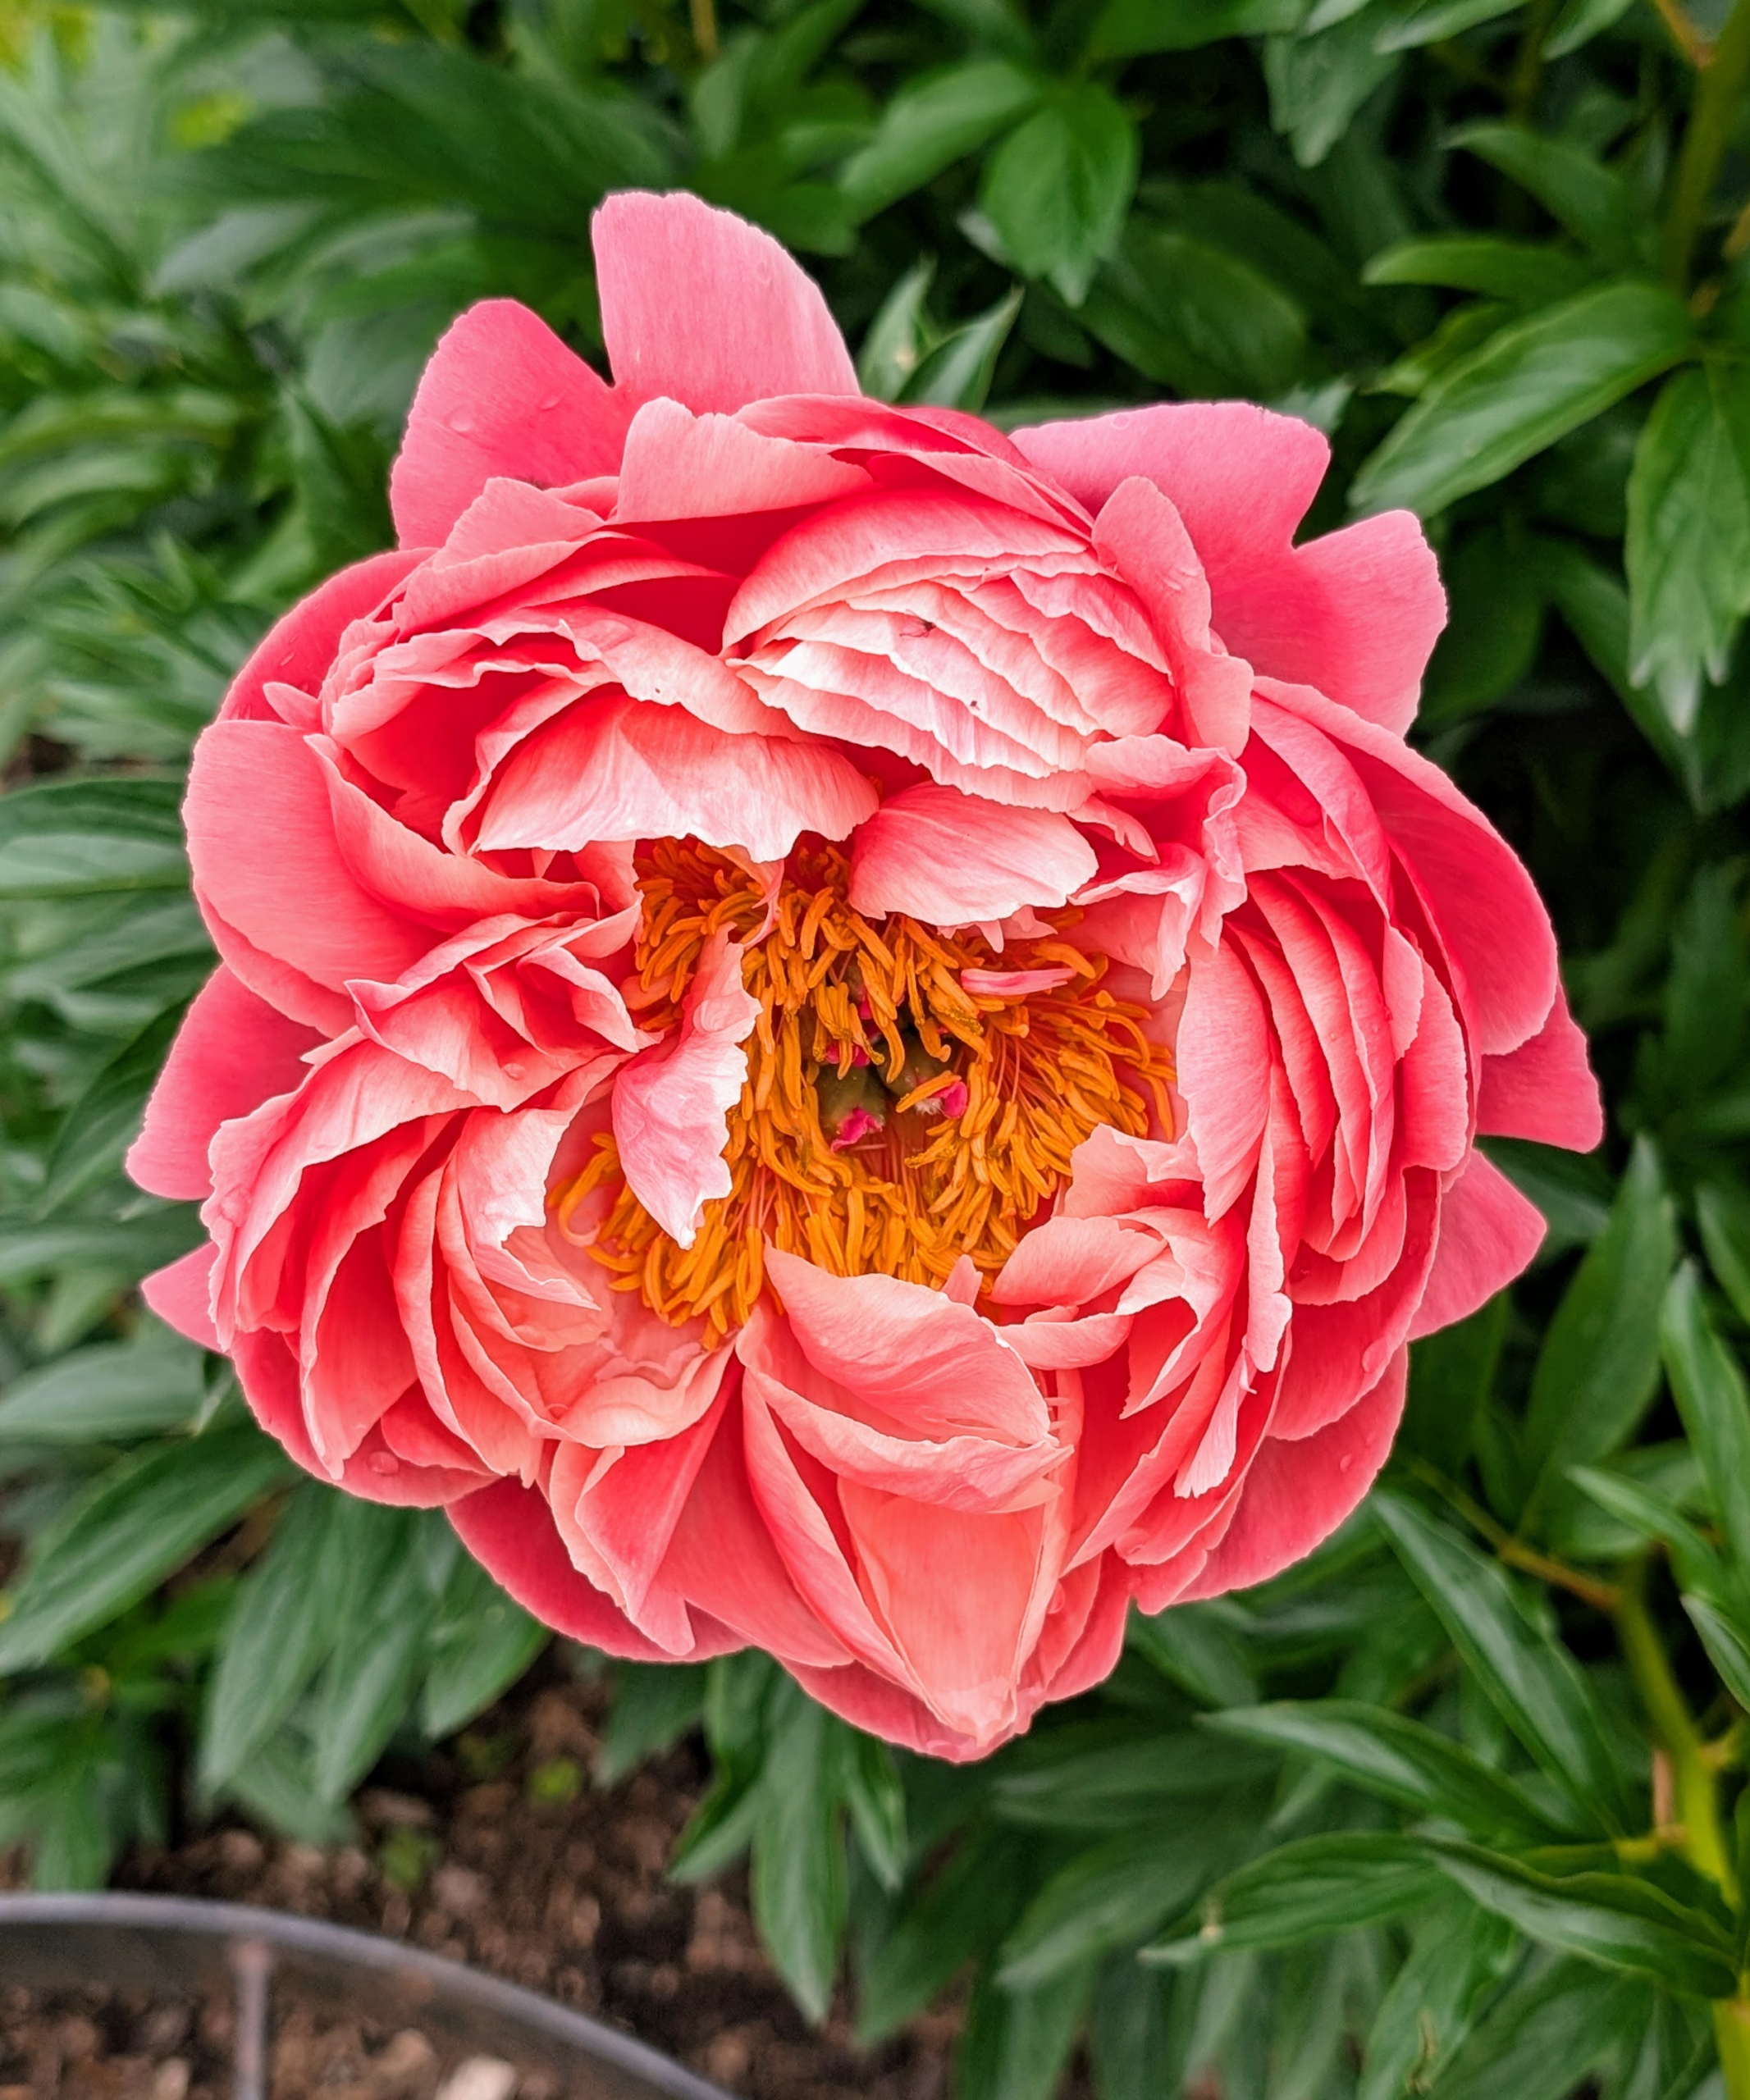
Paeonia ‘Coral Charm’ has huge bowl shaped flowers with bold coral color. The color lightens to a pale cream deeper into the bloom.
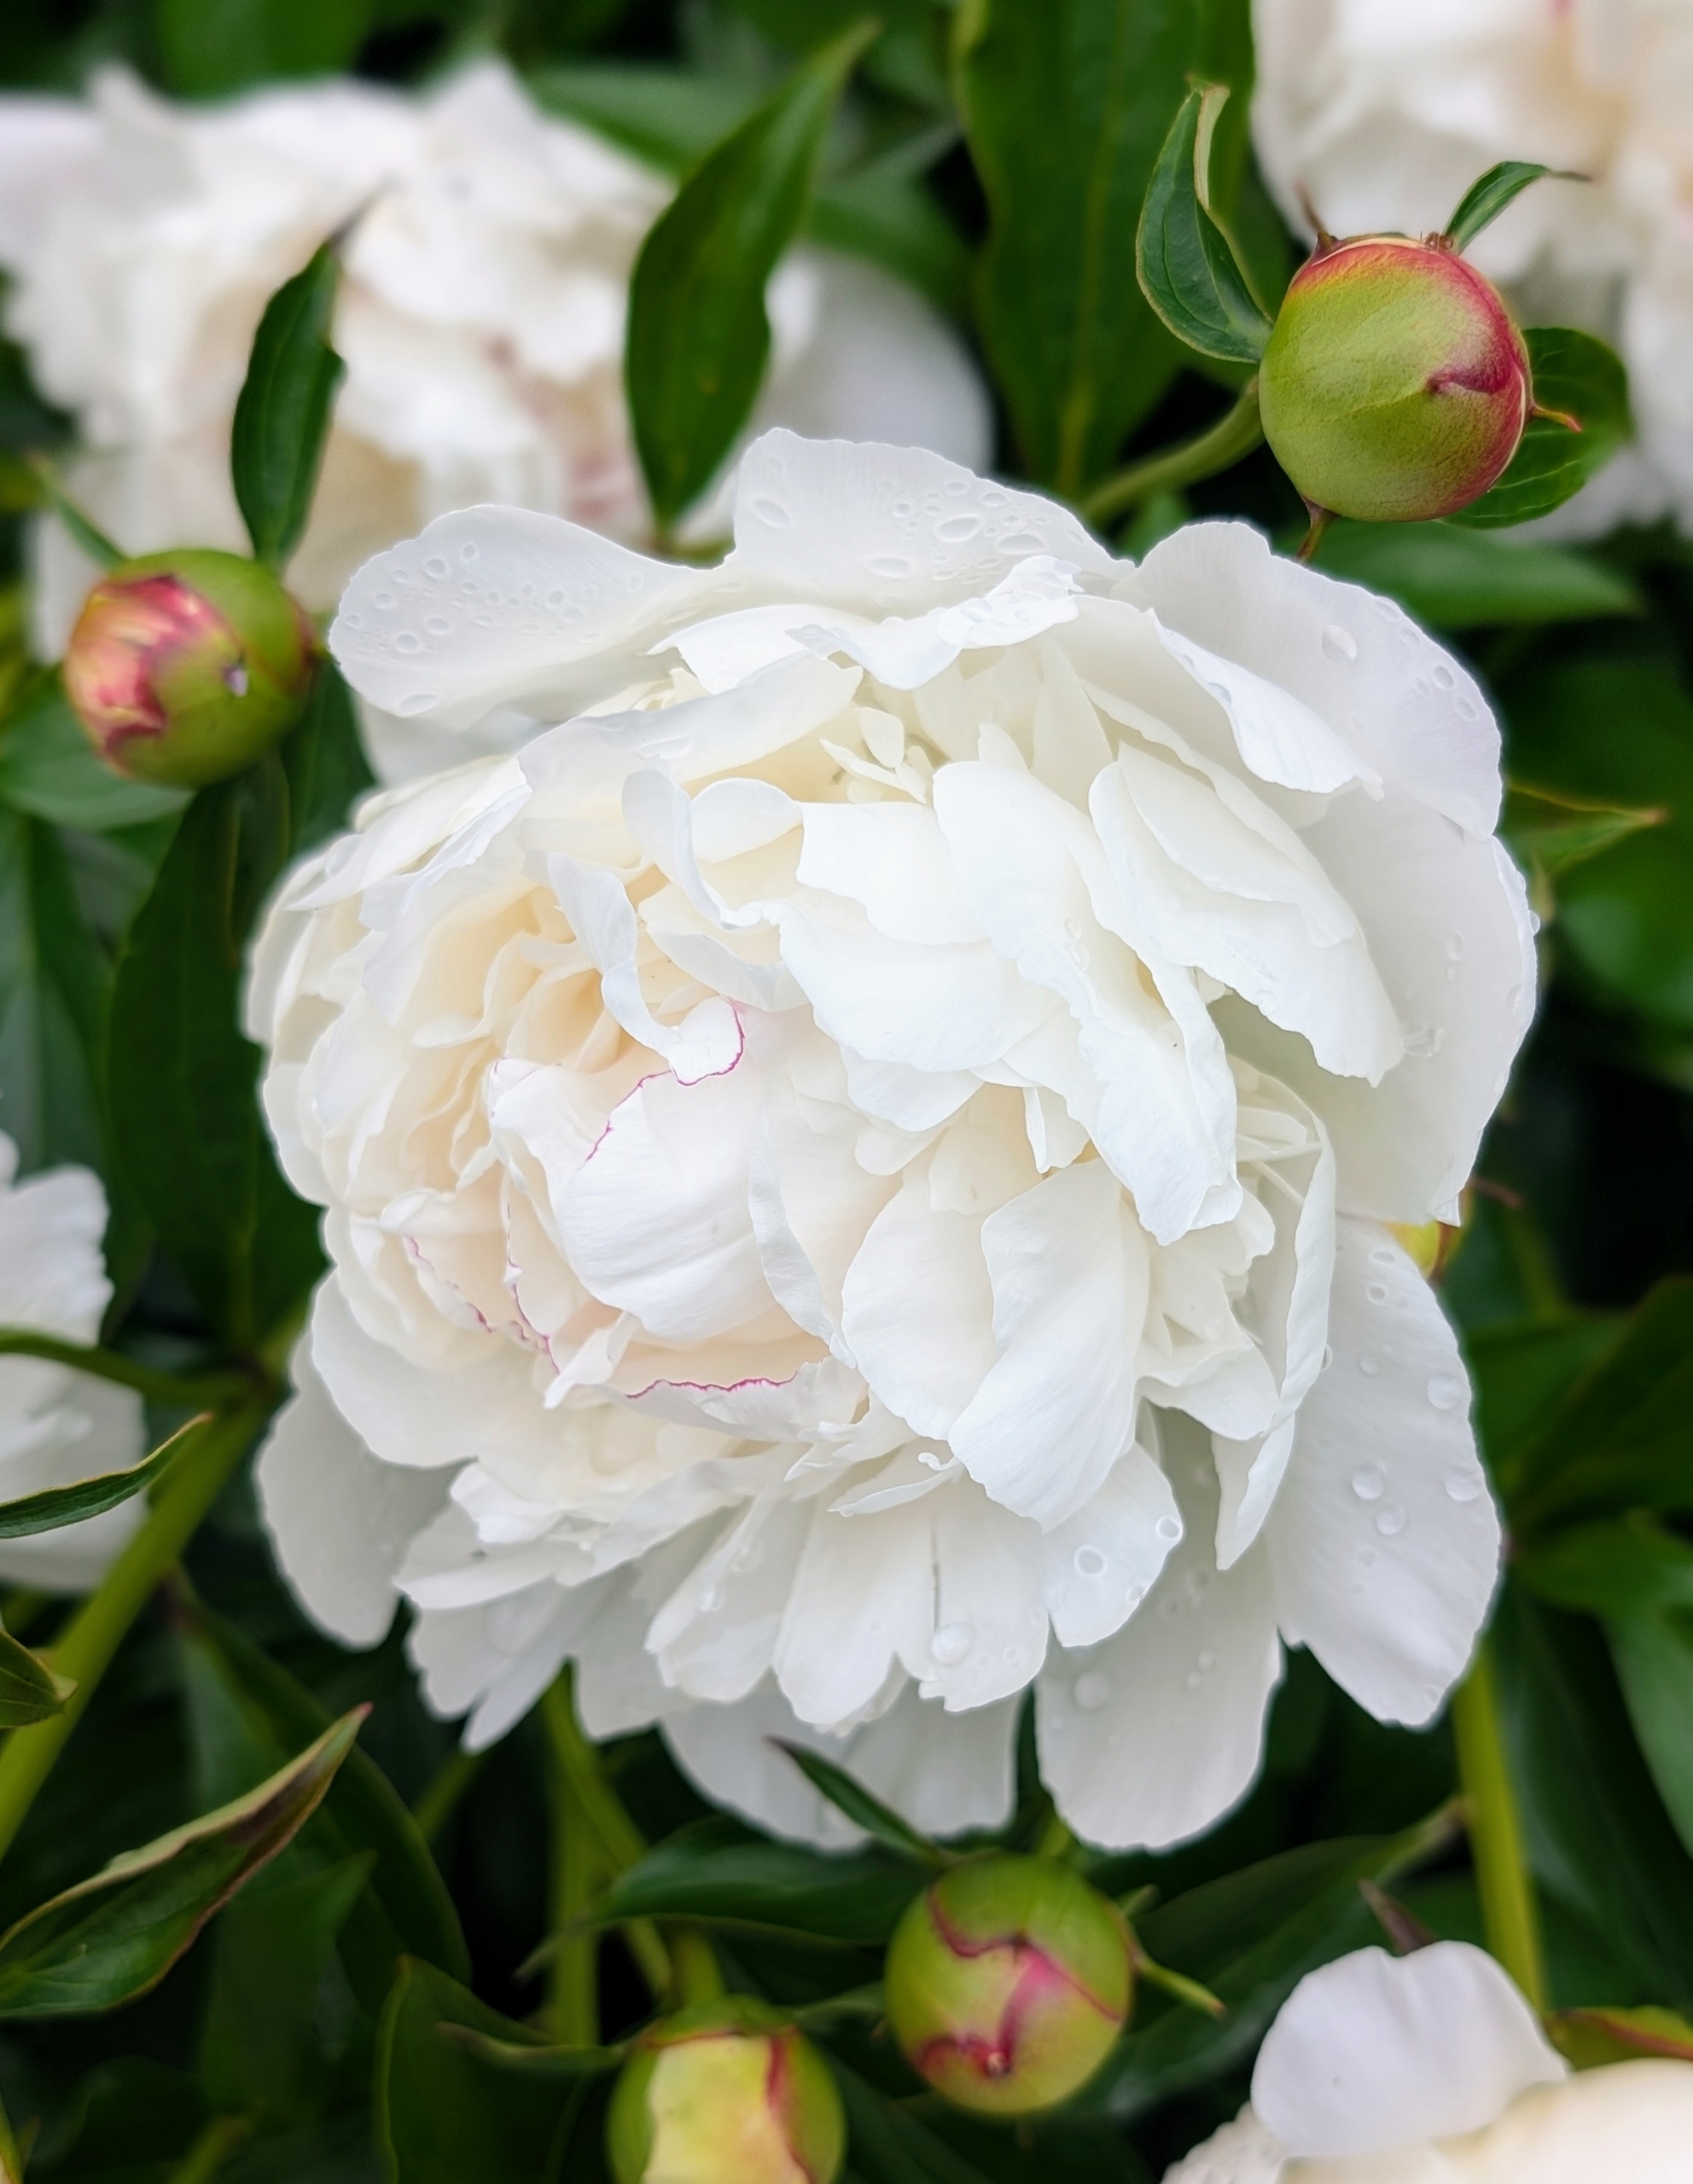
And Paeonia ‘Festiva Maxima’ is a double, white peony with edges accented with crimson. This variety is a longtime favorite for growers – it originated in France in 1851.
Peony ‘ Chiffon Clouds’ is a very soft salmon color with ruffled petals. It grows to 36-inches in height with good stem strength, fragrance, and reliable foliage.
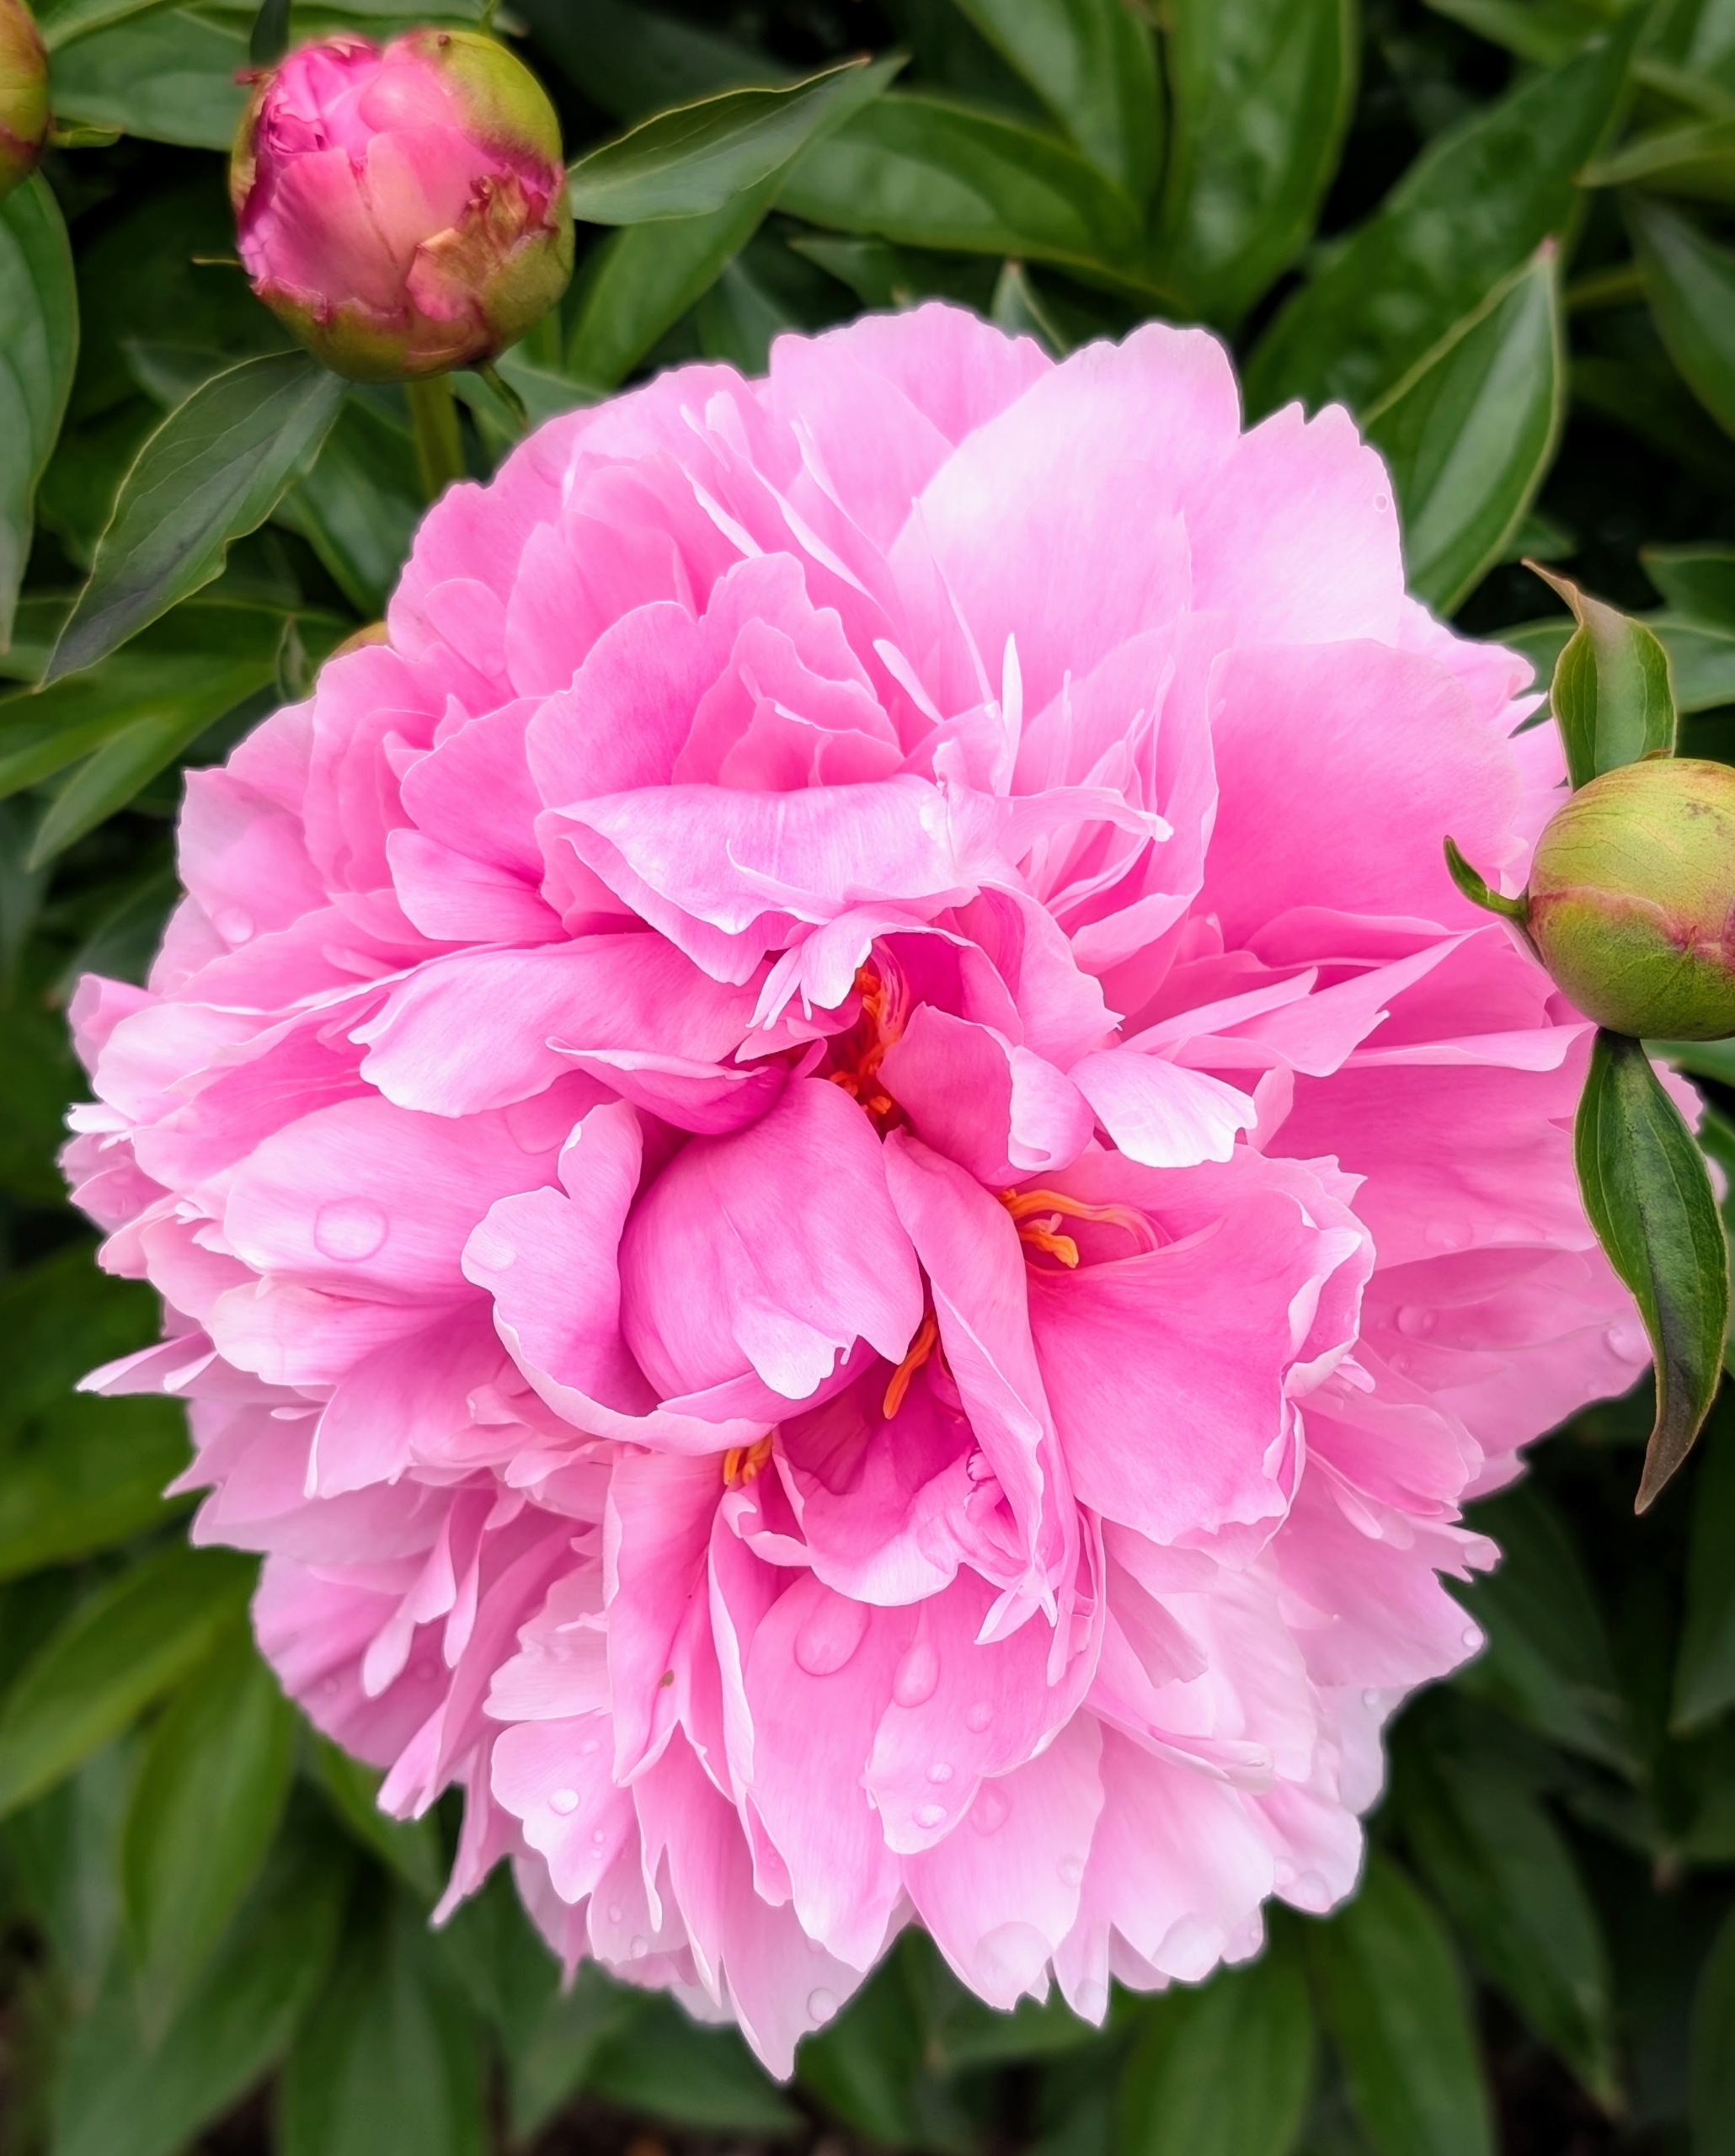
Paeonia ‘Kevin’ has large, double pink blooms that show lighter pink in the center. It makes an excellent cut flower.
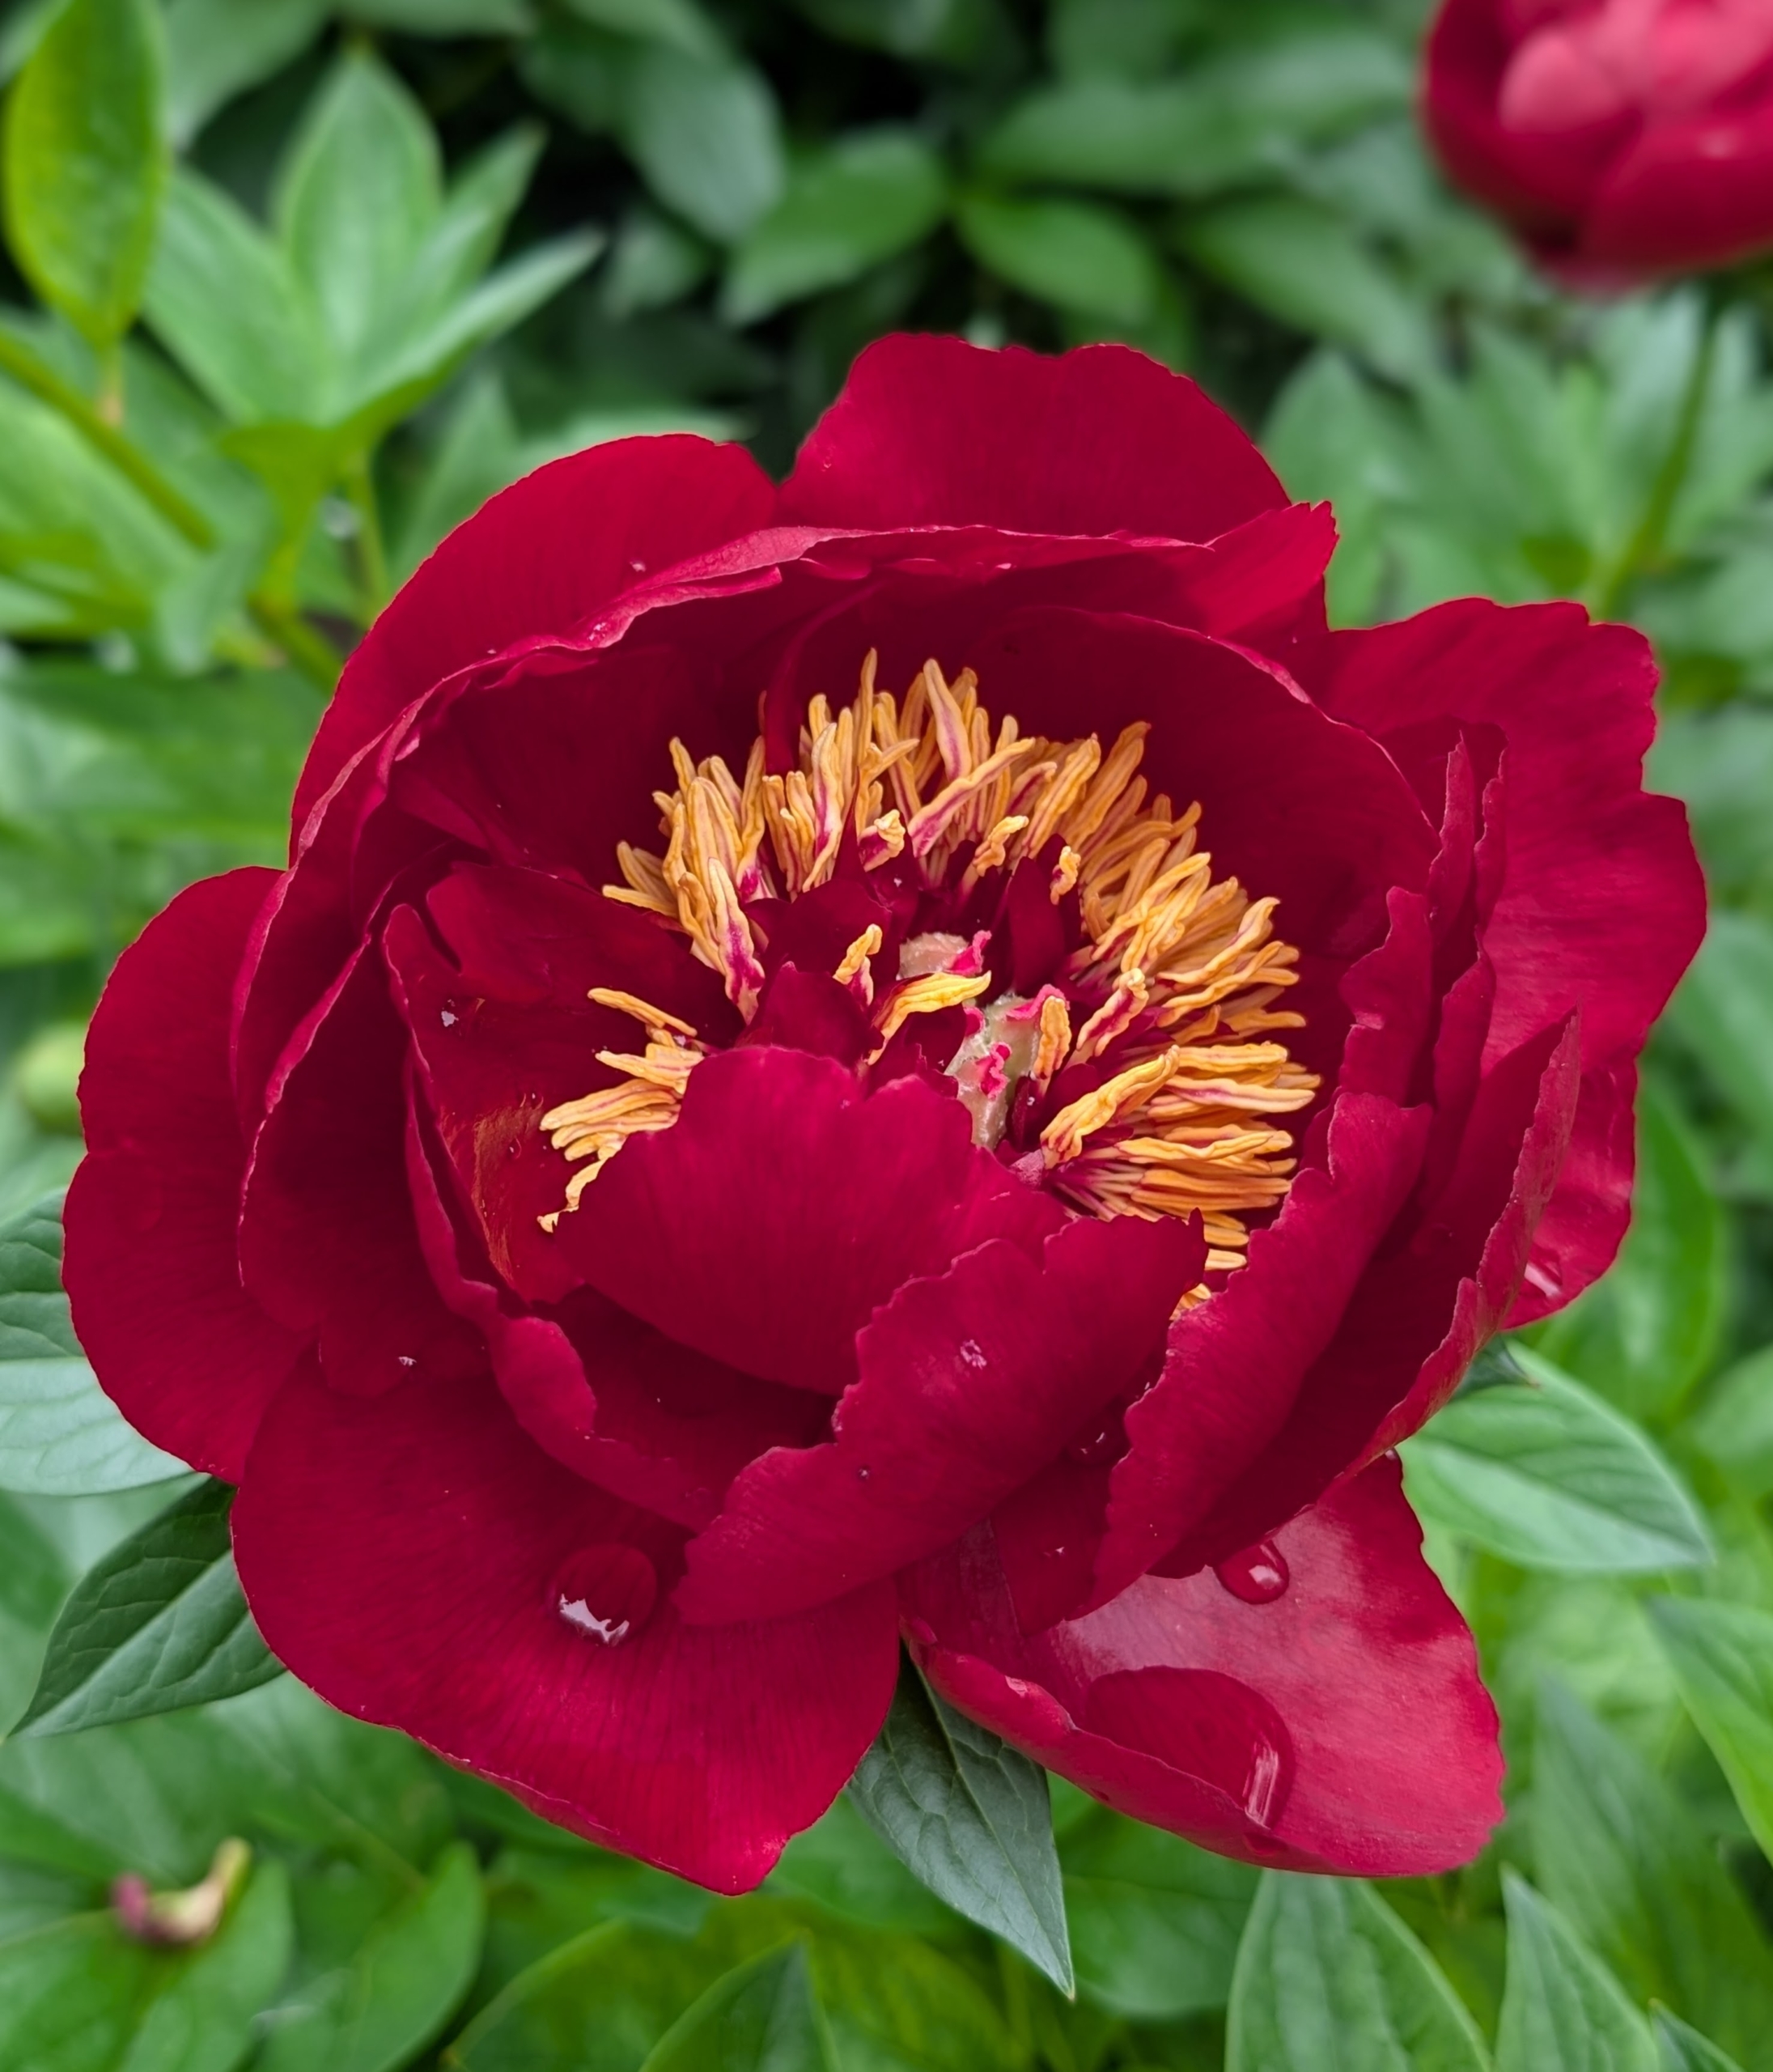
This peony variety is called ‘Buckeye Belle.’ It’s a semi-double, velvety, dark red flower held on sturdy stems.
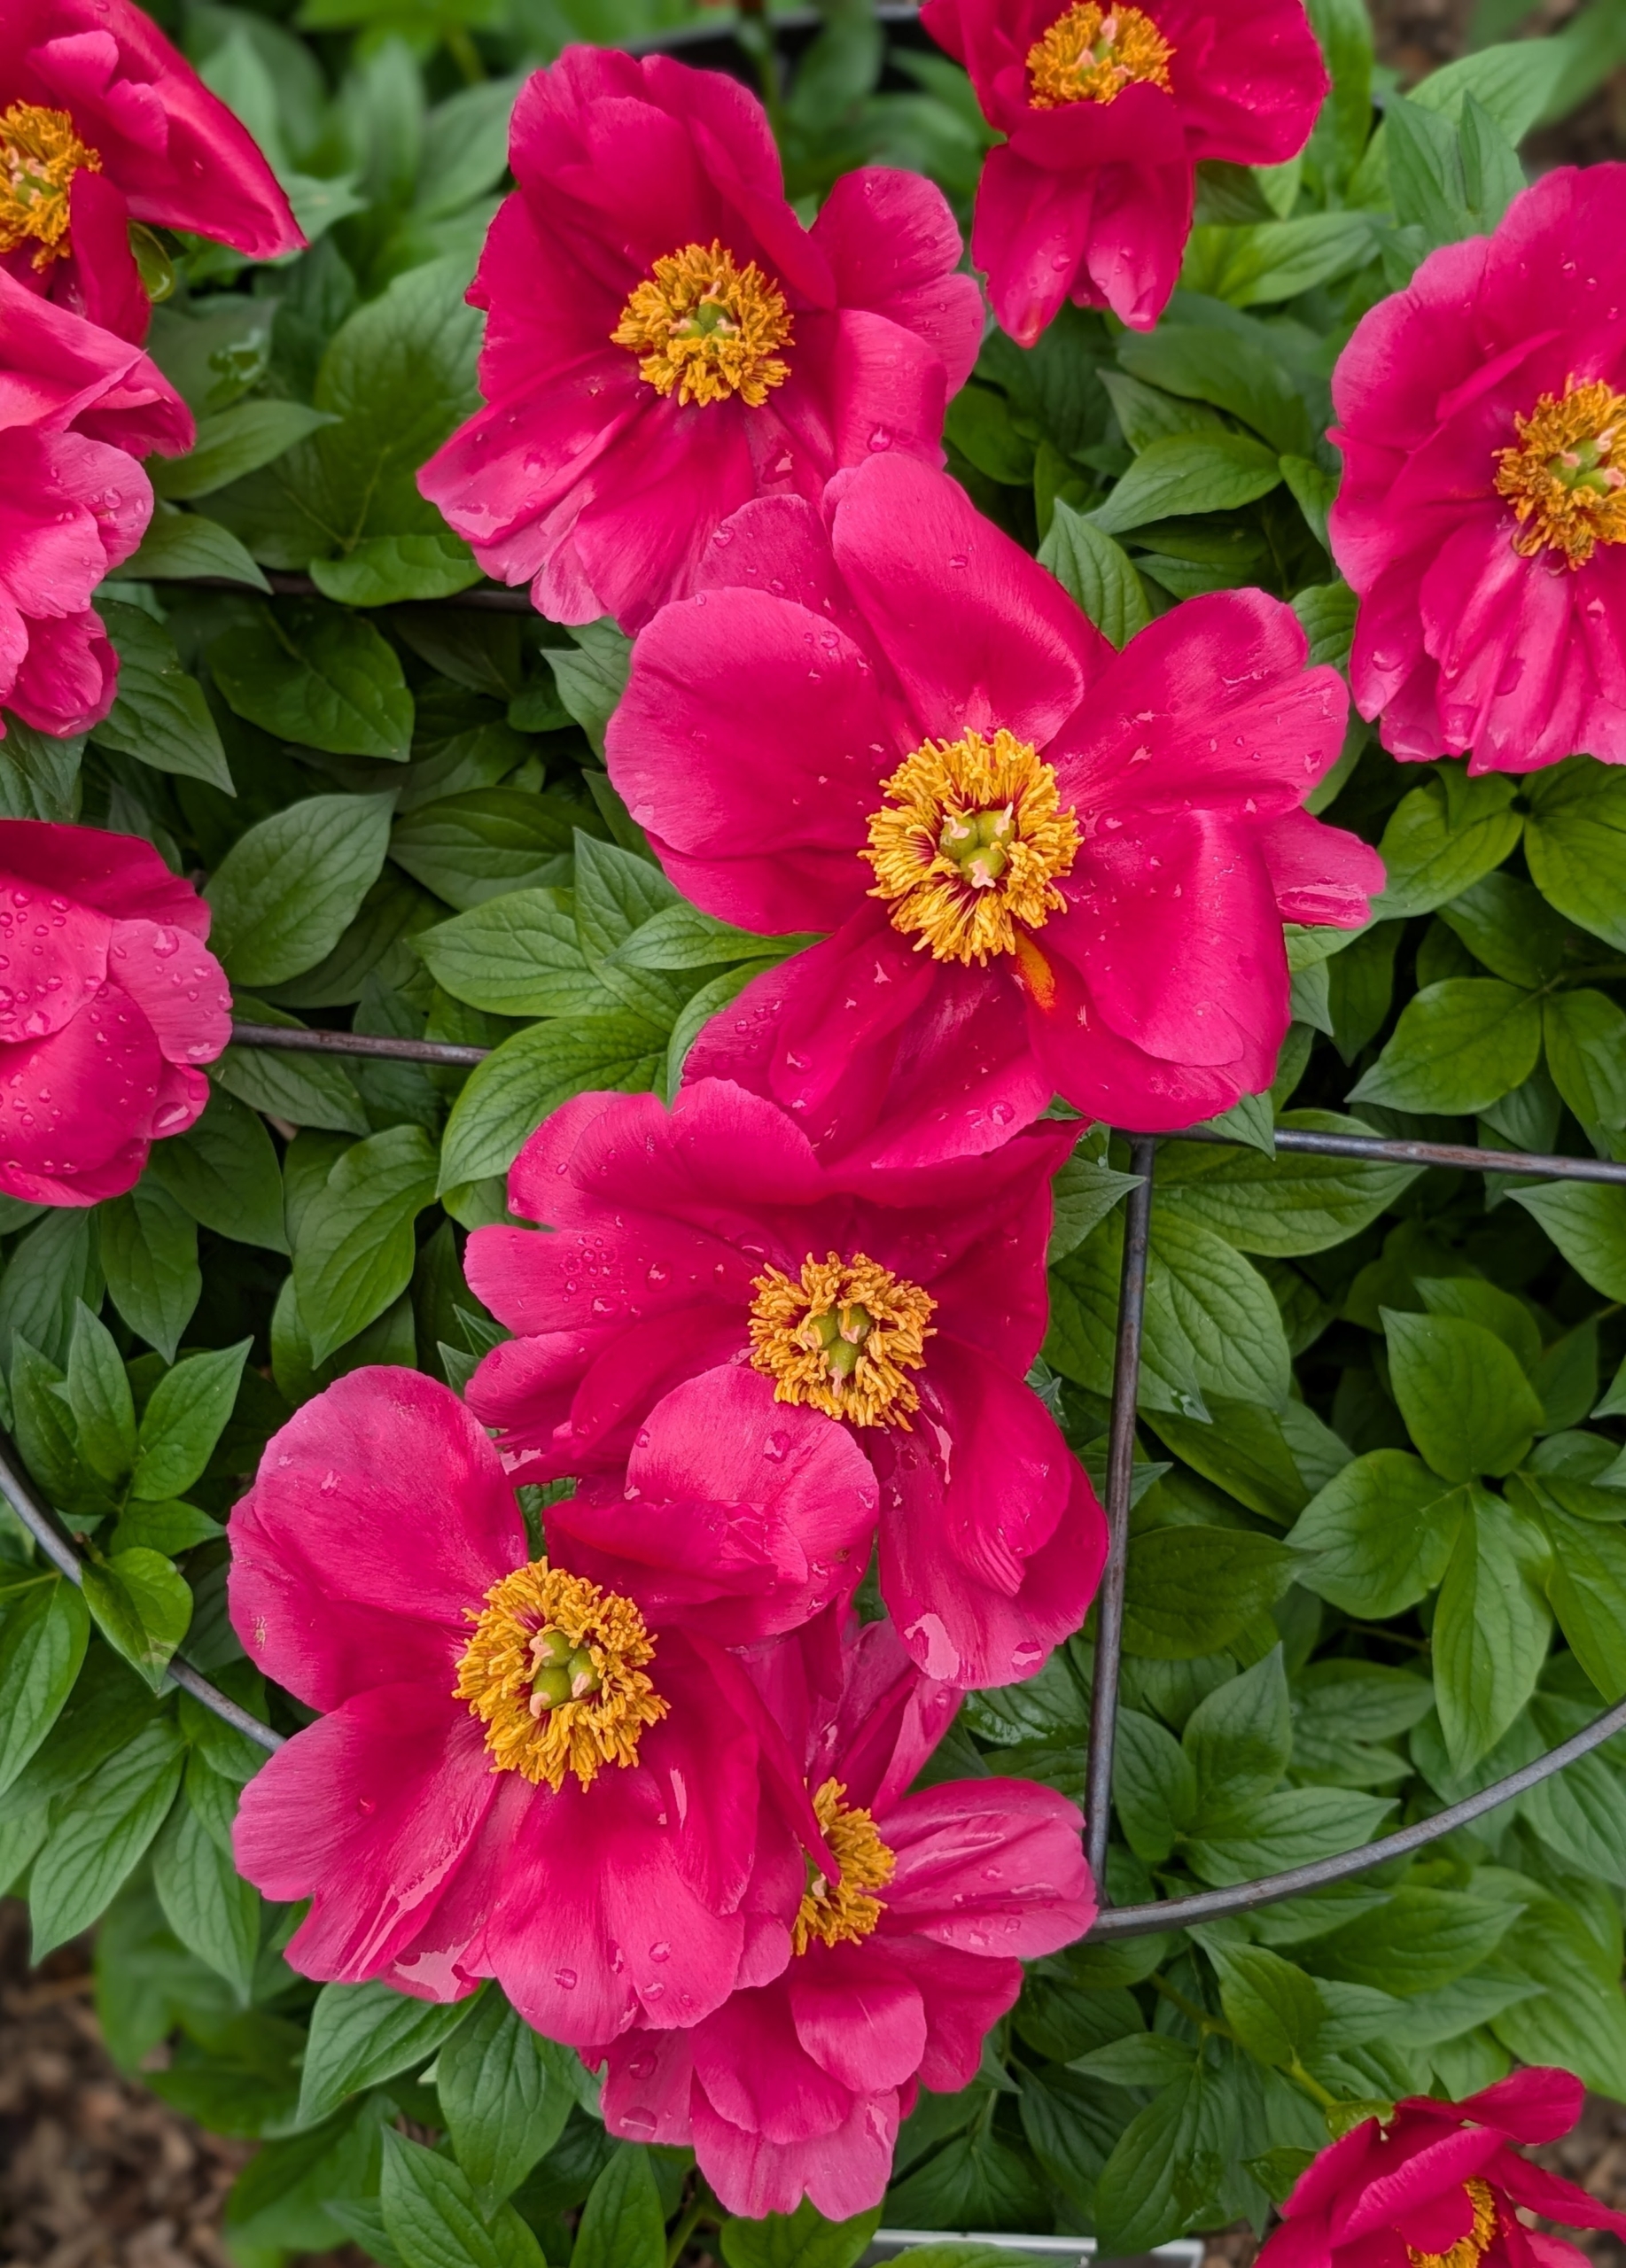
And this is ‘Burma Joy’ – soft red blossoms that are single and tulip-cupped shaped that grow to a height of up to 28-inches. If you’re in the New York City area this weekend, go to the New York Botanical Garden -there’s so much to see, enjoy, and learn.
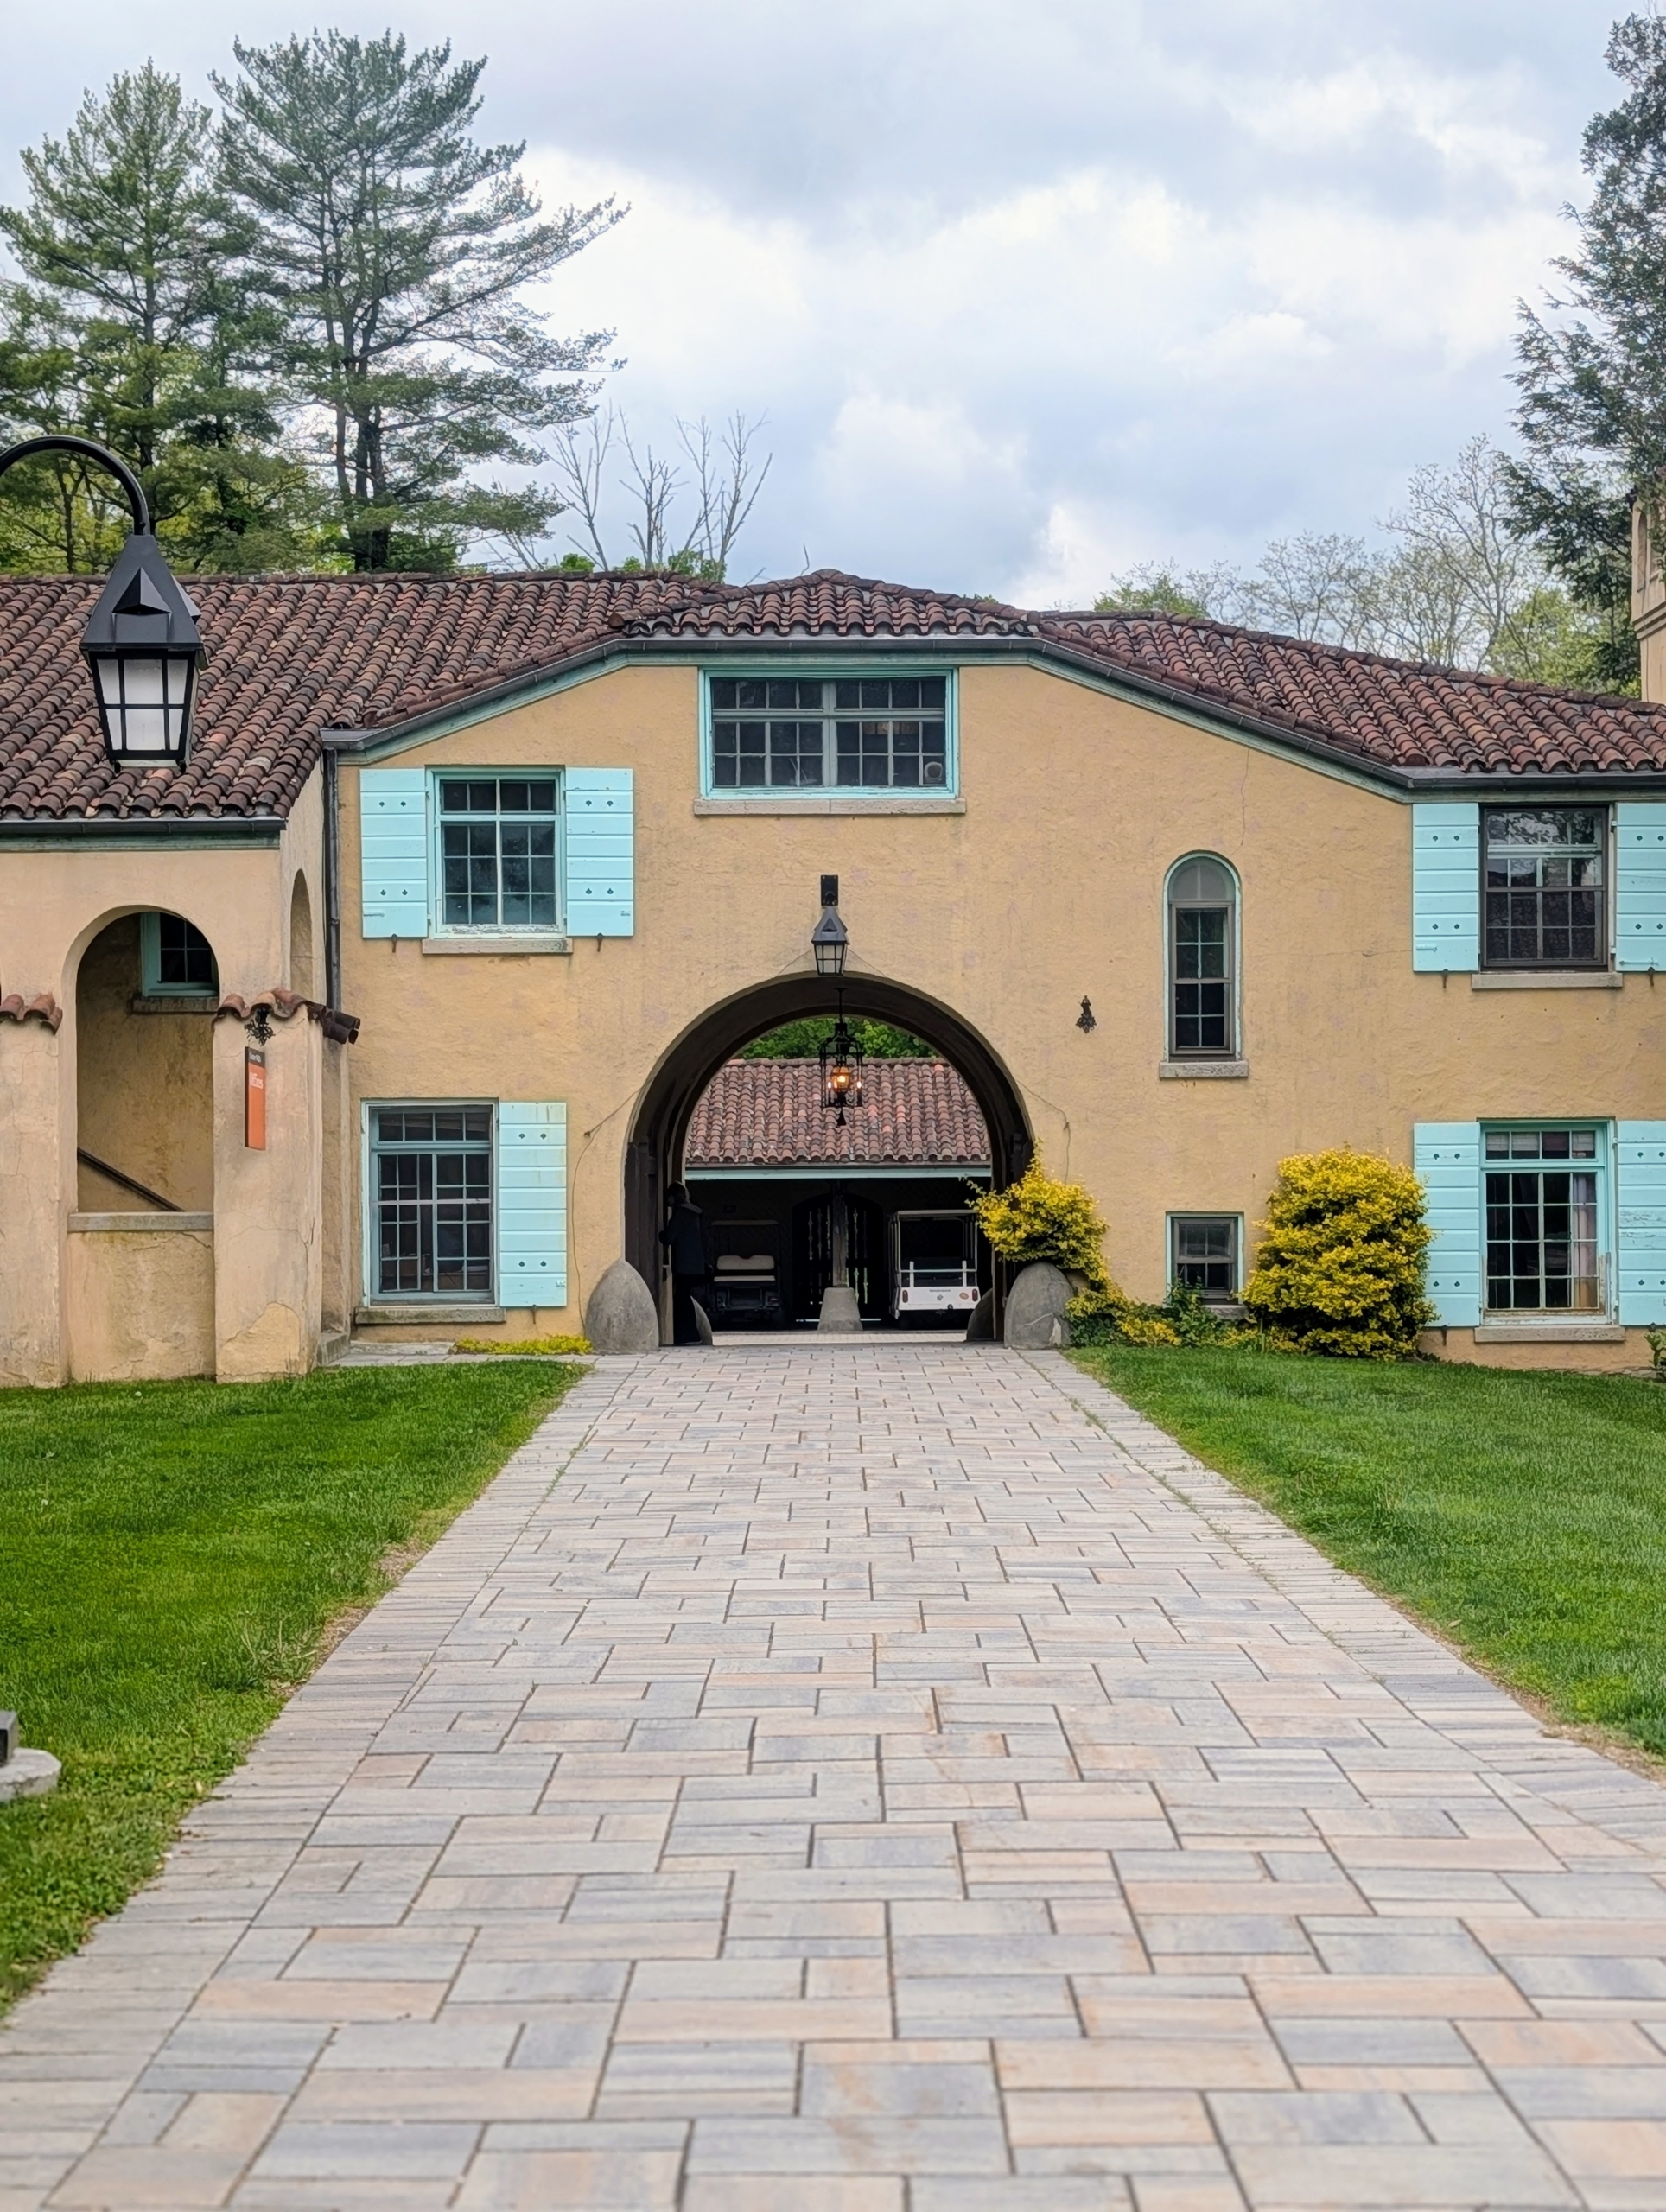
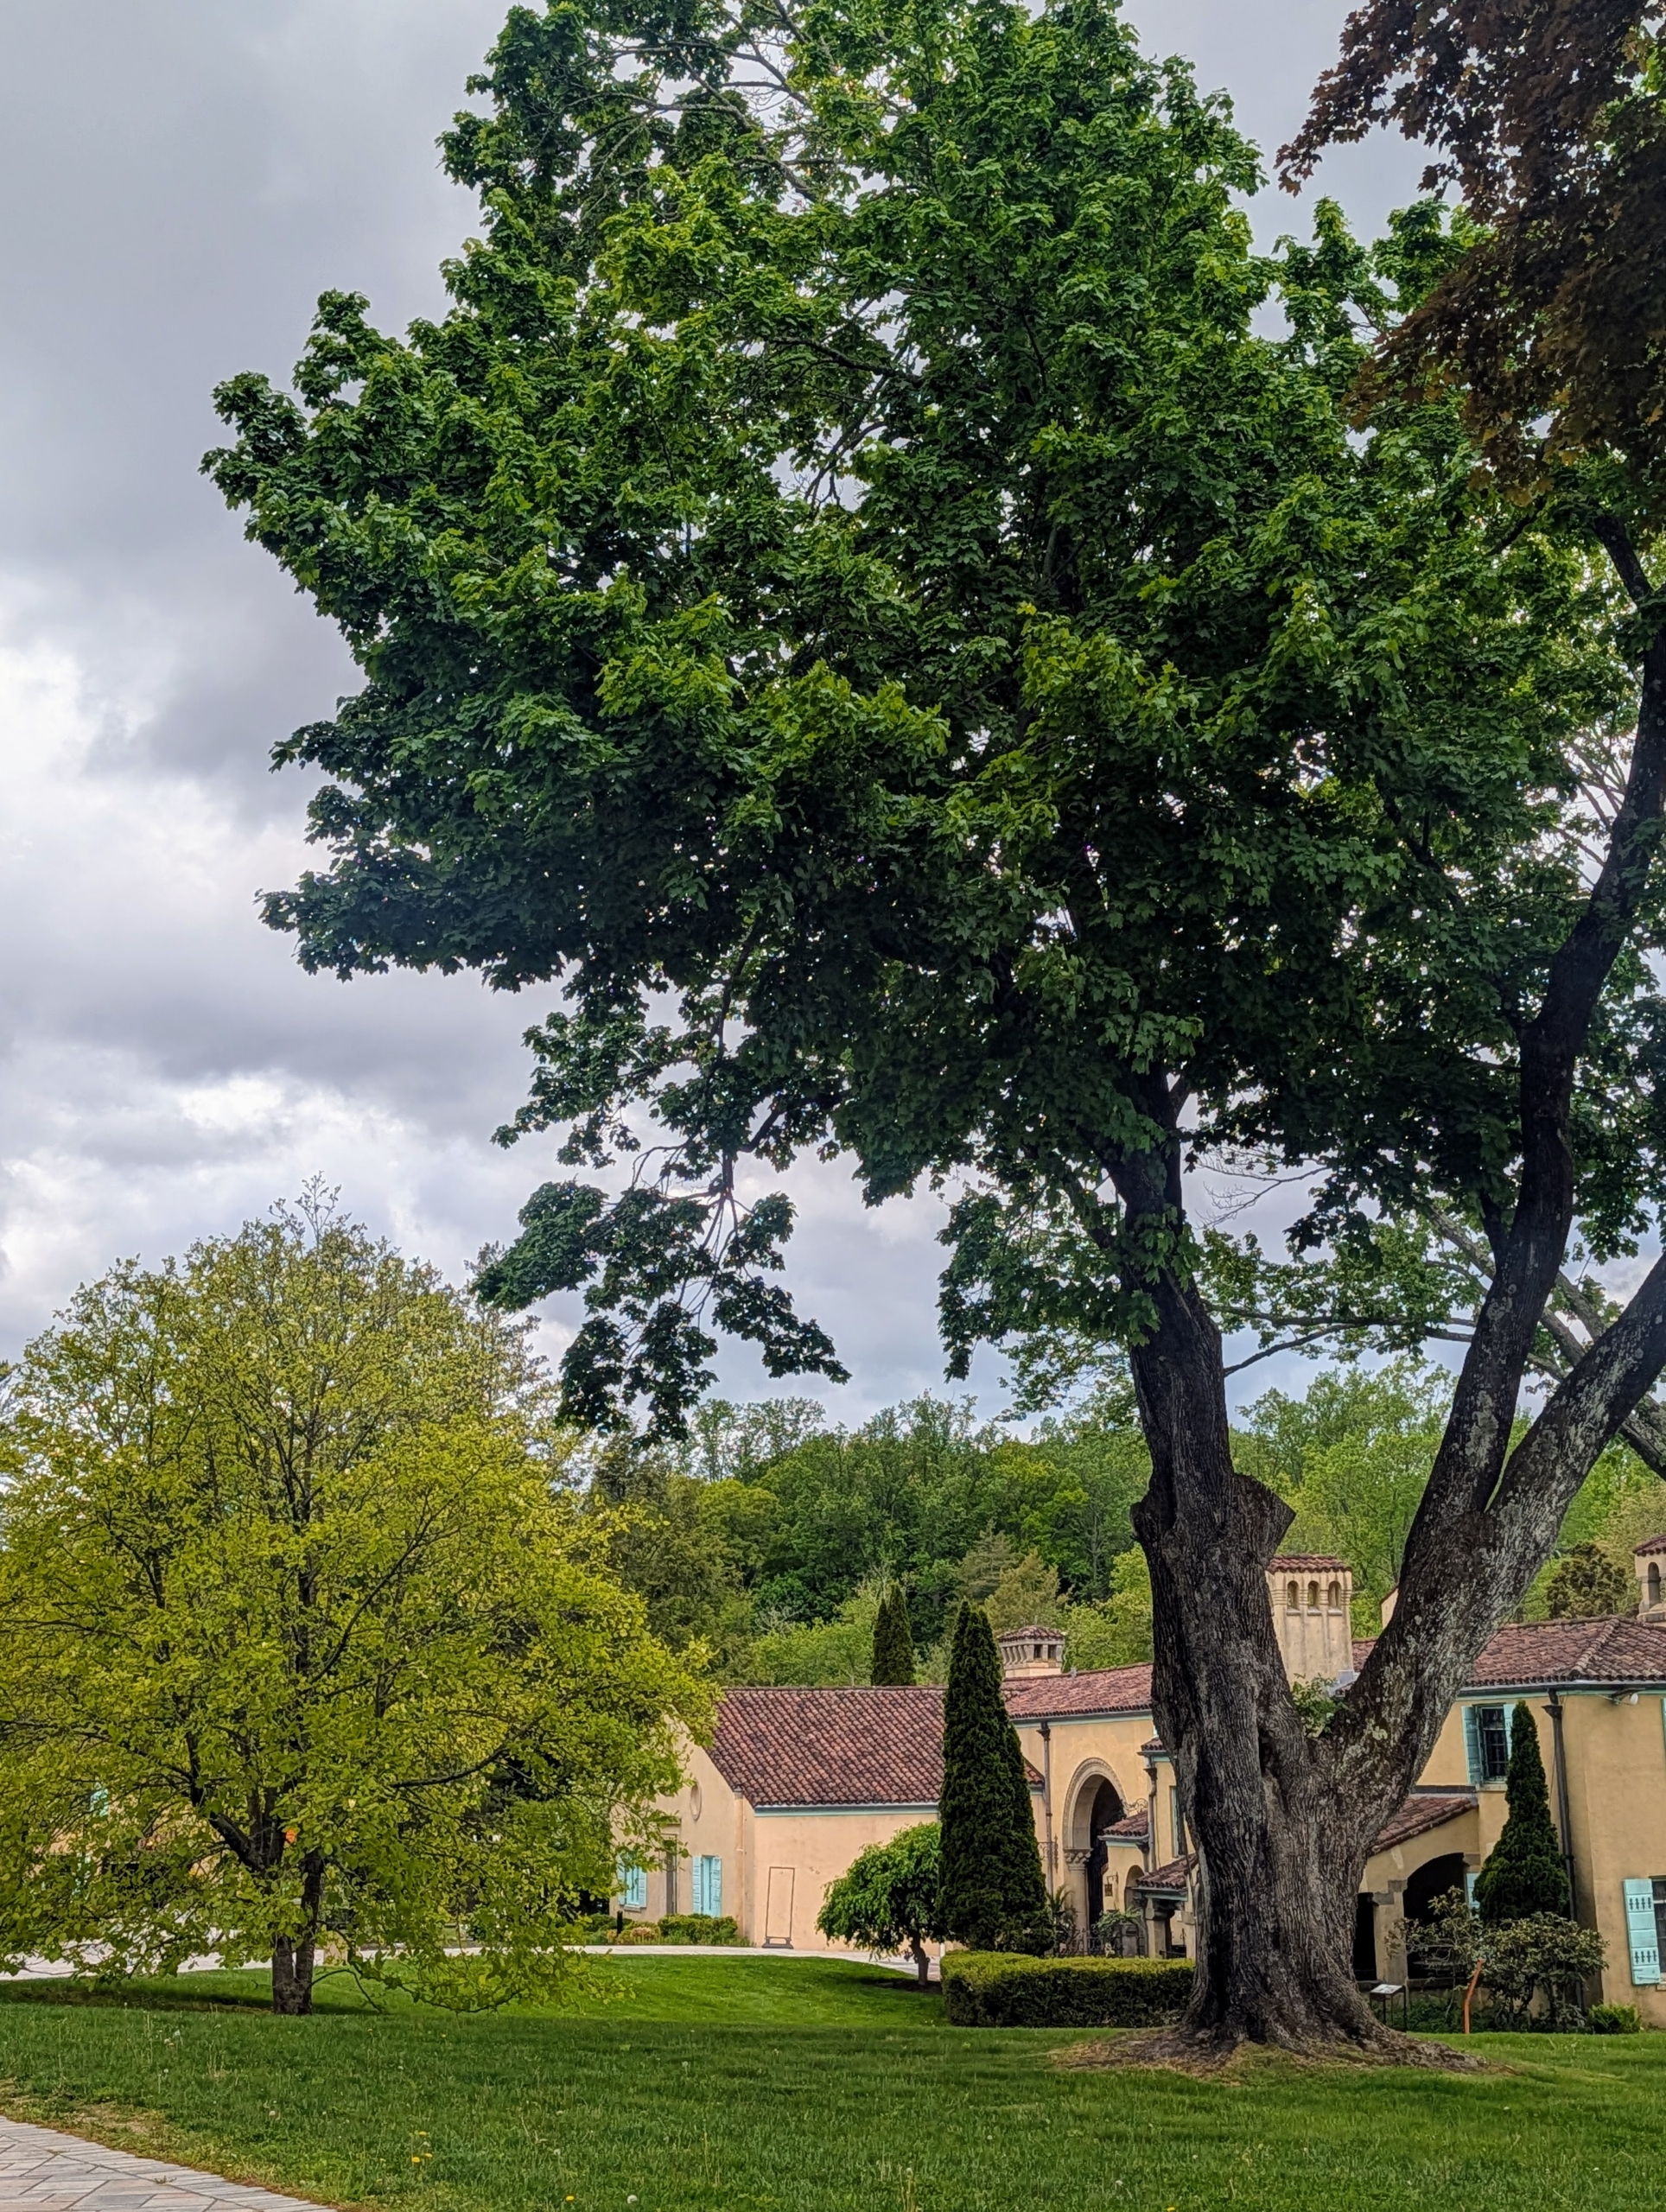
Caramoor is an 81-acre former country estate where art and music enthusiasts Lucie and Walter Rosen built an Italianate-style villa and gardens to entertain their friends from around the world. In 1946, the Rosens opened their property as a performing arts center, which hosts seasonal concerts, historic house tours, educational programs, and other outdoor affairs and performances. And now for the first time in more than 30-years, guests can view the bold garments Lucie wore and treasured from the 1930s to the 1960s - the shimmering silks, elegant patterns, and vivid color palettes - and learn the captivating stories behind them.
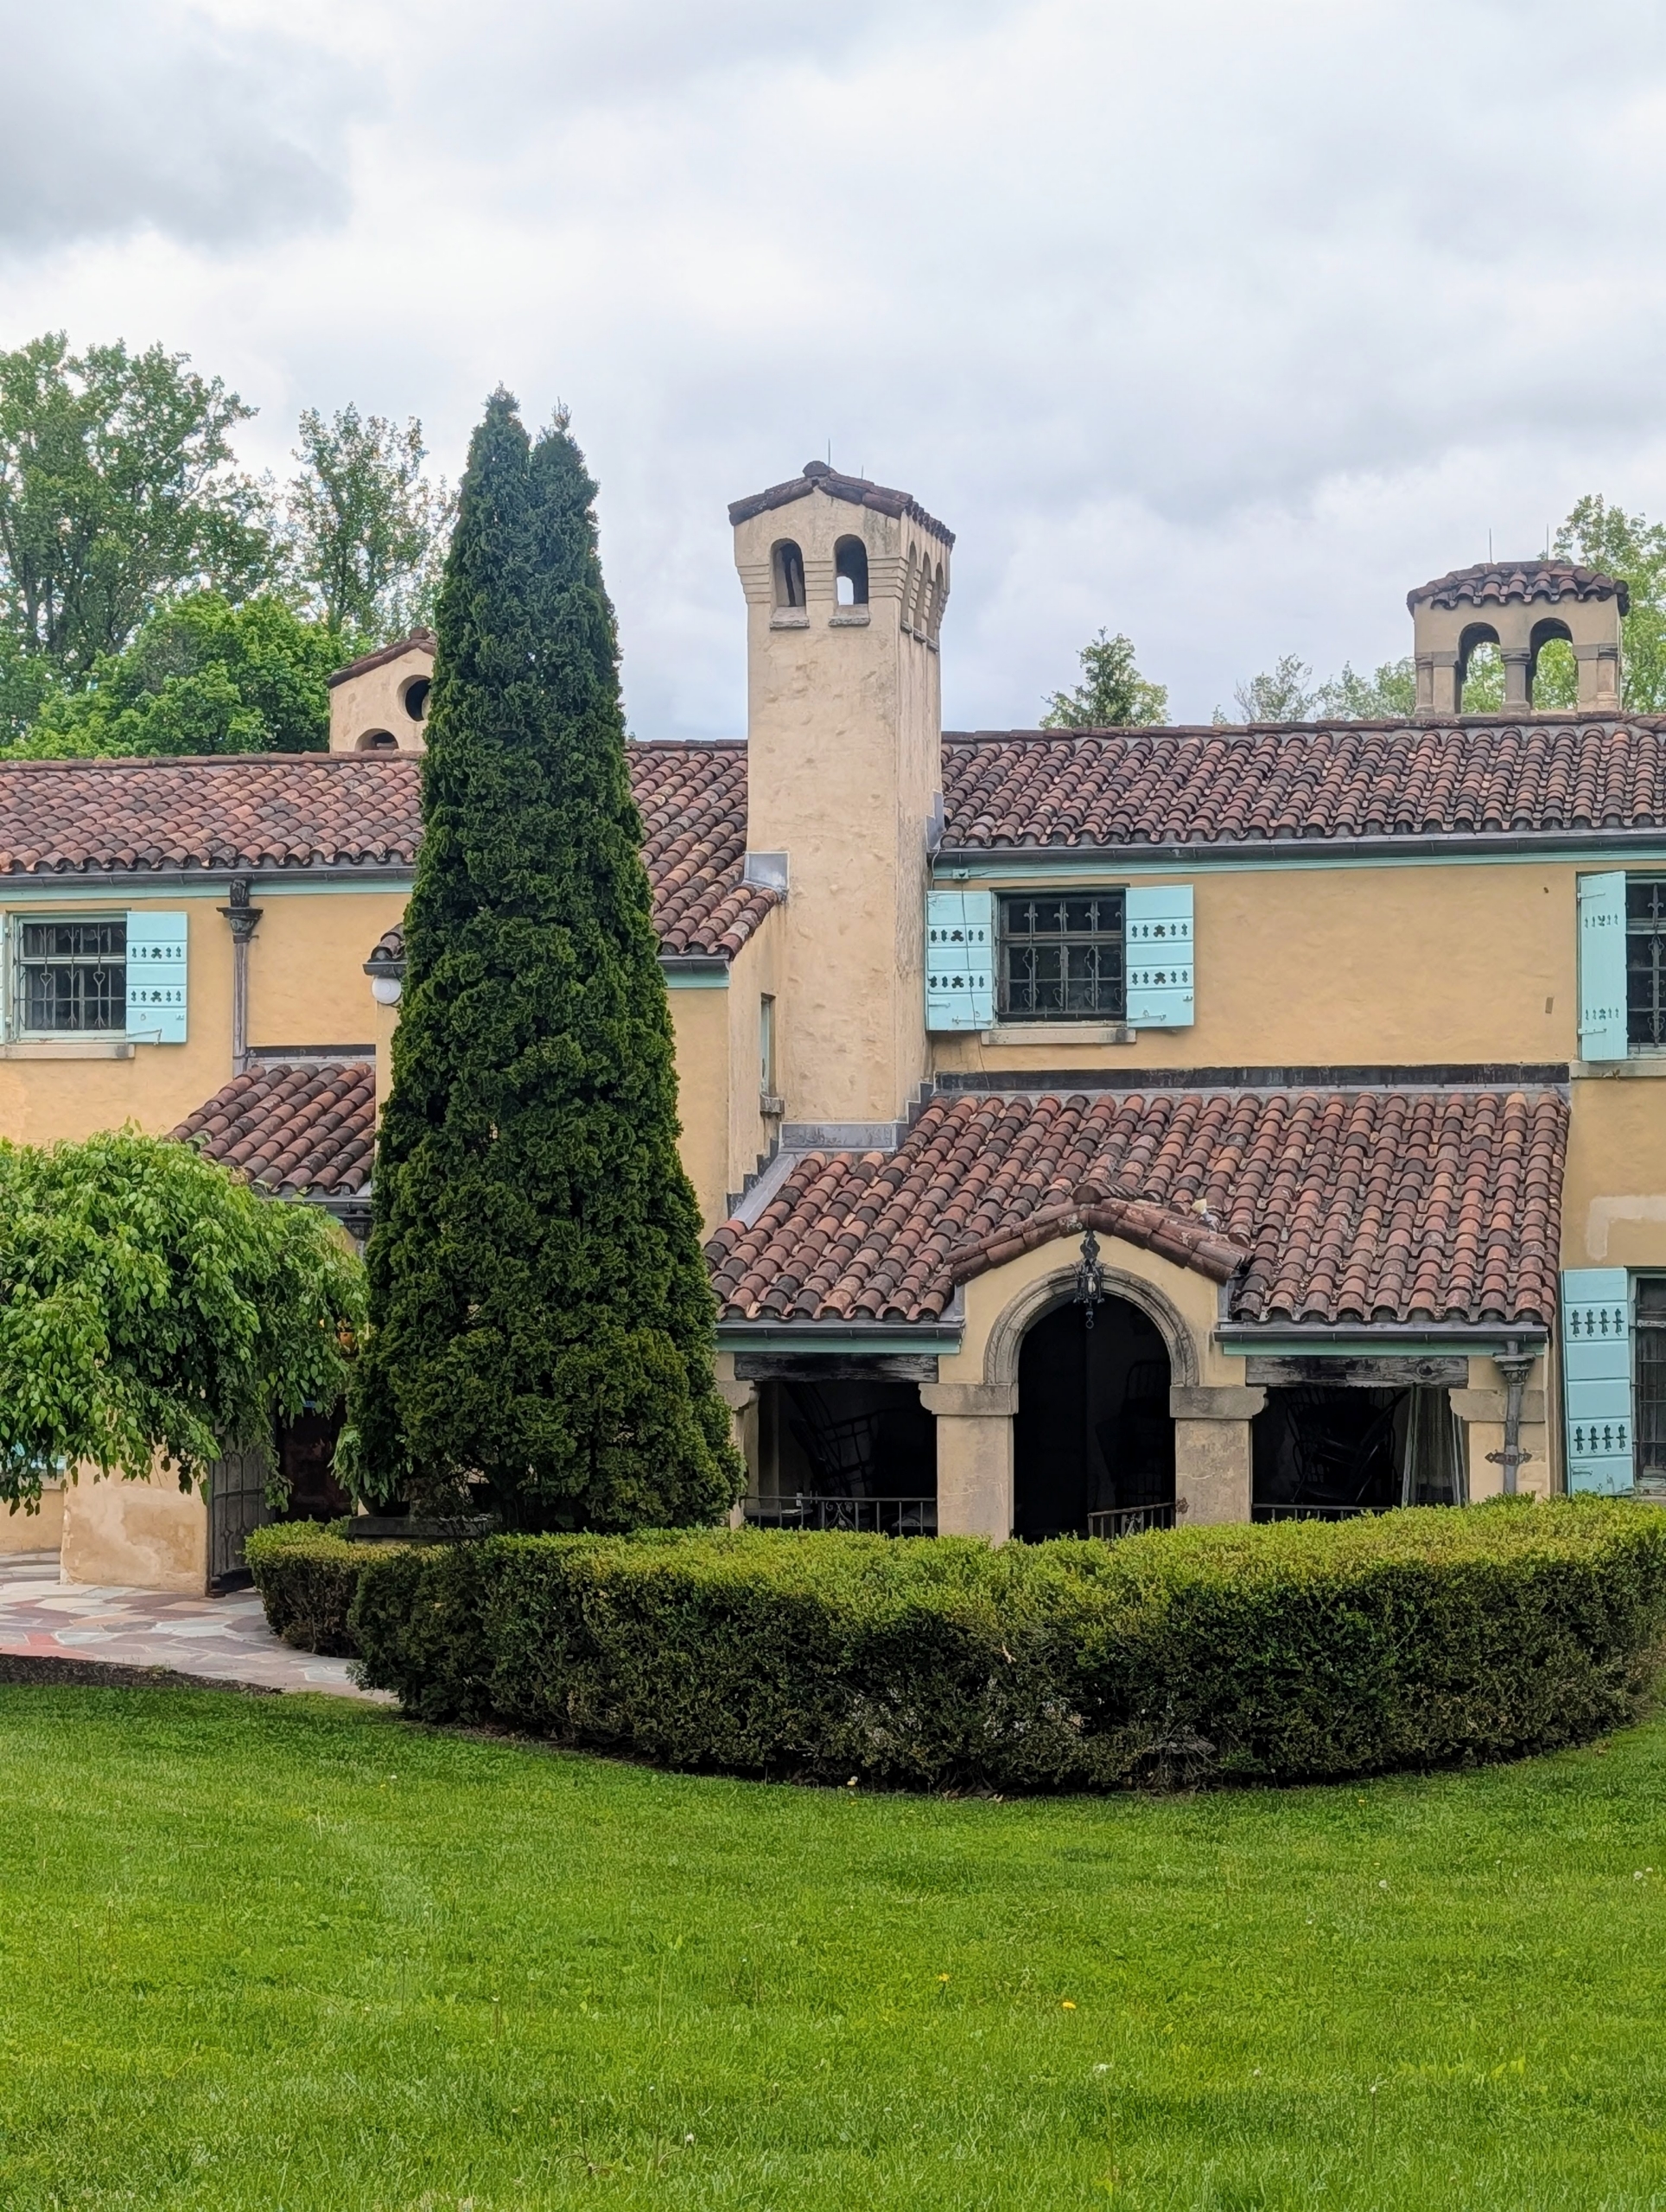
Caramoor Center for Music and the Arts is located in the picturesque hamlet of Katonah, New York and is listed on the National Register of Historic Places. If you haven’t been, Caramoor is a wonderful place where one can hear exceptional music, enjoy interesting and informative programs, and walk through beautifully maintained and historic gardens.
The Rosens built the estate and restored the grounds gradually during the 1930s, importing many architectural and decorative items from Europe. The Caramoor became a center for the arts and music following the World War II death of the Rosens’ only son.
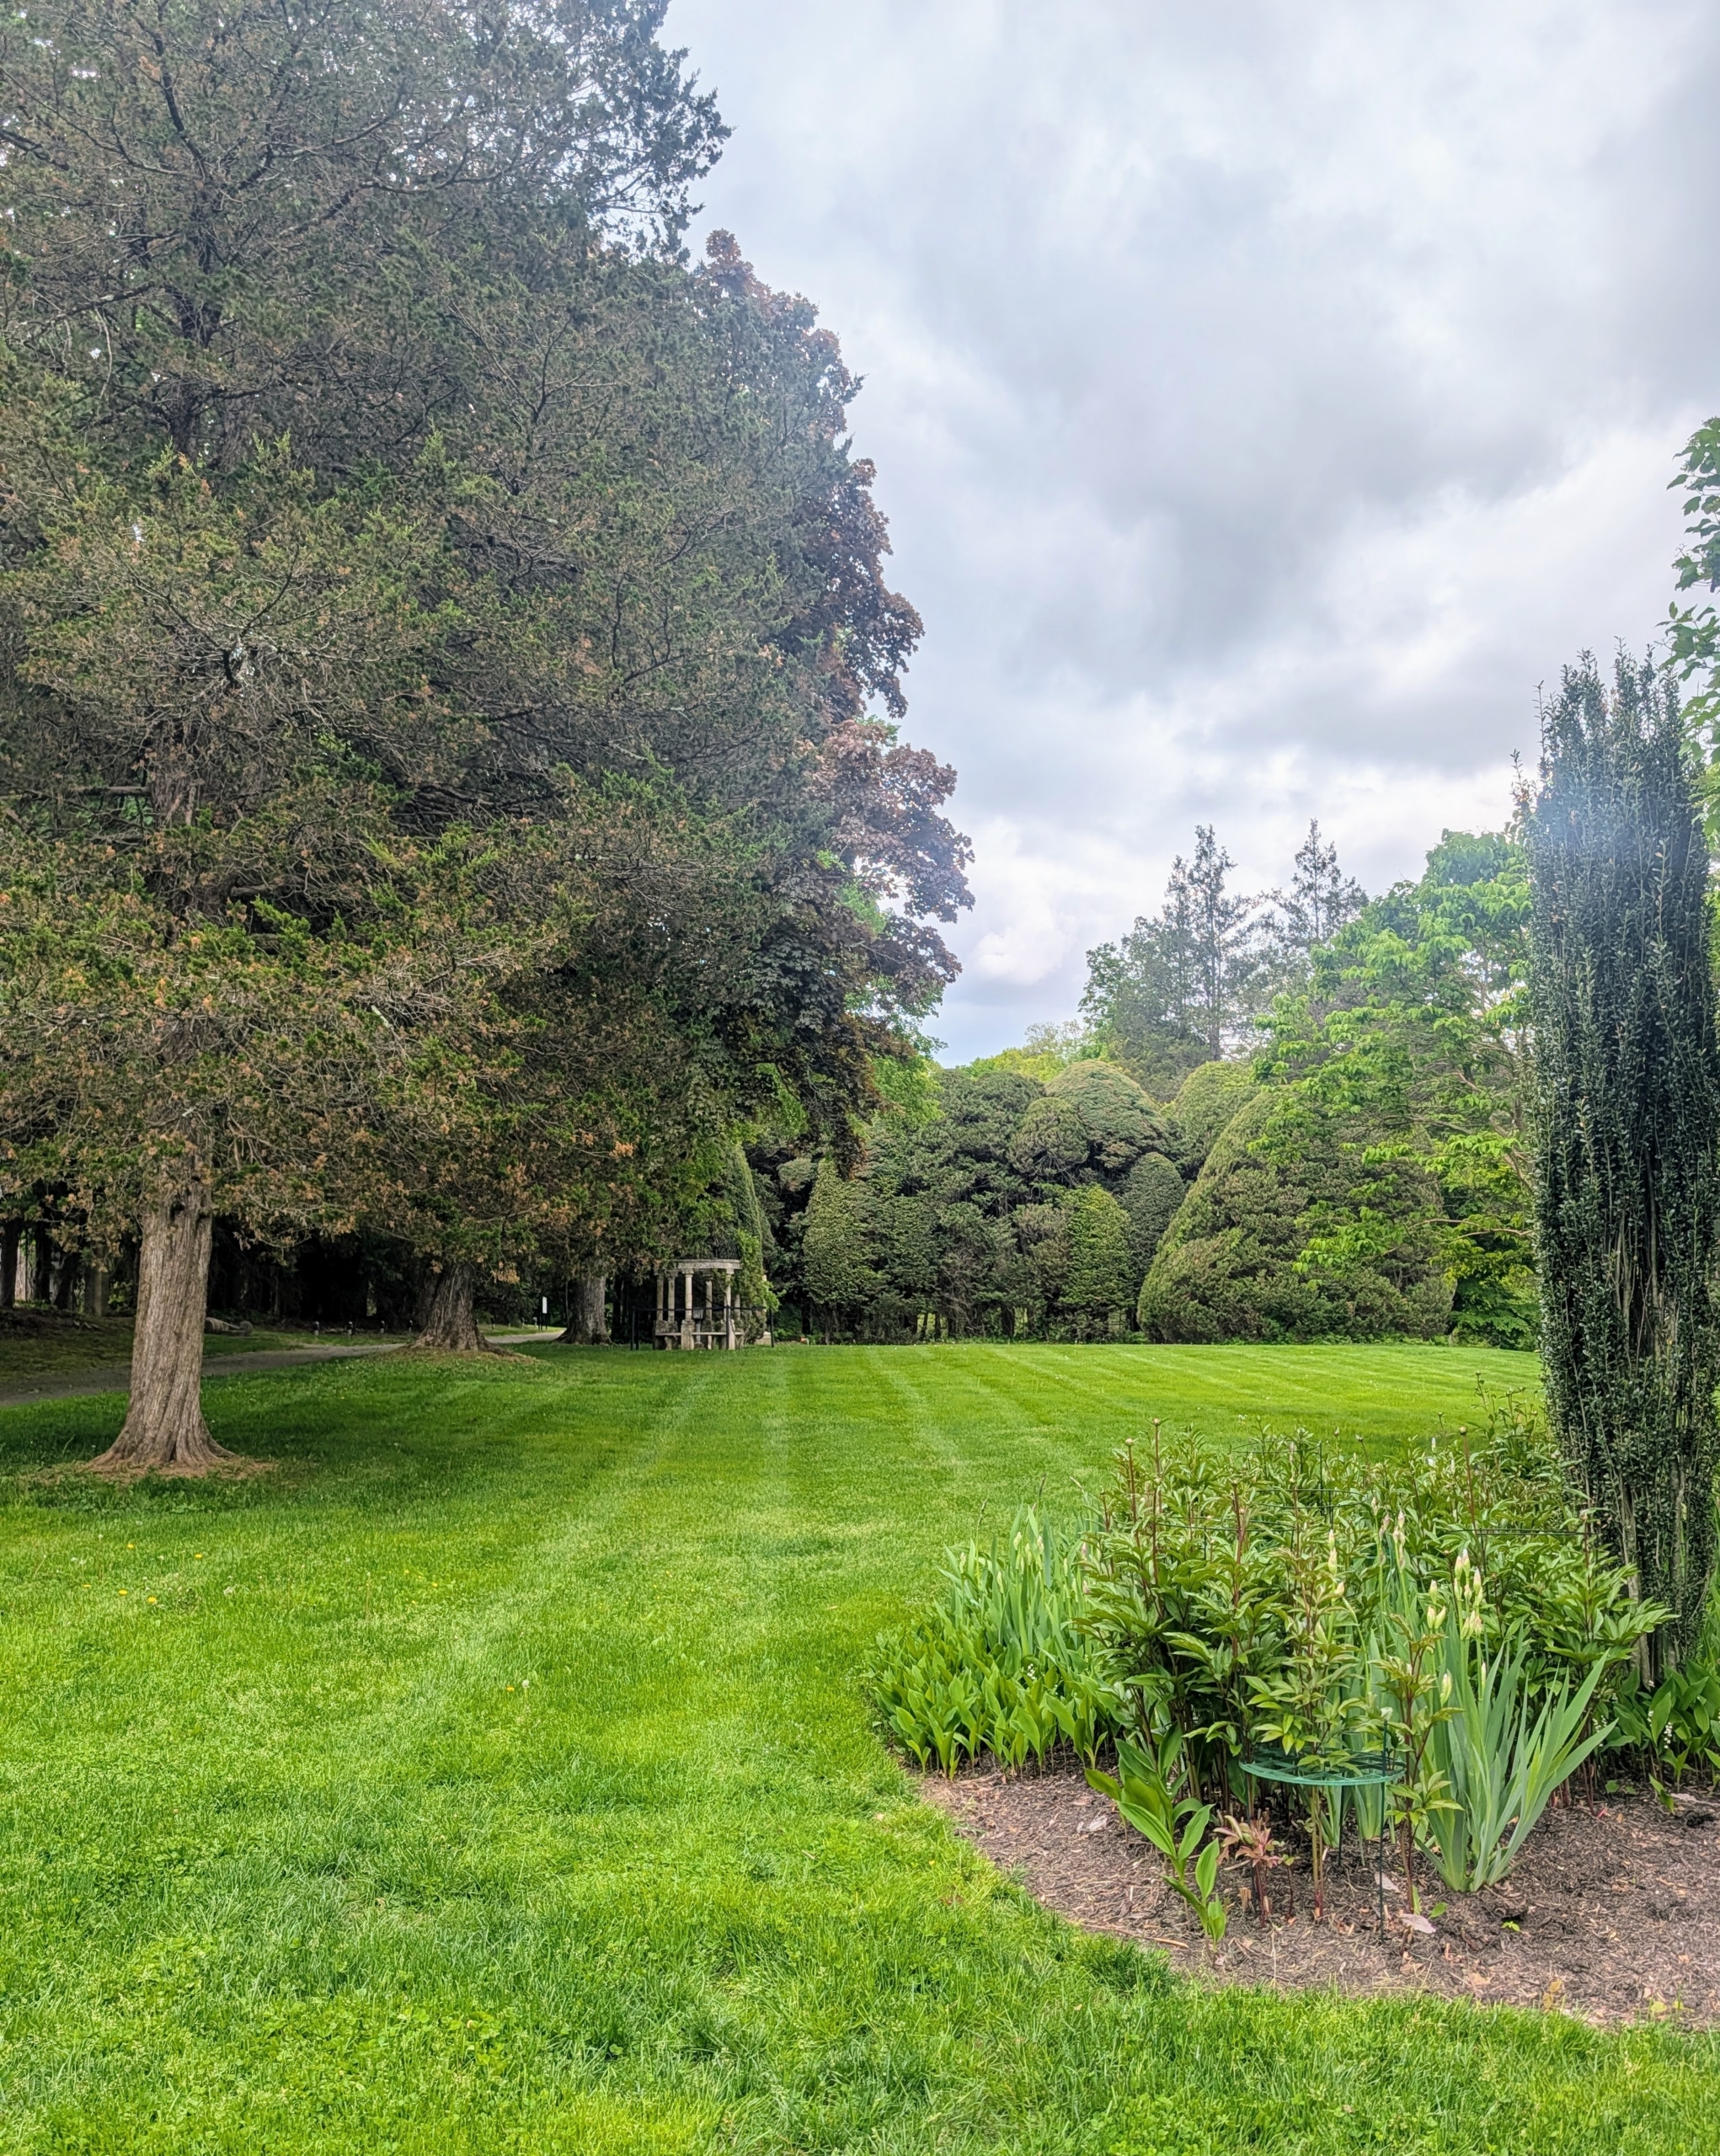
The gardens are meticulously manicured and maintained. Some of the original gardens were planted around 1912, making them one of the oldest native features of the estate.
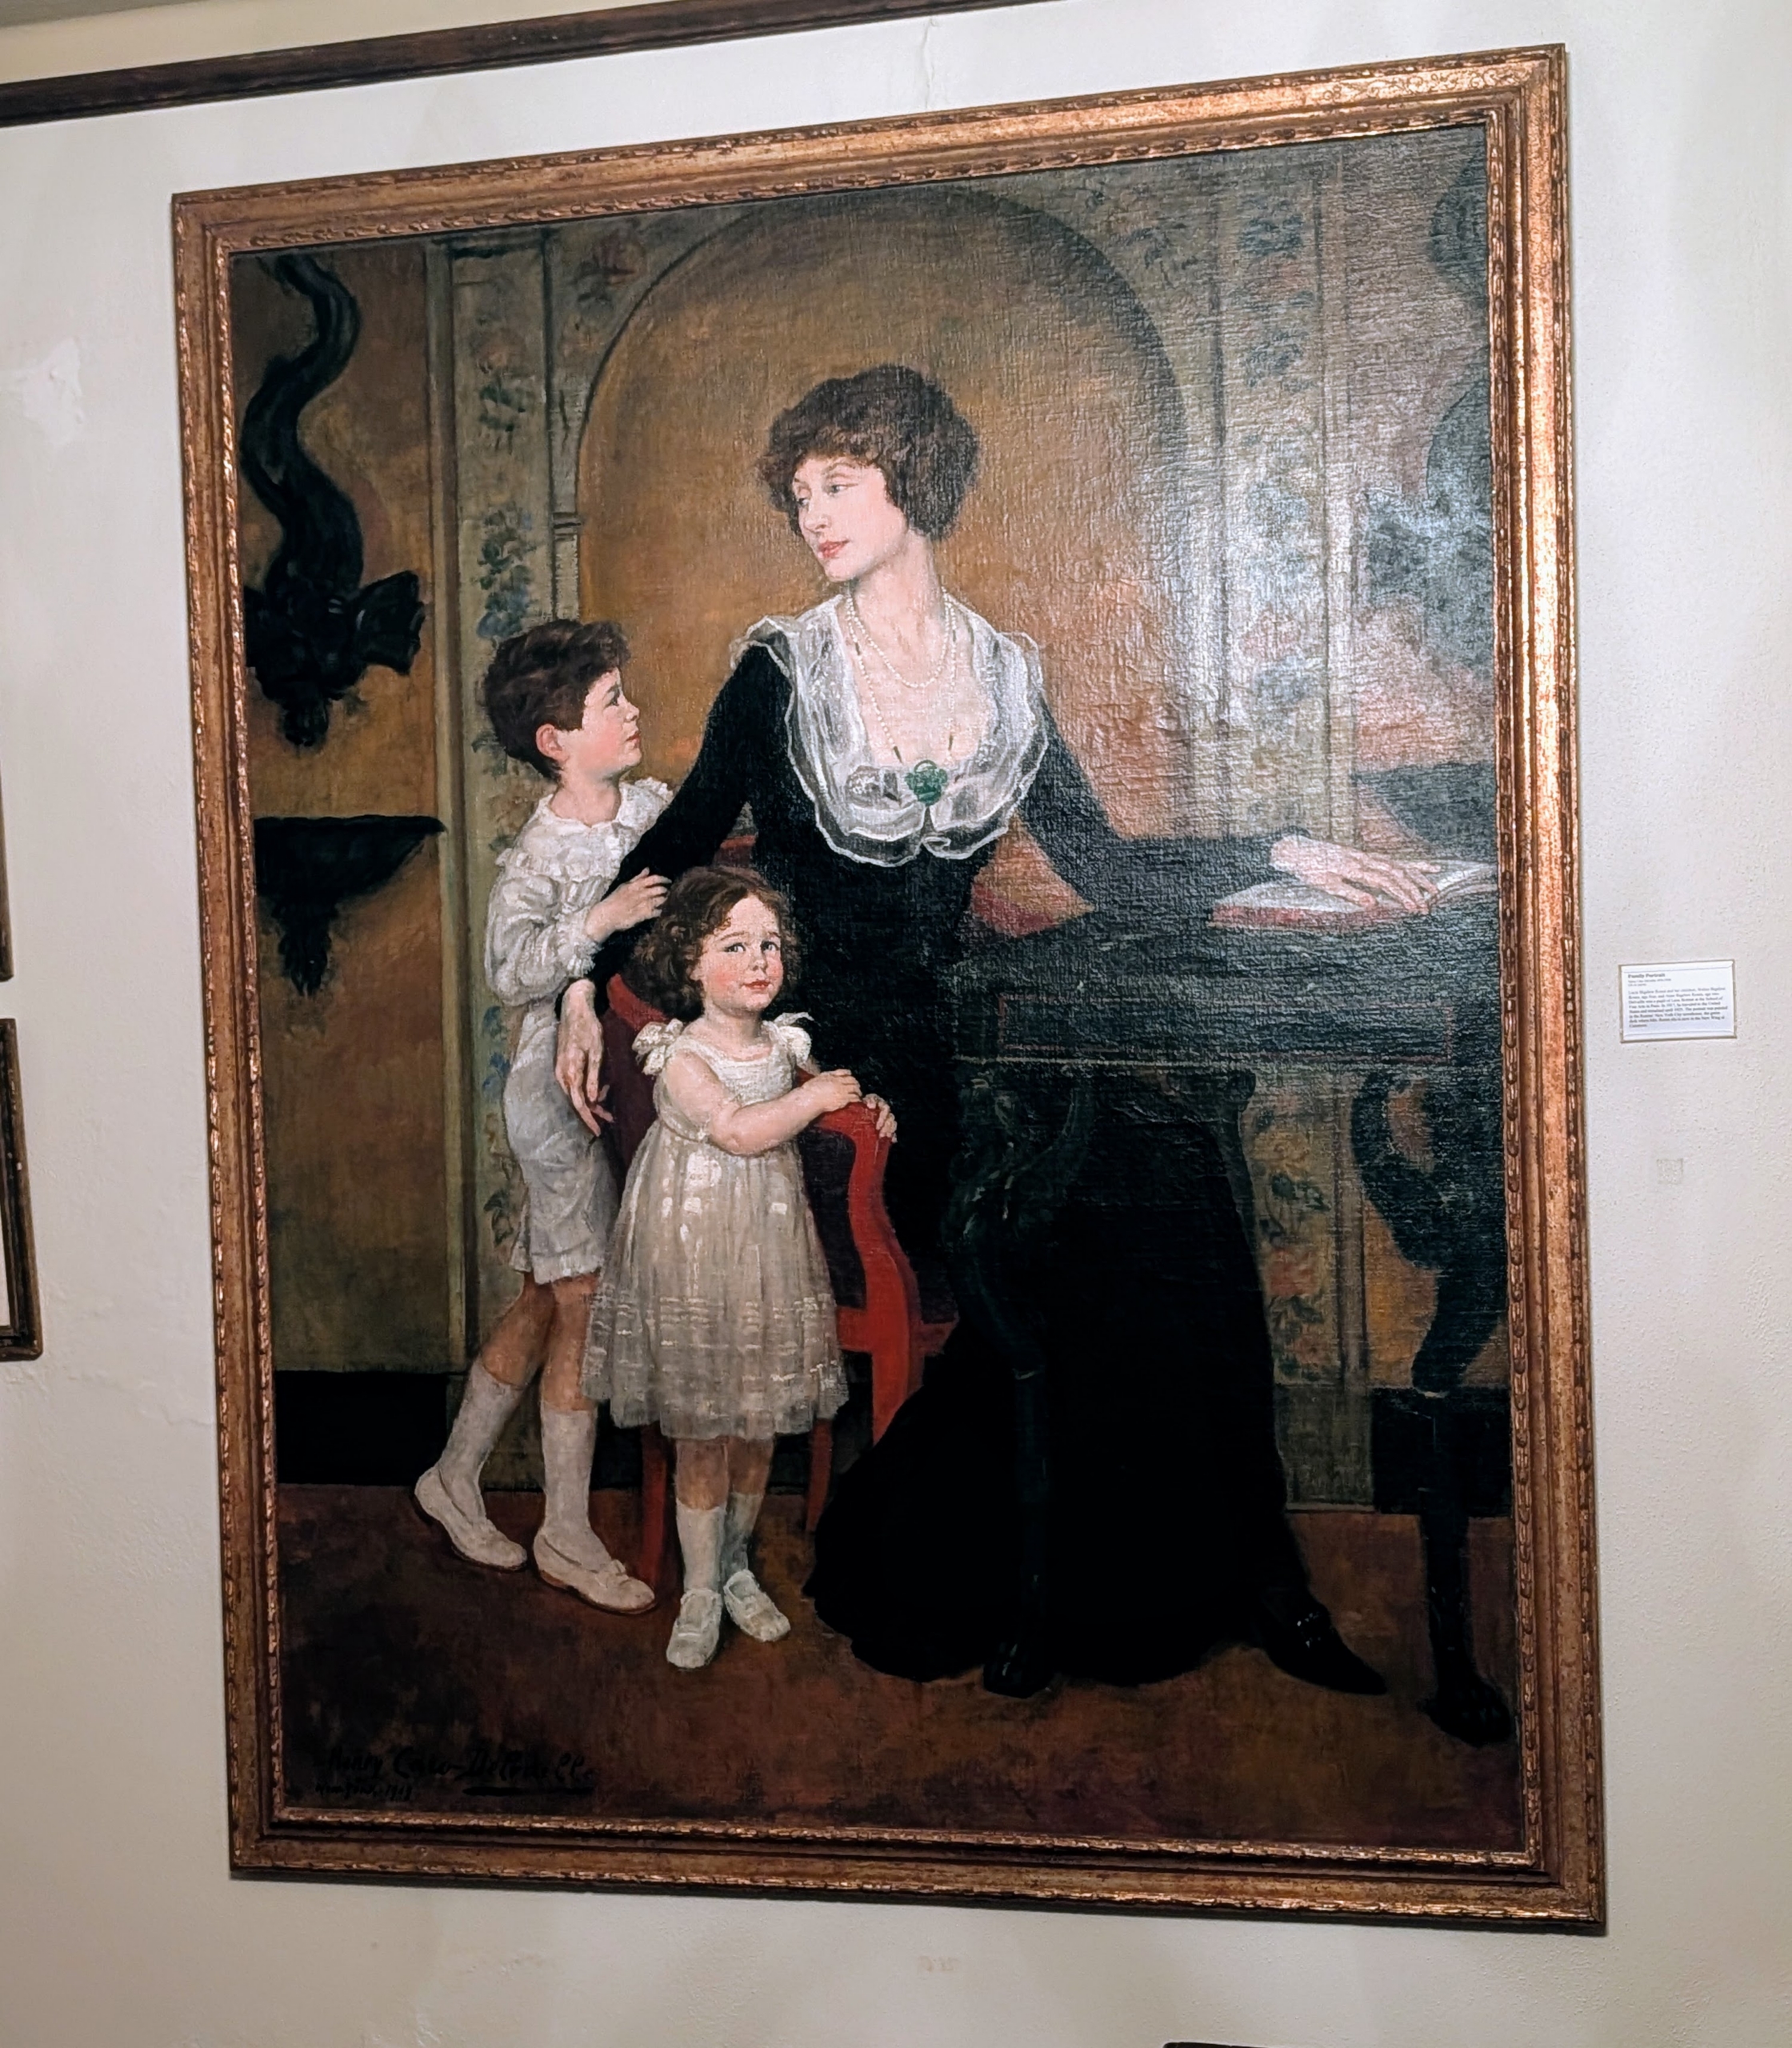
This is a family portrait of Lucie Bigelow Rosen and her children, Walter and Anne. This was painted in their New York City townhouse and is now displayed at Caramoor along with the green desk in the painting.
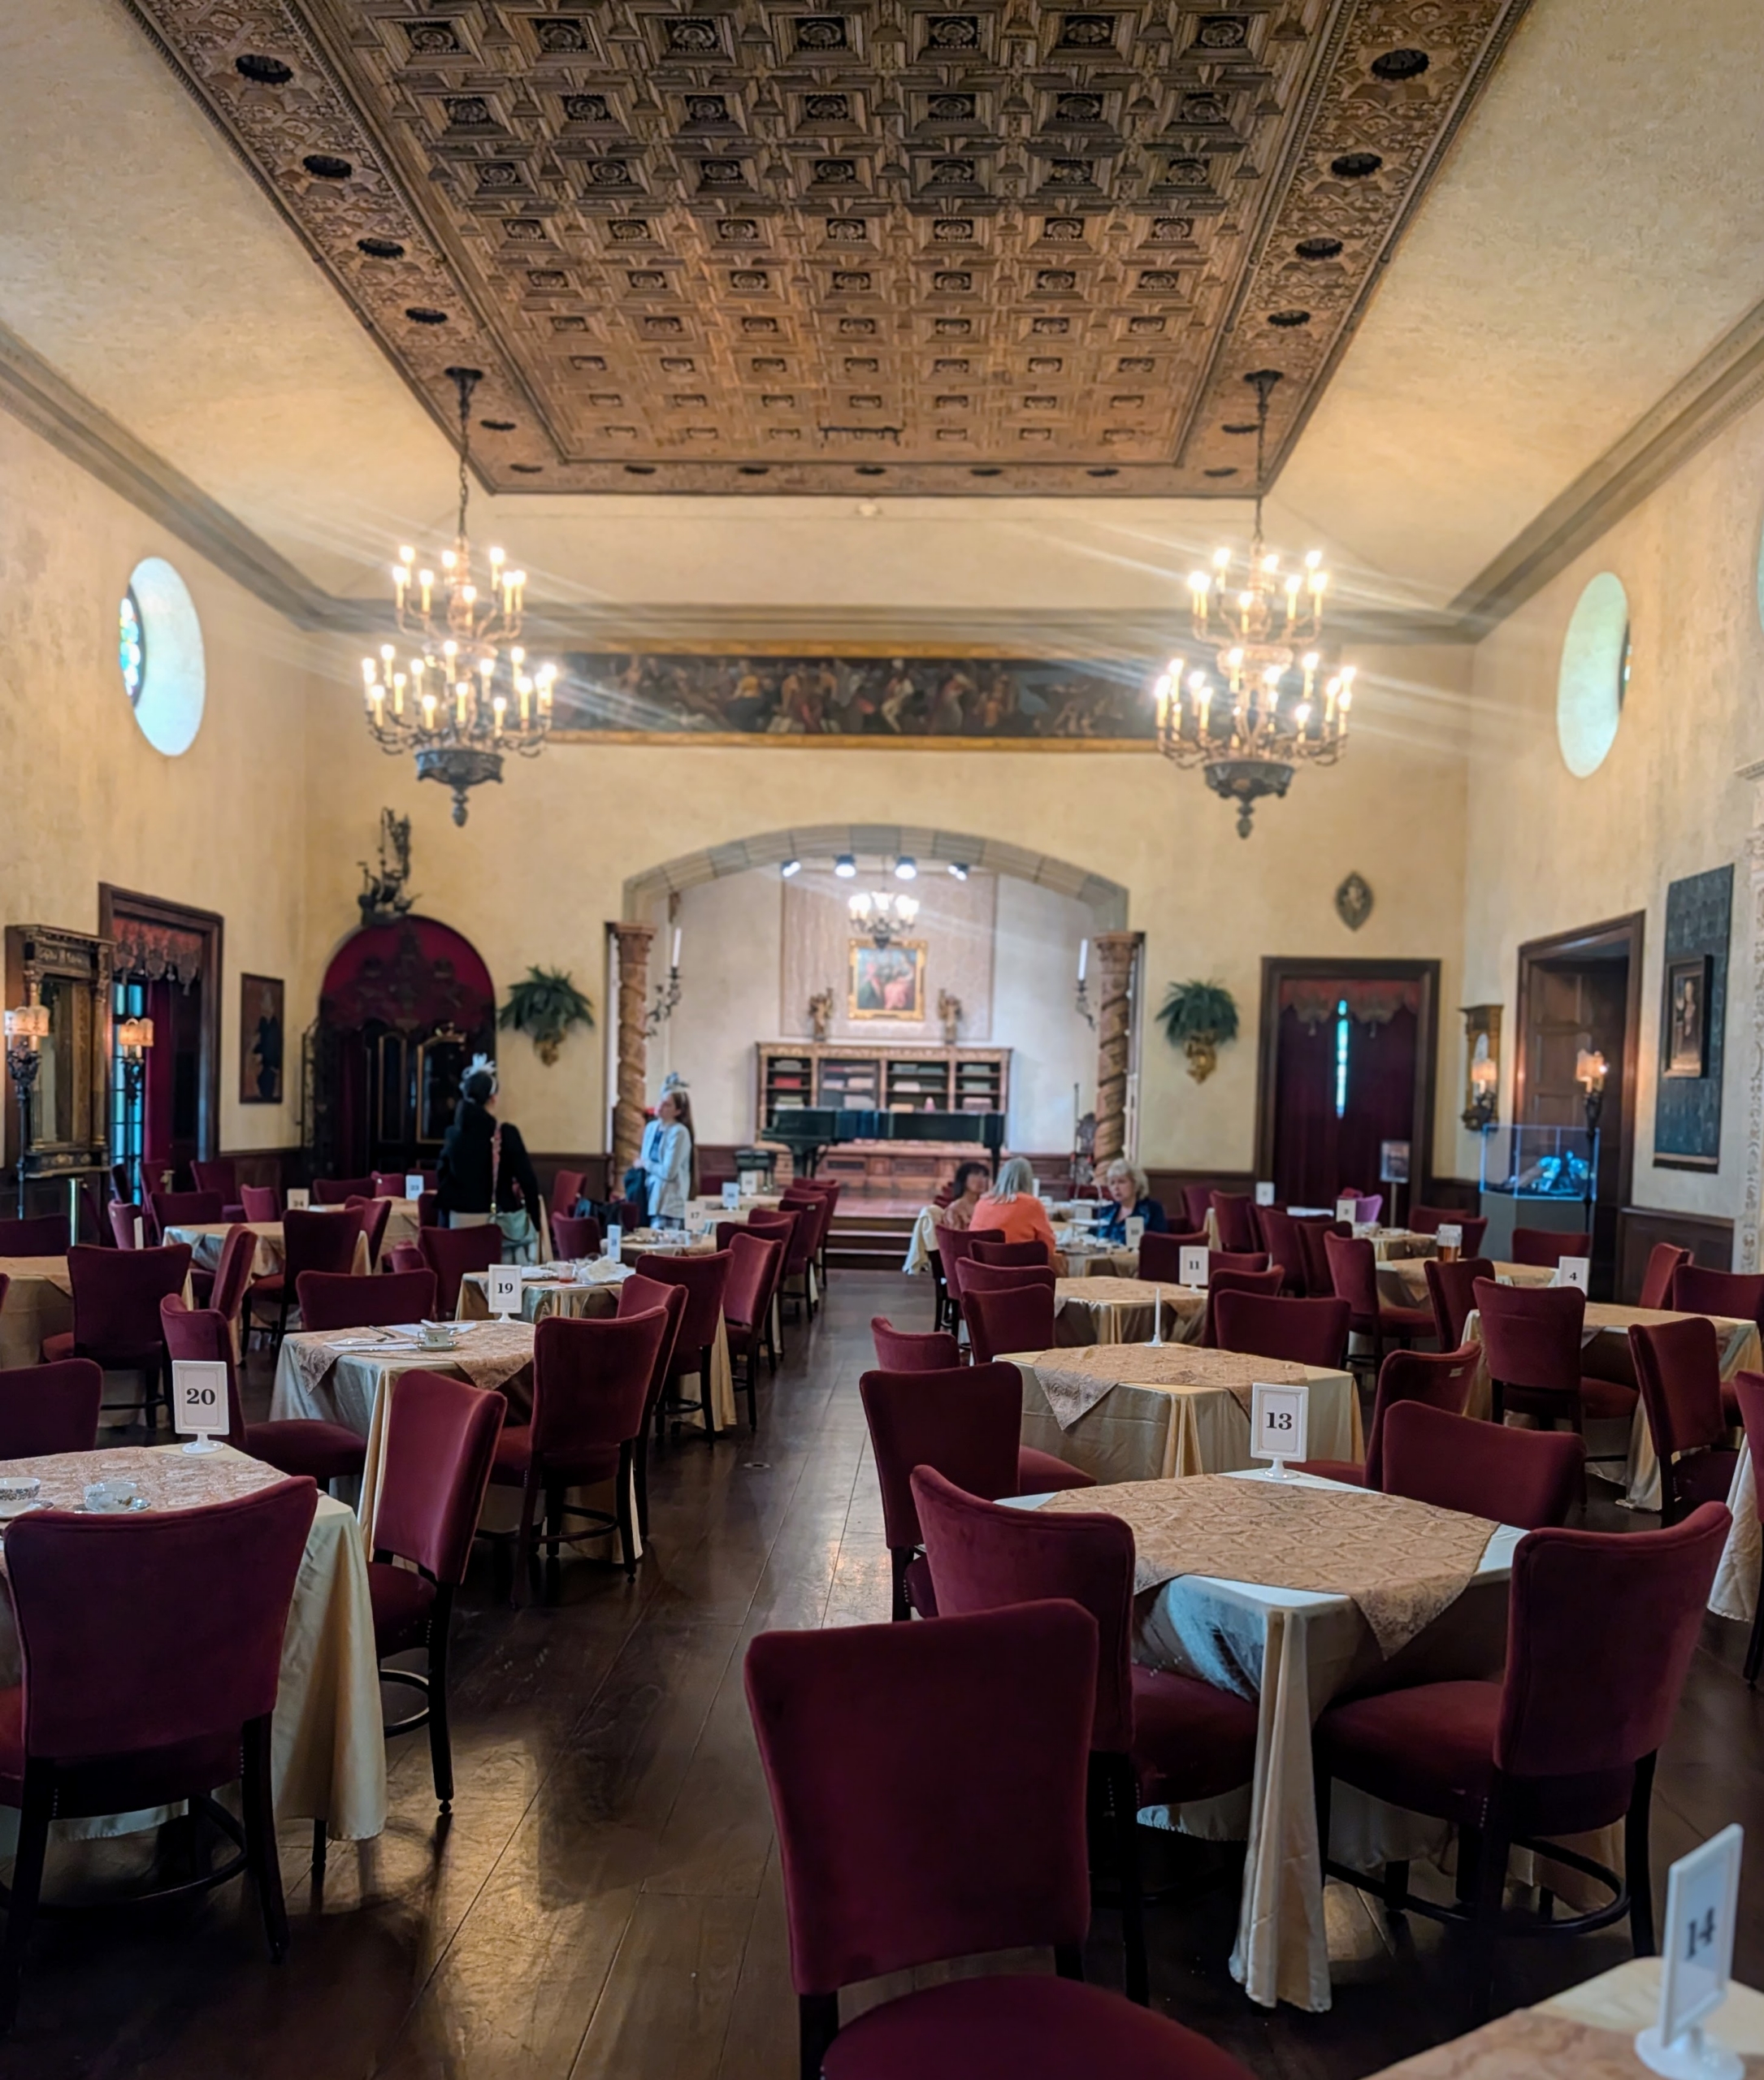
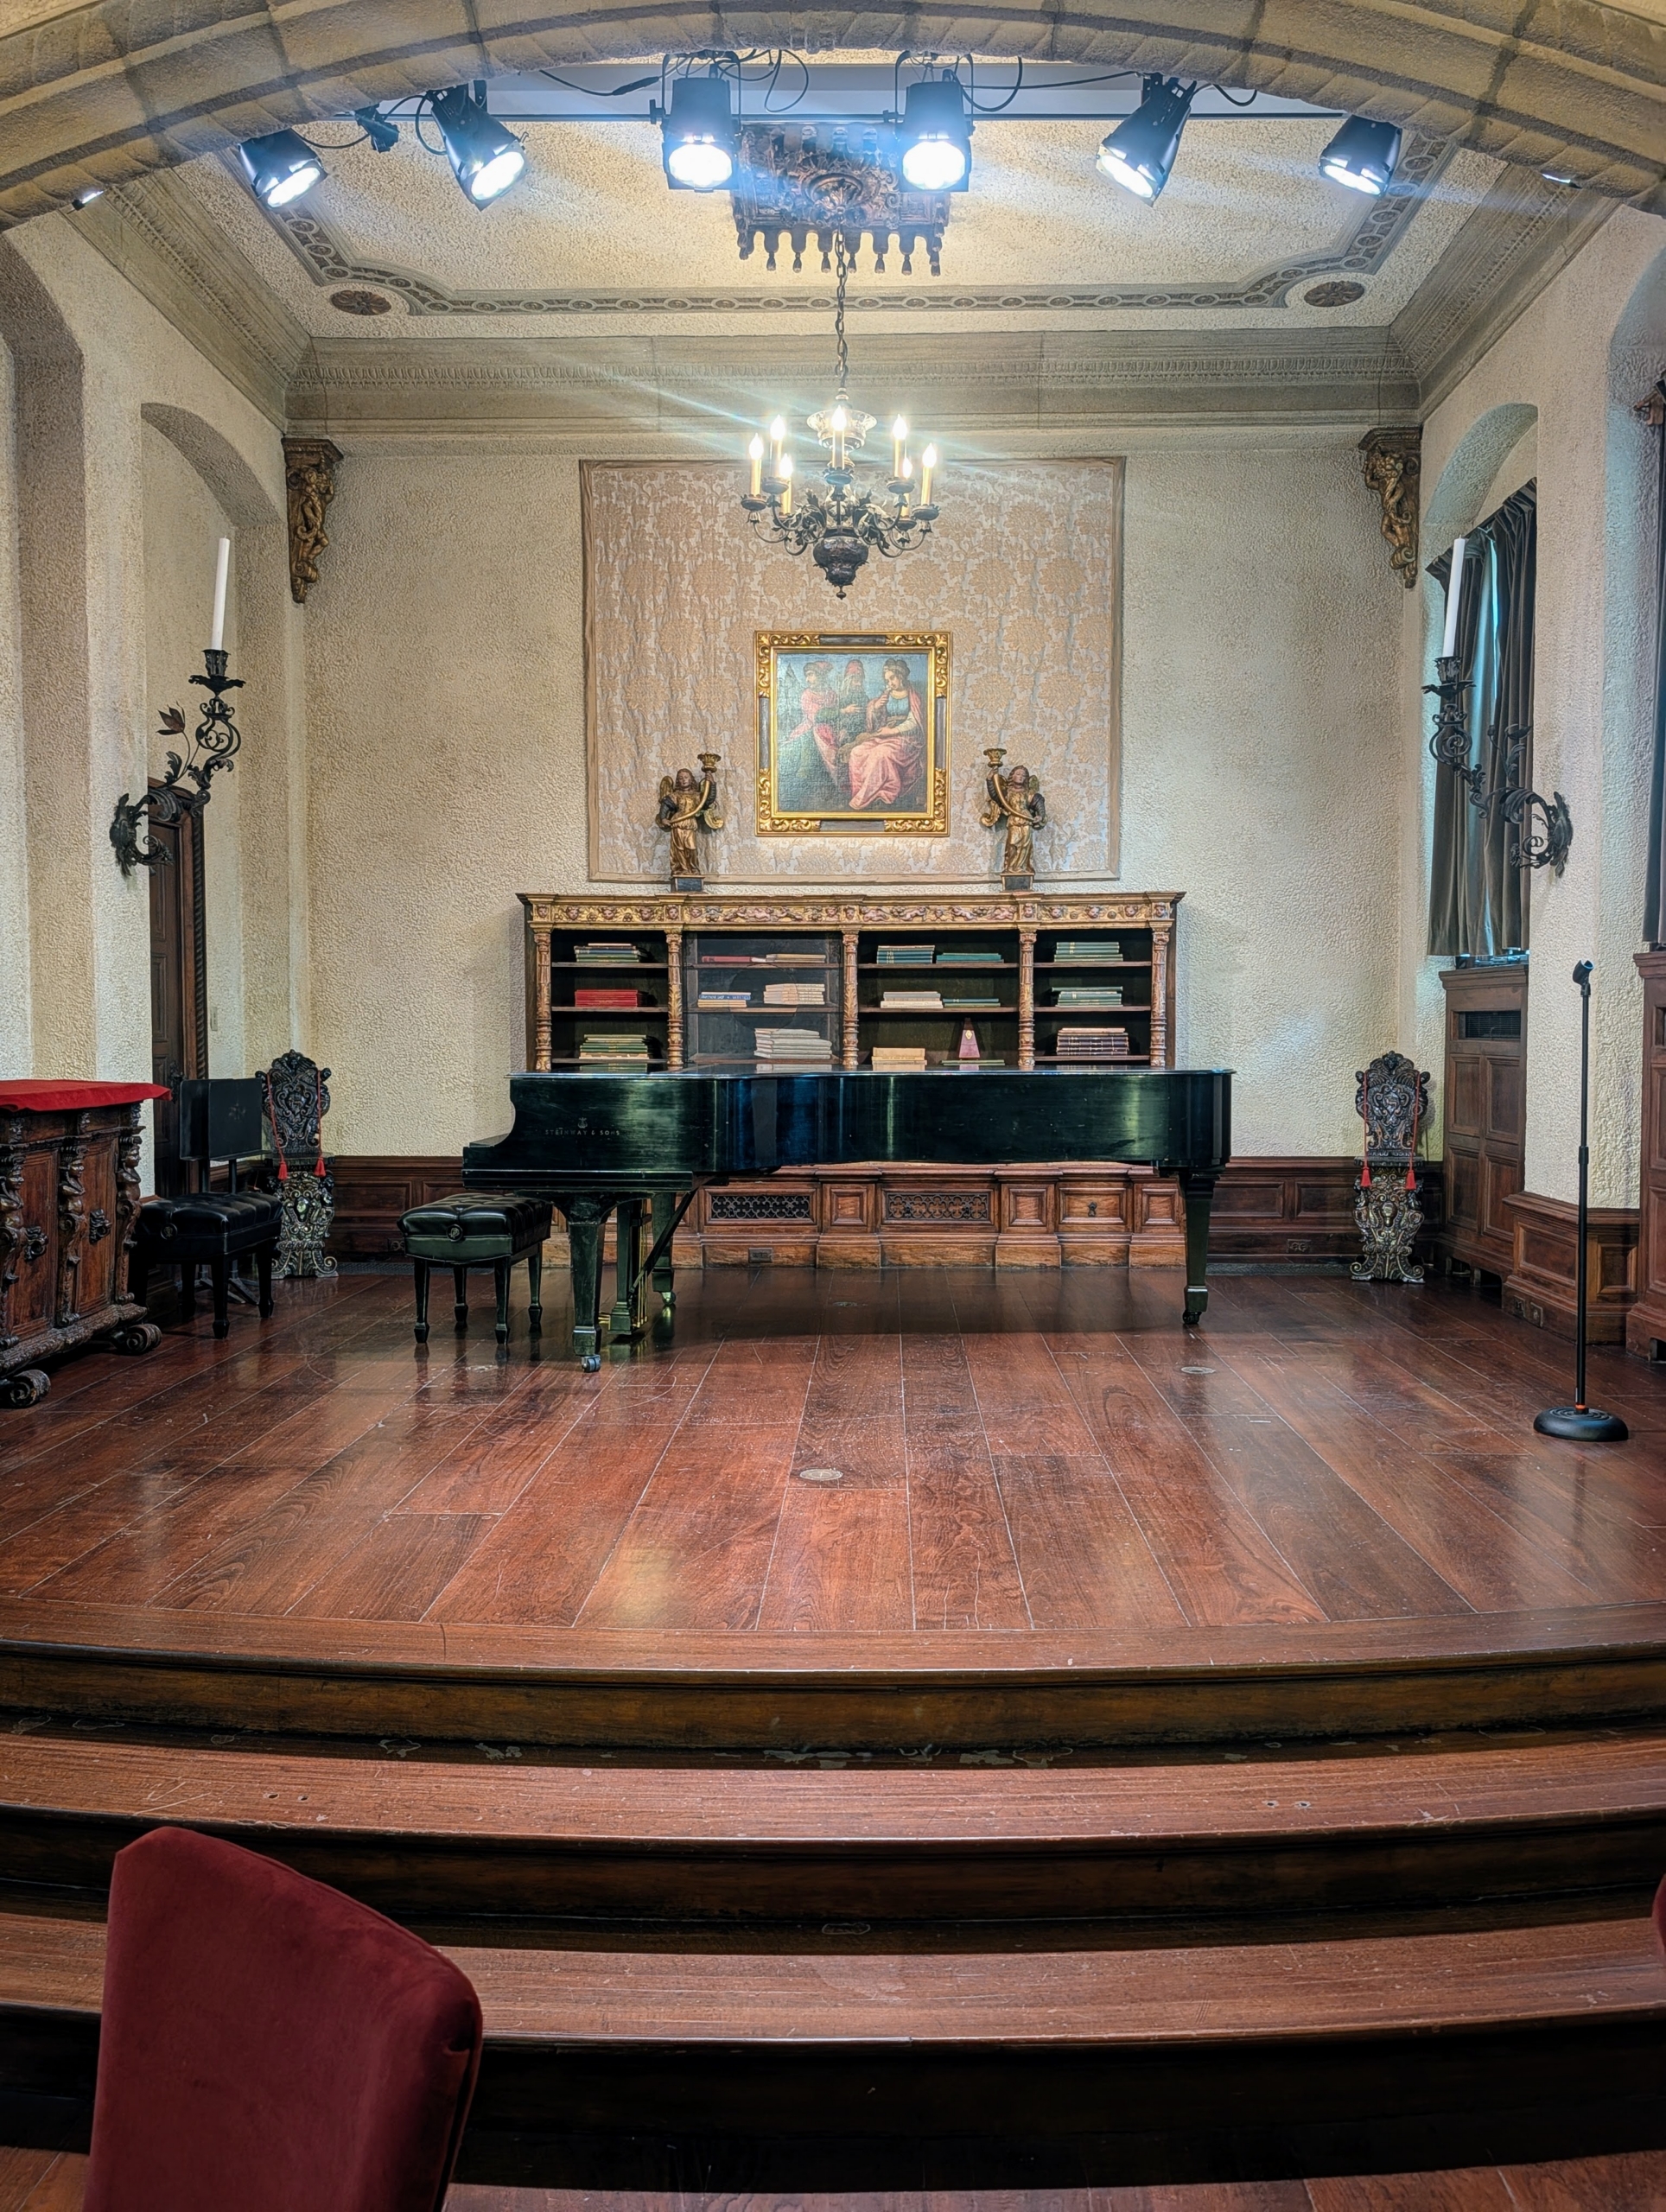
This is the Music Room at Caramoor. This room seats 170 guests and is known for its Renaissance furniture, Gothic tapestries, and stained glass elements. Depending on the time of year, the room is sometimes configured with theatre seating for views of the stage.
The Music Room is used for intimate musical performances, recitals, opera and lectures. My nephew, Christopher Herbert, performed here in 2018 with his musical group, New York Polyphony, an amazing a cappella vocal quartet that sang both early and new music.
Here are Gillian Fox, President & CEO of Caramoor and Gayle Greves, Director of Guest Experience.
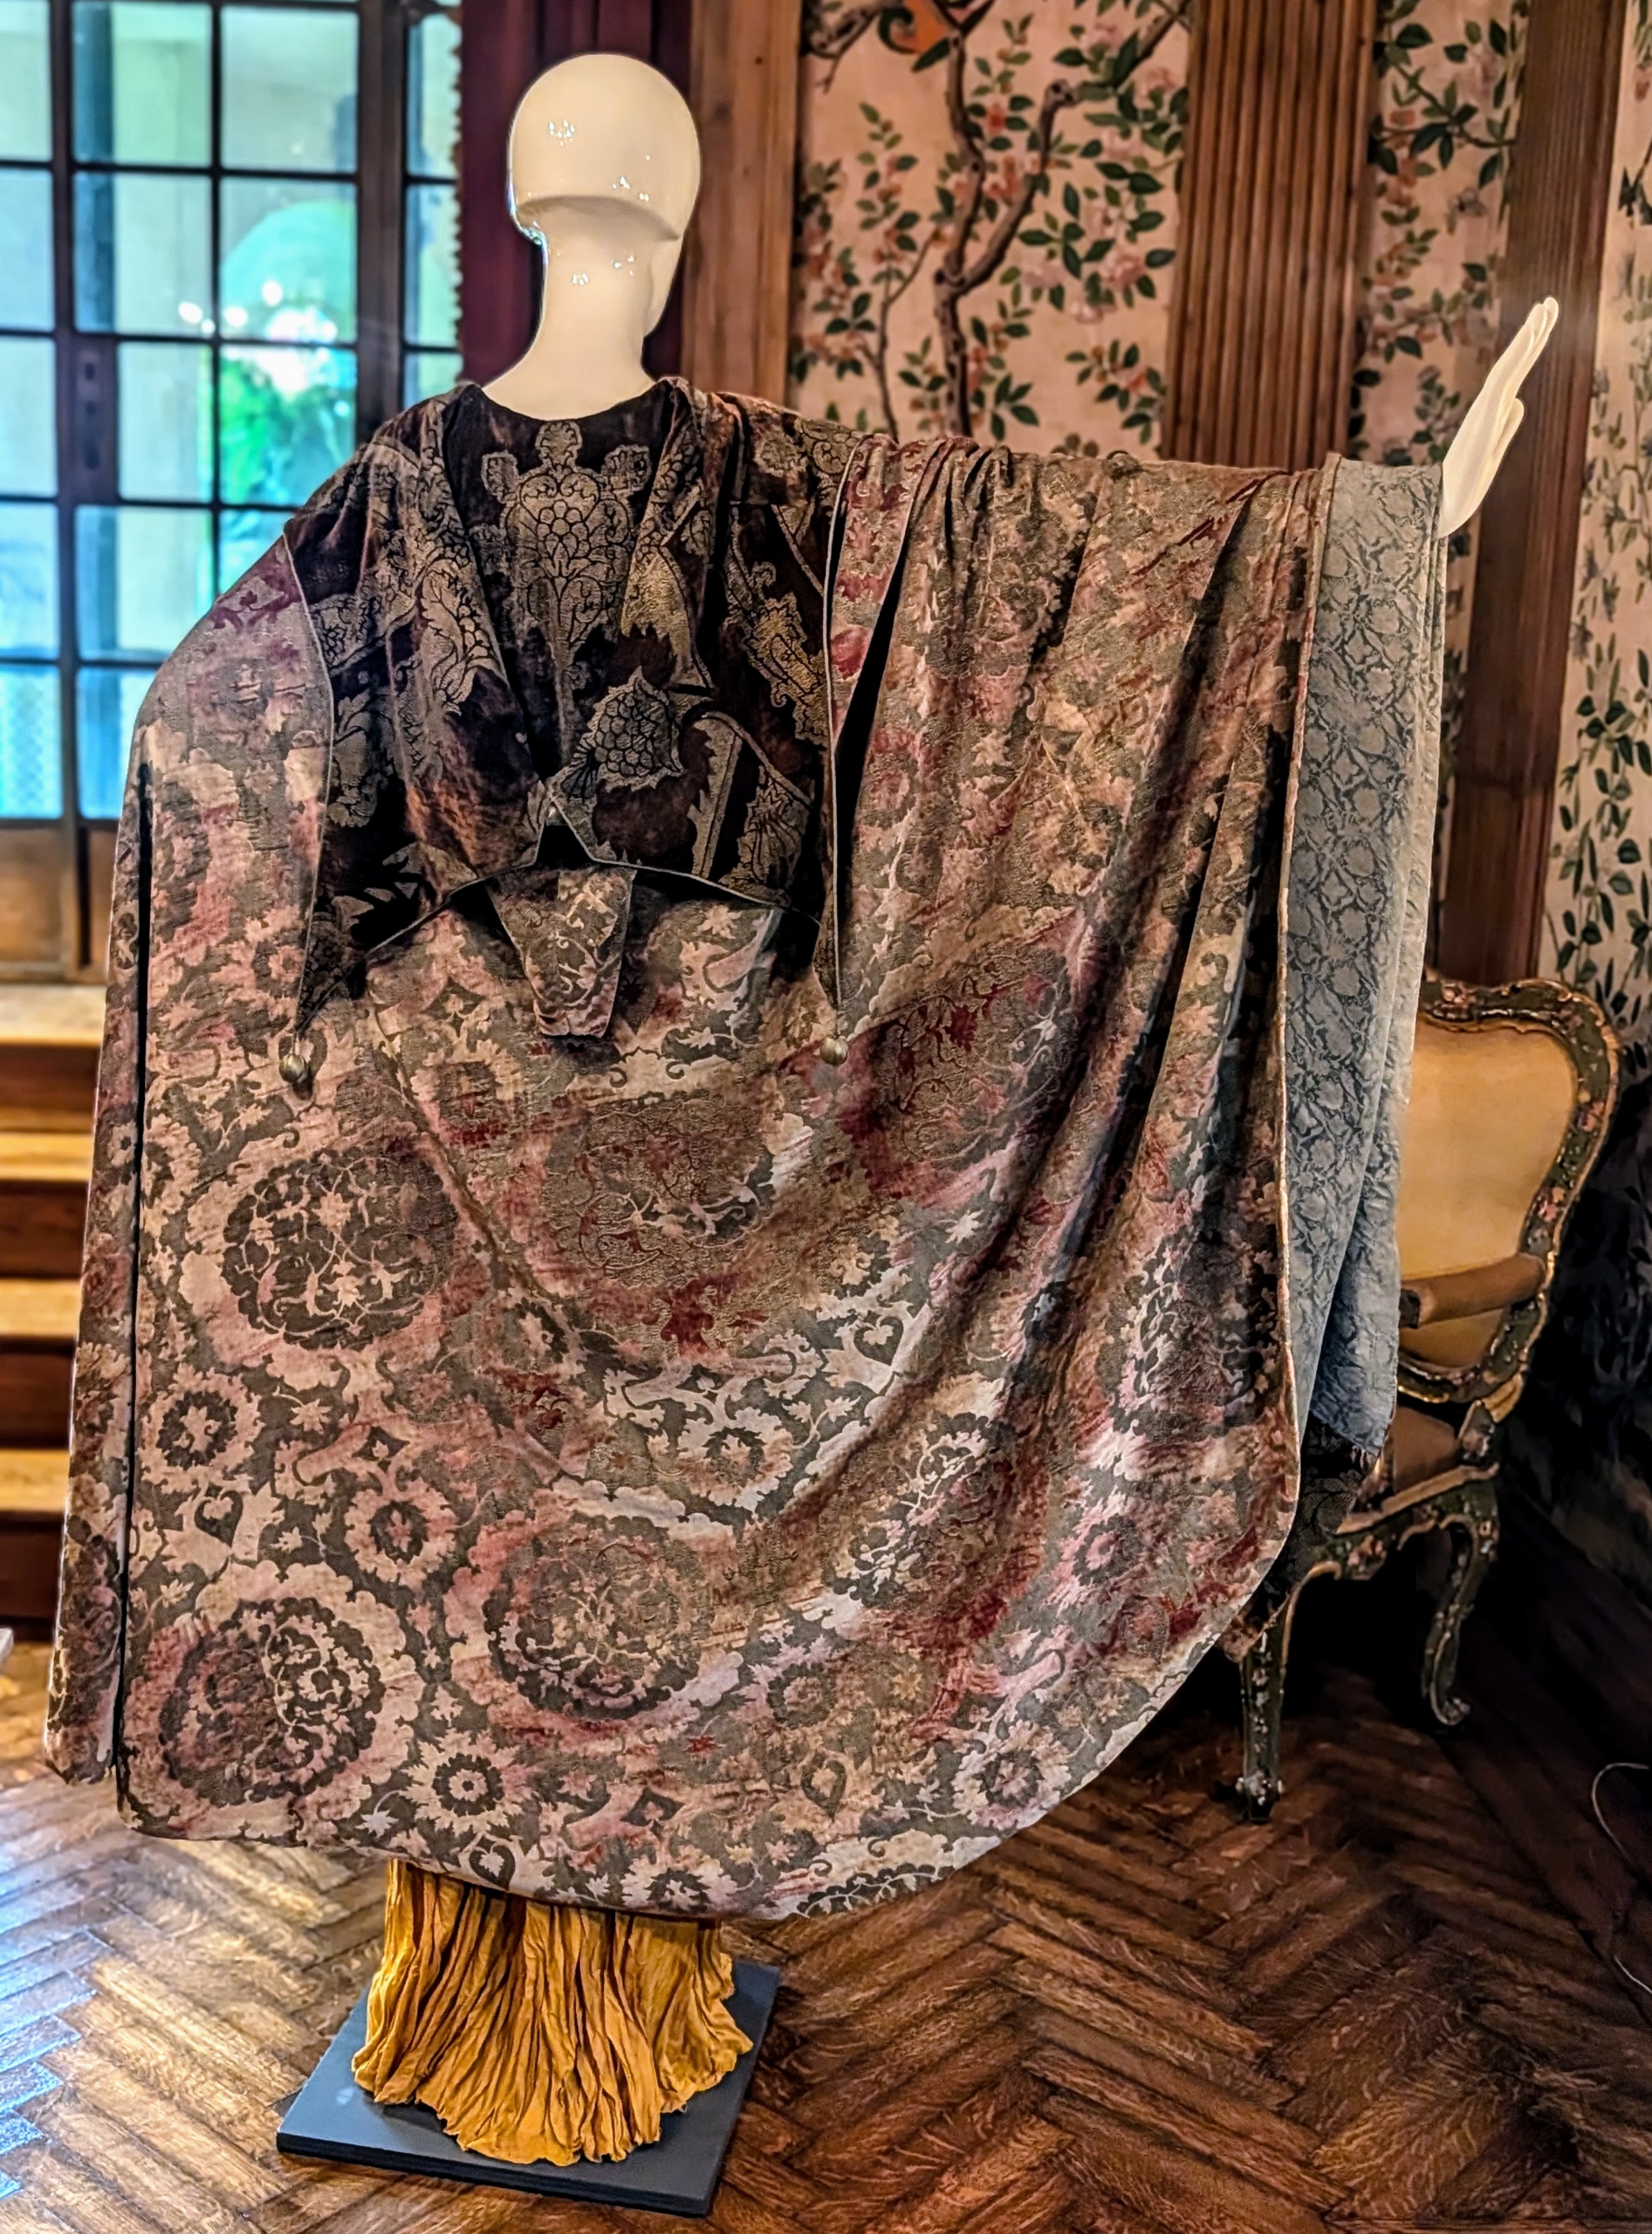
This year, the main exhibit is the Rosen House Focus Tour: Inside Lucie’s Wardrobe. It offers guests an interesting look at Lucie Rosen’s fashions through the years – some of which would still look radiant today. This is an evening coat made out of Fortuny stamped silk velvet.
This evening coat is made of orange-red silk velvet with metallic embroidery and trim. Lucie loved to use bold colors and rich fabrics for her capes.
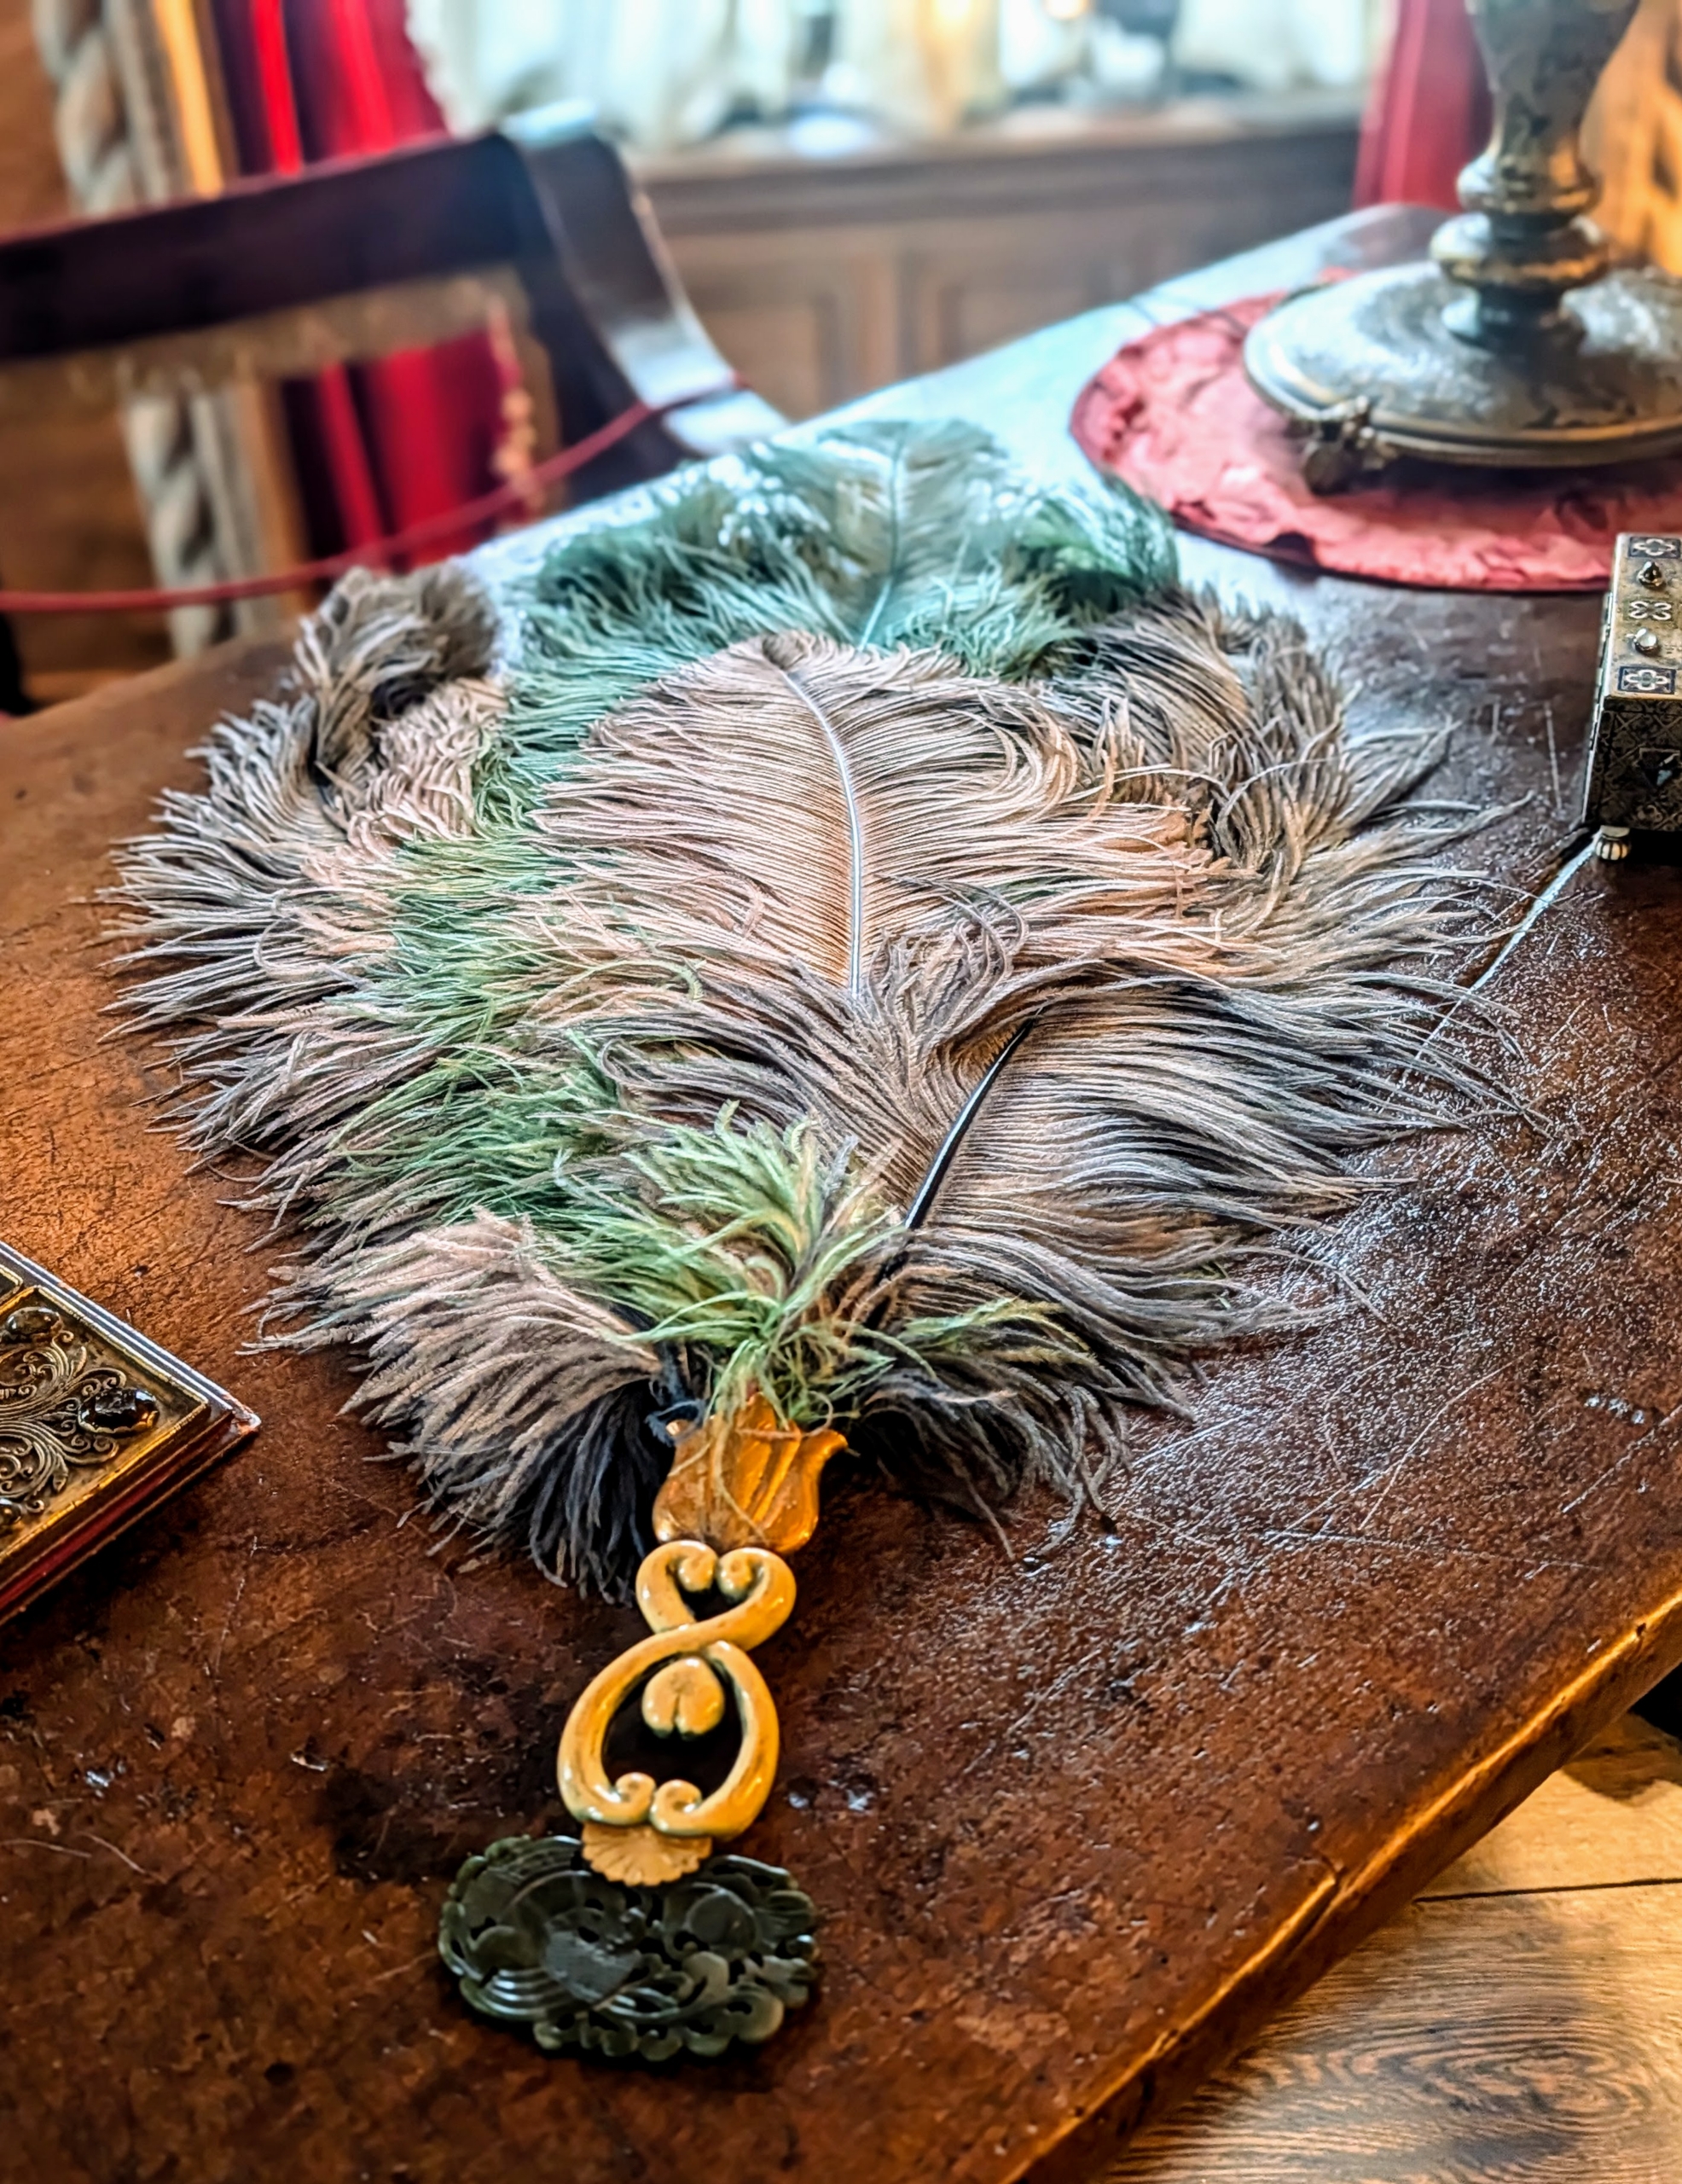
Lucie often used feather hand fans. She had them made in an array of different colors to match her clothing.
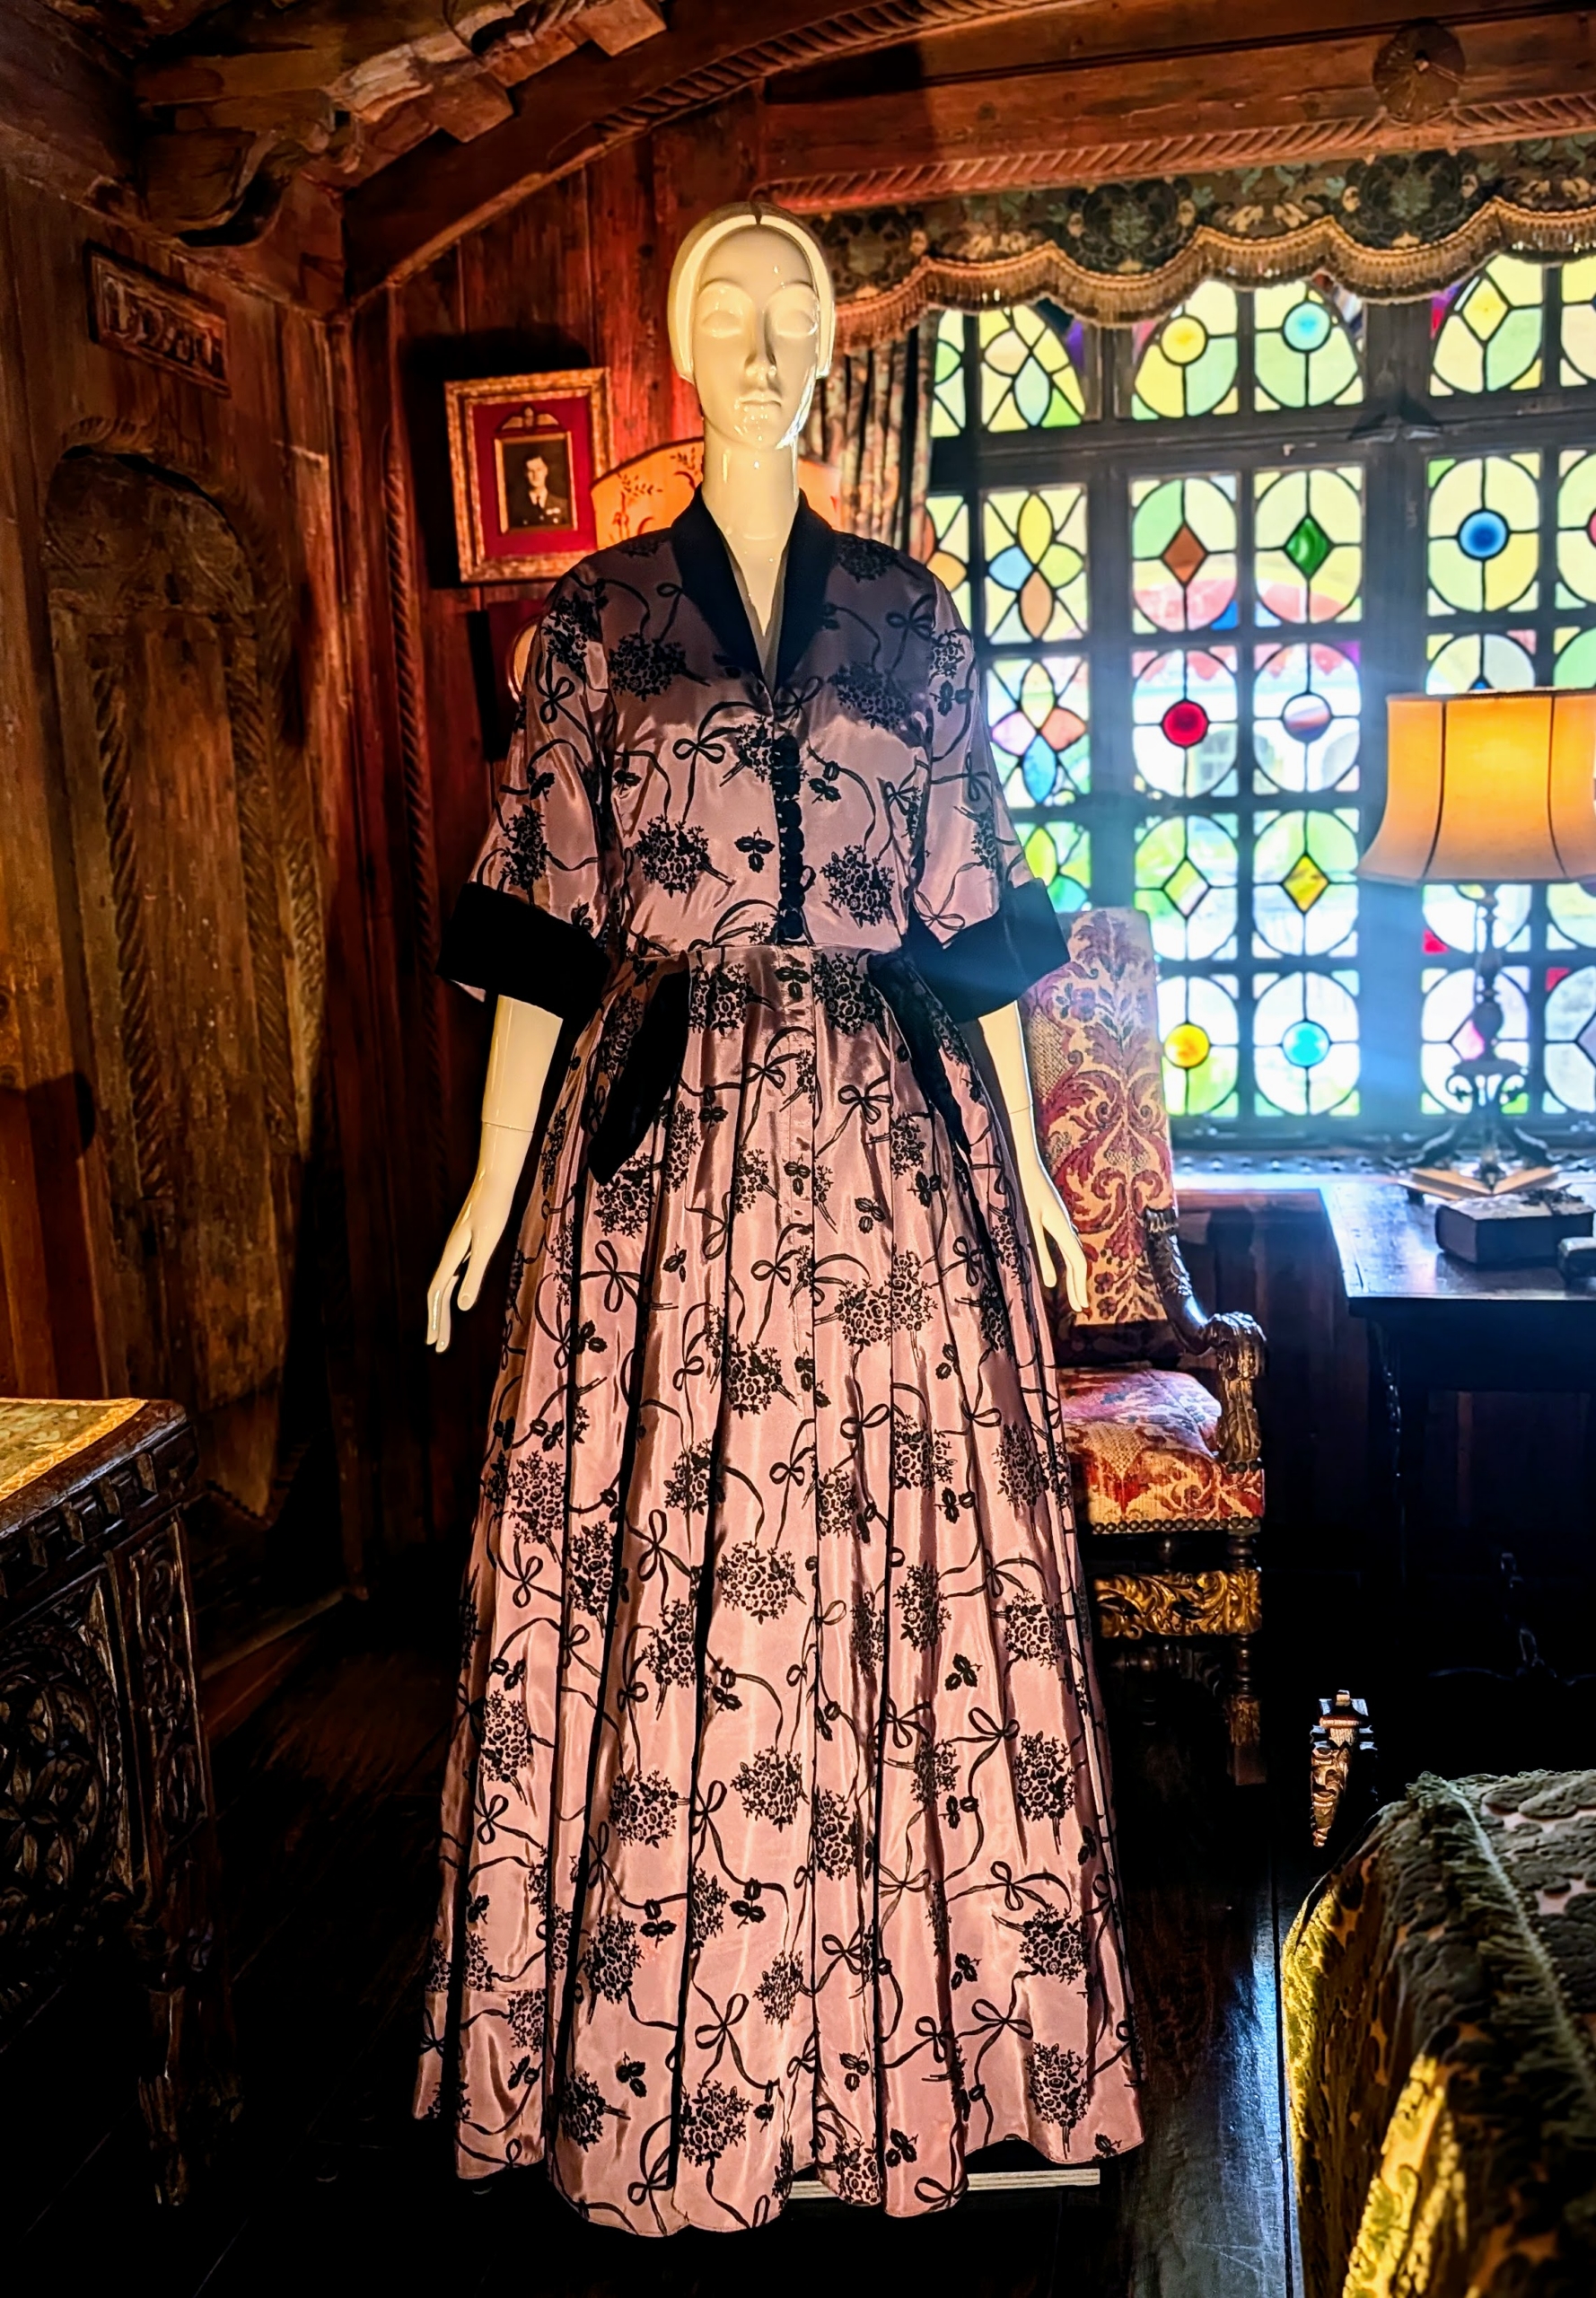
This silk satin hostess dress is flocked with velvet accents. While Lucie loved color, she often used some black for dramatic effect.
In the Spanish Alcove, a small space in the Music Room reserved for intimate gatherings and family games, were these costumes. On the left is a hand-painted Flora costume made of silk chiffon, silk organza, silk linen flowers, and metallic thread. It was what Lucie wore to the February 1924 Beaux Arts Ball, a high society fundraiser for the Beaux-Arts Architects. The costume was inspired by the painter Sandro Botticelli’s, Primavera.
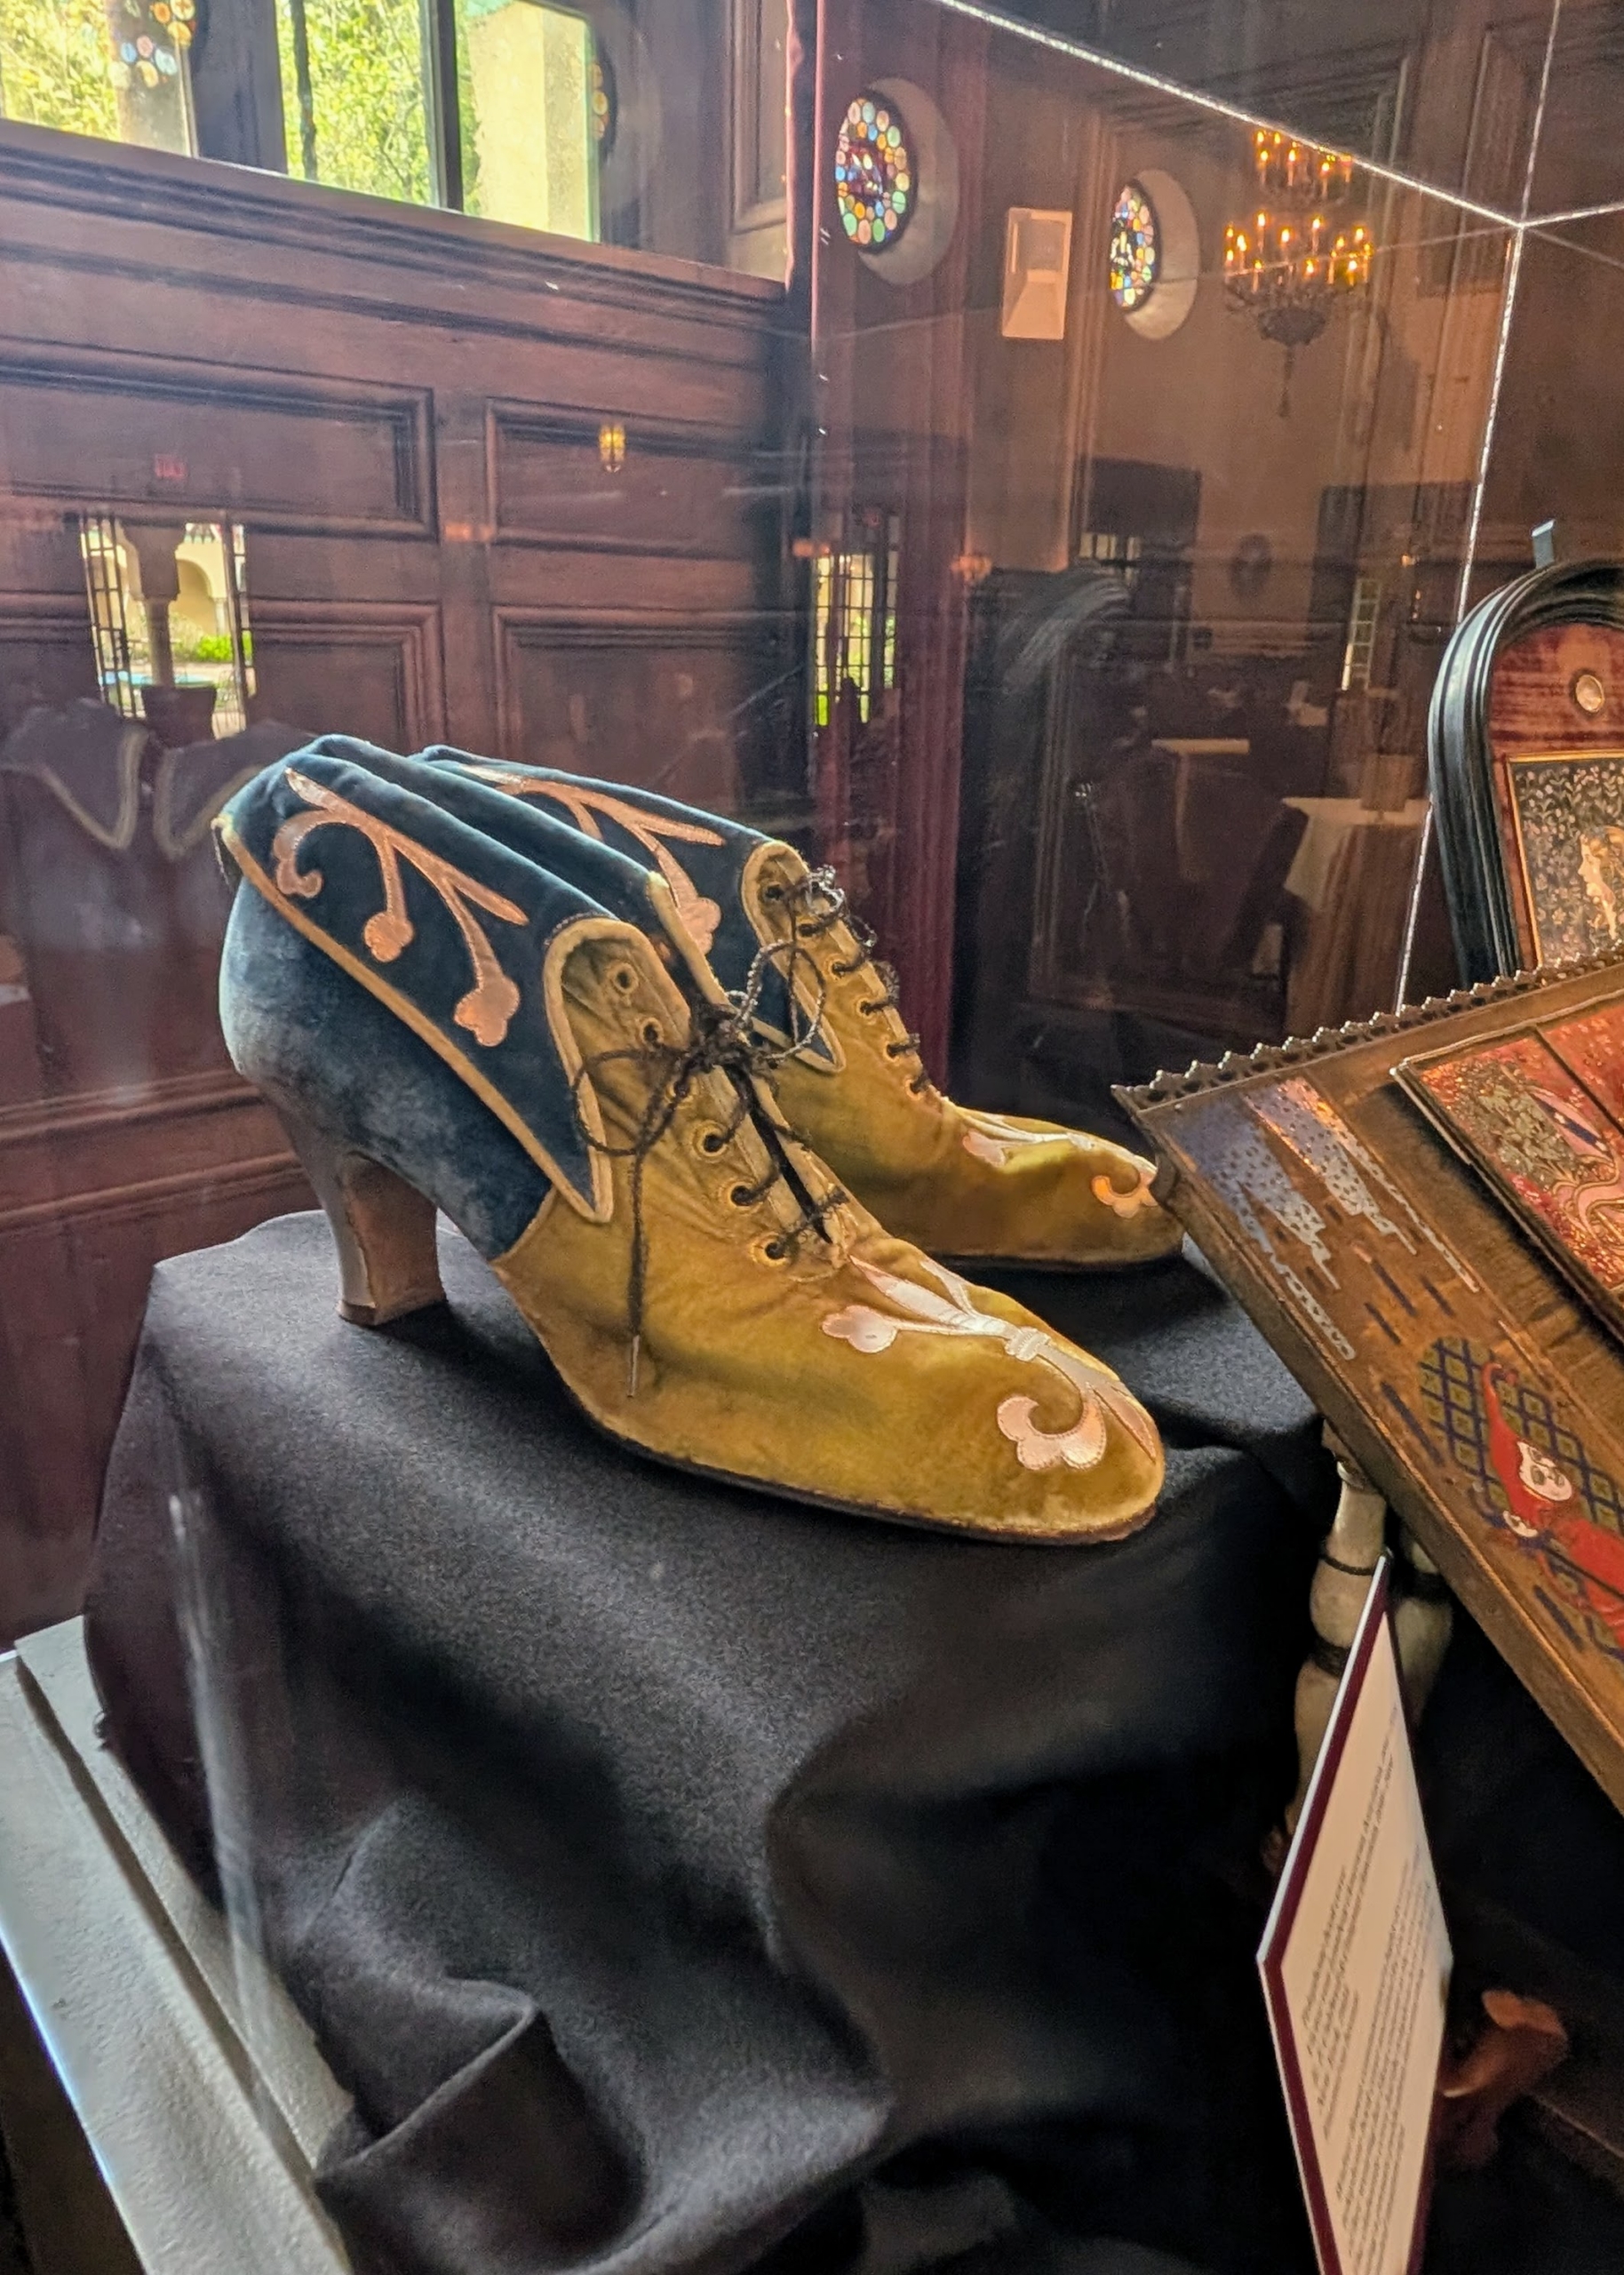
Also in the Music Room, a pair of Lucie’s shoes. Shoes of this era had elongated silhouettes to emphasize narrow foot shapes. Decorative elements were also used and required snug fits to maintain structure.
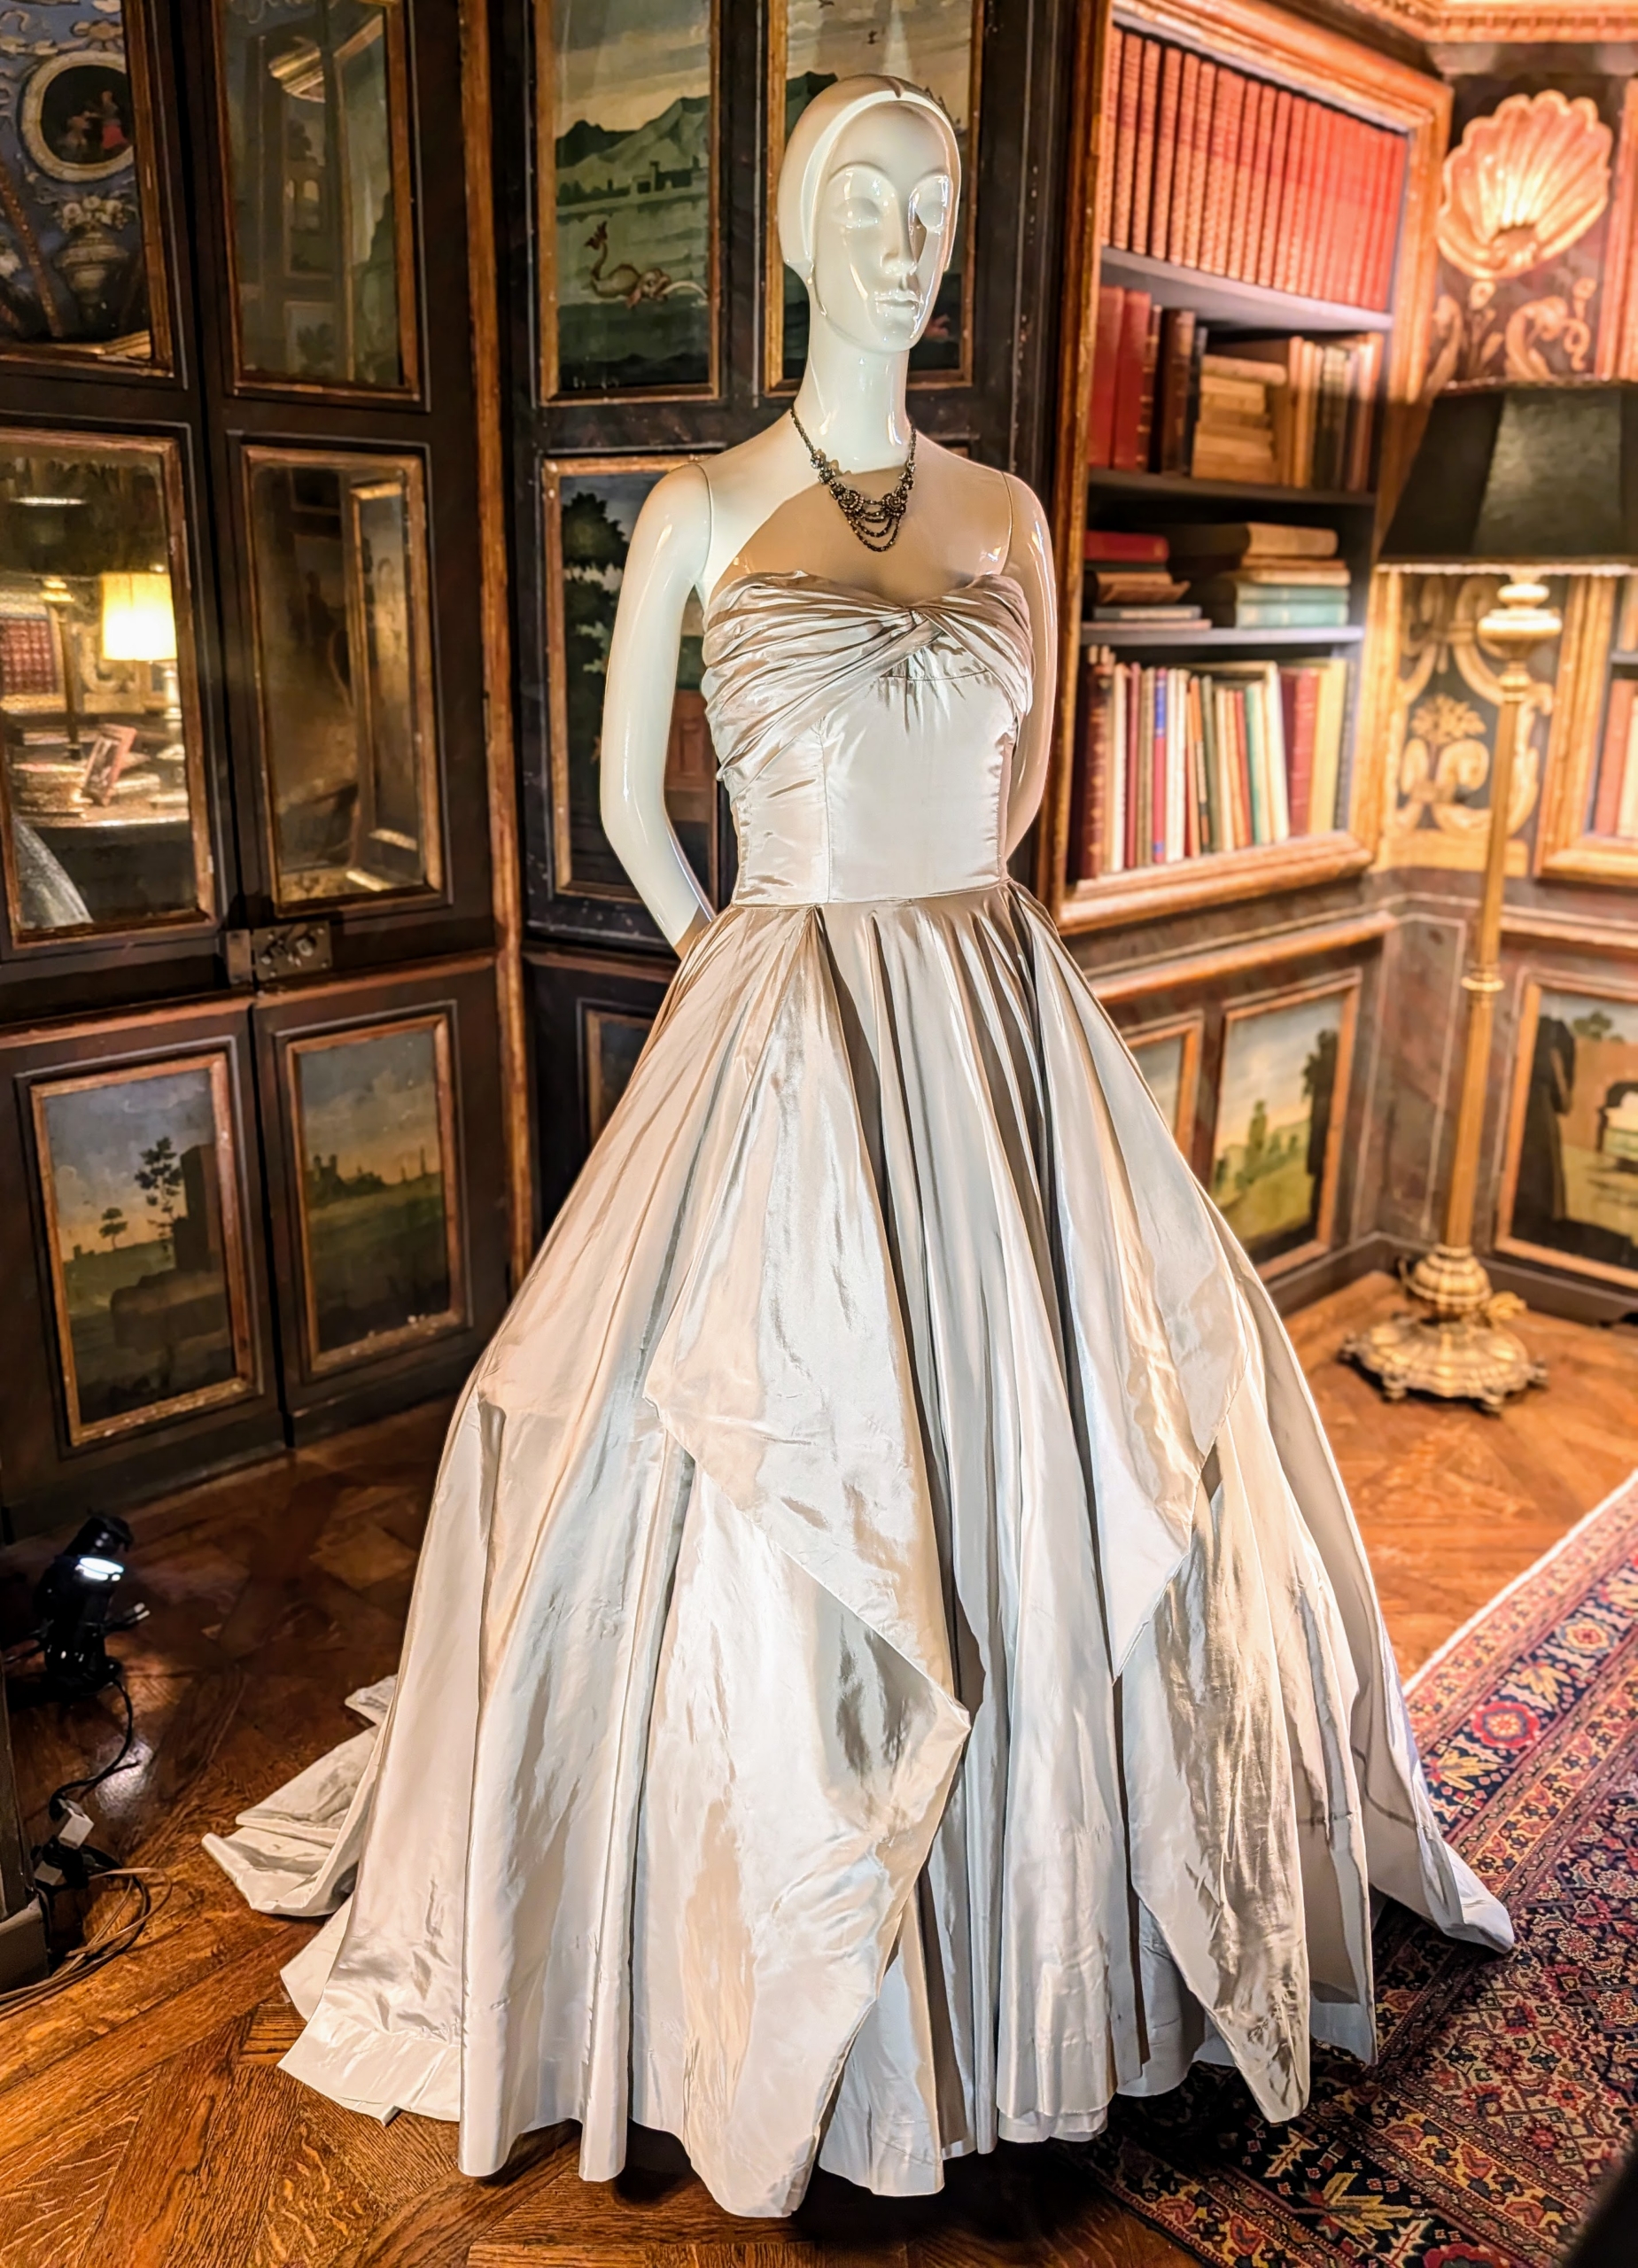
Full skirts, cinched waists, and shapely bodices were characteristic of evening gowns in the 1950s. This gown shimmers in silvery gray satin.
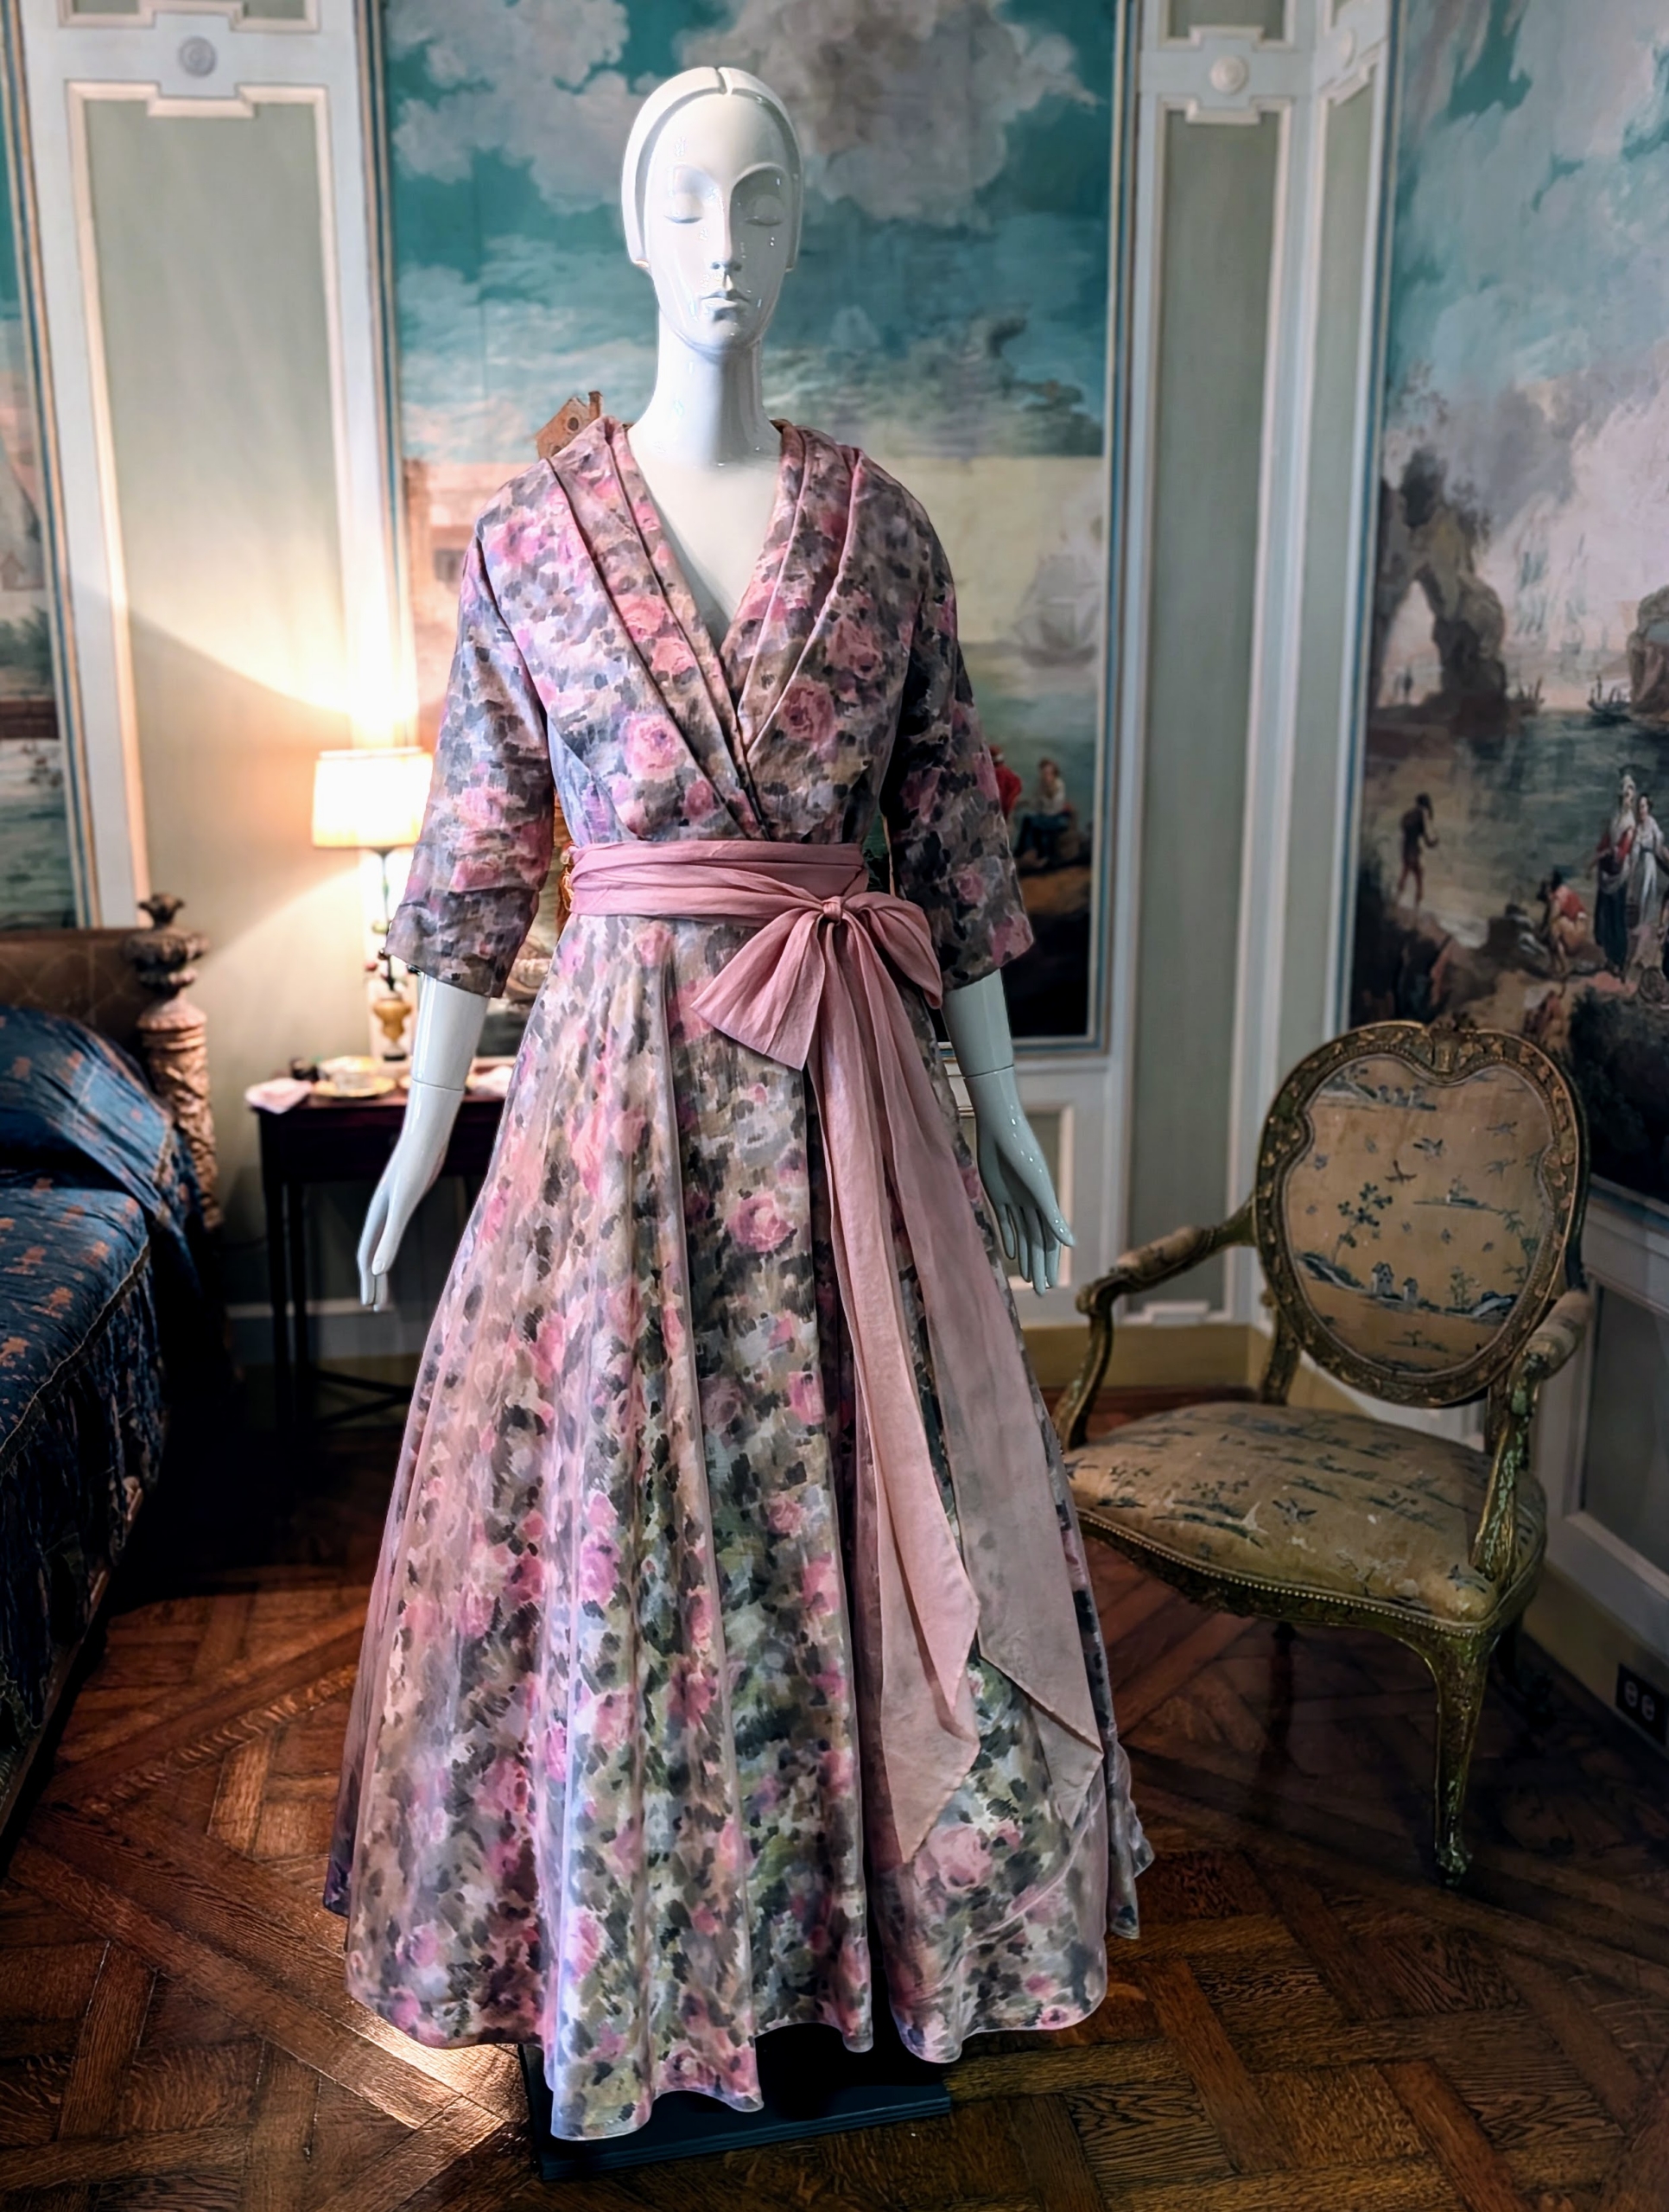
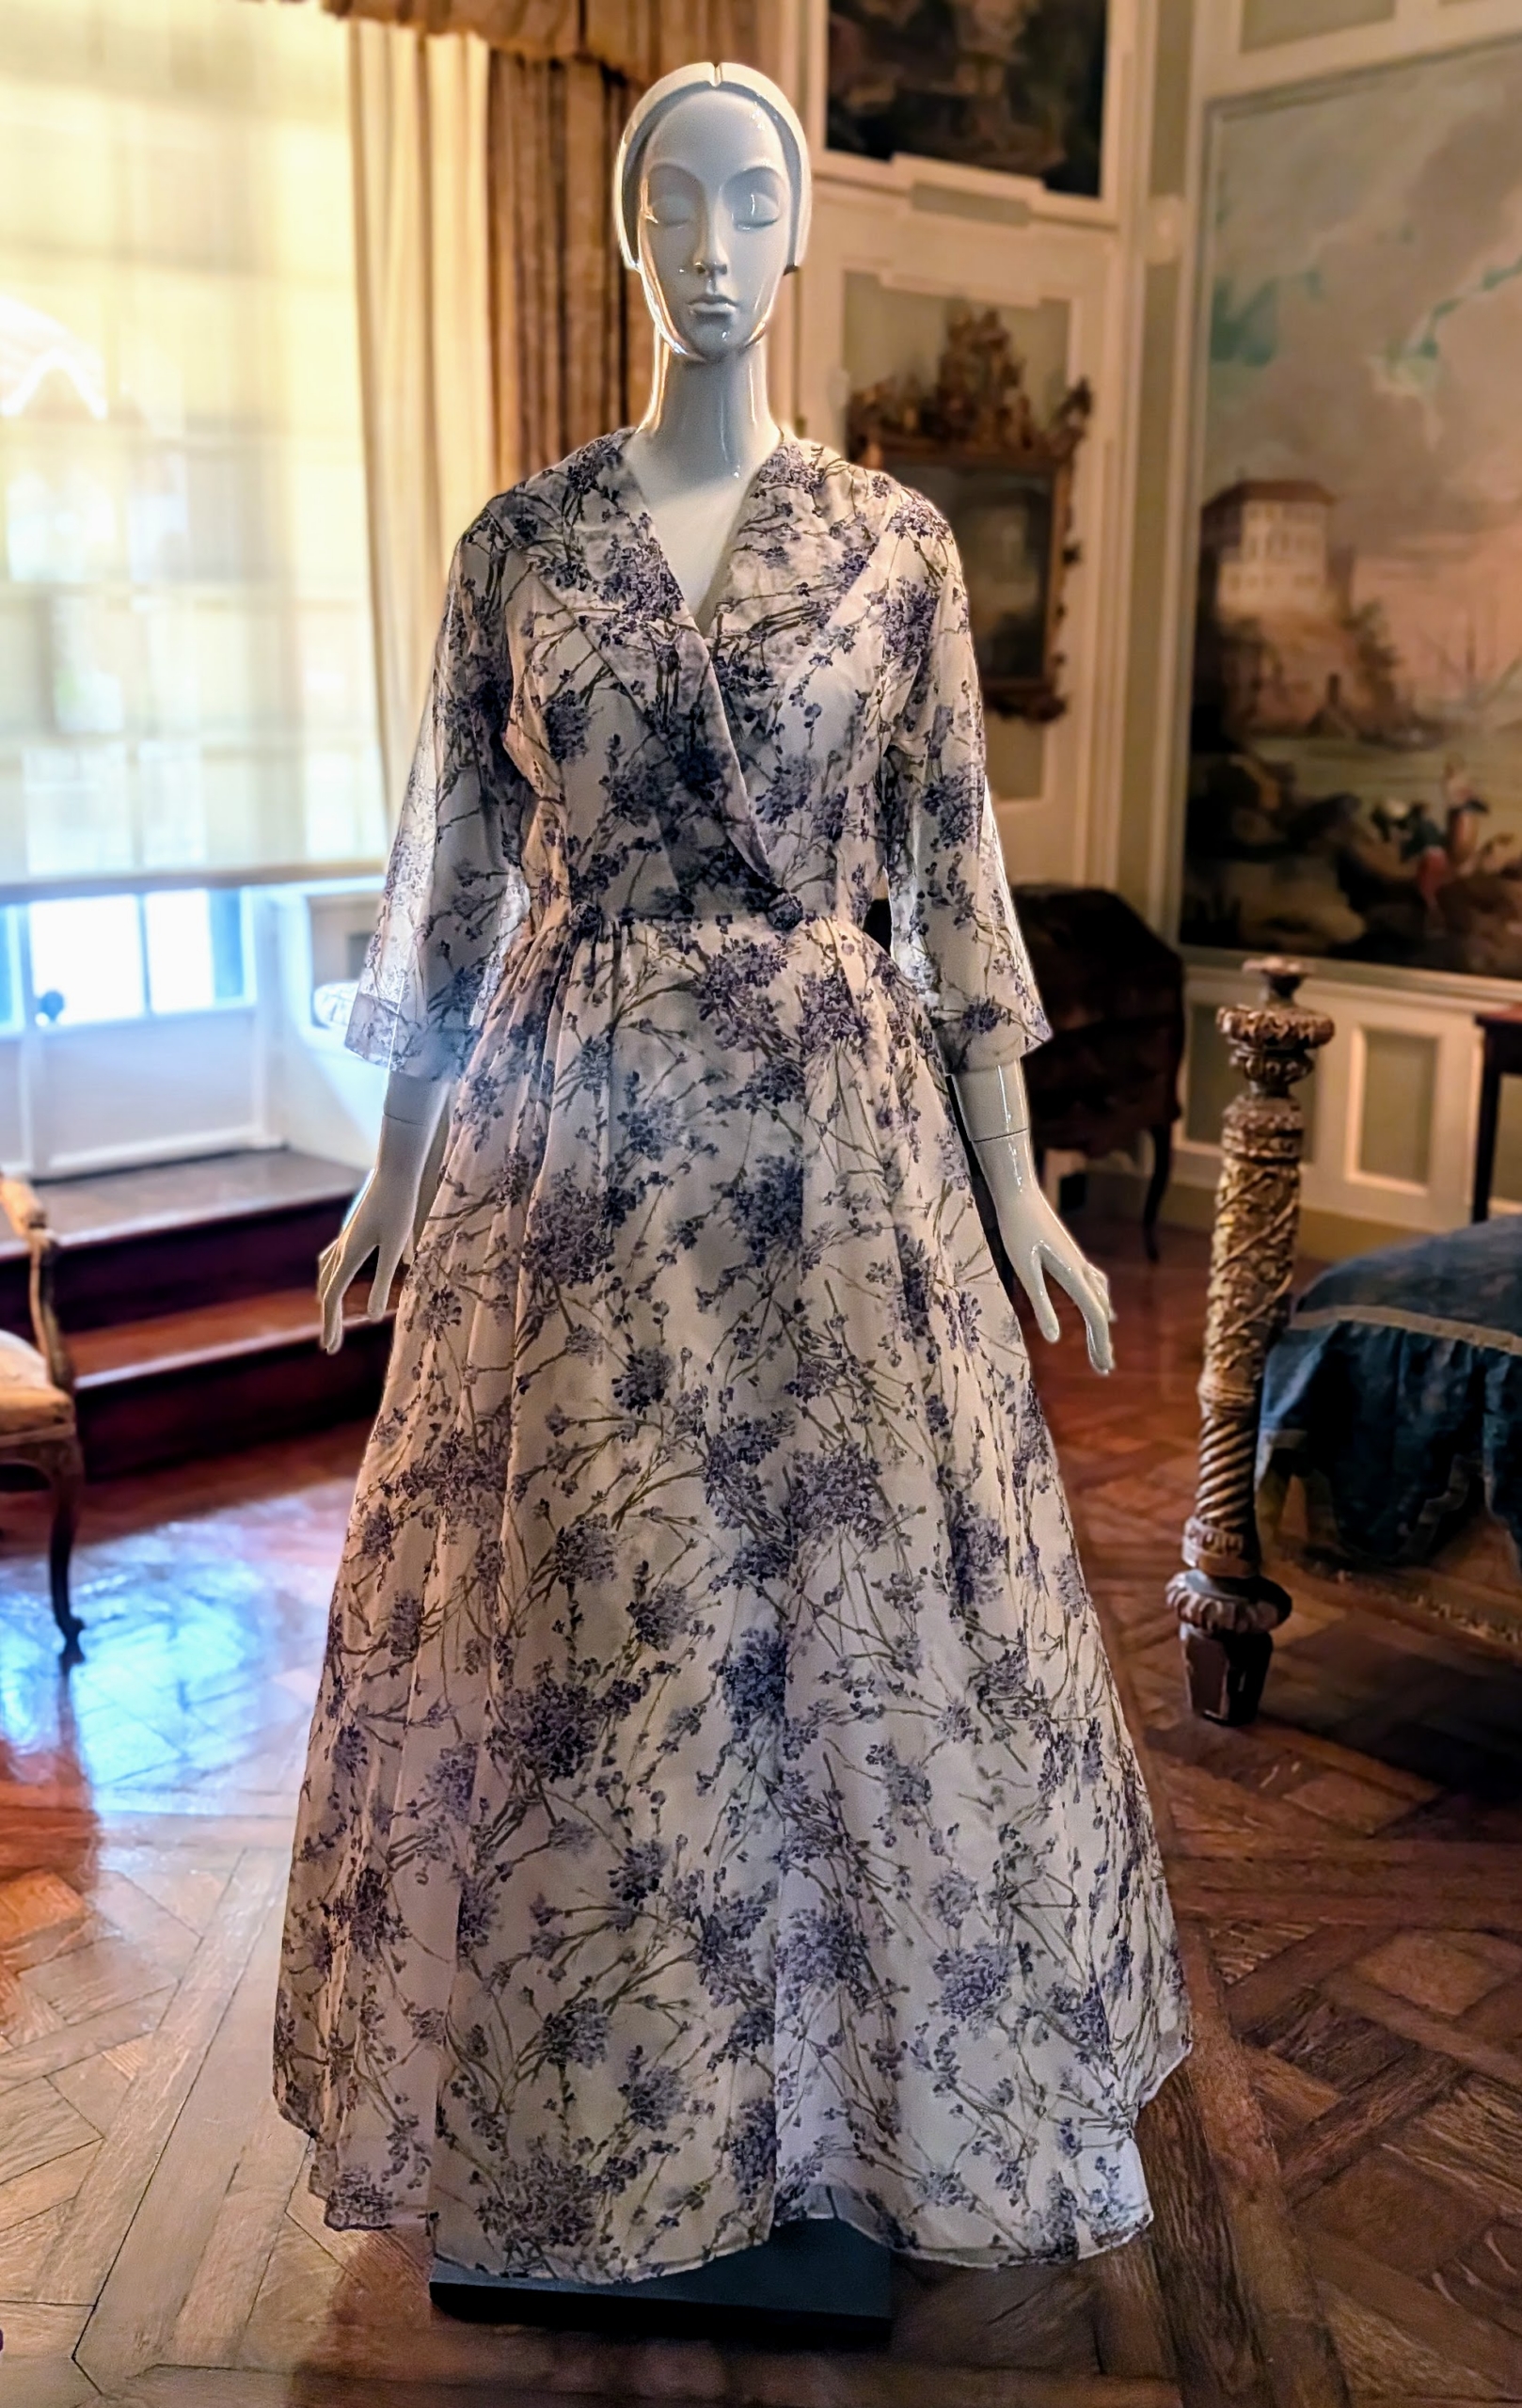
This is one of several day-dresses on display inspired by Christian Dior’s “New Look” after the war. These dresses included floral prints, long, full skirts and fitted busts.
Here is another example of one of Lucie’s floral day-dresses.
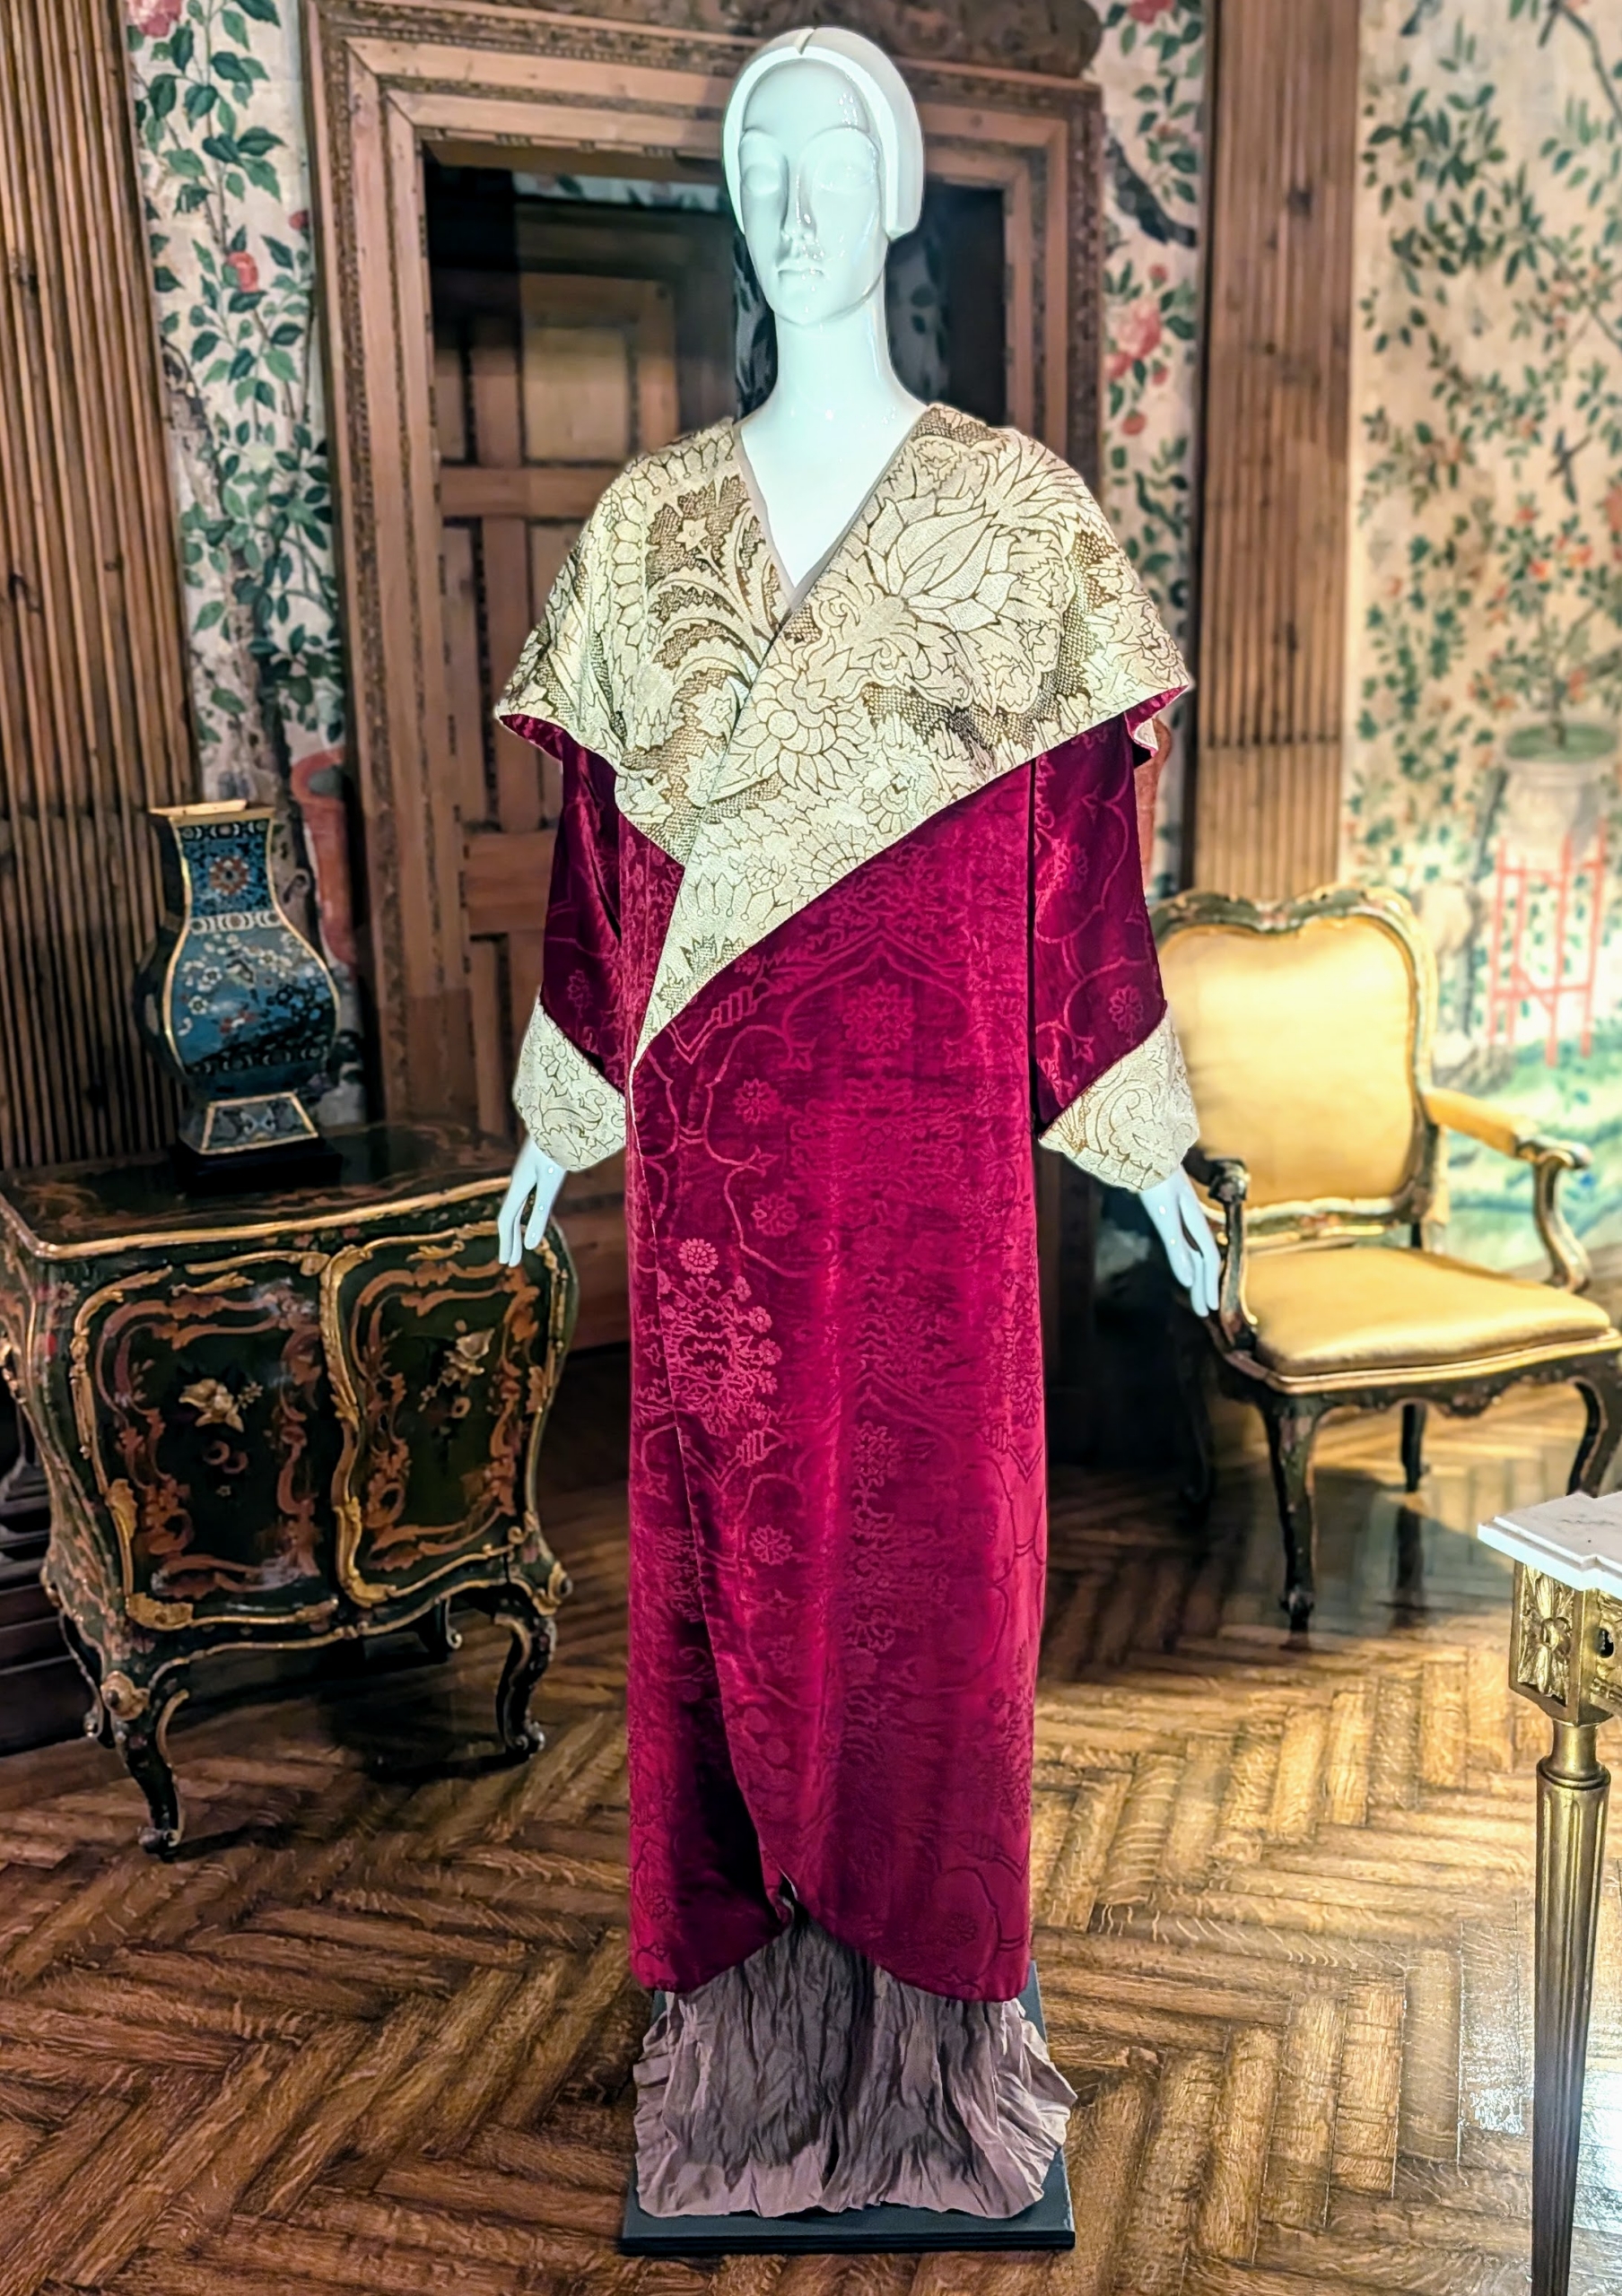
This wine-colored evening coat features a wide-collar with a pomegranate pattern stamped in gold, a signature pattern of Fortuny.
Lucie was more fond of finding her own fabrics and having them made into dresses than purchasing ready-to-wear garments. The fabric for this gown is made from magenta silk stamped with a silver pigment by Fortuny. The actual dress is said to be made separately with a custom fitted bodice and train.
Displayed here – a two piece ensemble used for lounging and a light tiger-lily patterned shawl, a gift from designer Ethel Wallace.
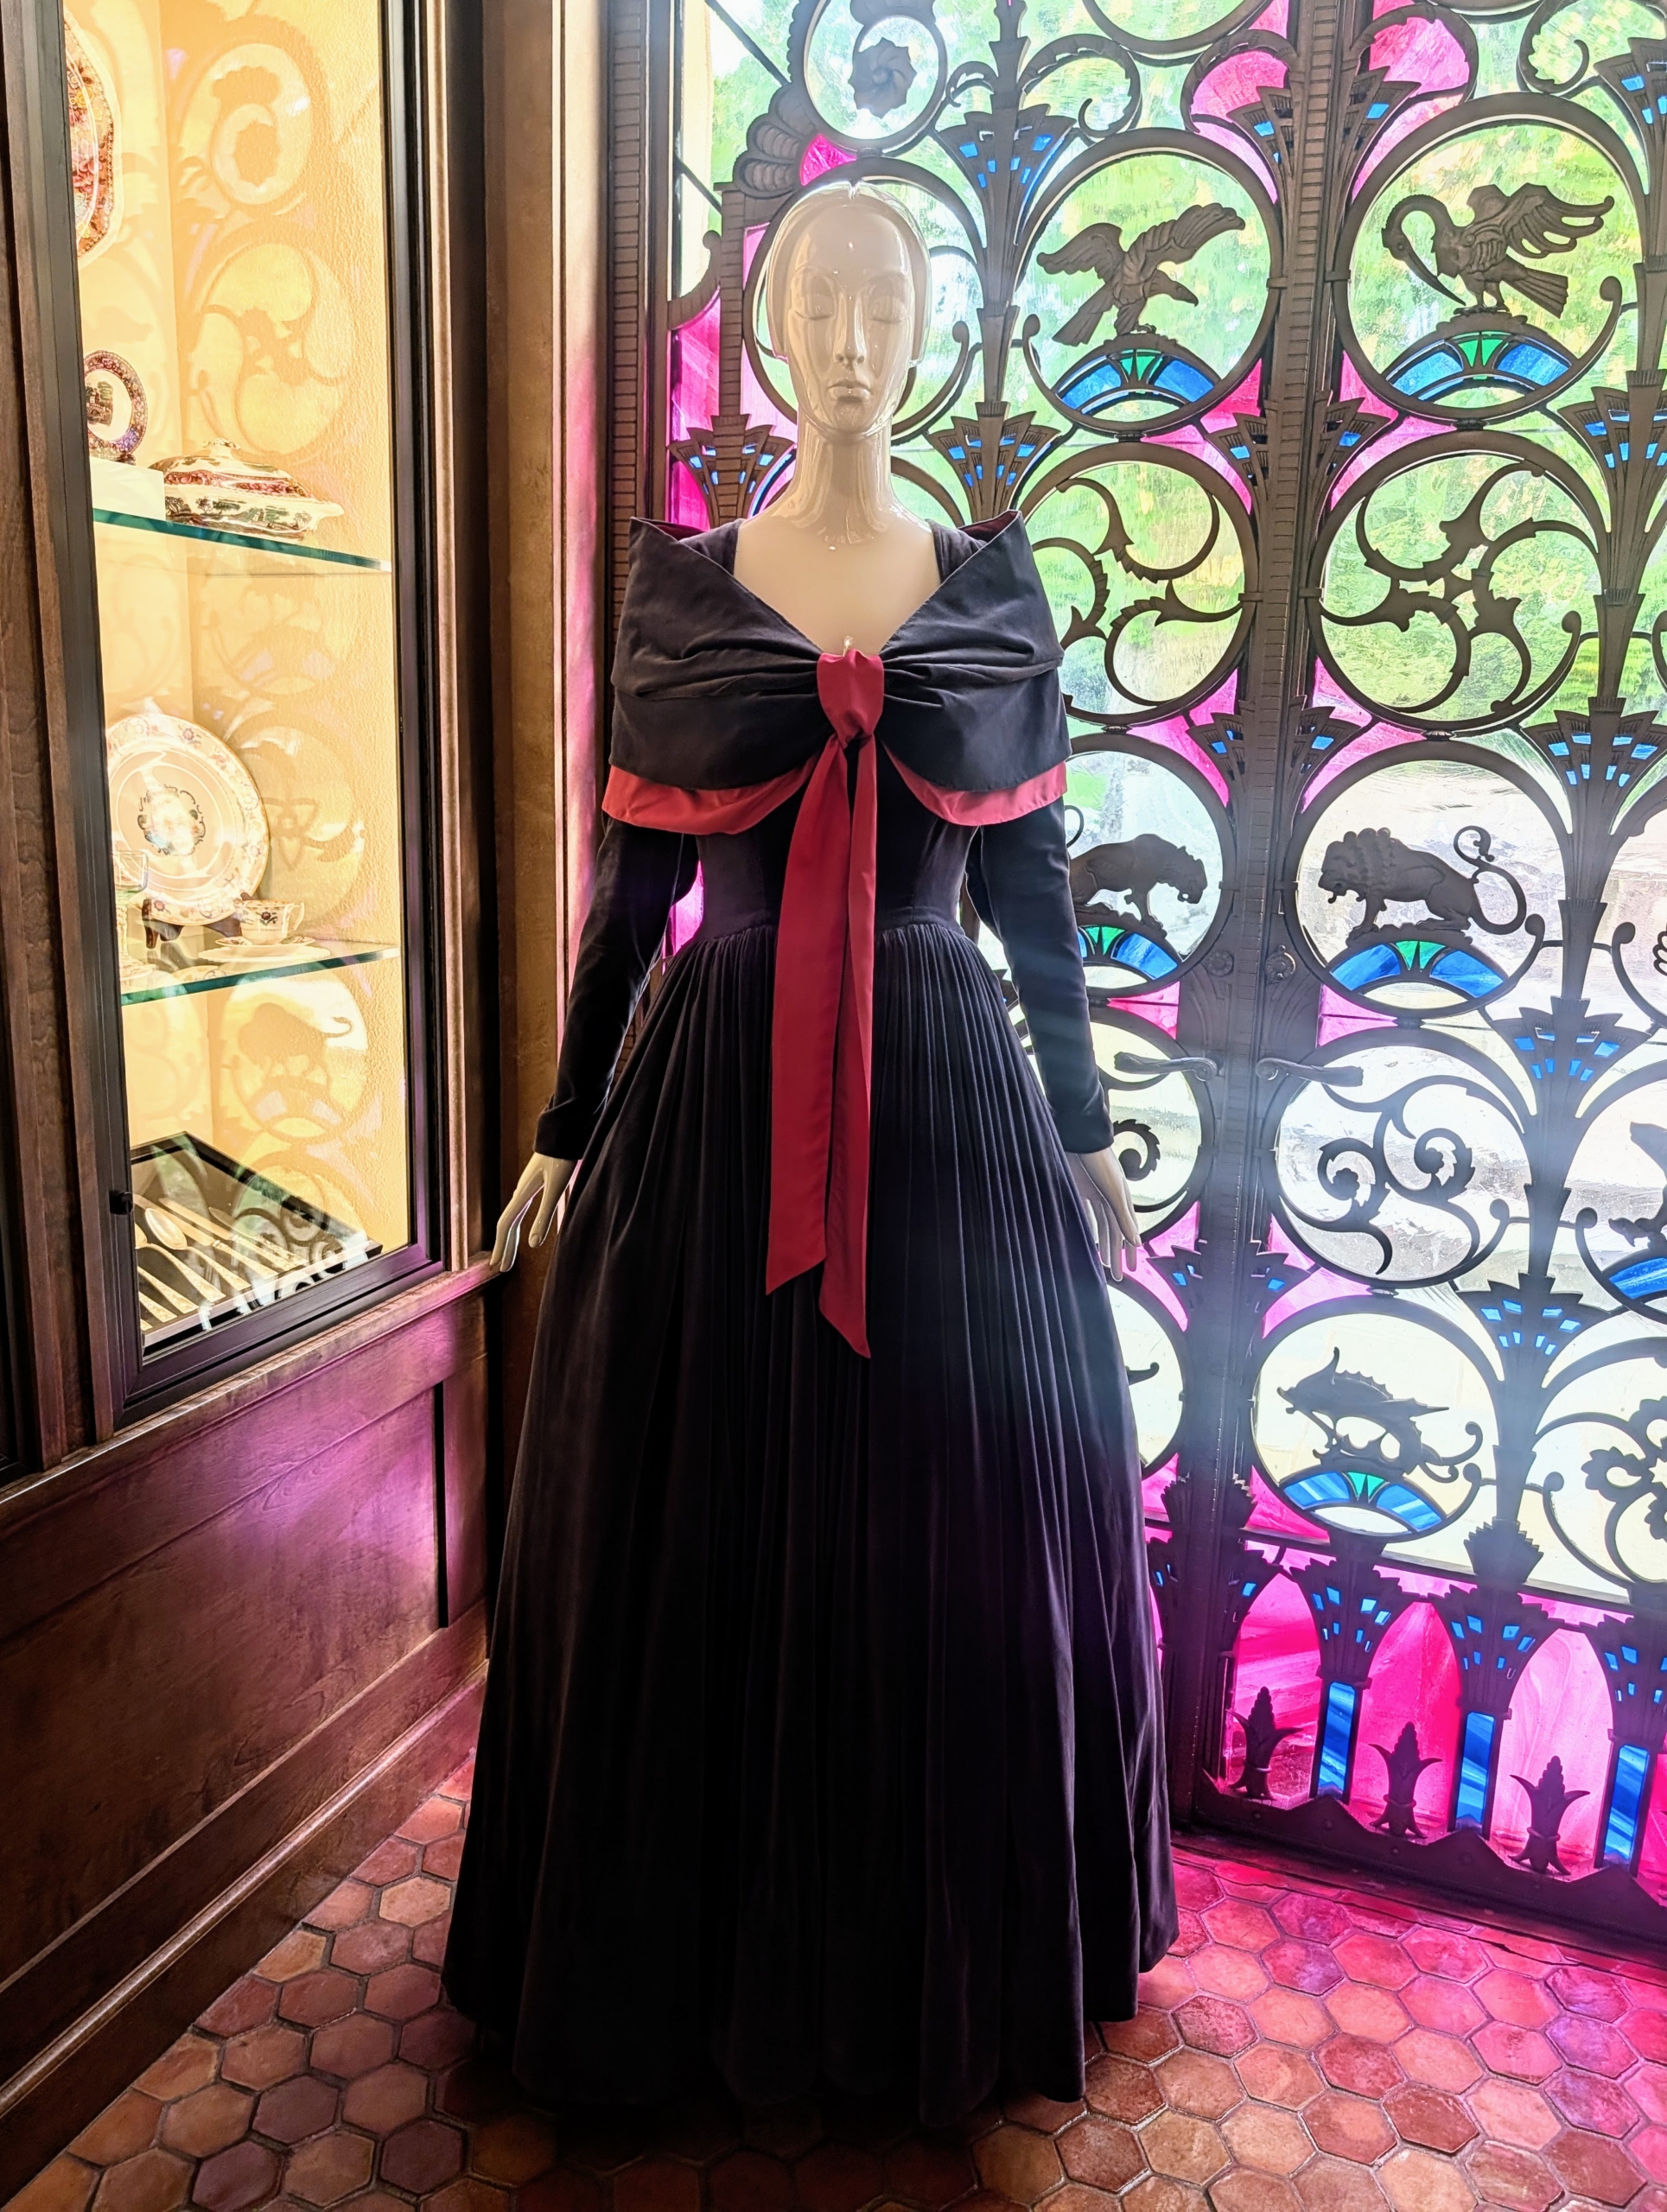
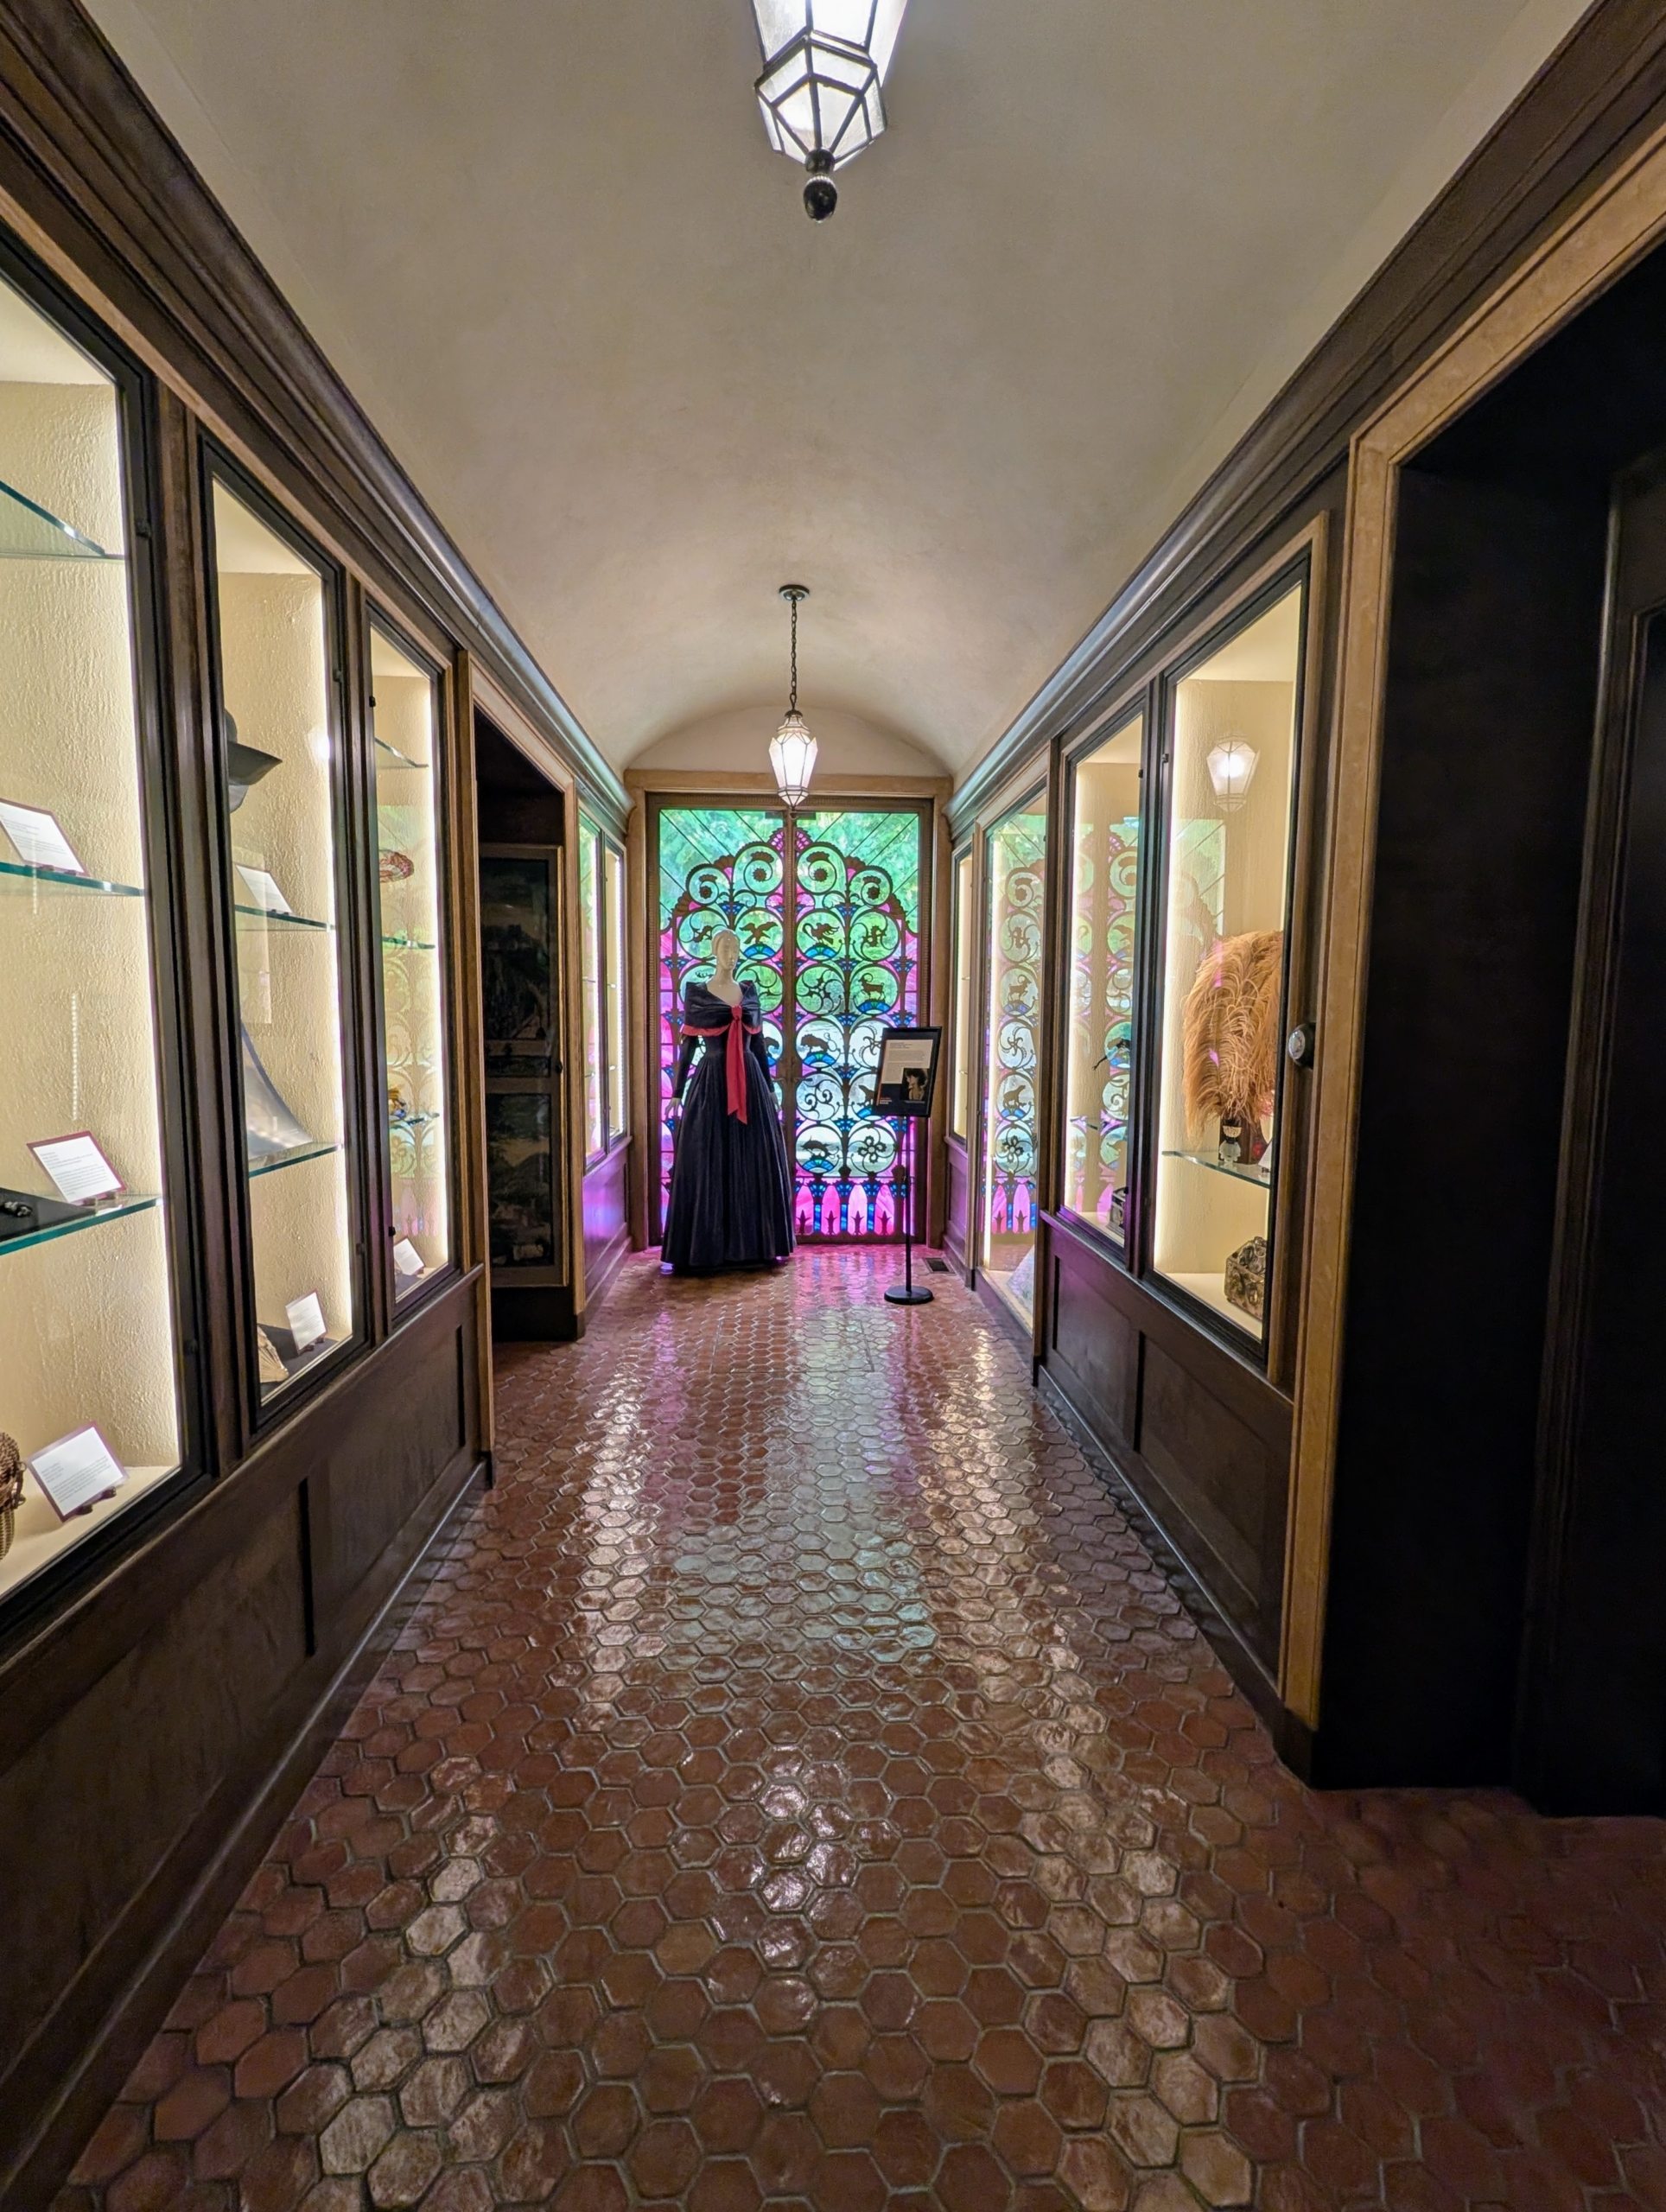
This dinner dress with matching stole lined in magenta was a favorite silhouette style for Lucie. She wore versions of this in the 1930s and 940s.
The dress is displayed at the end of the Southwest Wing, which was completed in 1974. It includes three period rooms from the Rosens’ New York City townhouse and features many of the items taken from that home.
There is so much to see and learn at The Caramoor Center for Music and the Arts. A visit offers a unique blend of world-class performing arts, historic architecture, natural beauty, and now an inside look into the wardrobe of Lucie Rosen. Caramoor is open all year round. Check out its calendar at caramoor.org or stop in for a pleasant walk through the historic gardens.