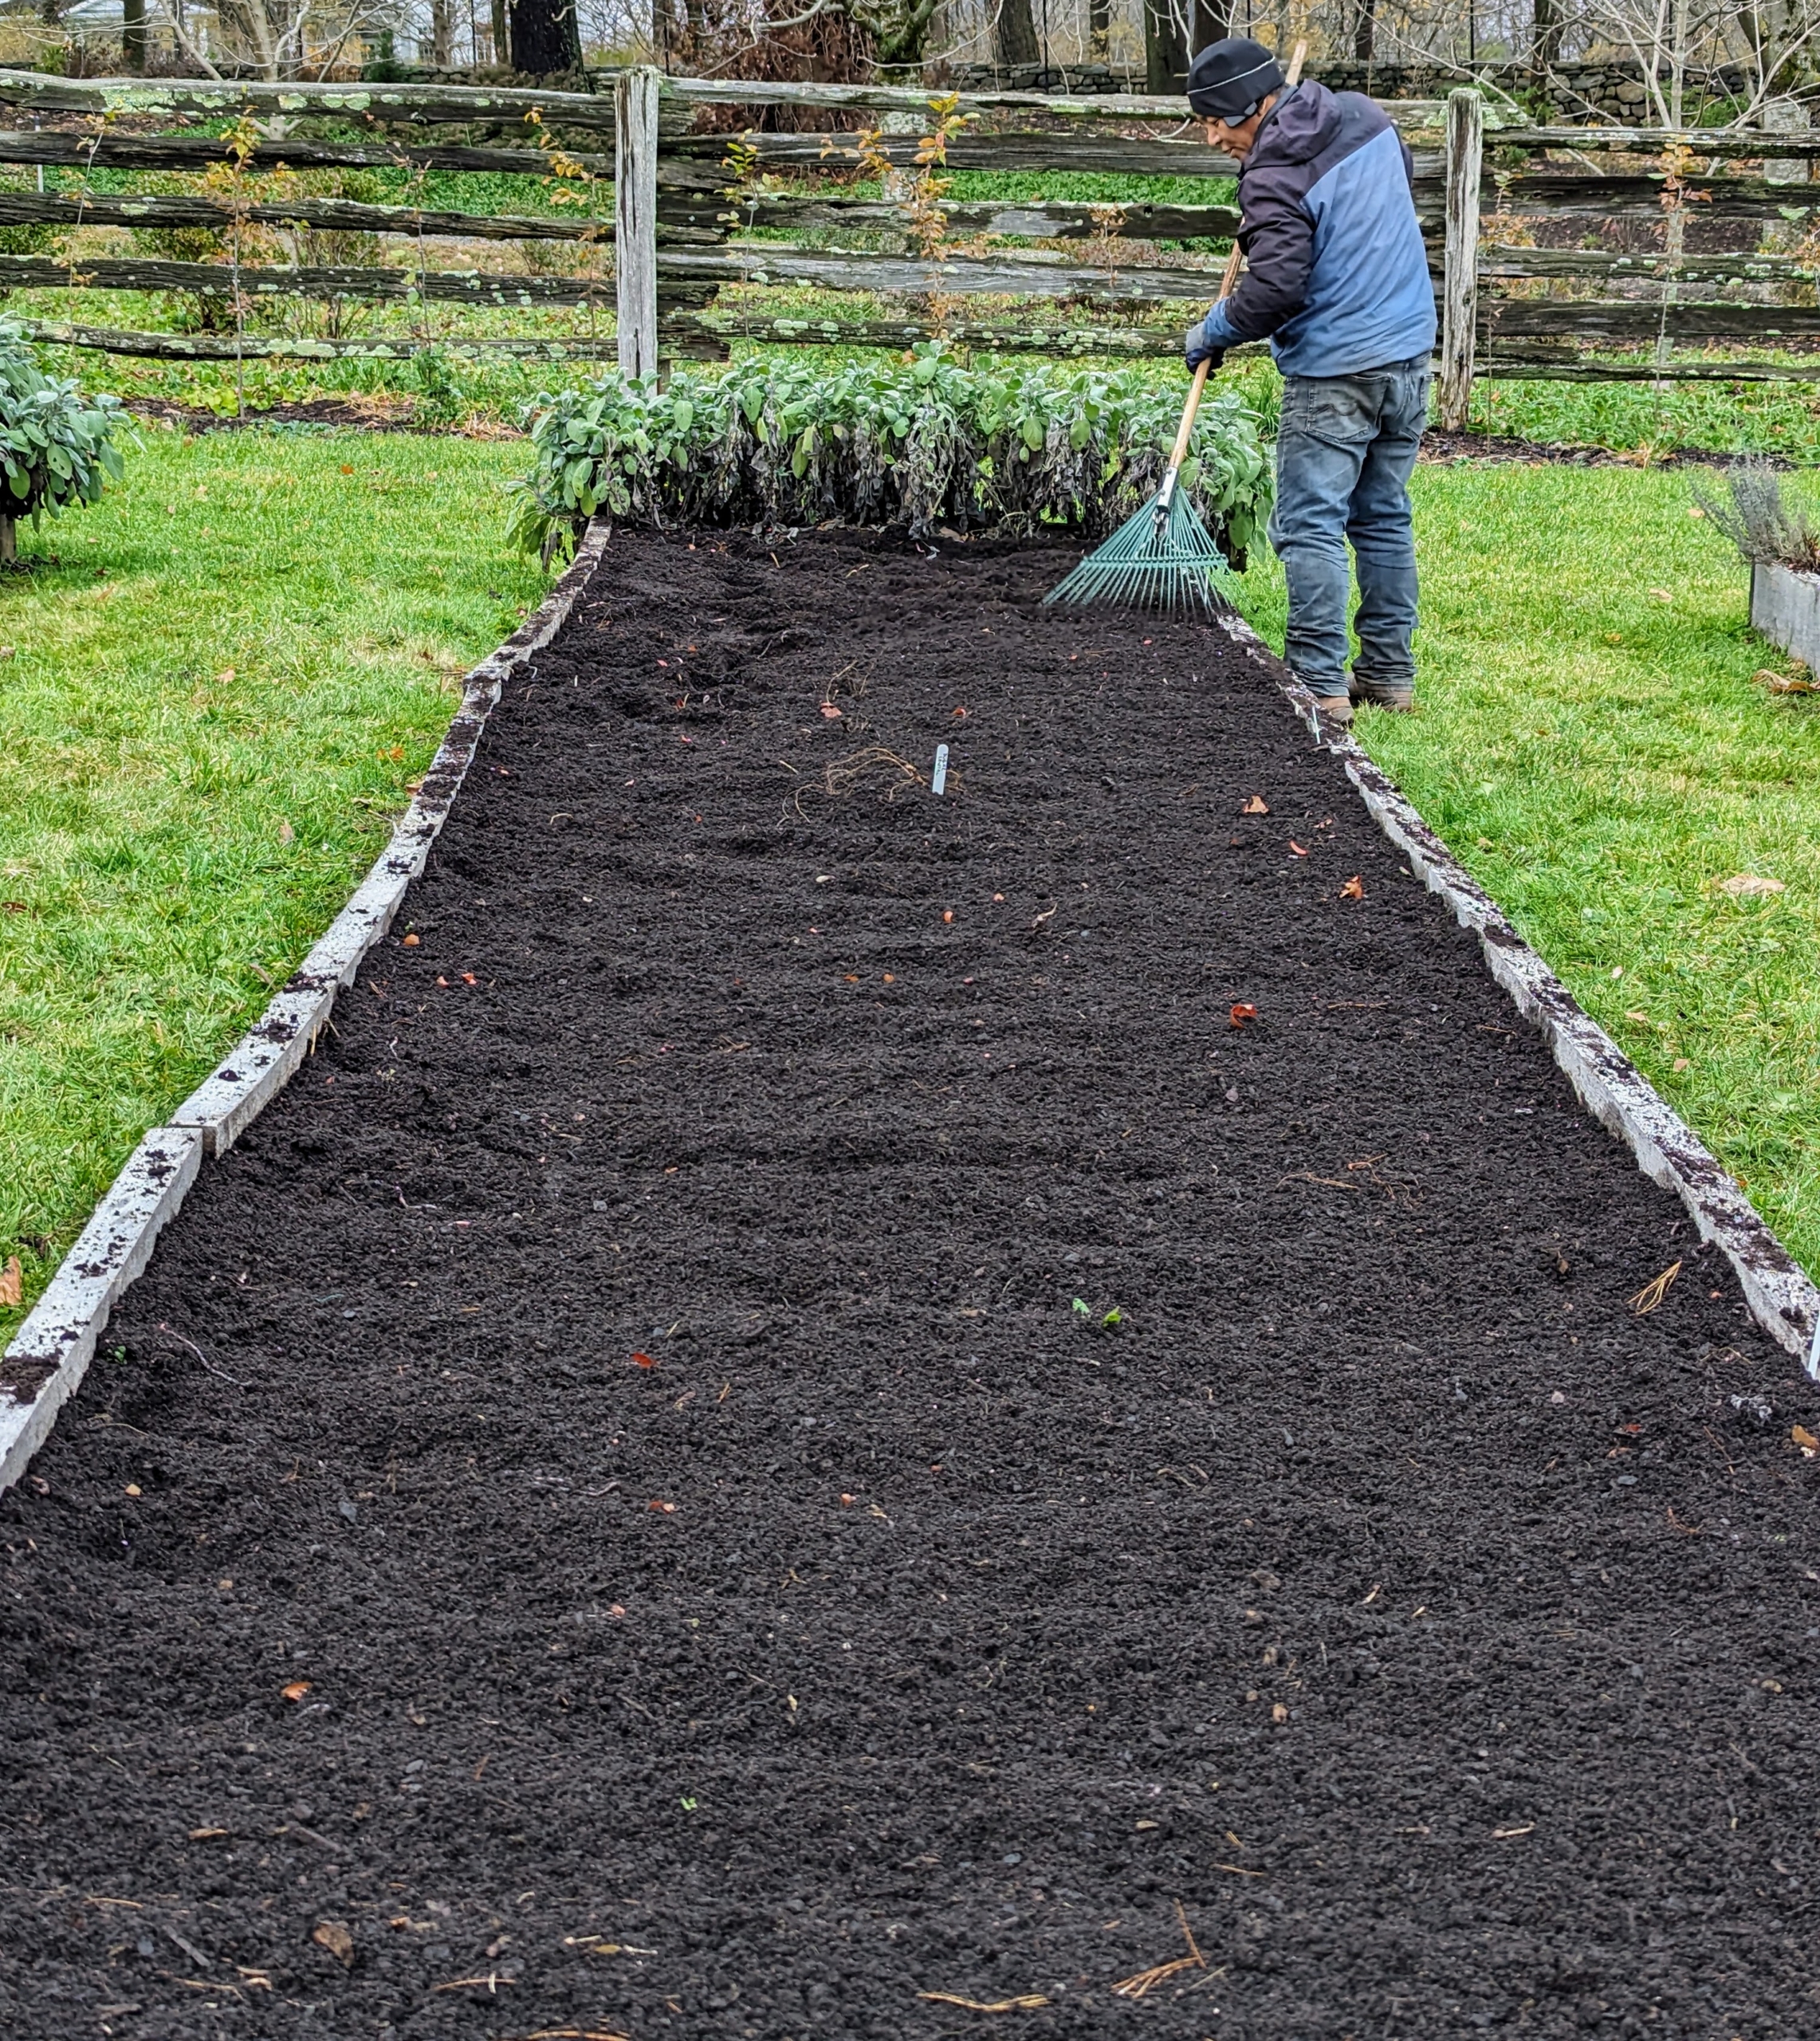
We're making lots of progress with our long list of spring chores here at my farm.
This time of year can be very hectic - my gardeners and outdoor grounds crew are busy keeping up with all the rapid growth. Many days are spent mowing the pastures, trimming and pruning the trees and shrubs, mulching the beds, prepping the vegetable and flower gardens - and of course, weeding. This week, the crew tackled the formal terrace parterres outside my Winter House, clipping and grooming the bright golden barberry hedges.
Here are some photos, enjoy.
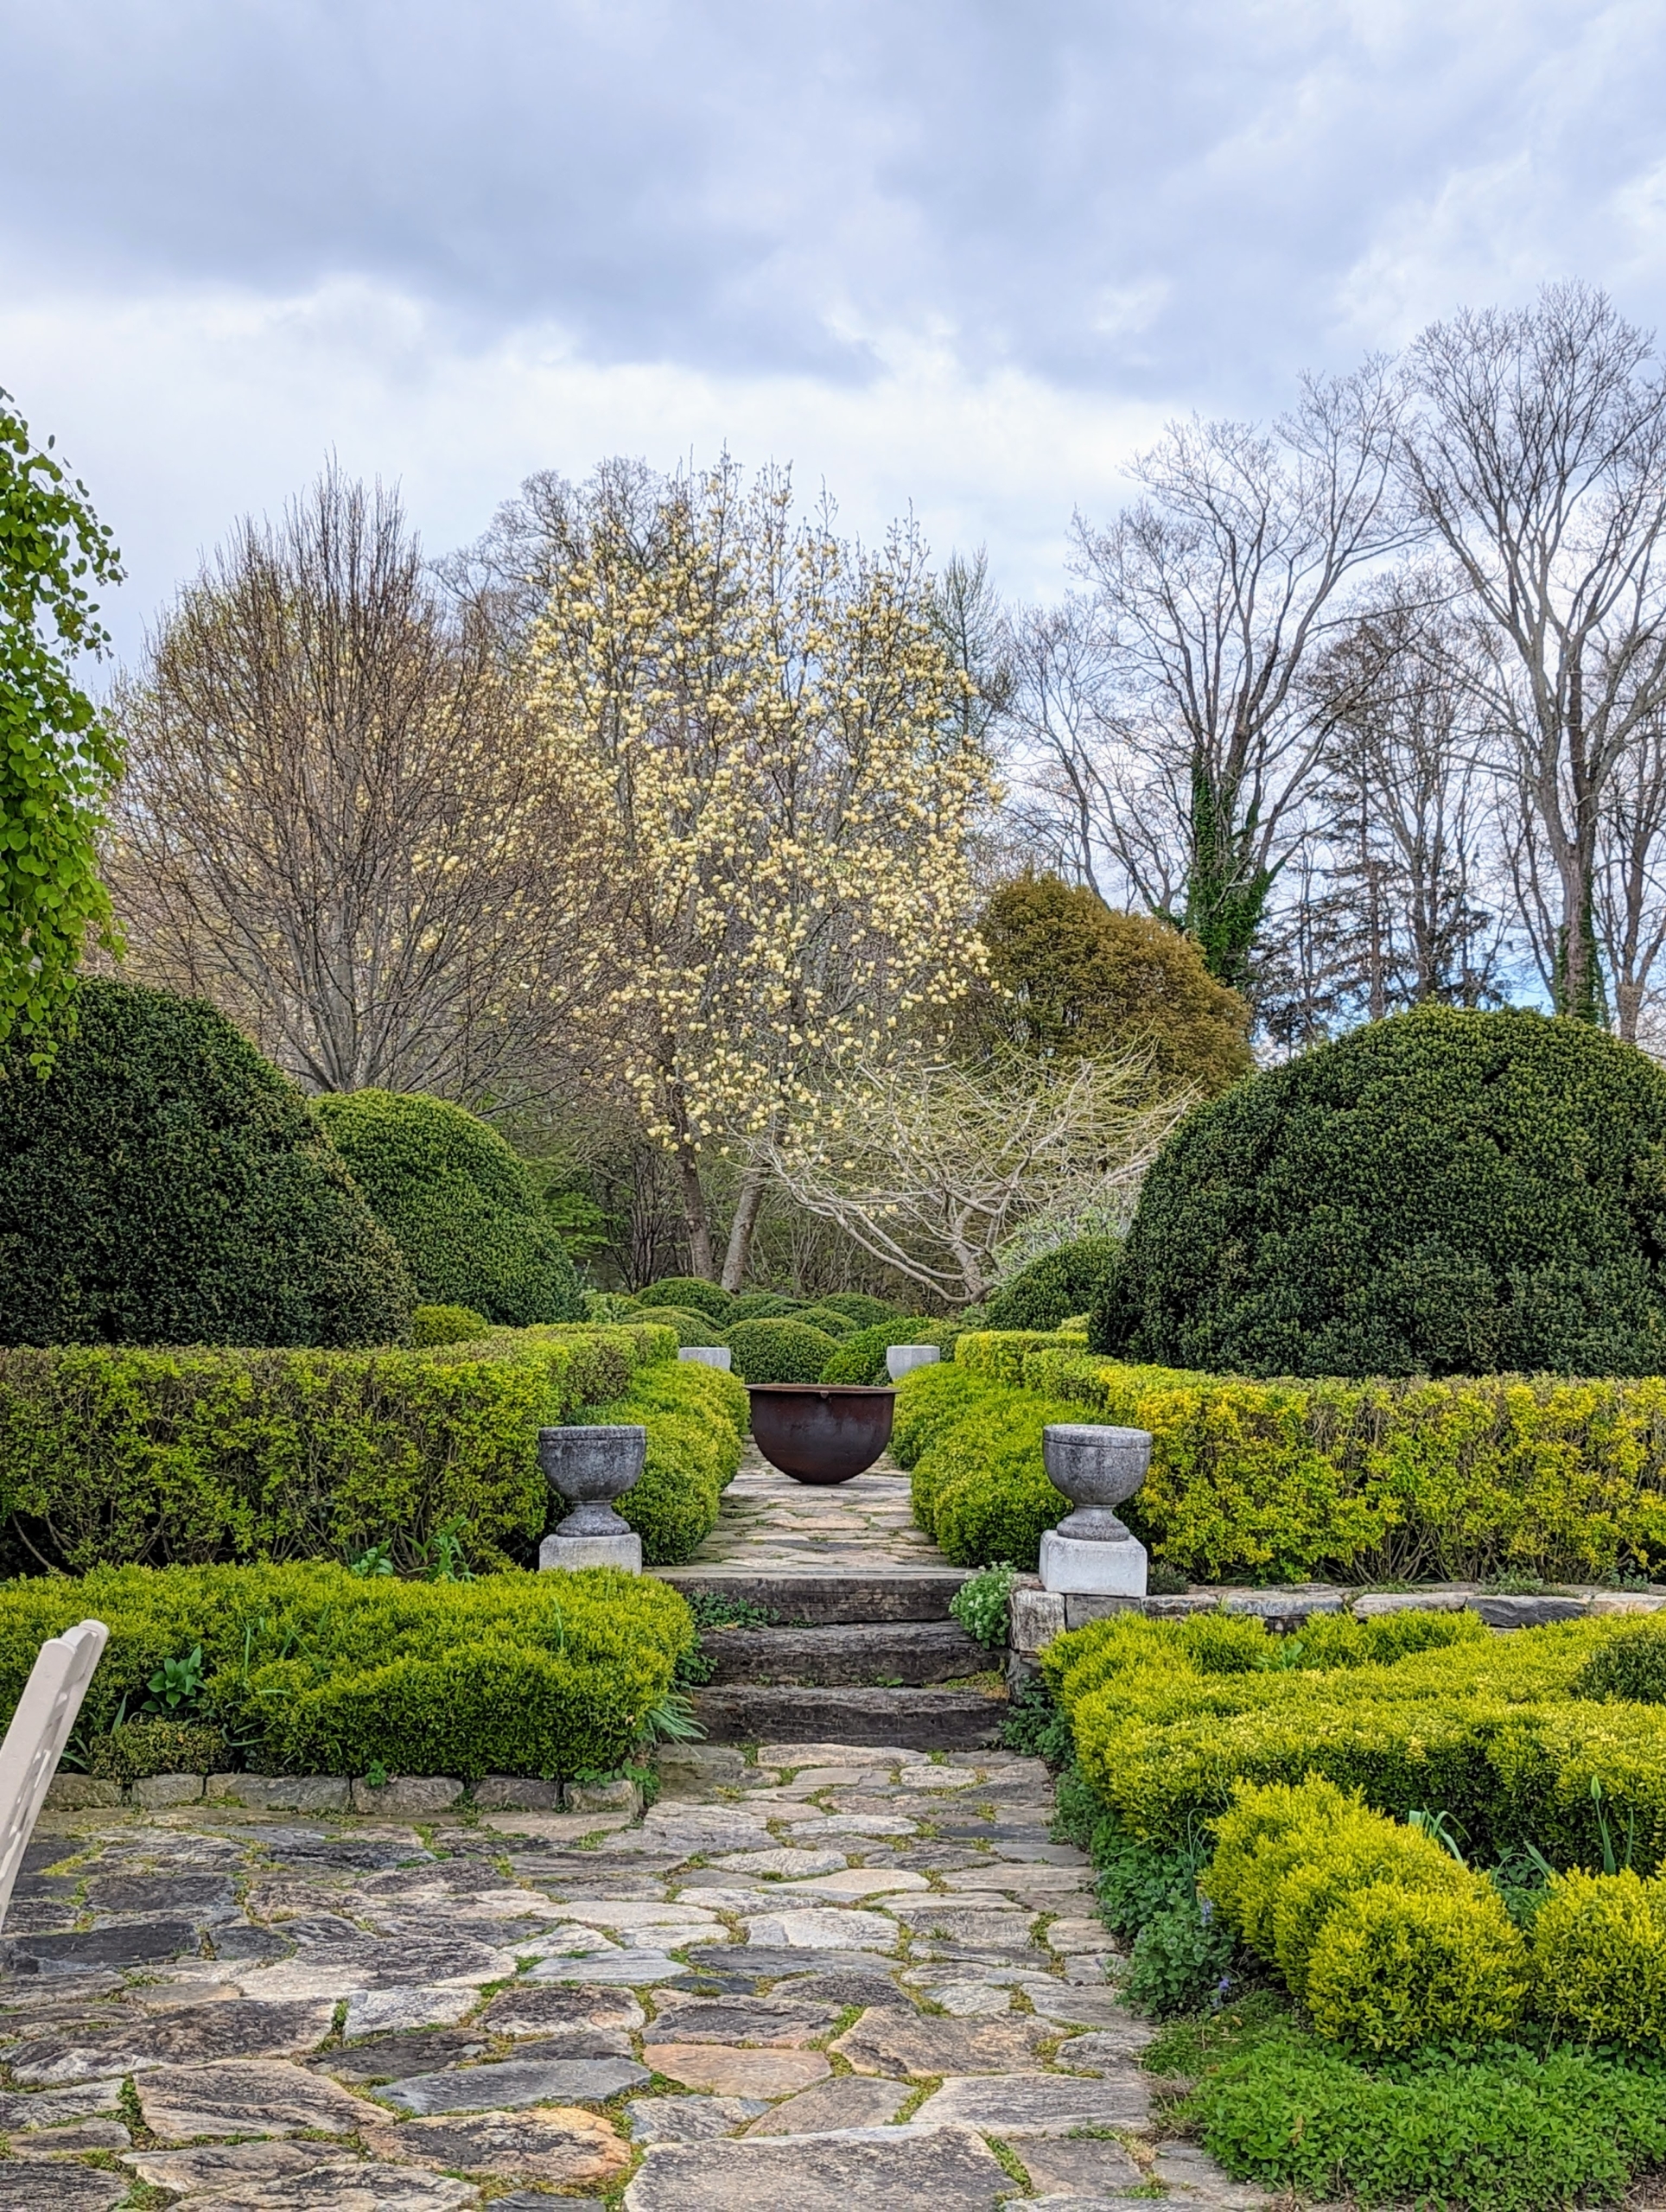
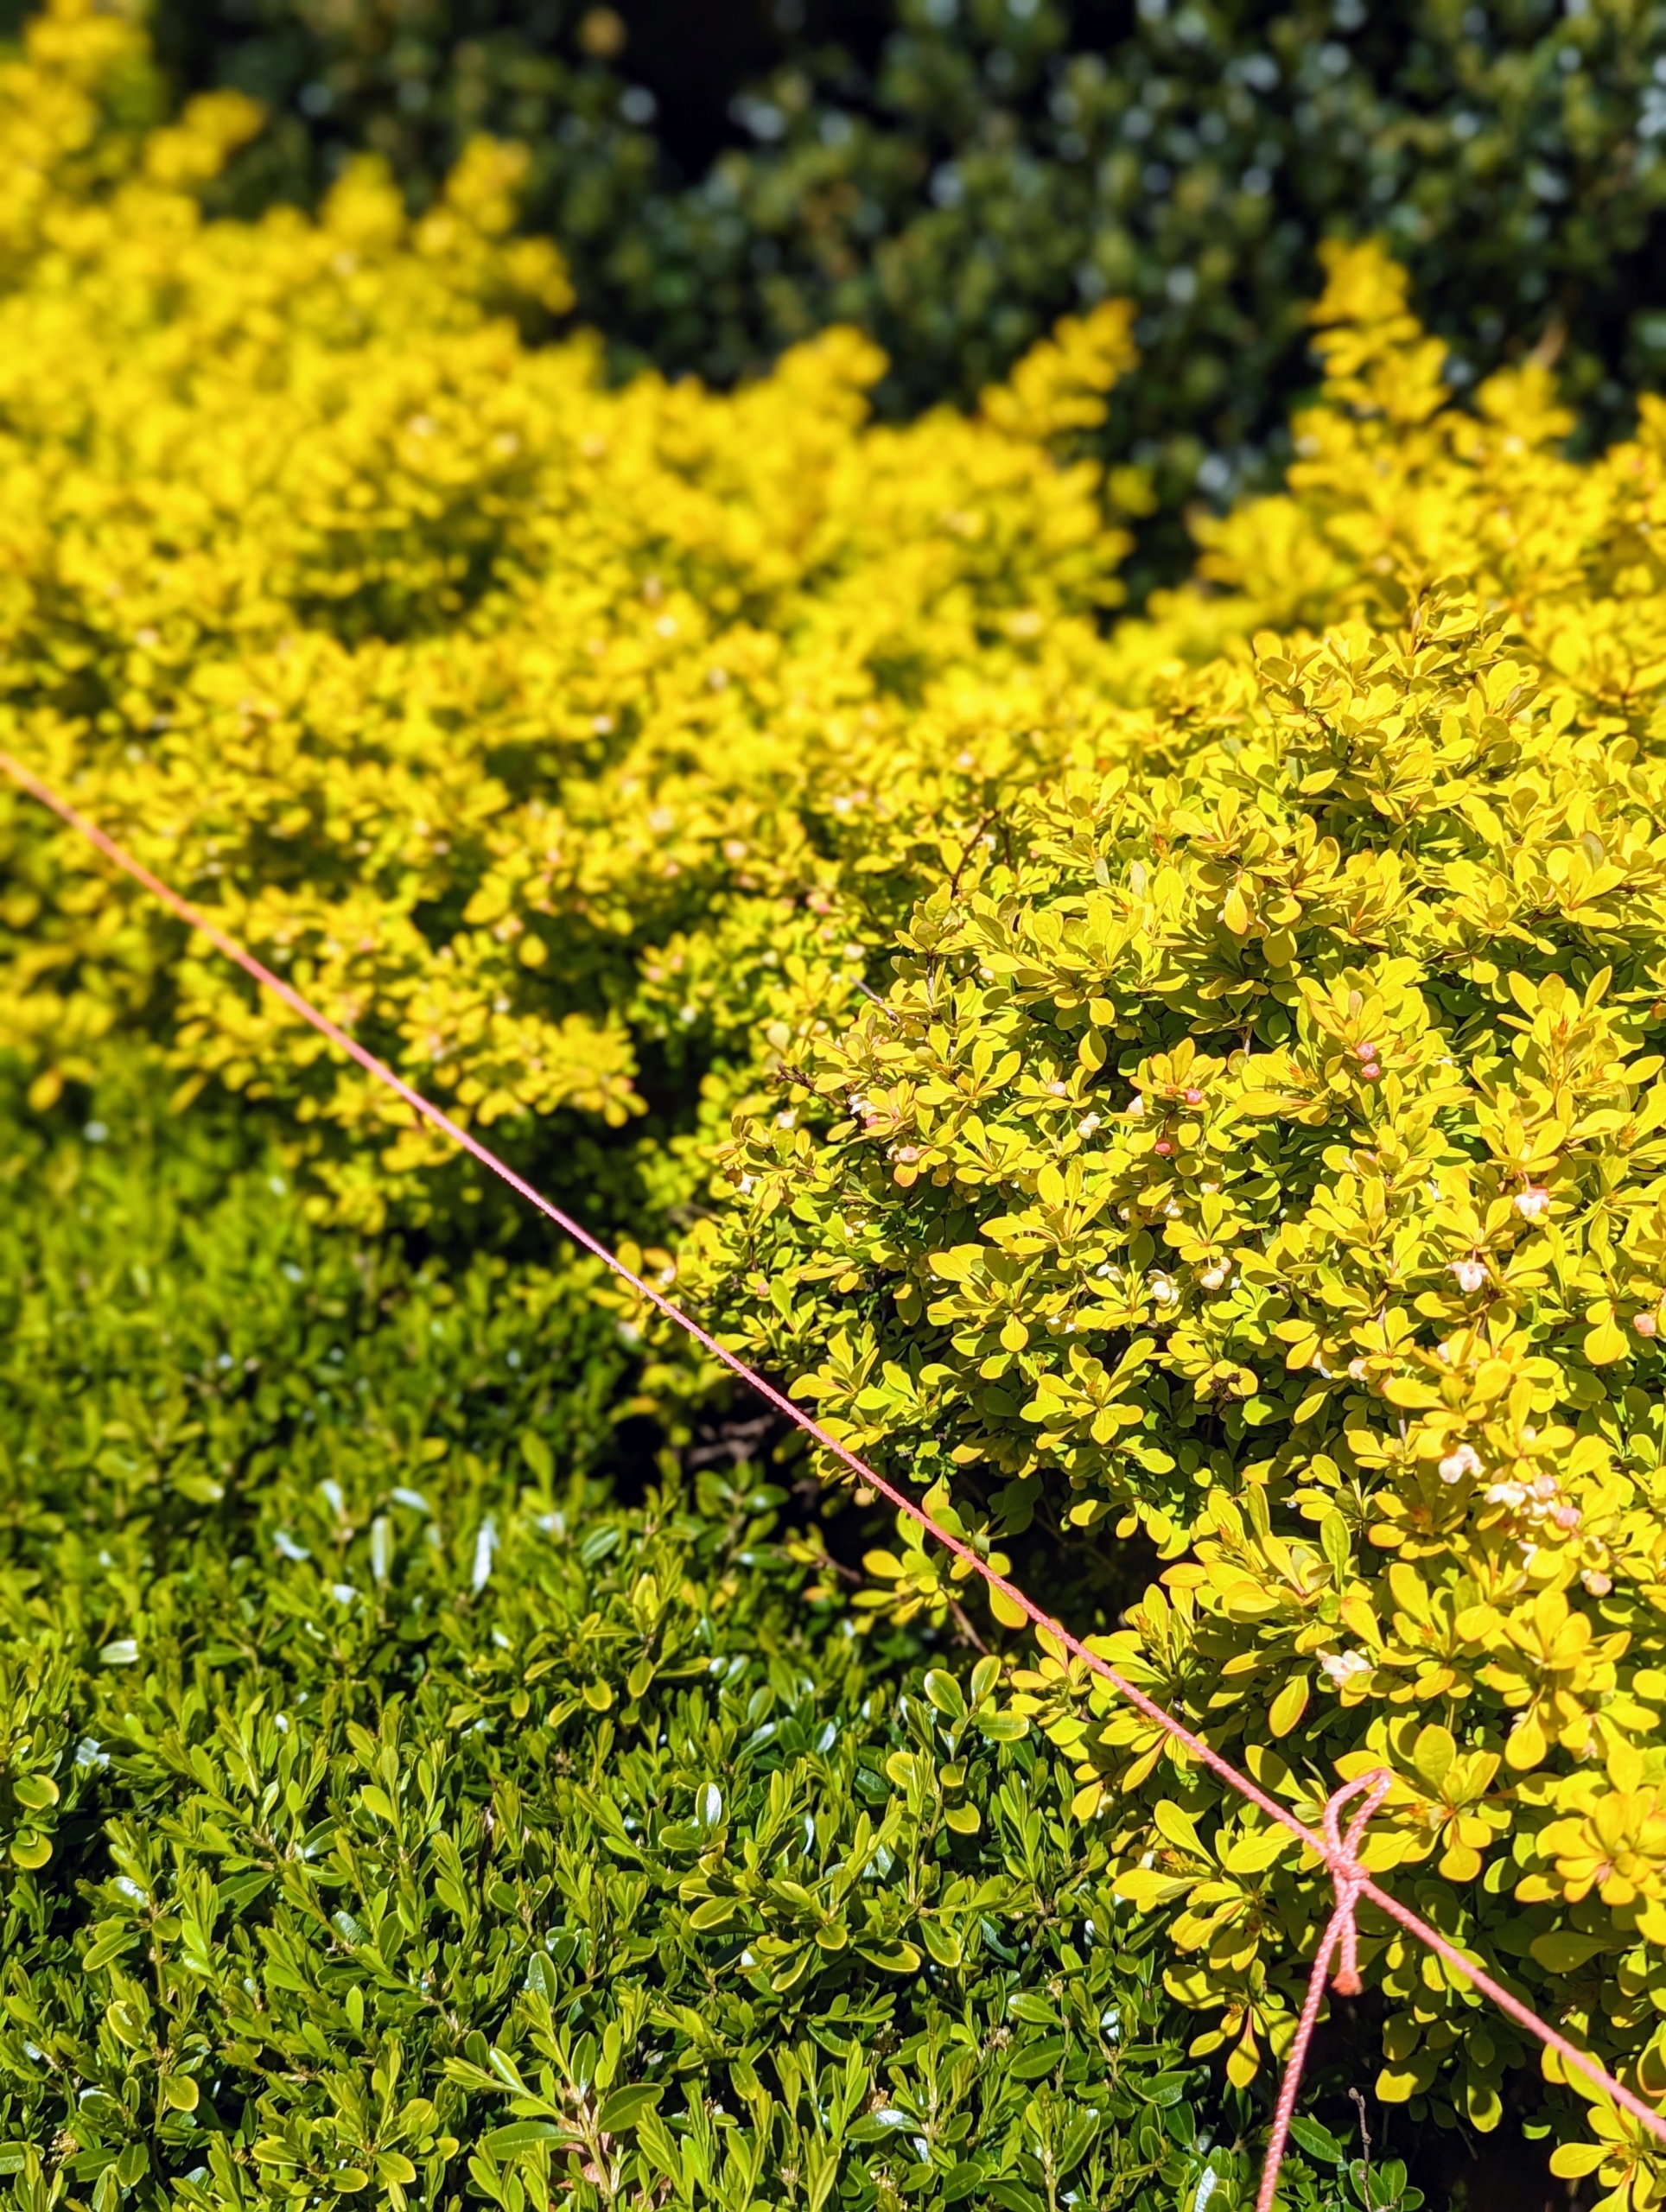
Along the side of my Winter House overlooking the farm, I have a large stone terrace with formal hedged gardens. For the upper terrace, I have contrasting evergreen shrubs – boxwood, and golden barberry.
To provide interest, these hedges are sheared to different heights, creating a layered or step effect. During the year, we prune them to maintain their shape.
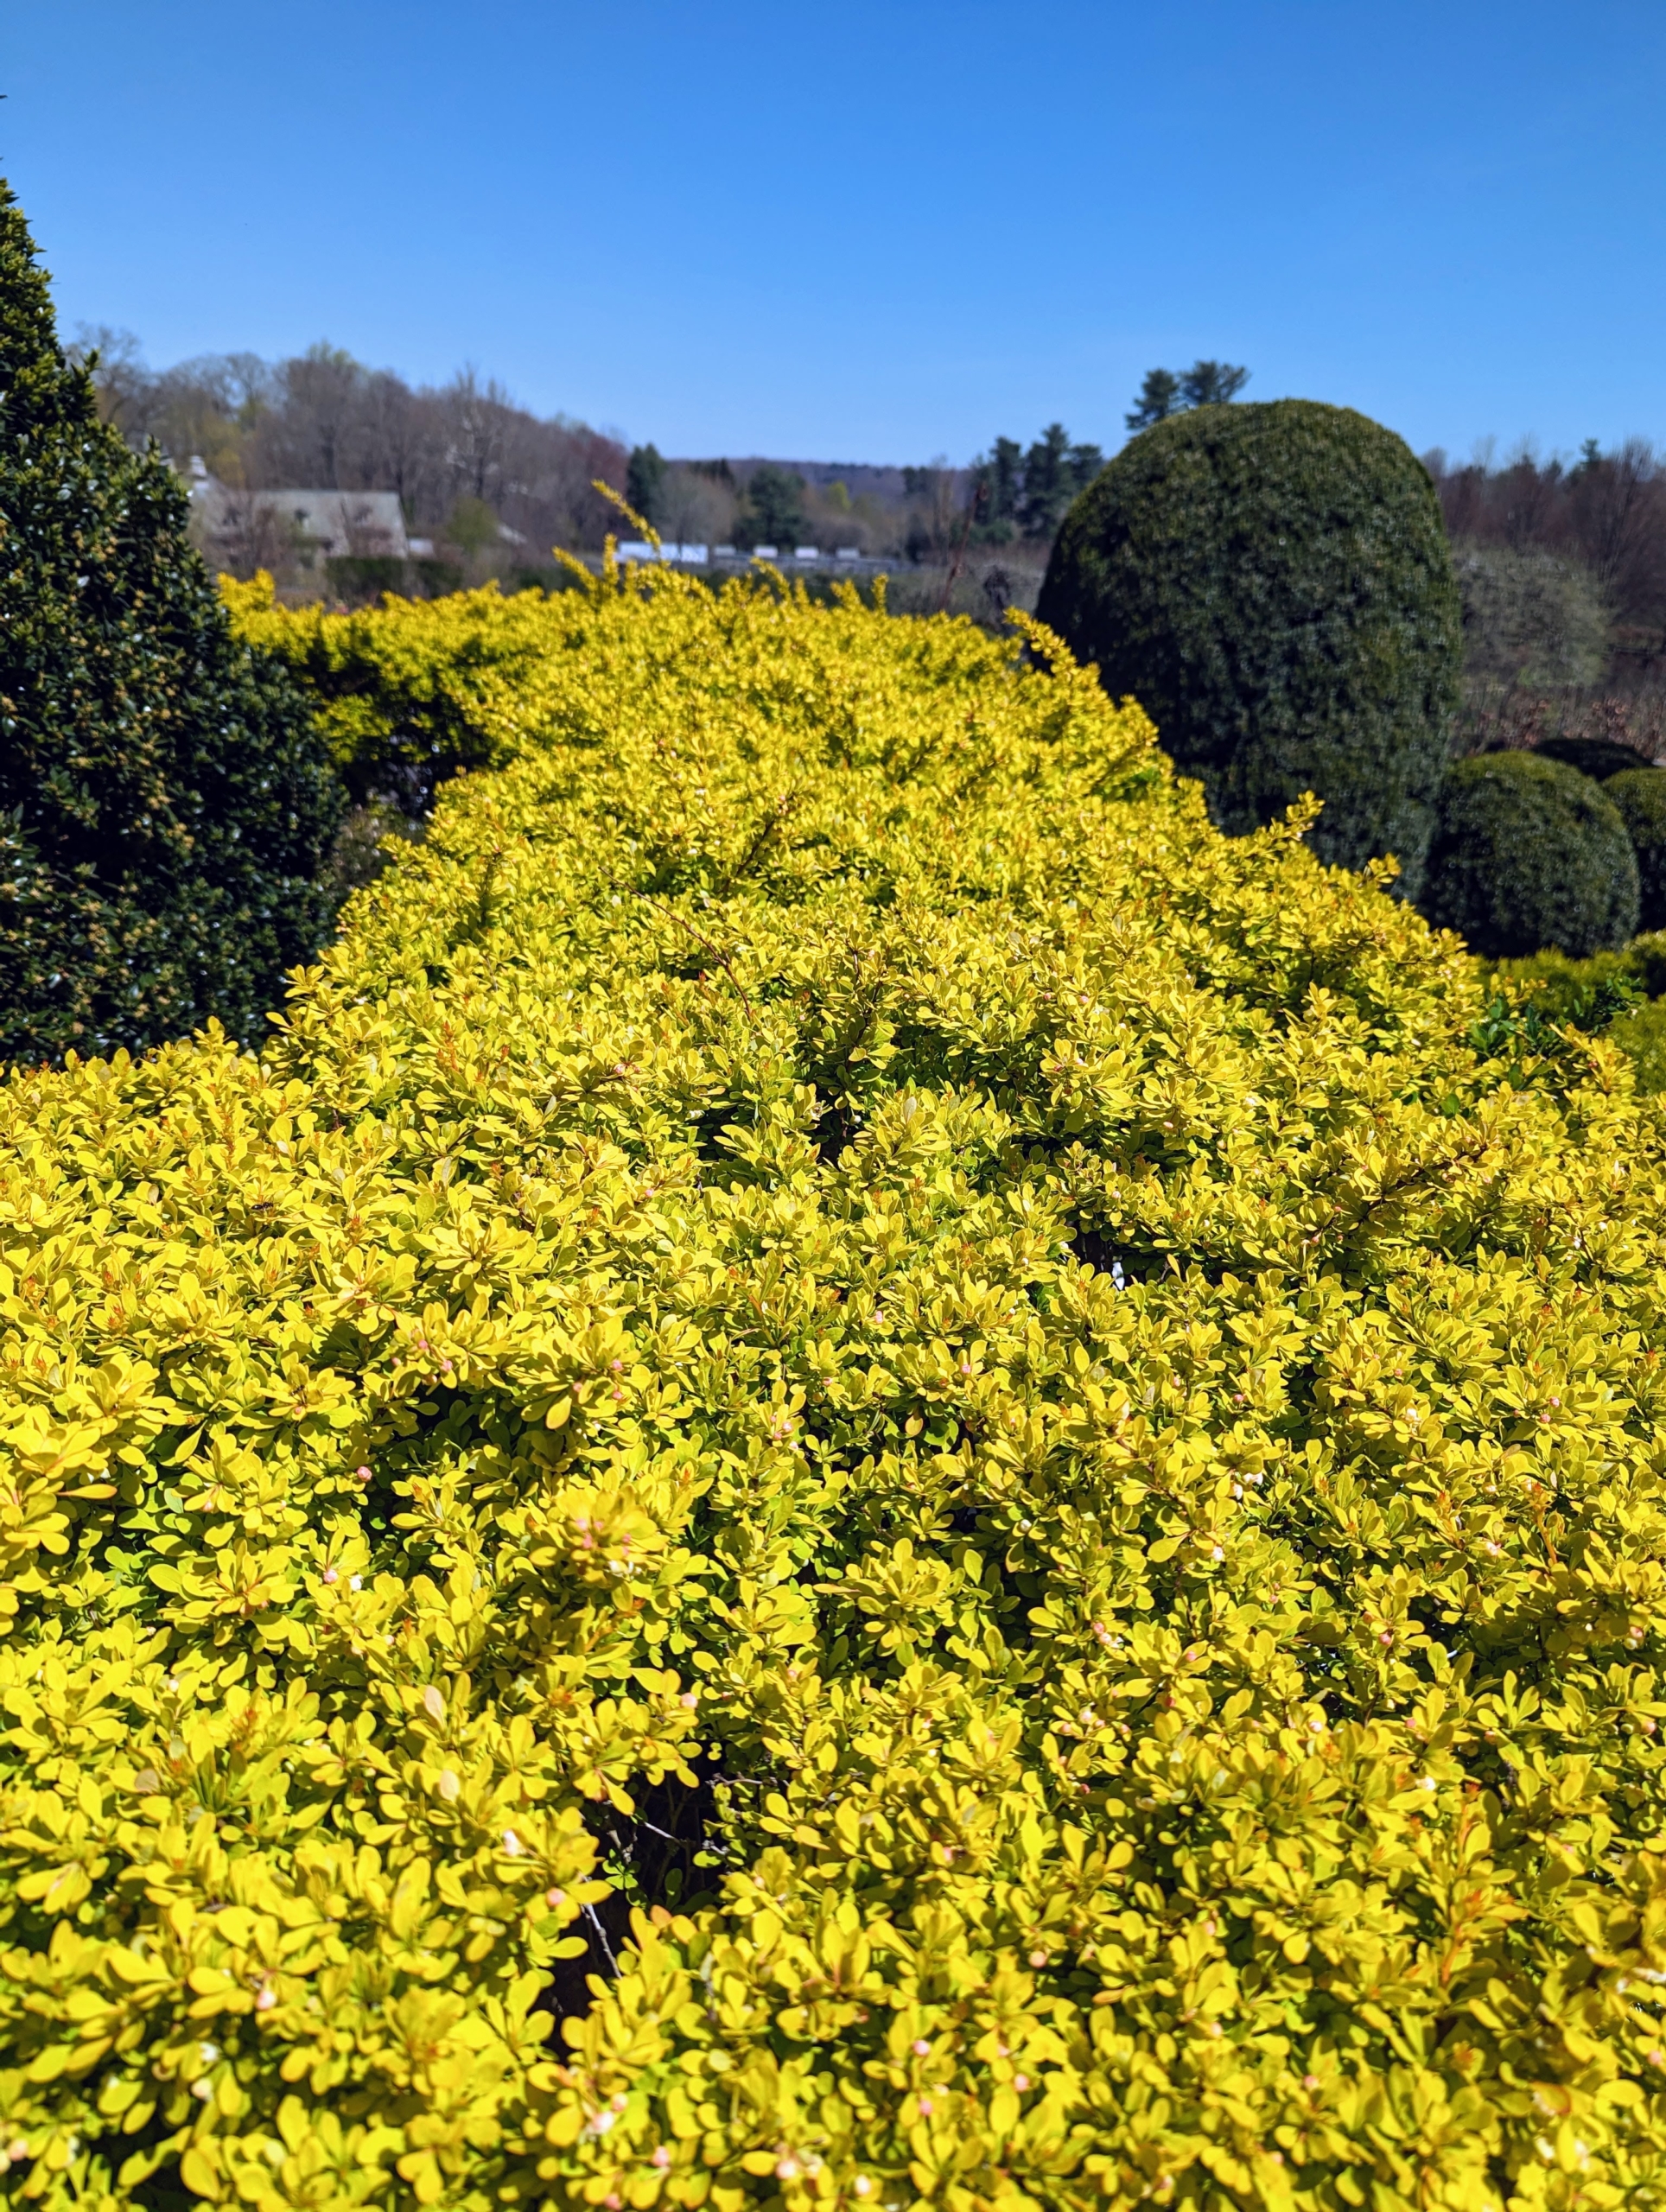
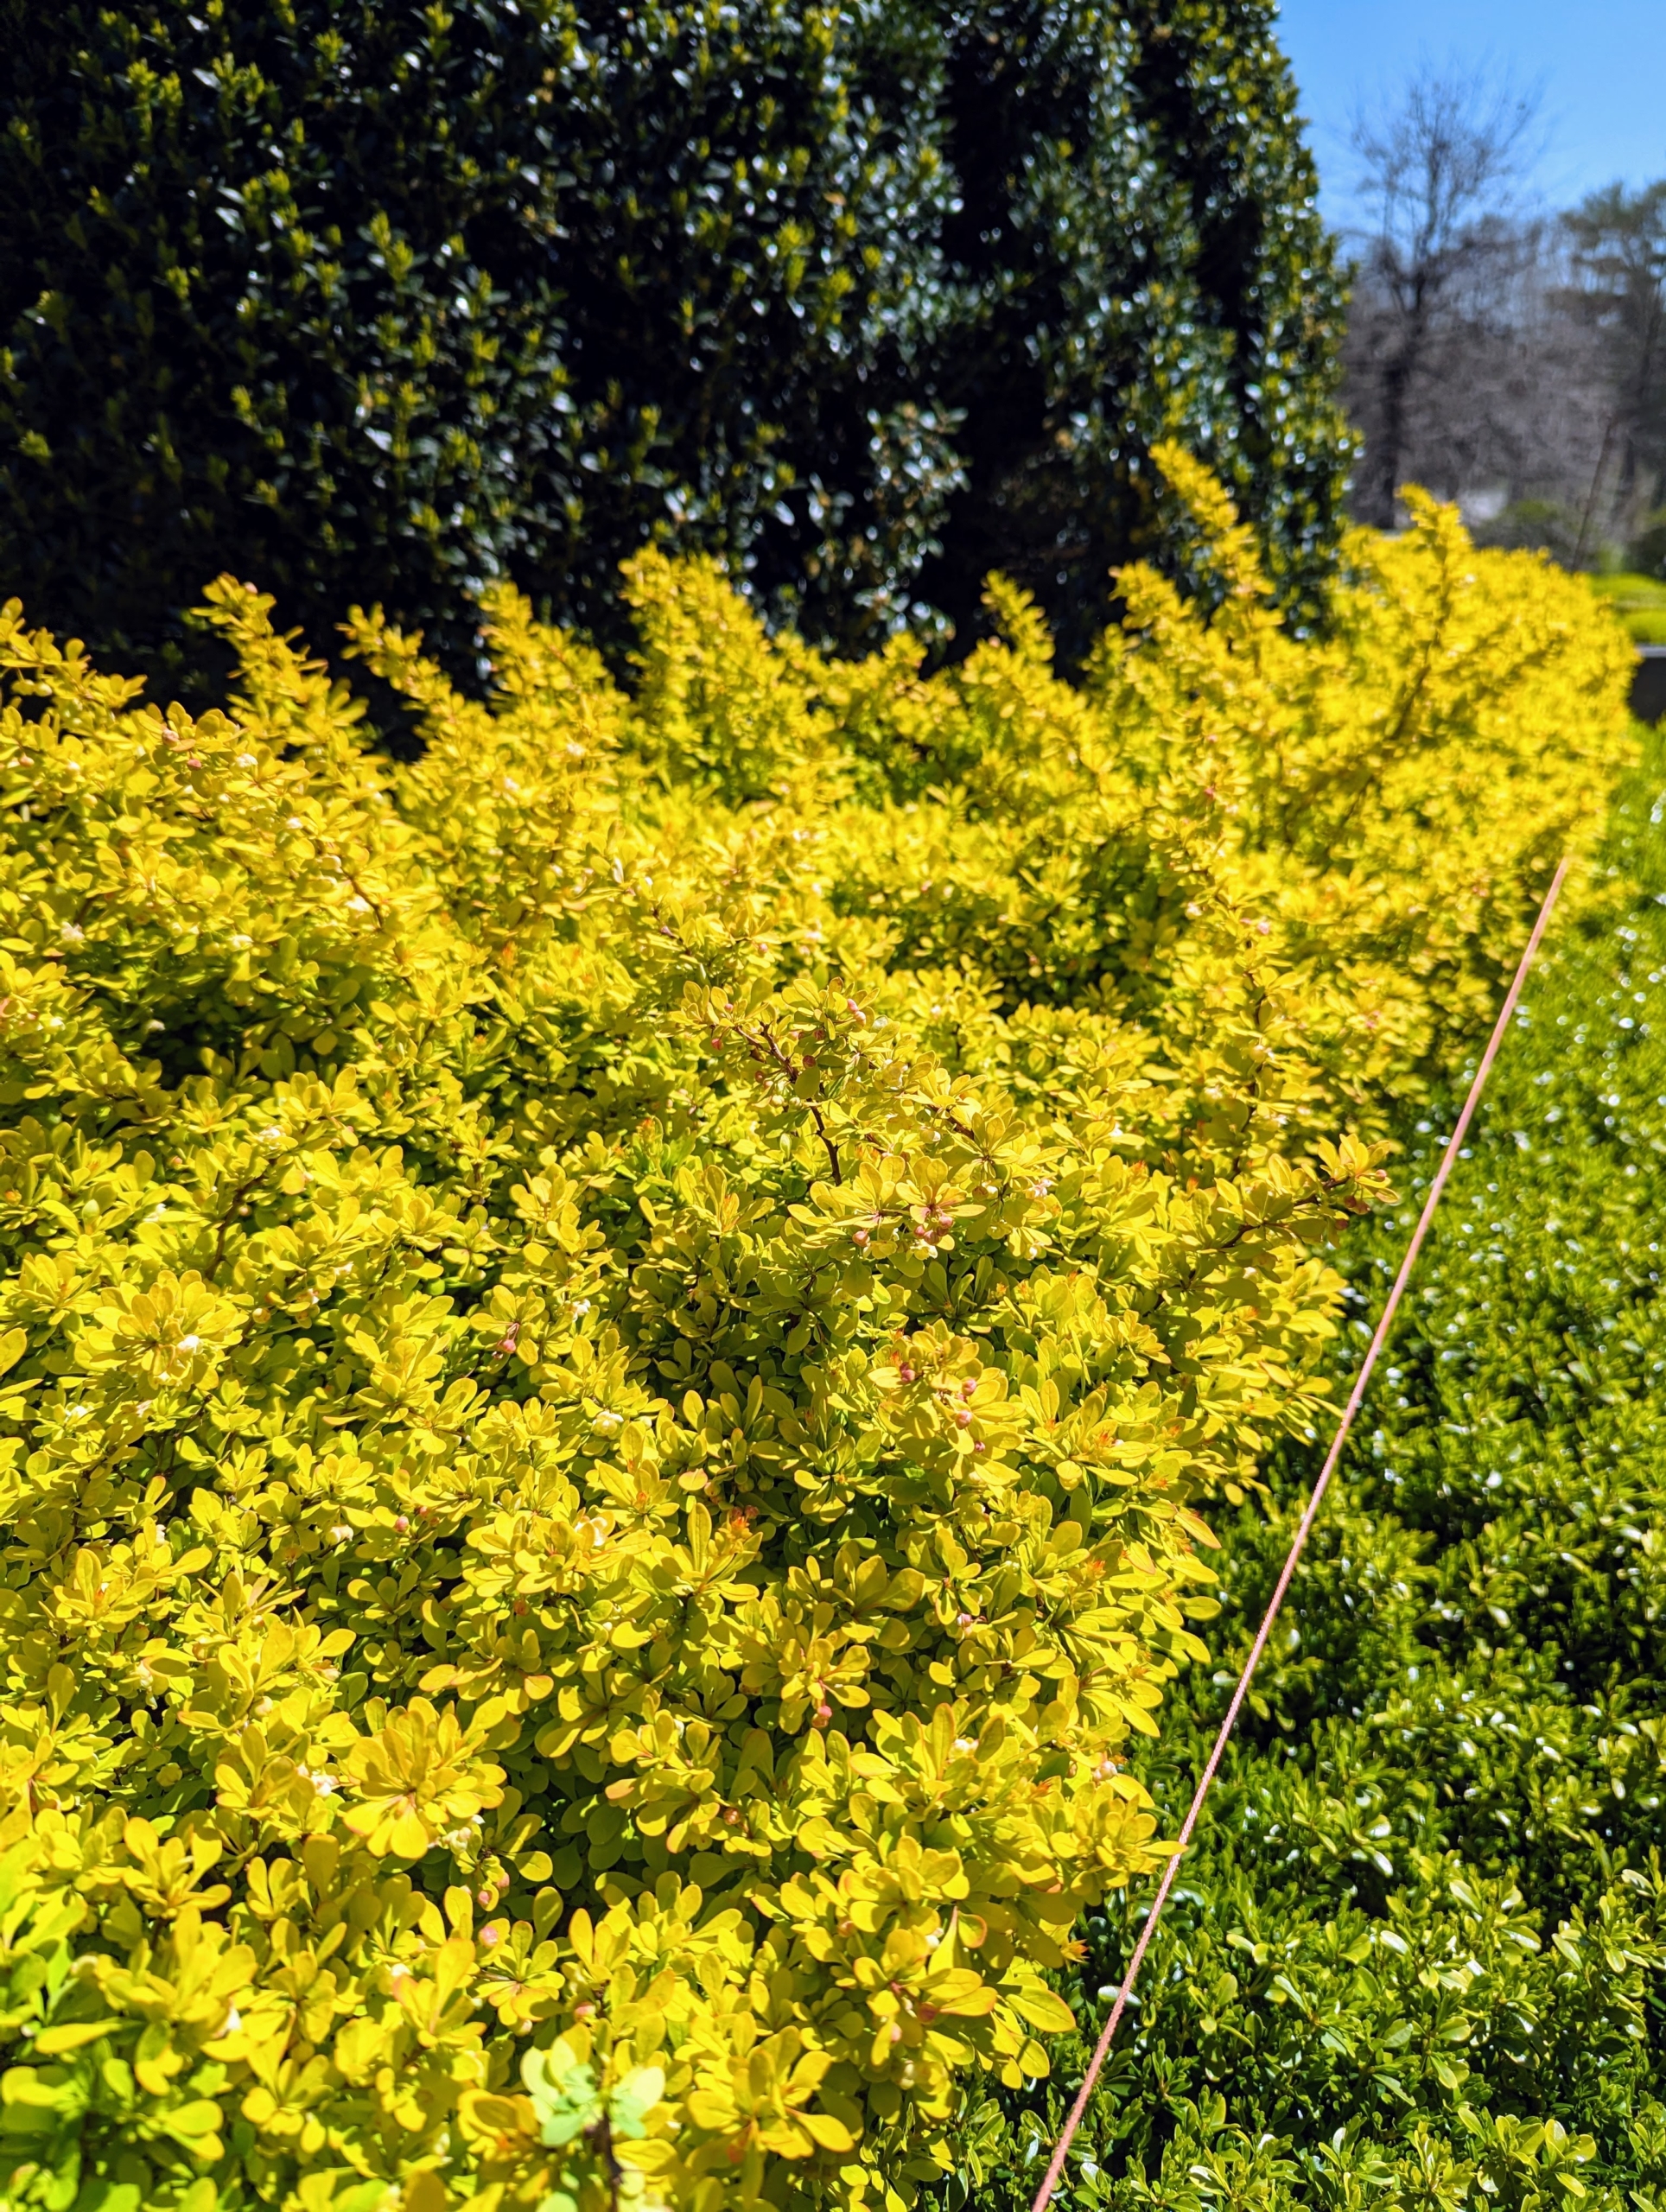
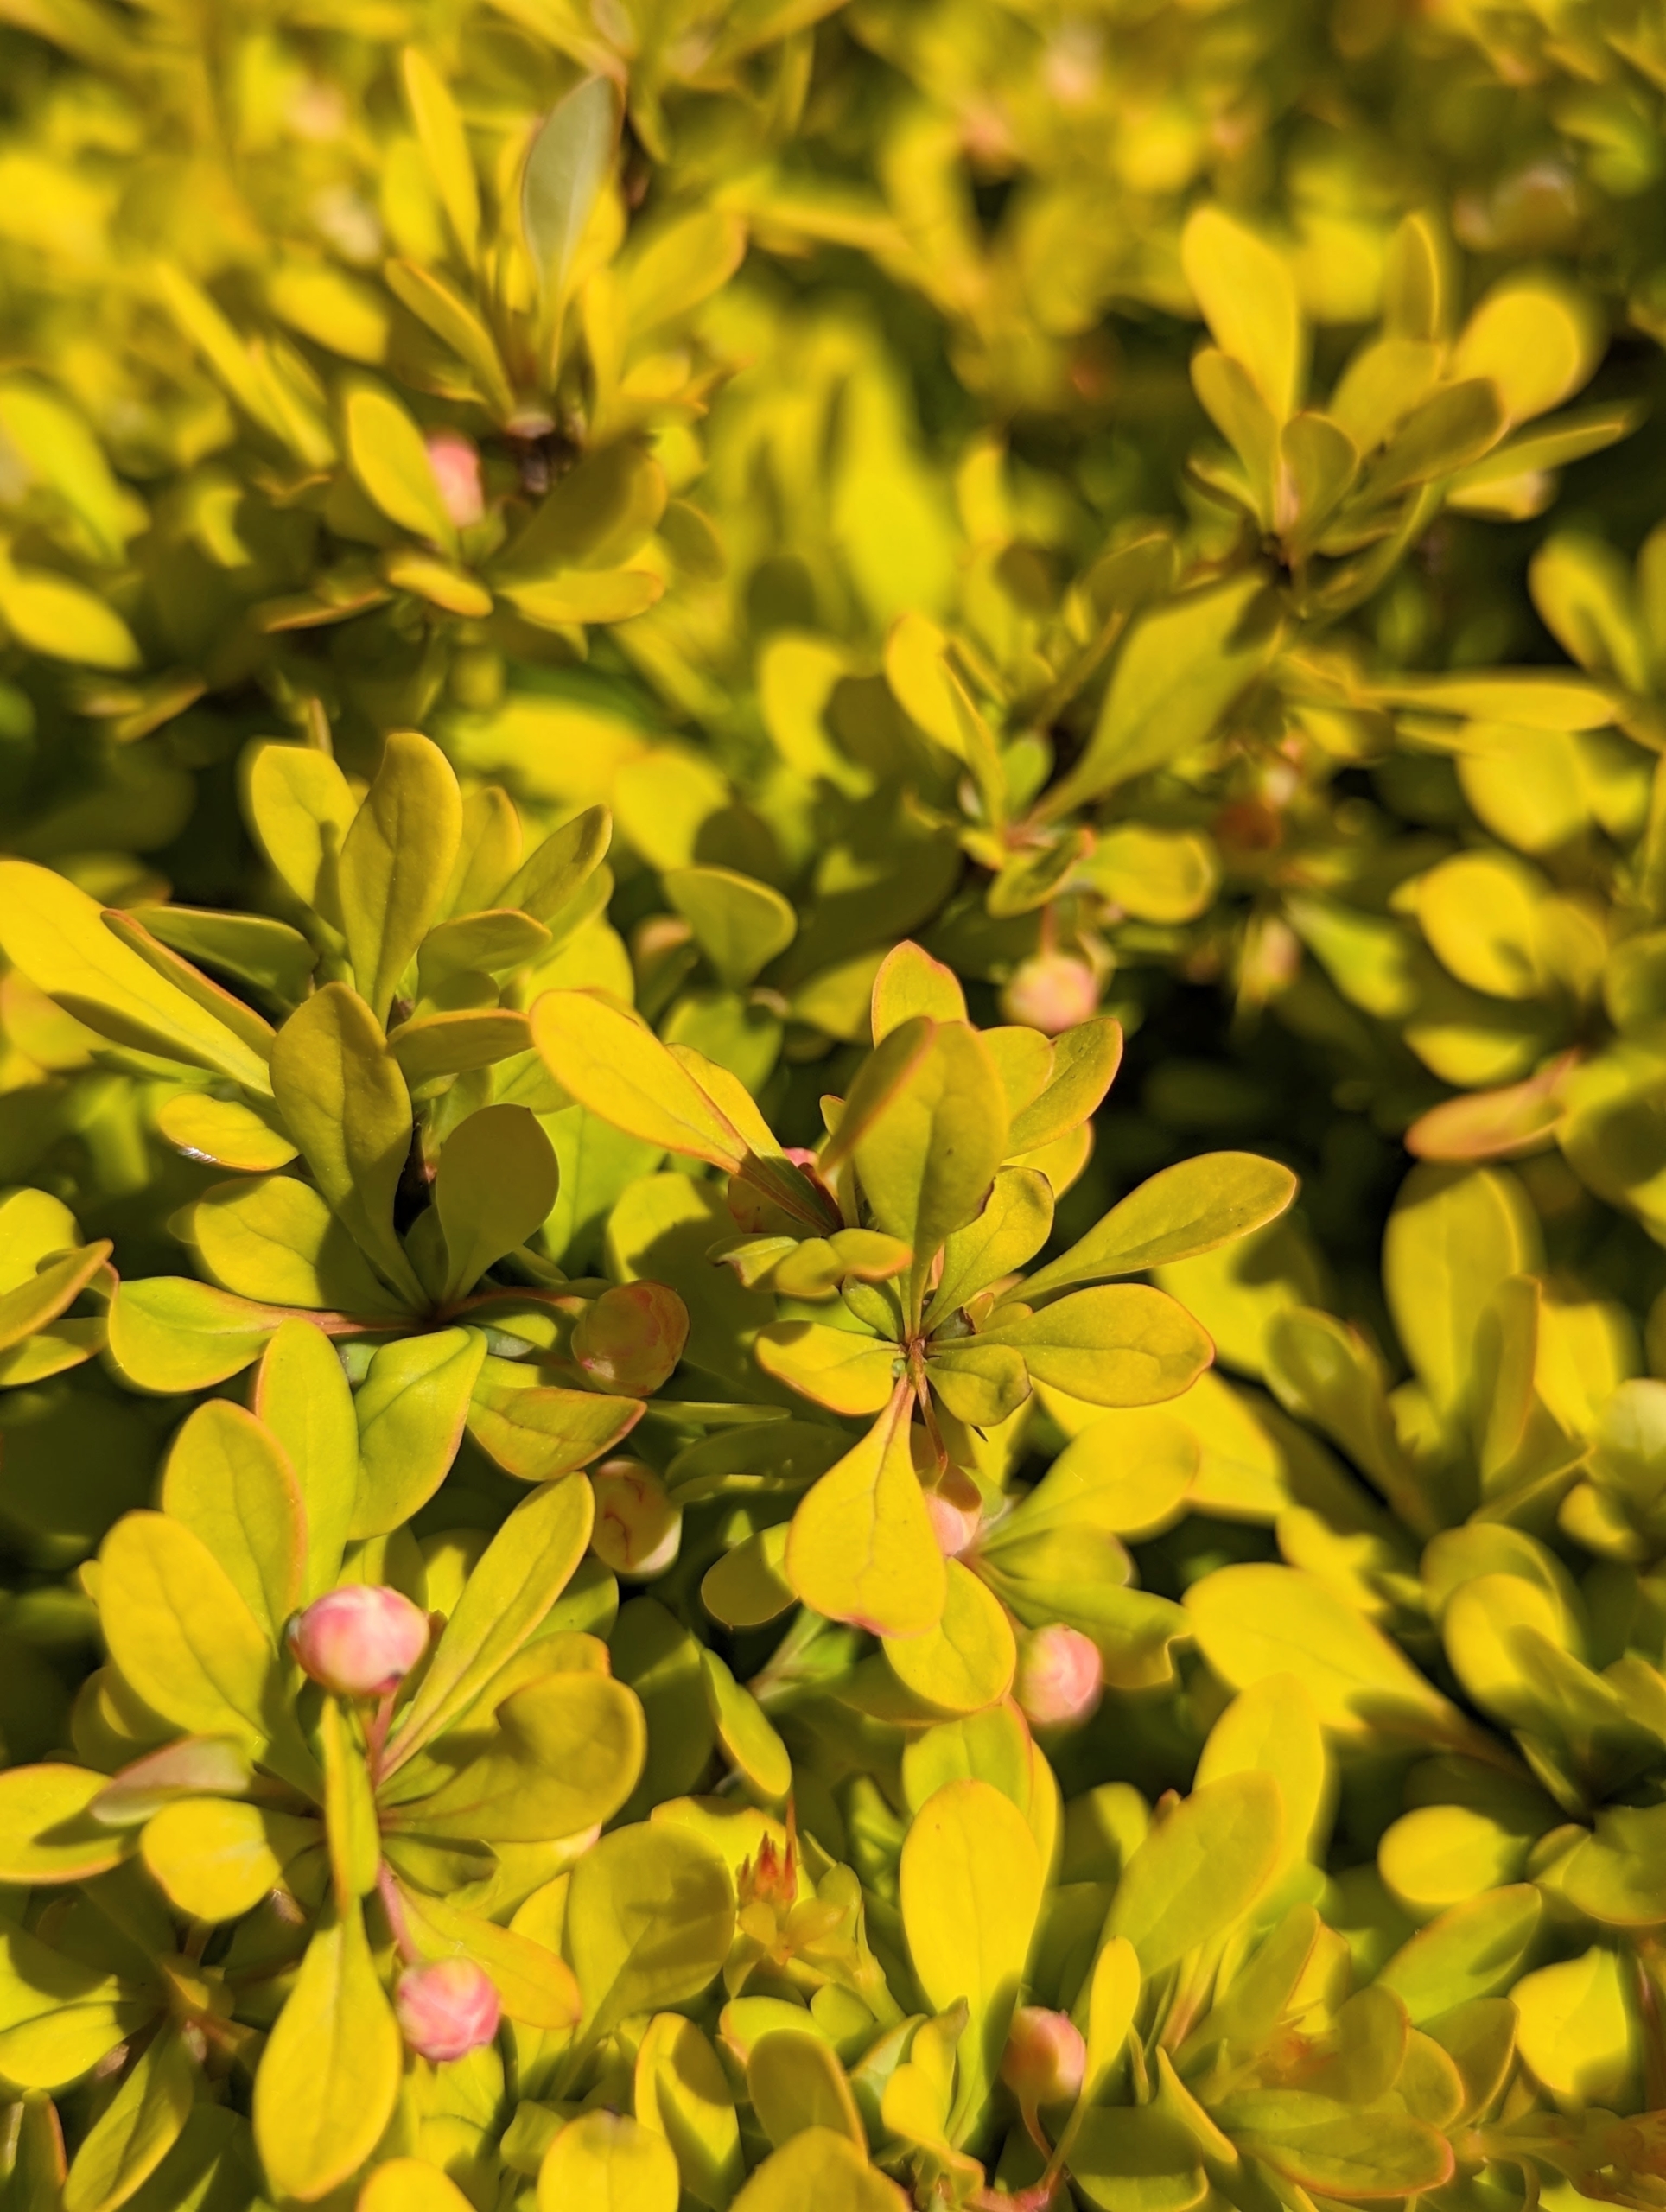
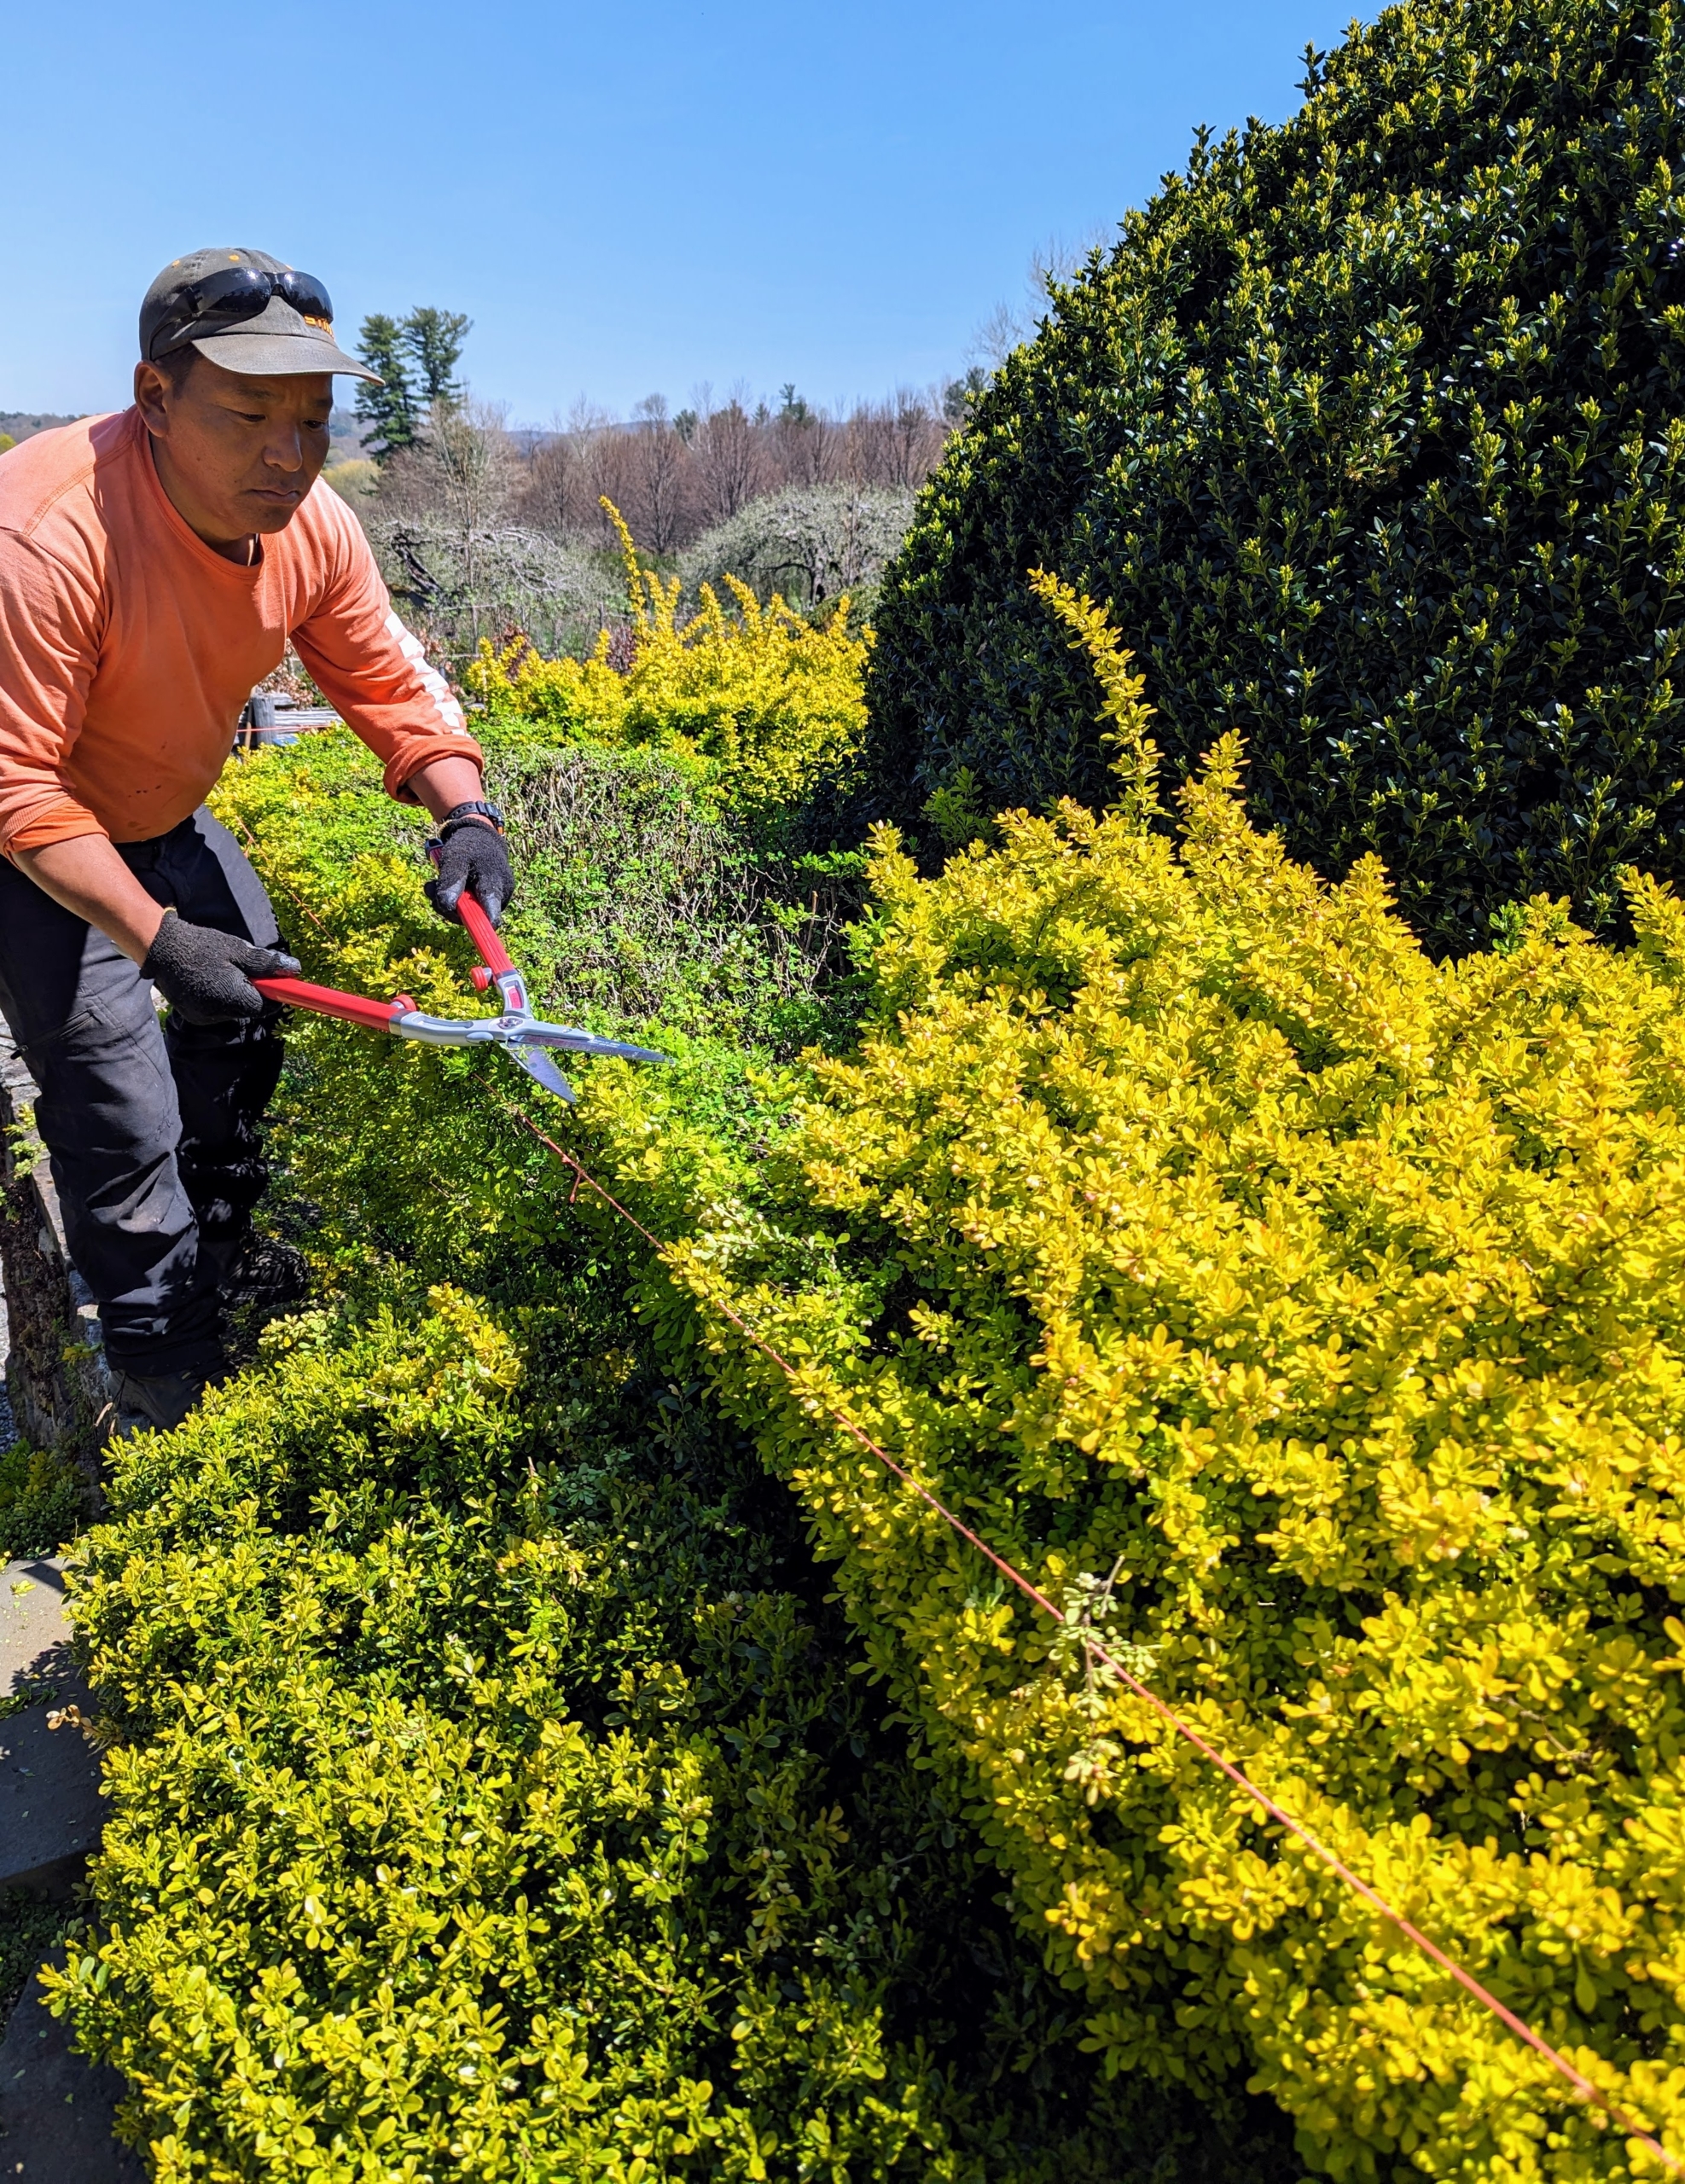
We needed to do the golden barberry first. This is how it looks before it is trimmed.
Golden barberry, Berberis thunbergii, is a deciduous shrub that is compact, adaptable, very hardy and shows off striking small, golden yellow oblong leaves.
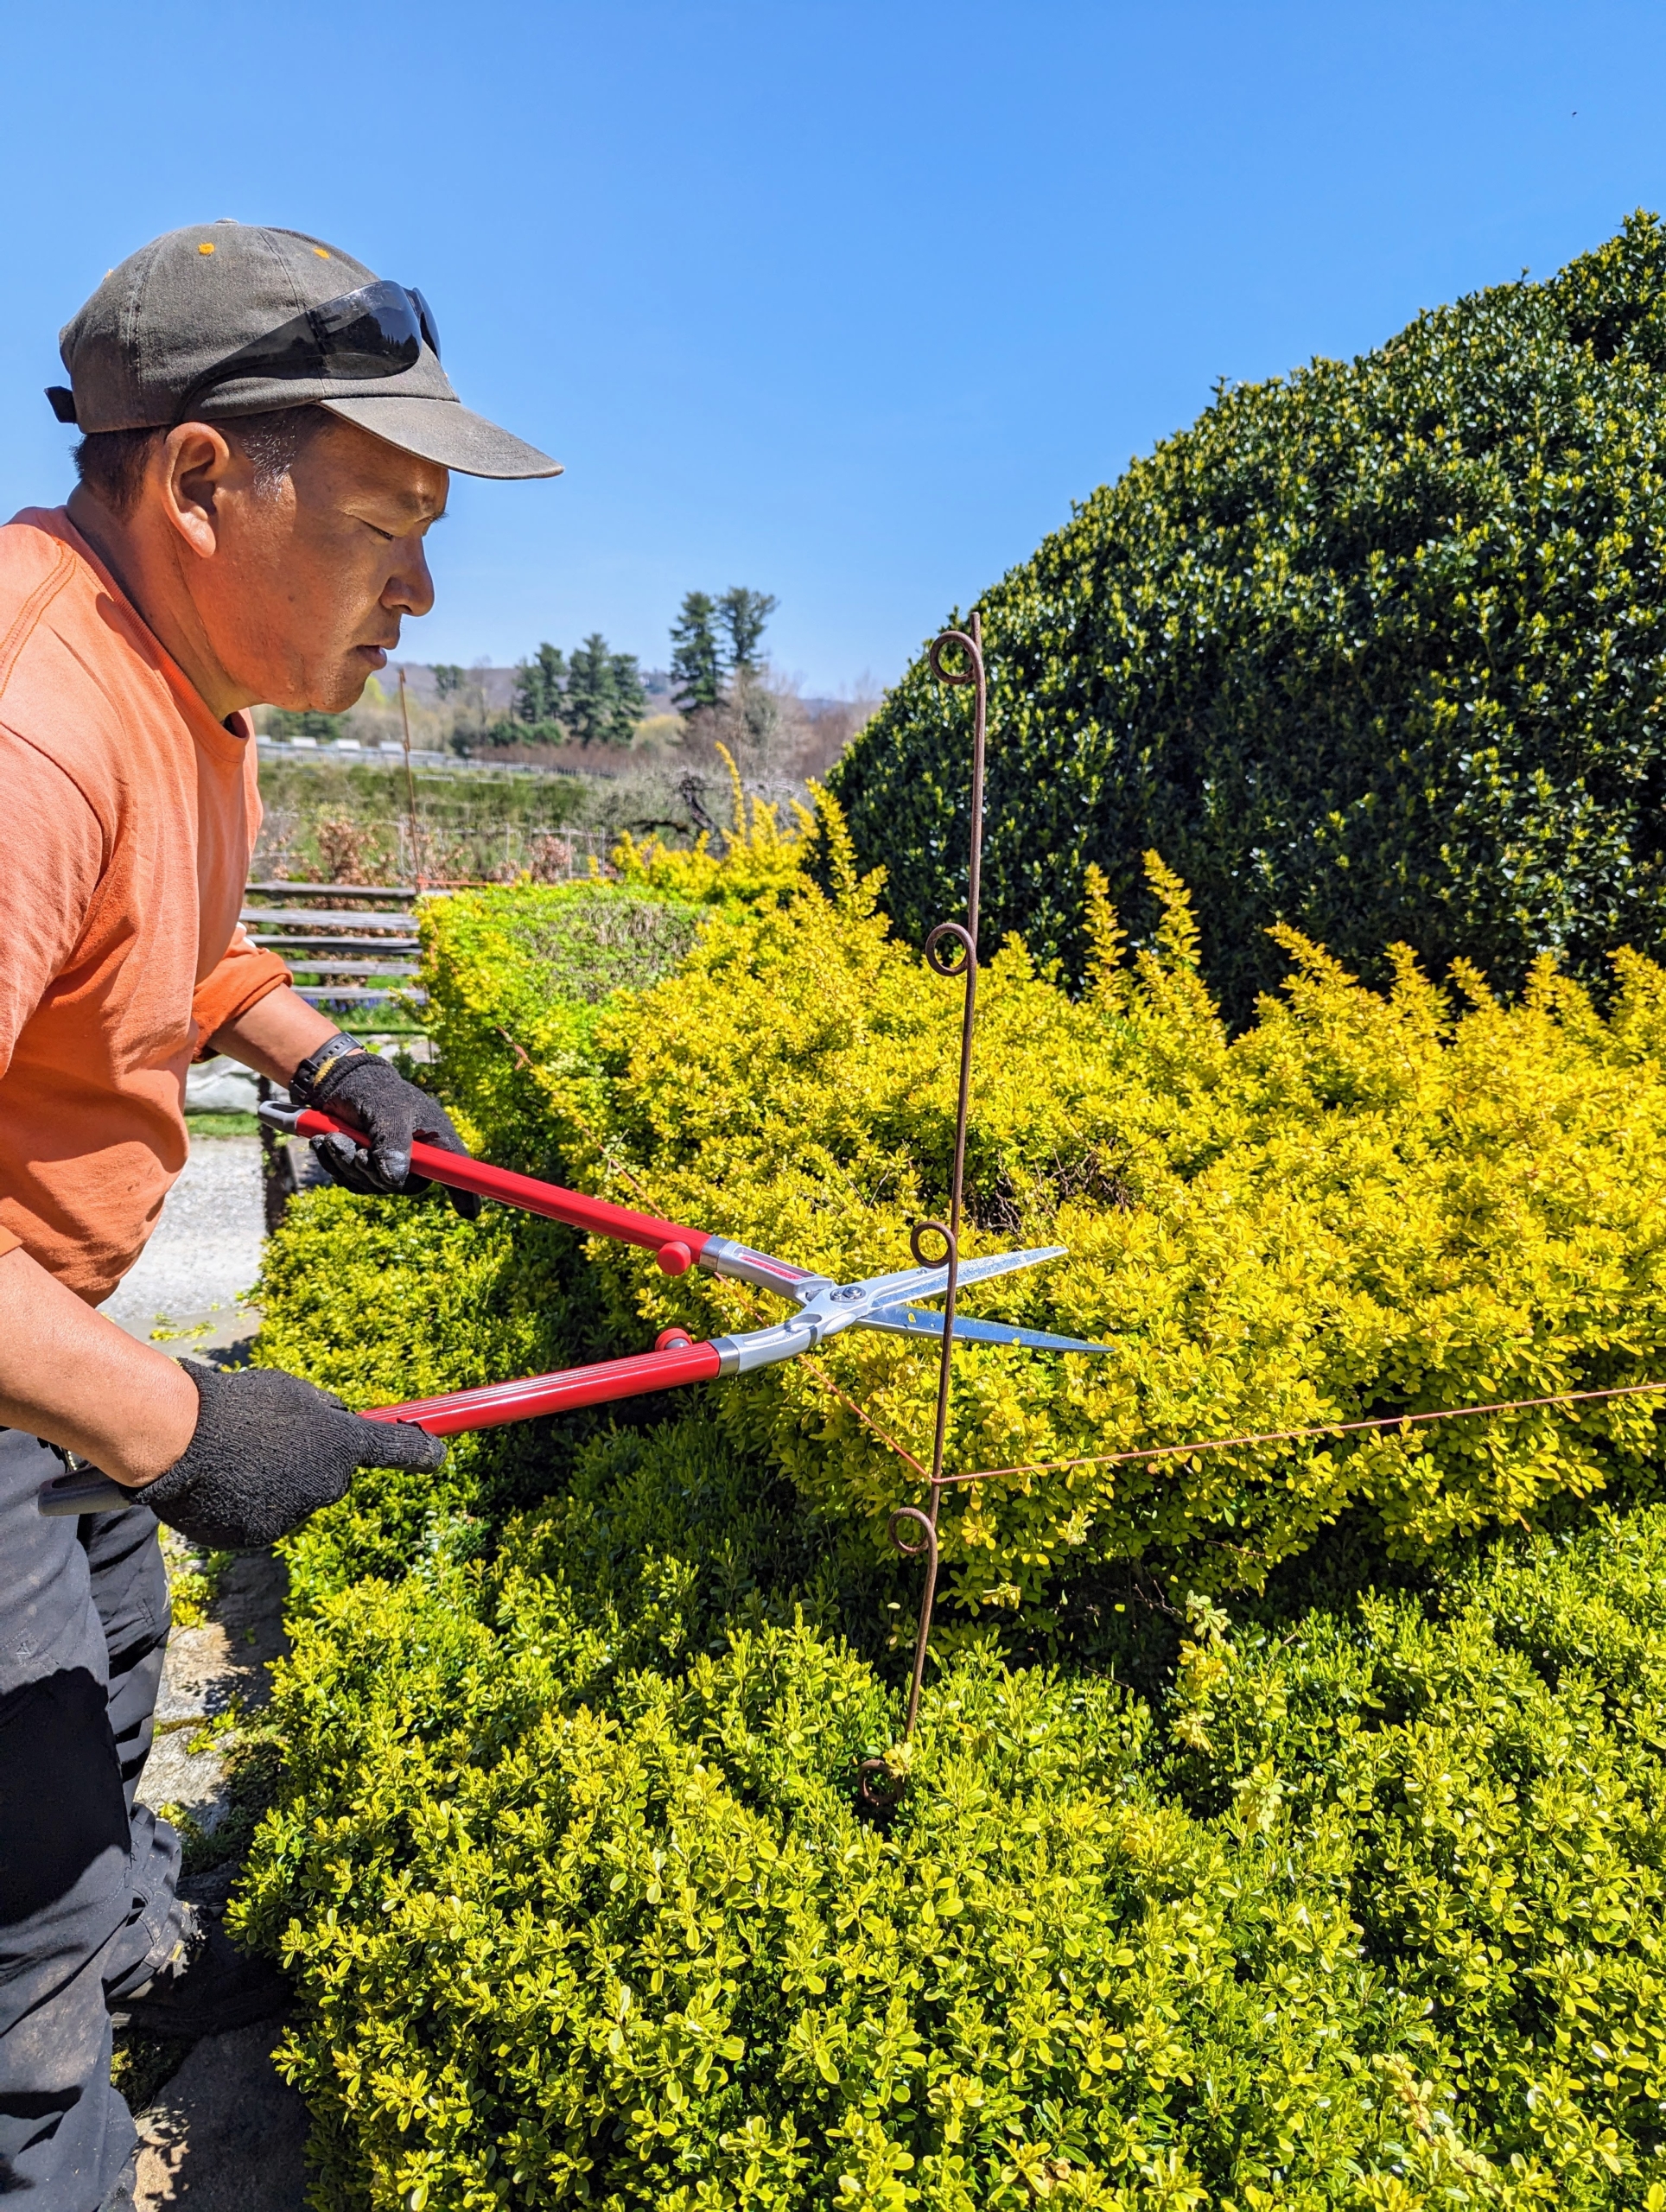
Both barbery and boxwood are known for being robust when grown under lots of sun. Golden barberry also takes on its brightest coloring if it gets at least six hours of direct sun a day. The bright orange landscape twine is placed at the corners to provide a guide for trimming.
Trimming is mostly done with hand shears to give them a more clean and manicured appearance. Phurba starts from the top of the shrub and works his way down. He is using Okatsune 30-inch long Hedge Shears. Okatsune shears are light and precise, and come in a range of sizes.
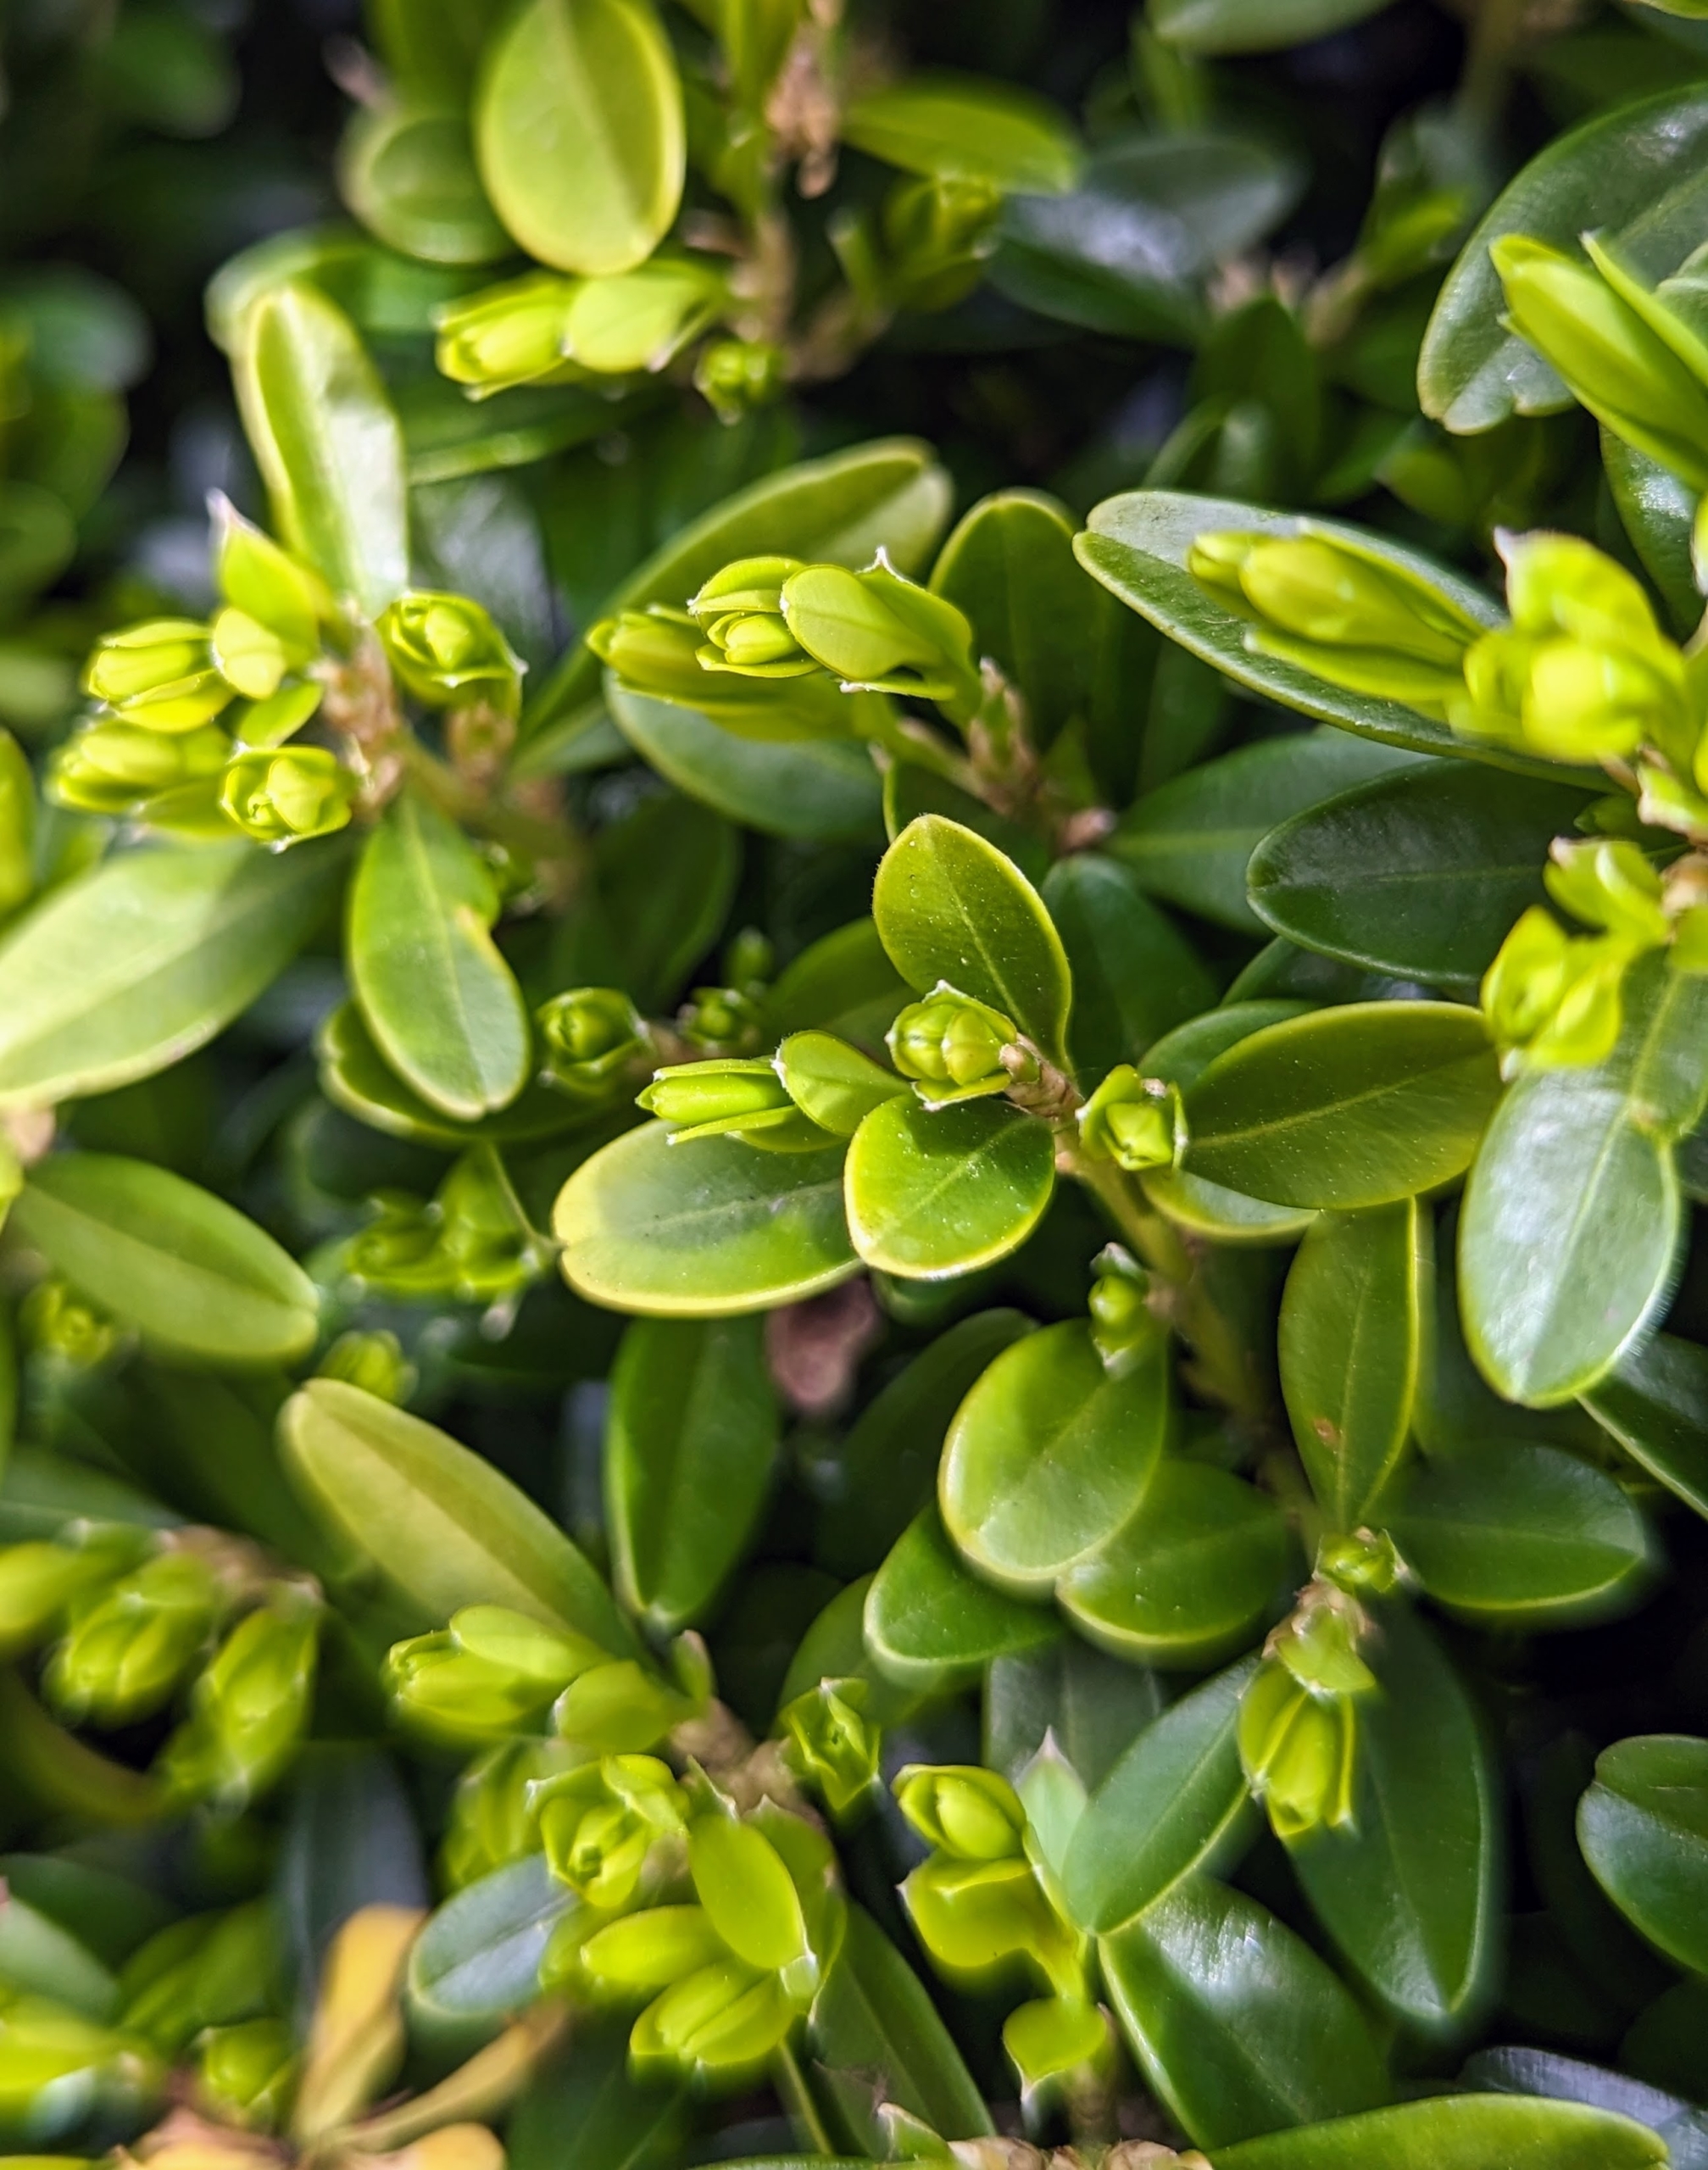
Buxus is a genus of about 70 species in the family Buxaceae. Common names include box or boxwood. The boxes are native to western and southern Europe, southwest, southern and eastern Asia, Africa, Madagascar, northernmost South America, Central America, Mexico, and the Caribbean. The leaves are arranged opposite from each other, making pairs.
This is a variegated boxwood shrub, meaning its leaves are edged or patterned in a second color – white.
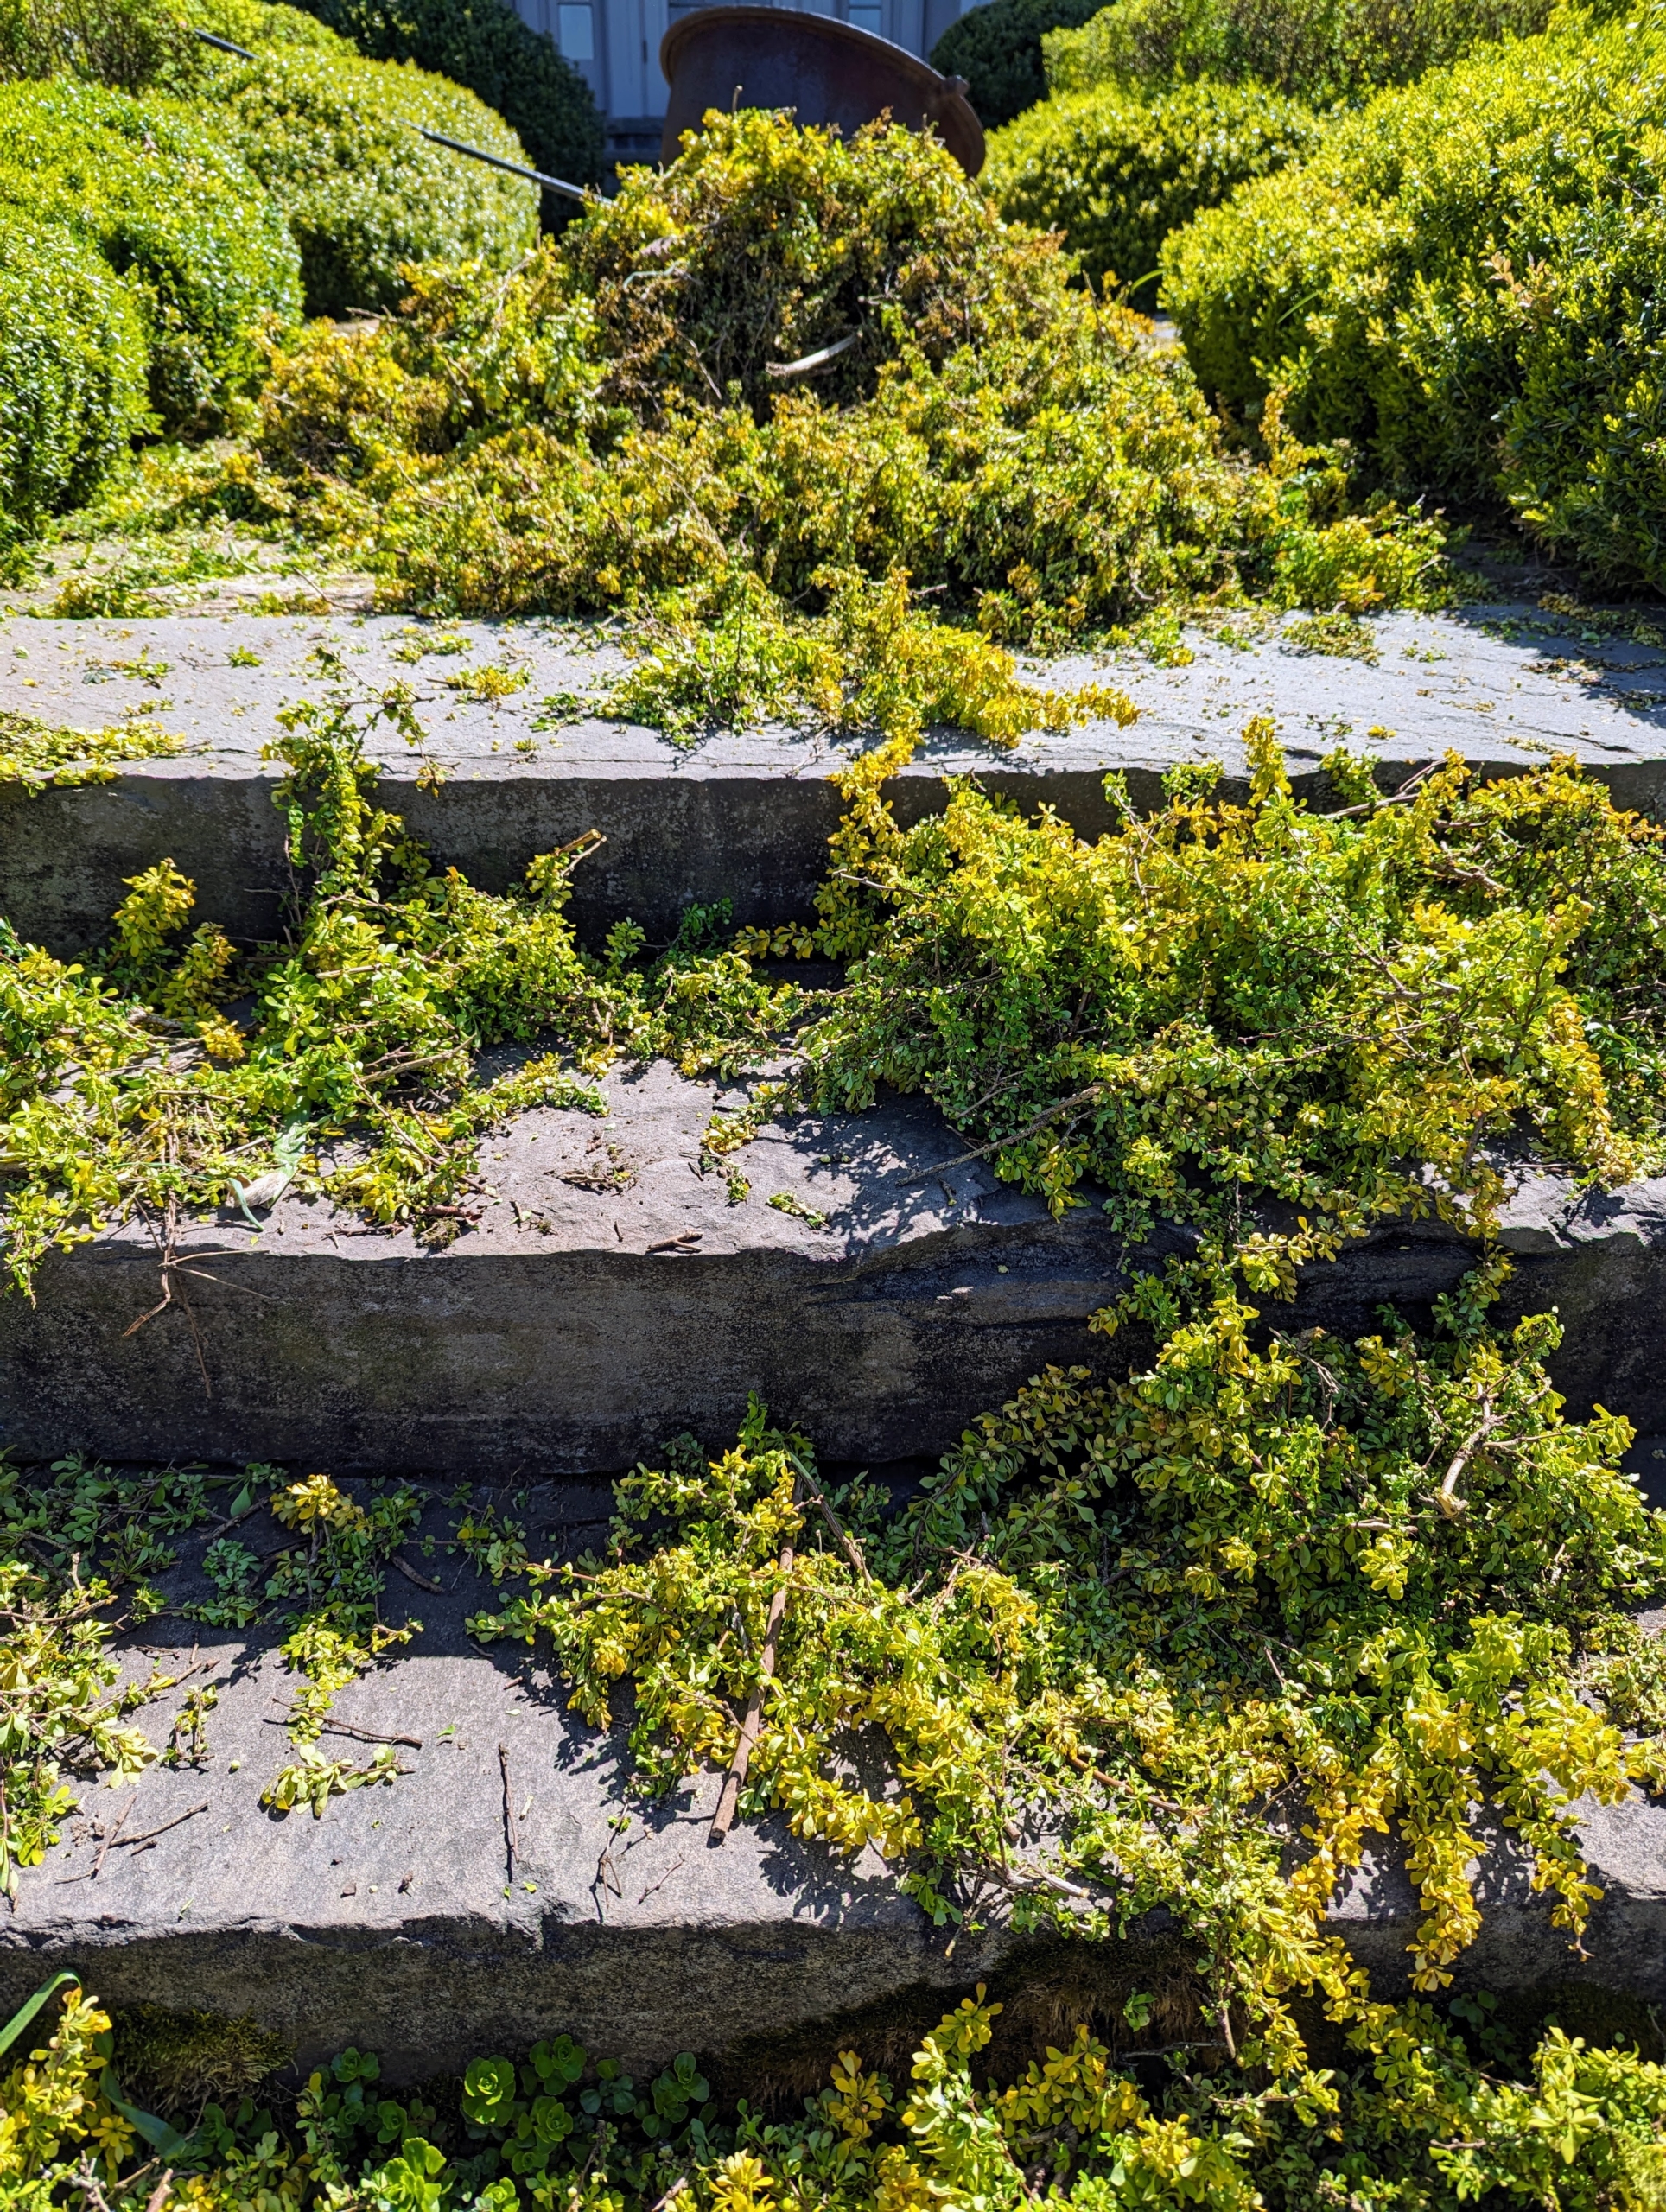
This chore is time-consuming and takes a couple of days to complete.
There are lots of clippings to clear away, but I am pleased these hedges are doing so well.
Once the barberry is trimmed, the terrace looks so much better – the golden barberry hedges are all level and they will get more gold in the weeks ahead. Next, Phurba will groom the boxwood.
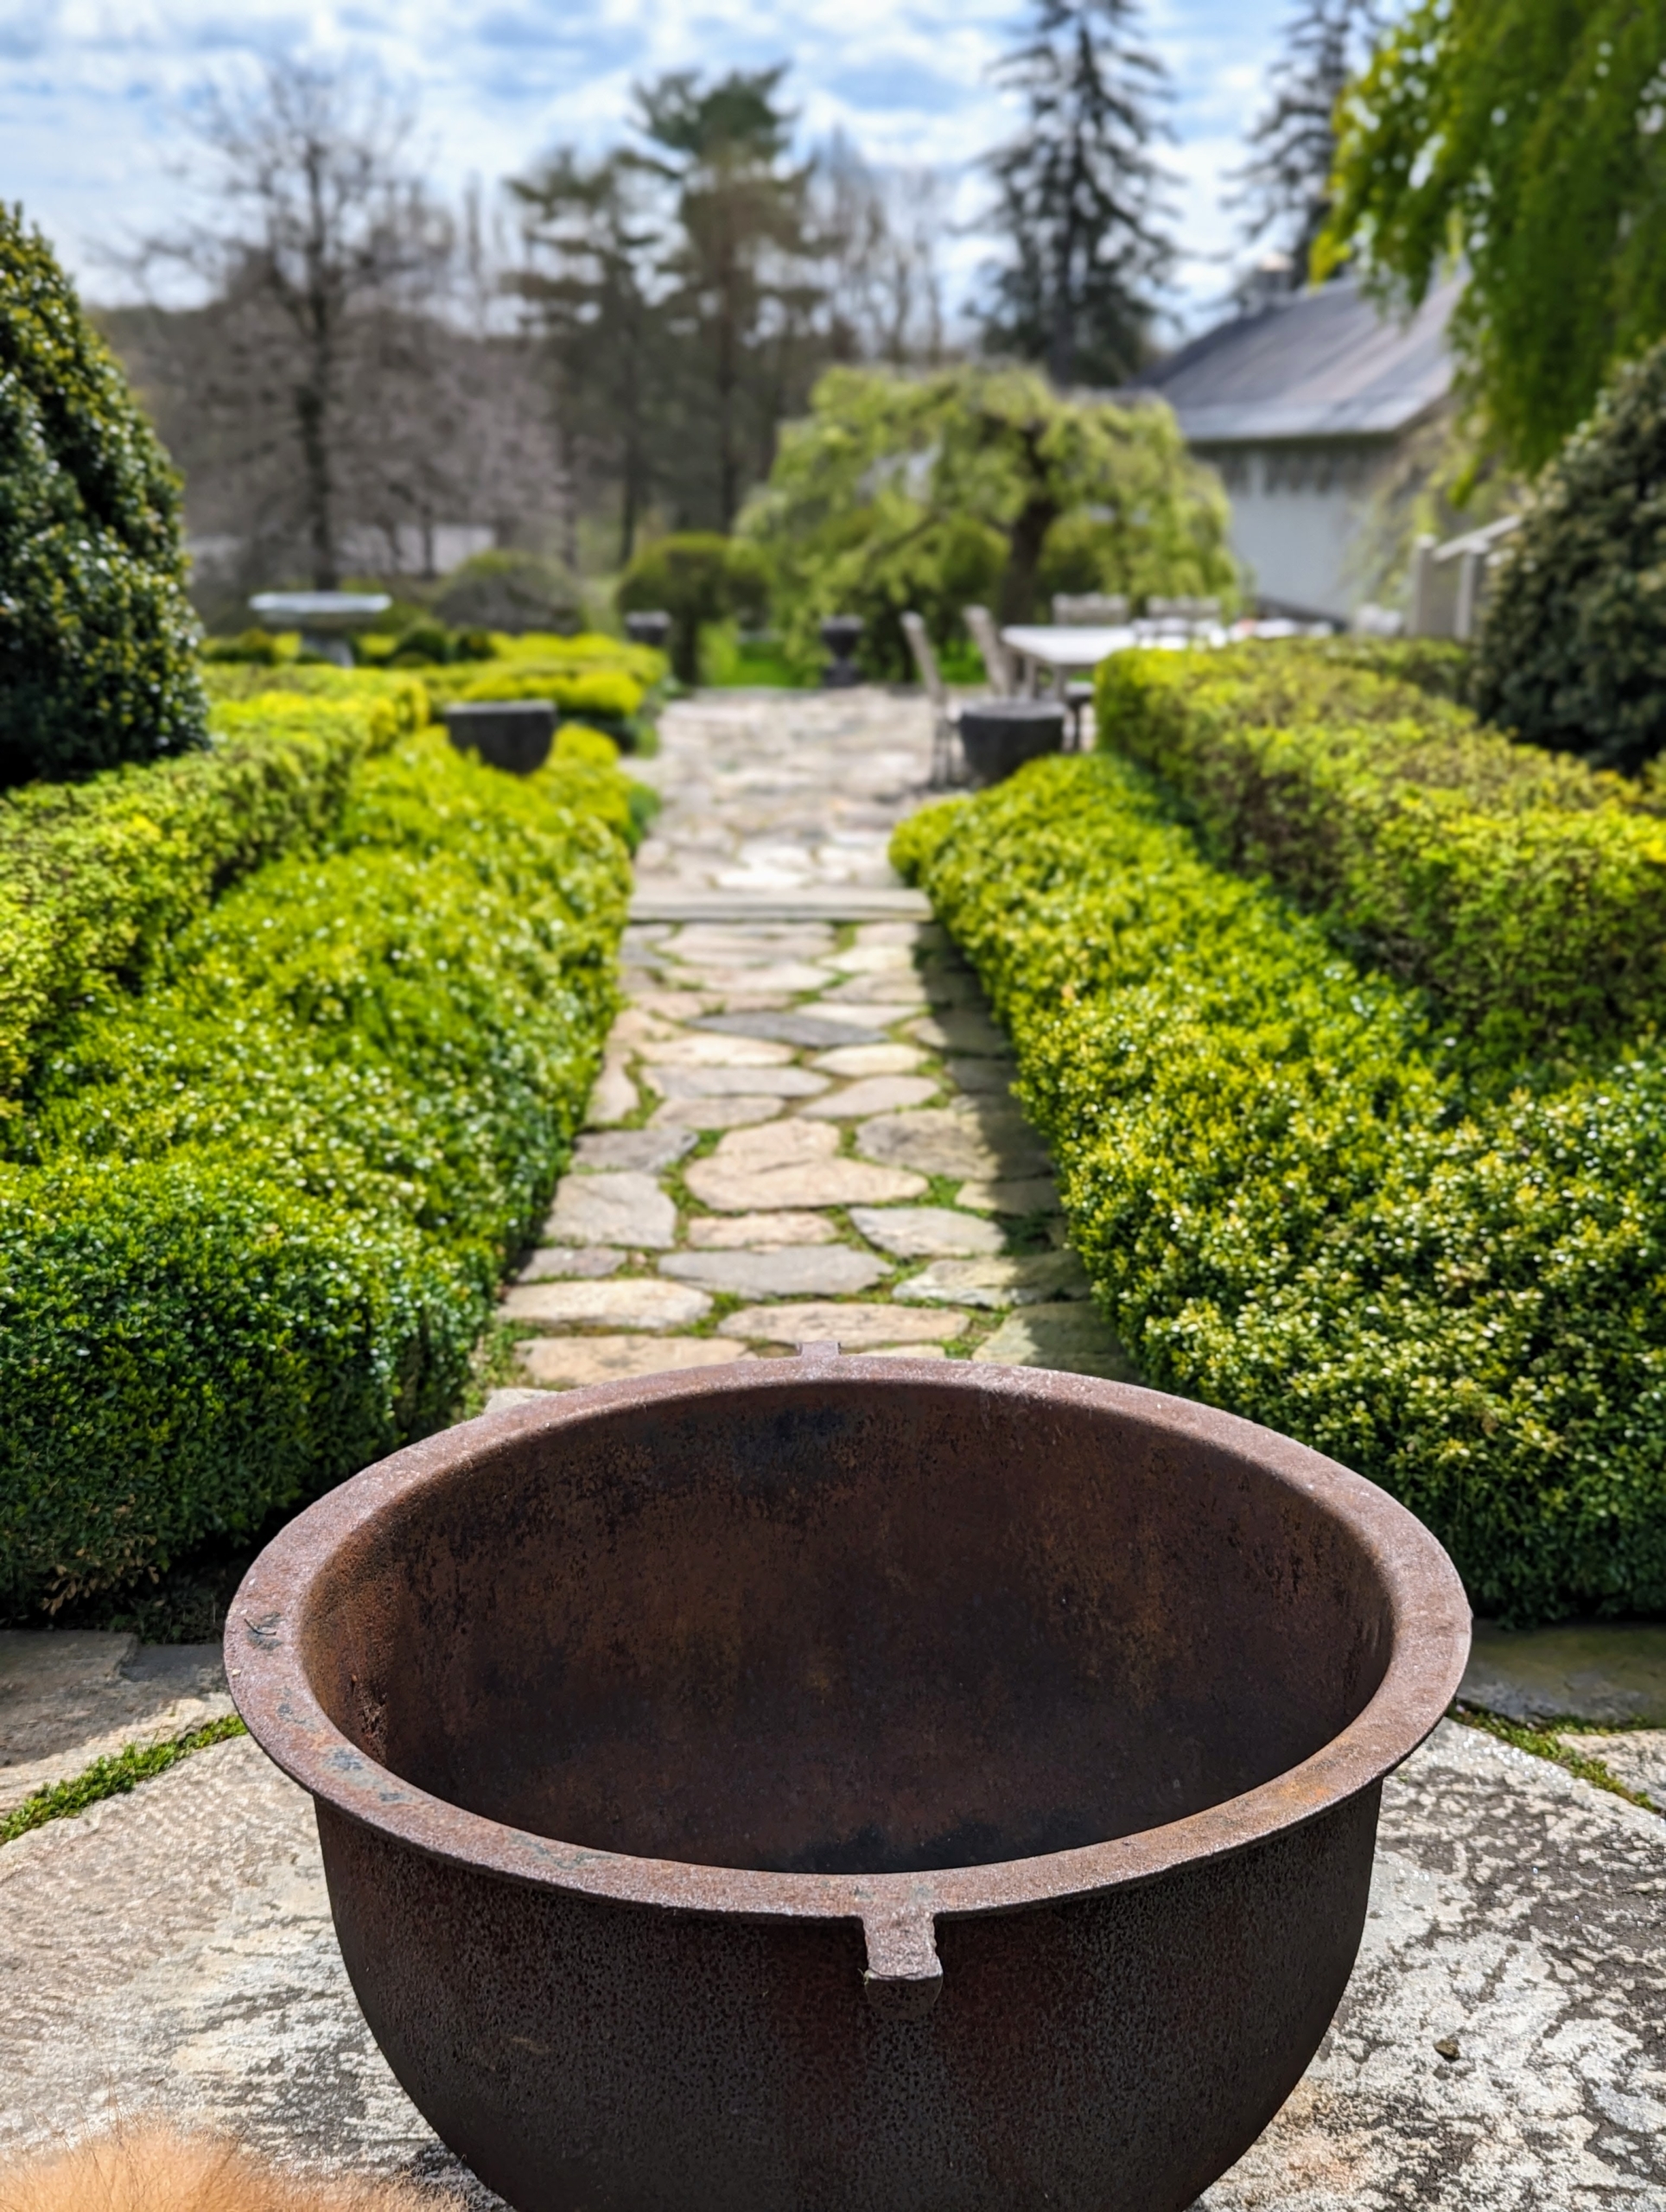
This in my antique sugar pot in the center walkway. Sugar kettles were used on 19th century Louisiana plantations for the production of sugar. In the winter, I use it as a fire pit when entertaining.
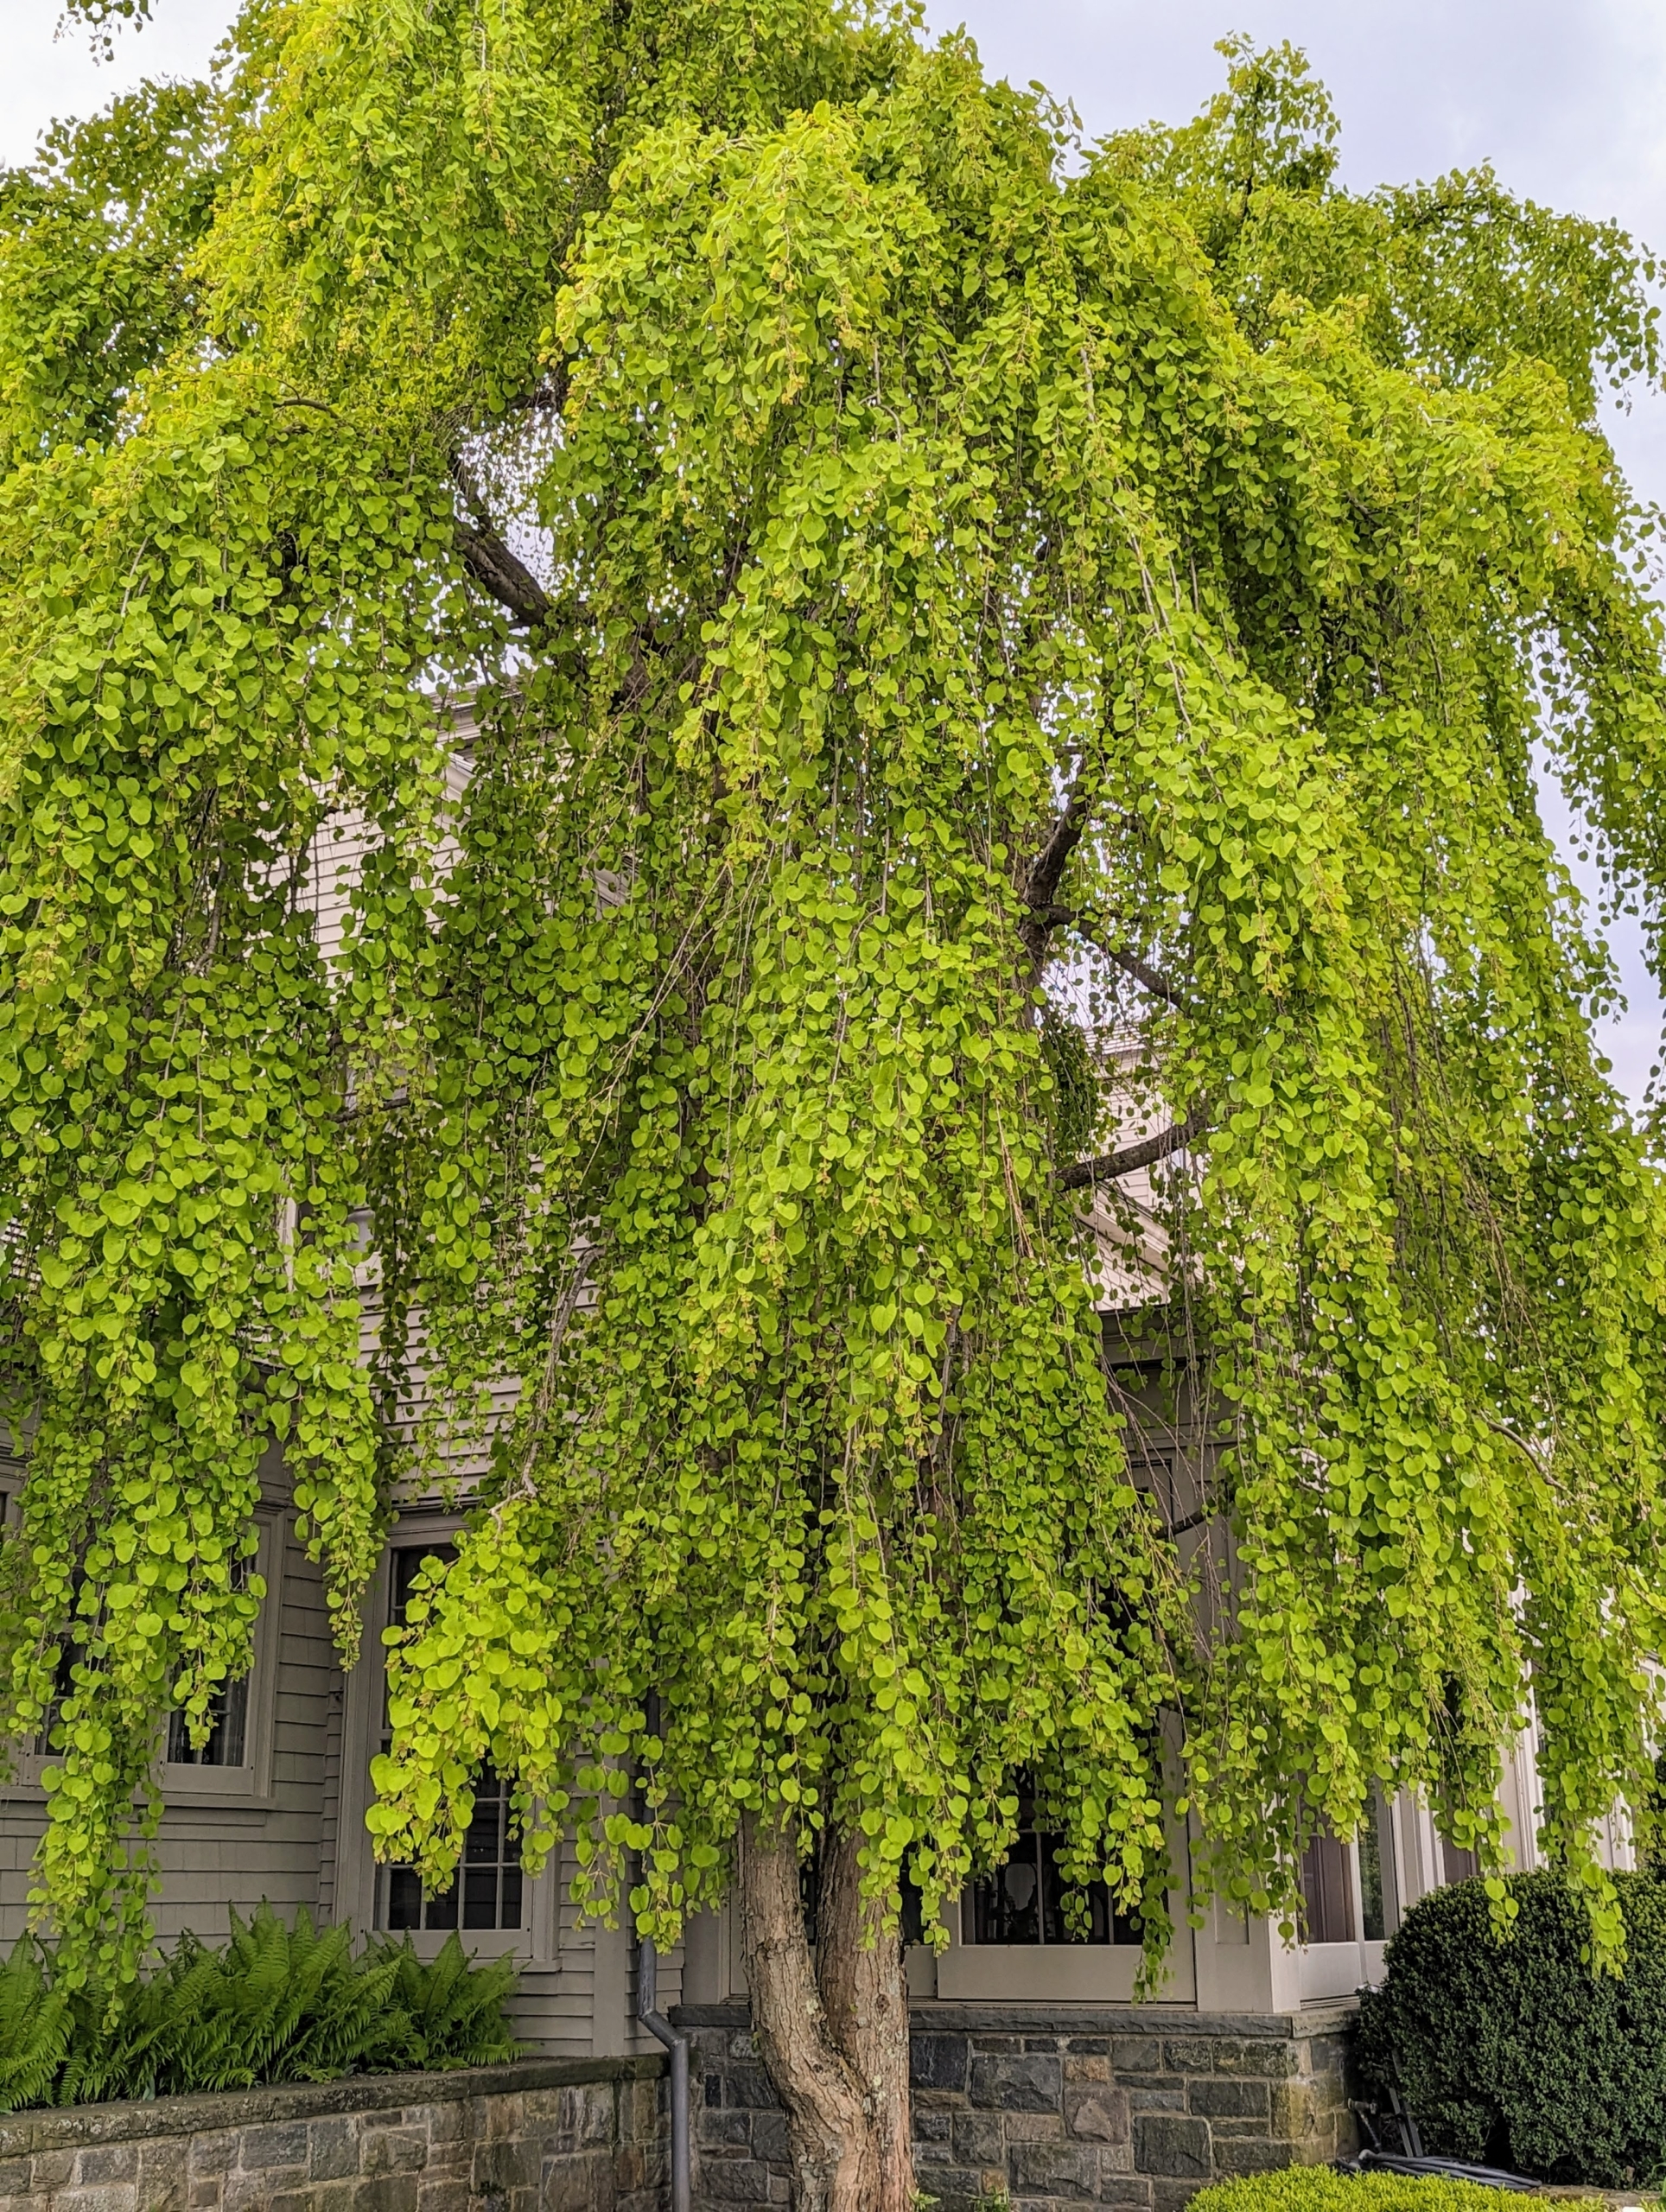
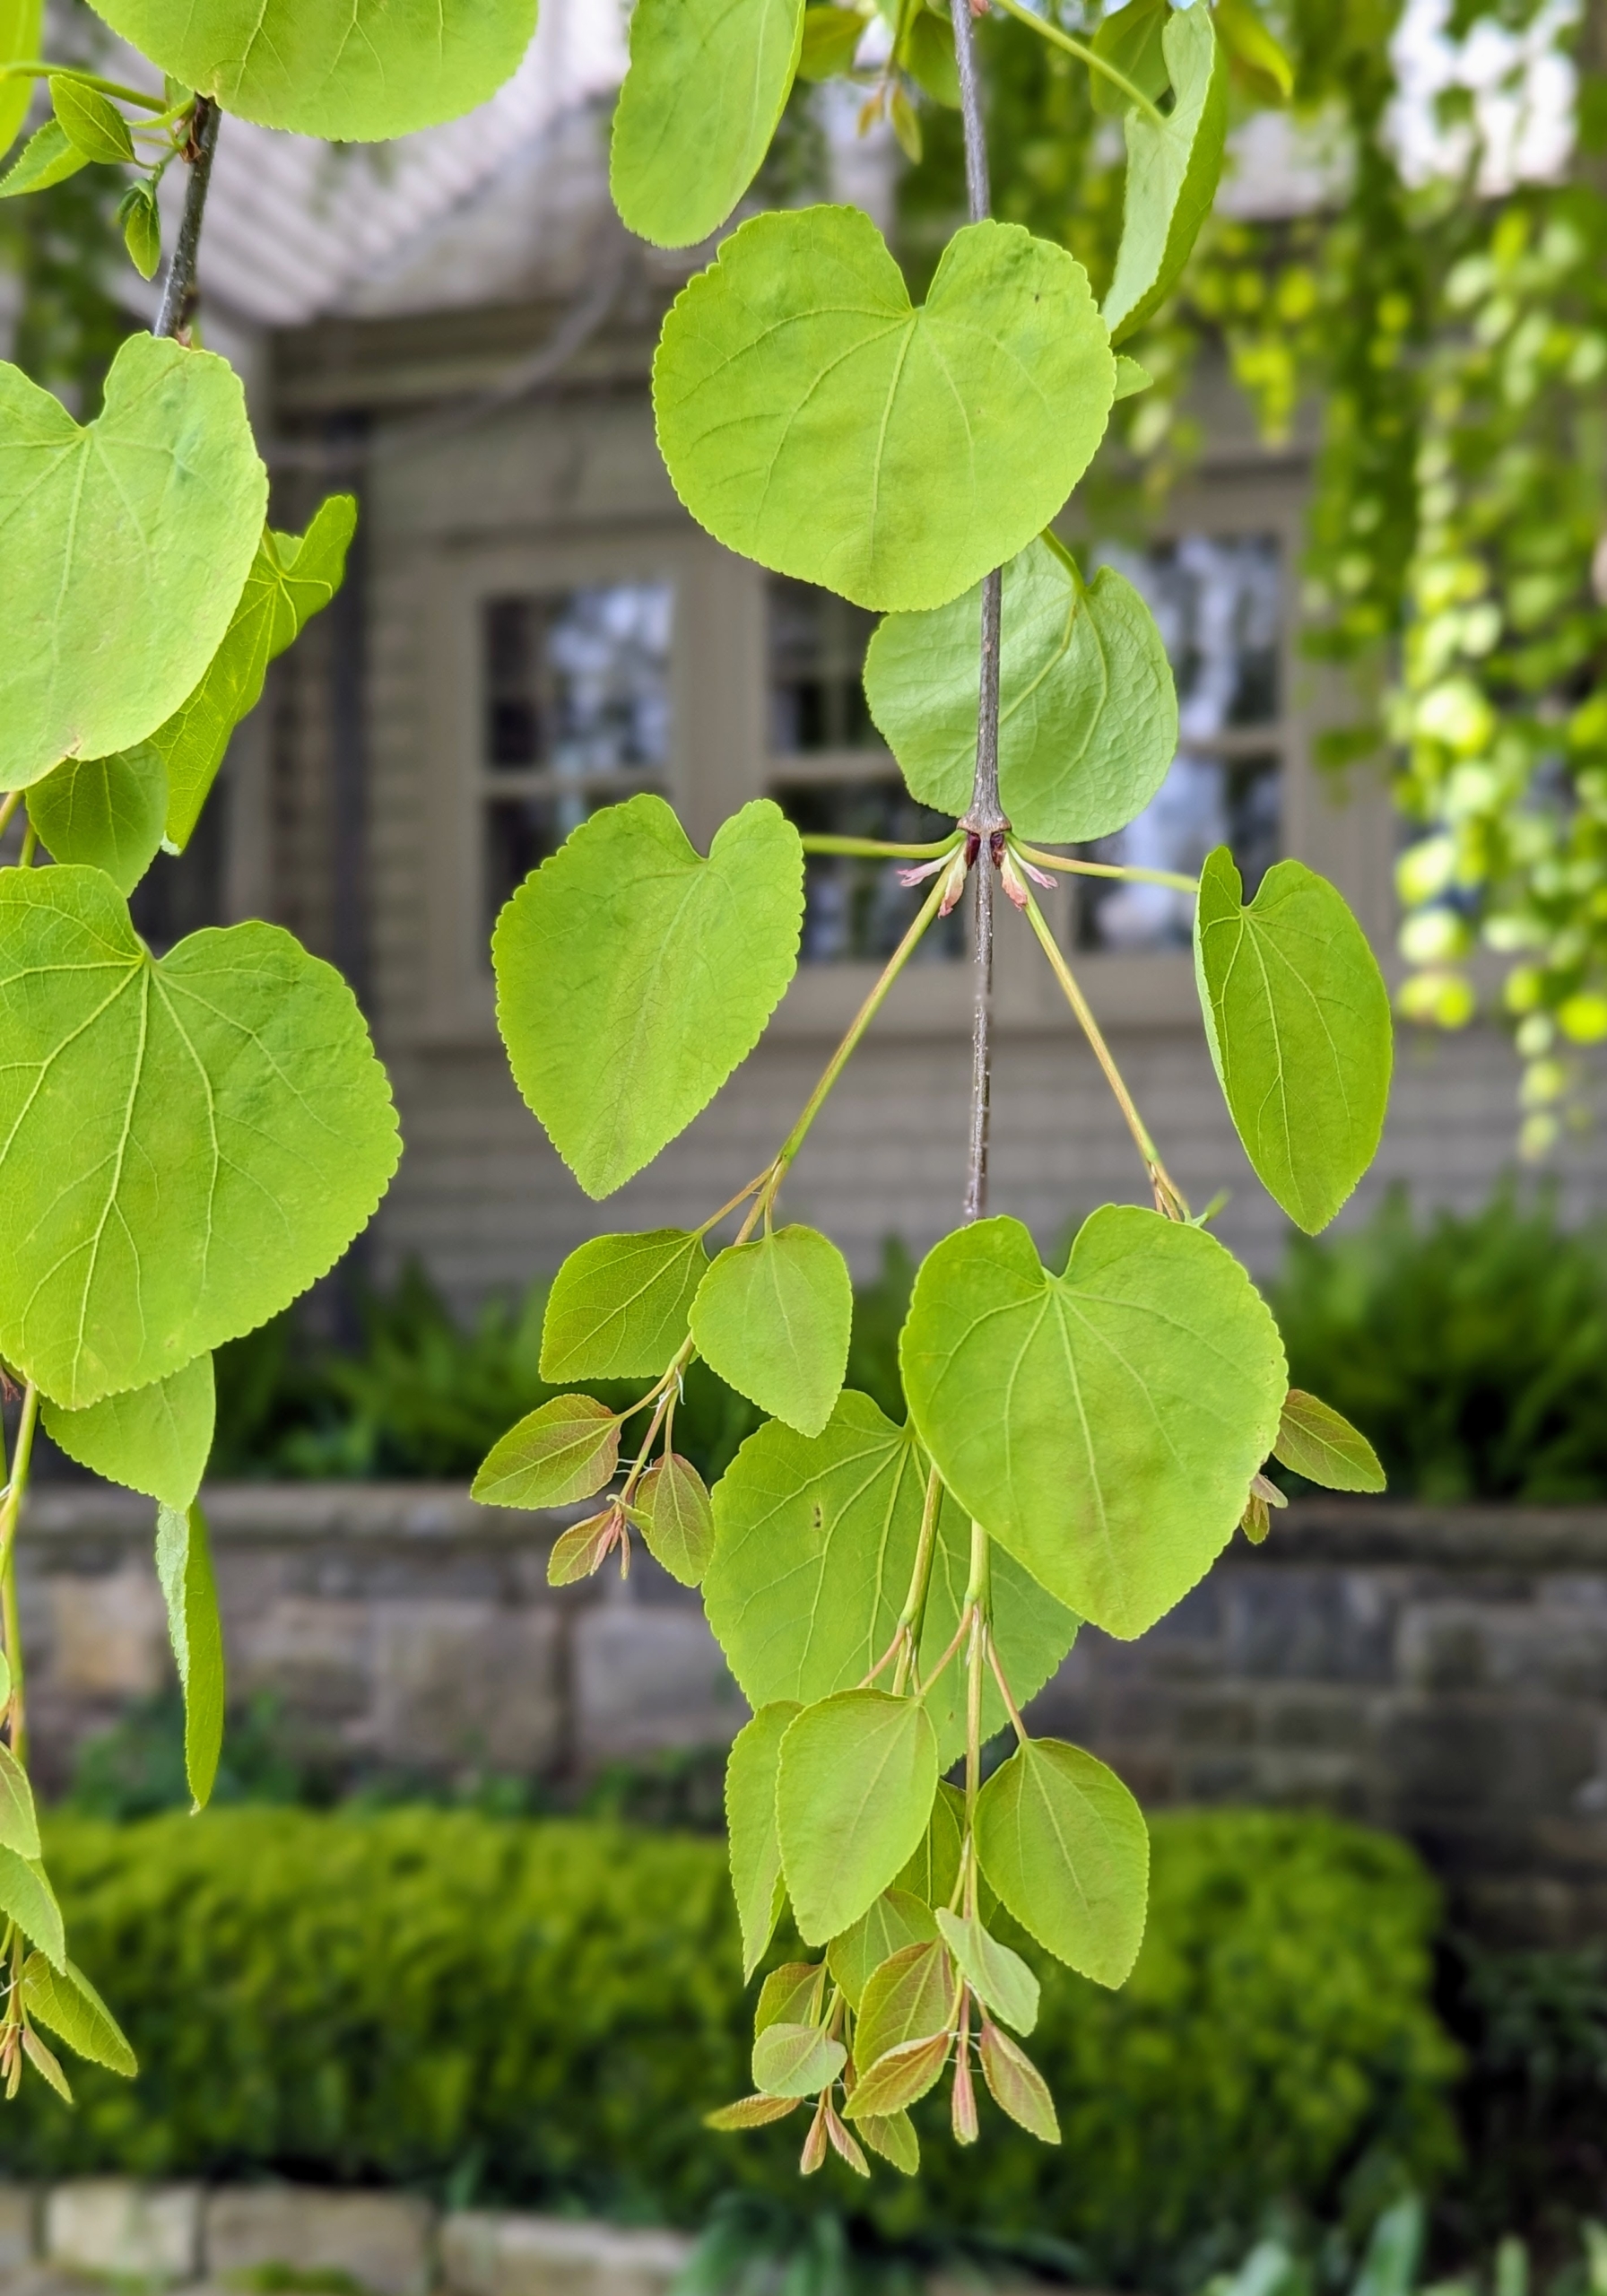
Also showing beautiful spring growth is this large weeping katsura tree outside my window. The katsura tree, native to Japan, makes an excellent specimen or shade tree. The weeping katsura, Cercidiphyllum japonicum f. pendulum, has pendulous branches that fan out from the crown and sweep the ground.
The leaves are heart-shaped blue-green.
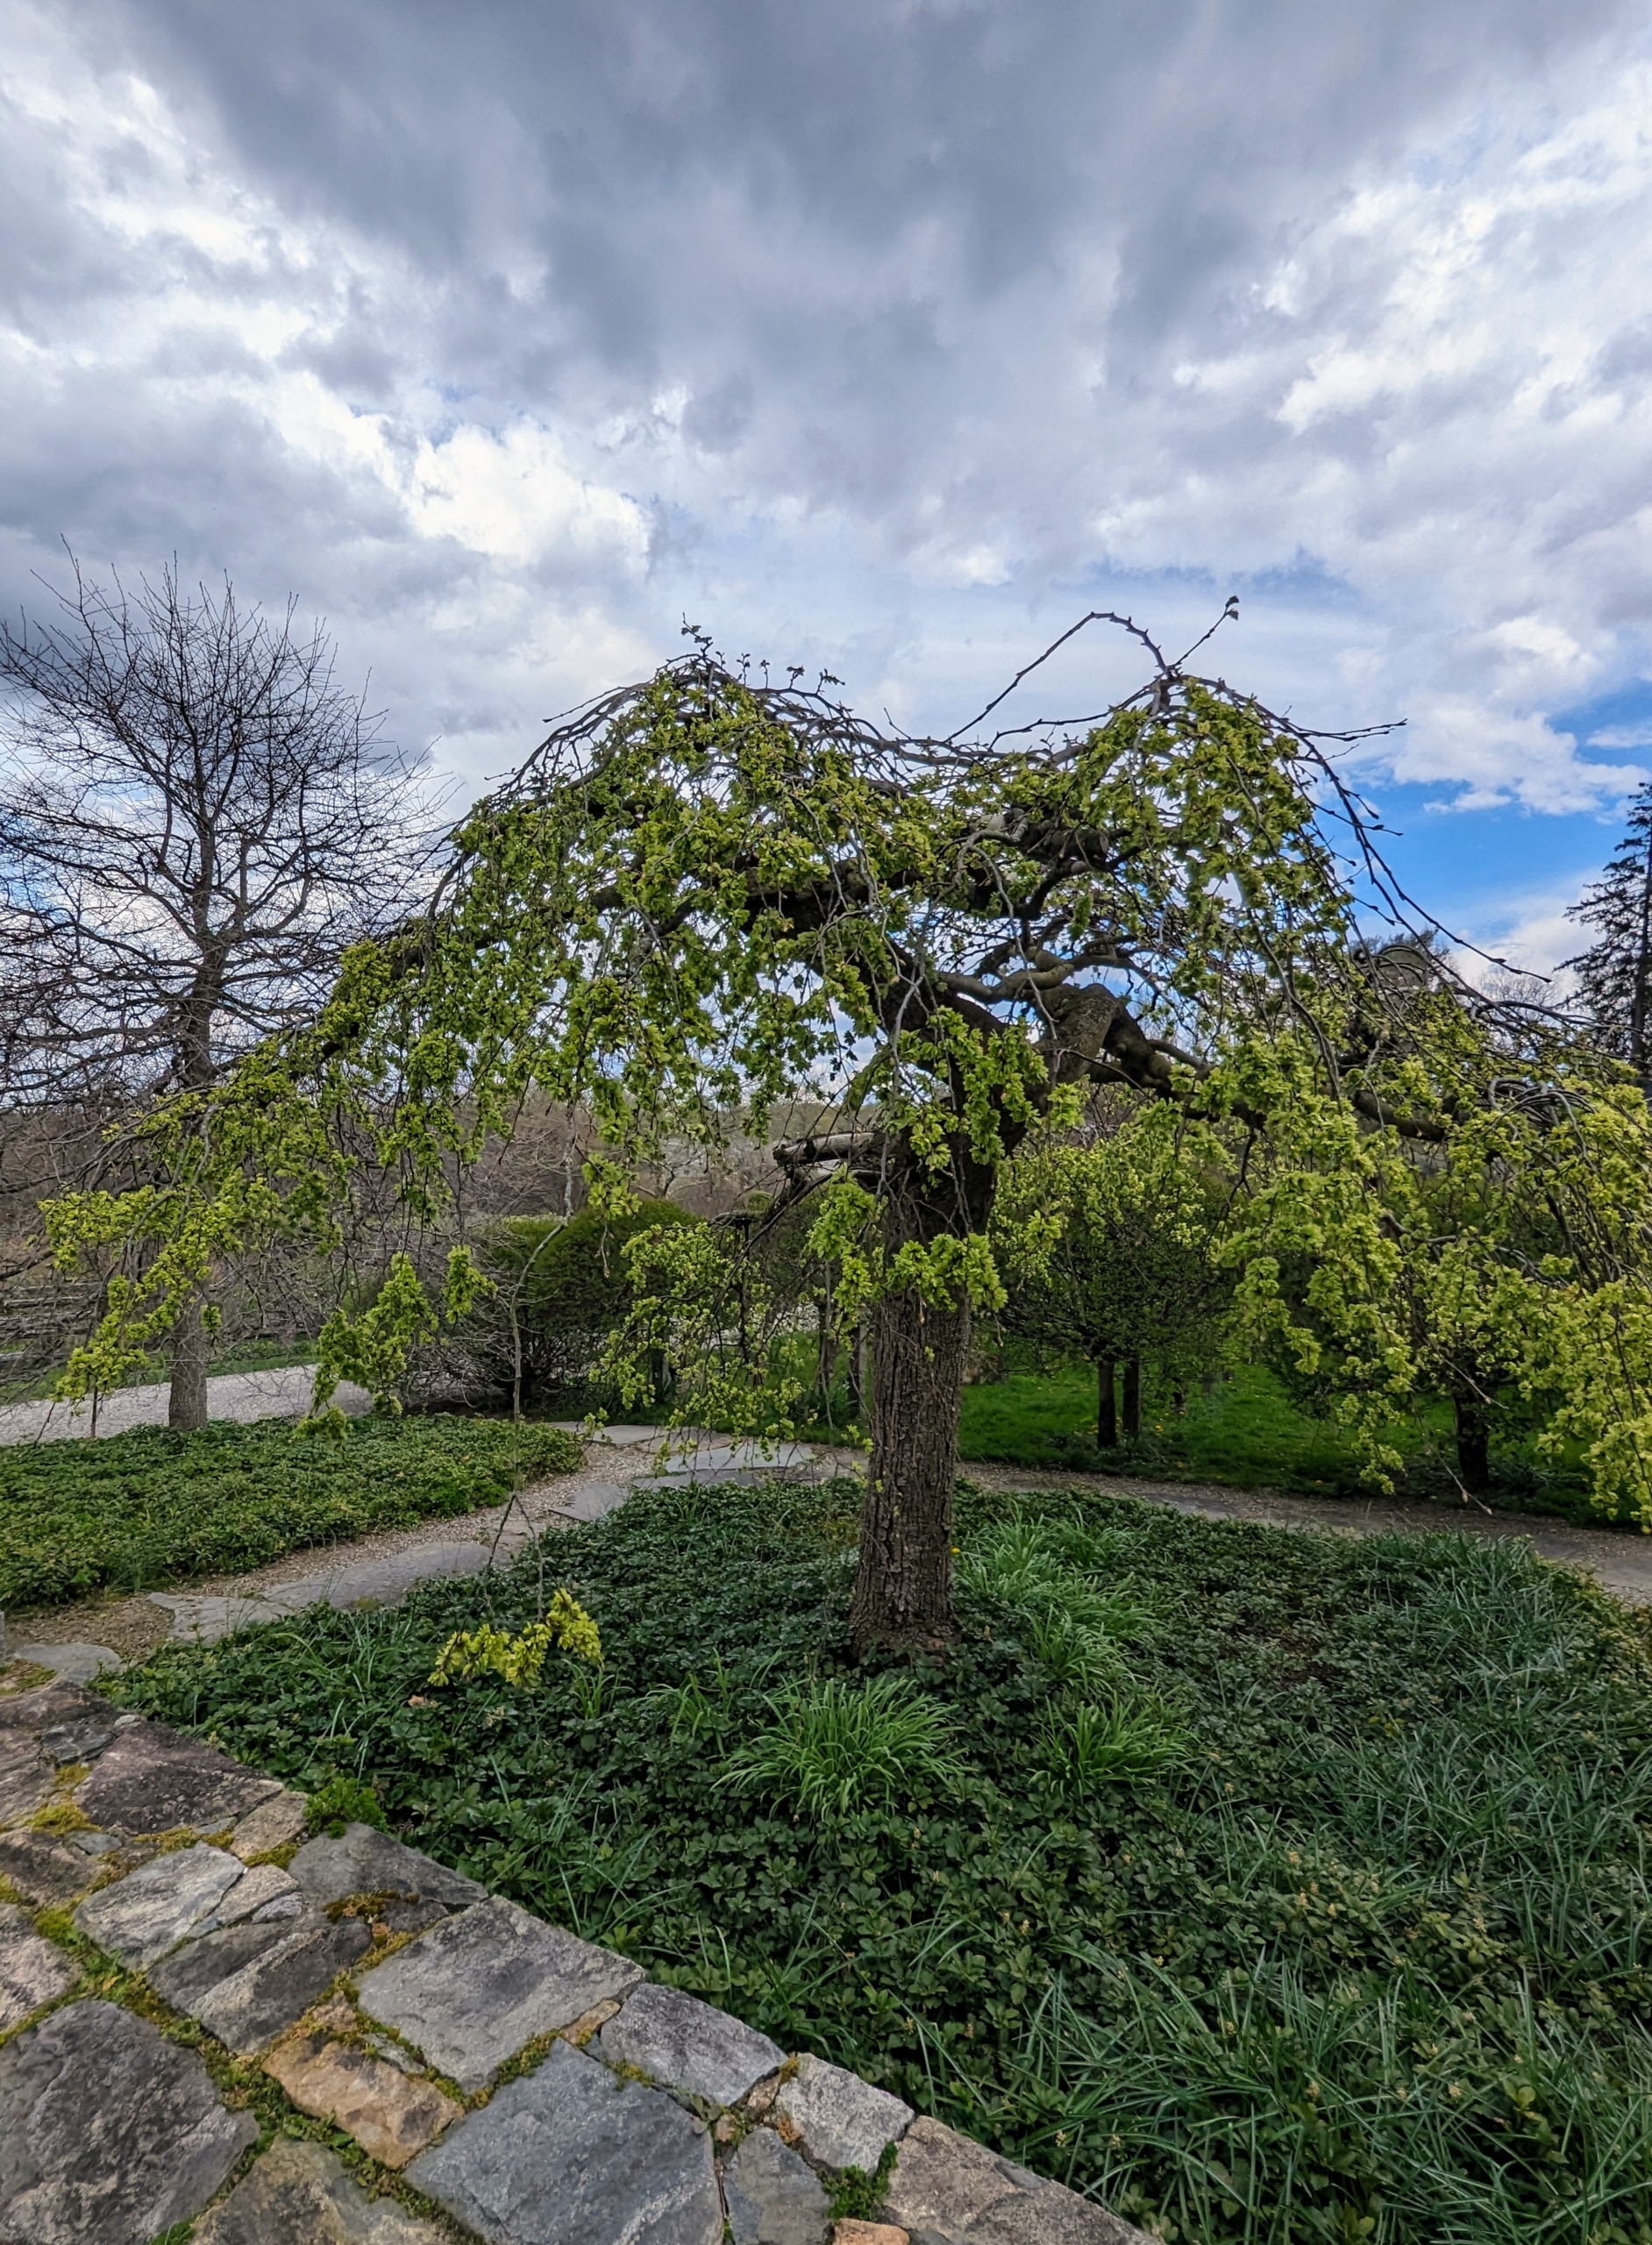
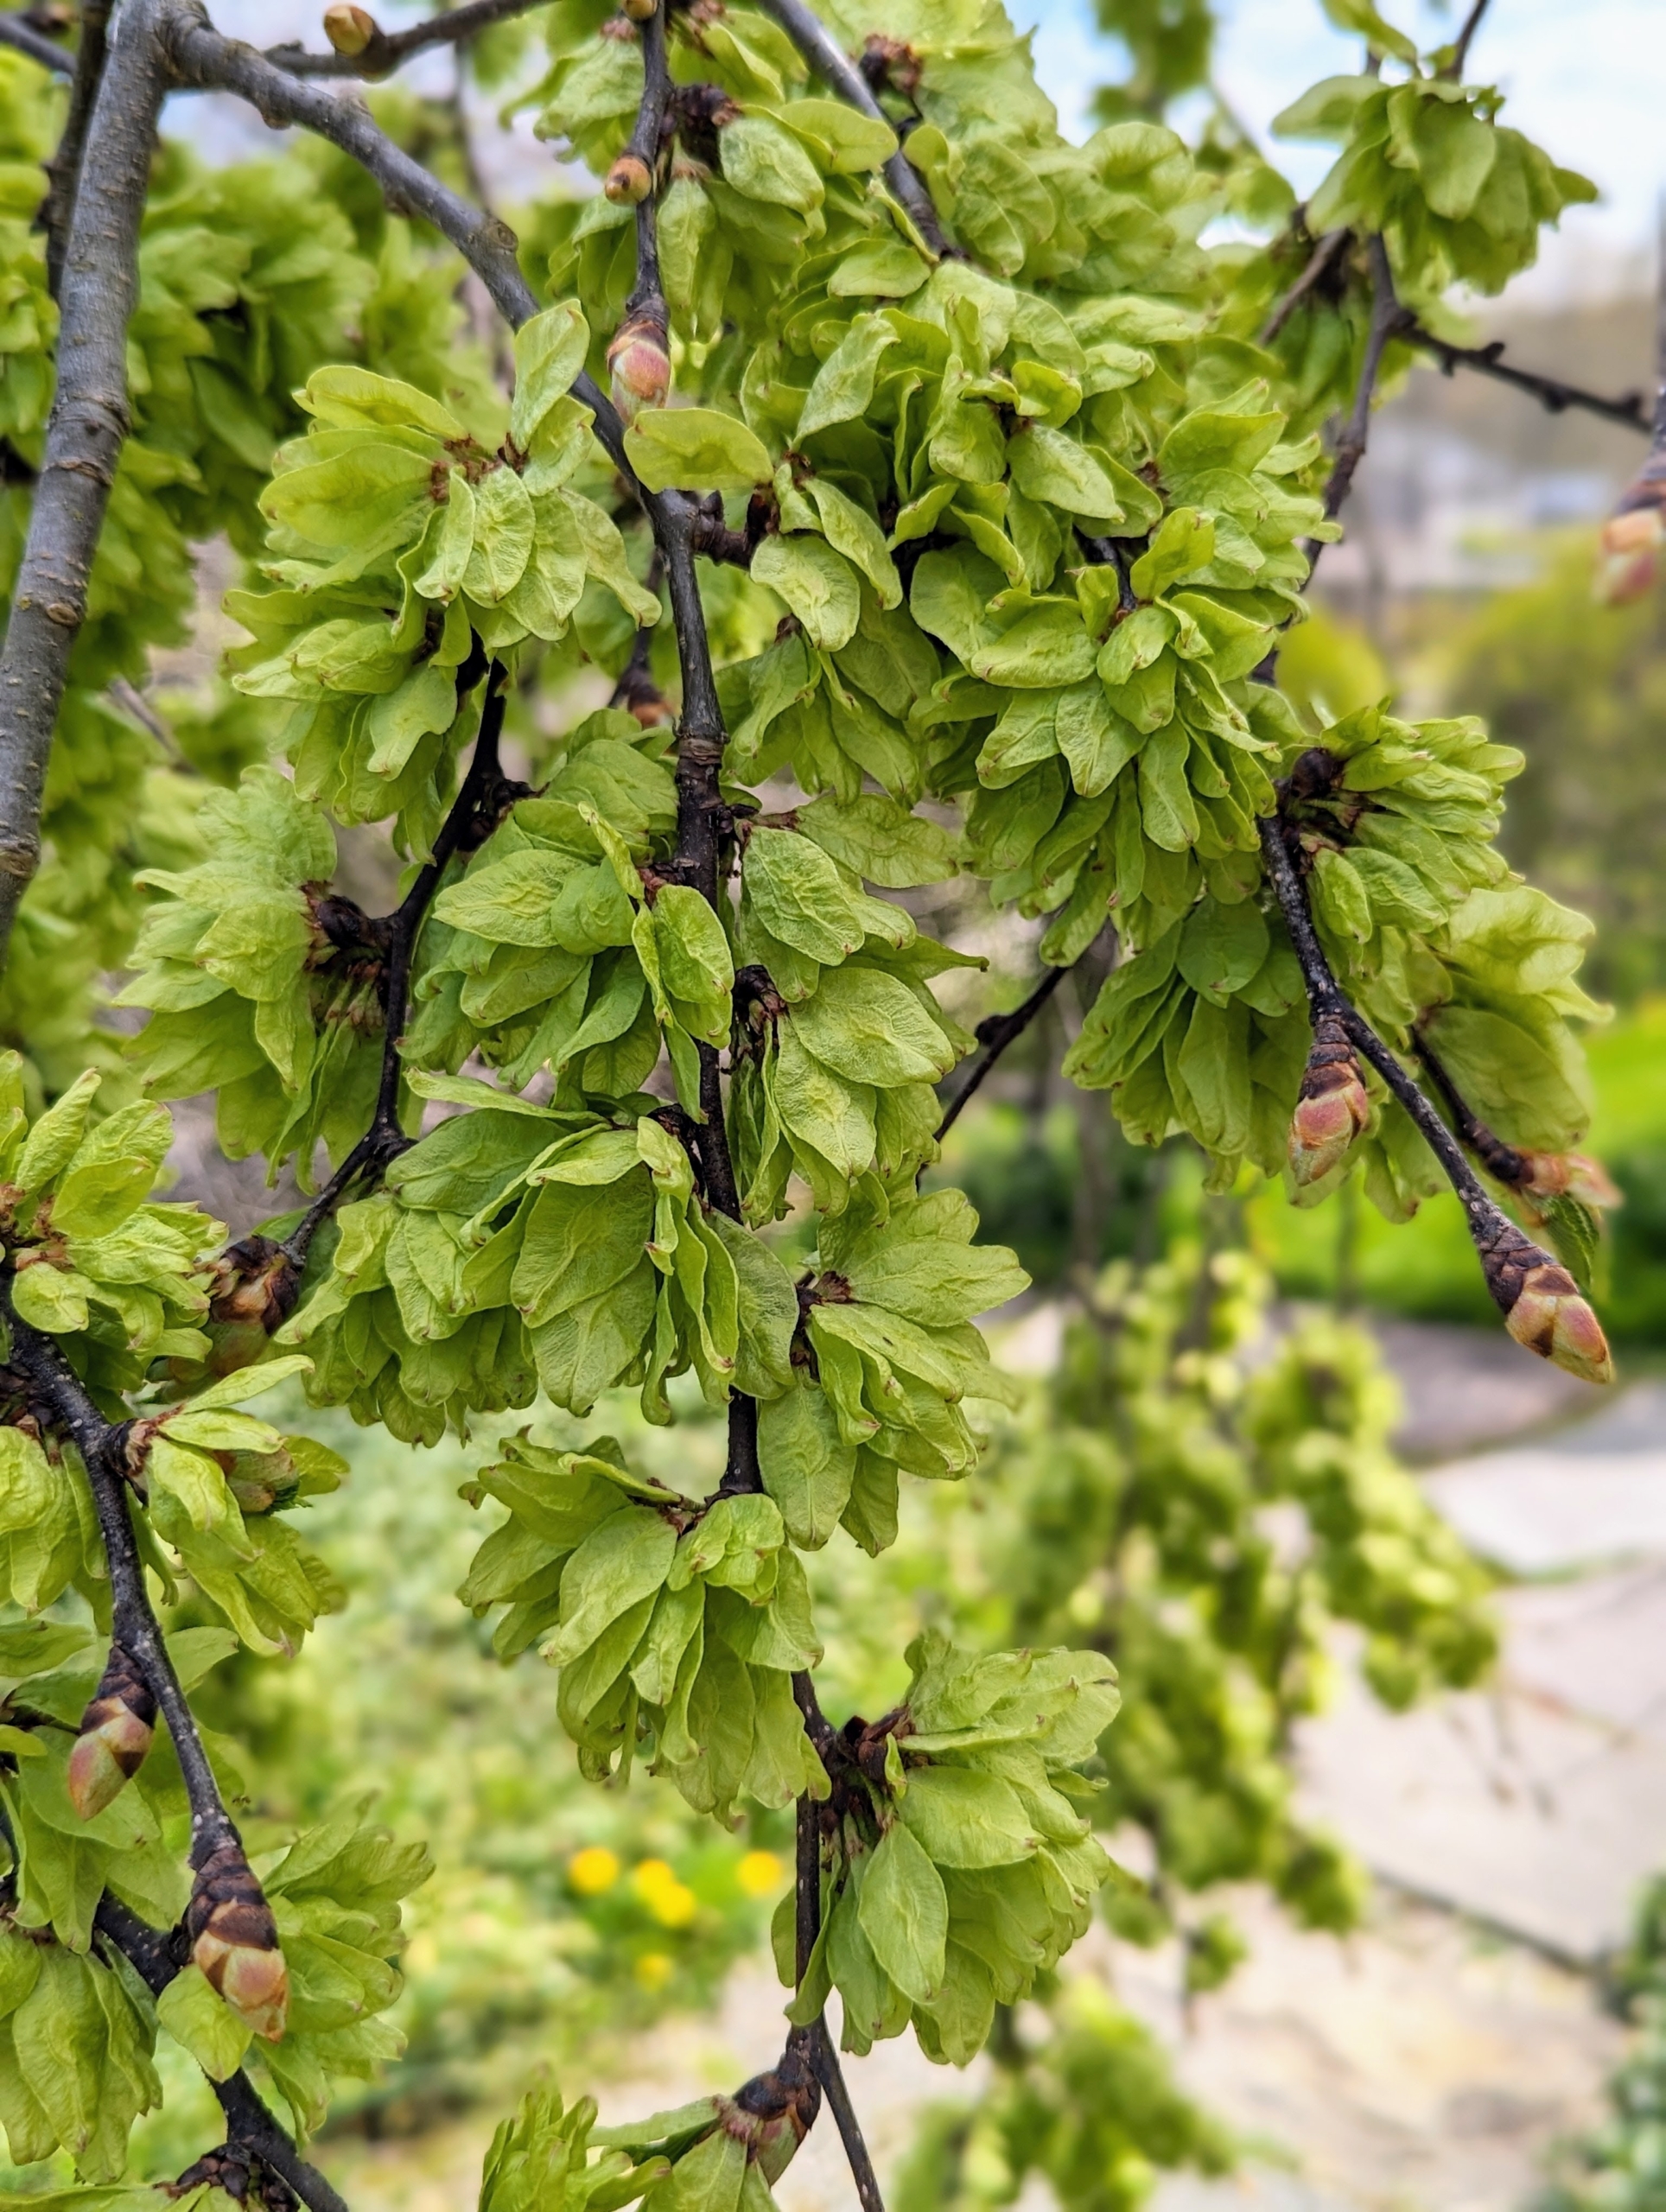
This is one of two weeping camperdown elms, Ulmus glabra ‘Camperdownii.’ Camperdown elms slowly develop broad, flat heads and wide crowns with weeping branch habits that grow down towards the ground. This is how it looks in spring.
It is full of seed pods in a light silvery green. In summer, it will be covered in dark, bold green leaves.
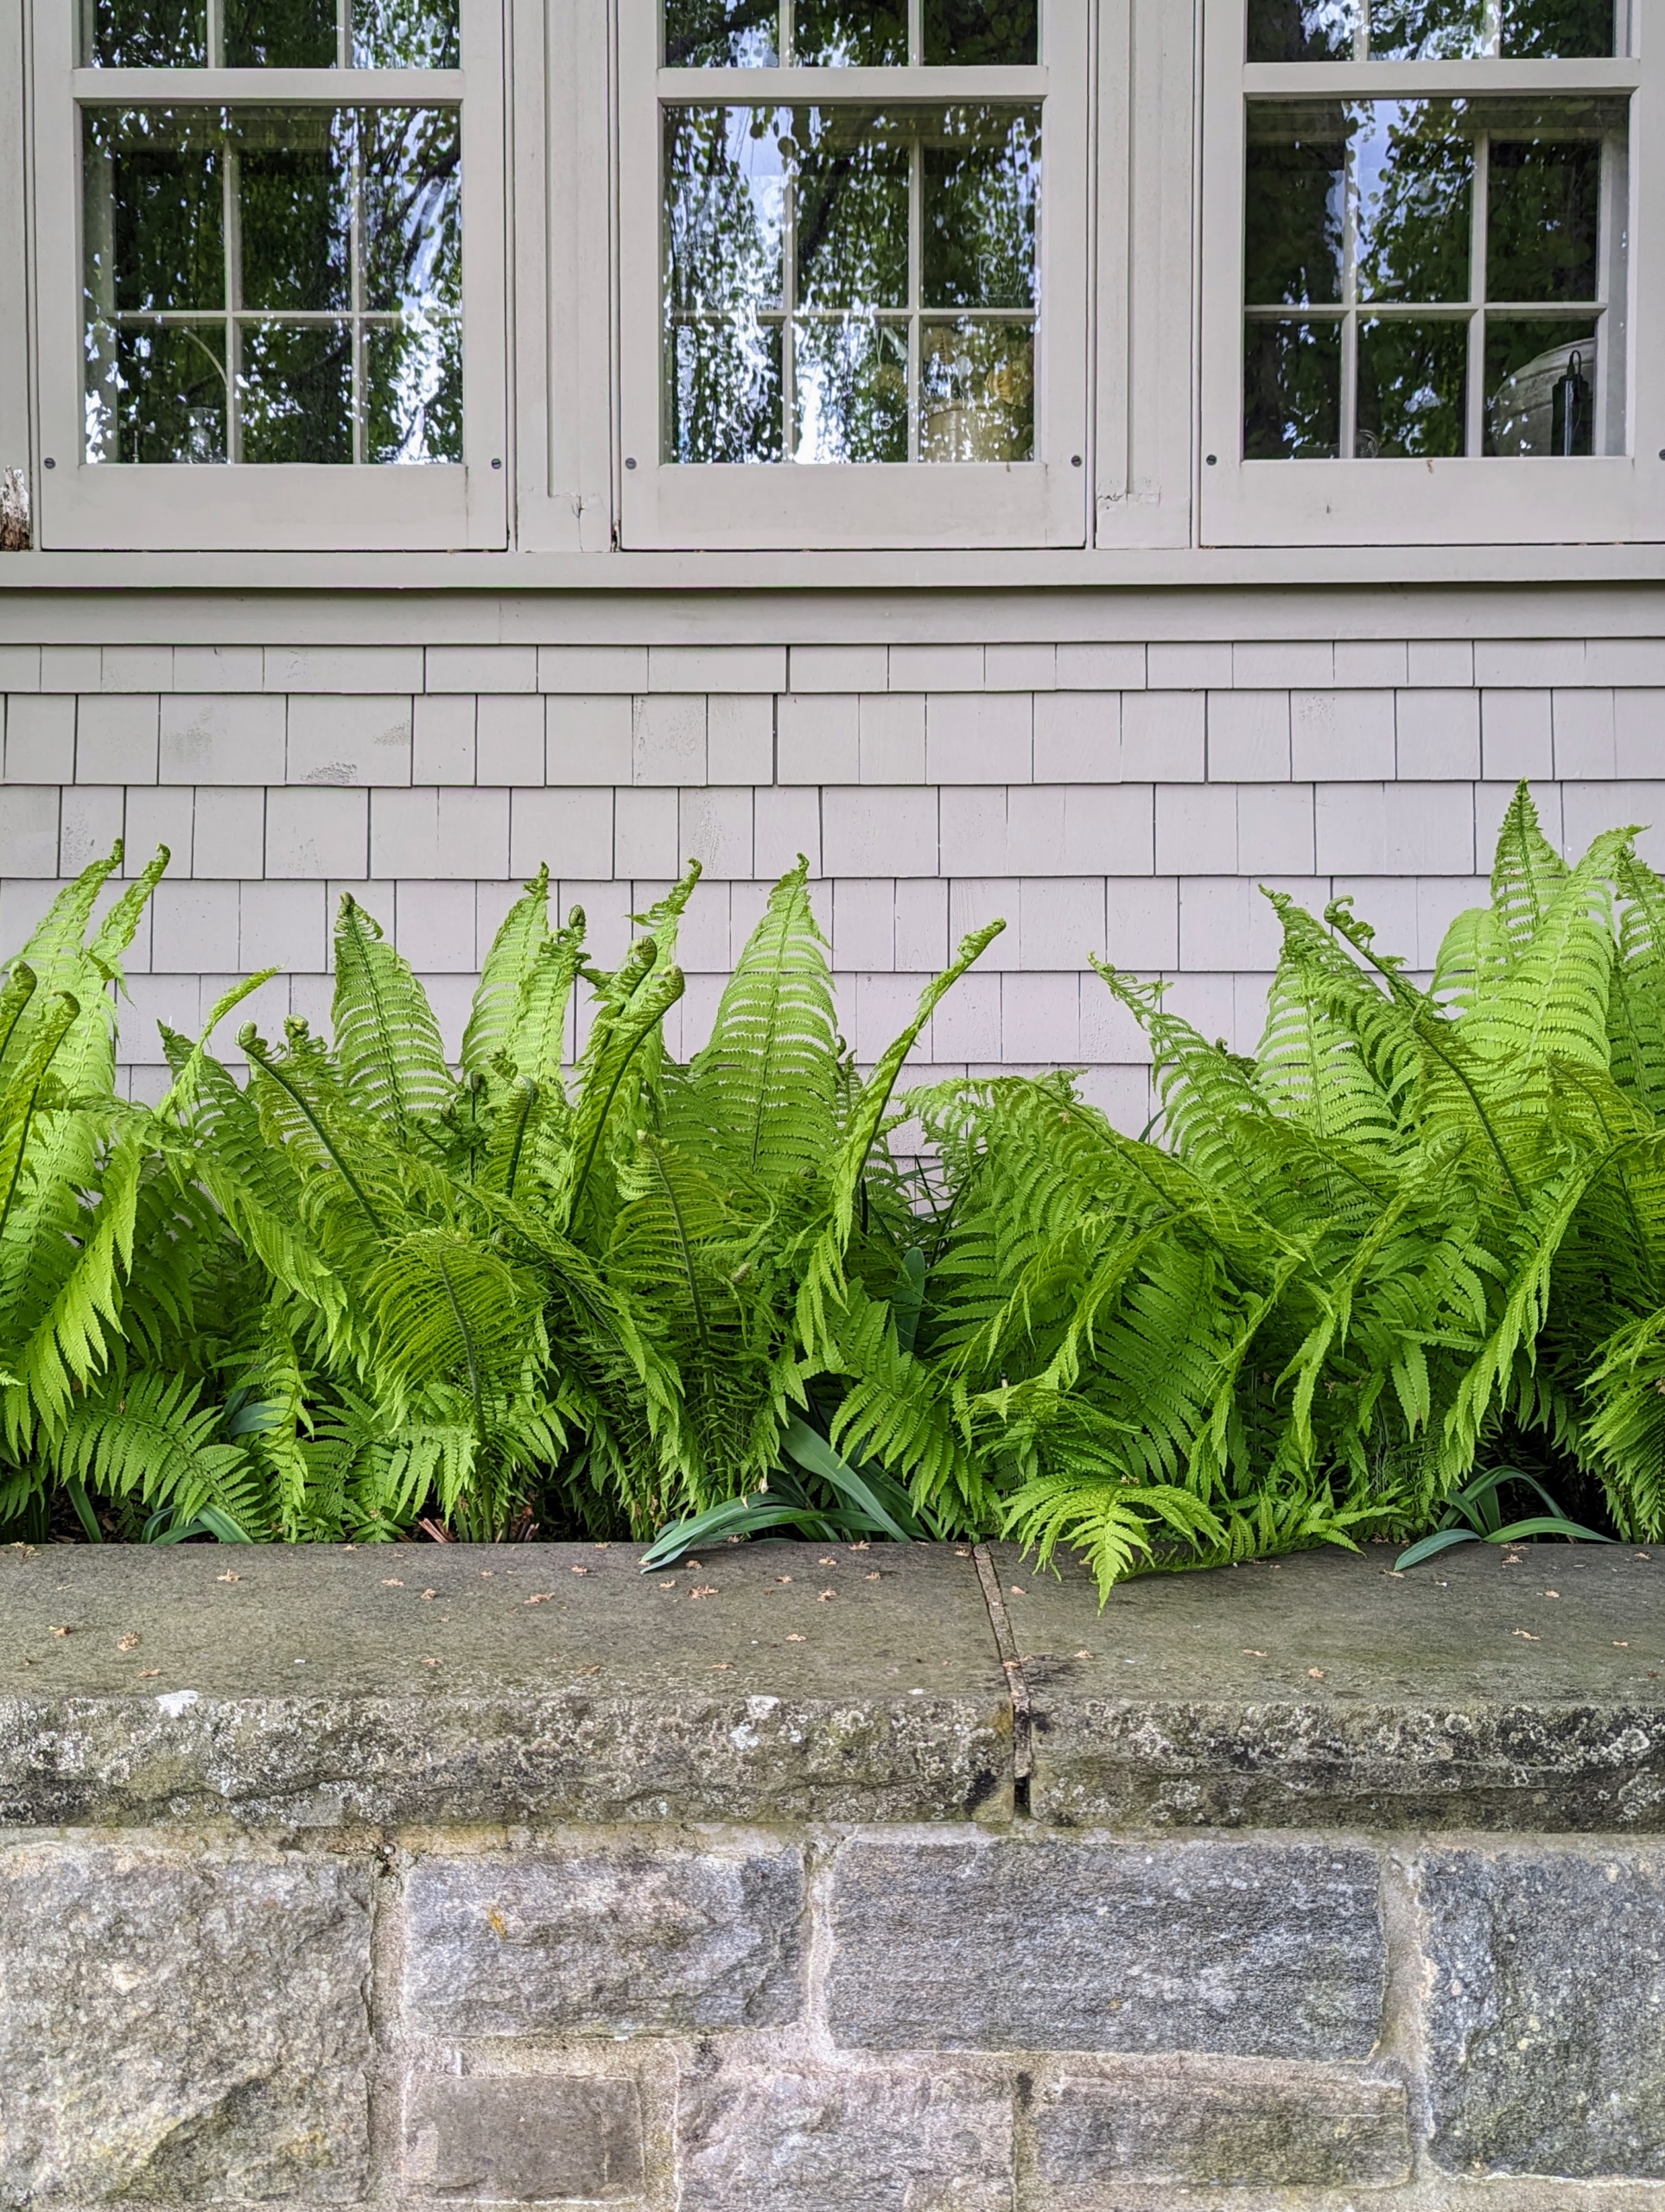
Here, under my servery windows – a lovely collection of ferns.
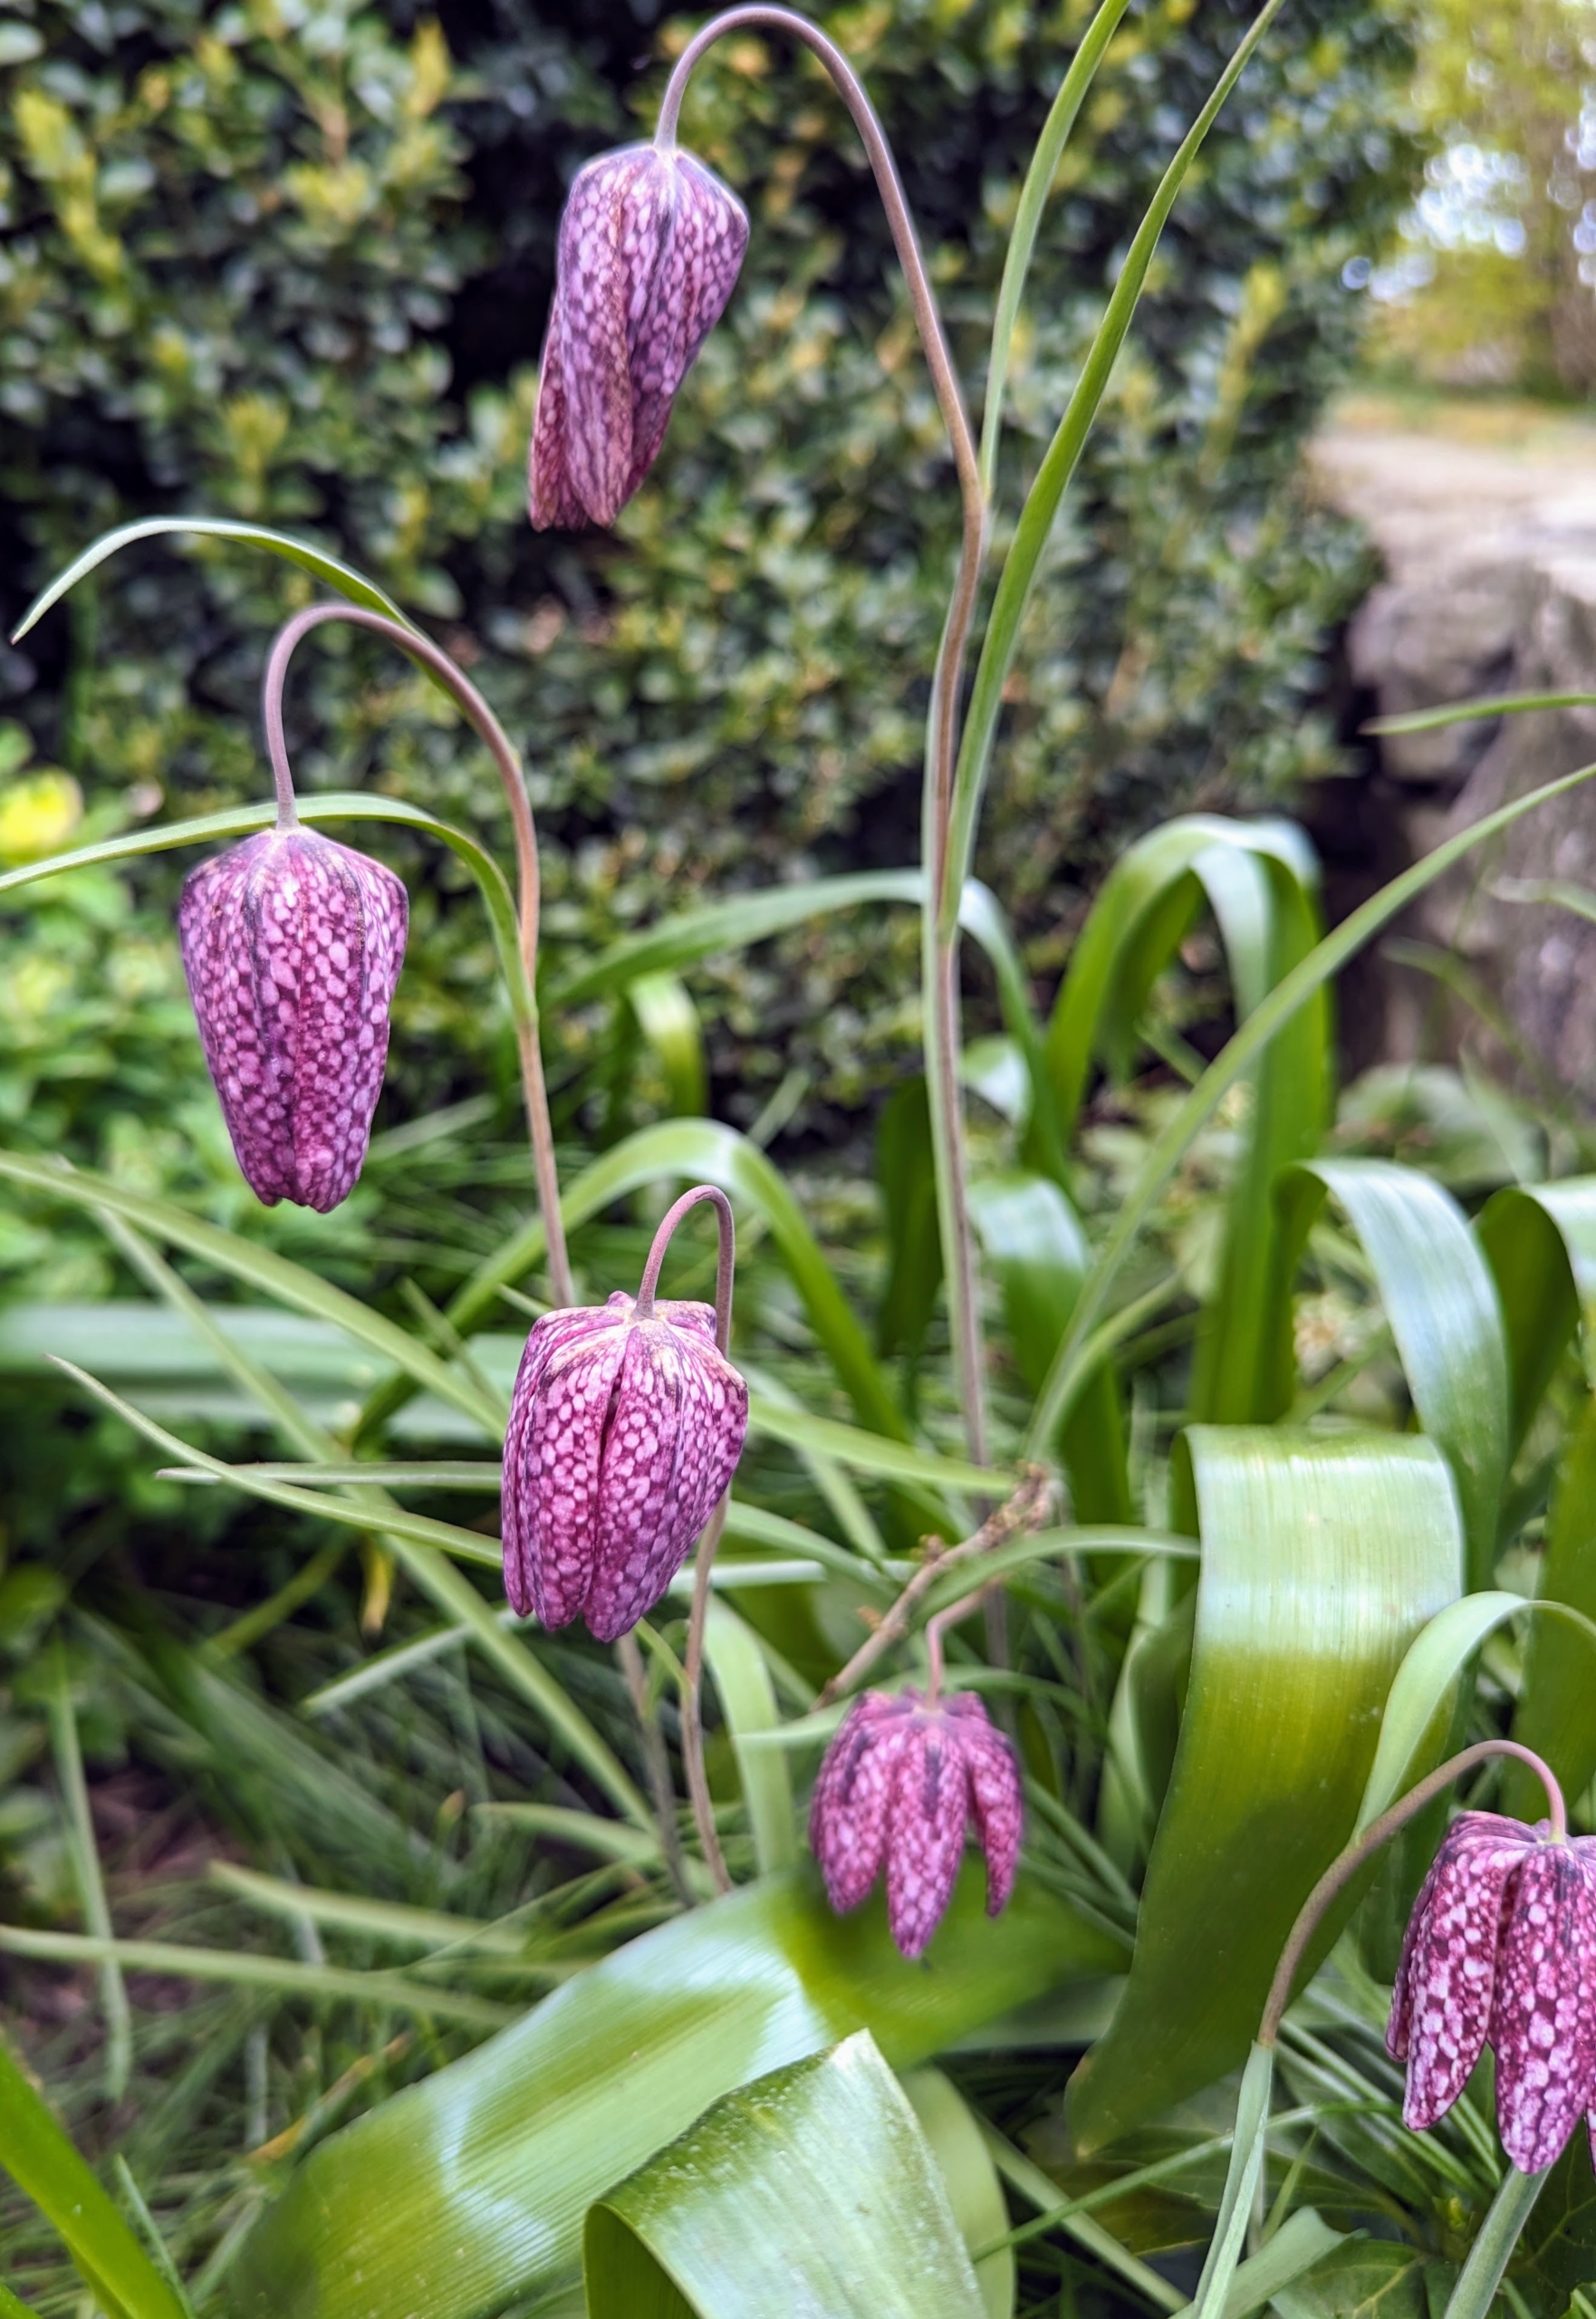
There is also spring-blooming fritillaria. Commonly known as Guinea Hen Flower, Checkered Lily or Snake’s Head Fritillary, Fritillaria meleagris is an heirloom species dating back to 1575. It has pendant, bell-shaped, checkered and veined flowers that are either maroon or ivory-white with grass-like foliage on slender stems.
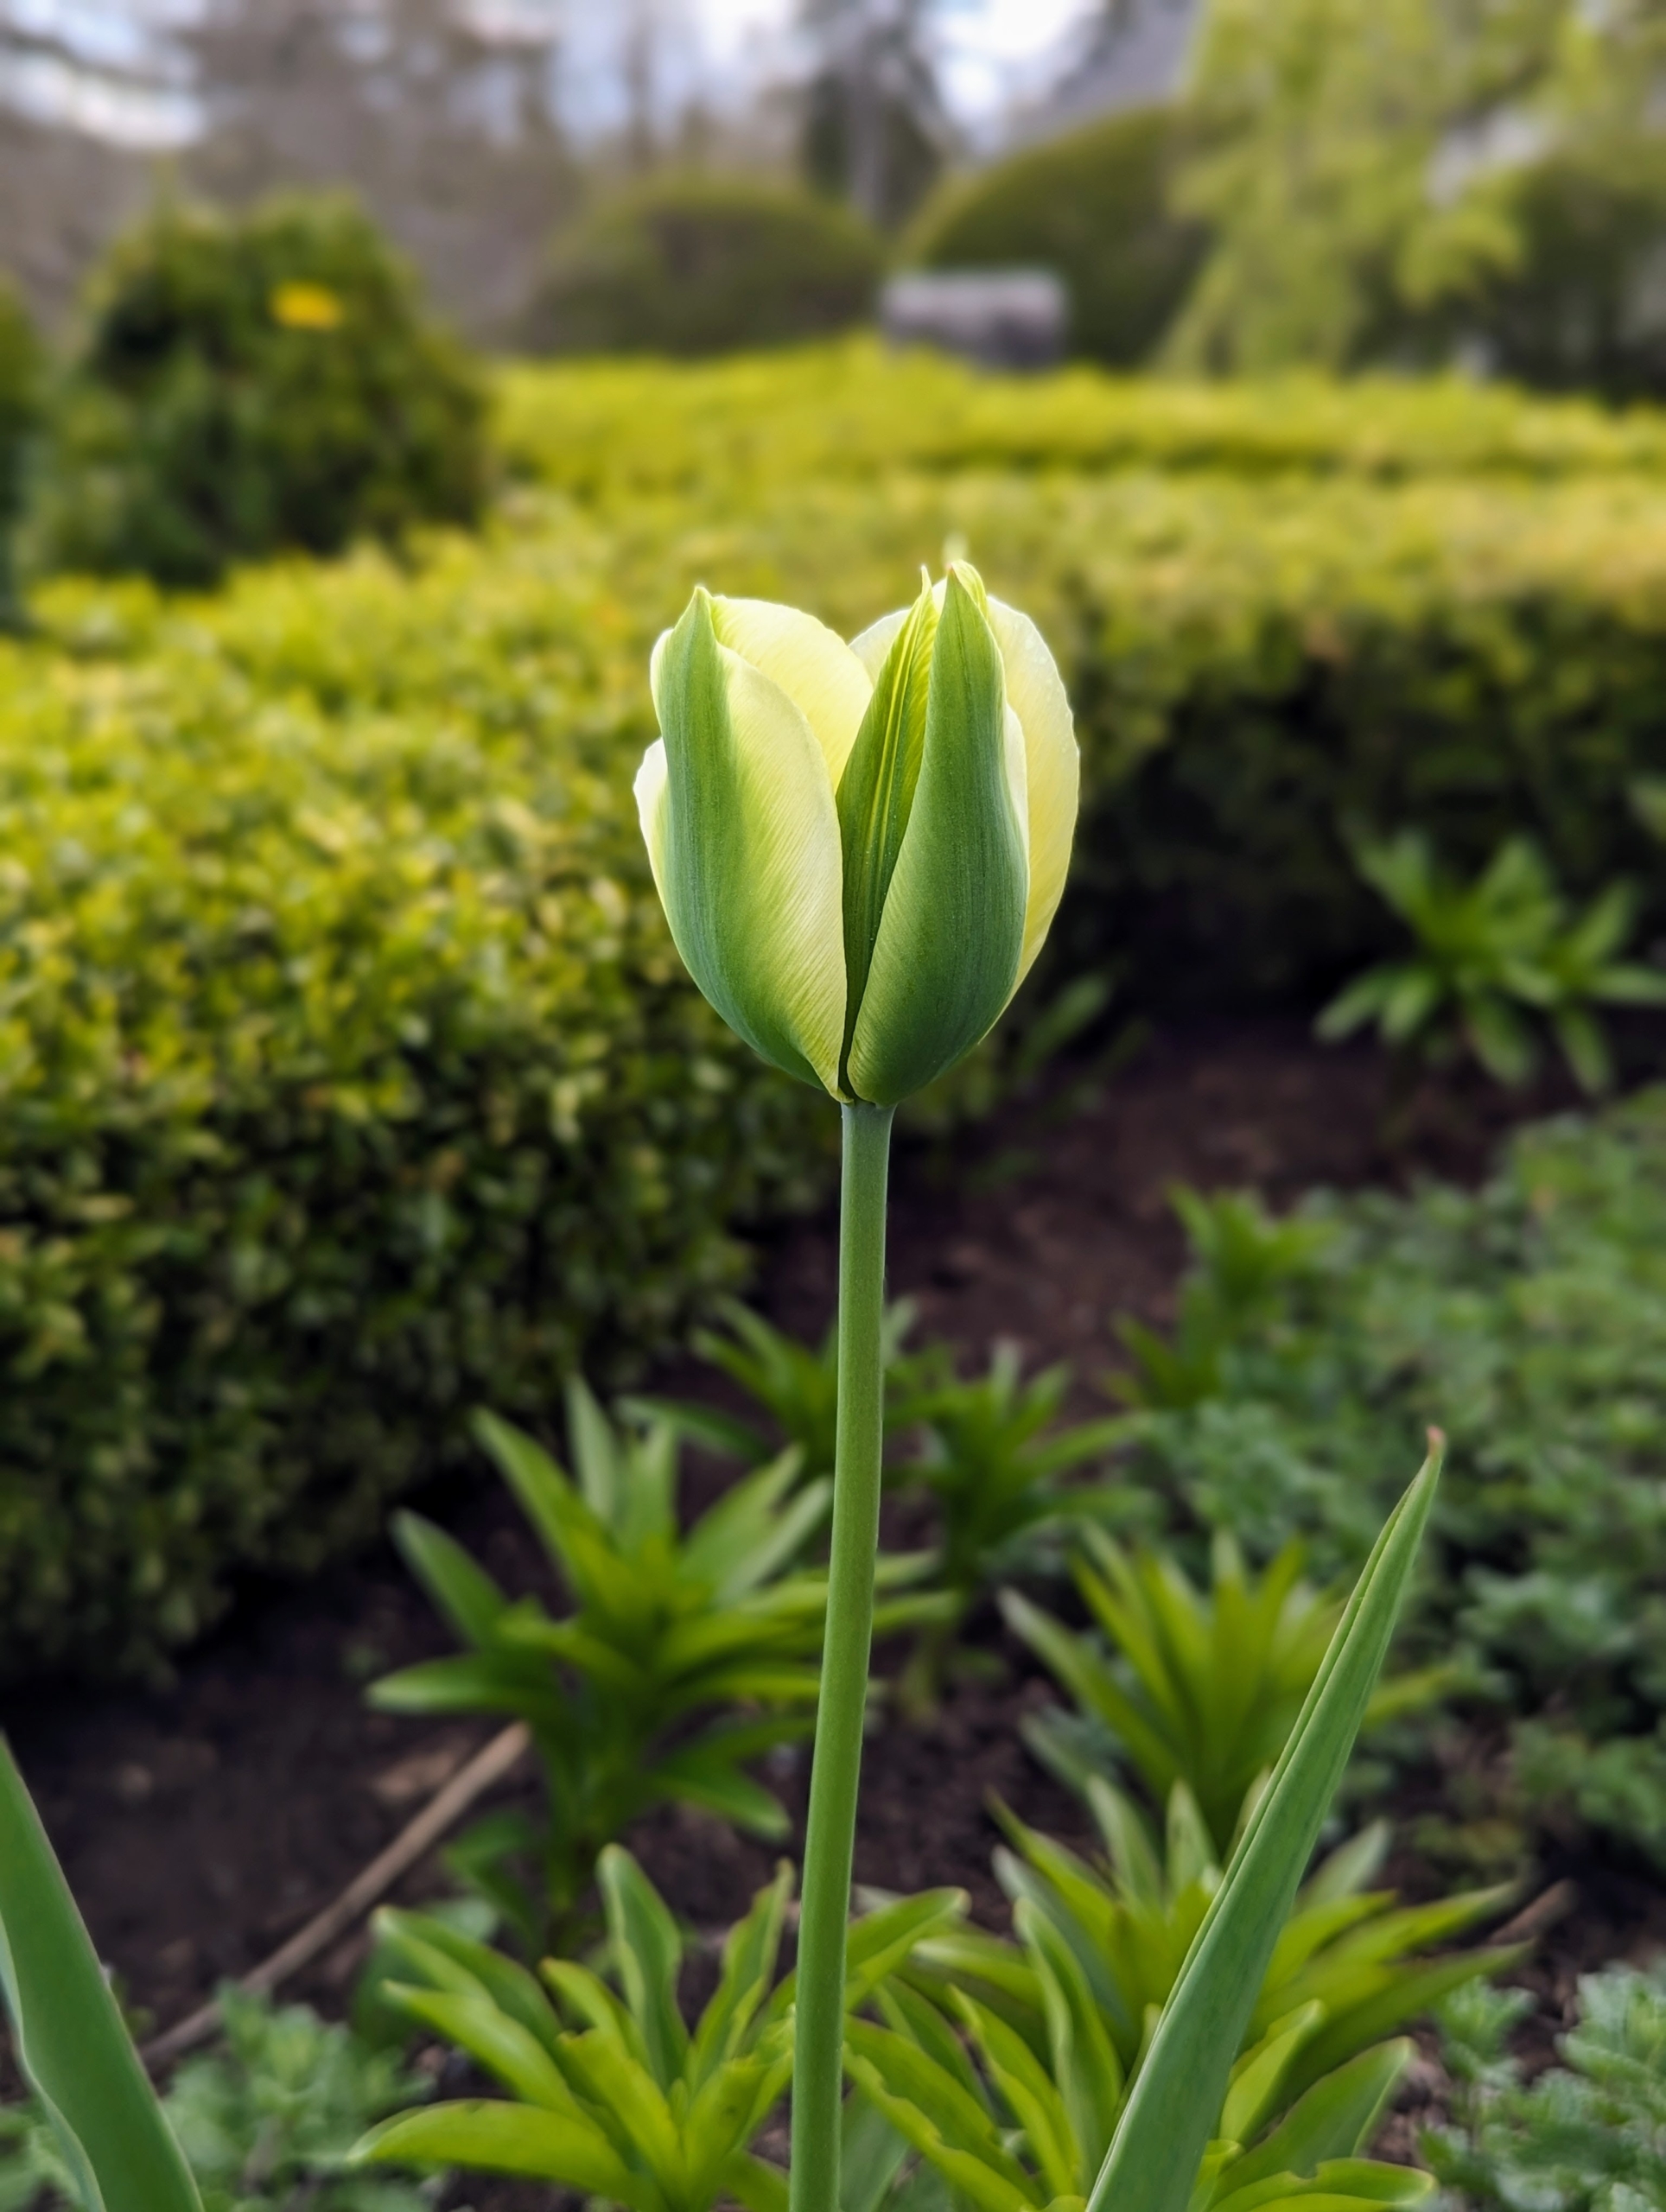
Here is a bright creamy light yellow tulip just about to open.
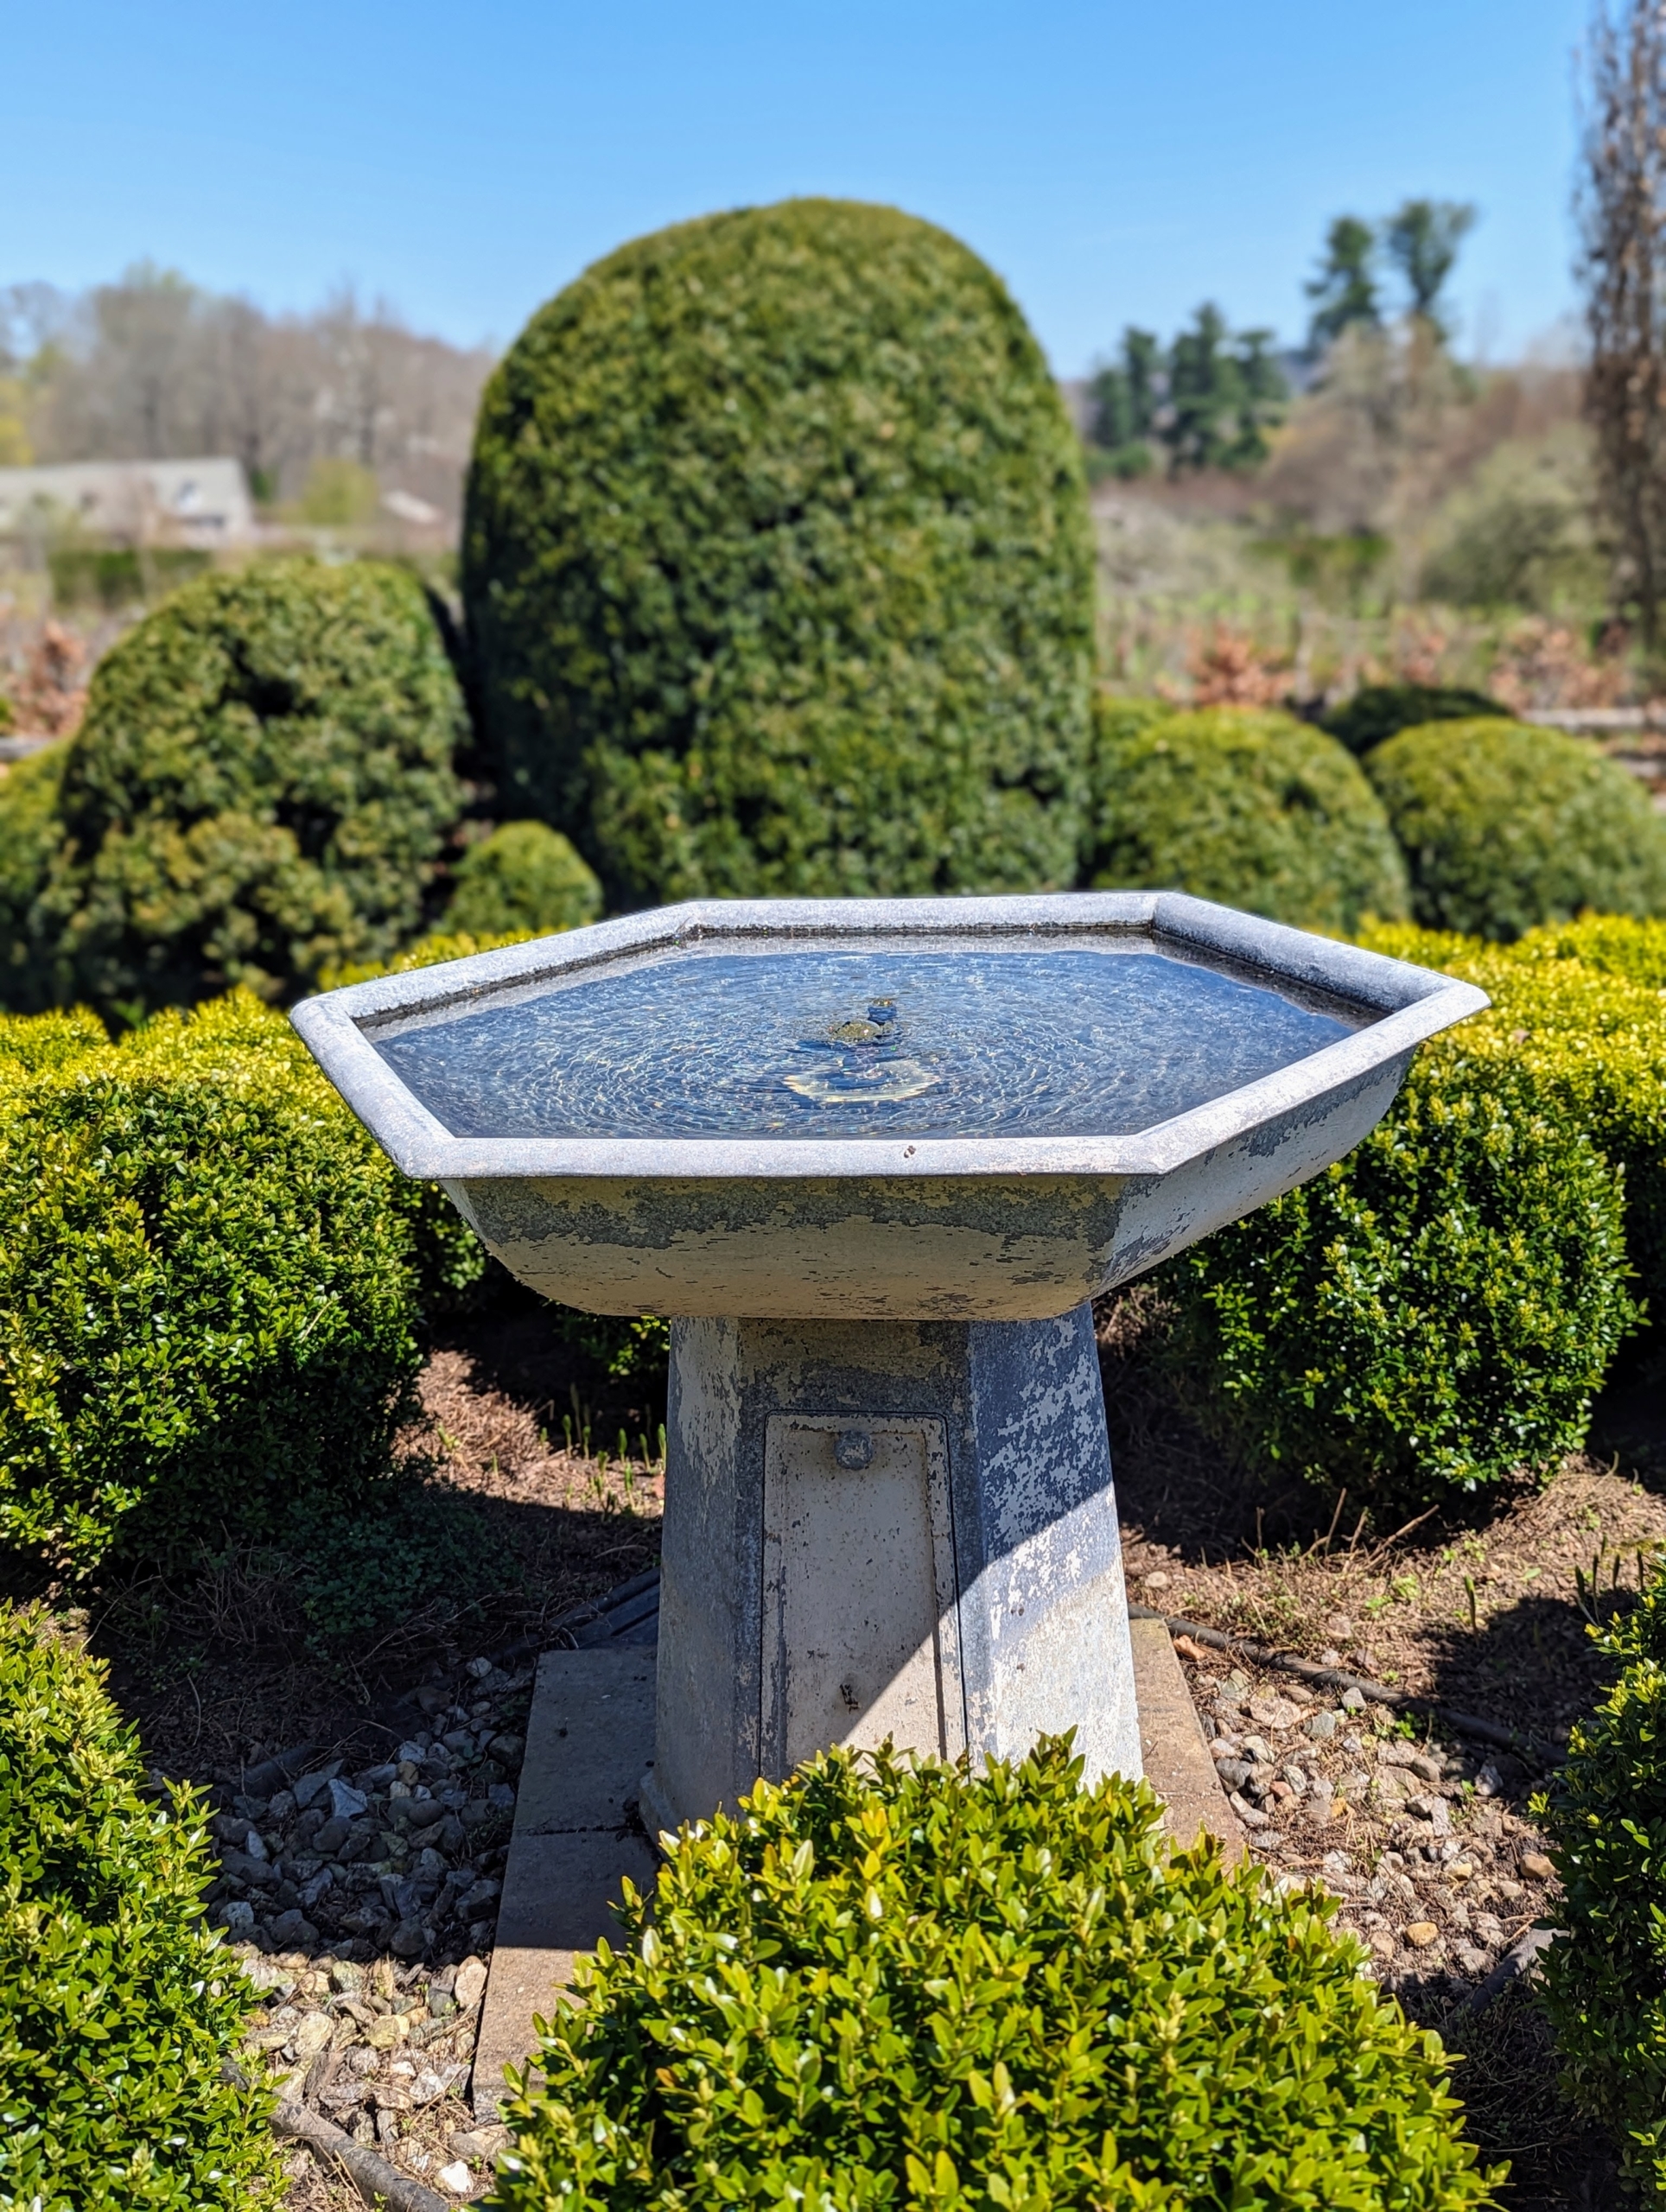
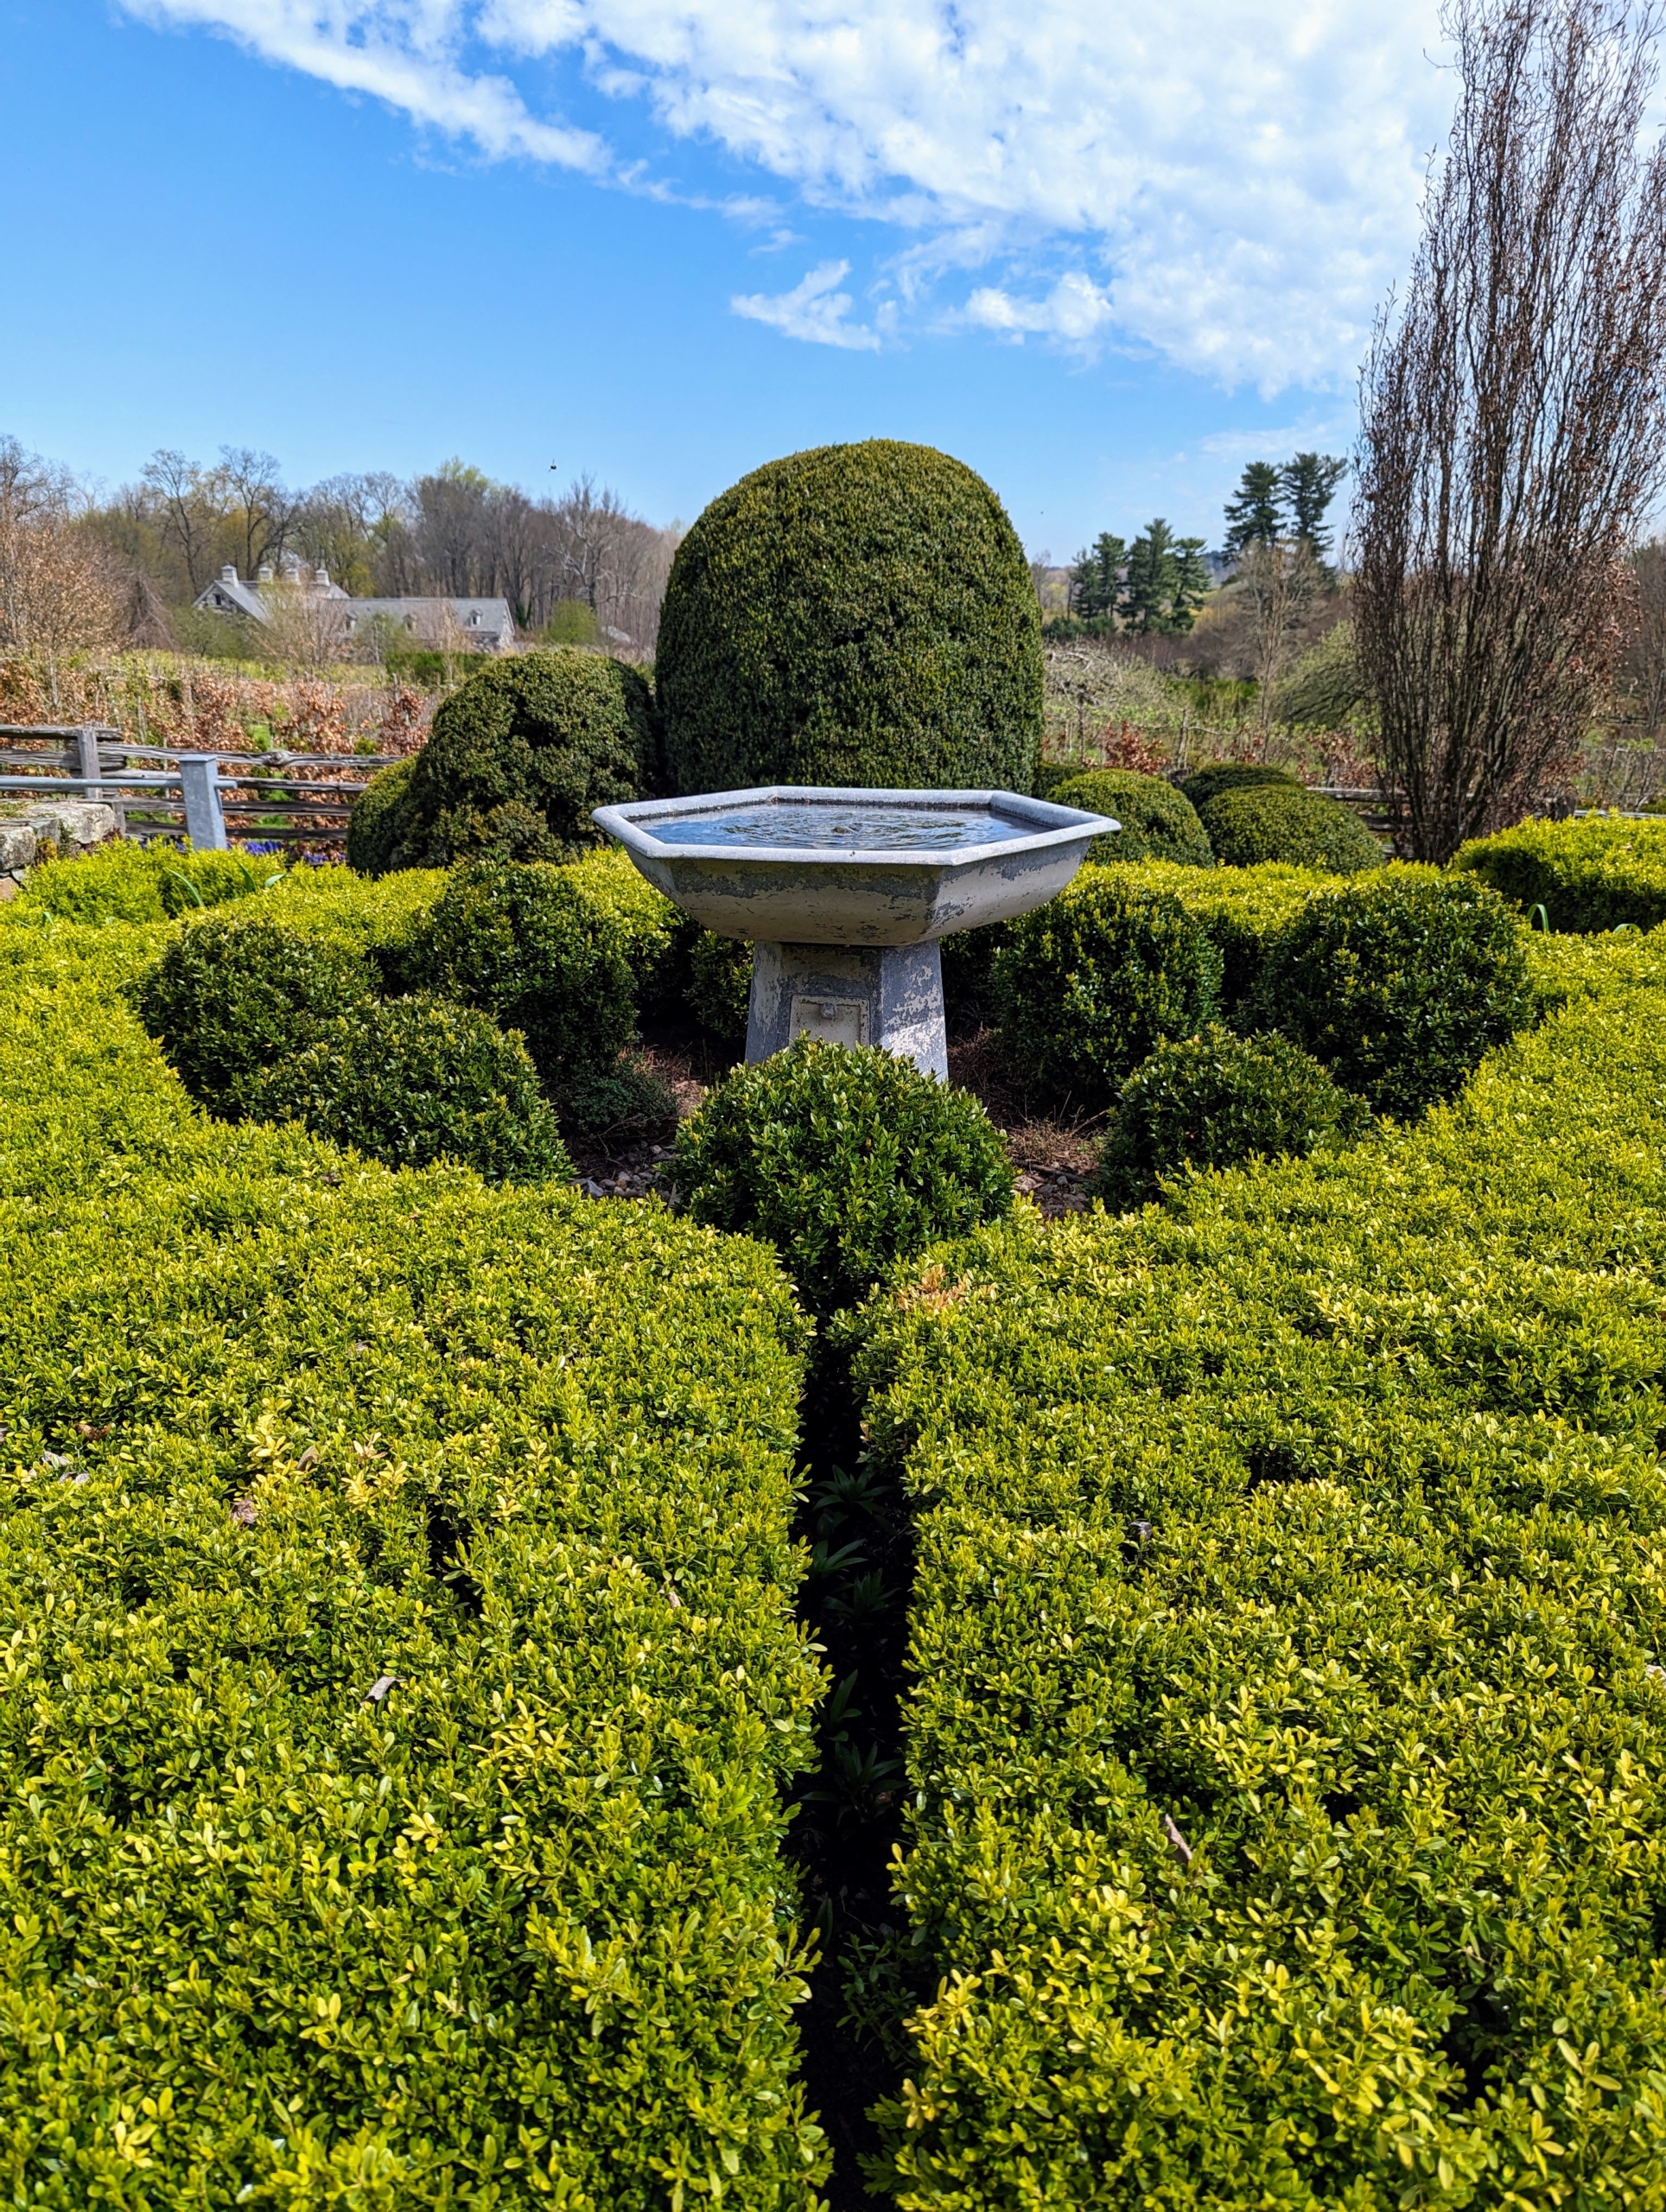
And here is one of two hand-casted antique fountains I purchased many year ago. It is turned on with the smallest dome of water possible – I wanted to be sure it was an attractive spot for visiting birds.
The fountain is surrounded with smaller boxwood shrubs and a sculpted boxwood hedge. I love this view looking over the peaceful fountains and out onto the pretty spring landscape – everything is looking so strong, healthy, and beautiful.
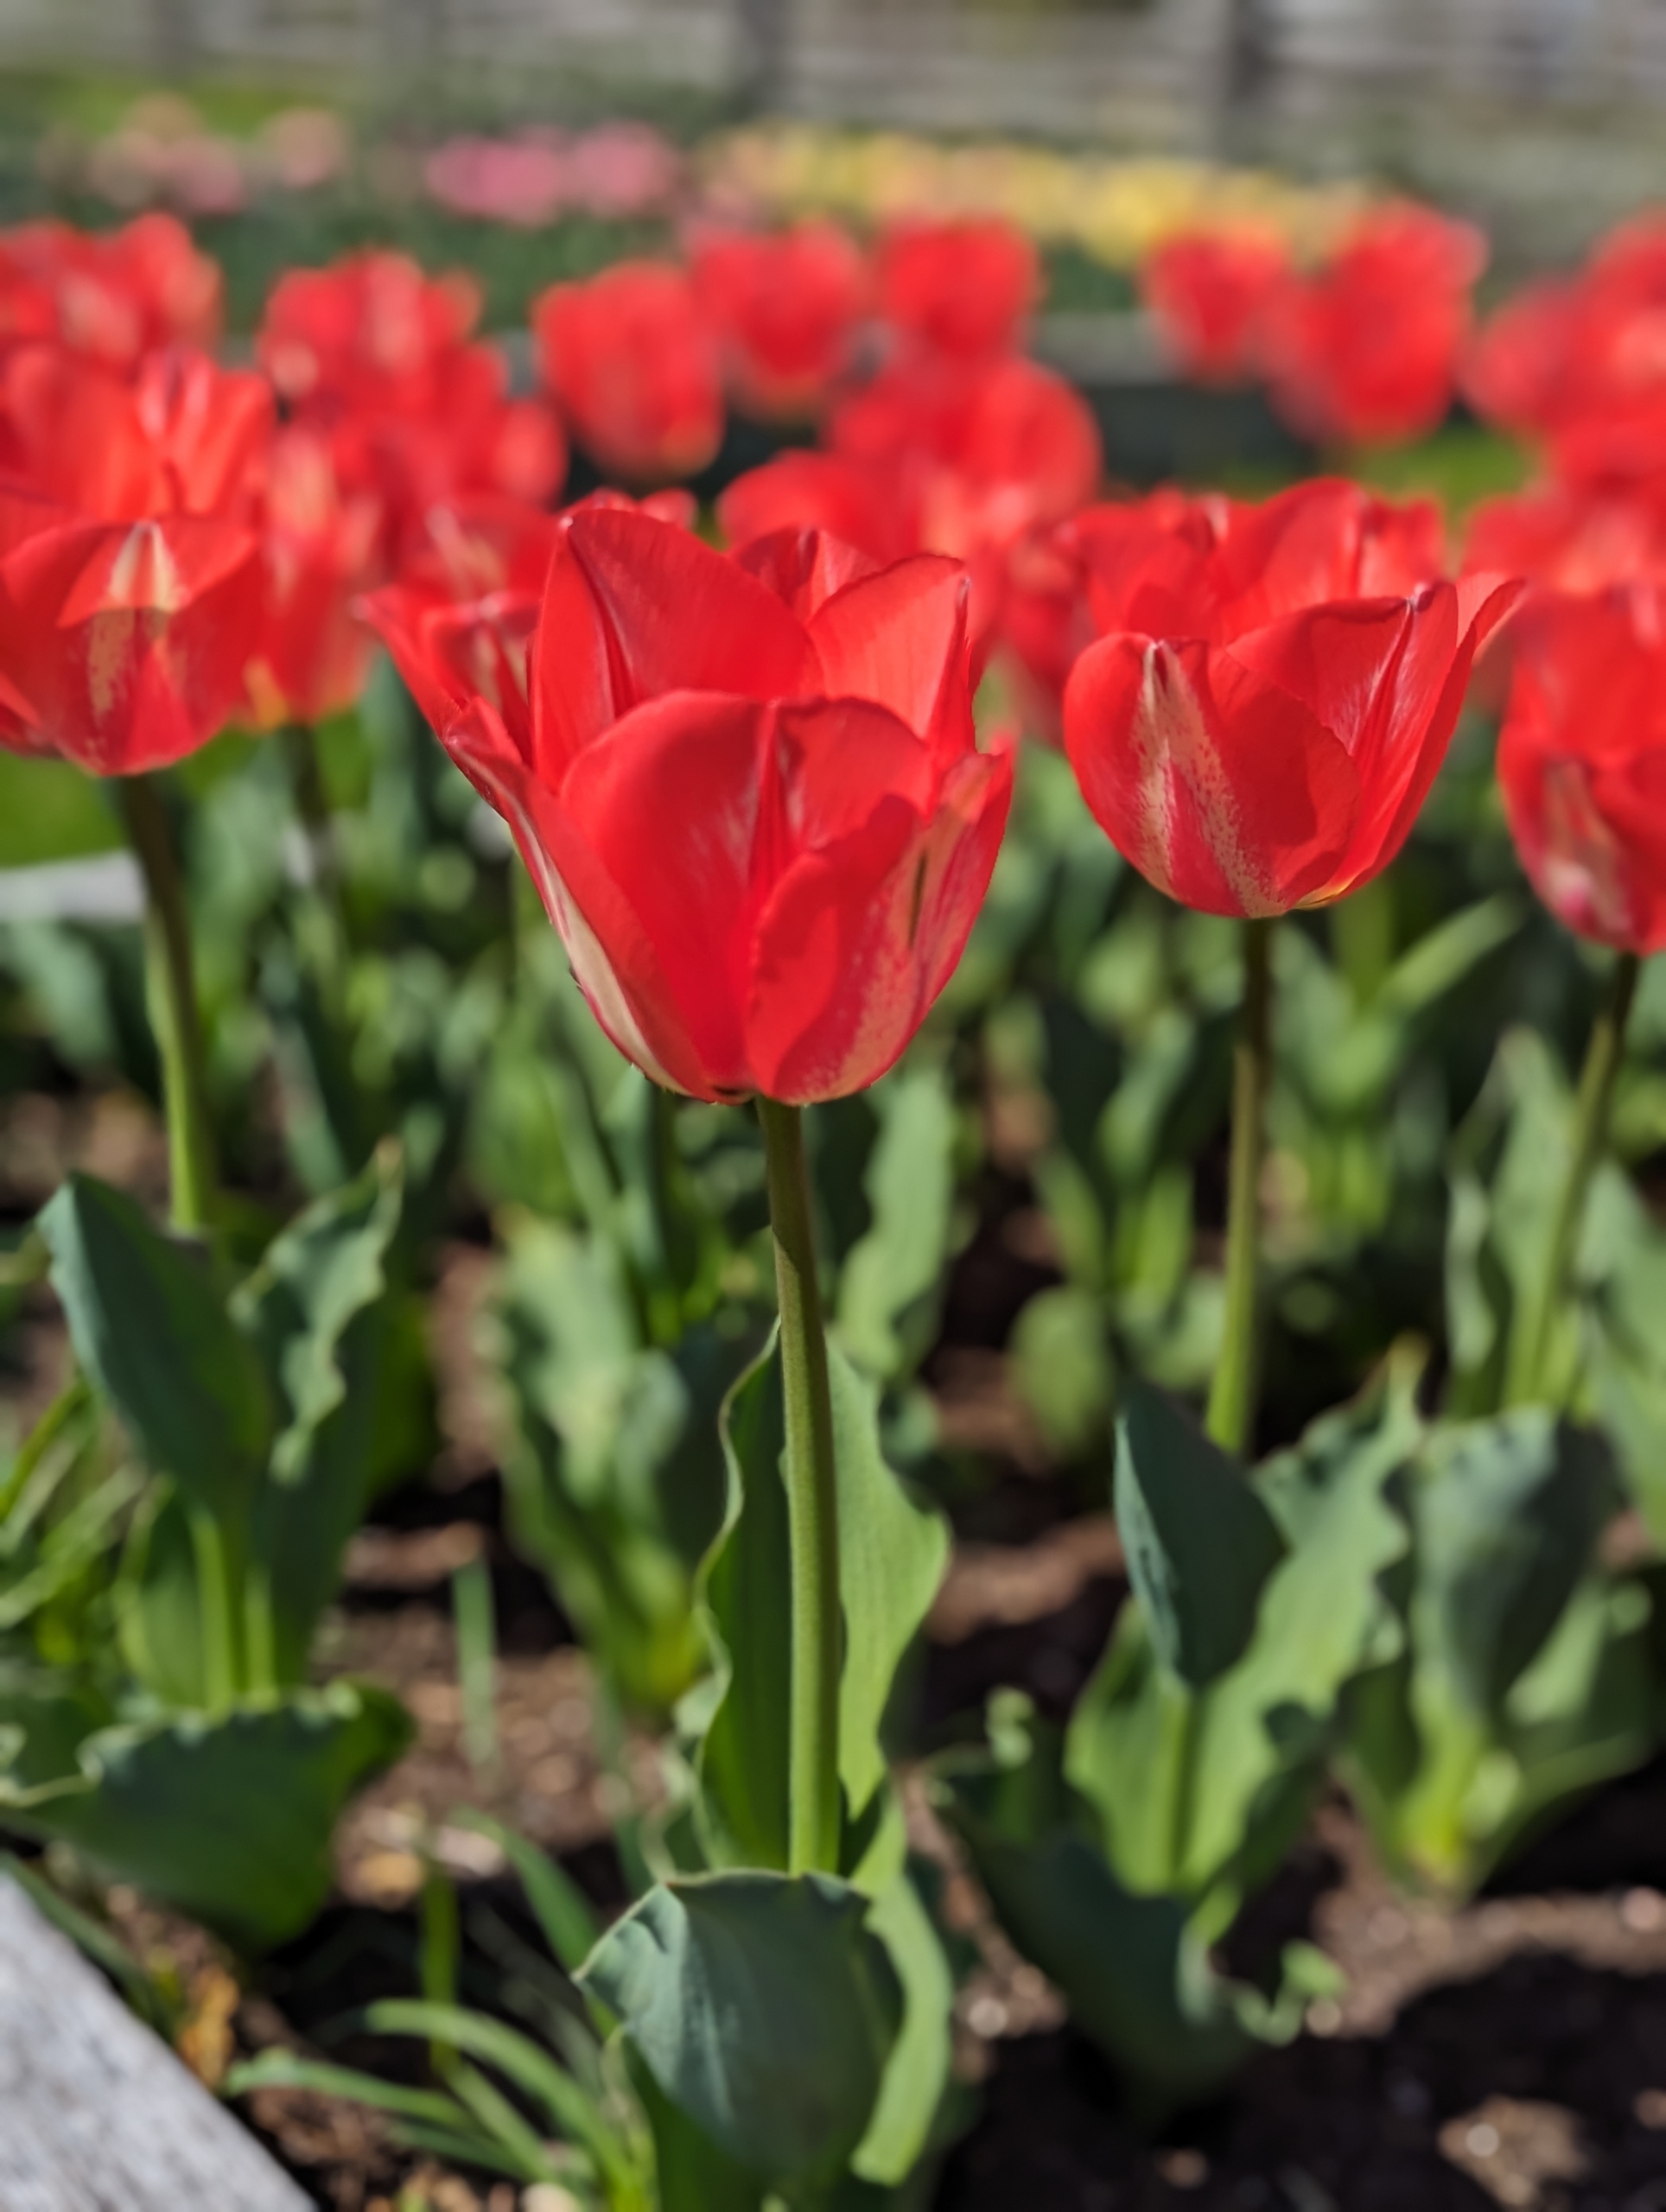
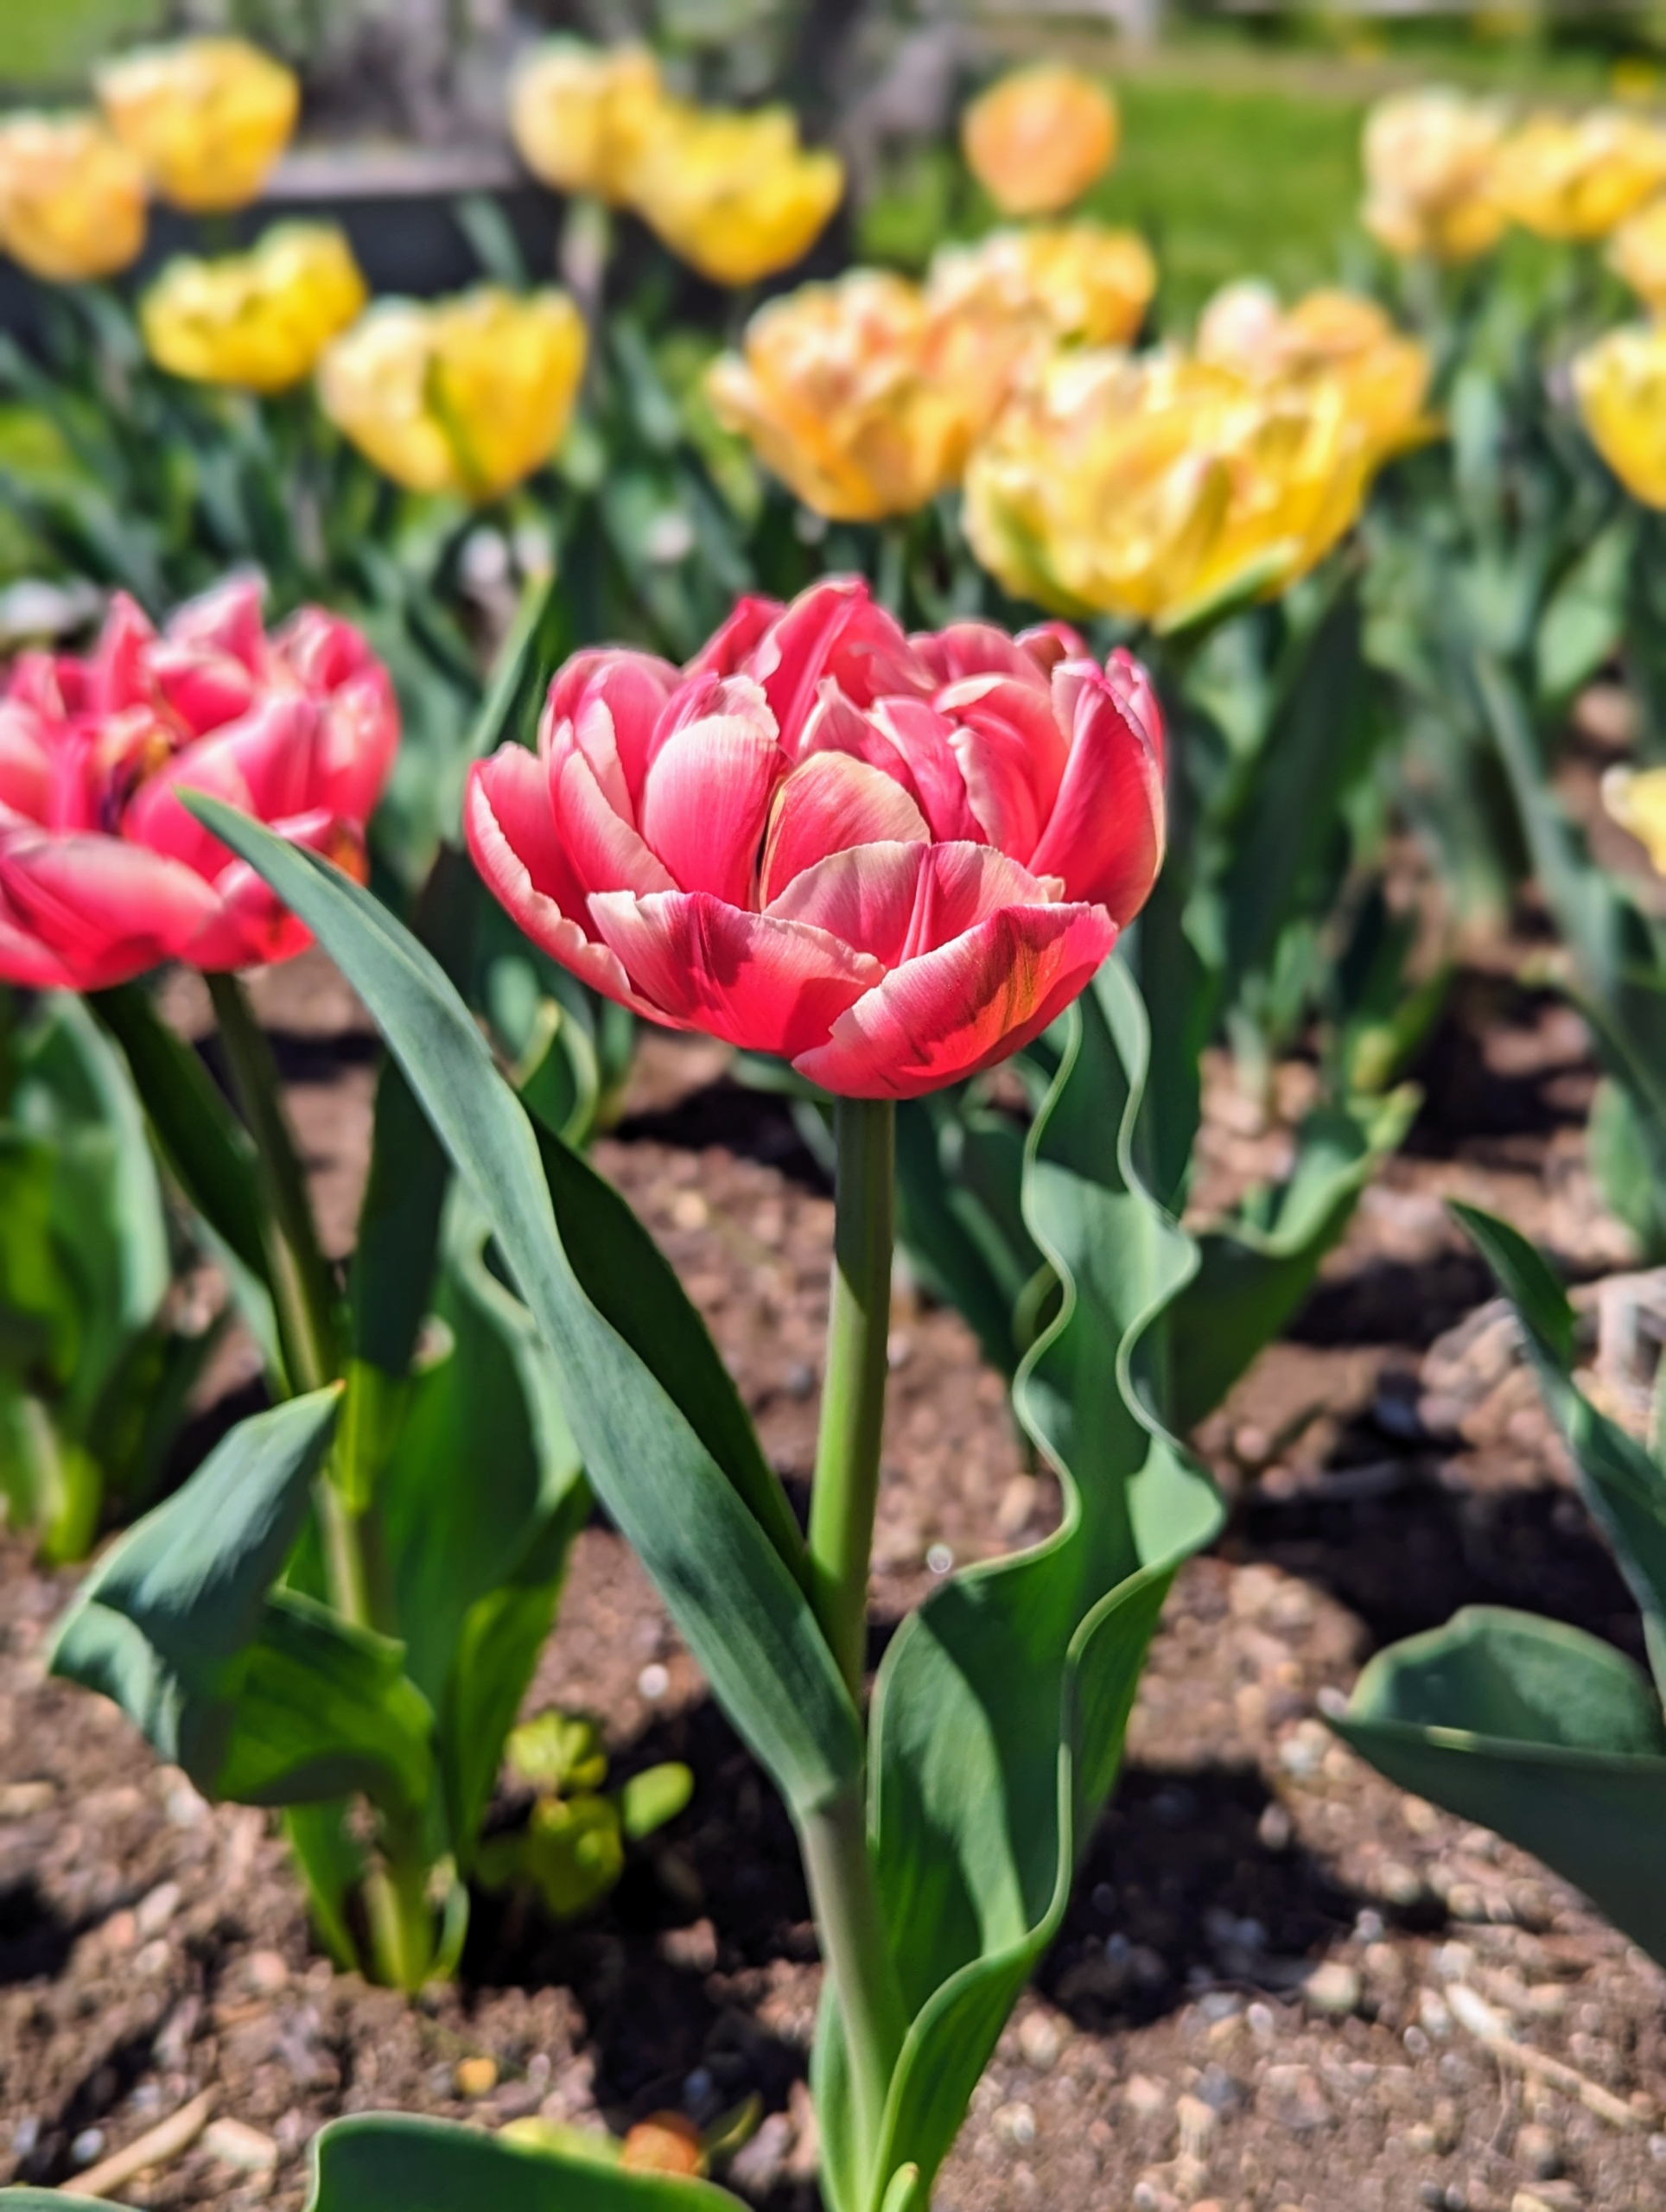
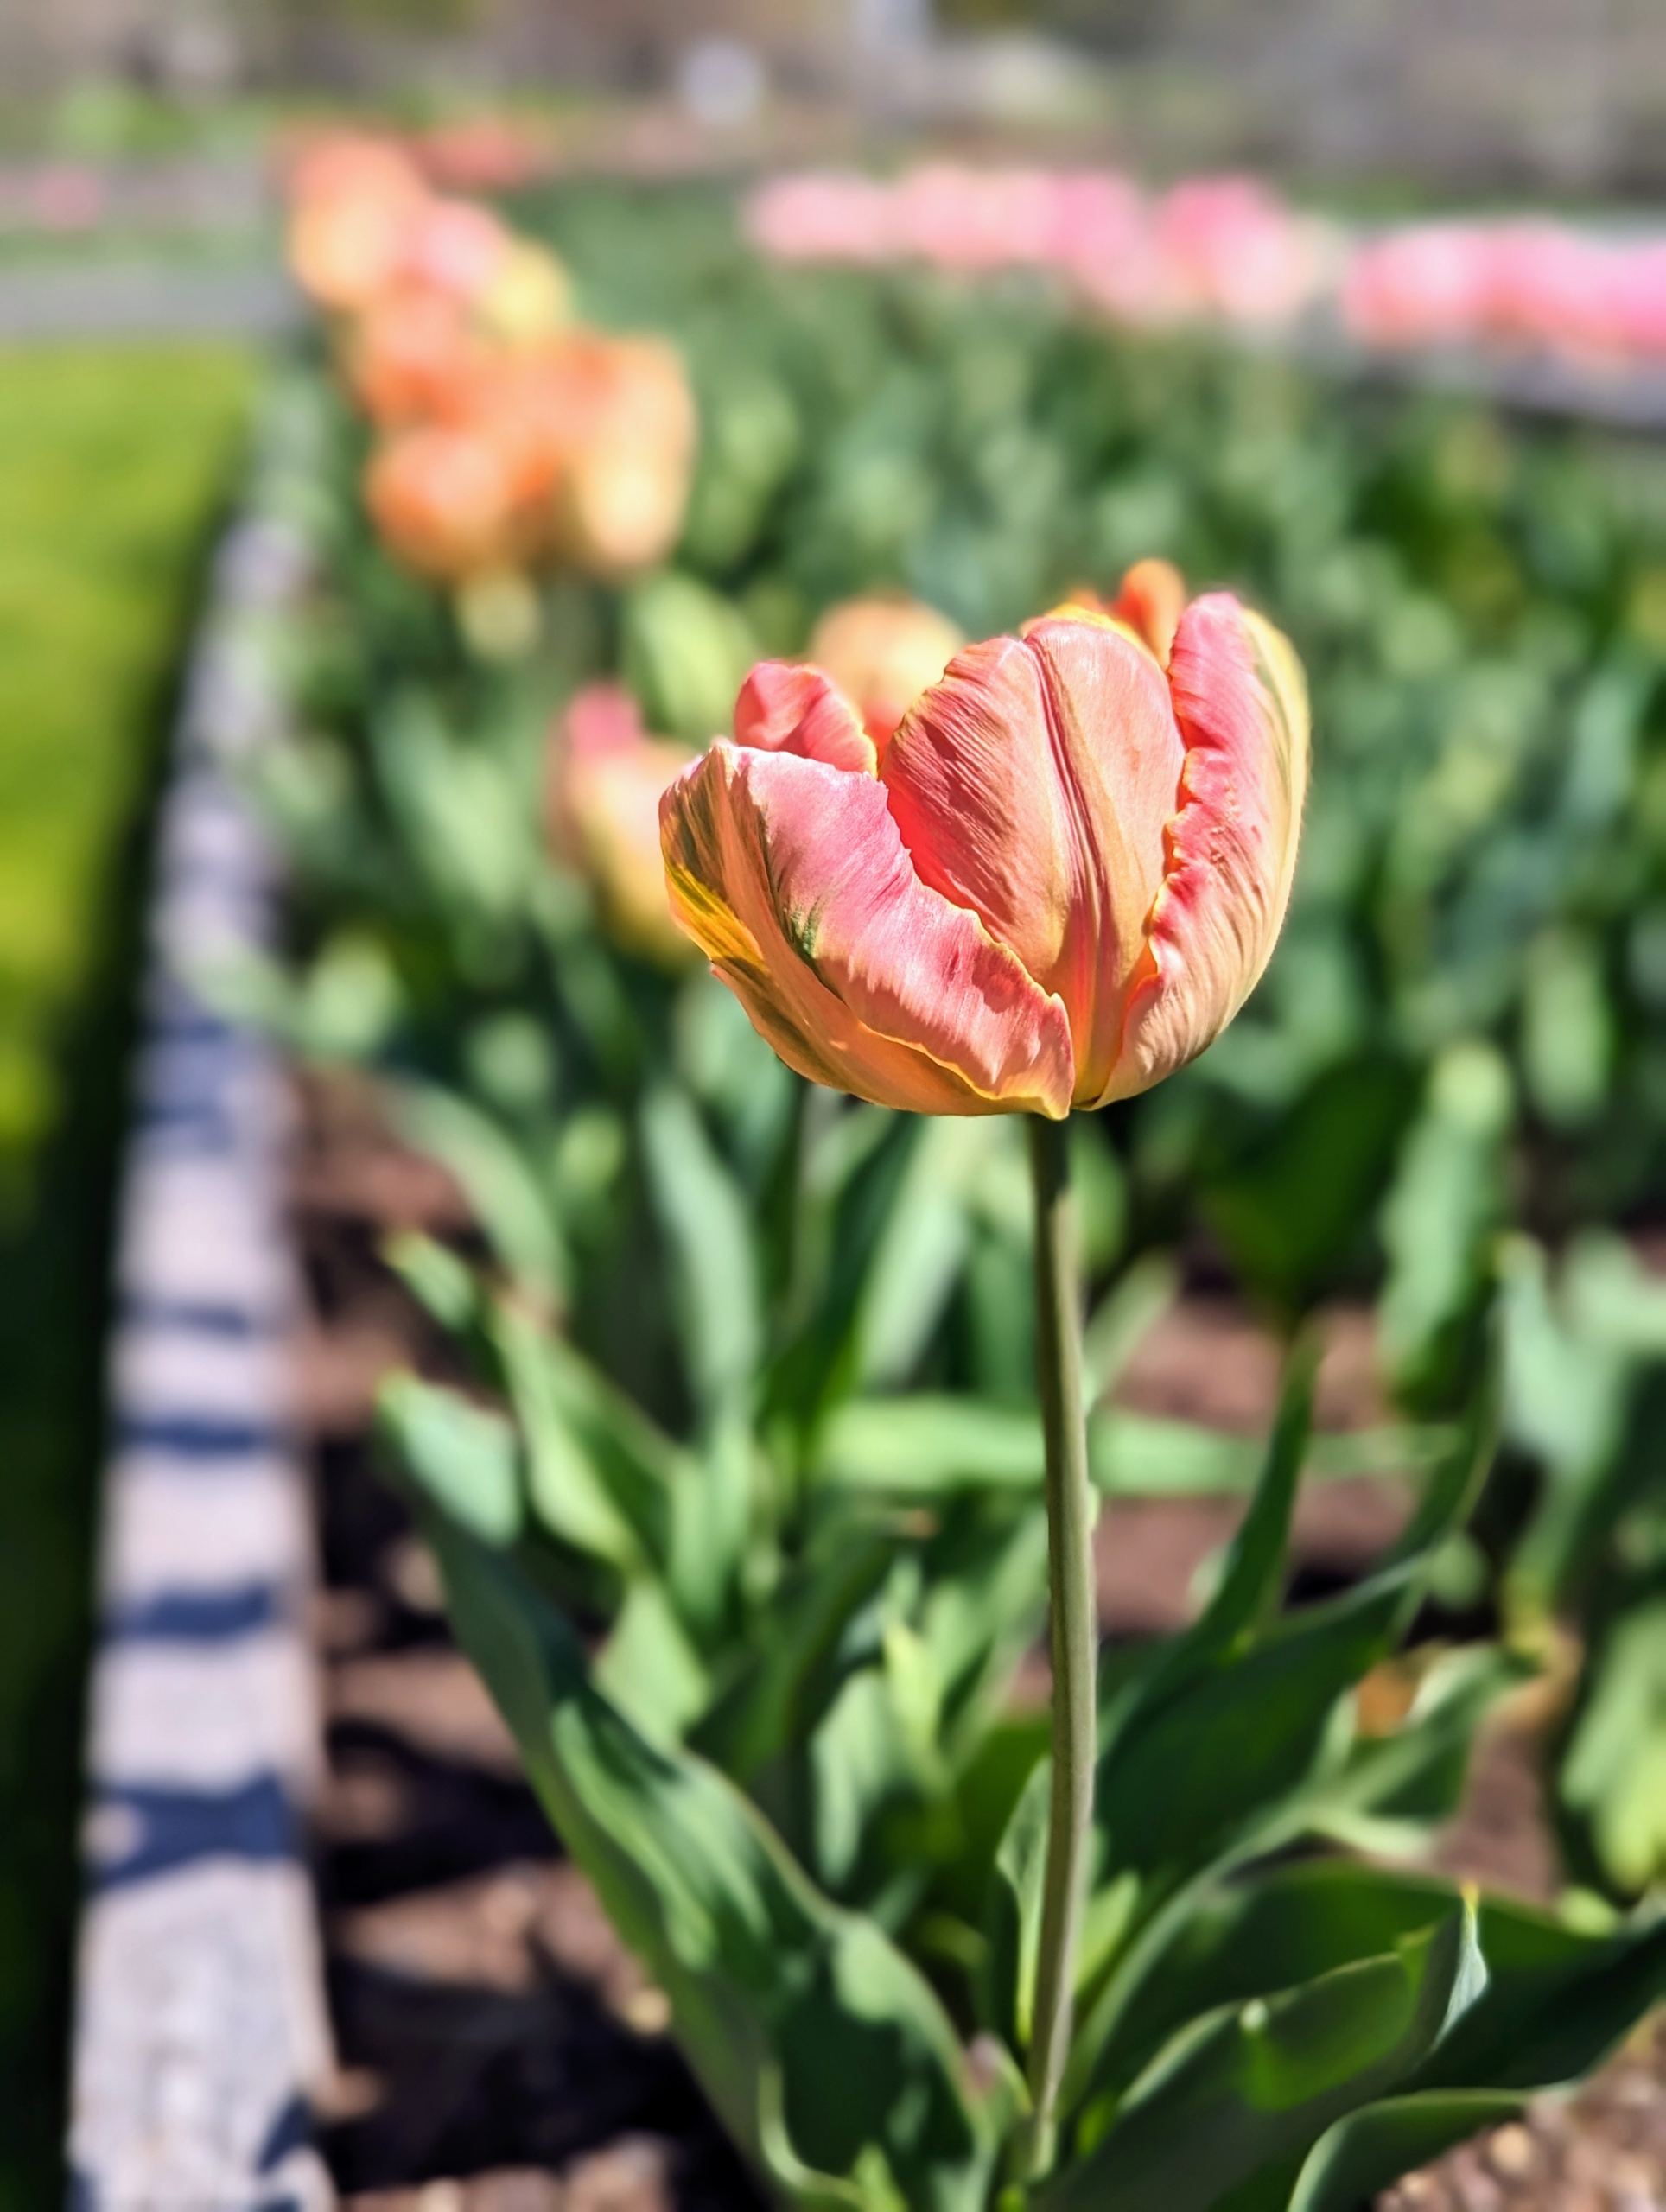
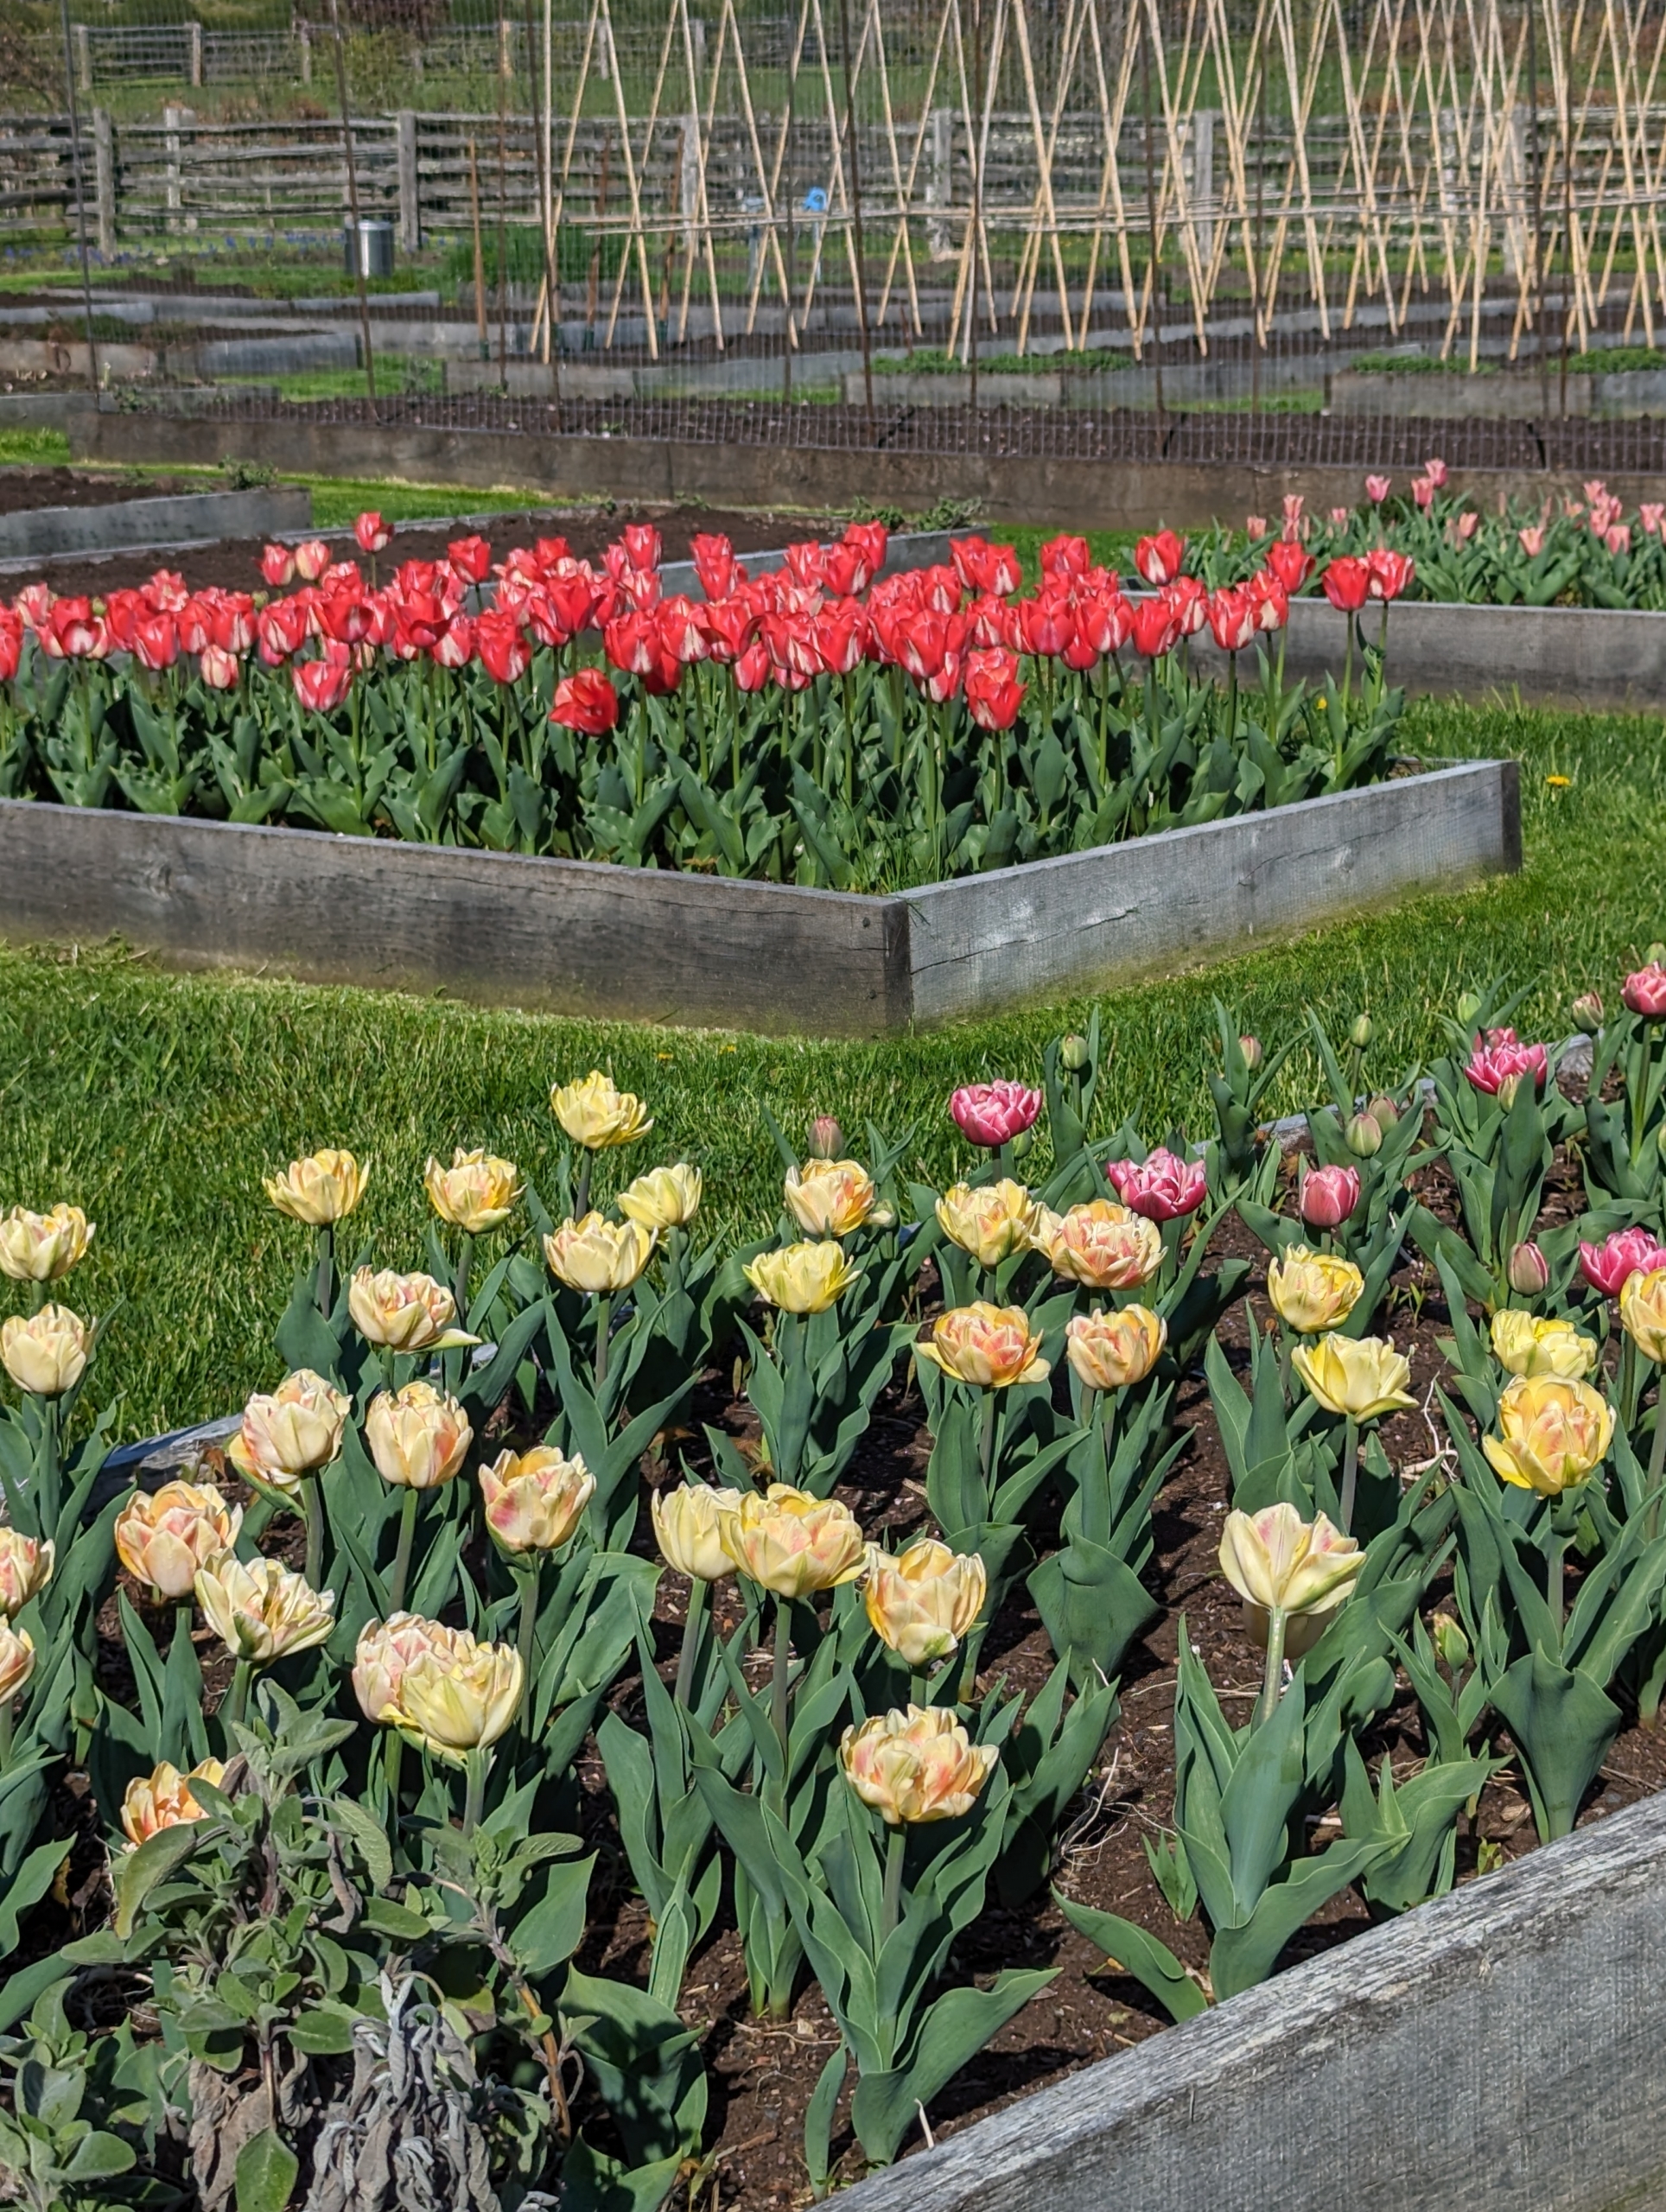
So much is growing around my Bedford, New York farm. This week, many of my tulips are in full bloom.
Tulips, which come in a variety of shapes and sizes, are perennial plants that open up each spring. They're grown for their graceful leaves and bright, cheery blooms. Some are traditional and cup-shaped, some have fringed petals, others have pointed ones, and some are full of fanciful ruffles. Some varieties even carry a soft, subtle scent.
Here are some photos, enjoy.
It’s so exciting to see the swaths of color in the garden beds after a gray, dreary, winter. Look at these perfectly formed tulips.
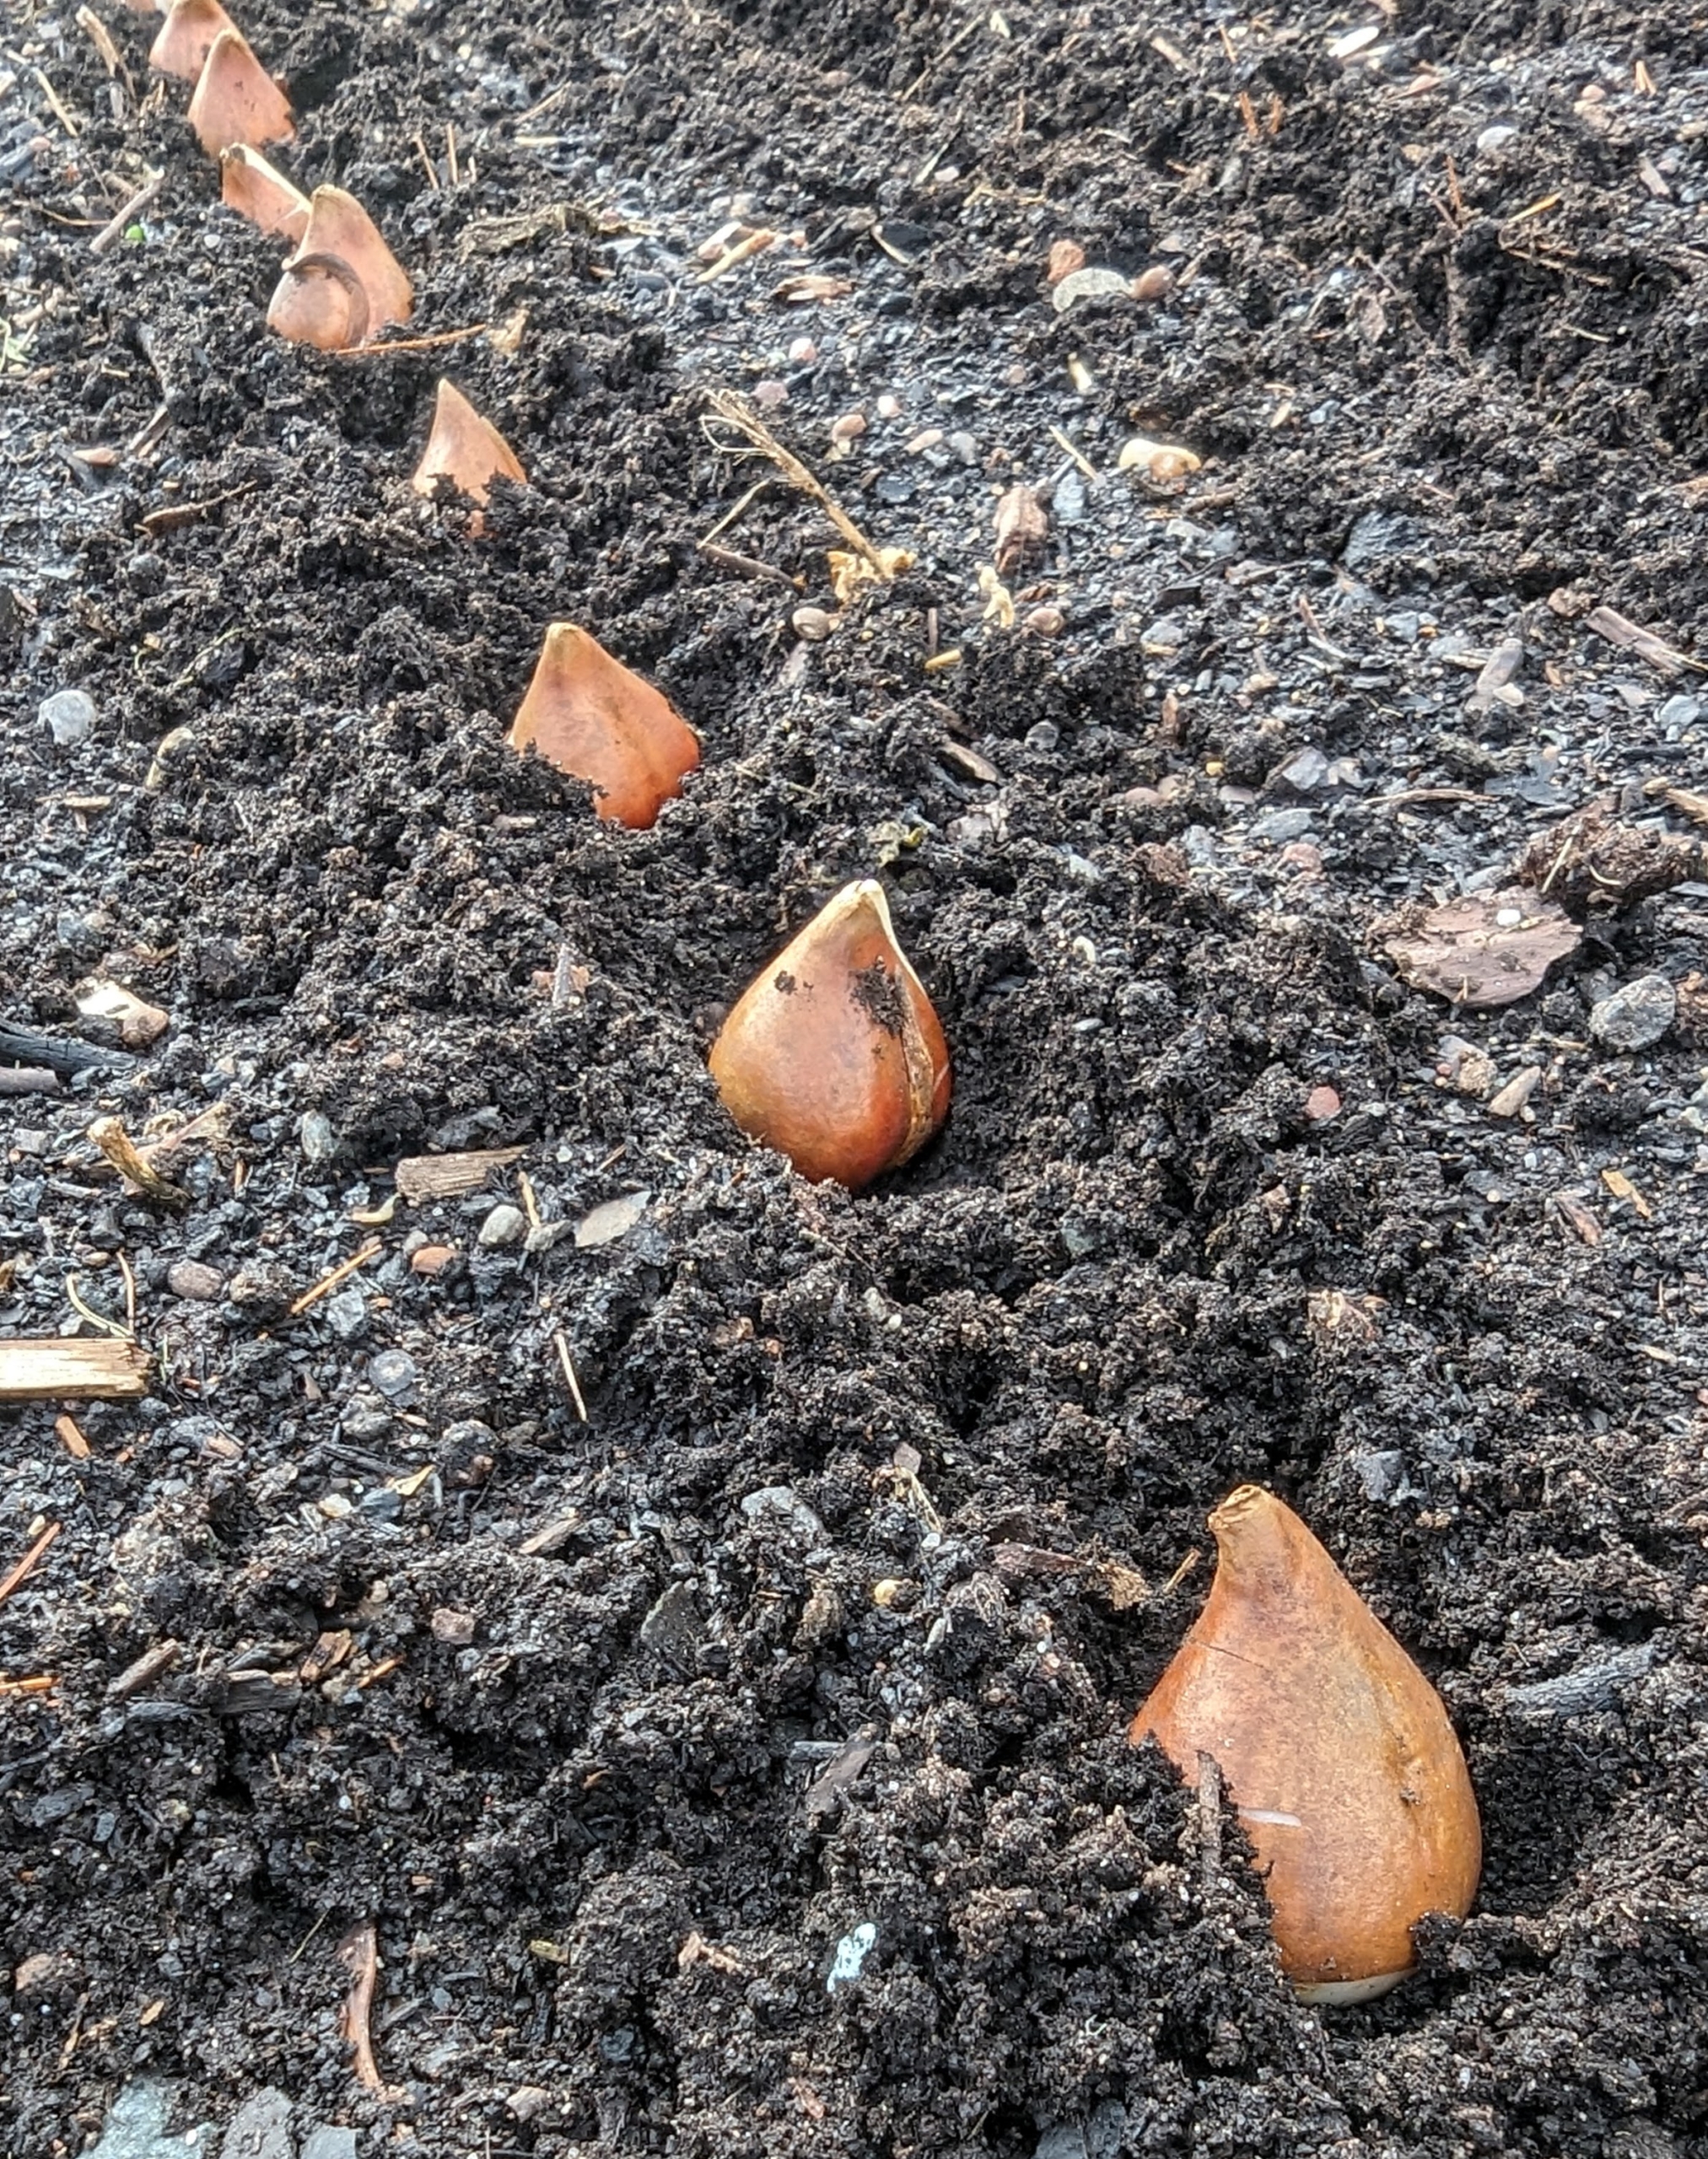
Just before last year’s Thanksgiving holiday, we planted all of our tulip bulbs in a handful of raised beds in the vegetable garden. We received hundreds of tulip bulbs from The Flower Hat. These look so healthy. Any kind of bulb should be firm and free of soft spots or visible rot.
All tulips are planted in the fall and bloom in the spring. They grow best in zones 3 to 8 where they can get eight to 12 weeks of cold temperatures while under the soil.
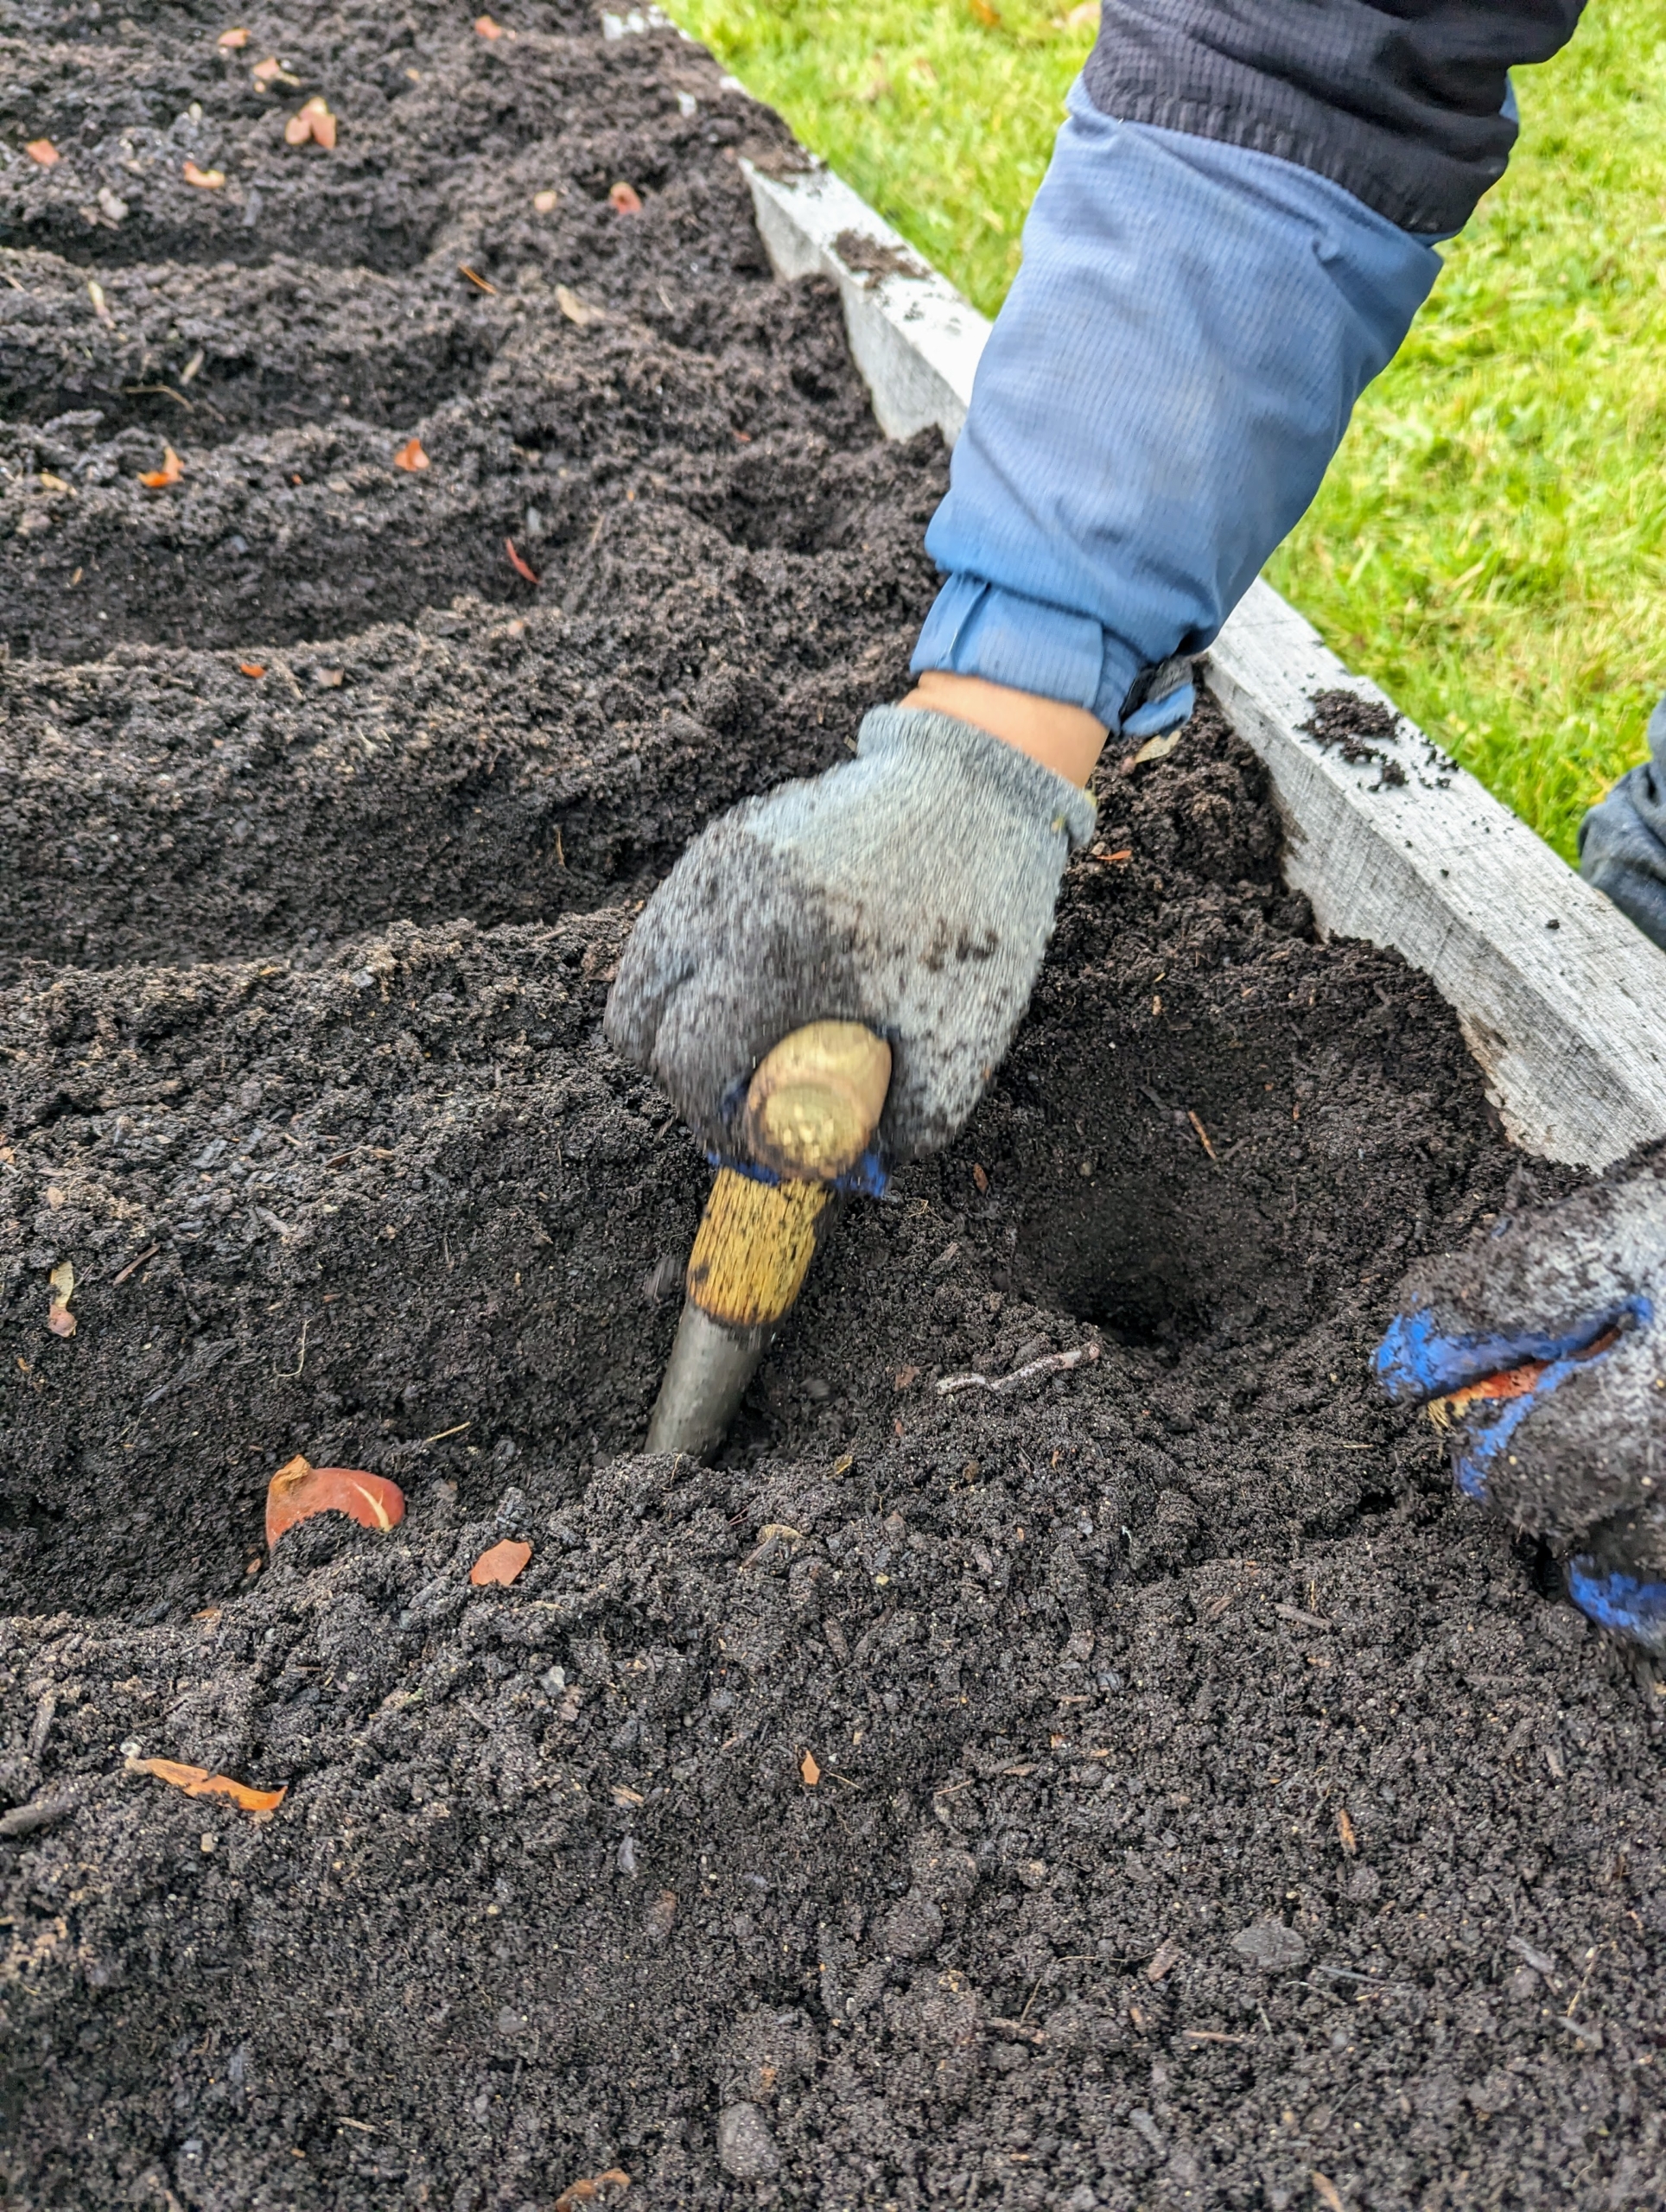
Once all the bulbs were in their designated rows, each one was placed into a hole made with a dibber. Tulip bulbs are medium sized, so they should be buried at least six to eight-inches deep. As a rule of thumb, bulbs should be planted about three times the height of the actual bulb.
And always place each bulb with the pointed end faced up. This is important for all bulbs. If the pointed end is not obvious, look for the flat side of the bulb, which is the bottom.
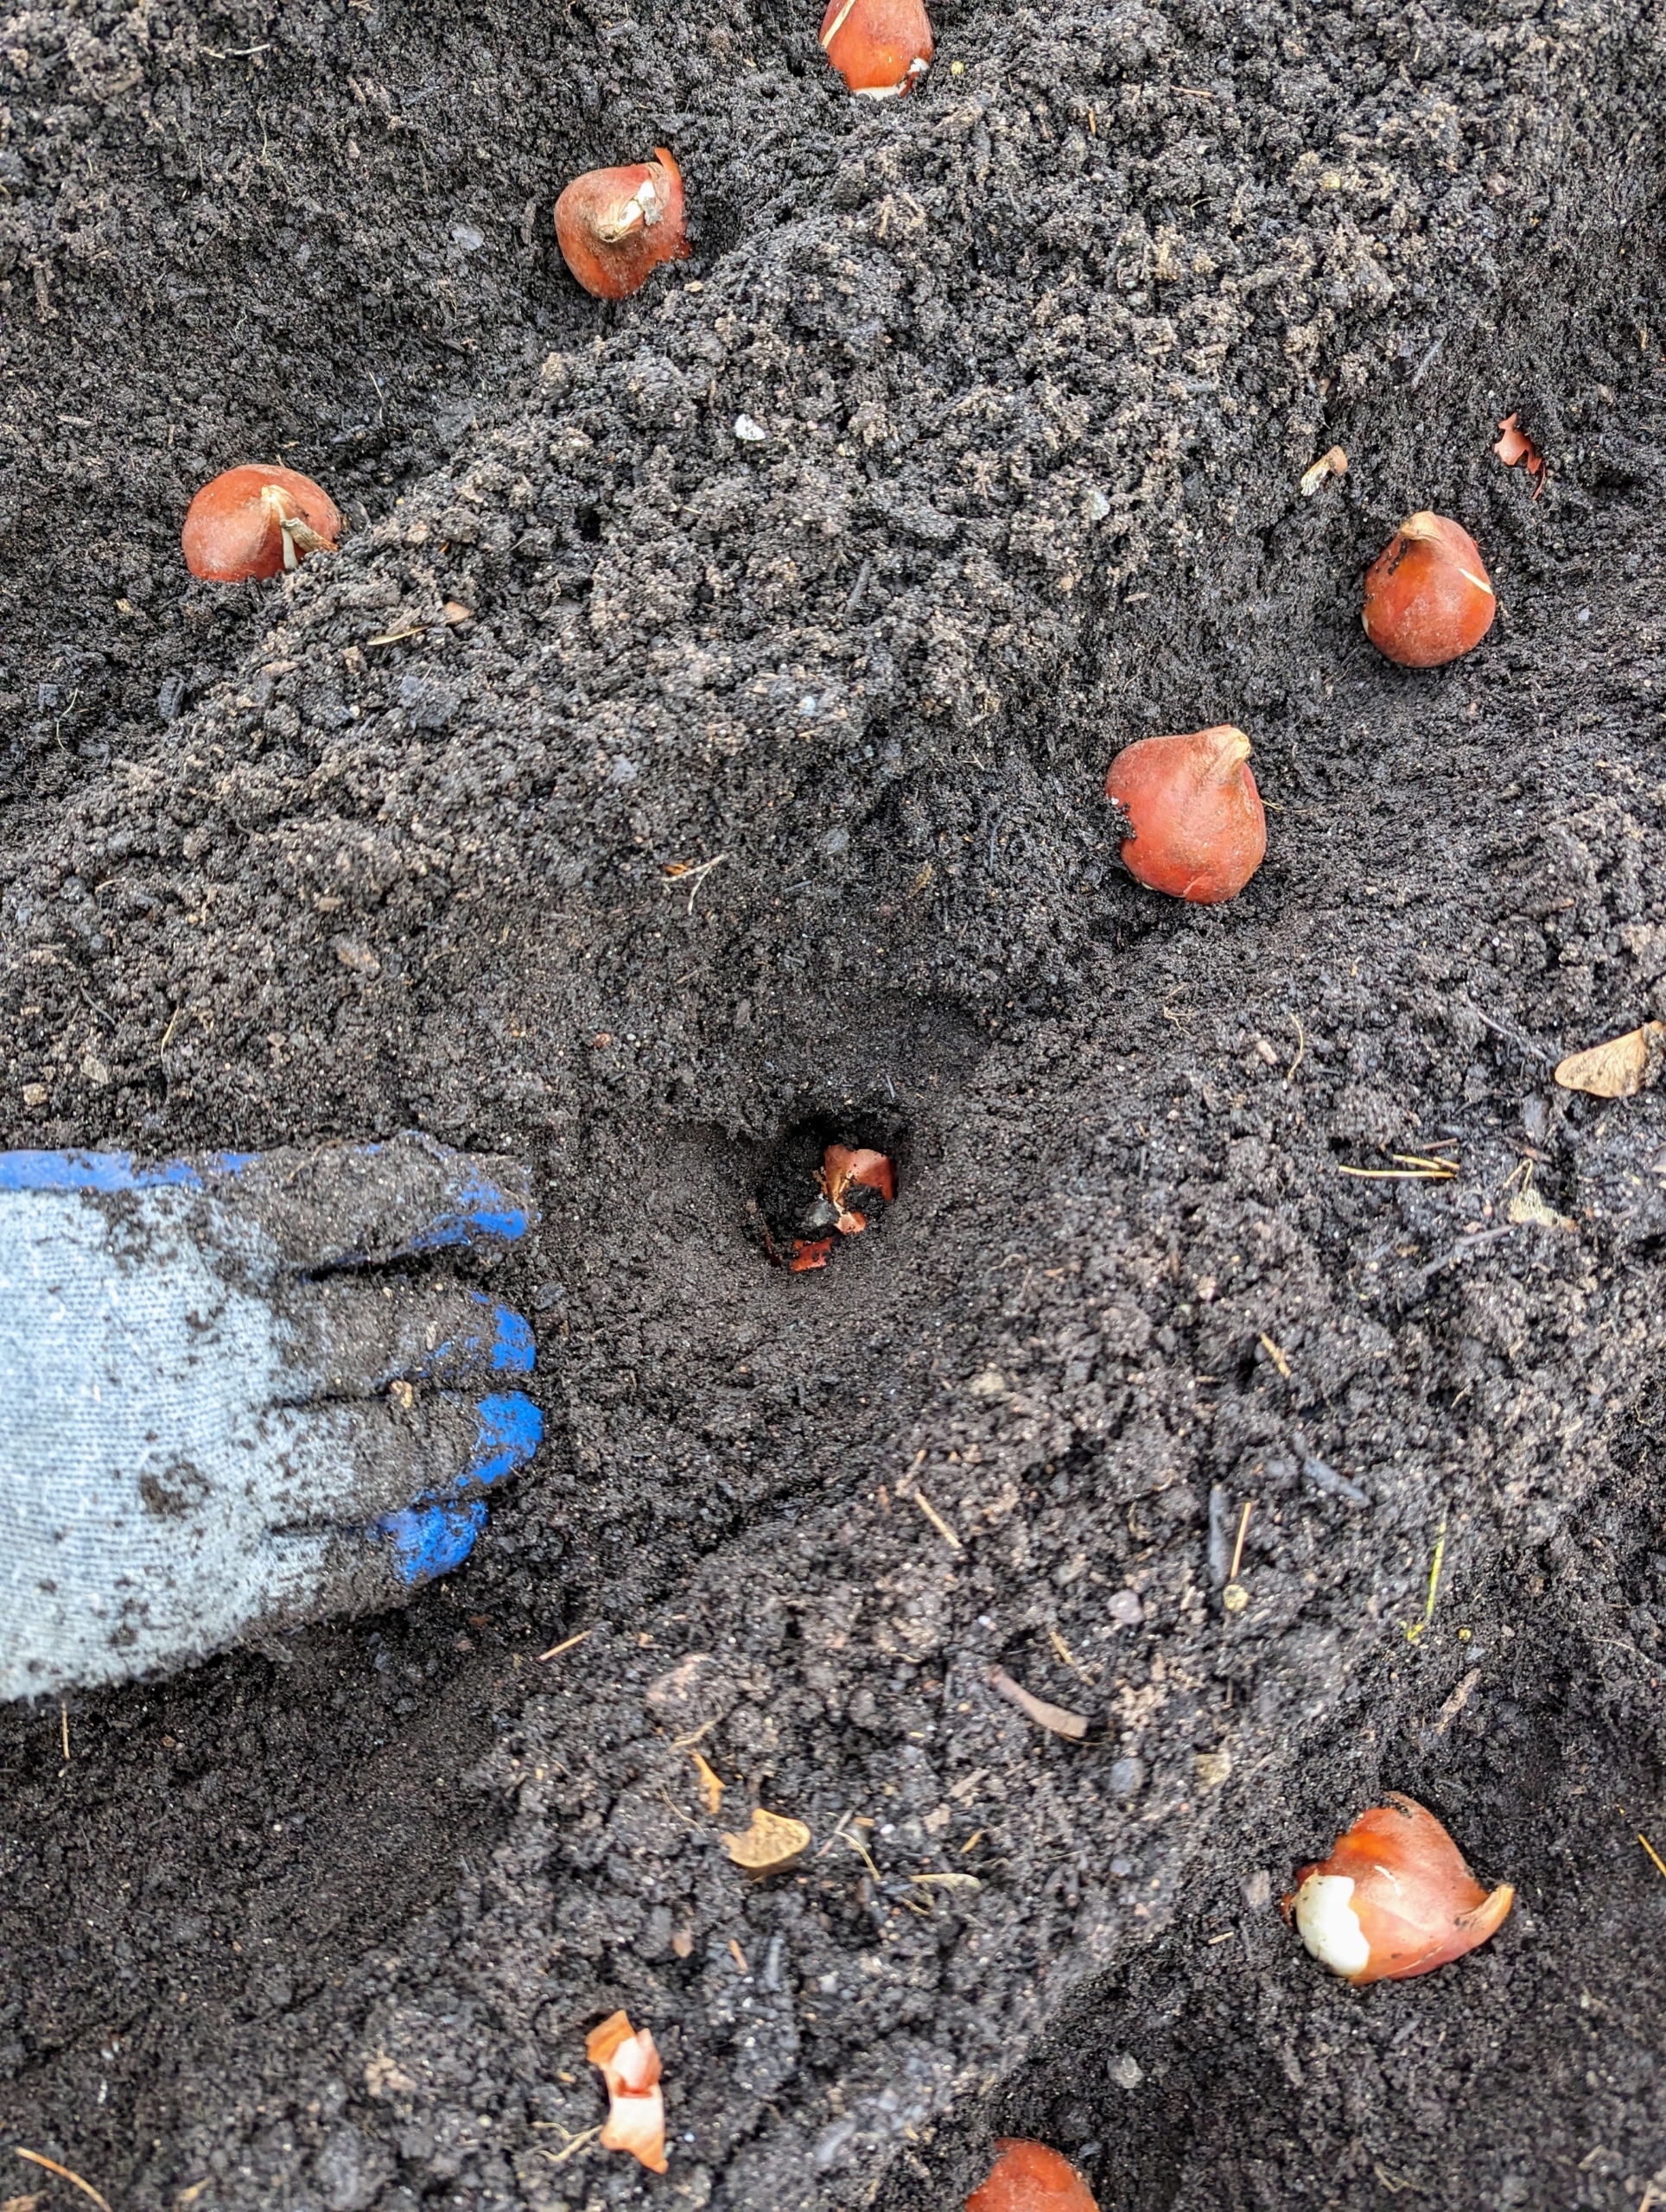
The beds were raked carefully so as not to disturb any bulb placements. Finally, they were left to nature for the duration of winter.
This week, many were blooming beautifully! Tulips have a fascinating history. Although closely associated with Holland, tulips were first cultivated in Turkey. The name tulip is believed to be derived from the Turkish word for turbans, “tulbend,” because of their resemblance. They gained popularity in Europe in the 17th century, peaking in 1636 to 1637.
This is Tulip ‘Columbus’ with its rich deep pink double flowers and petals tipped in silvery cream.
From above, one can see the large cupped, peony-shaped blooms and pointed petals.
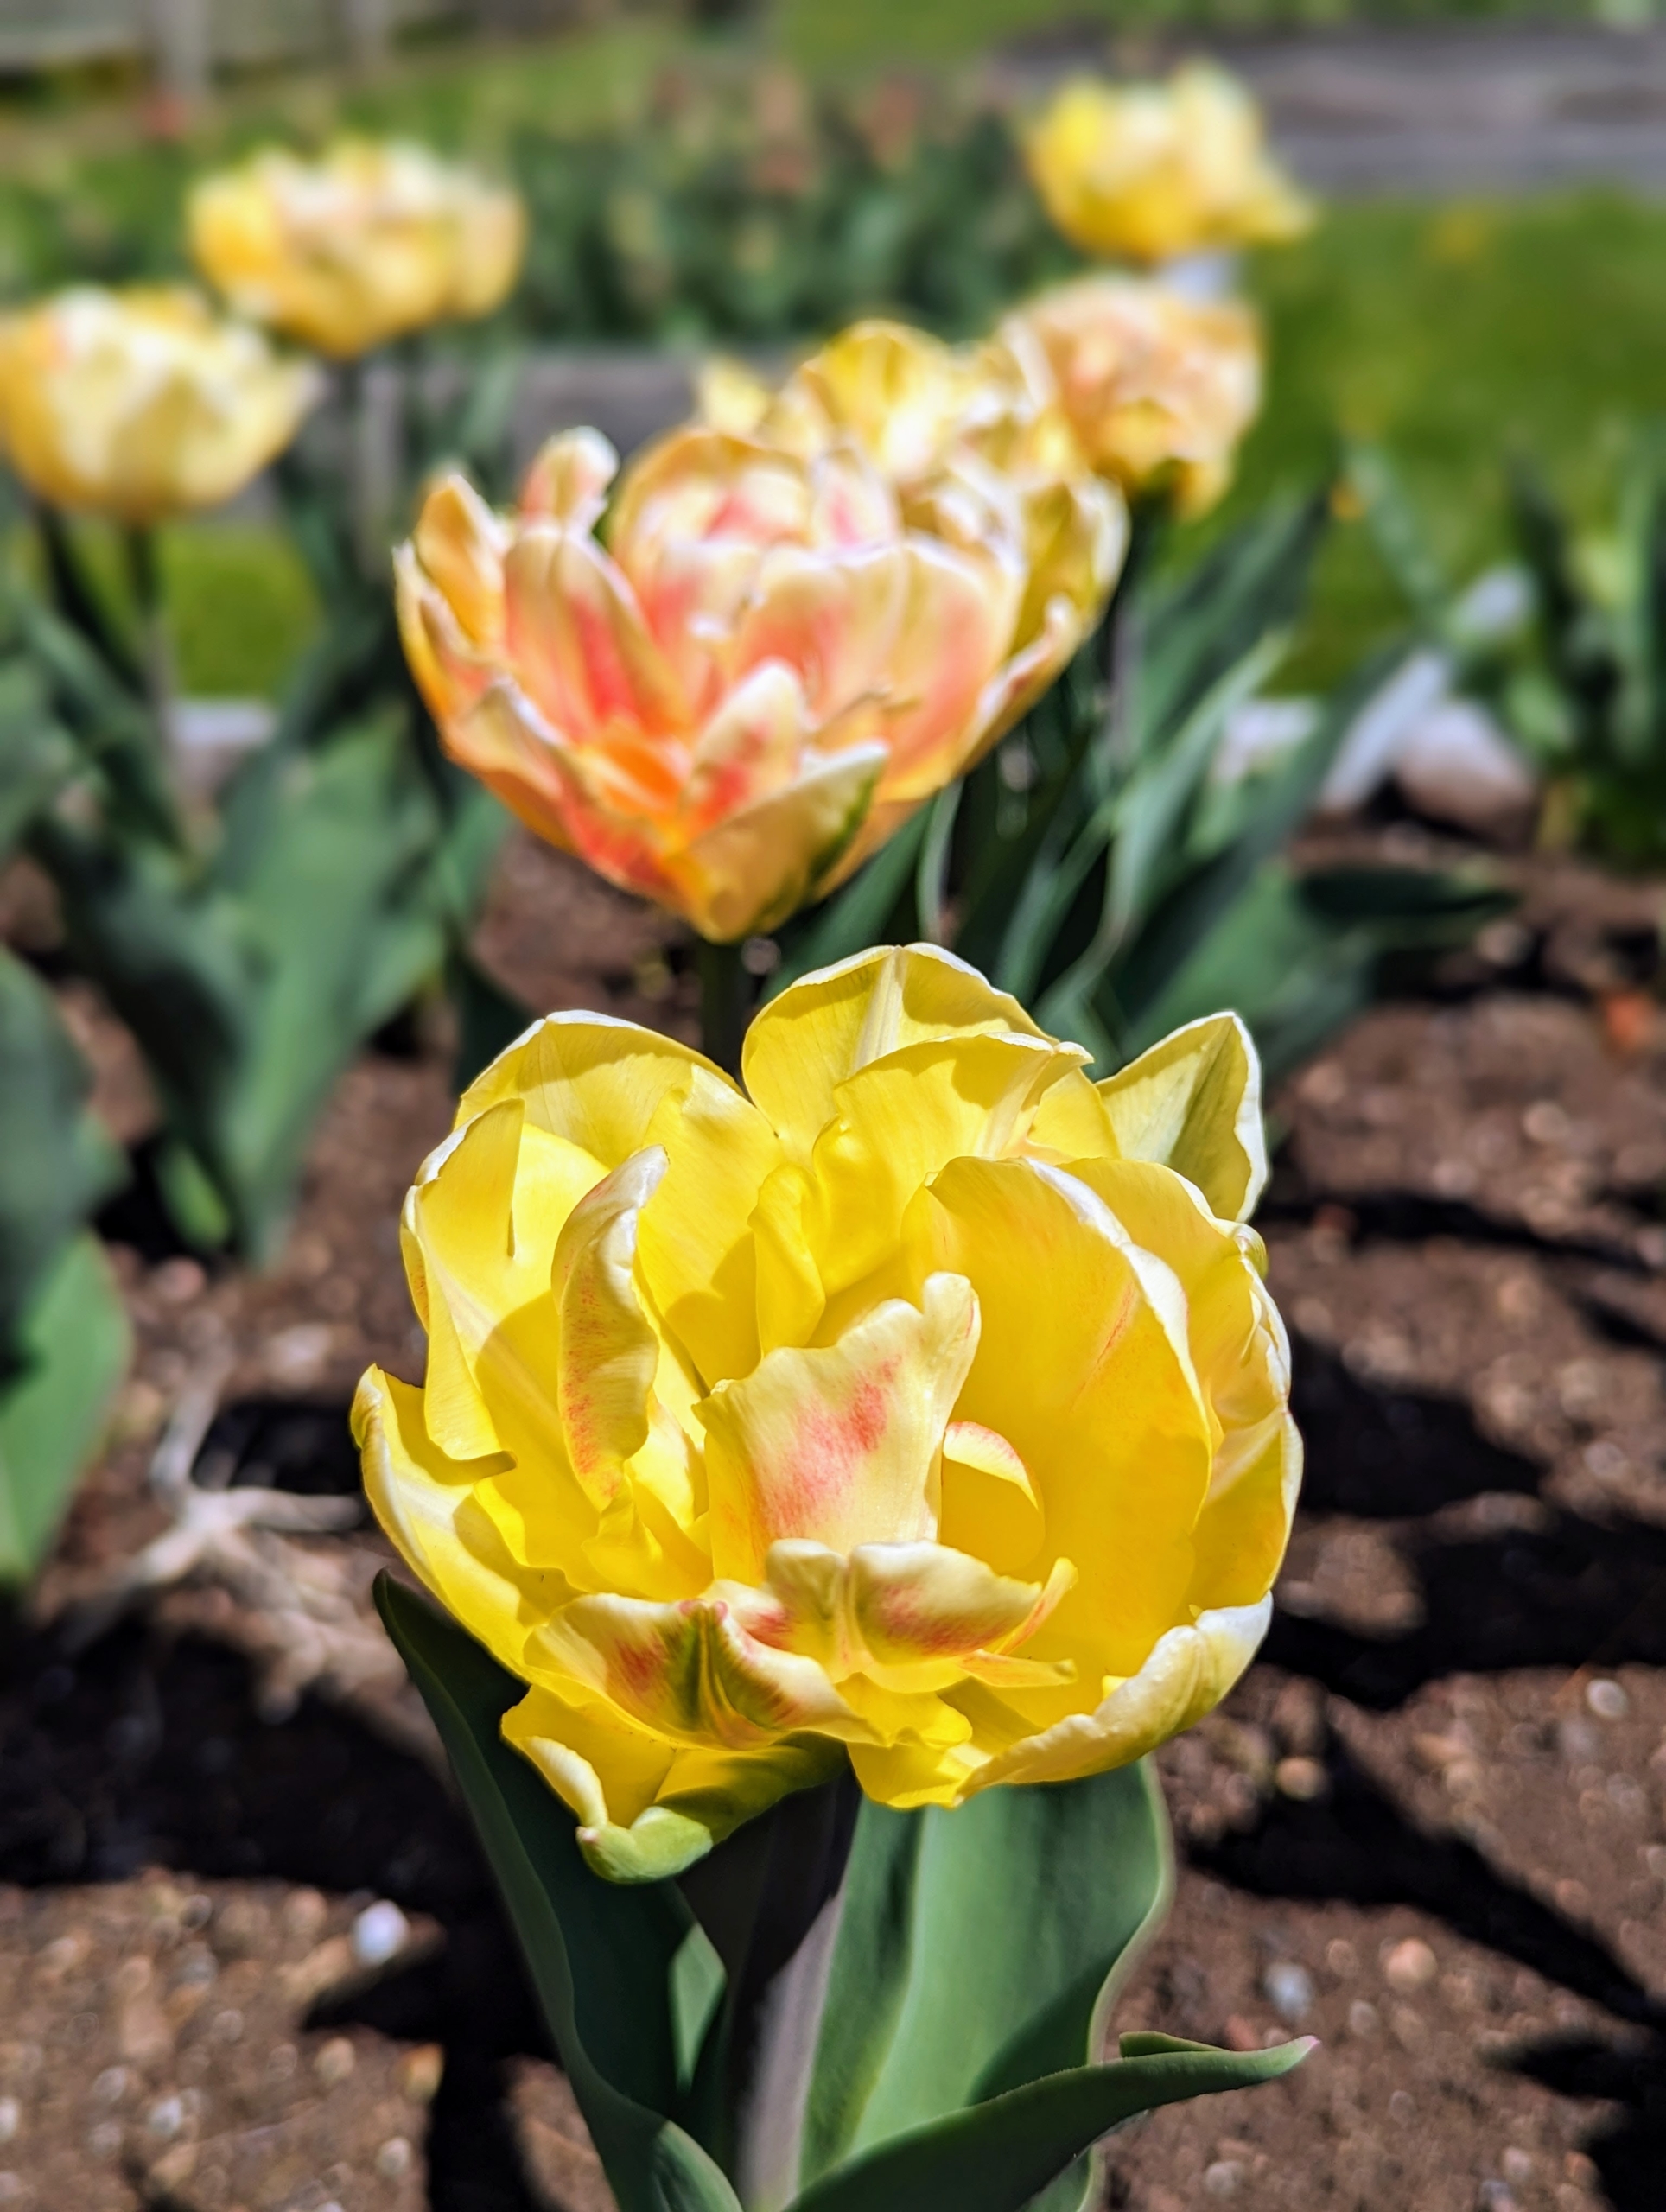
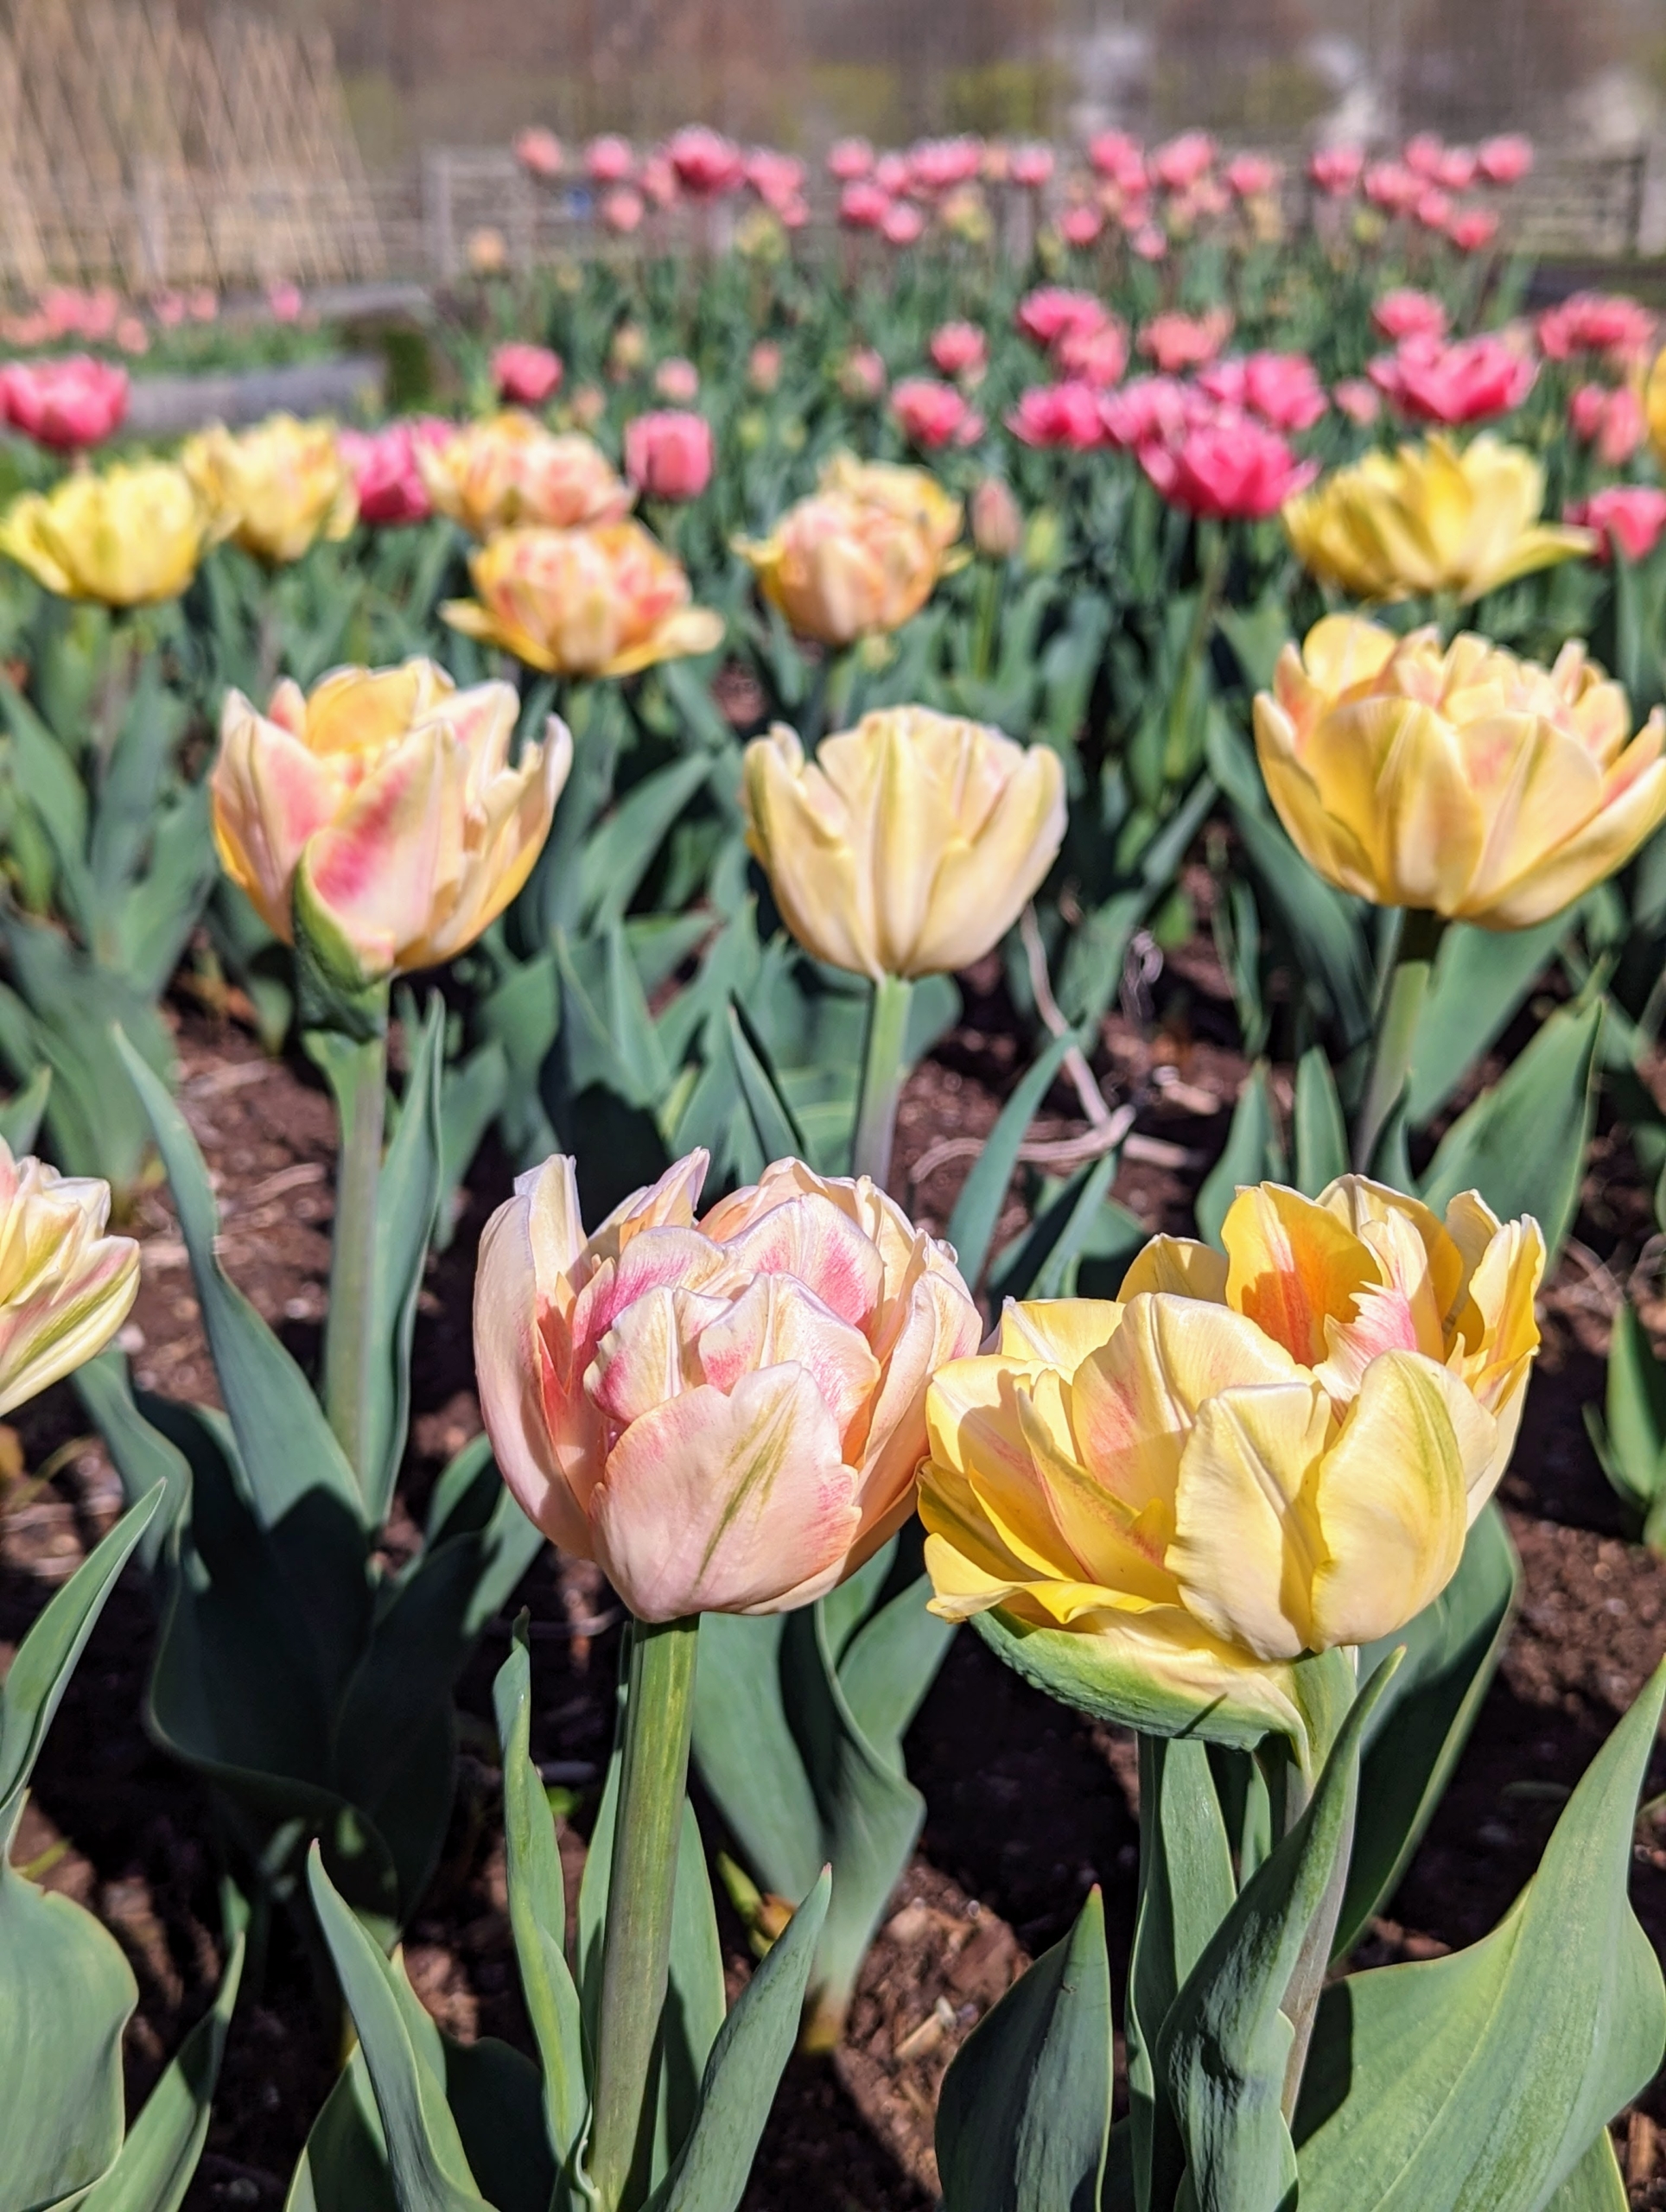
‘Foxy Foxtrot’ is a double tulip with shades of apricot, yellow, and hints of rose orange.
Its delicate blooms show slightly curved inner petals with a tinge of contrasting color.
Most tulip plants range between six to 24-inches tall. Taller ones should be shielded from any winds, so they don’t topple over.
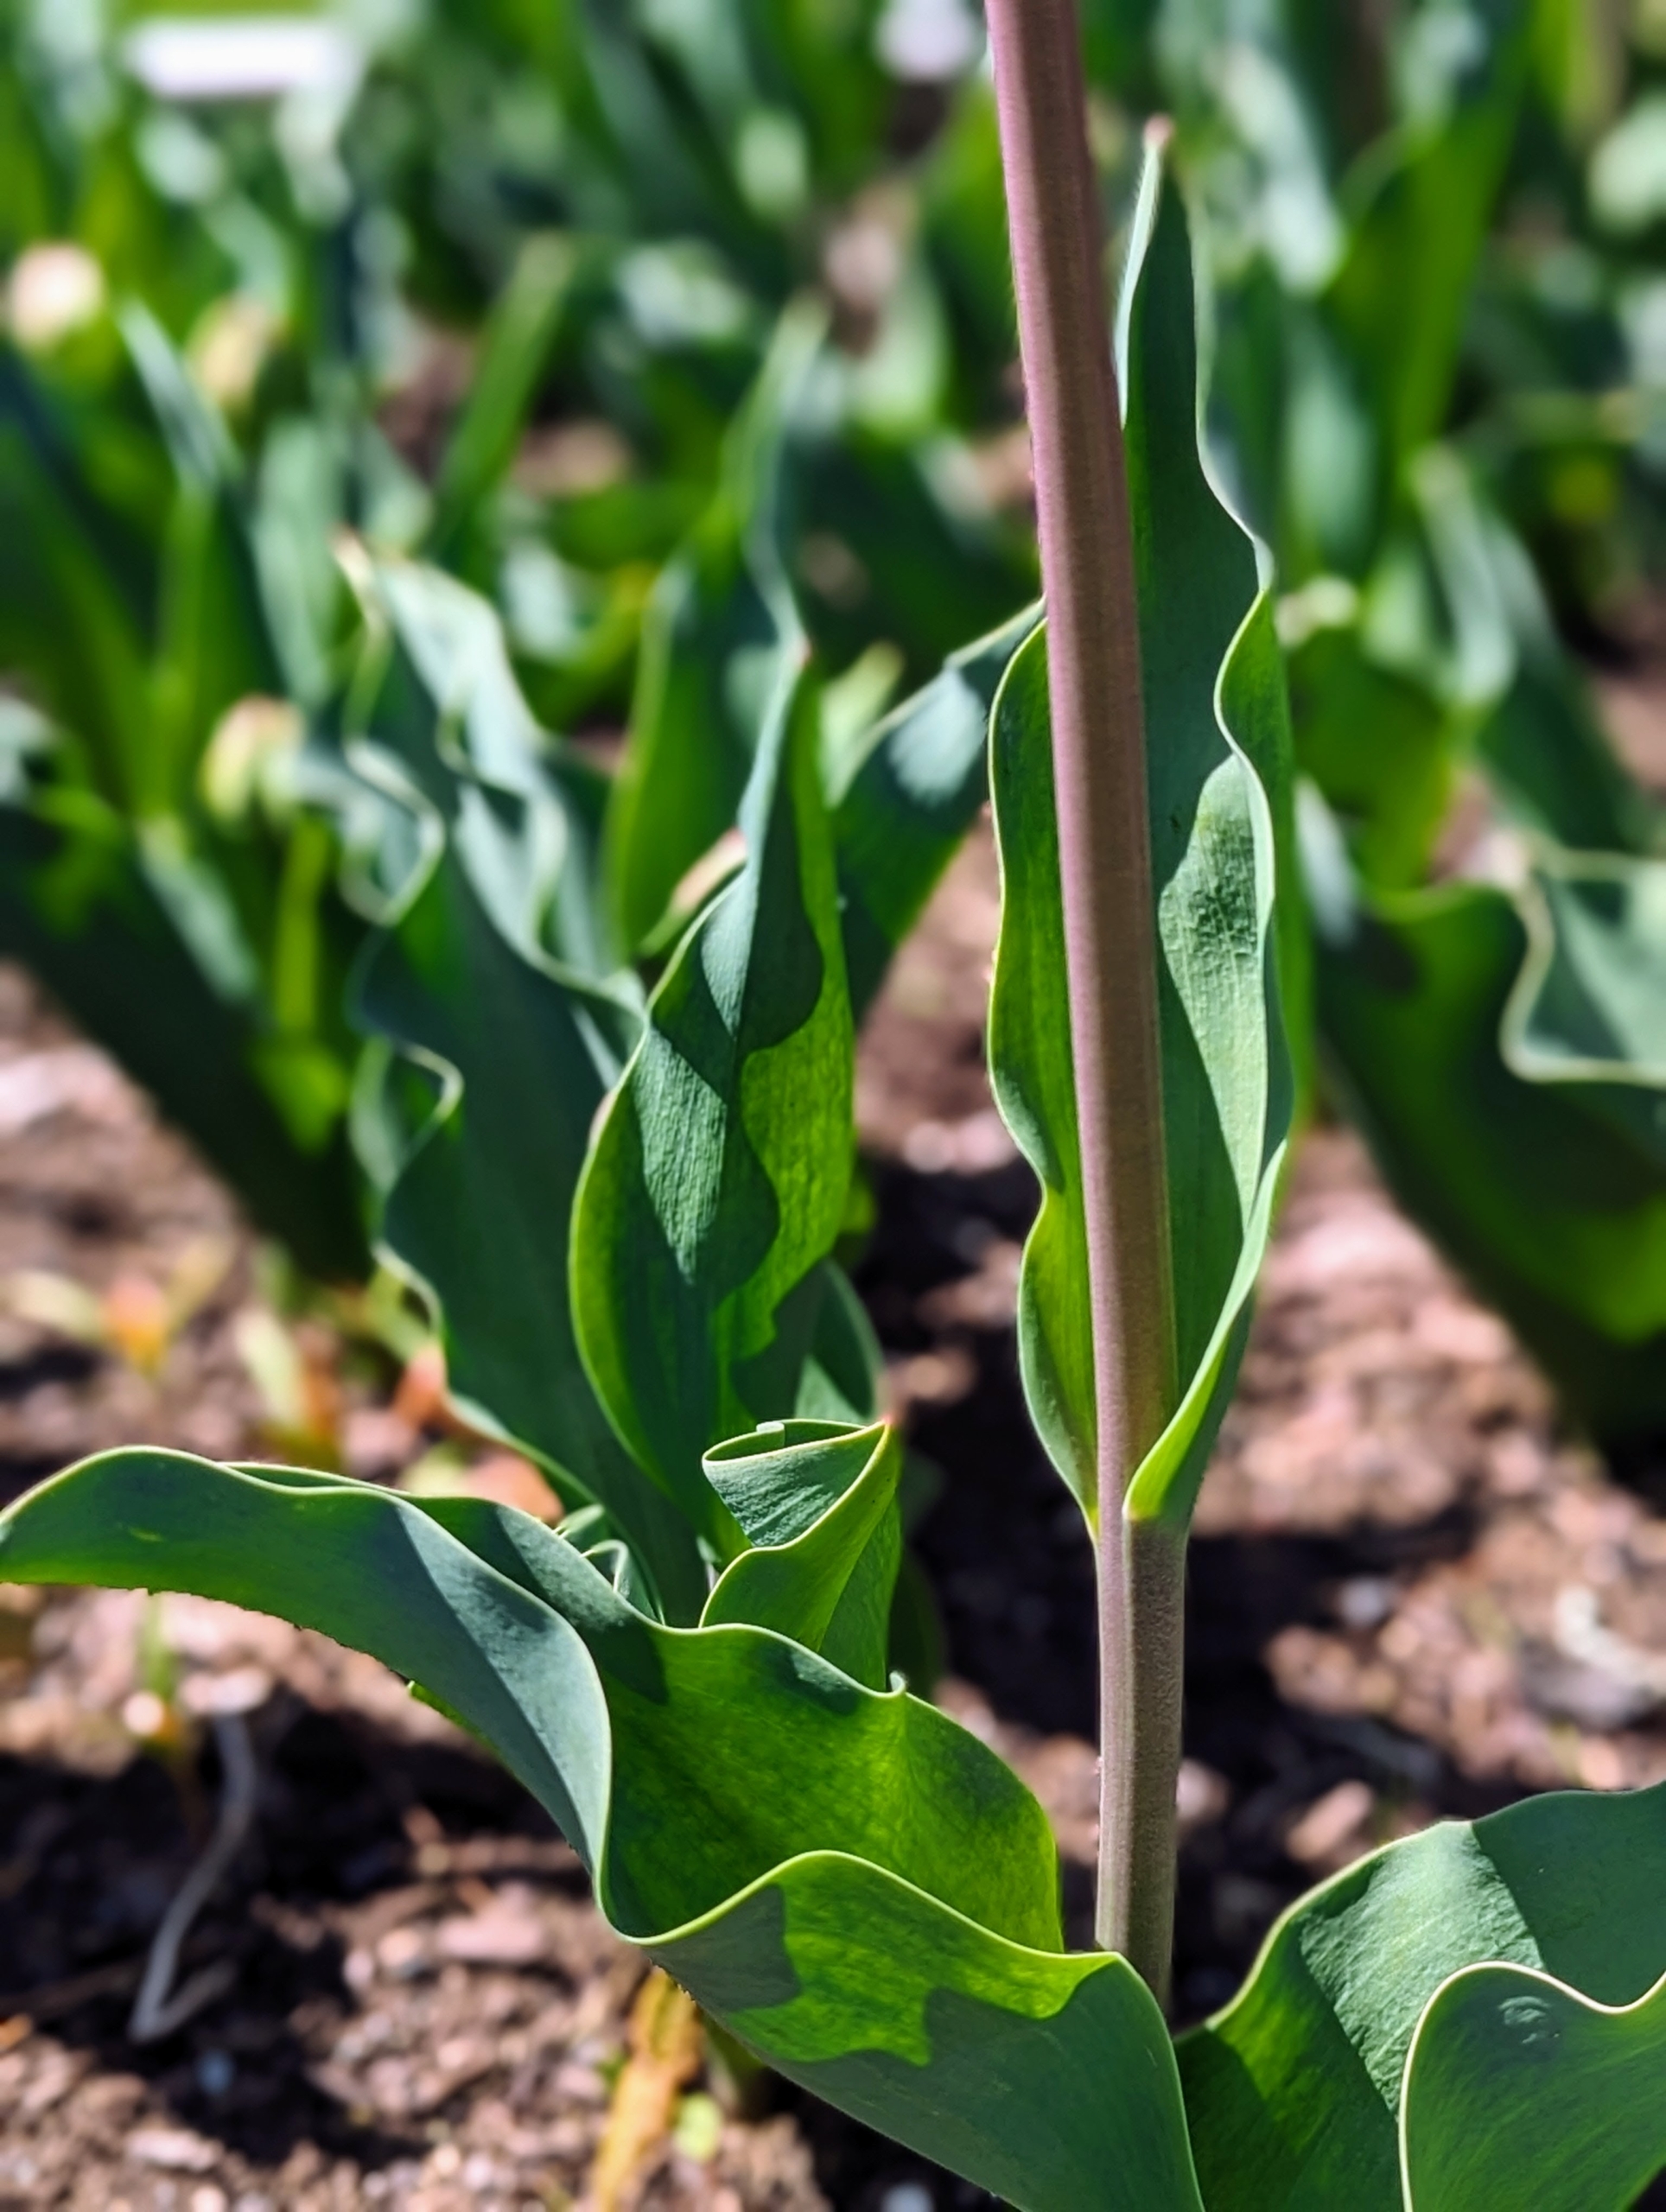
The broad, strappy leaves of tulips have a waxy coating that gives them a blue-green color. There are usually two to six leaves per plant.
Tulips are stunning when planted en masse. Tulip ‘Spryng Break’ starts with dark pink-red blooms, but then changes ever so slightly as the white turns creamy yellow over time.
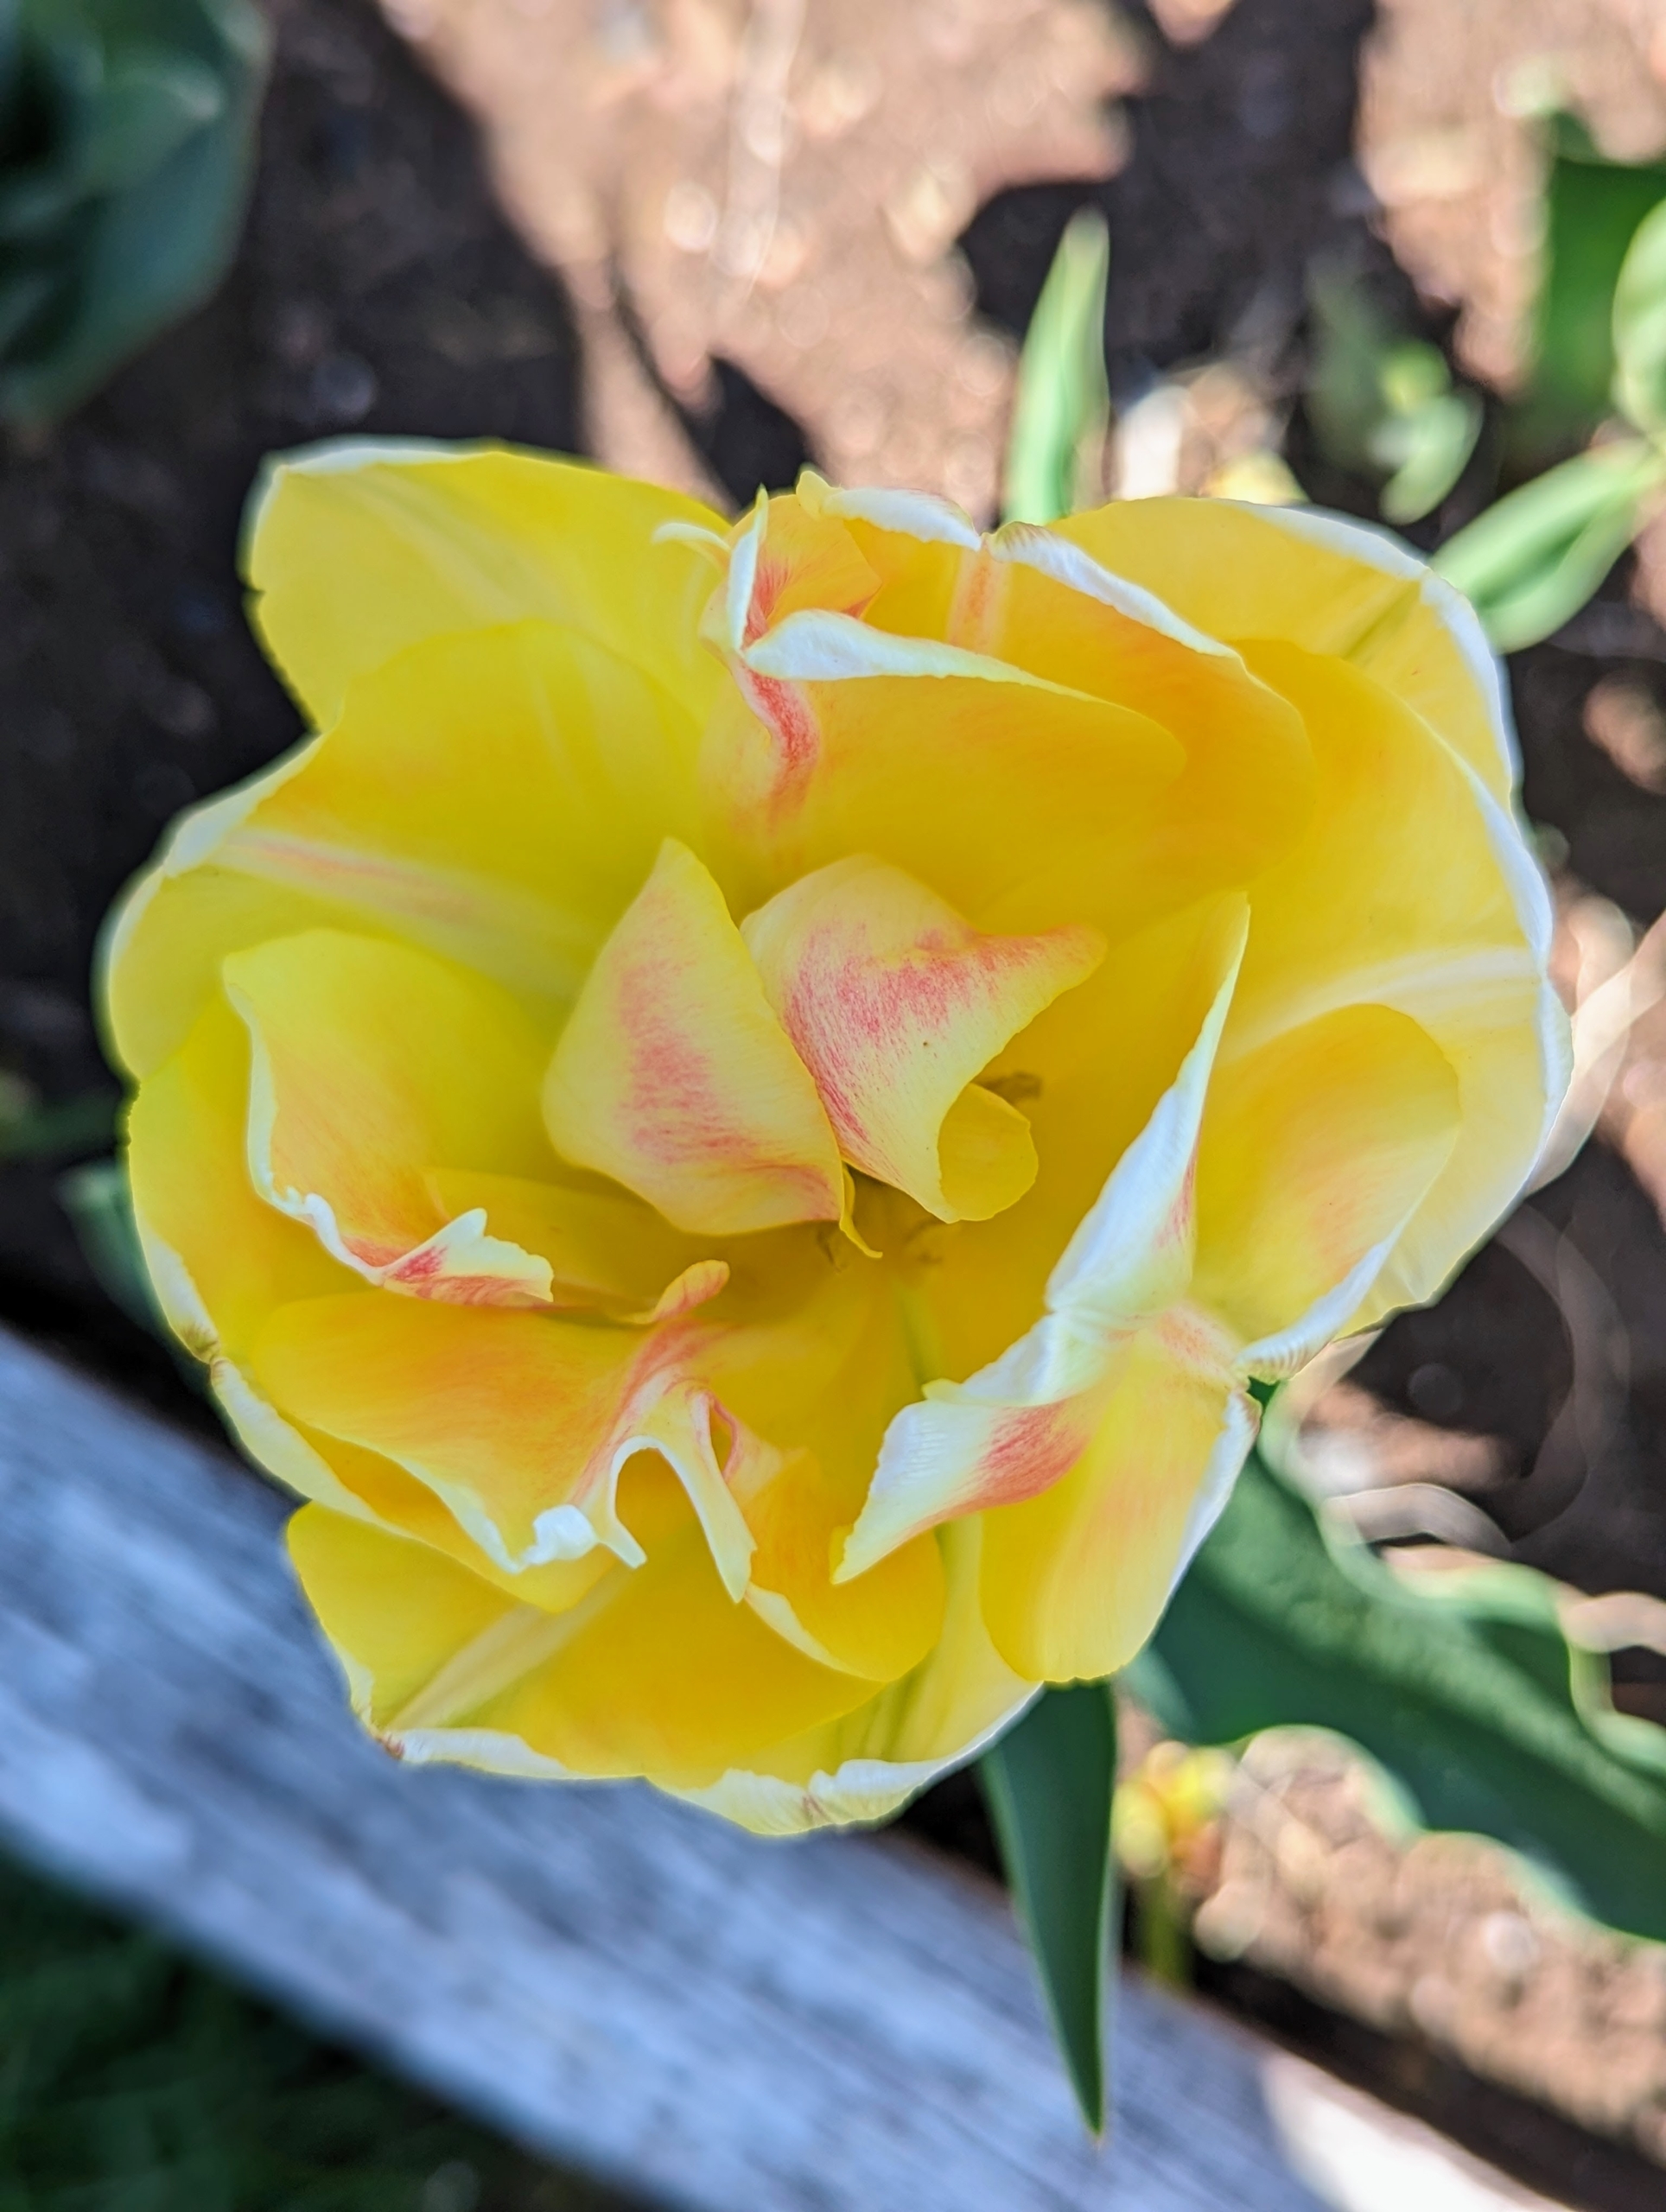
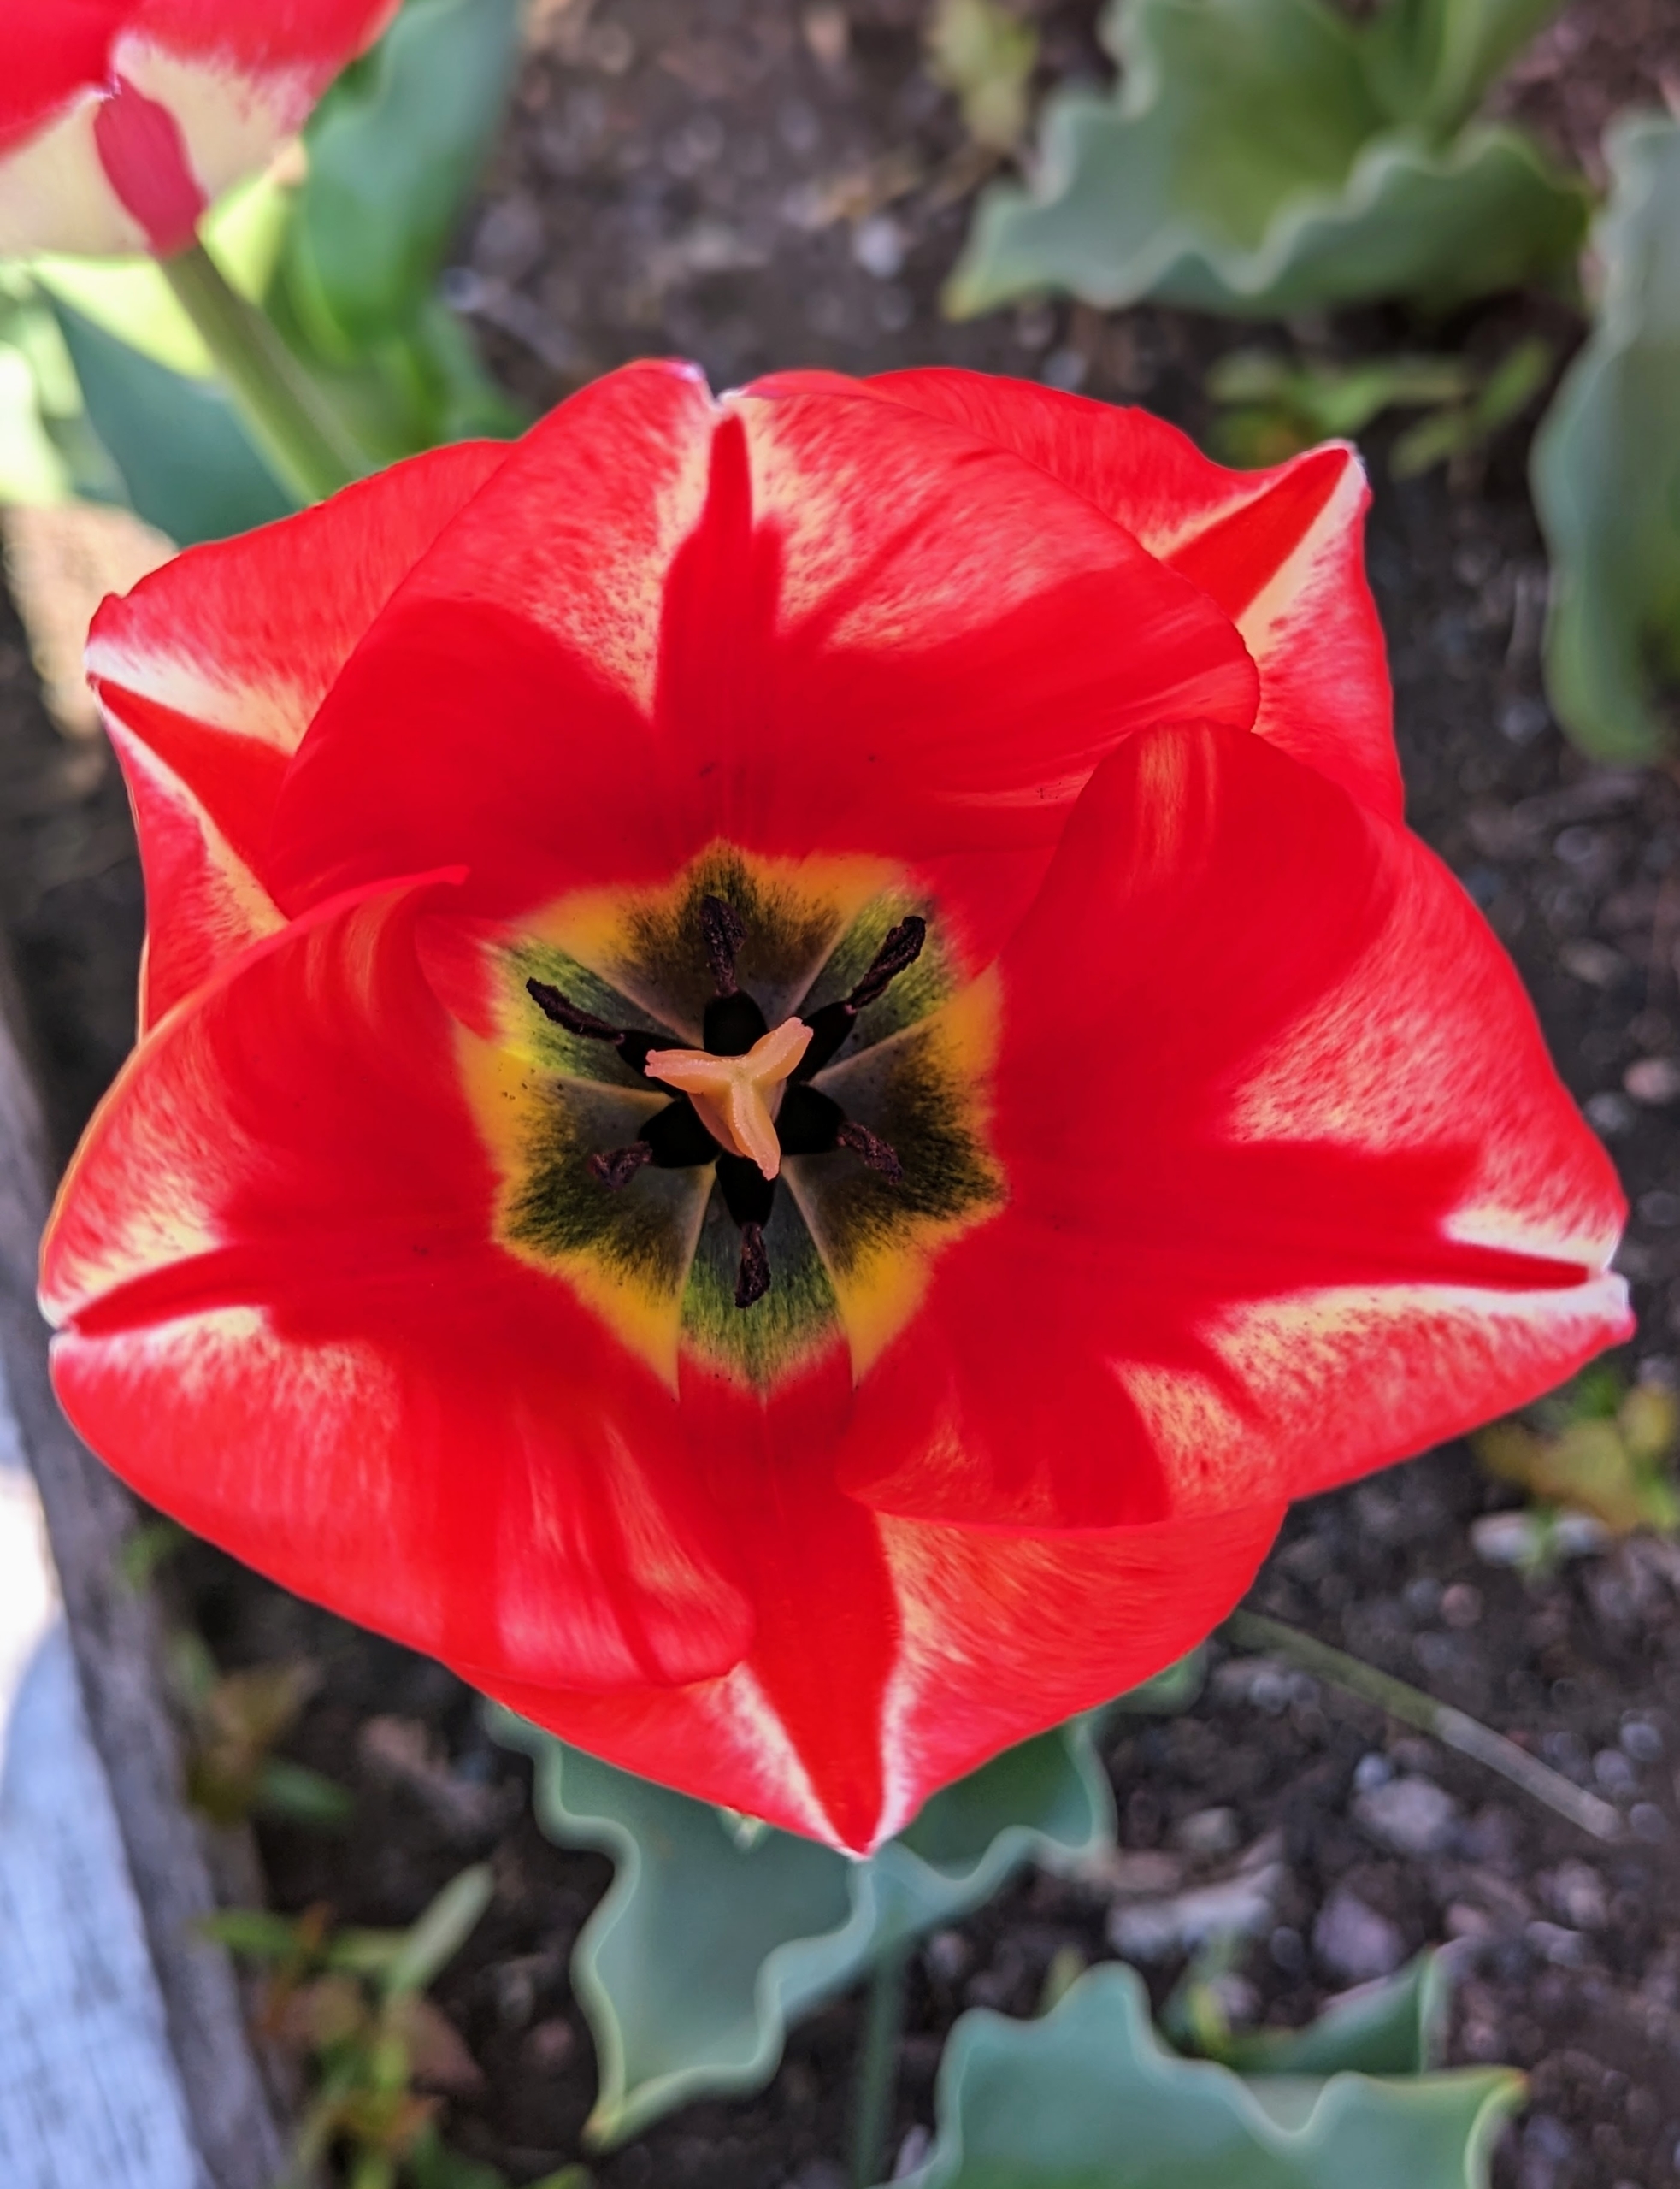
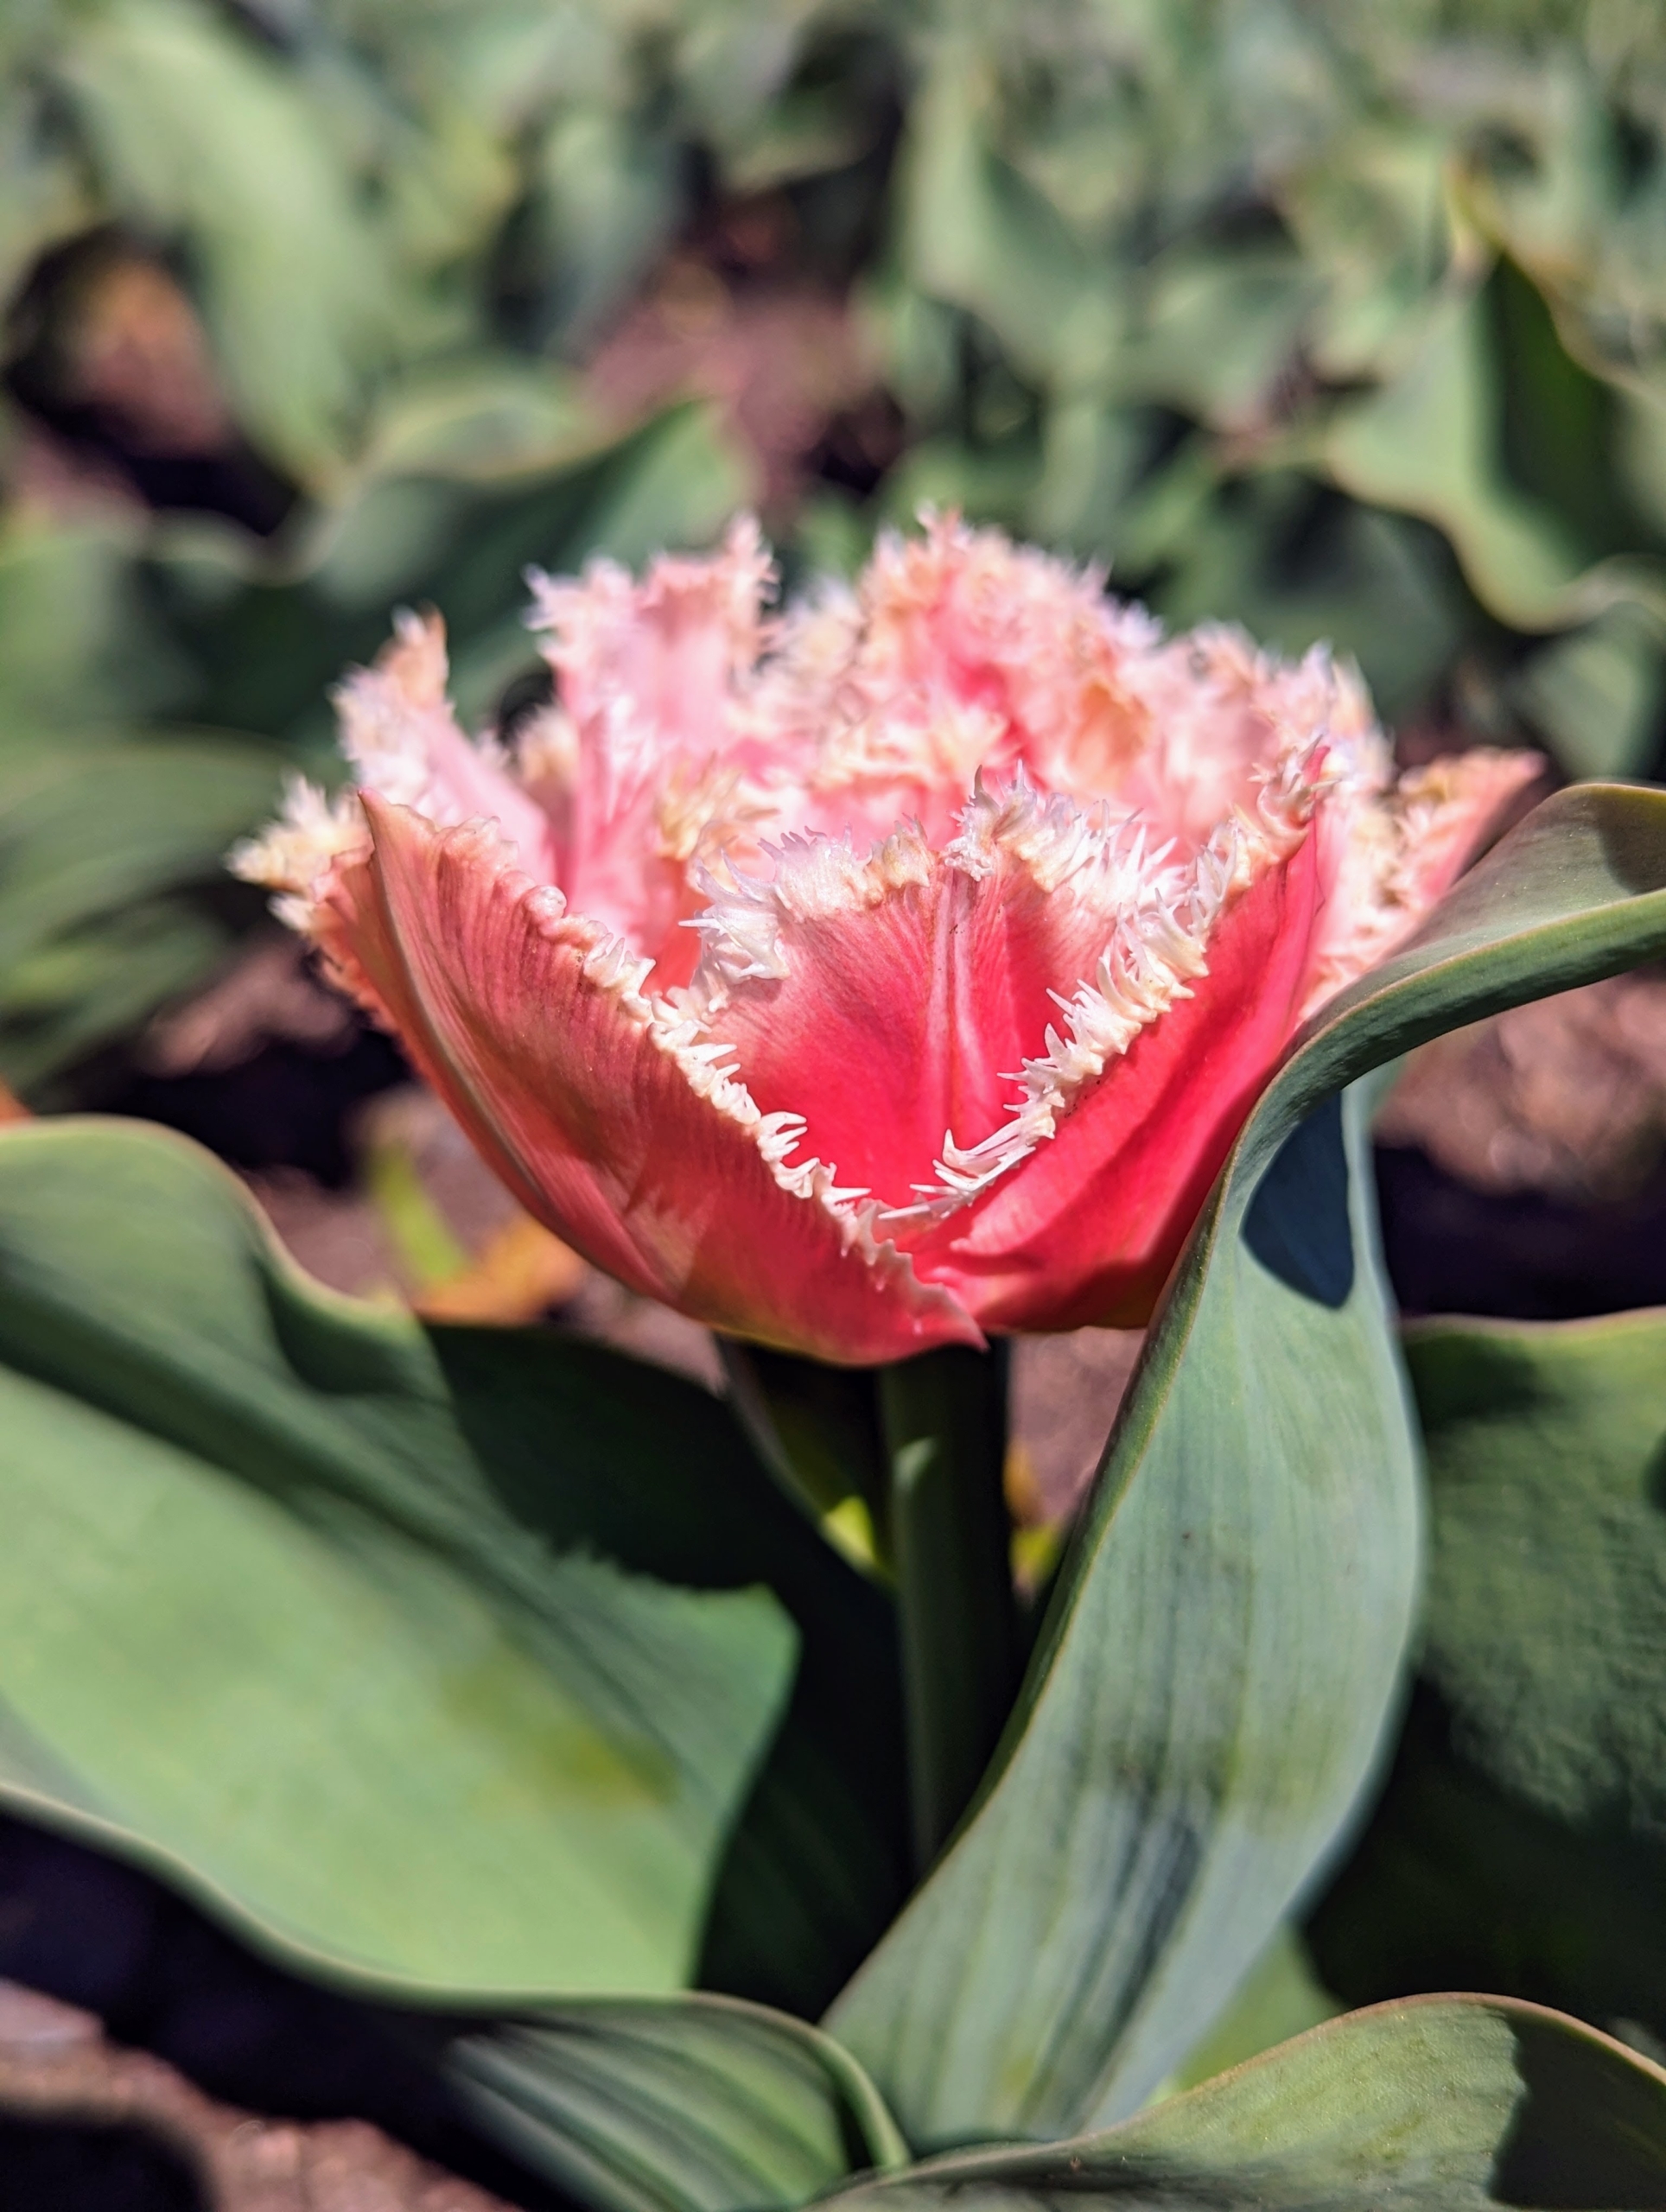
The inside is so geometric. Like many spring bulbs, tulips contain alkaloid compounds that are moderately toxic to pets as well as humans. The bulbs contain the highest concentration of toxins, but trace amounts are also found in the tulip flowers and leaves.
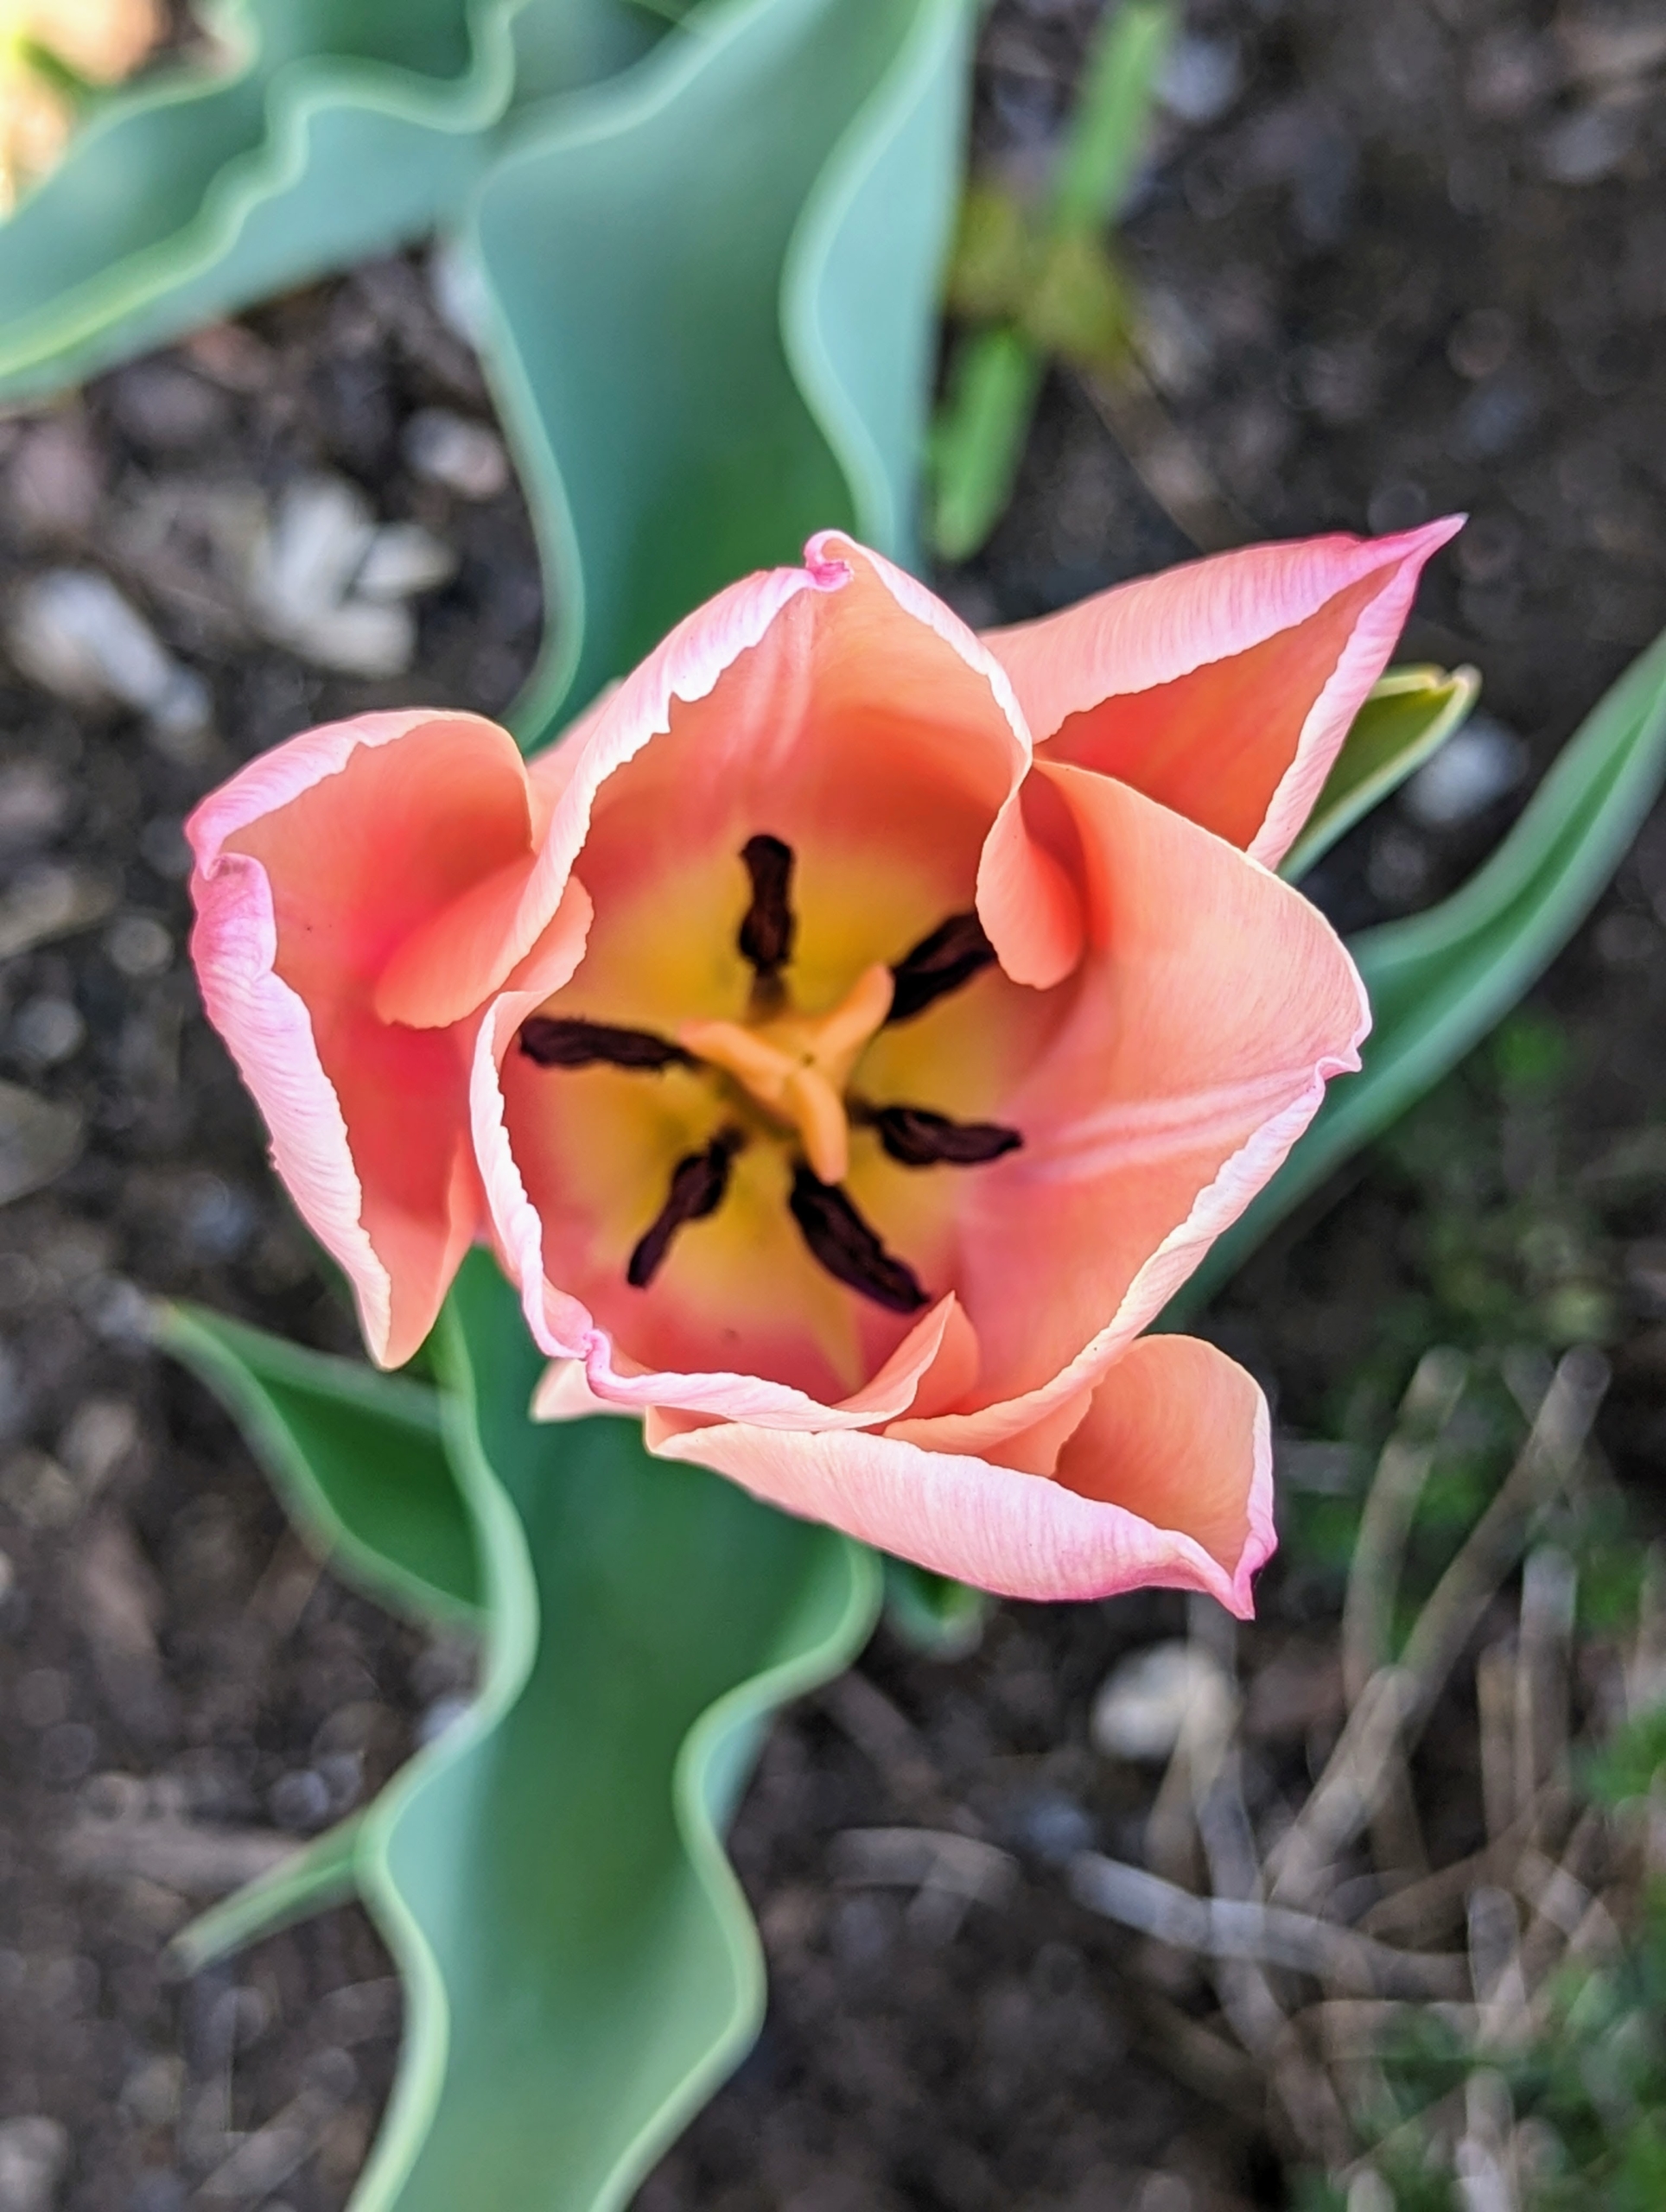
Tulip ‘Sanne’ has impressive, elegantly tapered flowers that open deep rose-pink and creamy-pink edges. As it matures, it turns lilac-pink with pink-ivory edges.
There are currently more than 3000 registered tulip varieties, which are divided into at least 15-groups, mostly based on the flower type, size, and blooming period.
Tulips have been hybridized in just about every color except blue. Most tulips have one flower per stem, but there are some multi-flowered varieties.
Tulips need well-drained soil. Sandy soil amended with some organic matter is perfect. They also prefer a slightly acidic soil pH of 6.0 to 6.5. I am fortunate to have such great soil here at the farm.
Tulip bulbs should be planted in full sun to partial shade. Too much shade will diminish blooming in spring.
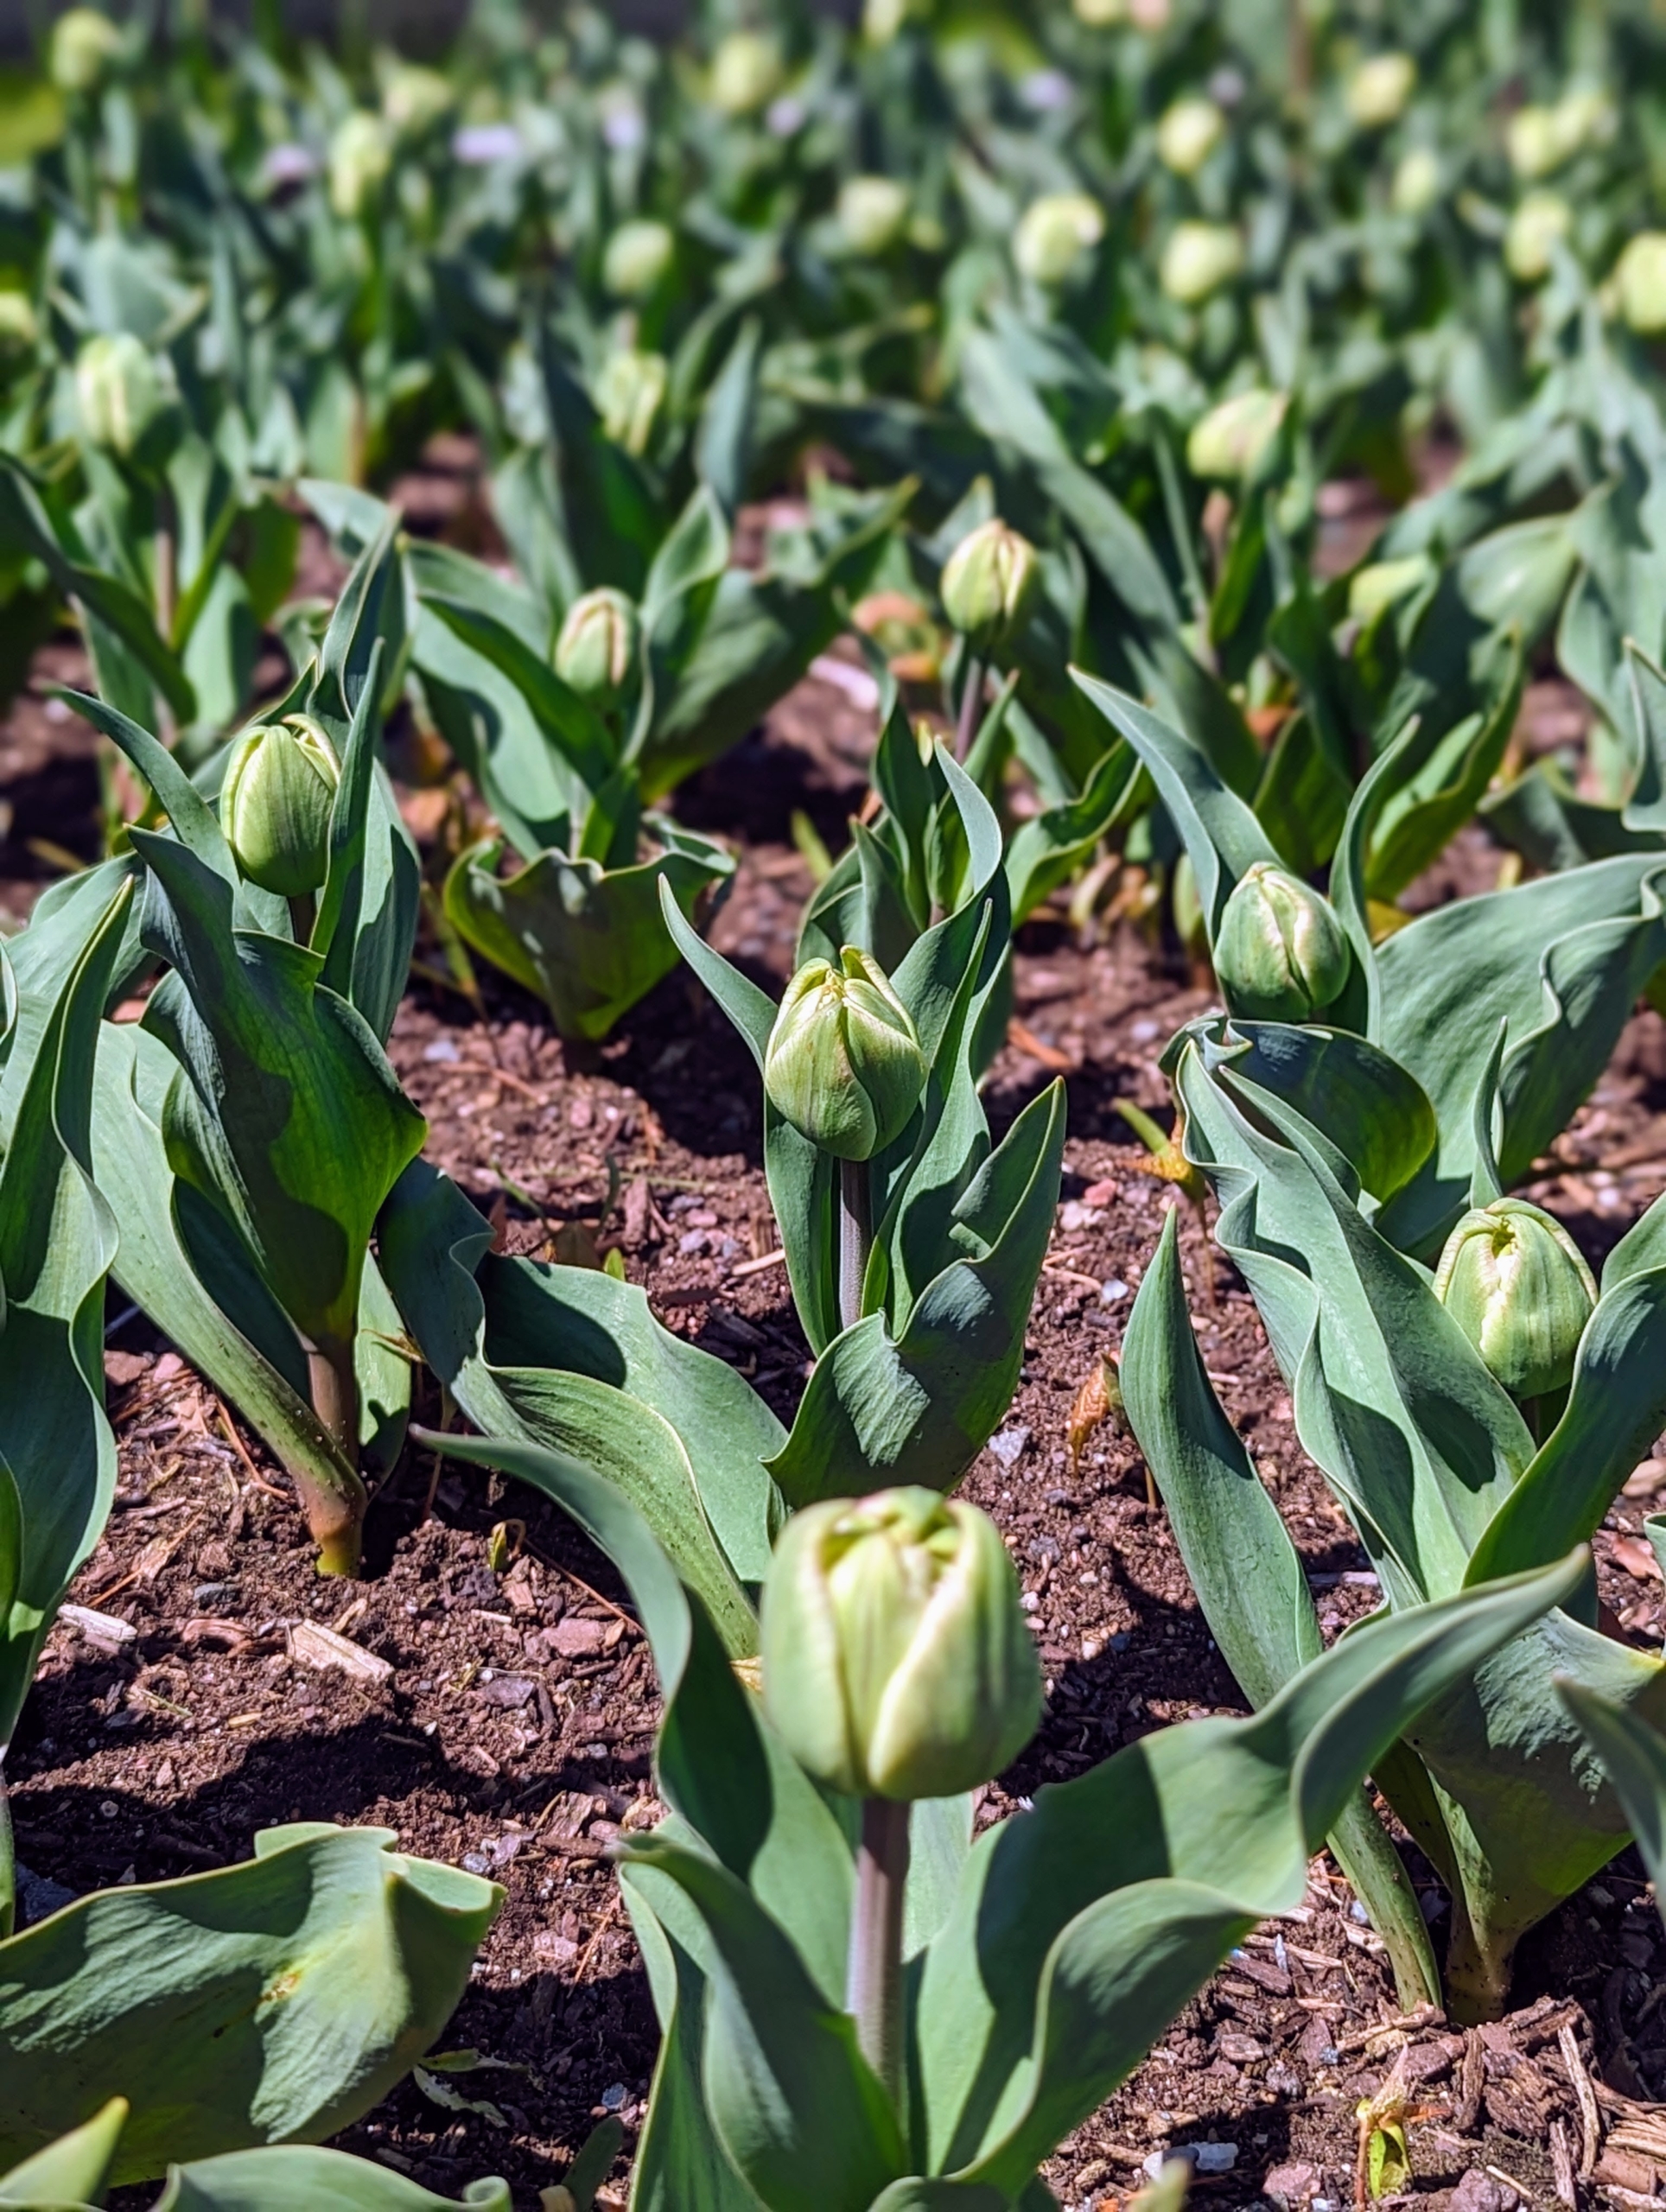
By planting varieties with different bloom times, one can have tulips blooming from early to late spring. These should open within the next week – I’ll be sure to share more photos, stay tuned.
Every year I always plant a collection of interesting and beautiful trees. It is such a joy to watch the gardens, groves, and allées evolve and expand around my Bedford, New York farm.
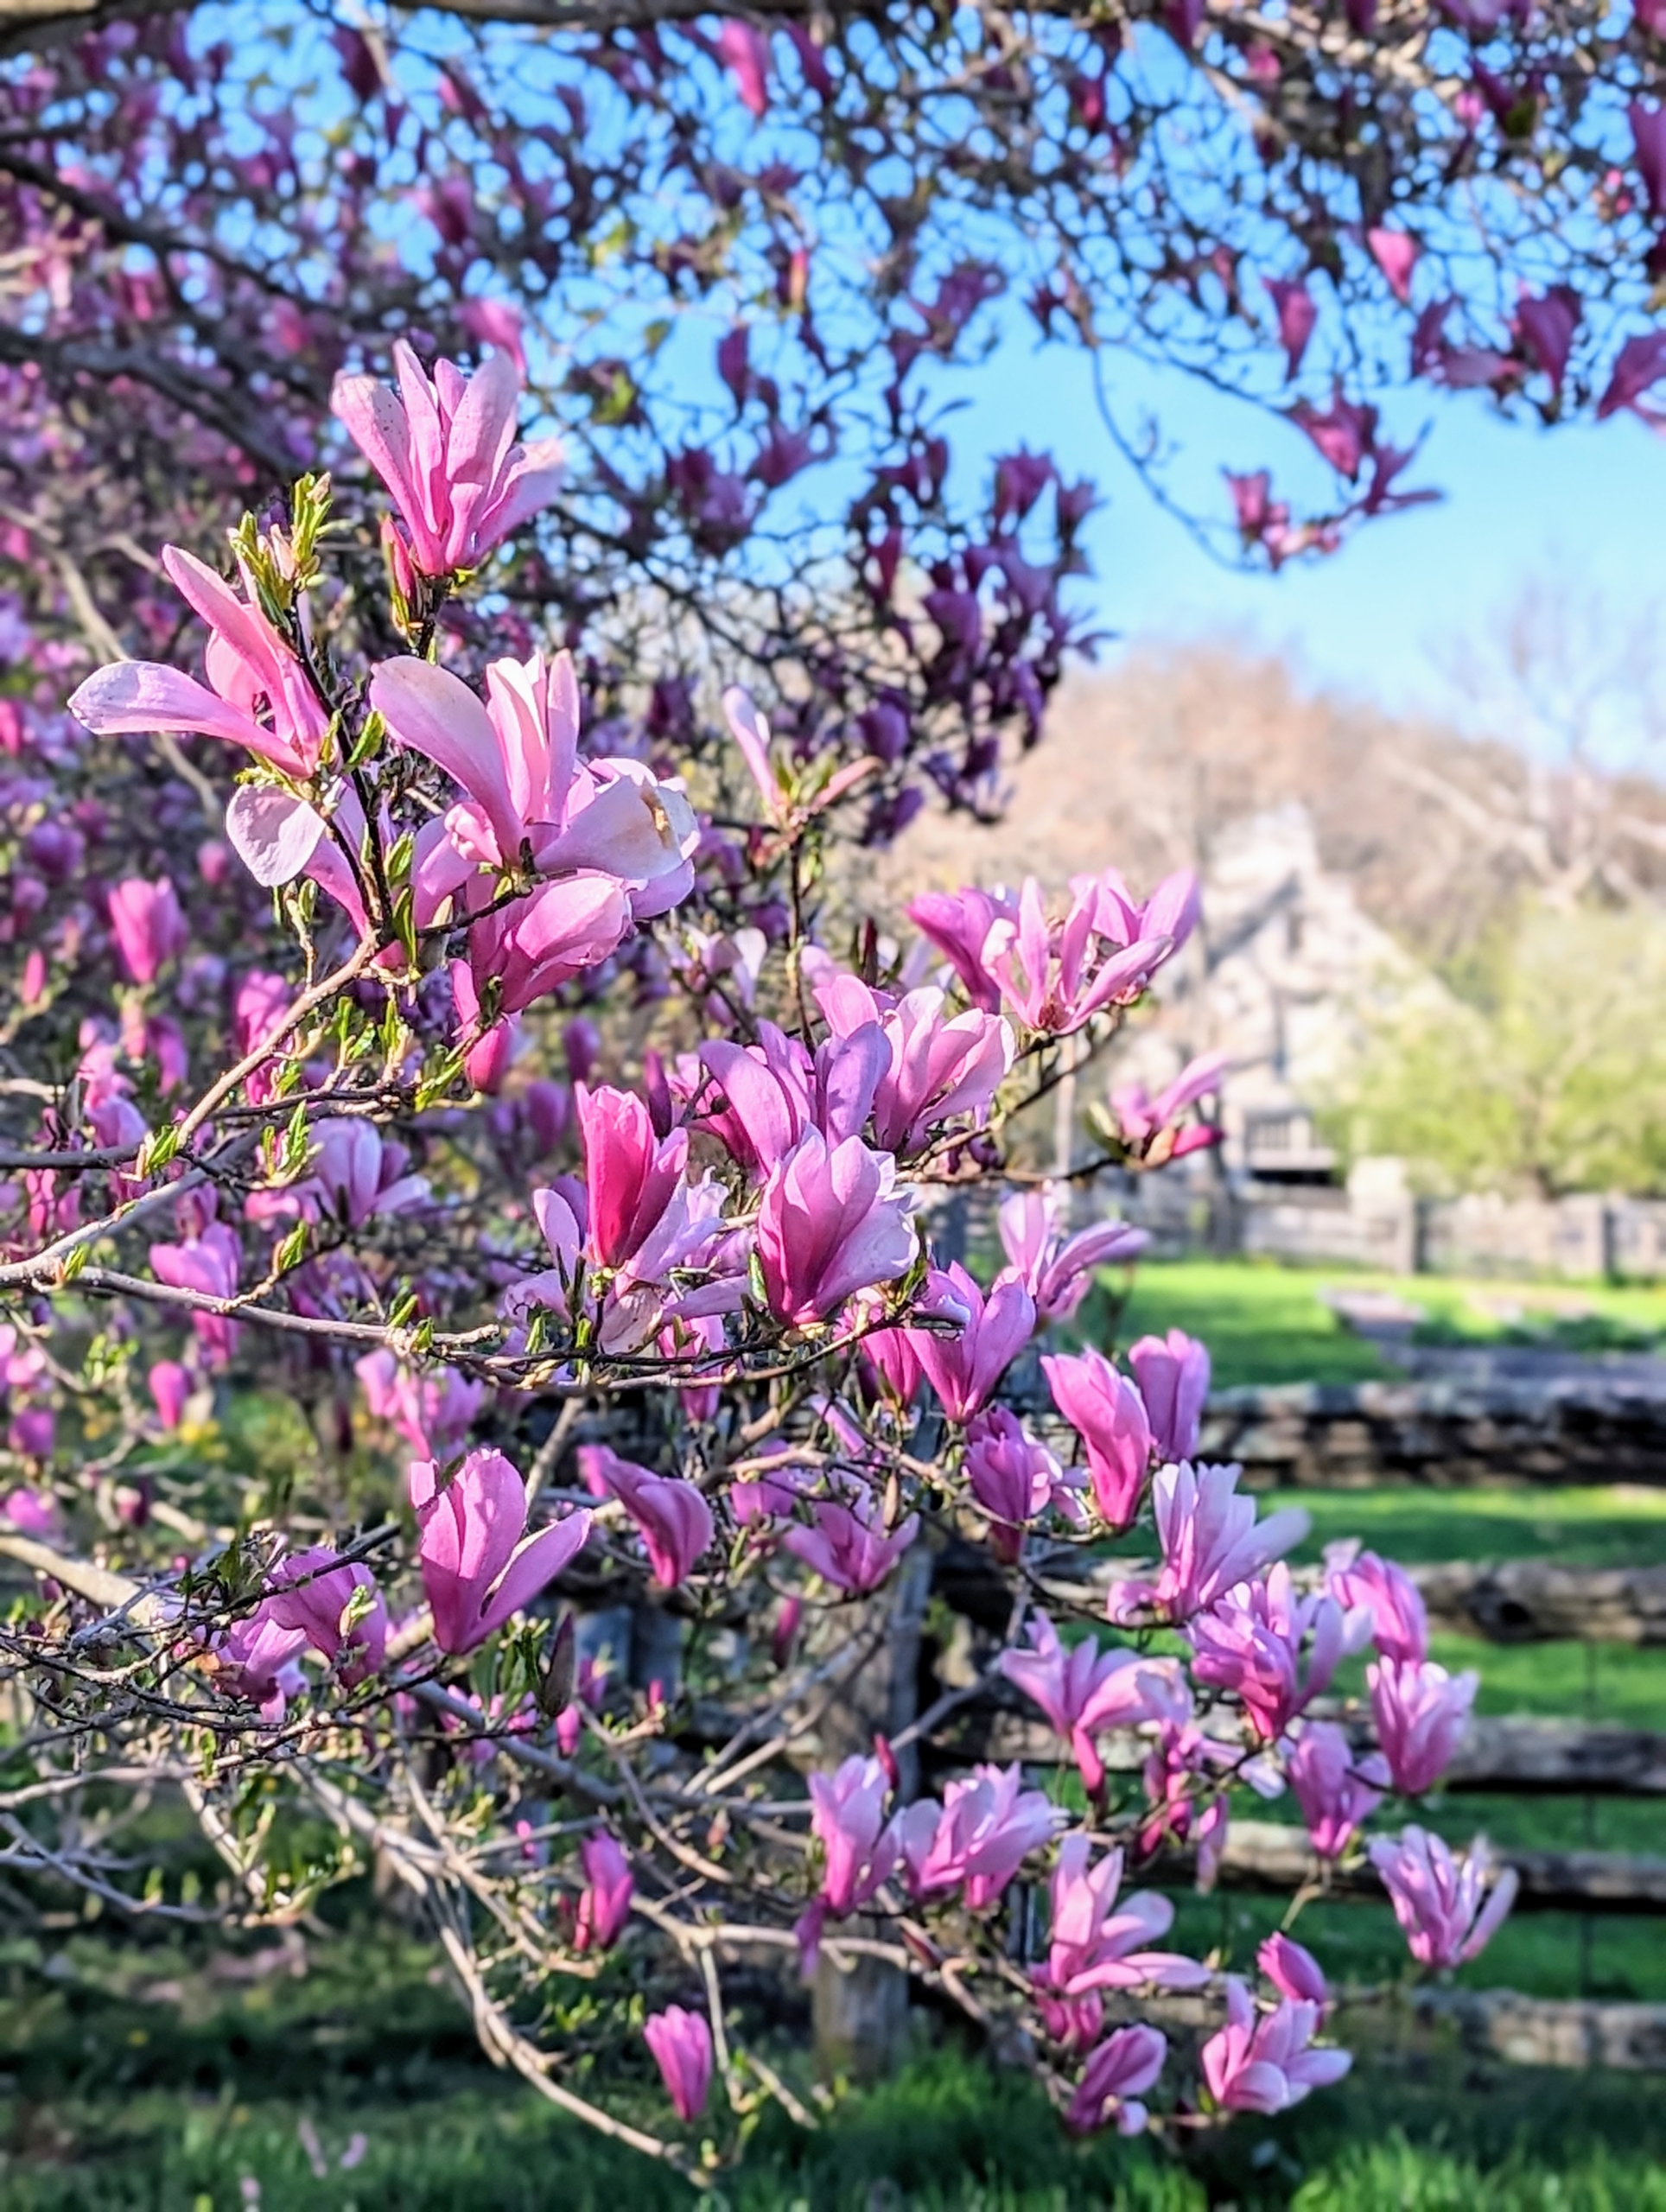
Not long ago, as part of a delivery of plants from the wholesale nursery, Monrovia, I received several magnolias - spreading evergreen or deciduous trees or shrubs characterized by large, fragrant blooms, which may be bowl-shaped or star-shaped, in shades of white, pink, purple, green, or yellow. In many of the deciduous species, the eye-catching flowers often appear in early spring before the foliage. I already have several mature magnolias growing around my home. These younger specimens, Magnolia 'Black Tulip' and Magnolia 'Yellow Bird' will make wonderful additions.
Enjoy these photos.
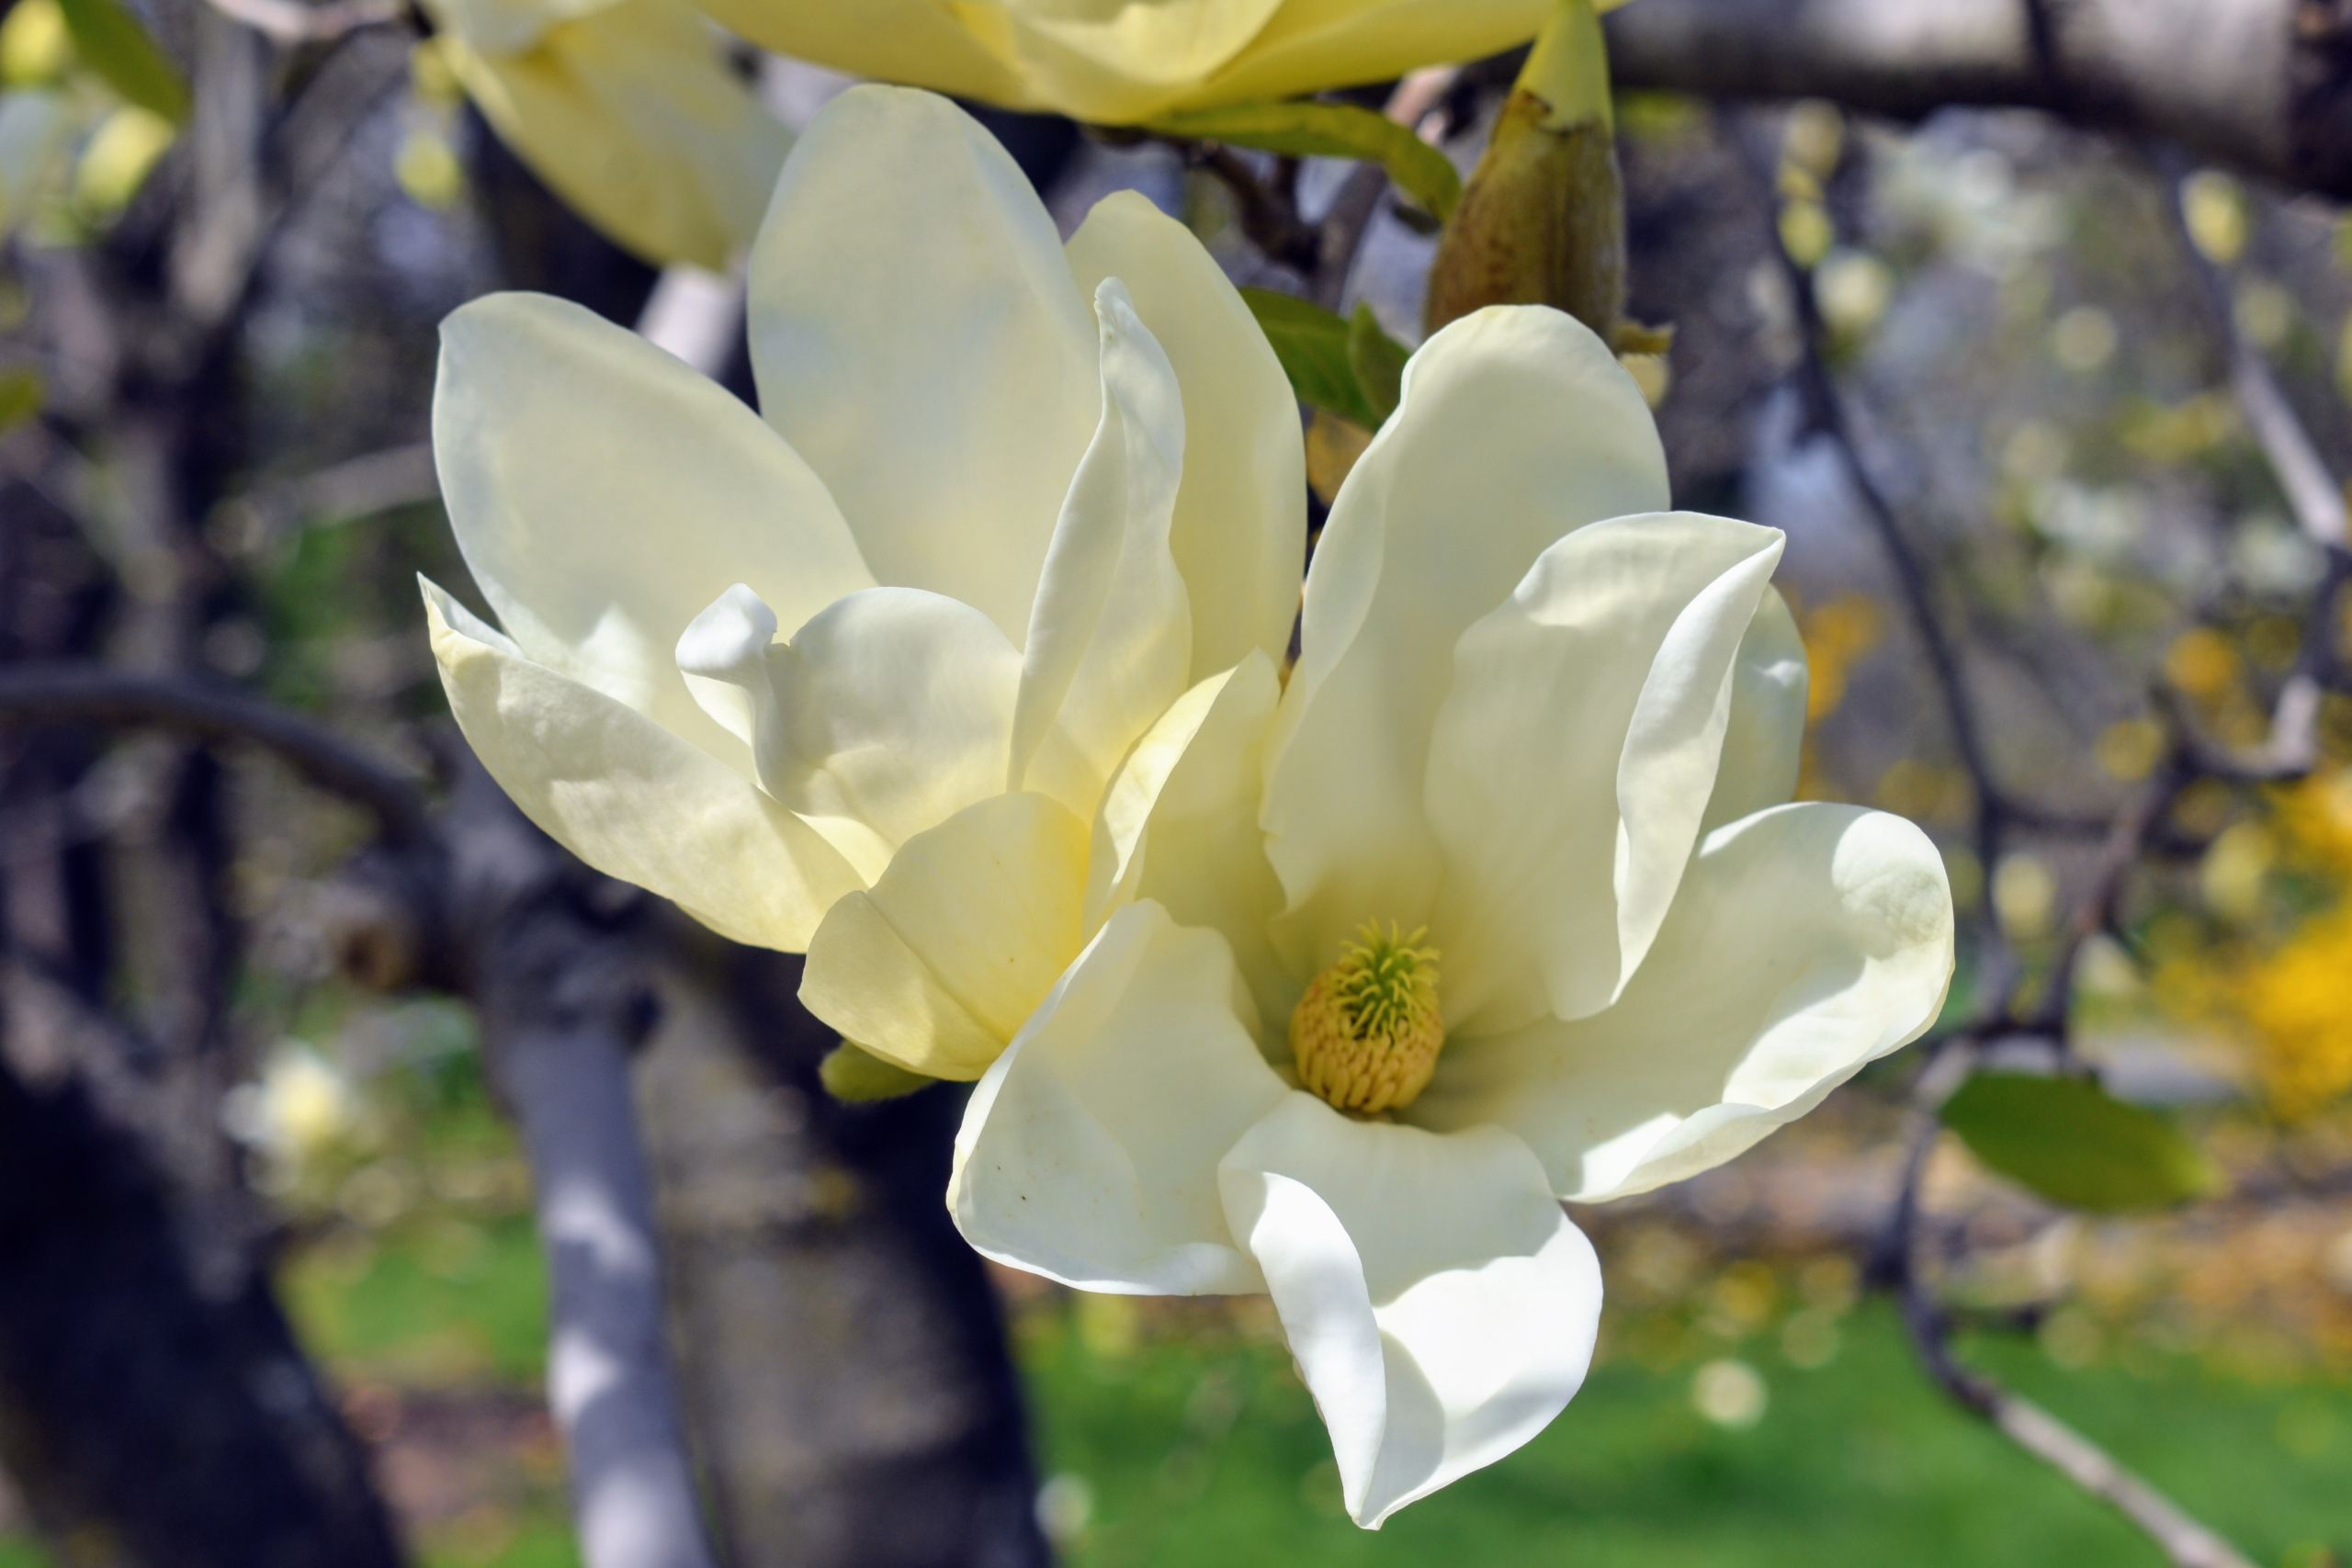
Magnolias are believed to be one of the earliest known flowering plants, with fossils dating back millions of years. Researchers say Magnolia trees existed before bees, when flightless beetles were nature’s main pollinators. This is one of many Magnolias at my farm, and it’s blooming beautifully right now in a grove outside my new vegetable garden and up the carriage road from my stable.
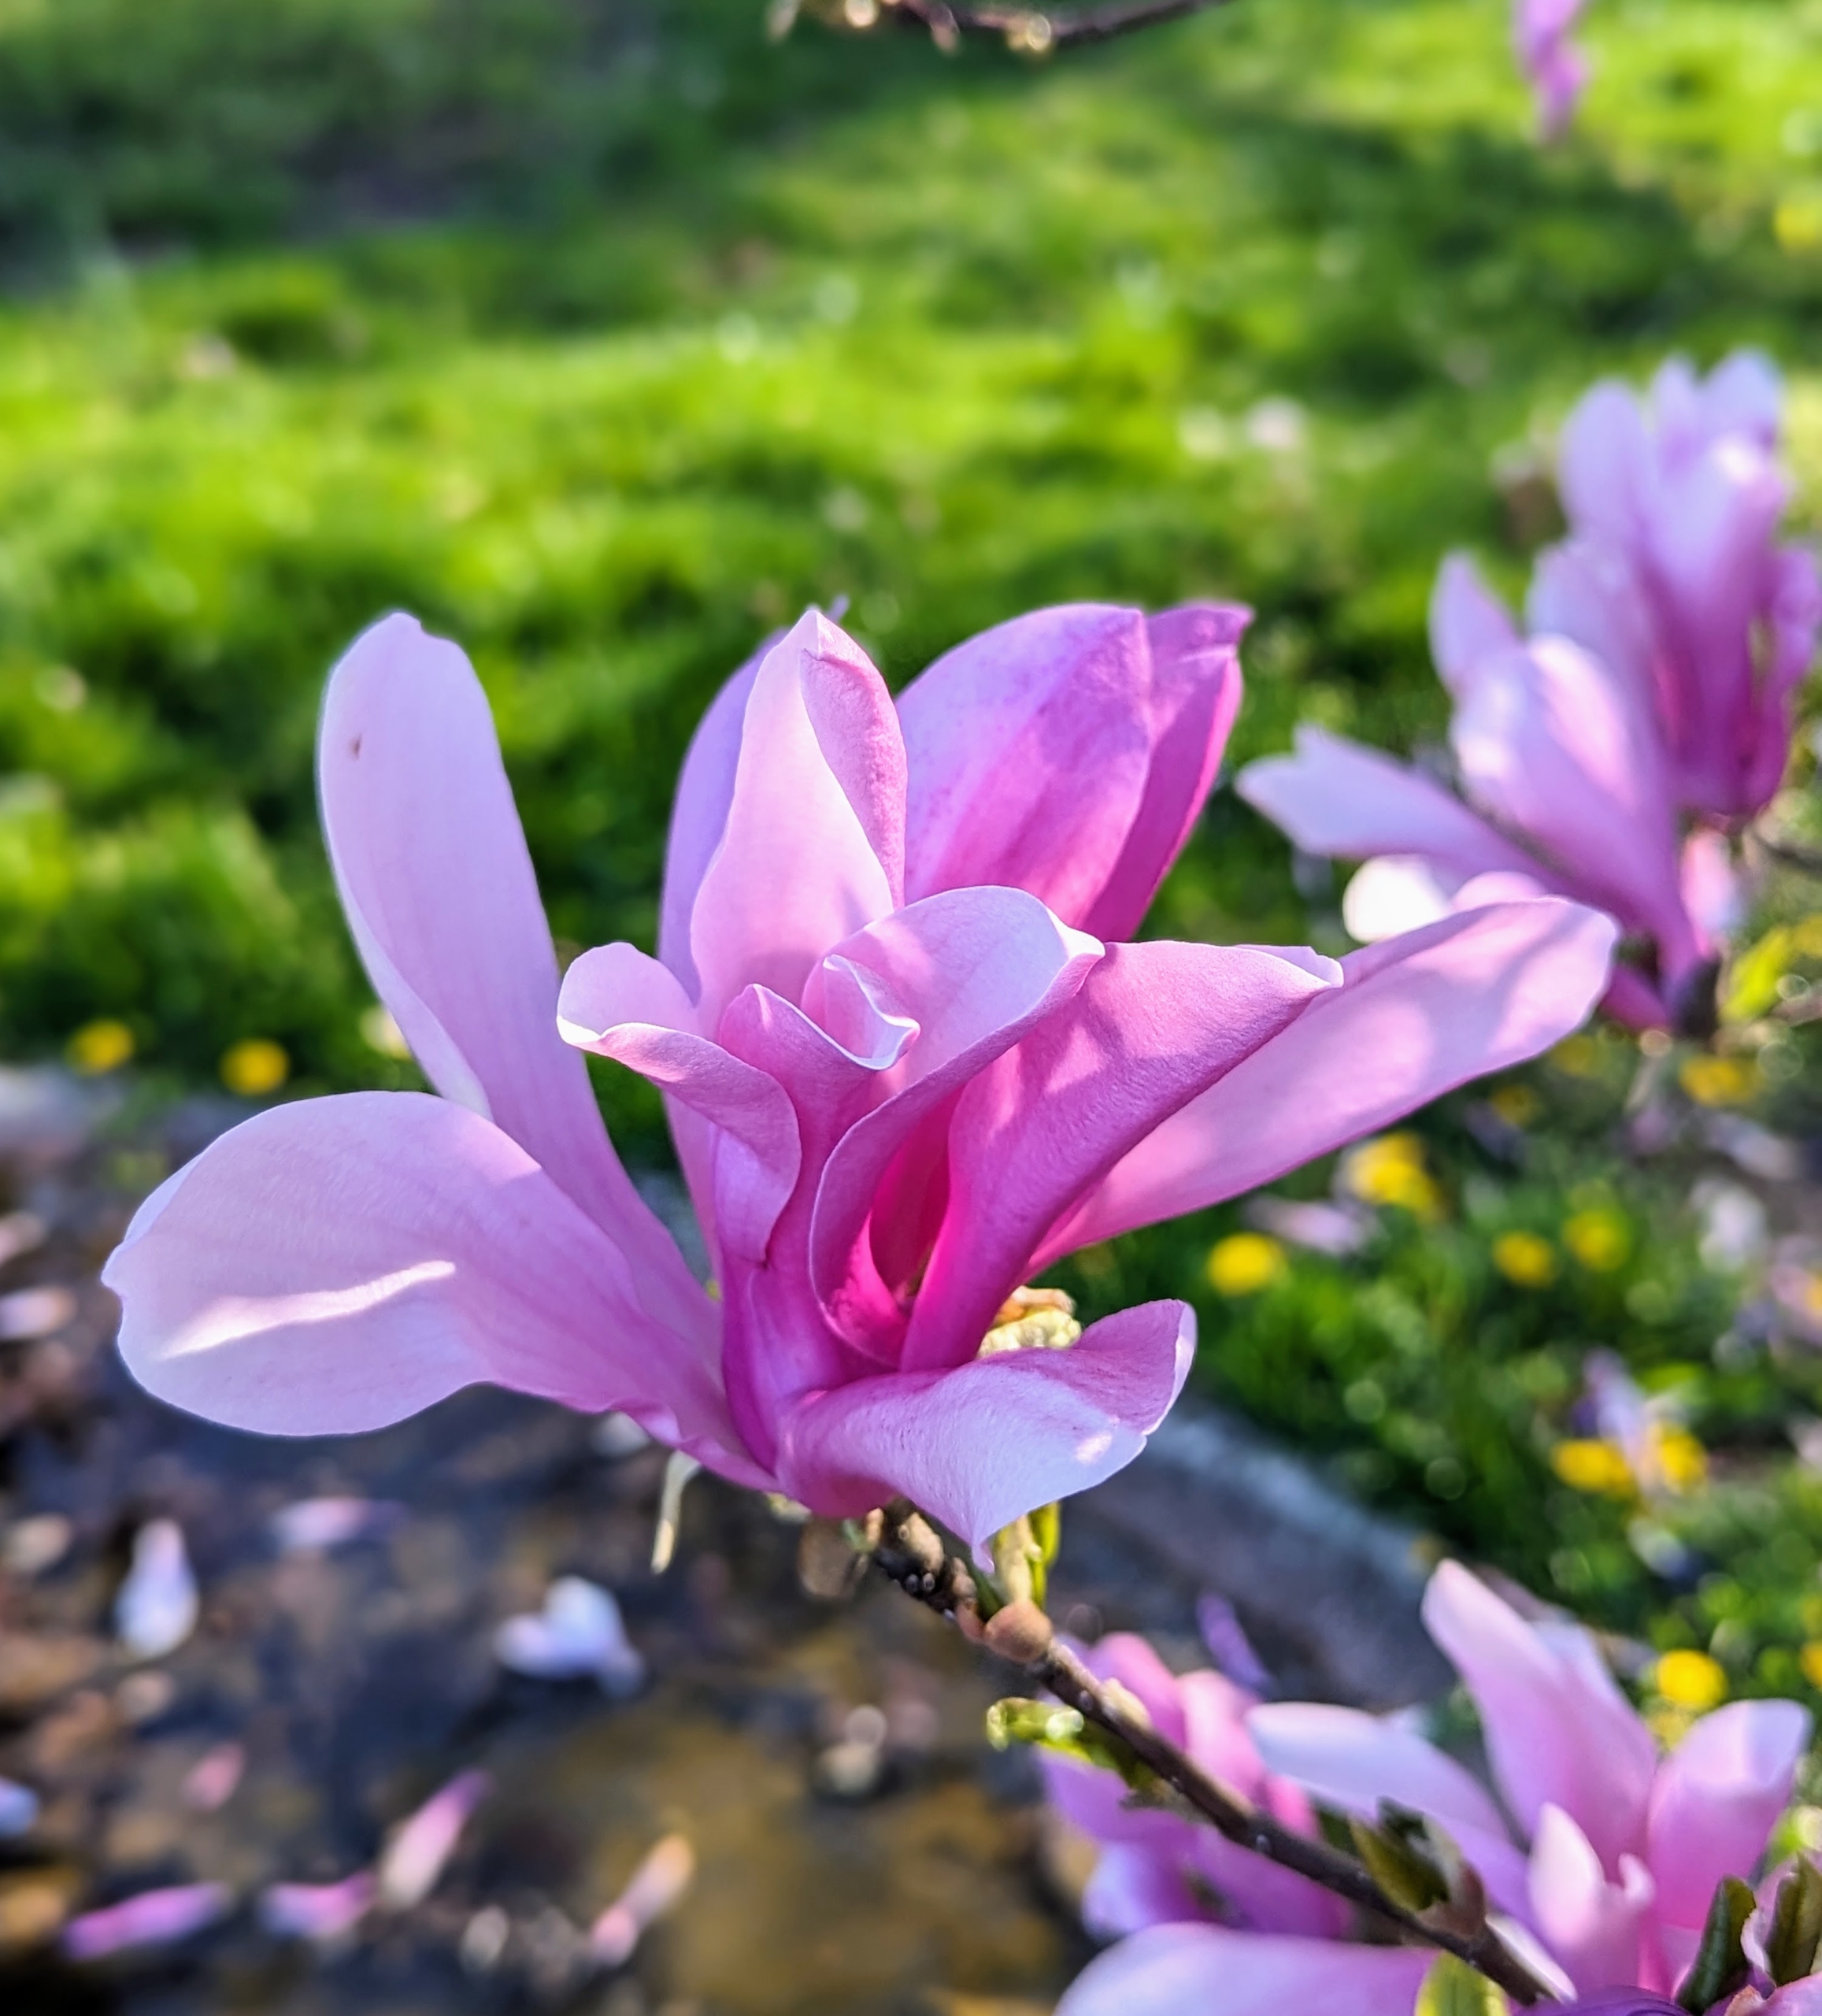
I have several pink, white, and creamy yellow Magnolias. Magnolias produce impressive flowers that range from three to 12-inches in diameter. Some species of Magnolia flowers are also protogynous, meaning they appear with or before the tree’s leaves.
Magnolia is a large genus of about 210 flowering plant species in the subfamily Magnolioideae. It is named after French botanist Pierre Magnol. Magnolia blooms do not have true petals and sepals; instead, they have petal-like tepals.
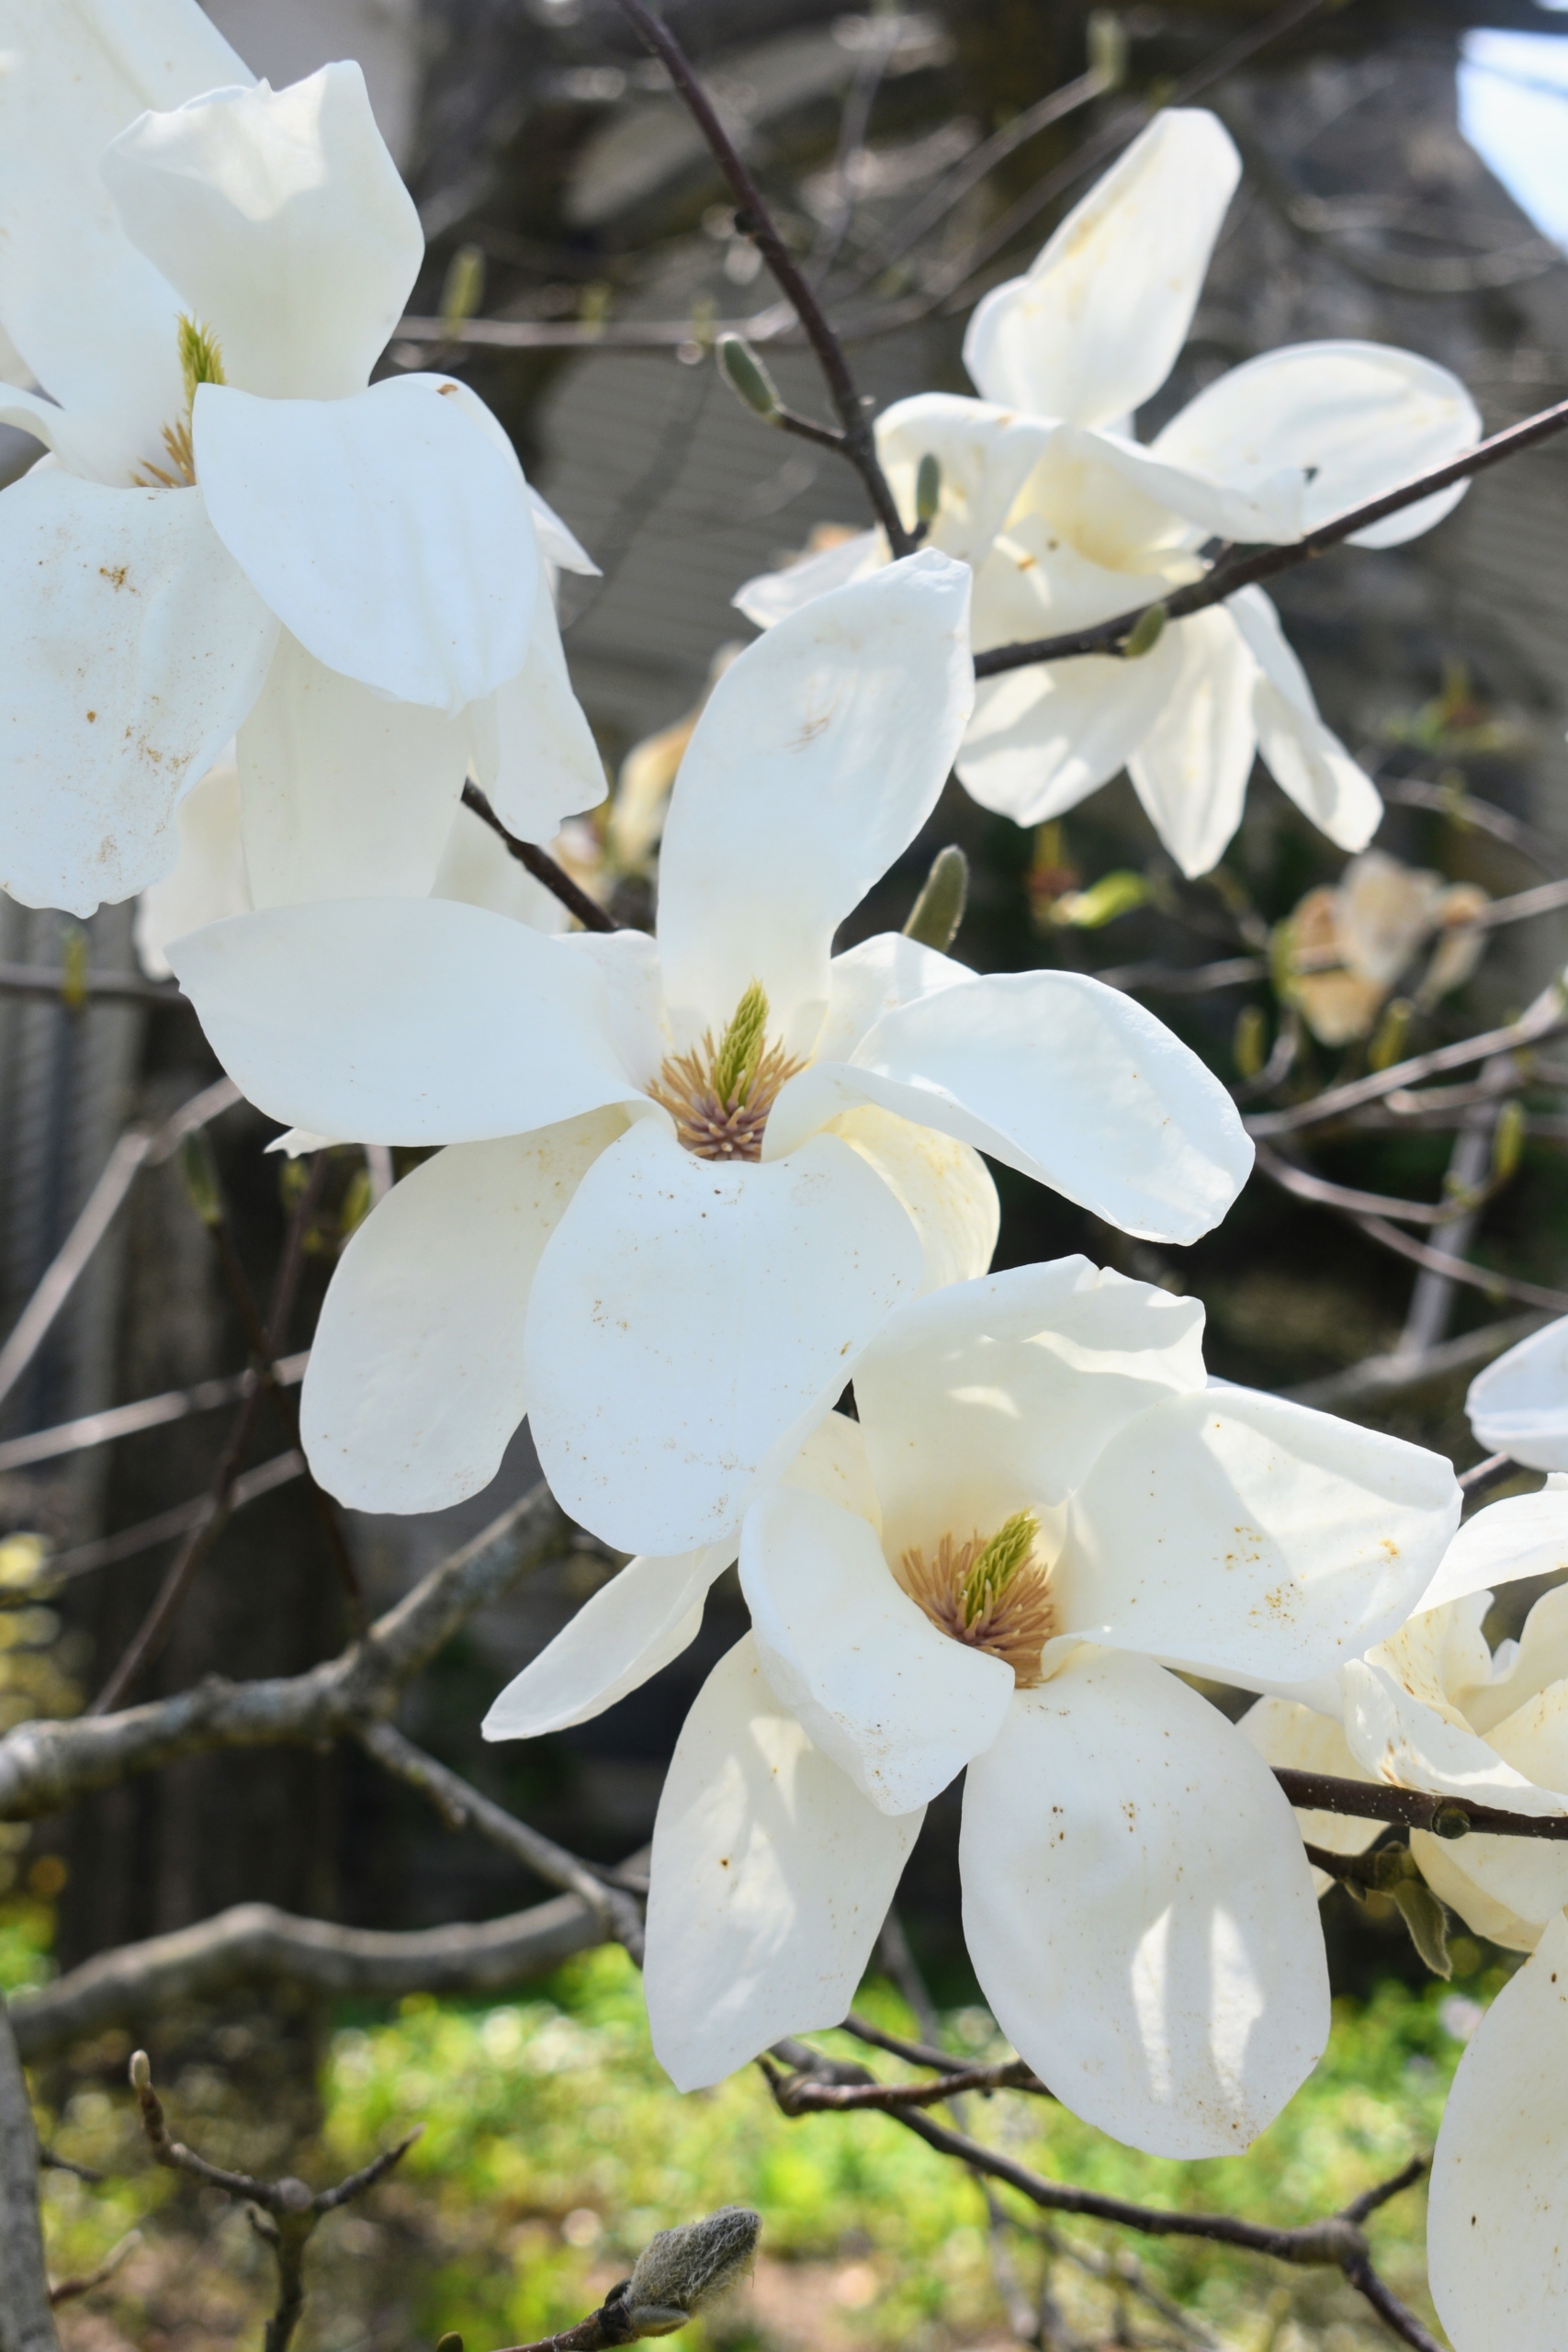
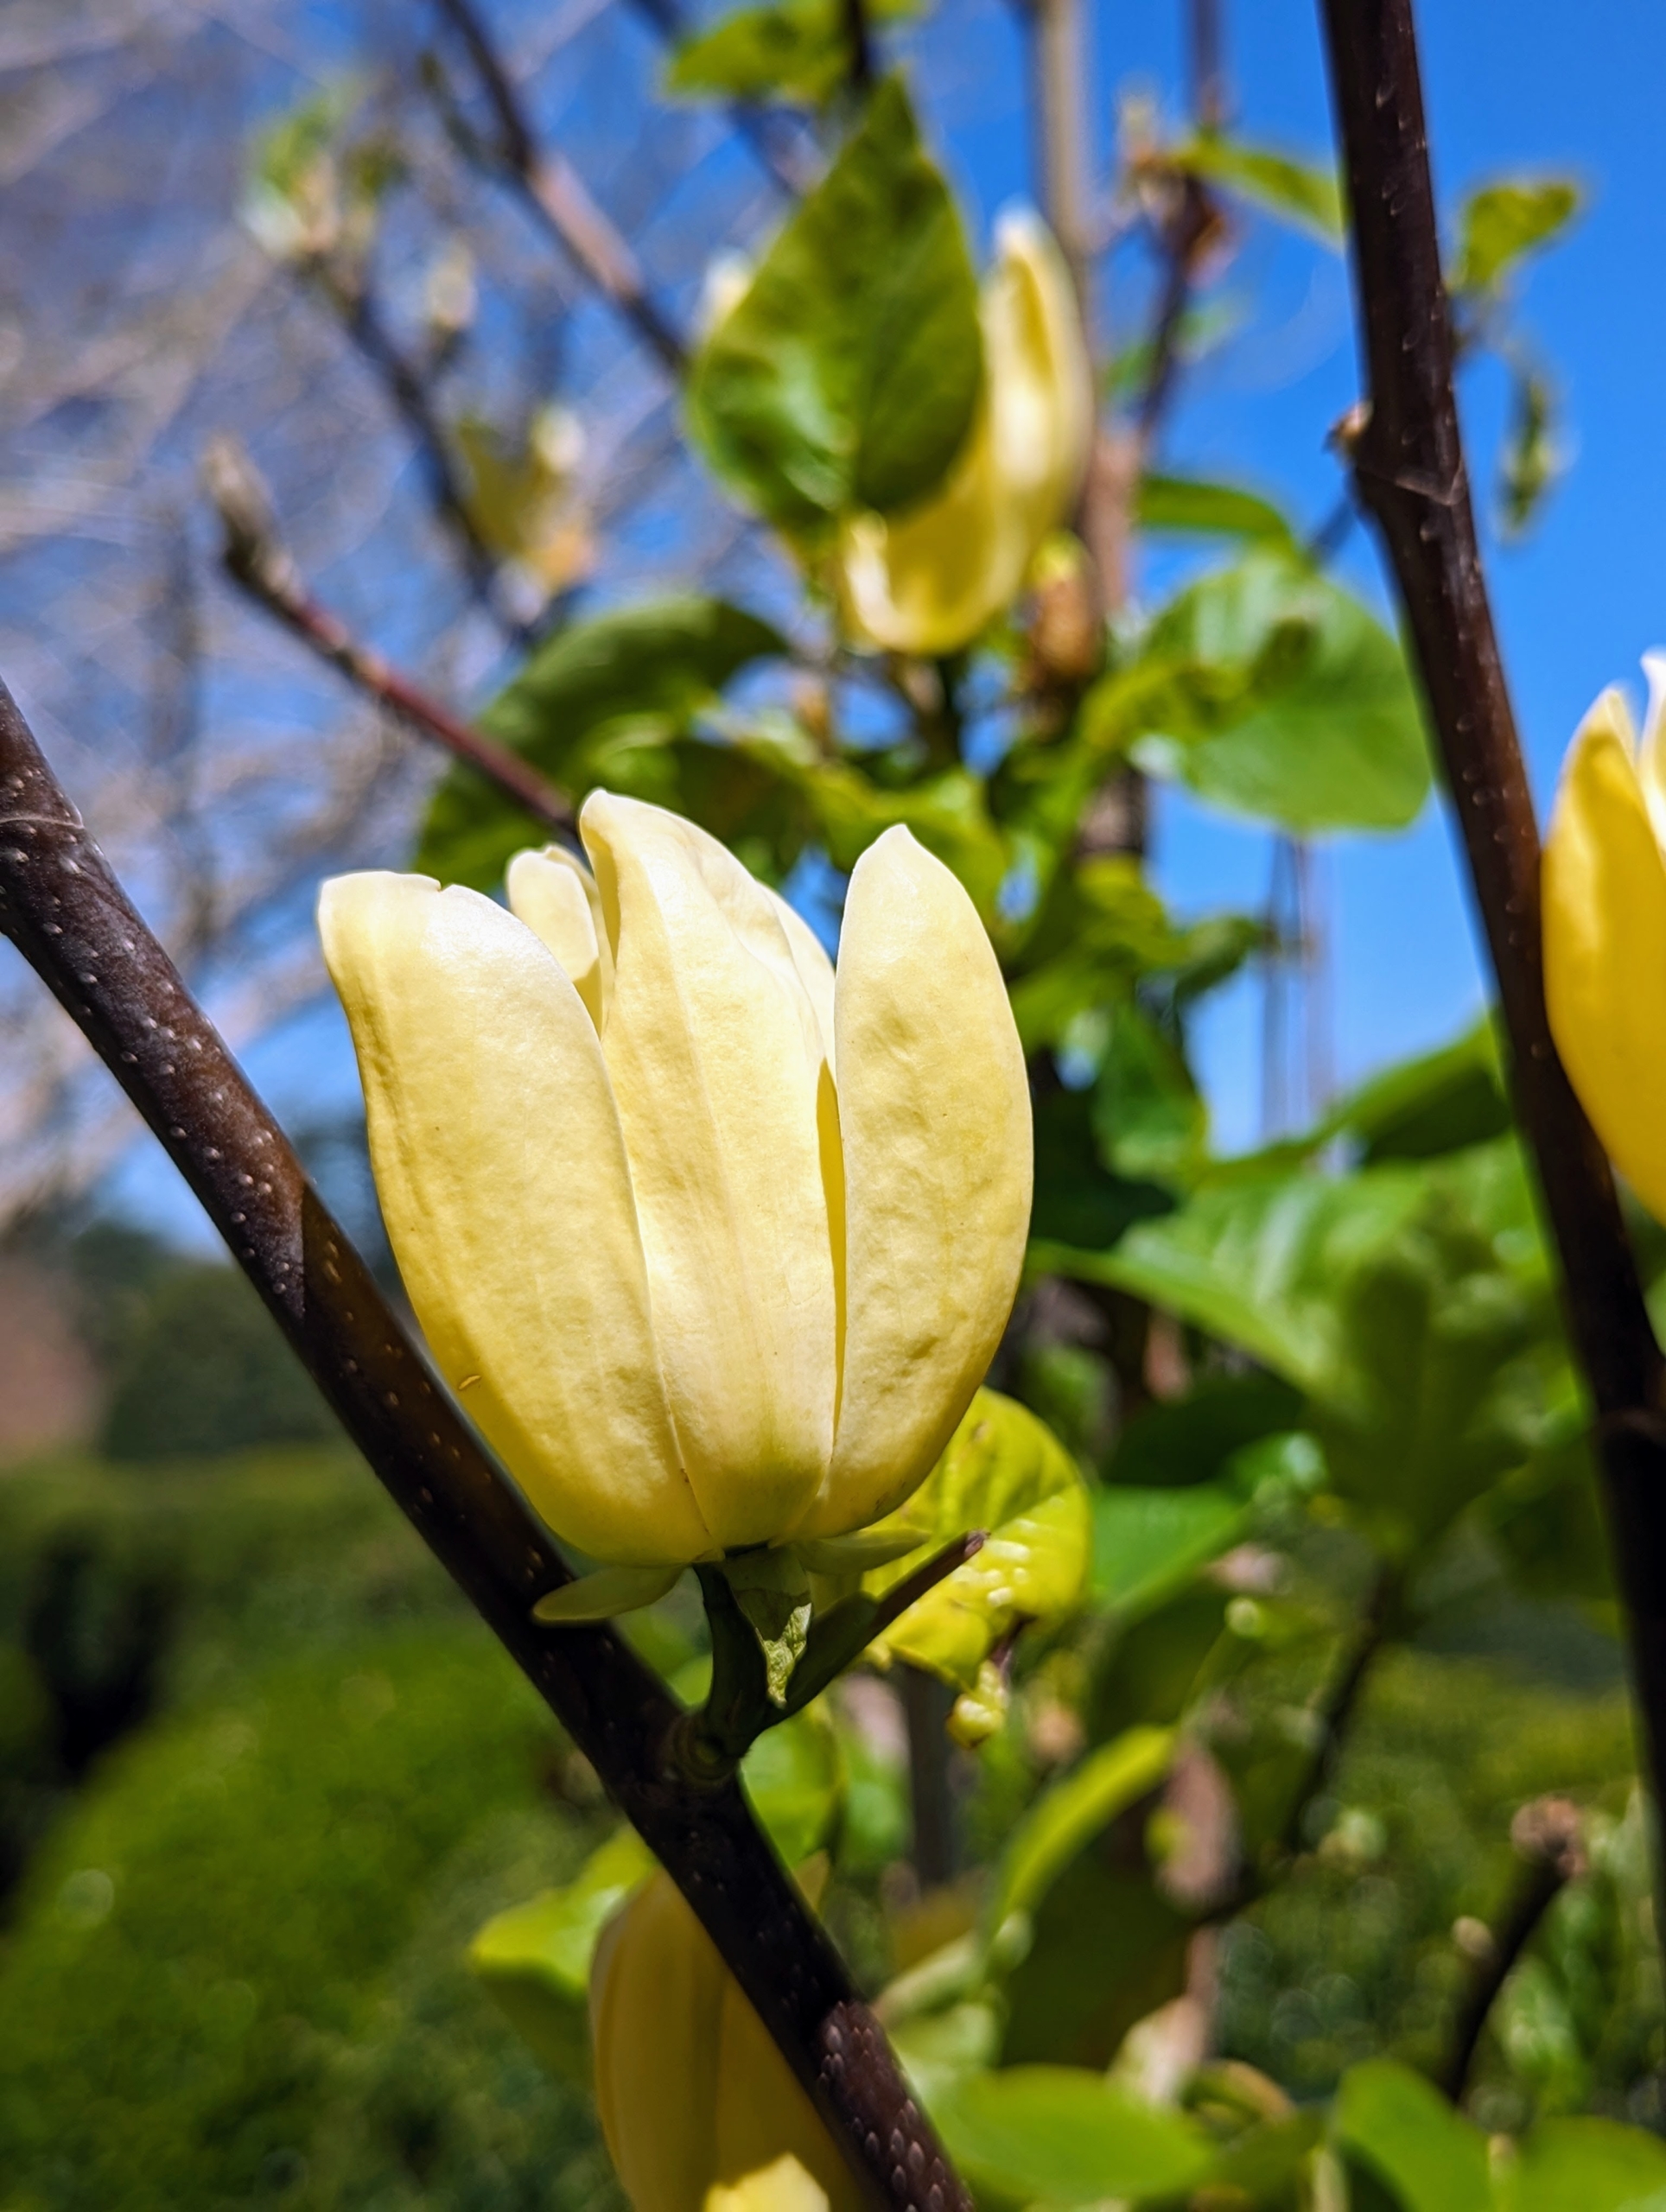
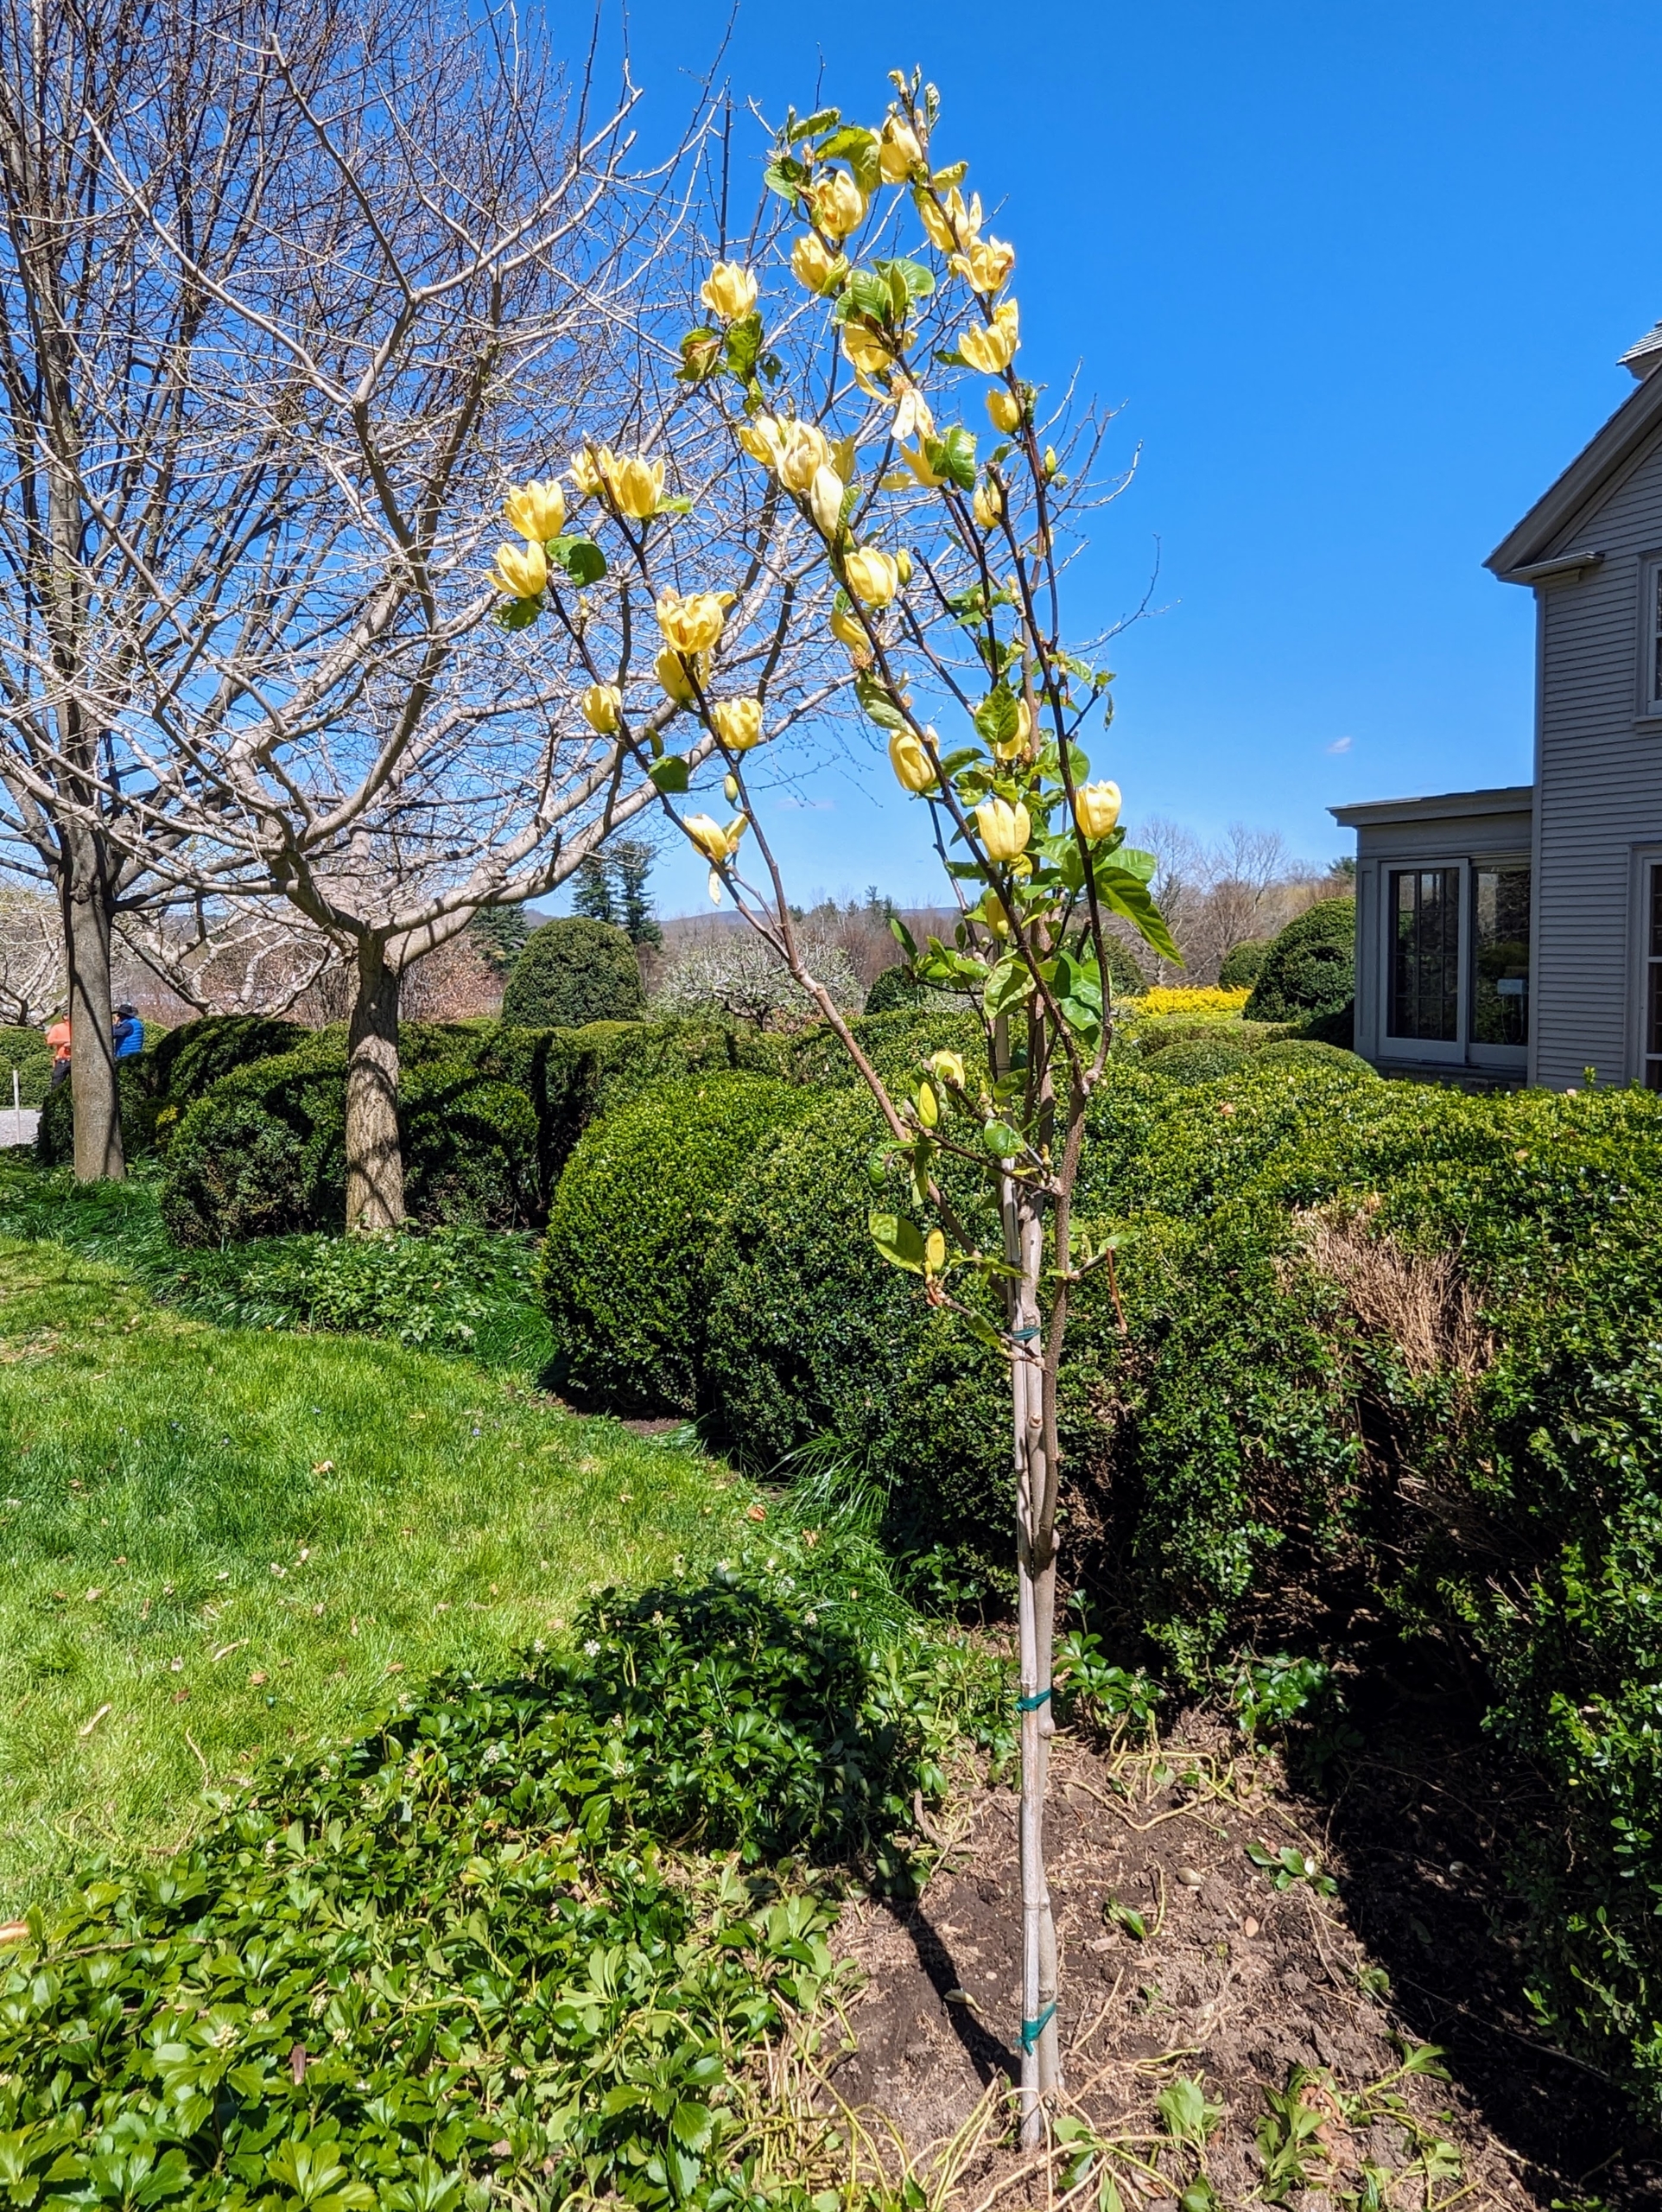
These creamy yellow magnolias are outside my Summer House – also putting on a beautiful floral display this week.
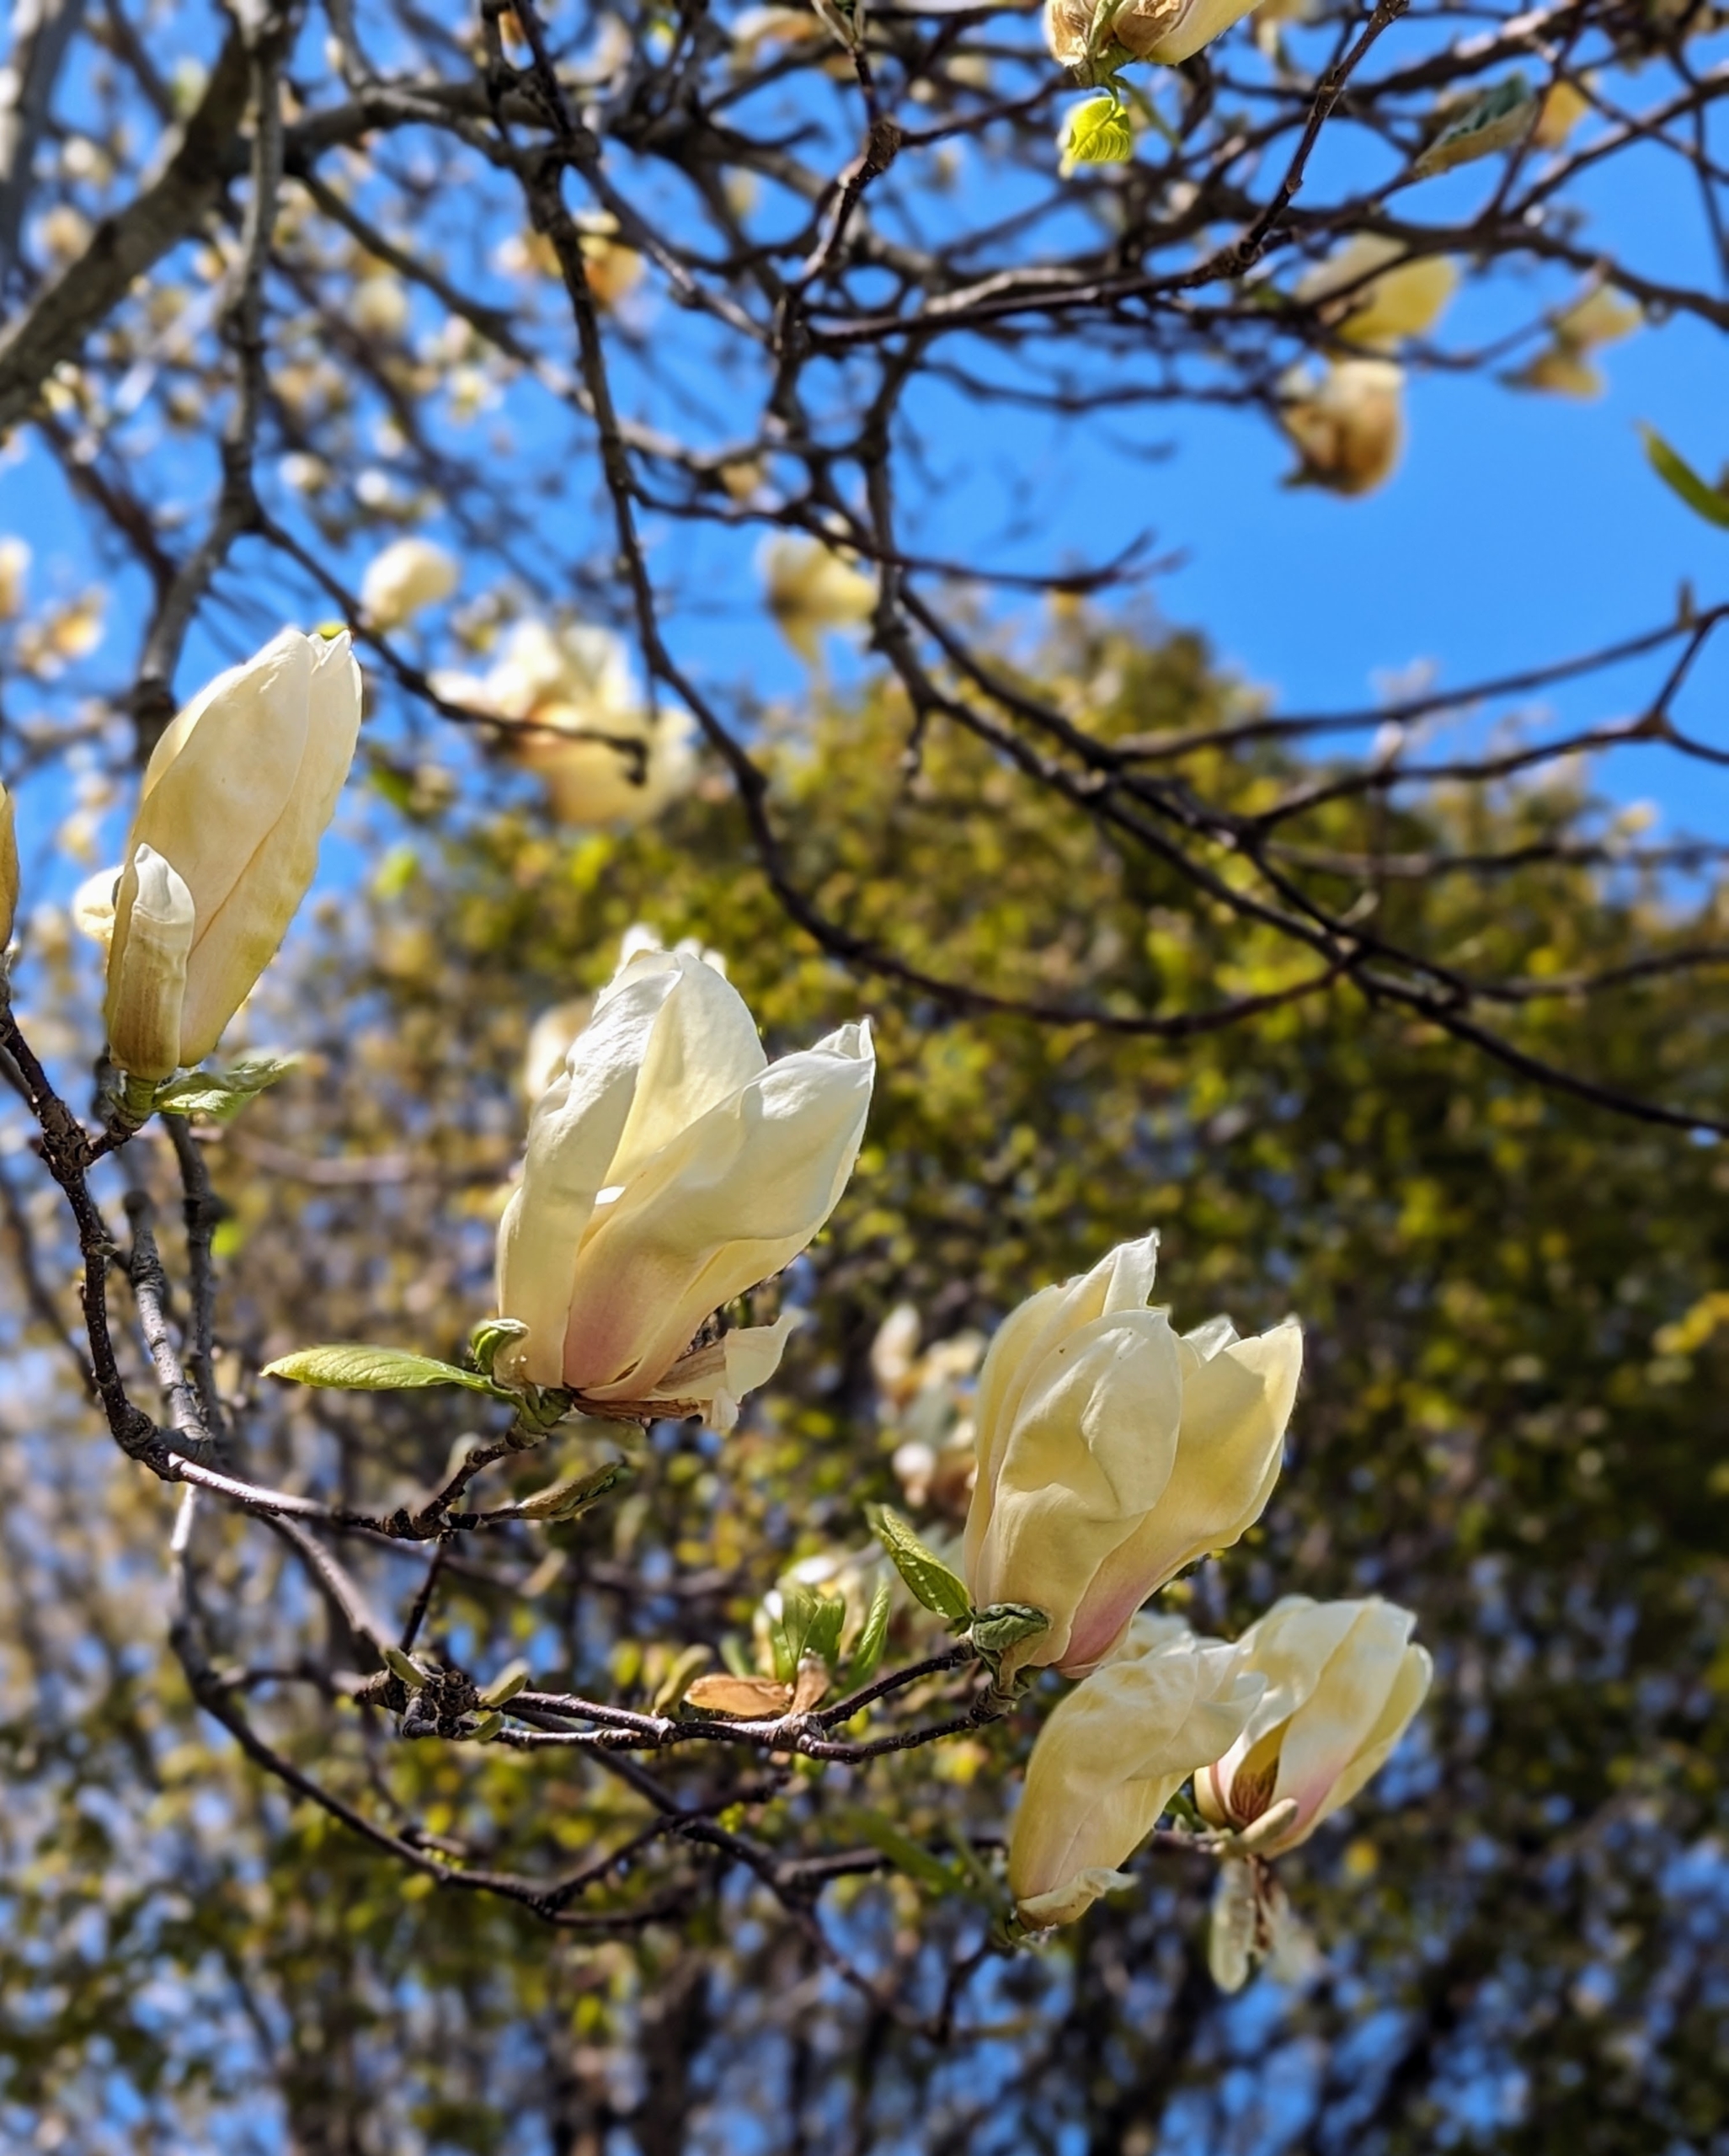
Though it depends on the weather conditions, Magnolia flowers can last about two to three weeks, before falling.
Magnolias come in a vast array of cultivars and species that can grow successfully in most gardens. Eight Magnolia species are native to the United States. Many others are native to Asia. And most Magnolias do best when planted in full sun or partial shade.
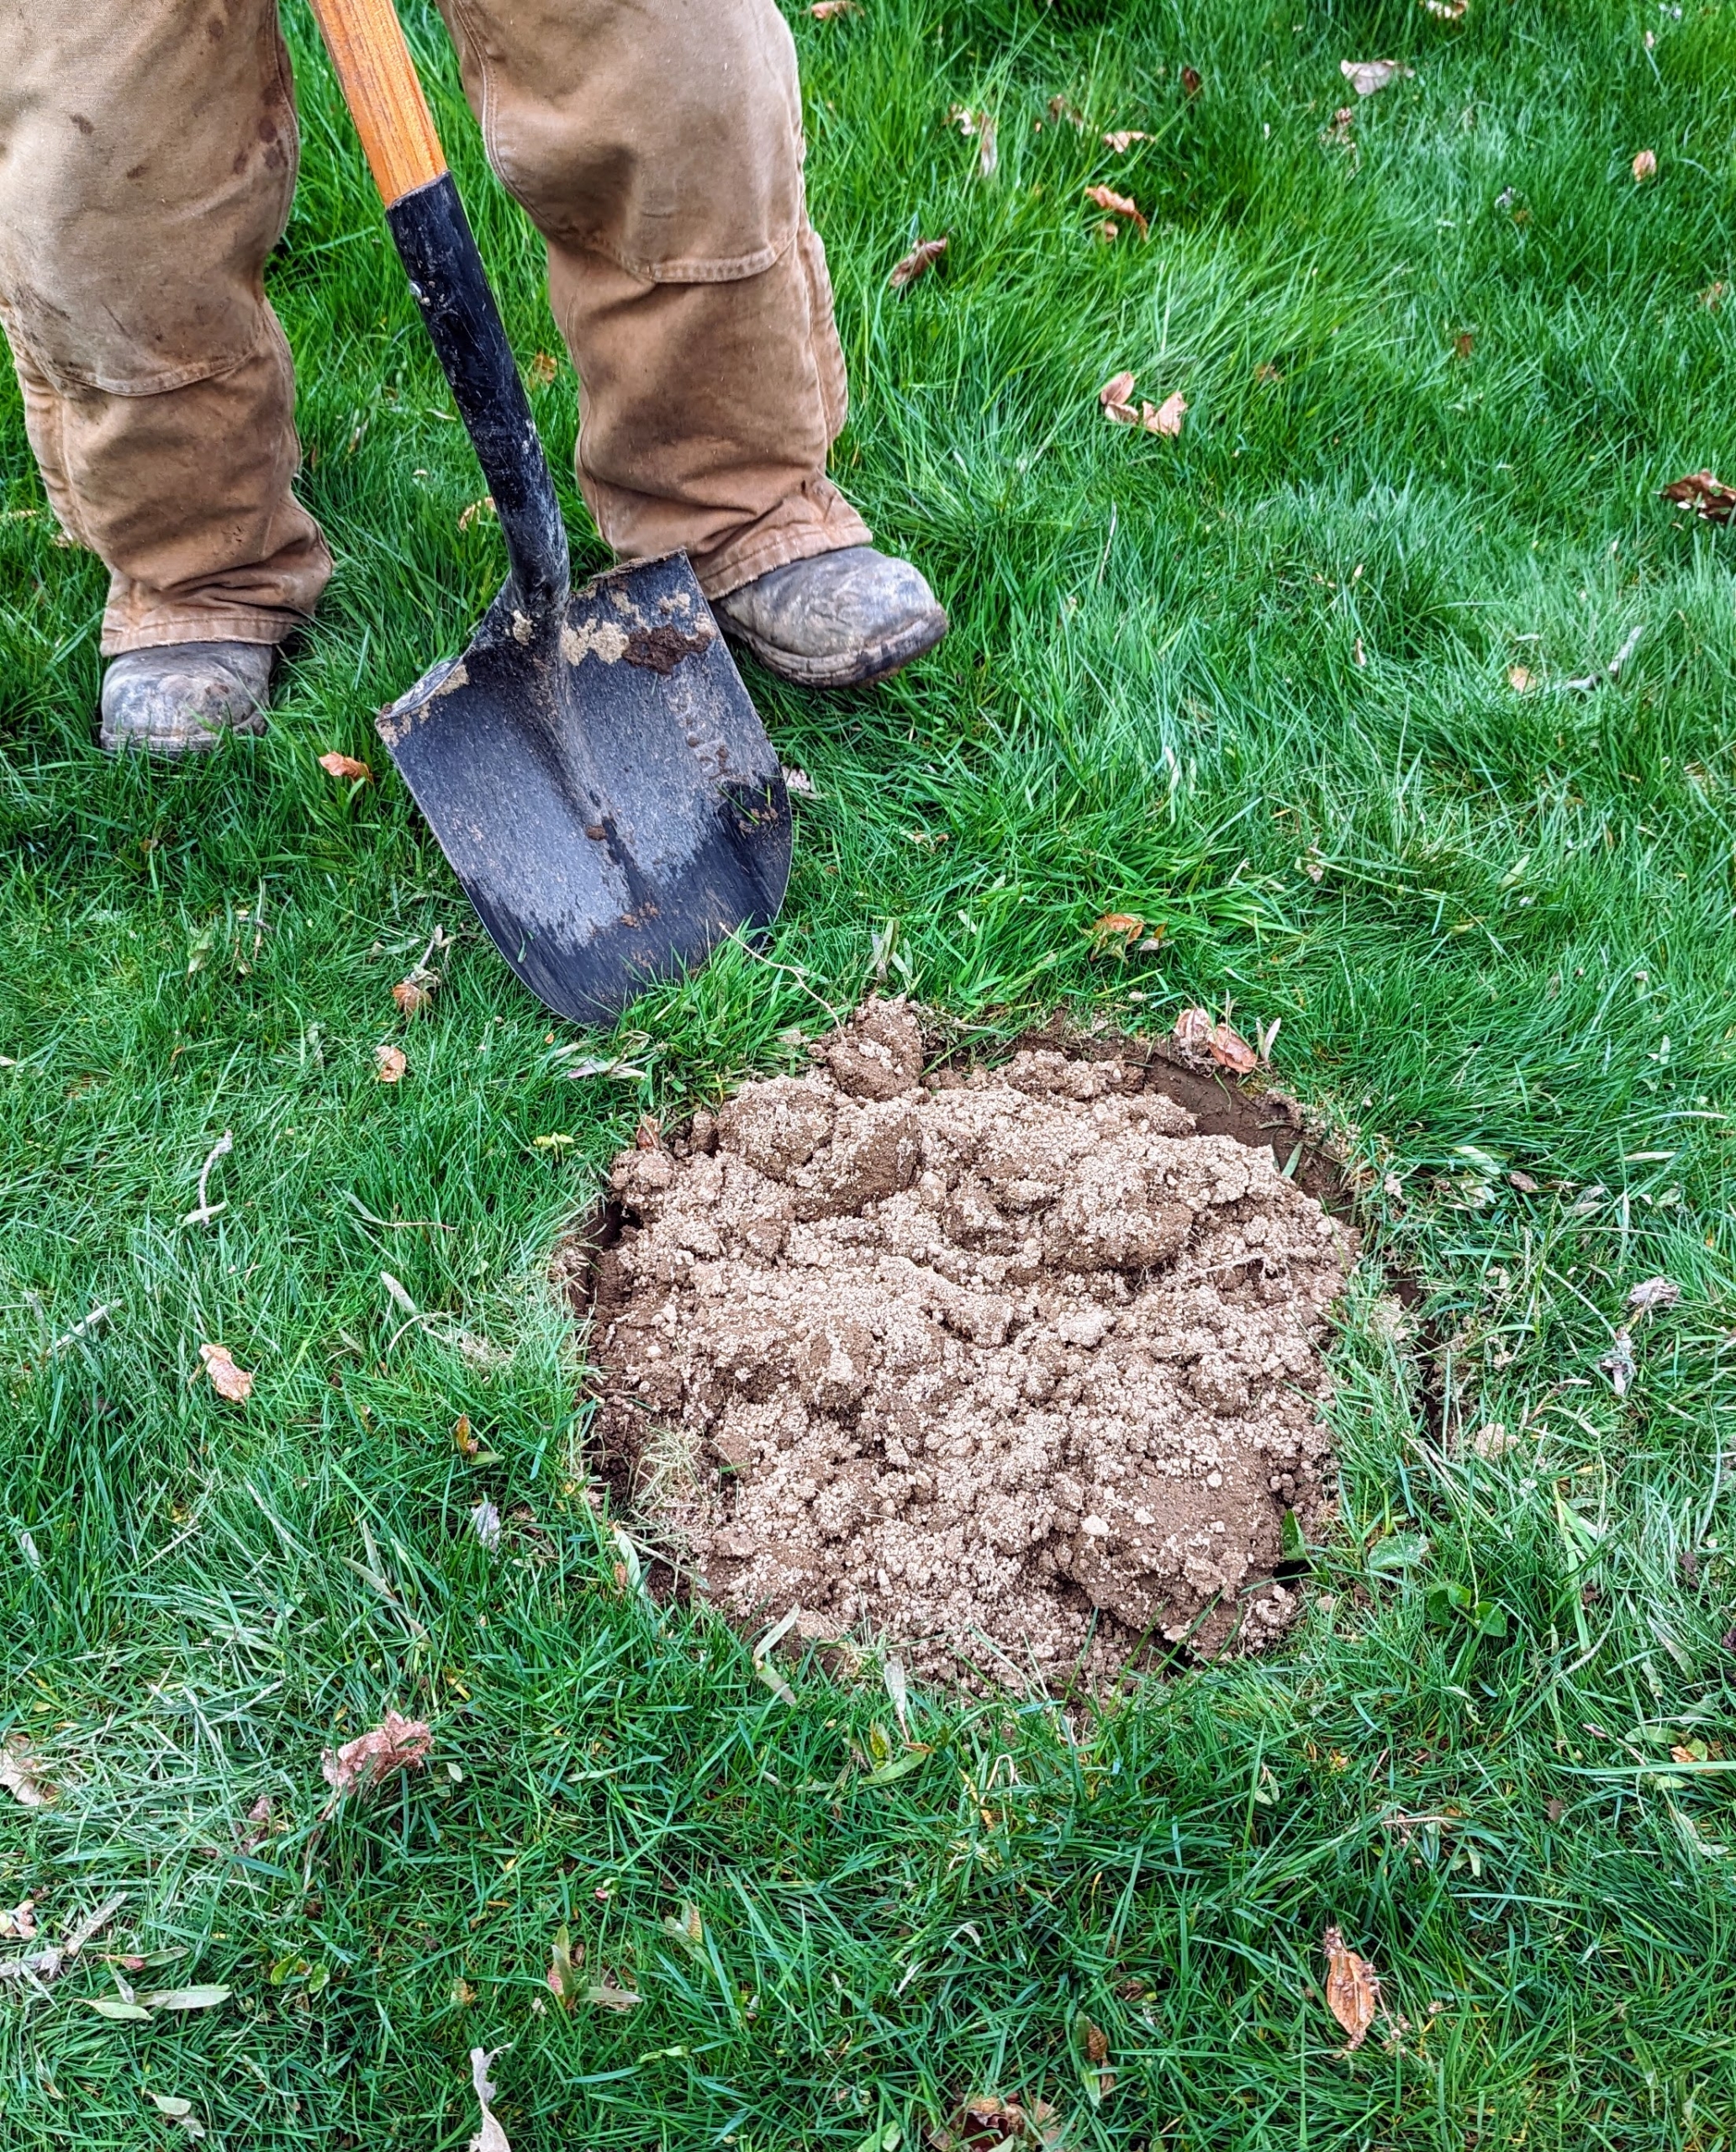
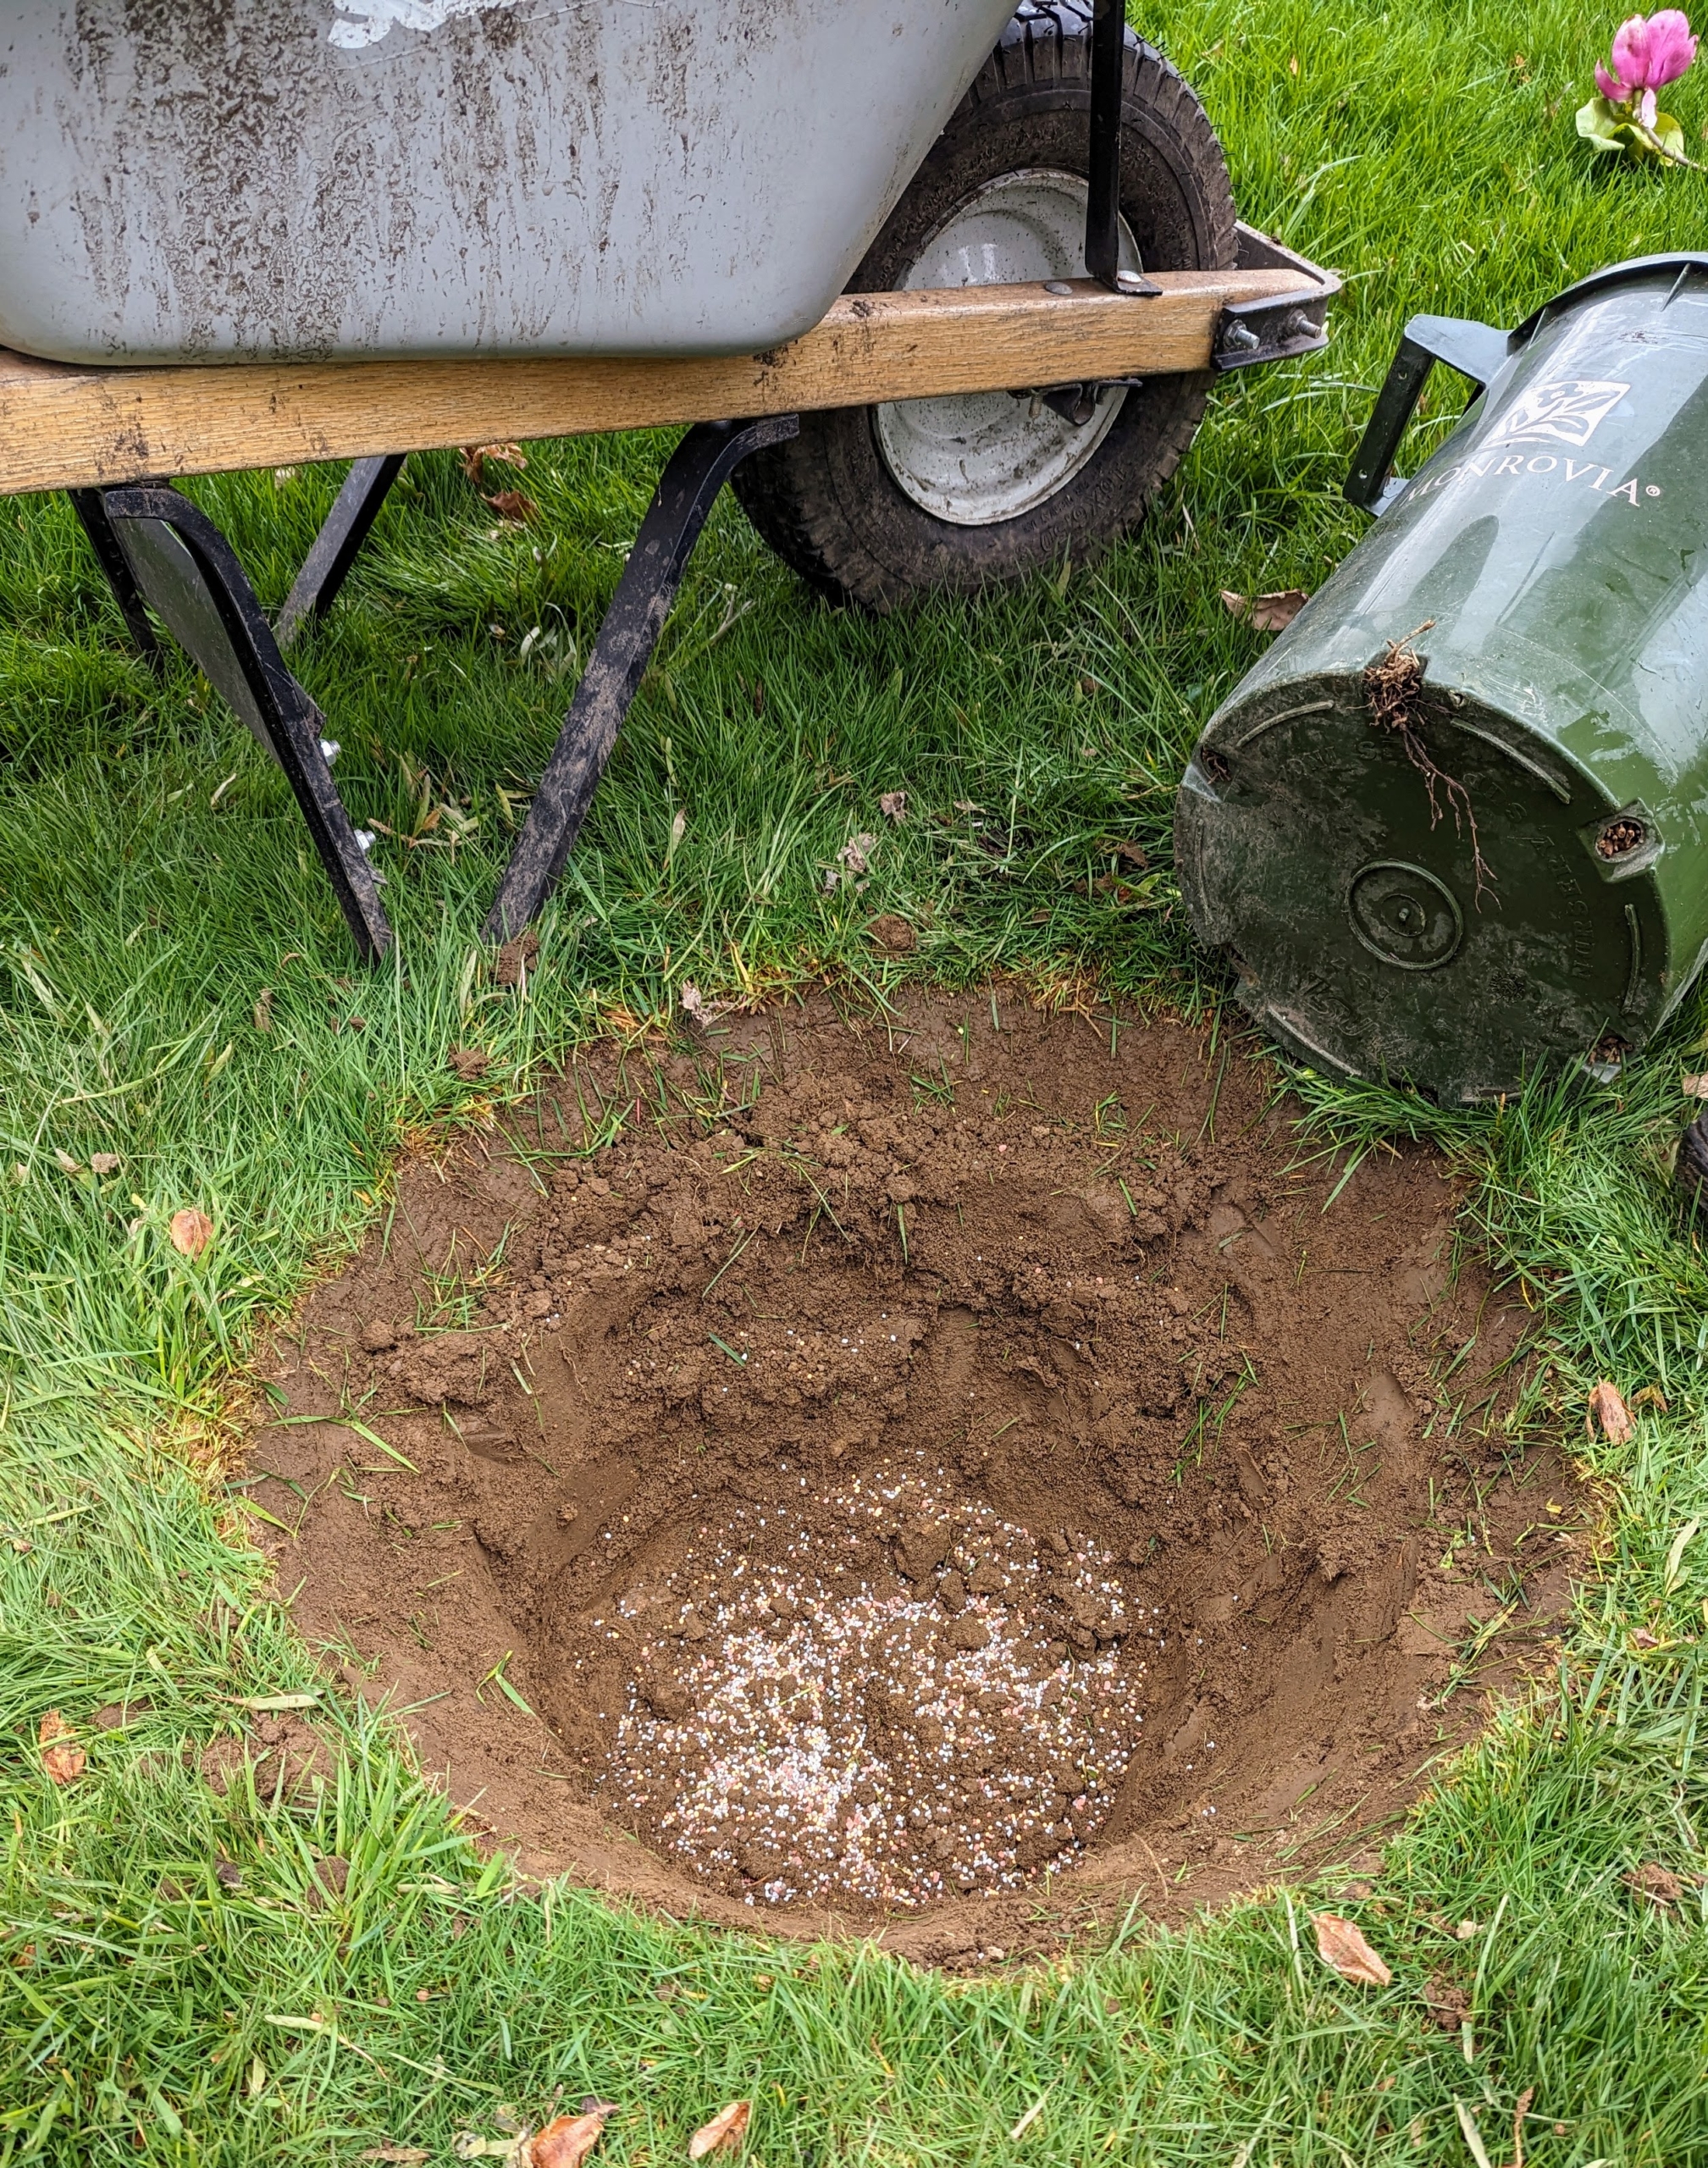
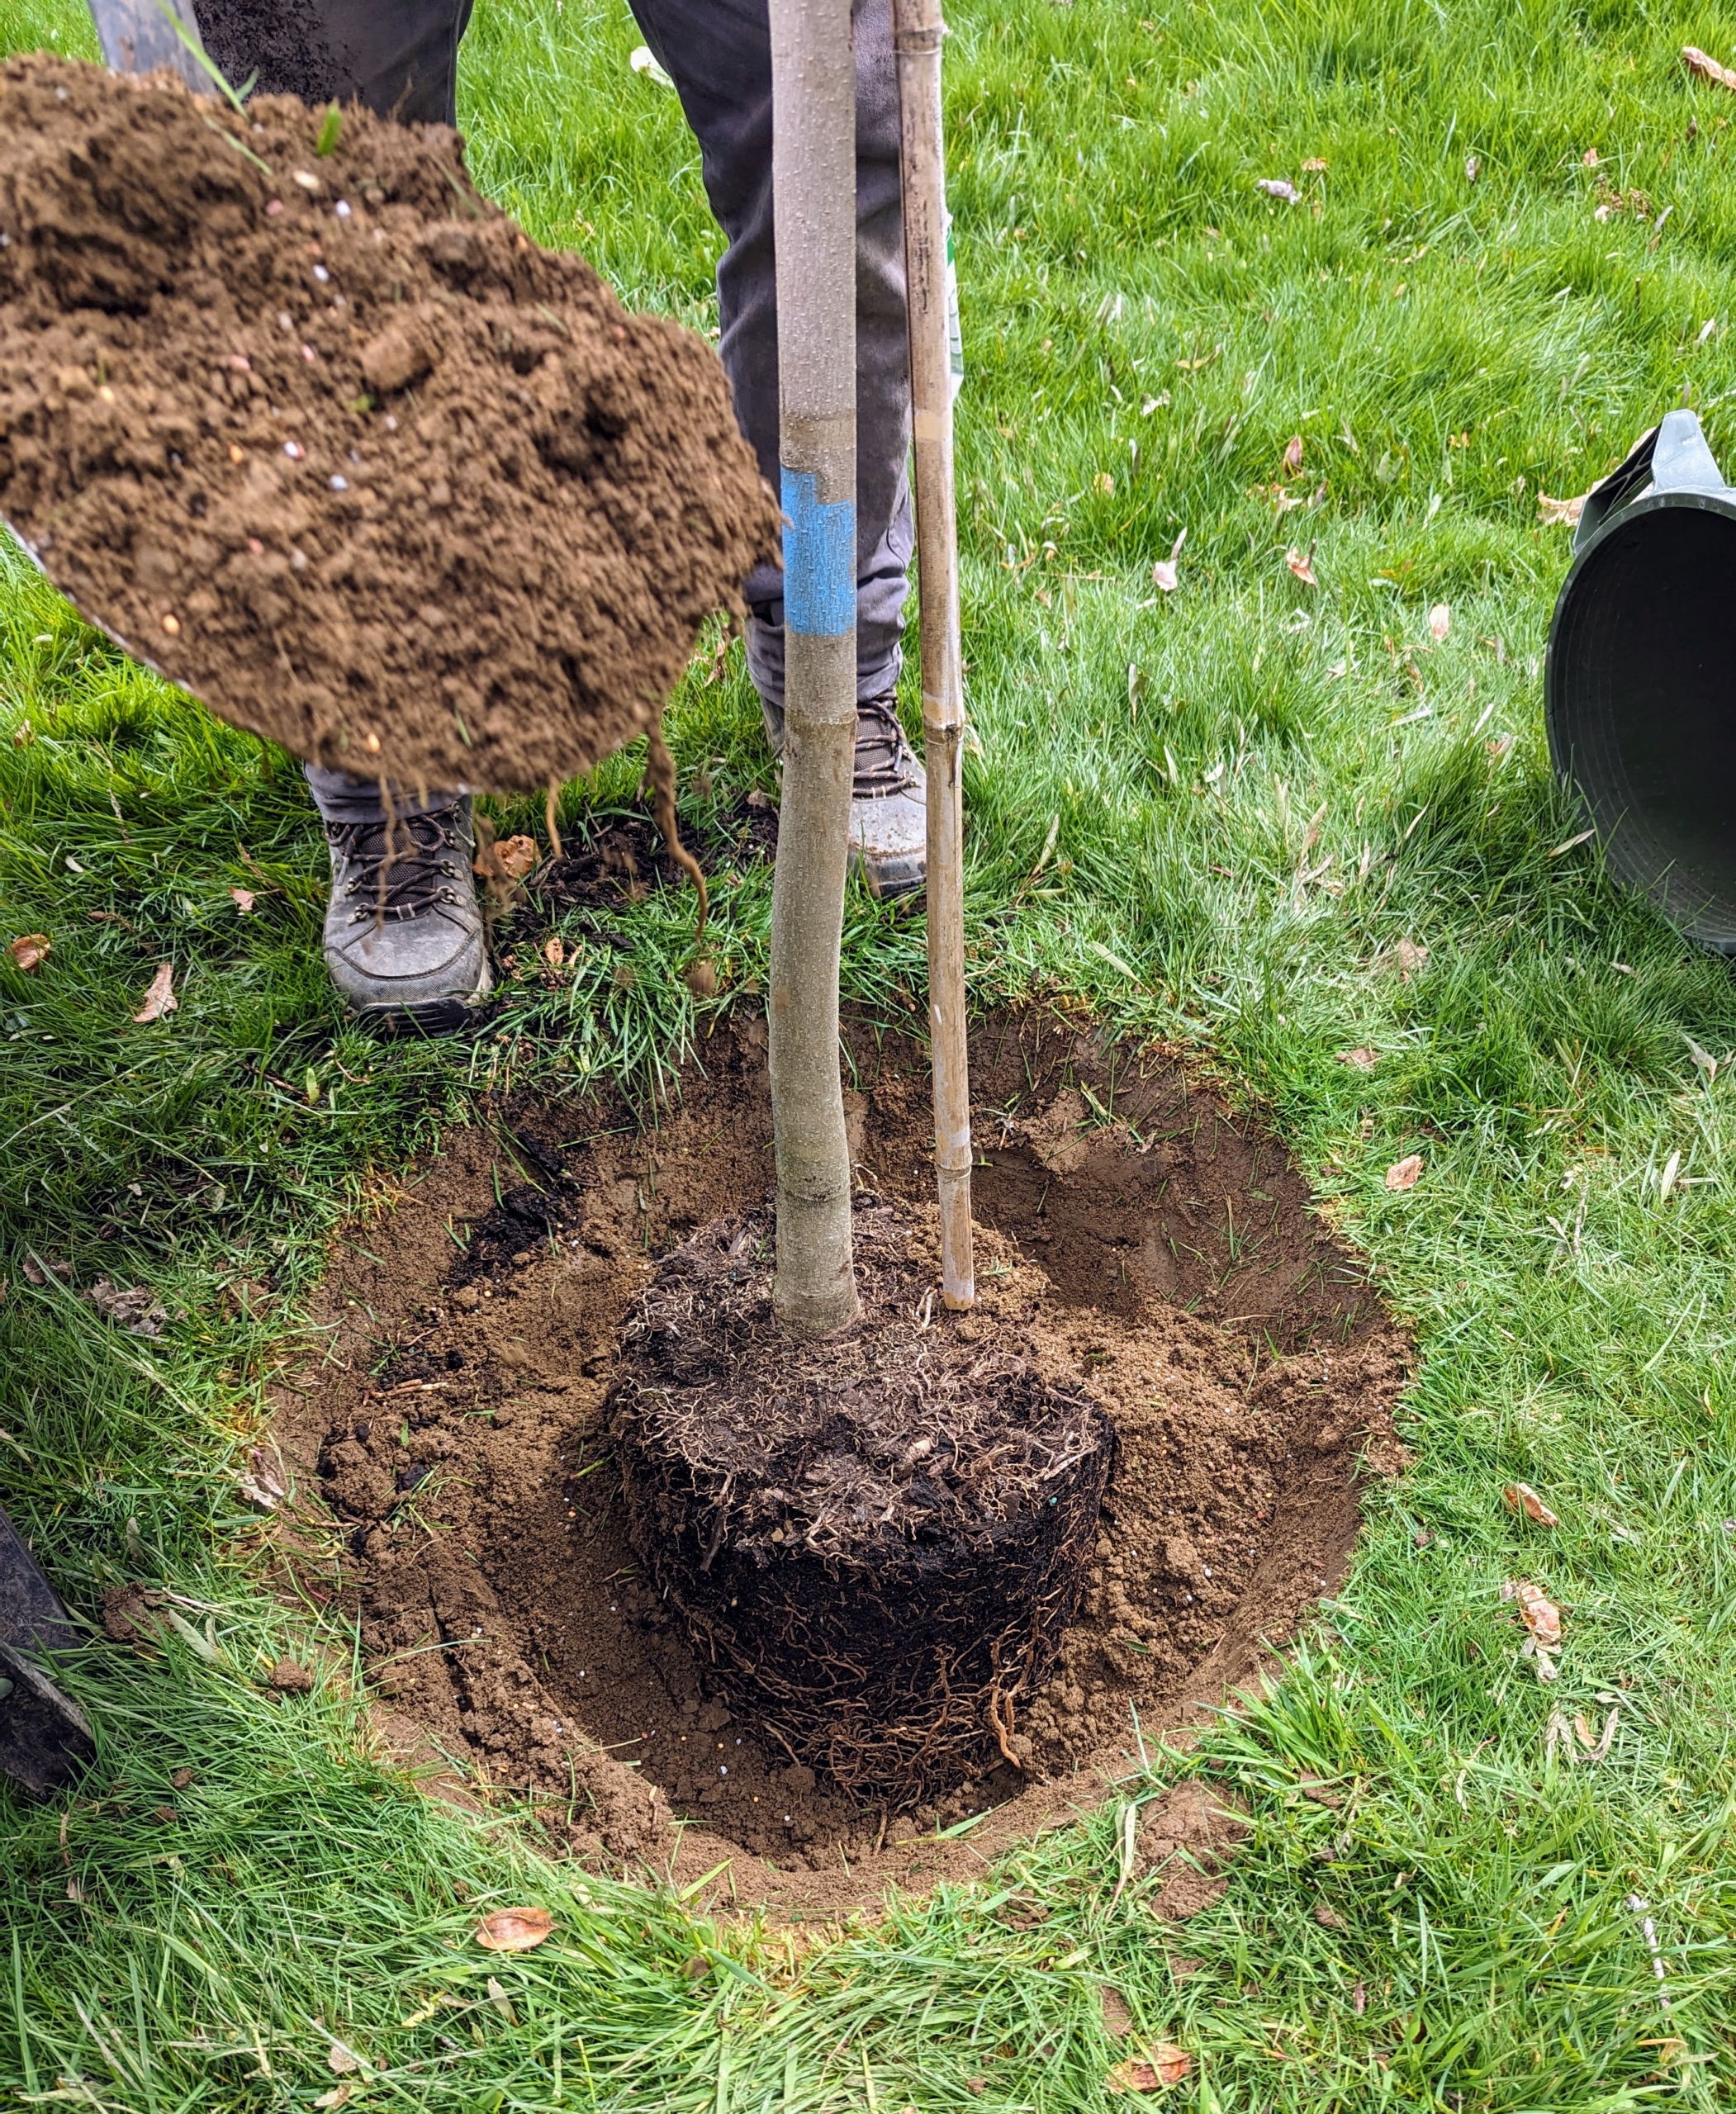
Last week, my crew planted several young Magnolia trees. They were strategically placed before getting planted. Magnolias have wide, shallow root systems, so they need lots of room to grow. To prevent any confusion, the sod was removed from the exact planting location before the pot was moved and the hole was dug.
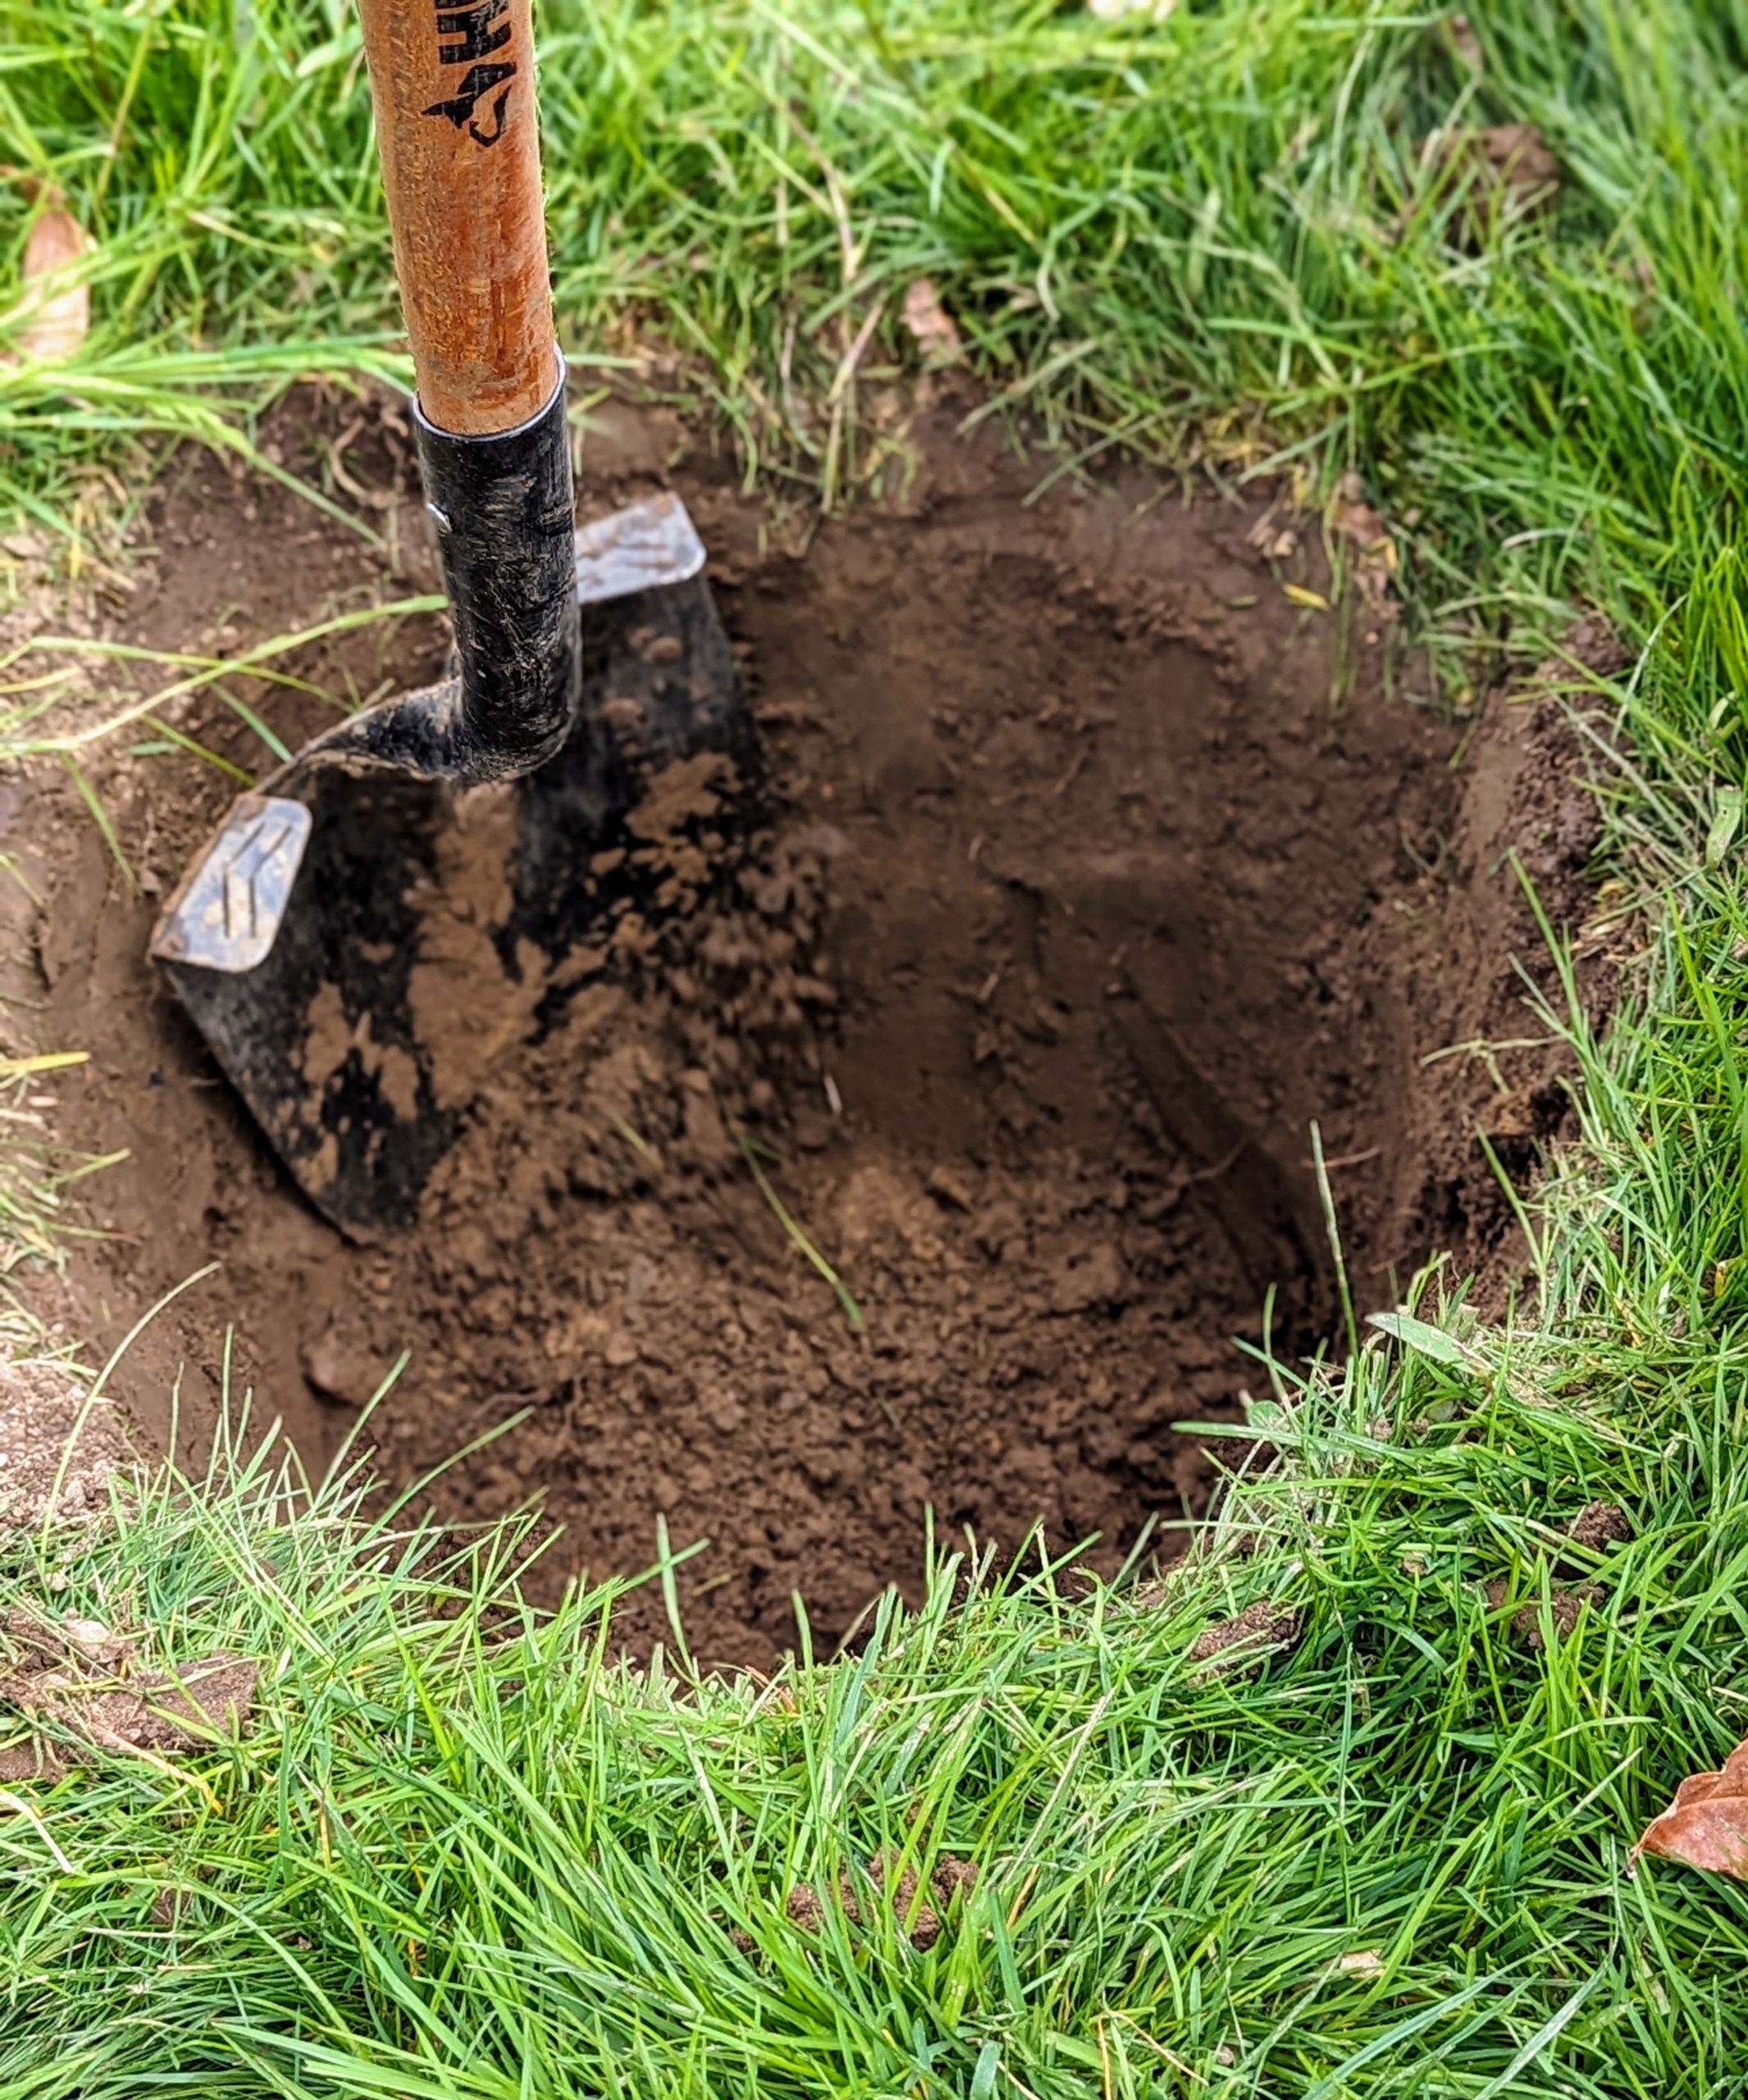
When planting a tree or shrub, measure the height of the root-ball to determine the approximate hole depth. Measure the diameter of the root ball to determine the width of the hole. The hole should be no deeper than the calculated depth. The rule of thumb is that the width of the hole should be a foot wider than the root-ball diameter.
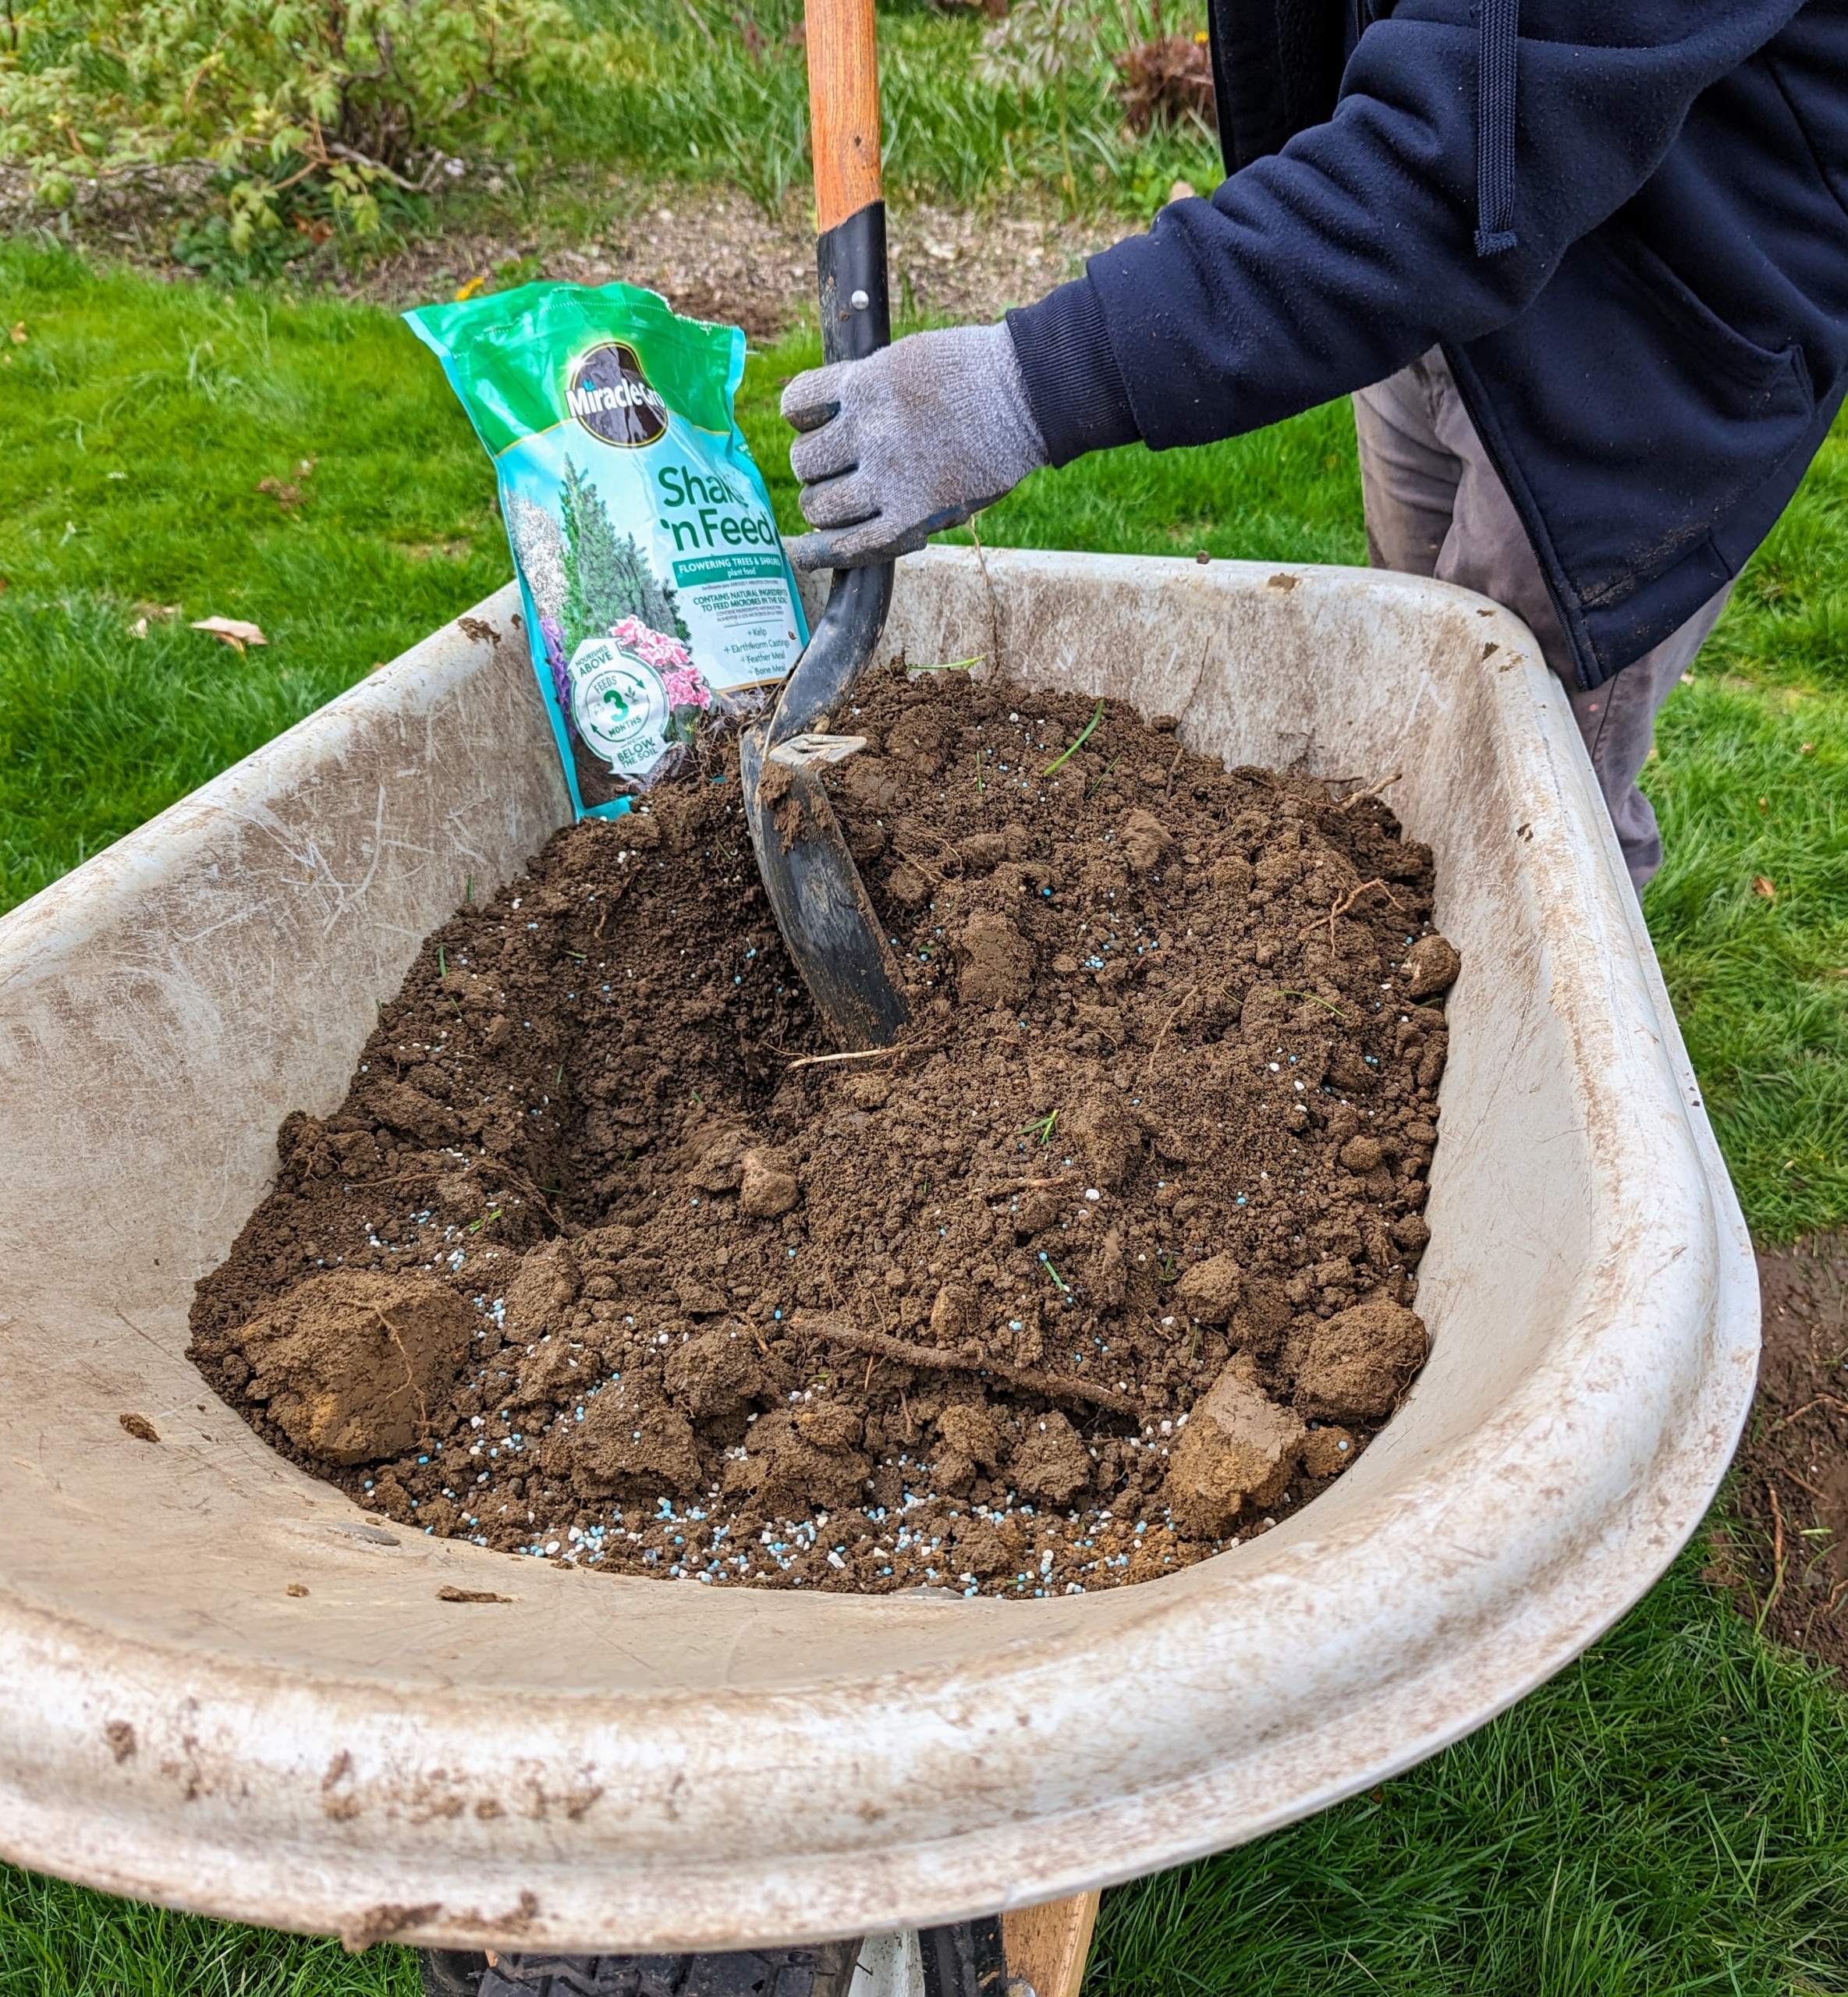
And always have a good quality fertilizer on hand to mix with the soil of the new specimen being planted. Here, a sprinkle of fertilizer is mixed with bottom soil.
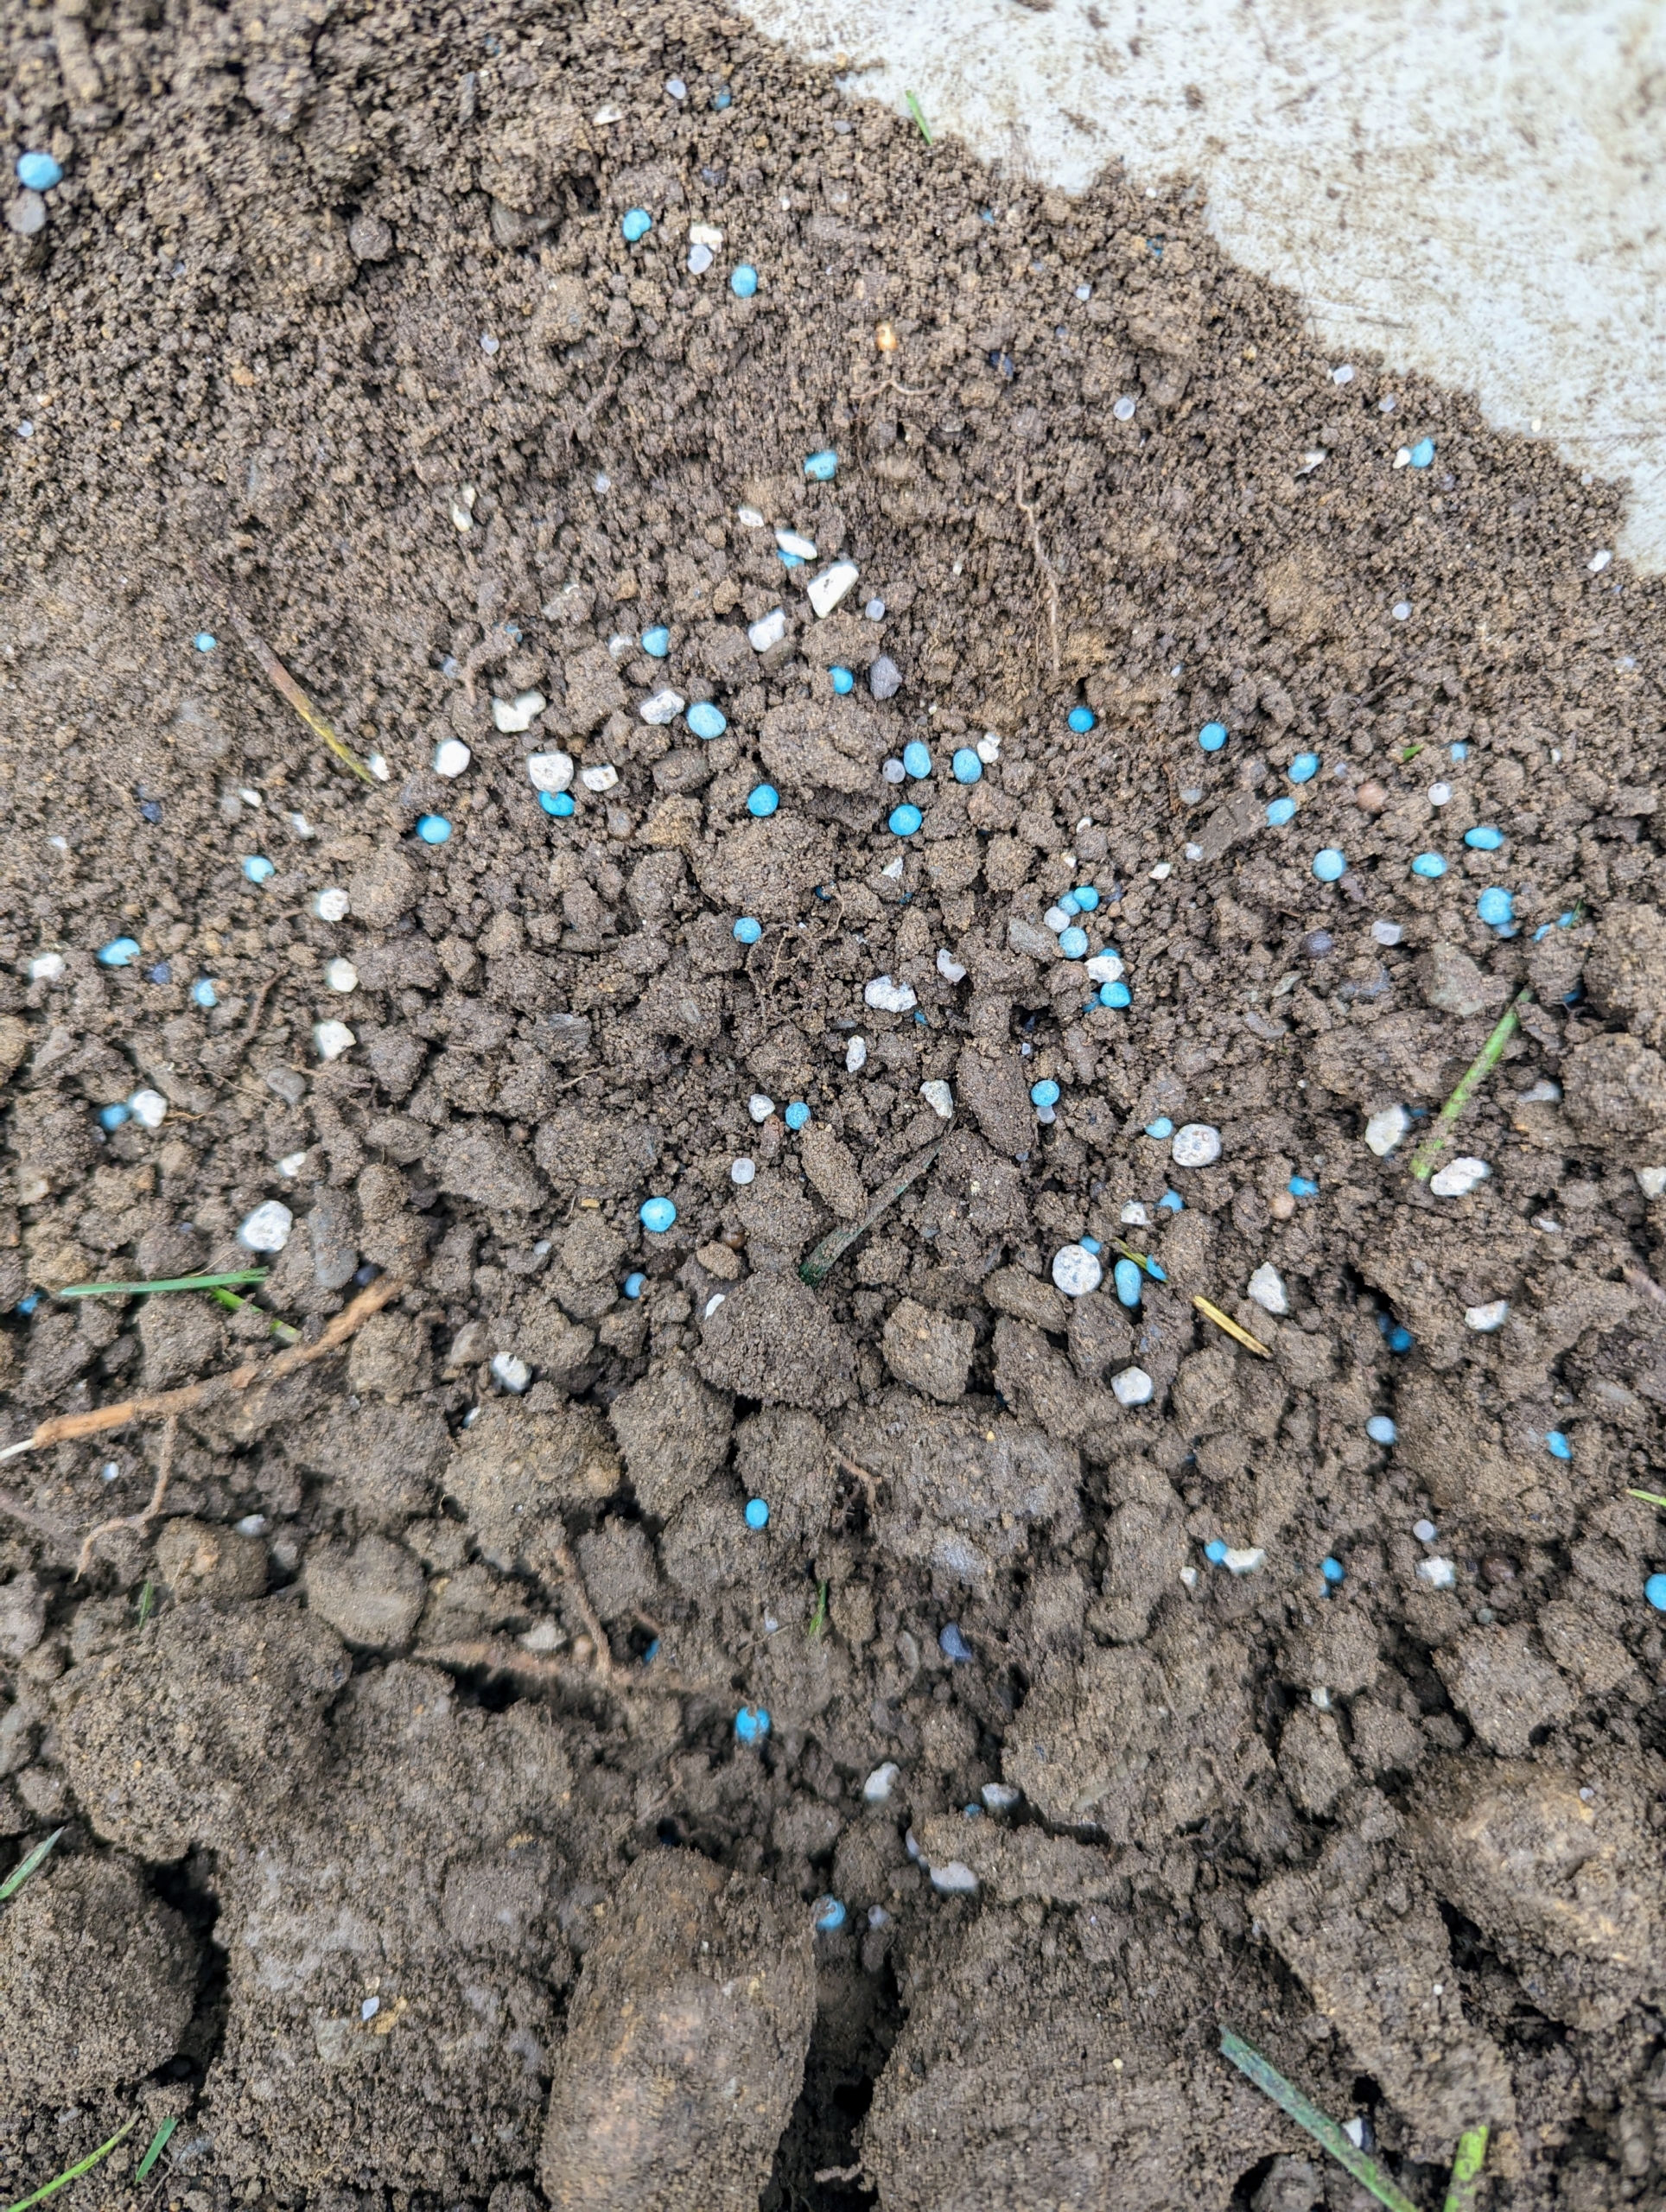
And then some is also mixed with the backfill soil. We use Miracle-Gro Shake ‘n Feed Flowering Trees & Shrubs Plant Food, which contains micronutrients to nourish above and below the soil.
The coated particles are formulated with kelp, earthworm castings, feather meal, and bone meal that support root strength and tree development.
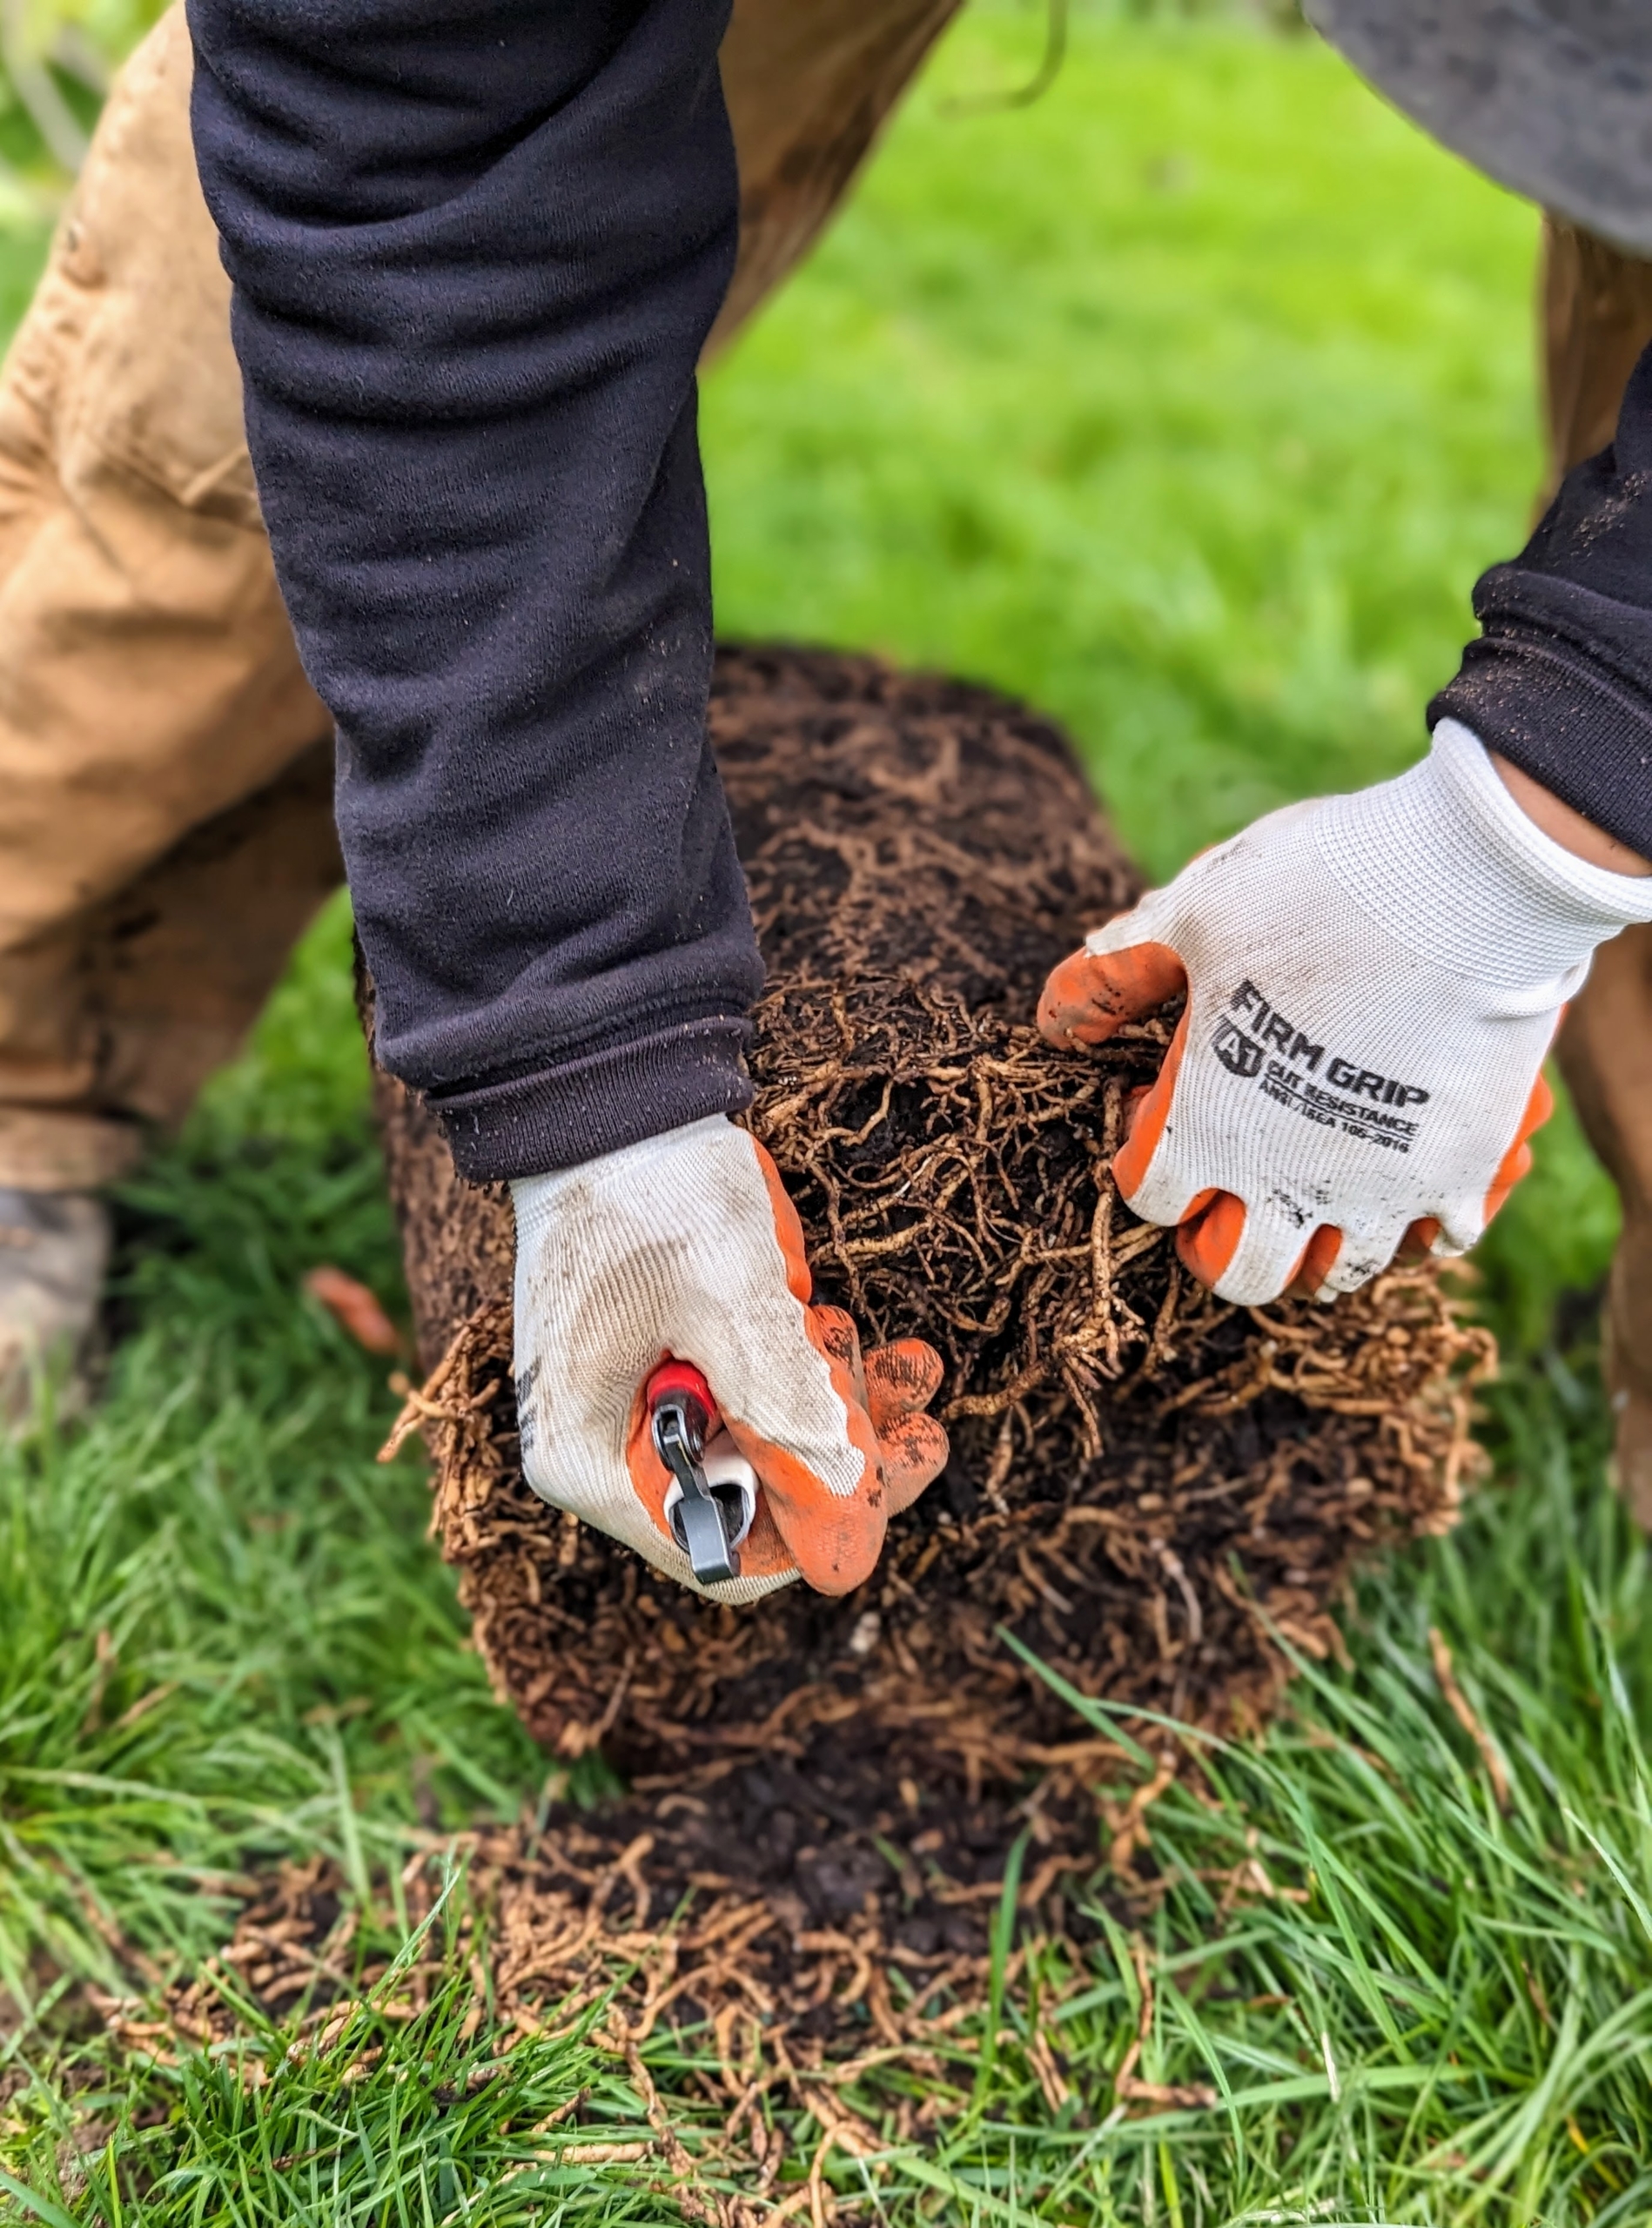
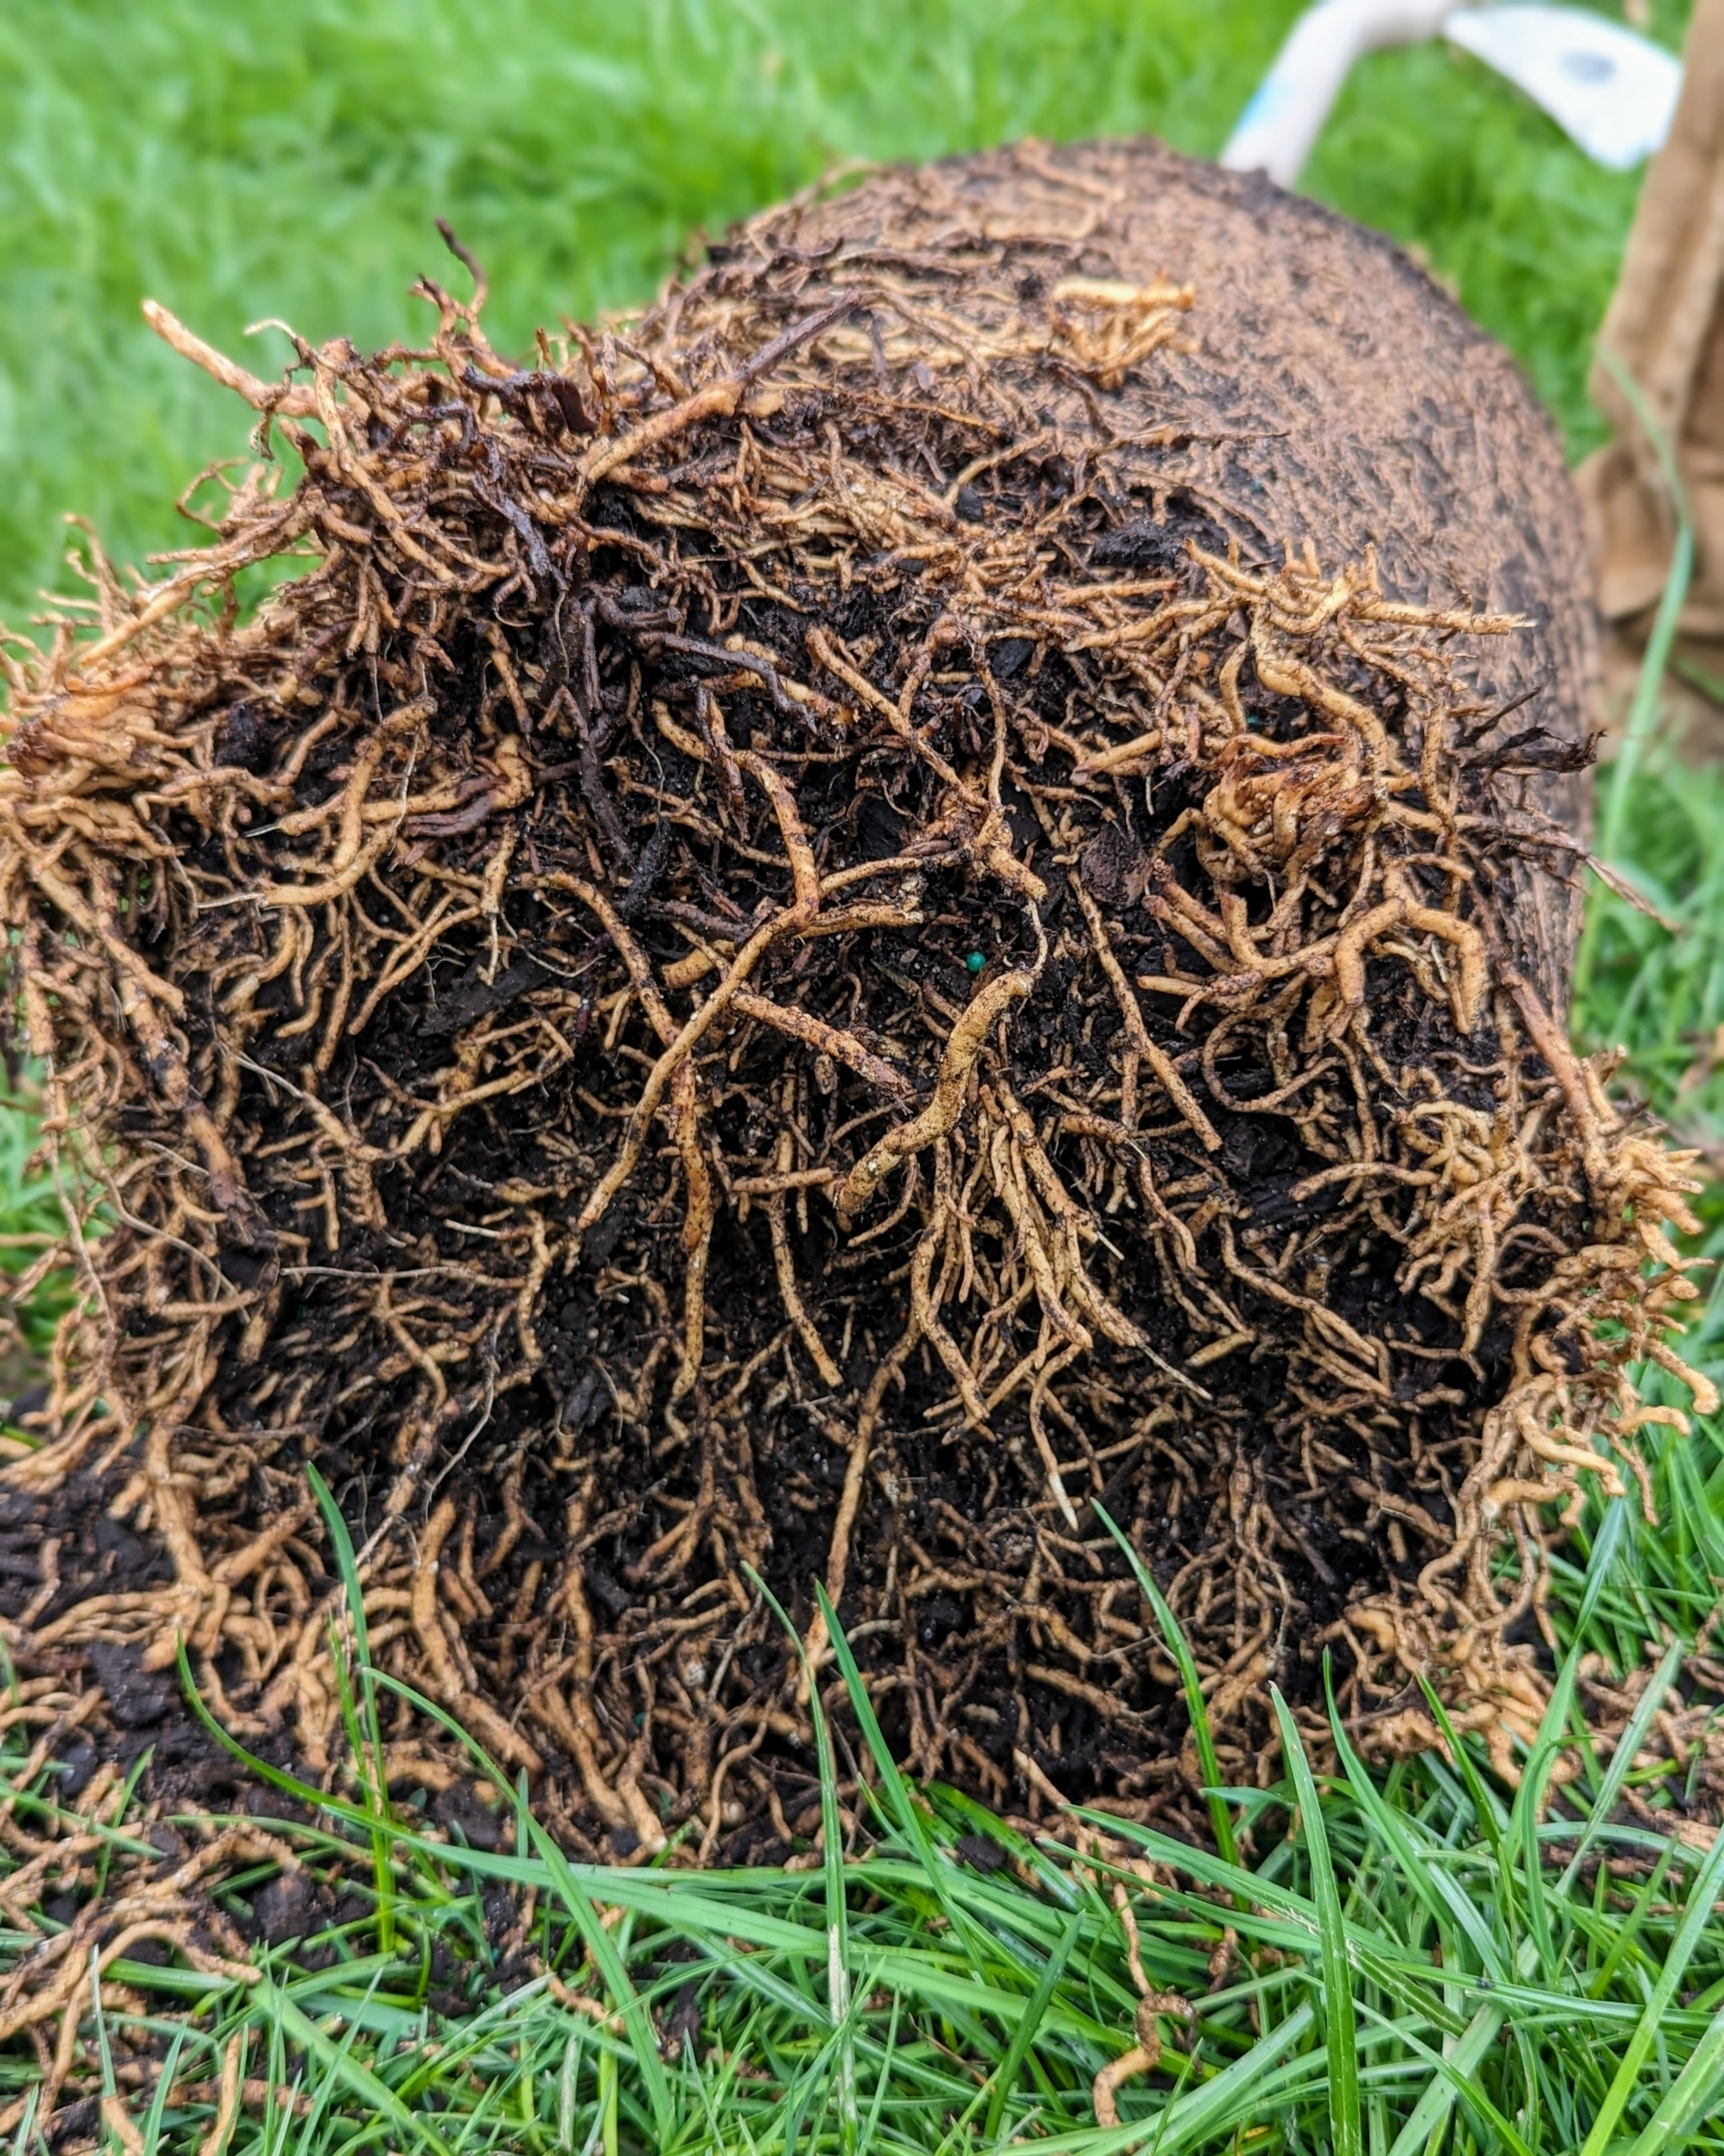
As with every tree planted, once it is removed from its pot, the roots are scarified. Scarifying stimulates root growth. Essentially, intentional cuts are made to loosen the roots and create beneficial injuries.
Here is a closer look. scarifying helps the plant become established more quickly in its new environment.
Once the tree is properly positioned, the hole is backfilled. “Bare to the flare” is the general saying when planting trees – the top of the root flare should always be above ground.
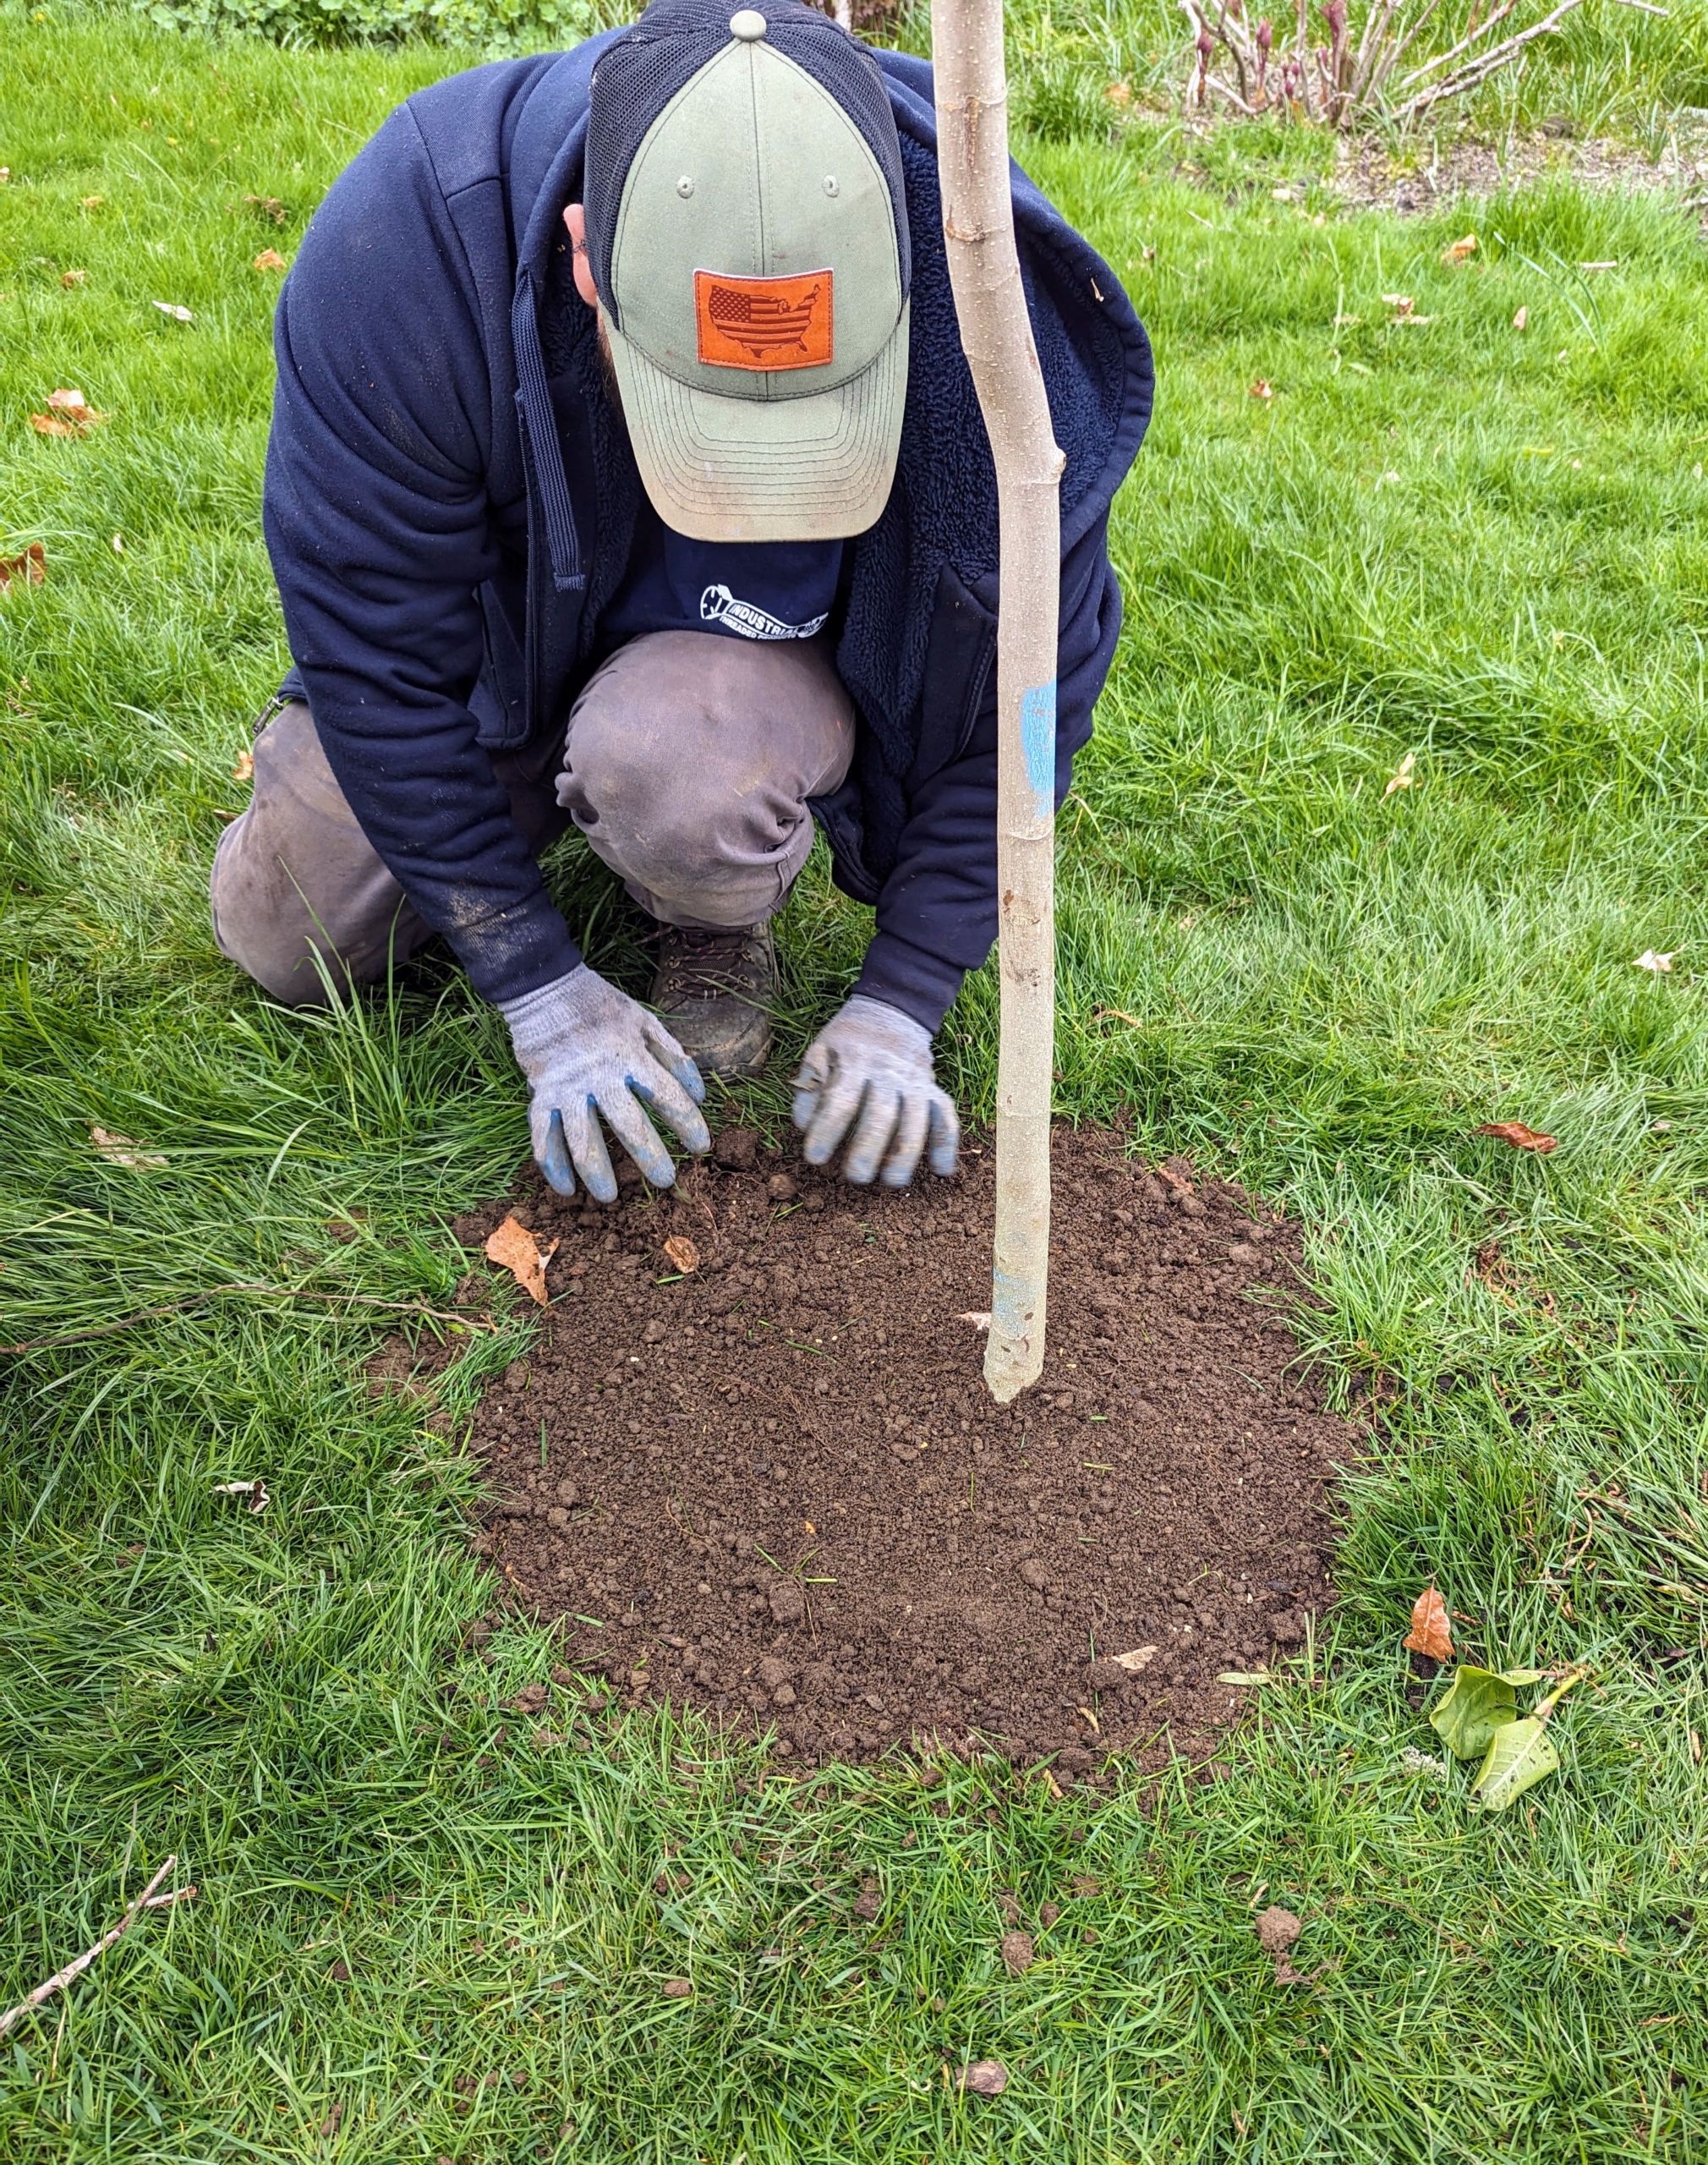
And then the top soil is tamped down around the root ball to ensure there aren’t any air pockets.
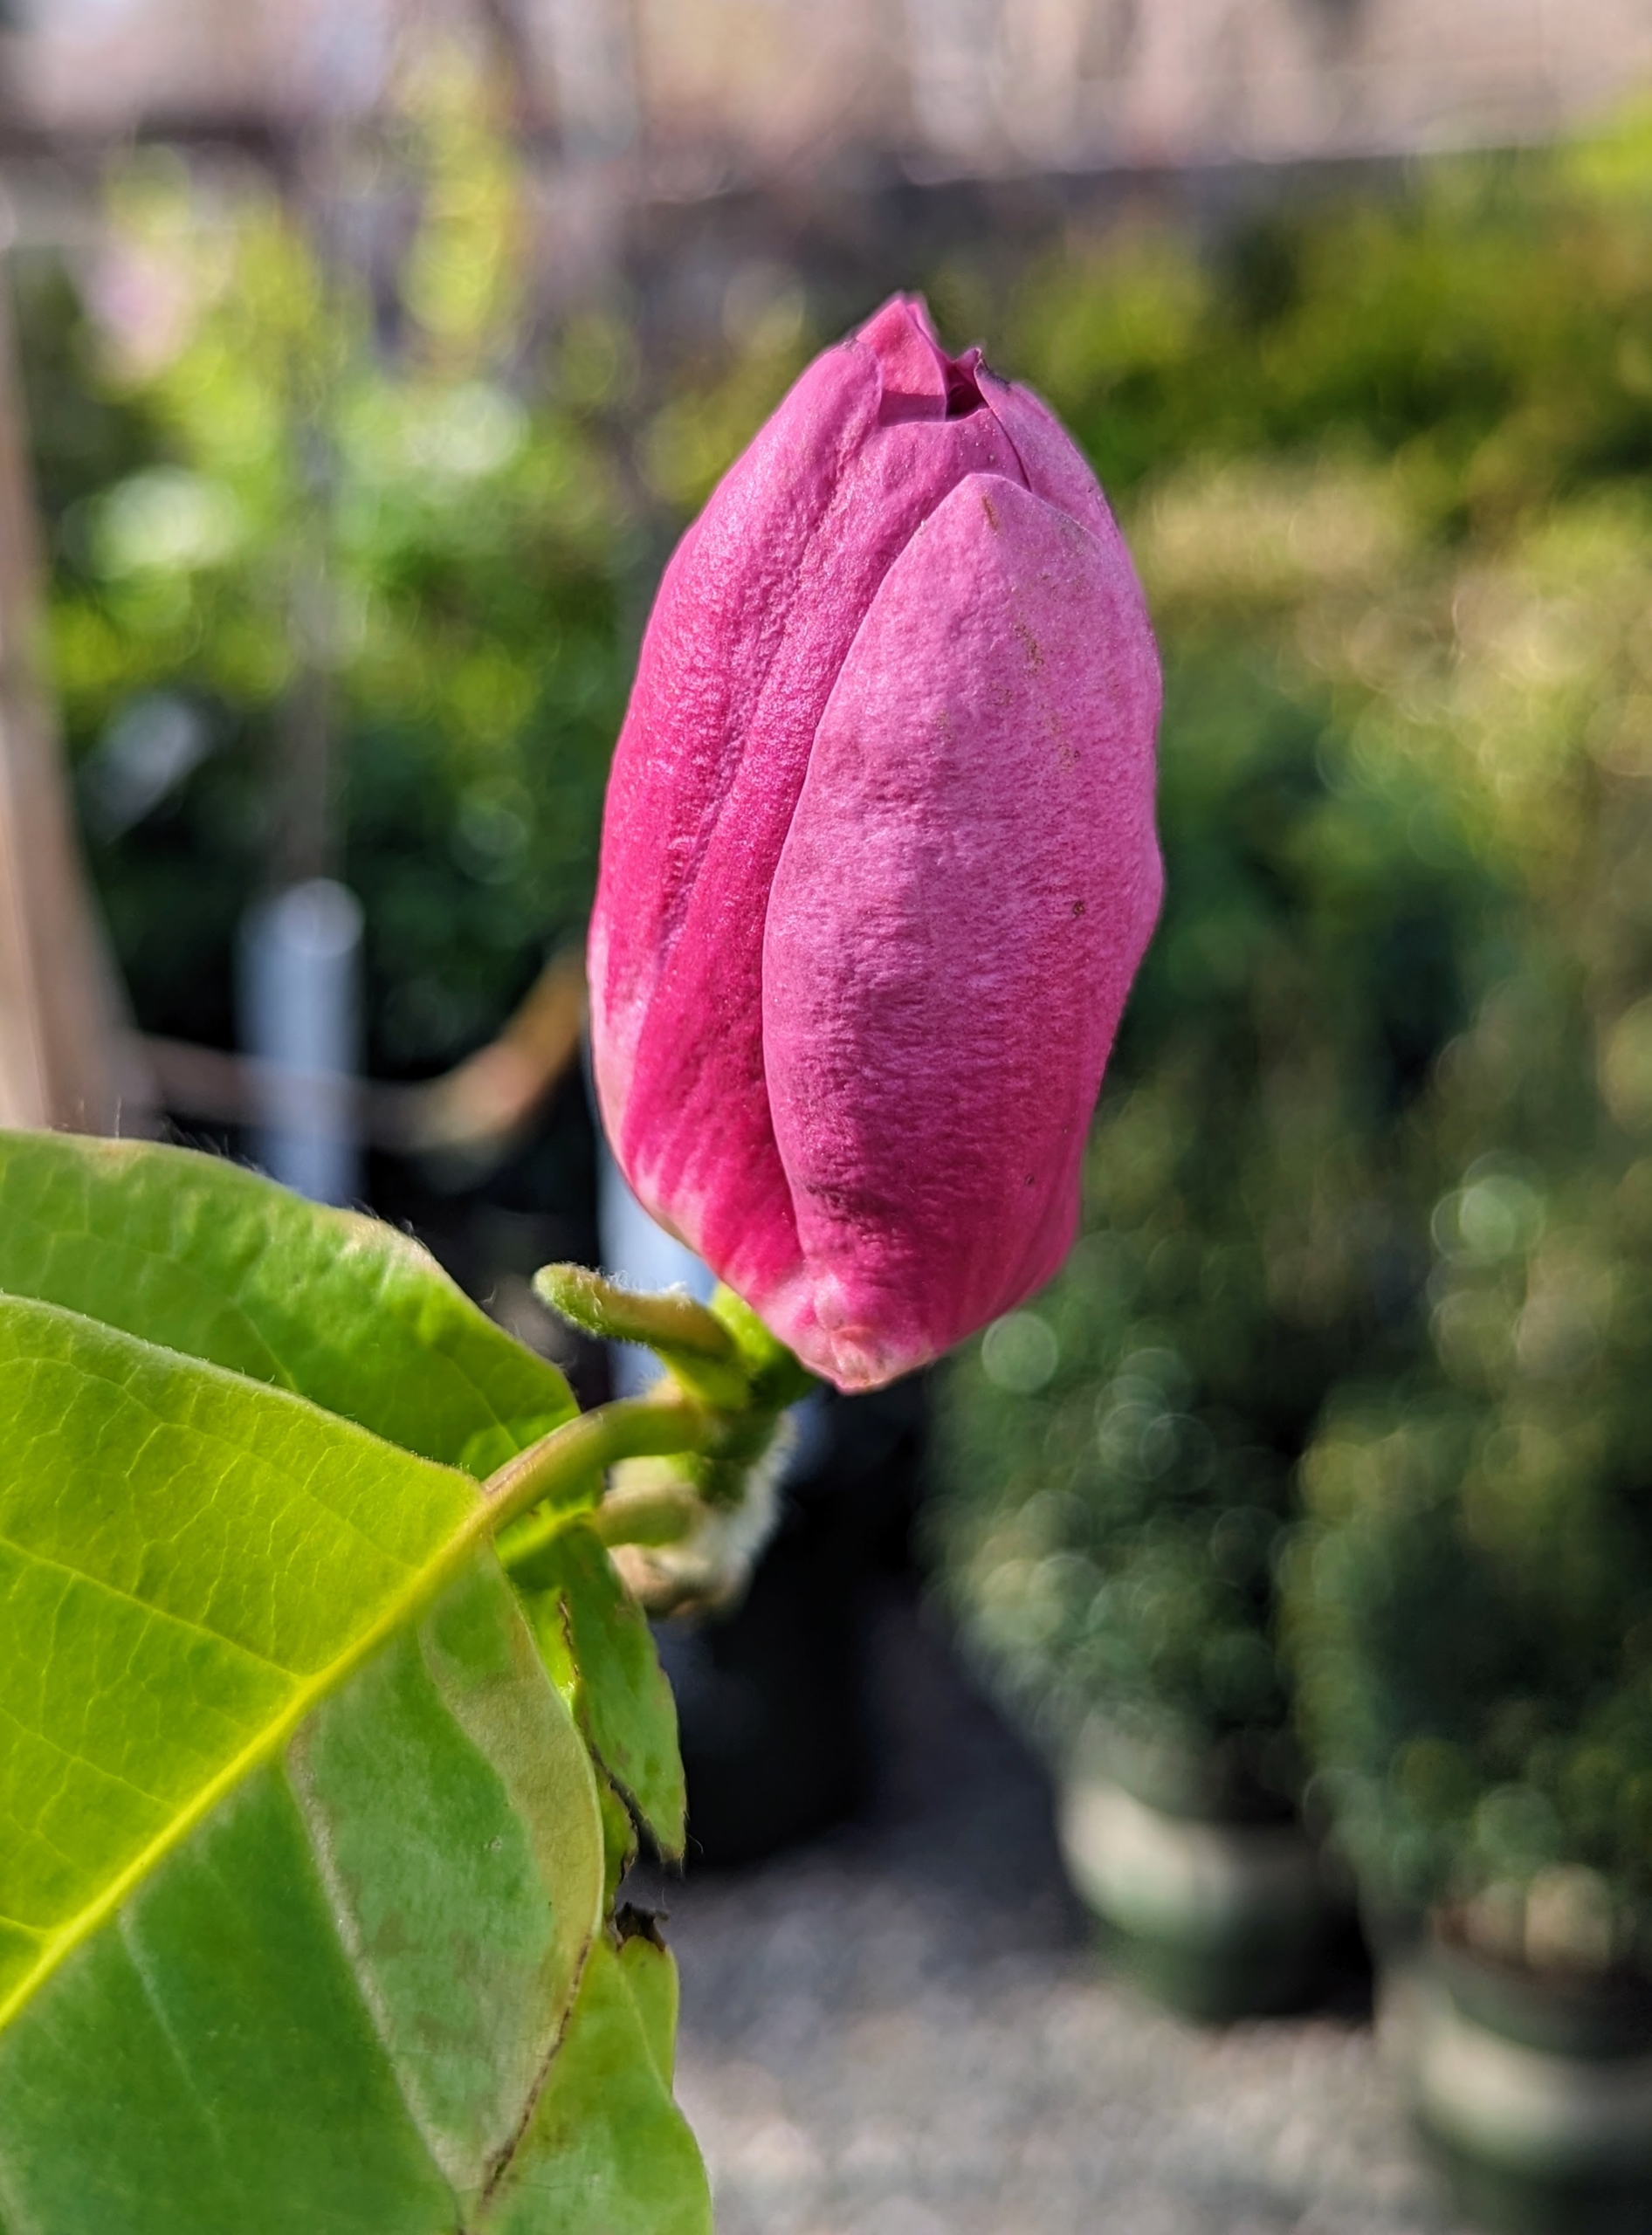
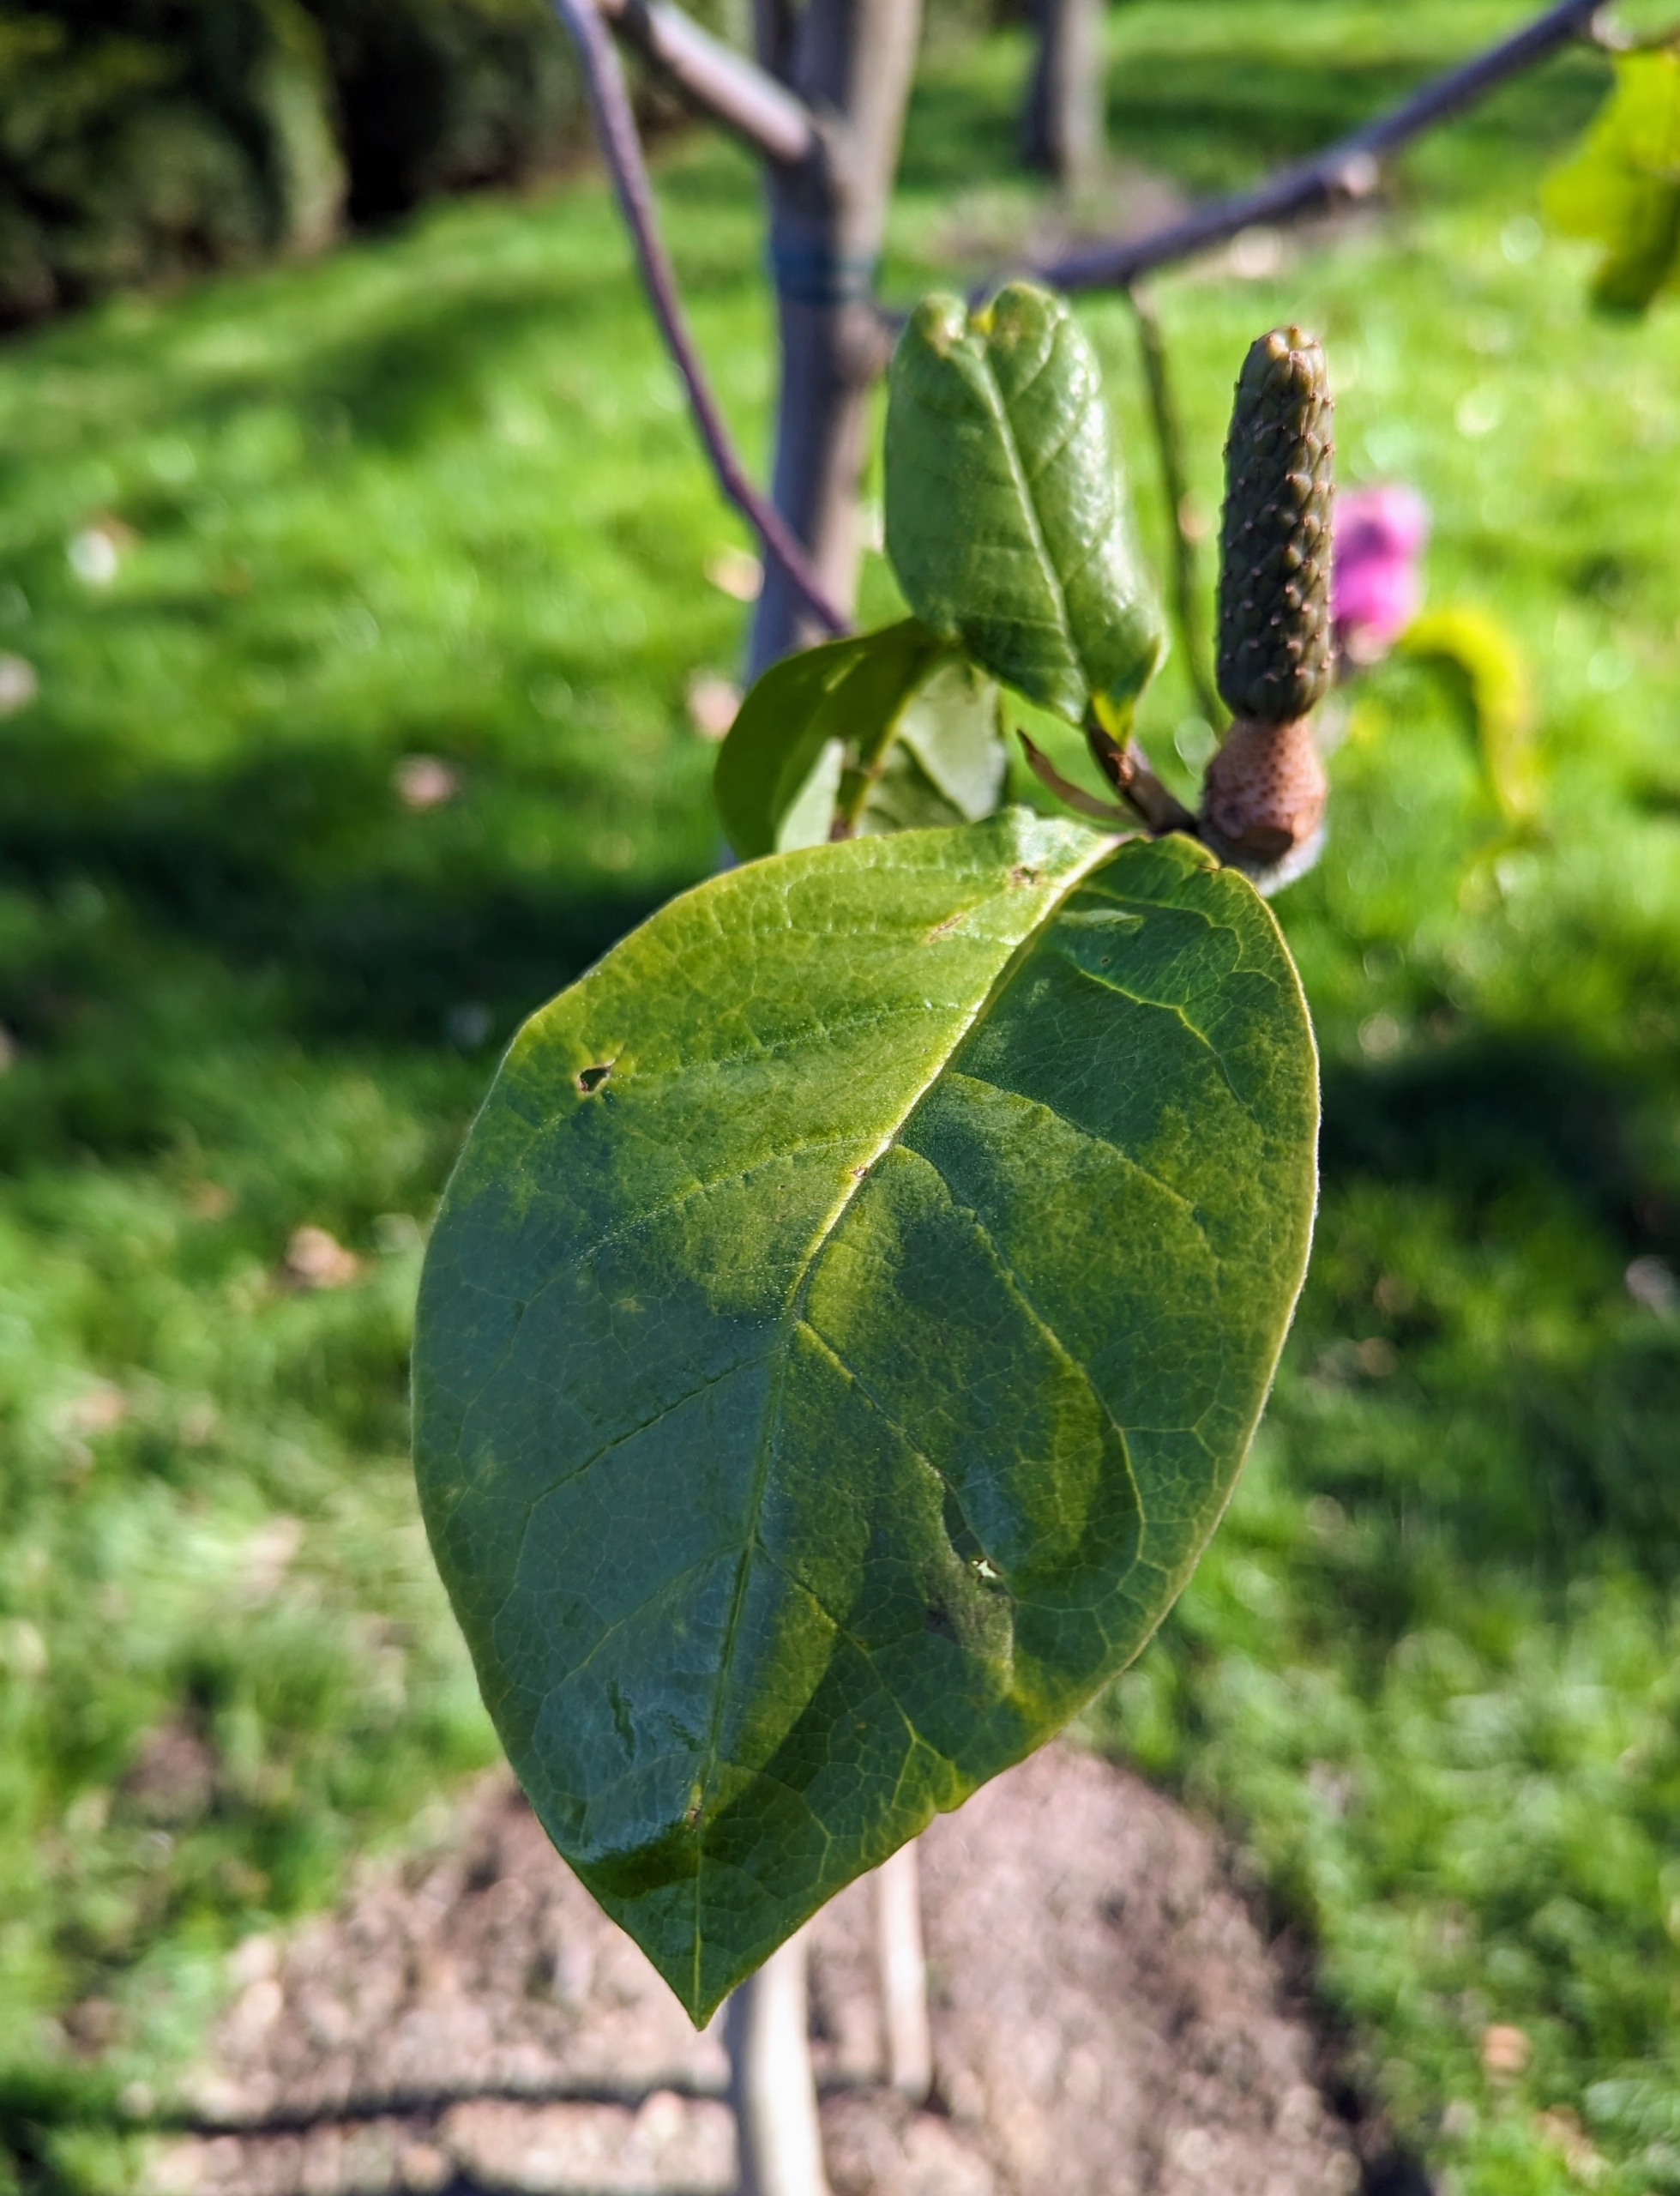
I always like young trees staked to protect them as they develop. A bamboo stake came with this tree, so it will be left with it until it is well-established. This is a ‘Black Tulip’ Magnolia, the darkest, most dramatic tulip Magnolia. When in bloom, it shows rich, deep burgundy-red six-inch-wide flowers that appear before the foliage emerges.
There was one bloom left on this tree when it arrived a couple weeks ago.
Magnolia tree leaves vary from shiny or waxy to soft, green, and saucer-shaped.
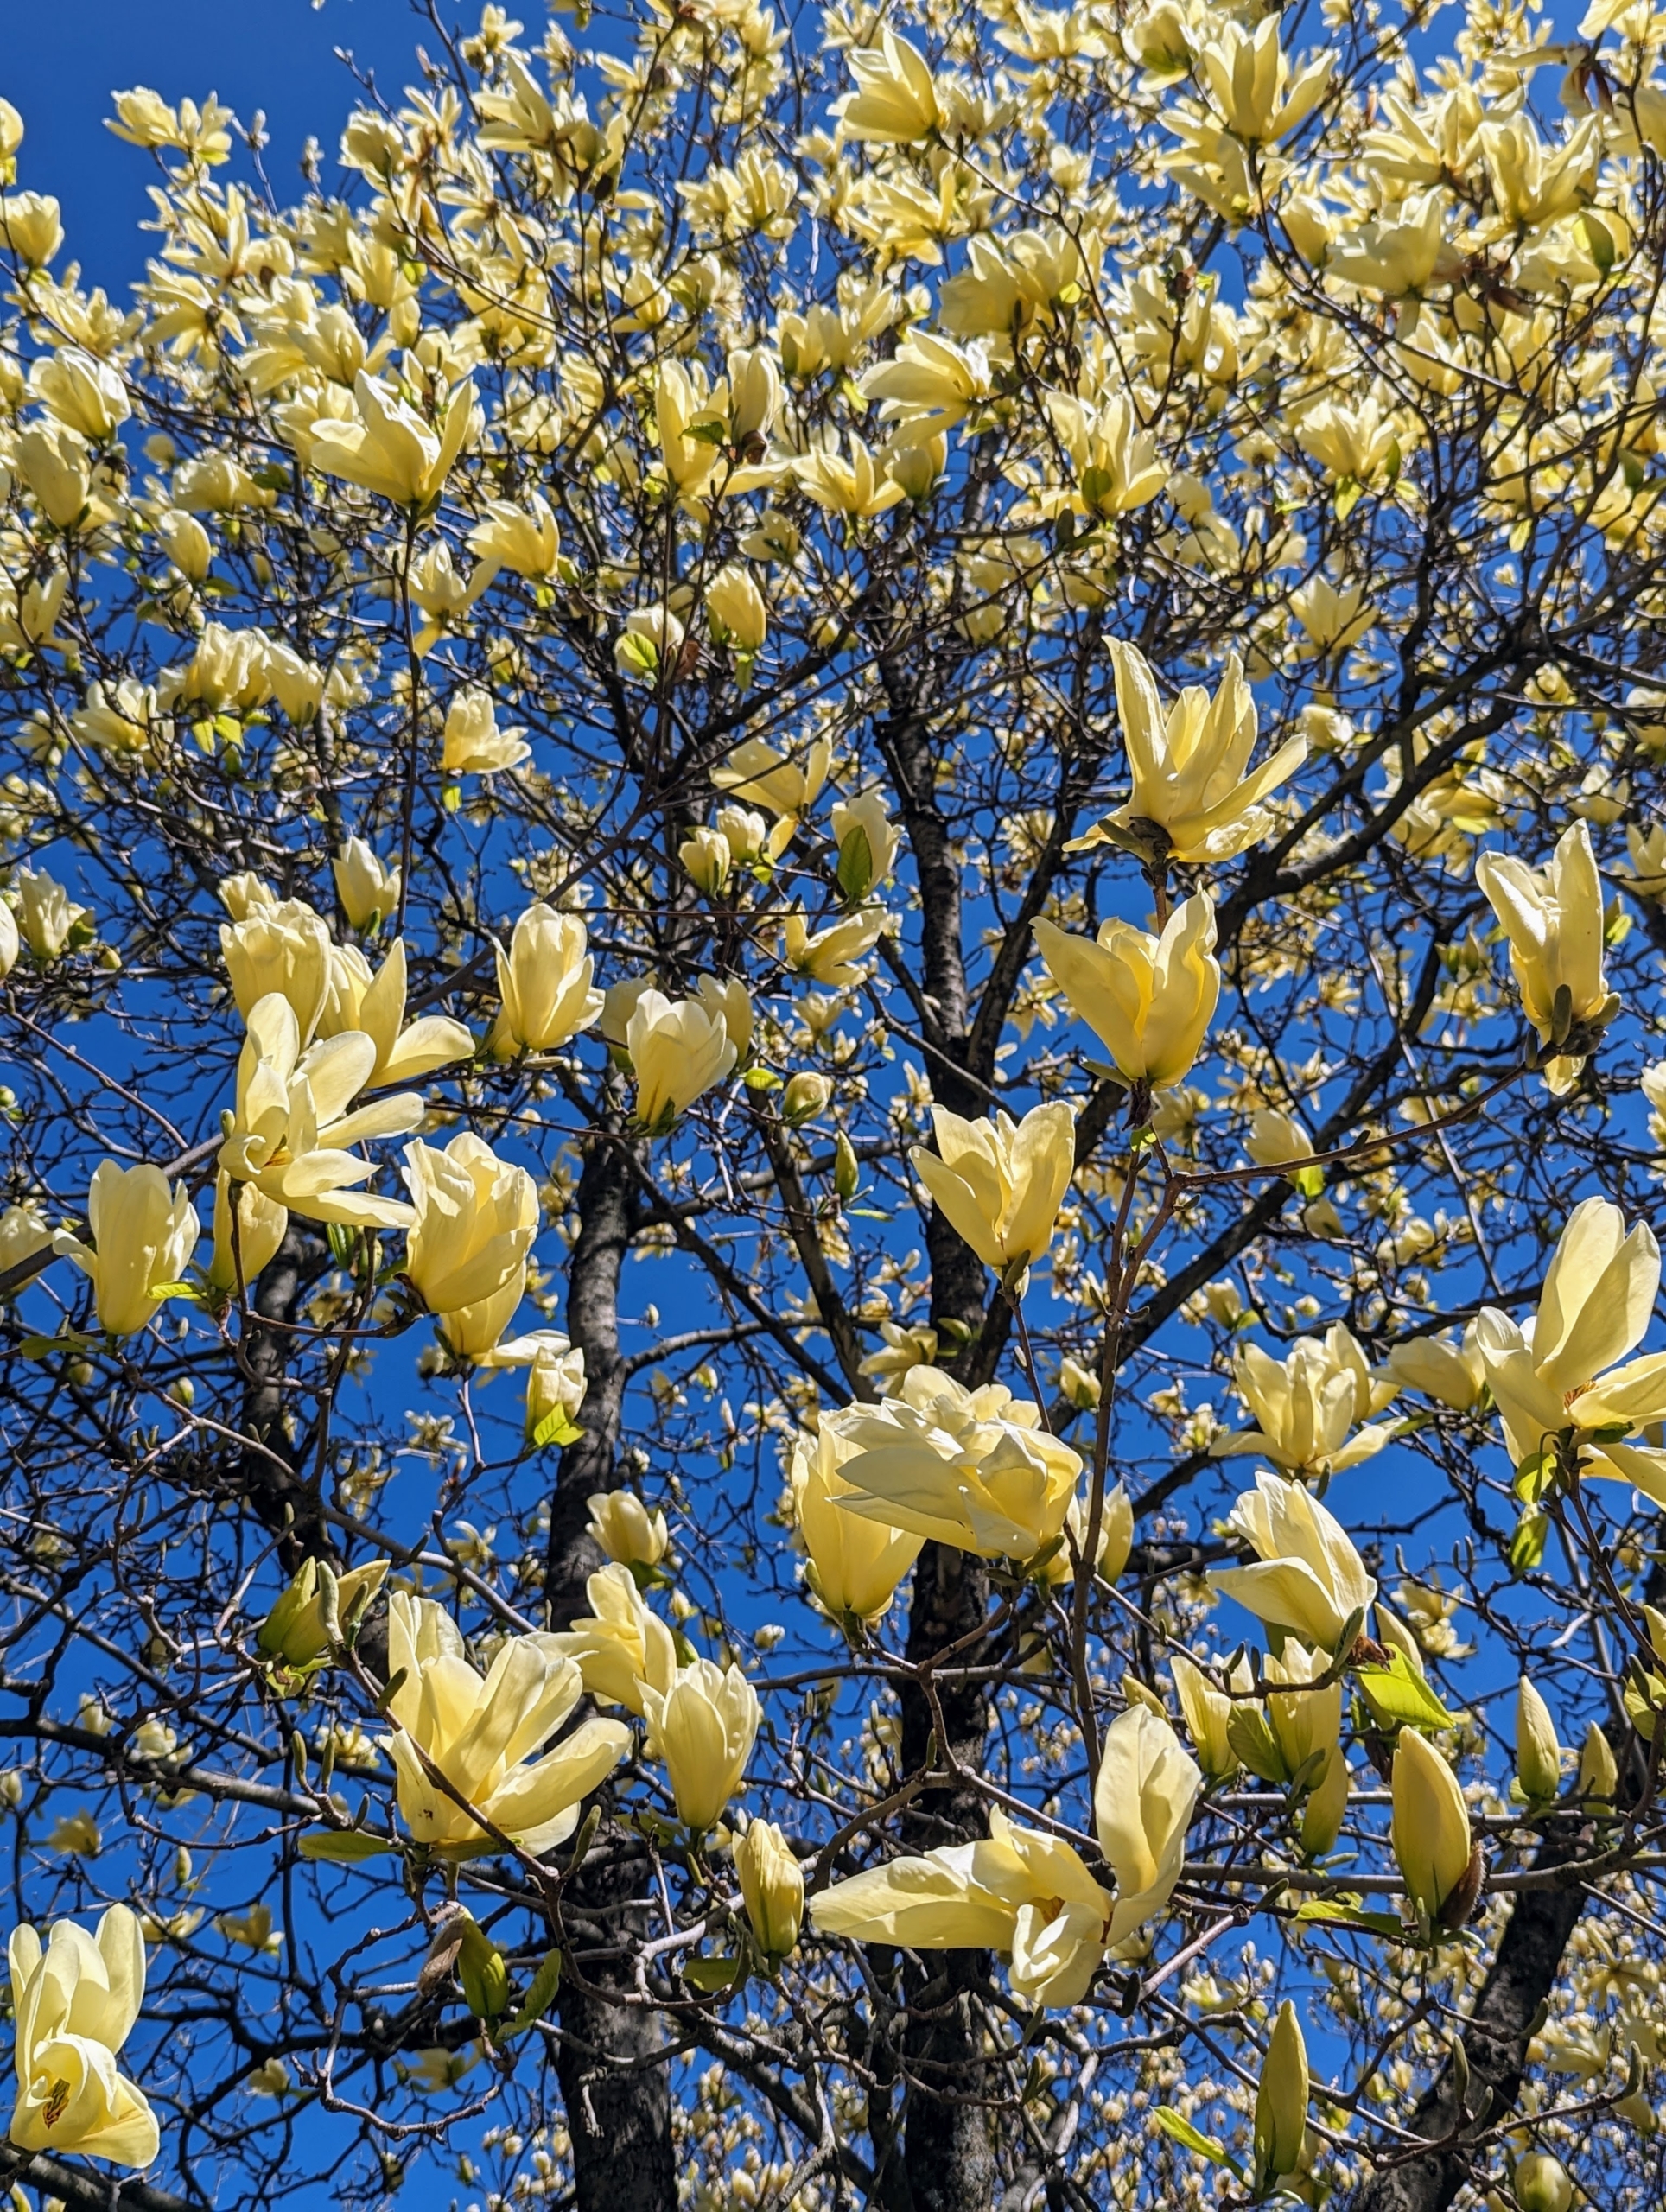
This is Magnolia ‘Yellow Bird’ has bright canary yellow three-and-a-half- inch flowers that emerge with the foliage later in spring after the danger of frosts. This one is starting to bloom now.
This magnolia tree is planted in the garden just outside my home, where I can see it every day. What magnolias are blooming where you live?