As a serious and passionate gardener, whenever I have the time I always enjoy visiting area nurseries in search of new and unusual houseplants to add to my collection.
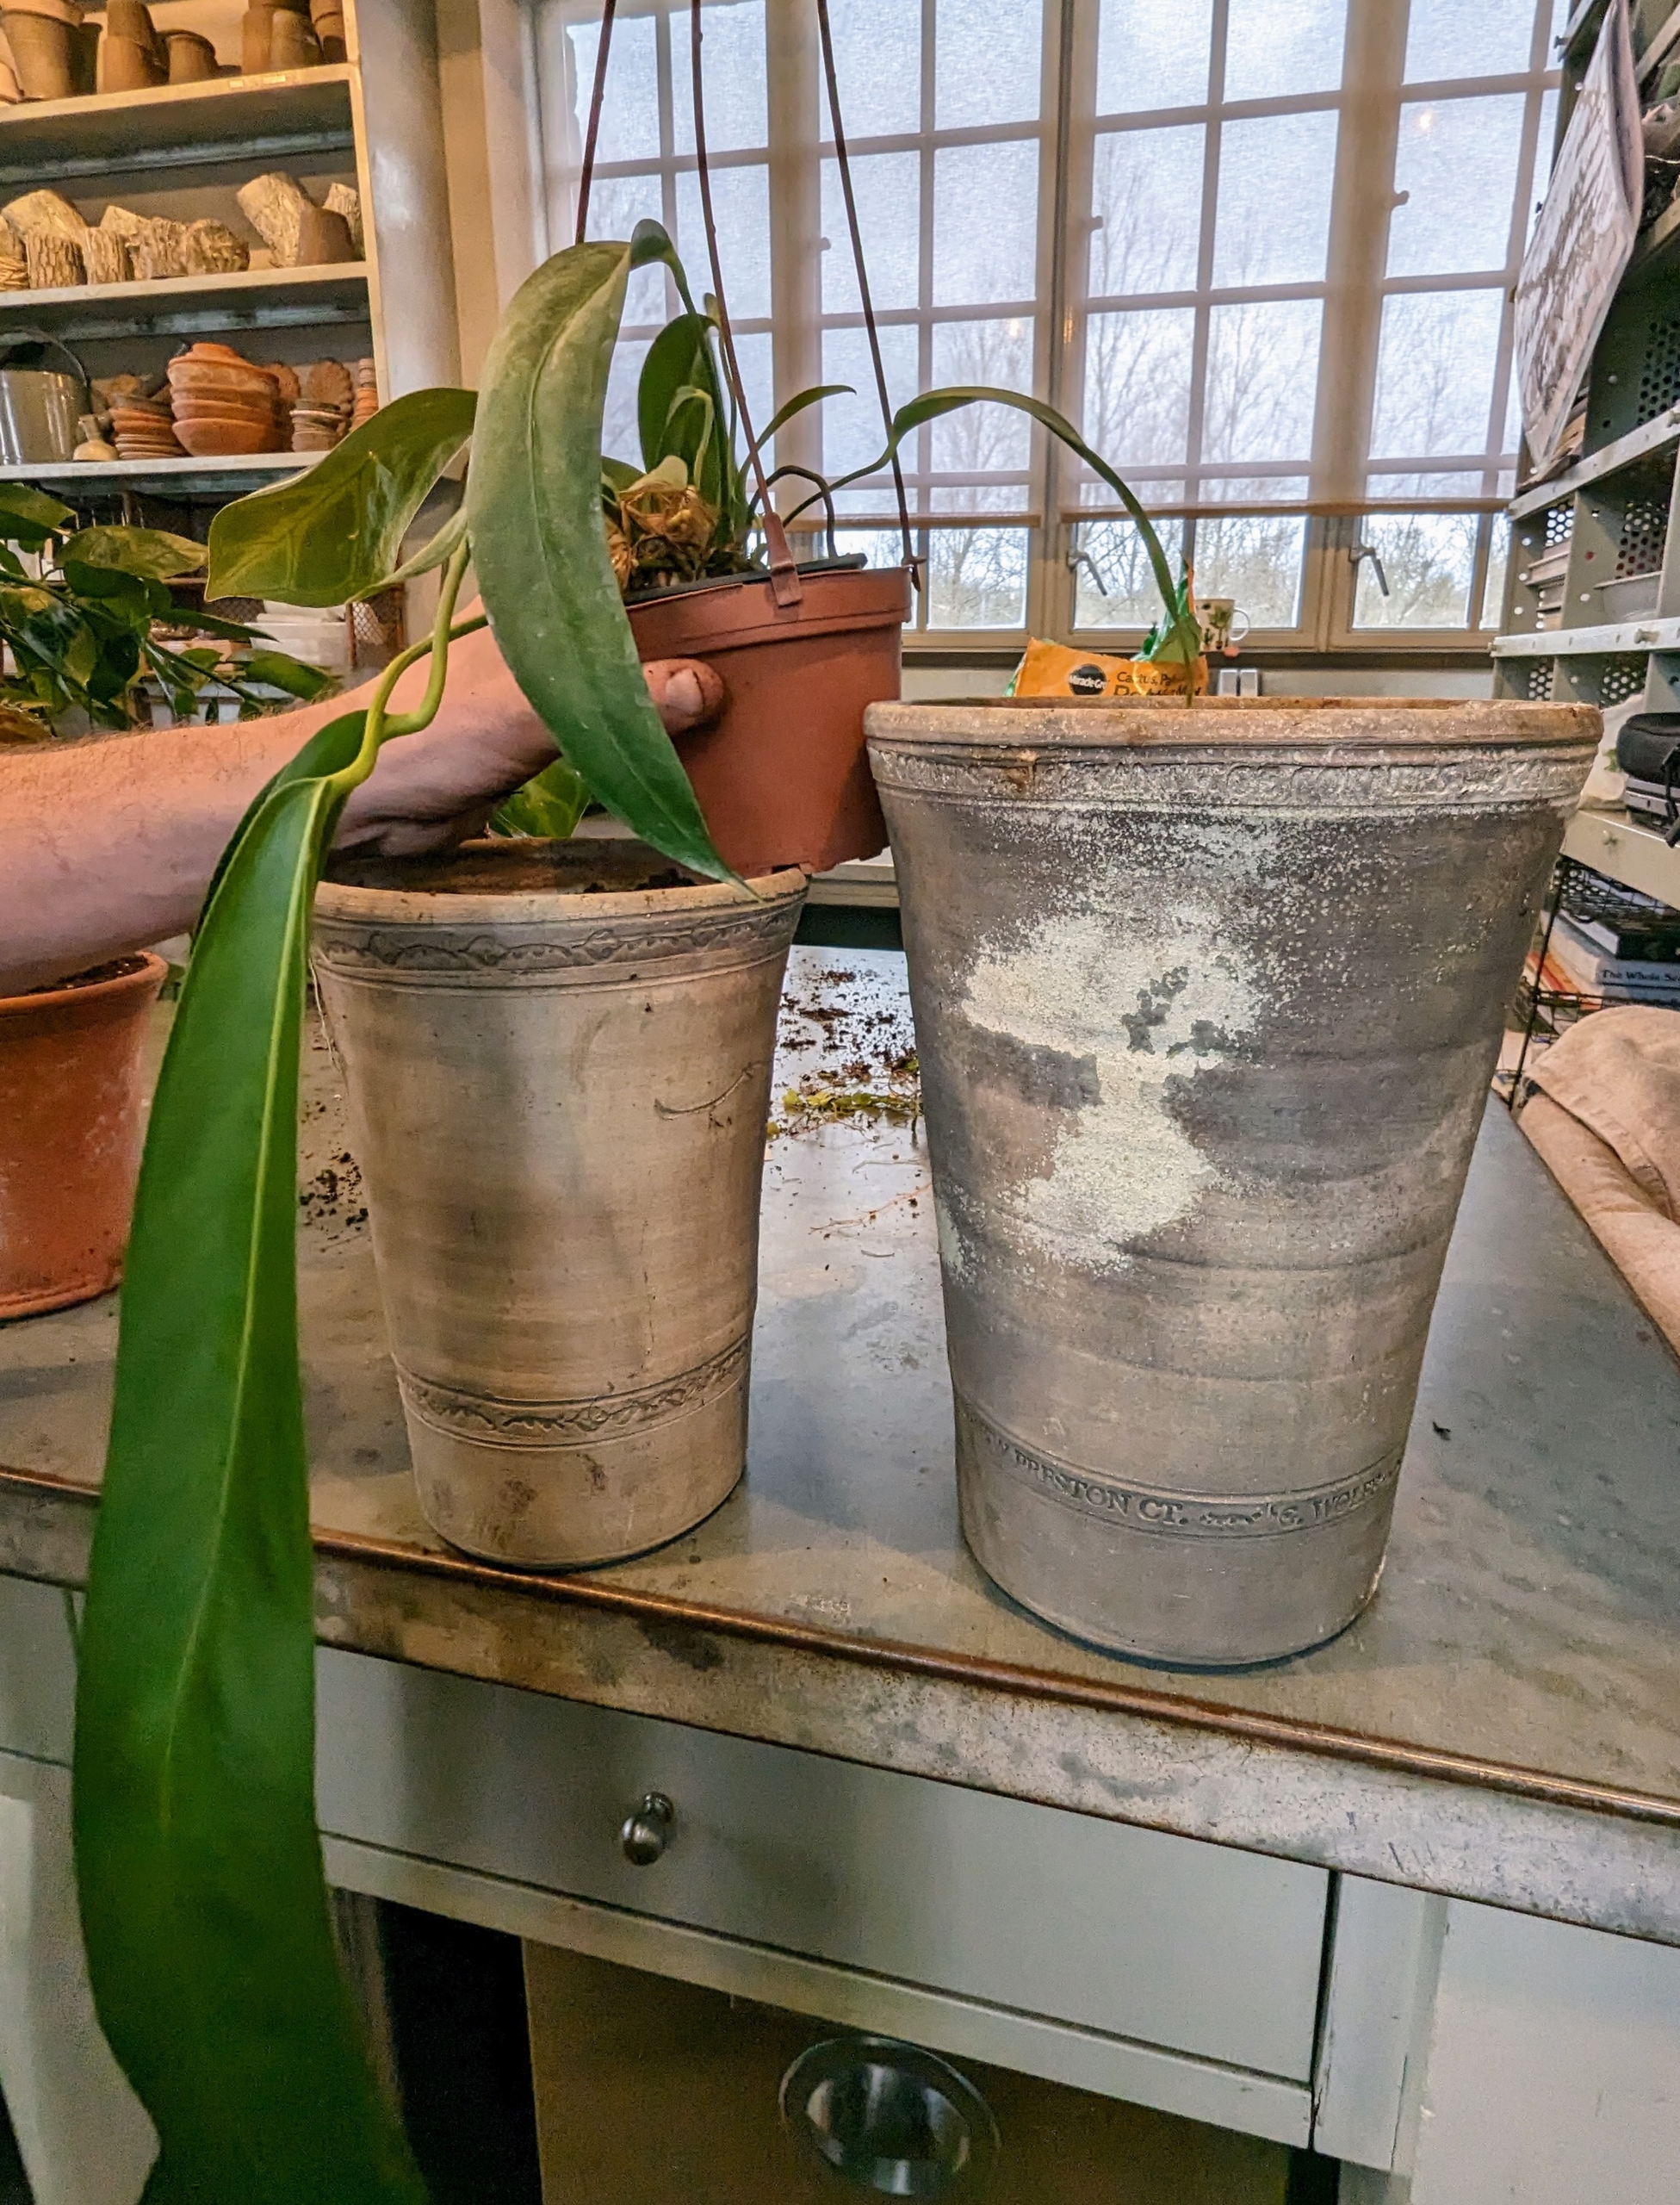
During a recent business day trip to Northeastern Connecticut, I made a stop at Logee’s Plants for Home & Garden in Danielson - one of my favorite sources for tropical specimens. Logee’s was founded in 1892 by William D. Logee. He started the business as a cut-flower shop and then expanded into begonias and tropical container plants. Today, Logee’s is owned and operated by Williams’s grandson, Byron Martin, and his business partner, Laurelynn Martin. Logee’s offers more than 1500 plant cultivars - most of which are all propagated right in its greenhouses. I have been going to Logee's for many years, and Byron has been a guest on both my television and radio shows. On this trip, I was excited to bring home several new plants to add to my growing collection - Begonias, Anthuriums, two Staghorn ferns, and a hanging citrus.
Enjoy these photos.
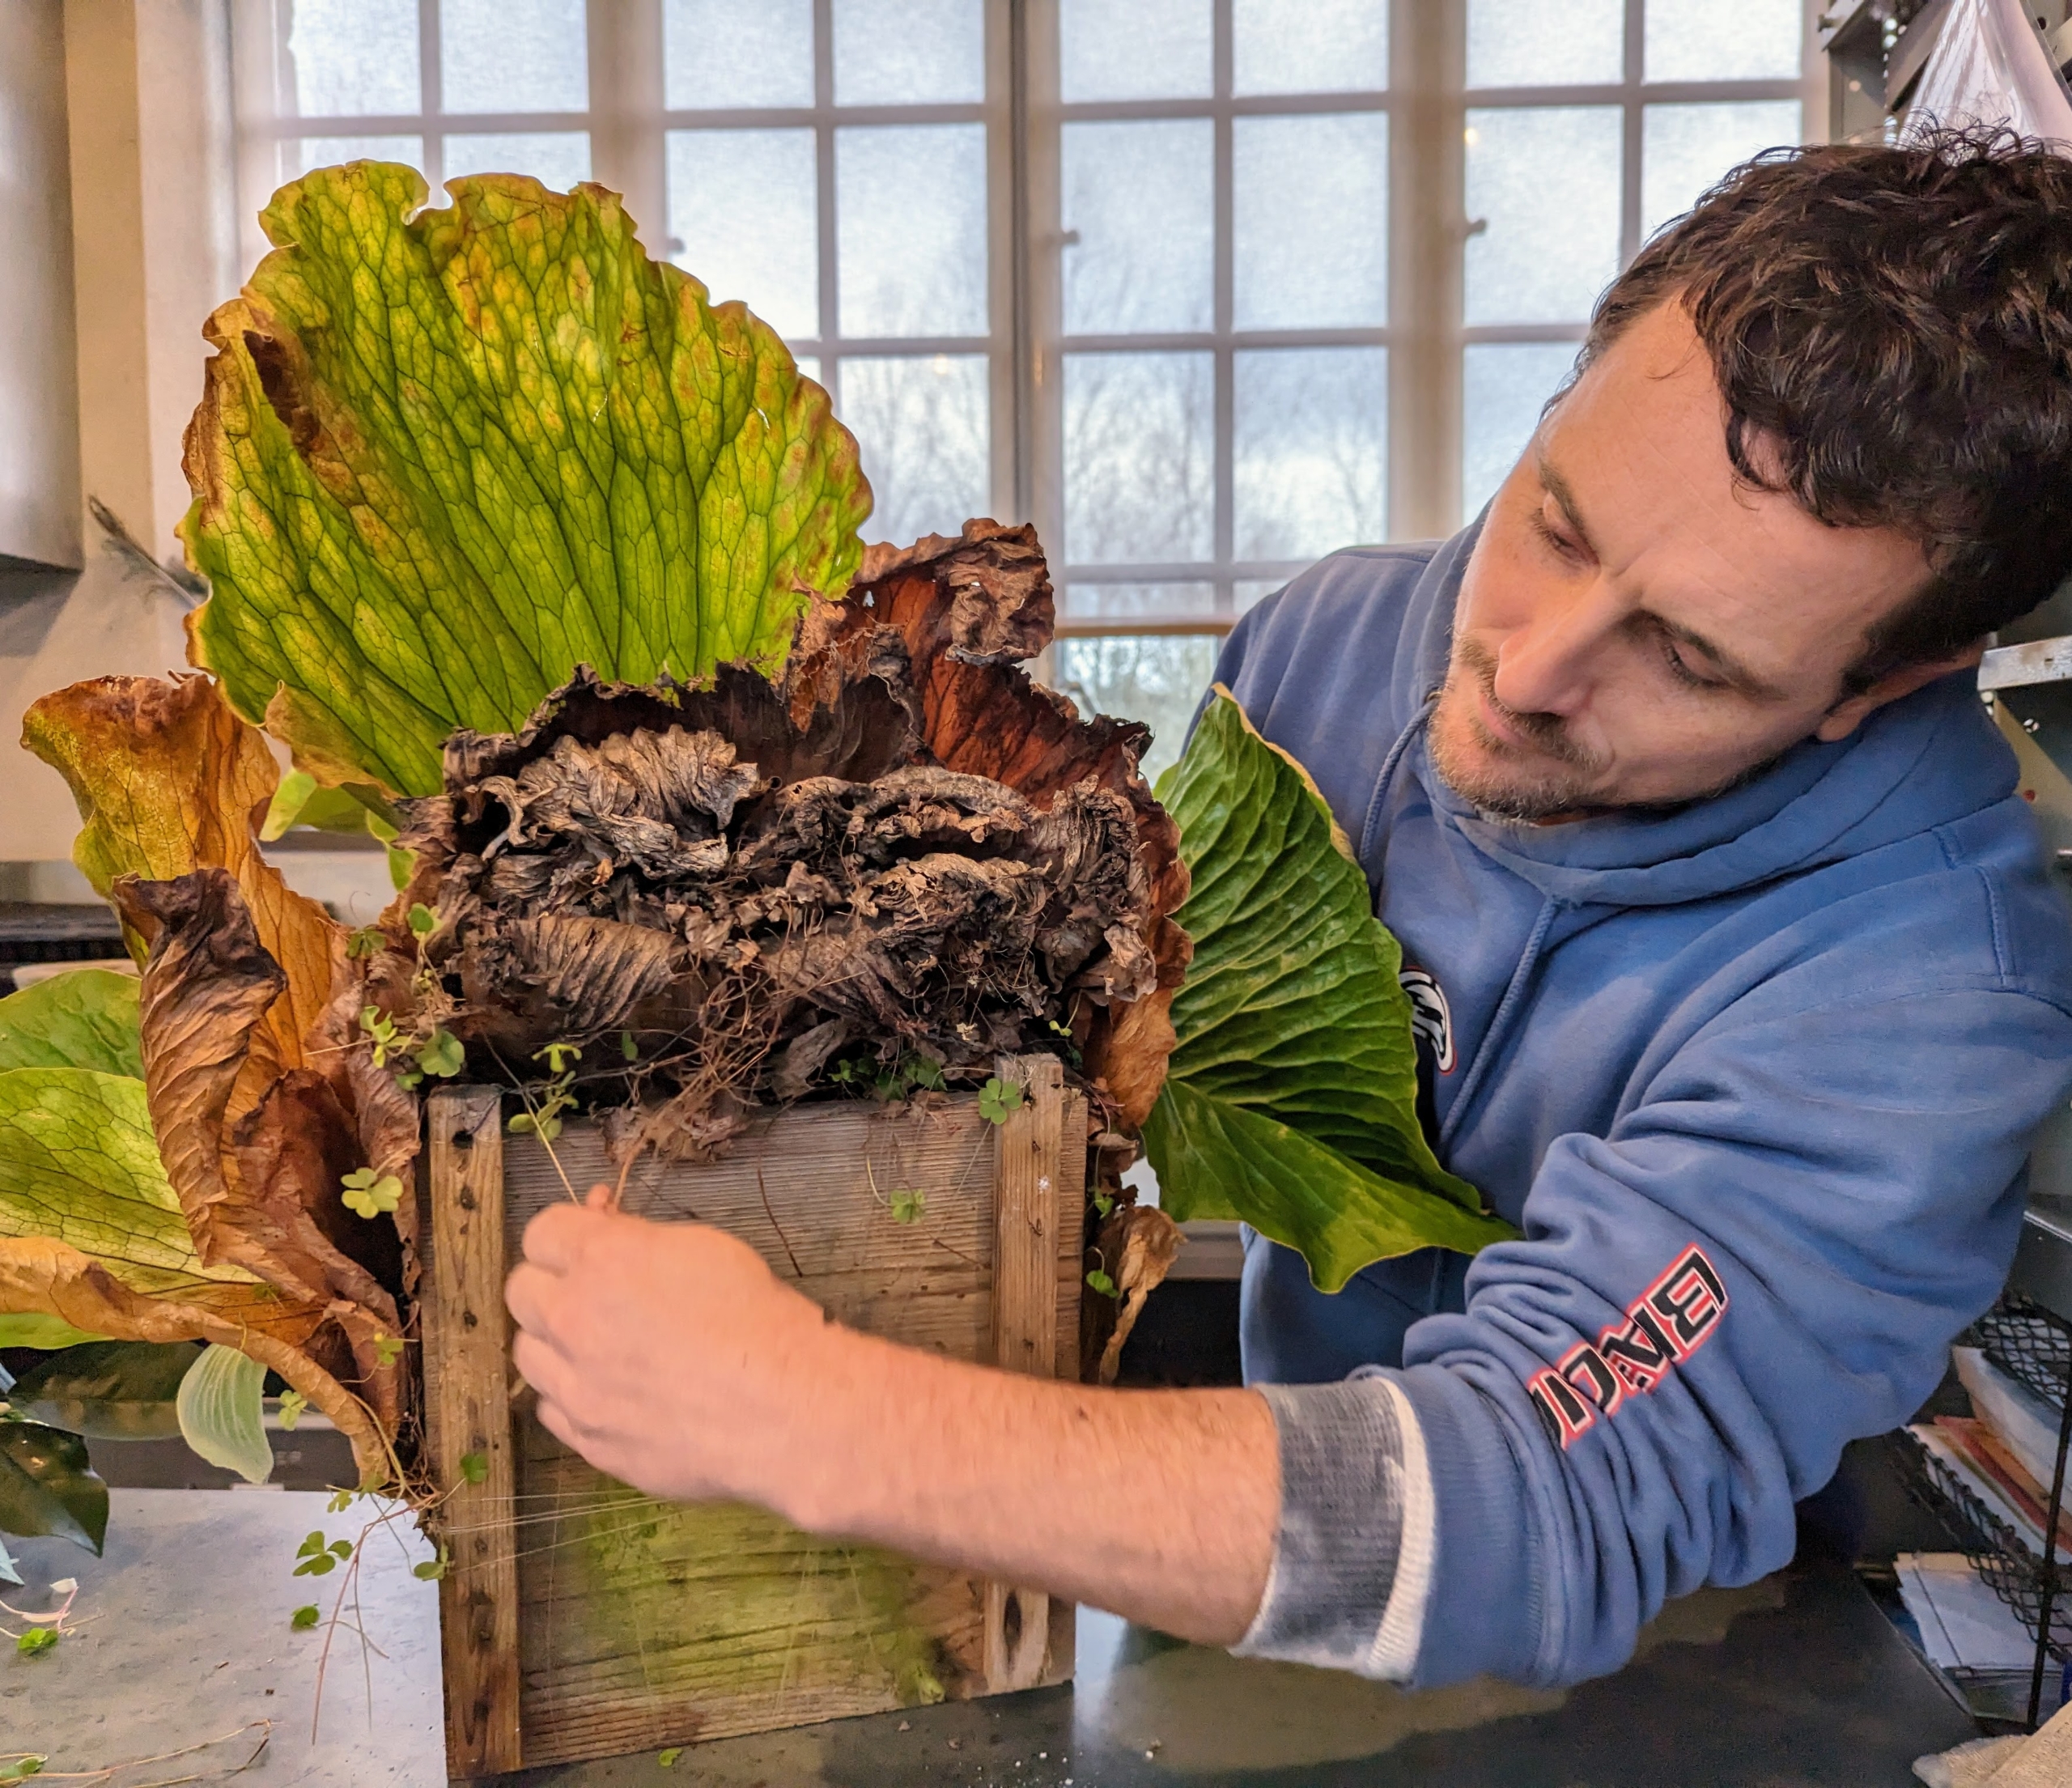
It is always so much fun to visit Logee’s – I never come home empty handed. Once I get the specimens home, I bring them into my main greenhouse, so they can be repotted, fed, and watered.
Here is one of two staghorn ferns I purchased. These plants are mounted on wooden boards. Staghorn ferns are epiphytes, which means they are air plants. They gladly grow on a wall mount, which lets air circulate around them.
Ryan chose to hang the staghorns on two upright pillars in the greenhouse. Staghorn ferns are very interesting plants. Fern leaves are actually called fronds, and staghorn ferns have two types. The first is the “antler” frond – these are the large leaves that shoot out of the center of the plant, and from which staghorn ferns get their names, since they resemble the antlers of deer or moose. The second type of staghorn fern frond is called the shield frond. These are the round, hard plate-like leaves that surround the base of the plant. Their function is to protect the plant roots, and take up water and nutrients.
Here is the other staghorn fern hanging nearby. I adore staghorns and over the years have collected quite a few of these magnificent specimens.
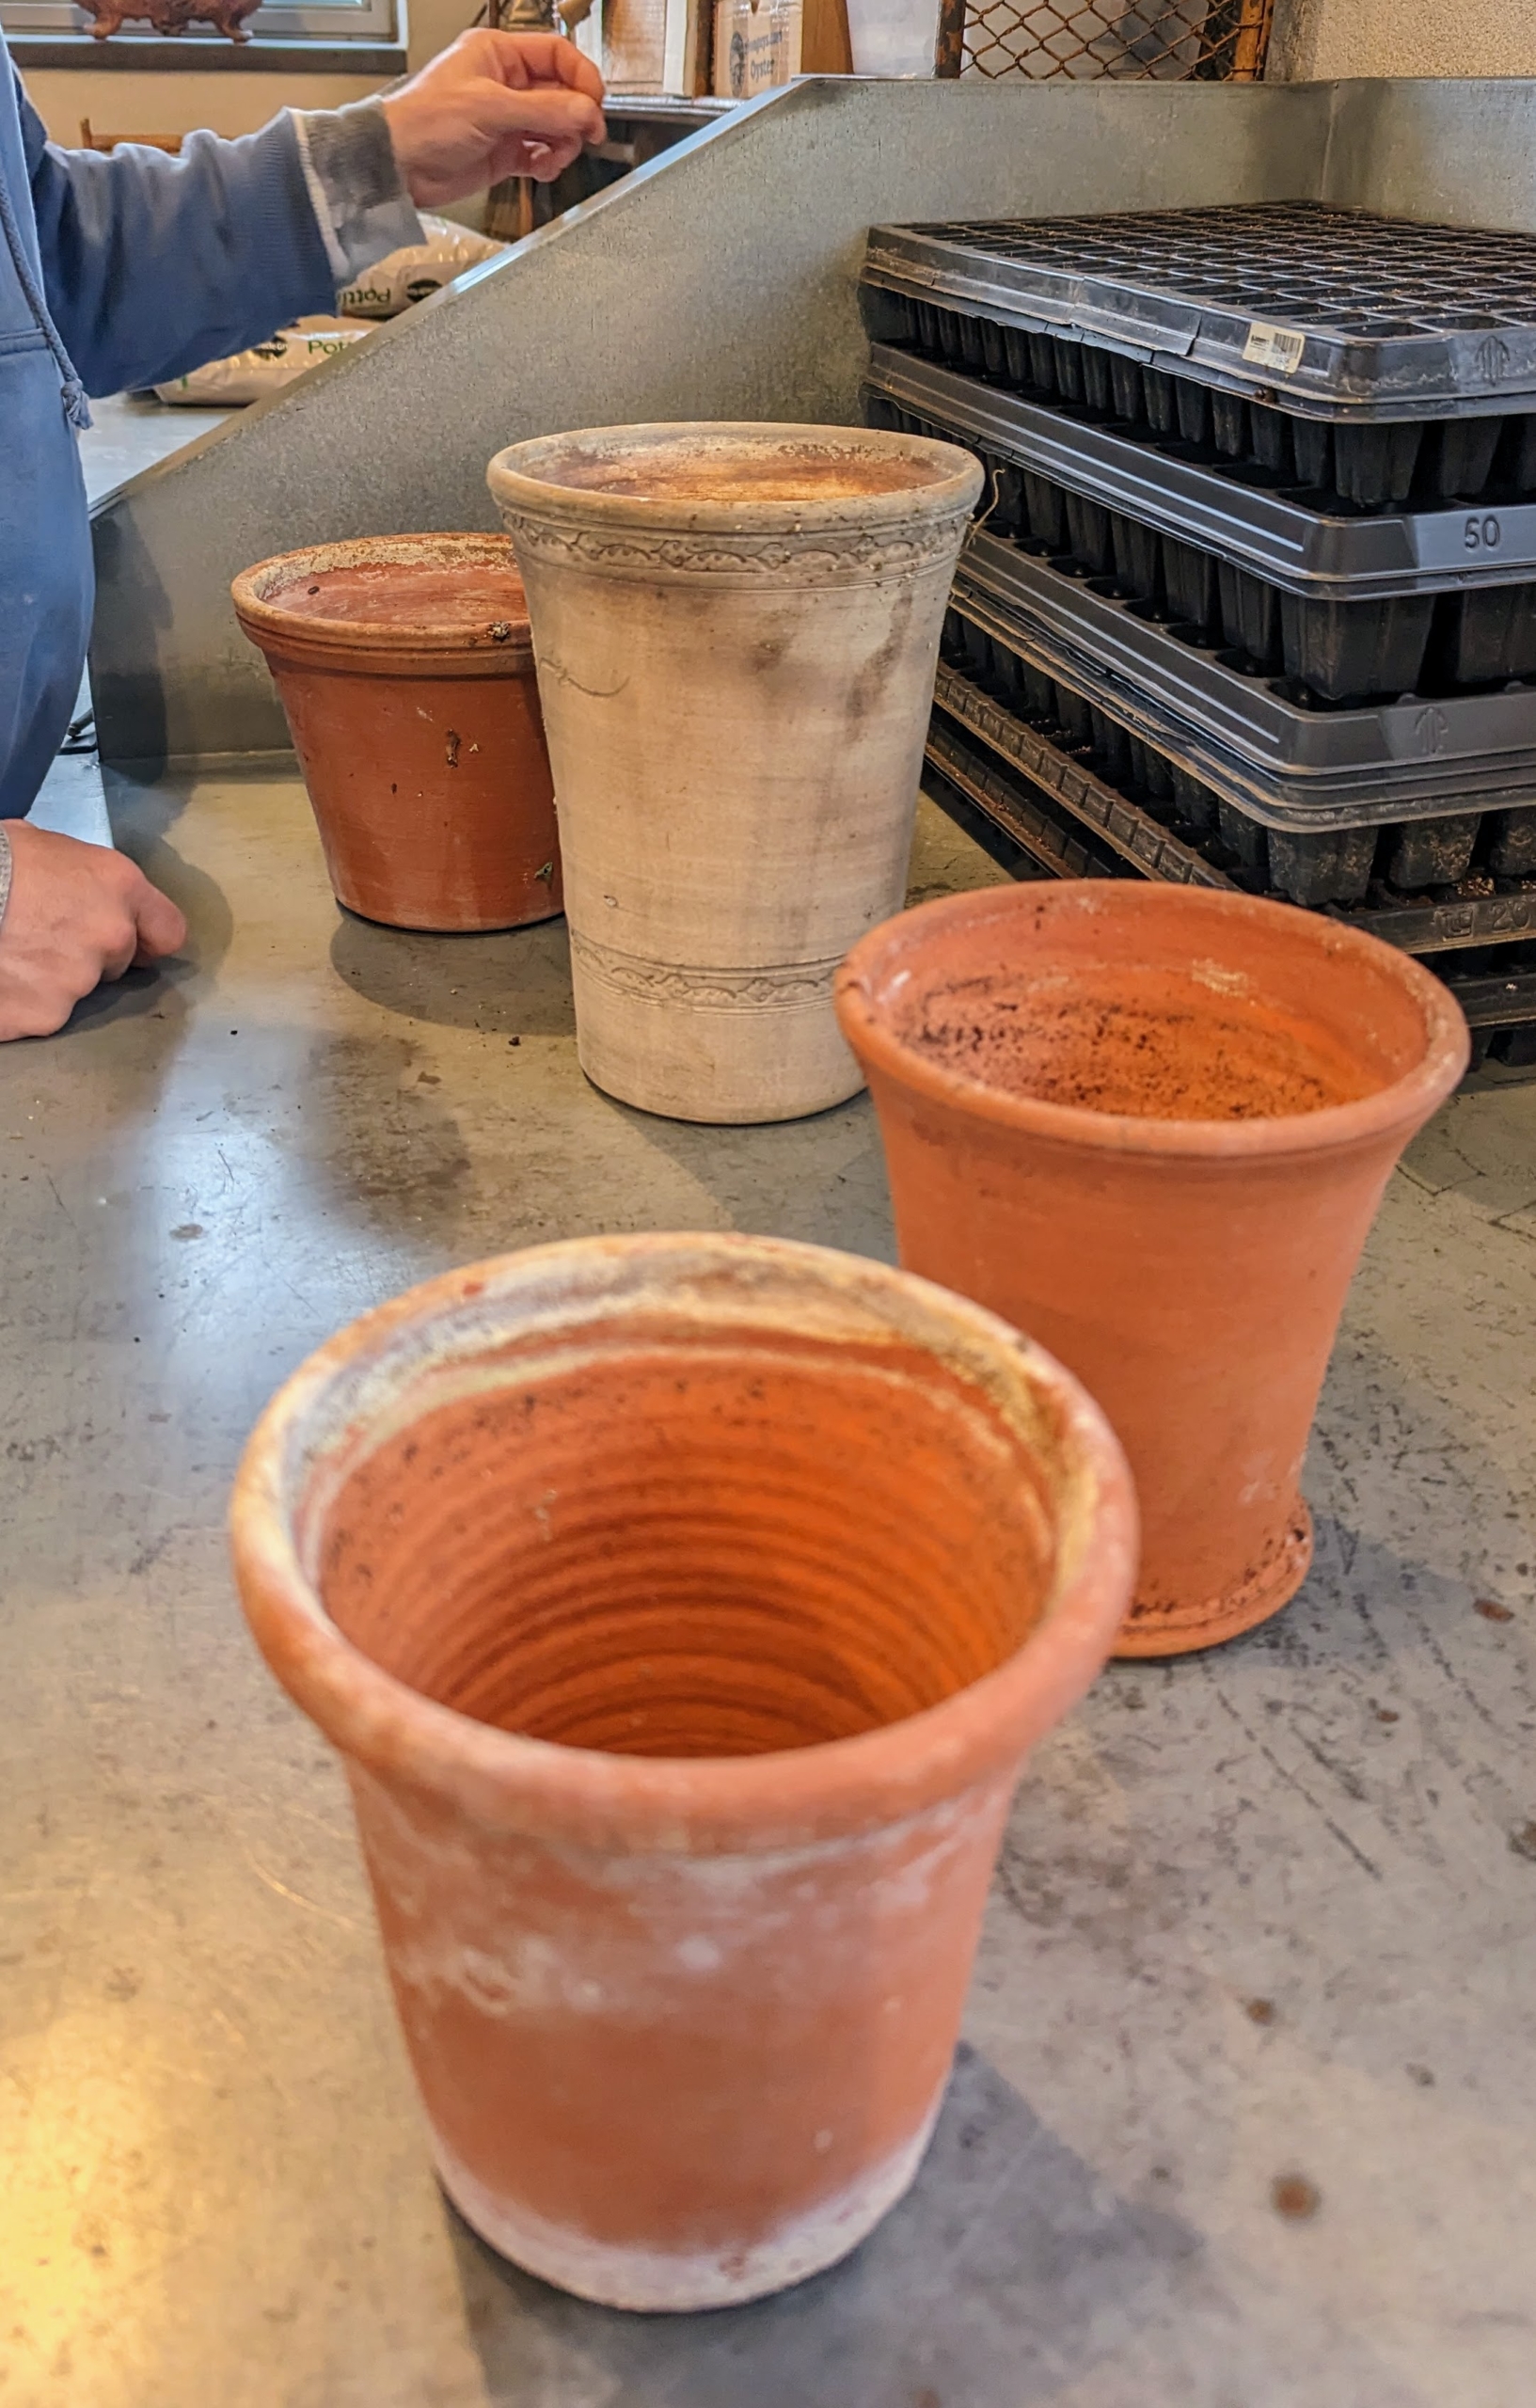
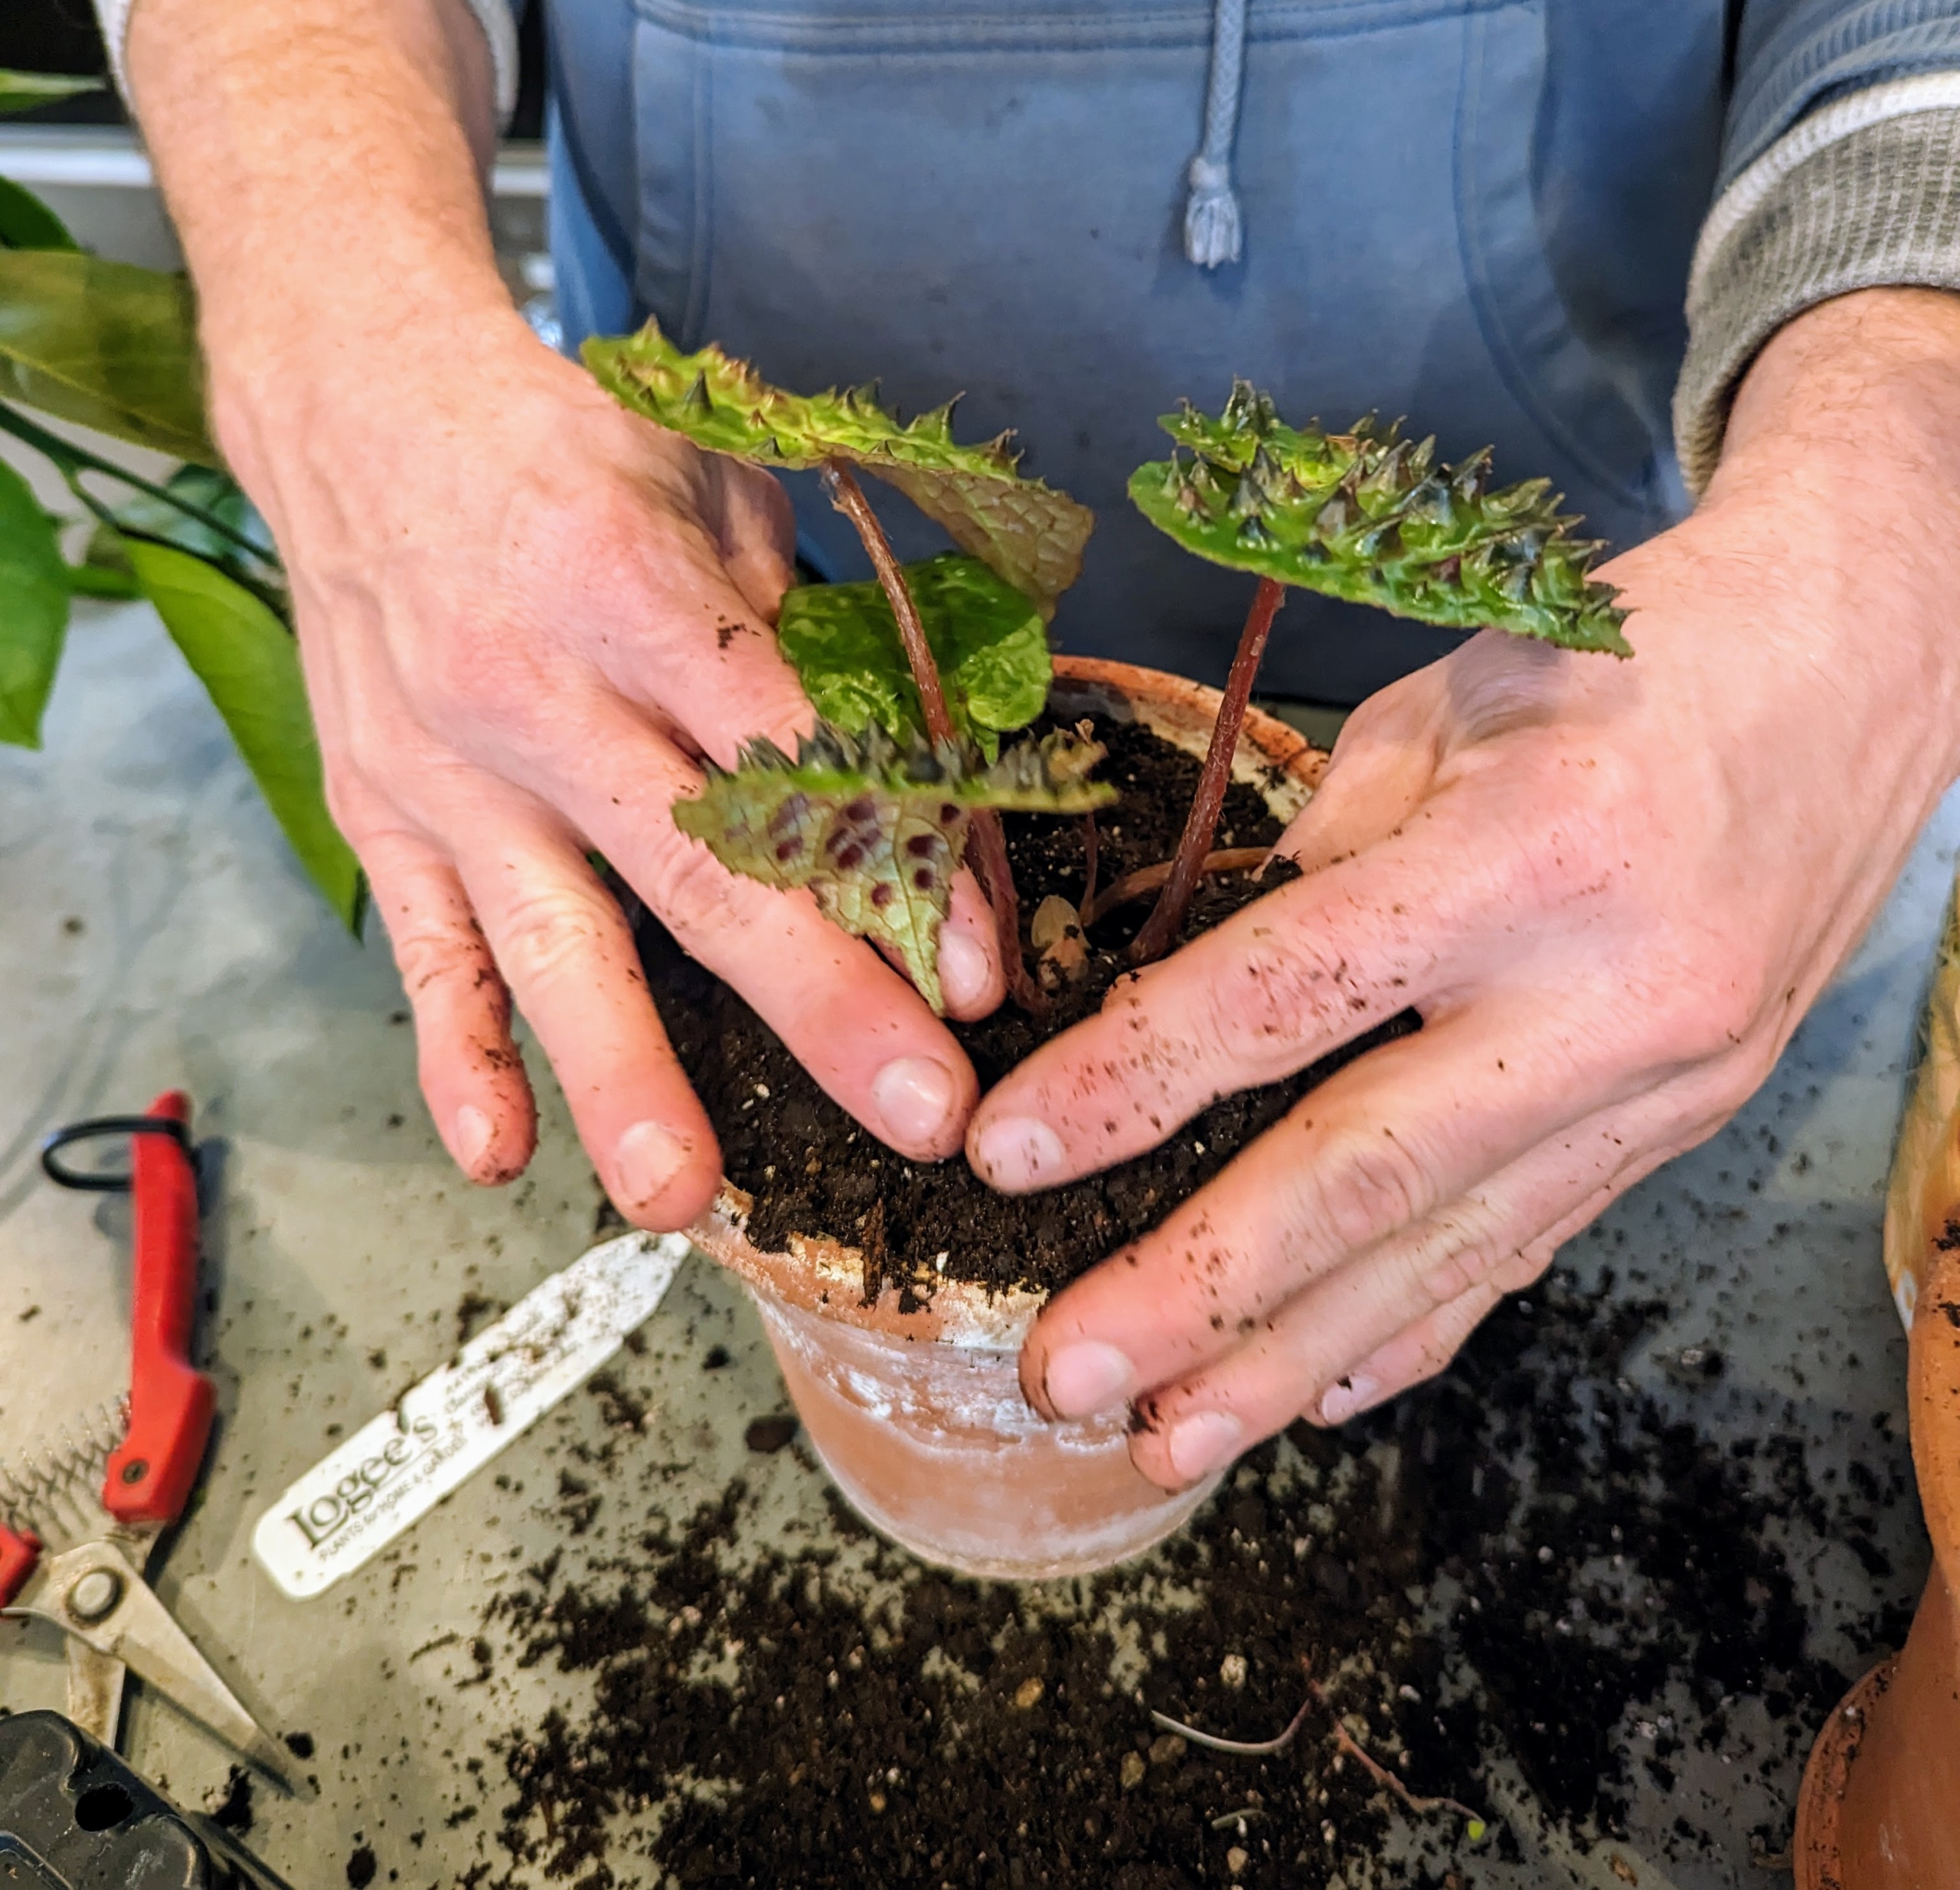
Next, Ryan pulls several pots for my new begonias and anthuriums. As a general rule, choose a pot that is one to two inches larger than its current container, and be sure there are holes in the bottom for good drainage.
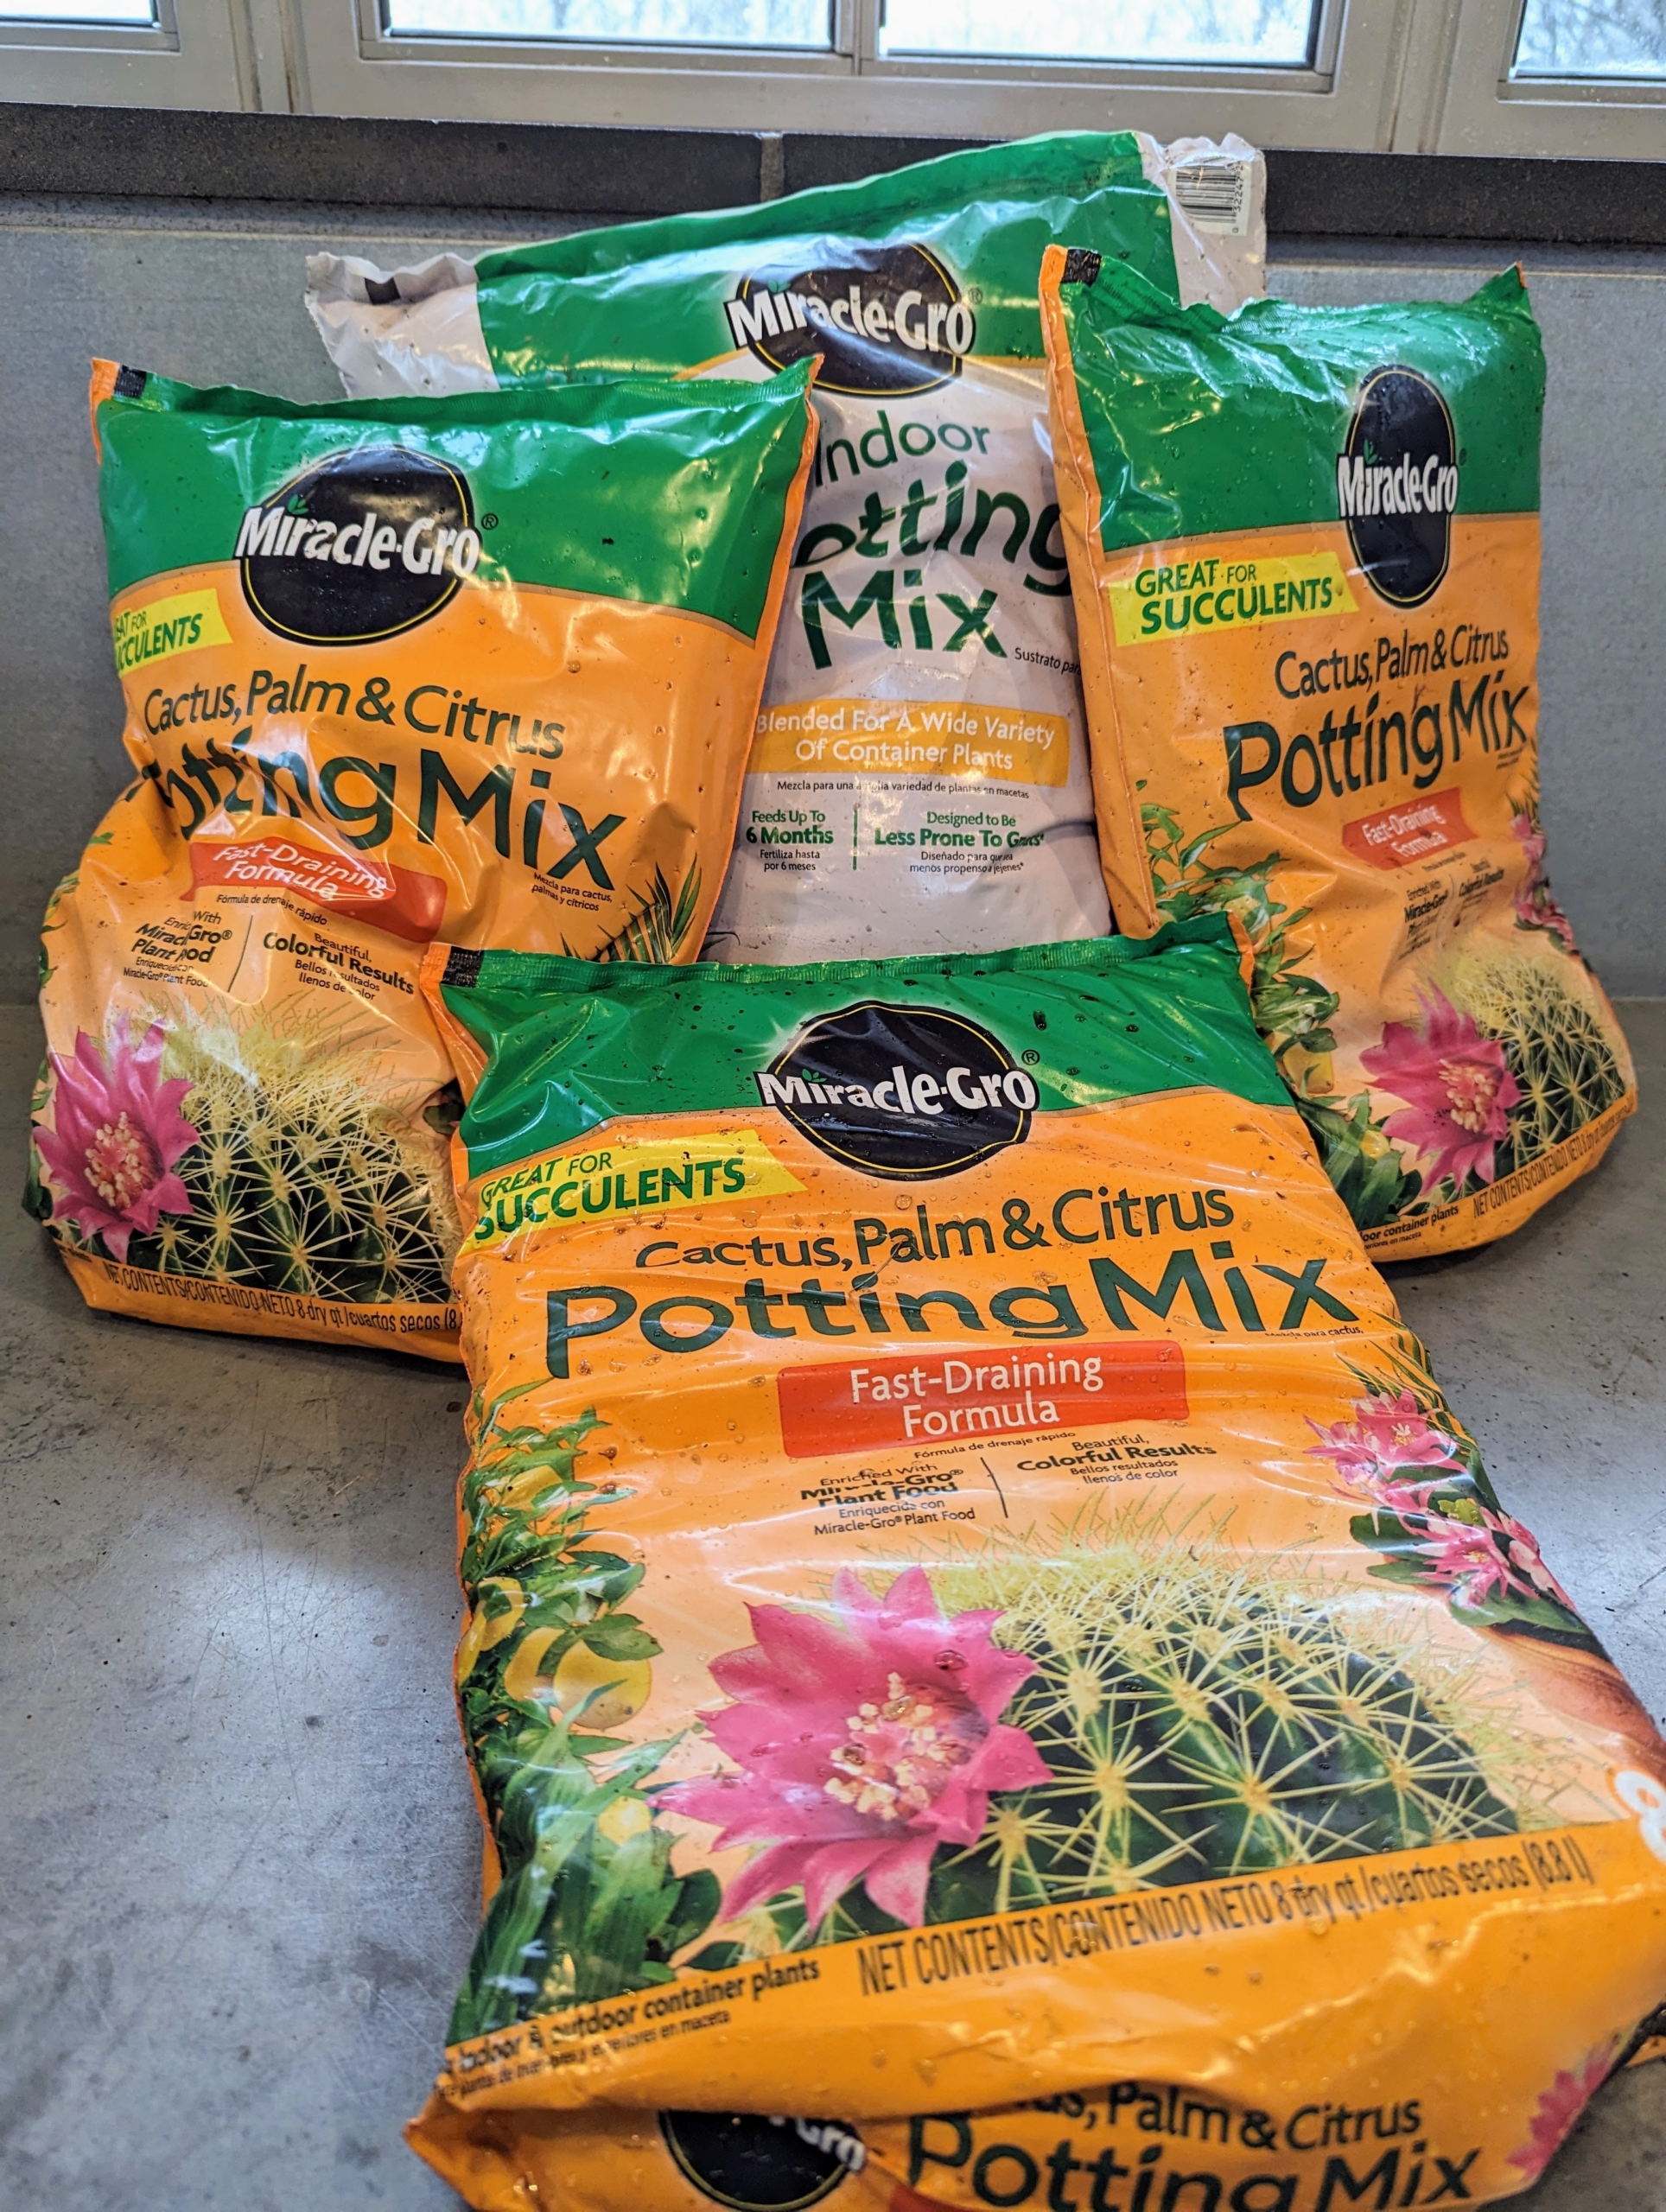
Ryan is using Scott’s Potting Mix. This formula is fast-draining and includes sand and perlite to help create an optimal growing environment. The mix is also fortified with iron and plant food.
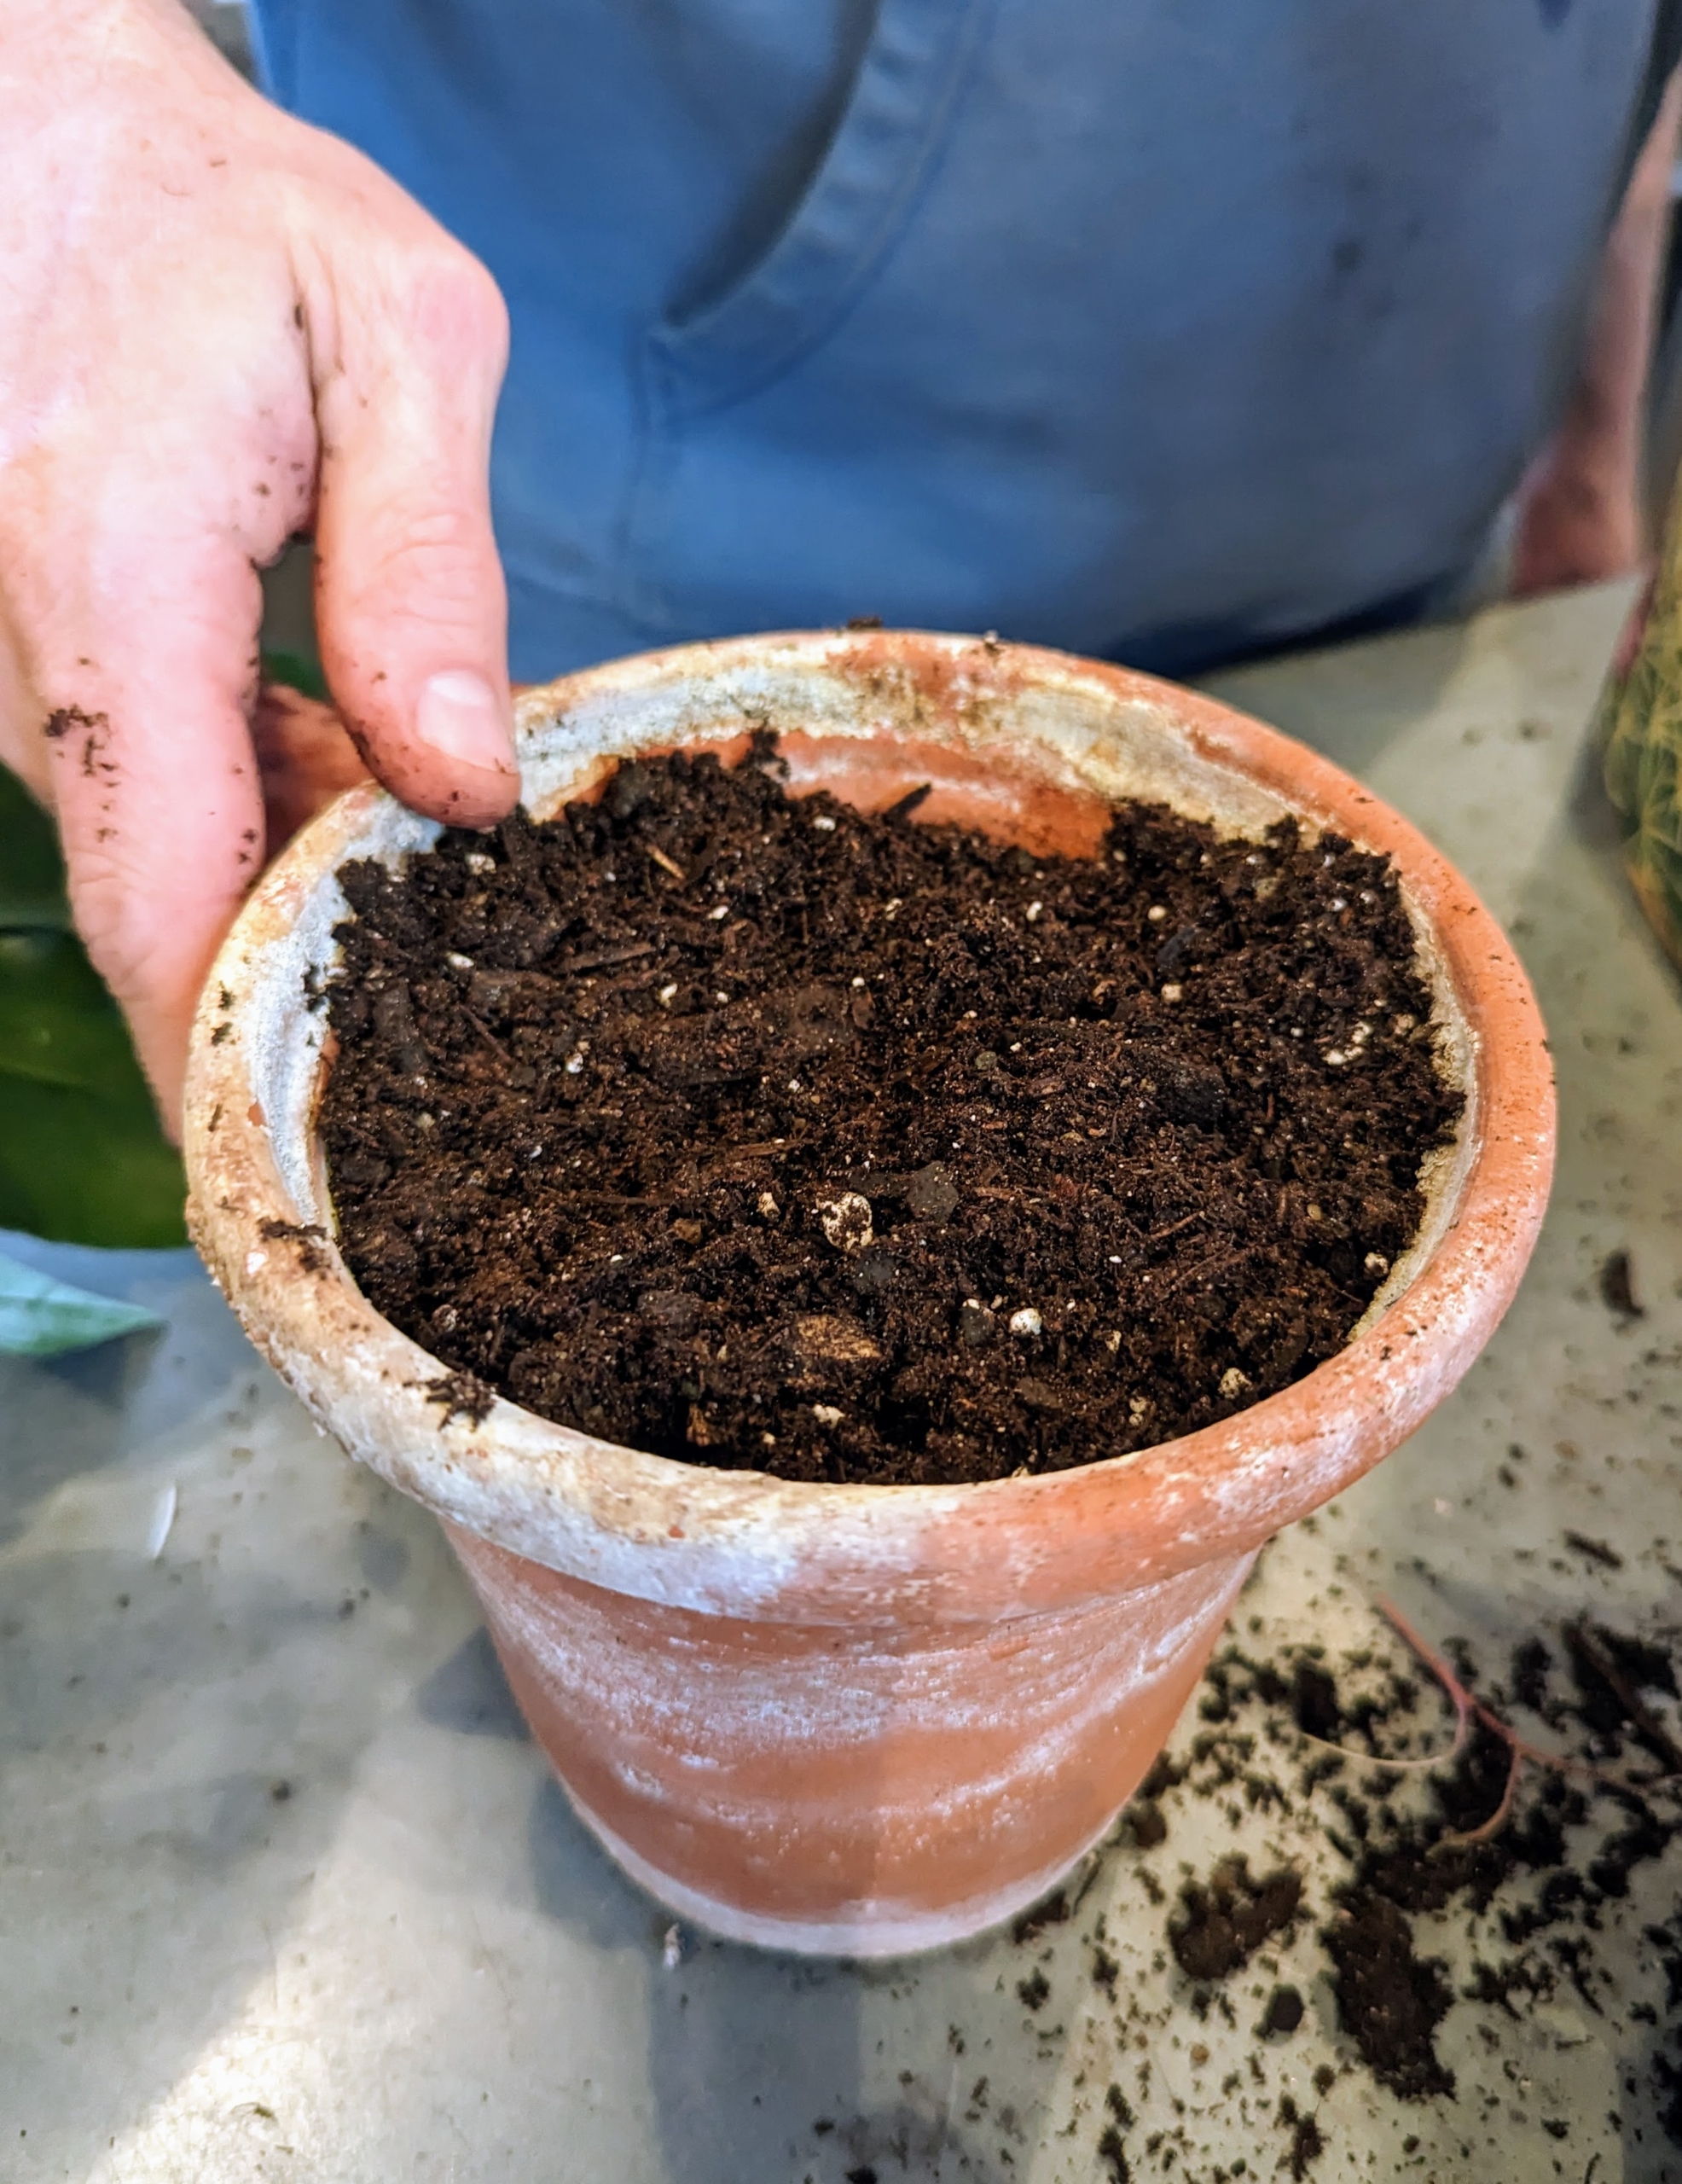
A clay shard is placed over the hole to help with drainage. We always save shards from broken pots – it’s a great way to repurpose those pieces.
Ryan fills the pot with mix to just under the rim of the container.
And then gently places it into the new pot – planting it slightly deeper than it was before. If needed, a little more potting mix is added around the plant and patted down, so there is good contact between the plant and the soil.
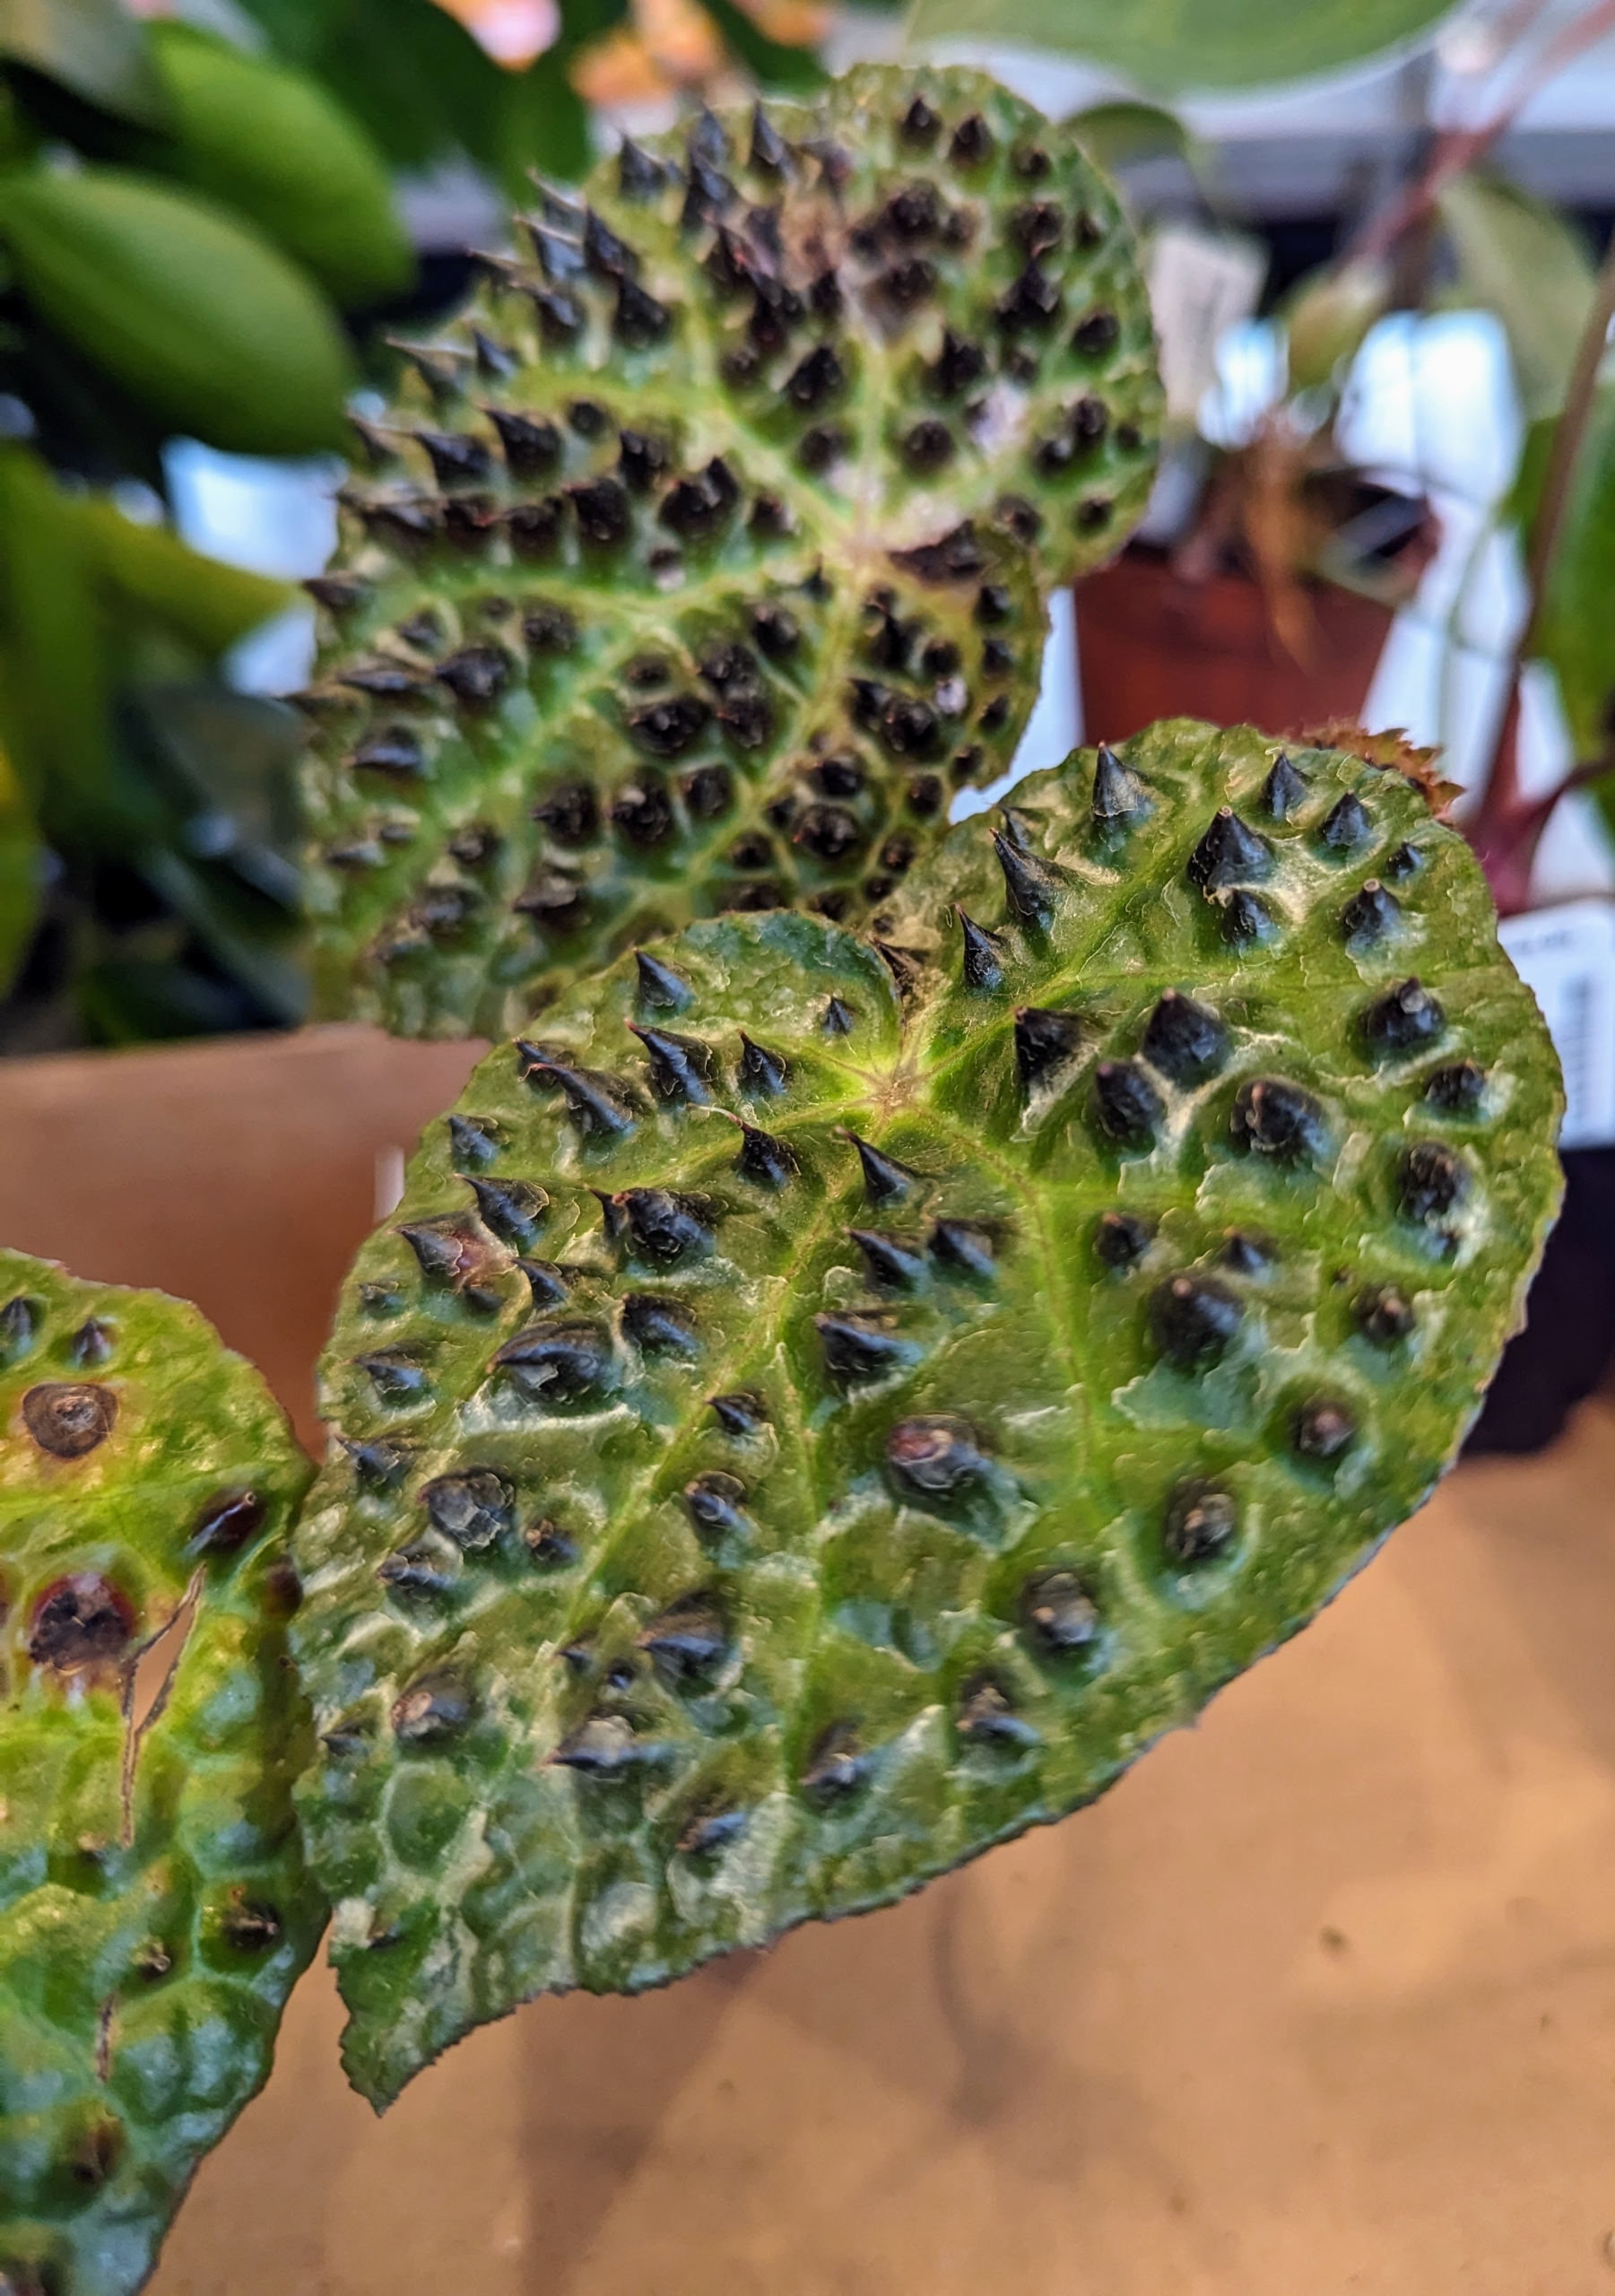
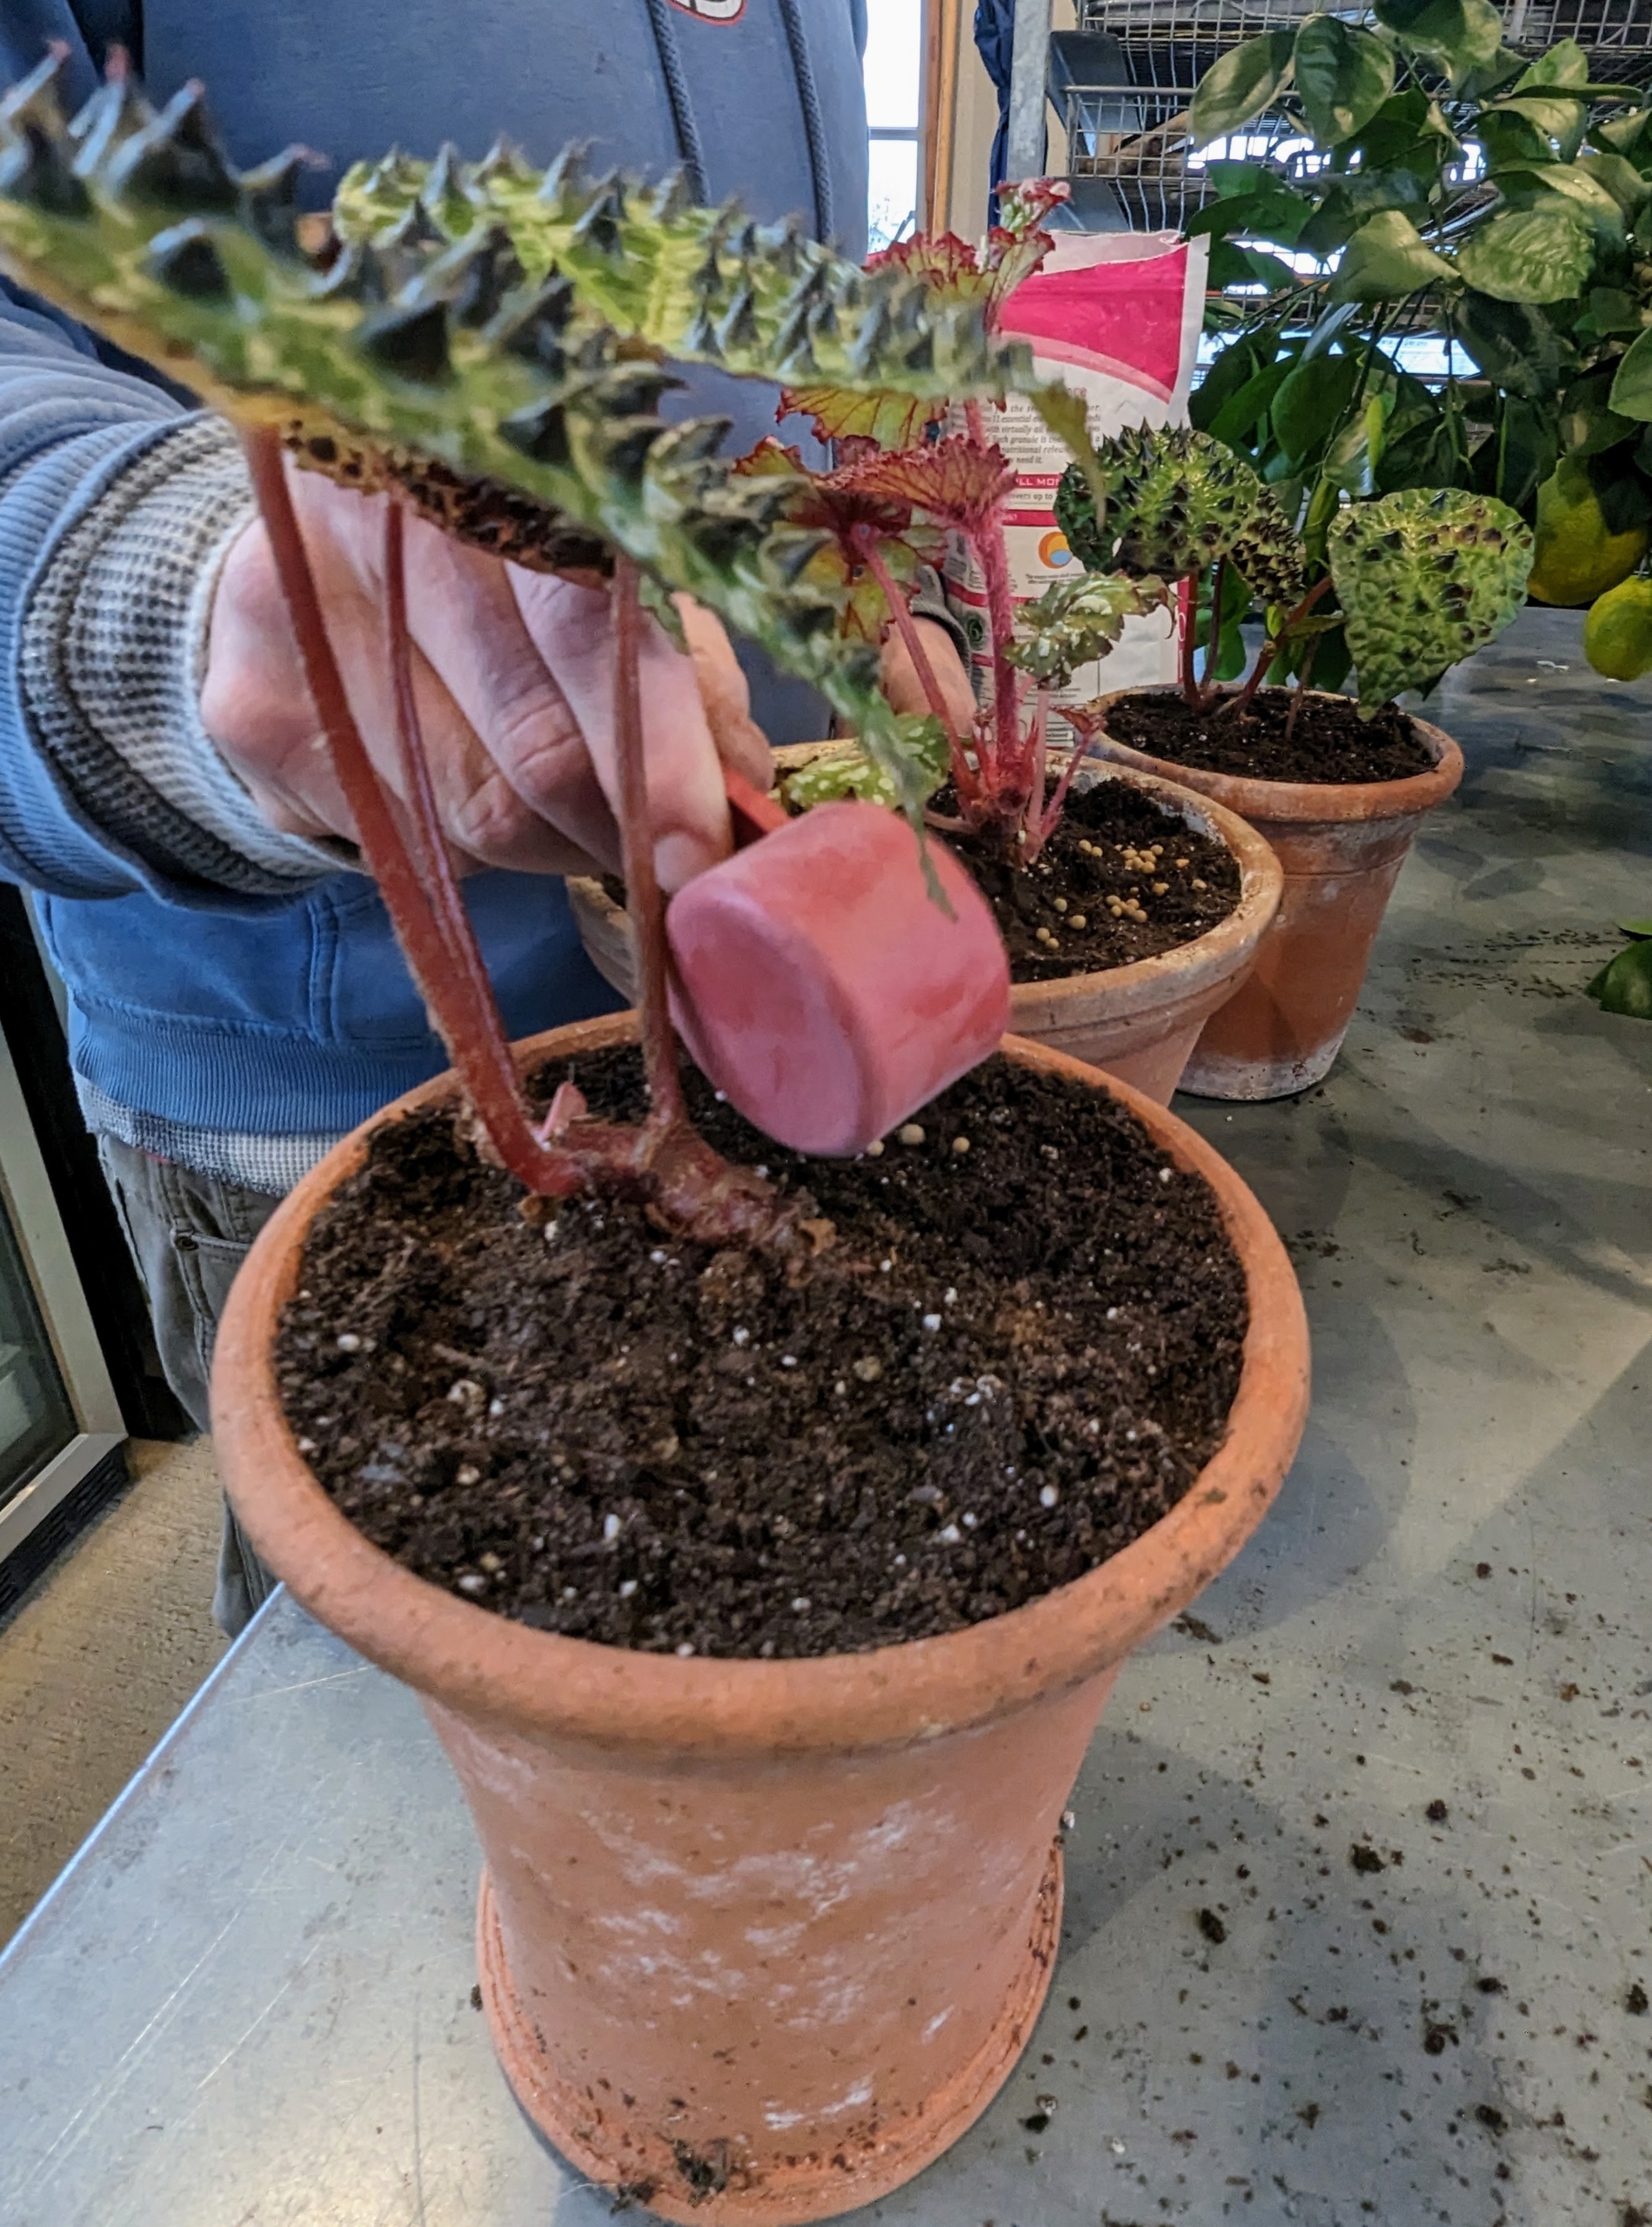
This is Begonia ferox, a species of flowering plant in the family Begoniaceae. It is a rhizomatous begonia endemic to Guangxi, China. Look closely – it is particularly striking because as it matures, it develops raised black cones on its leaves.
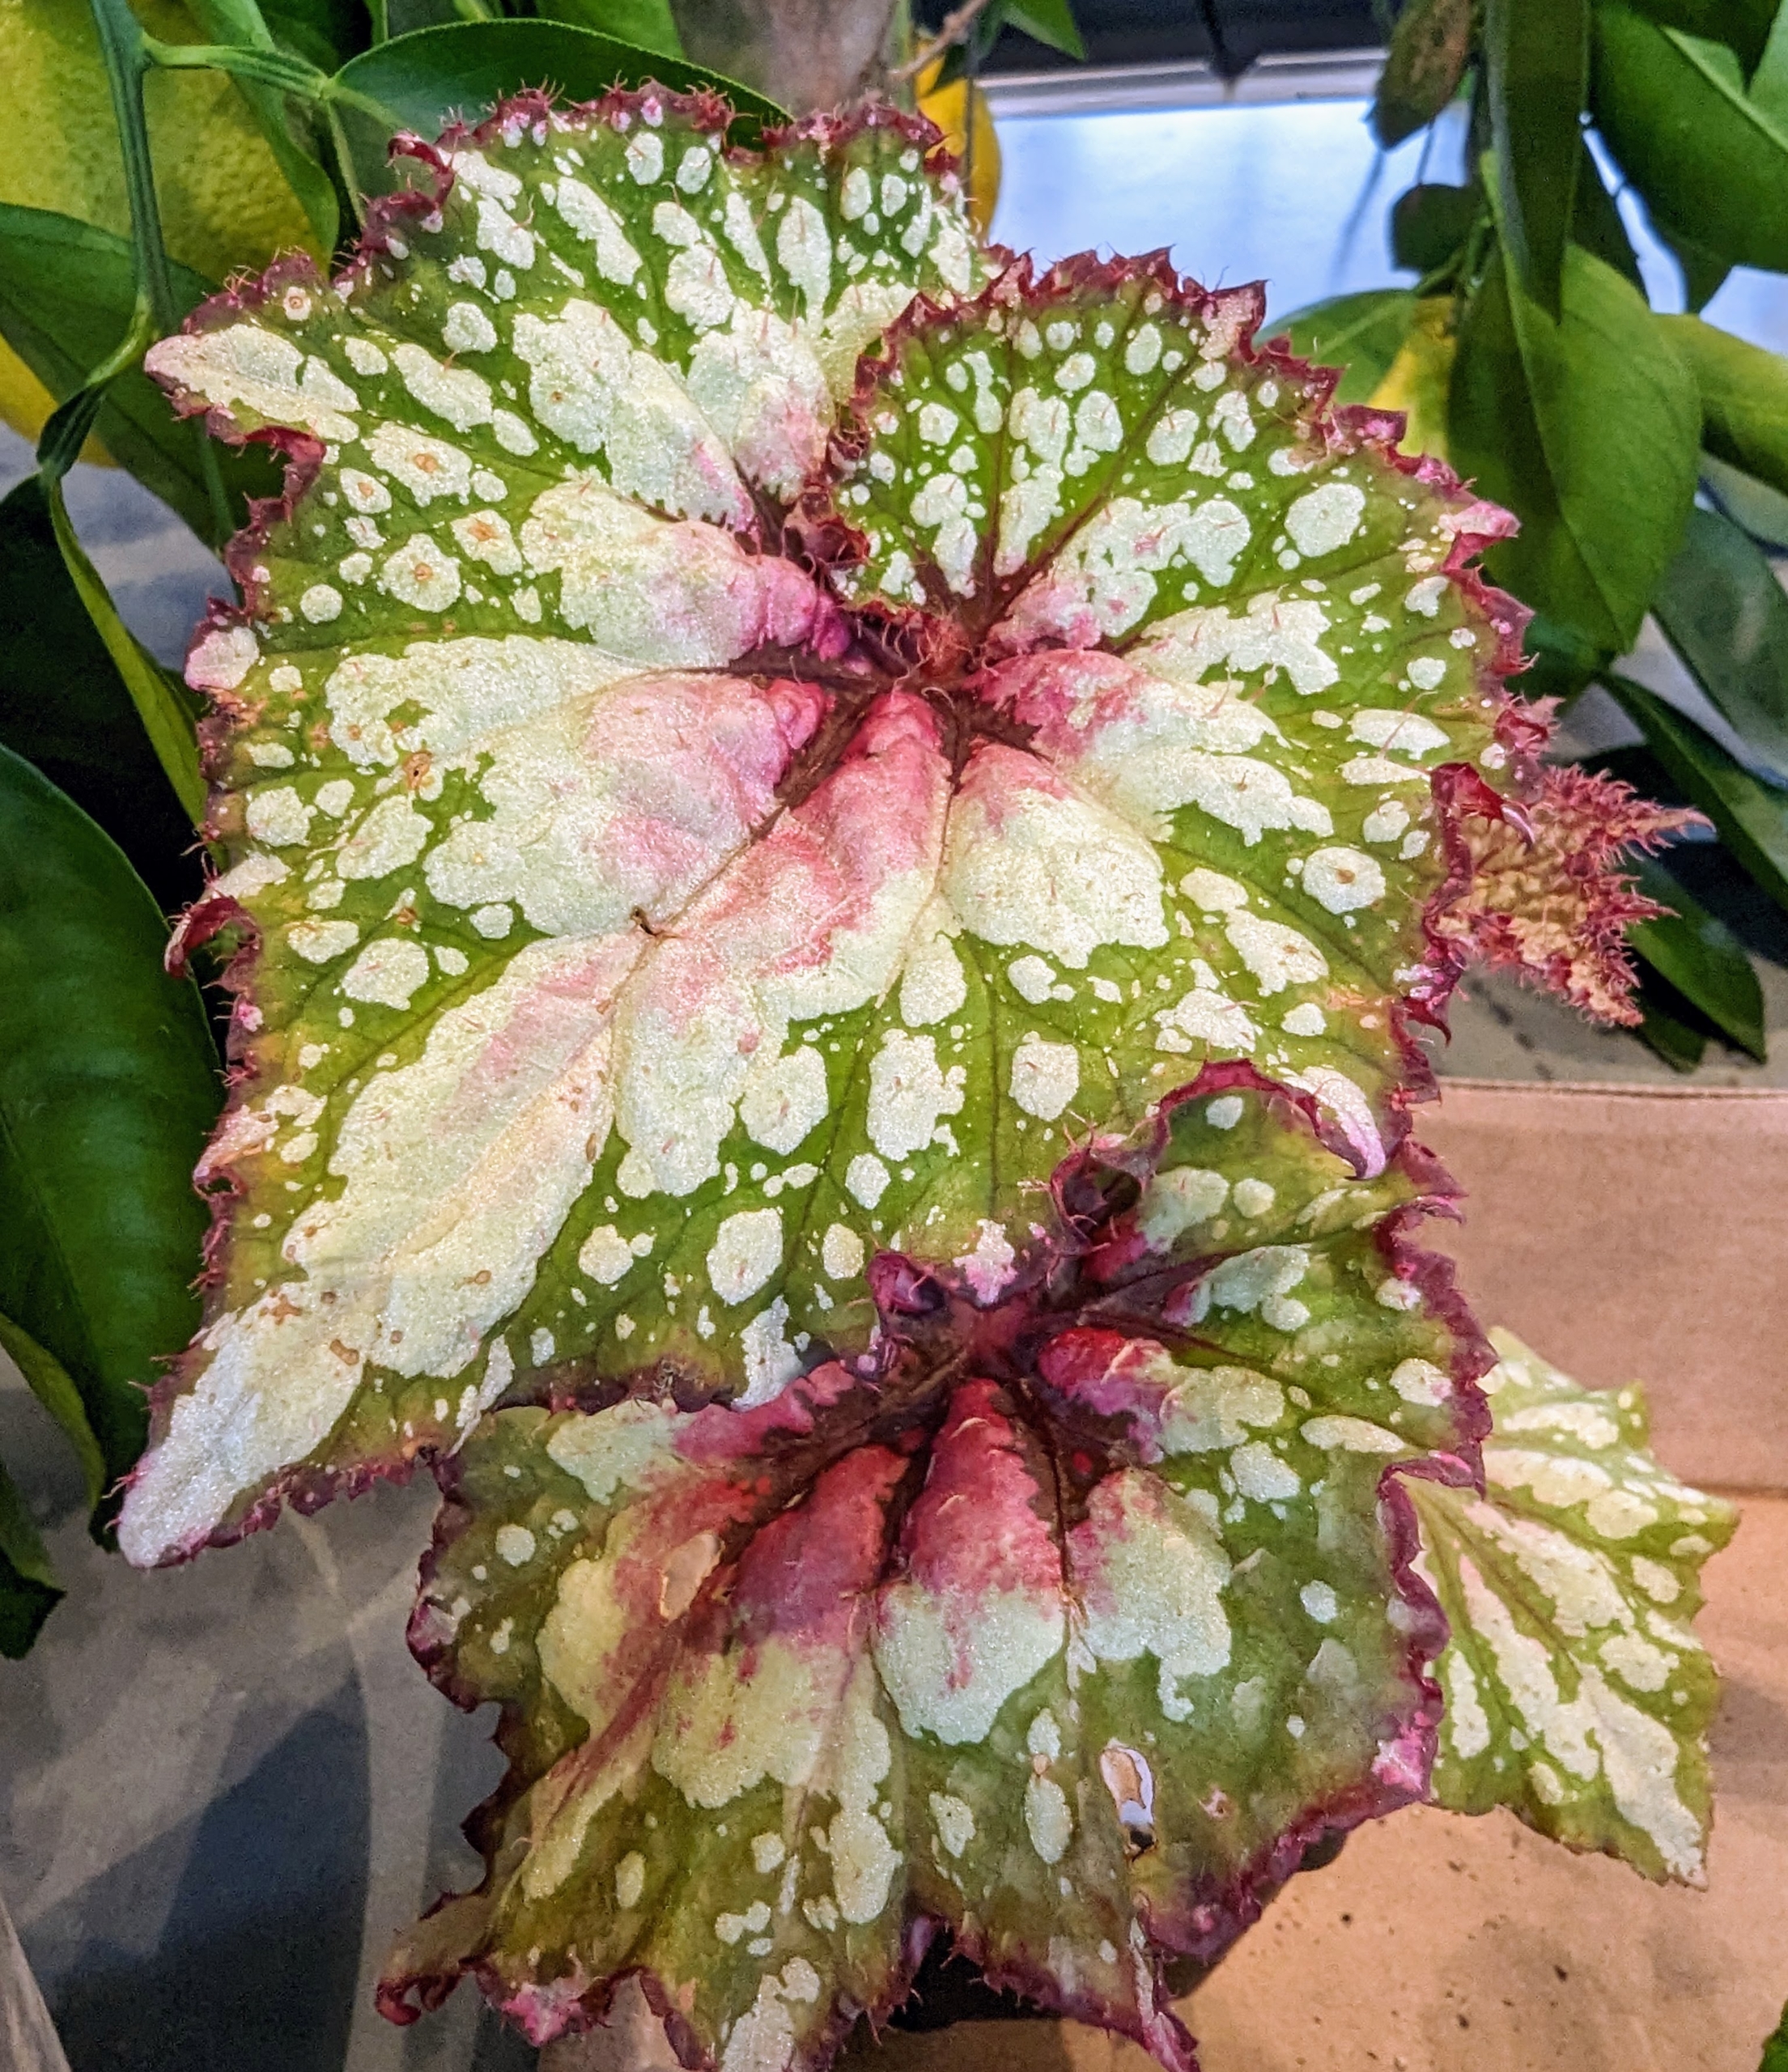
This is Begonia Joy’s Jubilee. It is a colorful and beautiful begonia with stunning white dots on deep green outer banding that transitions to a rich magenta center. This plant also has ruffled-edged leaves. It is a Byron Martin hybrid. Logee’s has been hybridizing begonias for a long time.
Here is a closer look at the leaf center. This begonia thrives in bright to medium indirect light, so it’s best kept near an east or west facing window.
Because begonias store water in the rhizomes, which are its thick, fuzzy stems, it is important not to overwater them. Only water these plants when the top one-inch of soil feels dry.
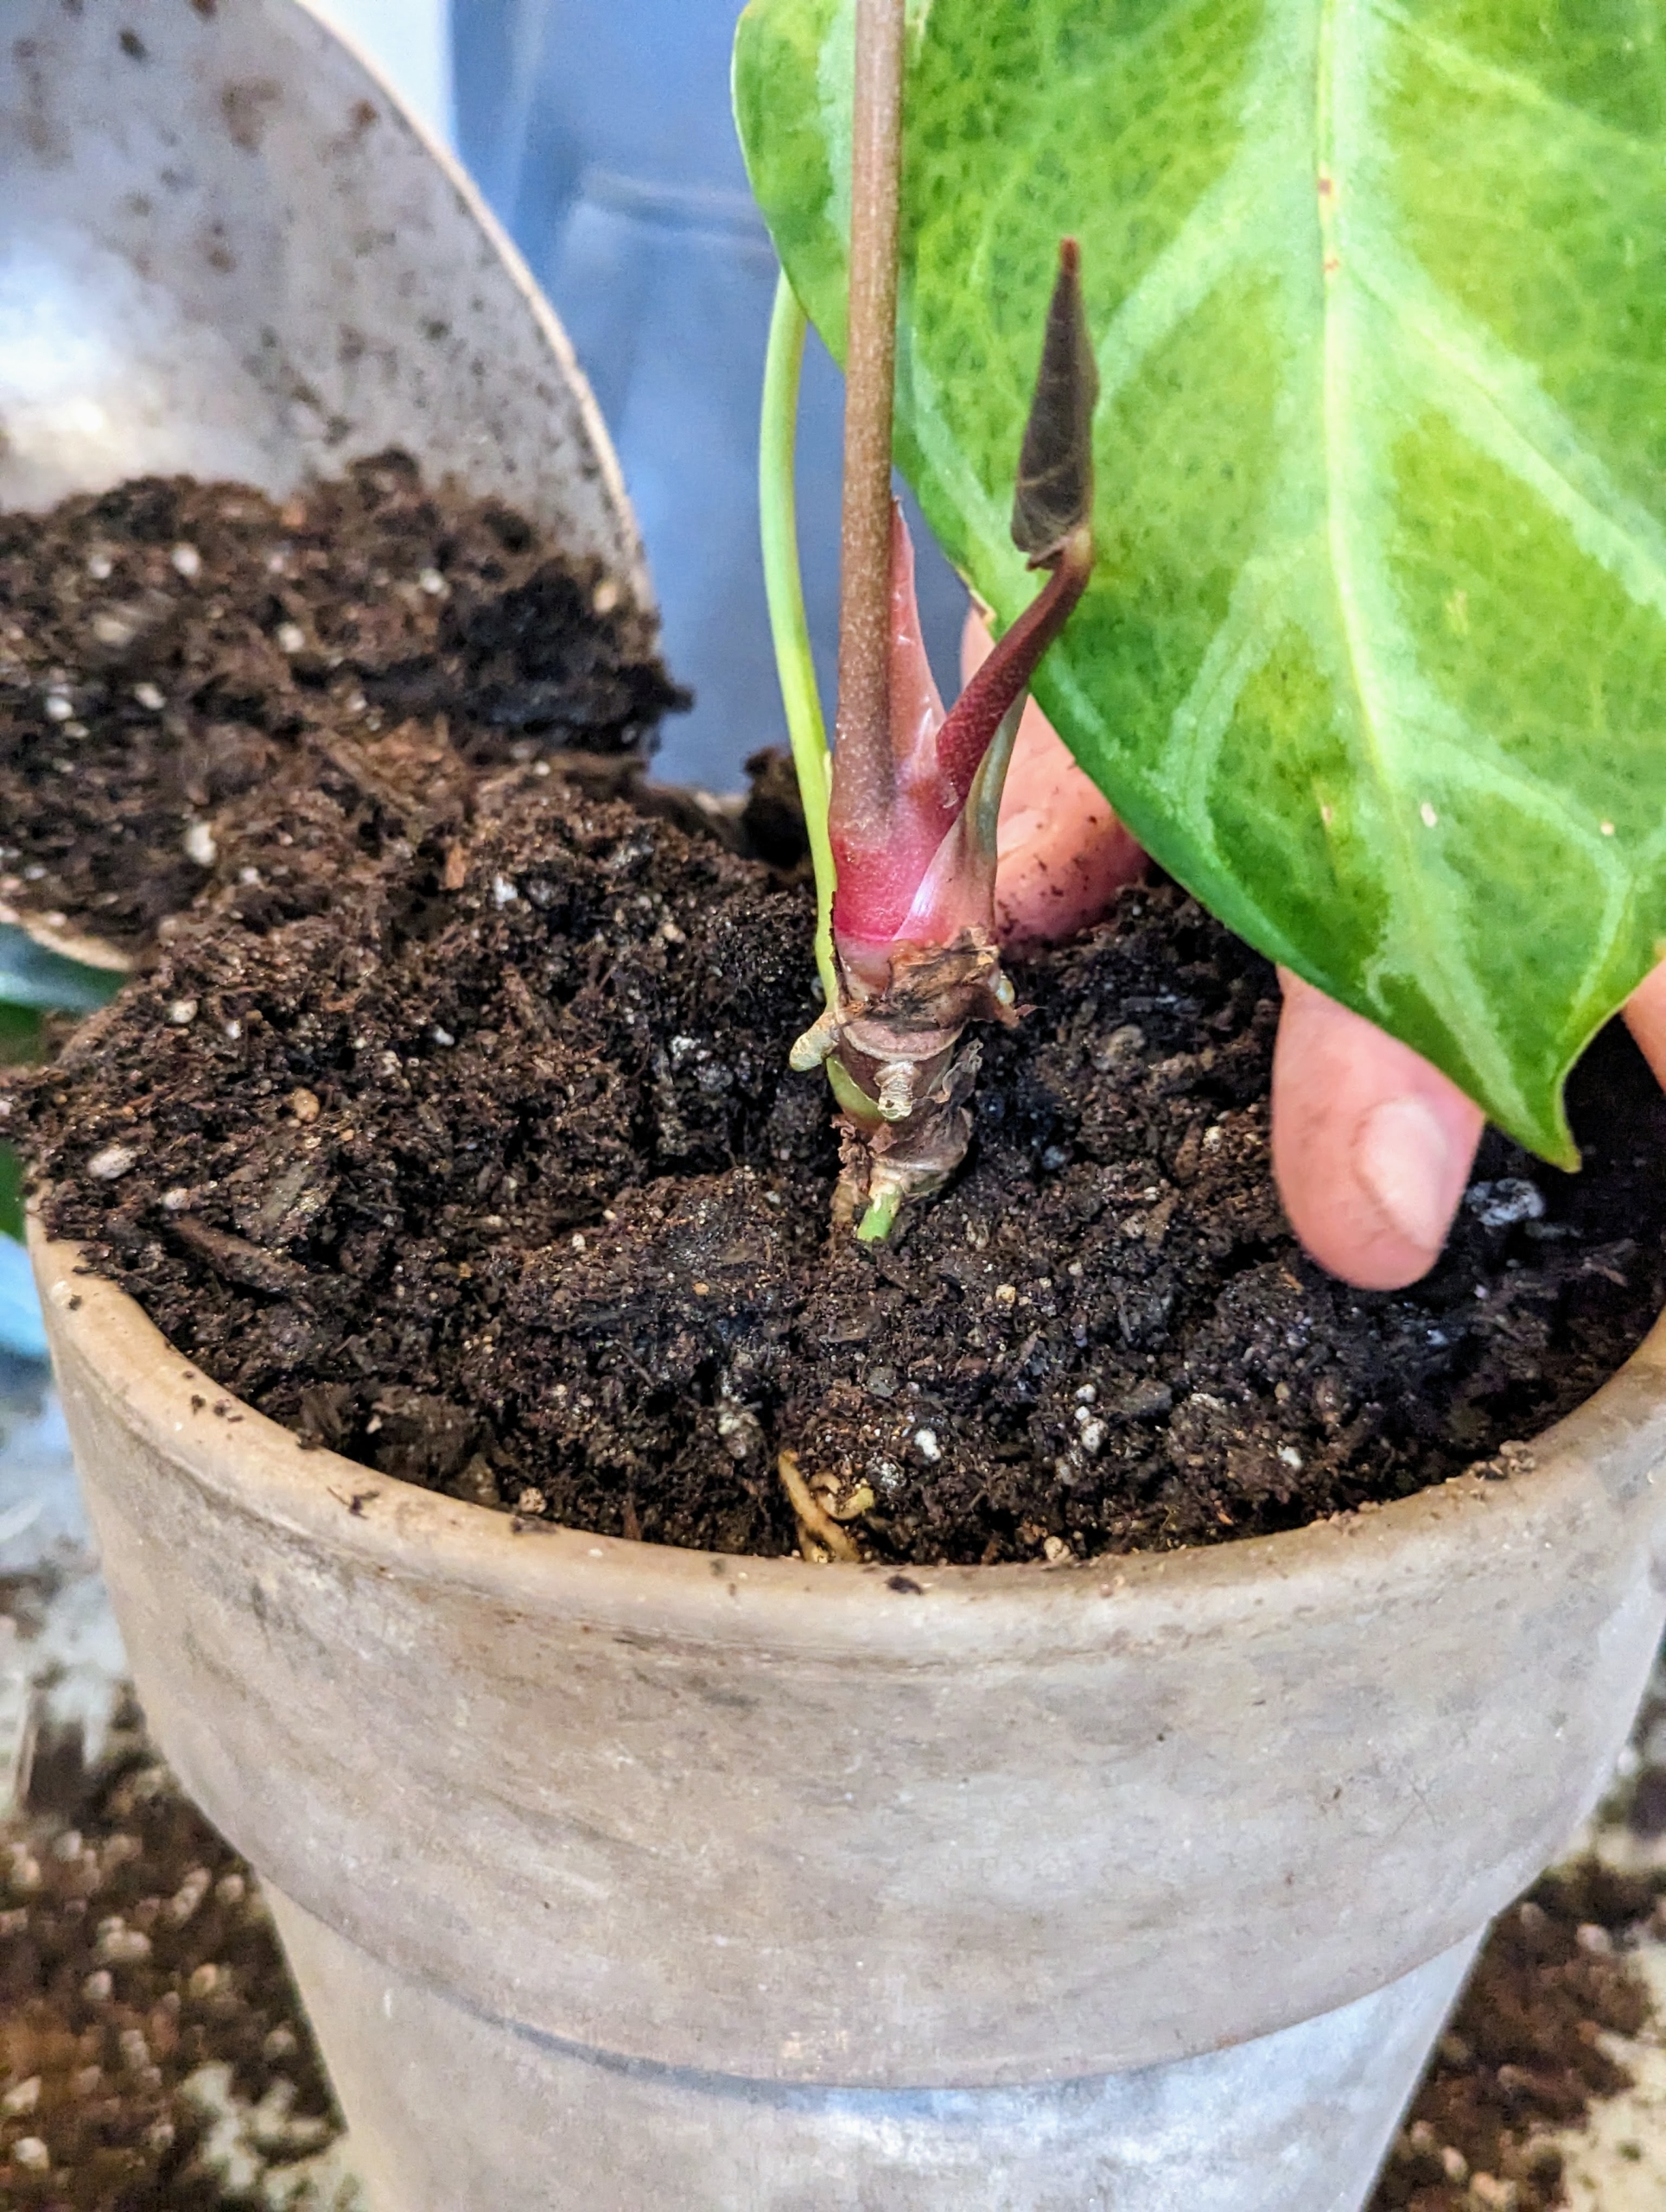
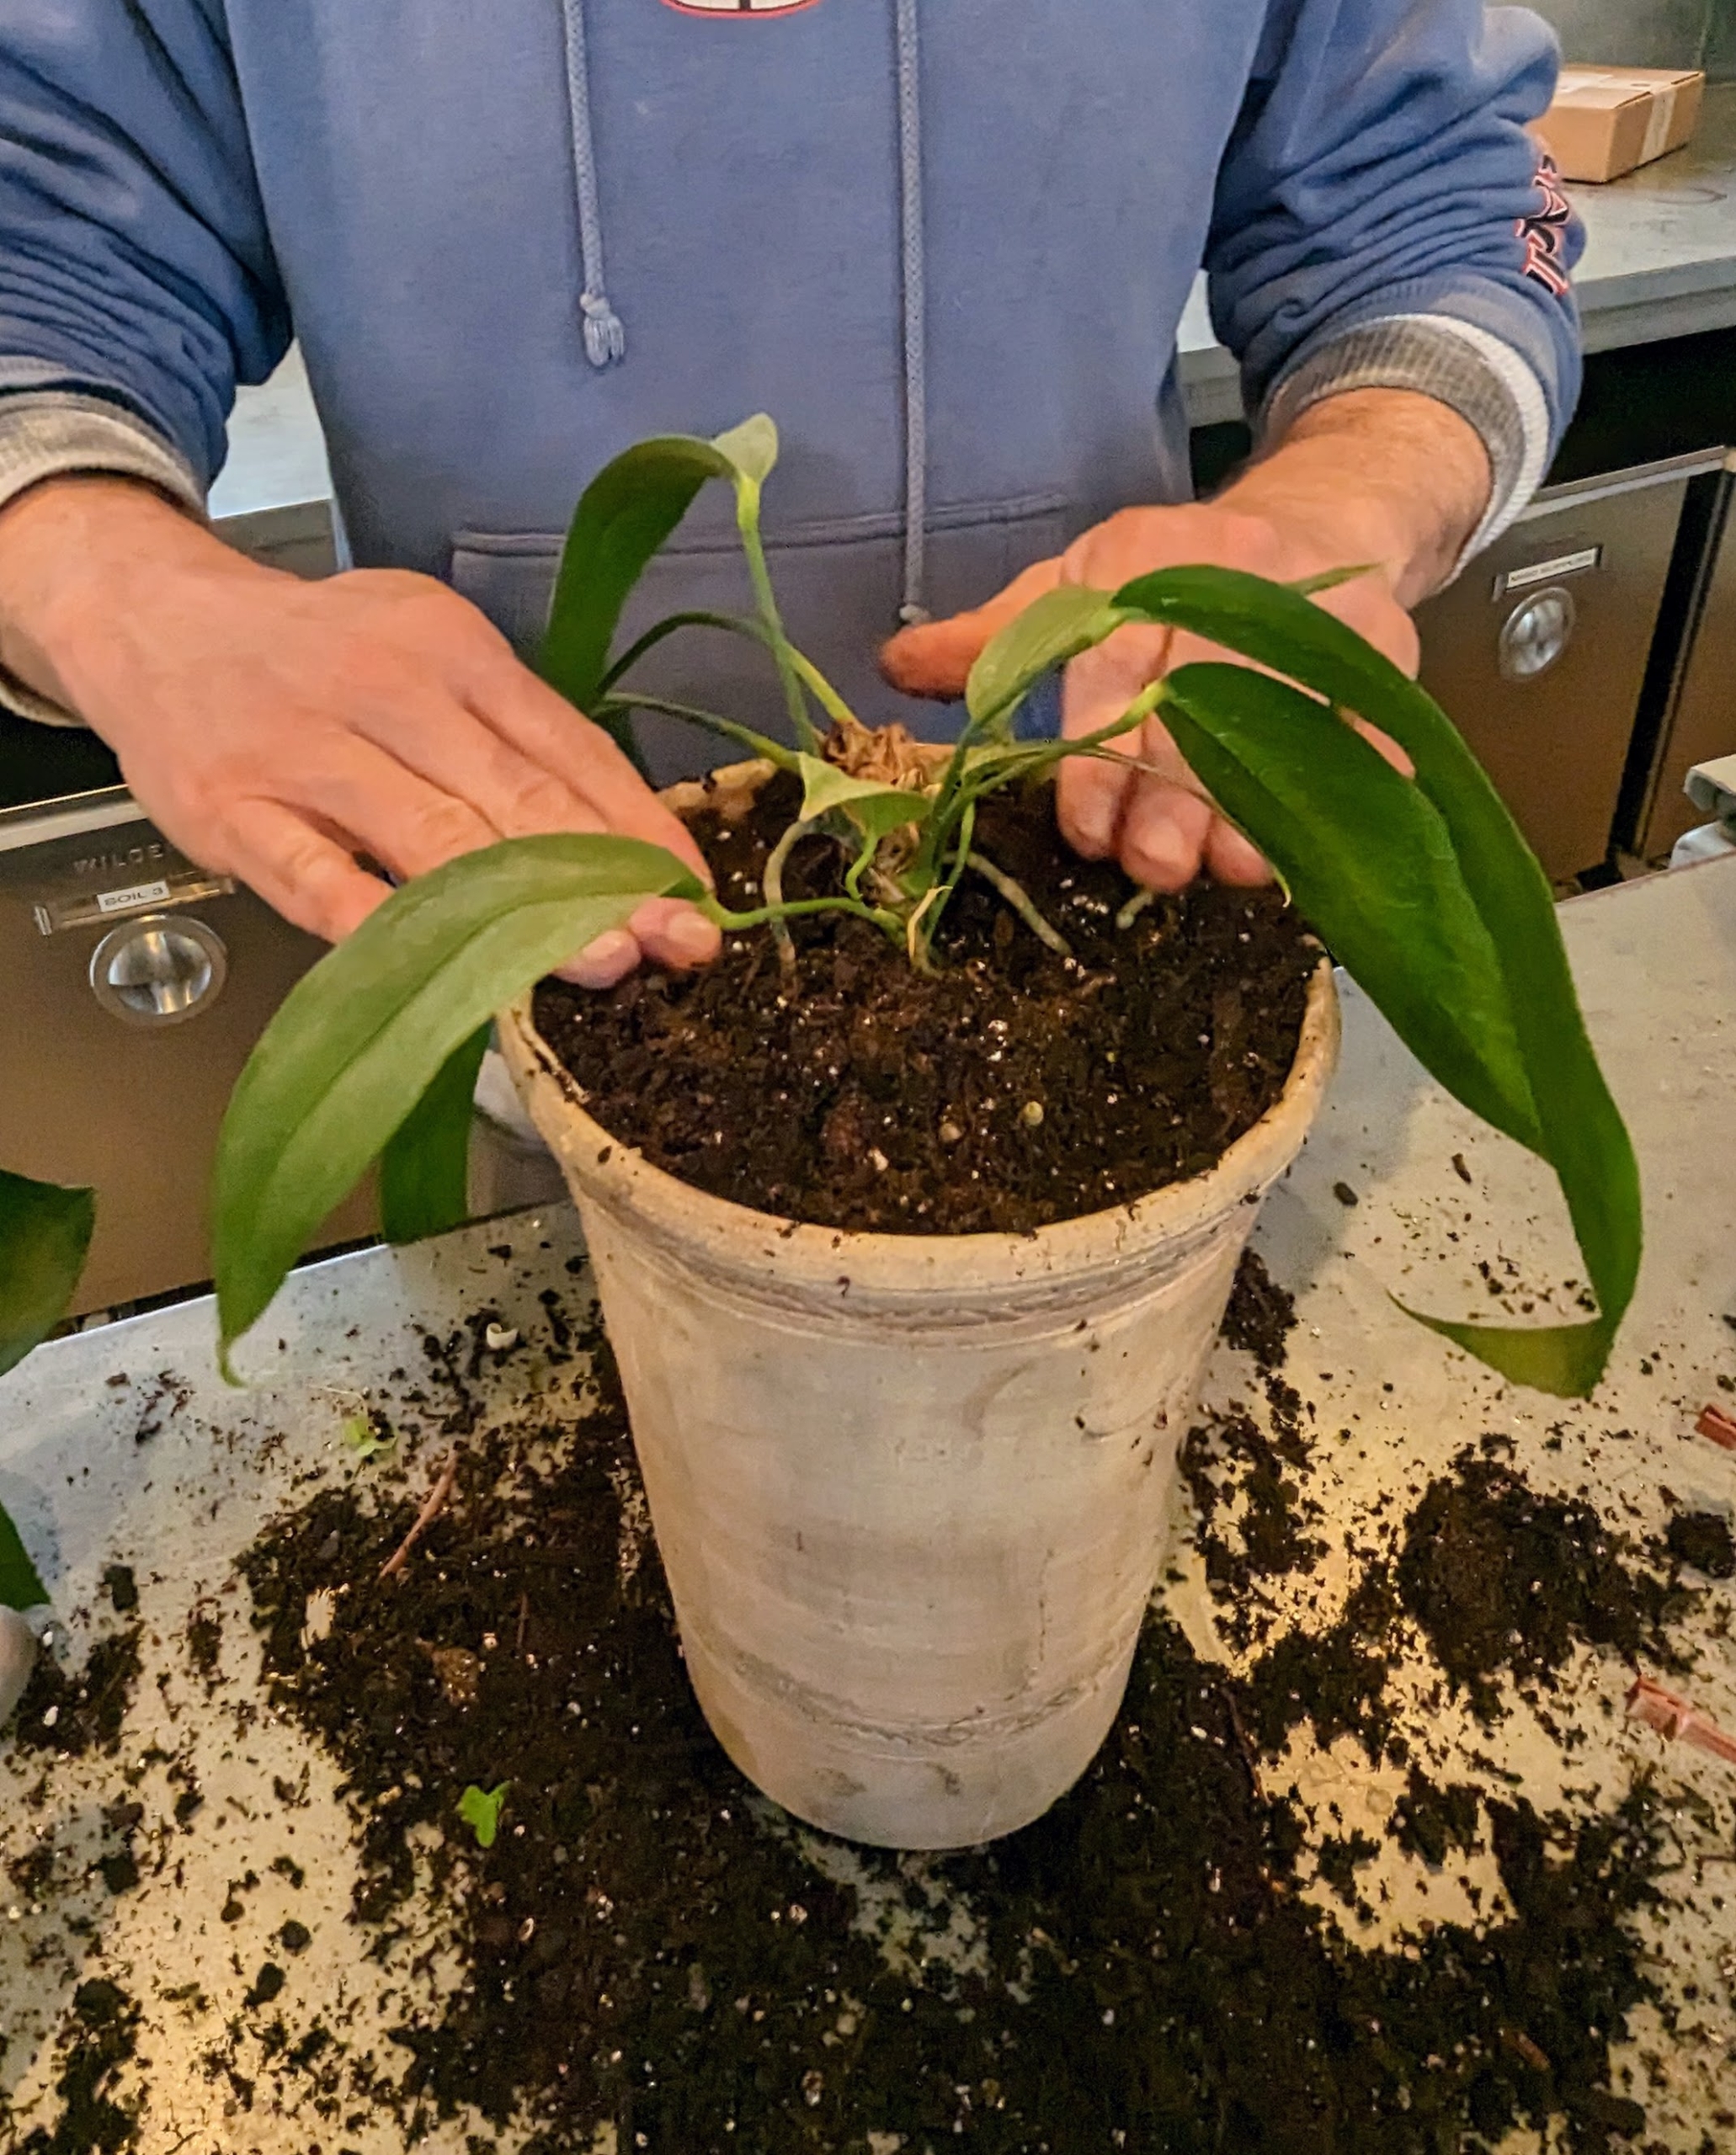
These are the roots of a very healthy Anthurium magnificum. Here, Ryan points out the new root growth. Anthurium is a genus of about 1,000 species of flowering plants, the largest genus of the arum family, Araceae. Other common names include tailflower, flamingo flower, and laceleaf.
The leaves of Anthurium magnificum can become quite massive, up to 18 to 24-inches long by 20-inches wide when fully mature. The leaves appear leathery with age and feature a lush dark green color with contrasting bright white veining.
Ryan pots it up as he does the others – into a vessel that is about one to two inches larger in diameter than its original container.
Here he is ready to pot up another Anthurium. Which pot is best? The leaves of this Anthurium variety are long, so taller, narrow pots are good to use, but Anthuriums do not like to sit in wet soil, so the right pot should definitely be fast draining. Both these pots are made by master potter, Guy Wolff. He says I have the largest single collection of his handmade clay vessels. All my plants look so wonderful displayed in the historical shapes that Guy and his son, Ben, create.
Ryan selected the smaller of the two. It will grow in this vessel and then eventually move to the larger one. For this Anthurium, Ryan uses an even faster draining soil mix.
Ryan sprinkles fertilizer over the soil of all the newly potted plants…
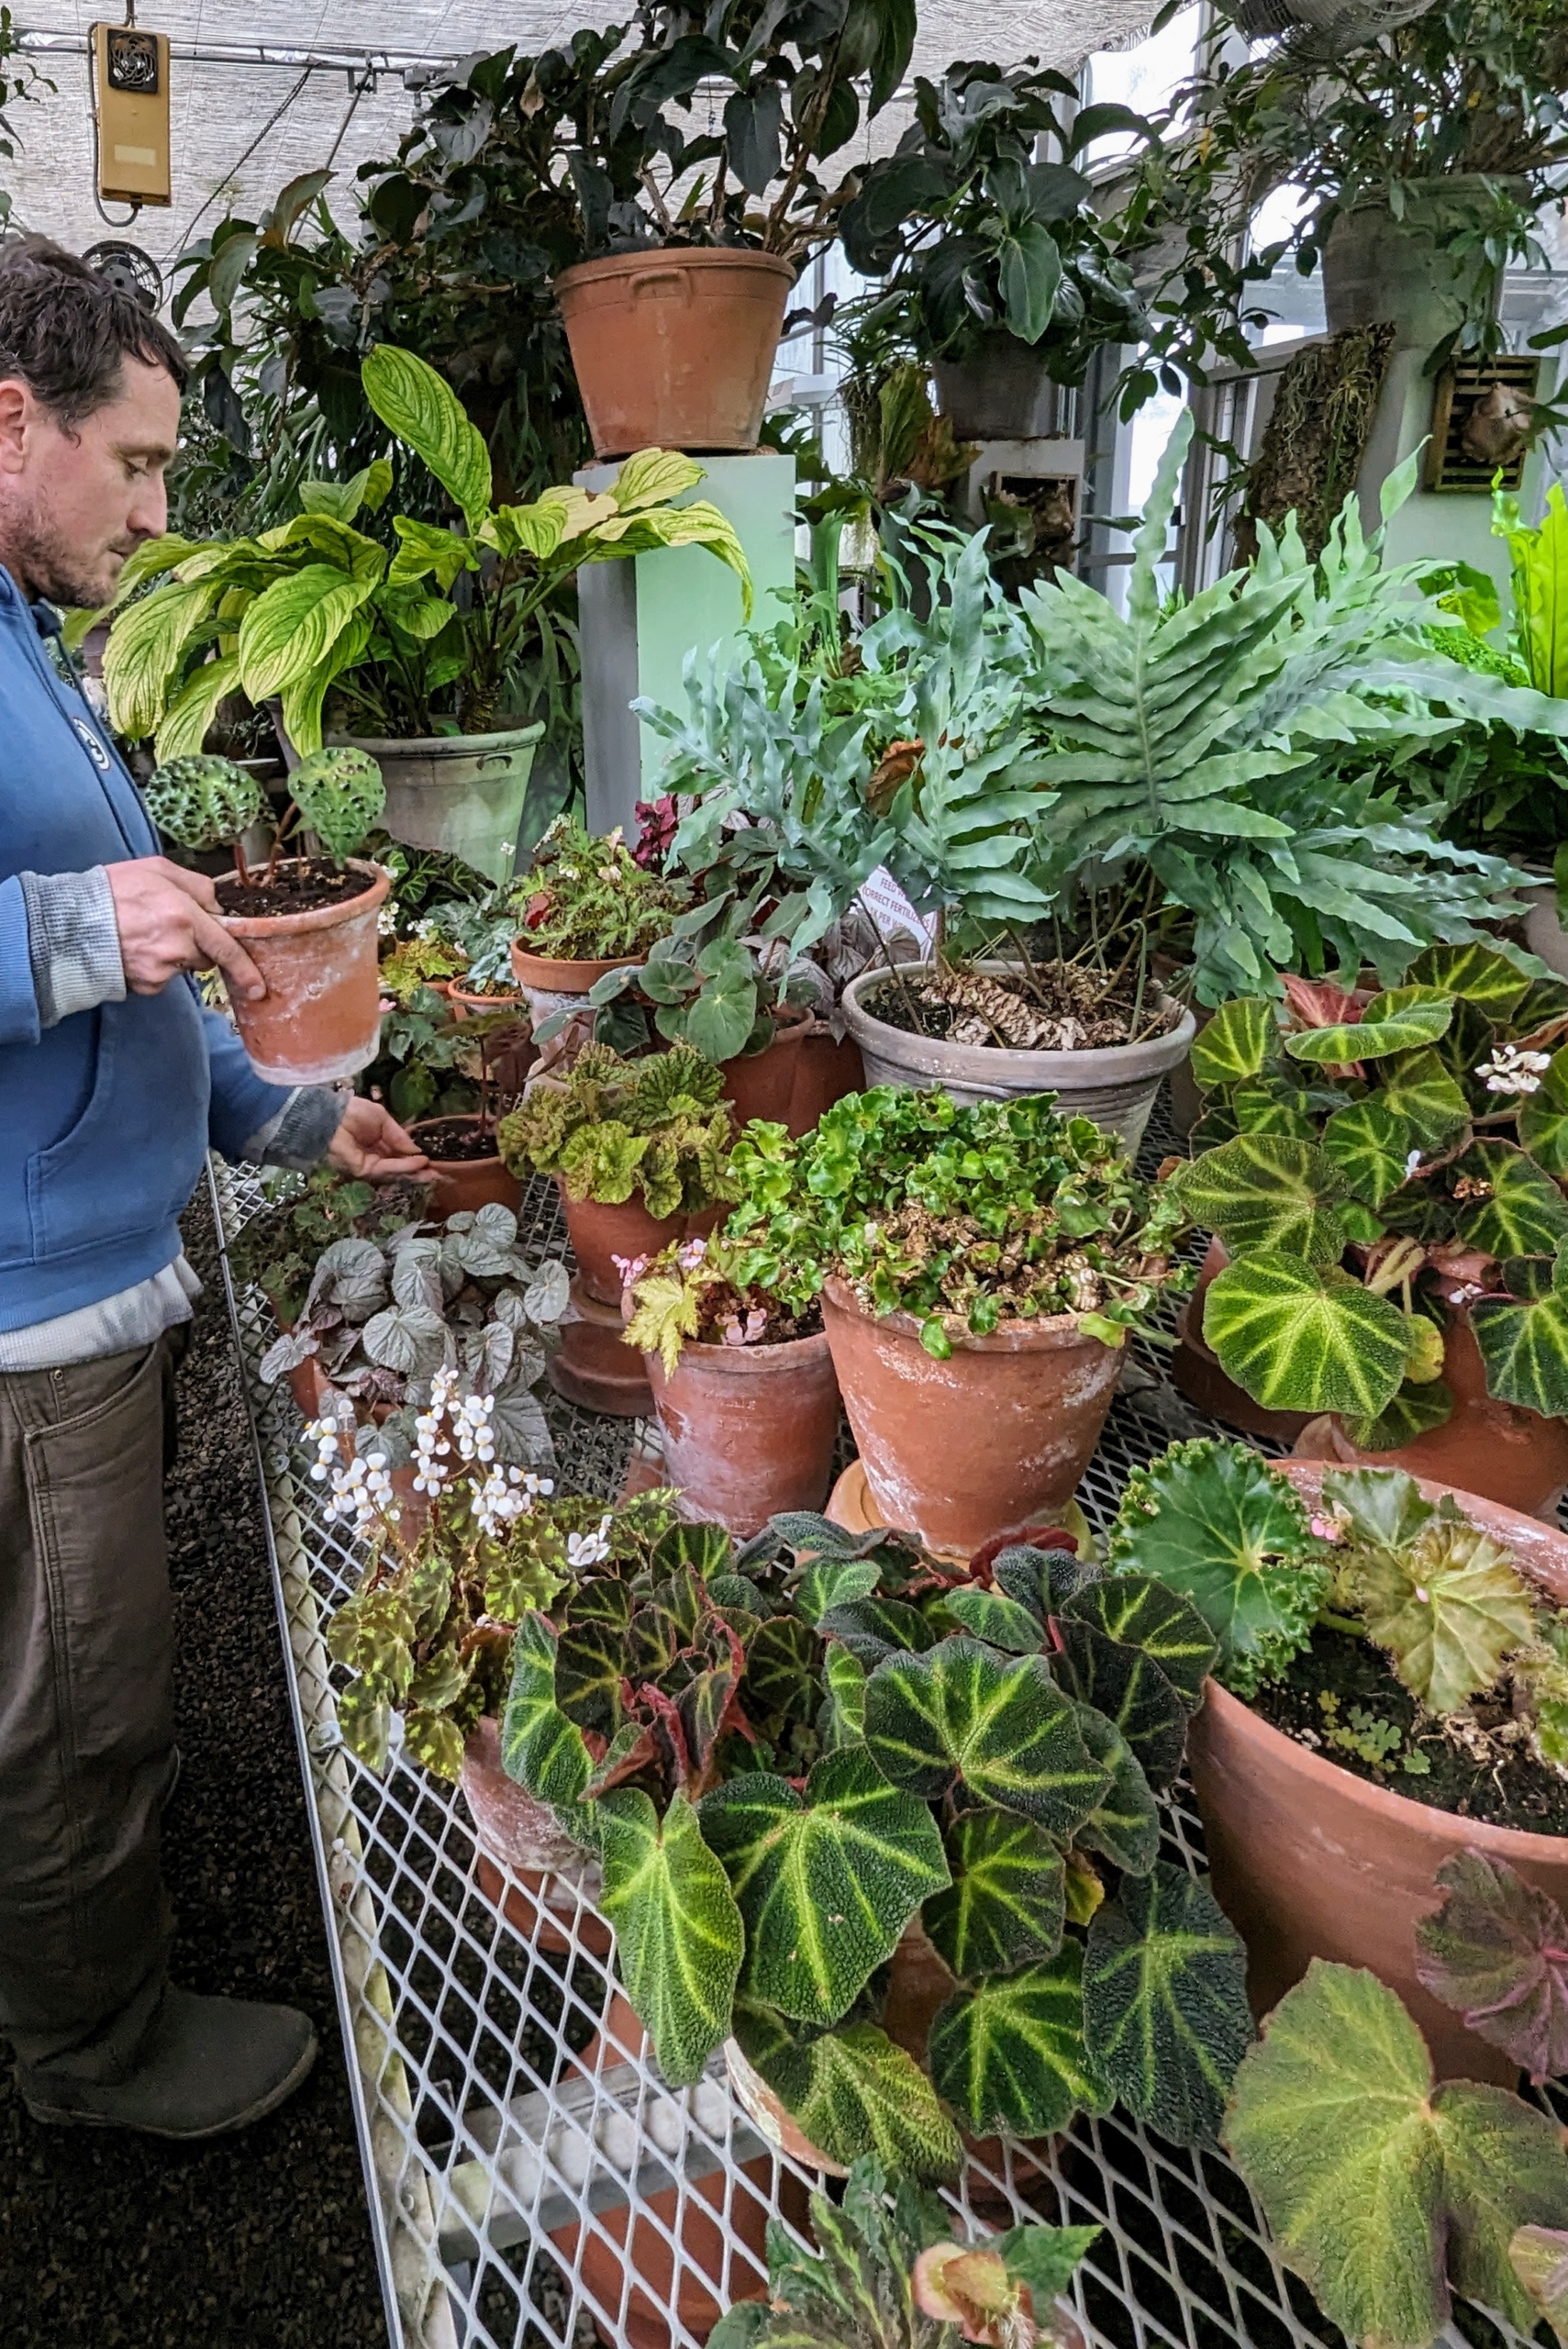
… And then takes the plants out to the greenhouse. This area is filled with all my begonias.
Ryan places the Anthurium on the other side, where I have a few other similar plants. The long leaves of this specimen will grow nicely here at the edge where they cannot be disturbed.
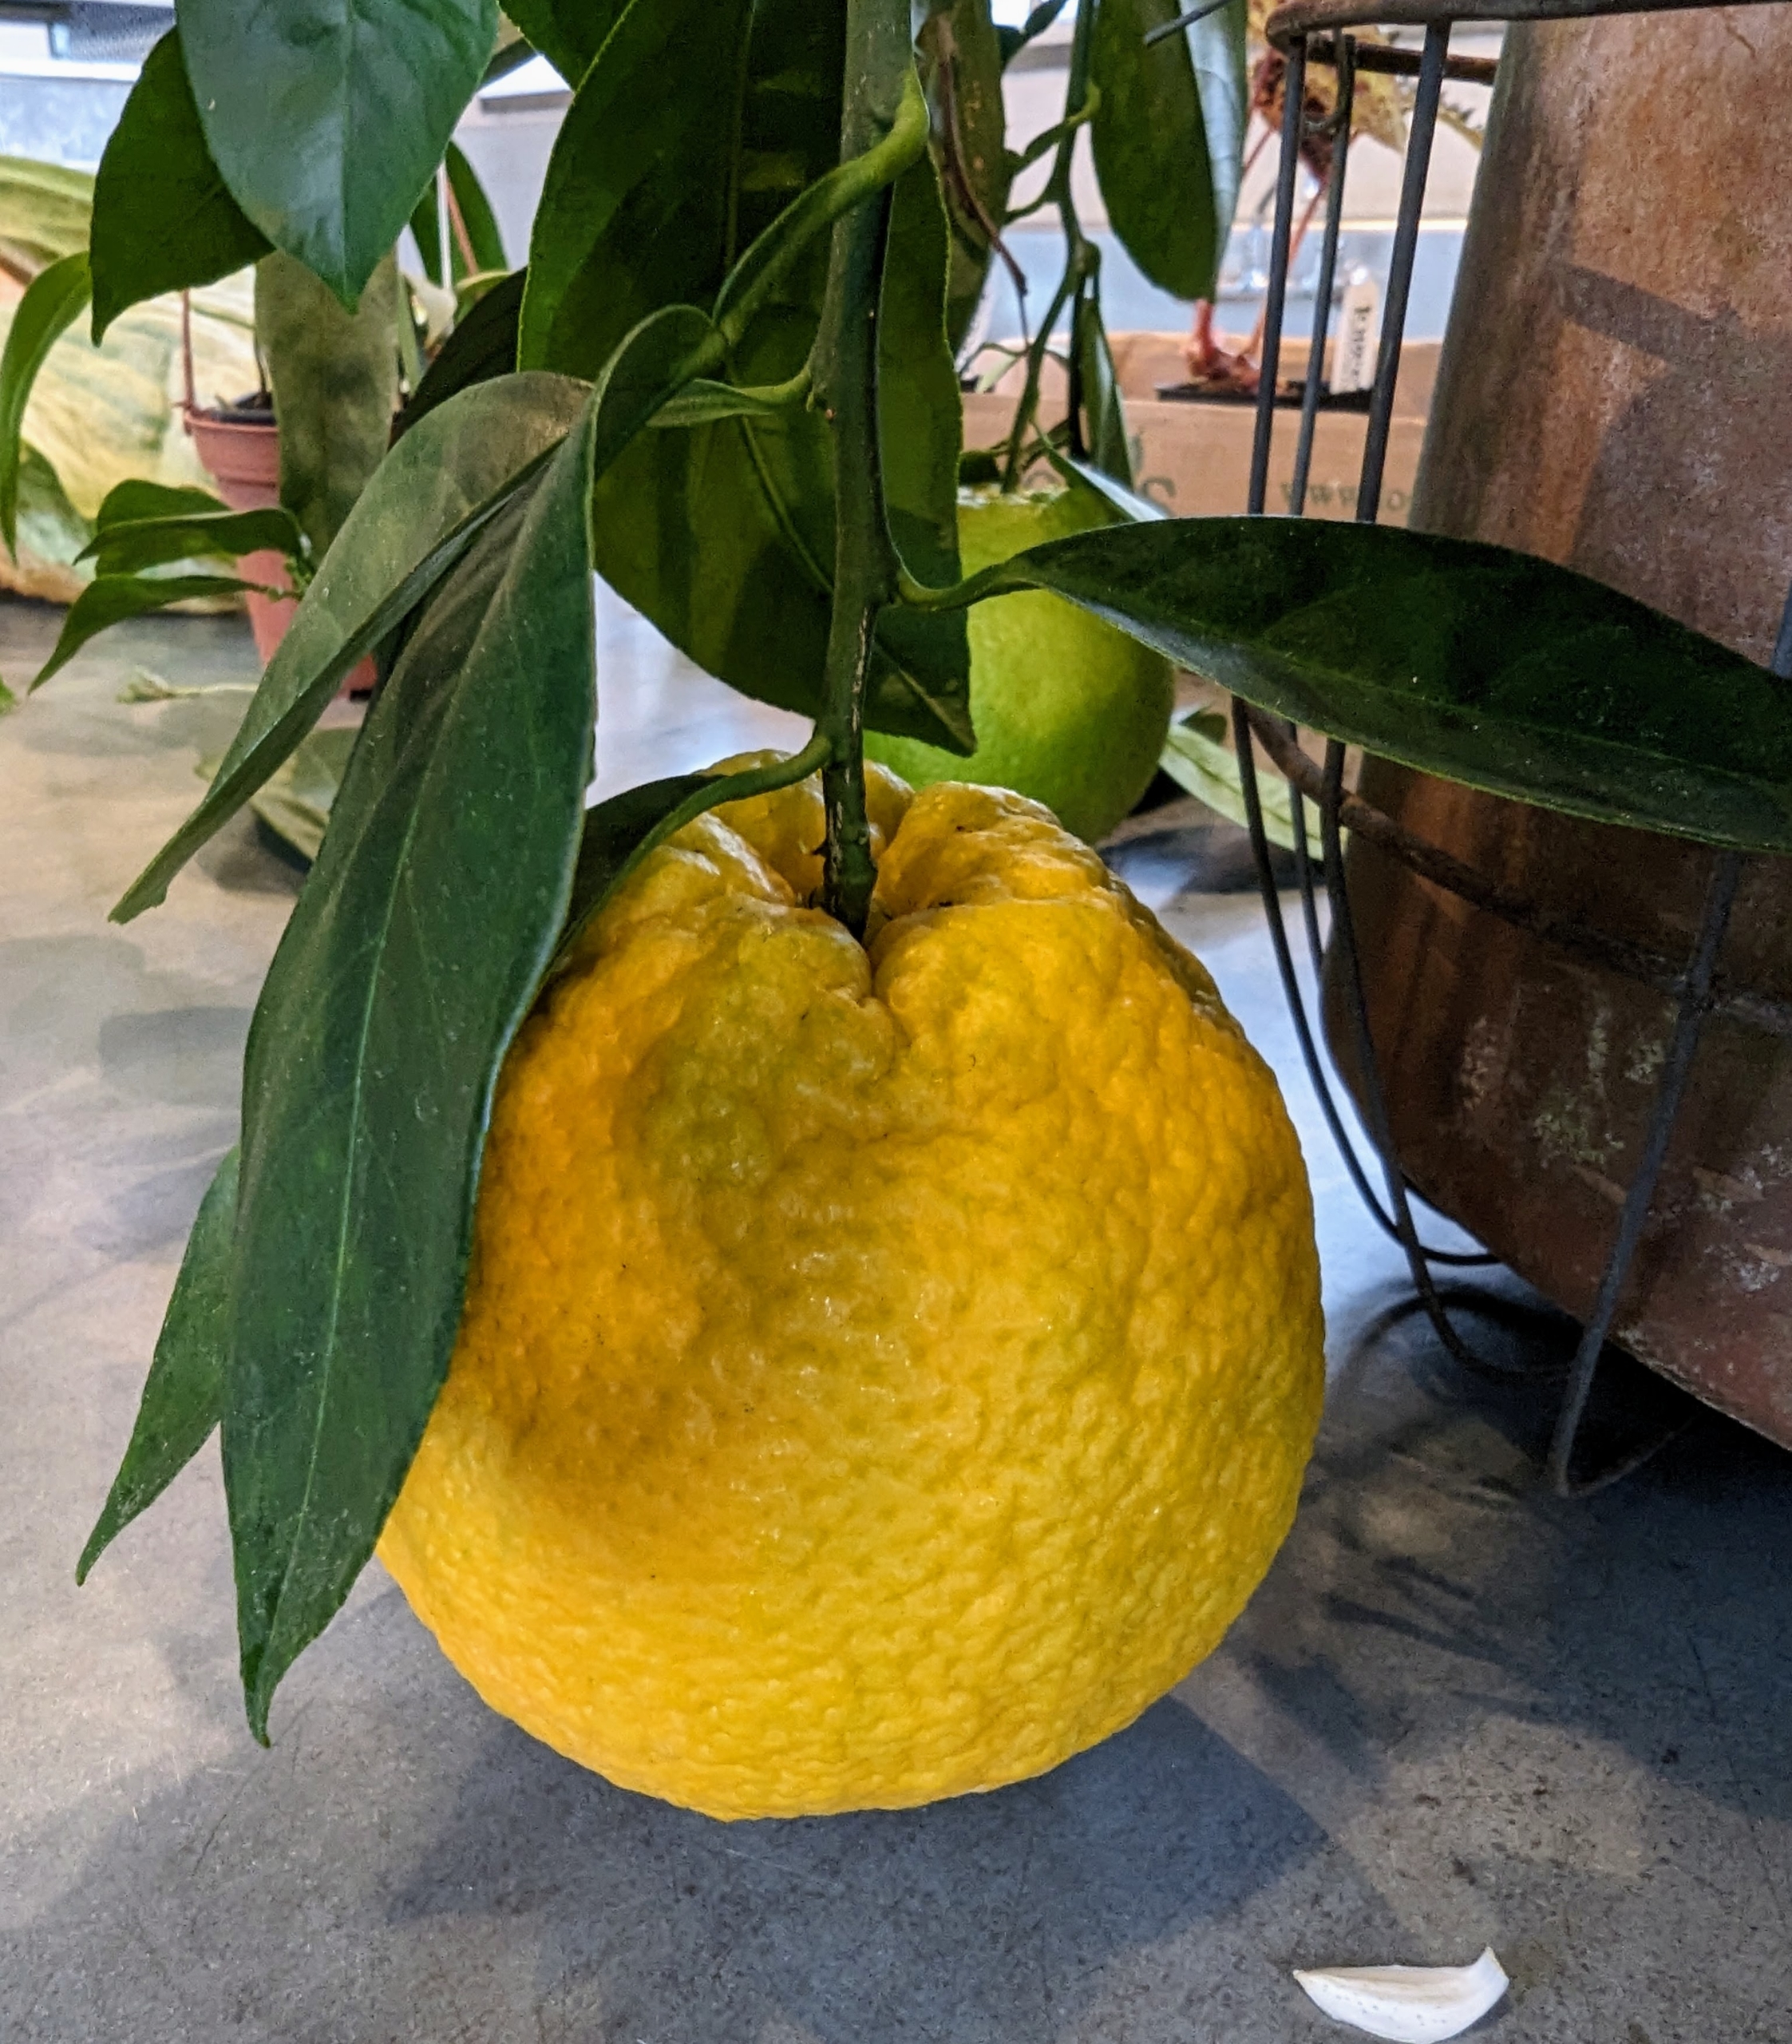
And look at this citrus fruit growing on my newest specimen. I am so excited to try it.
This hanging citrus will be brought down to my citrus hoop house where it will be stored with all my other dwarf citrus fruit trees. I am so very pleased with these additions to my greenhouse. I am looking forward to seeing them mature and thrive.
Everyone who works with me at my Bedford, New York farm loves our Marley Spoon meal kits, which include many of my recipes. They're delicious, easy to prepare, and each meal can be cooked and on the table within 40-minutes - so great after a long, busy day at work.
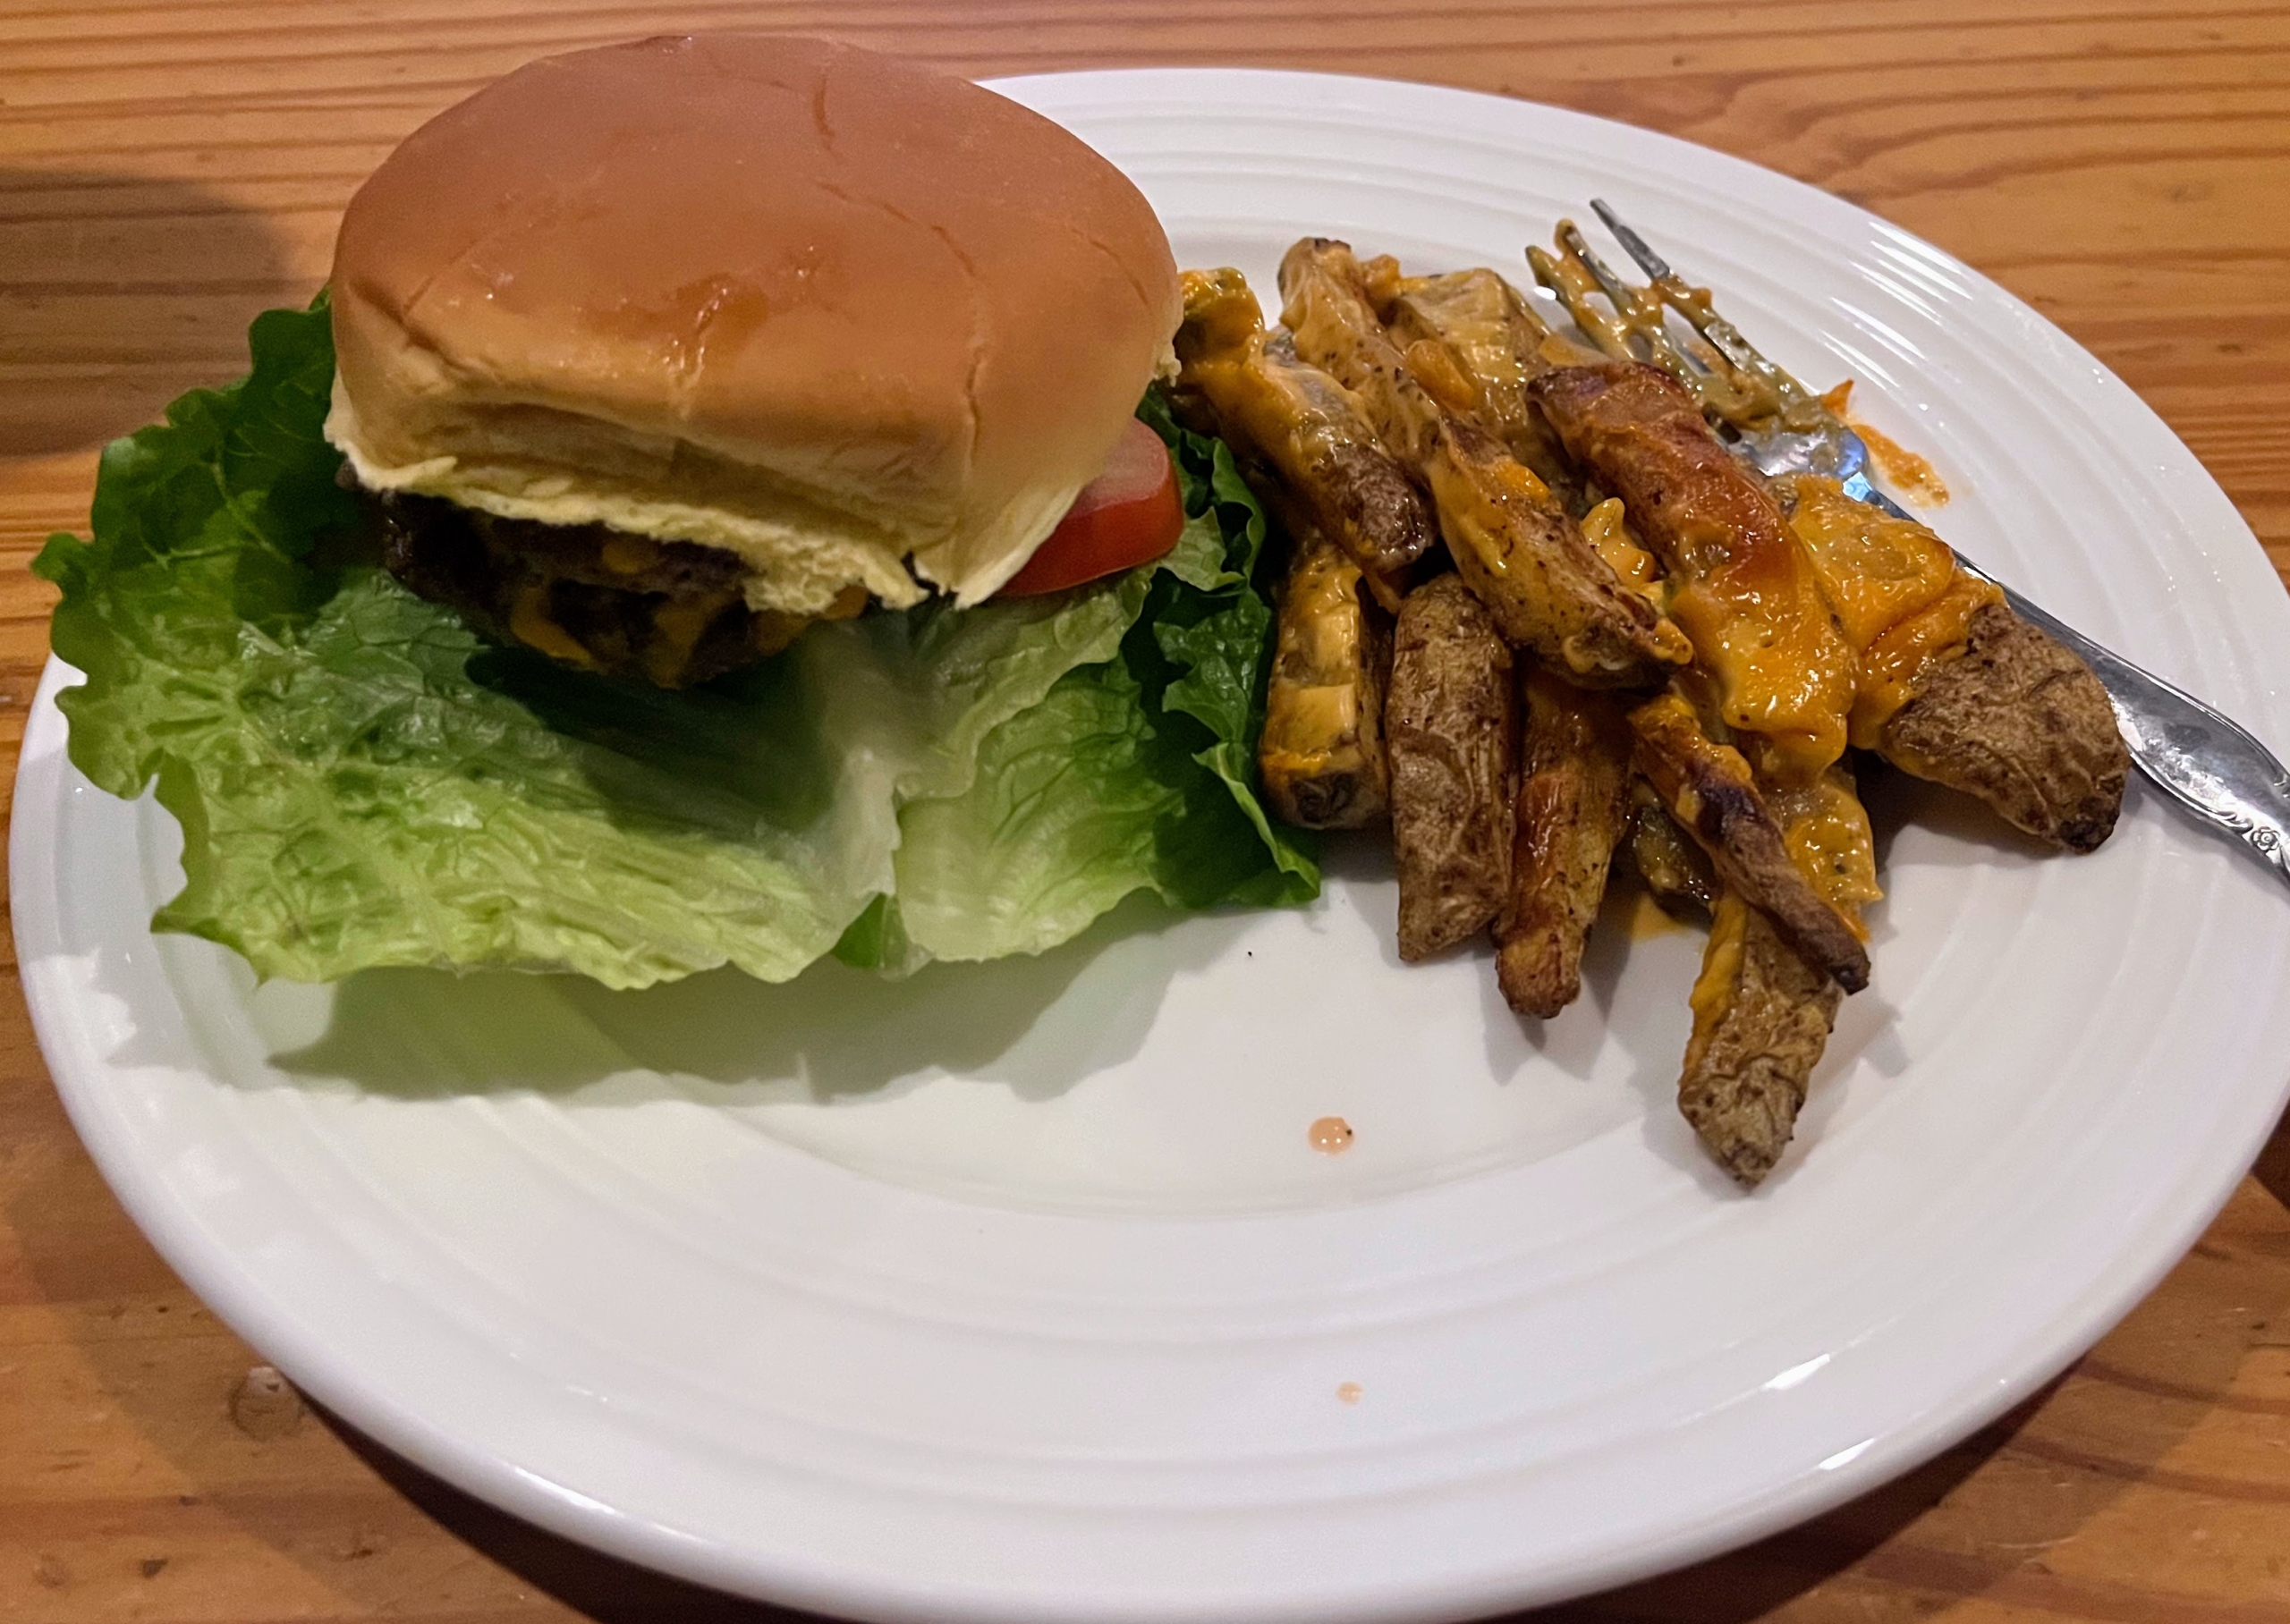
Every week, I order several Marley Spoon meal kits to enjoy. I cook one or two for myself, and then ask members of my team to take various dishes home to try as well. Recently, one of my gardeners took home Double-Double Burger with Animal Style Fries, our rendition of a popular meal with juicy meat patties dressed with decadent cheese, onions, and a special sauce of pickles, mayonnaise, and ketchup paired with crispy, seasoned oven fries. And, as always, all the ingredients are pre-measured, pre-packaged, and included with the kit.
Here are some photos, enjoy.
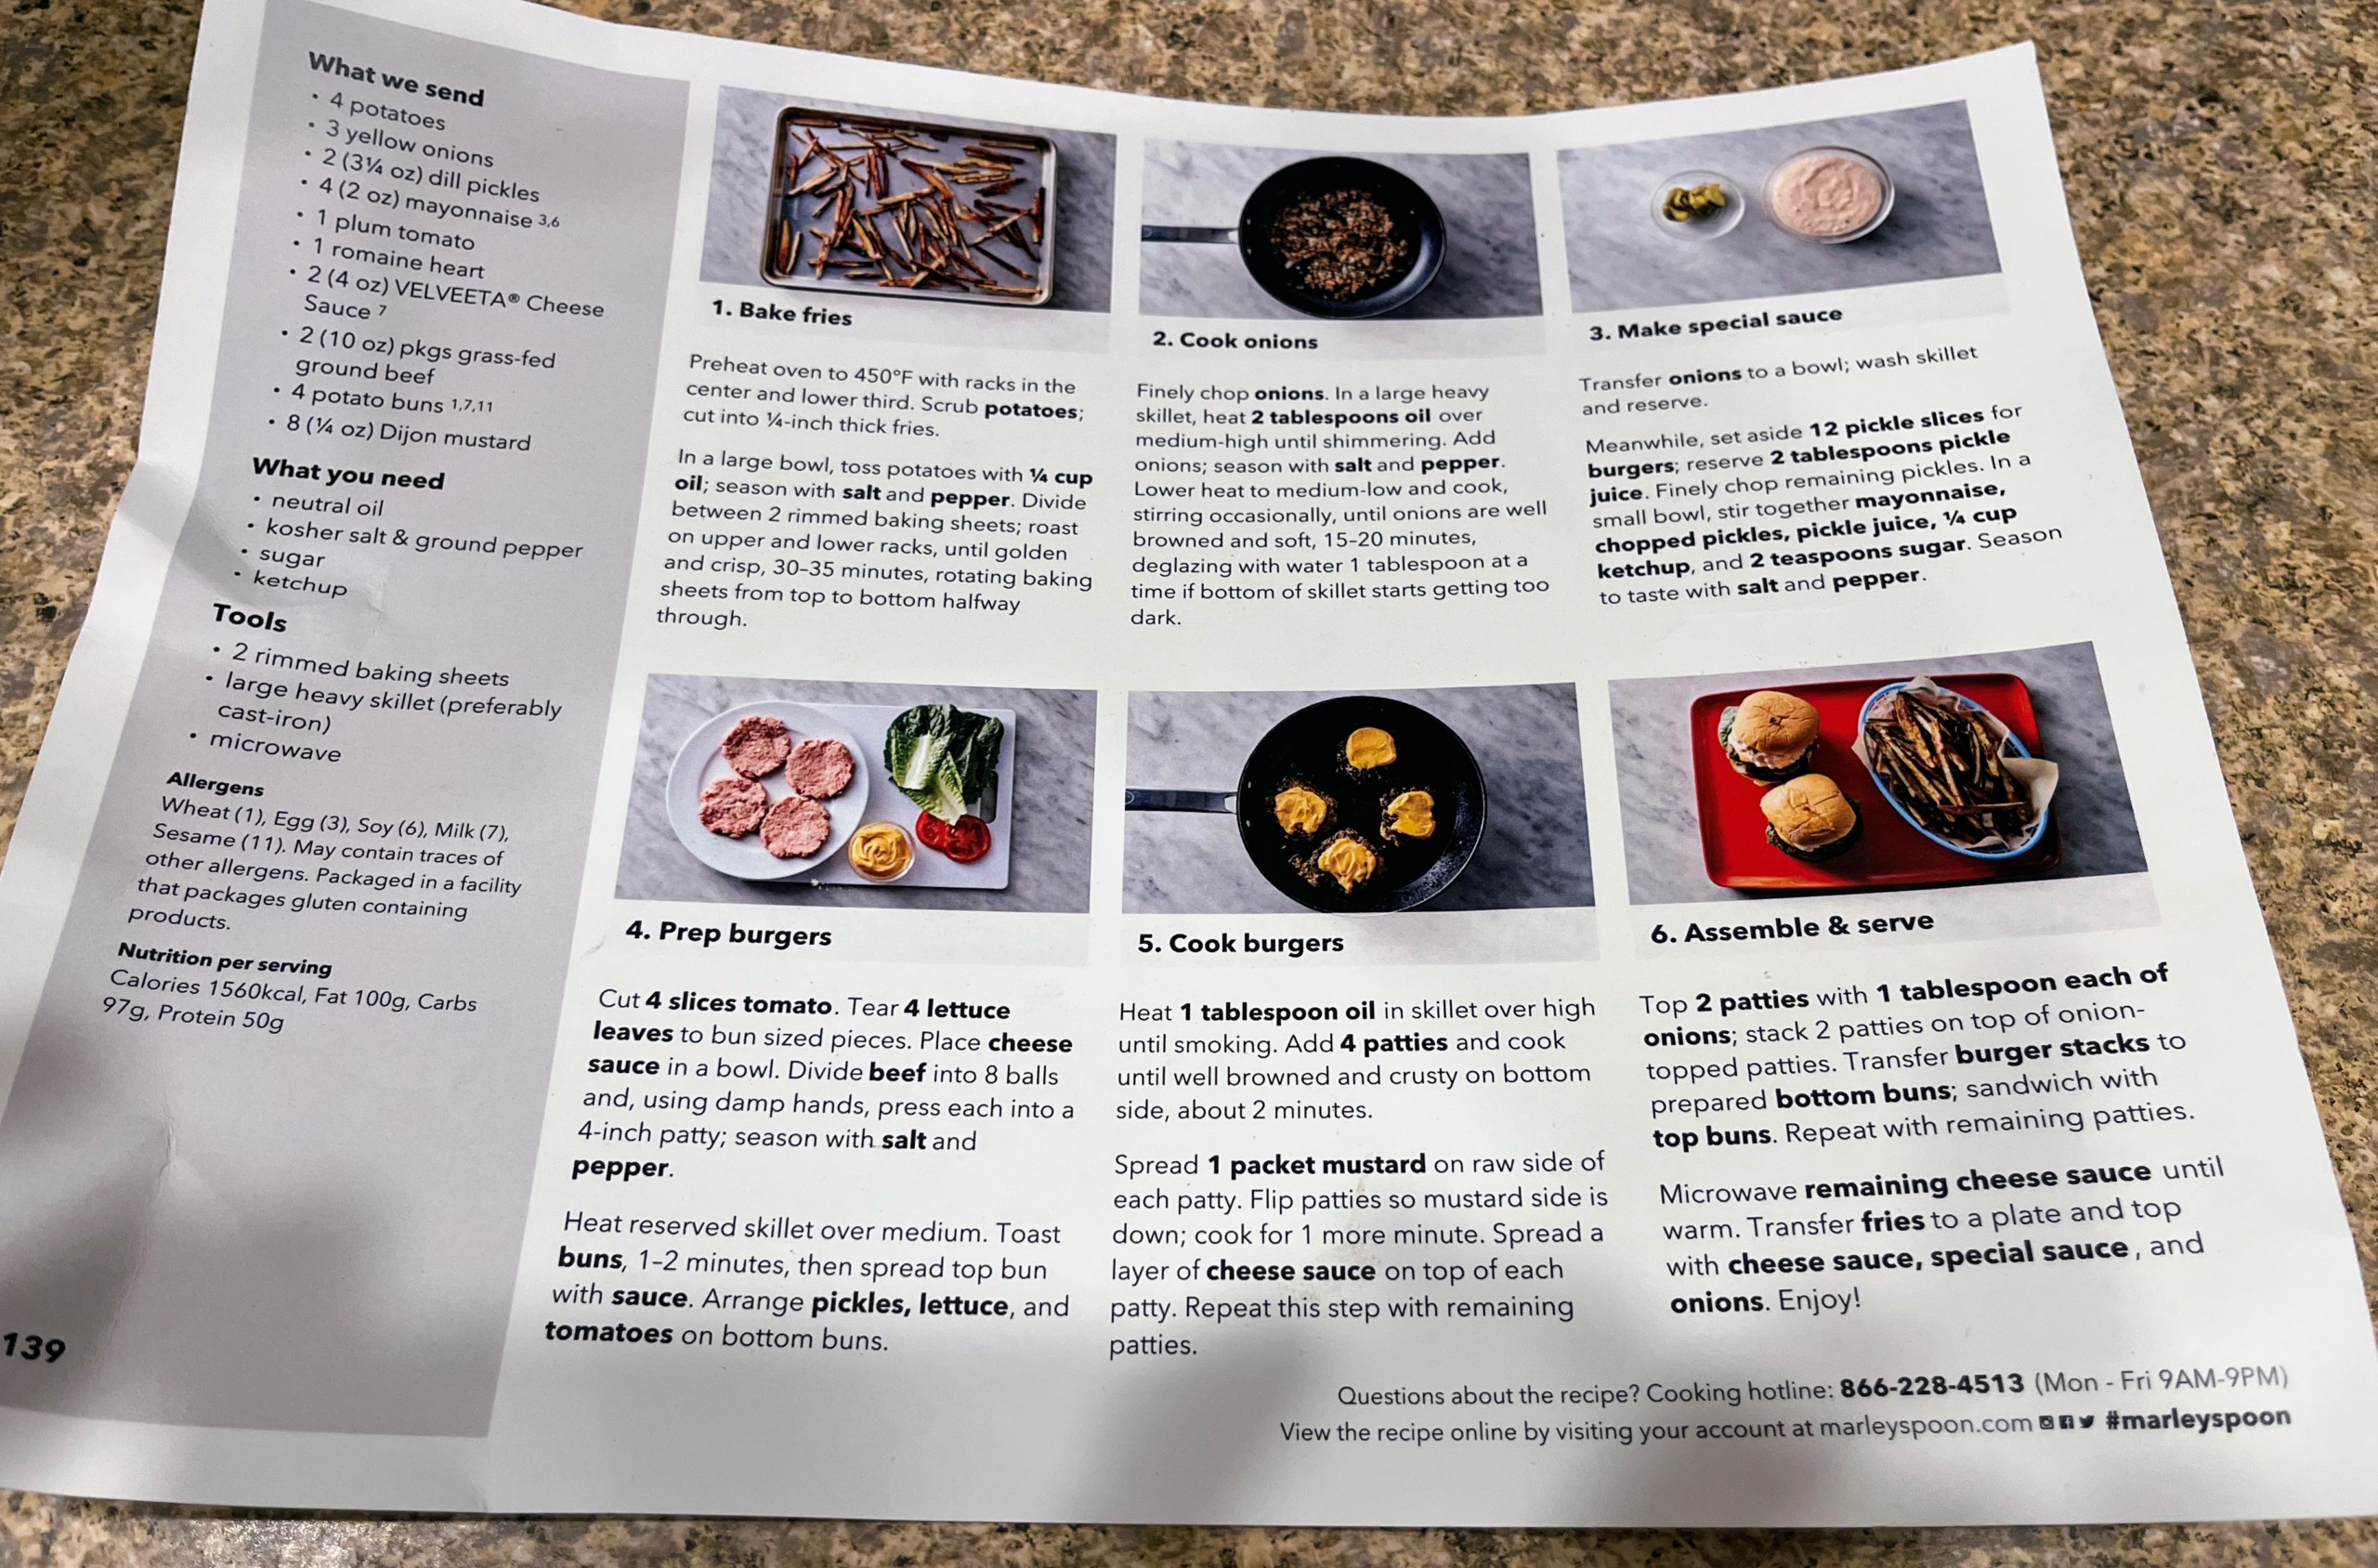
Here is the large recipe card for the Double-Double Burger with Animal Style Fries. Every Martha Stewart & Marley Spoon kit comes with this large recipe card complete with a photo of the finished dish on one side…
… And on the other, the complete how-to, step-by-step instructions and detailed photos to match. These photos help so much when preparing any meal. We make sure there are as few steps as possible for every dish. We work hard to develop every Martha Stewart & Marley Spoon meal kit recipe so it is time-saving, easy to make, and most of all, delicious.
This meal kit for four is inspired by another popular burger and fries duo. It includes four potatoes, three onions, two dill pickles, mayonnaise, a tomato, a romaine heart, cheese sauce, ground beef patties, four buns, and packets of dijon mustard. One only has to provide oil, salt and pepper, sugar and ketchup.
First, the oven is pre-heated to 450-degrees Fahrenheit.
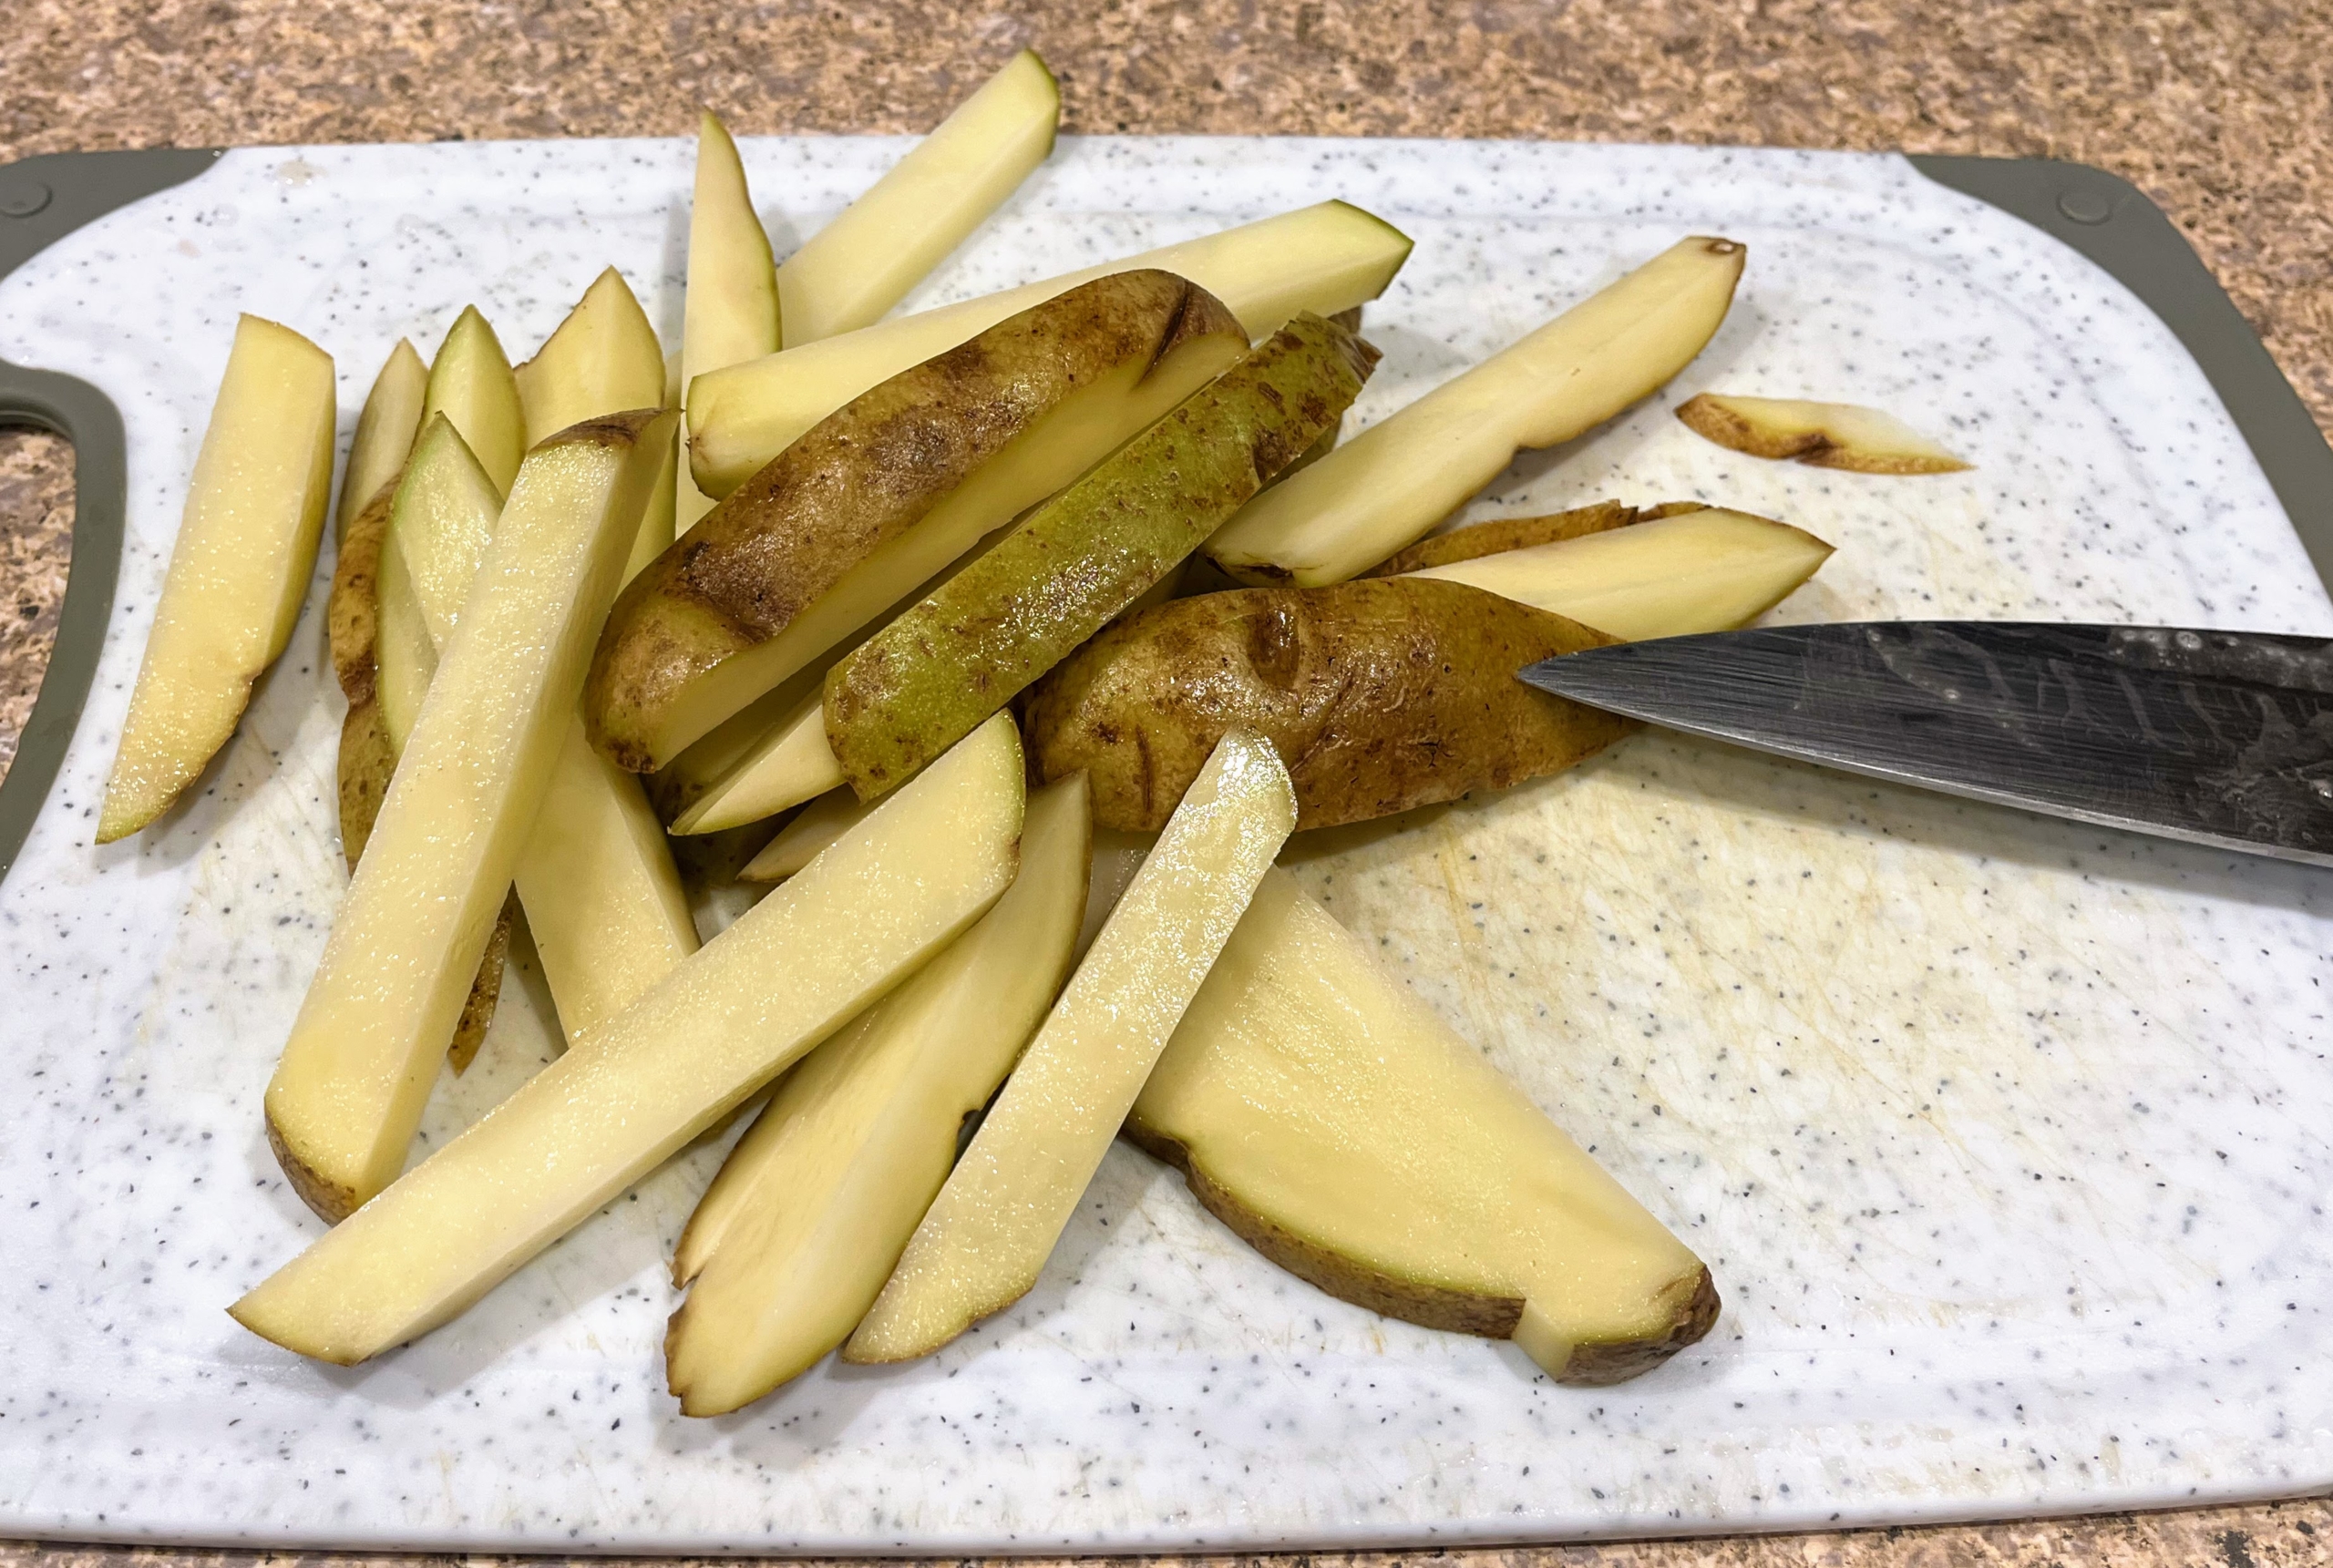
The first step is to prepare the potatoes. All four potatoes are scrubbed clean and then cut into quarter-inch fries.
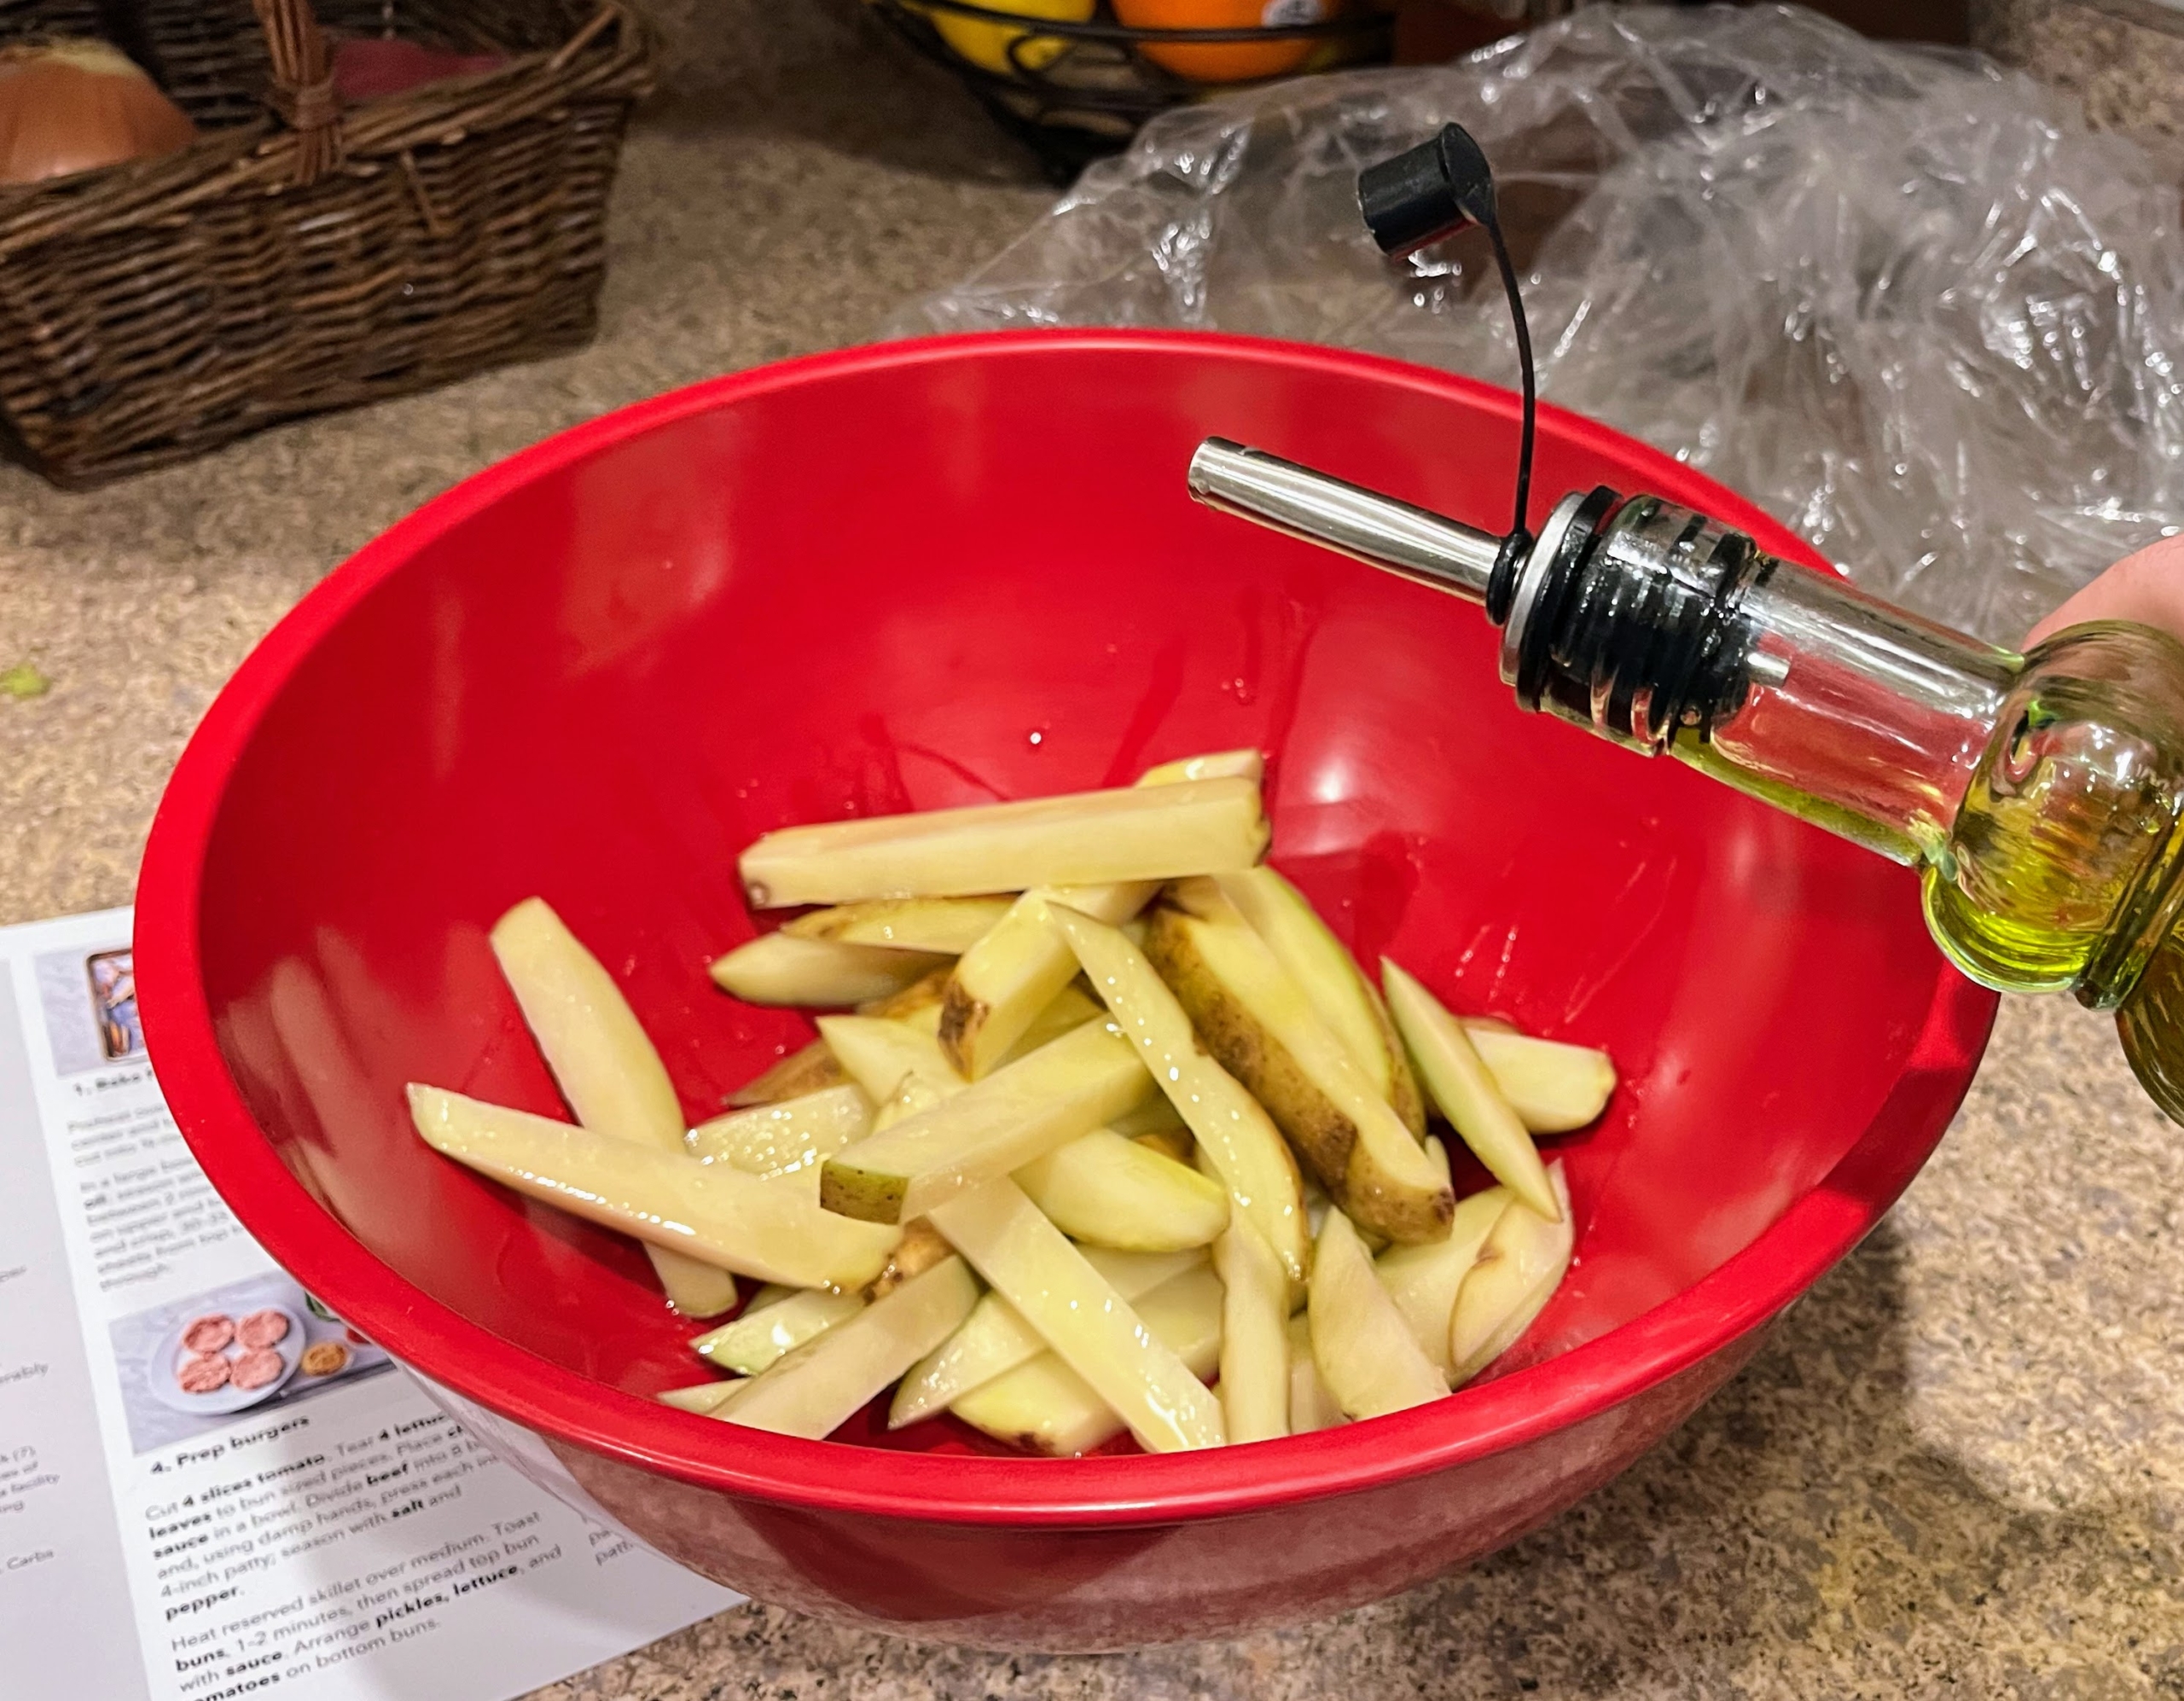
Then, the fries are drizzled with oil and seasoned with salt and pepper.
The fries are placed on a rimmed baking sheet and roasted on the upper rack of the oven until golden-crisp, about 30 to 35 minutes long.
Next, the yellow onions are finely chopped. And, do you know why onions make one cry? Onions contain amino acids known as cysteine sulfoxides. When an onion is cut, chopped, or torn, enzymes in the onion break down the cysteine sulfoxides and turn them into propanethial S-oxide, which then decomposes into sulfuric acid resulting in the irritation, stinging, and tearing that is associated with cutting onions. To cut onions without crying, try chilling them in the refrigerator for about 30 minutes first. The cold temperature will slow down the enzymes and ease the irritating effects.
The chopped onions are heated in two tablespoons of oil over medium-high heat with salt and pepper, and then cooked until browned and soft.
Then they are placed into a bowl and set aside.
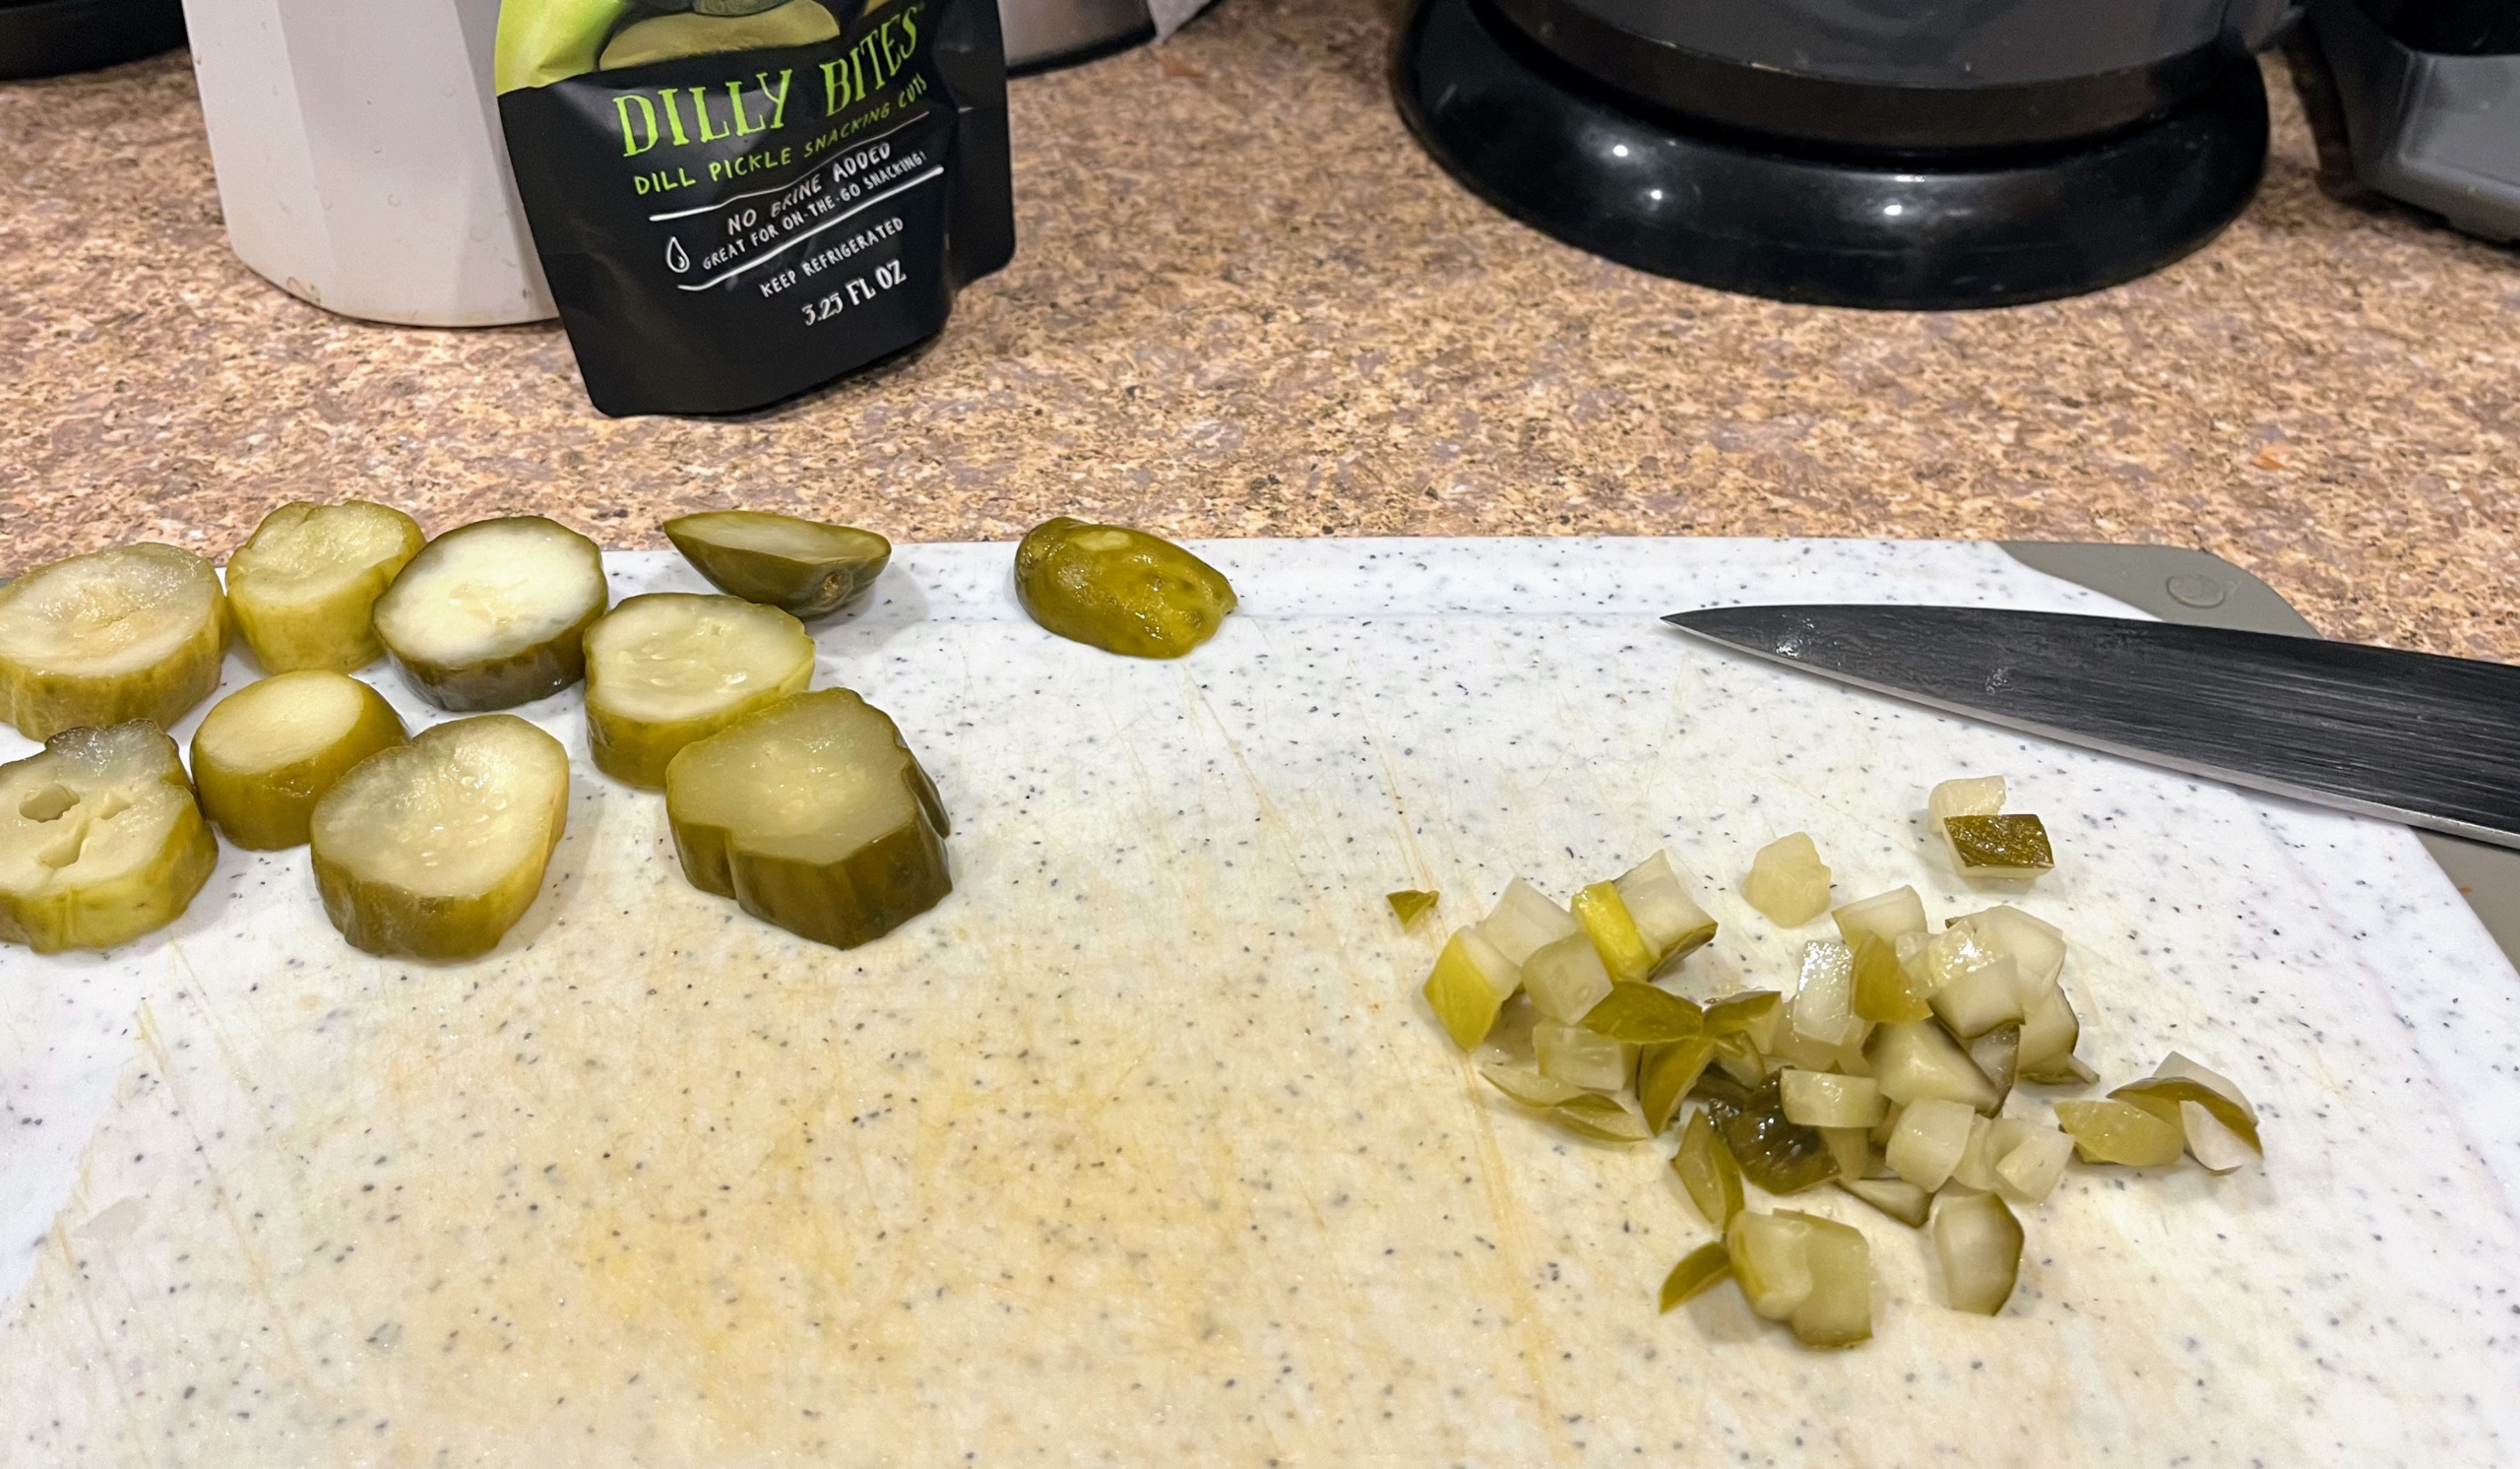
Meanwhile, while some of the pickle slices are reserved for the burgers, some are chopped for the sauce and saved with two tablespoons of pickle juice.
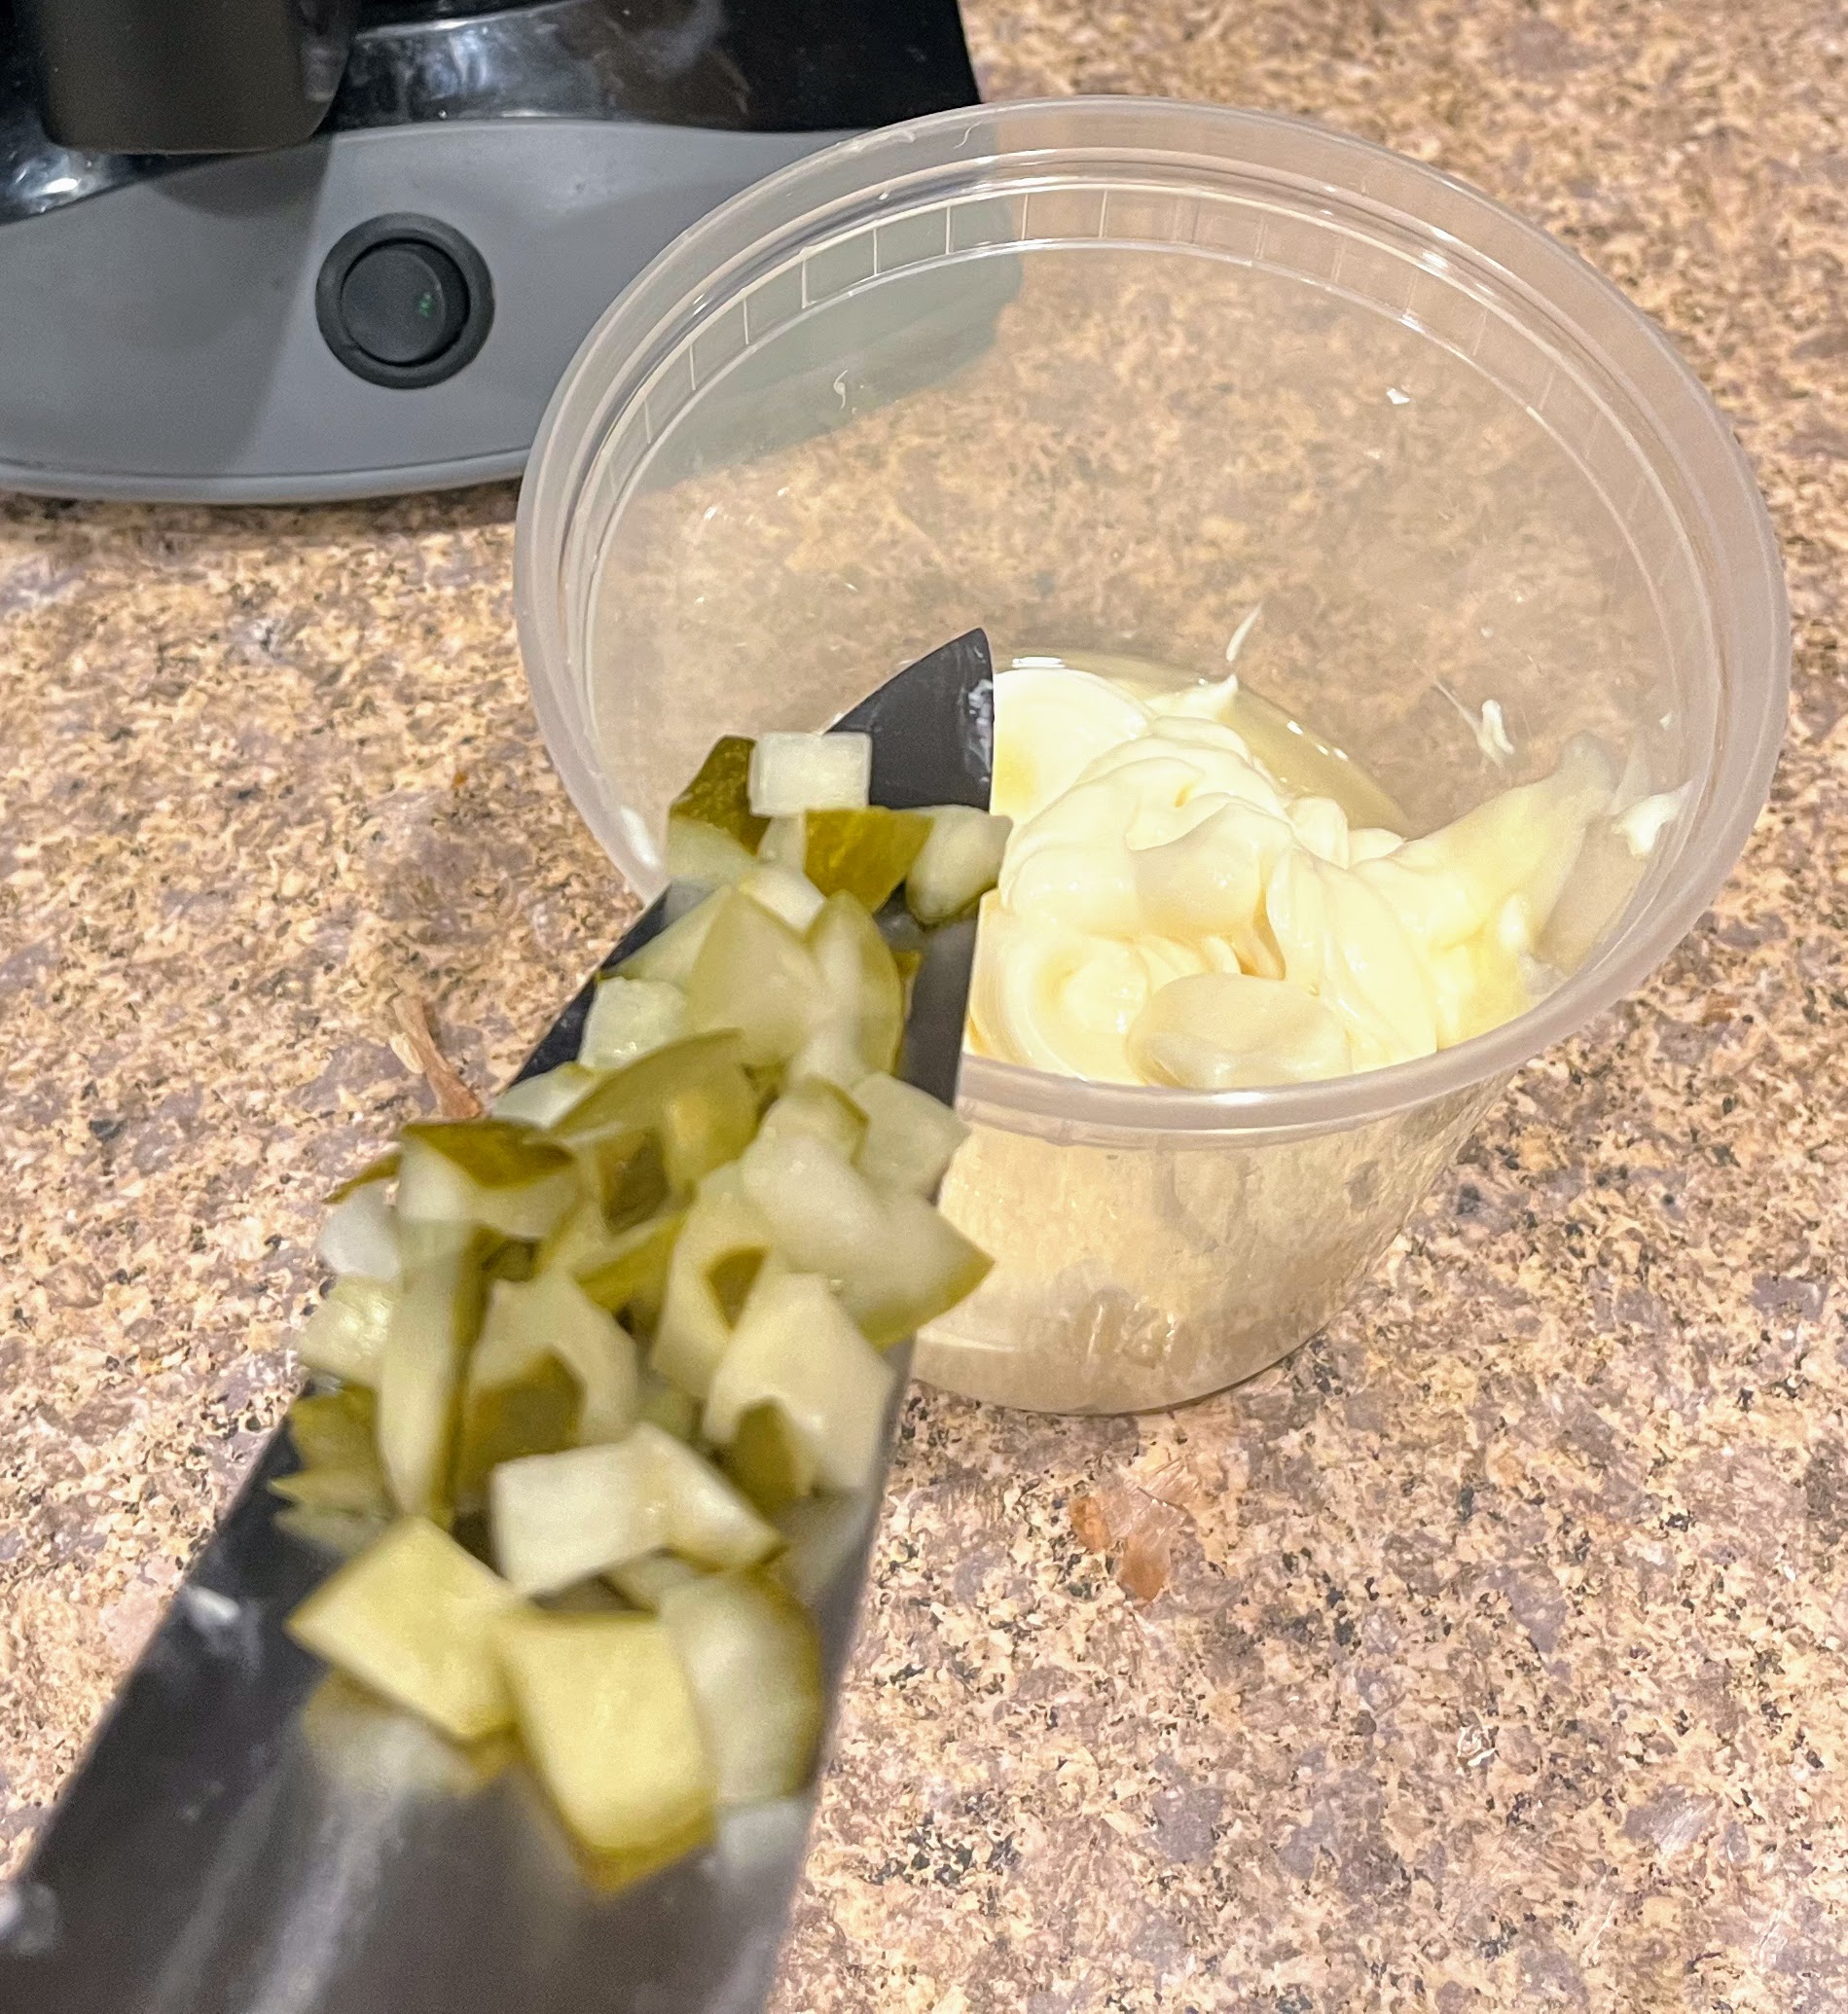
The pickles and juice are mixed with the mayonnaise…
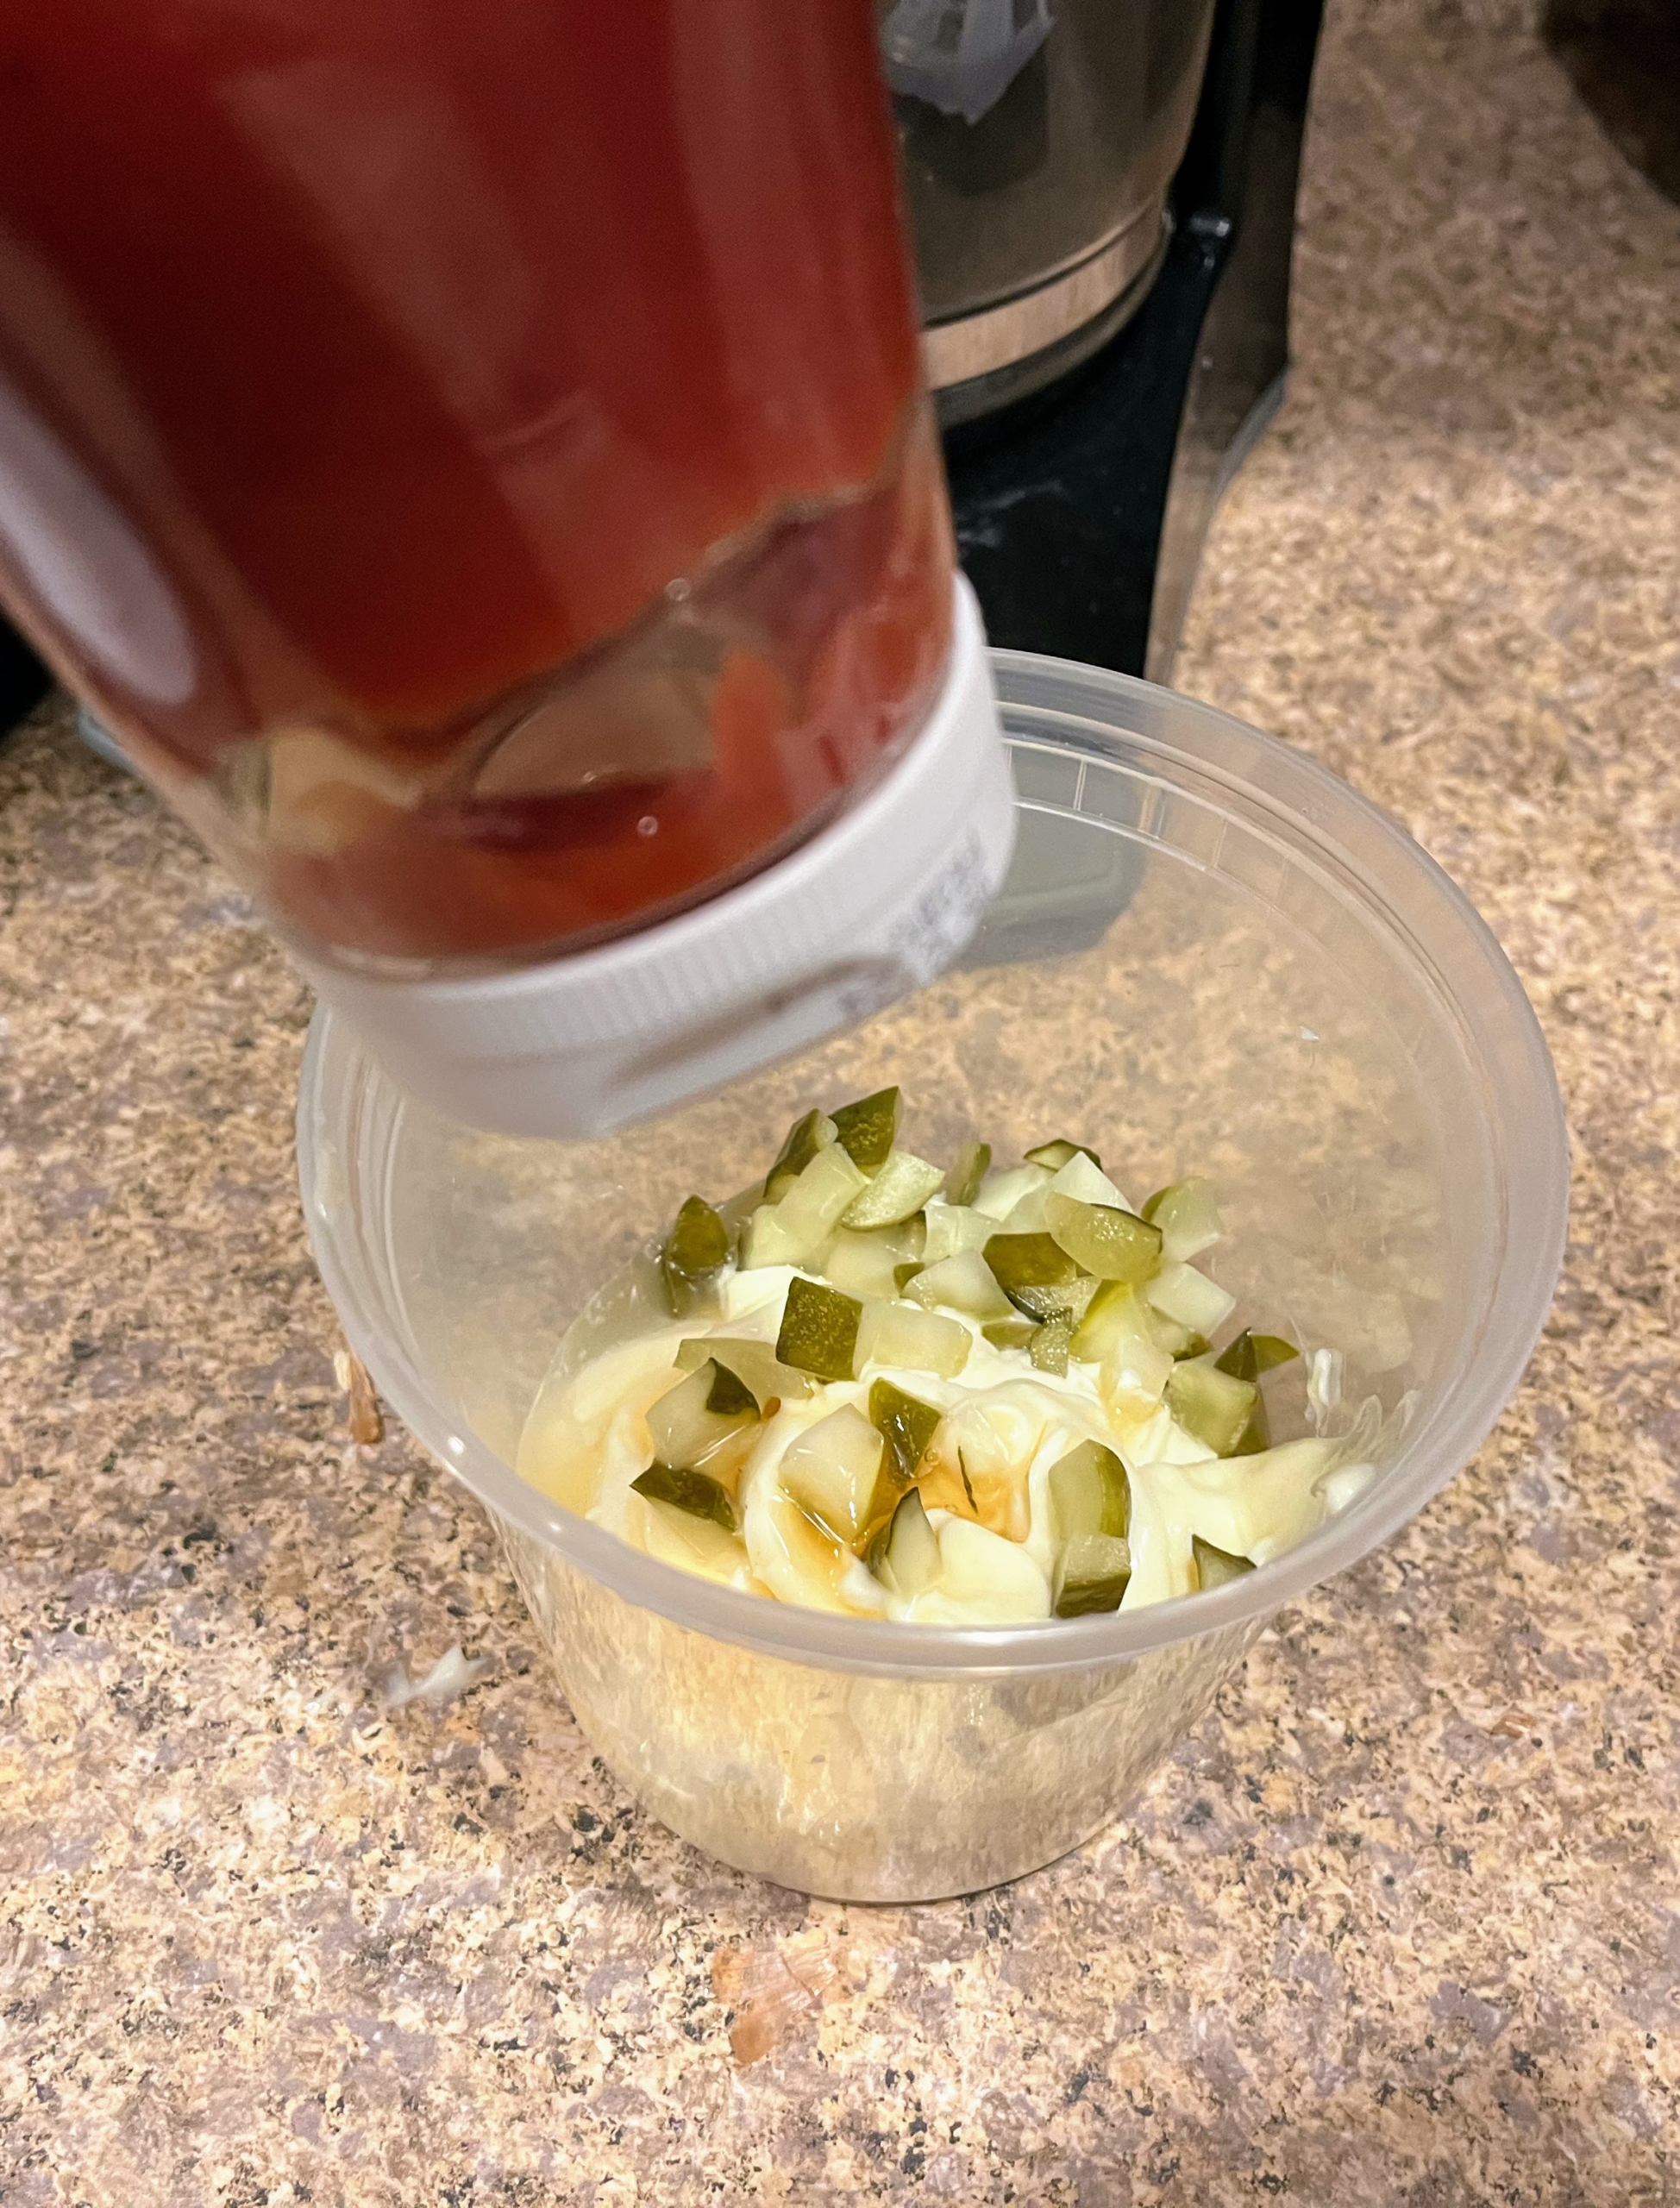
… along with a quarter cup of ketchup and two teaspoons of sugar.
The sauce is then seasoned to taste with salt and pepper.
Next, the tomatoes are sliced, and the lettuce is torn to bun sized pieces.
This meal kit has enough ground beef to divide into eight balls, which are then pressed into eight four-inch patties.
The skillet is heated with one tablespoon of oil over high until smoking. Then, three or four patties are put in and cooked until well browned and crusty on the bottom, about two minutes.
Mustard is spread onto the patty and then turned over so it can cook for one minute.
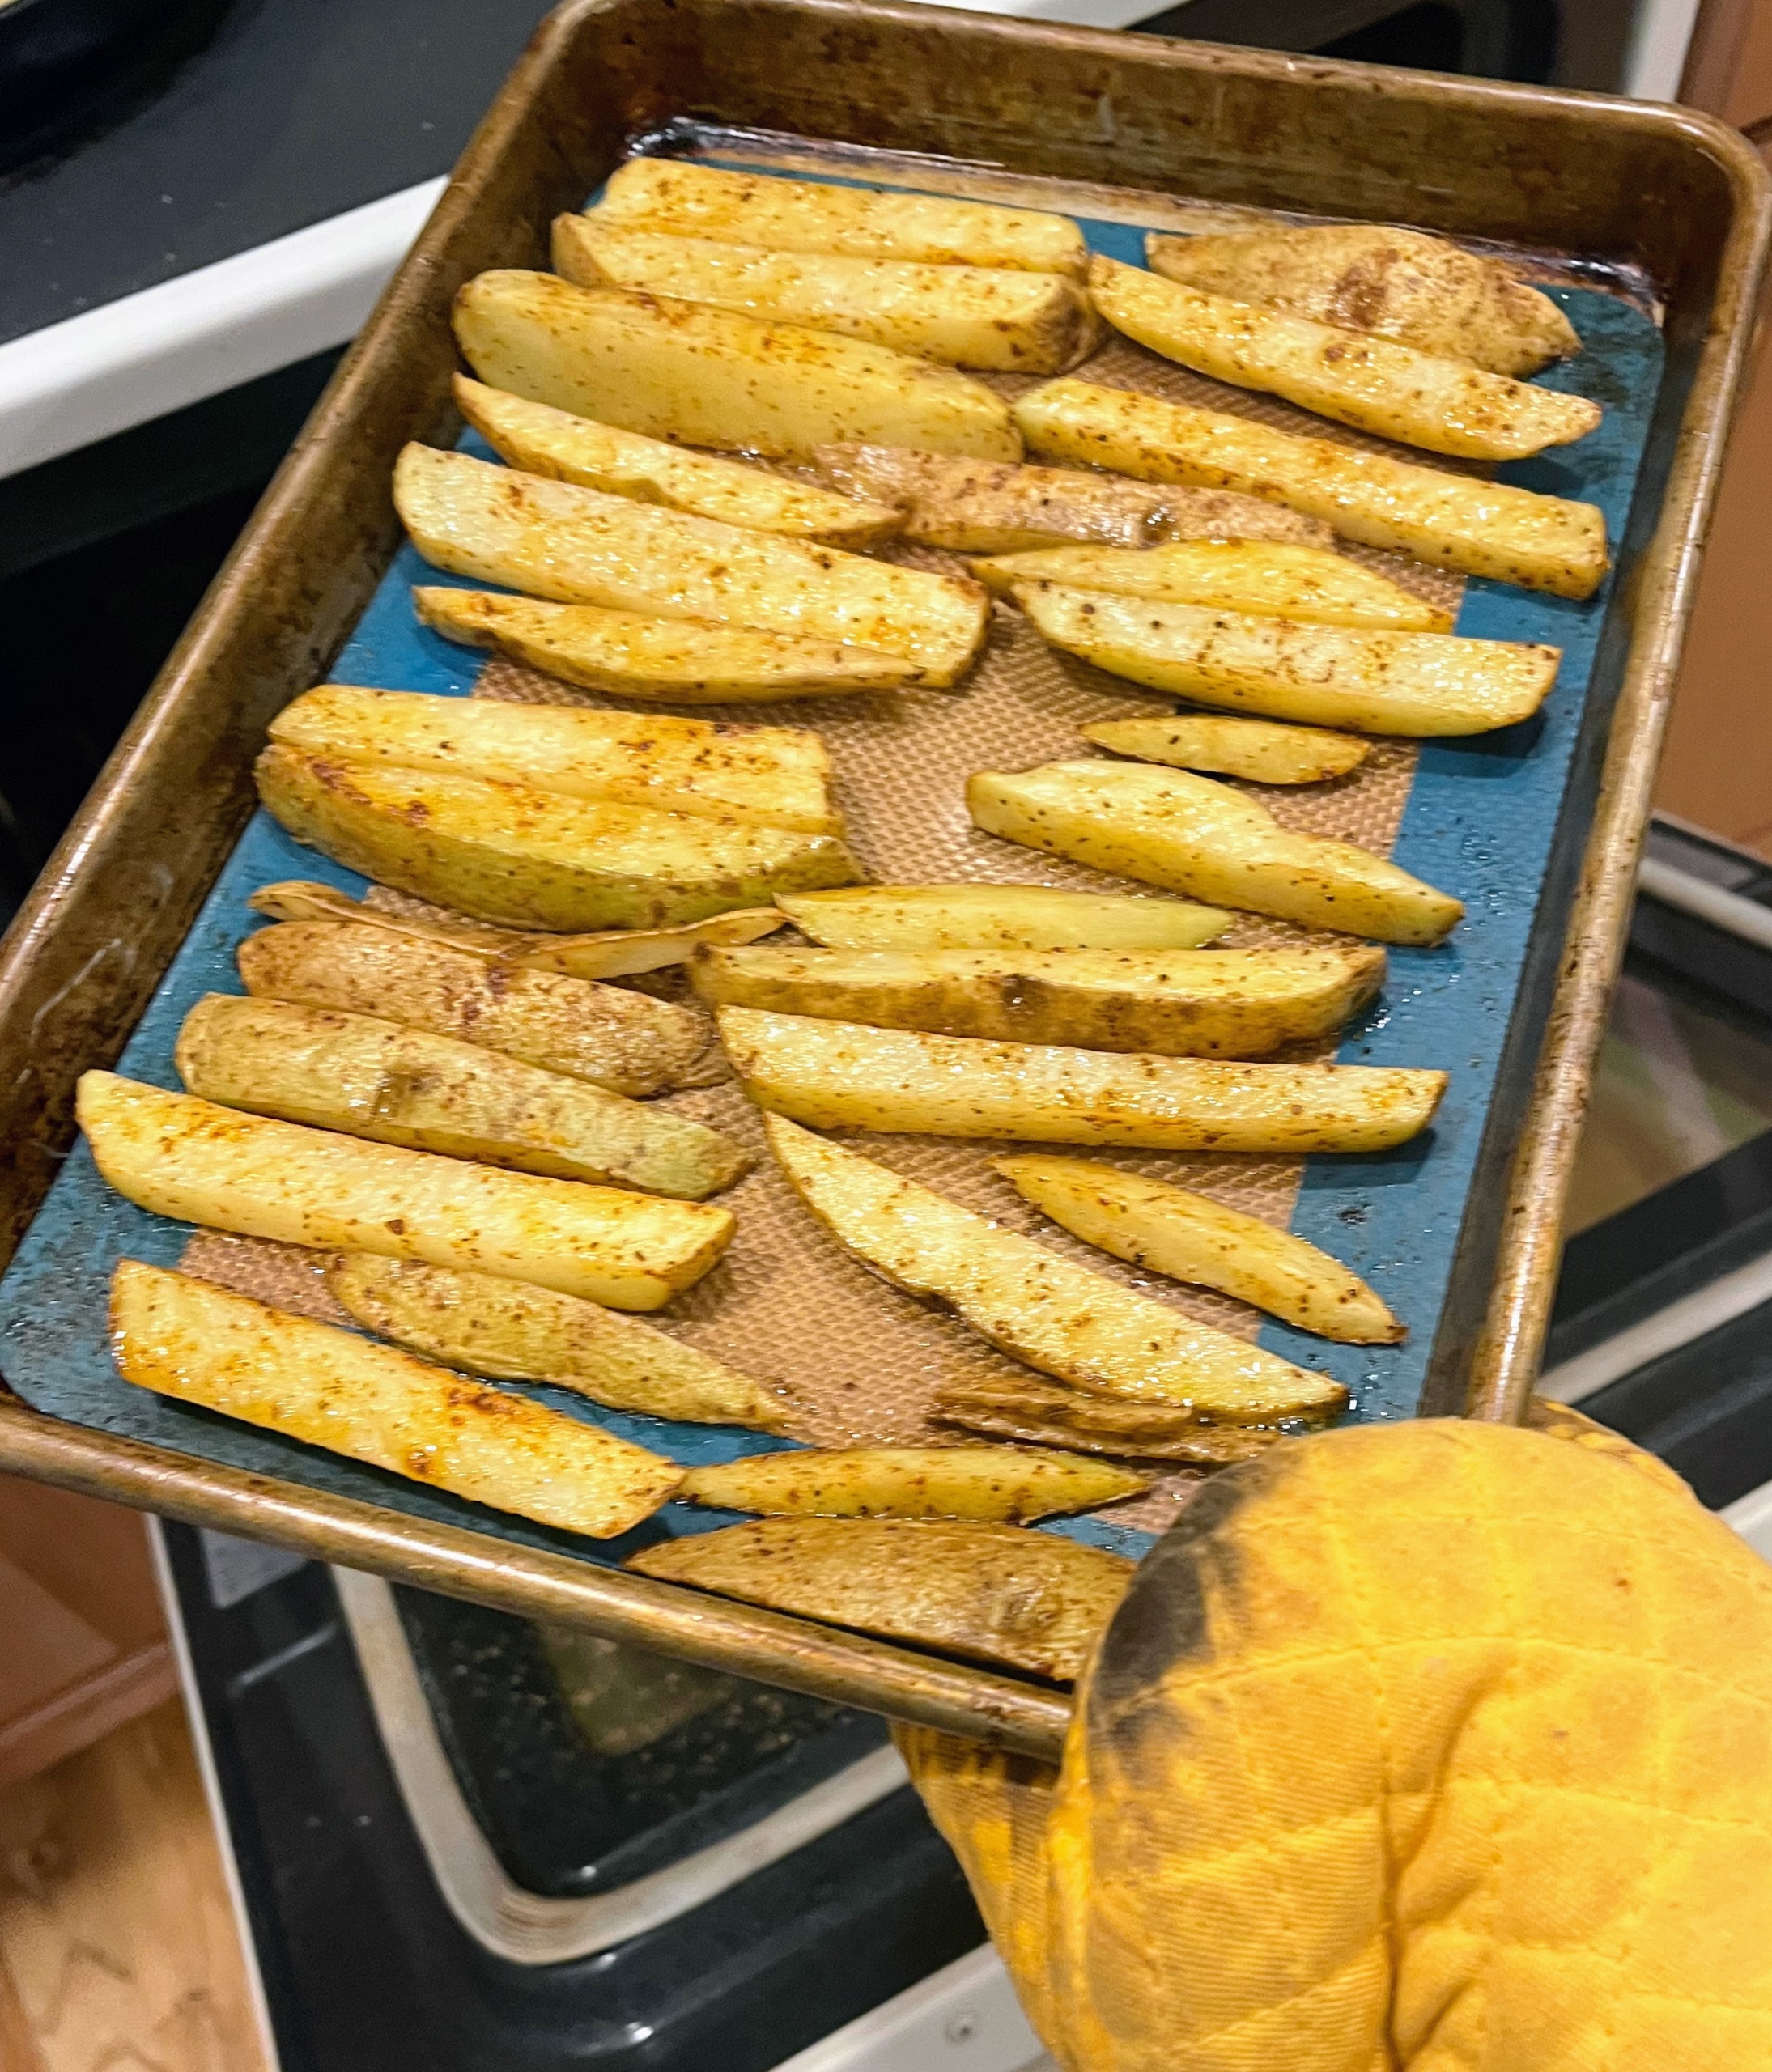
Here are the “animal style fries” fresh out of the oven.
The burgers are assembled – the patties, each with a stack of onions, lettuce, tomato, on toasted buns, and served with the cheese covered fries topped with special sauce and more onions. This meal was devoured in minutes. It’s delicious and mouthwatering. If you haven’t already signed up for our Martha Stewart & Marley Spoon meal plan, do so now and start the New Year with easy to prepare flavorful meals your whole busy family will enjoy! Click on the highlighted link and go to the Martha Stewart & Marley Spoon web site right now.
It's very busy and very noisy up at my compost yard - one of the most important areas on my Bedford, New York farm.
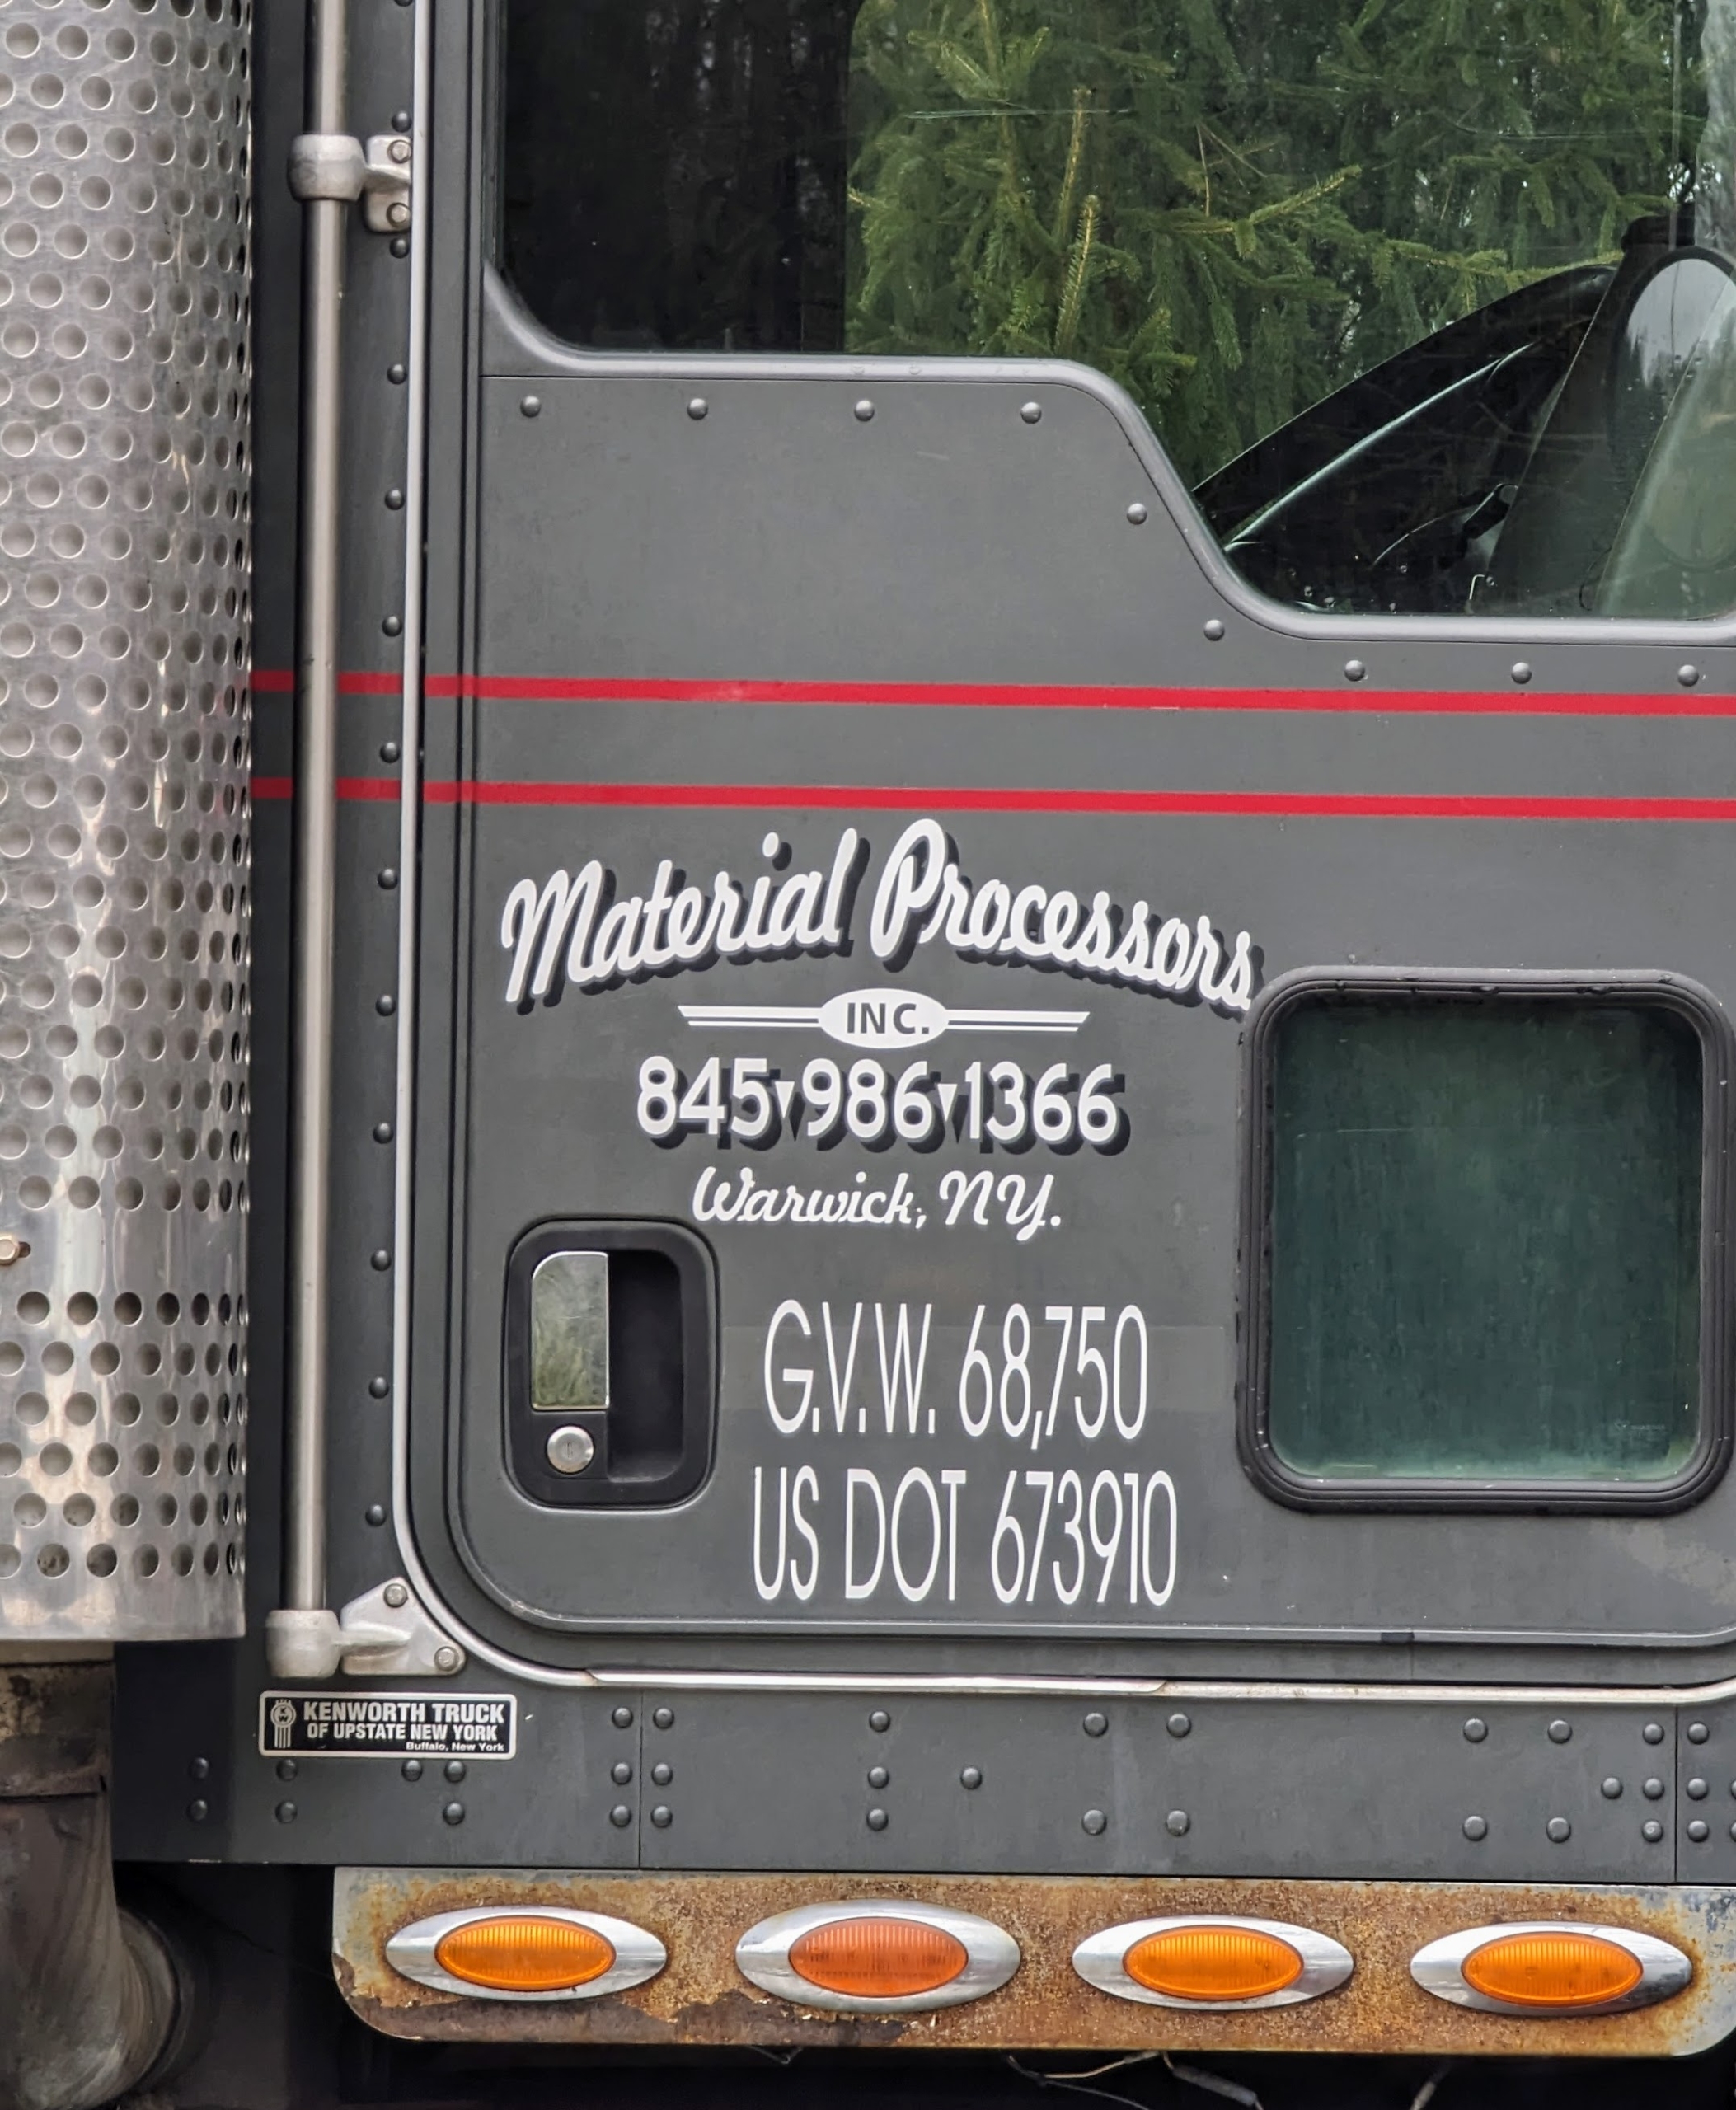
If you saw my last blog, you know my outdoor grounds crew has been gathering lots of organic debris - logs, stumps, bark and brush, and piling it all up so it can be taken to the compost yard in preparation for the tub grinder. I like to call in the massive machine once a year or once every two years, to reduce the size of our debris pile into much finer, nutrient-rich mulch. The crew and the tub grinder from Material Processors Inc. in Warwick, New York have made so much progress over the last couple of weeks.
Here are some photos, enjoy.
Our piles of debris get larger and larger every year. This is just a small fraction of what will go through the tub grinder.
All along the carriage roads around my farm are piles of organic material ready to be transported to the compost yard. It is a massive project. This pile includes large trees which had to be taken down because they were damaged or diseased.
There are also large piles of smaller branches and limbs taken off the trees before they are felled or picked up from the woodland floor after breaking and falling during storms.
For years, I’ve used a team from Material Processors, Inc. – a 30-year old company that focuses on recycling green waste, and clearing and preparing land spaces for development.
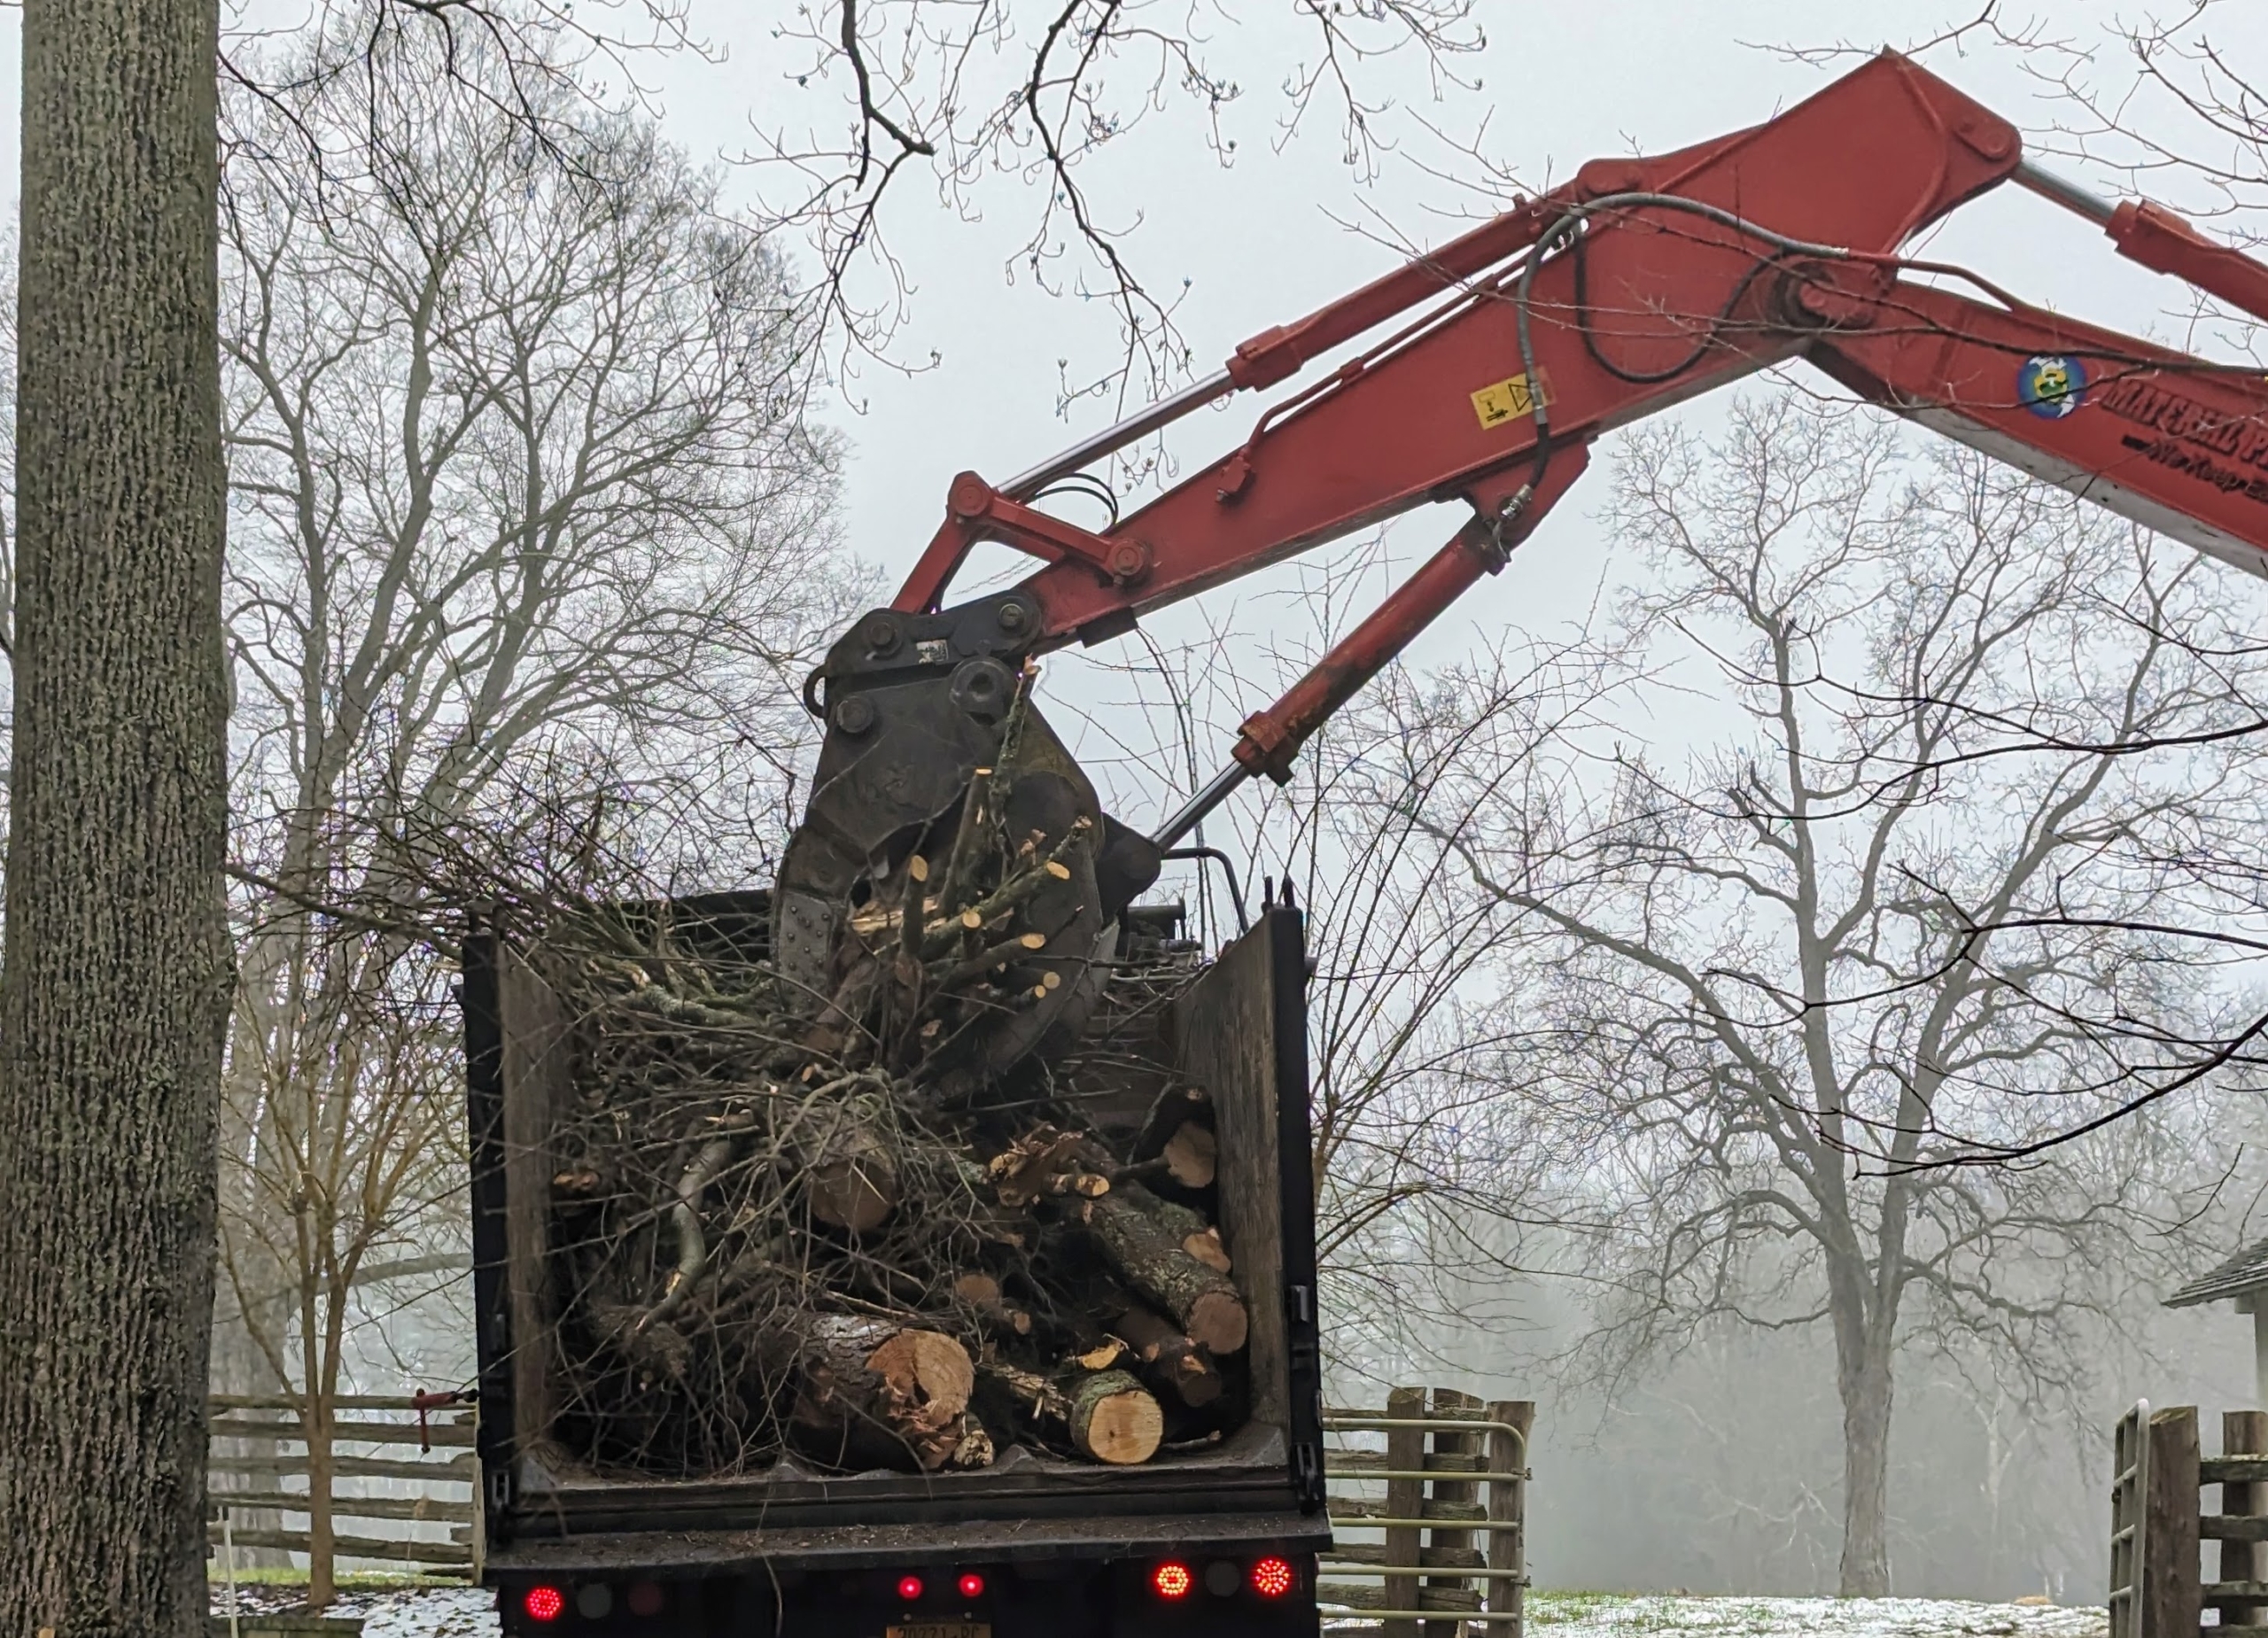
Here, they are using their own grapple and truck to help haul the bulky waste to the compost yard.
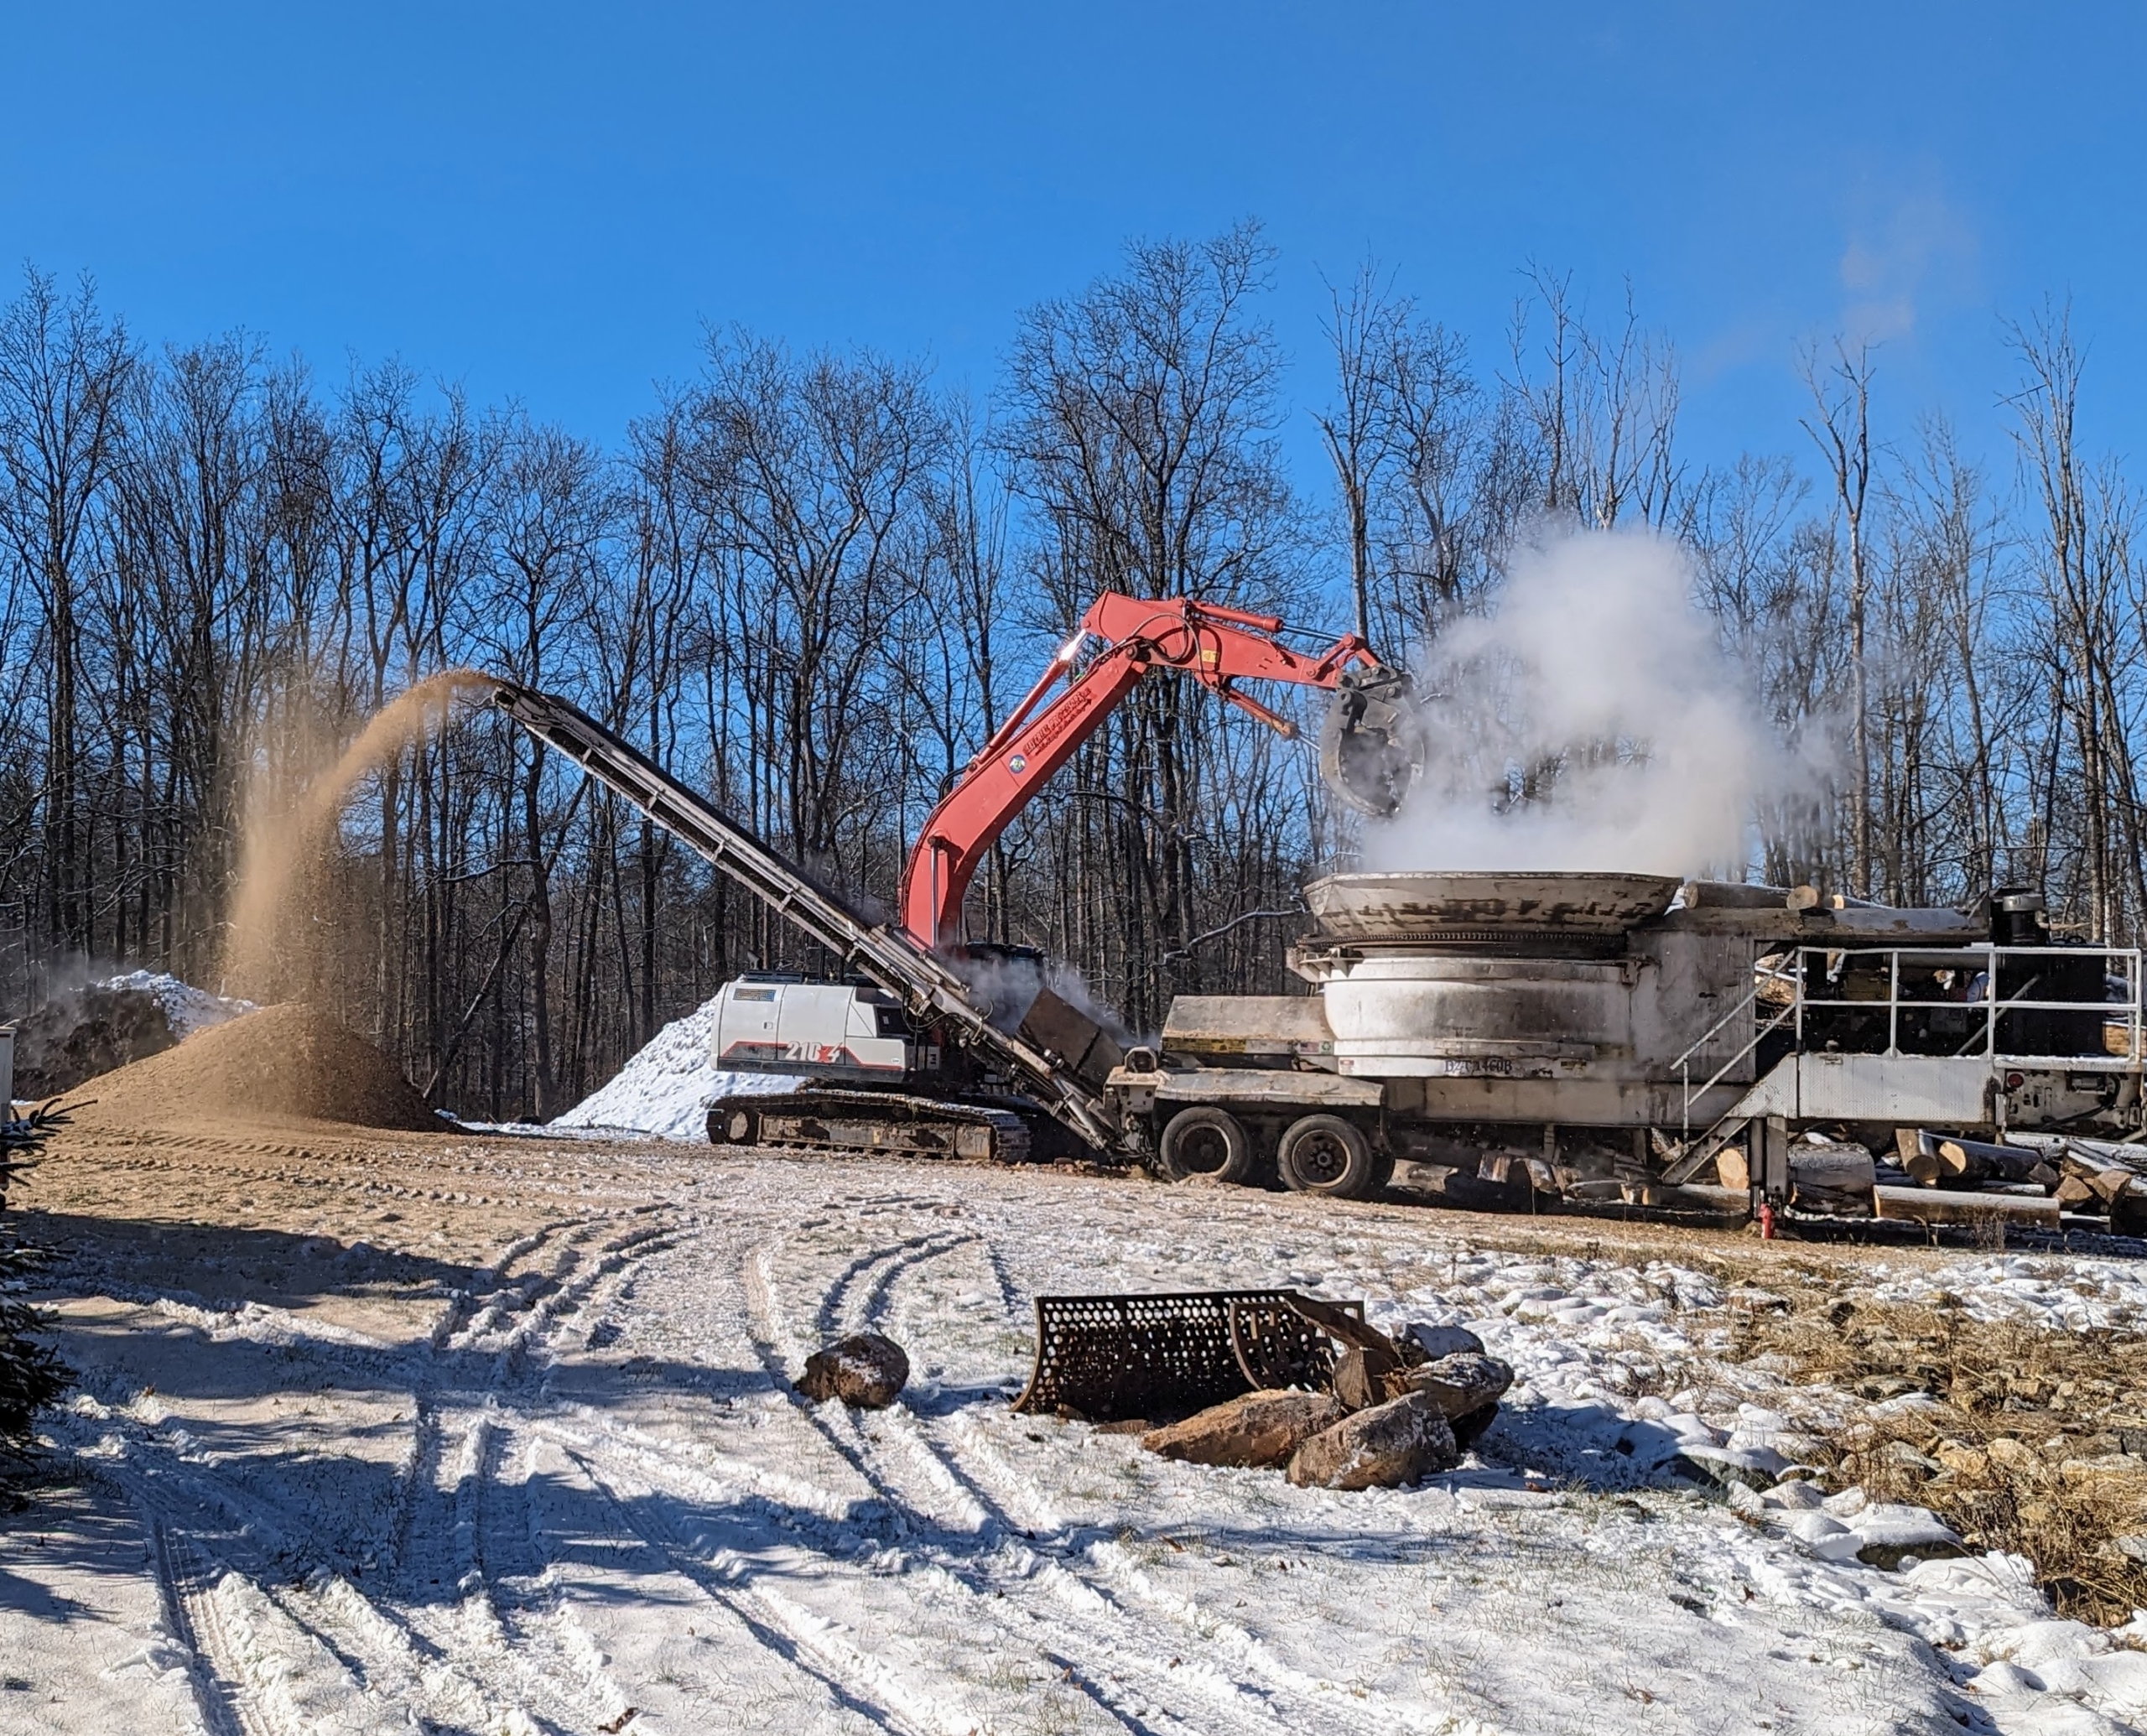
Tub grinders are extremely large and heavy, so the team delivers the tub grinder and excavator to the farm the day before to set it up and prepare it for work.
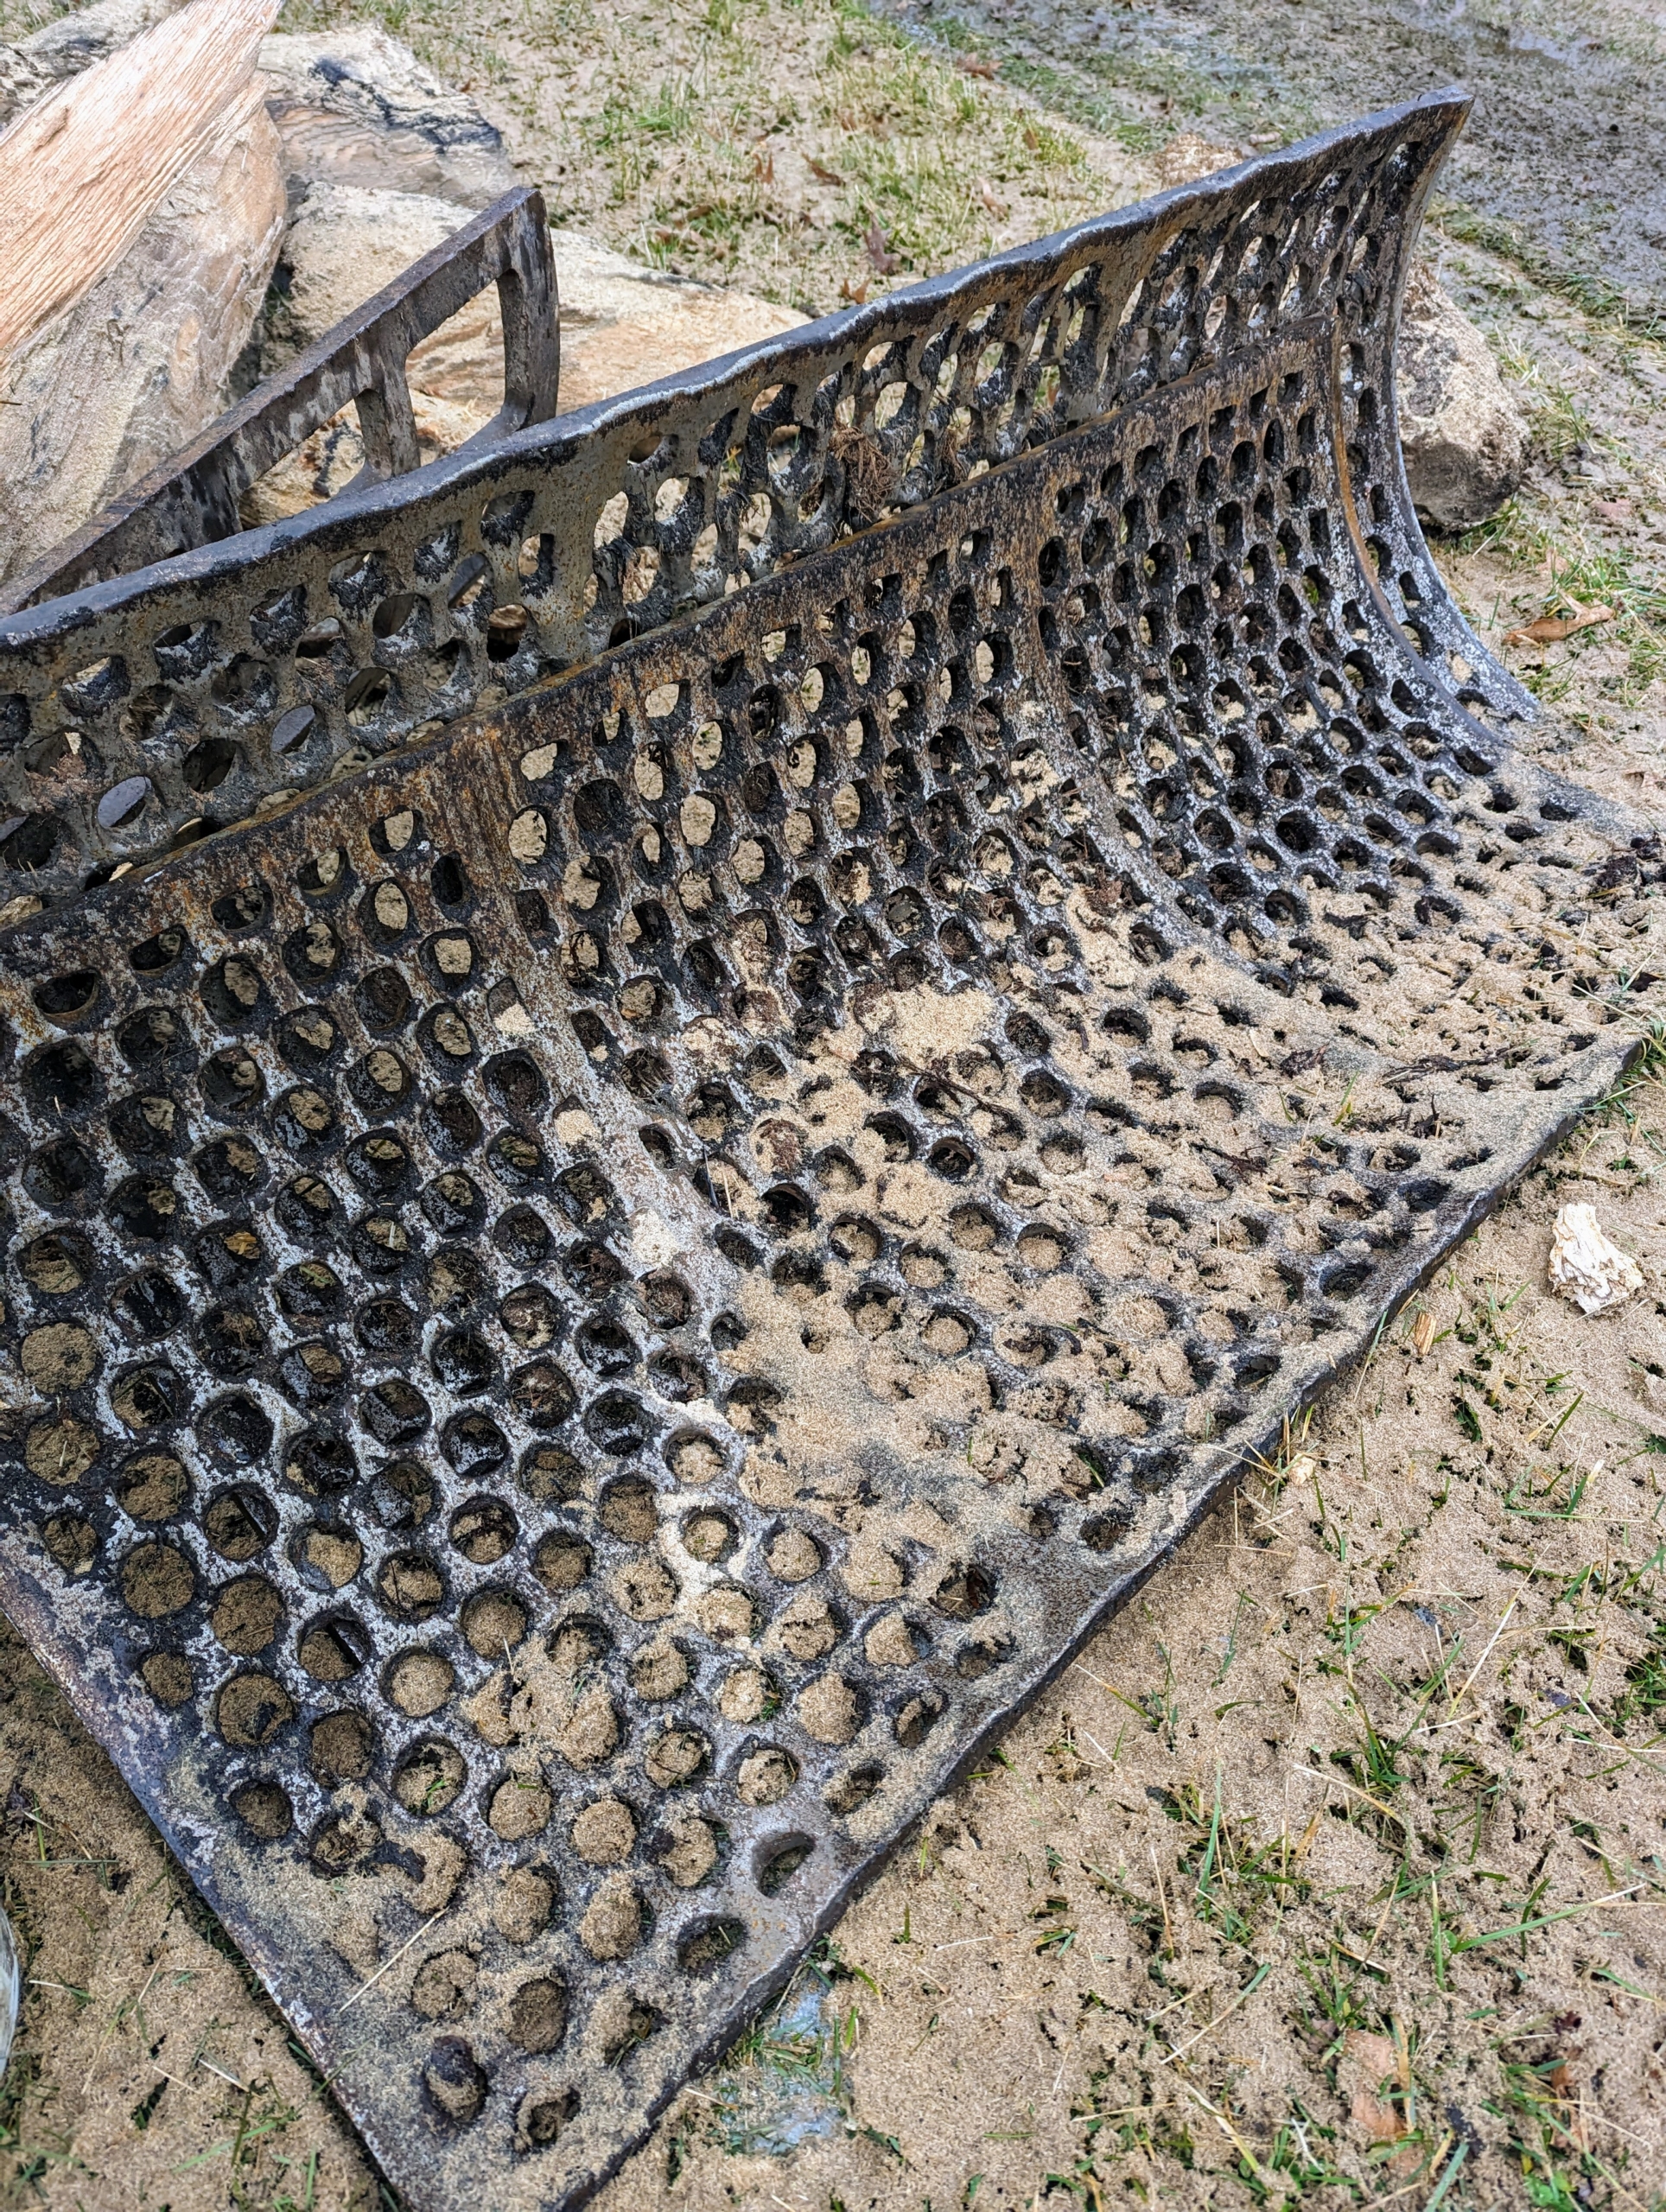
Tub grinders are named for the distinctive in-feed hopper – the large round tub, normally 10 to 14-feet in diameter and roughly six-feet deep. It is moved into position close to the wood pile. Before any equipment is used, all the controls are checked to make sure everything is in good working order.
Tub grinders have a variety of screens for the output. The screen selection for each job is usually based on the type of material being processed and the desired end-product.
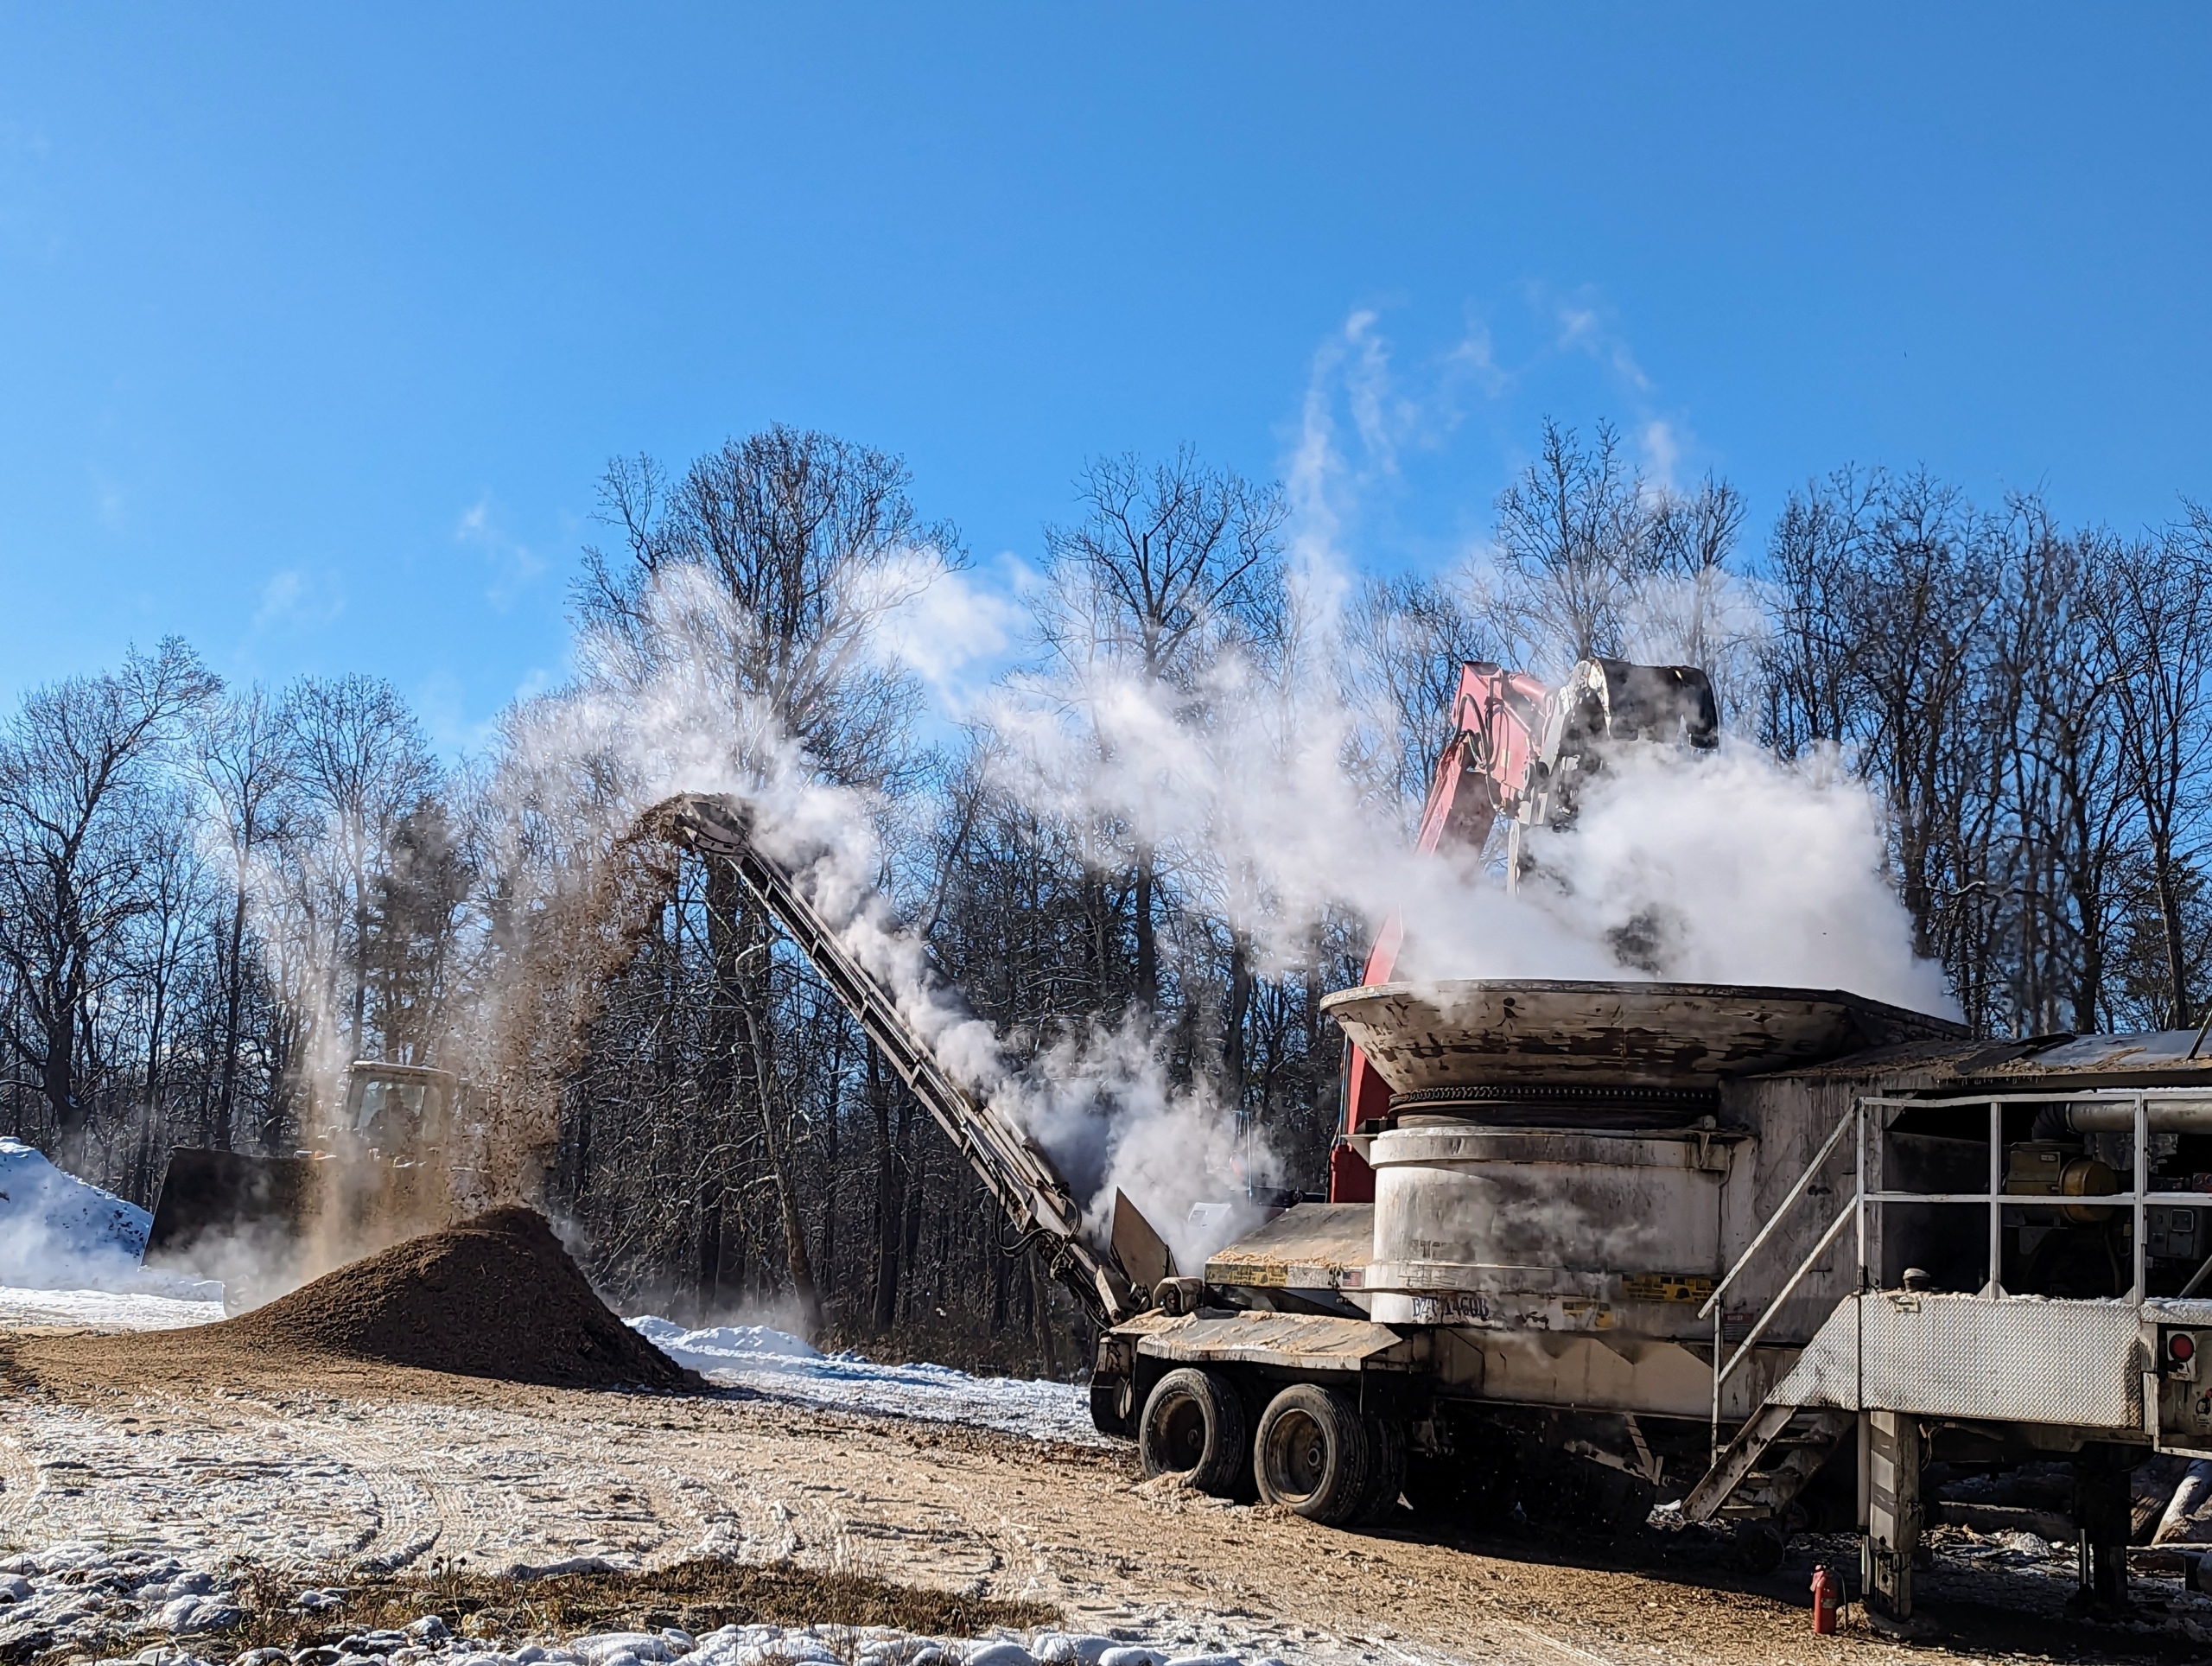
A conveyor belt transports the finished product away from the mill and then drops it in a nearby location.
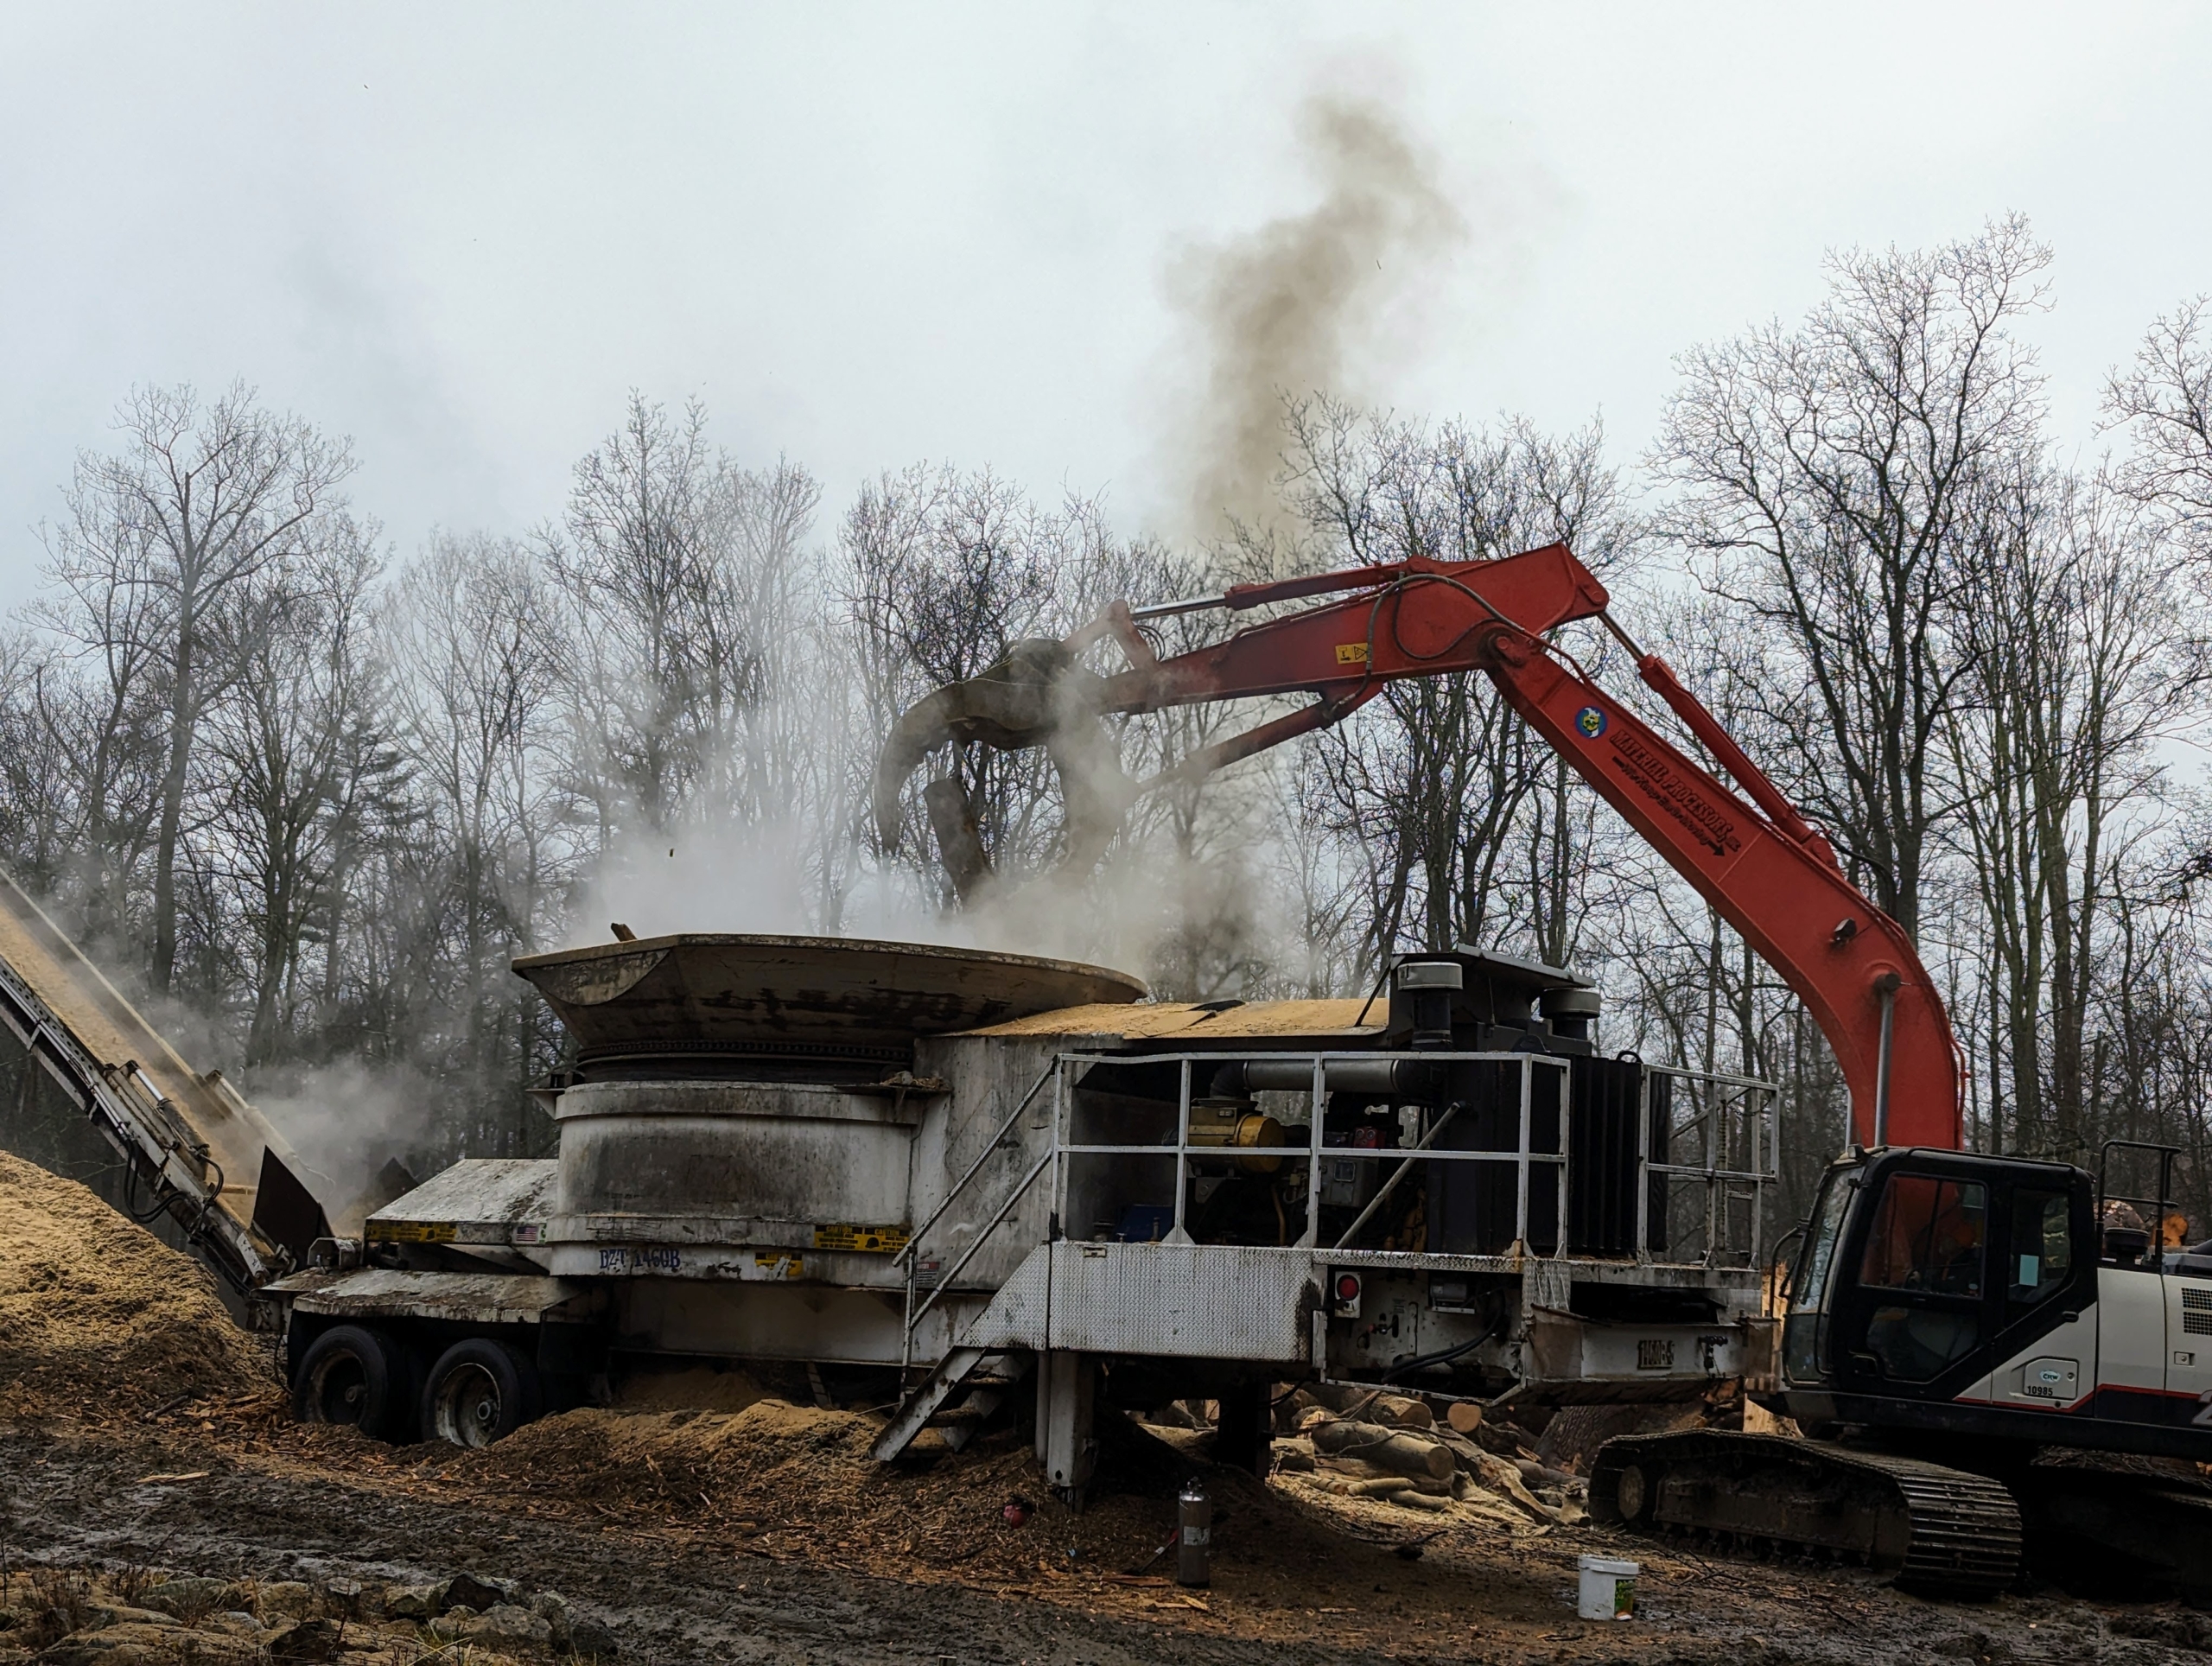
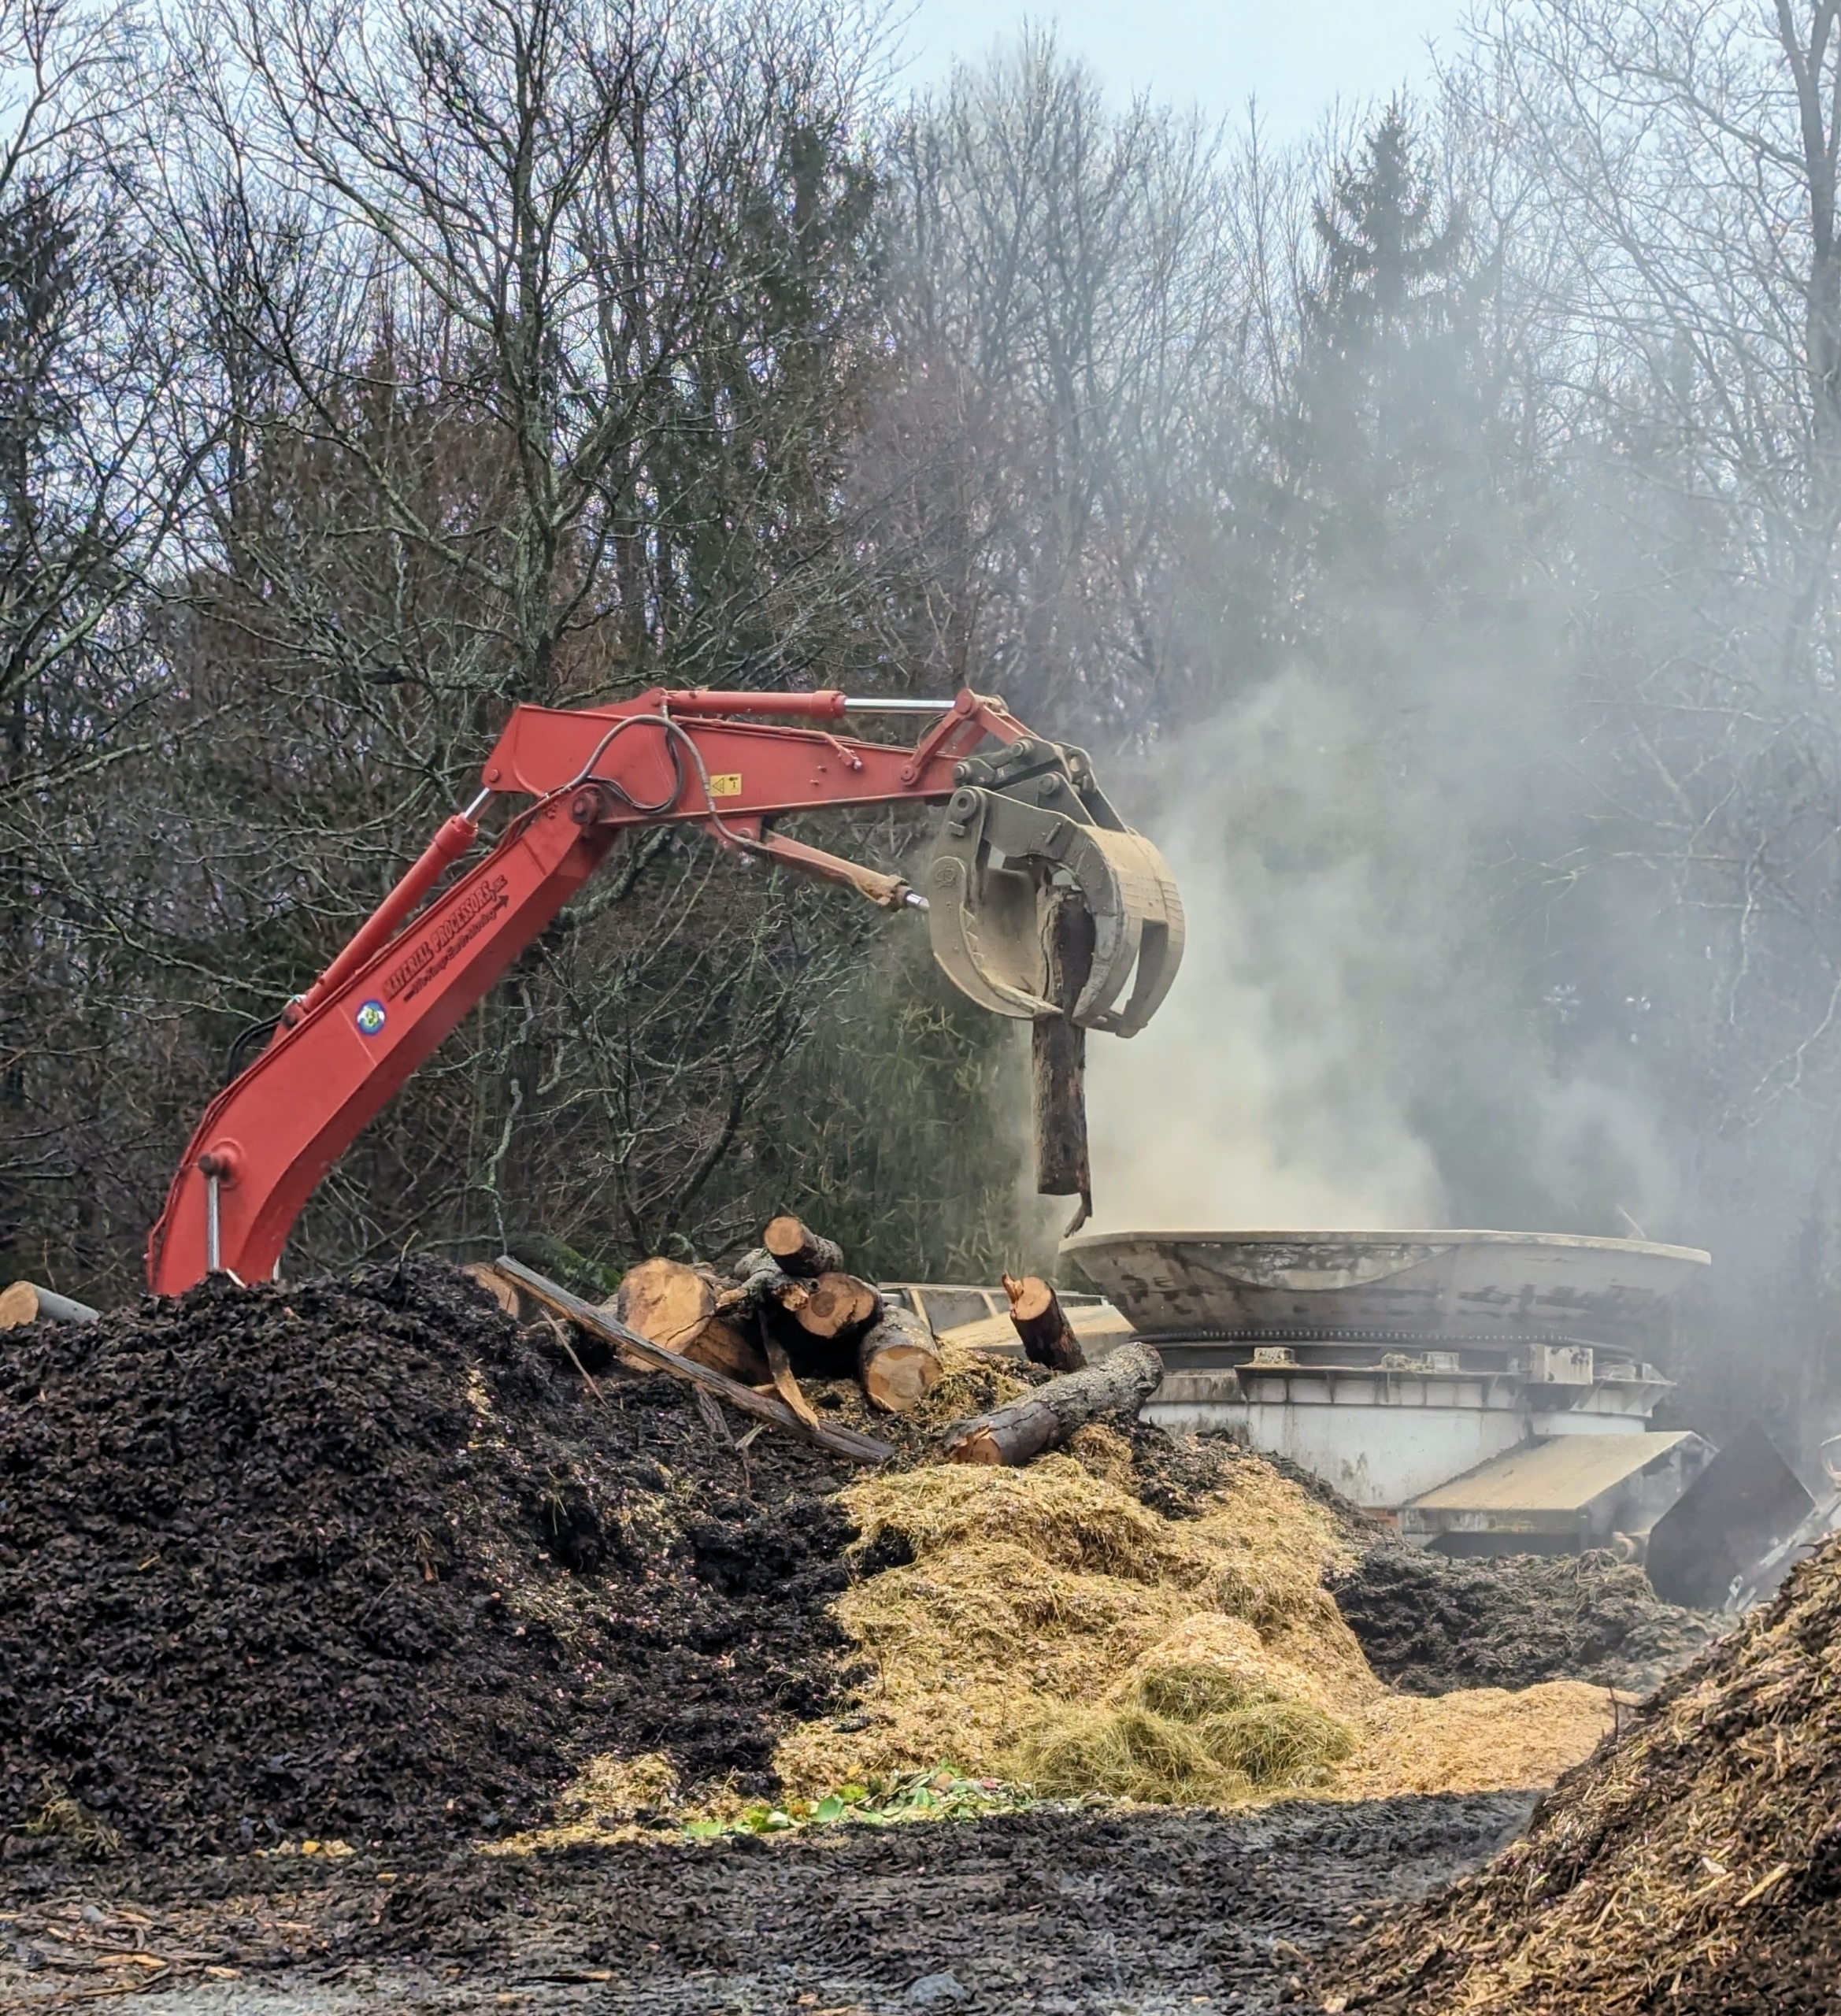
Here’s the tub grinder at work on the first day. The excavator is used to pick up the material using its large “jaws grab” bucket attachment to drop debris into the tub grinder.
Notice the small pile of ground up wood – it is very small at the start.
Every time I call in the tub grinder, the crew works for nearly a month grinding up all the material from around the farm. The jaws on the excavator are huge and can pick up, move and sort several large logs or pieces of debris at a time.
Tub grinders are loaded from the top. Here, one can see a load as it is delivered to the grinder just before it is dropped.
Tub grinders rely primarily on gravity to feed the material into the hammermill at the bottom of the tub. As the tub revolves, the hammermill below, shatters the wood into smaller fragments. Here, one can see the wood in the turning machine.
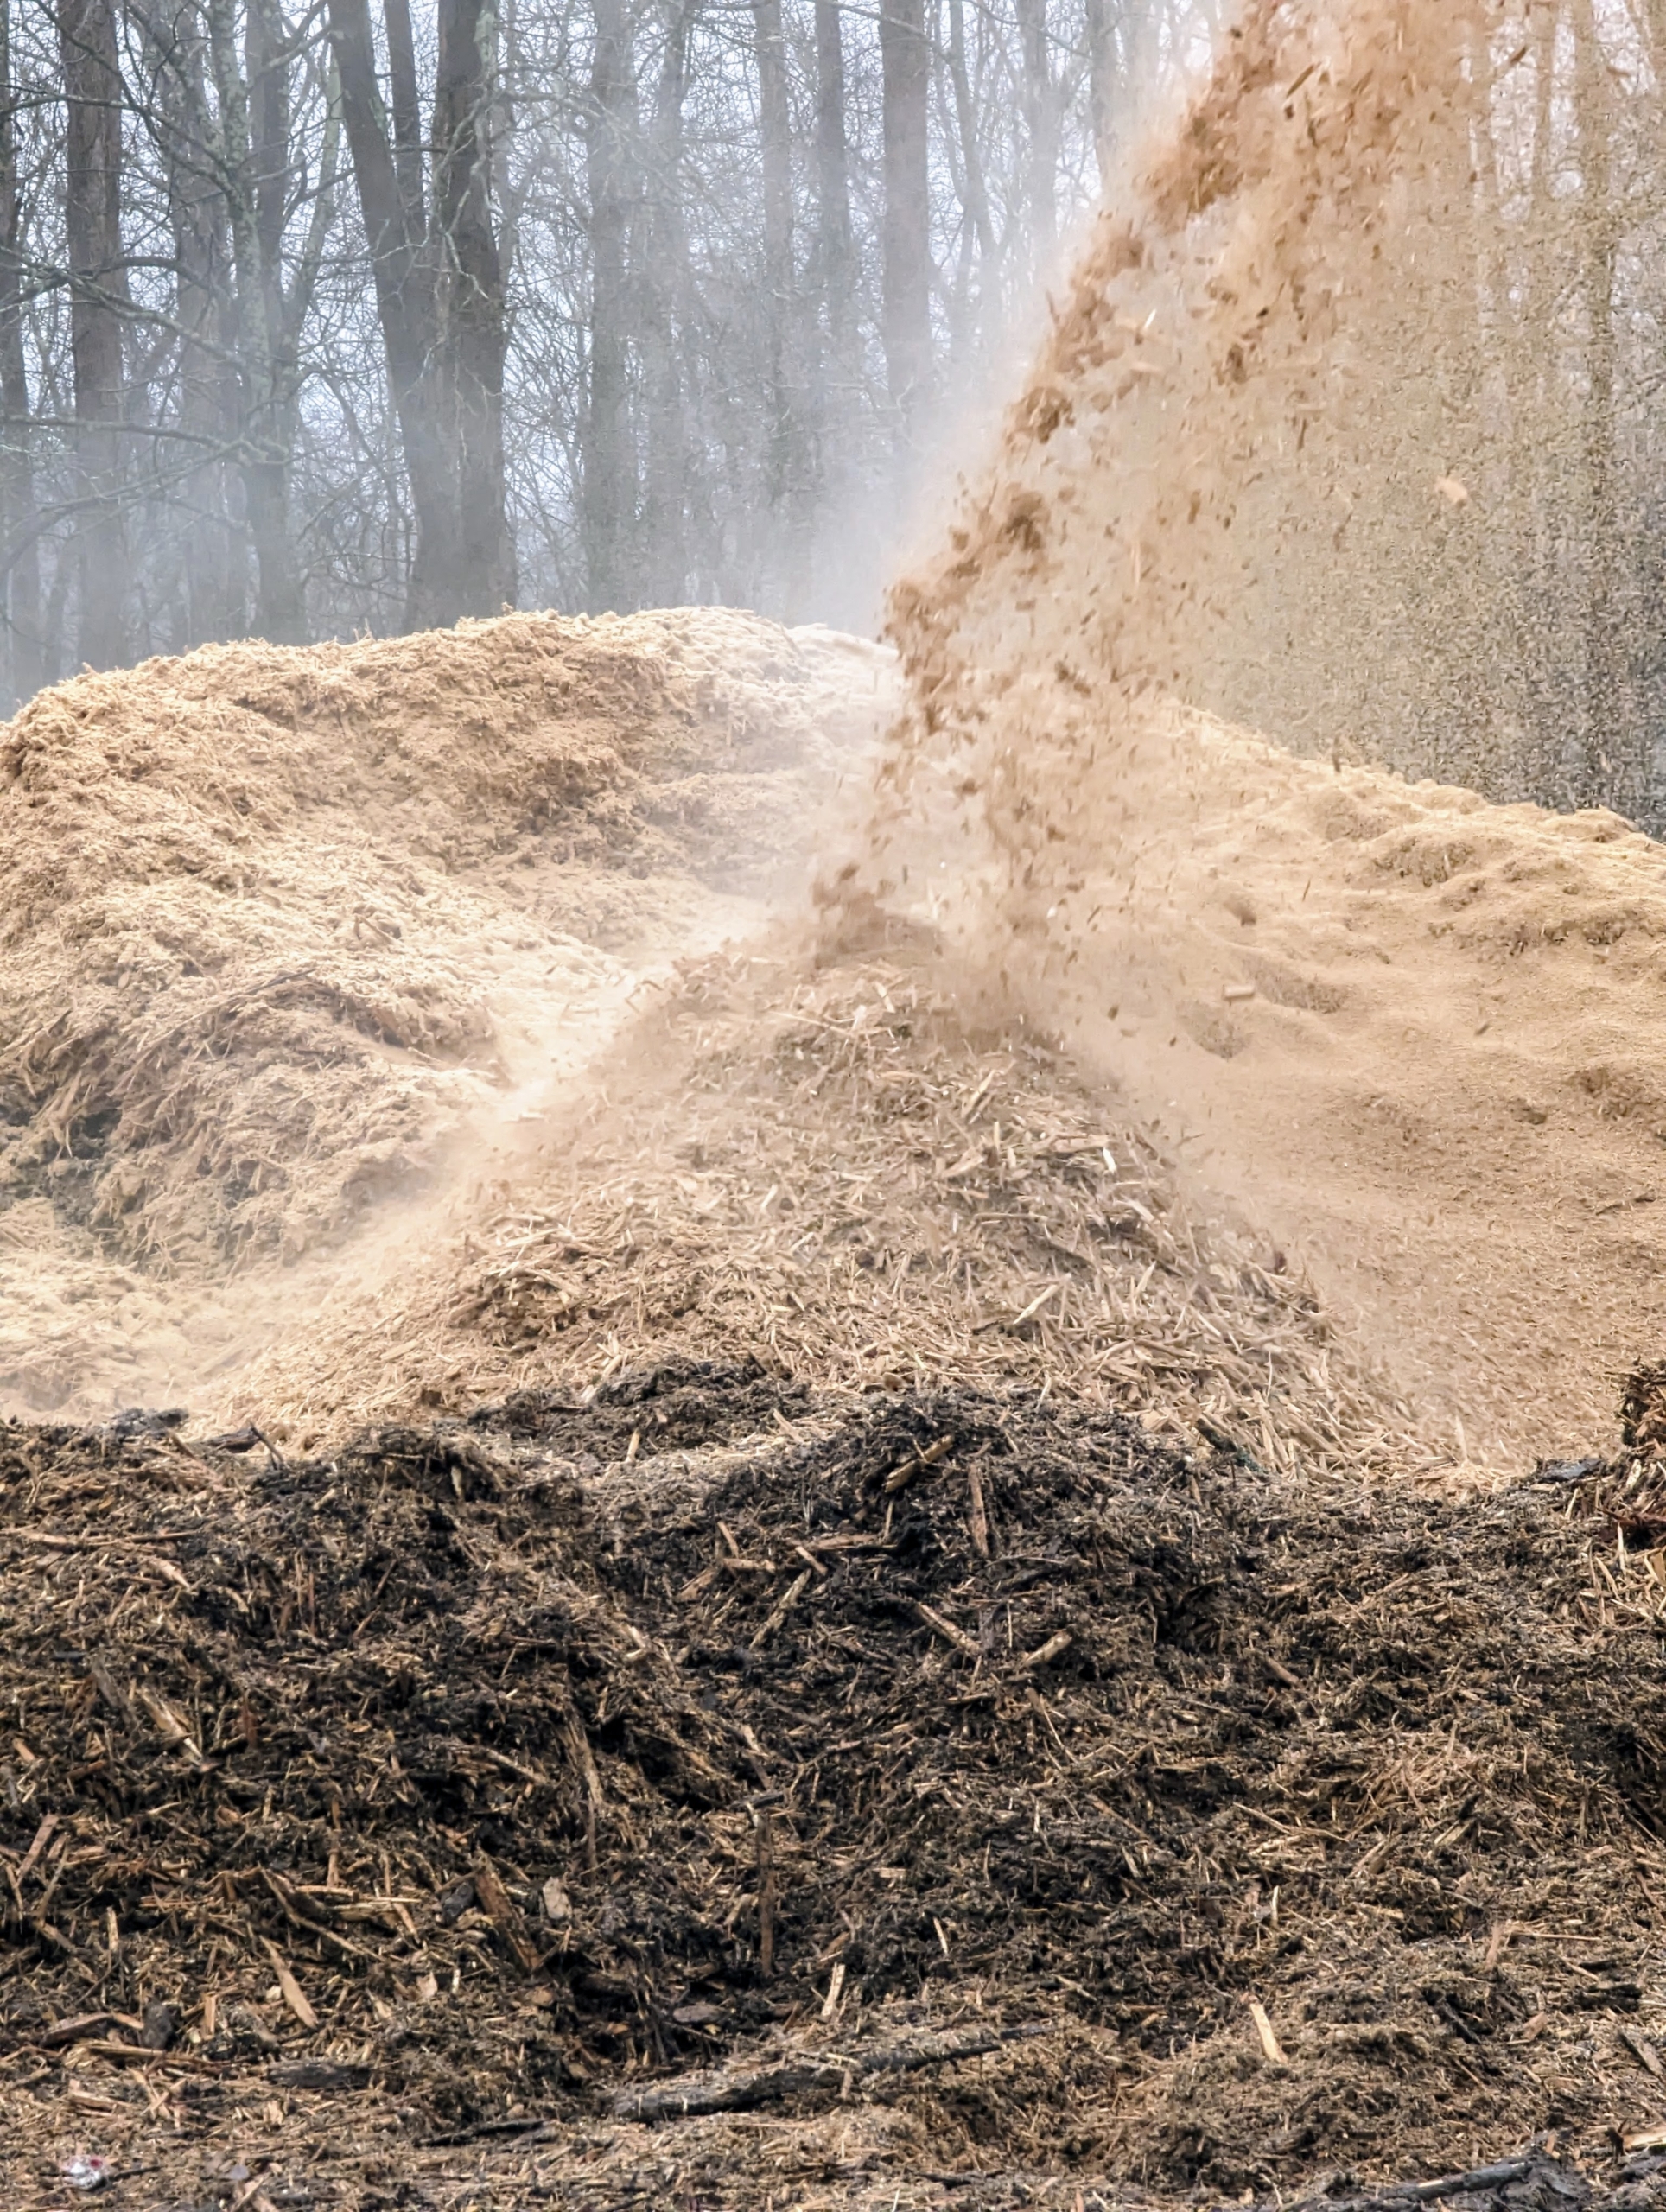
Here is the continuous discharge conveyor carrying the material away from the machine and onto a mound. It is always sad to see the trees go, but I am glad they can be repurposed into usable rich materials for the gardens. When the pile gets too large, a front loader comes to manage and move the output. This is the second week – the pile of output is much larger.
This output is from a first grind – only the wood. It will go through a second grind and get mixed with horse manure and organic chicken waste to create a nutrient rich mulch.
On the left is a pile of the horse and chicken waste.
After the second grind, the mound looks like this – beautiful, dark usable mulch which we use during the rest of the year to top dress the garden beds.
The machines do this over and over, one load at a time. There is a lot of dust and occasional debris flying around – it is very important to stay several feet away whenever visiting an excavator and tub grinder at work. The team prefers to work on rainy days, which helps to cut down on all the dust. The past few days have been perfect – on and off showers from morning to afternoon. We have a lot more work to do. I’ll be sure to share photos of the finished product.