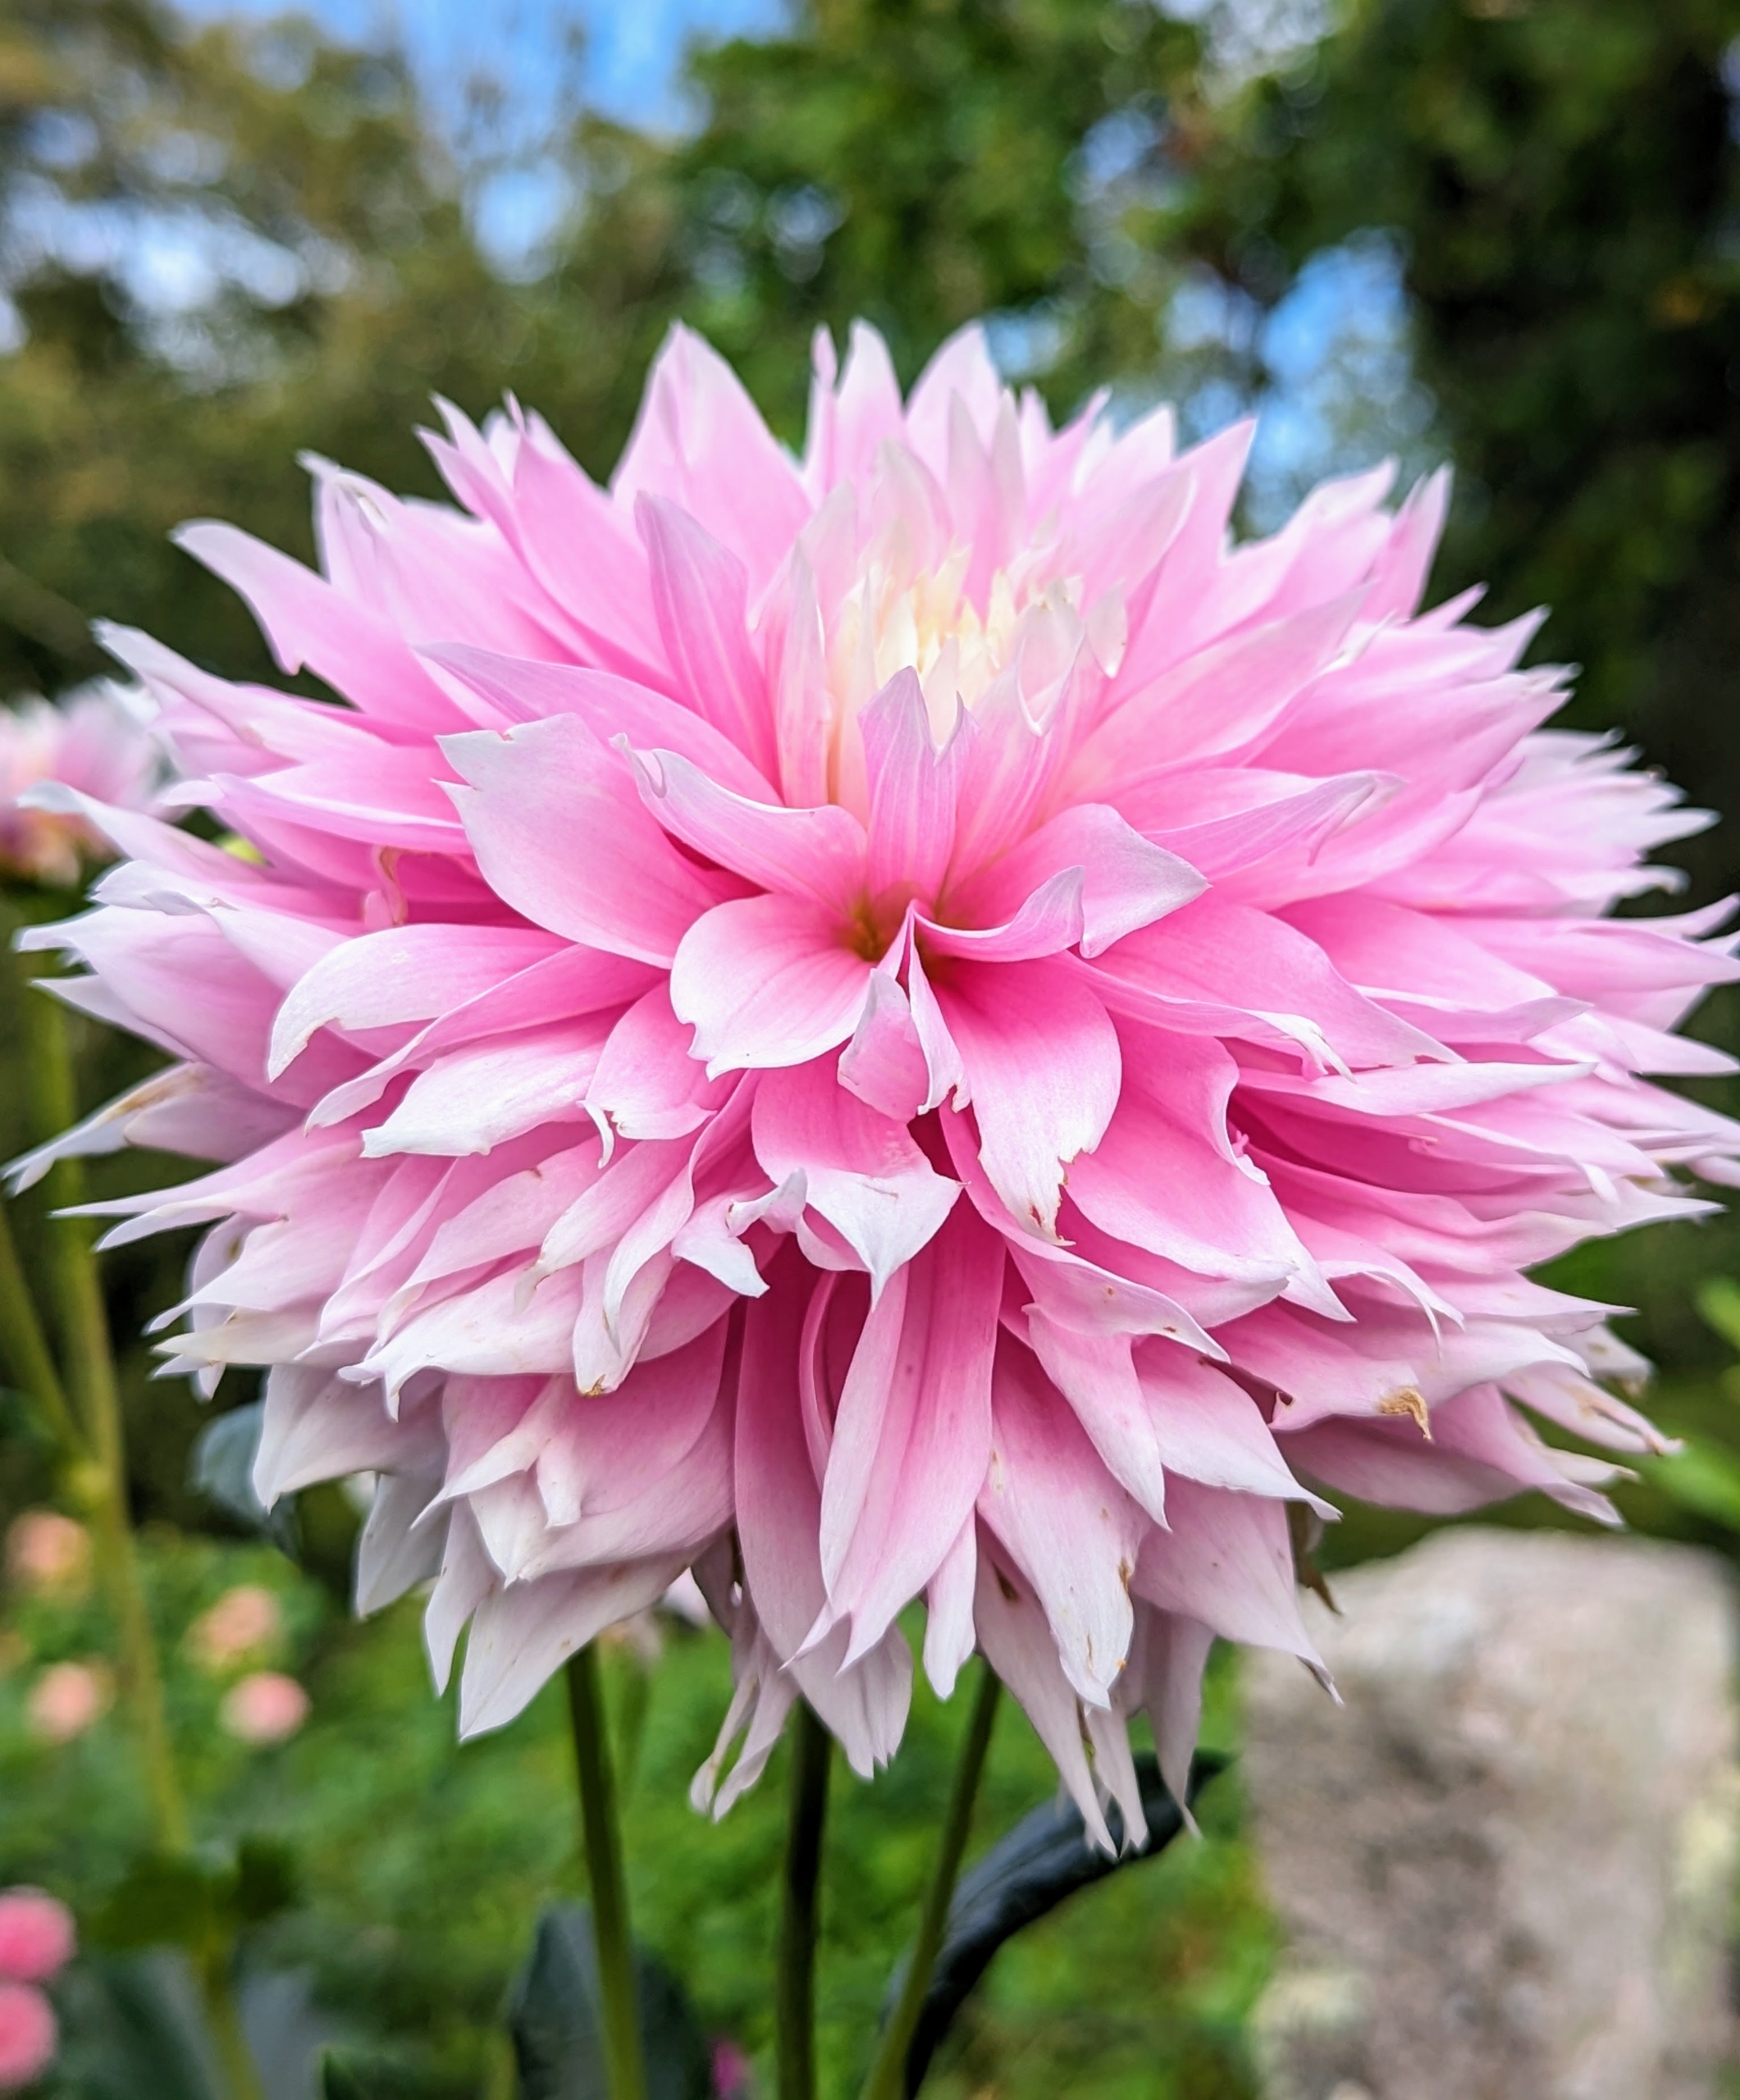
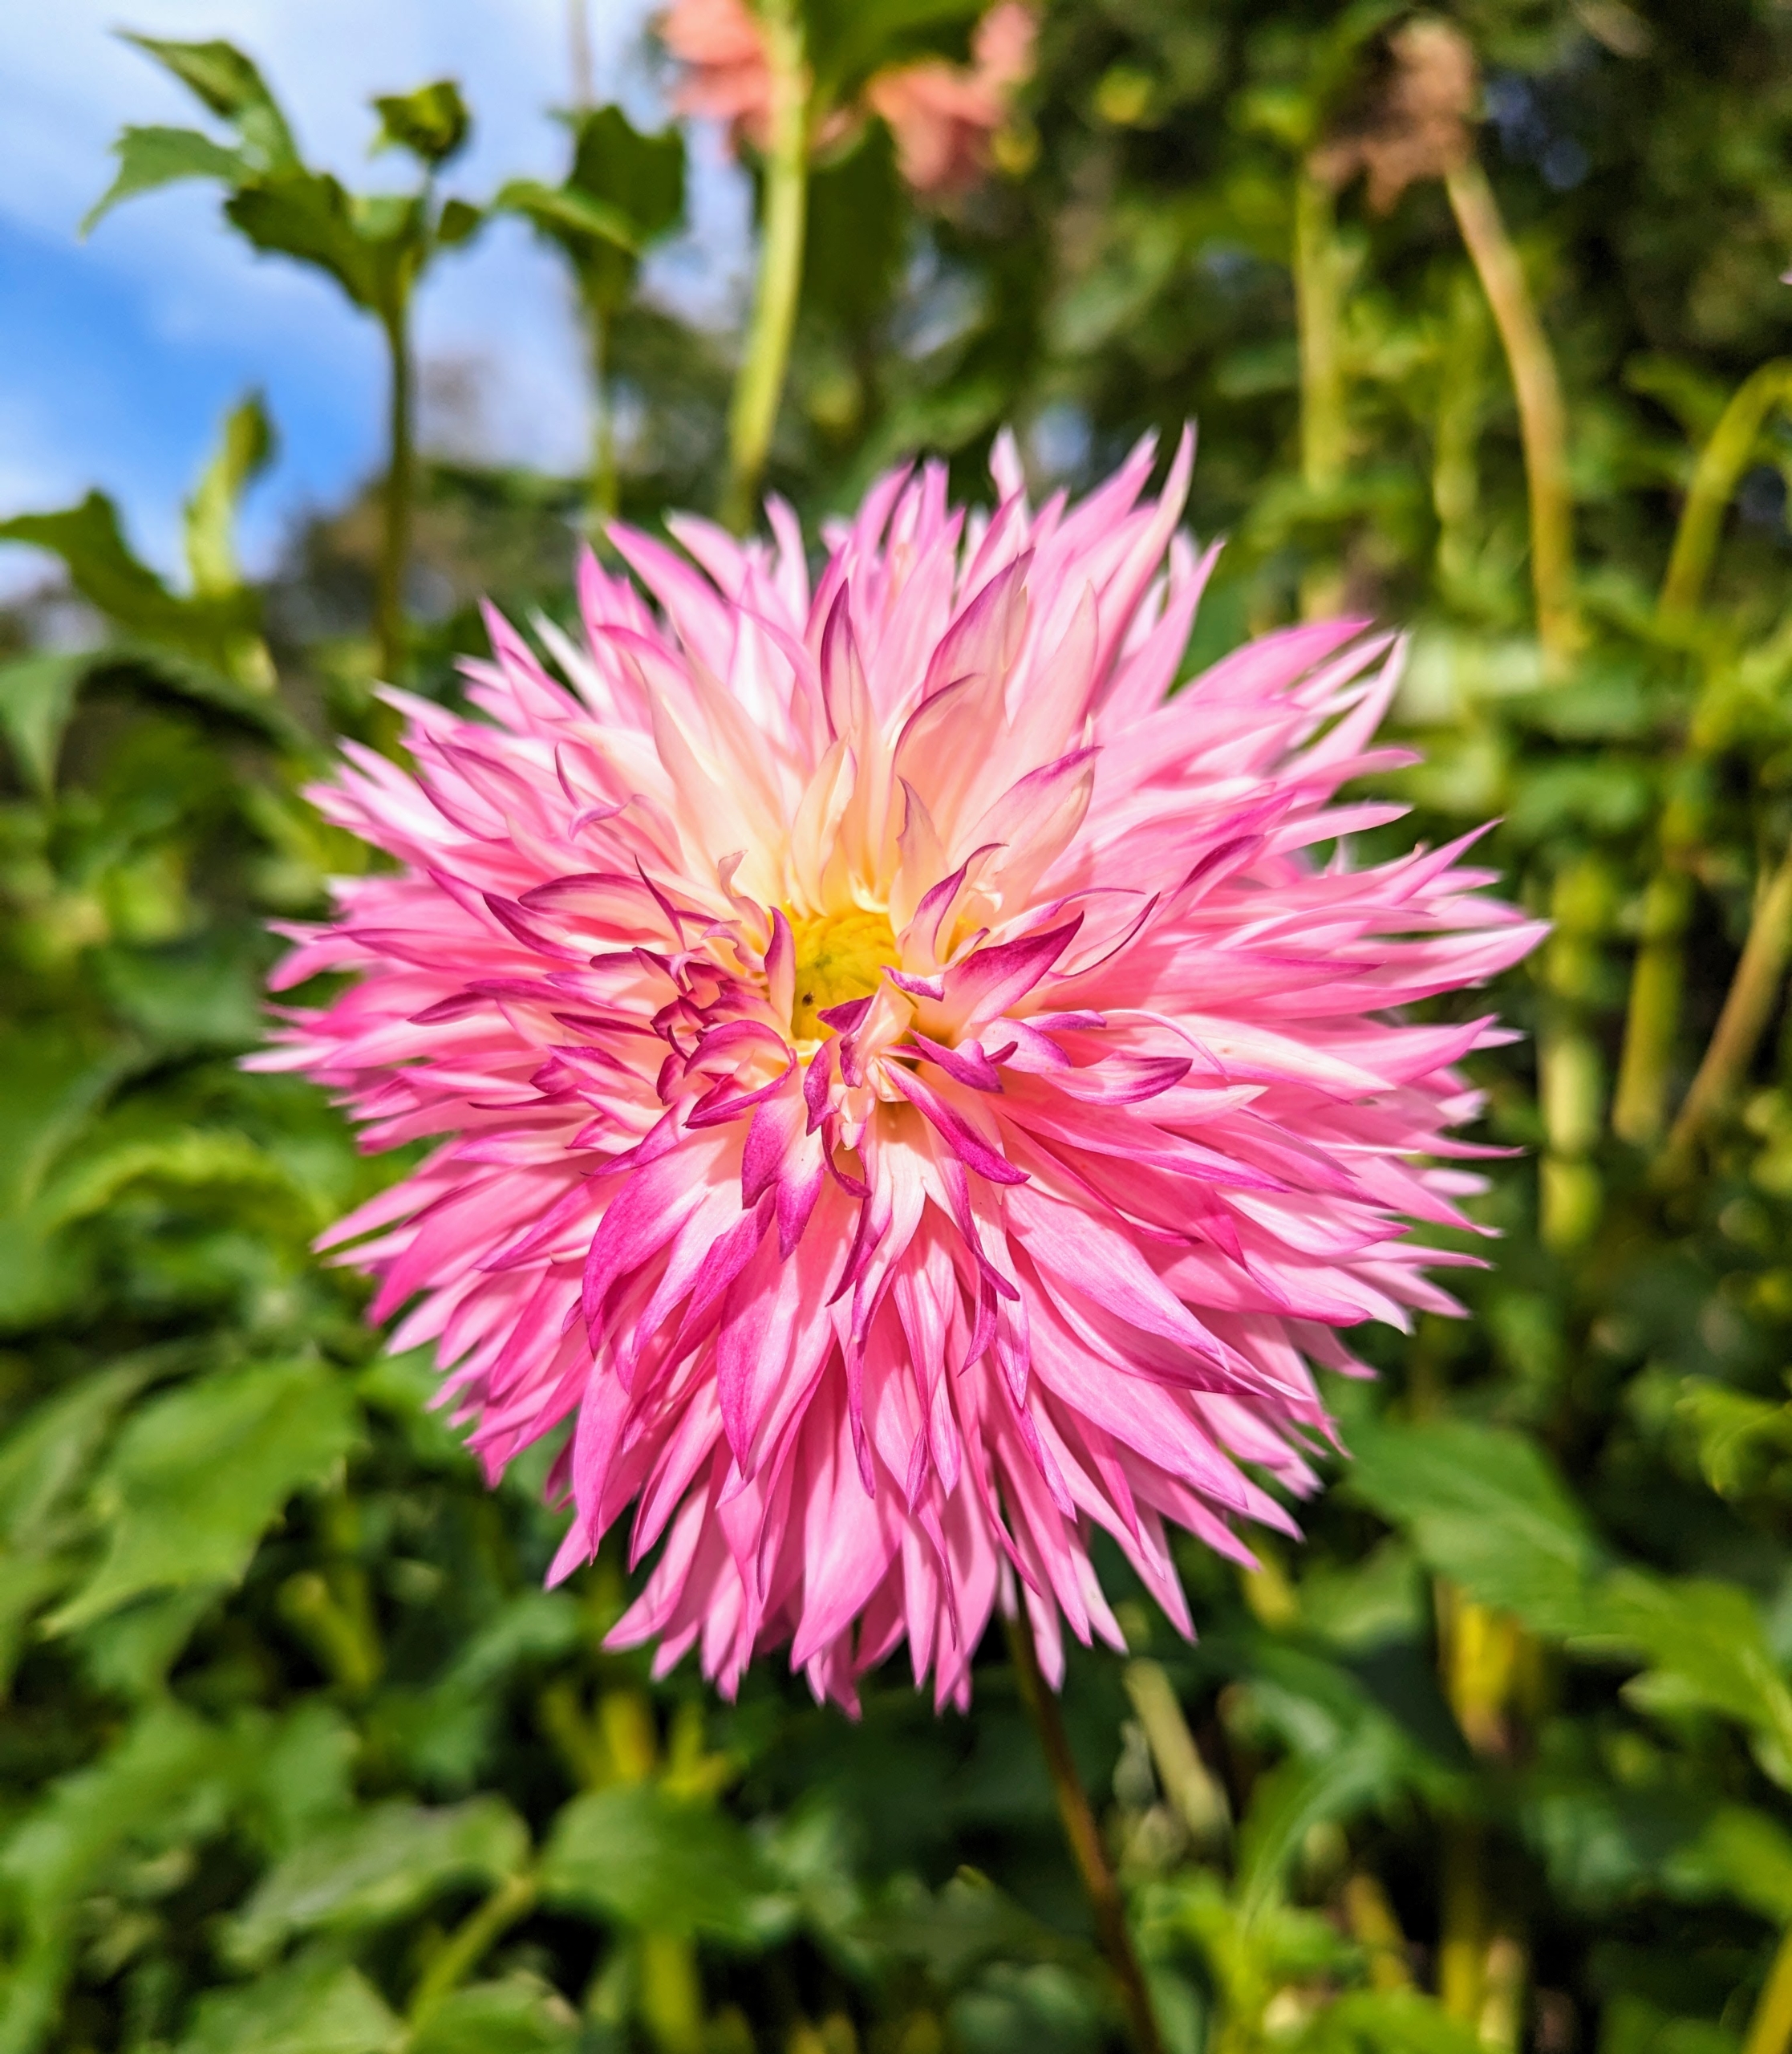
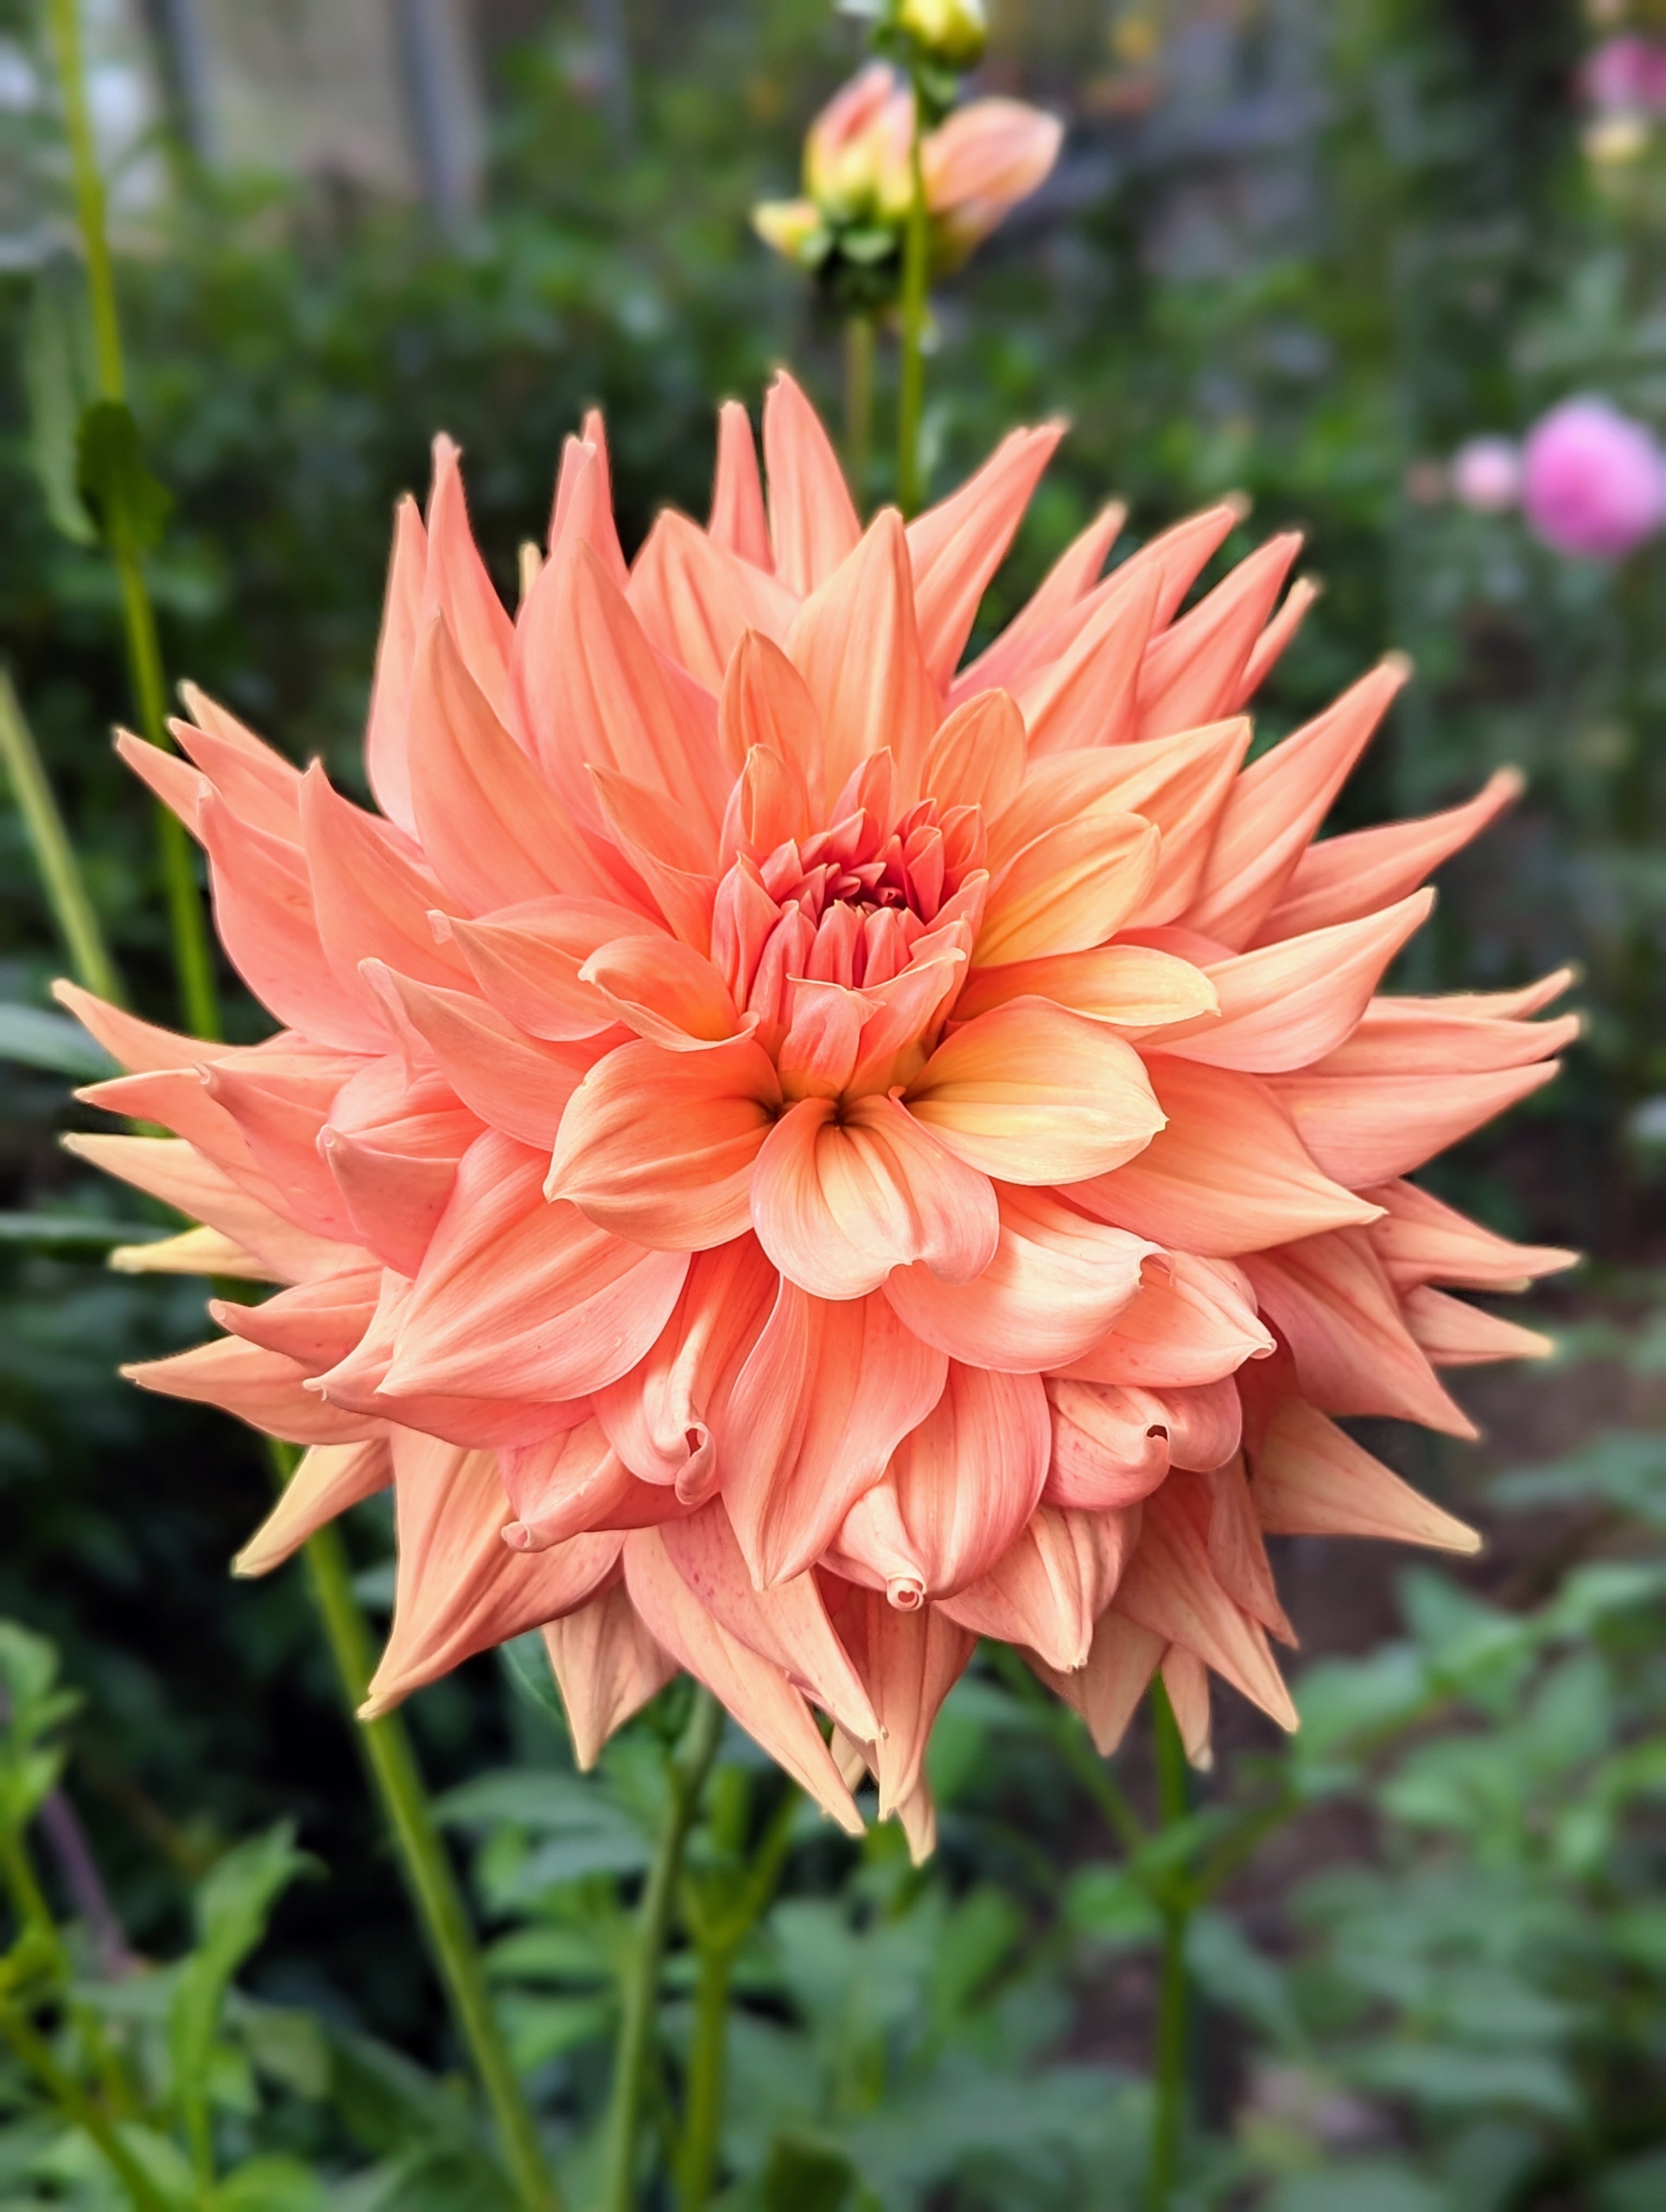
Tucked away in a bed behind my large vegetable greenhouse, this year's dahlias continue to bloom with gorgeous colors and forms.
Dahlia is a genus of tuberous plants that are members of the Asteraceae family and are related to the sunflower, daisy, chrysanthemum, and zinnia. They grow from small tubers planted in the spring. And from late June through October, if the weather is mild, these flowers give off a breathtaking show with blooms ranging from small to giant dinner-plate size. I grow a rich variety of dahlias - I like the big ones best - but they're all so pretty to look at, and so easy to maintain.
Enjoy these photos.
With autumn officially starting in just a few days, many of the summer flowers are past their prime or already gone, but turn this corner behind my big glass vegetable greenhouse, and there is still a gorgeous show of dahlia flowers blooming. This area provides just the right conditions for these dahlias – full sun, protection from winds, and just enough heat to allow them to winter in place covered with hay bales and tarps.
There are about 42 species of dahlia, with hybrids commonly grown as garden plants. The genus Dahlia is native to the high plains of Mexico. Some species can be found in Guatemala, Honduras, Nicaragua, El Salvador, and Costa Rica as well as parts of South America where it was introduced.
I have decorated my home with so many different dahlias this year, but there are so many still to enjoy.
Here at my farm, we see the first blooms in June and they last right up until the first frost. One year, we were still picking dahlias on Halloween.
Dahlias were first recorded by Westerners in 1615, and were then called by their original Mexican name, acoctli. The first garden dahlias reached the United States in the early 1830s. Today, dahlias are grown all over the world.
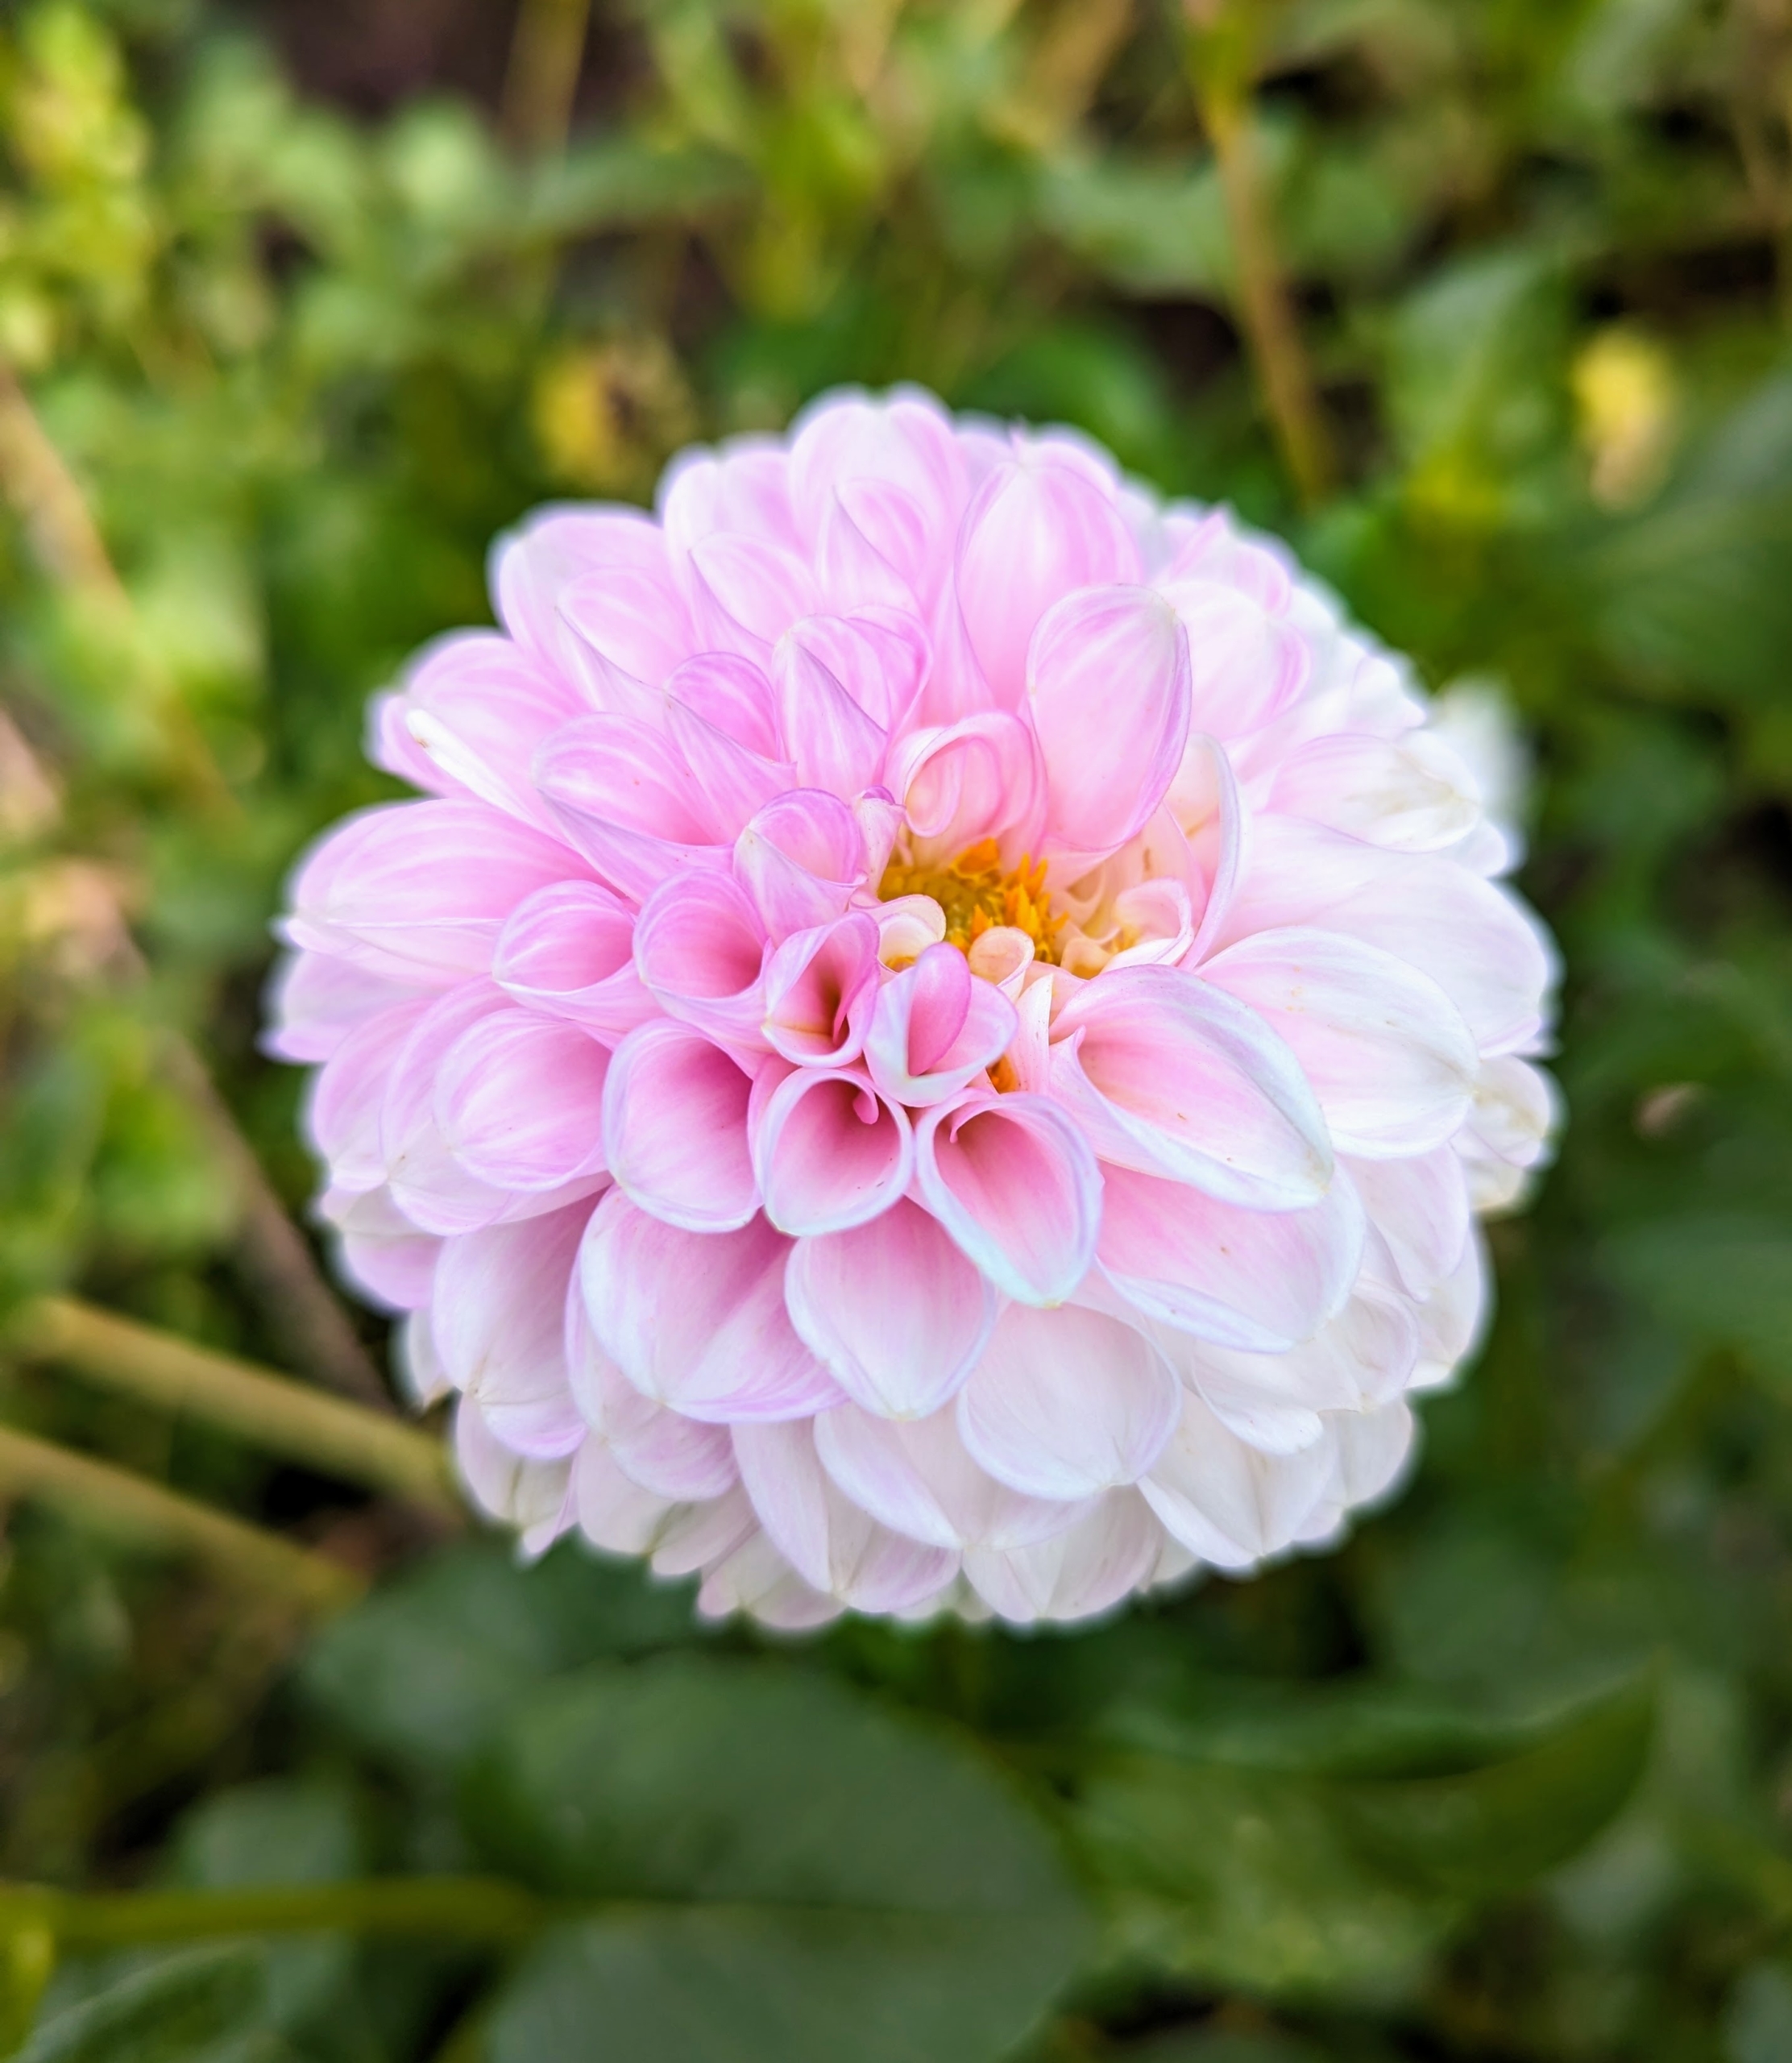
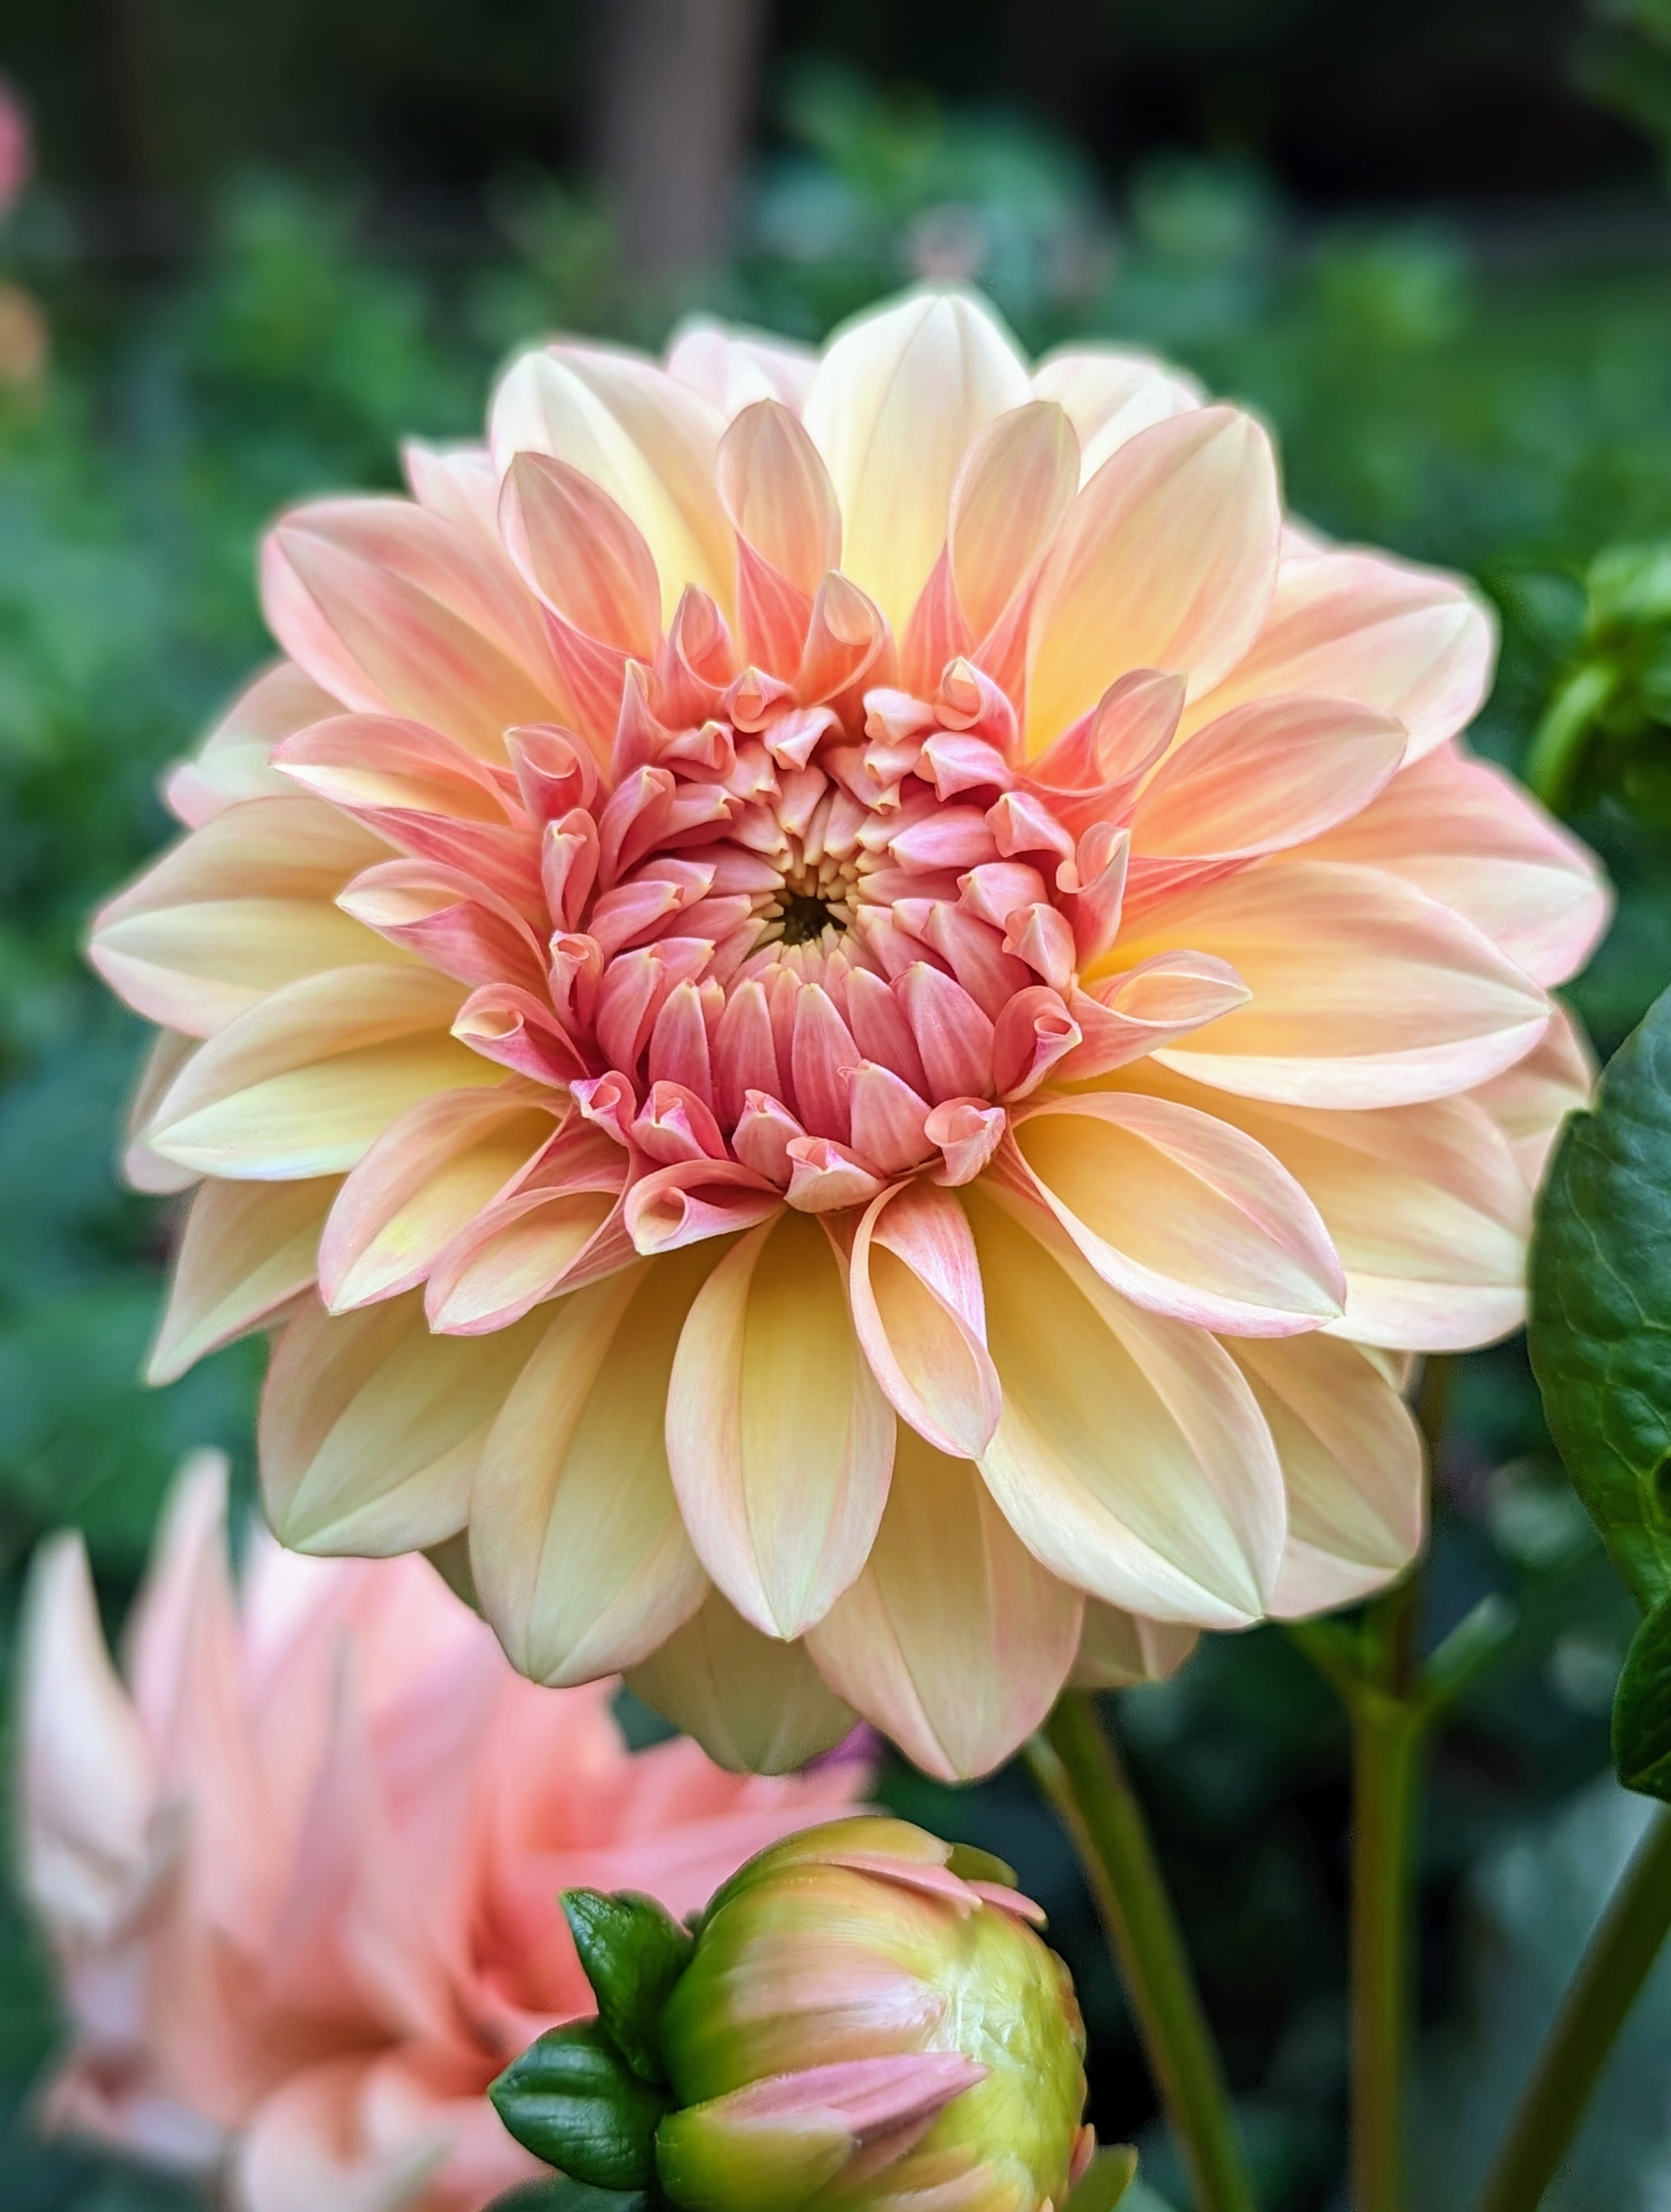
Dahlias vary in height, leaf color, form, and shape. This is because dahlias are octoploids, meaning they have eight sets of homologous chromosomes, whereas most plants have only two. Flowers come one head per stem. The blooms can be as small as two-inches in diameter or up to one foot across.
Here in the United States, dahlias are considered a perennial in hardiness zones 8 and higher. in colder regions, zones 7 and lower, dahlias are treated as annuals. We’ve been lucky here at my farm. It is in USDA hardiness zone 6b and our dahlias come back every spring.
The Dahlia is named after the Swedish 18th century botanist Anders Dahl, who originally declared the flower a vegetable, as the tubers are edible.
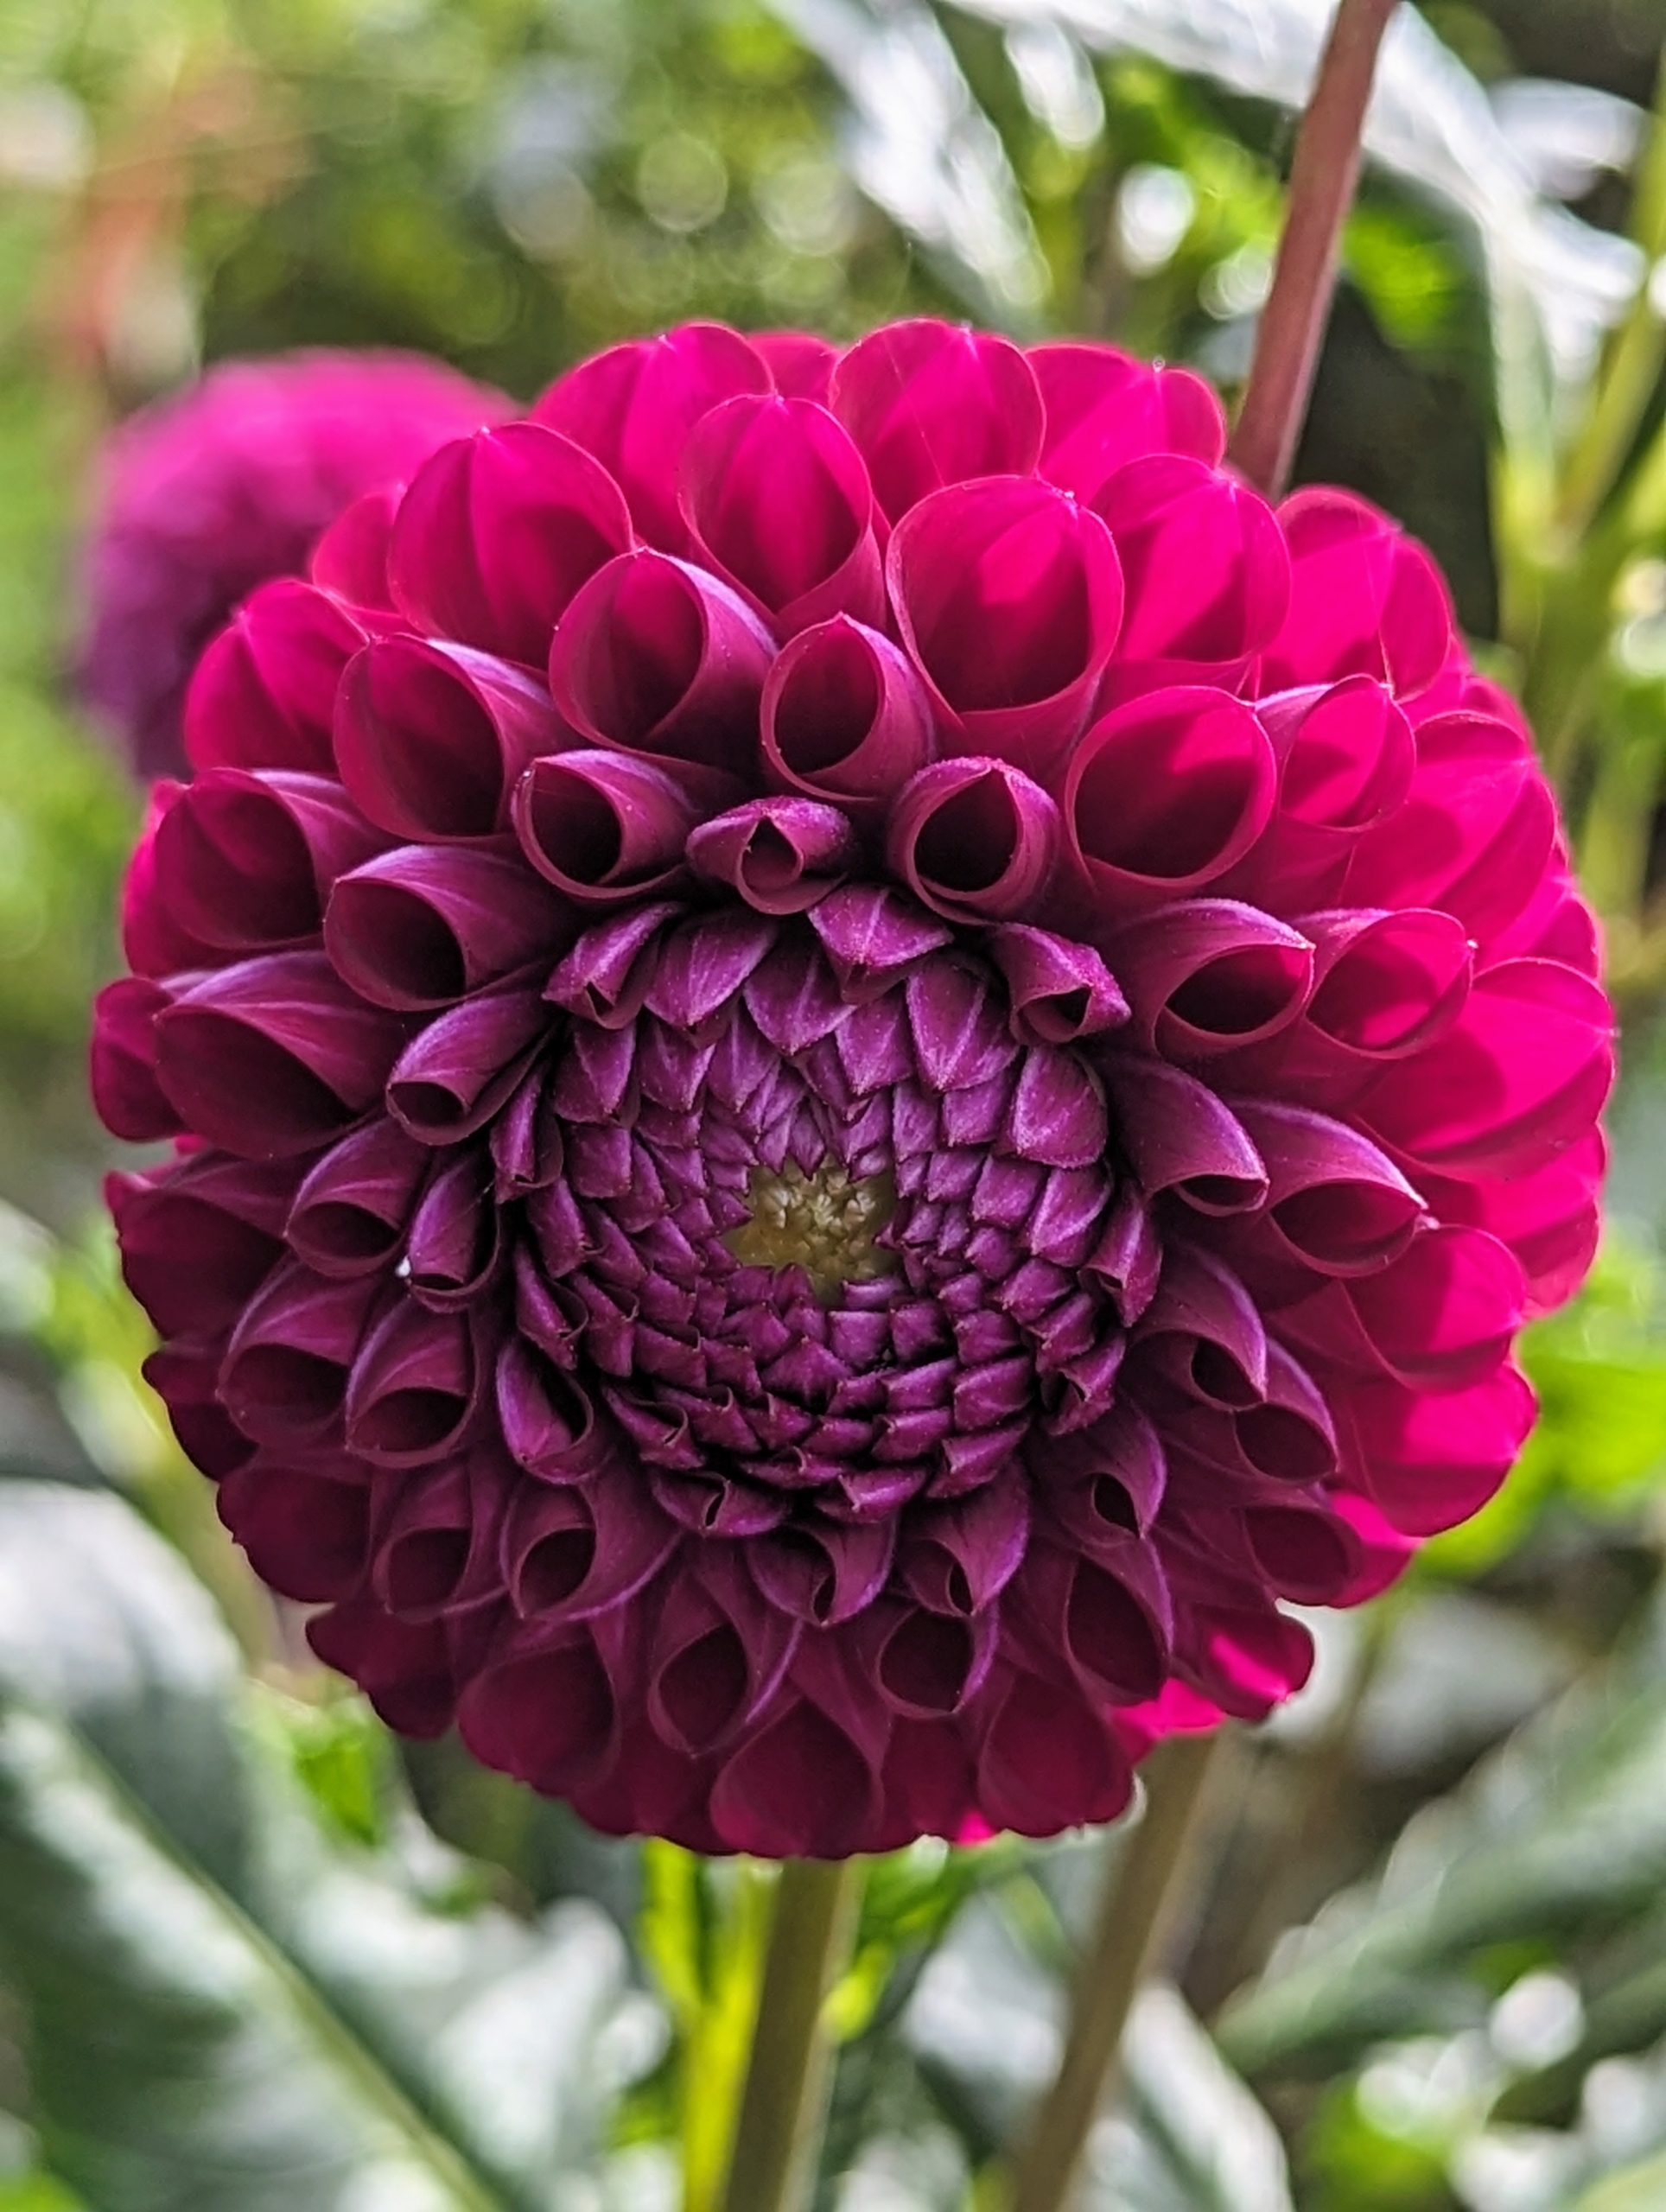
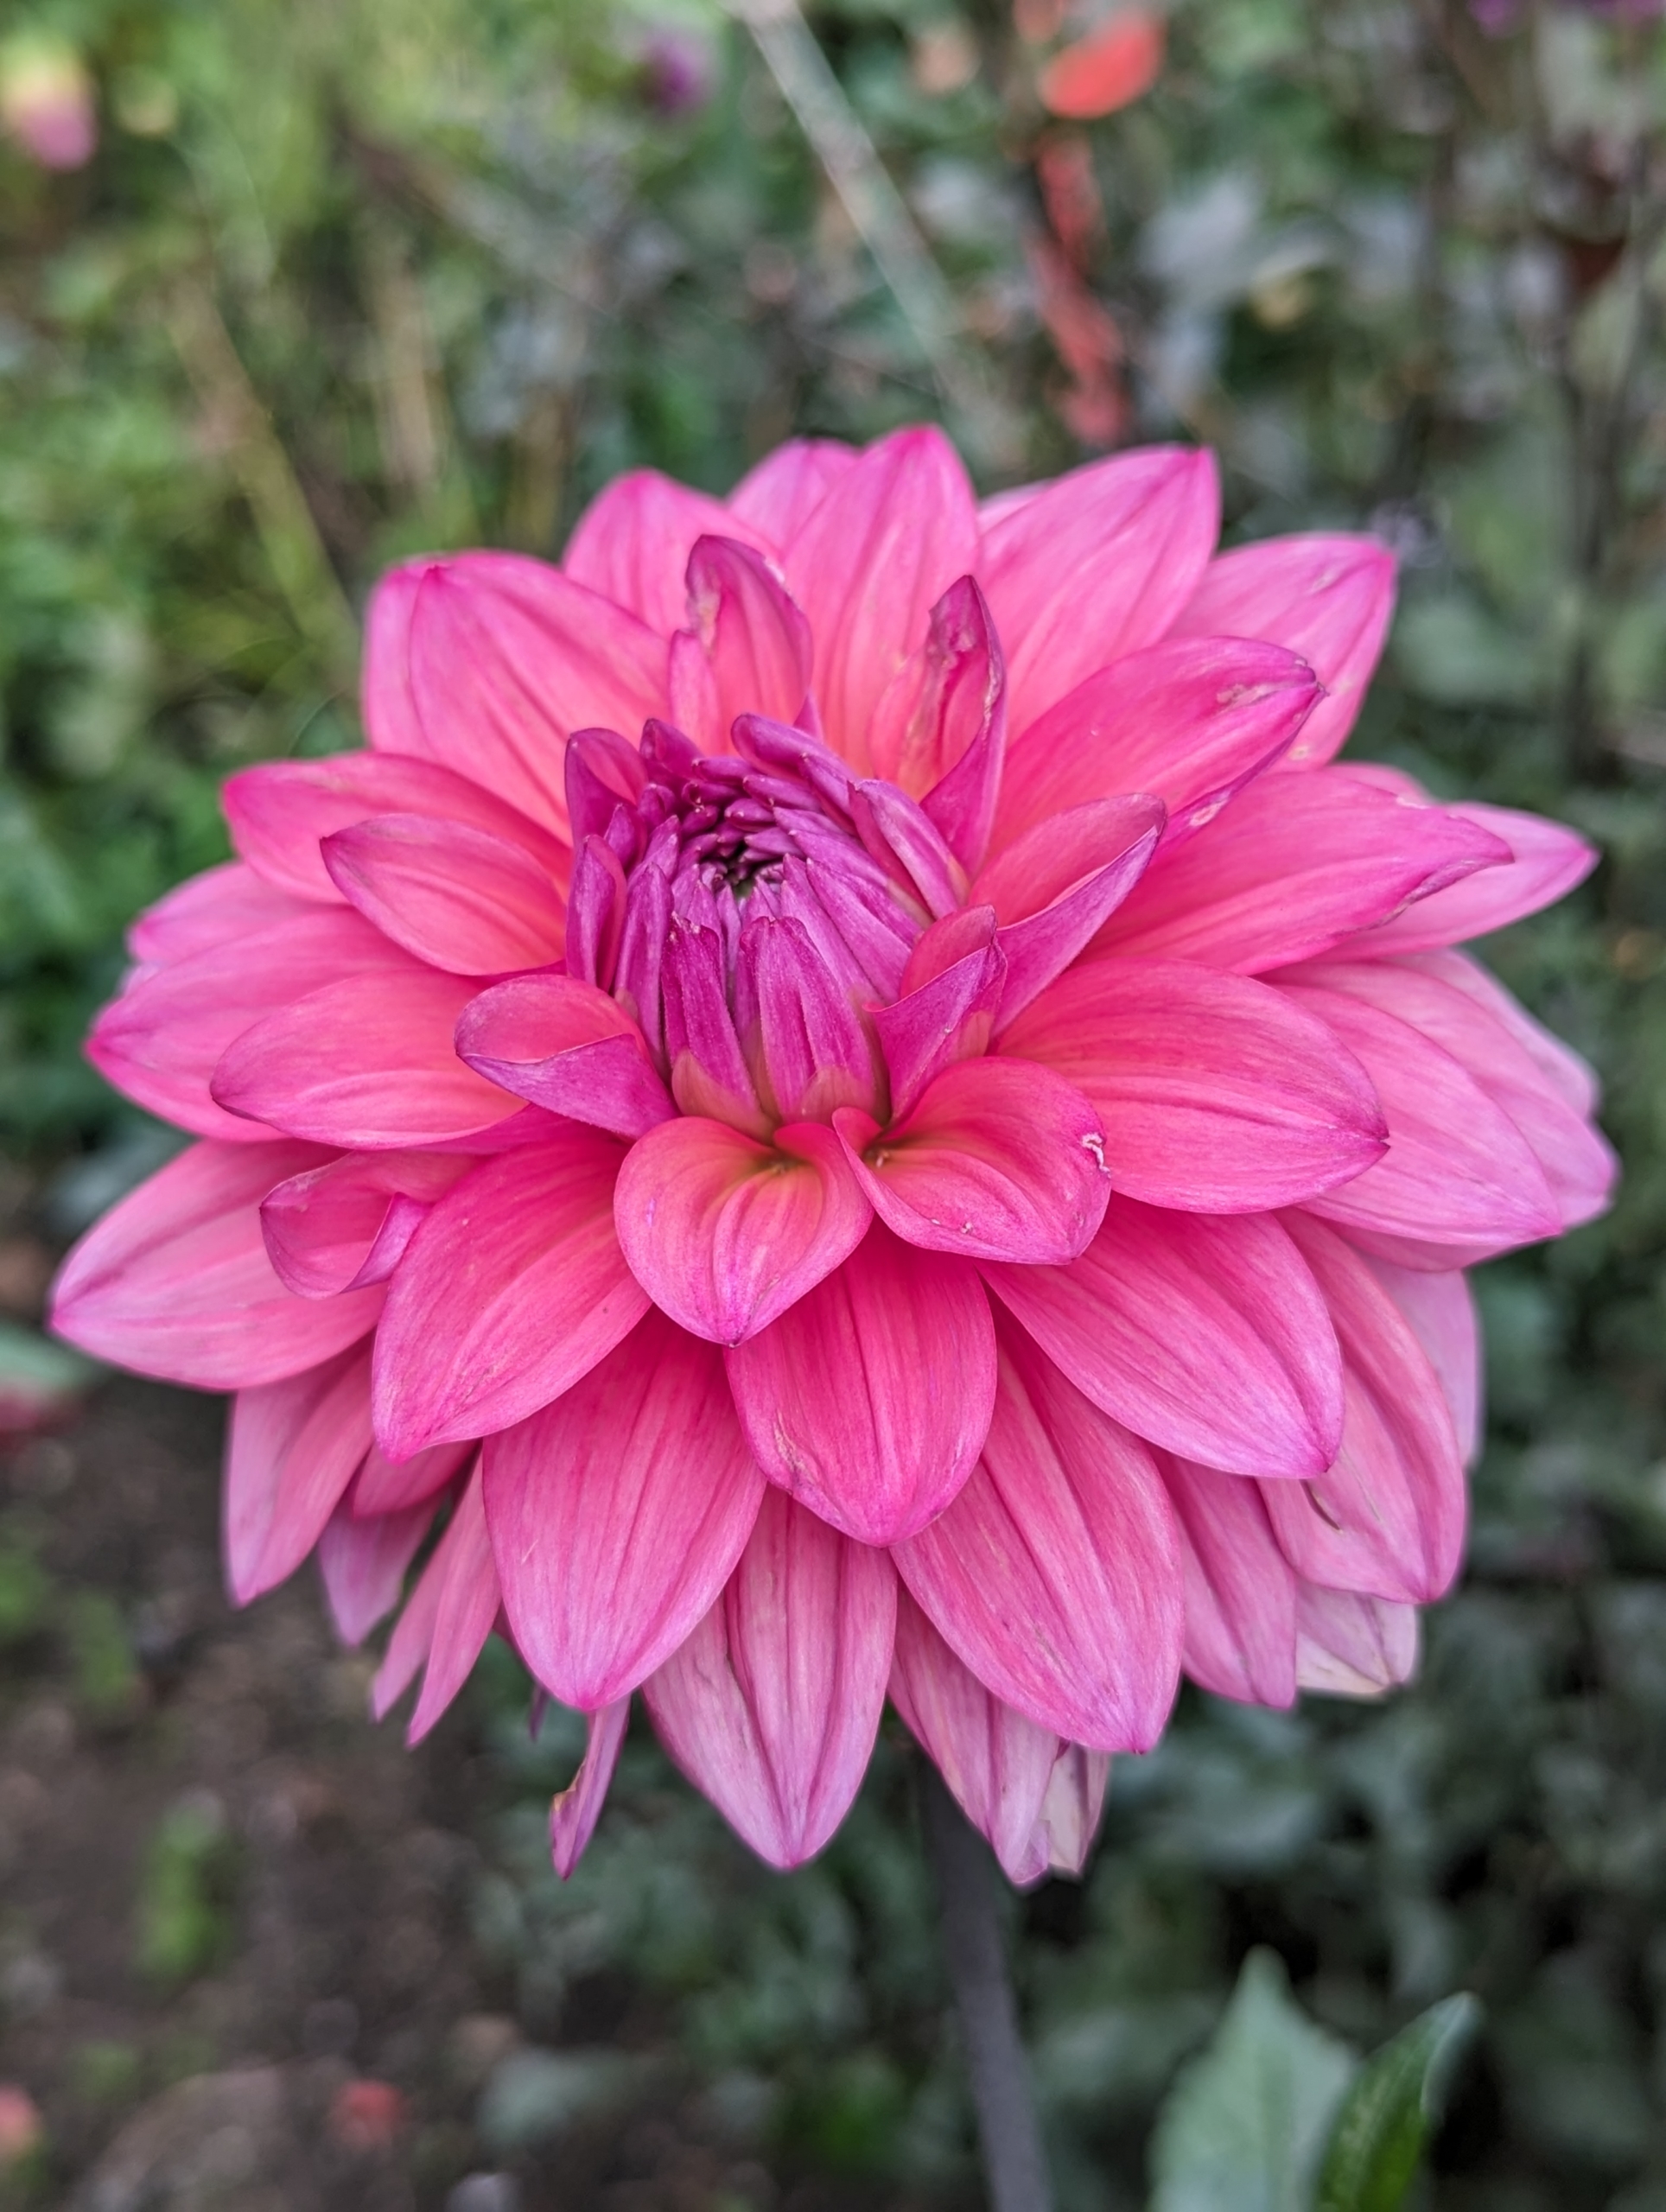
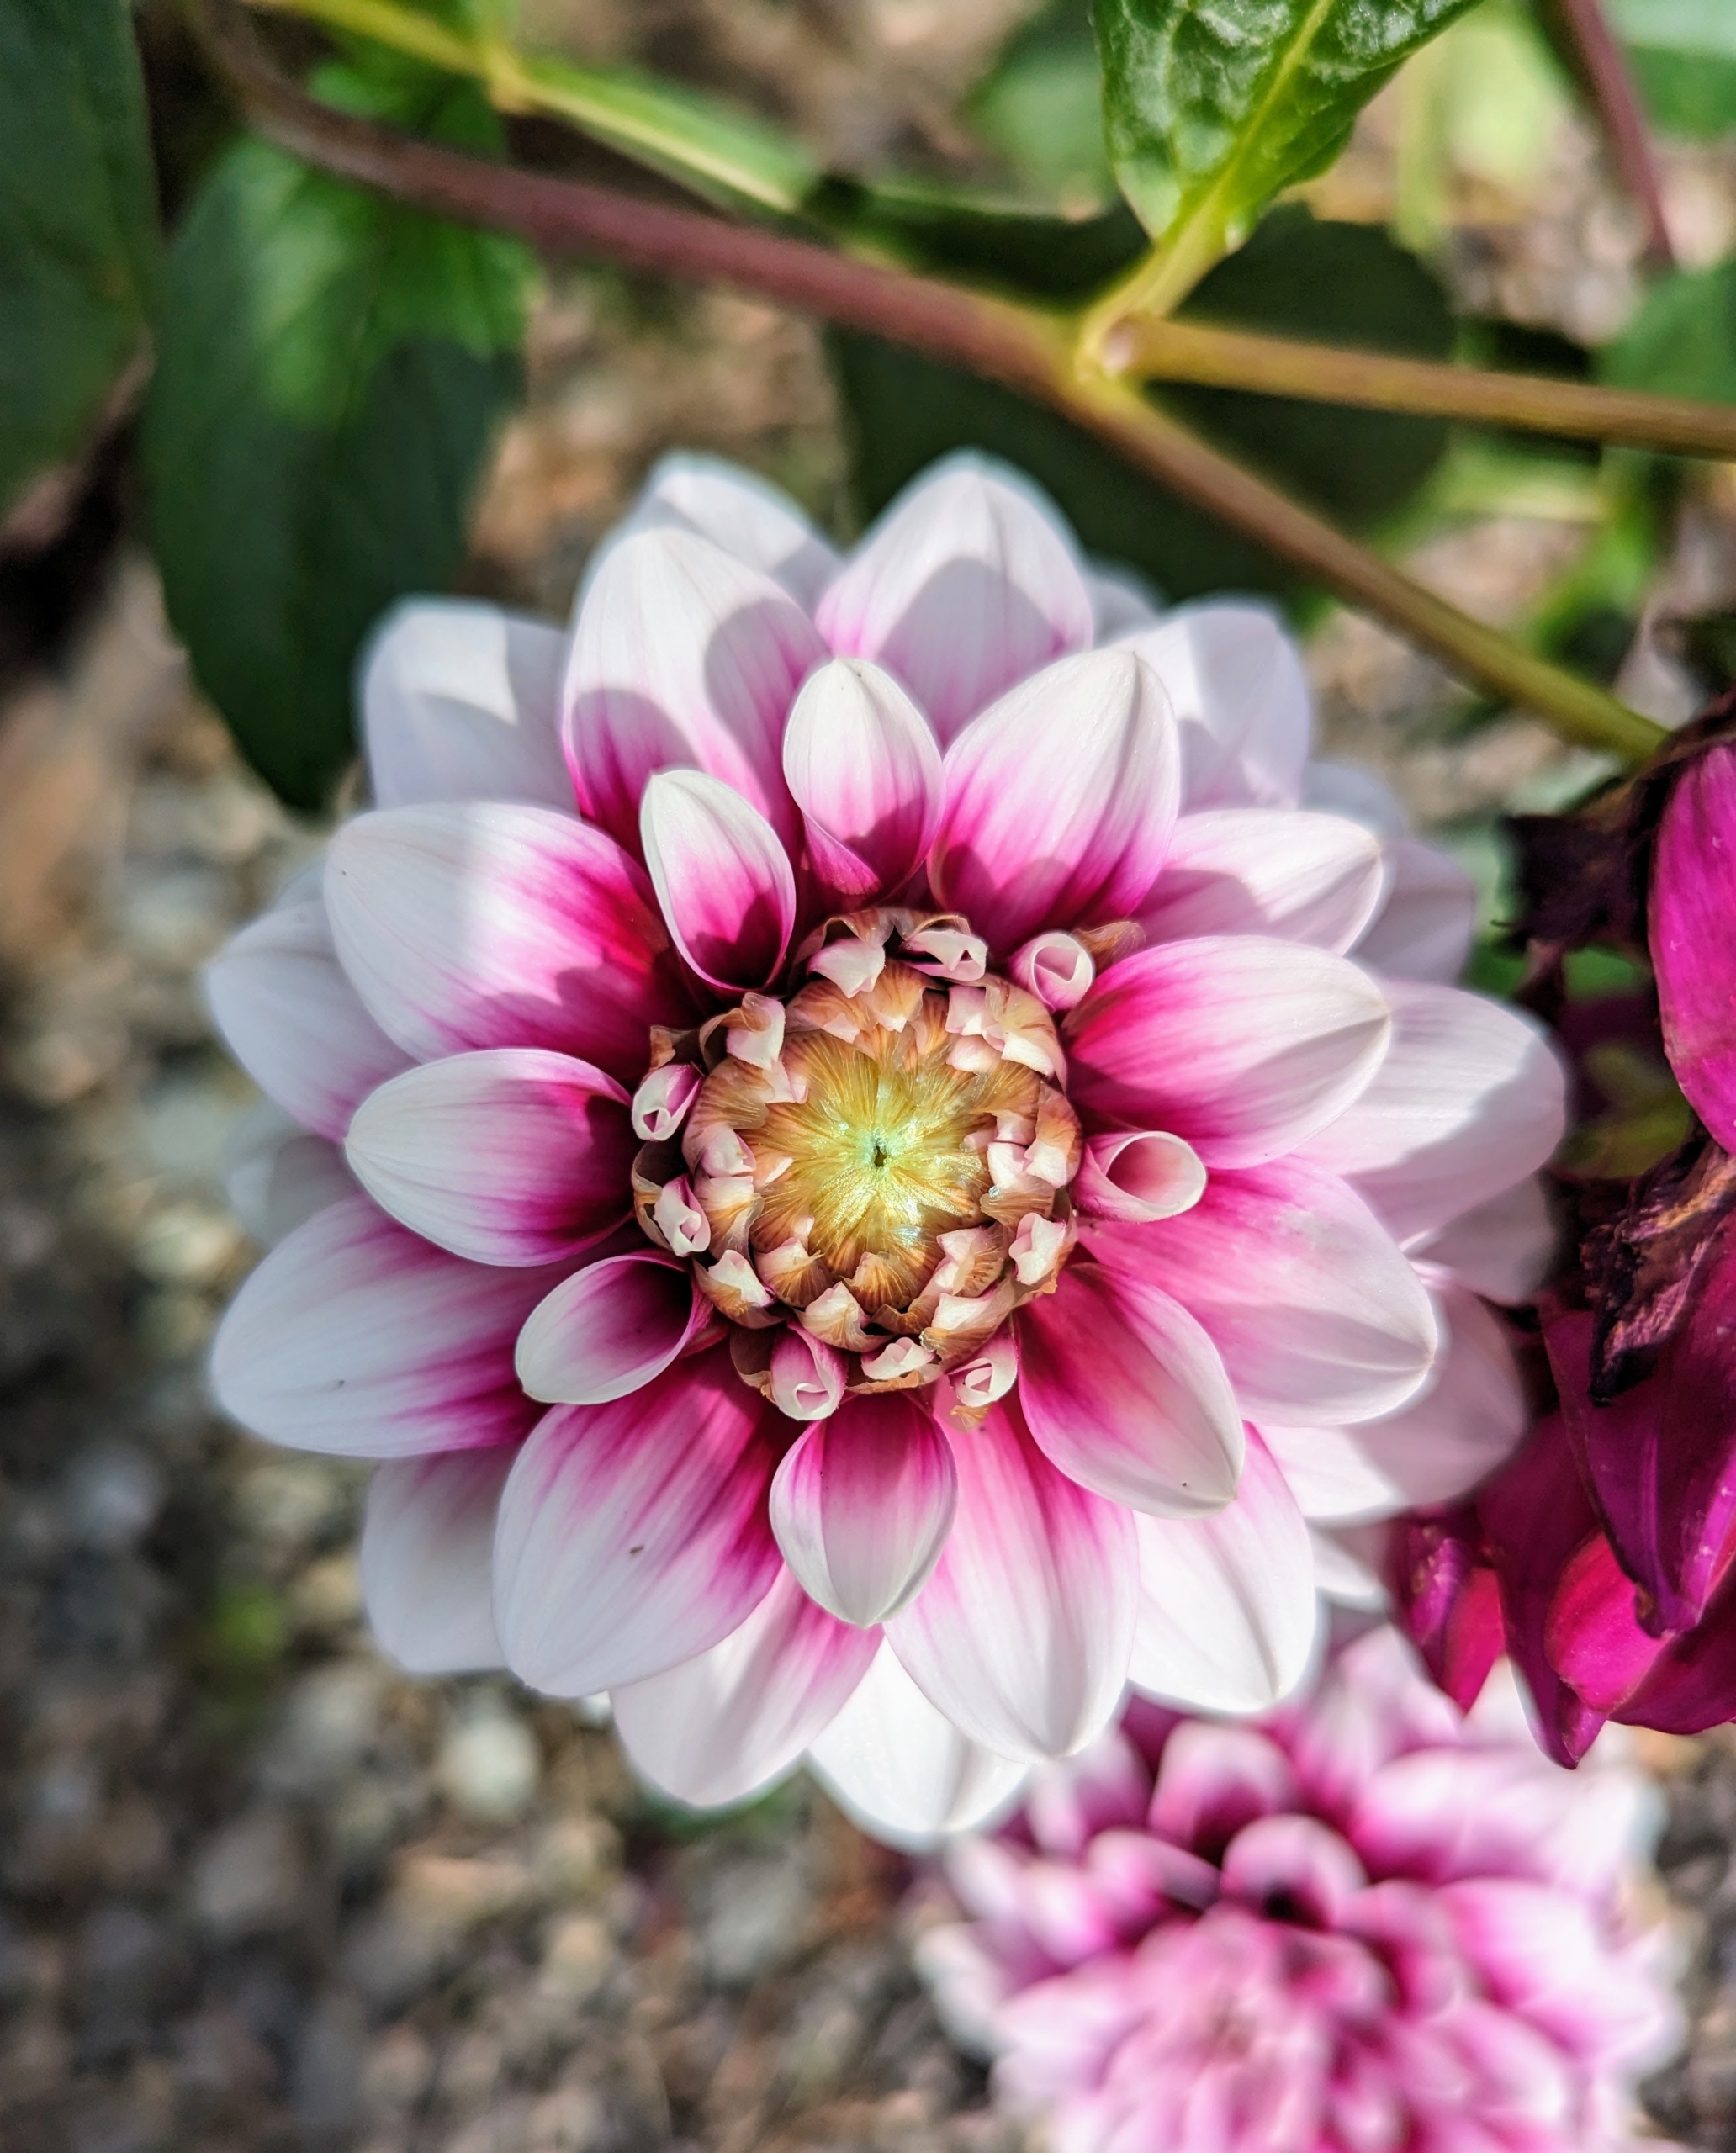
Dahlias come in white, shades of pink, red, yellow, orange, shades of purple, variegated and bicolor – every color but true blue.
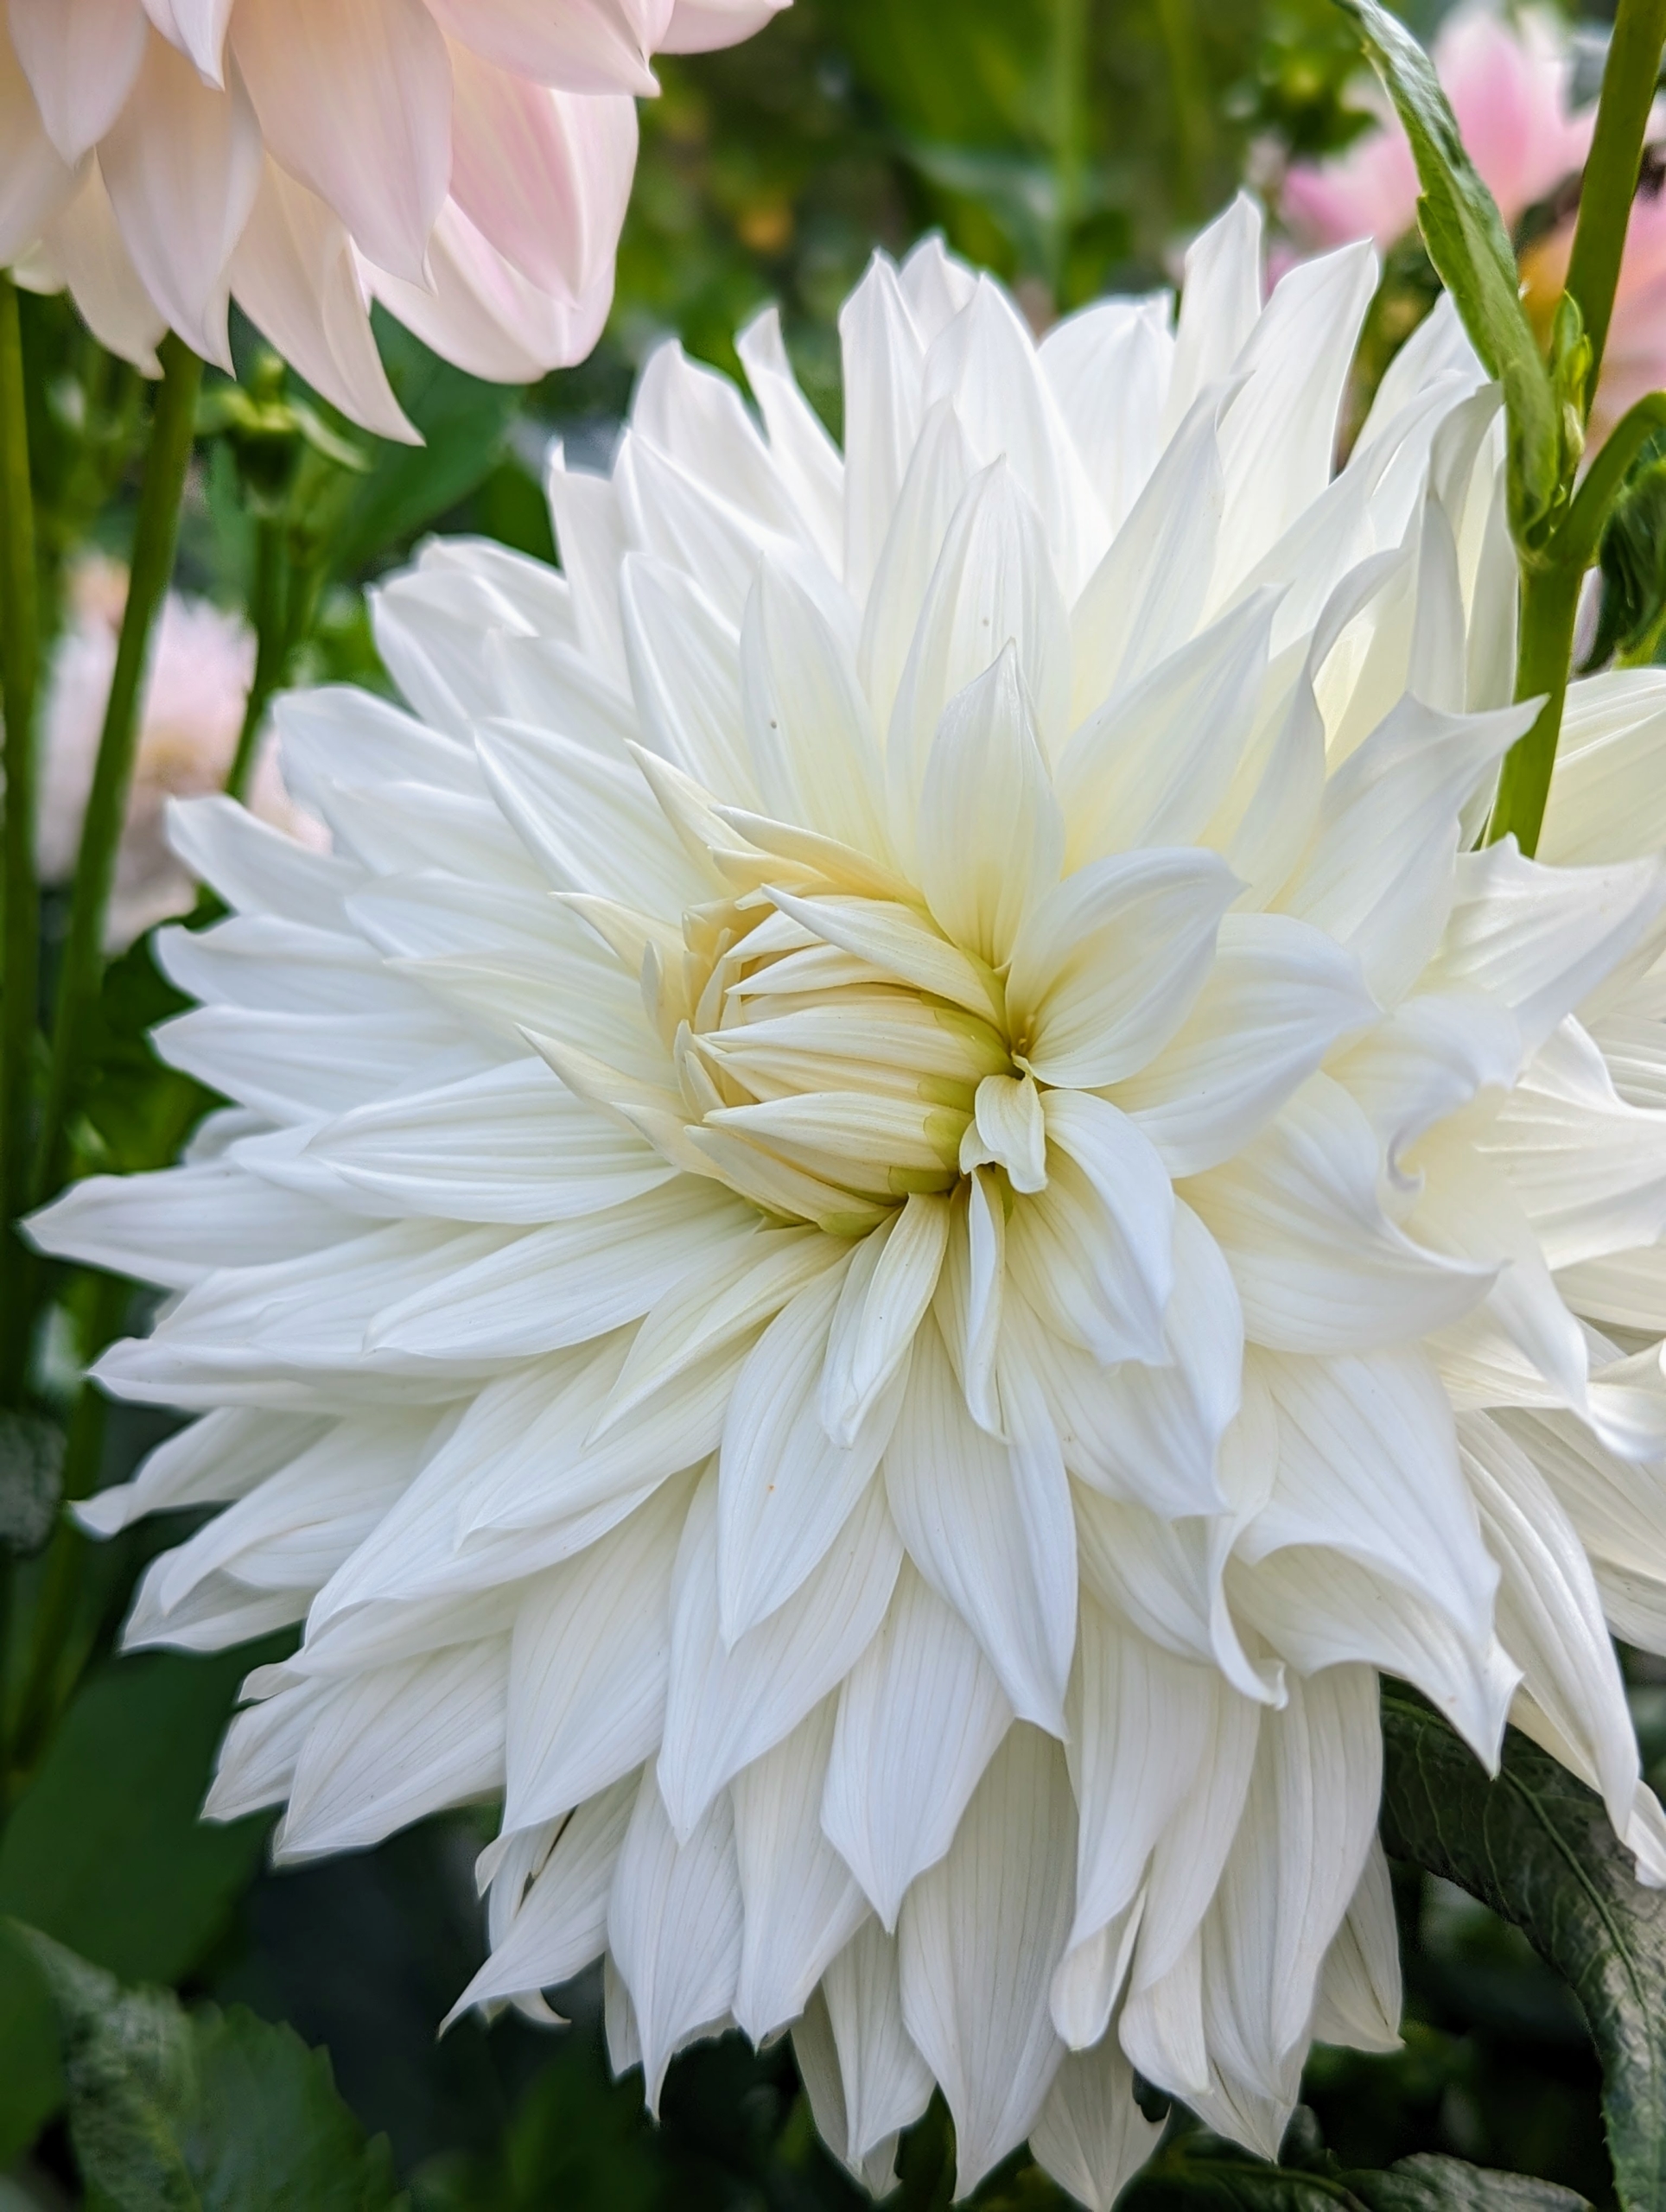
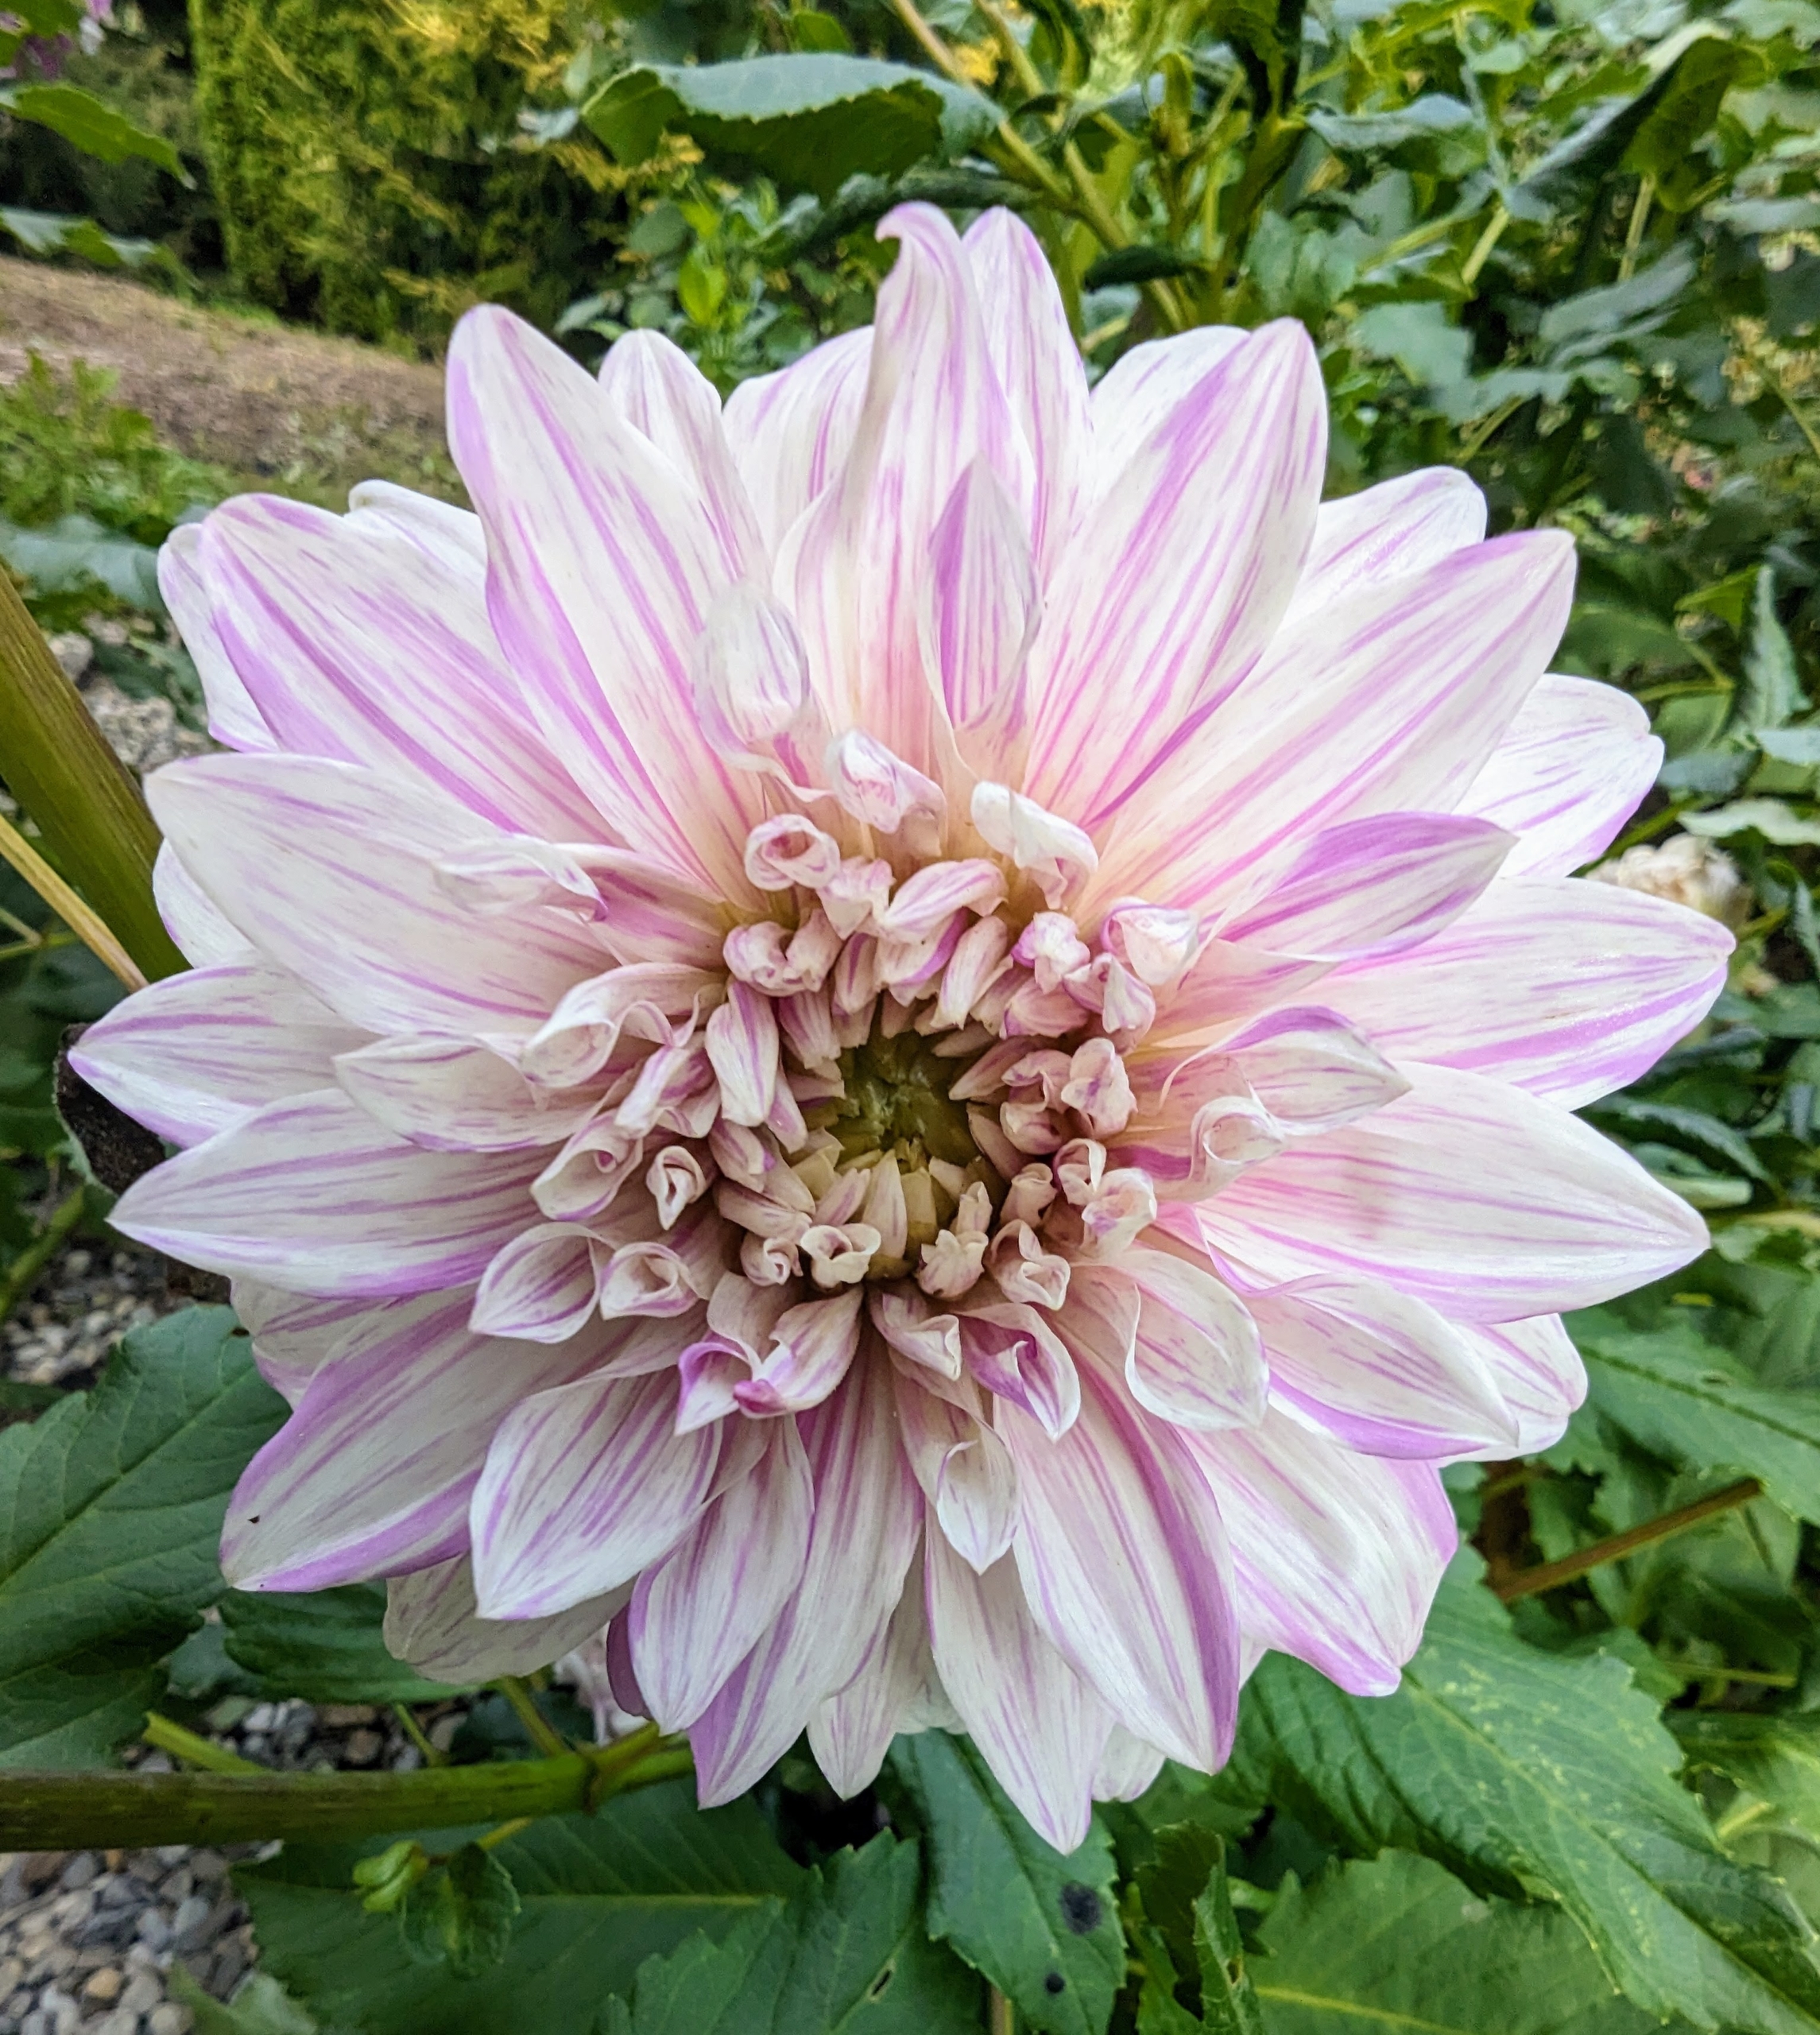
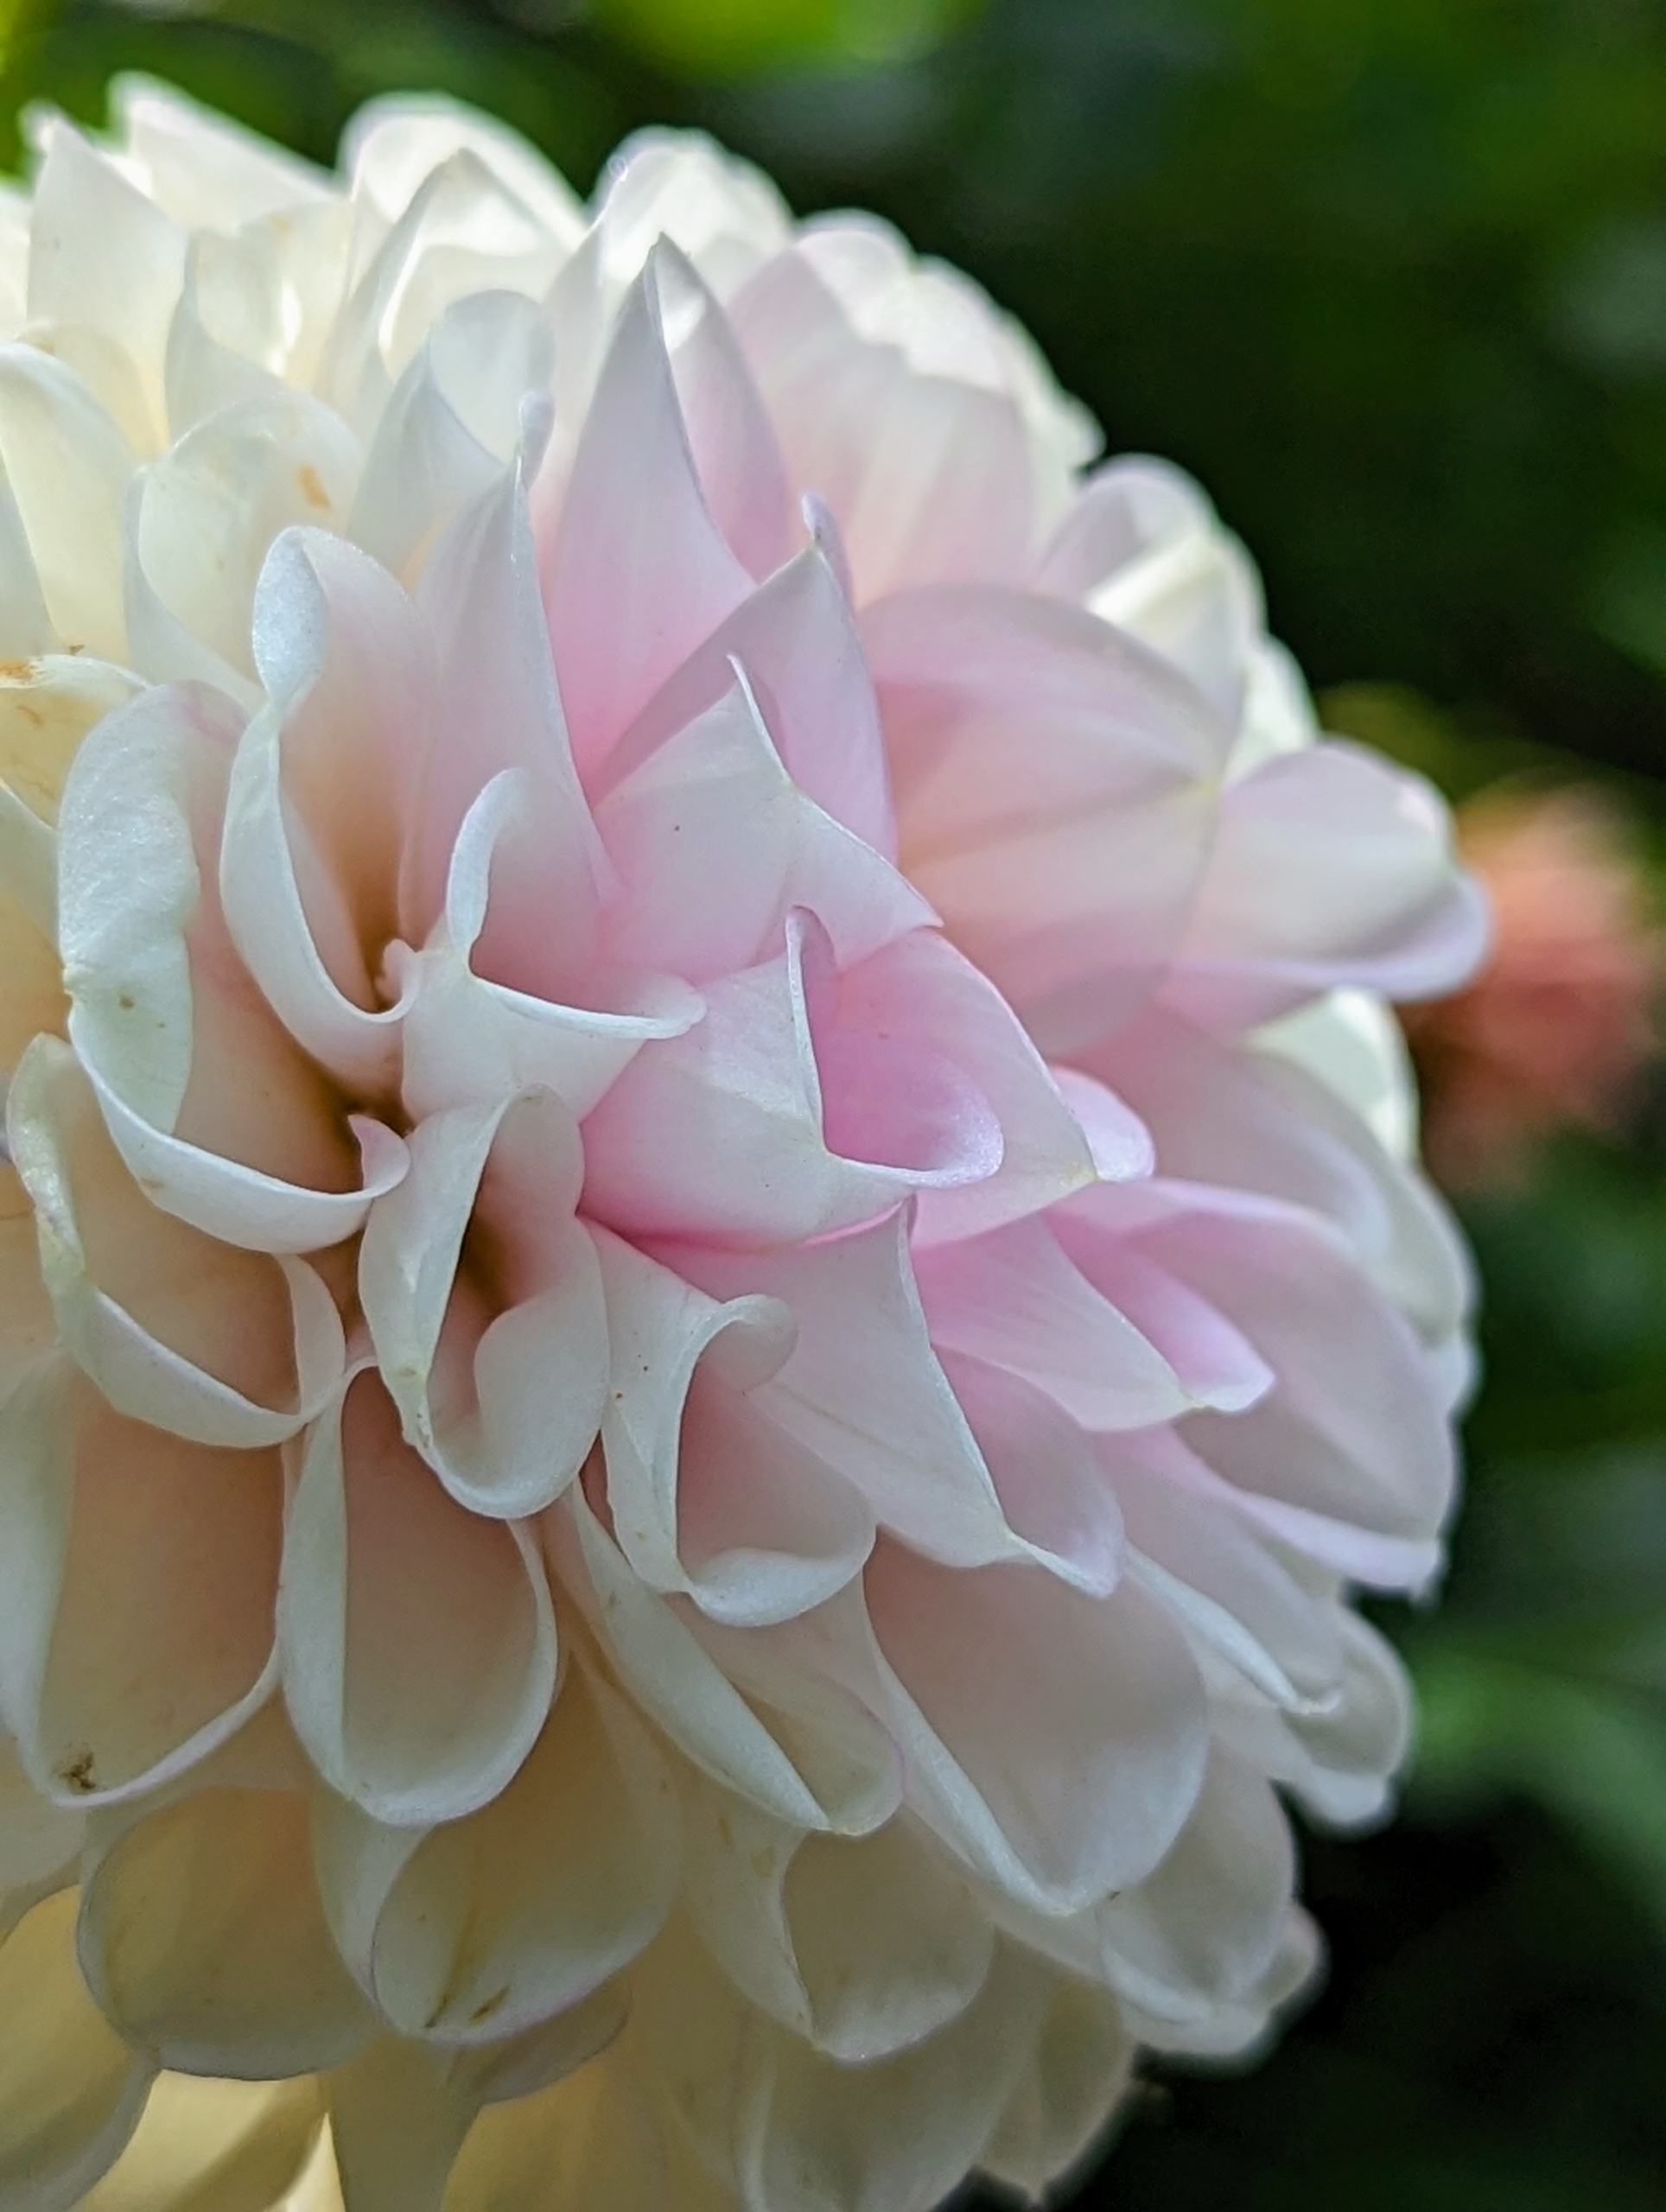
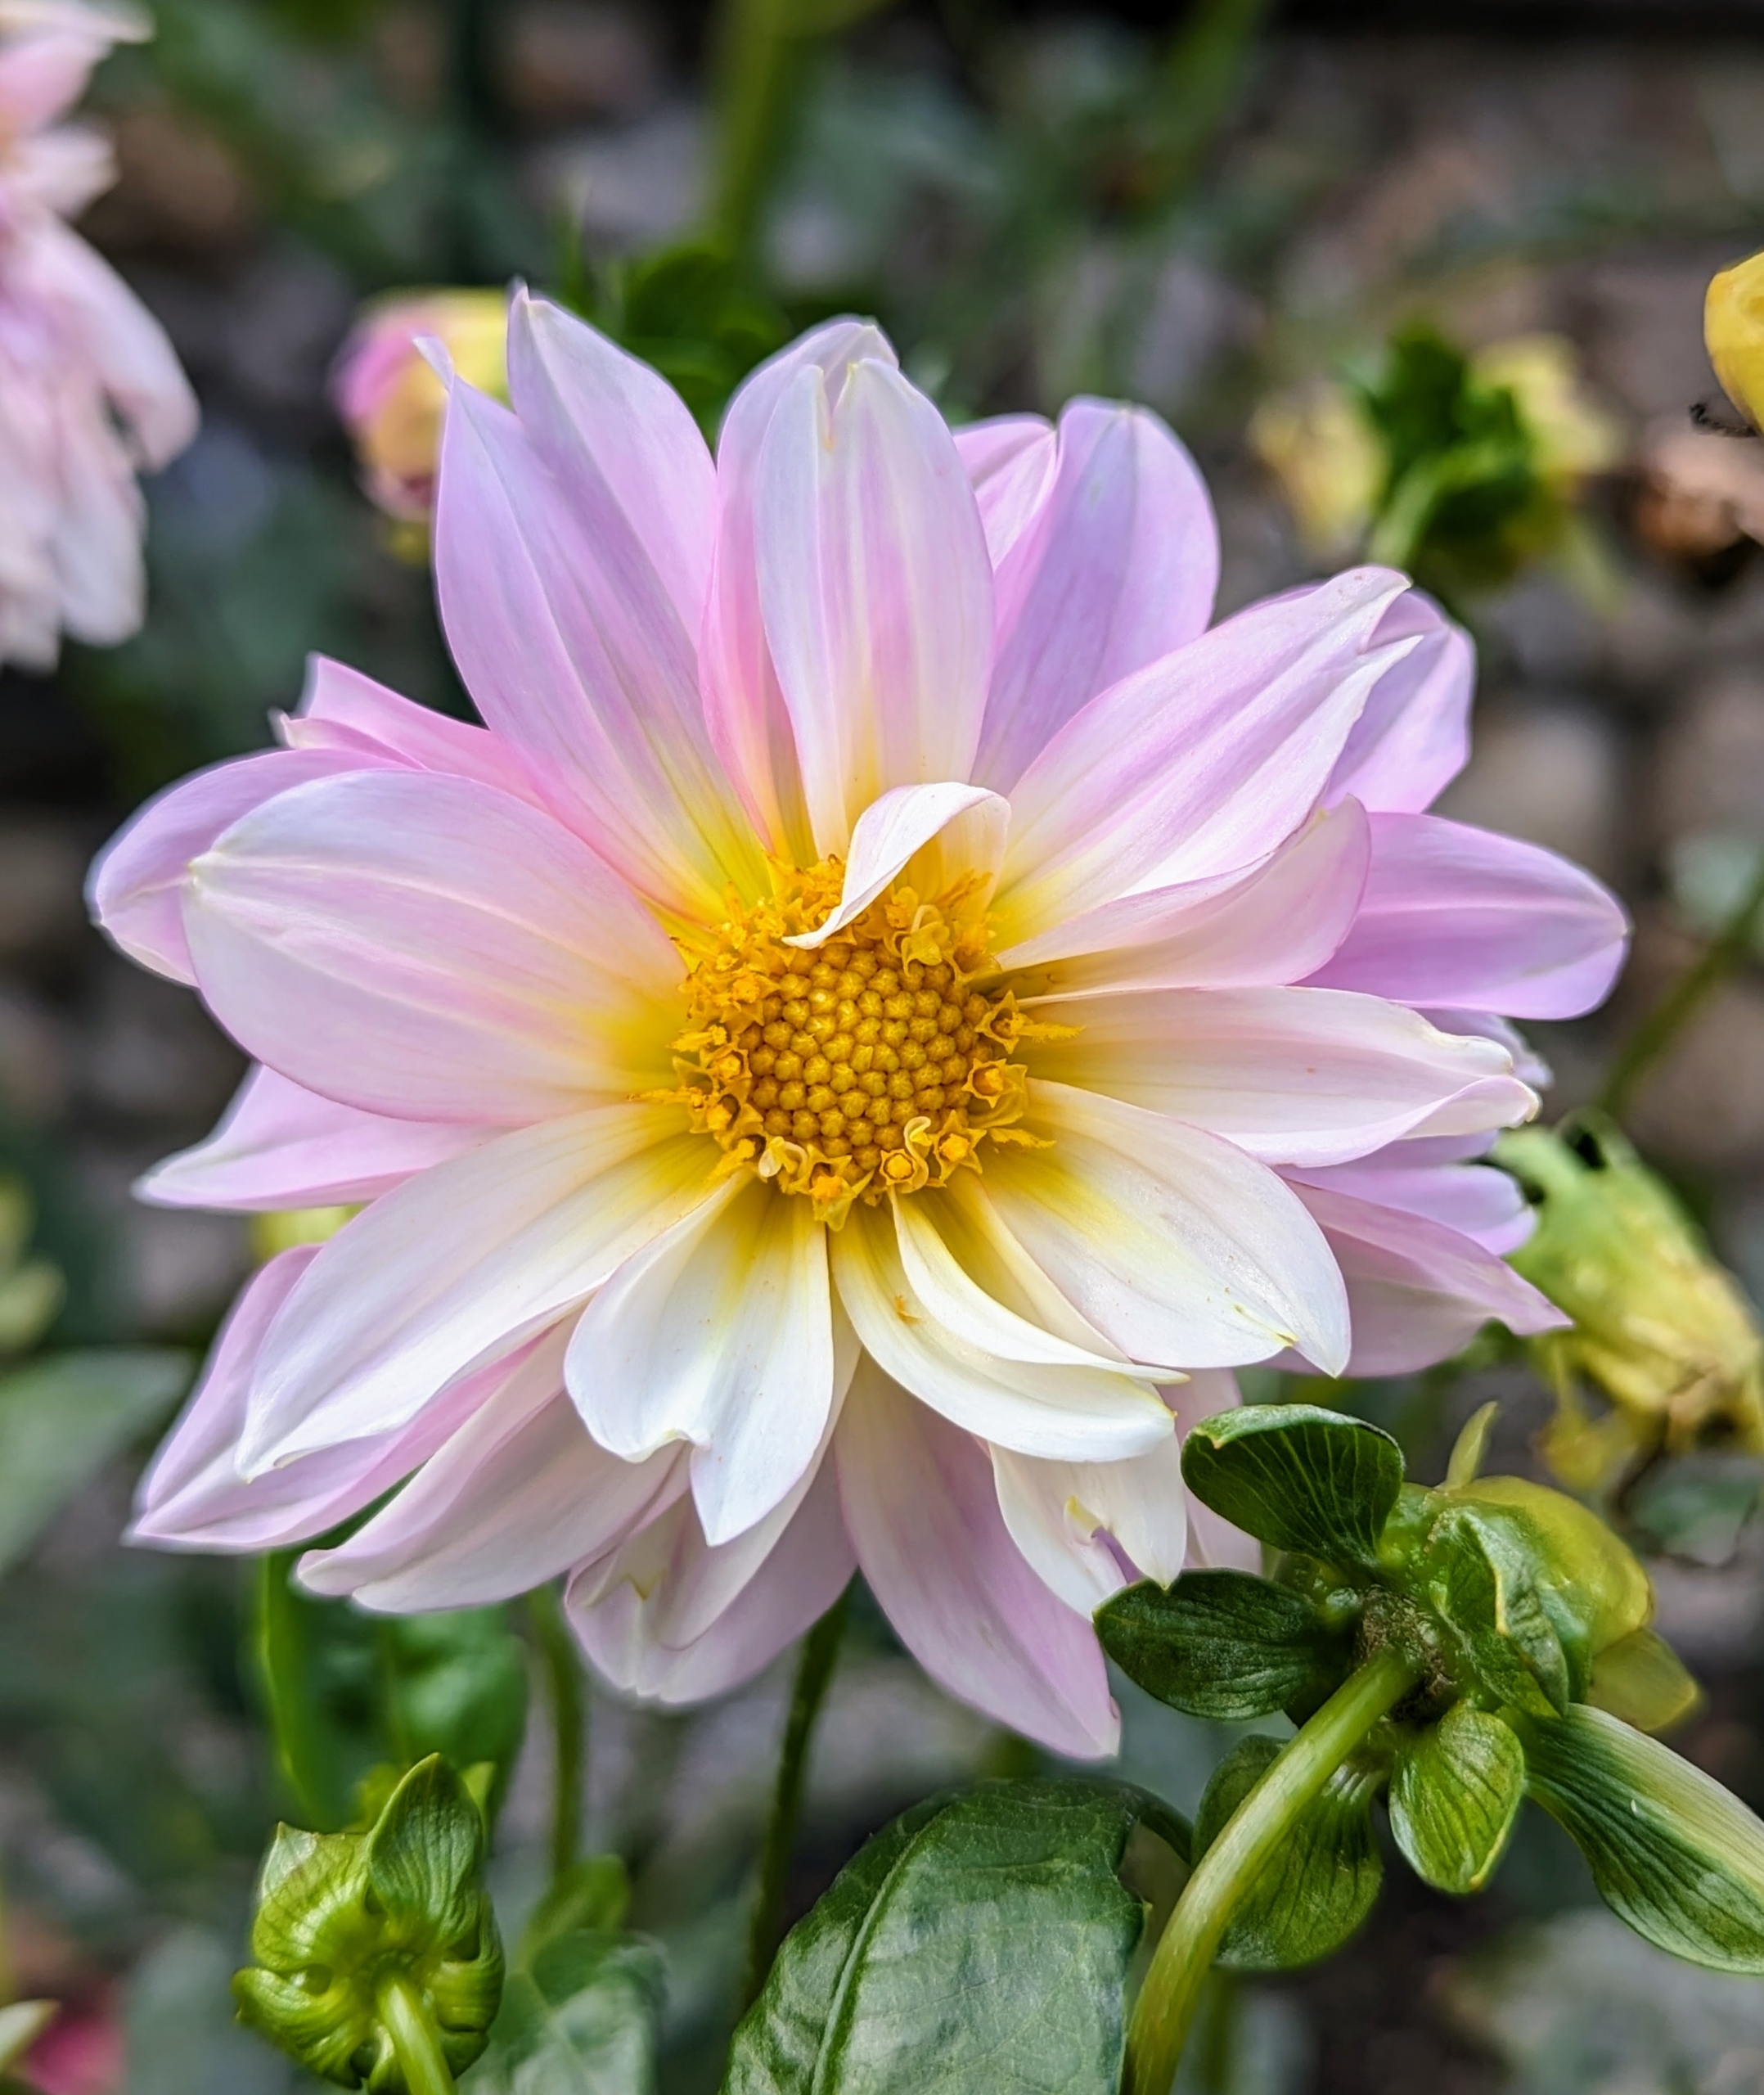
Here is another white dahlia with a tinge of light pink in the center.
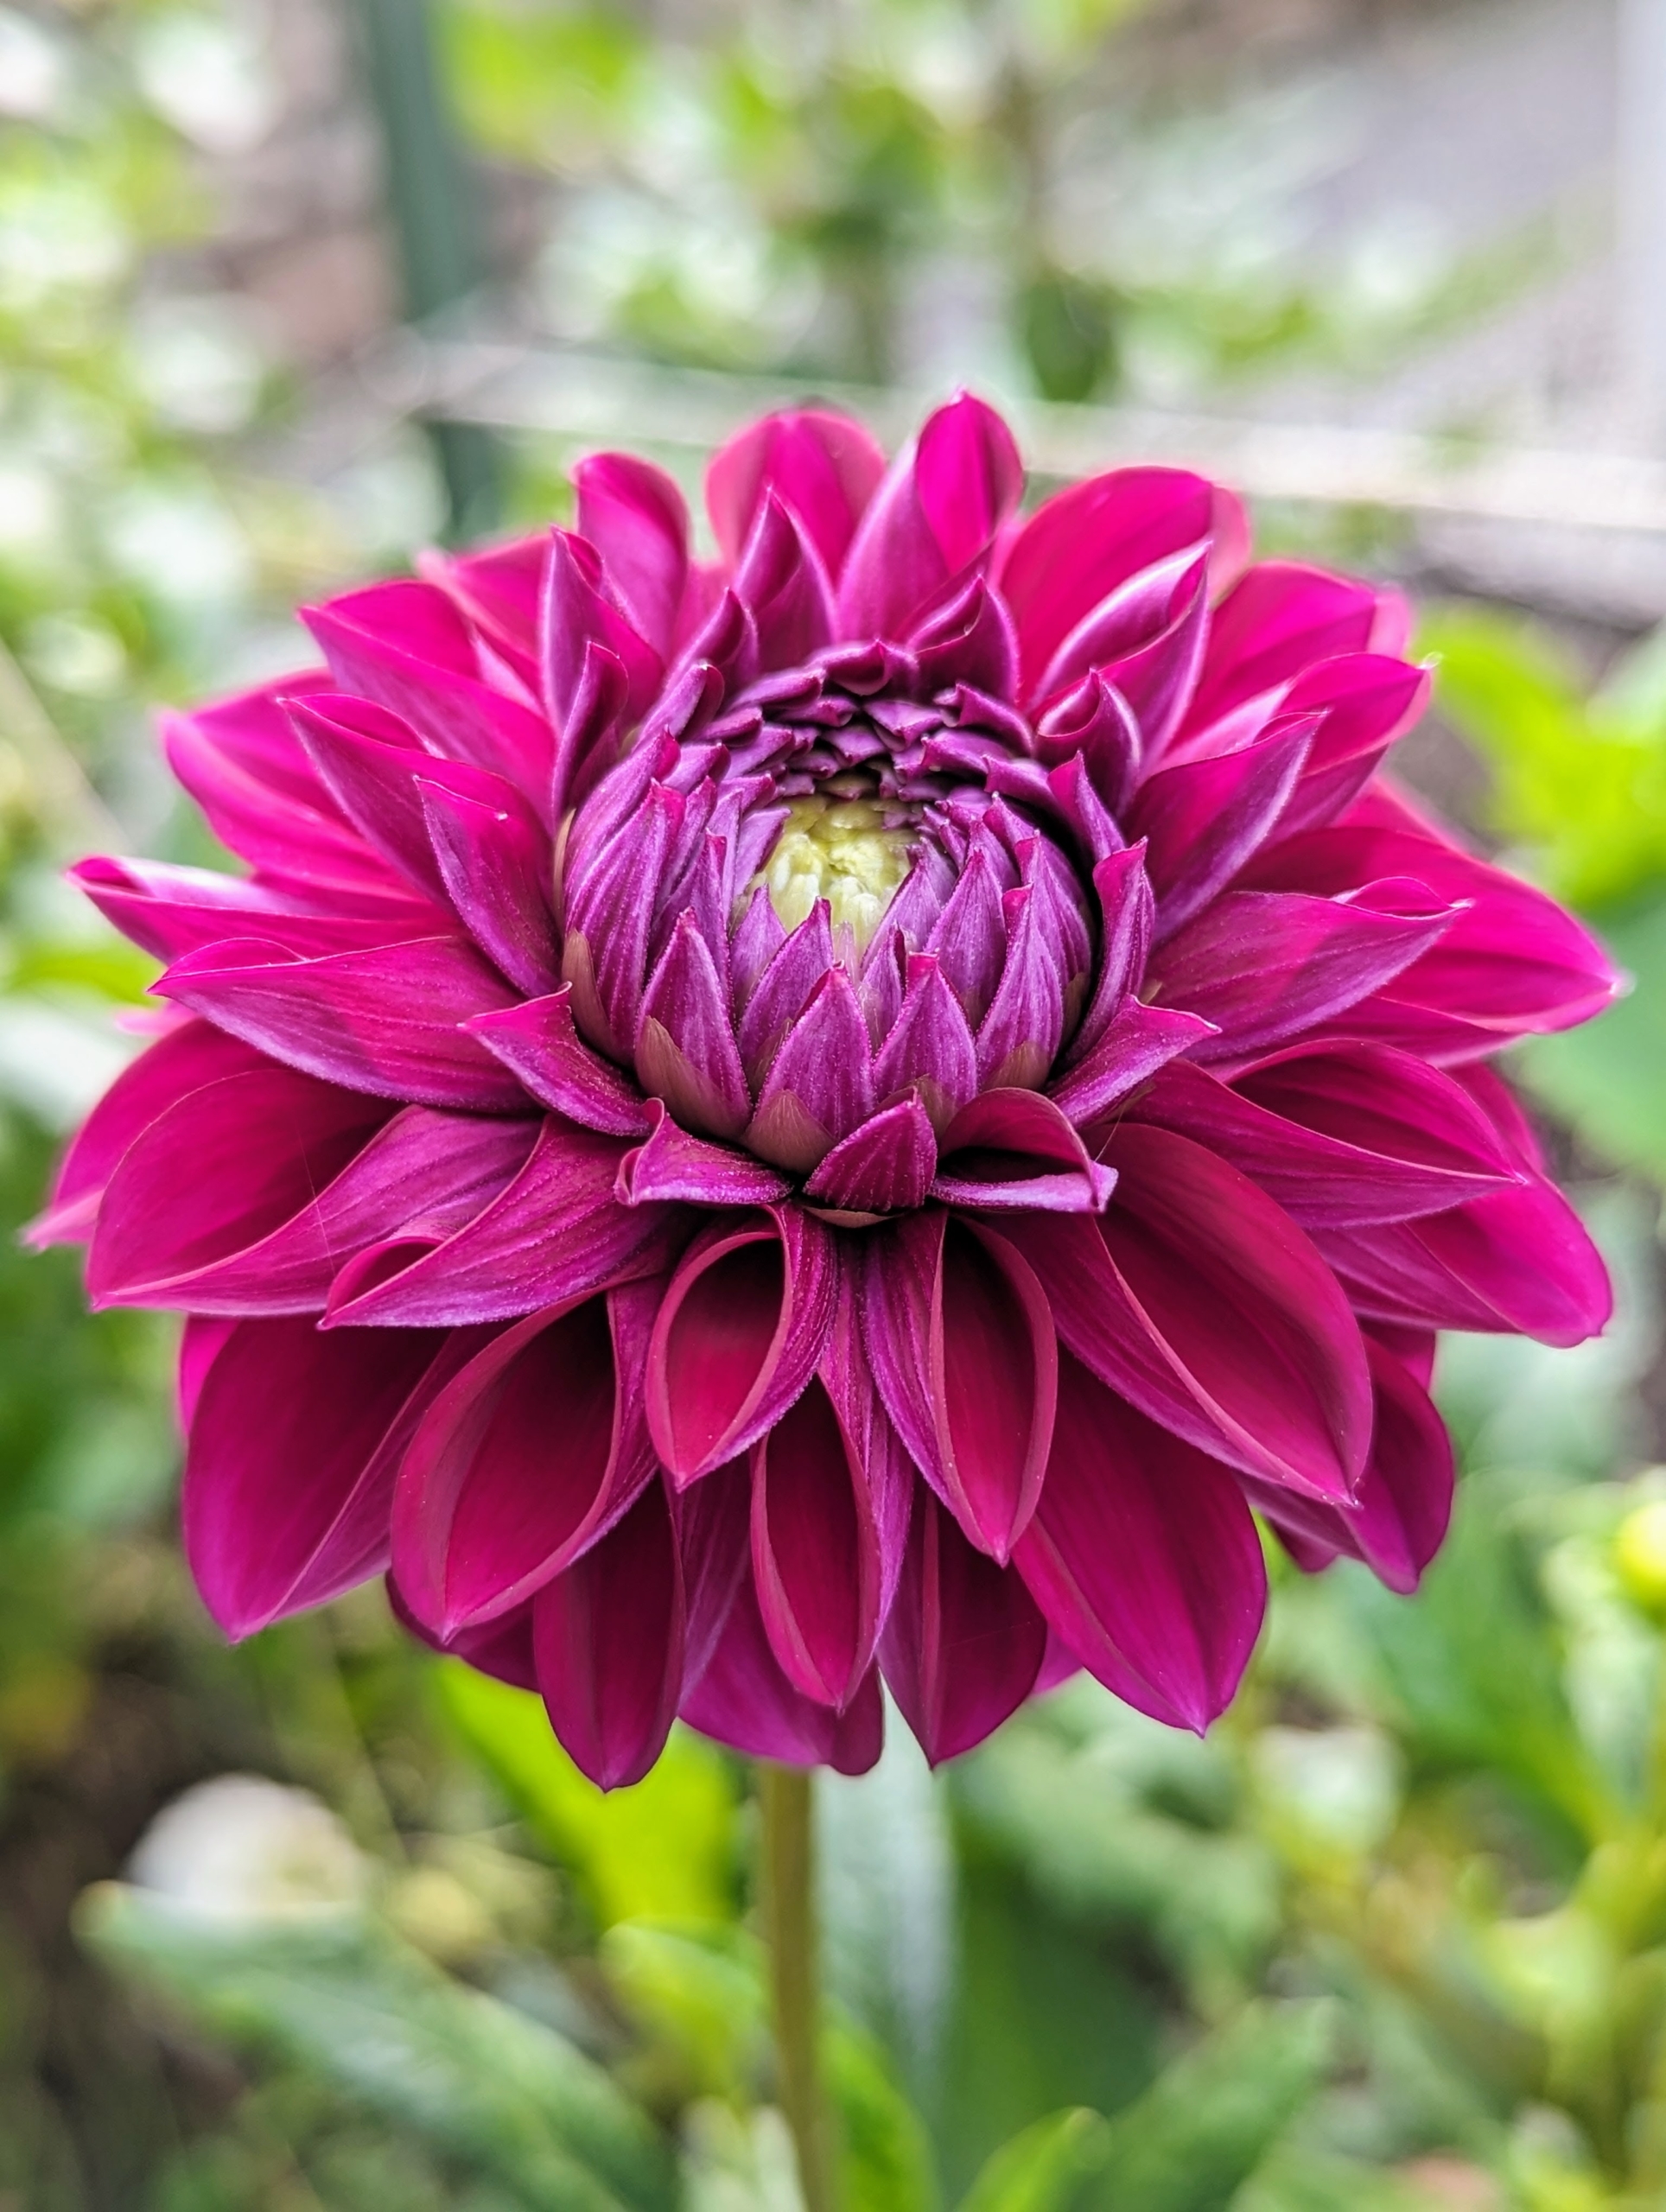
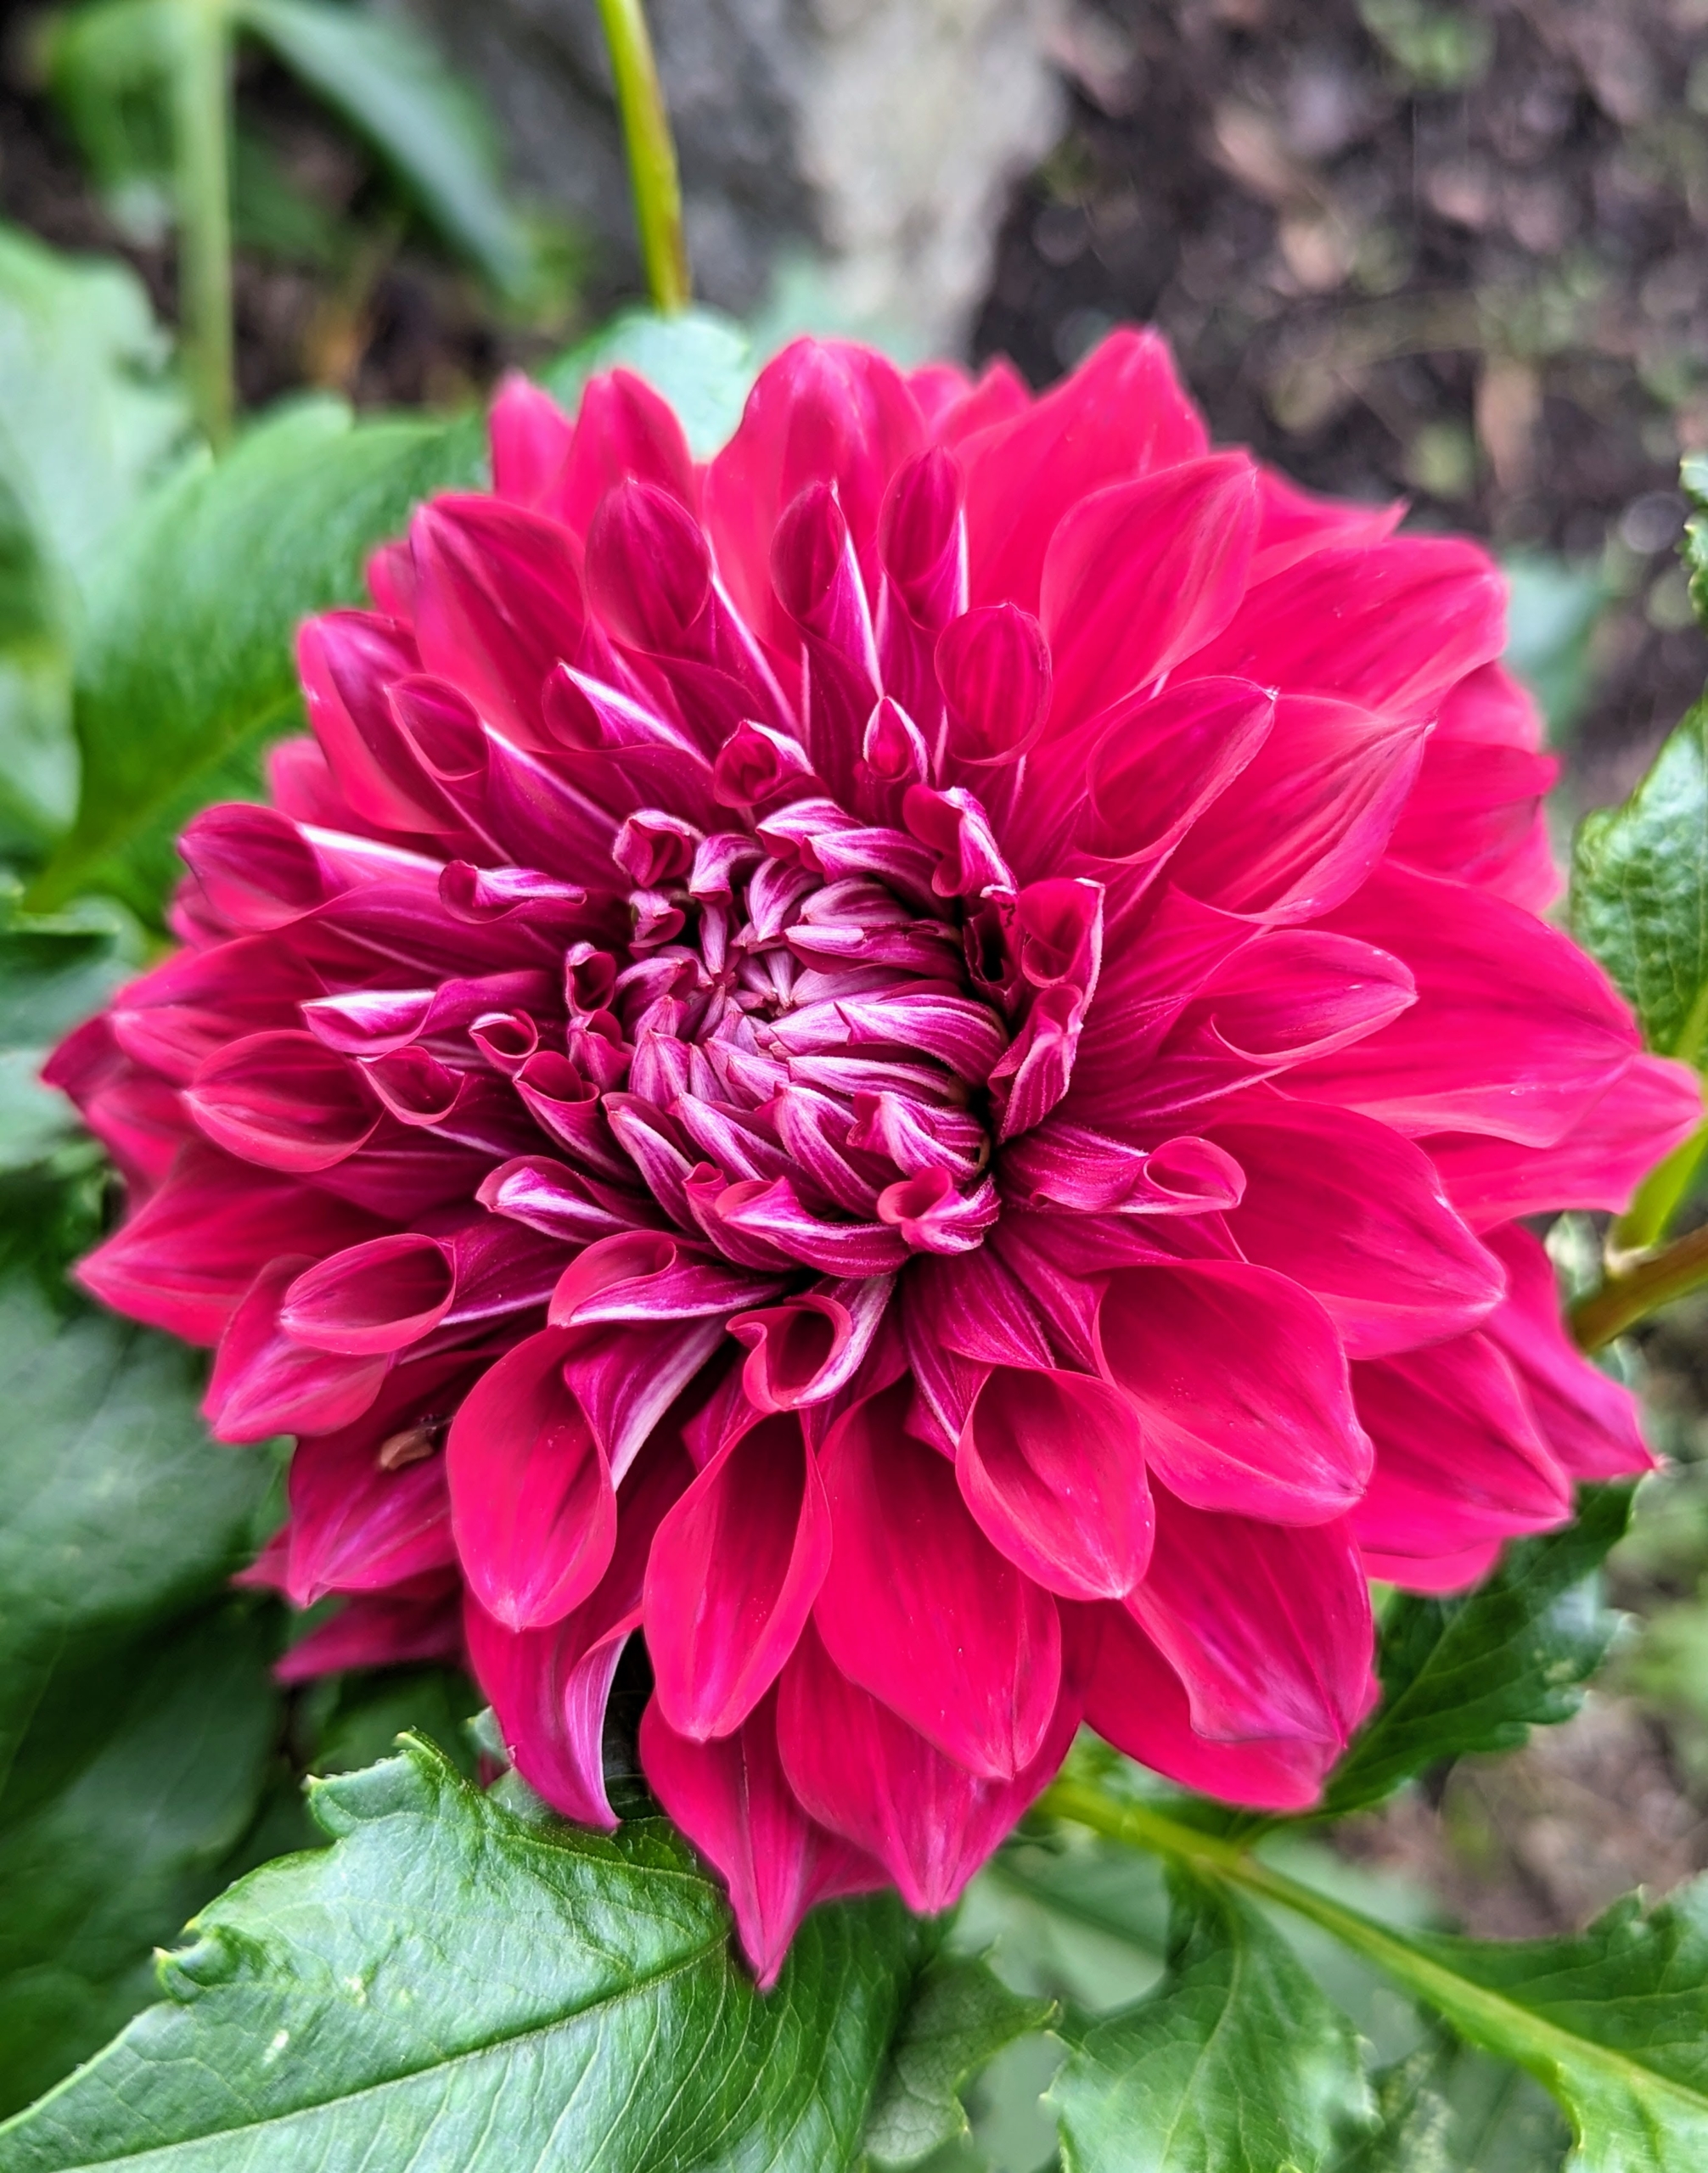
Here is one in dark burgundy. Like many flower varieties, there is also no pure black variety—only dark reds and dark purples.
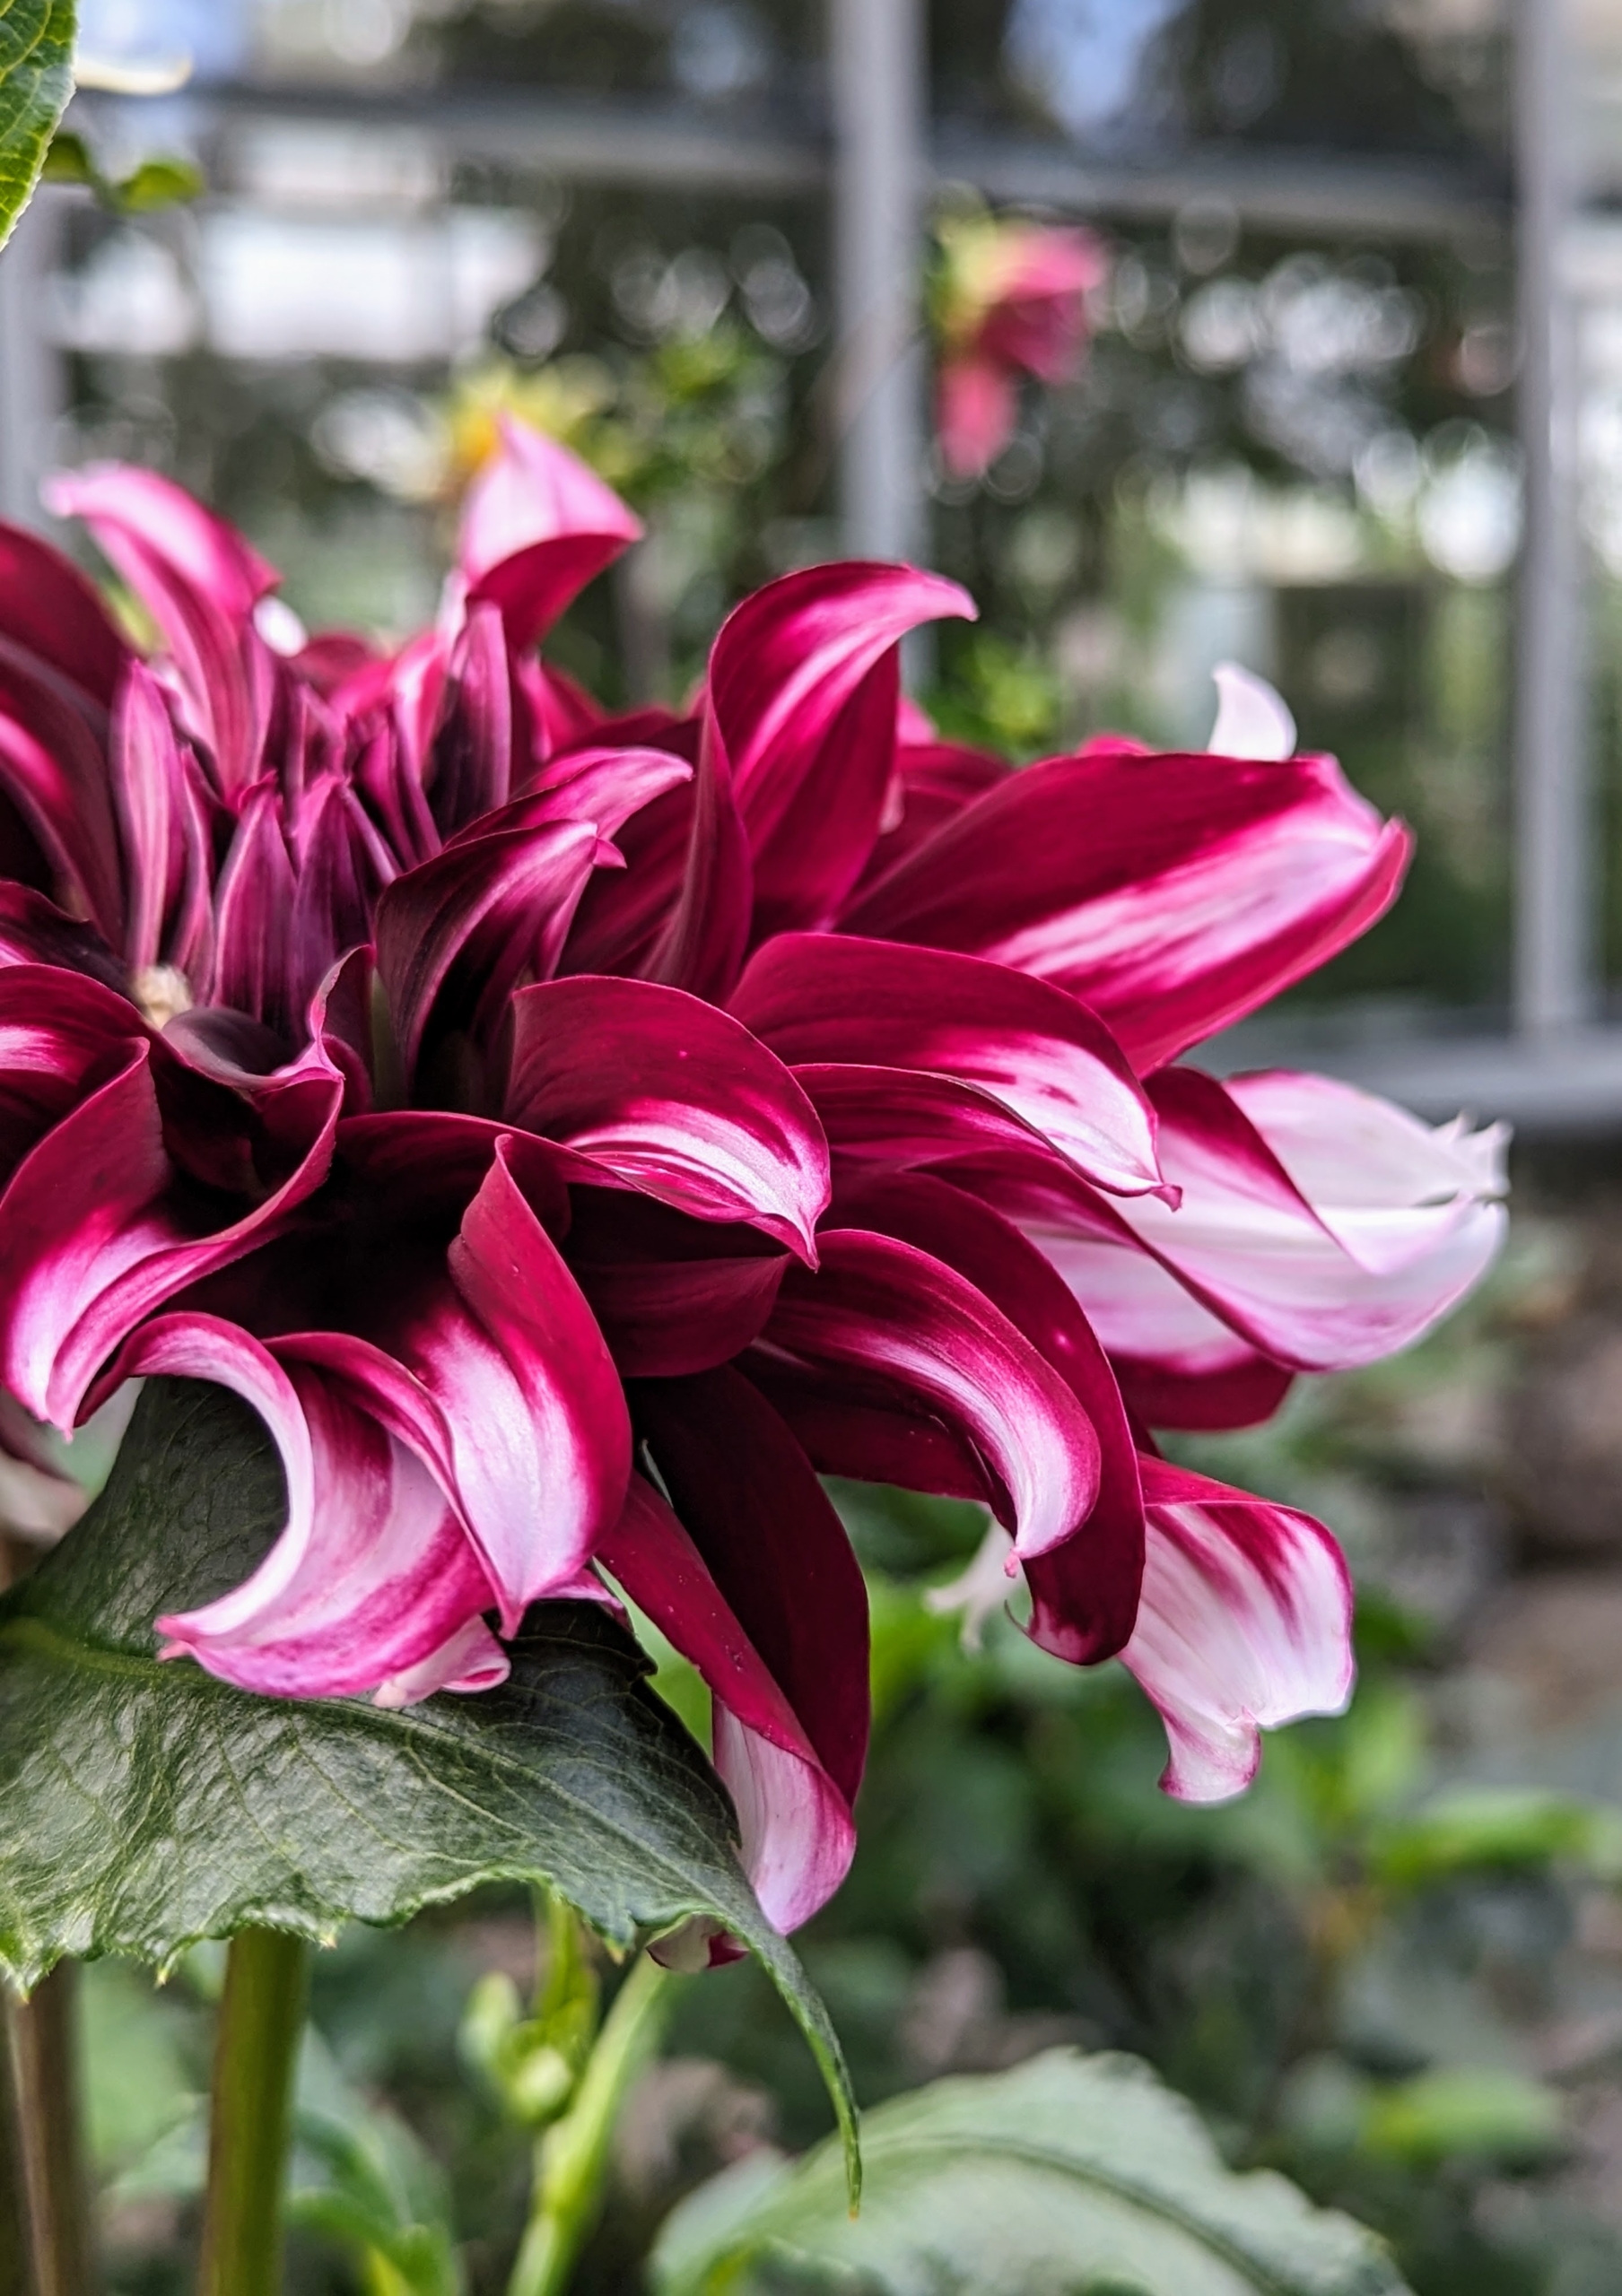
This large bloom is burgundy with white tips. Consider their size at maturity when planting. They grow best in rich, well-draining soil with a pH of 6.0 to 7.5. Amend heavy clay soil with aged manure or compost to lighten and loosen the texture for better drainage.
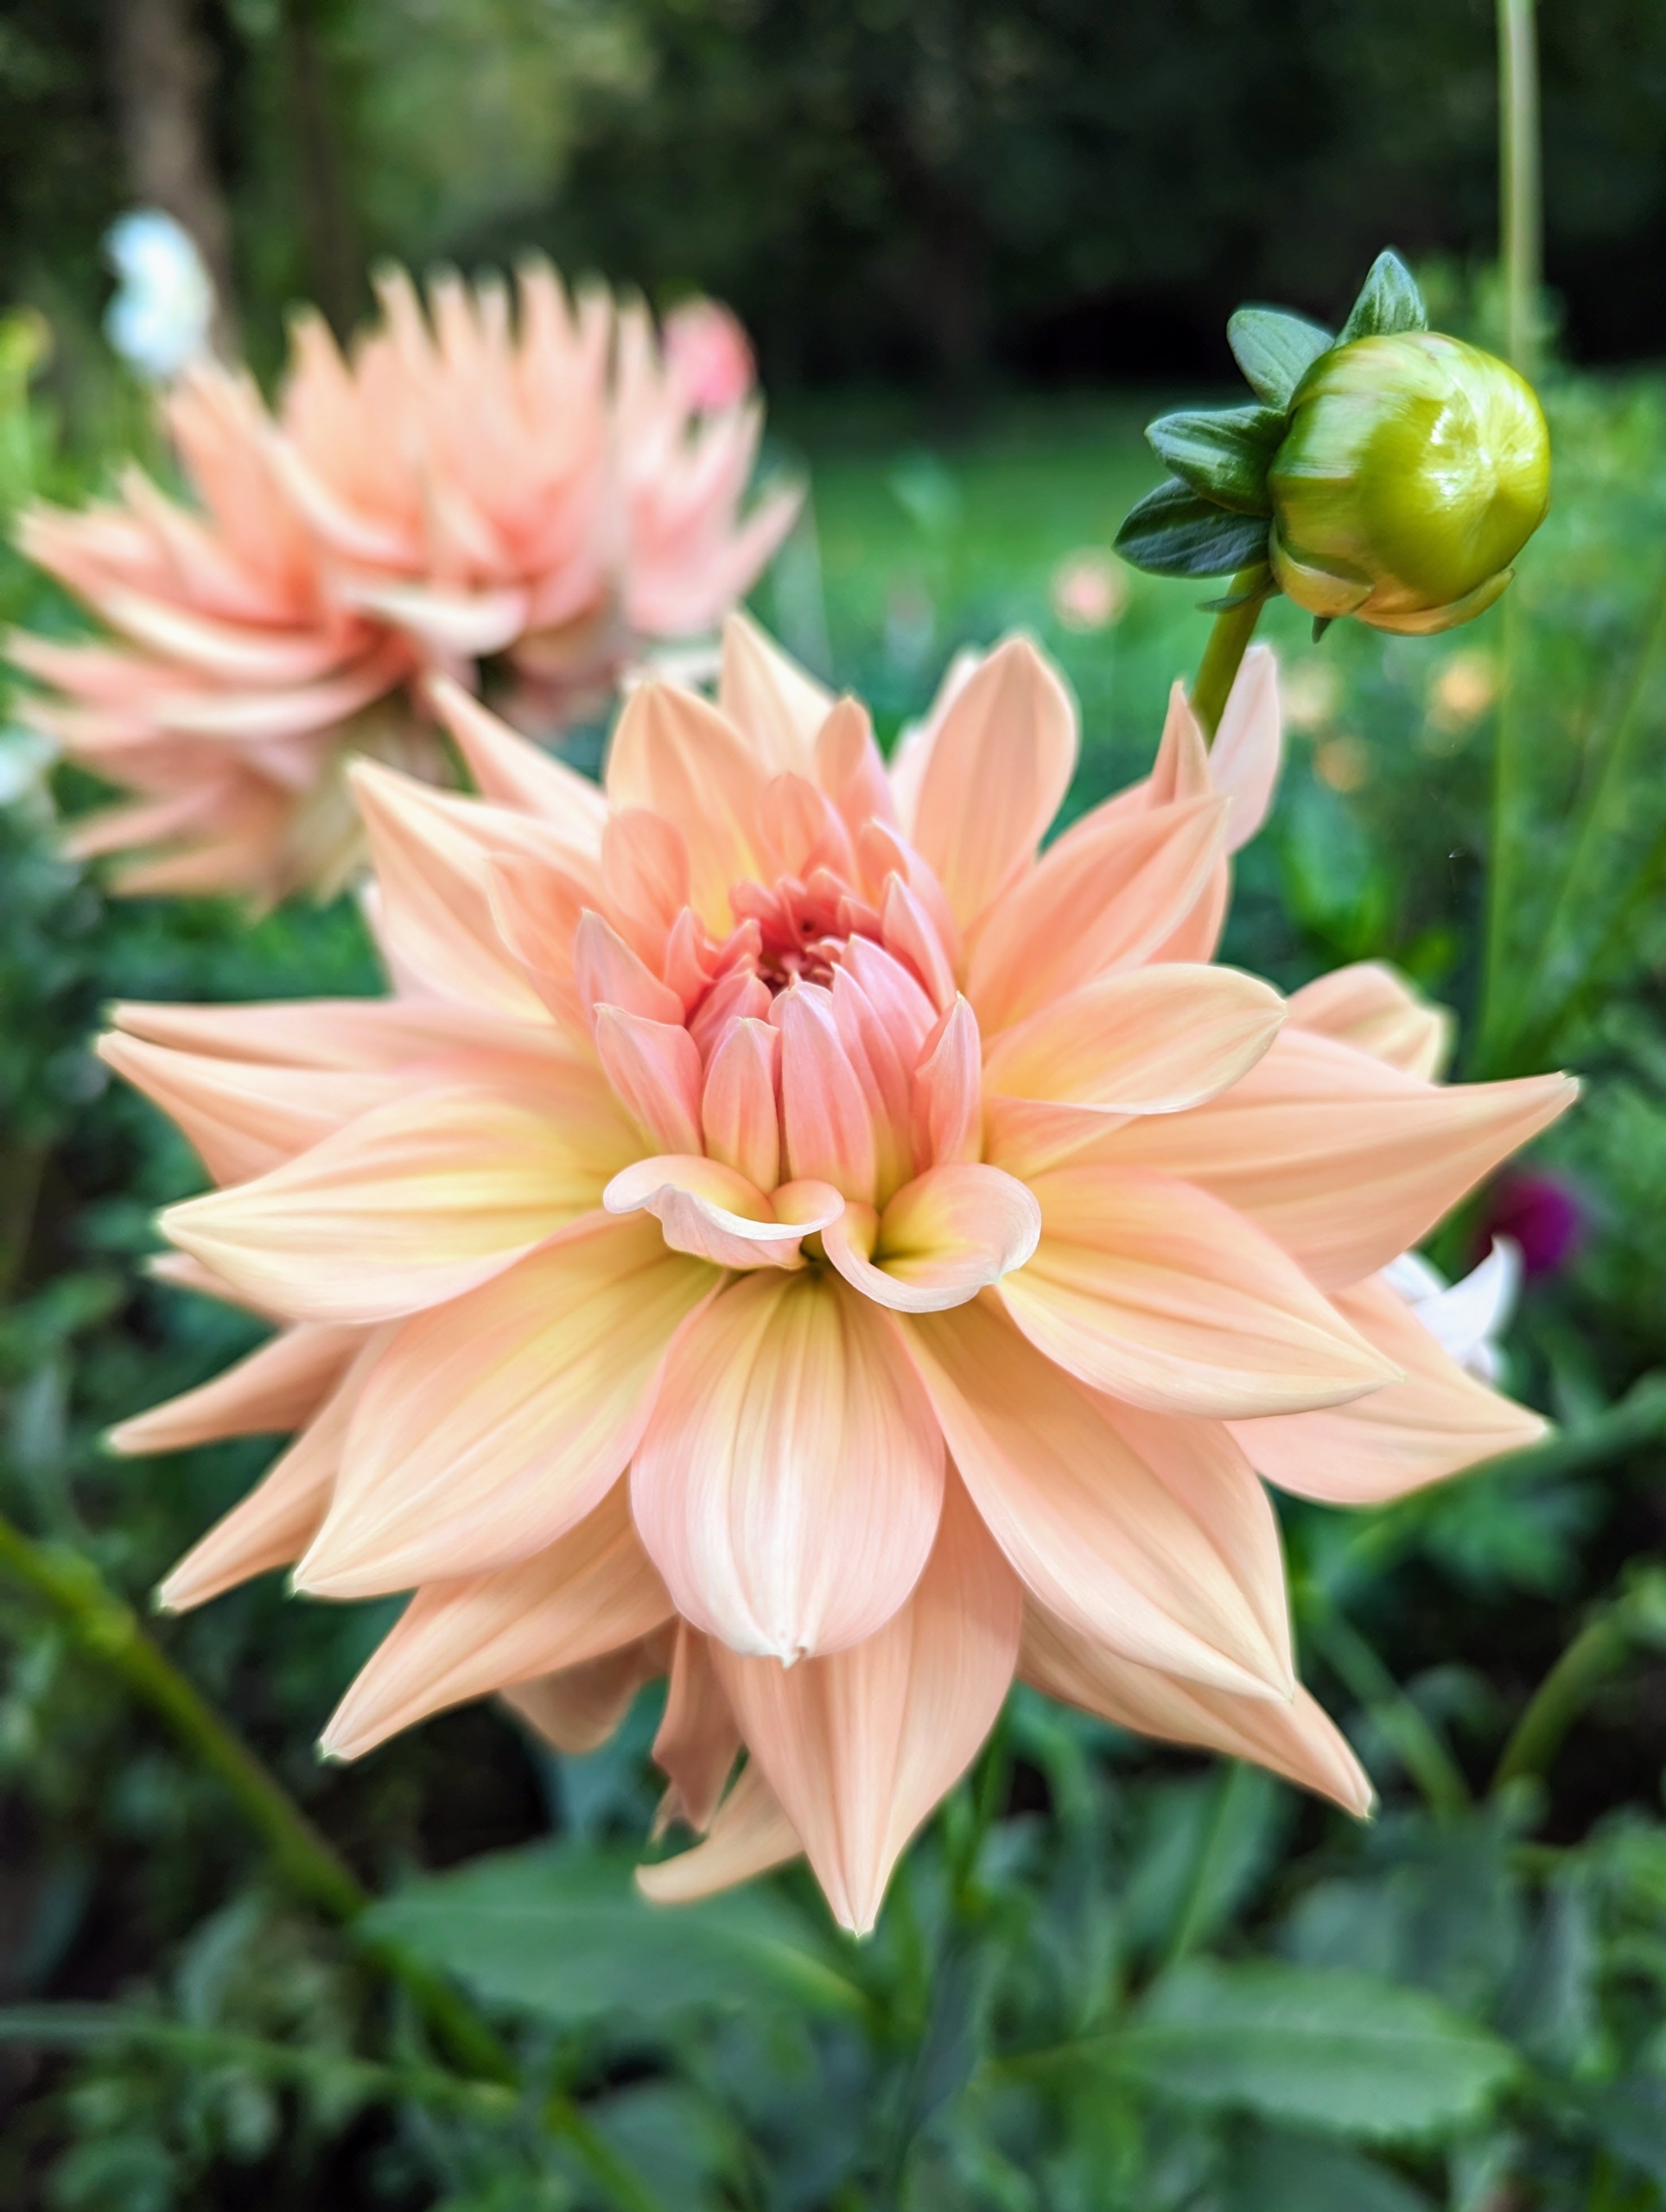
Dahlias also do not tolerate cold soil. Plant when the soil reaches at least 60-degrees Fahrenheit after any danger of frost has passed.
The majority of dahlia species do not produce scented flowers or cultivars, but they are brightly colored to attract pollinating insects.
This dark pink dahlia looks great in arrangements. To prevent wilting, cut only in the early morning or late afternoon. And only cut them after they open to mature size – dahlias will not open after cutting. Once cut, place the vase in a cool spot and out of direct sun. They should last about a week.
Dahlias are common wedding flowers, not only for their looks but also for their symbolic meaning. During the Victorian era, dahlias were a symbol of commitment and everlasting union. They are also used to represent inner strength, creativity, and elegance.
Another fact – before insulin, the tubers of dahlias were used to balance blood sugar due to their high fructose content. The petals were used to treat dry skin, infections, rashes, and insect bites.
Always wait until the foliage has turned brown before digging them up at the end of the season. This is important so that the plant can gather energy for the following year. It will store starches in the tuber which will fuel initial sprouting in summer. The best time is a couple weeks after the first frost when they’re well into dormancy yet haven’t been harmed by the cold.
For more blooms, one can deadhead as the flowers fade; deadheading keeps the flowers blooming for months.
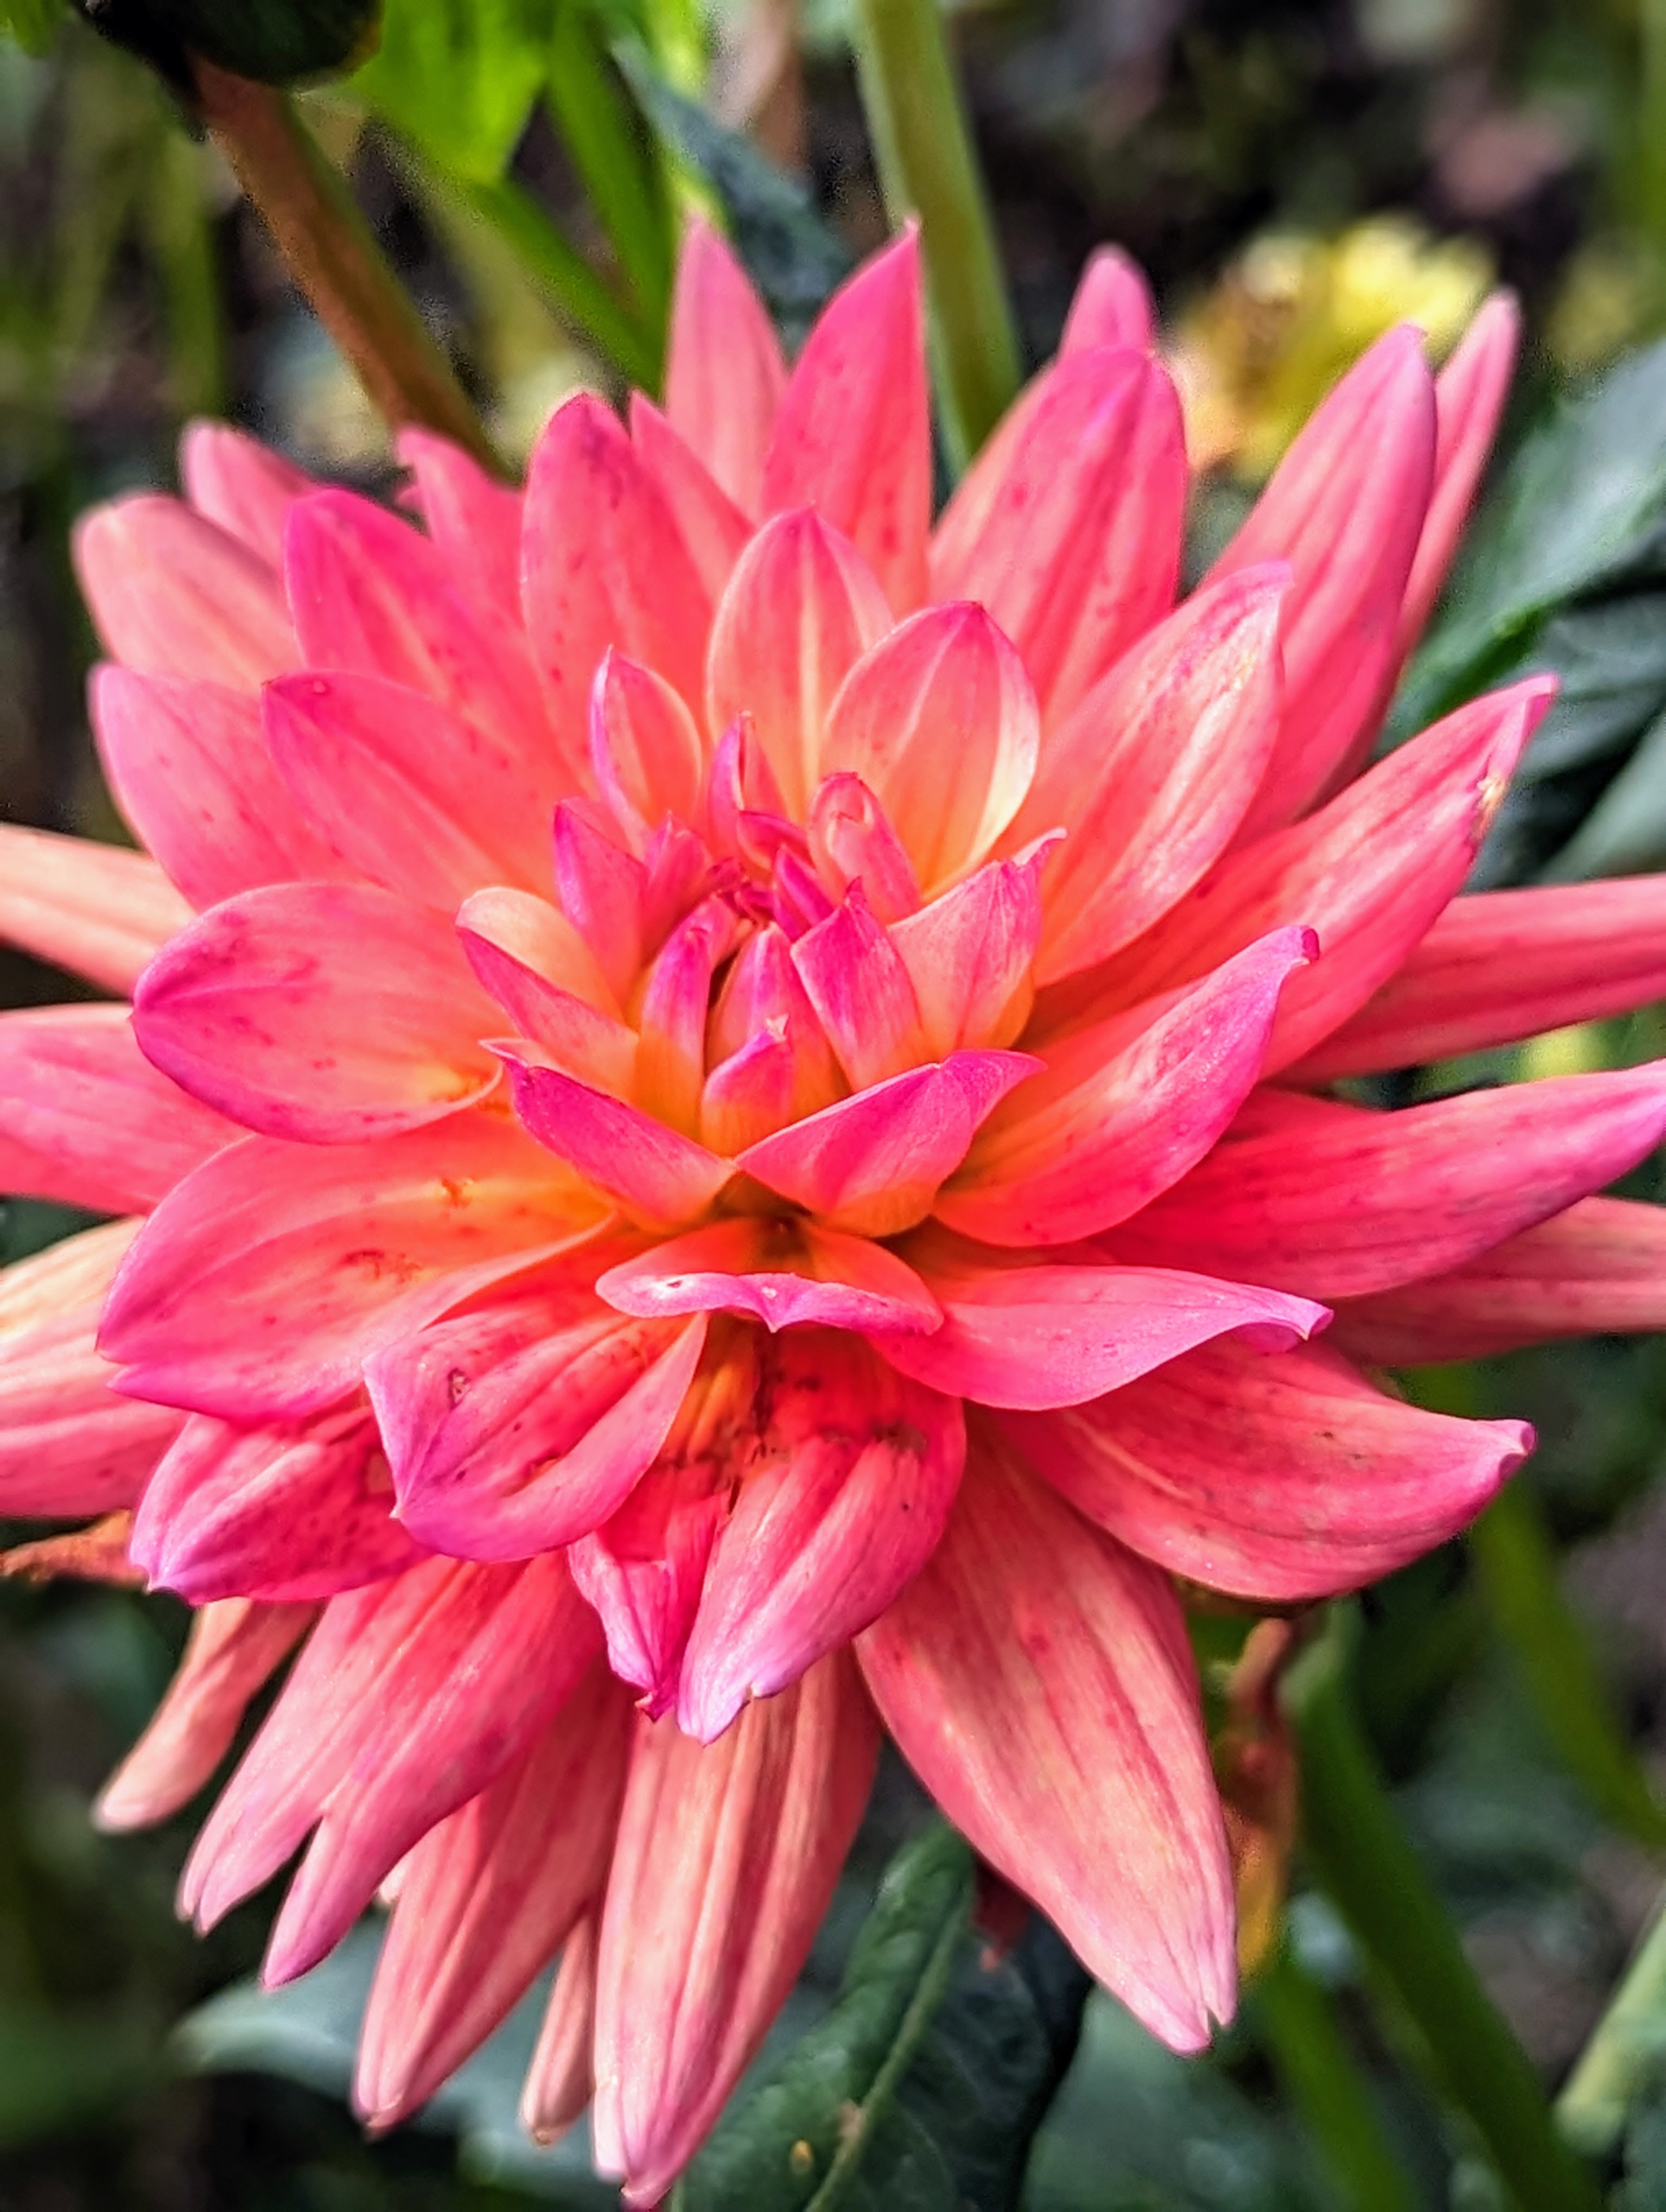
I always enjoy visiting the dahlia garden to see what new blooms appear. There are so many different kinds of dahlias and every one of them pretty.
This time of year can be very hectic - my gardeners and outdoor grounds crew are busy keeping up with all the growth in the garden beds.
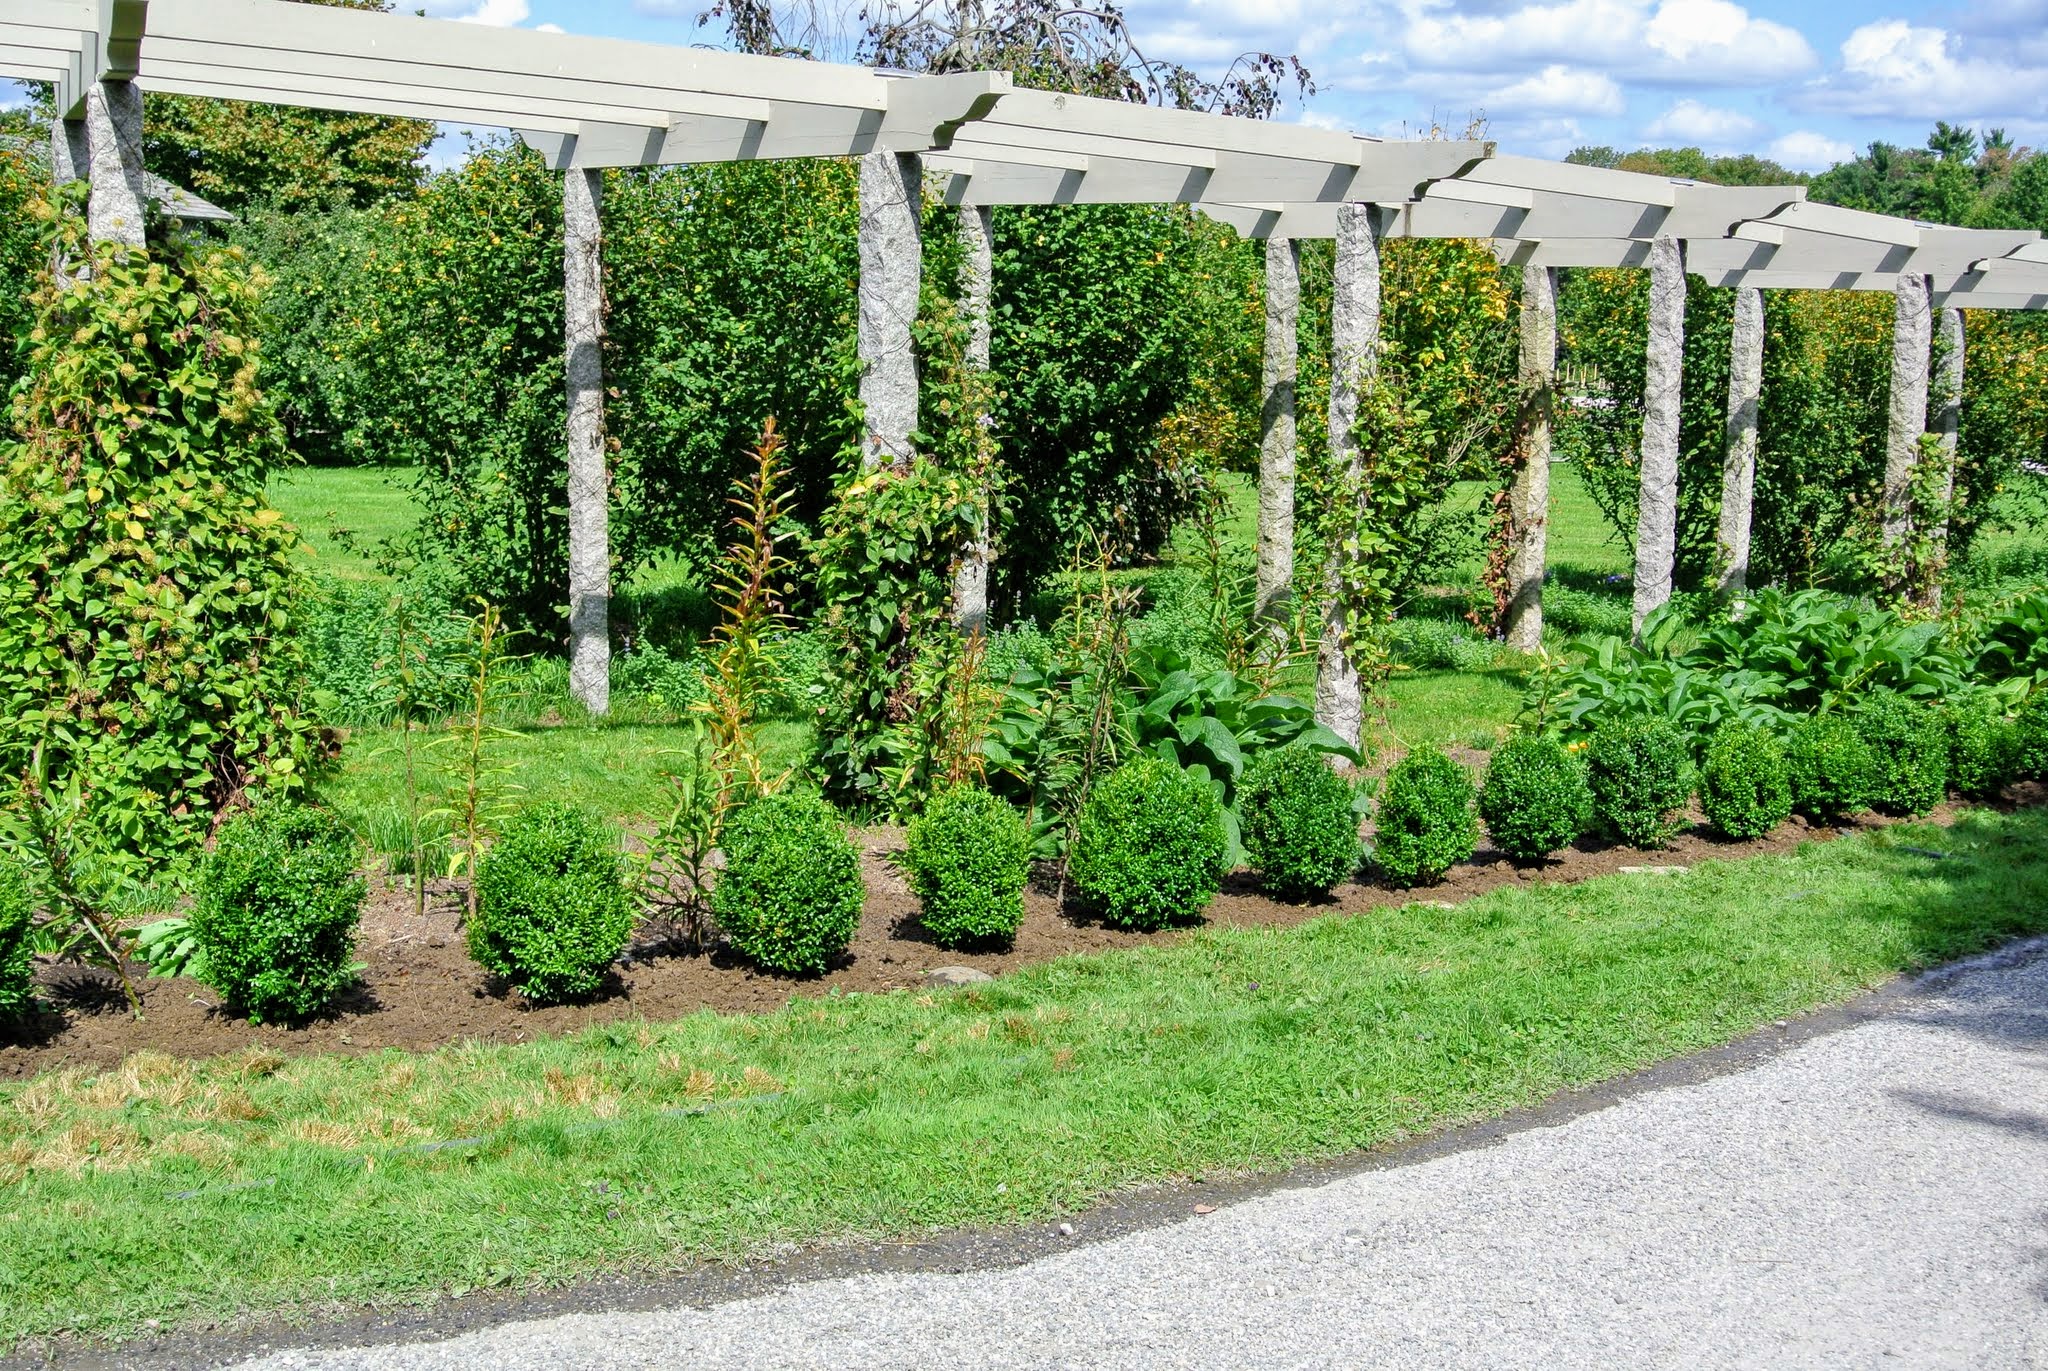
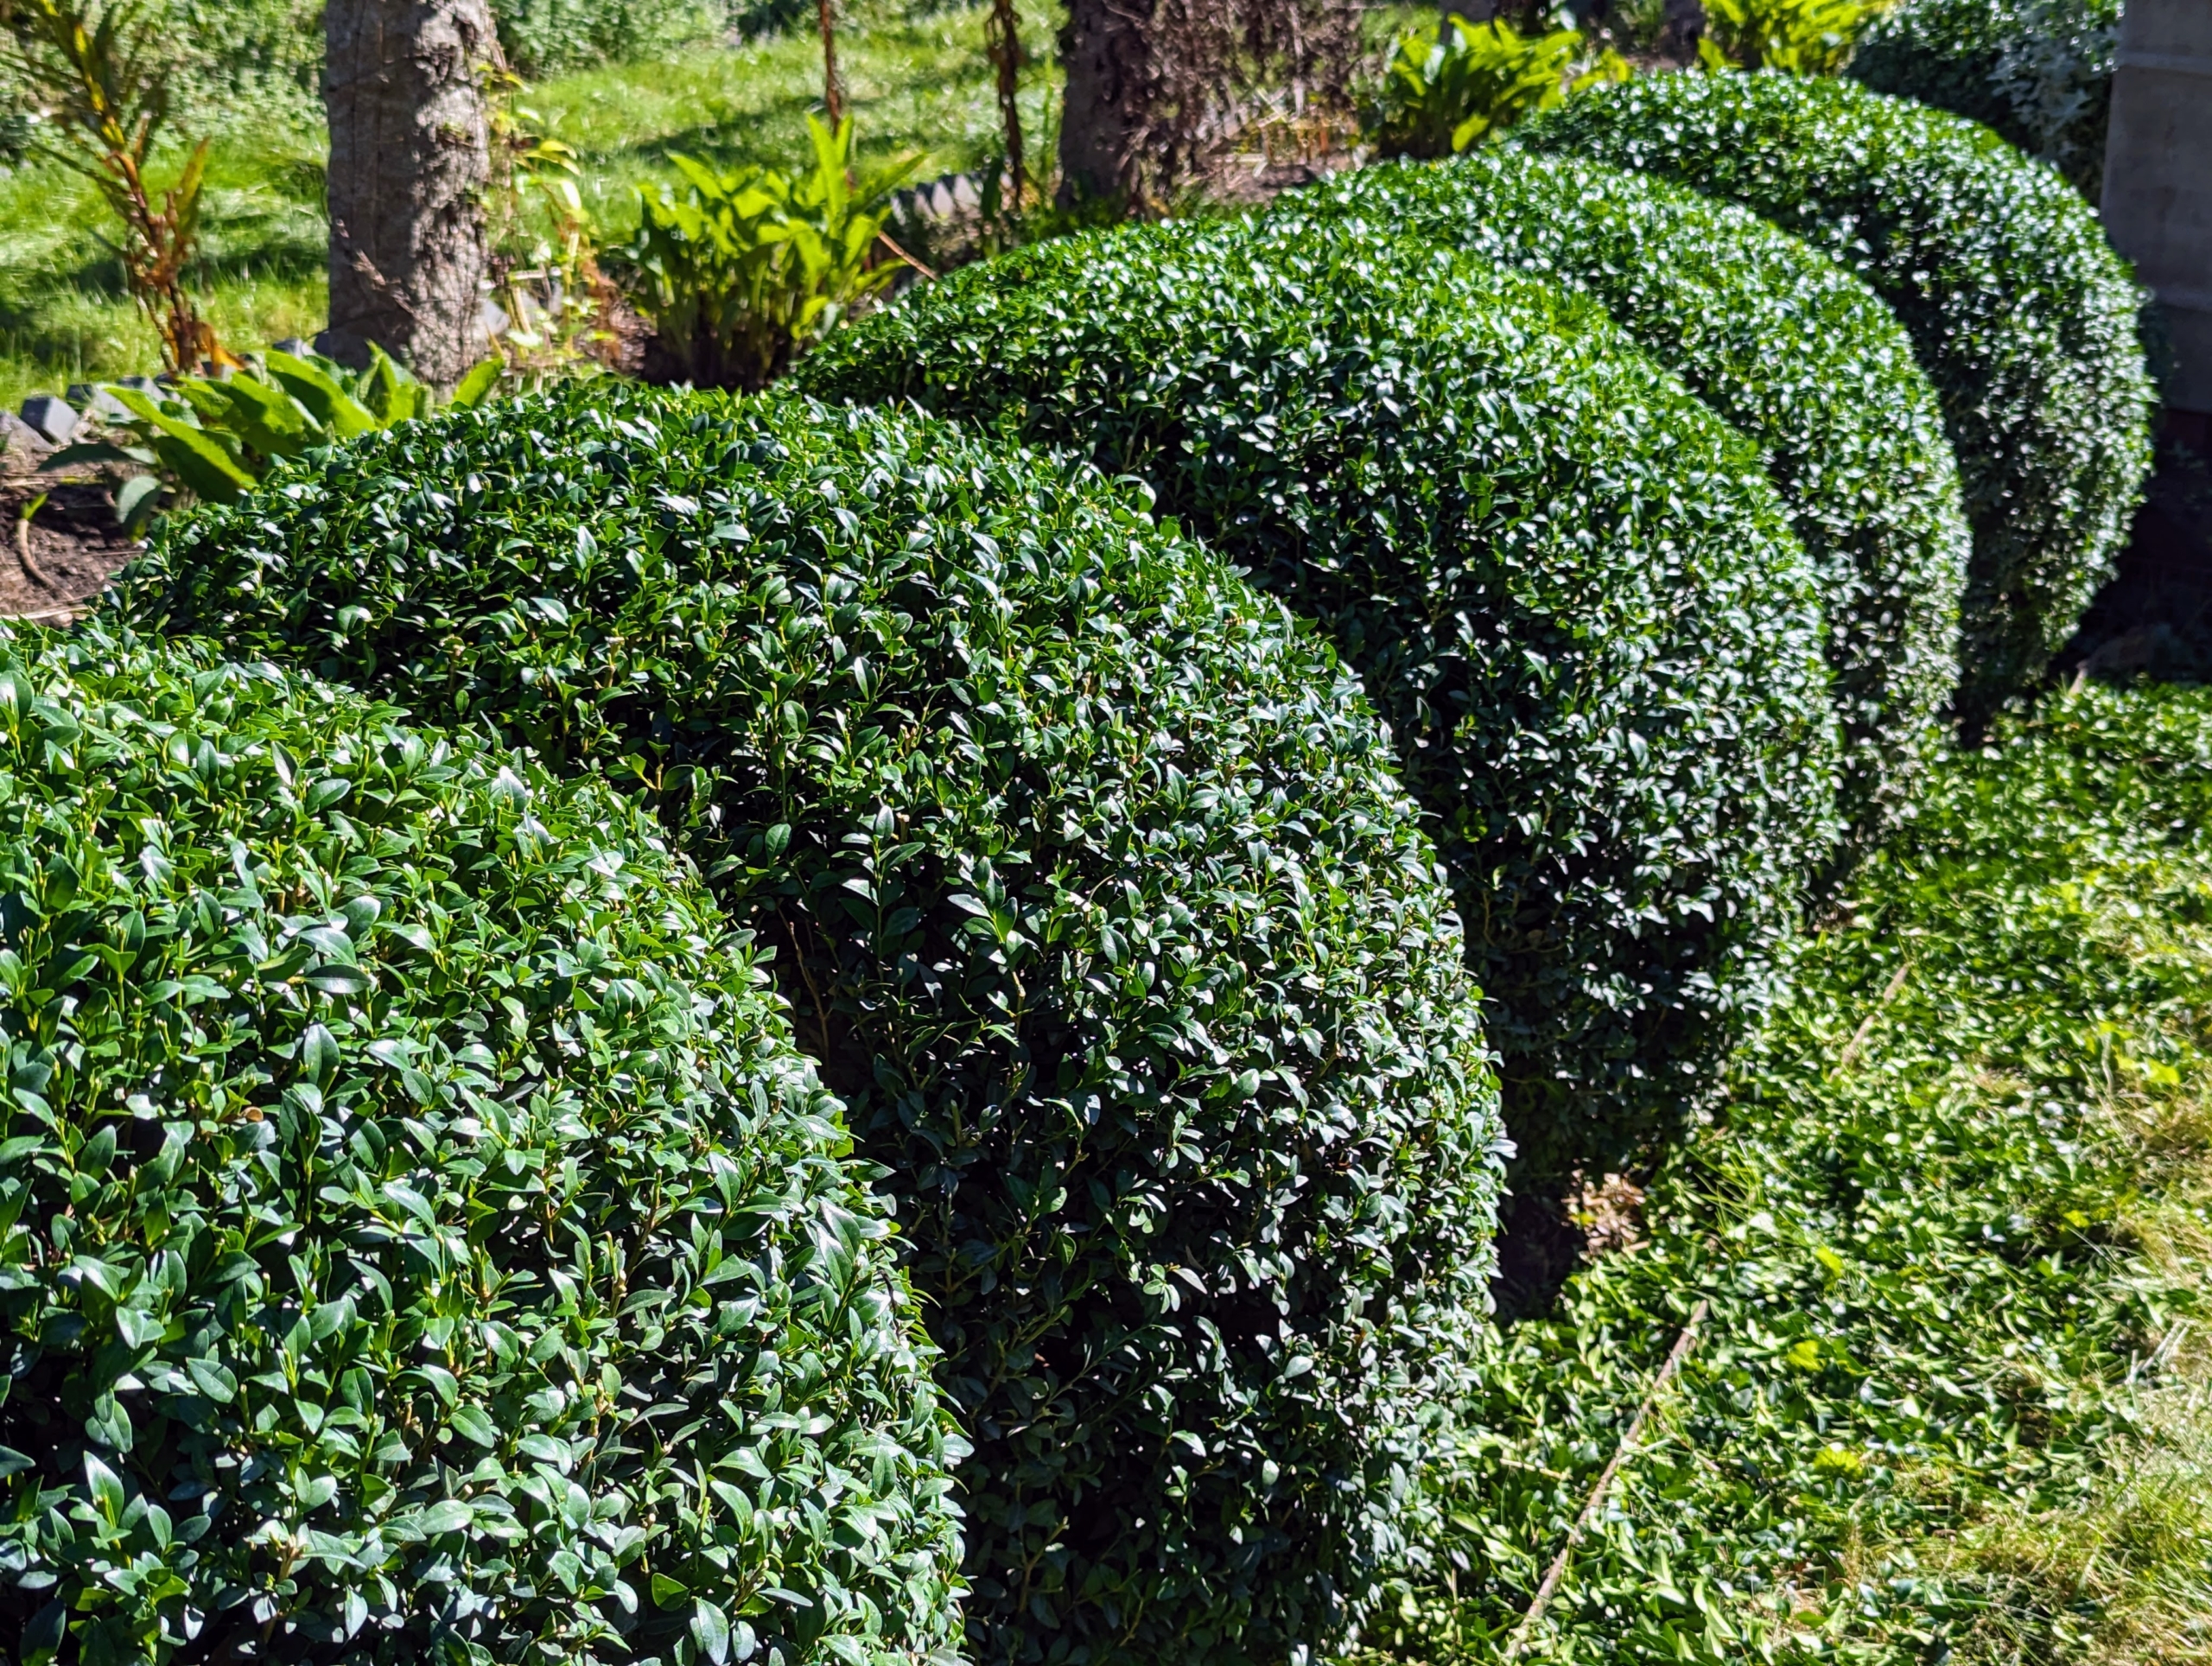
Summer is coming to a close, but there is still lots of work to be done - weeding, pruning, and grooming the many perennial plants and shrubs. Recently, Phurba Sherpa tackled the boxwood border along one side of my clematis pergola.
Enjoy these photos.
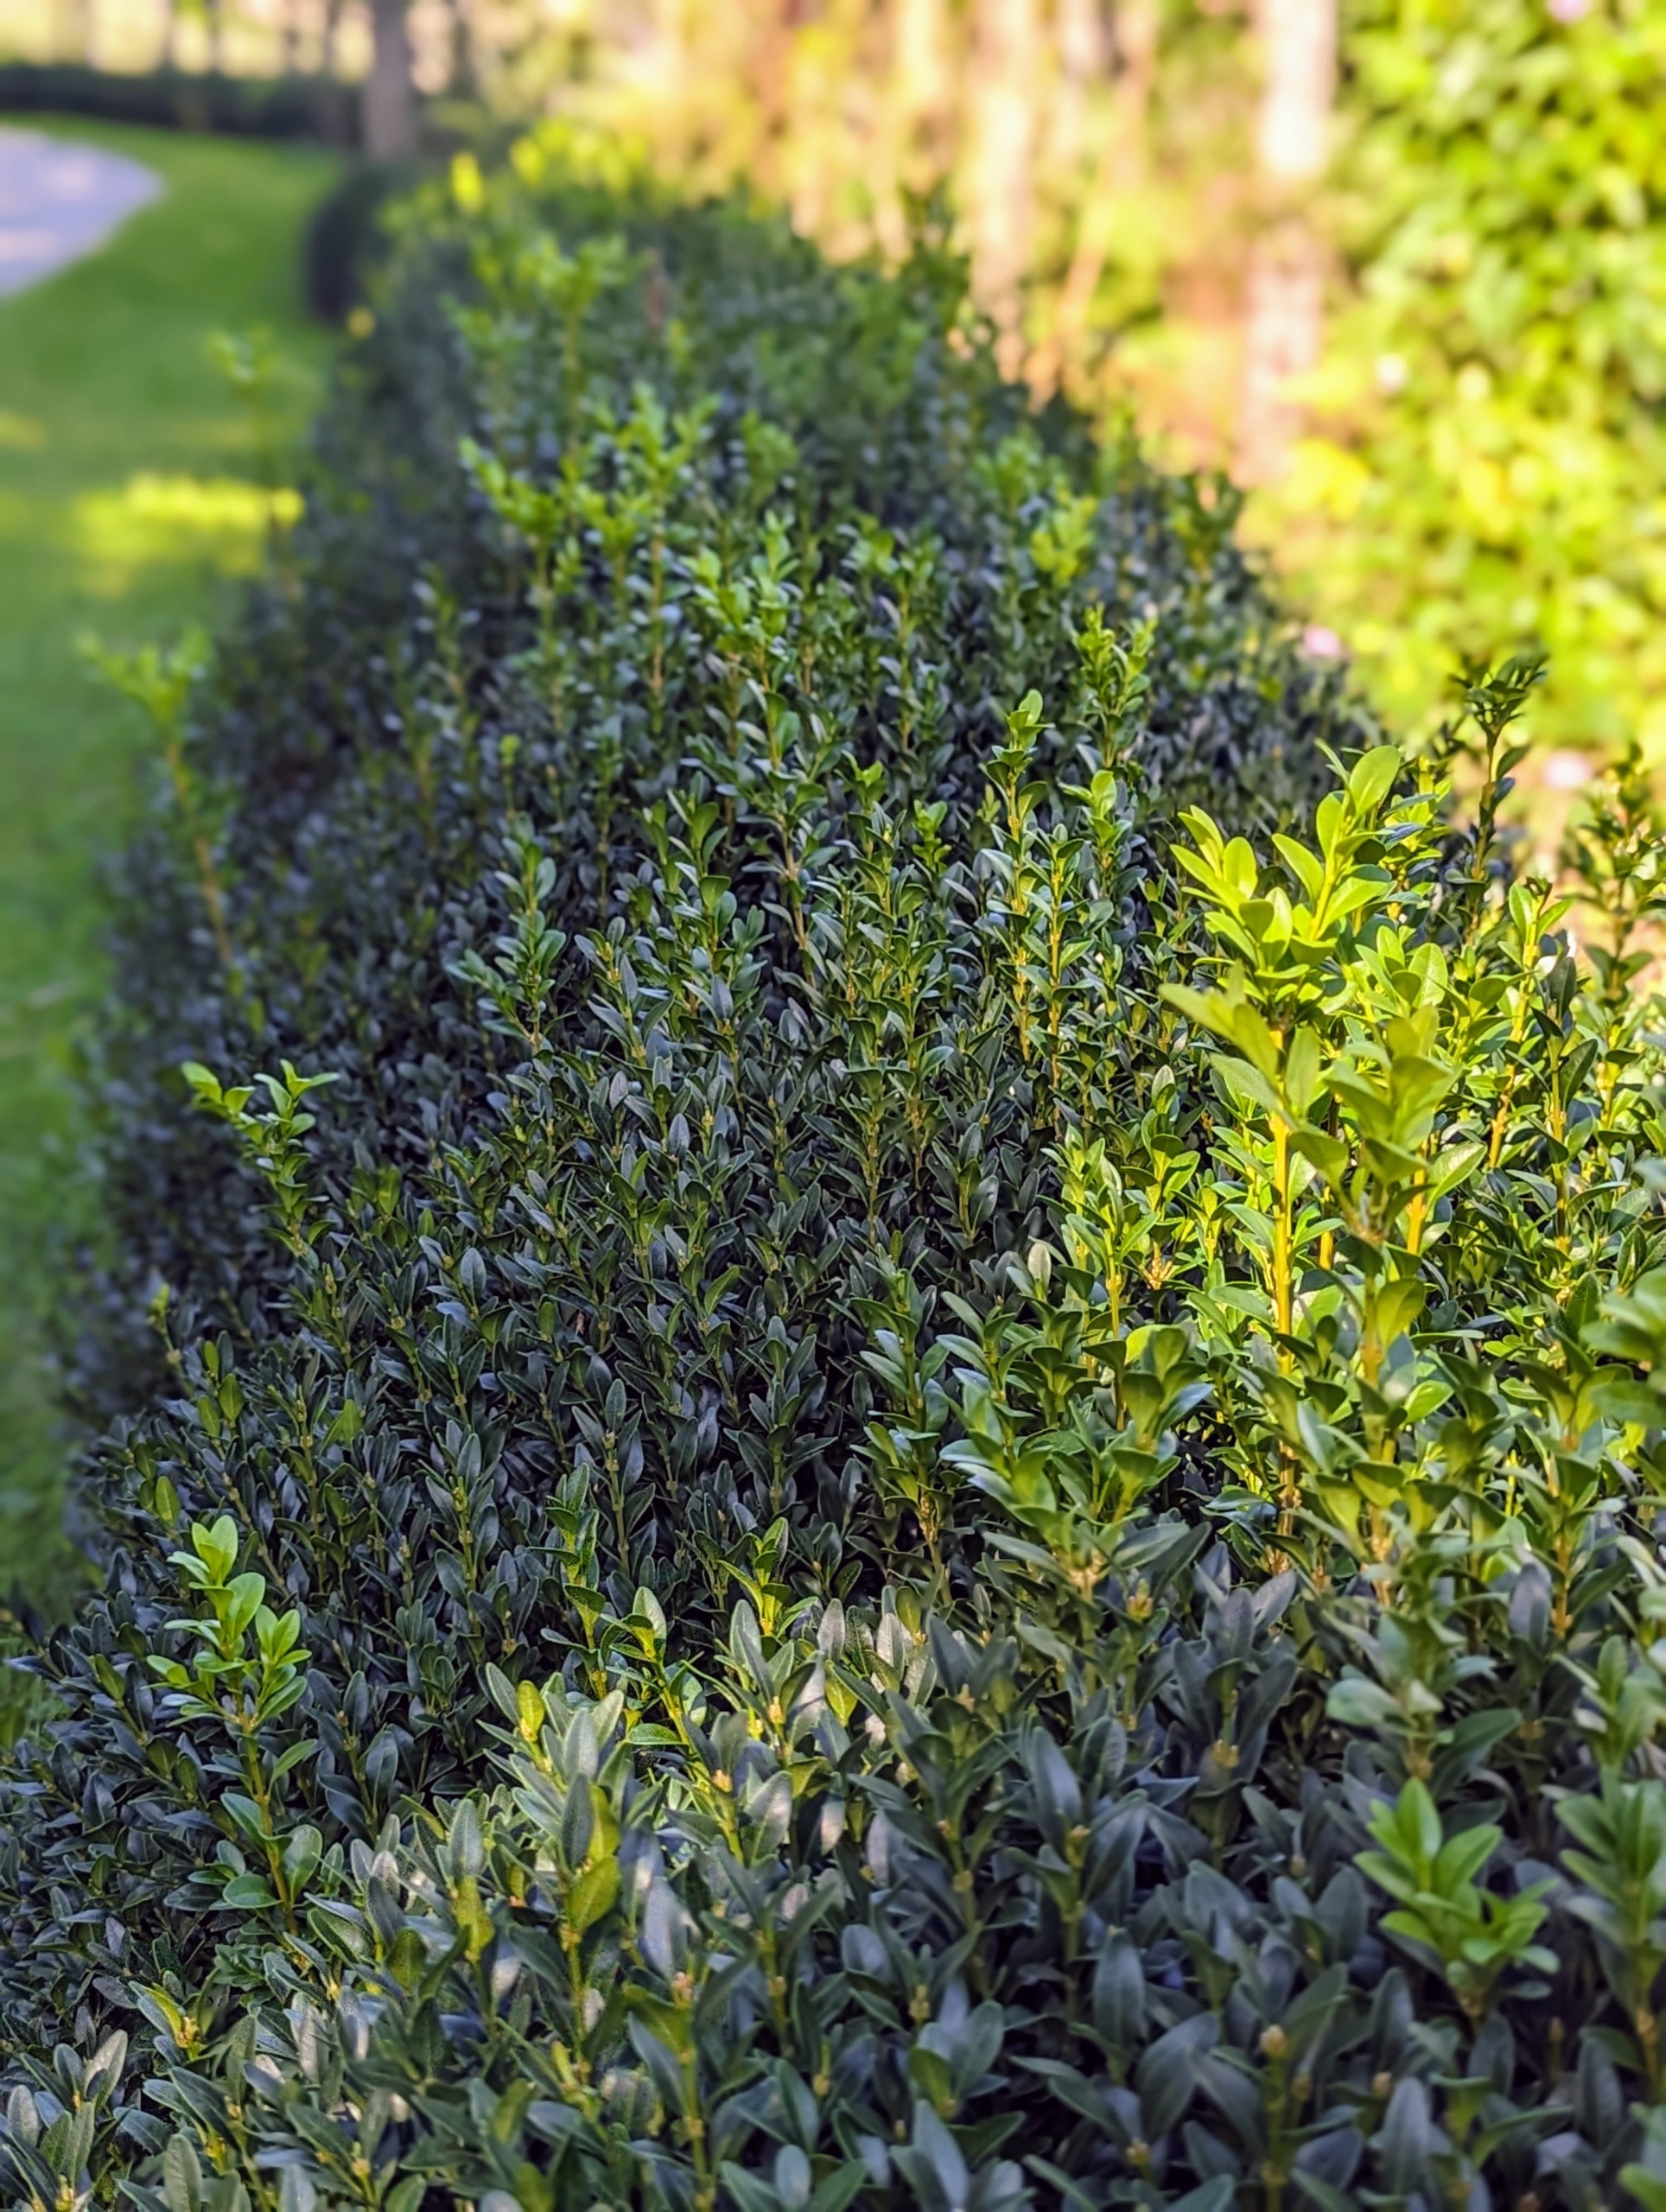
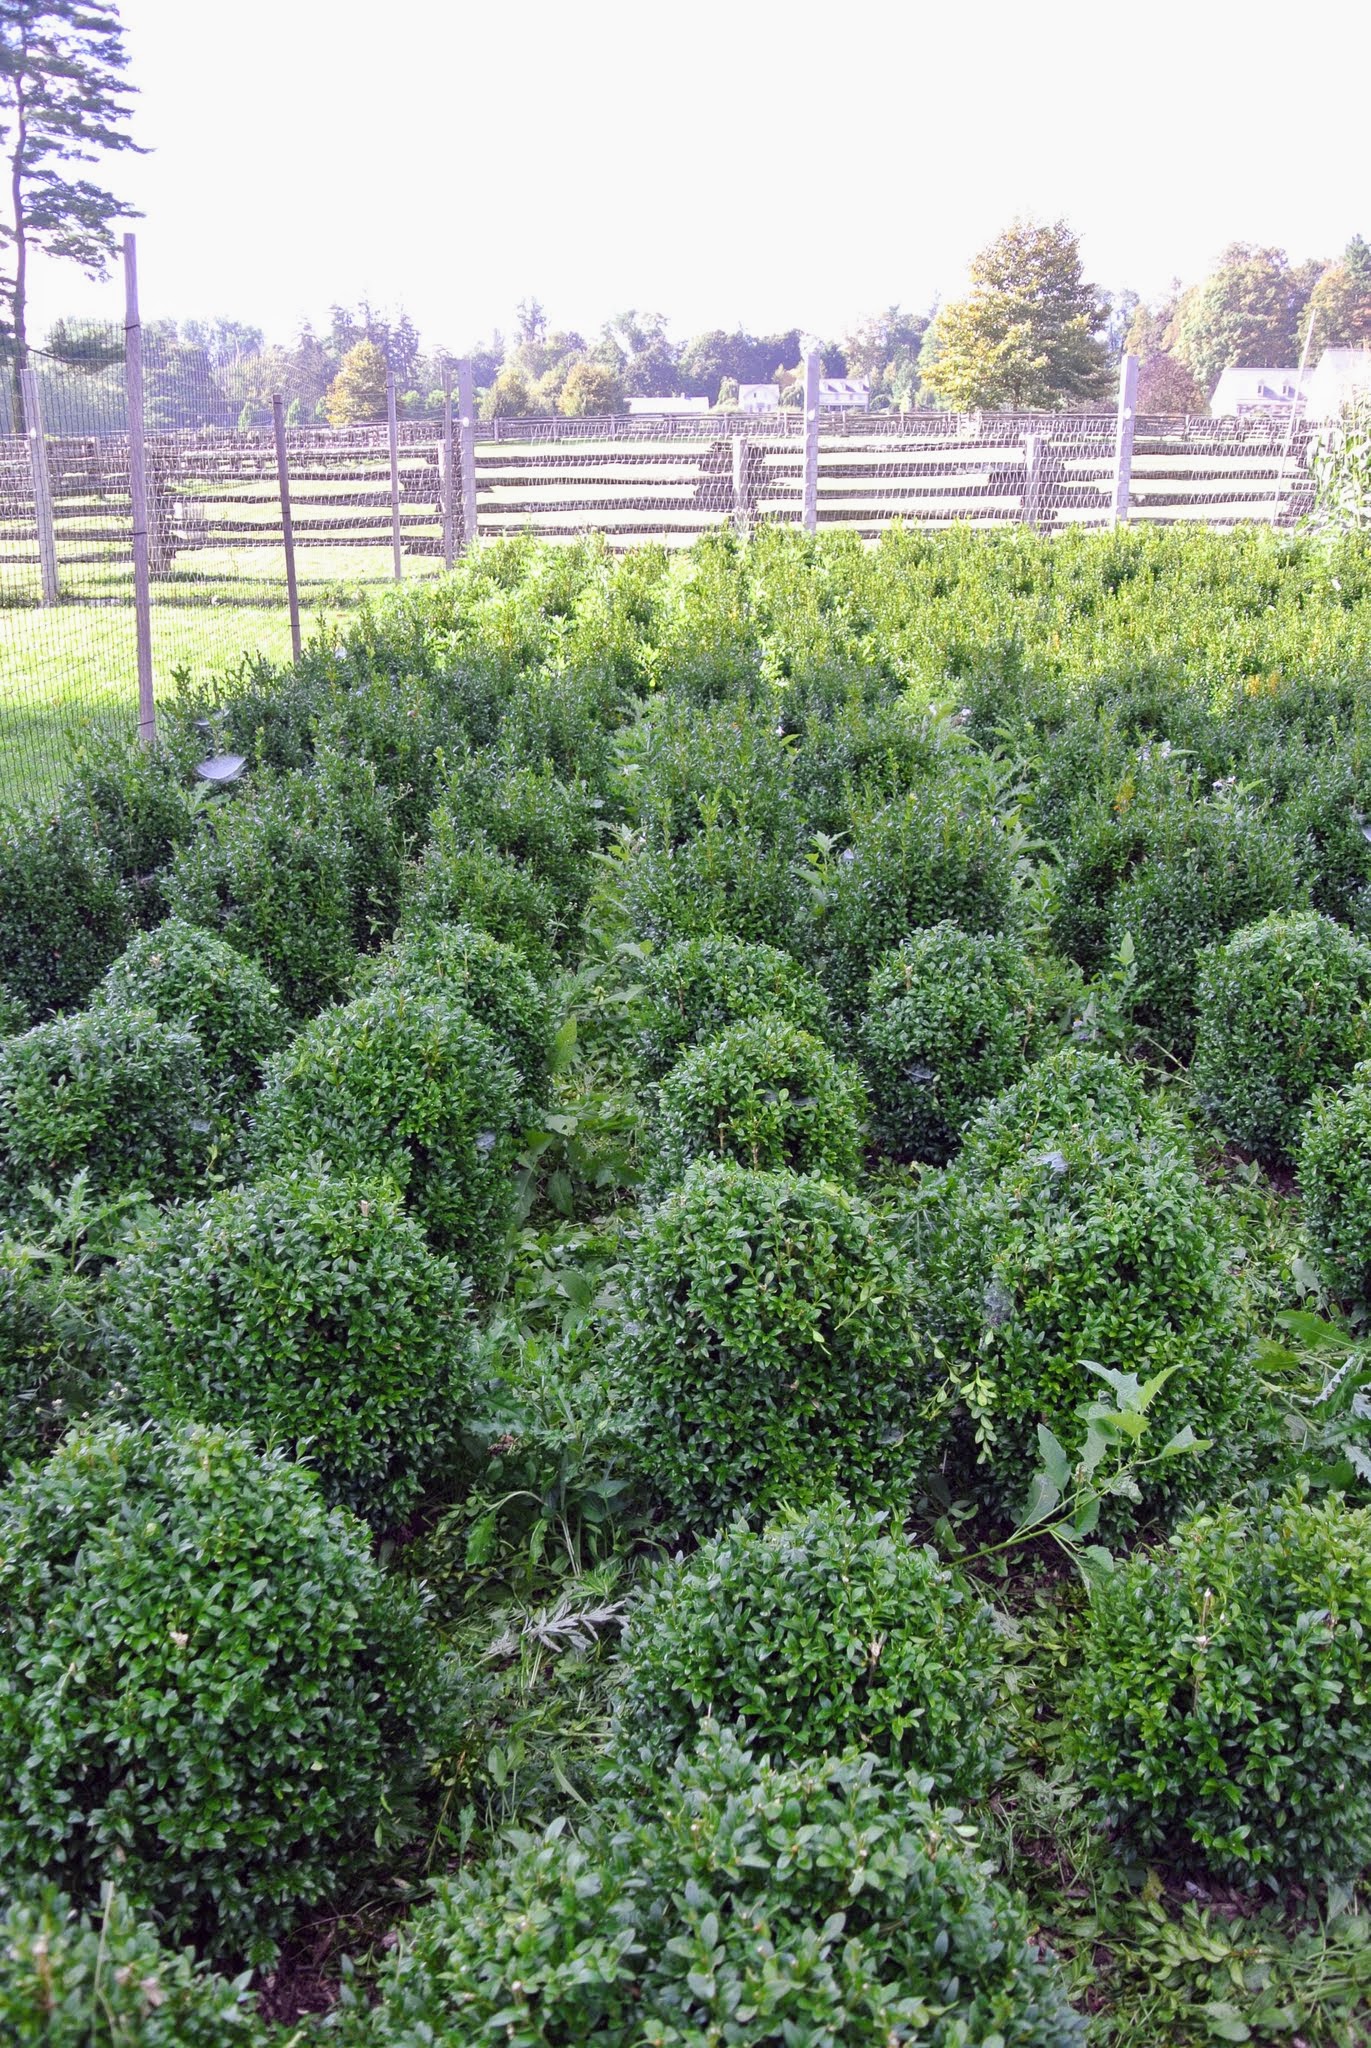
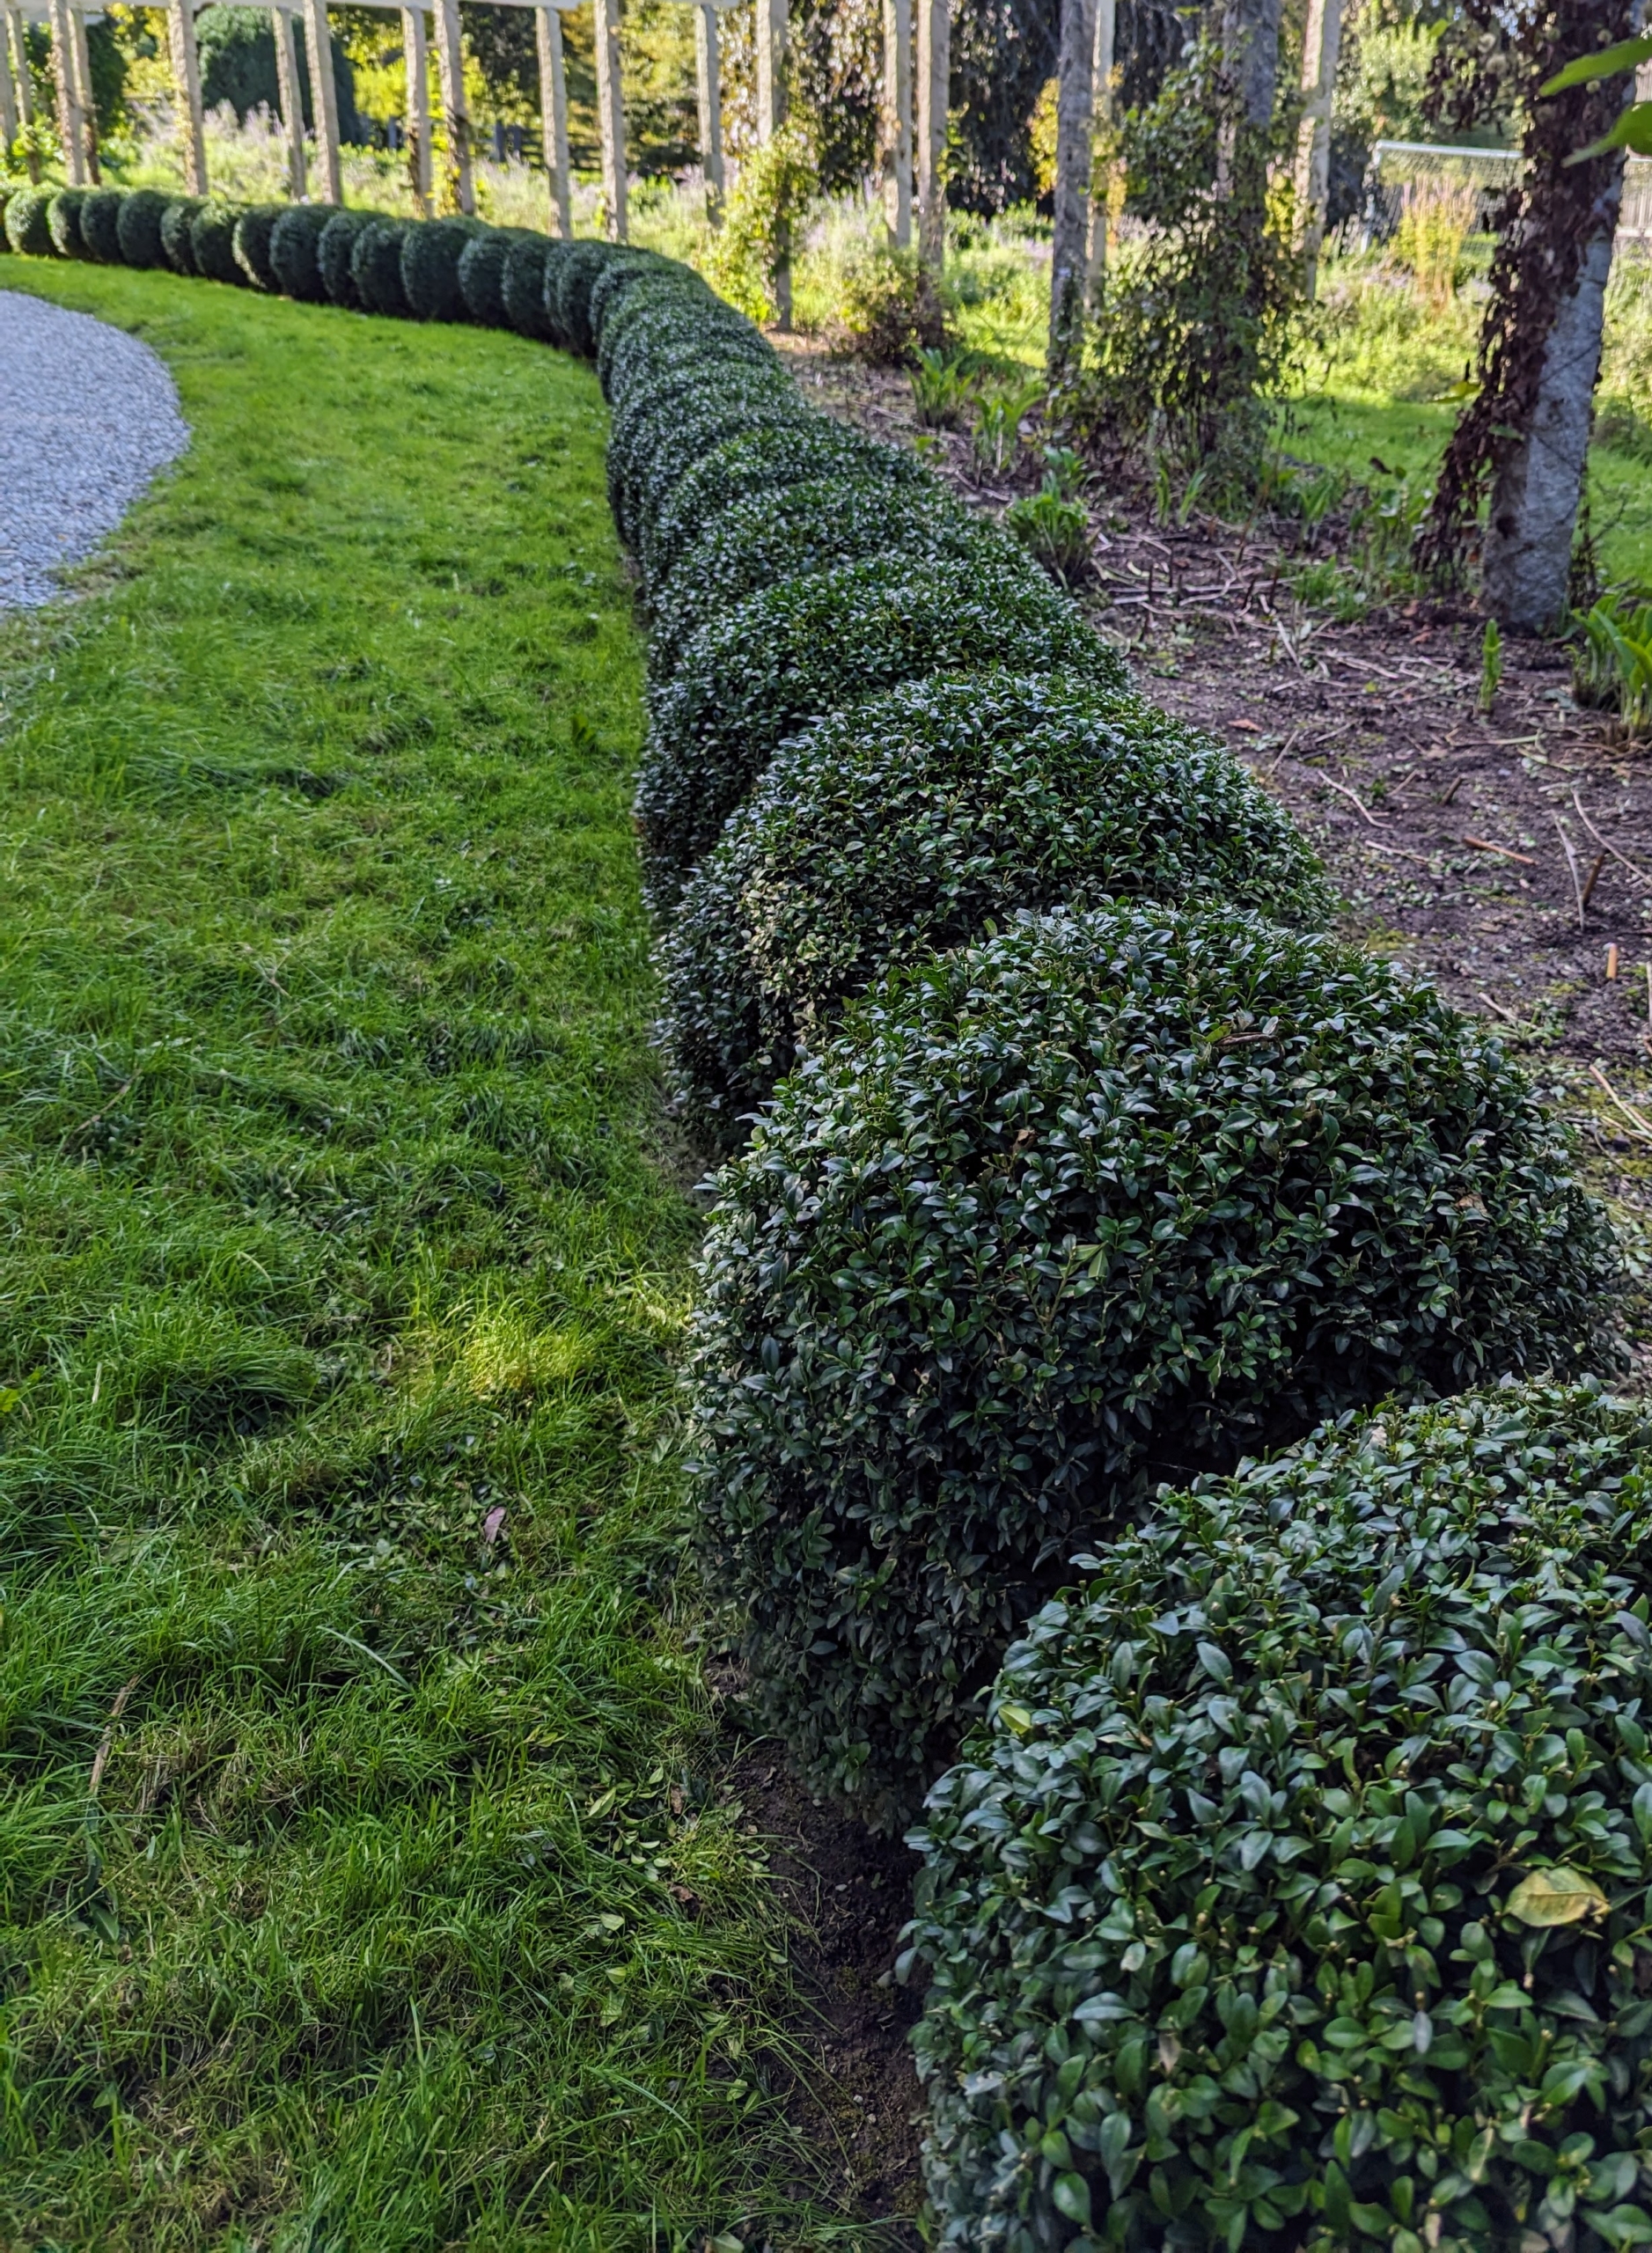
These boxwood shrubs along both sides of my winding pergola were grown from small saplings nurtured right here at the farm. There are more than 300 boxwood shrubs planted here.
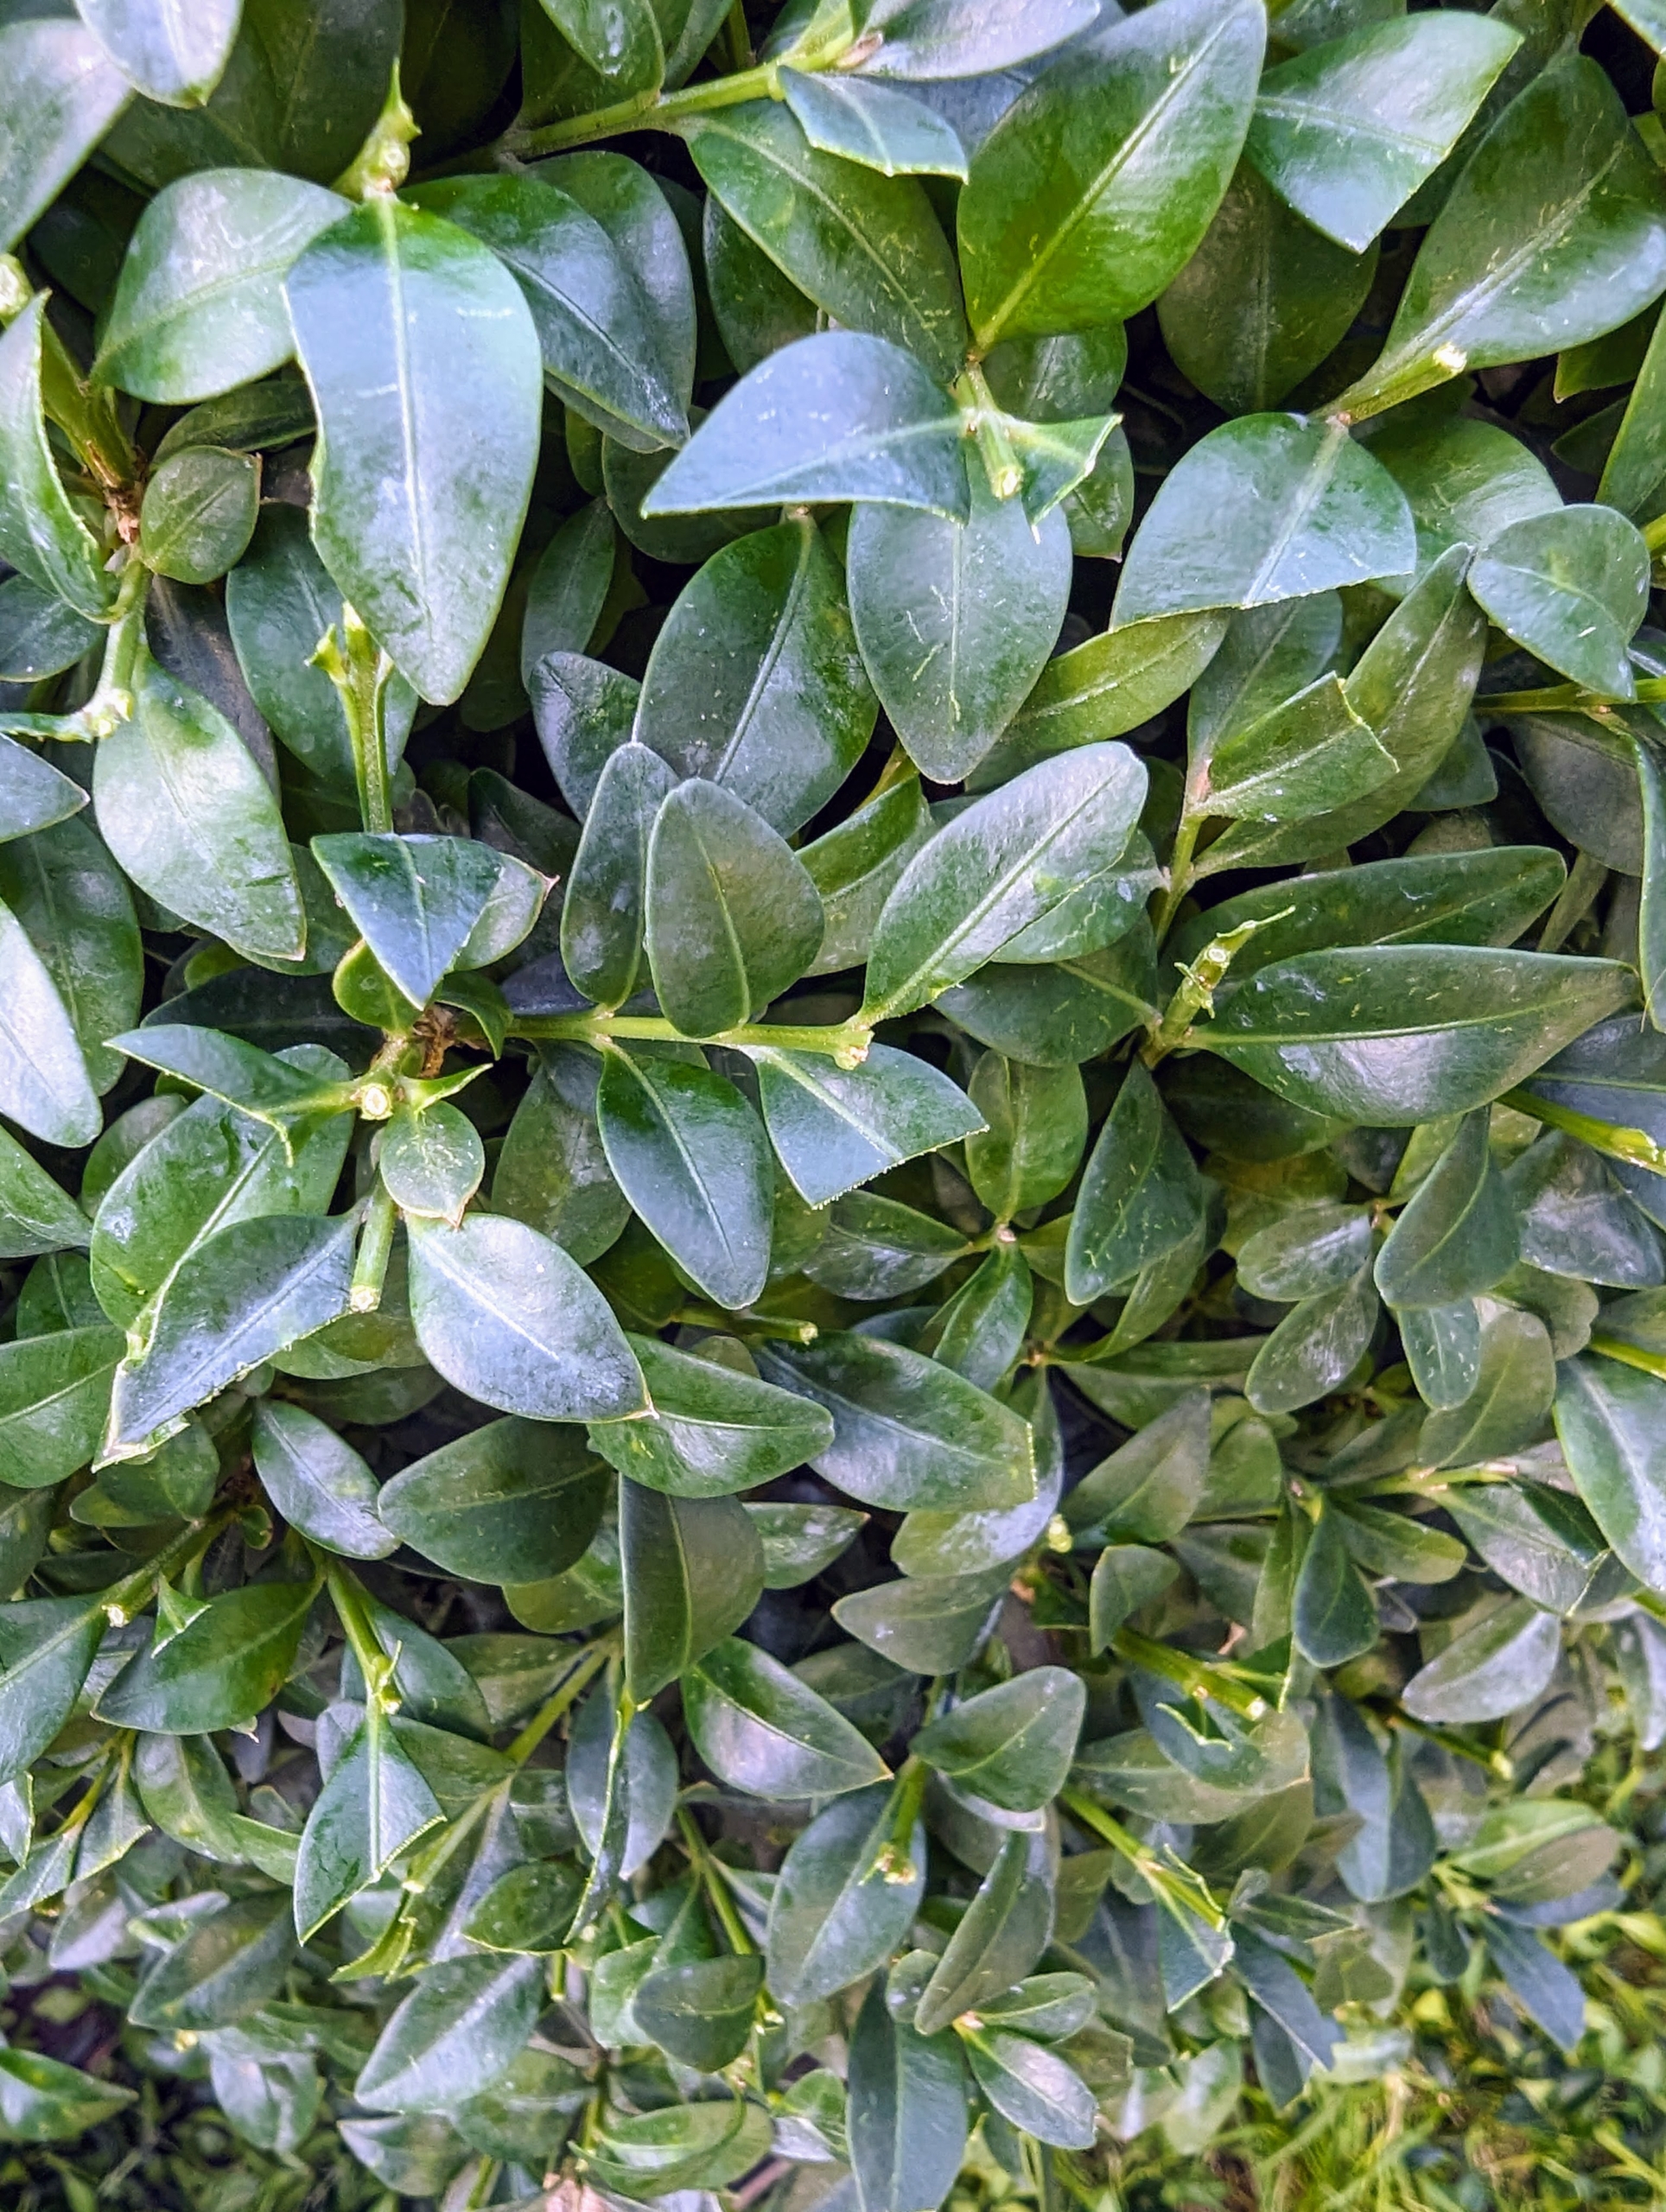
I love boxwood and grow a lot of it around the farm. Buxus is a genus of about 70 species in the family Buxaceae. Common names include box or boxwood. The boxes are native to western and southern Europe, southwest, southern and eastern Asia, Africa, Madagascar, northernmost South America, Central America, Mexico, and the Caribbean. The leaves on boxwood branches are arranged opposite from each other, making pairs.
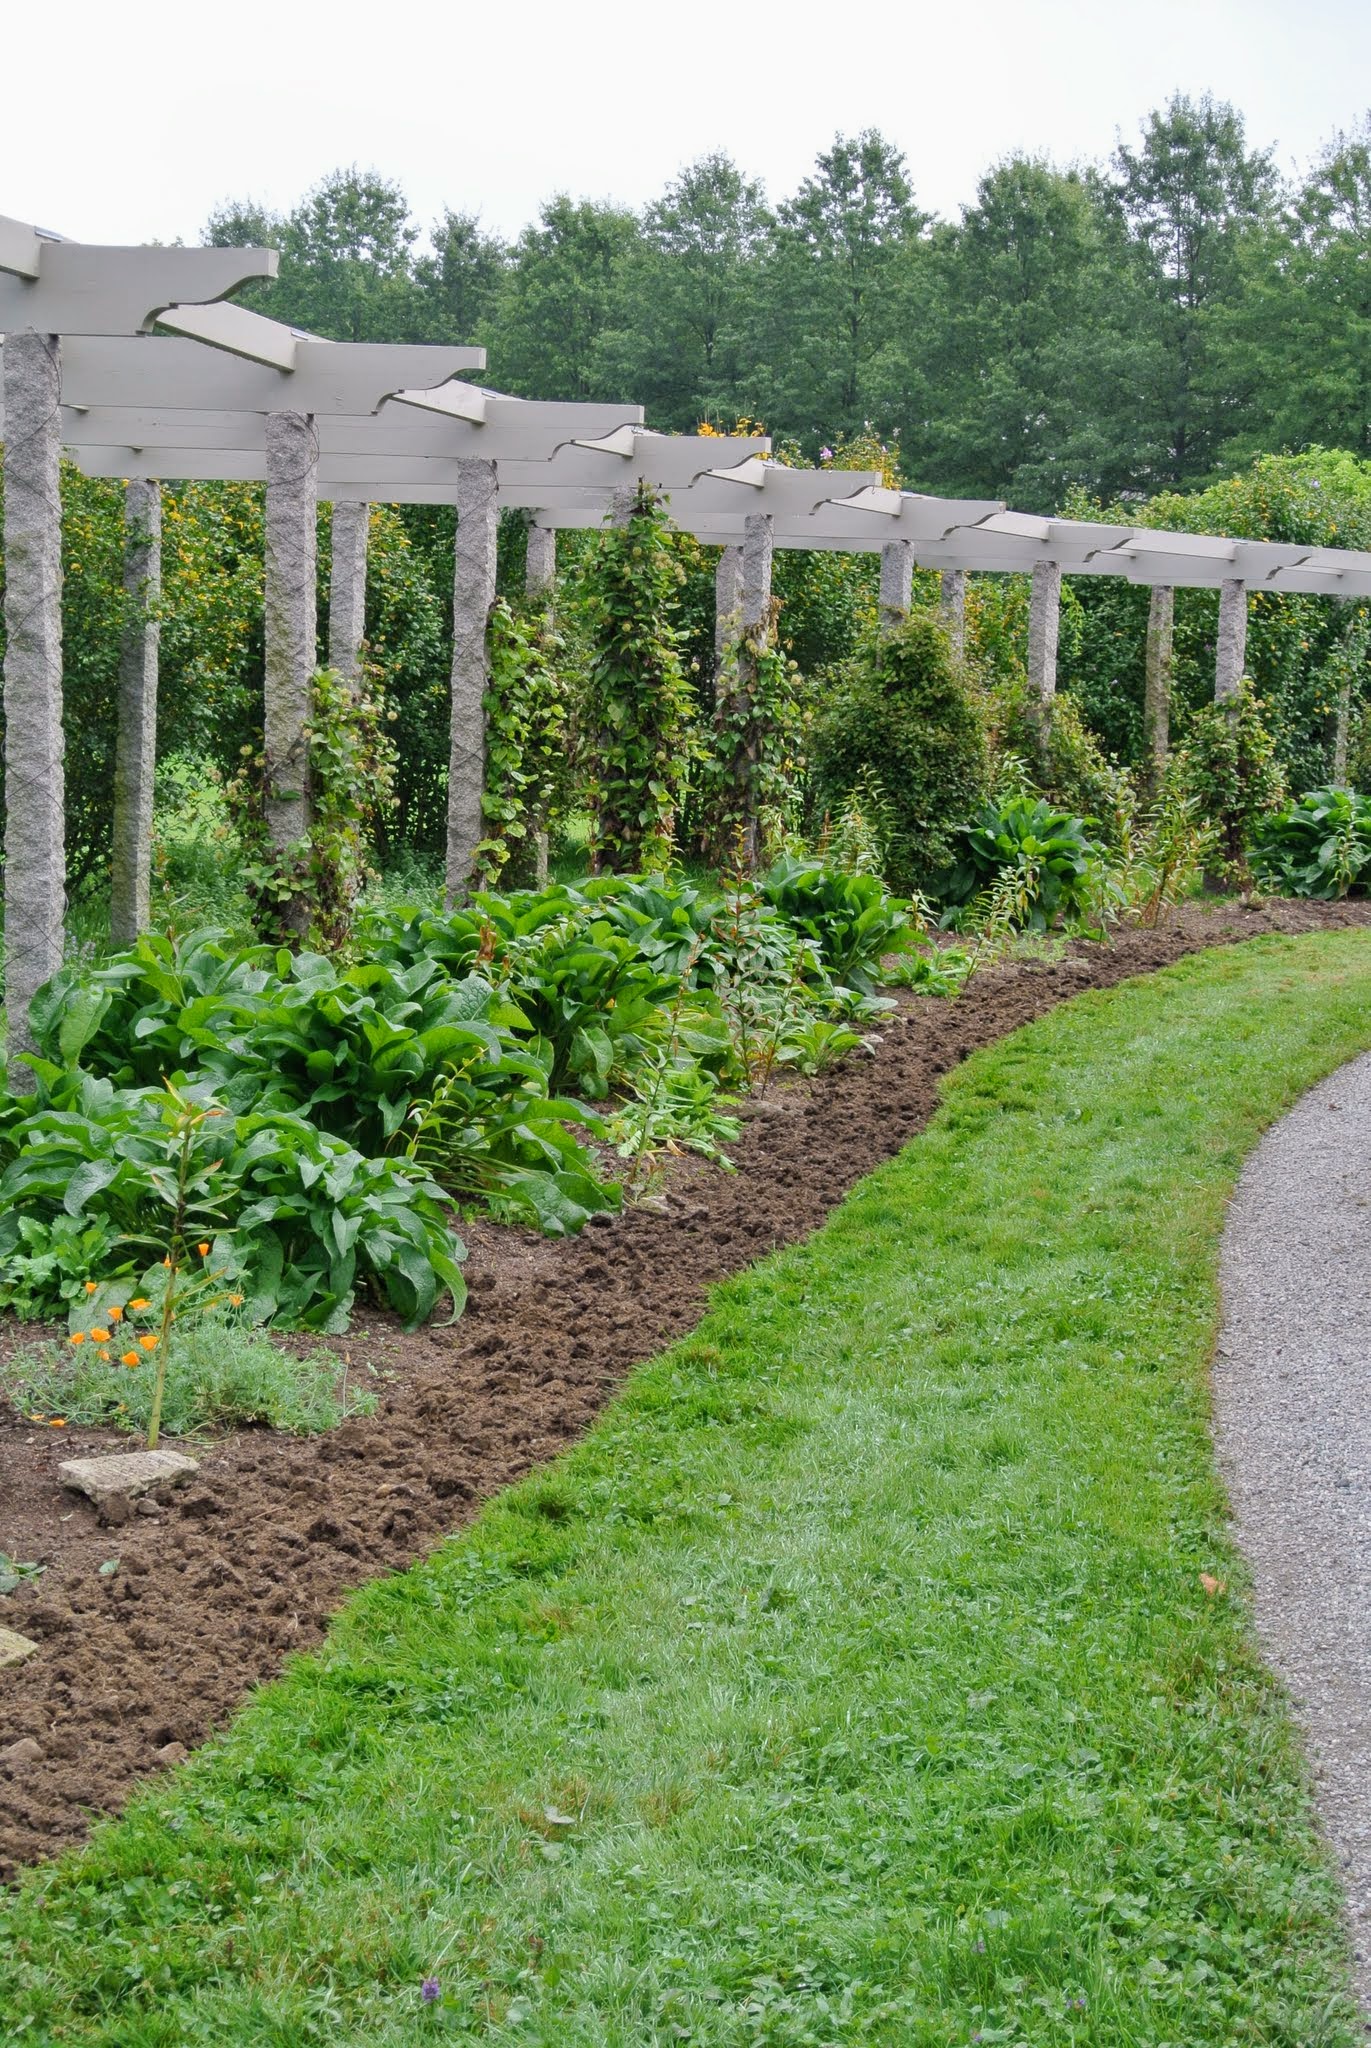
Some of you may recall, I planted the boxwood in September 2017. I decided this area would be great if planted with a row of boxwood on both sides. This photo shows the area all ready for planting.
The boxwood we used had been growing in this patch for about three years. Finally they were ready to transplant to their more permanent spots under the pergola.
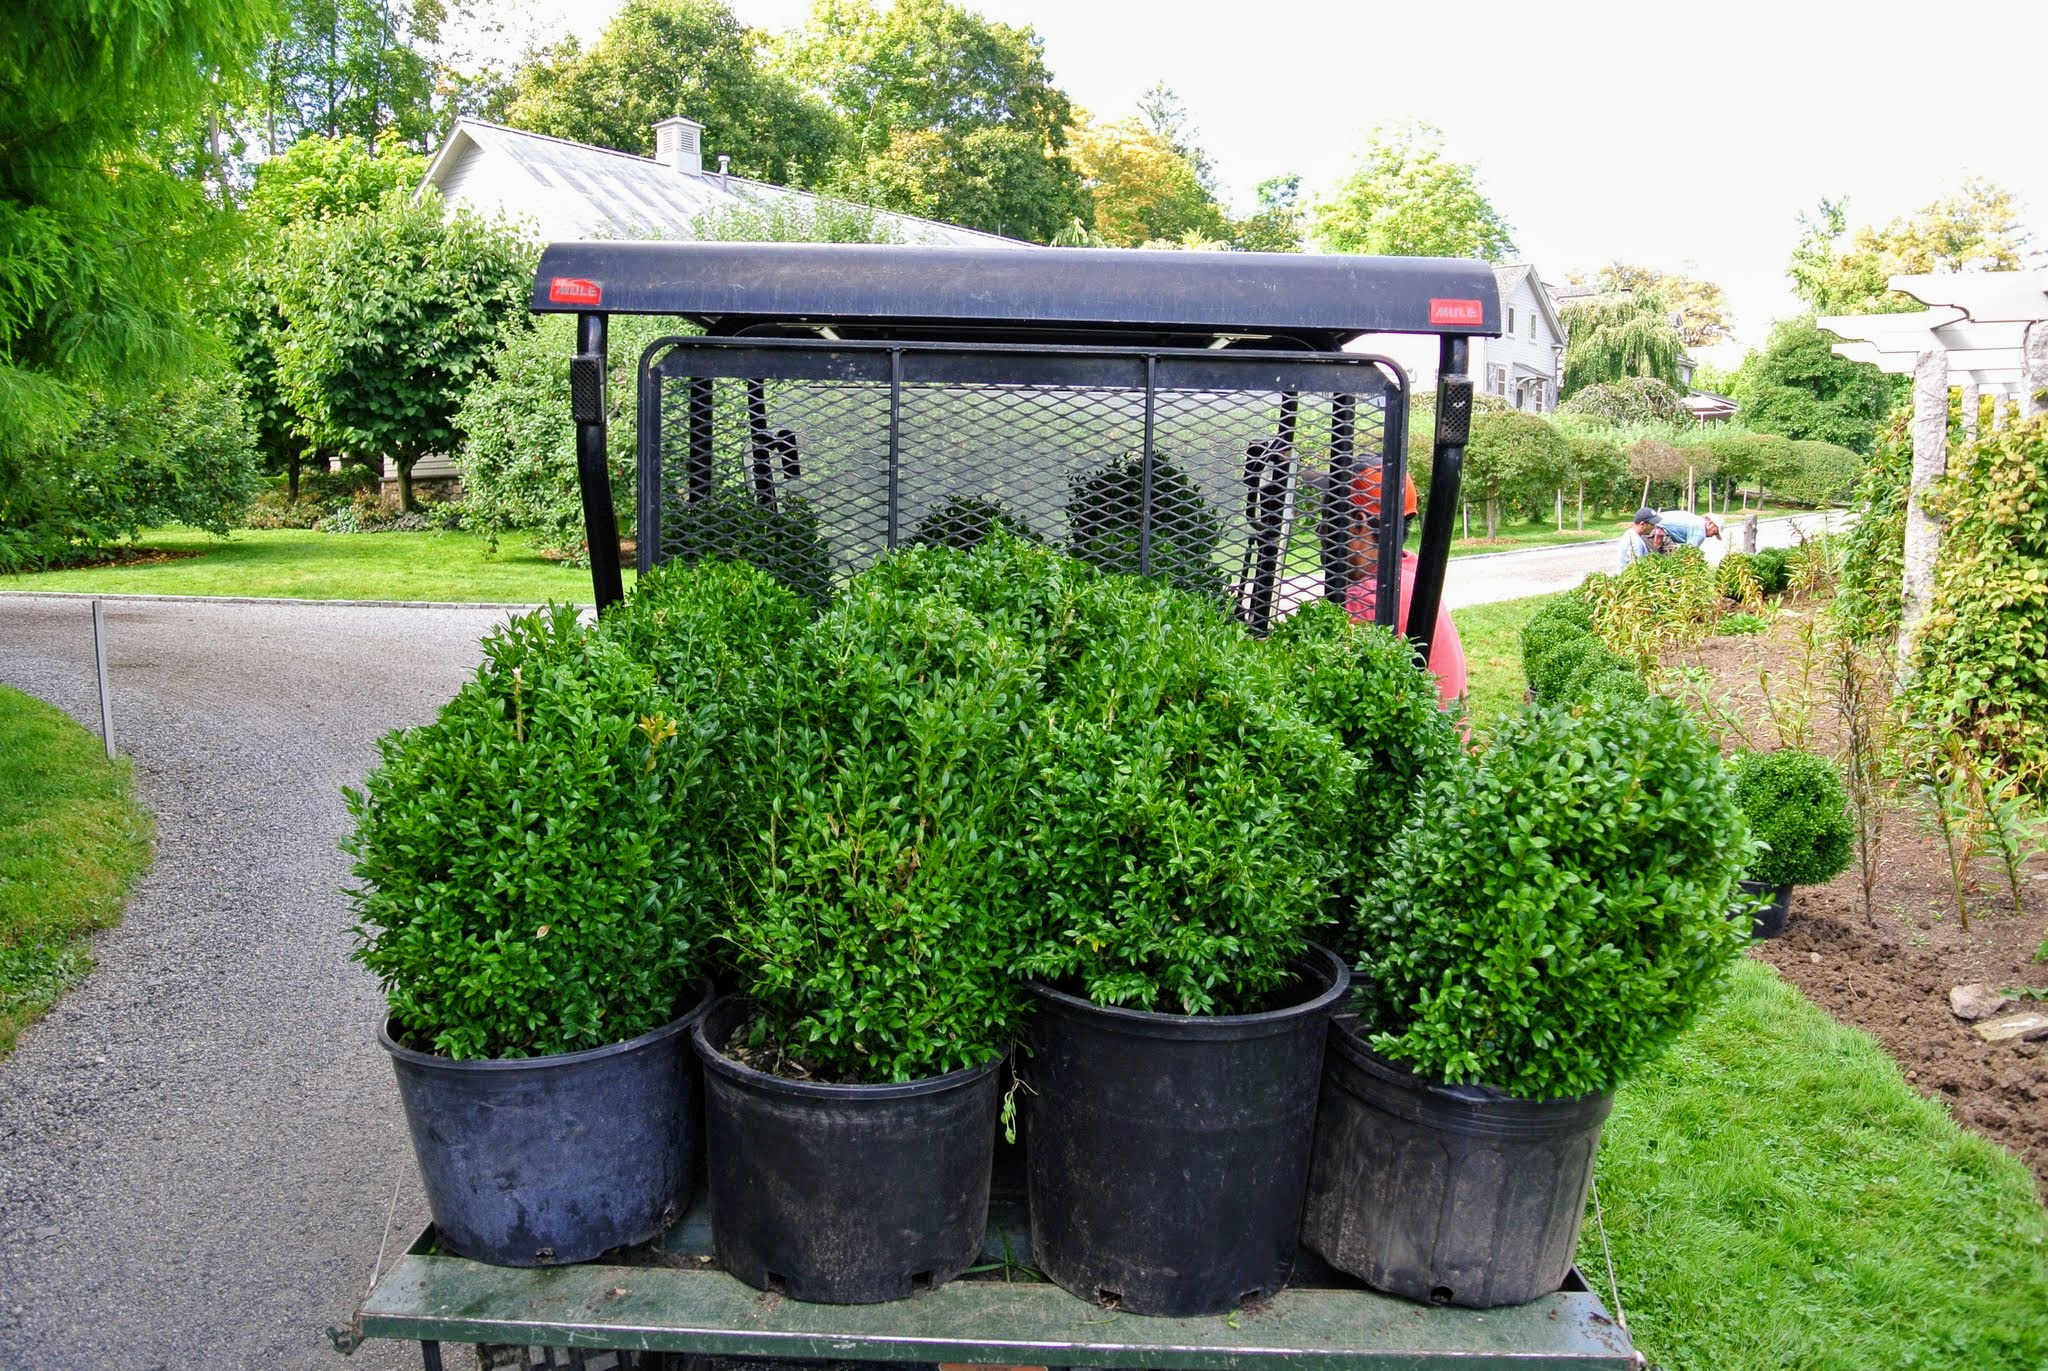
Each shrub was placed in a plastic pot and then groups of potted boxwoods were carefully transported.
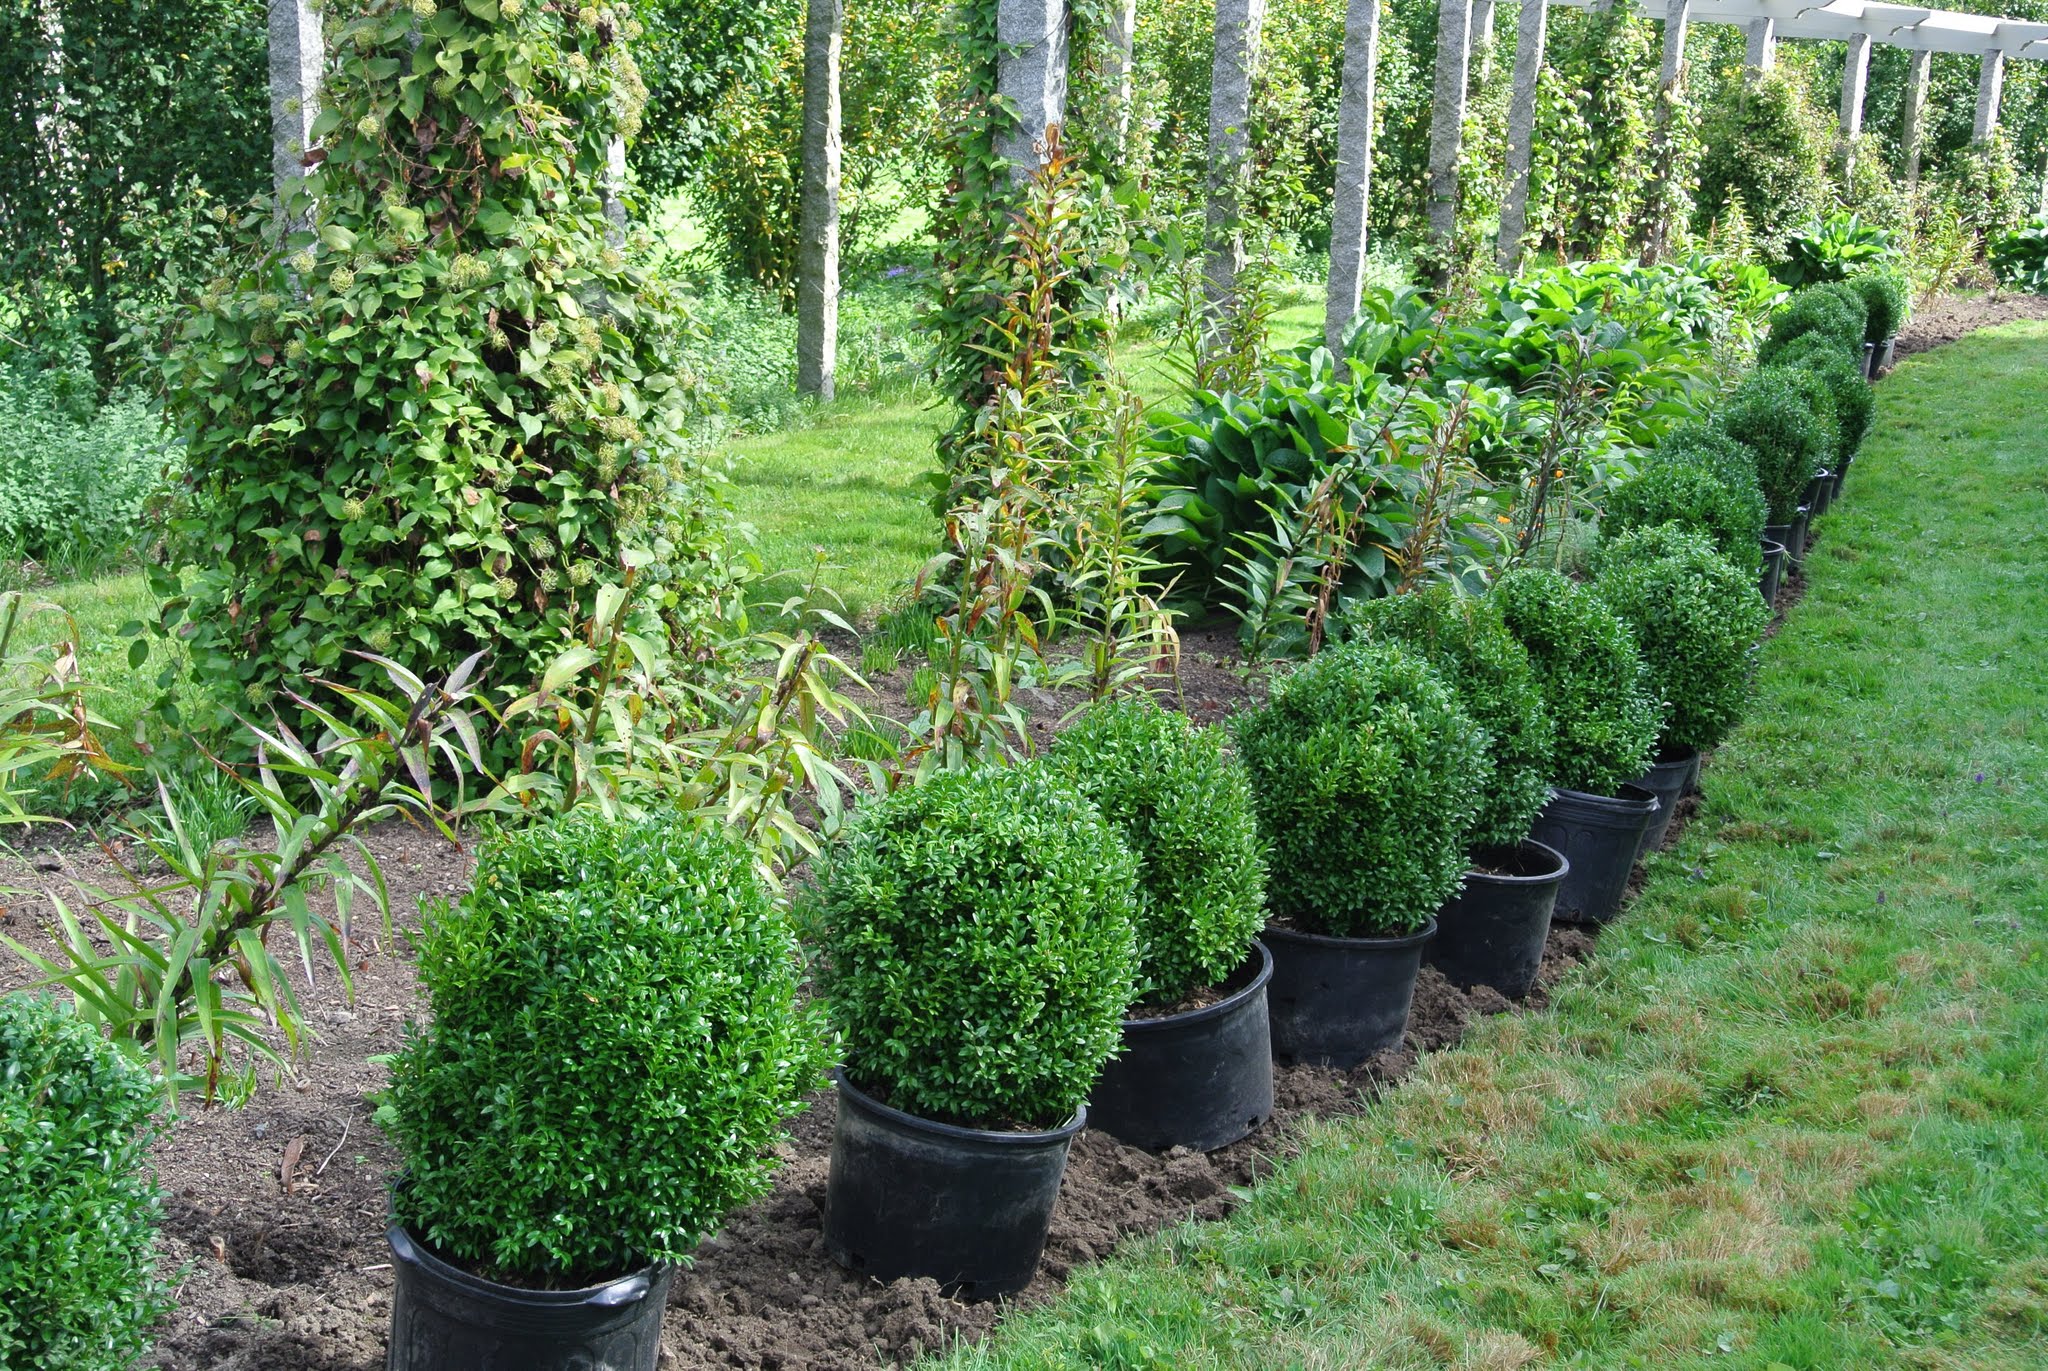
Every boxwood was positioned perfectly, two-feet apart from the next. It was a big project for the entire crew.
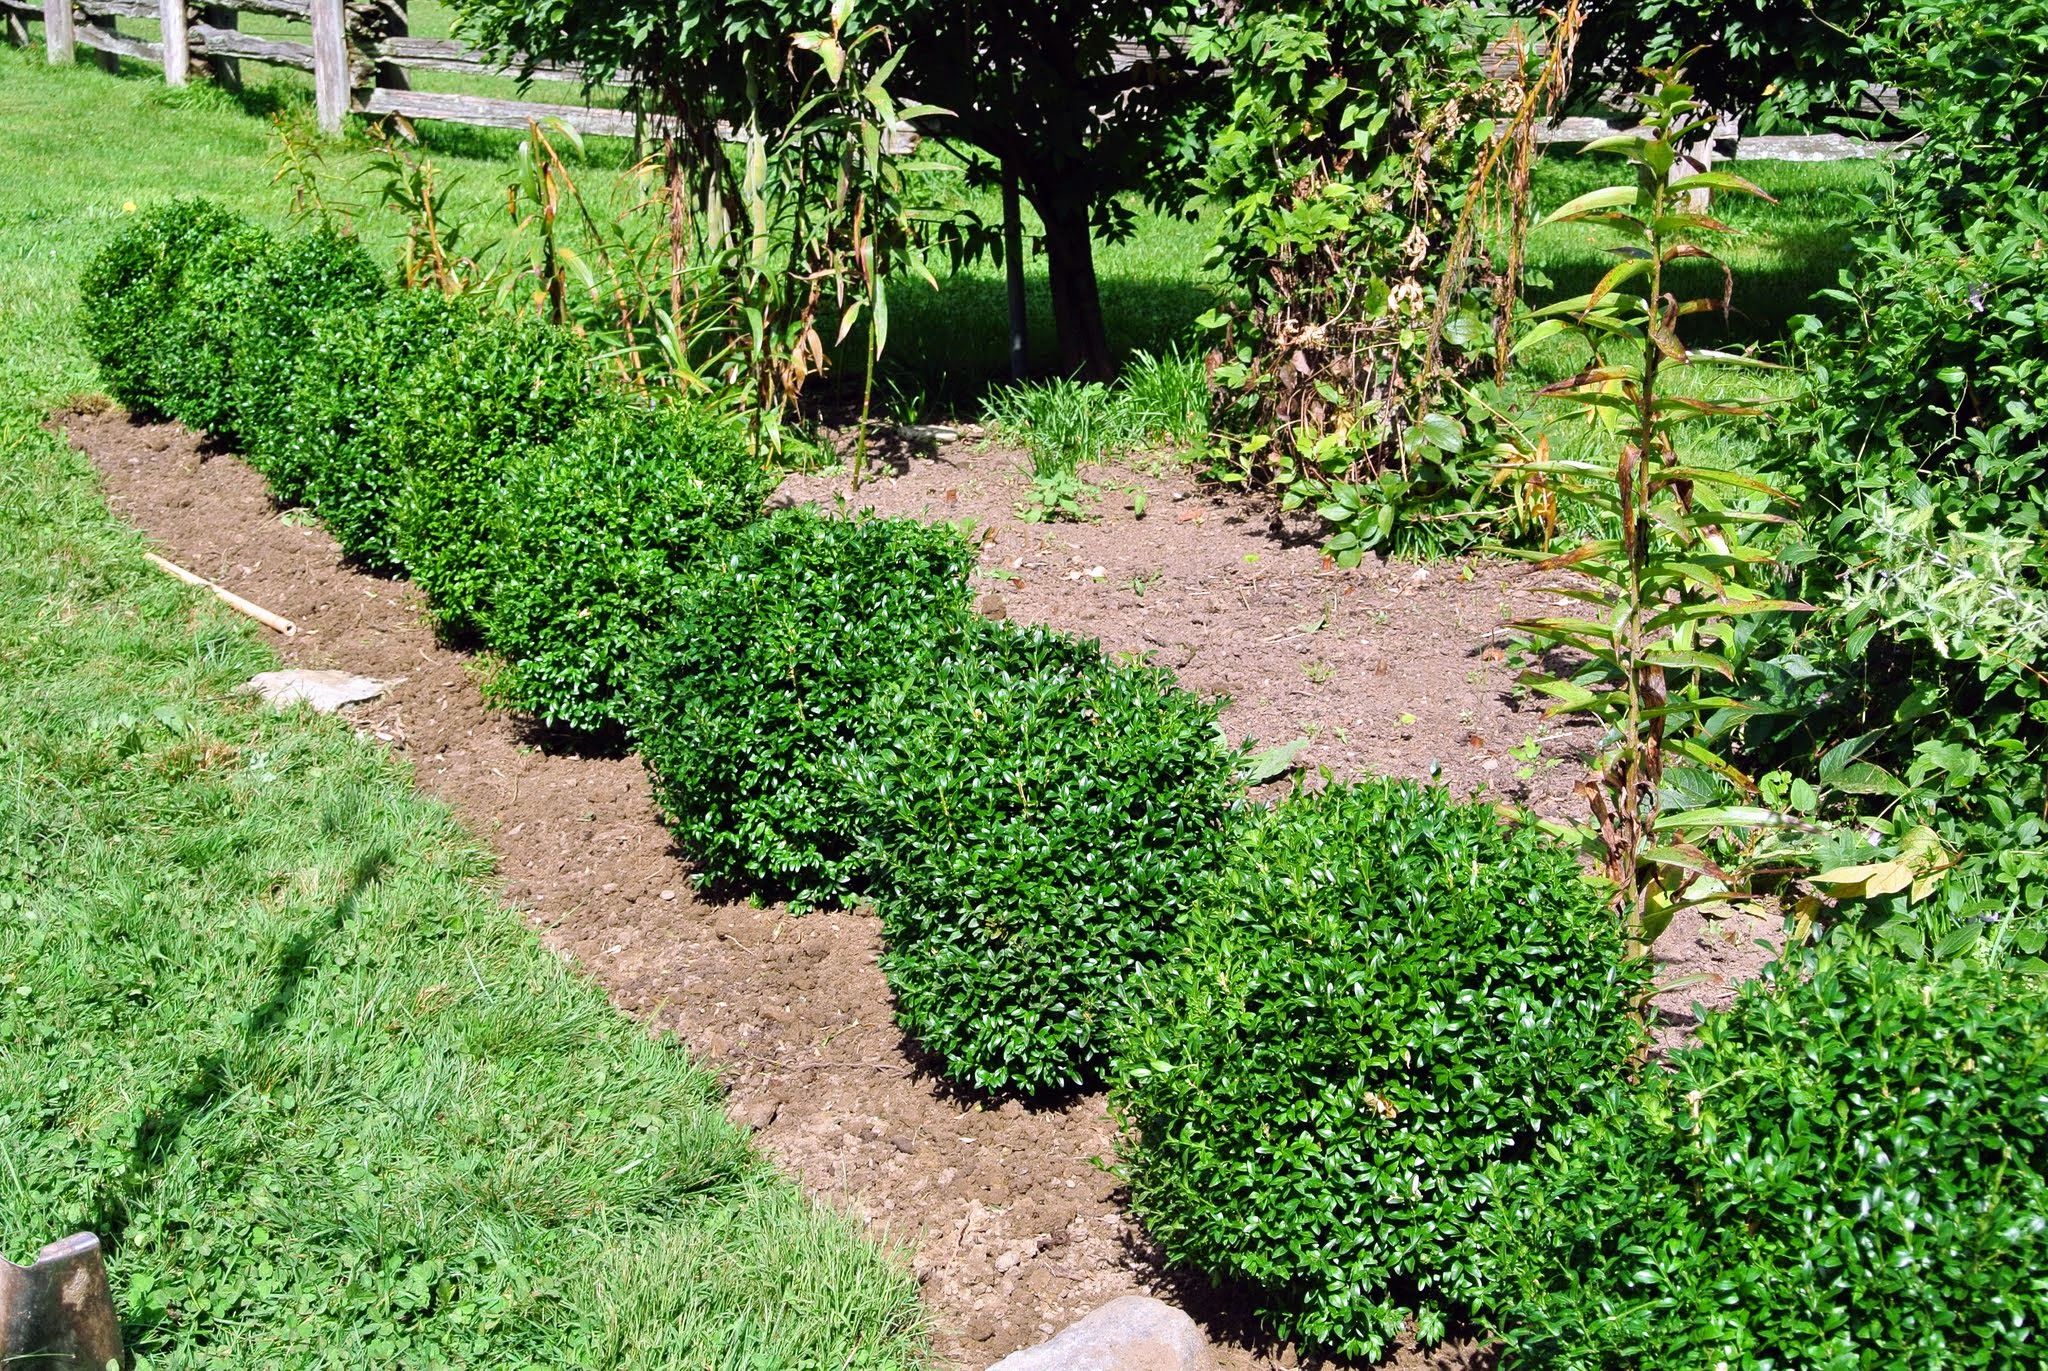
These were some of the first ones planted. Boxwood can grow in full sun and partial shade.
At the time, these shrubs were only about a foot tall, but every one in excellent condition.
Exactly six years later, they are all more than double the size and every one is touching. It is amazing to see the growth difference.
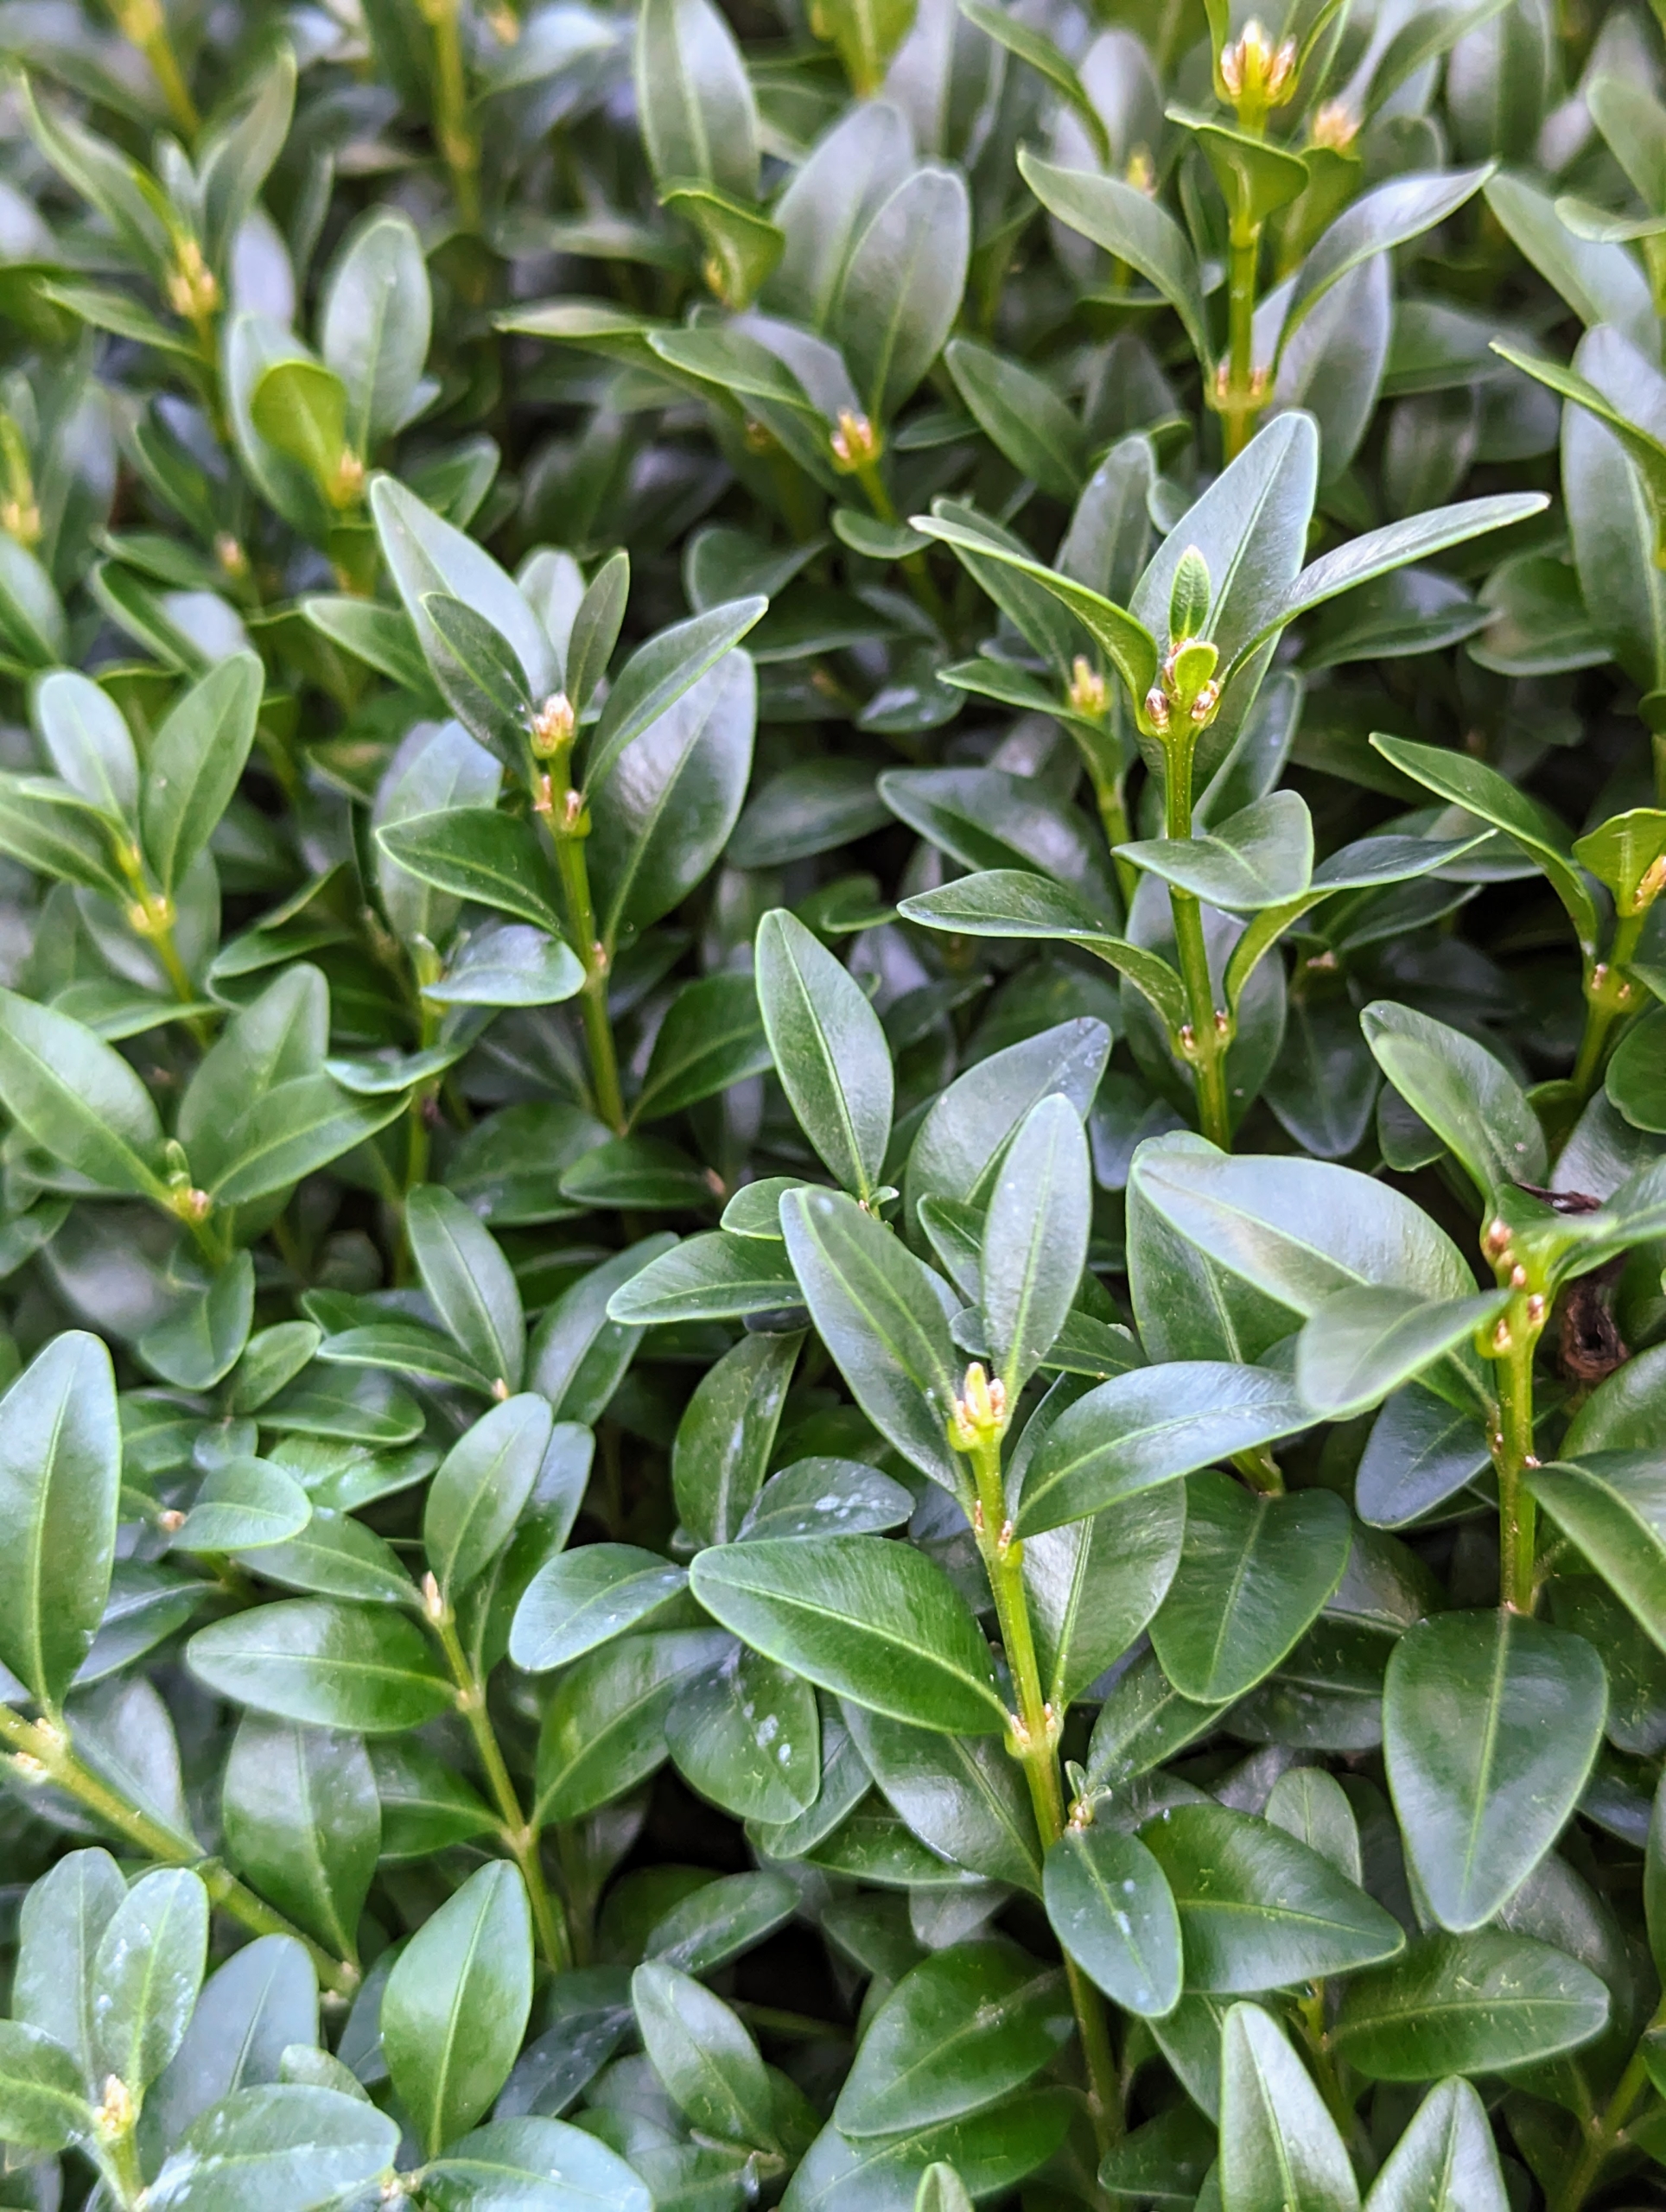
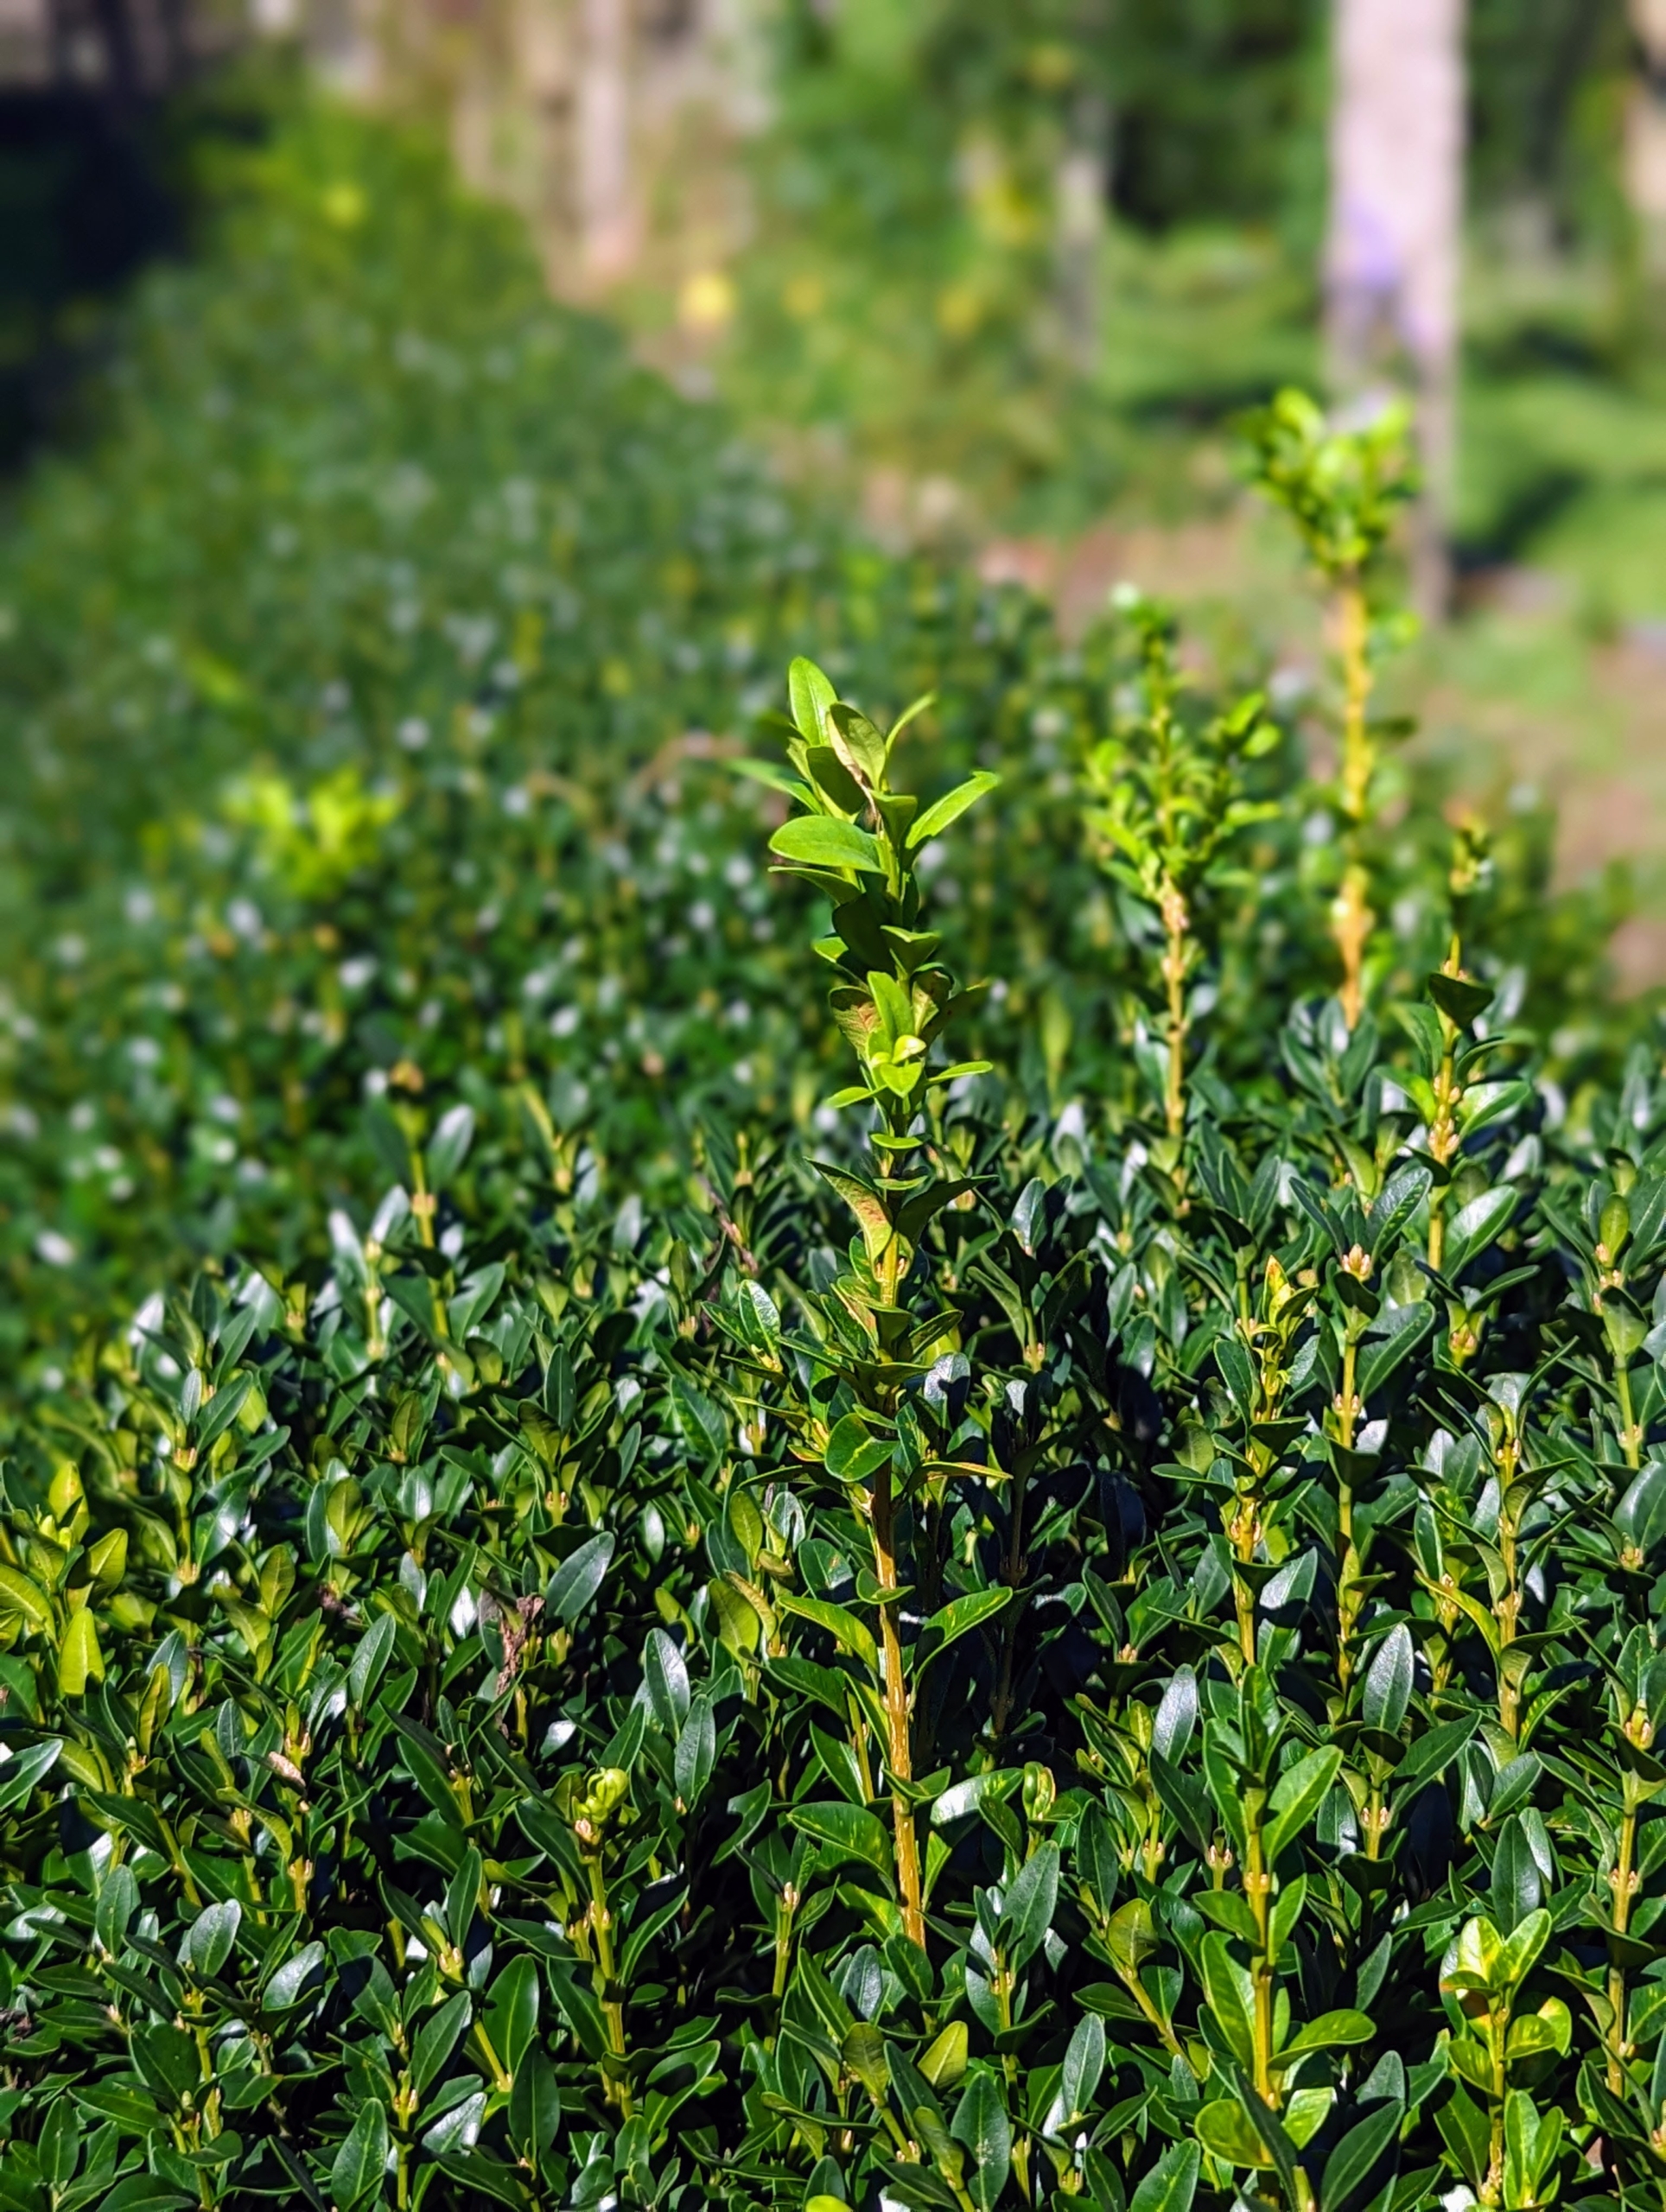
Here, one can see the newest growth. Boxwoods are slow growing compared to many other shrubs, with growth rate depending on the variety. Typically, the growth rate for most varieties is three to six inches per year. These needed a thorough grooming.
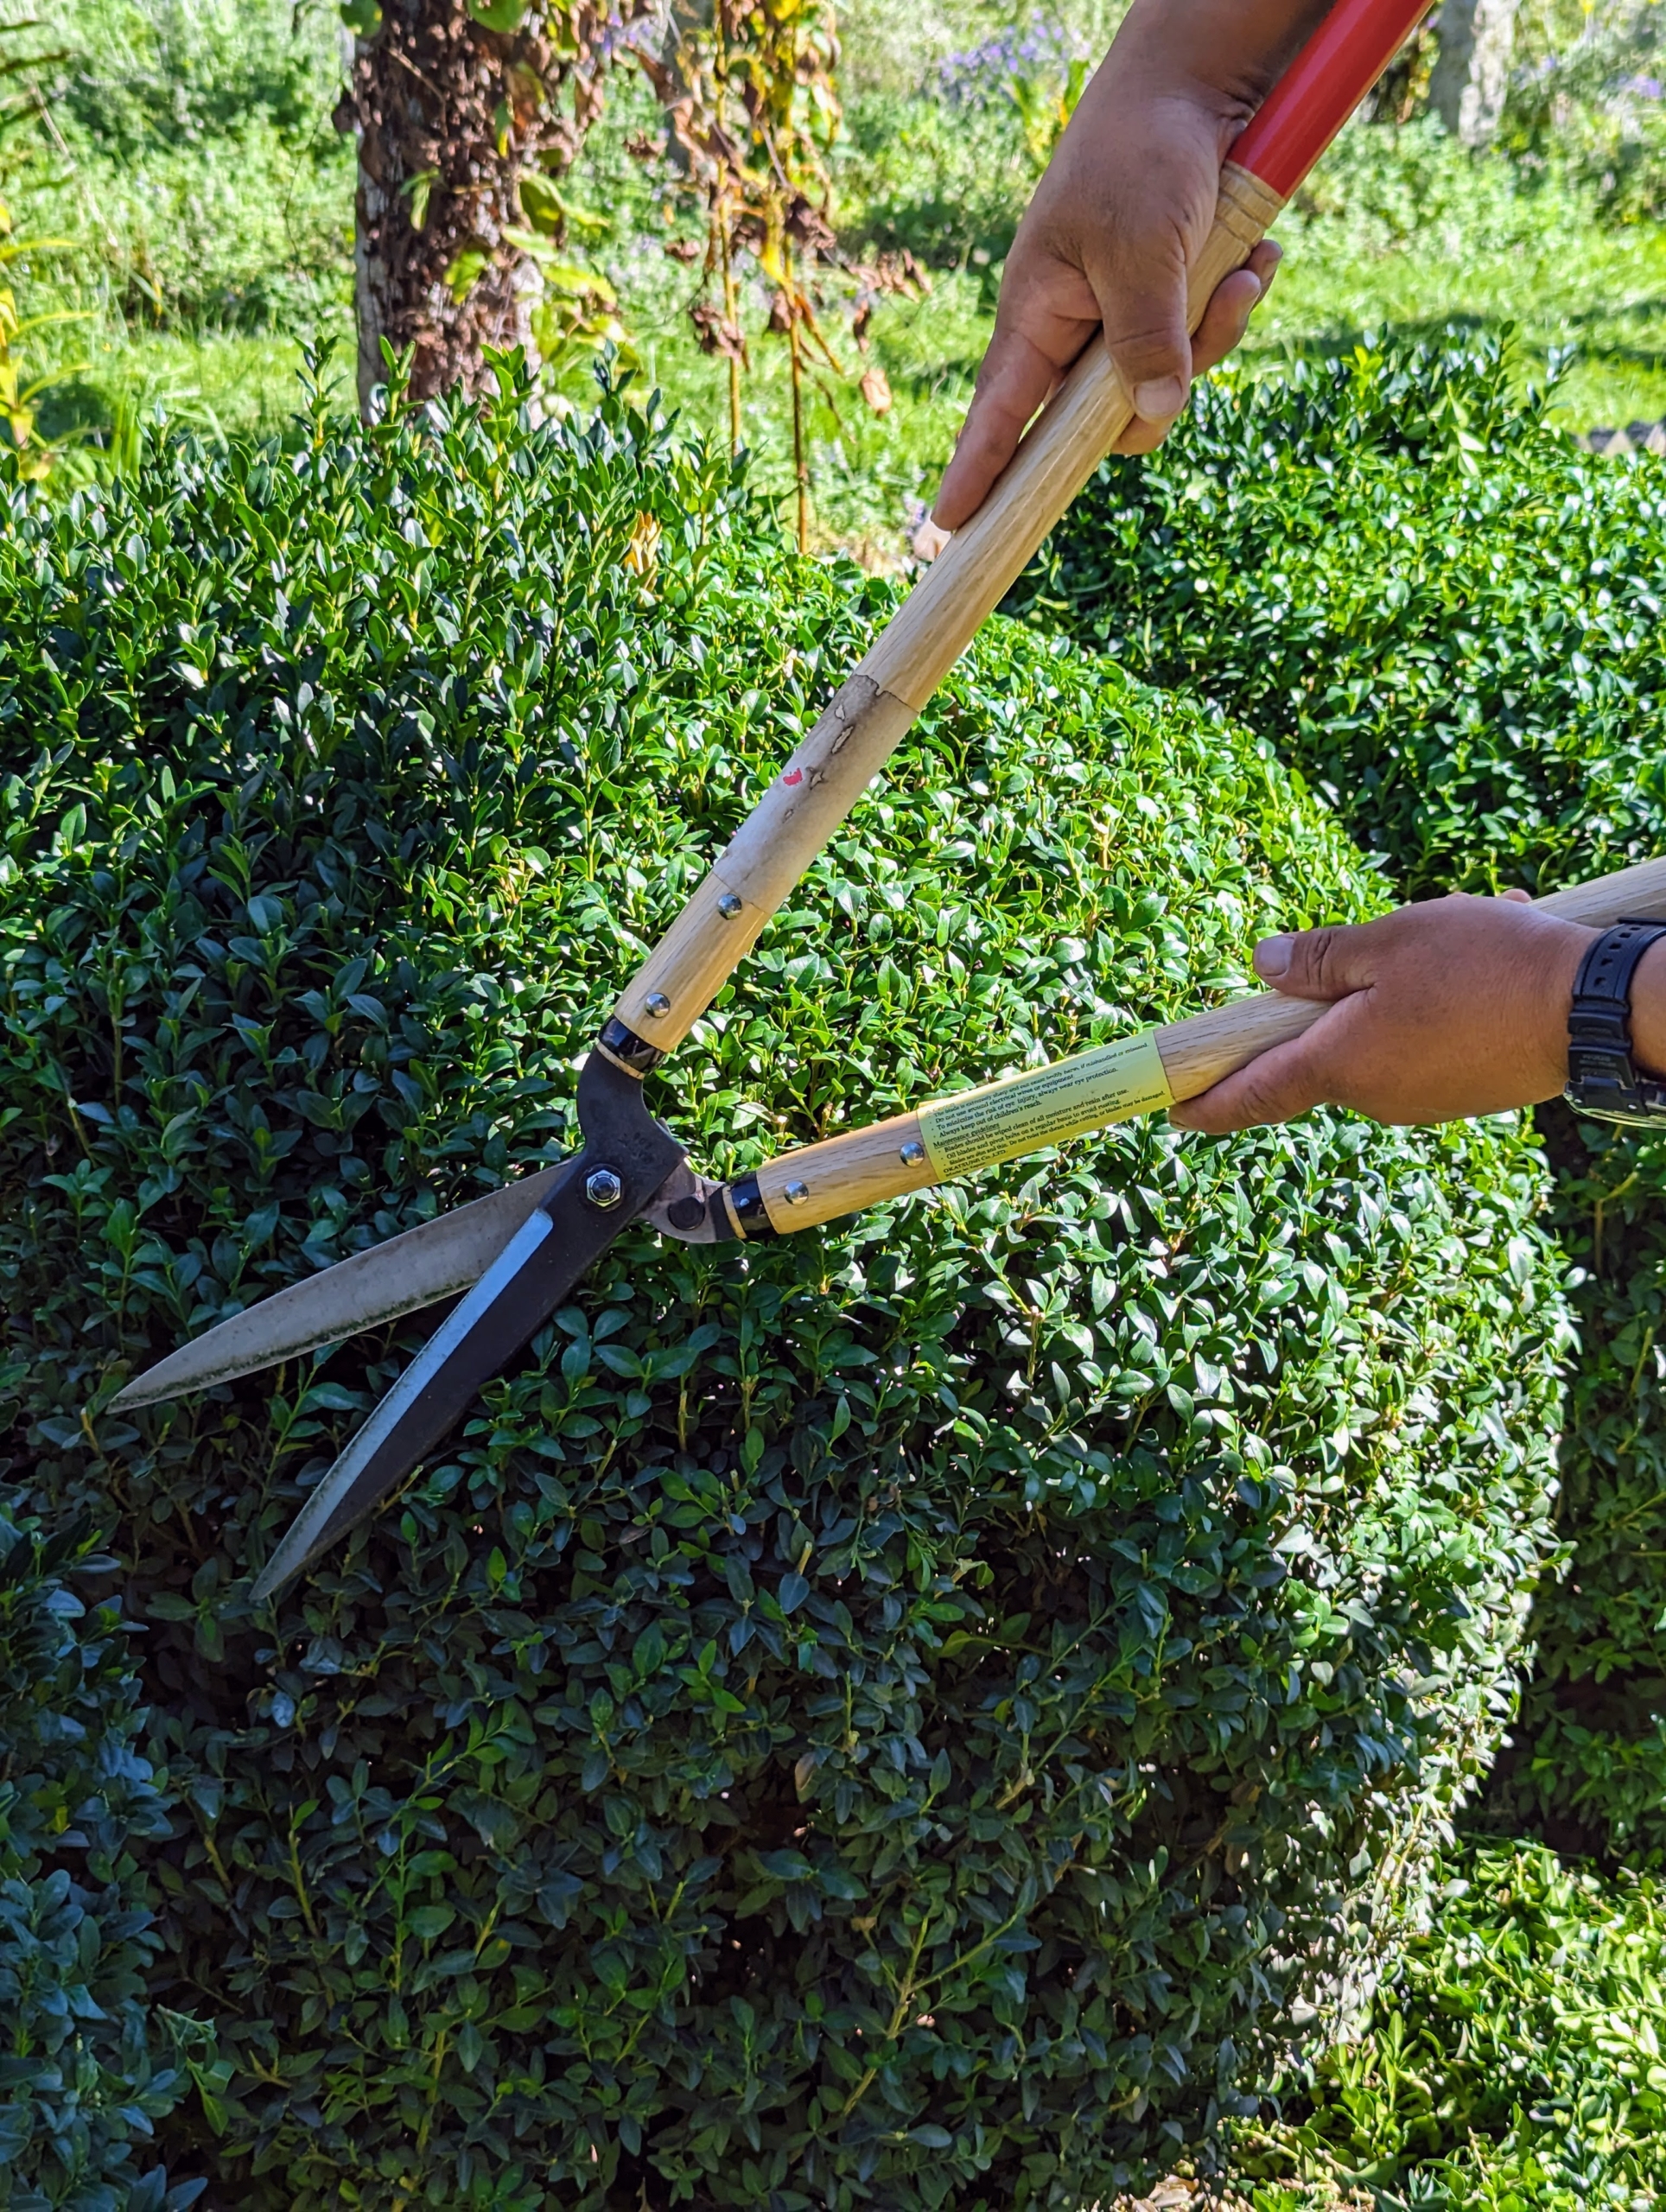
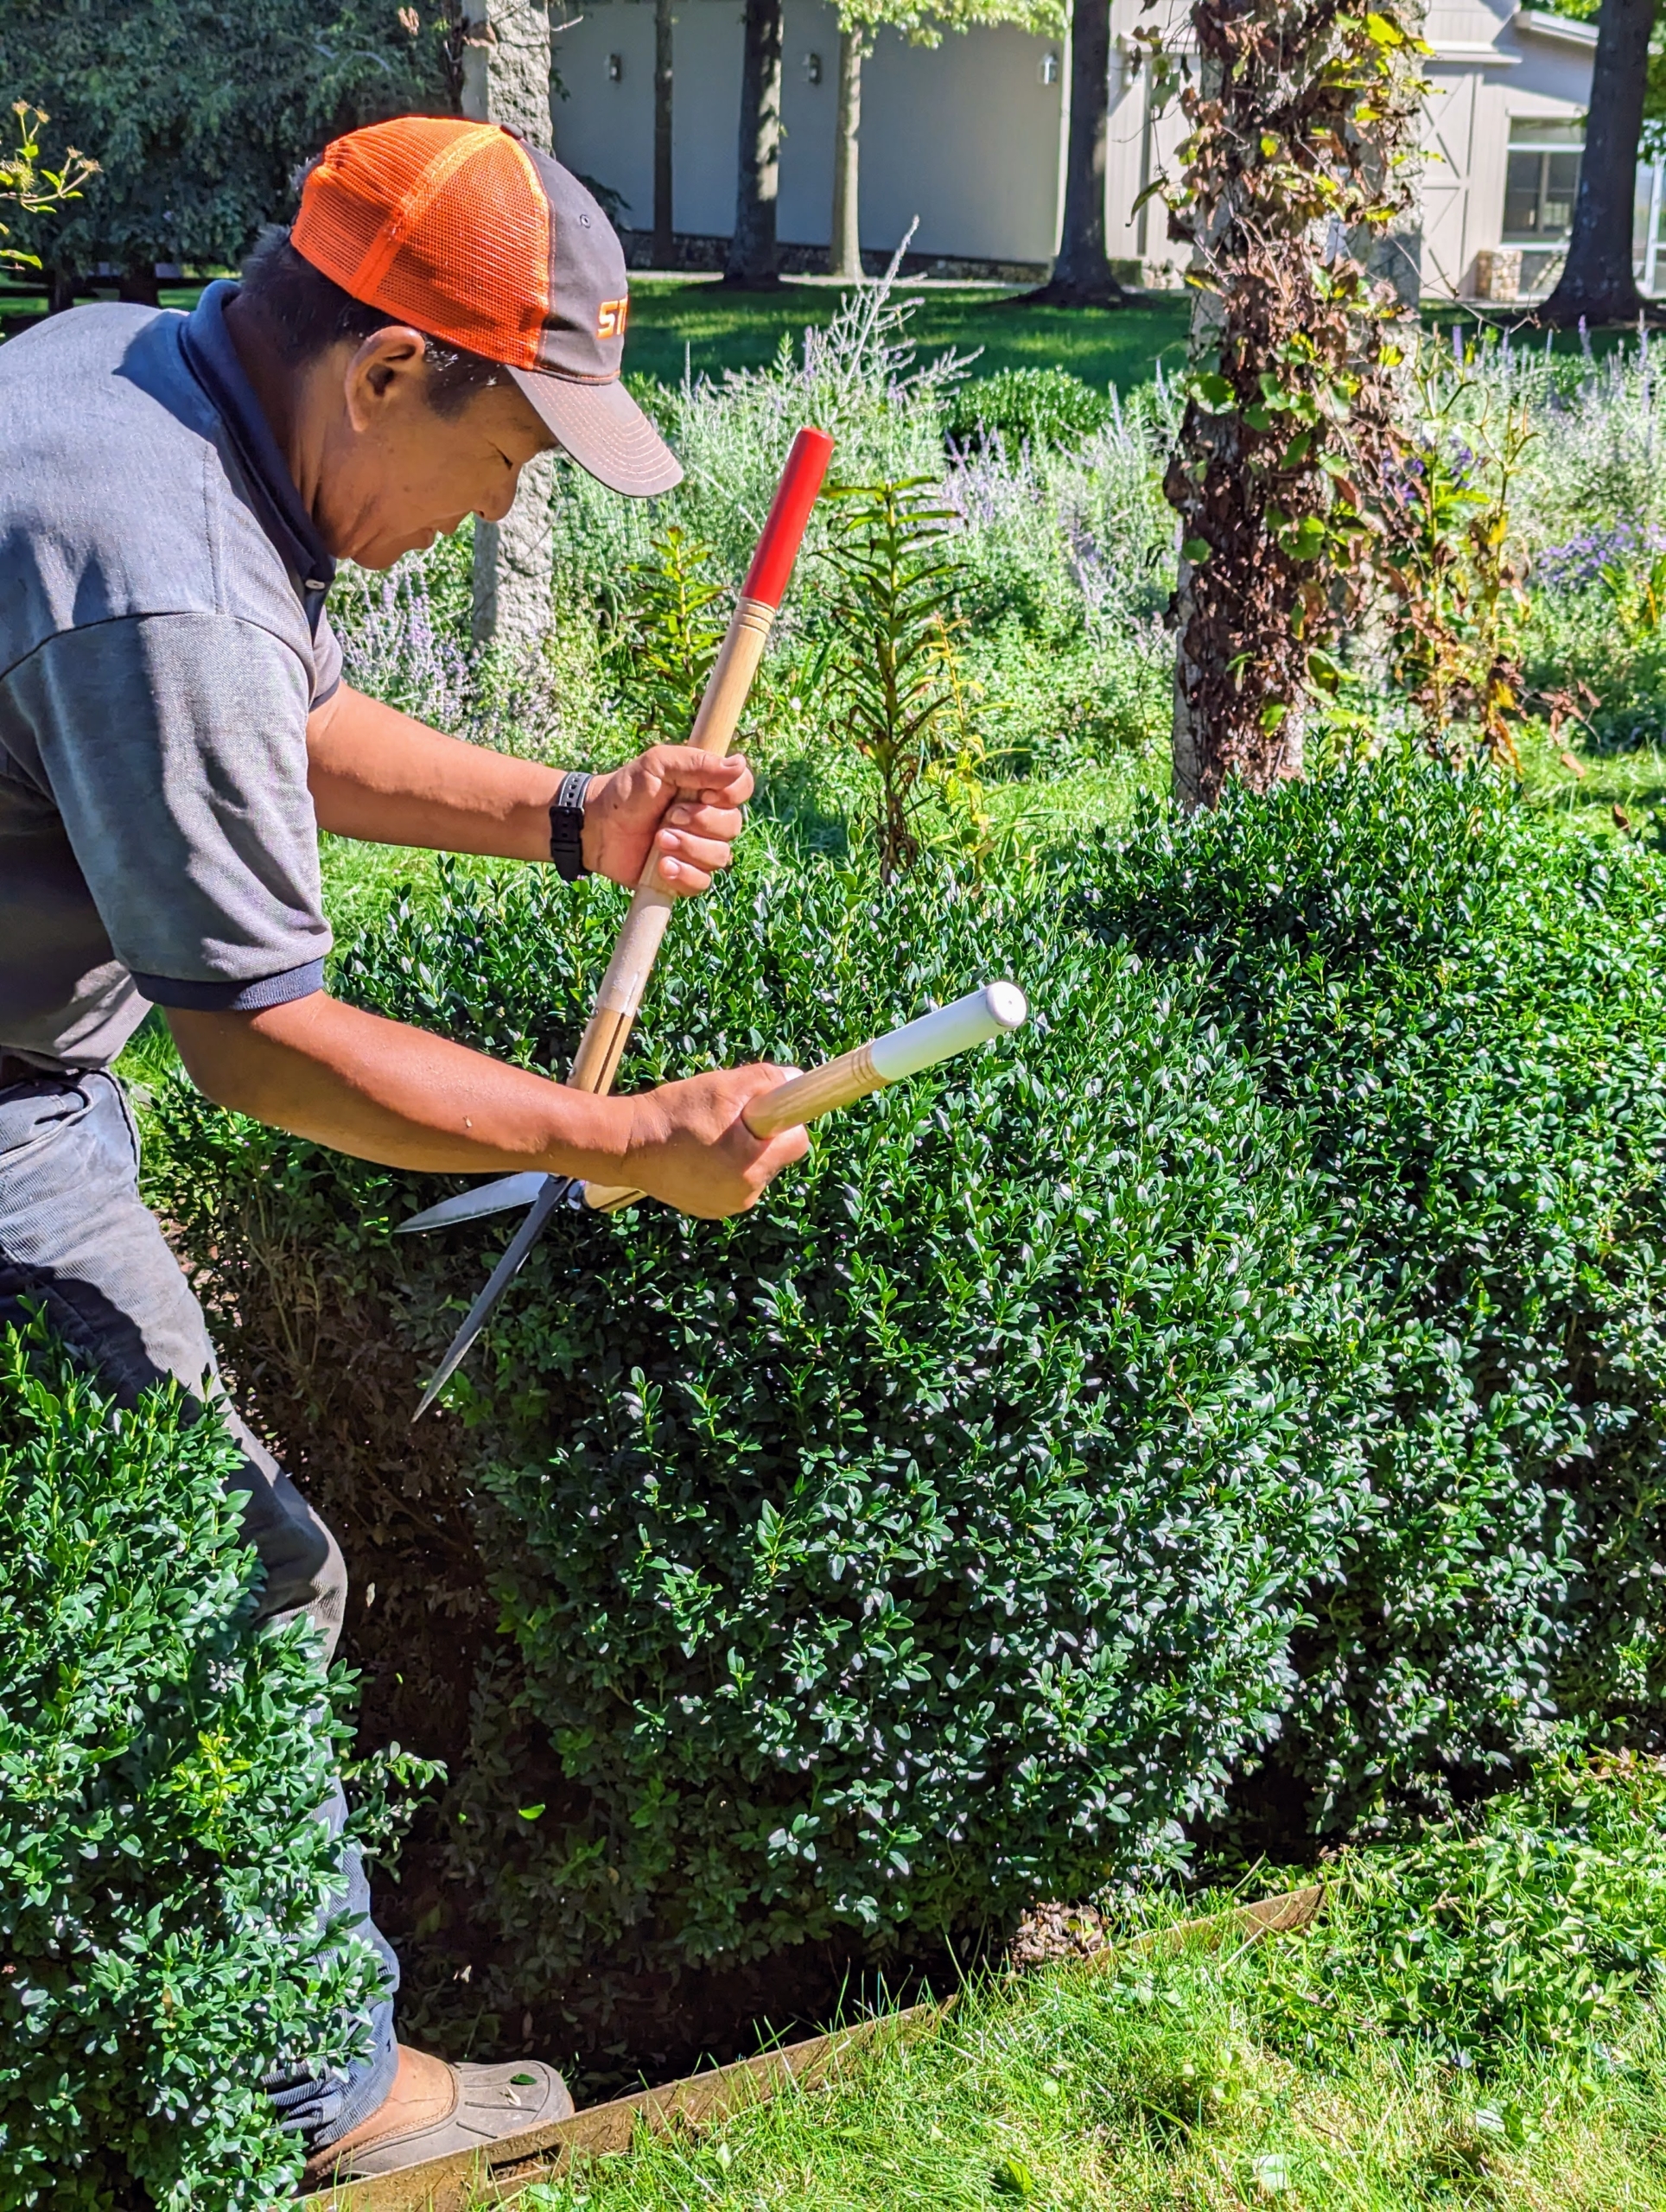
The crew does most of the hedge pruning around the farm by hand. Everyone uses Japanese Okatsune shears specially made for trimming hedges. These shears are user friendly, and come in a range of sizes.
To groom the tops and sides, Phurba keeps the shears close to him with his hands midway down the handles. This allows the best control.
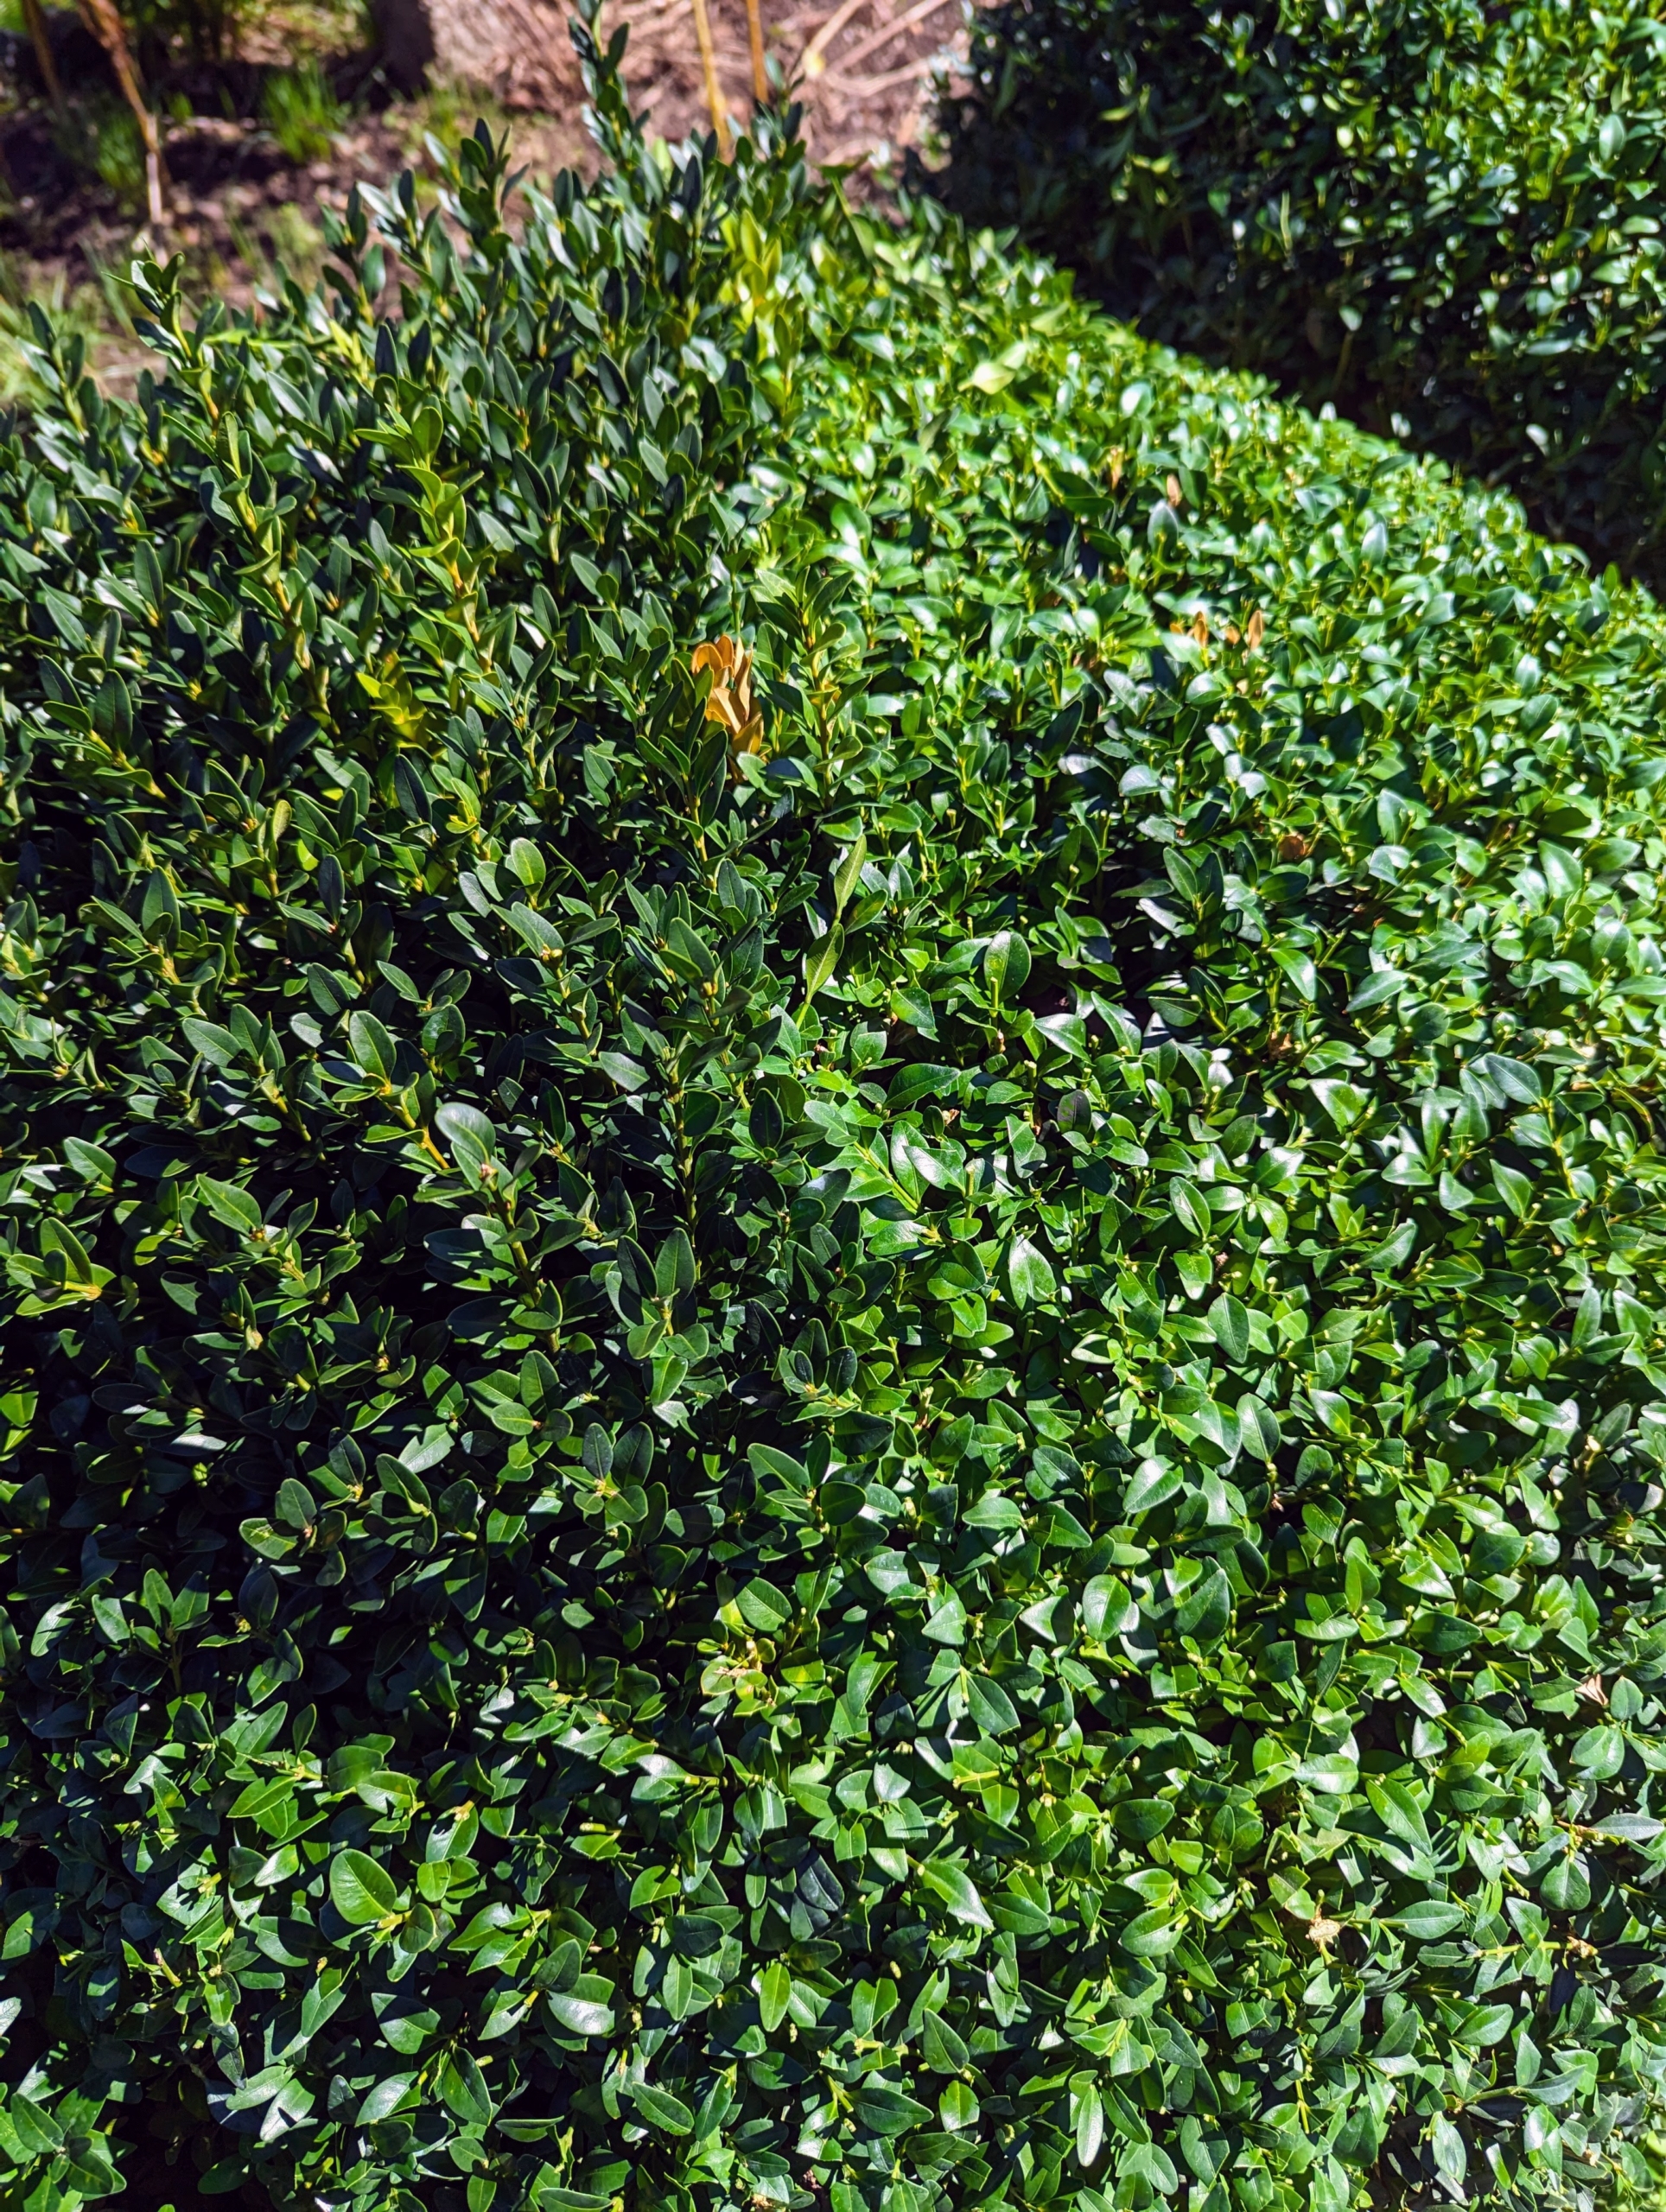
I prefer this method of trimming because the cuts are very clean and smooth when done by hand. Look closely here and see where some of the leaves have been clipped. It is also very important that the tools be sharp.
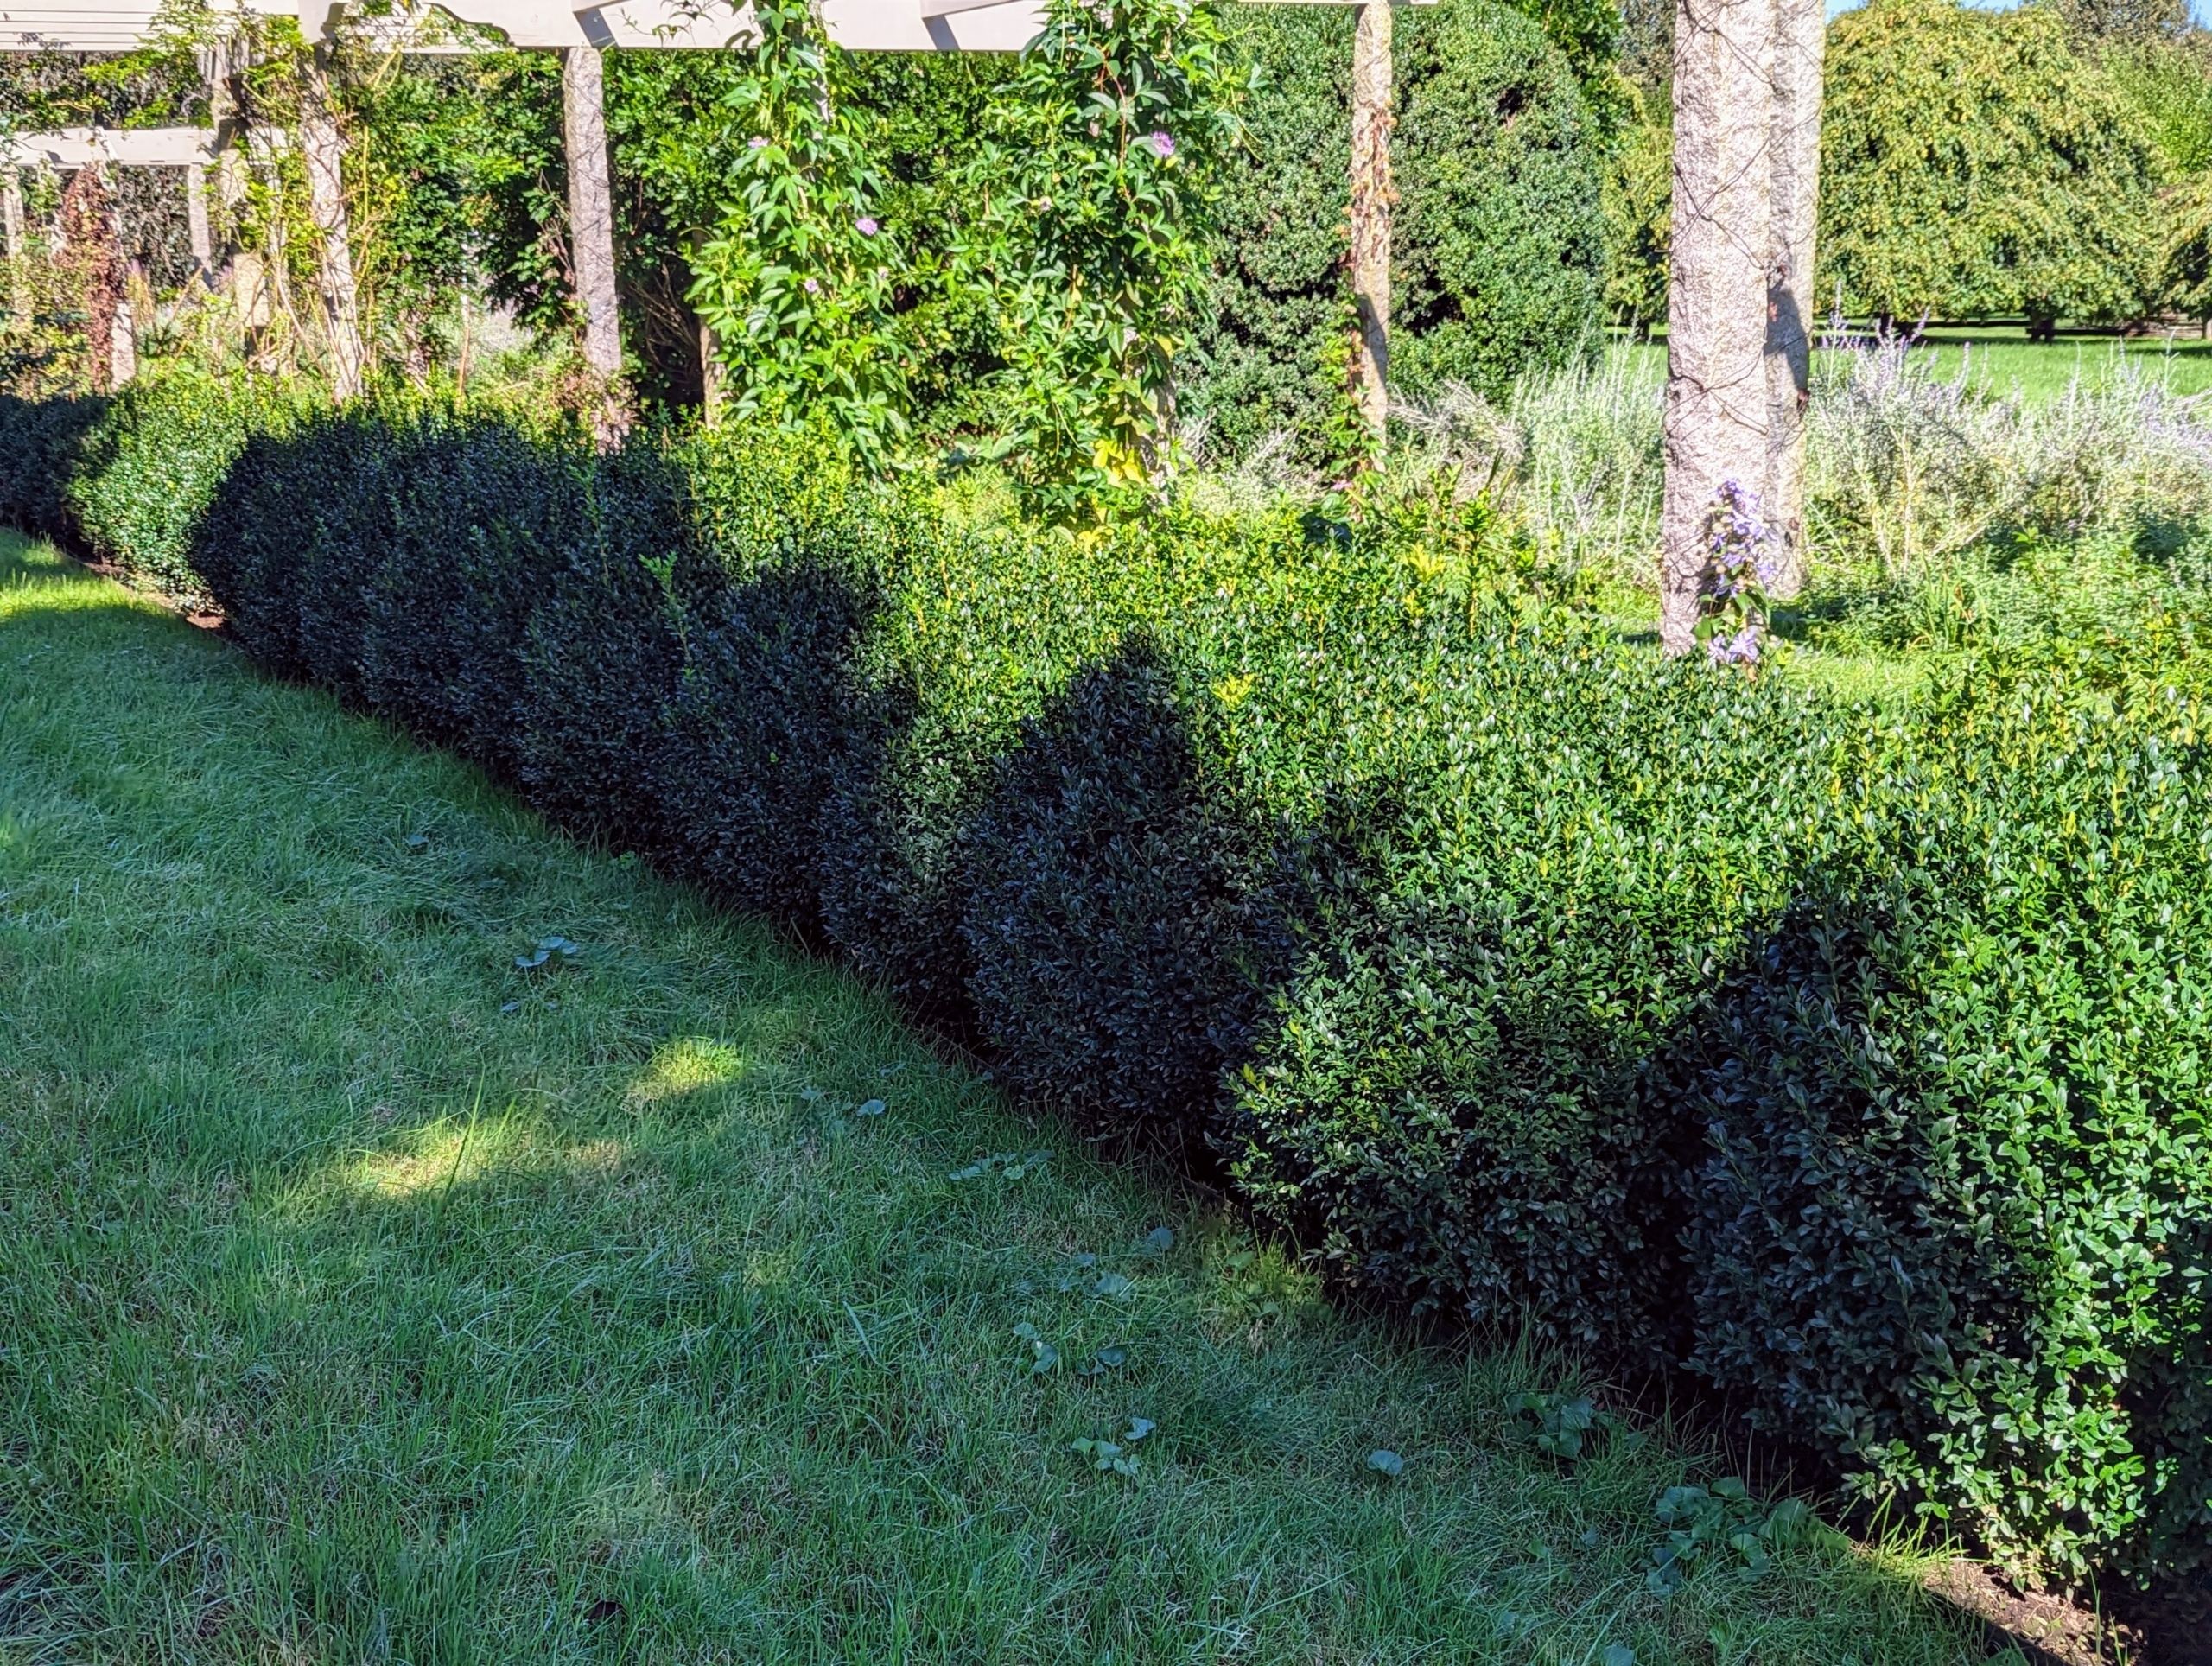
Here, one can see the right is pruned while the left is not. We groom and prune the boxwood at least once a year.
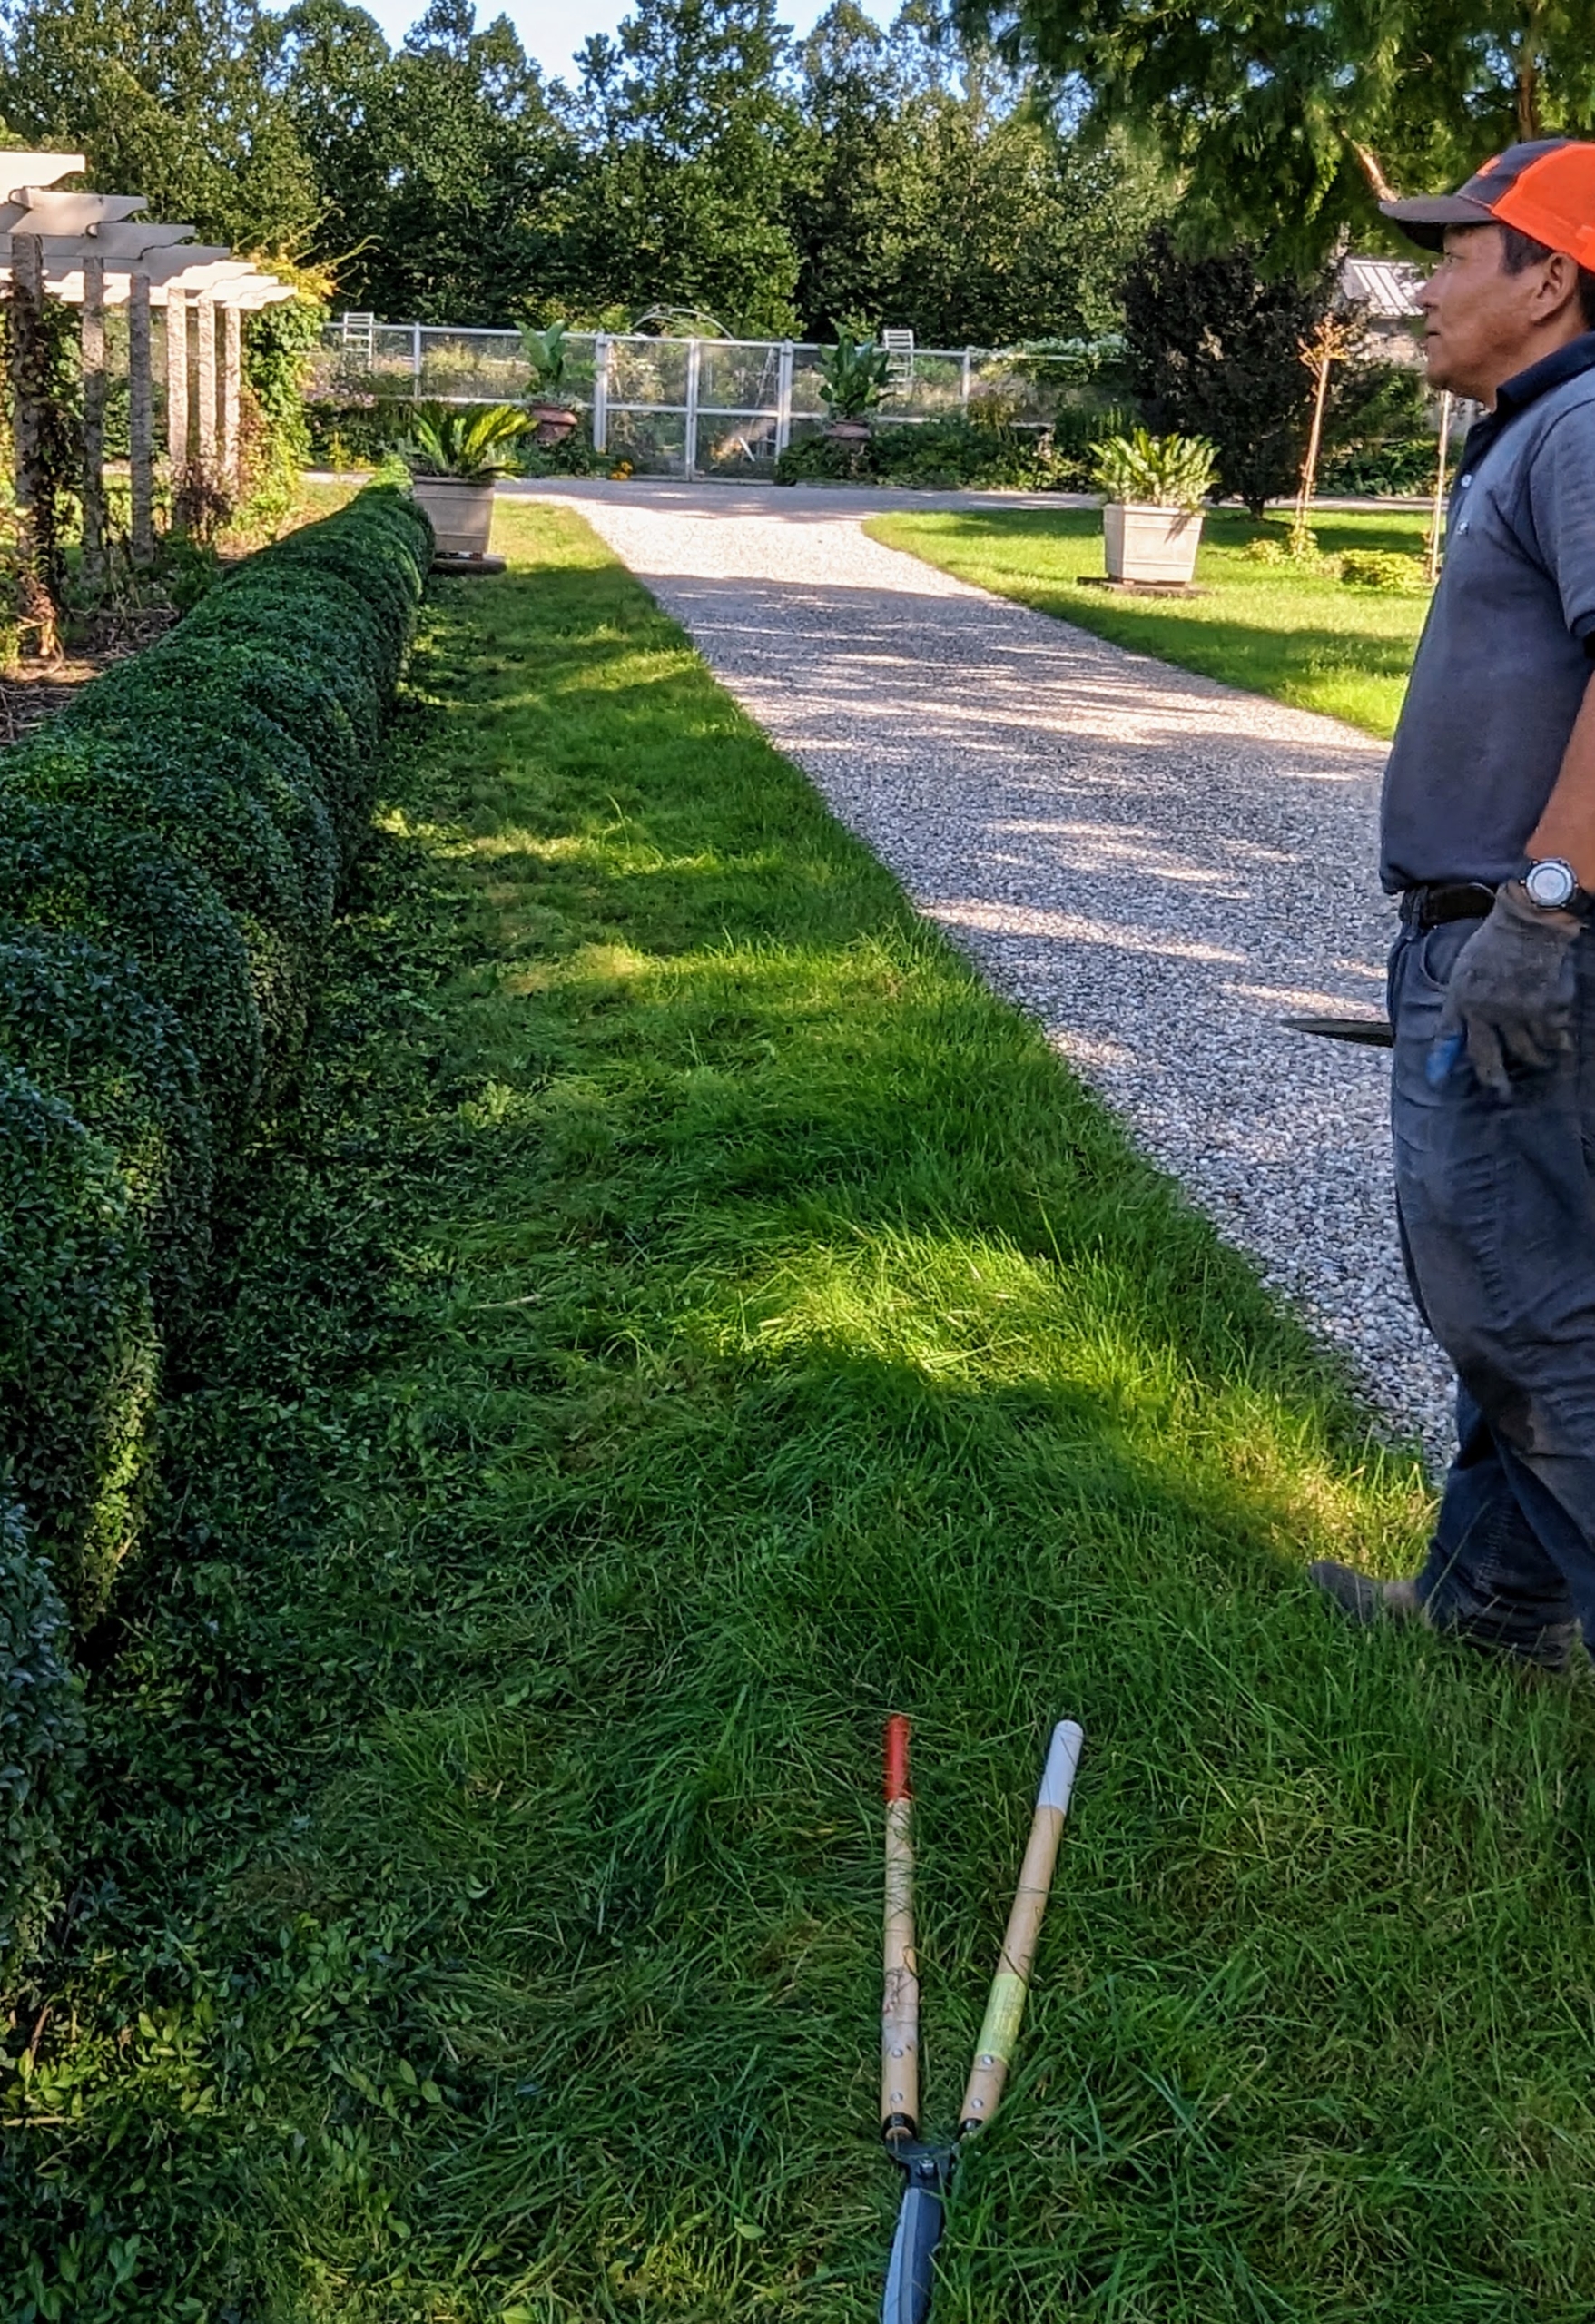
As Phurba works his way down the border, he stops occasionally to check his work and to make sure the boxwood looks evenly done.
Once a large section is done, the entire space looks markedly different. Here is a row of mature boxwood after trimming – they look so much better.
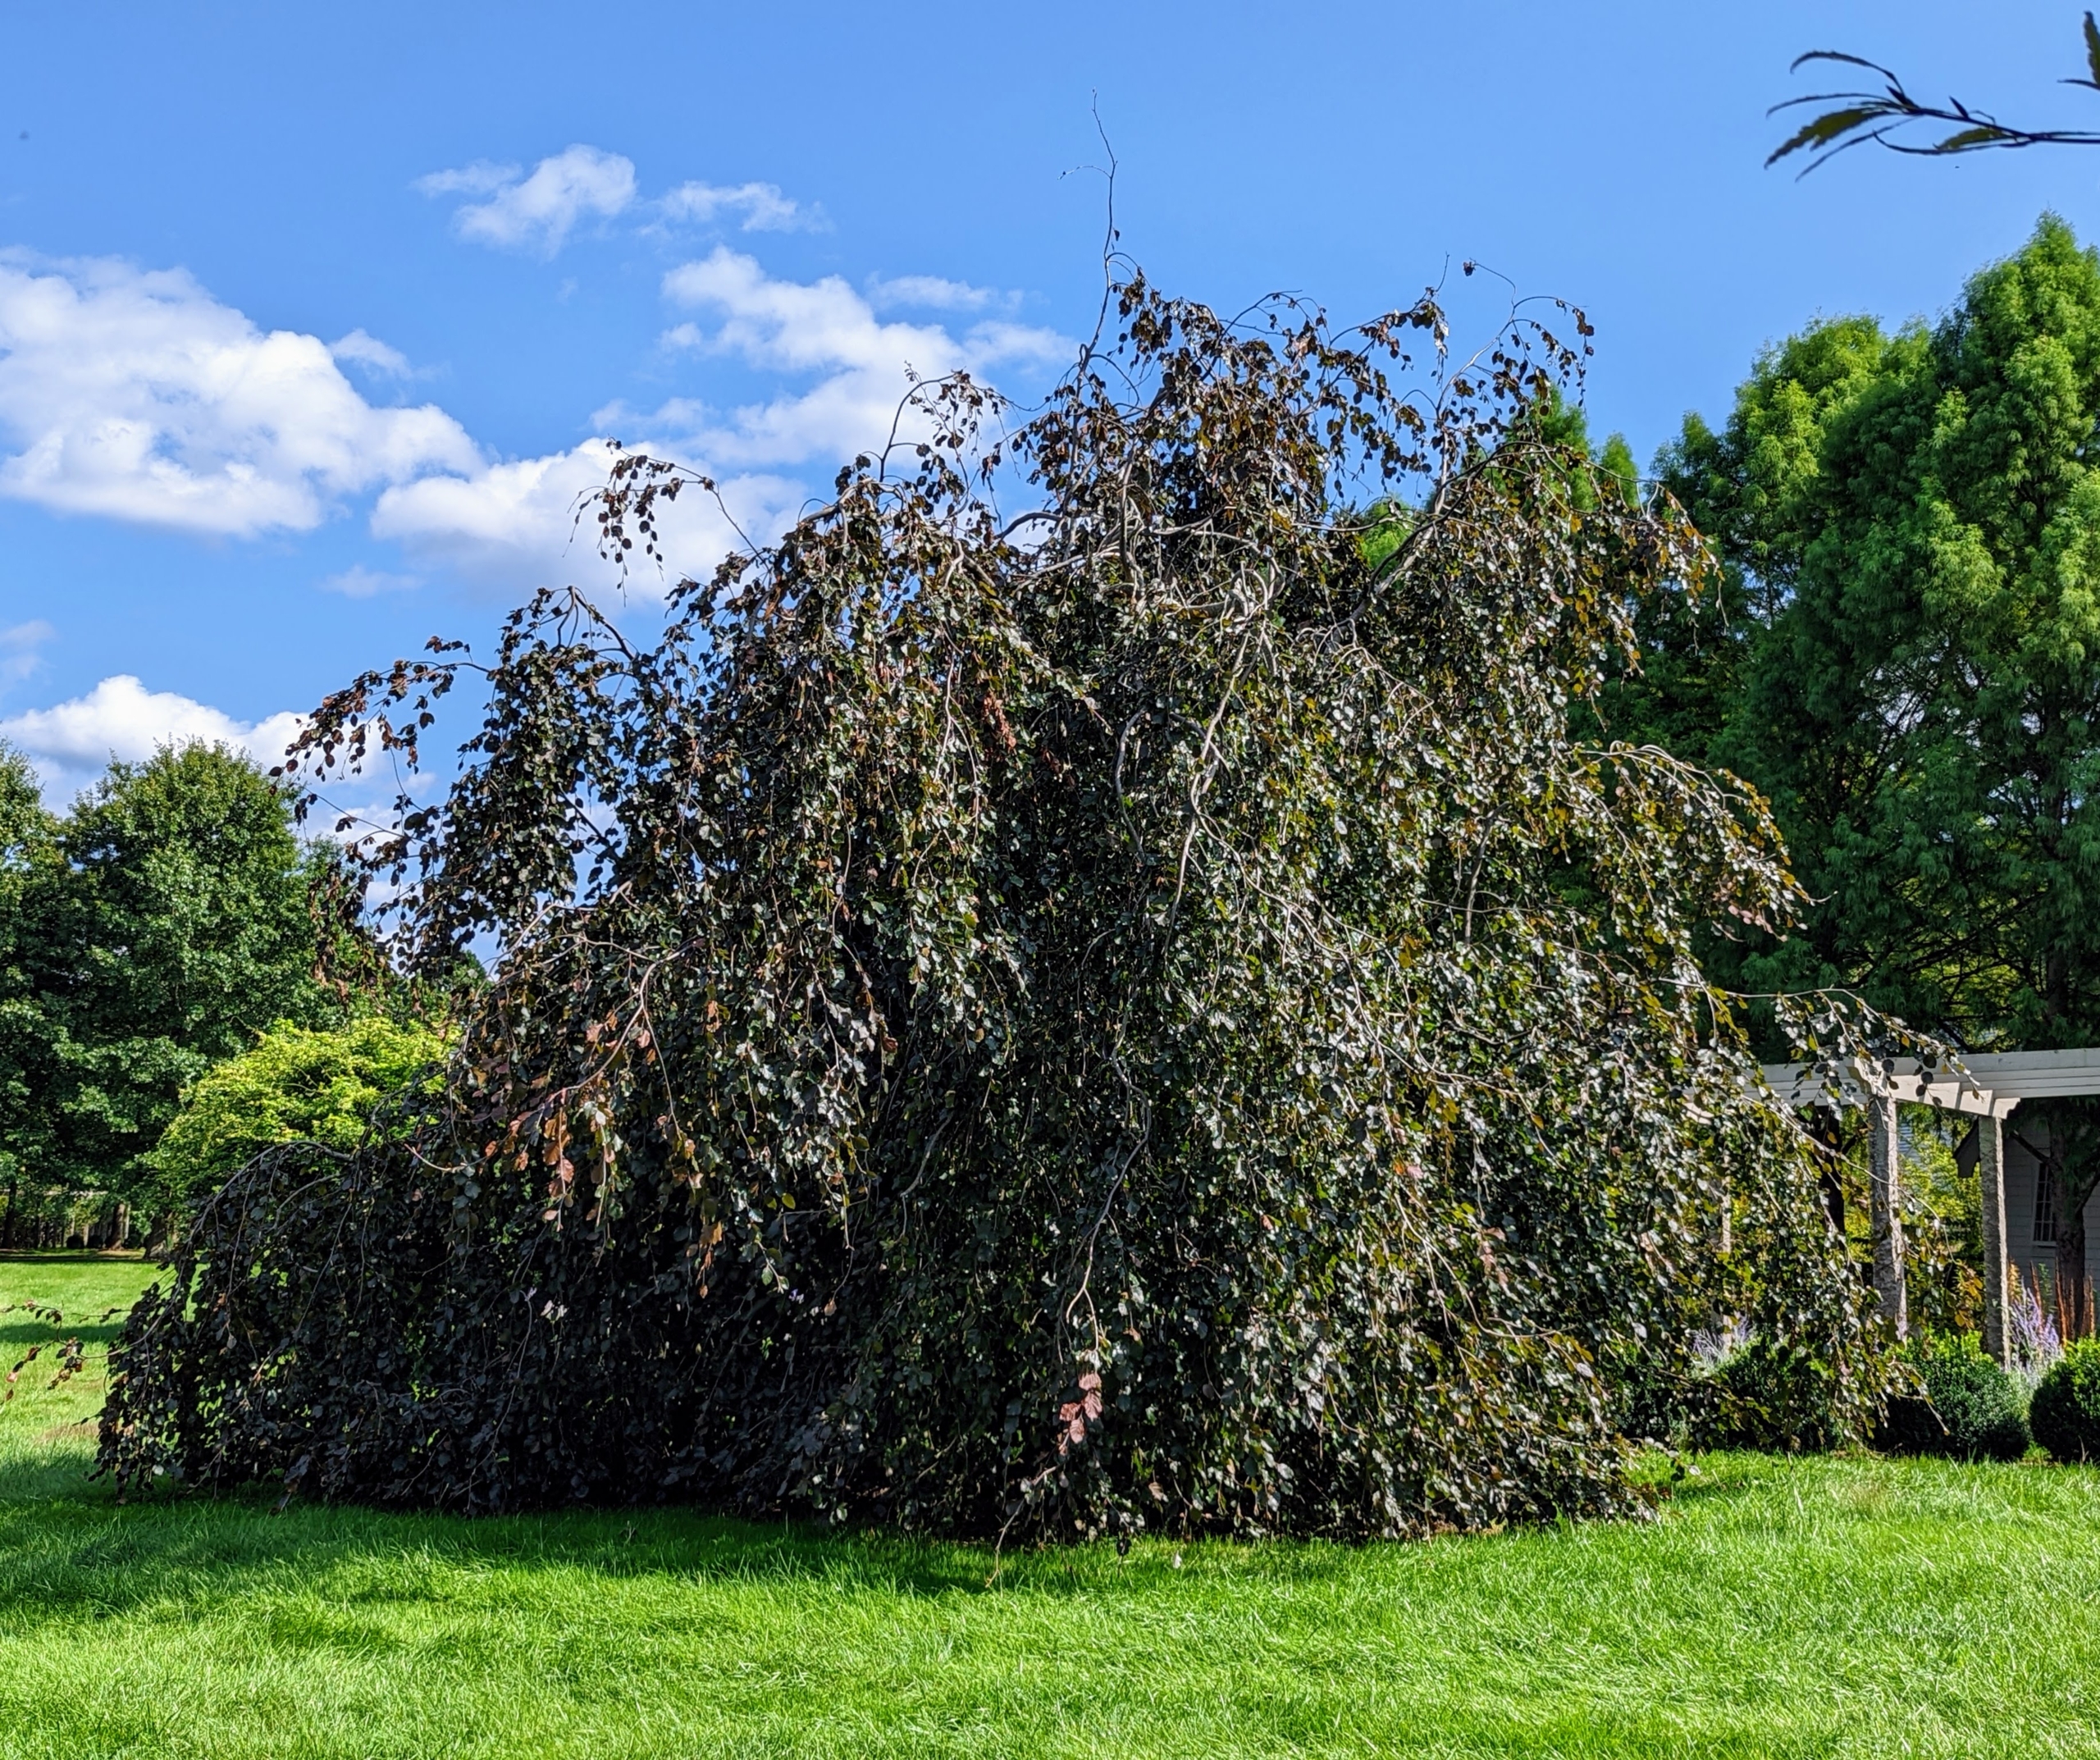
Behind the pergola is this giant weeping copper beech tree – I love these trees with their gorgeous form and rich color.
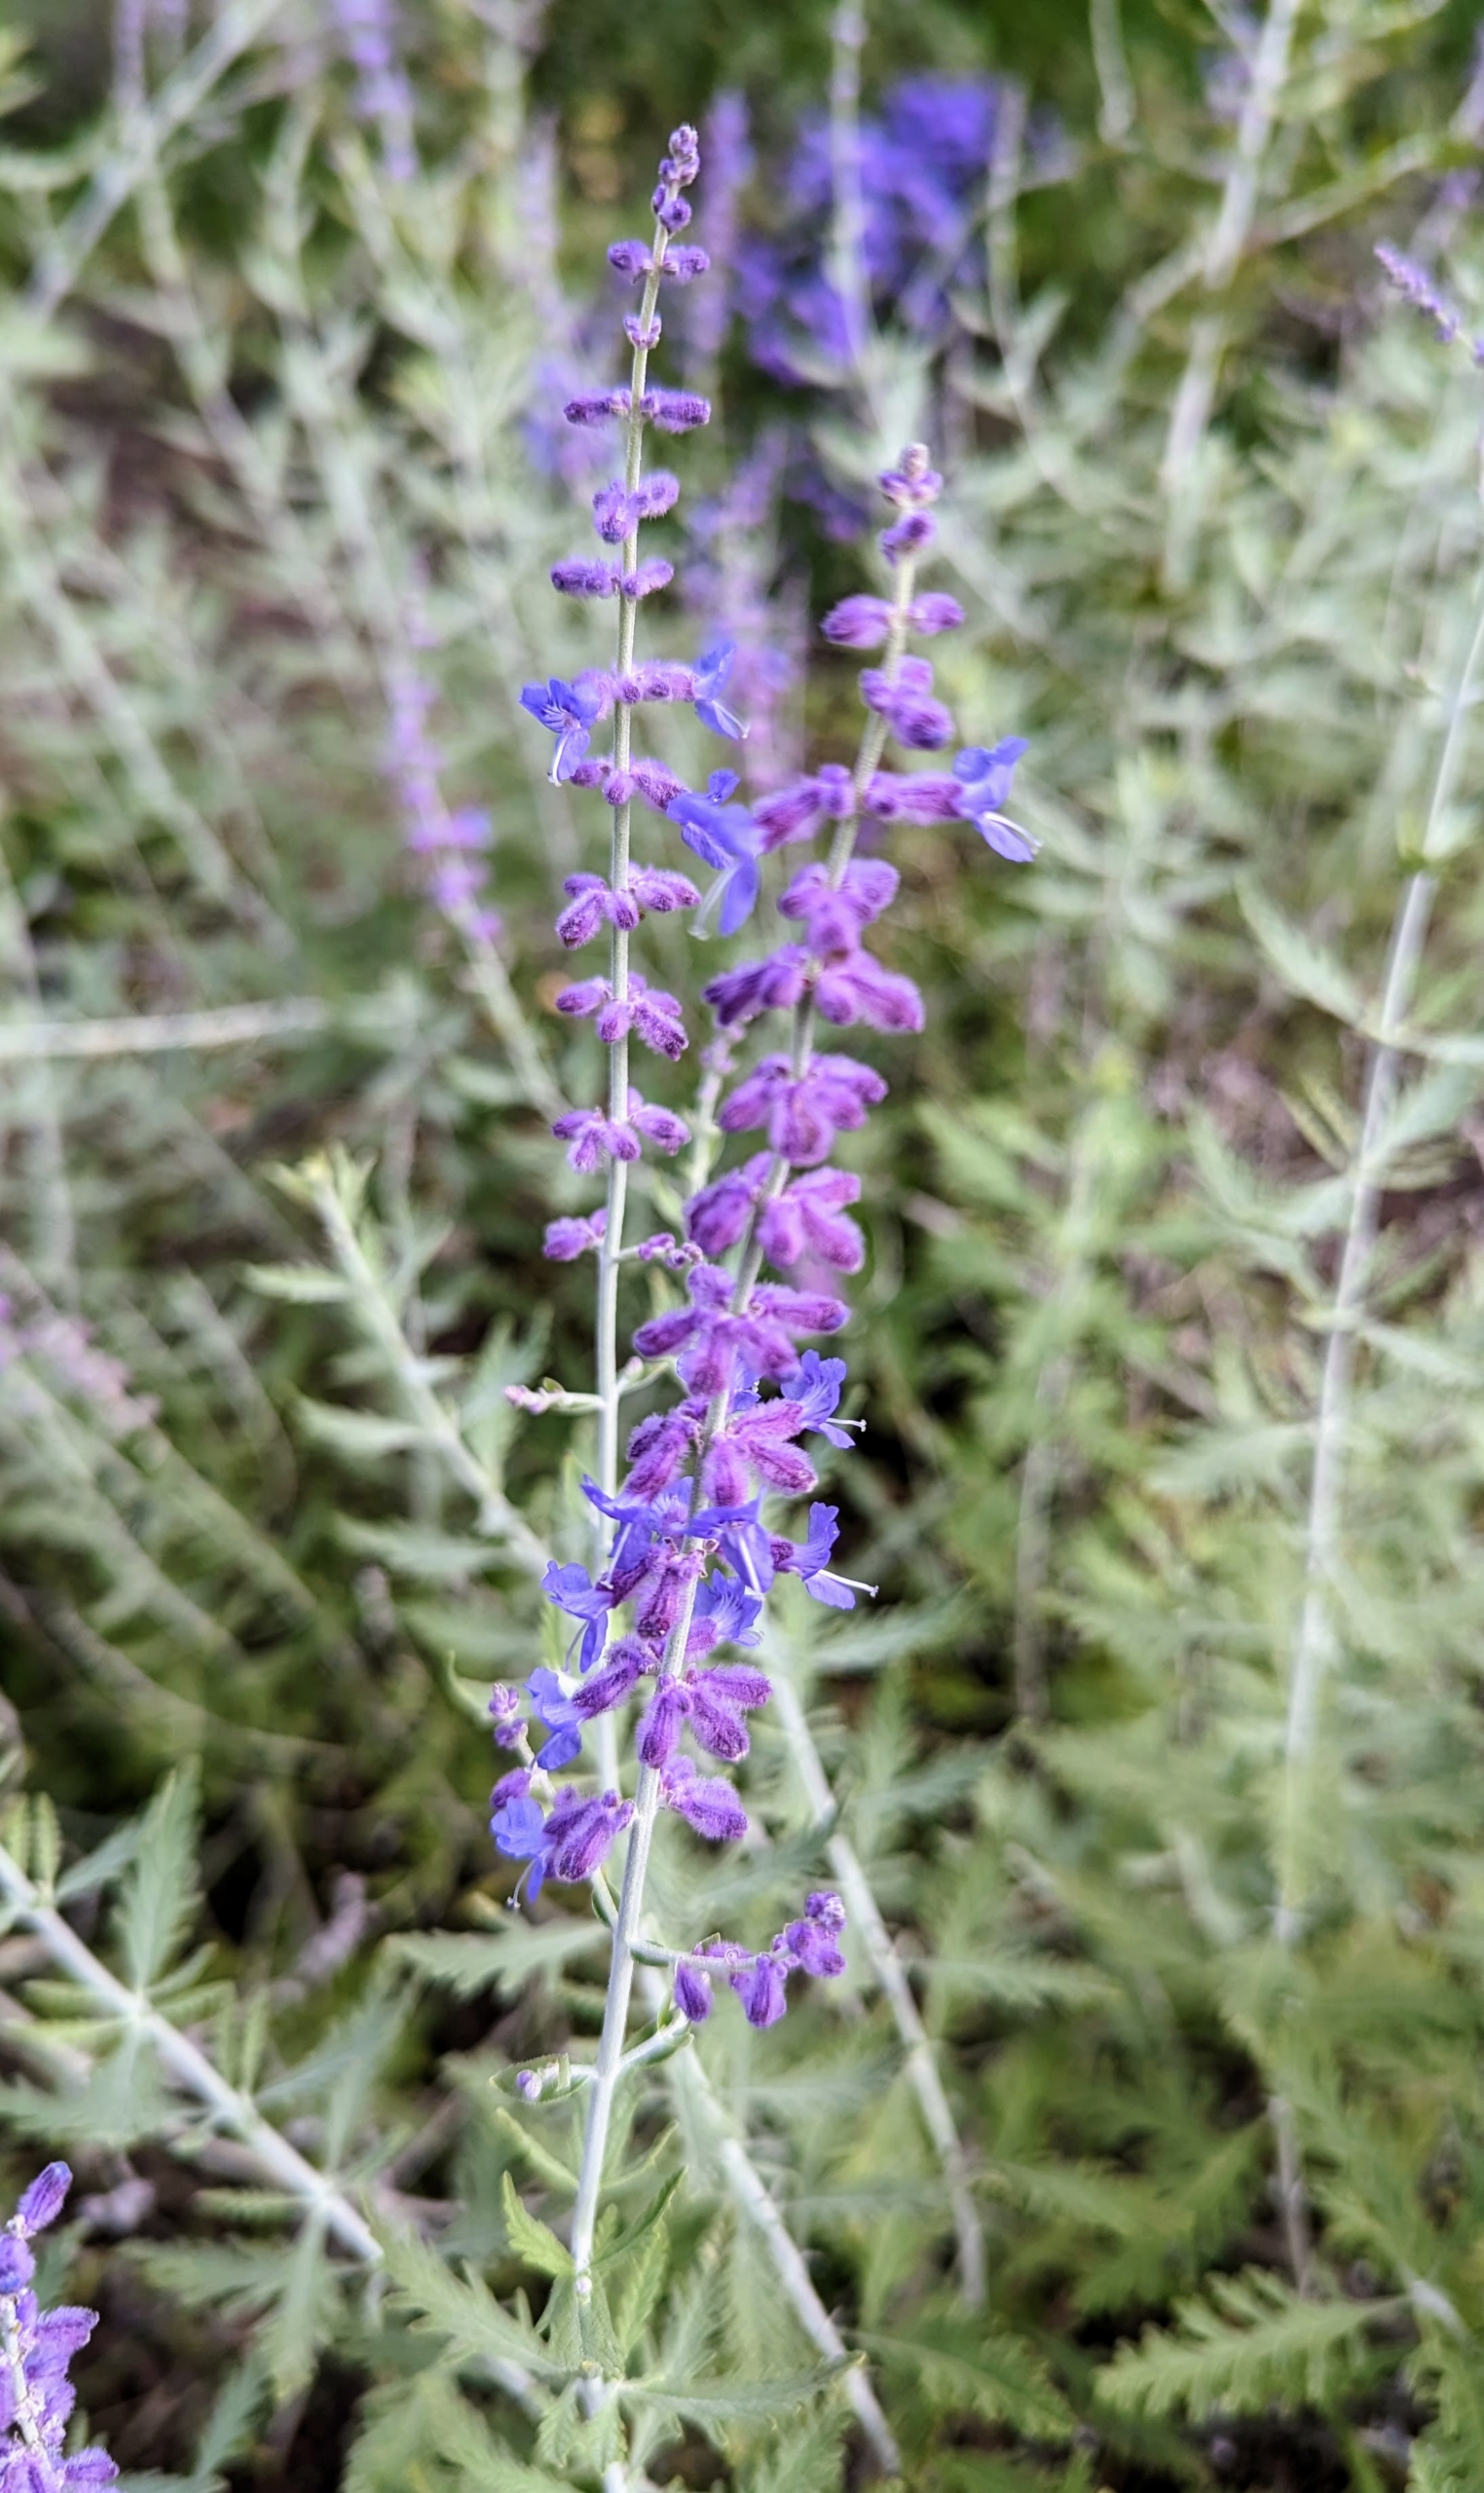
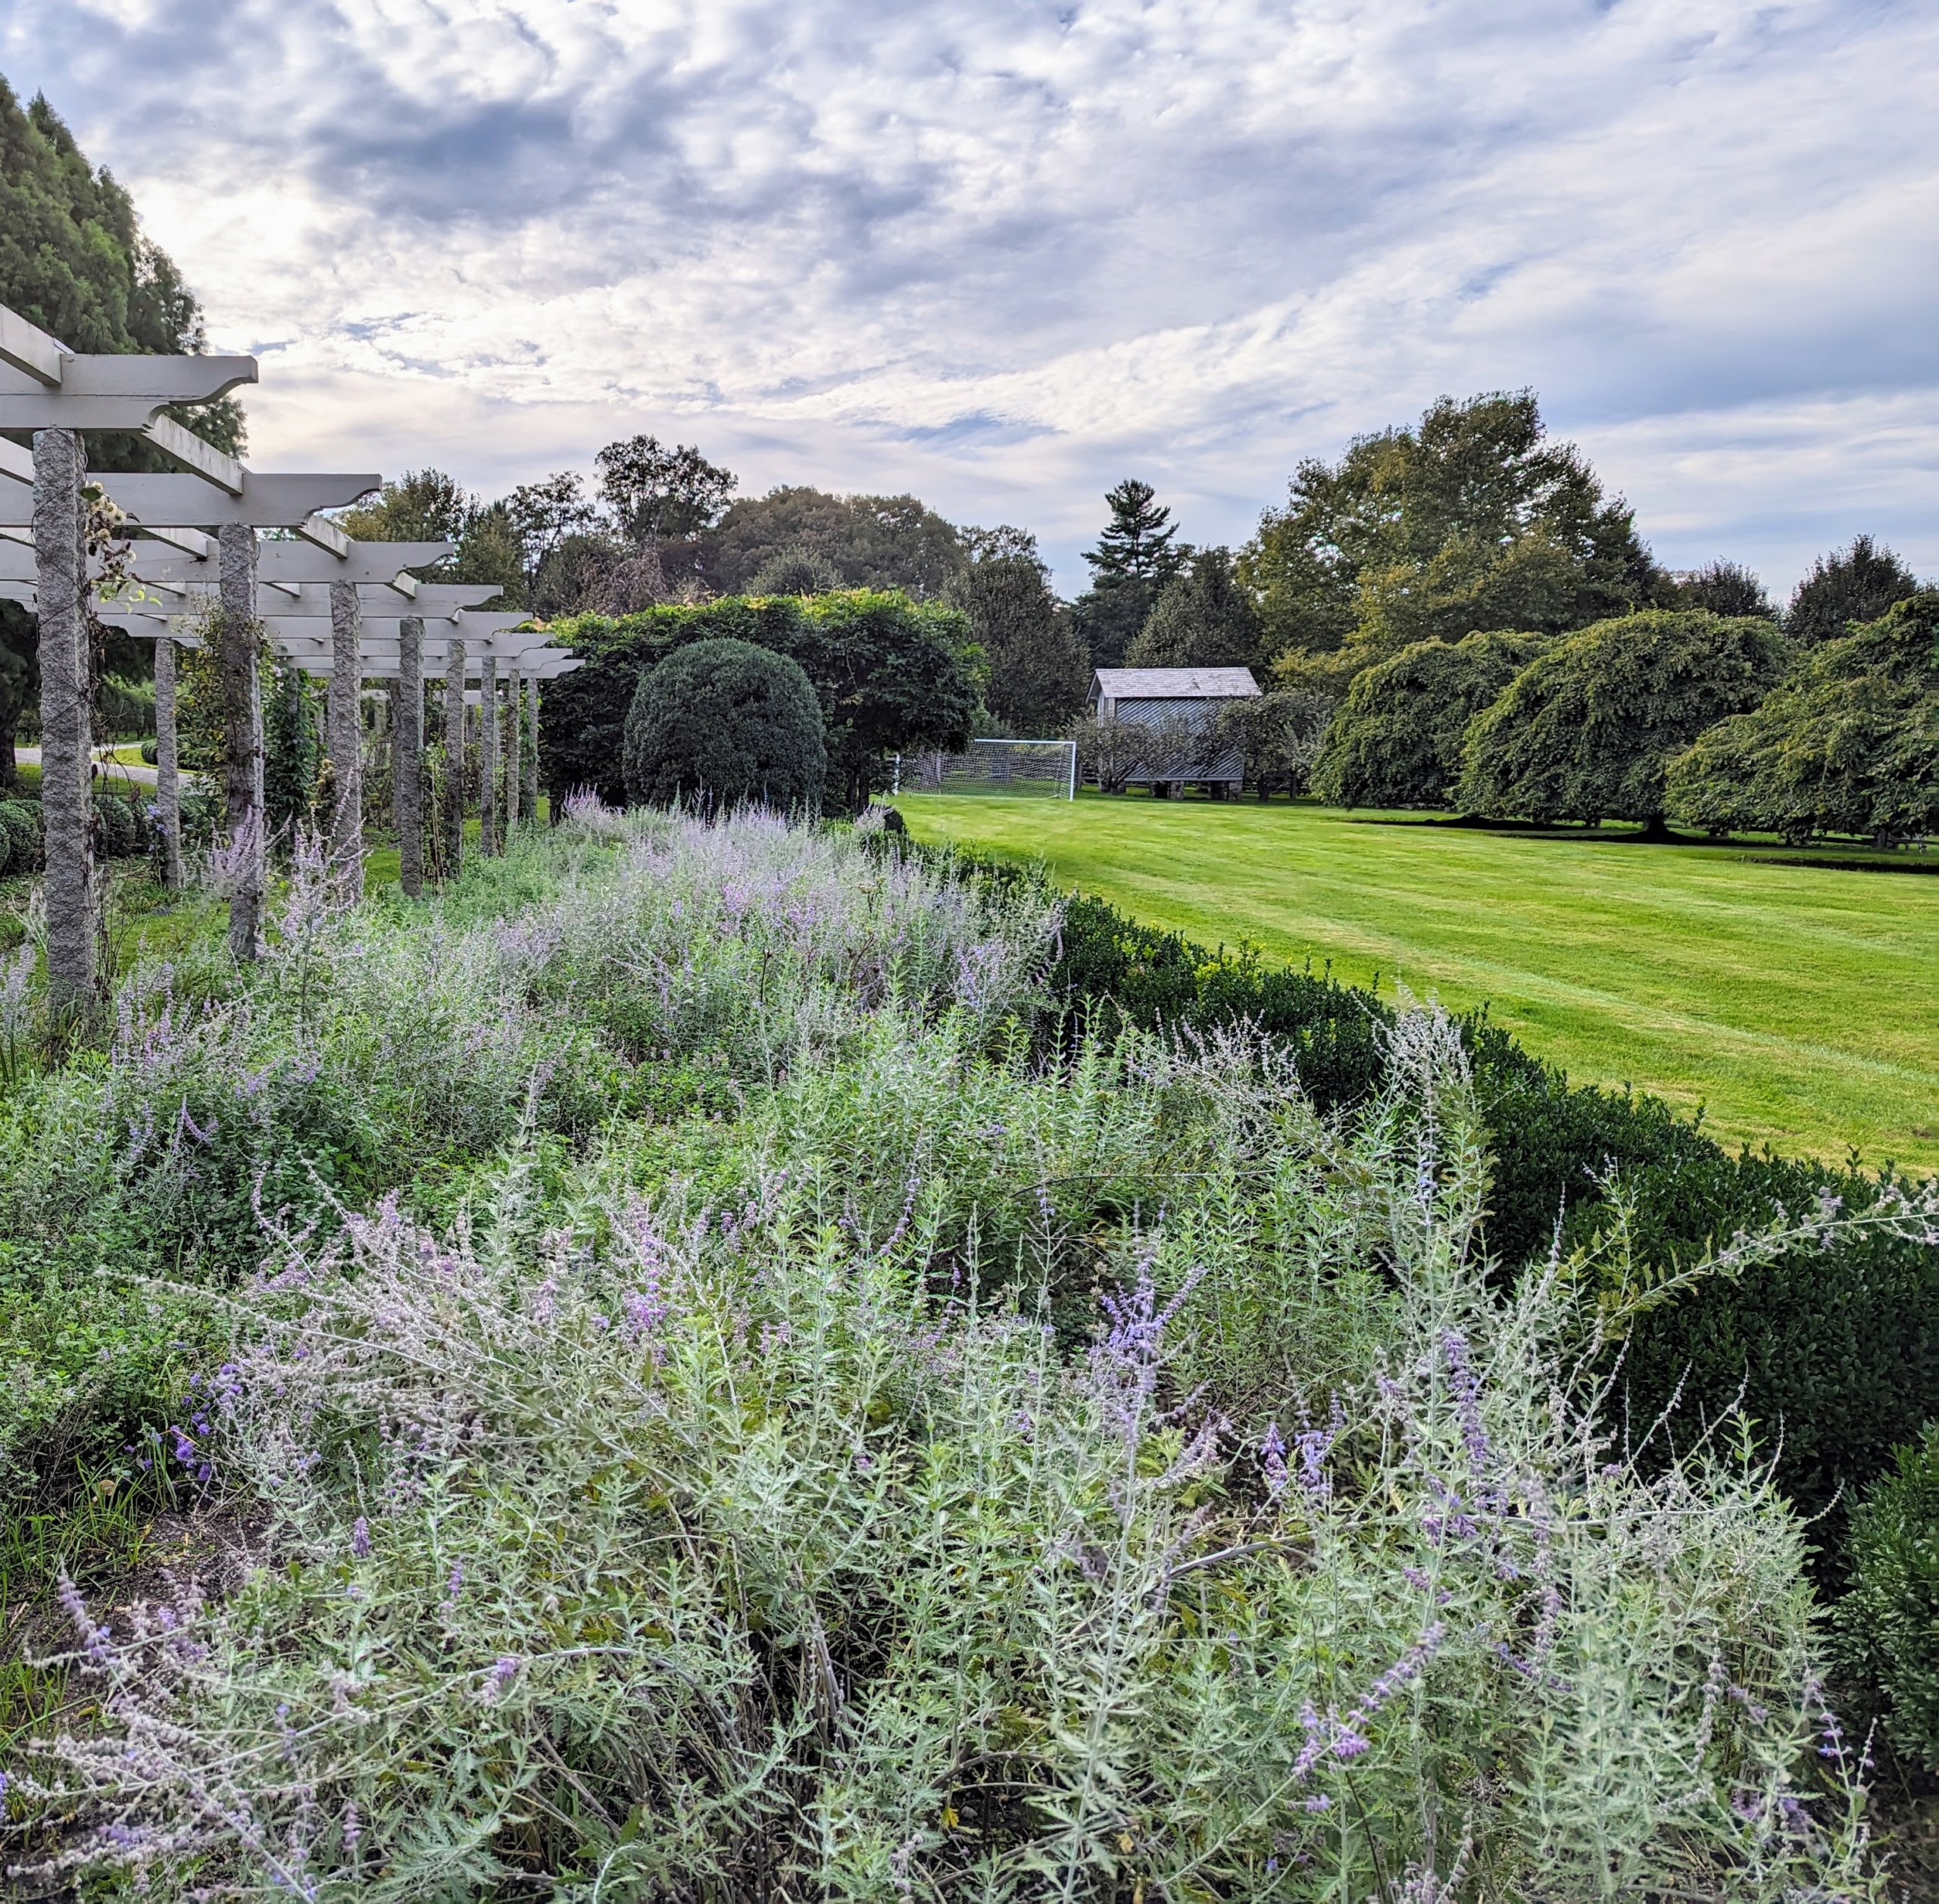
In the back bed, I also have Perovskia atriplicifolia, commonly called Russian sage, growing. This plant shows tall, airy, spike-like clusters that create a lavender-blue cloud of color above the finely textured, aromatic foliage. It is vigorous, hardy, heat-loving, drought-tolerant, and deer resistant.
It looks so pretty planted in masses.
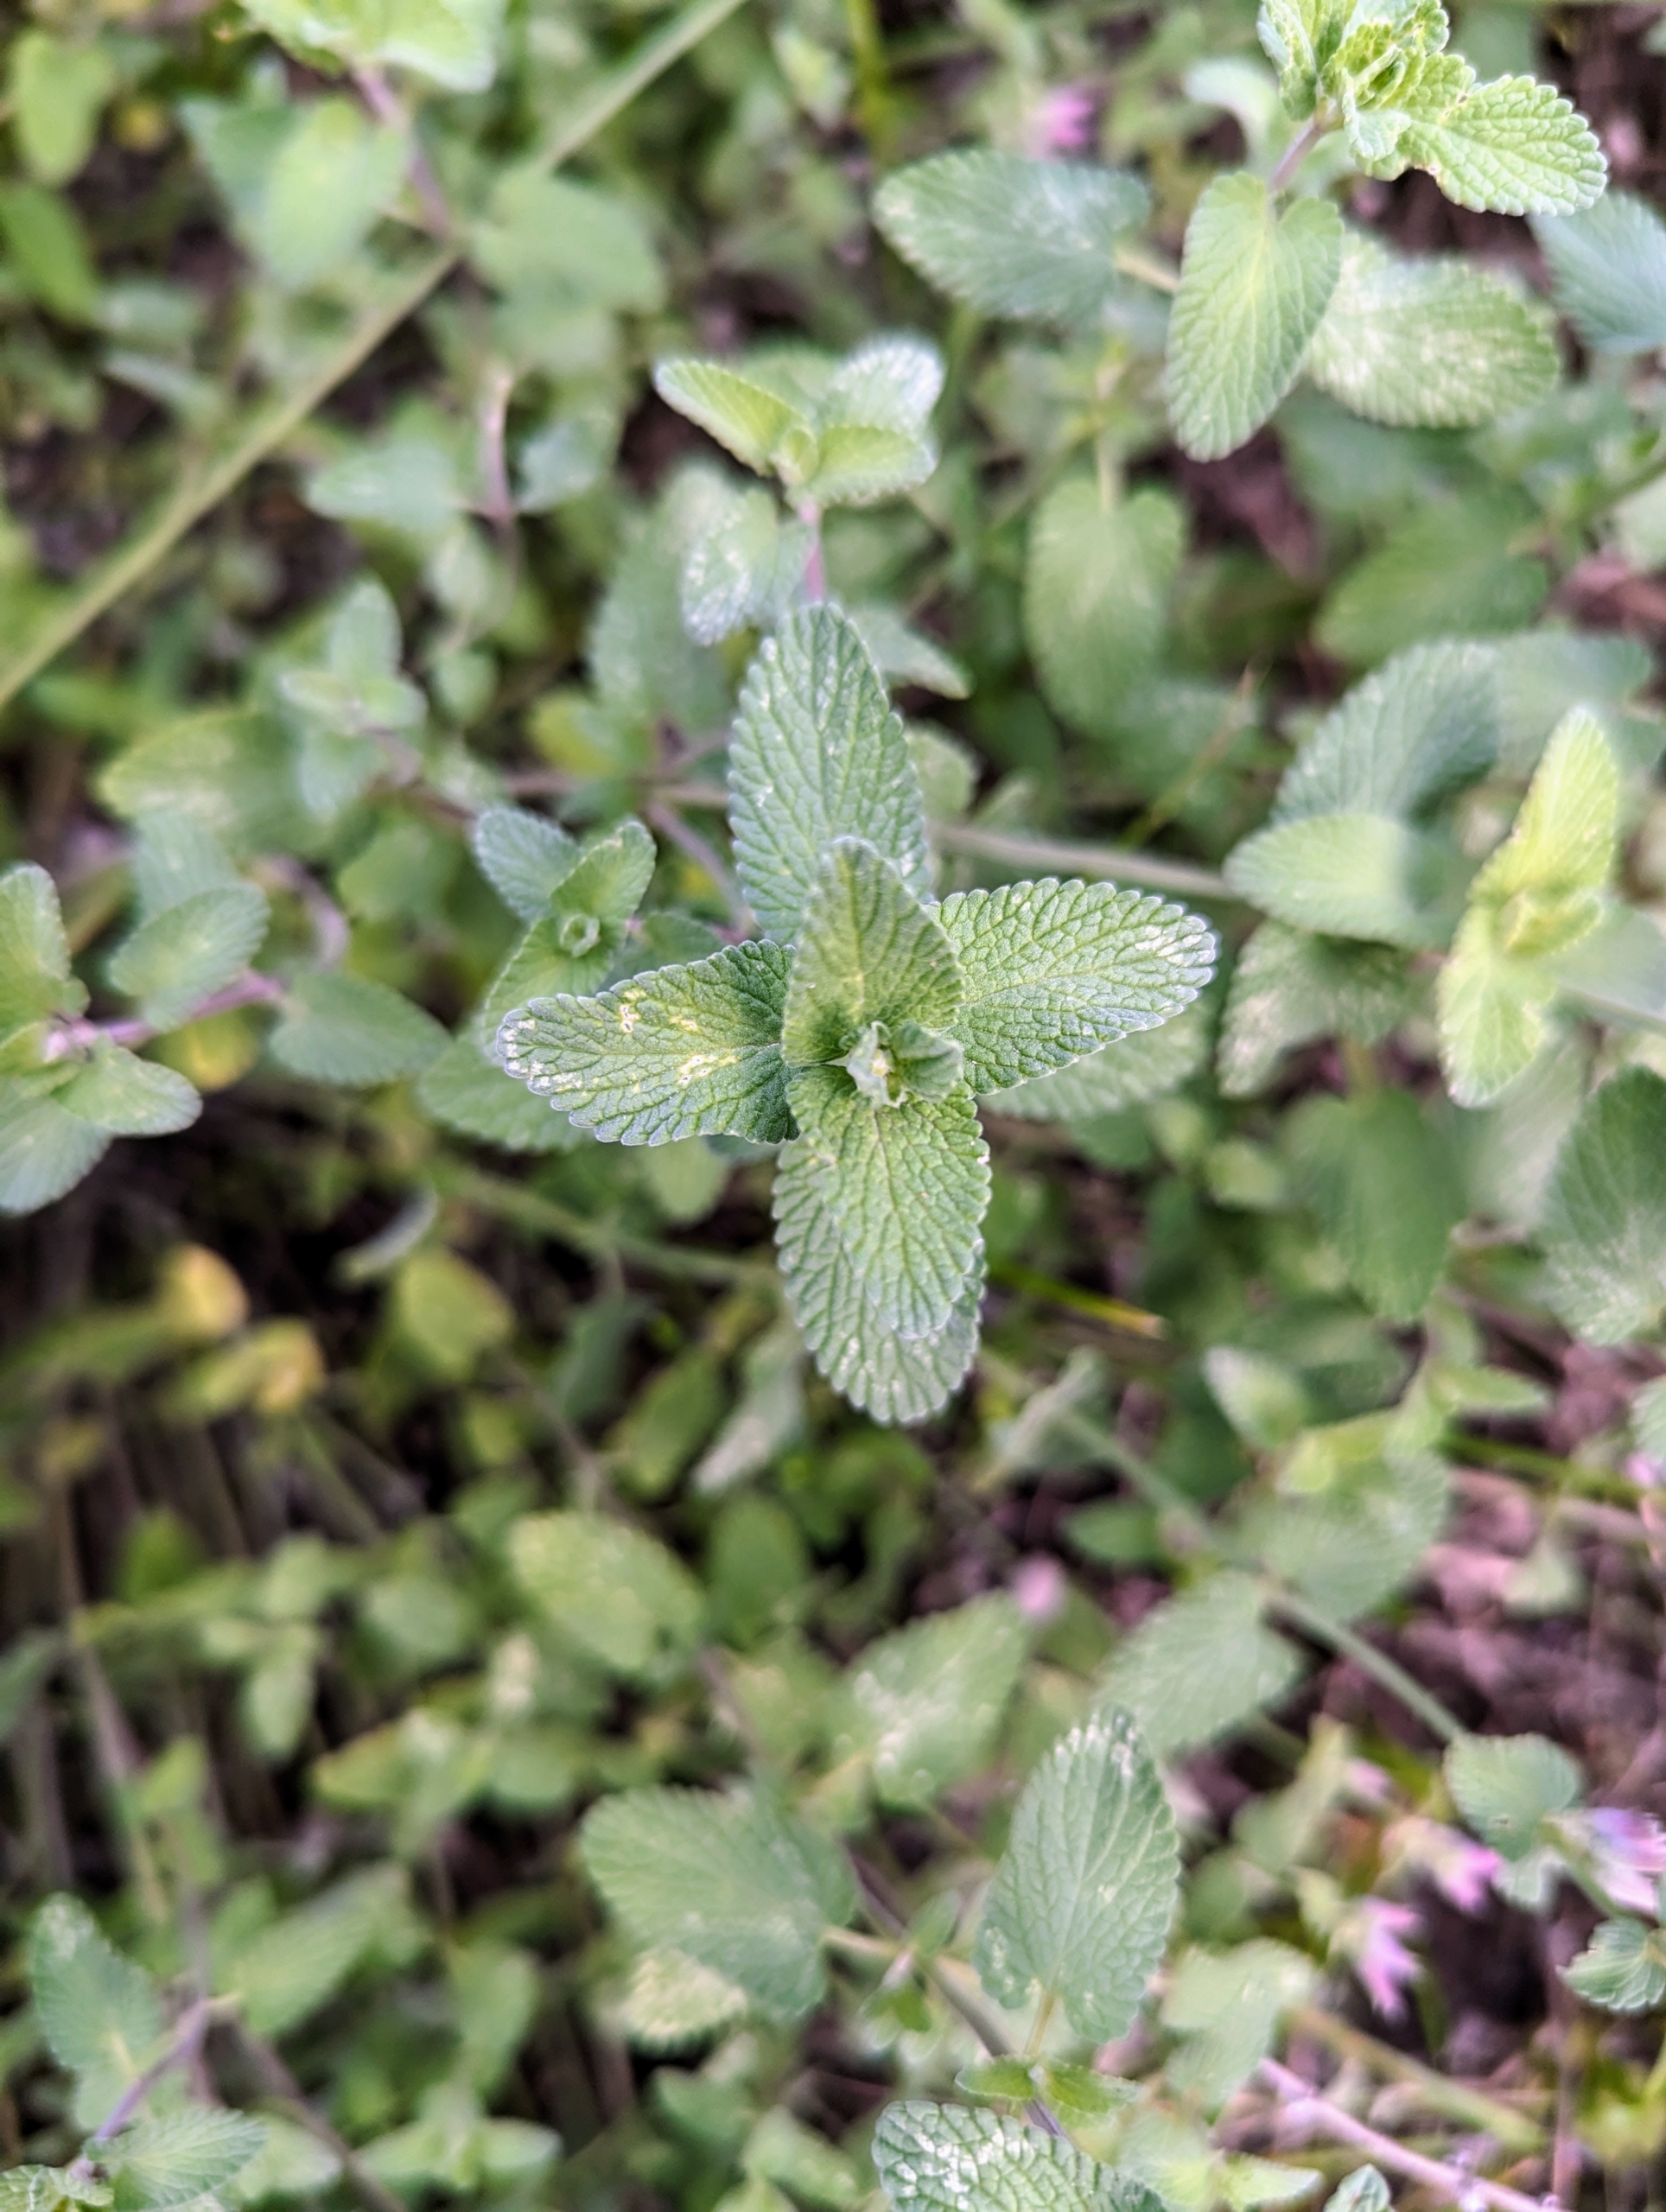
Mixed in is catnip, which I have grown for many years, especially for my cats. Catnip herb grows best in well-draining soil in the full sun but will tolerate part sun and a wide variety of soil types.
And here’s a closer look at the newly groomed boxwood. I am so pleased with how it’s developing. My gardens are constantly evolving. The entire border is just so beautiful – in spring when it blooms with gorgeous purple and blue; in summer when it features all the bright orange lilies; and, in autumn, with all its bold greenery.
What is your take on okra, the young seed pods of Abelmoschus esculentus?
For some, this warm-weather vegetable also knowns as lady's fingers, is particularly slimy in texture, but for others this finger-shaped pod is versatile and delicious, with a mild almost grassy flavor. Okra is part of the mallow family along with cotton, hollyhock, and hibiscus. It is popularly grown in tropical climates around the world, including Asia, Southern Europe, and the southern United States. I also grow lots of okra every year and pick when the pods are small and tender. It adds a wonderful crunch to soups, stews, and so much more.
Enjoy these photos.
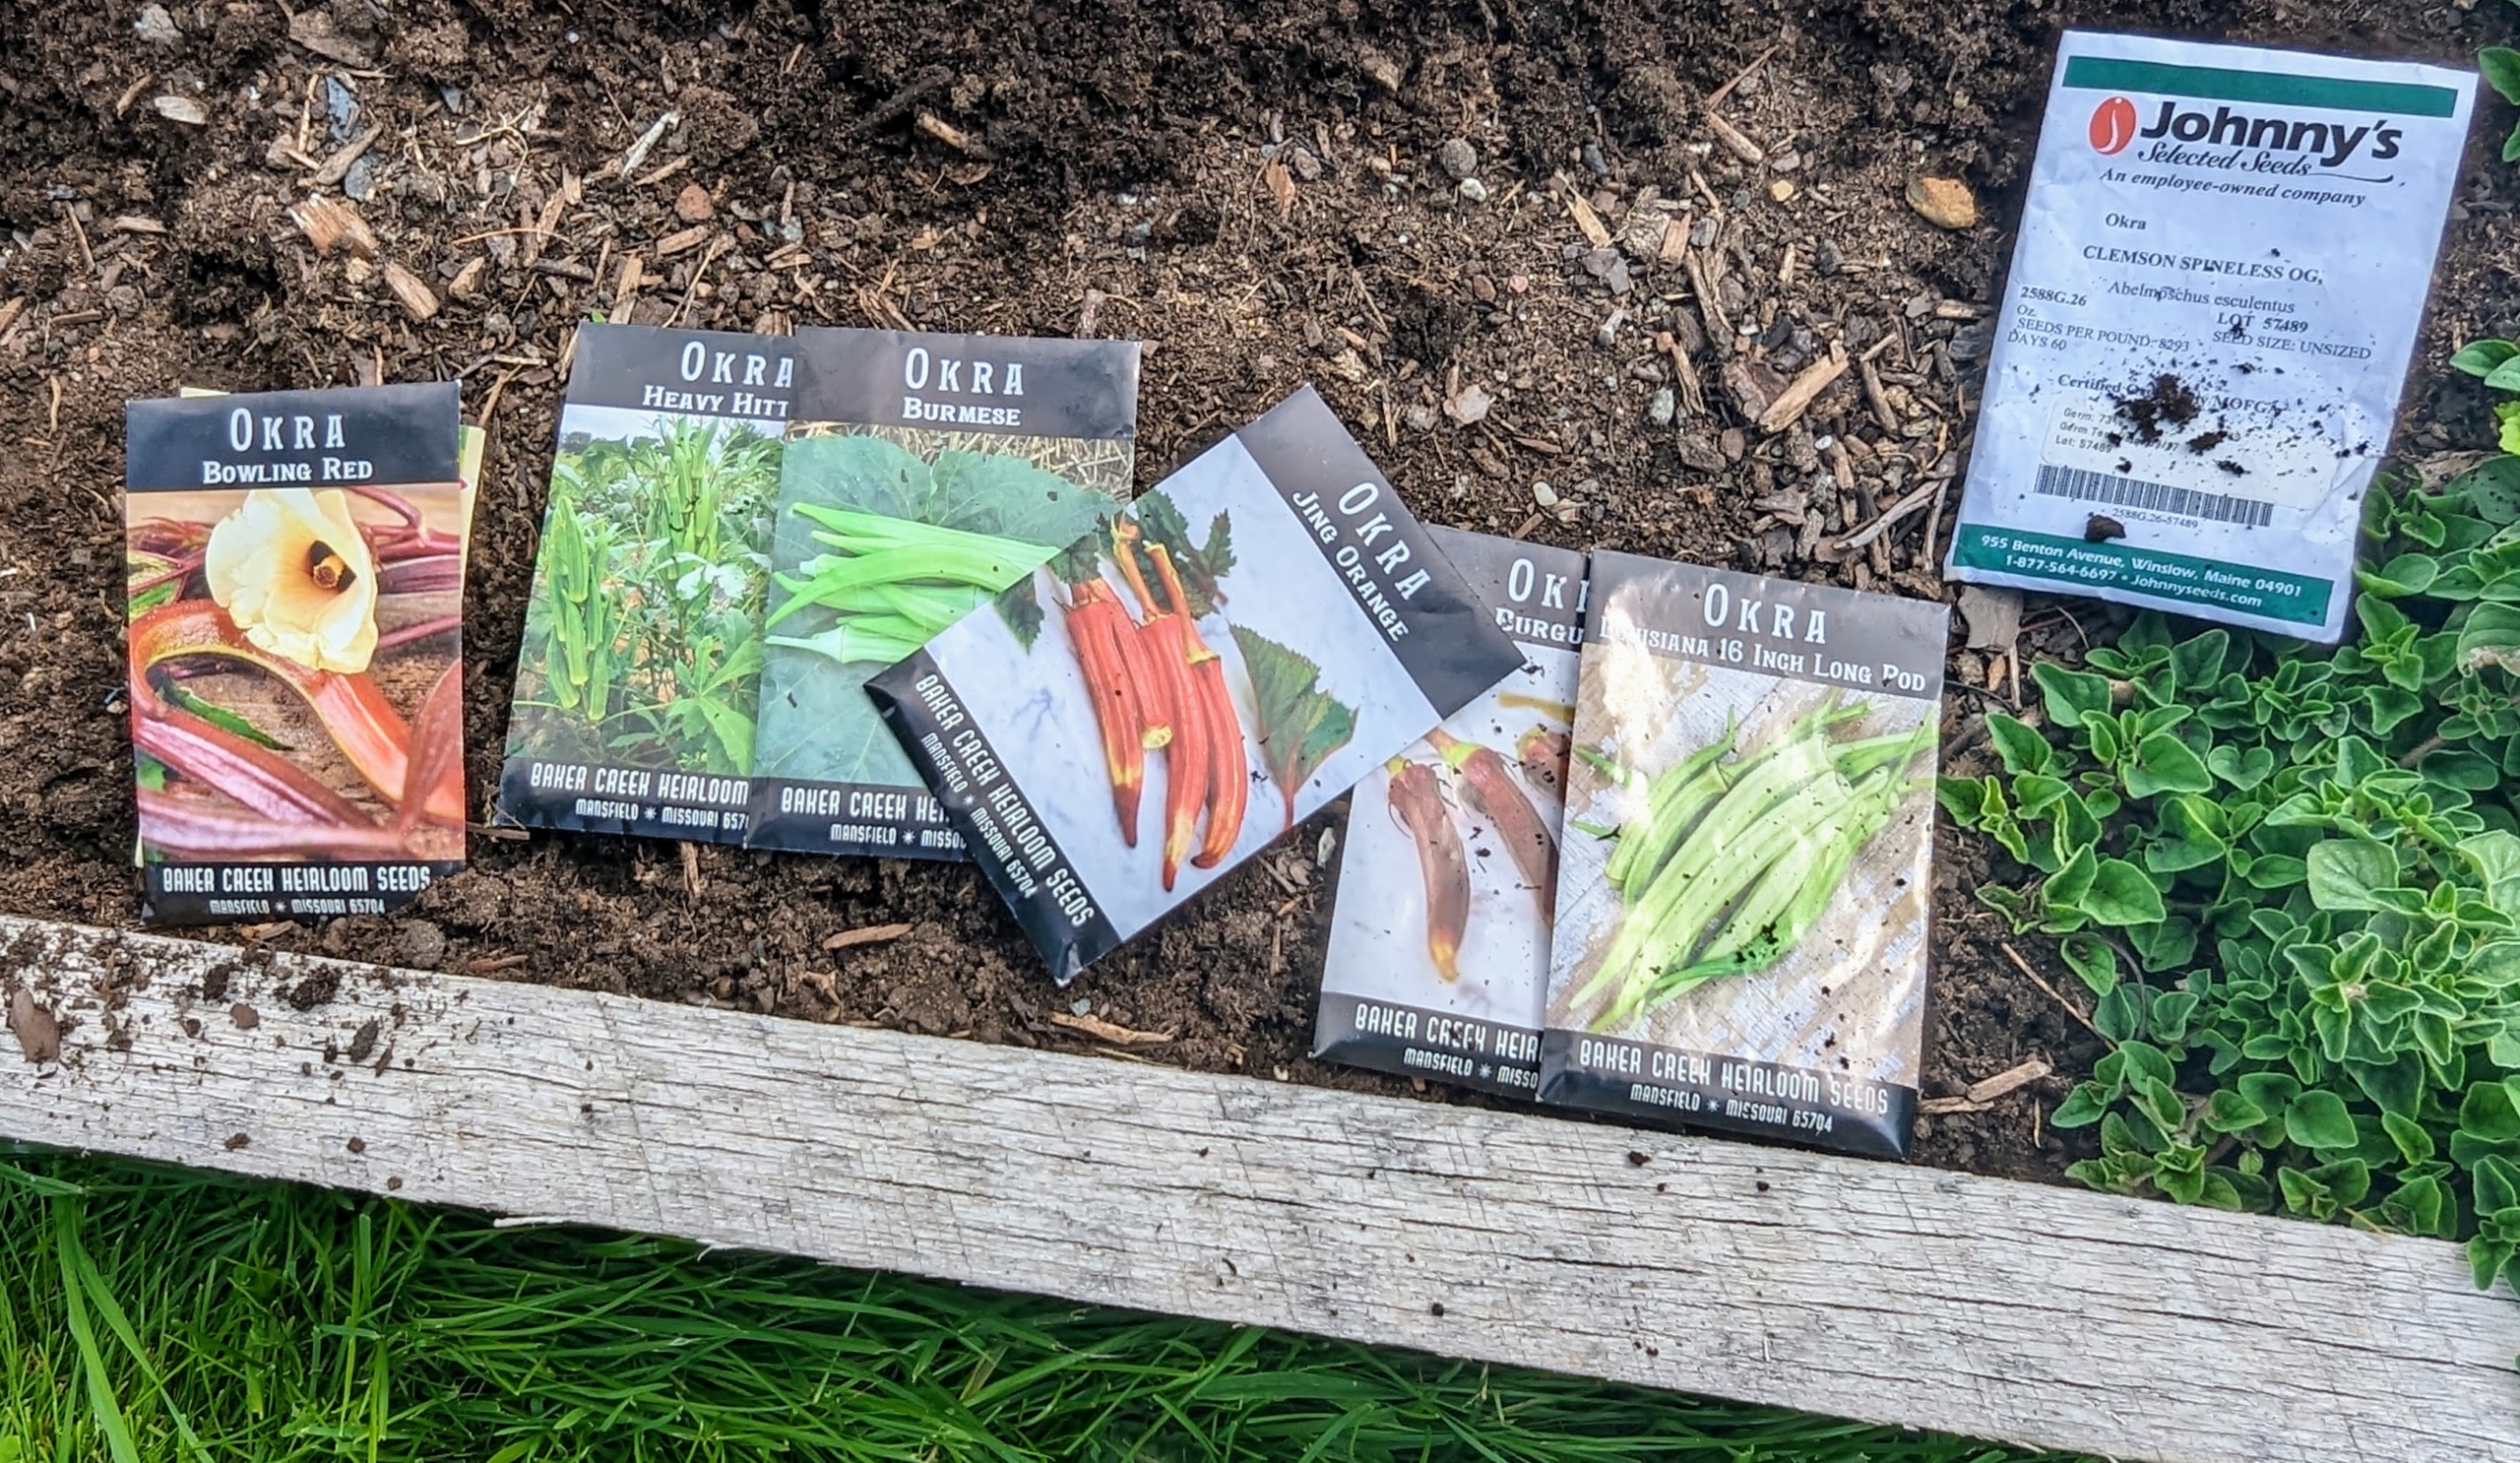
This year in my new and very large vegetable garden, we grew a variety of okra seeds. Many were from Baker Creek Heirloom Seed Company. We also grew seeds from Johnny’s Selected Seeds, a seed source I have been using for quite some time.
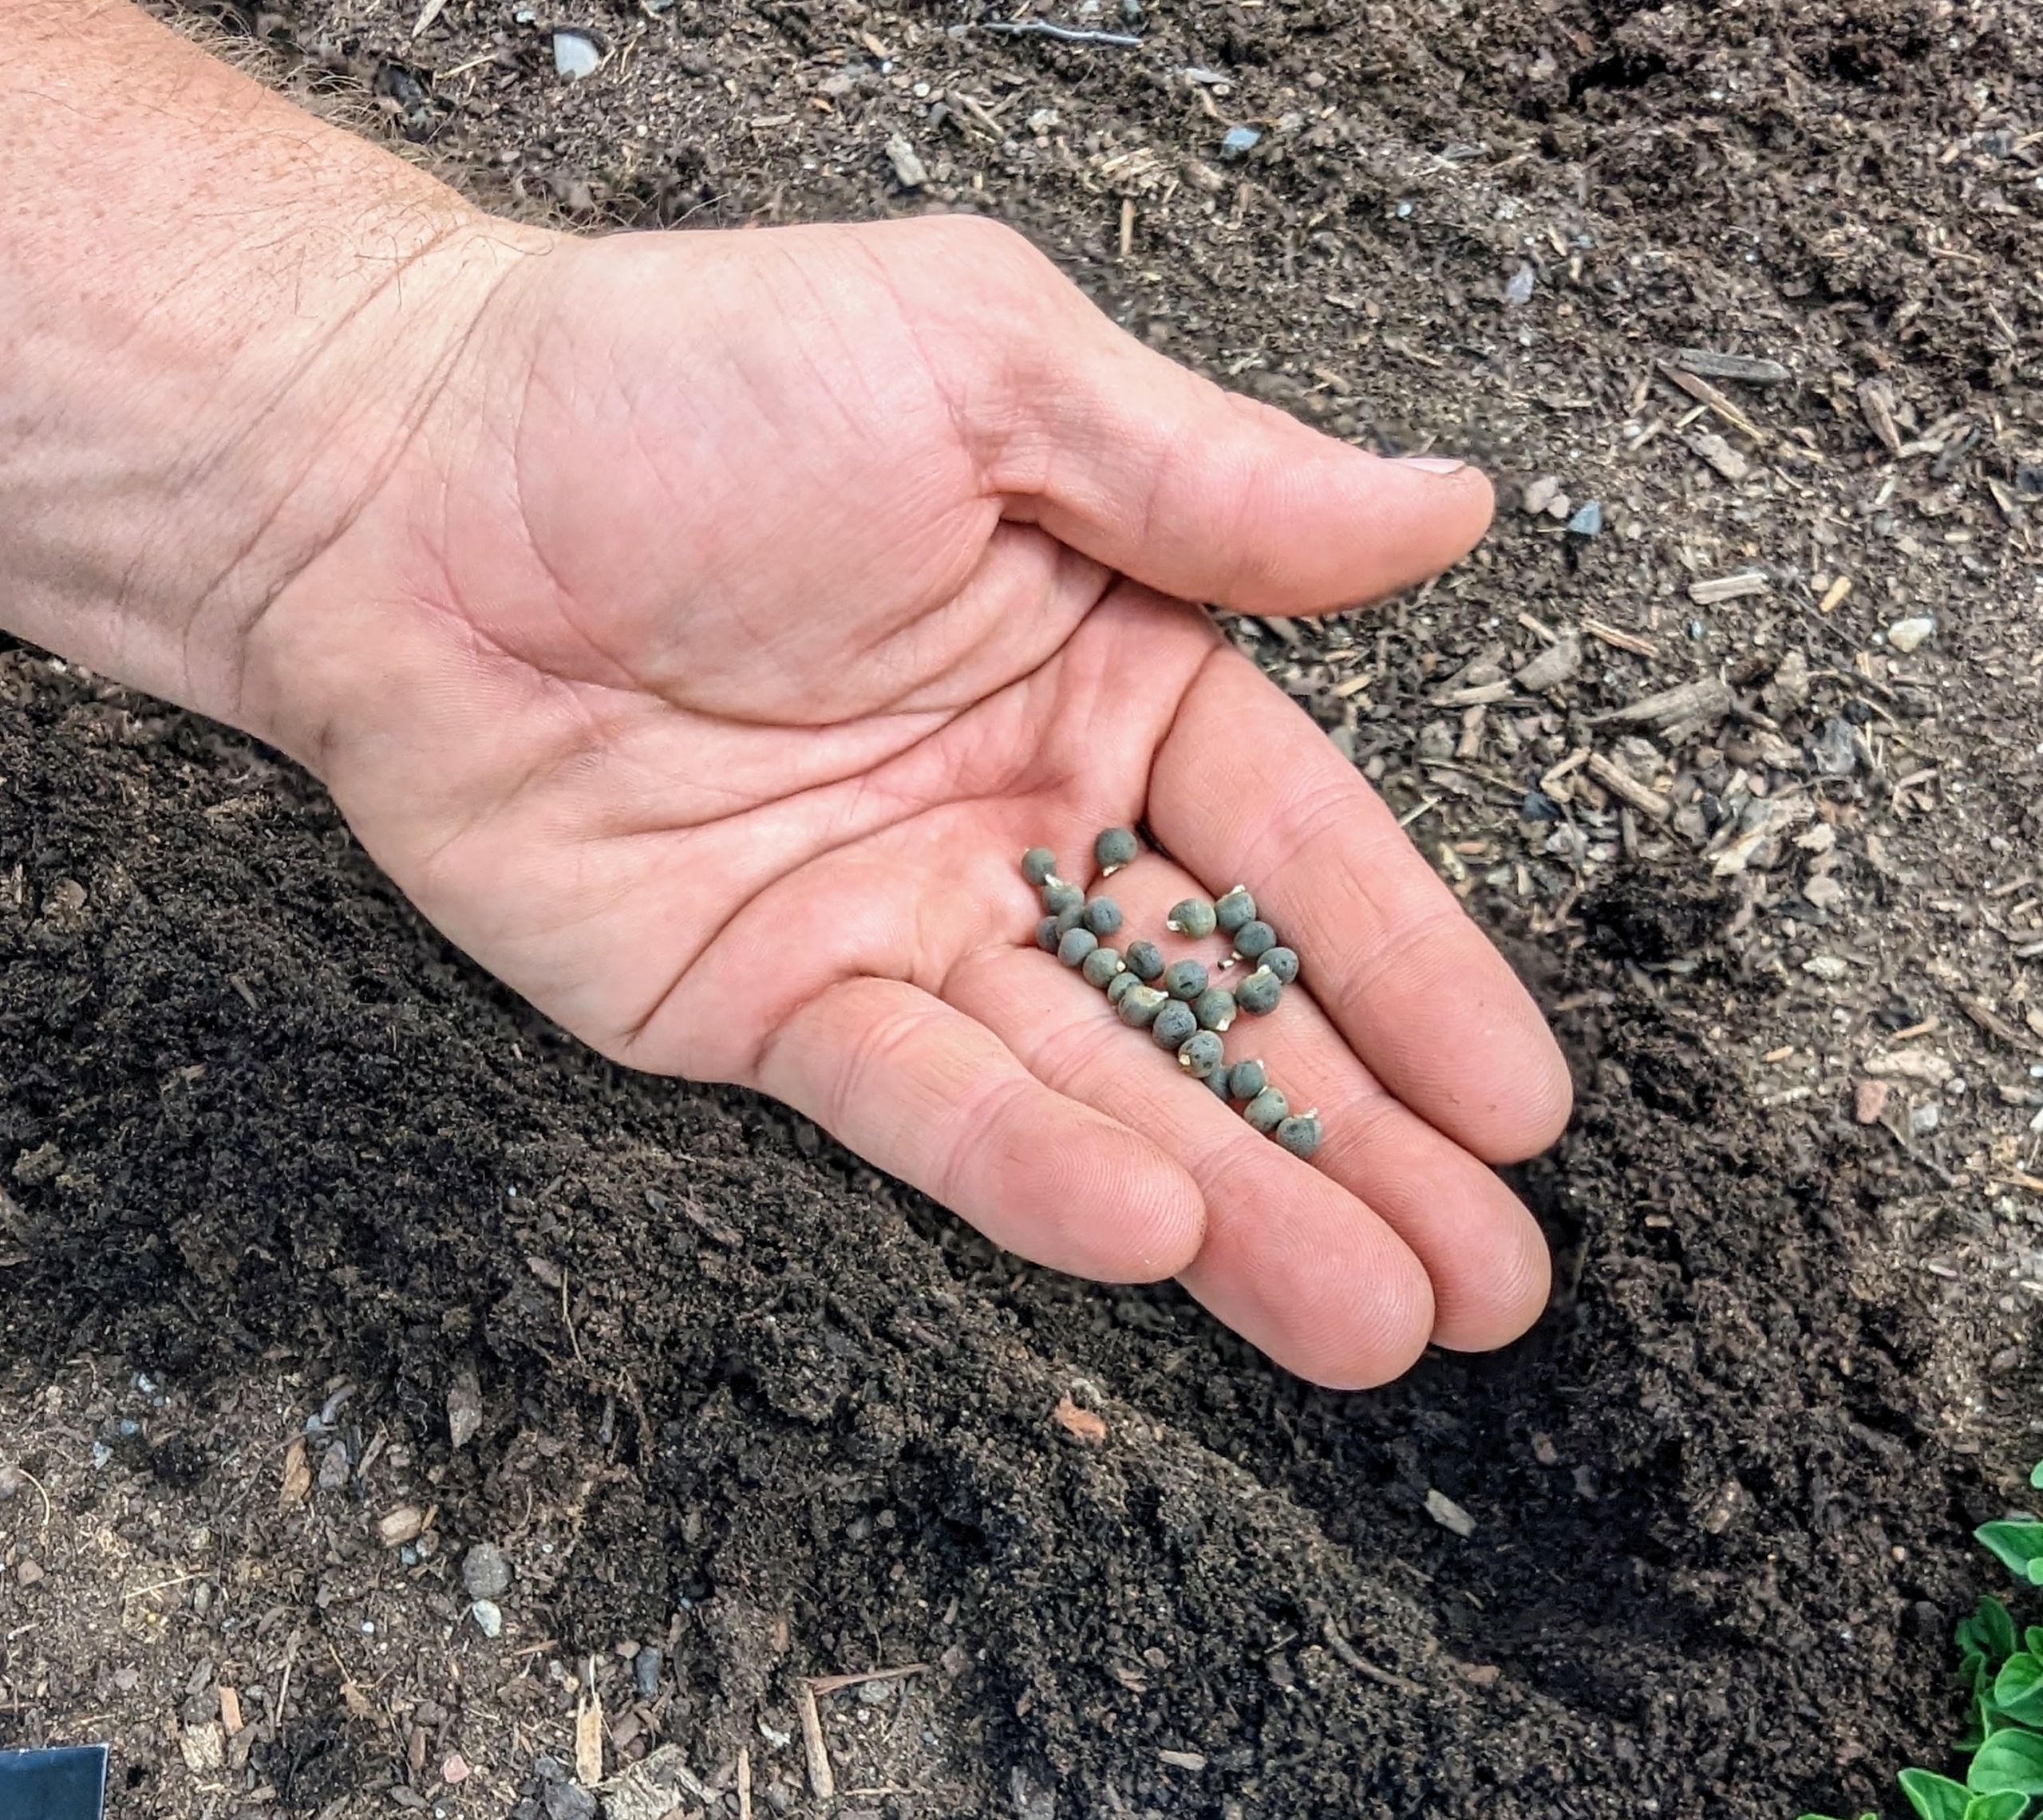
My head gardener, Ryan McCallister, planted the okra seeds in early June. These seeds should be planted about a half-inch to one-inch deep in nutrient-rich soil.
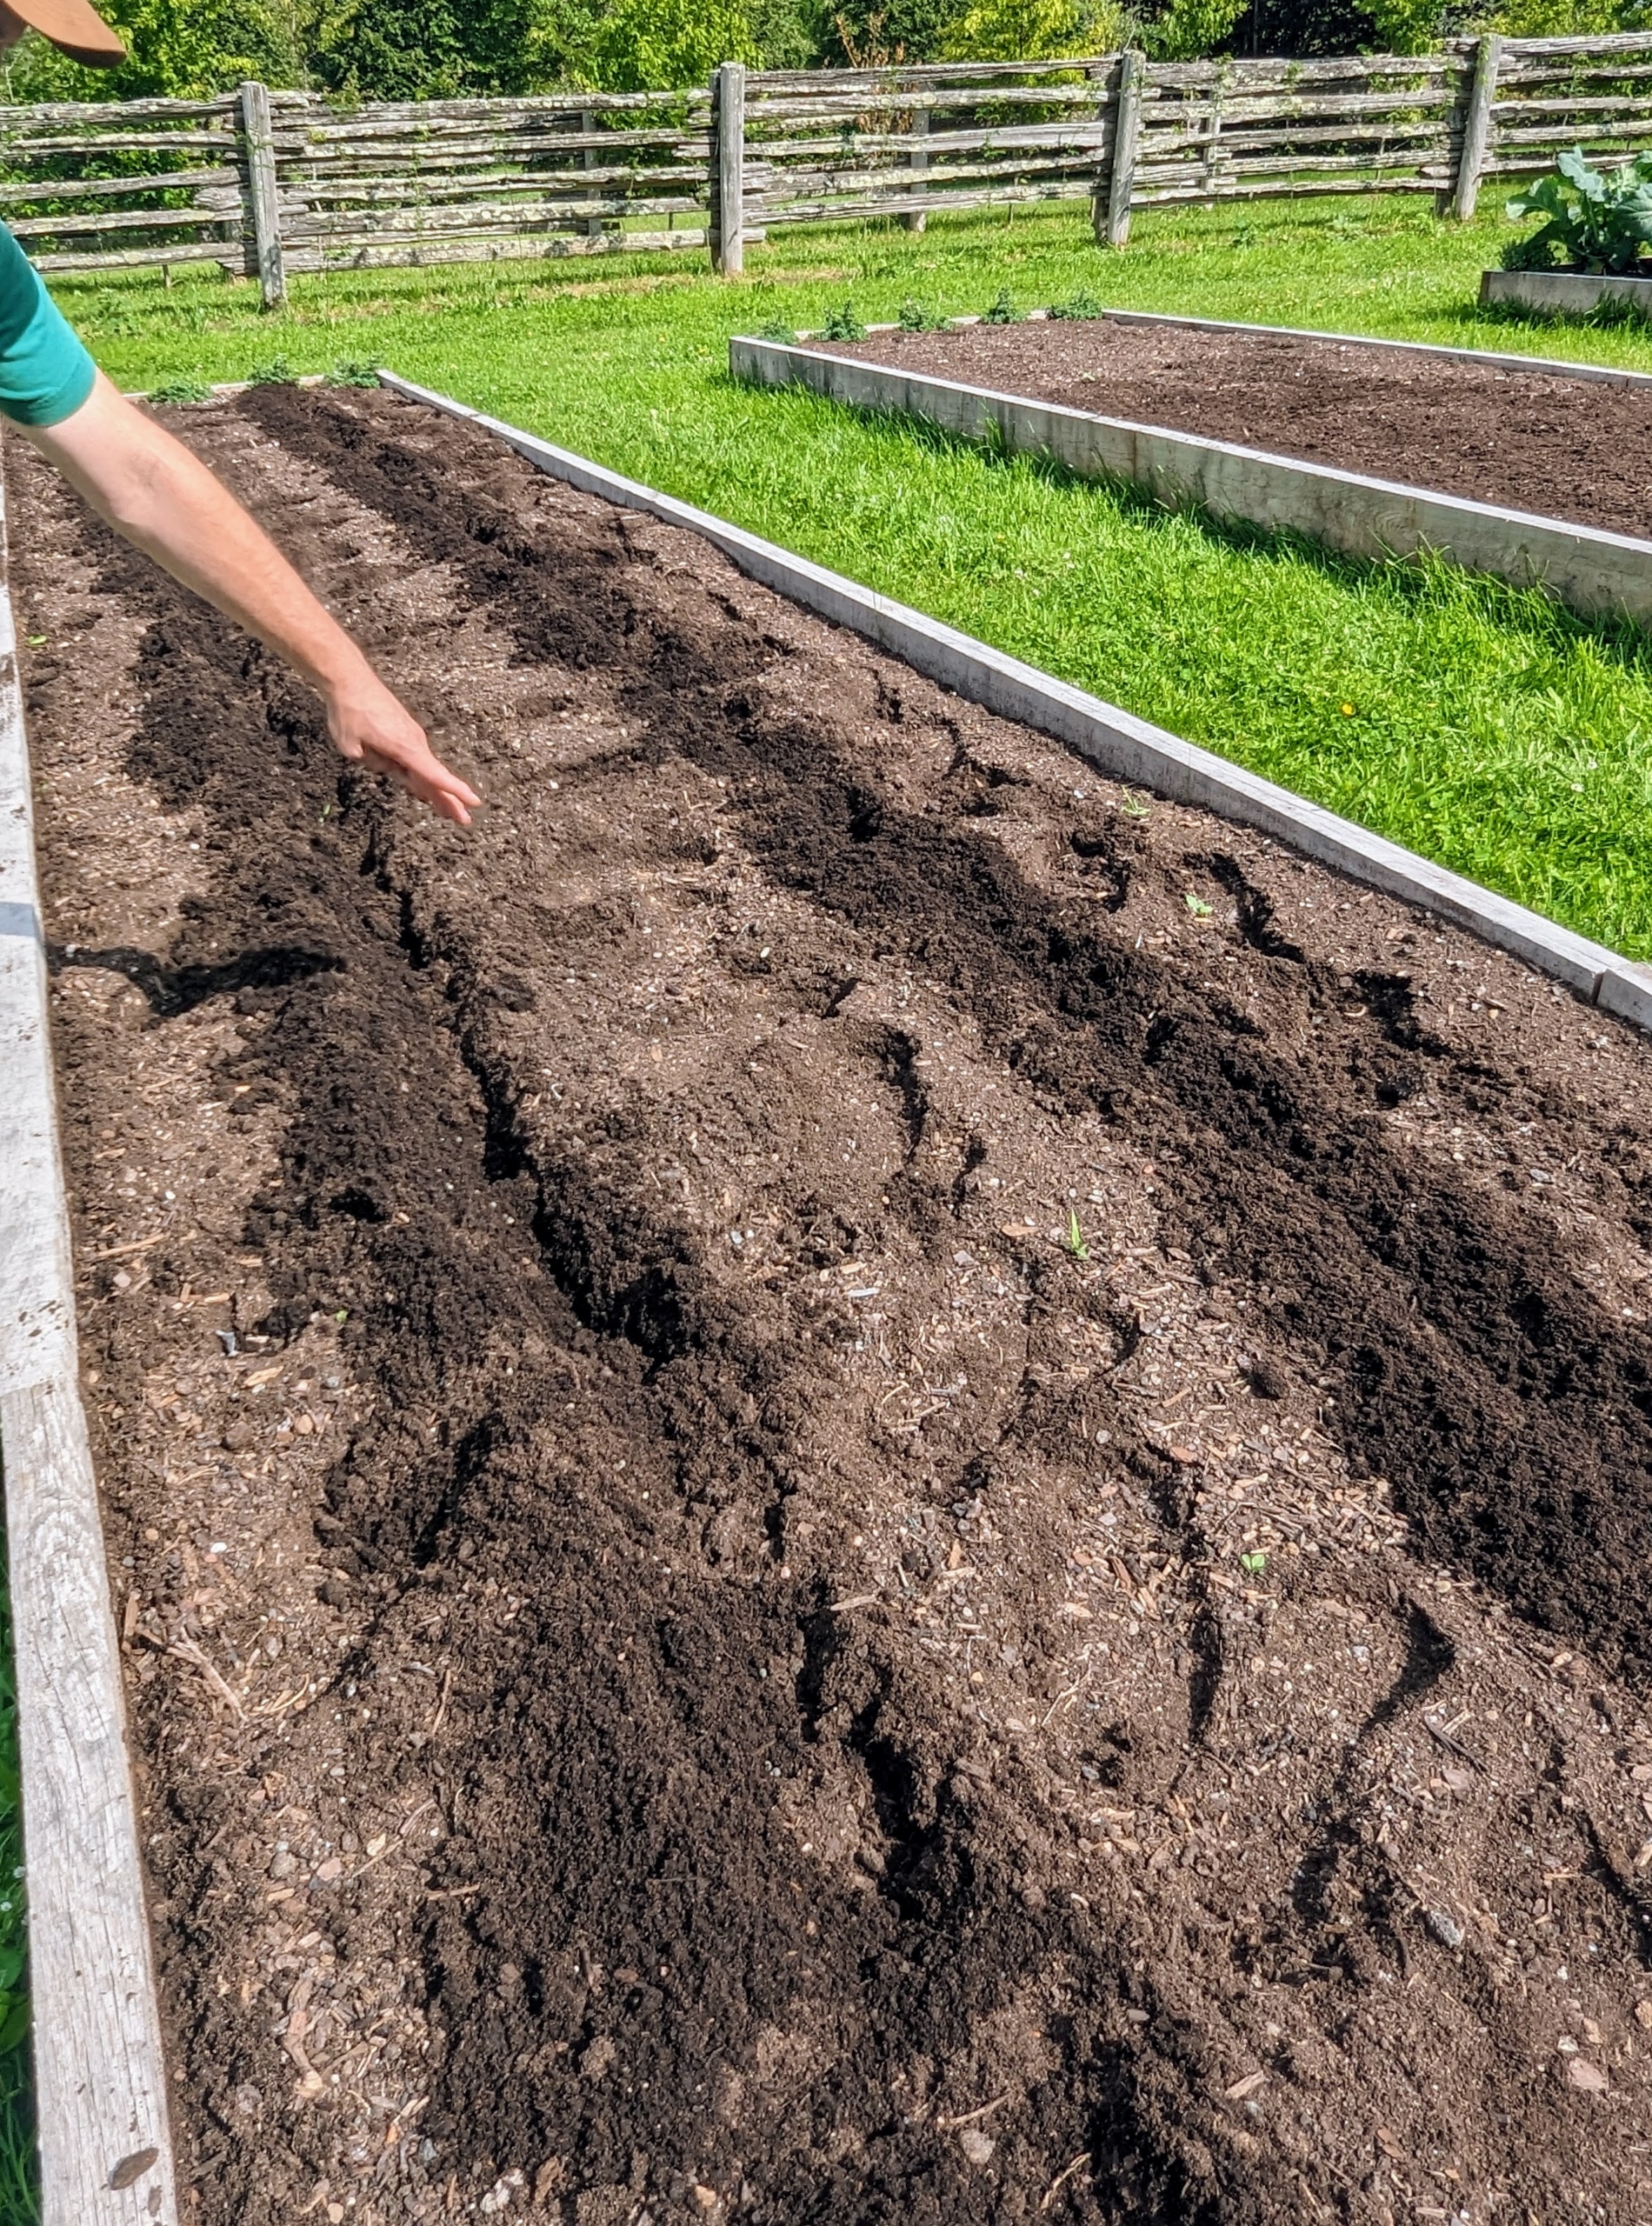
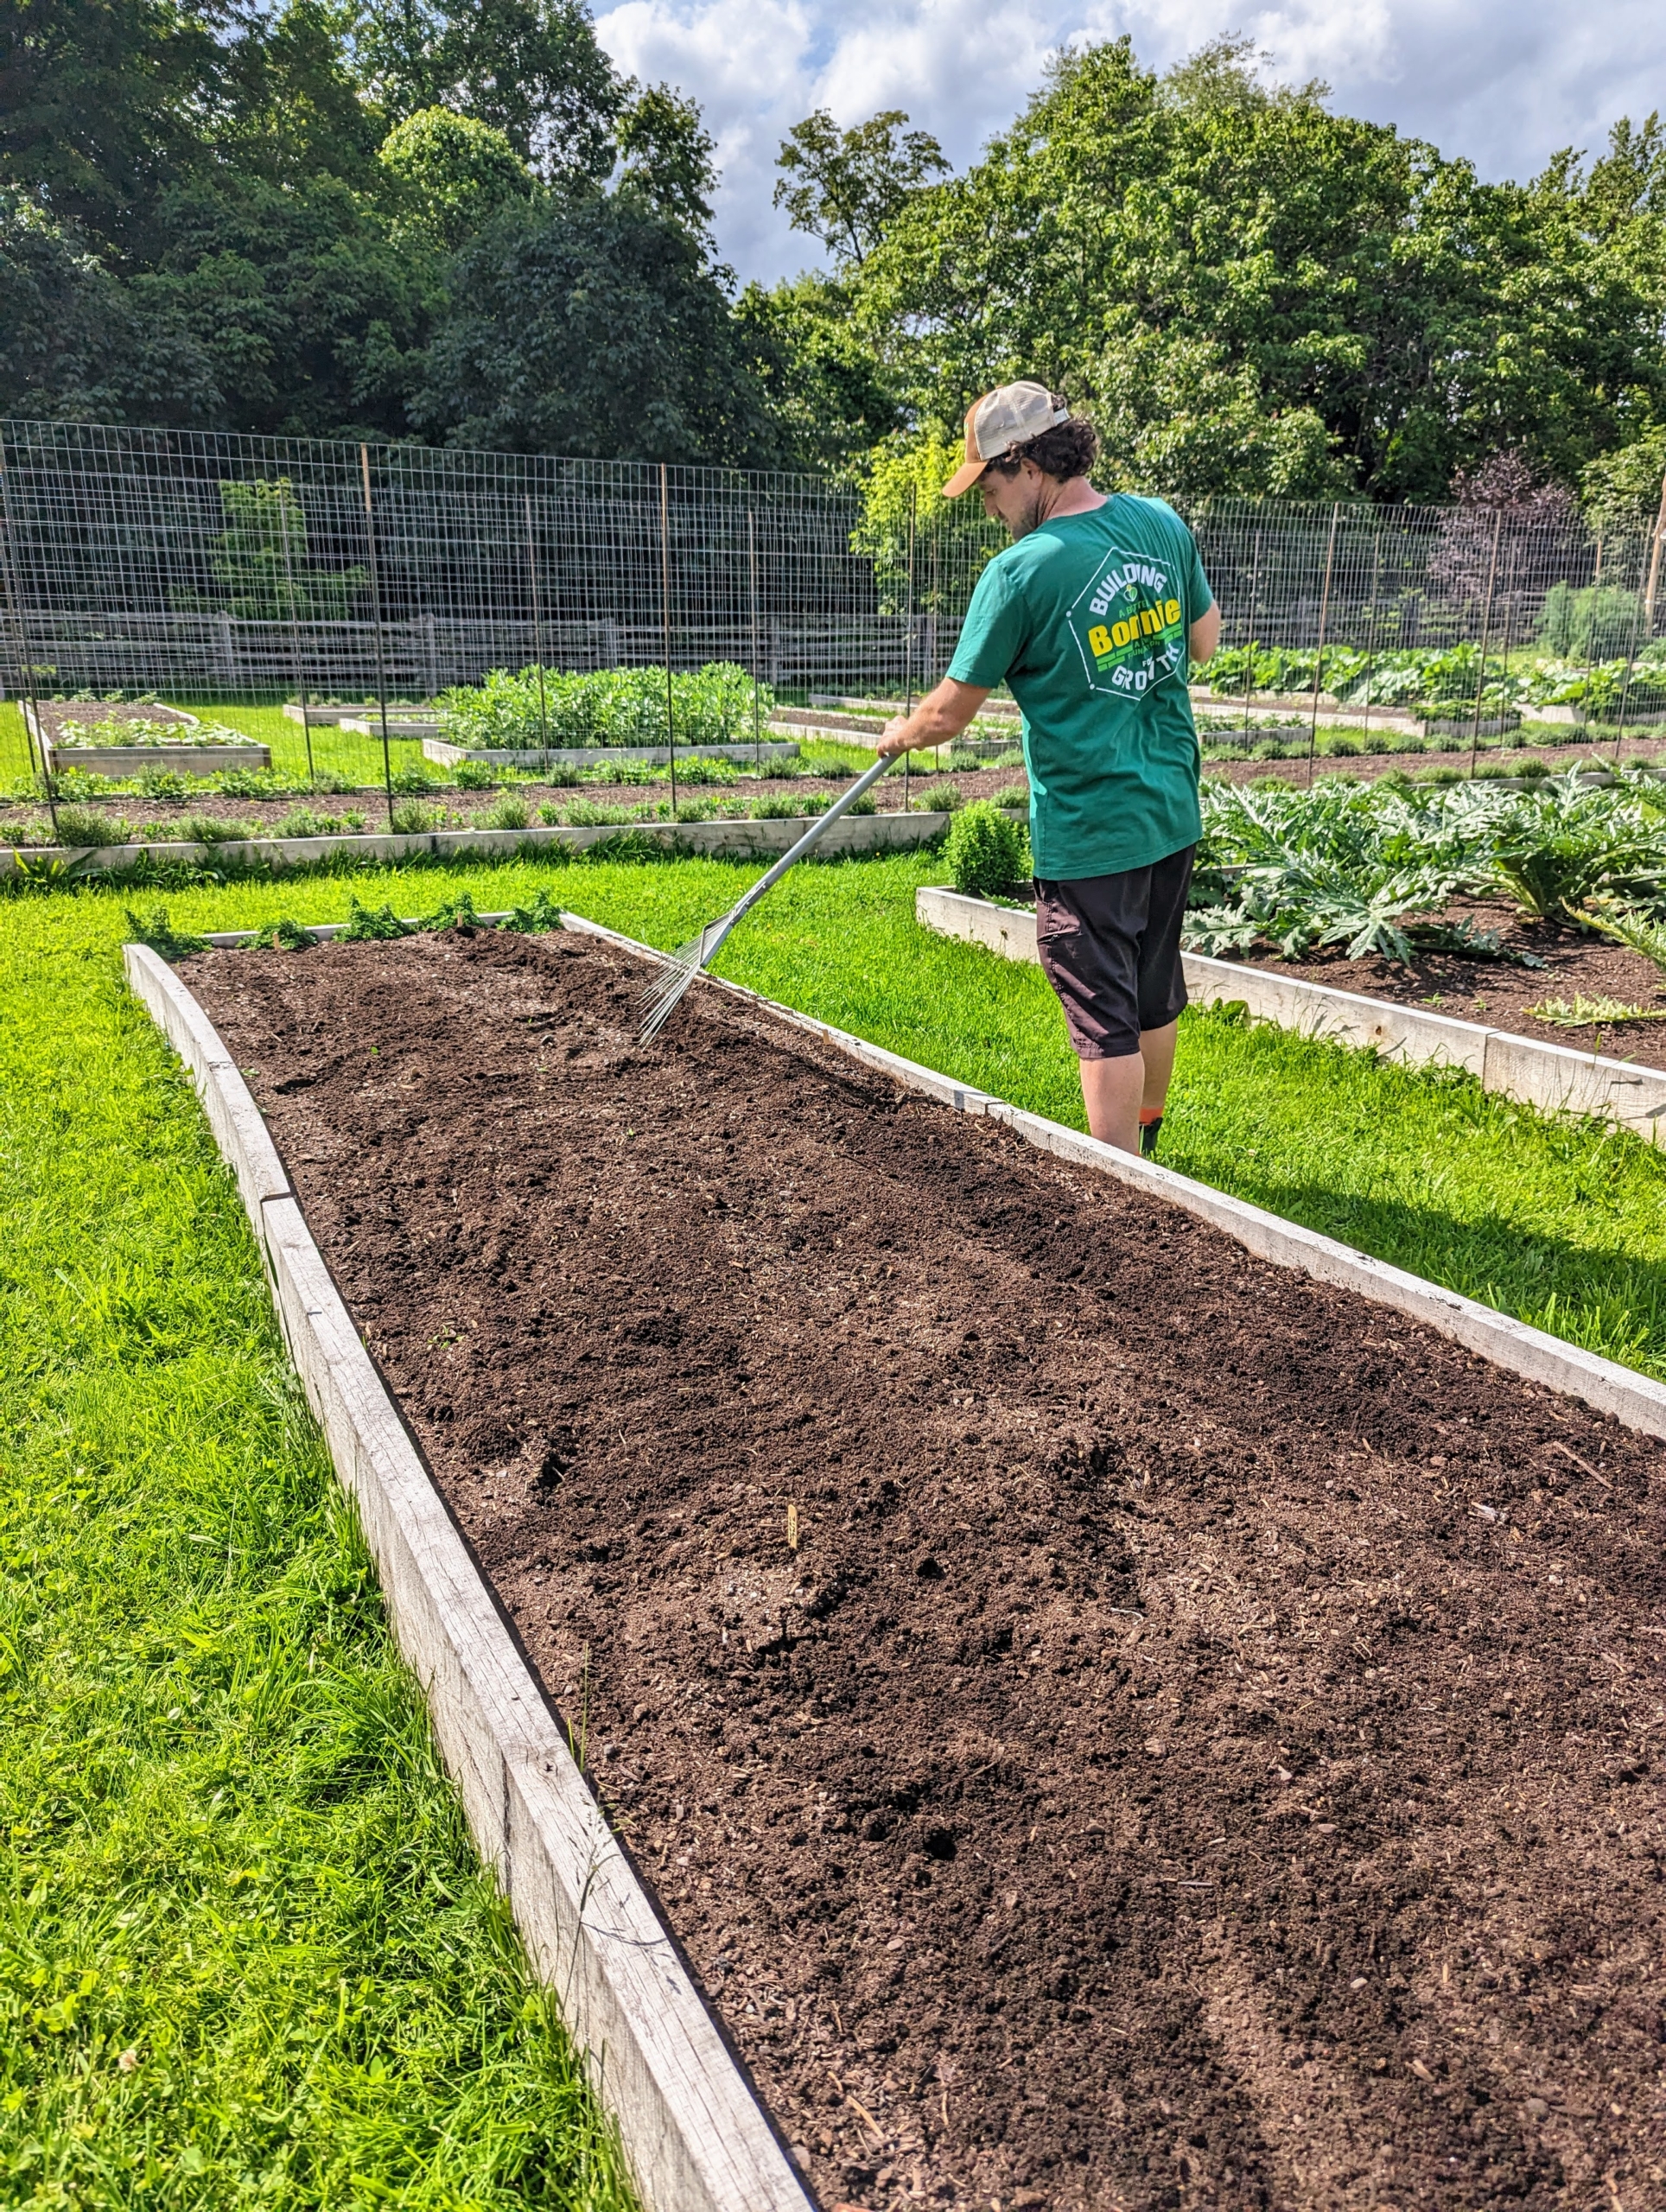
We dedicated an entire bed for our okra crop. These plants need lots of room to grow. Ryan made two big trenches and spaced the okra seeds at least 10 inches apart.
Here, okra can actually be seeded directly into the garden in an area of full sun as late as July and still produce a good late-summer crop. Ryan rakes over the trenches, covering all the seeds.
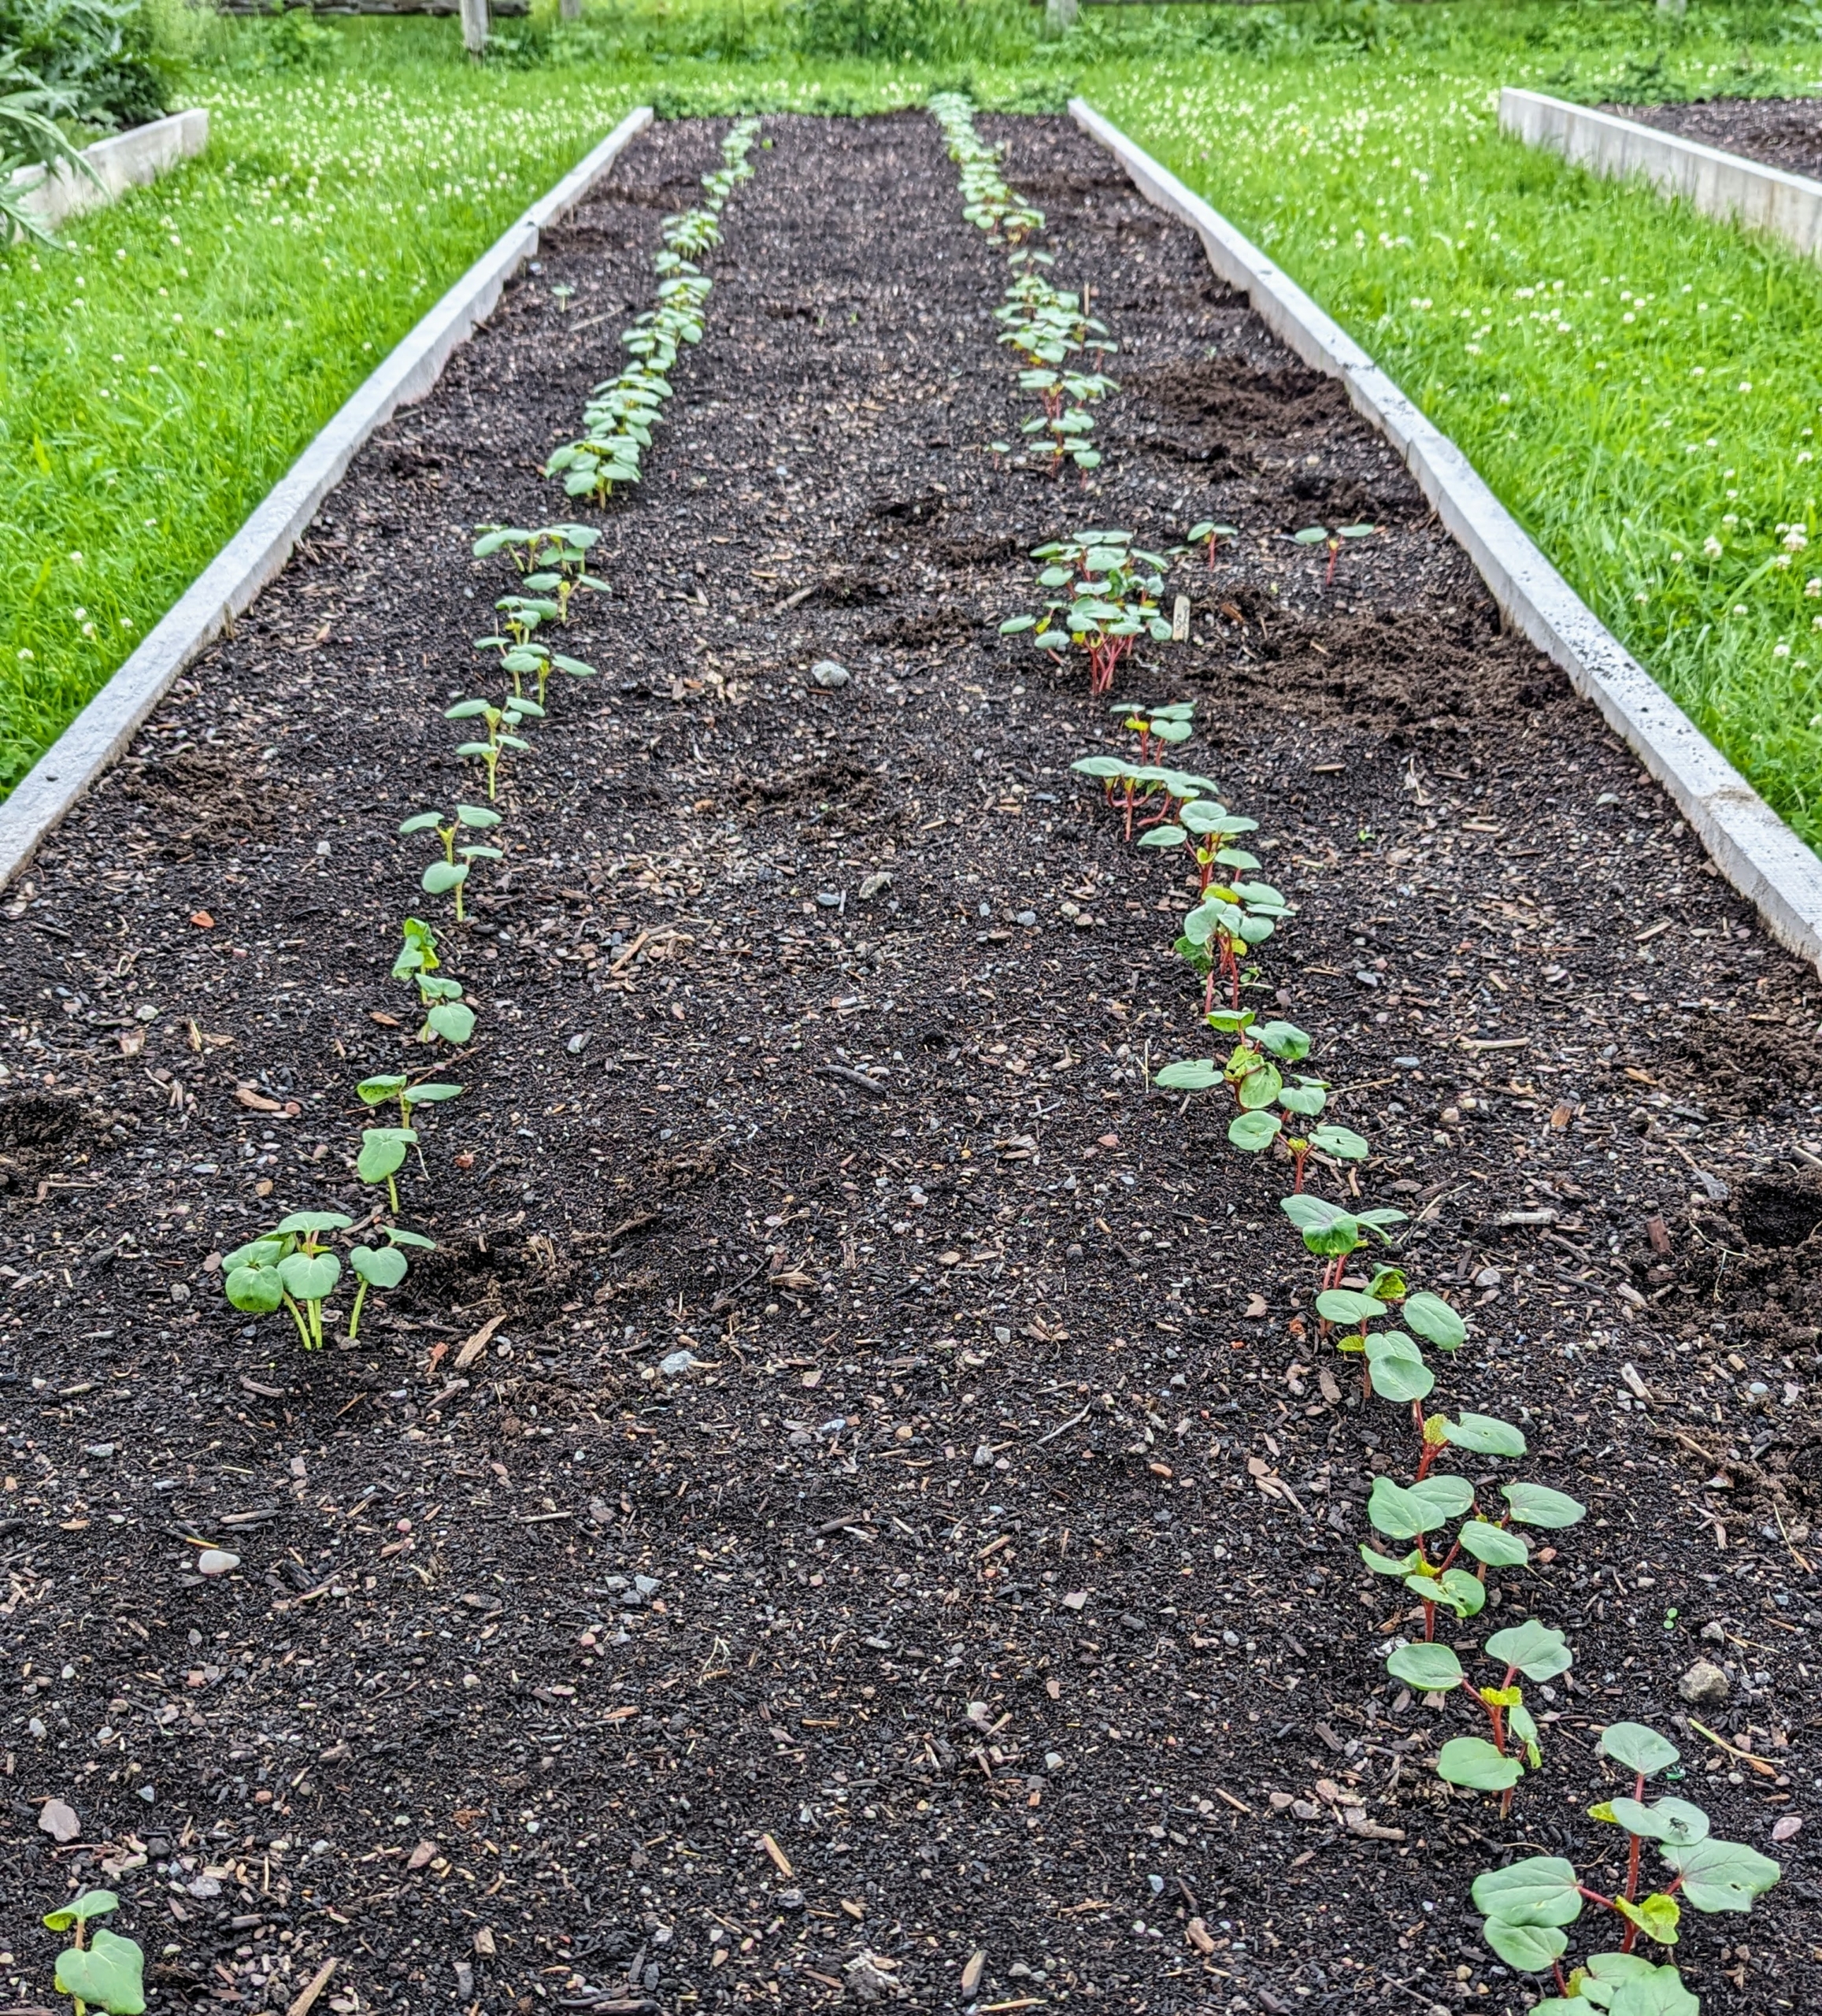
Just a couple of weeks later, we had a bed full of young okra sprouts. Ryan then assessed the condition of each one and pulled any that were weak to give the others more room to mature.
By the beginning of August, these plants are already waste high with giant leaves. Okra plants mature in about 55 to 65 days. It’s good to keep the soil moist, but not soggy, and water plants deeply once a week if there’s no rain.
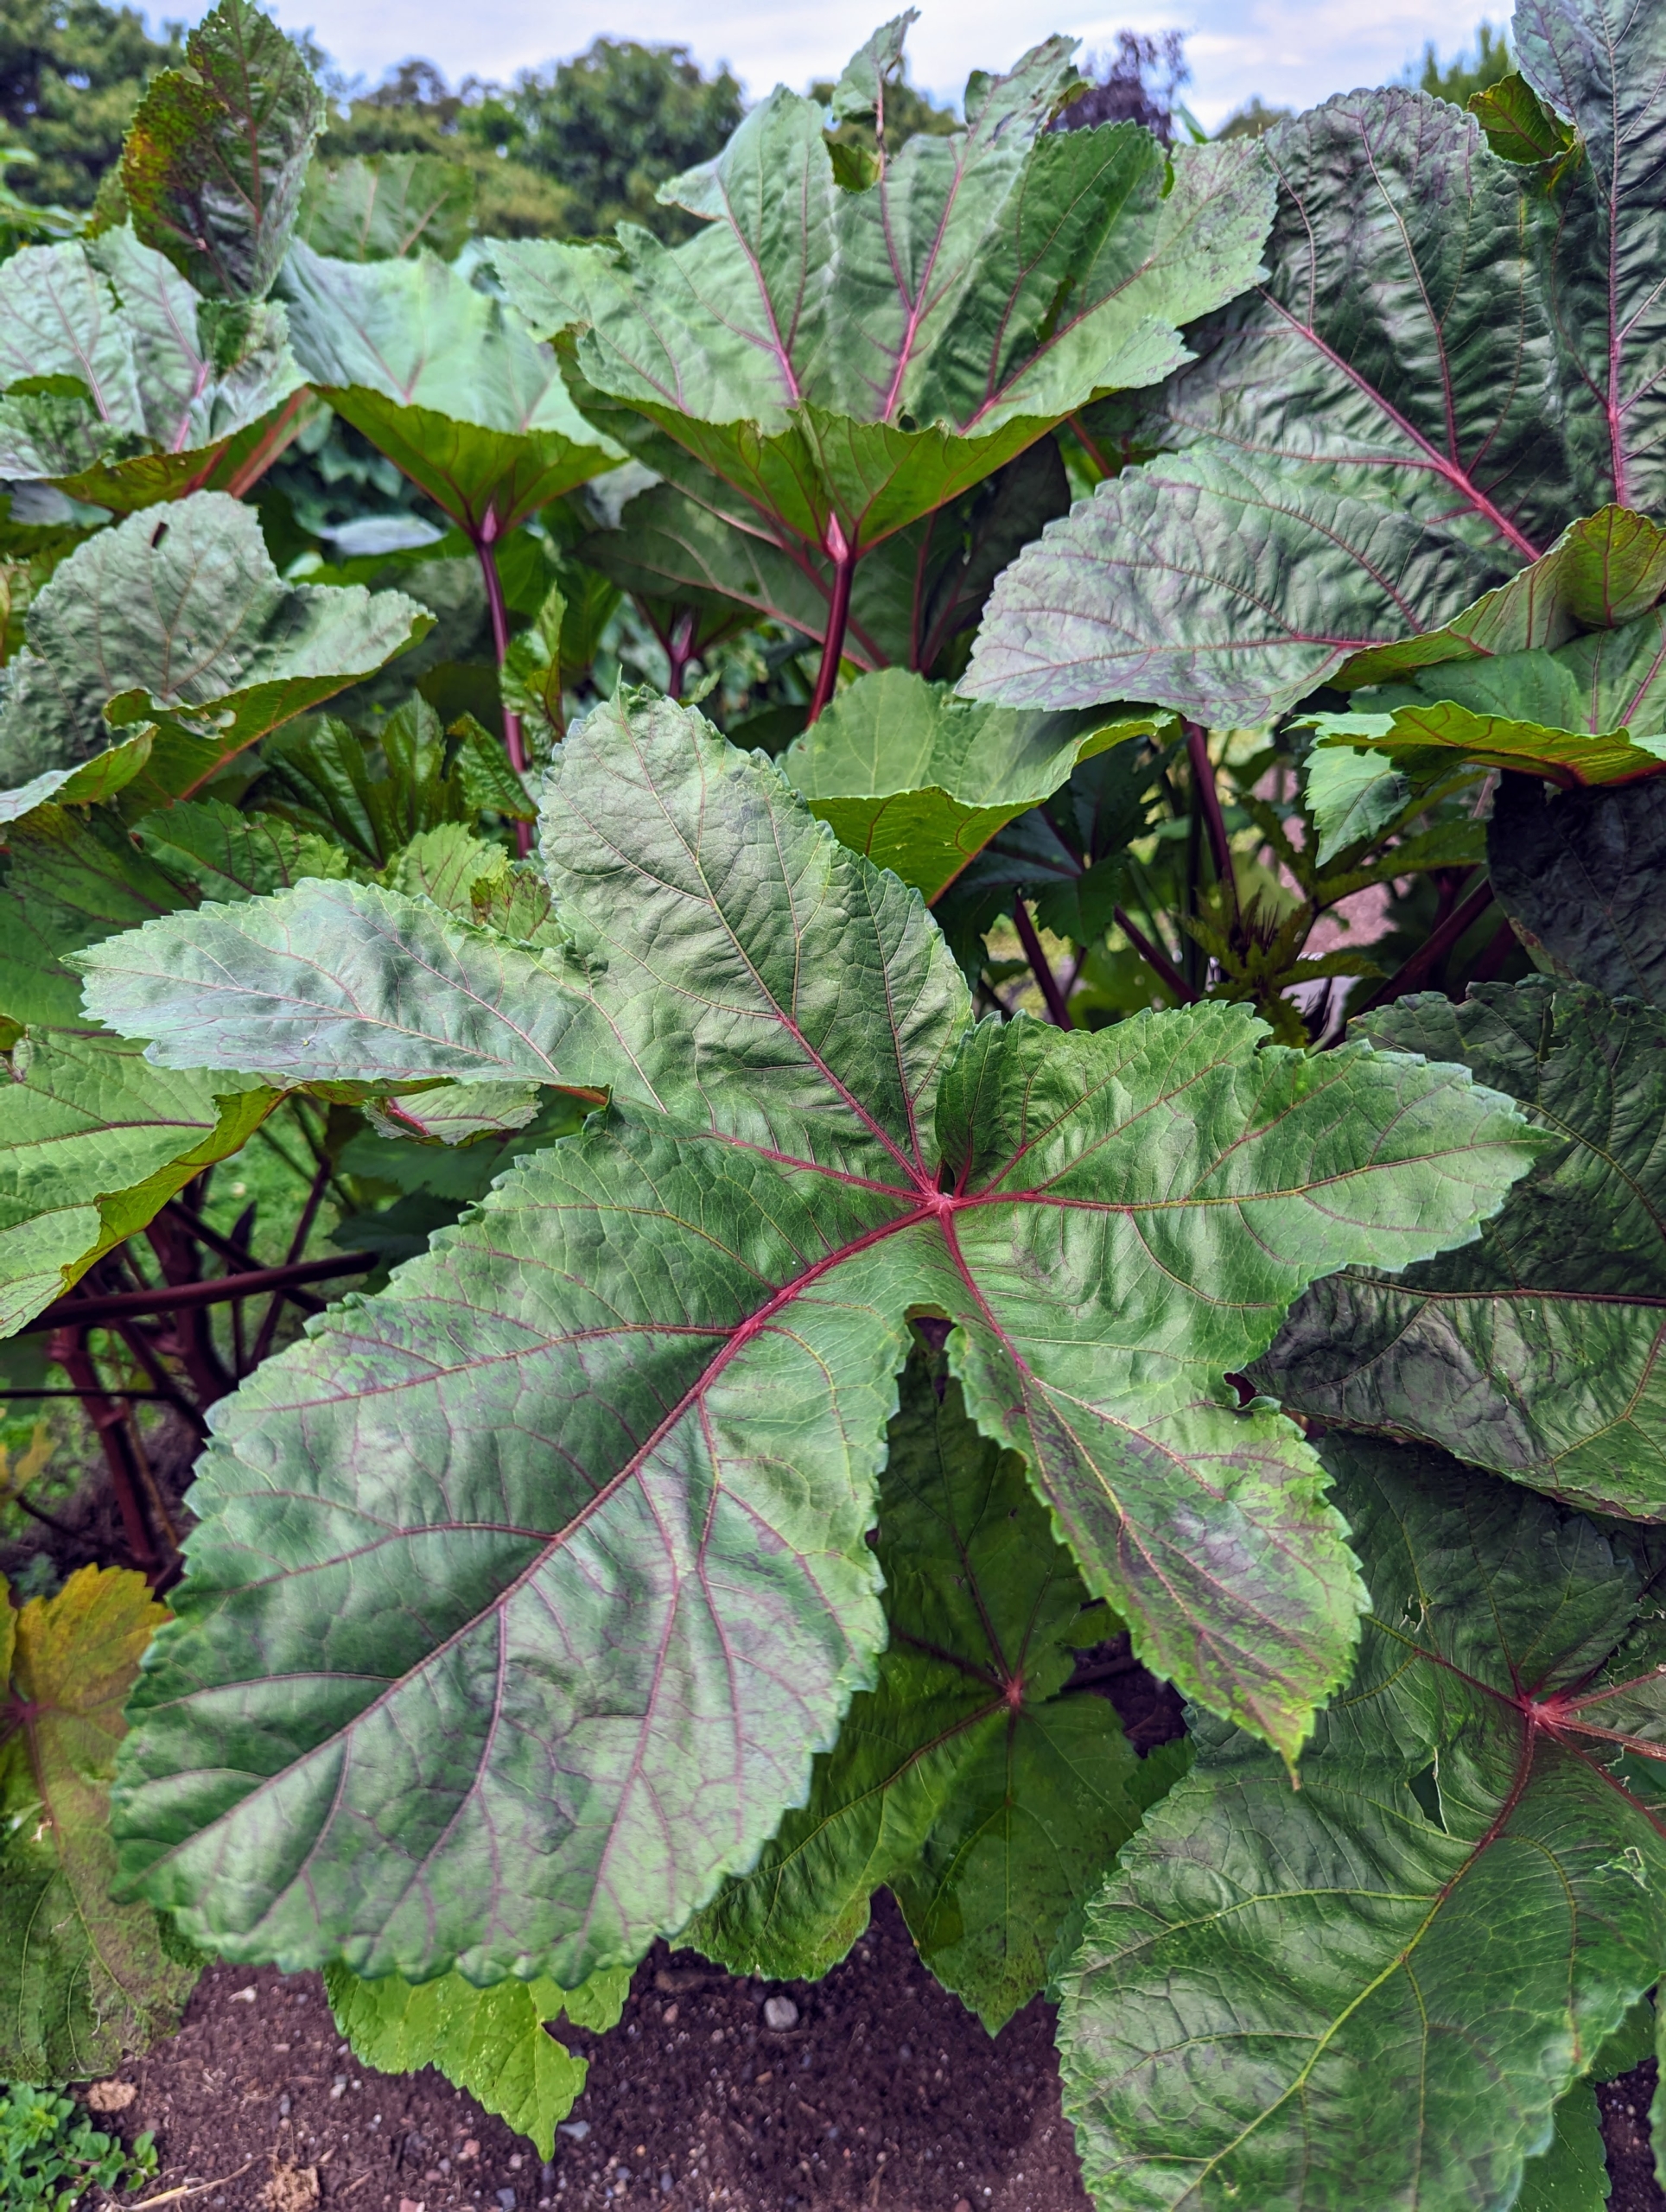
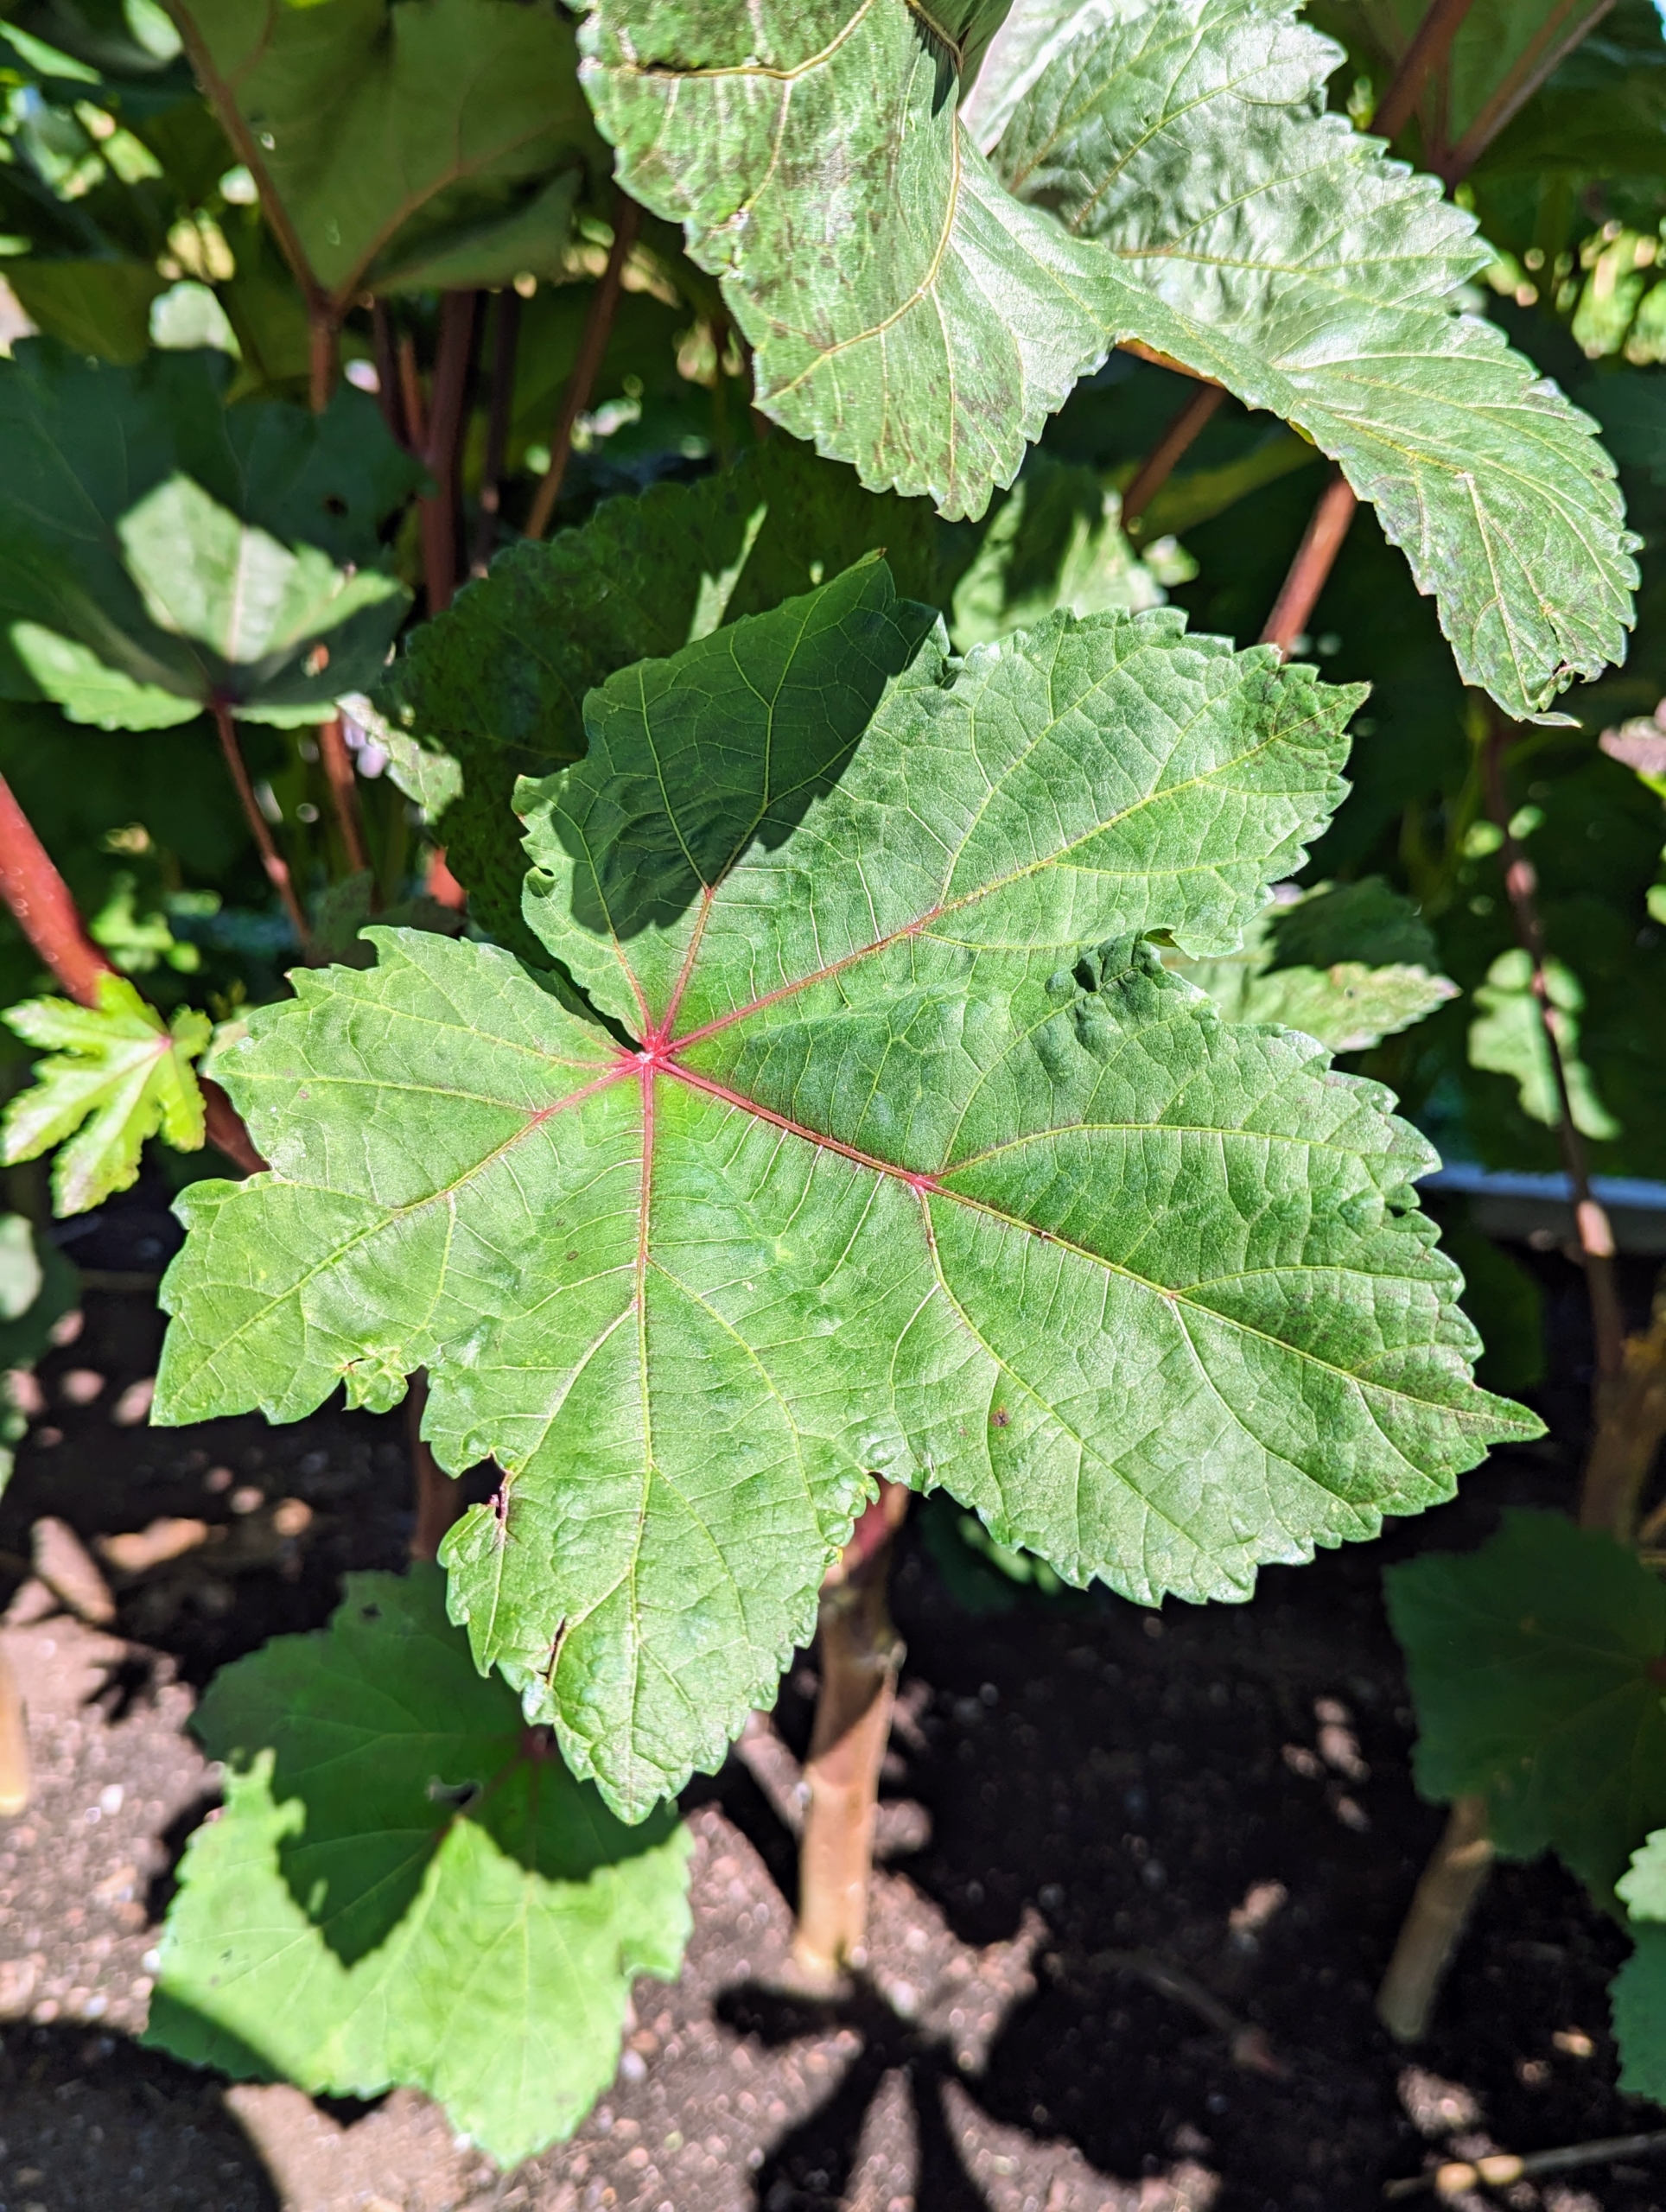
Okra leaves are very large – up to eight inches across. They are also heart-shaped and lobed.
Depending on the variety, okra leaf margins vary from slightly wavy to very deeply lobed.
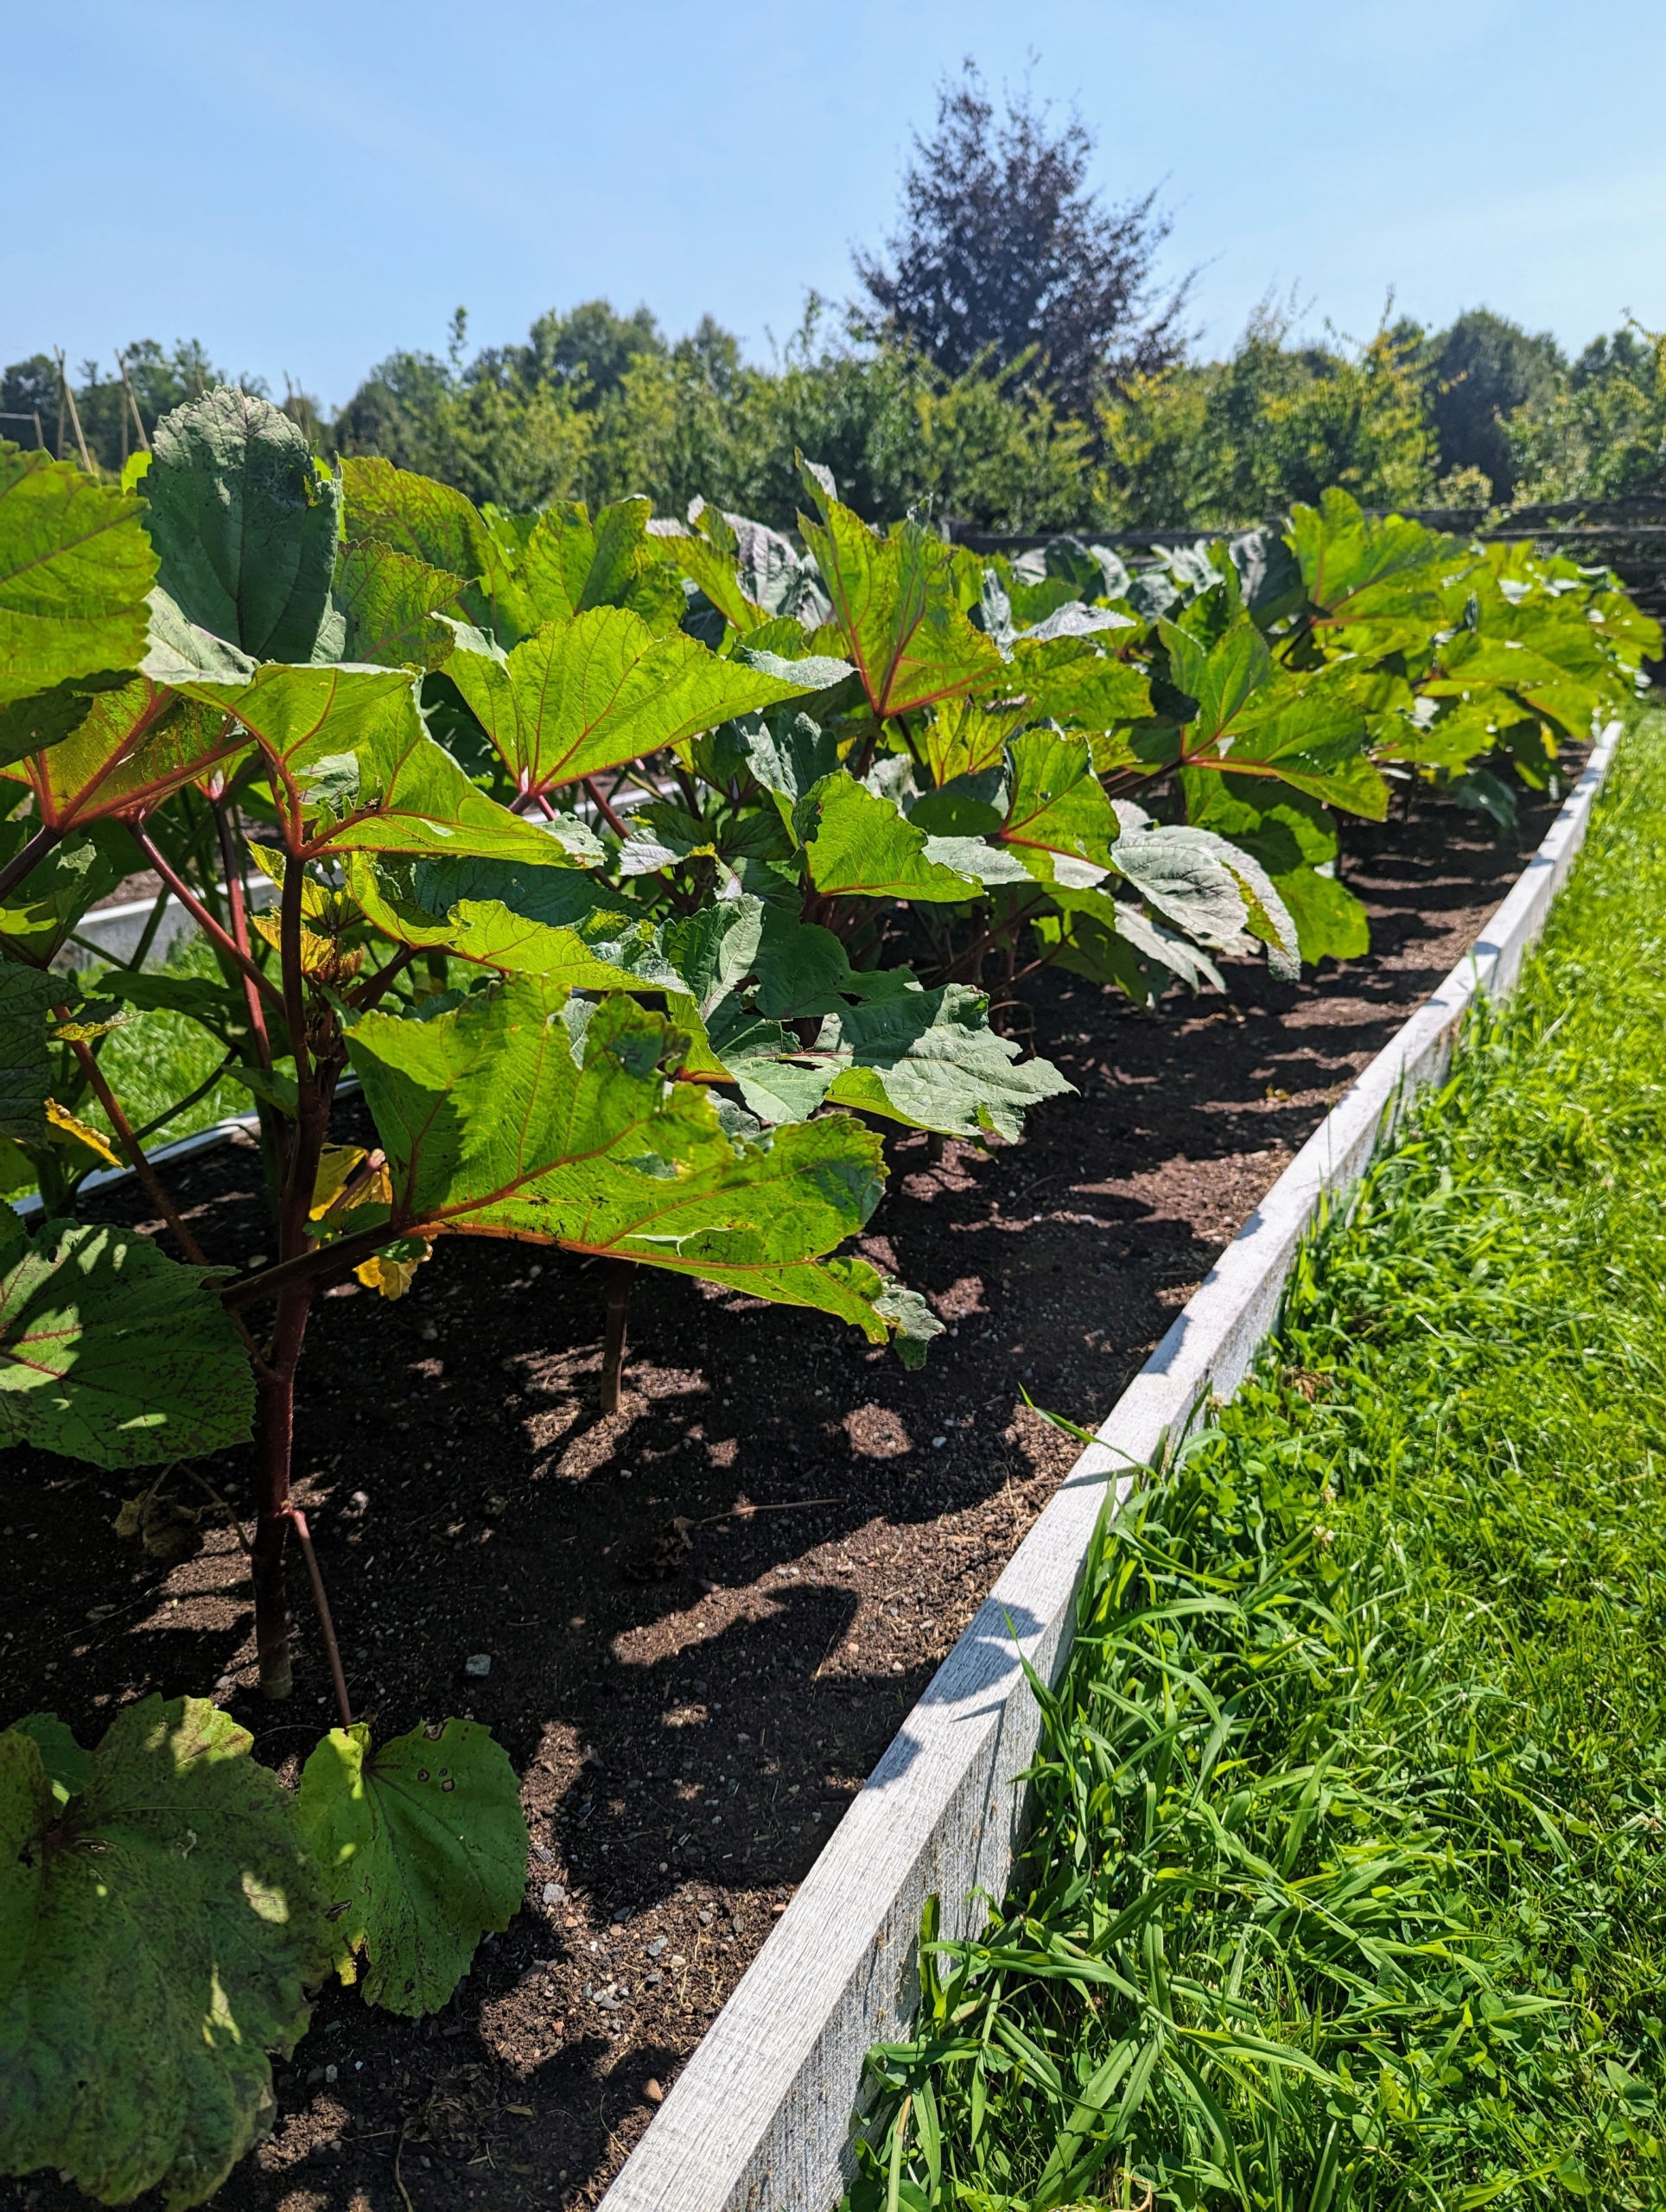
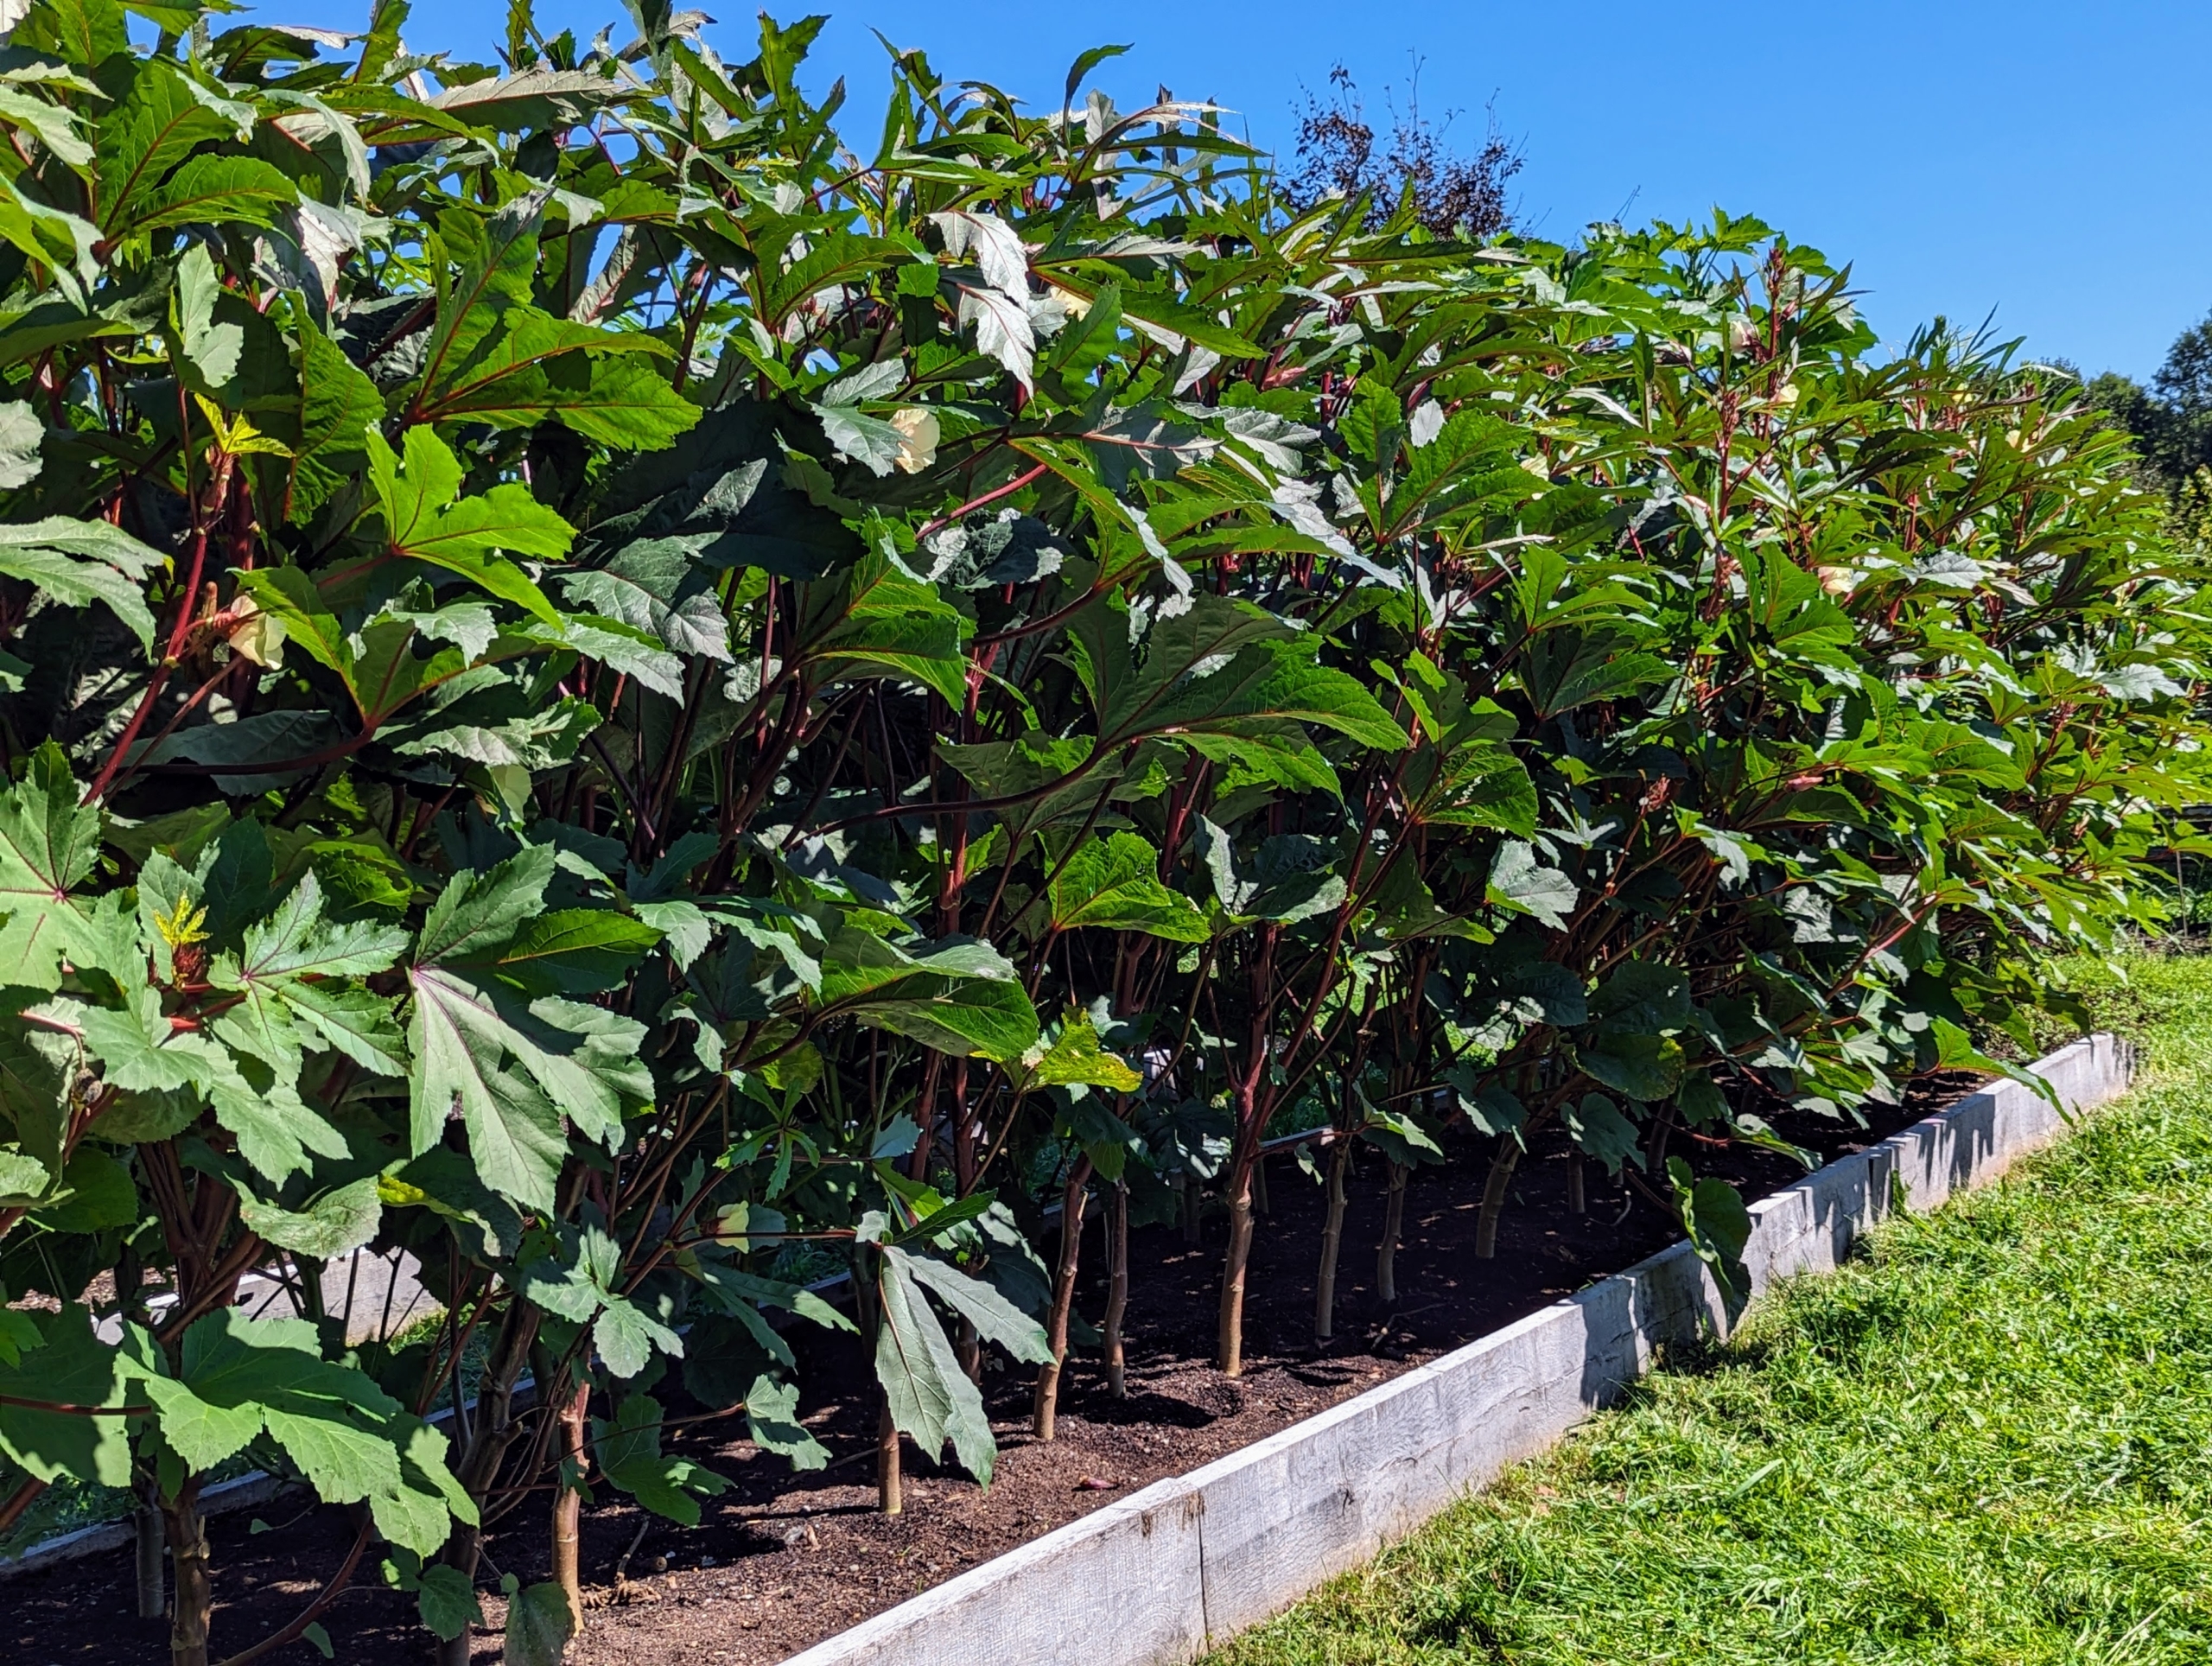
And last week, the okra plants were more than six-feet tall. Okra will continue to grow until the first frost.
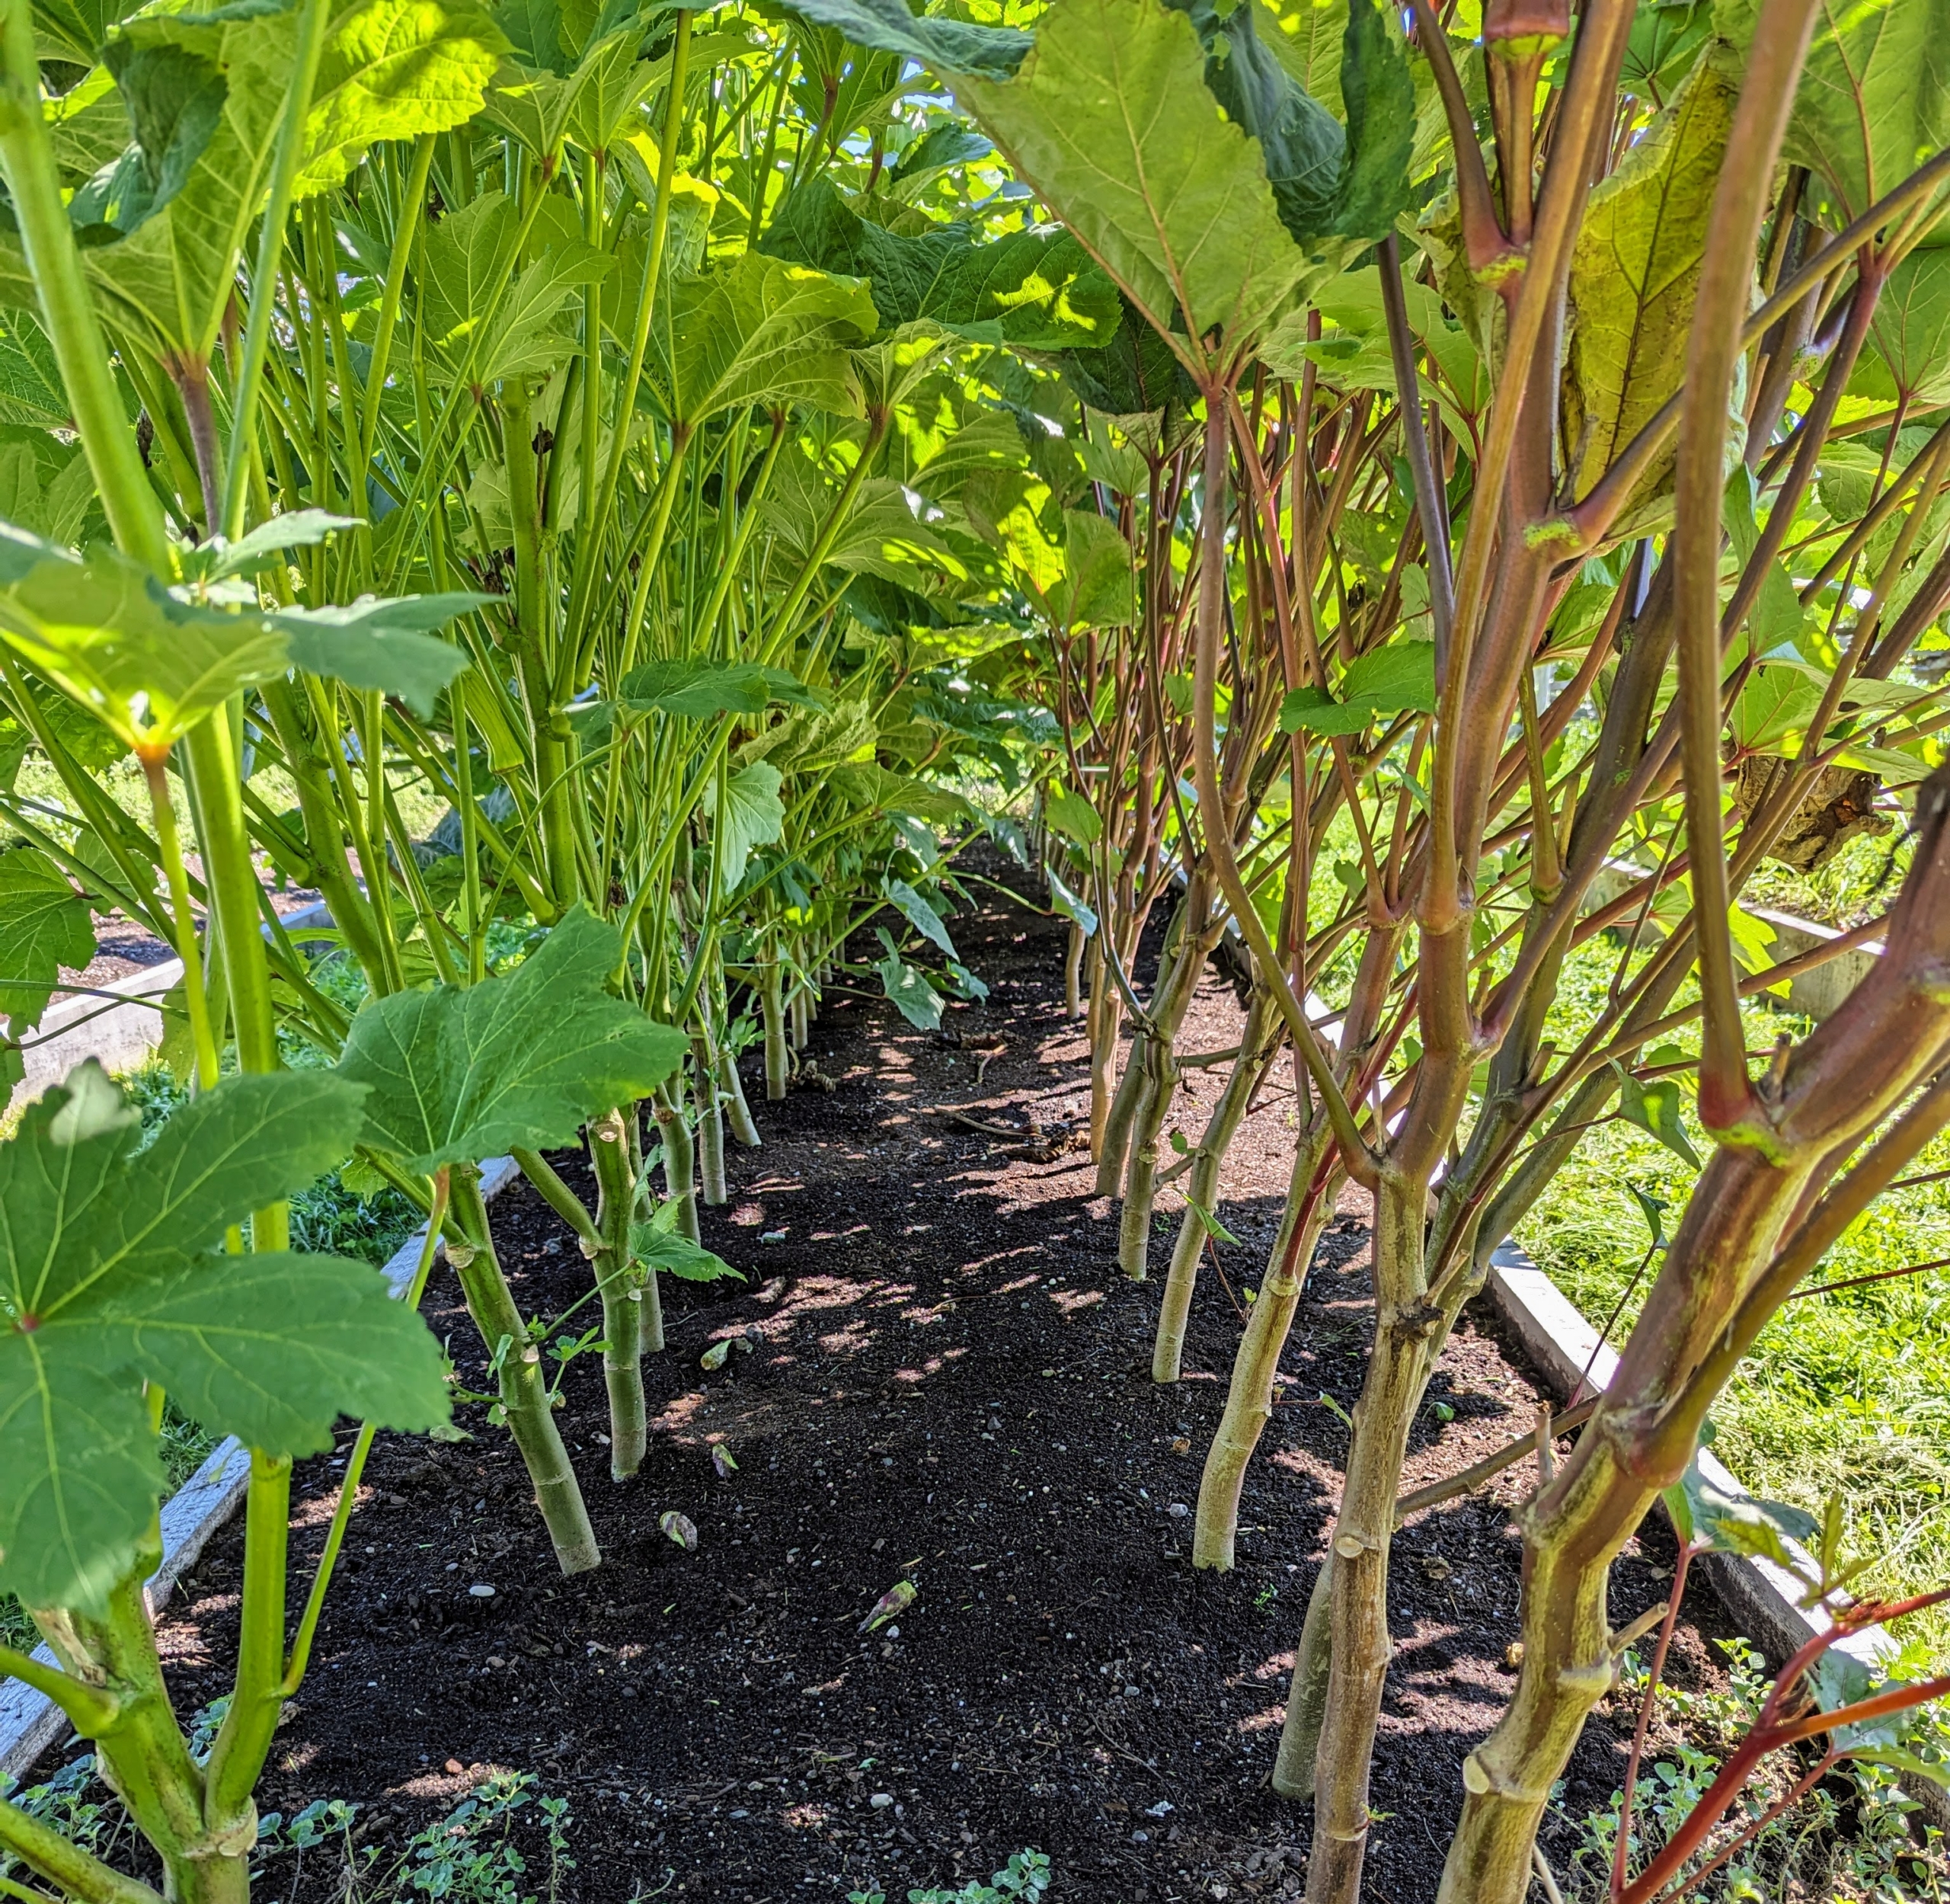
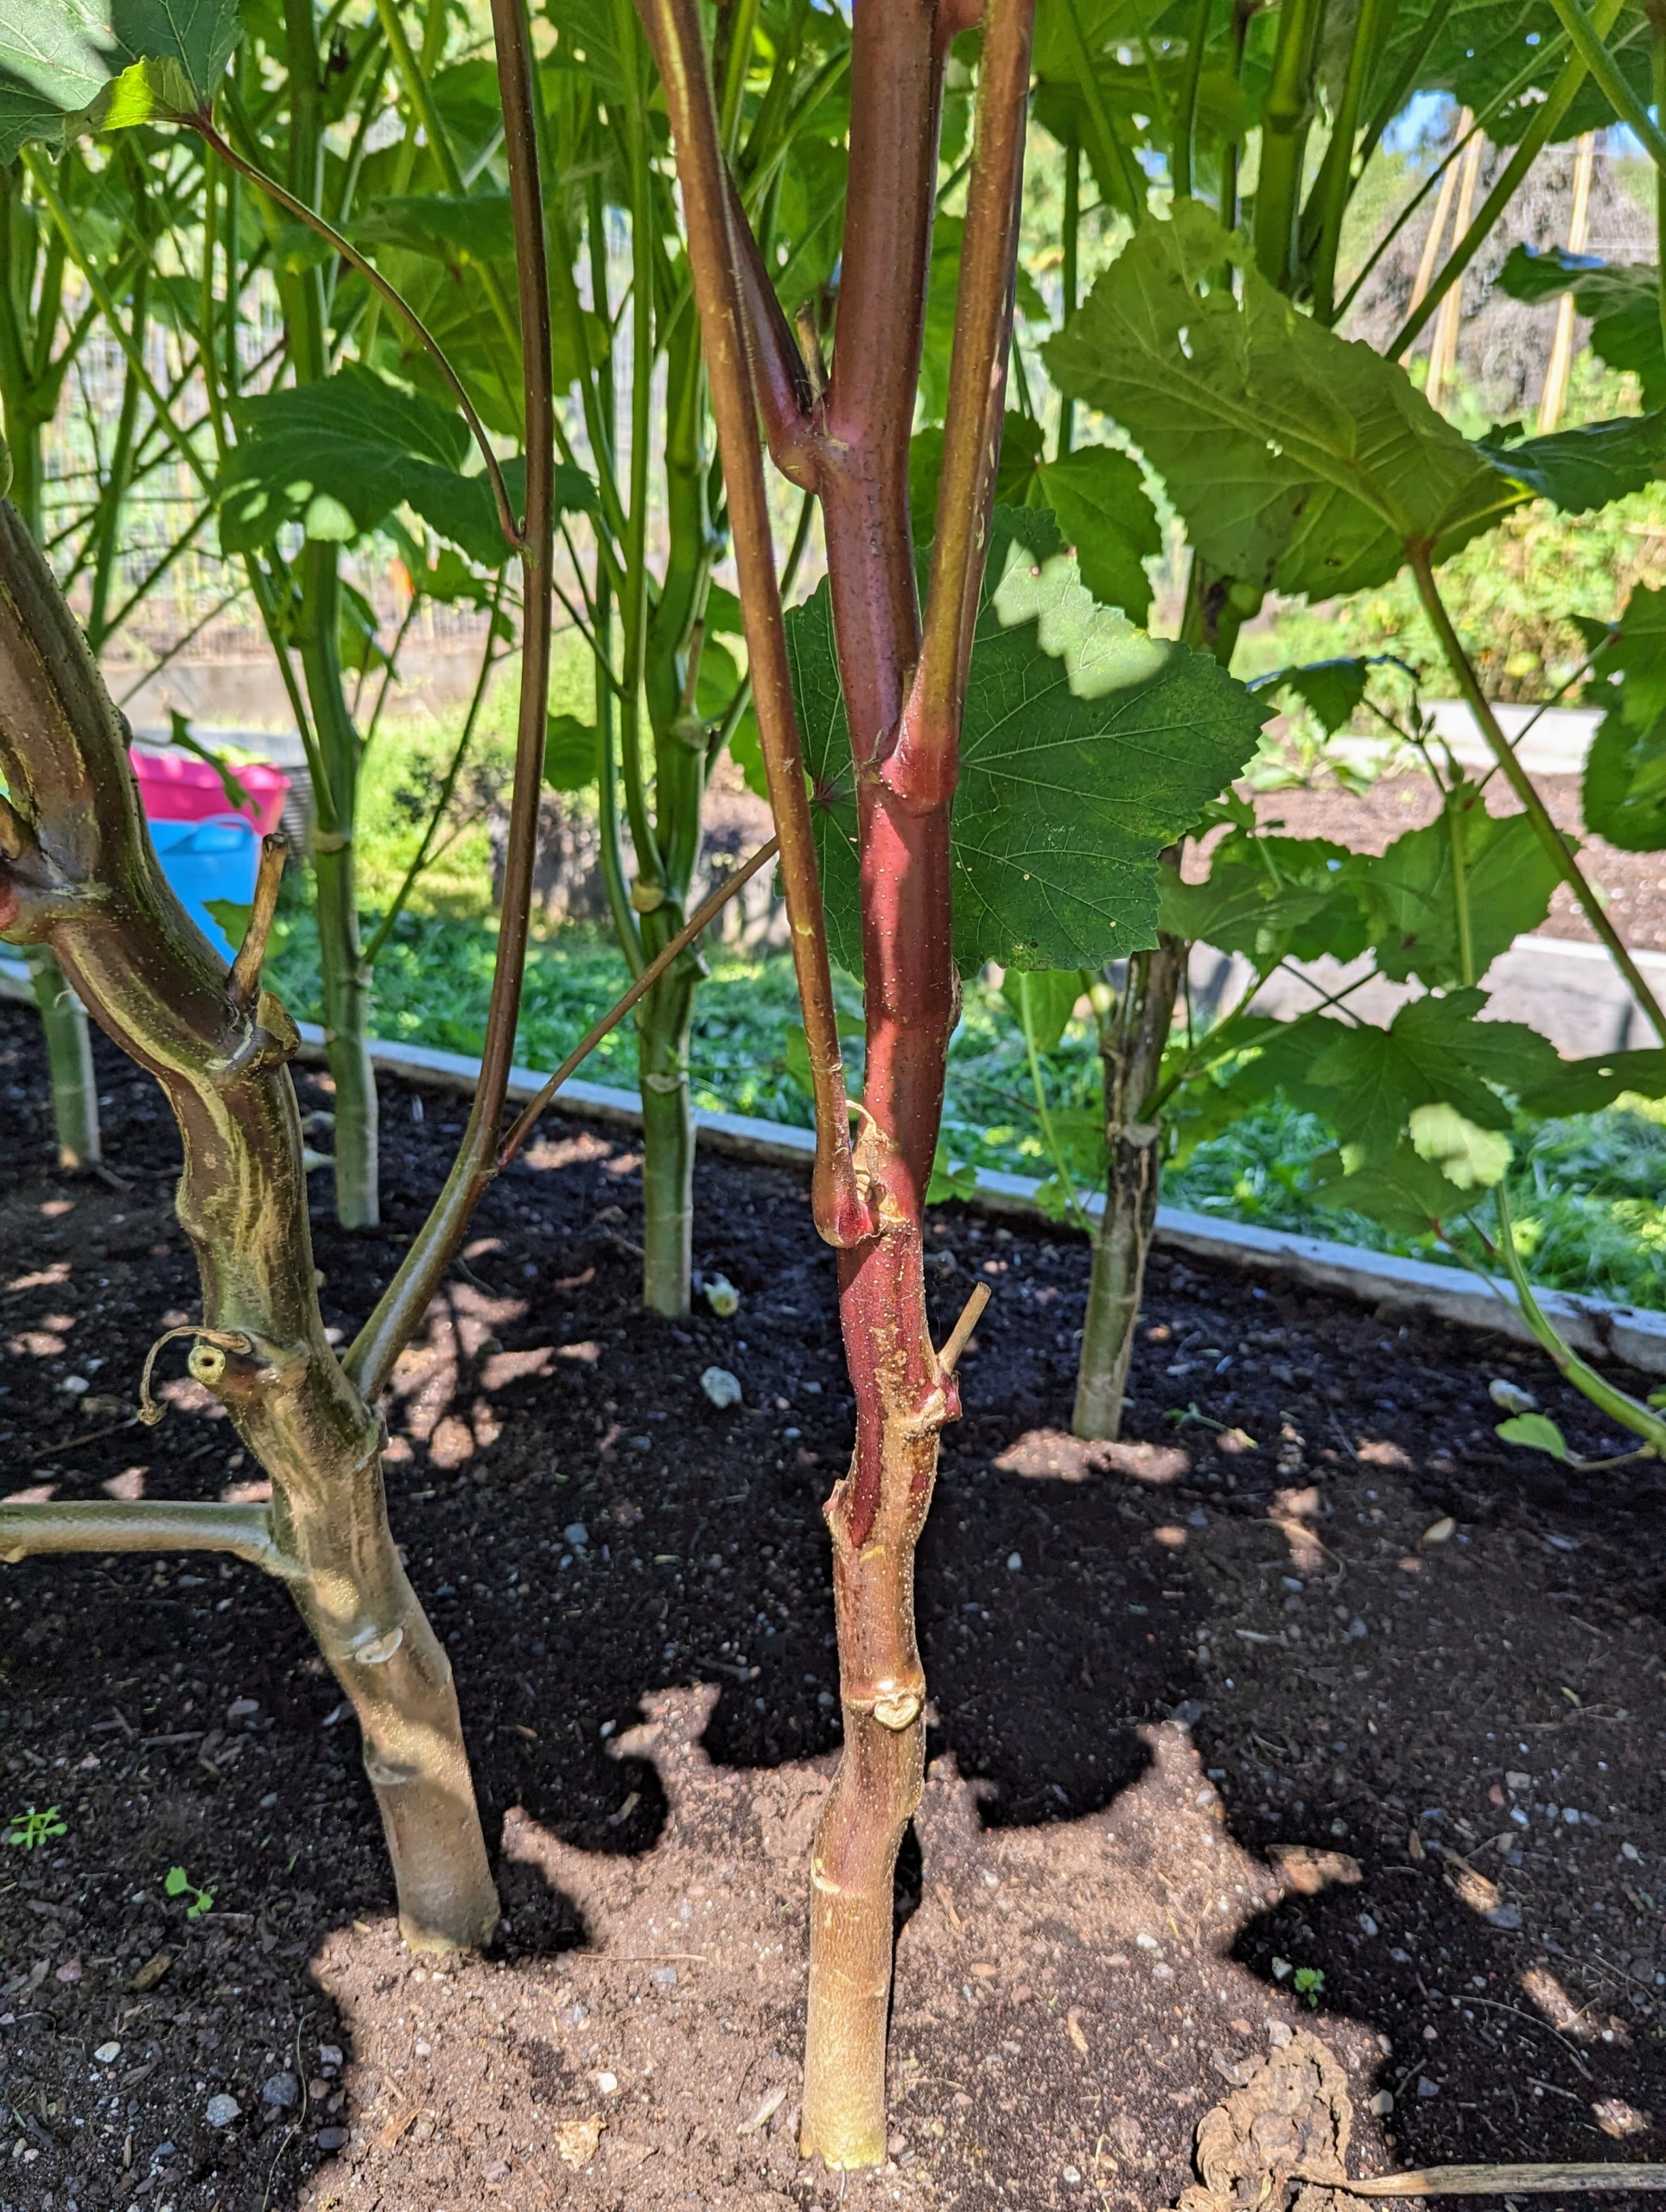
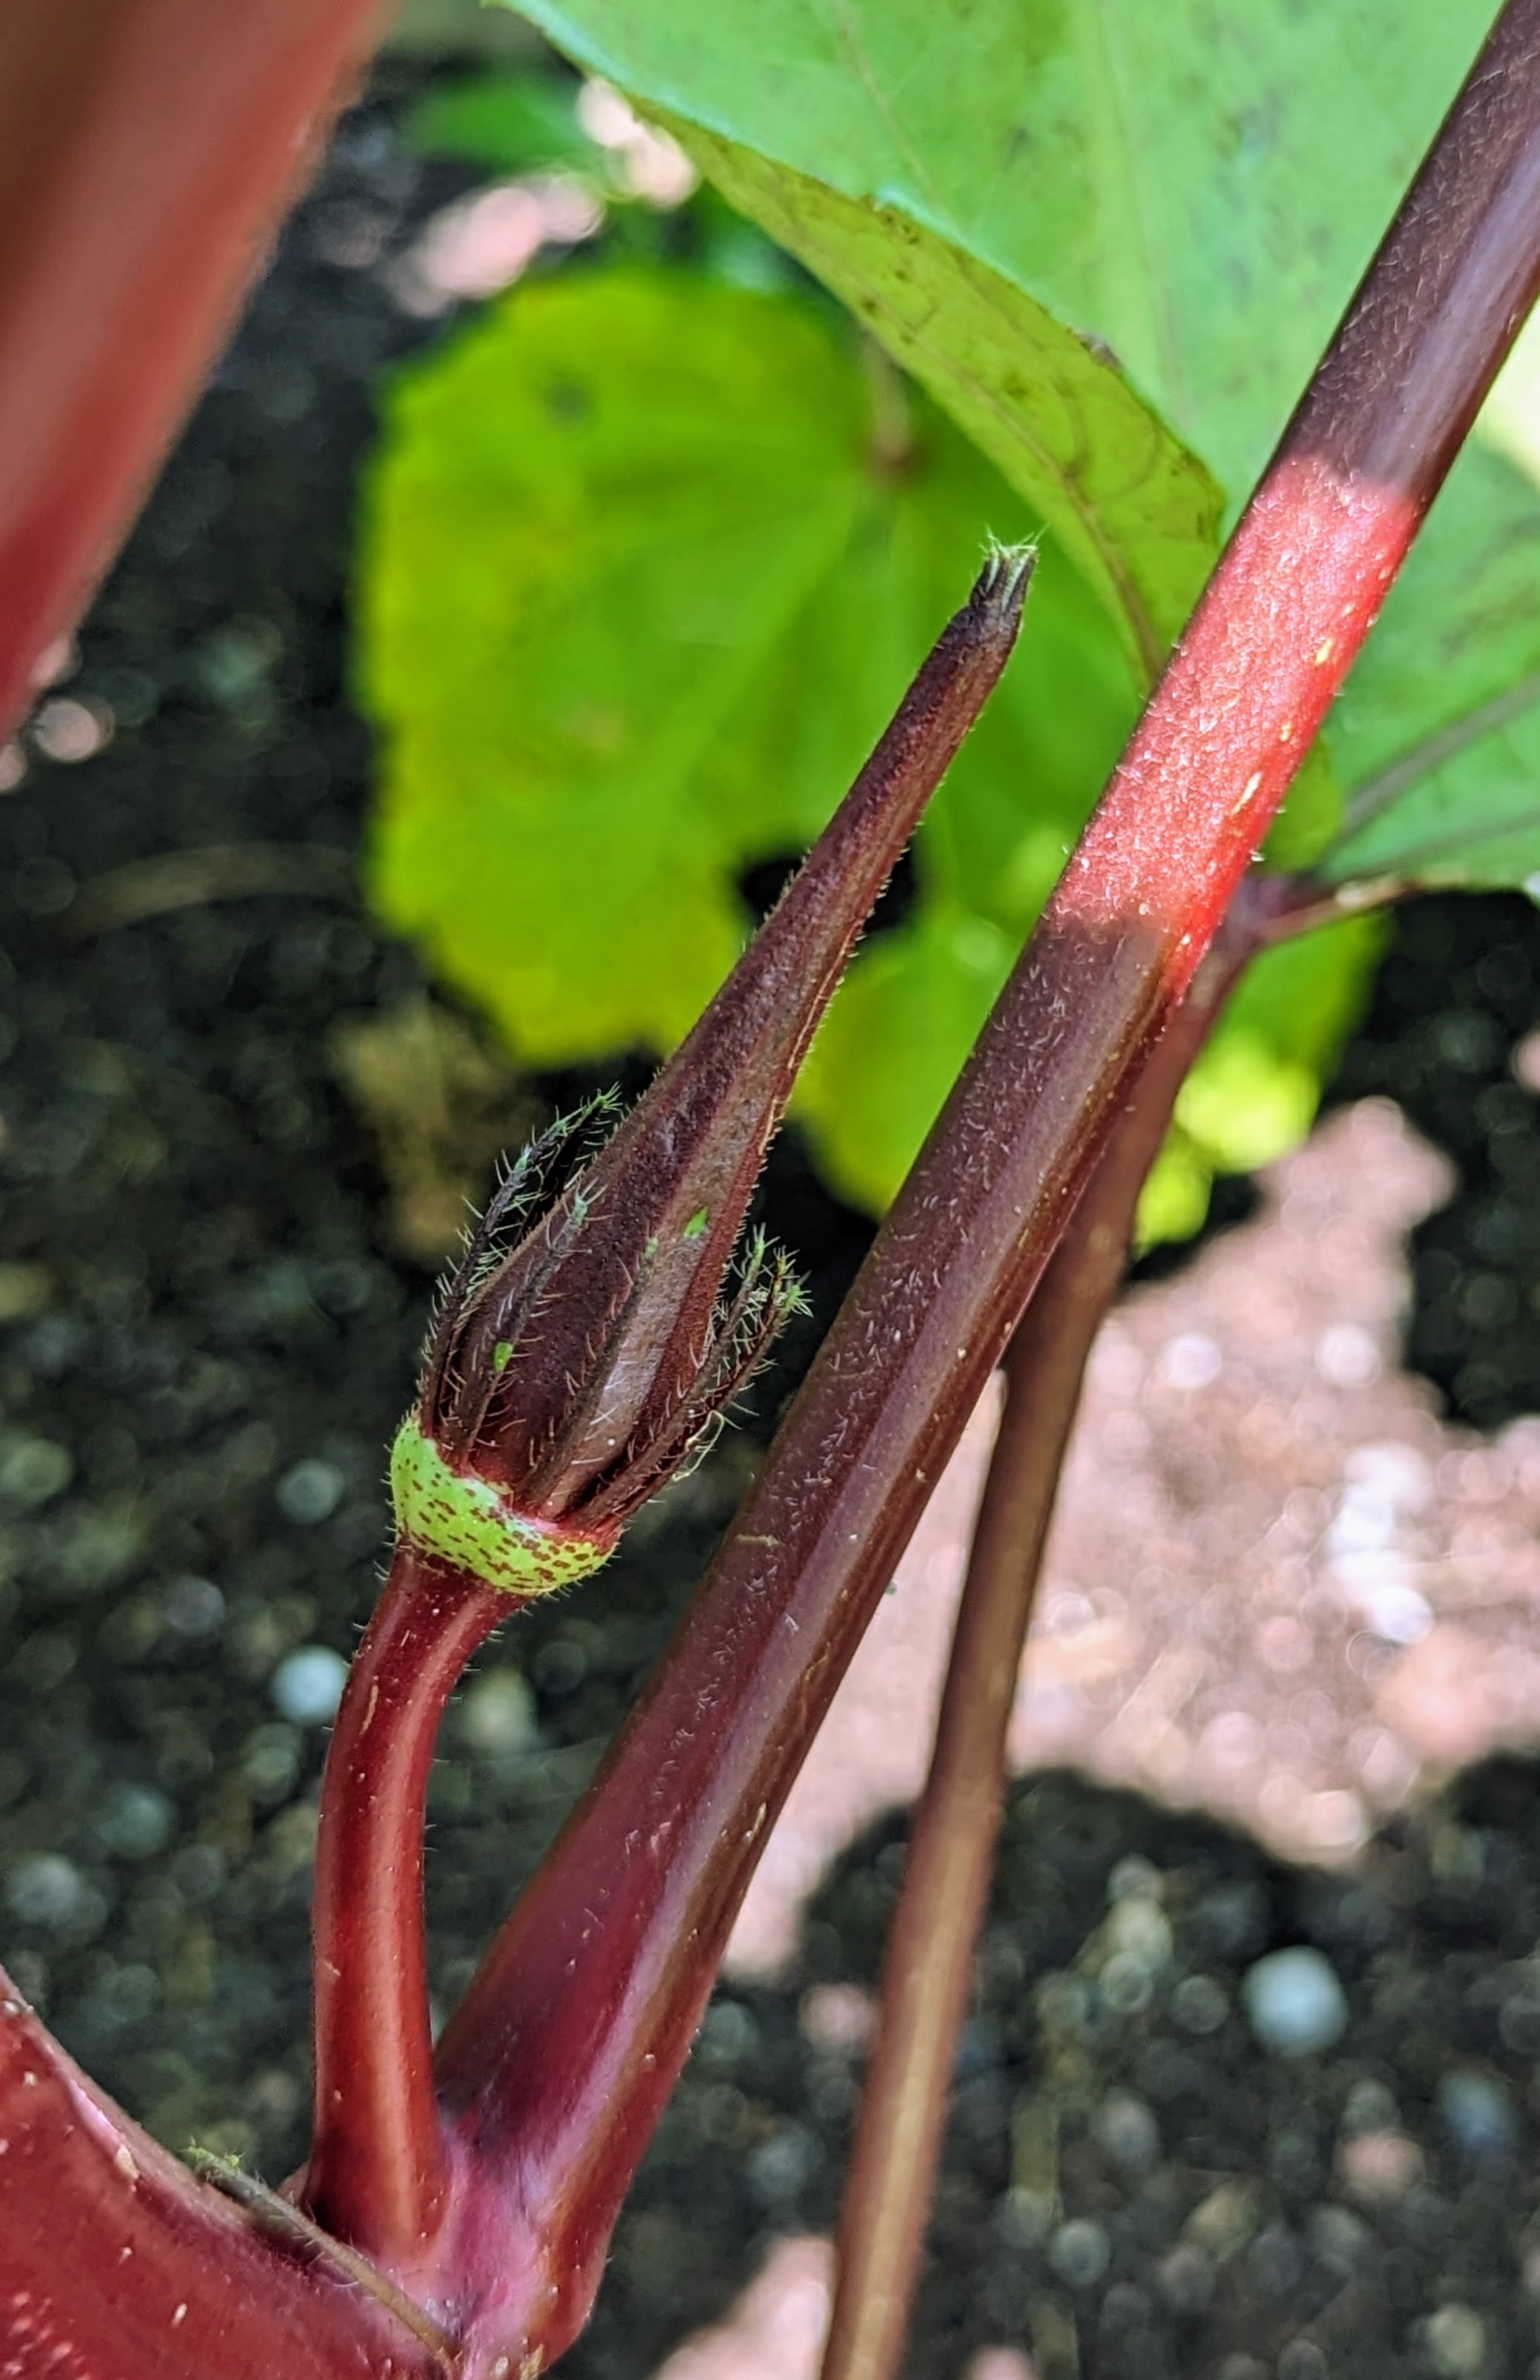
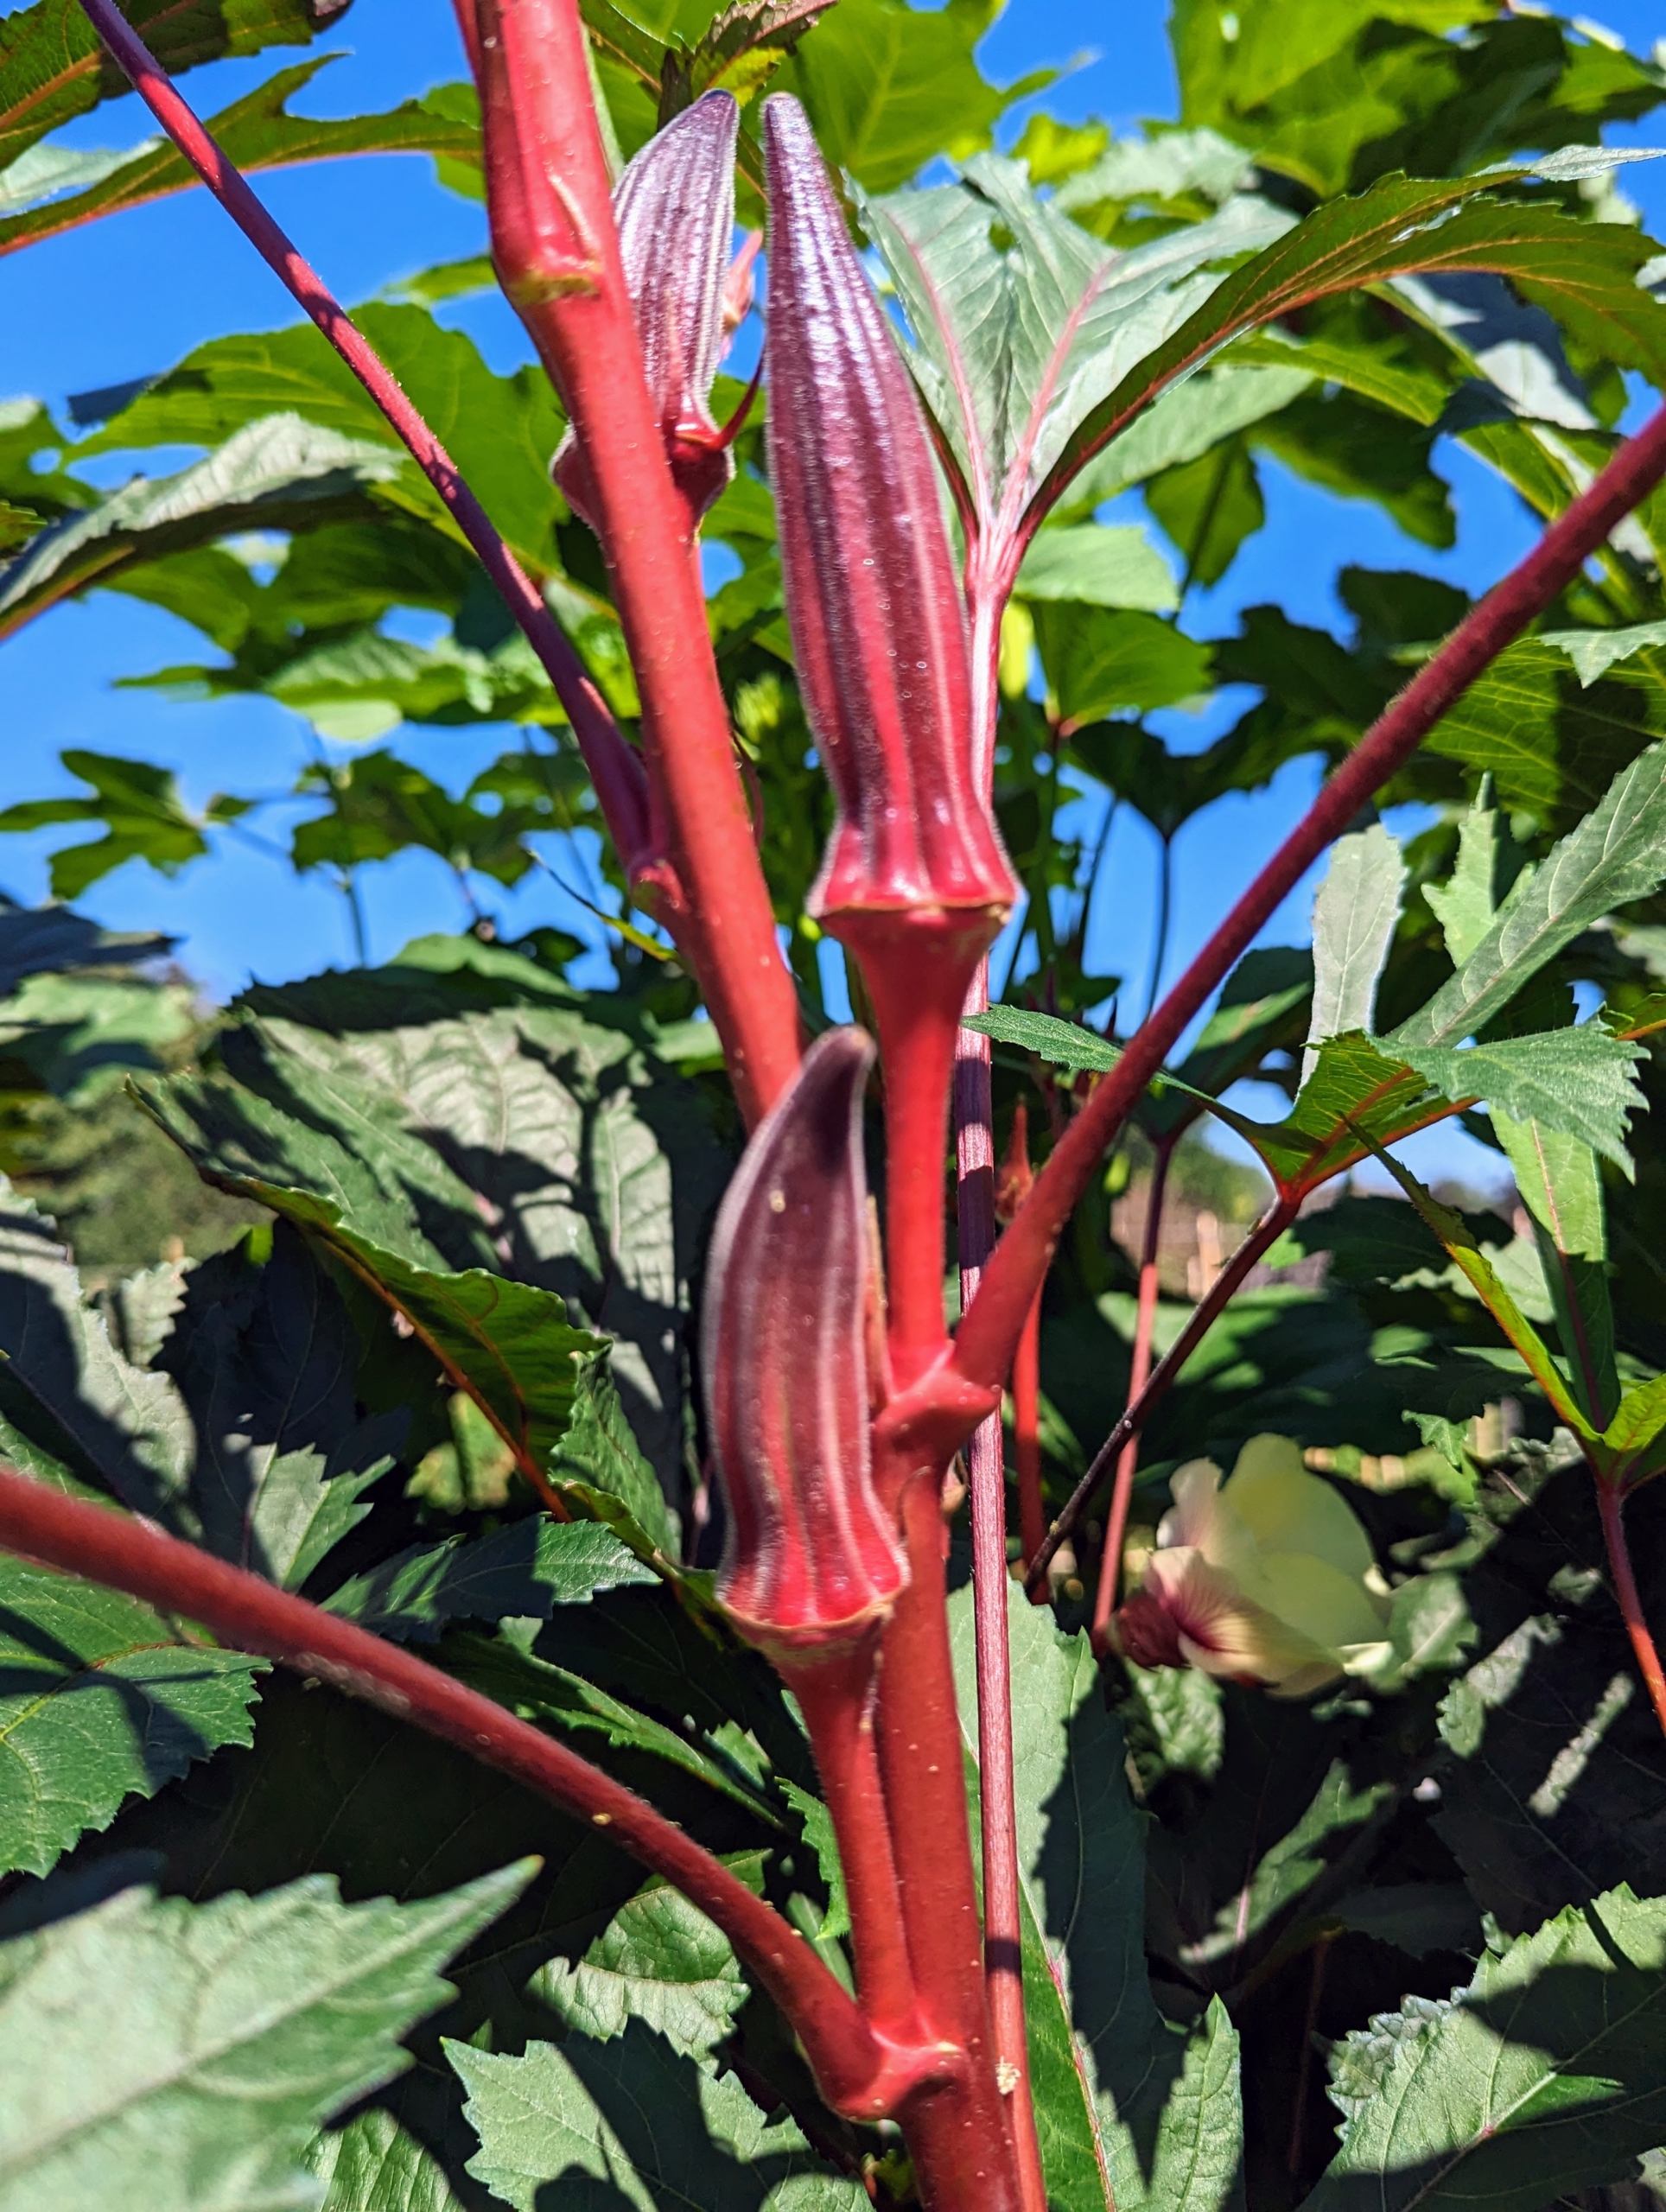
Here is a view of the two rows. We grew green okra on one side and red okra on the right. There’s not much difference between red and green okra other than color.
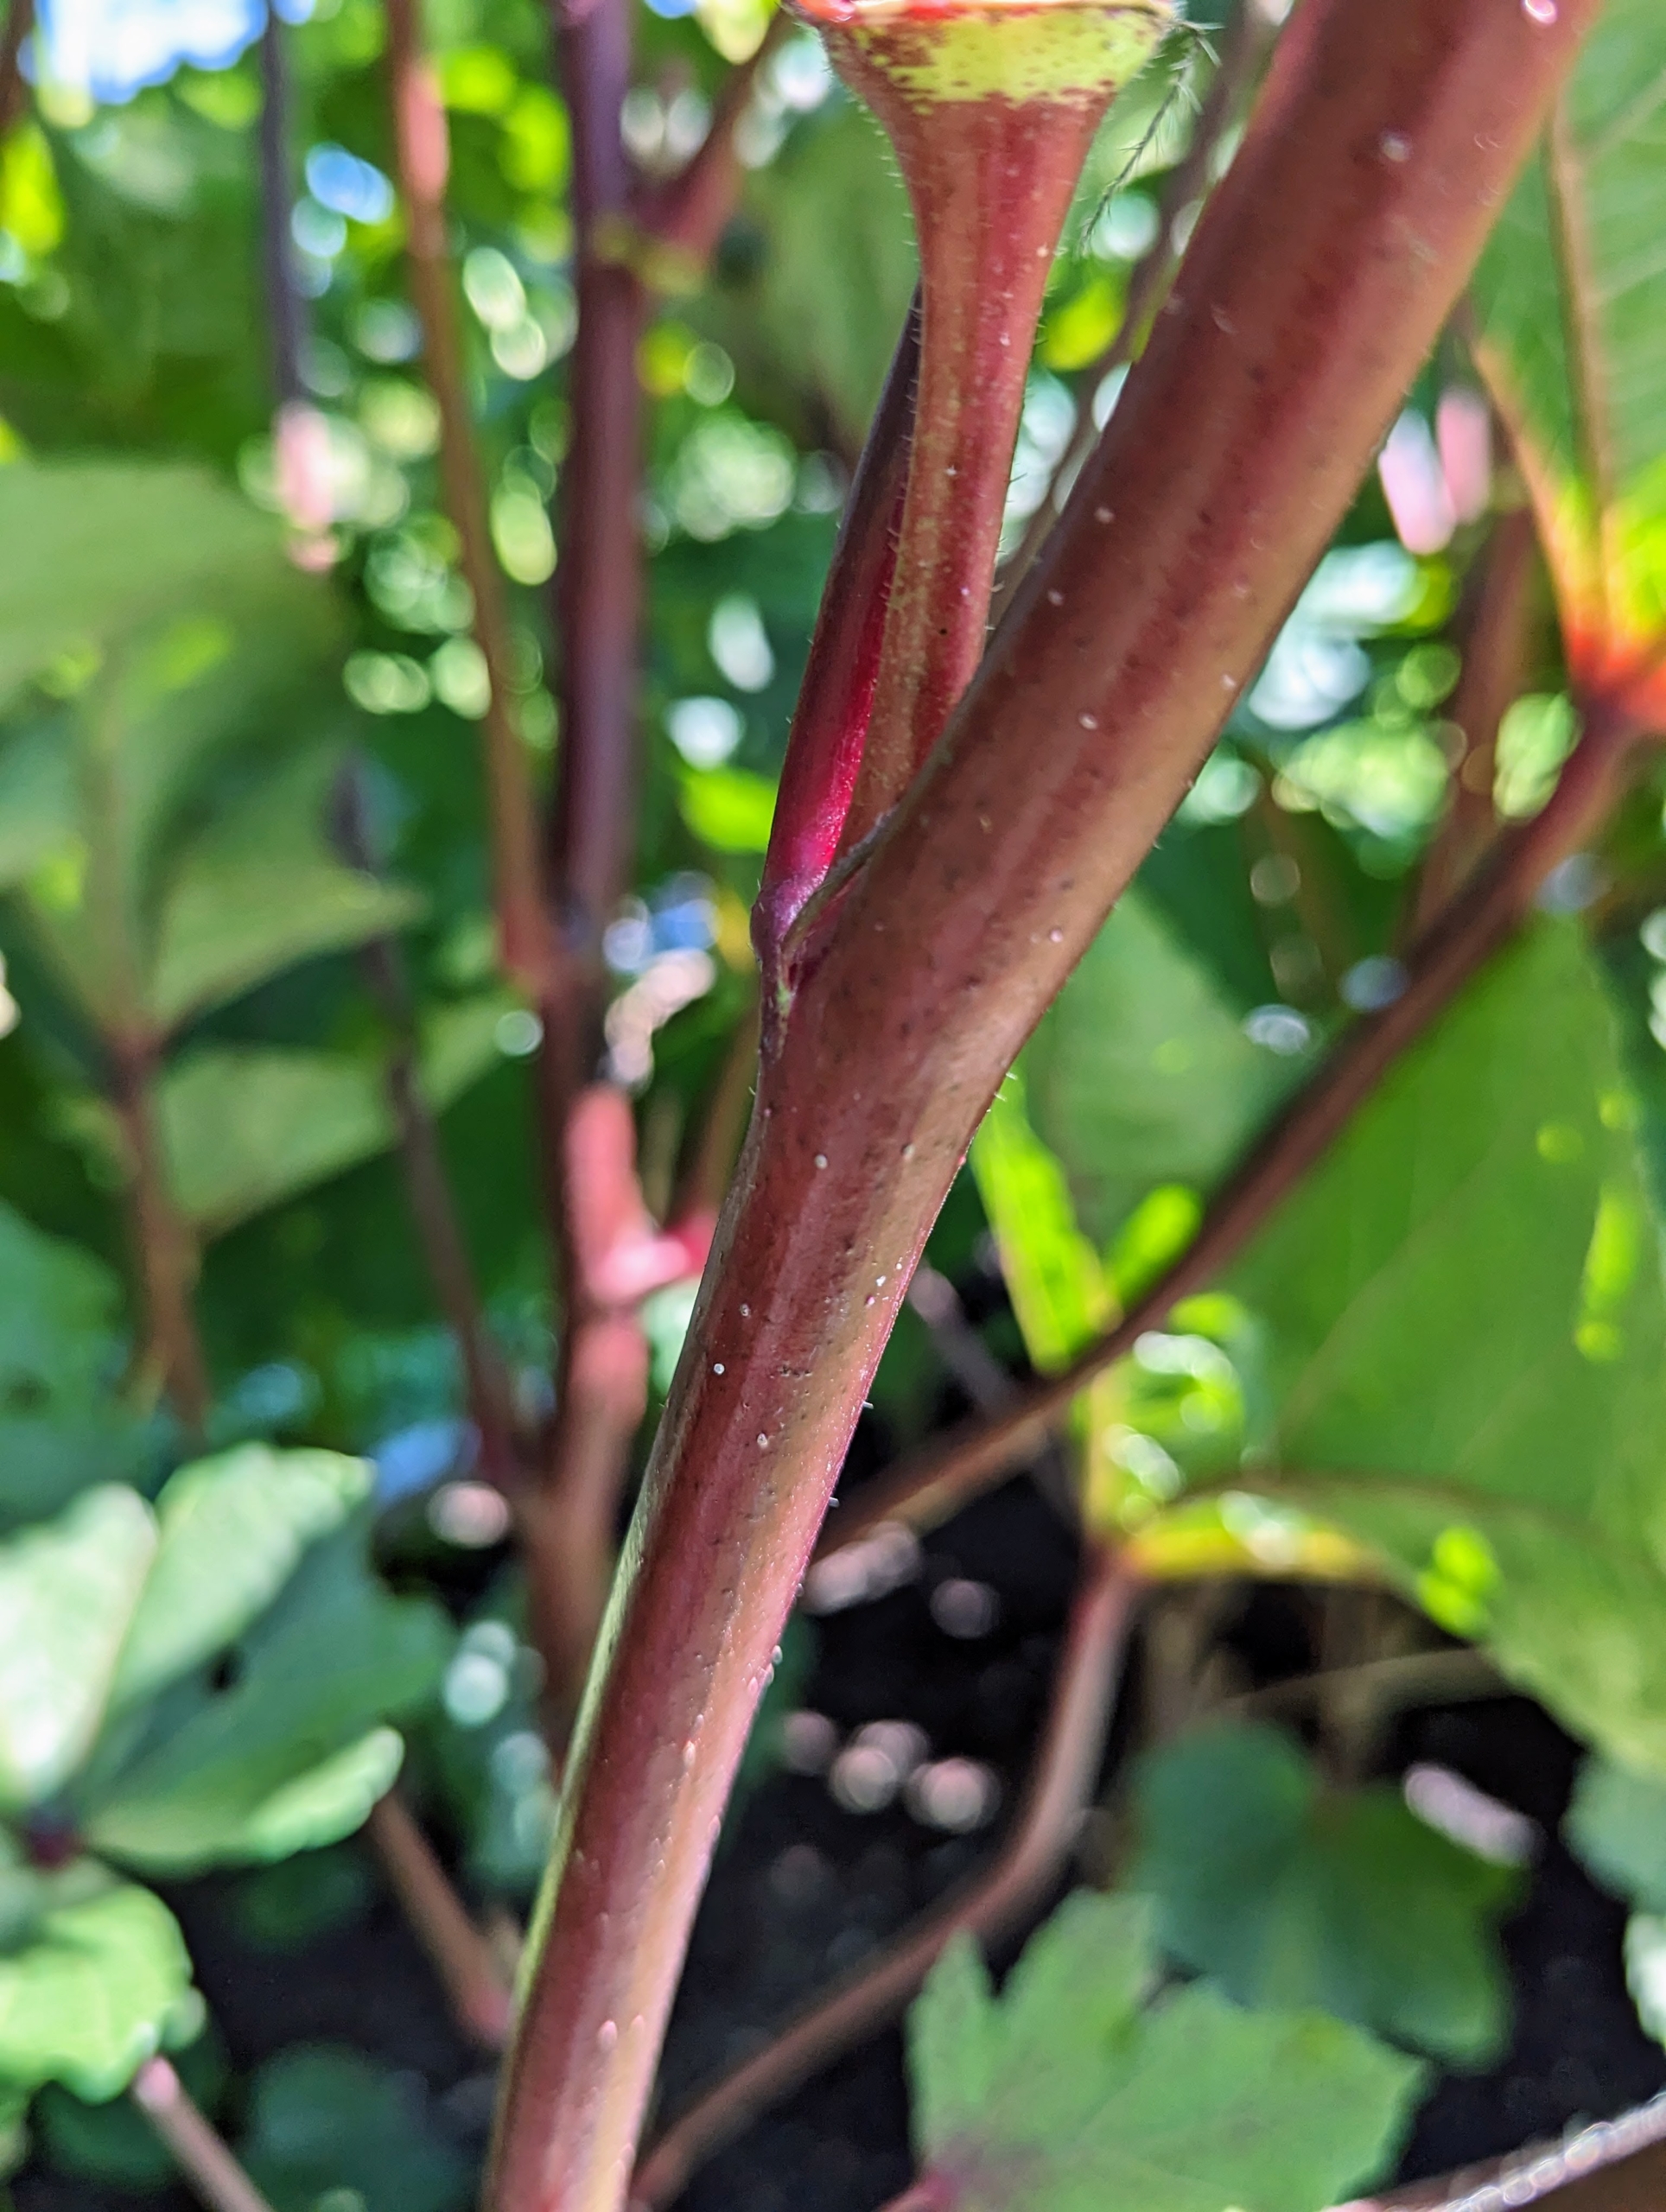
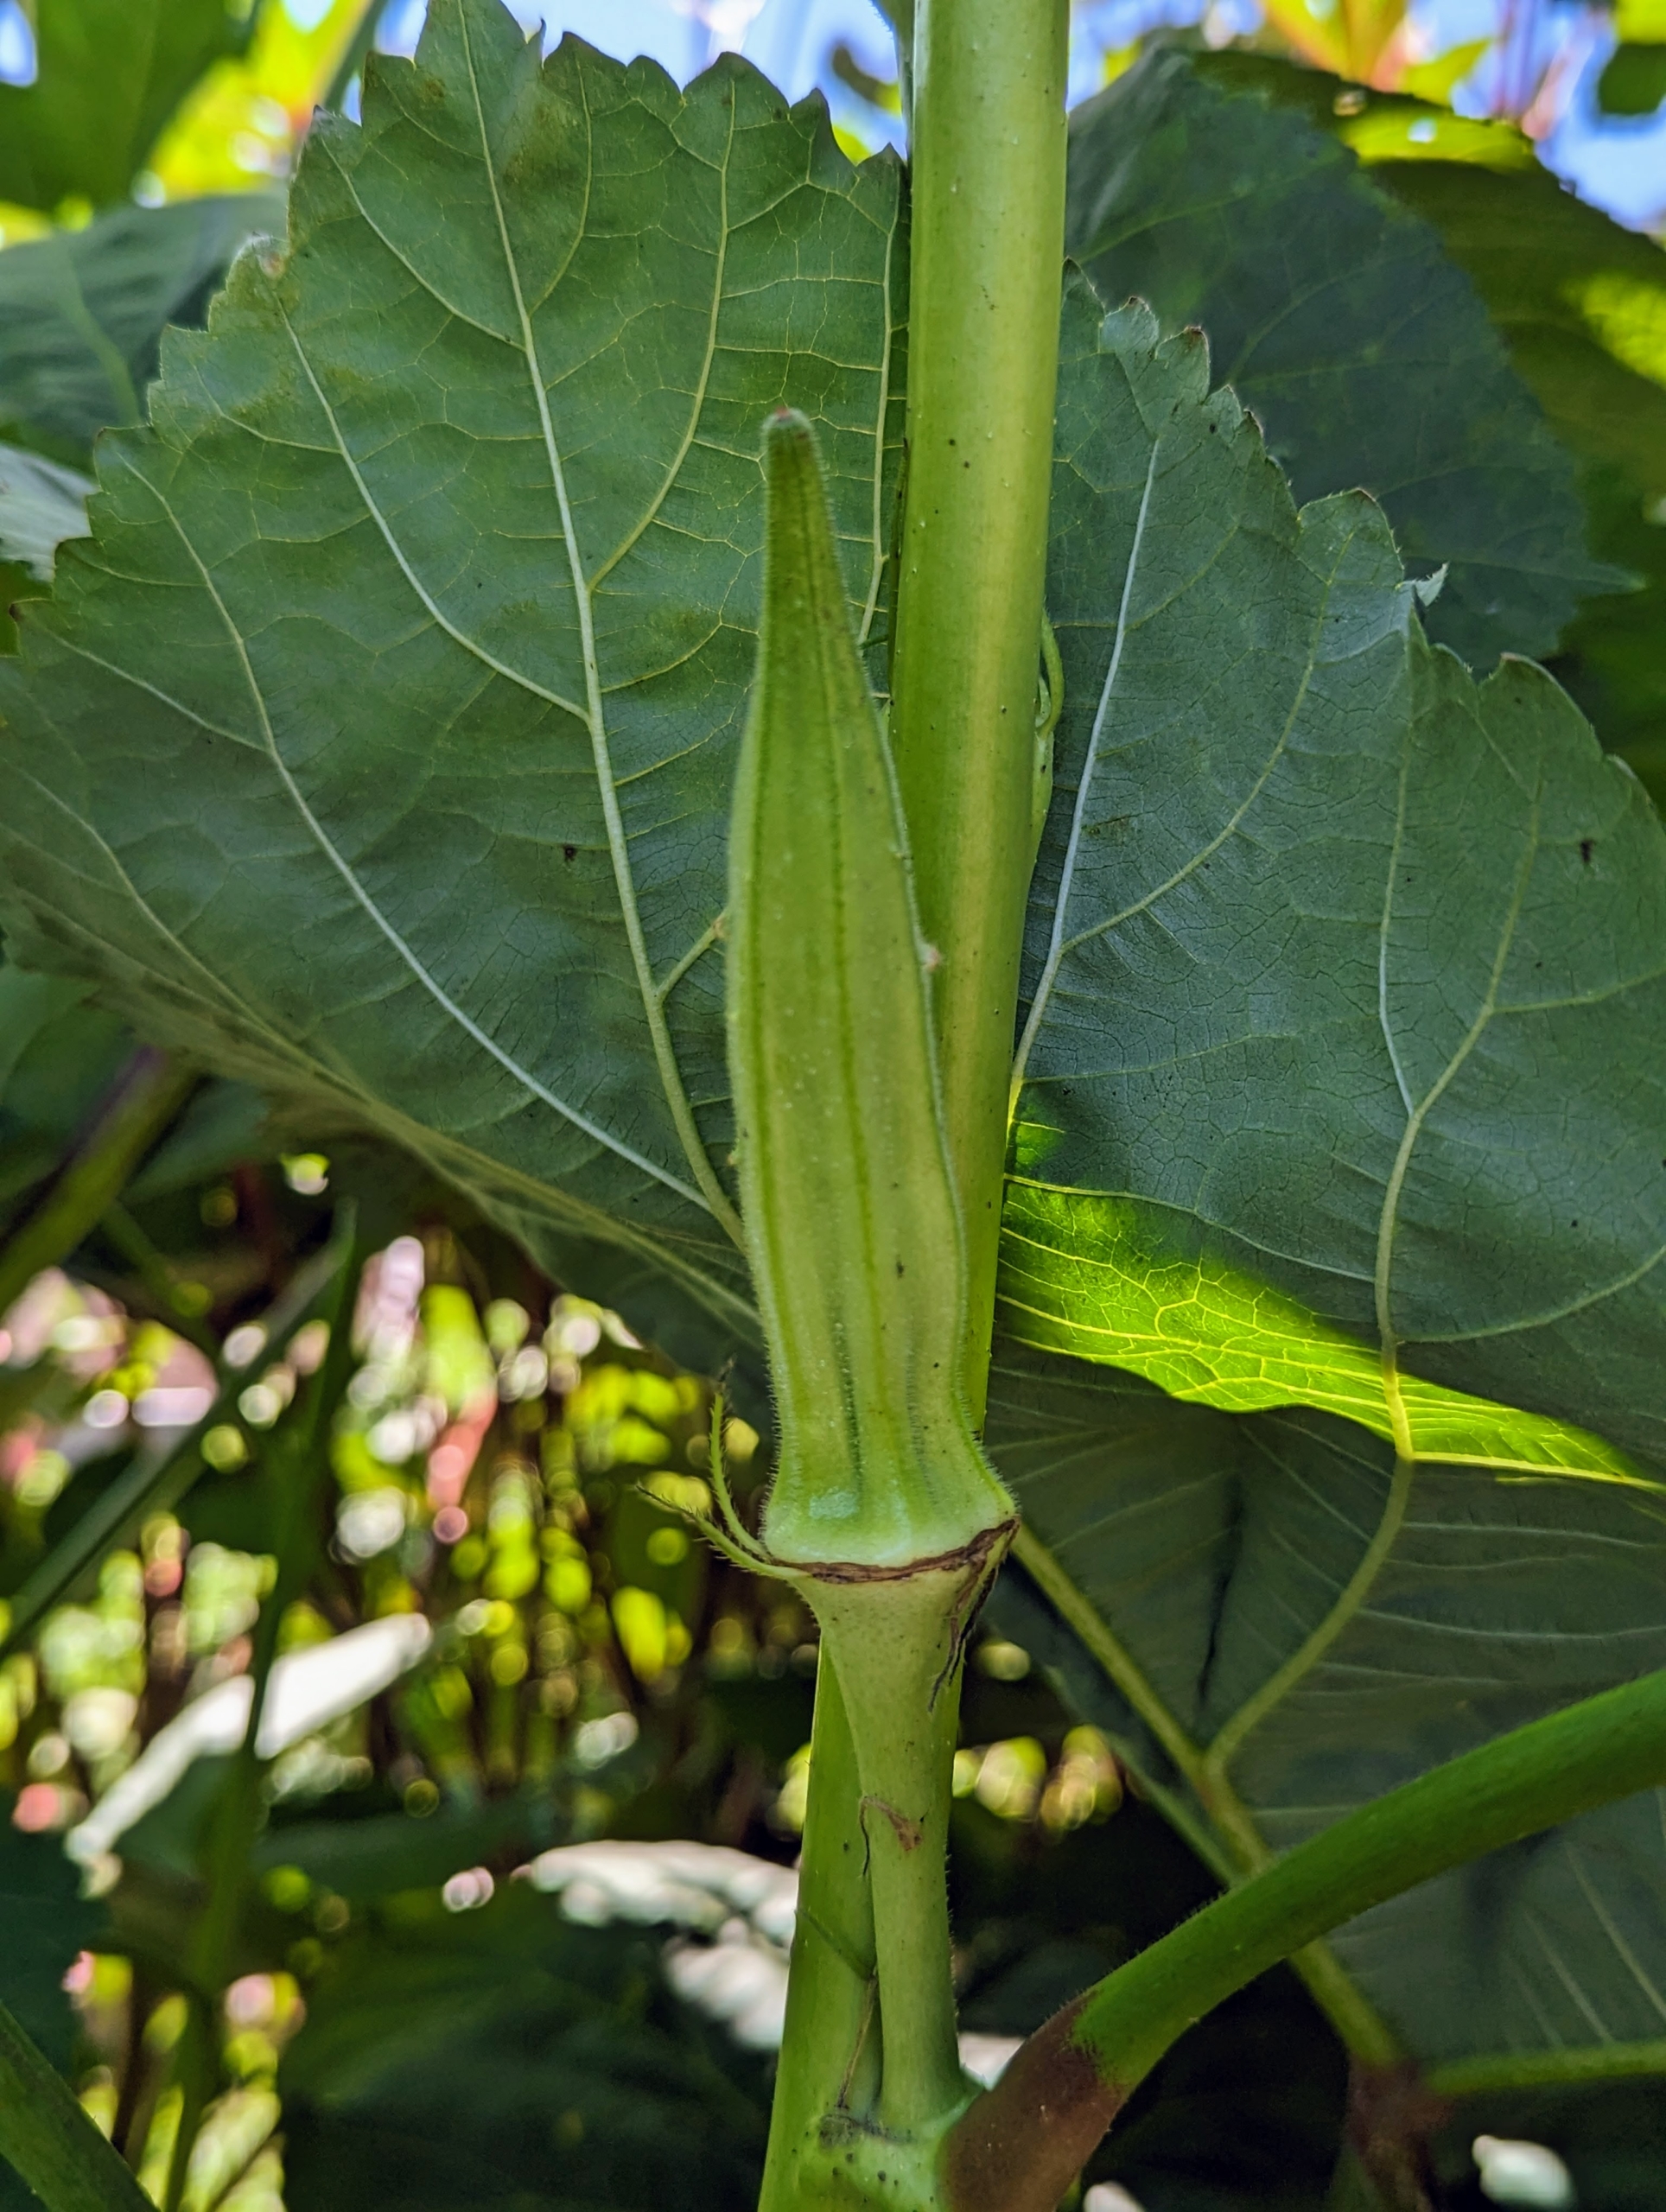
Okra is self supporting and rarely needs staking. The strong stems are about an inch in diameter.
Upon close inspection, the stems can be either bristly or hairless depending on the variety.
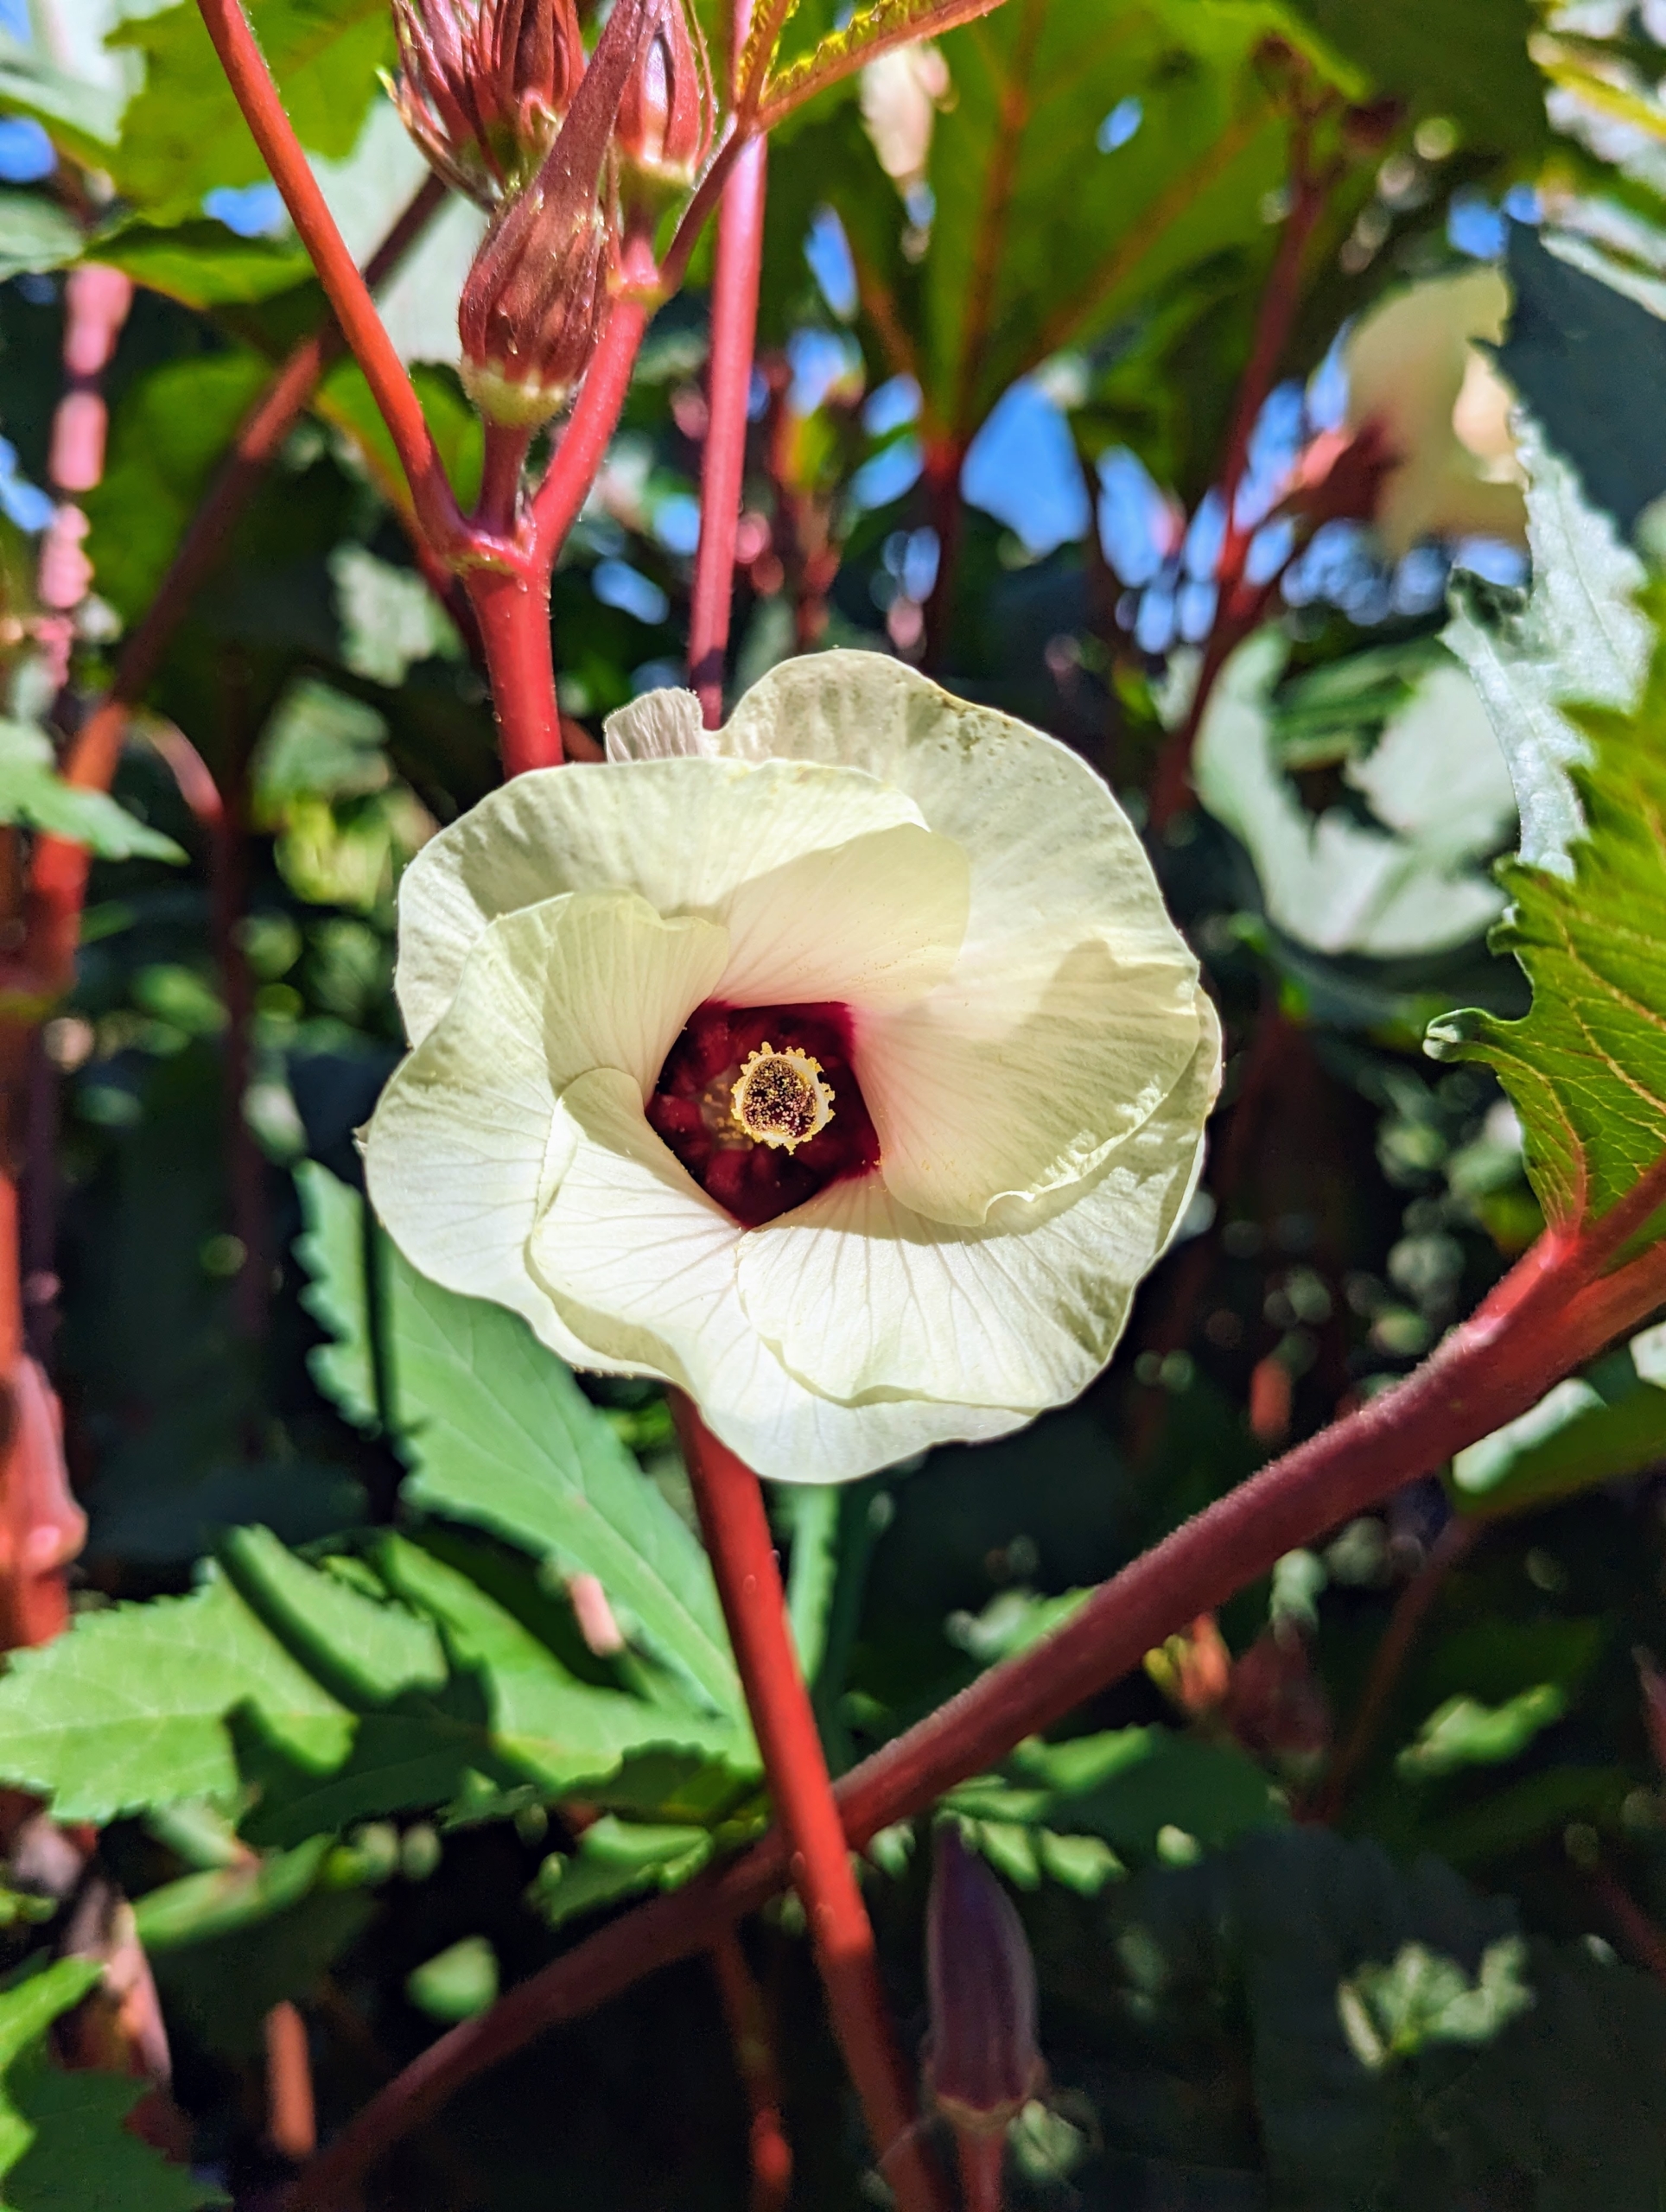
Okra flowers begin to appear 50 to 60 days after planting. The flower petals are generally pale yellow to white with purple to red ring markings midway down each flower petal.
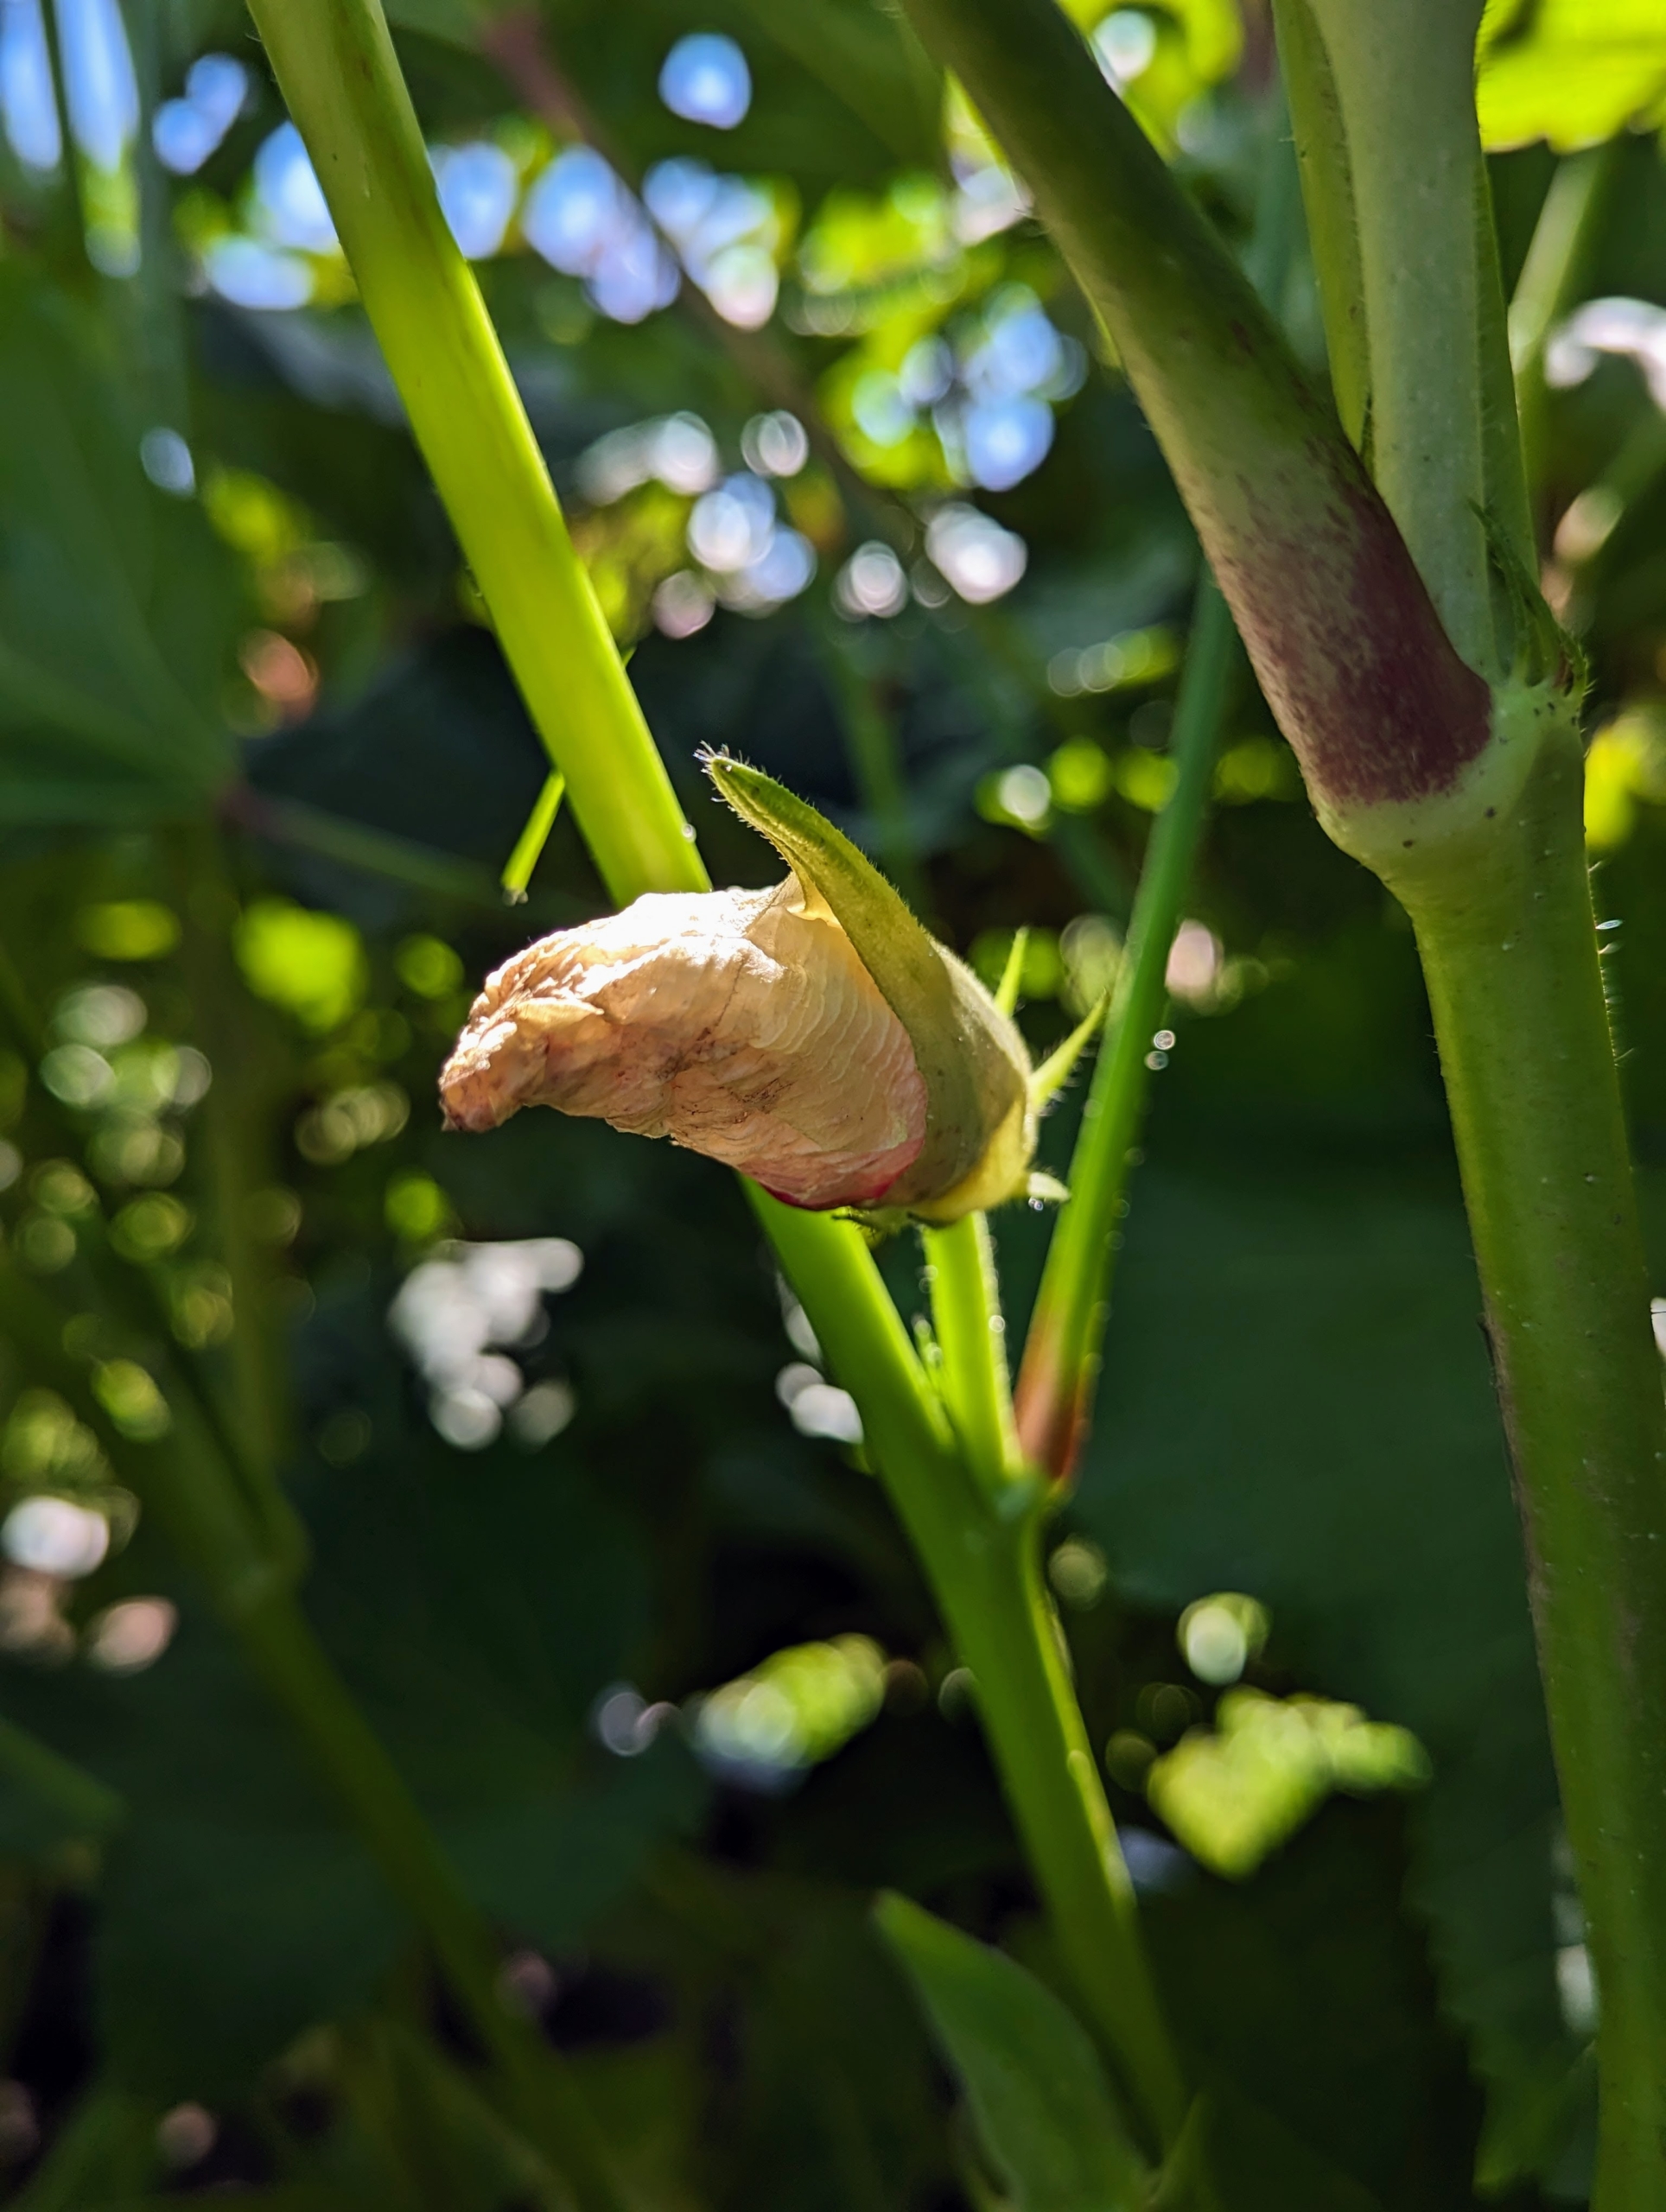
The okra flower opens for one day only, after which a small pod forms and grows behind the dead flower.
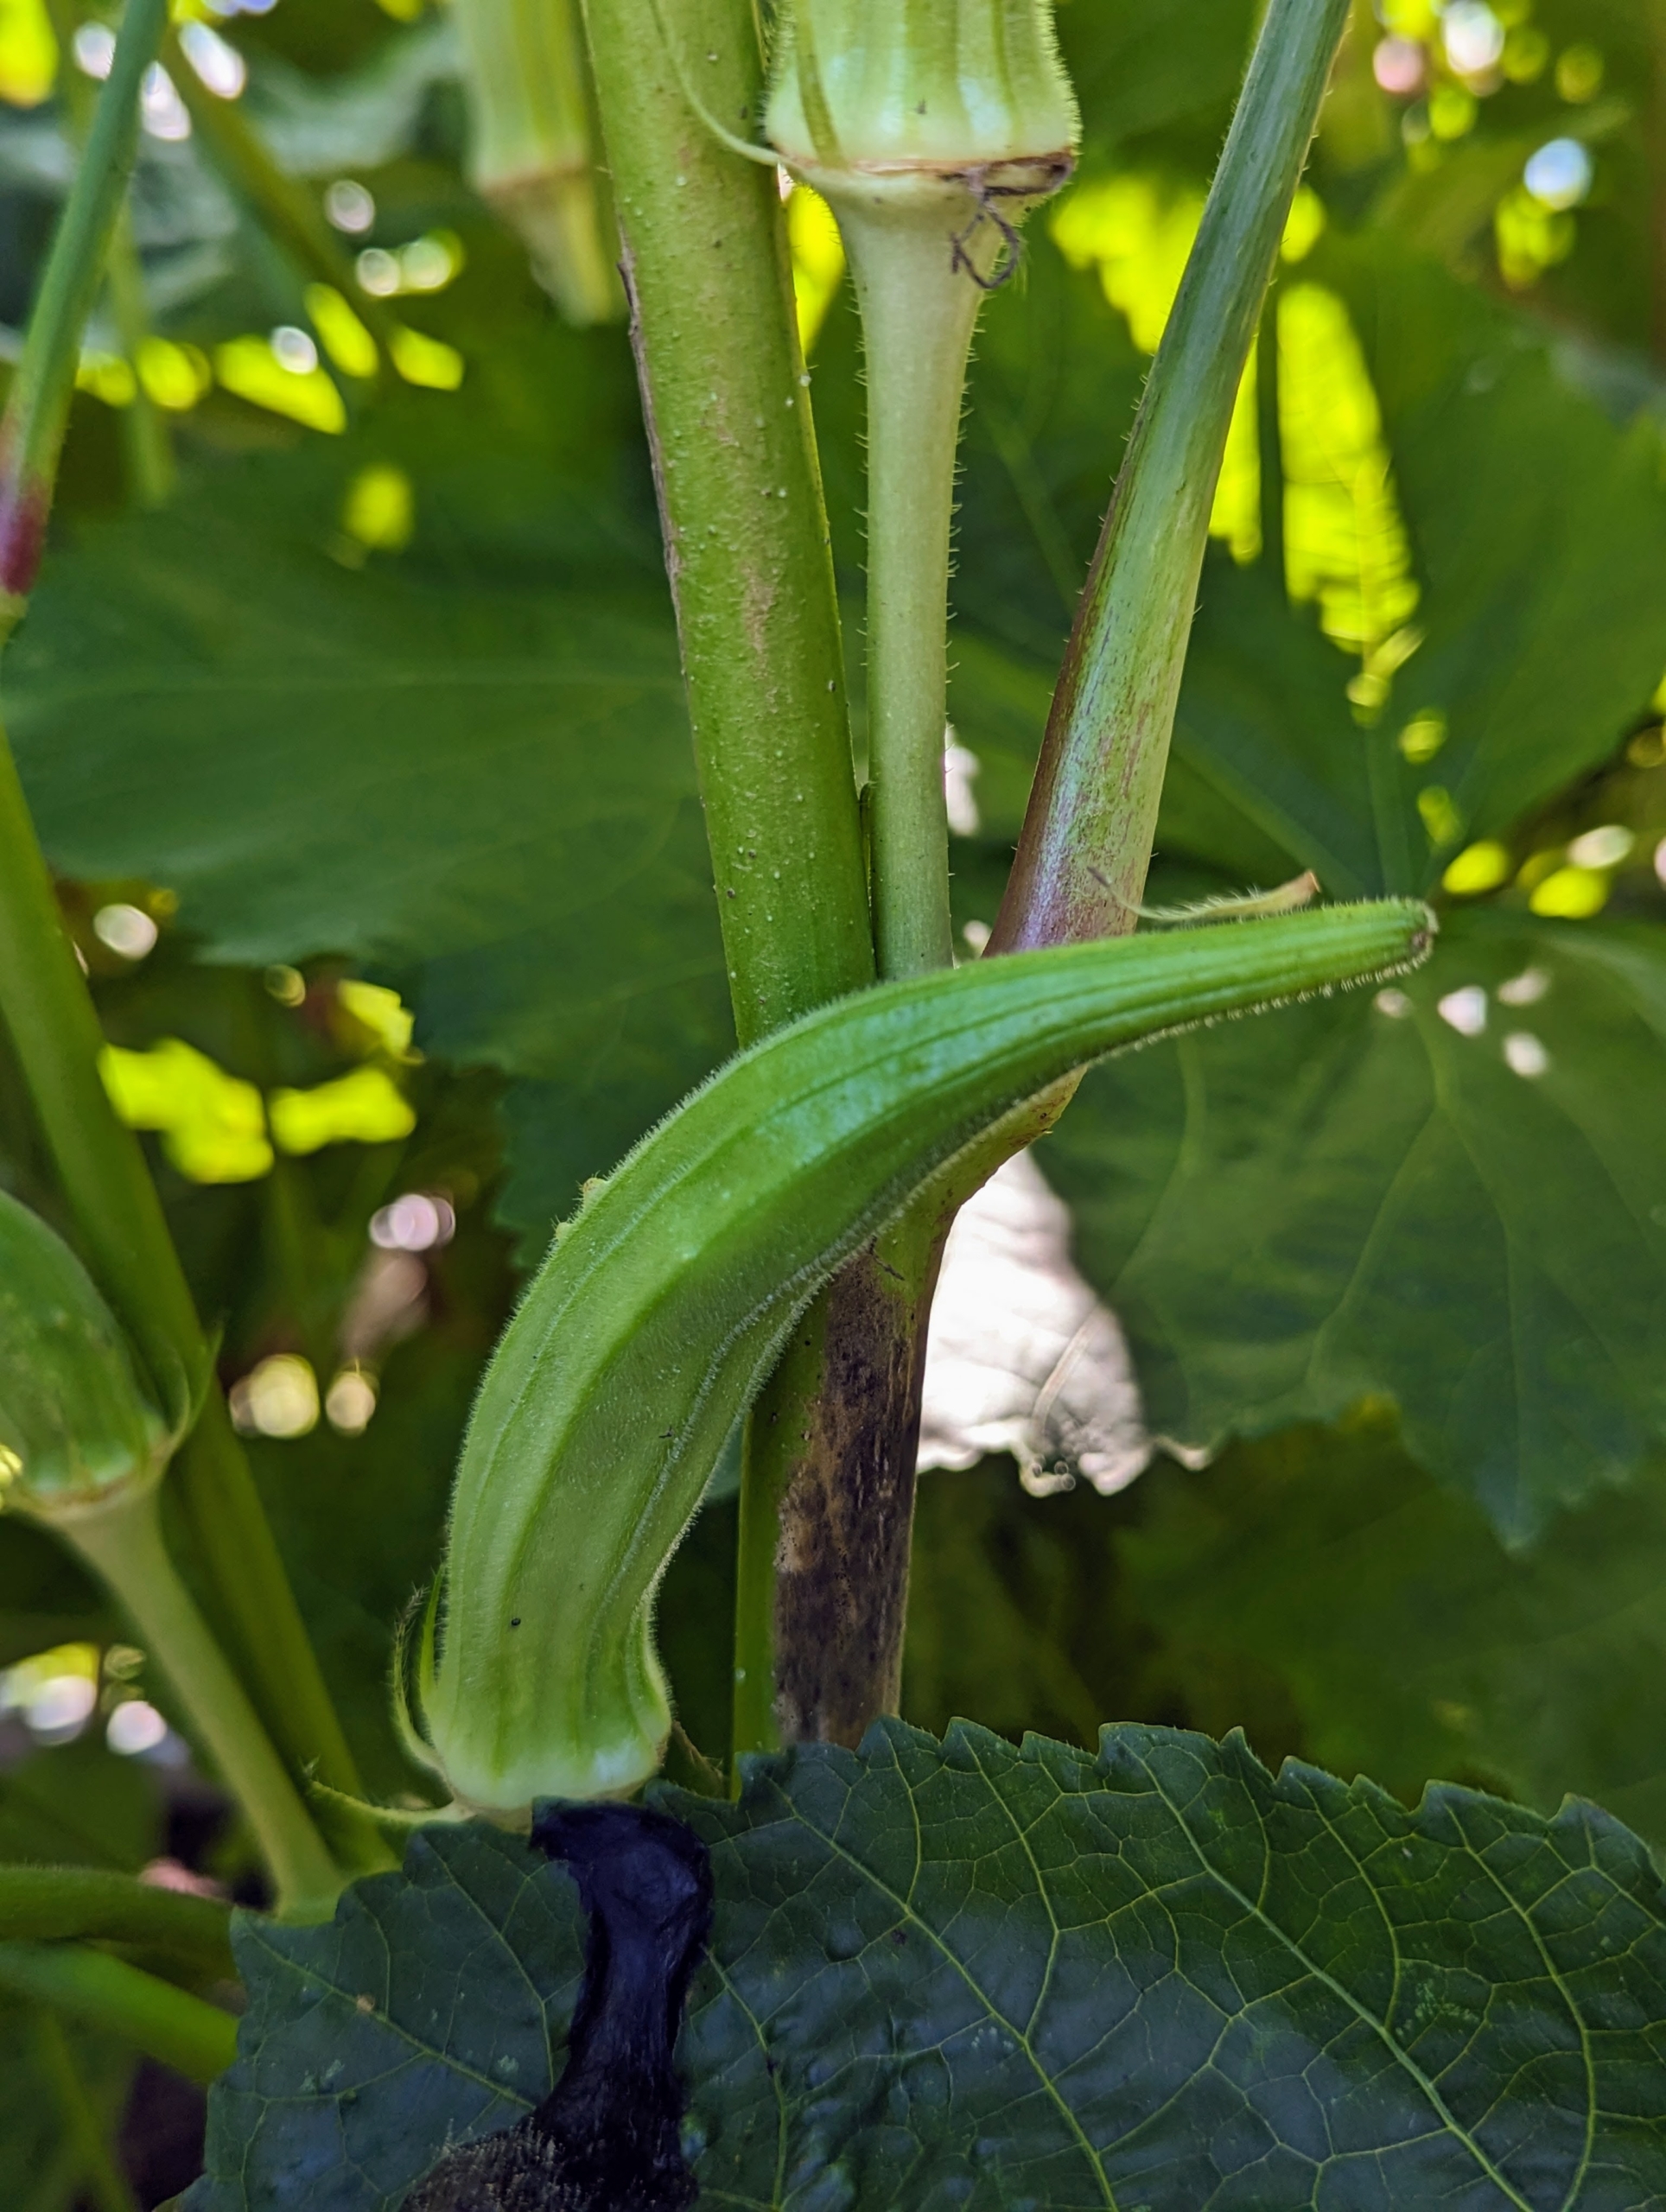
Pods appear approximately four to five days after the flowers. Once the pods reach two to three inches long and are vibrant in color, then it’s time to harvest.
Here is one of the red okra pods. Okra is also very healthy – it’s high in fiber, vitamin-C and full of antioxidants.
In ideal conditions, okra plants can produce up to more than 30-pods per plant.
A common mistake is harvesting the pods when they are six to eight inches long, when most will have a woody taste.
Okra is a “cut-and-come-again” vegetable. Keep cutting the pods every day or two, and they will keep on growing. Because okra roots have a fragile hold on the ground, it’s best to snip rather than snap the stems cleanly above each pod, leaving a bit to grasp
Ryan harvested a trug bucket full of okra. We’re looking forward to many more bounties of this delicious and interesting fruit through September! What is your take on okra? And how do you enjoy it? Share your comments in the section below.