This year's first cut of hay produced 1296 bales! A great amount for my horses and donkeys to enjoy.
Hay is a harvested plant that’s dried and cured after being cut in the field. In most cases, hay is cut during the late bud or early bloom stage to maximize its nutritional value. When I moved here, I designated three separate areas as hayfields, so I could grow lots and lots of delicious, nutritious hay. Last week, my outdoor grounds crew worked hard to cut, fluff, rake, and then bale the hay in all three areas.
Enjoy these photos.
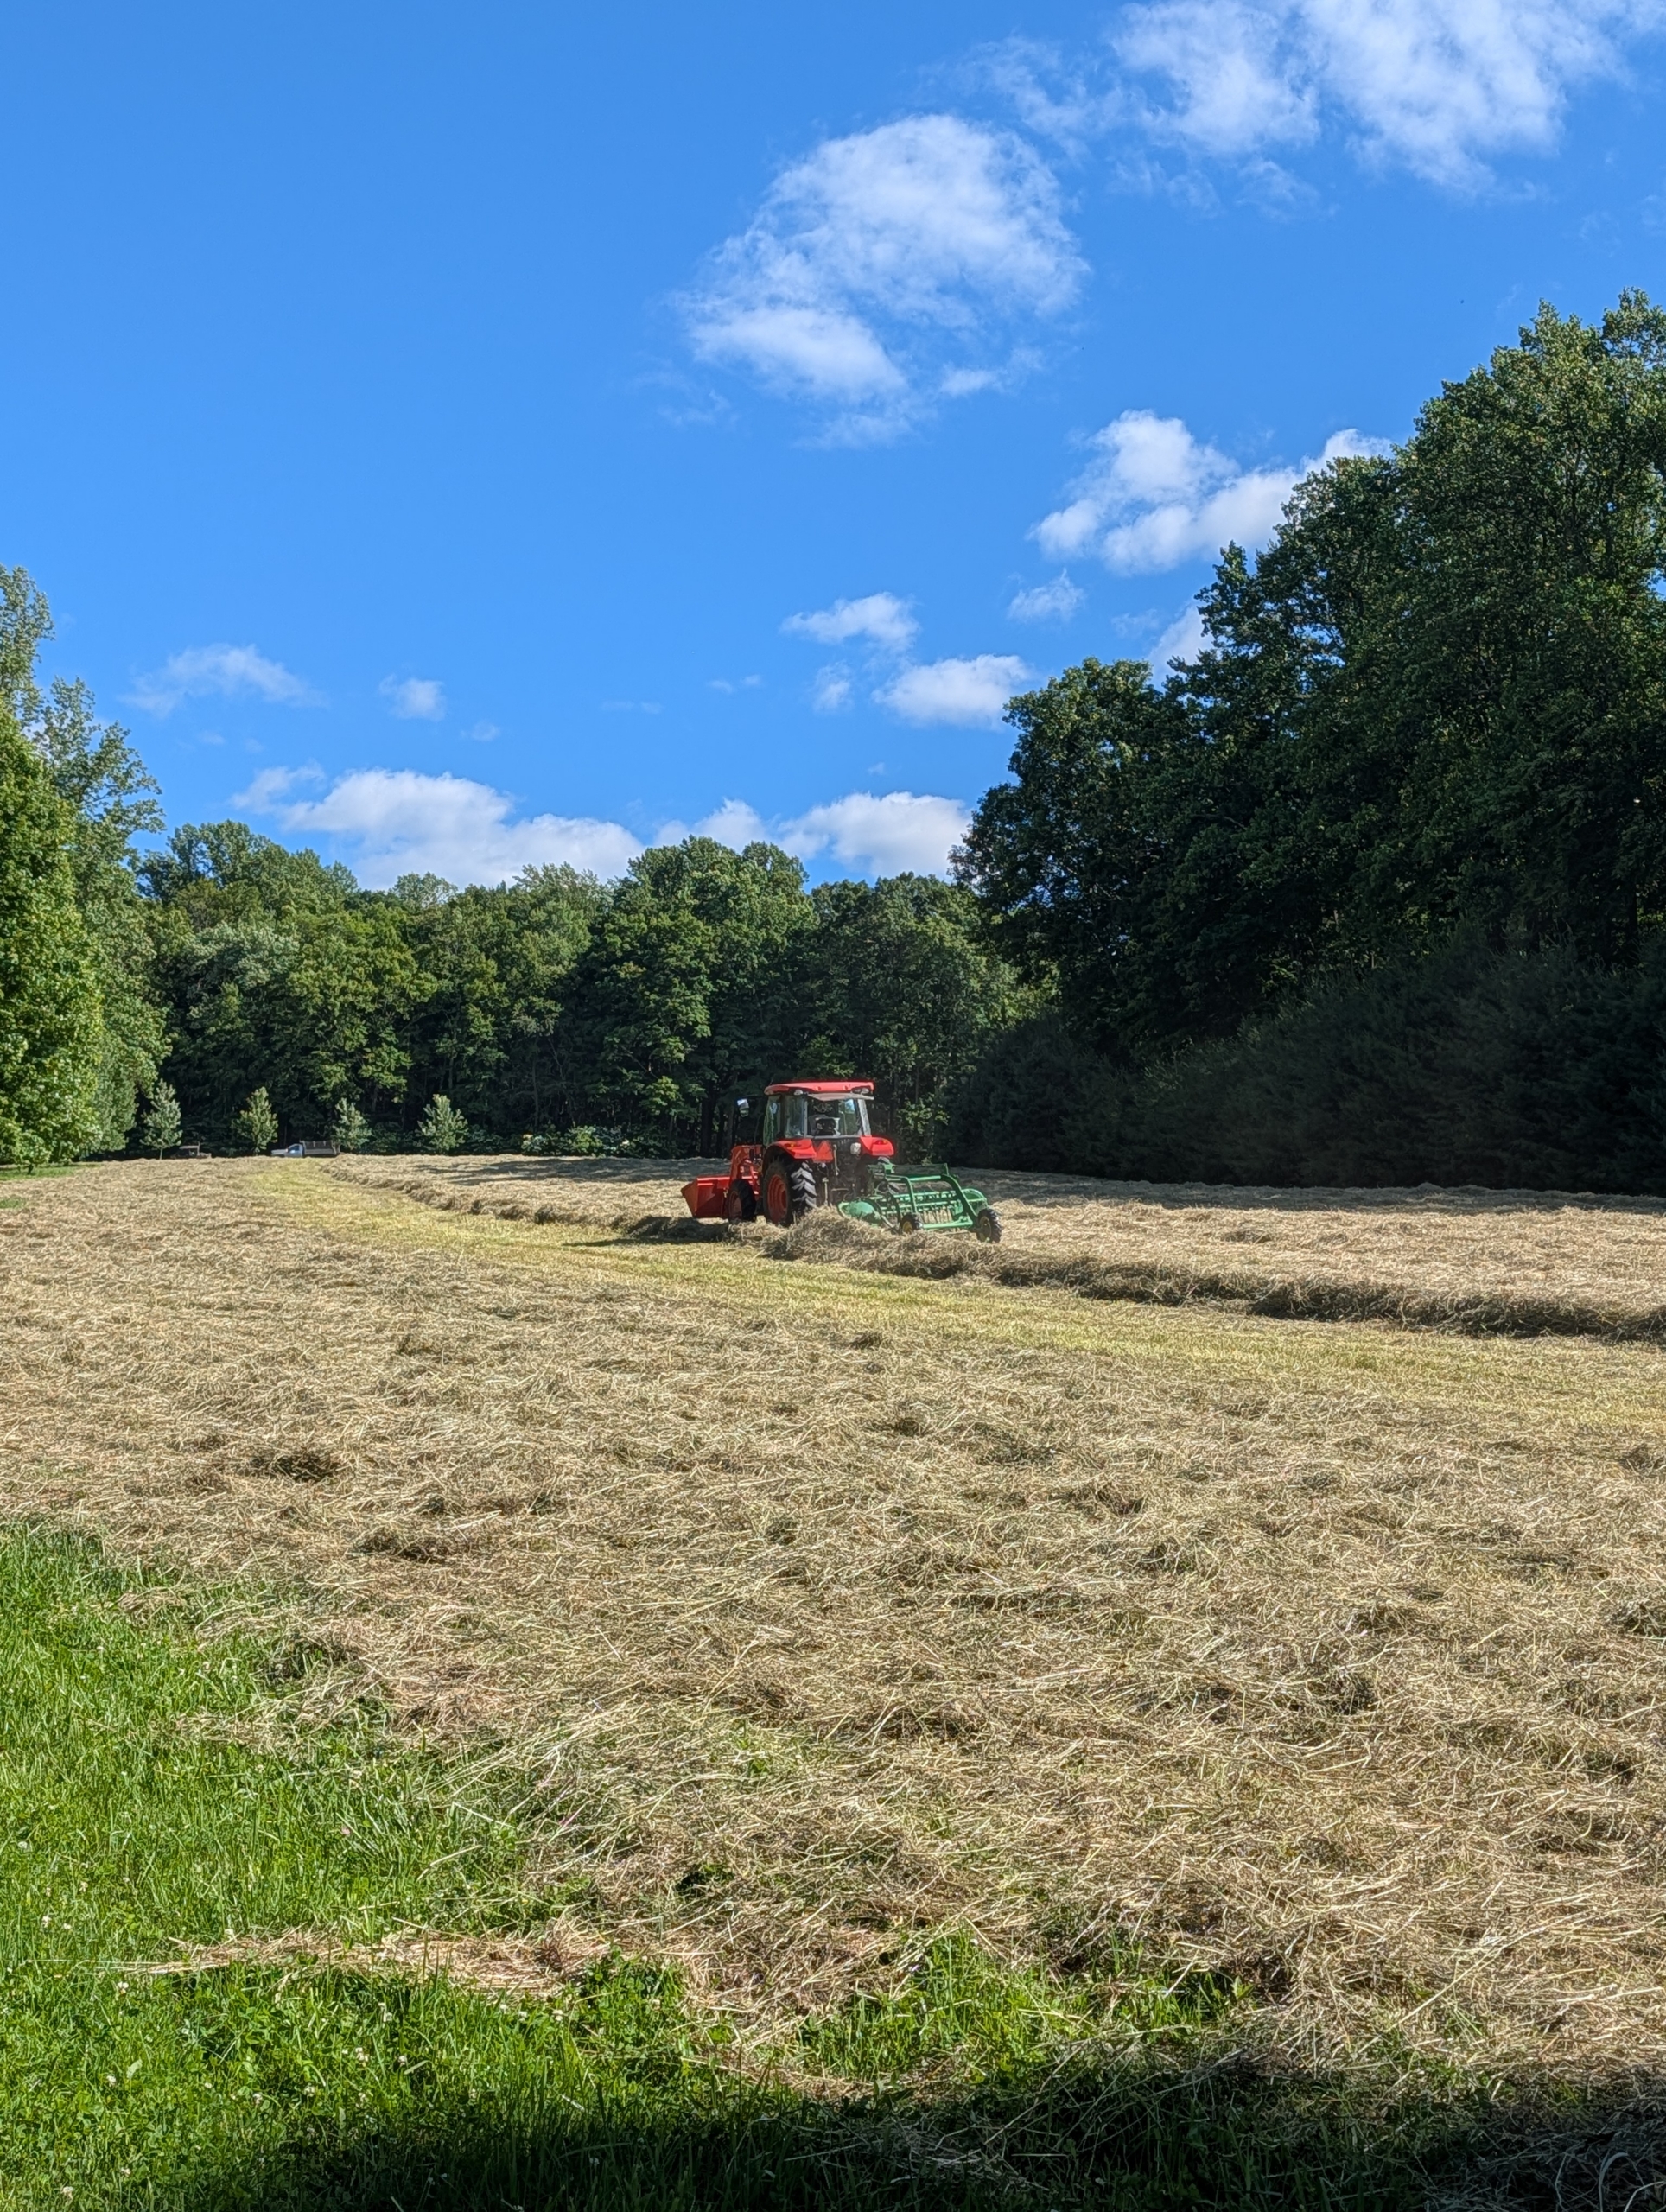
Here is one of my hay fields ready for the season’s first cut. My hay is a mixture of timothy, orchard grass, Kentucky bluegrass, ryegrass, and clovers – all great for my horses and donkeys.
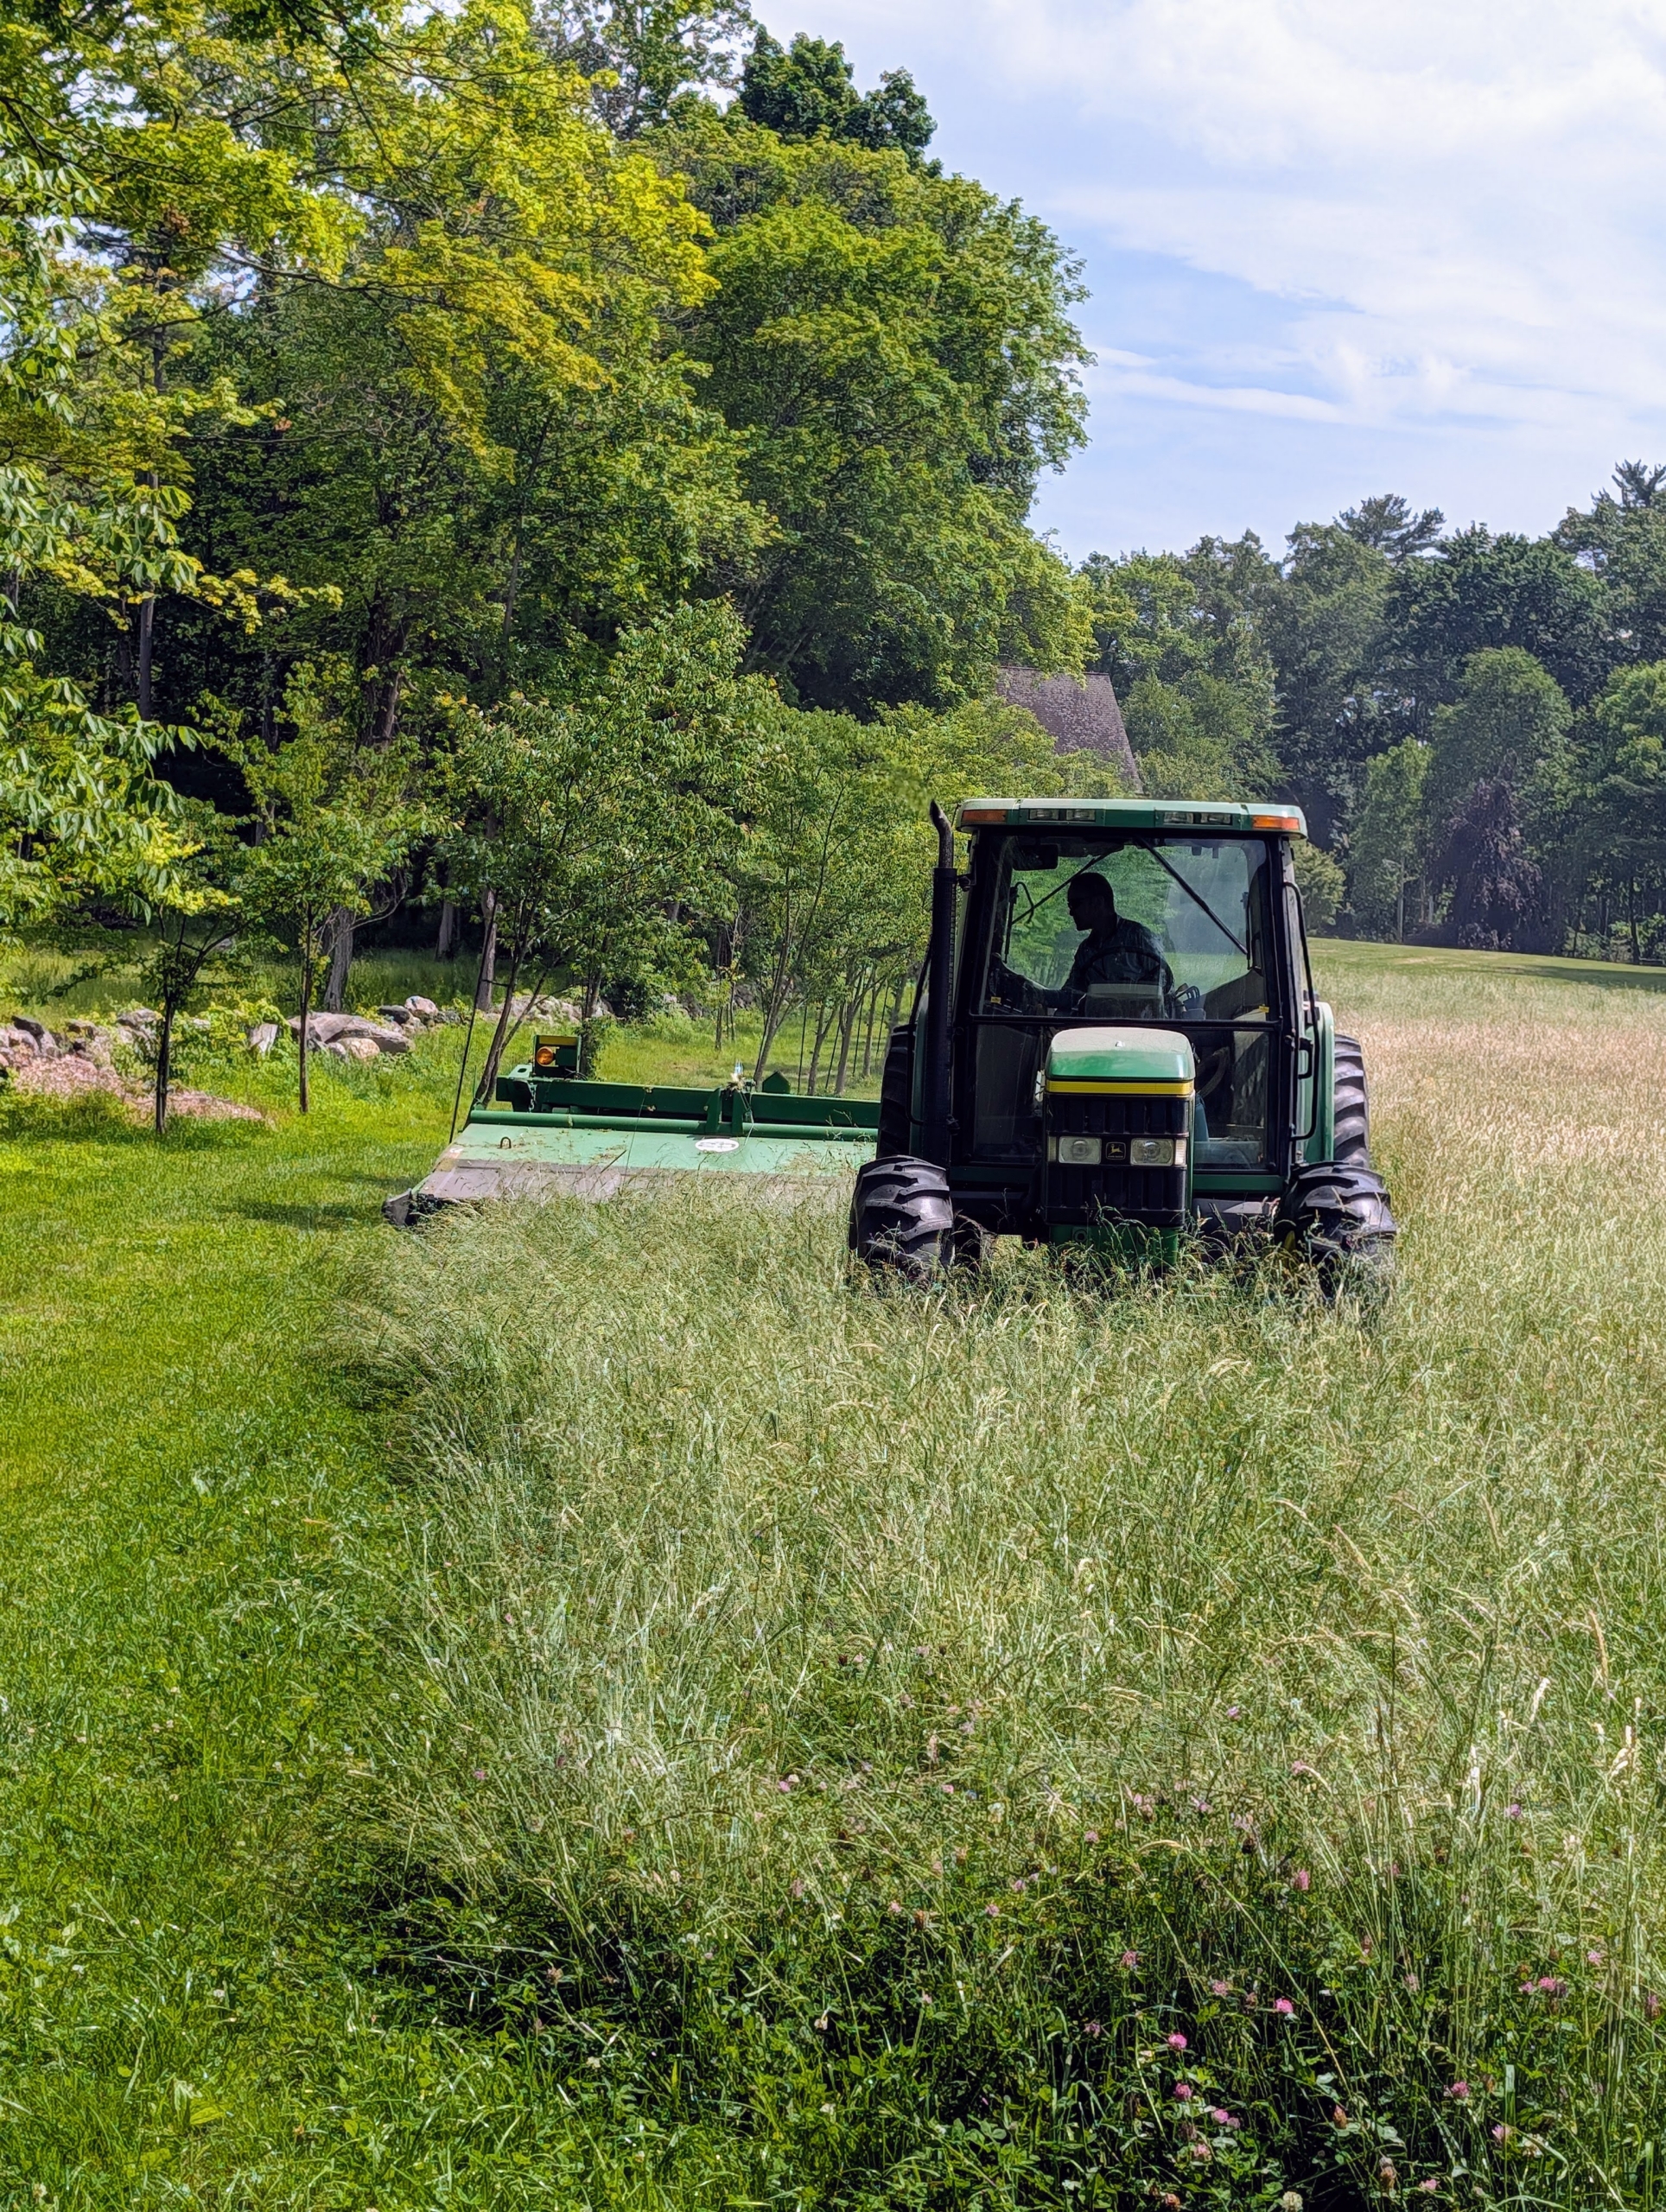
Mower-conditioners are a staple of large-scale haymaking. Attached to one side of the tractor, it cuts, crimps, and crushes the hay to promote faster and more even drying. It is the first step in the hay baling process.
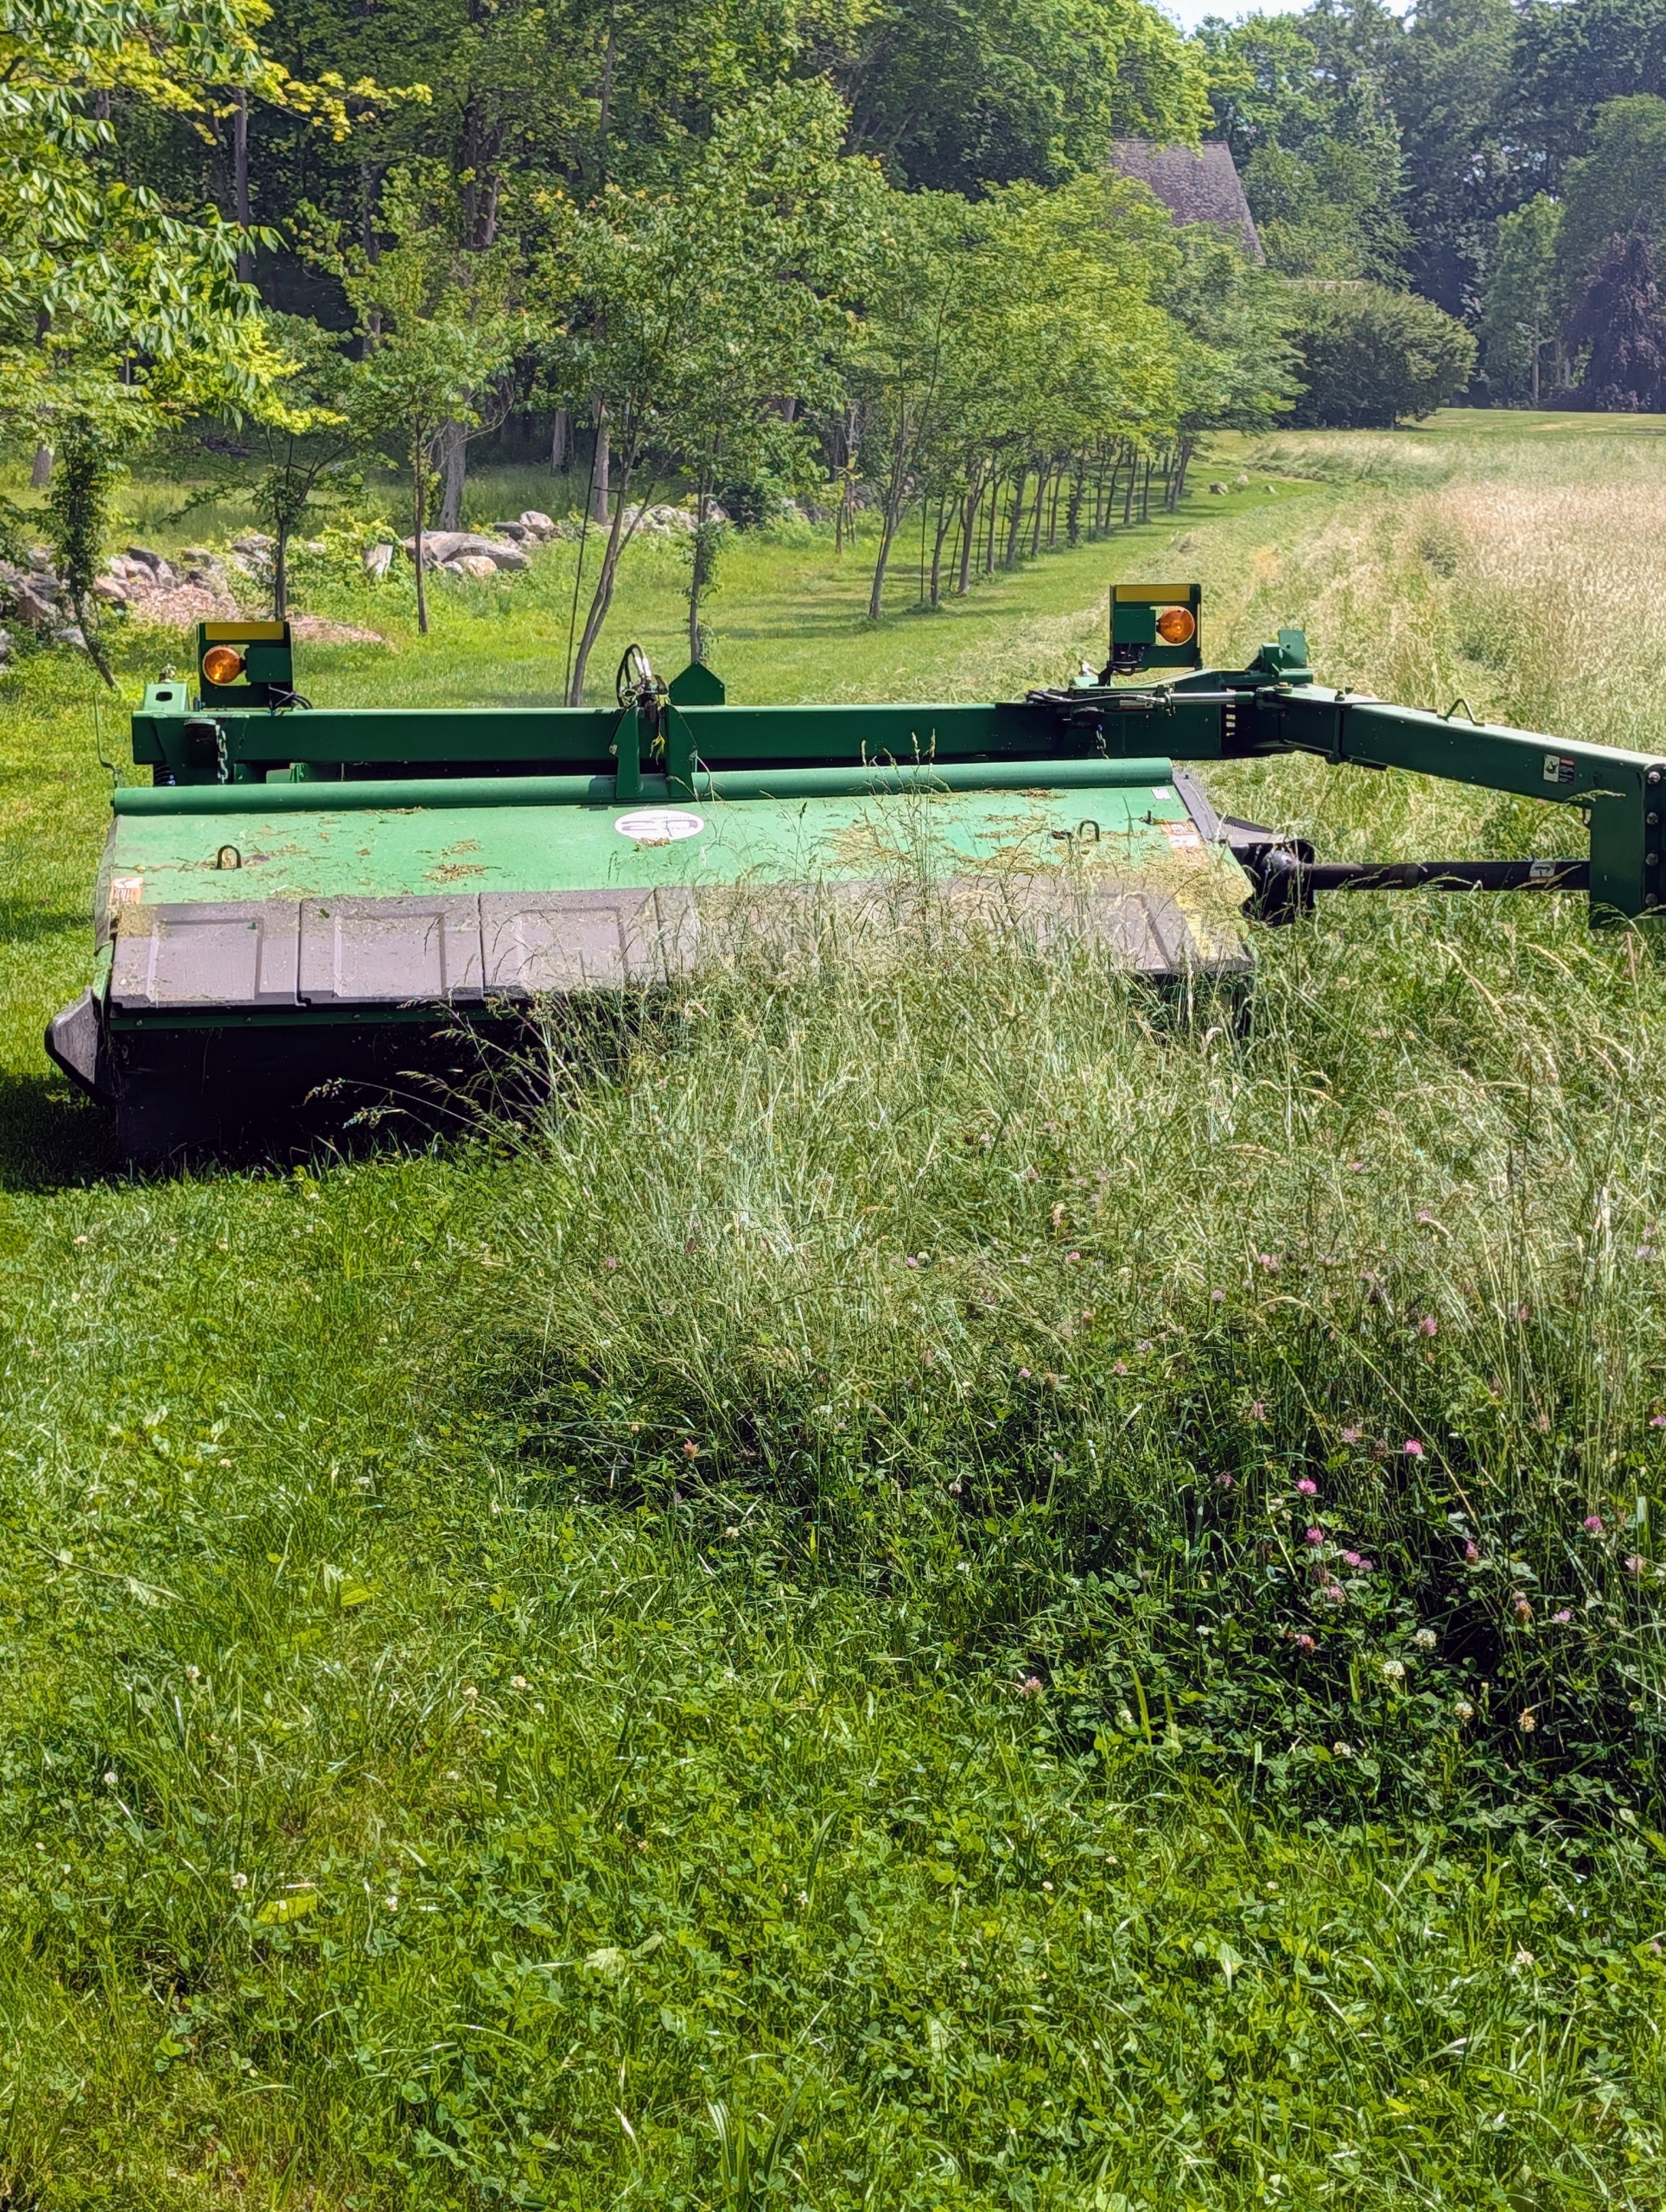
Here it is from the front. This equipment also works to remove the waxy coat on the crop as it conditions, making the hay dry faster – this means less waiting time and less chance for poor weather to negatively impact the hay quality.
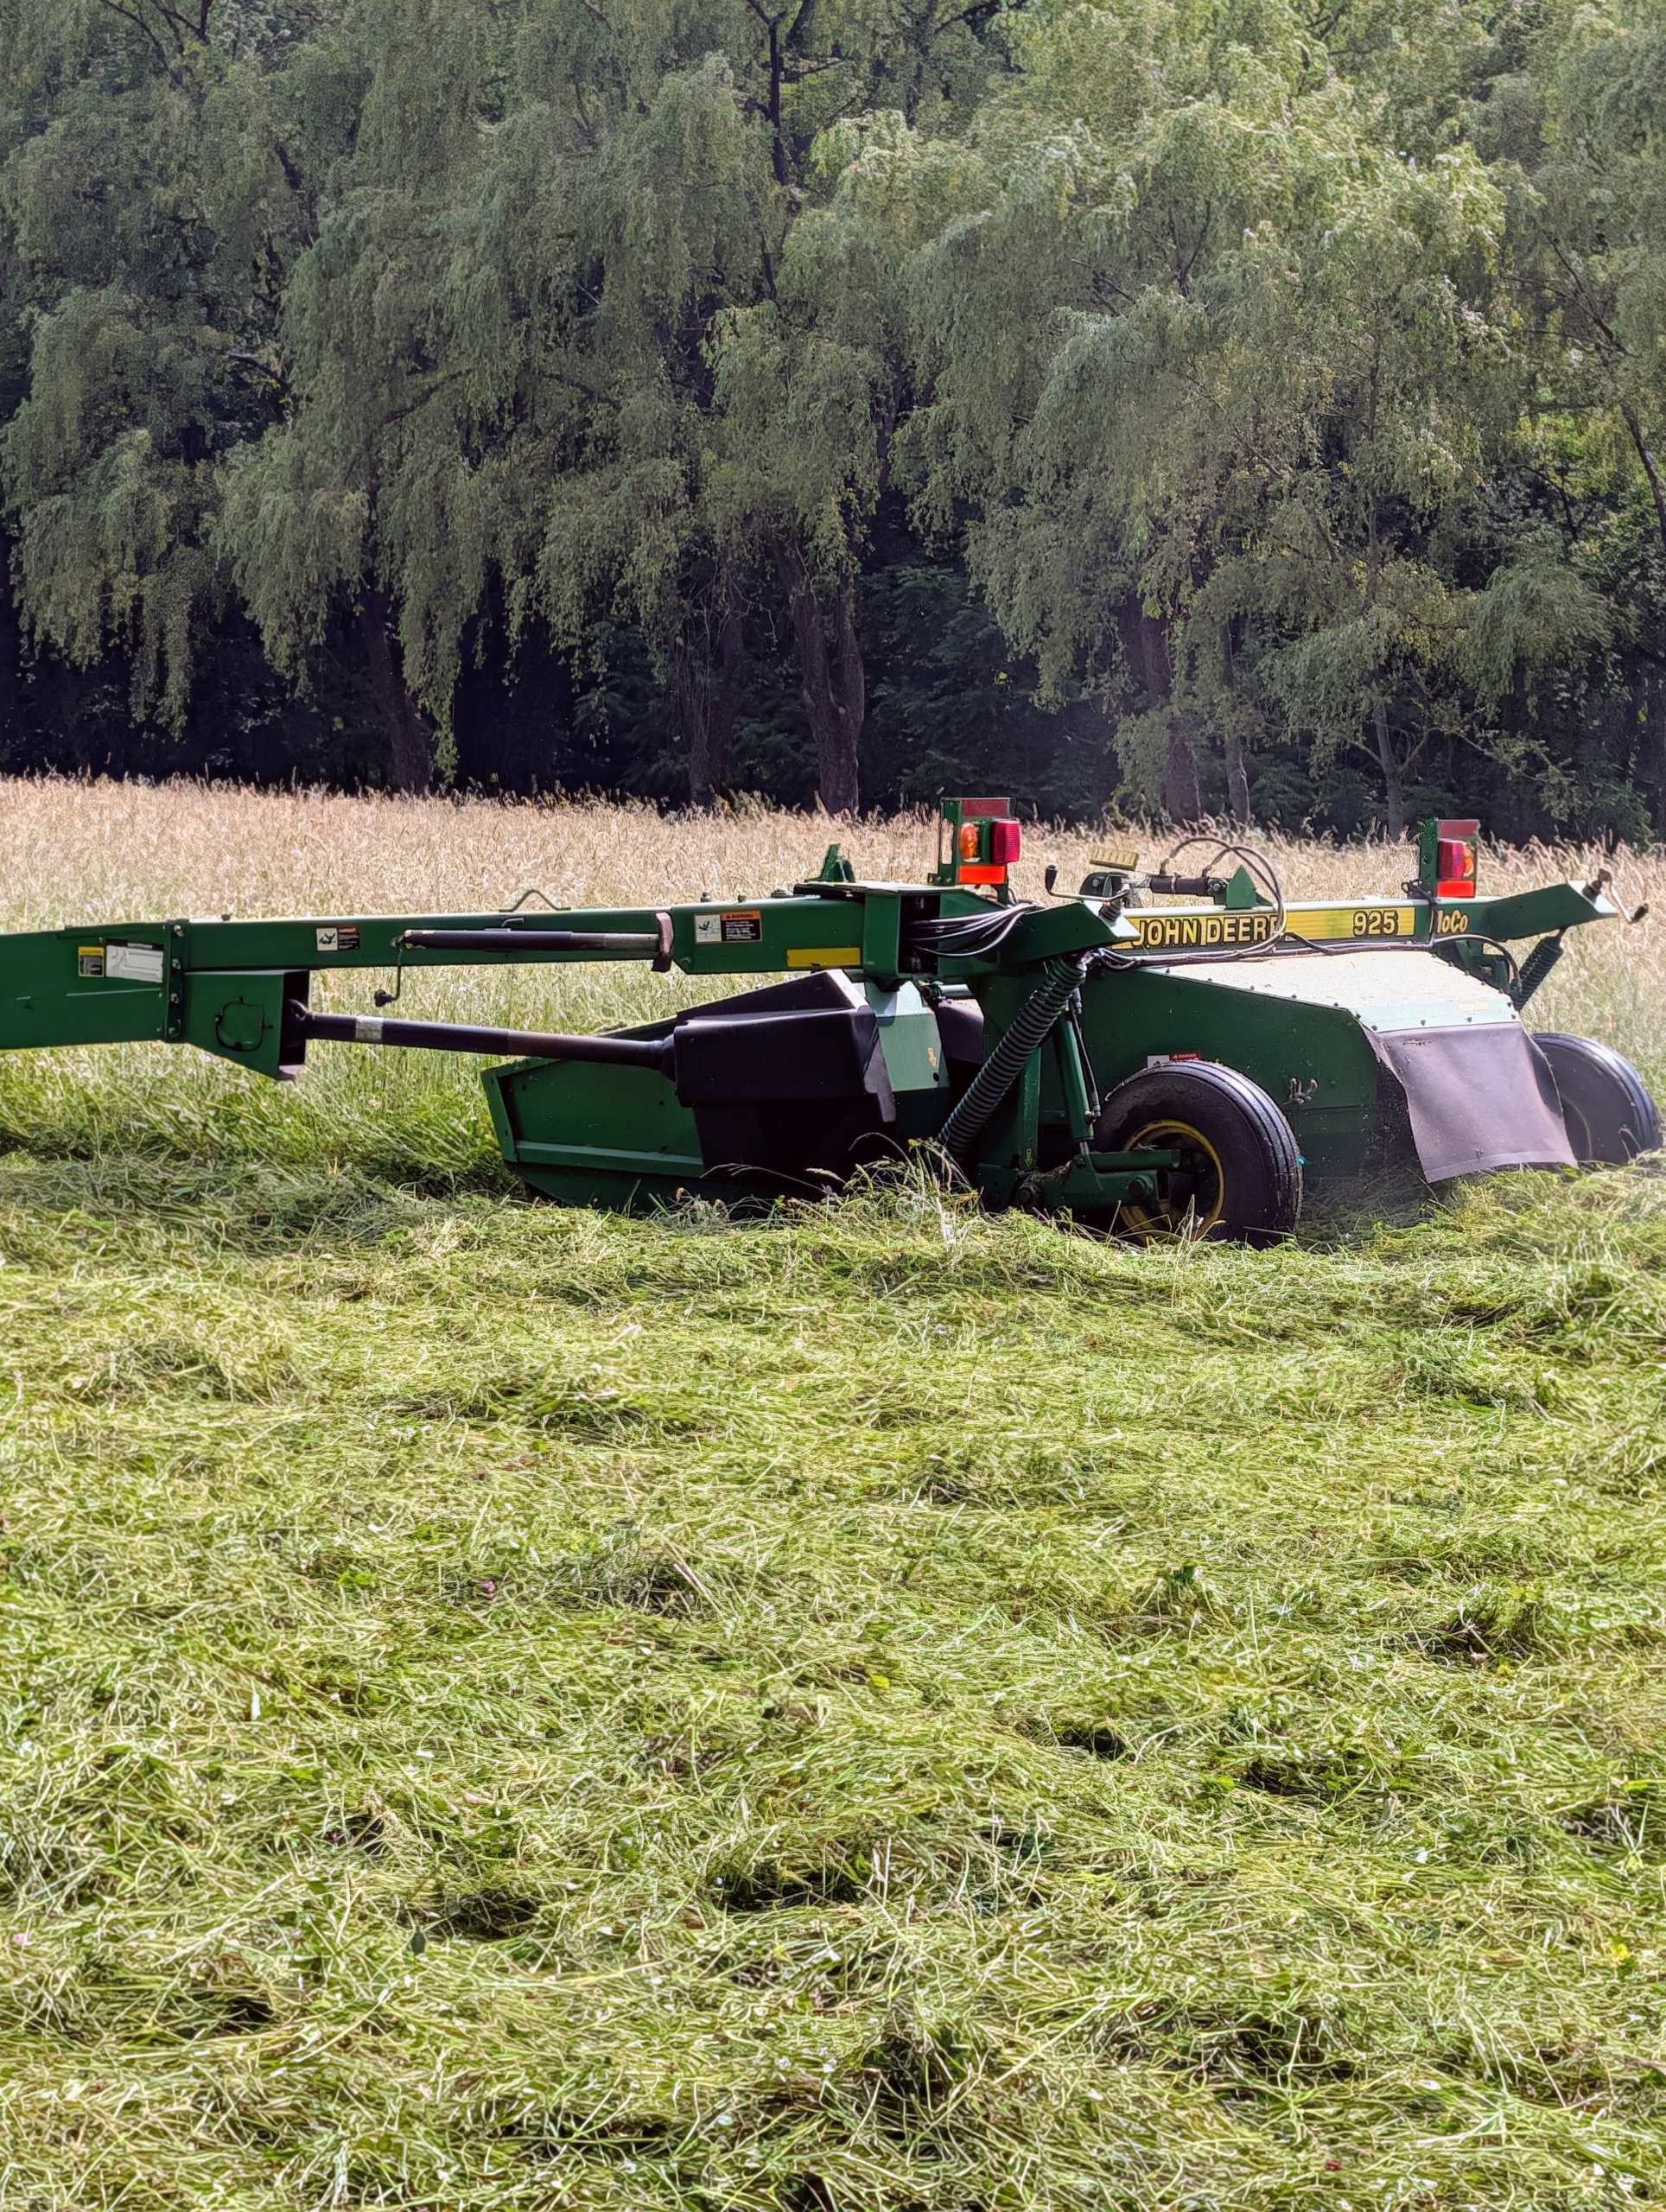
When weather conditions are ideal, these machines allow farmers to cut wide and fast – the best formula for quality field productivity. As the mower-conditioner goes over the grass, it cuts it and then conditions it – all under the protective hood of the machine.
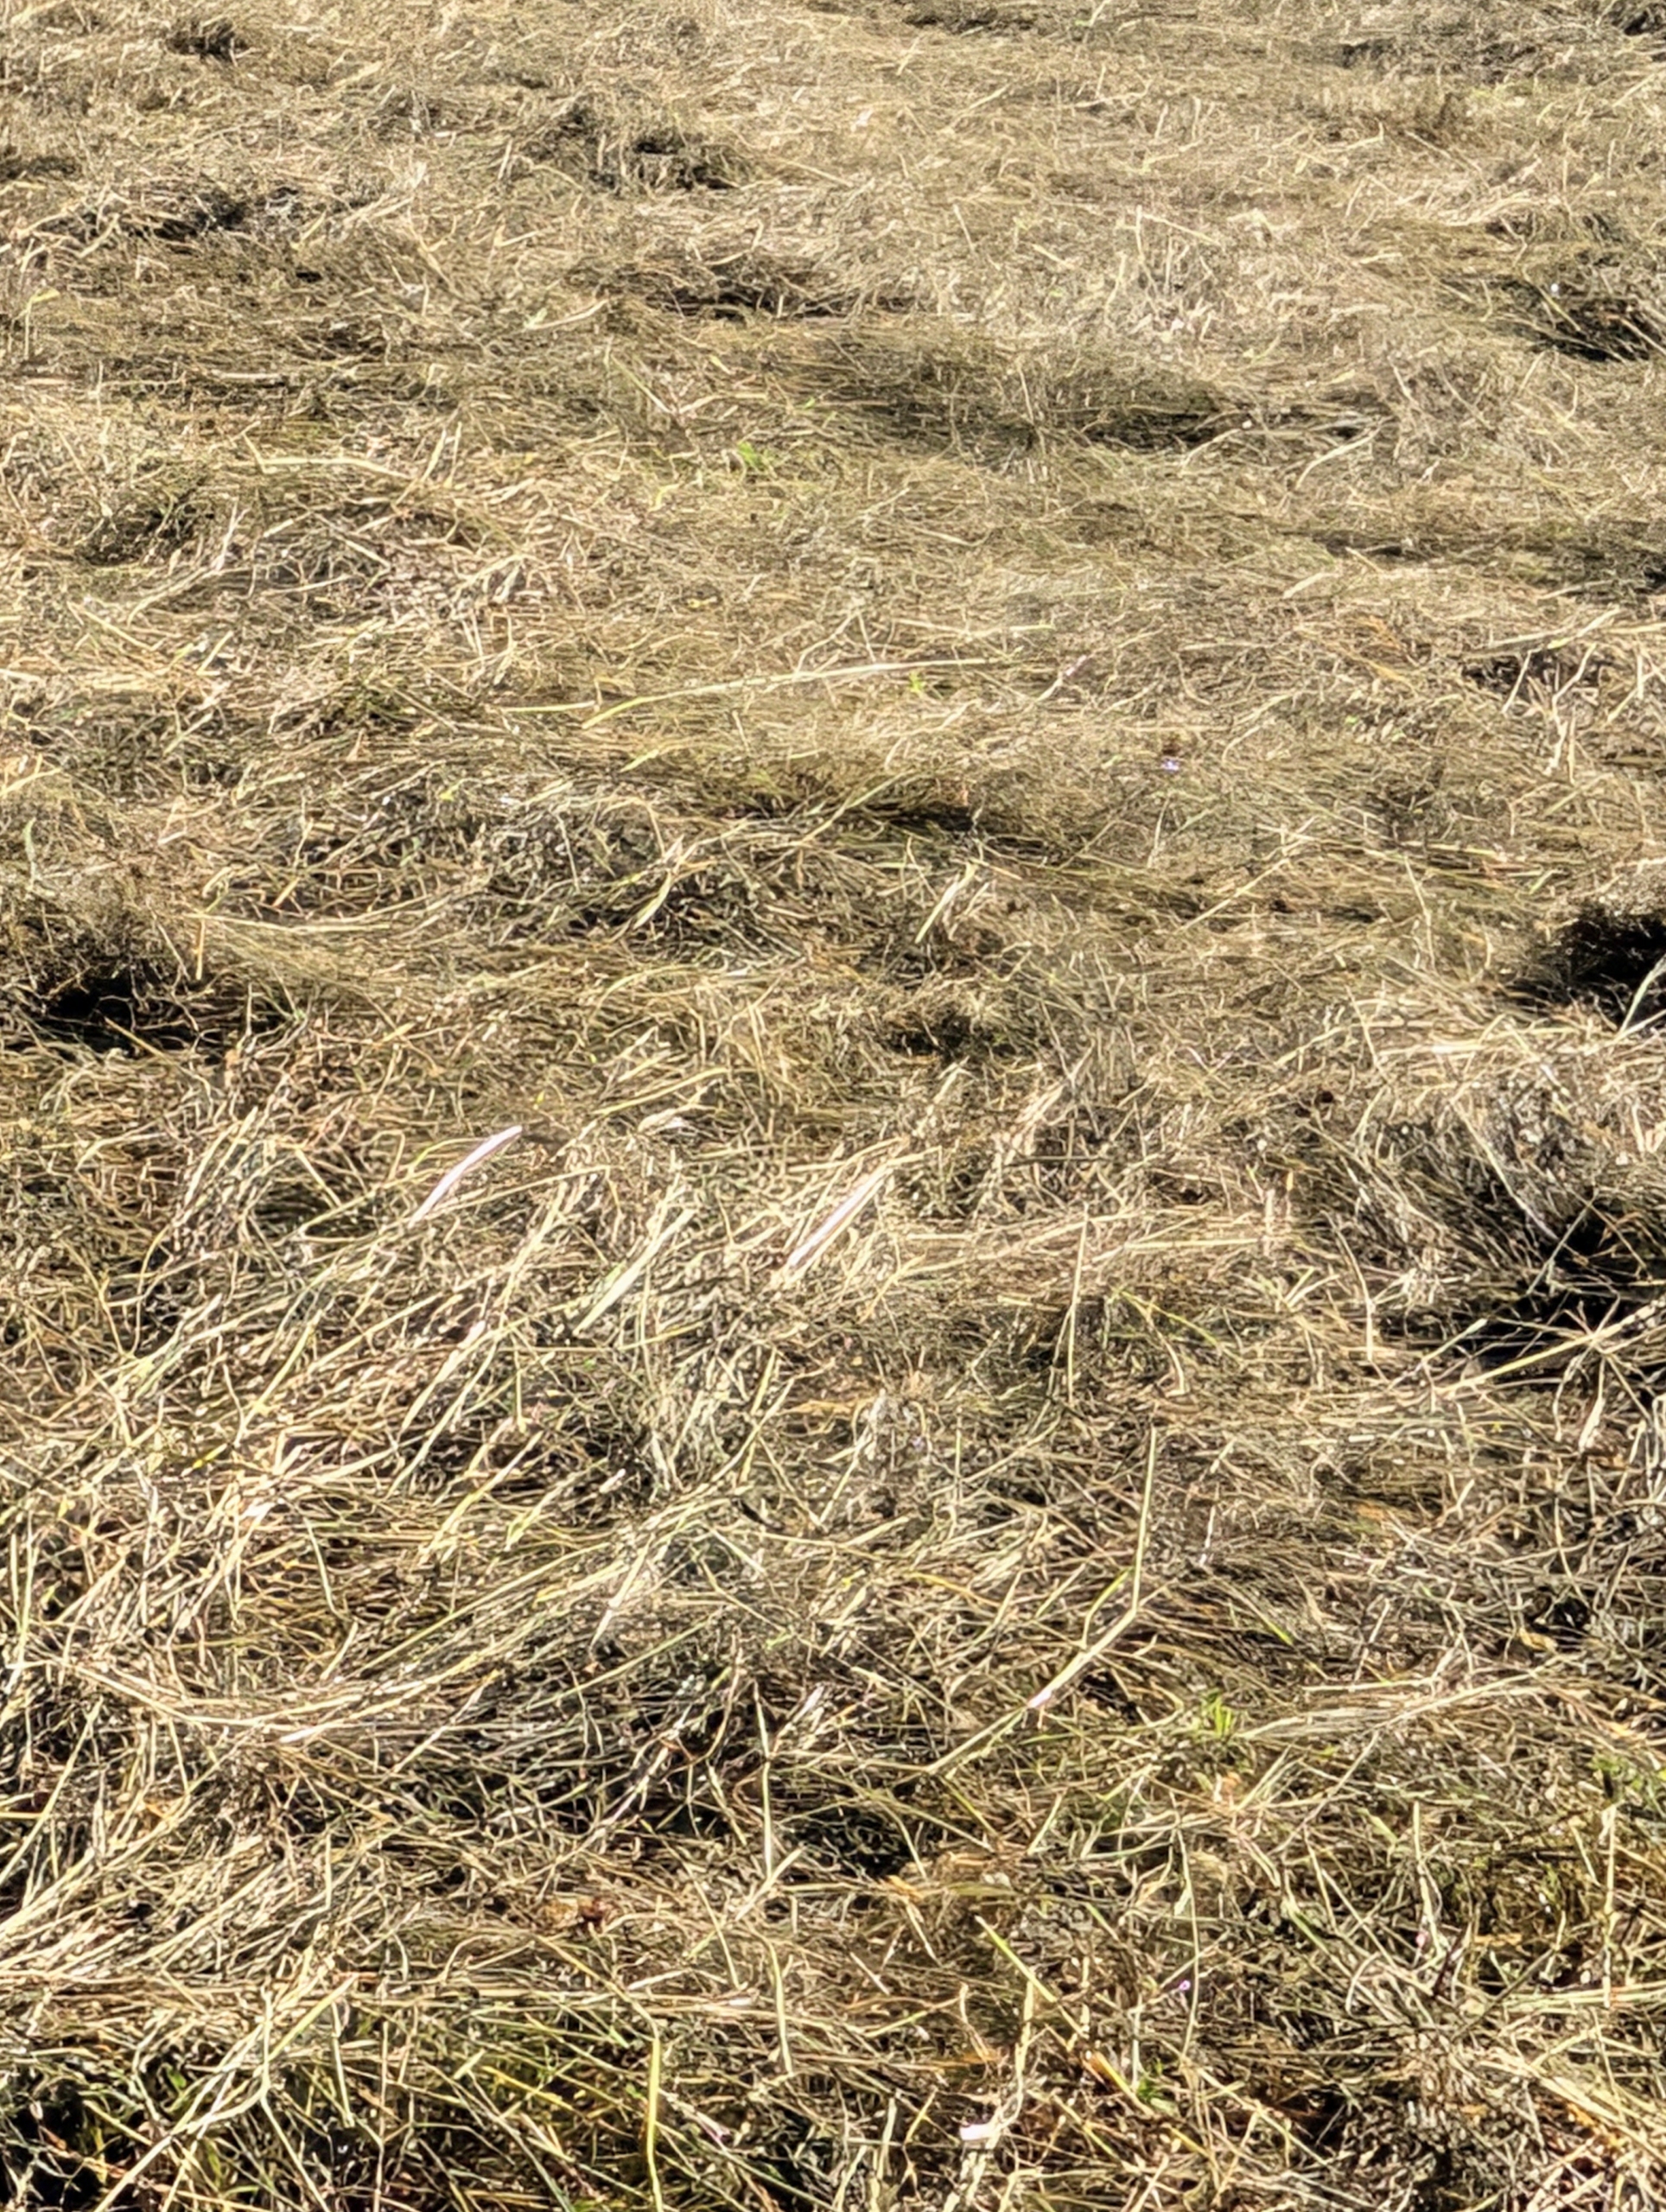
Here is a section of hay cut. The best time is to start as soon as dew is off in the morning, which will maximize drying time. After it is cut, it is left to dry for several hours.
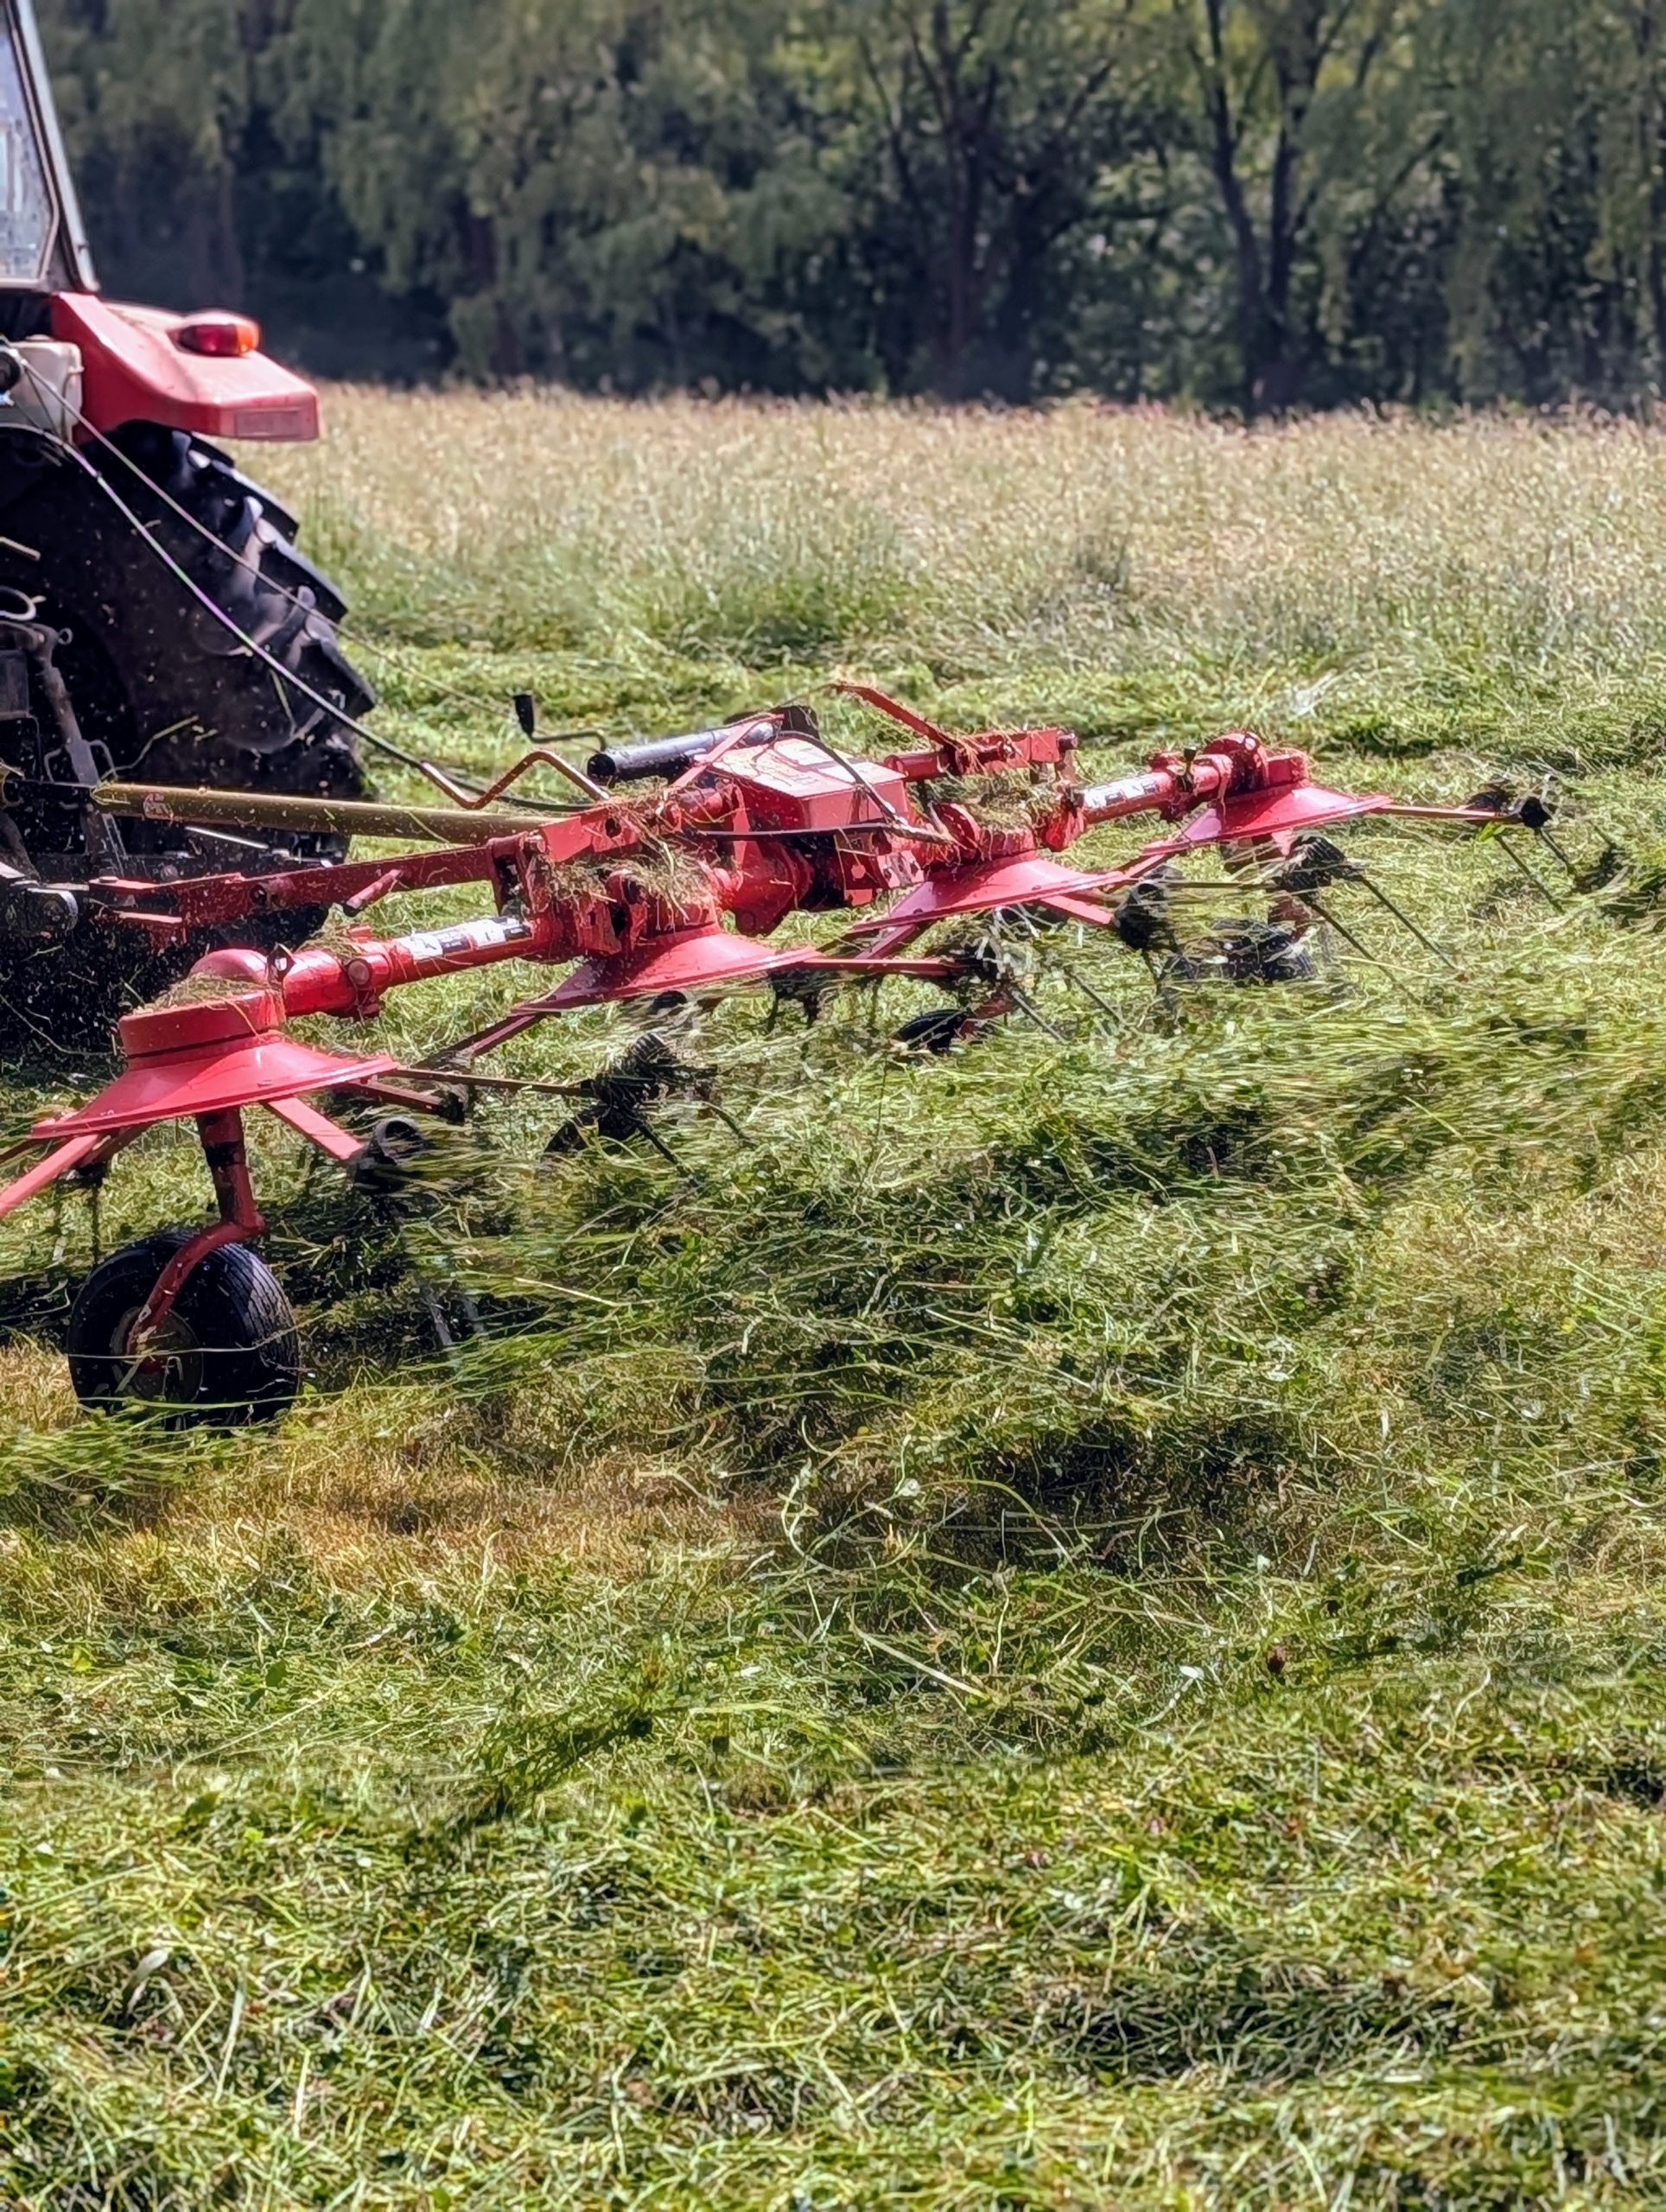
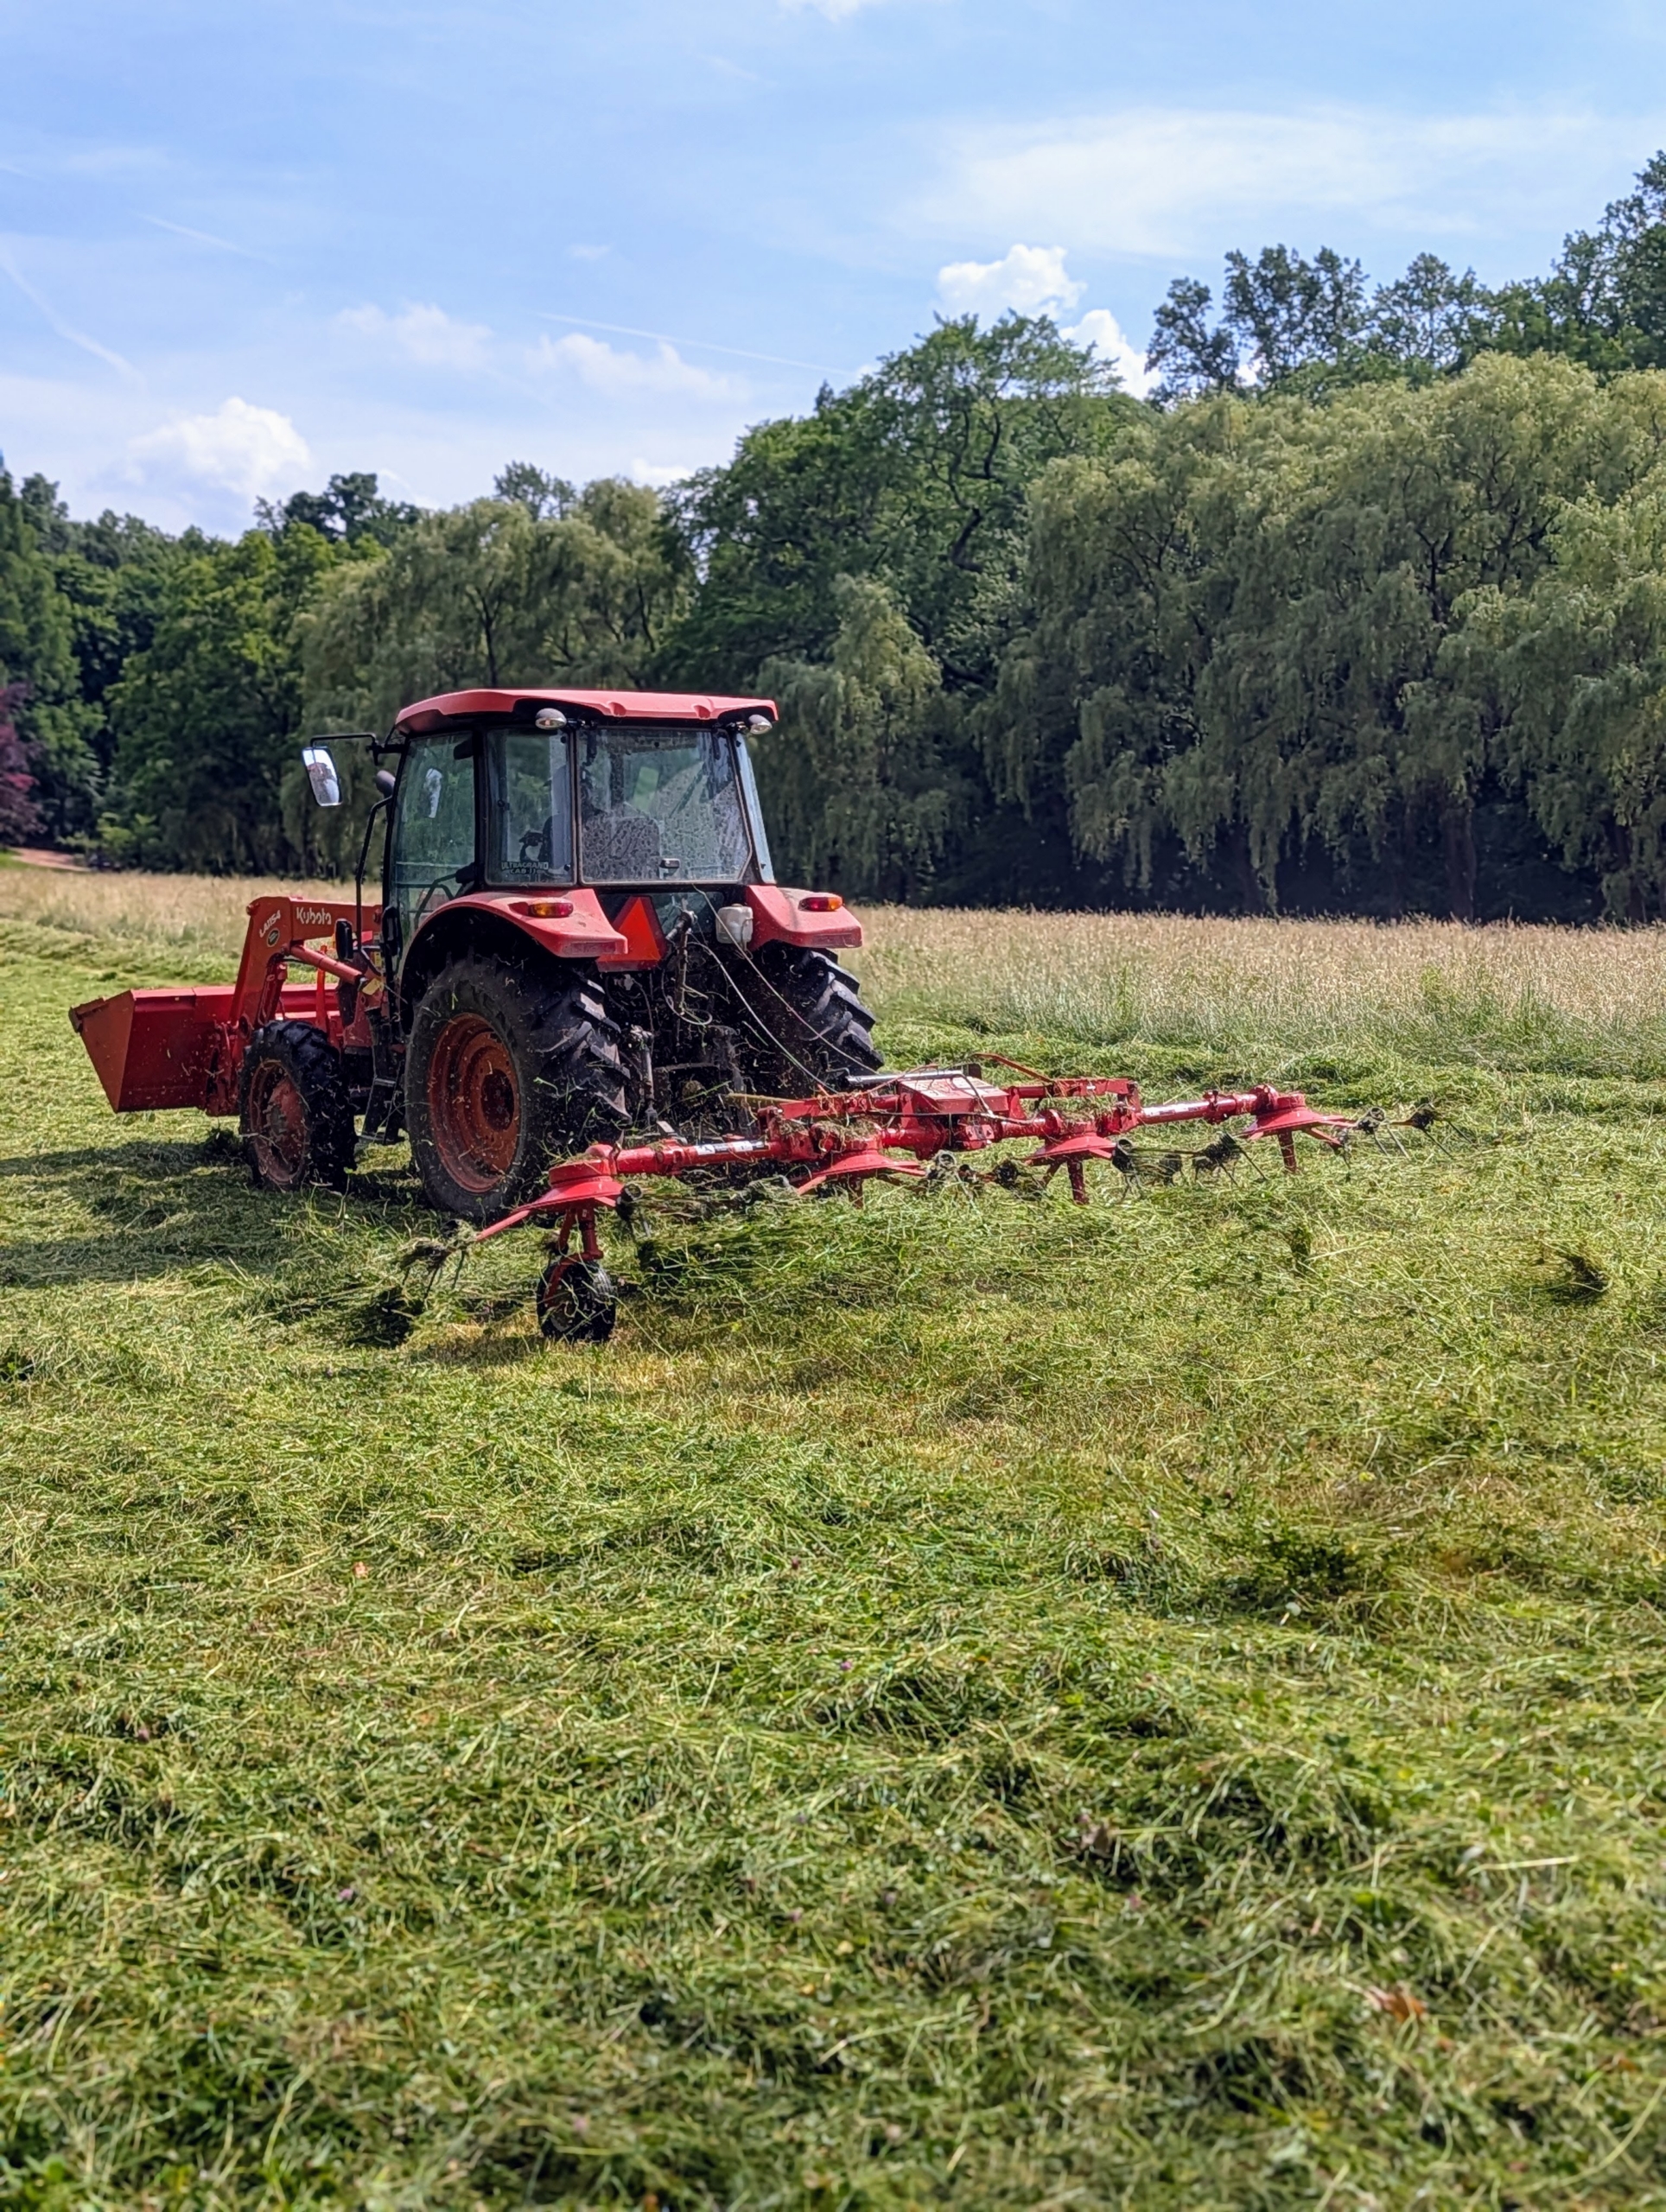
Next, the cut hay is ready for tedding, also known as fluffing. This is our hay tedder. A tedder spreads and fluffs the hay in a uniform swath. It uses a rotary motion to grab the hay with spinning tines and then cast it out the back of the machine.
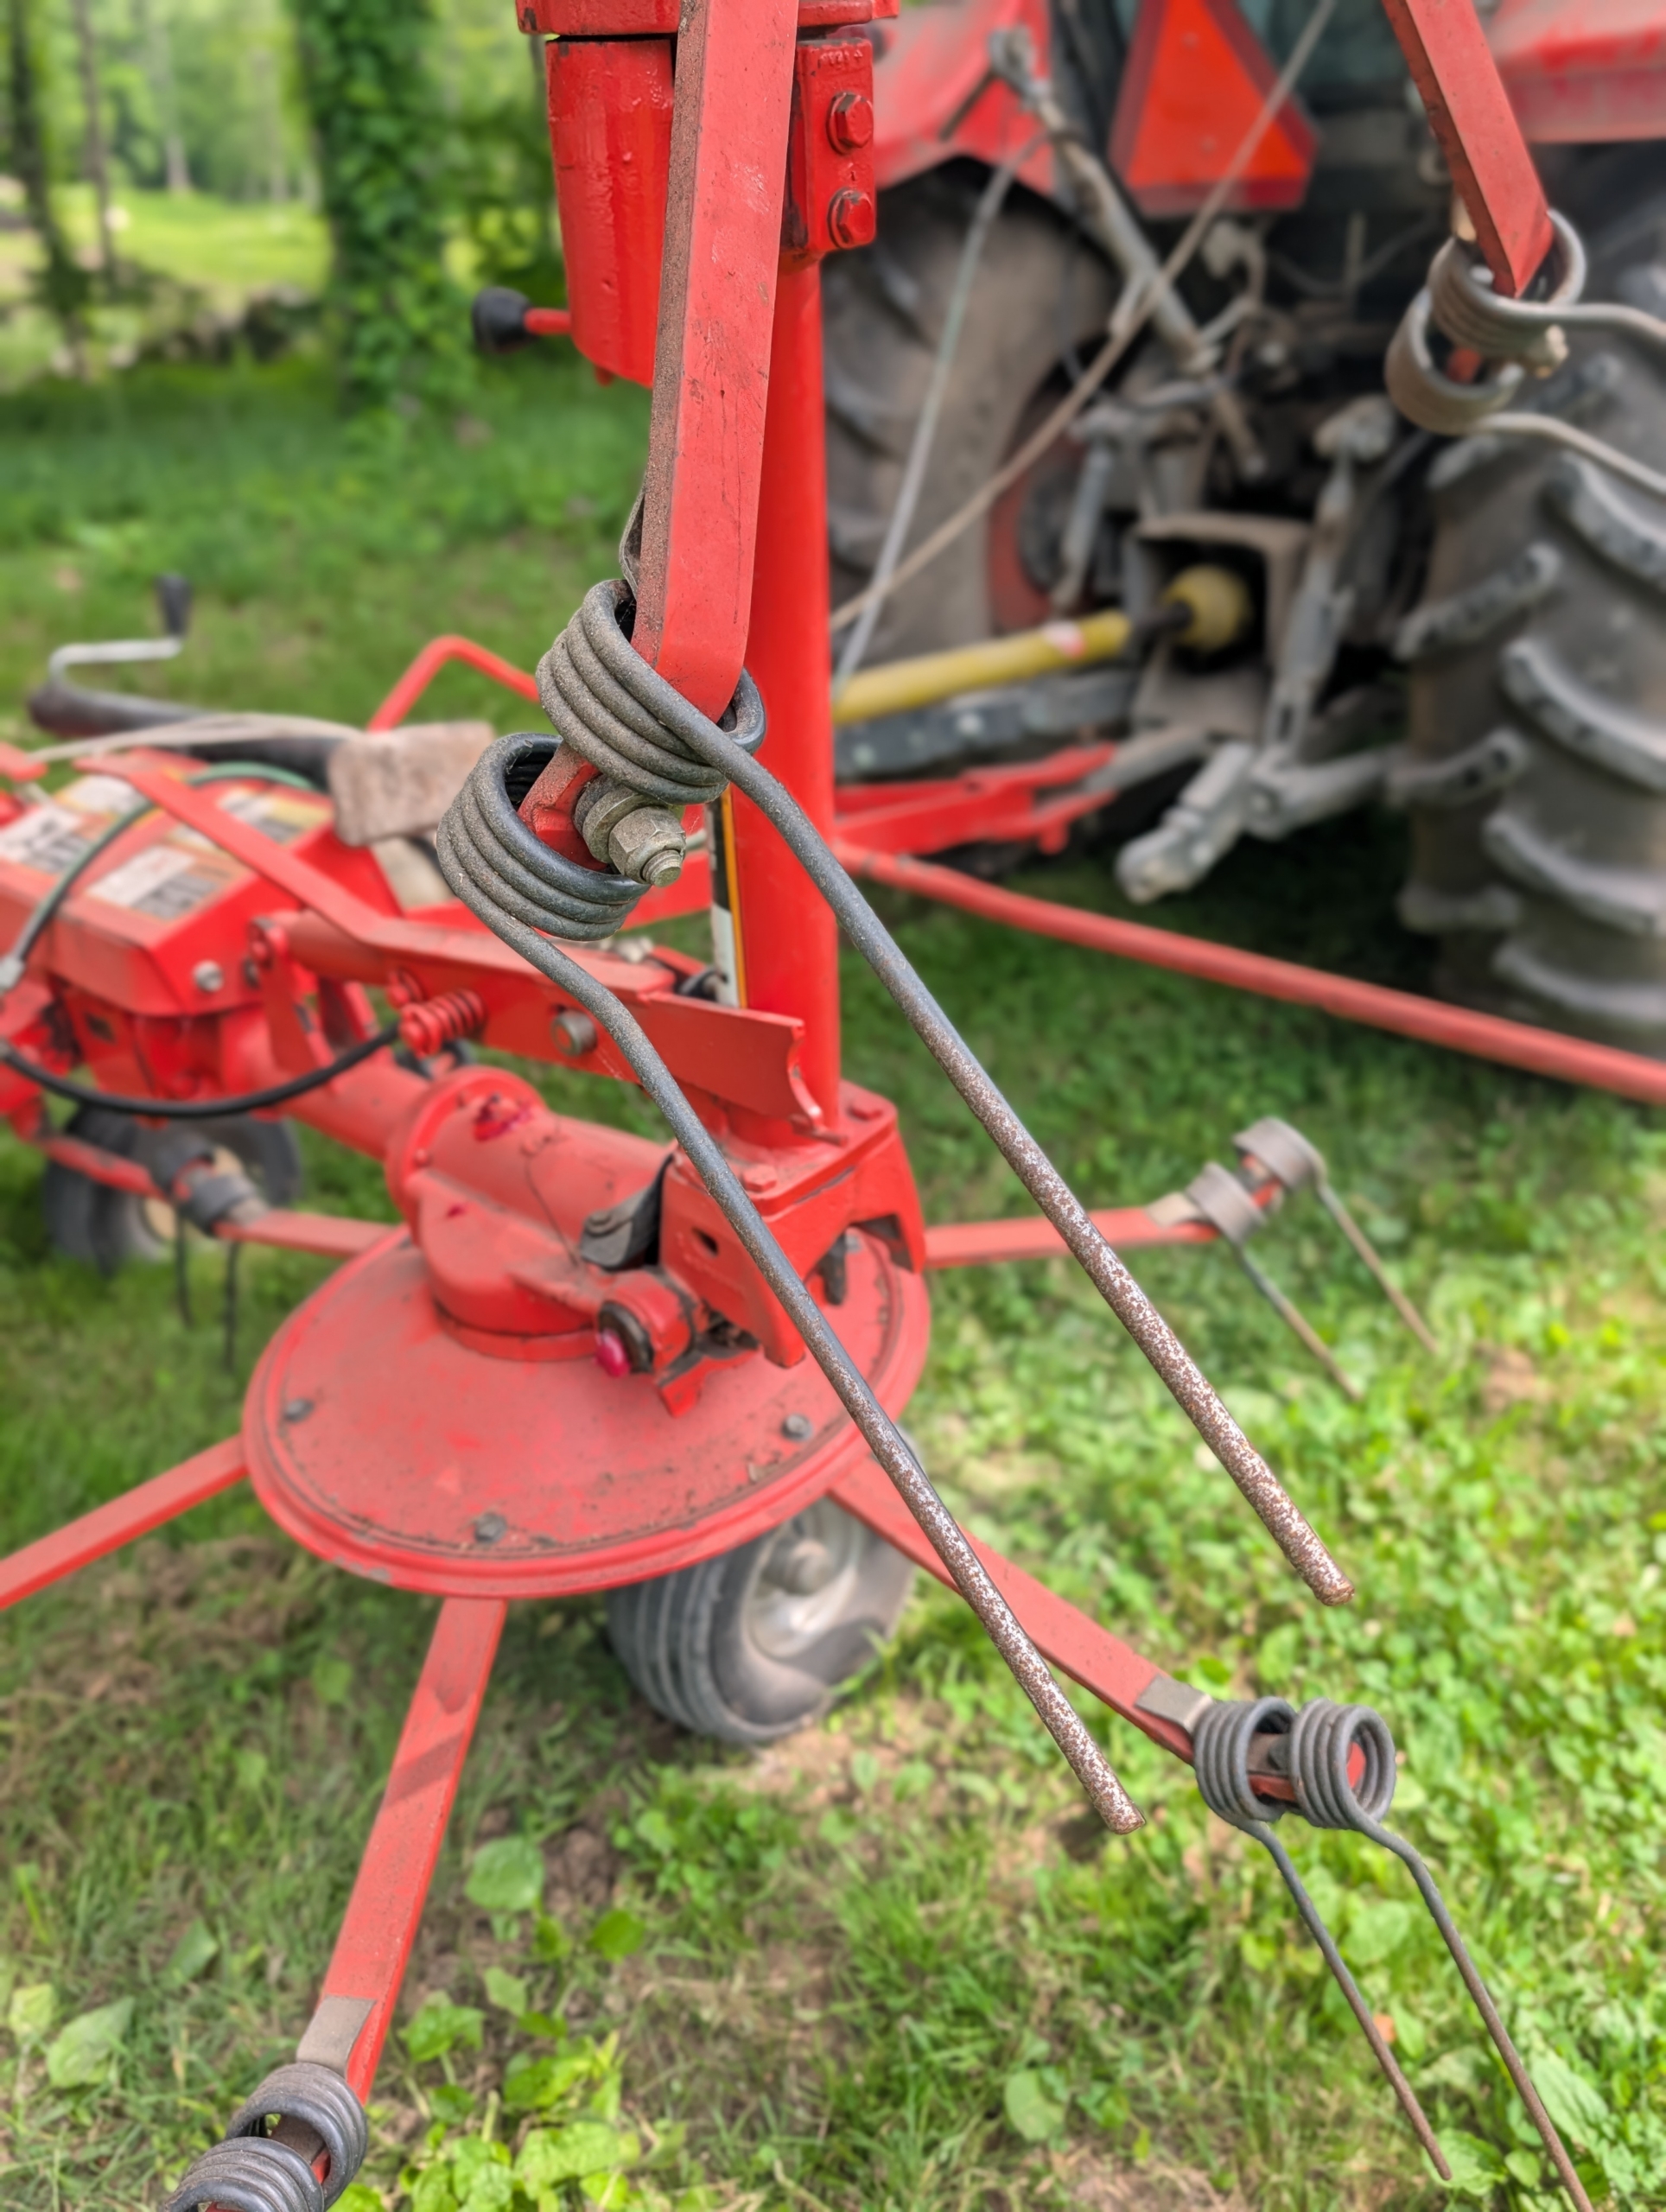
Here’s a look at the long metal tines when not moving.
The tedder moves up and down the field taking all the greener hay from the bottom and turning it over to dry. The hay turn colors from green to tan. On average, it takes about three days per field, depending on the size of the field and the weather, to complete the entire process of mowing, raking, and baling hay.
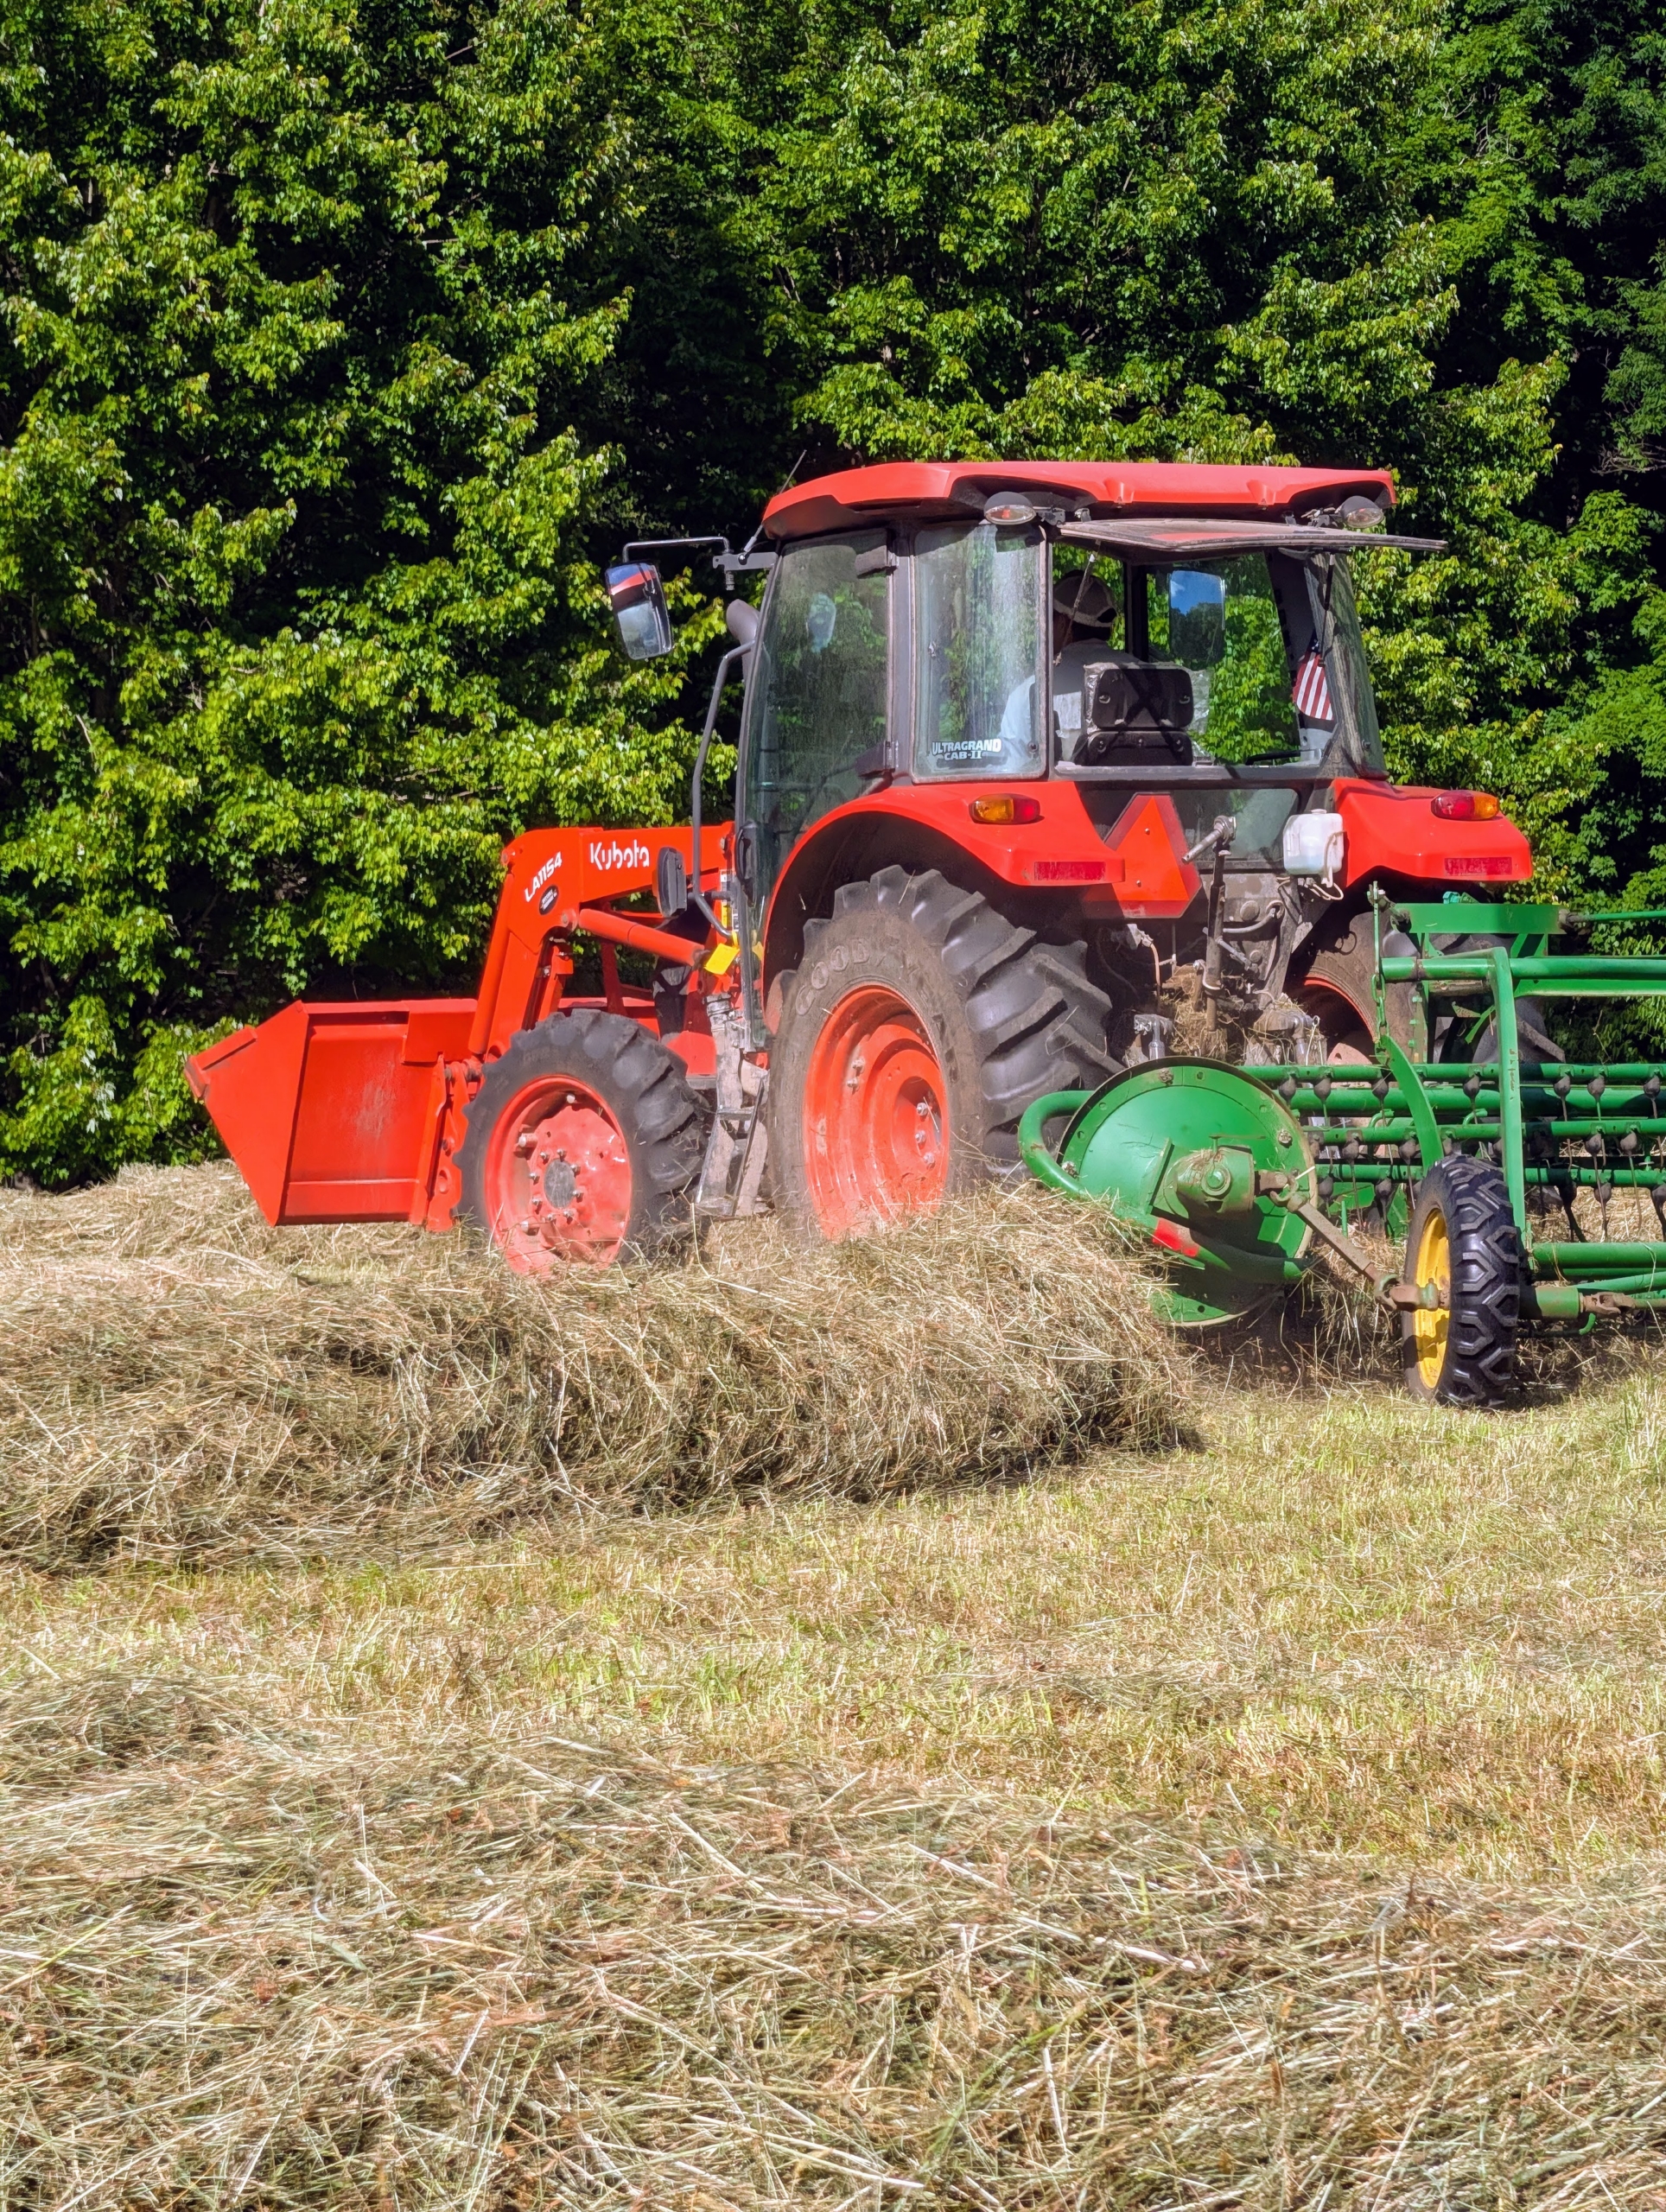
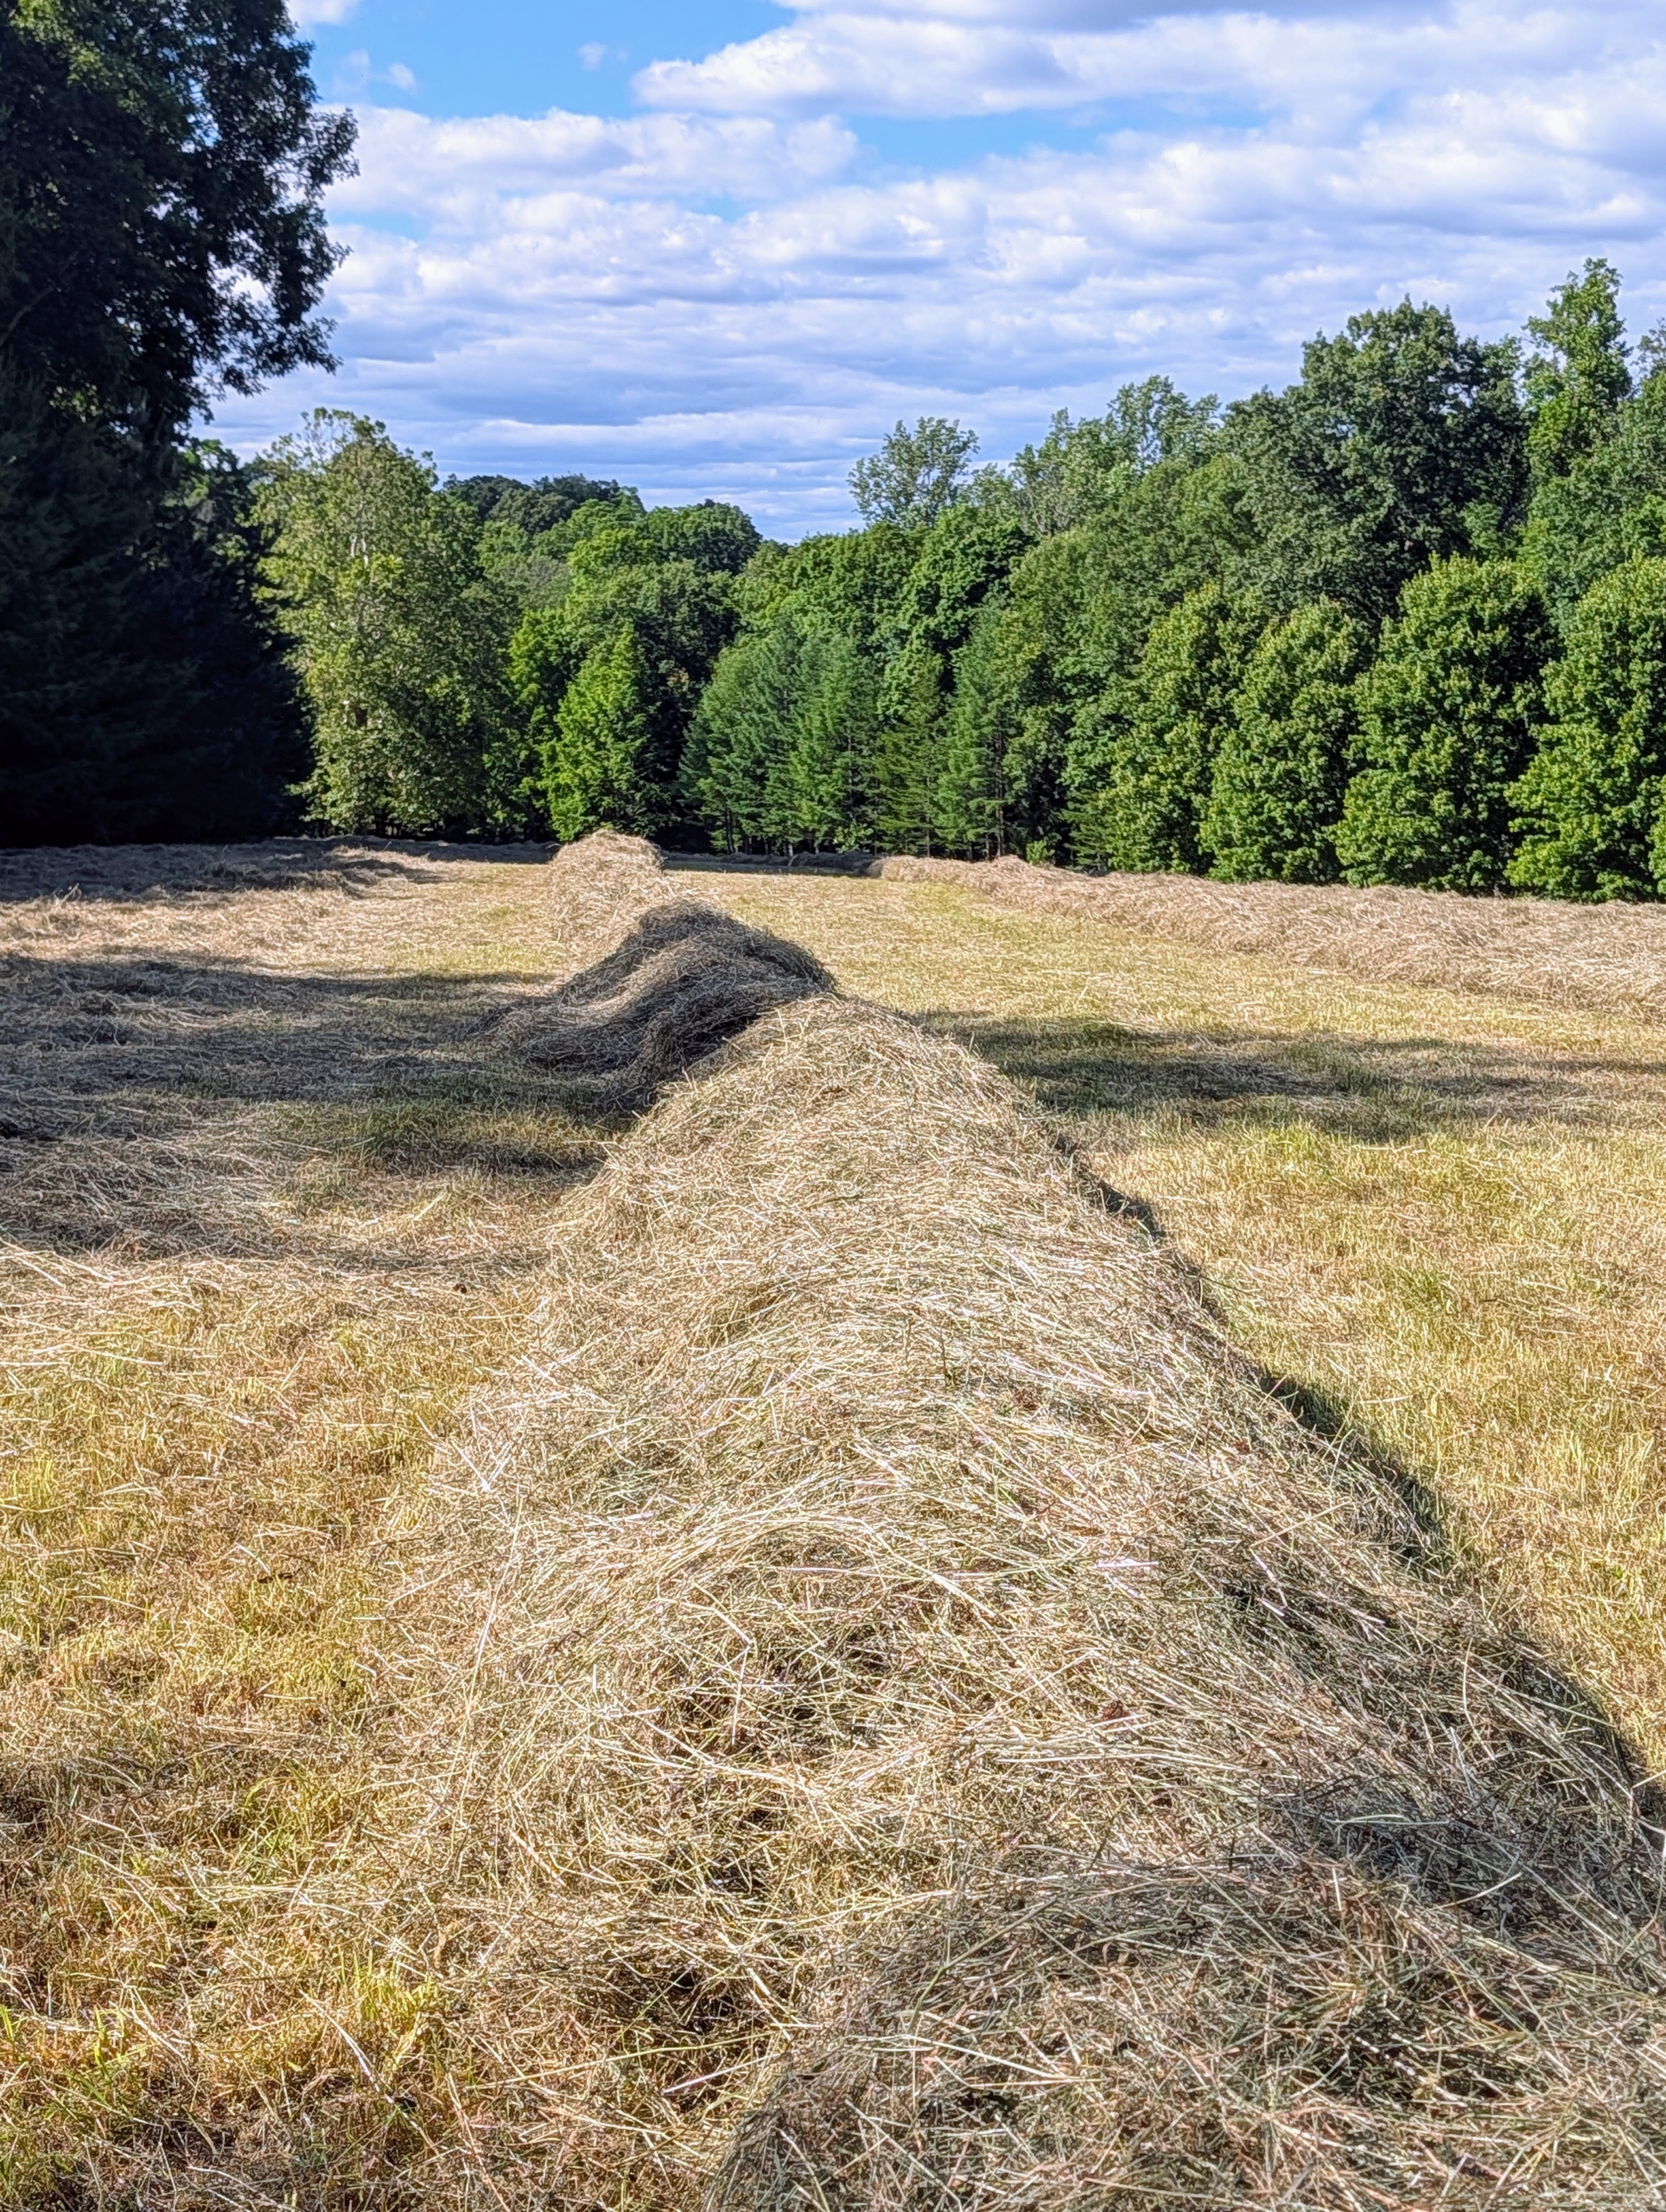
Then it is time to make the windrows, which are rows of hay raked up and shaped before being baled. The bar rake is pulled behind a tractor to make windrows from the tedded hay. The bar rake, also known as a basket rake is hydraulically driven. This rake allows for consistent movement across the fields making well-shaped windrows.
I am fortunate to have all this equipment. With a stretch of good weather, the entire process takes less than a week.
Here is a windrow ready to bale. All the windrows are lined up straight next to each other with enough room in between for the baler to maneuver properly around the field.
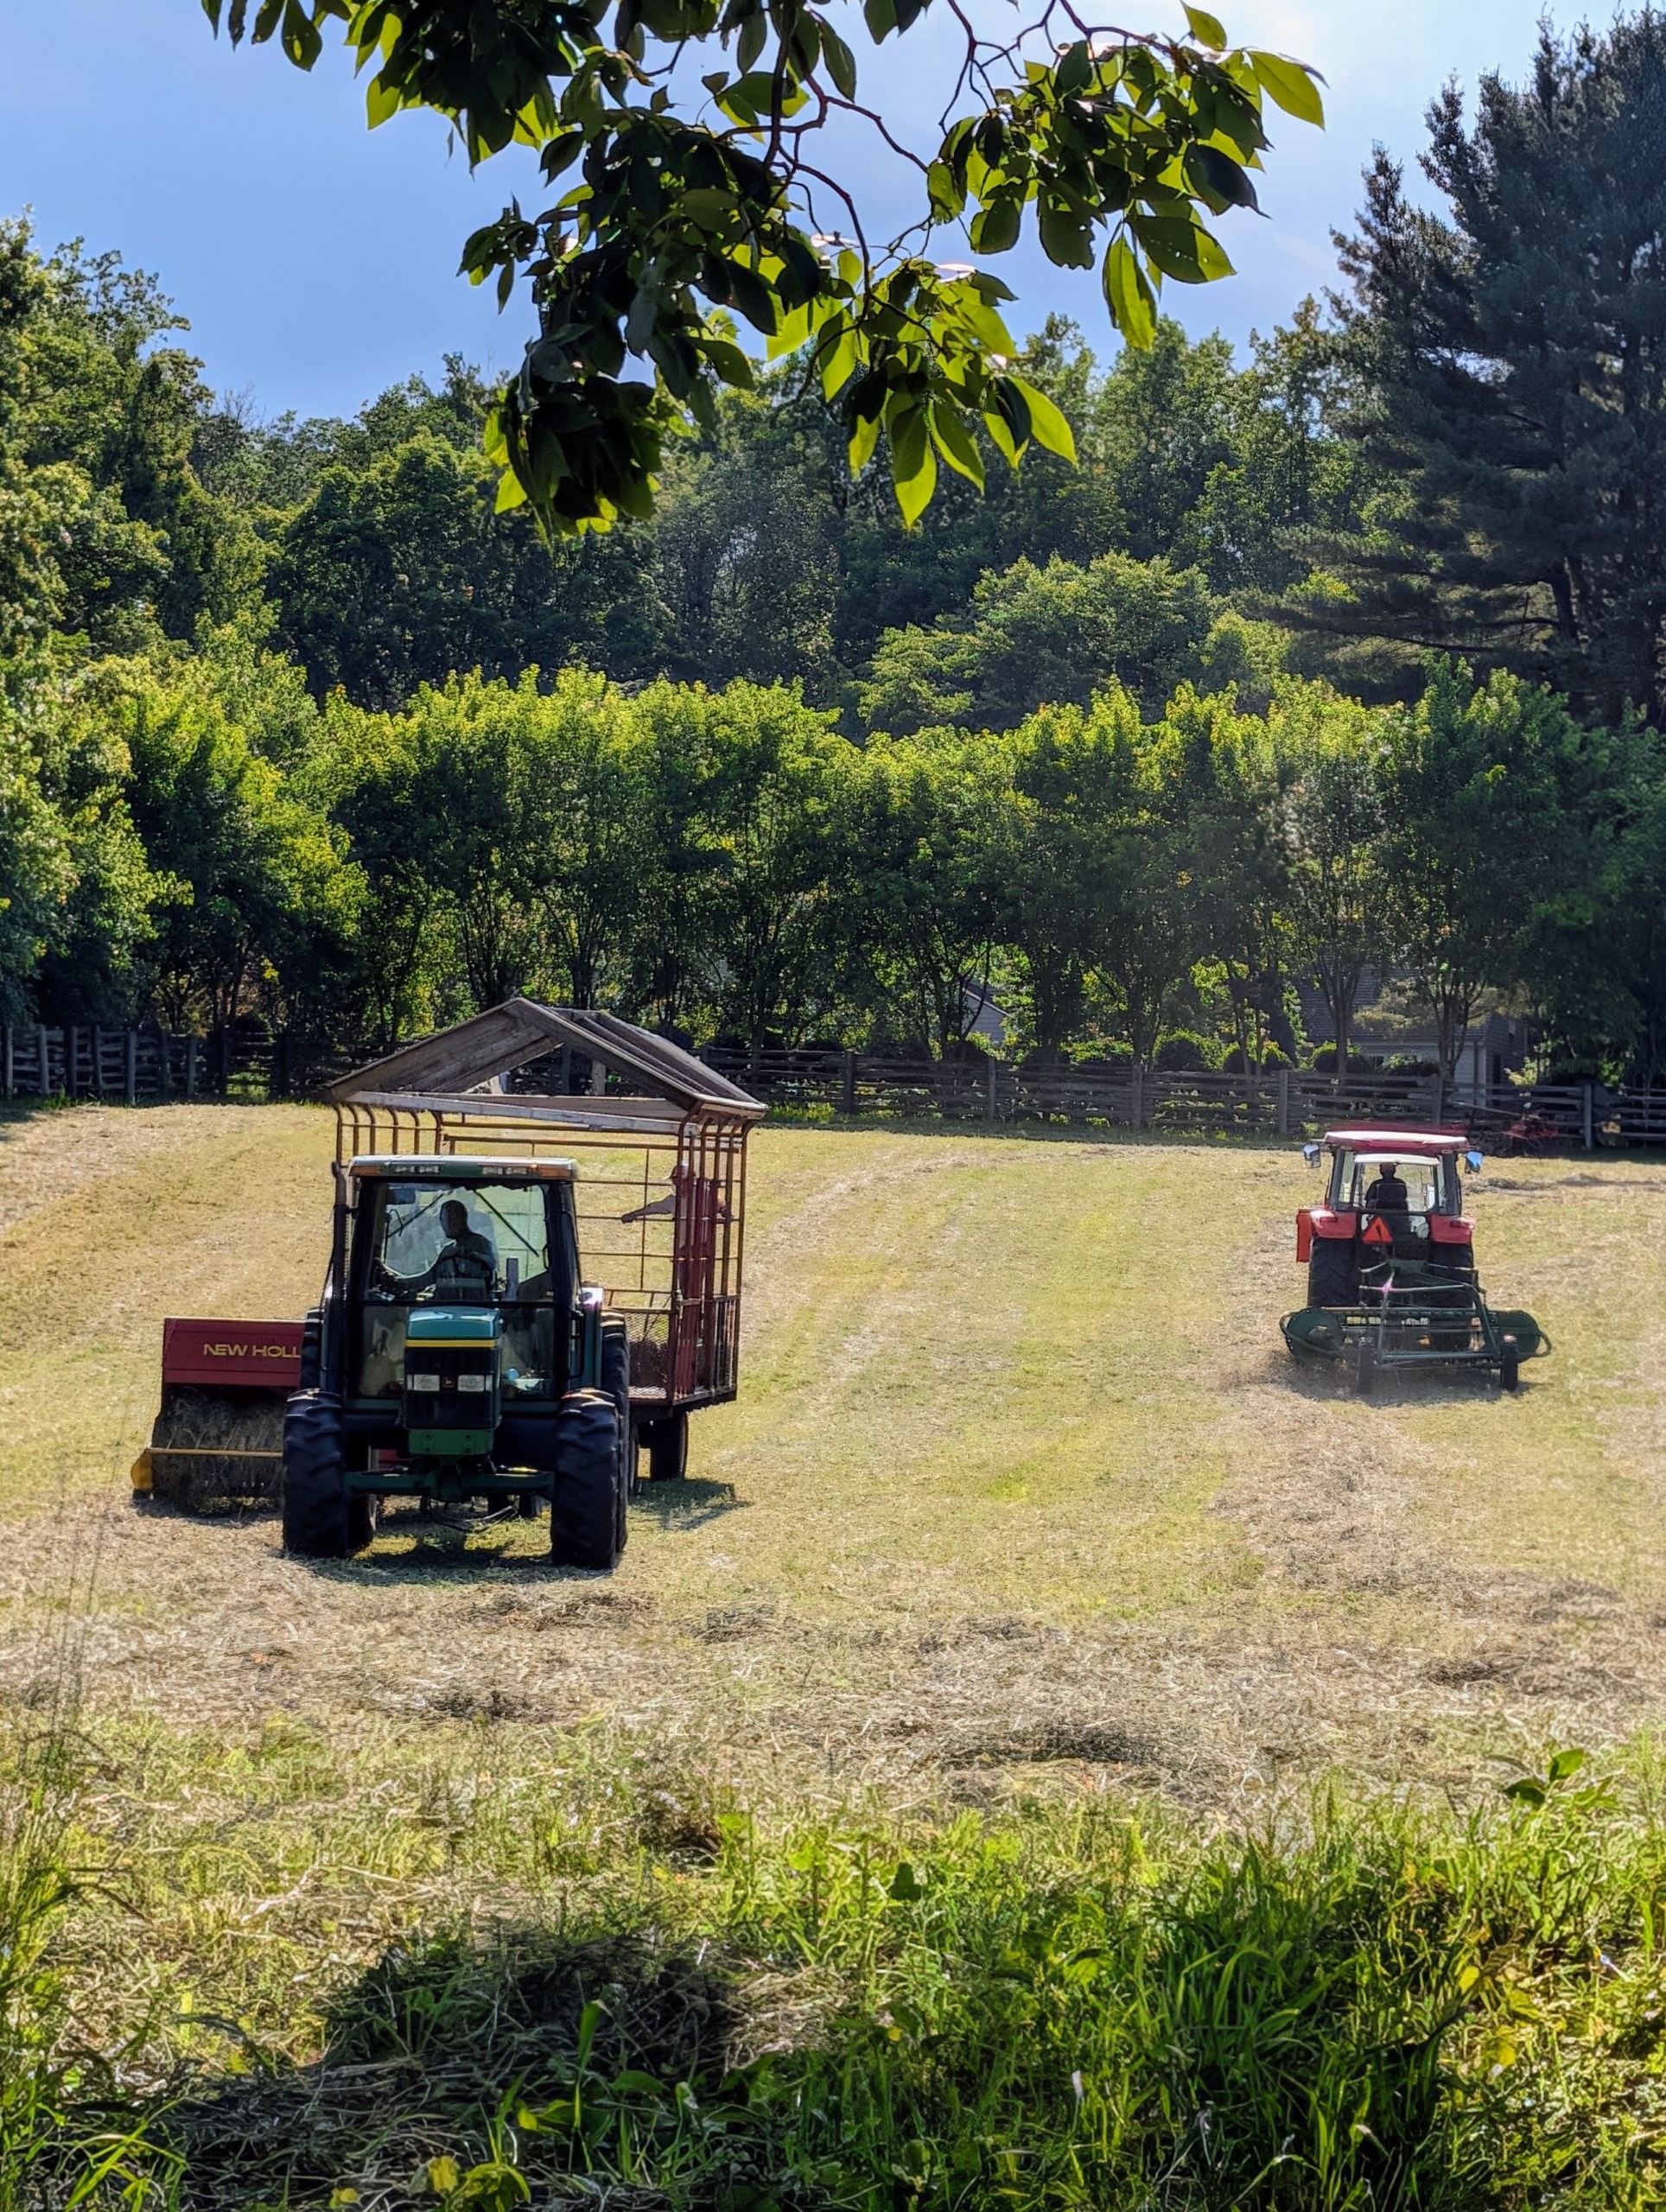
It’s an efficient process. As one creates the windrows, another bales.
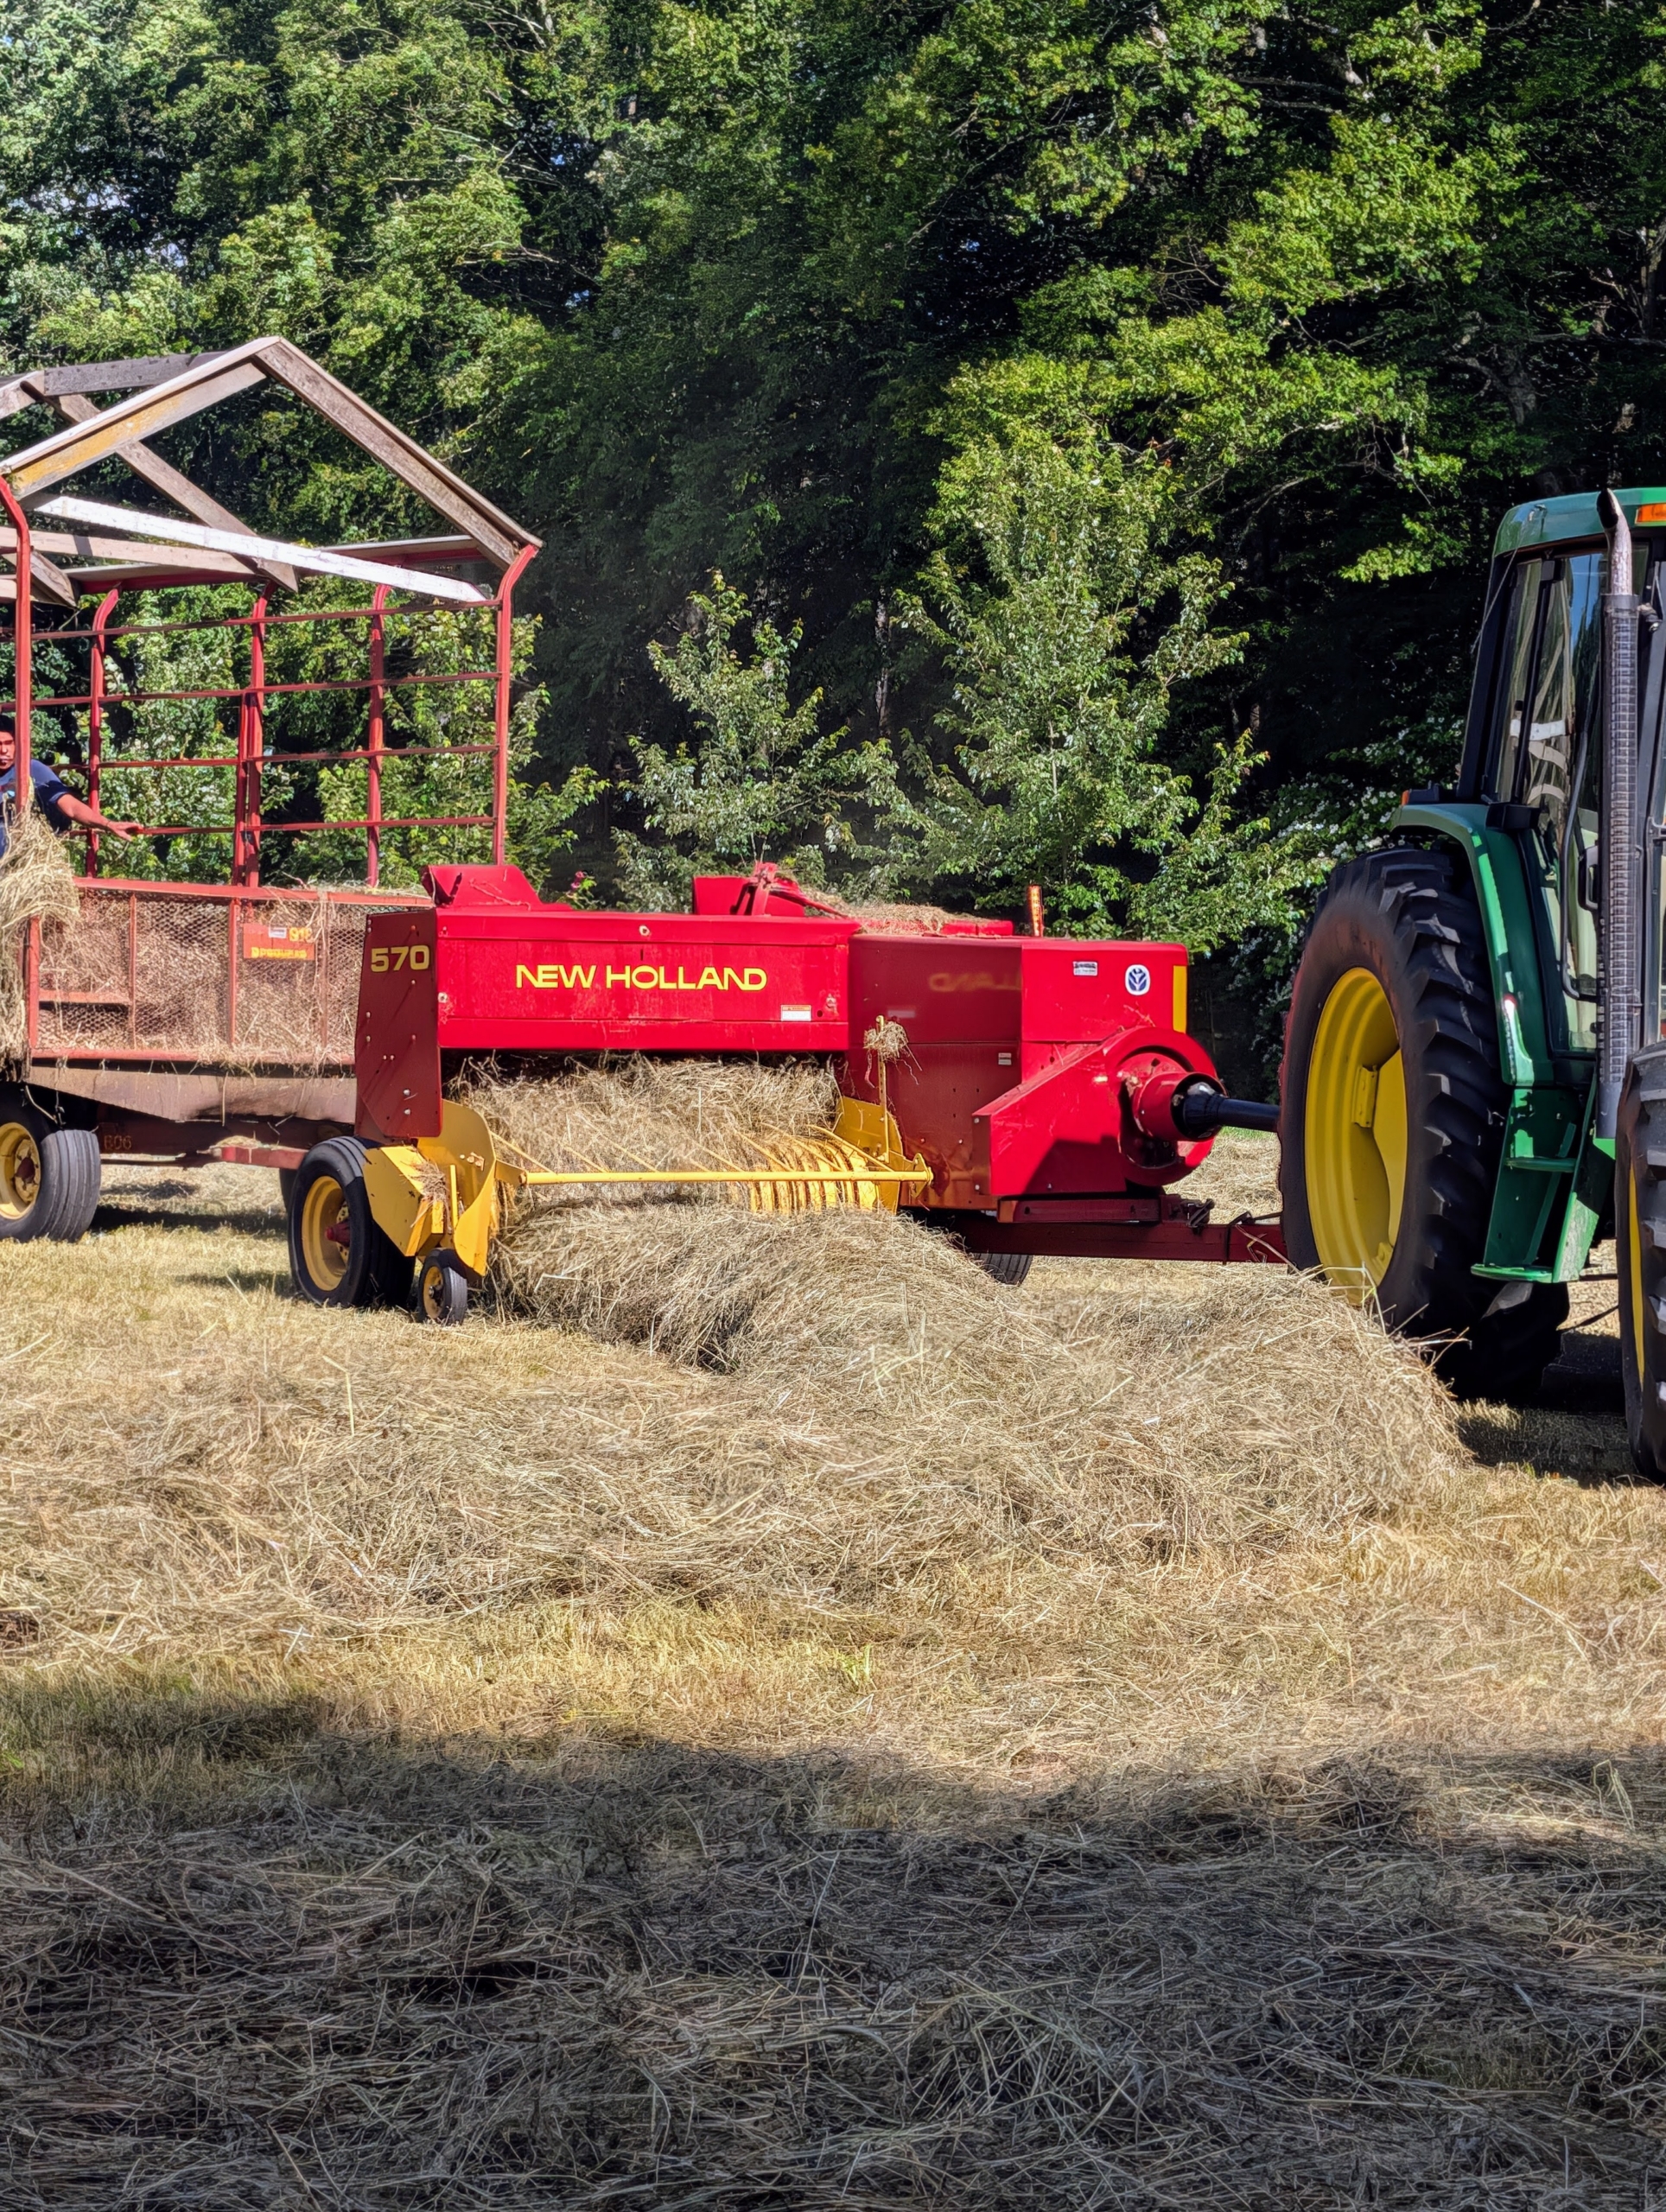
A hay baler is a piece of farm machinery used to compress a cut and raked crop into compact bales that are easy to handle, transport, and store. The tractor rides to one side of the windrow while the baler passes directly over it to collect the hay. All the hay is dry and passing through the machine smoothly. If the hay is properly dried, the baler will work continuously down each row. Hay that is too damp tends to clog up the baler.
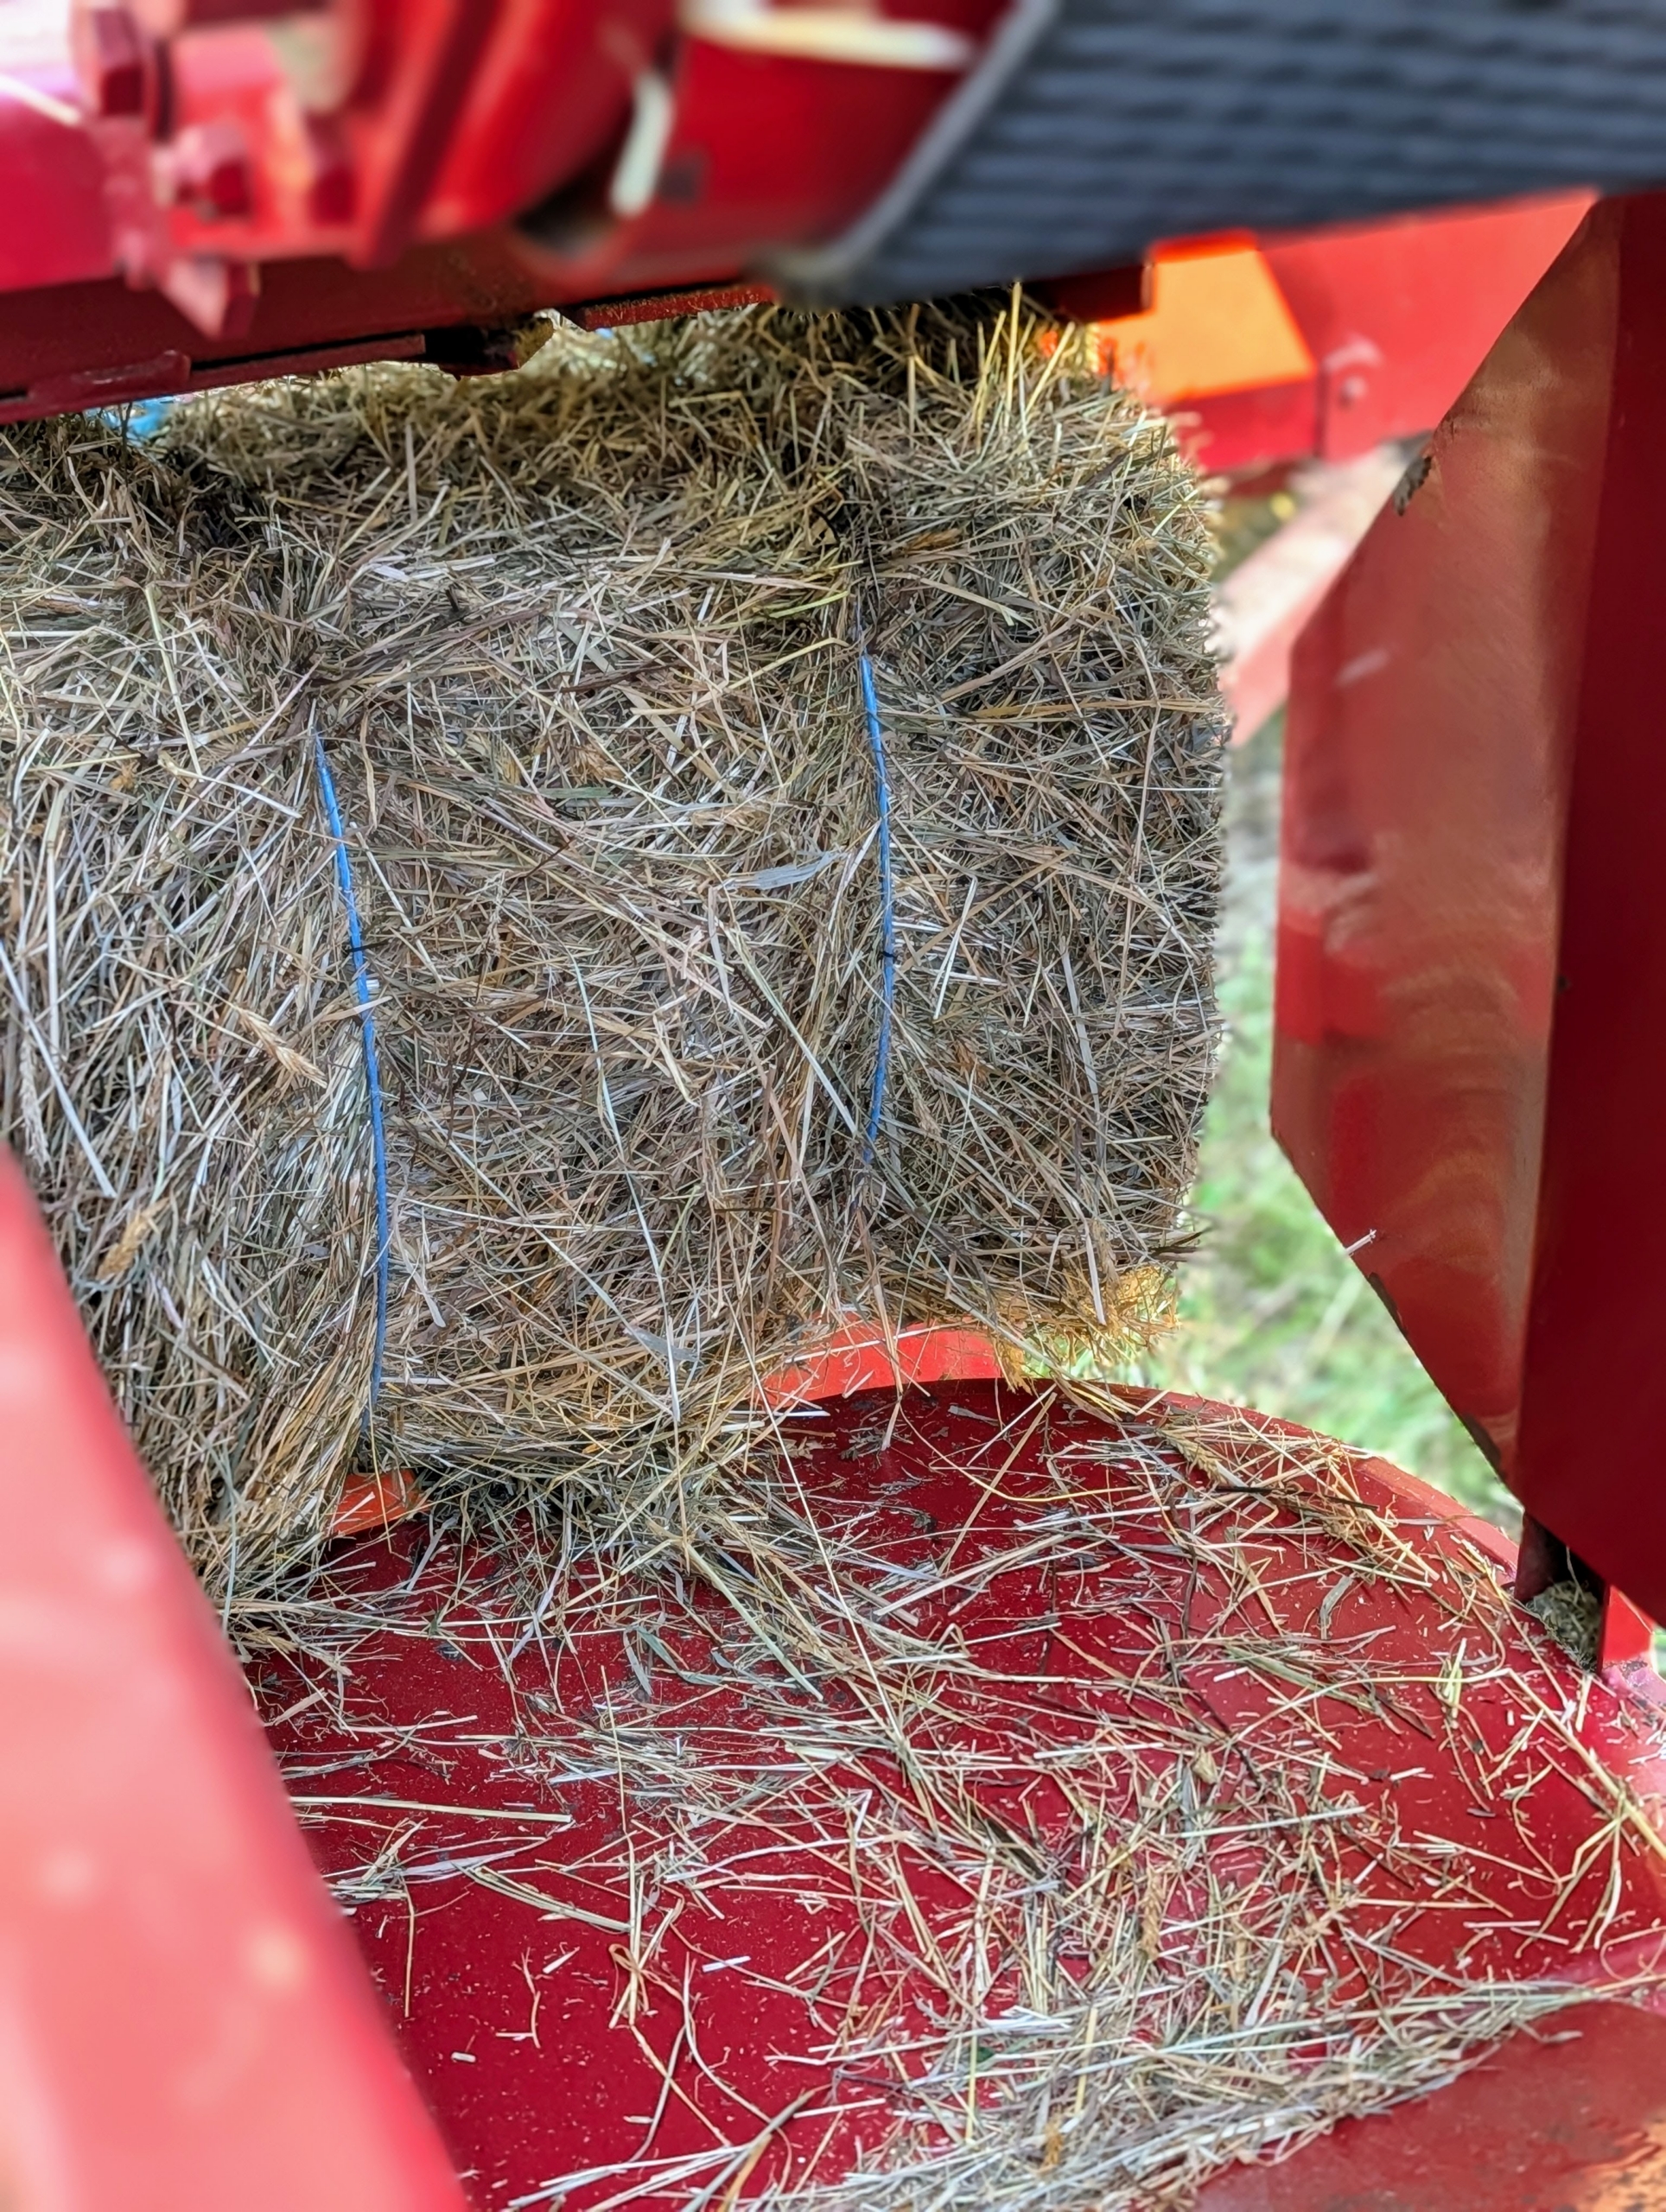
As hay is collected, a baled “square” travels up the conveyor belt. A measuring device, normally a spiked wheel that is turned by the emerging bales, measures the amount of material that is being compressed and then knotters wrap the twine around the bale and tie it off. And then it is propelled into the wagon by a mechanical arm called a thrower or a kicker.
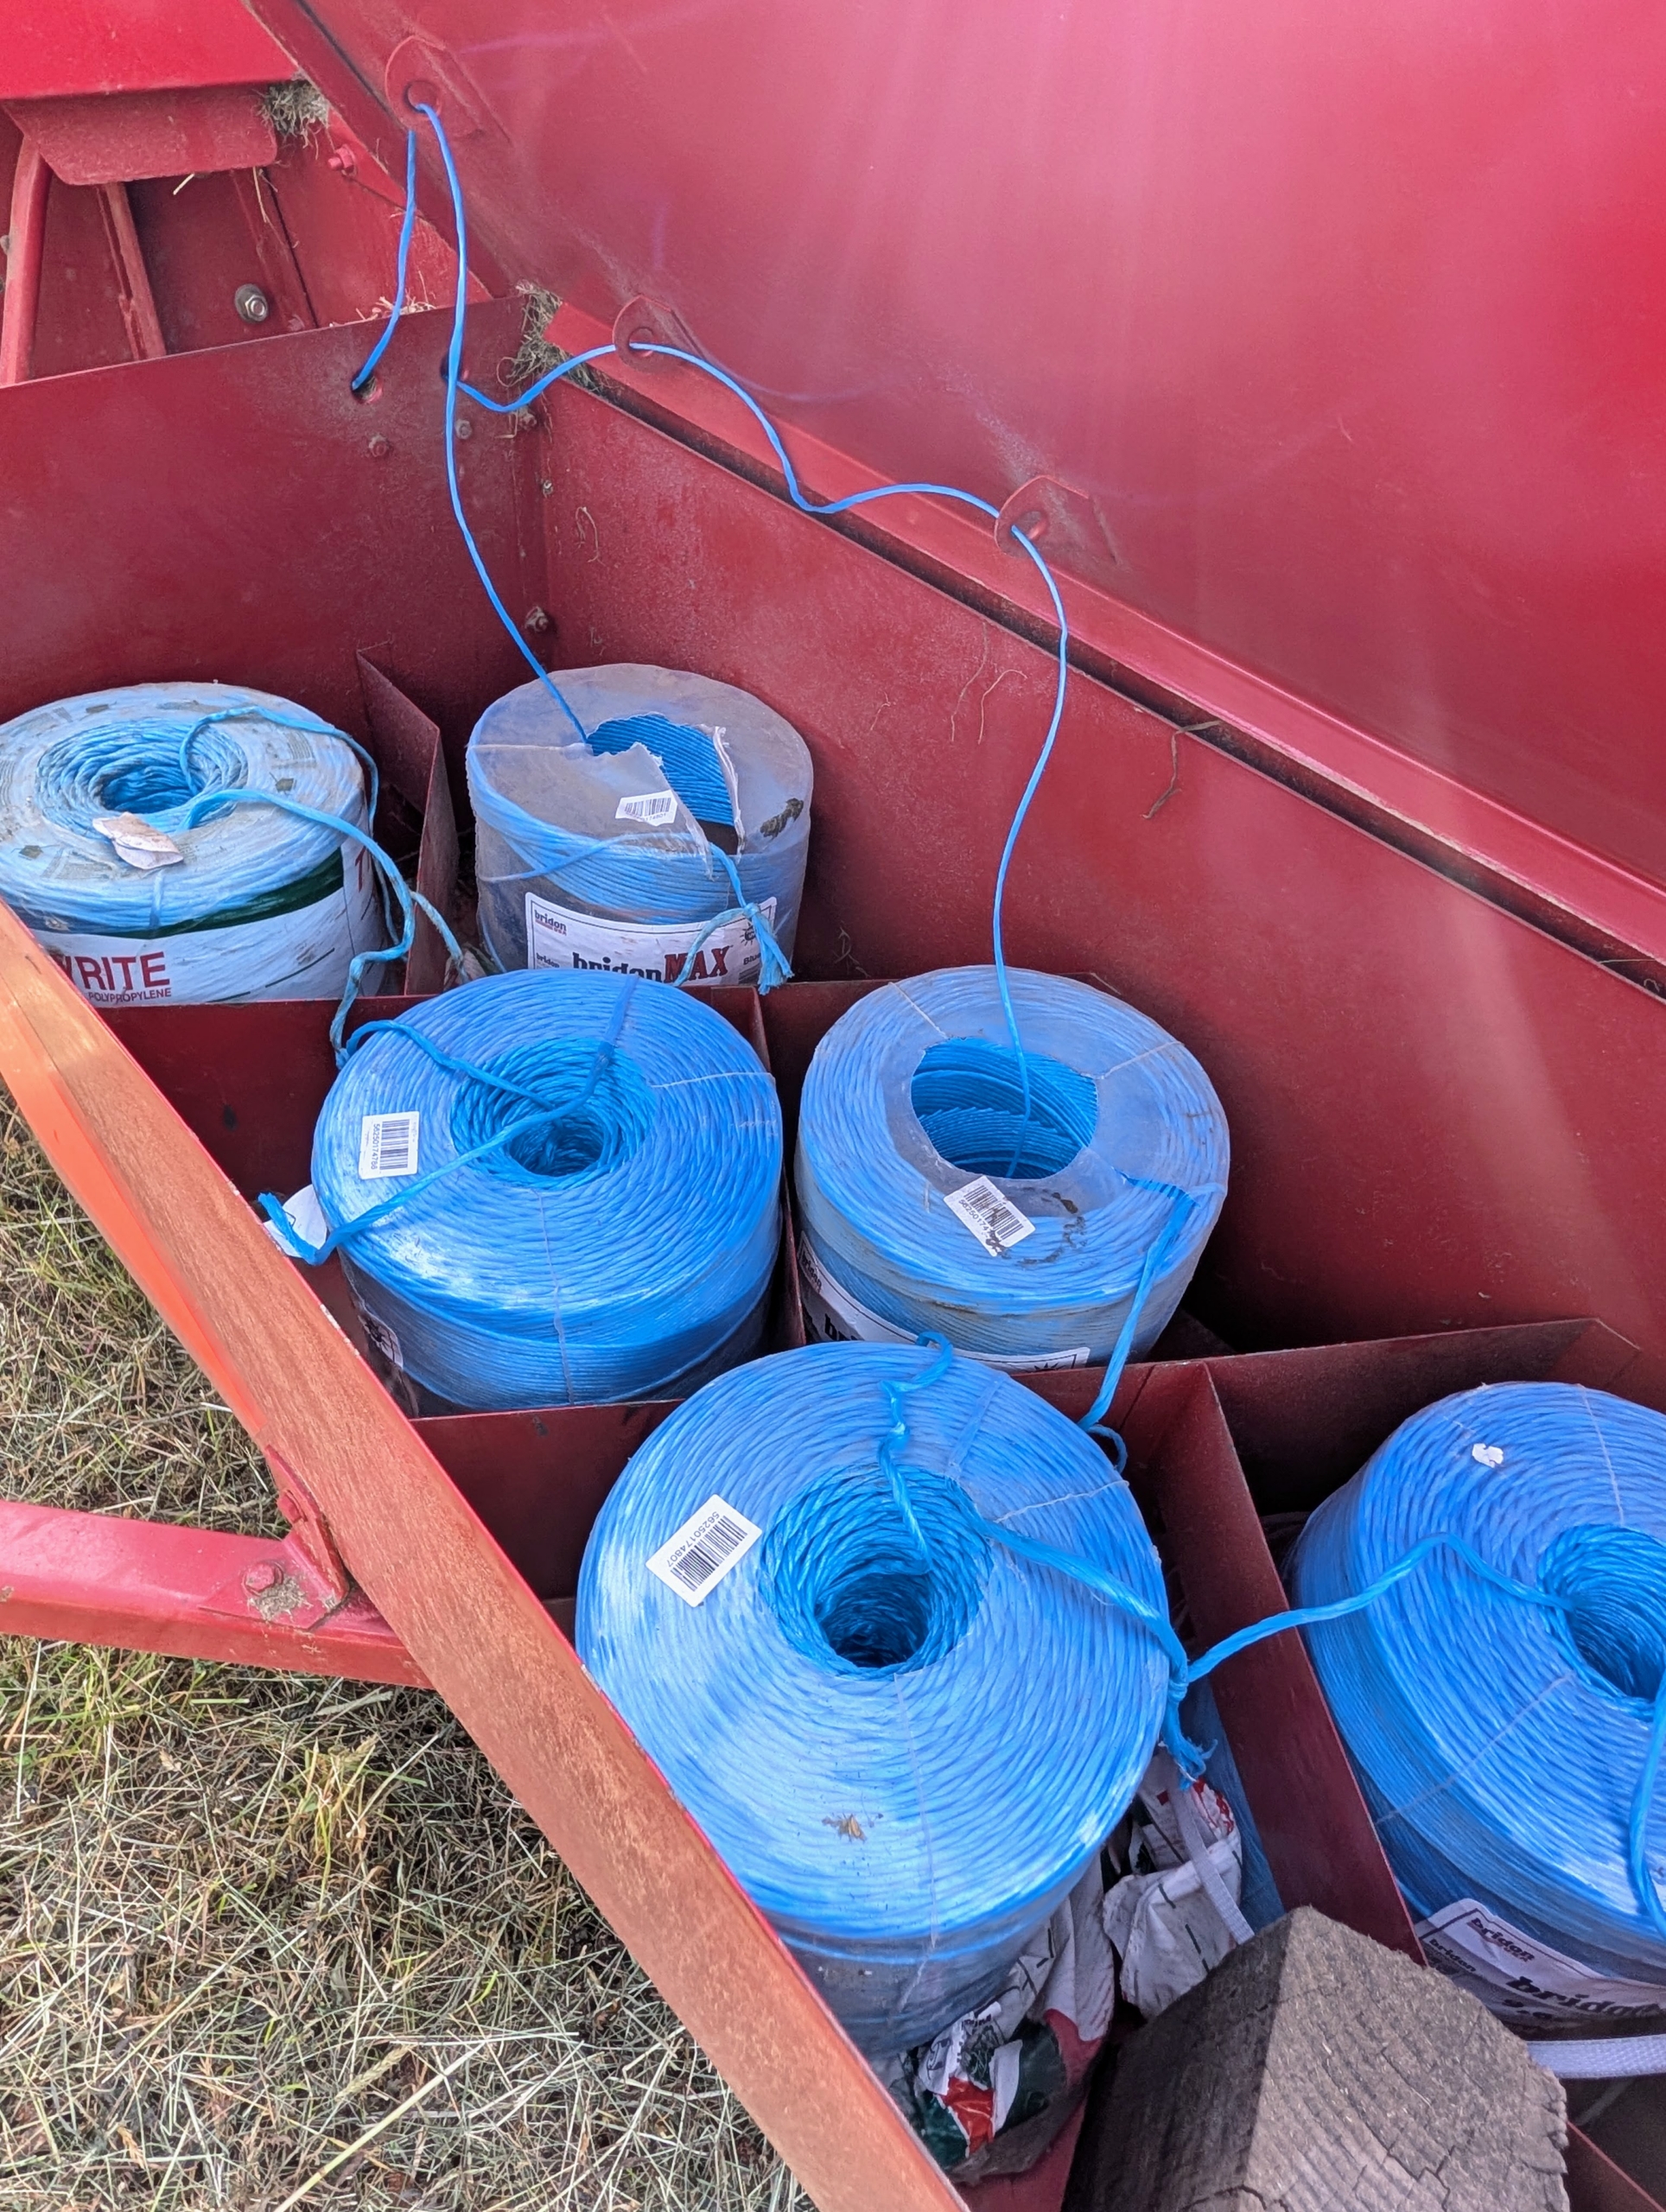
Inside, a box behind the baler is where large rolls of twine are positioned and tied to each other, so they can feed into the baler and secure the hay just before it shoots out into the trailer.
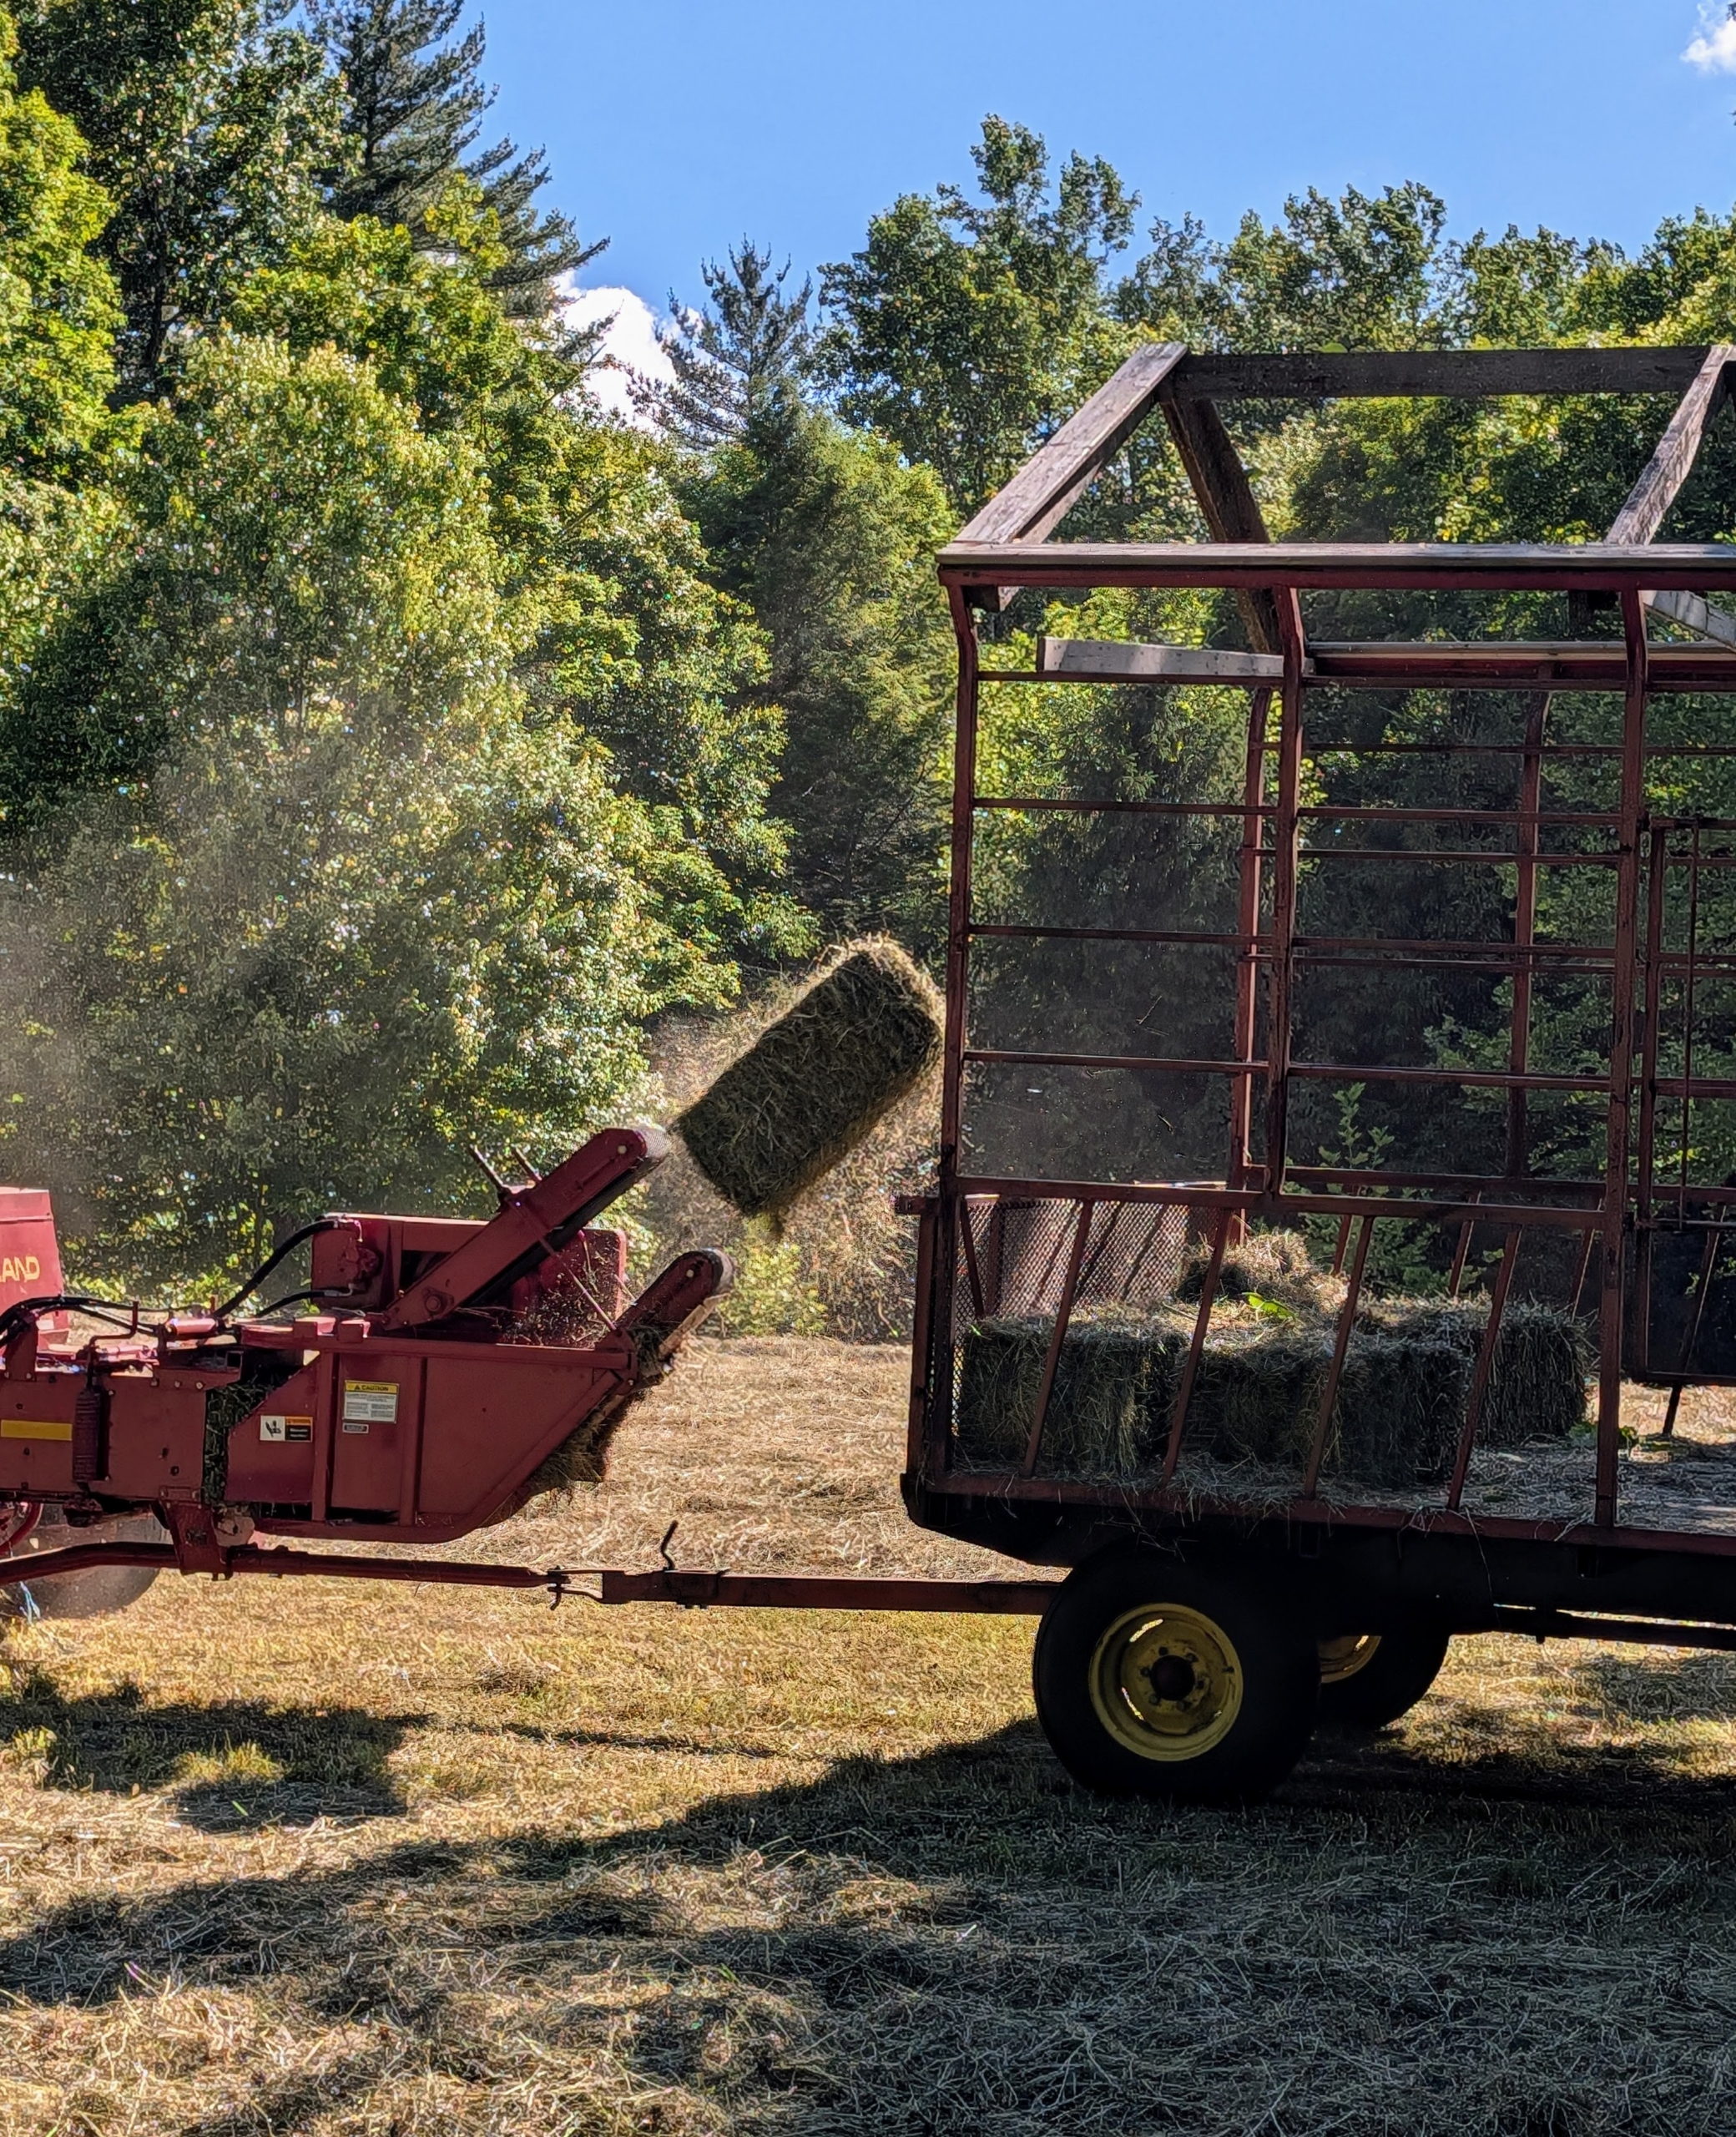
The process starts midday when there is the least amount of moisture. The wagon fills up pretty quickly. Each wagon can hold about 150-bales.
The hay is lifted by tines in the baler’s reel. Here one can see the bale shooting upward.
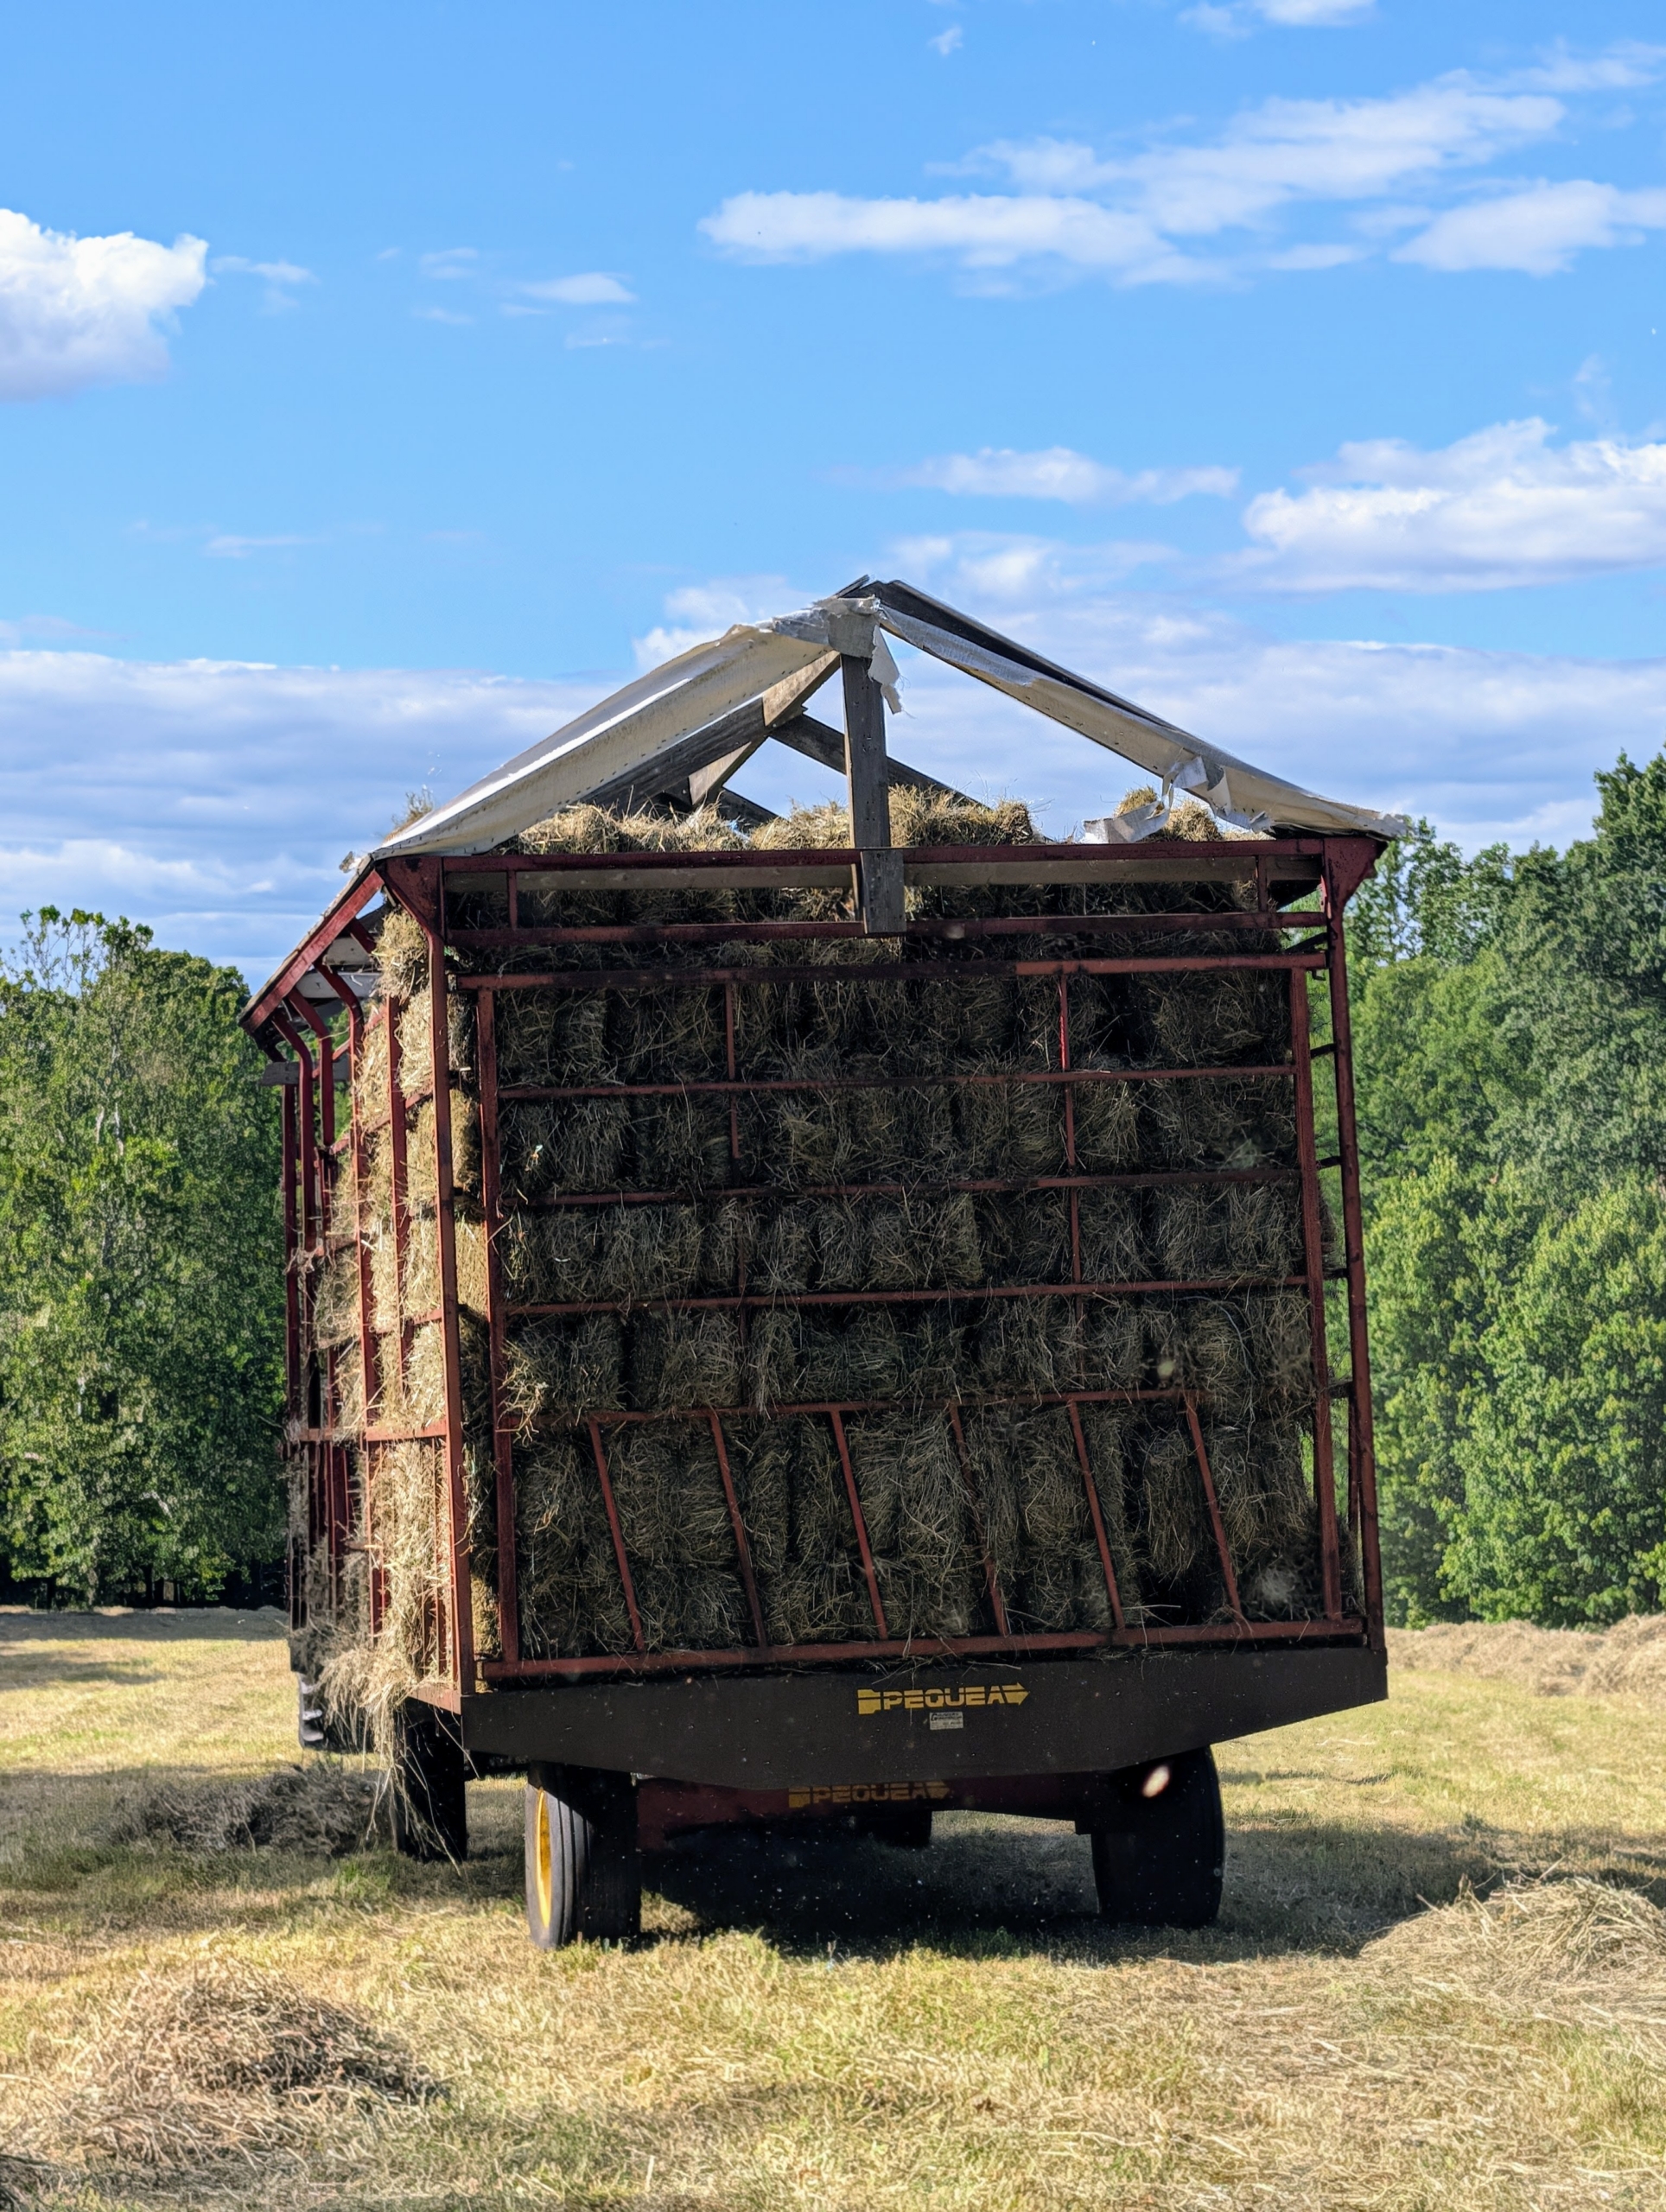
I have two hay wagons. Here is one completely filled and ready to stack.
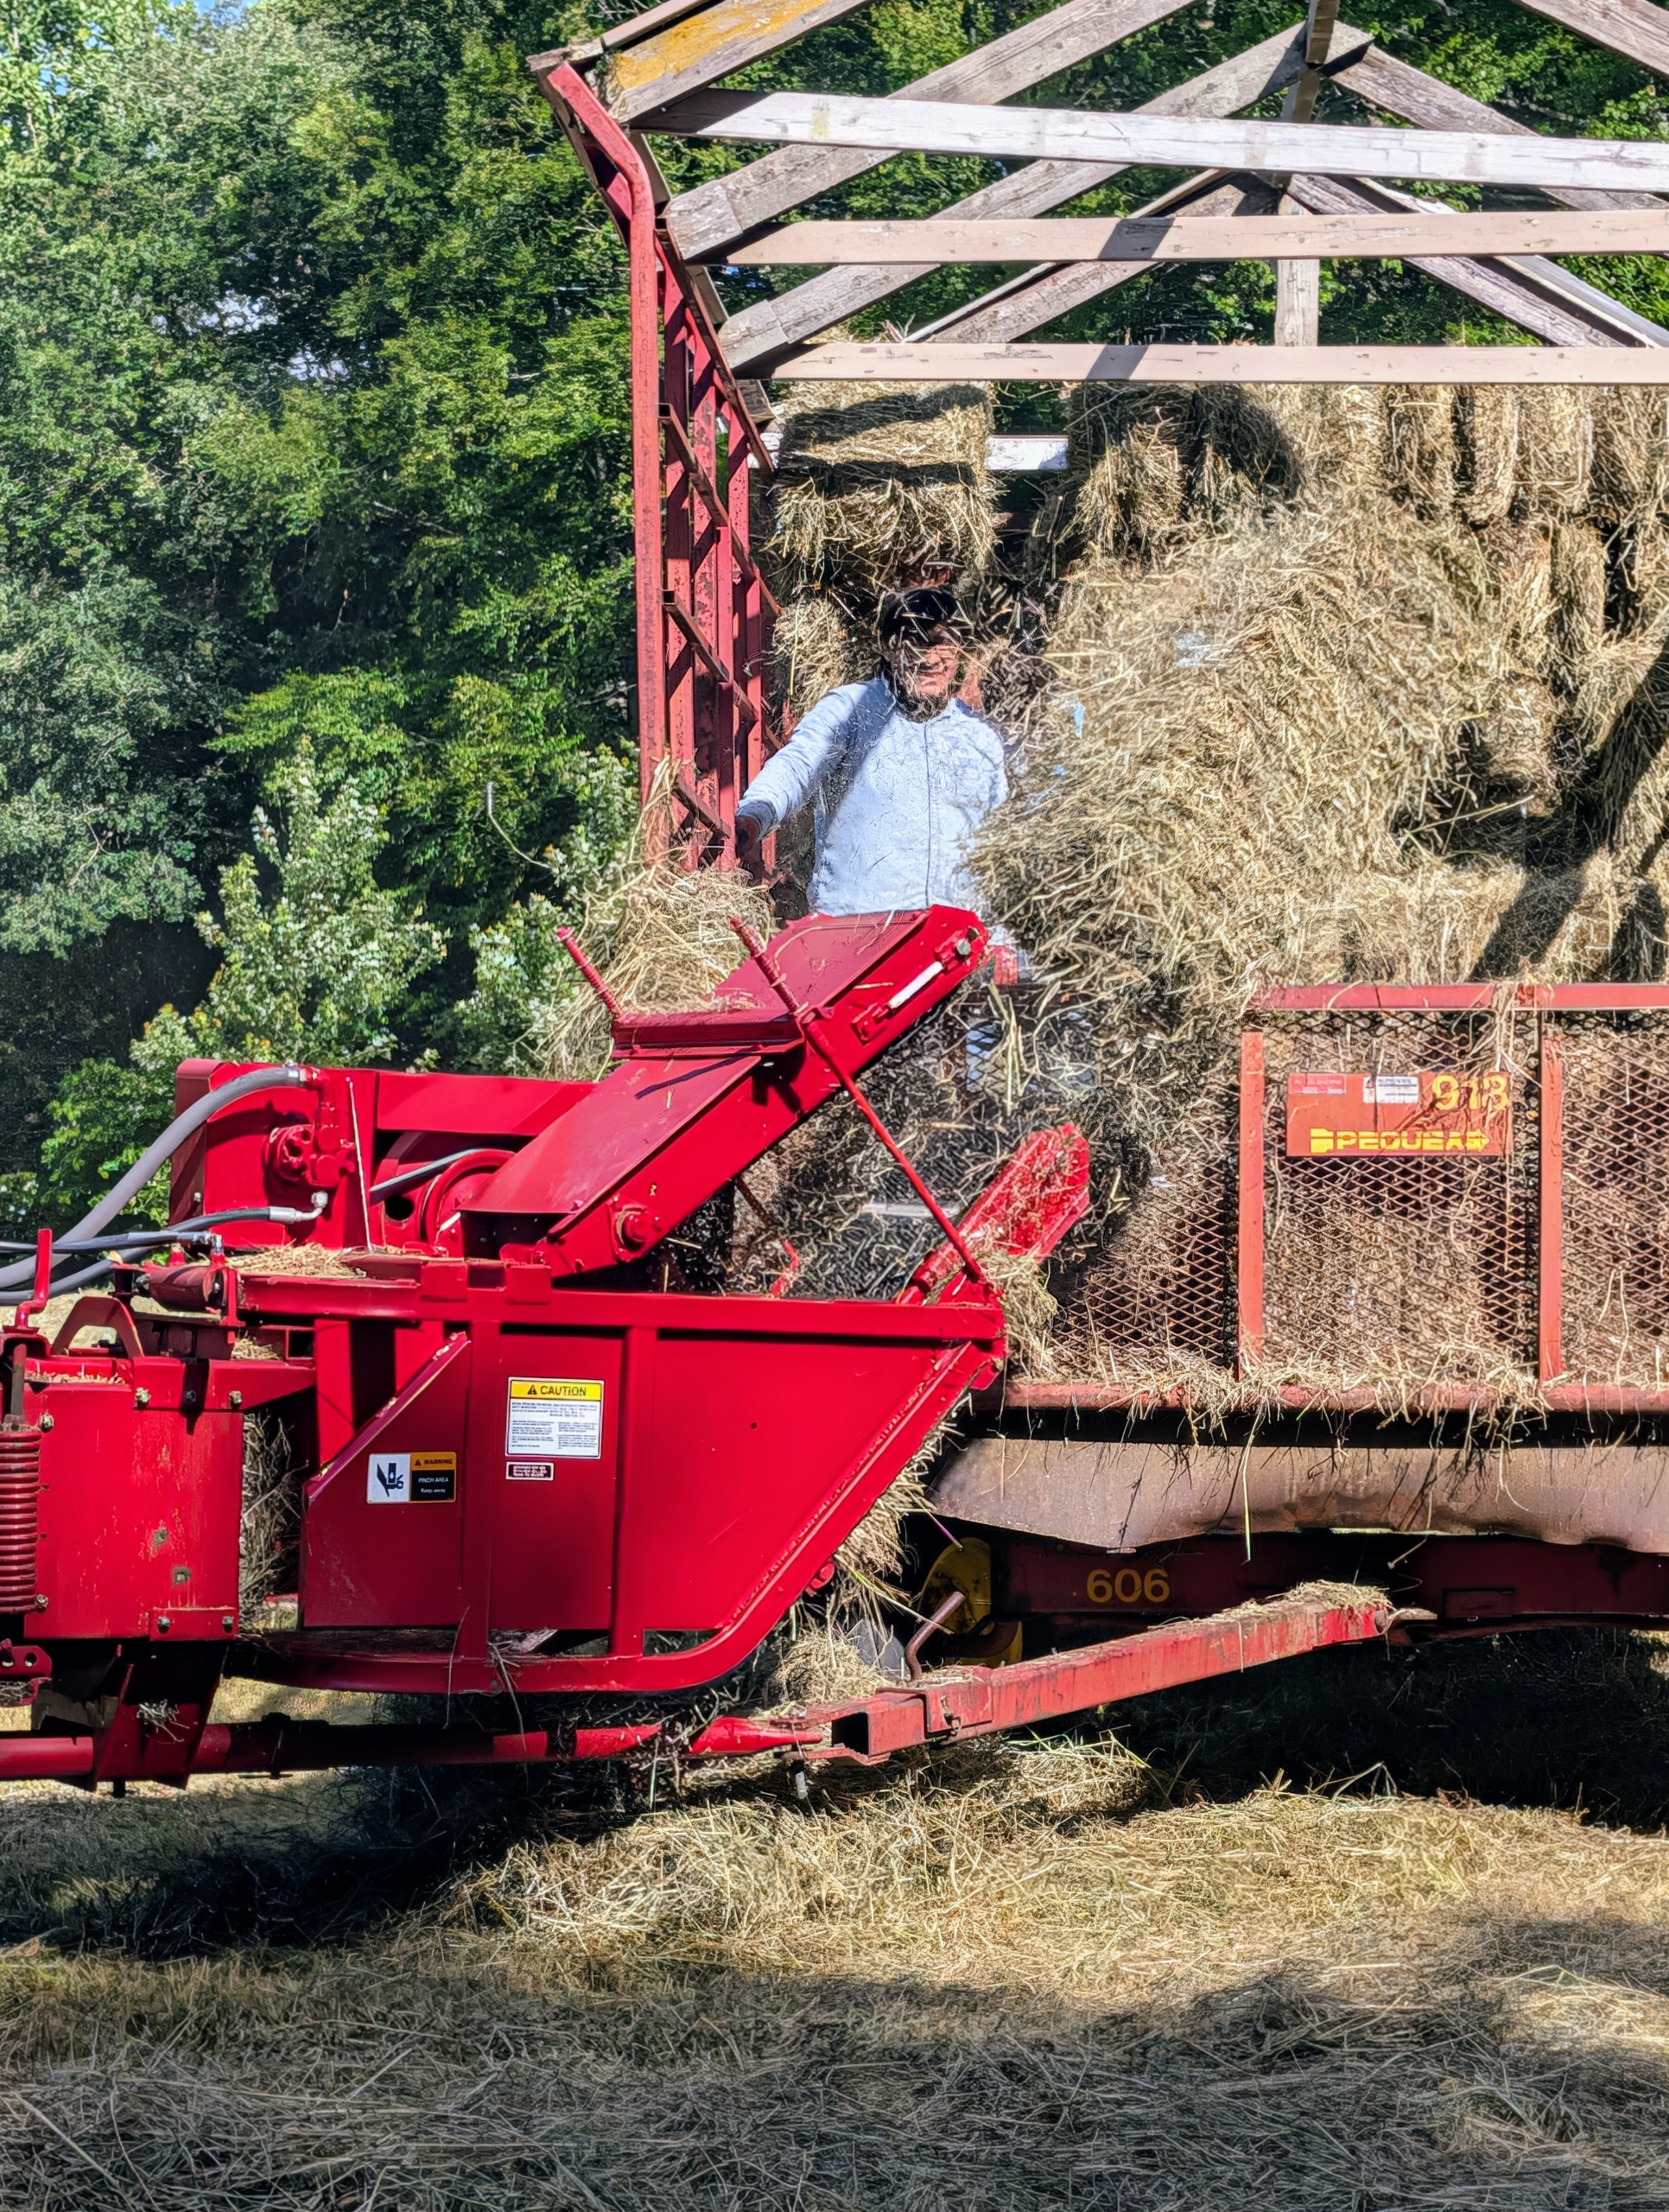
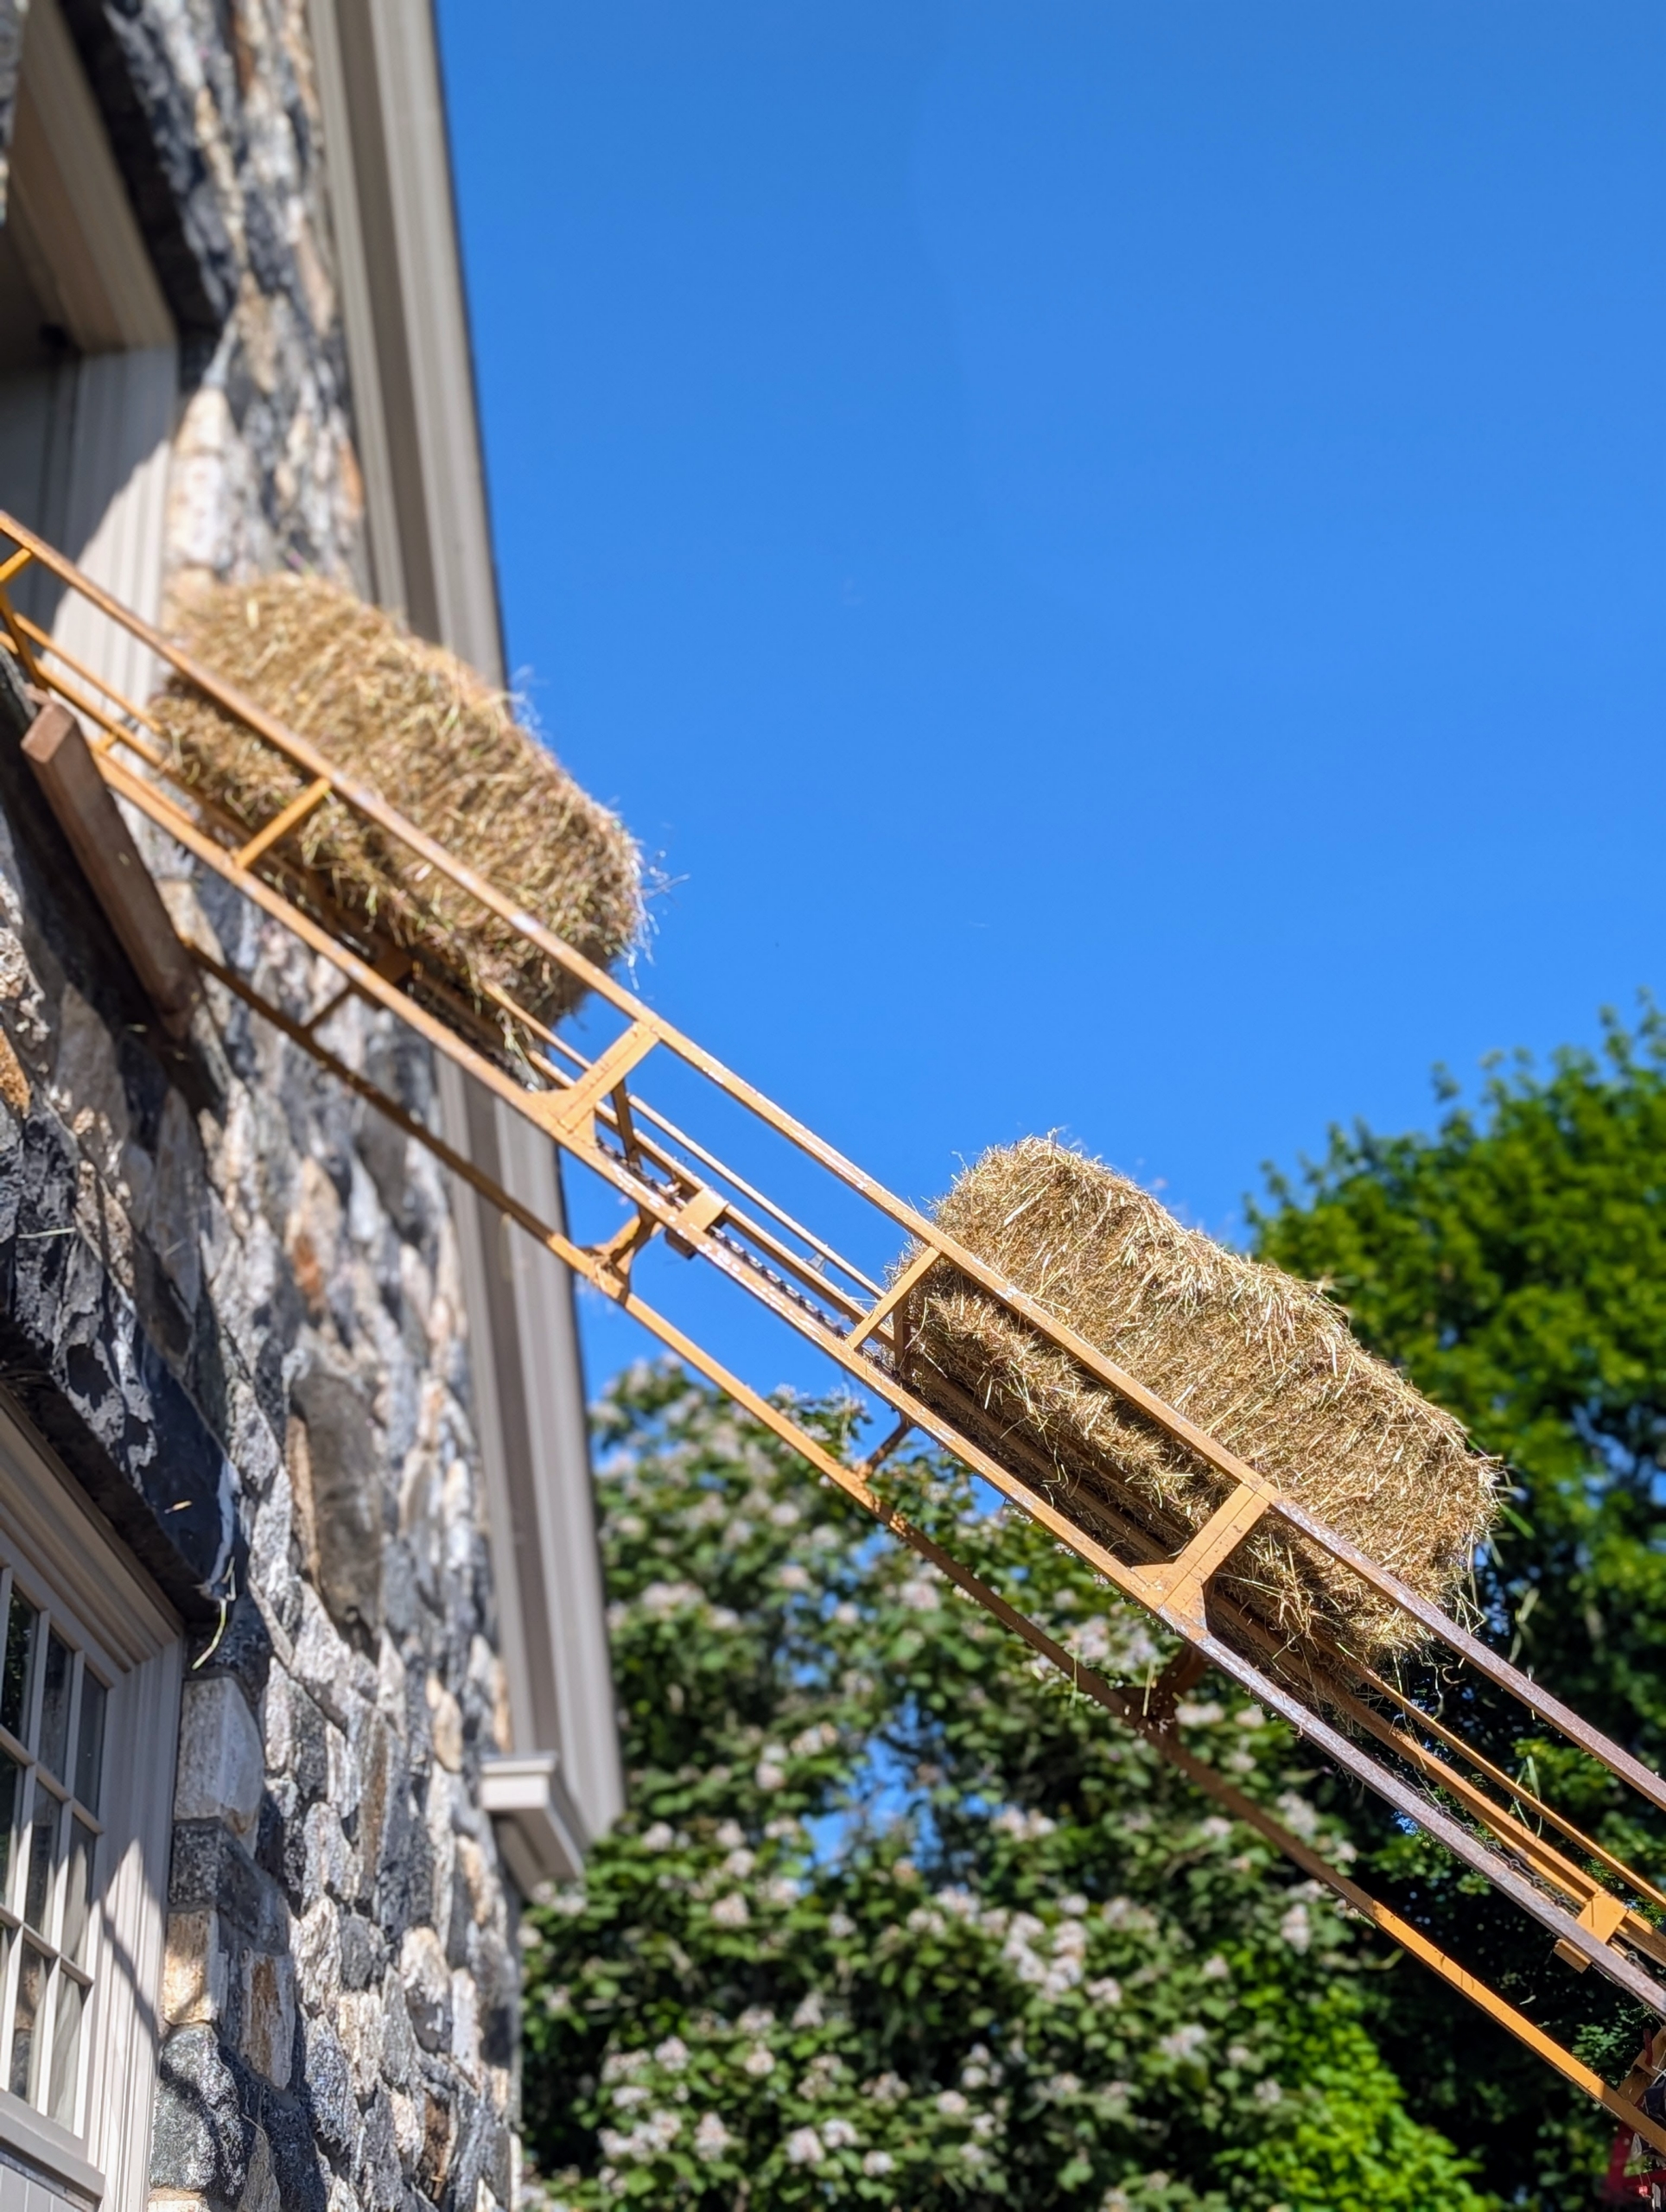
The crew sets up the hay elevator to the hay loft. Then each bale is placed on the hay elevator which sends it up to waiting hands. Baling hay is a team effort. Each bale is about 15 by 18 by 40 inches large. The number of flakes in the bale is determined by a setting in the baler. Many balers are set for 10 to 12 flakes per bale. The bales are manageable for one person to handle, about 45 to 60 pounds each.
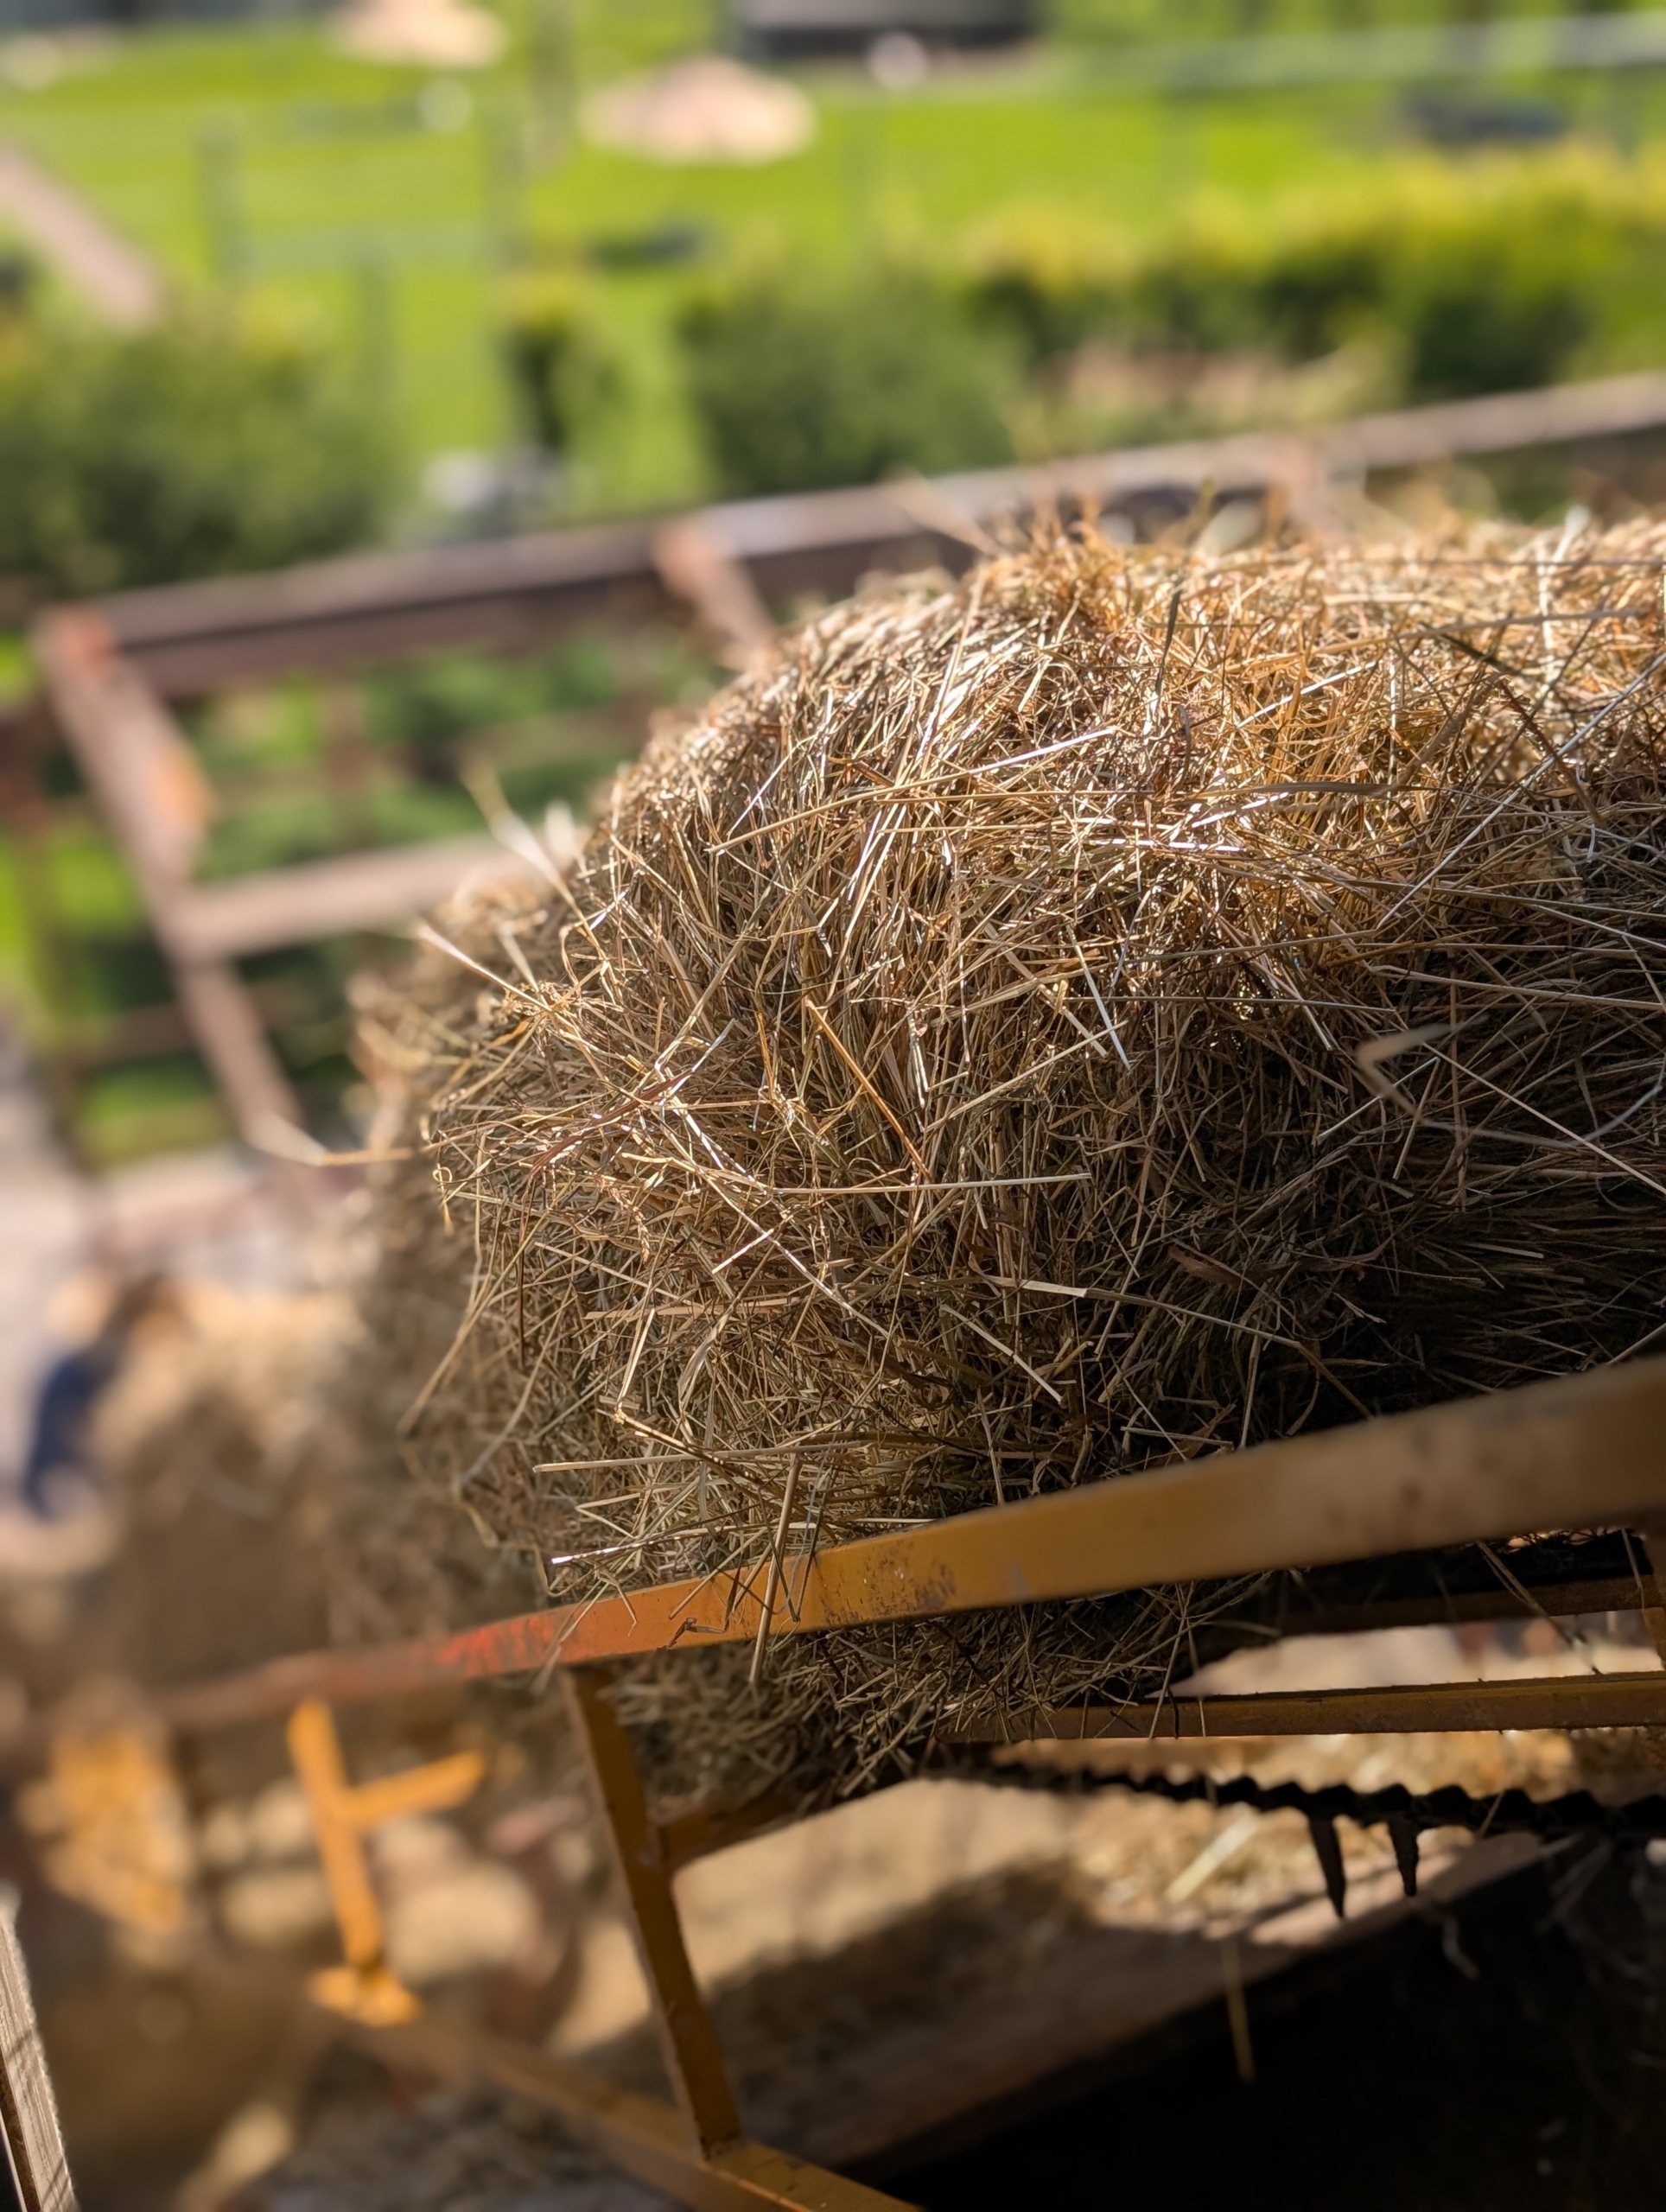
Here is a view from the hay loft as the bales come up the elevator.
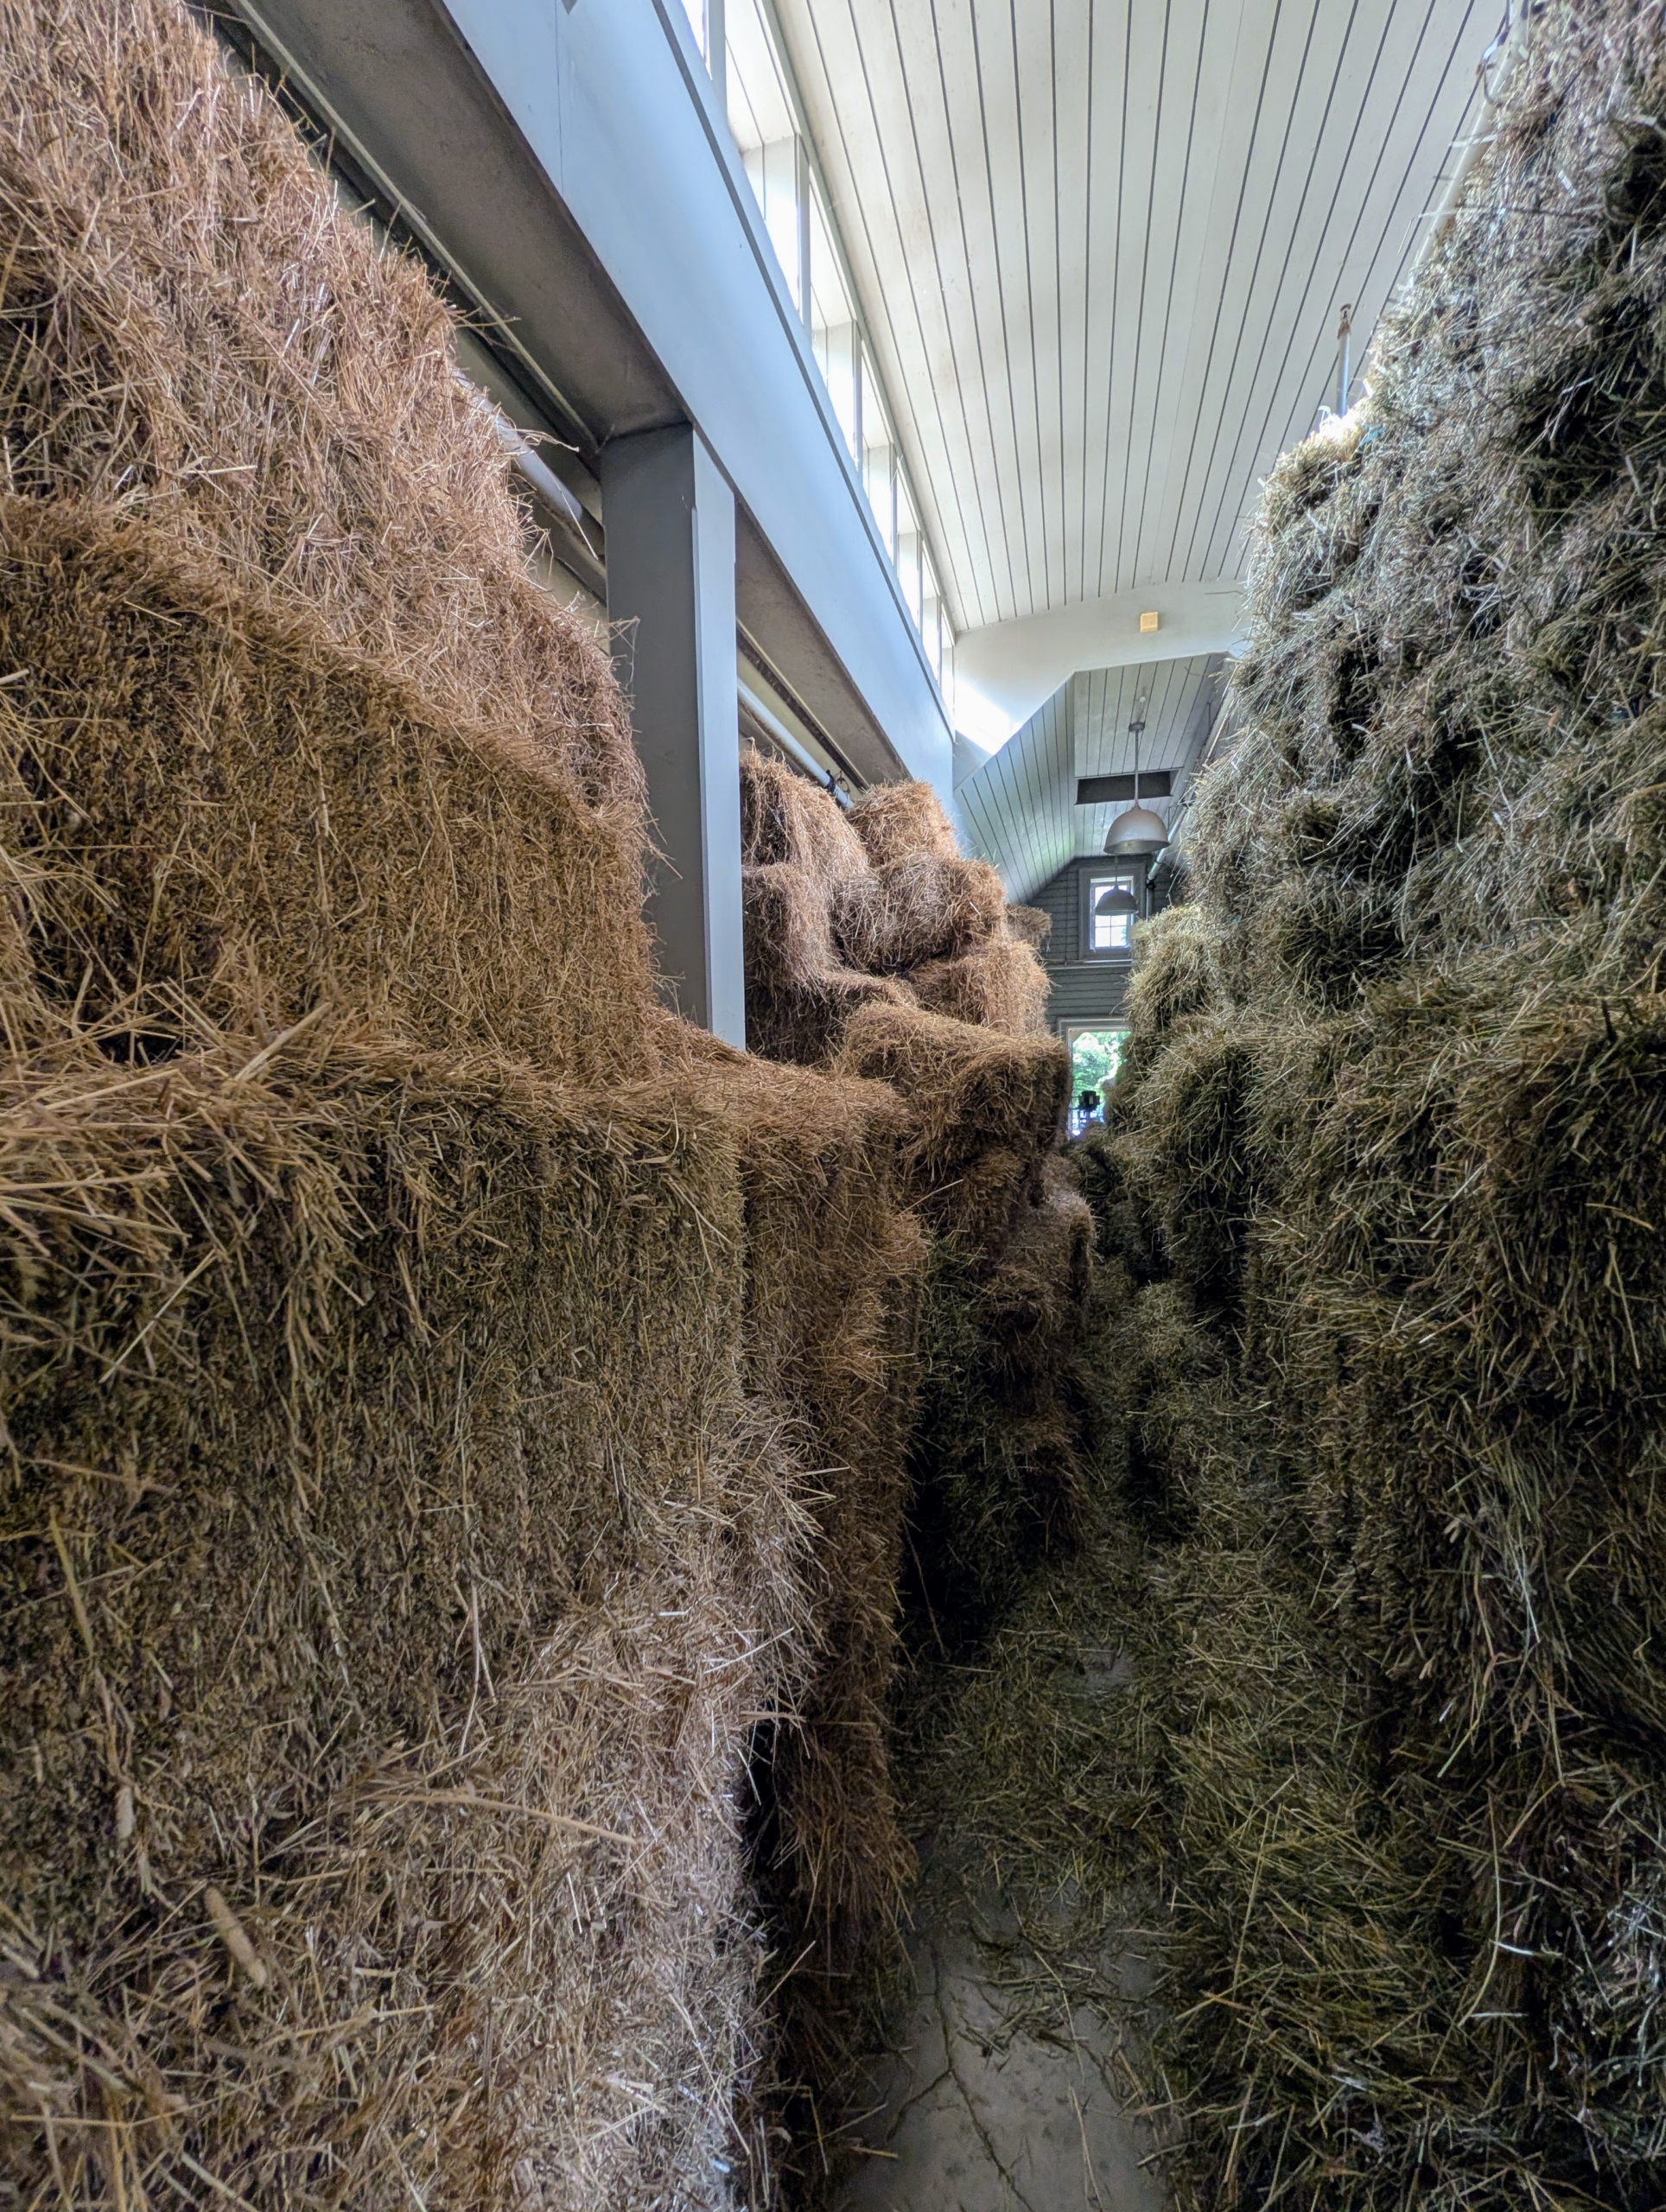
The hay loft is full! Once all the fields are cut, they will be re-seeded and we’ll do a second cut at the end of the summer. I’m so glad to be able to make my own hay right here at my farm.
For anyone passionate about gardening, it's always so rewarding to know well cared for perennials will return year after year, often becoming more lush and more resilient with each passing season.
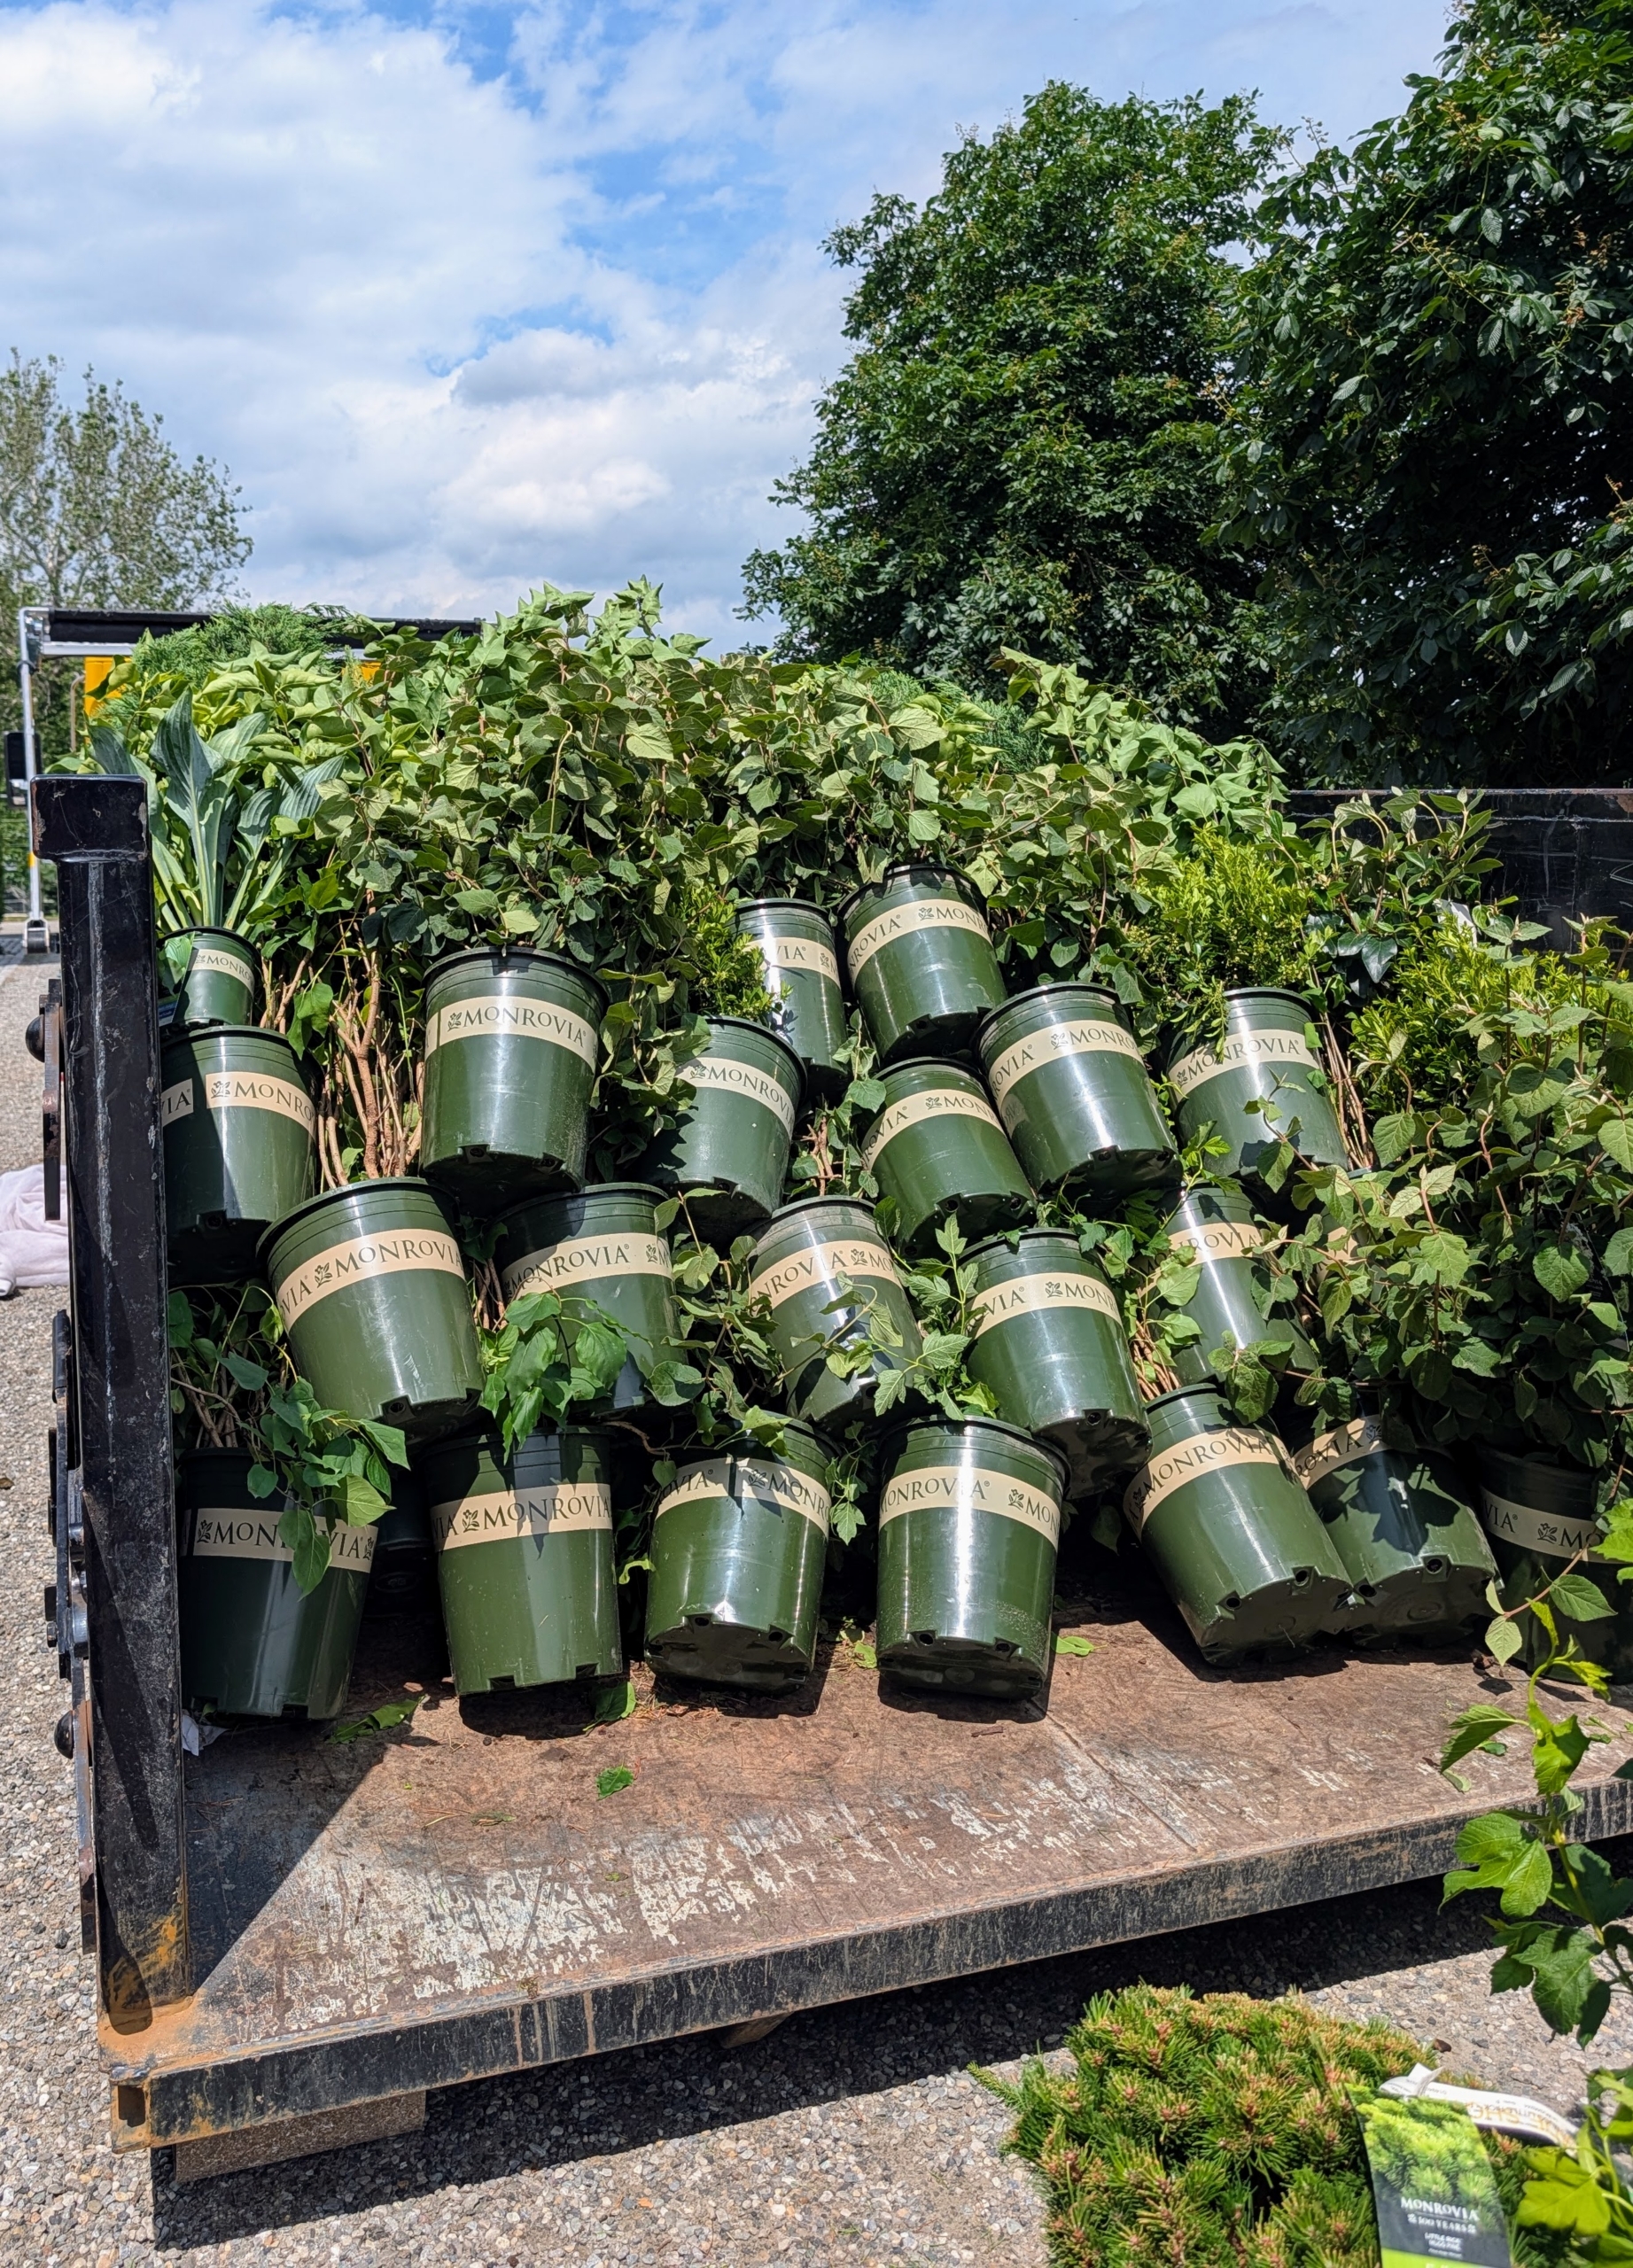
Recently, I received a large assortment of beautiful plants grown by Monrovia, a wholesale plant company with several nursery locations across the country. Many of the plants are from their Landscape Legends Collections and include Mint Julep Juniper, Little Rick Mugo Pine, Ilex Emerald Boxer, and Ilex Little One. I also received Blue Atlas Cedar, Yellow Ribbon Arborvitae, Hoop's Blue Spruce, Yankee Doodle Lilac, and others. I'm so excited with these plants and can't wait to add them to my living maze and to other gardens here at my farm.
Enjoy these photos.
Adding gorgeous, healthy plants to my gardens is one of my biggest joys. I was so thrilled to see these beauties.
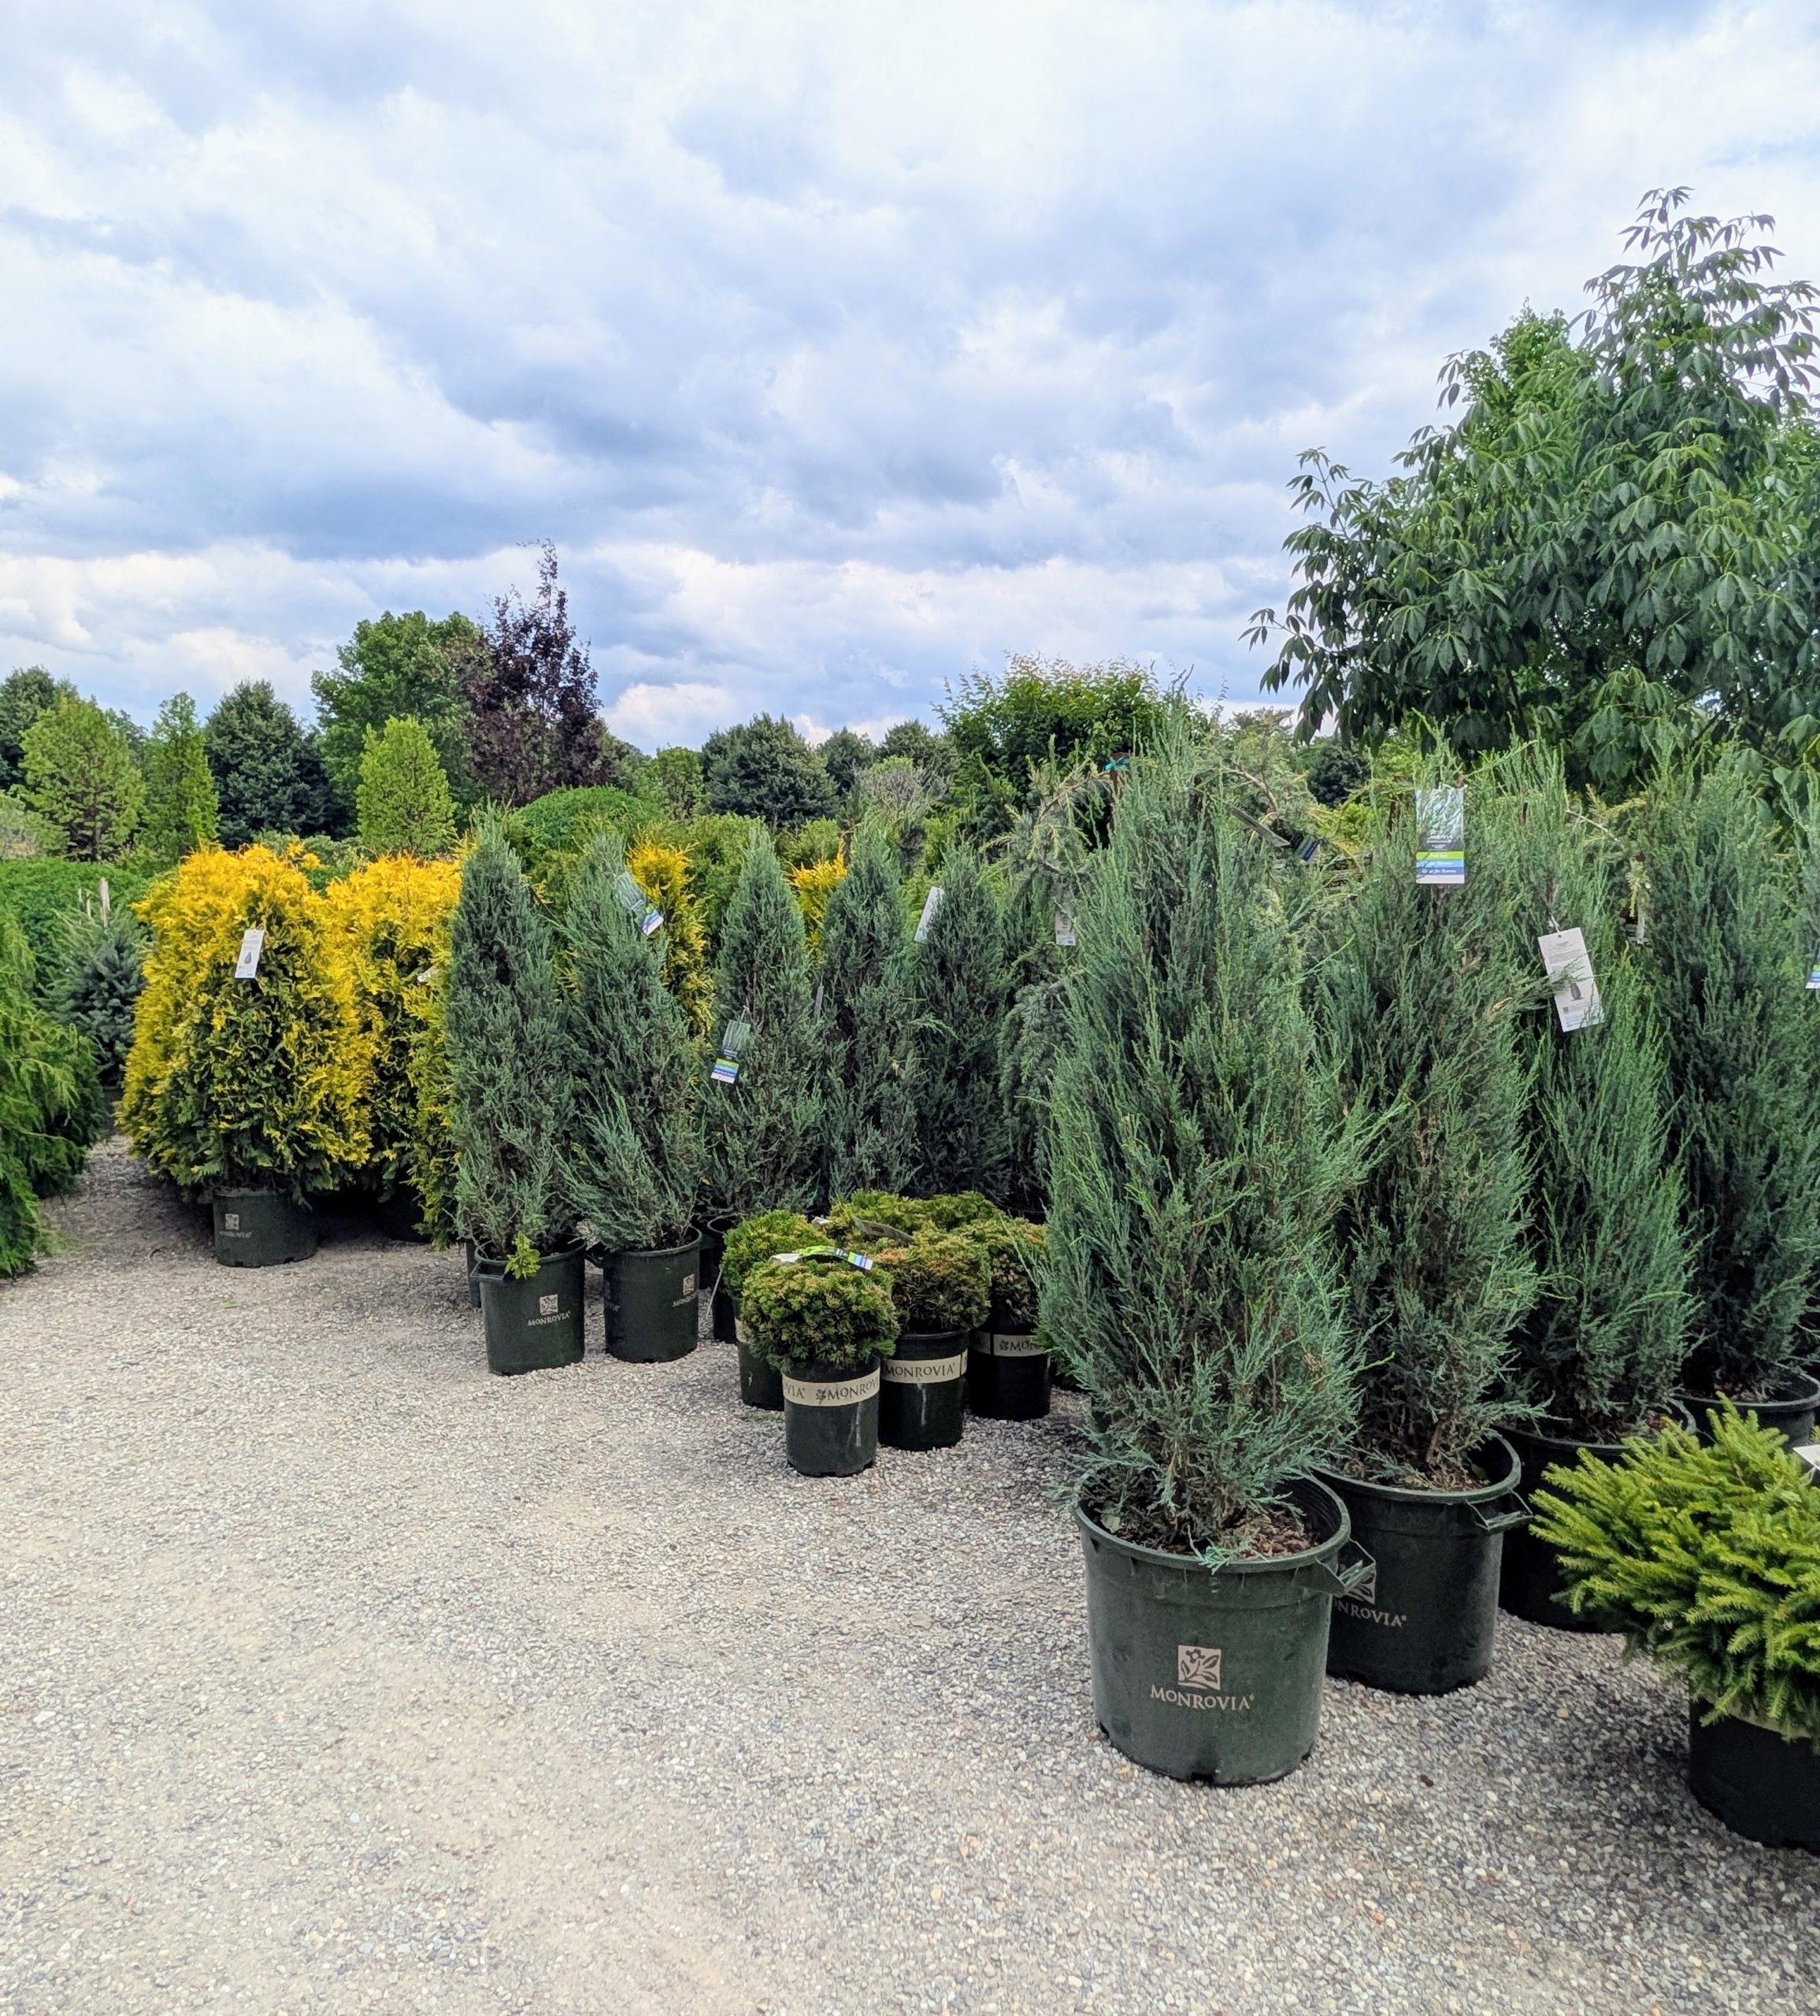
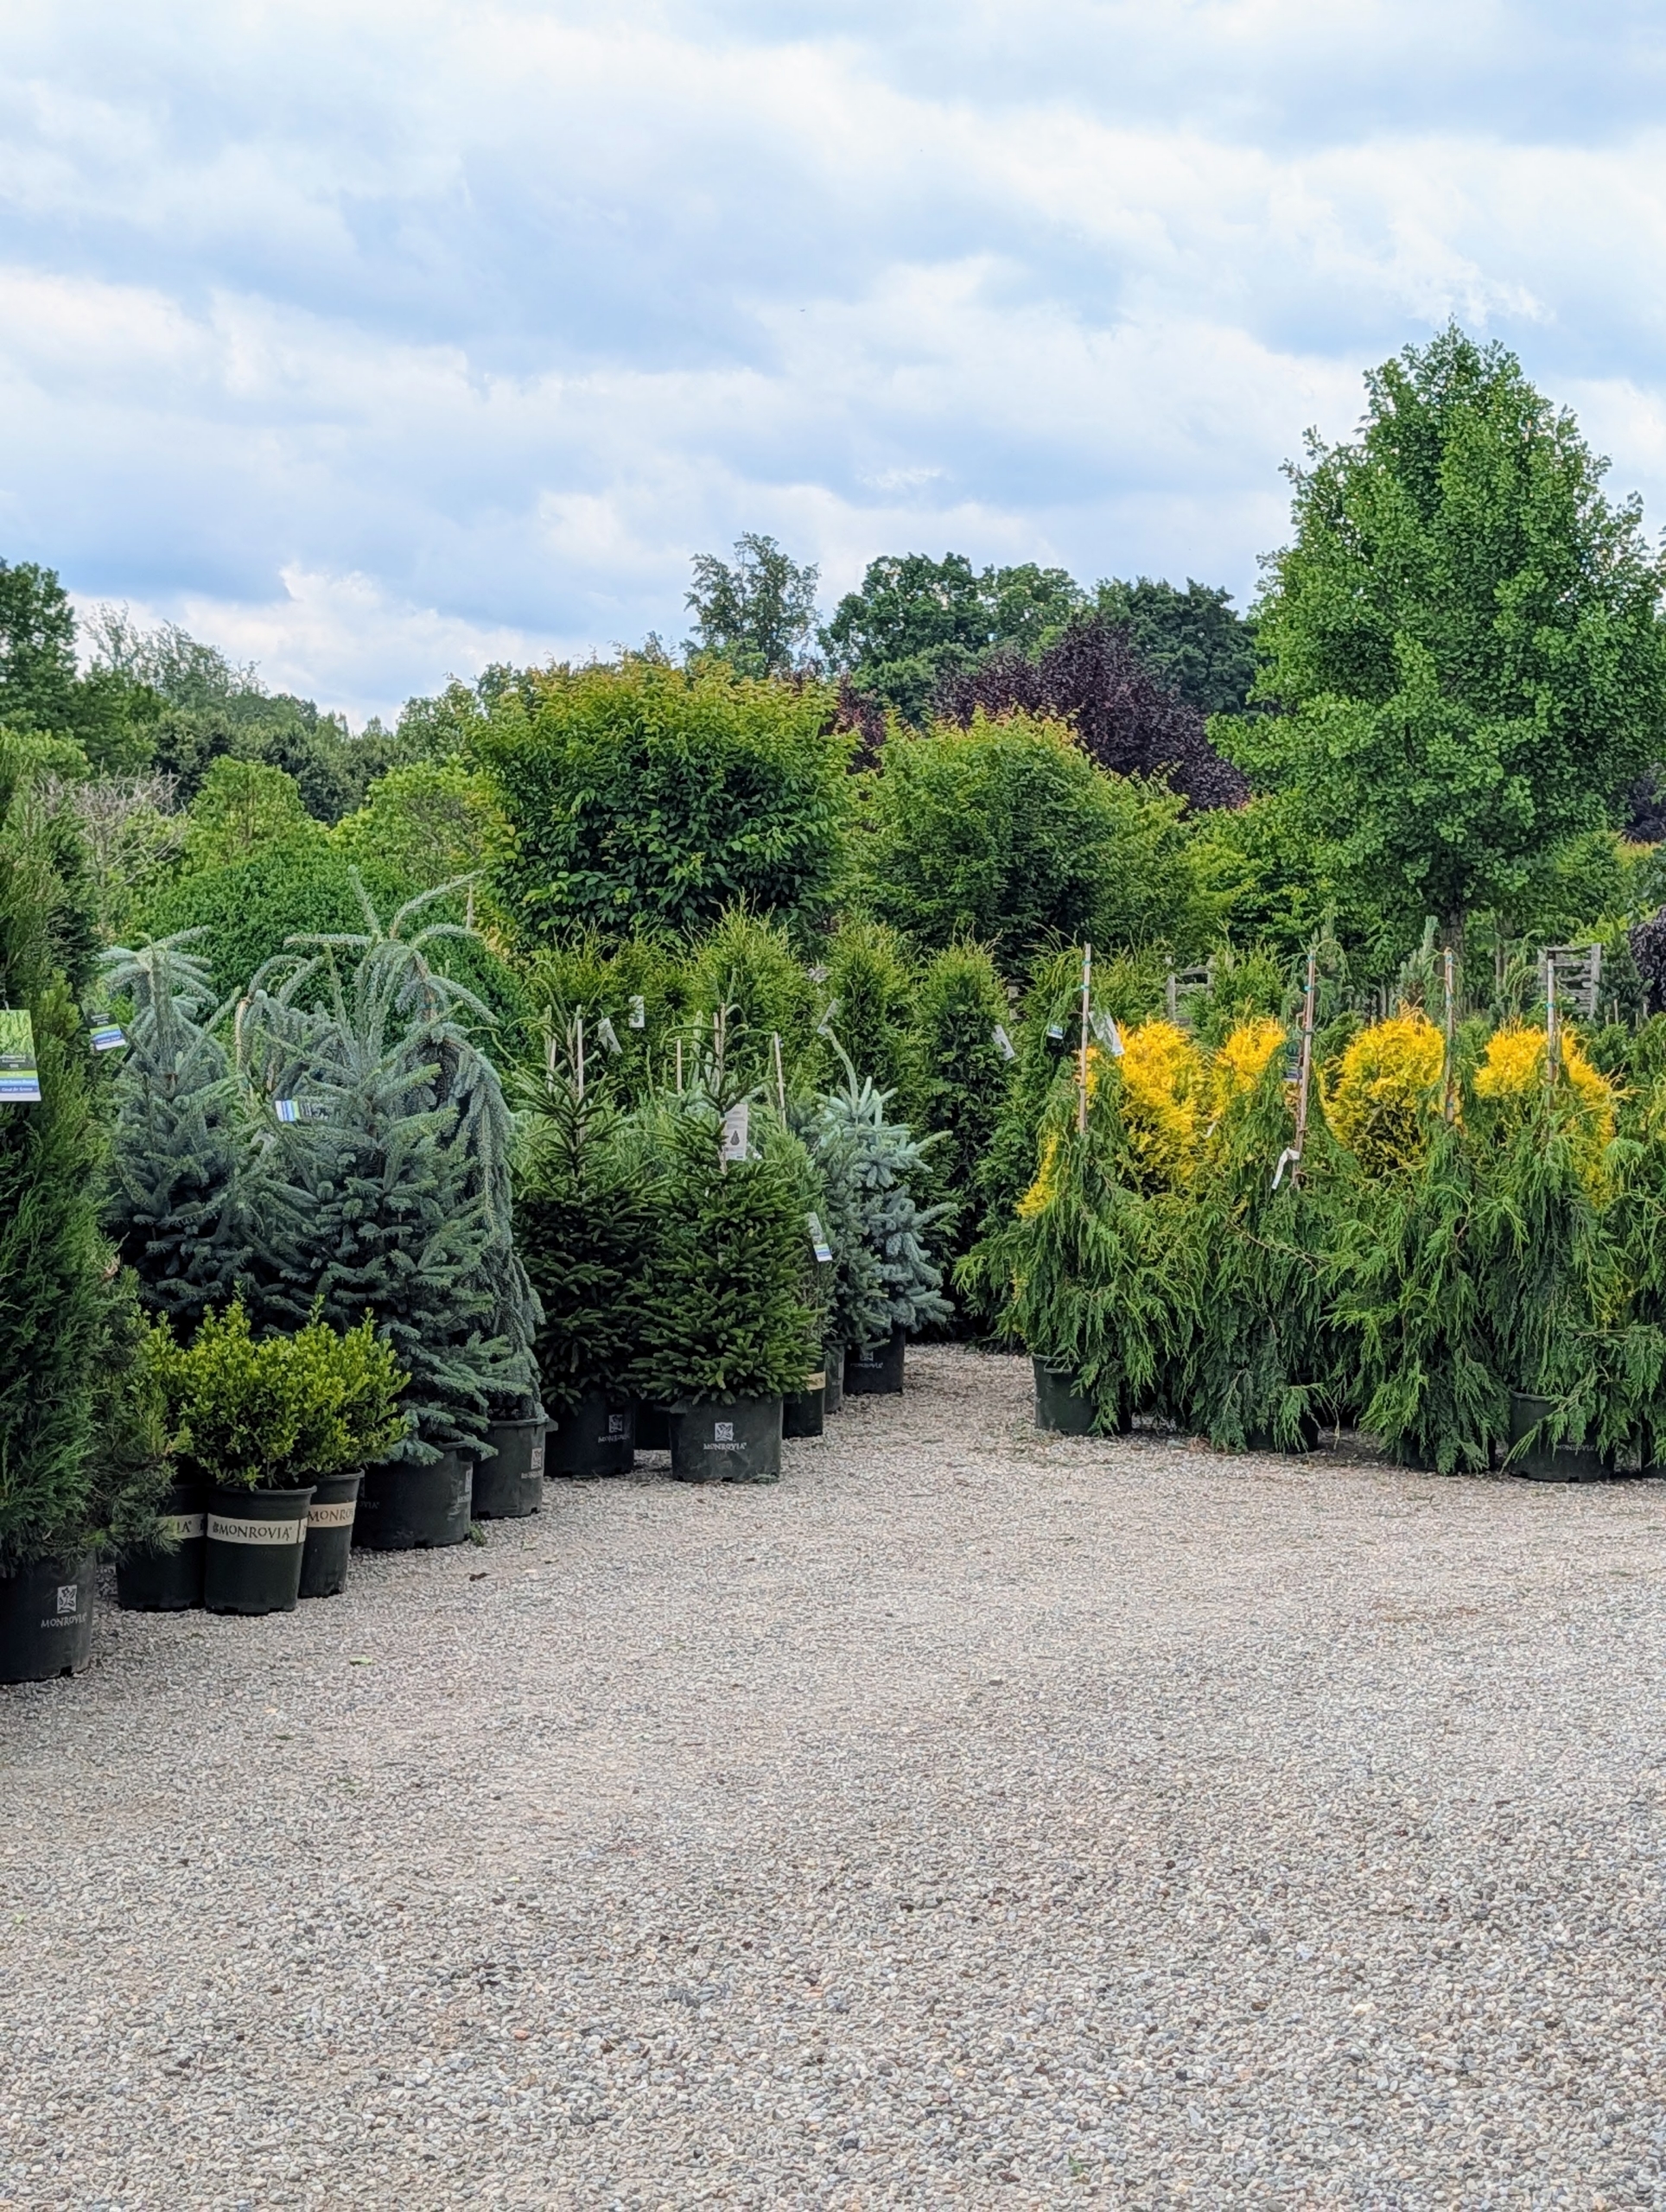
The plants arrived in several truck loads and had to be unloaded one by one.
As specimens are removed from the truck, they are organized in neat rows according to type so they are easy to see, count, and access when it is time to plant.
Creating a garden takes time. Select species suited to the climate zone and garden conditions. Also consider the plant’s mature size, sunlight requirements, and soil preferences to ensure long-term health. Add a few specimens every year and keep track of what grows well and what doesn’t.
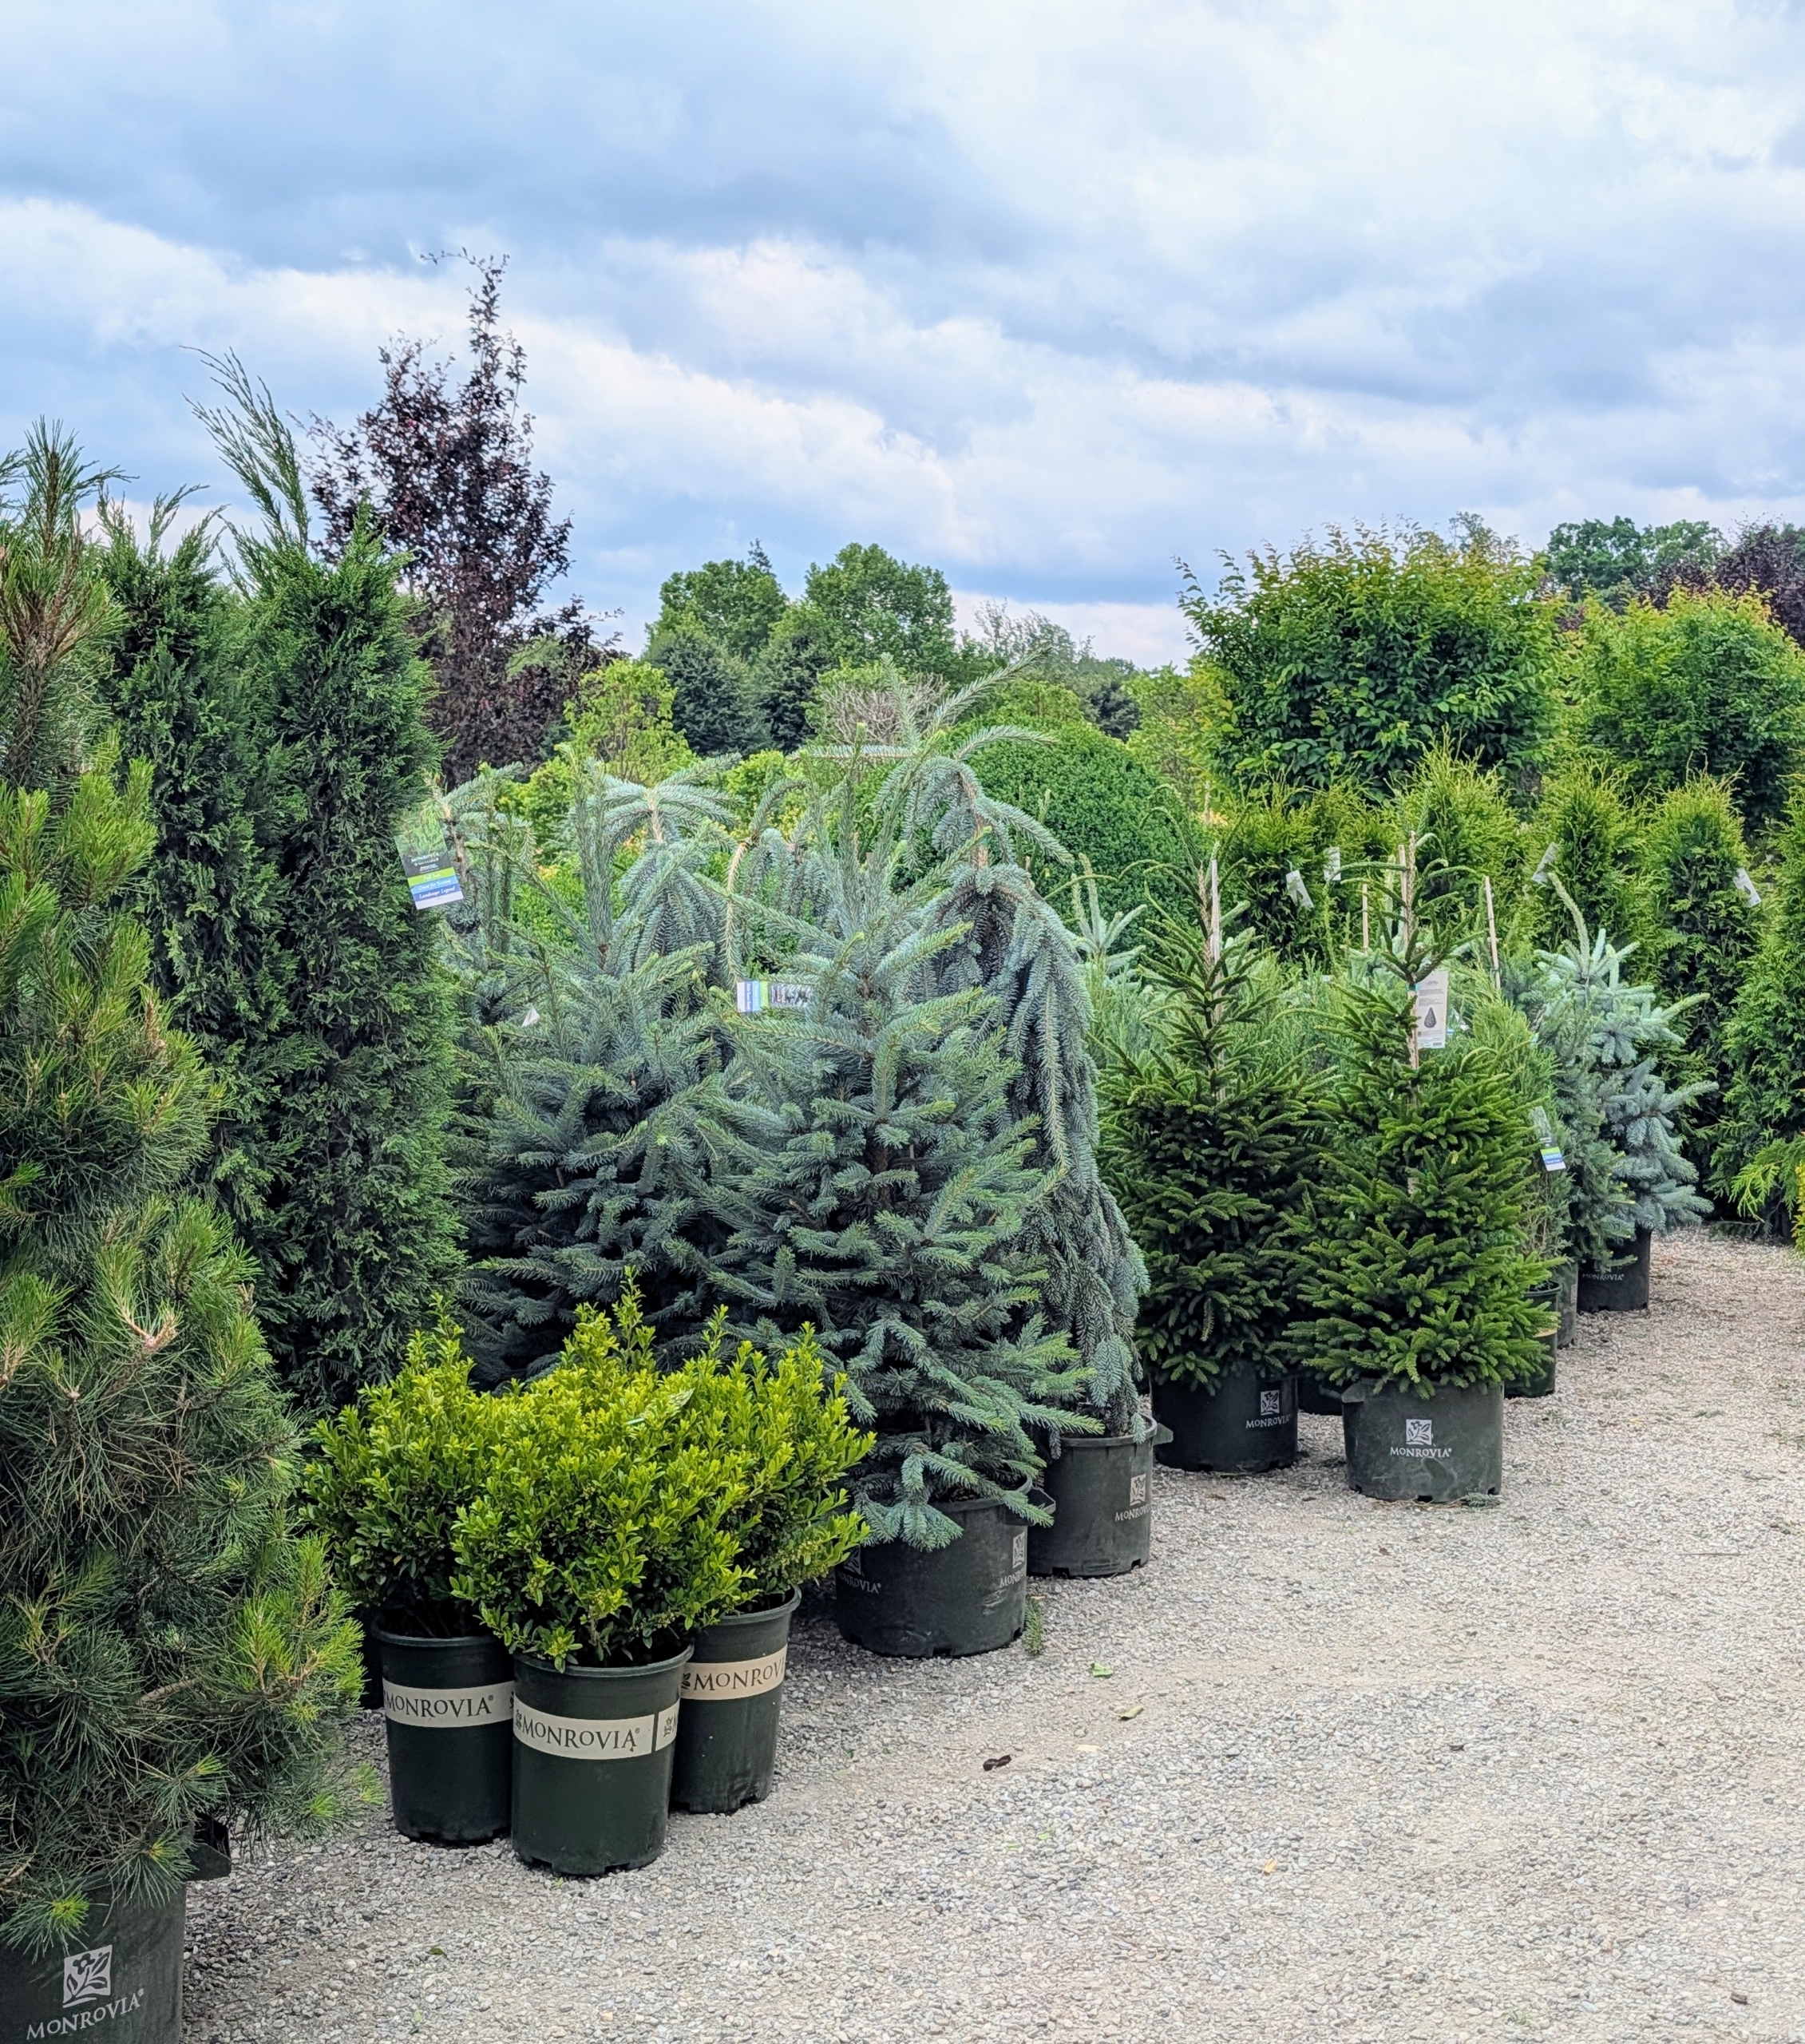
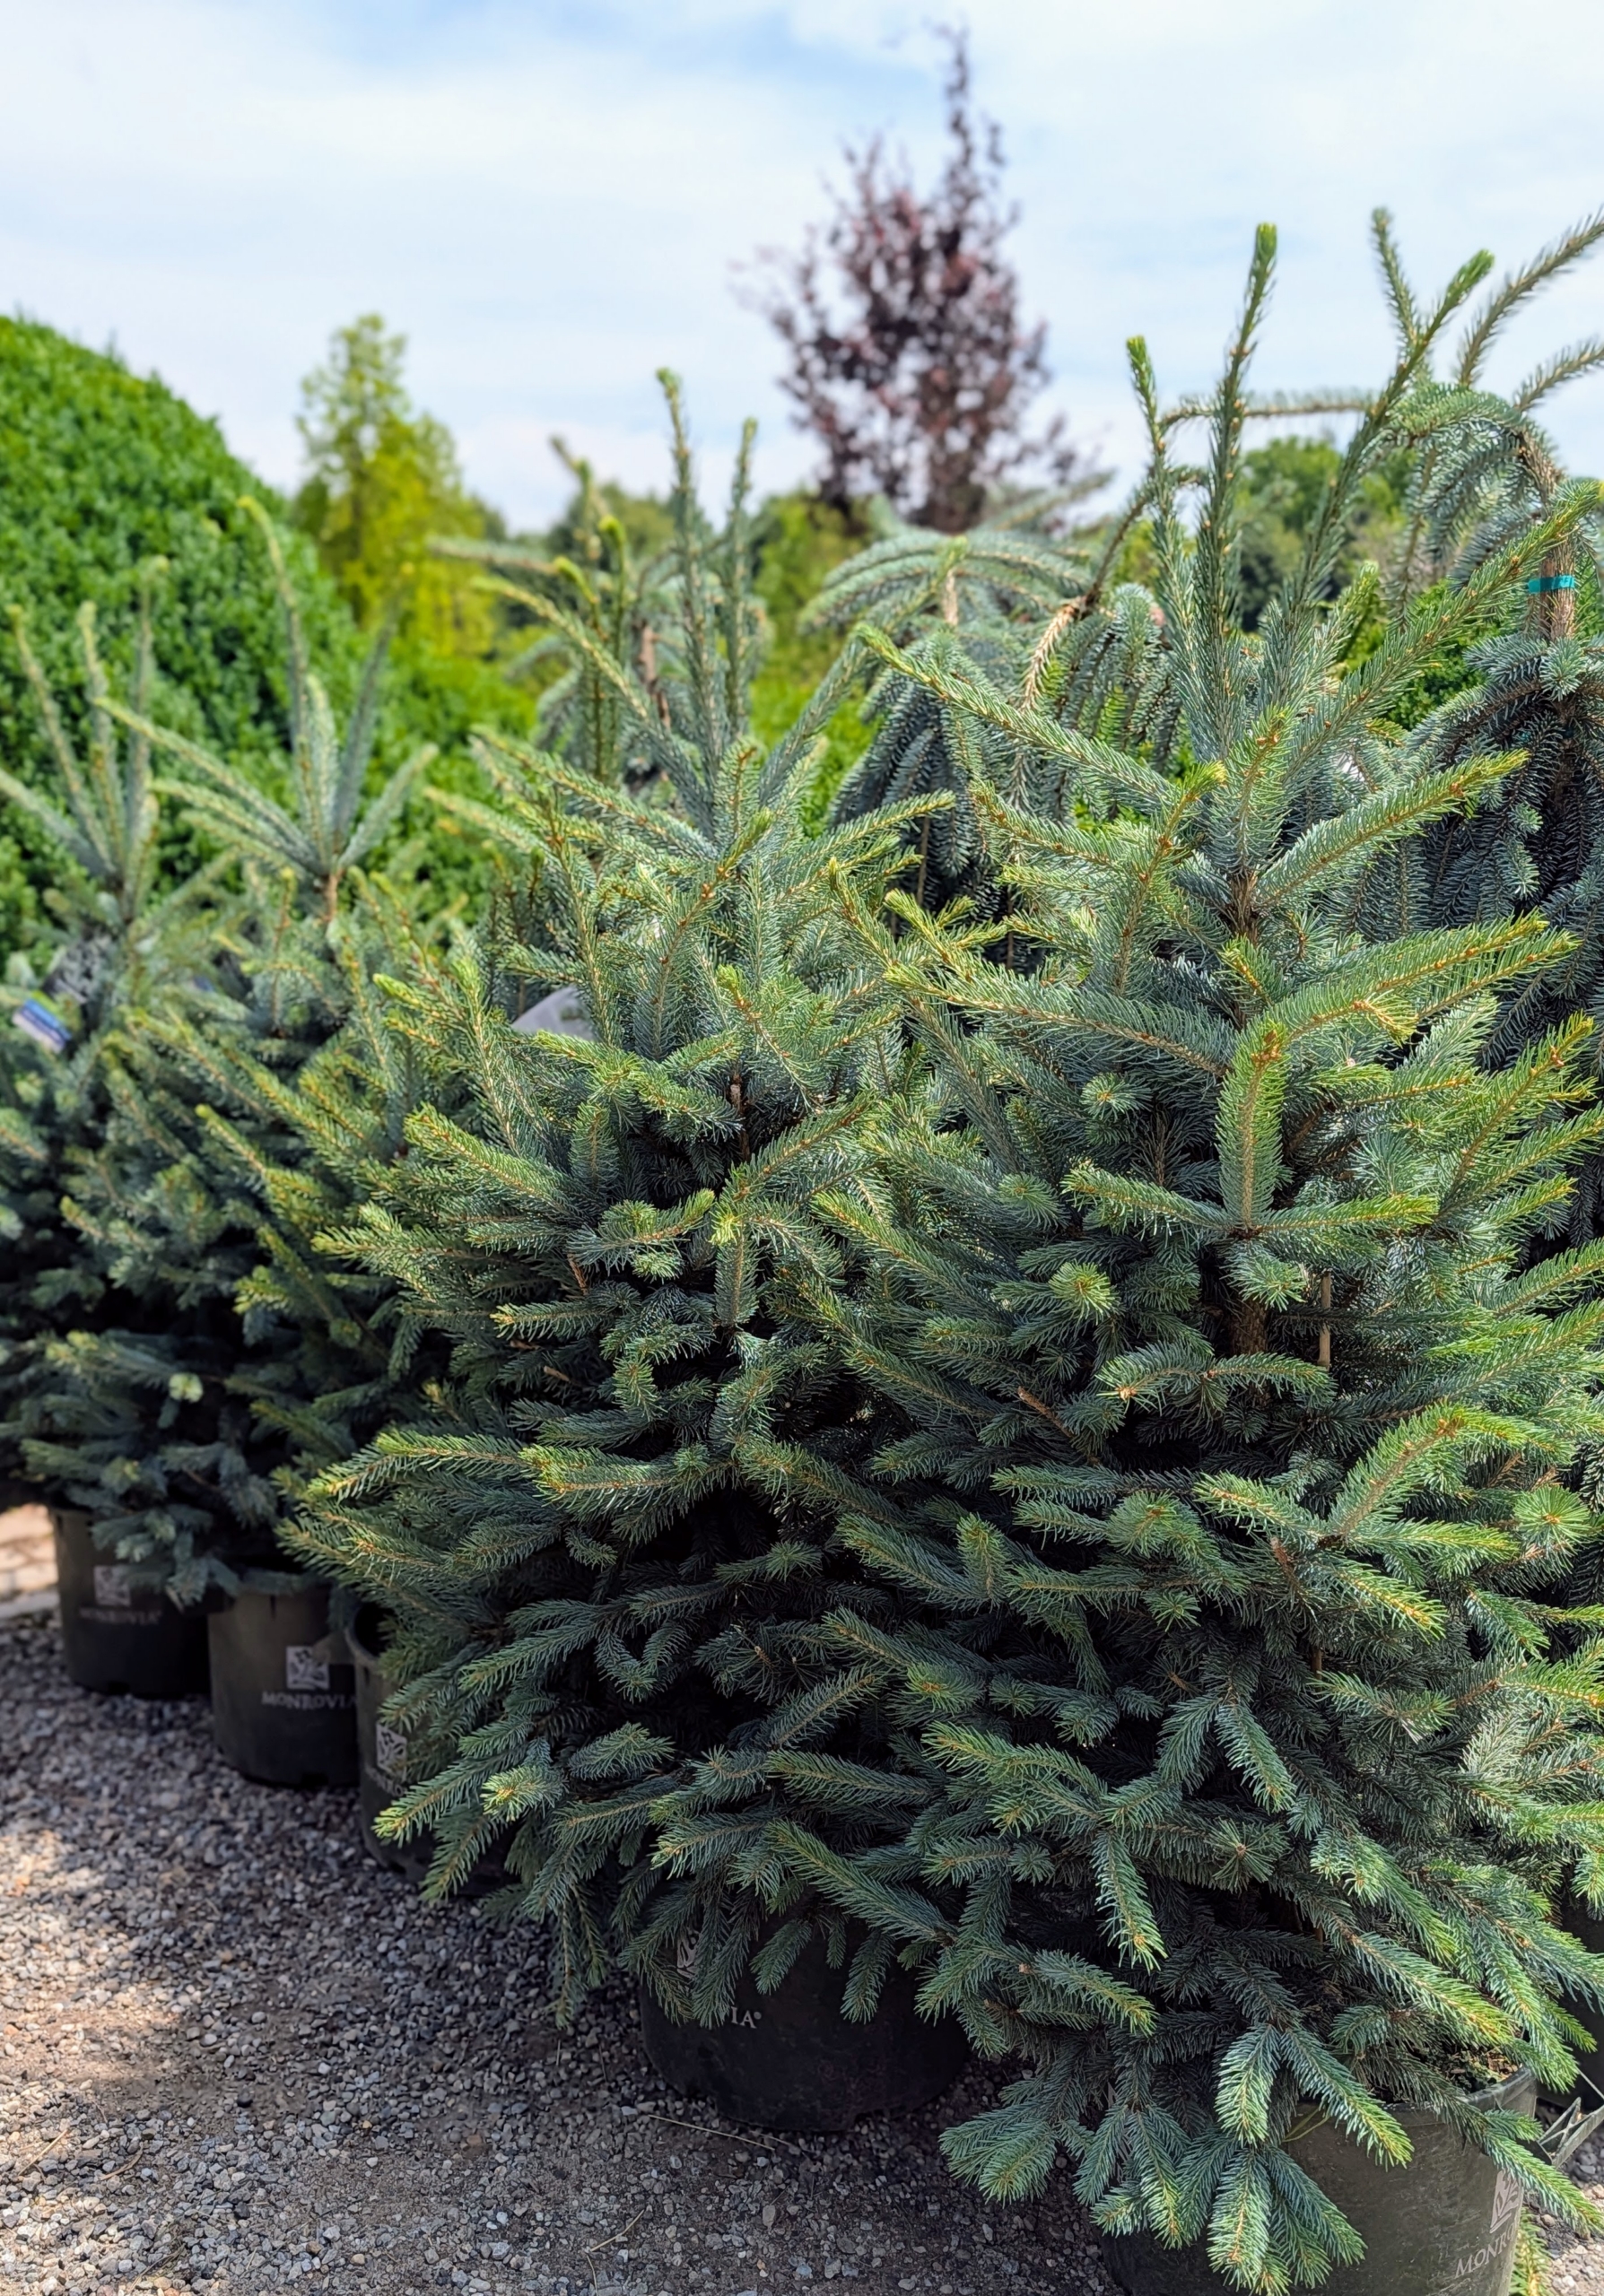
This is a Colorado blue spruce, Picea pungens ‘Fat Albert.’ It is an evergreen conifer with rich blue needles on dense branches. It grows slowly, but naturally in a pyramidal form. And it grows 10 to 15 feet tall and wide in 10 years time. Do you know the difference between an evergreen and a conifer? Evergreens are plants that retain their leaves year-round, while conifers are cone-bearing plants. Most, not all, conifers are evergreens, but not all evergreens are conifers.
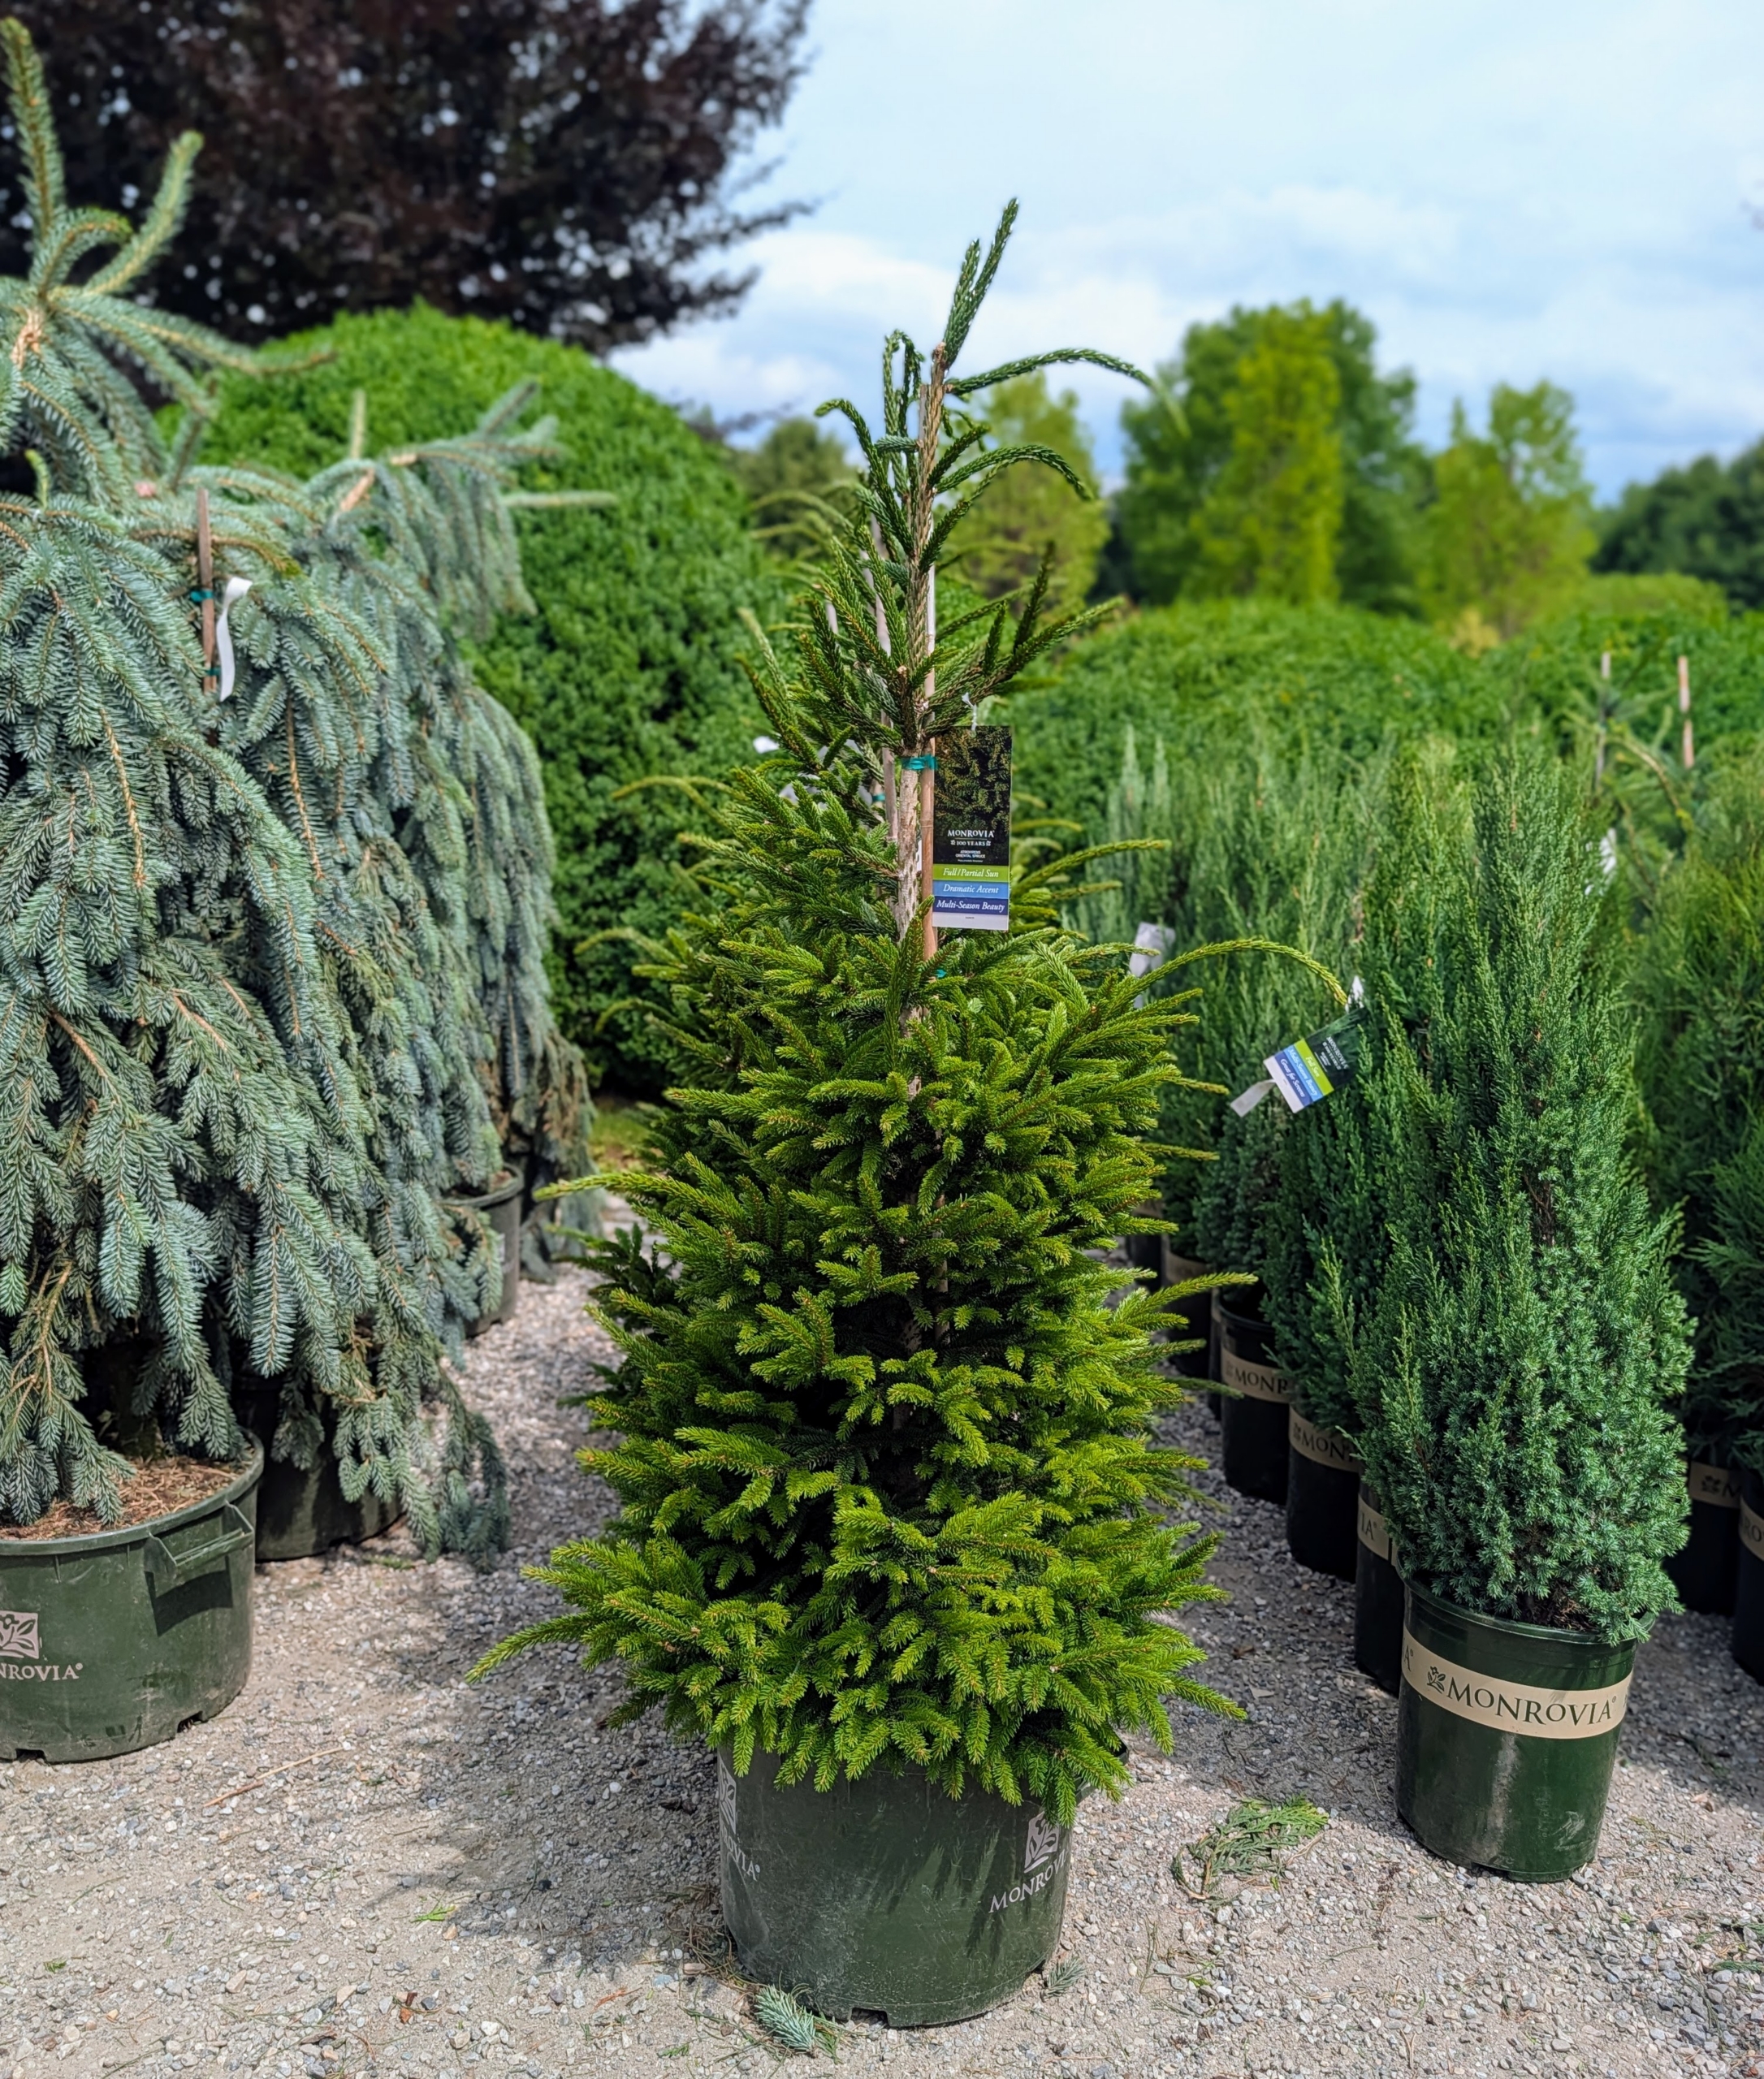
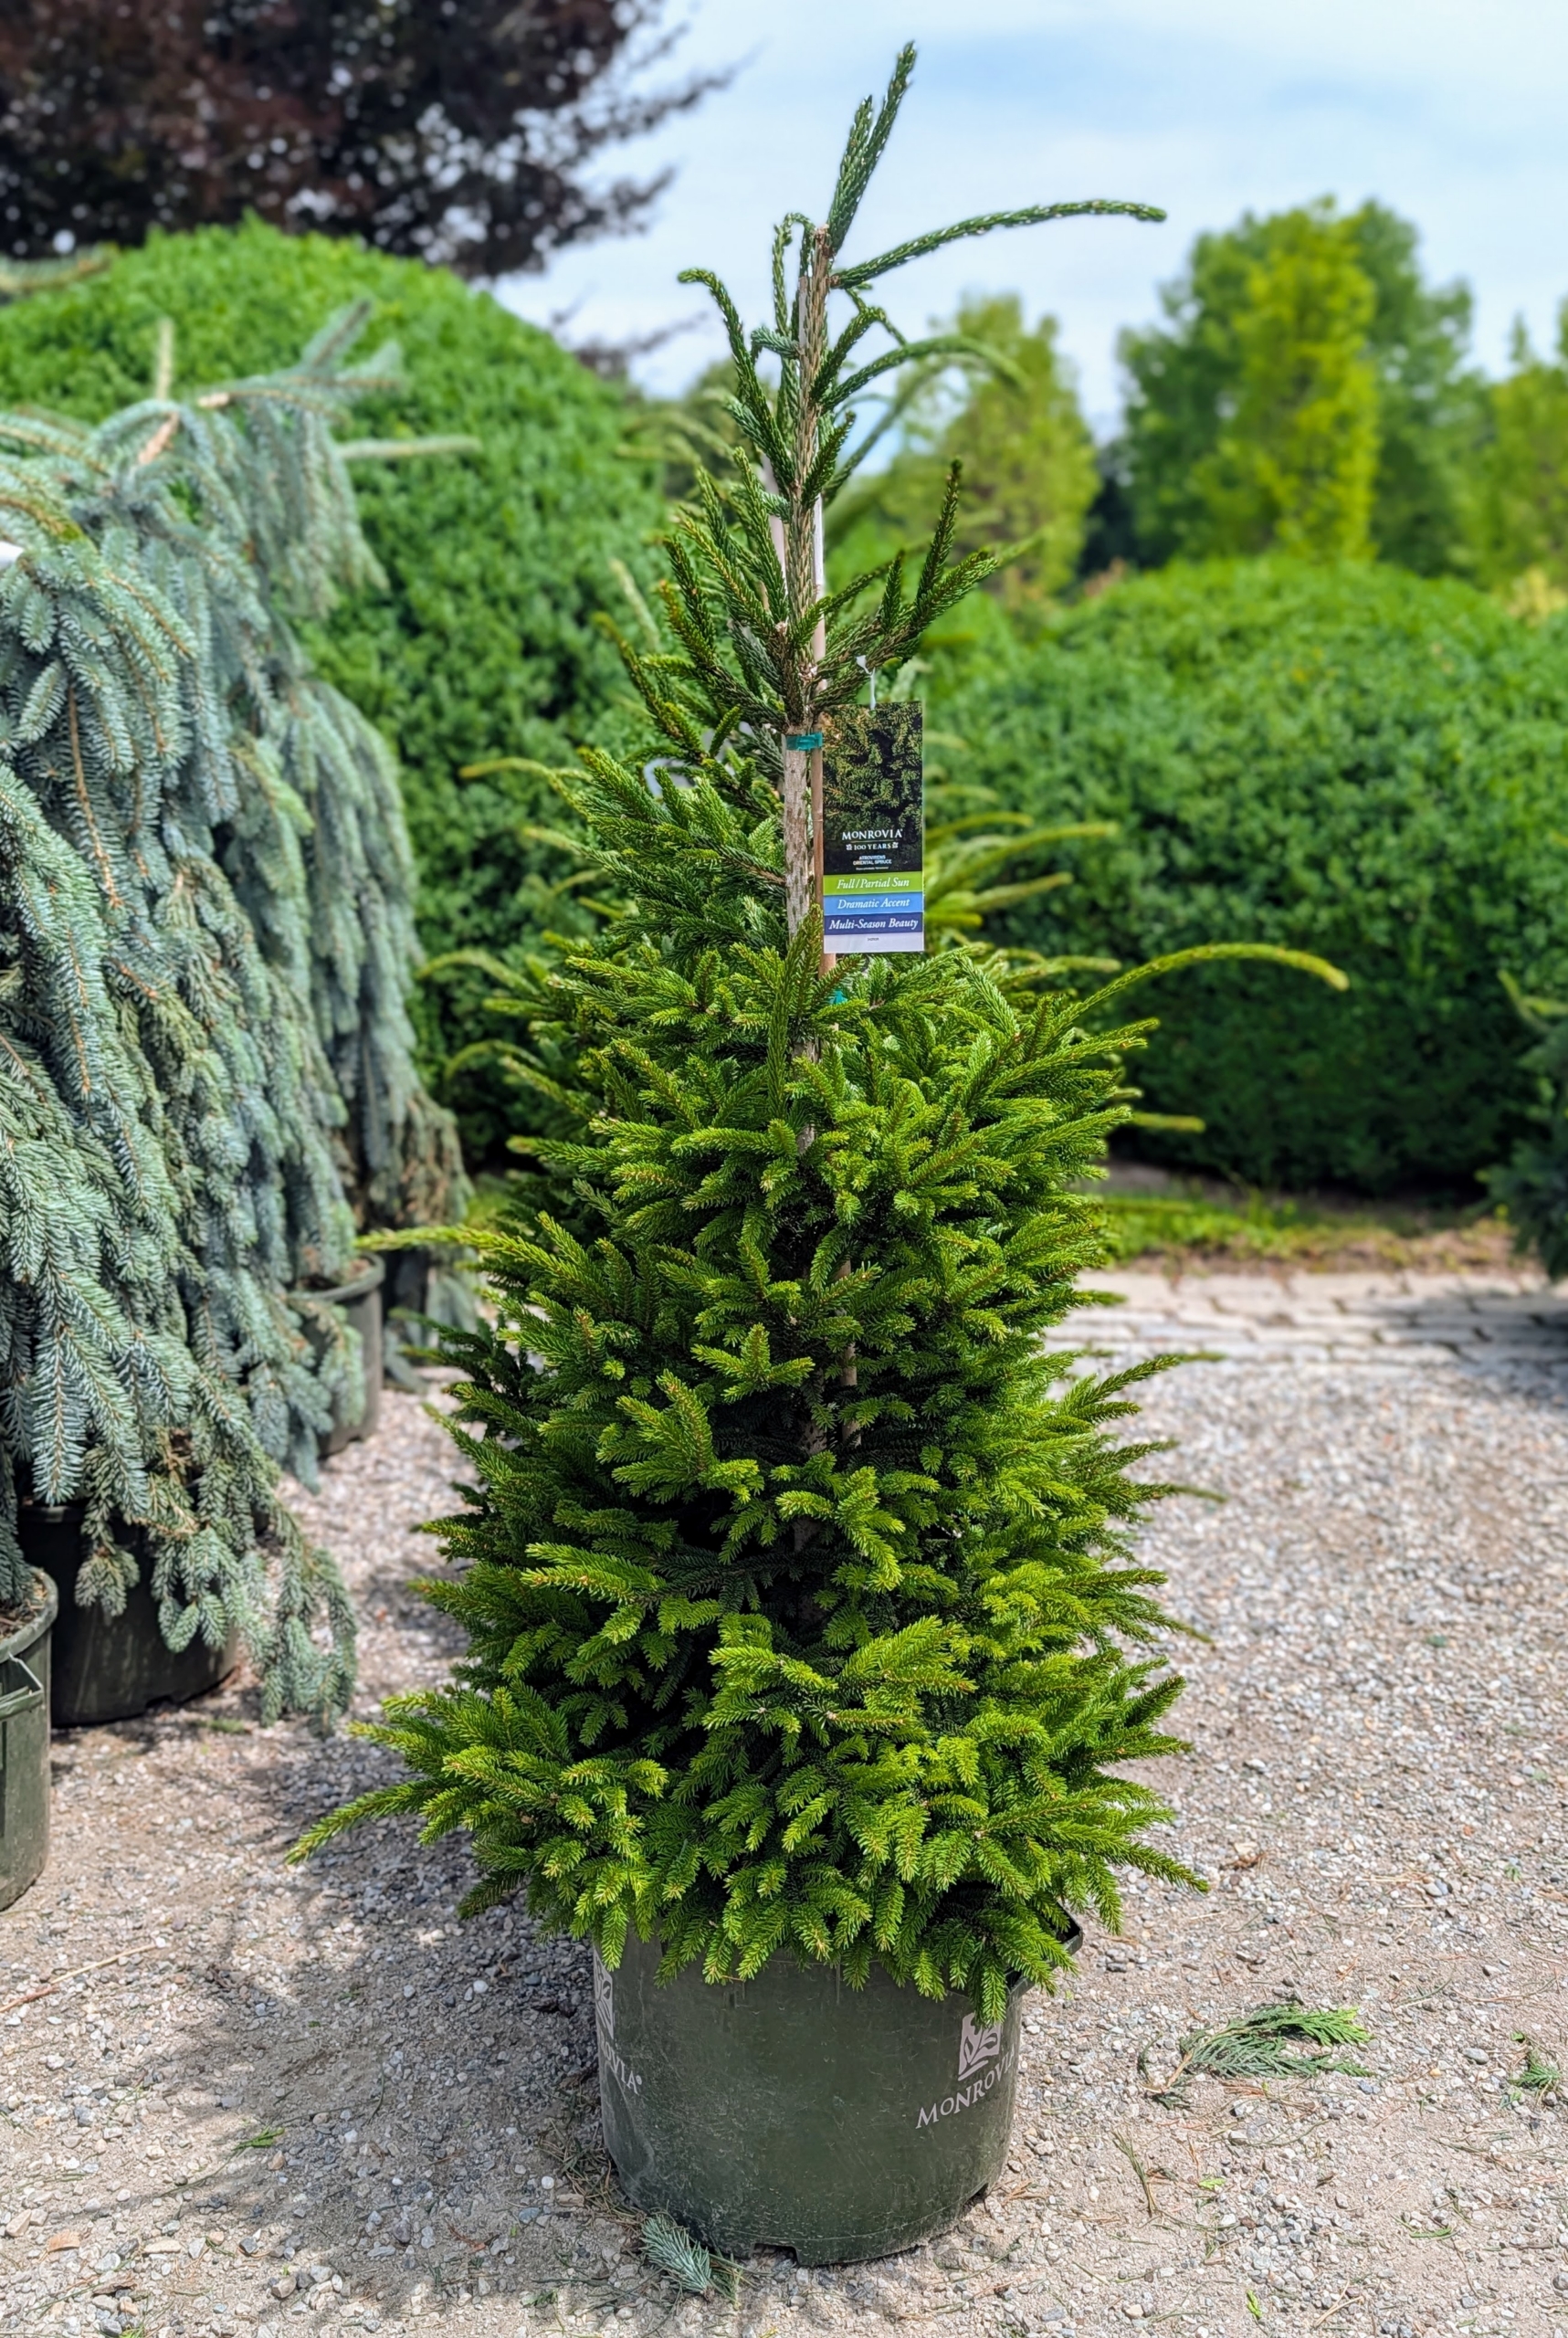
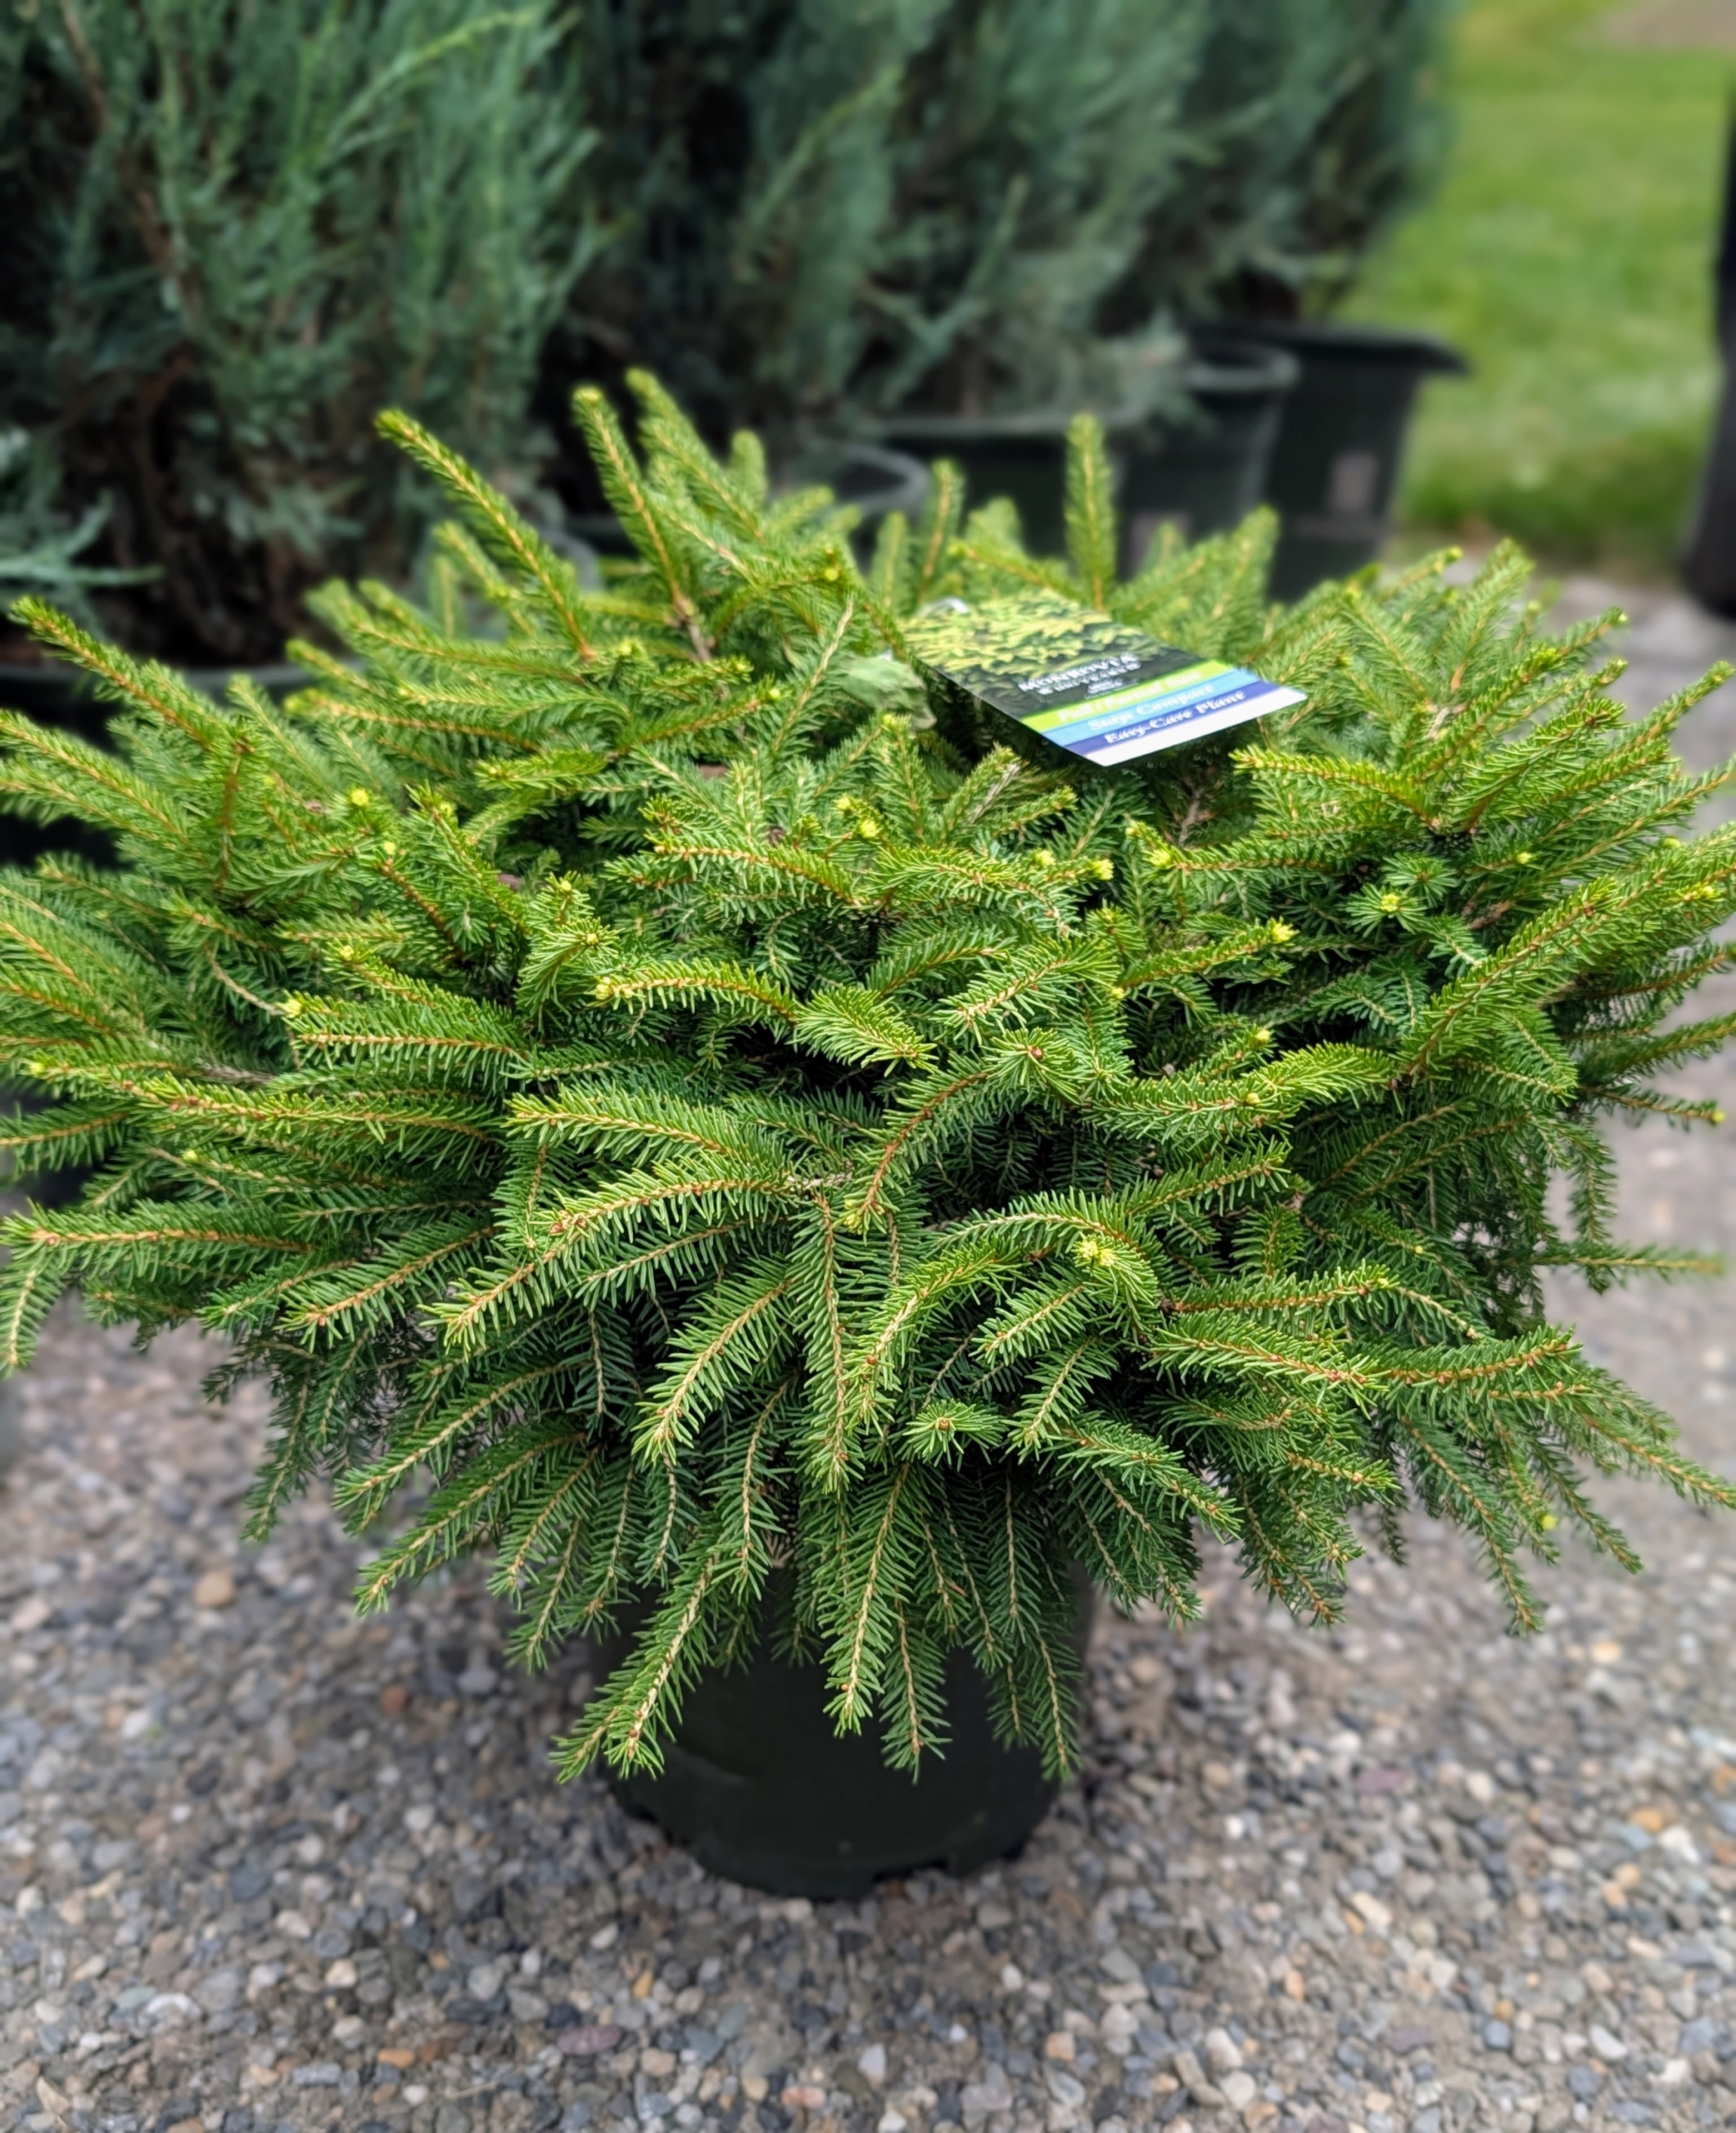
This is Picea orientalis ‘Atrovirens,’ an oriental spruce. This tree is an elegant conifer with exceptionally dark green, shiny needles on dense, pendulous branches. It is one of the last spruces to bud in spring. It produces showy female purplish cones before maturing to brown, making it a great specimen tree.
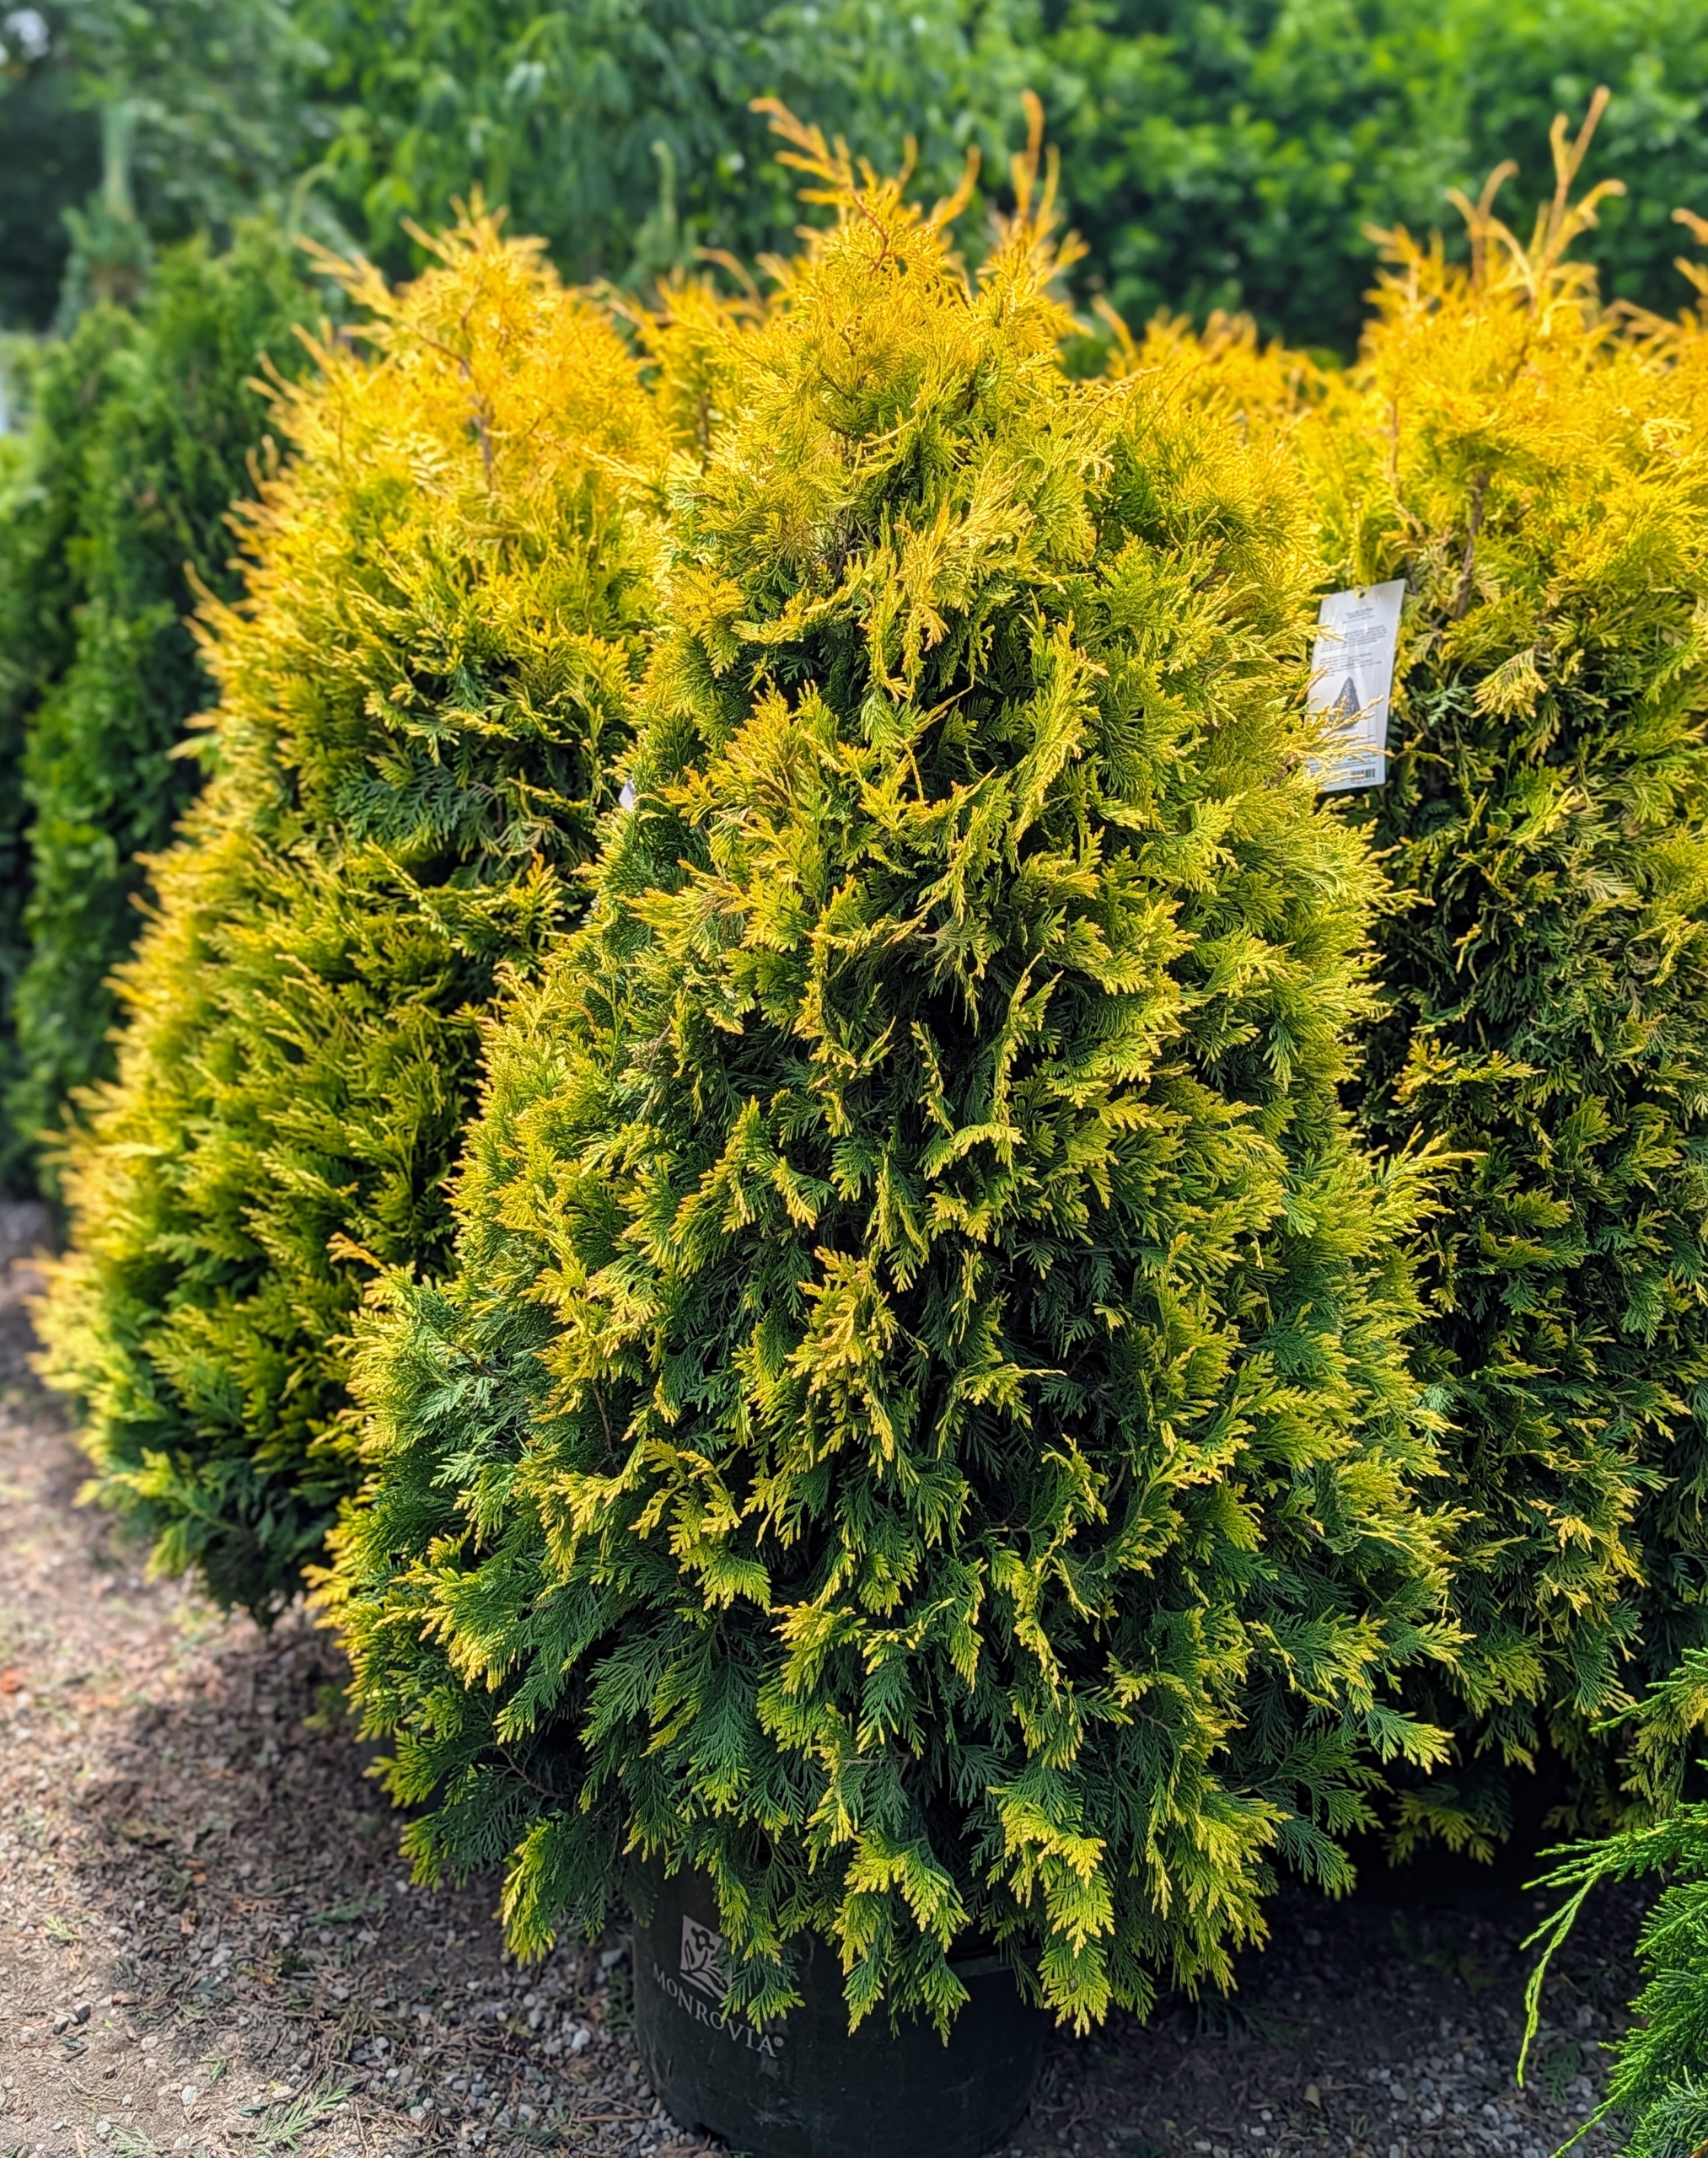
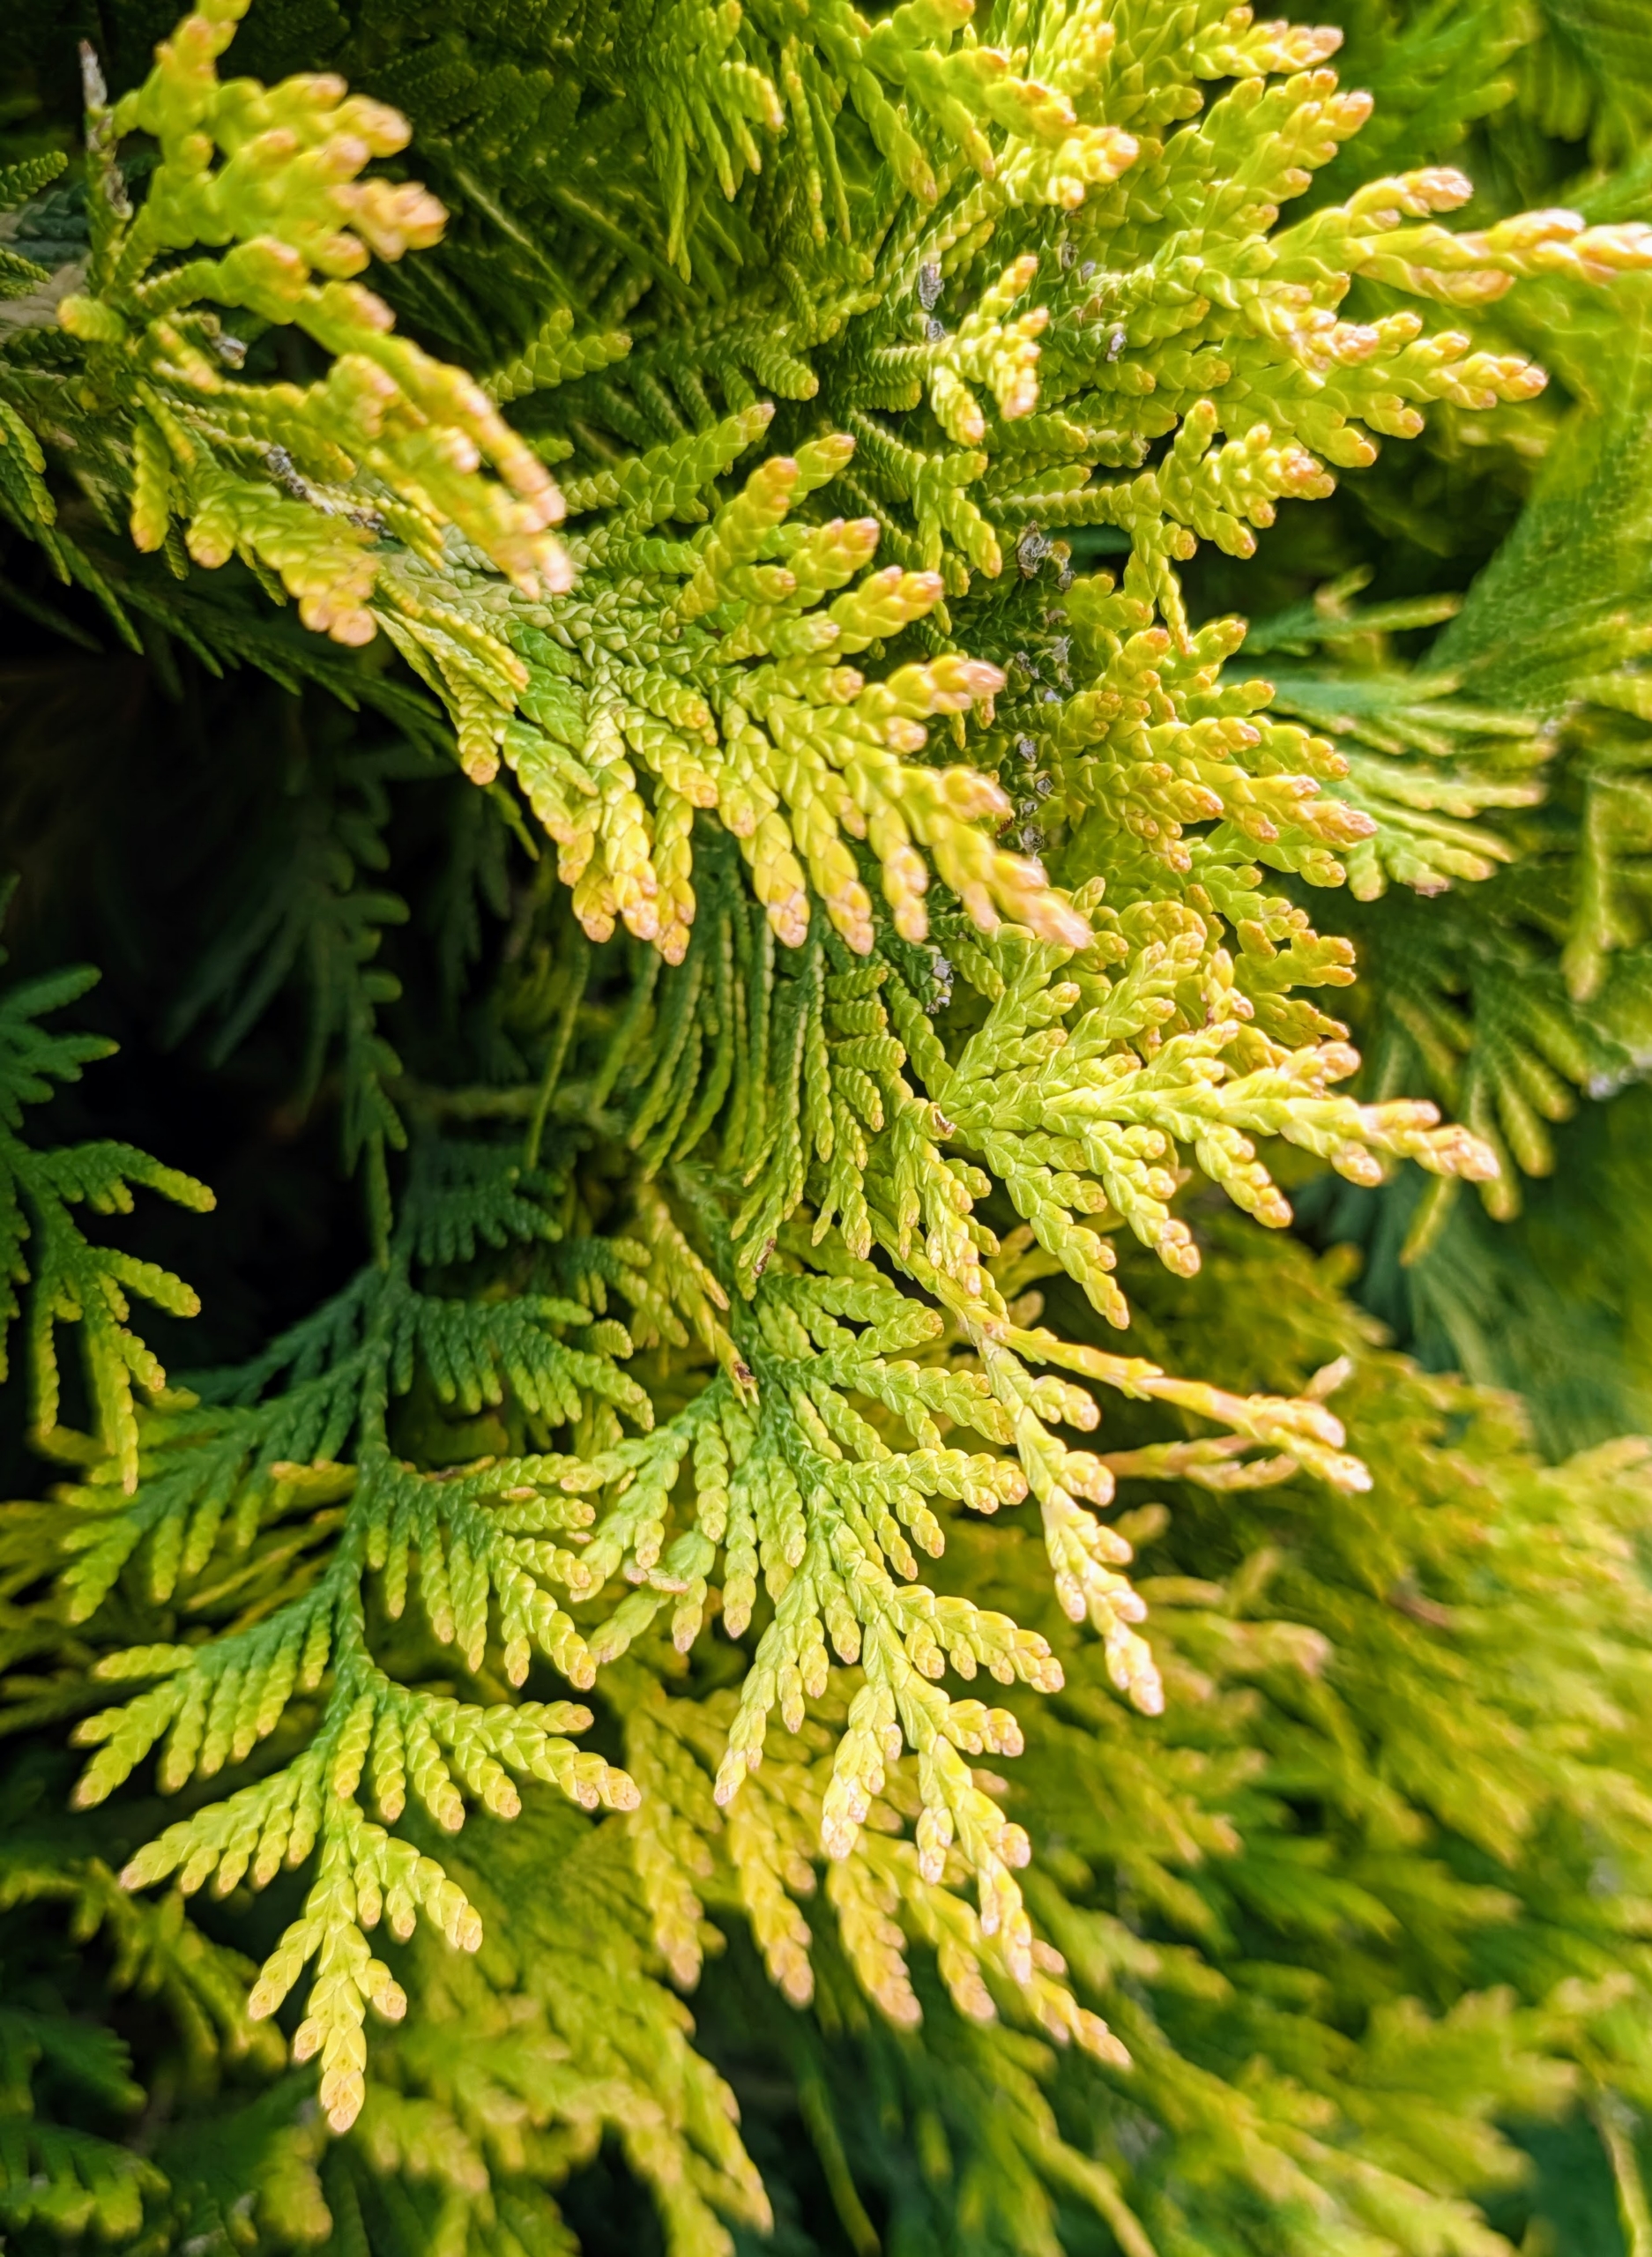
And look at this pretty tree – a yellow ribbon arborvitae, Thuja occidentalis ‘Yellow Ribbon.’ It is an evergreen with showy, dense golden-yellow foliage that maintains its color throughout the year. It’s wonderful wherever a splash of natural color is needed.
Its foliage grows in scale-like, flat sprays that are yellowish-orange in spring maturing to medium green.
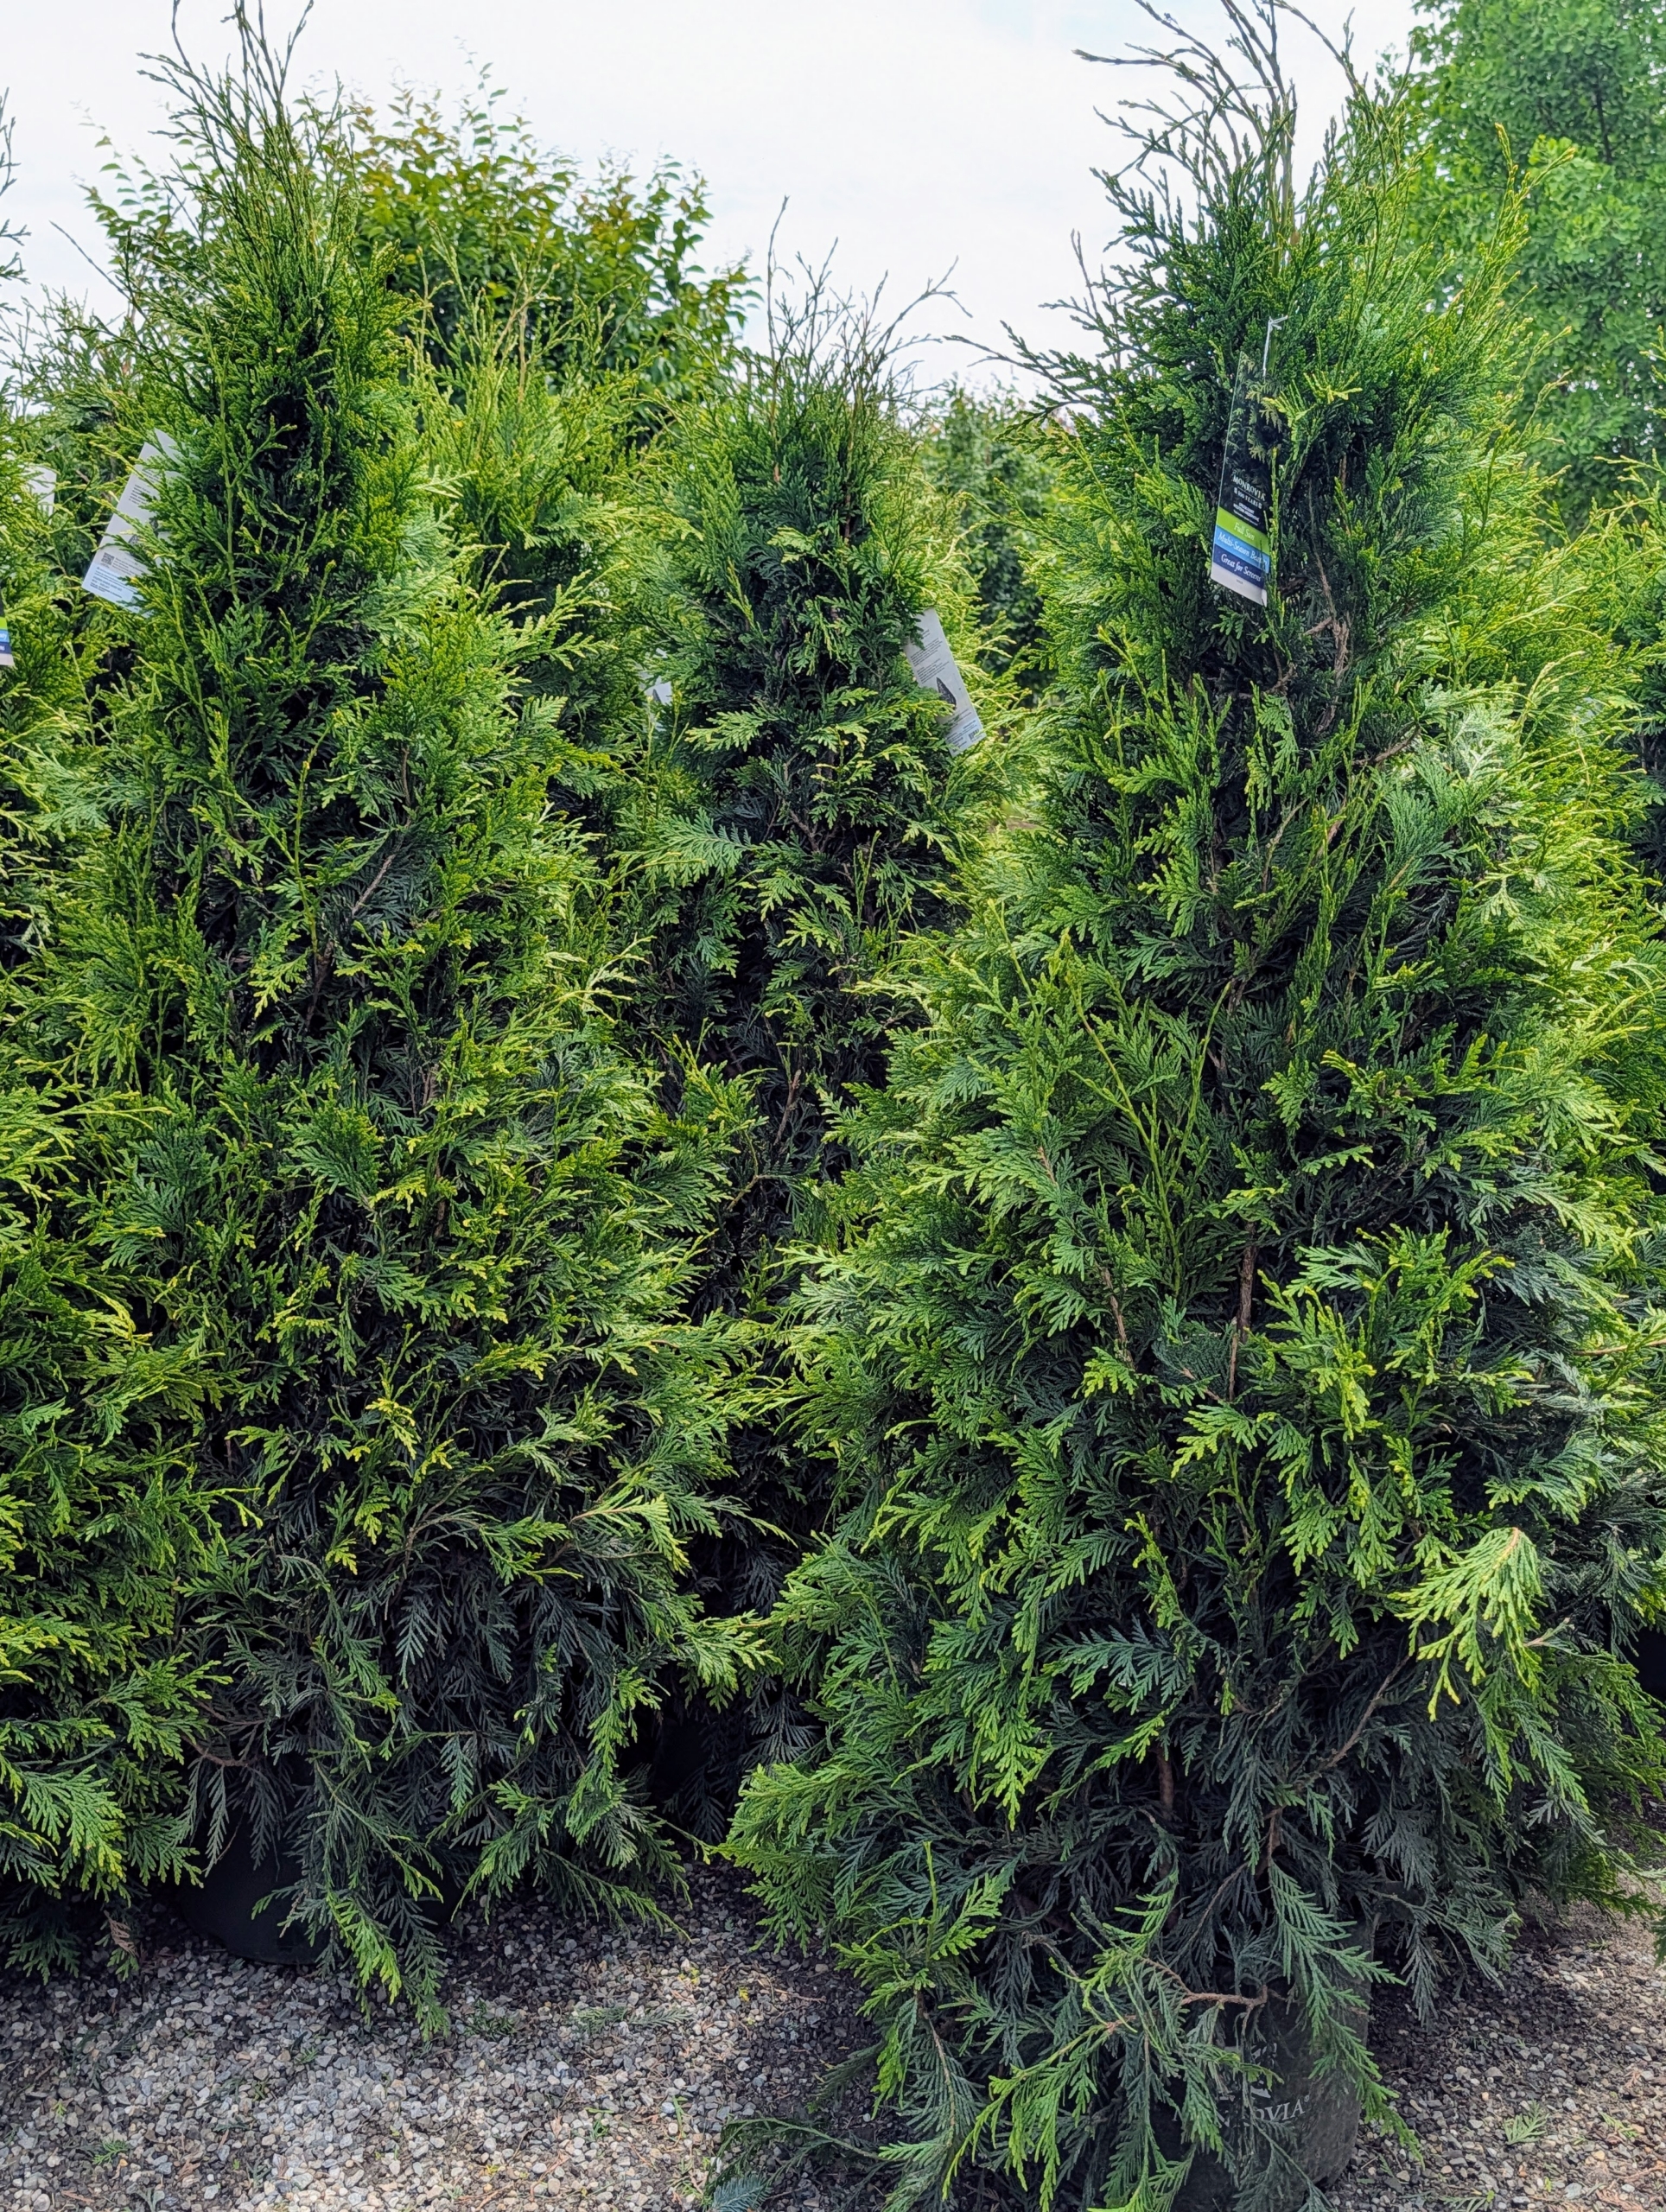
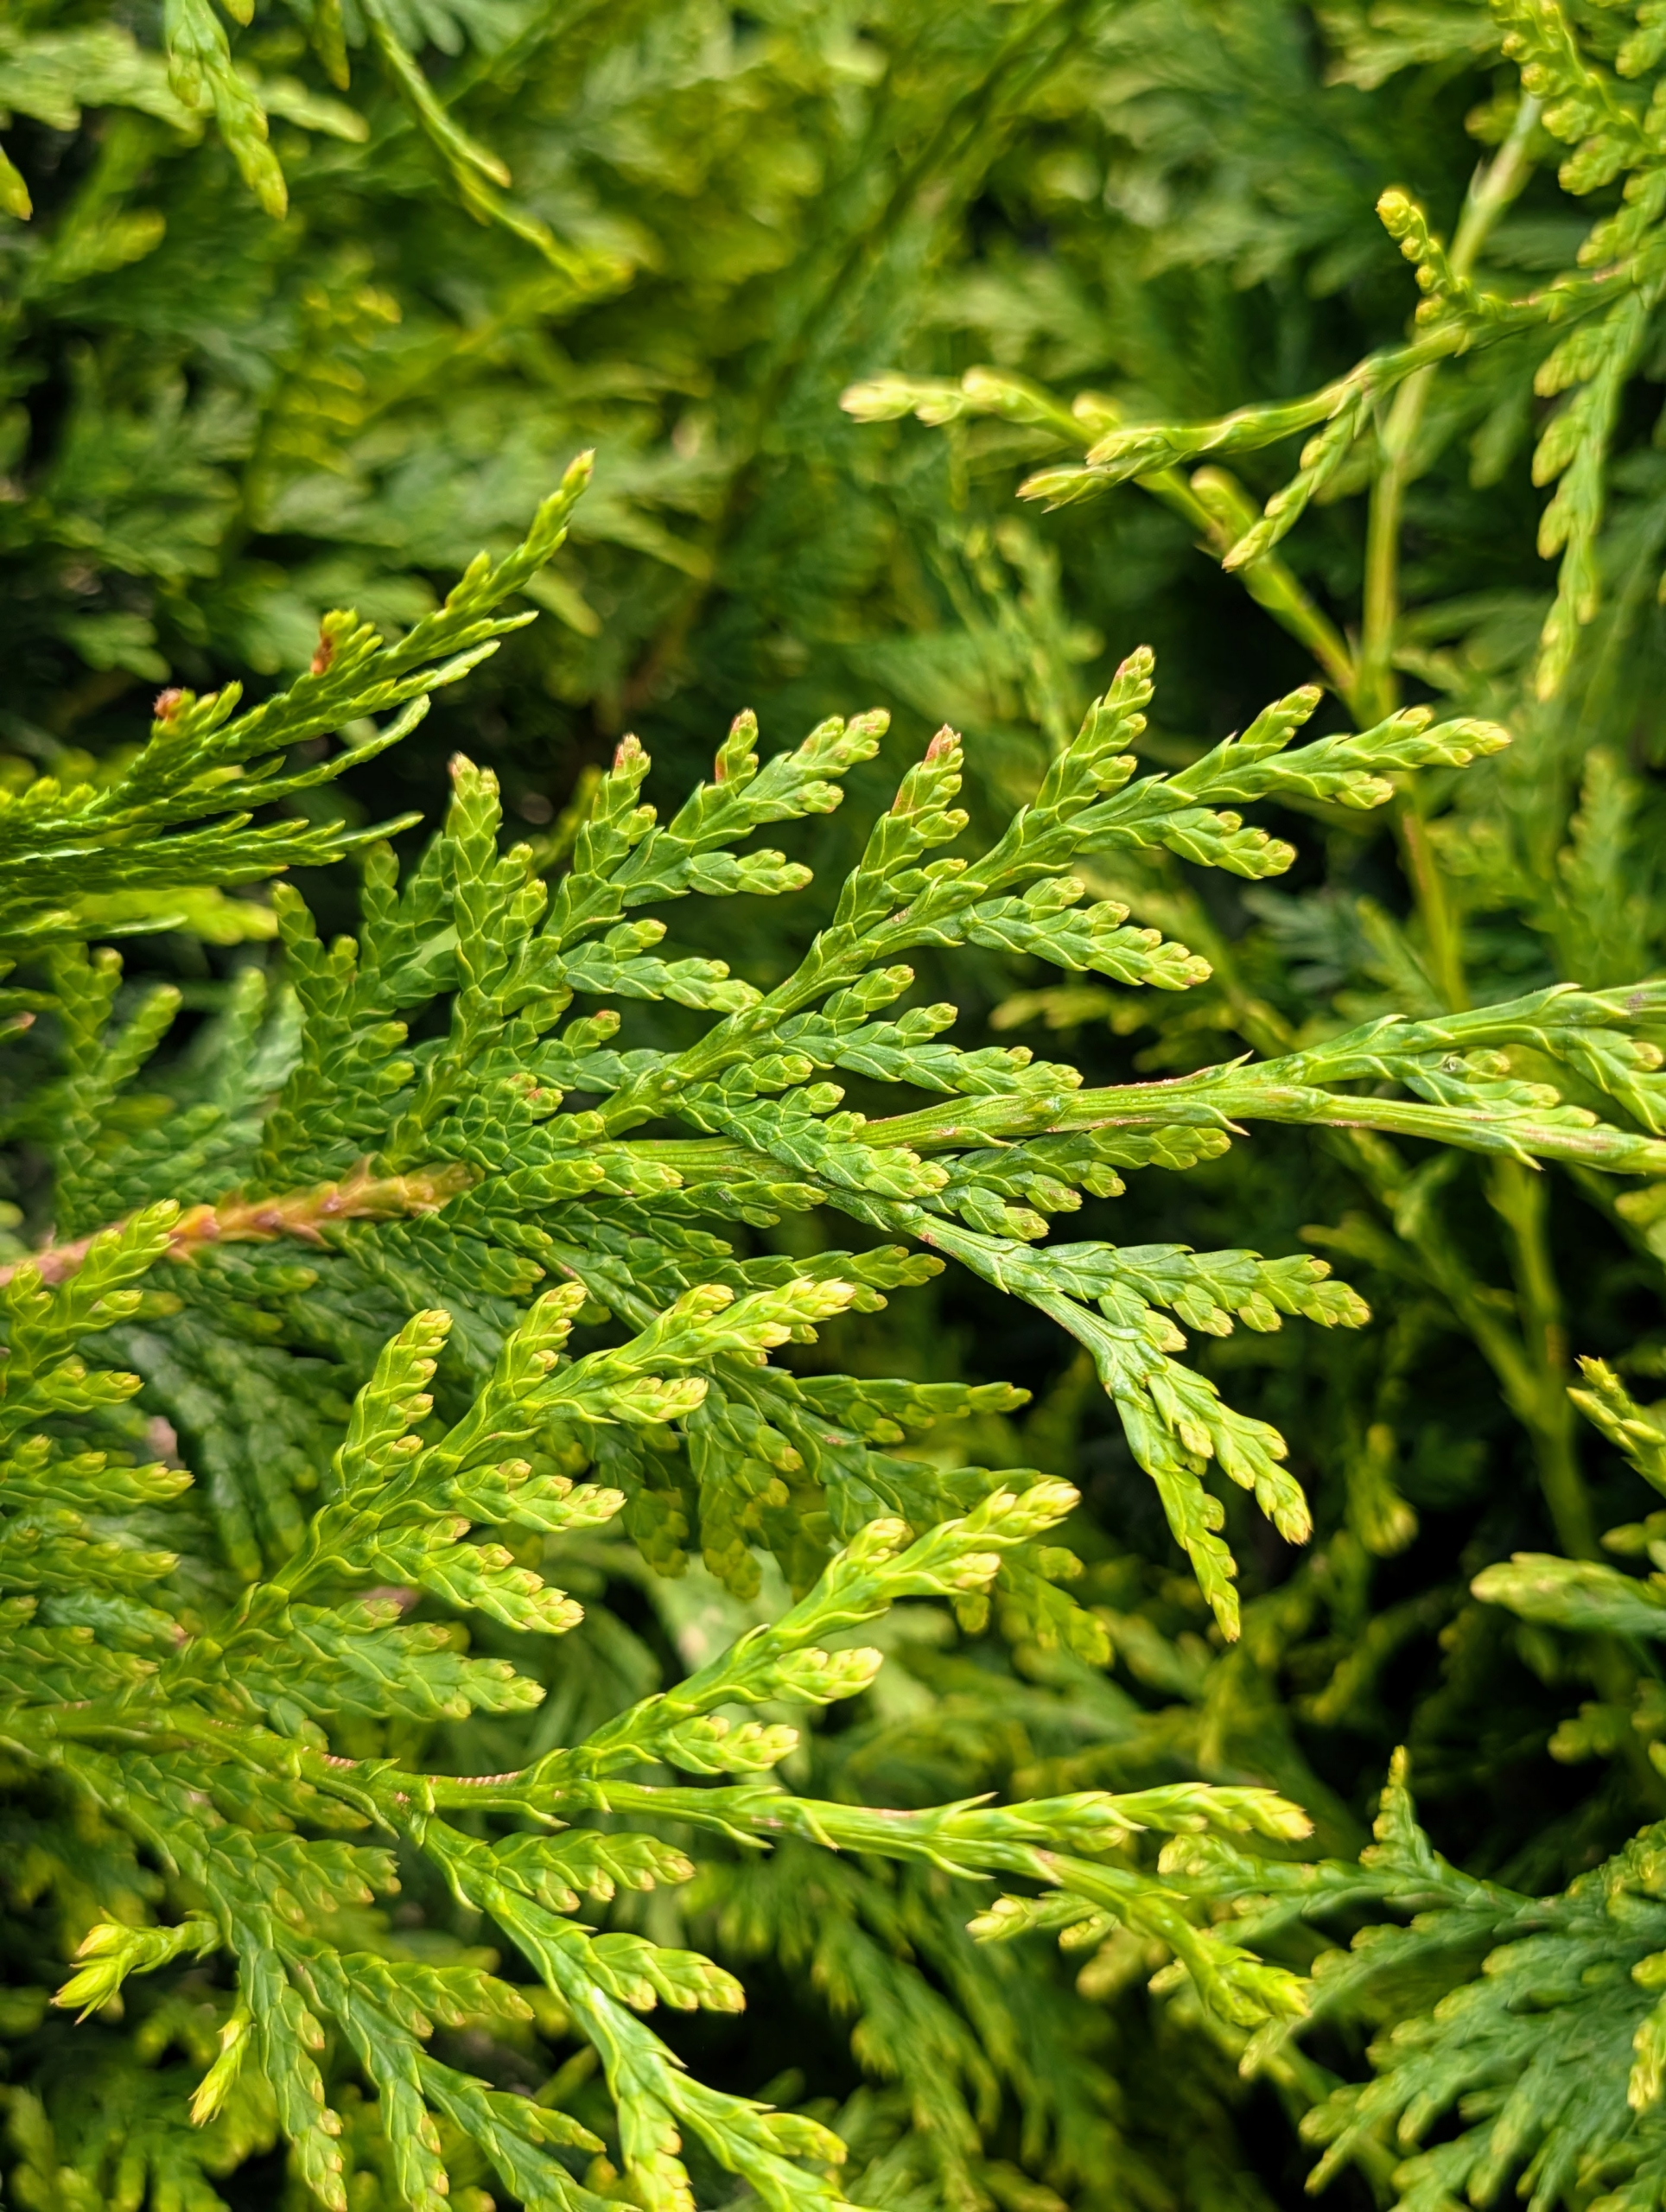
All of Monrovia’s evergreen trees and shrubs are unique and in excellent condition. Thuja ‘Green Giant’ is a handsome evergreen for use as privacy screening. It is an upright conifer that is versatile, strong-rooted and virtually disease-free.
This tree’s foliage is dense with rich green sprays that turn slightly bronze in winter.
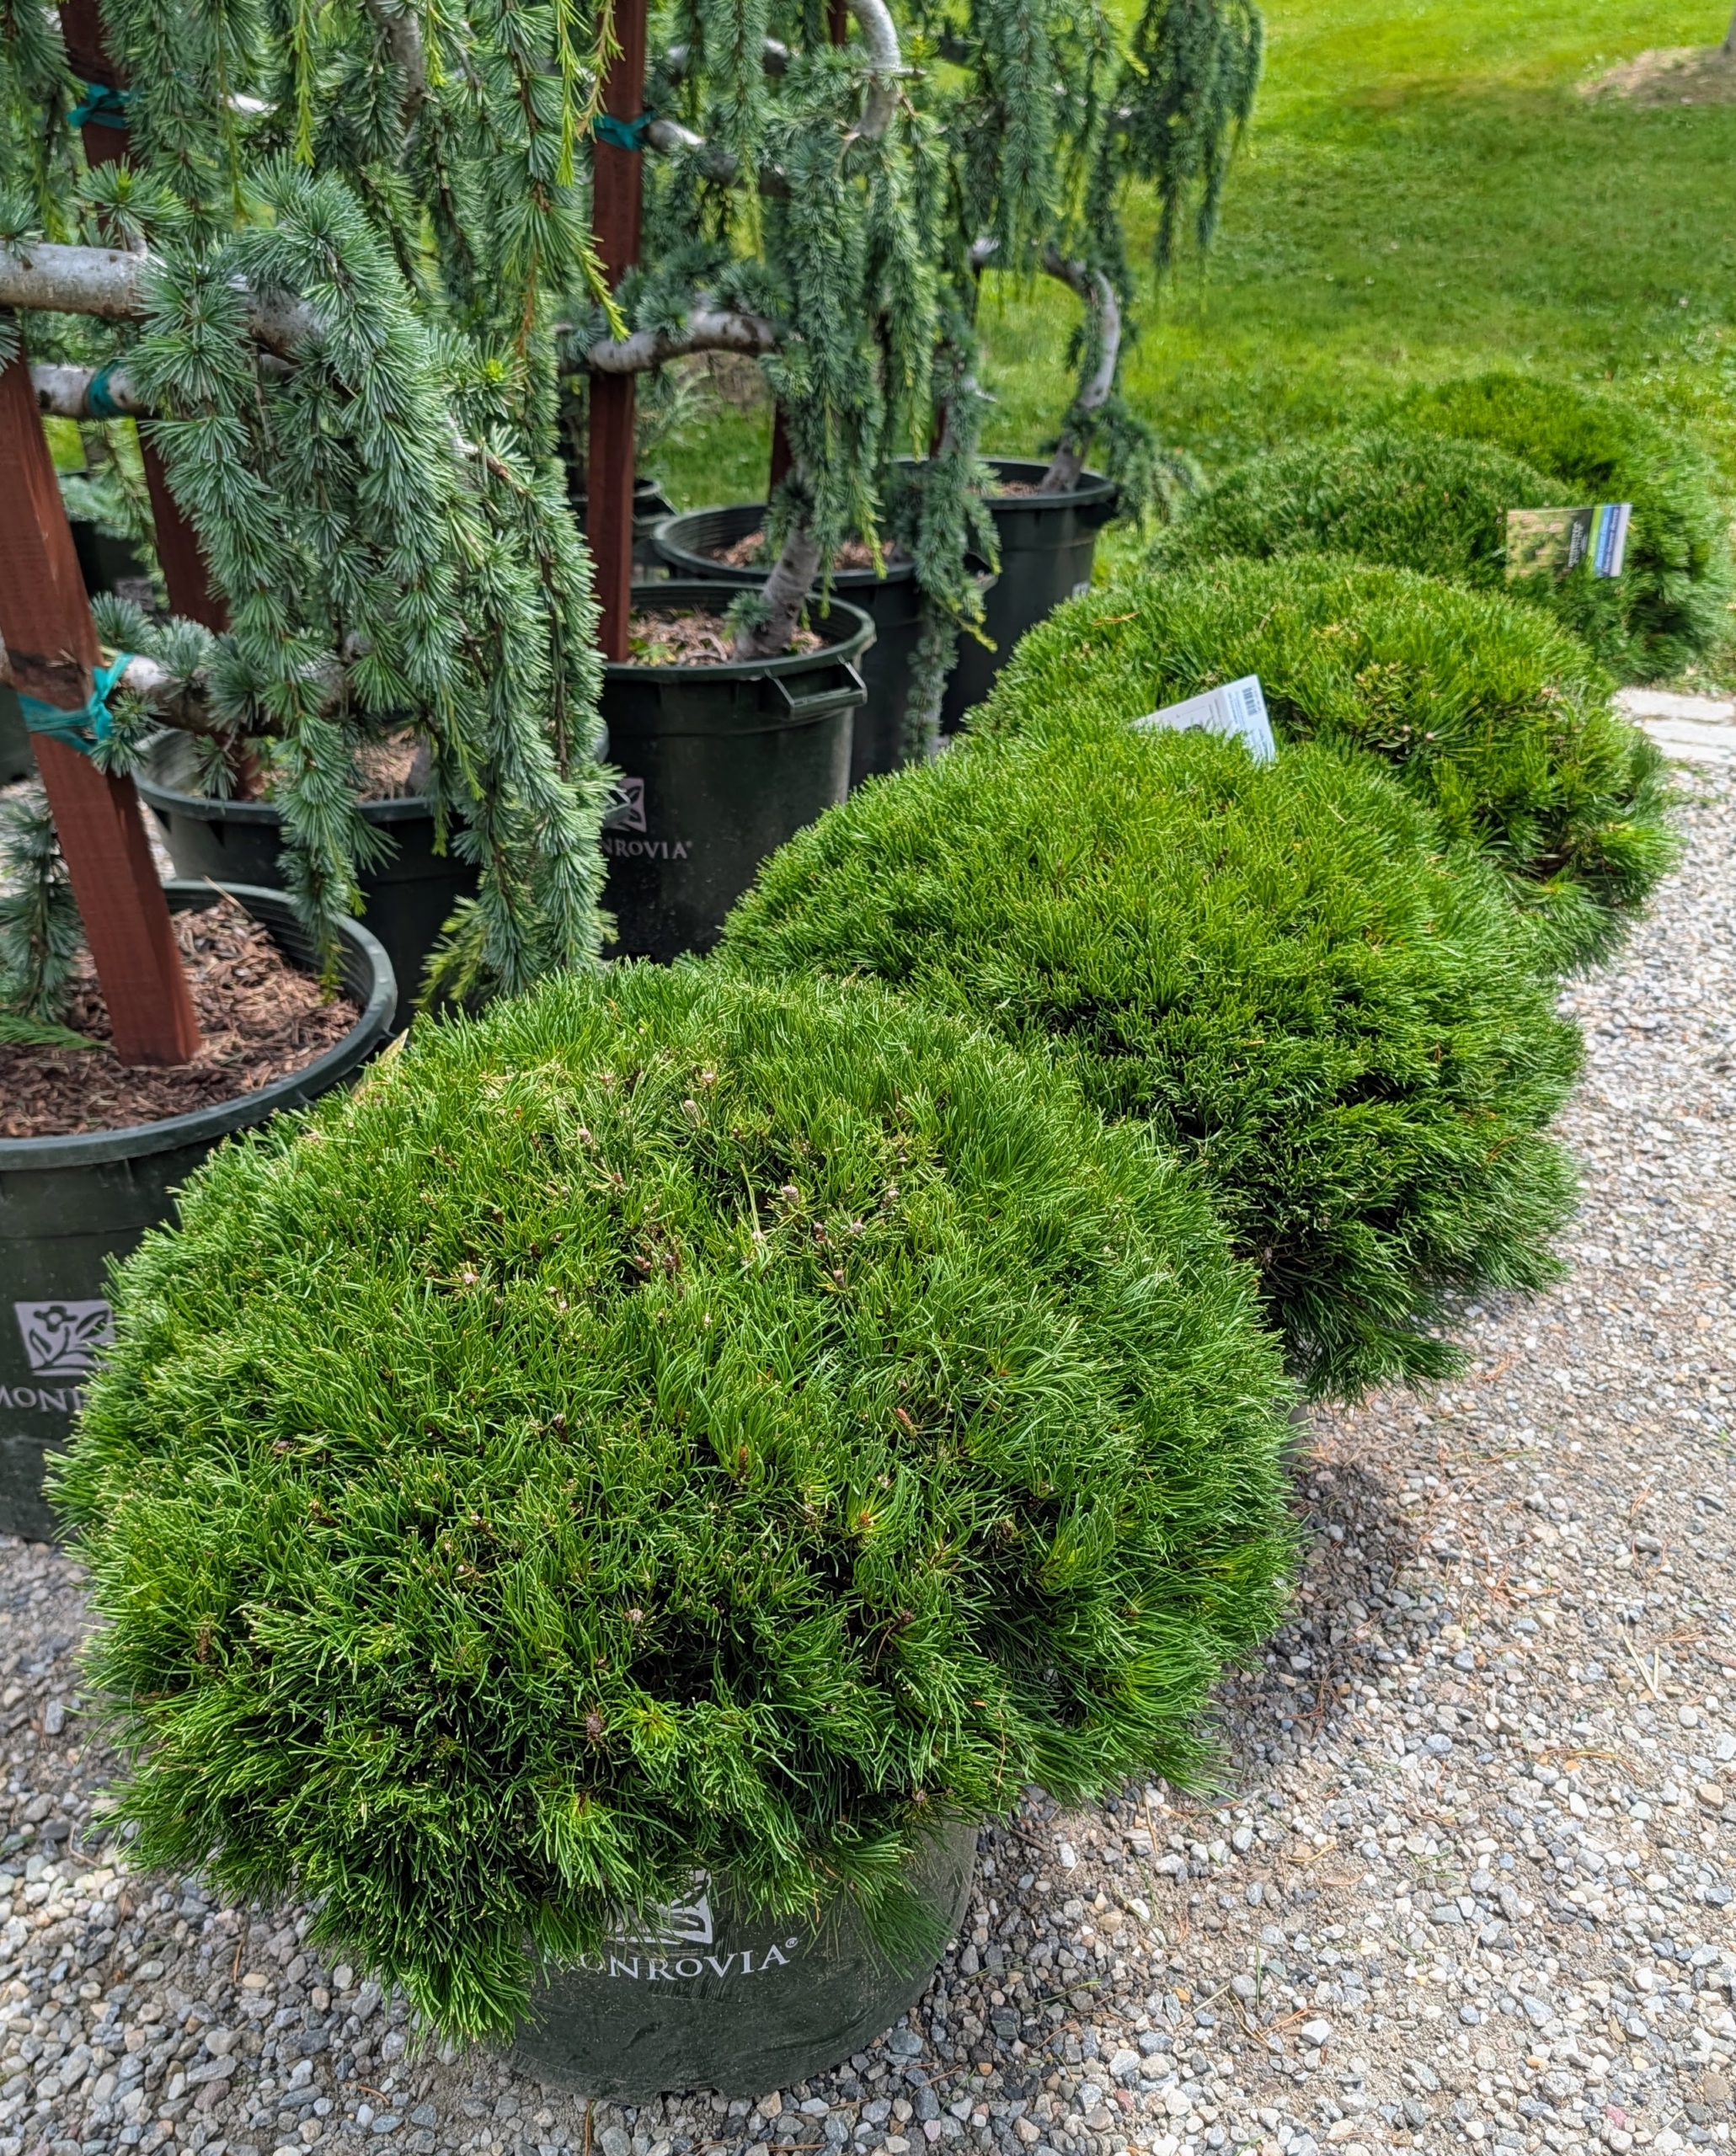
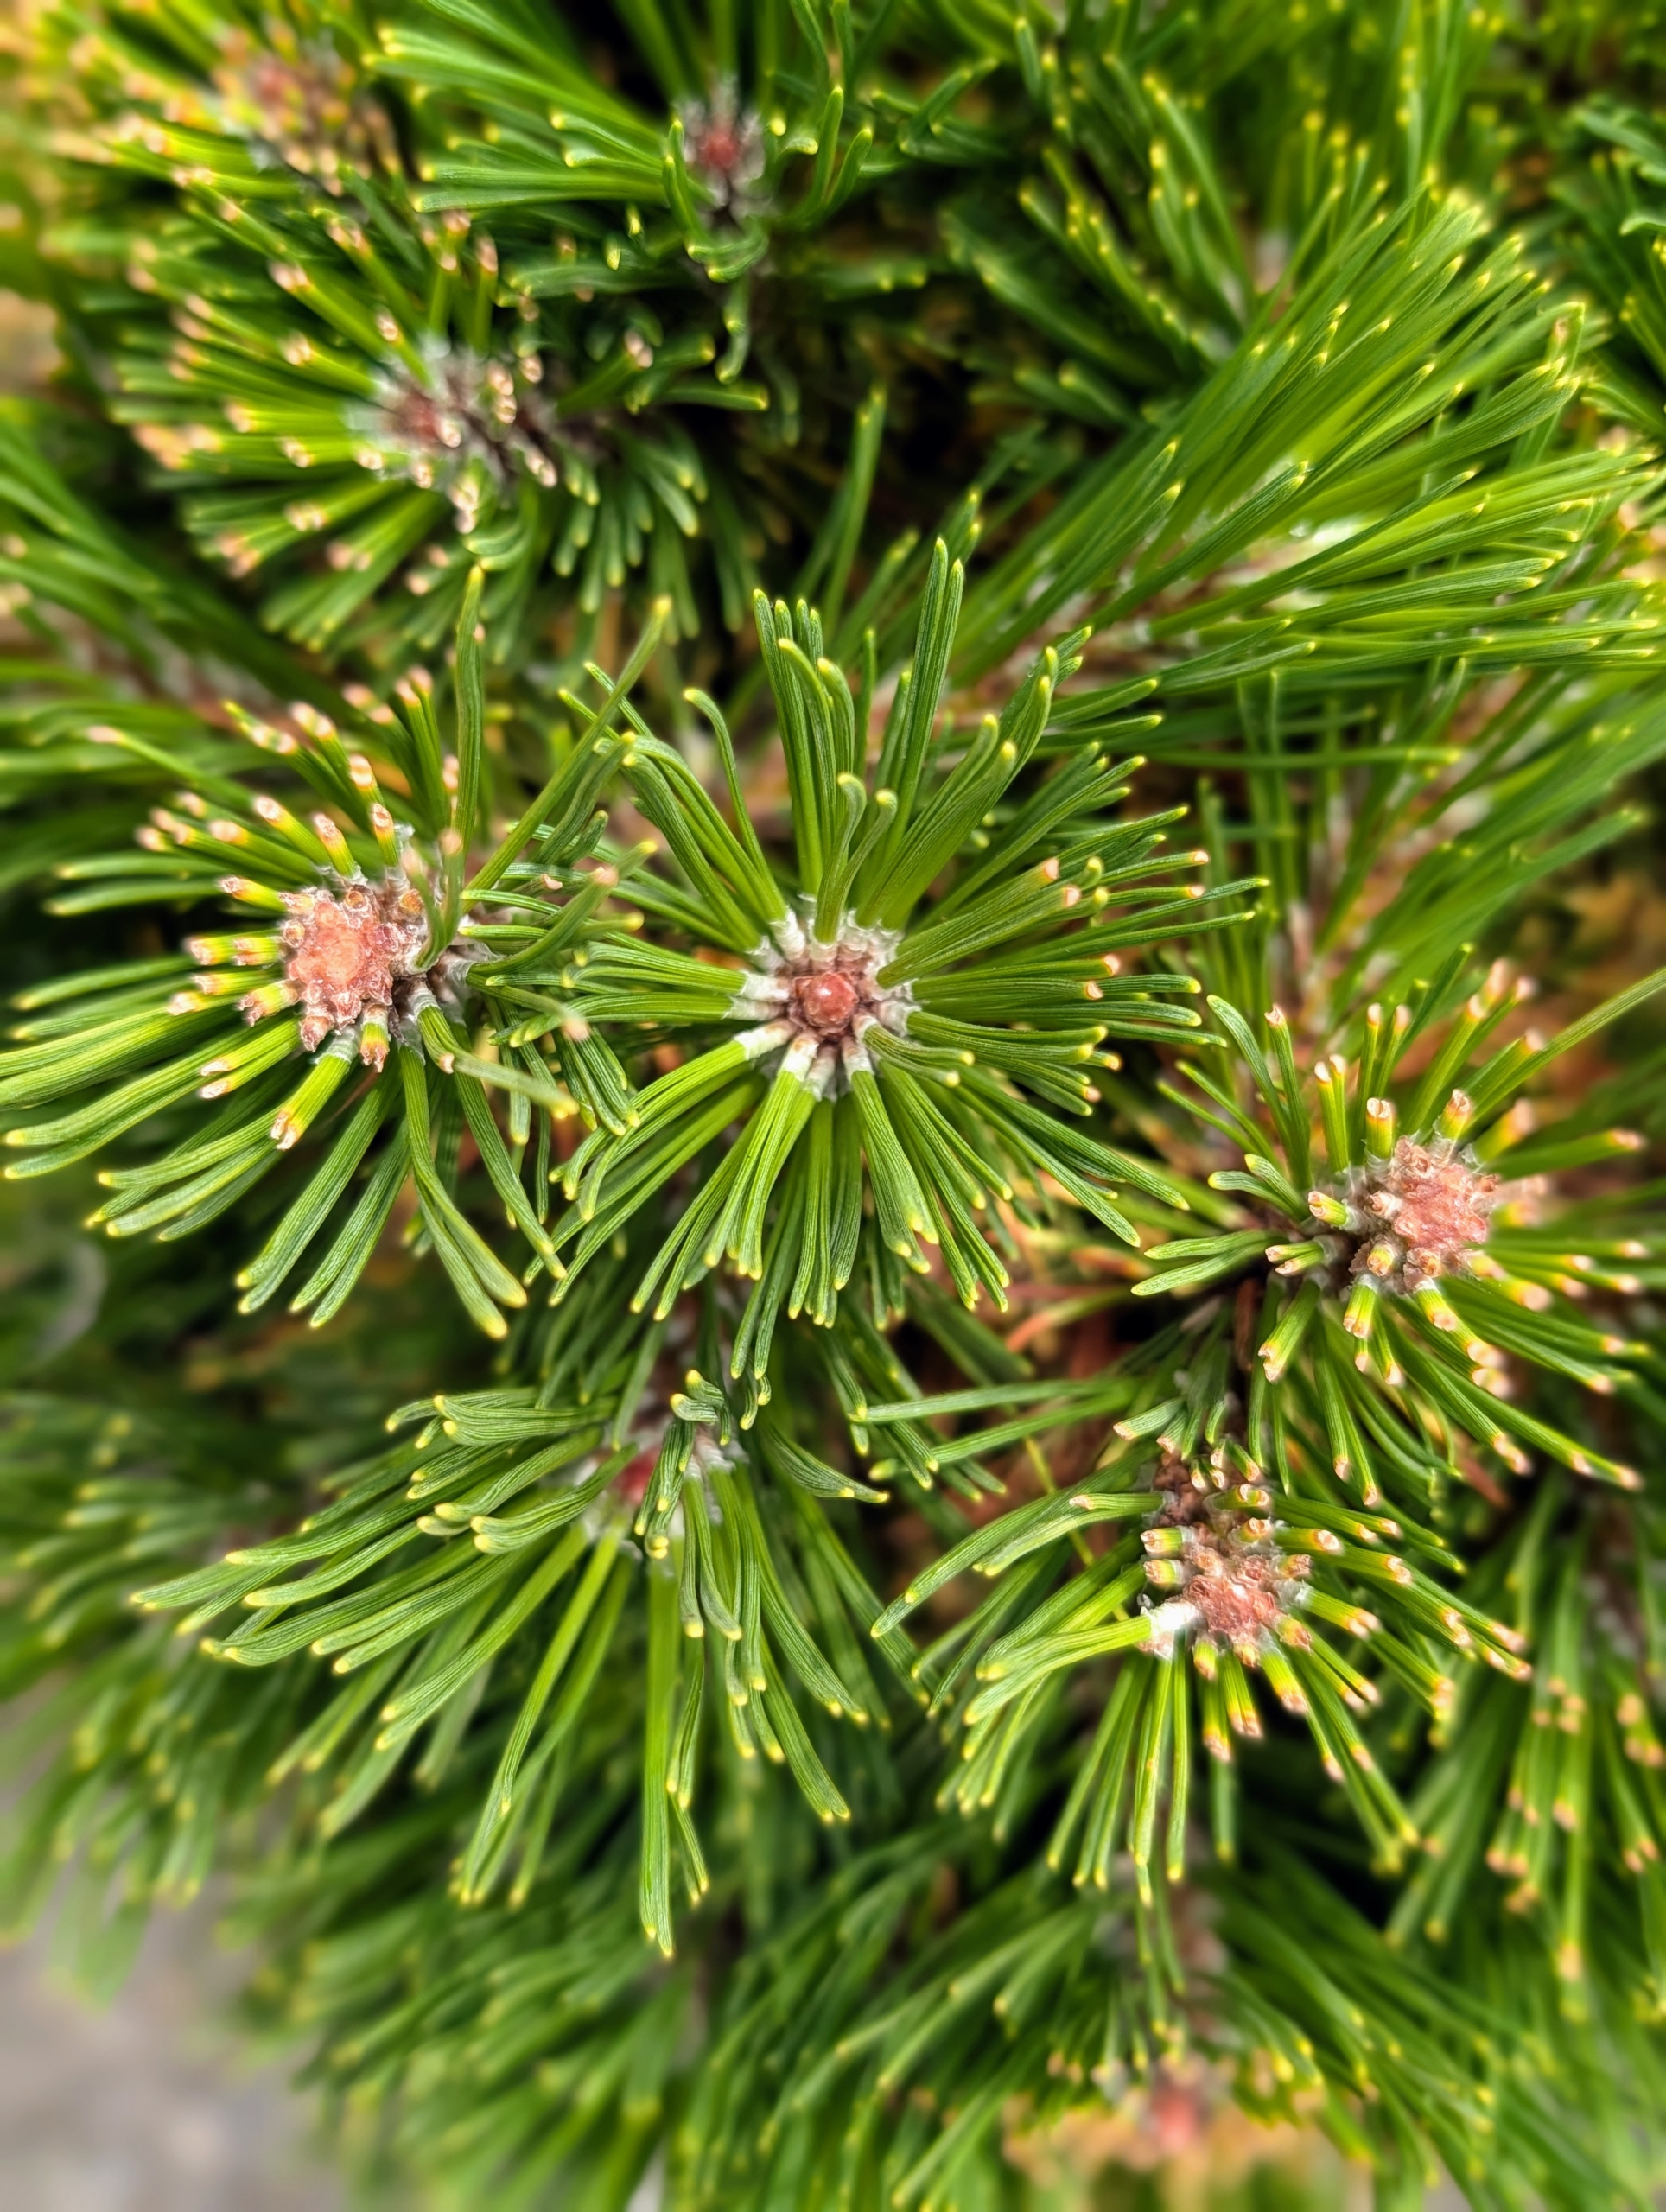
For lower growing texture in the garden, this is a dwarf mugo pine, or dwarf Pinus mugo var. pumilio. it is a popular conifer showing dark green needles on dense branches. A very useful, slow growing evergreen for rock gardens, mass plantings, and in mixed groupings. It also makes a great container specimen on a terrace.
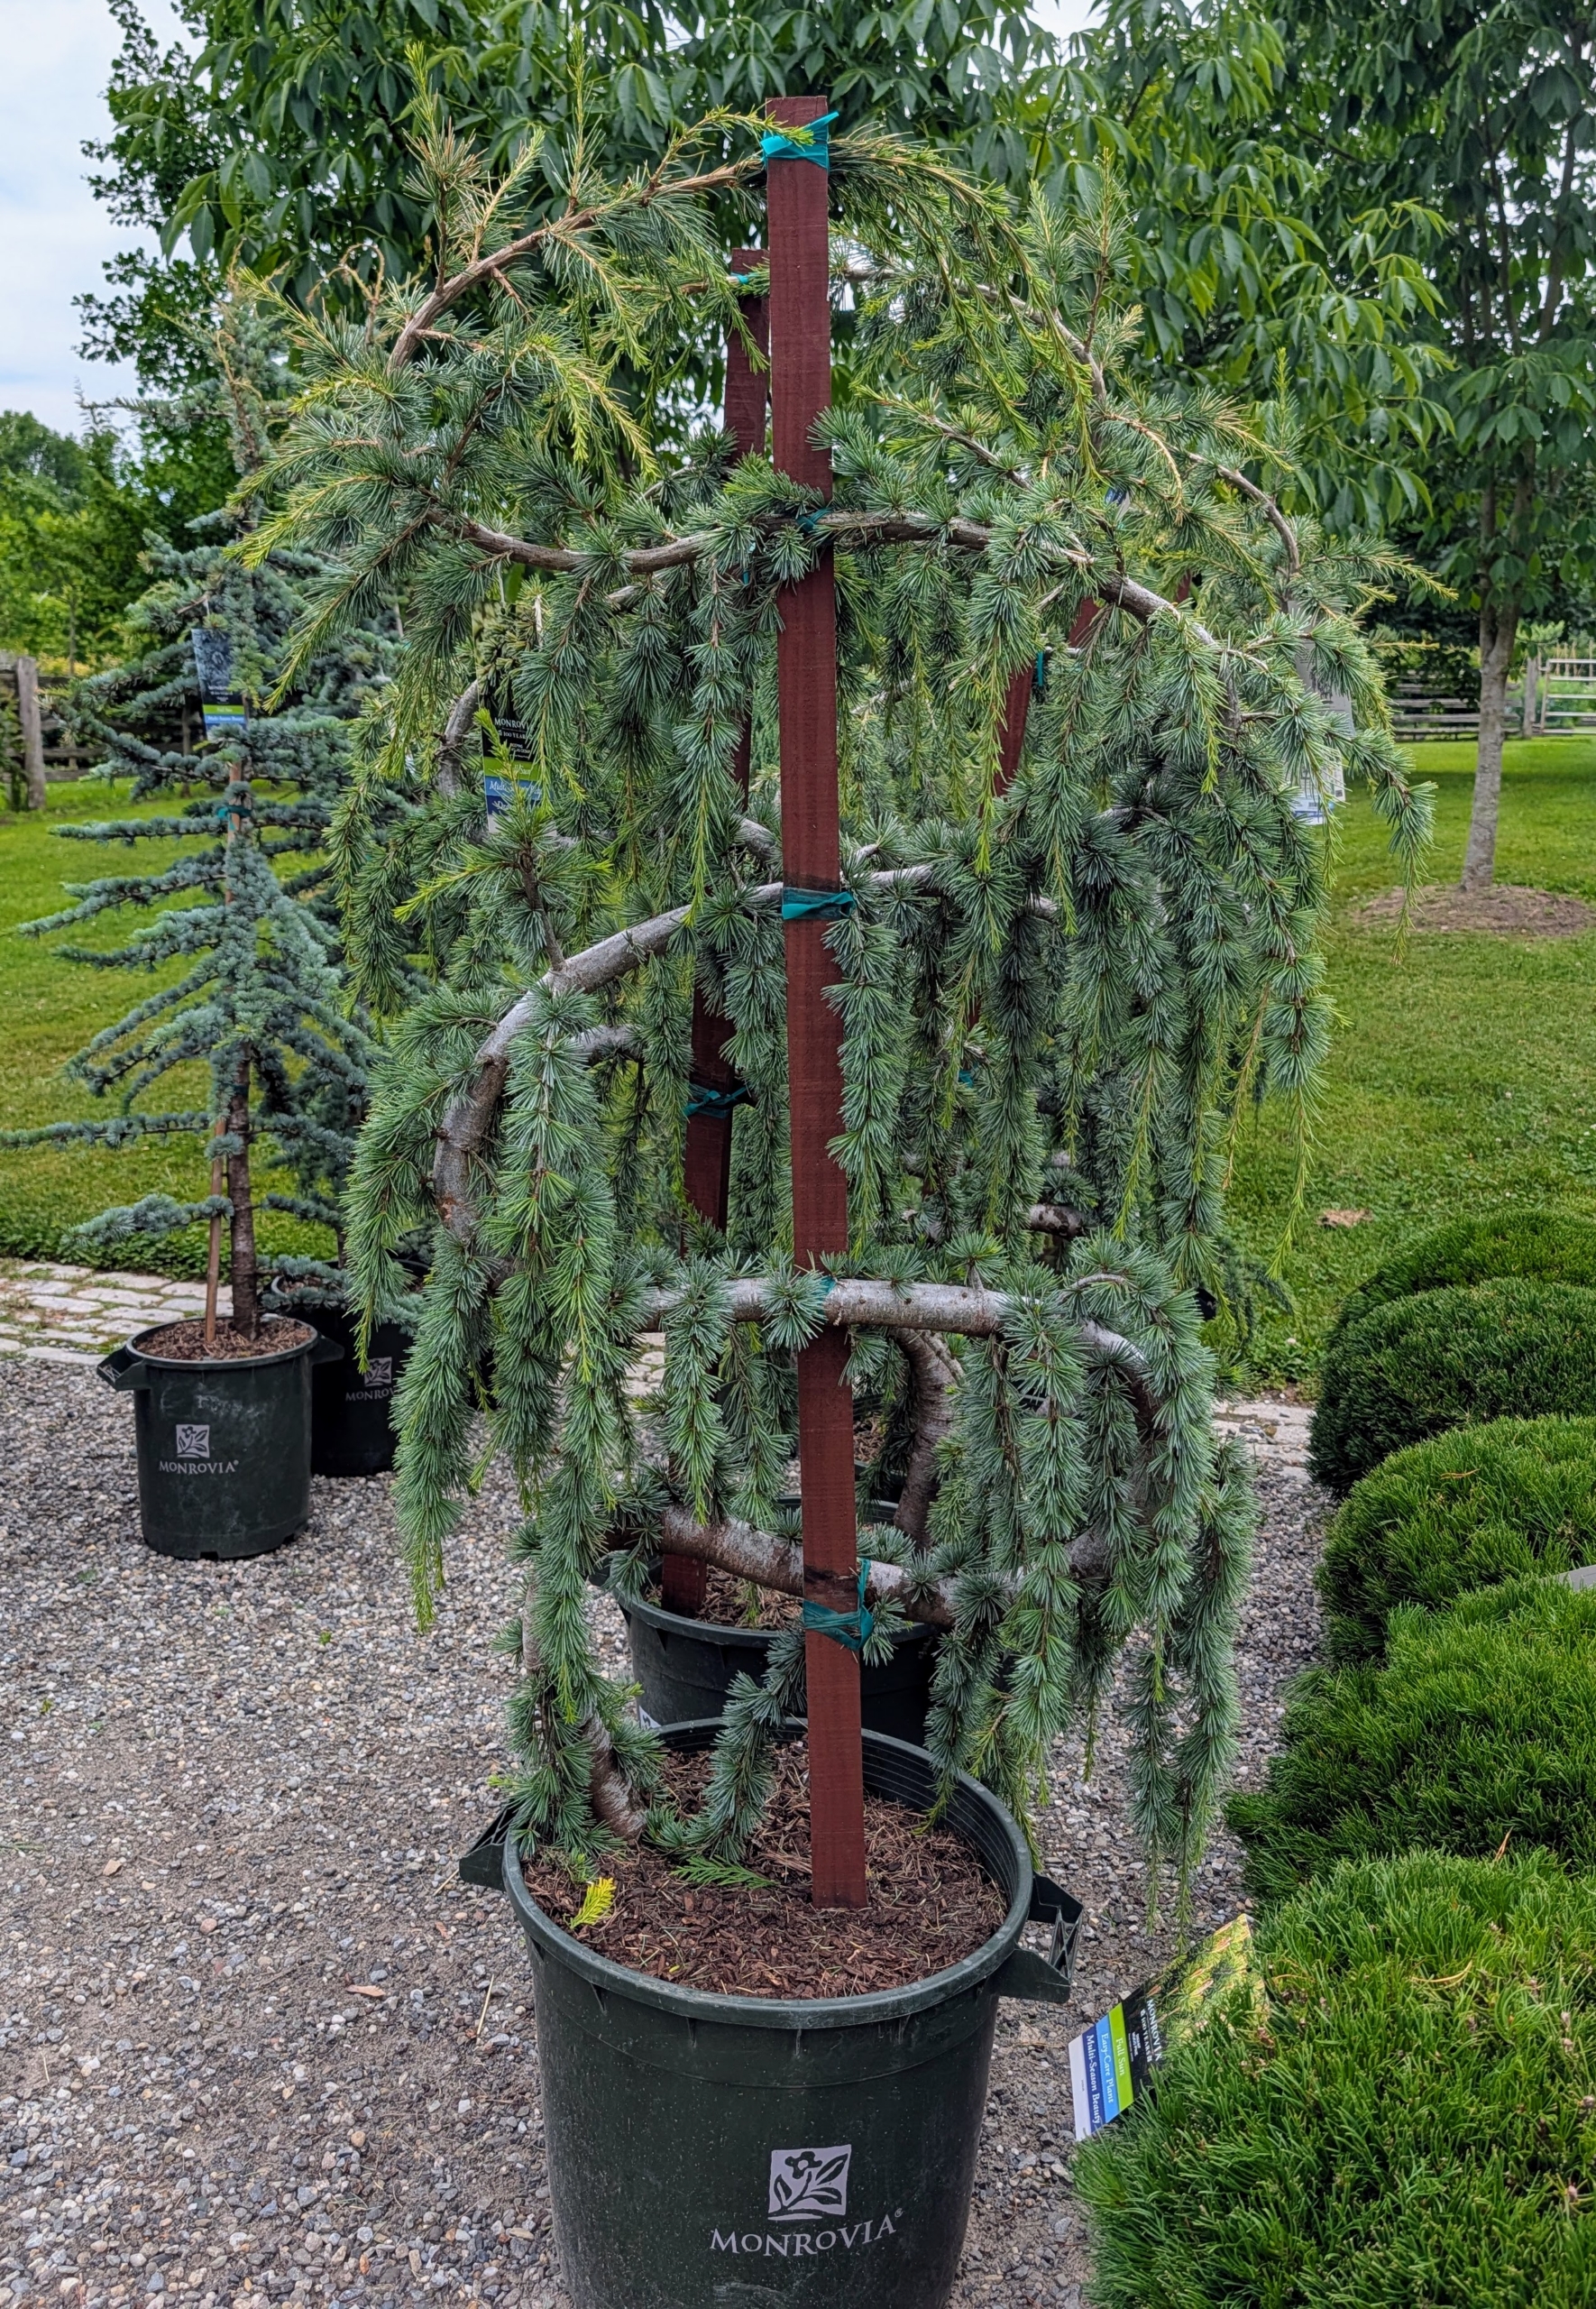
Everyone at the farm admired the weeping blue atlas spruce, Cedrus atlantica ‘Glauca Pendula.’ This dramatic weeping evergreen is naturally slow-growing with a sprawling horizontal habit that is often trained into an upright, serpentine form. Pendant branchlets display icy-blue needles. Where shall I plant these?
This is a nest spruce, Picea abies ‘Nidiformis.’ It is a small, versatile conifer with outward-curving branches and dense, dark green needles, resembling a bird’s nest.
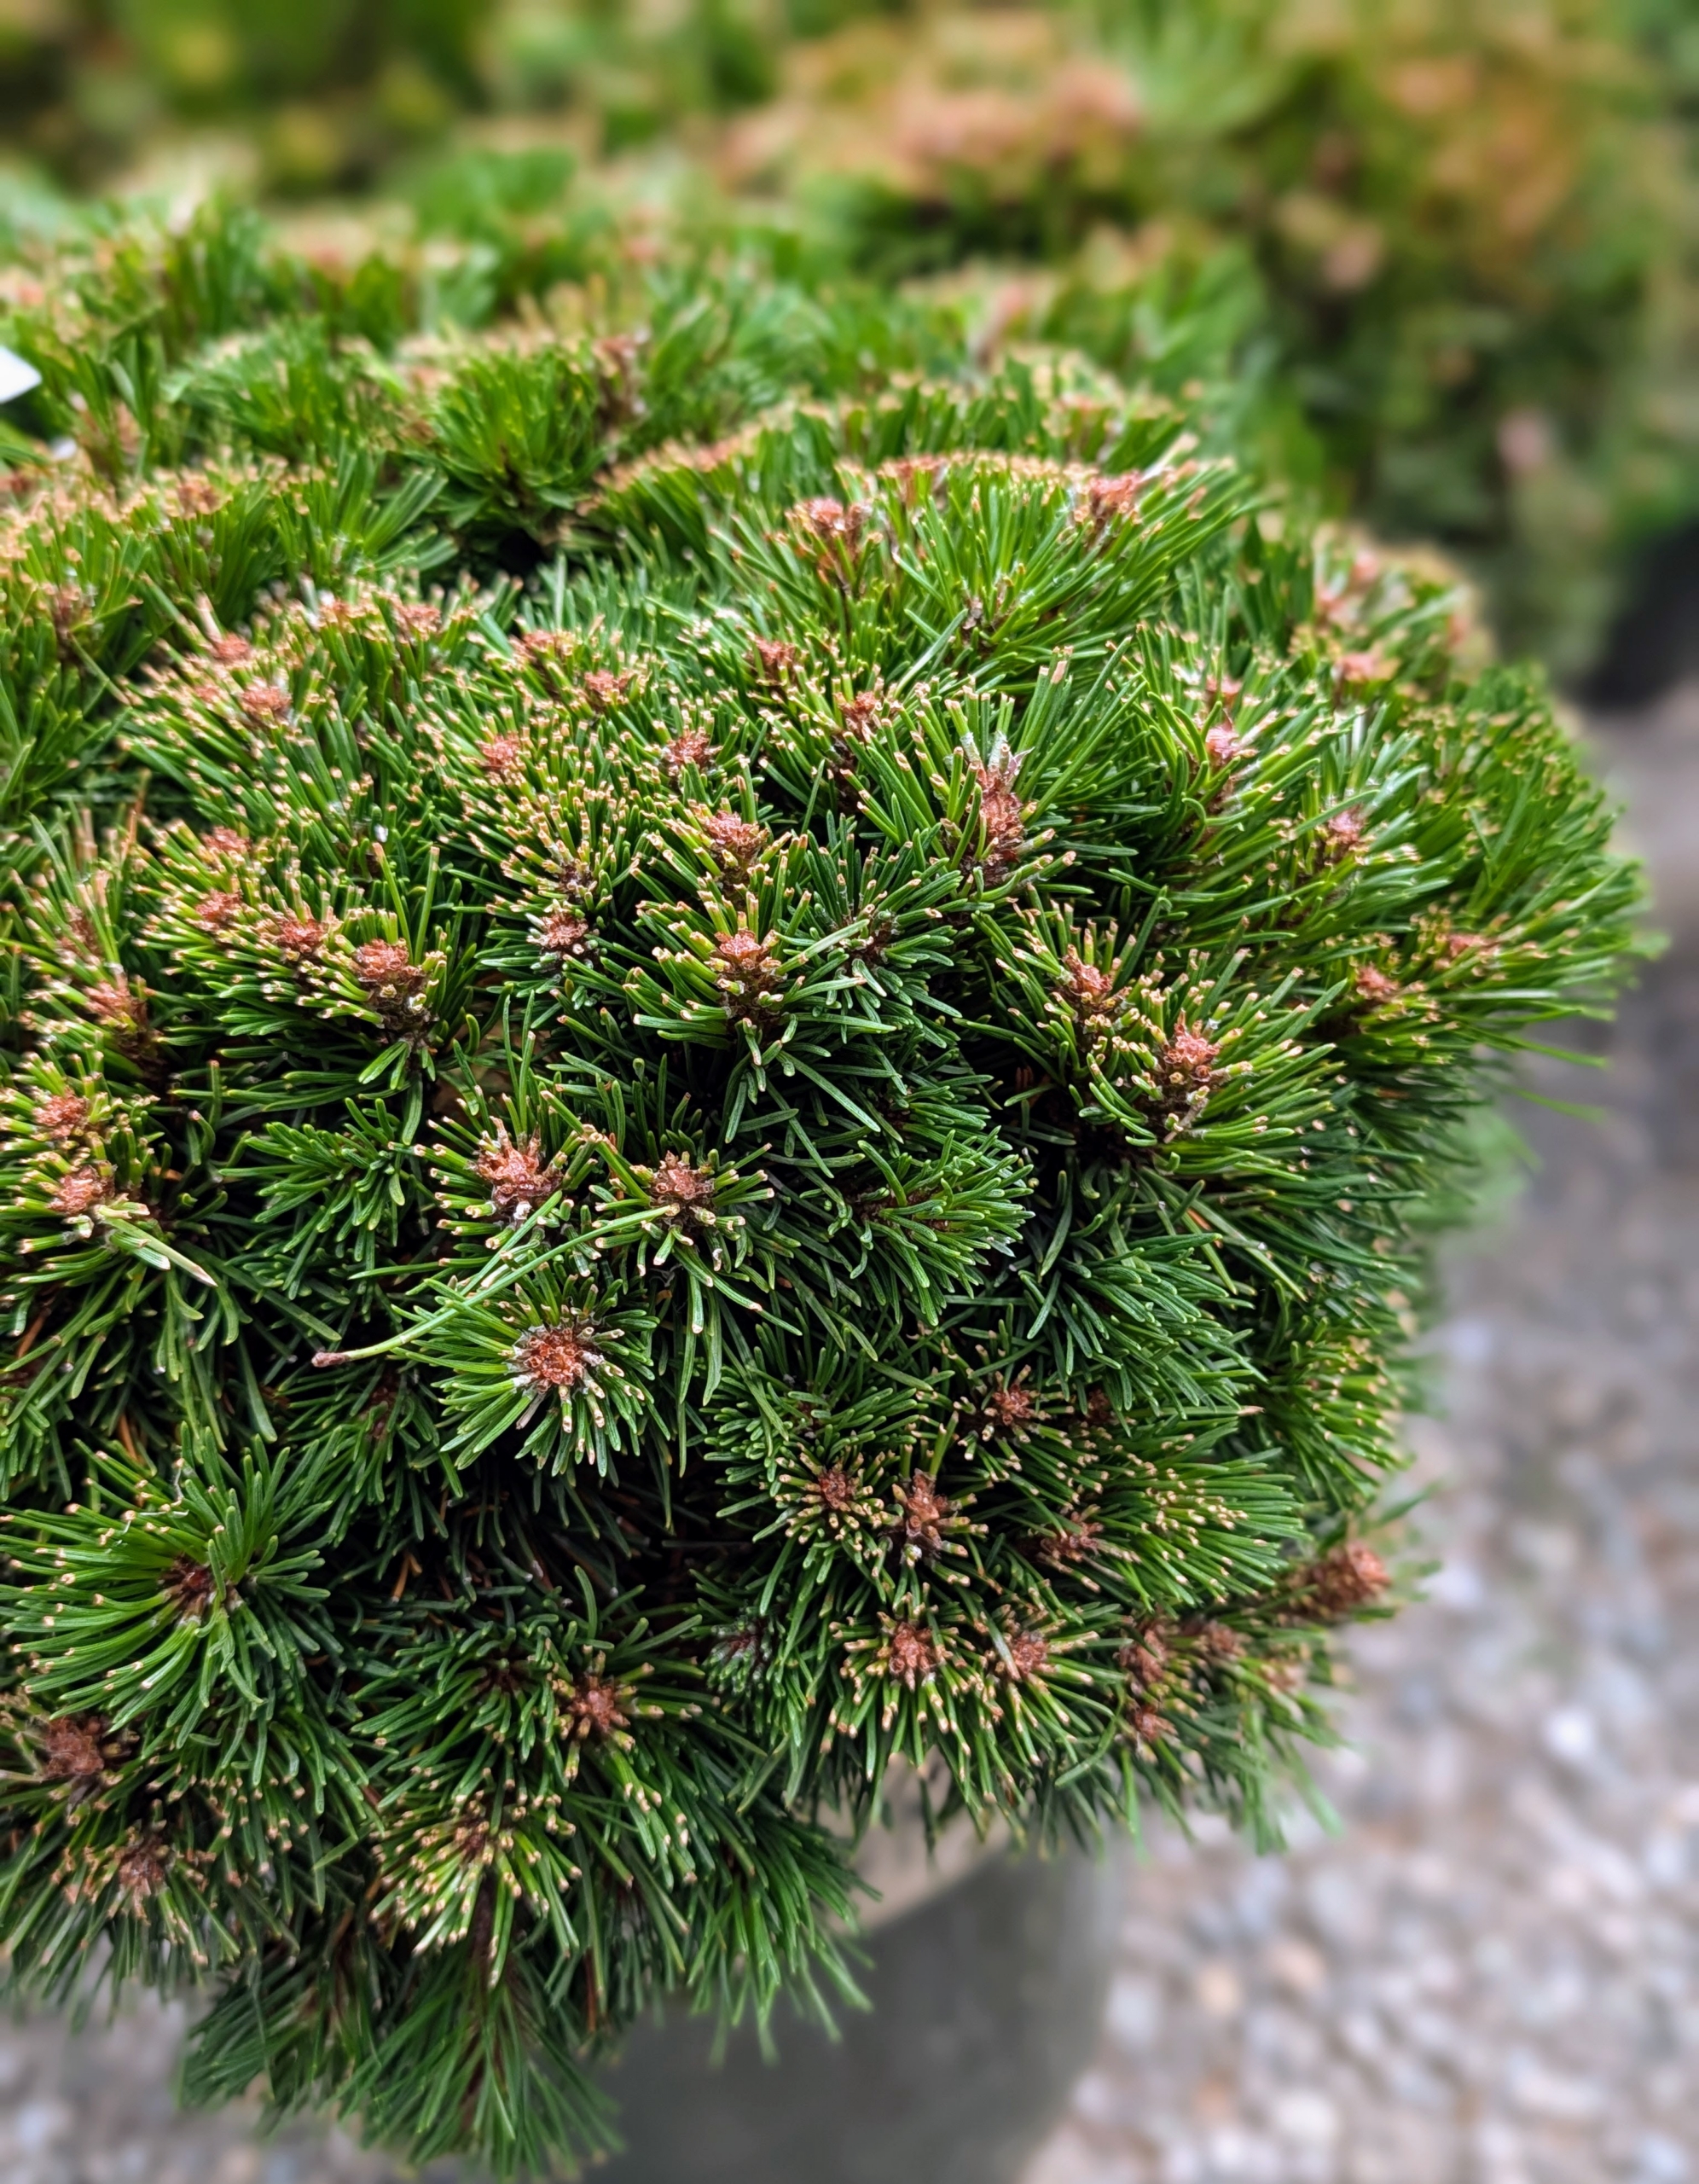
Pinus mugo ‘Monjaw’ is also known as Little Rick mugo pine. This is a compact, dense variety that stays green throughout the winter.
Pinus mugo ‘Carsten’s Wintergold’ is another a dwarf pine form. It is short with densely arranged green needles in spring and summer, turning a rich gold tone as cold weather arrives.
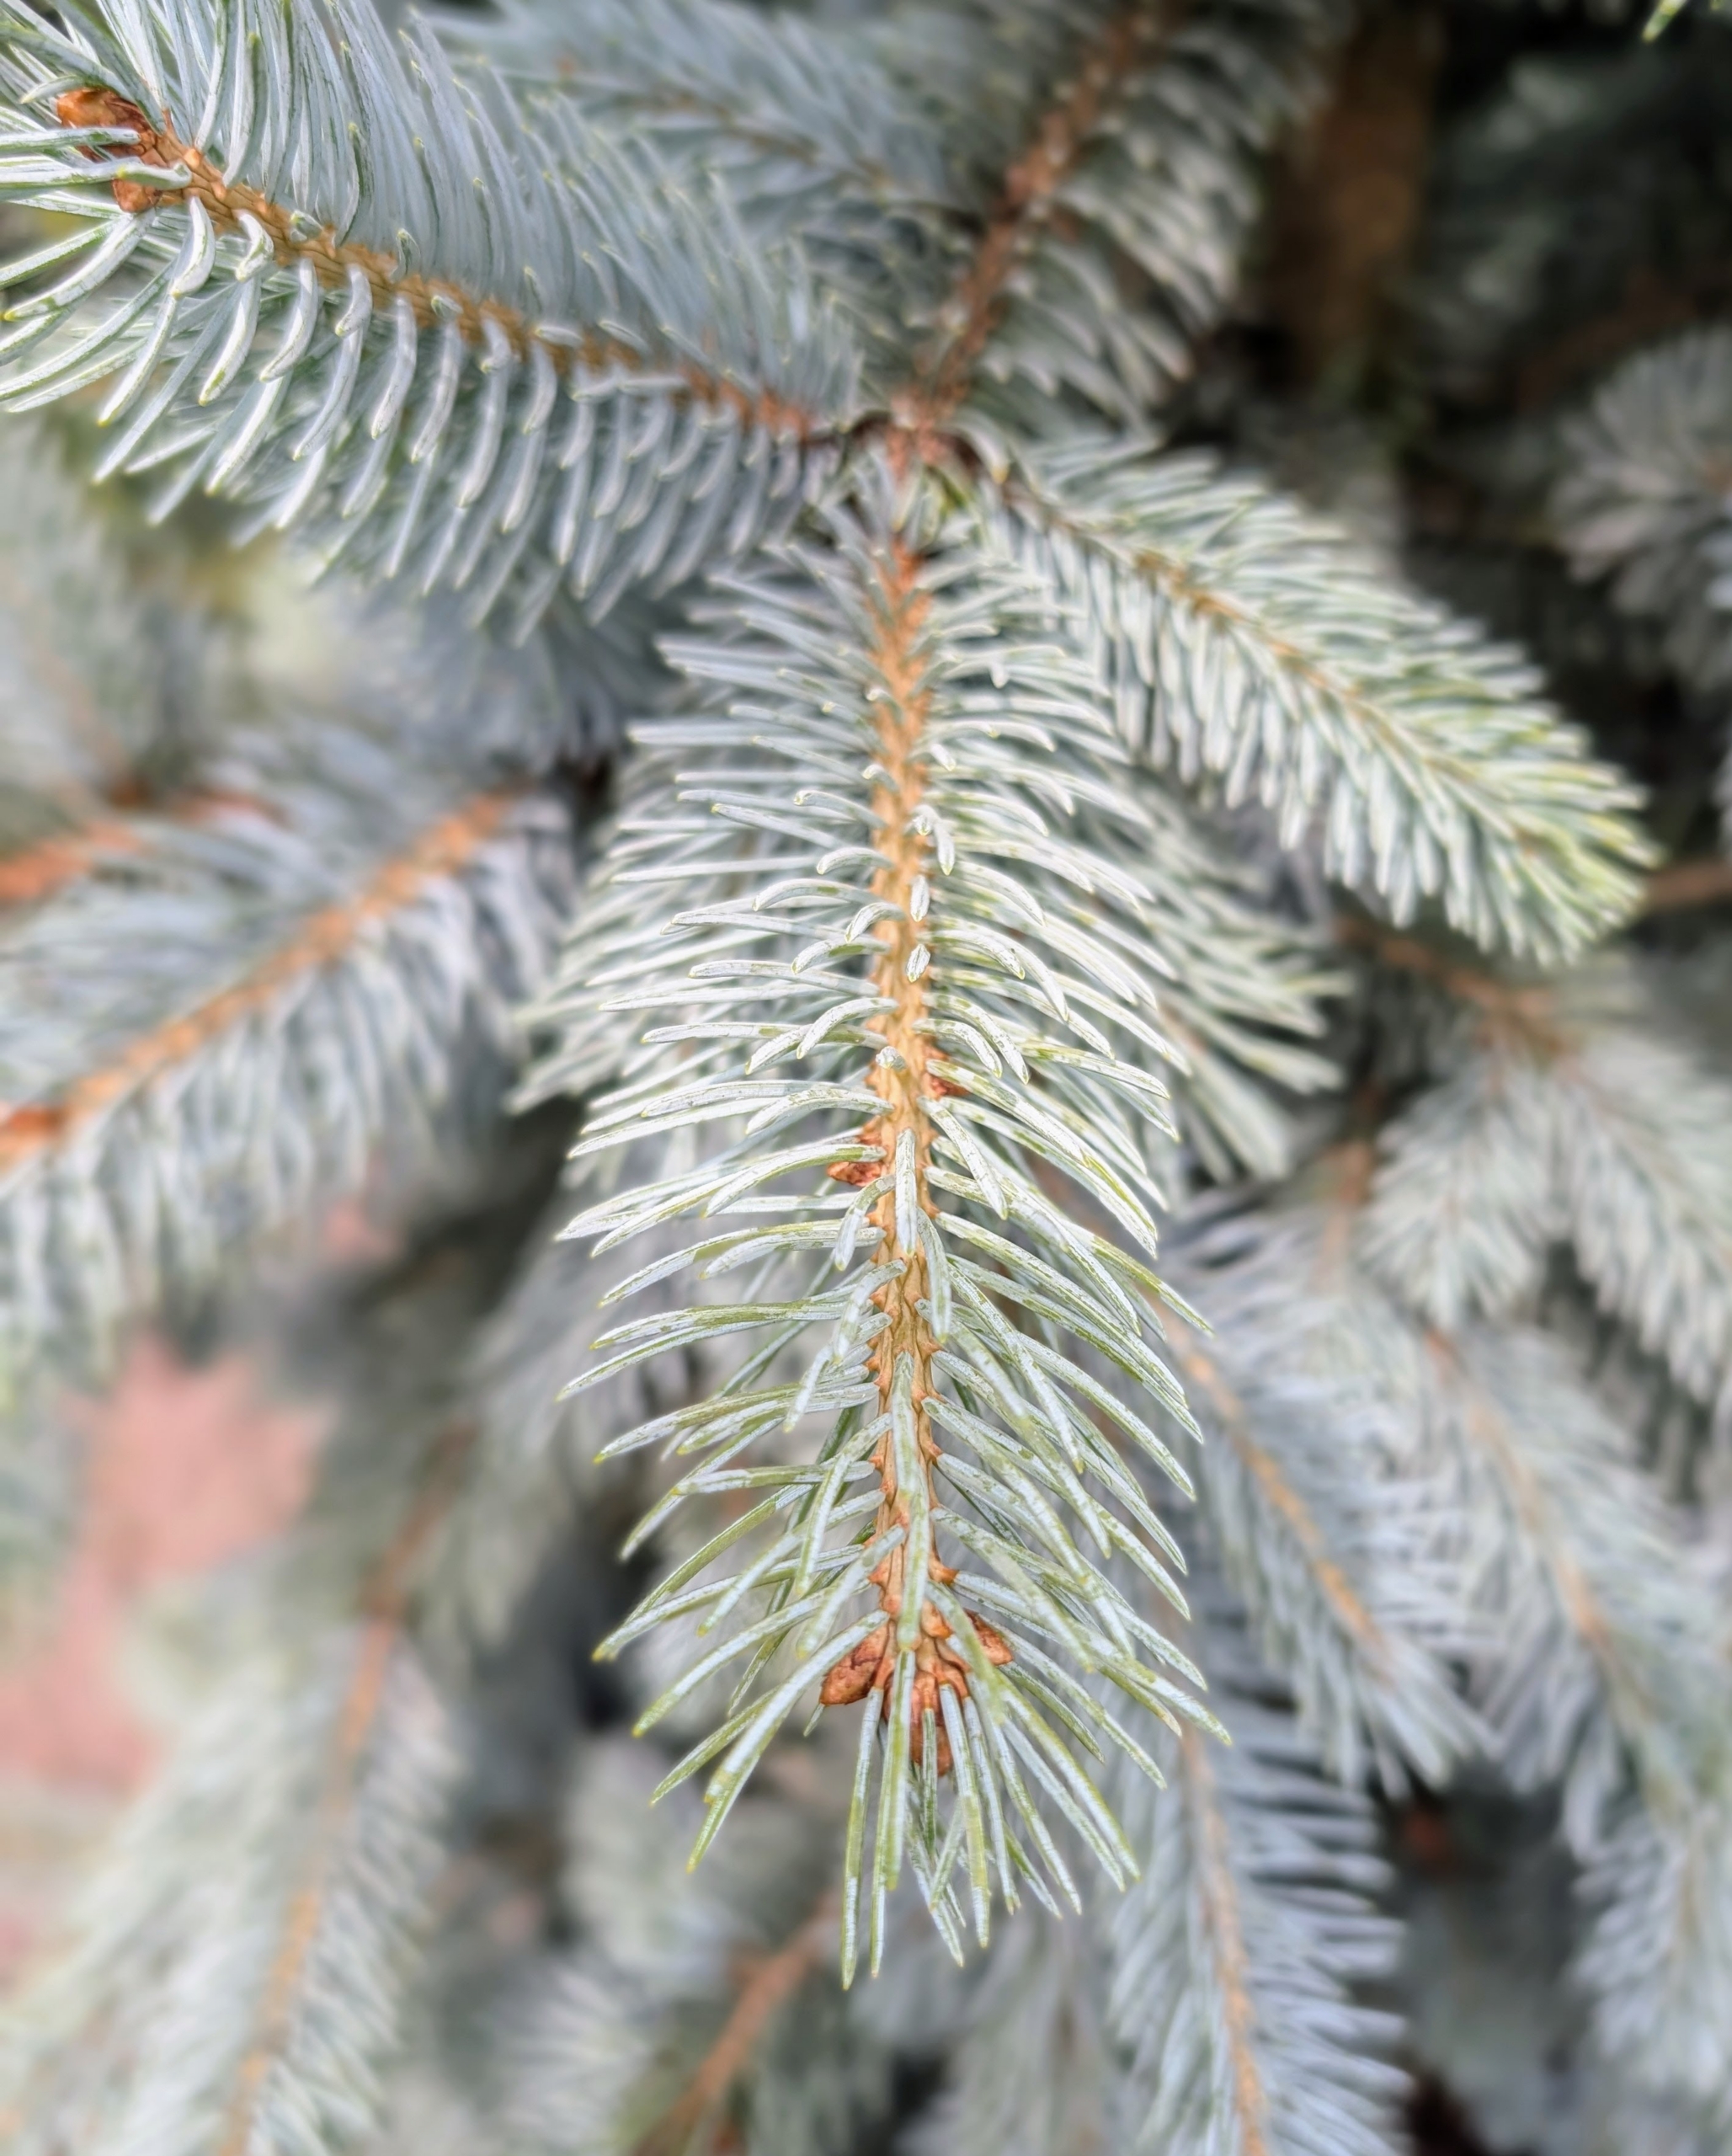
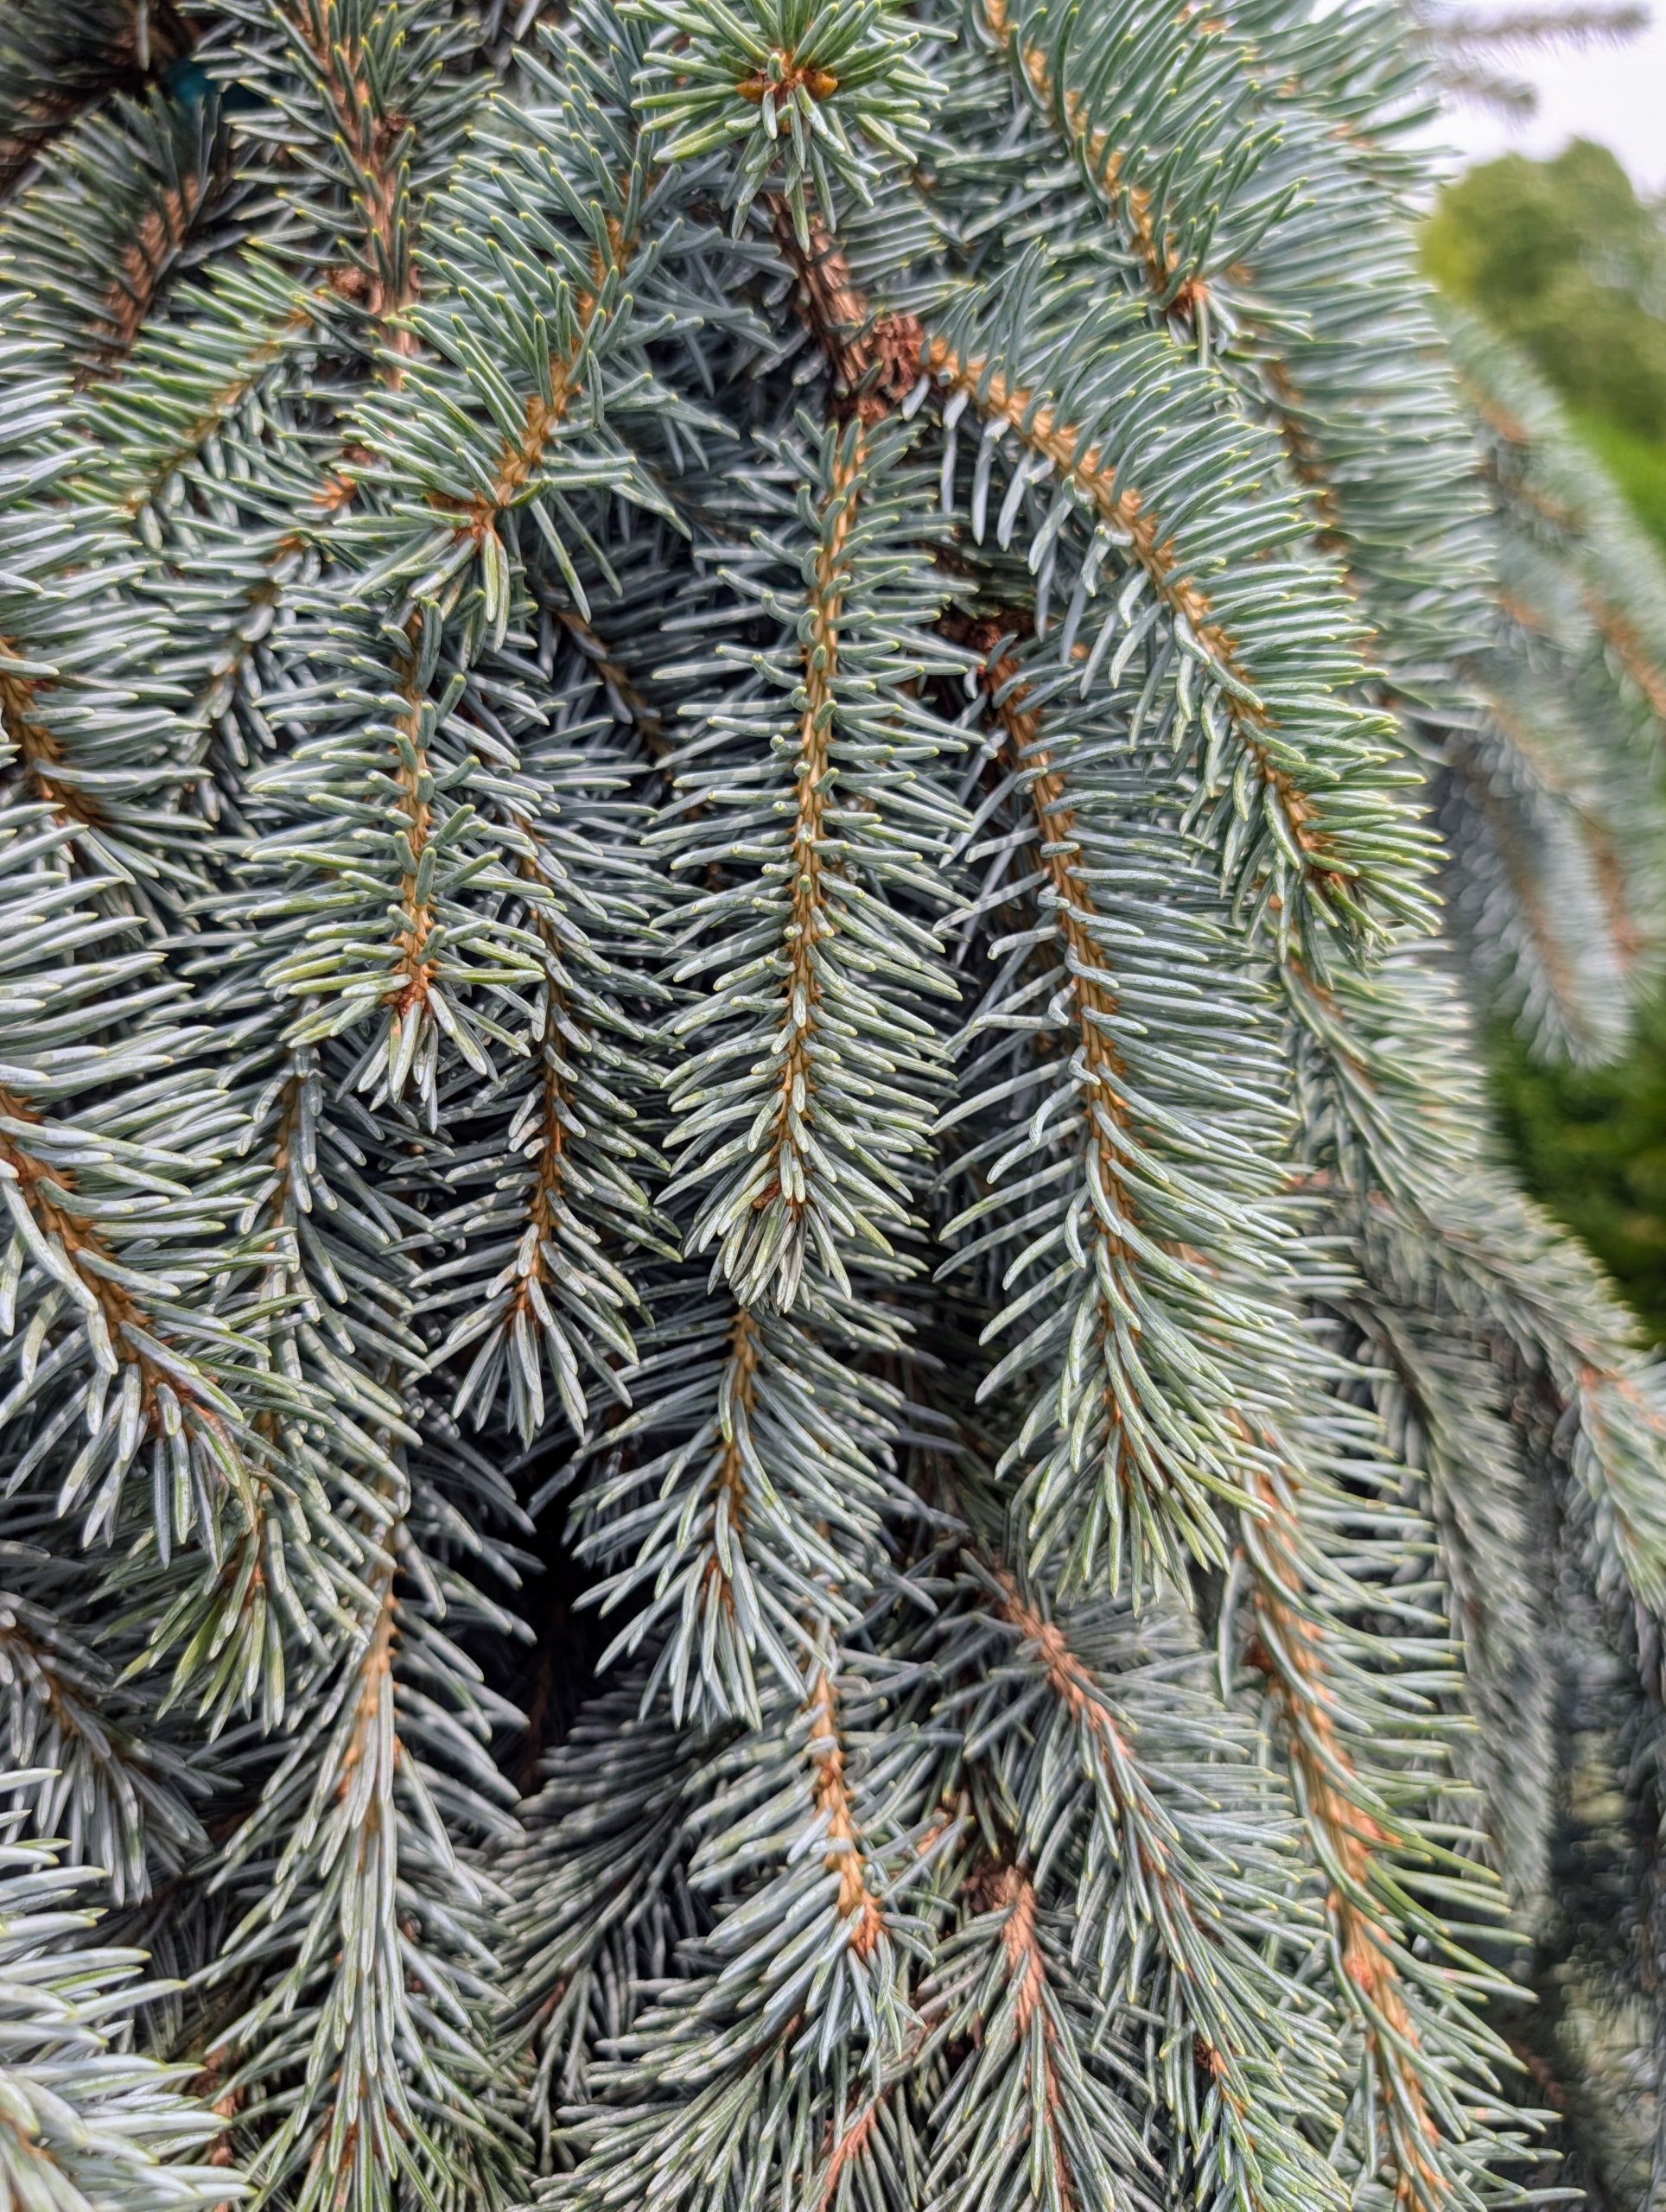
Hoop’s blue spruce, Picea pungens ‘Hoopsii’ is another hardy evergreen tree. Its pyramidal shape holds stiff horizontal branches with dense silvery-blue needles.
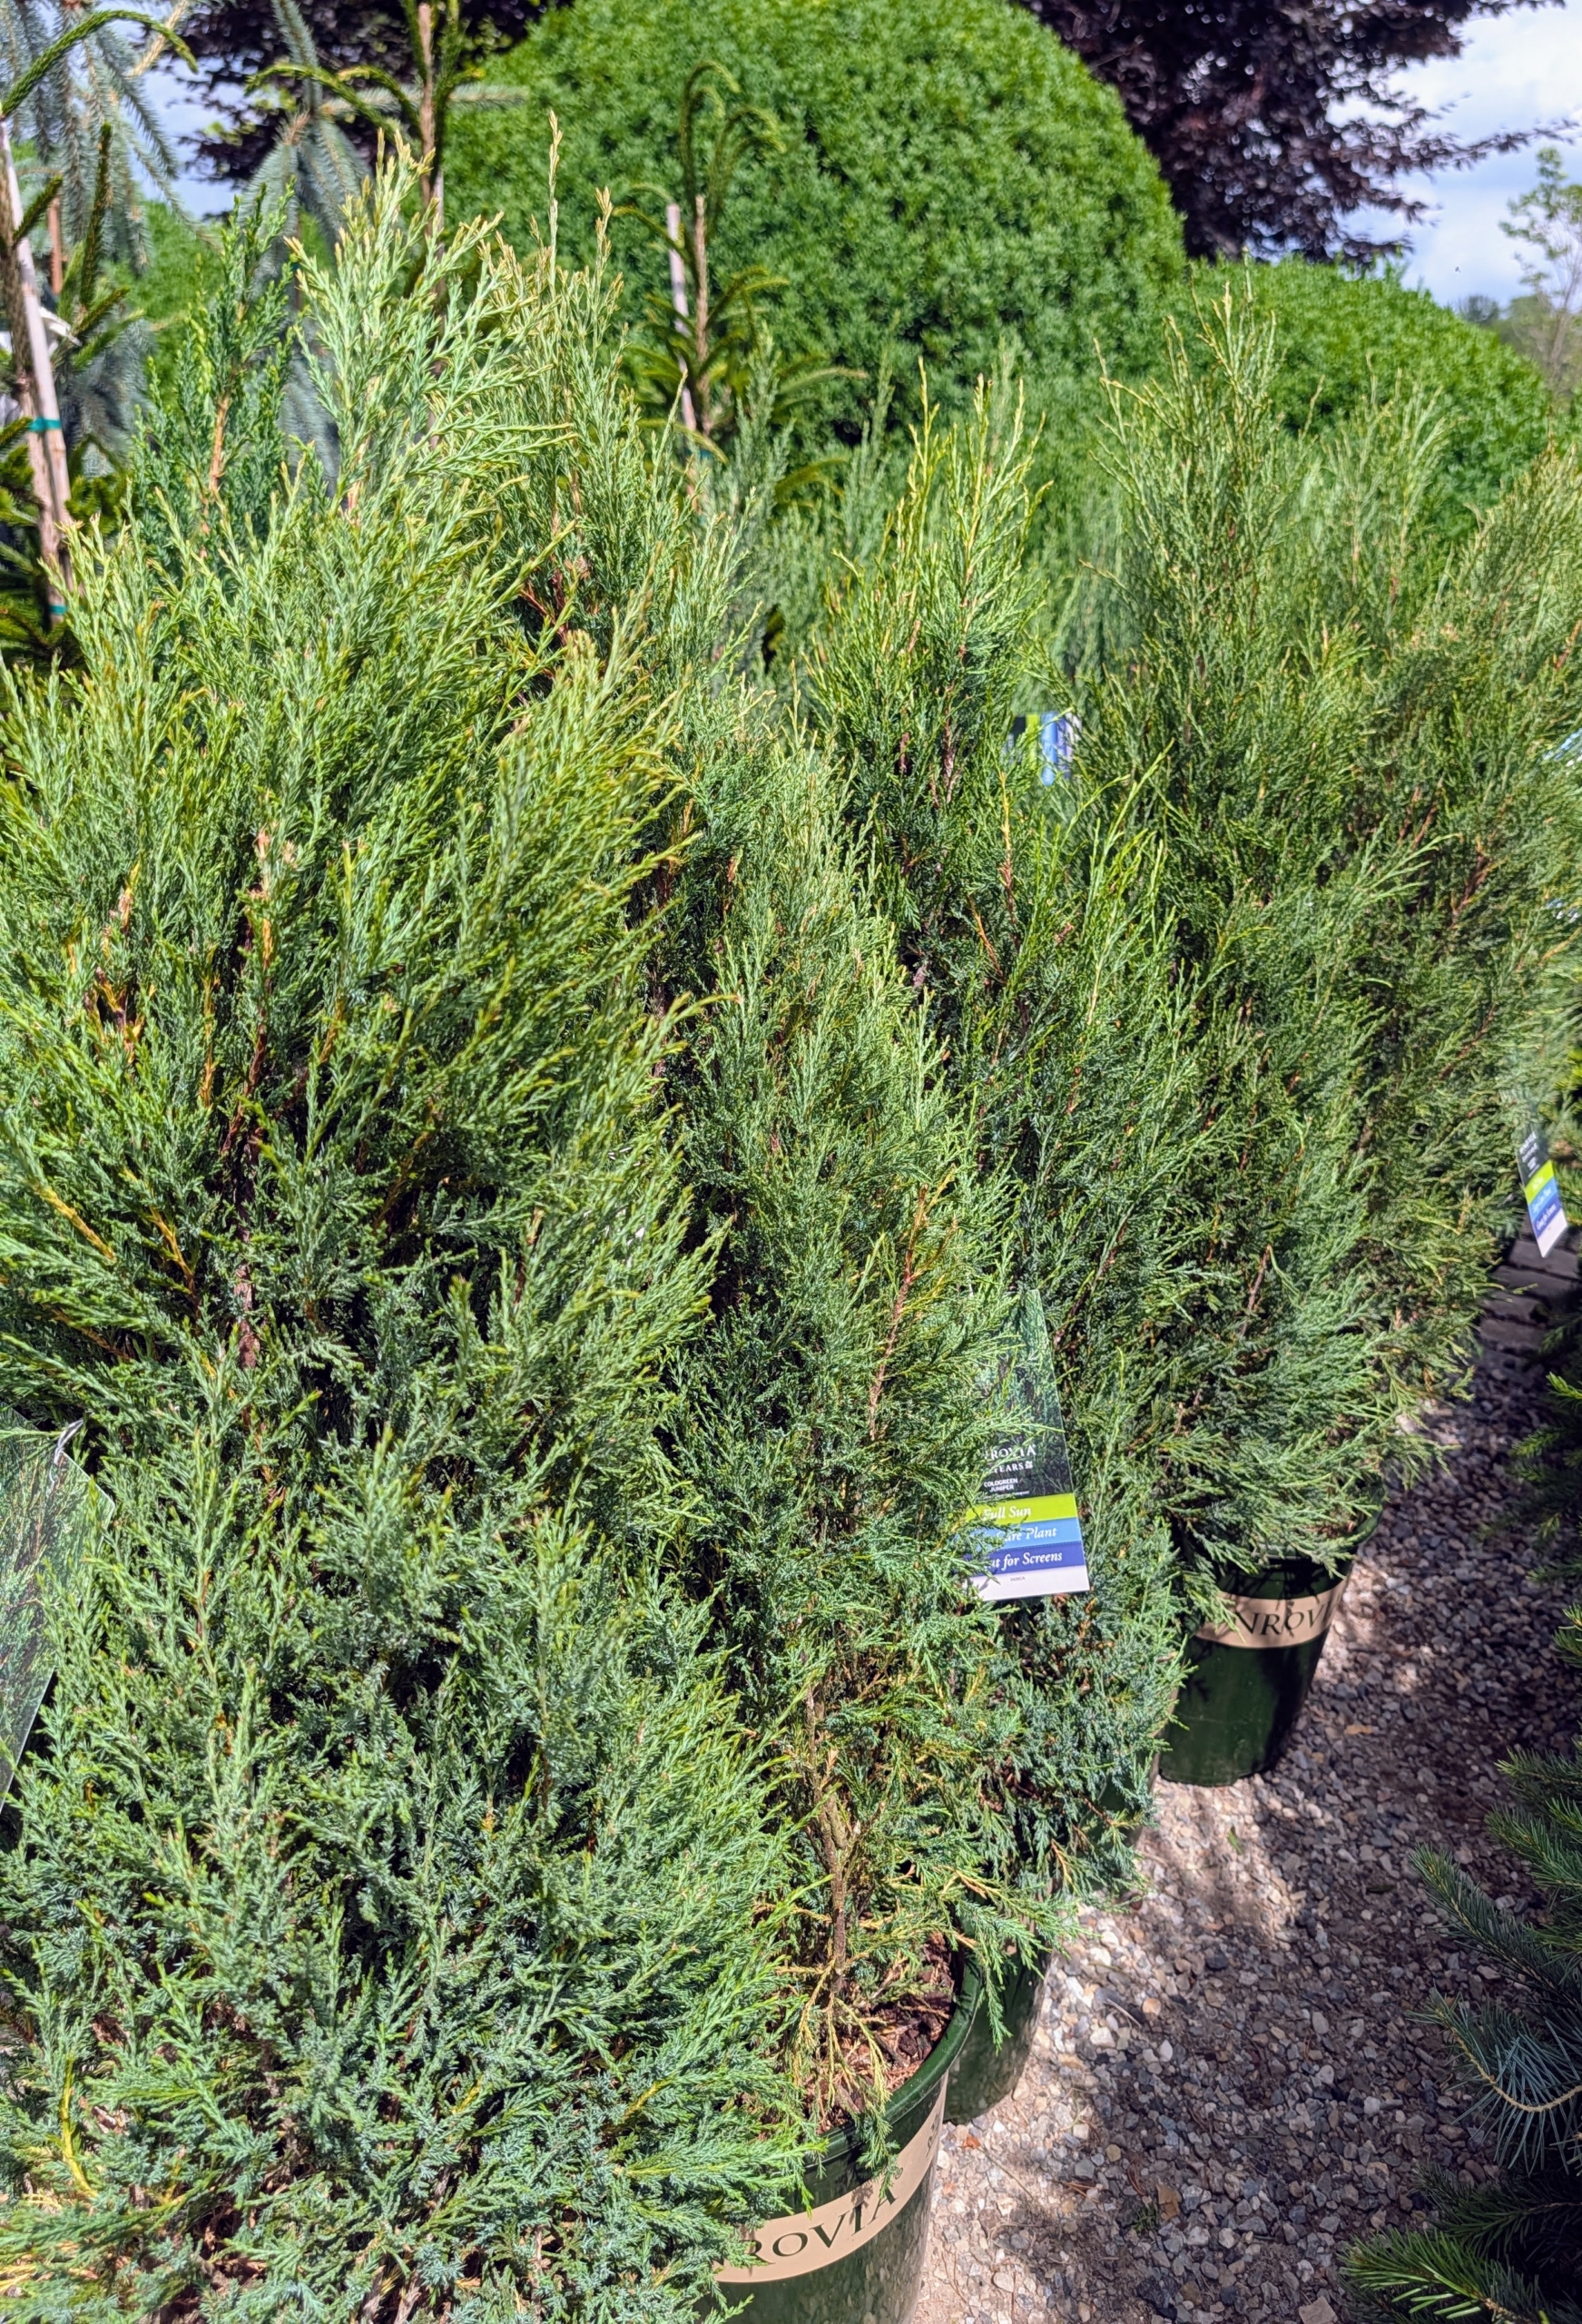
And this is a cologreen juniper, Juniperus scopulorum ‘Cologreen’ – a very interesting narrow, columnar cone-shape form tree. It is heat and cold tolerant that’s easy to maintain.
Picea pungens ‘The Blues’ – The Blues blue spruce. This is a strong weeper with irregularly spreading and drooping branches.
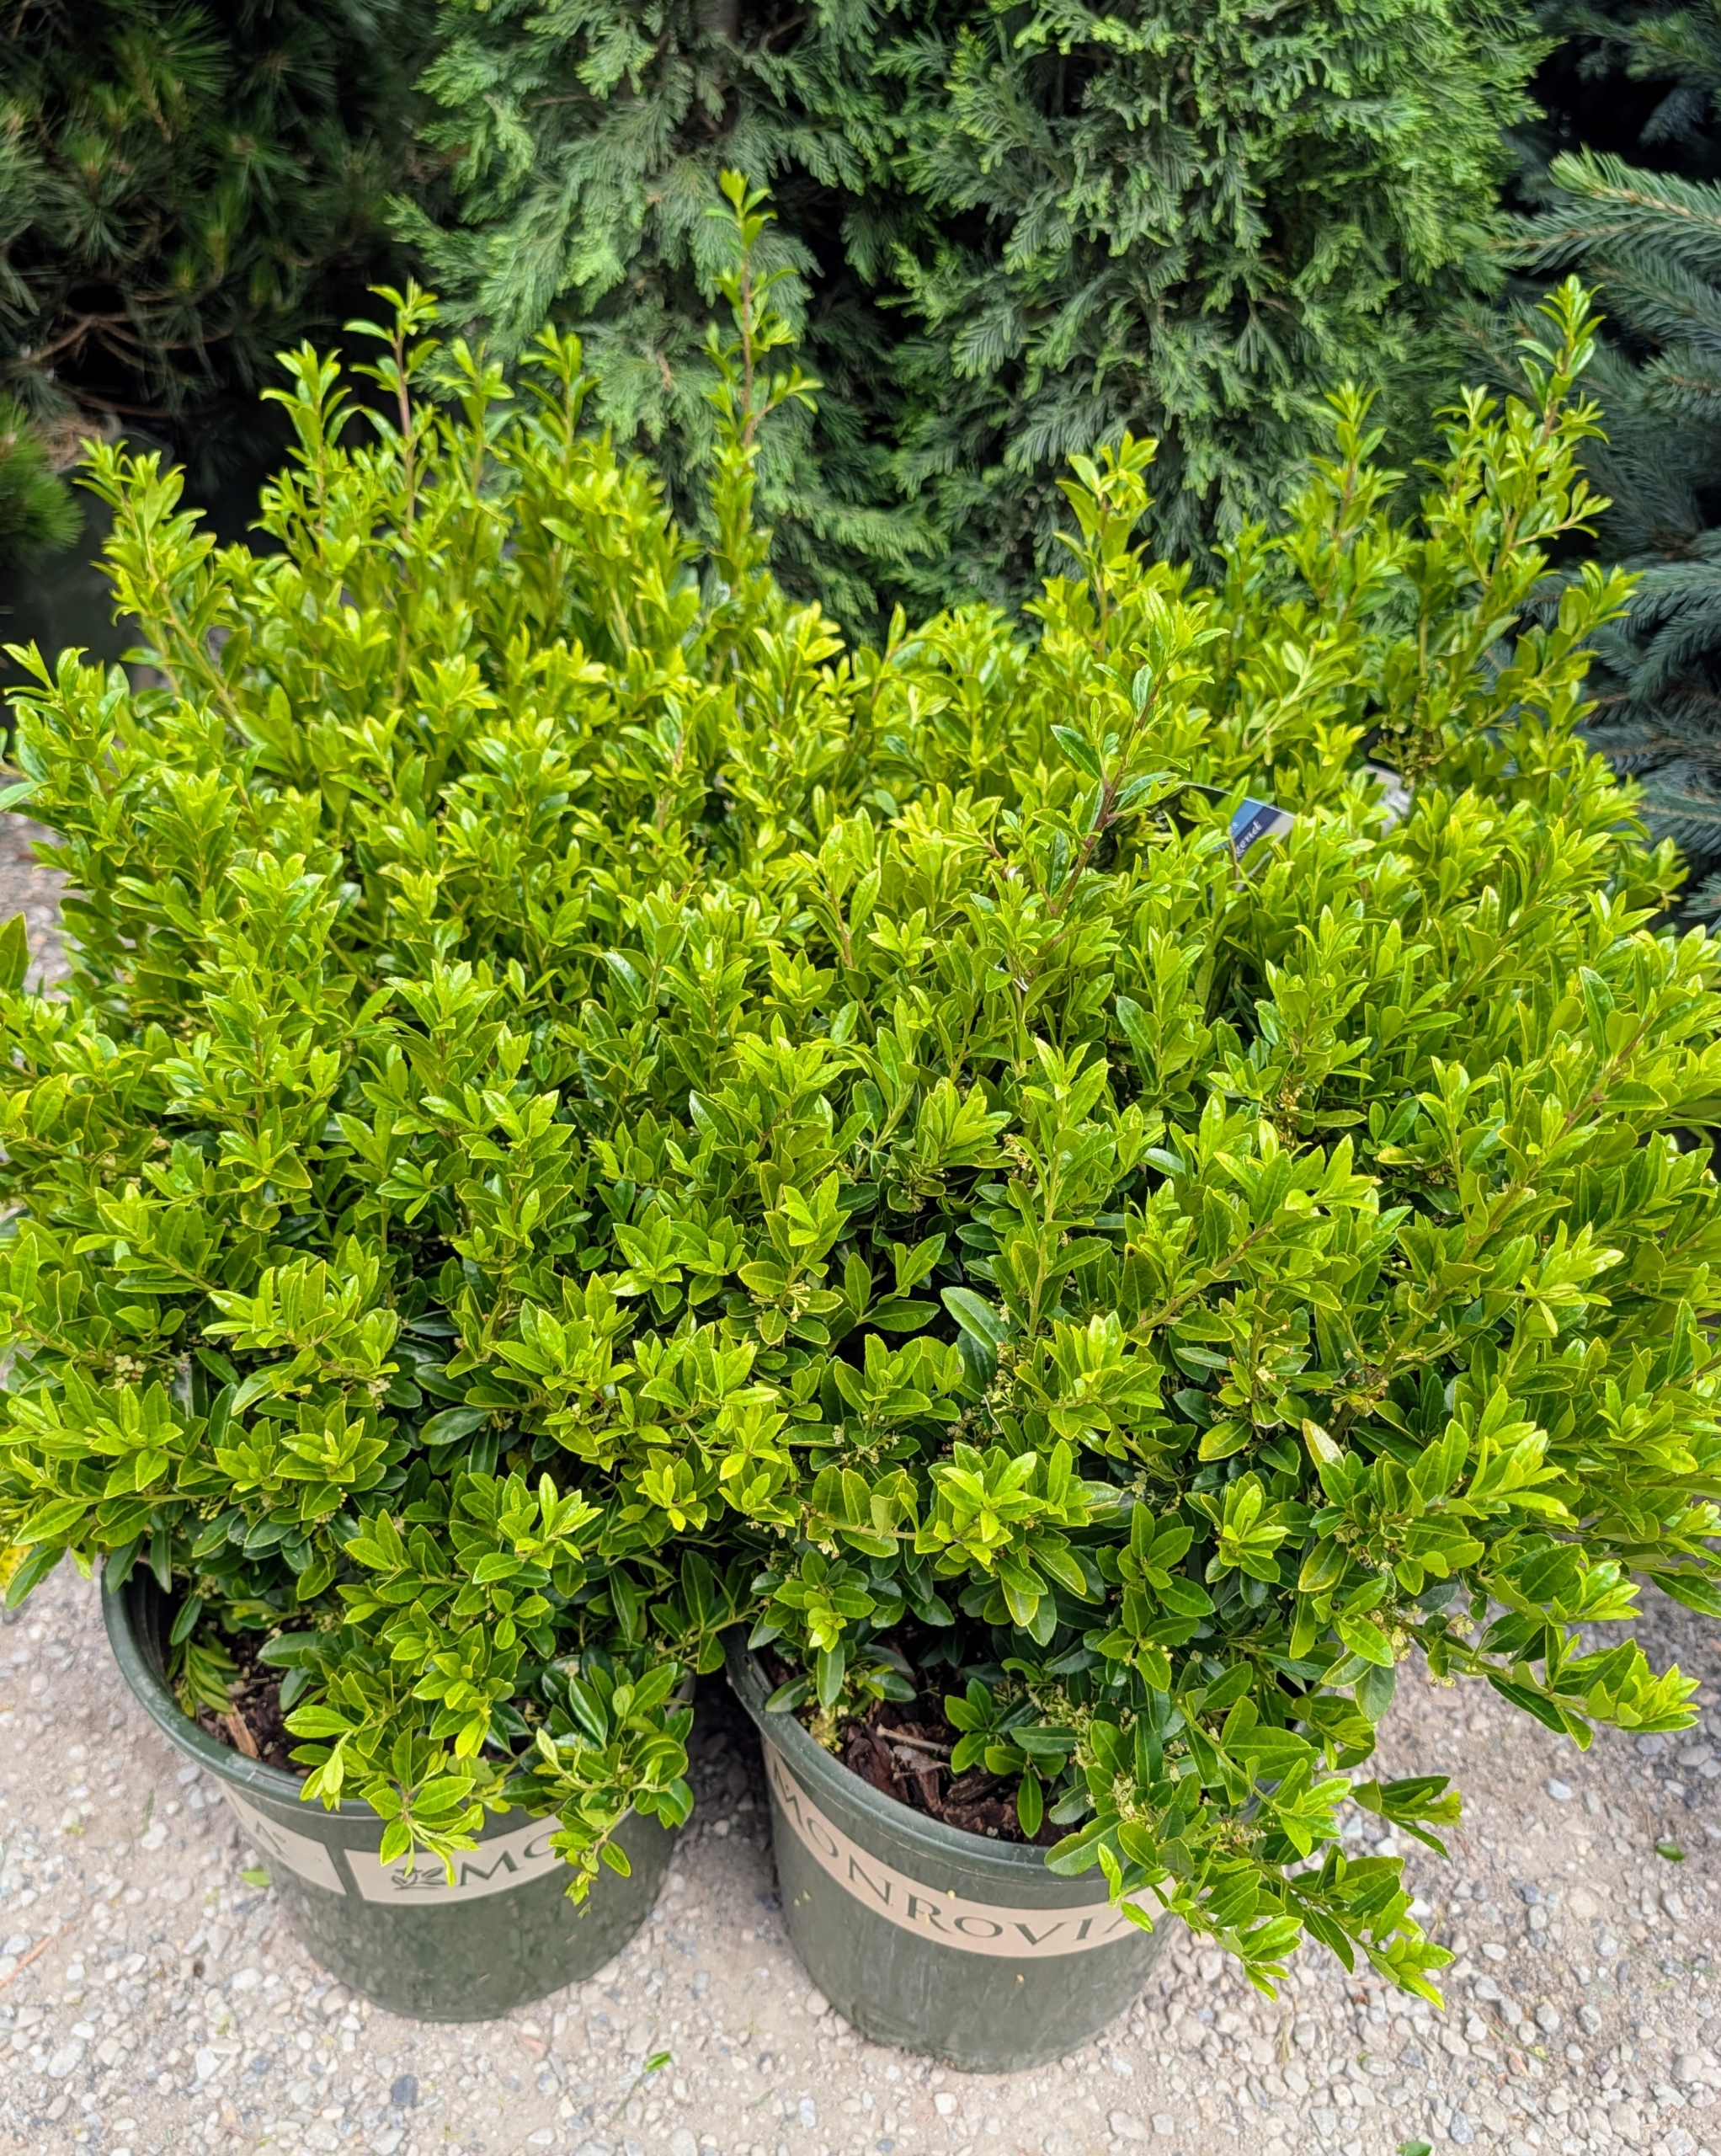
Ilex x crenata ‘RutHol10’ PPAF or emerald box holly looks similar to boxwood, but is actually a versatile male evergreen holly with a rounded form and small, green, toothless leaves. It makes a good replacement option for boxwood.
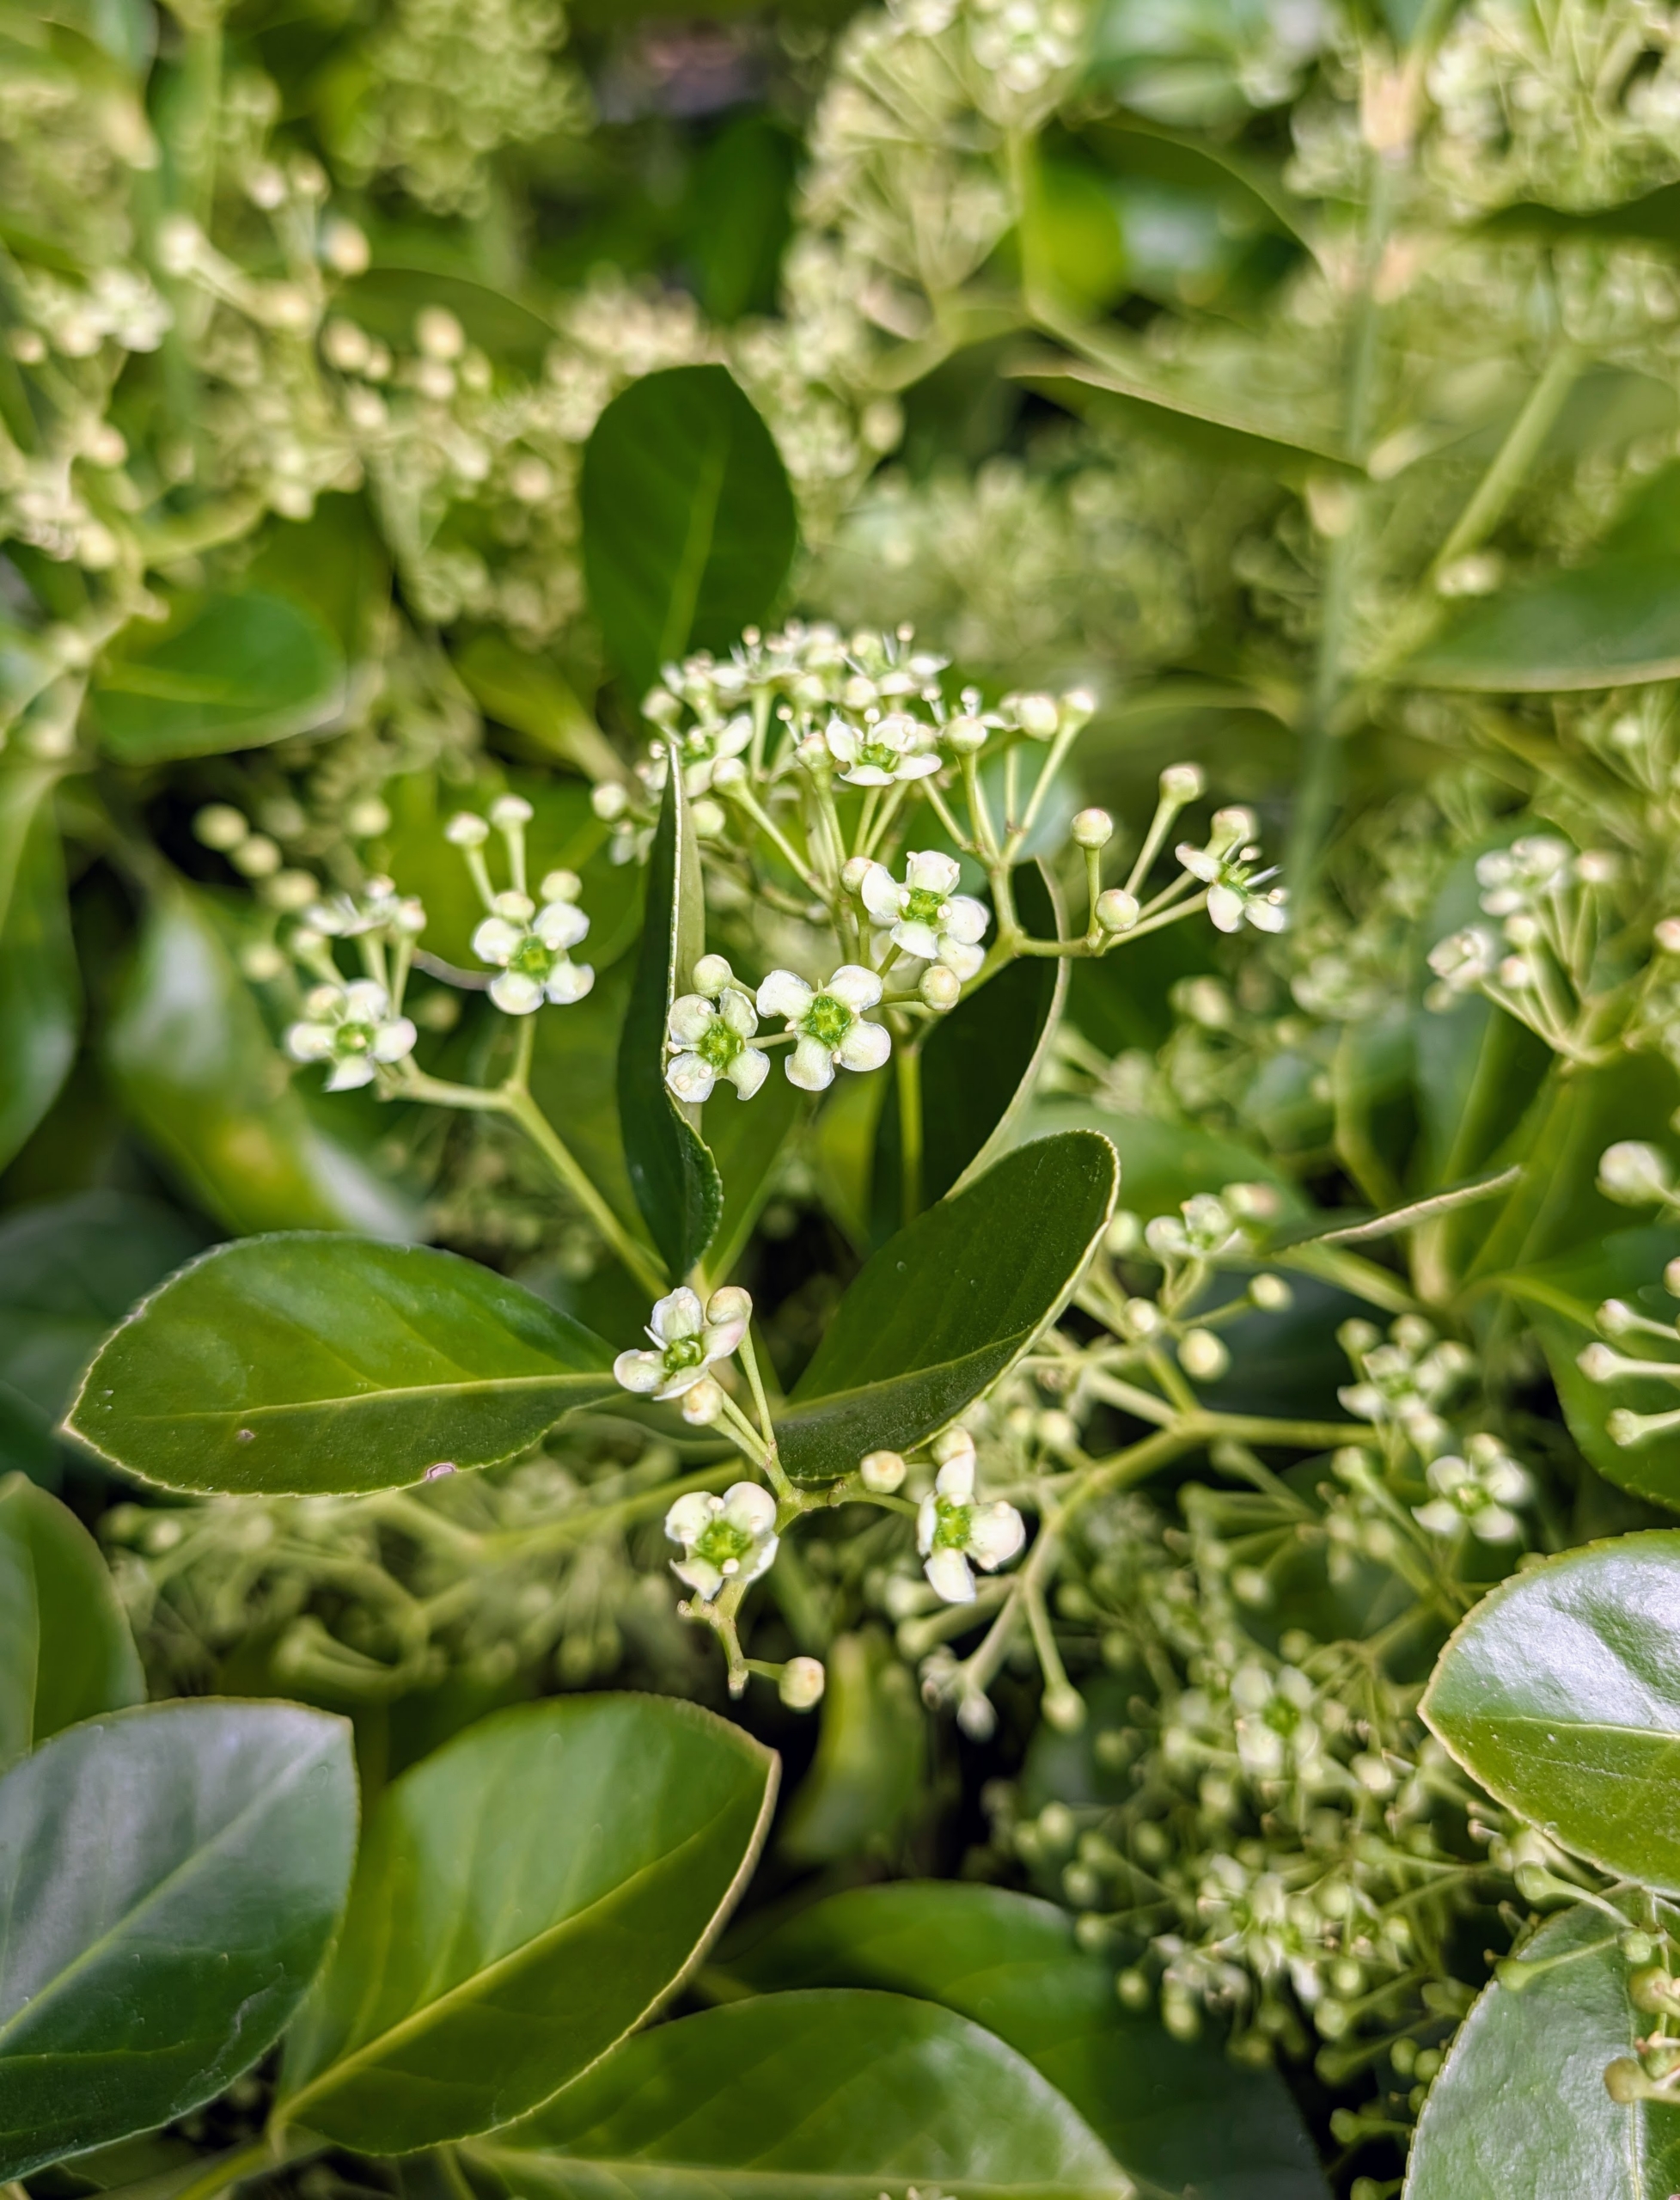
Euonymus kiautschovicus ‘Manhattan’ is an excellent choice for gardeners wanting a fast growing evergreen clipped hedge, informal screen, or espalier in full sun. This shrub has dense, lush, dark green foliage and a naturally neat, formal appearance that looks great without pruning.
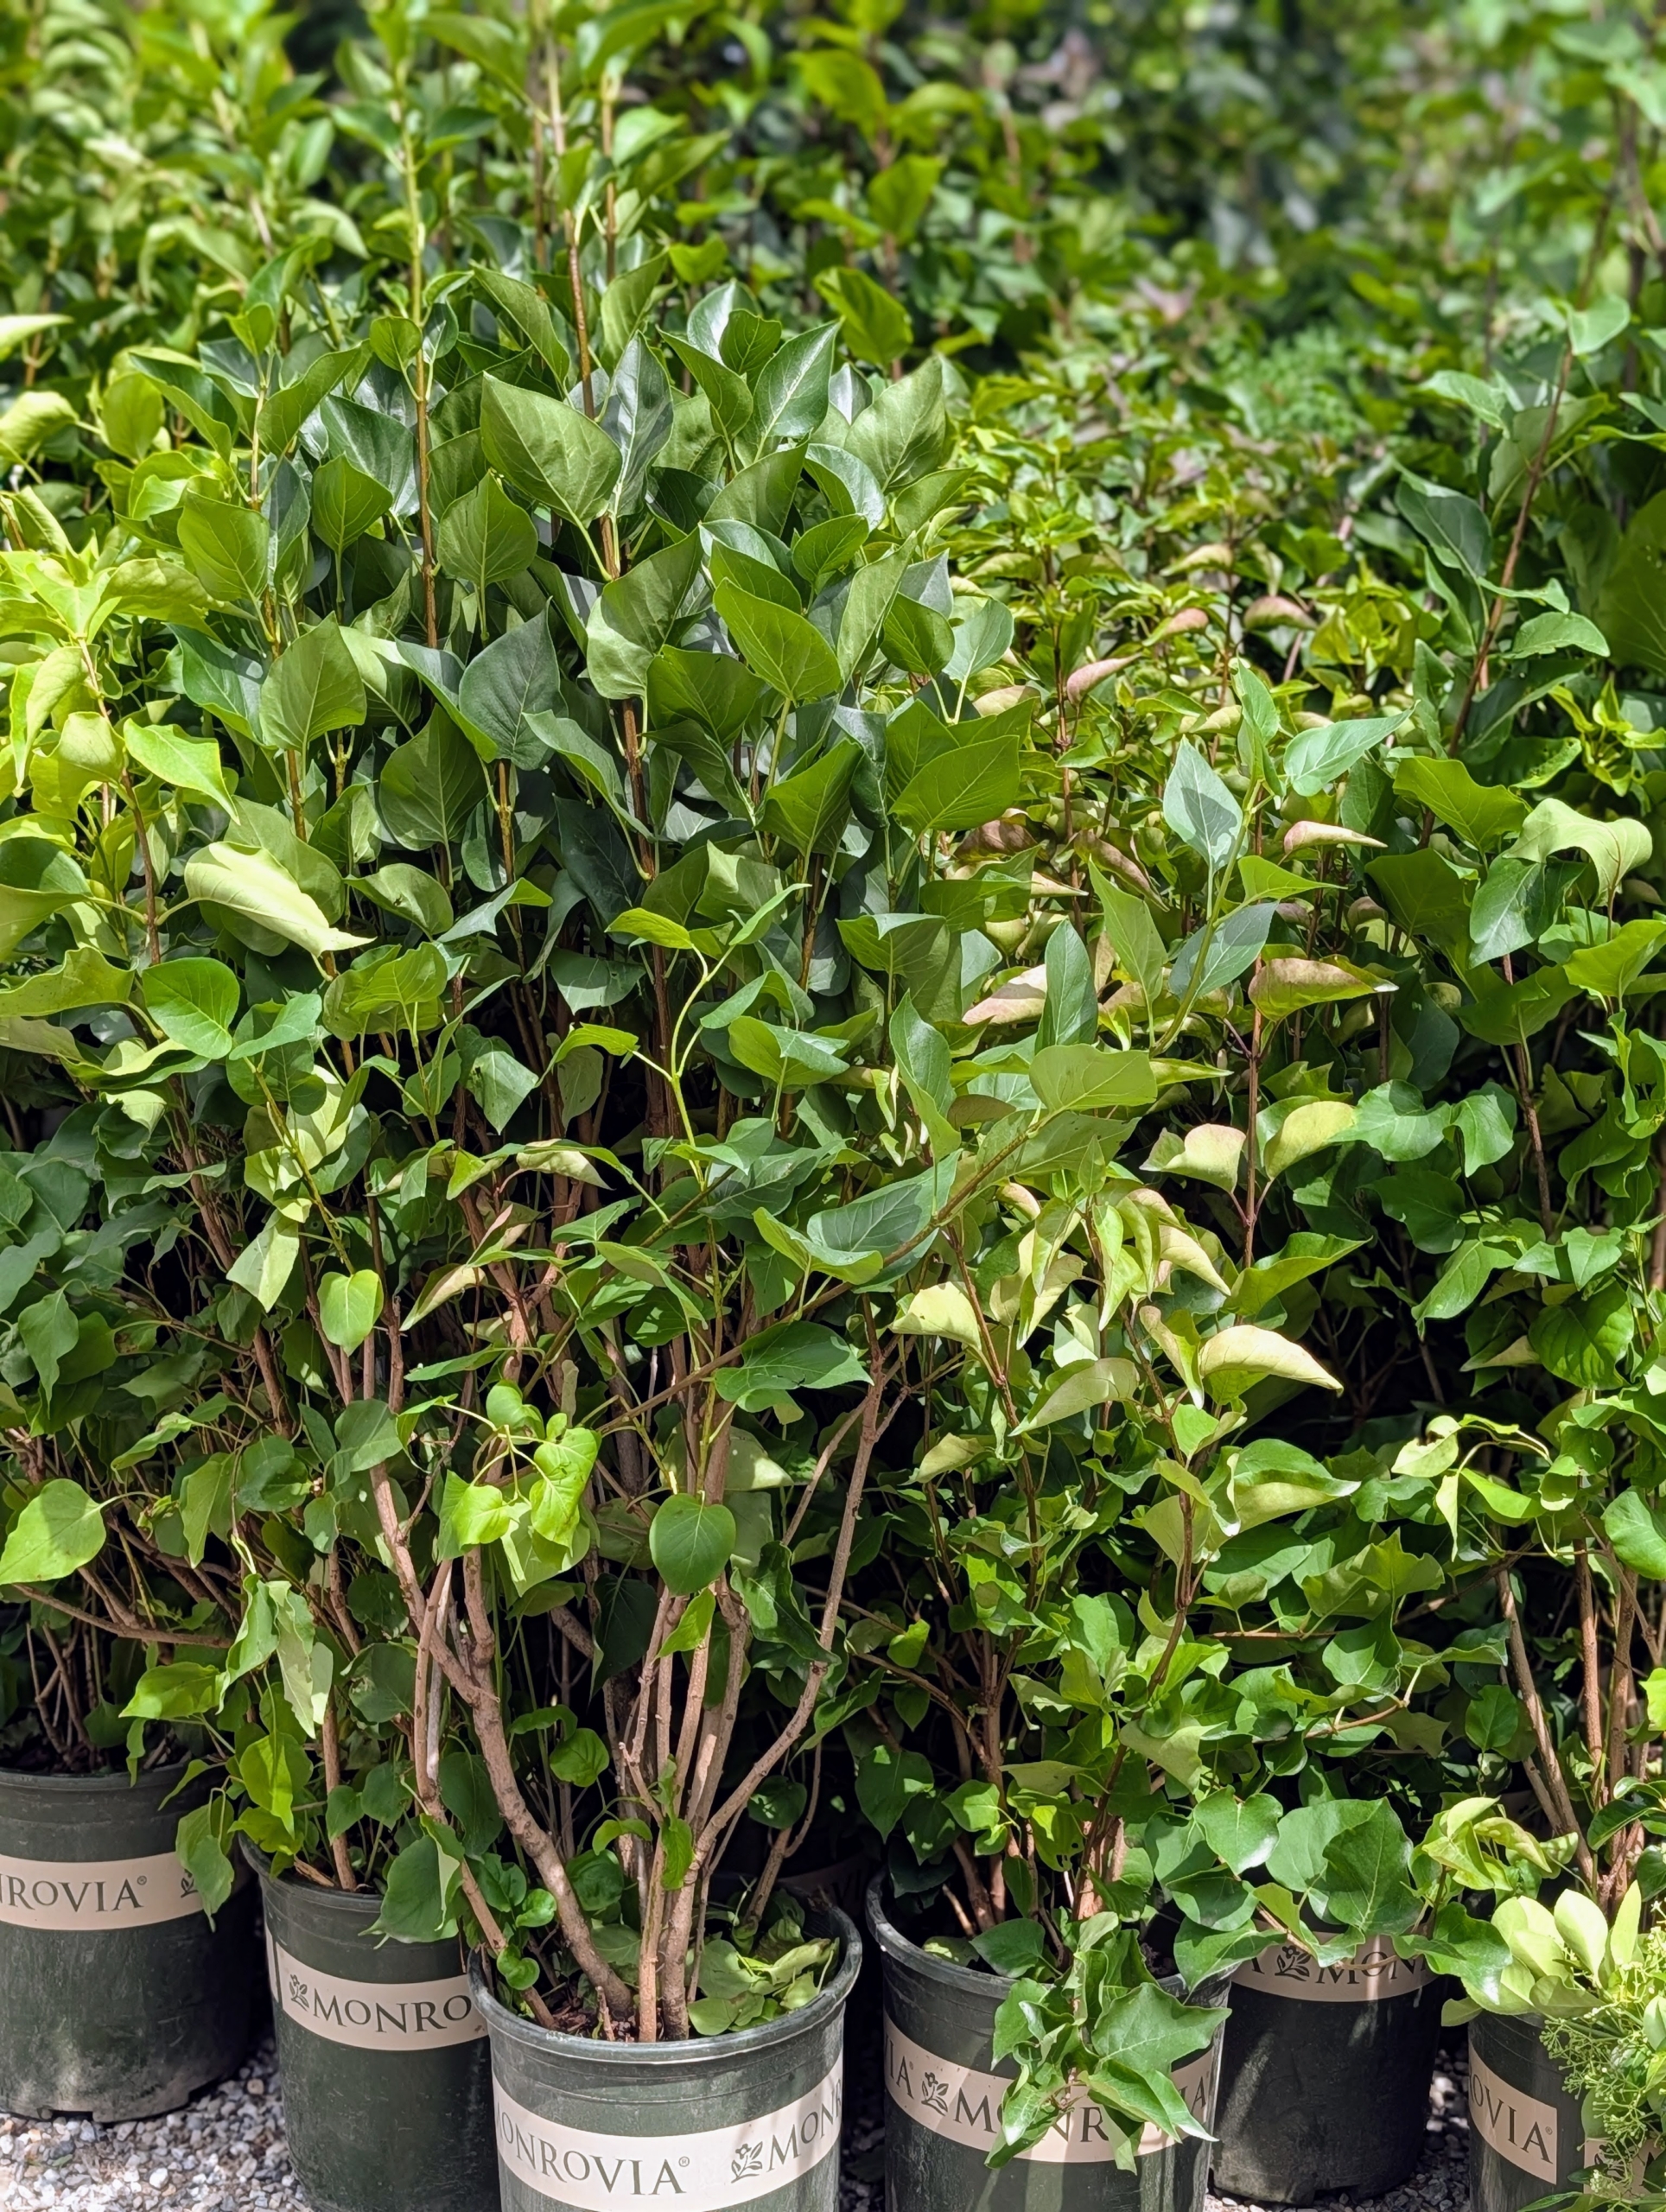
And this is Syringa vulgaris ‘Yankee Doodle’ – one of the darkest purple lilacs. It grows showy clusters of fragrant, purple florets that appear in mid-spring.
It’s planting season – happy gardening! And look for Monrovia wherever you buy your plants – you’ll be so happy you did!
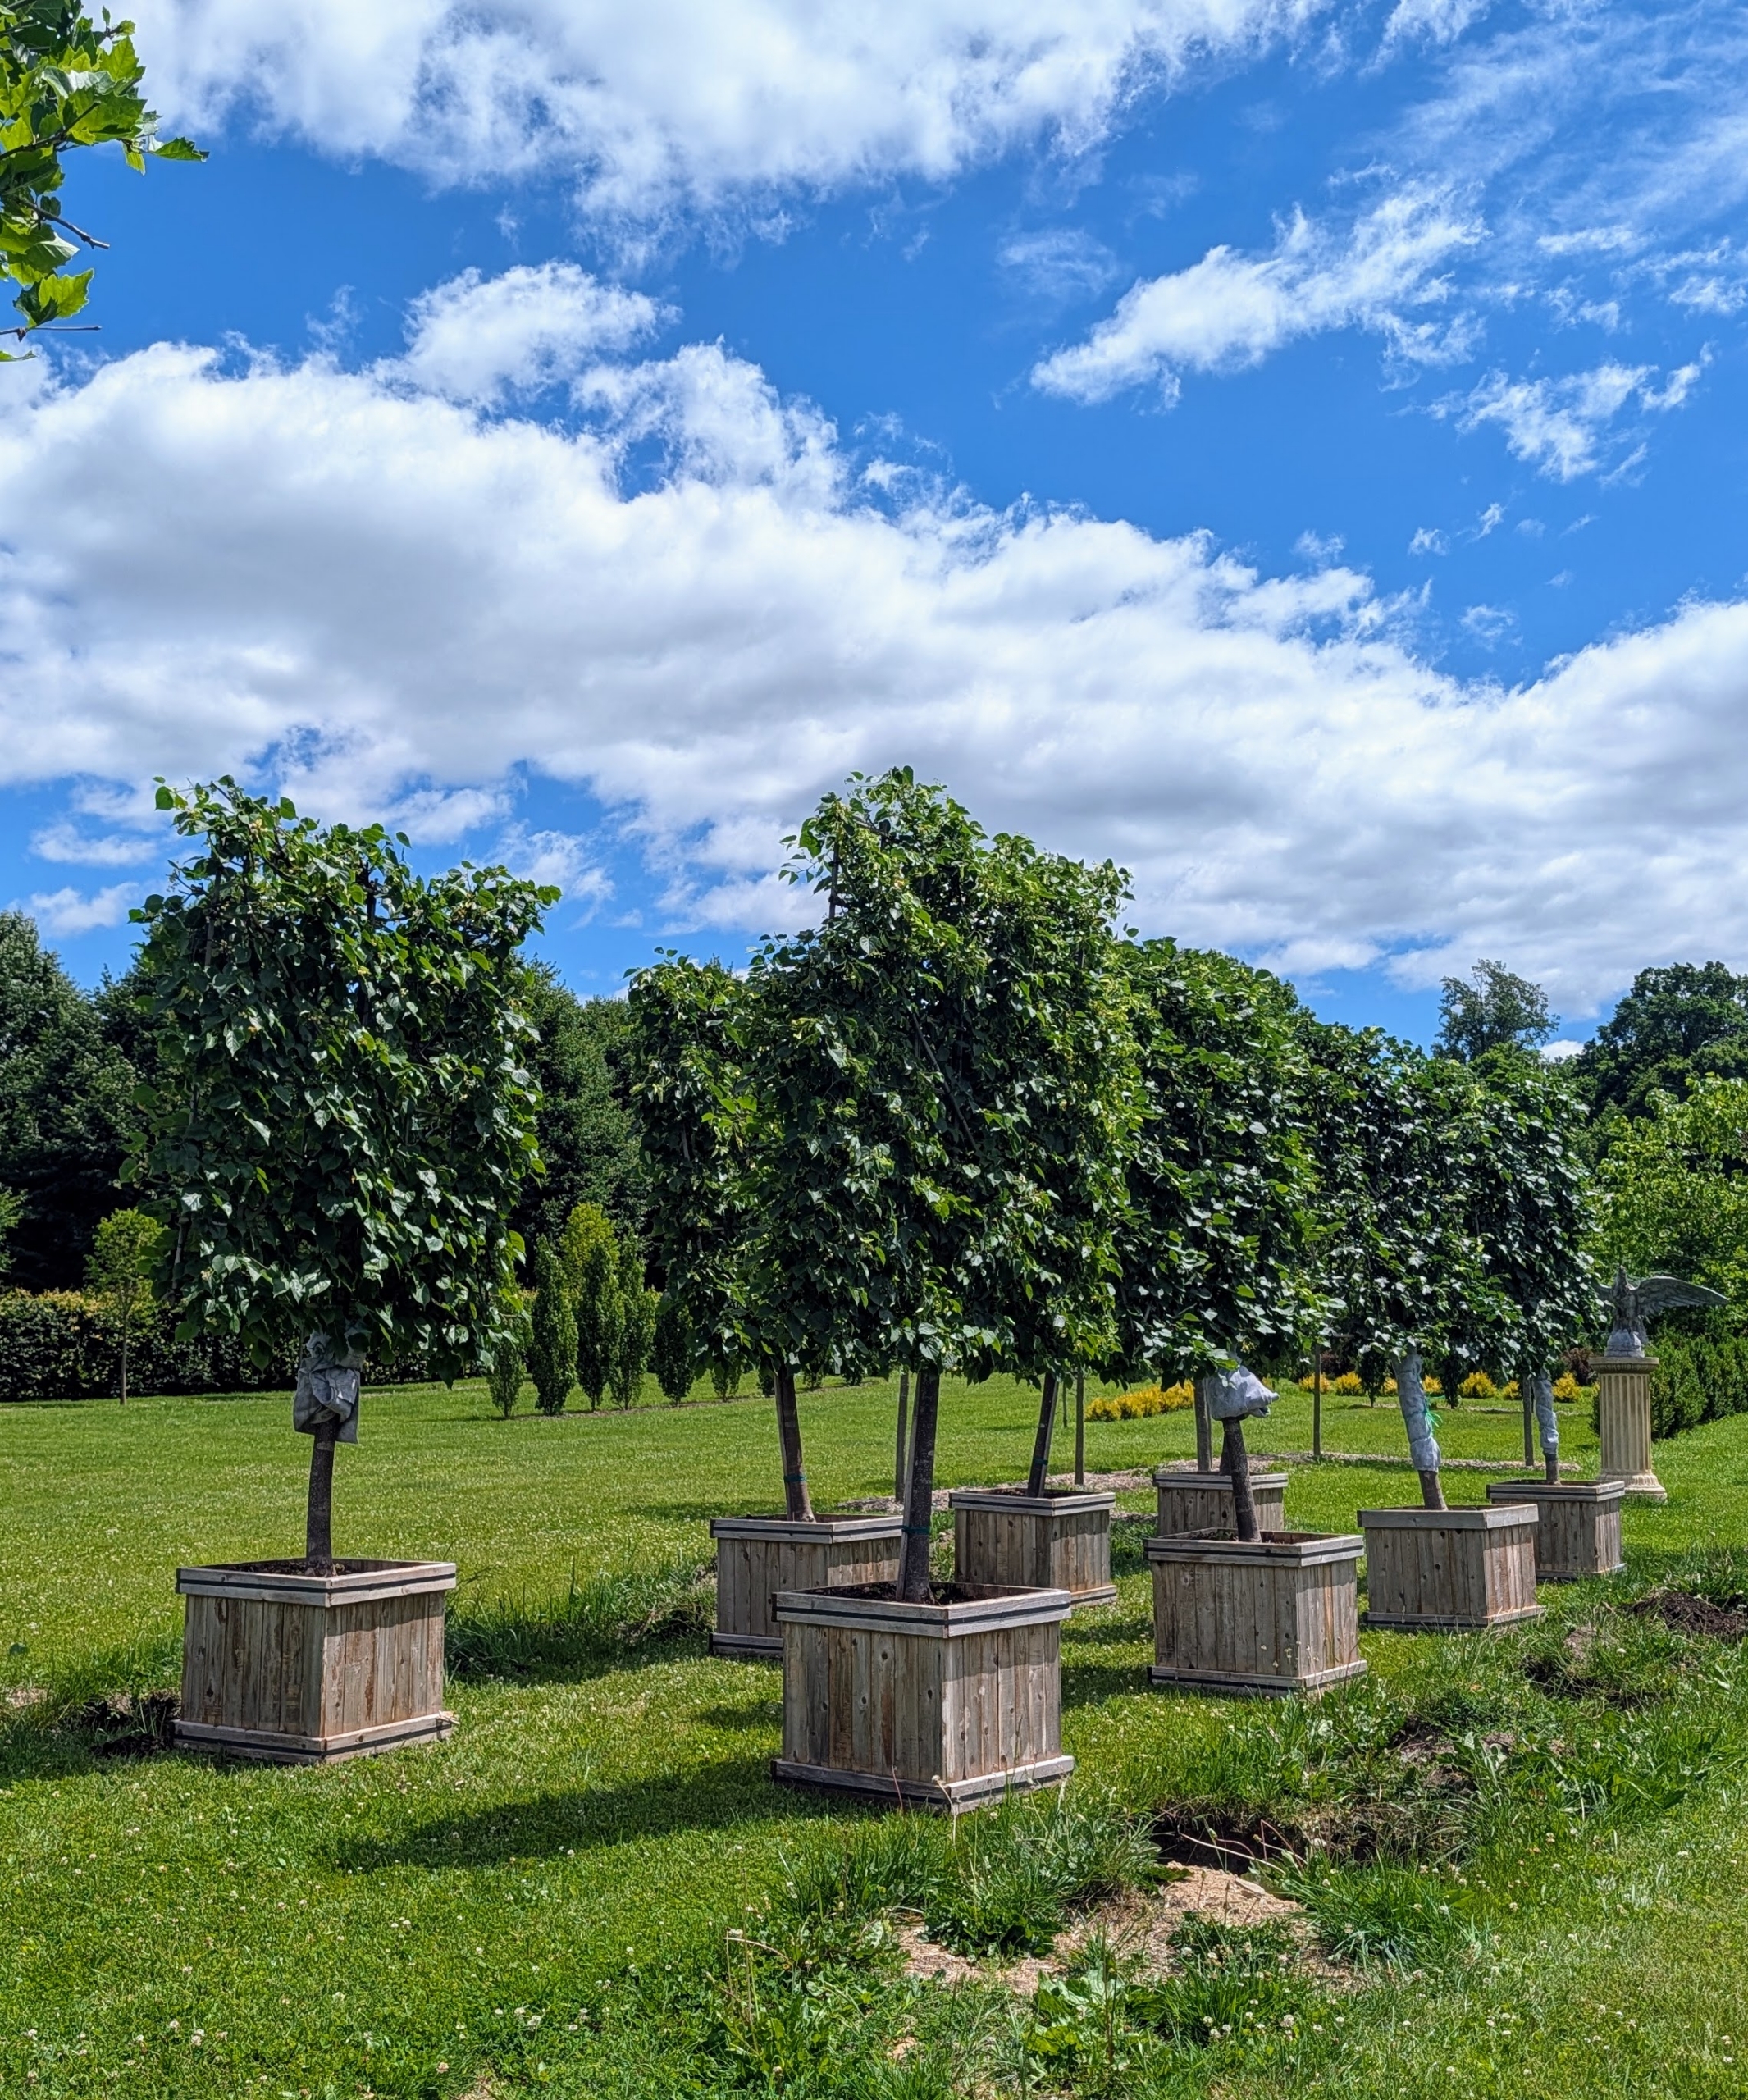
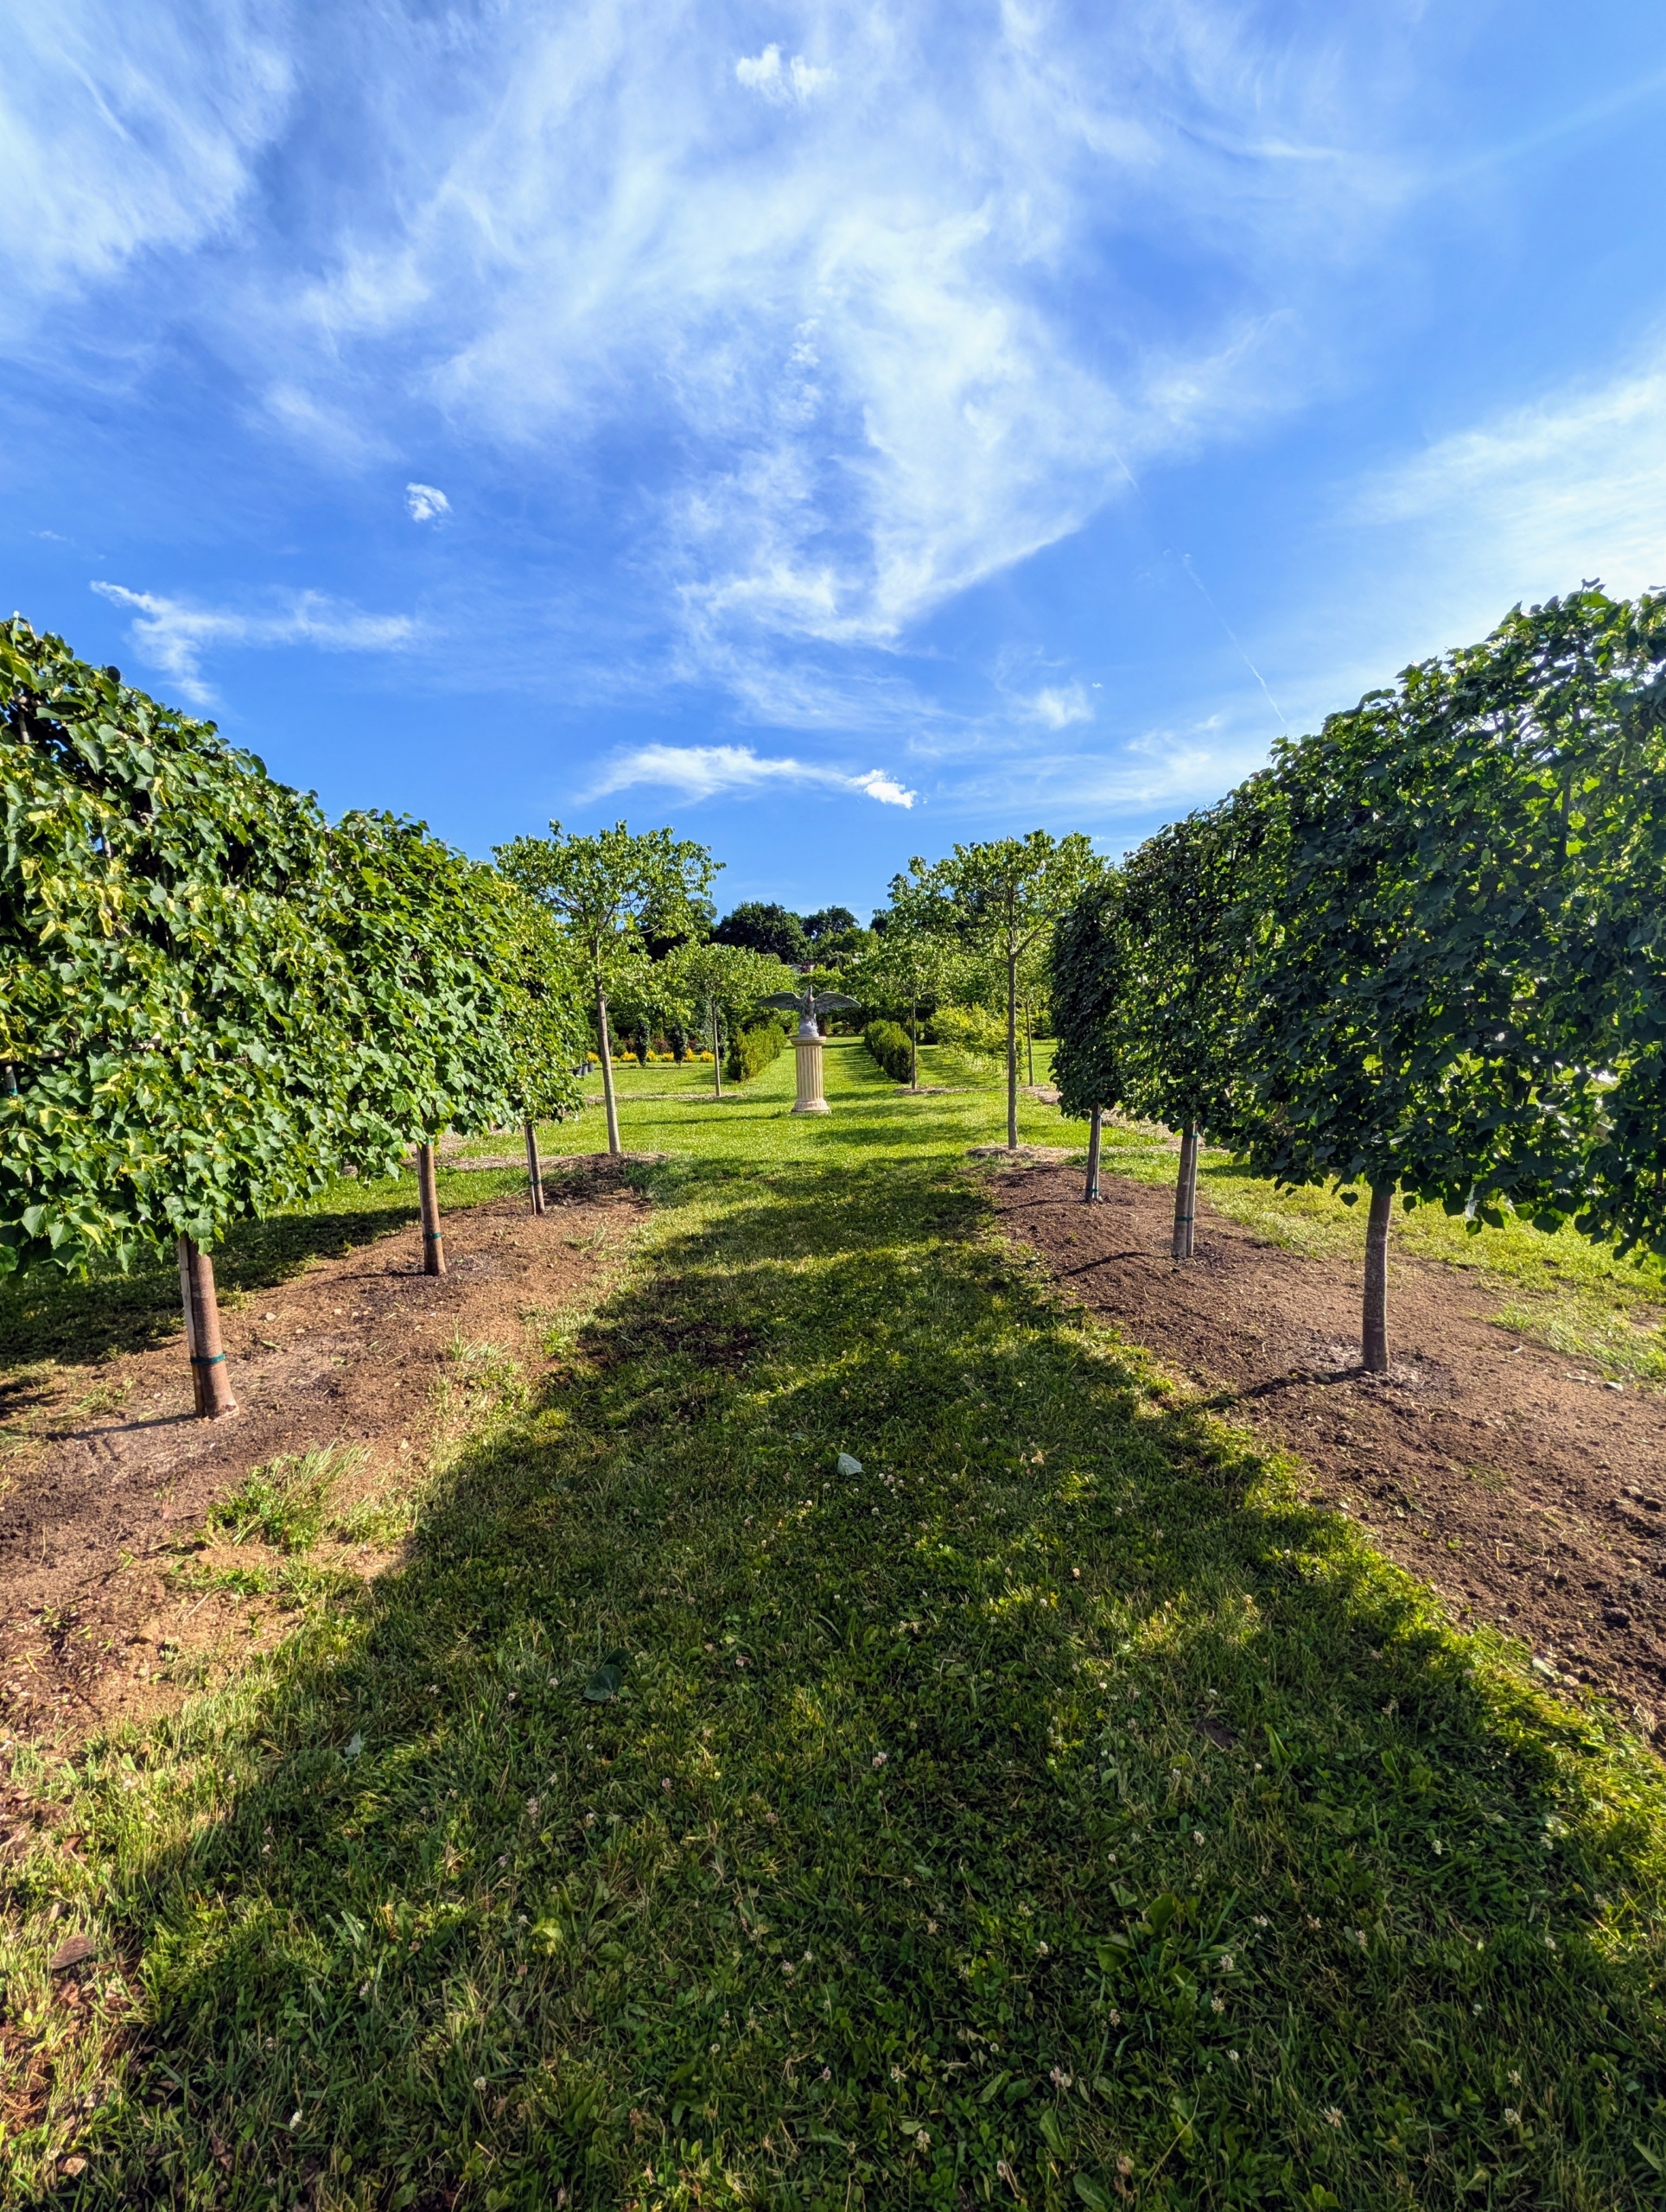
It's always exciting to find just the right specimen trees to plant in a certain location. I recently spotted eight espaliered linden trees, Tilia cordata EC square, at Select Horticulture Inc., in nearby Pound Ridge, New York and knew right away they'd look excellent in my living maze.
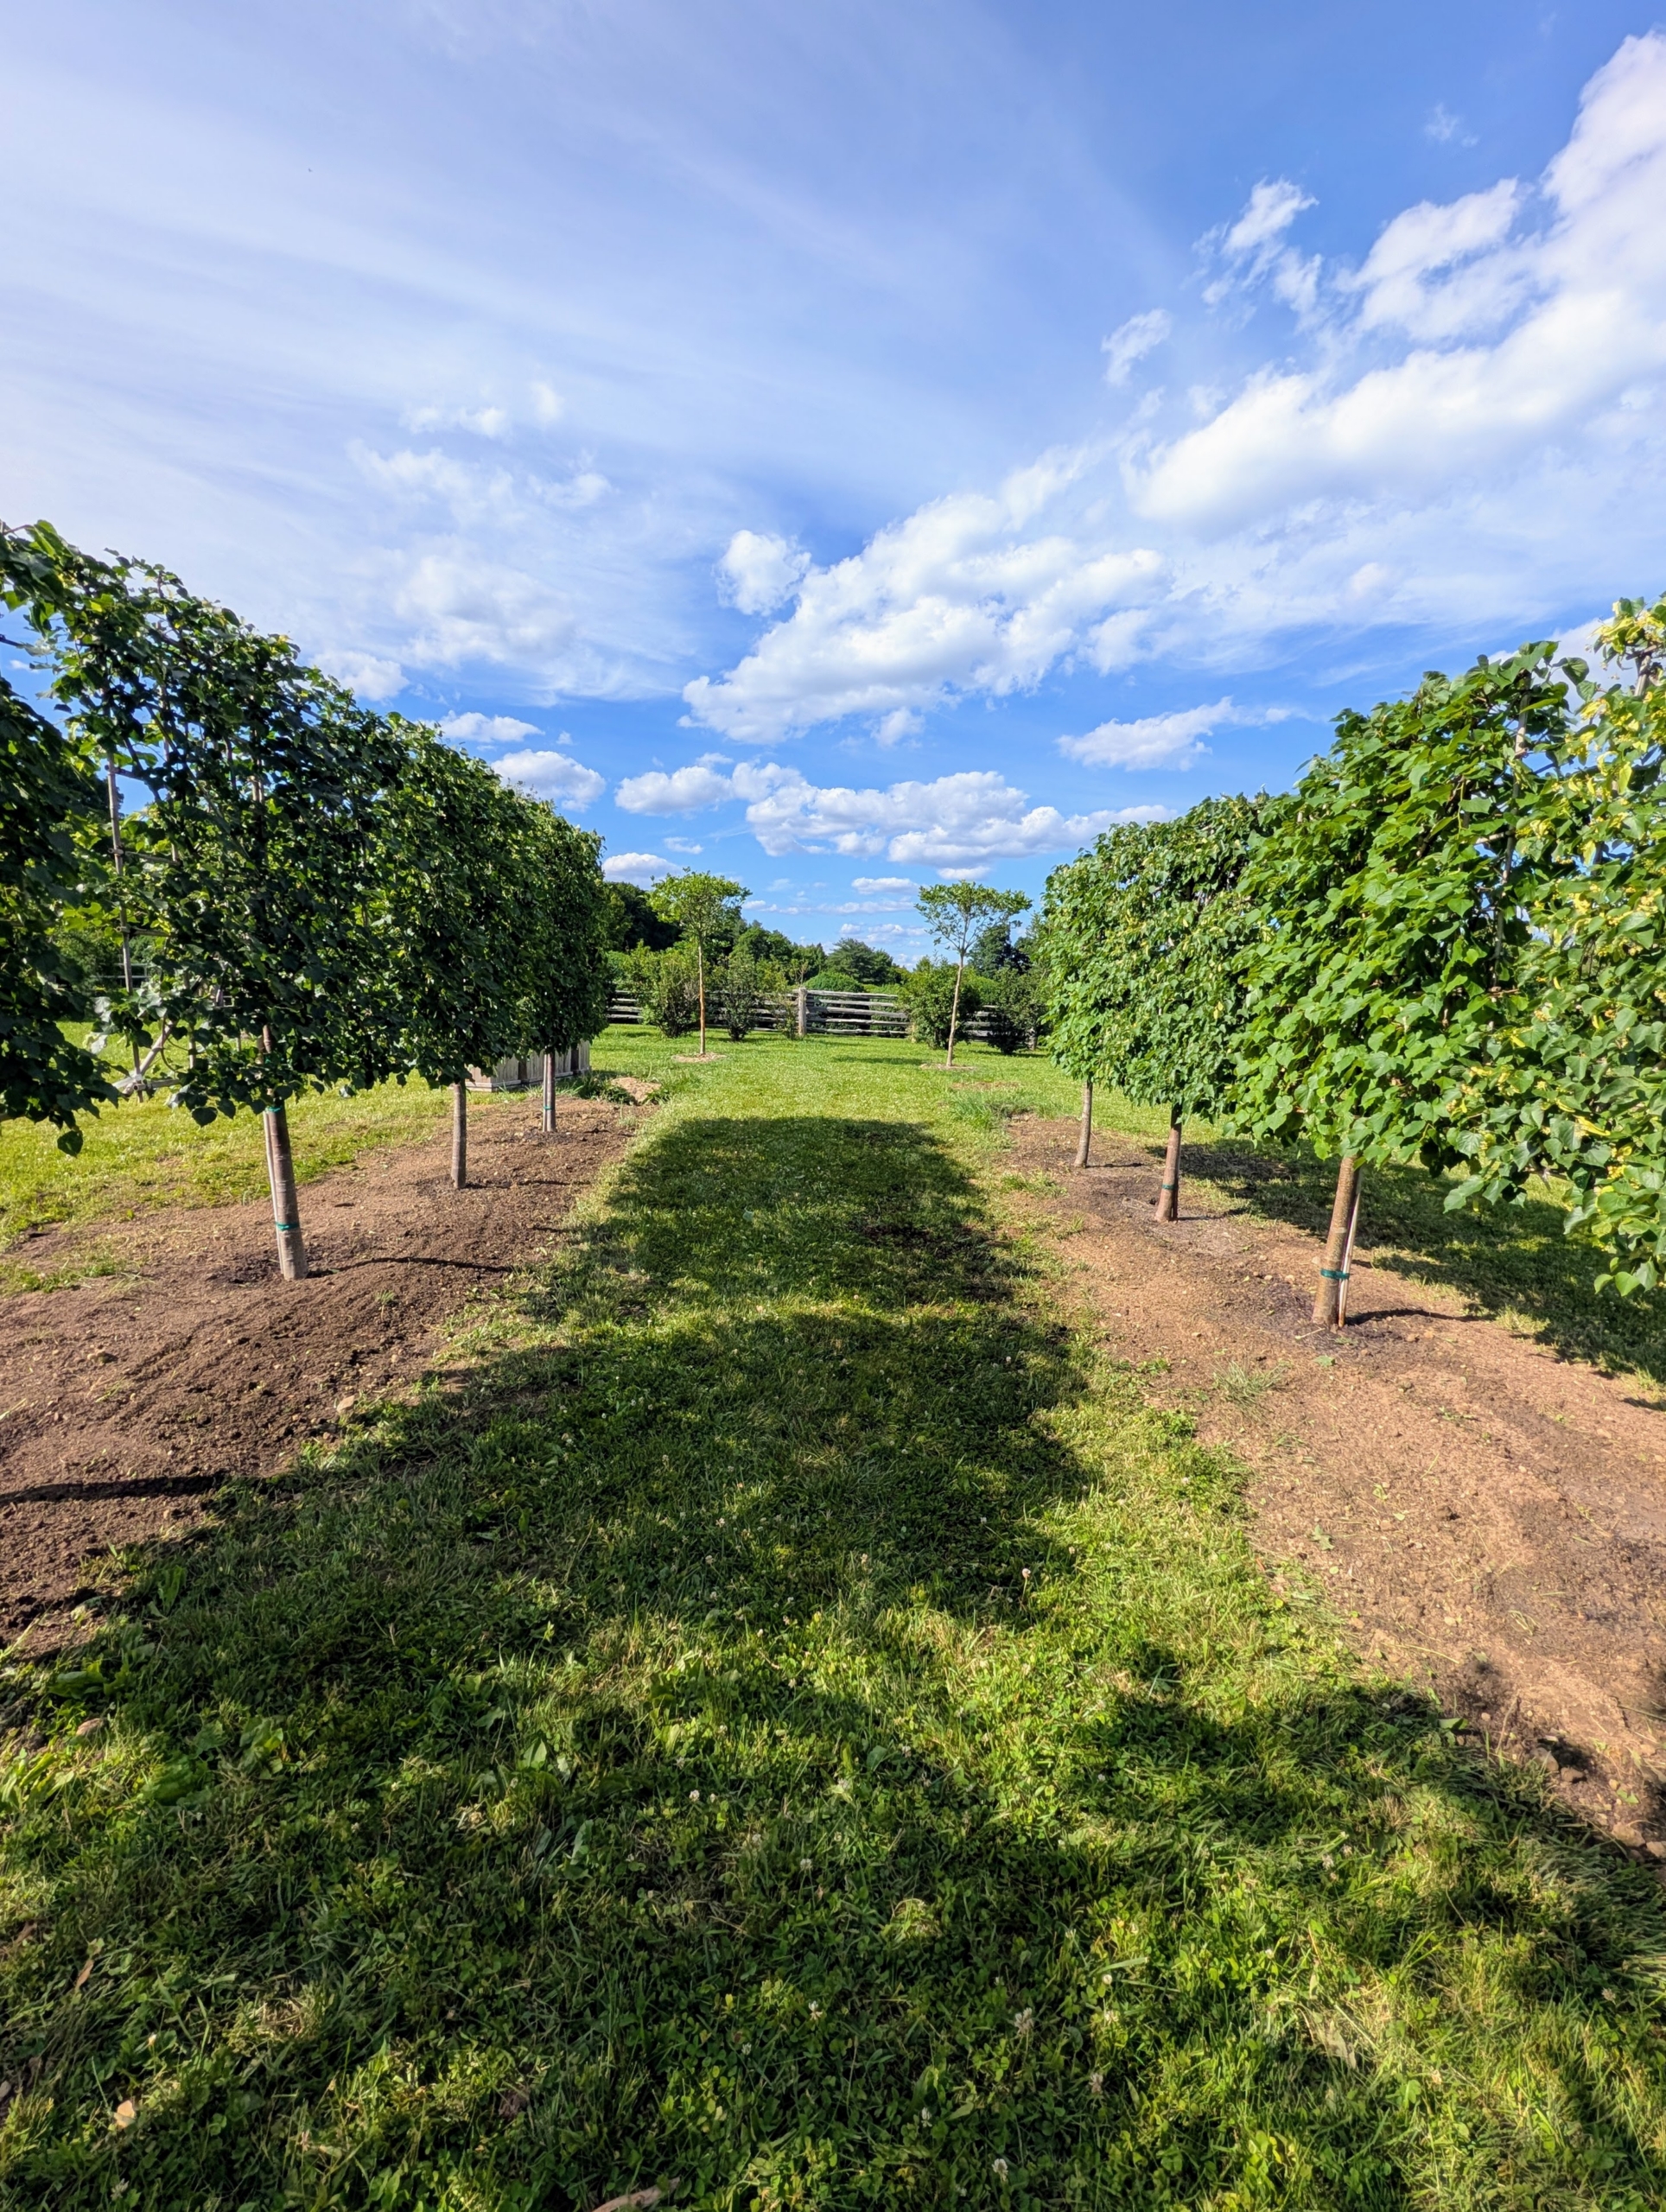
I designed my maze to have a variety of different trees and shrubs. I wanted every turn to be both beautiful and interesting. I decided these lindens should be planted close together in a center allée formation close to the north end of the three-acre space. My gardeners and outdoor grounds crew prepared the location, put up landscape twine so every tree would be perfectly straight, gathered their tools, and got to work.
Here are some photos, enjoy.
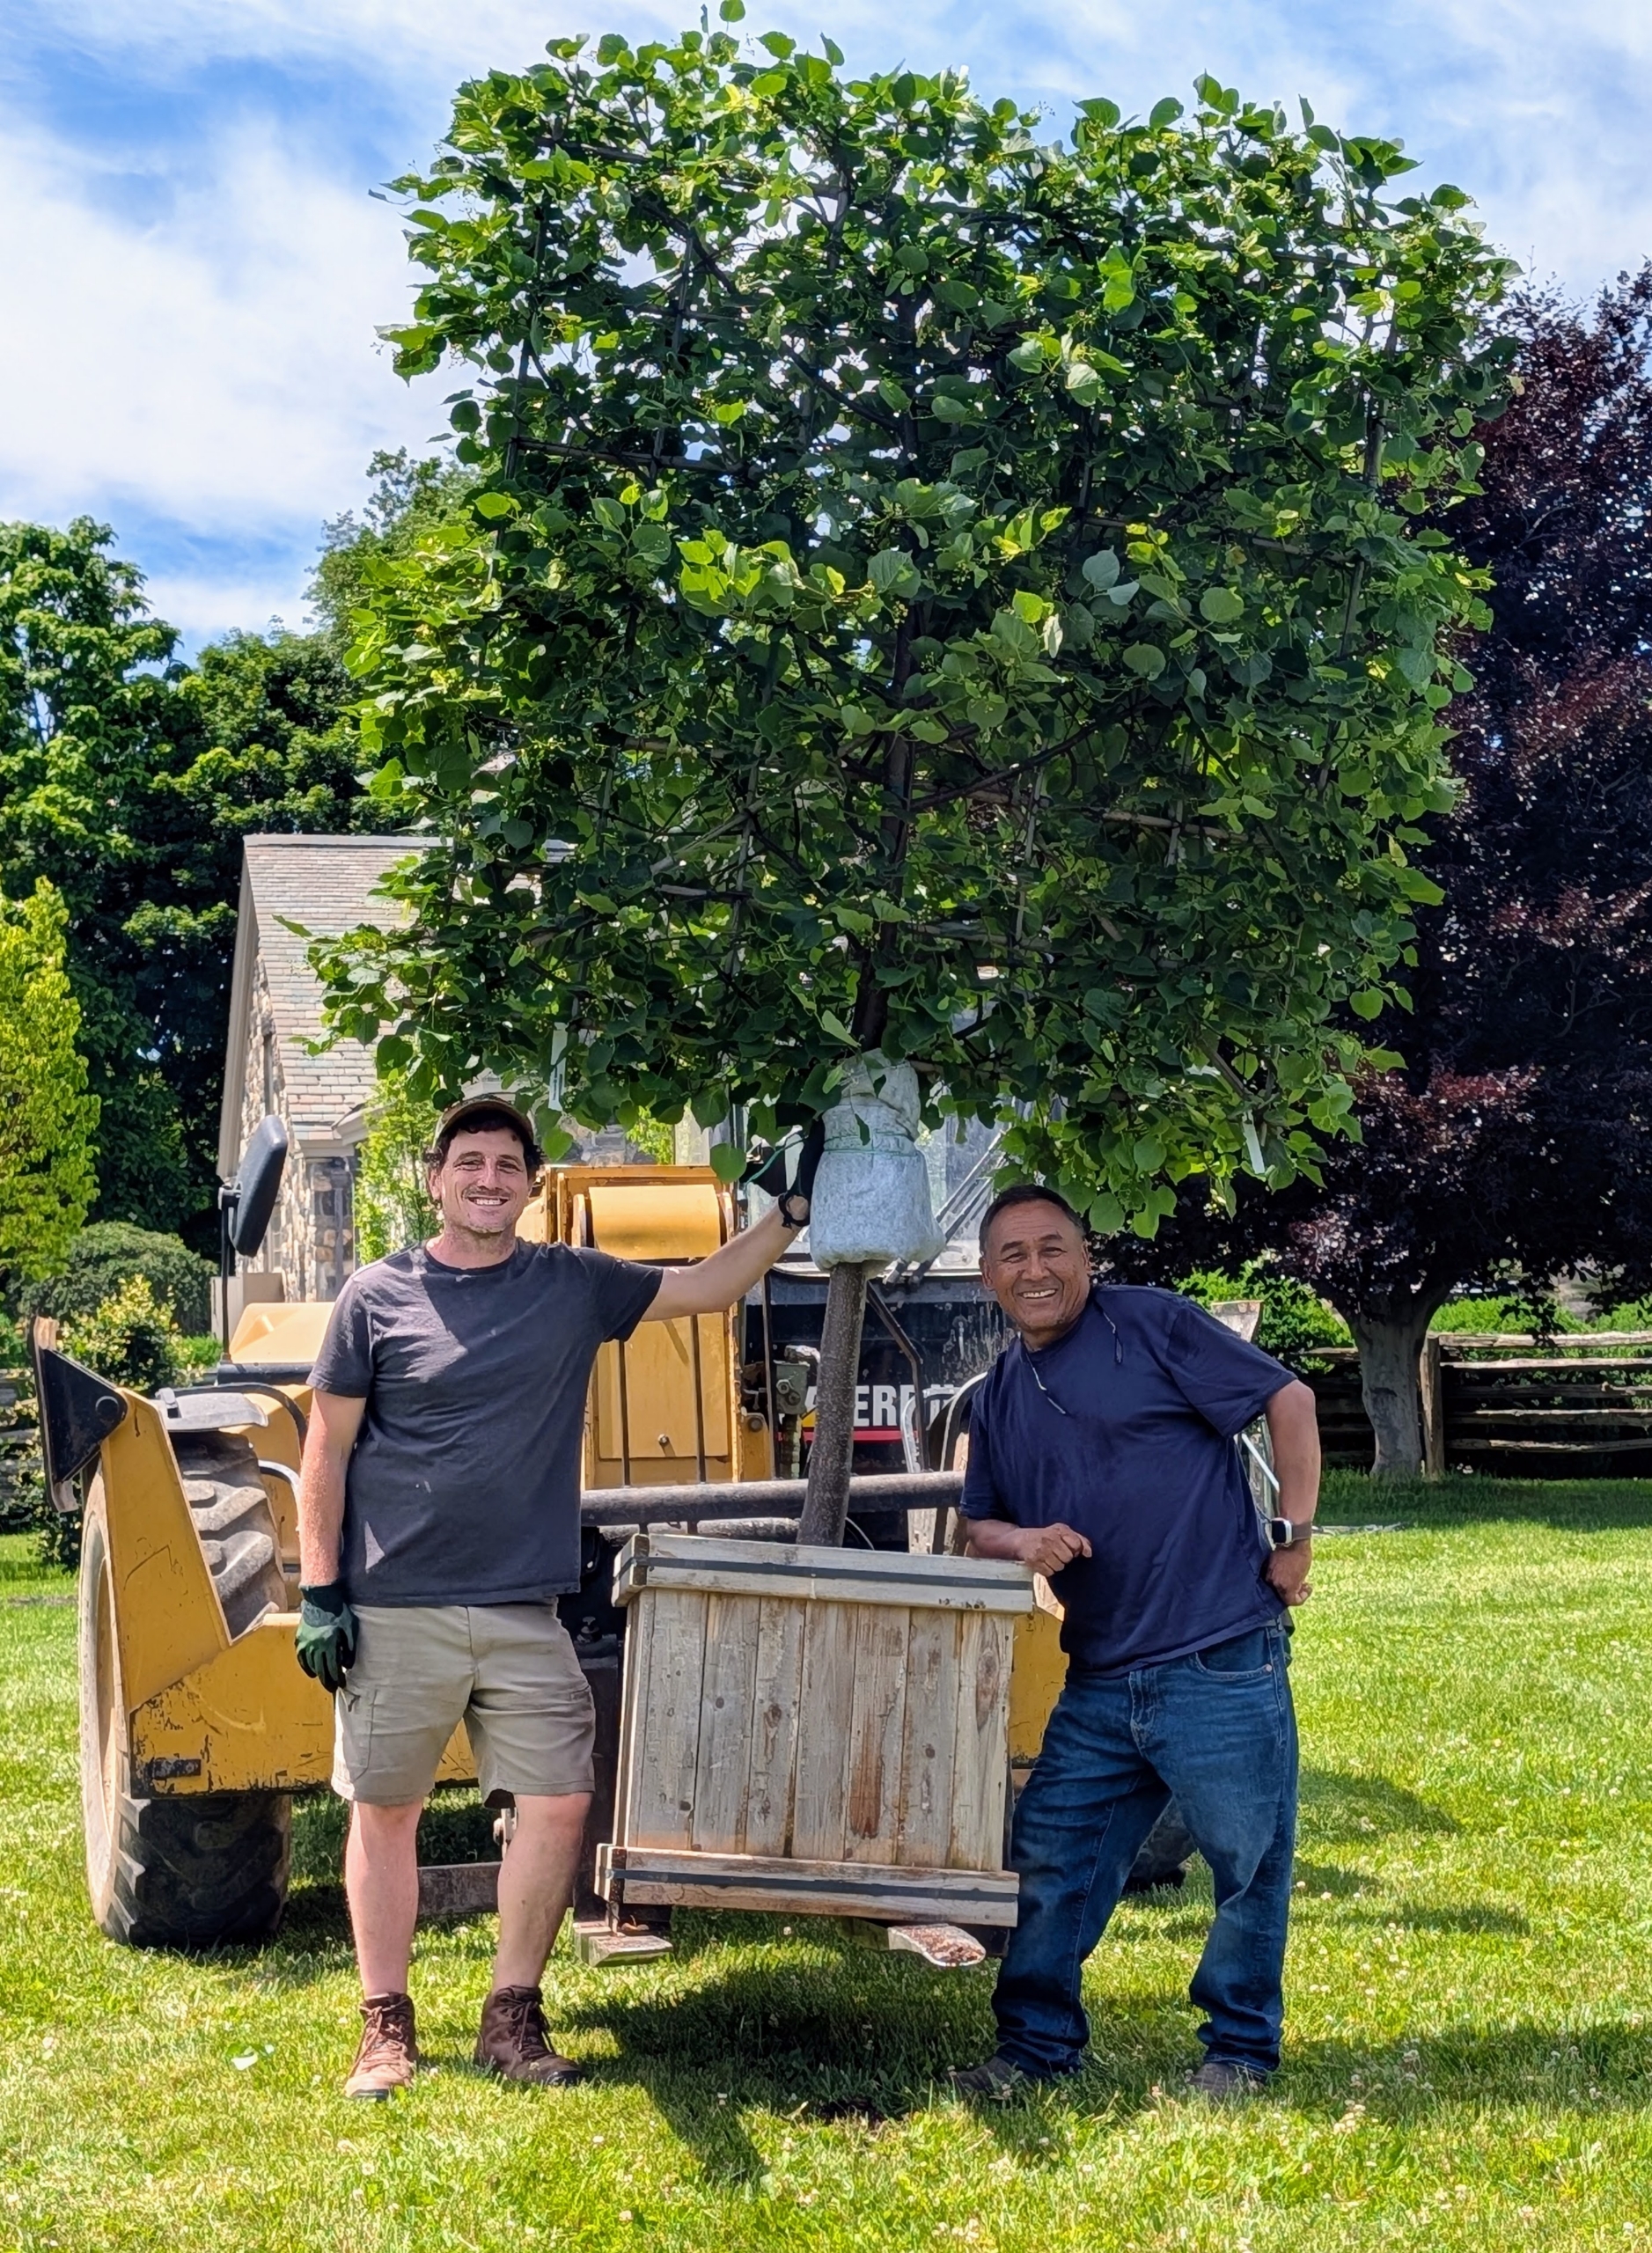
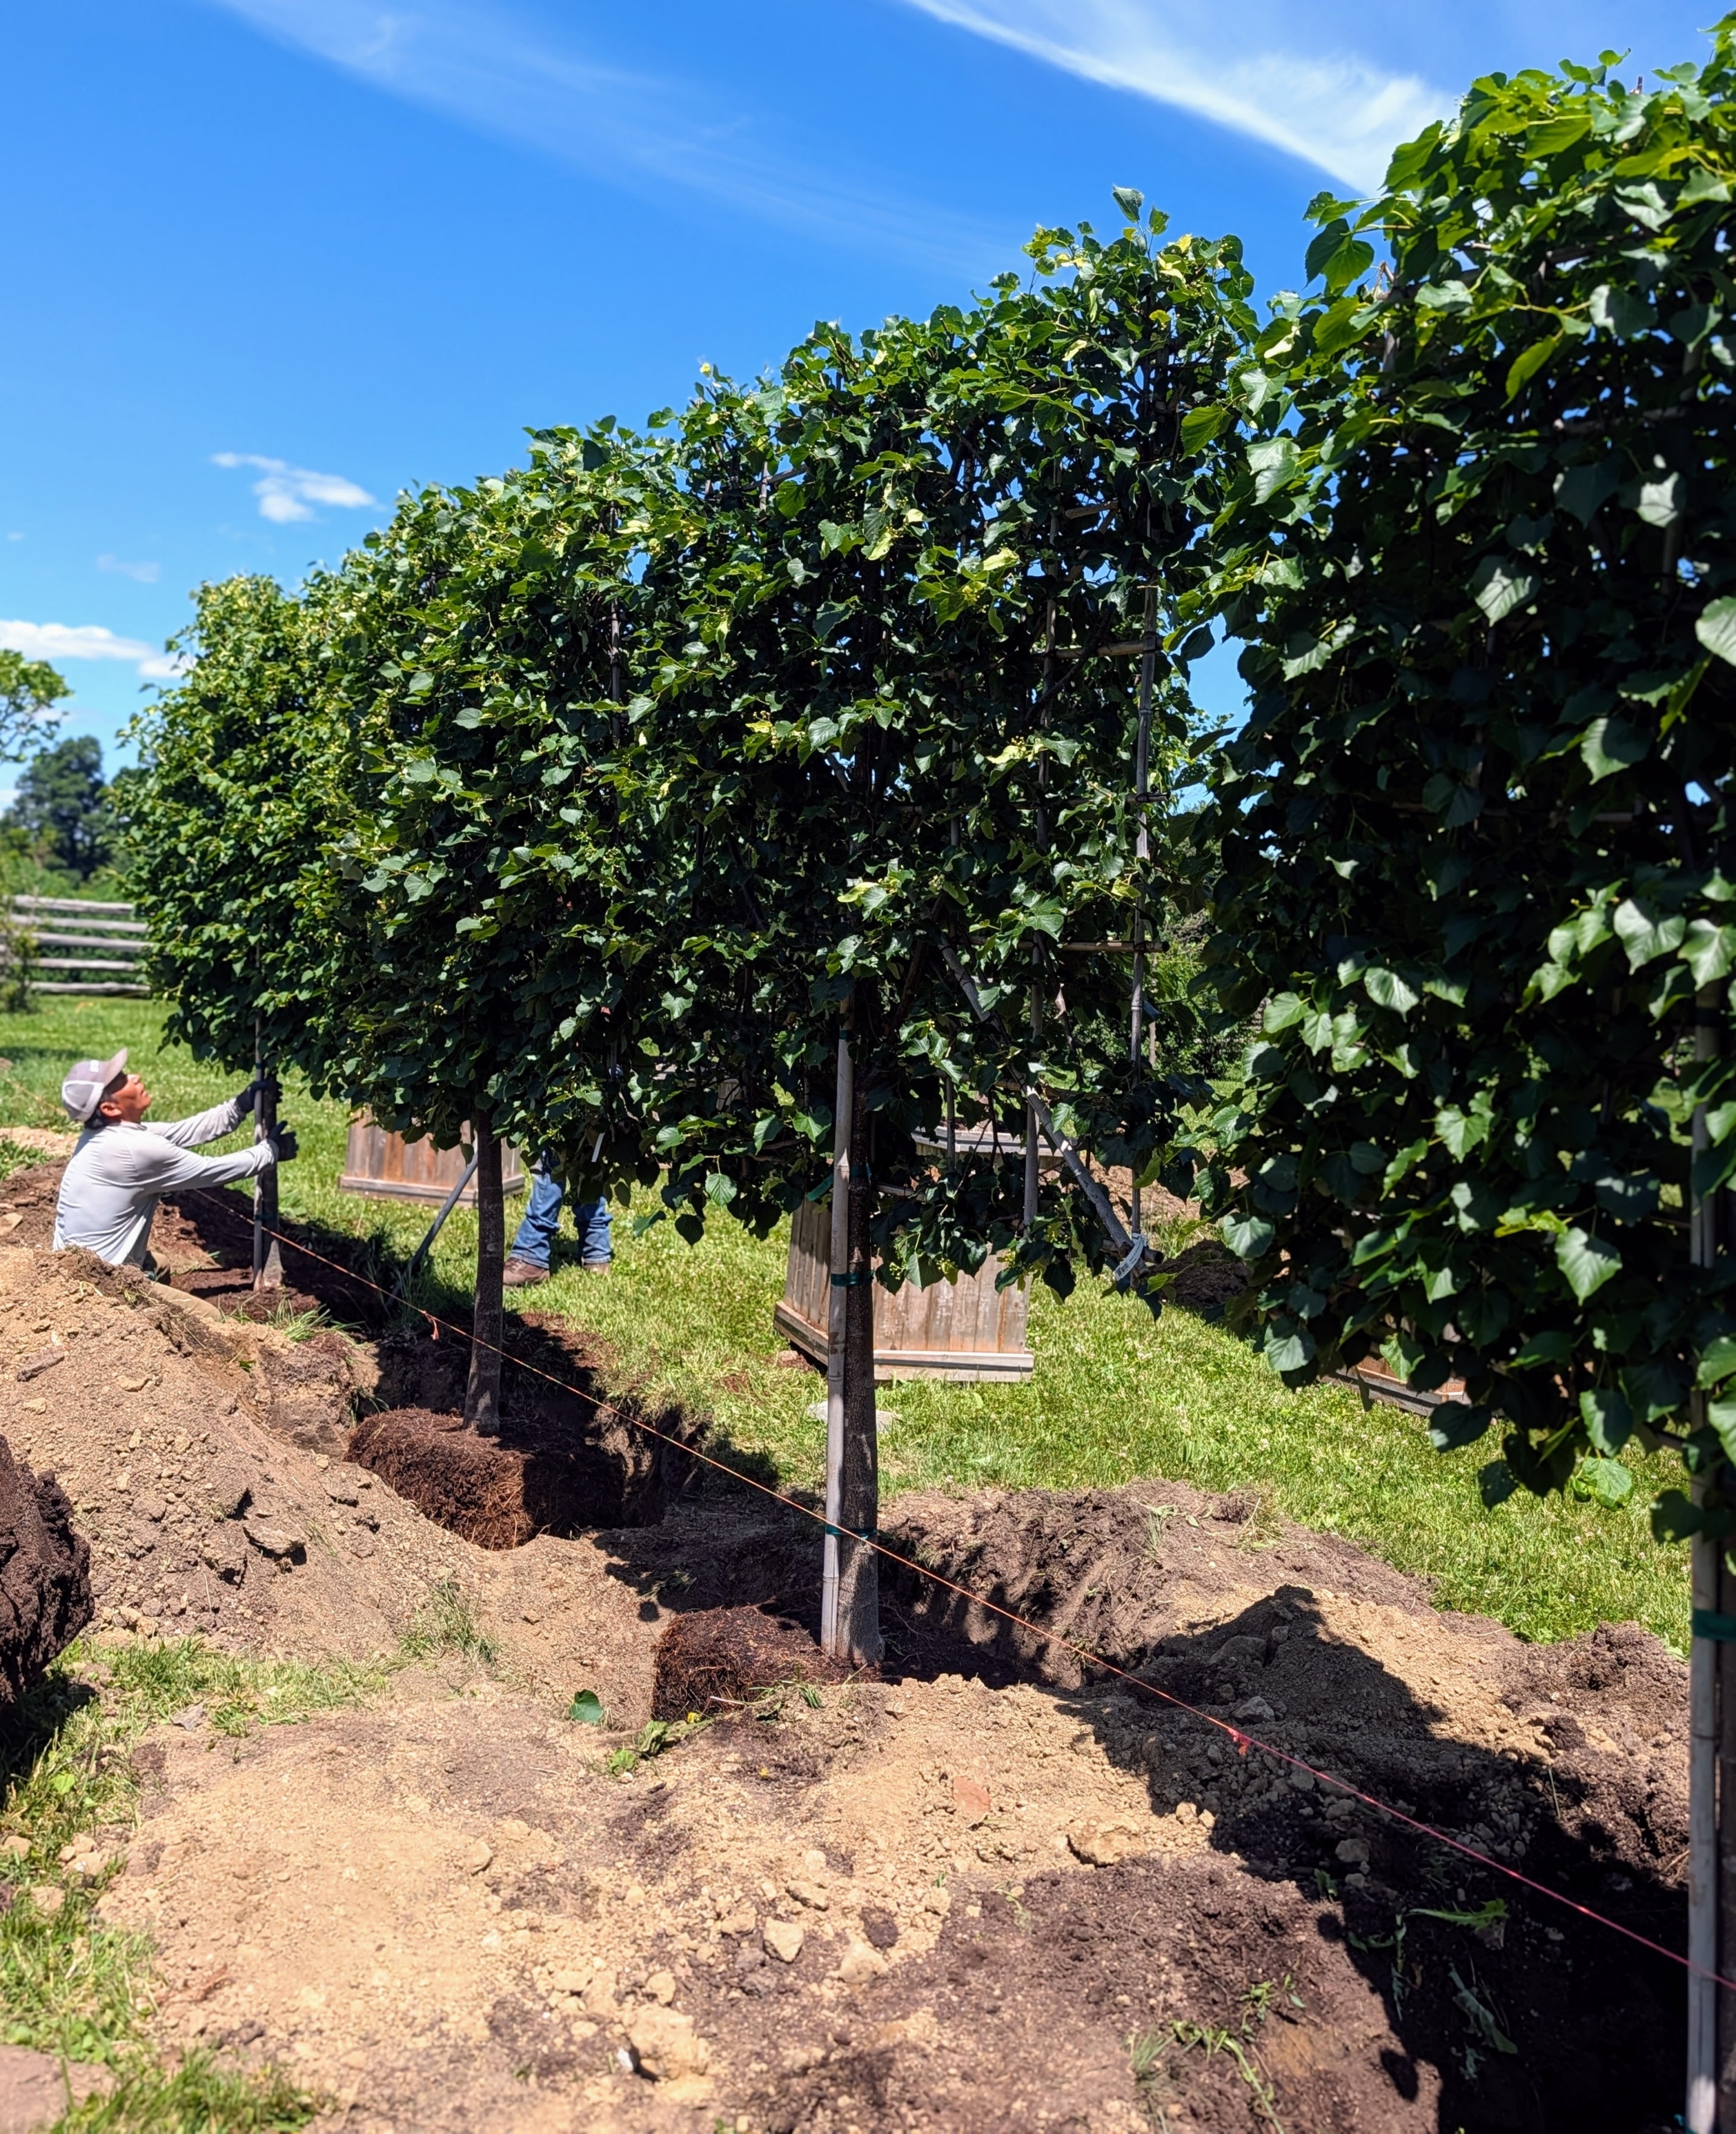
It’s always fun to see what new trees I’m adding to the farm – on this day, eight handsome espaliered littleleaf lindens.
My head gardener Ryan McCallister and Pete Sherpa from my outdoor grounds crew, unloaded all the trees where they would be planted – in a prominent center area of my maze.
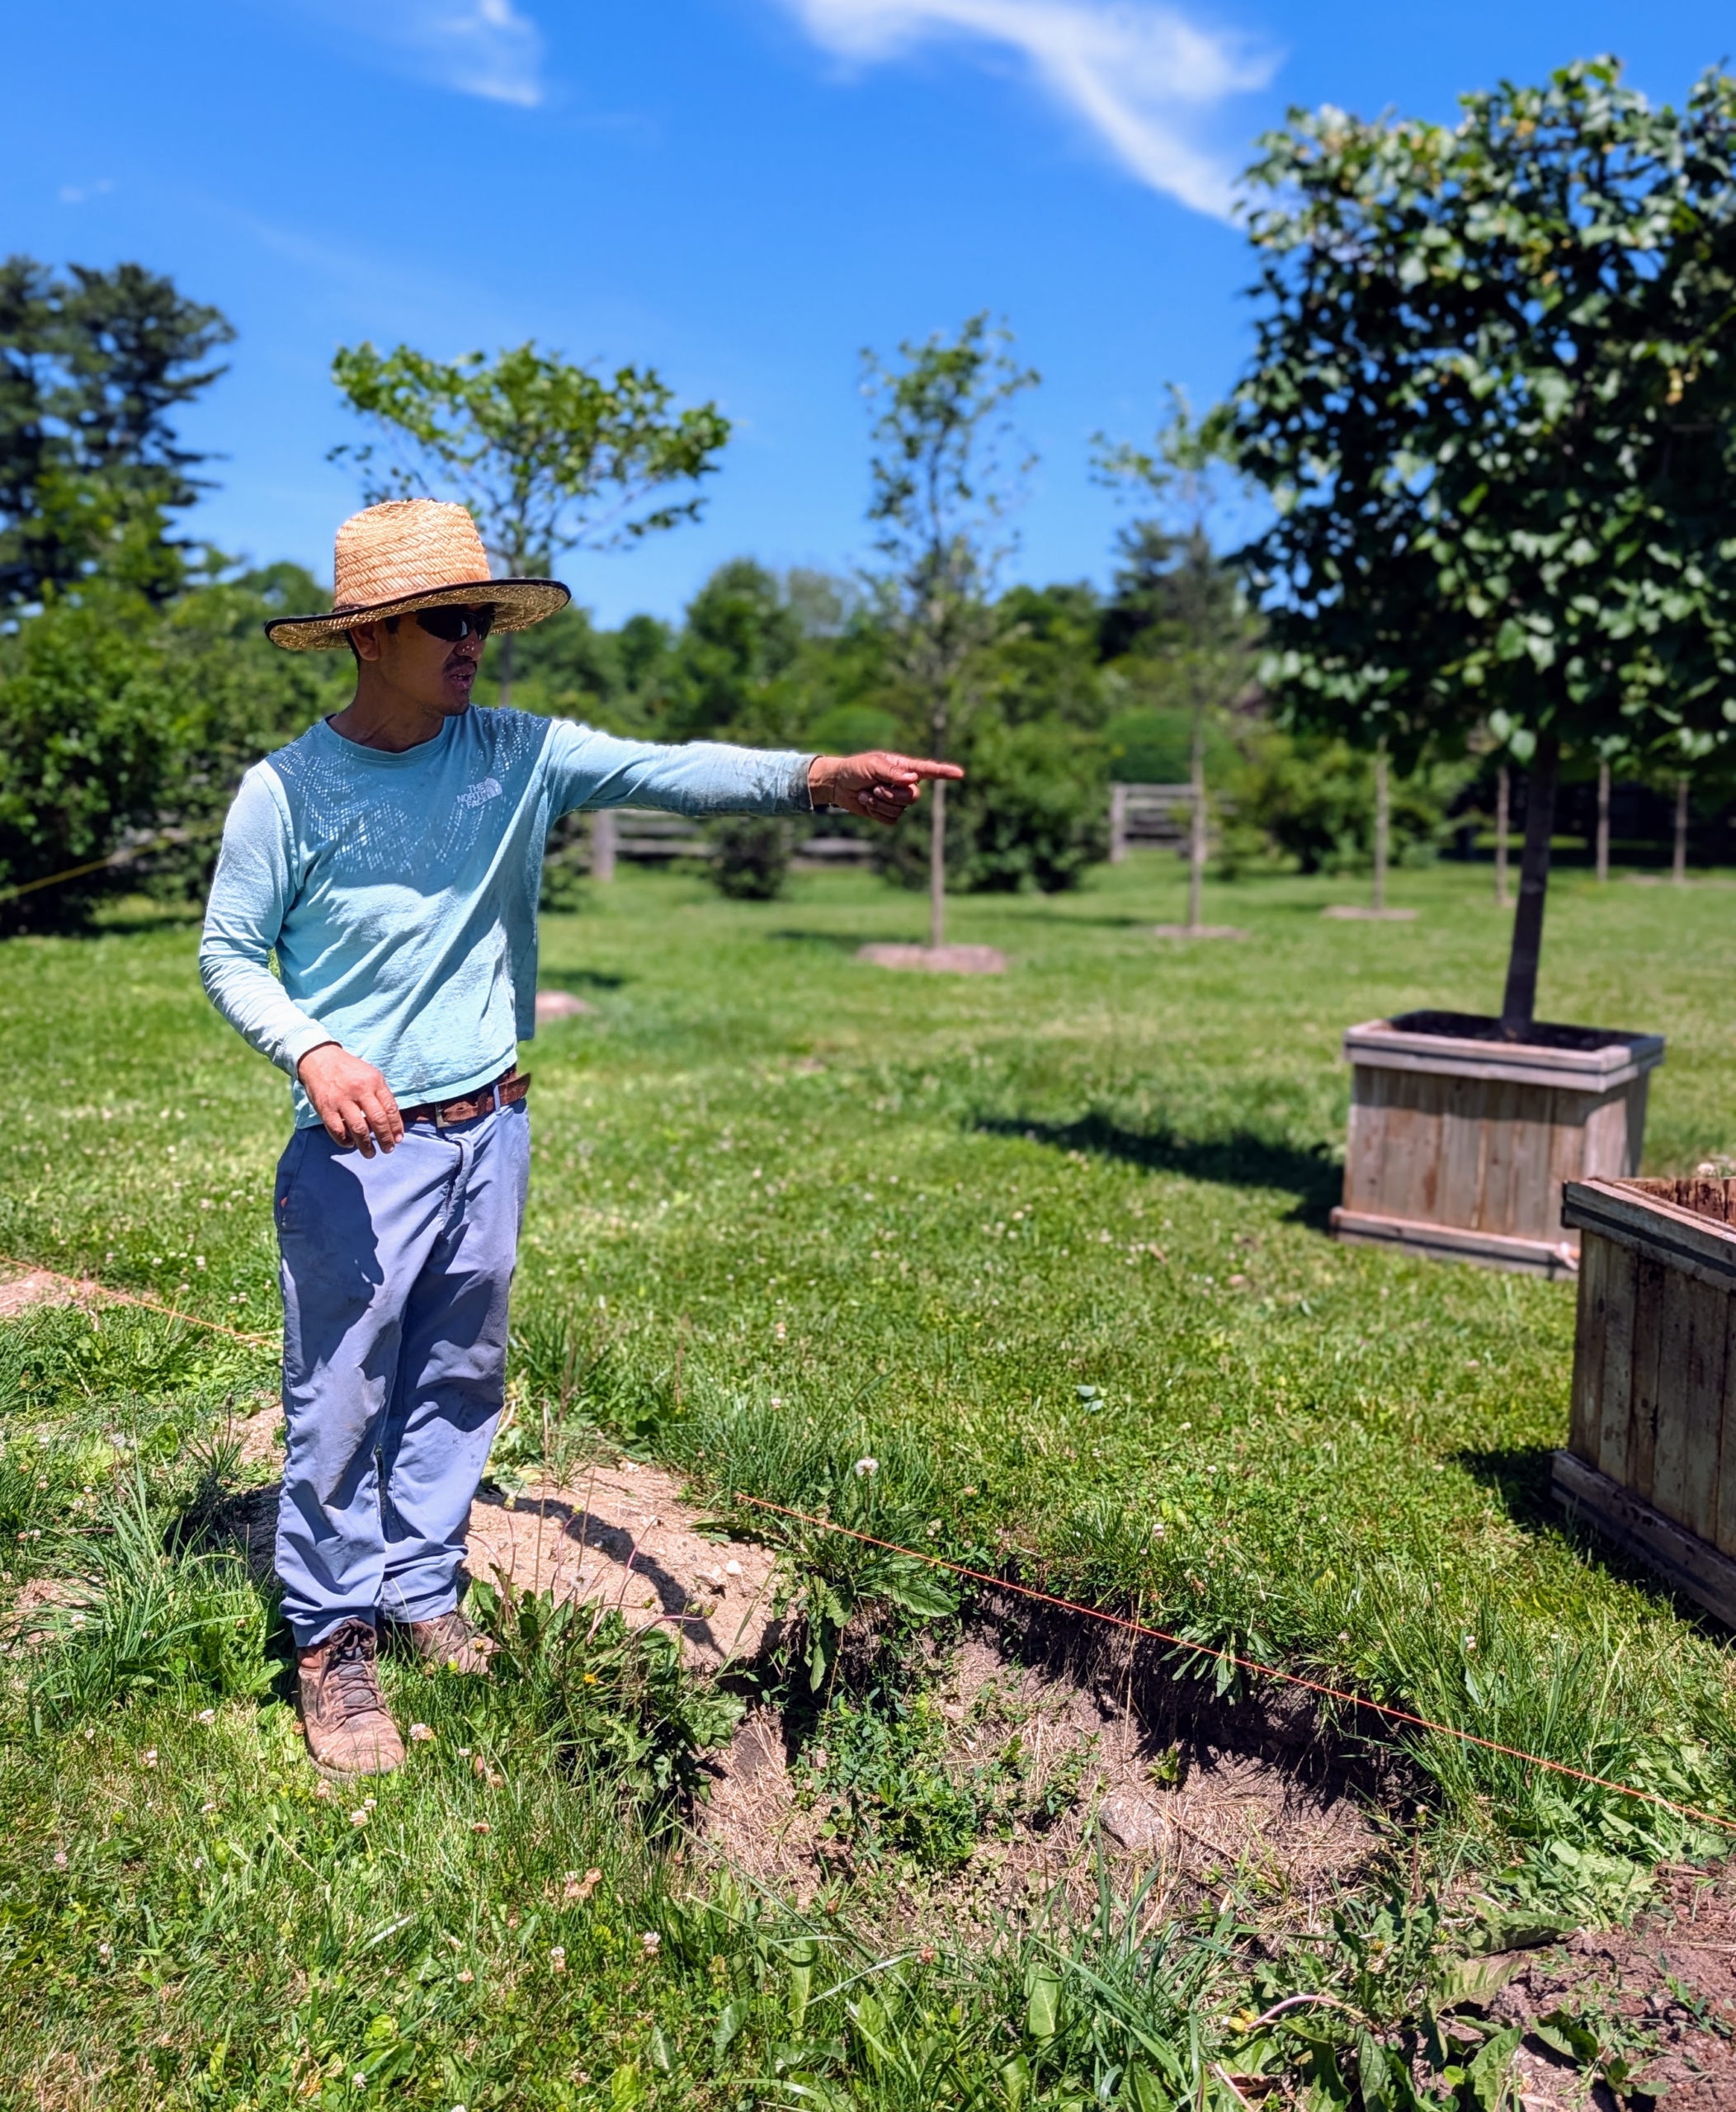
Here they are next to some previously dug holes. I instructed the team to plant them close to each other, almost touching.
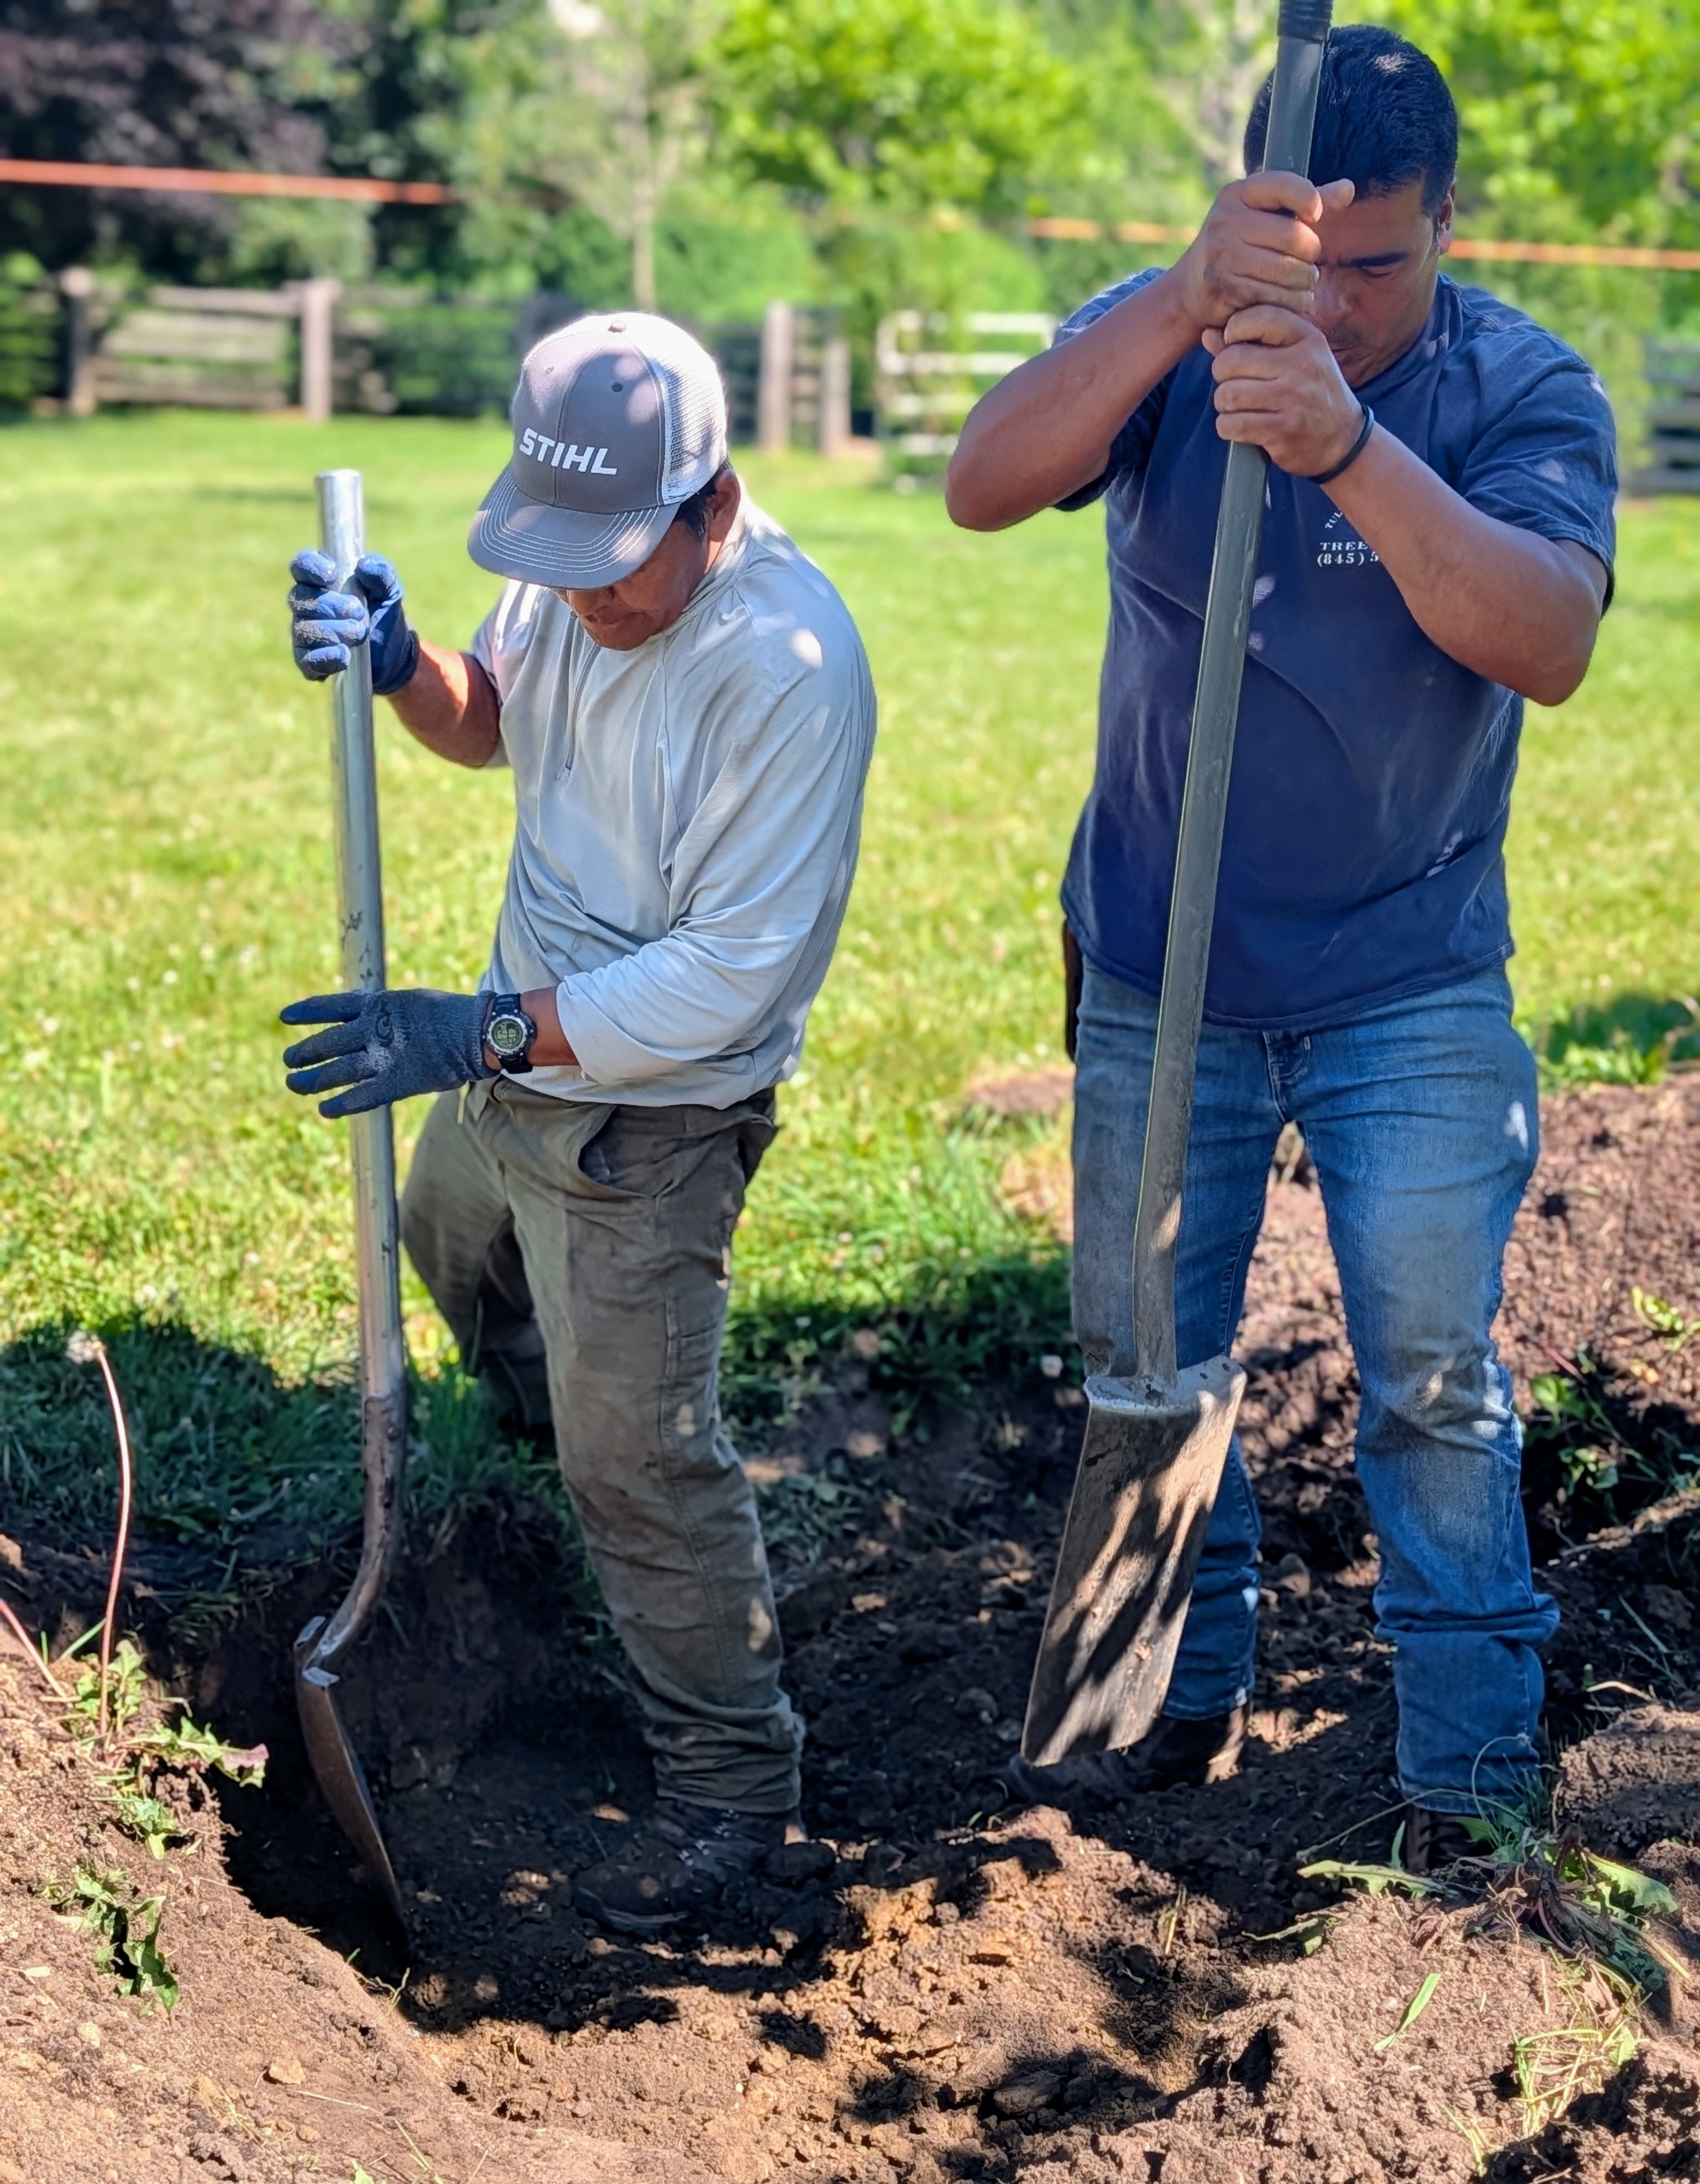
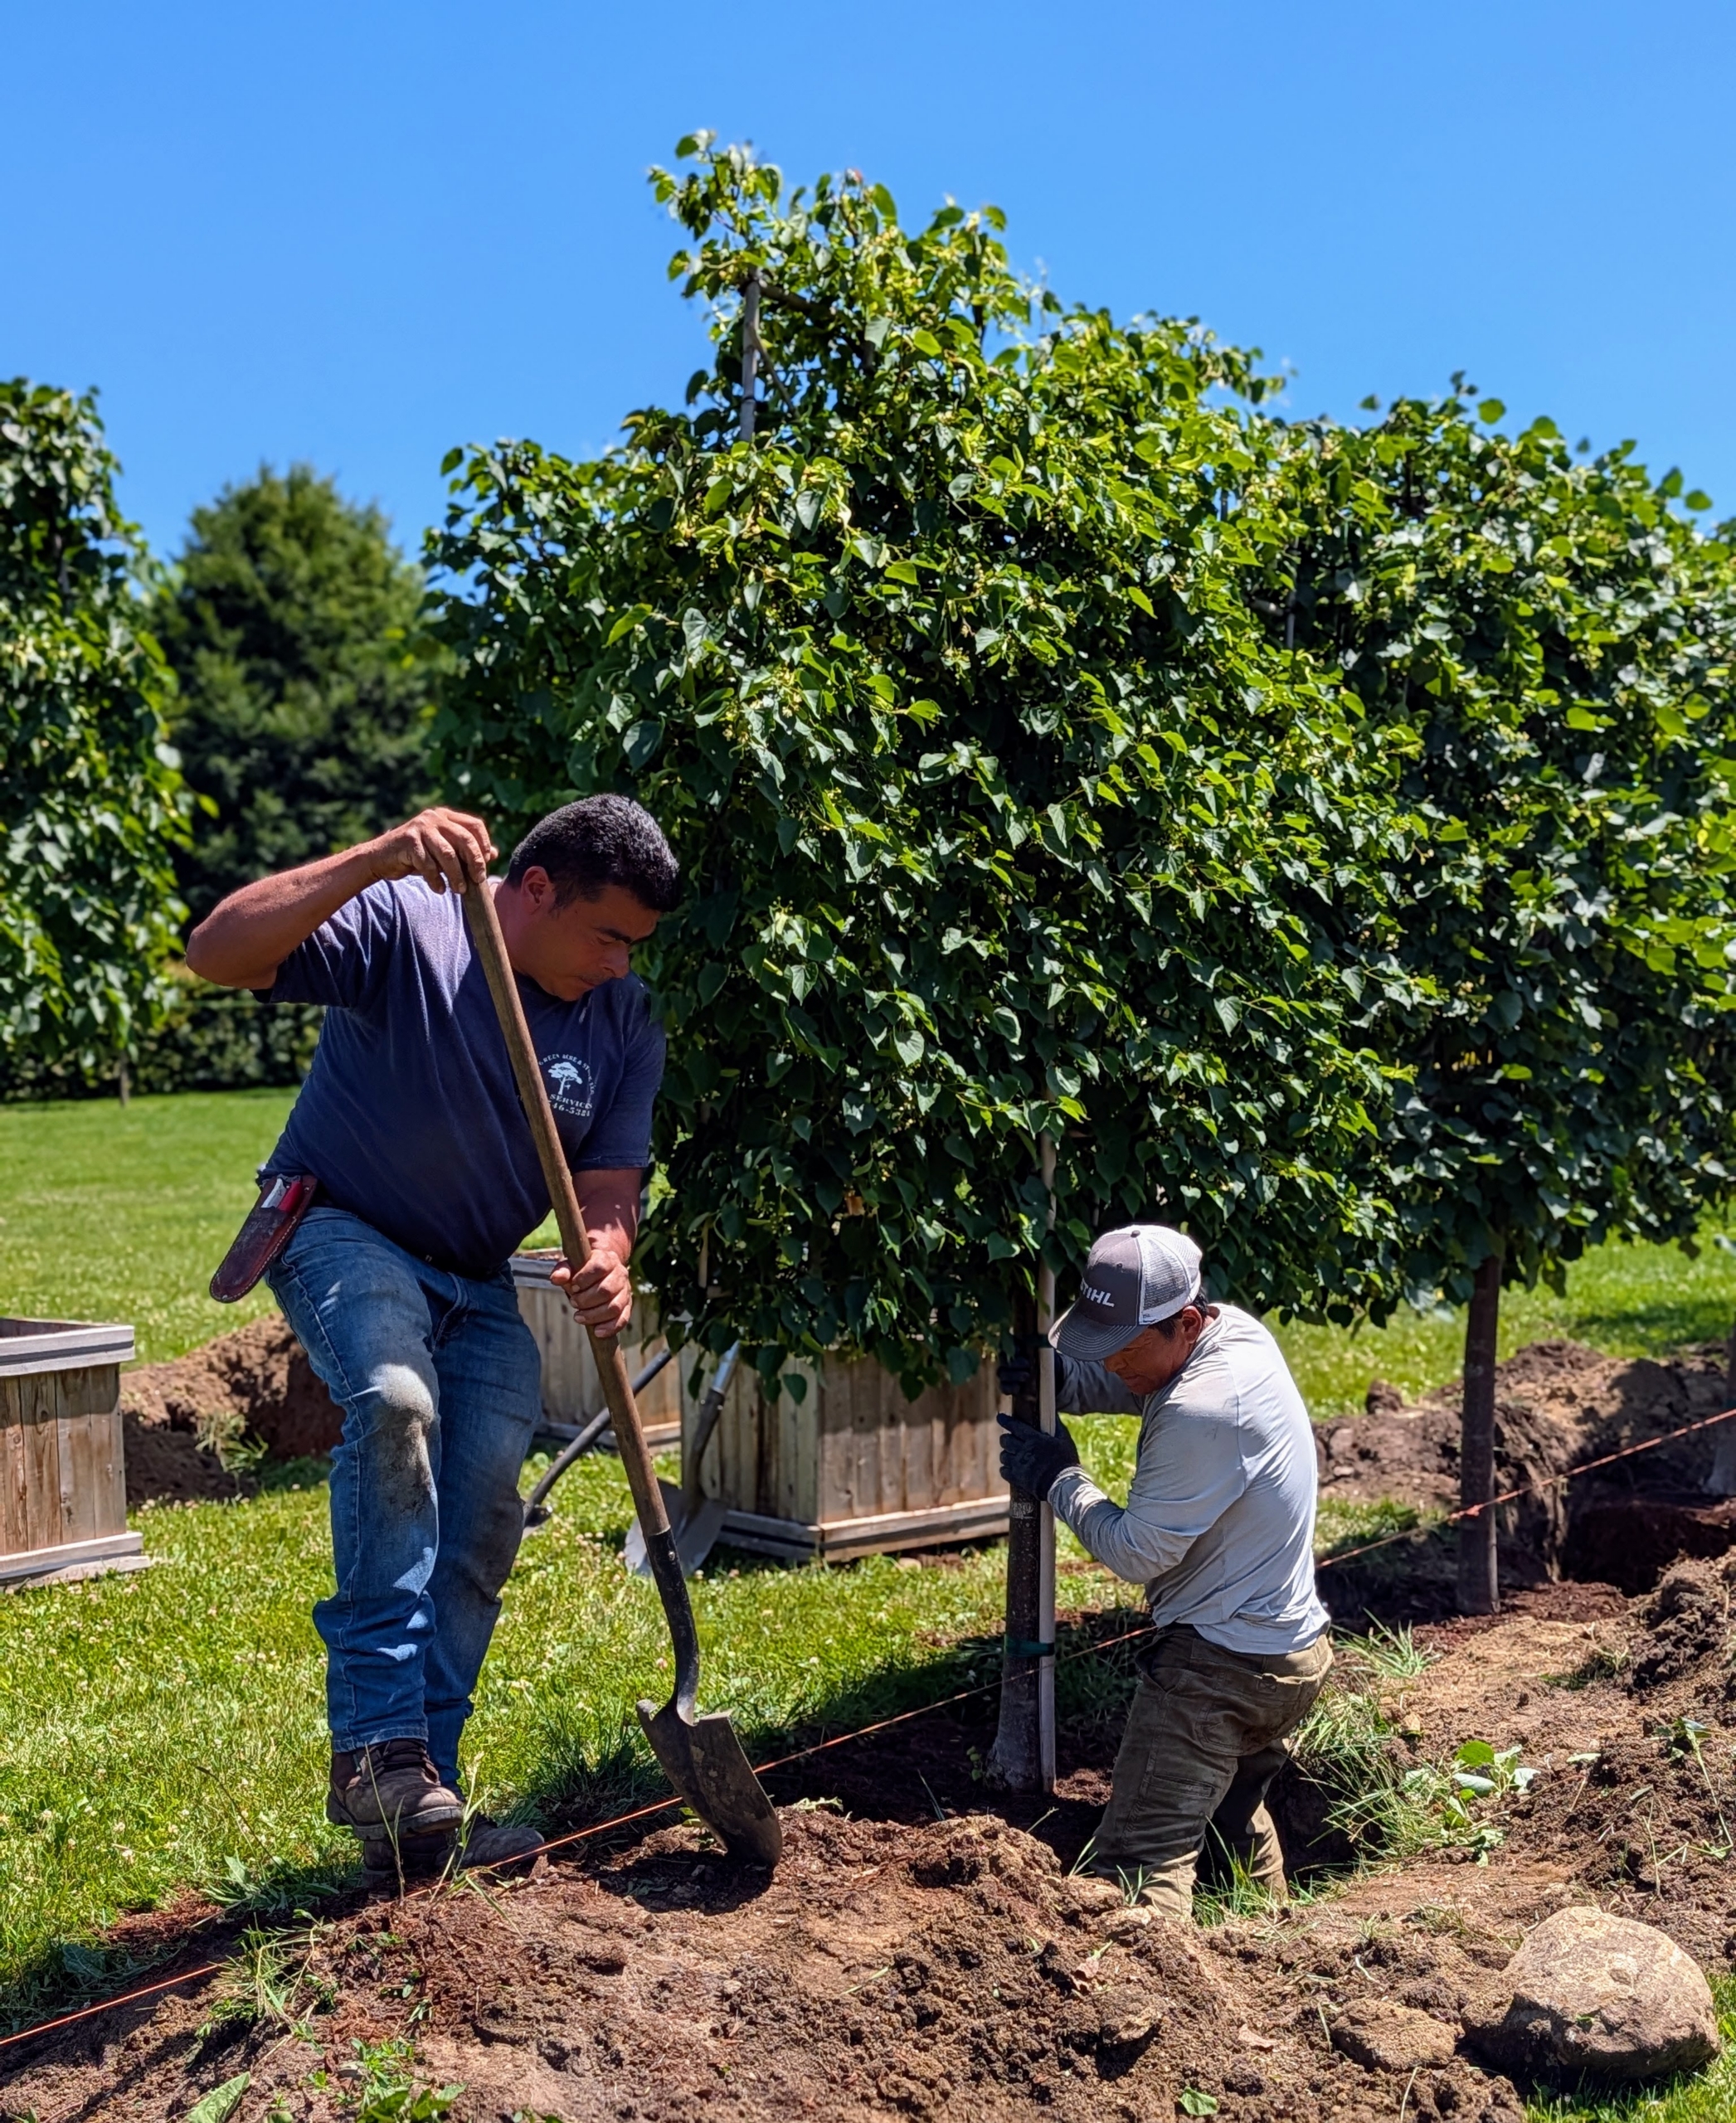
The holes needed to be moved slightly to accommodate the trees, so Phurba and Arnold started digging. Each hole is manually smoothed out and prepared to ensure it is deep enough for each specimen. The hole sides are slanted. Digging a wide planting hole helps to provide the best opportunity for roots to expand into its new growing environment.
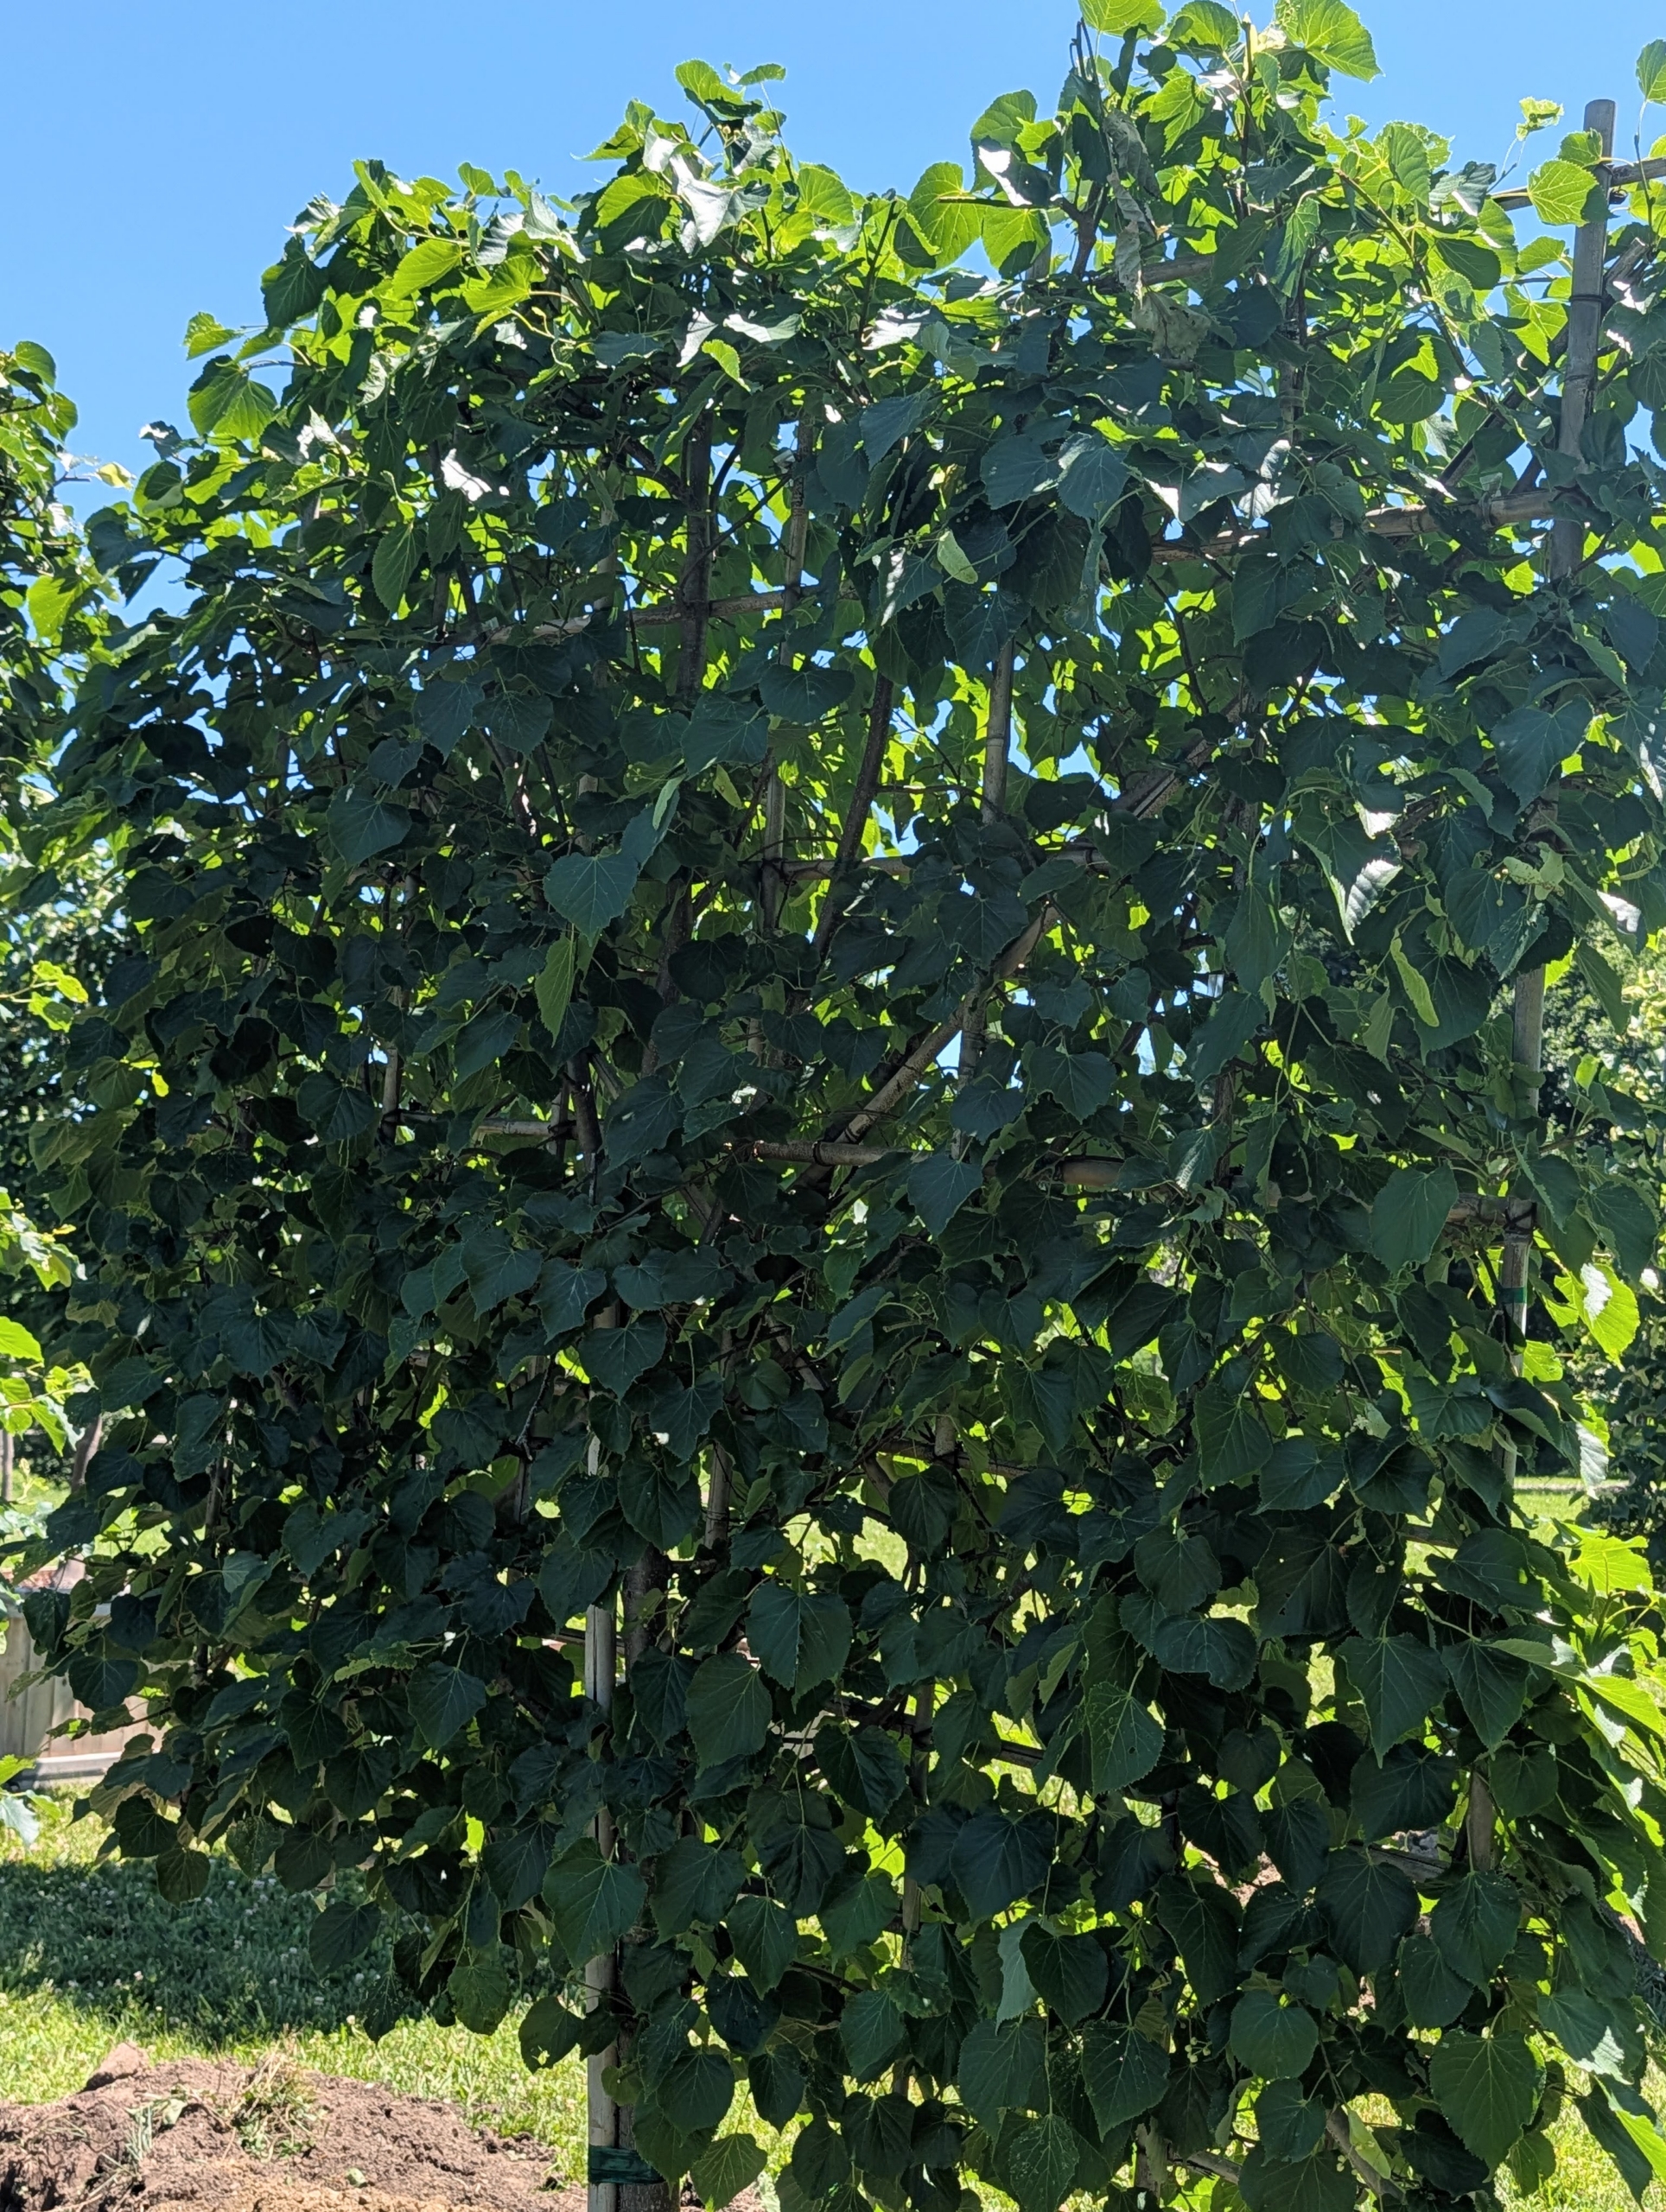
Tilia cordata, commonly called littleleaf linden, is native to Europe. It has been widely planted in the United States as an ornamental tree because of its attractive foliage, dense form, and its tolerance to urban conditions. These are espaliered, meaning they are trained along a support to keep them in this flat shape, which is square.
The leaves of the littleleaf linden are ovate, shiny, and dark green up to about three inches long with tapered tips, serrated margins, and cordate or heart-shaped bases. Littleleaf linden trees are known for their fragrant, creamy-yellow flowers that appear in late spring to early summer, typically June to July.
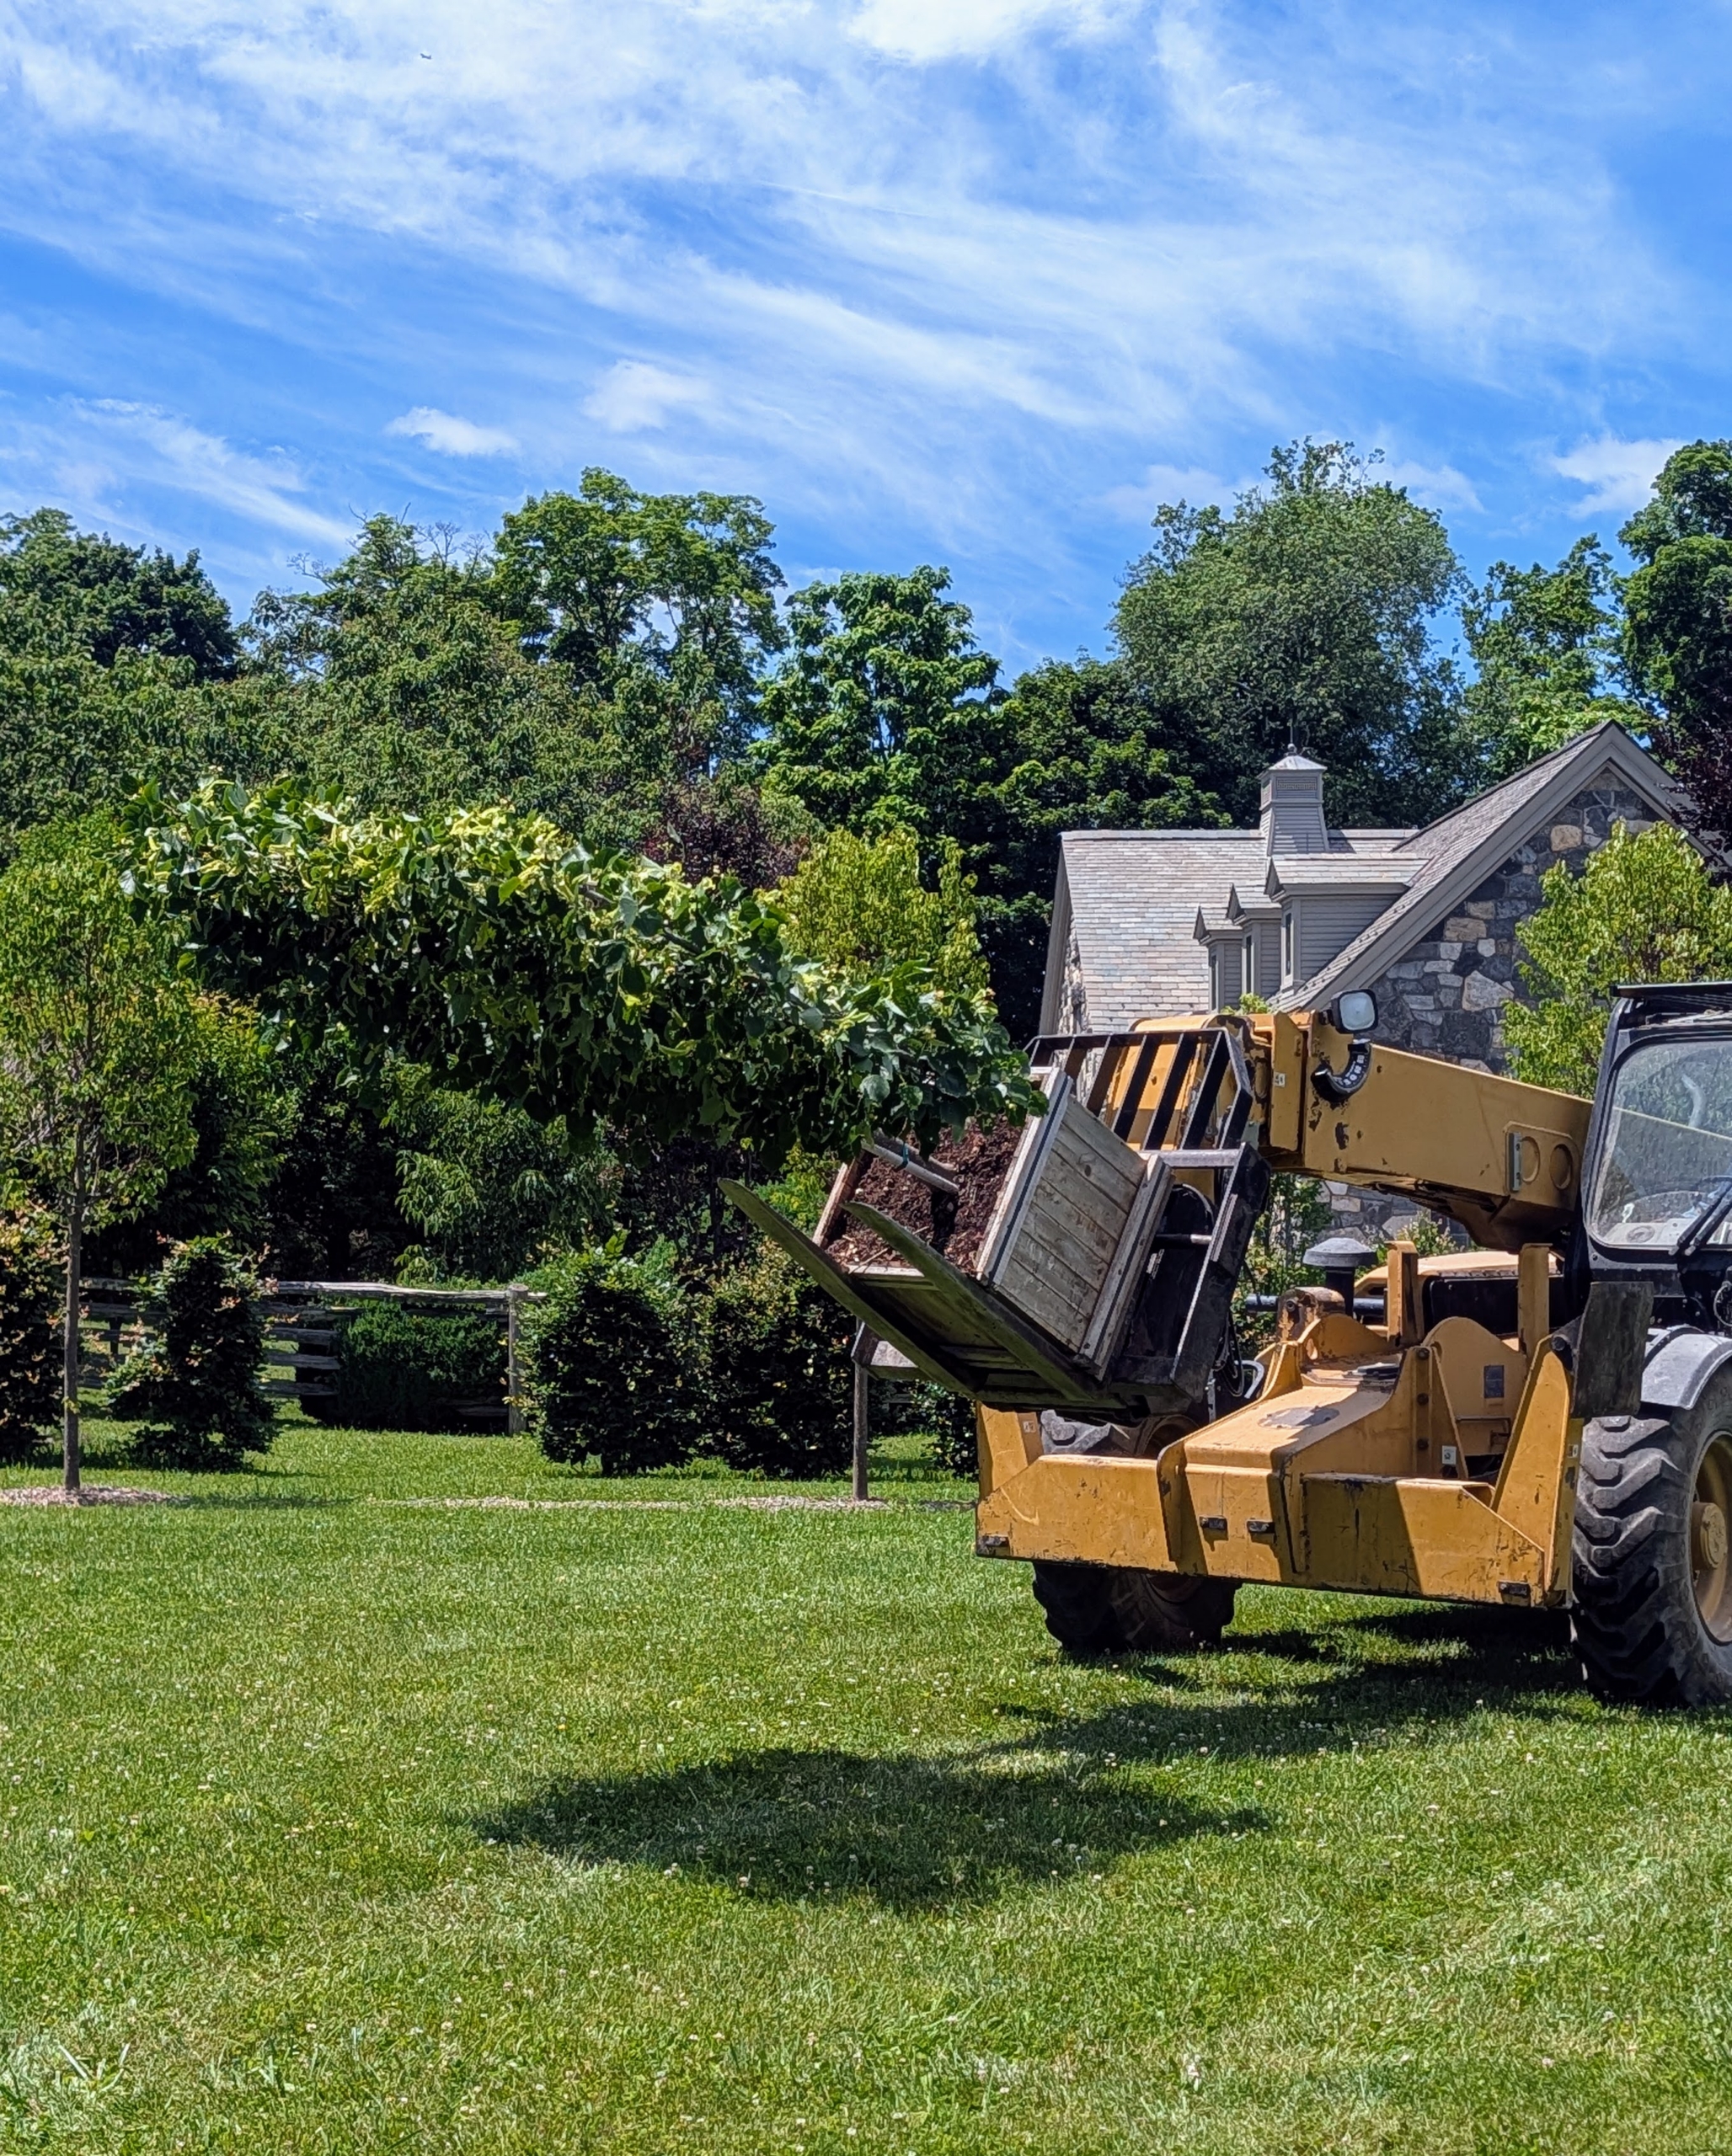
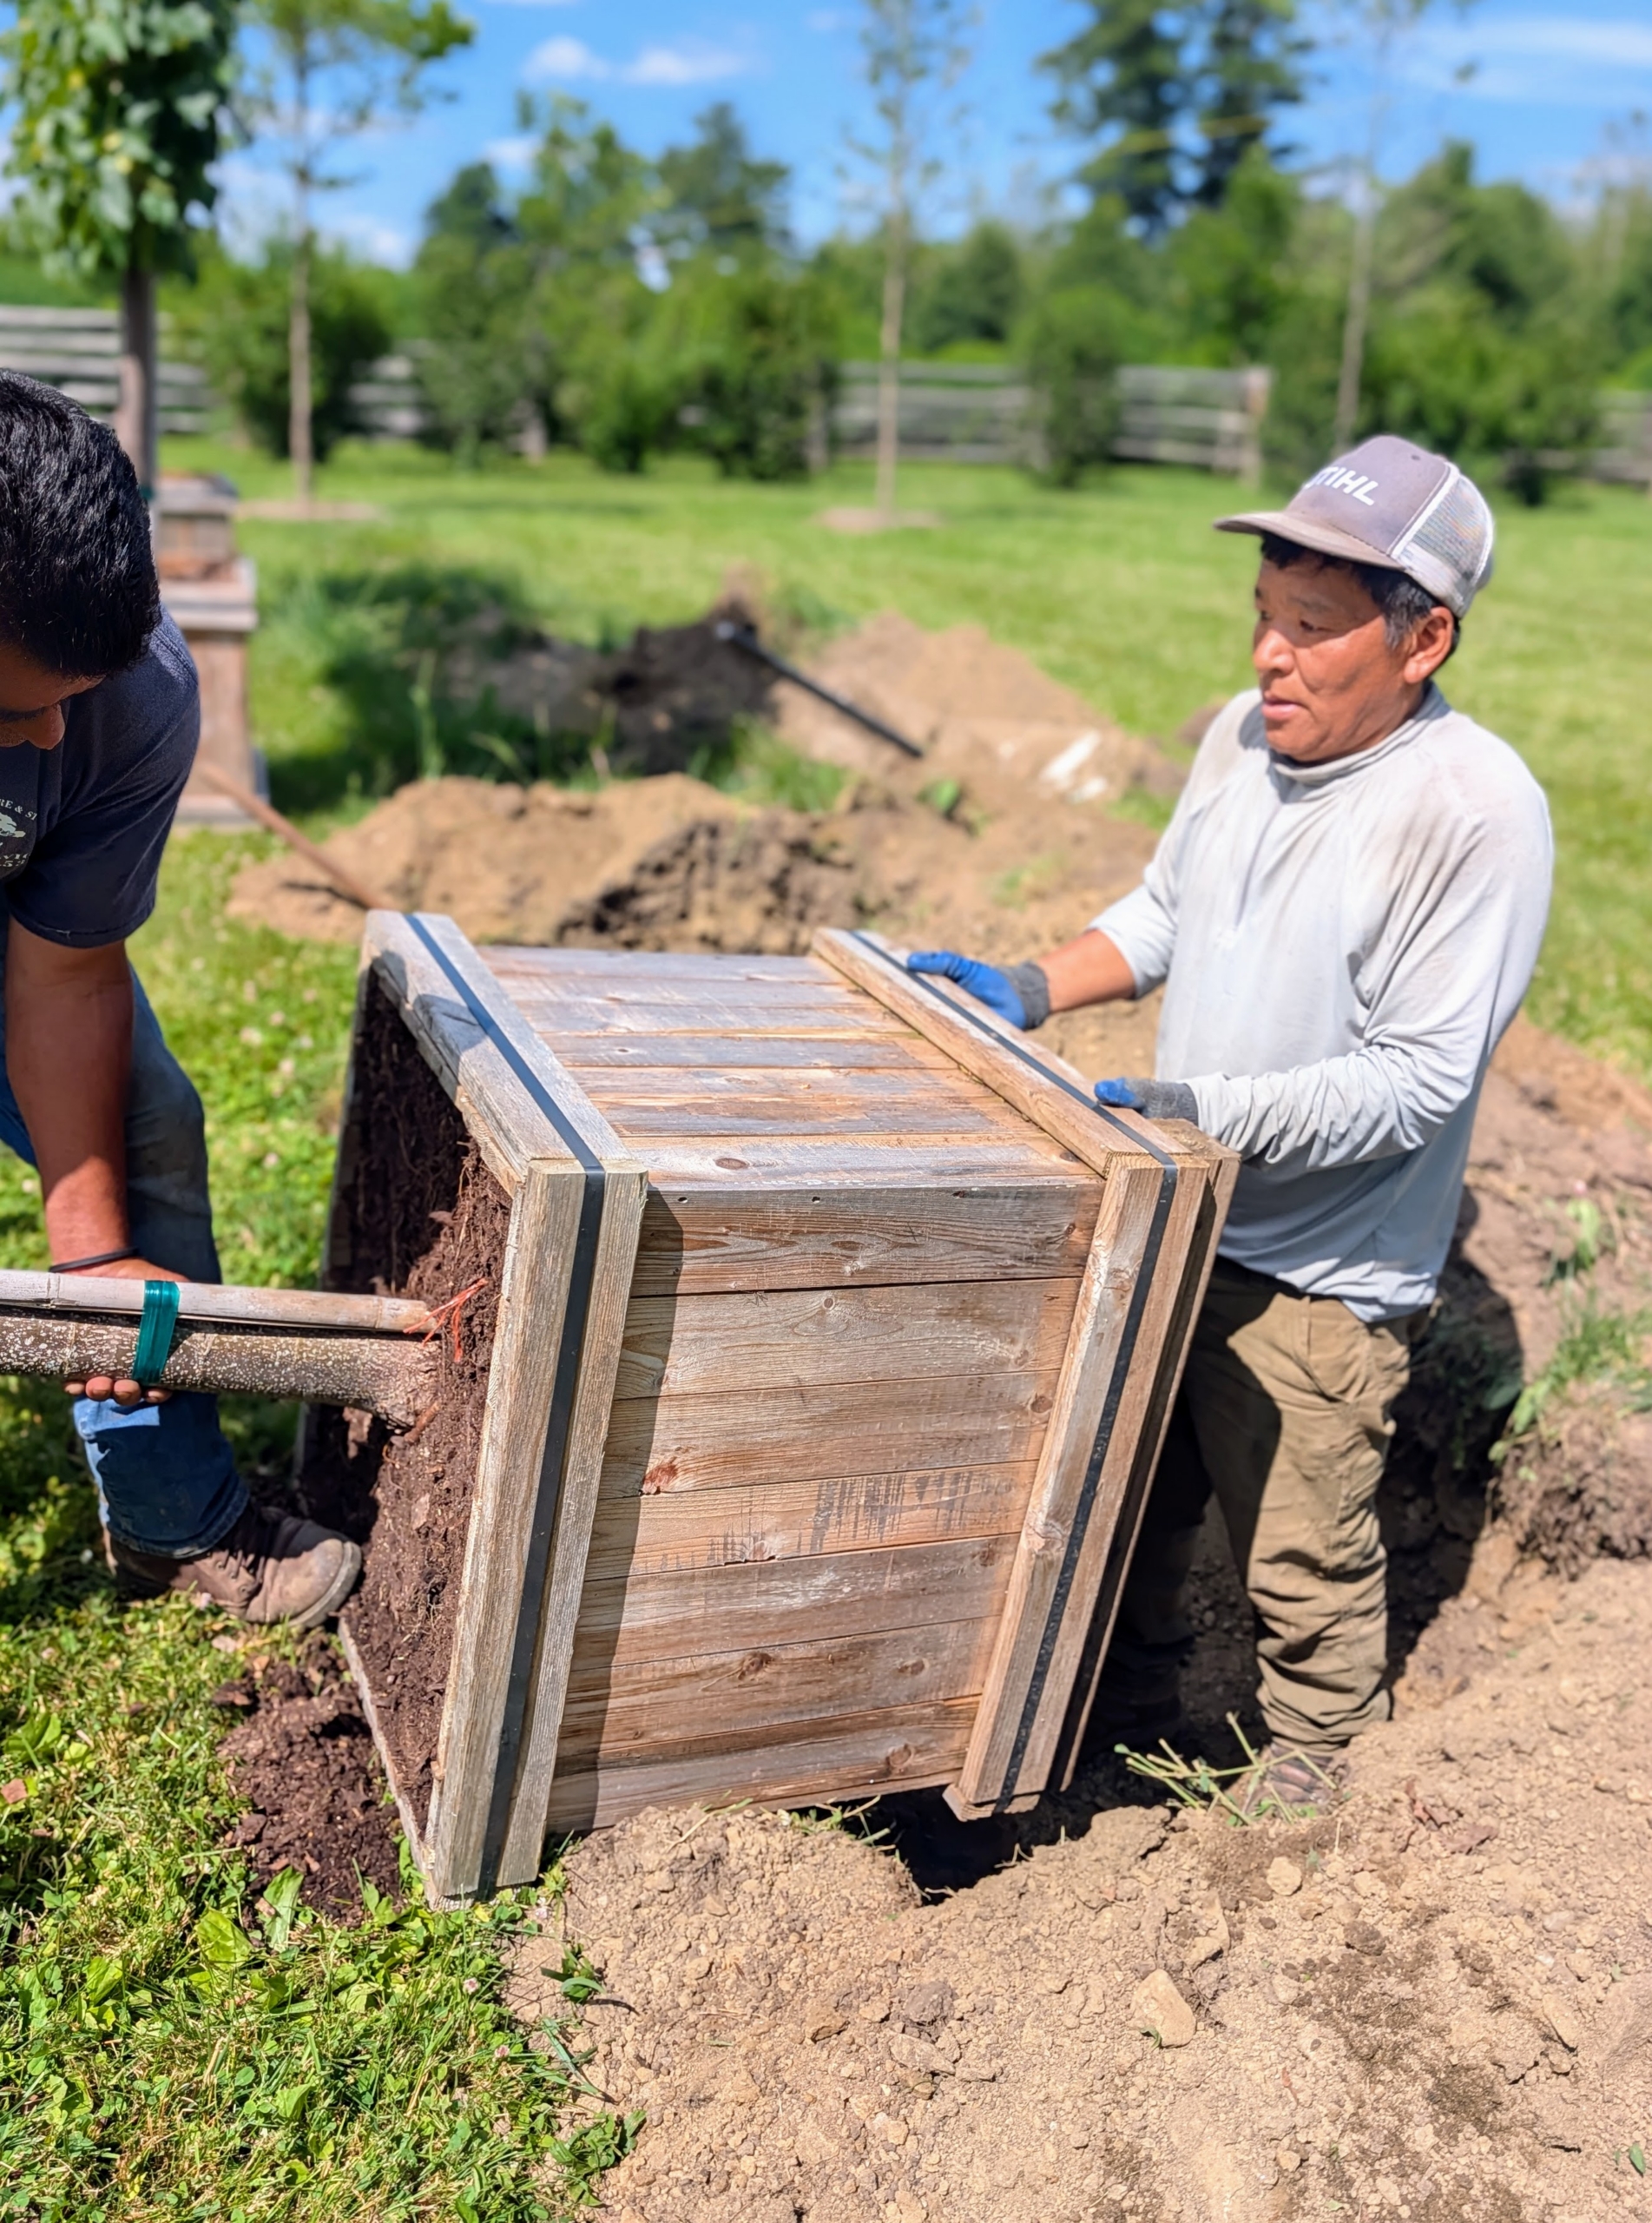
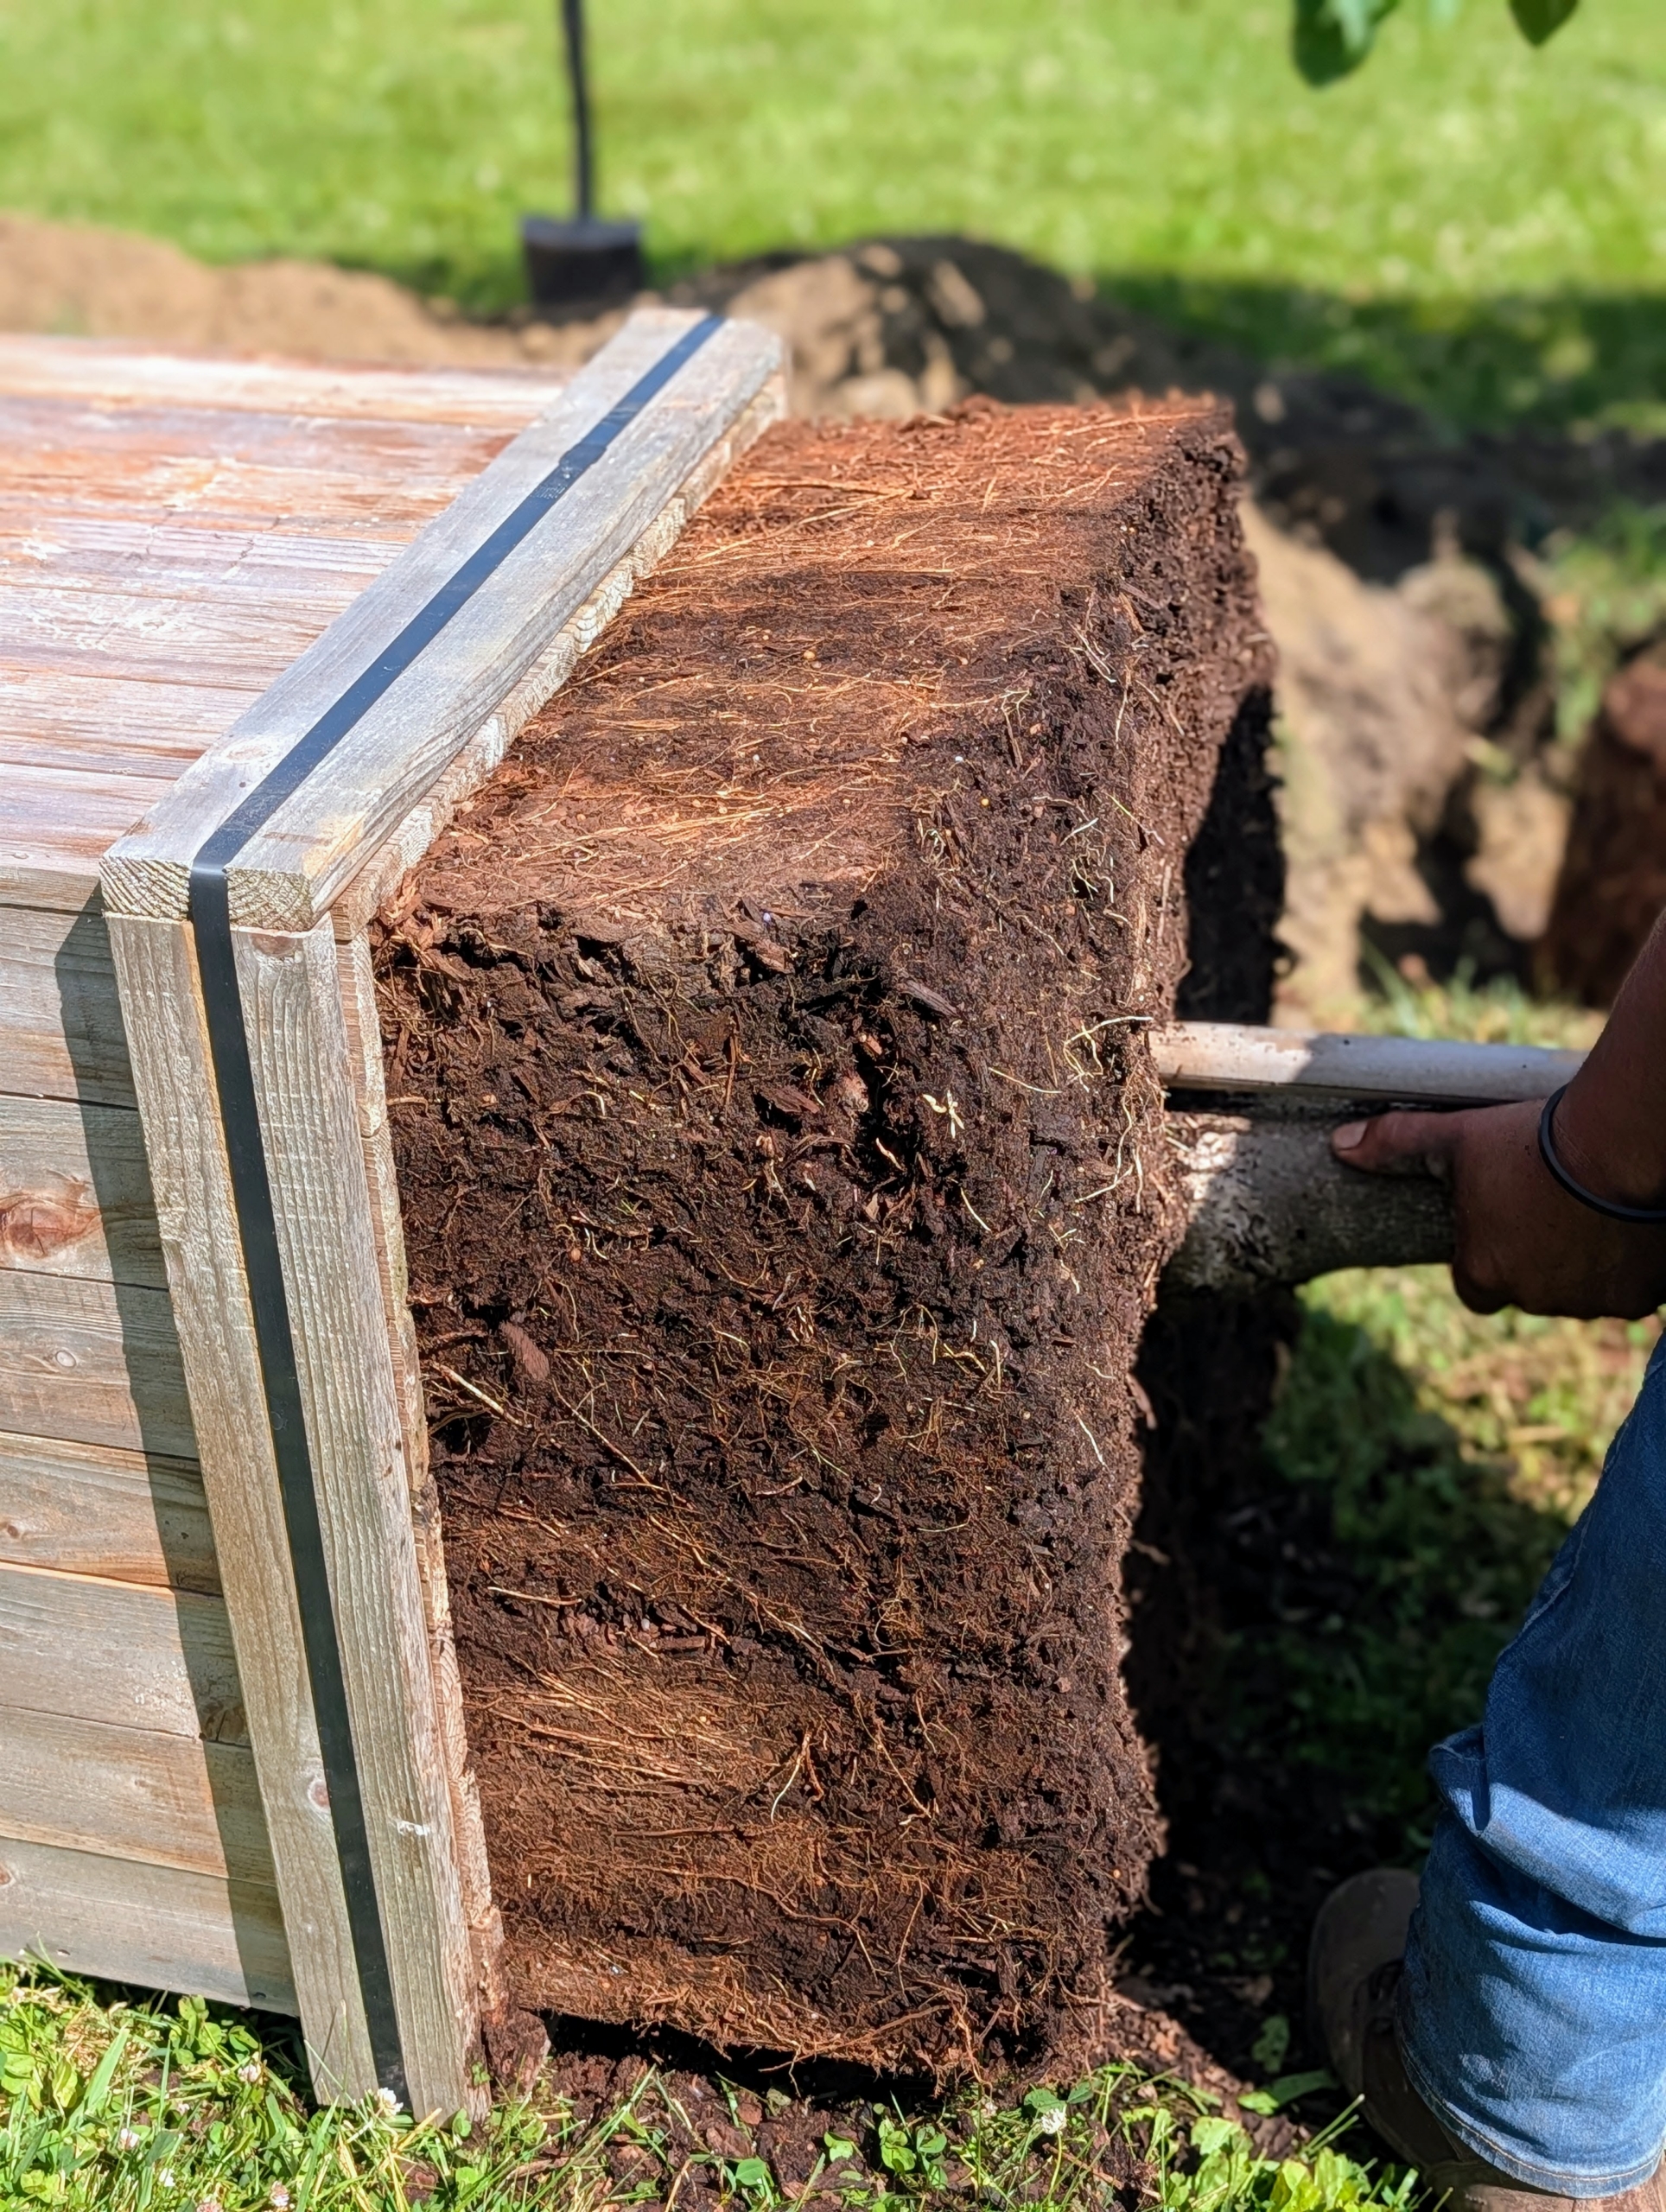
The trees arrived in wooden boxes. I asked the crew to be careful, so the boxes were not damaged – I can always repurpose them later.
The root ball is slowly pulled from its box.
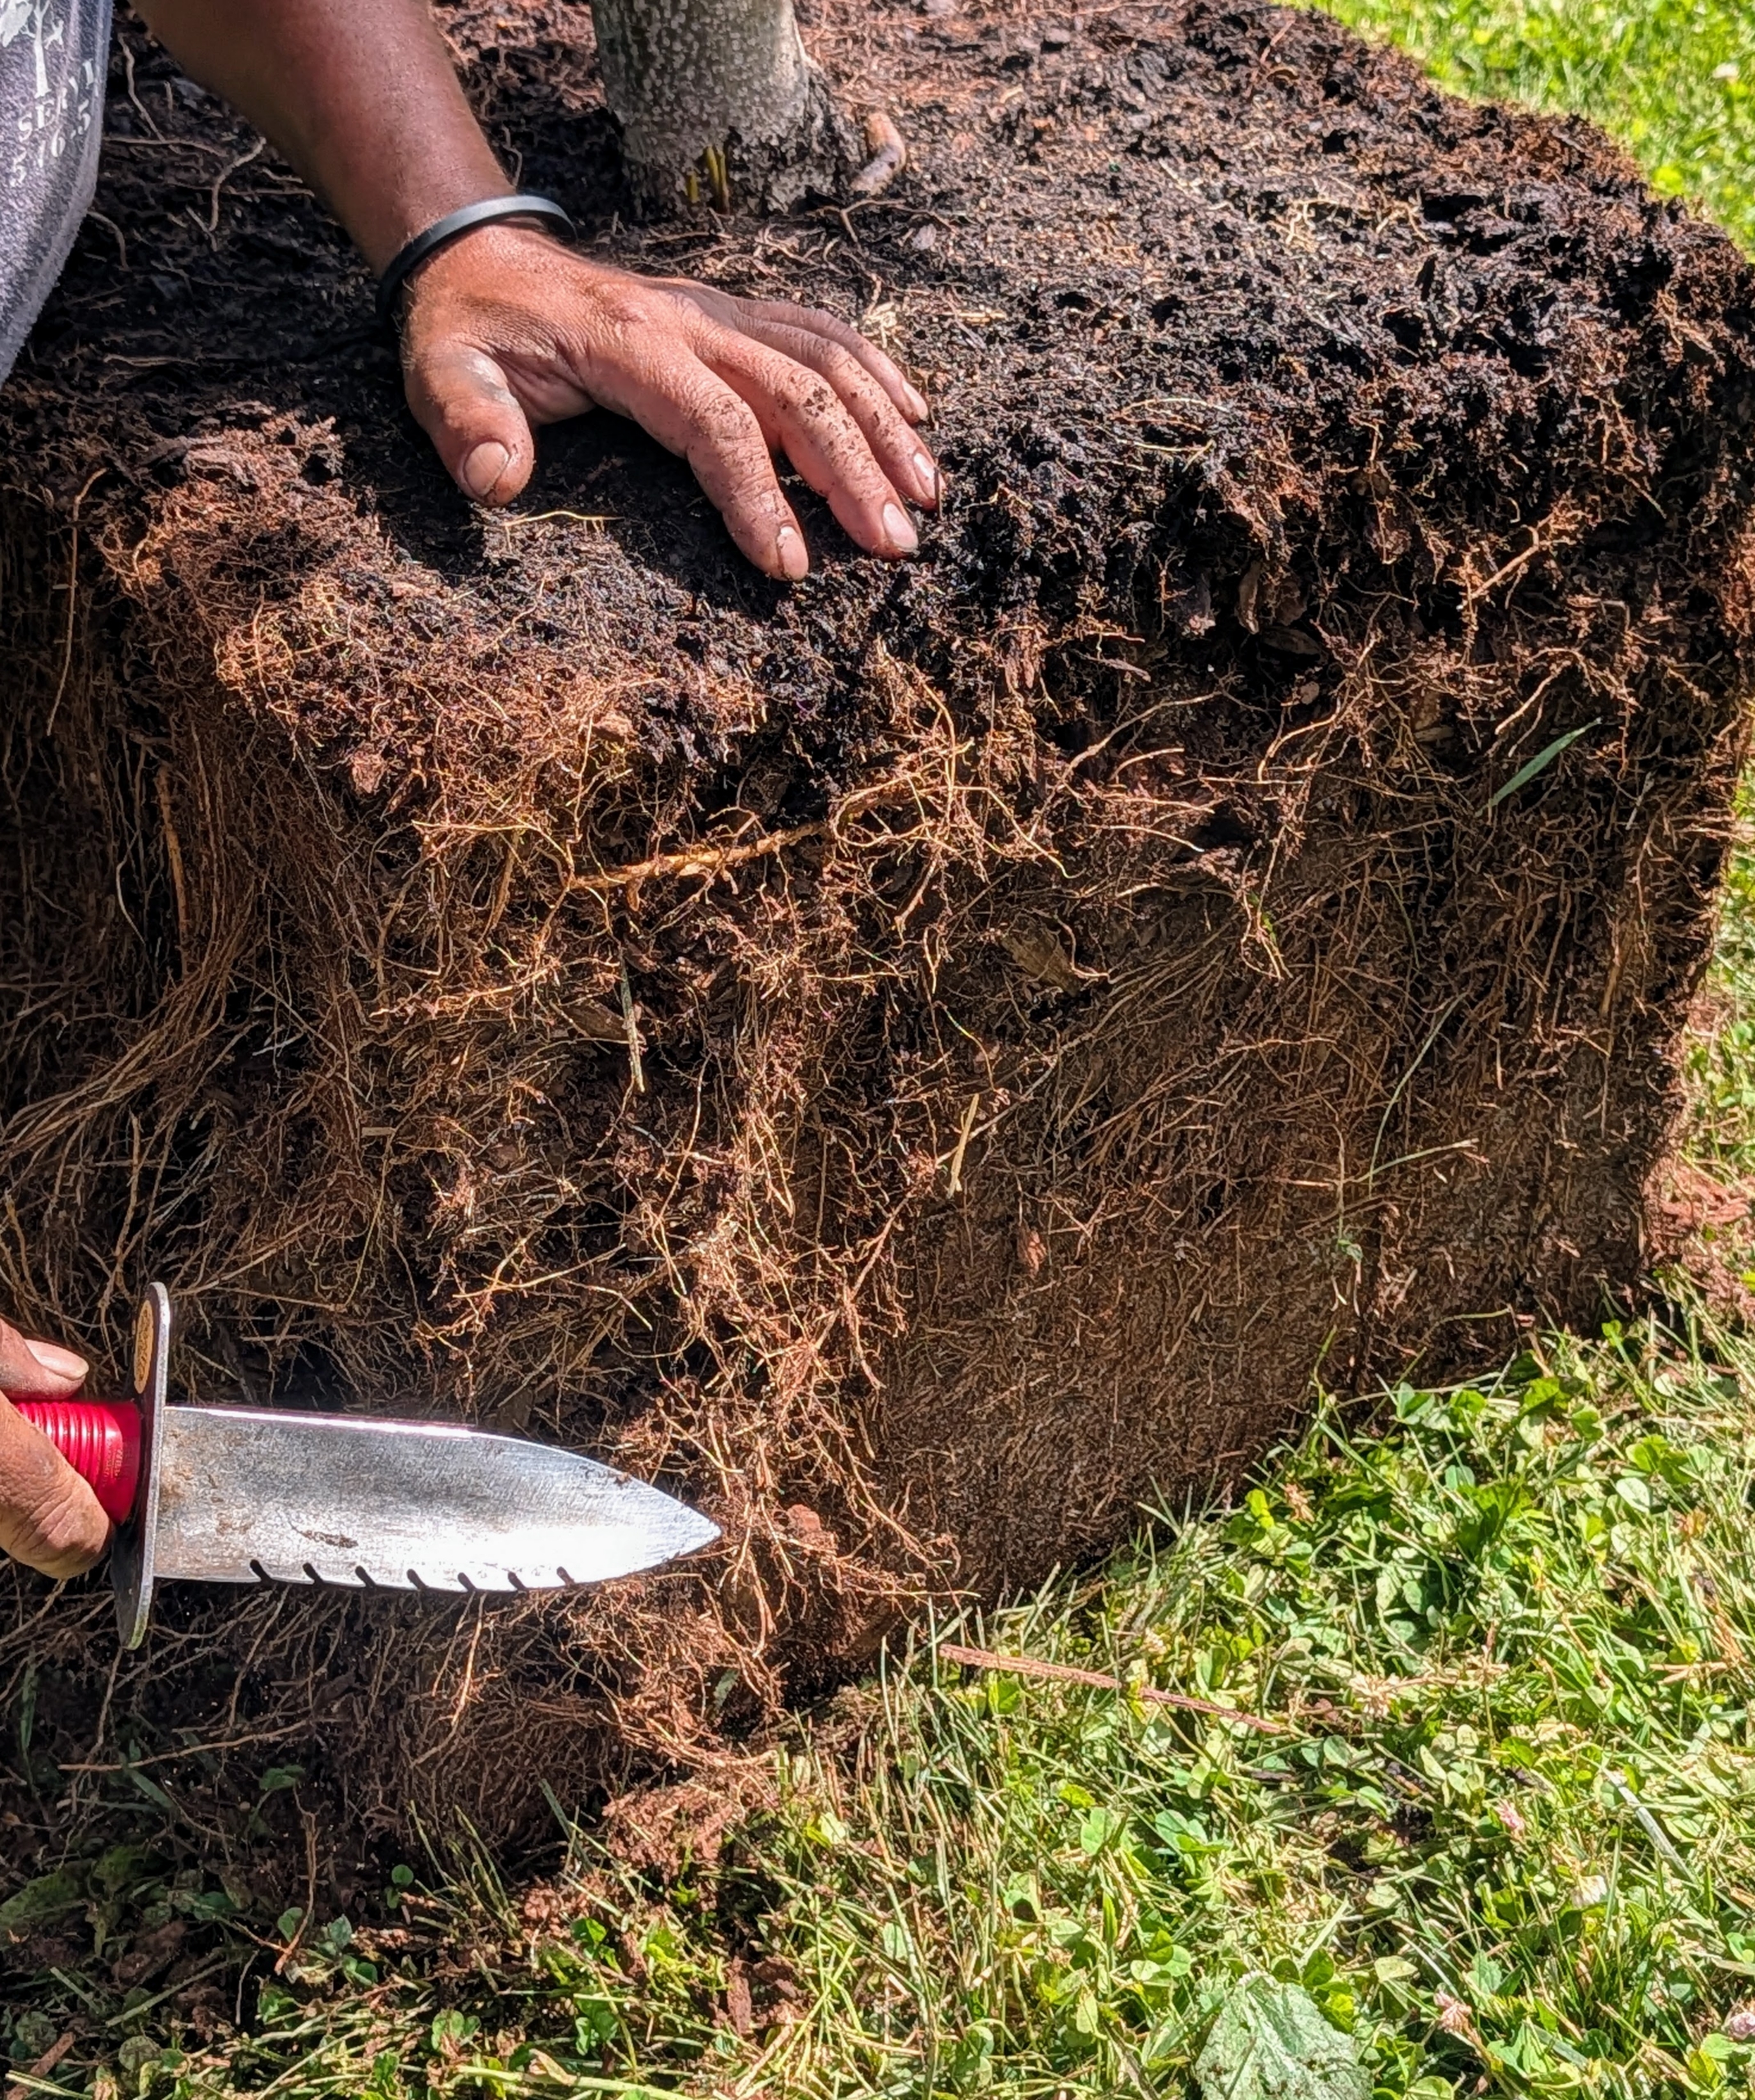
And then each root ball is scarified. Scarifying the root ball is a planting technique where one cuts or scores the outer edges of the root ball to redirect circling roots and encourage new roots to develop outward into the surrounding soil.
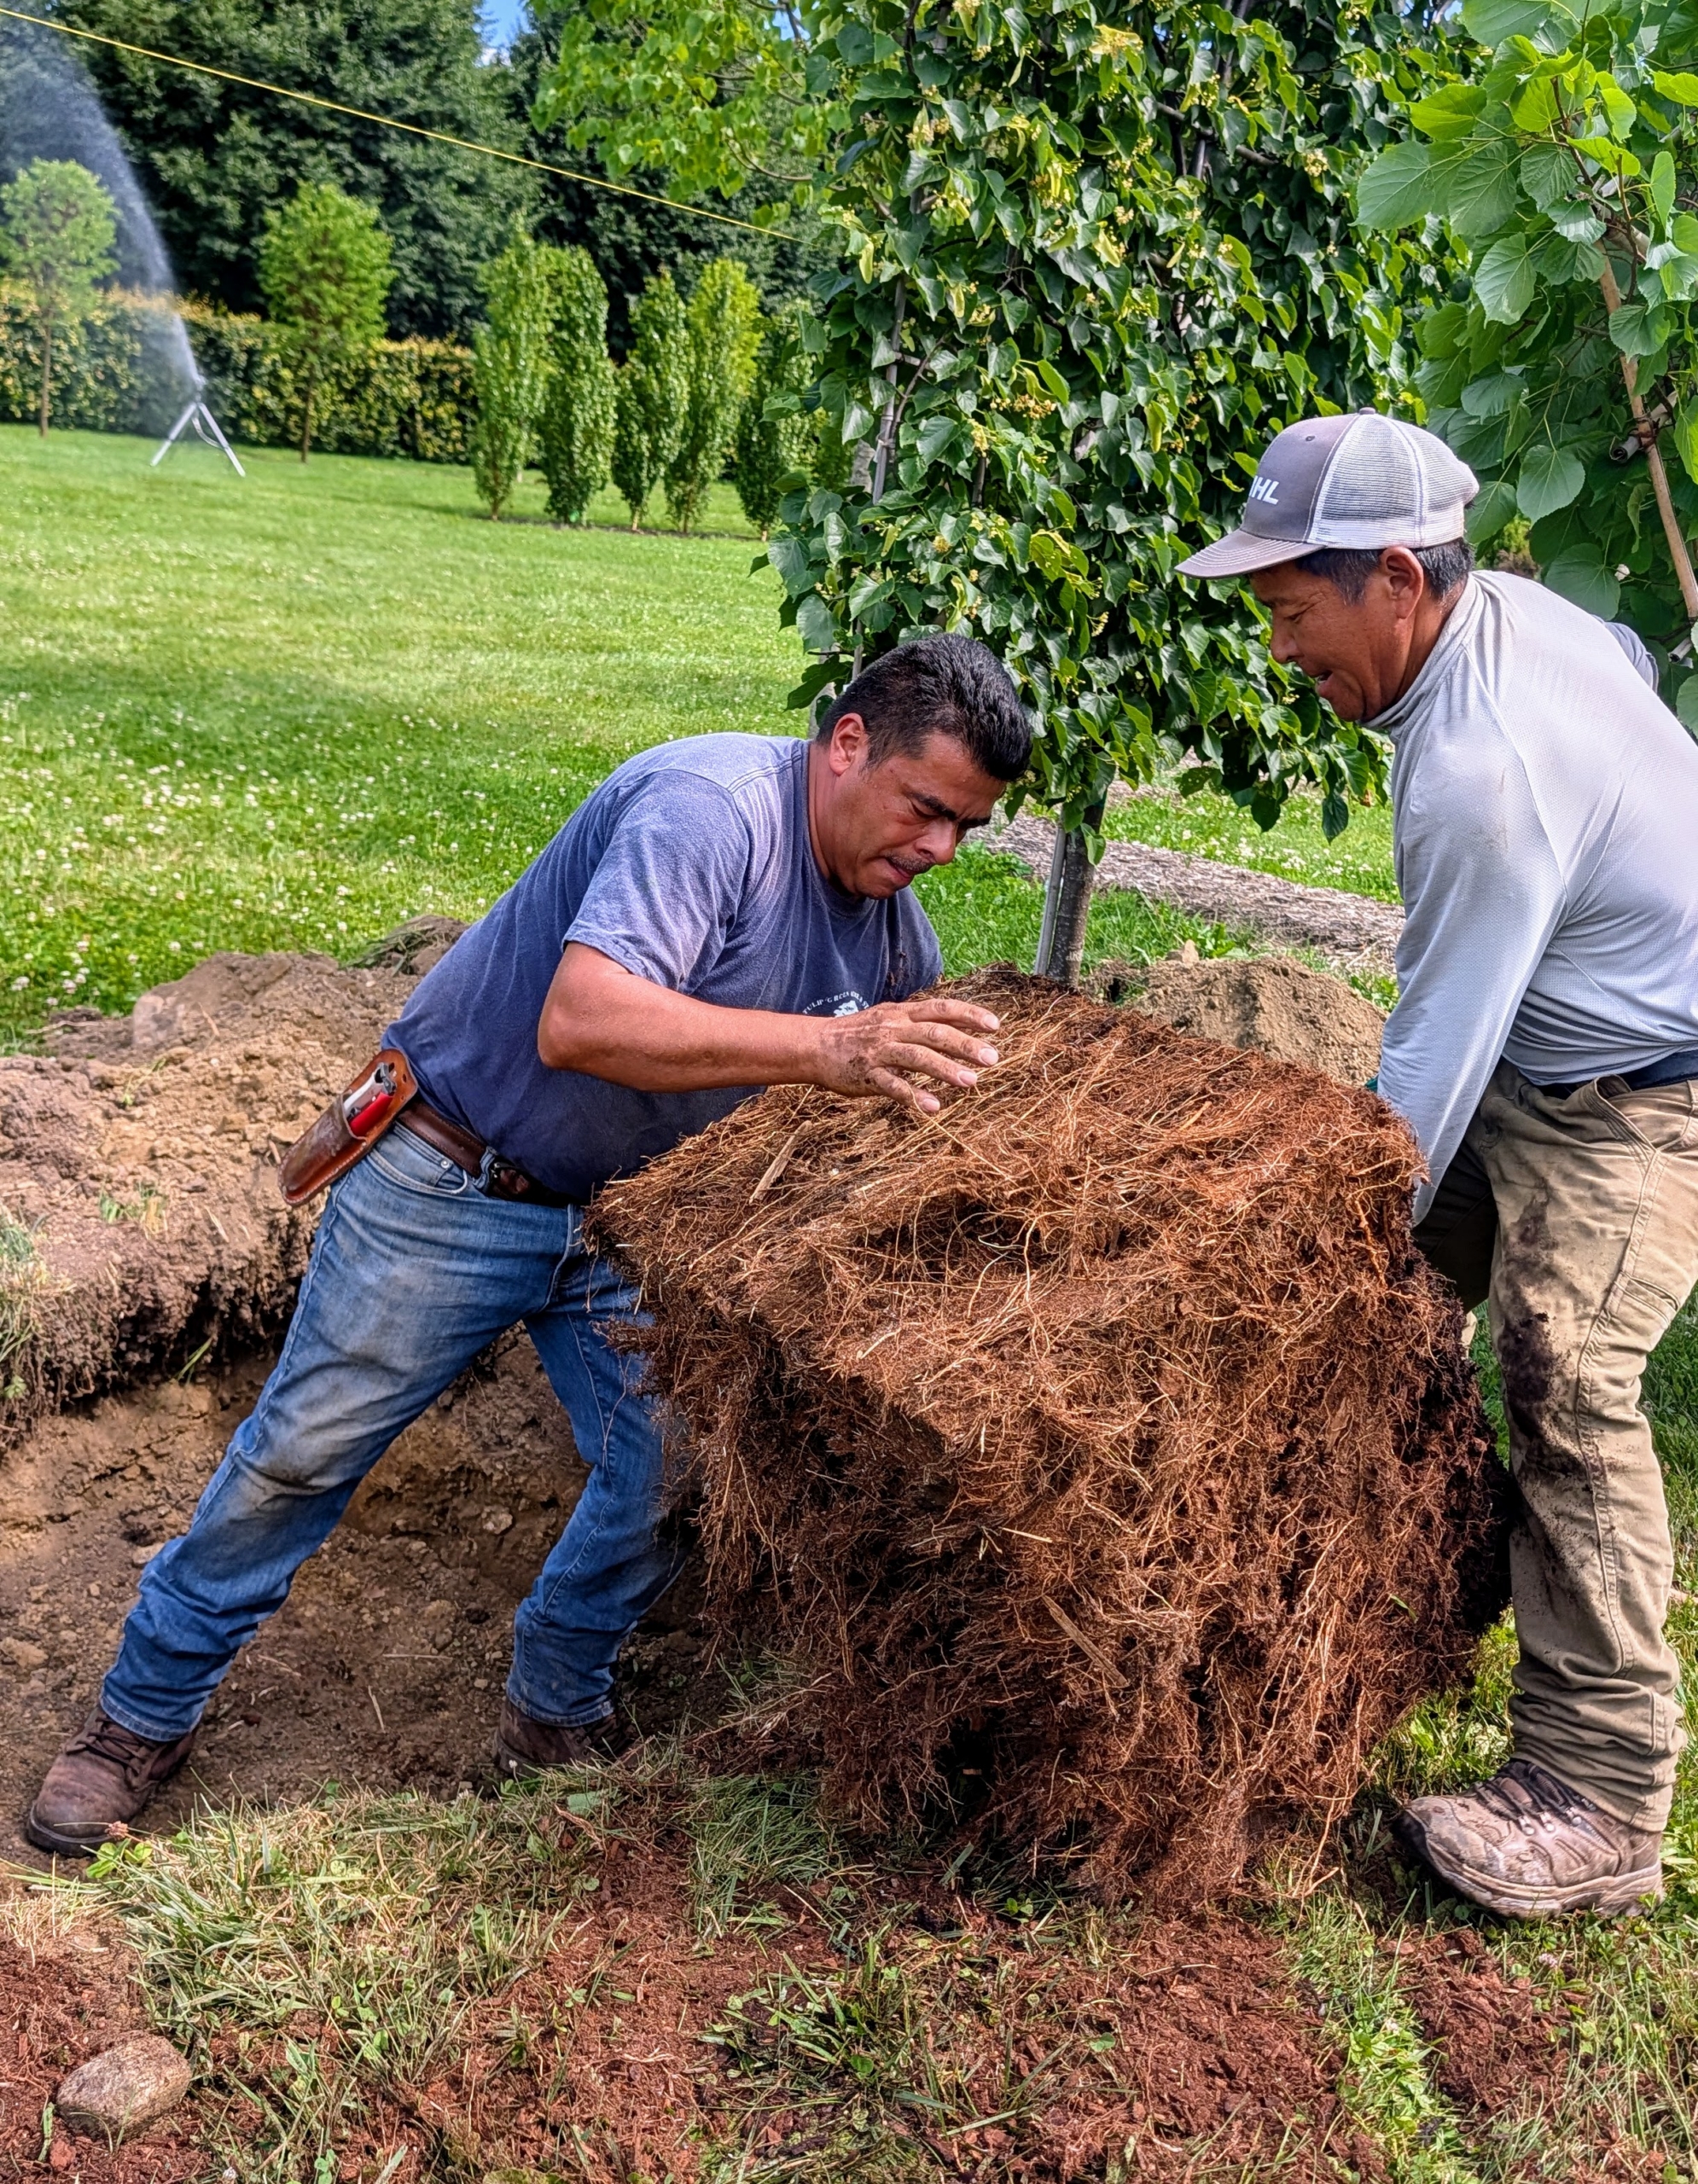
Arnold and Phurba slowly roll the root ball into position. When moving a heavy tree into its hole, only hold it by the root ball and the base of the trunk – never by its branches, which could easily break.
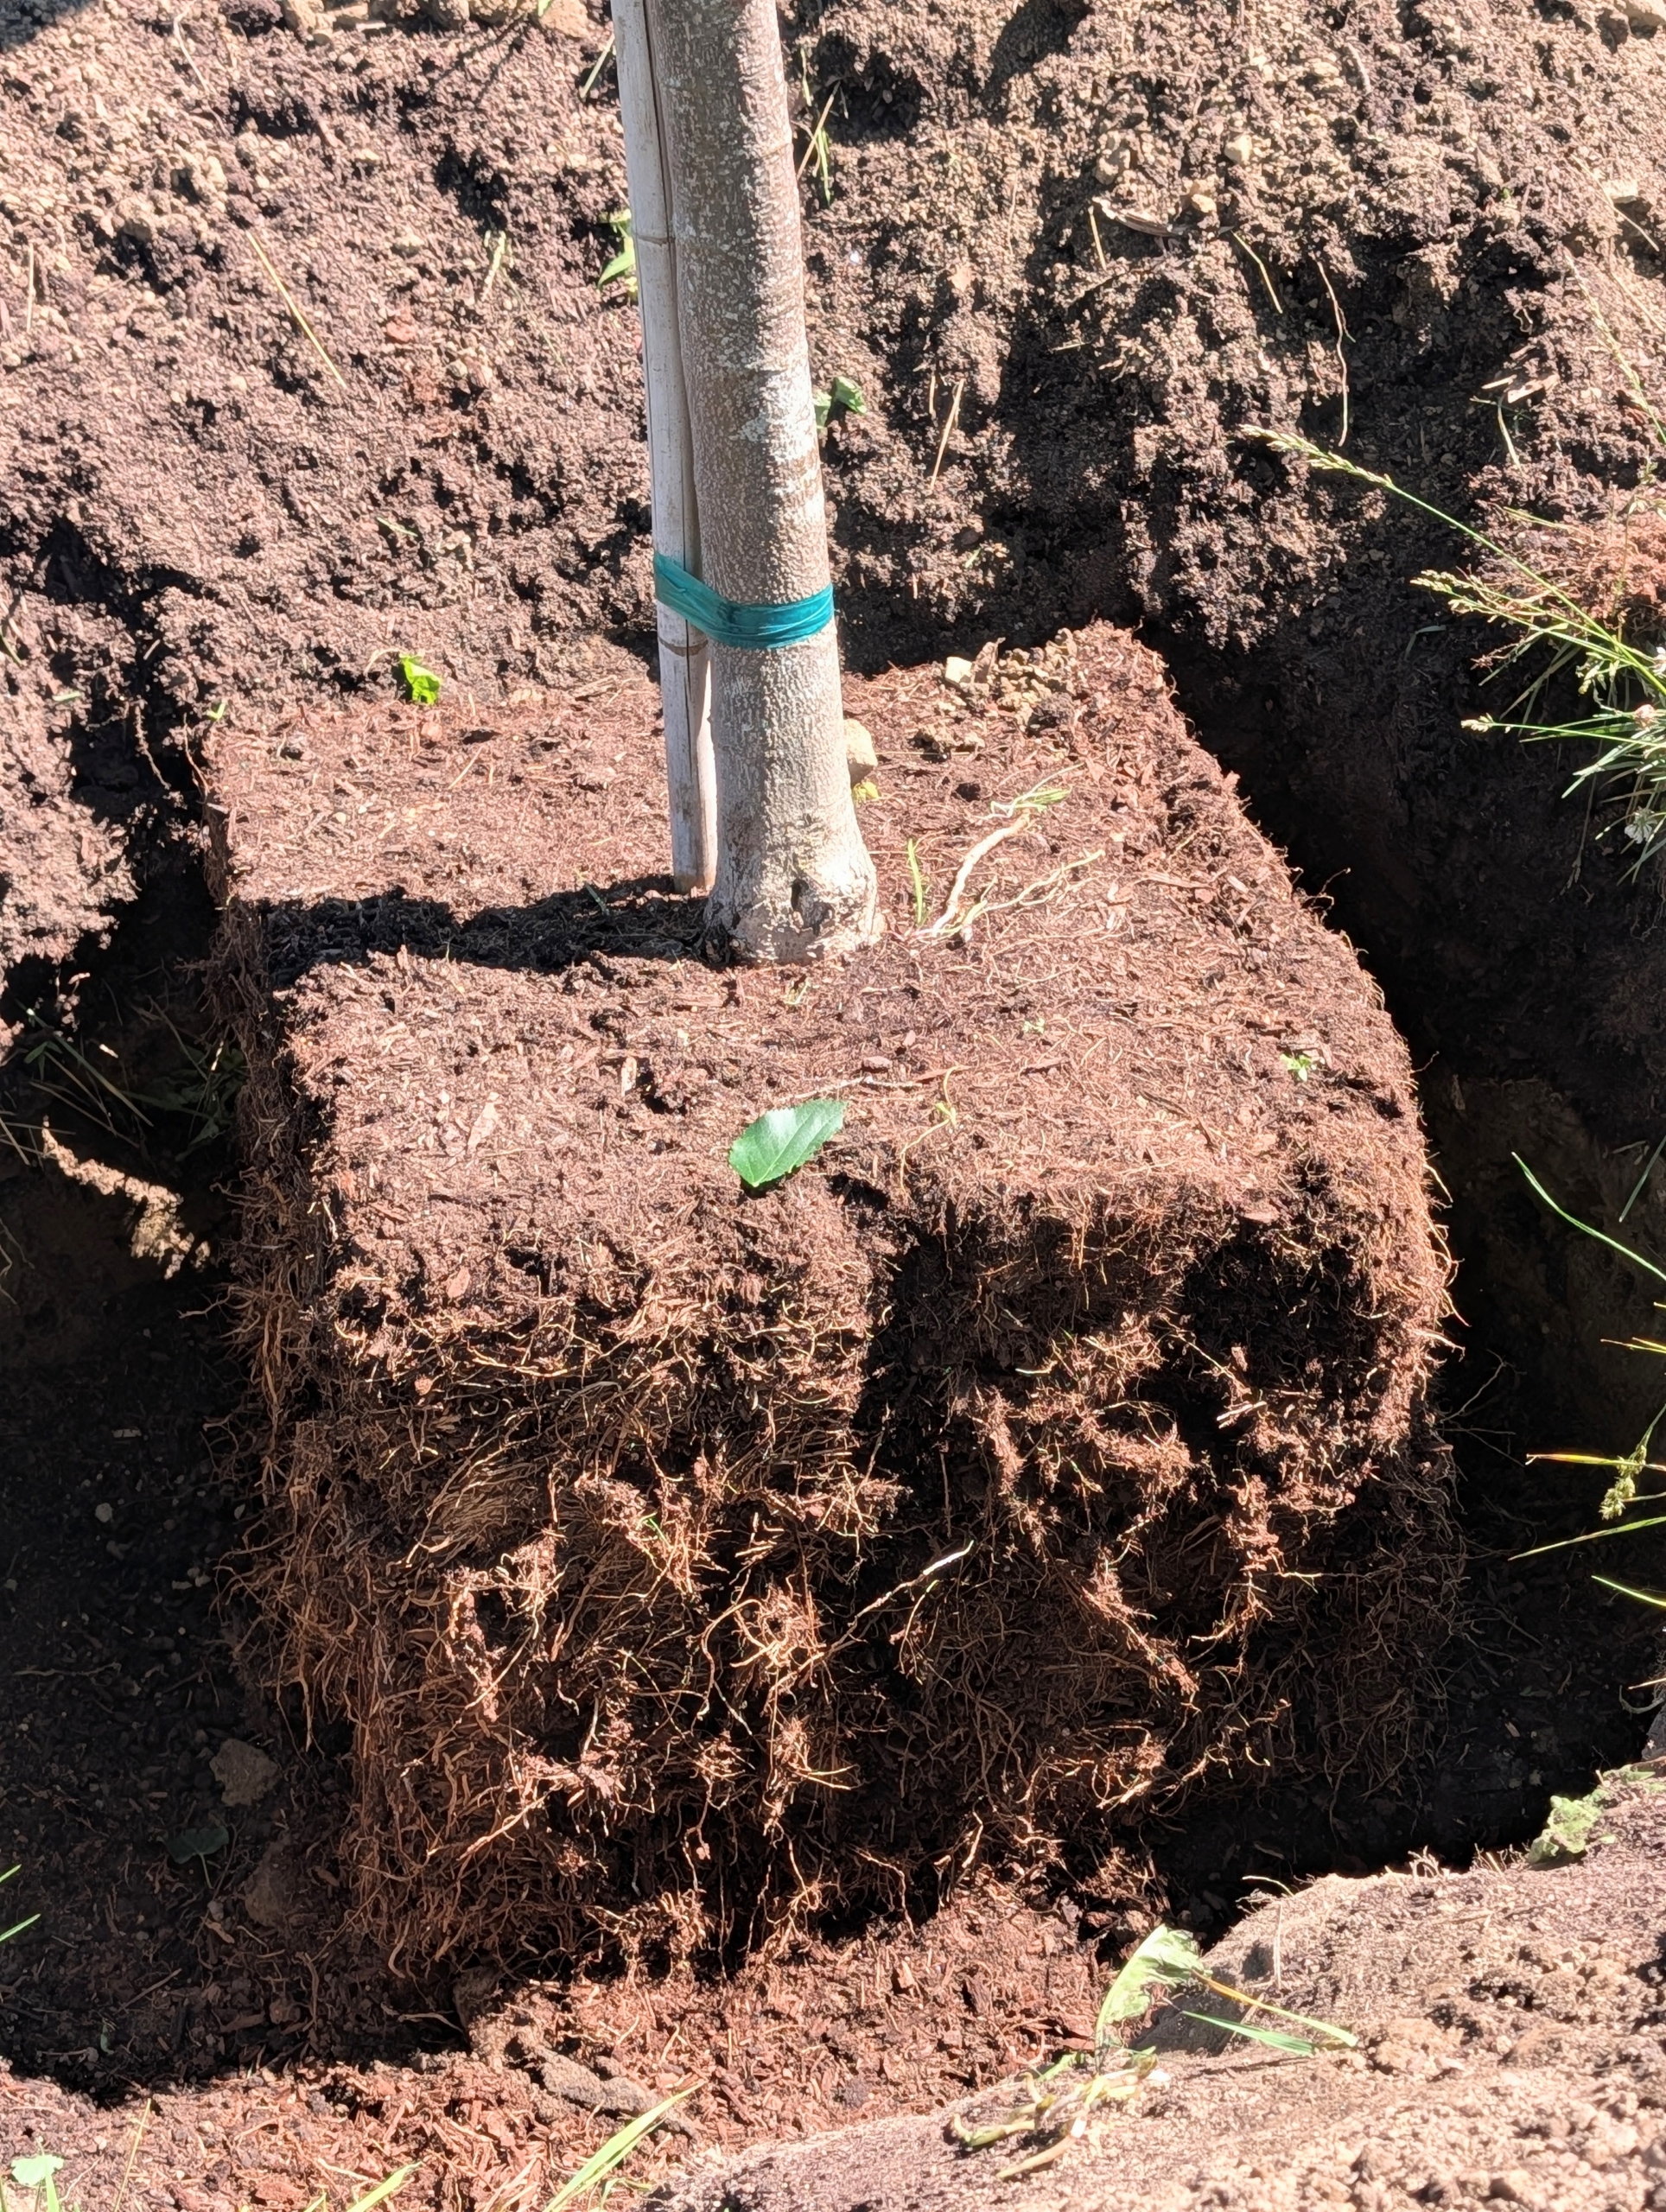
Once the tree is in its designated hole, it is adjusted to ensure everything is precisely straight and in line with the others. Landscape twine is secured to help.
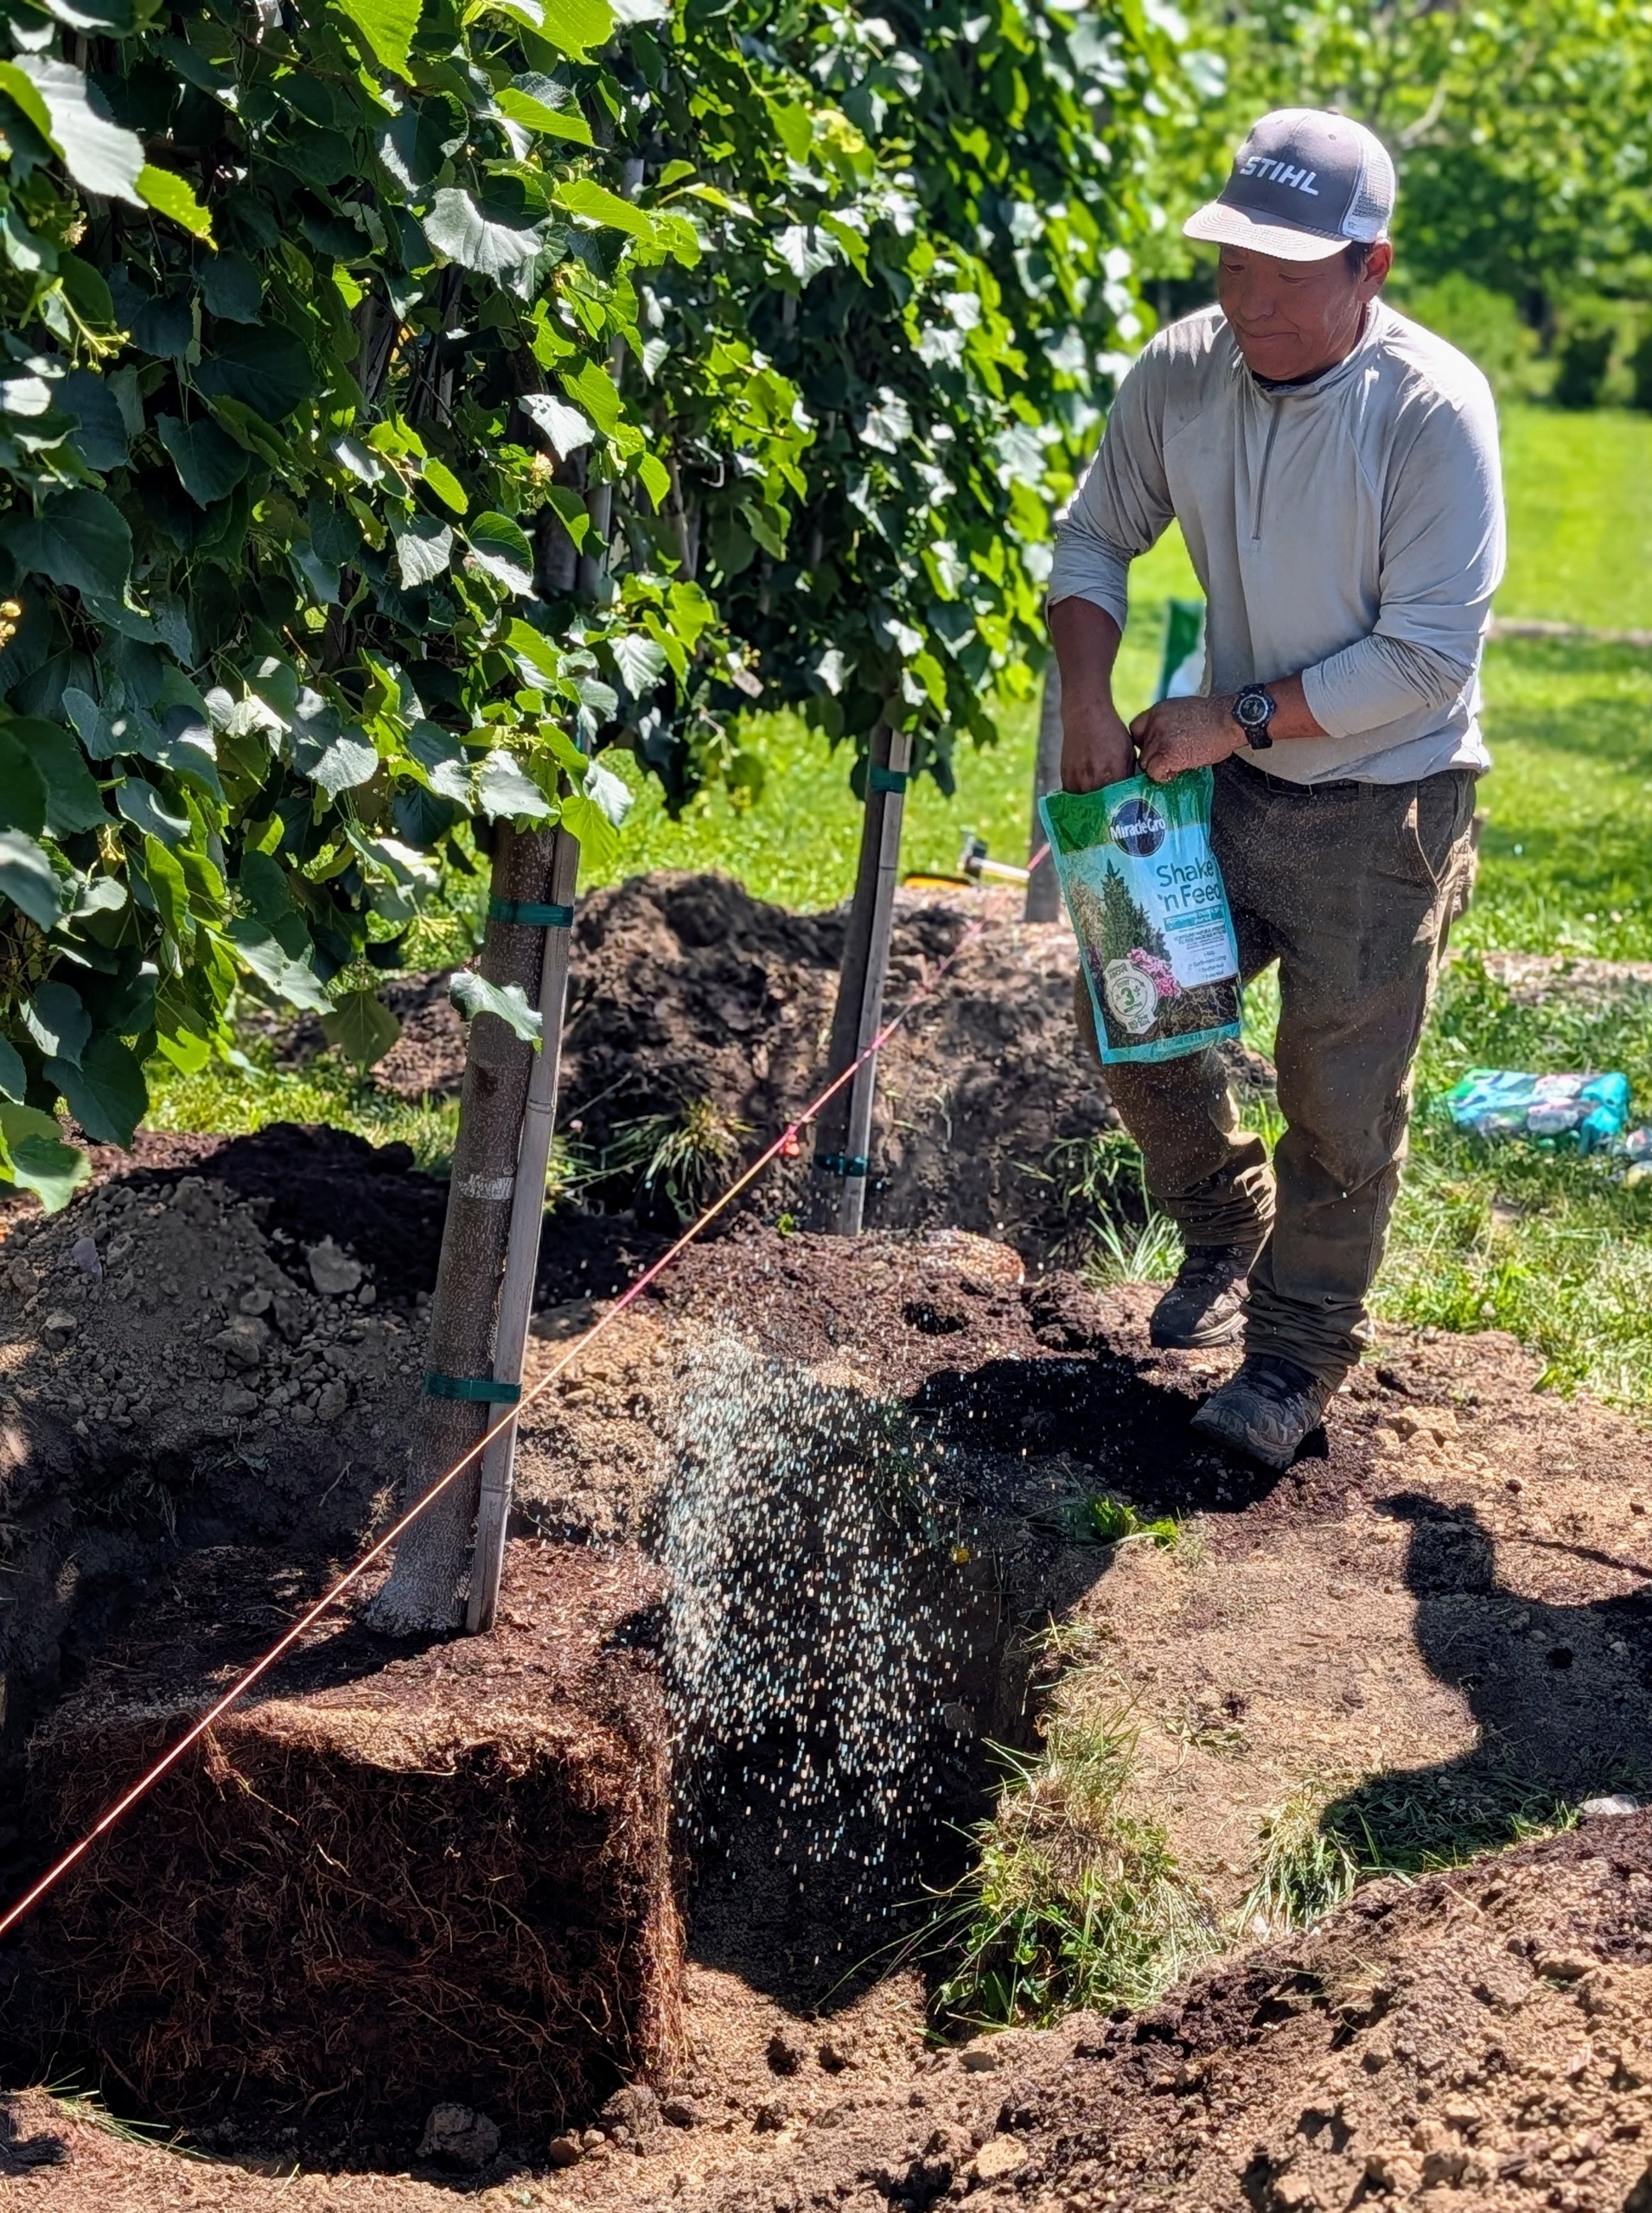
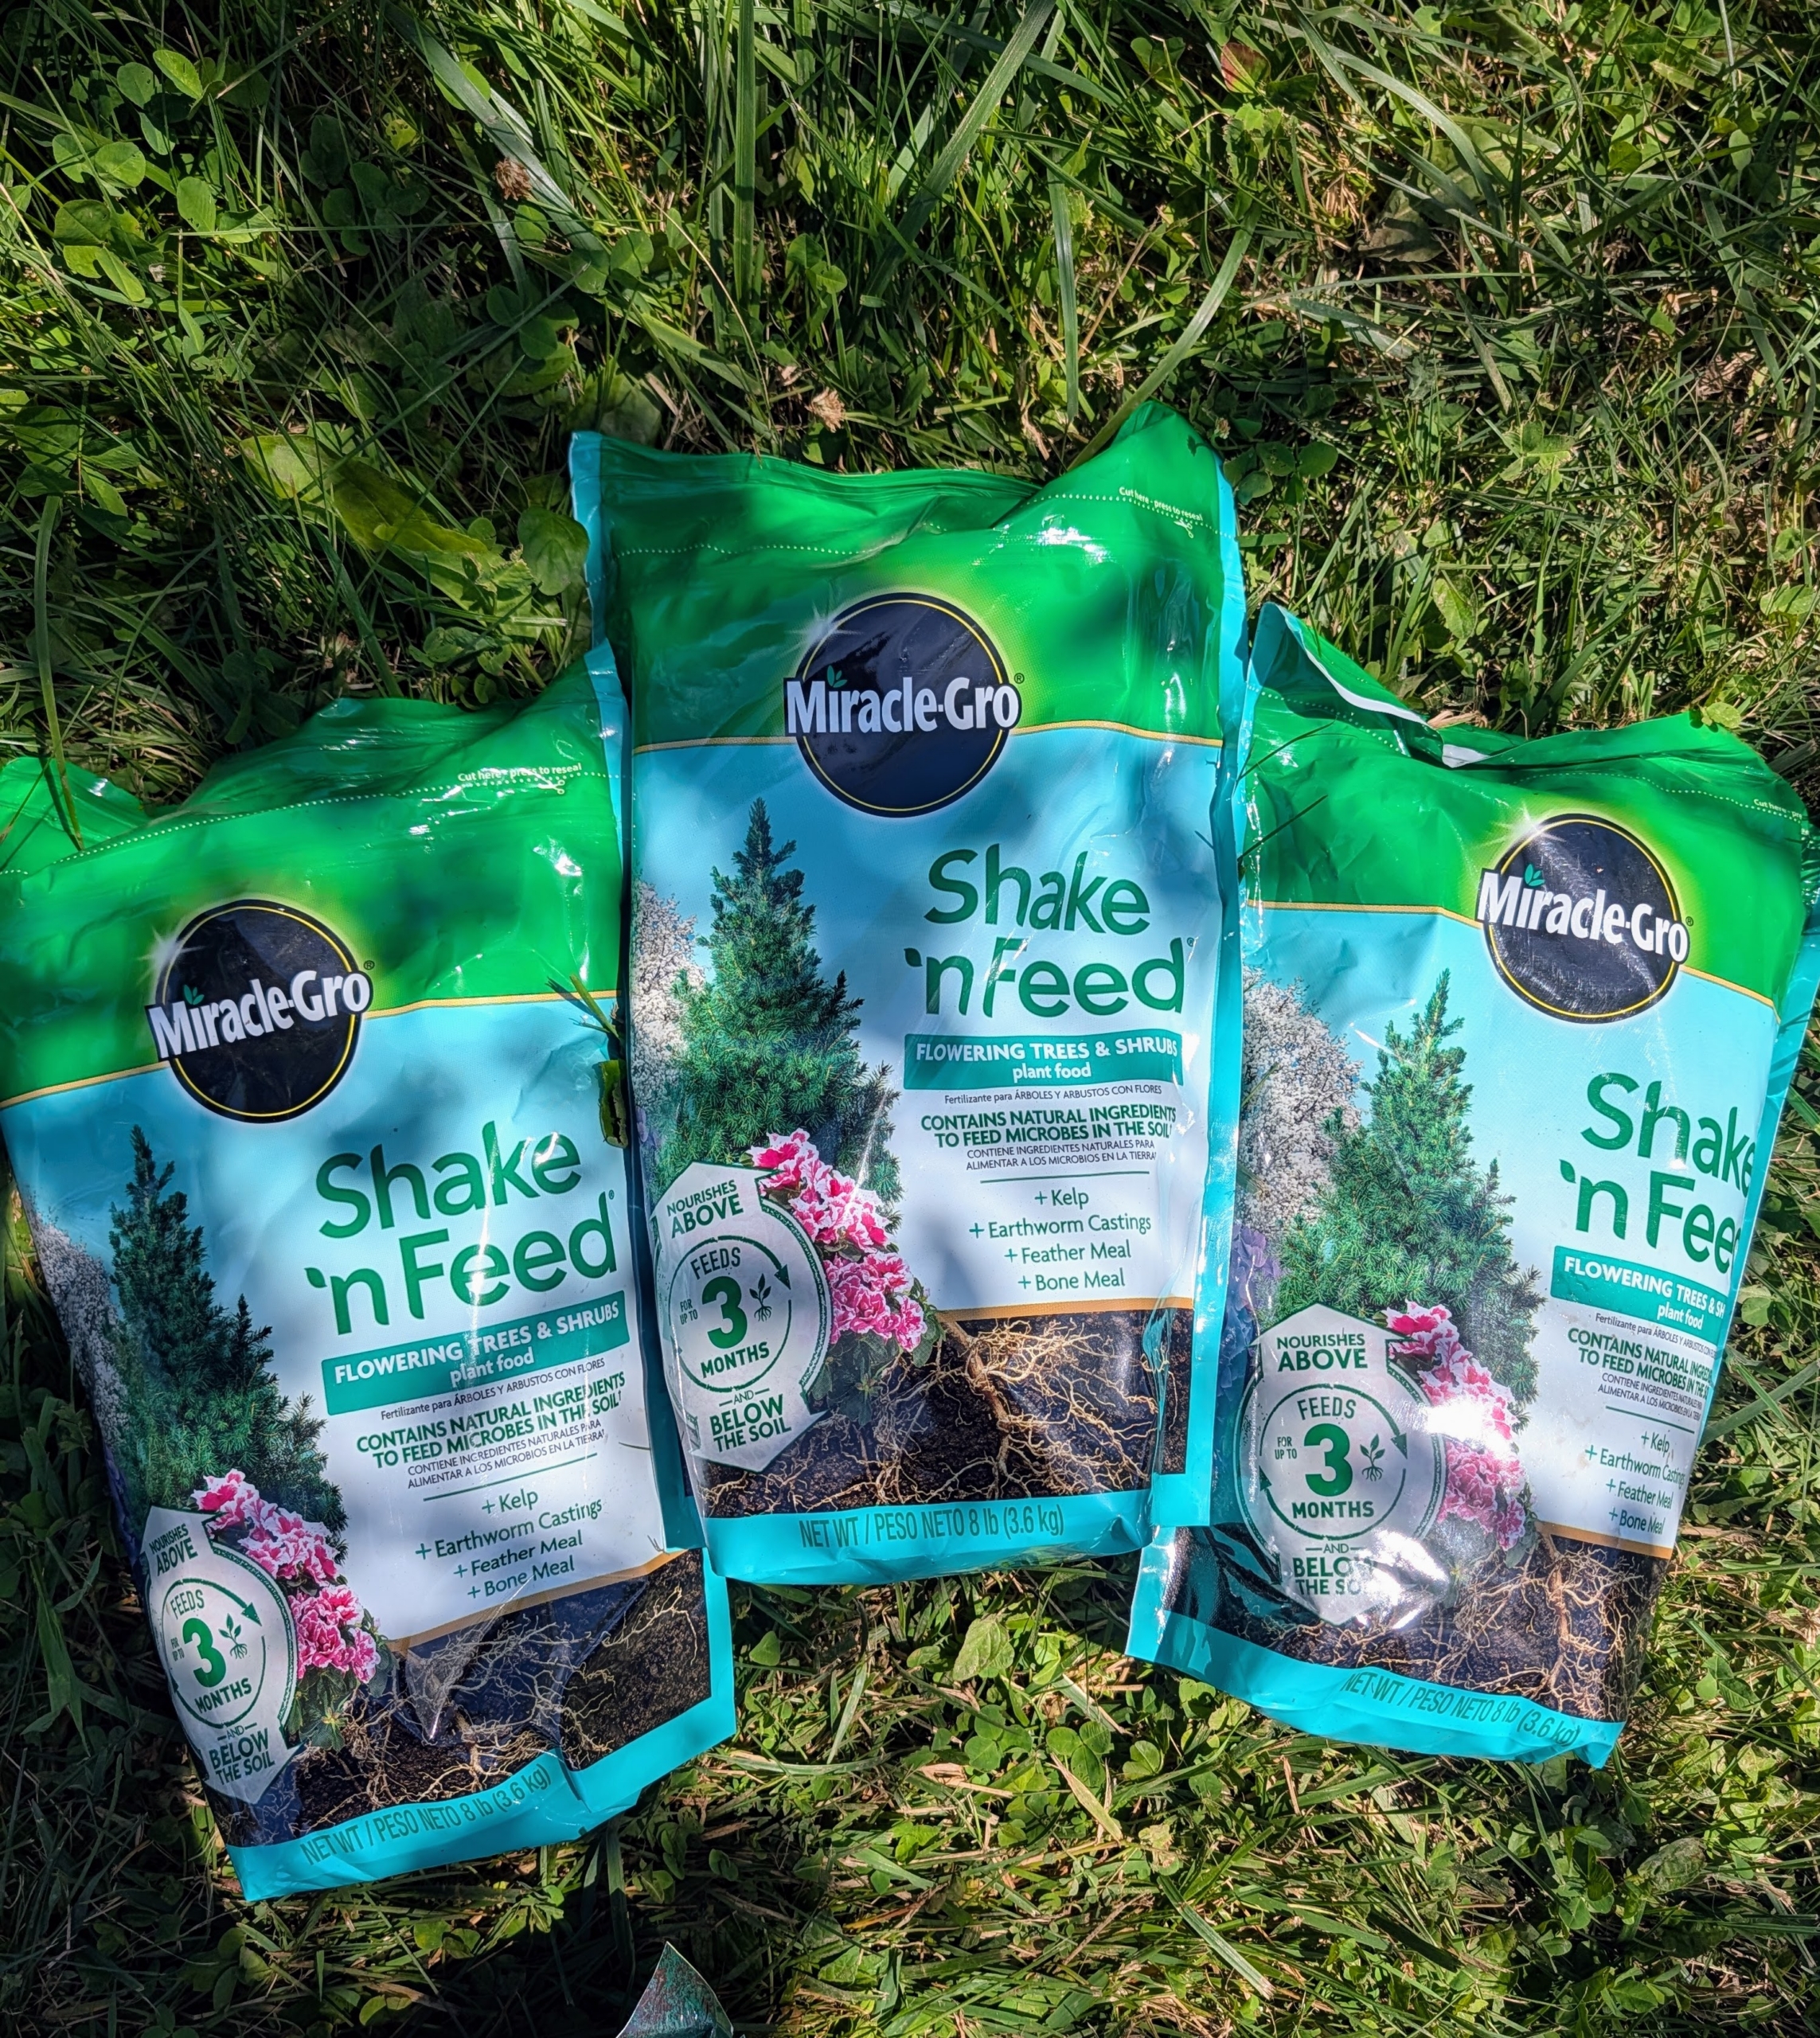
The entire area – each hole and the surrounding soil – is sprinkled with fertilizer.
For these I use Miracle-Gro Shake ‘n Feed Flowering Trees and Shrubs plant food.
My foreman Chhiring has a good eye for planting, so he also takes a look – pointing out which trees need a bit more adjusting.
Phurba moves a tree ever so slightly. The crew also positions plantings with the best side facing the walking path or area where guests, or myself, will see them.
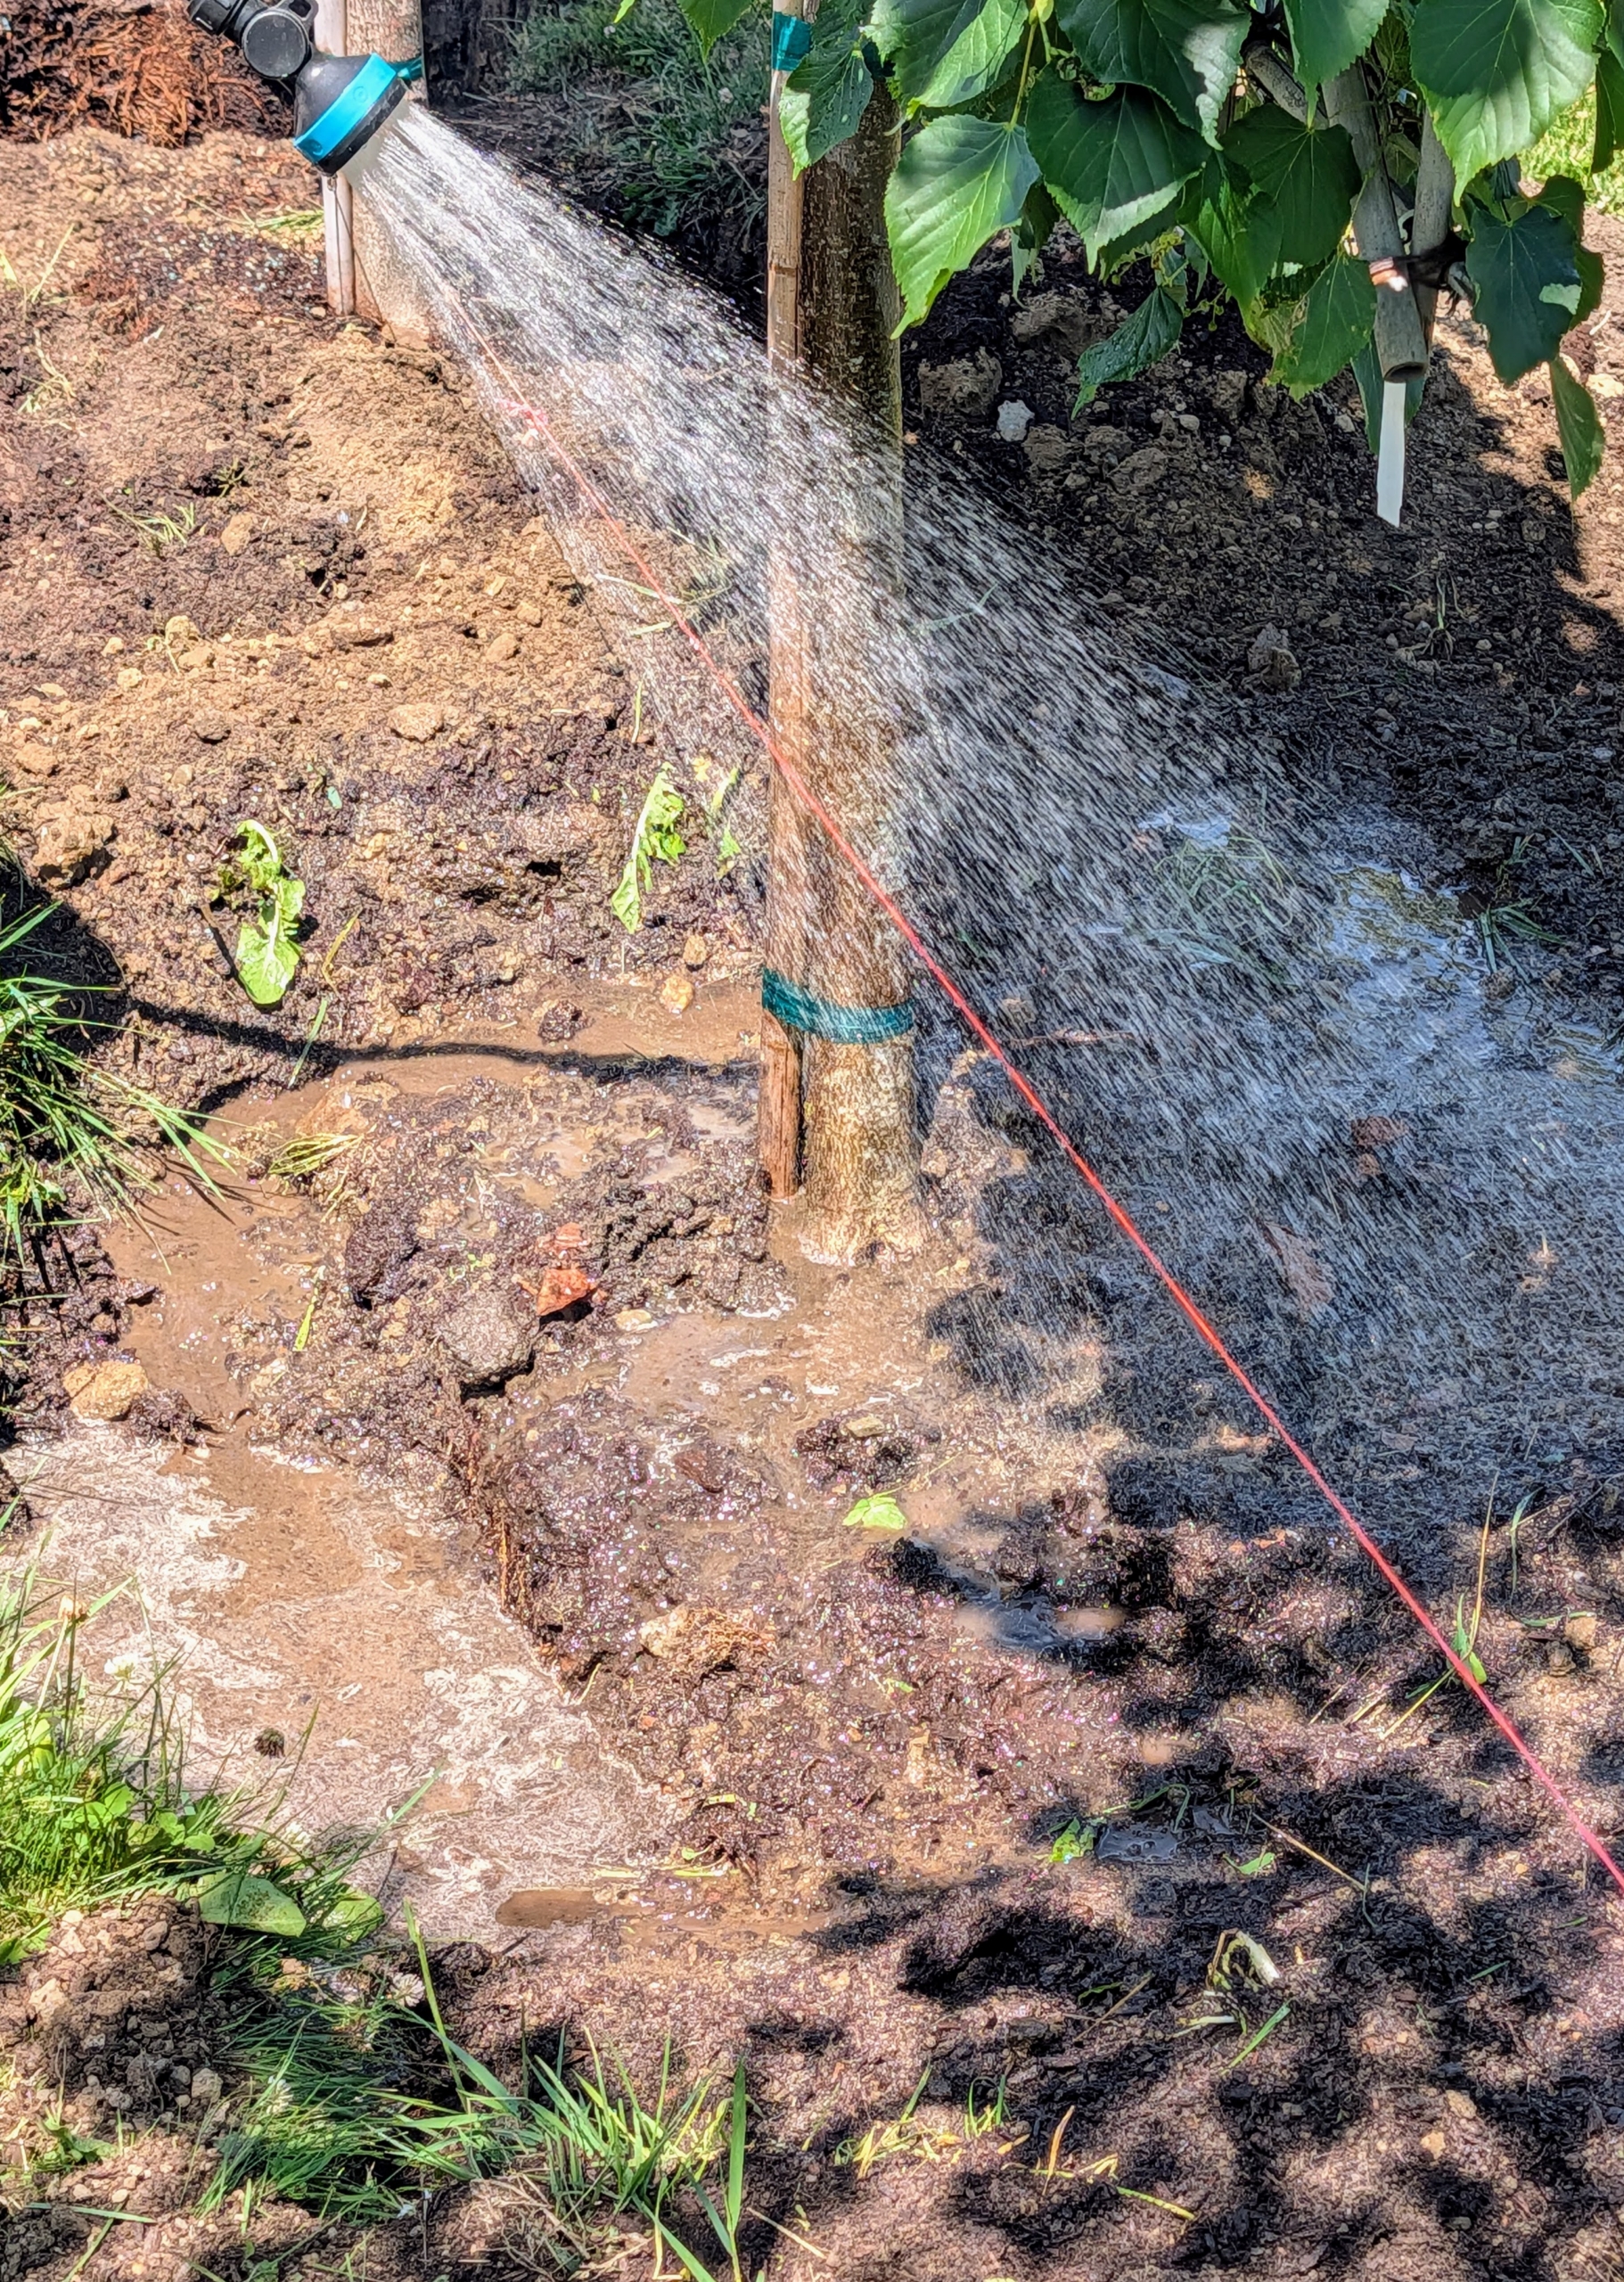
Once they are in place, the crew starts watering. I always instruct my team to fill the hole with water before it is filled.
Filling the hole with water helps settle any loose soil, eliminate air pockets, hydrate the soil around the root ball to encourage roots to spread, and minimizes stress to the tree when it is newly transplanted.
Then it’s time to backfill.
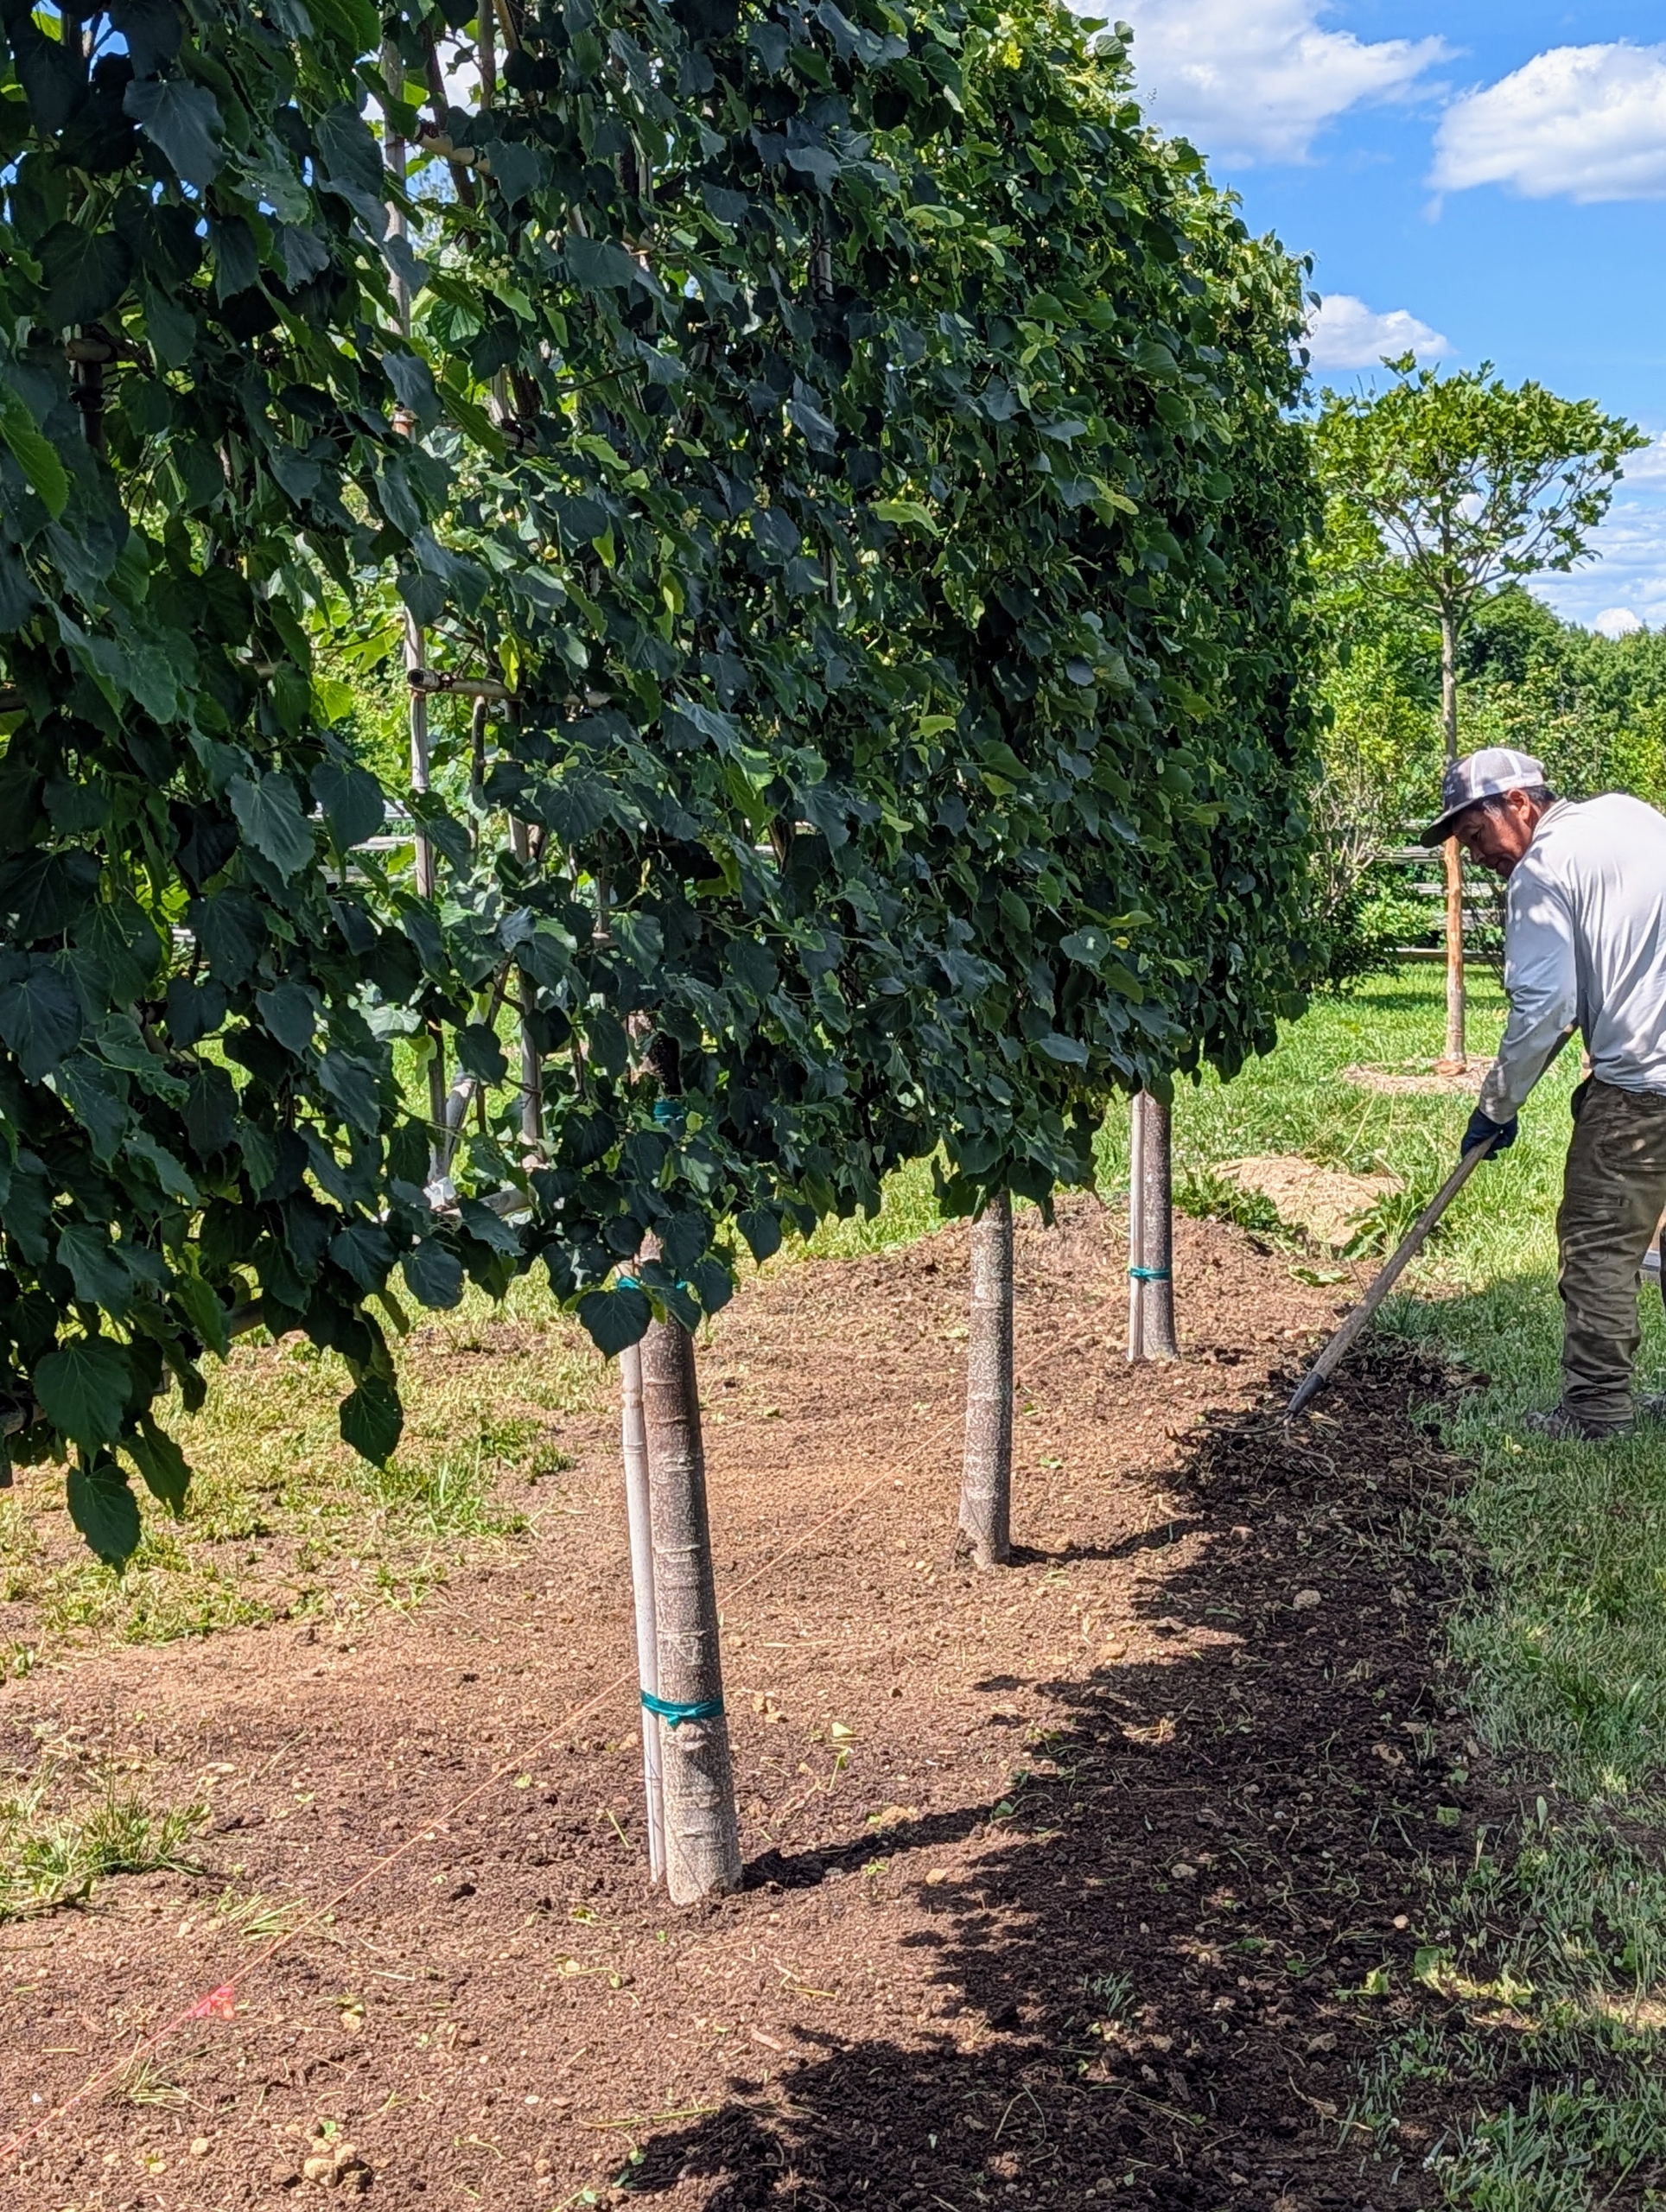
Afterward, Phurba rakes the area beneath the trees and removes and loose rocks or clumps of soil.
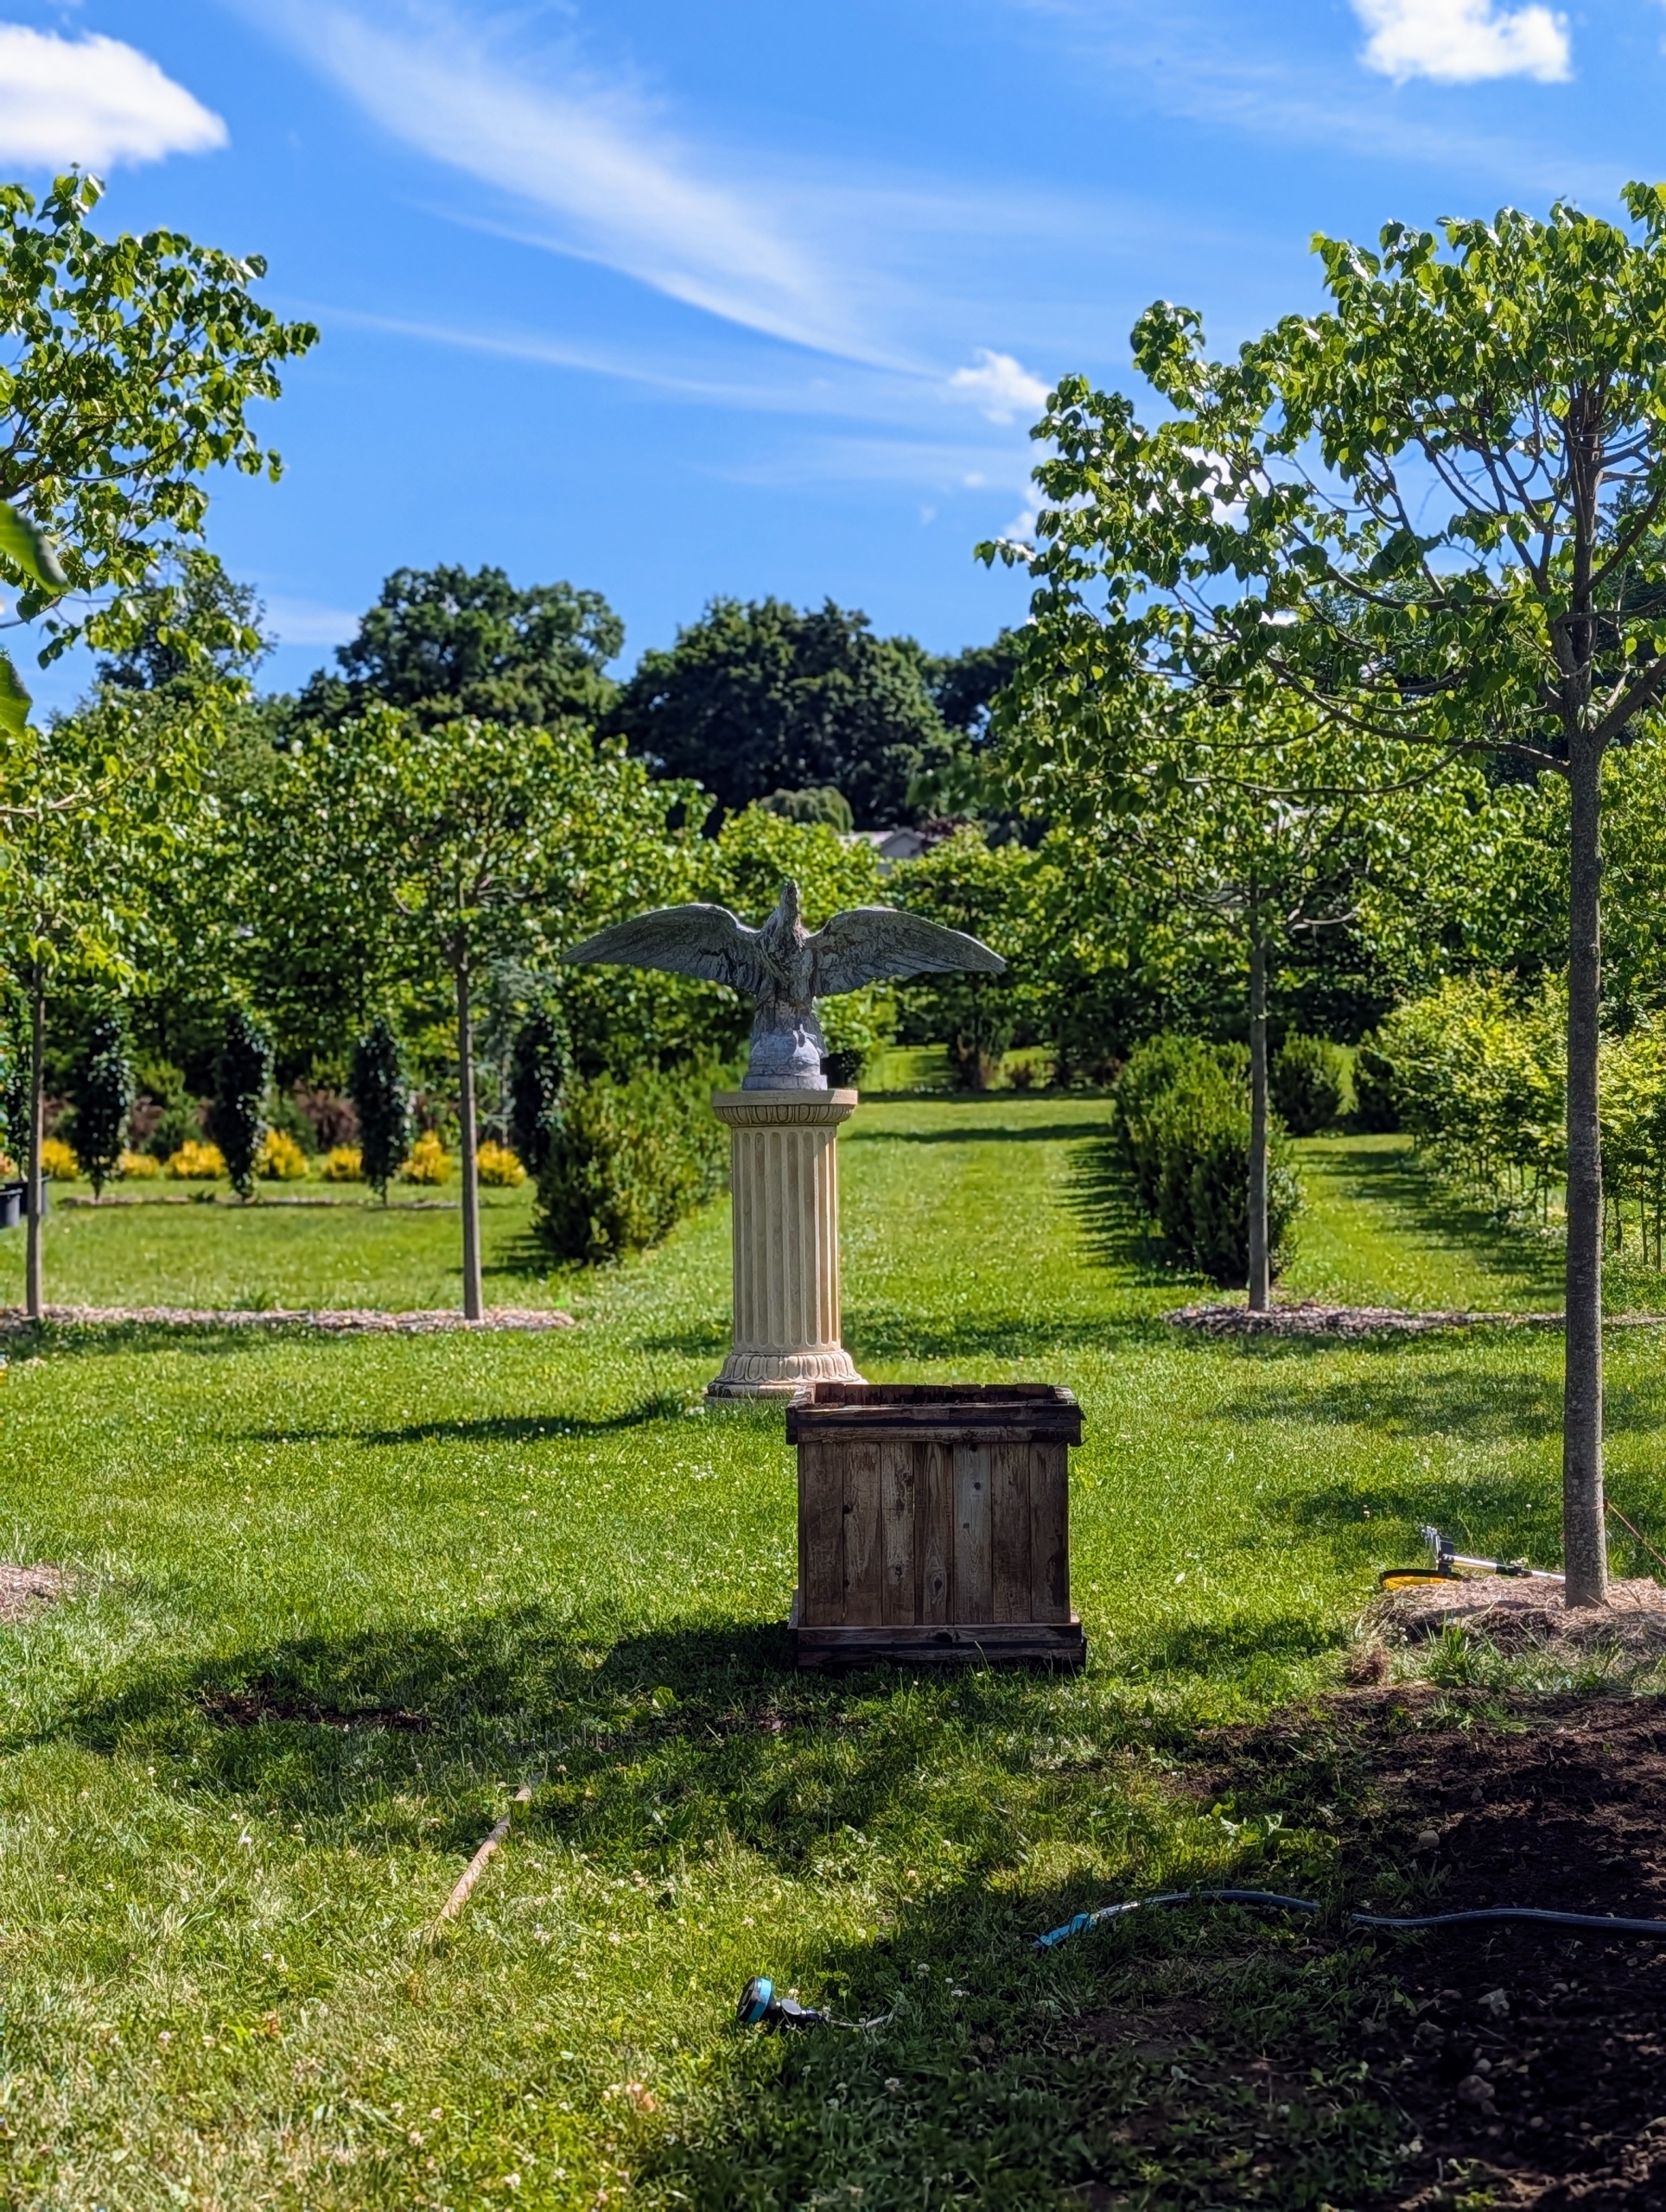
The trees are just in front of this eagle – one of the main focal points of my maze. The newly planted area will also be mulched and edged.
I think it looks so excellent here surrounded by other linden trees. These littleleaf linden trees usually produce a single leader trunk that supports the evenly spaced, horizontal branches.
This maze is almost done. I’m so proud of it. Follow along to see more of my “a-mazing” maze trees.