Every spring, we harvest bunches of delicious asparagus. Asparagus, Asparagus officinalis, are the edible shoots, commonly called spears, that rise early in the season from underground stems called crowns. These perennial plants require patience and at least a few years to become well-established. I made sure an asparagus crop was planted when I first bought my farm. I also now have a large asparagus bed in my new vegetable garden. And while we're careful not to harvest too much too soon, this patch is already proving to be very productive.
Enjoy these photos.
I’ve been enjoying homegrown asparagus for many years. The asparagus crop in my flower garden is already more than 10-years old and well-established.
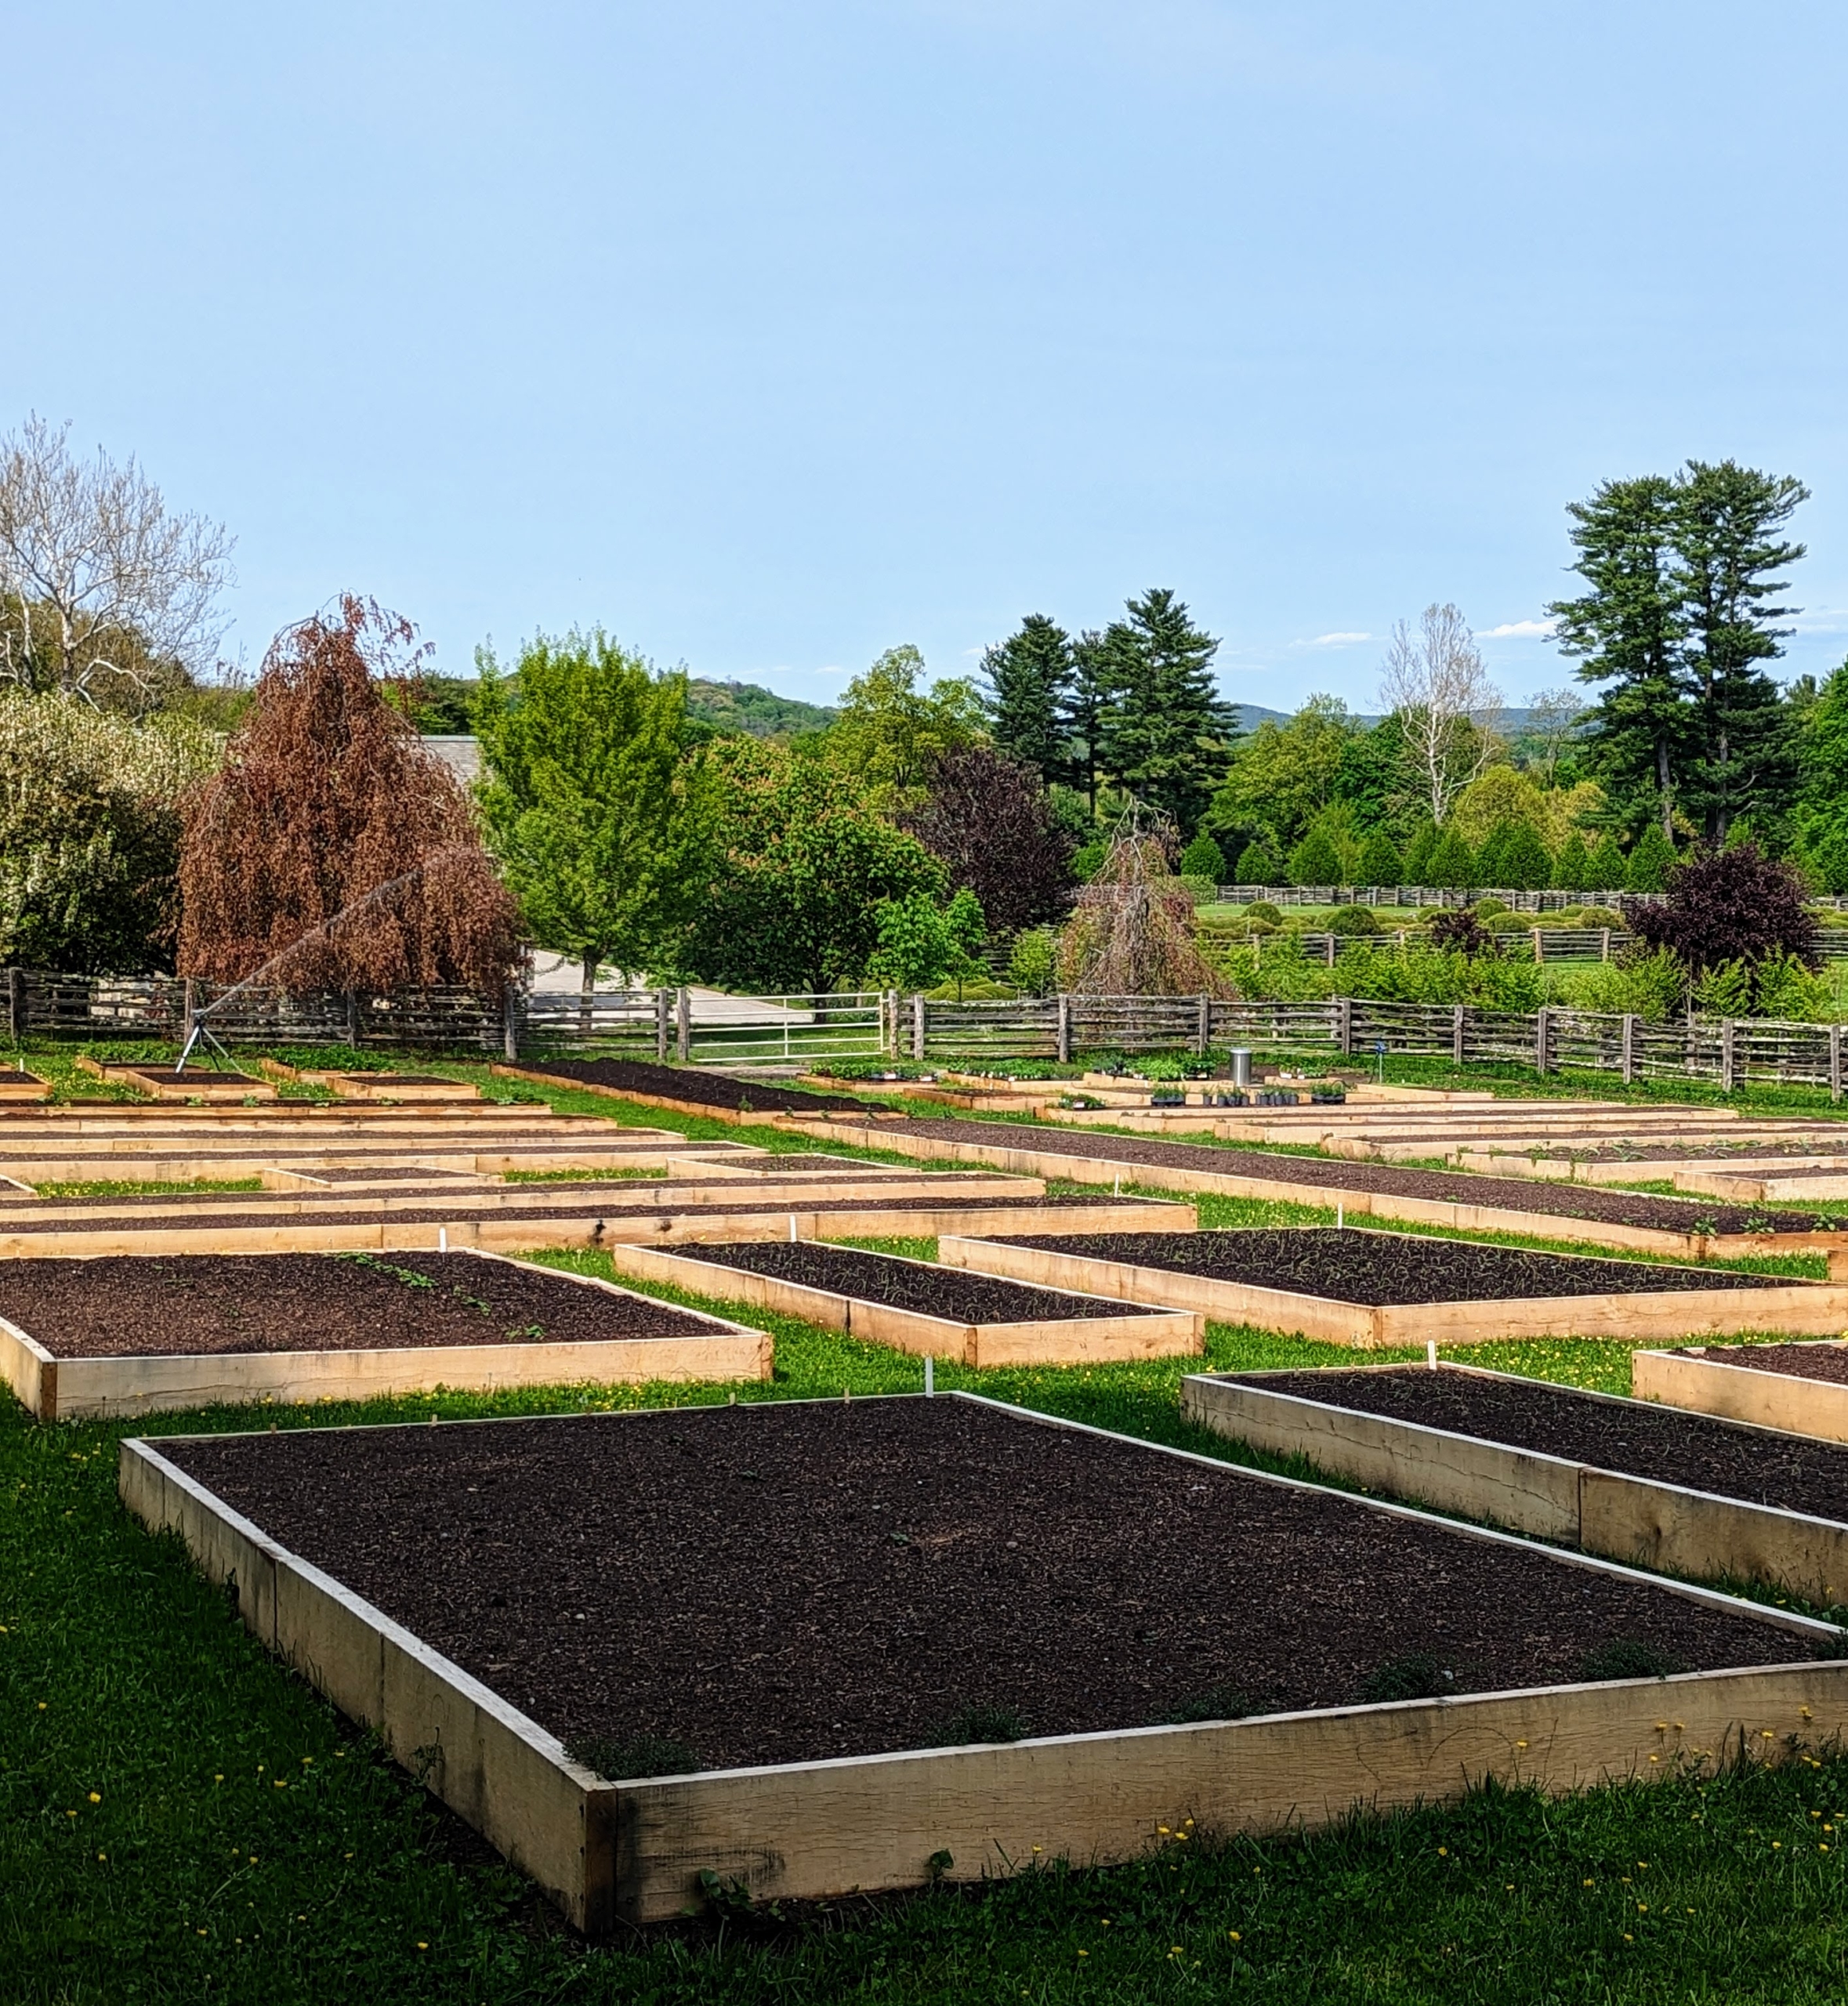
When I created my new half-acre vegetable garden last year, I made sure one of the biggest beds was earmarked for asparagus.
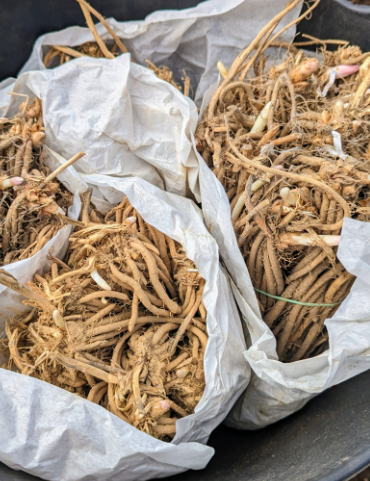
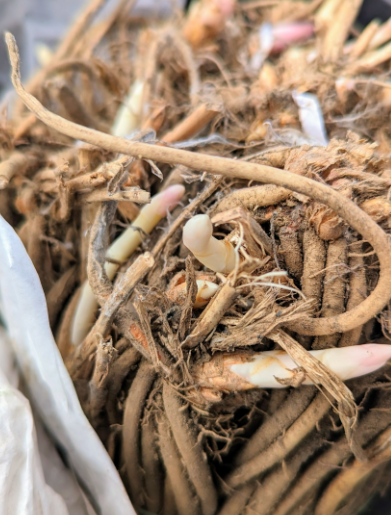
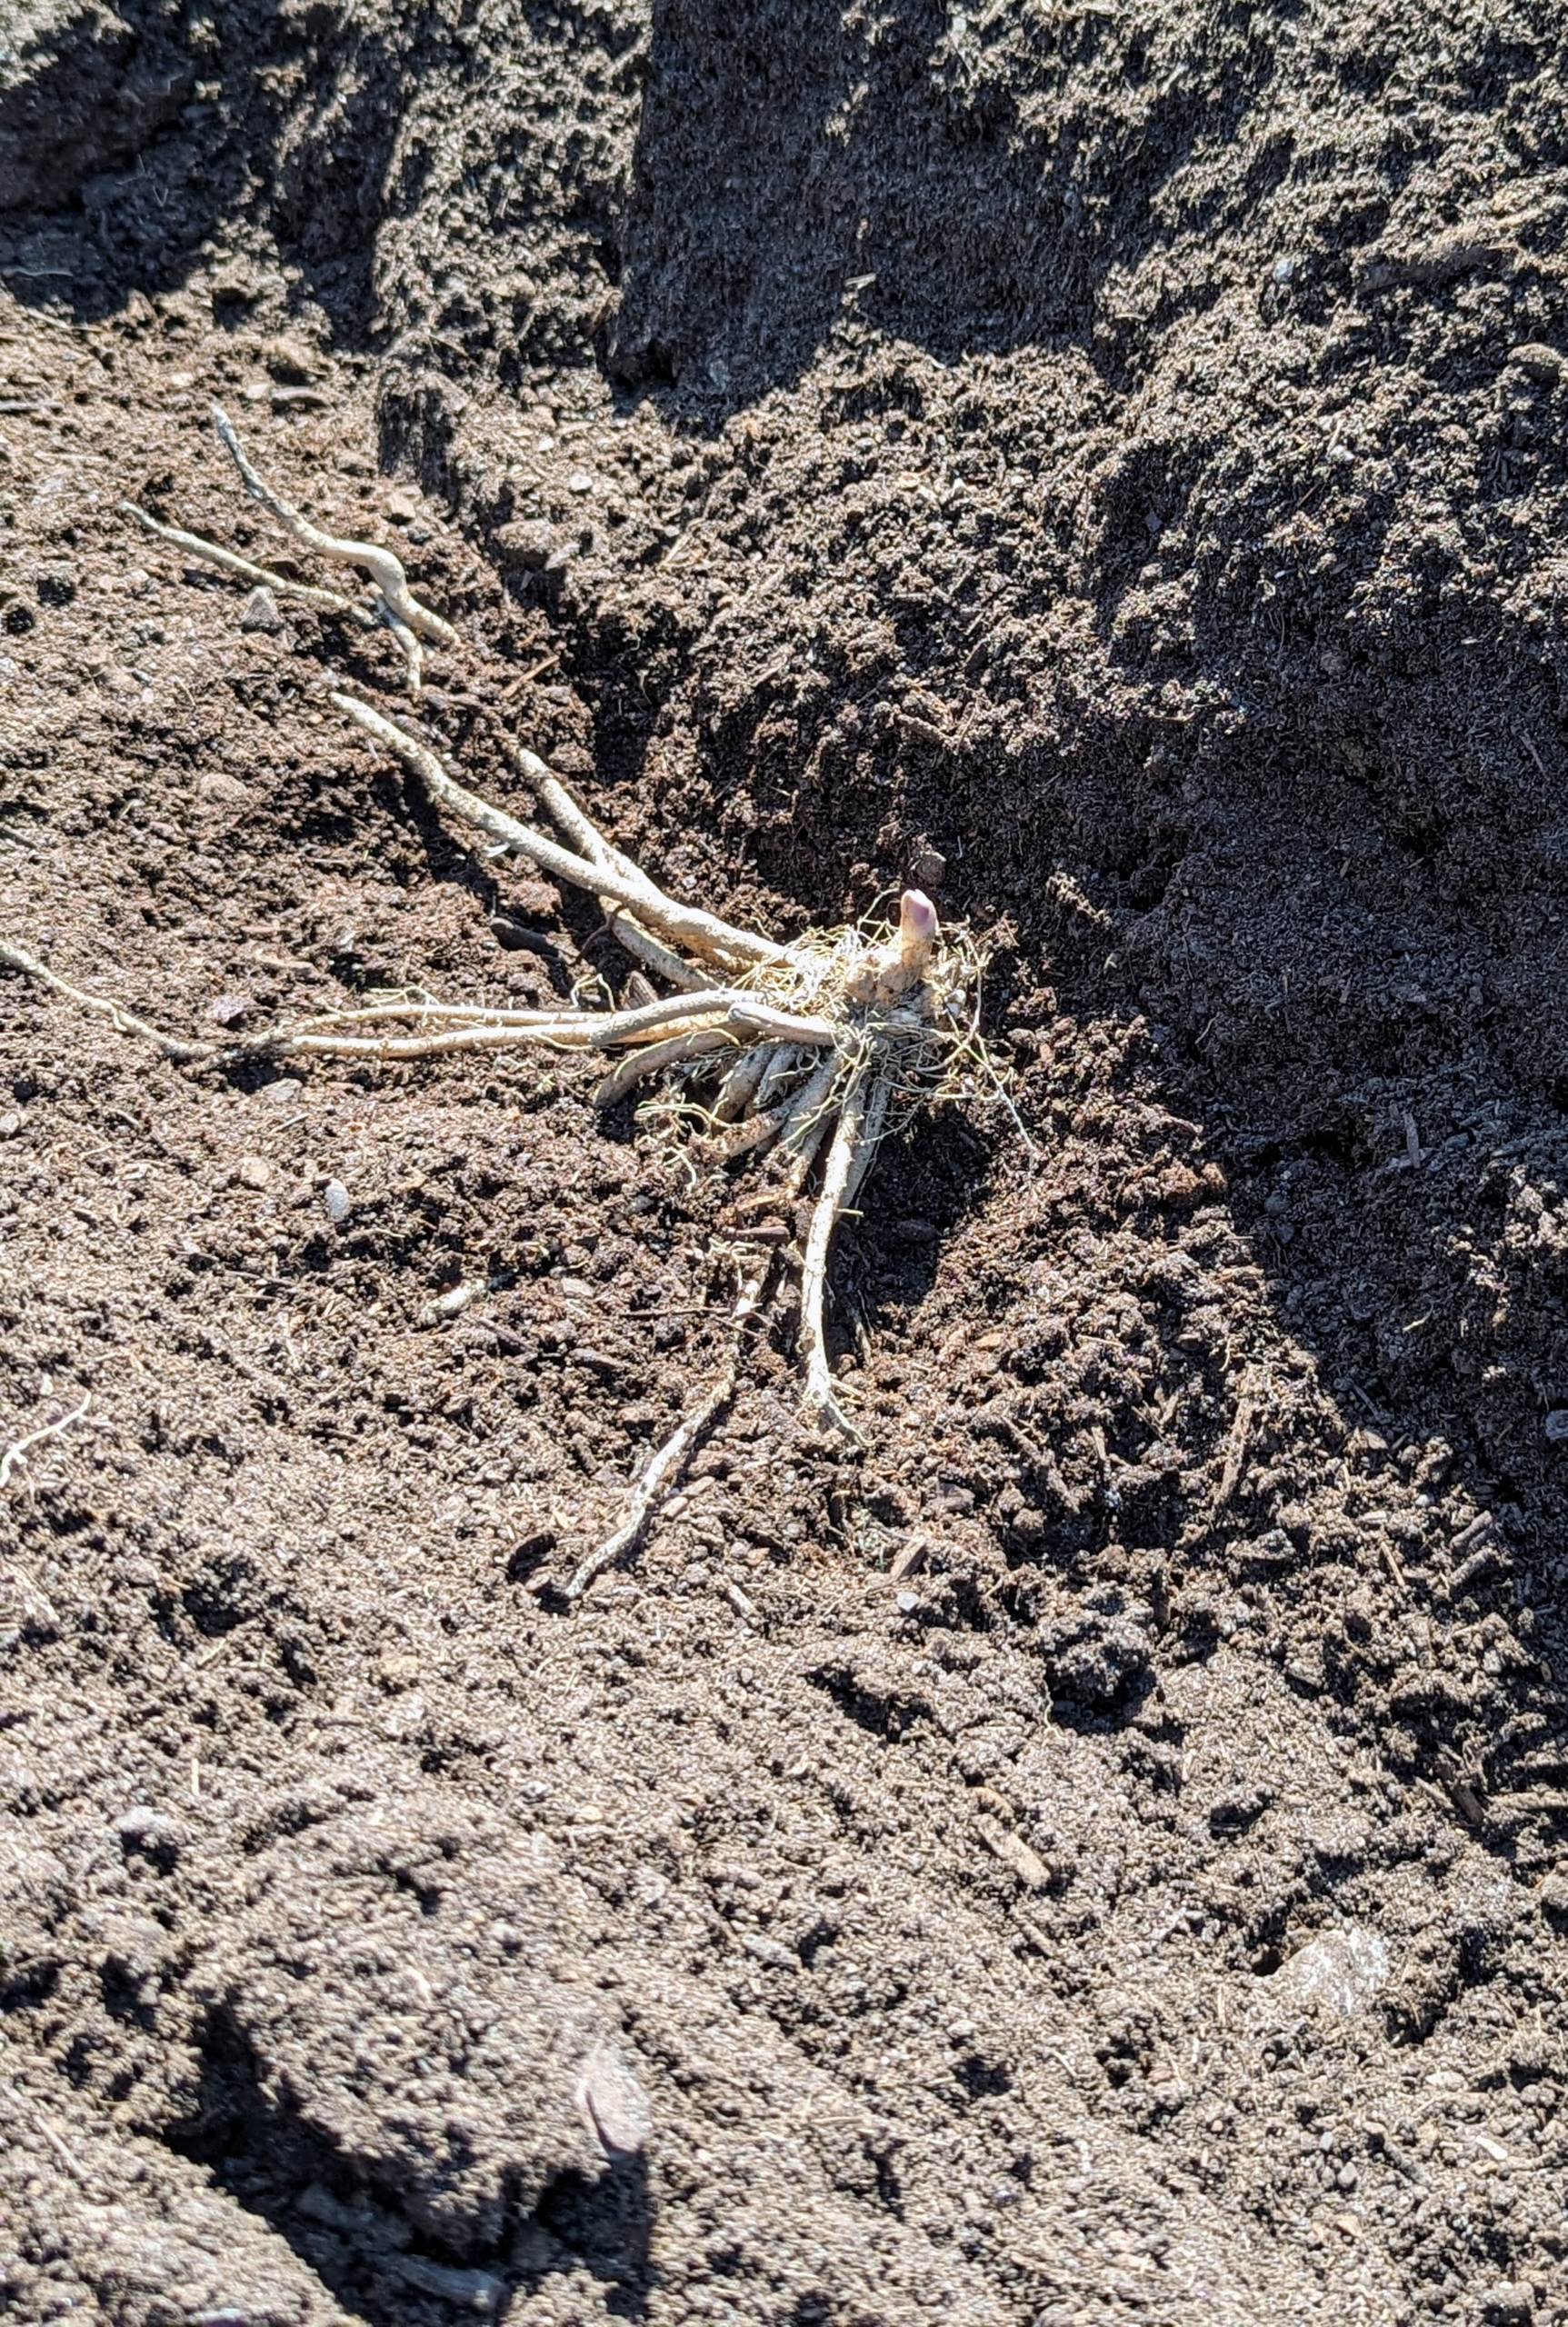
These are asparagus crowns from Johnny’s Selected Seeds. Each of these is about a year old. Asparagus crowns usually come in bundles of 10 to 25 bare-root plants.
Asparagus has modified adventitious roots that swell to store food and to support the plants.
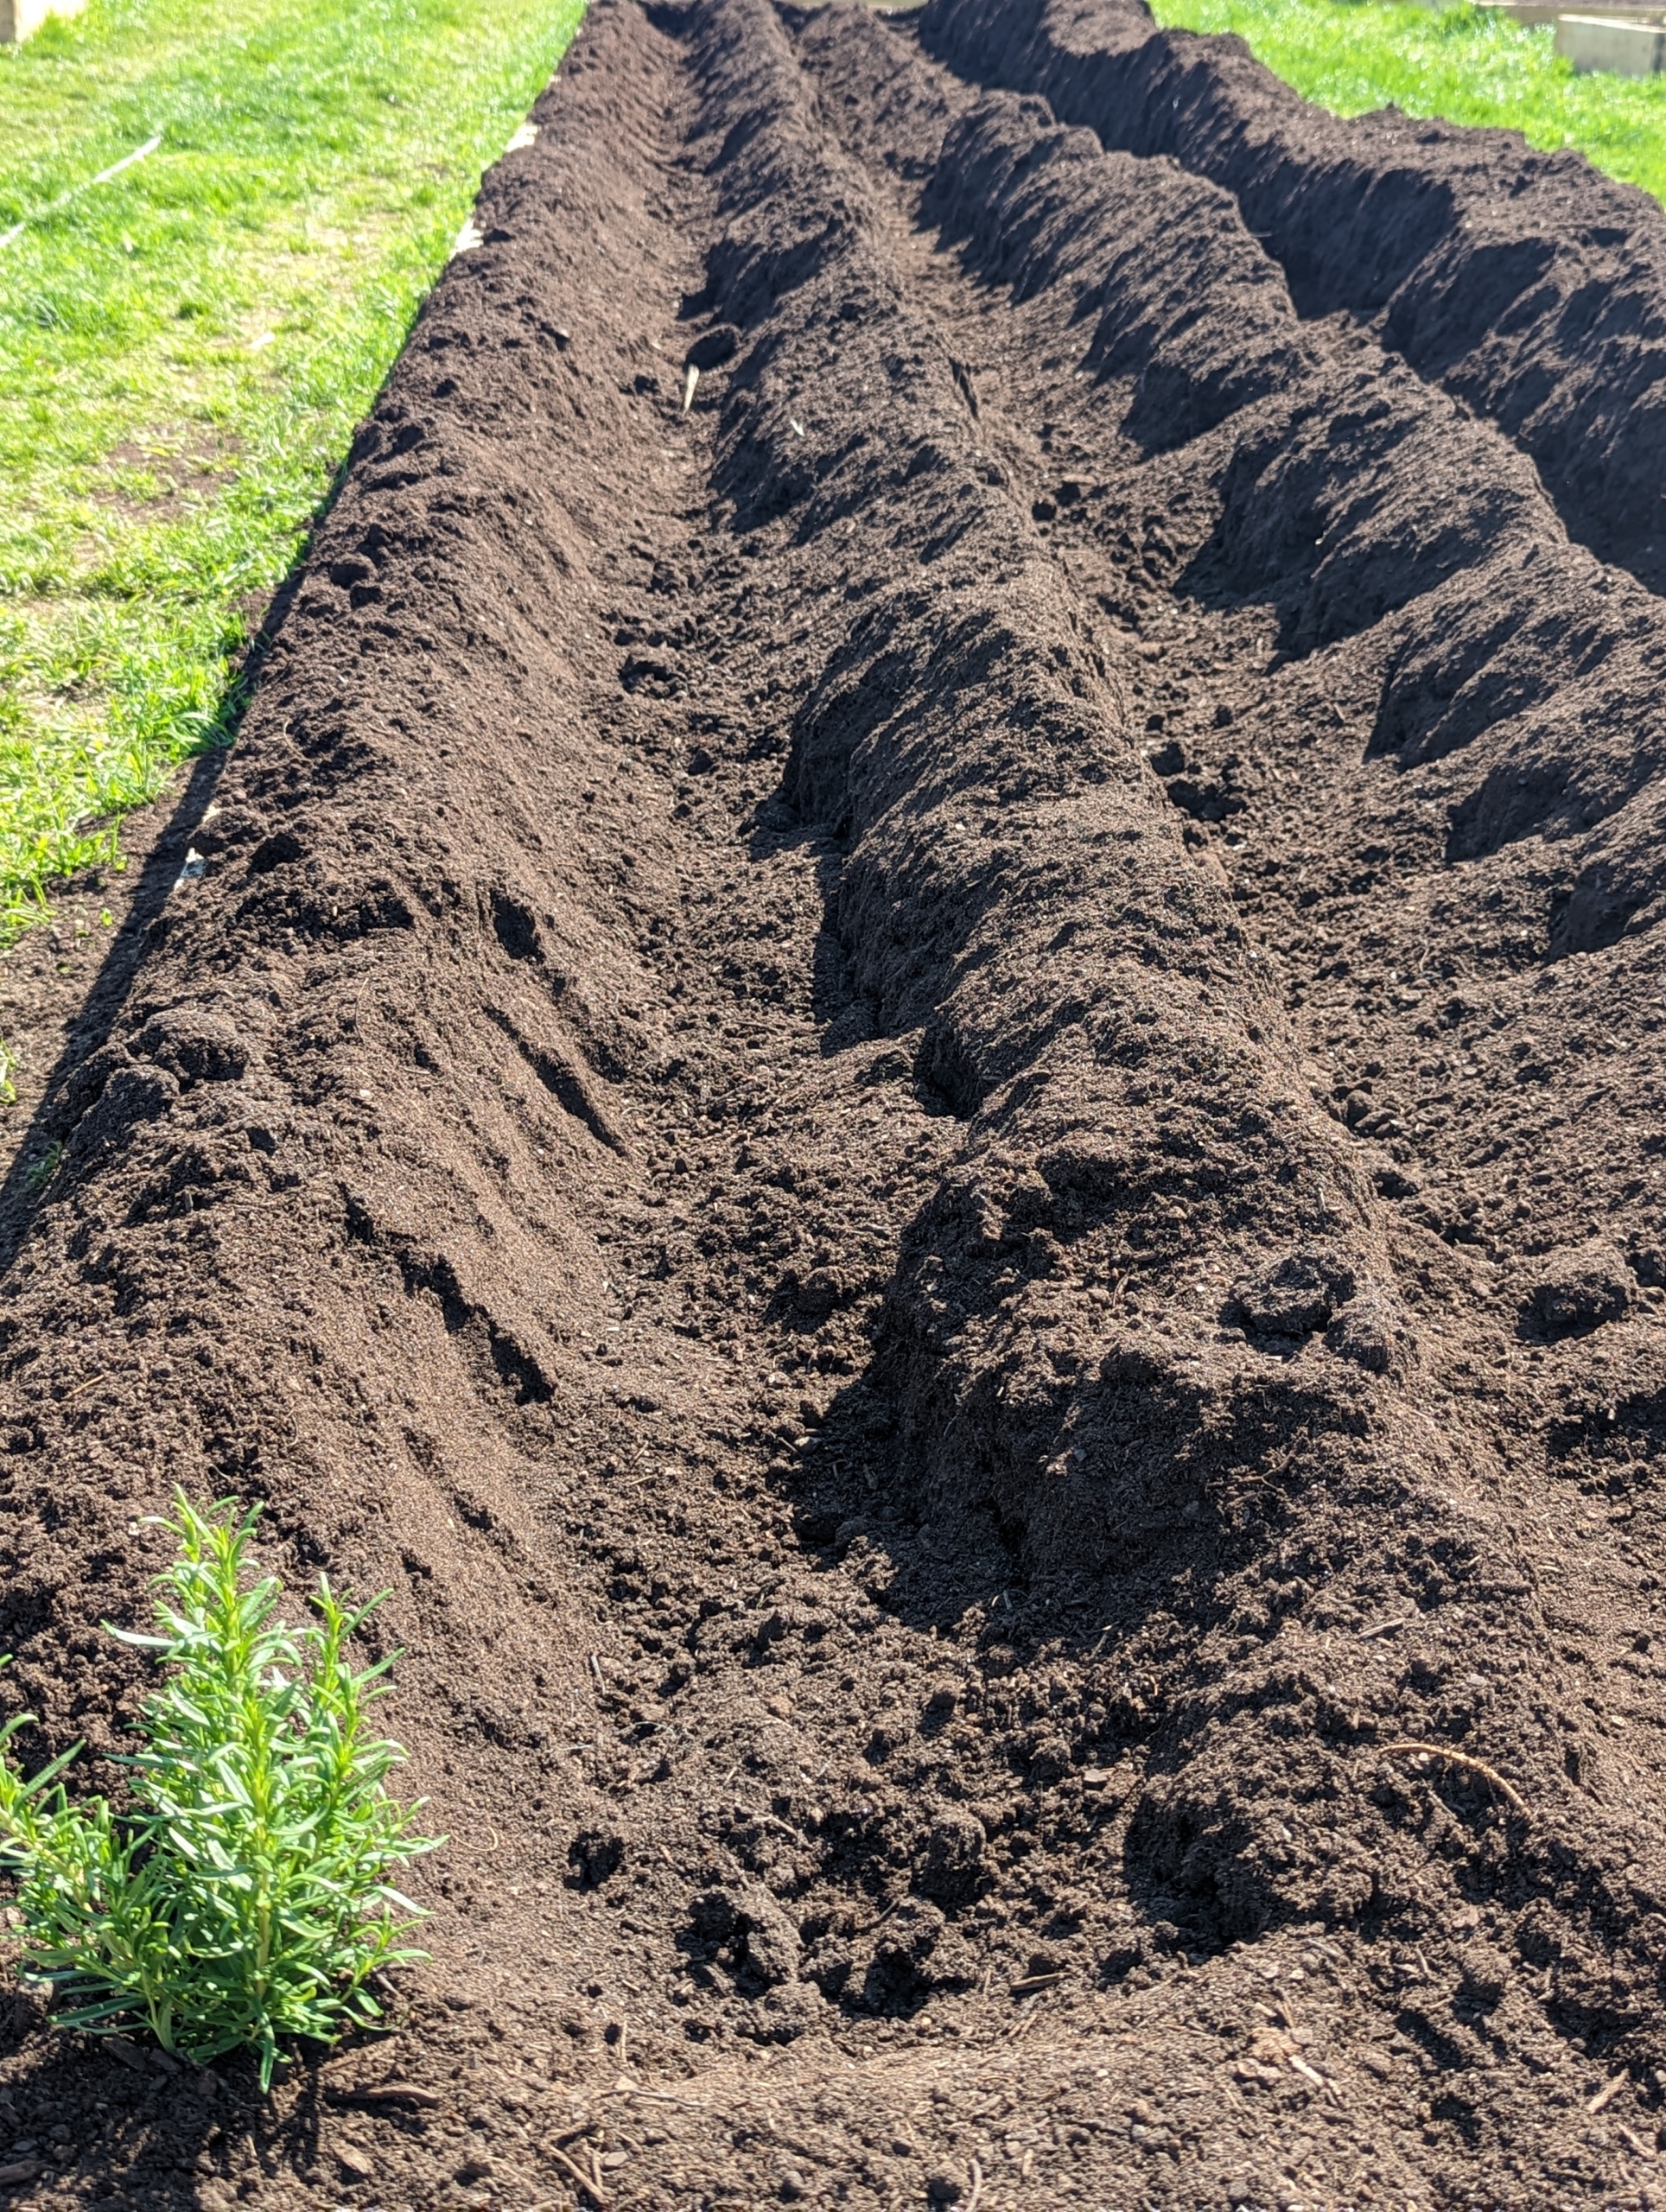
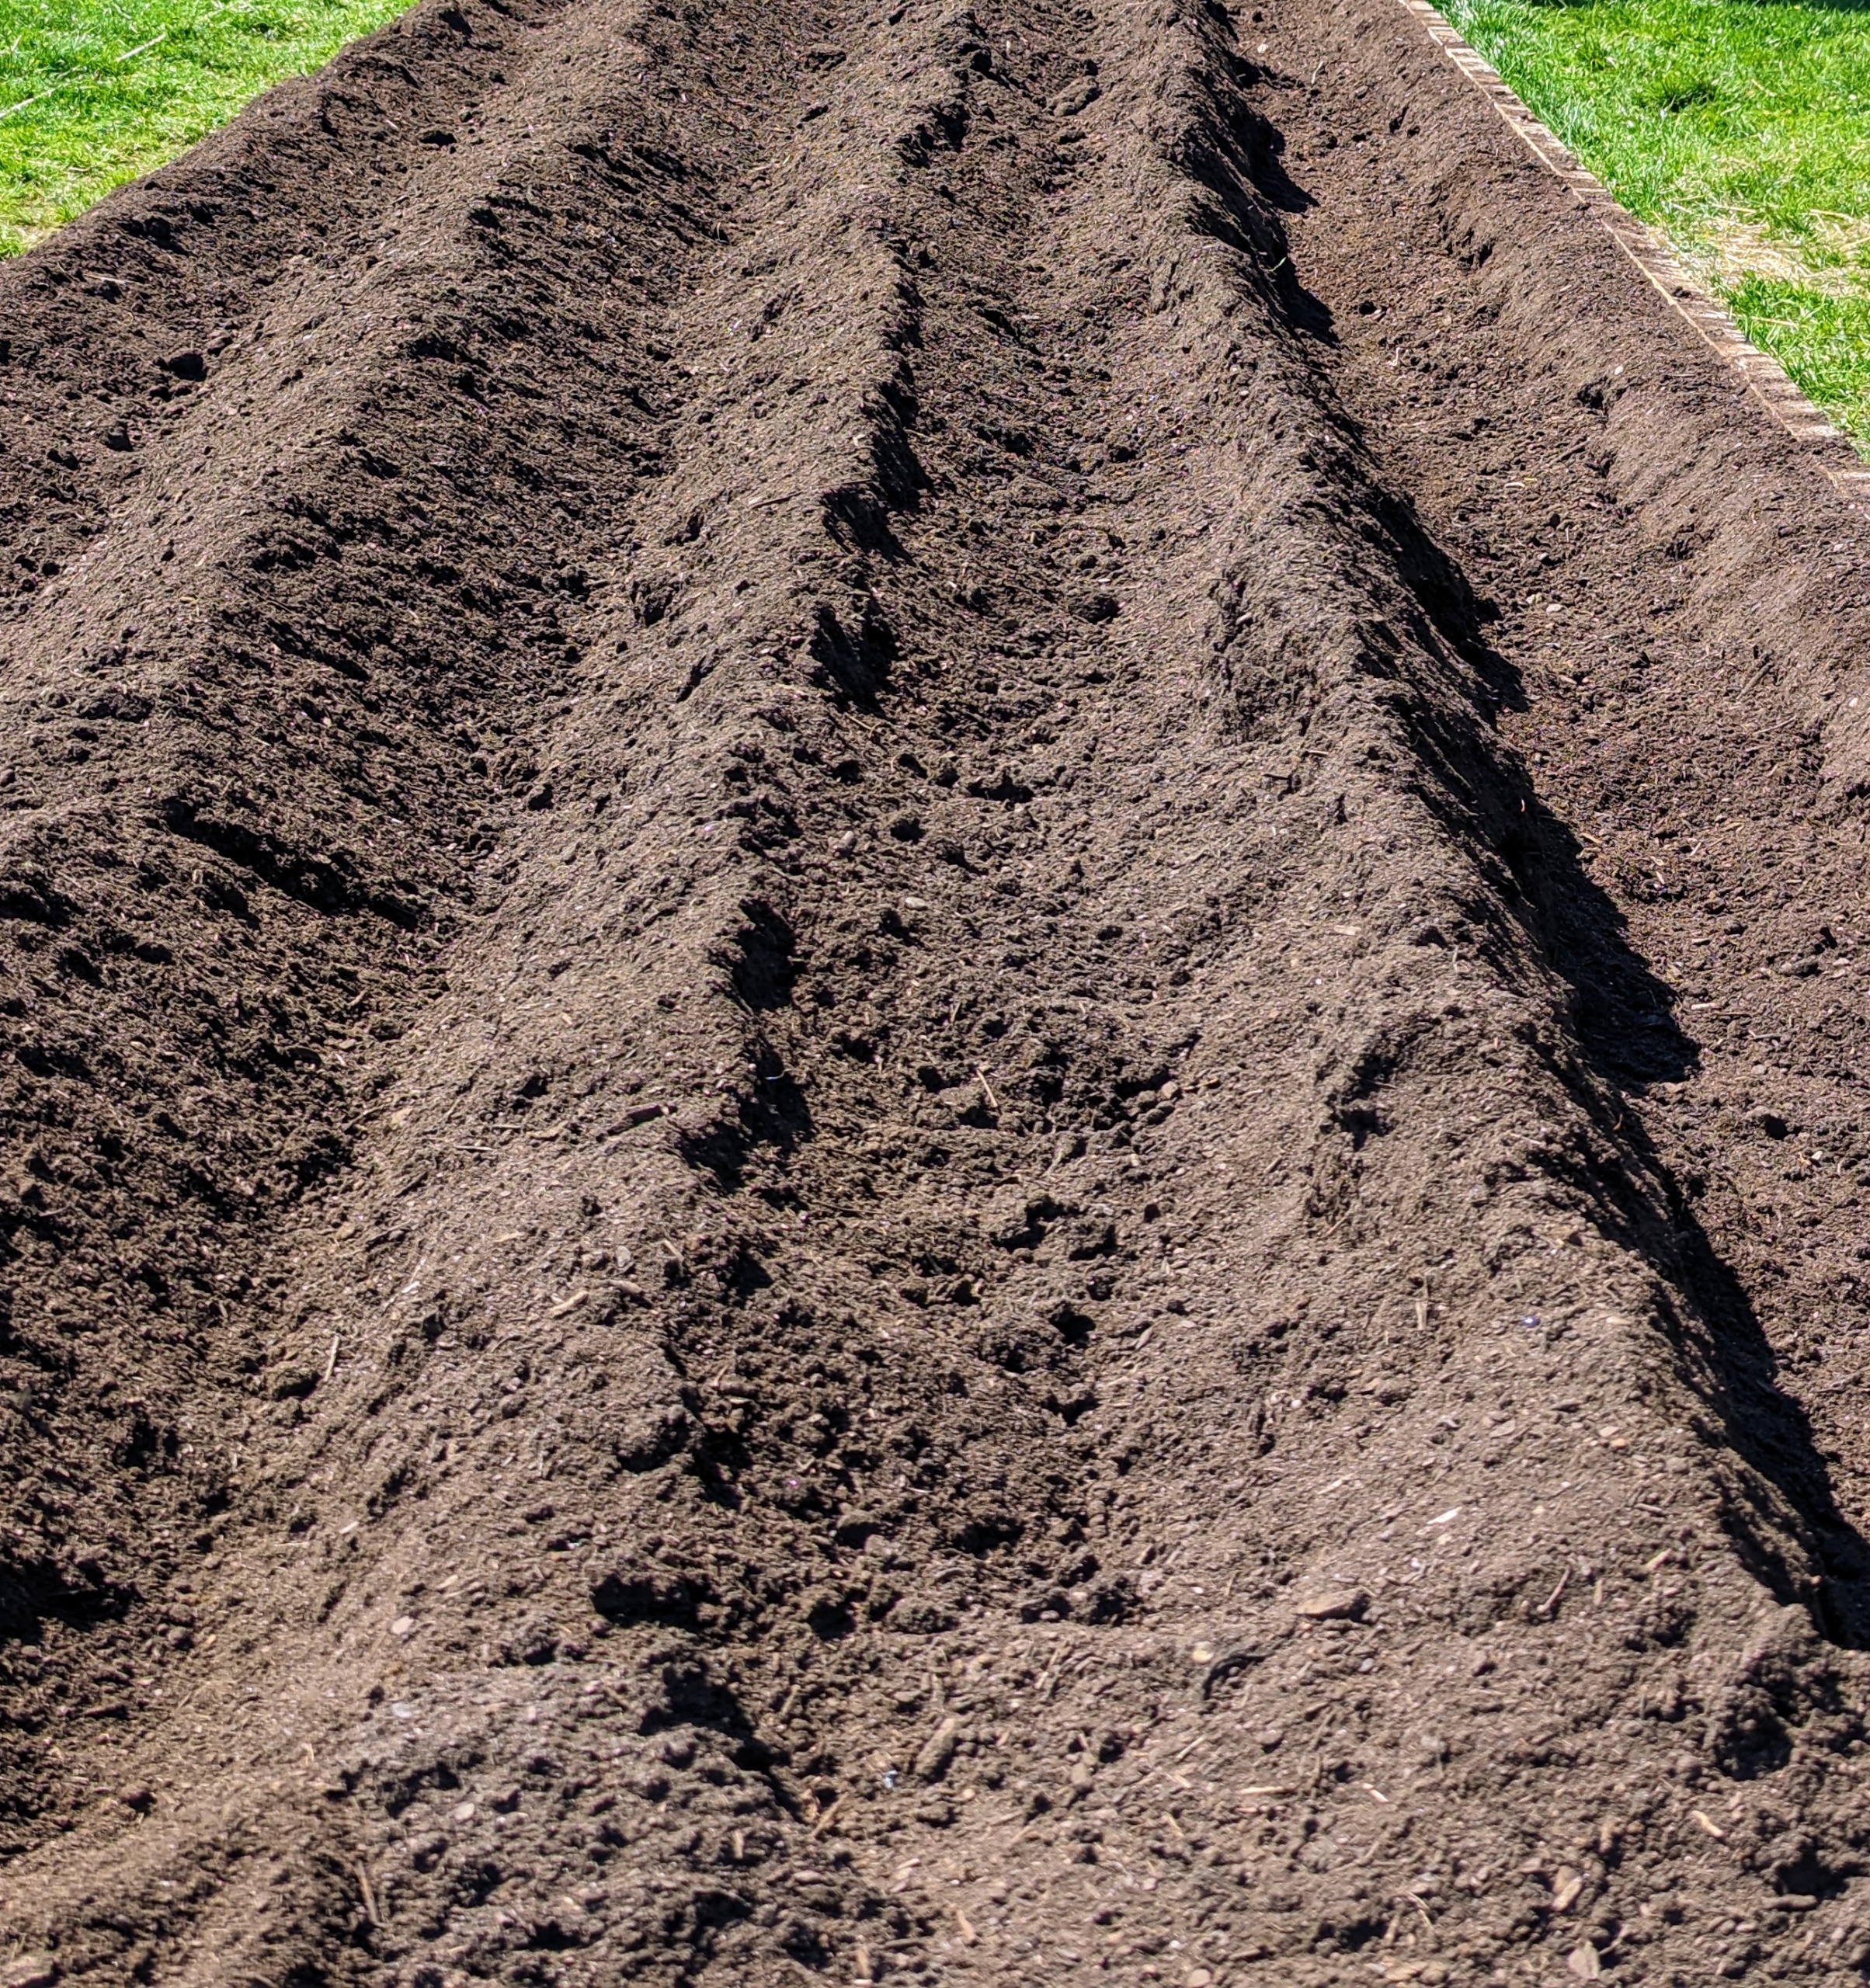
Asparagus grows in trenches like these. Depth of planting is critical. If too shallow, the plants will produce a large number of small spears. If planted too deep, the spears will be large, but few in number. These furrows are at least eight-inches deep and a foot wide.
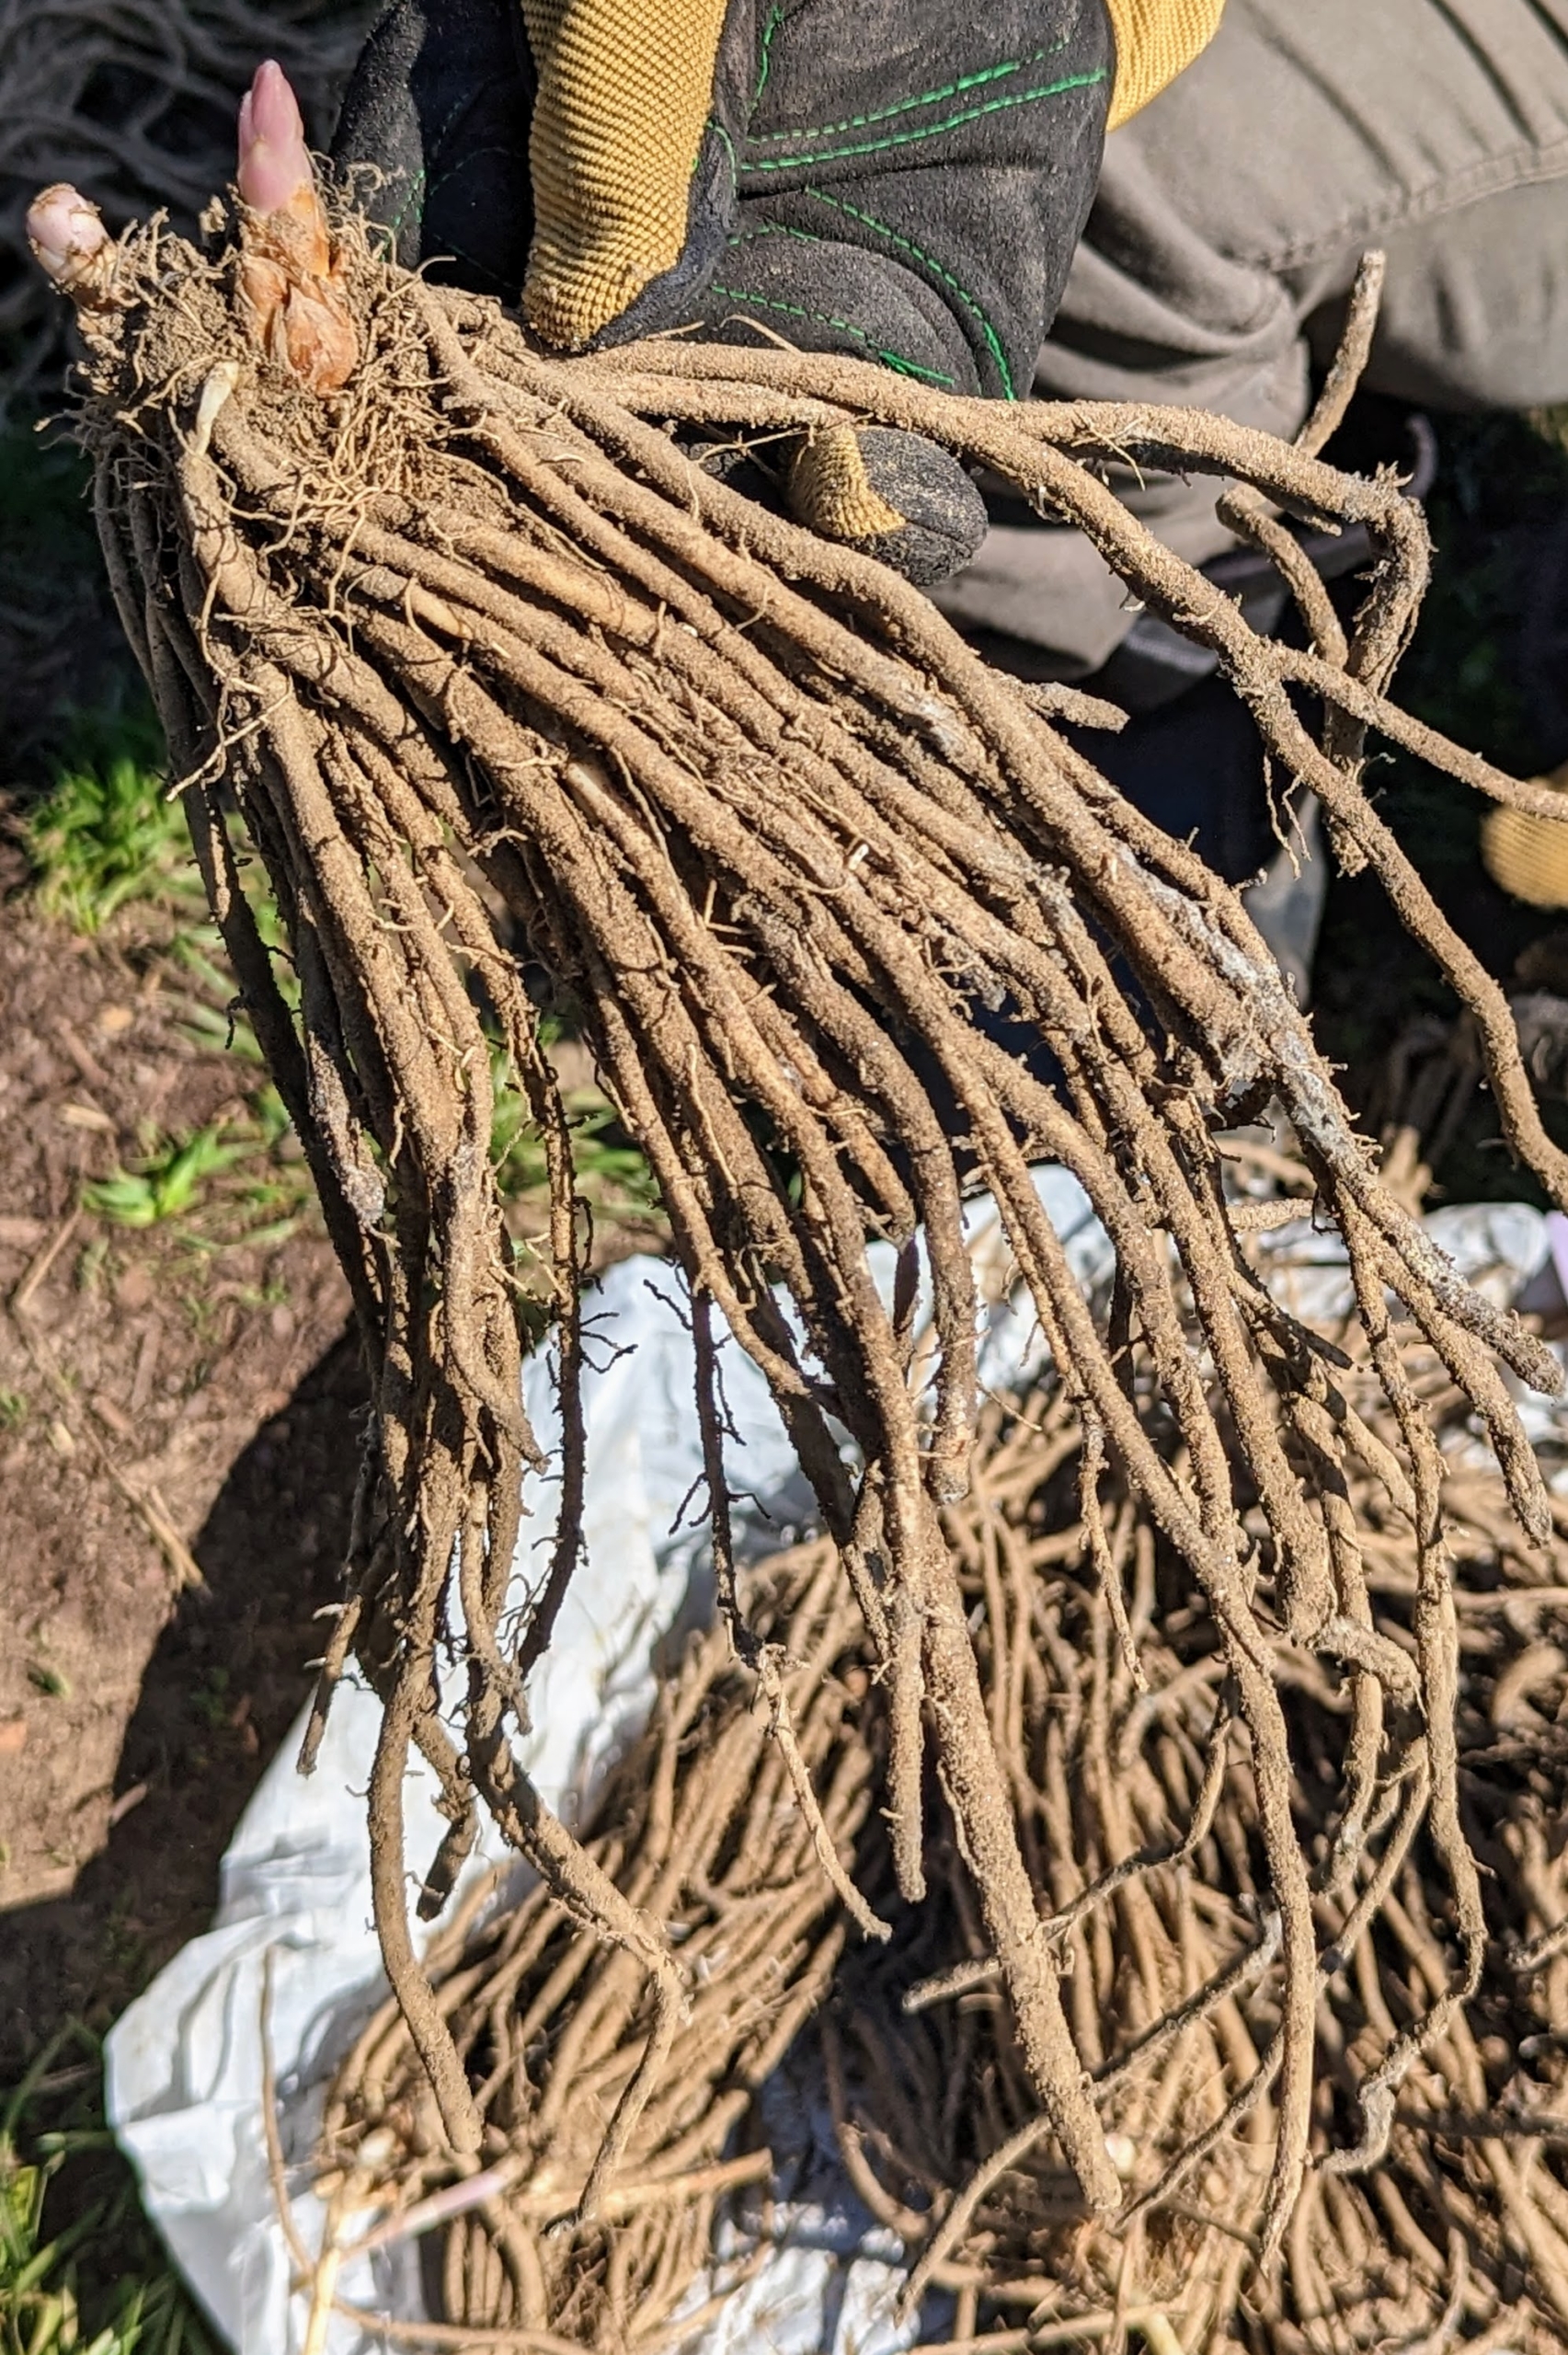
Asparagus roots grow very deep because they can survive very long in the soil.
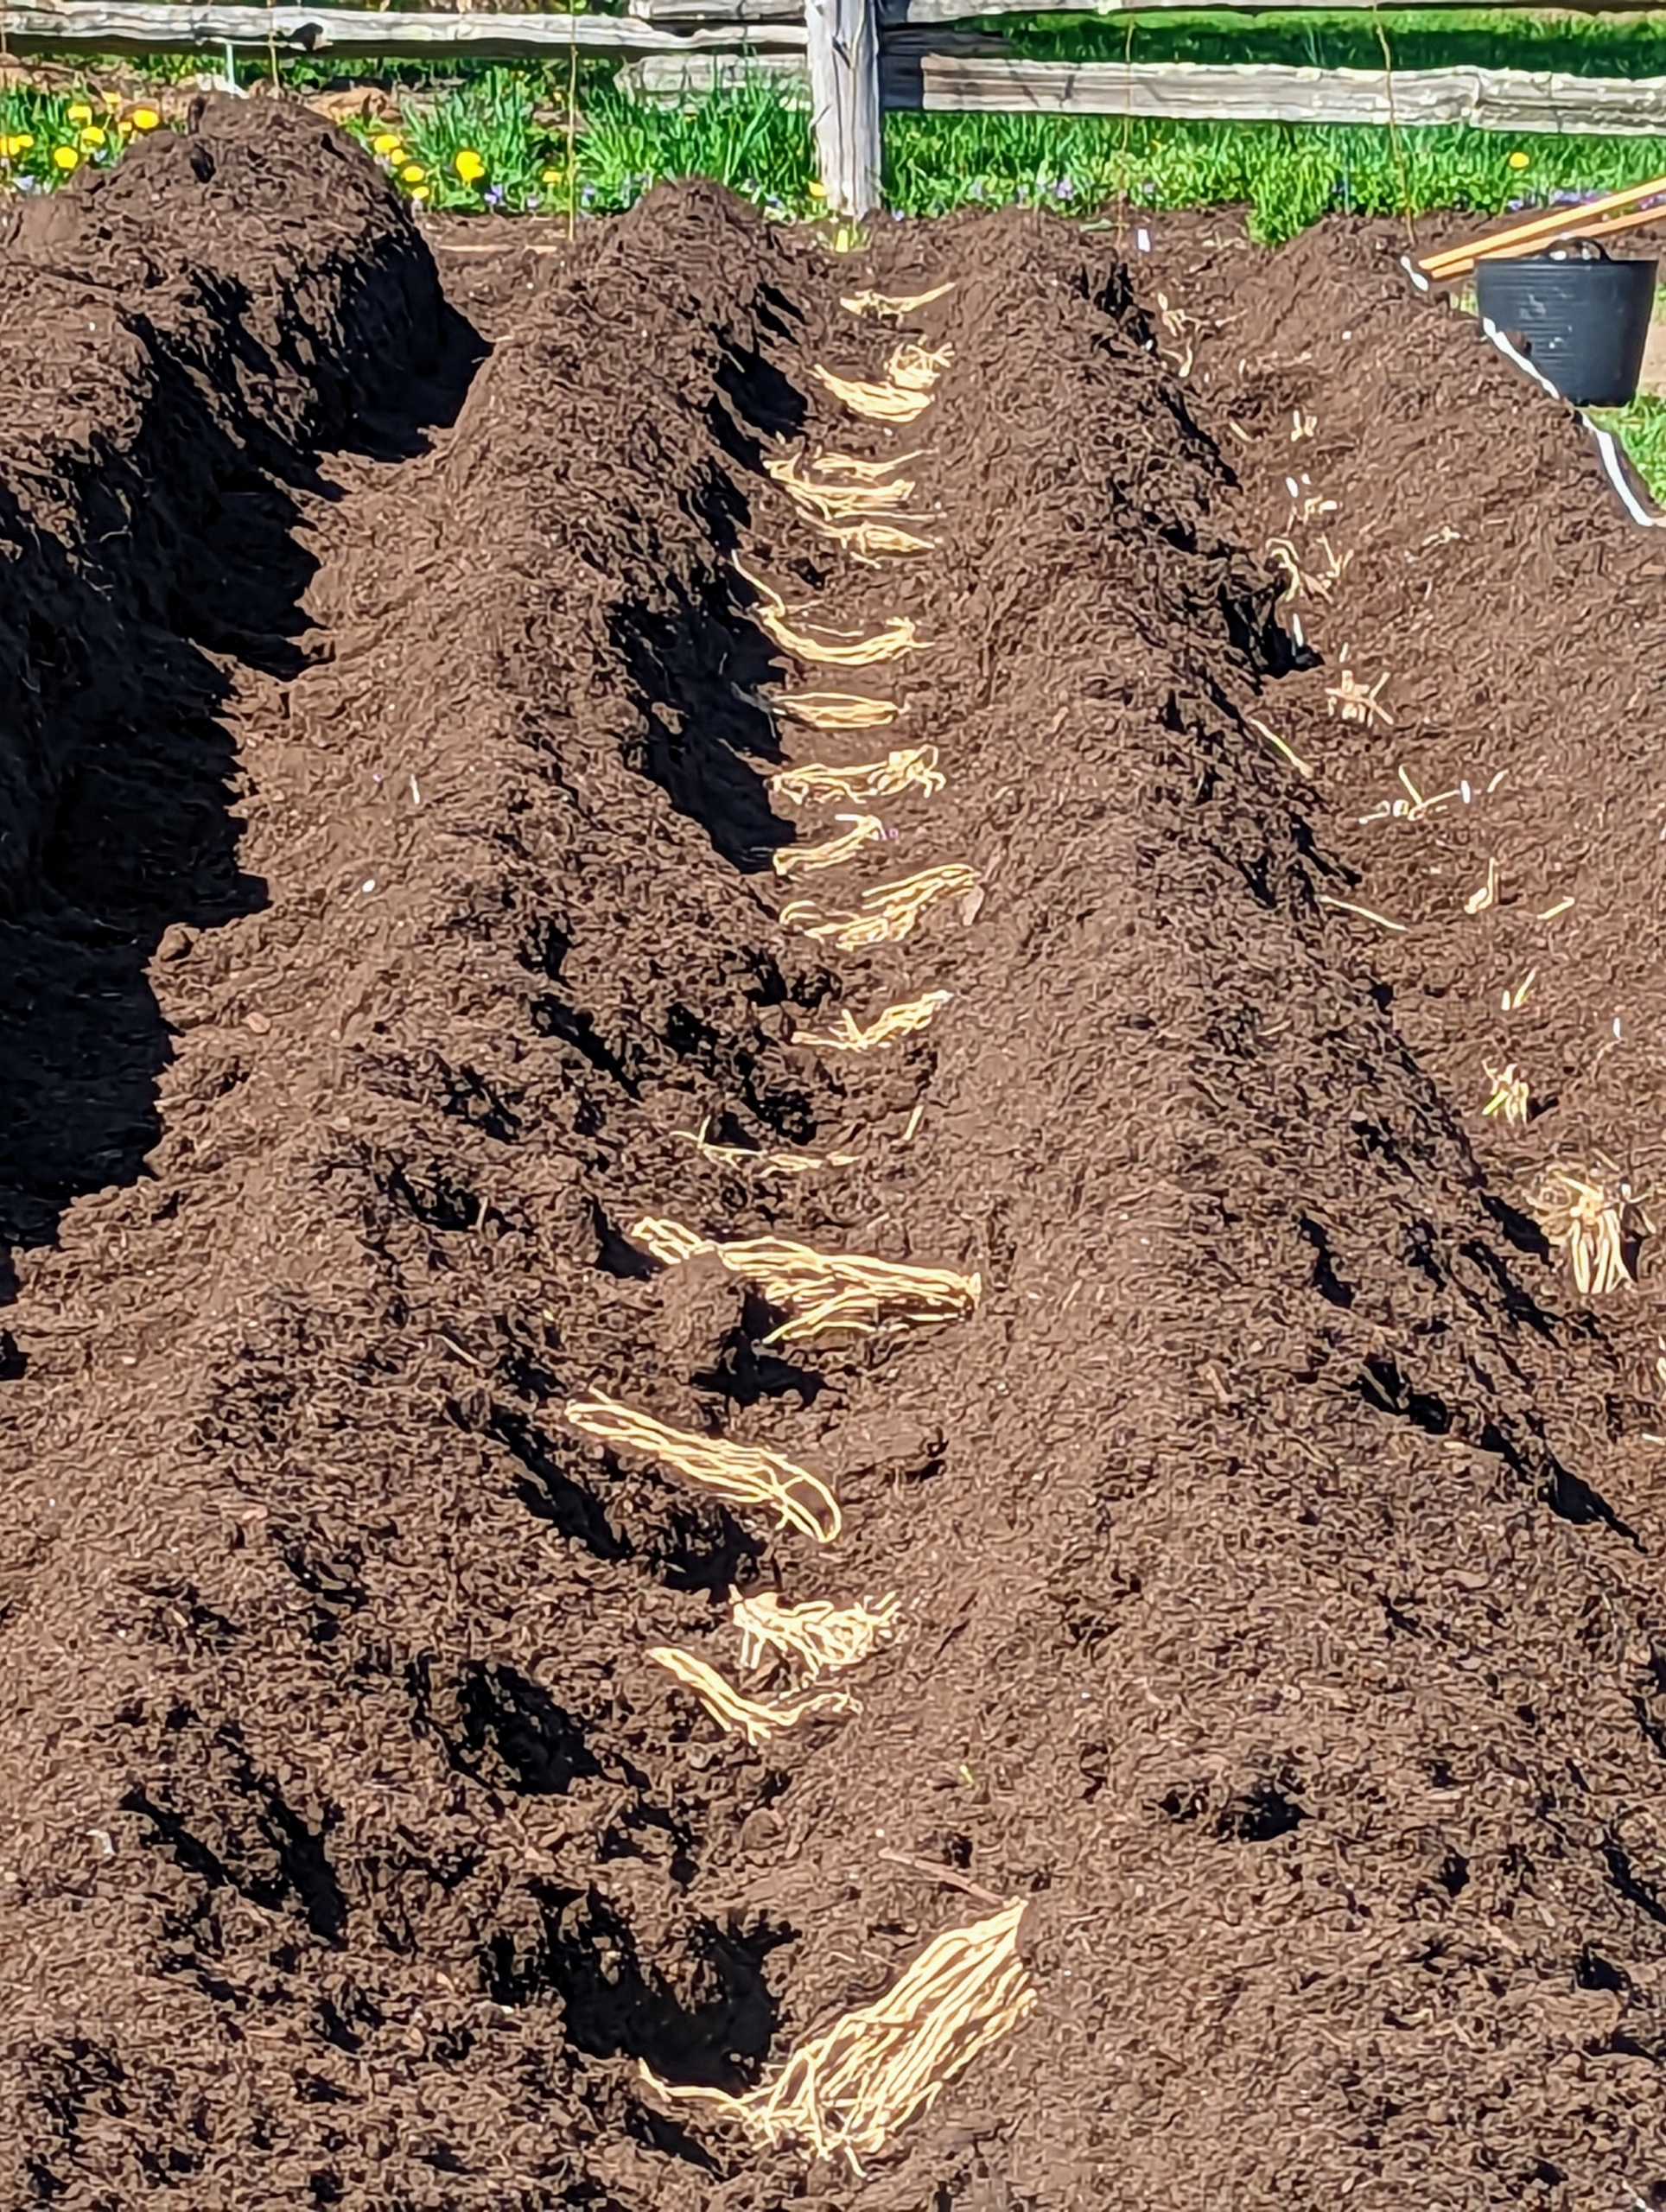
Here they are lined up in the trench. Last spring, we planted two varieties – ‘Purple Passion’, which produces attractive purple spears with a mild, nutty flavor and are reputedly sweeter than most other asparagus varieties. And ‘Millennium’ – a productive plant that produces high-quality spears that are tender, green, and delicious.
Asparagus needs lots of room to grow. The crown and root system can develop to an enormous size – about five to six feet in diameter and 10 to 15 feet deep. When planting, the roots should be splayed to direct the root growth outward and not downward.
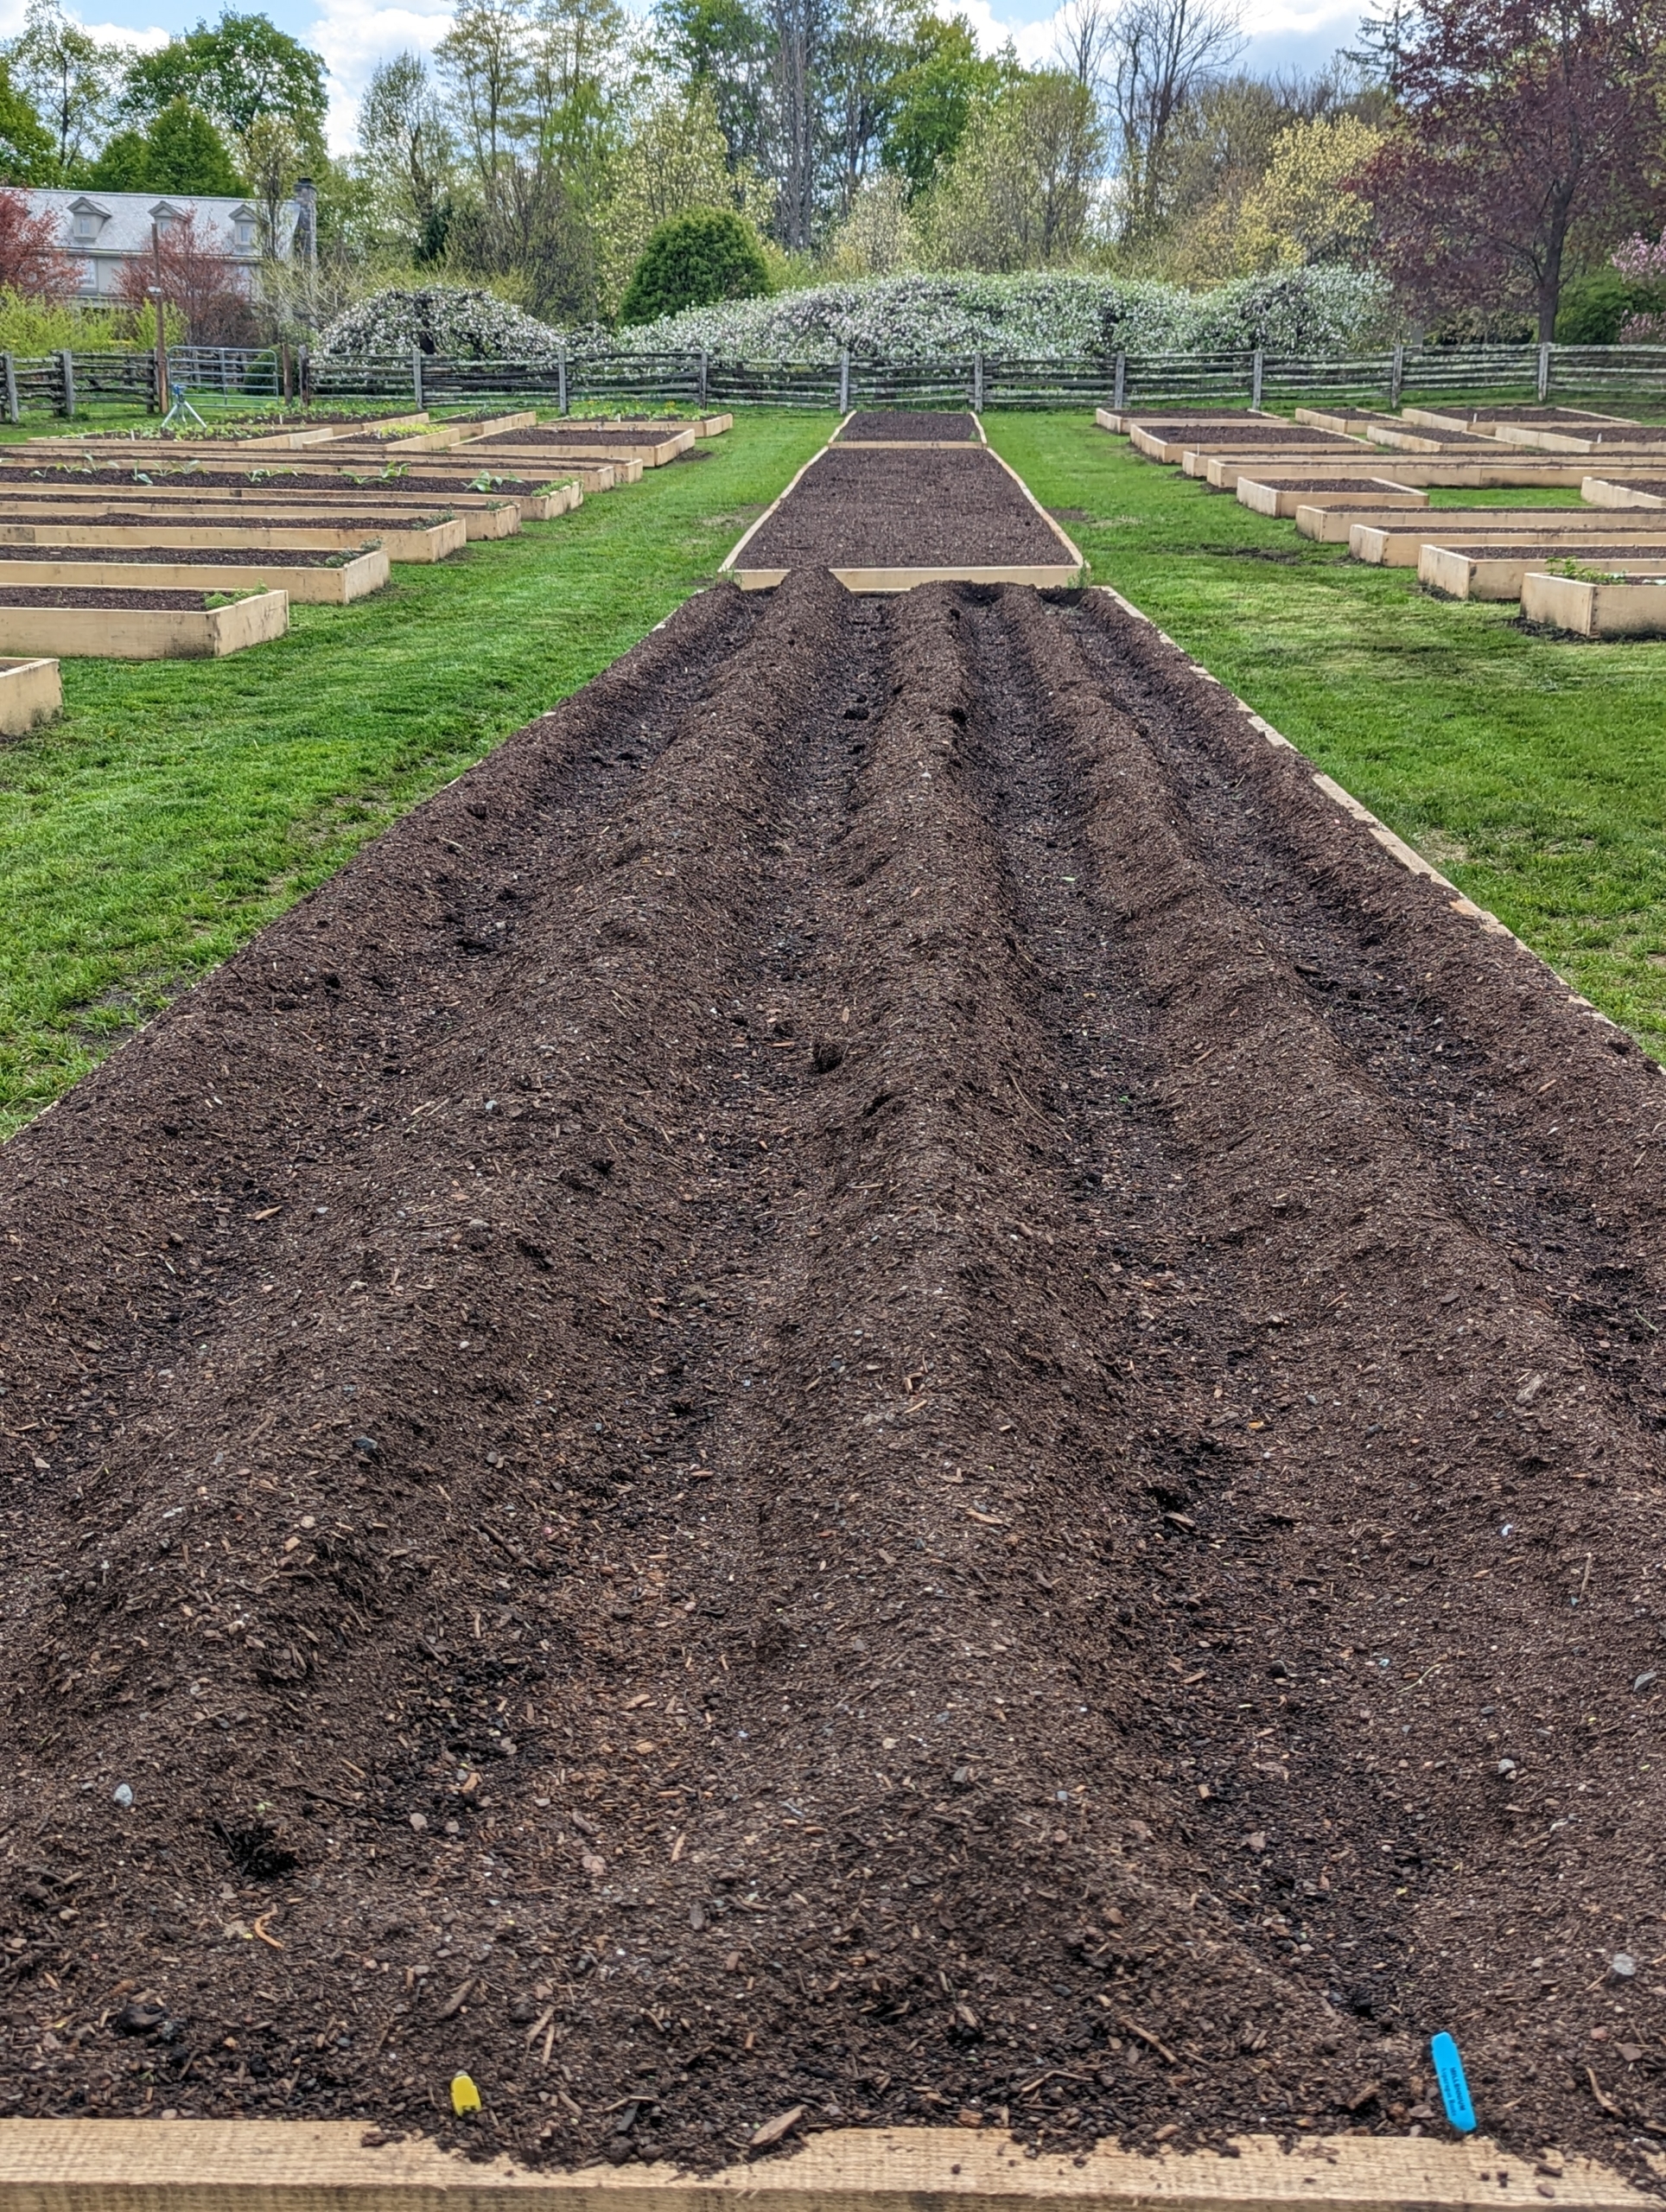
Once all the crowns are positioned, the trenches are covered with several inches of soil. As the weeks progress and growth appears, the rows are backfilled a bit more making sure the tips of the shoots are all but completely covered.
Asparagus beds require consistent soil moisture during the first growing season. Once established, the plants are relatively low-maintenance.
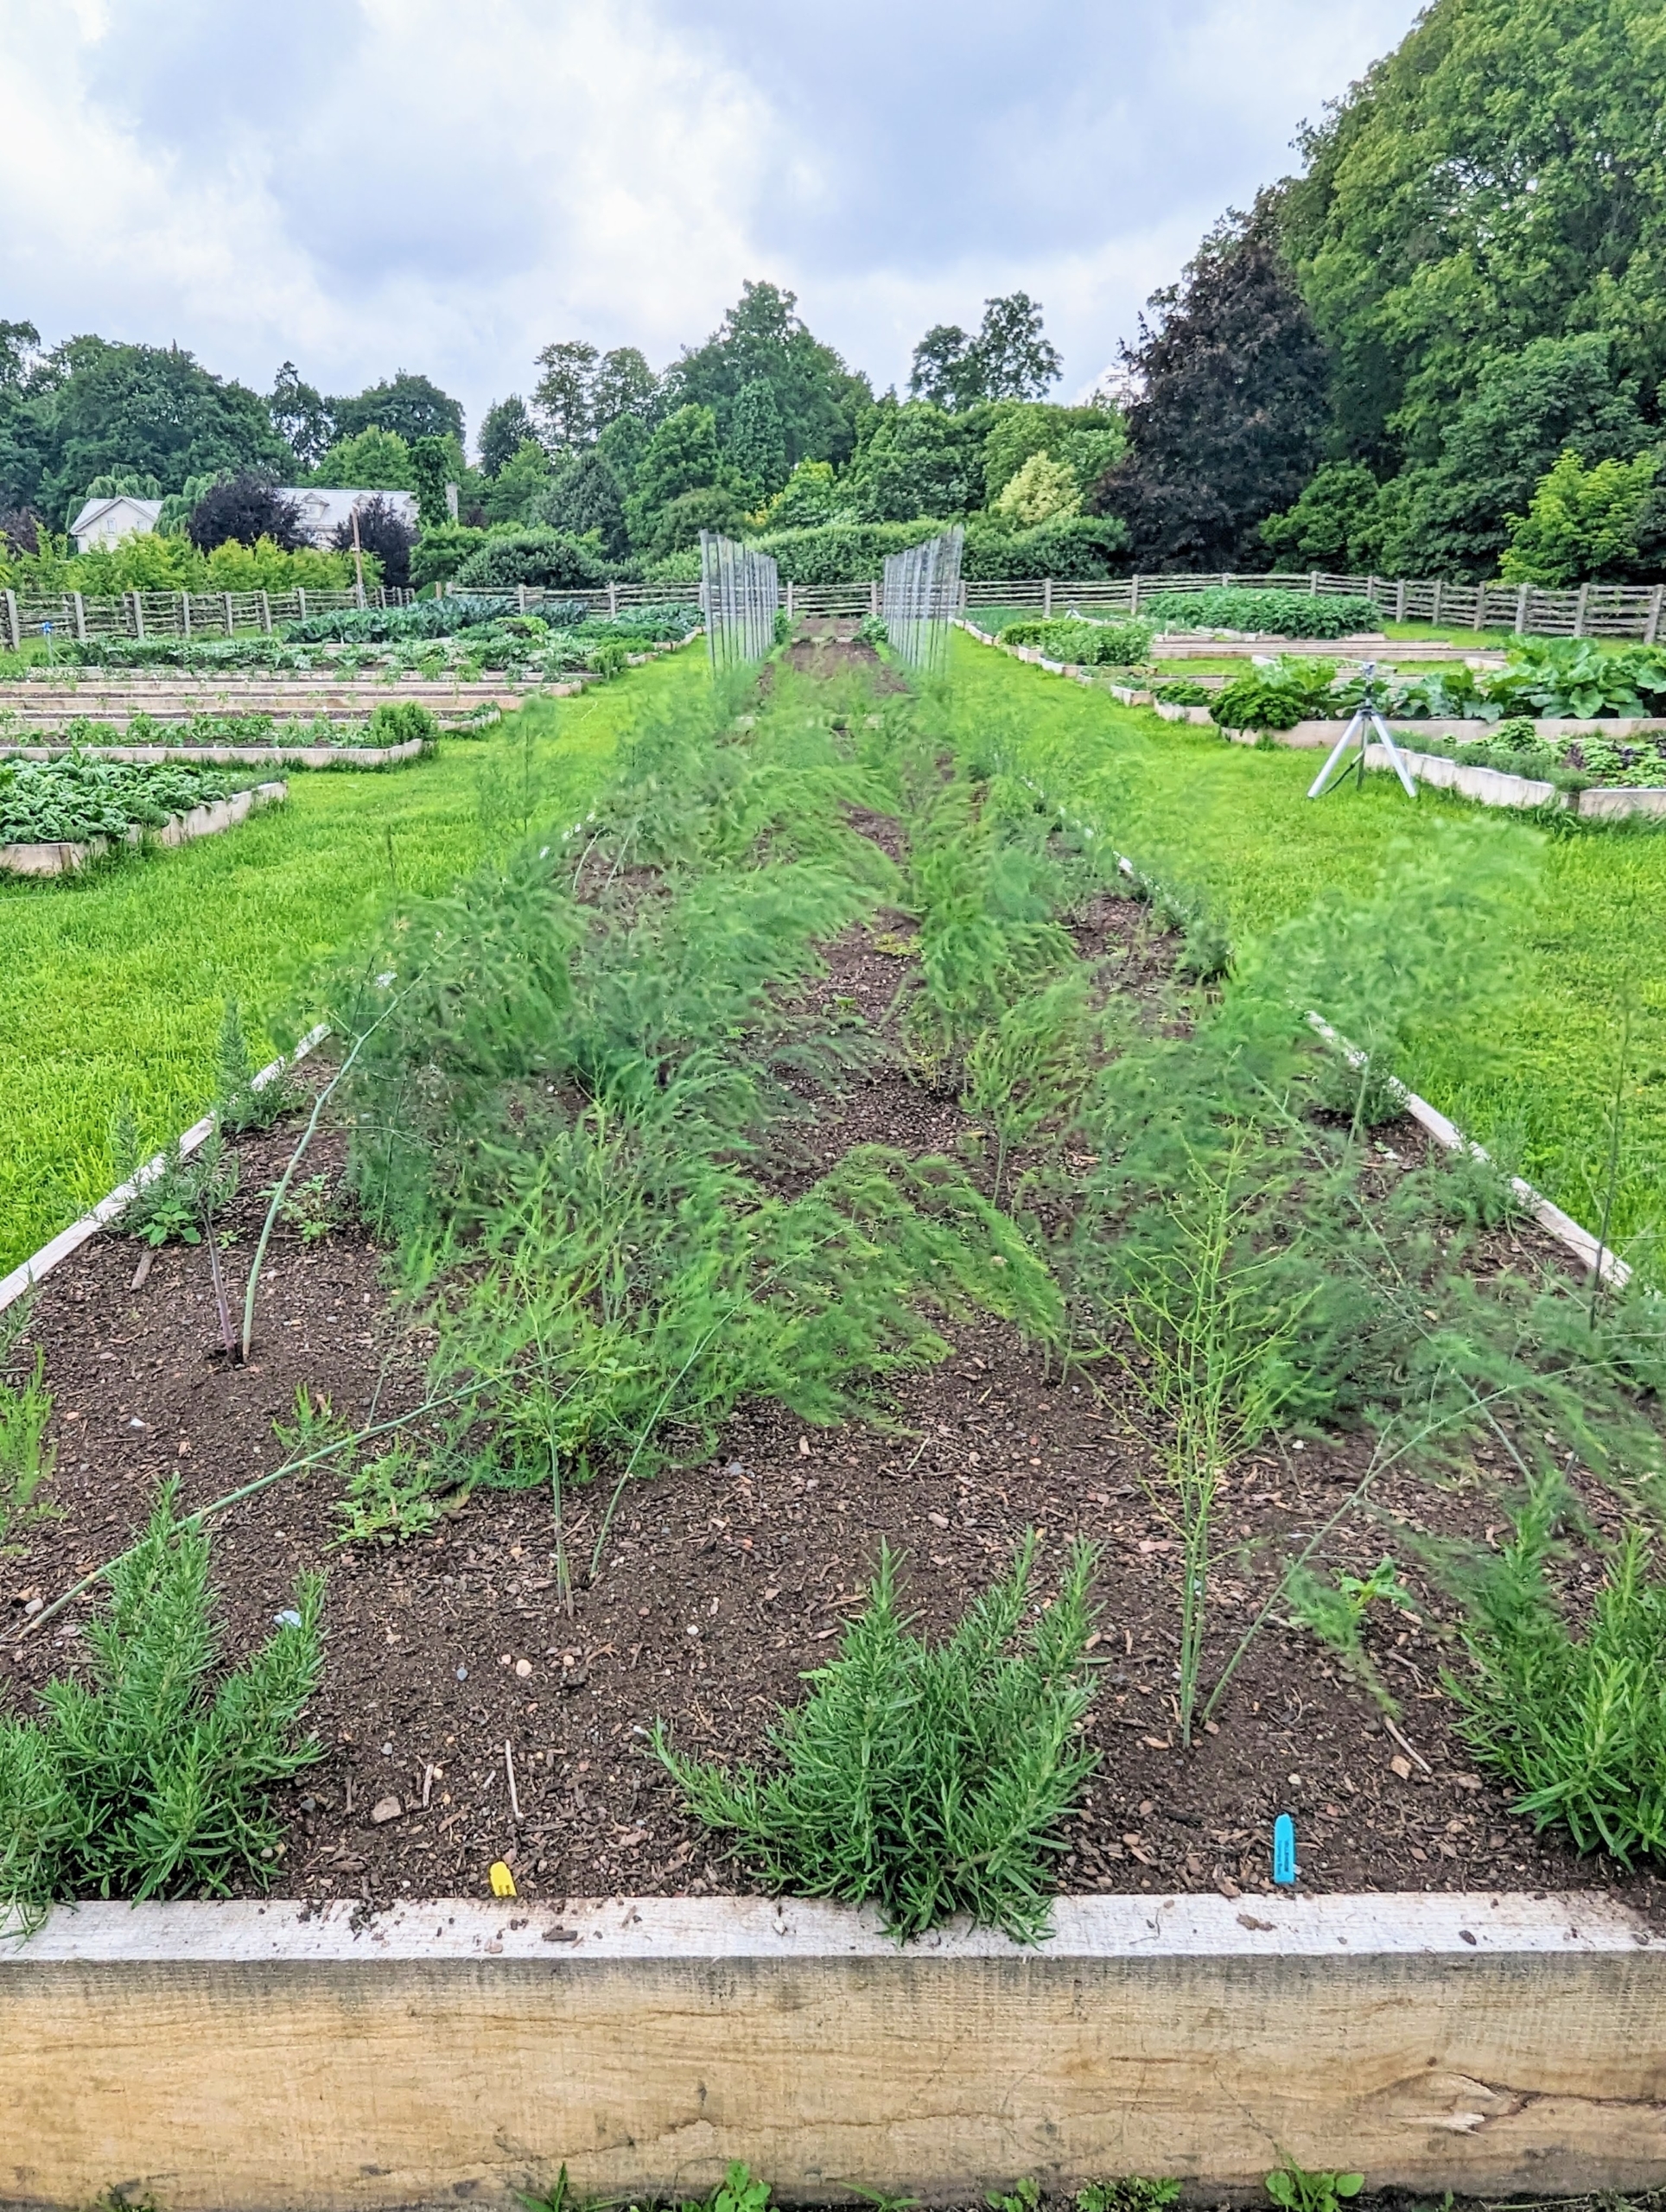
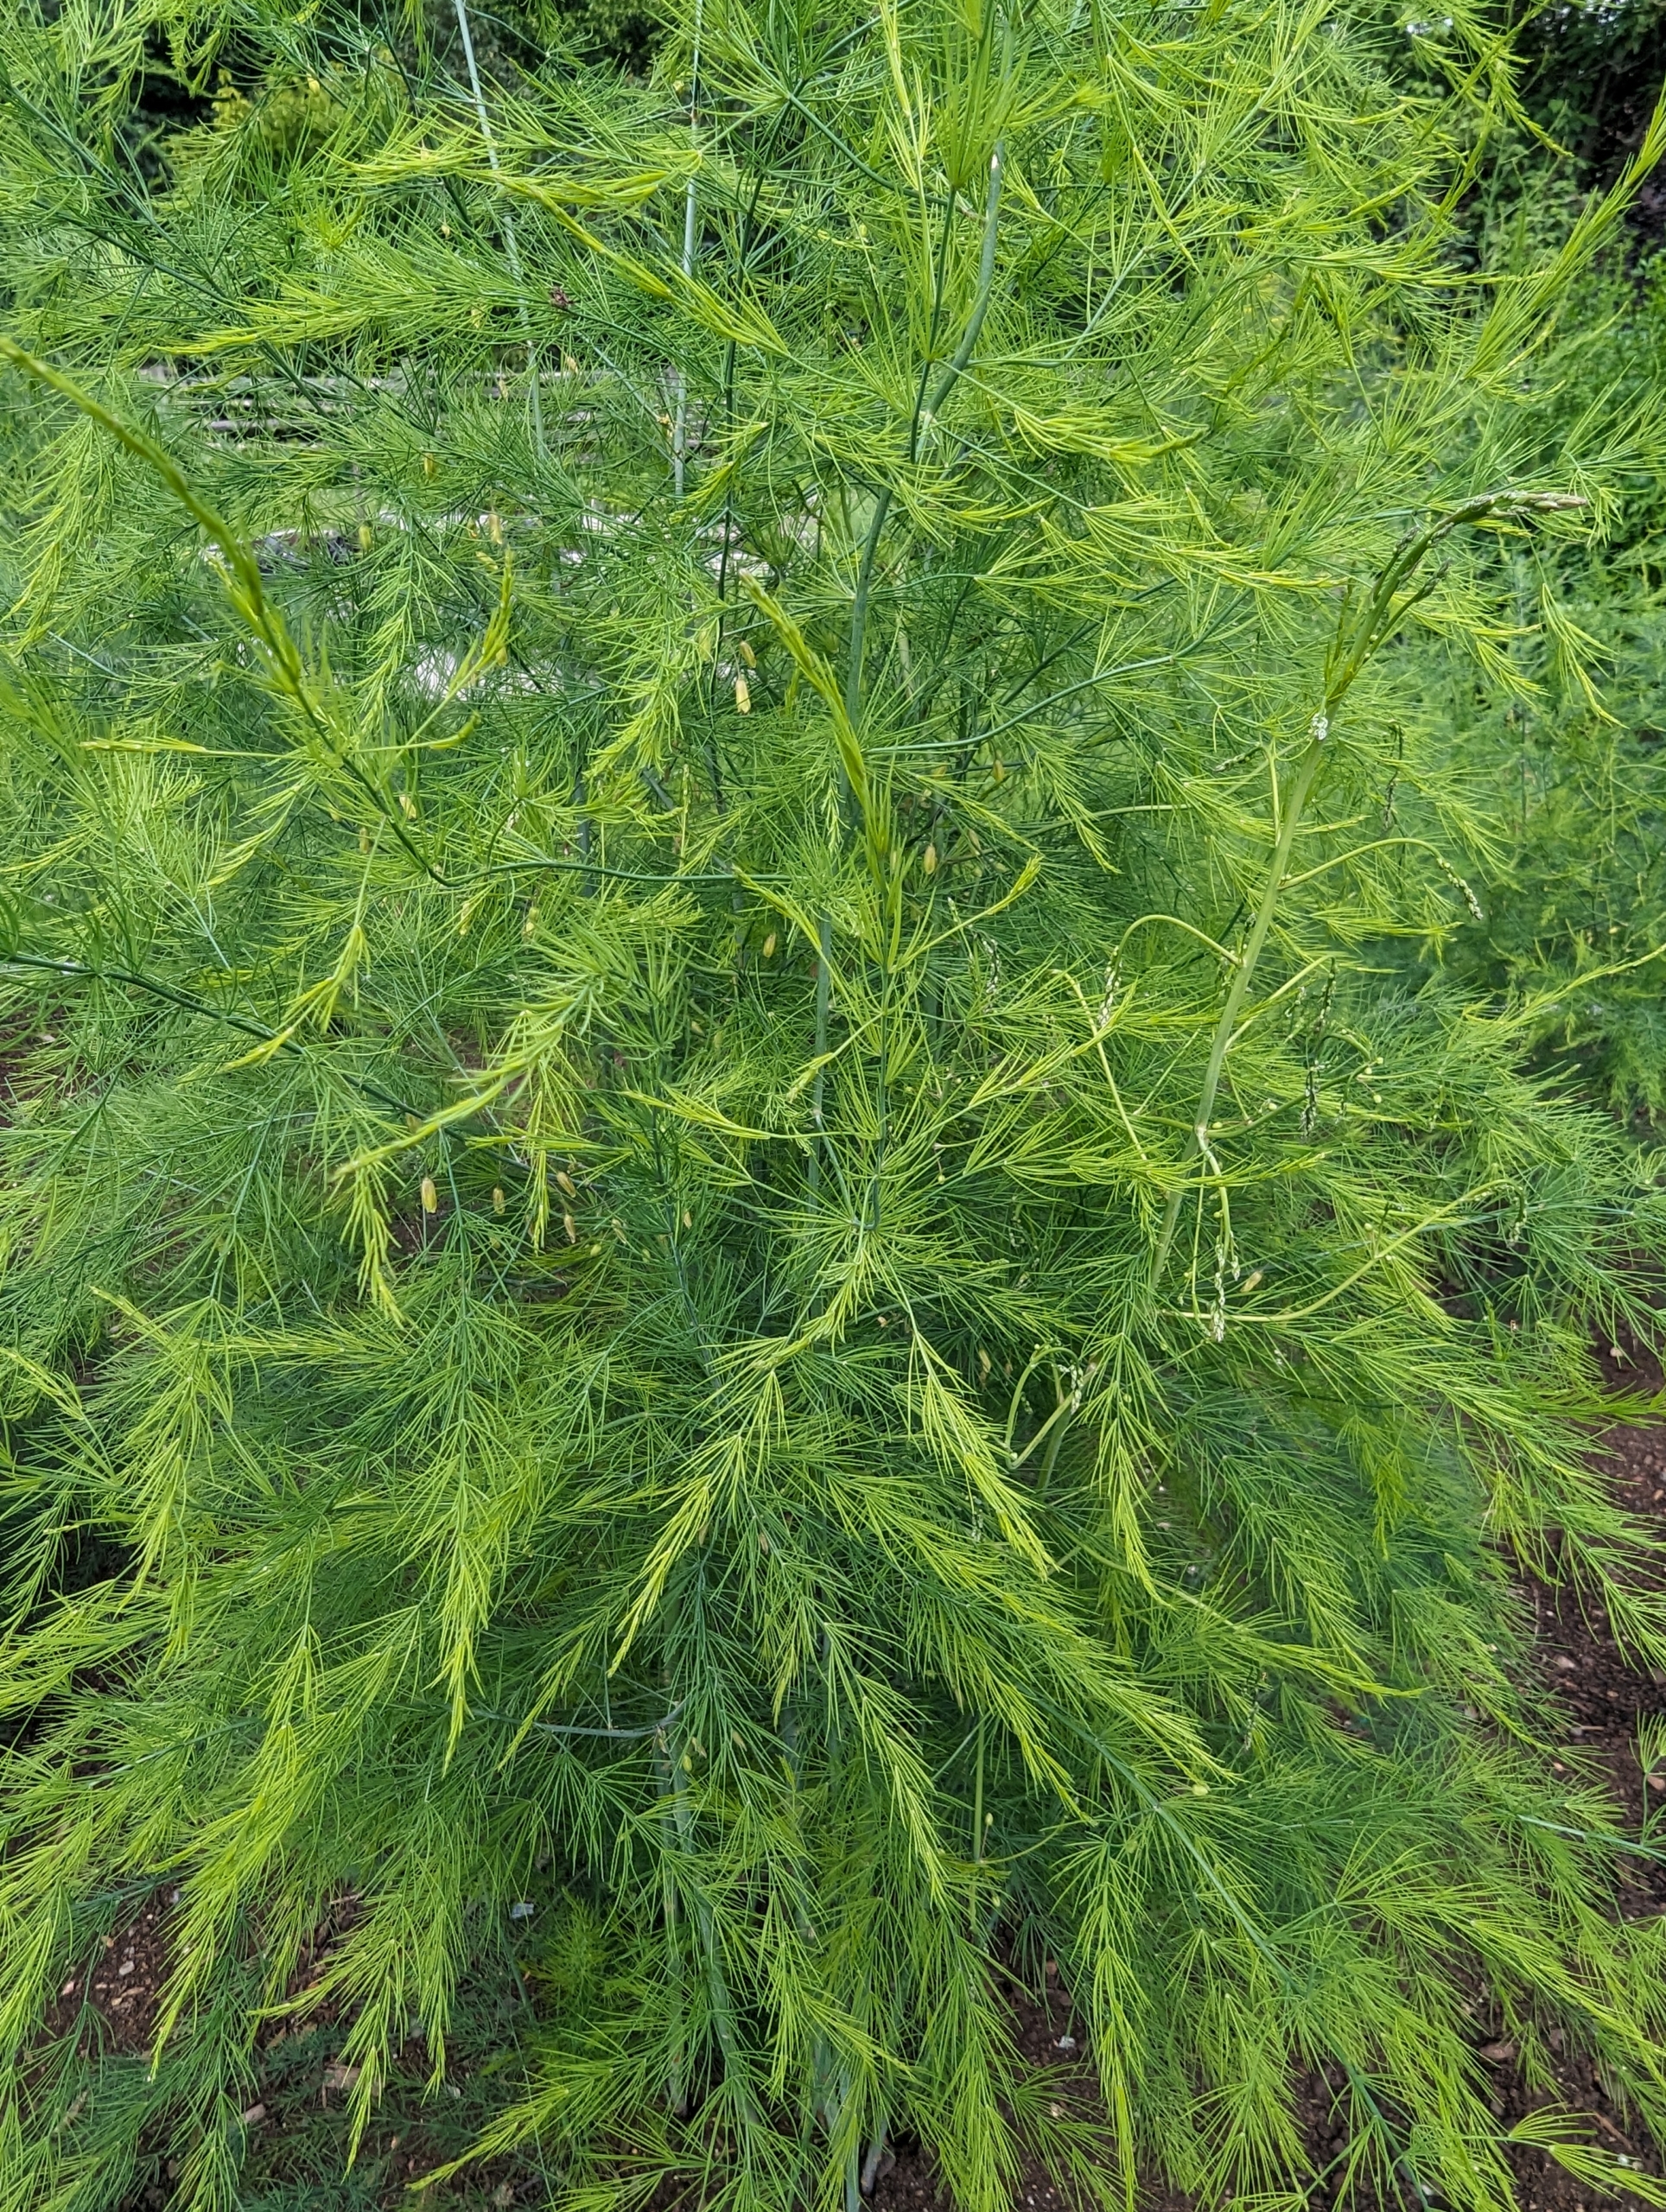
By June, the bed is full of growing young ferns. This fern production is crucial to the success of a developing asparagus patch. The number of spears produced each year and the overall health of the plants, is affected by how many ferns are left to mature.
The bigger the ferns, the more food is created to fuel the following year’s spear production.
First spears can appear within a couple of months after establishing an asparagus patch, depending on soil temperatures and moisture, but they should be left alone, so the plants could start to develop and become more established.
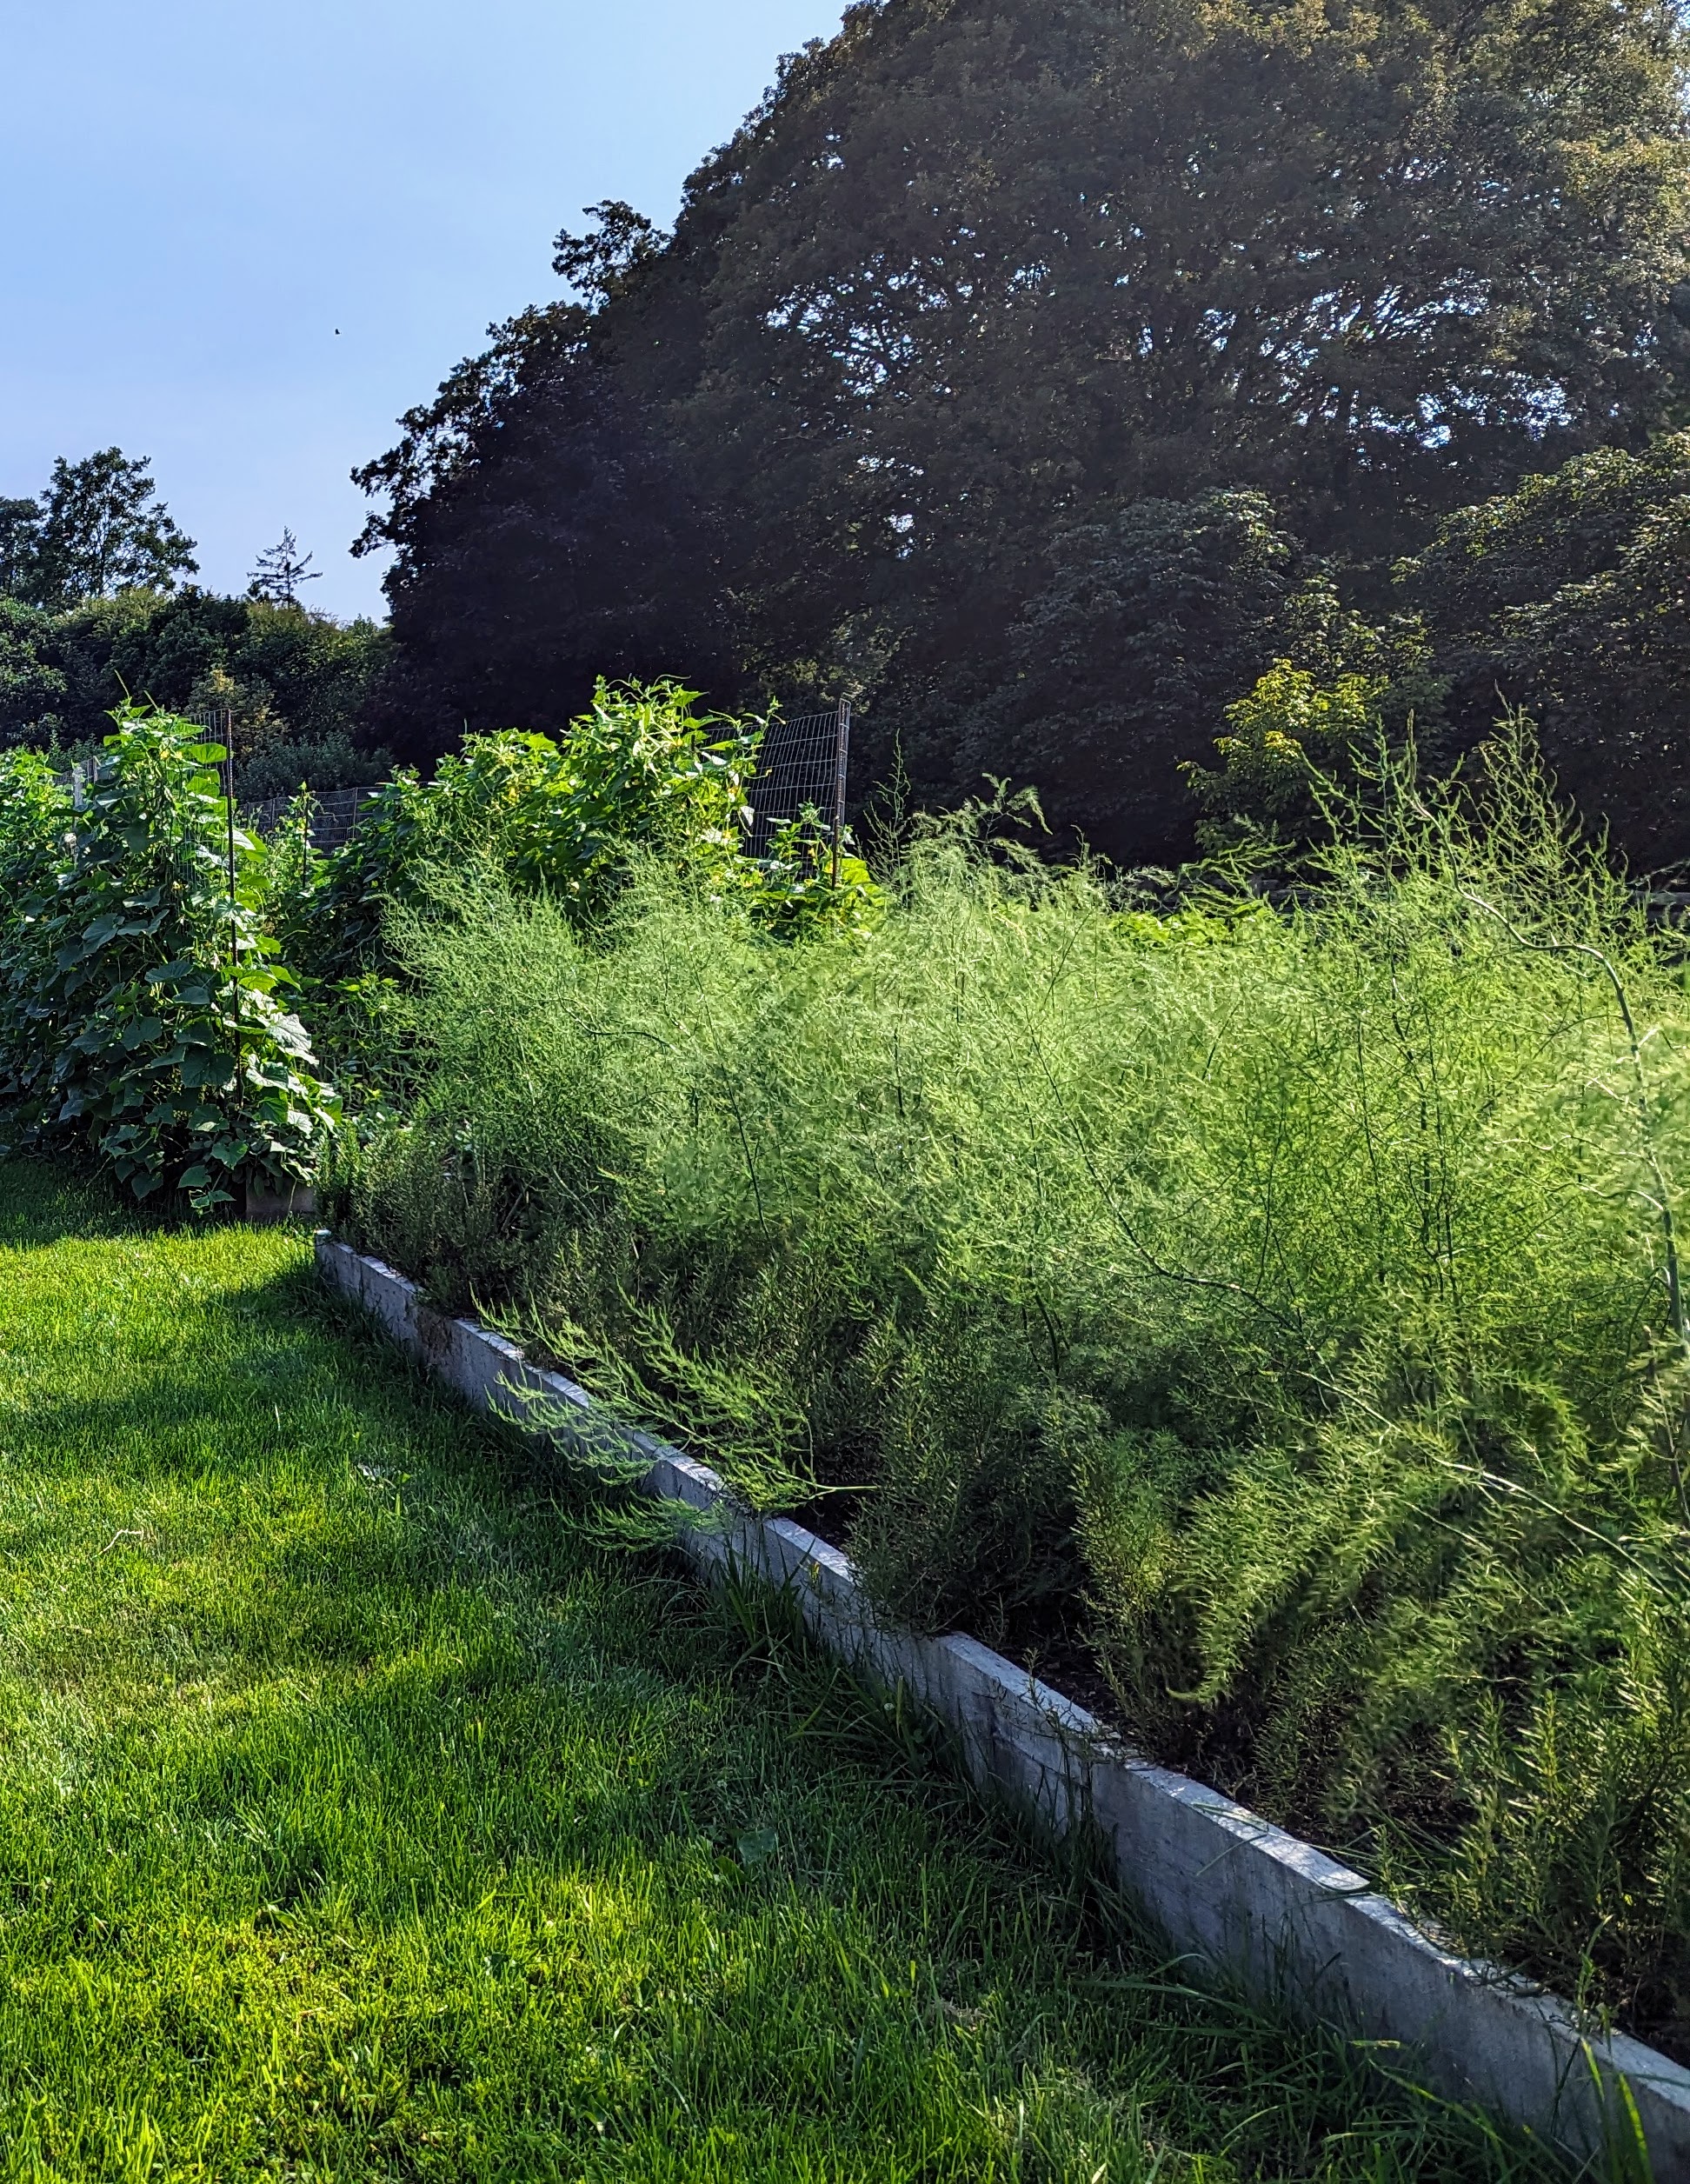
And here is the bed last August. The asparagus ferns are more than four-feet tall. The food produced travels back down to the crown and the roots of the plant in fall as the fern dies back. The carbohydrates are held in the dormant crowns through the winter.
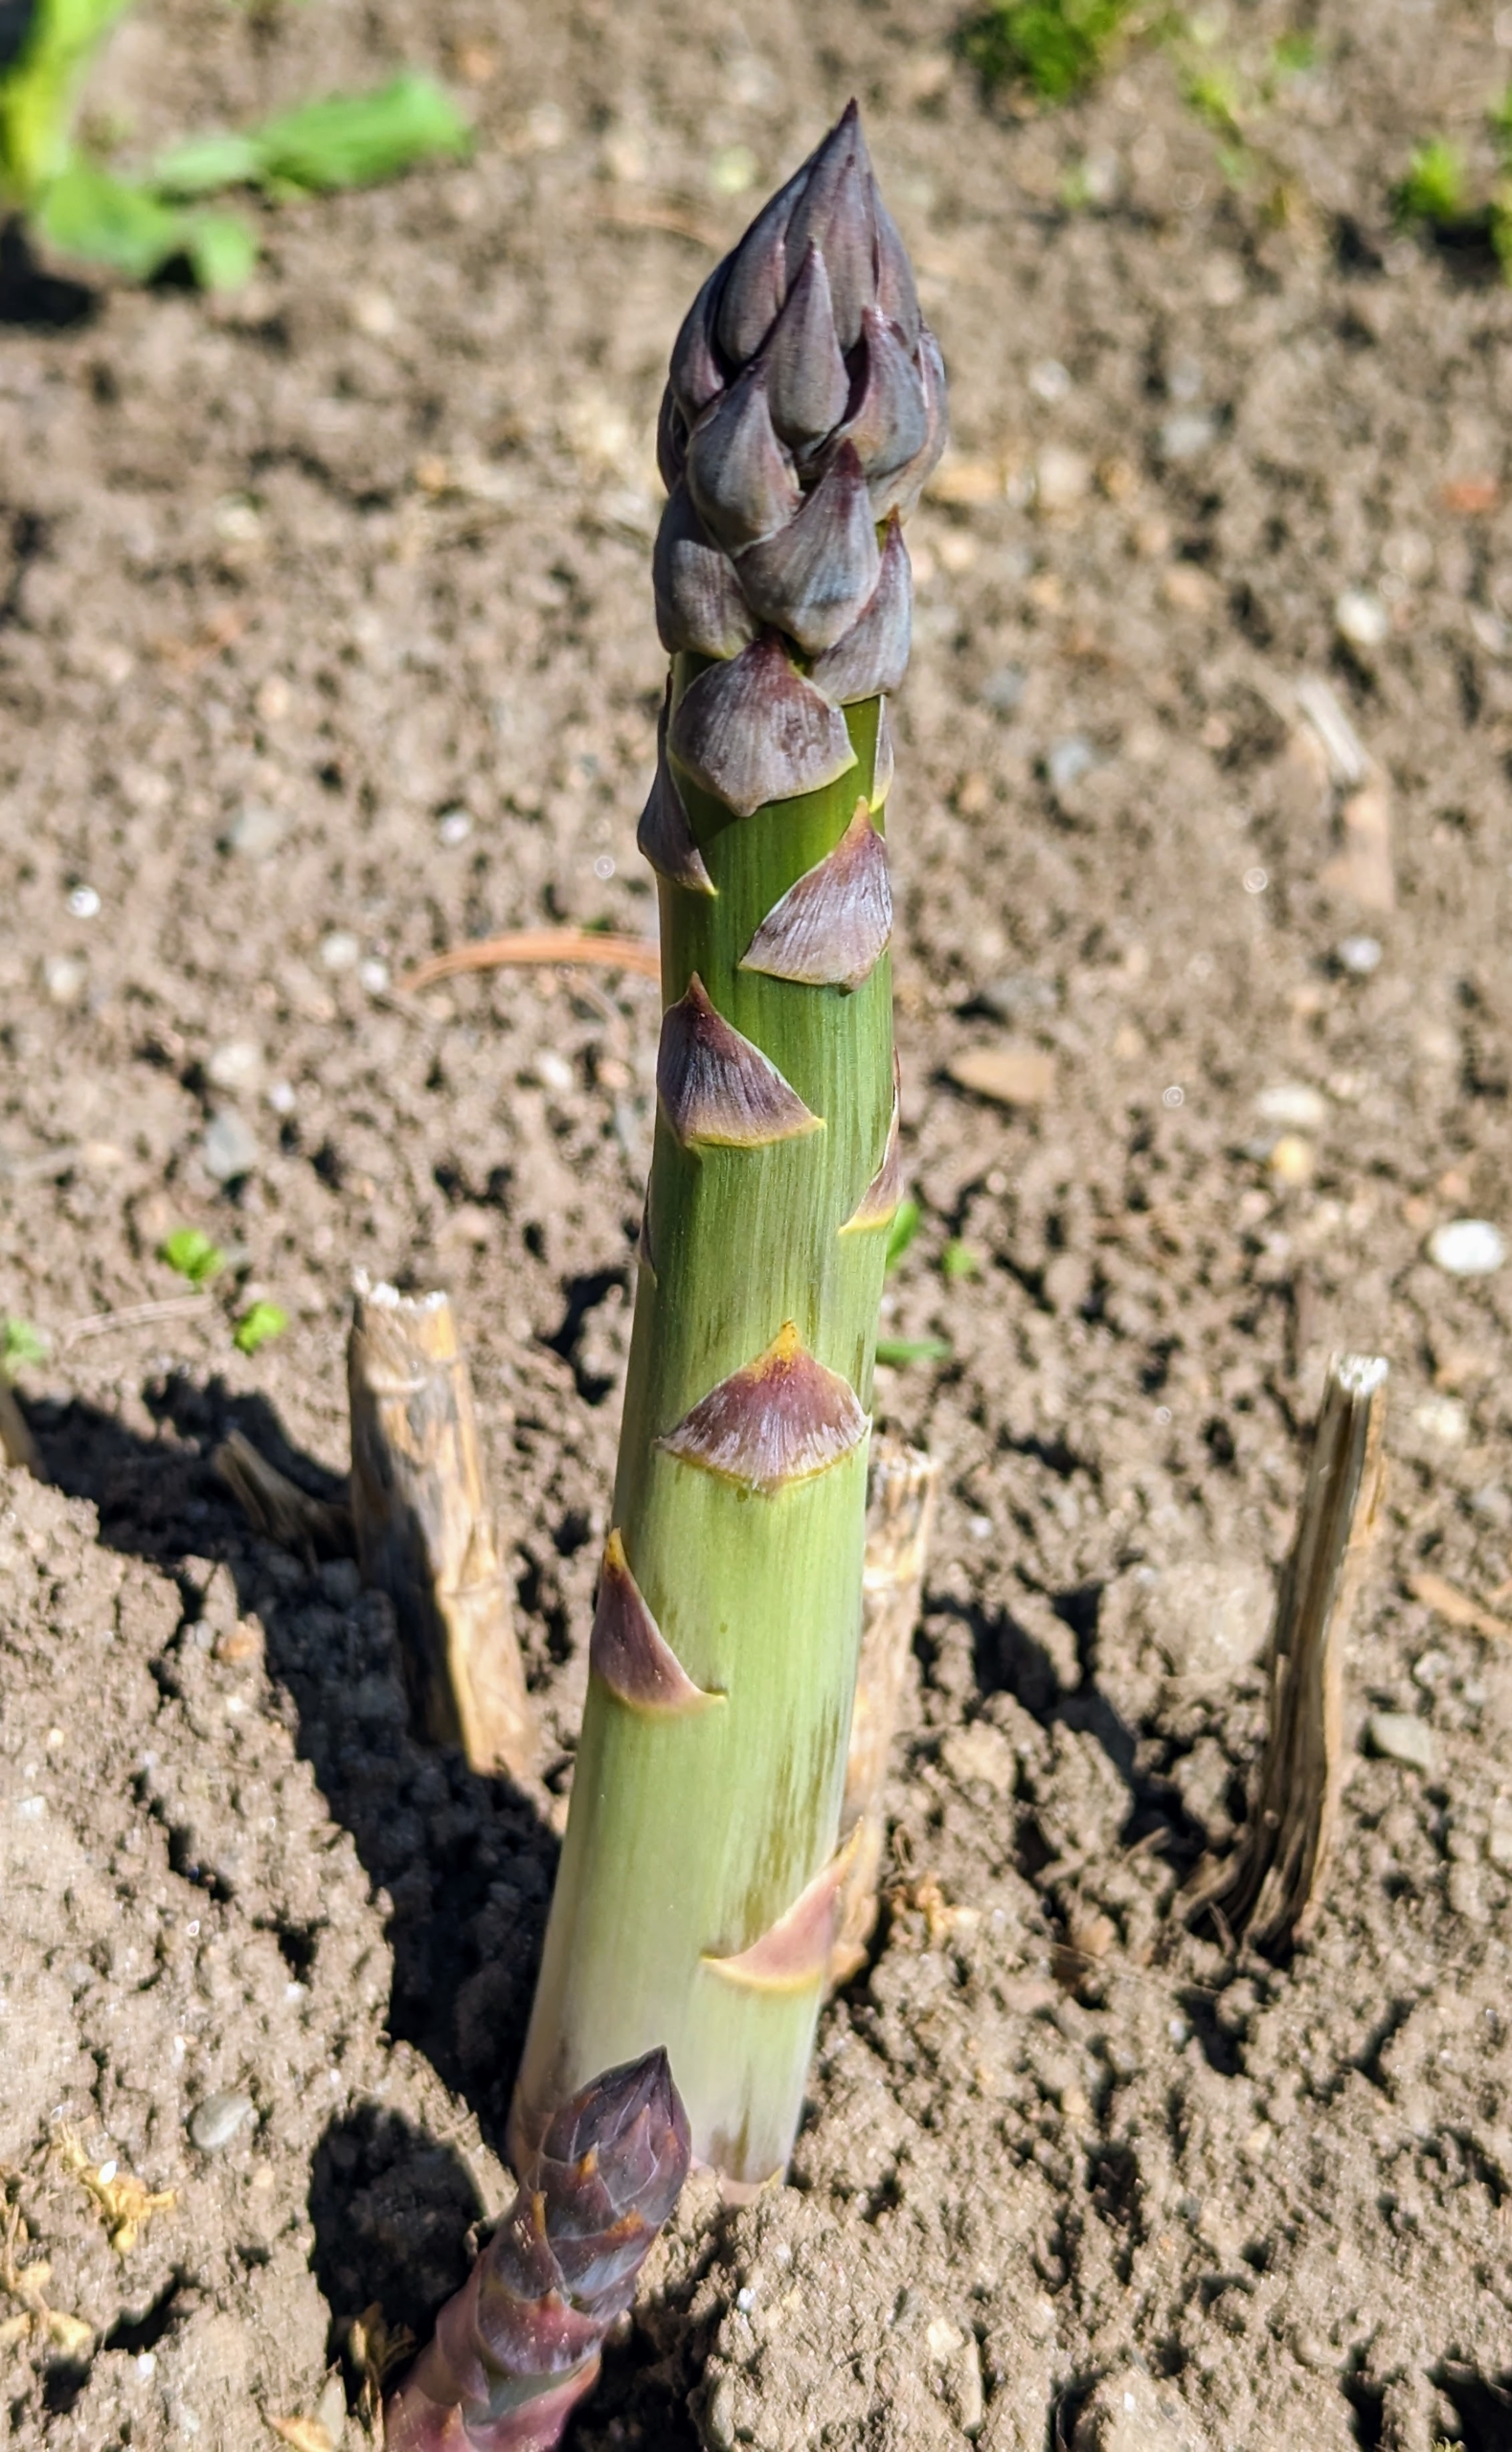
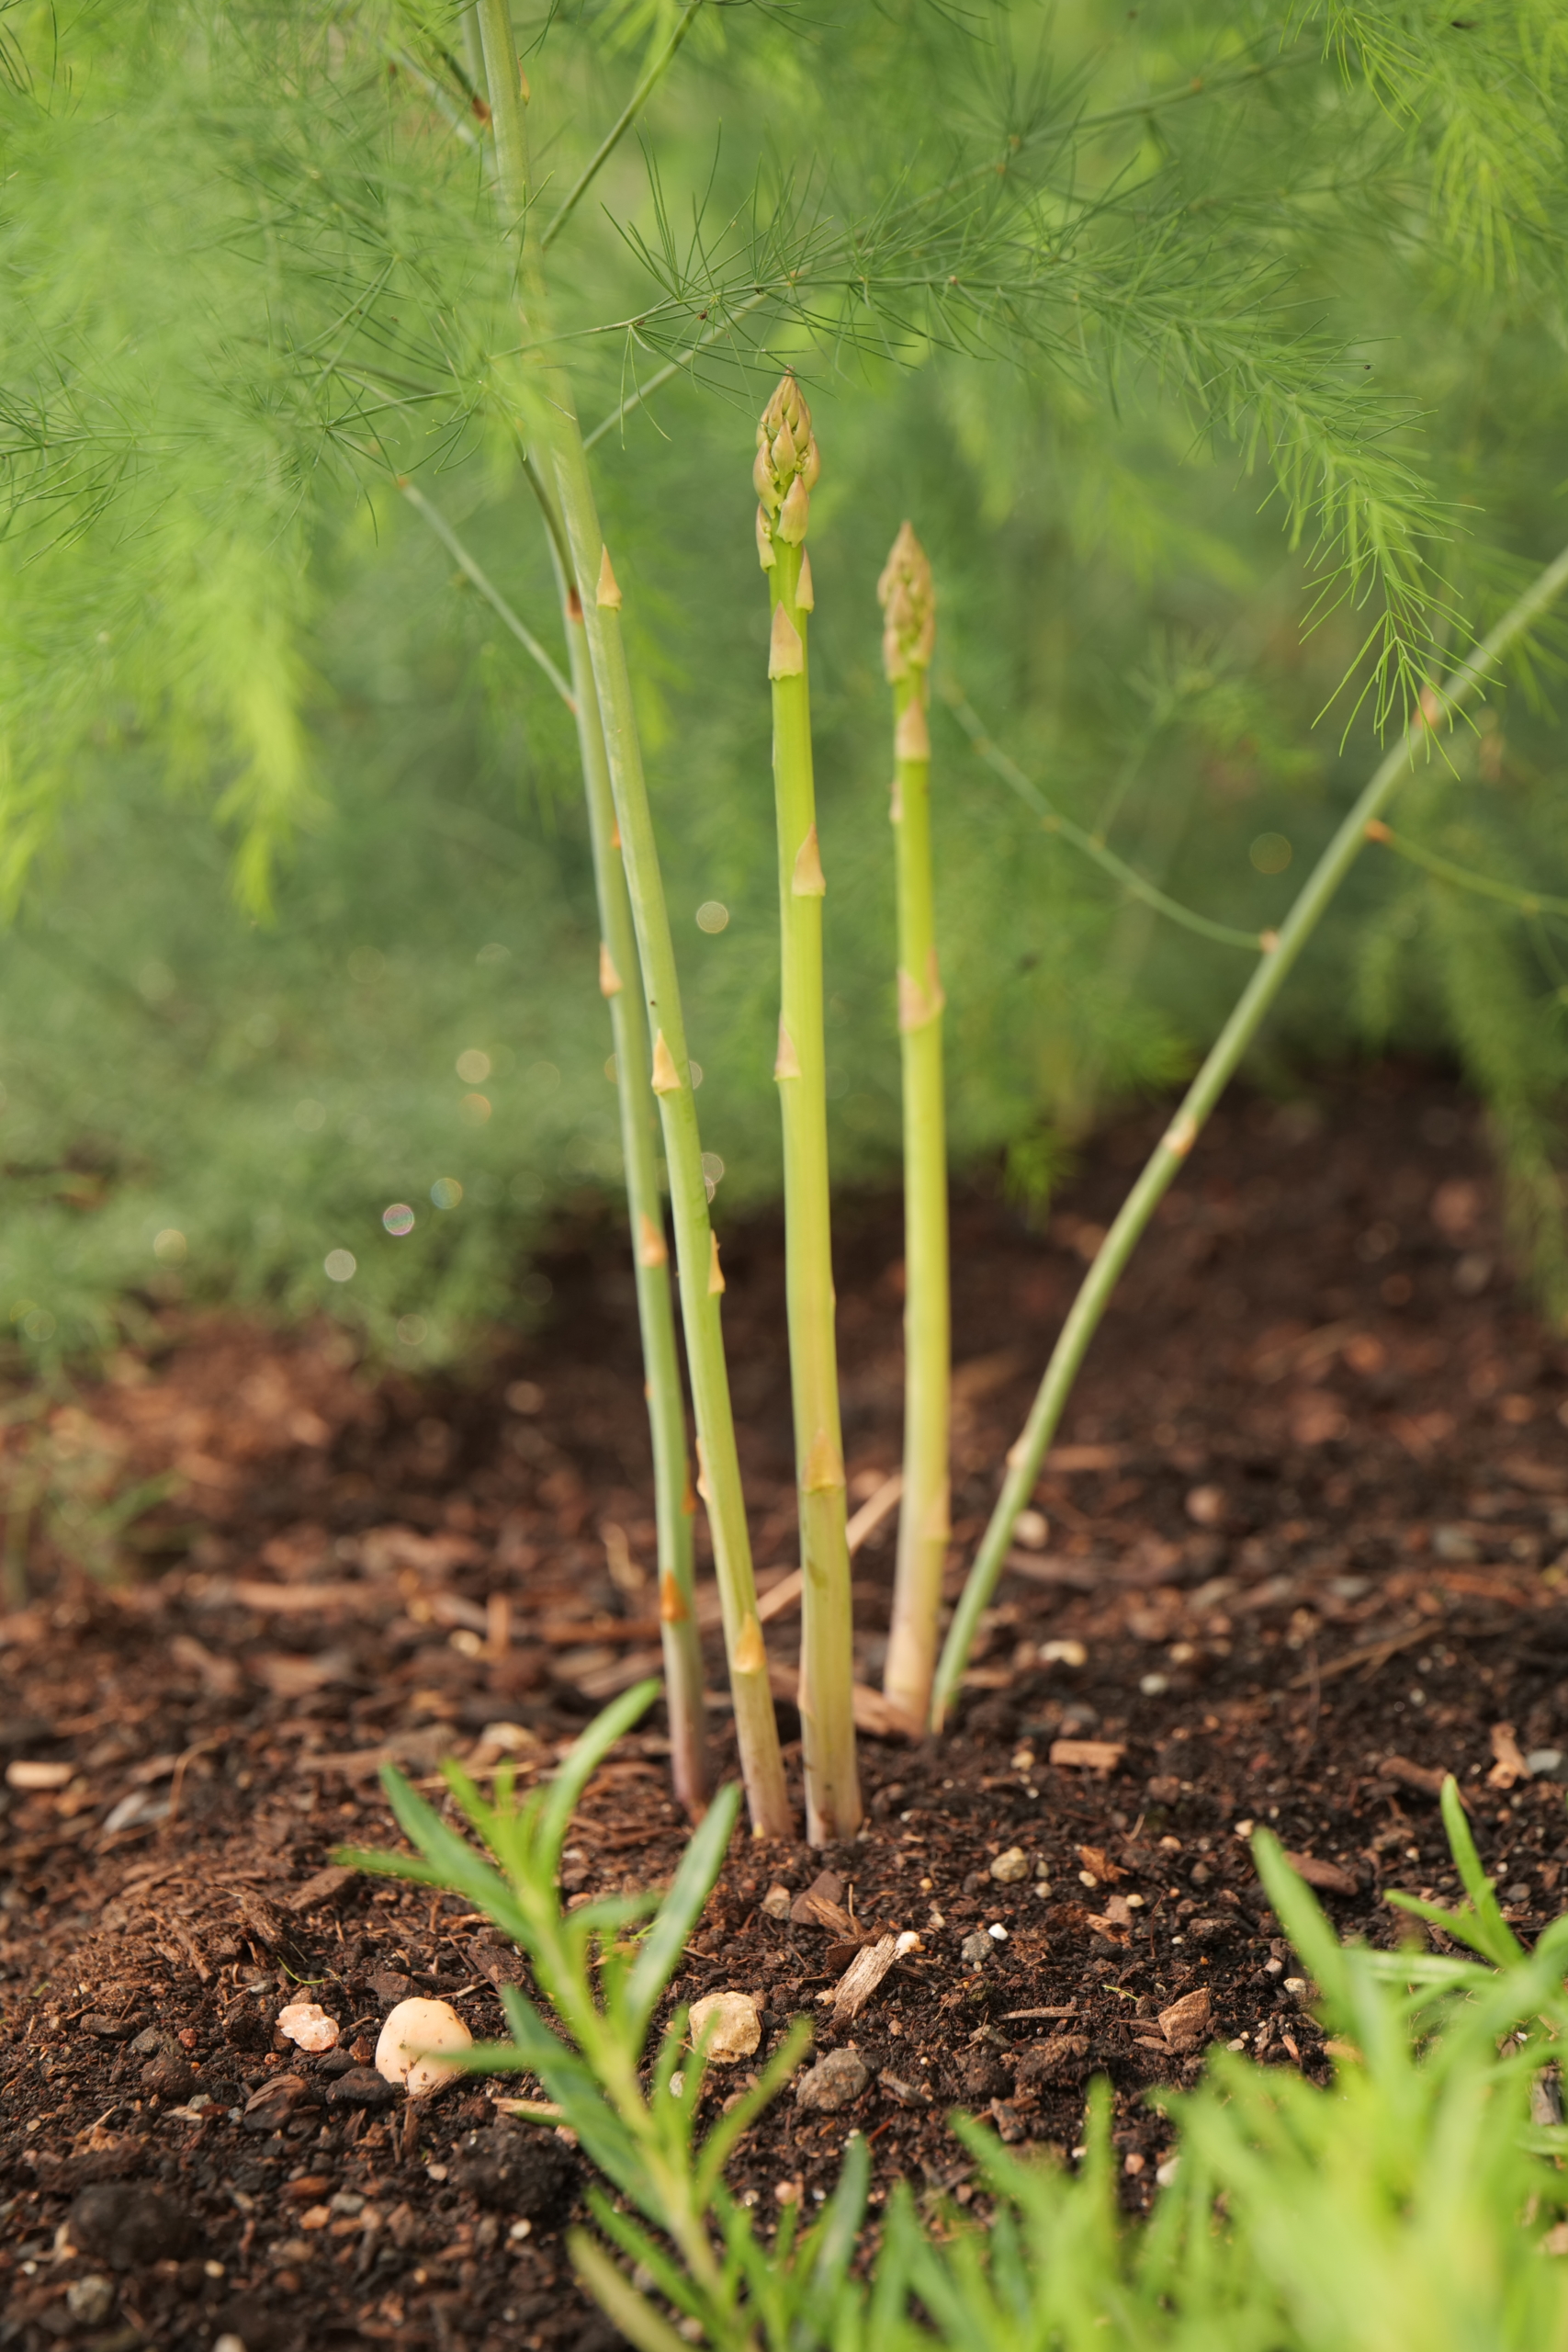
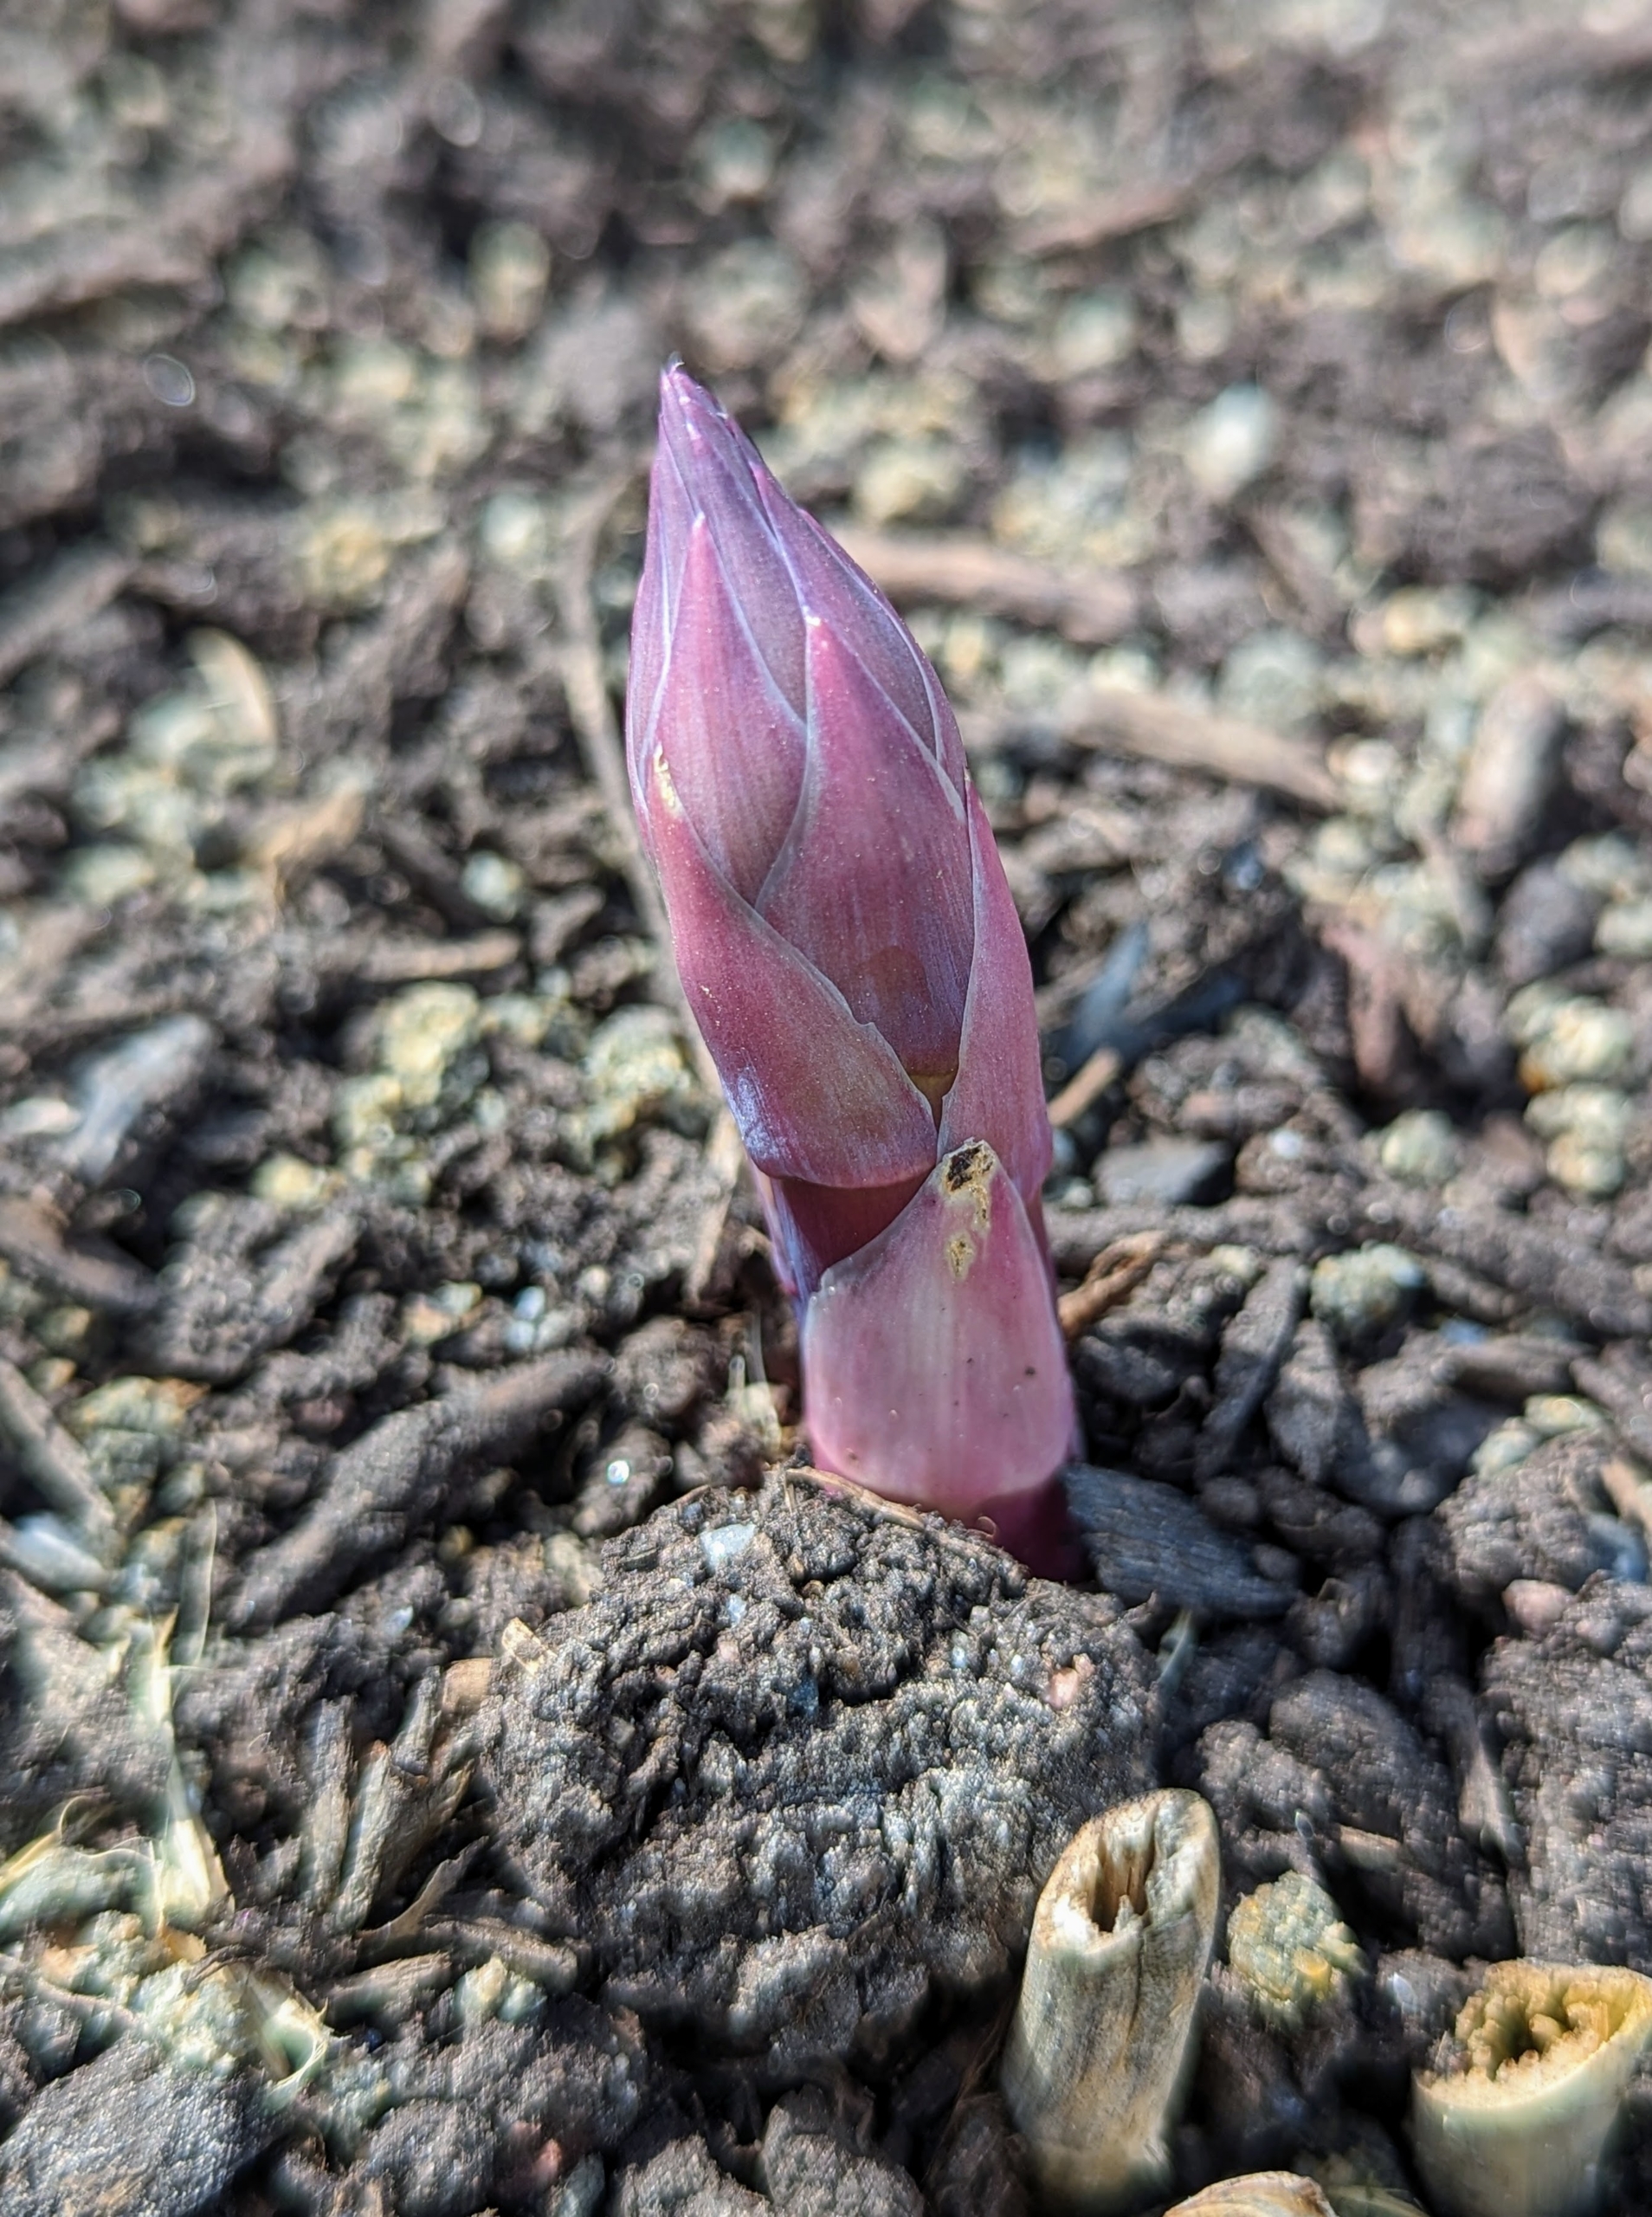
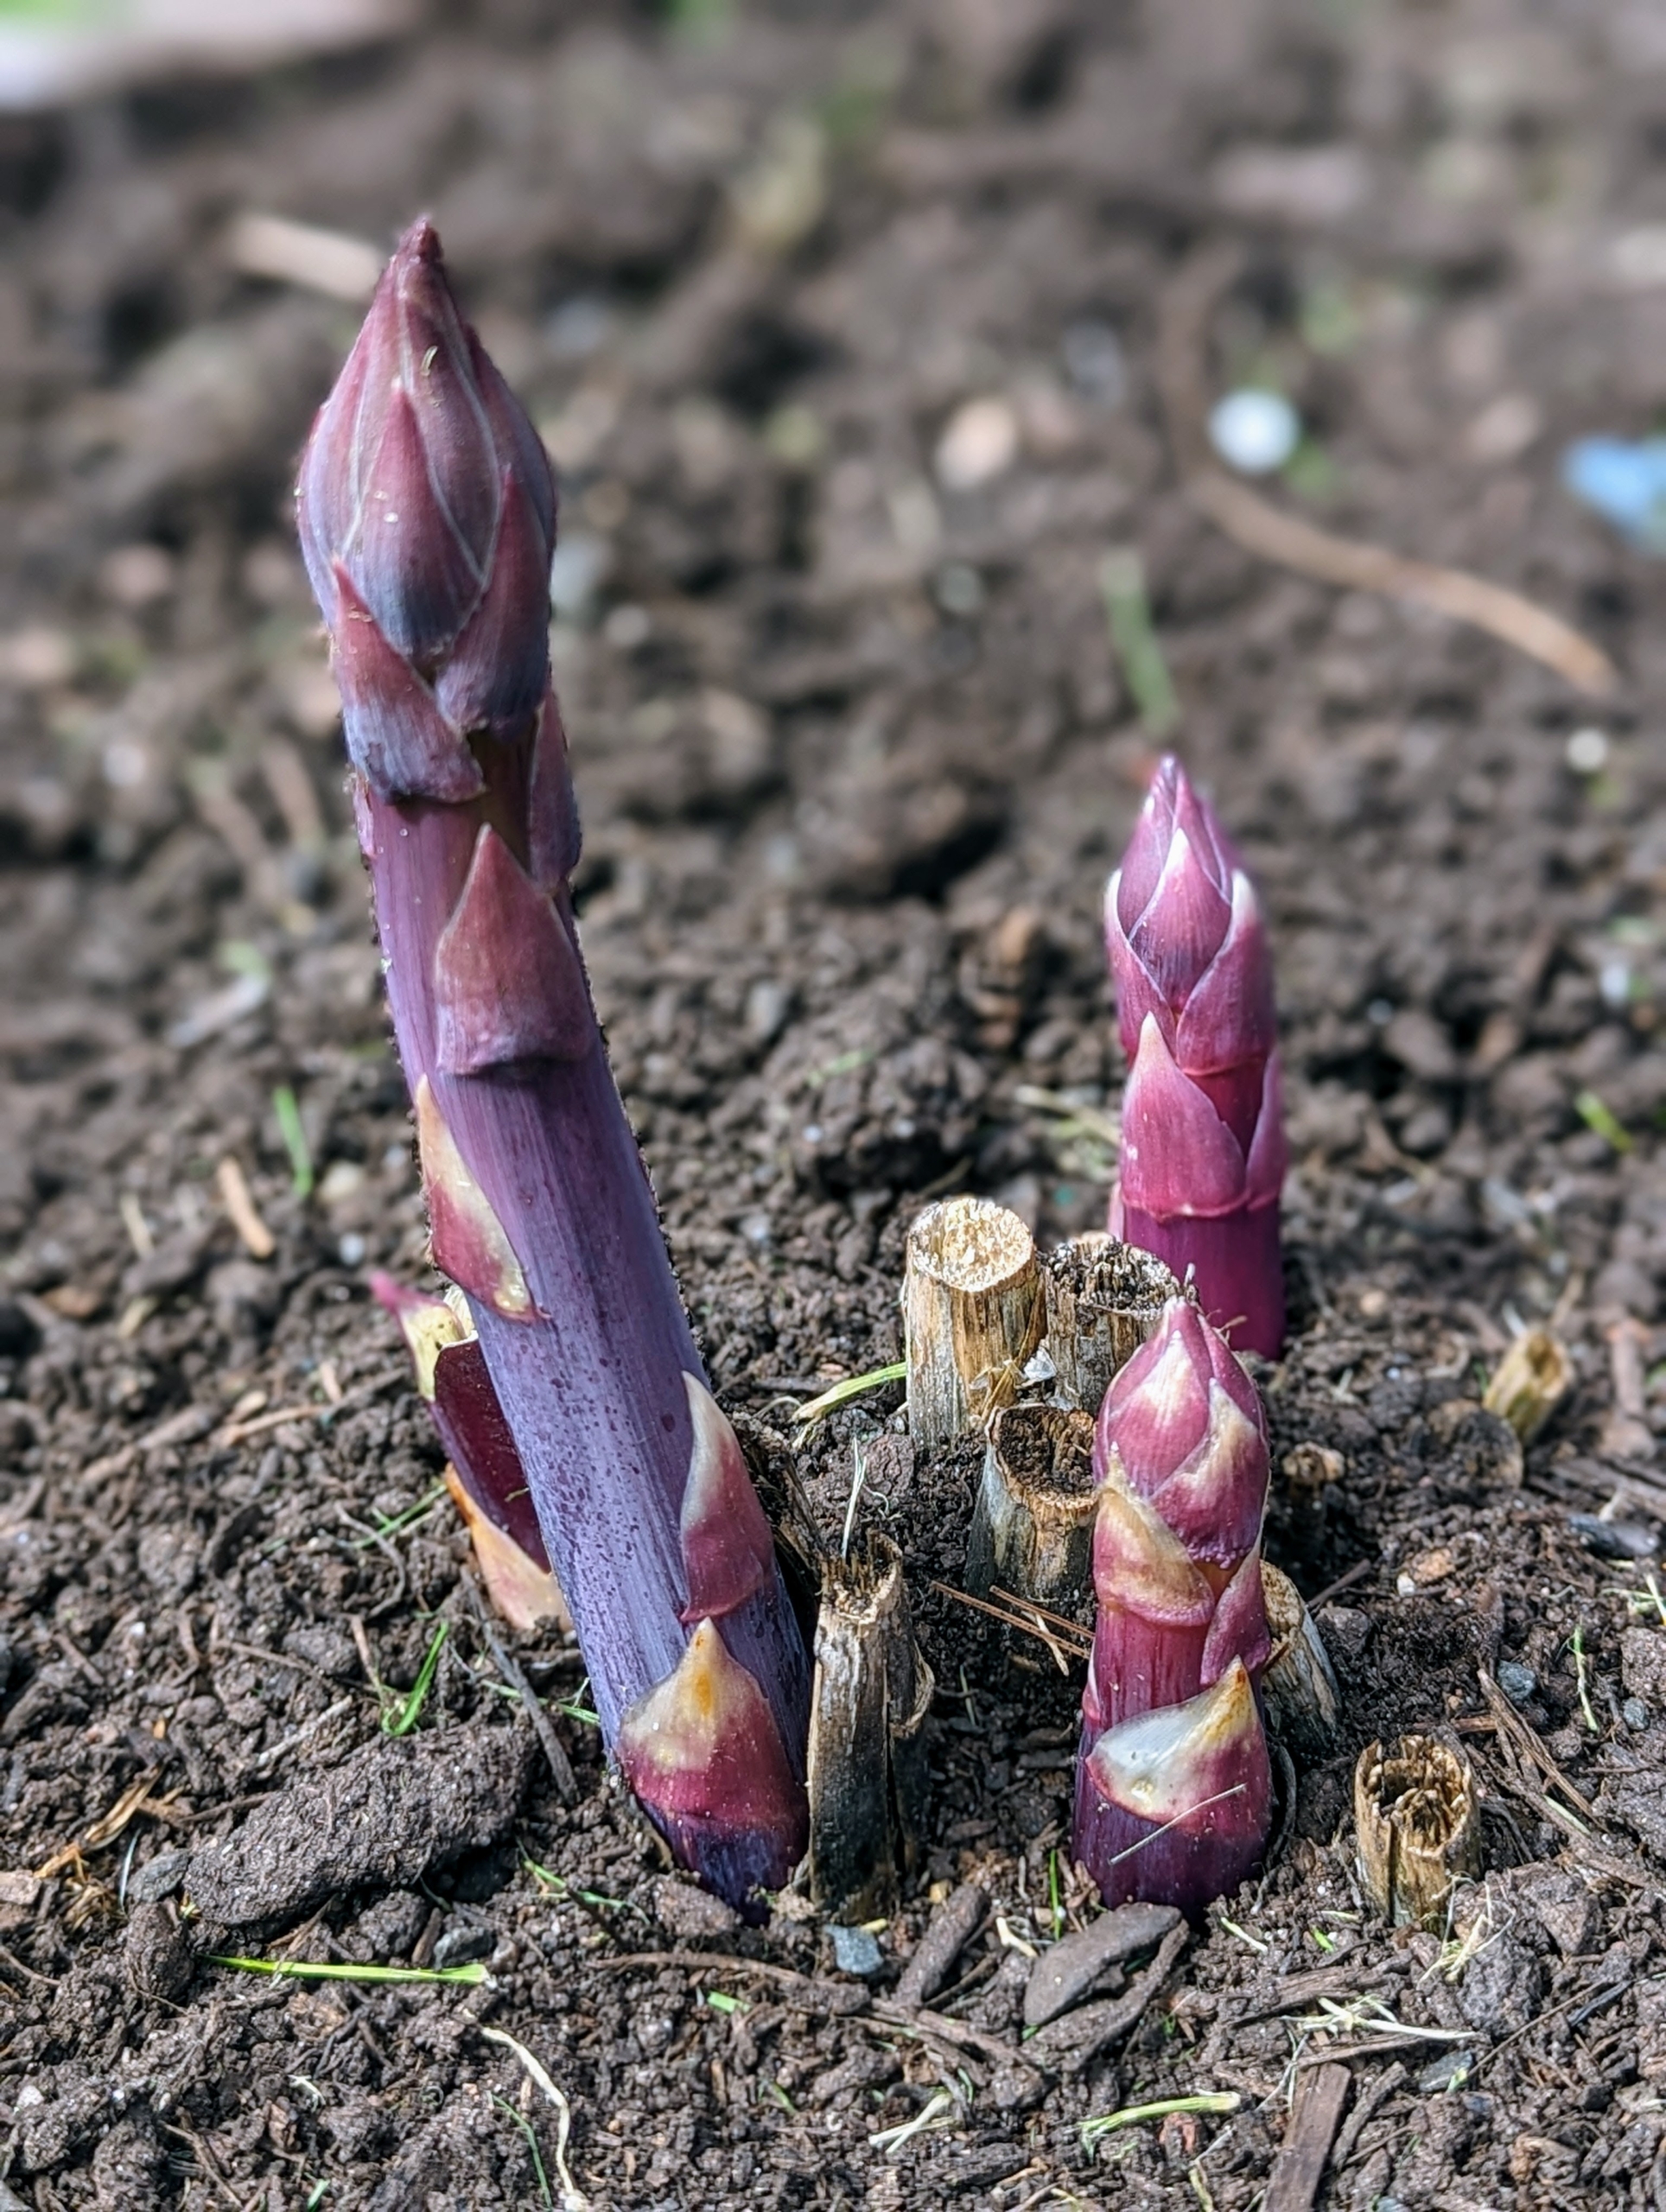
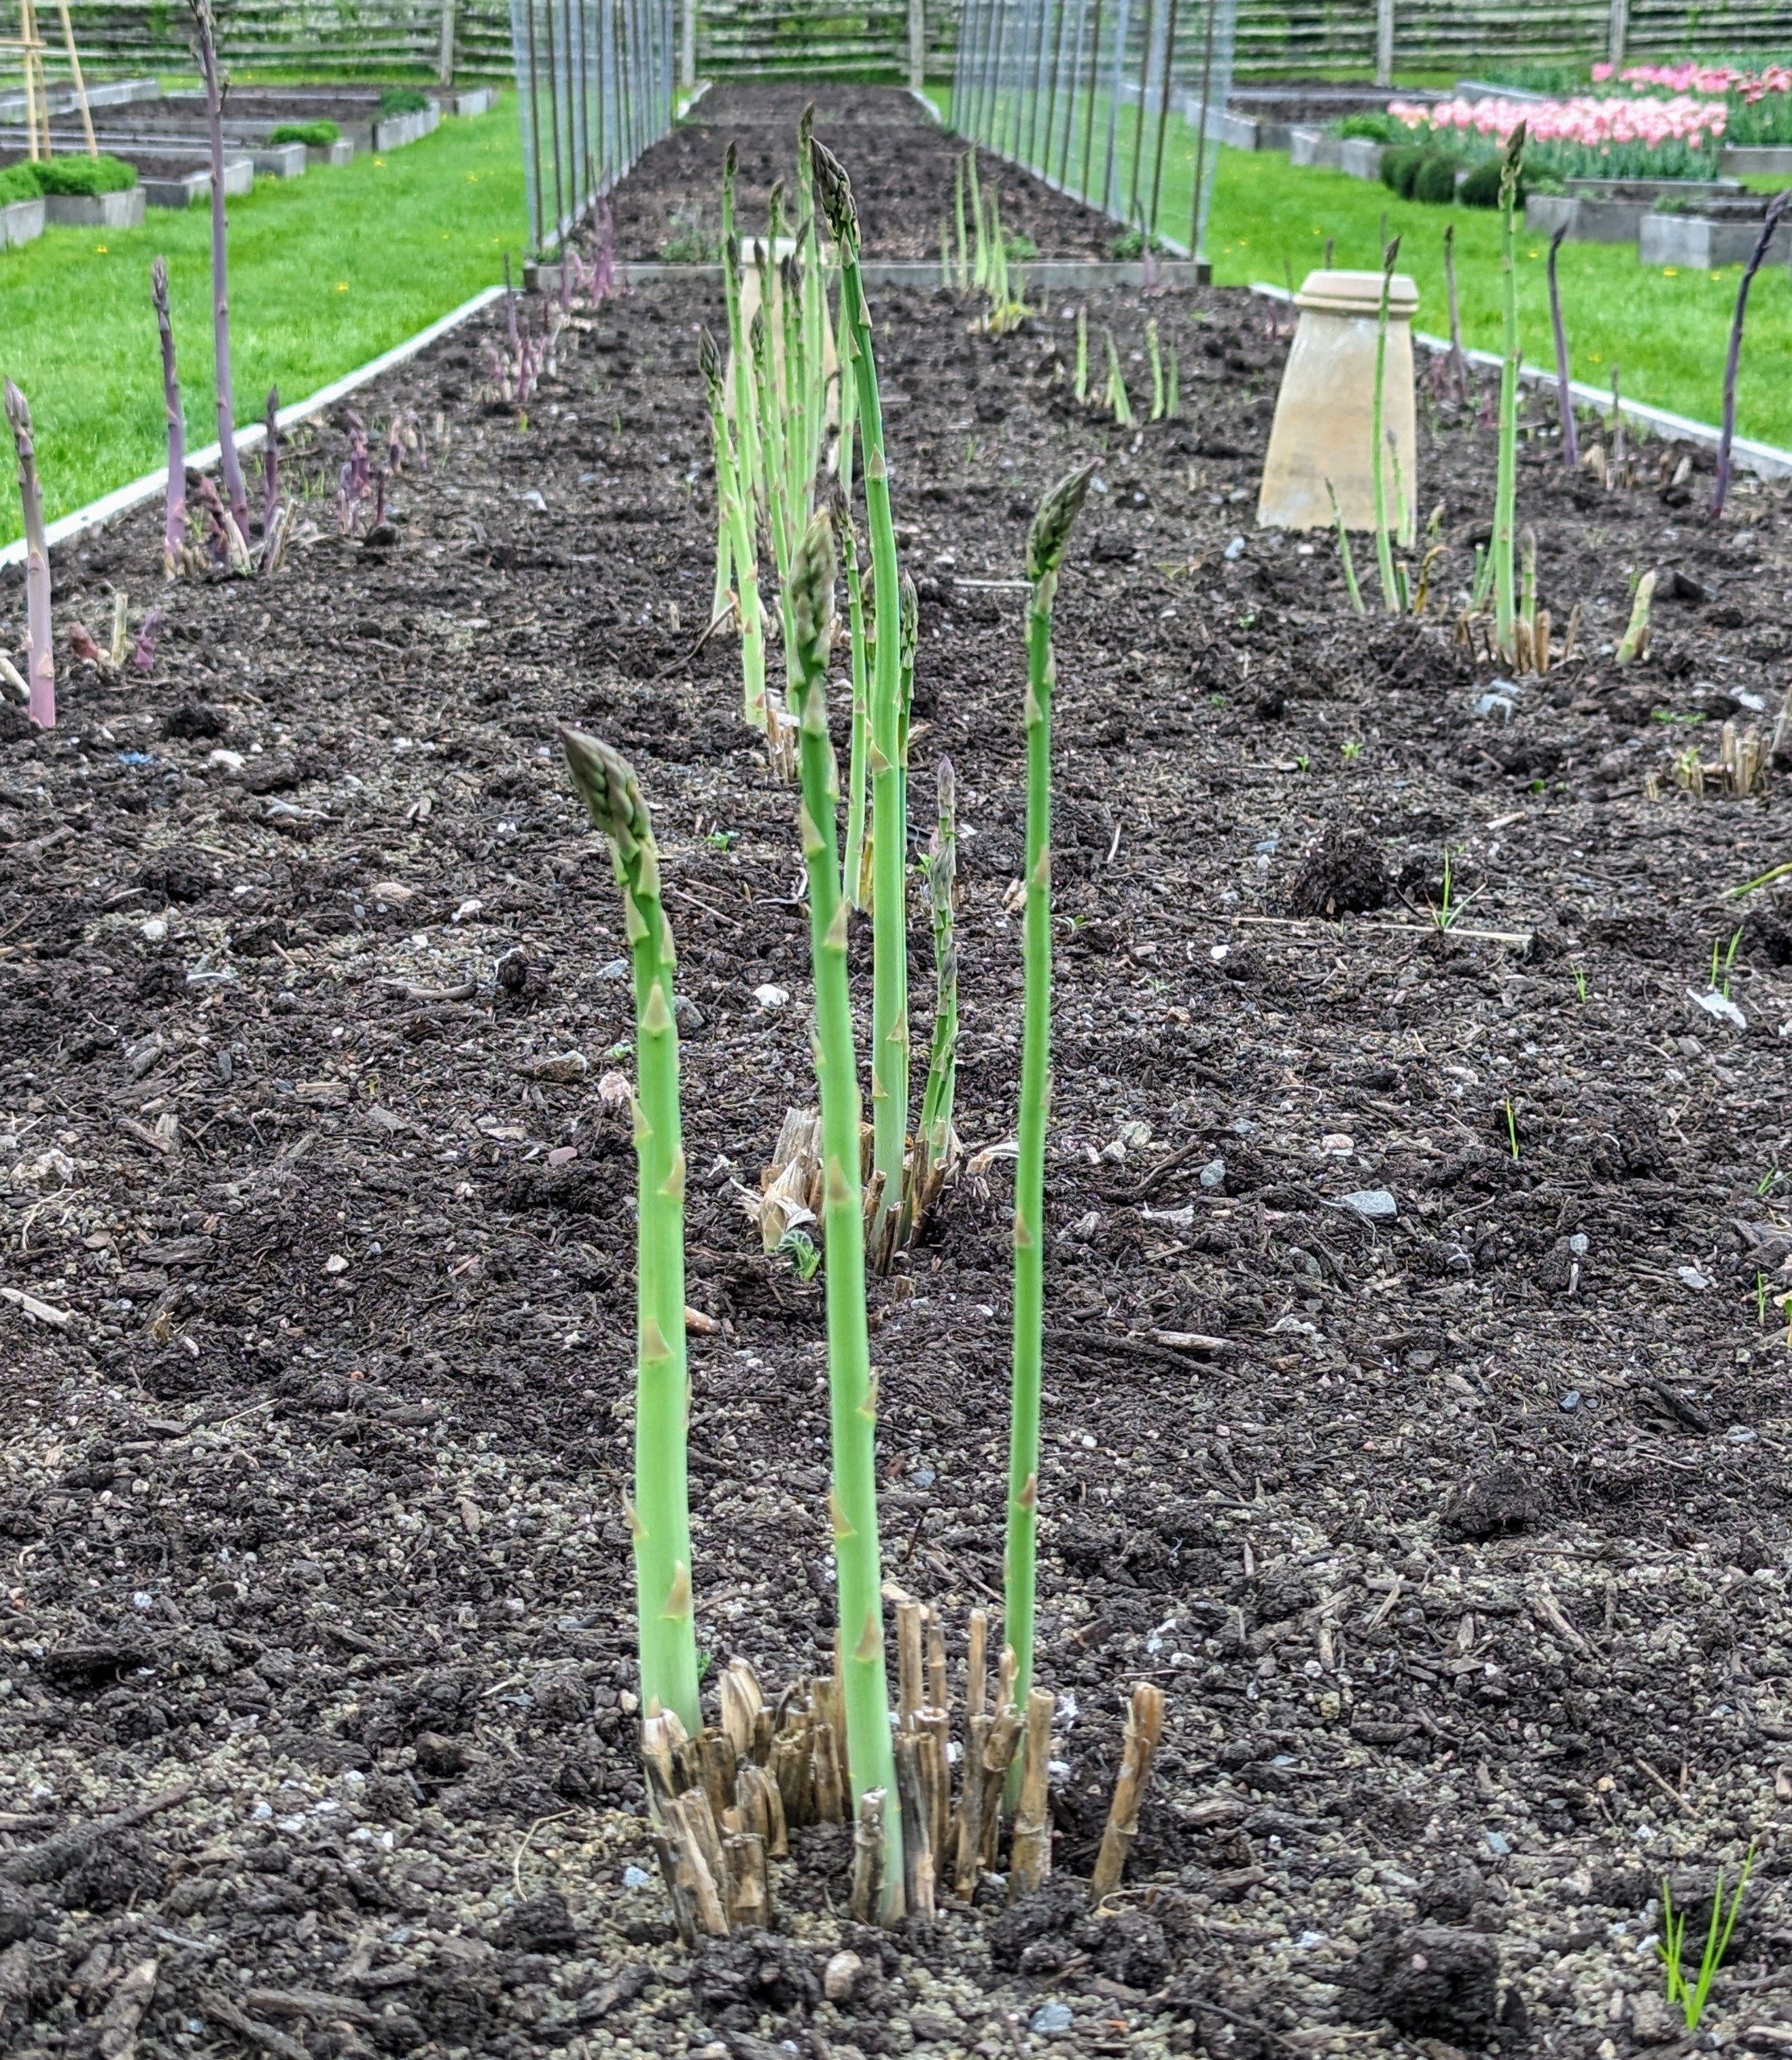
And then earlier this month, the heads of stronger, more robust spears poked out of the soil.
‘Purple Passion’ asparagus is nuttier, sweeter, and more tender than other green varieties because it has about 20-percent more sugar in its stalks. While the stalks are purple on the outside, the inside is the same as a green spear.
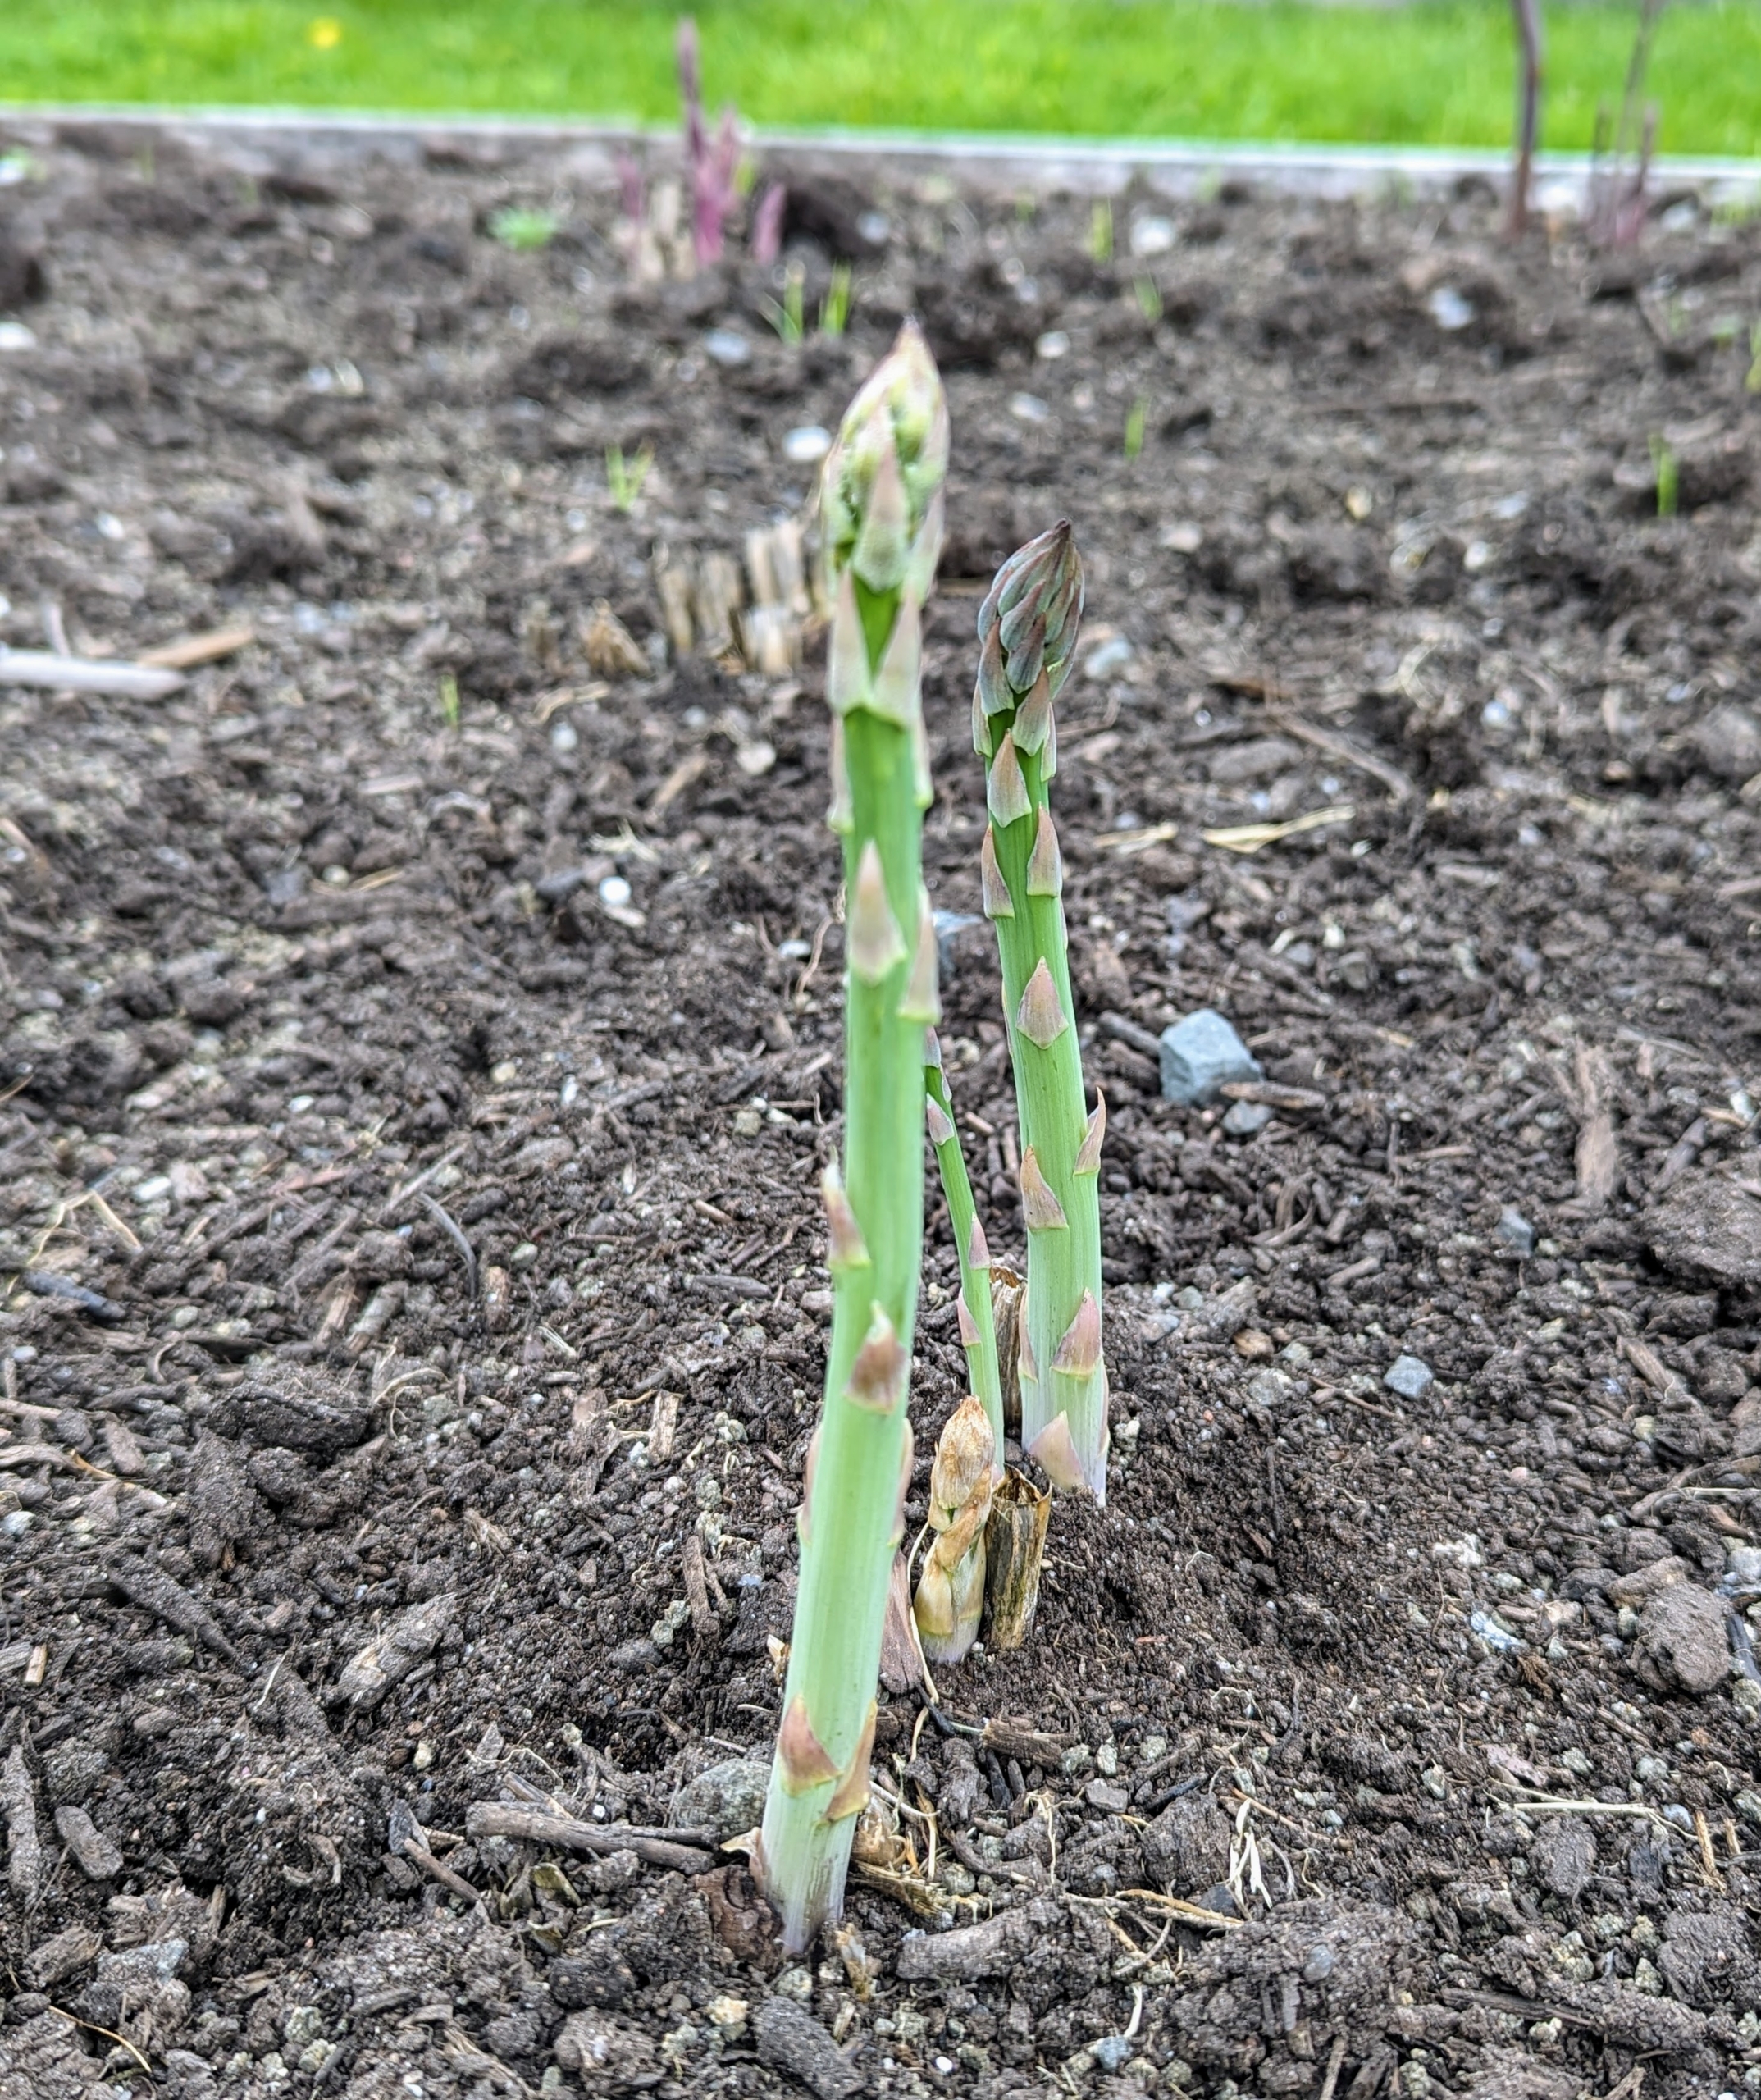
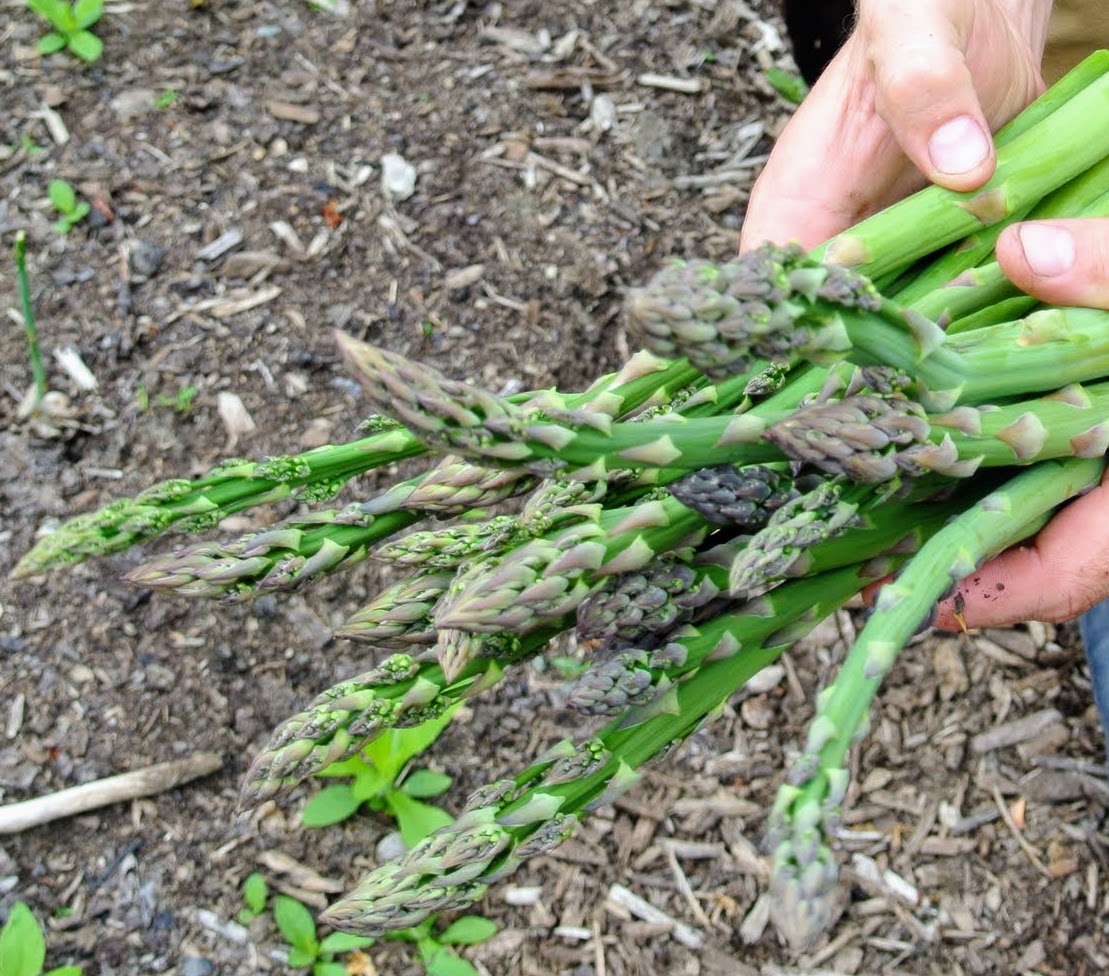
‘Millennium’ asparagus is high yielding, long lived, cold hardy, and adaptable. The best time to harvest is when the asparagus spears are about six to eight inches tall. Harvesting can be done by breaking the spears off by hand near the soil level.
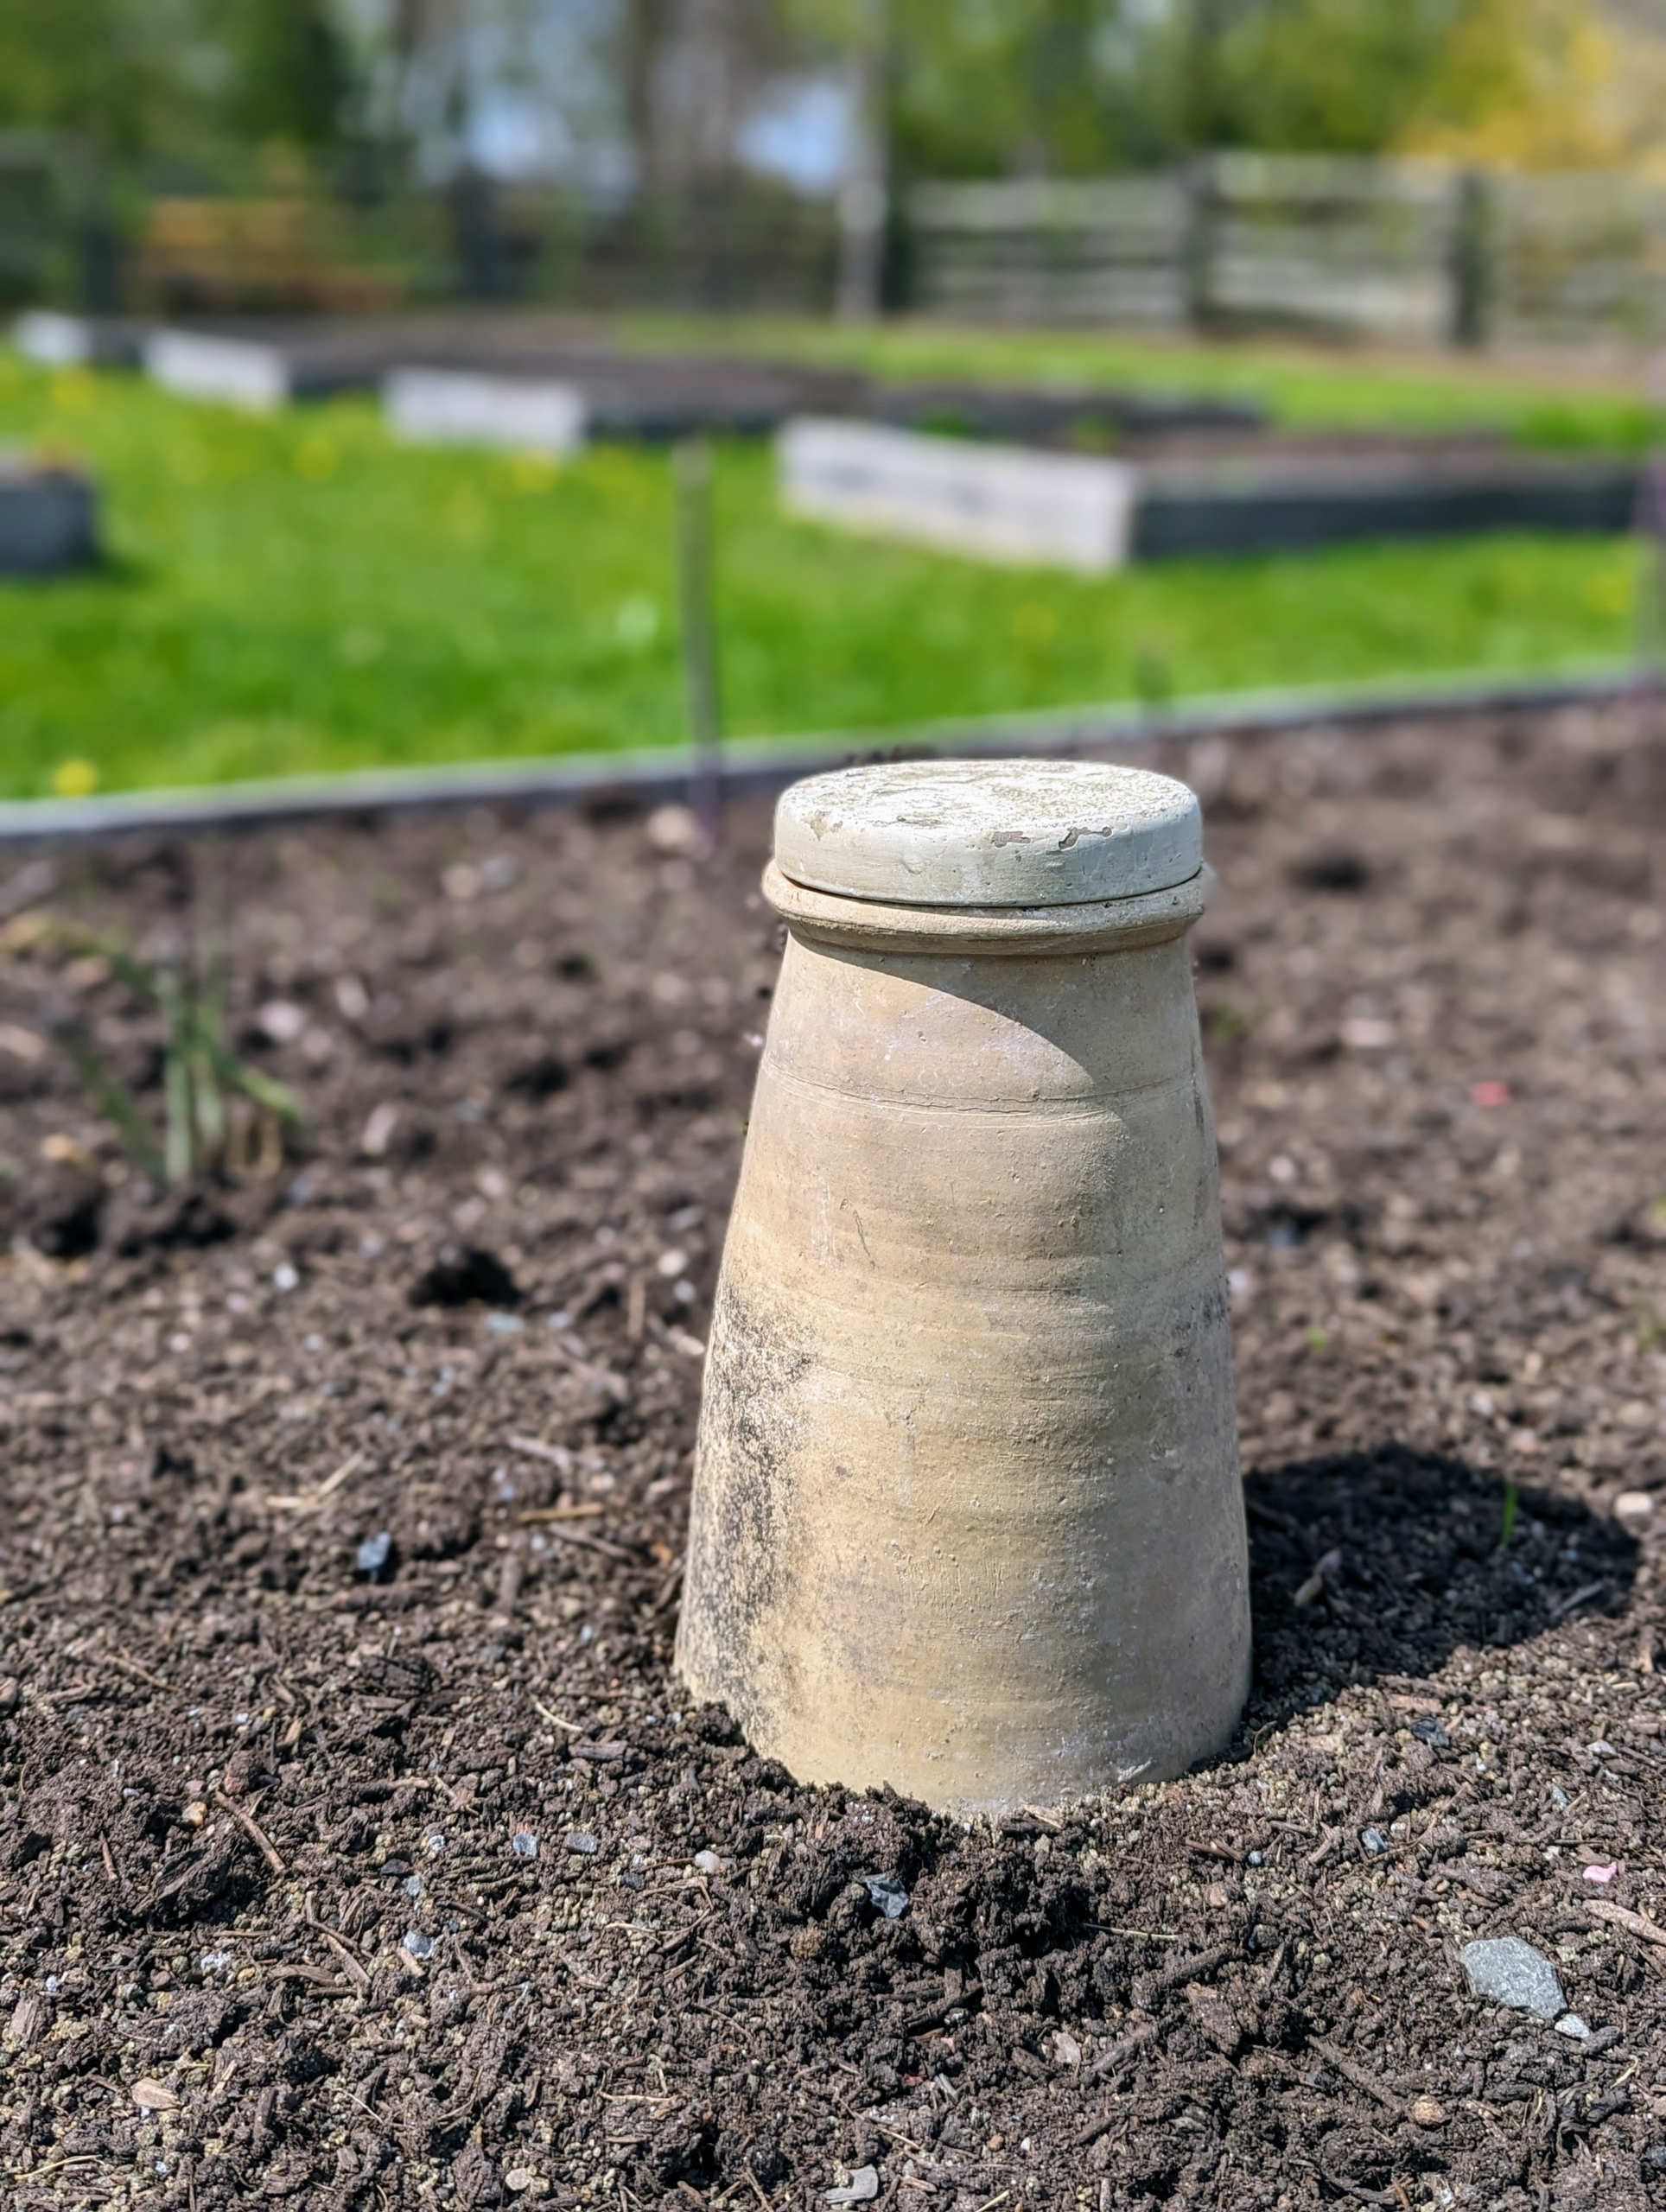
This is an earthenware cloche specifically for growing white asparagus. The plants are the same, but the spears of white asparagus are blanched, or kept from light while growing. Crossing fingers they’re white under there.
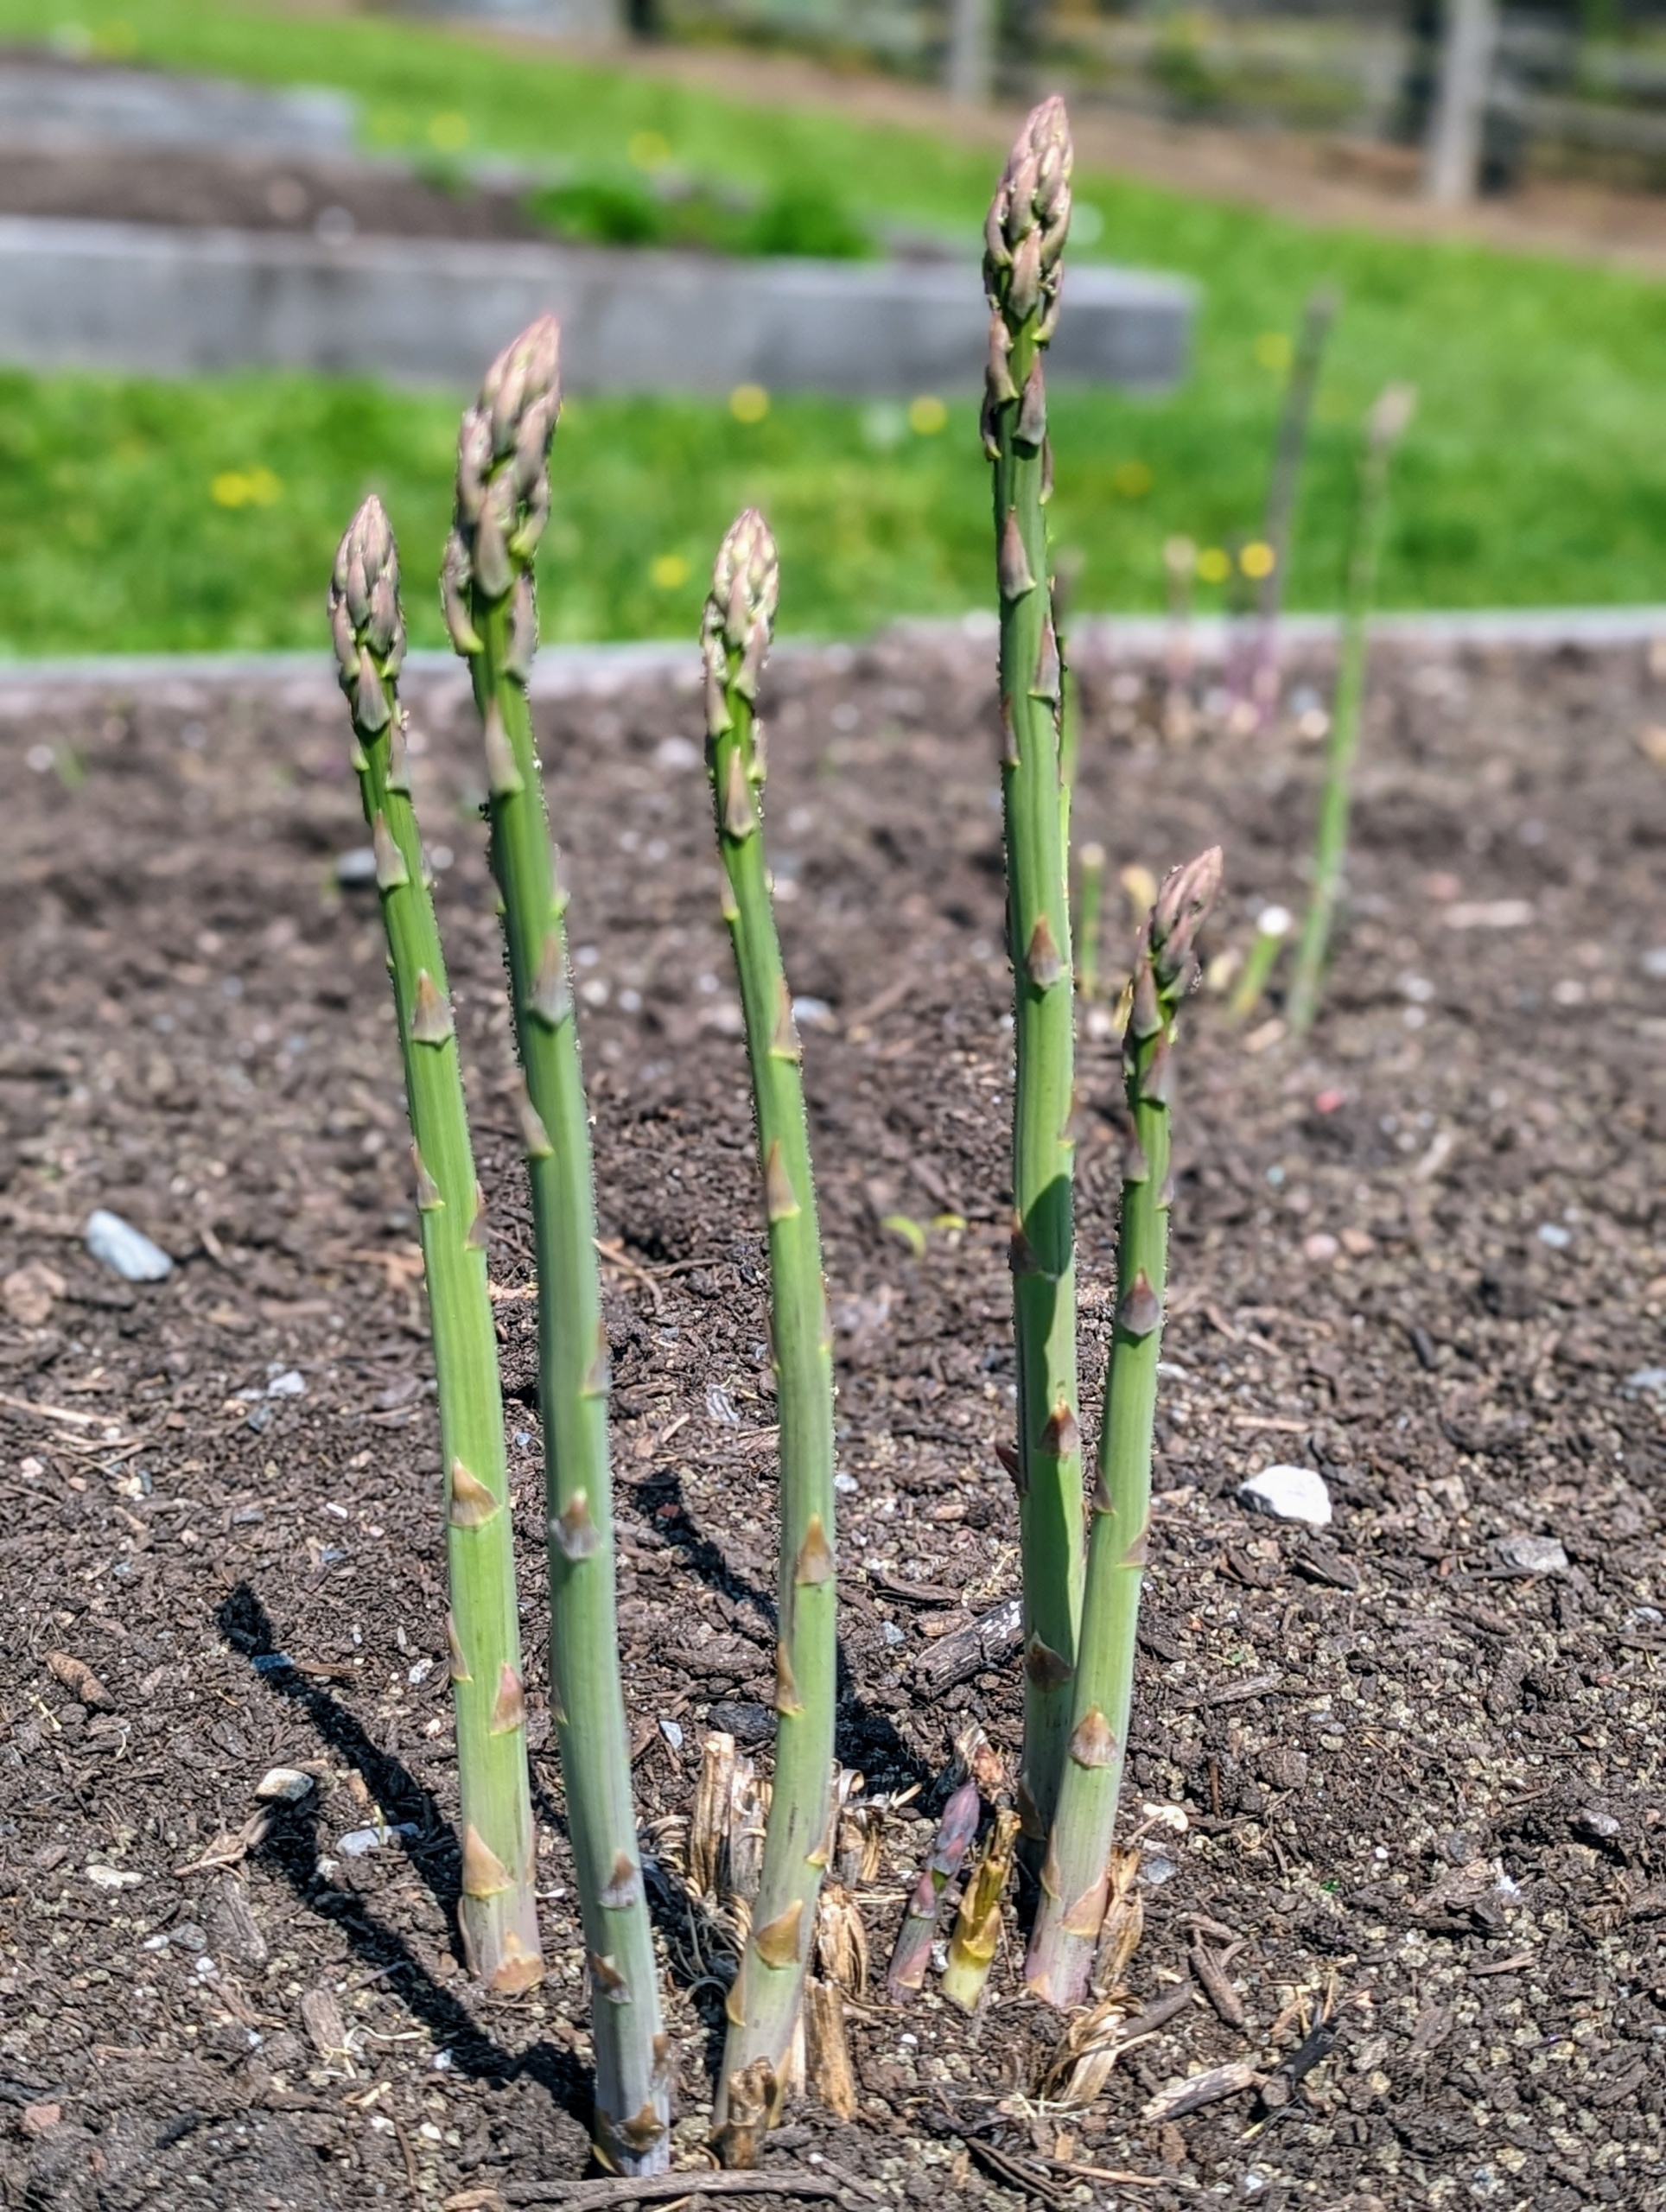
It’s widely thought that thin asparagus are tastier, based on the notion that slender spears are younger. However, thick spears are already thick when they poke up from the soil. The two are just different varieties. I love both kinds of asparagus, but I do find that fat stalks tend to be a little more succulent.
An asparagus bed should receive a minimum of eight-hours of full sun per day and be well-drained.
With room to grow, and a little patience to start, one can enjoy homegrown, delicious and nutritious asparagus for at least 15-years.
The gardens at my Bedford, New York farm are changing every single day.
One of the most anticipated sights on the farm is my herbaceous peony garden in full bloom. No garden is complete without these beautiful plants, which show off their large, imposing flowers in May and June. True perennials, herbaceous peonies can live for 100-years, becoming more impressive over time. Last week, my gardeners and outdoor grounds crew staked all the herbaceous peonies in the garden across from my Winter House. At maturity, these plants, which grow to about three-feet tall, need good support, so their massive flower heads don’t droop to the ground.
Here are some photos of our process, enjoy.
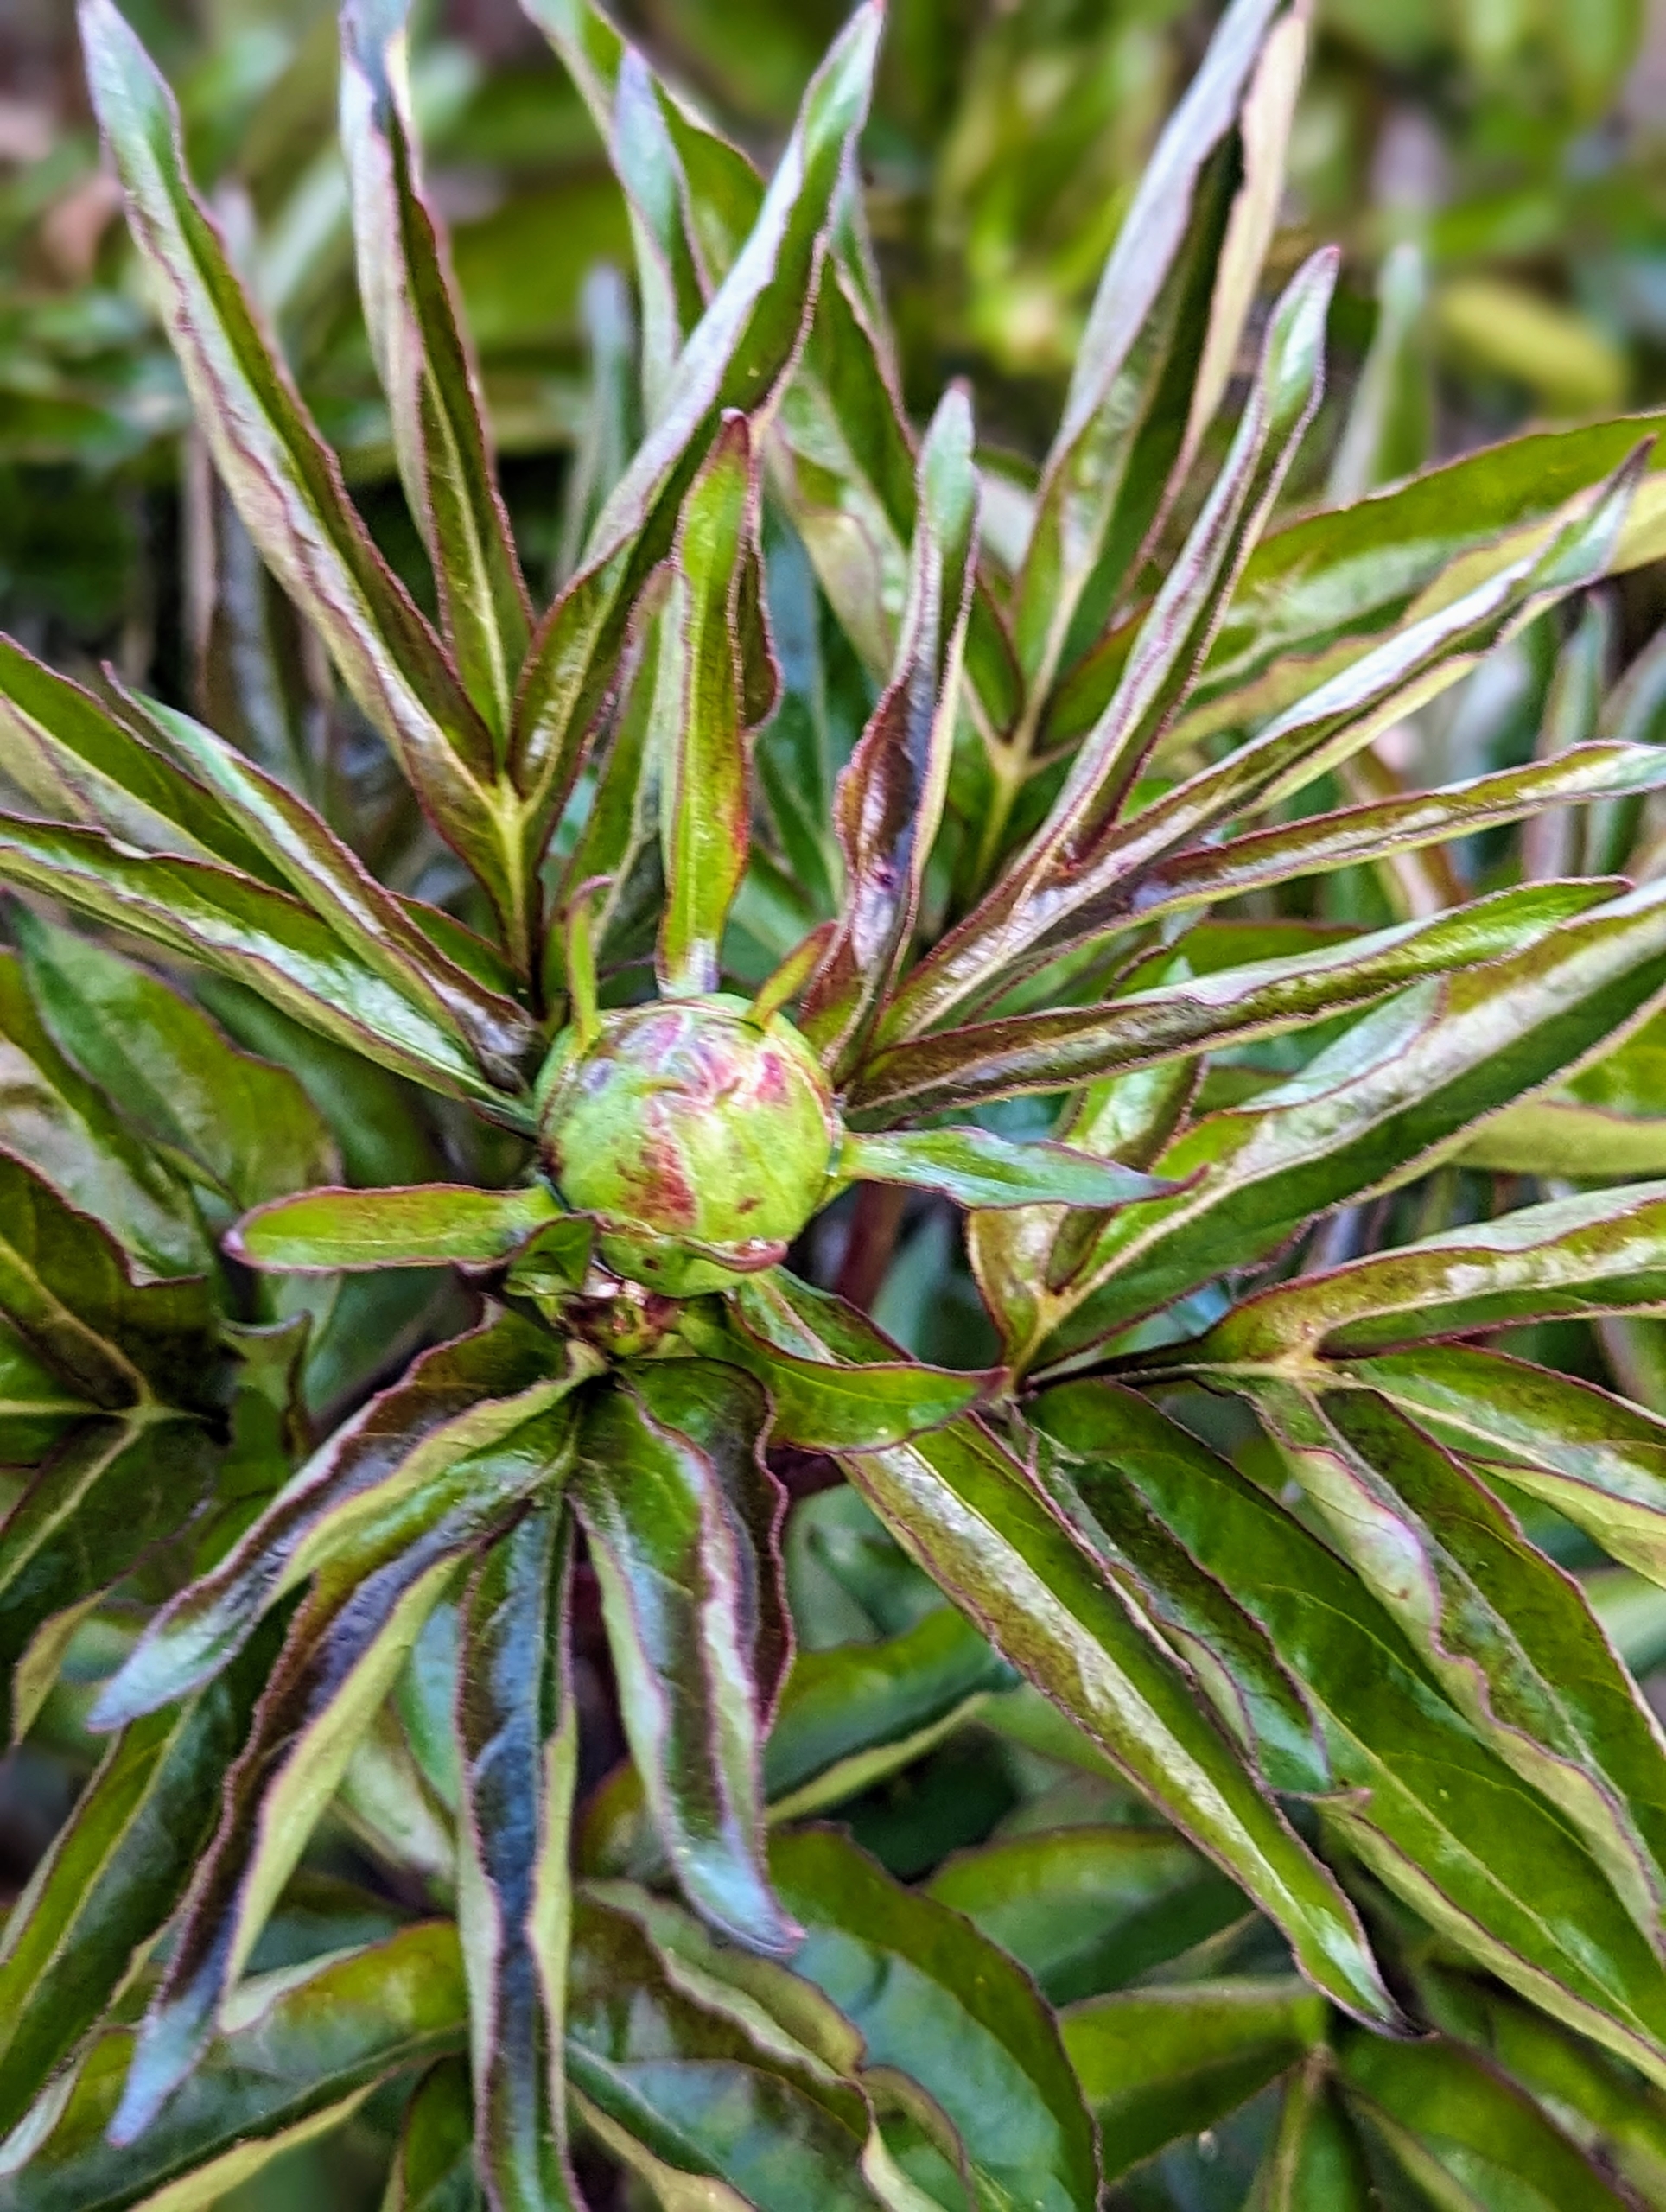
It’s almost peony time. In just about five weeks, rows and rows of stunning pink and white herbaceous peonies will be flowering here at my farm. Here is just one of many buds.
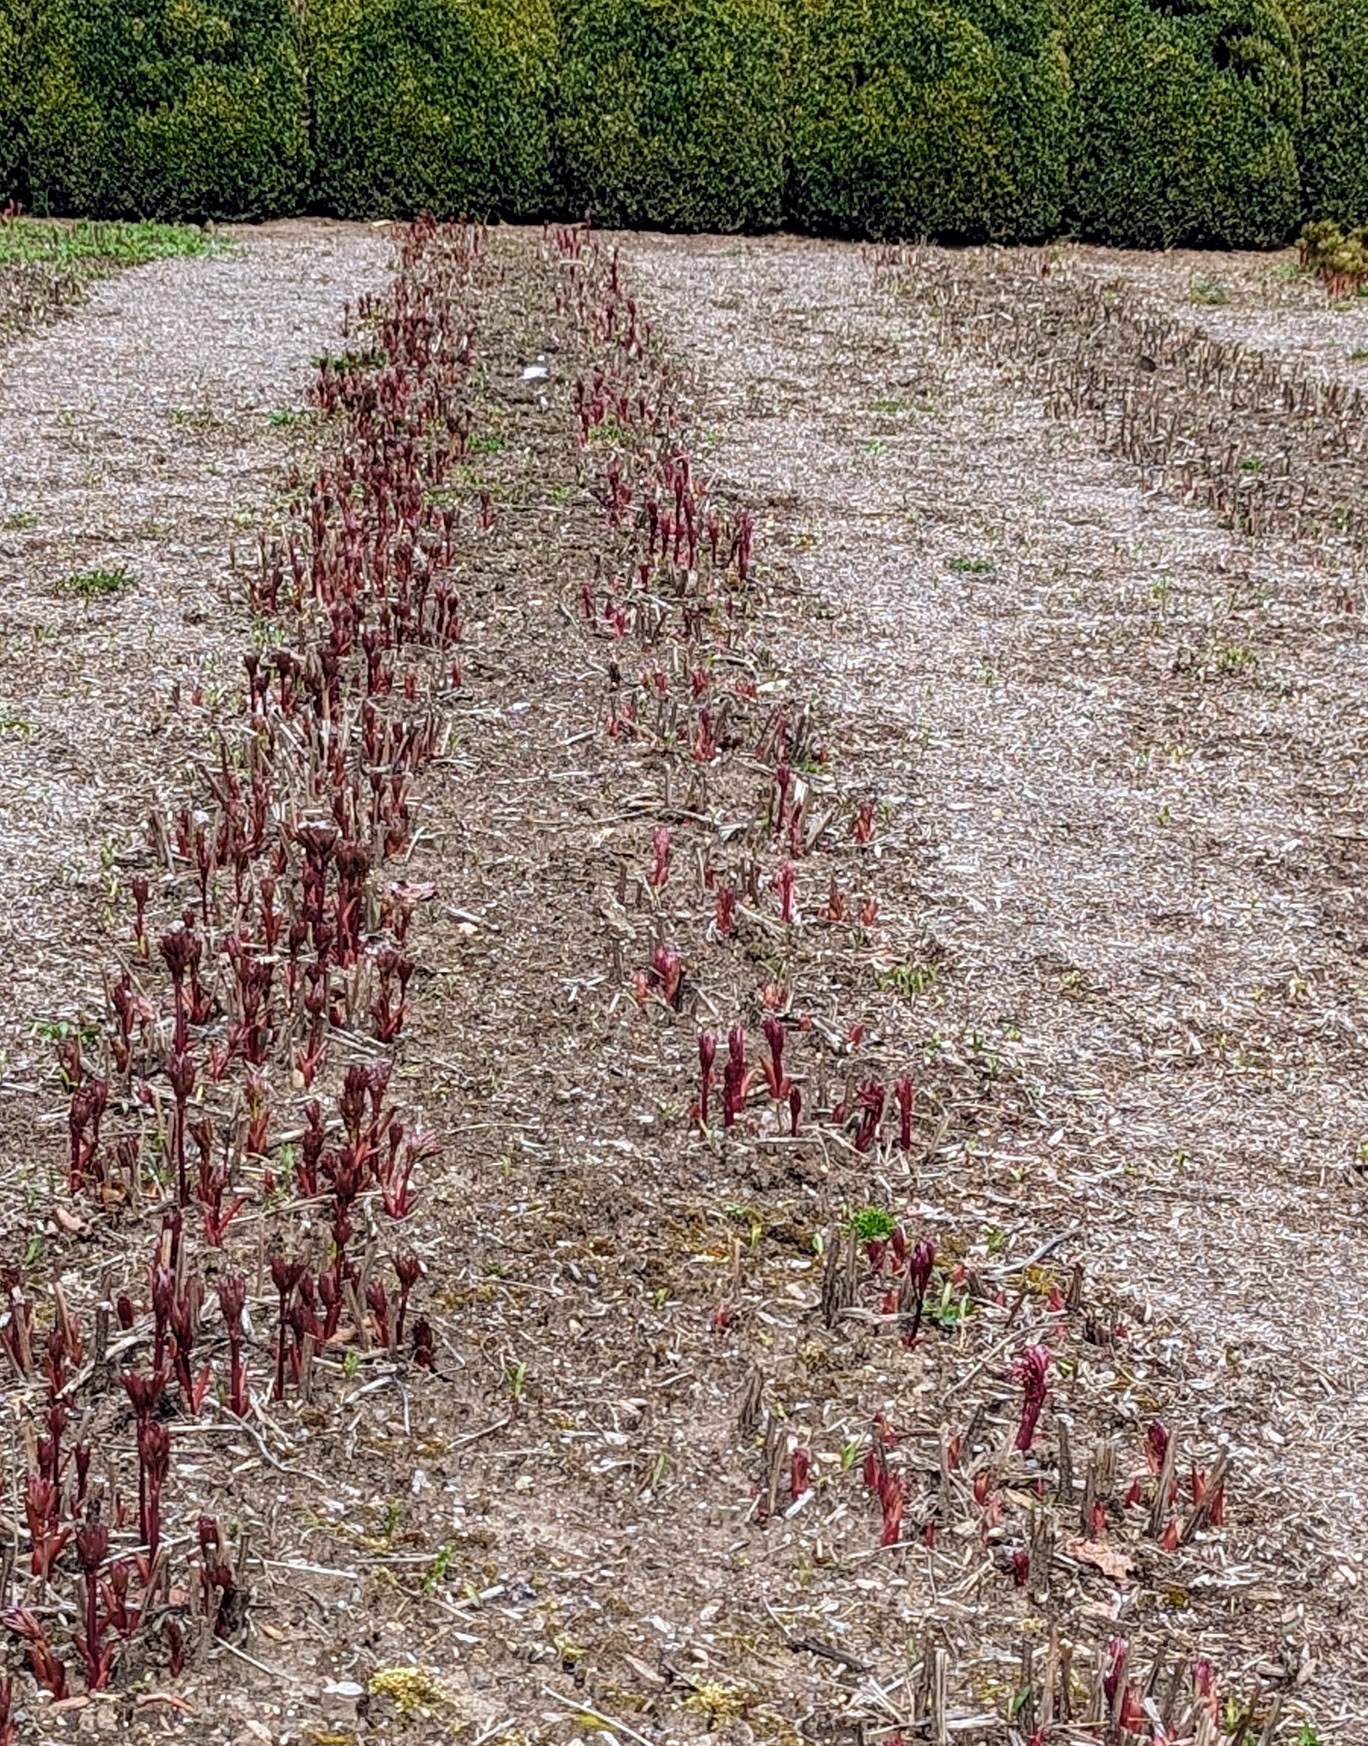
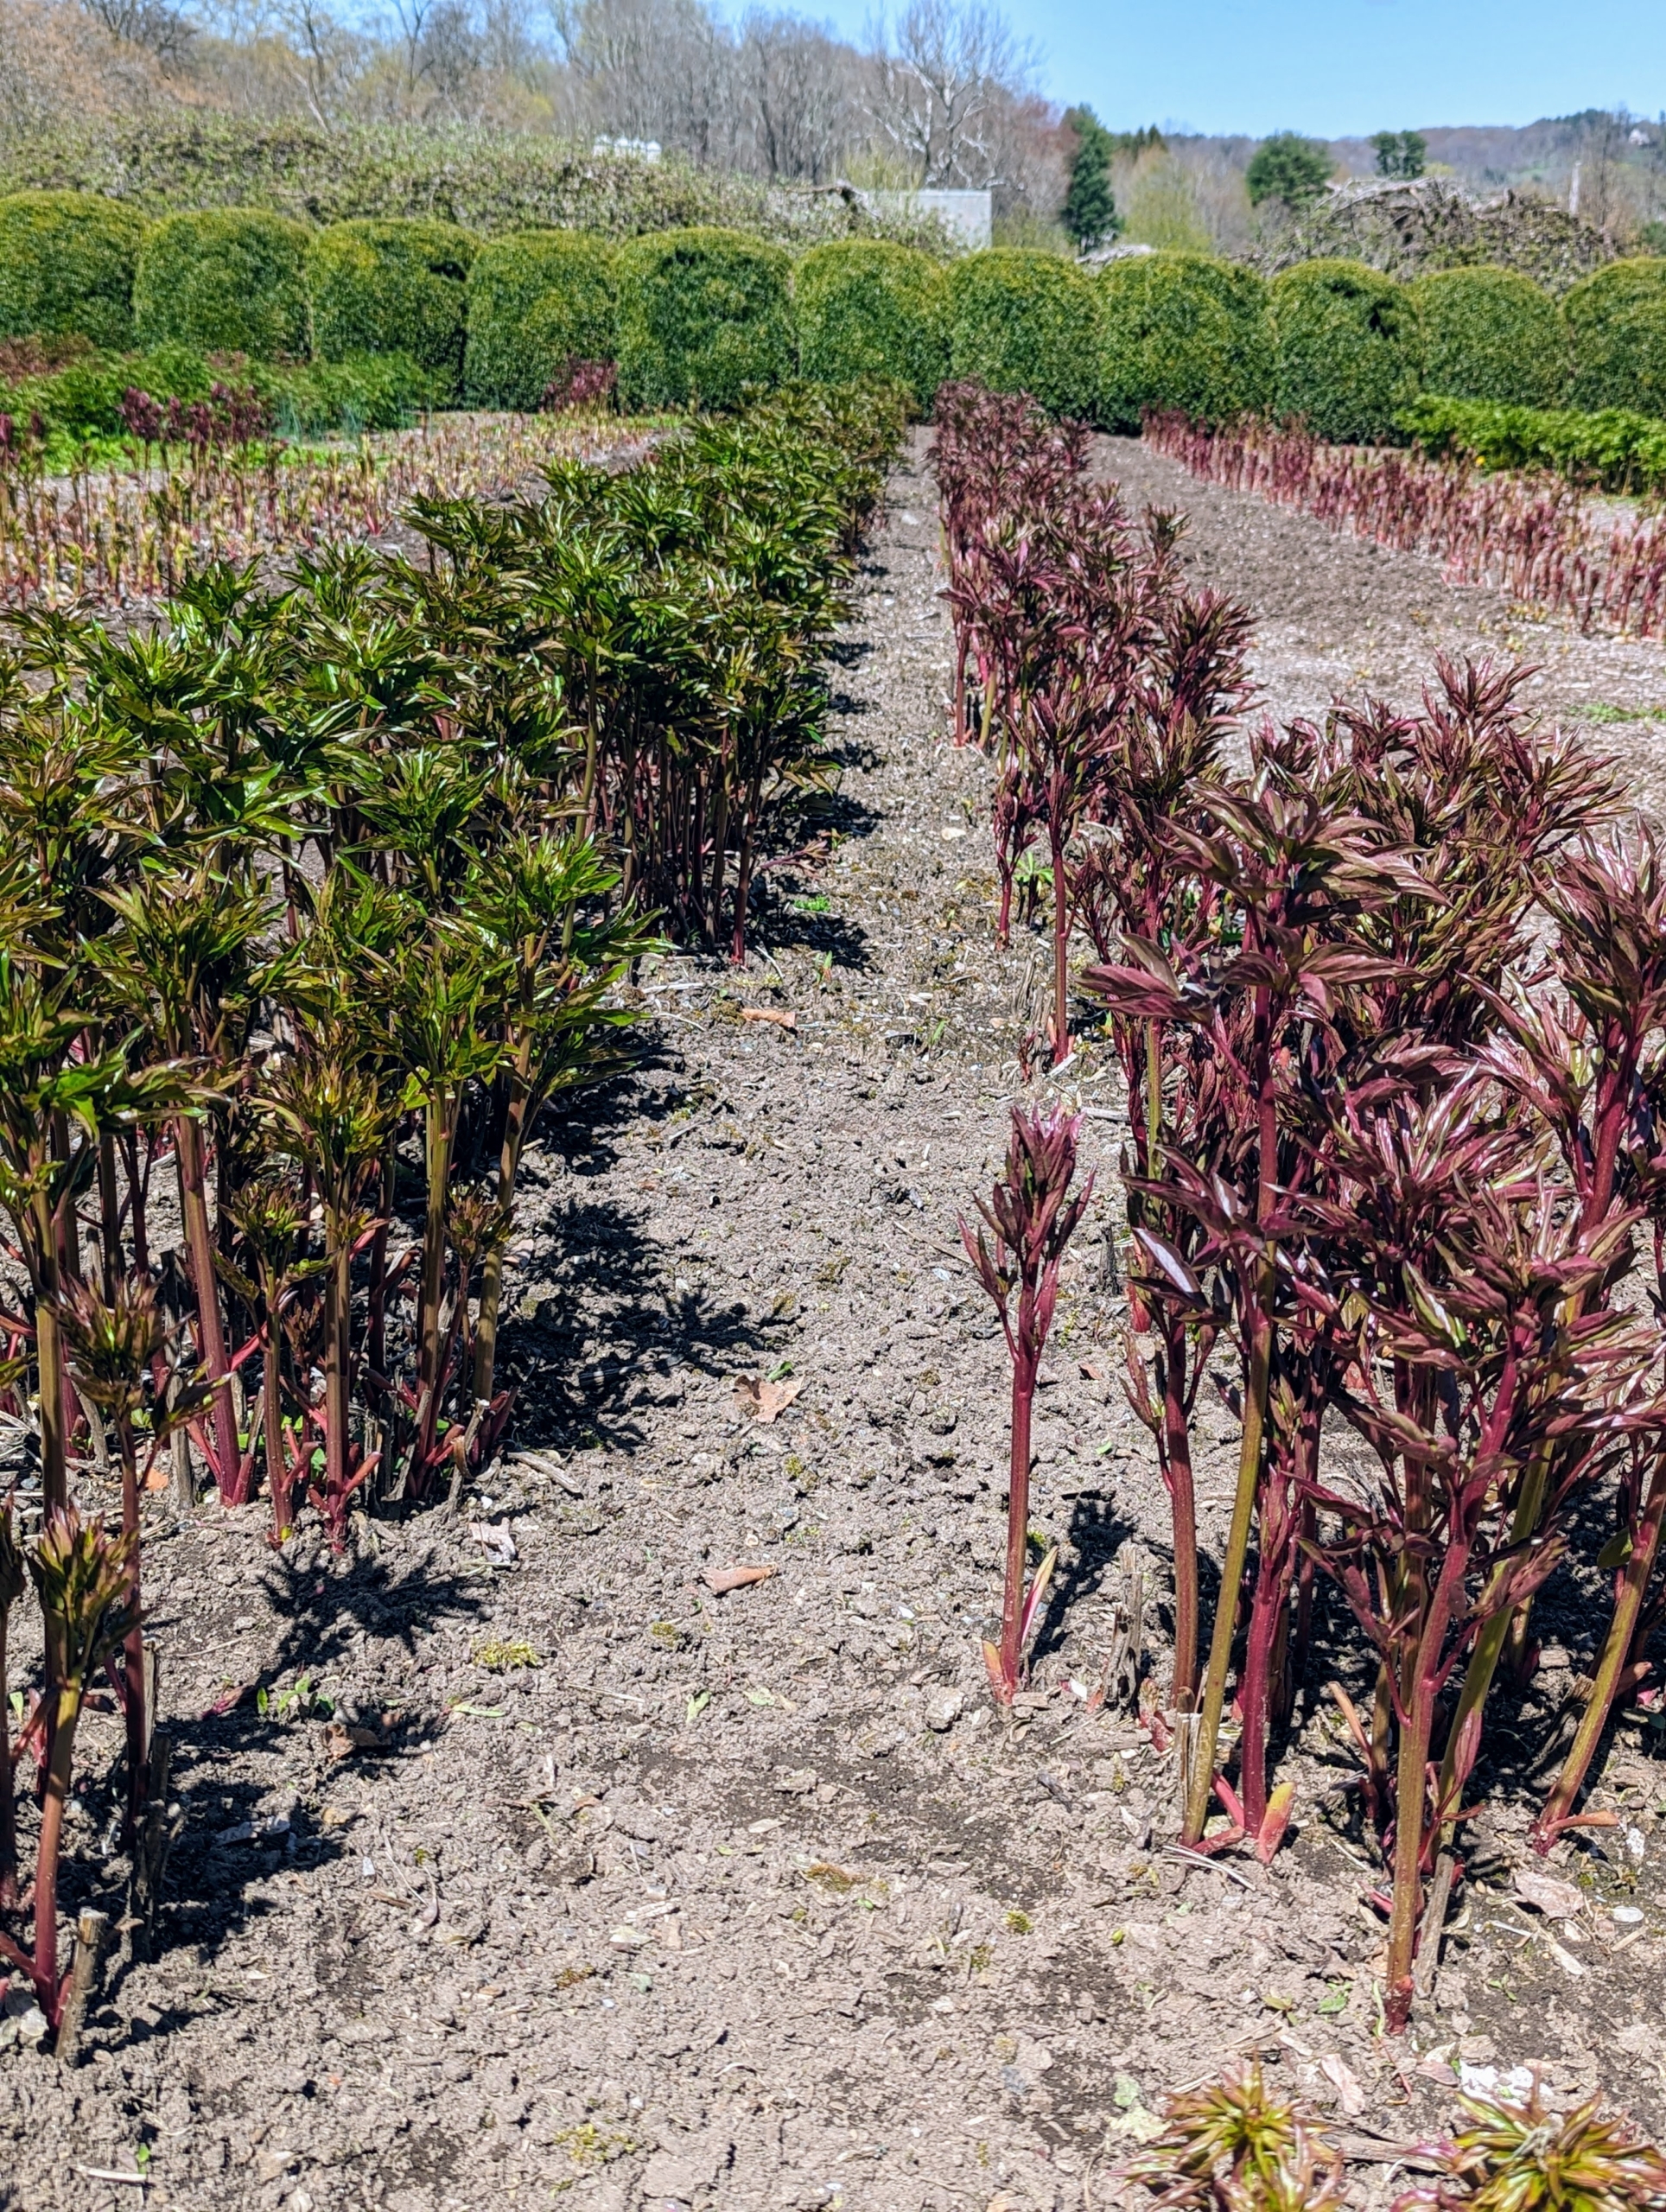
Herbaceous peonies are very hardy perennials and thrive in USDA zones 3 to 8. In early April, most of the herbaceous peonies begin emerging from the ground, but they grow very quickly. Here they are April 10…
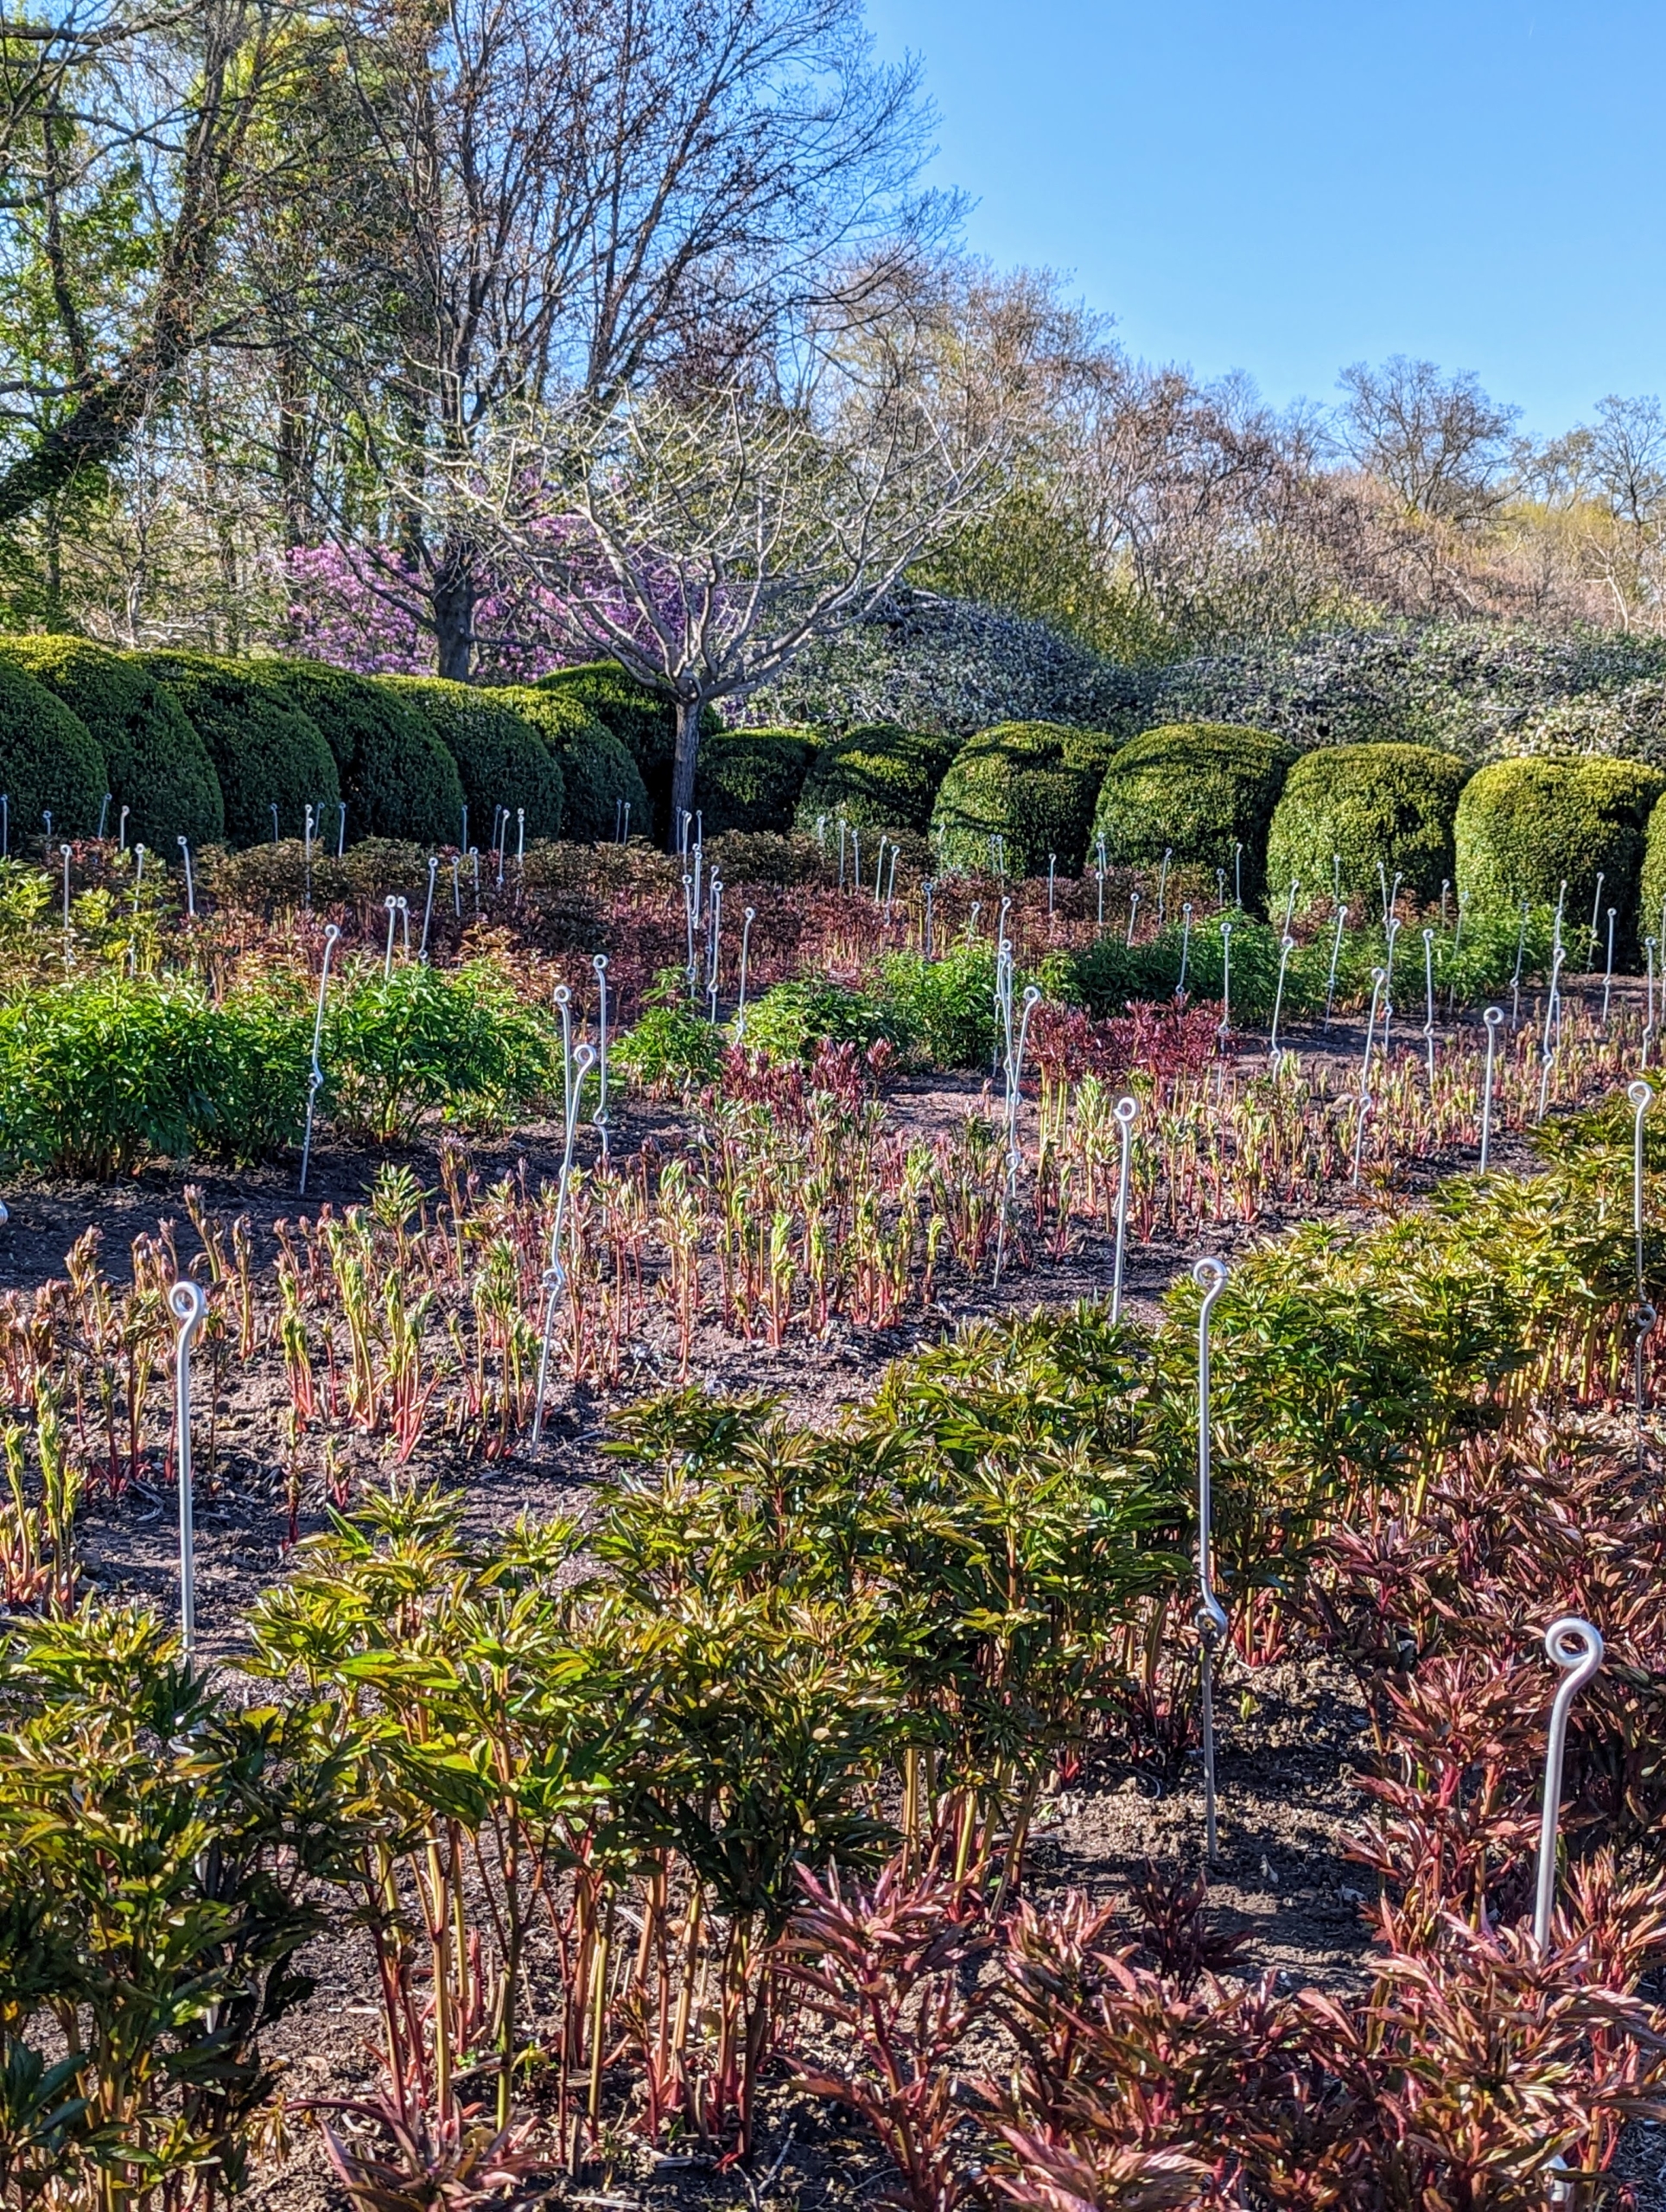
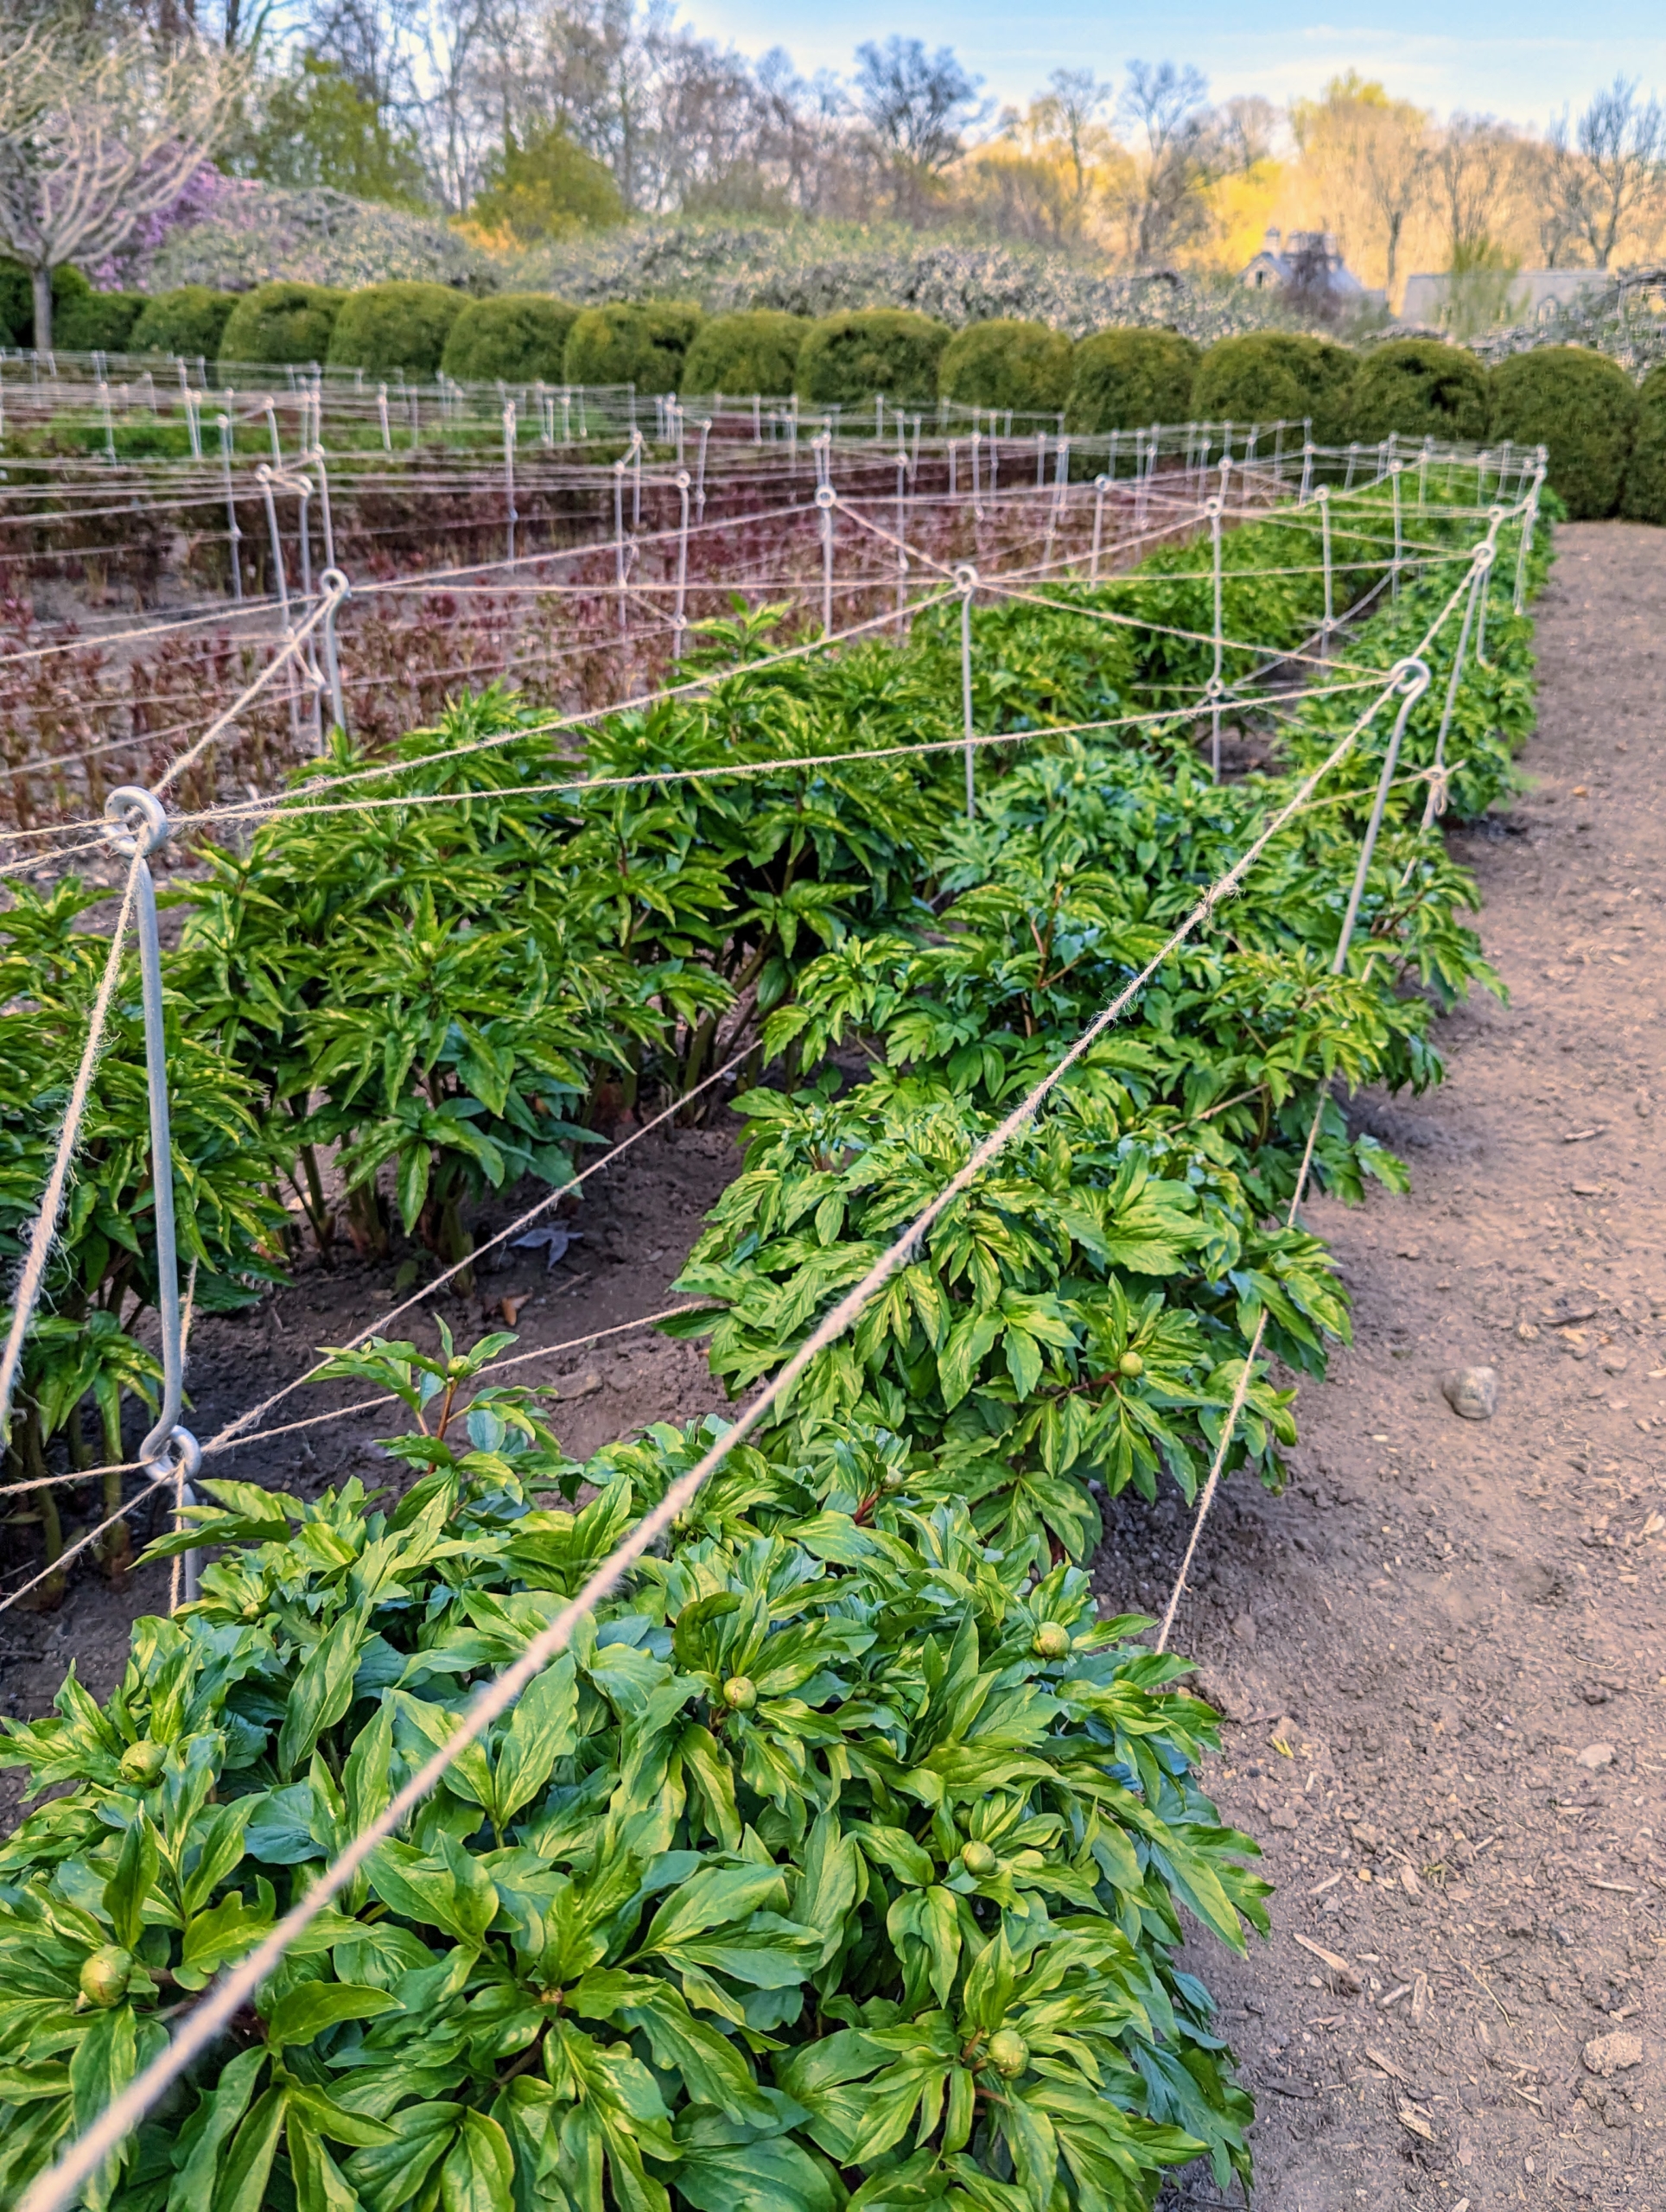
… And these are the peonies two weeks later. Once the stems are several inches tall, it’s time to stake each of the rows of peonies, so they are well-bolstered as they mature. I planted various peony flower types in this bed: single, semi-double, double, and anemone-type.
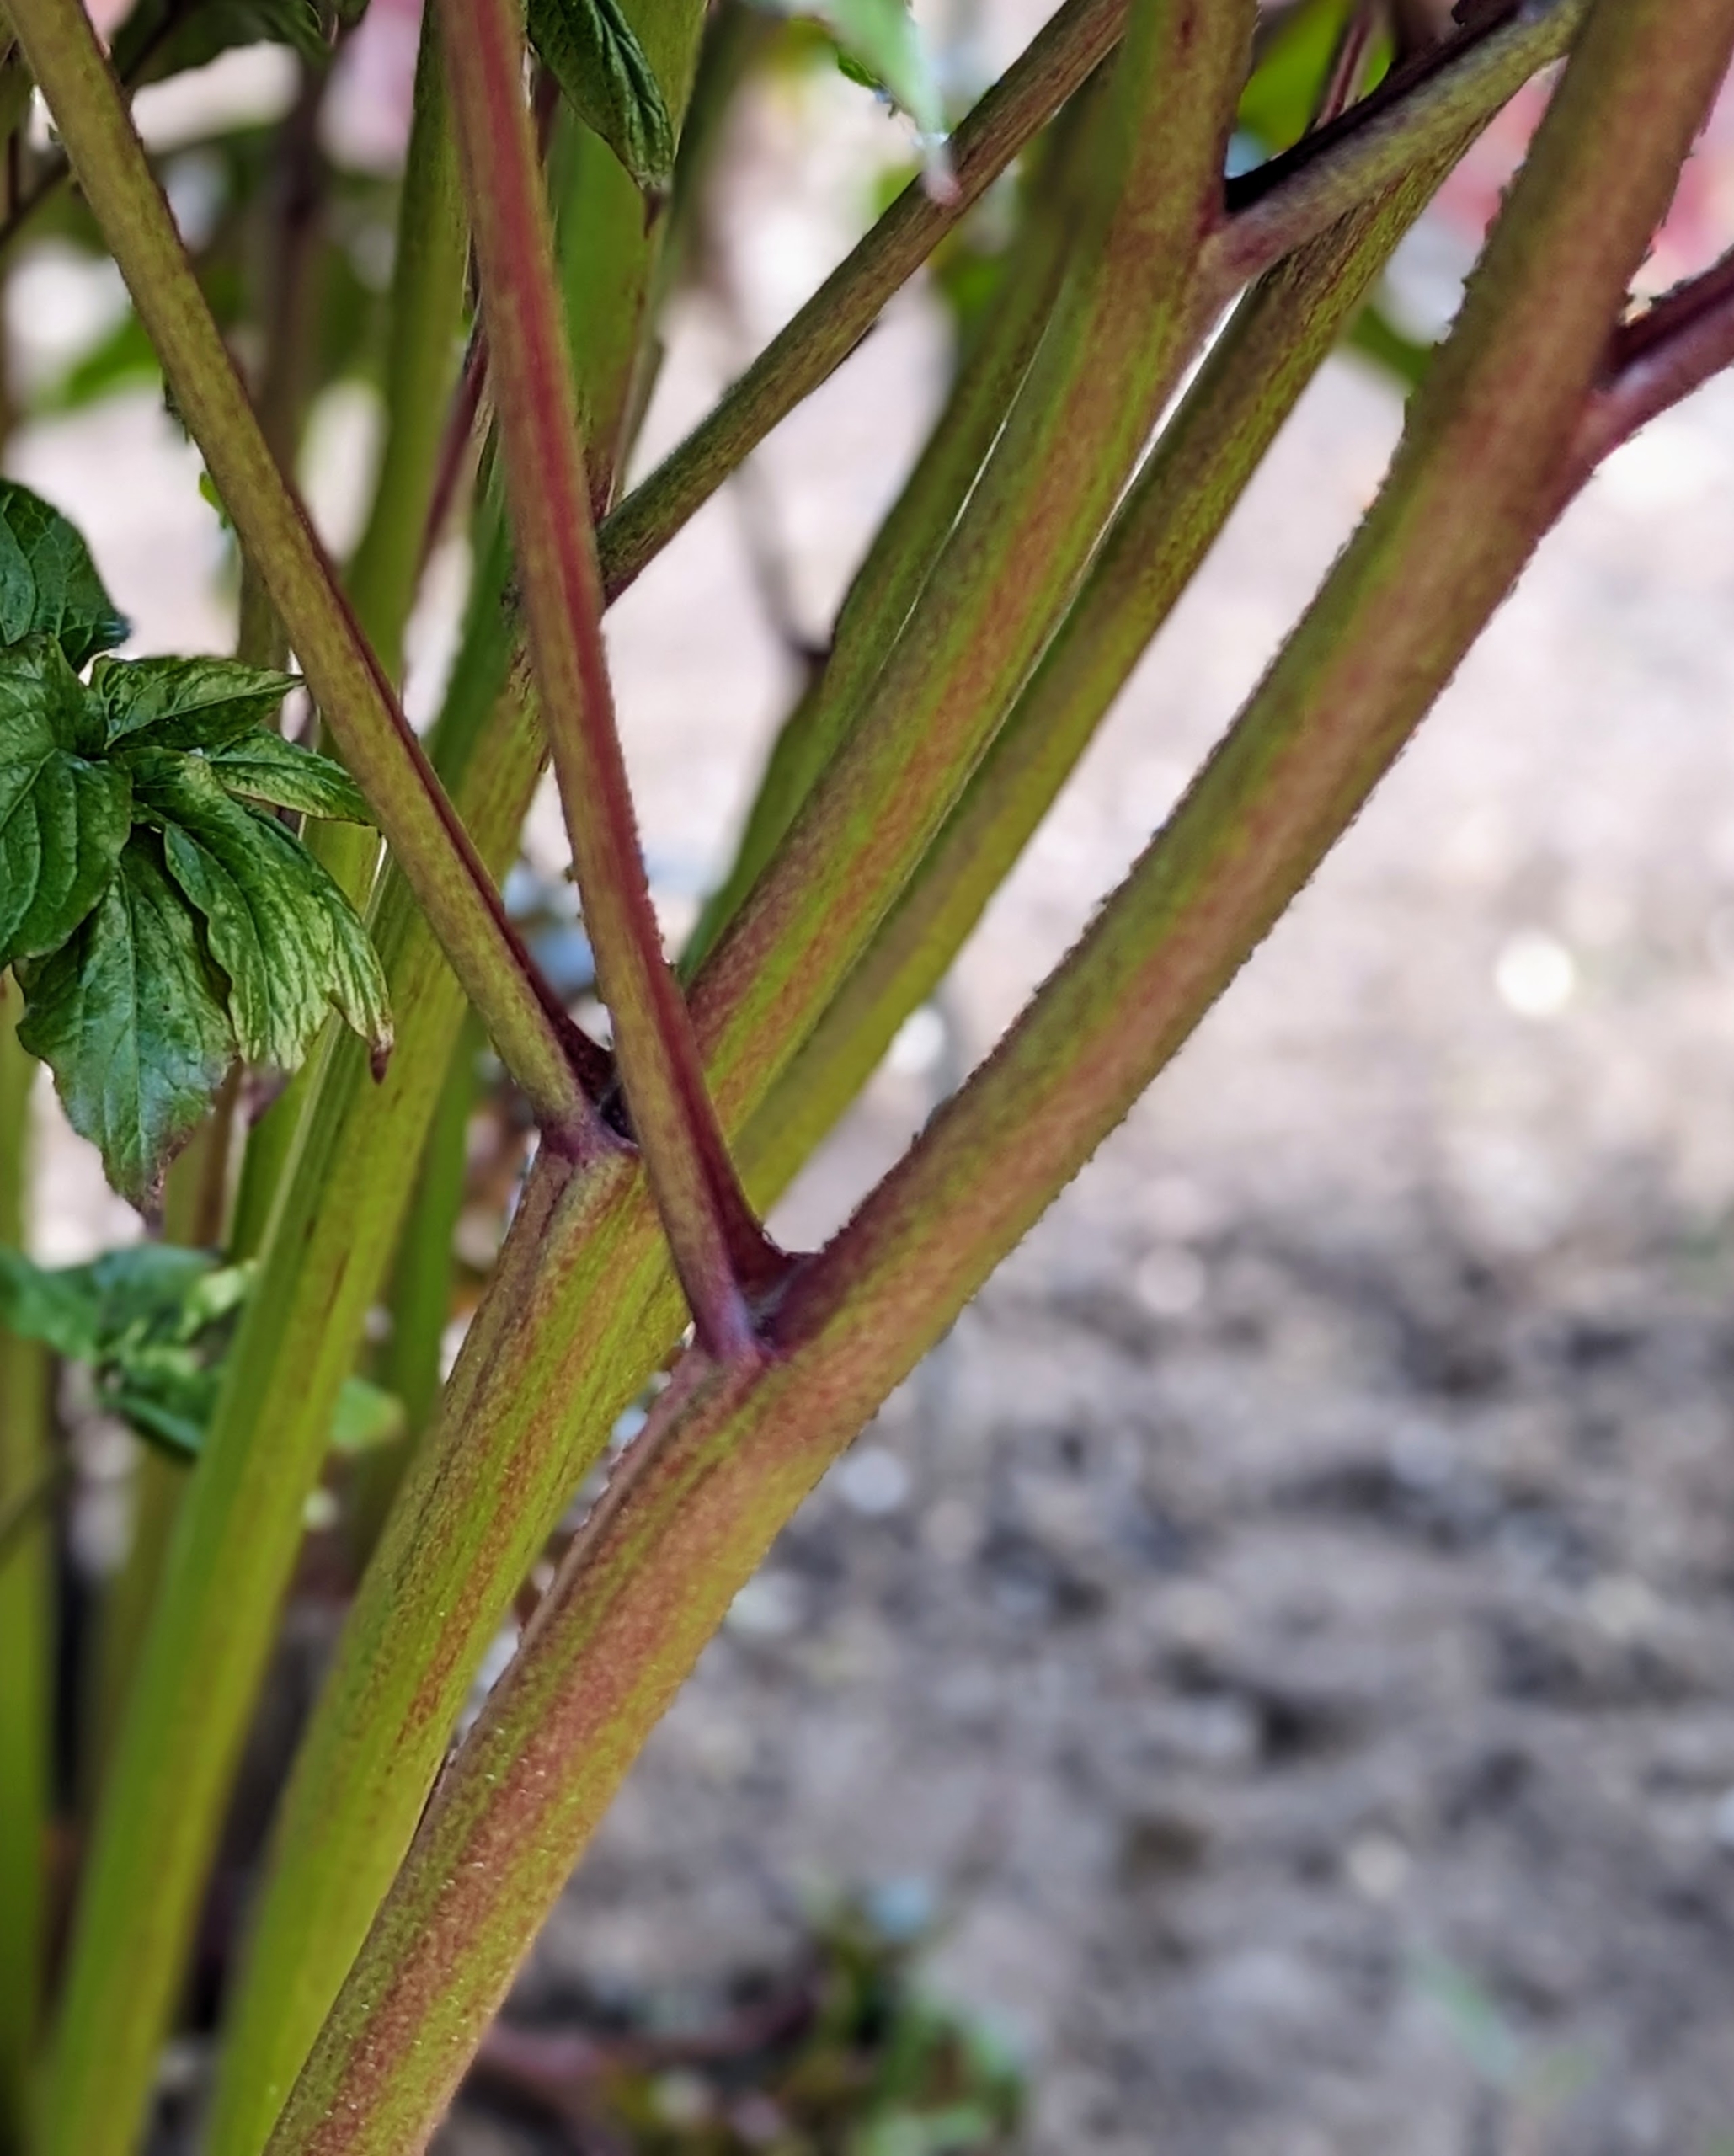
The stems of these herbaceous peonies are soft, flexible, and mostly green. They are much different from the woody stems of the tree peonies.
Peonies are native throughout the northern hemisphere and have been cultivated for centuries both in Europe and Asia.
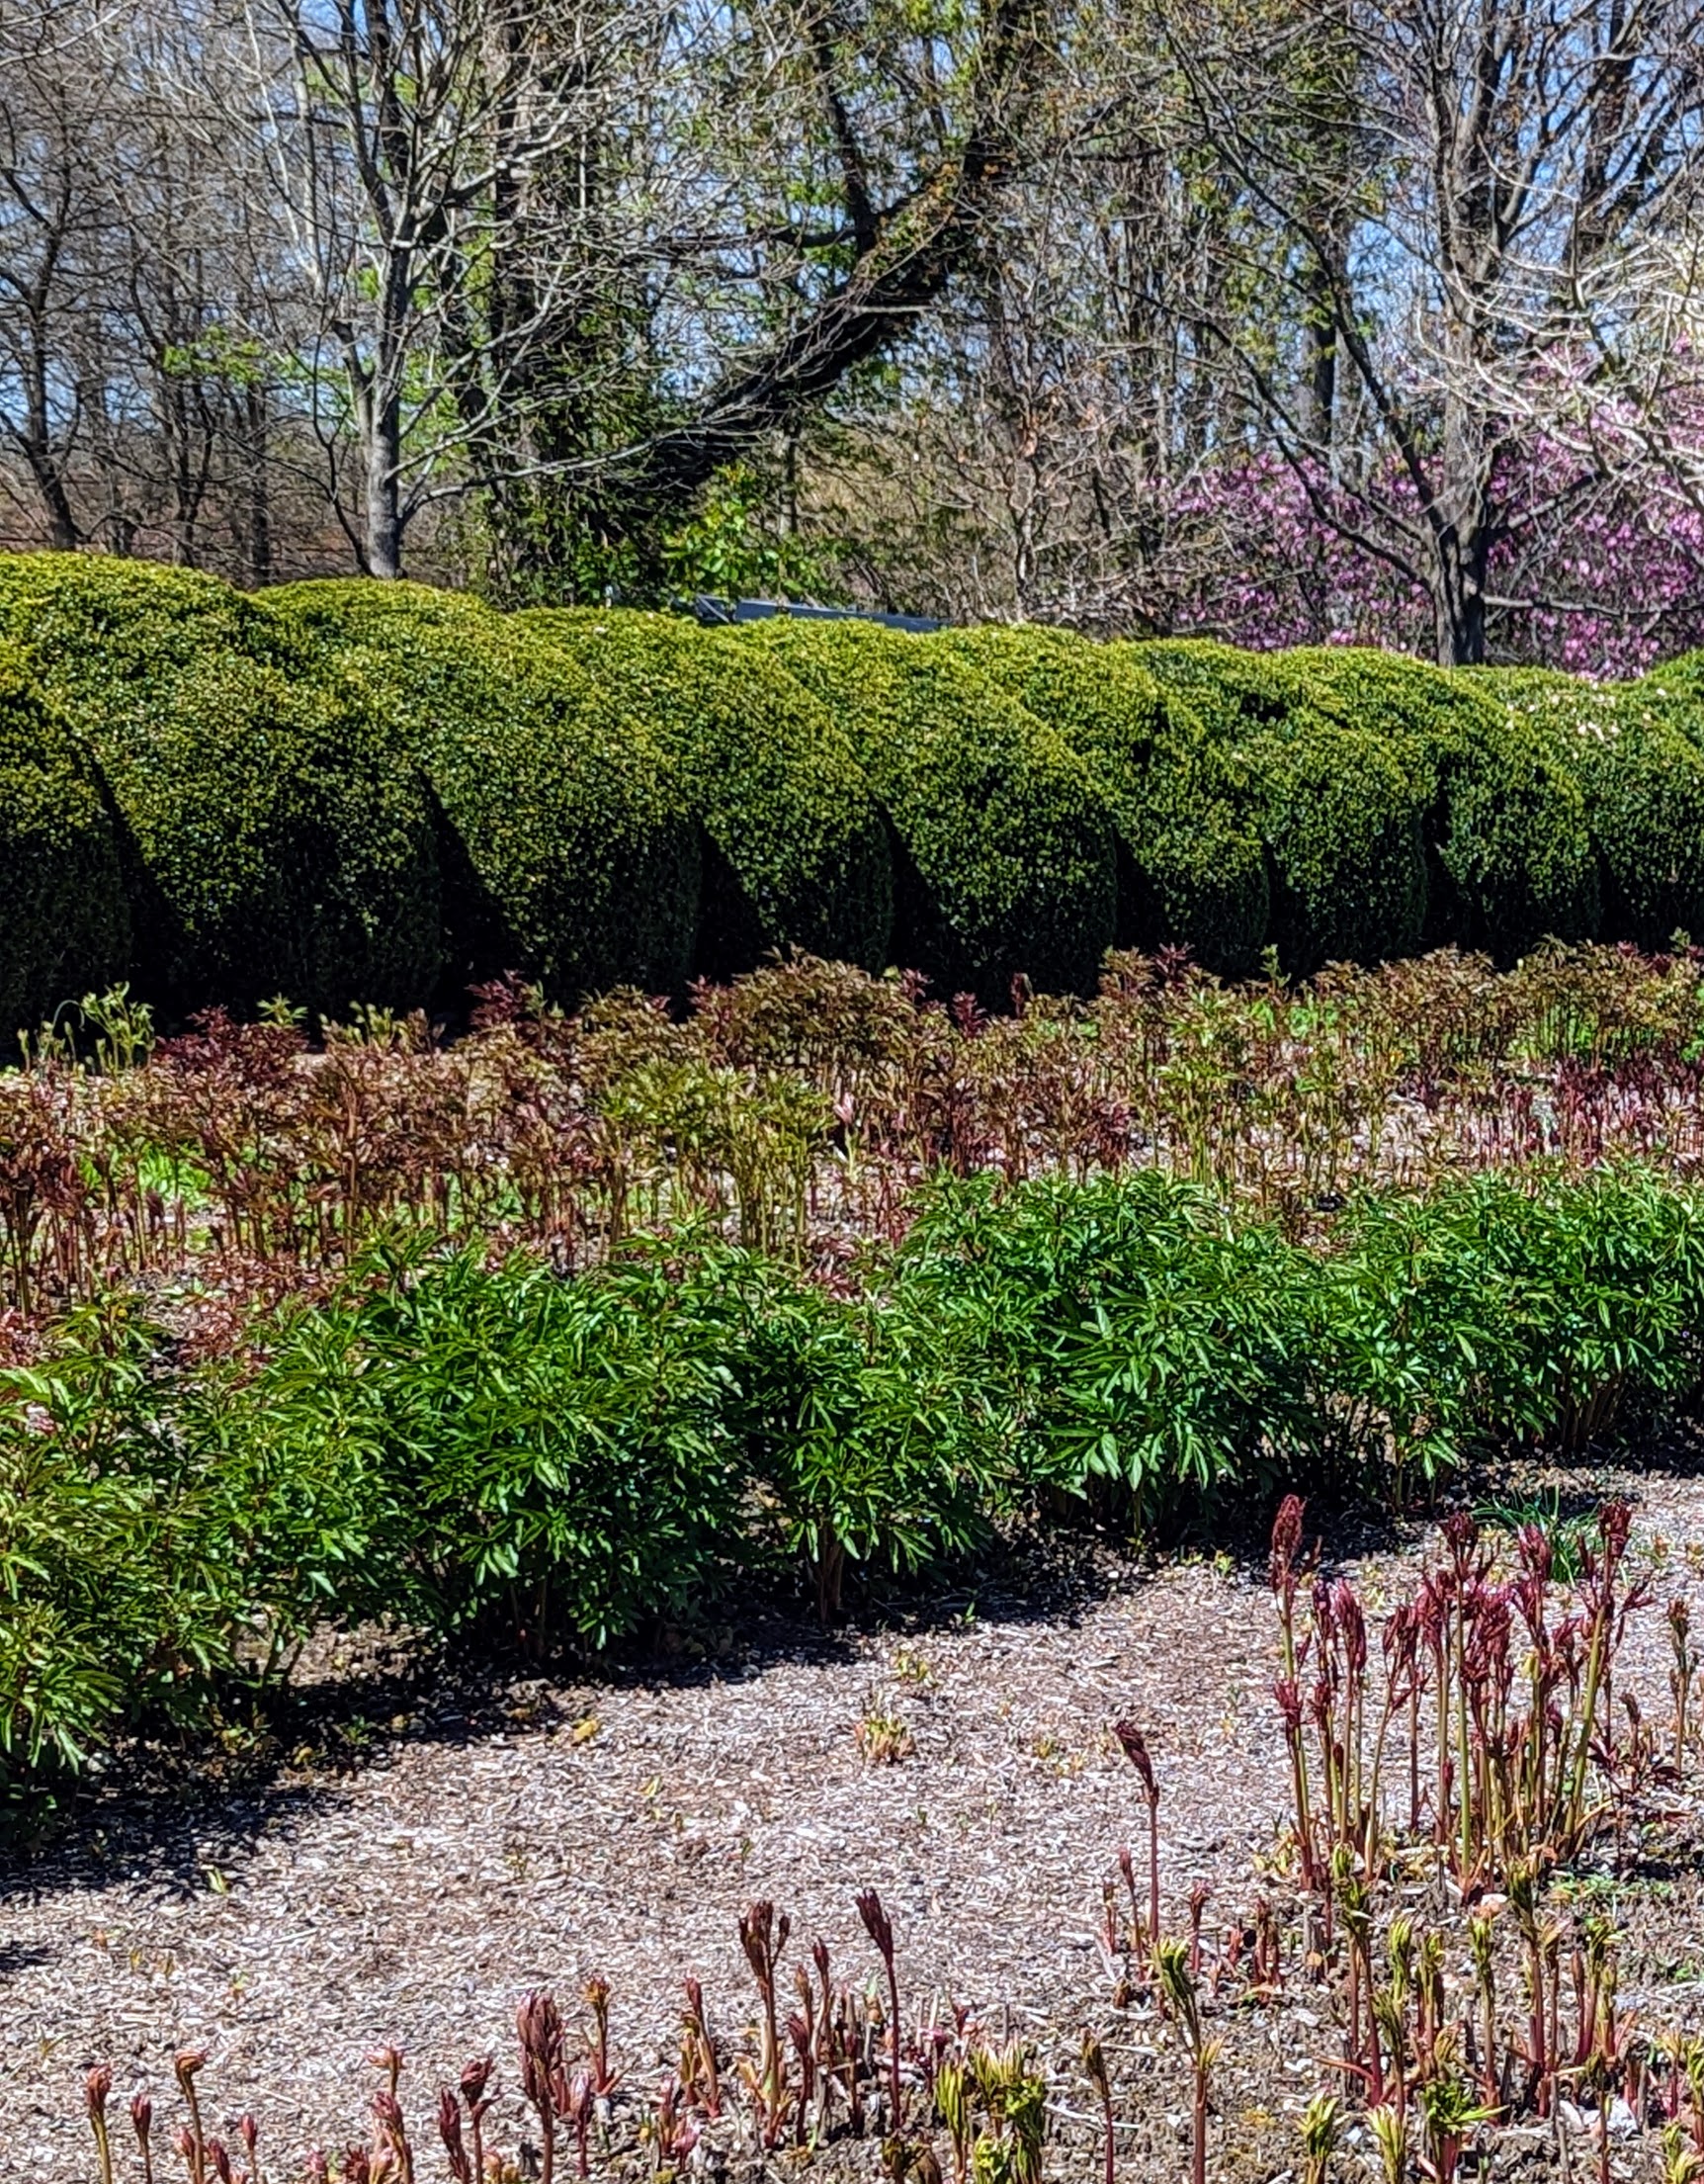
These herbaceous peonies are all surrounded by a hedge of rounded boxwood shrubs, making it a focal point on the property and in the overall landscape here at my farm.
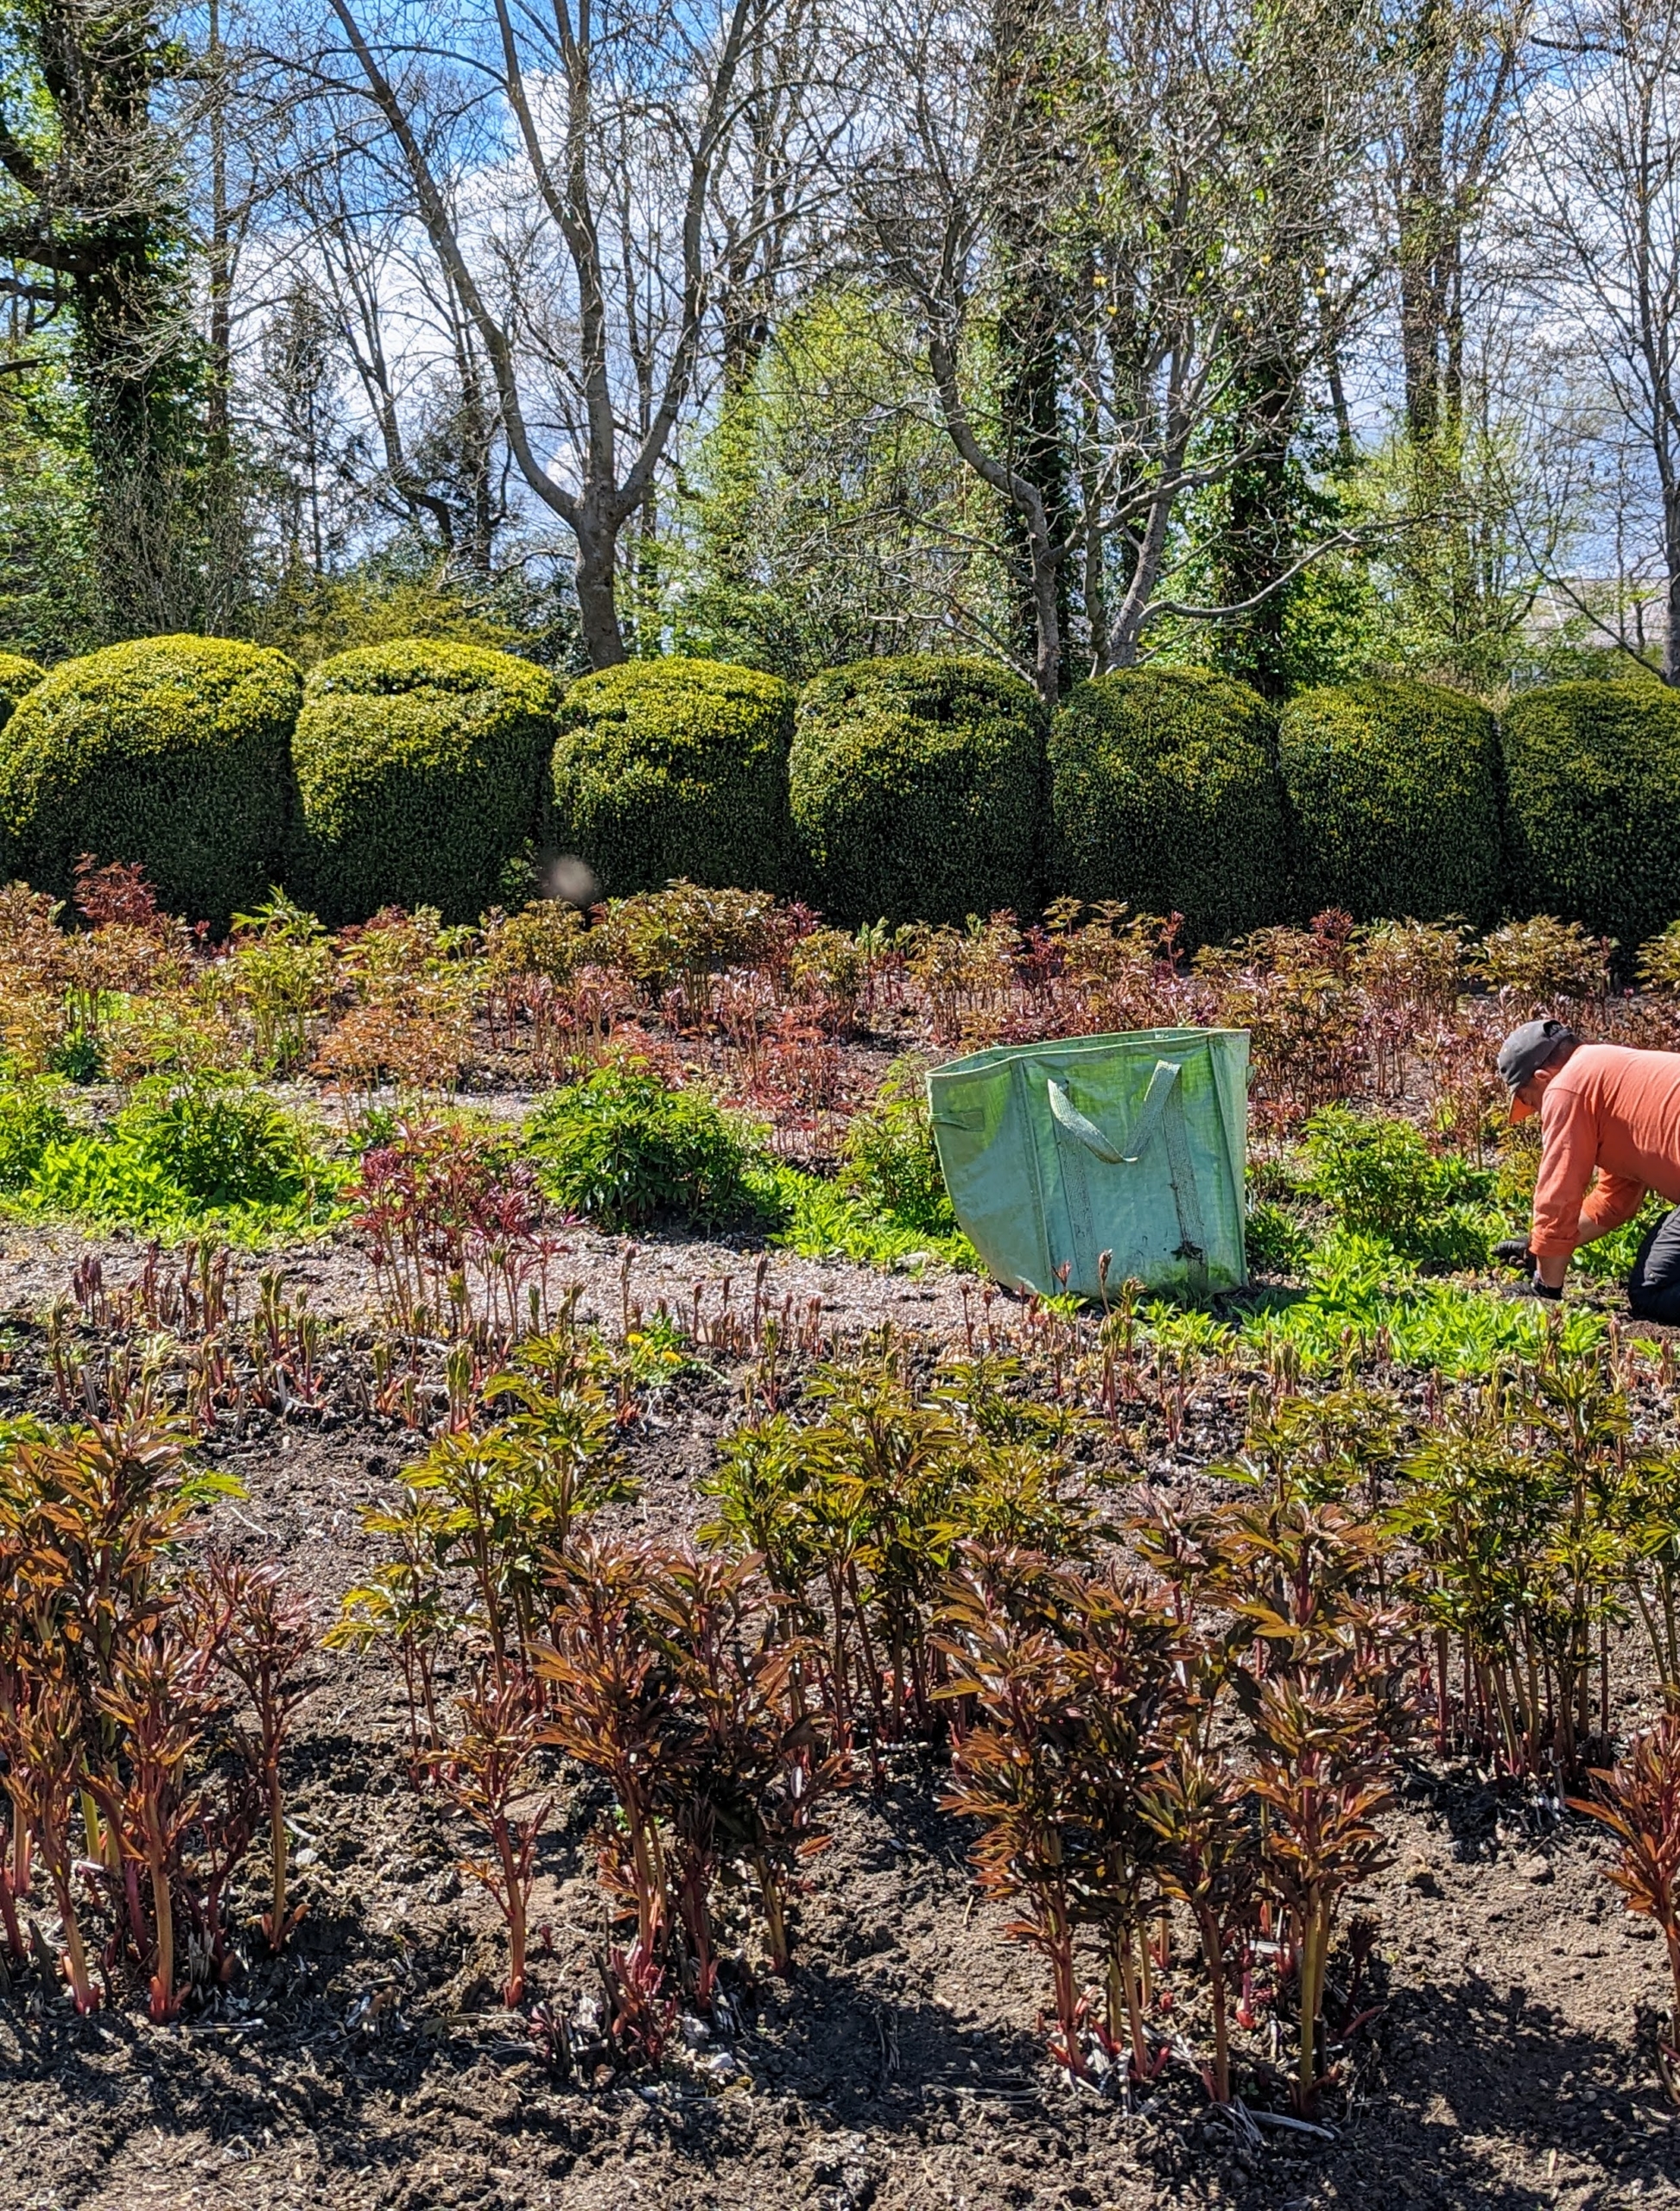
The first step is to weed all the rows. This is still easy to do since the plants are small.
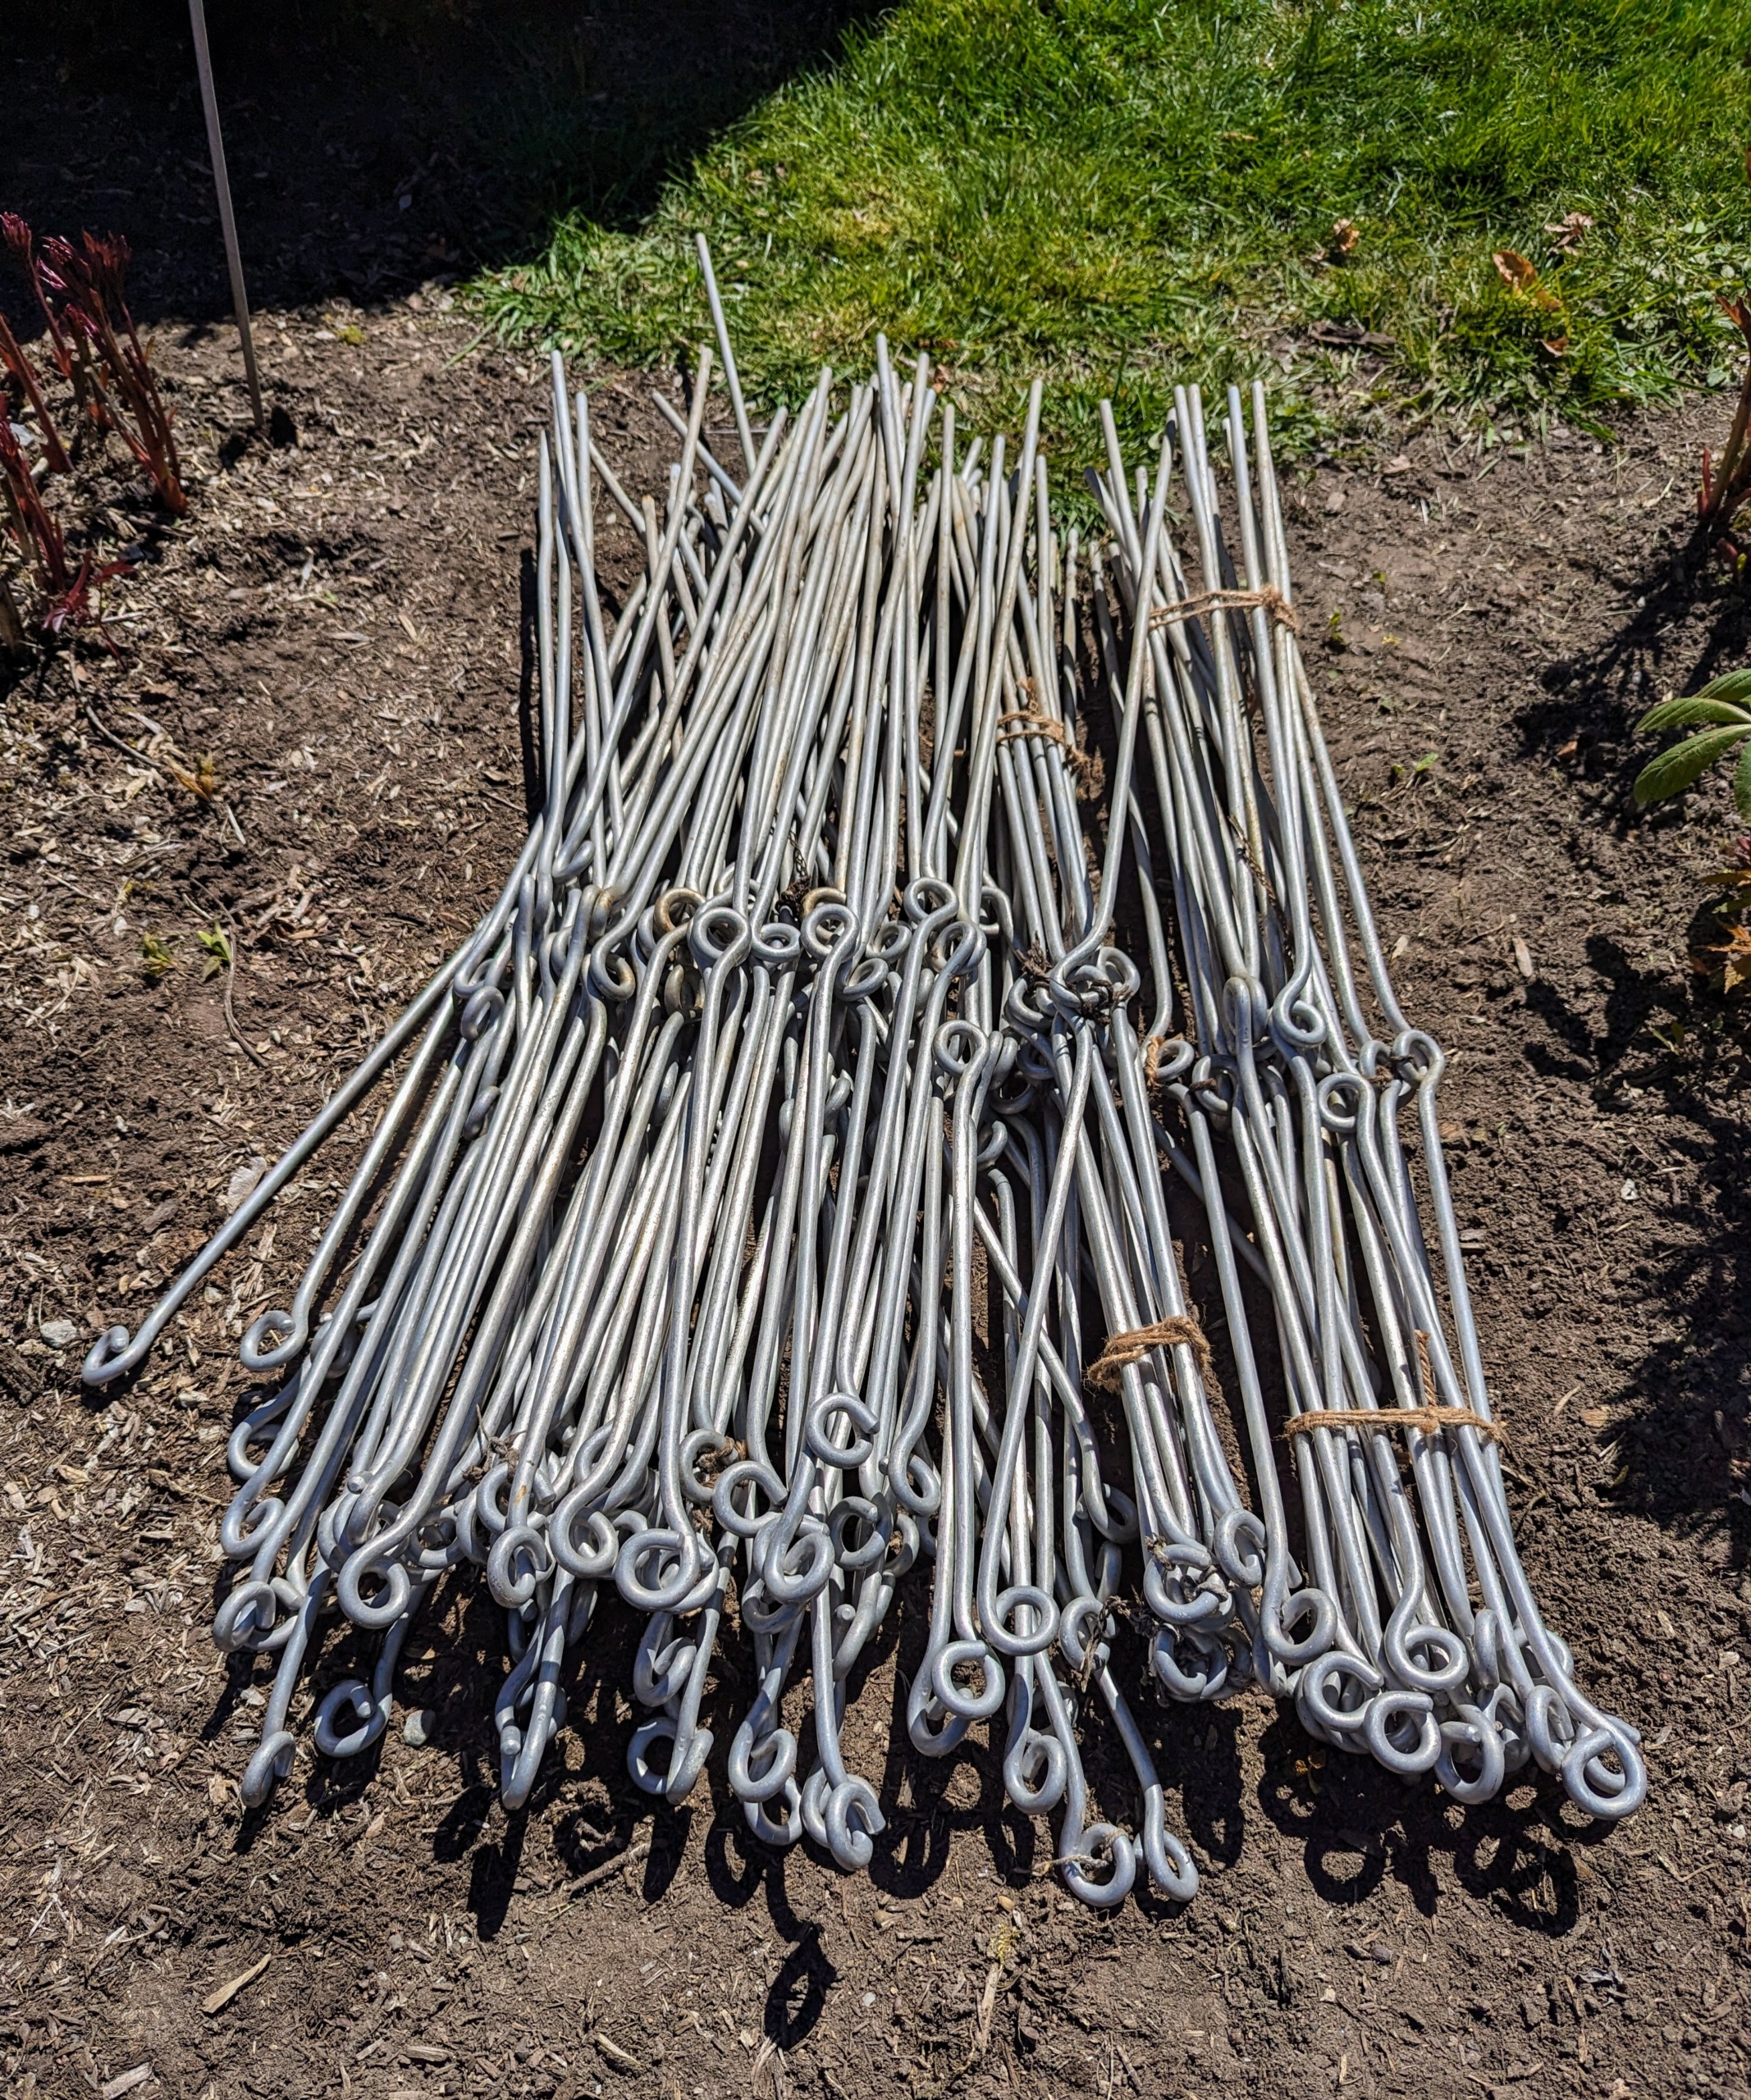
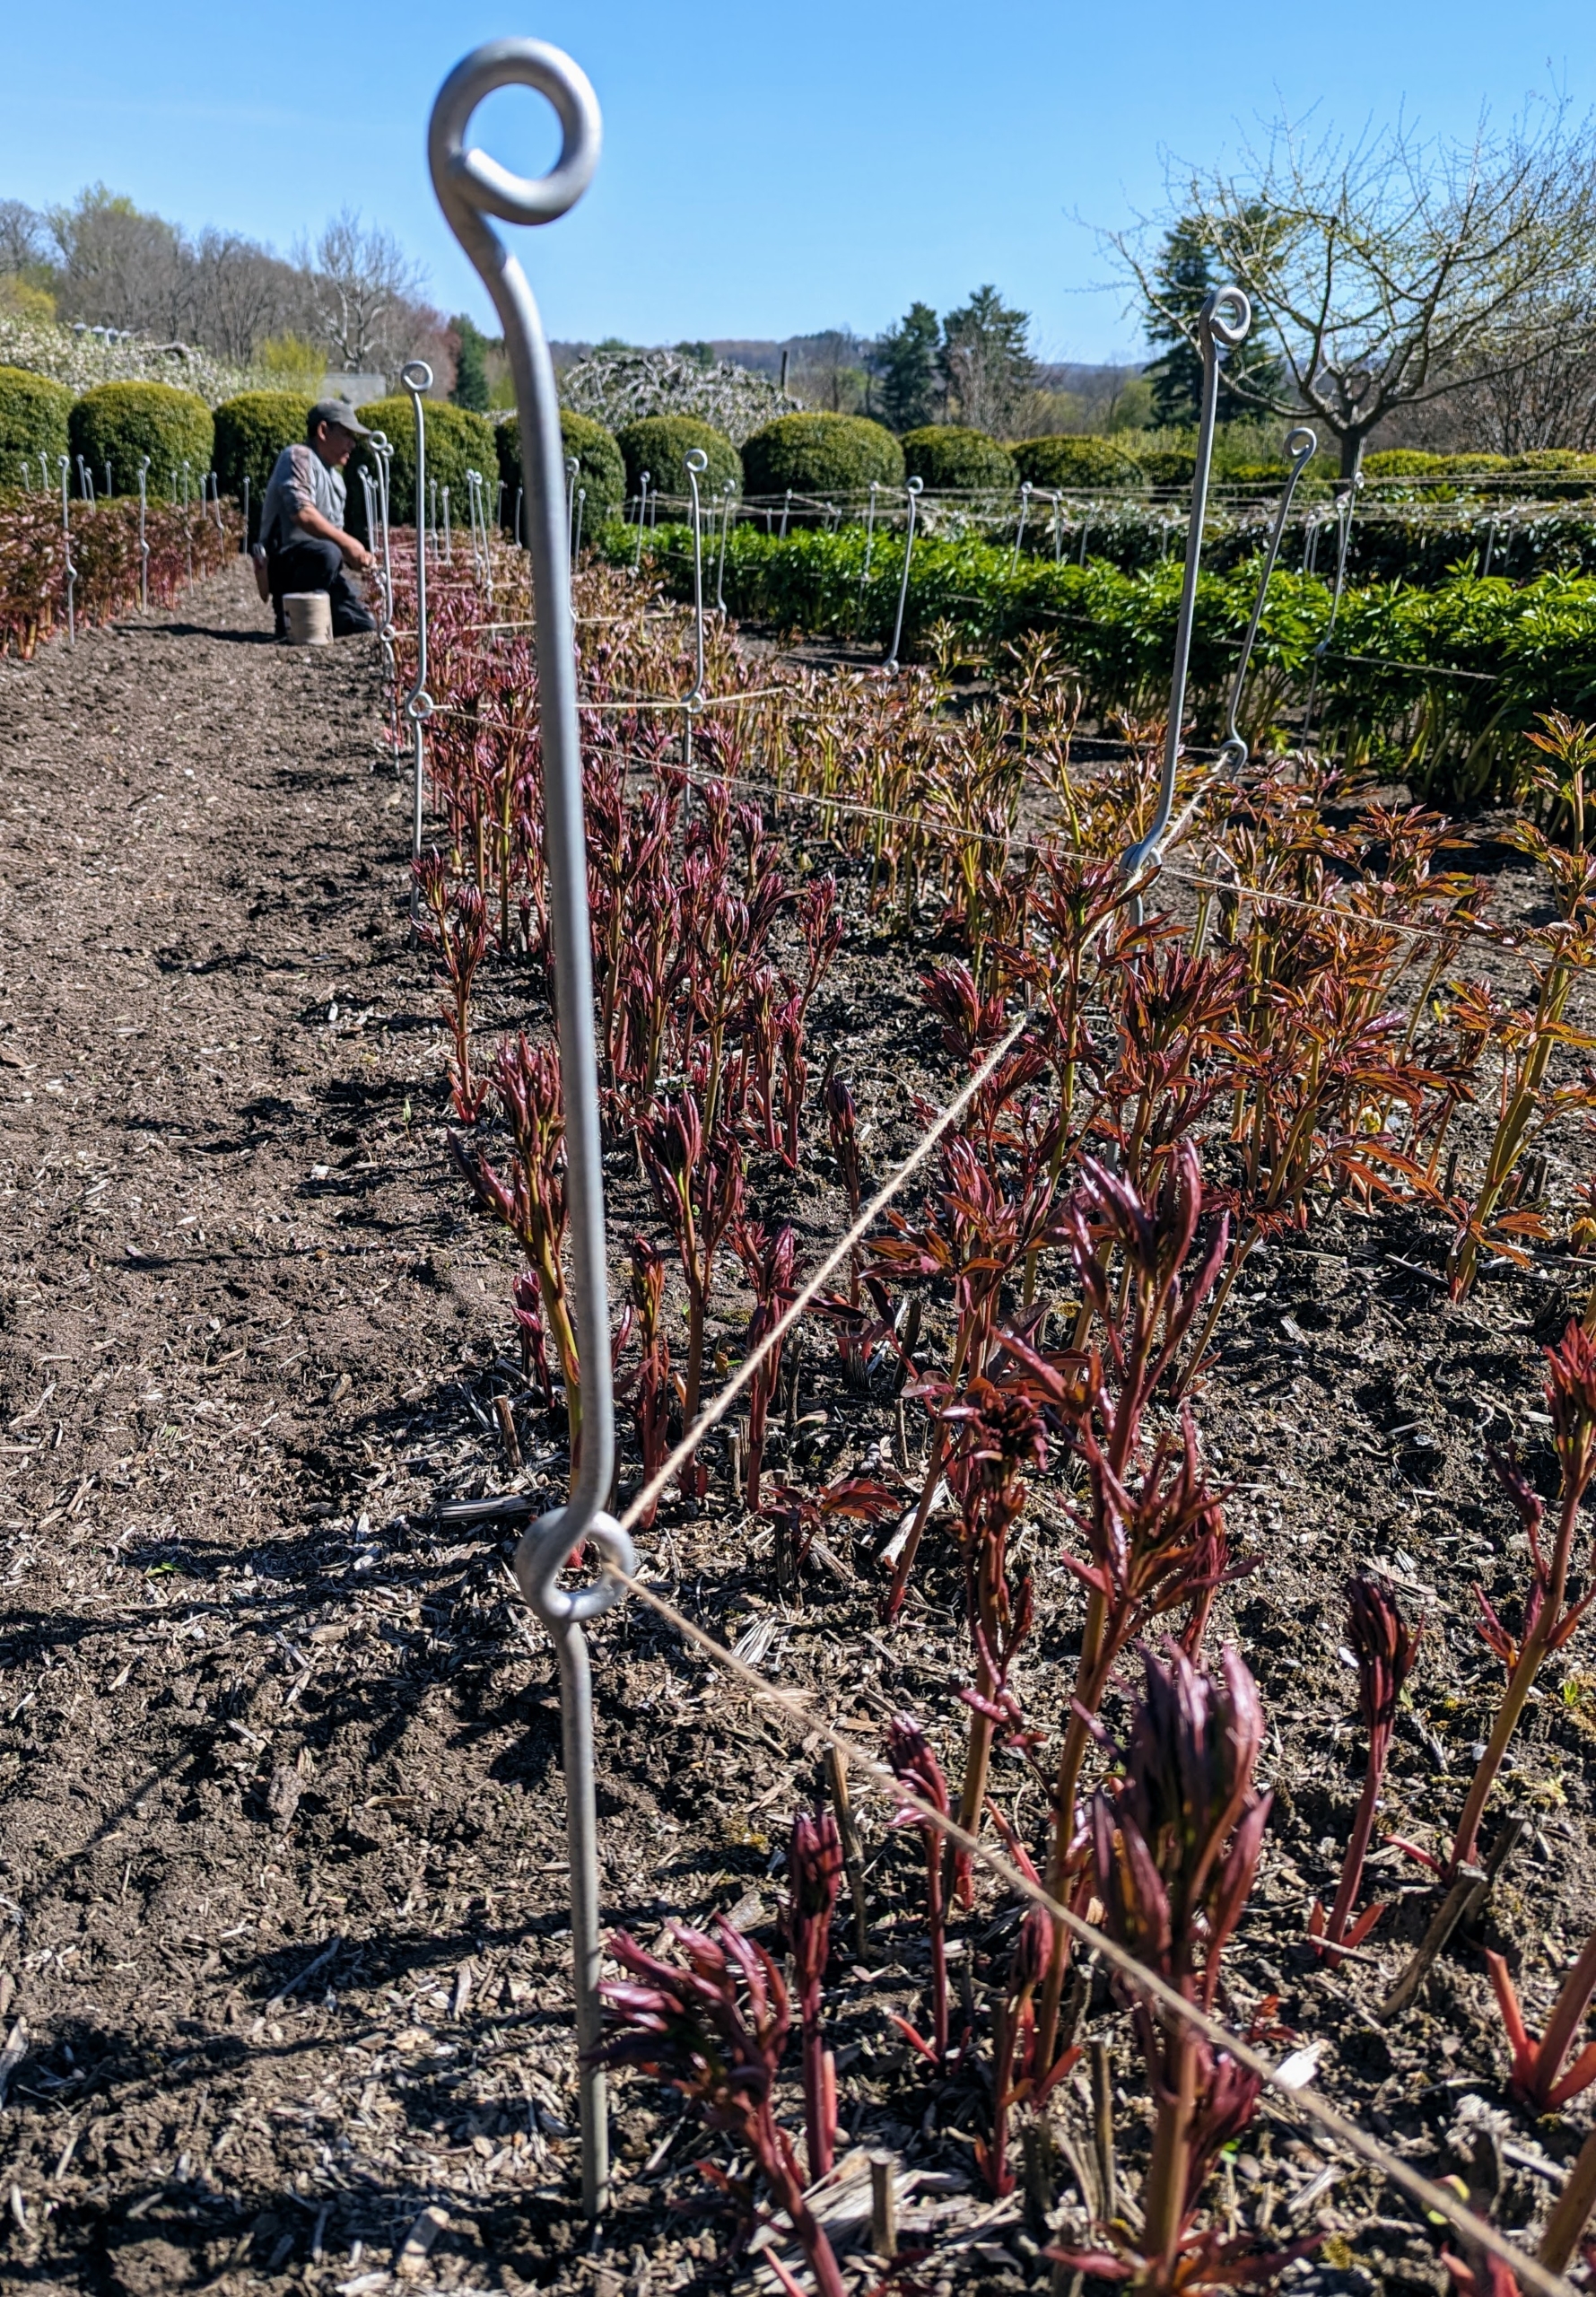
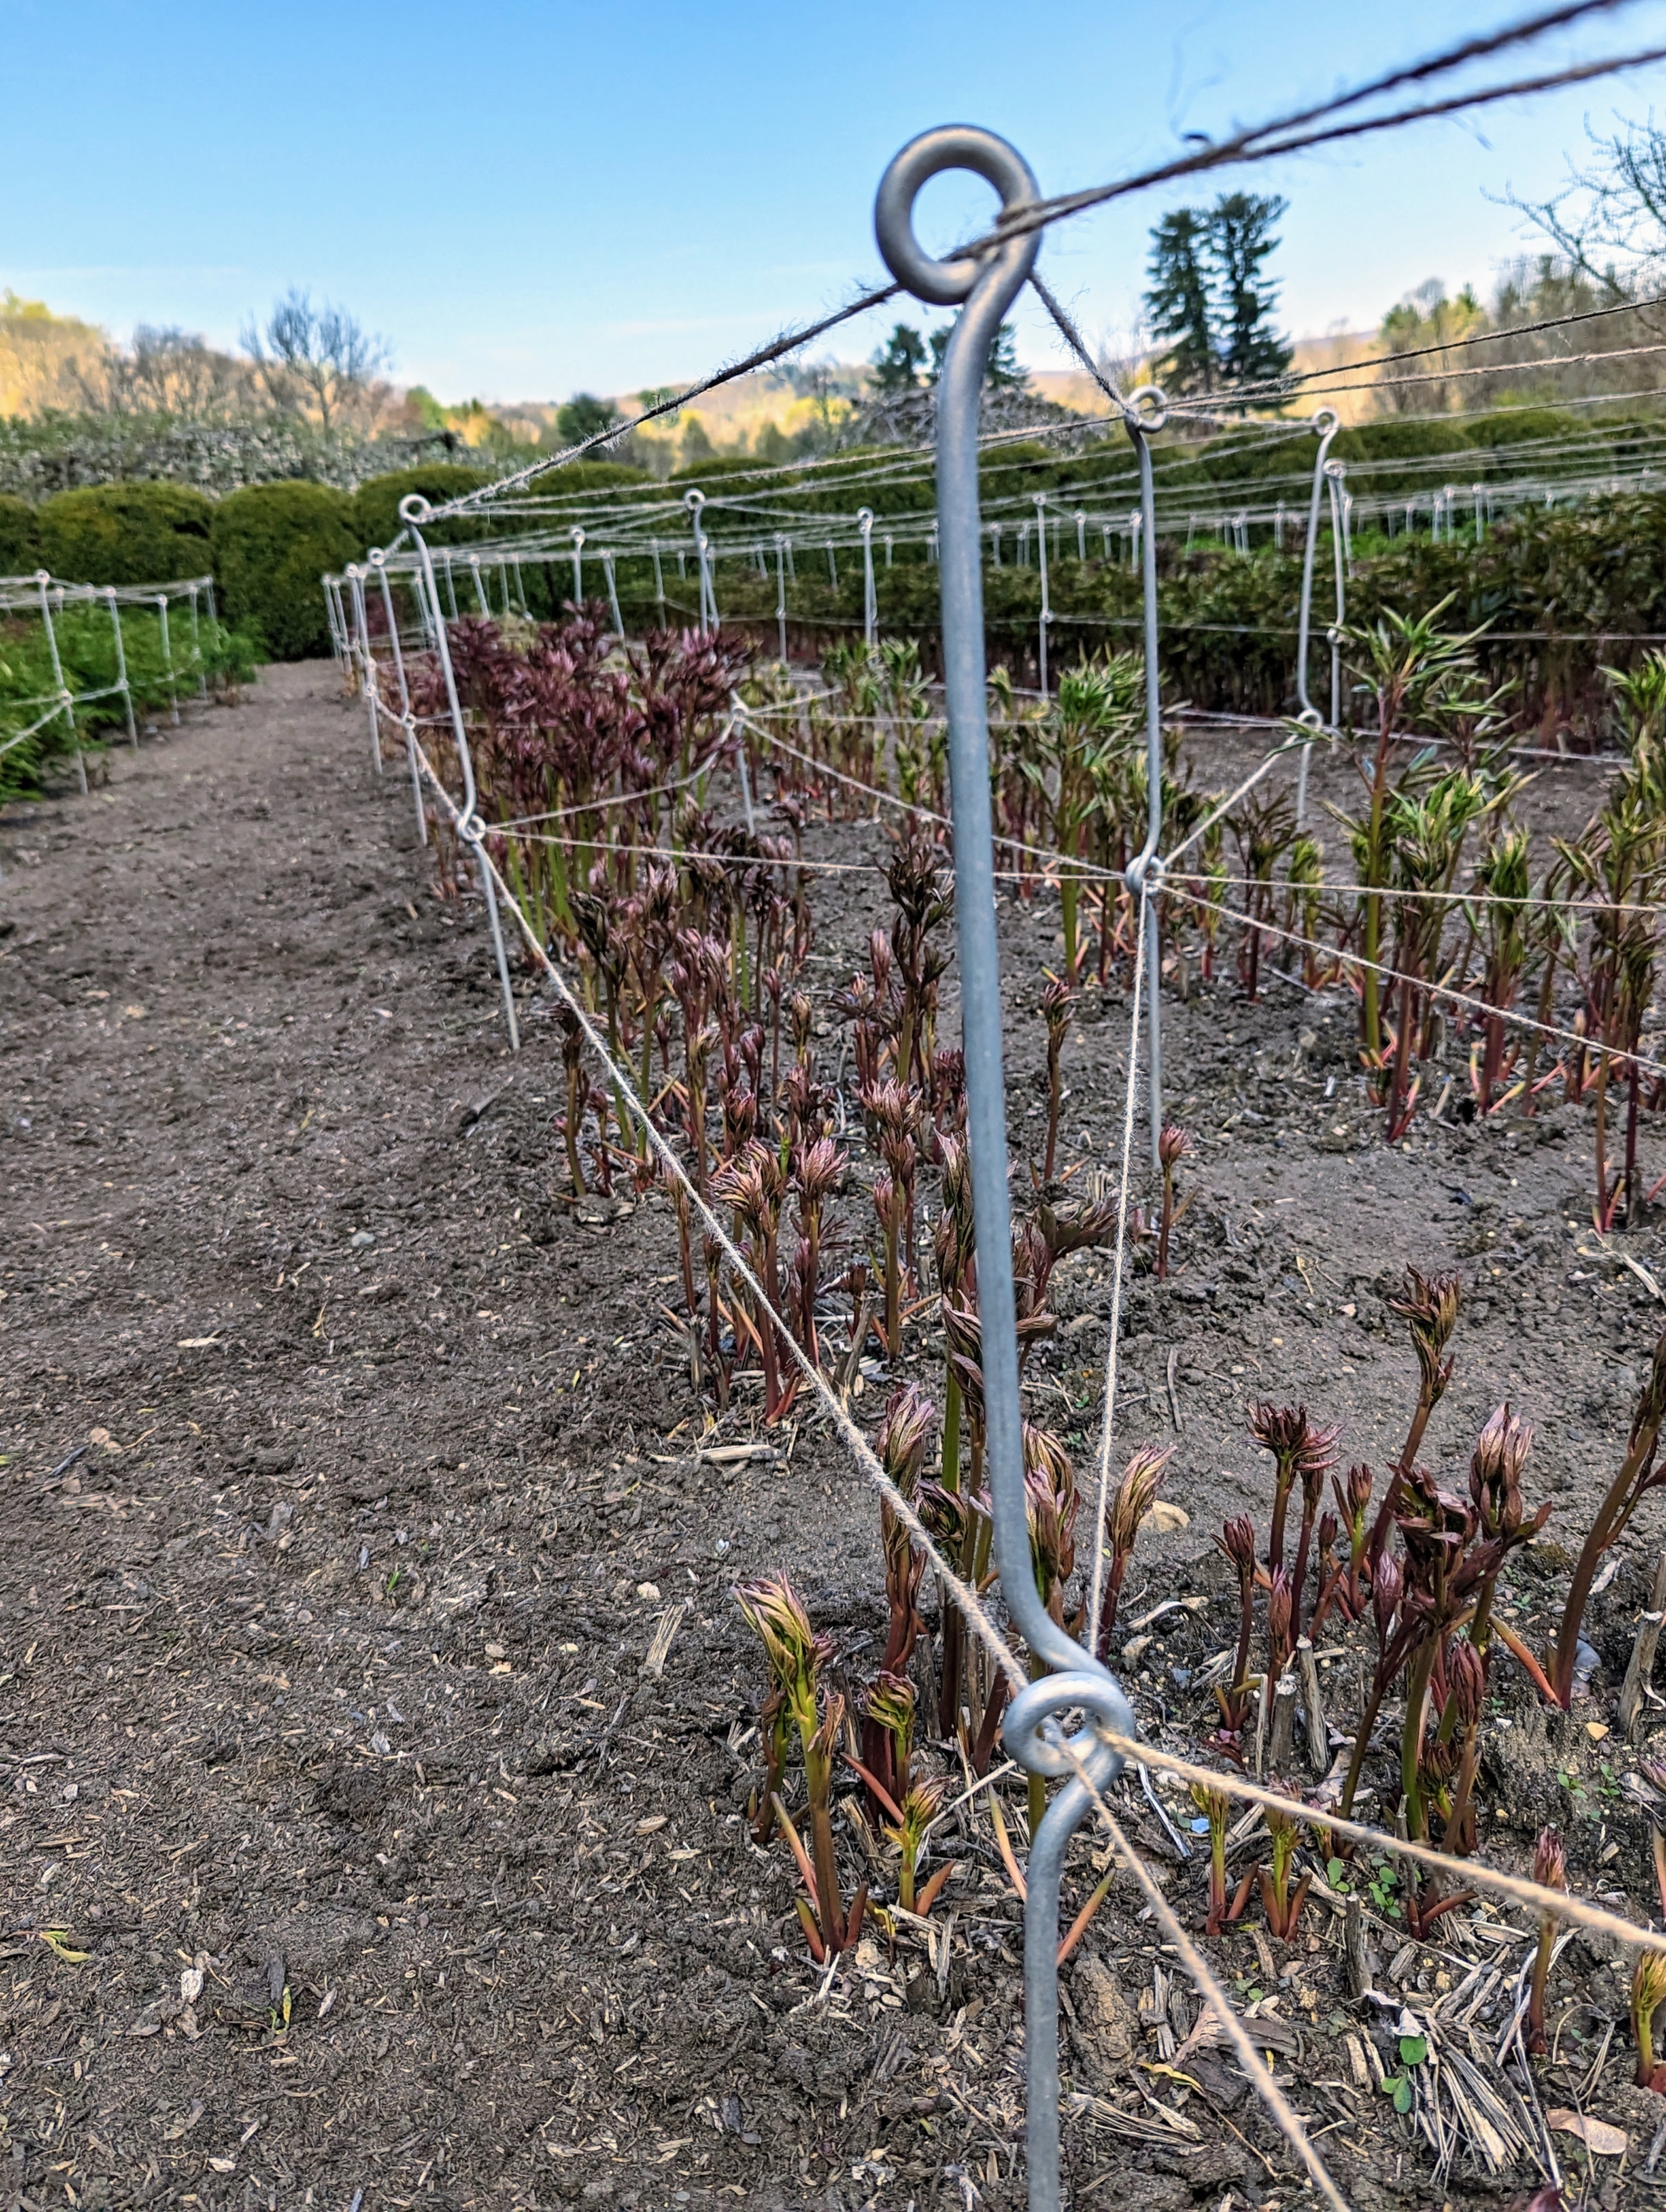
When staking, instead of the round rings that are available at many garden centers, I prefer to use these metal stakes that I designed myself for my farm. Each metal support has two eyes, one at the top and one in the middle. These stakes are about three feet tall.
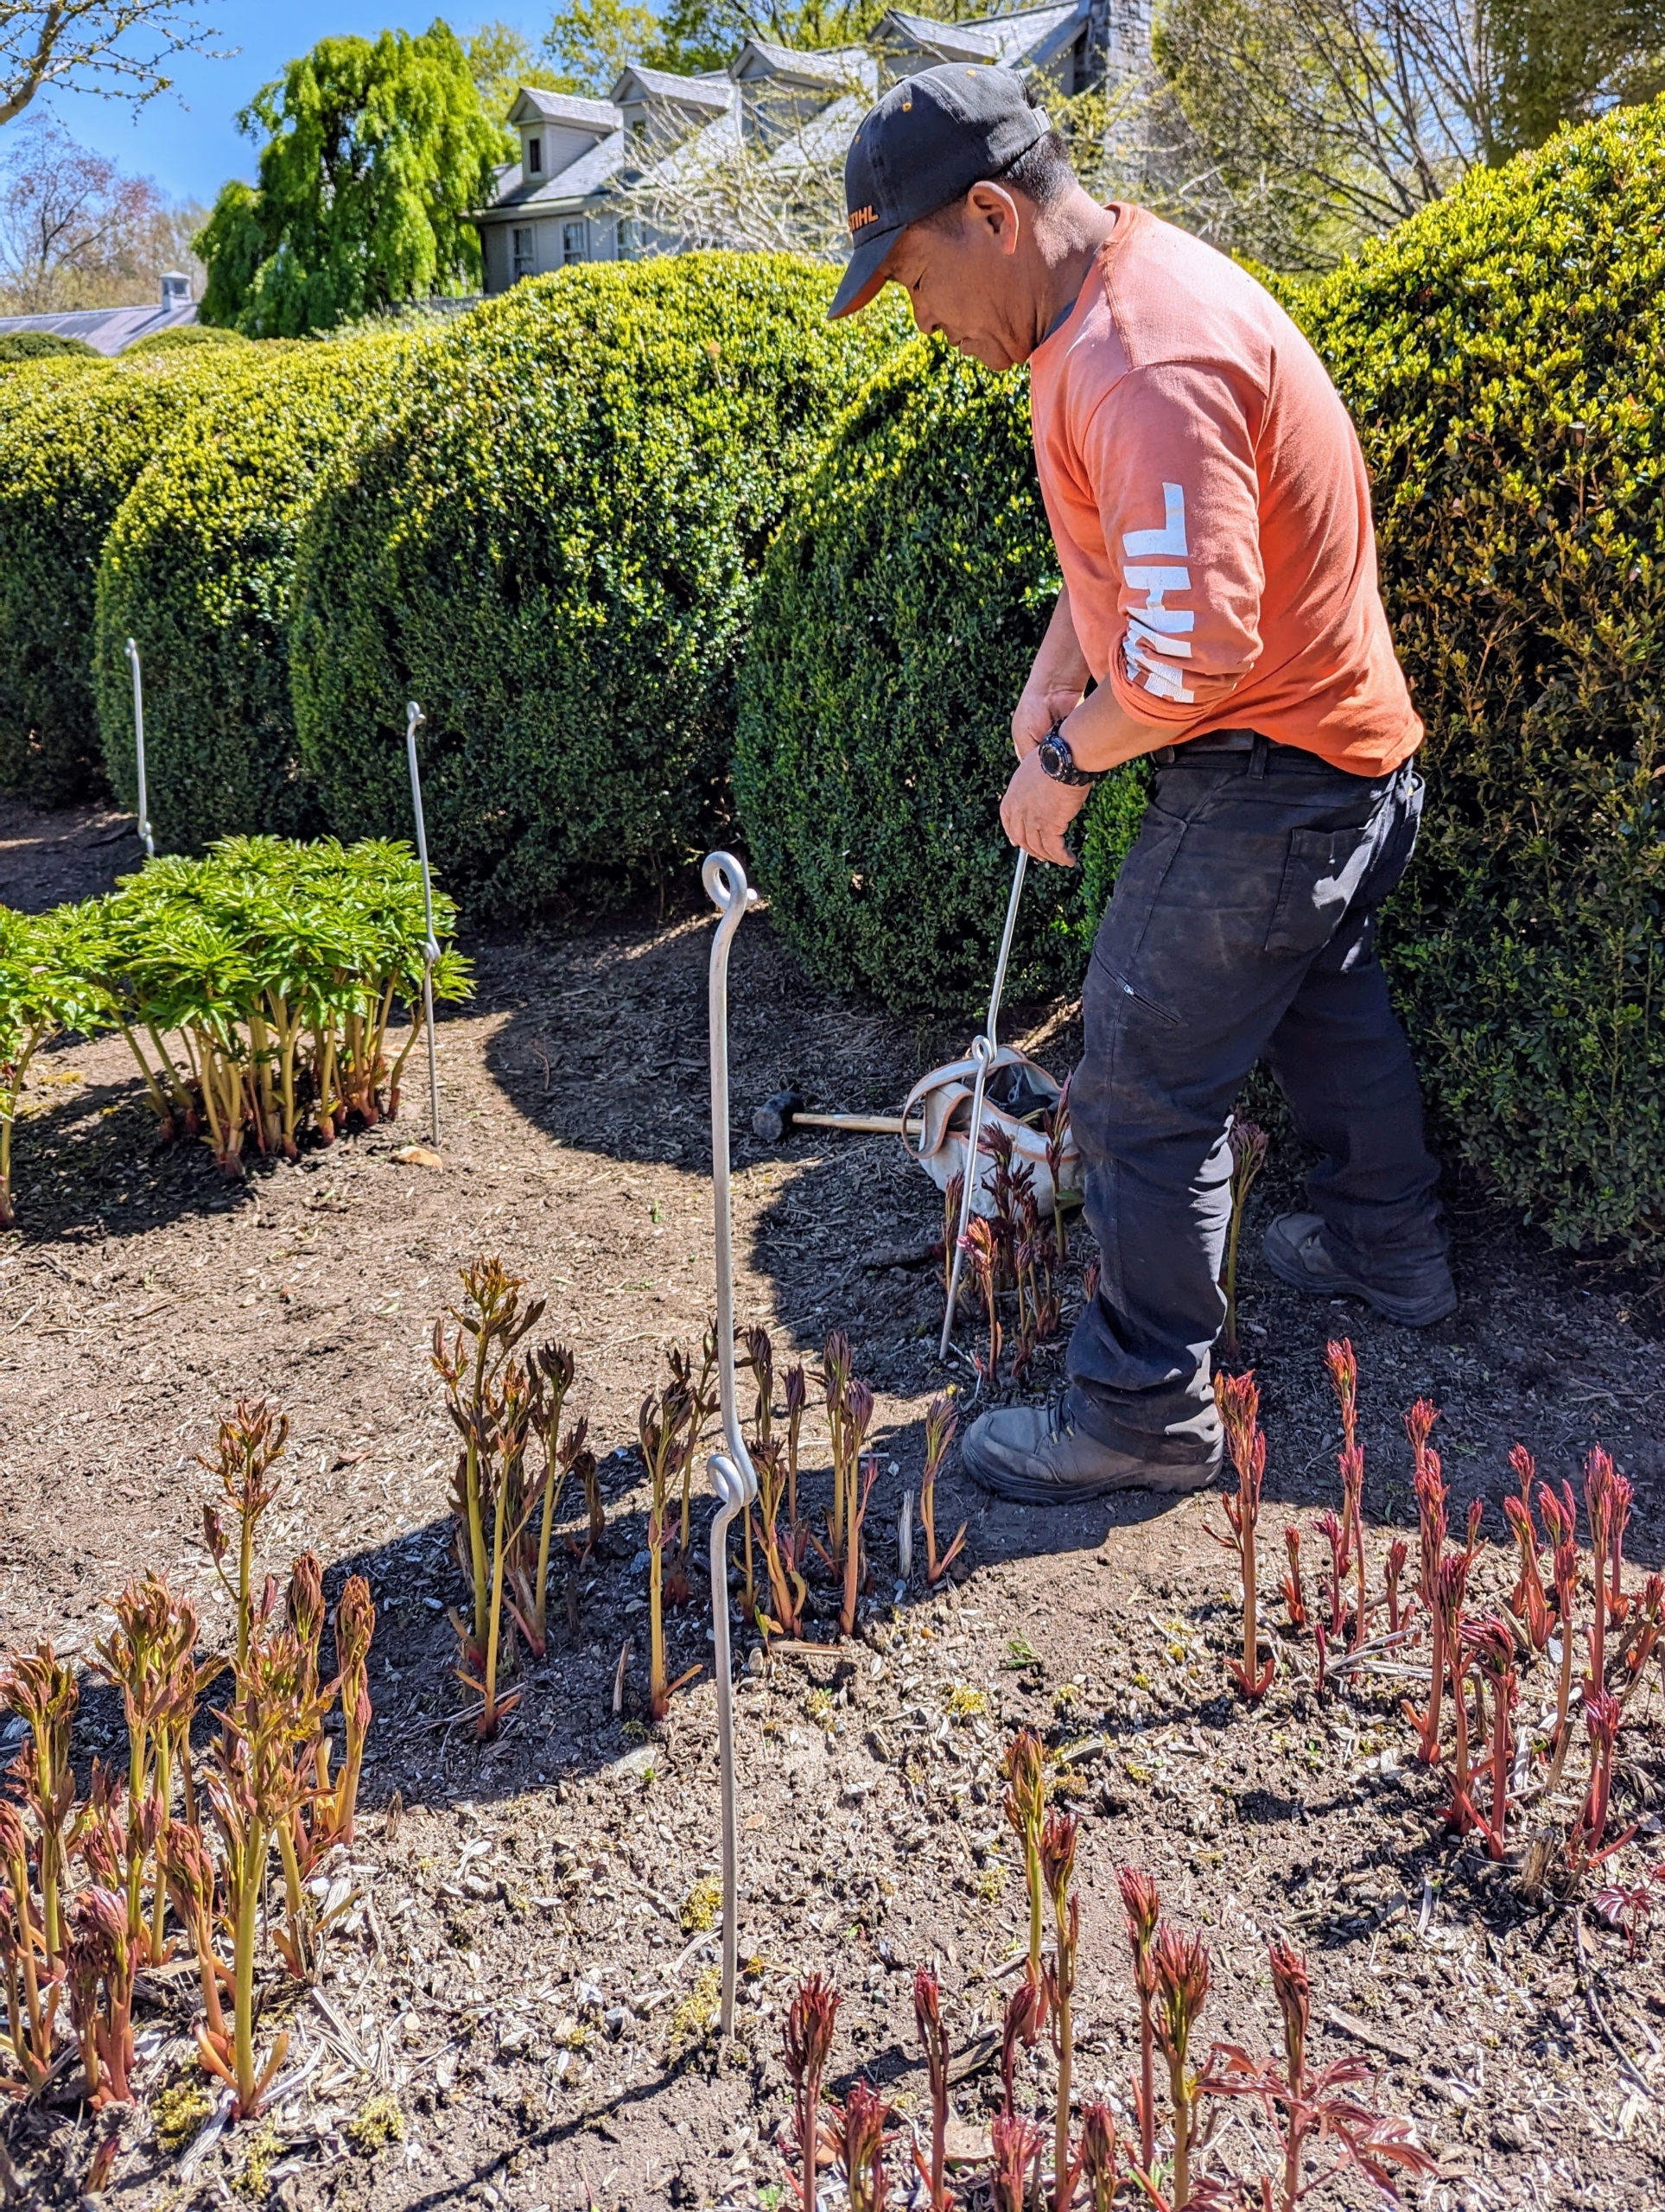
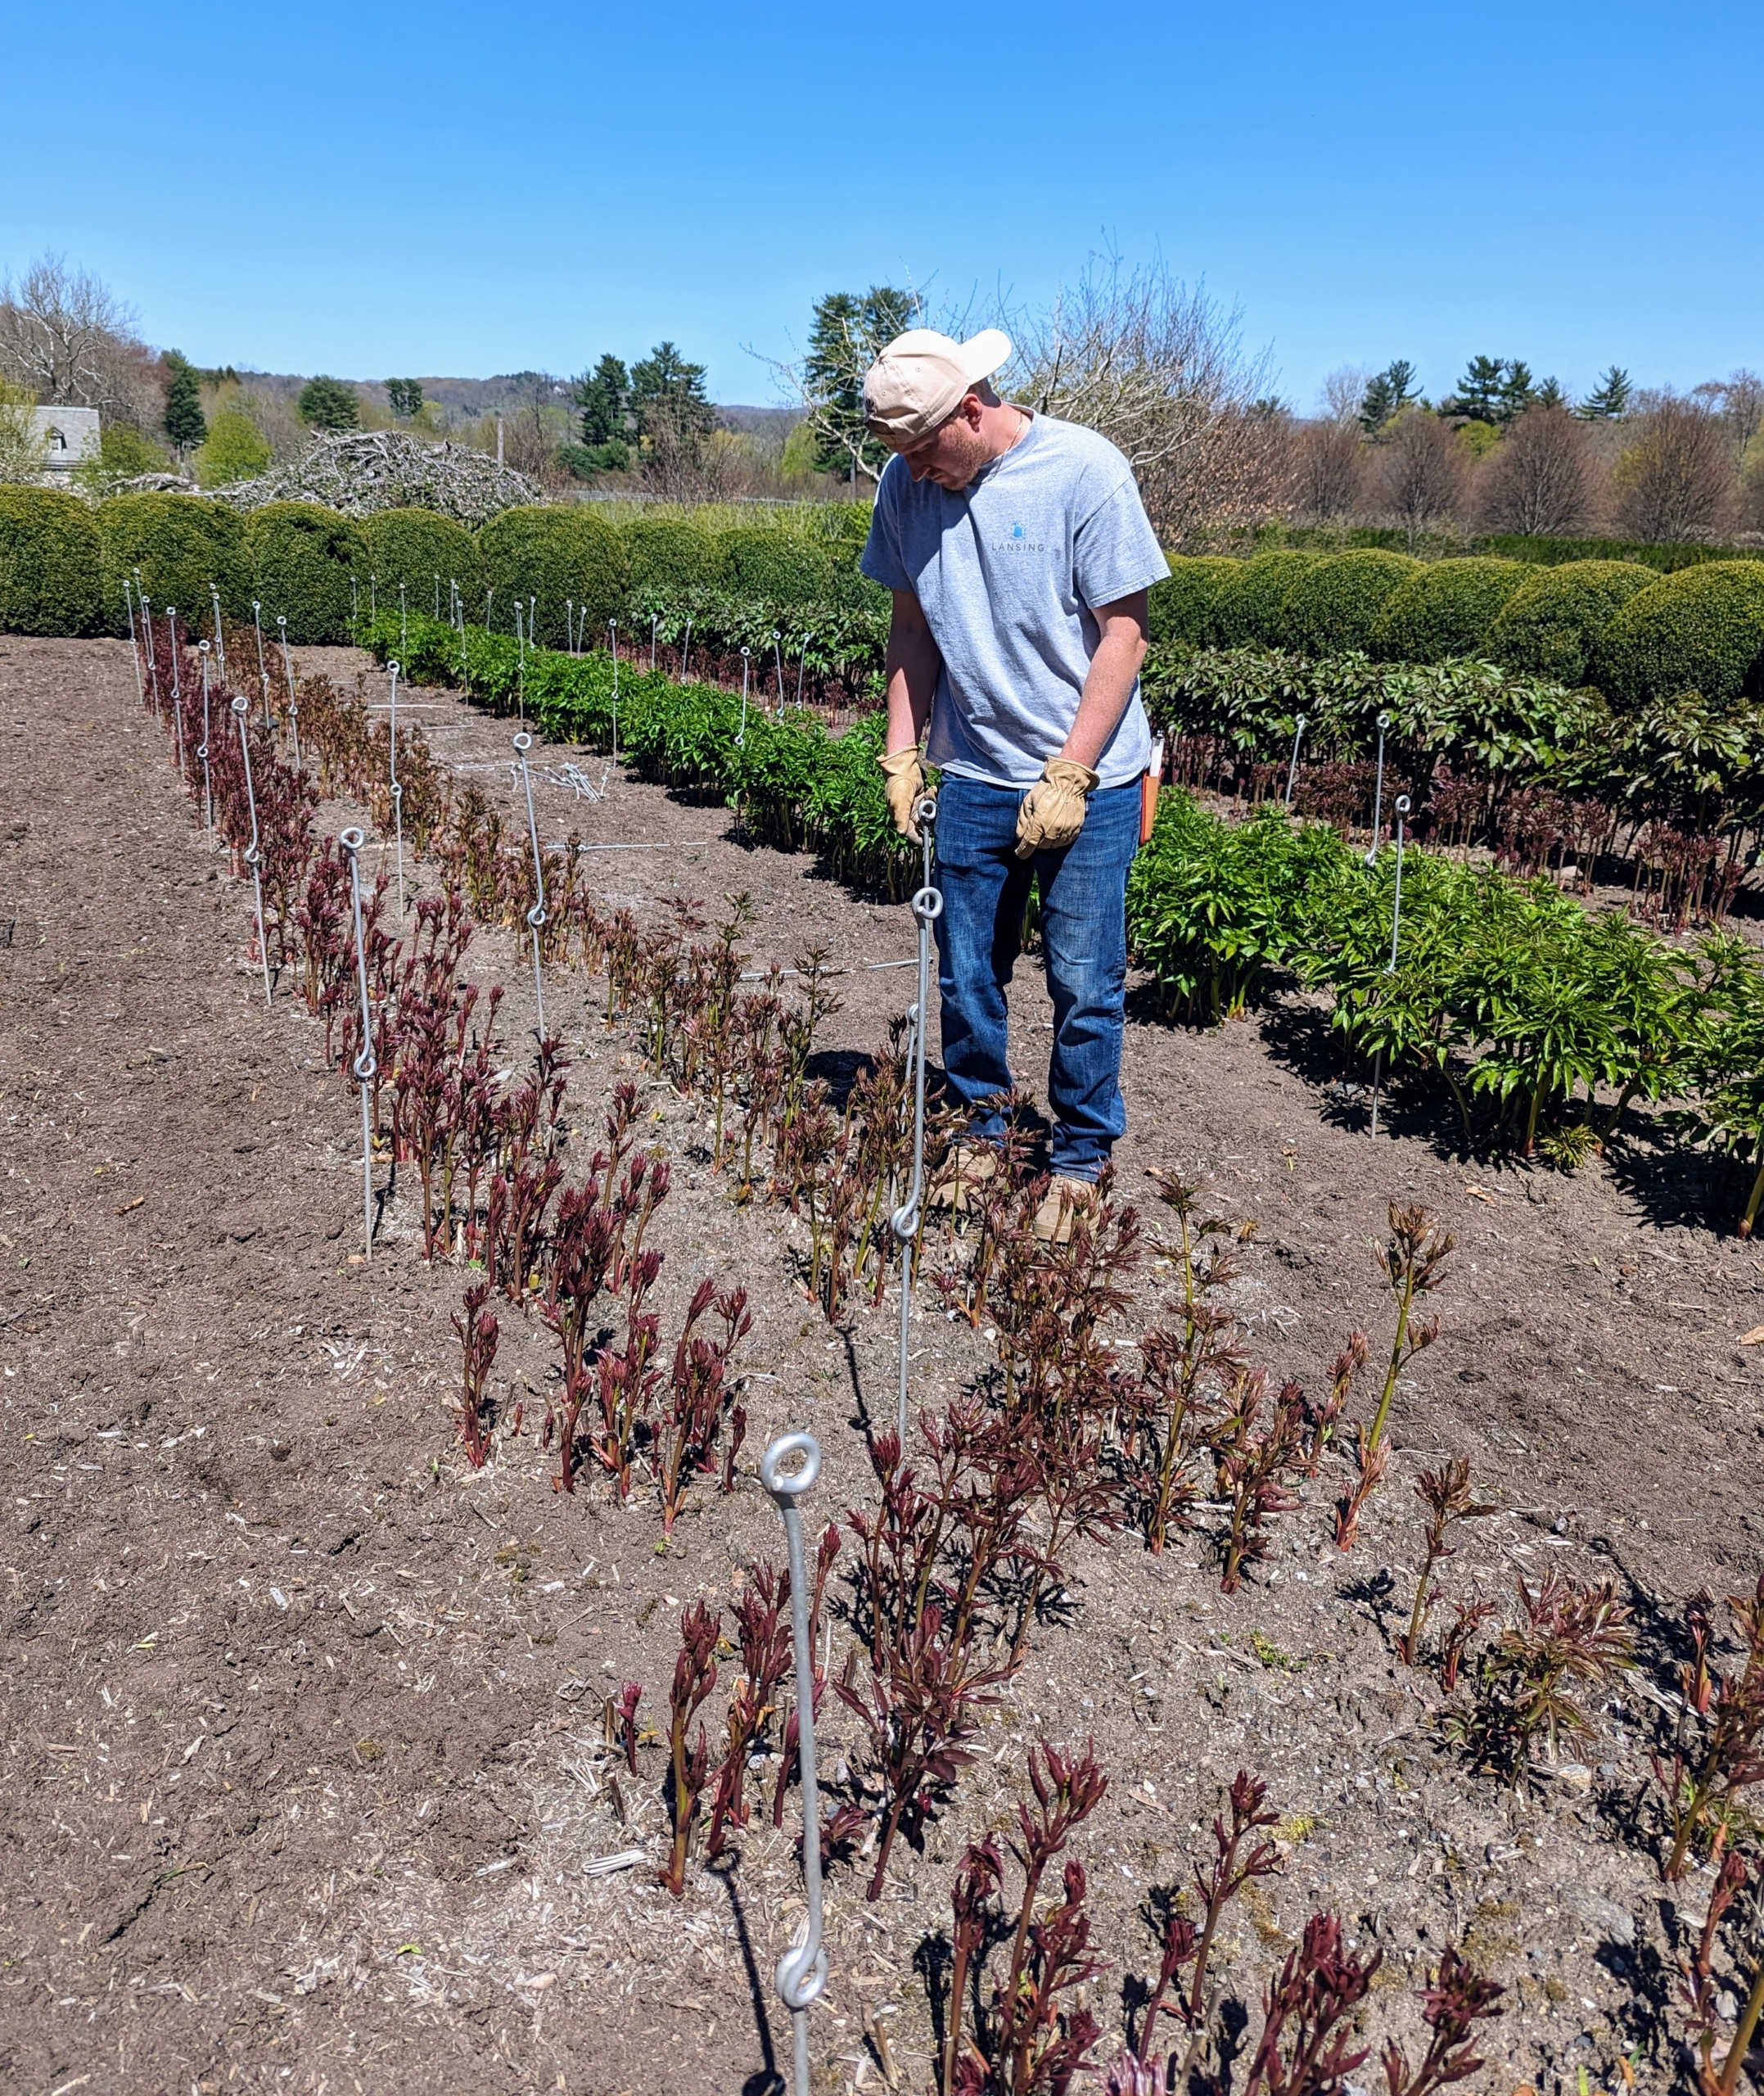
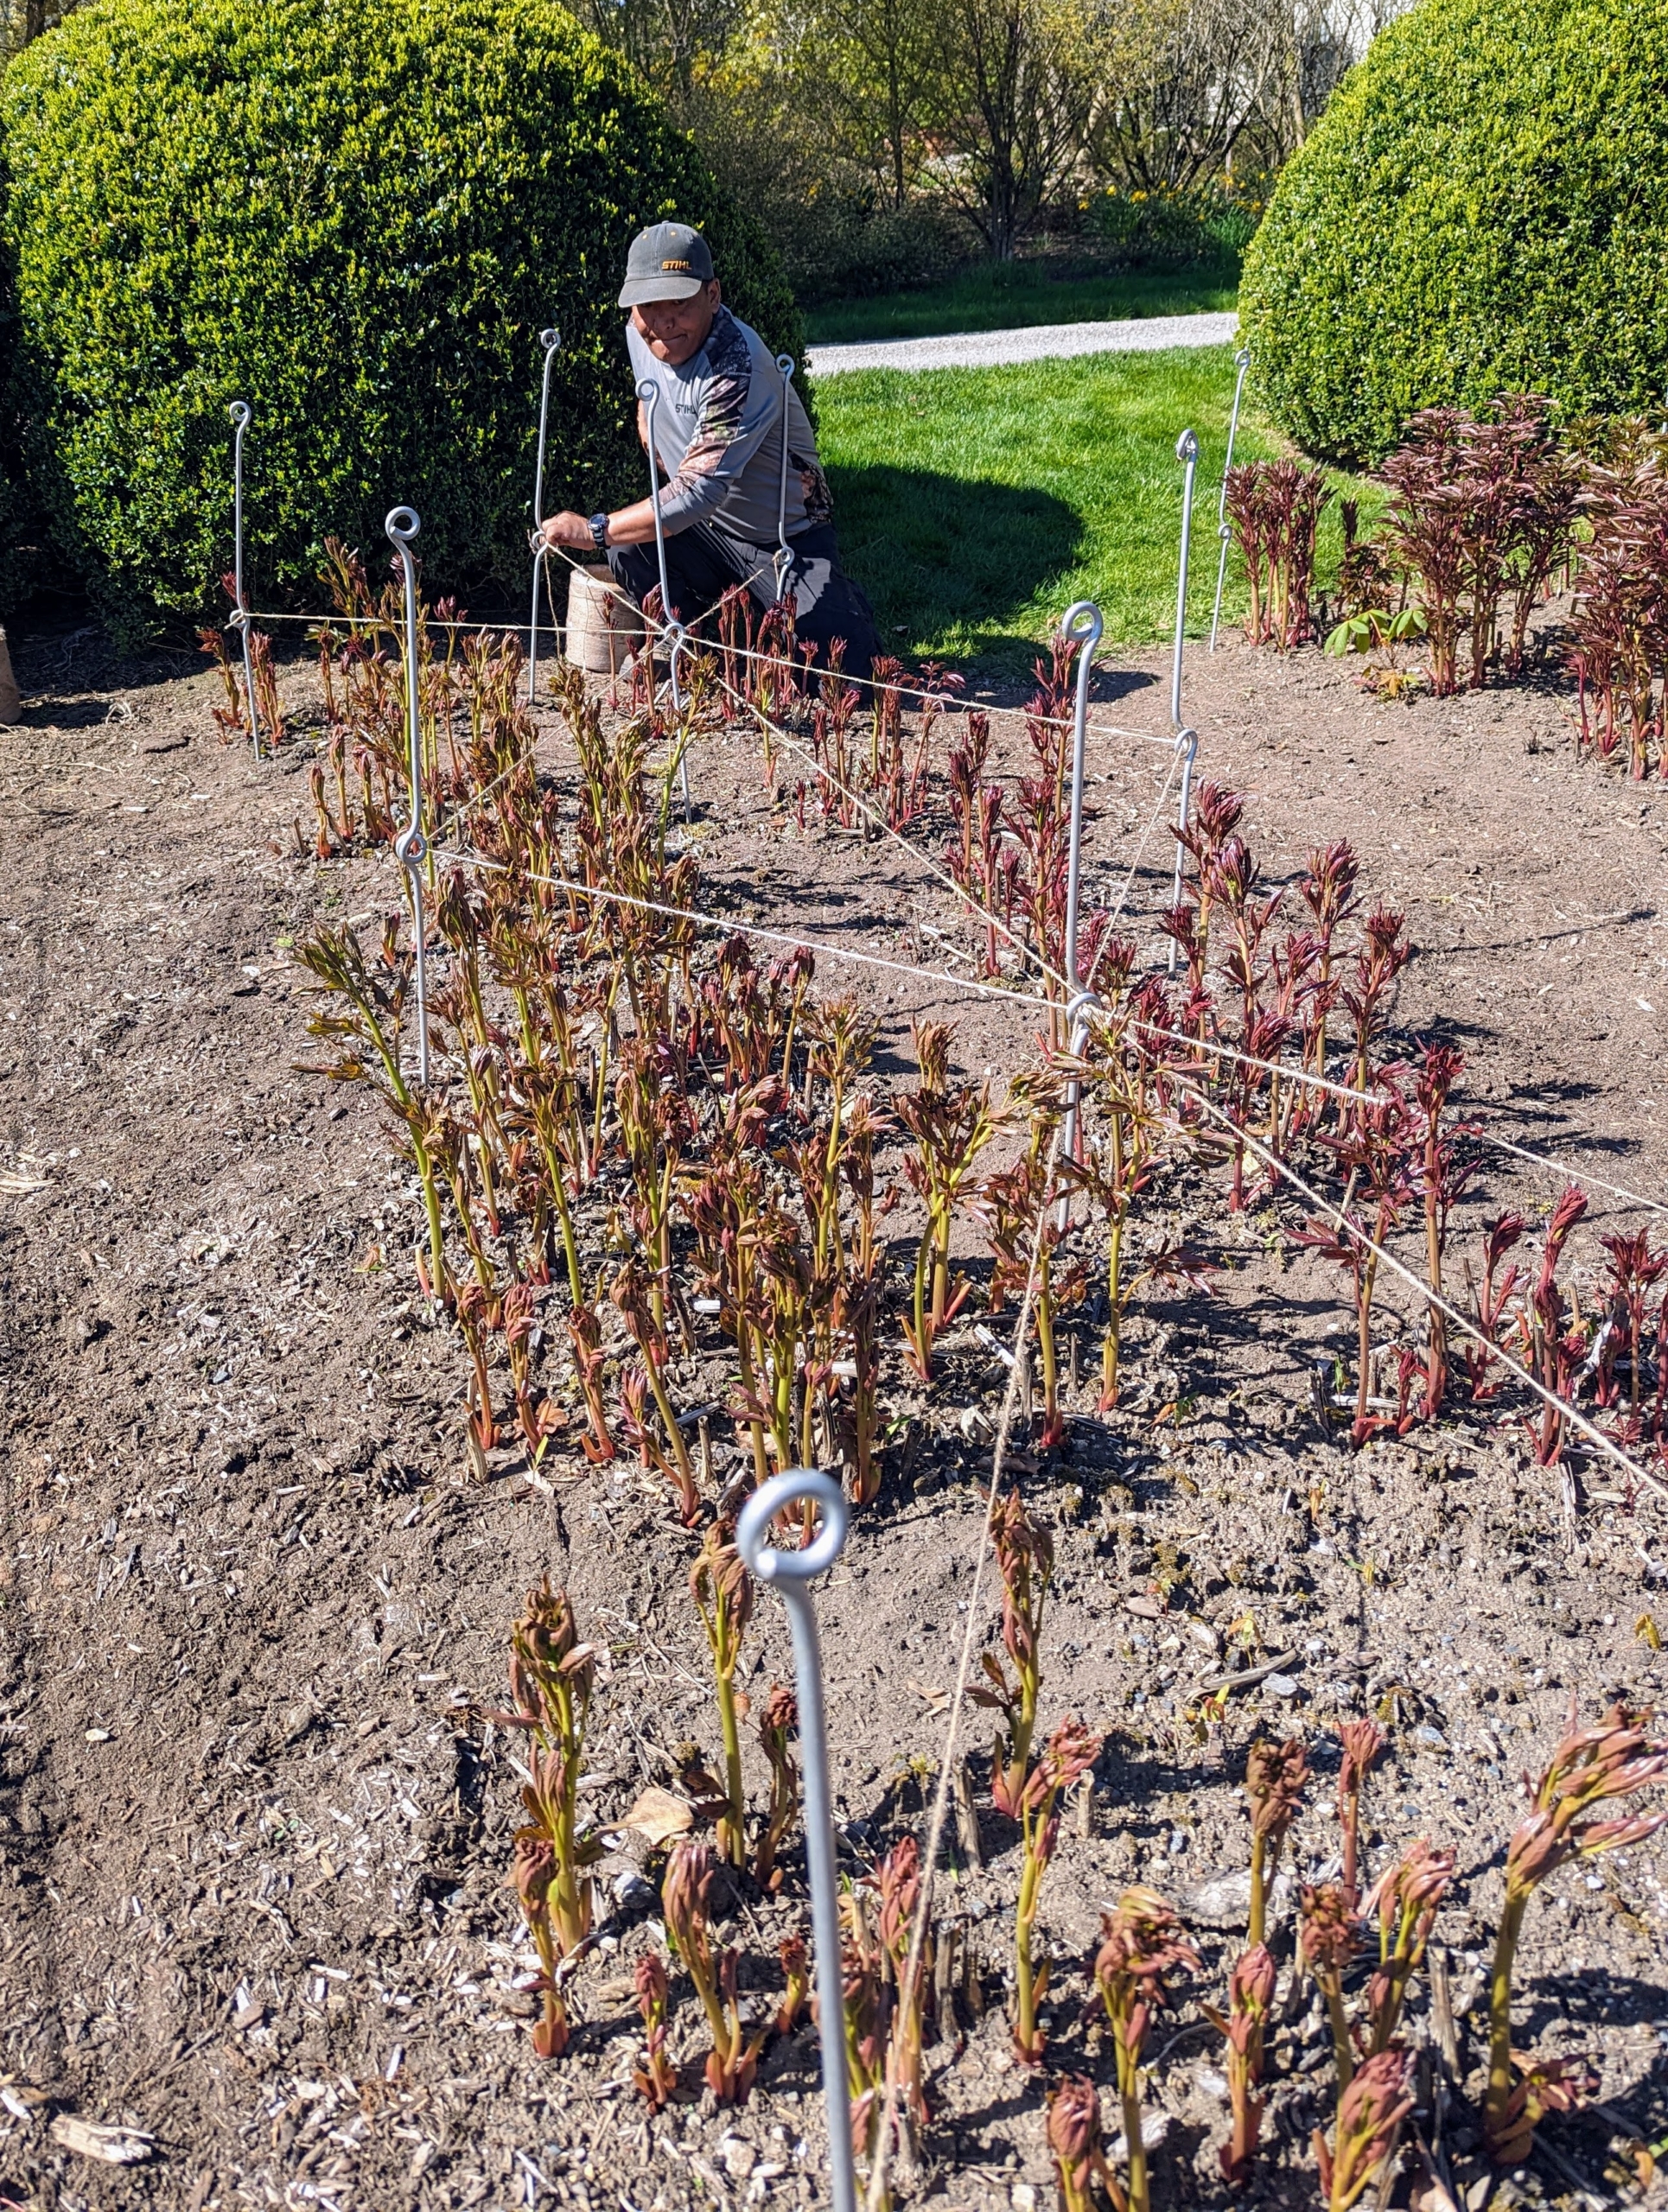
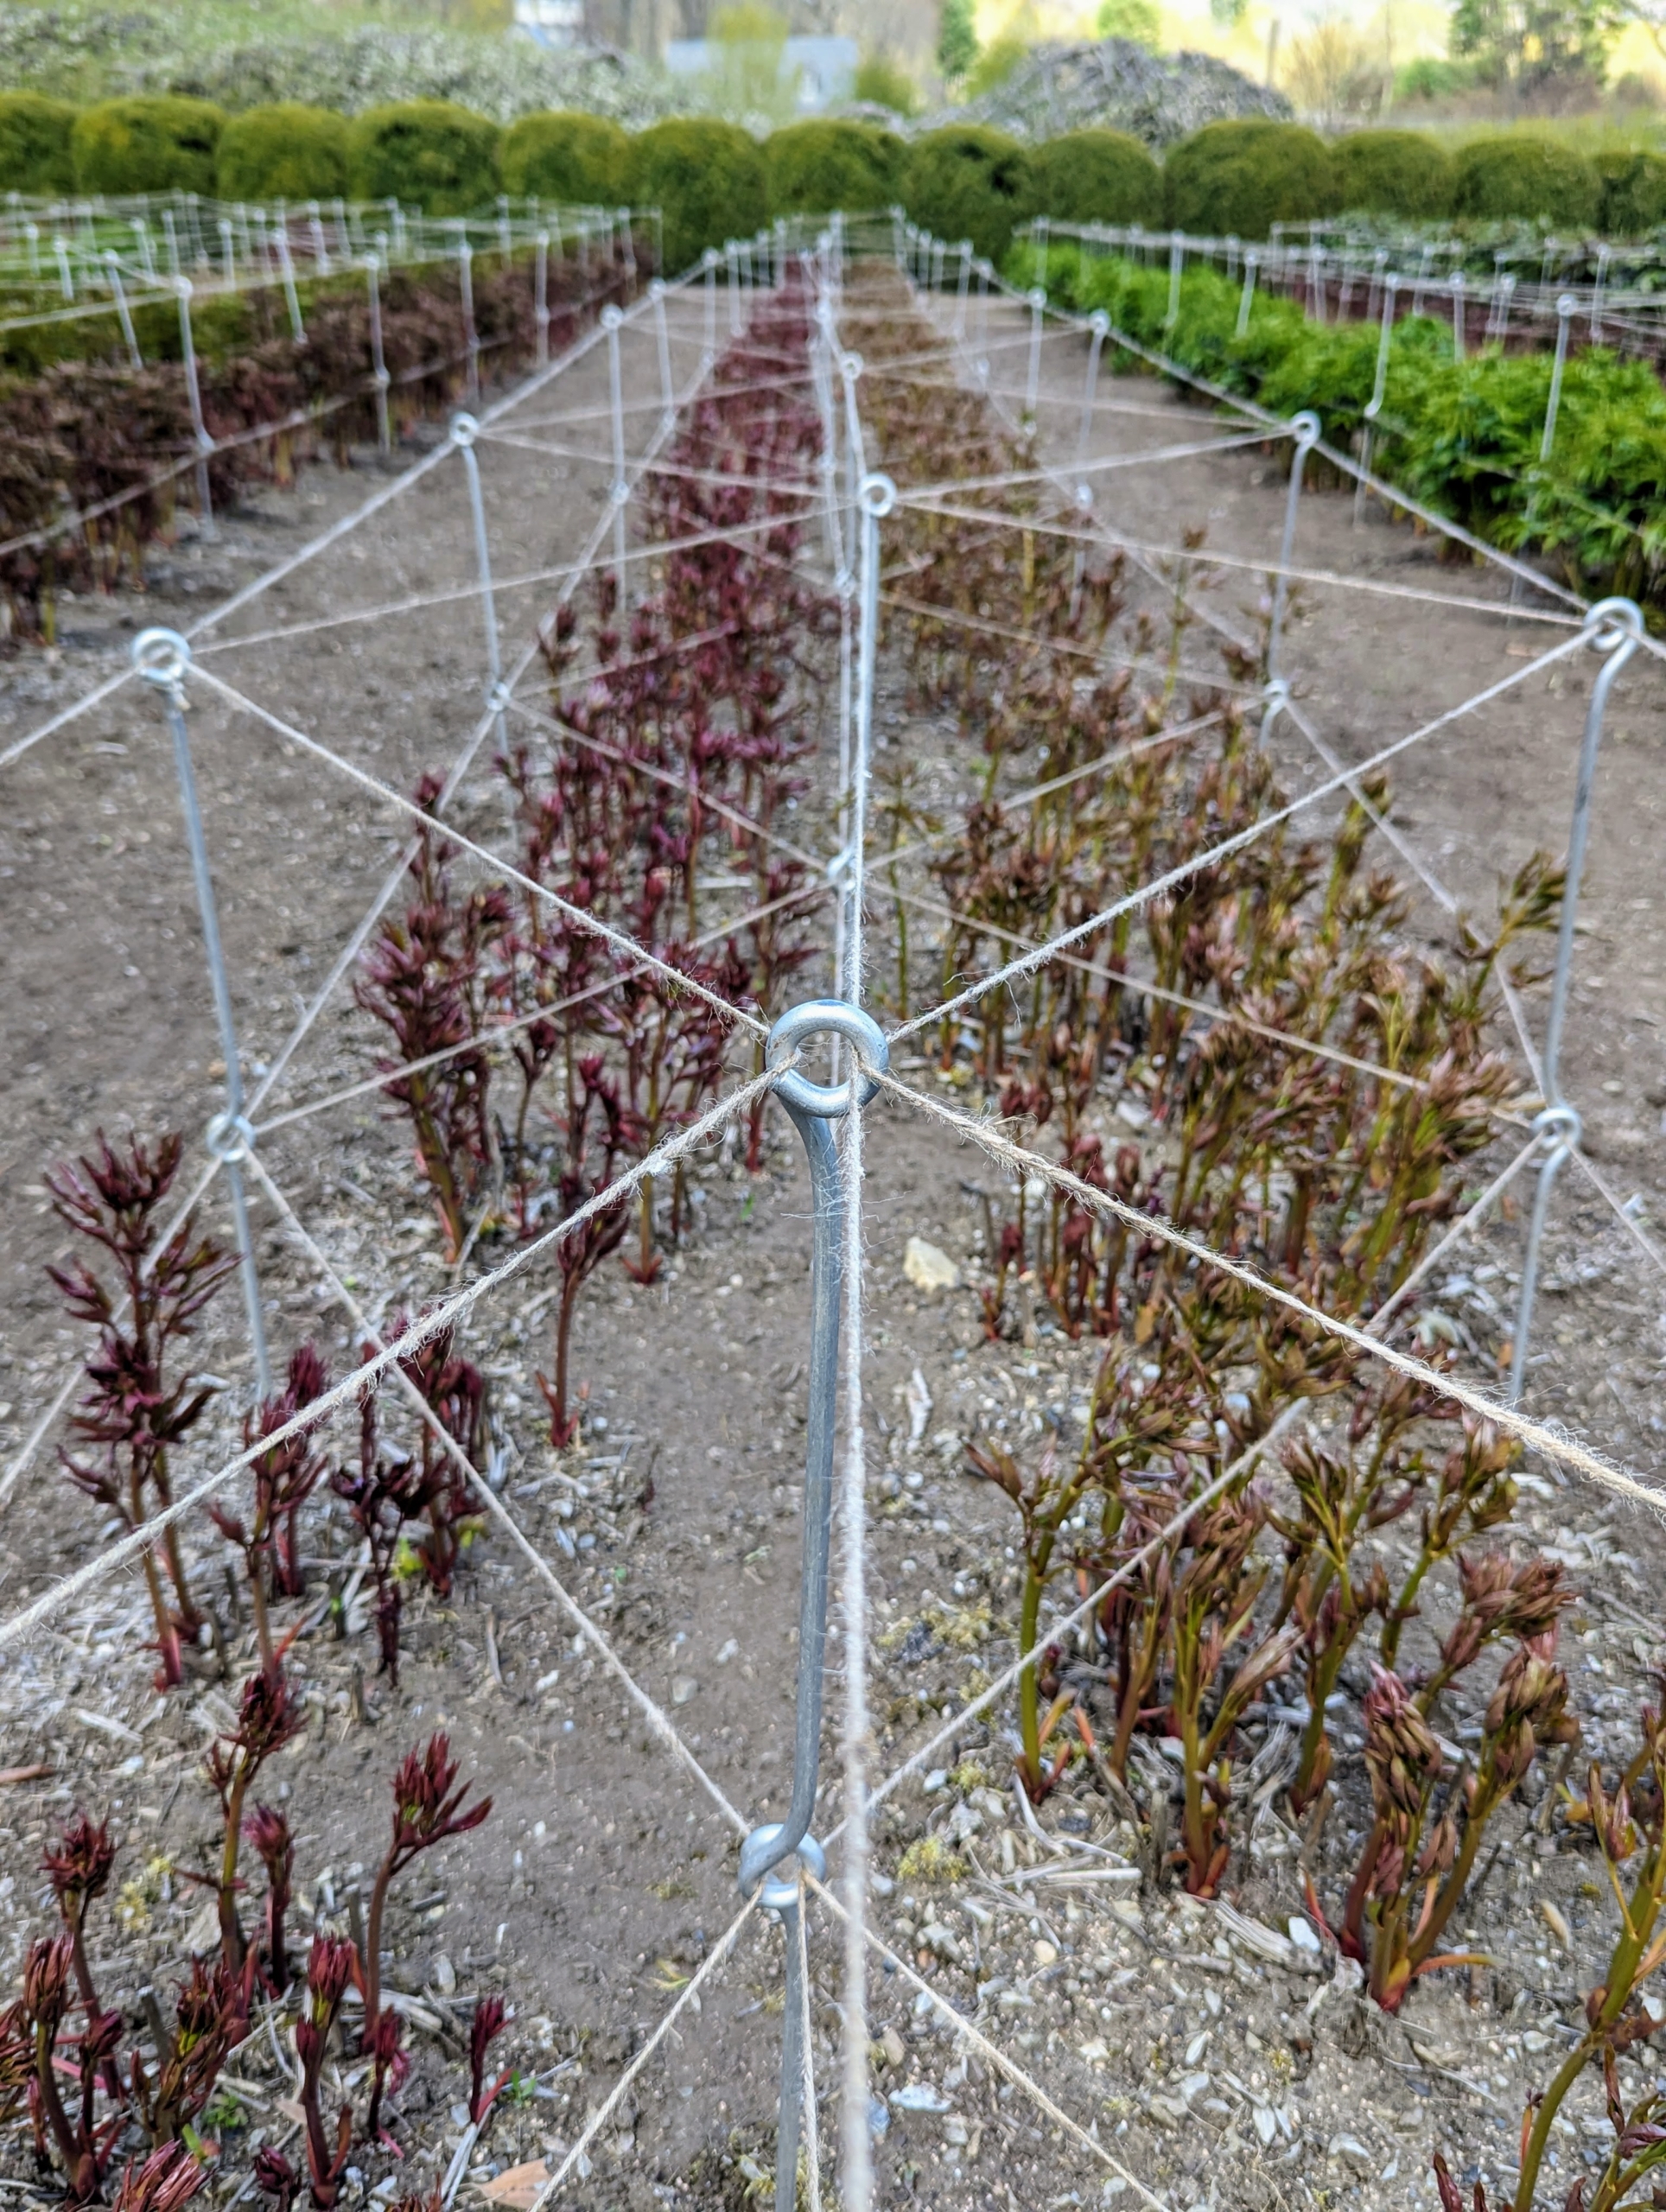
Phurba starts by inserting a stake every four-feet around the perimeter and down the center of each row. My peony garden is planted with 11 double rows of 22 herbaceous peony plants, 44 in each row of the same variety. Because there are so many rows, Phurba works to position the stakes…
… As Josh follows pushing the stakes several inches deep into the ground.
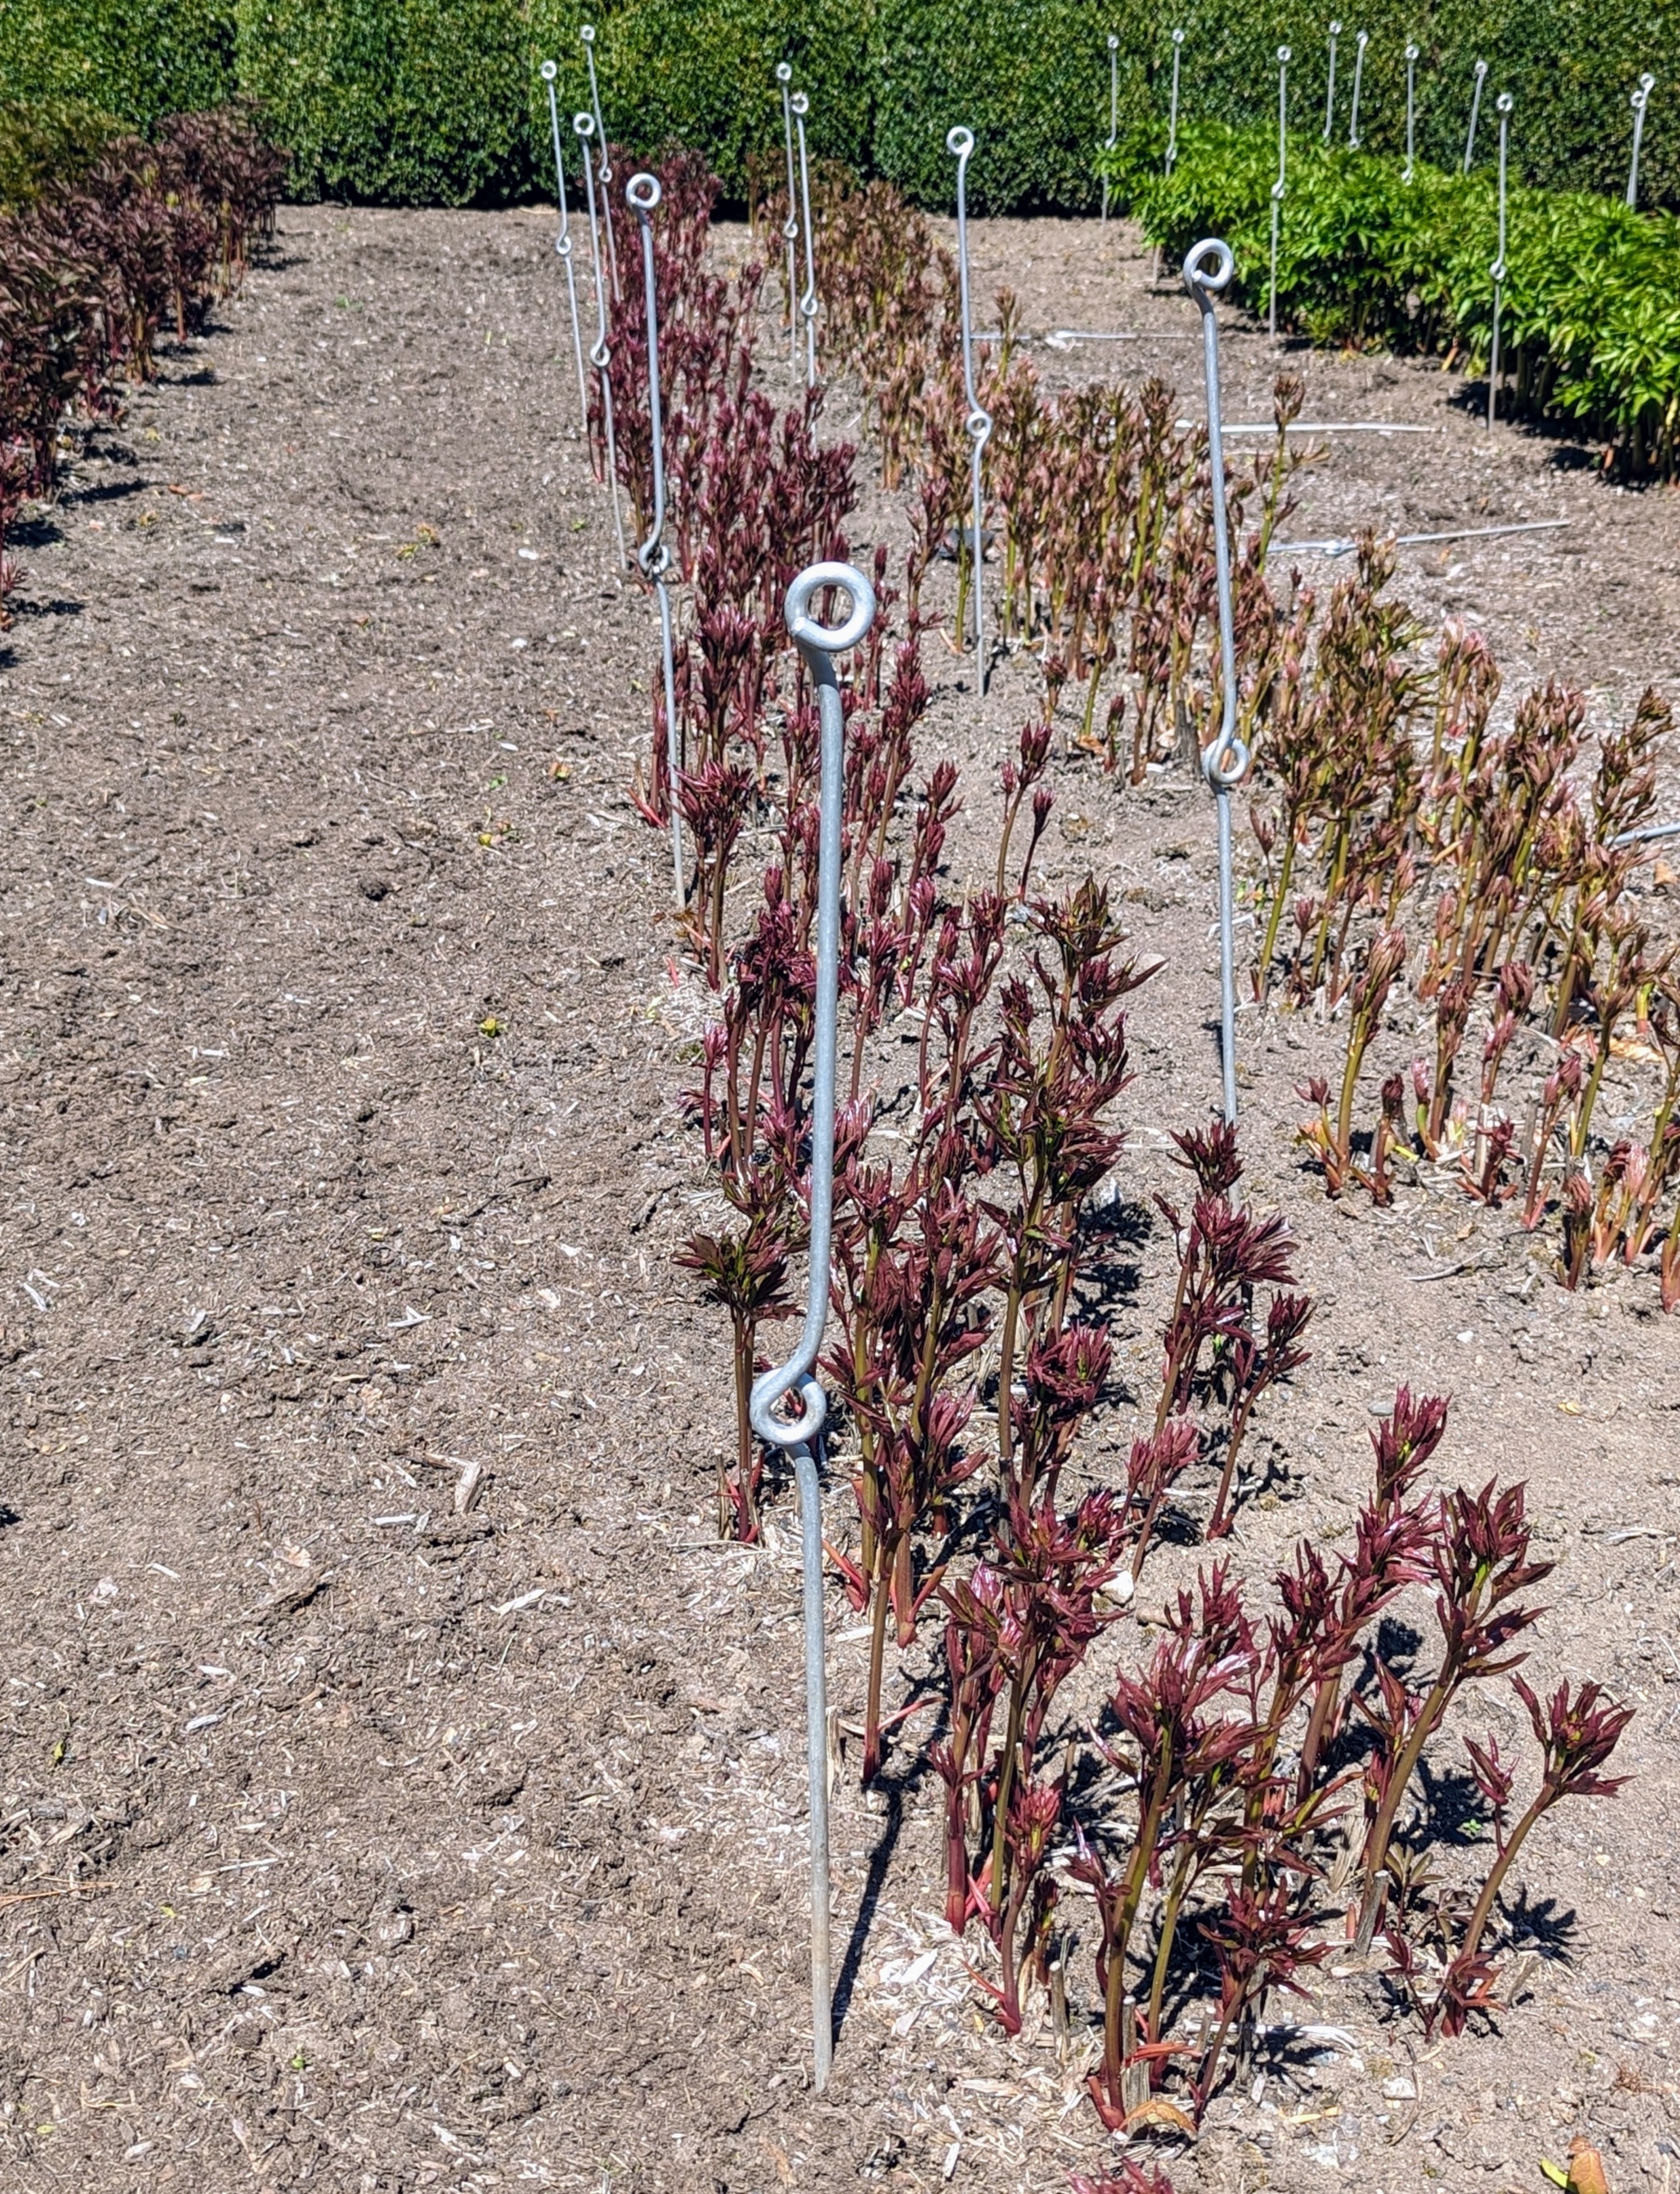
Each of the stakes is positioned, so the eyes face the same direction.
Here, all the stakes are in place. Herbaceous peonies need an area with fertile, well-drained soil and full sun.
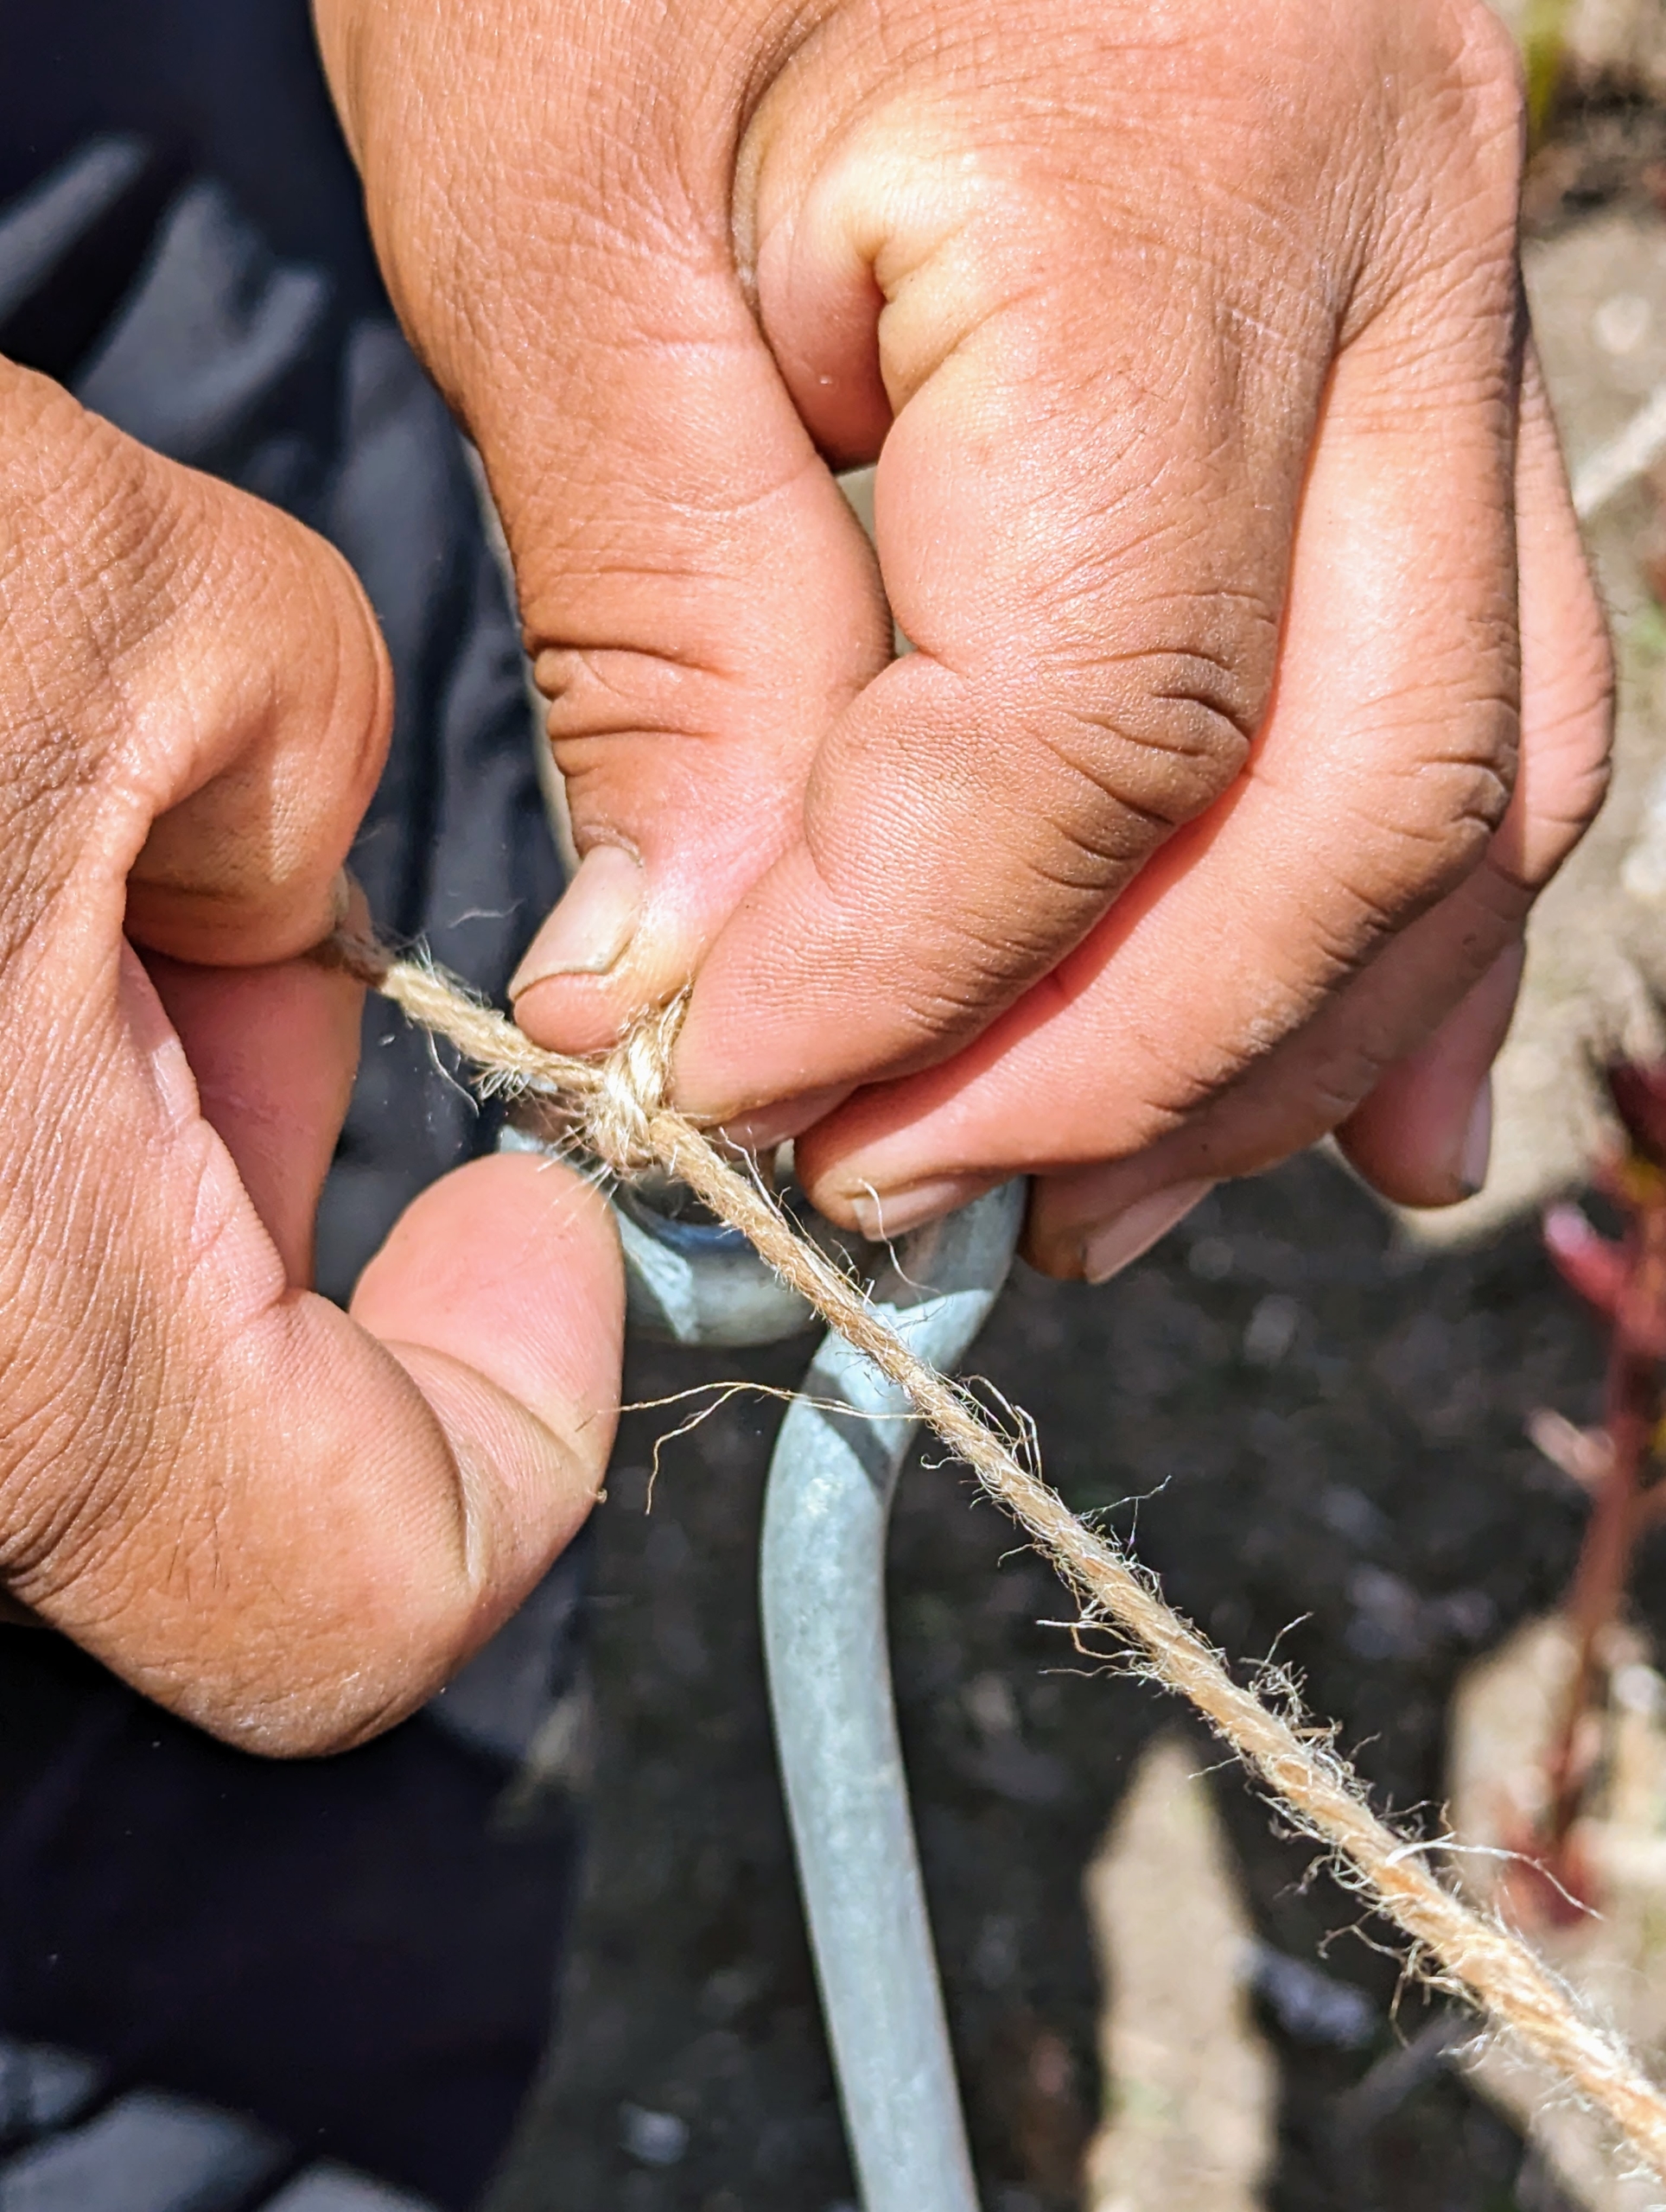
The next day, Phurba begins lacing twine through the lower stake eyes in a zigzag pattern all the way down the row.
Twine is also fed through the stake eyes for a center line.
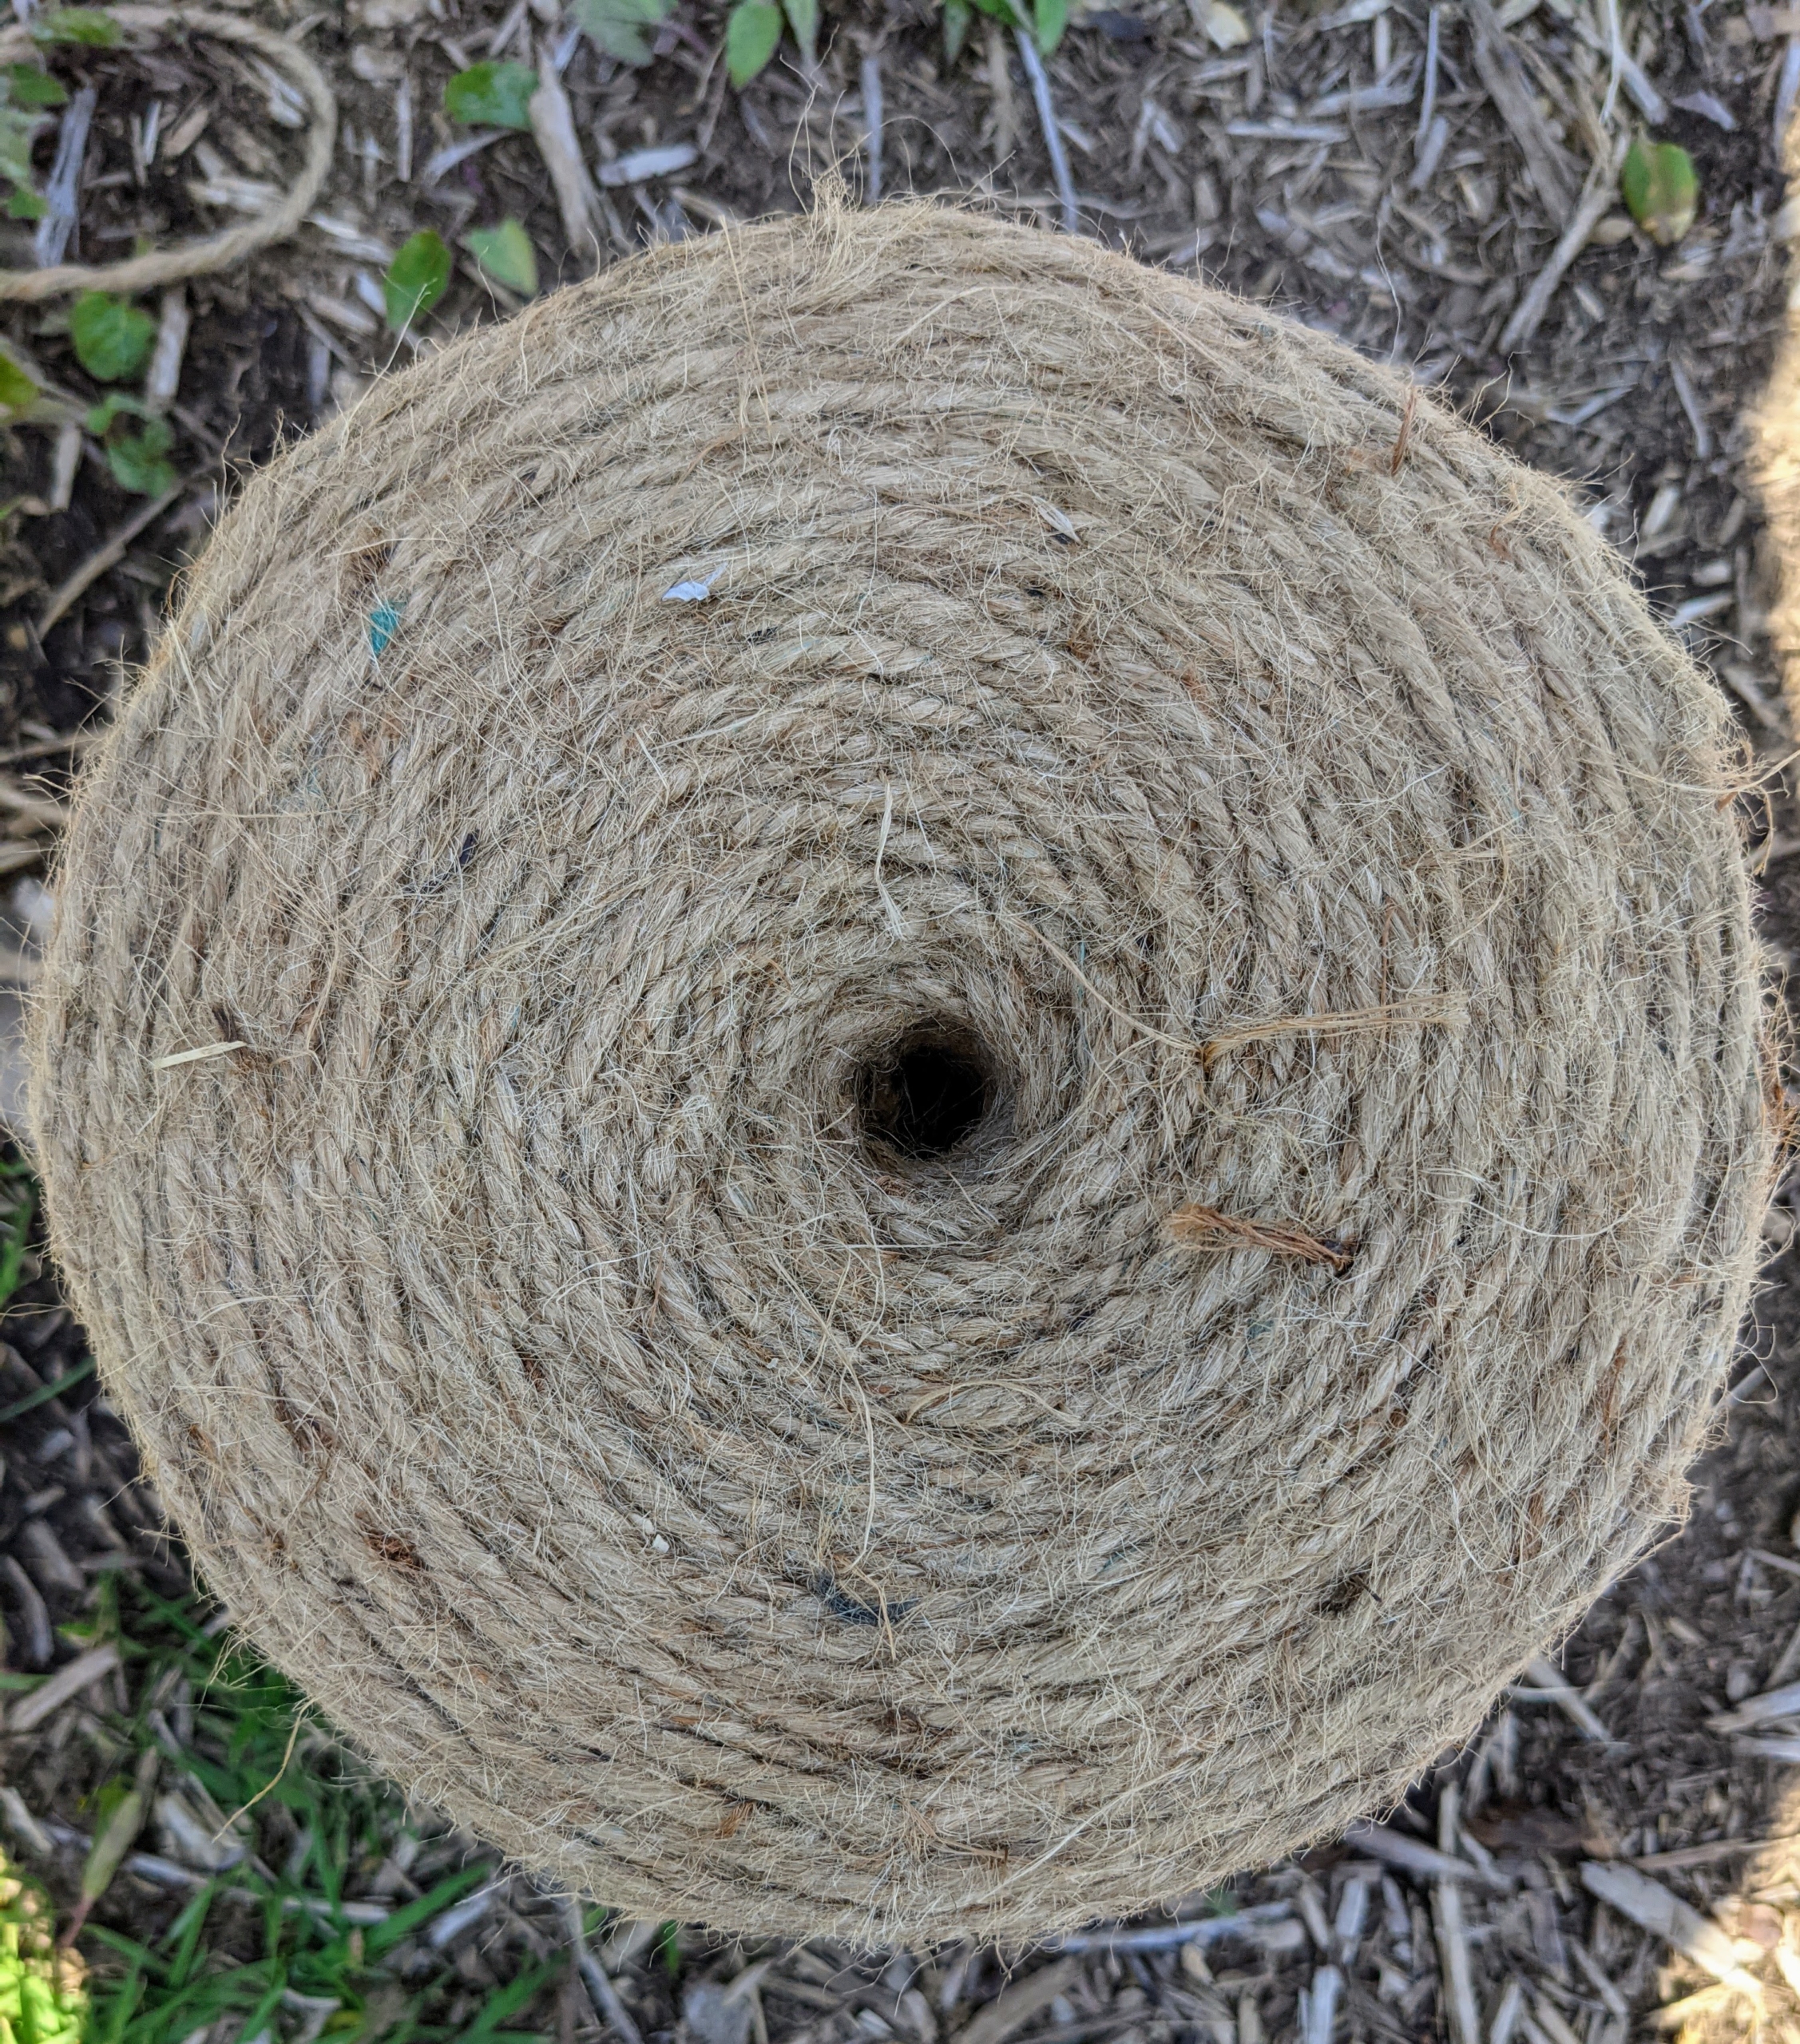
We use a natural jute twine for this project and for many gardening projects around the farm. Twine like this is available in large spools online and in some specialty garden supply shops.
Once the bottom is done, Phurba knots another string of twine in the upper eye of a corner stake and laces the top row in the same manner.
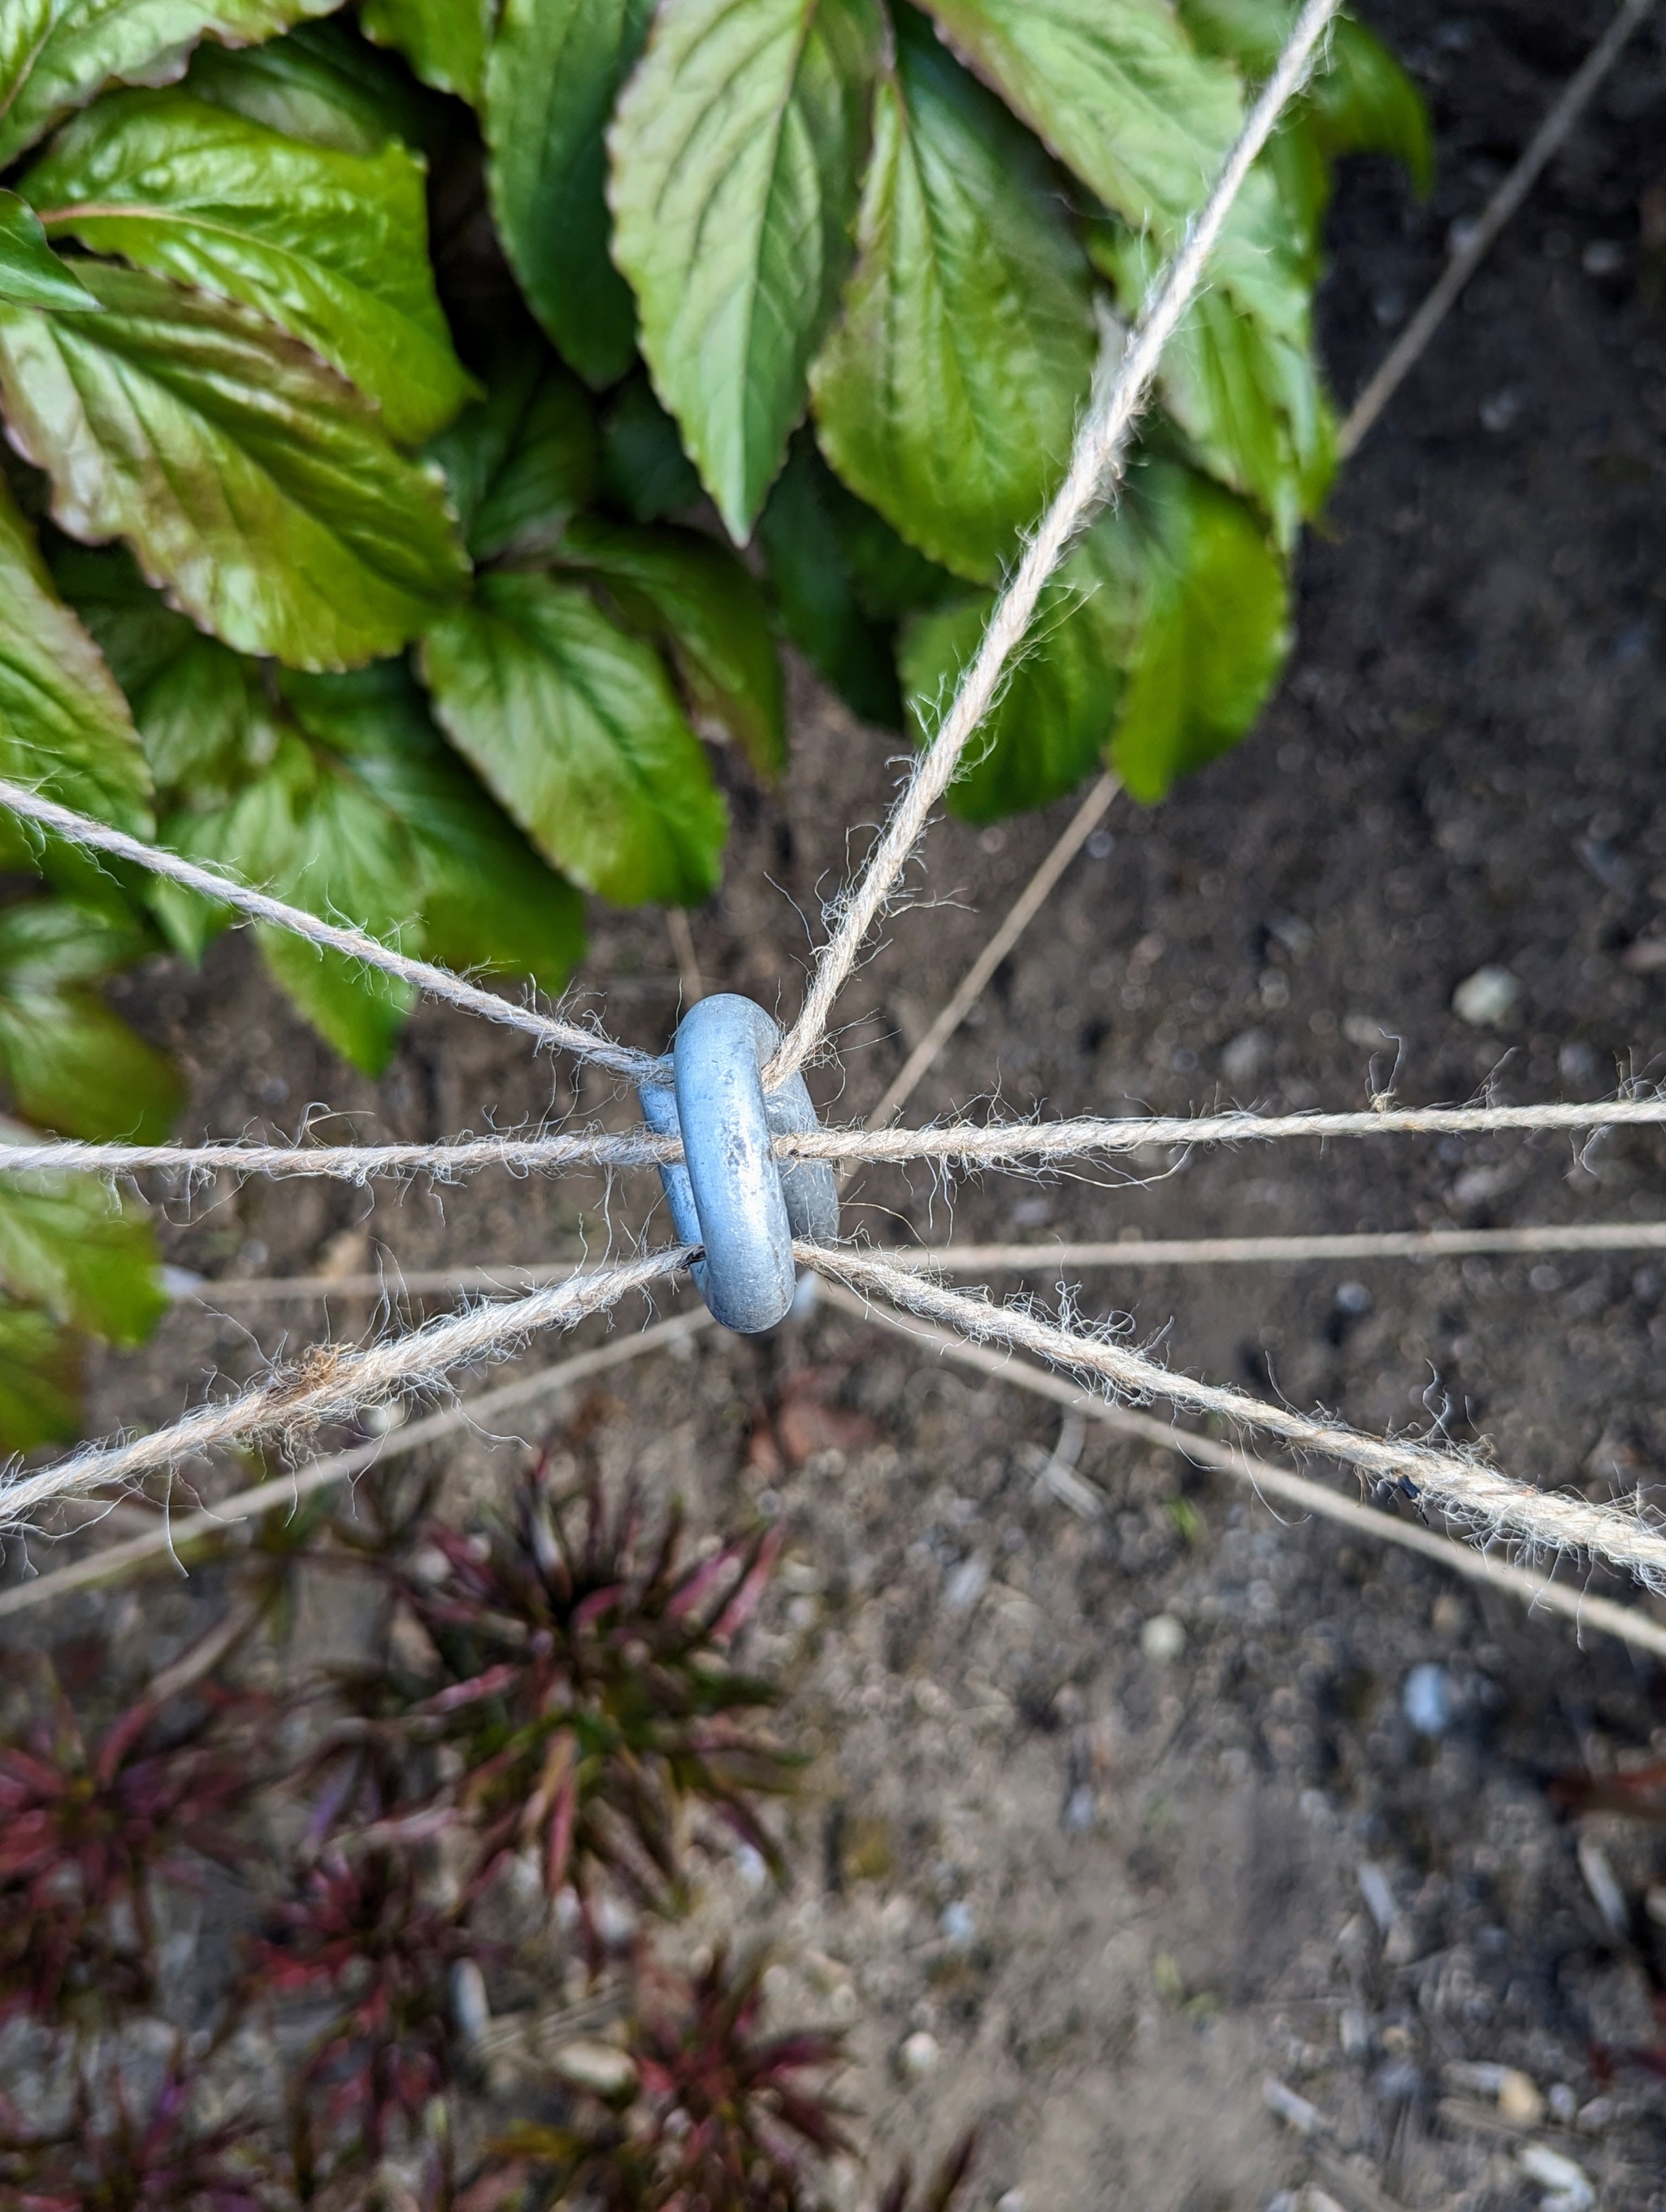
I designed the eyes to be big enough for the many threads of twine. These have worked so well for me over the years.
Twine is also secured around the entire row through the top and bottom stakes to hold all those heavy blooms at the edge.
It takes several hours to do all the beds, but it’s the perfect time to stake them since they are not yet full height.
Here is what a row looks like all done – very neat and tidy, and every peony plant supported by twine. The stakes and twine create such an artistic and geometric pattern.
This technique allows support from every direction. I am so happy to say, this garden is a huge success and joy every year. Wait until you see all the peonies – it’s a beautiful sight.
I'm back home after a whirlwind business trip to Nevada.
If you follow me on my Instagram page @MarthaStewart48, you may know I flew to Las Vegas earlier this week for a number of business commitments for QVC. Among them - hosting a special luncheon at my restaurant, The Bedford by Martha Stewart. The event helped launch QVC's Age of Possibility, the company's new campaign platform celebrating Q50 female celebrities, leaders, entrepreneurs, and other influencers. I have been part of the QVC family for many years and was honored to be included in this great group of women. In addition, I participated in a panel discussion, appeared in an ad on the famous Sphere Las Vegas, and ate a delicious cheesesteak lunch cooked by non other than Bradley Cooper. But, business trips are always most enjoyable when I can squeeze in a little time to learn about the wonderful places I visit - we also took an early morning drive around the picturesque Red Rock Canyon.
Here are some photos, enjoy.
My trip started right away with a visit to The Bedford located in the Paris Las Vegas. We had a delicious dinner followed by a review of some of the new menu items. If you’re ever in the area, make reservations – you’ll love every dish.
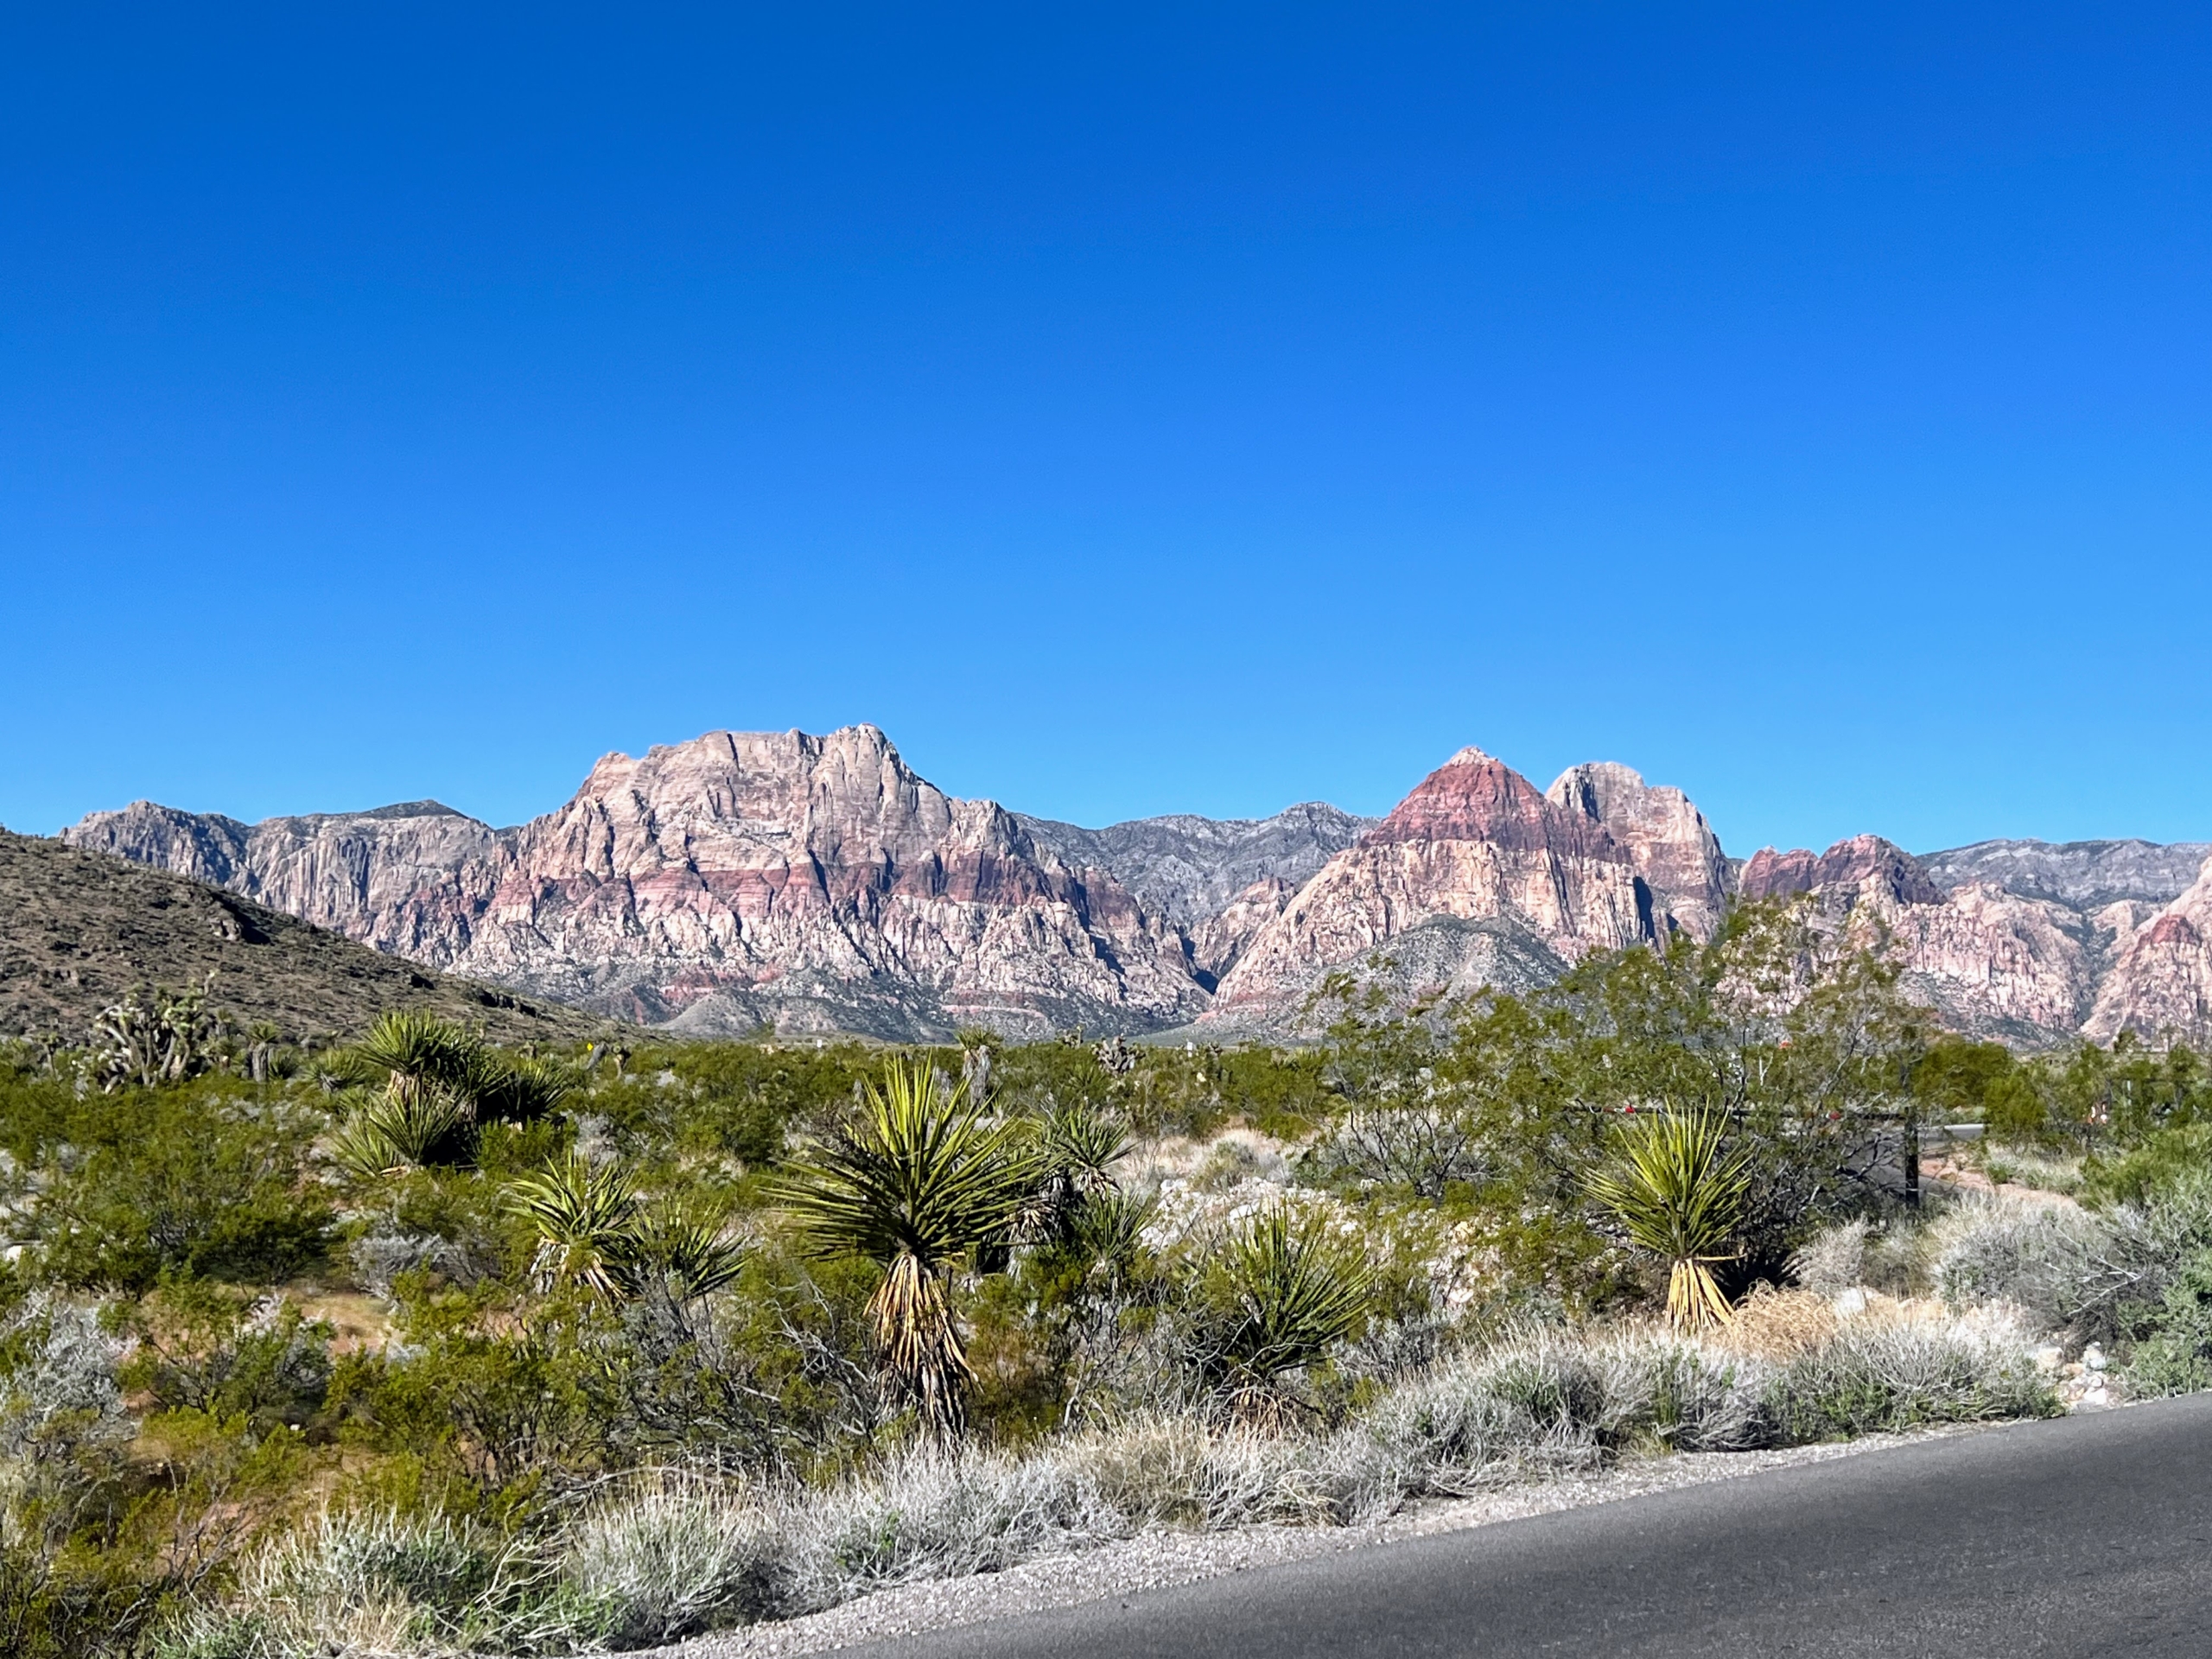
Early the next morning, we visited Red Rock Canyon. Red Rock Canyon features scenic desert cliffs, buttes, and rock formations. The park is located where the southernmost tip of Sierra Nevada converge with the El Paso Range.
The National Conservation Area encompasses 195,819 acres within the Mojave Desert. Visitors can see it via a 13-mile driving loop, but there are also hiking trails, camp sites, and lots of wildlife and plants.
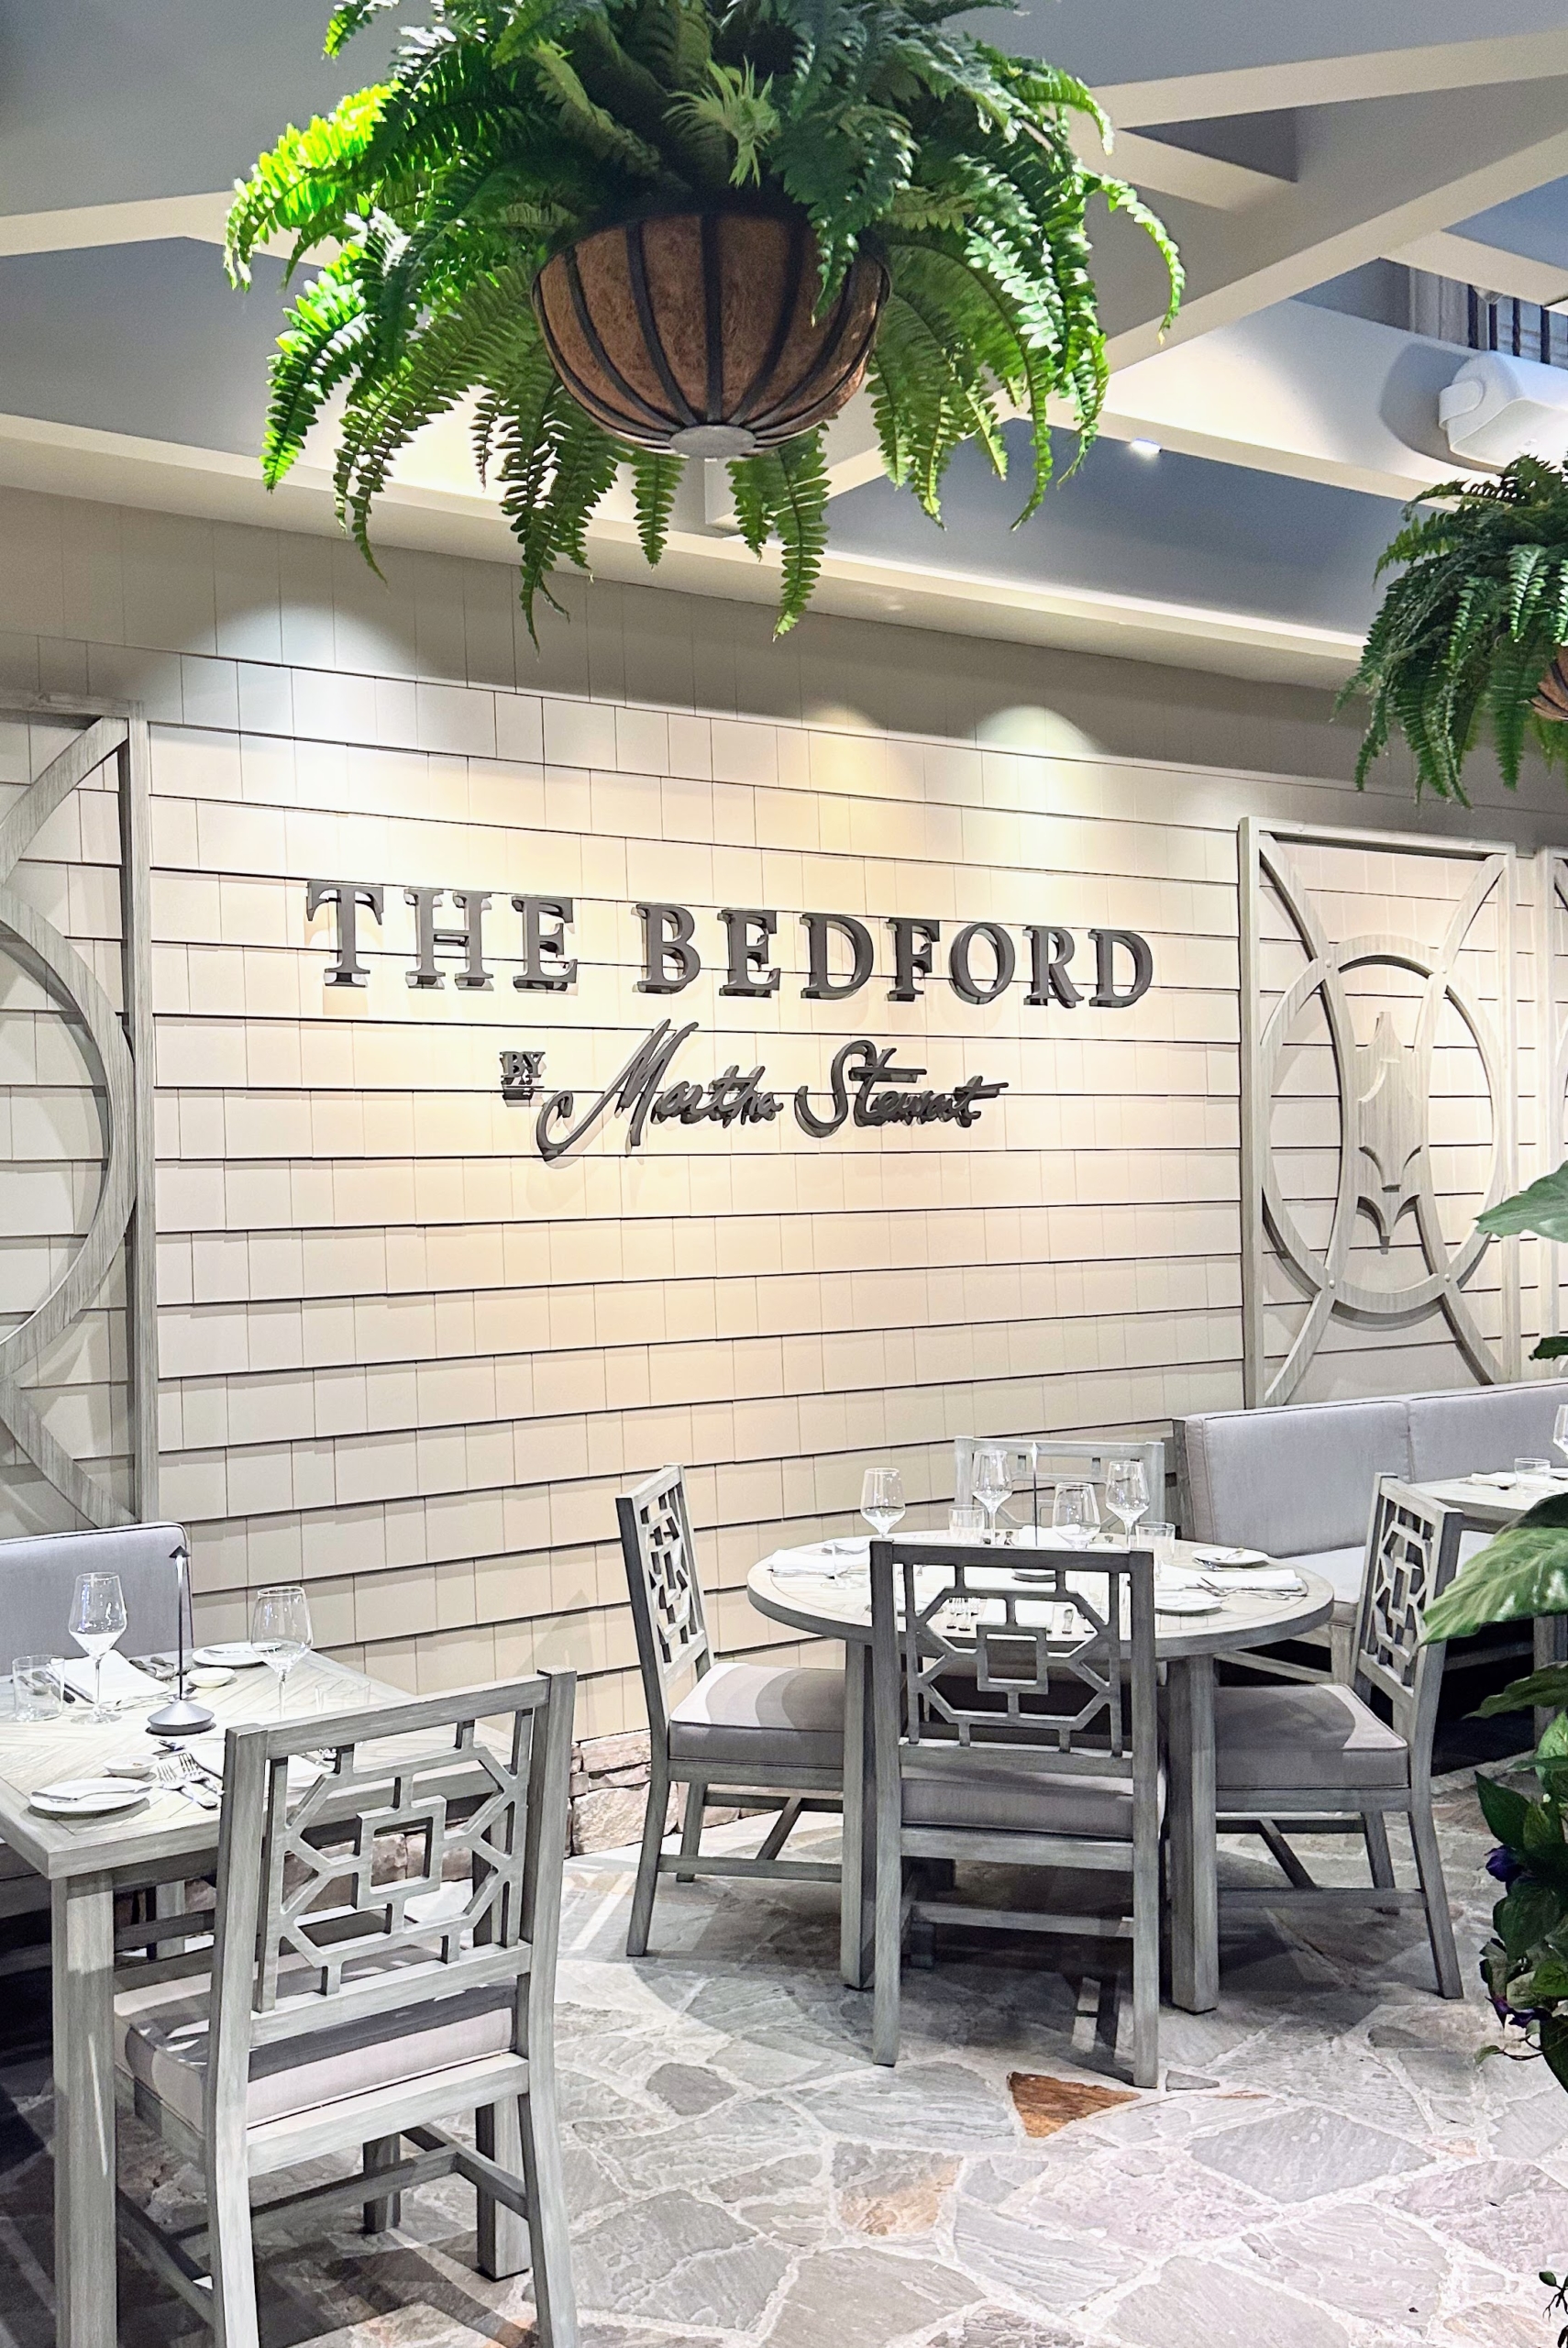
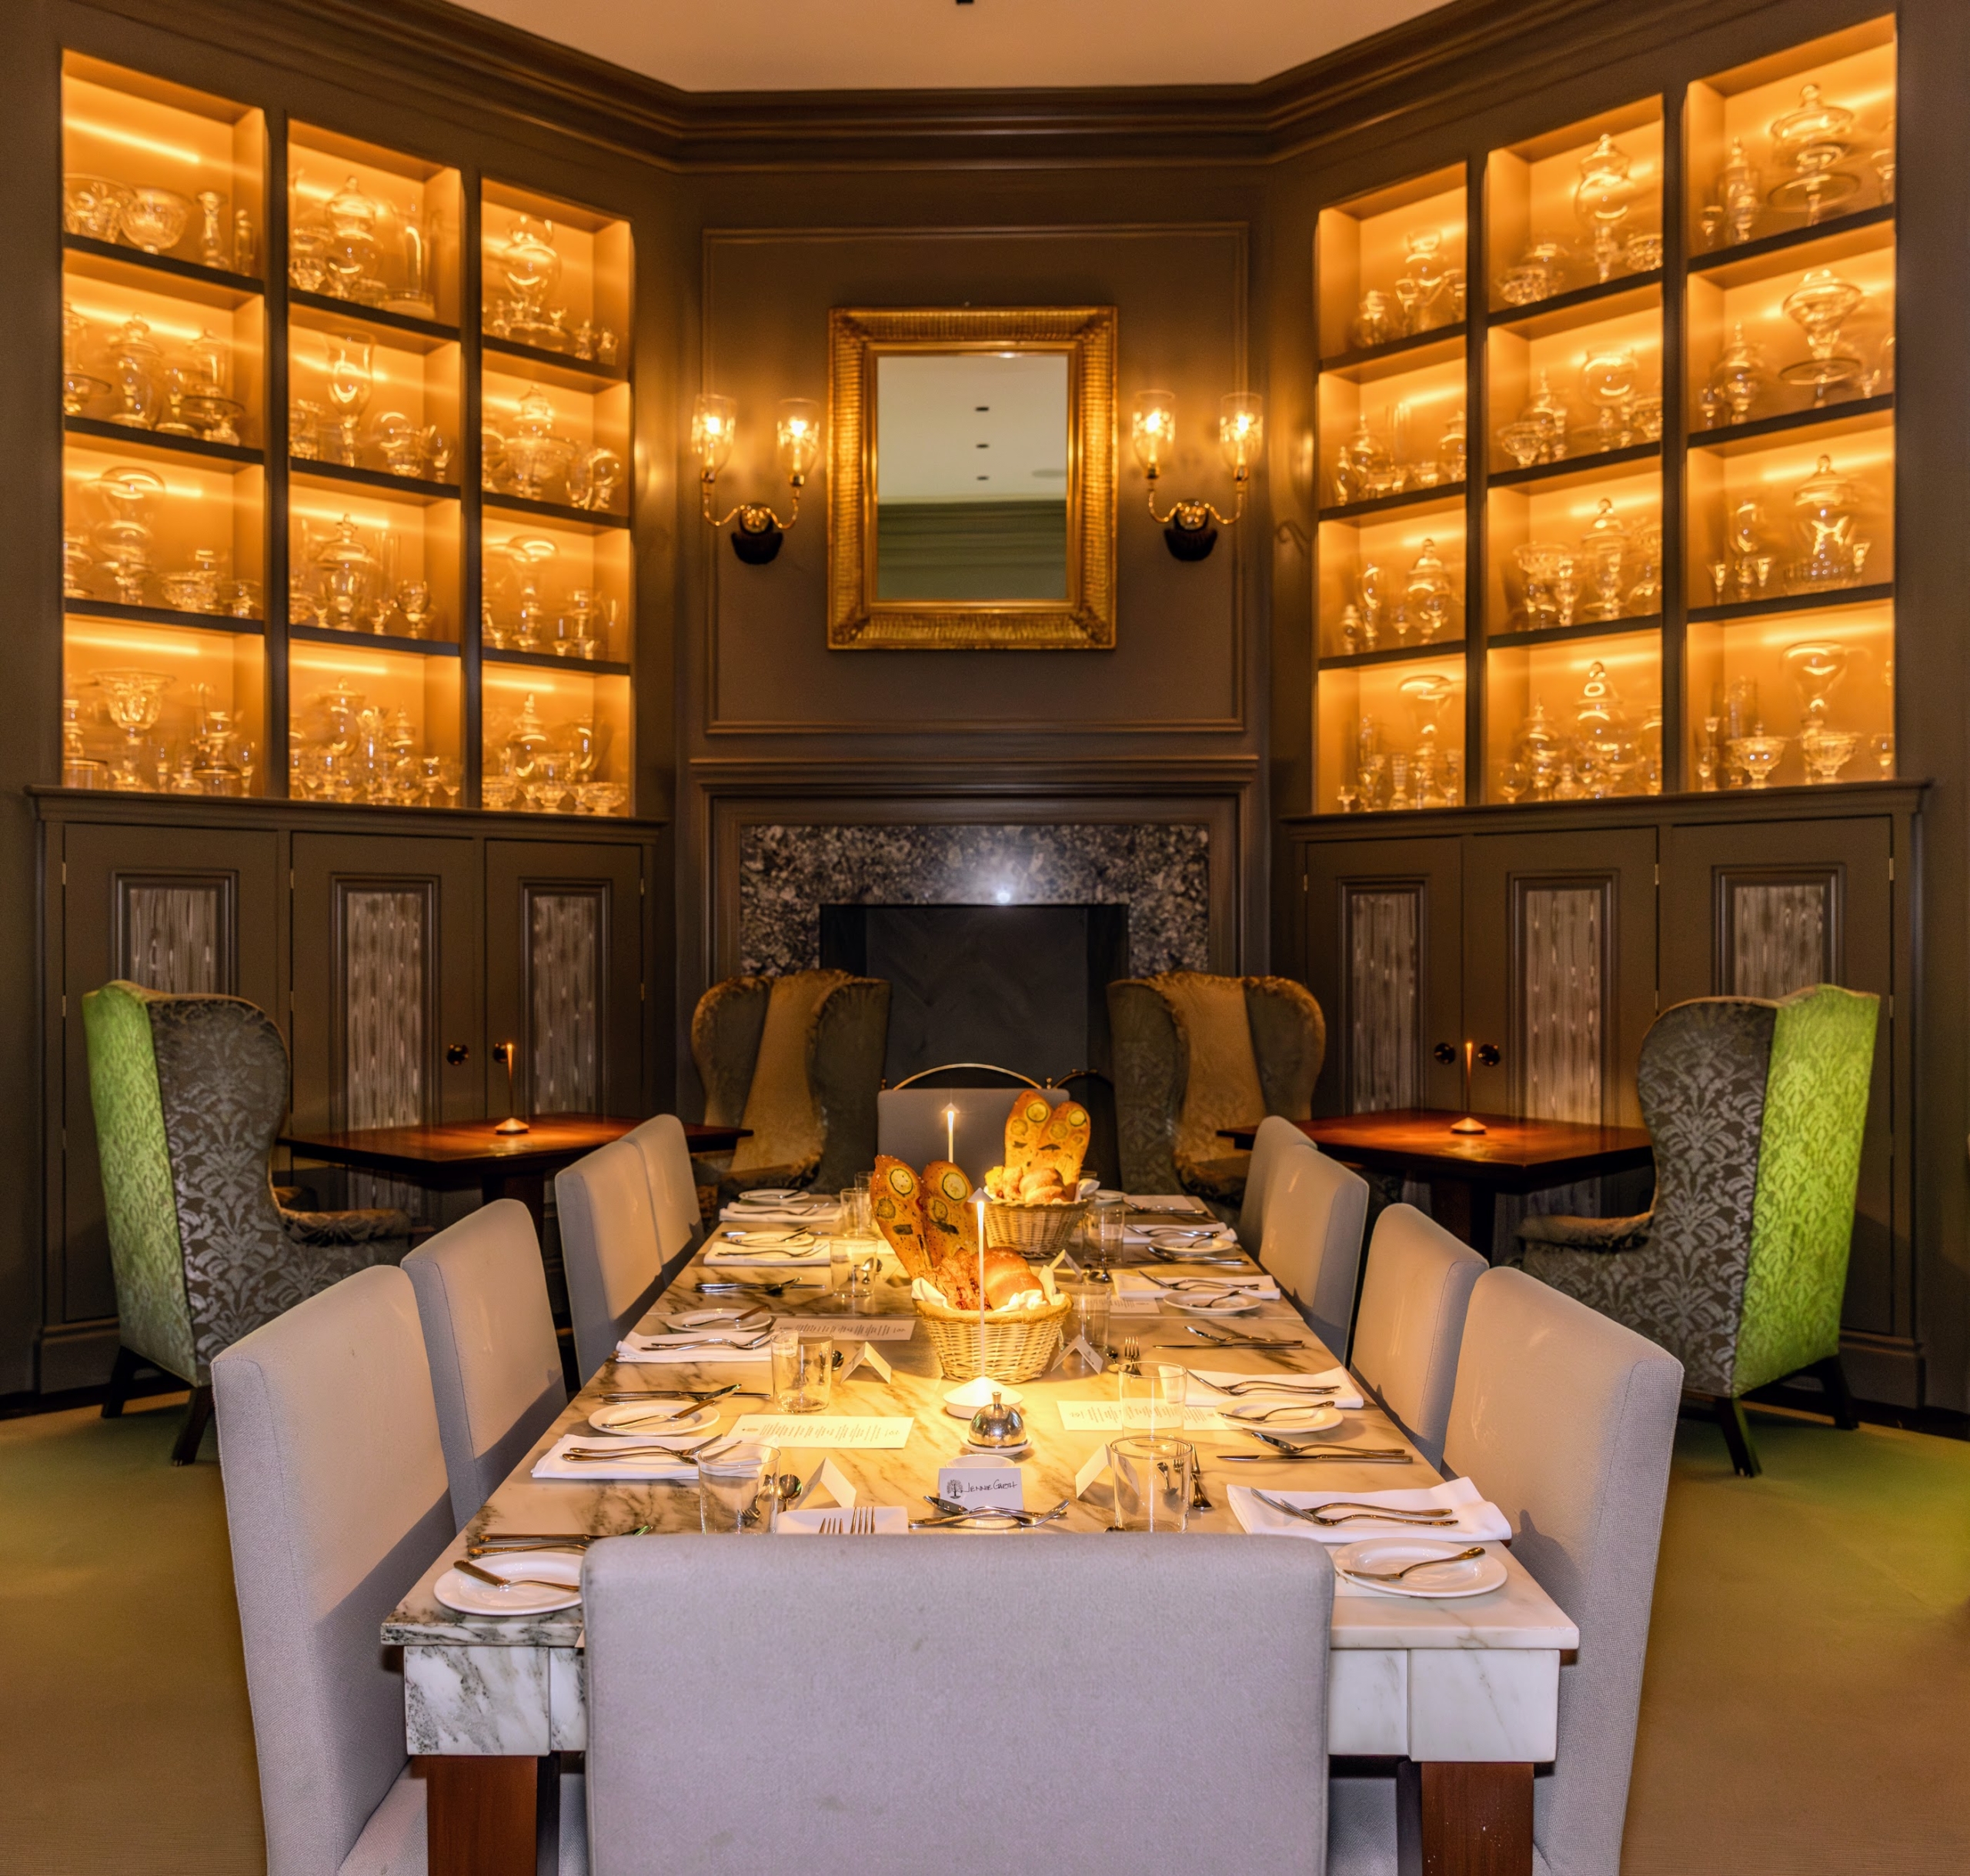
Then it was back to the restaurant. As many of you know, I opened The Bedford by Martha Stewart in August 2022 in a partnership with Caesars Entertainment. We all worked hard to make it feel just like my home in Bedford, New York.
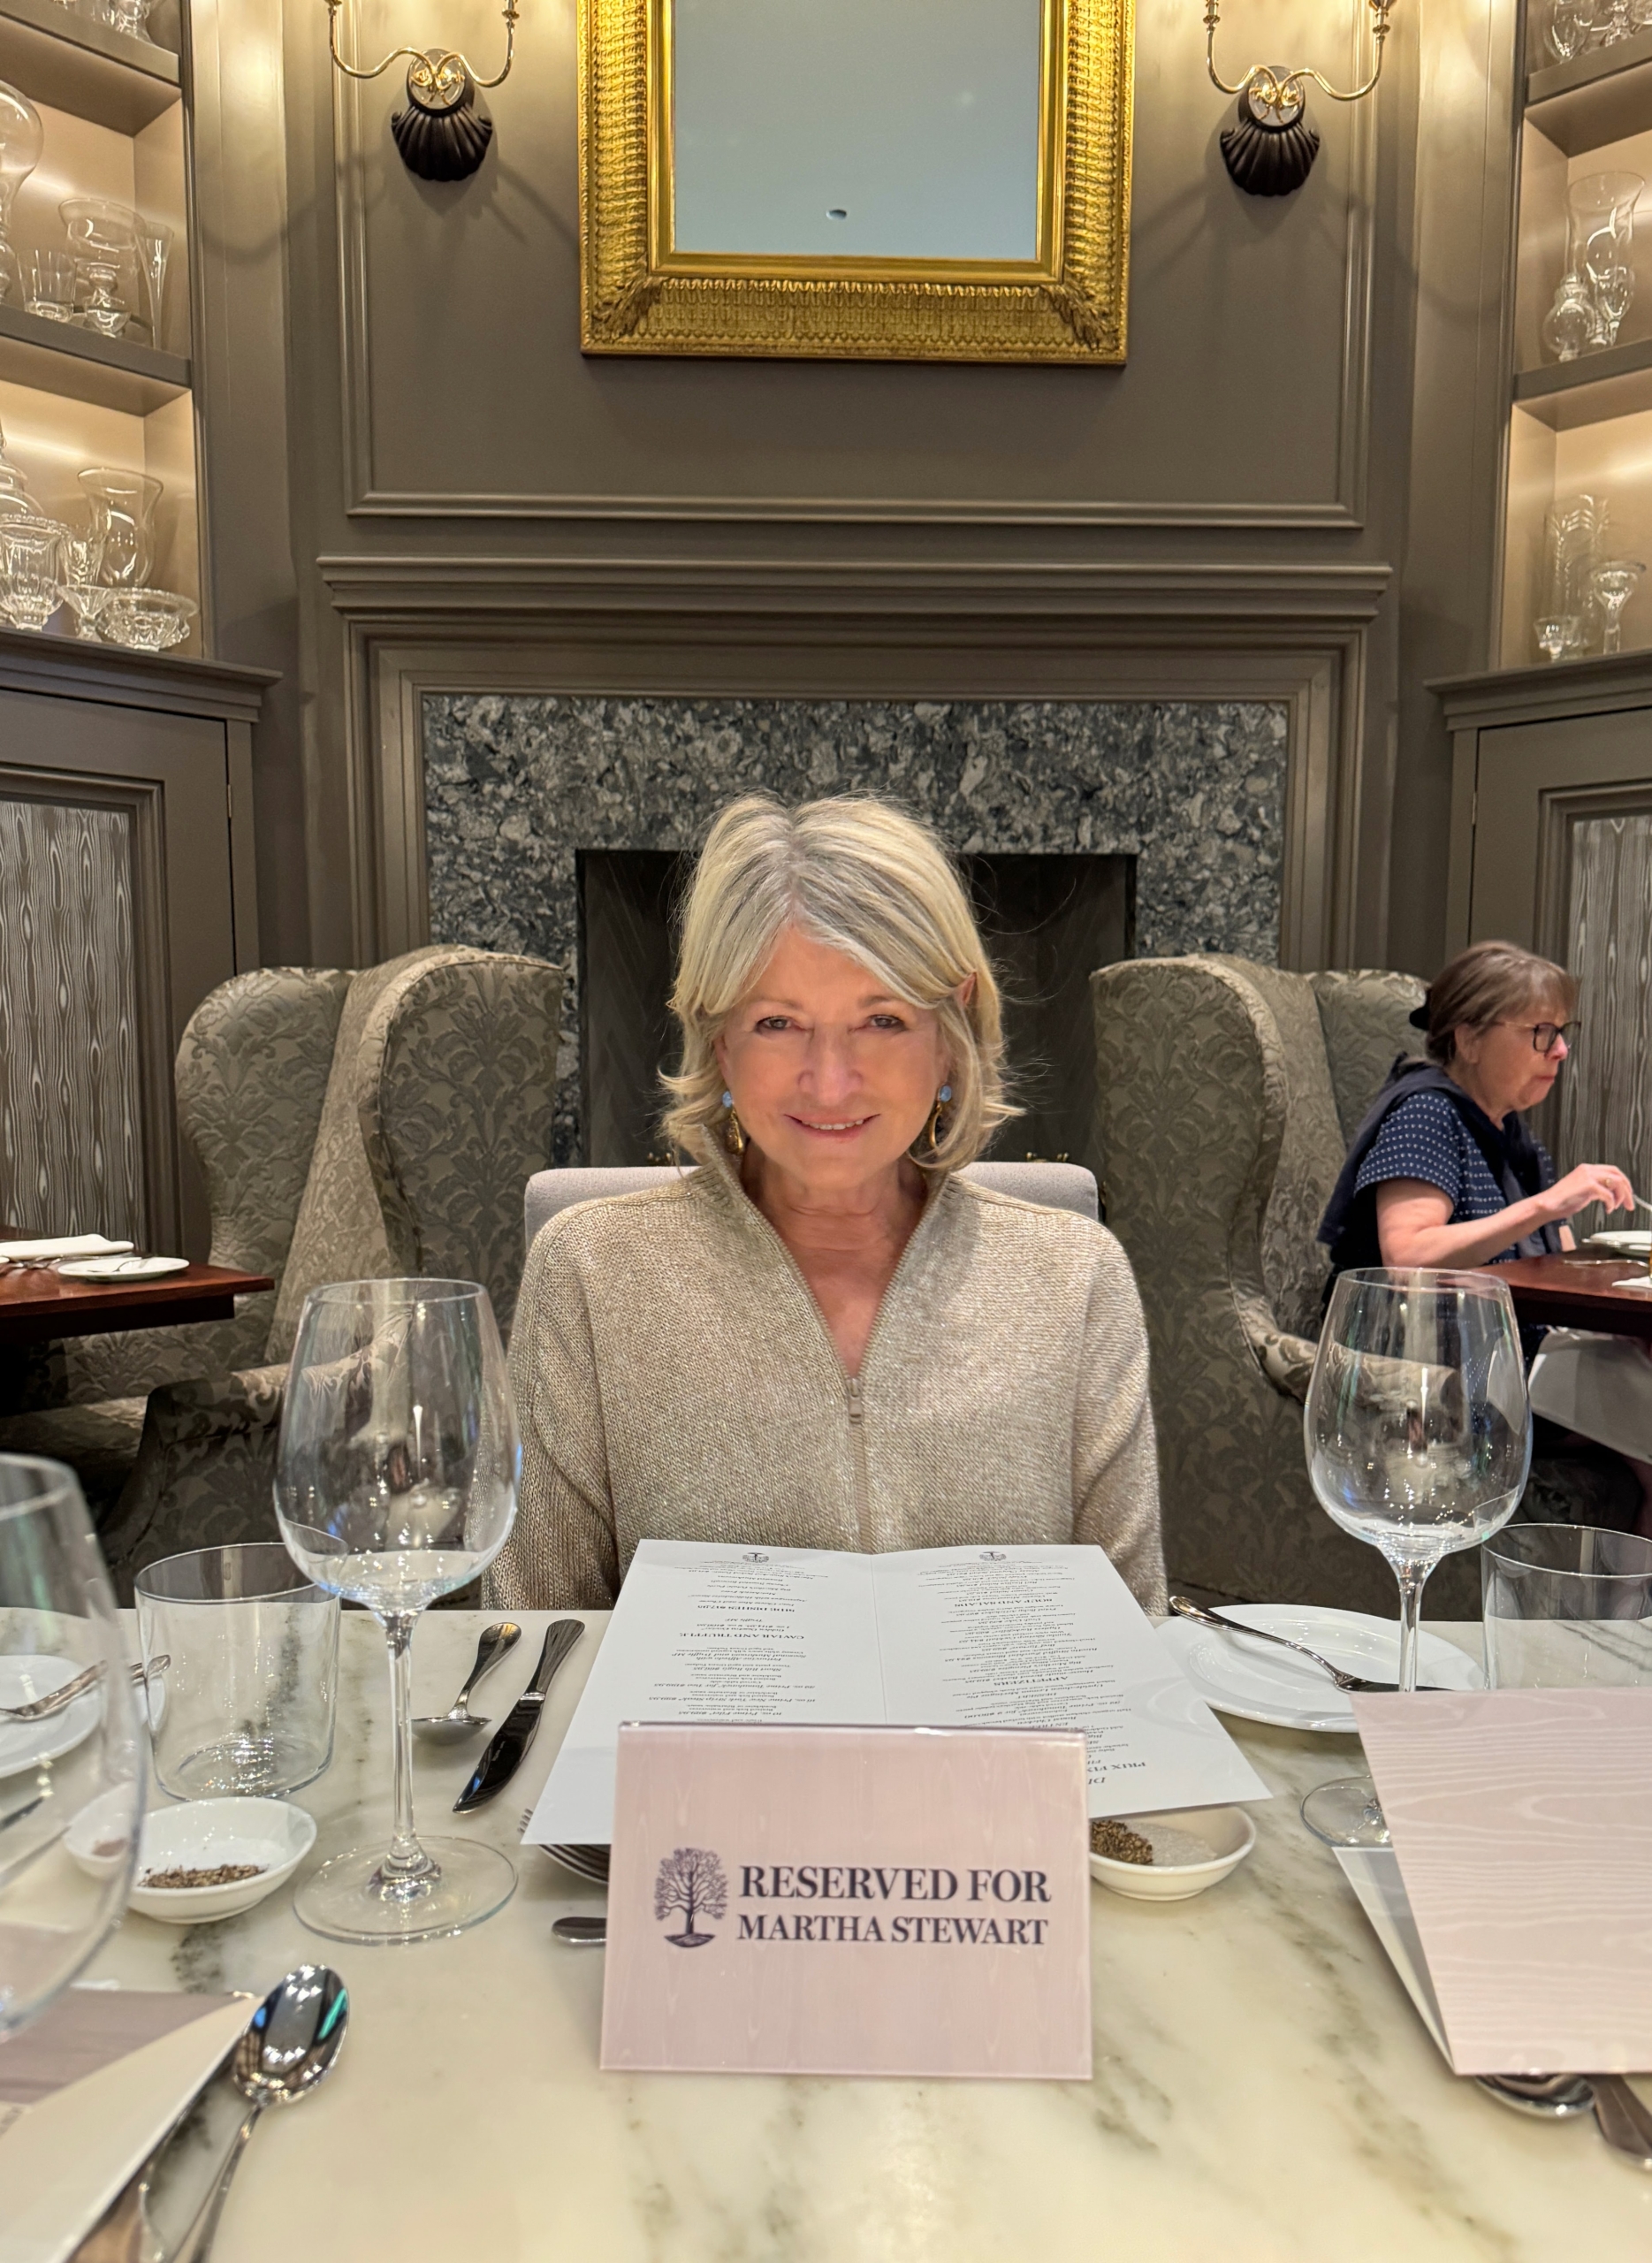
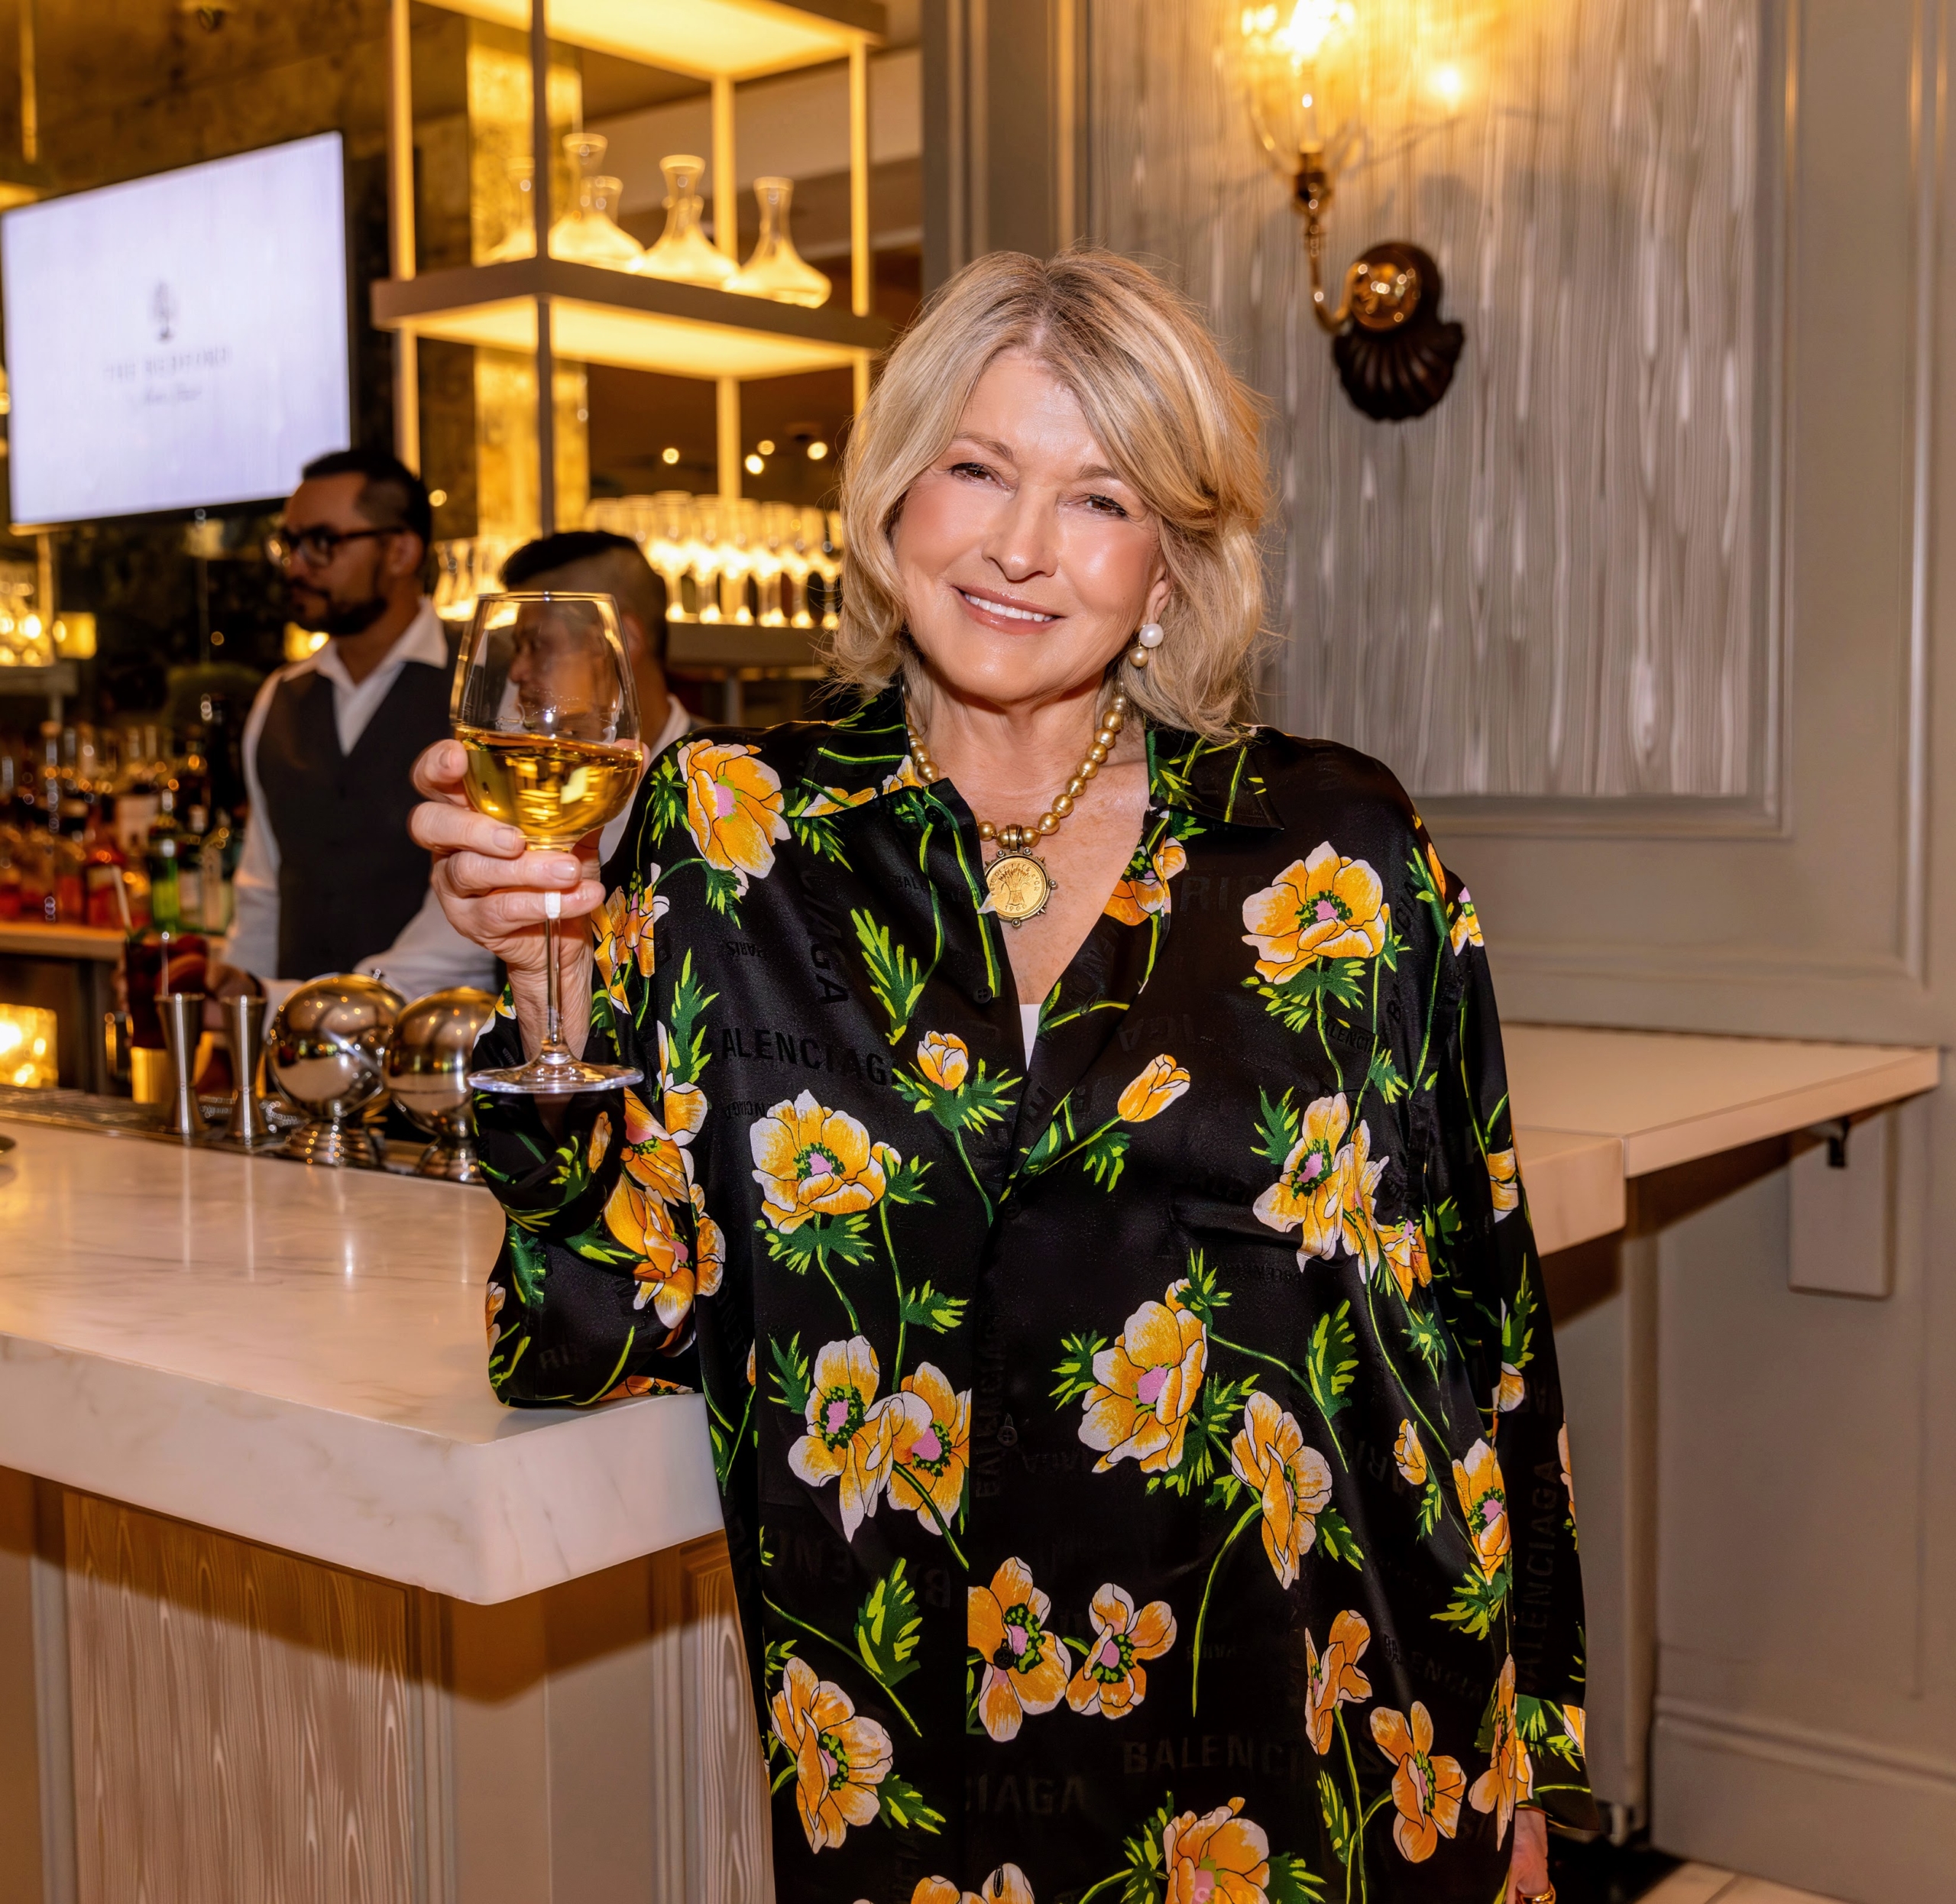
Here I am before hosting our wonderful lunch for QVC. My silk attire is by Balenciaga. (Photo by Gaby Duong)
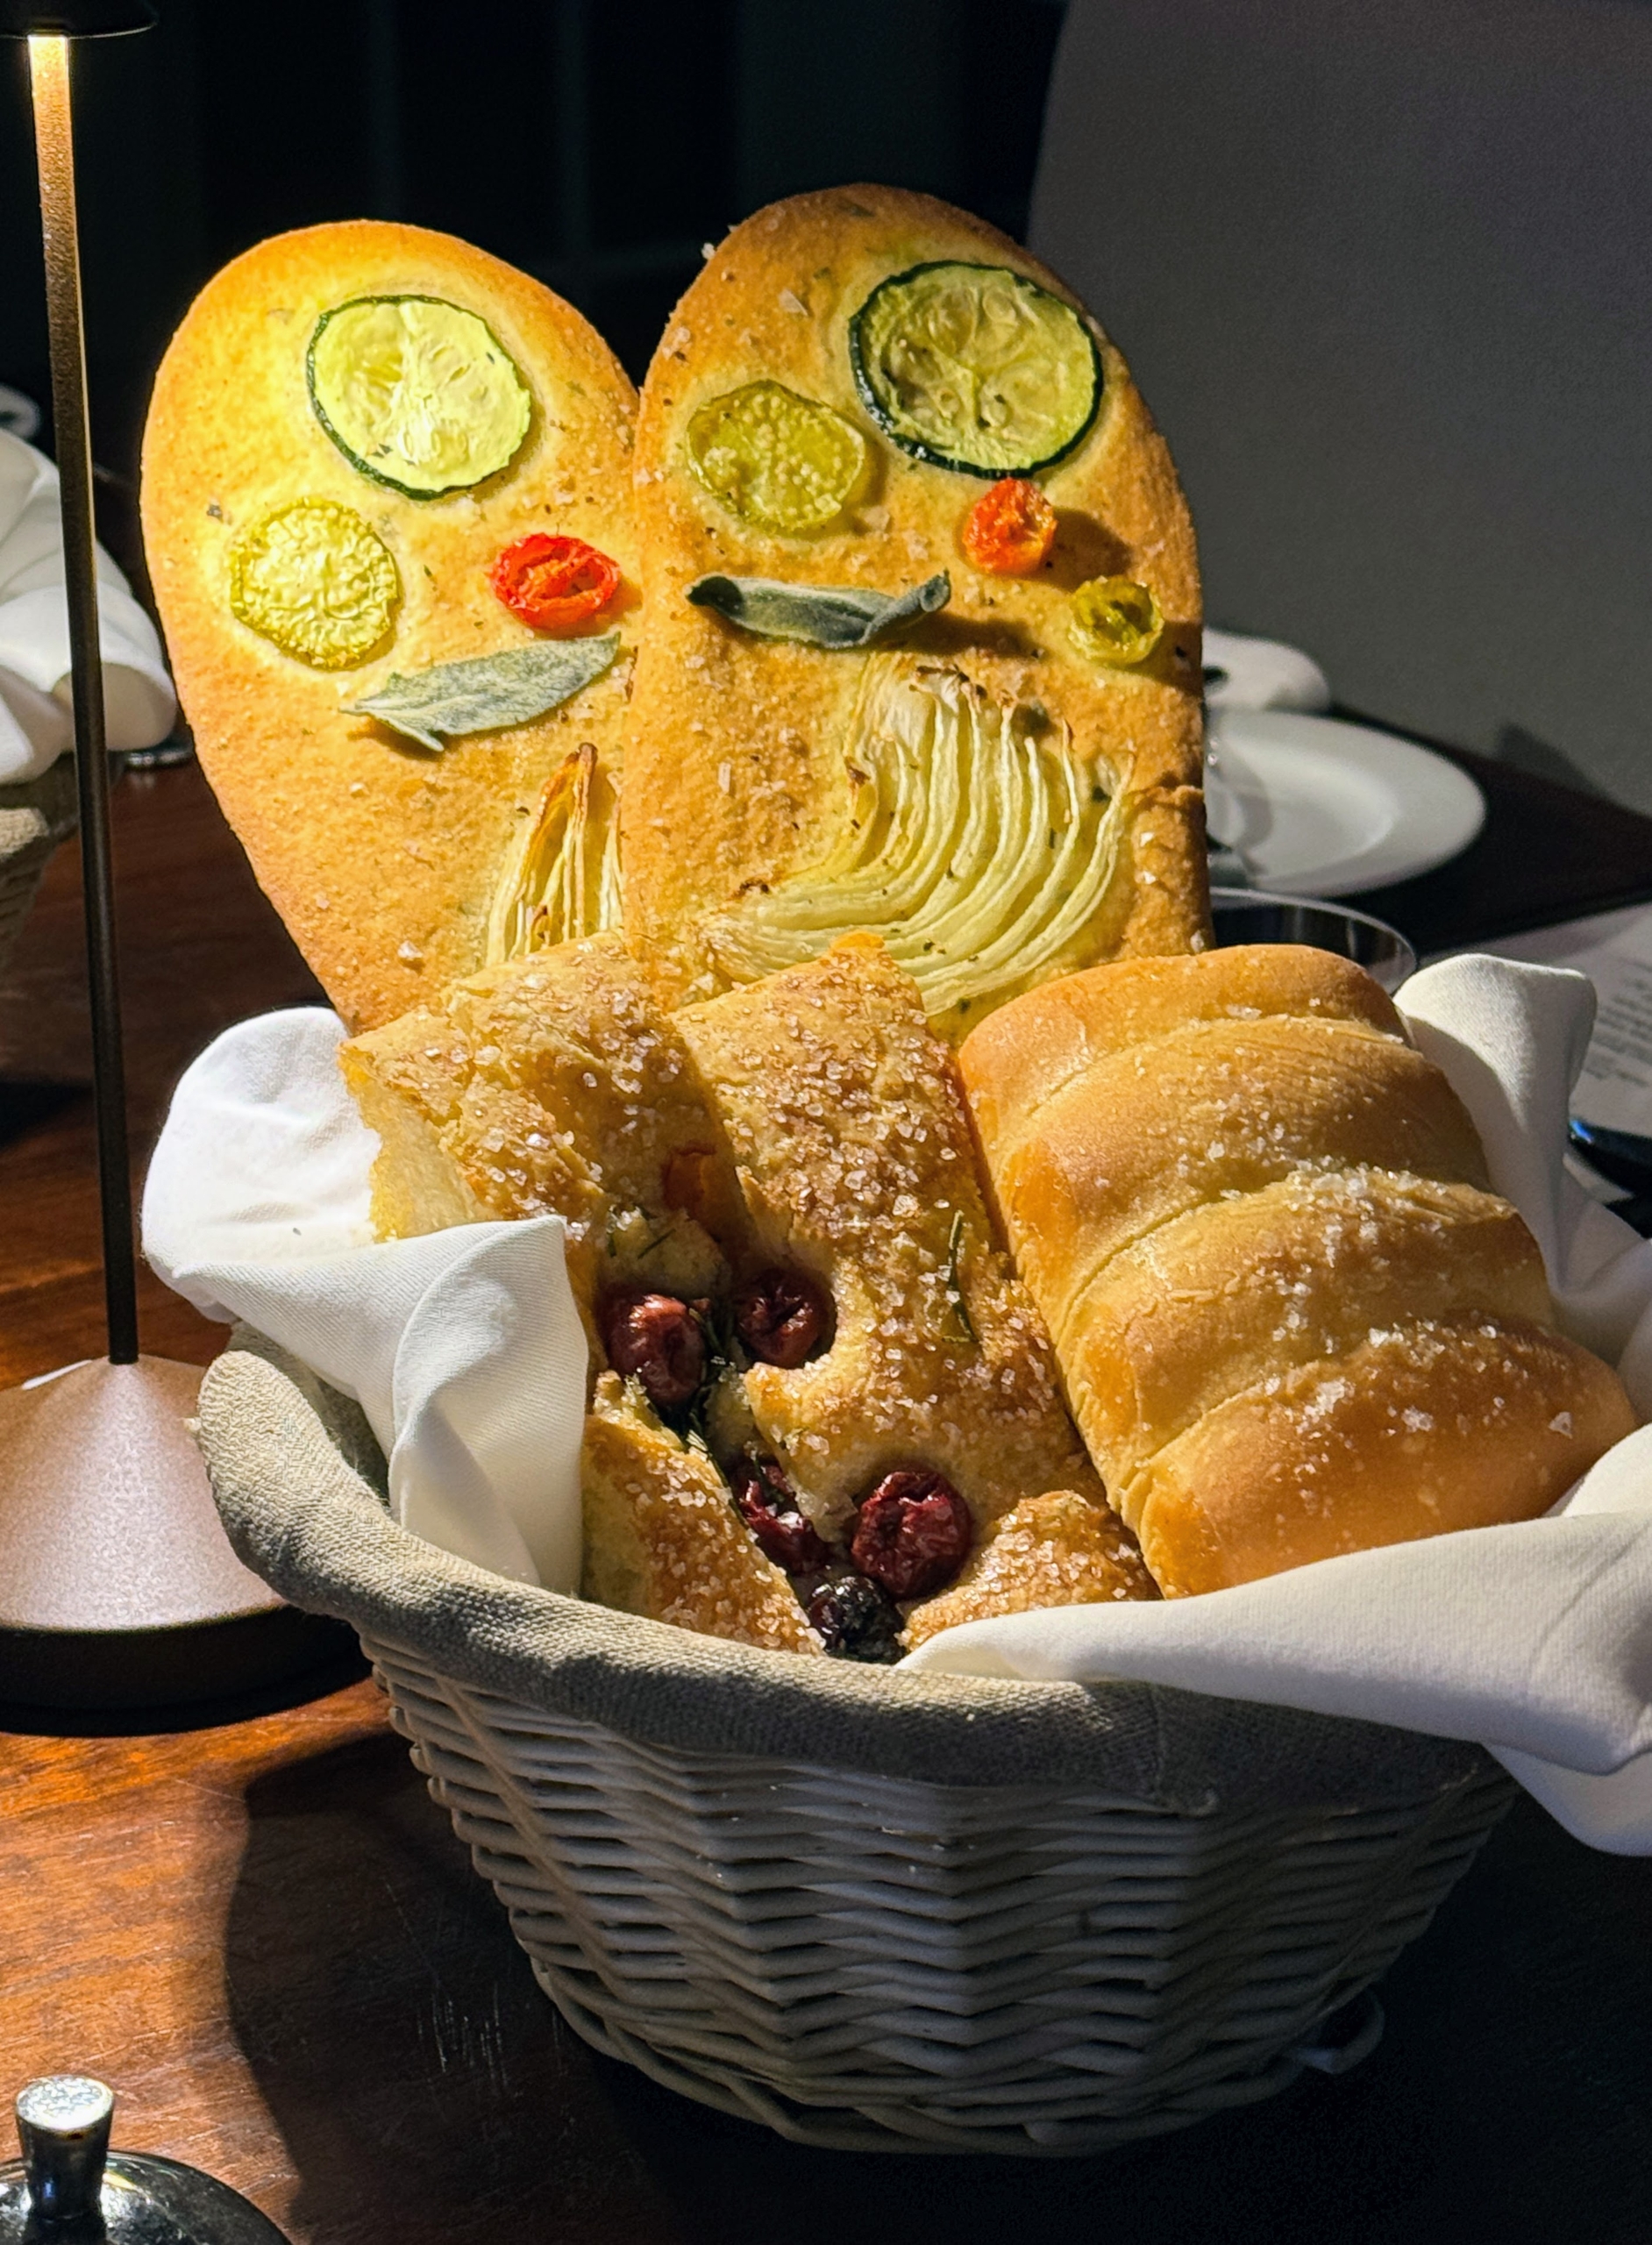
These House-made Bread Baskets are so popular. Each one includes Garden Flatbreads, Sour Cherry-Rosemary Focaccia and Parker House Rolls.
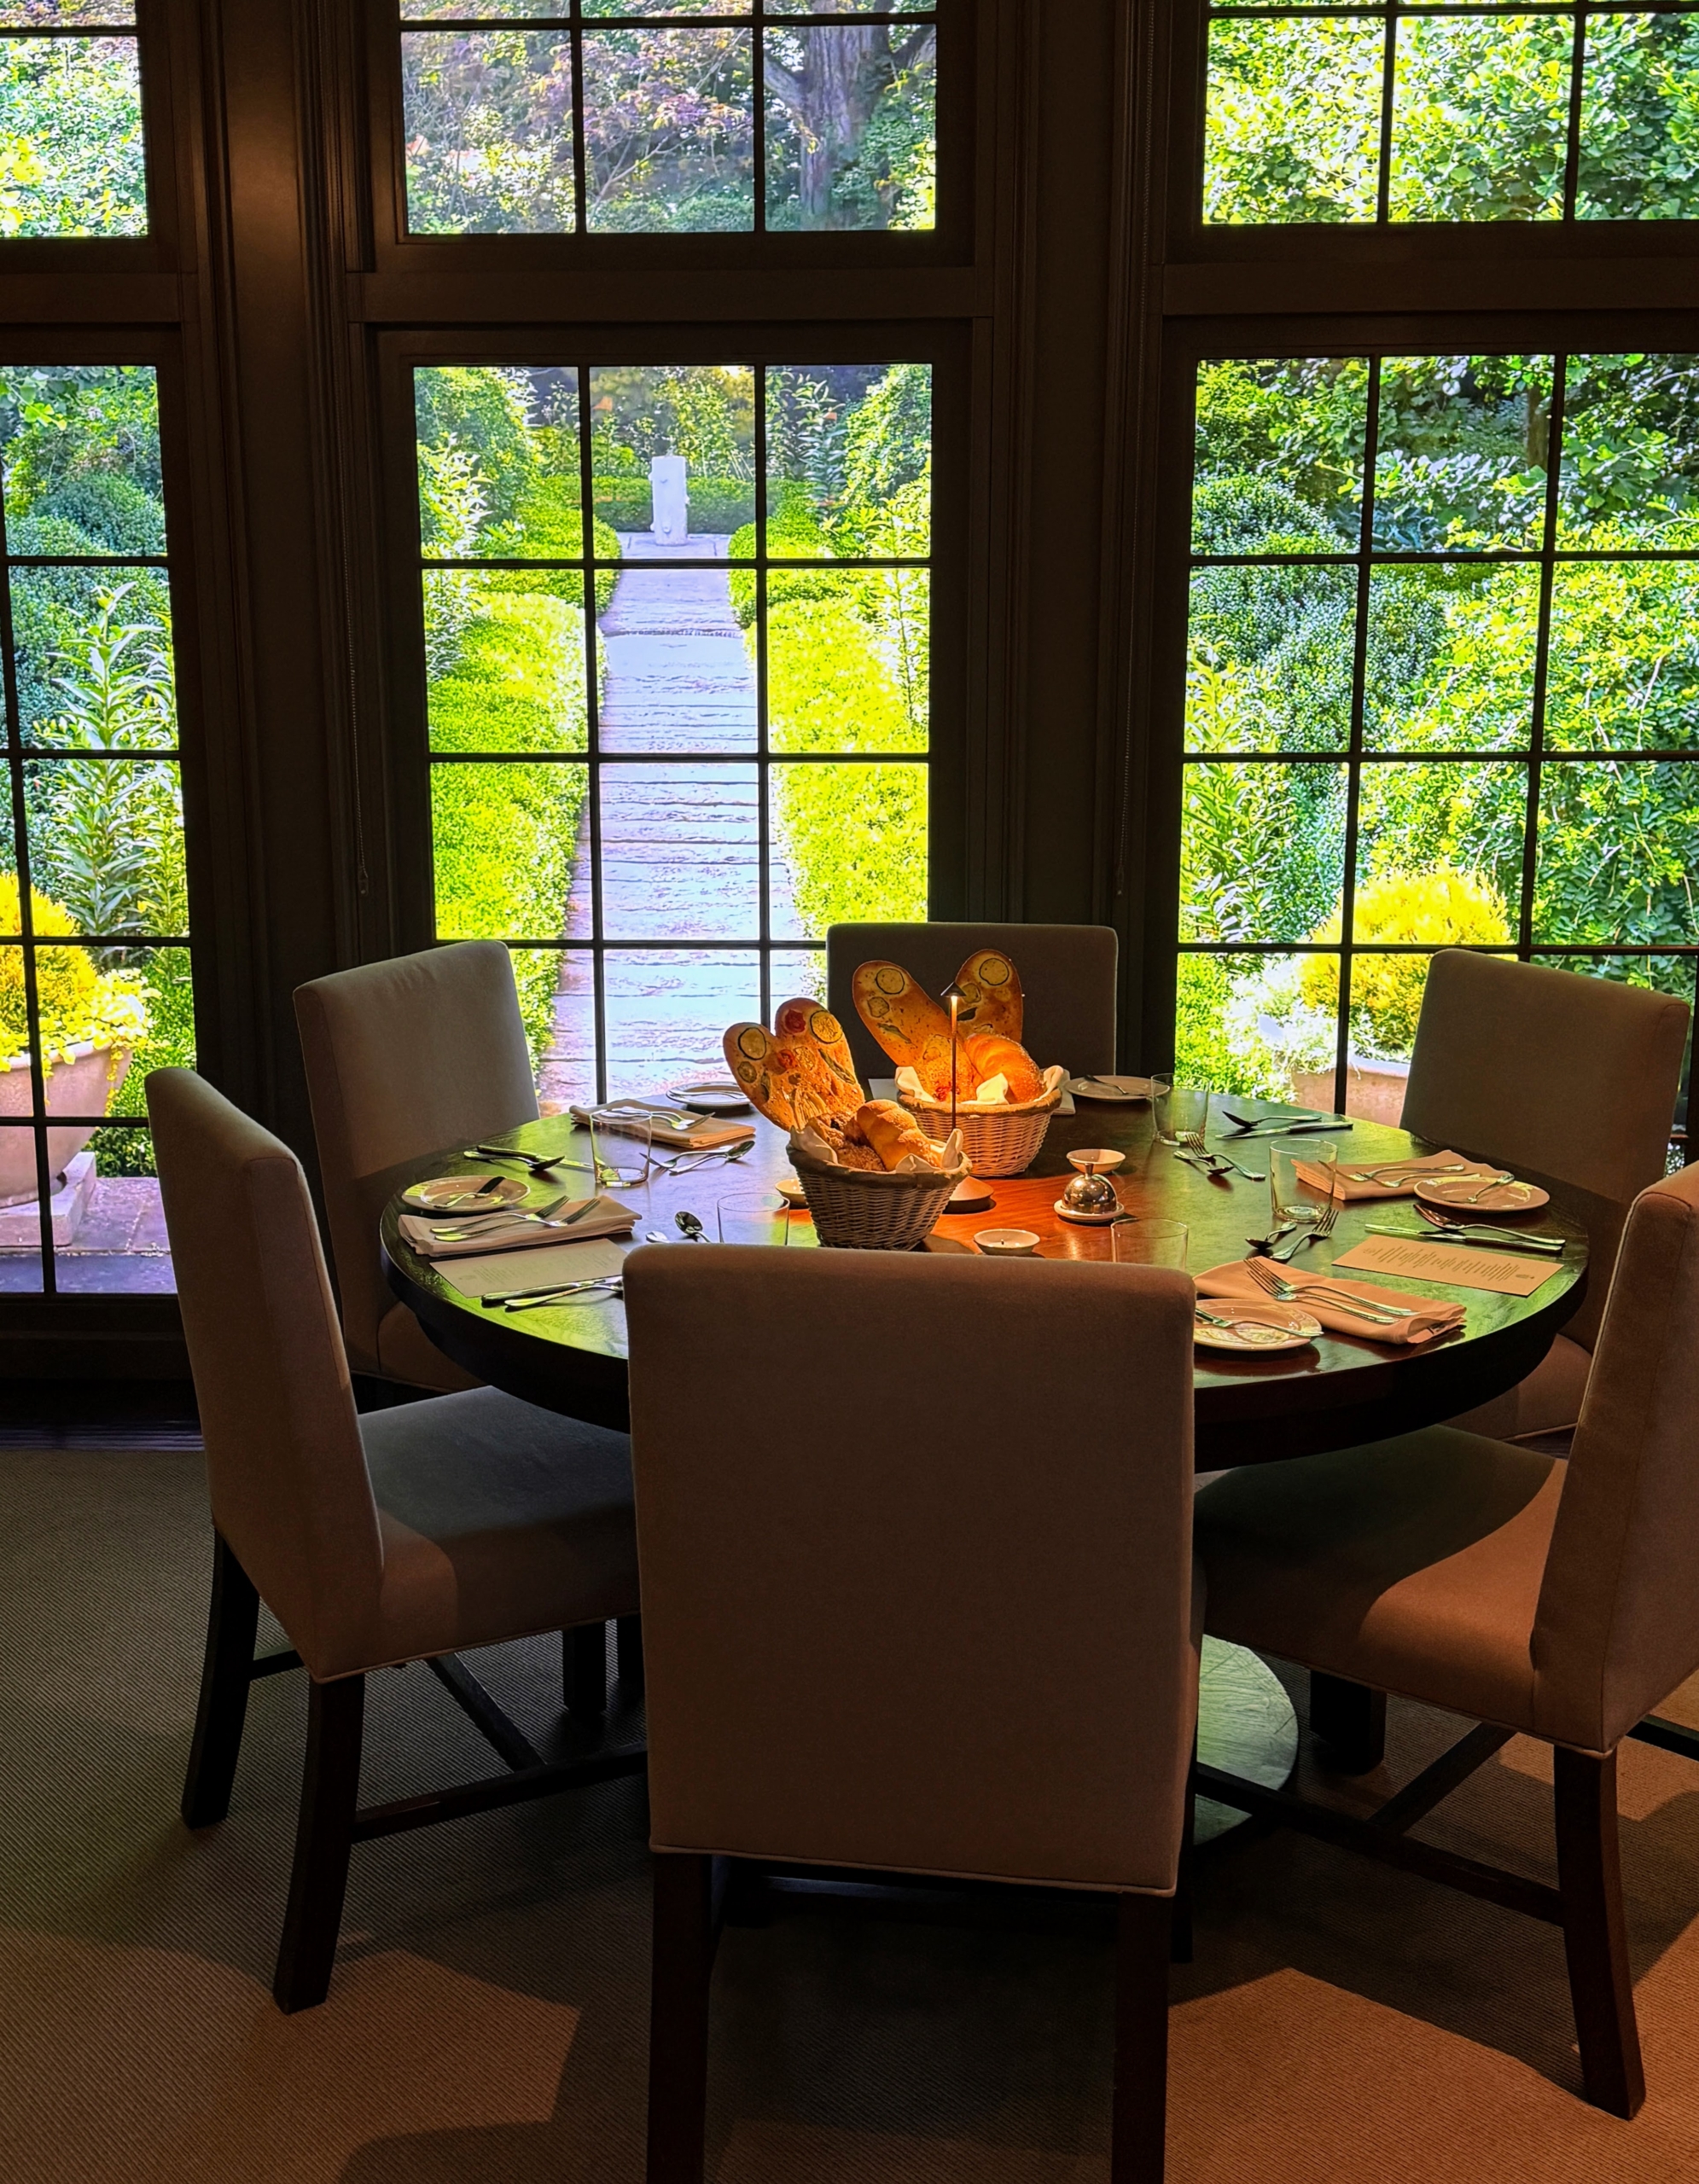
These tables are surrounded by floor to ceiling windows that look out to Durantrans, or large backlit transparency photos, of my farm. This background shows my Summer House Spring Garden. And of course, everything is changed seasonally.
All the décor inside and out was inspired by my 1925 farmhouse. Some of you may recognize the color palette. (Photo by Gaby Duong)
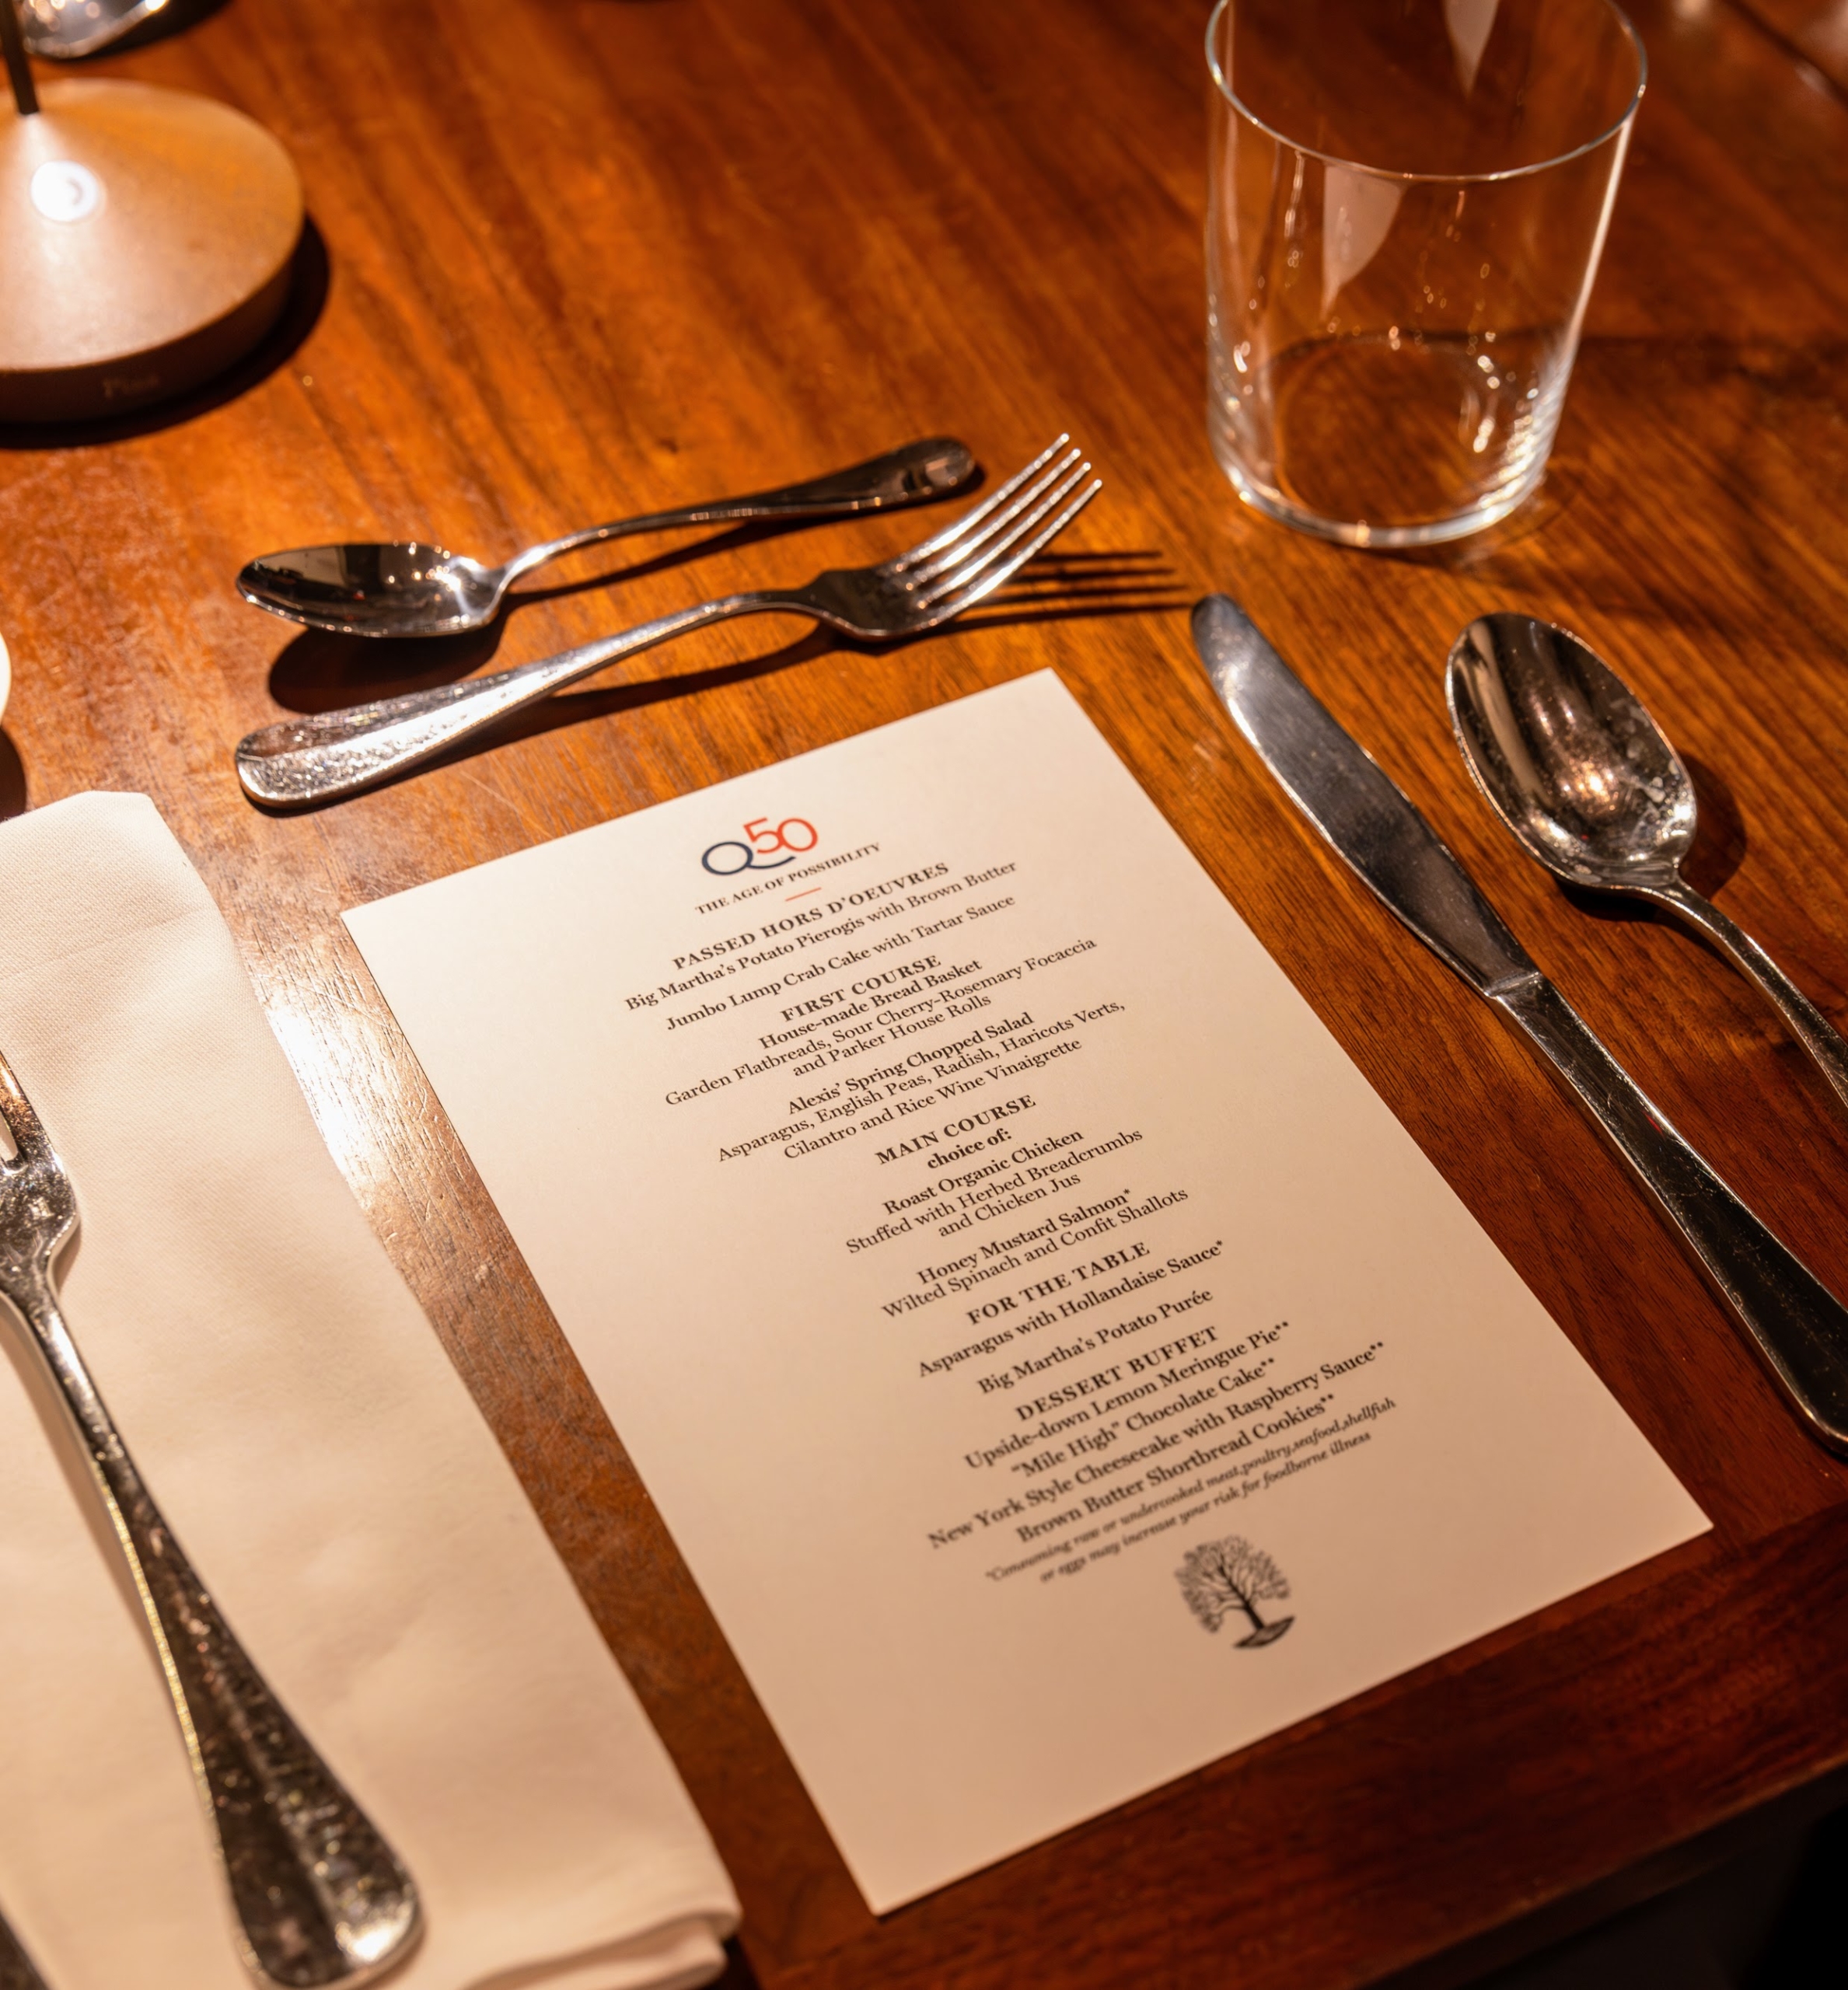
At each table setting, we place a menu of all the foods to be served. (Photo by Gaby Duong)
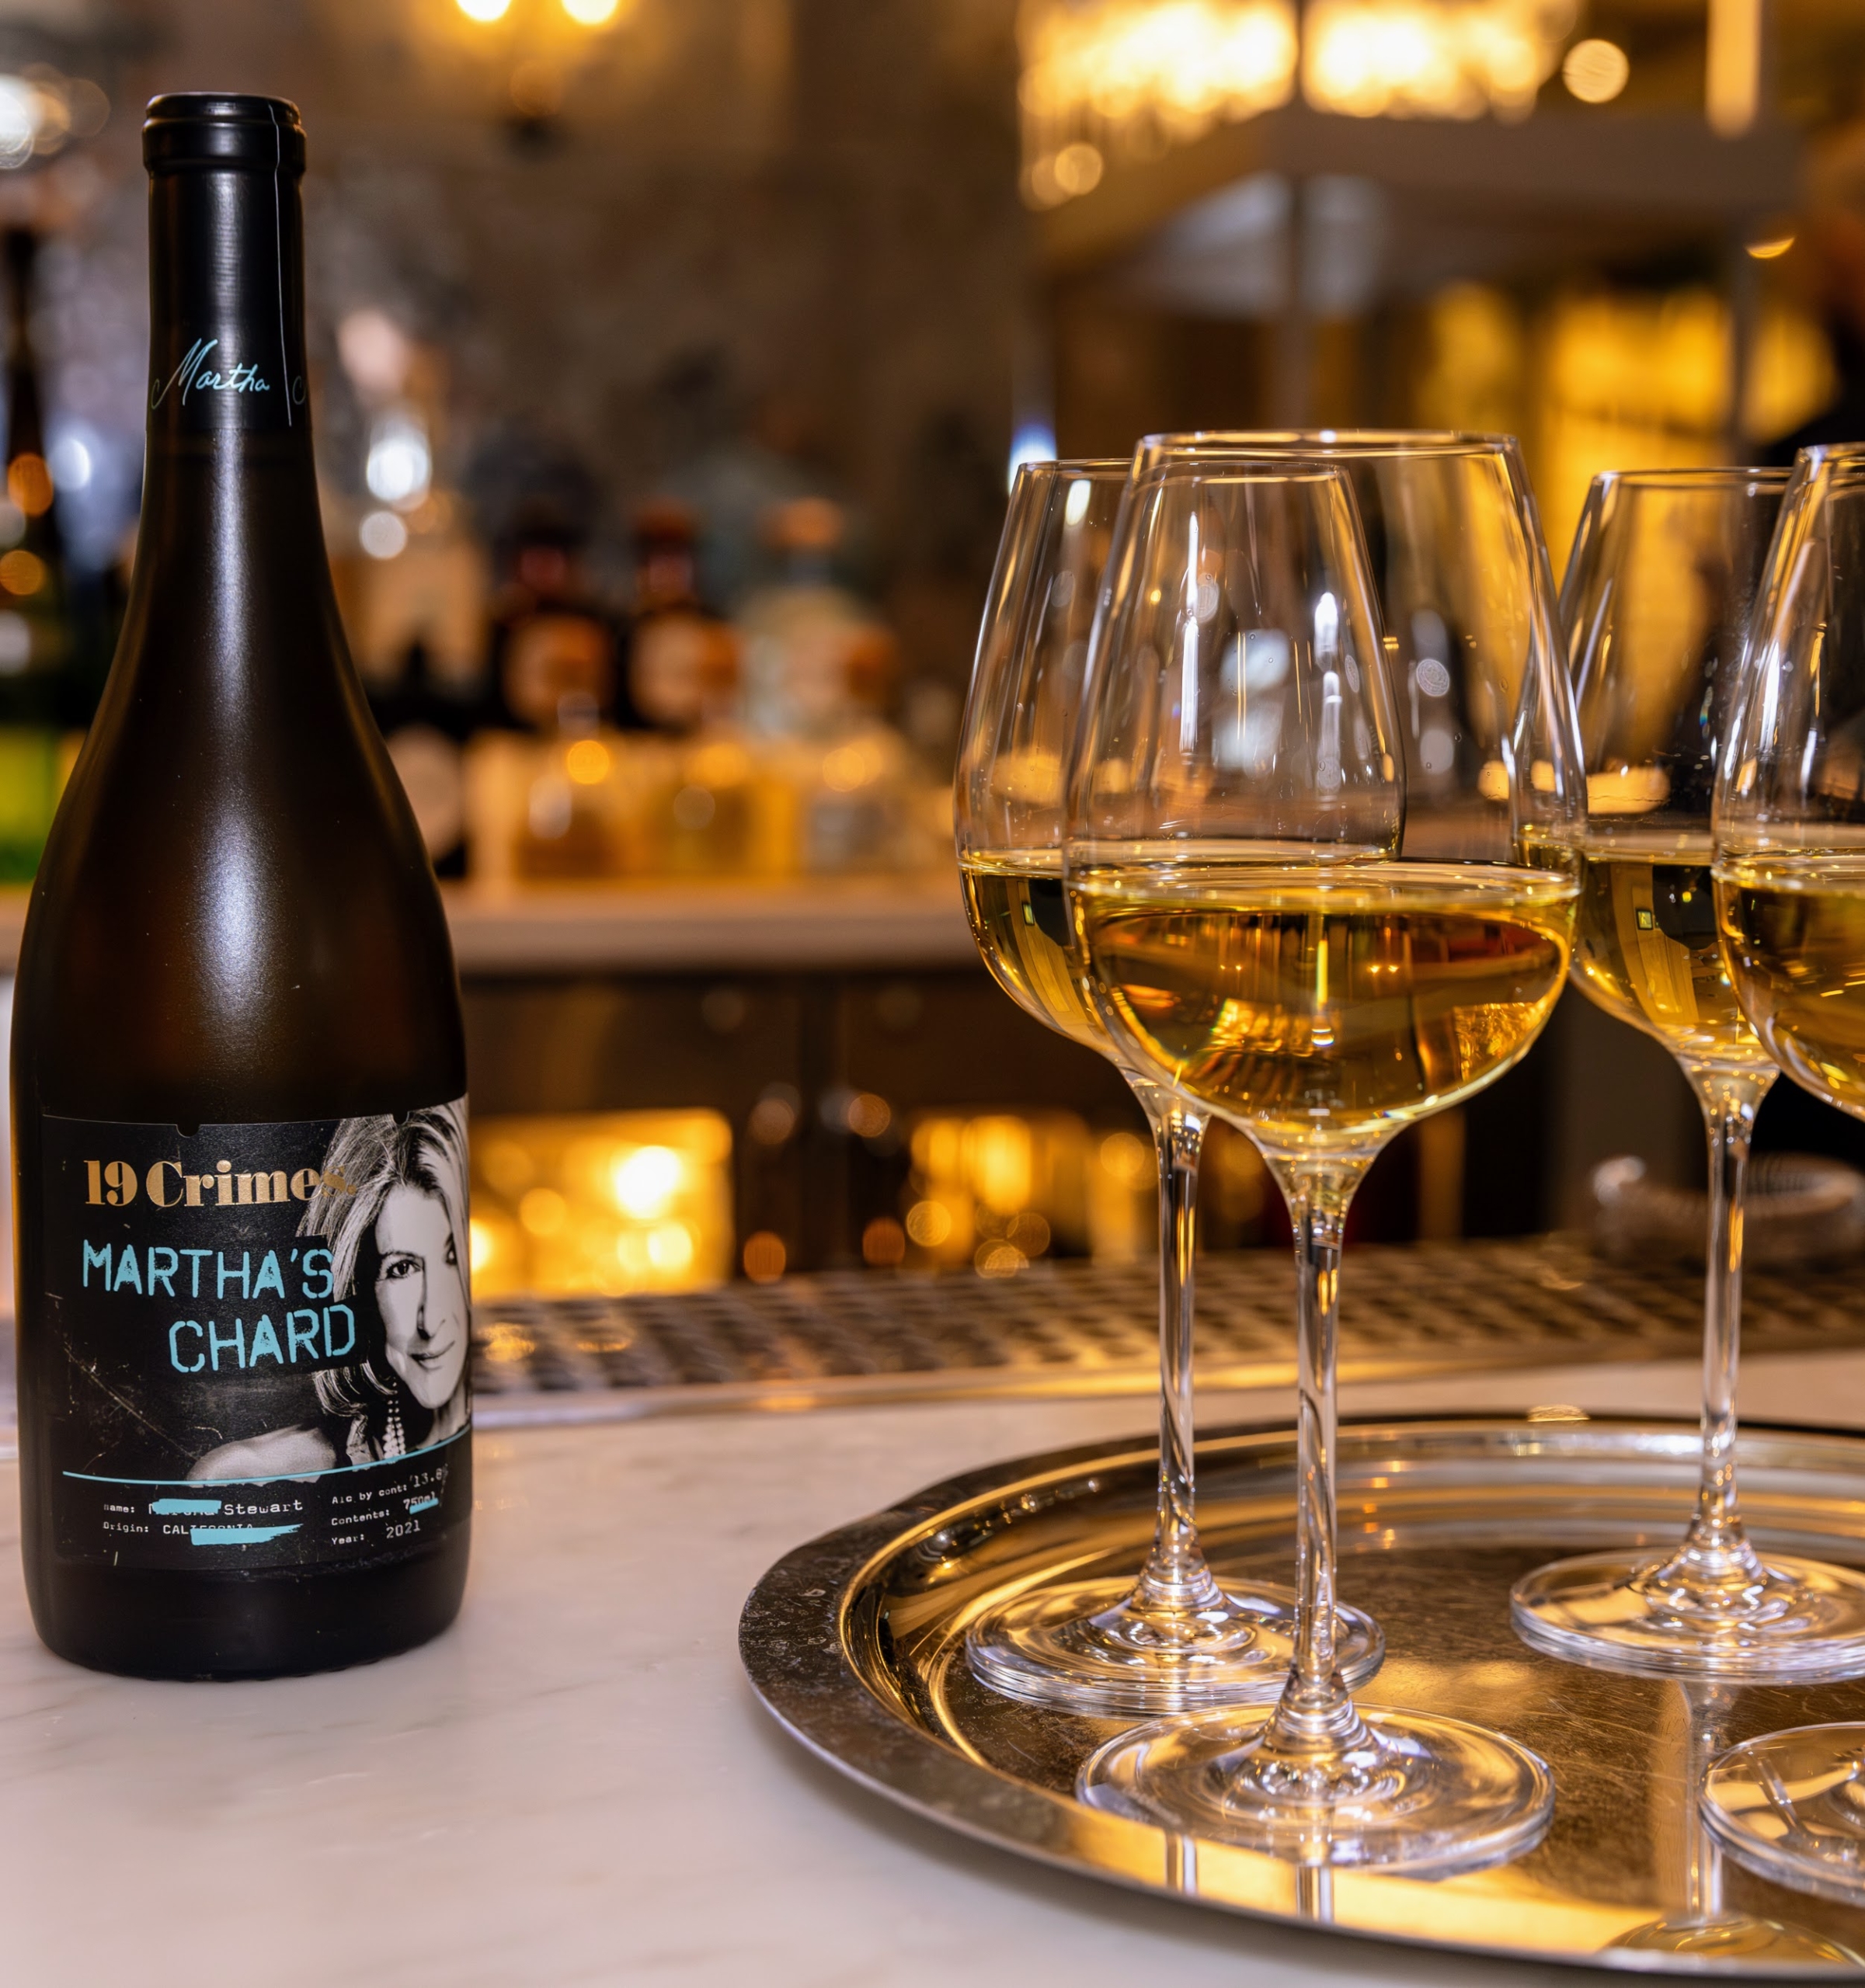
And of course, we had Martha’s Chard… work hard, play hard, and drink Martha’s Chard. (Photo by Gaby Duong)
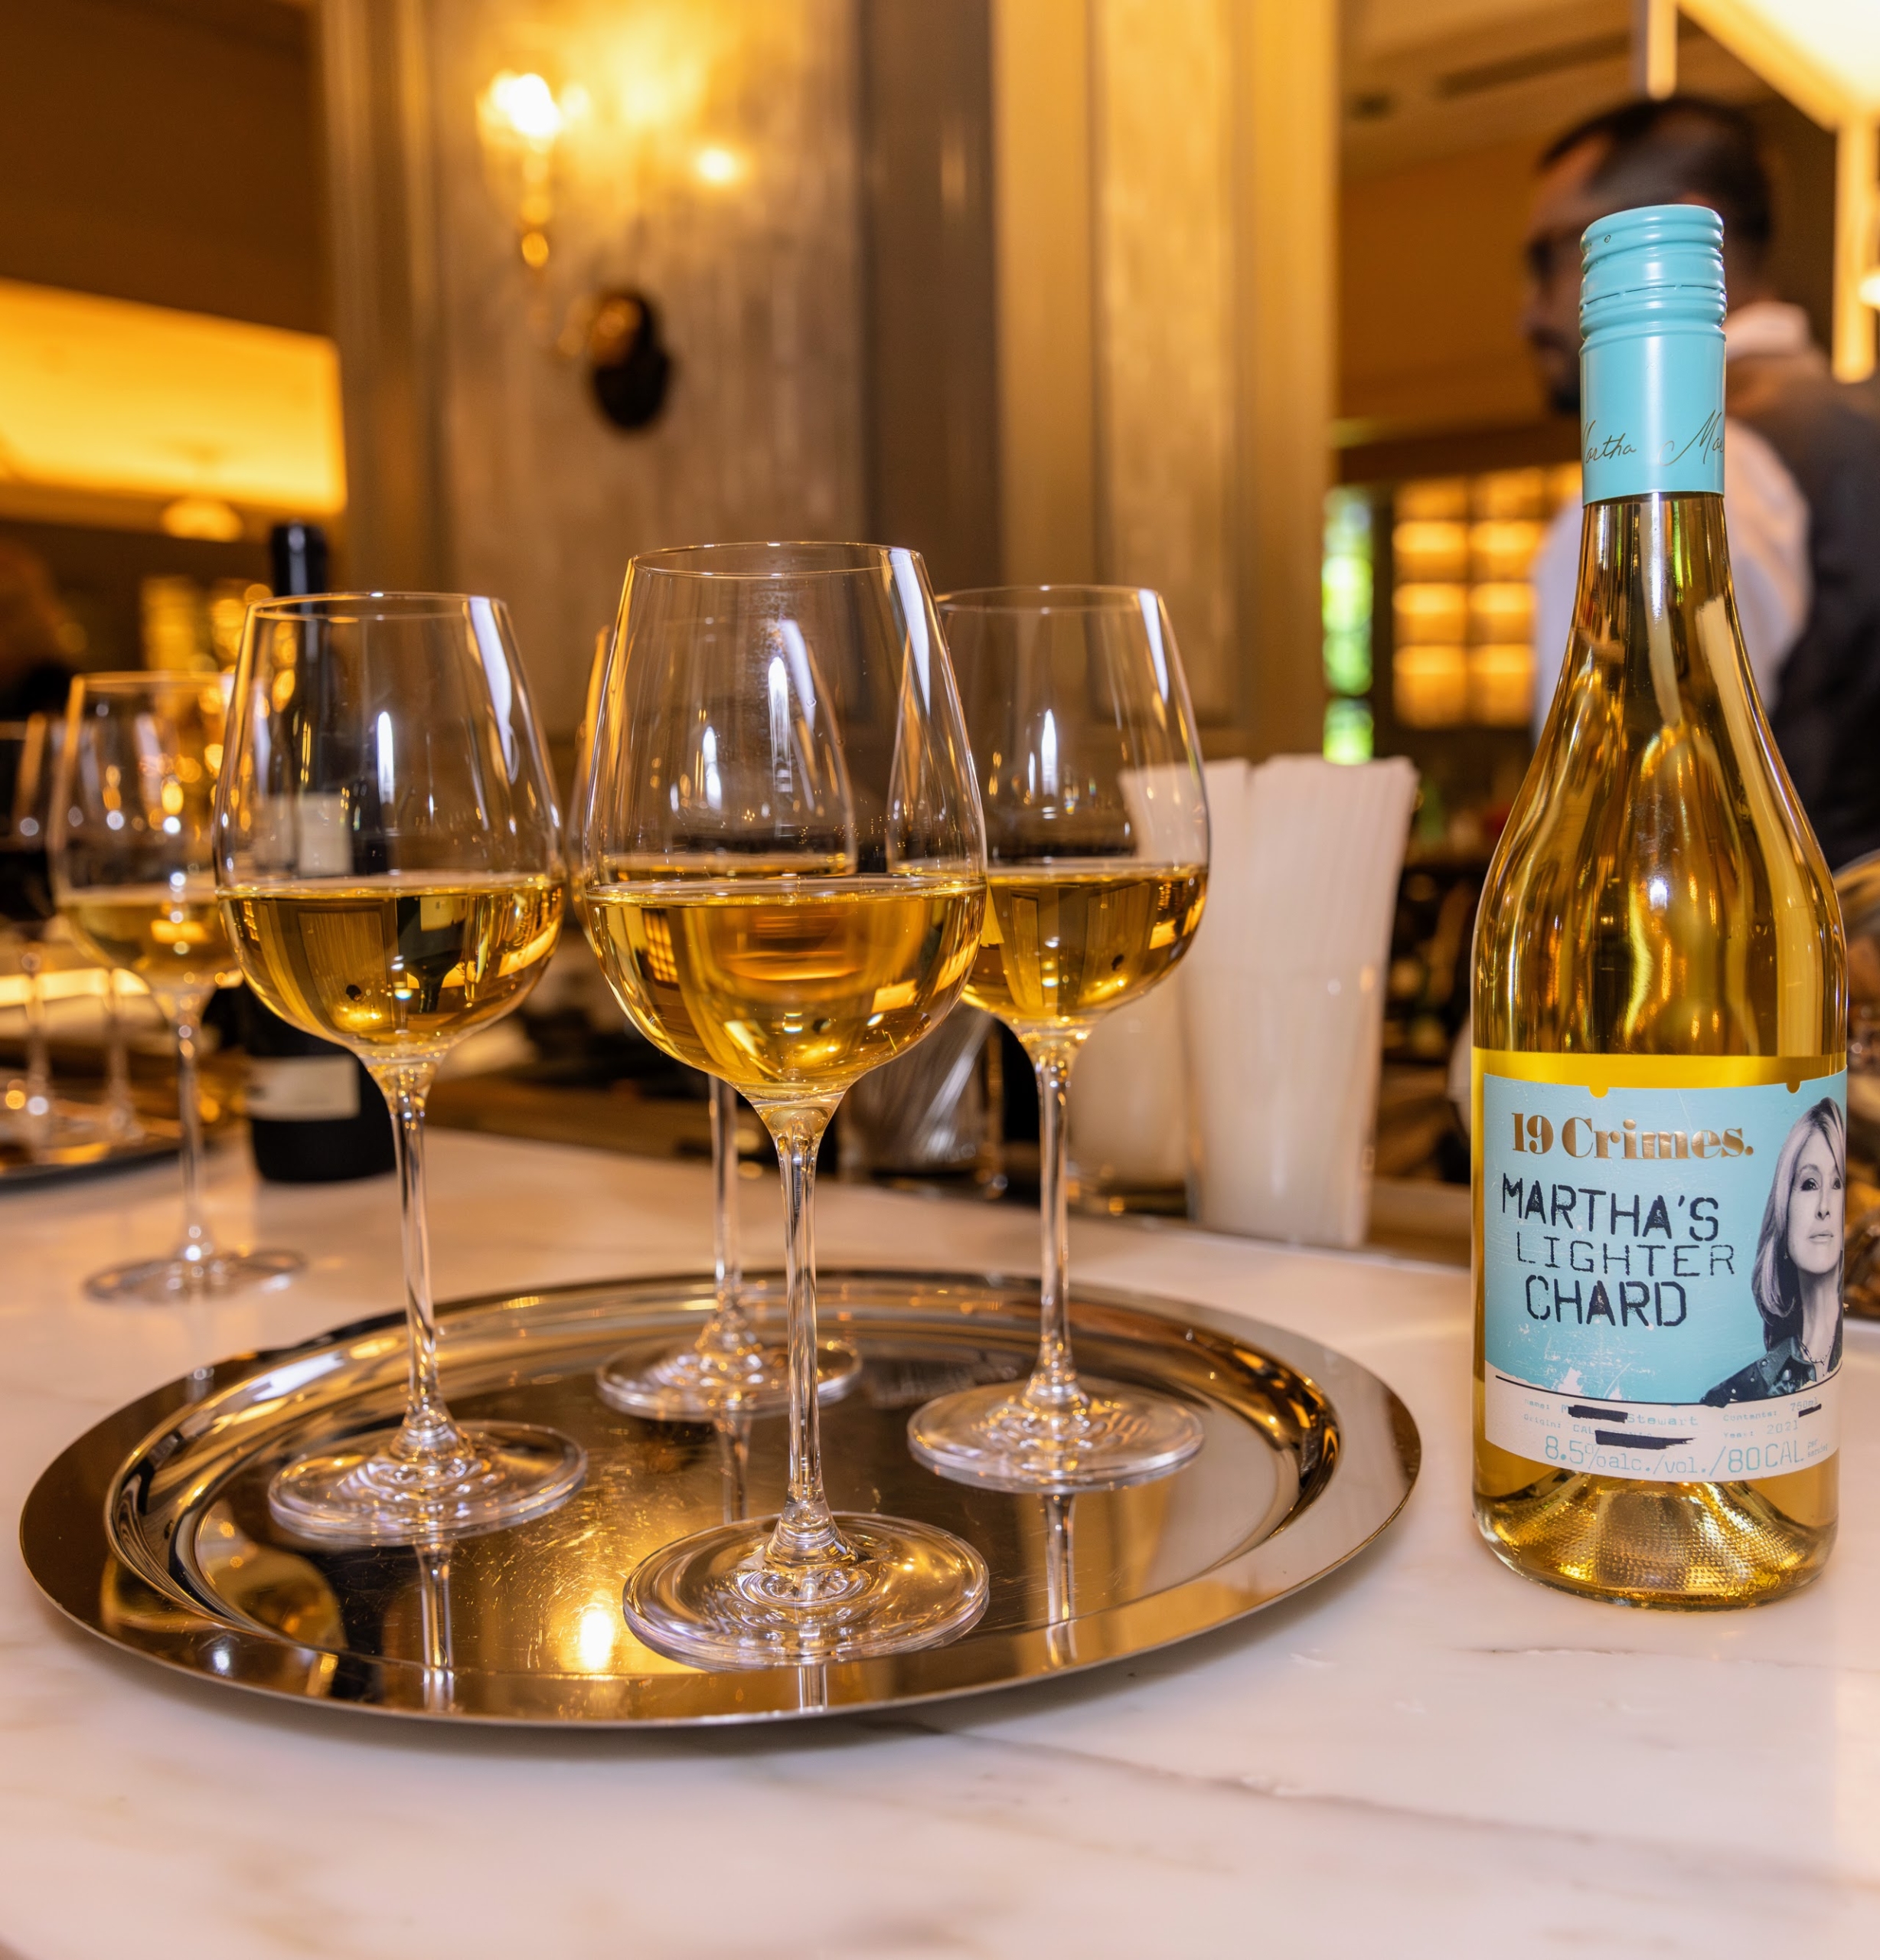
We also had Martha’s Lighter Chard – both have bright citrus fruit notes and a distinctly sweet, oaky flavor. (Photo by Gaby Duong)
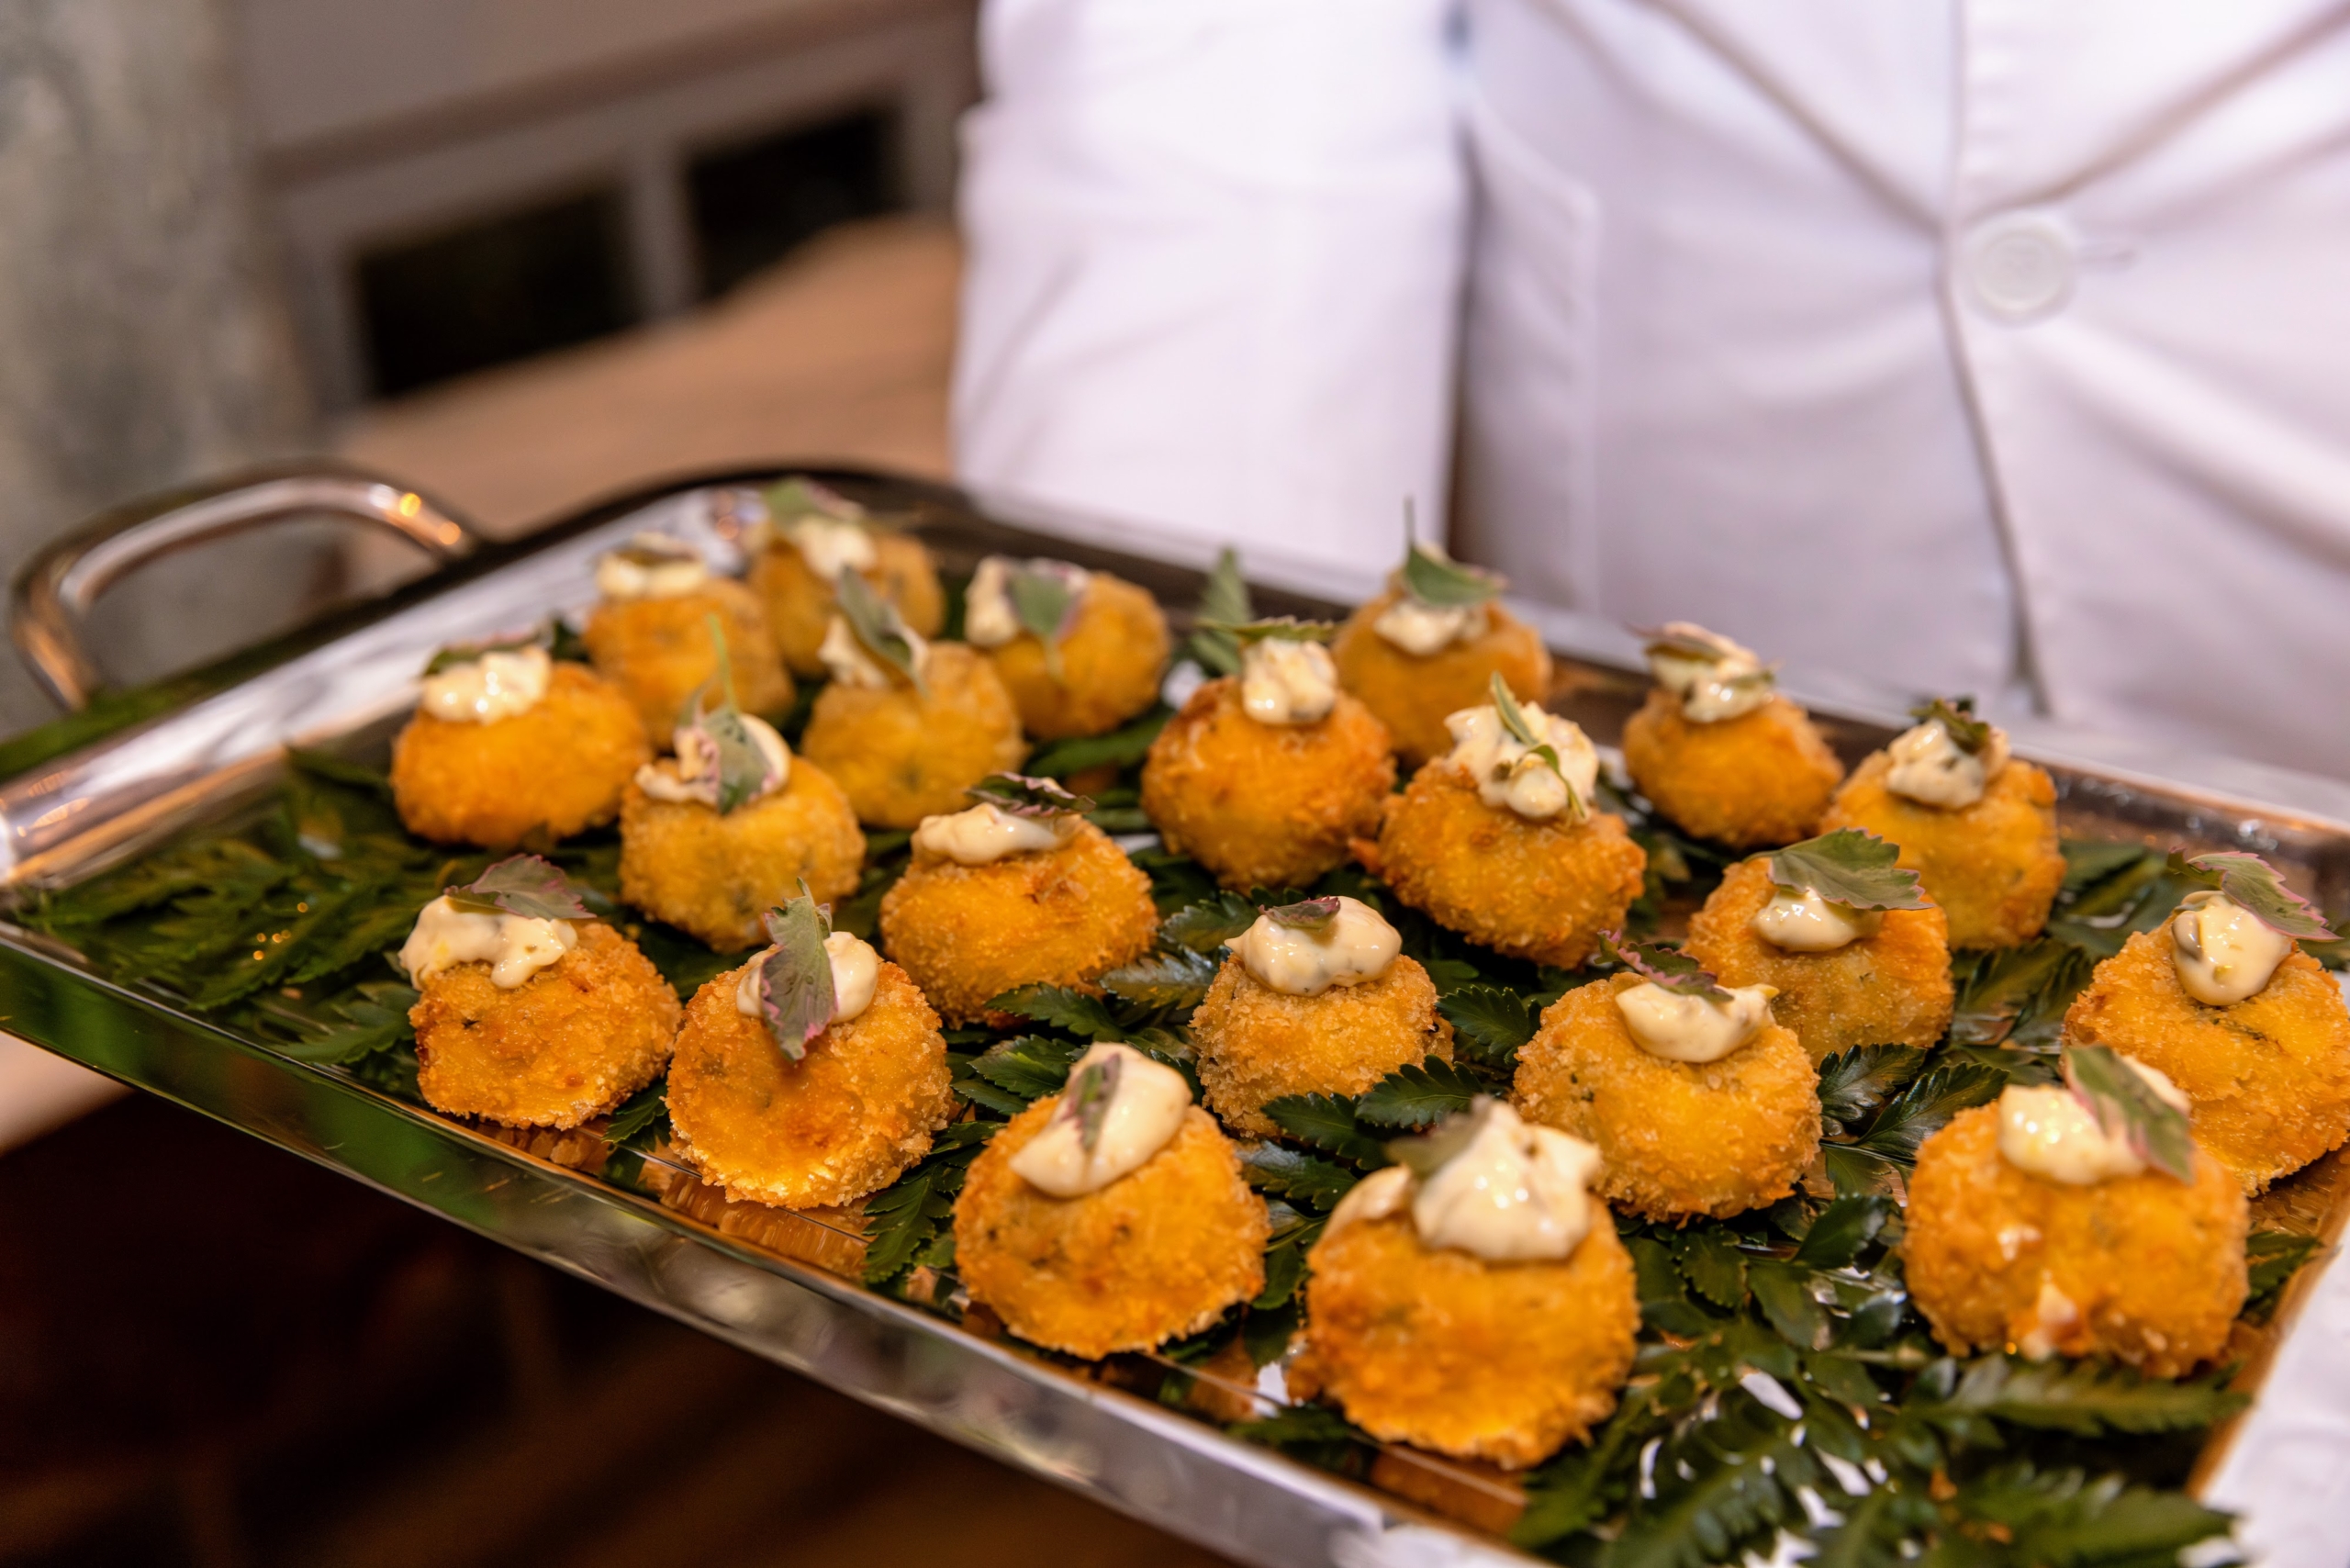
Some of the hors d’oeuvres passed around to guests included these Jumbo Lump Crab Cakes with Tartar Sauce. (Photo by Gaby Duong)
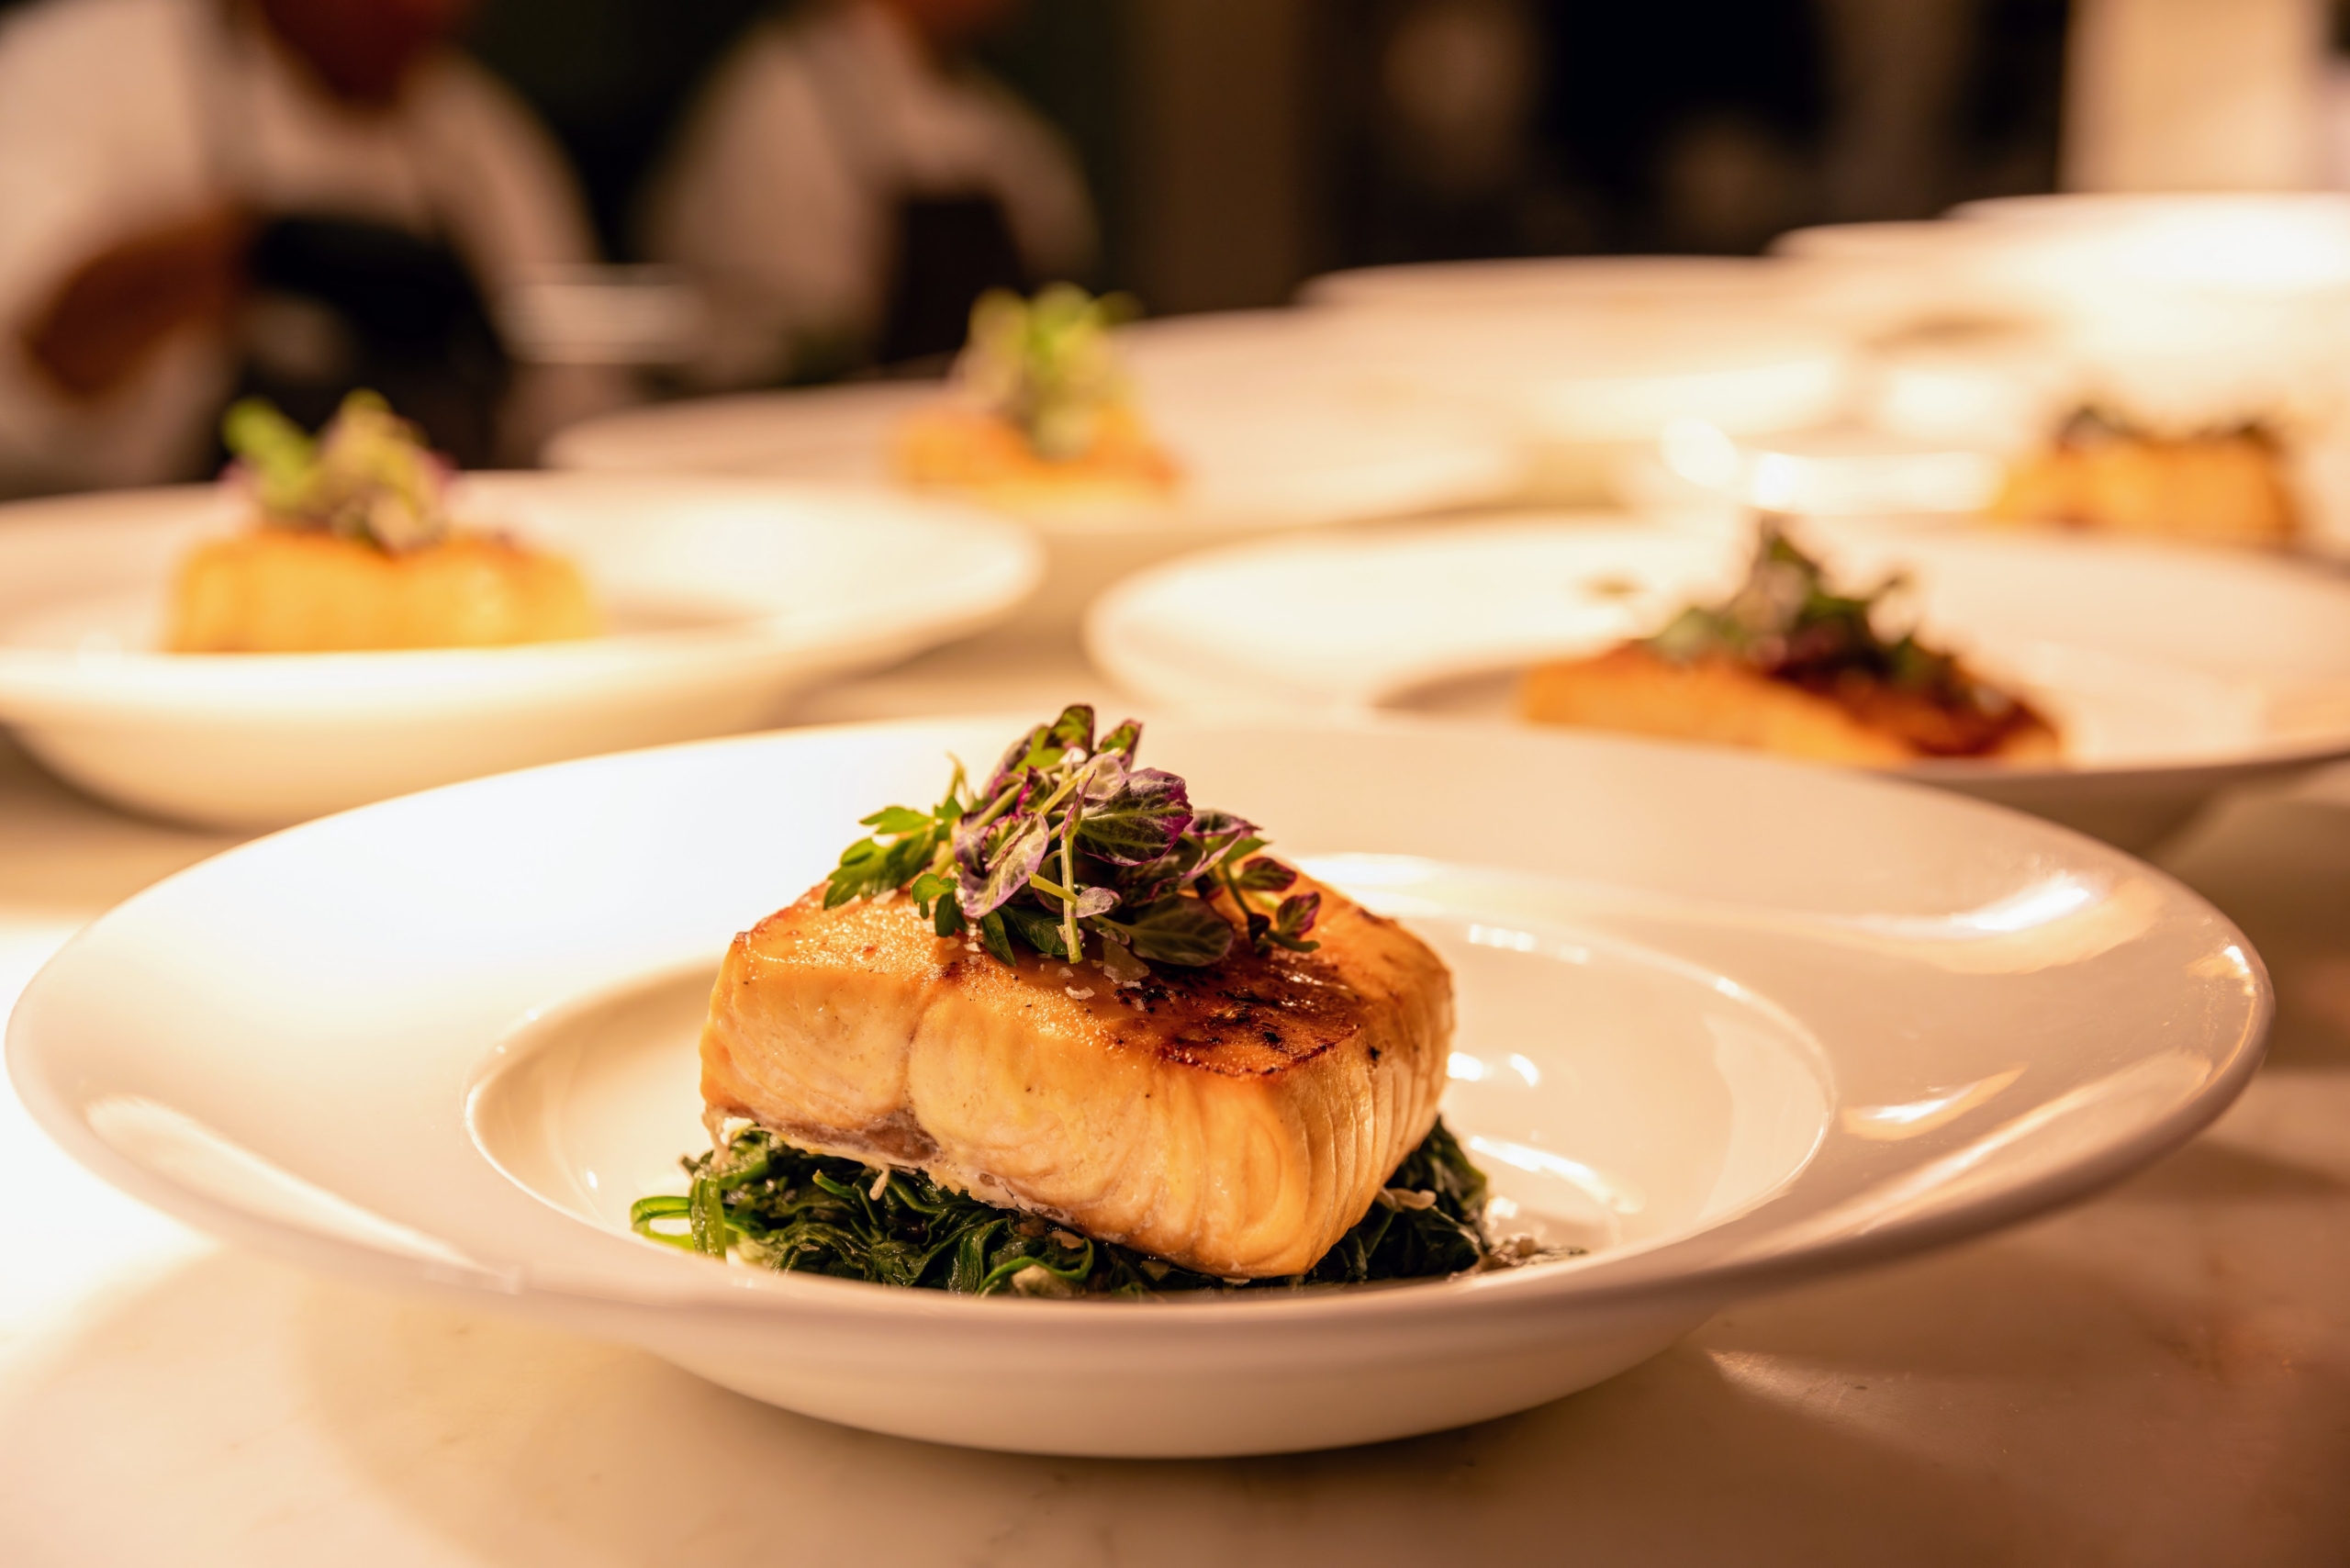
The entrées included this Honey Mustard Salmon with Wilted Spinach and Confit Shallots. So many of the dishes are the same ones I serve to family and friends when I entertain at home. (Photo by Gaby Duong)
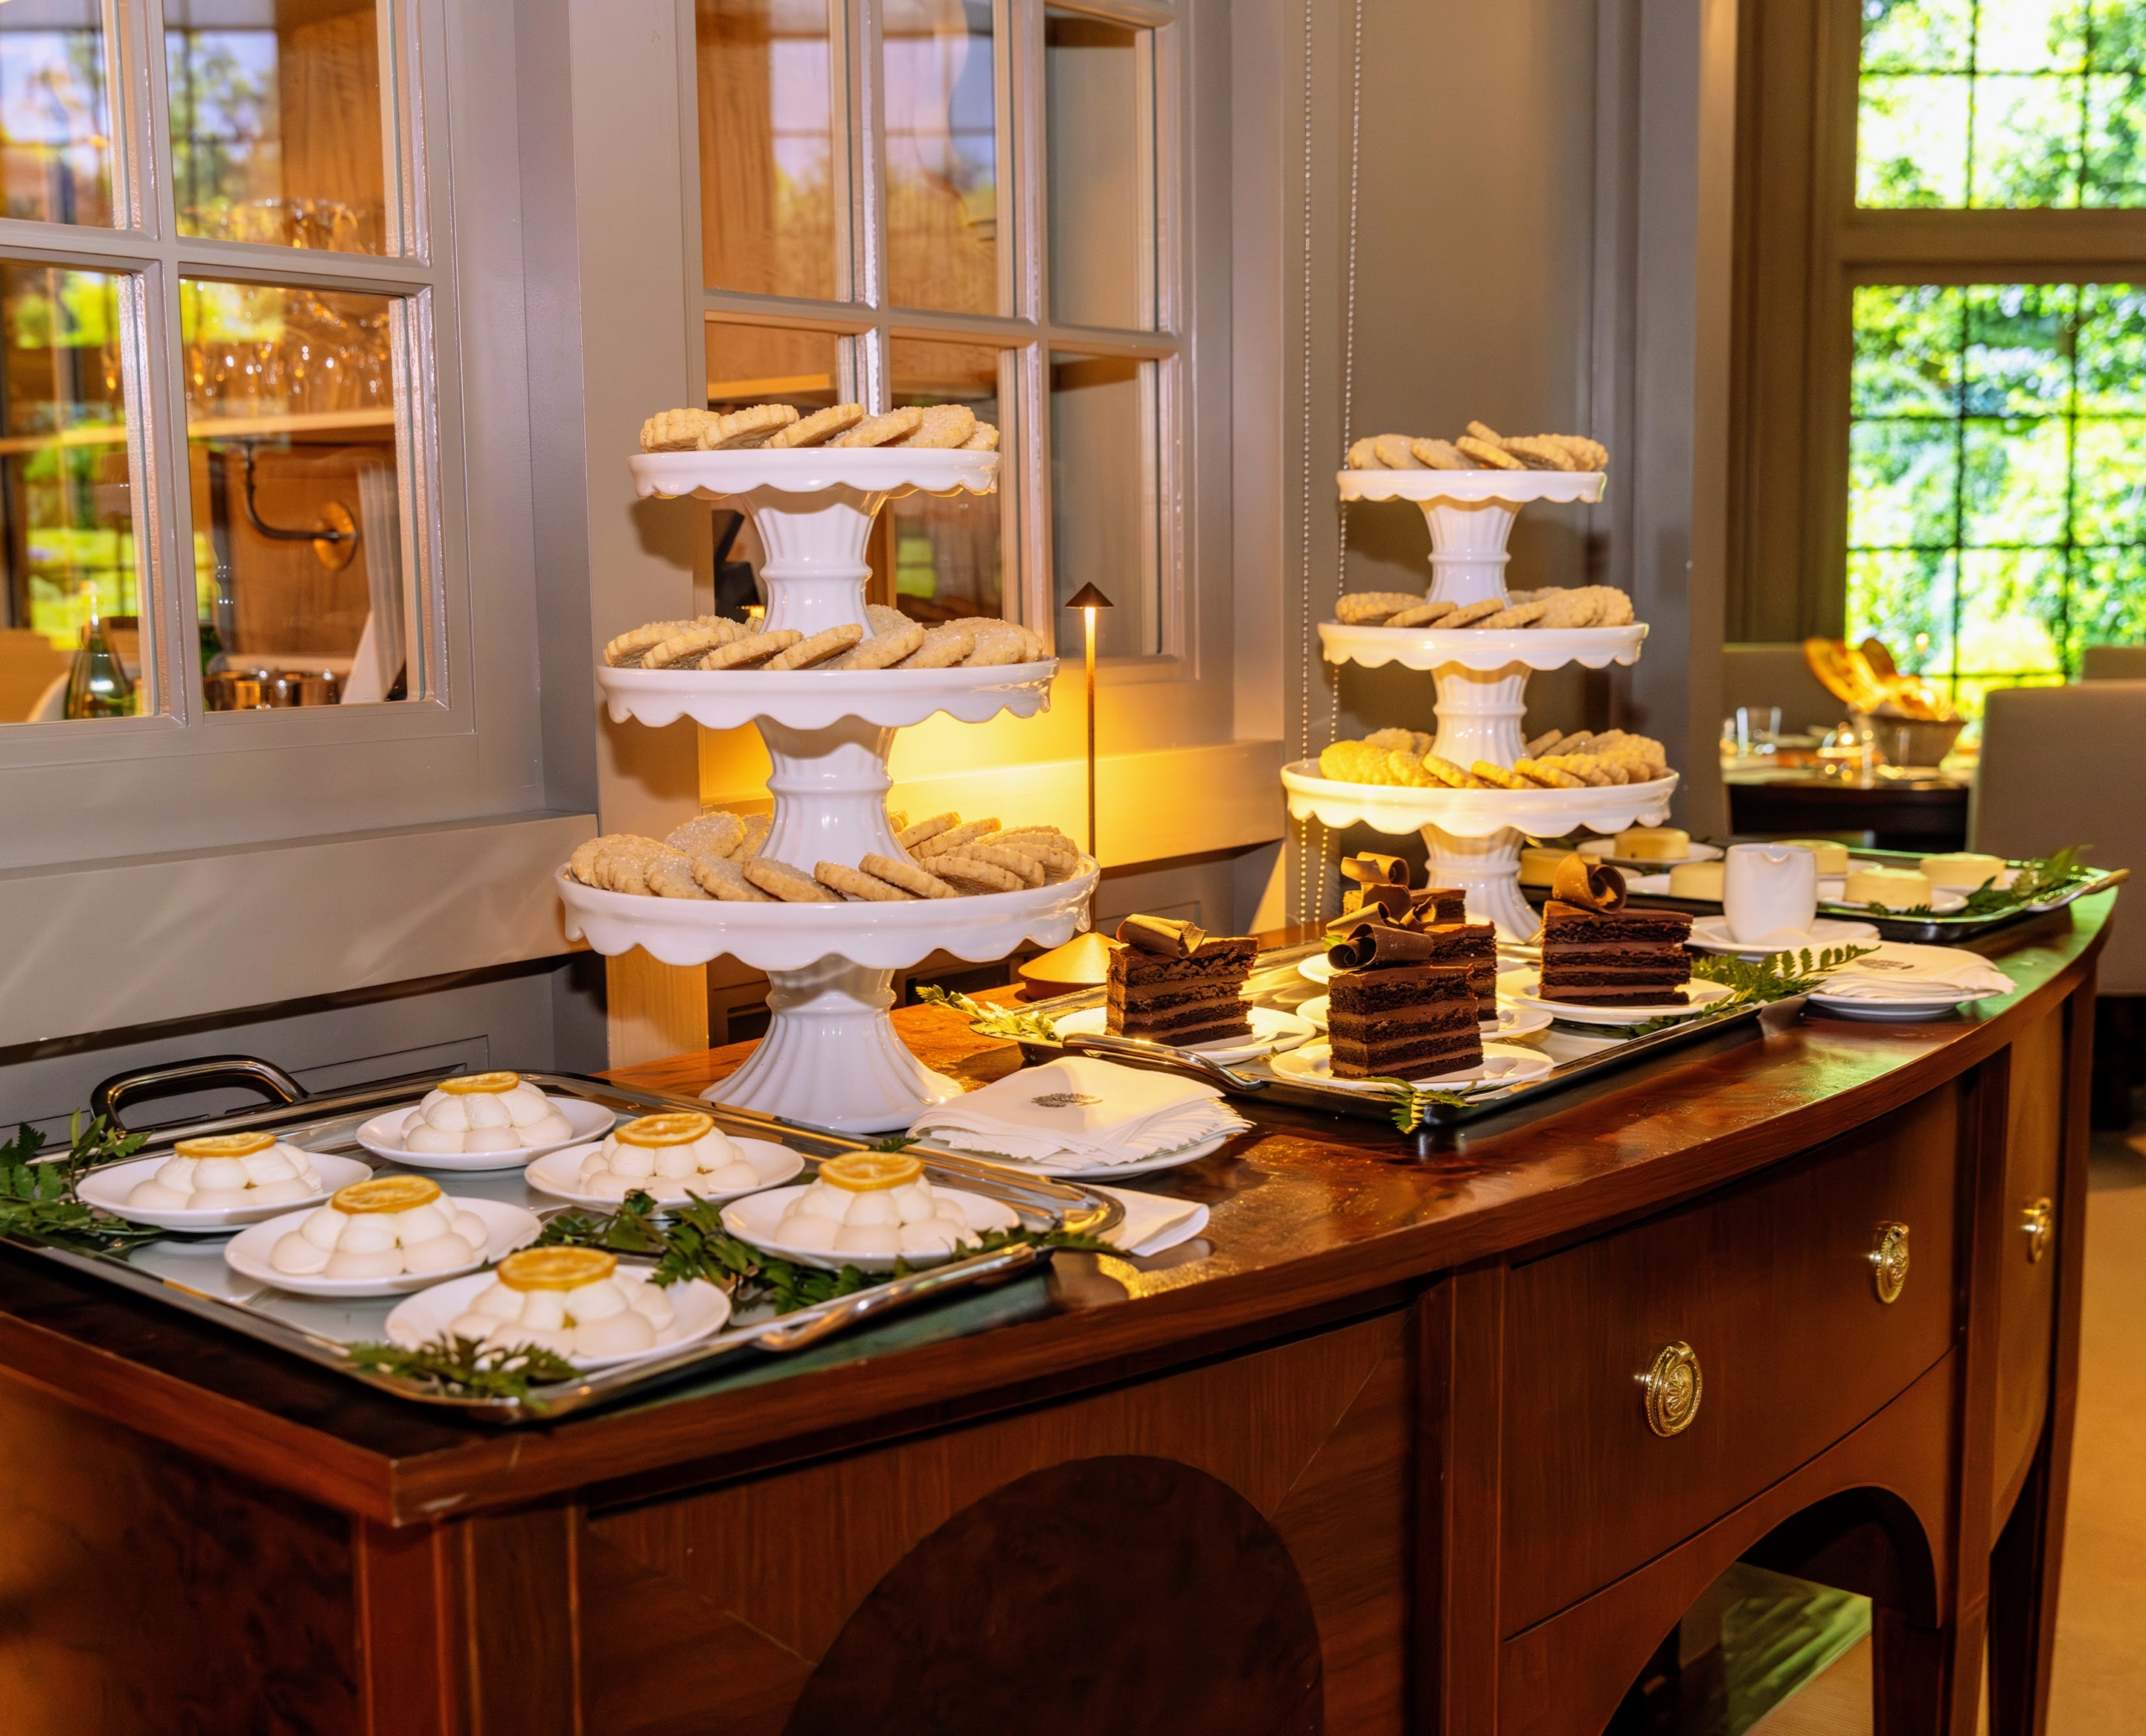
There was also a lovely dessert buffet which included Upside-Down Lemon Meringue Pie, Mile High Chocolate Cake, New York Style Cheesecake with Raspberry Sauce, and Brown Butter Shortbread Cookies. (Photo by Gaby Duong)
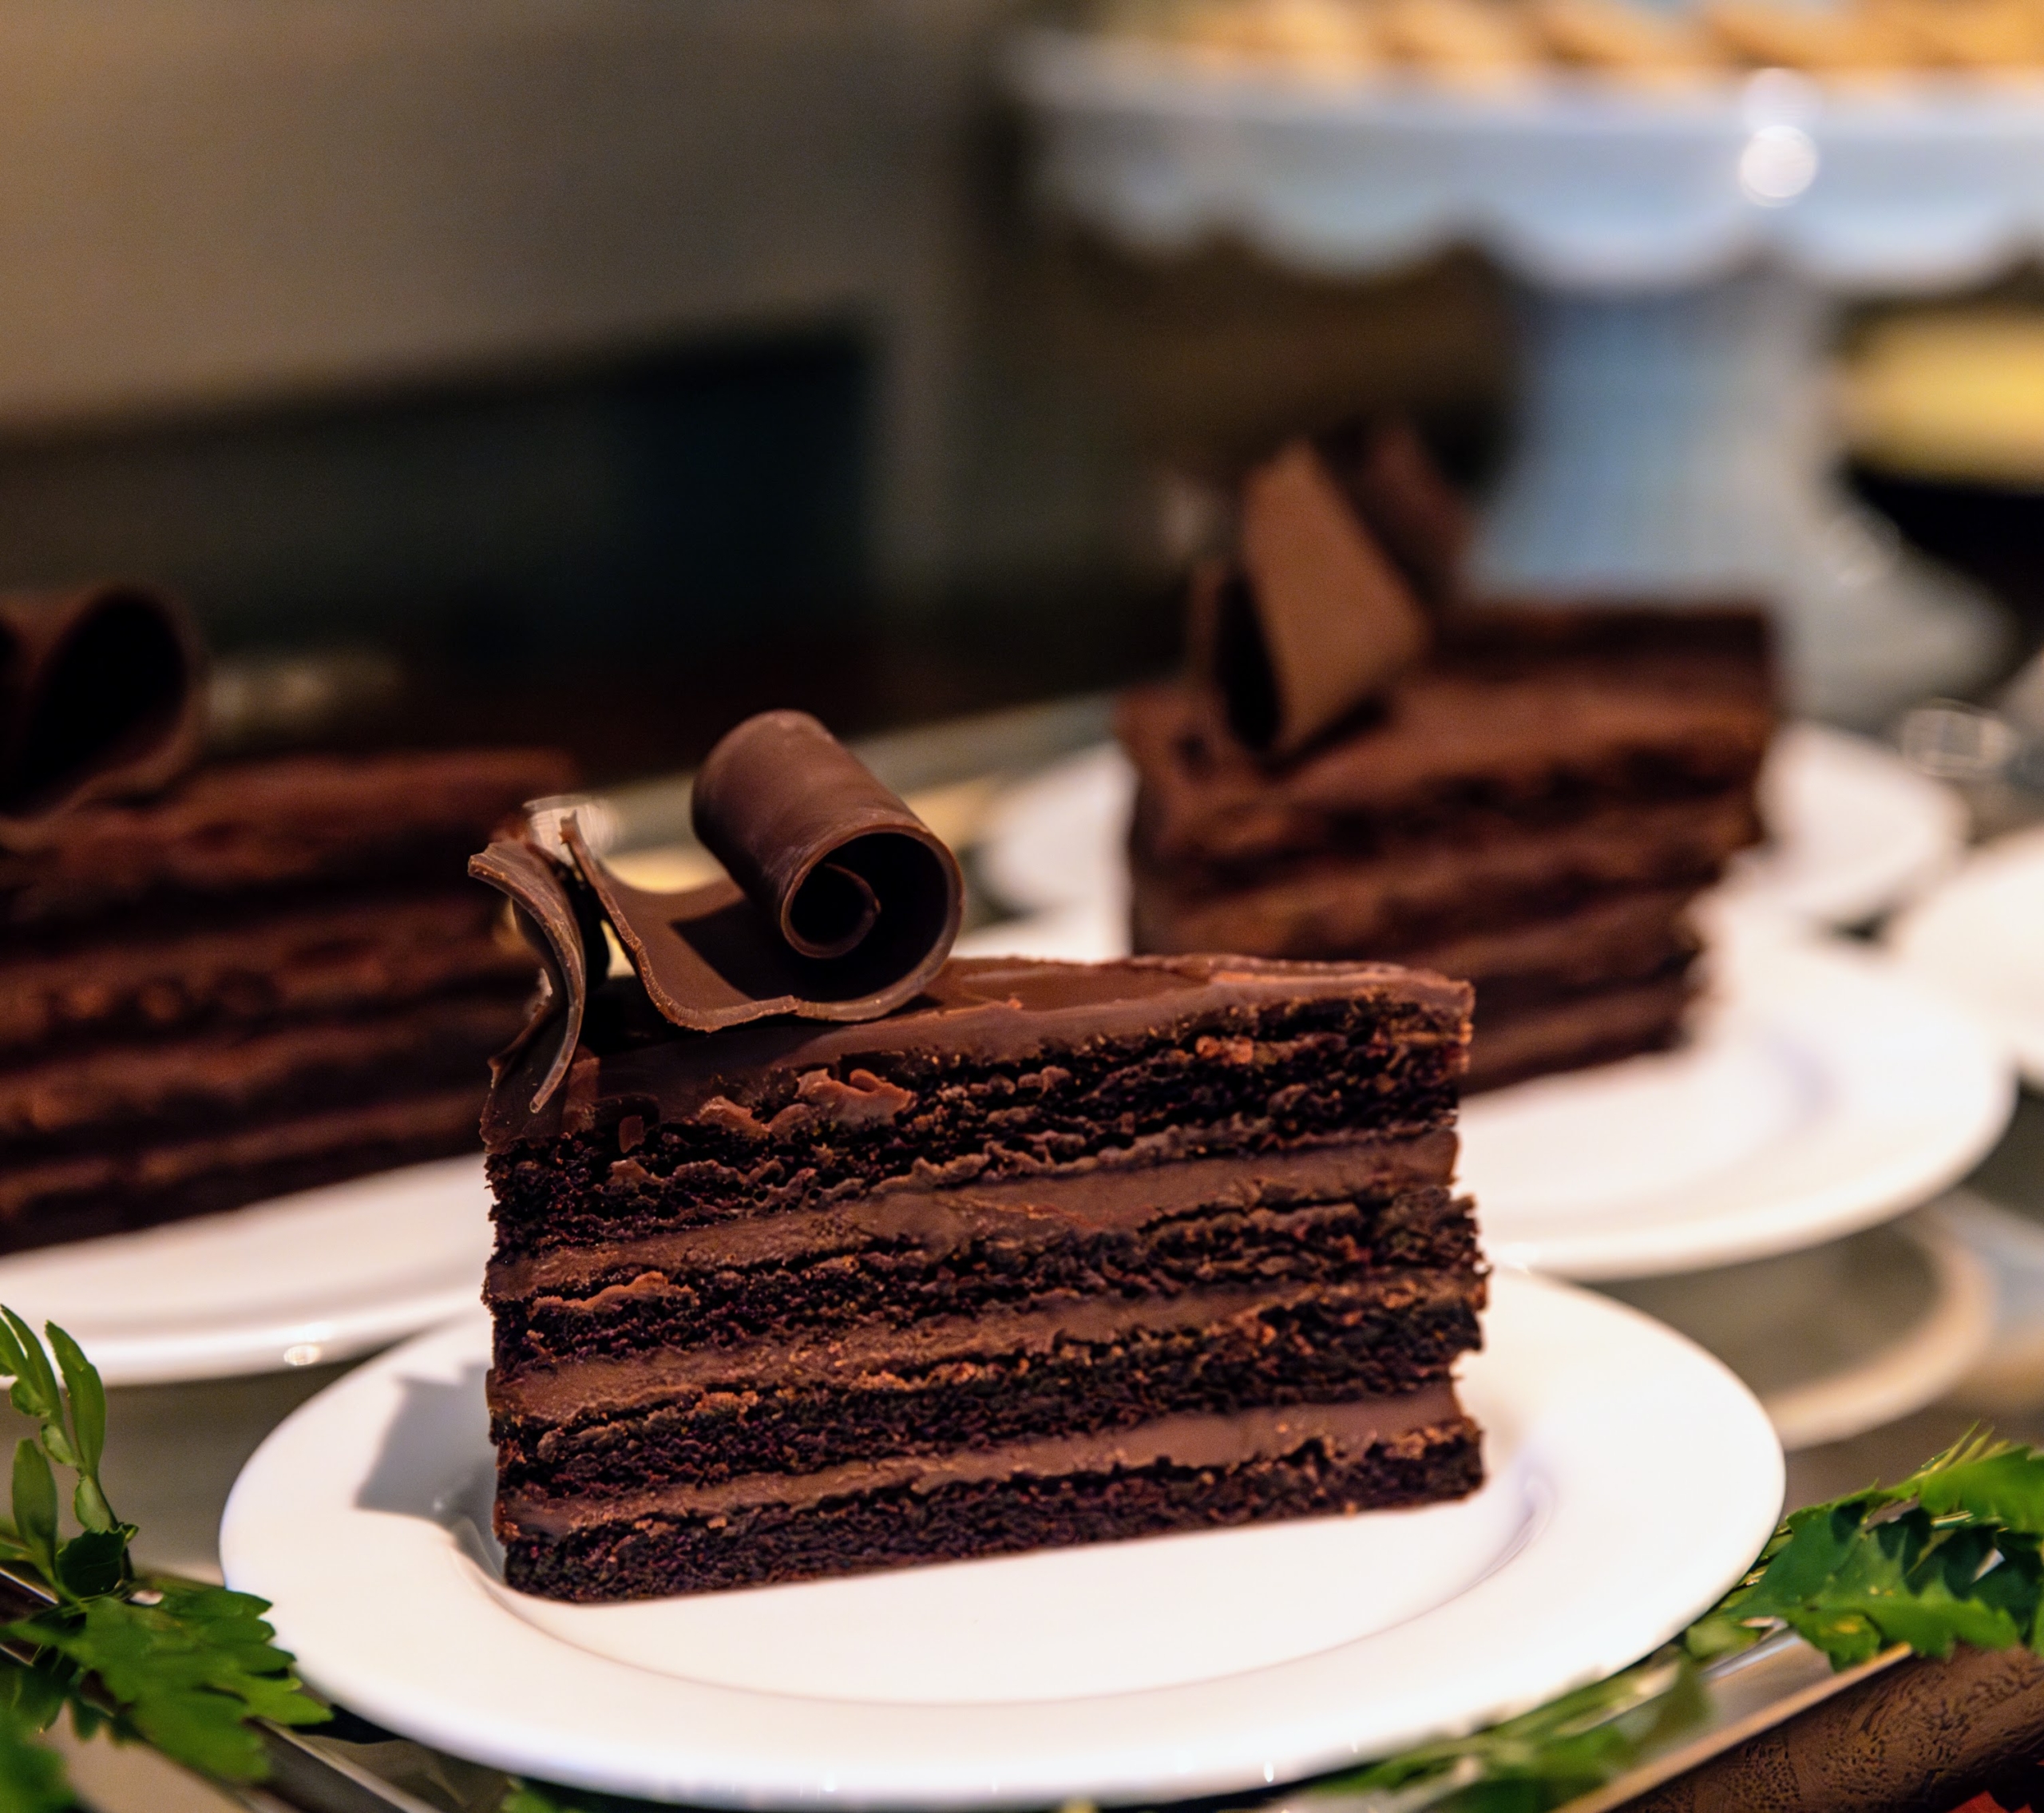
Here is a closeup of the decadent chocolate cake. (Photo by Gaby Duong)
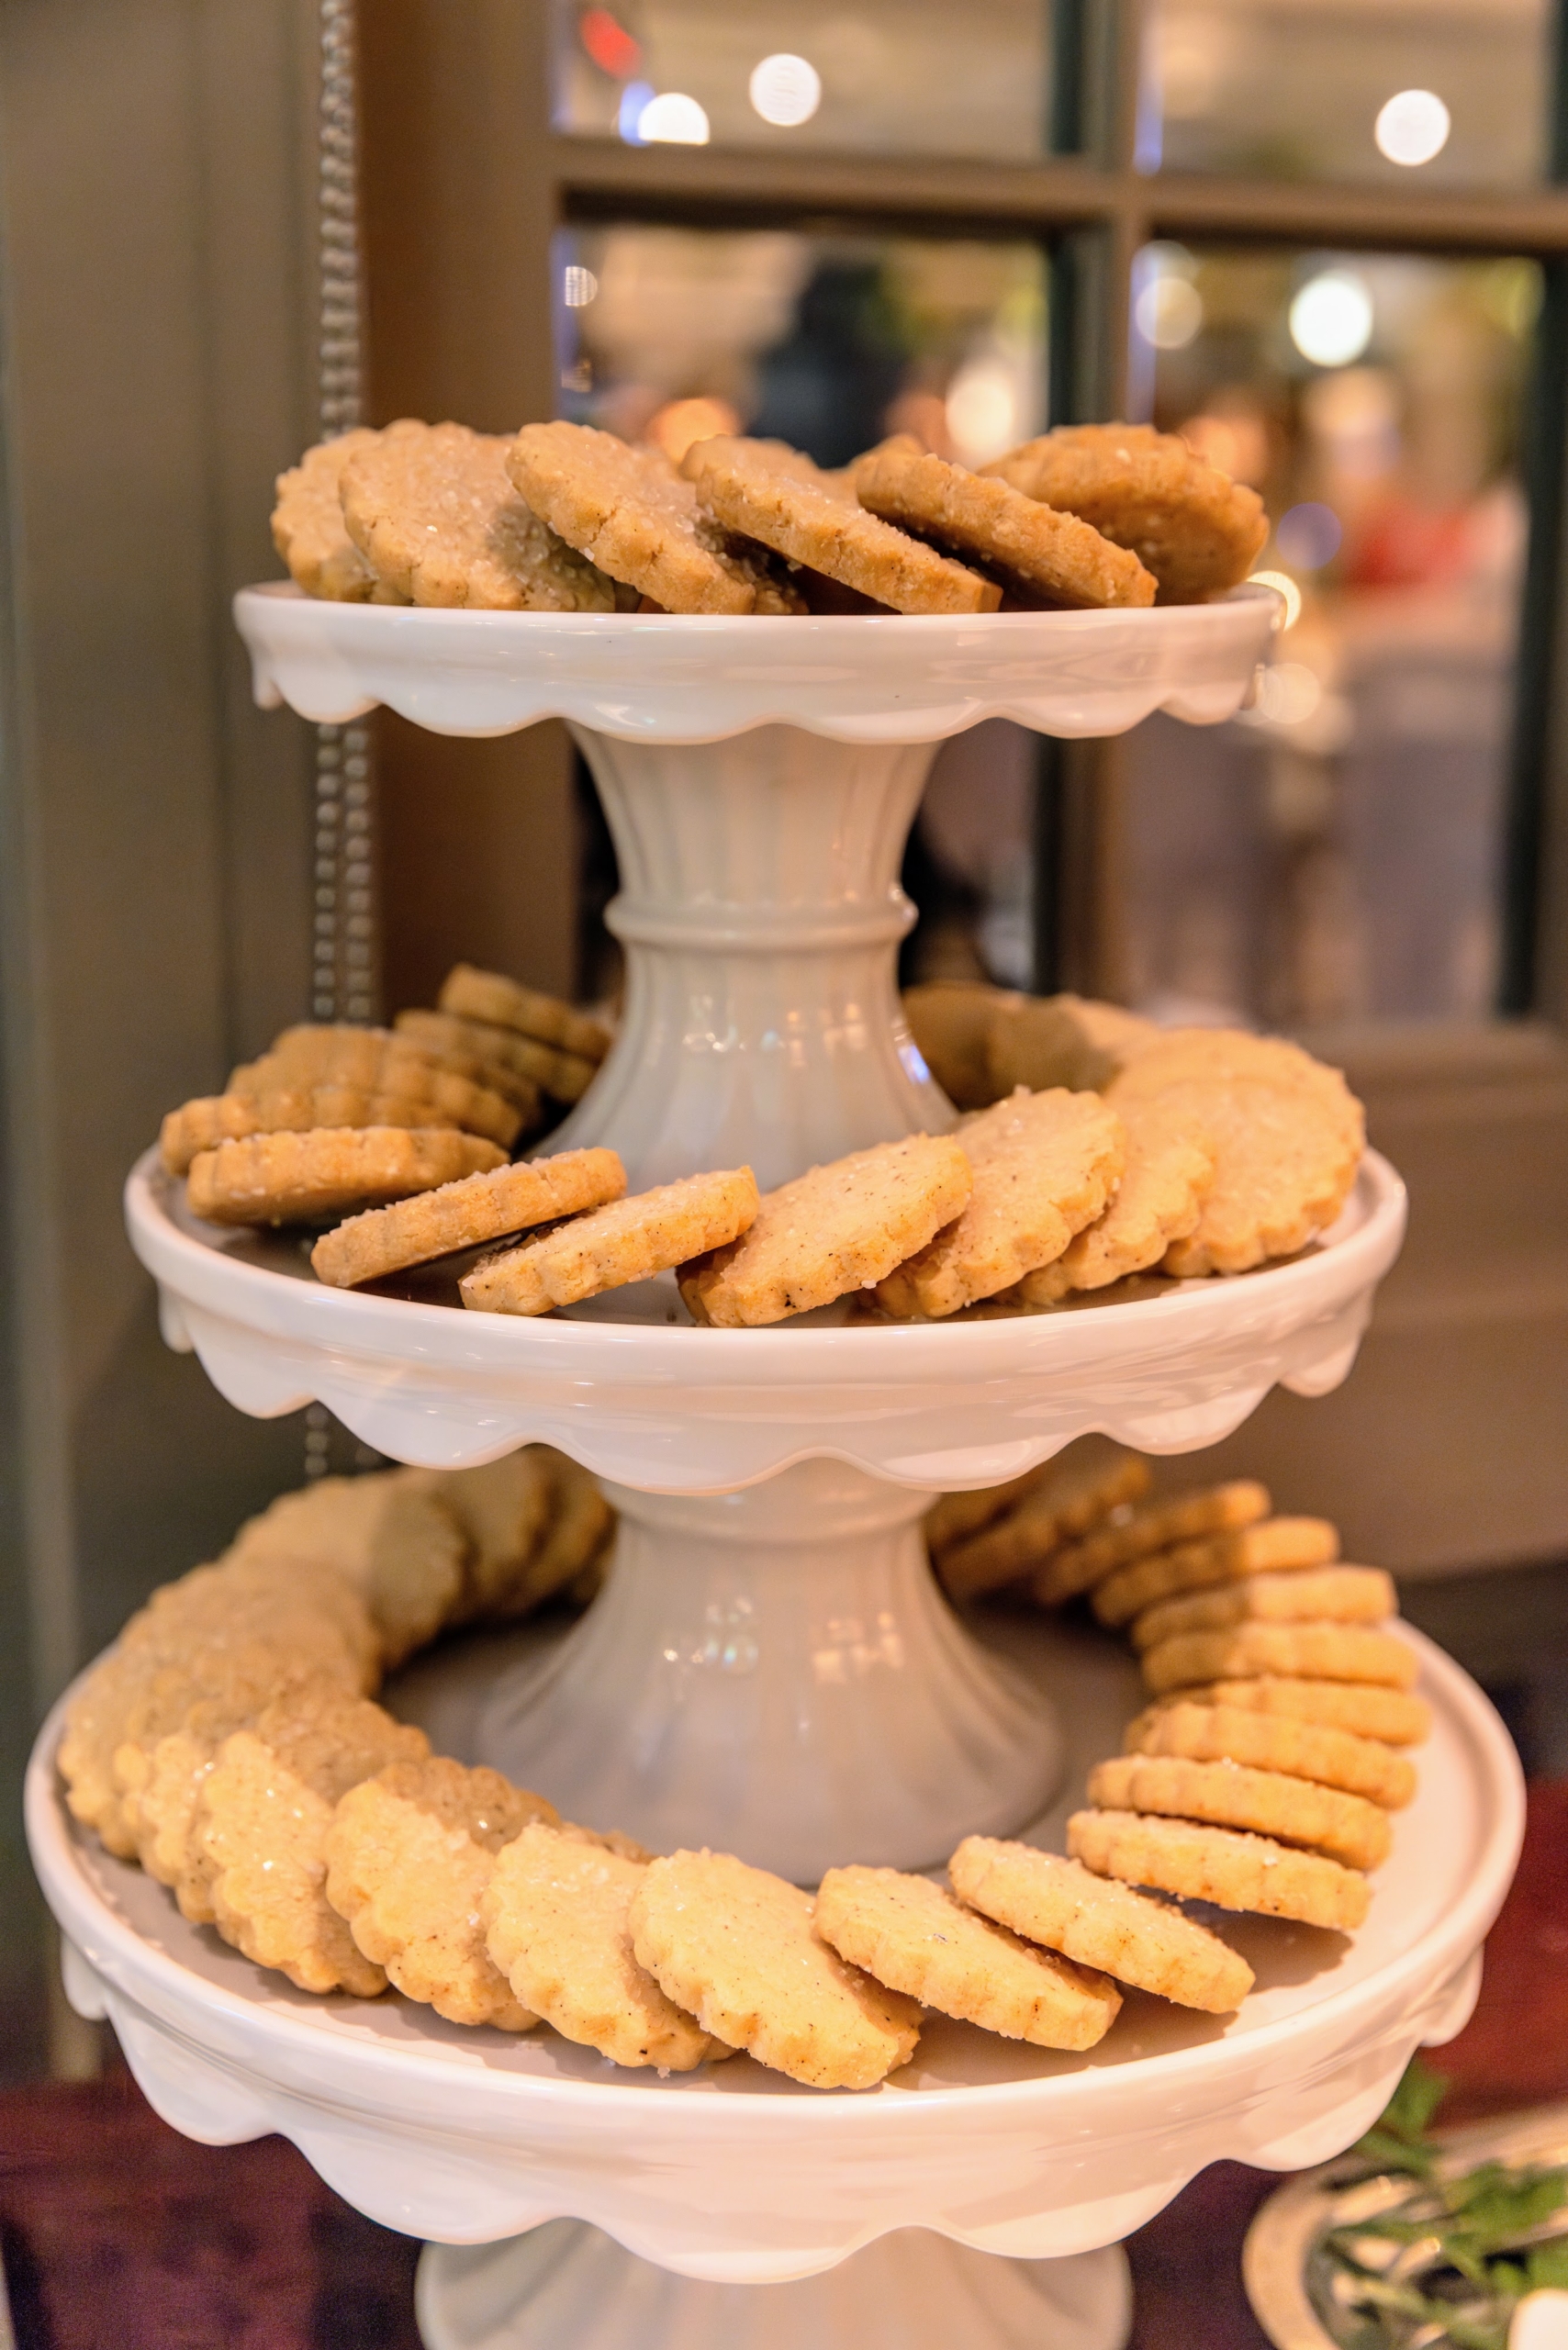
And the shortbread cookies. These cookies are a big hit at my own parties. (Photo by Gaby Duong)
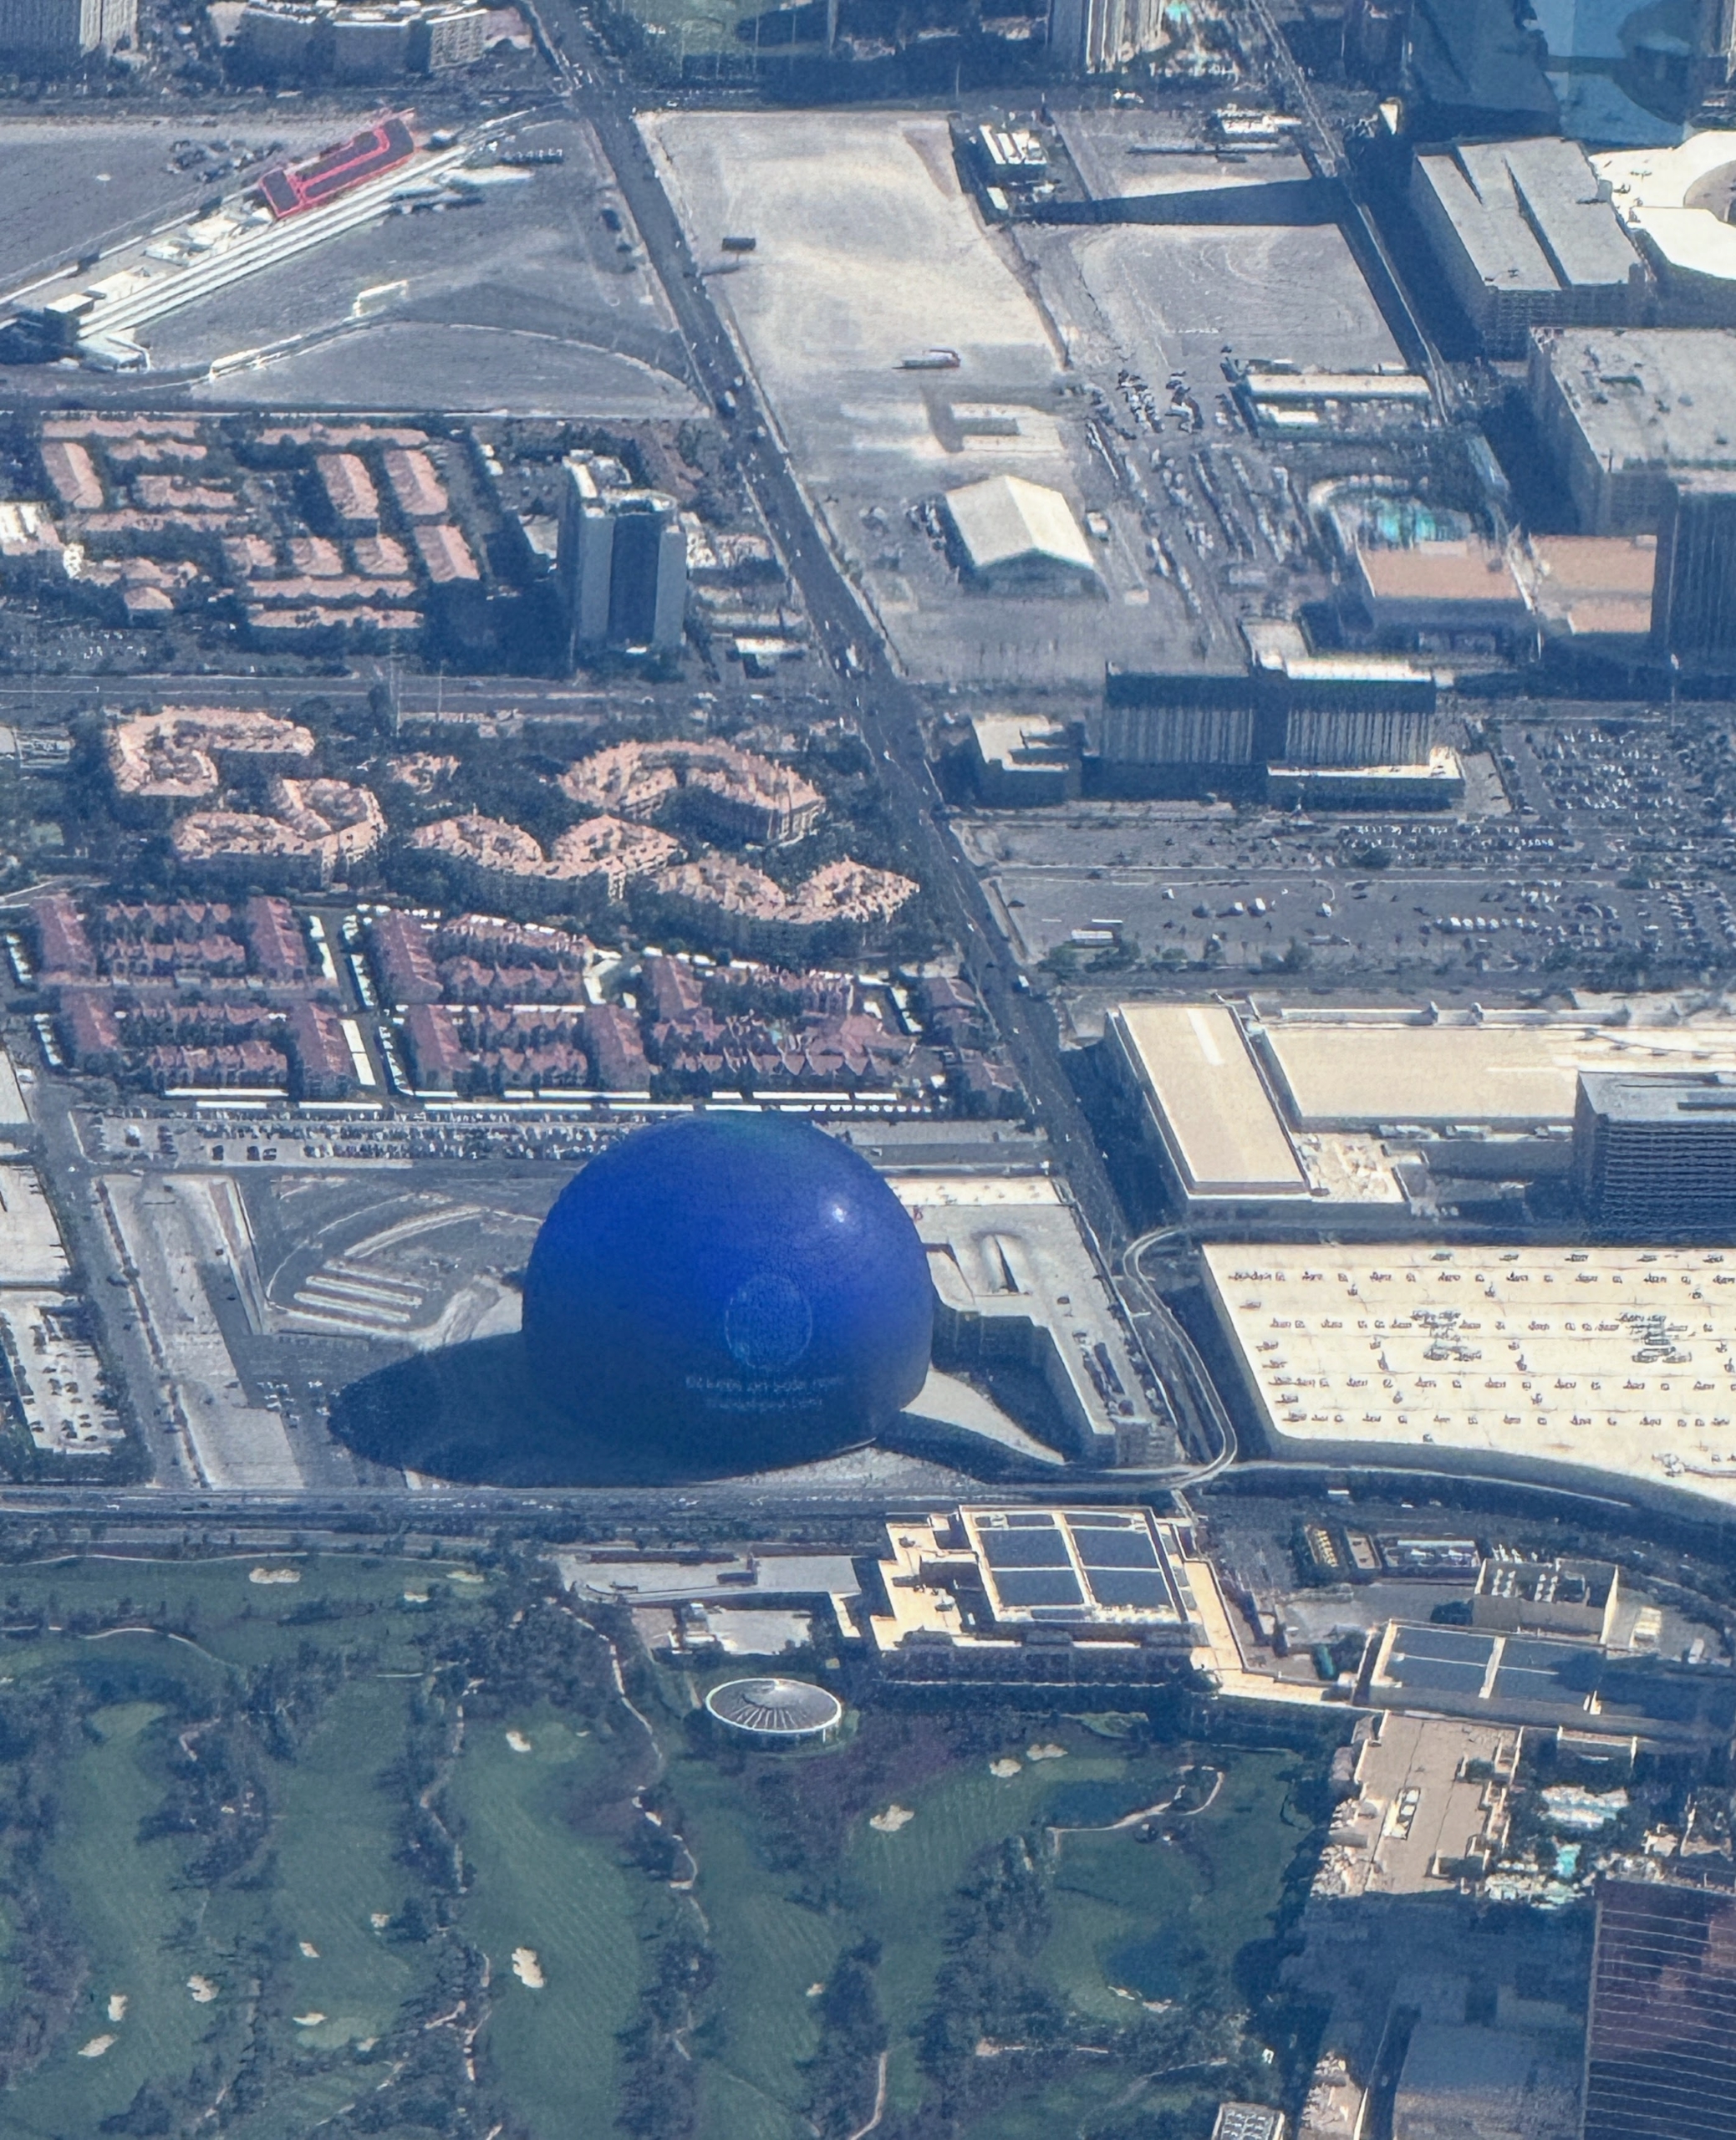
We also visited the Sphere Las Vegas – the grand music and entertainment arena in Paradise, Nevada, just east of the Las Vegas Strip. If you have not seen it up close, you may not realize just how big it is. Designed by Populous, the Sphere is 875,000 square feet, 366-feet high and 516-feet wide at its broadest point.
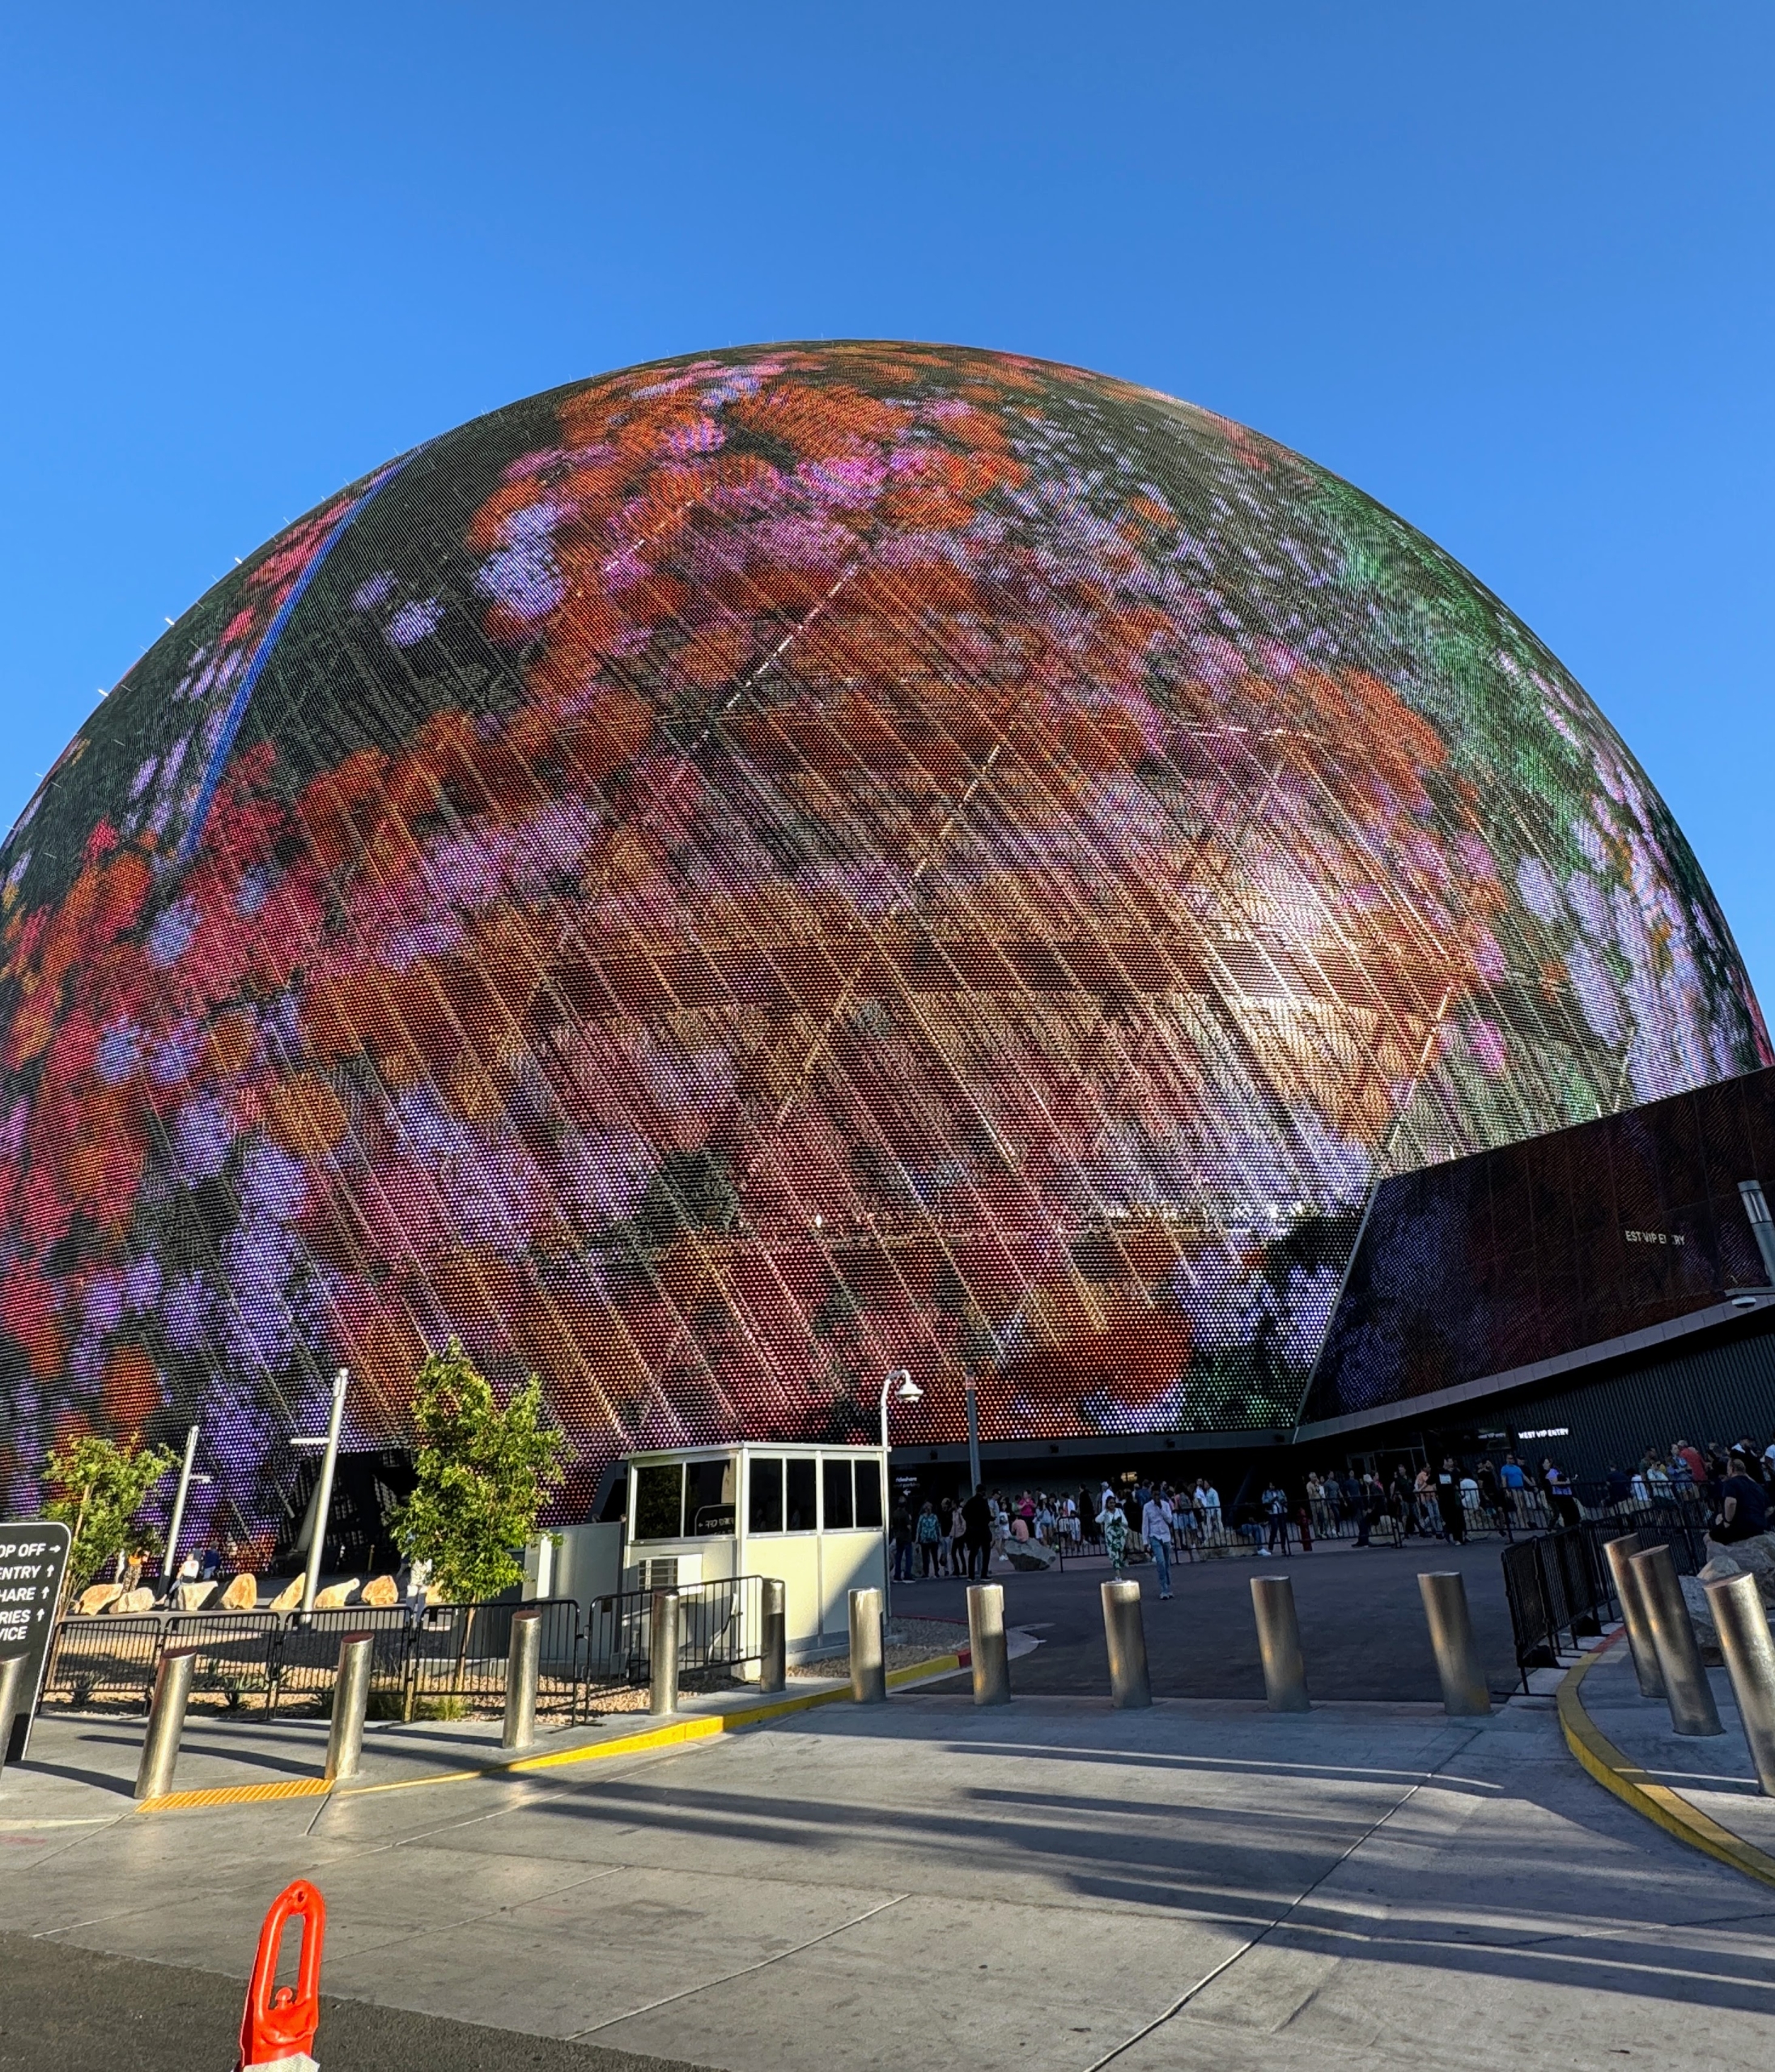
Here it is from the ground. The Sphere is the largest spherical building in the world and includes seating for 18,600 visitors.
Here, one can see how big it is behind the small parked cars.
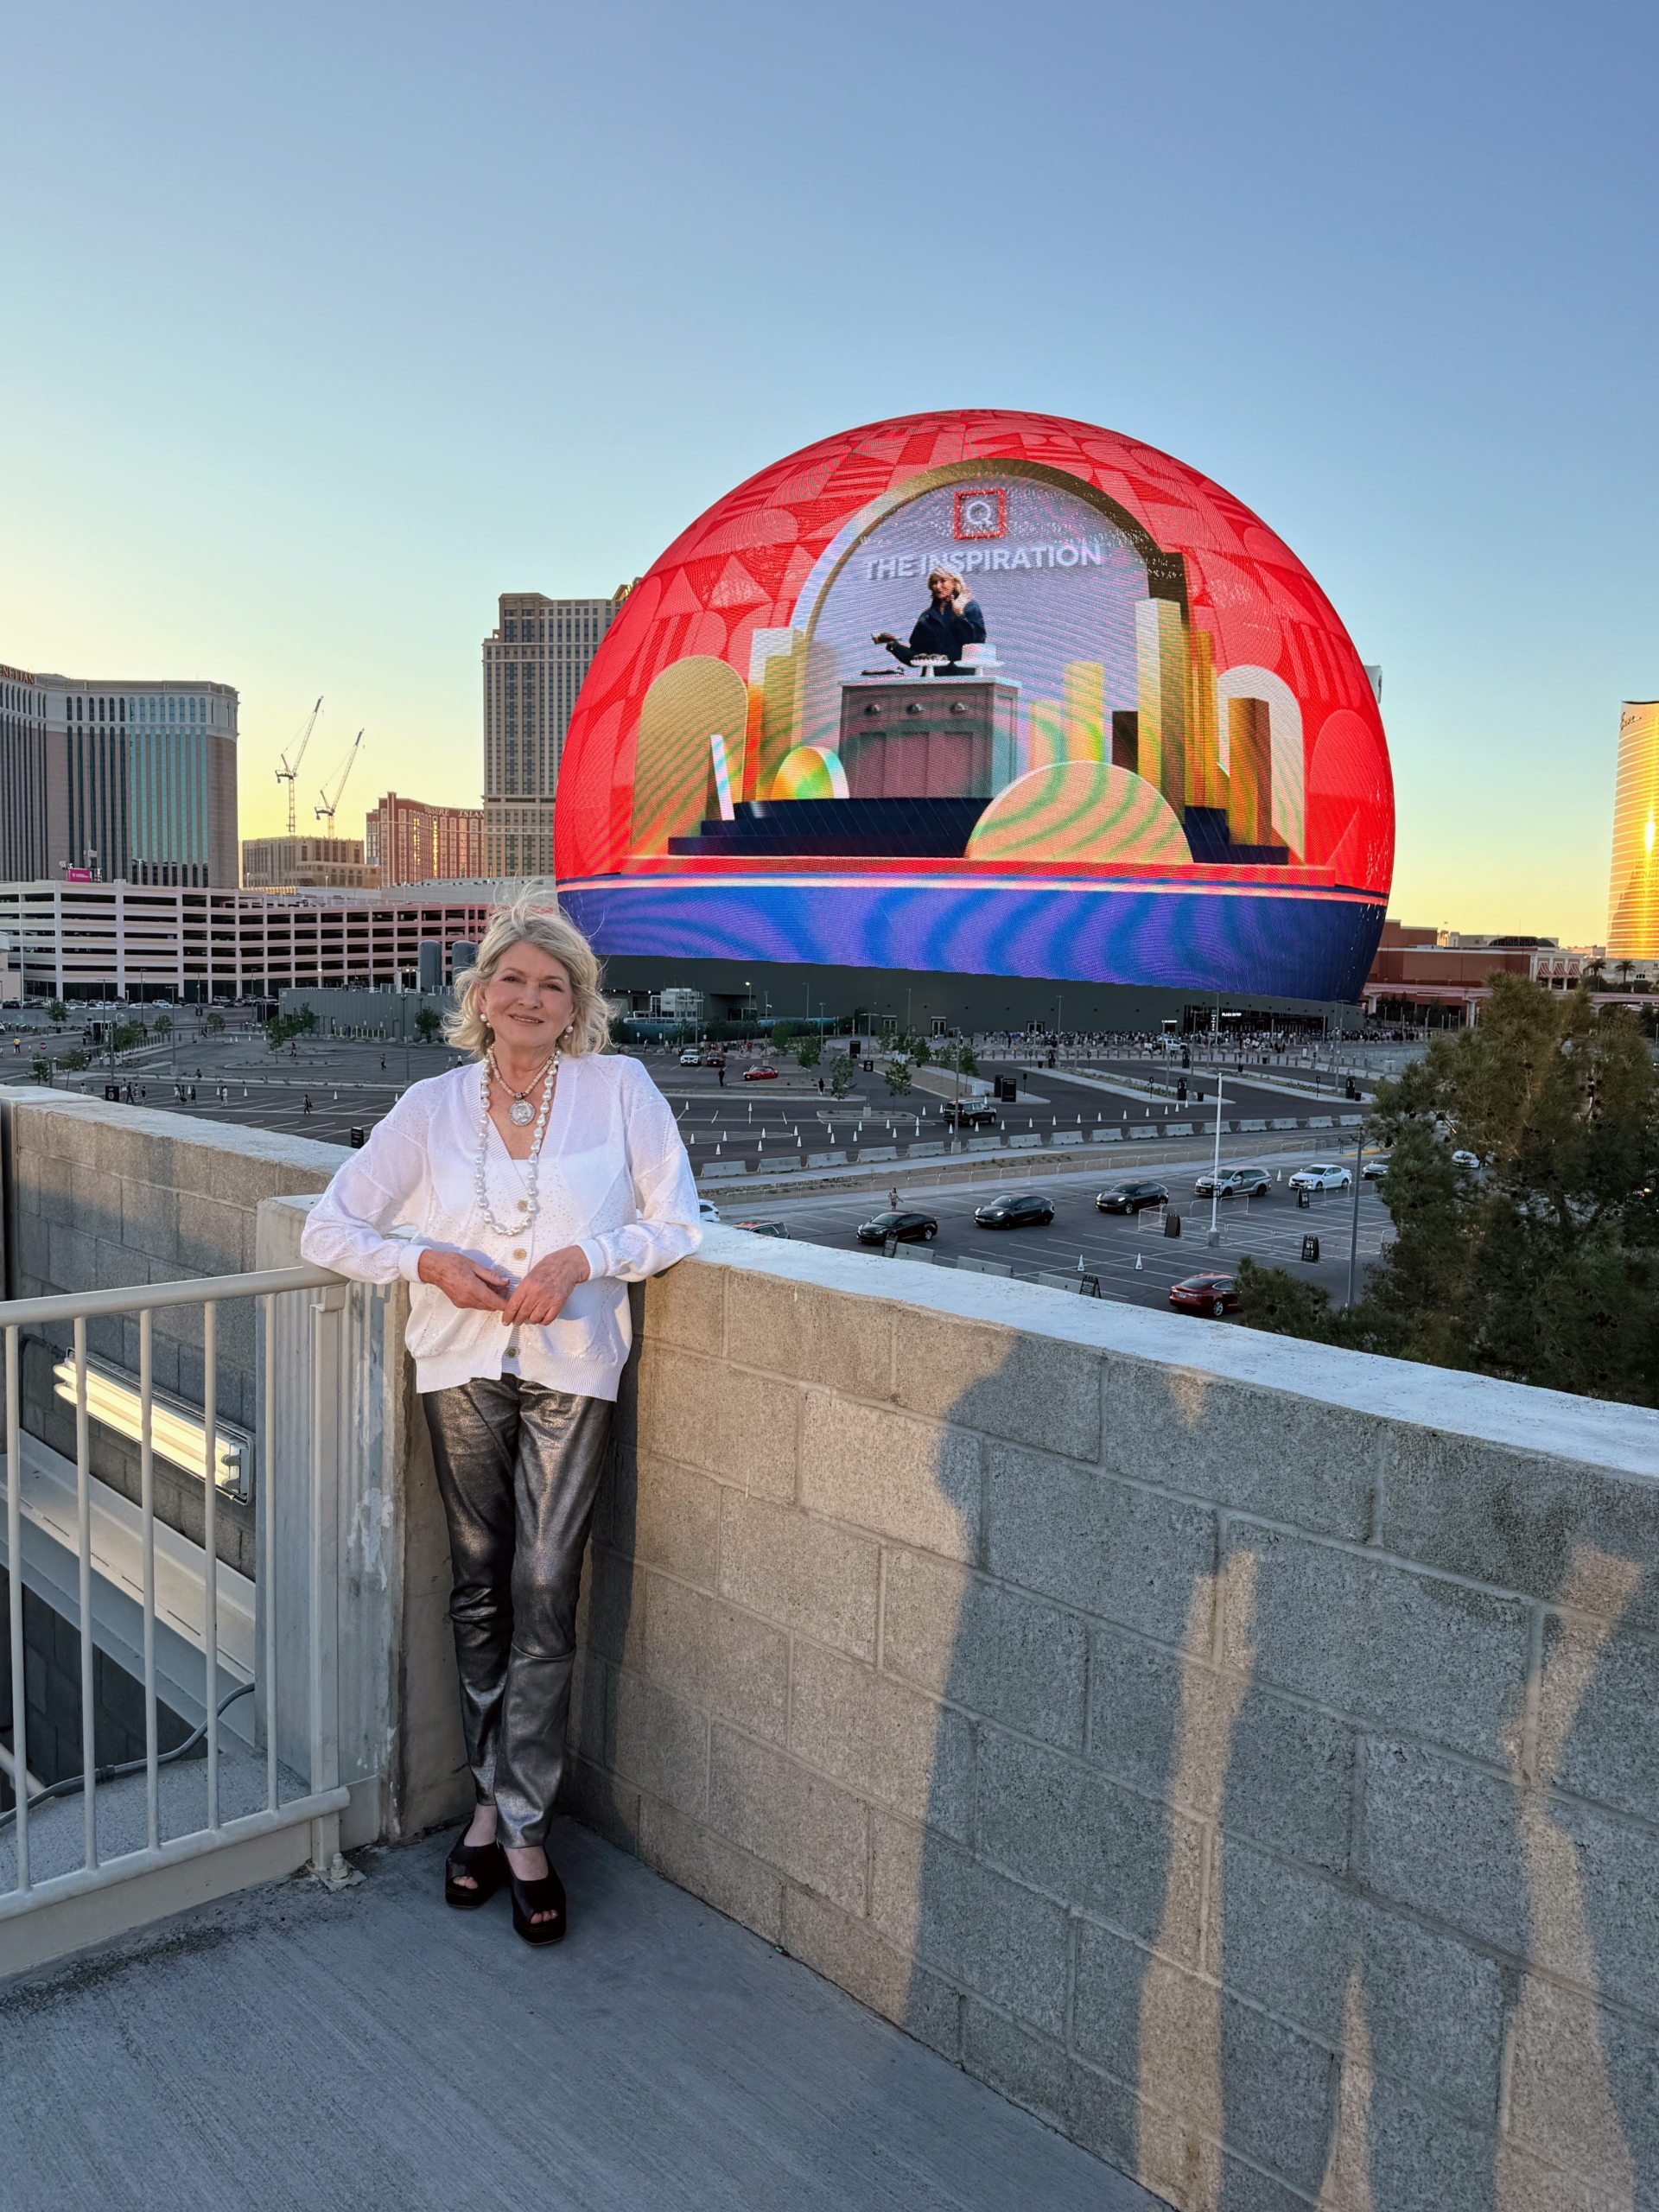
My photo went up as part of a 90-second QVC Age of Possibility ad that ran through the evening. It was a very busy, but fun and productive trip.